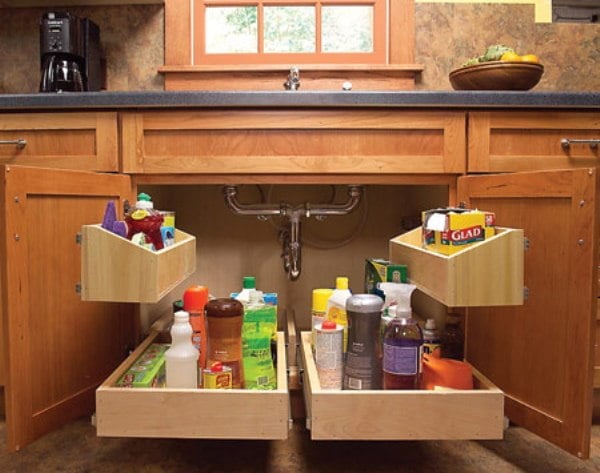
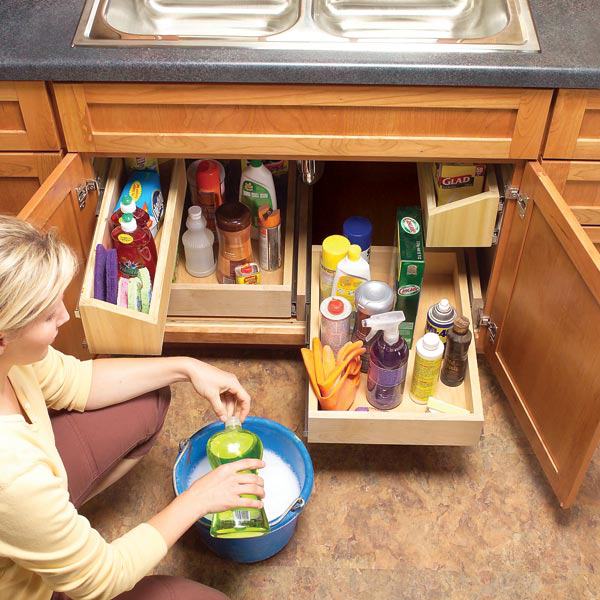
In most modern kitchens the storage space underneath the sink is unused. It is a space that requires maintenance from time to time, it is dark and dingy yet it still is a usable space. Space that can become storage easily. Showcased below we have a small short guide on how to build kitchen storage under the sink using roll-out trays, the same mechanism that you probably have already at each drawer in the kitchen. It rides smoothly bringing everything that you would need at a glance. Every item mentioned here can be found at a local hardware store or home center and the bill should not pass over 70 dollars. Hardwood plywood can also be found at a home center, lumberyard or in the hardware departments where you will also find at least one model of ball-bearing side-mount drawer glides. This is definitely one of the most practical projects we have materialized so far and we invite you to try it as well. Every modern kitchen should be as functional as it can be .
Related Articles
Step by step
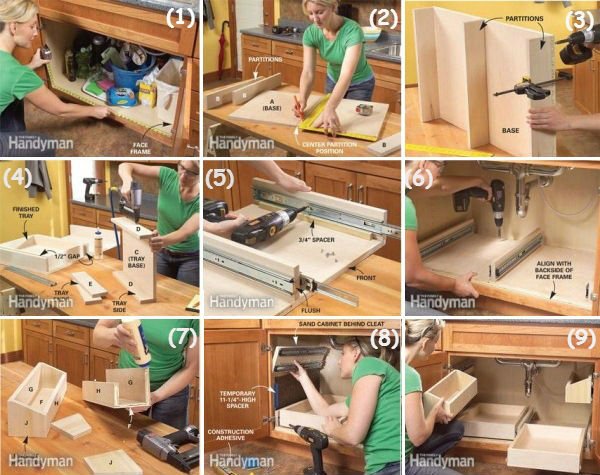
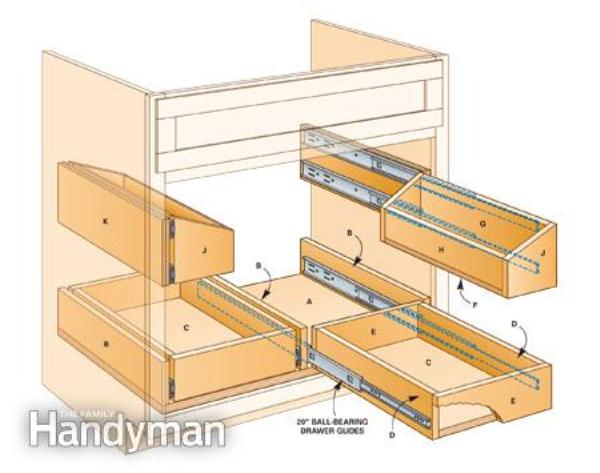
1. Start by measuring the cabinet opening to construct the base for trays on the bottom. Take in considerations any plumbing obstructions and design responsibly.
2. If you plan on creating two equivalent trays on the bottom carefully mark the center for this partition. In this guide, the thing that determined the width of each drawer has been the plumbing underneath the sink, exactly in the middle. If you have the plumbing underneath asymmetrically assembled it might be convenient for you to follow that line on the base as well.
3. Now clamp the partitions onto the base , drill pilot holes, glue them and screw them to the base.
4.Cut the parts for trays,glue and nail them together to create the trays. Pay attention to the measurements all the time.
5.Use a spacer to accurately fasten the glides on both partitions and tray sides.
6.Make tests and center the center base assemble inside the cabinet.
7.Upper trays now. Cut the parts, drill pilot holes and glue them together in the end product.
8.Now mount the cheats inside the cabinet, pay attention to the width of the cabinet on which you plan to mount them. You might want to avoid piercing all the material up to the other face in the adjacent cabinet. We suggest you to sand the side of the cabinet superficially to increase adhesion. In the end glue and screw the cleats on the sides.
9.Proceed by installing the upper trays for test fits at first. If everything goes smoothly end the DIY project by sealing the trays with two coats of polyurethane to make cleaning easier.
10.Be proud, enjoy your work and populate the trays with your items!
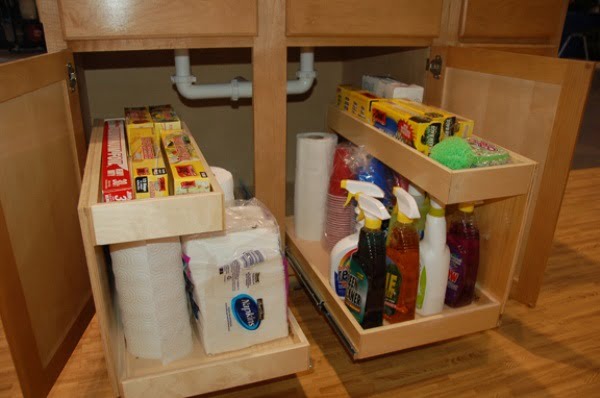
We would love to hear your opinion on this storage under the sink idea in the comment section below. We find it useful, creative and easy to materialize.
Photos courtesy to The Family Handyman
