Updated on
Window air conditioners are smaller air conditioners installed to the frame of a window. They blow cold air into a room, thanks to the fan in the internal unit, while the outdoor unit directs hot air outside.

With time, all ACs, especially window units, require maintenance and cleaning to provide effective cooling.
It’s essential to clean the AC after a few weeks to keep it functioning smoothly, and that’s the purpose of my article. I have written a step-by-step guide to help you clean a window air conditioner and prevent problems with the machine or health issues arising from indoor mold.
Step-By-Step Guide On How To Clean A Window Air Conditioner
Although you might think cleaning a window AC unit is challenging, I have listed a few simple steps that suggest otherwise. You don’t have to be a DIYer or professional to clean window air conditioners, and by following my techniques, you can keep your window air conditioner unit in top condition.
1. Preparation
A. Materials Required For Cleaning
The first step is disassembling the unit, but you will need some basic supplies.
- Rubber gloves
- Protective eyewear
- Cleaning cloth or towel
- New air filter
- 3% hydrogen peroxide solution
- Garden hose
- Vacuum cleaner
- Commercial coil cleaner or mild detergent
- Spray bottle
- Face mask
- Screwdriver
- Soft bristle brush
- Fin comb
- Air conditioner’s user manual
In most cases, the manufacturer’s manual for window units will tell you everything you must know about maintenance and cleaning, so keep it handy. Also, prepare 2 spray bottles - one containing the hydrogen peroxide solution and the other having a cleaning solution.
Once you have all the supplies ready, the next step is unplugging the air conditioning unit from the power outlet. For this step, turn off the circuit breaker to prevent electricity-related accidents.
It’s also possible to clean a window air conditioner unit without removing it, provided you don’t live in a second-story building where the outdoor components are difficult to access. In such instances, it’s better to remove the entire unit and clean the components at the back by placing the AC on the floor.
B. Cleaning The Front Panel
Proceed to clean the front panel, consisting of a metal or plastic covering that shields the front face of window air conditioners. Since the panel is held by screws attached to the bottom, use a screwdriver to unscrew the bolts and remove the panel.
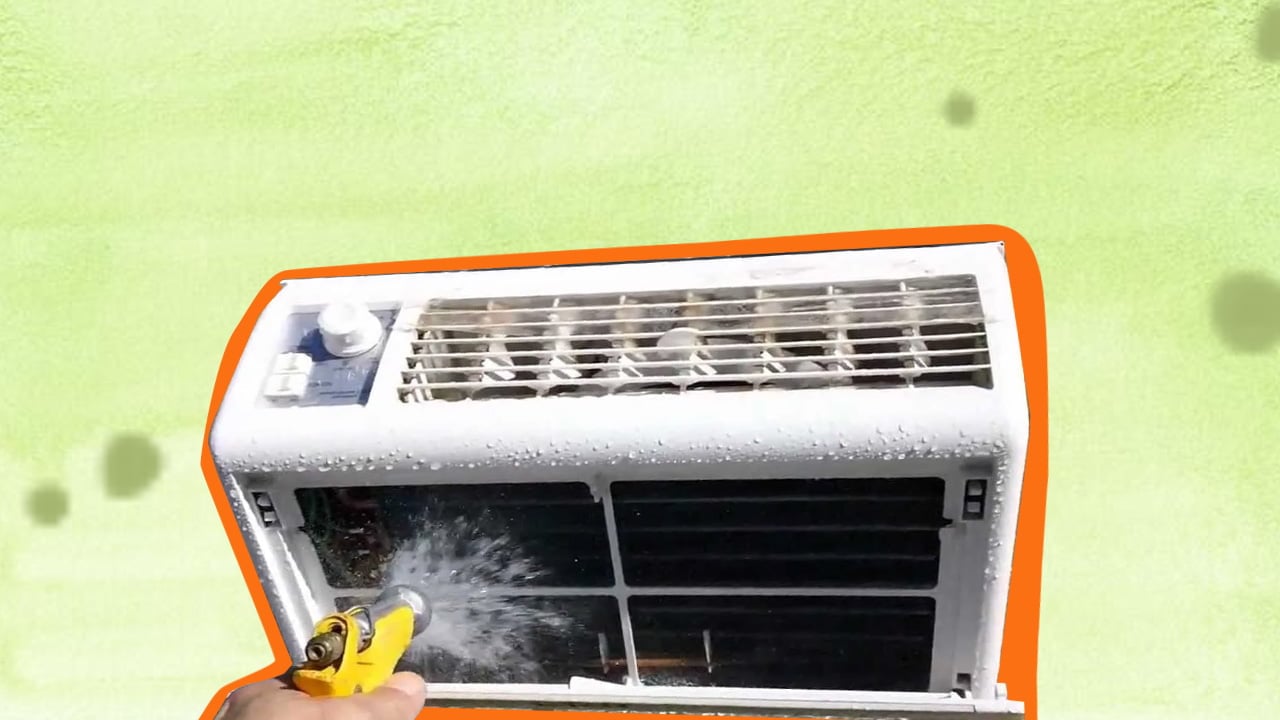
The next step is creating a household cleaner by mixing warm water with mild detergent. You must spray this warm soapy water over the window unit to remove as much debris as possible. I suggest allowing the mixture to sit on the window AC unit for a few minutes before wiping it with a damp cloth.
However, if the stains have set, you must use a soft bristle brush to scrub the debris lose or spray the front grille with a garden hose by taking it outside. Some homeowners do this step weekly to prevent dirt buildup, but it also depends on how frequently you use the window AC unit.
Leave the grille to dry completely and proceed with the remaining steps.
Tip
If a window air conditioner has no removable cover, use a small damp cloth with Q-tips to remove debris between the spaces. I also prefer using a duster to blow dust gathering on the front panel. Besides that, never use vinegar or bleach to make the cleaning solution, as these compounds lead to corrosion in metal parts.
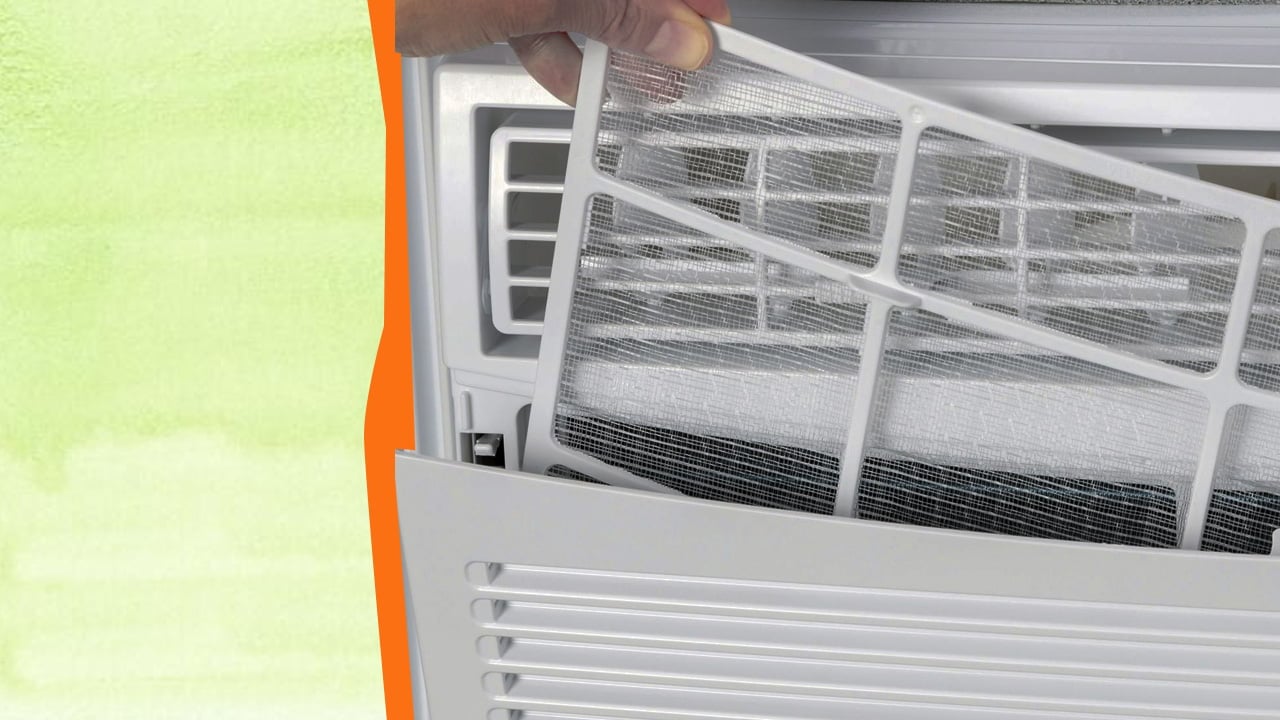
2. Cleaning The Air Filter
Air filters of a window air conditioner unit require thorough cleaning since they gather a lot of dust and debris from the indoor air. The air filter is responsible for preventing air pollution, and you must wash the filters regularly for the window AC unit to perform at optimum capacity.
Based on how frequently you use the window unit, it would be best to clean the air filters of the window unit every 2 weeks. I also suggest replacing the filters every 4 months to breathe cleaner air.
You will usually find the filters behind the control panel or inside the face panel. Just refer to the AC manual to know their exact location and how to remove them. After you dislodge the filters, check how much dust has accumulated on them before using a wet-dry vacuum or a soft brush attachment for primary cleaning.
Then use warm water mixed with mild detergent to gently wipe the surface or use a hose for a more thorough cleaning. Once you are satisfied, leave the filters to air dry outside.
When you place the filters back in, the window air conditioner will blow cool air across the room and operate at a higher efficiency.
3. Cleaning The Coils
Before cleaning the coils, there’s another important step, and that’s vacuuming the interior cabinets.
A. Cleaning The Interior Cabinet
From this step forward, you must clean the window air conditioner from the inside. Start by vacuuming the interior components of the window AC unit to remove debris stuck on the surface.
This includes removing dirt from the -
- Evaporator on the front
- Condenser behind the window AC unit
- Drain pan on the bottom
- Fan blades
- Blower located in the middle
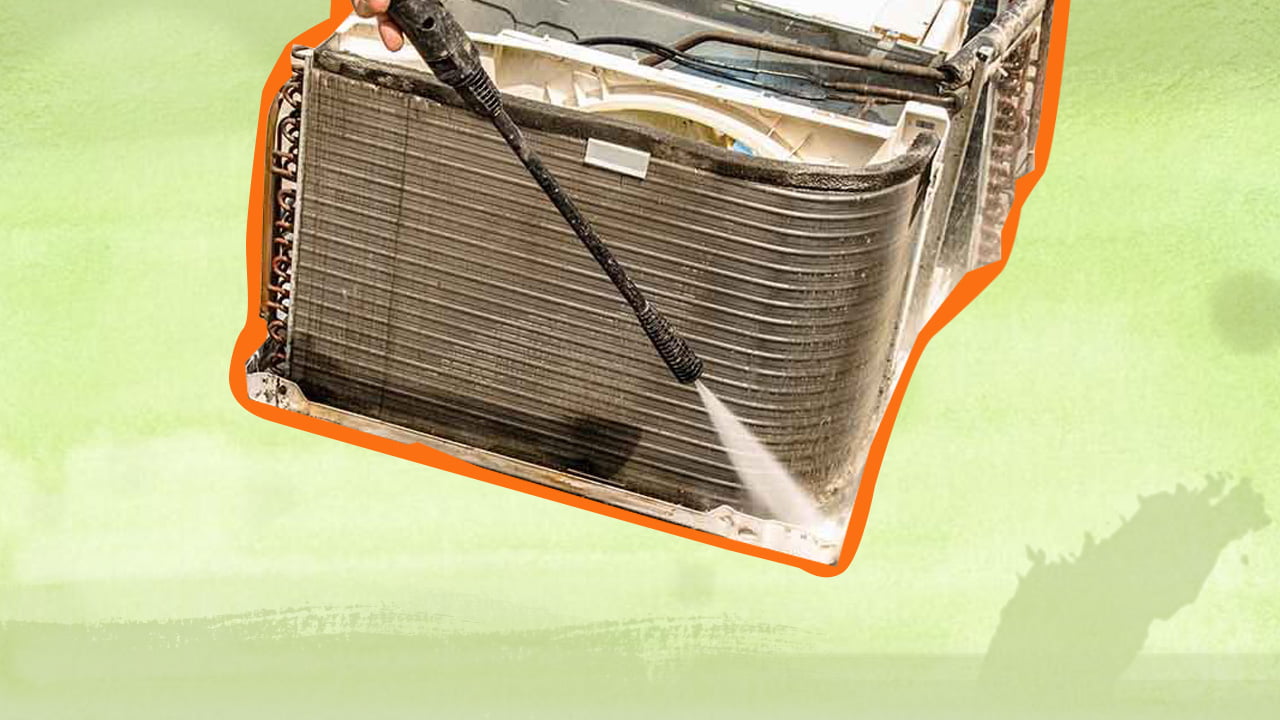
B. Cleaning The Evaporator And Condenser Coils
The condenser and evaporator coils play an important role by removing heat from the outside air, thanks to their small aluminum fins. As the fins gather dust over time, it increases the chances of mold spores thriving on the surface.
You must remember that the fins bend easily, and it’s important to be extra careful while cleaning the coils. Also, wear protective gloves since the fins are sharp and can lead to cuts while cleaning.
With a soft brush, gently scrub the coils, or use a fin comb to remove debris between the aluminum fins. If needed, you can use a mild dish detergent or make your own homemade cleaner for washing the coils.
You can use the same combination of mild detergent and warm water for homemade cleaning solutions. Add the mixture to a spray bottle and lightly spray it over the coils before leaving it to rest for 15-20 minutes. After that, wipe the coils of the window air conditioner with a soft cloth.
Some people even prefer vacuuming to scoop up the dirt and dust from the coils. But remember to vacuum from the bottom to the top of the fins while maintaining steady power to avoid damaging the fins.
In case the fins bend while cleaning, use the fin comb and run it in the same direction, which should help straighten the fins.
4. Servicing The Air Conditioning Fans
Usually, a window air conditioner has 2 fans - a bladed fan for pushing compressed air and a blower. I recommend using a similar homemade cleaning solution that you used for coil cleaning to wipe the fans.
With a cloth, take a little bit of the cleaner to scrub the dirt stuck on the fans and rinse them with a hose. Since the electrical components of a window air conditioner are sealed, you won’t have to worry about damaging the AC unit.
Leave the fans to dry naturally and move on to cleaning the drain pan.
5. Cleaning The Drainage System
Like most air conditioners, a window air conditioner also removes moisture from the room, which collects in a drain pan and filters out via a drain hole. Emptying and cleaning the pan is essential, as it collects dirty water and debris.
You can use a wet-dry vac and a damp cloth to clean it. In some cases, the pan might be cracked, so keep a water-resistant sealant handy to repair the surface. But if the drip tray is rusting, the only option is to replace it.
Moreover, clean the drain hole and use the AC manual to locate it quickly. If the drain channels and holes are clogged, use a wire or pipe cleaner to free the debris. Pour bleach and warm water into the pan and let it sit to stop bacteria and mold growth.
Tilt the AC unit to drain excess water, so get someone to help because a window air conditioner is quite heavy. In certain instances, the hole might be plugged, for which you must remove the cover and allow the water to drain. Then scrub the dirt away with a moist cloth or bottle brush and spray the drain hole thoroughly.
6. Spraying Hydrogen Peroxide
The last step of the cleaning process is spraying hydrogen peroxide over the interior and exterior housing on the window air conditioner. But why should you use hydrogen peroxide to clean your window AC? Because it can prevent mold growth, mildew, bacteria, and germs from nesting within the unit.
You must also wear proper eyewear and protective gloves when using hydrogen peroxide for deep cleaning.
7. Re-Assembling And Testing The Air Conditioner
Leave all the components dry before re-assembling the window air conditioning unit. Don’t be hasty because mold forms within the components when moisture is trapped in the air conditioner. So, let it dry thoroughly before reattaching all the screws to their respective housing.
Once again, you can refer to the AC manual to reinstall all the parts, followed by the air filter and front cover. Then secure the window air conditioner to the panels and plug it into the electrical outlet.
Turn it on to ensure the air conditioner is working properly; you should find cool air blowing through your home with energy costs coming down.
Why And How To Clean A Window Air Conditioner Having Mold?
Any window air conditioner that hasn’t been used for some time might have mold and mildew growing inside. You can easily spot it since mold is green, black, or brown, while mildew is gray or white.
They can start growing during the offseason and spread considerably until you spot them in summer. But how are they harmful? Air conditioners having mold prove harmful to your health since they produce allergens, resulting in headaches, sore throat, and other respiratory diseases.
Mold is most common in areas with high humidity and attacks the outside of the unit. But if they are growing inside, dislodge the front panel and create a mild cleaner by mixing warm water with antibacterial soap to clean your window AC.
Cover your hands and eyes before spraying the solution directly over the mold. Then, scrub the infected areas with a brush to loosen mold and mildew, and wipe all the components with a clean, soft cloth.
But to prevent the problem from resurfacing, try to manage the indoor humidity levels. Try to use the air conditioner regularly during summer and use a dehumidifier when the humidity is high. The goal is to remove warm air full of moisture, which is conducive to mold and mildew growth.
Other than that, never neglect AC maintenance and always spray hydrogen peroxide over all the components after you clean your window AC.
Conclusion - Window Air Conditioners Are Easy To Clean
As you can see, you won’t need an HVAC professional to clean a window air conditioner if you follow the steps mentioned in my guide. Ensure you get all the necessary tools before the cleaning day for a smooth experience.
It is also wise to proceed step-by-step, so start by cleaning the air conditioner body, front panel, and filters. Then, wash the internal components and let all the parts dry naturally to reduce the chances of mold or mildew.
Most importantly, regularly clean the air conditioner to detect issues and ensure safe operation. That’s all I had to say, and you can let me know about your experience of cleaning a window air conditioner.
And if you have some unique tips to make the process easier, I would love to know them.