Expertises: Painting, Art, Drawing, Pastel
Updated on

Inspiring Ideas for Modern Home
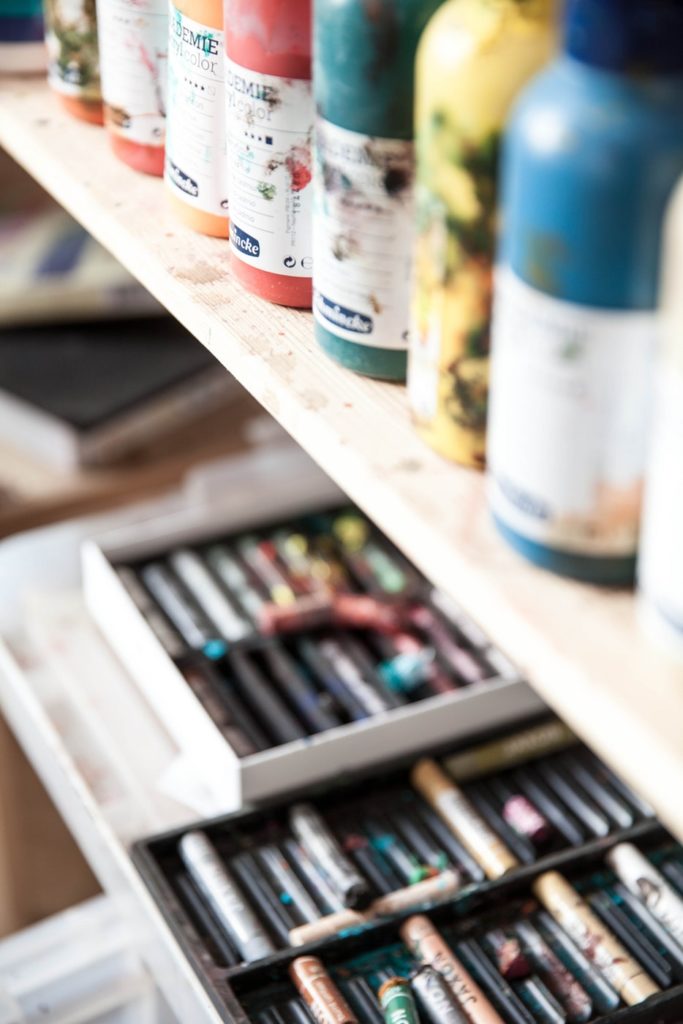
When it comes to producing exceptional masterpieces, oil pastels are one of the best ways to take you there.

While these mediums are soft and vibrant to offer great performance on their own, it is important to equip yourself with techniques in order to be a master in the world of oil pastels.
Today, we will present 26 different techniques which you can try with these sticks that can really help enhance your oil pastel paintings.
Remember to always prepare and prime the board before starting out with the project so that you’ll get the best, desirable results.
Without further ado, let’s get into it!
Blending is a popular technique in the art universe. Almost every kind of painting requires blending for creating certain effects.
When you’re done applying one color on the surface, take another shade and apply it right beside the first one.
Using a blending tool or your finger, rub the shades together to form another color in between the original tones. Remember not to leave any visible harsh lines.
While blending can be done directly on the surface, you can also do it prior to the application. Take the colors you are going to use and blend or mix them on a palette.
This is a useful technique because you can see the blended colors before applying them, hence, preventing disappointments if the shade does not turn out as expected.
The technique is called ‘dotting’ because it requires consistent work to produce a texture using dots. It is also known as pointillism or stippling.
For this technique, use the tip of the oil pastel and progressively work towards creating the desired figures. It requires a lot of patience to finally complete one medium subject but the outcome is amazing and worth it.
Keep in mind to be gentle and not apply too much pressure on the stick because that can make the soft composition break and leave unwanted crumbs.
Overlaying is the process of working on a base and then proceeding to form a layer on top of it. The purpose of this technique is to form a sheet effect covering the paints below. Also, it thickens the shade to provide full coverage and synchronized background.
To successfully execute the technique, use the side of the oil pastel which will serve this intention.
When you’re done applying oil pastels, use fingers or any blending tool to rub them for achieving smooth effects. Have an extender in hand and put a little amount of it on the painted surface to form a texture. You can also use the extender to improve the transparency of the colors.
Another way of using an extender is to apply it directly on the surface before oil pastels so that it acts as a base.
If you want to produce a piece with effects similar to oil painting, use the impasto technique.
This technique requires extra soft pastels which you have to blend over and over until they form a paste. We do not recommend mixing this directly on the surface because it will damage from the ongoing process. Instead, use a palette and mix some thinner if the oil pastels are still too hard.
This is a simple method of achieving great oil pastel results. It is also known as sgraffito.
Sgraffito is when you use the oil pastels dry. In this state, oil pastels behave as soft pastels would except that it can produce a lot more effects.
What you can do is fill the paper with preferred colors. When you’re satisfied, take a single color (preferably black) and fully cover all the other colors with it. Wait for some time, then take a stick or a sharp-tipped tool and start scratching the black surface slowly. Draw any figure or shape that you want.
If you put more colors underneath, the results will be more beautiful and vibrant.
Using a stencil will not only reduce mistakes but will also be faster.
The first thing to do is cut a shape from any hard paper for the stencil. Lay it on the sheet and start coloring inside the shape to create a precise figure.
Or you can apply colors directly on the edge of the cut shape and start transferring the colors to a paper by rubbing it lightly with your finger. This will give your painting a light color effect.
The masking technique involves using tape over the actual paper in order to create different patterns. You can also use draft tape for this purpose.
The best part about this method is that you can shape the tape however you want to for the desired textures. Proceed to drawing when the preparation part is done.
But before taking on this technique, keep in mind you will not be drawing on the actual paper anymore but instead on the surface of the tape.
Resist Effect refers to the appealing look of the piece.
You can achieve such an effect by using watercolors after finishing the drawing process completely.
Because the oil pastels contain oil and wax, they will naturally resist watercolors - and this is where the name of the effect comes from. Therefore, it will leave a beautiful and luminous effect when dry.
Short strokes are perfect for creating multiple effects and textures. They are also great for creating a painting concept with strokes pattern.
When doing a landscape painting, short strokes can be used to draw grass with dynamic effects. You can use this for drawing rain and meteor showers or any other similar subjects.
But most importantly, this technique works wonders when filling in minor areas with oil pastels.
When creating different textures or patterns, the artist can turn either create their own surface in the painting process or find a ready-made option from the local art store.
If you are a beginner who wants to create magnificent paintings but having a hard time with techniques, the shortcut is to find a surface which already contains textures.
As you progress, try creating unique surfaces by using extenders and other mediums to achieve special surfaces.
This is the most basic of all techniques and all it requires you to do is draw the certain features and shapes which you want to highlight in the piece.
By using your oil pastels and creativity, drawing can actually give the artwork the precise effects that you desire because you have more control over the outcome.
Similar to short strokes, these are perfect for drawing an area filled with grass, but which is closer to you. You can also draw hair using this technique.
The length of the strokes do not matter as long as you keep going and they meet the requirements.
Some other ideas which you can draw with long strokes include hay, animal fur texture, as well as fireworks.
This method consists of 3 rules to create an effect and is developed by Patrick Neumann.
The first thing to consider is this technique relies on the choice of colors. You should pick three colors of the same shades to
What this technique does is give your piece a more natural and realistic look.
The best way to think of an underpainting is to think of the wash you normally see in watercolor paintings.
The purpose of this technique is to cover up the white areas of the paper so they don’t look obvious to the eye. Therefore, by creating a light wash, you can replace them with another color which suits the piece more.
While using oil pastels is always exciting, there is also a price that comes with it - and it comes in the form of crumbs.
Here, crumb control does not refer to a technique to enhance your piece but instead point out ways to remove these unwanted inconveniences so that your artwork stays neat and clean.
One of the most effective ways is to use a kneaded rubber to remove or lift the crumbs off the drawing paper.
If you use solutions to thin oil paints, you can also use it for oil pastels which are water-soluble. The result will be similar to that of the liquid oil mediums.
There are also solubles such as linseed oil which are perfect for oil pastels in case you want the piece to have an oil painting effect.
However, the quantity of soluble depends on the number of oil pastels you want to use.
If the oil pastels are water-soluble, you can use the sticks to produce effects similar to that of watercolors only by mixing it with water or other solutions such as linseed, turpentine, and other mediums.
When using this technique, remember that any application which is too heavy can be blended for a smooth feel.
This method comes in very handy when you want to create multiple effects within the piece.
Beginners tend to have a lot of troubles when working on making grass textures look real. So as we have mentioned earlier, you can either use long or short strokes depending on the position of the grass.
Highlighting and using multiple shades will take the artwork a step closer to looking real.
Another tip to creating precise and realistic grass is to sharpen the oil pastel tips.
With layering, you can apply one color underneath followed by another color on top. When creating layers, keep in mind not to apply too thin or too thick as that can destroy the final look of the painting.
You can also blend the layers to achieve a natural and realistic appearance.
By creating marks, we mean using the oil pastels and give the paper any kind of strokes including short or long strokes, dots, hatching, and scumbling.
Yes, this is a way to use different techniques in order to create a unique piece. However, remember to use these techniques as you see fit, otherwise it will just be a combination of methods put together not serving any purpose.
Another way of bringing your painting to life and making it look real is by adding shadows and reflections. Many beginners tend to forget adding possible shadows when opting for a realistic painting, hence, making it dull and lifeless.
The best tip we can give to get amazing and precise shadows is by fixing an object anywhere beside the painting and imagine that to be a source of light so that every time you make a stroke, you’ll know where the shadow should be.
We can say that focusing on the smallest of details is sometimes overlooked as a technique. It seems every efficient artist does this and even beginners have an idea of it.
When you focus on the details, the artwork appears to be much more realistic and appealing to the eyes.
Working on details requires patience and skills but to make it an easy process, either sharpen the pastel or use the edge bit.
This is a fun technique to use for learners. The idea with this method is to apply oil pastel all over the paper. Then, place another blank sheet of paper on top and start drawing any figure you want.
Once the painting is done, separate the papers and you’ll see that the colors from the painted paper are transferred onto the blank paper, creating a reverse artwork on its back.
This is one of the cool tricks which you can use when the pigments start to get lighter.
What you can do is place the paper in the refrigerator for a solid 20 minutes, while at the same time, use the warmth of your hands to heat up the oil pastel so that it becomes soft again.
We find this technique very helpful to regain the vibrant pigments and provide full coverage.
And with that, we’ll wrap up today’s article. We hope you enjoyed reading it and found some techniques that you can use for your next oil pastel piece.
Happy Coloring!