Ask any person who loves to read how they would feel if someone returns a book they borrowed with folds like dog ears in page corners. Horrible! That's the answer you'll get, and normally so because no one likes to get their favorite book defiled.
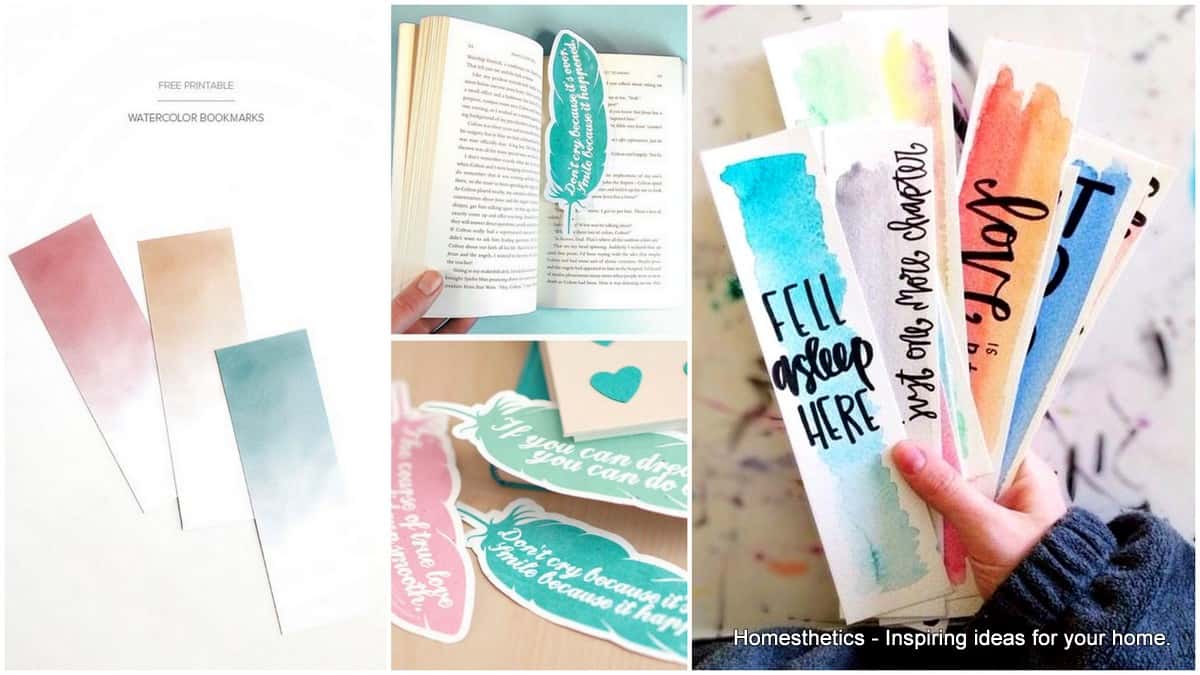
Recently, this friend of mine gave me a great suggestion. She told me why don't I lend the bookmarks along with the books? At least that ought to discourage the people borrowing them from ruining the pages with corner folds.
Wow! Why didn't I think of that before? But what do you do if there are no cute bookmarks left? Don't worry; today I will teach you how to make these amazing DIY bookmarks, not just for yourself, but as gifts for people to whom you lend books.
Cool Homemade DIY Bookmark Design Ideas Follow
-
This mustache bookmark that helps you stay classy
This cute little mustache bookmark is both handy as well as chic. It is simple, only requires a square paper that needs to be folded into a triangular shape, big enough to place it into the corner of the pages of your book, and a mustache template that should be stuck onto the upper part of the triangular bookmark. And voila, you're done.

-
This ice-cream bookmark that's perfect for summer reading
So, you're off on summer vacation and carrying a load of books with you to just bask in the glory of reading? Why not make it better by making this pretty ice-cream shaped bookmark? All you would need is a cardstock paper, a pair of scissors, some glue, sharpies, a perfect quote and not to forget, a popsicle stick.
Cut the cardstock paper into the shape of a popsicle, and color it in the way you want to. Pick a nice quote to write on it, and stick it to an ice-cream stick. You can even print design if you think you're not too great with drawing.

Tutorial @ lisastorms.typepad.com
-
A Bookmark with really long hands
These cute little-faced men with long hands could be a great bookmark for your kiddo. And it doesn't require a lot of time and effort for making it. All you would be needing is a cardstock paper, some color sketch pens or colored paper, and scissors. You can draw these little men in different expressions, color them up, and cut the hands accordingly so that they can be placed over the paper while the rest of the torso of these little men stay behind, while the face shows up.

Tutorial @ www.pinterest.com
-
Pompom bookmarks
Who doesn't love pompoms? These little furry balls of yarn or wool make for great decorations and that entire cheerleading thing. But did you know they can make for great bookmarks, in fact, I have one myself? They are really cute, can be made easily and in many colors.
This tutorial shows you a step to step process to make a beautiful pompom bookmark, from wool, yarn, or a leather sole, whatever floats your boat!

Tutorial @ projektila.blogspot.in
-
Another pompom bookmark
This one is a simple multi-colored woolen pompom DIY bookmark, and it looks gorgeous amidst your books. All you have to do is take multi-colored wool and spin it around a fork as per the size you want. Once, you are done, tie the knot in the center of the fork, pull out the wool, which should now look like a bundled bow tie, and simply cut them off at both the ends. You could use a longer thread to tie the pompom, which can come all the way to the bottom of the book when you place it in the middle of pages.

Tutorial @ pinterest.com
-
What better than a bookmark that reminds you of coffee?
For all the people who love snuggling up to a book in a couch, with a blanket and a warm cup of coffee on a cold winter day, this coffee bookmark might just be a cherry on top of the cake called reading.
For this elaborate yet straightforward DIY bookmark project, you will need a handmade cardstock paper, in two colors preferably, a template of a coffee cup (which you can also draw on a paper if you want), and few wires to replicate the hot fumes of the beverage. Follow this tutorial for more elaborate steps to complete the project.

Tutorial @ pinterest.com
-
Show your books some love with these heart-shaped paper clip bookmarks
There's no denying that paperclips are quite handy, you can just use them as a makeshift bookmark in case you don't have access to anything else. But if you got a little bit more time on your hands, and a couple of paperclips, you could make this adorable little heart-shaped bookmark. All you have to do is reshape the wire of the paperclip into a tiny little heart which could be clipped onto the pages of the book.

Tutorial @ howaboutorange.blogspot.in
-
Bowtie bookmark
What could a paper clip and some fabric or ribbon do together? Create a little magical bookmark. This could be an easy project that you can make when you don't have a lot of time on your hand but want a great outcome.
Just cut some fabric, make them into a bow tie, and stick it to a large sized paper clip. That's all! You can now mark your pages happily. What's more, make a few more of these; wrap it in a little box and who knows? It could be a perfect gift for your book-loving friend.

Tutorial @ www.lefrufru.com
-
Cute monster bookmarks that don't scare you away
Making corner bookmarks can be so much fun. They are easy to make and are highly customizable. For people who are fans of corner bookmarks, you might want to try out this cute little monster bookmarks.
You would need cardstock paper in different patterns, and a plain white paper to draw teeth and eyes. First, you need to make a normal triangular corner bookmark as mentioned in the mustache bookmark above, but only in patterned paper, and then stick the eyes and teeth onto it. You can simply cut out the corner of an envelope and use it as a basic corner DIY bookmark, but this tutorial also gives you detailed steps on how to do everything from scratch.

Tutorial @ tallystreasury.com
-
A little friend for your book
This one is like the little Mr. Long Hand bookmark shown above, but only more elaborate with the details of the body and torso.
Take a cardstock paper and draw a little figure of a human on it, be it a boy or a girl. Color it up and separate the hands from the torso and the rest of the body, so that you can clip on the bookmark with the hands, as shown in the picture.

Tutorial @ www.etsy.com
-
Simple paperclip bookmarks
Now, this is another way to make an easy yet aesthetically pleasing bookmark. That too, with just two materials - ribbons and colorful paper clips. Just take a small piece of ribbon and tie it around one end of the paperclip and you are good to go.

Tutorial @ alteredtoperfection.blogspot.com
-
Button it up!
Yup, I can just go on and on about the kind of bookmarks you can make with paper clips as the central material. After ribbons, which I mentioned in the previous bookmark, this one could be made with one simple replacement - buttons!
So, you can just collect as many cute buttons as you wish, and just pick the right ones you think would be perfect for cute diy bookmarks and stick it to the paper clip with the help of a tape.
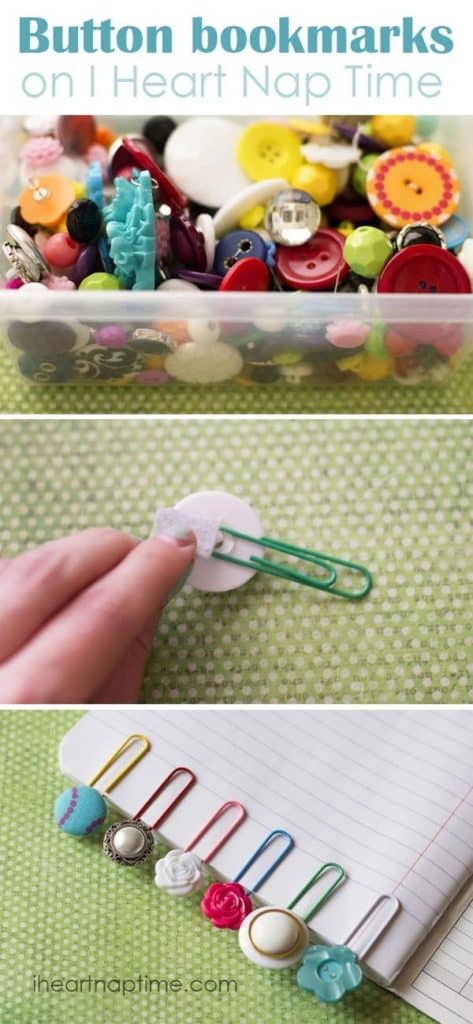
Tutorial @ www.iheartnaptime.net
-
Toys turned into bookmarks
In case you have the habit of hoarding old toys and keeping them for a very long time like me, this is perhaps a great way of upcycling. Just cut your old toys in half, especially if they are tiny, like animal figures or Barbie dolls, and just stick a paperclip on one end to use it as a creative DIY bookmark. Now, you don't have to let your childhood toys go to waste, just like that.
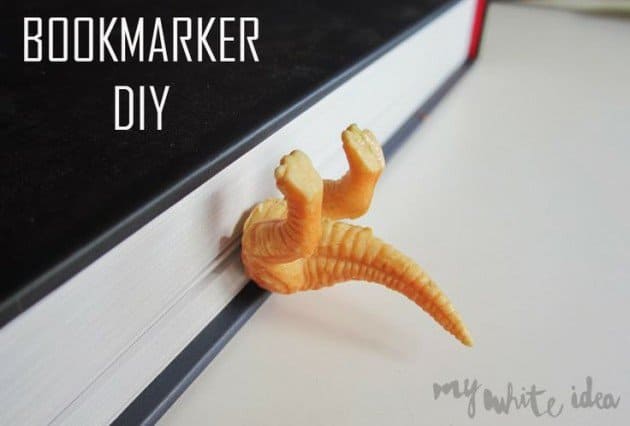
Tutorial @ mywhiteidea.blogspot.com.es
-
Color palette bookmark
If you have some color palettes lying around in your house after that huge refurbishing and repainting task, why don't you just convert them into some classy bookmarks?
Pick a color palette of your choice, and cut small shapes like hearts and stars in between the color shades (you could even use the shape punching machine). Then just punch a small hole on the top and tie a thread to give it a finishing touch as a holder.
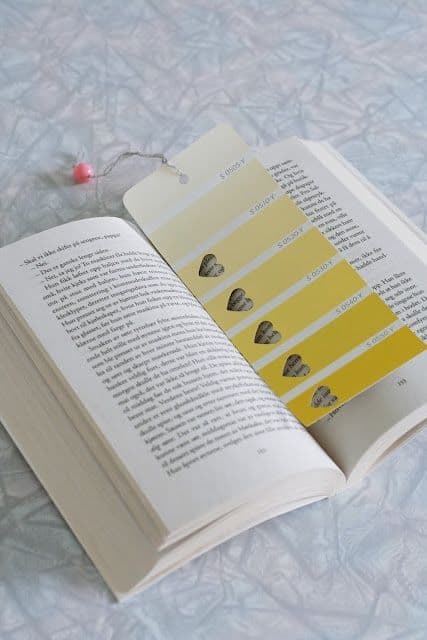
Tutorial @ daisy-pickers.tumblr.com
-
Heart shaped felt bookmark
Now this one is simple and cute. All it needs is a felt sheet and thread. Just take some red felt sheet, and cut two hearts out of it. Now, stitch them both together, but only at two sides, leaving one side open to use it as a corner bookmark.
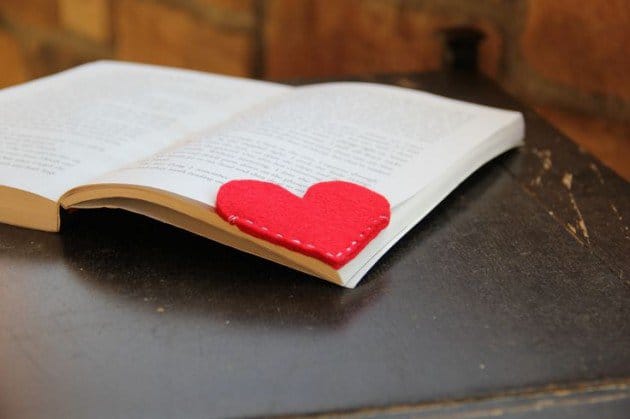
Tutorial @ wakeandwhimsy.wordpress.com
-
Turn your old jewelry into new bookmarks
Be it an earring whose pair is long lost, a broken bracelet or an old pendant, and you can now turn it into a blingy bookmark. I mean, who could resist something this creative? All you have to do is take some sheer or fancy ribbons and attach these pieces of old jewelry to them. Now they can give your half-read books a shiny and classy look.
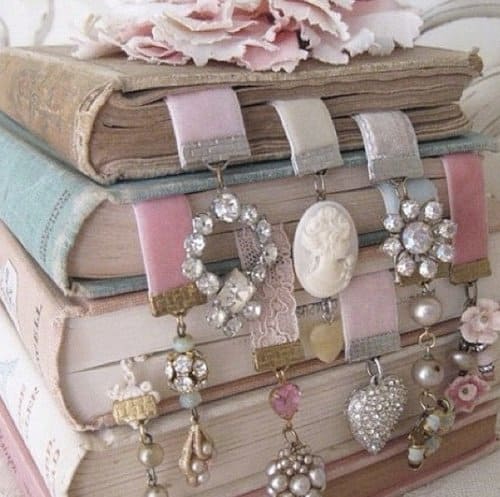
Tutorial @ kerli.buzznet.com
-
Bookmarks in the shape of cups and tea bags
Not everyone loves sipping a coffee while reading. Some of them are into having a nice cup of tea, too. Well, these cute diy bookmarks are for all those tea lovers who are also reading enthusiasts.
It is really simple to make, and you would need craft papers, a piece of thread and a tube of glue. Take some craft papers and cut them into the shape of teacups. Now take a thread, and a small piece of paper and wrap it around one corner of a thread like a tea bag. Glue the other end of the thread to the teacup and you are done.

Tutorial @ genuinemudpie.ca
-
Butterfly shaped ‘Read Me' bookmarks
Want a bookmark that calls out to you? Then you must try making this elegant butterfly shaped bookmarks. For this, you would need a patterned cardstock paper or just a paper ripped out of a magazine, a white paper, and thin ribbons.
Take the patterned paper and cut it into the shape of a butterfly. Glue a white paper onto it, which is also cut into the same shape, but smaller. Now punch a hole on the top and tie a ribbon that is long enough to be placed in the book.
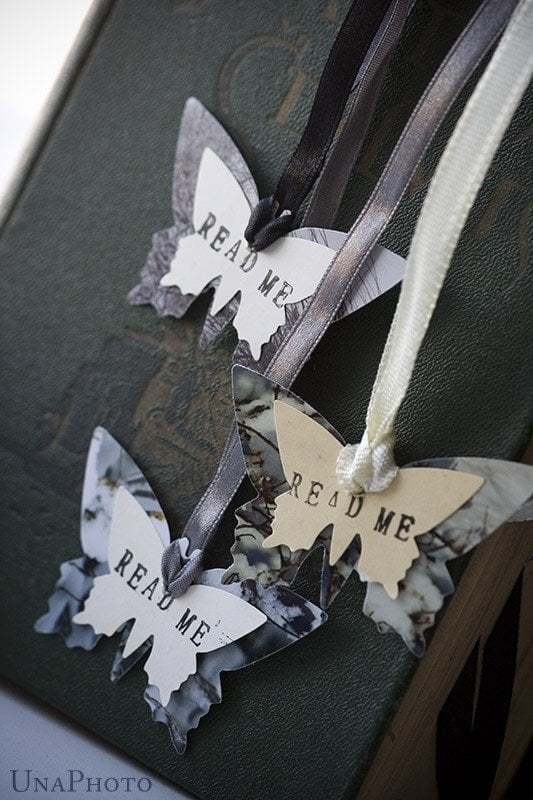
Tutorial @ www.etsy.com
-
A cute little dress bookmark for fashion lovers
If you are a fan of all the haute couture and ongoing clothing trends, then this might just be the bookmark for you. Take a piece of fabric, outline a dress onto it and cut it out. Now, take a thread and sew it along the edges to give it a proper finishing. And to turn this into a pretty little bookmark, stick this dress with a piece of an elastic band, which you can place around your book.
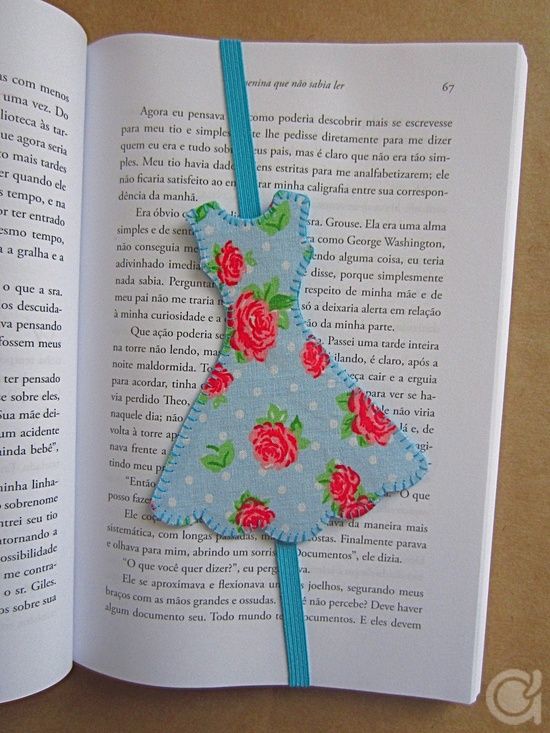
Tutorial @ amorascrafts.blogspot.com.br
-
Paper made heart shaped bookmark
This is another kind of heart-shaped bookmark which is completely made with paper. And of course, you would need glue to keep it all together.
First, take some white paper and cut the heart shape to the desired size. Draw a smaller heart on the patterned paper and cut it out. Now, attach these both together with the help of glue, but only on two sides so that you can use it as a corner bookmark.
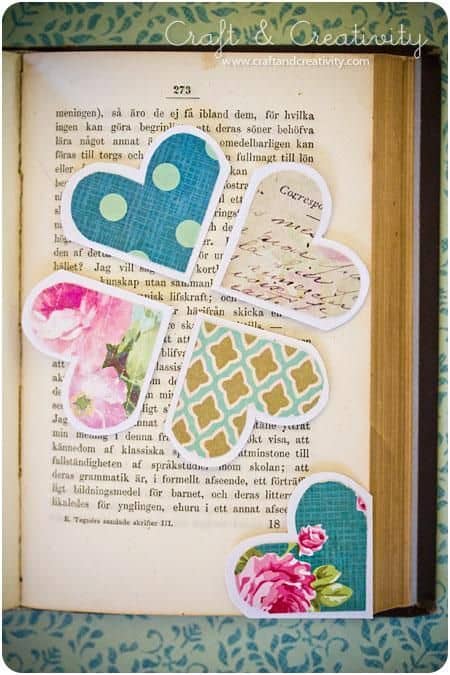
Tutorial @ craftandcreativity.com
-
Cardboard and paper bookmark
Now, this is a bookmark that is very simple to make and can be created in any design you want. All you have to do is take cardboard and cut it in a basic rectangular bookmark shape. Use a black marker to draw any sketch you want on it. Last but not the least, take a white paper and cut different shapes on it - be it animal, bird, flowers or anything abstract - and glue it onto your cardboard.
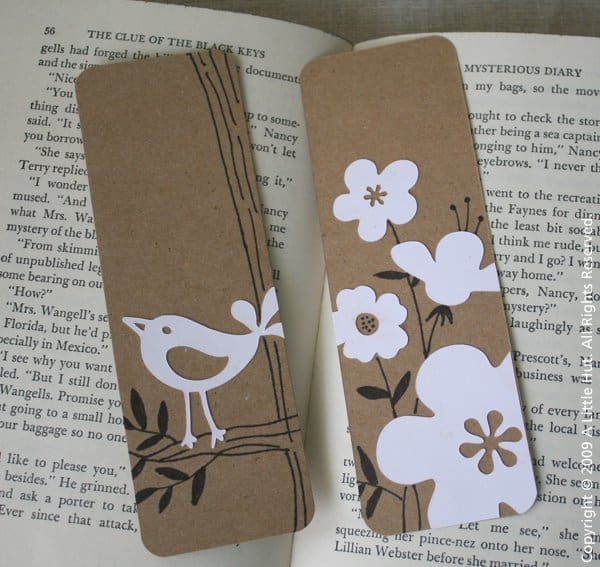
Tutorial @ indulgy.com/colleen
-
Sticking the sticky notes
The sticky note is a savior for those who forget things. Wouldn't be great if you can make bookmarks out of it? Just take a solid colored cardstock paper and place your sticky notes on it. Add some washi tape or ribbon as a handle on the top to give it a finishing touch. What's so great about this bookmark is that you can now take notes while actually reading the book, and not forget about it. Awesome, right?
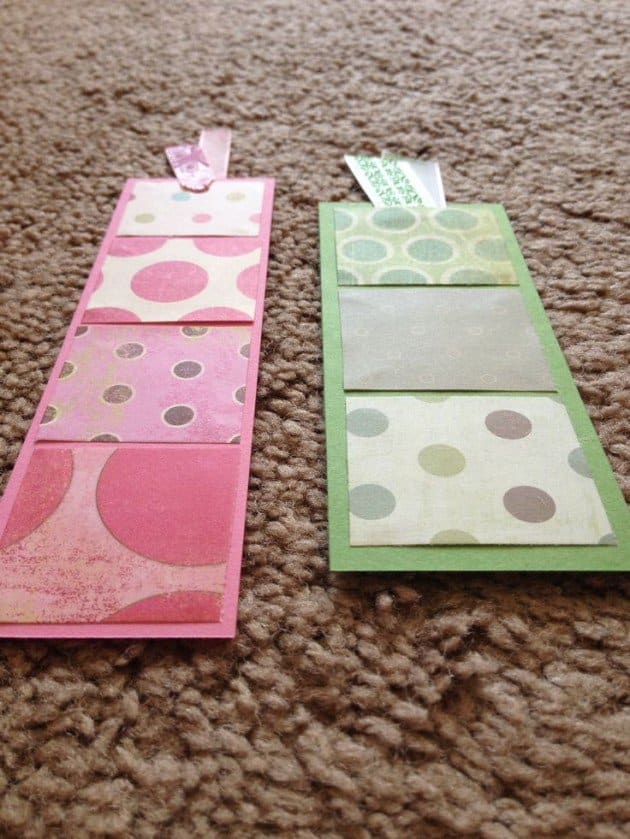
Tutorial @ pinterest.com
-
Felt monster bookmark
You've already seen how to make a heart shaped bookmark with felt. Now, you can experiment with it a little more by making monster shaped bookmark in a different color.
For this, you'd be needing two different colored felt sheets, which must be cut according to the shape you need, and stitched together. And here too, you must make sure that the felt sheets are attached only on two sides. For more detailed instructions, you can follow the tutorial mentioned in the link below.
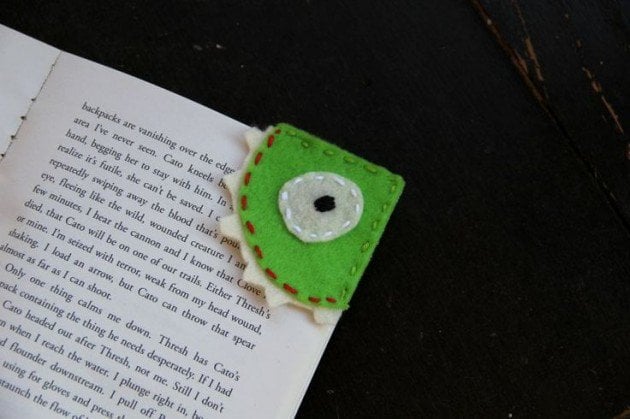
Tutorial @ wakeandwhimsy.wordpress.com
-
Personalized photograph bookmarks
Wouldn't it be a great gifting idea to give someone bookmarks made out of their own pictures? For this, you need to choose some old pictures from your albums, preferably in crazy poses, that you wouldn’t mind using in a craft.
Now, these pictures need to be cut out in the shape of the outline of your bodyand must be attached to a tassel on the top with the help of a thread.
Source Unknown
-
Owl bookmarks made with cardboard
If you are in love with all those owls shaped jewelry and printed bags, then this cute owl-shaped bookmark is the one for you. All you have to do is take a template of an owl sitting on a branch and cut various color papers into the shape. Finally, you must glue them all together, but leave the upper most layers half open so that you can place them in the half-read books accordingly. These detailed instructions will help you make one perfectly.
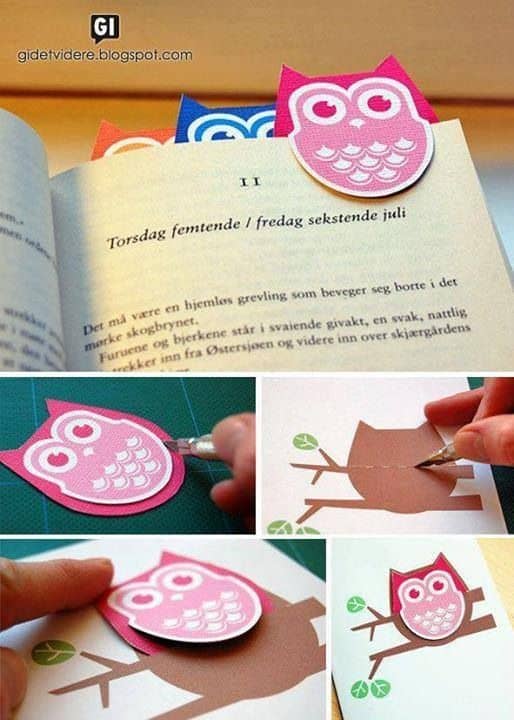
Tutorial @ gidetvidere.blogspot.no
-
Cute cat bookmarks
If you are a cat person, then this bookmark is a must-have for you. All you need is colored paper, some sharpies and a pair of scissors. Cut the colored paper into a rectangle on the three sides, and two triangles on the top resembling cat ears. Now sketch cat with two paws on it. Cut out these paws leaving one side still attached to the bookmark, enabling it to be placed inside the book perfectly. And you are done!

Tutorial @ diycandy.com
-
Tie bookmark
Give your book a formal look with this bookmark shaped like a tie. To make this one, you need four thin strips of paper, preferably of two colors, which you need to pleat one over the other, as shown in the picture and the tutorial. Once you are done, glue it to keep everything intact, and add a thread on the top to give it a complete look of the tie.
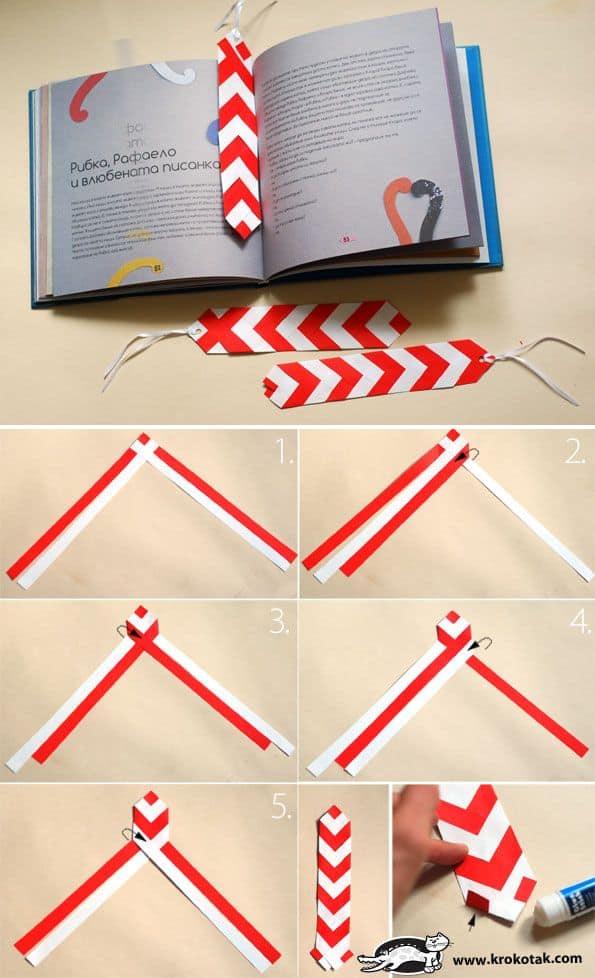
Photo Courtesy of krokotak.com
-
Easy tassel bookmark that you can make at home
Give the usual rectangular patterned bookmark a peppy look by just adding a tassel to it. Just take a piece of paper and cut it out into a basic rectangular bookmark. You can even use patterned cardstock or magazine cut outs for the same. Now punch a hole on one side of this book mark, and attach it to a tassel which is made with thin wool or yarn. The tutorial attached will give you an idea of how to make a tassel if you don't have an idea of making one.
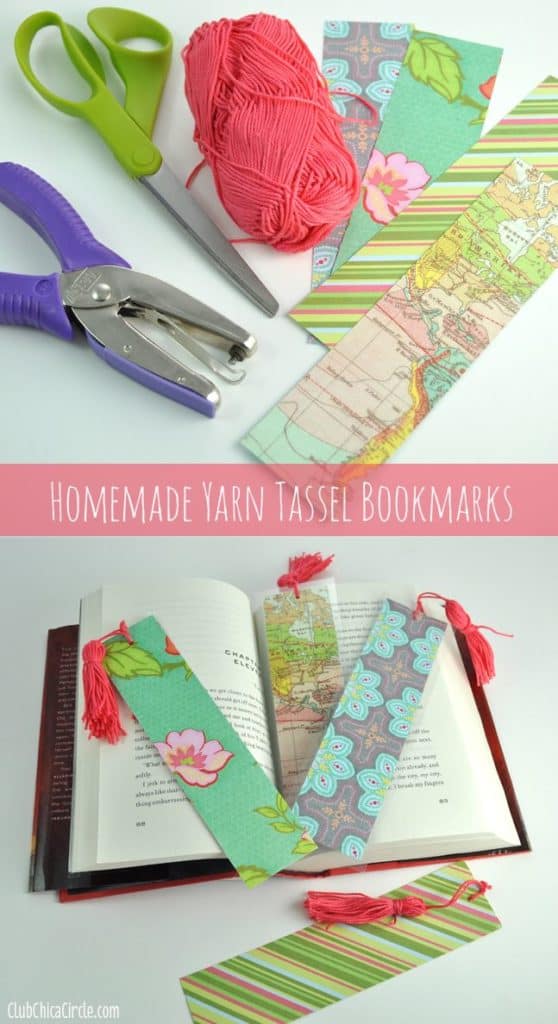
Tutorial @ club.chicacircle.com
-
Funny bookmarks with googly eyes
What can a colored paper, googly eyes and scissors do together? An ultra-cool funny faced bookmark. All you need to do here is to cut the colored paper into rectangular shapes, and long nose a la Pinocchio style. Now for the finishing touch, add some googly eyes to it and you are done! If you want to decorate it further, you could even add horns to these funny little bookmark creatures.

Tutorial @ dumpaday.com
-
Book corners with color papers
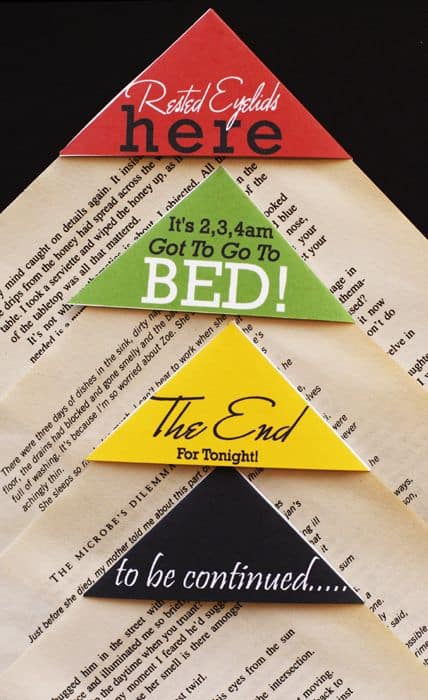
This is another way to make corner bookmarks more fun. Fold colored papers into corner bookmarks and just jazz it up with a funny little command or a simple quote. This tutorial can sure help you make one.
-
Free printable bookmarks that you can color by yourself
Now, this one is extremely easy. All you have to do is get printouts of these bookmarks with sketches or doodles and color them in whatever way you like. For those who are interested in coloring, this might be a perfect activity - it doesn't just give you satisfaction, but also a vibrant and gorgeous bookmark for your book collection.
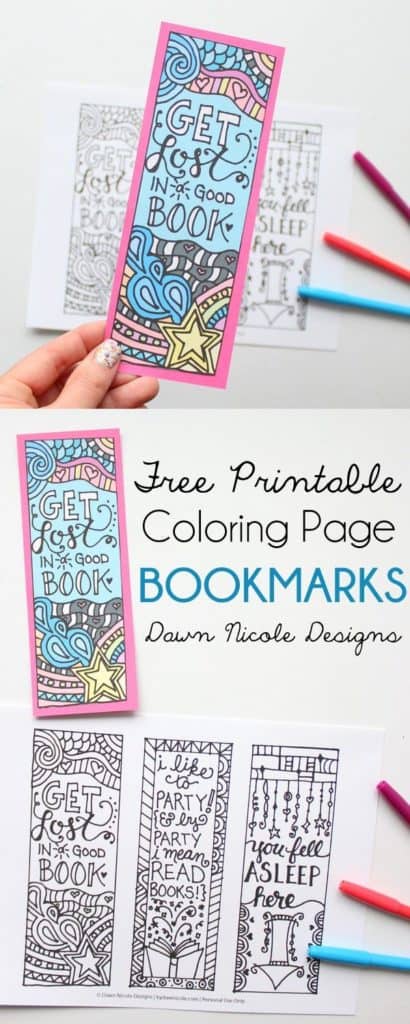
Tutorial @ bydawnnicole.com
-
Heart-shaped bookmark in origami fold
Now, this is another heart-shaped corner bookmark but only made with origami folds. All you have to do is pick up a colored pattern paper and fold it into the shape of a heart. This tutorial details every step to get that perfect little bookmark. If you're too lazy to read, the picture is also pretty self-explanatory.

Tutorial @ howaboutorange.blogspot.com
-
Origami kitten bookmark
Another fun DIY origami project is this funny little kitten bookmark. Though it looks difficult and time-consuming if you follow the right steps mentioned in the tutorial. It is not so hard to achieve. And guess what; all it needs is a simple solid color paper and a knack for folding them.
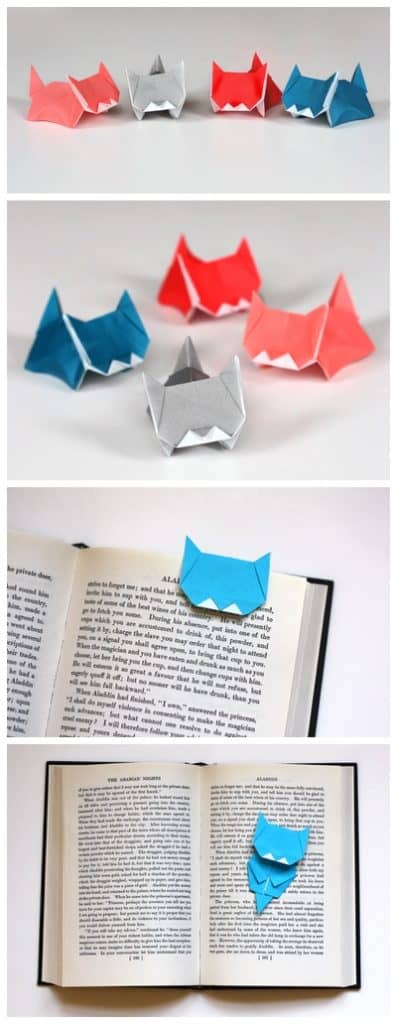
Tutorial @ howaboutorange.blogspot.com
-
Another simple kitty bookmark
This article is definitely a treat for all those people who love cats. Here's another simple kitty bookmark you can make. Just print the template of the cat and cut it around the dotted line. Now, take a craft knife and cut the lower half inner grey line of the kitty leaving the outline. You can now clip on this kitty into the pages of your book and use it as a bookmark.

-
Ribbon and hair tie bookmarks
Want to make a simple yet pretty bookmark? Then just go to a craft store and pick up some nice polka dotted ribbons, colored hair ties, and buttons.
Now, take a long piece of ribbon and attach a hair tie to it, probably by sticking or sewing it into the corners. To give it an extra touch, you can glue a button to one or both the sides of the area where you attached the ribbons and elastic together. You can follow this tutorial with detailed steps below.
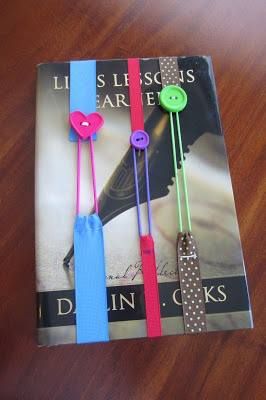
Tutorial @ theprincessandhercowboys.com
-
Cat bookmark made with metal
Woot woot! Or should I say meow! Here's another simple cat bookmark which is entirely made out of wire. Take a long wire and coil it in three to four circles. Now take the outer end, bend it into the shape of a kitten's face and voila, you have your bookmark in your hand.

Tutorial @ diychristmascrafts.tumblr.com
-
Bookmarks that look like greeting cards
These DIY bookmarks open up like greetings and are very easy to make. The supplies you need for this are patterned paper or fabric, plain card stock paper, craft knife, colorful ribbons and a glue stick.
Take the card stock paper and fold it into two halves like a greeting card. But make sure, it is in the shape of a basic bookmark. Now take a small piece of patterned paper or fabric and stick it on the inside, as shown in the dotted line of the picture. On the other side of the card, draw any shape you wish and cut it out with a craft knife. As a part of the last step, fold back the bookmark, punch a hole on the top and tie a ribbon around it. You can even write a small message on the bookmark if you want.

Tutorial @ mmmcrafts.blogspot.com
-
Fabric flower bookmark
Why do we always have to use cardstock, paper or felt for the bookmarks? Here's a completely different, washable alternative - a floral bookmark completely made with fabric. To make this, you must first create a fabric rosette and attach it to a strip of fabric that's sewn into a basic bookmark. This project needs a sewing machine, but can also be done with hand if you have a lot of time to spare.
This tutorial by little birdie secrets will help you with a step by step procedure on how to make this beautiful bookmark.

Tutorial @ littlebirdiesecrets.blogspot.in
-
Ruffled ribbon bookmark
This is a bookmark made of ruffled ribbon, which can also be doubled as a journal wrap. To make this bookmark, you would need a strip of elastic and a ribbon.
First, you must make ruffles with the ribbon by making small folds and stitching them together in a compact manner. Now, attach this ruffled ribbon to strip elastic to make the bookmark.
This project would also need a sewing machine to get that perfect finished look. Also, a colorful ribbon would be the best pick for this particular DIY project.

-
Hug-a-book puppy bookmark
Since we have had quite a few cat bookmarks already, I think it's high time there's one bookmark for dog lovers as well. This is a hug-a-book dog bookmark that's quite easy to make. All you need is a white card, brown paper, glue stick, markers and a pair of scissors.
Cut the white card into a rectangular piece and glue a drawing of a dog face, ears and paws on it. The best part of this cute little bookmark is that pops of the page and you could make these bookmarks with other animal faces too.
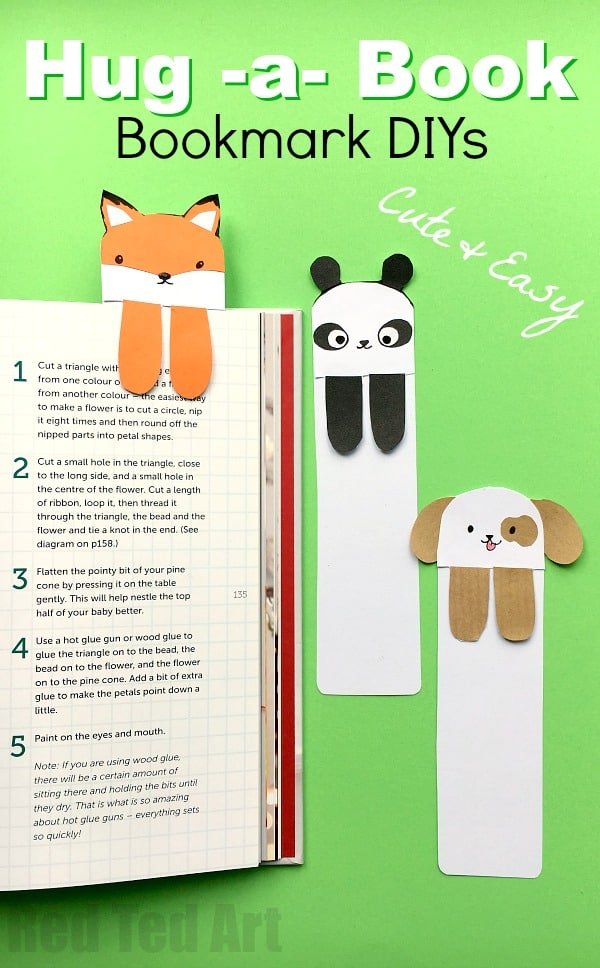
Tutorial @ redtedart.com
-
Mermaid bookmark
This is a DIY bookmark which is made the same way as the puppy bookmark, but with a little more design and detail. Instead of a regular rectangular shape, you need to cut the back part of the bookmark into a mermaid's tail. While you can use different colored papers and sketches to make the mermaid's face, hair, and other accessories. What's more, you can even embellish the whole bookmark with sequins and other glittery decorations.
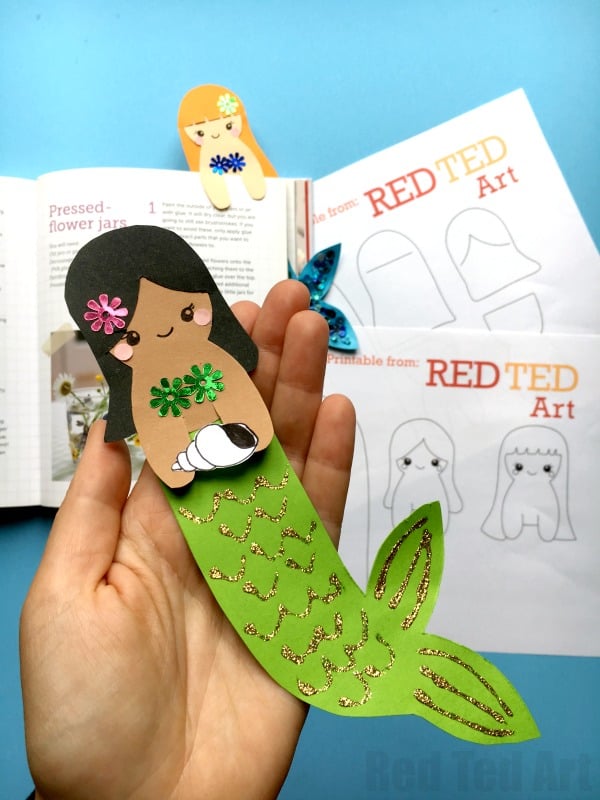
Tutorial @ redtedart.com
-
‘How To Train Your Dragon’ inspired bookmark
Isn't Toothless on How to Train Your Dragon adorable? How about making a bookmark of this cute little dragon? You can make your own Toothless bookmark from scratch, only with paper, scissors, and glue.
This tutorial from redtedart also gives you a printable template if you need one, and all you have to do it is assemble and glue it according to the tutorial.
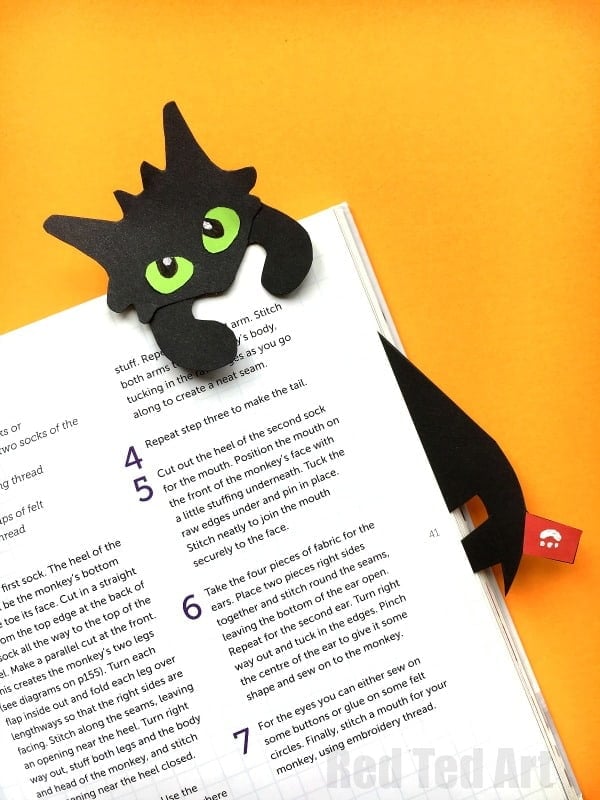
Tutorial @ redtedart.com
-
Origami ghosts bookmark
Another fabulous way to have an amazing bookmark if you are into origami is this less-spooky ghost. These little fellas can be made with one square sheet of paper and will be perfect for bookmarking your horror reads.
If you are a beginner, then you can follow the detailed steps in the link below, to fold a piece of paper into these cute little ghosts and use them to mark your books.
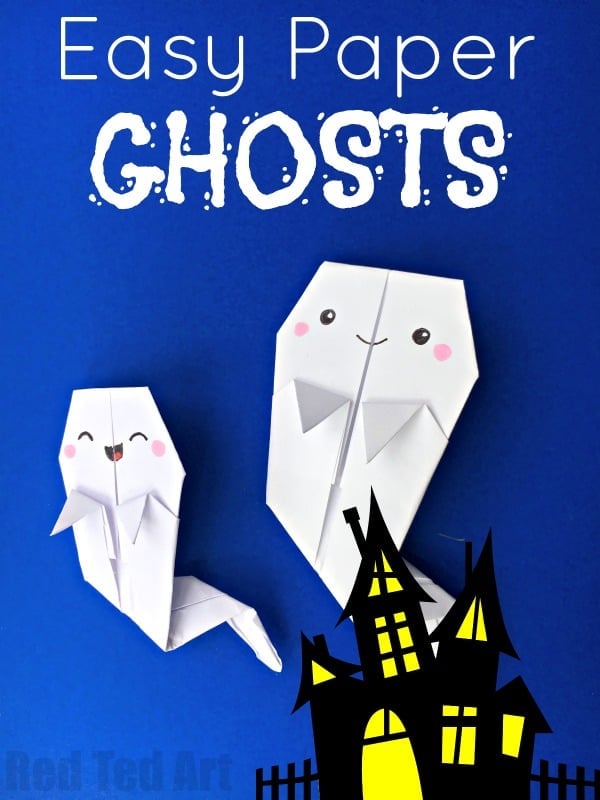
Tutorial @ redtedart.com
-
Black glue art shark & seahorse bookmarks
This project is something unique, but definitely an eye-catching way of making bookmarks. If you are into painting and other kinds of art, then this black glue and watercolor bookmark is just perfect for you. All you have to do is take a white paper or a cardstock, draw the template of a shark, seahorse or any other creature you like and cut it out. Now, outline it with black glue and paint the insides with watercolors to give a final touch to it.
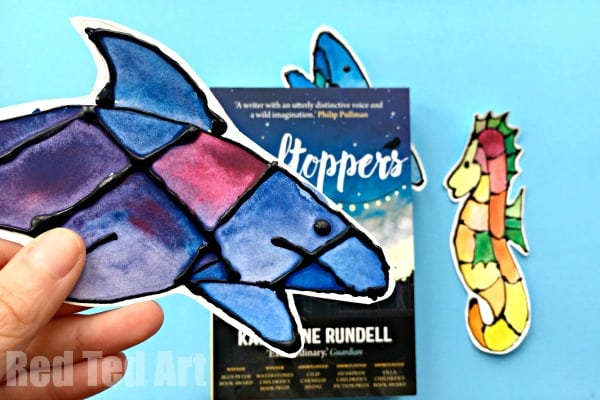
Tutorial @ redtedart.com
-
Watercolor leaf bookmarks
Another excellent way to make use of paper, black glue and watercolors apart from sea creatures is to paint nature with it and make bookmarks. These gorgeous leaf bookmarks are made in the same way like the shark bookmarks above. Just draw a template on the right watercolor sketchbook, outline it with black glue and paint it in colors of your choice.
What you could do differently with this is that you can also make a tiny little matching acorn and tie or glue it to the leaf with the help of a thread or a yarn and you are good to go.
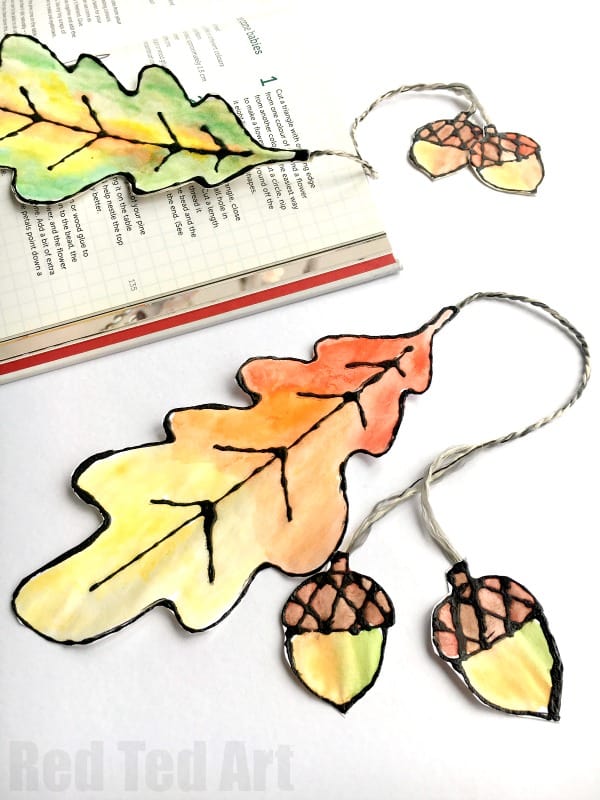
Tutorial @ redtedart.com
-
Mindful Bookmarks
These could be made as perfect matching bookmarks along with the cover art for your mindfulness journal. All you need to do is cut a cardstock paper and doodle your favorite set of inspiring words and color them with sketch pens or sharpies. Now just punch a hole, attach a ribbon or a woolen strand to the bookmark, and you're done.
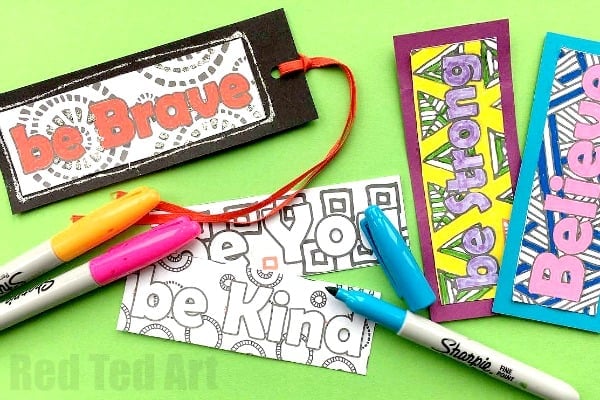
Tutorial @ www.redtedart.com
-
Bookmarks inspired from your favorite books
What better way to celebrate the love of books than making bookmarks on the theme of your favorite books? When you buy books at bookstores, they sometimes give you promotional bookmarks, but making one on your own is definitely a much better idea.
You can select a favorite page, quote or cover of the book, scan it, print it and stuck it on a colored cardstock sheet to achieve the desired outcome. It's that simple. Oh and also, you could just attach a ribbon to it as usual to give the final touch. This could be a fantastic project to work with the children and keep them occupied while you have errands to run.
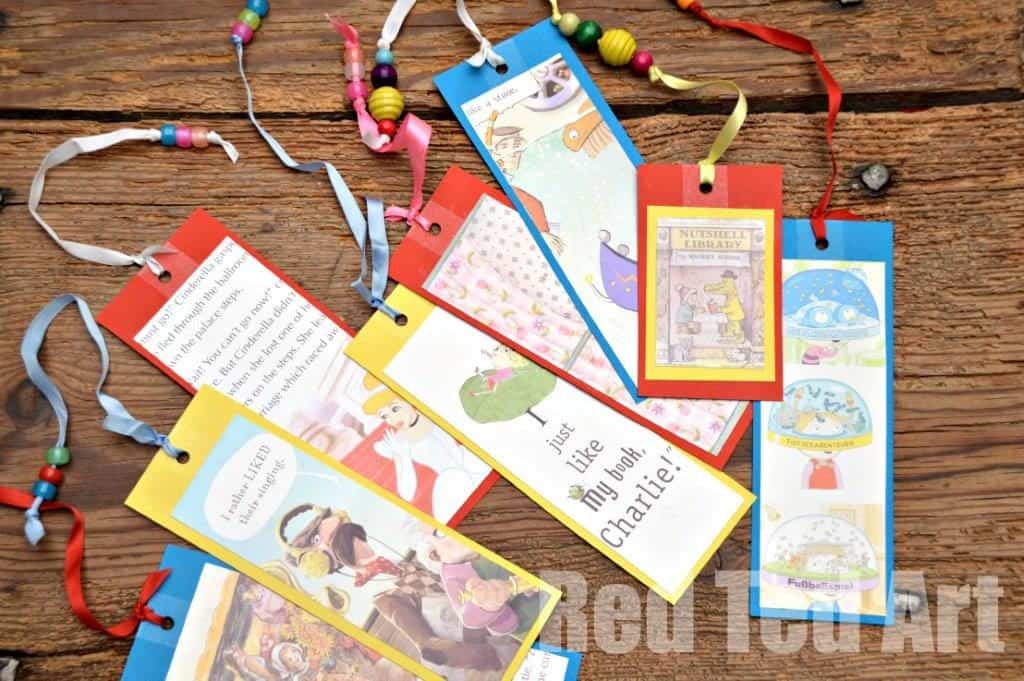
Tutorial @ redtedart.com
-
Harry Potter bookmarks
We all love Harry Potter and can never get enough of craft ideas and DIYs based on the theme of these books. So, I looked around to find these Harry Potter themed chevron bookmarks. The basic pleating is like the same as the tie bookmark mentioned above, but the difference here is you print out a house badge and glue it onto the bookmark.
Also, you must make sure that you use the right house colors while pleating these bookmarks. These are the colors you could use:
- For the Slytherine Bookmark – Green and Grey
- For the Hufflepuff Bookmark – Yellow and Black
- For the Gryffindor Bookmark – Maroon and Yellow
- For the Ravenclaw Bookmark – Blue and Grey

Tutorial @ redtedart.com
-
Bookmark design with recycled cardboard and artwork
What can recycle pieces of cardboard, an old artwork, some PVA glue, and some ribbon could possibly give you? An amazing bookmark. For this, you must take recycled cardboard pieces, preferably thin ones, and cut them into hearts of different sizes. You can then stick these heart shapes onto the old art sheets and attach it to the ribbon with the PVA glue.
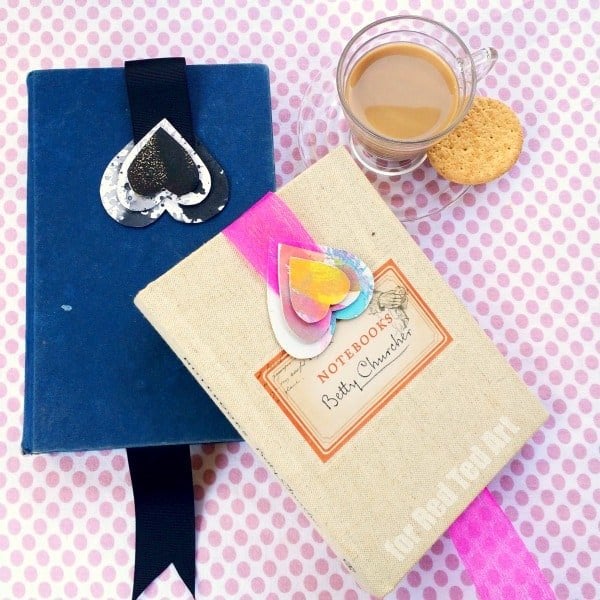
Tutorial @ redtedart.com
-
Easy bookmarks made with craft sticks
These are so easy to make that you could perhaps even involve your young ones in this project. They will surely enjoy doing the craft stick bookmarks all by themselves. All you have to do is color the craft/popsicle sticks into whatever design and shape you like. You could even use some ribbons, sequins or other embellishments to decorate it.

Tutorial @ redtedart.com
-
Dainty Daisy bookmark
If you are into crochet, then this daisy flower bookmark might be the perfect one for you. All you need is some colored worsted weight yarn, a G hook and this step by step tutorial which will help you make the right crochet bookmark for you.

Tutorial @ daisycottagedesigns.net
-
Easter bunny bookmarks
Bunnies are cute, especially when used as a bookmark. To make this adorable little bunny bookmark, all you need is a paperclip, a bunny and an Easter egg sketch drawn onto the paper and a thread. All you have to do is glue the bunny sketch onto the paperclip and attached it to the Easter egg with a thread.

Tutorial @ redtedart.com
-
Map your favorite place onto the bookmark
Traveling is one of the most happening passions of people these days. Everyone has a place they went and loved, they wanted to go, or the one place on their bucket list. So why not make a bookmark out of it? All you have to do is make a basic bookmark with a cardstock paper and ribbon. But to make it beautiful, you have to just choose the map of one place you love or want to be and stick it onto the bookmark.
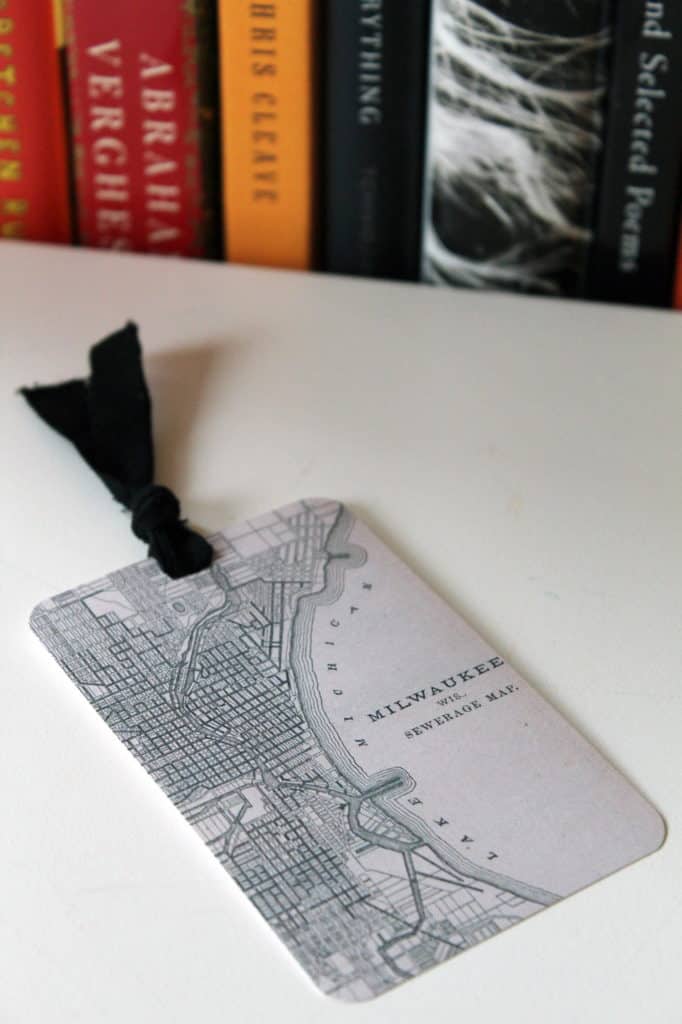
Photo credit Alison Sherwood
Tutorial @ archive.jsonline.com
-
Washi tape bookmarks
Washi tapes, otherwise known as paper tapes can make for wonderful bookmarks. To make these, you need to have a basic cardstock bookmark onto which you can stick washi tapes of different colors in different patterns and designs. And of course, don't forget the ribbon or the thread that you usually attach to a bookmark. You can even use a different pattern on the other side to use your bookmark both the ways.
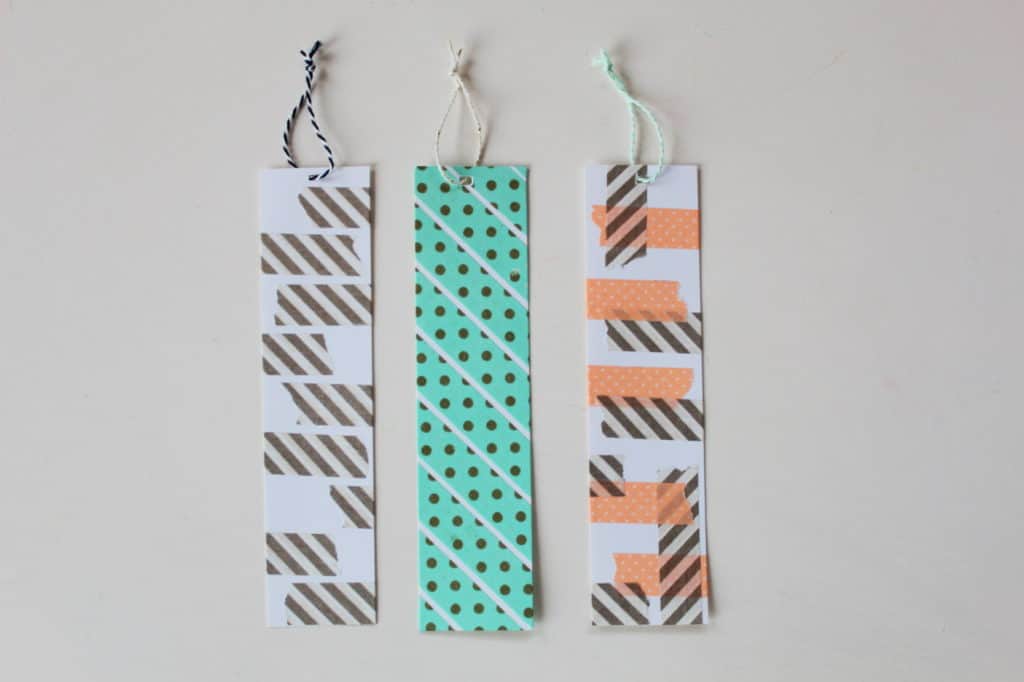
Photo credit Alison Sherwood
Tutorial @ archive.jsonline.com
-
Show some love towards your state and country with these patriotic bookmarks
This is for those who want to show the pride of their state and country, even with something as little as a bookmark. To make this, you can choose a small map of the state you belong, and cut the template onto a glitter paper. This must be stuck onto a basic cardstock bookmark, which you can outline with more glitter paper to give it a nicer look. If not a state, you can even use the map of the town, city or the country - whatever you wish!
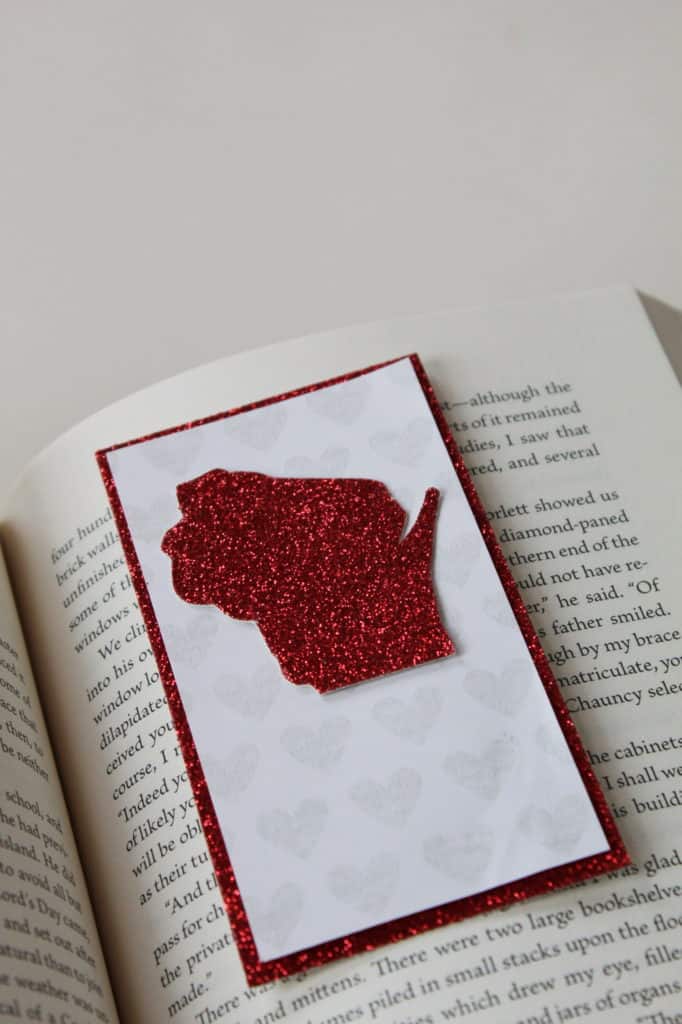
Photo credit Alison Sherwood
Tutorial @ archive.jsonline.com
-
Bookmark that lets you mark it up
This is a perfect bookmark for the students or readers who have the habit of marking not just pages, but also paragraphs. It also helps you take small notes whenever possible. All you have to do is glue on rows of bunches of small sticky notes in neon colors onto a basic cardstock paper bookmark. You can use sticky notes of one color or multiple colors to give the bookmark a different look on the hole
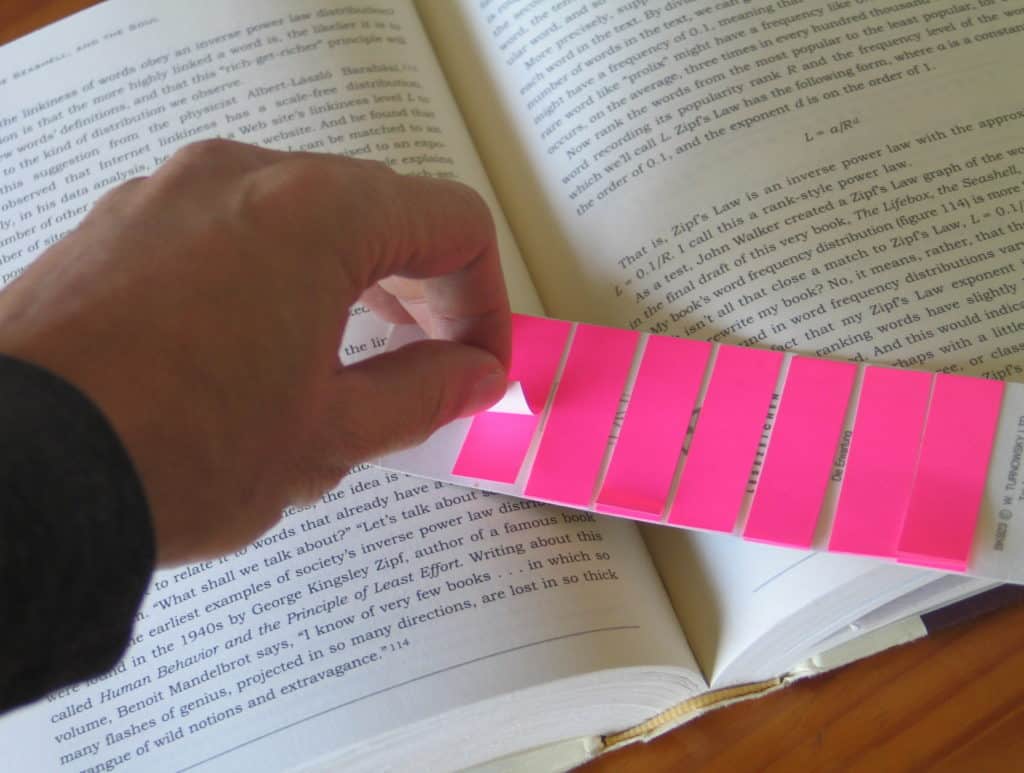
Photo credit Dav Yaginuma
Tutorial @ archive.jsonline.com
-
Bookmarks made out of gift tags
If you are too lazy to make everything from the scratch, but still want a rustic bookmark, then you should perhaps try this one out. To make this bookmark, you need a gift tag, a stamp and a piece of string. You must choose a design of your choice and stamp it onto the gift tag, and tie a string to the end of it. This is a perfect bookmark for those who don't want to spend too much time but want something simple and classy.
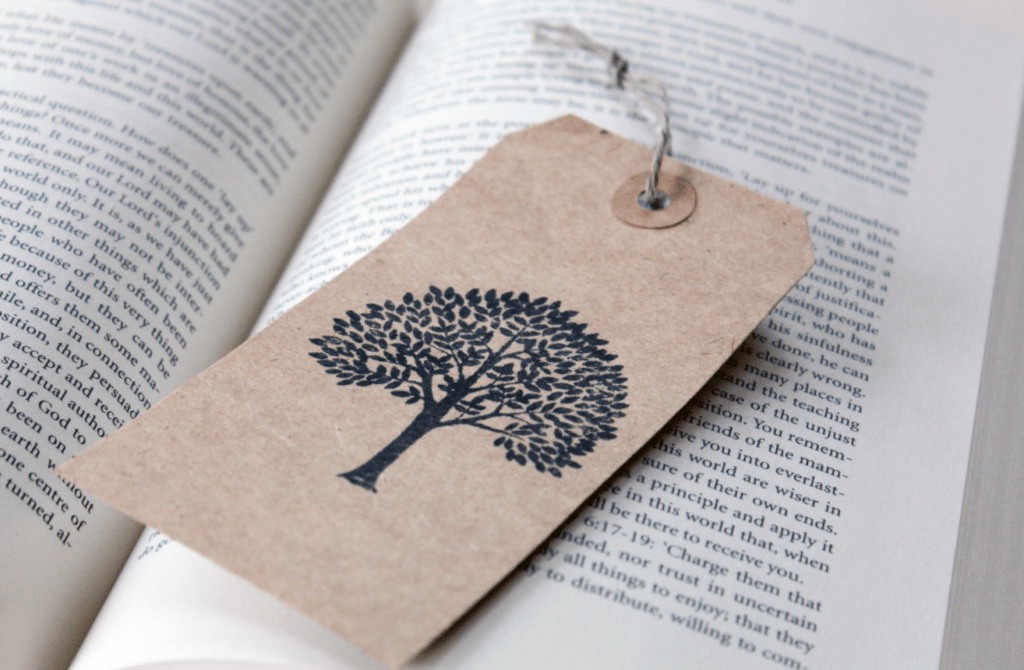
Photo credit Alison Sherwood
Tutorial @ archive.jsonline.com
-
Your reading buddy bookmark
More than a traditional bookmark with a string or a corner bookmark, this is more like a piece that you would put inside the book and close it. For this, you have to take a patterned cardstock paper, print out a template of an animal, a tree, a flower or any other figure that you like, and outline it onto the card stock. Now, using a craft knife and cut it out and use the front half as a bookmark.
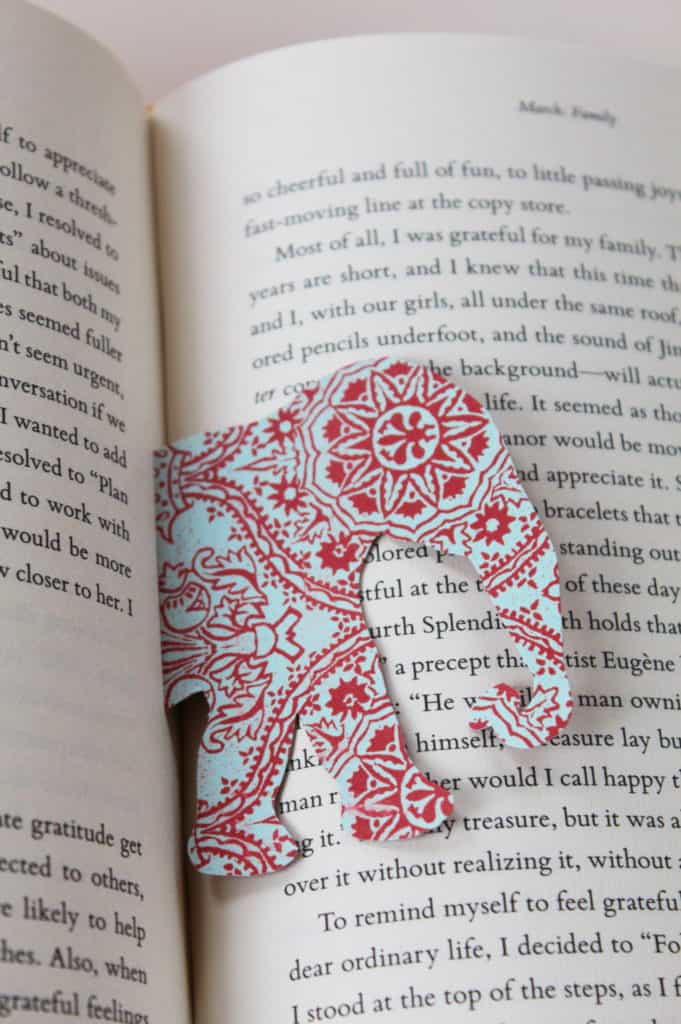
Photo credit Alison Sherwood
Tutorial @ archive.jsonline.com
-
Washi tape and paper clip bookmarks
Who knew that washi tapes and paper clips are a perfect match when it comes to craft? They are fire; they could quickly whip up a fantastic bookmark in practically seconds. All you have to do is to pick a nice colorful washi tape and stick it onto the paper clip by folding them. You can make many of these, put them in a box and give them away as presents, too.
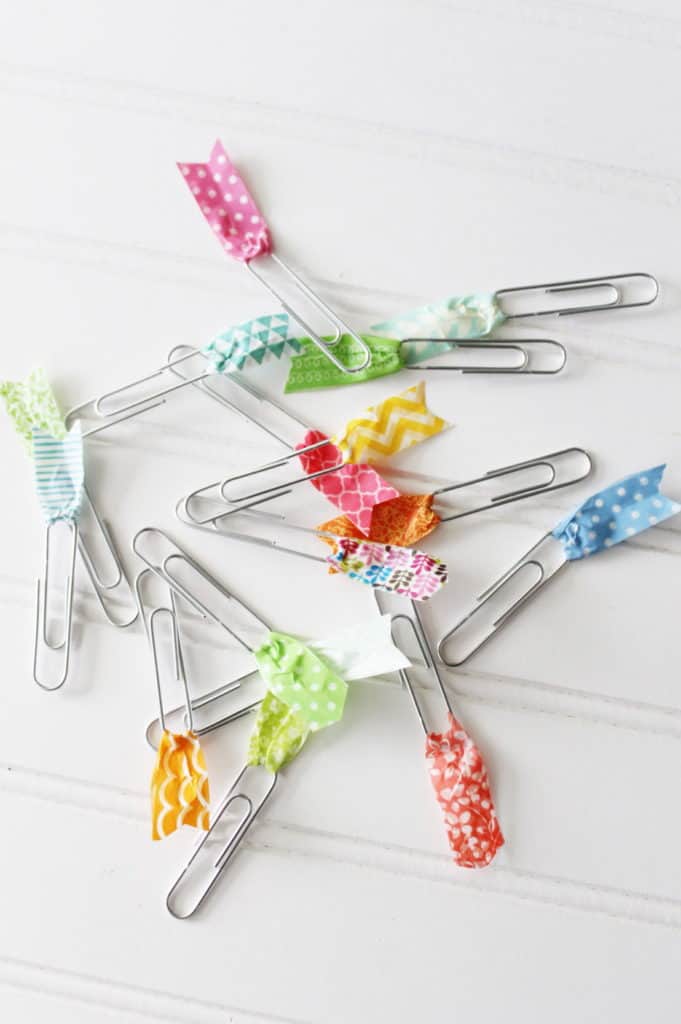
Photo credit Laura Silva, laurascraftylife.com
-
Bookmark with your favorite team's felt tassel
If you are a hardcore sports fan, you can make a bookmark with the theme colors of your favorite team too. I mean who said sports and reading could not go together? Just take a felt sheet, cut out two long strips with a rectangle at the bottom. Now, cut fringes at the lower part of the rectangles, lay the felt strips one atop another and roll them up beginning from the side of the long strip. For the final strip, glue the felt pieces together as a tassel and you are good to go!
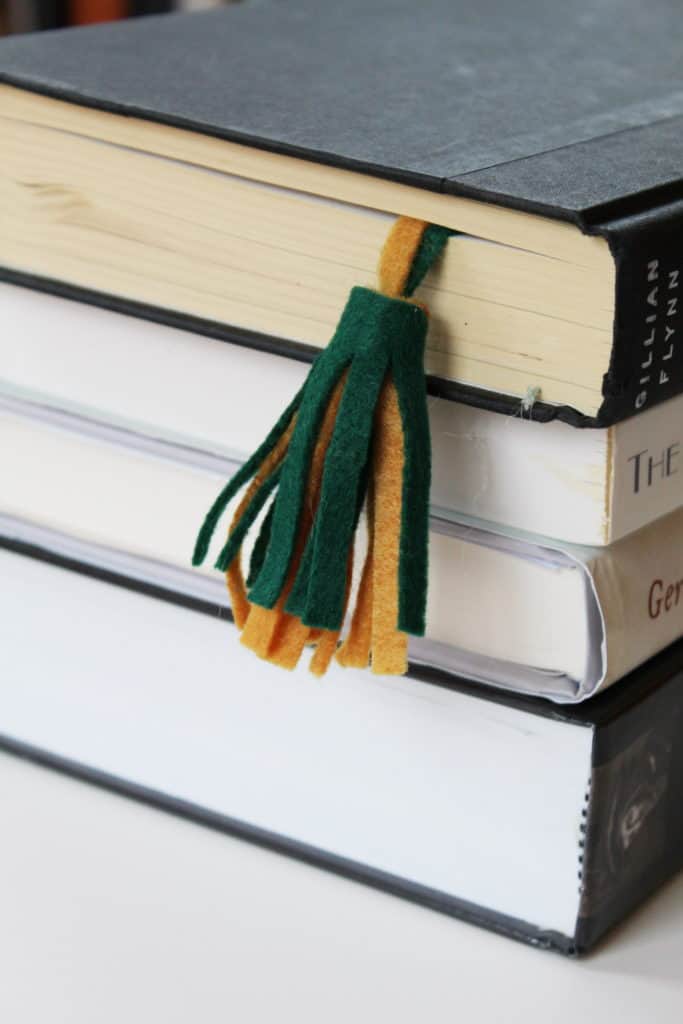
Photo credit Alison Sherwood
-
Confetti filled bookmark
I have the habit of keeping business envelopes because I never knew what I would need. And this seems like a great idea to use one of those cards. For making a confetti-filled bookmark, you need one of those business envelopes with a clear address window. You can cut around the window, keep it on a piece of colored paper, and stick it to the paper, but only from three sides. Now, fill in as much confetti as you want to make a shiny, glittery bookmark.
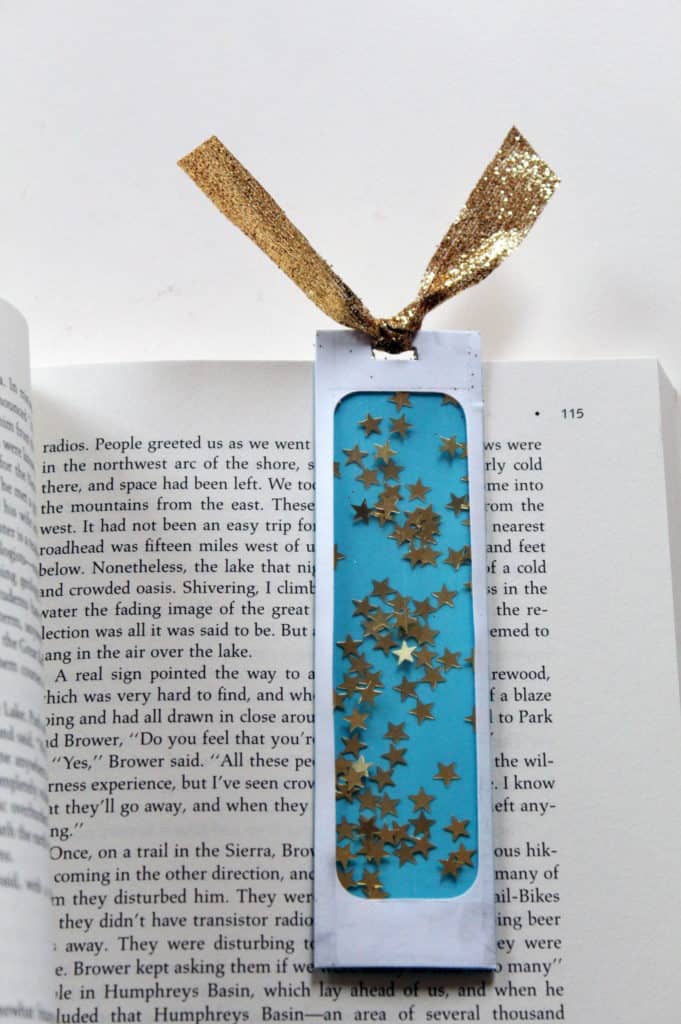
Photo credit Alison Sherwood
-
Bookmarks with RE-PURPOSED calendars
Since it's the New Year, we have the habit of discarding the calendars of the previous years. But I have one suggestion, don't do it, because the material on the calendars can be extensively used for DIY. These bookmarks are one such example.
To make these bookmarks, all you have to do is choose the right artwork, cut it into the shape of a bookmark and tie a string around it. It's that simple. You can make as many for yourself, or just make a bunch of them and give them away as New Year presents to your friends and family.
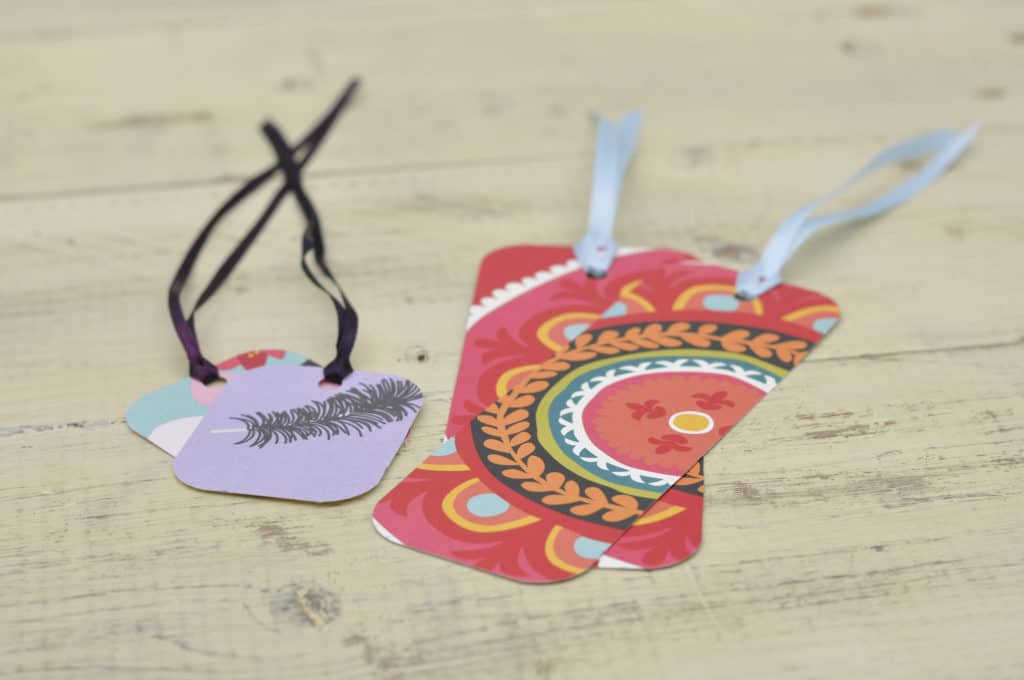
Photo credit Brenton Gospodarek
-
Quoted bookmarks
This is one of the effective and beautiful ways to speak out about your love for books. These quoted bookmarks are easy to make and can really reflect on the lines from the works of literature that inspired you. You can just pick the quotes you liked, take a print of them and glue it onto the basic bookmark template made out of cardstock template. You can even make a small design on one corner to give it that edgy look and they are perfect bookmarks to carry around when you are back to school or are on a reading spree during summer vacation!
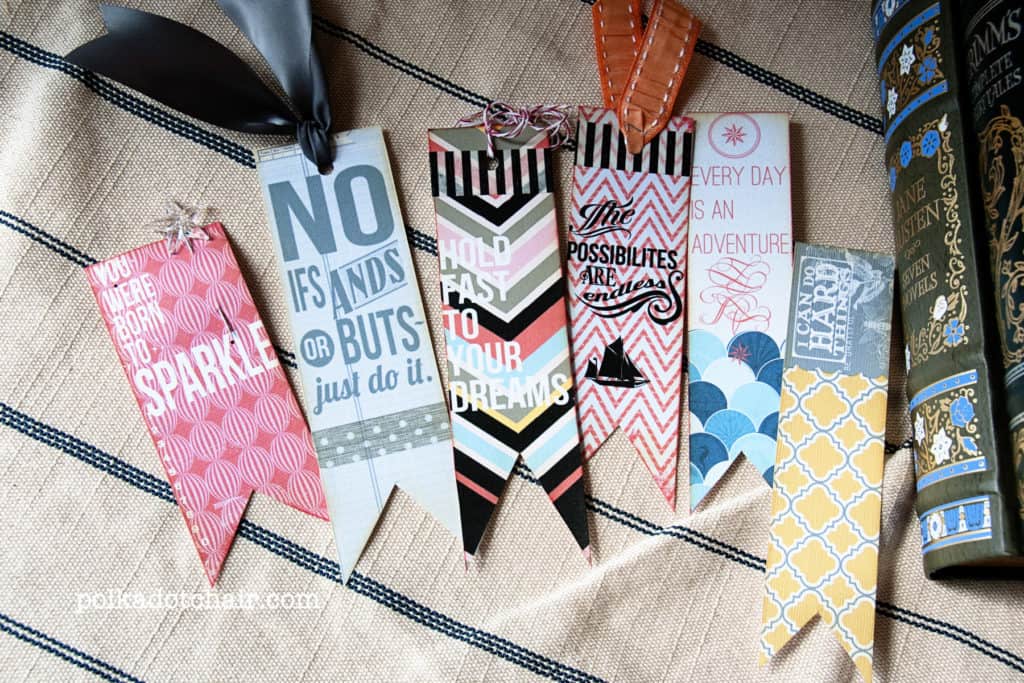
Tutorial @ polkadotchair.com
-
Duct tape bookmarks
Duct tape can account for some really chic bookmarks, based on how classy your imagination can run. Make a basic cardstock bookmark template and go all the way, using your creativity to create shapes, letters, sizes or abstract designs for your bookmarks.
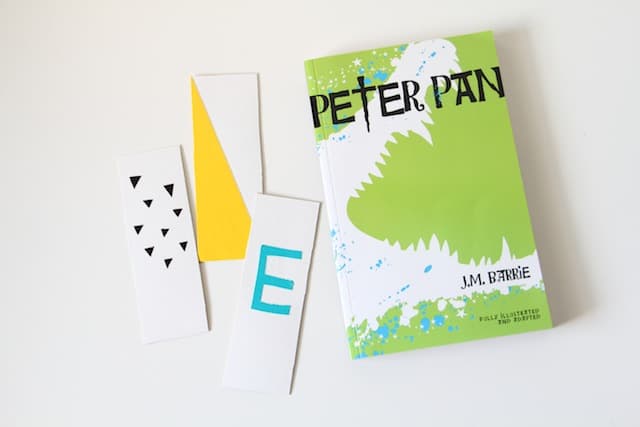
Tutorial @ andweplay.com
-
Bookmark with an arrow bookmark
I once made this arrow bookmark, and I couldn't get enough of it. All it needs is a large hair tie or an elastic band tied at both ends like a journal wrap, and a small craft stick or thick cardboard cut into the shape of an arrow.
All you have to do is fix the arrow onto the elastic with the help of hot glue. What I really love about this bookmark is that it not only shows you which page you are on but can precisely tell you about the particular paragraph and line you stopped reading. Amazing, isn't it?
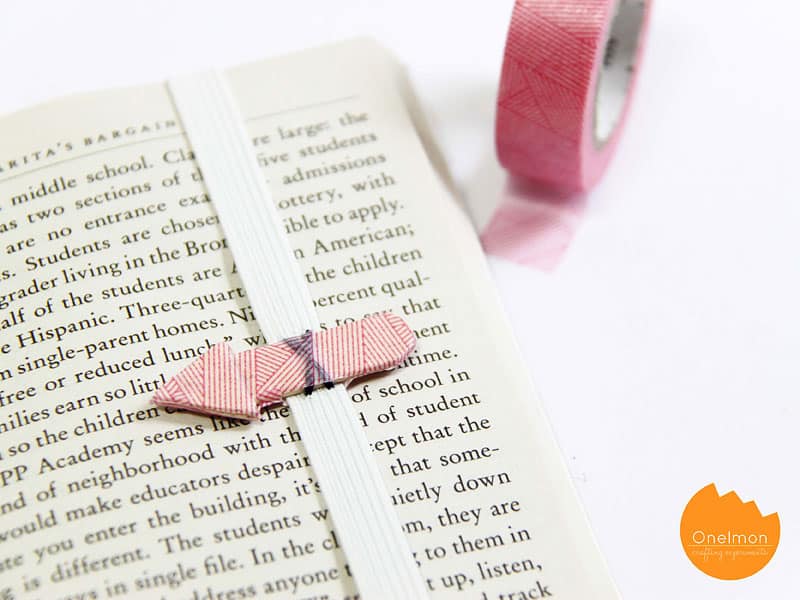
Tutorial @ onelmon.com
-
Another Harry Potter bookmark
Well, we can never get it over with one Harry Potter bookmark, can we? Only this time, these are house ties and scarves wholly made out of felt sheets and glue.
Like the previous one, you must choose the color combinations of various Harry Potter houses and glue the felt strips accordingly. This tutorial will help you with the step by step process of making these bookmarks easily.

Tutorial @ wearpinkwednesdays.com
-
More bookmarks made out of fabric
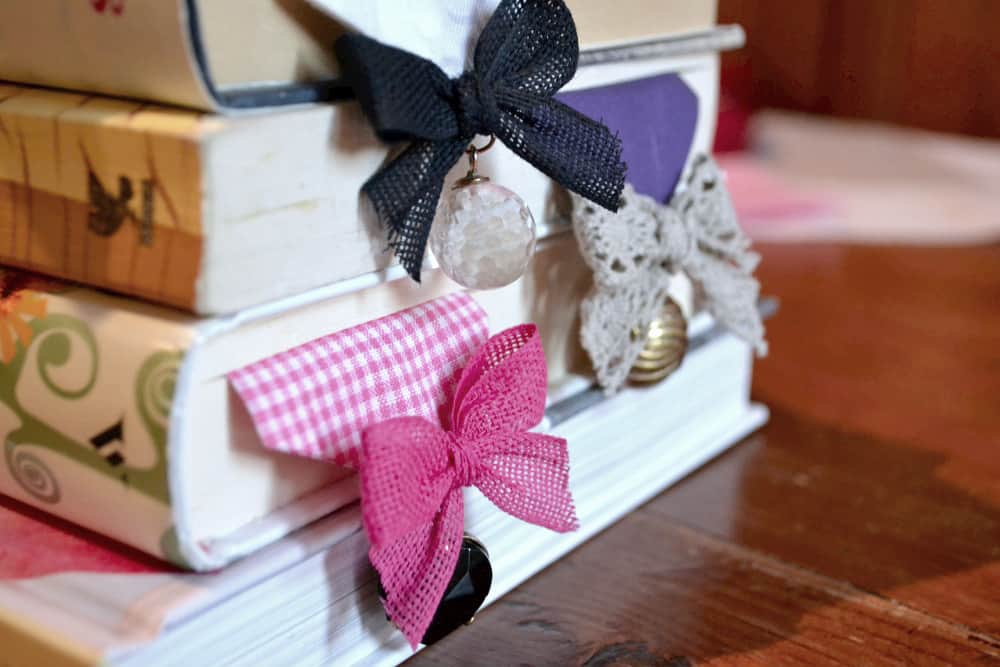
Here's another style of bookmarks made with fabric. For this too, you must take in a piece of fabric and sew it together with the help of a machine. But what's cute and unique about it is the shimmery lace bows and beads that are placed as embellishments. These additional decorations give the cute bookmarks a really elegant yet cute look.
-
Use elastic and patterned paper to make bookmarks
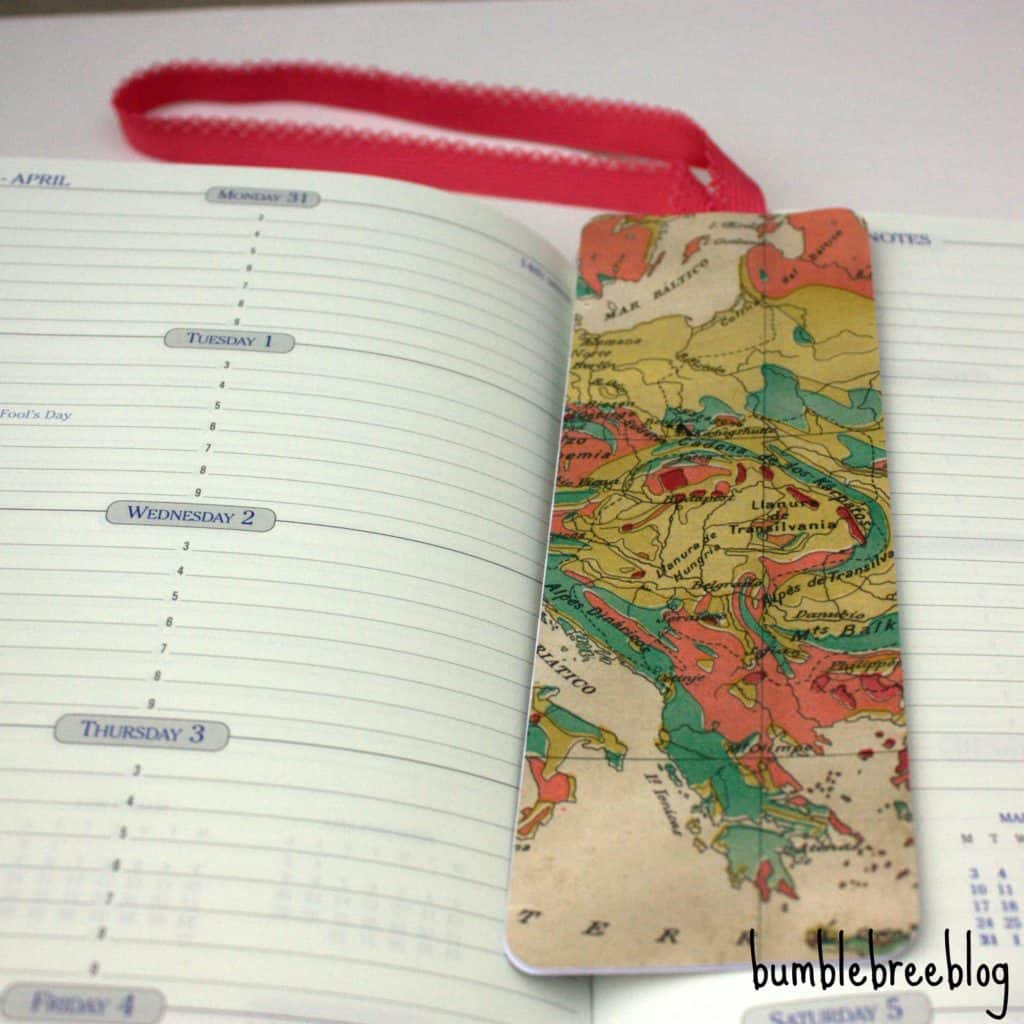
Paper in varied designs, patterns and art and some cardboard, along with a piece of fancy elastic can make up for a perfect bookmark. Just cut in the design papers, stick them up on the cardboard and attach the elastic to it. And there you go, a simple and really cool bookmark is ready.
-
Use spines of the books as bookmarks
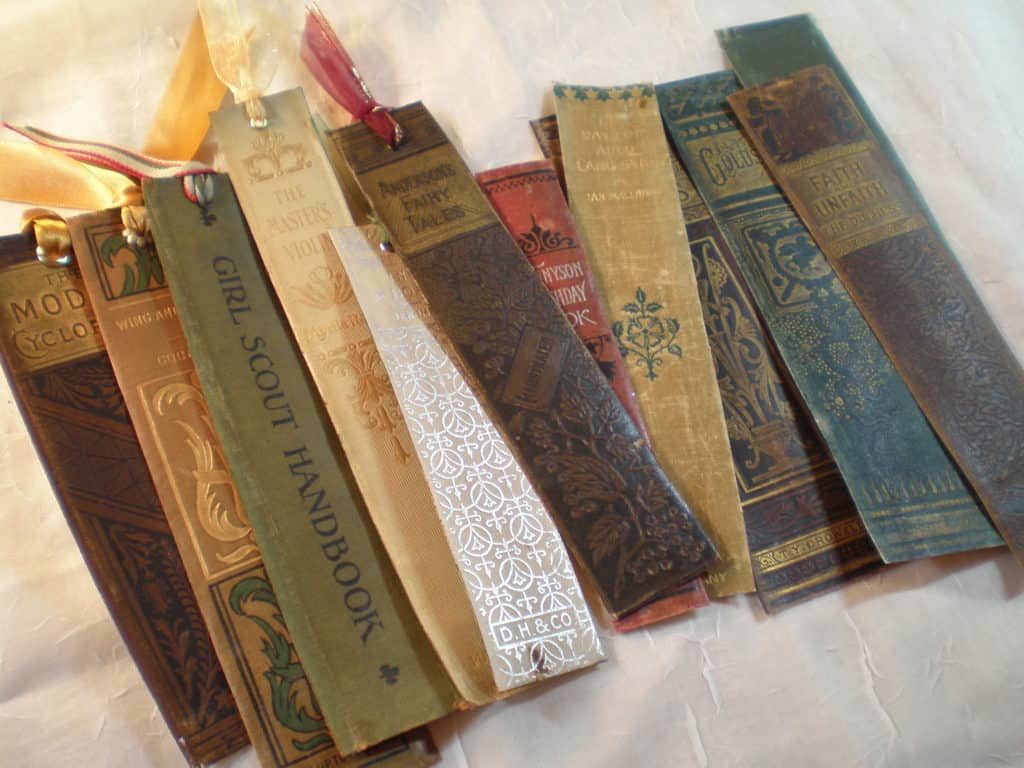
When I first read about this idea, I absolutely fell in love with it. This fantastic idea involves magical bookmarks made out of the spine of the books. So be really careful when you are deciding to work on this project. You must opt for this only if you are willing to let go of some of the books from your cherished collection.
But in case if you have old books lying around, just cut them up, pick the spine and attach it to a piece of string to make a truly appreciated literary bookmark.
-
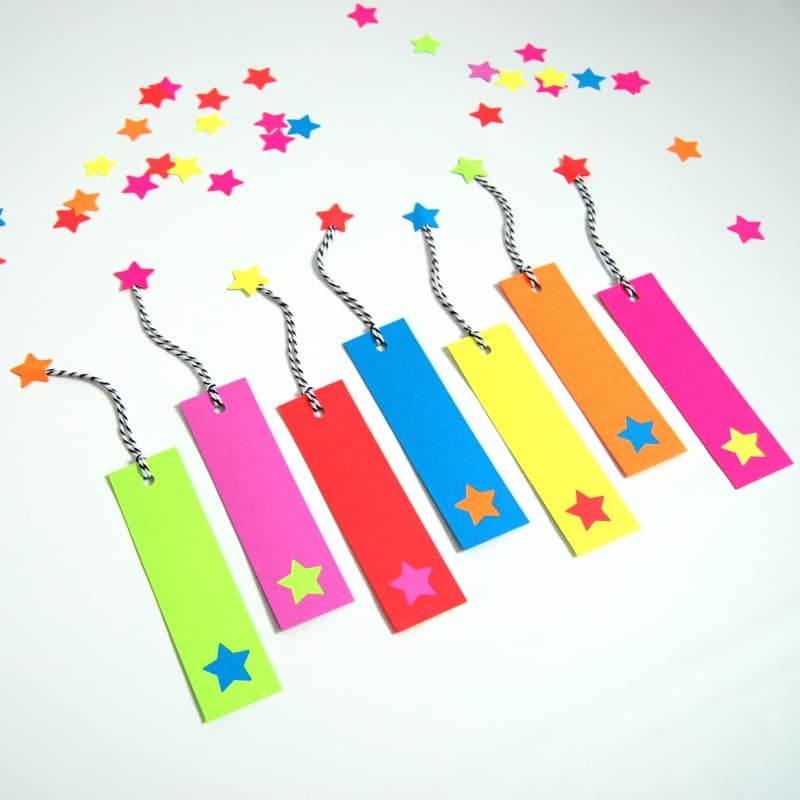
Starry bookmarks
Geometrical shapes as decorations are here to stay and never go out of style. These simple and cute bookmarks are embellished with star-shaped color paper cut-outs stuck on the basic template of the bookmark. You can also attach a bigger star at the end of the string to give a complete look.
It's simple, pretty and easily doable, even for the little ones. So, why don't you give it a try?
-
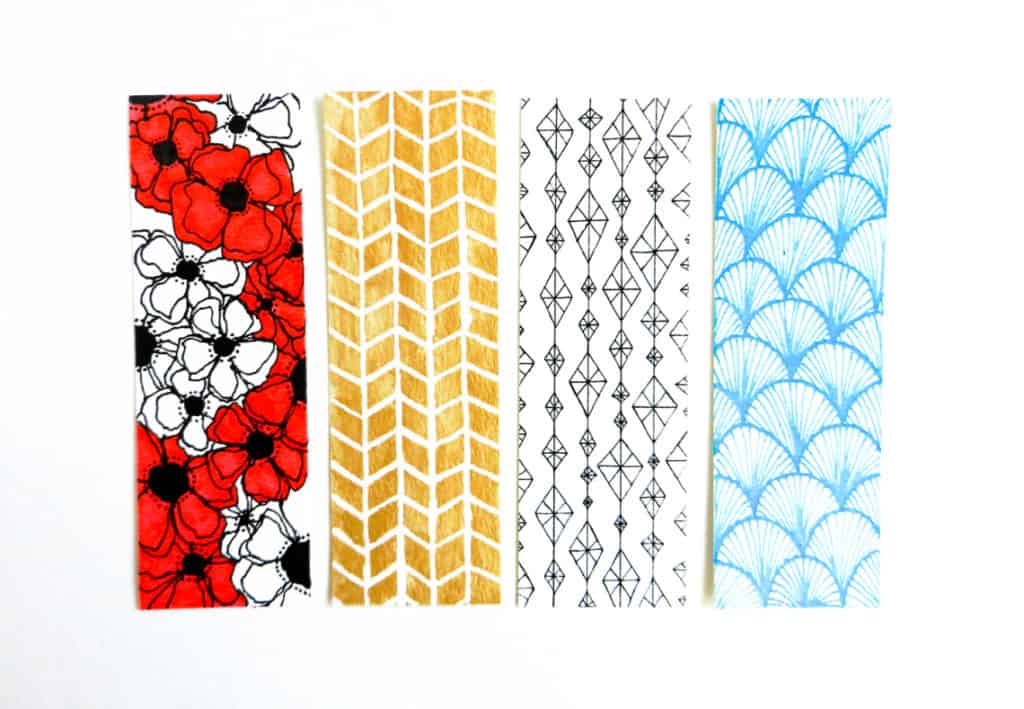
Hand drawn bookmarks
There is no better inspiration than something that is entirely created from the scratch with one's own hands. Especially, if it involves drawing. So, try something different when you are making cute bookmarks this time. Instead of sticking some printed things or embellishments, just draw whatever you feel like on a cardstock sheet or thick paper. Now, you are good to go and use this as your very own personalized bookmark.
Tutorial @ thepostmansknock.com
-
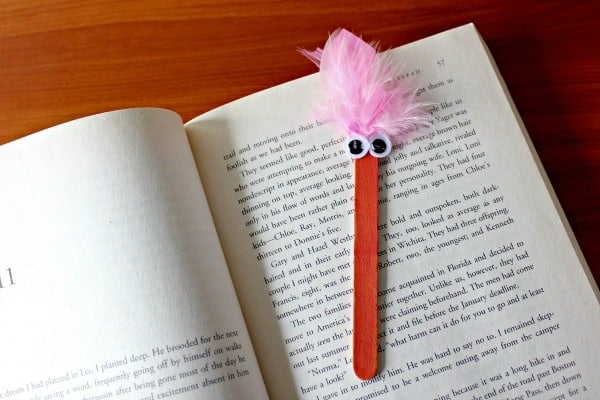
Simple popsicle stick bookmark idea
You can make this cute little bookmark by taking a popsicle or craft stick and painting it in a solid color of your choice. Then, you can simply addgoogly eyes and some colorful feathers to it to make it beautiful. It's very easy to make and can be done in a variety of color combinations. Also, you'd never get bored of how adorable they look.
Also, this is a wonderful project for the kids to work on as it doesn’t take too much effort.
Tutorial @ in-our-spare-time.com
-
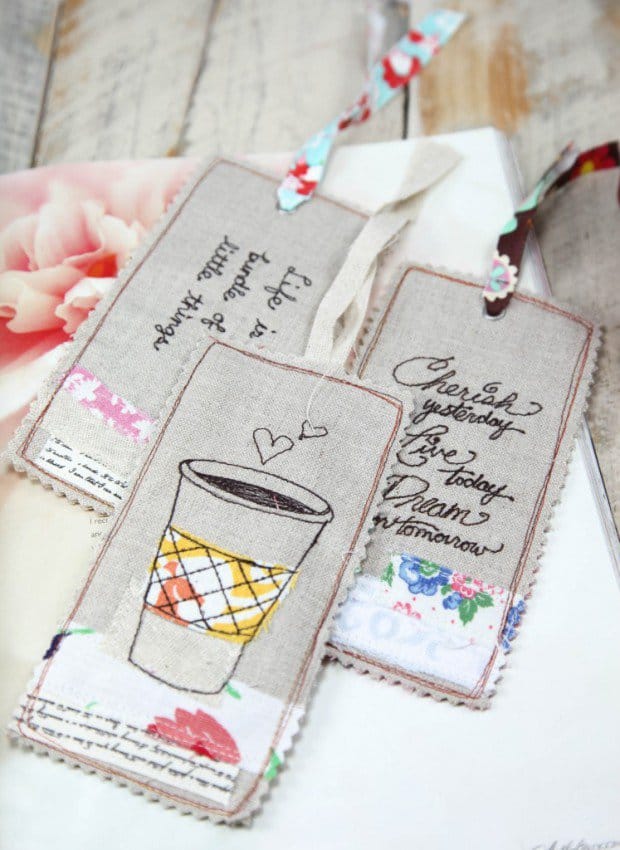
Embroidered bookmarks made with linen
Linen can be a great fabric to make cute bookmarks. To make something like the one shown in the image, you must cut two strips of linen fabric, which would later be stitched together.
Choose your favorite quote and print it on one of the strips. Now, embroider the quote following the pattern on the sketch, and attach the both of these together with a sewing machine or by using a hand. You can even embroider an image onto it. And as a final touch, just add a colorful ribbon or an extremely thin fabric strip on the top.
Tutorial @ minkikim.com
These are some of the ideas I could get together to give you the ideas to make creative bookmarks on your own. You could always look for more inspirations and try making something that's close to your heart.
So, do remember not to fold dog ears into the pages of your books, because that's an unforgivable sin. Instead go for a great bookmark in a diy project, because they help you keep your book absolutely new!
