Expertises: Cooking, Food, Kitchenware, Kitchen utensil, Kitchen
Updated on
Inspiring Ideas for Modern Home
Did you just get a new refrigerator for your home? If so, you should know that even the best refrigerators, especially those with dispensers, need a water line installation.

Installing a refrigerator water line is more complex than you think. It's not just connecting a tube to another tube. It involves not only plumbing but also proper planning and forward thinking.
Fortunately, we have the tool to make you the handyman that you need to be for this task. Here's everything you need to know.
Before you get excited about this task, check if there's no existing water line and shutoff valve for your refrigerator. These poke out from your wall or come through the floor.
If you already have an existing water supply line, you simply need to connect the shutoff valve with a ¼ x ¼-inch flex supply tube to your refrigerator.
On the other hand, if you don't have an existing water line to your refrigerator yet, prepare the following:
If your water line passes through cabinets, you may need a drill with a 1/2-inch bit and vinyl zip-tie hangers.
Once these are ready, you can install a water supply line to your new refrigerator.
Different brands and types of refrigerators may have specific instructions on their water line installation. But these are the general guidelines for doing so:
Source: Instructables
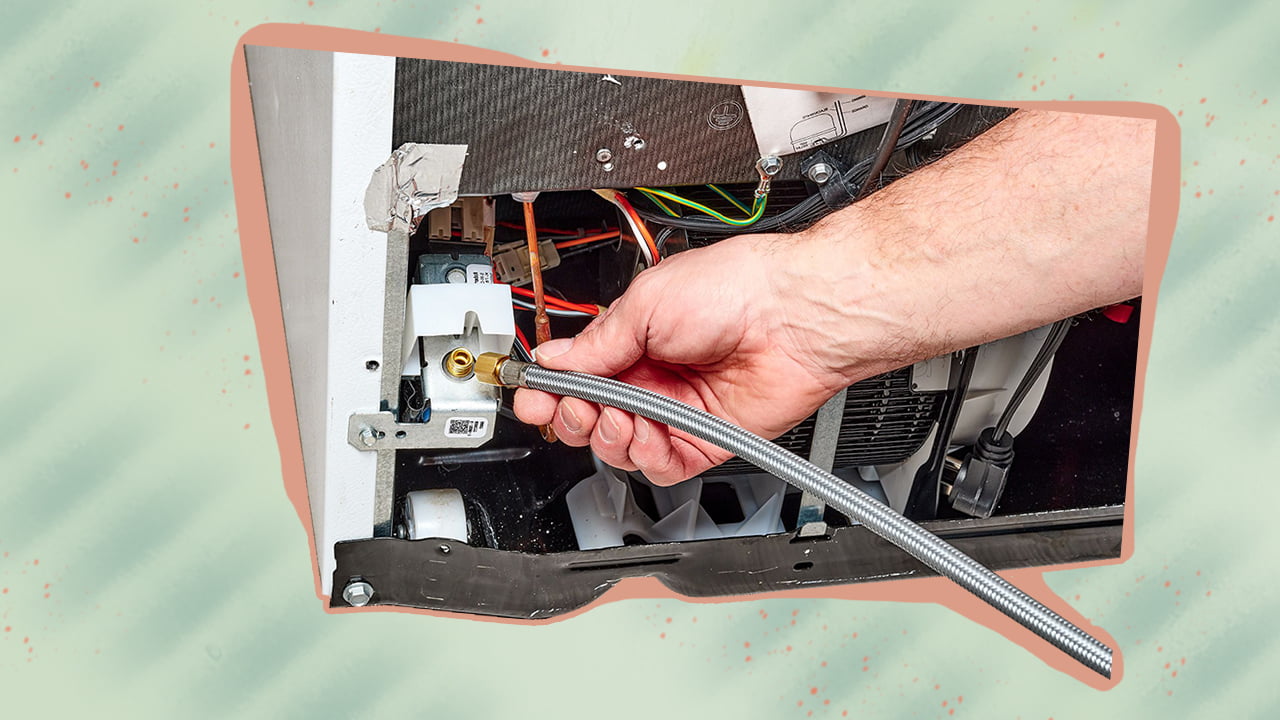
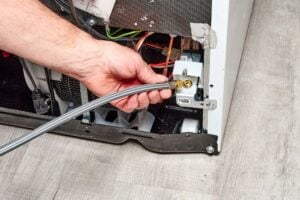
Check the owner's manual of your fridge to know its connection requirements. If you can't find the information there, pull the home appliance away from the wall and look for either push or compression fitting accommodations.
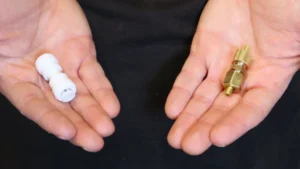
To differentiate the two, know that a push fitting has no thread to screw into.
A compression fitting, on the other hand, has threads around its outer edge. If you're installing a plastic pipe with compression fittings, use plastic ferrules to compress onto your pipe to leak-proof it.
Ensure you get a refrigerator water line installation kit that can accommodate the connection requirements of your fridge.
Source: Instructables
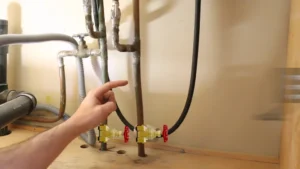
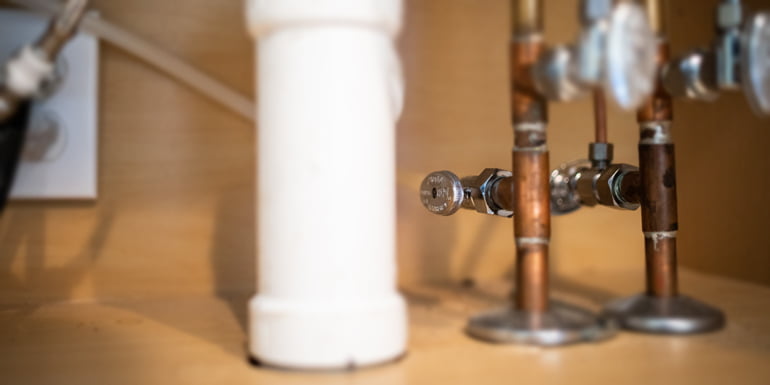
Homes usually have an existing water valve dedicated to the refrigerator water line as home builders usually anticipate the need for this already. It looks similar to the water valve located under your kitchen sink.
If your home doesn't have one yet, you have two options for going about it.
The first one is the easiest and best method we recommend. It extends a water line from under your kitchen sink. If you don't want to do this, tap into a water line in your basement or plumbing crawlspace.
A common yet old practice is using saddle valves to pierce existing copper water supply pipes. However, we don't recommend this because of its high leak potential and the prohibition imposed by some municipal building codes. You can use plastic tubing instead.
Source: Instructables
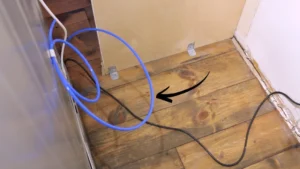
Find the shortest possible route to run your new water line tubing to create a connection between your water supply source and the fitting on your refrigerator.
Measure the length of this connection but add a few extra feet to give space to pull your fridge away from the wall whenever needed.
Don't hesitate to run your tubing through cabinets or the floor if your tap water source is in your basement or crawlspace. However, avoid running your new line through an uninsulated crawlspace because this can cause a frozen pipe situation in cold temperatures.
If you already have a dedicated cold water valve under your kitchen sink, shut the valve off and open the sink faucet to drain the water pipe.
Shut the water supply of your entire house off at the main water valve if you don't have an existing valve below your kitchen sink.
Source: Instructables
First, empty the cabinets where the length of your tubing will pass through. Remove their drawers as well.
Drill discreet holes with a 1/2-inch diameter on the sides of your cabinets or the floor, depending on your tubing route. Then, thread your water line through the holes from your refrigerator to your water source.
Secure your new tubing with zip-tie hangers in the cabinets if you think it's needed.
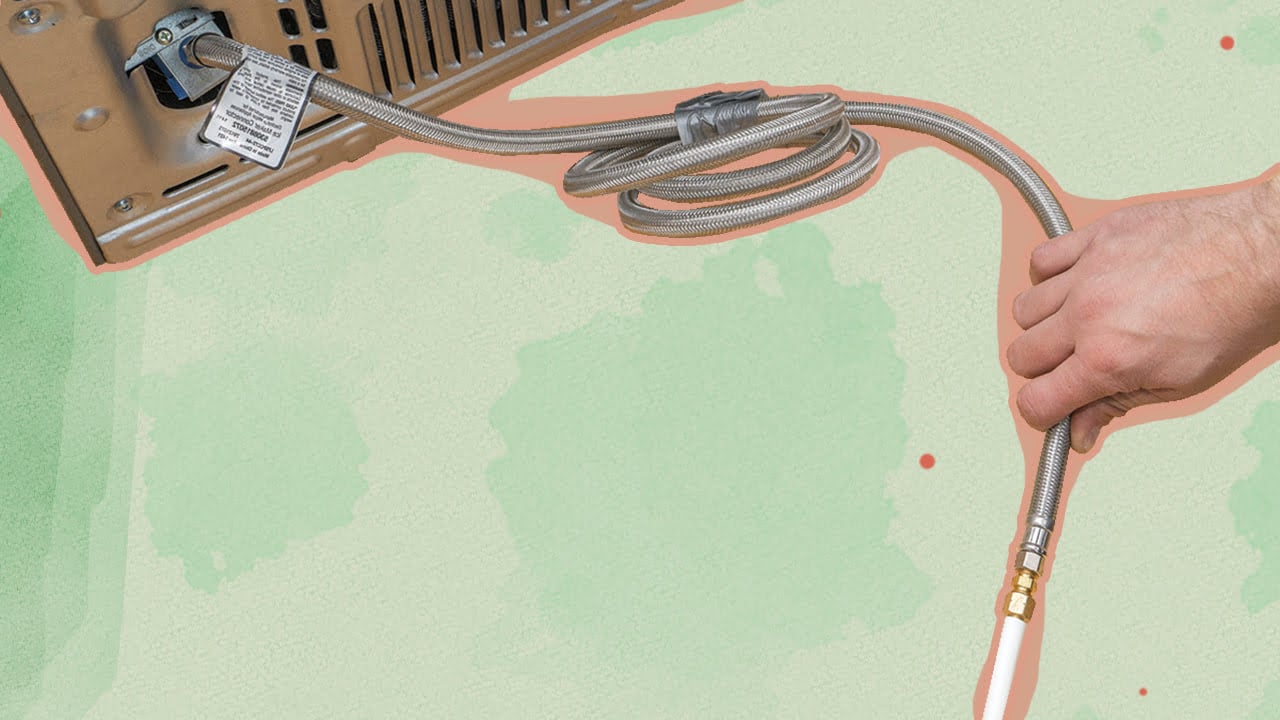
It's now time to make the plumbing connection. Again, start from your refrigerator.
Source: Mr. Rooter
Here's the fun part. You have three options on how you can connect the water line of your fridge to your water source. They are the following:
If you already have a reliable water source for your fridge, connecting is the same as what you did with your refrigerator's compression fitting.
You'll need to prepare a rag or small bucket under your water supply valve to catch the draining from your water supply tube before you go on with the following steps:
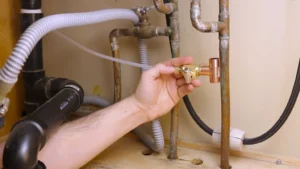
First, make the compression fitting connection to the saddle valve. Twist the handle clockwise to close it.
Position your valve's gasket and frame around your copper pipe.
Then, tighten the frame screws but make sure they're even by alternating after a few twists. Continue this until the saddle valve is secured on your water pipe.
Take Note
This is the least dependable option because it pierces your copper pipe water line. Only resort to this option if the abovementioned options don't suit your cold water pipe.
Now that your pipe ends and connections are secure, it's time to check for leaks.
To do this, turn the water back on from the main water line, dedicated valve, or new valve. Inspect each of your connections for water leaks.
Once you're safe from leaks, slowly push your fridge back to its place and wait a few hours.
Check if the ice and water dispenser is working properly by running it. You should flush around one gallon of water through your new line for this.
If everything is clear, you can now enjoy the convenience of having ice cubes ready and an automatic dispenser.
Aside from knowing how to choose a refrigerator, it would be best if you also took note of the following guides to ensure good water line tubing:
Know more about how to clean out a refrigerator here.
We’ve answered the common questions you might have to help you go about your refrigerator water line installation better. Installing a water line to a refrigerator can range from $75 to $150. This depends on many factors, such as job size, conditions, and location. You can spend less if you’re replacing an old refrigerator with an existing water line for dispensers. It depends on the fridge you’re installing. You might not need a plumber for plumbing-free fridges that use a water tank for their ice and water supply. If your fridge has an icemaker and a water dispenser, hiring a plumber is best. Look into the best mini freezers for options.Installing Refrigerator Water Line FAQs
How Much Does It Cost to Install a Water Line to a Refrigerator?Do You Need a Plumber to Install a Fridge With an Ice Maker?
A refrigerator water line installation is a manageable task you can do. However, it's best to consult a professional plumber to ensure it is done properly, especially if your new refrigerator comes with dispensers.
The easy way to do this can be different from the right way to do it.
Hiring a professional plumber who's been doing many refrigerator water line installations saves you from future leakages and water damage.