Expertises: Paint, Home improvement, Wood, Car, Painting
Updated on

Inspiring Ideas for Modern Home
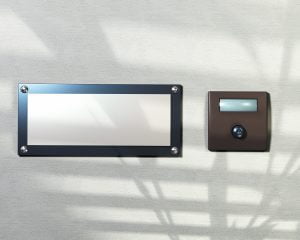
You will need all the right tools to drill holes and a back mount bracket to install the battery-operated push button unit at an accessible-height outside the main door. Follow the instruction manual further to place the doorbell chime receiver and connect the transmitter within the compatible wireless range.

Without doorbells, how would your guest announce their arrival? If your electrical system is already in place, you might want to avoid hardwiring a manual doorbell to it. And to eliminate this problem, you can choose to get wireless doorbells.
On purchasing a wireless doorbell, you will also have to learn how to install it. And to help you with that, we have come up with this guide.
Let’s take a look!

The point of a wireless door chime is to hear it when it rings. And to ensure that happens, you must place the receiver at a place where the wireless doorbell can be audible. It should be audible from your lawn or backyard as well.
In case the door chimes are not audible, consider purchasing extenders, and you will be able to hear the chime from anywhere on your property.
If you do not have experience working with electronics, you might not know what doorbell transmitters are. Well, there’s nothing too complicated about them. A transmitter is what carries the signal from the doorbell button to the receiver. To make things easier, you might install a number of doorbell transmitters that can be easily accessed from anywhere in the house.
But, as we have mentioned before, wherever you install the transmitters, make sure that the receiver is within range of the wireless doorbells you are installing.
For people who are trying to install a wireless doorbell system for their big mansion or large office space, a doorbell extender can be of great help. It can easily increase the range of the wireless doorbell.
If you are wondering how that works, let us explain it to you. An additional transmitter will carry the signals from the doorbell to the receiver, even from a long distance. So, even if the receiver is far from the door, the chime unit will function as effectively.
To begin with, you will need to locate a 120V outlet which needs to be near the door. You might need a higher or lower outlet capacity as well. To know the perfect requirements, read the instruction manual that comes with your wireless doorbell.
Also, when installing wireless doorbell chime units, it is essential that you place them strategically to make sure that the ringing can be heard from all areas. If you take our suggestion, go for the front hallway, as that provides a direct line of sight to the front door.
For this step, you will first have to get your hands on a flathead screwdriver. Once you have it, put it to use and open the battery door casing on the push button unit. Then proceed to insert the batteries that come with it.
While at it, take proper caution and check twice if the battery has been placed correctly and is facing the right direction. Once done, it’s time to put back the battery door casing.
During a wired doorbell installation, it is an absolute must that you choose the right height. In general, you cannot go wrong if you keep the height between 44 and 48 inches for the doorbell push button. This will make accessing the doorbell easier for your guests.
To make the process more smooth, try placing the push button on the doorframe side and not on the hinge side.
Once you are done placing the push button near the door, it is time for you to test if it’s functioning properly. To confirm that the placement is right and the transmitter is catching the signal properly, press the push button.
If you hear an audible ring, you have done a good job so far!
To finally put the push buttons in place, you will need a back mounting plate, which comes with the package itself. Follow the steps mentioned in the doorbell instructions manual to make sure that you mark the drill hole locations correctly.
Not to mention, you might come across a push-button unit that makes use of the back of the housing as a plate. In that case, use the flathead screwdriver to open the unit and then proceed to mark the drill hole locations.
The last step is to drill pilot holes in the wall that are not more than half the diameter of the actual mounting screws. Then proceed to attach the mounting plate and ensure that the mounting screws holding the plate are properly tightened.
Once the screws are tightened, the push button will be properly installed, and you can start using it.
Wondering how to fix a wireless doorbell if it malfunctions? Here’s what you can do:
With a bit of research, you will know that unplasticized polyvinyl chloride (uPVC) or metal can hinder the transmission of radio signals. Because of this, your signal range might get limited, and the connection between the push button and the chime box might be affected.
So, if you have a uPVC or metal door, or window, it is best that you place the push button far from it. This might get really difficult if you have metal studs on the walls of your house. If you have installed the push button in front of the metal studs, there is no option but to relocate the button somewhere else to improve transmission.
You might find yourself in a pickle when the doorbell stops chiming or might be left wondering “why does my wireless doorbell keep ringing?”. This mostly happens when the push button unit has run out of power or when the chime’s outlet is malfunctioning.
To fix this problem, you will have to start by removing the chime unit from the electrical outlet. Once you are done doing that, put another device in place to check if the outlet is getting power. If this device is not functioning as well, you will have to check the circuit breaker and fix the power outlet.
Another common problem that users face while installing is placing the battery incorrectly. Wireless doorbell batteries are quite small in size, and people often confuse them with another type. So, before you insert batteries, take some time to ensure that you are using the right ones.
Also, before coming to the conclusion that something might be wrong with the chime control button, double-check your battery placement. It’s not uncommon for users to install it backward. If you have done the same thing, flip it and put it in its right orientation.
To make it convenient for users, most wireless doorbells now come with a volume control option. So, according to your requirements, you can turn the volume up or down. And when away from home, you can even consider turning the sound off completely.
To know how to make these adjustments, make sure you read the manual carefully.
Tip
Many times, people change the security codes on their wireless doorbell system by mistake. Make sure to enter the right security code; otherwise, your doorbell will fail to chime.
The lifespan of a doorbell battery depends on the surrounding temperature of the area in which the device is placed. For example, if you stay in a cold climate and the temperature falls below 41 degrees Fahrenheit, the batteries are likely to degrade sooner. This is especially true for the small push batteries that go in doorbells.
To sort out this issue, there is no other option but to replace the batteries from time to time. As you cannot adjust the weather conditions, we suggest you plan on changing the batteries in the doorbell more frequently during winter.
Warning
Take special care to ensure that the battery unit is always dry and in no way collects moisture. If the unit gets wet due to snow or rain, there is a high chance that the battery terminals in the doorbell unit will rust faster.
In that case, replacing the batteries won’t be enough; you will have to consider changing the push button unit. In the worst-case scenario, you might have to replace the entire doorbell system.
Installing a doorbell is no difficult feat and can be done quite efficiently if you follow all the steps that we have mentioned above.
Once you are done installing it, play around and select a chime tone of your choice. If you have two receivers, make sure you select different sounds for both. This will help you understand when to answer which door.
If there are issues that you run into after the installation is over, troubleshoot them at the earliest. In case you face any difficulty fixing them on your own, we suggest calling a professional for help. And if things still don’t get better, check if the electrical outlet is functioning properly.