Expertises: Cooking, Food, Kitchenware, Kitchen utensil, Kitchen
Updated on
Inspiring Ideas for Modern Home
If you're looking to personally add an ice maker to your freezer, it can seem like a daunting task.

But with the right steps and tools, it's doable!
In this article, we'll walk you through the process. With a simple plug and pull of the necessary components, you're sure to enjoy ice-cold drinks all year round.
Let's begin!
Most modern refrigerators come with pre-installed ice makers, but you can purchase a kit from any home improvement store if yours doesn't come with an automatic ice maker.
With some plumbing and electrical know-how, you can easily install the ice maker and enjoy its convenience!
To install an ice maker in your freezer, ready the following items:
Before starting the installation, ensure that the refrigerator frame and the back wall where you will install the ice maker are clear and clean.
Clear out any items from the freezer compartment and clean the area around the tube opening where it will be installed.
Secure all the necessary materials, such as the ice maker kit, power drill, nut driver, screwdriver, adjustable wrench, measuring tape, and pliers.
Select a kit that is compatible with your refrigerator model*. Make sure to choose one specifically designed for your refrigerator brand and model.
Check the instruction manual in the ice maker kit to ensure you have all the necessary parts.
Note
The model number can usually be found in the user manual for your freezer or on the manufacturer's website.
Cut the electrical connection of the refrigerator before starting the installation process. This is for safety purposes to avoid any electrical hazards.
Before installation, turn off the water supply to the freezer and refrigerator. This can be done by turning a water valve under the sink or near the main water supply line.
If you're unsure which valve to turn off, deactivate the whole house water supply to be safe.
Begin by locating the water inlet valve and the mounting holes.
It is typically on the back of the refrigerator, near the bottom. It should have a small plastic or copper tube that runs from the water valve to the refrigerator.
(You may need to mount it in a lower position of the refrigerator if it's a bottom freezer type.)
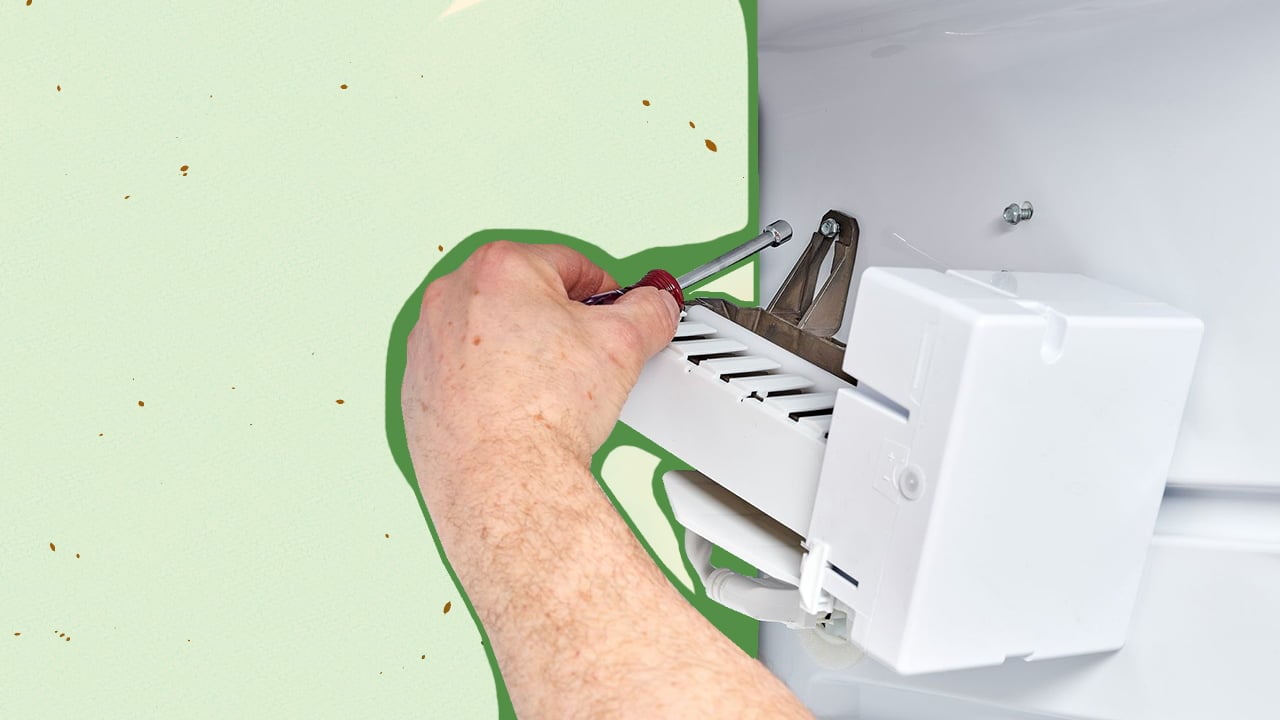
Take the mounting screws included in the kit and attach them to mounting holes in the freezer wall. Use the nut driver to tighten them enough to hold them in place.
Next, you will need to connect the water supply. This involves attaching the water supply line to the water inlet valve at the back of the refrigerator.
Take the compression nut and sleeve from the kit and slide them over the water supply line. Then, insert the line into the valve and tighten the nut using the adjustable wrench.
Alternatively, saddle valves can tap into the cold water pipe under the sink or near the refrigerator. Follow the instructions in the kit to attach the water supply line to the valve.
Be sure to use a nut driver to tighten the compression fitting on the water valve, but don't over-tighten it, as this can damage the fitting.
To run the water line, you must drill a hole in the side of the cabinet or the floor behind the refrigerator. This is so the water inlet tube can go through the correct "wall."
Measure the distance from the valve to the hole and add a few extra inches for slack. Cut the tubing to the appropriate length and attach it to the valve using compression fittings.
Pull the tubing through the hole and connect it to the ice maker using the compression nut and sleeve.
Attach the water inlet tube to the back of the refrigerator by inserting it into the tube opening and securing it with a compression nut. Next, wiring harnesses need to be attached.
Connect the wiring harness with caution! Plug the wiring harness from the ice maker assembly into the wire harness opening on the back of the refrigerator.
If your refrigerator doesn't have an opening for a wiring harness, you may need to remove the plastic cover to access the wiring.
Attach the fill tube to the back of the ice maker. Use pliers to adjust the tube to the proper height and secure it with the mounting screws.
Make sure the water inlet tube is inserted into the fill cup and that it is properly aligned.
Plug the ice maker's power cord into an electrical or wall outlet.
Make sure the electrical connection is grounded correctly and that it is not damaged.
Turn on the water supply valve and check for leaks.
If you notice any leaks, tighten the connections or adjust the tubing until the leaks stop.
Finally, level the ice maker using the leveling bracket included in the kit. Adjust the bracket until level, and secure it with the mounting screws.
Fill the fill cup with water to test. Wait a few hours to see if the ice maker produces ice cubes. If it does, you have successfully installed it.
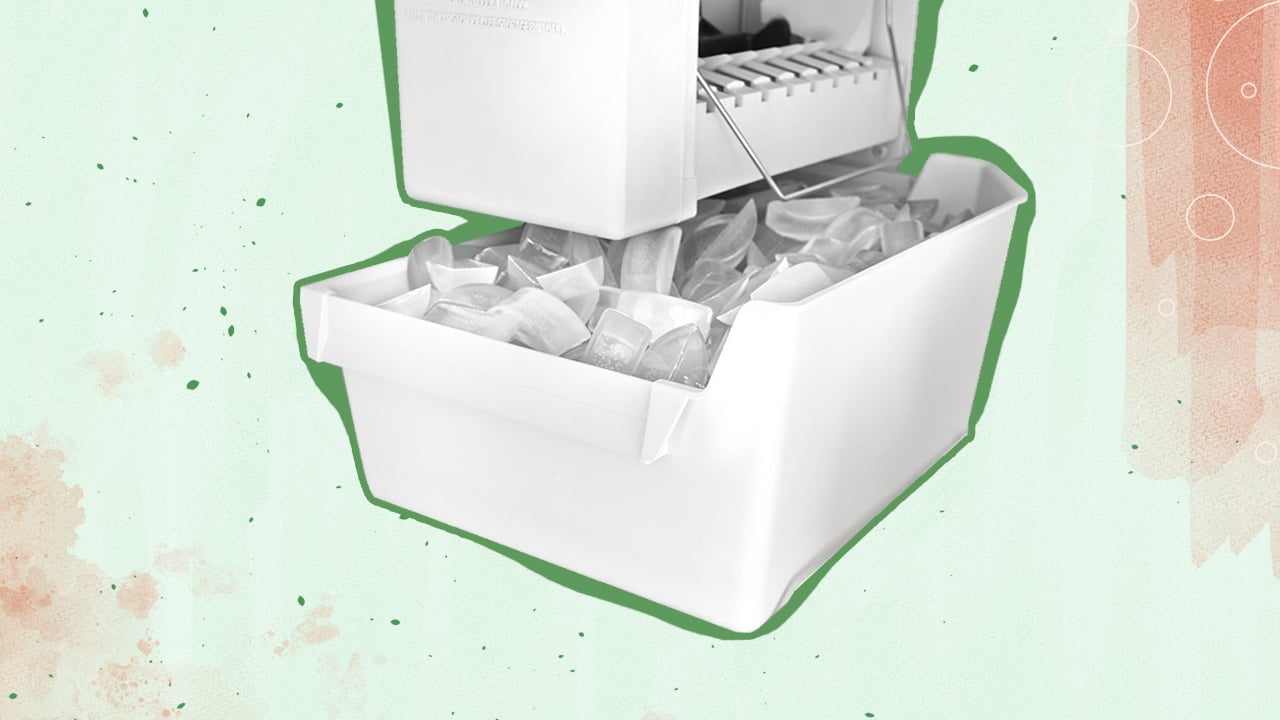
Ice makers are devices installed in a freezer to produce ice automatically.
They are connected to the water supply line through a water inlet valve, usually located behind the refrigerator.
The ice maker consists of a fill tube, an inlet tube, and a valve controlling the water flow.
The installation involves mounting screws to secure it to the freezer wall and connecting the water supply line to the inlet tube using a compression nut.
Once installed, it automatically fills the tray with water and freezes it, creating ice that can be accessed through the refrigerator pull.
If you choose to install this device, it can offer lots of benefits which include:
We think it's a great addition to current refrigerators and makes entertaining guests a breeze.
If you need reliable recommendations for the best refrigerators and the best mini freezers, hit the links!
When it comes to adding an ice maker to your freezer, the right gear can make all the difference!
There are many factors to consider, from selecting the appropriate tube and pipe sizes to finding the proper pull, hole, and plug placement.
We'll break down a quick guide on choosing the perfect ice maker for your needs.
Keep these in mind when making your purchase decision:
Generally, the cost to install a basic ice maker ranges from $150 to $500, but it can vary depending on several factors, such as:
It's important to factor in any required tubing, line, and plug costs.
Remember that you may need to drill holes into your cabinetry to install the ice-making device.
Need help maintaining or troubleshooting your refrigerator setup? Check out these helpful guides: How to Fix a Refrigerator Light That Won't Come On | Baking Soda in the Refrigerator
You can easily enjoy cold beverages with just the plug and a pull of an automatic ice-making device! Here’s more information regarding installations: To determine if you can add one to your refrigerator, you need to check its compatibility with your water line, tubing, leveling bracket, appropriate holes and valve, and freezer space. If these features are present, installing an ice maker is possible. However, it may not be the best option if your refrigerator lacks these components. We recommend consulting the manufacturer’s guidelines or seeking professional advice! It depends on your experience and comfort level with plumbing. It’s essential to ensure the tube, hole, pipe, and plug connections are secure to prevent leaks. You may not need a plumber if you feel confident in your ability to do this. However, if you’re unsure about the process or encounter any difficulties, hiring a plumber is best to avoid potential damage to the freezer or the water line.Install An Ice Maker In A Refrigerator FAQs
Can I Add an Ice Maker to My Refrigerator?Do You Need a Plumber to Install a Fridge With Ice Maker?
In conclusion, installing an ice maker in your freezer may seem daunting, but it's a simple process you can do!
By following the steps outlined in this article and having the right tools and materials on hand, you can easily plug in your ice maker and enjoy refreshing ice in no time.
Remember to take safety precautions and double-check your work to ensure everything is installed correctly.
With a little effort, you'll have a functioning ice maker to make your life more convenient and enjoyable!