Expertises: Paint, Home improvement, Wood, Car, Painting
Updated on

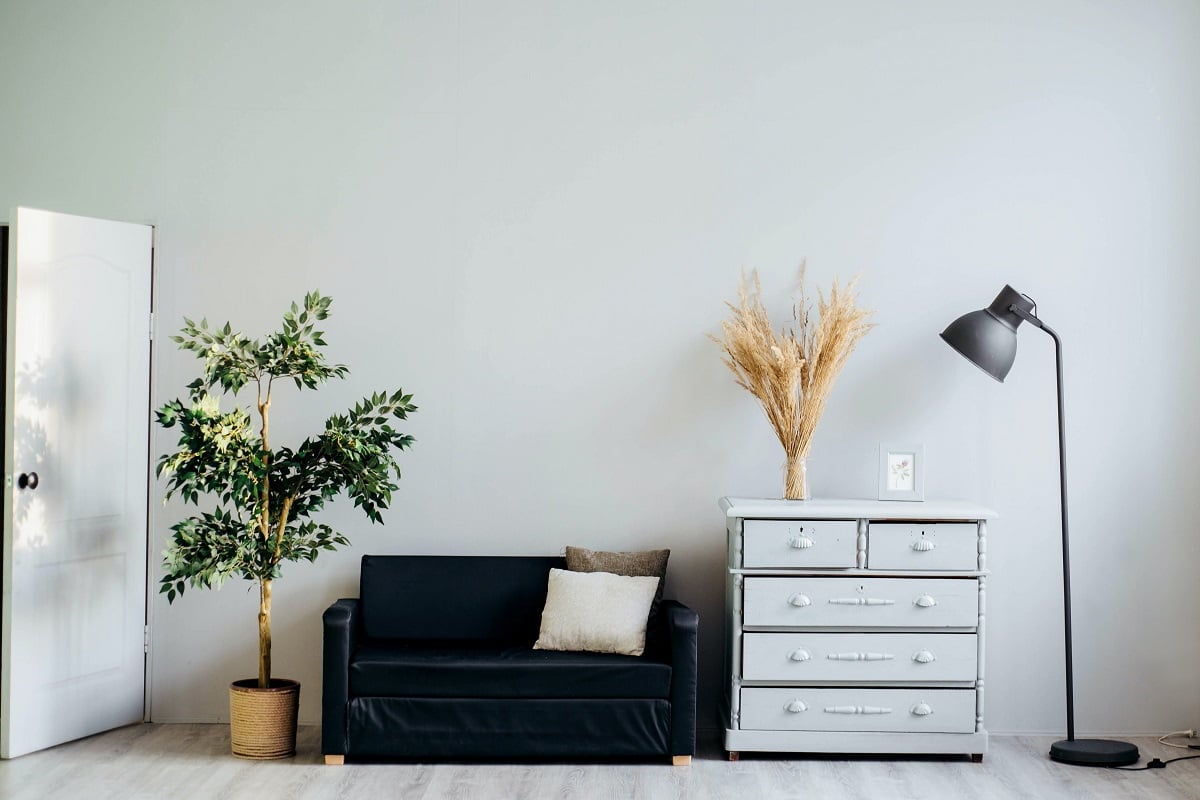
Inspiring Ideas for Modern Home
To give old wardrobes or tables a complete makeover, you can try your hands on chalk paint for furniture.

It is true that chalk paint is slightly different from other standard paints like latex or acrylic, and there’s a bit of a learning curve. However, once you get the hang of it, trust us, there’s no going back. This paint requires minimal prep work, and you can get started with just a few accessories.
Once the surface area is prepared, you can directly get to applying the paint on your furniture pieces. But as we have mentioned, there’s a slight learning curve, and you will have to follow a few steps. Study the material that you are working on, get the right brushes and paint, and you’re good to go.
To help you, we have prepared a beginner’s guide to use chalk paint. Let’s dive right in!
Before we go into the nitty gritty of chalk painting furniture, let’s first take a look at what it is.
Annie Sloan chalk paint is one of the oldest available paints out there, and we thought it would be a good starting point. It was originally manufactured by her and presented a luxurious and velvety finish. And the best part about using chalk paint is that you won’t necessarily have to prime or sand the furniture before applying the paint.
This ultra matte paint is mostly liked by people who do not like a glossy finish on their furniture.
It dries up super quickly on painted furniture and is preferred because of the versatility it puts on the table. And most of the chalk paint that you find on the market can be applied on a range of materials, such as wood, glass, fabric, ceramic, and so on.
Now, it is time we take you through the various steps involved in making chalk-painted furniture.
In case you have no prior experience working with chalk paint, it is always best that you first practice on a tiny piece. Directly painting the furniture might lead to dire results.
Most people have experience using acrylic or latex paints. In case you are in the same boat, we suggest that you spend some time practicing how to use chalk paint, as it involves a significant learning curve.
Before applying chalk paint, it is always ideal to get acquainted with its properties first. You would not want to experiment with your luck on the final piece directly. So, it is best that you first practice and then select the piece that you want to transform.
We suggest that before you start chalk painting, gather all your supplies and accessories required for the job. You won’t need to prepare a lot, as the paint does not generate any fumes. So, you can conduct the painting process indoors too, if there’s enough space.
To be able to paint in the house is a great plus for DIY enthusiasts as there are no elaborate processes involved. If you decide on doing the same, it is best that you keep some drop cloth handy. Or you can opt for a lint-free cloth as well. This will help you immediately clean stains when there are spills.
Special Tips
When using chalk paint on a piece of furniture, you can make it sit on a wooden block. That will help you paint all across with much ease, especially the bottom half. You can make use of any type of paint brush that you like for the purpose. However, you will also find certain brushes that are made specifically for this..
A professional painter would tell you that an angled paint brush is a great bet for chalk paint projects.
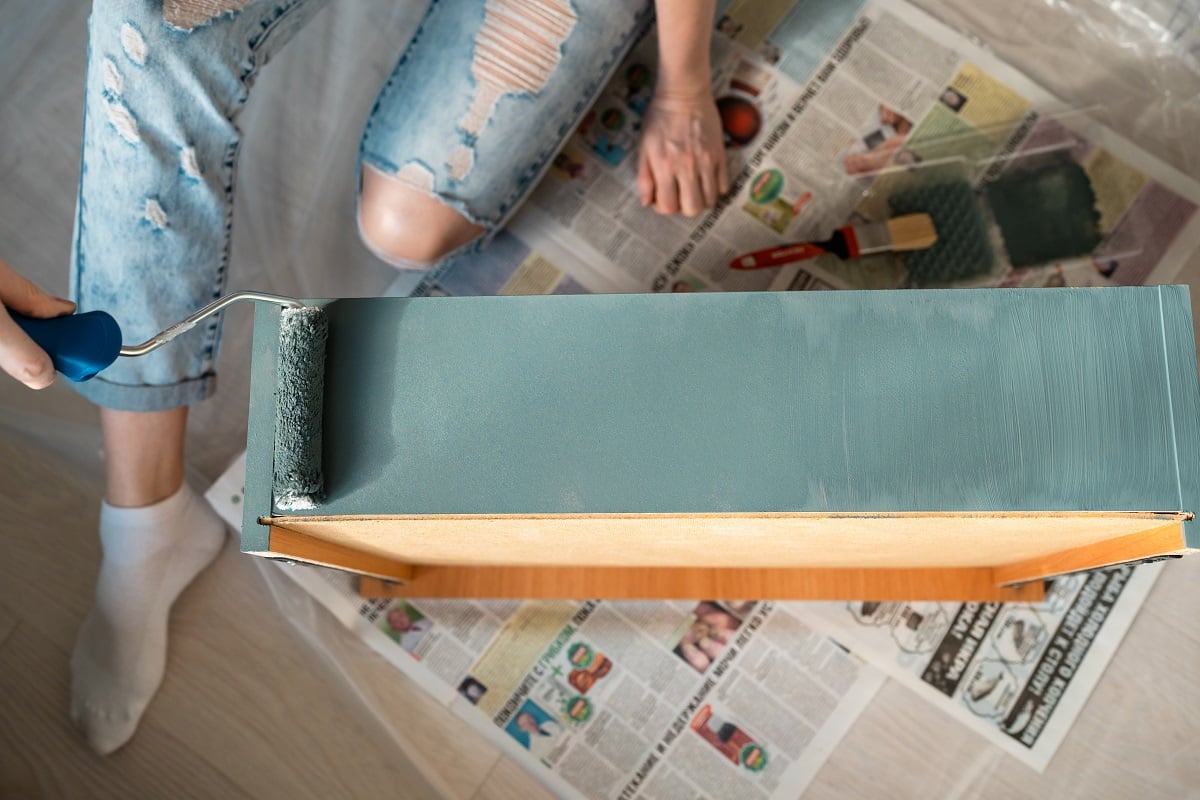
In case you take up a paint project that is big, it is best to use a roller and not a brush. Suppose you are painting kitchen cabinets or big wardrobes; it is best to use rollers as that will help you save time. When painting more intricate areas, we suggest you use a paint brush to ensure that all the nooks are painted well during the first coat.
Once that is done, use a roller when applying the second coat. Some people even opt for using paint sprayers too. In case you want to spray paint furniture, it is recommended that you thin the paint first.
Before you can apply chalk paints on furniture, it is crucial that you clean the surface properly. Unless you do that, the final output might be compromised. In the worst-case scenario, dirt and grime will show through the paint, and the color might not stick well to the surface.
For cleaning, you can make use of a number of materials. The most commonly used ones are denatured alcohol, Windes, and TSP. If the surface is not too dirty, you can simply use a soap and water mix. Once you are done with the cleaning, it is prep time!
Remember that all materials are different and need to be handled differently. If you love chalk paint and want the results to be amazing, it is essential that you fill all gaps and holes during this step. You can consider using sand smooth or wood filler for this purpose.
Don’t believe anyone who says that chalk painting needs no preparation. For the colors to come out well, make sure you lightly sand all rough surfaces before you embark on the color process.
Special Tips
Many DIYers who have no prior experience in painting wood complain about how the colors bleed. There are some woods that are very dark in color, like mahogany, which might result in bleeding even after you apply multiple paint coats.
The solution? You simply have to use a sealant on the furniture piece before applying the paint. A primer or sealant is great as it will help prevent the wood color from mixing with the chalk paint and save time.
After you are done with the cleaning and prepping, now it’s time to have some fun! A word of caution, before you start painting, make sure that you remove all sanding dust that the light sanding might have generated.
For prepping the paint brush, run it under water before dipping it in the paint can. It is also essential that you give the brush a squeeze to ensure there’s no excess water. The brush should ideally be wet but not dripping water so that you can paint smoothly.
Now, it is time to check the color in the can. You should ideally be thinking of creating a thin layer on the furniture. And if you notice that the paint present in the can is very thick, just mix a few spoons of water and give it a good stir.
If you have used chalk paints before, you will know that they tend to become thick over time, so this is a crucial step to follow.
Coming to the painting style, most people like painting with wood grain. However, when you are renovating a piece of old furniture, you can opt for a crosshatch painting style that will help preserve the look.
Special Tips
If you like an ultra-smooth look, you can put a foam cabinet roller to use.
We would suggest ensuring that the finish is proper, so consider lightly sanding between the coats. Do this before the last coat and before applying the top coat as well. For the ultimate finish, you can thin out the last paint coat by adding a bit of water to the paint.
Chalk paints are a great bet for DIY enthusiasts as the paint tends to dry up pretty quickly. This will make your furniture painting process quicker, and you will be done with it in a short span of time. The best part is that you will not have to spend long hours between the coats to ensure that they dry fast.
Also, keep in mind that the first paint coat might look a bit splotchy but there’s nothing to worry about. This blotchy look will vanish with the subsequent color coats that you put in.
Did you know that you can add interesting elements to chalk paint when taking on a furniture makeover project? This, however, is not a mandatory step.
But you can consider using stencils, transfers, or graphics to give your painted piece a special touch and ensure that it stands out from others.
Unlike latex paint, chalk paint lacks a sealer. Therefore, it is best that you use clear wax on the furniture surface after you are done with the painting. A wax coat will ensure that the color does not fade and water causes no damage to it.
But before applying the wax, ensure that the paint coat has dried up completely. Also, get a separate wax brush for the purpose. These brushes are different from regular paint brushes and are specifically designed to apply wax coats. The only downside to these brushes is that you cannot use them for painting once you’ve applied furniture wax with them.
For a few projects, you have to be really generous when applying wax. So, we’d suggest keeping a paper towel handy to wipe off the excess wax as you keep working.
Wax coating can be really useful when you are working with dark woods, as it will prevent the possibility of color bleeding. If you know how to apply glaze to painted furniture, you will face no difficulty with this step as the process is pretty similar.
When you choose wax to cover coffee tables or other pieces of furniture, you need to keep in mind that there are two choices. You can either opt for a dark wax or a regular wax, depending on your requirements.
As the name suggests, dark wax, when applied to furniture, gives off a dark tinge that makes the piece look dated. If you have a preference for old-world looks, this might work well for you. But keep in mind, when you decide on using a dark wax, you will have to designate a brush only for that purpose.
Once you use a brush for dark wax, there’s no way that you will be able to use it for regular wax or for other painting needs.
There are a lot of people who do not prefer using wax on chalk paint because it involves going through a labor-intensive process. The finish that wax delivers is undoubtedly glamorous. But the time it takes is quite a lot.
If you do not want to put in all that time and effort, you can simply go for a poly coat. There are plenty of poly options that you will find on the market, and they do a pretty decent job. However, let us warn you that the final output is not as great when you apply a light coat of wax.
Apart from that, poly has a few other disadvantages. Many DIYers complained that when they painted poly on white or other light-colored furniture, they noticed that the top coat soon started to turn yellow.
However, yellowing of color sometimes happens because of the underlying wood, and to prevent it, consider using a primer.
Just knowing how to paint furniture with farrow and ball chalk paint to give it the ultimate makeover is not enough. Knowing when to use what paint is essential to give your furniture the looks they deserve.
For example, if you are trying to turn the big cabinet in your kid’s nursery into a canvas, consider using chalkboard paint. This color delivers a surface on which your kids can write with chalk and erase the writings when they like.
On the other hand, chalk paint is quite different. It is pretty similar to other regular wall paints, apart from the fact that it delivers a unique finish. So, even though the names are quite similar, their functionalities vary widely.
Chalk paint is water-based, and you can directly paint it over a clean and dry surface. It can be applied even if the surface is already painted. And although not mandatory, it is best that you do some light sanding before applying chalk paint.
We also suggest that you use a wax coat as the final touch to give the ultimate sheen to your furniture.
As we have mentioned, since chalk paint is water-based, you will have no trouble cleaning the brush after you are done painting. You will not need to dip the brushes in mineral spirits to get rid of the color. Simply dip them in water, and the color will come off.
The drying time required for chalk paints varies slightly from company to company. In case you are using Annie Sloan paints, it is best that you give it a day between paint coats to enjoy the best results.
It is true that the ‘curing time’ for chalk paint is less, and the coats will feel dry to the touch in a few hours. But when you are painting furniture, we recommend that you provide enough drying time between the coats to ensure that each layer solidifies properly and becomes durable. That will ensure that the paint lasts for a long time.
After you are sure that the coats are completely dry, you can proceed to apply a final wax coat or a poly sealer. This protective finish will further enhance the durability of the paint.
Honestly, chalk paint is relatively thicker when compared to other standard paints that are available on the market. So, we would advise that you add some water to the paint to ensure that the painting process is smooth.
On adding water, the consistency of the paint changes, and it becomes easier for you to use the brush. Also, experts suggest that adding some amount of water to the chalk color and thinning it out helps in ensuring that the final finish is smooth.

That’s all we have for you today! We hope that you had a good time going through this informative read.
You can try and experiment as much as you want with chalk paints. Some people even use chalk paints for a dual tone where one color shows through the other. This can be really great when you are trying to create a shabby chic look.
If you have more questions, consider reaching out to the manufacturer of the chalk paint that you purchase. And make sure that you follow the steps we have mentioned for the ultimate chalk paint results.
Until next time, take care!