Expertises: Paint, Home improvement, Wood, Car, Painting
Updated on

Inspiring Ideas for Modern Home
If you are looking for the best clay for sculpting and the steps to making your own jewelry, look no further.

Everyone loves wearing stylish pieces of jewelry but making them is a satisfying form of art. Creating a personalized pair can be the next new hobby to tap into, and air-drying clay is the perfect medium to use.
Try your hand at making a few adorable, lightweight air dry clay earrings, and you'll find them easier to create than expected.
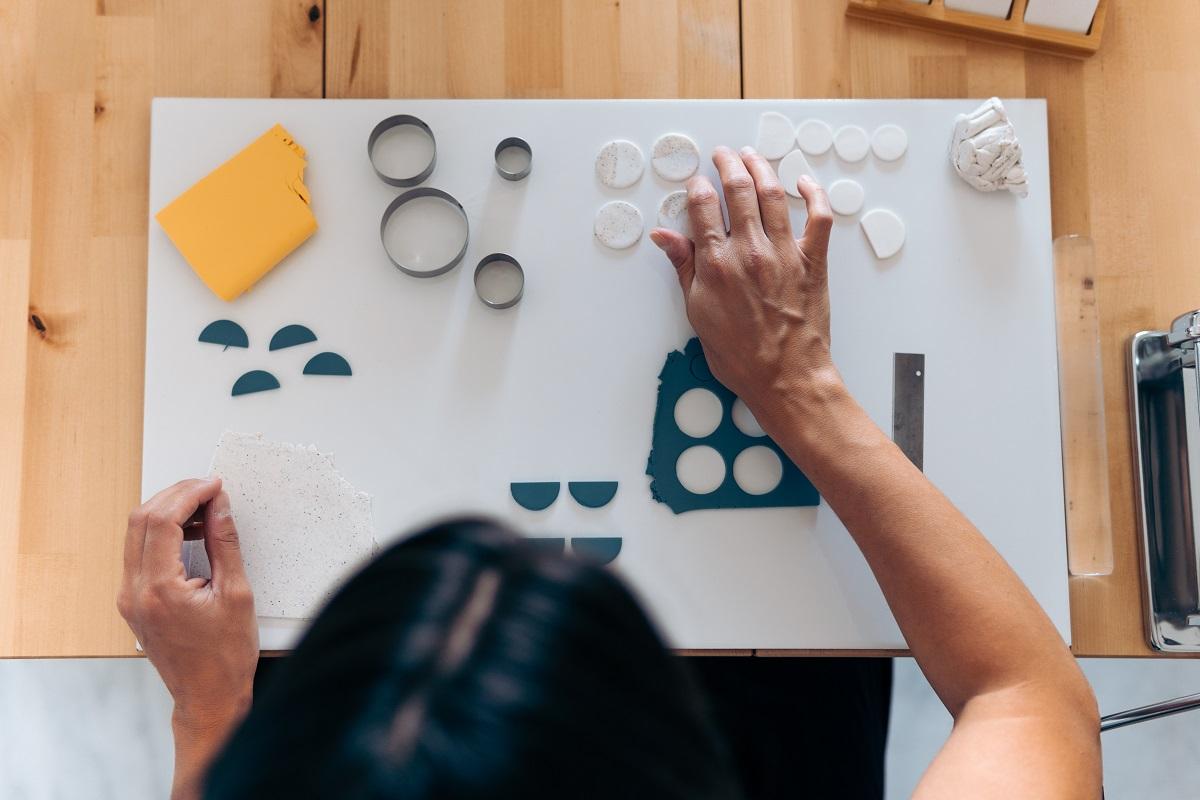
Right off the bat, it is safe to say that making earrings out of clay is the easiest thing ever. It's beginner-friendly, does not require ovens or baking for long hours, and anyone can use the cutters to make the shapes. Most of the time, you'll have to smooth out and roll the air-dry clay with your hands.
Don't worry too much about getting them in the right shape when starting out. You should start with simple shapes such as round, rectangular, or square ones. Before starting, ensure all the materials and tools are prepared and ready for use when required.
Purchasing air-dry clay is the first step which is fairly simple since you can buy it in 2 lbs packets in stores. Approximately two pounds or one kilogram of air-dry clay should be enough to create 20 pairs of earrings.
Additionally, craft starter packs are available in local arts and craft stores which contain all the materials and tools required to make clay earrings. This will come in handy for anyone planning on making these earrings often.
However, they aren't cheap, so they might not be the right choice for one-time use. As an alternative, it's always possible to use household objects as tools and shape makers. Now, let’s take a quick look at the materials and tools required for making air-dry clay earrings.
Now that all the materials are acquired, you are ready to make custom handmade jewelry for yourself or friends and family. Here's the complete guide to making clay earrings using just a few steps.
If you are making clay earrings for the first time, it will help to find a sample earring of a similar size similar to the design you want to create. At the very least, they will eliminate the need to build from memory, and there will be a visual guide to help you construct earrings.
Begin by pinching off a small piece of the air-dry clay and placing the rest in an airtight bag, so it doesn't dry out. If you leave it exposed to air, it might become useless and will need to be thrown away. Dry clay for jewelry and accessories is an absolute disaster, and there's no way to construct a good-looking and durable piece from it.
Firstly, take the piece of clay between your fingers and press to loosen it, and roll it into a ball shape. Then, press down on the ball to get a somewhat flat round disc to create the basic shape of the round earrings.
At this point, make sure to keep the flat disc at a thickness of at least ¼ inches so that it does not break after drying. Circles and round shapes are what beginners start with, but you can try other shapes like teardrops if you are confident.
Incidentally, many people try to smooth out the imperfections and nit-pick about the size or structure for too long. Don't get us wrong, but that's not a huge problem because handmade pieces are not meant to appear perfect. Allow a few mistakes here and there, as that will add to the raw beauty of an air dry clay earring.
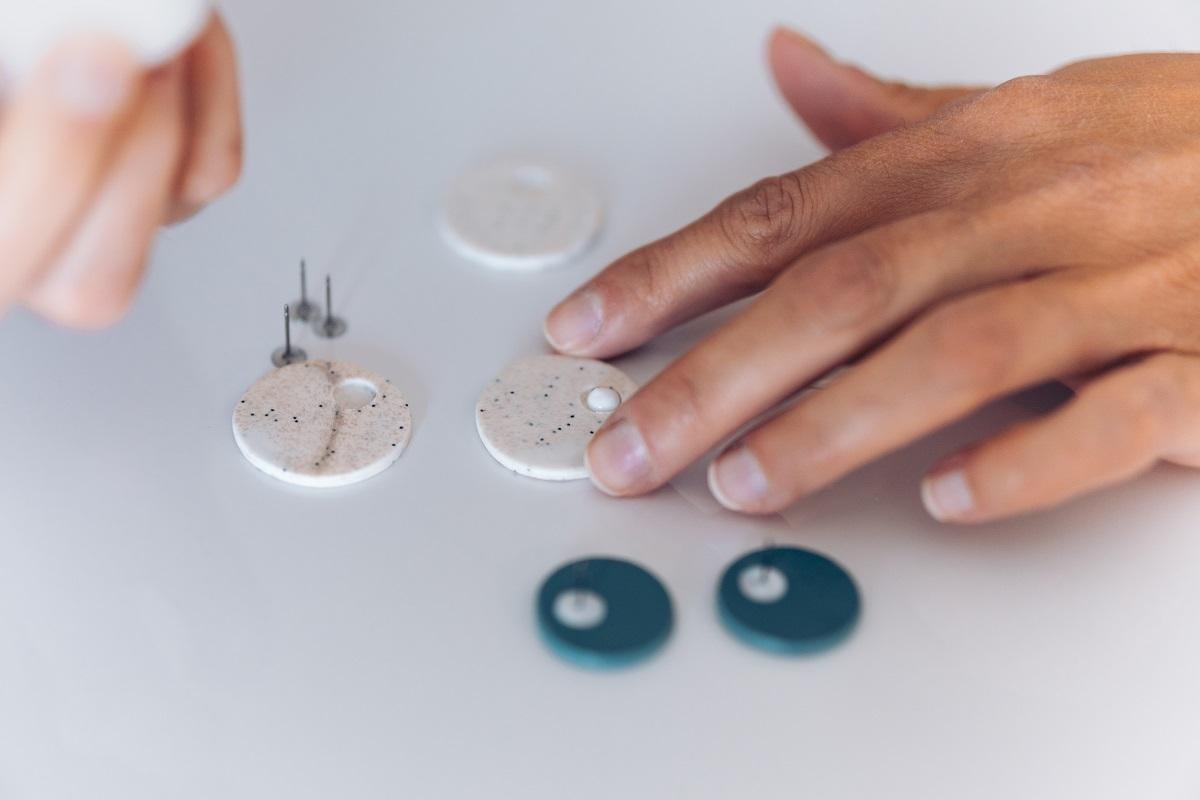
Apart from that, remember to always use a sharp pin to poke a hole in one corner of the flat disc. This hole will serve as the holding point, and jump rings or hooks will pass through it.
Since there is no baking involved, the drying time may take longer than you’ve anticipated. It is by no mean an instant process, and some pieces do dry overnight because they have a larger mass. The smaller ones, like the very first air dry clay earrings you make, will take around four to five hours to dry completely.
At this point, the question arises, "How to harden modeling clay," and the answer is simple—just expose it to air. This is a characteristic of air dry clay, which is also the reason why it's a popular material in DIY projects.
Essentially, the clay that starts out as a darker gray color and eventually shifts to become whiter as it dries.
Now's the time to unleash your dormant creative side and paint one side of the flat disc clay earrings. This is the only part of the guide that doesn't have any rules because you can cover it with anything you like. We'll leave the fun part of making air dry clay earrings to you, but we suggest looking up basic designs that are quick to pull off.
For instance, the earrings can have stripes, flowers, leaves, polka dots, or a solid plain color. Usually, people make a matching pair, but you can bend the rules to create a unique print with variations for each earring.
Sometimes, the basics aren't enough to make a gorgeous pair of air dry clay earrings which leads us to glitter, stones, and other accessories that stick with glue. Dig into your craft supplies and search for size-appropriate gems for your new earrings. After the paint and accessories are all dried up, it's time to move to the next step.
Now, sealing the clay after drying and painting is a pretty important step because of its delicate nature. The material is brittle and porous after drying and can break easily upon contact; thus, we seal it with a binding agent.
For sealing, take some mod podge and mix it with water until it becomes a slurry. Using a paintbrush, apply a coat of this mixture over the finished earring and allow it to dry. The mod podge itself is available in various types like matte, gloss, sparkle, or stain finish, but you can add some glitter to jazz it up.
Make sure to follow this step to keep your precious handmade air dry clay earrings in good shape for a longer time.
After the clay, paint, gems, and sealing coat are all dry; it's finally time to add the earring hook and jump rings to the disc. Using craft pliers, insert the attachments and secure them by twisting them, so they can stay firmly in place.
Next, add the hook portion to the rings, and you will have a brand-new pair of homemade air-dry clay earrings. If you are considering gifting these earrings to someone, we suggest placing them in a sheer bag with a card that contains personalized wishes.
First of all, you may not need to bake the clay at all if it is an air-drying type. As the name suggests, it can dry completely by getting exposed to air at a comfortable temperature. But, if you have a clay type that requires oven baking, it can be baked for ten minutes at 275 degrees Fahrenheit with ¼ inch thickness.
Coming back to the question, "Can you bake modeling clay?"—yes, you can if they are oven-baked ones.
It's alright to use anything you find in the house for a project as simple as this. Any cylindrical glass can act as a rolling pin, and old toys or icing nozzles can replace the cutter shapes. Also, you can use a table to flatten the clay pieces and use sharp tools like an X-Acto knife to materialize the shape.
More than anything, you need to try creating air-dry clay earrings for the sheer enjoyment of the process. Grab a rolling pin and experiment with various shapes, and you'll have a dozen new pieces to add to your collection in no time.
Moreover, let the rough edges be because it does not have to look super finished with pristine smoothness. We’re hoping you enjoy making air dry clay earrings as much as we do. See you next time!