Expertises: Painting, Art, Drawing, Pastel
Updated on
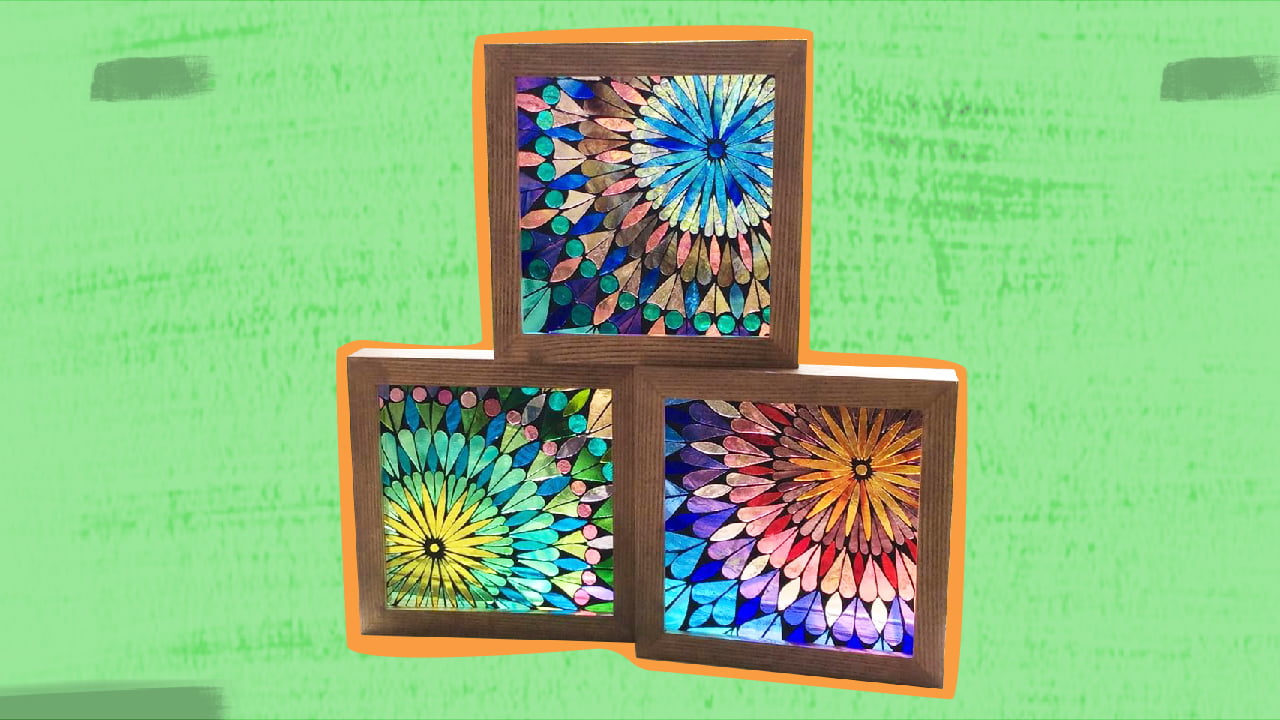
Inspiring Ideas for Modern Home
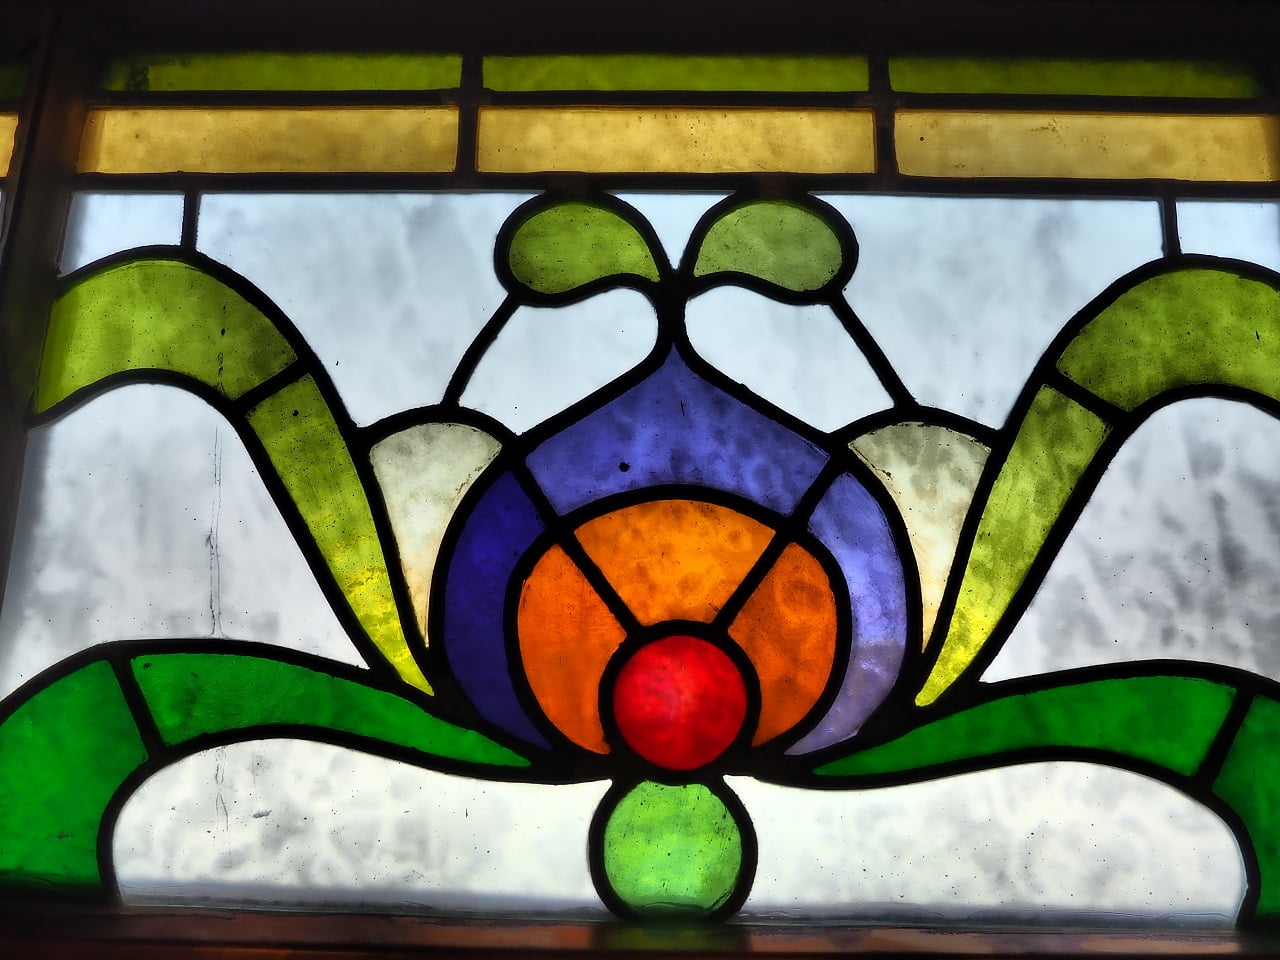
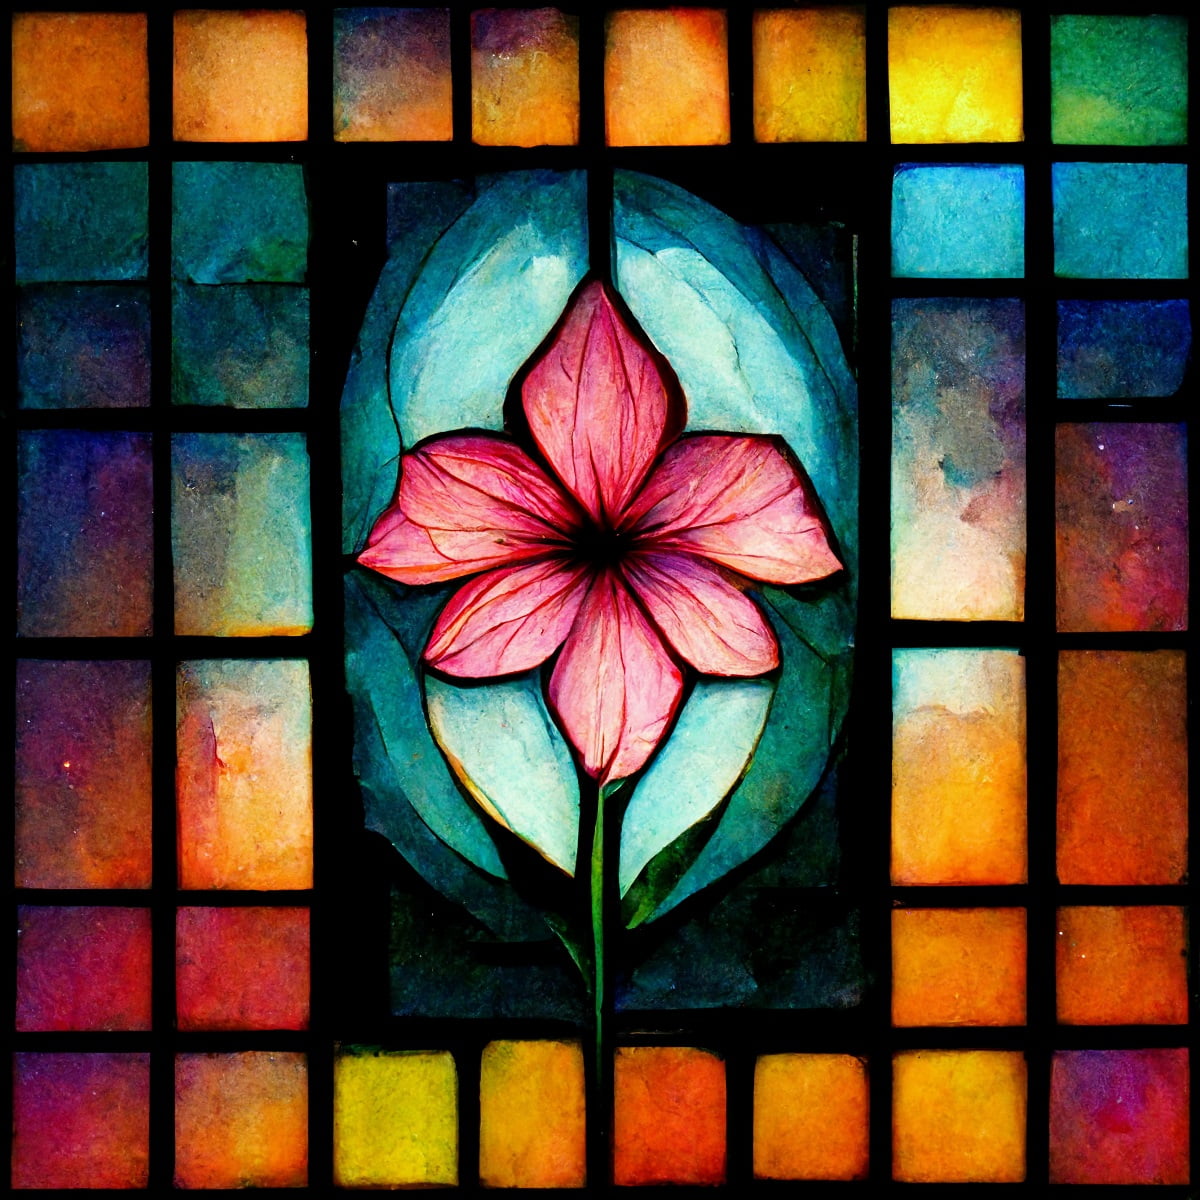
Stained glass painting is the technique of mixing various shapes of colored glass that get their color from metallic salts added during production. You can find stained glass work in church windows, lampshades, and mirrors.

Rather than spending money on costly interior décor, I suggest customizing your home with designs and patterns of your liking. While DIY enthusiasts will already be readying their tools, you might be circumspect if you are not experienced in handling home projects.
But don’t worry, my guide about making stained glass is suited for amateurs and professionals alike to help them create standout creative pieces. Plus, it’s a lot of fun, so let’s get painting!
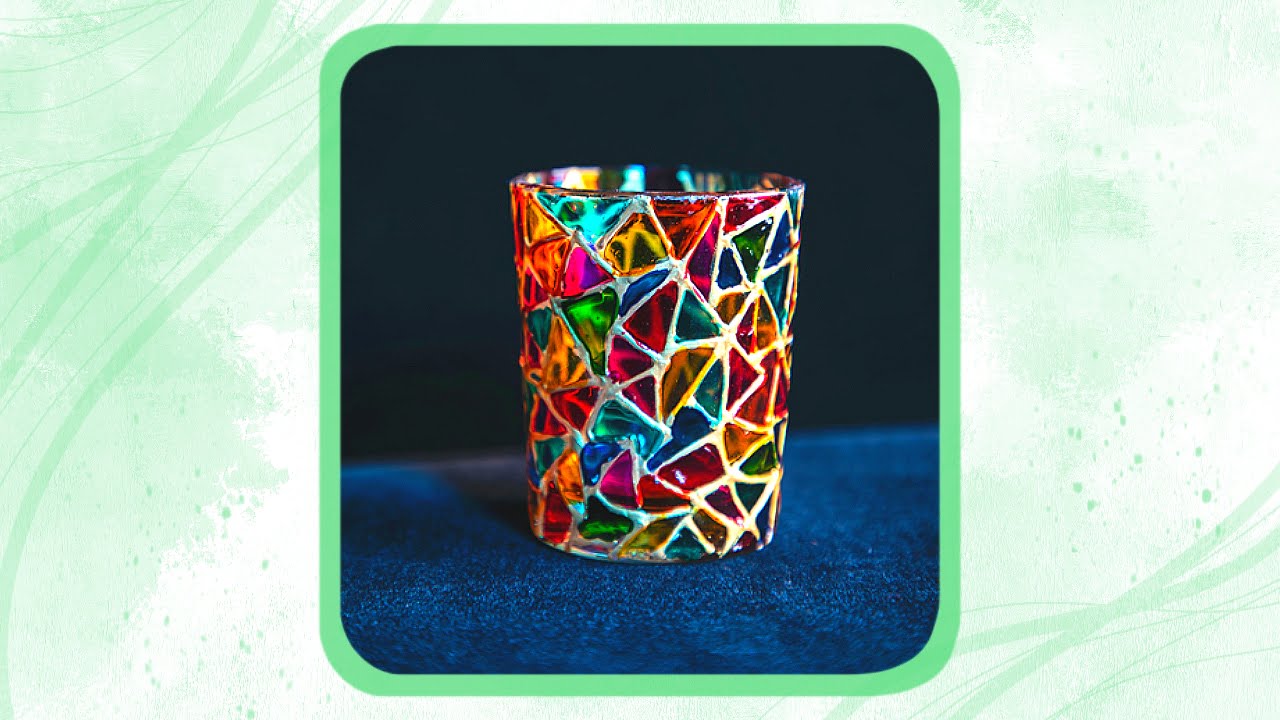
A stained glass project is nothing but decorating colored glass that you can arrange in multiple shapes, images, and patterns to amplify the interior décor. While you can opt for a DIY stained glass project, some people hire professionals to assemble numerous colored glass pieces that fit over the windows like a mosaic.
But if you are wondering what gives stained glass its unique colors, manufacturers add salt or metal oxides during production. However, for DIY projects, you can use markers, paint, foil, glue, etc., to get the desired results.
There’s a lot to cover, so let’s look at how to create stained glass, starting with the necessary tools and materials. After that, I will discuss all the steps in proper order.
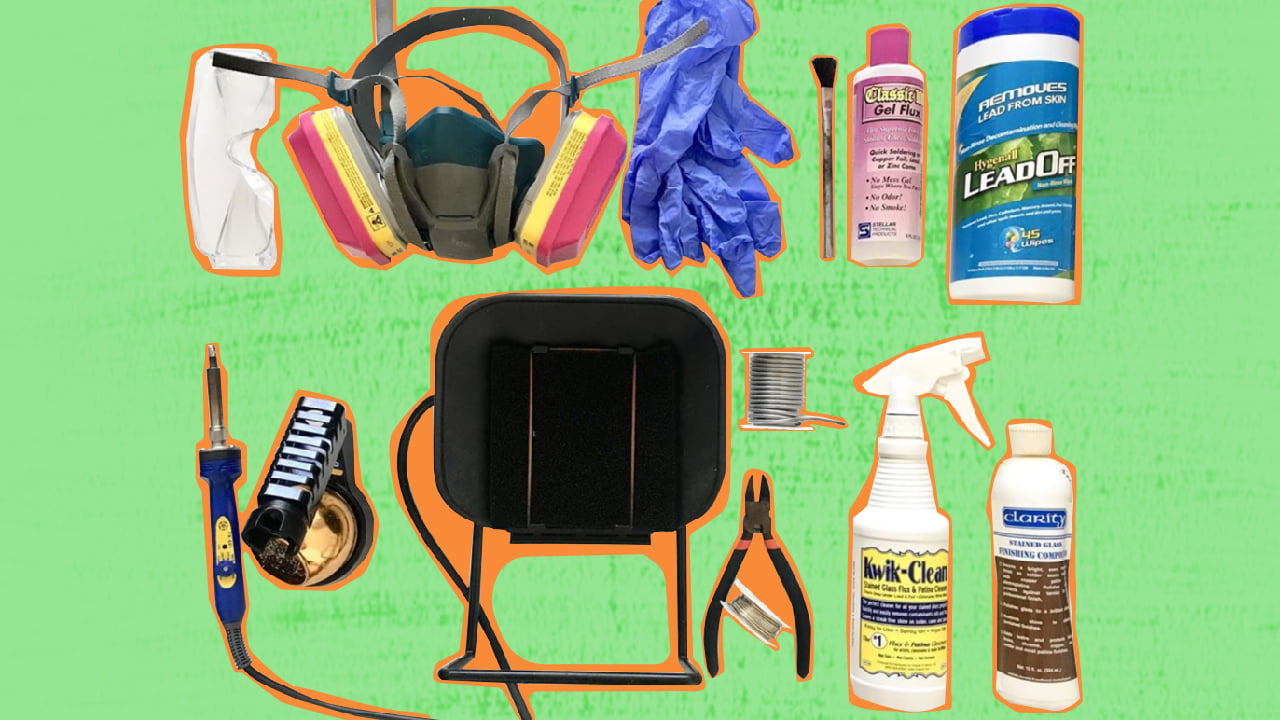
While making stained glass projects is easy, you will need several tools and materials, and I have shortlisted all the supplies in this section. You can add more items to do this as and when needed.
1. Glass
First, you must choose the right type of glass, but that’s also the challenging bit, as there are so many choices. While streaky or textured glass is one of the most common options, here are other materials you can try…
Make sure to get enough stained glass based on the size and complexity of the project. You can get the stained glass as sheets, with the smallest available in a 1-foot x 1-foot dimension, while the largest is four times that size. Most importantly, remember that a quarter of the glass will be lost due to trimming.
Opalescent glass comes in various shades, with most people going with opal or white tones to make the color palette more eye-catching. Similarly, you can use blue opalescent glass that’s not entirely transparent, but the trickiest part is cutting the glass surface into the desired shape. You will usually have to apply more pressure due to its higher density than other glass.
iii) Cathedral Glass
Cathedral glass is transparent and consists of colors that are added later. It doesn’t require much energy to cut this material into smaller pieces of glass.
You can even combine the two types to get contrasting transparent and colored glass shades. Or go with streaky glass, which has opal mixed into its structure.
2. Glass Cutter
There is no dearth of glass cutters, from simple variants to more fancy units, like a tungsten carbide wheel cutter in which the handle has an oil reservoir. You will also find a glass cutter with a pistol grip, perfect for beginners cutting thick glass because they don’t have sufficient hand strength.
Apart from that, use a hand cutter for template cutting due to their greater flexibility and accuracy, while a pencil-style cutter offers more control during trace cutting. And along with a glass cutter, get cutting oil for proper maintenance.
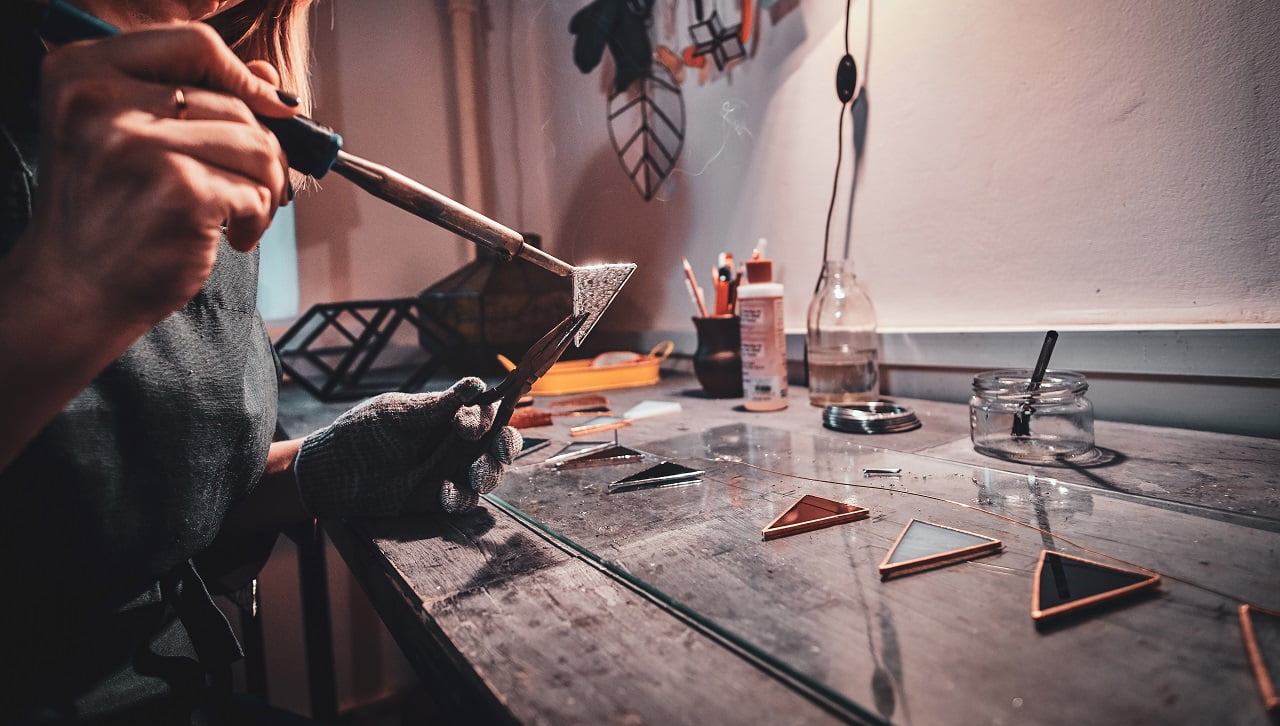
3. Soldering Iron
If you didn’t know, solder combines lead and tin. When the tin content is high and the melting point is low, it allows the tin to flow quickly and deliver a silvery finish. When getting a soldering iron for stained glass projects, choose one with a relevant tip and a minimum of 75 watts.
4. Copper Foil
I have used copper foil with copper or silver protective backing for soldering it to the glass surface. You can choose a suitable copper foil based on the width of the glass, allowing you to hold the glass pieces on one side using the adhesive. With Cathedral glass, the backing is visible, and you must use the right color to blend it with the surface.
5. Grinder
When running on a tight budget, use a Carborundum stone instead of a grinder to grind down the sharp edges of the stained glass. You can do this after cutting the glass in straight lines, for which an electric glass grinder is ideal owing to its fast performance.
These devices have water-cooled grinding wheels to blunt the rough edges and shape the glass according to your needs.
6. Pliers
Rather than using ordinary house pliers, you must use Grozer and Running pliers. Grozer pliers help break glass and rip off the sharp edges while Running pliers come in handy for snapping long cuts in stained glass.
7. Flux
To ensure the solder flows freely between the copper taped pieces, use flux available in liquid or gel form. I also recommend brushing every copper-foiled surface using flux prior to soldering to get the best results.
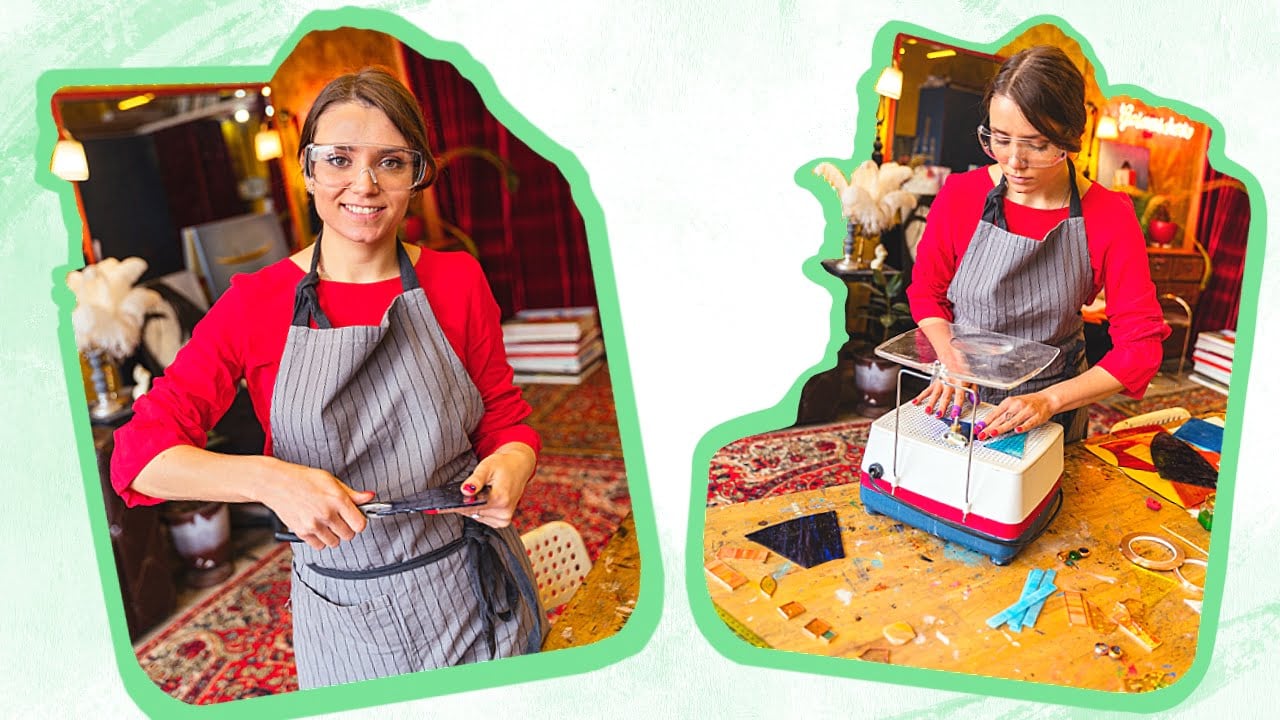
8. Gloves
It may not seem important but take it from me, a person who has several cuts on the hands and fingers, that safety gloves are essential. You can use latex gloves for maximum protection and durability.
9. Eye Protection
You can use most safety glasses so long as the eyes are covered. Also, tiny pieces of debris fly around when you cut stained glass or even grind it, so long sleeves are a must.
10. Lightbox
With a lightbox, it becomes easier to transfer the idea from the paper onto the stained glass. Or you could cut the paper pattern and trace it onto the glass surface, although it’s slightly more challenging.
Once all the materials are ready, a stained glass artist chooses the patterns. For beginners, I recommend coming up with a simple pattern that does have too many parts, so you can easily fix the panel to the windows.
While picking a pattern, keep 2 things in mind - your skill level and whether you like it. When going through several patterns, look at how many glass pieces it will need to ensure you won’t have to do much soldering or cutting.
In most cases, artists can find a suitable glass pattern from many free patterns available on the internet. The best part about readymade patterns is that you won’t have to think about how they will look on the window.
But some like that challenge and customize their own pattern by taking inspiration from their surroundings. Or take the help of art books and nature to get the creative juices flowing.
When the design is ready, draw, print, or copy it on graph paper that’s the same size as the stained glass. You must cut the pattern piece by piece and study the glass to label each piece by grain direction or color.
Place the glass over the pattern, helping you trace the different parts on the surface with a permanent marker. But make sure to leave at least a couple of centimeters between each piece, depending on the thickness of the copper foil.
Some artists also prefer using a specialty black pen; however, I always take the help of a lightbox since it promises greater convenience.
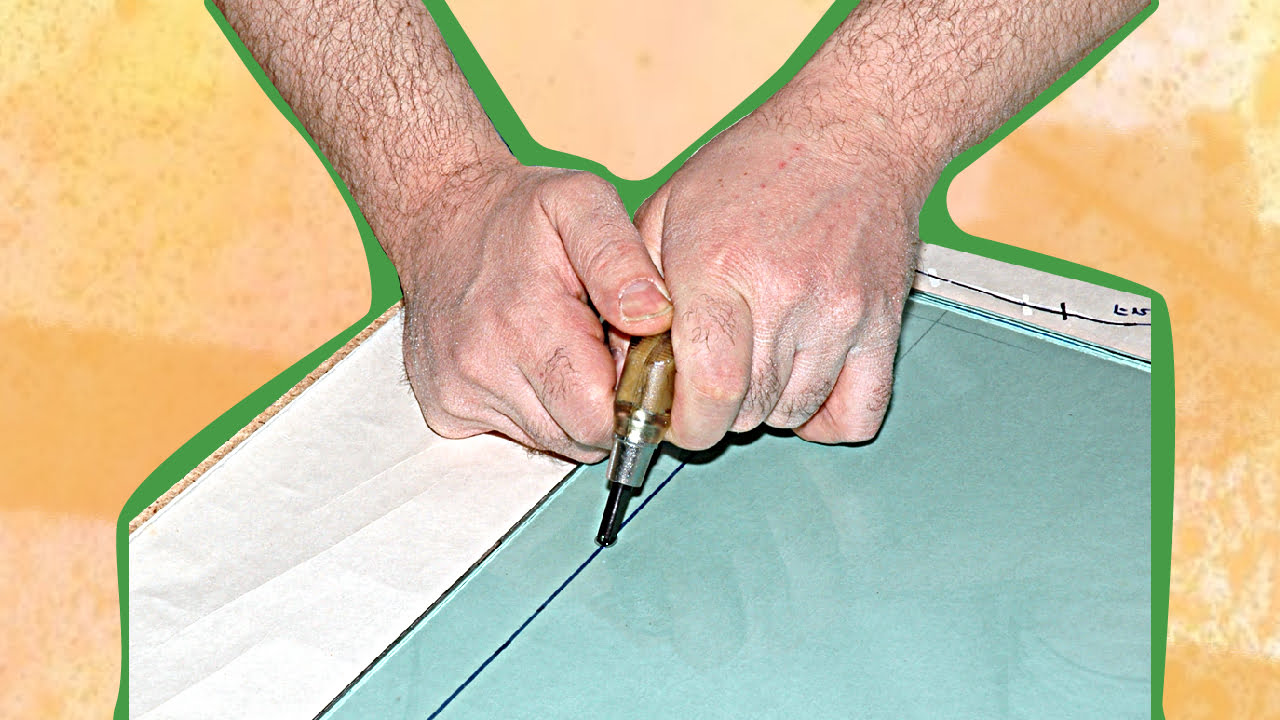
The next step is scoring the glass by imprinting the glass pattern with the cutter. Hold the cutter between the forefinger and thumb while pressing the iron tip with the middle and forefinger.
This is the safest way to create the pattern lines but feel free to develop a grip at your convenience. Then place a steel ruler over the lines and press the cutter into the stained glass while scraping inwards.
Start from the outside before moving toward the main body of the pattern. You will learn how to apply the right amount of pressure with practice because too much will wear out the surface, whereas gentle pressure won’t break the glass.
The score line should travel to all the edges, so follow the pattern accurately and rotate the glass if needed.
Tip
When scoring the glass, ensure you follow the pattern in a single movement instead of stopping and starting, and always score on the smooth side. Breaking the score is also easy; hold it at one end and snap the glass gently or apply pressure on the score line with pliers.
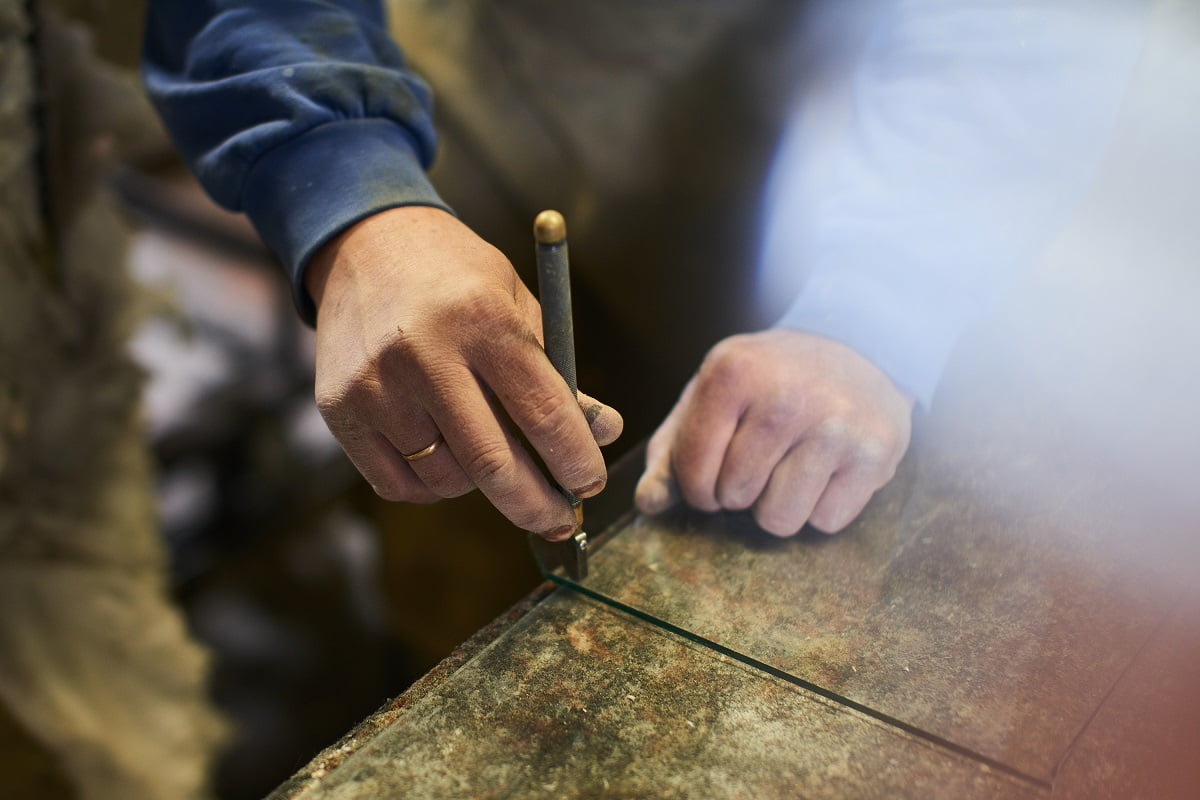
It would help if you employed a suitable cutting technique based on the size and curves of the stained glass. When you notice a line forming on the straight edges, use pliers to squeeze the cracks and separate the pieces. More seasoned artists can break the glass with their hands, but you should take your time before trying such an advanced technique.
The tricky bit is cutting deep curves since the glass tends to break along other lines. You must remember the same principle and work from one edge to another. An interesting technique is tapping the glass with the ends of the pliers to break glass, but I always use a glass cutter and treat each curve like multiple shallow curves.
Try to keep the curves gentle when designing, and don’t worry if the edges are slightly jagged, as grinding will help smoothen them.
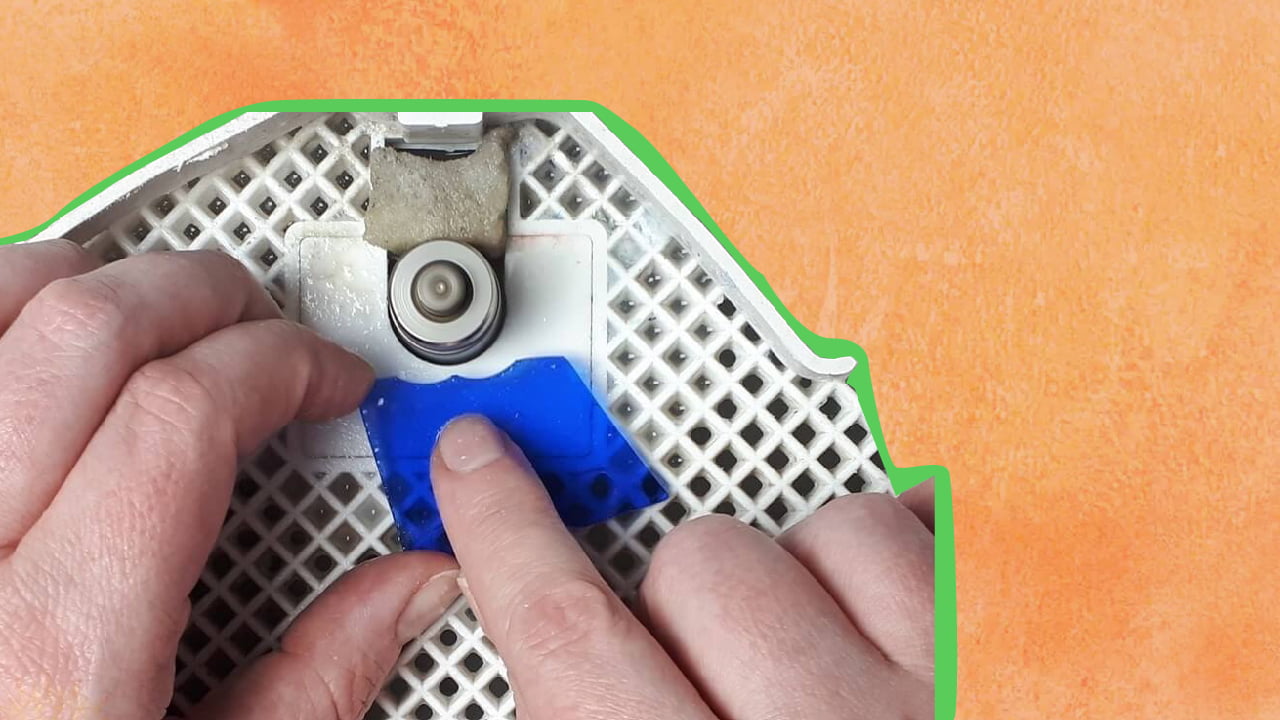
Once all the pieces are ready, it’s time to grind the edges to achieve a smooth texture. While most people prefer a grinder, sandpaper can also blunt the edges. The important thing is to wear gloves and prevent accidents if your hand slips accidentally.
Similarly, wear goggles and a mask to keep the glass shards away from sensitive body parts when using the grinder. Usually, grinding is time-consuming since you must be thorough to avoid chipping any stained glass pieces.
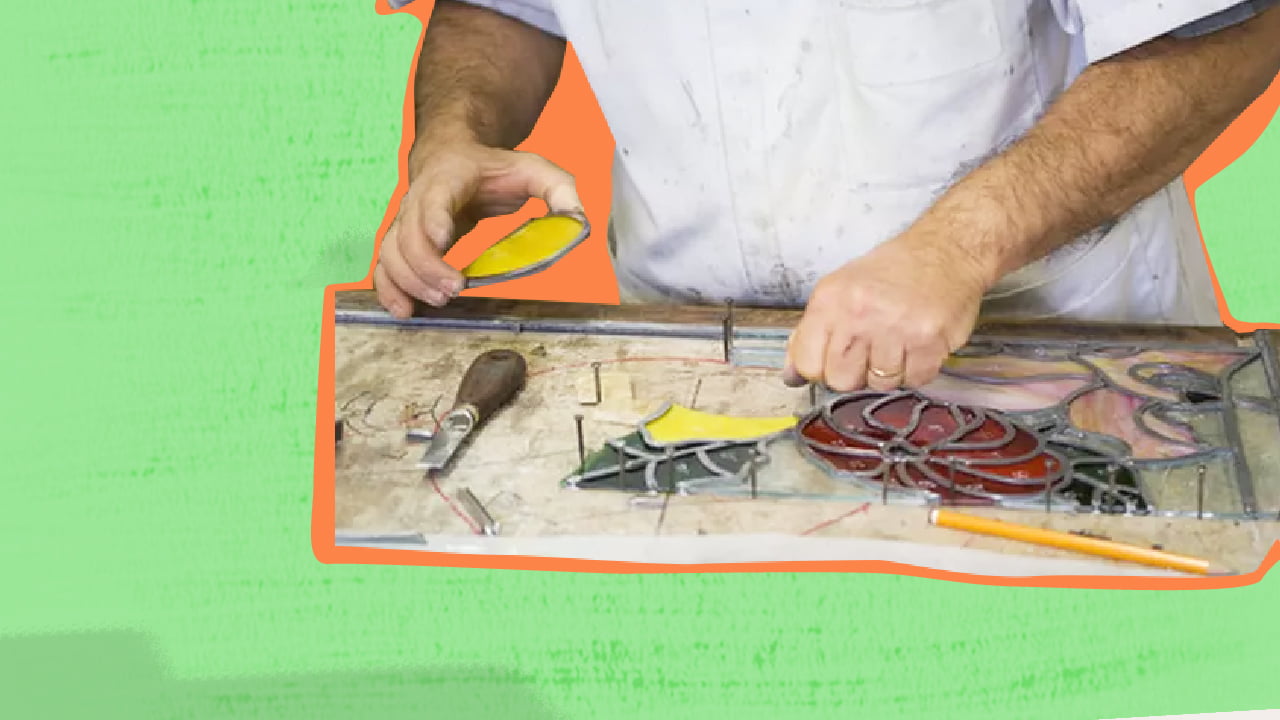
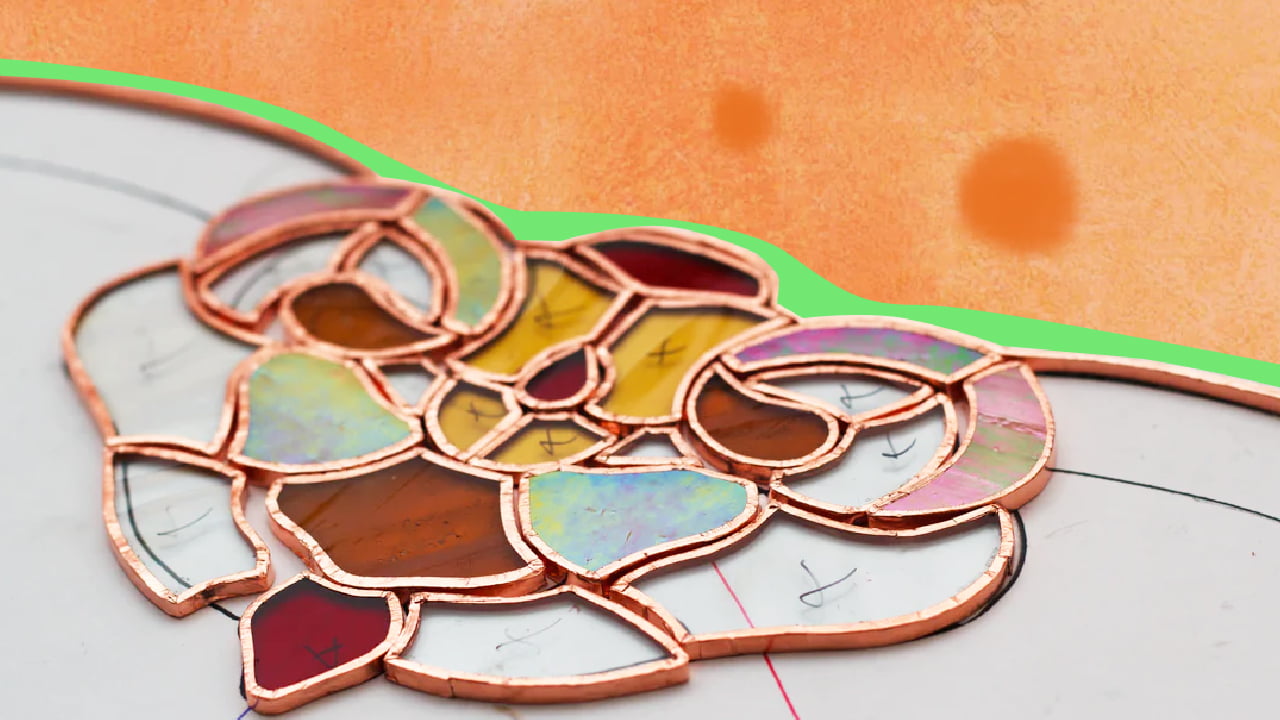
Place each piece over the pattern and grind the glass into the necessary corrective lines. Doing so allows all the pieces to fit like a puzzle when you align the glass. Moreover, I like to frame the pieces after grinding and arranging them to see how the finished art looks. This further keeps the pieces from slipping when foiling the stained glass.
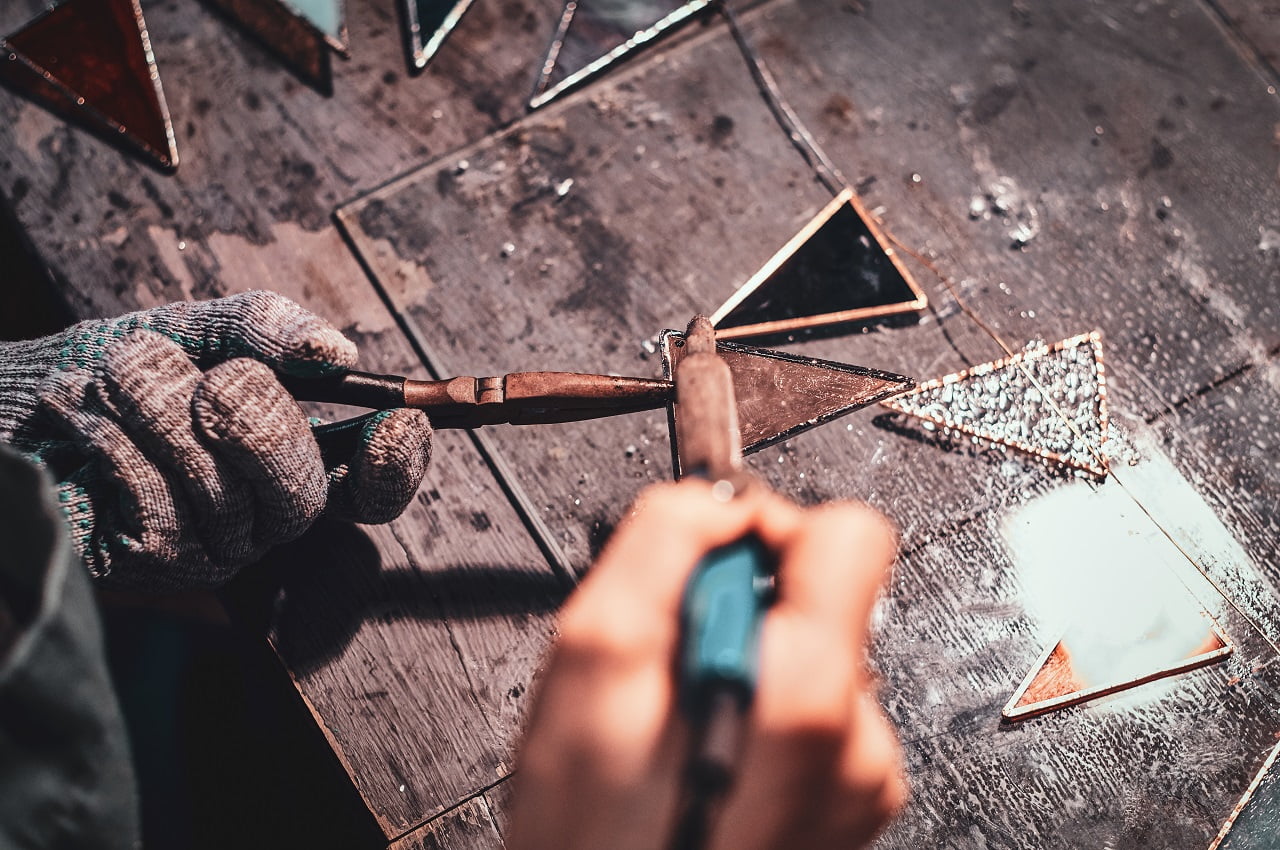
For proper foiling, use a 7/32-inch copper foil to cover the edges of the stained glass. While handling glass, exercise extra caution and apply the foil to the center; otherwise, it just looks odd.
Some people use a table foiler, but I’m more of a manual operator, although the choice is yours. When you have the right-sized copper foil, peel off its protective backing and center the glass on the copper tape.
Press the copper foil down to secure it from the glass to the edges using a firm instrument, like a tongue depressor. Once the copper tape is secured and appears, even know that your job is complete. But if one or more sections get bunched together, tear the portion off and start again.
With proper copper foiling, you are sure to get perfect soldered pieces so that the final result is one smooth, stained glass project. Soldering takes time, so you will have to stay patient because there are several intricate methods you need to follow.
The basic method is to tack the pieces together, tin the seams, and add the bead. So, starting with the first step, you must add flux to the desired areas and melt a slight portion of solder on top to tack the pieces.
After that, apply the desired quantity of flux to the seams along with a thin amount of solder to tin the seams. Take time to coat the whole copper foil and apply another layer of flux to the newly tinned seams.
In such an instance, you must apply more solder to the seams and run the soldering iron back and forth to melt the solder completely. Then, gently lift the soldering iron leaving a shiny and smooth bead over the piece.
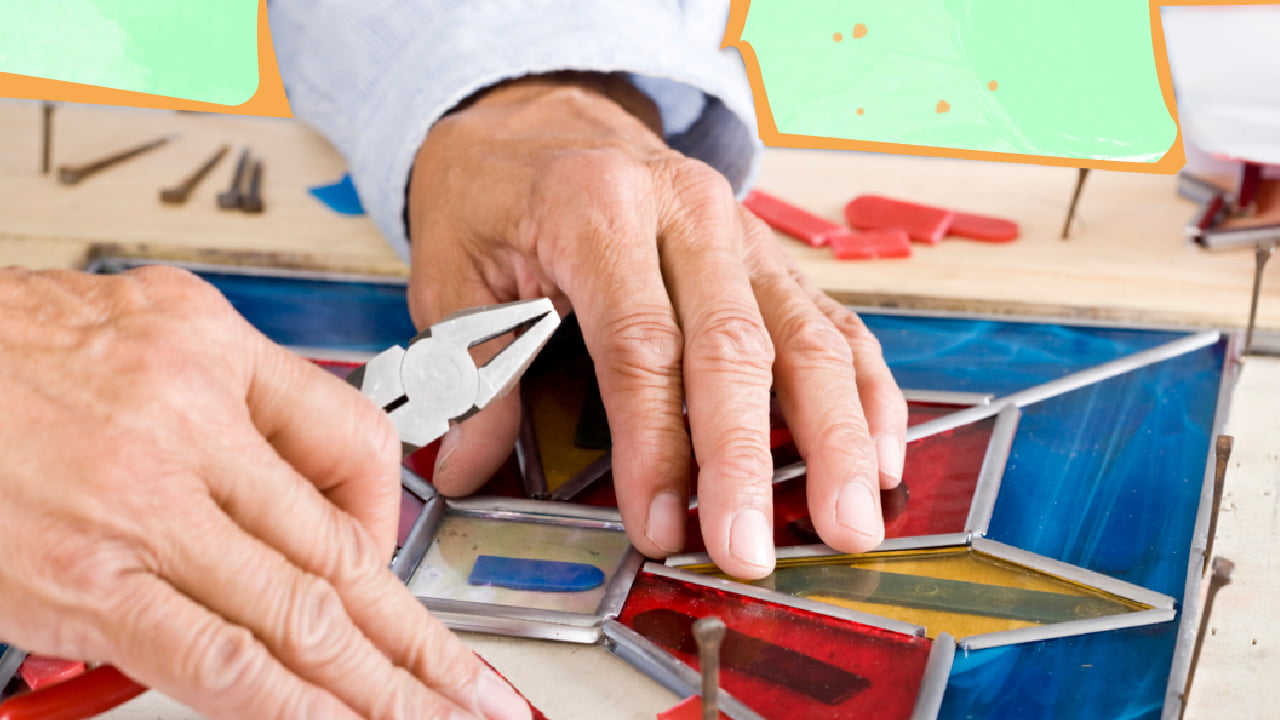
The final step is framing and holding the stained glass piece, for which you can either use a lead channel or a zinc frame. But for this, you will need more soldering, similar to the steps above.
Suppose you are using the lead channel - cut the channel to ensure it fits around the edges before soldering them and the glass pieces at every intersection. For hanging the stained glass work, solder tinned copper wire in two loops to hold its weight, but after cleaning the art piece with glass cleaner or a mild detergent.
And always hang it in a well-lit room or window for the best results.
Making stained glass is the first step because you must spend adequate time cleaning and maintaining it once it's ready. Here I have jotted down some basic steps for taking care of stained glass for your benefit.
If it's your first time making stained glass, you will find it tough to cut or grind the edges accurately, leaving gaps between two pieces. But there's no need to worry since you can fill in most gaps with a soldering iron; just solder like you normally would to complete the project.
Scoring the glass is one of the most crucial and intricate steps in determining how the rest of the project turns out. Usually, people who are adept at scoring stained glass focus on 3 things -
Over the years, I have realized it's important to stand as if you are scoring only long lines. This will offer better reach while bringing the upper body and shoulder into the scoring motion. It would be best to complete the long lines first before moving on to the shorter scores.
For the latter, you must stay seated to concentrate better and follow the line of the permanent marker easily. It's also equally important to use the right glass cutter - a unit that isn't cheap or too expensive.
Ideally, you should spend a few dollars more on a quality glass cutter to cut clear glass well and get smooth performance. I prefer carbide head glass cutters because the oil lubrication makes them pretty useful.
And to guarantee smooth cutting lines, you must apply the right amount of pressure to the glass surface. When you hear a zipping noise while scoring, know that you are doing it right. Most importantly, remember it takes more pressure to score opalescent glass than Cathedral glass.
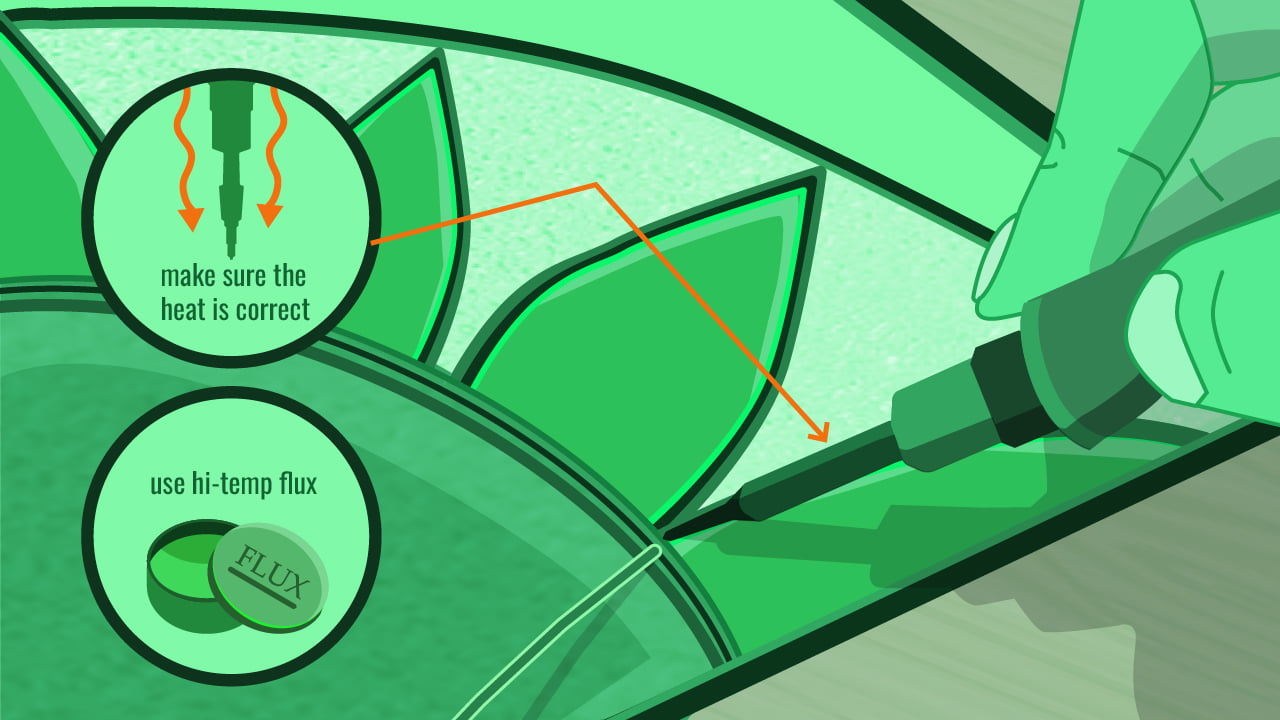
Like scoring, you can encounter problems with soldering, so ensure the soldering iron tip is properly heated and of the correct size, depending on the scale of the project. Moreover, the flux must be suited for higher temperatures to deliver the best results.
When people use the wrong flux, it results in black tip syndrome and subsequent charring. In other words, the soldering iron tip goes black, and you can't re-tin it or use it again.
Other than that, measure the width of the stained glass you use to choose the right size soldering iron tip. And maintain the necessary space between the copper and the tip.
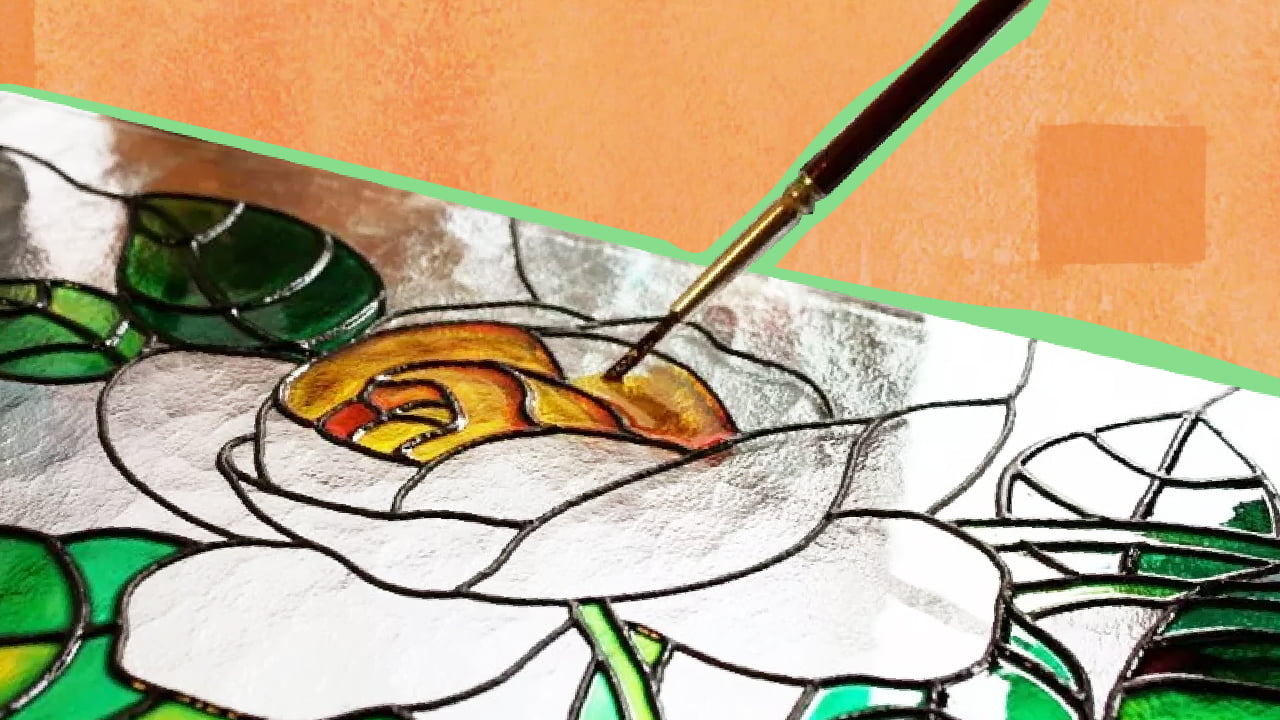
While there are many types of paint, I always use enamel paint for stained glass since it is made from ground glass, flux, and color pigments mixed together. In most cases, there are two types of paint - high and low fired, but in both instances, they are placed in a kiln at temperatures ranging between 968 degrees and 1,382 degrees Fahrenheit.
Also, note that enamel paint is either transparent or opaque glass paint, and if you use colors from the same manufacturer, it's possible to mix them. You can create vibrant color combinations but keep a record of each type for future use.
I gave you a slight idea about high and low-firing paints, so apart from the temperature, let's see how they differ. Obviously, higher temperatures make a paint high-firing and vice versa.
With high-firing paints, you will get better results during fusing as they can withstand higher temperatures. In comparison, low-firing paints are most used on stained glass because it's easier to include them within copper or lead-foiled panels.
But whatever your choice, always wear masks and gloves while painting since stained glass paint can pose a health hazard.
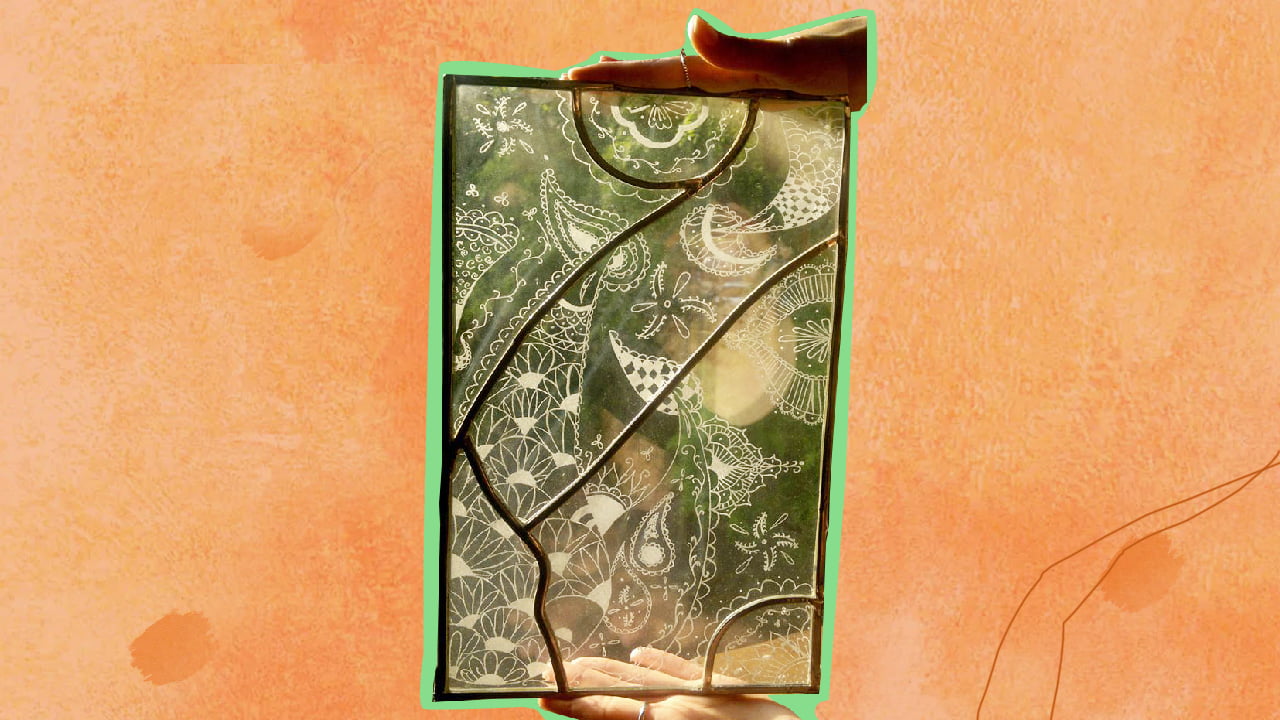
Let me begin by telling you what happens if you apply transparent paint to stained glass sheets by sandblasting, abrasion, or etching techniques. This will give you a semi-opaque effect along with a greater depth of color, which will help block out the view at the bottom of the window.
Moreover, I find that using either of these techniques delivers more creative glasswork with intricate textures. The trick is to use multiple layers of paint, gradually building on the density of each layer to achieve a rich shade.
But refrain from painting thick layers on the stained glass to prevent it from cracking during firing or turning black. That's why it would be best to work with clear or pale glass sheets while using light colors.
Many artists use enamel on stained glass that has been engraved beforehand, or you can engrave the paint after firing it in the kiln. This technique is effective for adding details and making the painting lifelike.
You can also mix the paint with several mediums, such as oil, gum arabic, damar varnish, or any other commercial screen medium. As a result, you can create different effects depending on the subject.
While you can even use water but I don't recommend it. Water is ideal for achieving subtle shades, but damar varnish will produce more vibrant thick line work. Apart from this, you will find opaque paints for stained glass, called glazes, and fired up to 1,562 degrees Fahrenheit, which makes them perfect for slumping and fusing techniques.
You will mostly be handling dry paints when using a sieve, so make sure to wear a mask. Apply the color pigment before firing them in a sieve and shaking it over the desired areas of the sheet glass.
For greater control, you can use a stencil and mark out the areas on the glass to apply the paint. Moreover, don't shy away from drawing patterns into the dry paint with blunt instruments, like a stick.
Another technique is brushing the glass with glue using random patterns or preset designs and shaking the sieve over the surface. Once the paint dries, you can shake the loose pigments from the surface.
And the final step is getting your hands dirty, which is the best technique, in my opinion. What better way to add detailing and texture to your artwork than manually applying the colors with precision?
For regular stained glass painting, you can use the following tools to achieve the desired texture-
Remember that it will take time to master any technique, so keep practicing to become more proficient. Once you develop confidence, it will be easier to make numerous stained glass paintings on various subjects without much difficulty.
To lend a helping hand, I have decided to share how I mix the paint. You must mix one part of the paint with two parts of a liquid medium, such as oil or water. Use a palette knife to mix them until they attain a creamy texture, and be thorough so that the paint flows after being fired.
Also, remember that the paint is likely to show brush strokes, and since you can't repaint the surface with thicker layers, I have a solution. Let the brush strokes be but use a softer brush that holds more paint and apply it in swift, confident strokes.
After reading my guide, are you confident about creating stained glass projects?
While it may appear tricky and complicated initially, stained glass artwork is fun apart from serving a practical purpose. It enhances the room's interior décor and provides a different dimension to the space while blocking the outside view for greater privacy.
When you have a dark and slightly dull room, using stained glass might be the decorative piece you need. Remember to take your time and practice it as a hobby to get better.
And although you can take inspiration from other people's work, don't compare your progress or skill level with another’s. Learn at your own pace and for everything else, read my guide to create decorative pieces of glass that are unique and eye-catching.