Expertises: Architecture, Design, Art, Home improvement, Painting
Updated on

Inspiring Ideas for Modern Home
Sealing pavements with sand can help preserve them from aging and stains. It is critical to use polymeric sand and coat the pavements as soon as possible after installation. Sealing the pavers makes them look brand new and protects them from possible harm.

There are two major scenarios in which homeowners learn about using polymeric sand to seal their pavements. The first is when they've just finished installing pavements for the very first time.
The second is when they employ paver repairs because the pavers start looking worn out. Paver sealant is an essential maintenance product for keeping paver patios and driveways free from damage.
In this article, I have provided advice on whether you should seal pavers to achieve the desired finish.

Sealing your pavers is the most effective approach to maintaining your pathways, patios, walkways, pool decks, retaining walls, and other hardscapes. The highly efficient sealers provide a durable finish that restores the original color depth, repels stains, and prevents surface damage.
Just as you would clean and polish your automobile regularly, your pavers and retaining fence blocks require the same attention to keep them functional and as good as new.
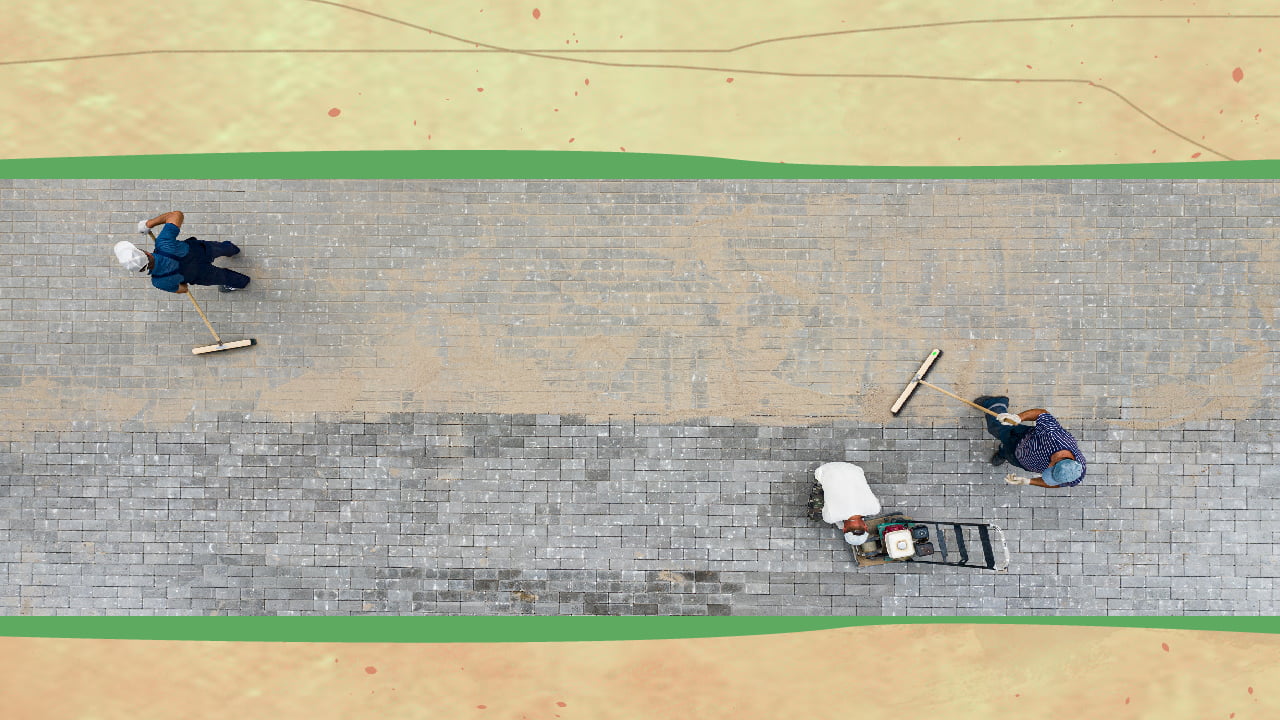
It is always recommended to seal pavers immediately following a fresh installation. However, the tried-and-true procedure of repairing, cleaning, and sealing can restore the original brilliance of even worn, unclean, and fading pavers.
The following are the benefits of sealing the pavers:
Most manufacturers and builders advocate sealing pavers for one reason. The materials used to make pavers are permeable - cement and stone are both porous. This implies that your pavements will absorb fluids, which is what causes stains.
When the pavement gets wet, it darkens for a moment, but all that moisture will dissipate with time. The underlying problem is that your paver stones are exposed to grease, hard water, corrosive water, and other contaminants. When these liquids penetrate pavements, they leave a discoloration that’s difficult, if not impossible, to remove.
The sealer is designed to infiltrate the holes of your paving stones and make them impenetrable, forming a layer that protects the surface and makes it easier to clean. A completely sealed pavement will not discolor and will readily erase any markings.
This very important question may loom in your mind: "Is there any disadvantage to sealing pavers?" The answer to this question would be: "If the item required for sealing is not adequately chosen and the application was badly executed, there might be a problem in the sealing process."
If you don't like the color improvement option, you should use a natural-looking sealer. Since you may be unable to create a paver patio with a shiny surface, the chosen product must give greater friction. These are legitimate issues that you must address before purchasing a sealer.
Poor application may also result in haze and white films. Worse, it has the potential to trap dirt behind the sealing layer. However, these are not necessarily disadvantages of paver sealing. As mentioned before, they are disadvantages of poor product selection and implementation.
While it is true that you can, you should not. You will benefit greatly from hiring a professional unless you are skilled and have the necessary tools for sealing pavers. Many things could go wrong if you don't have the requisite experience. A professional will take all of these factors into account.
And I'm guessing you won't be able to save any money by going the DIY route. You'll have to pay retail for your sealer and will most likely have to rent gear for power washing before sealing and spraying the sealer evenly. Furthermore, you will waste a whole weekend on a task that might turn out differently than you’d want it to.
A decent rule of thumb is 3-5 years. However, you only need to correctly examine your pavers to understand when the true moment is approaching. You will notice that the film begins to wear off, particularly when it rains.
When your pavers are exposed to water, they will darken. While conducting routine washing, use the garden hose to see if the water is being absorbed instantly by the pavement.
Before getting to your neighborhood hardscape supply store, examine the paver manufacturer's sealing standards. This will provide you with crucial information on the type of sealing materials that are appropriate to apply to your pavers and the recommended waiting time before adding sealer to new pavers.
Before beginning your job, ensure no rain is on the horizon for the next 24 hours. In most circumstances, you should only apply a sealant on totally dried pavers. You should also avoid sealing jobs in severe temperatures. Generally, temperatures between 60 and 80 degrees Fahrenheit are optimum.
I cannot emphasize how important this step is! Not only should you clean dirt from your pavements before sealing them, but you should also start taking care of any efflorescence. This cleaning phase prepares the pavers for optimum sealer bonding.
If you're going to handle the sealing procedure, don't cut any corners. Make sure to replace any contaminated sand in the joints with polymeric sand.
Tip
If you're replacing sand, do the efflorescence cleaning after you refill the polymeric sand and then before you seal.
Following are the different types of sealants available on the market:
A surface sealer is a transparent coating applied to the paver's surface. It protects the pavement from discoloration and makes cleaning easier.
A penetrating sealer enters the paver's pores, forming a shield against moisture, oils, and debris.
A liquid sealer is a penetrating sealer composed of acrylic polymers. It forms a transparent, protective layer after bonding to the paver.
An oil-based sealant is a penetrating sealer created from petroleum-based materials. It forms a transparent, protective layer after bonding to the paver.
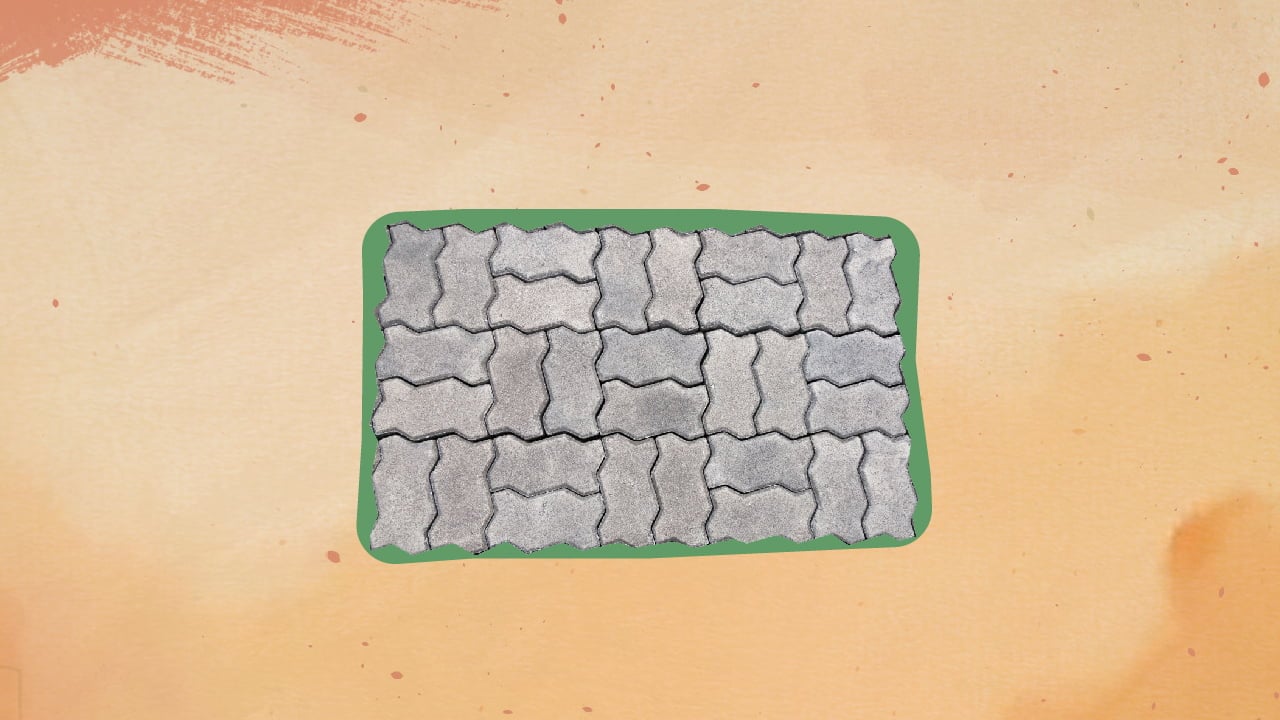
So, what is polymeric sand and how is it used? Well, it is a sand that includes polymers, often known as plastics. This sand binds pavers together and fills up any fractures or gaps. Polymeric sand comes in various hues, allowing you to match it to the shade of your pavements.
Yes, polymeric sand is superior to normal paver sand for several reasons. For starters, it strengthens the bond between the pavers. Second, it aids in the filling of any fractures or gaps between pavers. Finally, it is resistant to pests and bug infestation.
There are a couple of drawbacks to polymeric sand. To begin with, it is more costly than normal sand. Second, if you ever have to repair the pavers, it might be tough to remove the sand.
The quantity of paver sand required will be based on the size of the paver. You'll need around 2 pounds of sand for a modest patio. For a bigger patio, you'll need around six to eight pounds of sand.
Once you've established how much sand you need, spread it onto the pavers. The best tools for the job are a push broom and a hose with a nozzle connection. To begin, moisten the pavements with water. Next, use the hose or broom to distribute the sand over the pavers uniformly.
The purpose determines the ideal sand to use. Concrete sand, for example, is commonly used for pavement projects, but brick sand is best suited for masonry construction. Polymeric sand is the finest option for sealing pavers since it holds them together and fills any fractures or gaps.
Following are the types of sand that can be used for sealing the pavements:
I recommend a joint width of 1/8th of an inch to 4 inches and a joint depth of at least 1 inch between your pavers. This helps you to get the most out of your polymeric sand's bonding performance.
Furthermore, too-thin or excessively narrow joints might create spillover during the setup process. Tight channels do not enable water to circulate and sink downwards to the bottom of the connections while washing the pavement.
Sand is put through the joints. As a result, I do not advocate utilizing polymeric sand in excessively thin connections. Similarly, overly-wide joints can induce washout by allowing too much water to enter during the activation phase.
Before putting in polymeric sand, make sure the pavements and gaps are dry. If there's any dampness present, the polymers will prematurely activate, resulting in a haze on the surface, or the sand will not firm up correctly. Wait until the morning dew has burned off before putting the polymeric sand in a humid area.
This is a reasonable and frequent error. You stuff your joint to the top, hoping to get the finest joint stability possible. But don't do it. It is critical to leave around 1/8 inch from the surface of your pavers. This is essential to avoiding spillover once you begin wetting the joints to activate the sand.
Whenever the sand is 1/8 inch thick, it provides for the optimum bonding and adhesion of the paver joint below the surface. Furthermore, overfilled joints will deteriorate over time with activity on the surface. This is going to appear poorly on your project.
You should try to obtain the finest adhesive effectiveness from the peak of the junction to the bottom. Ensure that you wet your joints for the appropriate amount of time, and use the "spray" mode on your pump attachment.
A. Underwatering The Pavement
Underwatering the pavement leads the polymeric sand to create a "crust" on top. As such, the joints won’t connect properly, and the crust will eventually break away, damaging the joint. Since the sand has only partially bonded the whole depth of the joint, it also generates fissures and gaps.
B. Over-Watering The Pavement
Over-watering may cause polymers to separate from the sand during reactivation, lowering bonding strength.
Poor drainage might jeopardize your project. To seal your pavement properly, you should adhere to the following guidelines:
A. Pavers Should Be Put On A Drainage-Friendly Foundation
Pavement or paver stone should be placed over cement, limestone, or other similar materials, with bedding soil in between. Thin pavers can be put on concrete in some circumstances, often with bedding soil in between to create a padding effect and drainage.
Installation recommendations differ across the region for different soil constraints, temperature conditions, and usage demands. Water must be able to escape for the polymers to harden. If polymeric sand is utilized in locations with poor drainage, the liquid will subject the sand to extended wetness and moisture, rendering it susceptible to washout.
B. Ensure Your Pavements Have A Border, Whether Natural Or Artificial
If your pavers are parallel to the ground, you will have a natural barrier and drainage. Otherwise, you should install a cement boundary or edging to avoid runoff at the borders.
C. The Project Area Should Have A Modest Incline
If the area has places that retain water for extended periods, avoid using polymeric sand.
Since it adheres so well, polymeric sand is ideal for paver stabilization. This becomes an issue when activated and afterward left to dry on the pavers rather than between them.
The problem can be made more difficult to resolve if the sealer is applied on the surface of the sand-crusted paving stones, accentuating the coarse texture and haze. Of course, when used correctly, the sealer may provide an exquisite touch to your project.
There are two critical periods during installation when you must remove the polymeric sand from the surface of your pavements:
All patios settle, wear, and disintegrate over time. Instead of merely filling up the gaps between the pavers with conventional sand, use polymeric sand to provide long-lasting functionality and appeal to the surface.
If you don't, a lot of the sand you pour in will flush away after a few hard storms, and weeds may sprout before you complete the sealing process.
Sand sealing is an important step that may help preserve pavers from weathering and stains. You can properly seal your pavements with polymeric sand and rest assured they will last for years to come by following the professional recommendations in this guide.