Expertises: Painting, Art, Drawing, Pastel
Updated on
Inspiring Ideas for Modern Home
Glass is tinted with metal oxides during manufacturing to create stained glass. Then, artisans cut and rearrange these colorful panes into various designs. Knowledge of architecture and metallurgy will help you craft perfect stained glass artwork.

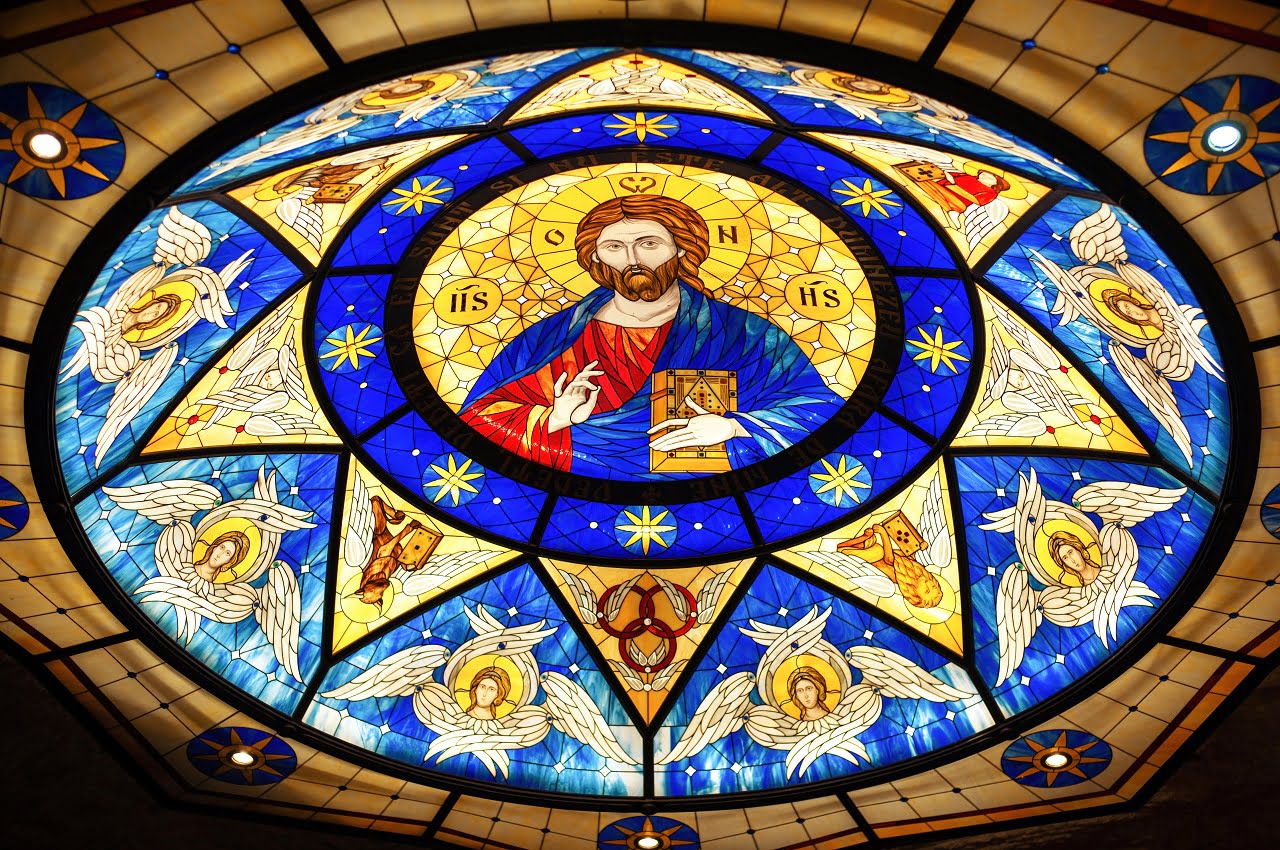
Stained glass can refer to colored glass or the artwork created by manipulating this glass. However, the first things that come to my mind when I hear "stained glass" are ornate, vibrant Gothic church windows. And the same is true for many.
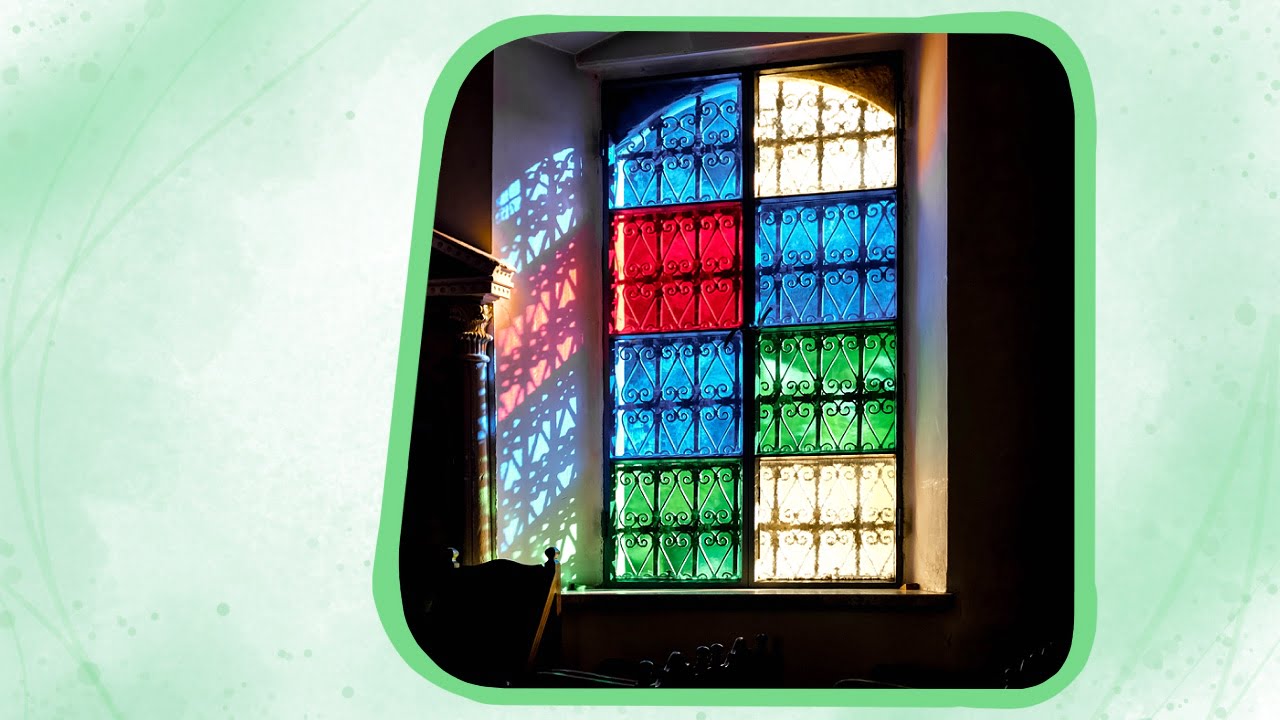
For most of history, the primary function of stained glass has been in religious buildings, specifically their windows. If you look closely, these stained glass windows have little colored pieces of glass joined to create a complete image.
I create stained glass art in the same way. So, my guide below will help you if you want to do the same.
"Stained glass" refers to colored sheets of glass. In the past, a stained glass artisan individually painted clear glass pieces after creating them. However, their method soon evolved, and they added metallic colorants while creating glass to solidify it into a colored sheet. Thus, it's only possible to have one color per glass piece.
However, Churches needed more than just one color in their windows. Thus, artists innovated a method to create colorful artwork. They would plan the design based on blocks of individual colors and then cut and paste glass in those shapes.
This is startlingly similar to how "pixels" work on our digital screens - several little blocks of solid color combine to create a complete mosaic. Remember this analogy when creating the collage for your stained glass windows.
To join the little panels together, you also have to delve into technical craftsmanship. You will melt lead and solidify it to hold each glass piece to its adjacent pieces permanently. Then, you'll join all the remaining pieces of glass until the finished stained glass window is a sturdy, detailed, and colorful work of art.
The first use of stained glass was for windows, and European Christian Churches adopted them about 2,000 years ago. However, artists discovered the stained glass creation methods 5,000 years ago.
Long before painted glass windows were invented, artists in Rome and Egypt made crafts out of flashed glass. It is believed that the methods originated in Southwest Asia, with records dating back to 700 BC.
In 675 AD in France, Benedict Biscop oversaw one of the first recorded uses of stained glass in church windows. We know this because archaeologists found broken, colored glass and lead near St. Peter's monastery, which Benedict Biscop was building.
However, the use of stained glass in religious buildings was not restricted to Europe. Painted glass gained popularity during the Islamic period in the Middle East, where it was incorporated into stained glass windows for aesthetics and temperature control. Mosques used stained glass windows to depict colorful geometric patterns and the religious texts of Islam.
In the 12th century, stained glass was mainly used in religious buildings, especially Gothic cathedral windows. The 12th and 13th centuries in the middle ages were the golden age of stained glass art.
Churches adopted stained glass windows because they were excellent methods of pictorial education. Most commoners during the late middle ages were illiterate because education was a luxury. However, religious leaders still wanted to spread the teachings of Christianity. So, they used stained glass windows in Gothic cathedrals to depict incidents and parables from the Bible that people could understand easily.
Stained glass is a very delicate art form. The creator needs knowledge of architecture and engineering to create an entire window that doesn't crumble under its own weight or succumb to the elements.
The early Gothic buildings had small, heavy stained glass windows. However, as English Gothic architecture evolved to be more dramatic and aesthetically pleasing, the windows grew larger and more supported by the framework. Thus, an architect or stained glass artist could create detailed and expansive stained glass windows from the stained glass without risking durability.
The windows grew in complexity, ranging from rose windows to highly detailed artwork with multiple focal points. The Chartres Cathedral displays an excellent example of these intricate stained glass windows.
Soon, artists did not need to color their stained glass materials individually. It was manufactured in bulk and then supplied to artists across Europe.
Over the centuries, the methods to create stained glass have remained more or less intact, but two main innovations improved the manufacturing process. First, John La Farge invented opalescent glass in 1880. It allowed the artists to add more details and depth to their glass.
Sanford Bray discovered in 1886 that copper foil was a better soldering material for stained glass than the previously used lead. This was a great advantage because lead posed dangers when inhaled or in contact with broken skin.
The Renaissance changed the trajectory of stained glass. Artists started painting clear glass artwork. Furthermore, during the Reformation, several stained glass windows were destroyed by revolutionaries as a political symbol. Very few windows from this period survived the purge; of these, the Hengrave Hall windows at Suffolk are the most beautifully preserved.
Stained glass underwent a simultaneous revival in Europe and America around the 19th century. Artists had abandoned the Gothic structure to move into more Classical forms. But the European craftspeople delved into stained glass creations with renewed interest and followed medieval methods. Soon, England was creating Gothic revival architecture elements, including stained glass windows. This was known as the Arts and Crafts Movement.
French artists created large stained glass panes based on famous works of art. These were damaged during the French Revolution and restored in the late 19th century. These restorations sparked an increased interest in medieval structures, and designs became more Gothic and detailed. During this time, artists also added new colors to the stained glass palette, including cobalt blue, magenta, and pink.
German stained glass adopted different techniques than the rest of the world. Here, the lead borders did not define much of the stained glass art. Instead, artists relied on painted glass borders and details to add dimensions to an image. The soldered borders were merely for support.
Meanwhile, professional artists were trying to kickstart a stained glass movement in the United States. However, most American artists were unskilled and traveled to Europe to learn the manufacturing process passed down there over generations.
As industries evolved, stained glass production was significantly streamlined and centralized. Glassblowing and staining corporations were set up in America, France, and Germany, some of which are still functional today. Artists collaborated in famous studios to deliver glass windows to buyers. The most popular use of stained glass during this period was still a place of worship, like the Catholic church, where most studios and industries delivered their work.
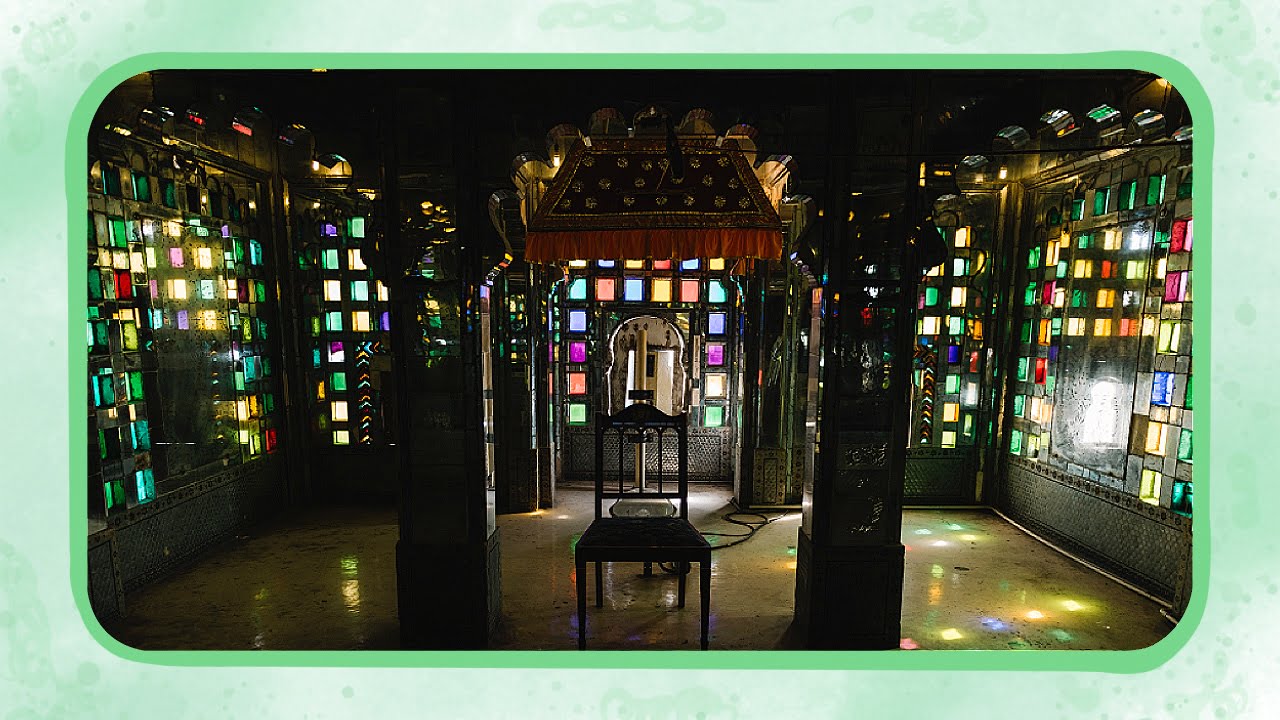
This use has decreased in the present times. Now, 90% of all stained glass is used in decorations for homes and industrial buildings. And it's not just in windows anymore. Nowadays, we have stained glass lights, home décor, and even fashion. Artists are experimenting with abstract, expressionist, and geometric styles. These are made possible by advancements in technology.
I make my own stained glass, starting from the raw materials to the designing and soldering. It’s very satisfying to look at a finished stained glass project and know I created every part of it. I’ve given detailed descriptions of my steps below to help you feel the same satisfaction.
Step 1:
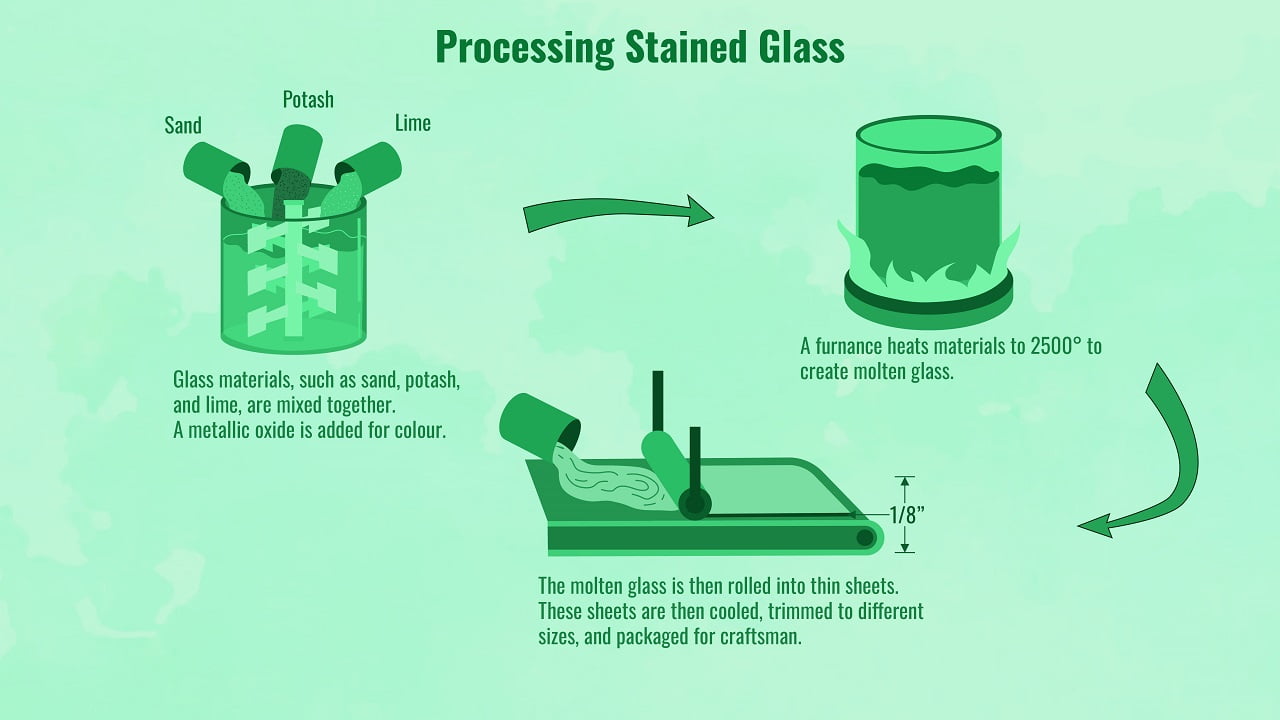
The first step is creating hued glass to serve as building blocks for the stained glass project.
Traditionally, I make glass from sand, potash, and lime. According to Chemistry, these materials are silica, an alkali, and lead oxide. Also, I add a small portion of sodium carbonate to speed up the process.
When you make stained glass, add the hues at this stage. You need to add a dye that spreads evenly throughout the glass without reacting with any raw materials.
Below are the colorants I use and the colors each brings.
As you can see above, I use a metallic oxide combination, neutral metal, or gemstone. You shouldn't use acidic substances because they'll react with the alkaline glass and affect the procedure adversely. Also, adjust the color amount to give the glass your desired transparency and translucency.
After mixing the correct materials and colorant, heat it in the furnace. The temperatures in this modern furnace reach up to 2,500 degrees Fahrenheit, which is the melting temperature of all your ingredients. So, take care not to be too close to it while the stained glass mix is being melted and transformed.
Then, cool the furnace and remove the molten glass. Carefully pour it into a heat-resistant flat surface and wait for the sheet of glass to cool.
If you're making a large window, it needs standardized 0.12 inches-thick glass. To flatten the liquid to this exact thickness, you can use a specially designed cylinder. Some roller cylinders have grooves and gentle patterns, which will help you create textured glass when needed. After rolling the glass, let it cool in an annealing lehr.
Here's a secret - molten glass never really "freezes" to solid! Room-temperature glass is a unique state of matter with both solid and liquid properties. But for our intents and purposes, molten glass hardens into a solid like any other.
Once the glass has cooled down, use a cutter to trim and shape the irregular edges. Now, you're ready to start creating your stained glass artwork.
Step 2:
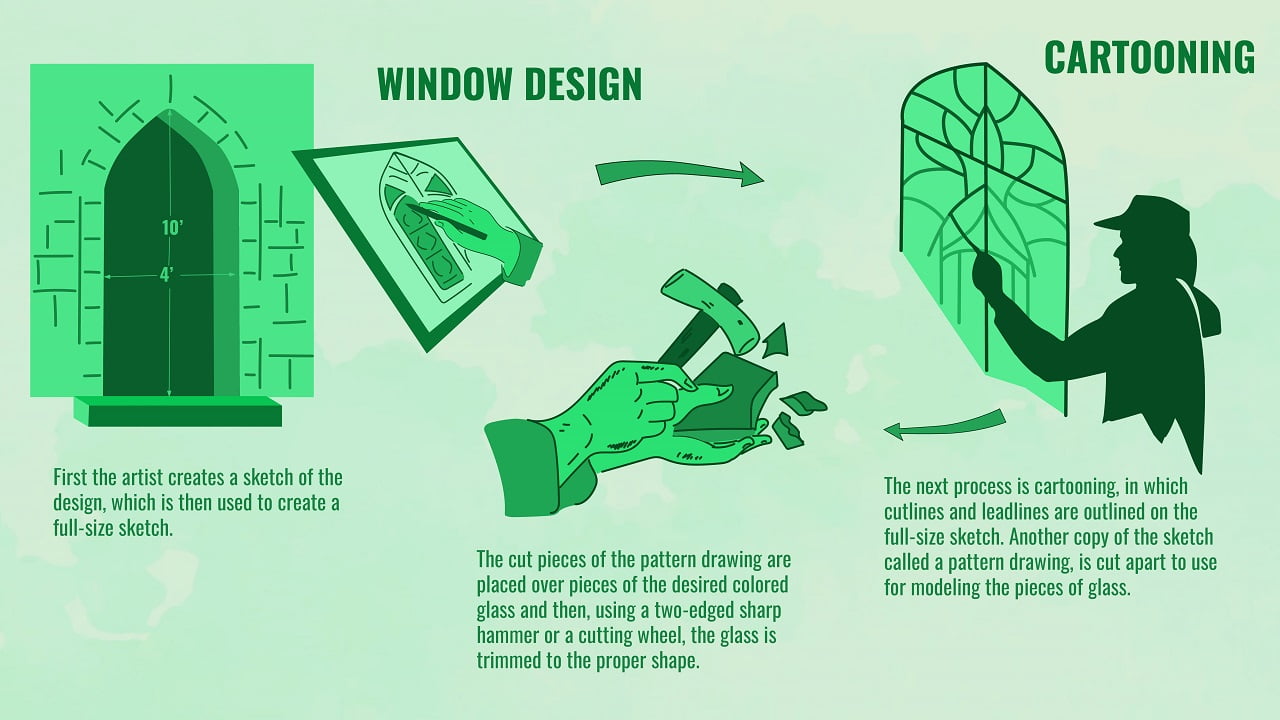
First, get an idea of the stained glass design you want to make. If you're making a stained glass window, note the accurate dimensions of the window and scale them down to a small drawing. Then, sketch a rough draft of the design you're aiming for. Finally, scale this draft back to a full-size "cartoon" because it allows you to see the realistic effects.
The cartoon stage is quite critical because if you neglect any important details here, it'll be an issue when you work with the glass. Review and redo your sketches until you're satisfied with the design and know how to achieve it. Then, fill the design with colors corresponding to the colored glass you can make.
At the coloring stage, I often make several changes. This is because I might like a design but cannot make the colored parts fit right. Or, I might look at the colored cartoon and realize a different design works better with this palette. Overall, I use my artistic eye to find soothing and complimentary color combinations I can put together.
Once you're satisfied with the cartoon, create a more precise cutline drawing to act as your window pattern. Cut this pattern into individual pieces by following the borders you drew. Then, use the window pattern pieces as references to cut your stained glass into similar shapes.
For tracery and cutting, I use a ring saw because it is easy to handle and works quickly. However, you can also use a diamond saw or double-edged hammer if you want a different approach.
Cutting the glass precisely takes skill and practice. At first, my hands shook, and I didn't cut the edges with an even speed. As a result, my pieces of glass were different from how they were supposed to fit in my pattern. However, I kept at it and used whatever I could make until my craftsmanship naturally improved.
Step 3:
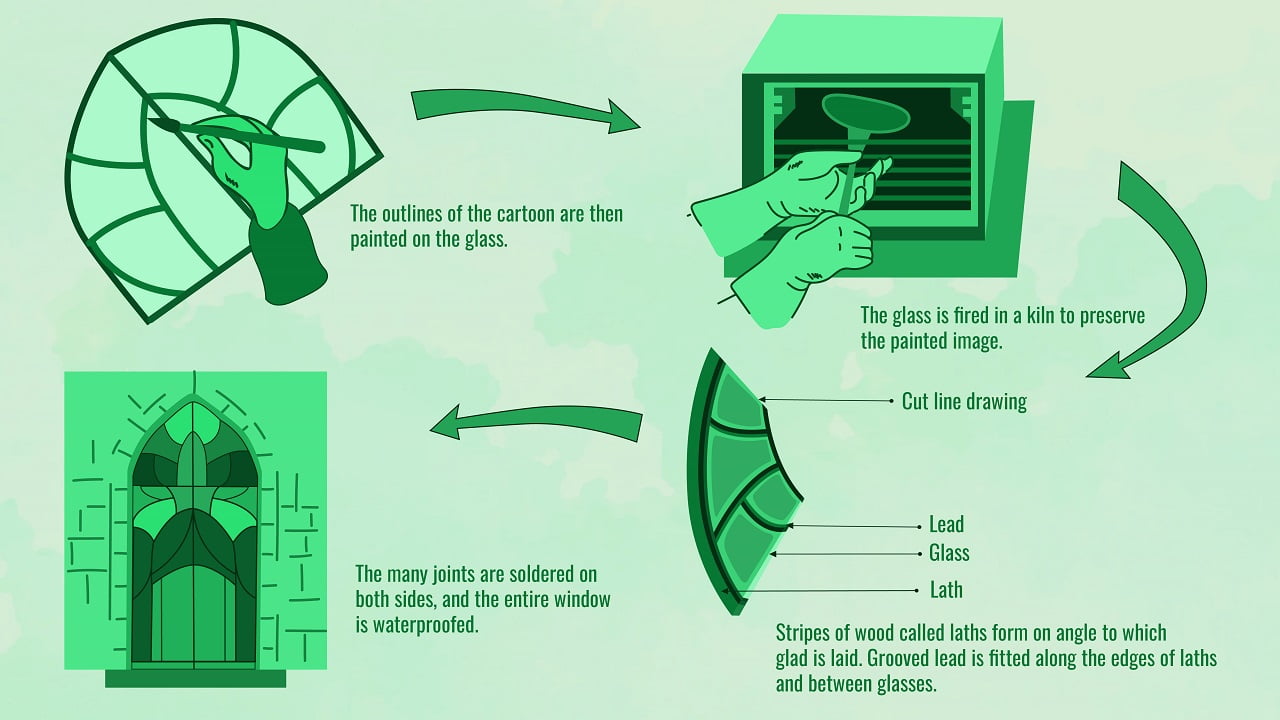
You can use vitreous paint to color the borders on stained glass pieces. This special paint melds into the glass when you heat it, and thus, it's scratch-free and lasts as long as your artwork.
Part A:
After fusing the paint on your glass, darken your room and hold each piece to the window. The afternoon is the best time to do this because ample natural light shines through the glass to help you imagine the final effect.
Sometimes, I find irregularities in the glass or realize I picked a slightly different hue than intended. Being a perfectionist, I redo these pieces until they pass the sunlight test. Also, if I need to bleach any portions of the glass after coloring, I use manganese.
Now that you have the perfect glass pieces, it's time to glaze them. First, place your cartoon on a hard surface. Then, fix wood borders along the outer edges of the drawing. These borders will hold your glass in place when you add them. Finally, insert narrow strips of copper foil into the joints between the glass pieces. Ensure that every junction between the glass pieces on your pane has copper foil separating the glass.
After this, solder the copper foil joints. First, apply a thin coating of flux. With a soldering iron providing the heat, melt a thin lead wire over the joints so the droplets fall in the gaps. This liquid solidifies, holding the joints together permanently. Keep going until all the joints in the stained glass window pane are soldered this way. Then, slowly flip it over to solder the other side.
After both sides are soldered, you should reinforce the exposed edge with a sturdy came. If you want, you can follow famous artists and use silver came, but lead is the most common. After fitting the came, do a series of tests with the stained glass project.
Part B:
First and foremost, hold it up to the window and check whether it fits perfectly into the wall borders. This is important because an uneven stained glass window is more likely to be damaged by wind or rain. Additionally, it will not properly insulate your room.
Therefore, if you find even an inch of a gap between your pane and the inner edges of the window, add extra metal droplets to that area to even it out. Conversely, if some parts of your pane are too tight, file them down until they fit. You can also hold the pane before a fan to ensure it doesn't make rattling noises. If the joints rattle, it means they need more soldering.
Finally, you need to waterproof the stained glass window pane to be functional during extensive cleaning processes or thunderstorms. Test your pane to see if any water gets through. If you see some leaks despite your sturdy soldering, coat all the joints with lead cement and test it again. If you have done it right, your stained glass window is now waterproof.
After you're confident that your stained glass is adequately durable and weather-resistant, you can install it in the window. Usually, you'll need one or two other people to help you if it's a large window. You can ask your friends, family, or fellow artists to help lift the pane and hold it still while securing it to the entire window.
Finally, add reinforcing bars to the borders to strengthen the window further - you shouldn't risk the safety of your design for anything. Now, you can enjoy the beautiful patterns in the window every day.

The popularity of stained glass has displayed steady growth over the last two decades. Restorations of old, ruined windows are common, and people are starting to appreciate the value of stained glass separate from its religious aspects. In the future, people can be expected to find more ways to incorporate stained glass into everyday decorations.
With increased automation and better technologies, stained glass manufacturing procedures have also received a boost. In the future, factories and studios will easily meet the rising demand for stained glass. Additionally, modern innovations can lead to better soundproofing properties in stained glass windows, as they become more important due to the ever-growing urban areas and background noise affecting buildings with such glass installations.
Furthermore, the Internet is making knowledge freely available worldwide on a scale never seen before. People from New York City no longer need to travel to Europe to learn medieval stained glass techniques – they can find a website detailing the manufacturing process within seconds of searching. The Stained Glass Association of America strives to spread these skills further.
Thus, artistic methods are now accessible to those who could not find them before. This will encourage more artists to dabble in glass art and find their new passion. As more artists explore the medium, there's potential for innovations in both aesthetic design and practical concerns, such as soundproofing capabilities.
Tip
While cutting, you need to pay attention to the colors. If you colored a particular piece blue in the cartoon, you must also take care to cut that shape out of blue glass. You can prevent mistakes in this area by coloring your pattern according to the cartoon before you start working with it.
It's redundant and takes time, but it will save you a lot of material and effort in the long run.
The art of stained glass dates back several millennia, but its most recognizable use is in chapel windows. Over time, this art form went through various ups and downs, with layered destruction and restorations undoing the other's effects.
However, today, stained glass artwork is gaining the recognition it deserves. This is boosted further by the Internet's knowledge base and aesthetic-oriented communities.
Interested artists today can follow my steps to make stained glass. These steps have been in practice since medieval times without significant changes. With time and effort, people can create their own home décor and stained glass window panes with stained glass. Others may pursue it professionally.
All forms of art have a rise and a fall. However, stained glass has stood the test of time, and people always return to it. I hope my explanation will help you start your stained glass journey.