Expertises: Art, Pastel, Brush, Drawing, Pencil
Updated on

Inspiring Ideas for Modern Home
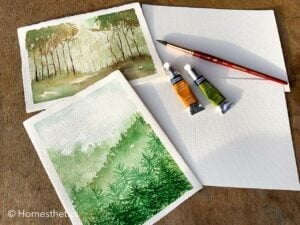
Creating soft, natural edges in watercolor painting takes practice and patience. By avoiding common mistakes and following these tips, you can improve your technique and create beautiful works of art that are sure to impress.

As the sun sets, you take a deep breath and dip your brush in the paint. You begin creating layers, but suddenly, a hard edge appears, interrupting the flow.
Frustration sets in as you try to fix it, only to make it worse. But using the right techniques can help turn those harsh lines into seamless blends of color.
In this article, I'll explore the common culprits behind hard edges in watercolor and help you find out how to fix them.
Achieving soft edges while painting with watercolors can be challenging. Often, the result of your work is hard and unattractive edges that leave your painting looking flat and lifeless. But what causes these hard edges? Here are some of the most common mistakes that lead to hard edges in watercolor painting:

If you start painting on a dry surface, your paint will not spread and blend as smoothly as it would on a wet surface. The dry surface will also cause your paint to dry too quickly, resulting in hard edges.
The painting process is all about creating magic on paper with watercolors. But if you start painting on a dry surface, it's like trying to light a fire with wet wood- it just won't work. Your watercolor paints need wet paper to work their magic, and a dry surface just won't cut it. So, make sure your watercolor paper is wet before you start your painting.
Applying too much water to your paper can cause your paint to spread too much and create hard edges when it dries. Watercolors require the perfect balance of water and paint to create beautiful soft edges. But applying too much water can ruin your painting. To avoid this, use less water and create an underlying wash of color or pigment.
When it comes to watercolor edges, the brush is your best friend. Using a dry brush can cause hard edges because the paint will not spread as easily as it would with a damp brush. And you will end up with hard lines that can be difficult to soften. So, make sure to gently brush your watercolor paints with a damp brush to create those beautiful soft edges.
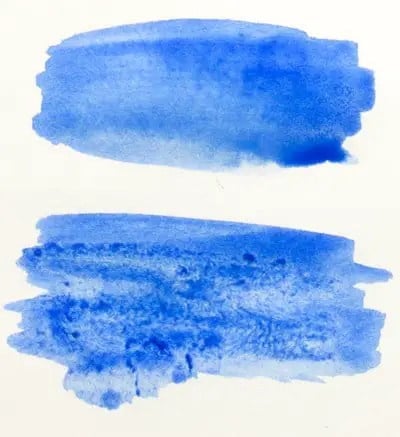
Watercolor paints are notorious for their unpredictable nature, and letting them dry unevenly can be a disaster. If you let your paint dry unevenly, it will create hard edges where the paint dries first.
Uneven drying will make your painting look grainy and unappealing. To avoid this, make sure to lay down your watercolor paints in layers, allowing each layer to dry completely before adding another. This will help to create an interesting texture and beautiful soft edges in your painting.
While hard edges in watercolor can be frustrating, there are several techniques you can use to fix them. Here are some advanced techniques to soften and blend hard edges in your watercolor paintings:
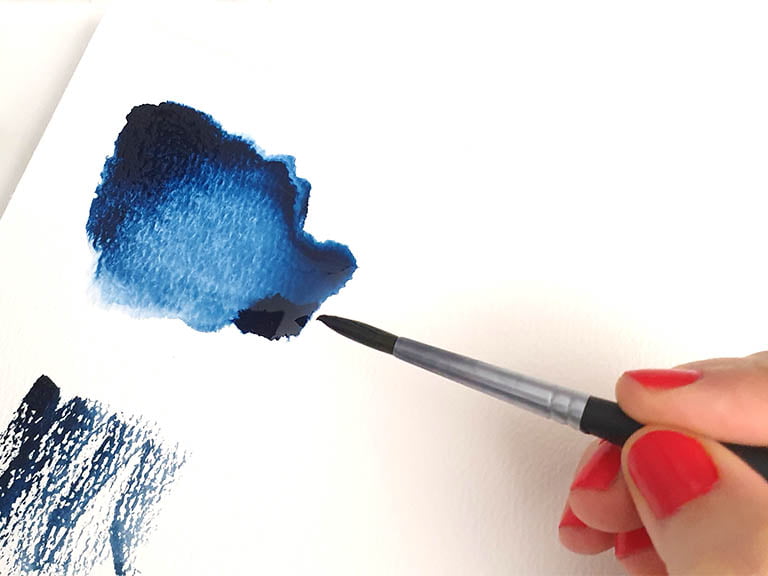
The wet-on-wet technique involves adding water to the area of the hard edge and then applying wet paint. The excess water on the surface of the paper helps to blend the colors, creating a soft edge. This technique requires a bit of control over the amount of water you use, as too much water can cause the paint to spread uncontrollably.
To use this technique, follow these steps:
The lifting technique involves removing paint from an area to create a soft edge. This technique is useful when the hard watercolor edge is caused by too much paint or water.
To use this technique, follow these steps:
The blending technique involves using a flat brush to blend the colors and create a soft edge. This technique is best used when the watercolor edge is caused by a difference in color or value.
To use this technique, follow these steps:
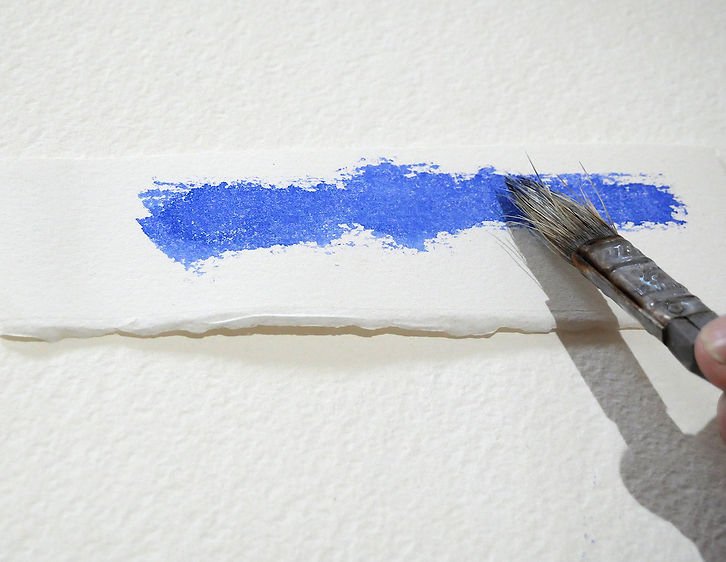
The dry brush technique involves using a brush with very little water and paints to create a rough texture and interesting effects. By gently brushing over the painted area with a dry brush, you can create an interesting texture and soften the edges of the painted area.
To use this technique, follow these steps:
Experiment with different paper weights and textures to find what works best for you. Heavier paper tends to handle water better and is less likely to buckle, while rougher paper can create an interesting texture in your paintings.
Use a light touch when painting. Pressing too hard with your brush can create hard edges and lead to overworking the paint. Instead, try using light, feathery strokes to build up color gradually.
Allow each layer of paint to dry completely before adding another. This can help you build up the color gradually and avoid overworking the paint, which can create hard edges.
Glazing involves applying thin layers of paint on top of each other to build up the color gradually. This technique can help you avoid hard edges by allowing you to control the intensity and saturation of each layer.
To avoid hard color edges, it's important to keep both your paint and your brush damp. Wet paint will blend more easily with other wet paint, while a damp brush will help to soften any hard lines that may start to form.
By tilting your paper at an angle, you can encourage the paint to flow naturally and create soft, blended transitions between colors. Experiment with different angles to find what works best for you.
Hard edges can make your watercolor paintings look stiff and unnatural. Avoiding hard edges and creating soft edges can give your painting a more organic and flowing appearance. To prevent hard edges from forming, start by painting on wet paper or applying an underlying wash. Use less water and layer your paint gradually, allowing each layer to dry before applying the next. Experienced watercolor artists also suggest using found edges or lost edges, which means allowing the paint to blend naturally and creating a soft transition between colors. You can try to soften the edge by re-wetting the area with clean water and blending the color. Or you can use a dry brush to remove excess paint and create texture. Some tools that can help prevent or fix hard edges in watercolor painting include a flat brush, clean water, and burnt umber, which can be used to create an underlying wash. A paper towel can also be used to lift excess paint. Yes, it is possible to intentionally create hard watercolor edges for artistic effect. Hard edges can be used to create contrast and emphasize the shape and form of an object. They can also be used to create a more graphic, stylized effect in your painting. Using hard edges in watercolor painting can create contrast and depth by emphasizing the shape and form of an object. By juxtaposing hard watercolor edges with soft edges, you can create a more dynamic and interesting painting. You can also use hard edges to create a focal point in your painting and draw the viewer’s eye to a specific area. Create a series of paintings focusing specifically on creating soft edges. Start by applying a wet underlying wash of color, then use a damp brush to blend the paint gently. You can also practice creating lost edges, where the edge of one painted area blends seamlessly into another. Experiment with different techniques, such as using a fan brush or spraying the paper with water, to see how they affect the final result. Yes, masking fluid can be a useful tool for areas of the paper that you want to remain white or unpainted, you can create a barrier that will prevent the paint from bleeding into those areas.FAQs Related To Hard Edges in Watercolor
Why should I try to avoid hard edges in my watercolor paintings?How do I prevent hard edges from forming in my watercolor paintings?Can I fix hard edges in my watercolor painting after they have already formed?Are there any tools or materials that can help me prevent or fix hard edges in painting?Is it possible to intentionally create hard watercolor edges in watercolor painting for artistic effect?How can I use hard edges in watercolor painting to create contrast and depth?How can I practice painting soft edges and avoiding hard edges in watercolor?Can I use masking fluid to prevent hard edges in my watercolor painting?
As we've seen, preventing hard edges is a fundamental skill that every artist should master. However, mastering this skill is just the first step.
It's easy to get lost in the technical details of painting, but it's important to remember the joy that comes with creating art. While mastering the basics of wet-on-wet technique, proper brush control, and paper selection can help prevent hard edges, it's also important to embrace your creativity and experiment with new techniques and materials.
Instead of viewing hard edges as a mistake or frustration, try incorporating them into your artwork intentionally. The beauty of watercolor painting lies in its fluidity and spontaneity, and by letting go of rigid expectations and embracing the joy of painting, you can create truly stunning works of art that inspire and captivate.
Remember to enjoy the process of painting and allow yourself to make mistakes and experiment. Every painting is a learning experience, and even the most seasoned artists still have room to grow and learn.