Expertises: Art, Pastel, Brush, Drawing, Pencil
Updated on

Inspiring Ideas for Modern Home
To get started with watercolor mixing, you need art supplies like paint, palette, brushes, and a cup of water. Then, using the concept of basic color theory, you can start mixing colors. Add a small amount of paint on the palette and blend with another shade using a brush. Avoid clumps while mixing.

It is impossible to find every color, tint, shade and tone that you want to paint your artwork. This is when you get to explore how the different colors blend together. You can mix watercolors to create unique shades and hues and give an extra magic touch to your painting.
In this article, we will be going through everything that you need to know about watercolor mixing. It includes a step-by-step guide to the technique and all the necessary tips that you need to follow. Let’s get started!

Watercolor mixing requires you to blend different color pigments to create a variety of shades and colors. However, you should keep a few materials prepared before you understand how to mix watercolors. Here are a few necessary art supplies that you need to get started with watercolor mixing:
It is no surprise that paint is the first and the most important material needed for watercolor mixing, or else what will you even mix? There is a huge variety of watercolors that you can pick from, and the choice should be made based on the kind of art that you will be creating and the paint that you are comfortable working with.
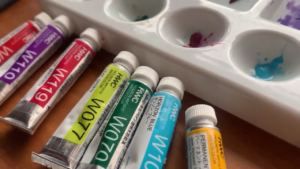
You can go for either pressed cakes, tubes or pans while choosing your ideal kind of watercolor paint. If you are looking for a set of watercolor paints that is ideal for mixing, then the former choice will be better for you.
However, if you want to paint that is convenient to use - go for the tubes. Likewise, you should make a smart decision while picking good quality paints to learn how to mix watercolors.
Water is another essential material required to try out the various watercolor mixing recipes. You should have clean water beside you at all times. It serves two main purposes - helping you achieve the desired watercolor consistency and ensuring that your brush is clean.
For instance, if you add more water to your paint brush or paper, you can create a lighter hue of the specific color. On the other hand, if you wish to keep the hues in your painting on the darker side, you can use less water to avoid diluting the paint.
And in either case, water should be used to clean your brush from time to time to avoid muddiness in your artwork.
Possessing a watercolor mixing palette makes the overall process of mixing watercolors a lot easier. It is an art tool that is shaped in the form of a shallow container and is made specifically to act as a base for all your paint-mixing requirements.
There are several kinds of palettes that you can go for. For instance, you can choose either a plastic, metal, or ceramic palette to mix watercolors.
You should buy a palette with different compartments to store a variety of pigments if you want to avoid mixing them. But for mixing purposes, going for a watercolor mixing palette that is made to mix colors is better.
The quality of your brushes can either make or break your painting. Since a cheap one with broken bristles can damage your artwork, it is strongly advised that you only invest in good quality brushes from reputed brands.
Flat brushes that lie in the size 8 to 10 range are ideal for large washes and background painting. On the other hand, a round brush is better for detailing and filling in colors. The latter option is considered an ideal type of brush for watercolor mixing too.
Grasping the understanding of which color suits what shade may seem difficult to a beginner artist, but is a fairly easy concept. All you need to know is the basics of color theory, and you are good to understand how to mix watercolors!
Color theory helps us understand how different colors interact with each other, and how they are perceived by the human eye. To get a clearer idea of this concept, we need to go through its four vital components:
There are three primary colors - red, blue, and yellow. A common similarity between the three pigments is that none of them can be created by mixing two or more different shades. These are the “mother” pigments of the traditional color wheel since all the other shades on it are created by mixing these three colors.
When we mix two primary colors, we create a secondary color. There are mainly three kinds of secondary colors - orange (created by mixing primary colors red and yellow), purple or violet color (created by mixing primary colors red and blue), and green (created by mixing primary colors yellow and ultramarine blue).
However, there are more secondary colors that you can create and paint with. For instance, take the example of the shade scarlet. It is formed using the colors red and orange. Even though orange is a secondary color in itself, it is created using red and yellow pigments. As a result, when we mix both orange and red - we get a color that falls under the category of secondary colors (since the red in orange overlaps with the red being mixed).
Mixing primary and secondary colors results in the creation of tertiary colors. Both secondary and tertiary colors are made from primary colors, but there is a subtle difference between the two of them.
Since there is one shade contributed by a primary color and two shades contributed by secondary colors, a tertiary color is a combination of three shades. Whereas, secondary colors are a combination of two shades only.
There are six kinds of tertiary colors: red-orange, yellow-orange, blue-green, blue-violet, yellow-green, blue-violet, and red-violet. Artists use such shades to create a harmonious color scheme in their paintings.
The colors on the color wheel and a watercolor mixing chart are not placed arbitrarily. Their position is very calculated, such that the color combinations placed opposite to each other are considered to be complementary colors. Understanding this concept can assist you in experimenting with how to mix watercolors.
As the name suggests, complementary colors go well with each other. They produce a strong contrast when used together, and can be used to give off a suitable vibe from your artwork. A few examples of complementary colors are blue and orange, red and green, etc.
Tip
You can go through a tutorial to understand how the concepts of color theory work on various platforms such as YouTube, SkillShare, and so on.
Watercolor mixing recipes may seem like a frustrating skill to master, but it is quite achievable if you are ready to put in a decent amount of practice. To make your work easier, here is a step-by-step guide on how to mix watercolors to create your desired shades:
The first step to watercolor mixing is to start with a clean watercolor mixing palette. If your base is dirty, the pigments that you mix on it can get contaminated and muddy. As a result, the colors won’t mix as effectively as you want them to.
Hence, it is always advised to wash away any residue of paint colors from your palette before you start painting any new artwork. In case you are using a fresh palette, you should not use it directly. Wash it thoroughly with water first.
Lift a small amount of pigment that you want to mix from your set of watercolors using a clean brush and place it on your watercolor mixing palette well. Start adding a few drops of water to this compartment, and then add more as per your requirements.
For instance, if you want your first color to have a lighter hue, you can add more water until you reach the desired level of dilution.
Next, take a brush and dip it in the pigment that you wish to mix the first color with. You can add a few drops of water if you think that the consistency of the paint is too dense for your liking.
Tip
An important thing to note here is that it is easy to mess up the watercolor composition by adding too much of one color while mixing two colors. Hence, be careful not to add an excess amount of either color.
Using the same brush through which you picked up your second pigment, start mixing the two watercolors. This step is extremely crucial because you need to ensure that there are no clumps or streaks in the paint and that the final shade that you create is as smooth as possible.
There are a variety of ways through which you can mix colors. For instance, you can move your brush back and forth on the paint mixture or use your brush in a circular motion for better mixing.
Since watercolors give off a lighter hue when they dry, trusting the pigment when wet is not the best decision. Hence, once you are done mixing the watercolors, you should always test the final color on scrap paper.
To do so, simply dip the brush in your newly created shade and stroke it across a clean scrap paper. Examine the color of your paint once it dries out. It will give you a more accurate idea of what the shade of your new watercolor pigment is.
The secret to getting the perfect watercolor through the process of mixing paints is following a series of trials and errors. Hence, it is okay if you don’t achieve your desired shade of color on your first try.
Once you take note of the color on the scrap paper, understand what the pigment is lacking and then make suitable amends. For instance, if the hue of the paint looks too dark you may add a little water to it. You can also add more watercolor paints to adjust the tone of your created pigment.
You might feel the urge to use a lot of colors at once when you learn how to mix watercolors, but you should stick to a limited color palette for better results. This is especially important if you have just begun practicing this technique.
Mixing too many colors can complicate the process of painting cohesive artwork. Hence, you should start by sticking with the OG primary colors - red, blue, and yellow. You can also use some warm neutral colors like burnt Sienna and Raw Umber, or go for cooler tones like Grey. It is fascinating how many colors you can create even with such limited palettes!
Good quality art supplies are not cheap at all - and watercolors are no exception. Hence, if you use an excess of them while following watercolor mixing recipes, and the whole process goes against your liking - you will just end up wasting a large chunk of expensive watercolor paint.
That’s why you should always mix colors in small amounts. This way, you can prevent the wastage of mixed paint even if you are unsatisfied with the final outcome, since there won't be any surplus paint left over to discard.
The key to creating beautiful artwork is not being afraid of experimenting. Hence, don’t shy away from working with different ratios of watercolor paint and water, as it can help you create a variety of effects and textures.
For instance, you can lower the ratio of water used while mixing the watercolors to create a more concentrated paint effect. If you want to use watercolor painting techniques such as wet on wet or wet on dry, you will need to change the consistency of your newly created pigment by varying the amount of water used to dilute it. This will also help you fix hard edges in your watercolor transitions.
Dark palettes can make pigments appear a bit different from their actual shade of color. Hence, it is important to use light color palettes for a better understanding of the pigments being created.
Additionally, most people like to paint on a blank white canvas. Using a light palette to mix colors in this case is a good decision, since you will be able to be more accurate with the color shade creation.
You should always use clean brushes before you paint and mix watercolors. If you don’t wash your brushes routinely, there is a high chance that the previously used watercolor paint will build up on the bristles. As a result, the process can get difficult, since the residue colors will mix with them too.
It is very easy to clean painted brushes. All you need to do is rinse them with clean water and then dry the bristles using clean paper. Repeat this cycle of cleaning every time you need to dip the brush into a new color.
If you want to add a sense of vibrancy and colorfulness to your paintings, it is best to experiment with the concept of complementary paint combinations while trying out the watercolor mixing recipes. Mixing the shades that lie opposite to each other on the color wheel can help you create interesting color combinations and hues.
The concept of complementary color combinations can also be beneficial while watercolor mixing if you need to balance out intense tones like warm colors. For example, if you feel that the color that you have created is an extremely bright yellow shade, you can add a hint of purple to tone it down.
The best way to clean your watercolor palette is to scrape off the residue paint from its surface first using a paper towel. Next, wash the palette using clean water. You can also use a sponge for the same. To effectively clean your brushes, you should first remove the excess paint from their bristles using scrap paper. Next, rinse them with clean water. You can also use cleansers such as soap if needed. If you want to mix your colors in a way that stays consistent throughout your watercolor painting, it is best to keep the ratio of each color used in mind. . Additionally, you should paint the whole landscape or portrait painting in the same lighting. If you keep changing the light under which you paint, there are chances that the shades of color in your art might end up becoming inconsistent. Yes, you can try mixing different brands of watercolor paints. However, you should keep in mind that the color shades may vary from one brand to the other. So, make sure you test out the colors before you mix the watercolors of two different companies. You should always work with small amounts of paint while mixing watercolors and use complementary colors to neutralize the tones of your pigments. Furthermore, use light palettes and always clean your brushes regularly to avoid your art supplies from hampering the quality of art that you create. It is also strongly advised that you invest in good quality paper, paints, and brushes. It is best if you sketch out your drawing using a pencil first, map out the regions where you want the contrasting effects of the complementary colors, and then go ahead with the painting. This will allow you to understand if you need to add more pigments or water to your paint mixture to achieve your desired color and consistency. You can mix watercolors to create many textures or patterns in your painting. For instance, you can use dry brushing to create rough textures like streaks. To create interesting patterns, you can mix watercolors and then dip your wet brush in them. You can even do a flicking motion using the brush on your canvas to create a splattering effect. How To Mix Watercolors FAQs
What is the best way to clean my watercolor palette and brushes after mixing?How can I make sure the colors I mix are consistent throughout my painting?Can I mix different brands of watercolor paints together?What are some tips for mixing complementary colors?How can I mix watercolors to create textures or patterns in my painting?
While many people opt for oil painting and invest in acrylic paint sets, the tradition of watercolor painting is not expected to die out anytime soon. More and more artists are exploring the art of using watercolors in their artworks, and so can you! In this article, we went through a step-by-step guide on learning how to mix watercolors easily.
Other relevant things that we discussed above are the materials that you need to go about this technique and the concept of color theory and complementary colors. Now that we are nearing the end of this article, it is important to note that when it comes to mixing watercolors - experimenting your way through is the best way to go about it.
Try out different techniques and colors, and see what works best for you!