Expertises: Paint, Home improvement, Wood, Car, Painting
Updated on

Inspiring Ideas for Modern Home
The best way to protect your wooden surface is to apply a coating of polyurethane.

Many people like to add a layer of polyurethane to their floors and admire its shiny glossy look. How does that help the floor, you ask? Polyurethane is a water and chemical-resistant product and forms a strong protective layer, preventing any damage to your hardwood floor and furniture.
If you are looking to apply polyurethane to wooden items but have no idea how to proceed, you’ve reached the right place. No need to look any further for queries regarding polyurethane types, coating, drying, and application. We’ve got you covered in this comprehensive guide.
Let’s find out all the aspects related to polyurethane, beginning with its types.
So, what is polyurethane, and why do people use it for coating surfaces in the first place? Polyurethane is essentially a type of varnish which is applied over wood to make it sturdier and maintain the outer layer. Adding a few layers of polyurethane makes the surface waterproof, heat, and scratch-resistant.
Along with its protective properties, it is shiny and smooth to look at, which improves the beauty of your wooden furniture. If you plan to add a finishing layer at home, applying a coat of polyurethane makes the most sense. Even though there are a few essential methods you should learn about, it is by far the easiest product for DIYers to work with.
Although we think of polyurethane as oil-based, that is not always the case. There are two types of coatings- water-based and oil-based; and their different properties are something that would be useful to know.
Oil-based polyurethane is the more common type of coating used for furnishings. The substance is created by adding polyurethane resin to varnish, which gives it its resistant properties after curing. Also, it has been around for much longer than water-based polyurethane.
Compared to other finishes and varnishes, these have a thicker and oilier consistency. But of course, this depends on the number of coats you choose to add. After application, it leaves an amber-colored hue which adds warmth to woods with lighter shades. These coatings can also be easily cleaned using mineral spirits.
Using this type of polyurethane comes with its pros and cons. While you get a super strong finish that looks beautiful, these dry slower. As a general rule, oil-based paints or varnishes take longer to dry than water-based ones.
And, if you add three or more coats, the process can take you much longer to complete. Also, these contain high levels of VOCs, which is why some people prefer water-based coatings nowadays.
A more environment-friendly option for your surfaces is water-based polyurethane. These are a safer option because of a lower amount of VOCs, which is why people switch from oil-based polyurethane to water-based ones.
Also, if you do not want to wait around for every layer to dry, the water-based polyurethane would be better suited to your needs. It levels easily and dries quickly, allowing you to complete the floor or table varnish in a few days instead of weeks.
Furthermore, you can apply more coats since it dries off quickly. However, even though some aspects of this type of polyurethane coating are great, it has a few drawbacks. For example, the final finish is not as durable as oil-based ones, and it may get damaged by water.
Also, the application of water-based polyurethane raises the wood grain; thus, a few extra layers will be essential to get a smooth finish. And since the consistency is rather thin, you’ll require more layers of coating to get a final glossy finish.
The number of coats you apply will alter the appearance of the surface and also change the strength of the wood. But how will you know if one, two, or three coats are ideal? One thing is for sure- if the underlying wood has to be adequately protected, multiple layers are necessary.
Another general rule is that water-based polyurethane coats will require more layers than oil-based varnish. But, ultimately, the number of coats will be determined by the surface type, how frequently the surface is used, and the level of protection required.
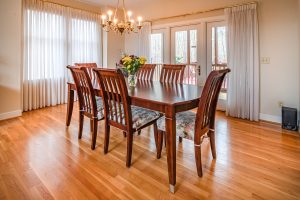
When it comes to deciding the number of polyurethane coats for hardwood floors, the first thing to consider is the type of varnish. As mentioned before, water-based and oil-based varnishes are very different and will need a different number of coats. But it is also essential to consider the condition of the wooden floor and how often the floor is in use.
If you are applying water-based polyurethane on the floors, at least three thin coats are a must. Because the varnish is thin, note that it will raise the grain of the floor. Three coats should be enough for forming a protective layer, but if you want to go the extra mile, you could add a fourth layer.
It’s recommended to add the layers and buff the uneven parts so that the end result is a smooth and almost reflective floor. If you select an oil-based polyurethane, you could opt for two coats on the hardwood floor. A new and well-maintained surface should not need more than two layers, one for sealing and the second for finishing.
Hardwood floors that need a fresh look after many years of use might need a third coat; however, this is not necessary. Now, for those of you who are confused between selecting water-based and oil-based products, we recommend water-based polyurethane for hardwood floors.
This is because water-based varnishes are much more manageable and can be covered with a new coat if the existing one is messed up. But oil-based varnish can chip, peel and form dents if not handled with care and might ruin the final look of the floor.
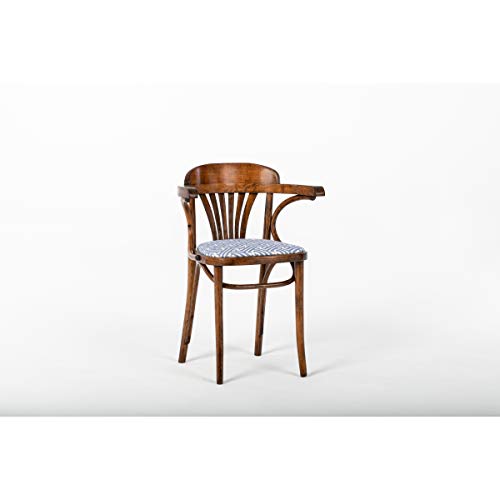
If you are looking to apply a layer of polyurethane on wooden tables or chairs, there are a few things you should consider. You already know that oil-based and water-based varnishes will have different drying times, but there’s another factor to look into.
When an oil-based varnish is applied, it dries off to become a rich amber-hued color which transforms the furniture giving it overall warm tones. Water-based varnish doesn’t have any color of its own and merely provides a smooth sheen, retaining the color of the table underneath.
Here the decision lies with you to choose based on color differences. The warm hues make wooden tables look richer and beautiful, but it is possible that the shade might not match your room or house decor. If the extra warmth adds interest to your room, the oil-based varnish is a great option. But if you’d rather not hide the natural color of surfaces, the water-based varnish is better.
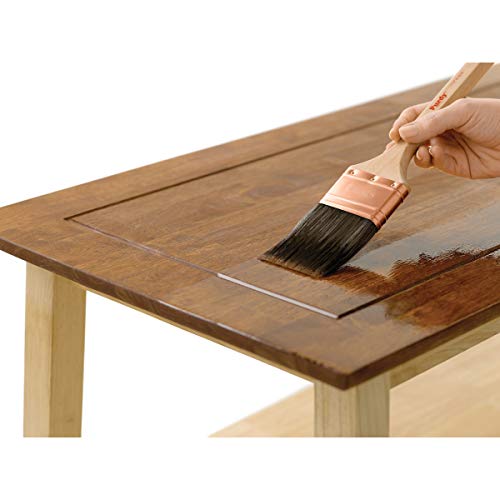
There are several ways to apply a polyurethane finish. You can choose to brush it on, spray all over the surface or wipe it into the wood. If the varnish is applied using a brush, there are chances of the brush strokes remaining on the surface, giving an uneven look. This is why many DIYers prefer to spray the varnish on, which is similar to spraying paint on walls.
Spraying is the best method, especially if the surface is not flat. And while it’s easier this way, you get thin layers of varnish; thus, 5 or 6 coats are required. While spraying, it is crucial to work with a steady hand to prevent any drips and spills.
If you hold the spray in one place for a long time, the liquid polyurethane will drip and need immediate cleaning. One drawback of spray painting is the release of harmful fumes, which might not suit people with sensitive skin. If you plan on applying the varnish on a flat surface like the wooden floor or table, using brushes would be the best option.
Applying polyurethane to surfaces is not a difficult task if you follow the correct method. If you are beginning the coating process, going through this section will help get a beautiful finish for your floor effortlessly.
Before working with polyurethane, the first thing to check is the area and location of the application. Is it a spacious room or a small basement? How well-lit is the room, and does it have windows for ventilation? These questions are imperative for safety reasons and will also affect the drying time of the varnish.
Since most varnishes, mainly oil-based ones, emit VOCs, it is necessary to have good ventilation in the room. To improve ventilation, leave the windows and doors open for fresh air to pass through.
For safety reasons, make sure to wear protective gear while applying polyurethane. Prepare for clear safety goggles, gloves, and a respiratory mask to protect against VOCs and fumes arising from the varnish. Lastly, ensure the work area is well lit with ample sunlight or artificial light. If the light is dim, it will not be possible to spot minor imperfections and brush marks.
The surface must be well-prepped before applying any varnish. Clear out the room/ area to remove any obstacles for a continuous spray or paint job. If objects or wall decorations are not removed, they may get damaged by the spray or the volatile fumes. Thus remove the room of all wall paintings and light bulbs.
Now that other objects are out of the way, you can focus on the actual area of work- the hardwood floor. The first step is to sand the floor with coarse sandpaper thoroughly. This needs to be done all over the floor at least once. Unfortunately, there is no easy way out of this step, and the results do not look good if this step is skipped.
After the coarse sandpaper, gently rub the surface with finer sandpaper until it is smooth and even to touch. Clear up the dust and bits of wood using a regular vacuum cleaner and wipe the area till it is clear of any remaining dust.
Some people like to mop the floor with a slightly damp cloth, but this is not recommended because the floor will take time to dry. Besides, if some moisture remains in the floor and the varnish is applied on top, there are chances of the wood rotting from within.
This is especially true for oil-based varnishes because they are completely water-resistant and will trap the water with no way to get out and evaporate. But there is no need for concern while using water-based polyurethane. In fact, wetting the surface beforehand will raise the grain of the surface, which can then be sanded down to perfection.
In any case, the floor must be clear of dirt and moisture; otherwise, the polyurethane might not stick properly to the wooden panels.
Now, the first layer of polyurethane can be applied to the clean hardwood floor. The first layer is called the sealant because it acts as a barrier between the wood and the following layers of varnish. This layer is always thinner than the rest and can be achieved by thinning the product you’ve already bought for varnishing.
Wood is usually porous, and direct application of thick polyurethane can form bubbles. A sealant covers up the pores on the wood and prevents bubble formation. There are special sealants available on the market which are meant to be applied on their own; however, they are expensive.
And, the same task can be accomplished by creating your own sealant layer, so buying an additional sealant product is not necessary. So how do you make polyurethane sealant? It’s simple, mix two parts of the oil-based product with one part of mineral spirits. Mix it well to get a fluid consistency that flows and spreads easily.
If you are using water-based polyurethane, use the same ratio, but replace the alcohol with pure water. Now that the mixture is ready use a large brush to apply the sealant on the floor using long brush strokes. Try to cover the entire floor without drips.
A good tool for this is a natural bristle brush which leaves fewer brush marks and gives a smoother finish than synthetic brushes. In some cases, the sealant will not adhere to the wood because the stain might be oil-based.
An oil-based sealant shouldn’t have this problem, but a water-based one will need extra preparation. To roughen the floor, you can use steel wool instead of sandpaper to help the varnish bond better.
Technically, the sealant is the first layer that goes on the floor, but the first viscous layer is called the first coat. After the sealant is applied, wait for 24 hours before adding this first coat of polyurethane. After 24 hours or so, the sealant should be dried entirely if the room has access to fresh air.
This is when you can go ahead and apply the first coat. Remember not to create very thin layers with this first coat because this will cause gaps in random places. If you are spraying on this layer, the layers might be slightly thin so take your time to cover each section sufficiently.
And if you prefer using a brush, try to connect the brush strokes and allow them to overlap. This will prevent streaky lines after the brush is lifted. Also, try to smoothen the drips and spills as you go along the floor instead of waiting till the end to fix them.
Depending on the polyurethane base, you will have to follow different steps to complete the remaining steps.
For oil-based polyurethane, the best tools for application are foam rollers or brushes, natural bristle brushes, or soft bristle brushes. Stay away from rough or synthetic brushes, which often leave streaks and do not allow the polyurethane to settle evenly.
Firstly, dip the foam roller or brush in the polyurethane can or tin and remove it, allowing the excess to drip into the can. Do not wipe the brush against the side of the can to remove bubbles or extra product. Doing so will leave gaps on the hardwood floor while applying.
Instead, tap the brush a few times into the center of the tin. Remember that oil-based polyurethane coats are typically thicker, and trying to force them into thinner layers will not give the much sought-after smooth finish.
The number of coats required will vary depending on the purpose and floor type. But two or three coat applications are the norm. Sanding is another step that you cannot miss out on when applying oil-based polyurethane.
The first thing you should know is that this type of varnish is much thinner, so there are more chances of dripping and spilling. The best tool for water-based polyurethane would be a foam roller, but you can also use a soft brush or cloth brush. The application method is slightly different from oil-based varnish.
Make sure you apply thin coats of this varnish because heavy layers of moisture-laden product can raise the wood grain. With oil-based coats, it is essential to sand down the first layer, but this is not required when working with water-based polyurethane. For best results, three coats of this varnish should suffice in lesser-used areas of the floor.
If the floor is in constant use, upto four layers would be required. Since the drying time is much faster, the entire project will take a shorter time as compared to oil-based polyurethane.

After the sealant and first coat application, the hardwood floor needs a round of sanding to polish the uneven parts left by the first coat. But the sanding process can only begin after 24 hours have passed after the varnish application. The layer should be dry by this time.
Begin sanding with fine-grit sandpaper using the wet sanding technique until the surface is smooth again. To protect the varnish from chipping off, dip the sandpaper in water often while sanding. Finish by wiping the whole surface with a wet cloth and remove any dust and chipped-off pieces. The surface must be completely dry before applying the next coat of polyurethane.
Generally speaking, you can apply more layers of polyurethane than recommended if you think the floor or furniture needs it. But remember to apply the next layer only when the previous one has completely dried up. Also, do not skip on sanding between two layers, especially when using oil-based varnish.
The only case where you can avoid this step is when the layers look visibly smoother and even. Lastly, the final coat needs to be polished, not sanded. This last step will give the surface the shiny polish that polyurethane coatings are known for.
Sanding the coatings makes them adhere to the next layer and flattens and levels them. But the final layer should be polished to give a shiny and almost slippery look to them. After the previous layer of varnishing, the surface should be left alone, untouched for at least 48 hours.
Use a good quality polishing product that is suitable for applying over polyurethane. It’s better to select a polishing product with fine-grit particles that remove the scratches caused by sandpaper. Dampen a soft cloth, apply some polishing cream over it, and rub the floor in a circular motion.
This should give a smooth and shiny look all over the surface. After the floor has dried, buff it with a dry cloth to finish the process. If the surface appears cloudy, repeat the process until it turns transparent and mirror-like.
While most of the instruction will remain the same as finishing hardwood floors, there are some other things to mention. First of all, try to work indoors as much as possible. Unlike floor varnishing, tables can be moved around the house, and some people like to work in the backyard.
But the problem with varnishing outdoors is that there is increased exposure to dust, smoke, and other contaminants. Even small bugs can stick to the wet varnishing and ruin the finish. That’s why working indoors in a ventilated place like a garage would be better for varnishing furniture.
The best results are achieved on a perfectly flat surface. So, if the table is uneven, you can sand it down using prickly sandpaper. The flatter the surface, the better is the leveling, and the coats glide easily without dripping.
Freshly varnished furniture can be stored in the garage or an empty room where no one is likely to touch it. But what about floors? How long before you can actually walk on them? To understand the time required, remember that after drying, the varnish needs a long time to cure. Only then can we say that the entire process is complete.
However, you must have heard that complete curing of wood can take weeks or even a month. The question is- At what time is it safe to walk across the floor and start placing heavy furniture without spoiling the varnish? Let’s find out about both the stages - drying and curing.
Usually, it takes a minimum of 24 hours for the hardwood floor to dry. At this point, the uppermost layer has hardened, but the layers within are still processing. So, this floor cannot be used for walking and standing and definitely not for dragging furniture across the floor.
It is advisable to keep the room ventilated, so you keep the windows and door open. But if you have small children or pets who might suddenly run into this room, it is better to lock the door. In fact, no one should be allowed to walk on the hardwood floor for at least 48 hours after the varnish.
After 48 hours, you can walk on the floor wearing a pair of soft socks but refrain from moving in furniture just yet. If you walk in wearing shoes or boots or even barefoot, the pressure might leave marks that can not be removed once formed.
Curing is the process of molecules of polyurethane resin forming irreversible bonds and becoming extremely tough and resistant to change. Curing takes a much longer time than drying; until then, the bonds are not completely hard enough for everyday use.
On average, water-based polyurethane varnish takes two weeks to cure, while oil-based one takes 3 to 4 weeks to cure the same number of coats. Walking on the floor before the curing is complete is a big no-no. The best thing to do is lock the room or avoid it for the entire curing time.
As we mentioned, walking with soft socks should be tolerable for a week-old varnished floor. But walking with boots should be allowed only after the curing time is complete. The same goes for moving in cupboards, tables, and all other heavy furniture.
Working with oil-based polyurethane is a bit tricky. Not only does it take twice as long to cure, but it also dries in two stages instead of just one like the water-based one. In the first step, the light and water-soluble thinners evaporate in the air and leave a tack-free surface behind.
Over the next couple of weeks, the oils in the varnish react with the oxygen in the air and help it harden with time. After all the oil molecules have reacted, a hard protective layer is formed, which is the final stage of the curing process. Note that environmental factors play a role in the speed of curing time.
If the room is moist and humid, the varnish will take much longer to dry and cure. One easy way to know that the curing is complete is when the floor stops emitting odor. As long as you can smell the fumes, the curing process is not yet complete.
Usually, fine-grit sandpaper should be good enough for sanding after each layer. Dip the sandpaper in water after each scrub so that the polyurethane doesn’t get damaged. When you are done with one layer, make sure the surface is dry before applying the next layer.
The grit of the sandpaper might need to be increased if the wood has a glossy finish. This is because it is difficult for polyurethane to adhere to glossy wooden panels. So, some extra sanding might be necessary before applying the first layer.
On average, it was found that polyurethane dries best at 77 degrees Fahrenheit. This is approximate and is not the only factor for drying. The room ventilation and humidity have an impact on drying time too. A room temperature of 77 degrees Fahrenheit and humidity of around 50 % are ideal for drying polyurethane coatings.
Brush marks can be removed by the wet sanding method mentioned in the Stepwise guide. Use fine dry sandpaper and rub on only the parts which need to be leveled out. If the sanding is too intense, it will leave scratch marks of its own. Brush marks could result from applying thick coats, so you could opt for thinner coats to prevent them.
Bubbles on the topmost layer can be removed with the help of mineral spirits. Dip a cloth with the chemical and rub the surface for about 20 minutes. This should get rid of the bubbles on the topmost layer. If this doesn’t work, the layer will need to be sanded and revarnished instead.
Here we come to the end of our all-inclusive guide about polyurethane coatings. When using polyurethane, the main thing to remember is that even two coats protect the wood against water, dust, and insects. But getting a beautiful mirror-like sheen requires more than two coats, whether it be water-based or oil-based.
Finally, if you are looking to prevent wooden floor panels or furniture from spoiling due to humidity, oil-based polyurethane is your best bet. But, if you require a quick freshening up of older wood, water-based polyurethane should do the trick.
We hope this guide answers your queries related to polyurethane coatings and their application. For further questions, please ask away in the comments below.
Until next time, bye!
Relative Articles
8 Best Wood Lacquer [Reviews & Buyer’s Guide]
9 Best Paint Brush For Polyurethane
11 Best Polyurethane Protective Coatings
Water-Based vs. Oil-Based Polyurethane Floor Finish Today