Expertises: Art, Pastel, Brush, Drawing, Pencil
Updated on

Inspiring Ideas for Modern Home
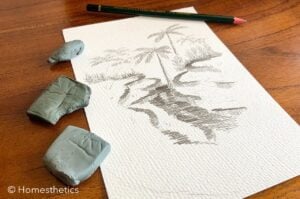
You can use a kneaded eraser by molding it into a shape that suits your needs and then lightly dabbing it over the required area. A kneaded eraser can be used to lighten certain sections of your artwork. It is also used for blending, creating textures, and enhancing highlights. Make sure to clean it first for the best results.

Erasers are an artist’s best friend. They help rectify the mistakes that might degrade the quality of your artwork. However, what if such tools did more than simply erasing the flaws of your art piece?
A kneading eraser is a versatile tool that can help you create and erase a variety of elements in your artwork. It can also assist you in carrying out several drawing techniques, and it is available in most art supply stores.
But how can an eraser establish all these tasks? And even if it does, how can you use it as a beginner? In this article, I will be taking you through the answers to such questions. Let’s begin!
The primary function of a kneaded eraser is to assist you in erasing small and precise details of your sketches. However, you should keep a few things in mind before you start using this drawing tool, such as:
When it comes to purchasing any art supply, quality should be a determining factor. Hence, while buying a new kneaded eraser you should ensure that it is soft and does not leave residue of eraser bits behind after application.
Depending on the size of your sketch, you might need different sizes of kneaded erasers. You should also ensure that eraser size is comfortable for you to hold.
To ensure that your putty eraser is working to its full potential, you should always clean it before application. To do so, knead your eraser until it becomes softer. Next, rub it on a clean surface. This will remove any form of dirty buildup on the eraser.
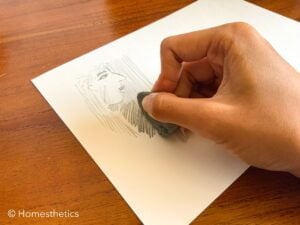
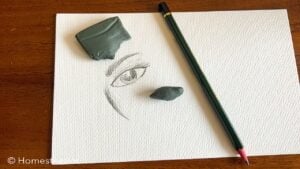
The next step in the preparation of kneaded erasers is shaping them. Since such erasers are softer and pliable, you will be able to mold them in a pointy shape to erase precise elements of your artwork.
The best way to get started with a kneadable eraser is to practice the basic techniques of its application. Here are four such techniques that you can consider trying out:
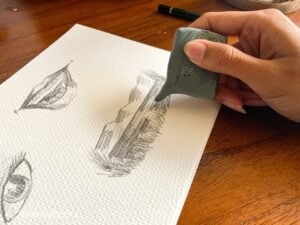
Sometimes, we end up shading certain sections darker than they should ideally be. To deal with this, take a kneaded eraser ball and press it gently on the area of graphite or charcoal that you wish to lift. Then, lift the eraser off the paper. You can repeat this process multiple times until the intensity of color is absorbed and you’re happy with the shade on your sketch.

A kneadable eraser makes the process of making transitions in charcoal and graphite sketches easier. All you need to do is use techniques like feathering or smudging to create a blended effect between two shades.
Tip
Make sure to not overblend.
It is strongly advised that you only press the eraser lightly and use small circular motions to achieve any specific effects.
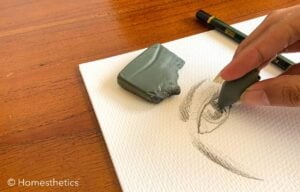
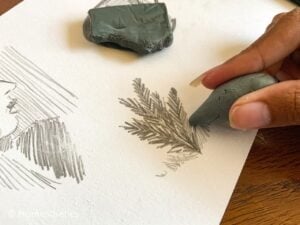
You can also create textures by dabbing the eraser gently on the required section of your sketch. For instance, you can dab on a specific region of your artwork to create a stippled effect. You may also create a layered texture by applying and then erasing a layer of mediums, such as graphite or charcoal in various sections of your art piece.
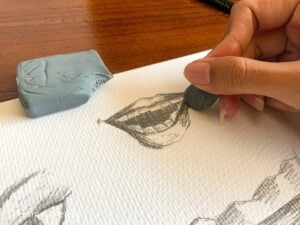
To create highlights using a kneaded eraser, mold it in such a way that it has a pointy end. Press this pointy end on the section of your sketch where you wish to create highlights gently.
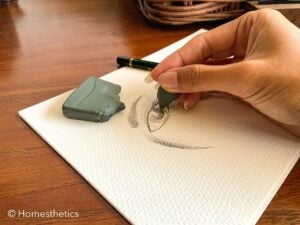
A kneadable eraser can help you create and enhance fine details in your artwork easily. All you need to do is warm up and shape the eraser in a pointy or sharply-edged form. Then, using a dabbing motion, you can gently lighten certain sections to intensify the details.
Mold the kneaded eraser in a way that it has a sharp edge. Trace the edges of your artwork using this eraser to create sharp lines in your sketch.
There is a variety of erasing tools on the market, and you should never shy away from experimenting with them all! To step up the level of your erasing game, you can consider combining a kneadable eraser with other materials, such as electric erasers. This would help you create a spectrum of erasing effects.
Depth and dimensions can make or break your artwork. Using a kneaded eraser, dab on the specific regions of your sketch that need highlights.
Then, you can add a layer of graphite over them to create a wide range of values in your art piece. You can also learn how to use watercolor pencils to create colorful lights and shadows using this technique.
The versatile nature, flexible surface, ductility of a kneaded eraser together make it a very useful art tool. You can use it to create various types of effects and textures by combining a few basic techniques, such as blending and highlighting.
You can use kneaded erasers to create bold and bright highlights. To do so, you should mold your kneadable eraser into a pointy shape. Using its pointy tip, dab on the region you wish to create highlights until its brightness levels suit your needs. You can then blend out the lines around this section to create a more blended look.
One of the biggest advantages of using a kneaded eraser over other types of erasers is that it can be molded to fit your needs better. For instance, if you need to erase a certain small section of your artwork – you can easily mold the kneaded eraser into a smaller and pointed shape to erase it precisely. Another benefit of using a kneaded eraser includes its ability to help you create highlights. All you need to do is dab the pointy end of your new eraser over the region you wish to create highlights on. It can also help you create sharp edges. Overall, the versatility of a kneaded eraser makes it a much better tool than its alternatives like plastic erasers. The best way to prepare a kneaded eraser for use is to start by cleaning it. Once you remove all the dirt and buildup from it, the eraser will work much more efficiently. Next, shape it in such a way that you can easily rub off your mistakes as precisely as possible. Kneaded erasers can work with any type of media, be it chalk, charcoal, or graphite. You can also use these erasers with drawing materials, such as watercolor pencils and pastel colors from brands like Prismacolor and Faber-Castell. To erase pencil marks using a kneaded eraser, take a small portion of your eraser and knead it until you soften it. Then, gently dab the eraser over the marks that you need to erase. Another good way of going about this process would be to roll it very gently on the pencil marks to erase them. If you rub the kneaded eraser too roughly on your paper, it might damage your sketch by tearing the paper. The best way to clean your kneaded eraser is to rub it on a clean surface before using it on your artwork. This will ensure that all forms of dust, dirt, and residue of eraser bits are removed. You can easily maintain a kneaded eraser by storing it in a dry and clean plastic bag. Also, avoid using it on oily surfaces to prevent damage. And to make them last longer, you should consider not sharing such erasers with others. One of the best tricks to use a kneaded eraser effectively is by applying different levels of pressure on it during use. Doing so will help you create a wide variety of textures and effects, and also assist you in understanding what suits your style the best. While a kneaded eraser lasts way longer than natural rubber erasers, it cannot be reused indefinitely and will eventually lose its effectiveness over time. Kneaded erasers might not necessarily wear out like pencil erasers, but over time they keep absorbing the medium (charcoal, graphite, etc.) that they are rubbed on. Once they reach their saturation point, they will start leaving marks on your paper instead of removing them. This is when they completely lose their efficacy. Whenever you use an eraser on mediums such as charcoal, chalk, graphite or pastel, you should dab it as gently as possible on the surface of your artwork because they get smudged easily. You should also be careful while using a kneaded eraser on a smooth surface, since it may leave behind some residue. Kneaded erasers may also whiten your paper a bit, which might be a problem if you’re using a dark paper. Hence, it is best if you test the application of a kneaded eraser on a small part of the dark sheet beforehand. Use A Kneaded Eraser FAQs
What are the advantages of using a kneaded eraser over other types of erasers?How do I prepare a kneaded eraser for use?What types of media can I use a kneaded eraser with?How do I use a kneaded eraser to erase pencil marks?How do I clean and maintain my kneaded eraser?Are there any tips or tricks for using a kneaded eraser effectively?Can a kneaded eraser be reused indefinitely, or does it eventually lose its effectiveness?Are there any precautions I should take when using a kneaded eraser with certain types of media or surfaces?
A kneaded eraser is a great tool to go for if you are looking to upscale your artwork. It can be molded into different shapes and sizes to suit your erasing needs in the best ways possible. You can also use it for blending, creating transitions, and enhancing highlights in your sketches.
Kneaded erasers can be used to create different kinds of textures and sharpen edges too. You can combine such erasers with other erasing materials as well to create a plethora of designs and modes of application.
By experimenting with different pressures and techniques, you can create your way of using kneaded erasers.
So, feel free to use this tool as creatively as you want to. Now that your doubt about how to use a kneaded eraser is answered, let your artistic abilities get to work!