Expertises: Art, Painting, Drawing, Home improvement, Gardening
Updated on

Inspiring Ideas for Modern Home
Whether it’s the countertops in your kitchen or the edges of your fireplace, leaving the junction points barren is a huge turn-off for the overall appeal of the house.

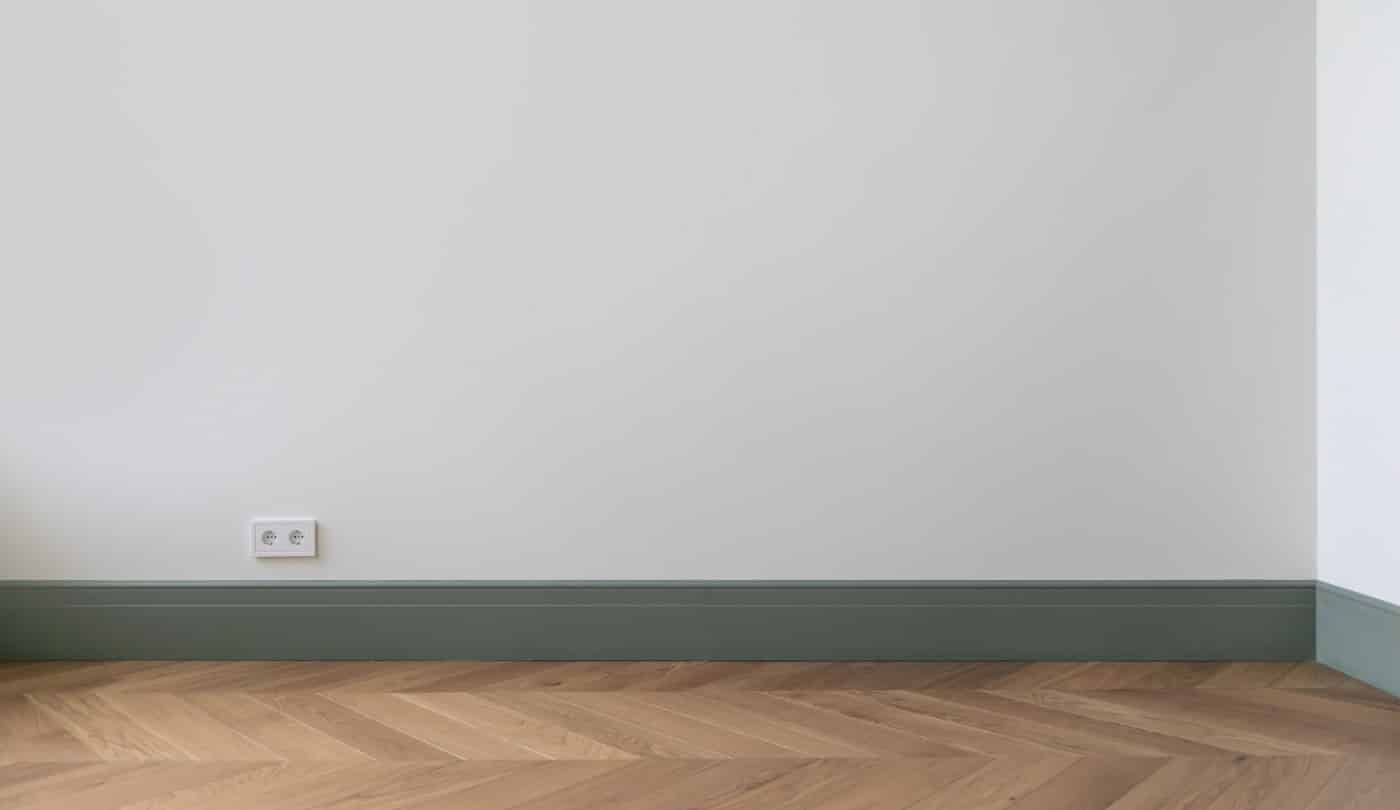
That’s when moldings come into the picture. Base moldings are thin beams made out of wood or other materials used to cover the meeting point between two adjacent structures.
As you most probably already know, based on the shape, these are mainly of two types - shoe molding and quarter round.
In this comprehensive guide, we will draw a comparison between the two. We’ll start from scratch and get to know everything about the base trimmings and move on to their similarities and differences.
If you are a beginner, then no worries, we have included a detailed molding installation guide to get you through the whole process smoothly. Keep reading to find out.
Let’s get started!
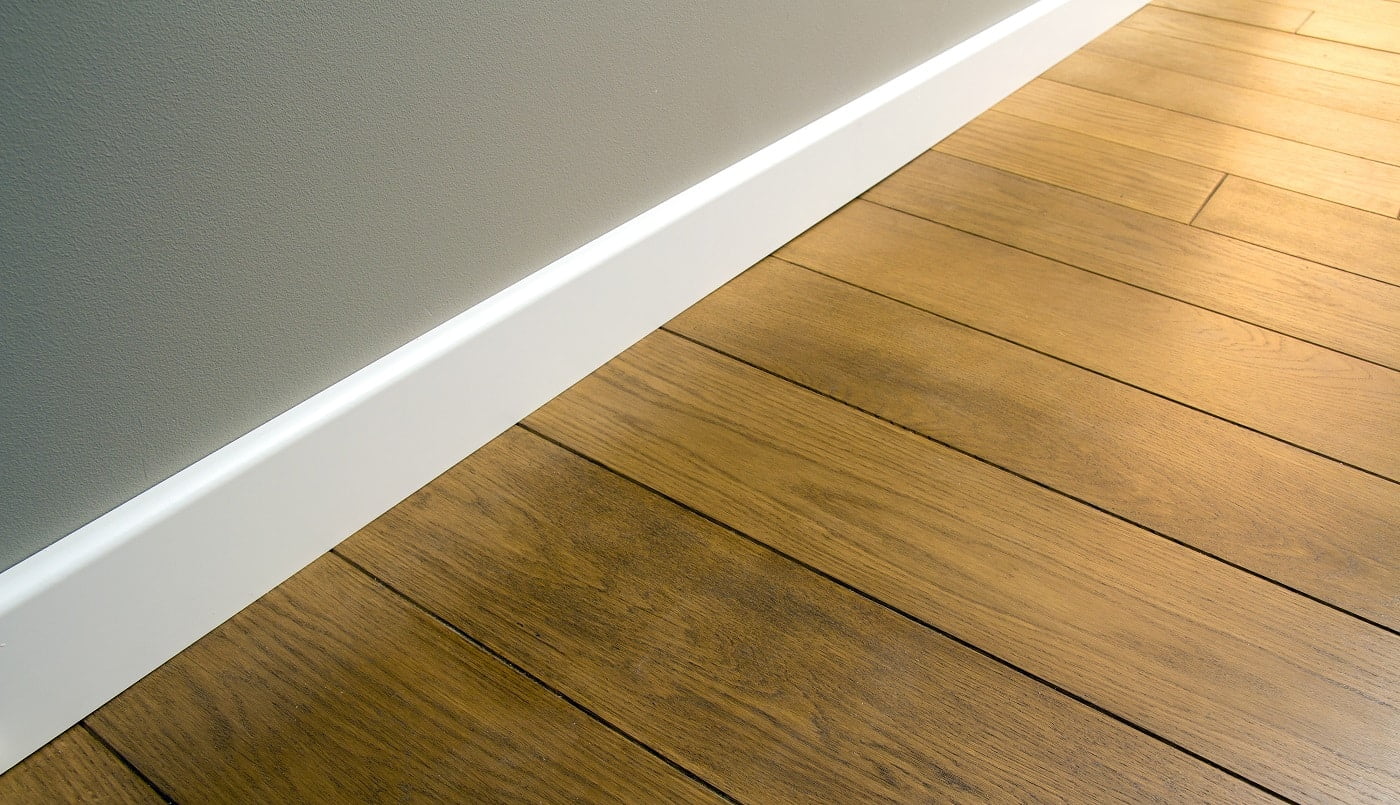
Shoe Molding is a type of trimming with a ninety-degree backside and a squat curvature front, used at the intersecting point of any architectural structure. Commonly 1.5 inches wide, this trimming does not have a perfect curvature; instead, it is somewhat flattened out.
These pieces give a smooth transition to the places where furniture or the floor joins the wall. Depending on their material, shoe moldings are of various types. We’ll discuss them in detail in the next section.
To match the different types of baseboards, shoe molds are also available in various materials. Some of these are:
This type is the most common among all. Hardwood moldings like ash, oak, and walnut are stainable and can be painted as needed. The pinewood options are the most affordable and can be bought at a nominal price per foot section.
These are the traditional types and the go-to choice for most homeowners because of their durability, sturdiness, and long life span. Once varnished and seasoned, wooden trims are hands down the most elegant looking out of all.
Polystyrene shoe trims are more of a temporary situation. They are the cheapest and dent quite easily when bumped, but you wouldn’t have to meddle with saws and lumbar to install them on the upside. Unlike wood, they resist humidity and do not rot, so this type is perfect for you if you live in the Bay Area.
Additionally, they stay safe from the terror of termites and have a sleek, professional look. The best part is you’ll save a lot of money.
Ideal for uneven baseboards, MDF shoe moldings can fill all the gaps and depressions effortlessly. They are composed of sawdust and resin in varying proportions.
We’ll have to say that this type is the most aesthetically pleasing since it’s available in different types of beautiful carvings and patterns.
If you want to add a rustic or vintage finish to your house with those old-school vibes, you know which trim to go for. The only thing is you’ll have to settle with whatever shade they are available in as they do not stain well. But you can always paint them, so you’re not exactly missing out on anything.
Quarter round moldings are more or less similar to their shoe-type counterparts, the key distinguishing feature being their shape. They are identical from the backside, having a ninety-degree base but have a perfect radius for the curvature.
The quarter round trims are three-fourth sections of a circular dowel. And unlike shoe moldings, they do not have a squat shape. The units are typically available in long strips of seven to eight feet, and you’ll have to bifurcate them into sections for installation.
Furthermore, you can use them to fill the gaps between the floorboards and adjacent walls. Shoe moldings and quarter round trims can technically be used interchangeably, depending on your preference.
Now we are done with the basics and can move on to the real question at hand, what’s better, shoe or quarter round molding? Well, it’s not that simple. The answer depends on your preference and needs. No, we aren’t being diplomatic, just stating the facts.
It’s crystal clear by now that both of the moldings have curved edges. The difference lies in the shape and size of the curve, and that plays a pivotal role in the visual appeal of a space.
If you are looking for a well-rounded and pronounced edge, then quarter round trims will do the trick. These look amazing in window-casings and doorframes, and the well-rounded shape adds a decorative element.
In the same lines, shoe moldings are perfect for instances like filling the space between the stair steps where you don’t need an accentuated curved molding.
To demarcate the differences properly, let us have a look at the similar aspects first. Both of the trimmings have a rounded finish and a flat base - ideal to use with stone, natural tiles, wood, concrete, and laminate materials. They are typically composed of either solid wood or wood veneers.
And they can be used to give a smooth transition to connecting points of furniture, floorboards, countertops, etc. You can also install them to bridge the gap between the steps or separate the foundations from the walls.
If you are looking to construct a fireplace, both these trimmings will help you give it an ornamental touch. Door Frames, window cases, and the edges of the shelves are also a few essential applications for both types of moldings.
Both quarter round and shoe moldings are easy to customize and have a width ranging from 0.75 to 1.5 inches. And depending on your tastes and requirements, you can leave them unseasoned or paint them.
It’s about time we jump on to the differences and pick a winner out of these two. The following are the key distinguishing features:
The quarter round molding features a well-rounded one-fourth radius of a complete circle, while the shoe molding has a squat profile. It is also thicker when compared to the width or quarter round type.
Furthermore, shoe molding is available in several types and is more versatile, while the round quarter type comes in more size variations than the former. If we have to pick a winner, it’ll be shoe trimmings since they are multipurpose and can be used in a lot of areas.
How exciting it is that you can change the whole vibe of a room with small collective improvements. The importance of the basal trimmings is often overlooked while interior designing. Instead of just choosing the conveniently available option, we suggest paying a little attention and planning things out. We guarantee you’ll be more than happy with the outcome.
We always appreciate the zeal of those who put in the efforts of manually altering their living spaces. That’s why in this guide, we’ll assist you with the installation of your moldings.
First and foremost, you’ll need the right gears for your project. The skills are undoubtedly the most important part, but convenient tools can significantly simplify the whole process. The basic accessories that you’ll need are a utility knife and a putty knife, a saw, a miter box, a pneumatic nail gun, a measuring tape, and a handful of nails, along with your moldings.
Some other things that might prove to be handy are a nail setter, nail crayons, a caulk, some varnish, and paints. We advise keeping these things within your reach for a finished professional look.
Before buying the moldings, you need to have a precise idea of the area you’ll be covering. Accurately measure the room or the walls using a measuring tape from one corner to the other. You’ll feel tempted to orally remember it instead of writing it down but don’t give in to that.
Write down all the dimensions and measurements and buy the trimmings accordingly. You can never be over-prepared, and it’s always wise to be farsighted, therefore buy a little extra material.
This step will be relevant only if you are renovating your place or replacing the pre-existing trimmings. Feel free to skip over to the next part.
For removing the original molds, you’ll have to loosen them out with the help of the utility knife. Carefully scourge out the paint coating without hampering the baseboard. This will liberate the trims from their original place.
Insert the putty knife underneath the base of the molding and pry it away. Raise it with a flat bar and remove it from the surface. Next, you can start pulling out the nails. Once the trims are removed, inspect the baseboards thoroughly. If they are not in good shape, you’ll have to sand and repaint them for the next installation.
Put a finishing coat over the new moldings after sanding, measure and angle them out accurately using the miter box, and divide them into perfect sections. Make sure that the finishing complements your baseboards. You can also use varnish for that purpose.
After following the above steps, you’ll be ready to put in those trims at their place.
Nail down the molding with the pneumatic nail gun at the desired place after appropriate positioning. Be sure to drive the nail right at the center to prevent it from cracking. Space out the nails properly and maintain a gap of at least 1.2 to 2 feet.
While installing the molds, you’ll come across points where they will meet with nooks or doors. At such intersections, you’ll have to craft a return. There are many types of returns to choose from, like Bull-nose returns, mitered returns, wrap-around, etc.
Go with the one that suits the room the best, but we’ll warn you that certain types are challenging to make. It’ll be prudent to do your research beforehand.
Bridge the accidental gaps using caulk for a smooth finish. Be constructive and look for easy ways to cover up any flaws. You can use a nail crayon to mask ugly nails or holes effectively. When you’re happy with the structure, the only thing that remains is staining and painting.
We were saving the most enjoyable part for the end. Paint the trimmings in a shade of your liking, which makes you happy. You can also stain it if your moldings are wooden. When finished with the work, be proud of yourself and pat your back from our side.
This is a question that we come across often. Simply put, yes, baseboard moldings are extremely important. In the absence of moldings, there might be unwanted gaps in flooring and stairs. Such gaps are ugly to look at and serve as pits for collecting dirt and debris. The baseboard moldings help in keeping these troubles away.
Typically a quarter round molding ranges from six to seven feet in length. The pieces are 0.75 inches wide and are easily customizable. You can cut them into smaller sections according to your needs.
The shoe moldings are available in a range of colors and designs. While the polystyrene type has more of a professional look and looks best in white, wood and MDF can be stained and painted in whatever shade you like.
On the contrary, the Medium-Density Fibreboards are available in beautiful designs with carved patterns. They look good with vintage interior décor. People normally play it safe by installing white-colored moldings only. They are versatile and won’t need to be replaced during renovation since they match all décor types.
Yes, you must get rid of the pre-existing base shoe before renovating the floor. If your moldings are old, then they might be damaged or dented at several places. After multiple renovations over the years, they end up being coated with many layers of paint. It’s best to go all-in and replace the moldings as well to have a brand new floor.
Additionally, renovating the floor is a tedious task. If you keep moldings in, it will become very difficult to set the new floor. The sander will not completely go along the edges and the installation will be uneven.
After going through the article, you must have realized how similar both these moldings are. Apart from a few key differences, both can be used interchangeably.
However, if you are a perfectionist and like to keep things a certain way, you’ll enjoy the shoe moldings better. They are available in a variety of types and materials and are more versatile to use.
Quarter round trims have a more pronounced shape and are more suitable for a few instances like windows and door frames.
When a new floor is installed, it is essential to leave a little distance between the ground and the adjoining walls. This keeps all the elements from grinding against each other in case of expansion due to the weather conditions.
Baseboard molding is also an important part of the architectural structure of a house. It beautifies the space, while keeping the debris and dust from accumulating in the gaps. We hope that this informative guide will help you select the right moldings for yourself.
See you next time!