Expertises: Art, Pastel, Brush, Drawing, Pencil
Updated on

Inspiring Ideas for Modern Home
New York - an urban jungle brimming with life, color, and energy, is constantly evolving and presenting a dynamic landscape for artists to capture.

From the iconic yellow cabs to the glittering skyscrapers, every corner of New York is a sight to behold. So, it’s no surprise that the diverse neighborhoods, rich history, and classic landmarks of NYC have inspired artists for ages, wouldn't that make it an extraordinary watercolor plein air painting?
You are right!
That said, among all other mediums, I believe the unique vibrancy of watercolors is ideal for capturing the essence of the city that never sleeps. In this step-by-step guide, I’ll take you through everything you need to know to create a stunning watercolor painting of the bustling streets in NYC in a simple, and beginner-friendly guide.
So, grab your watercolors and brushes, and let’s get artsy!
First things first - you must have a set of watercolor paints and watercolor brushes that are comfortable enough for you to use throughout the process. You obviously don’t need to splurge on expensive art supplies, but it definitely helps to find something that works for you. Also, note that unlike some of my previous works, this painting requires quite a lot of colors, so I recommend investing in a set of at least 12 colors, you can learn more about the types of watercolor paints here but don't forget to mix colors to discover new shades and colors as you paint.
That said, here’s a list of equipment I’ll be using for today’s artwork:
Paint: Daniel Smith George Politis MA Set 1 6x5 | Paper: Saunders Waterford Watercolor Paper - White, 300gsm | Brush: Princeton Aqua Elite Professional 4 Piece Set 4850
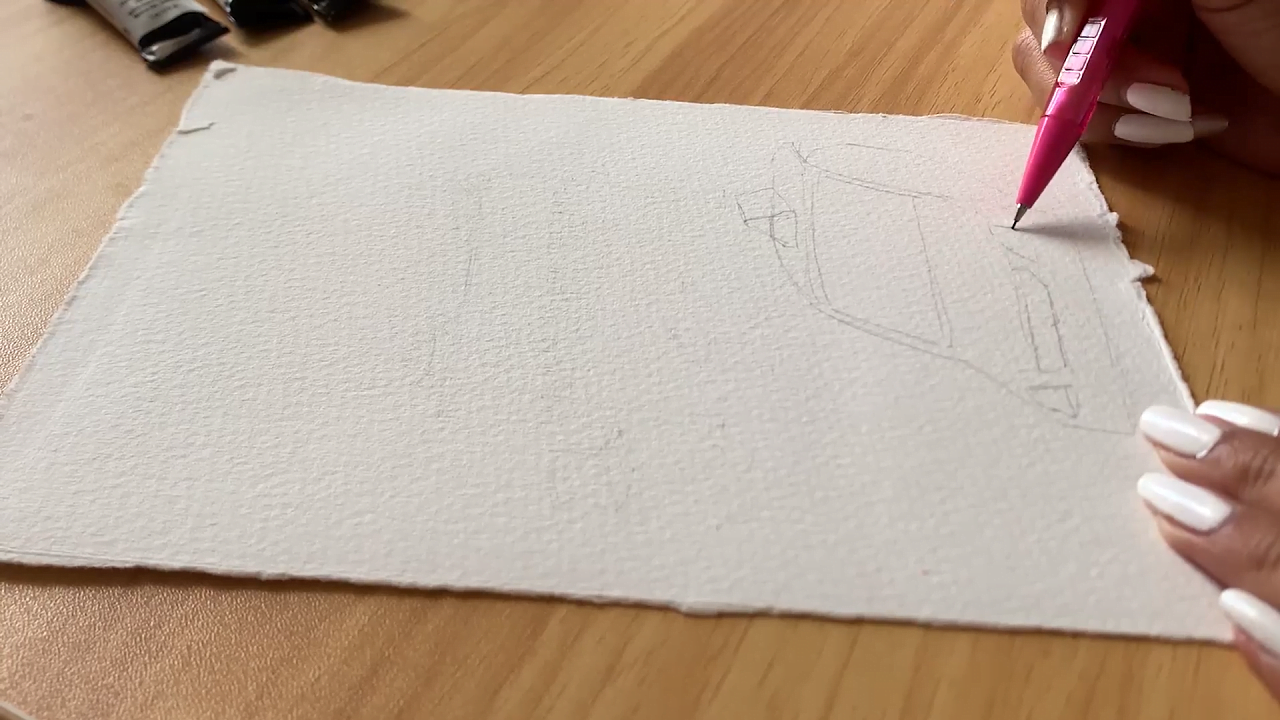
As always, I’ll start today’s painting with a rough sketch. I’ll lightly sketch two cabs as the main subject of my composition. Notice how I’m adding details in the first step already? Well, that’s because, considering how busy the streets of NYC are, I think it’ll be best to draw every little detail right away. This will make coloring easier and prevent mistakes in the later steps.
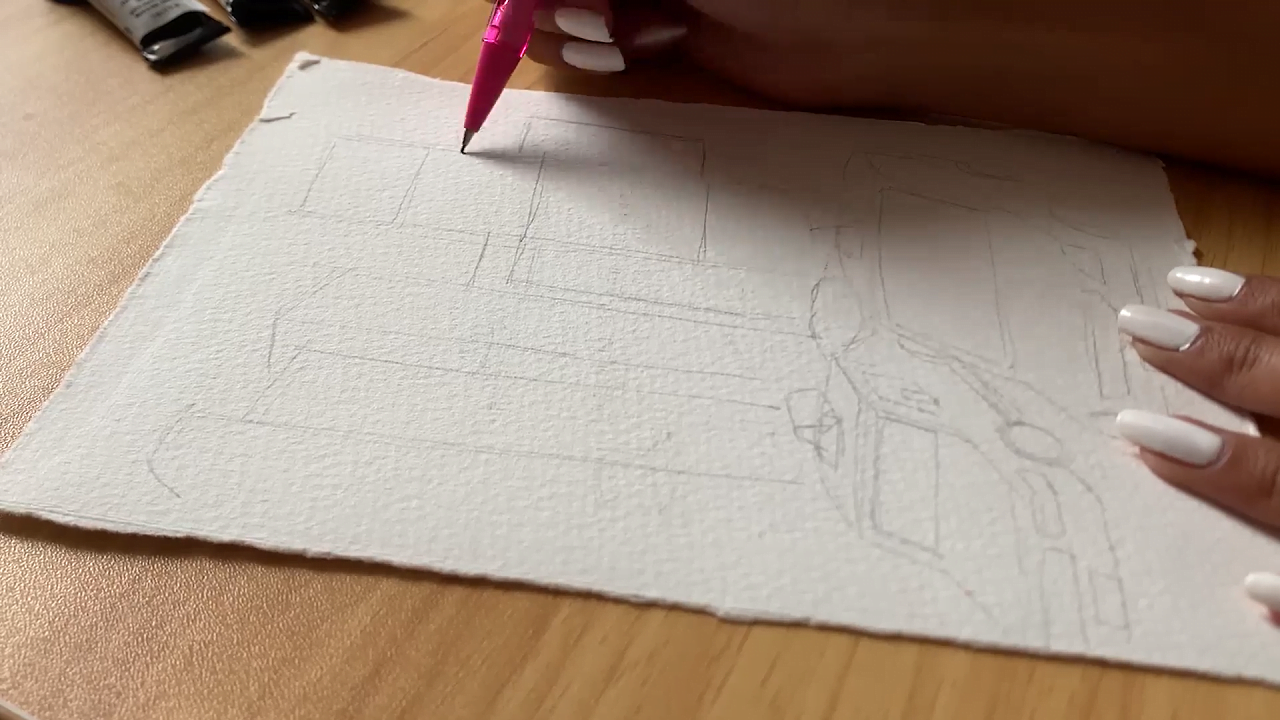
However, there’s no right or wrong way to sketch. I’m making it detailed today, but usually when I’m making natural landscapes, I stick to the basics and add details later. So, you can proceed according to your expertise and comfort level.
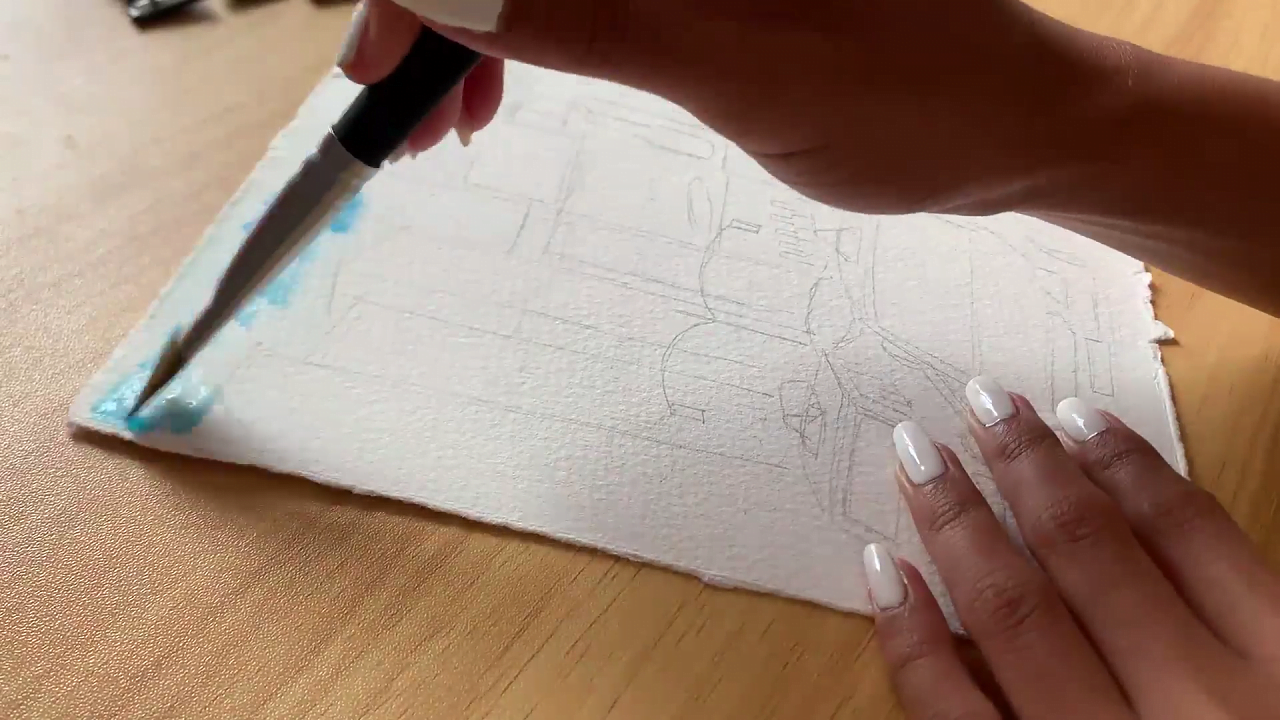
Before you paint, always remember to start with the largest area with no details in between. As such, I’ll start by painting the sky. Since it’s the first layer, I’ll use just a light flush of blue and keep the brush wet enough for the paint to spread seamlessly. But make sure the brush is not dripping wet unless you want the colors to bleed and the paper to tear, even with the proper watercolor paper.
Just be slow and careful, and paint very lightly. You can always darken certain parts later. This will help you achieve a more realistic and lifelike look.
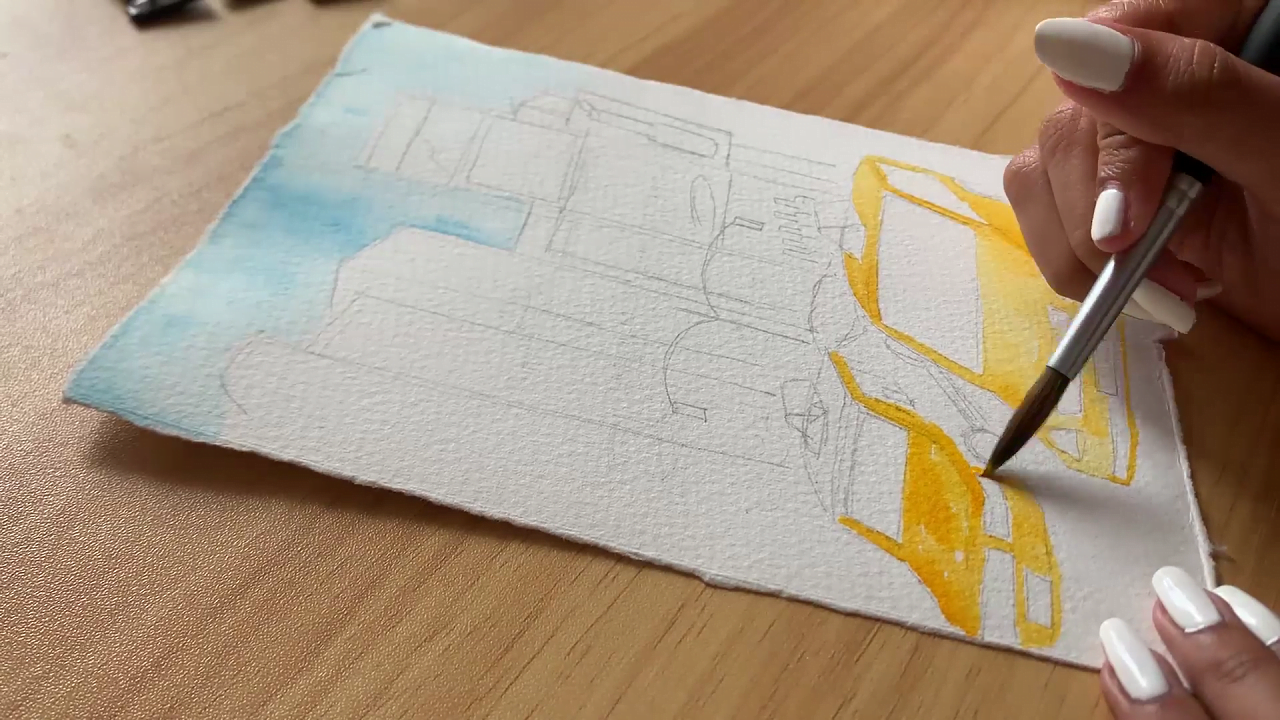
Coming to the star of the show - NYC’s signature yellow cabs!
Start with a light yellow layer and paint both the cabs, leaving the windows and headlights. Again, you can always build up the saturation later, so paint with very little pressure. Otherwise, you might end up painting over smaller areas that aren’t supposed to be yellow!
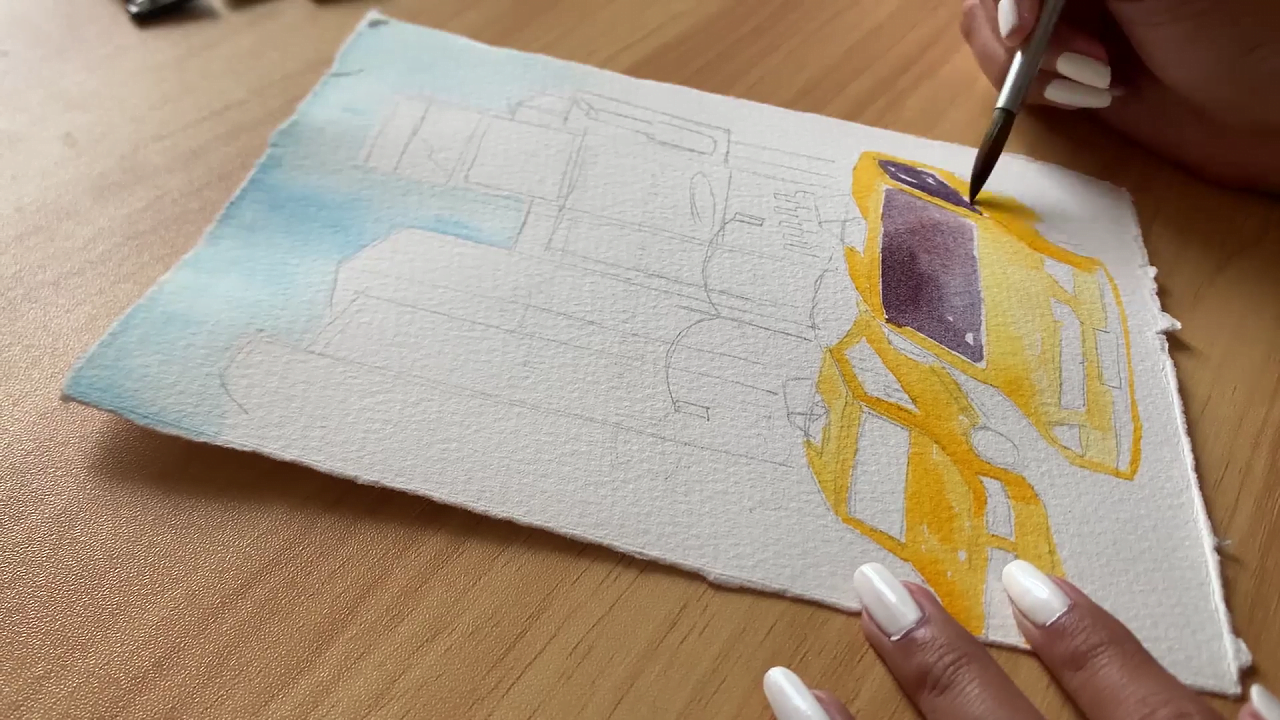
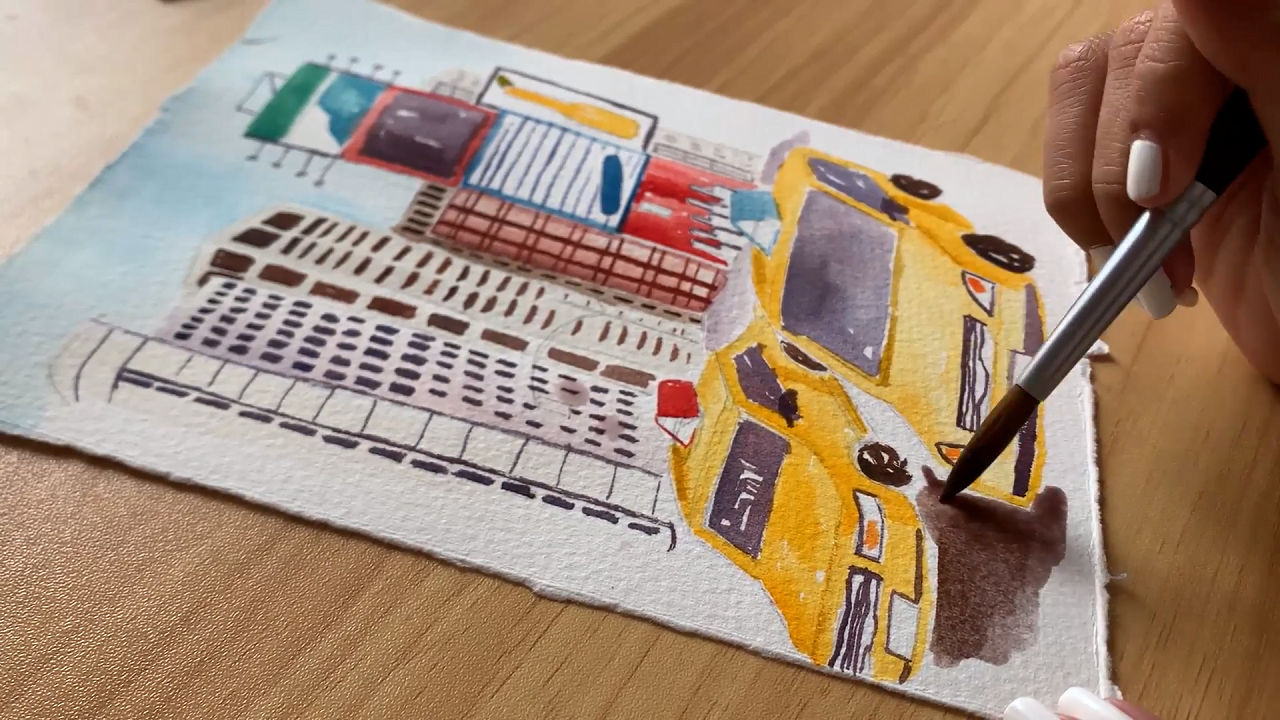
Similarly, paint the windows and tires too. I’m using brown, but you can opt for gray, black, or blue. Here, too, you can begin painting roughly and add more color later. As you can see, I’ve left some portions blank to mimic the effect of shiny mirrors reflecting the city lights.
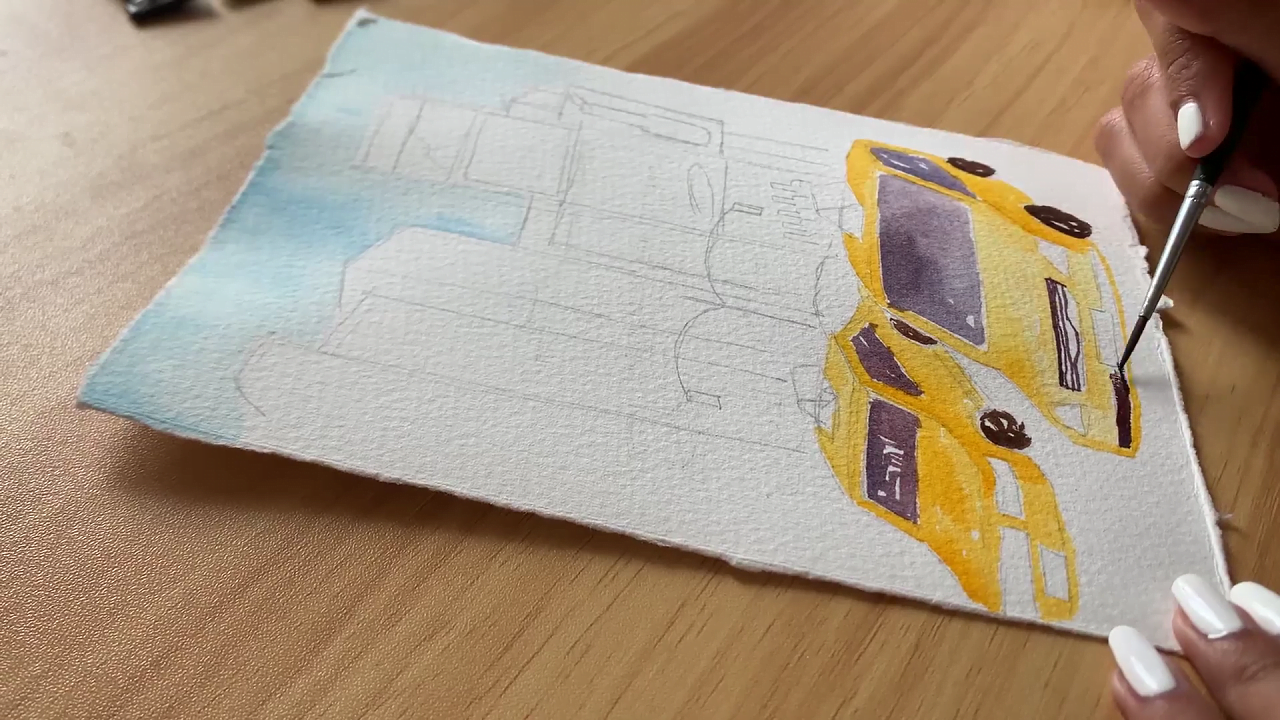
Now, switch to a smaller brush for the finer details, like the grille, bumper, headlights, etc. In this step, make sure your brush is not as wet as it was in the previous steps. This is because you’d want to paint more precisely now, and a dripping brush will only make things messy.
Again, I’m using brown for a muted effect, but you can always use black or make the parts of the cab more realistic with metallic colors. Basically, feel free to experiment!
With the same brush, I’ll also add some colorful details on the top of each cab.
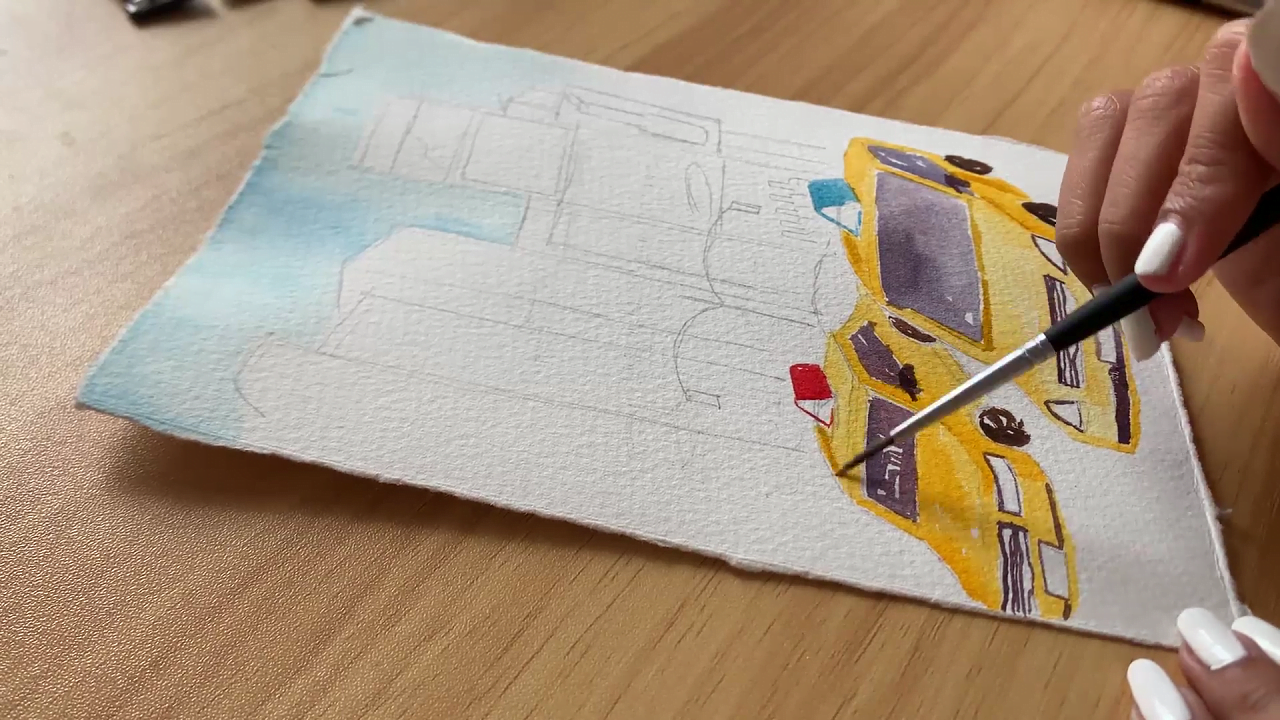
Thereafter, you can proceed to add some shading to the cab. Doing so will create more depth and dimension. Here, all you need to do is swipe a single line wherever you want the shadows to fall, and it’ll instantly bring your painting to life!
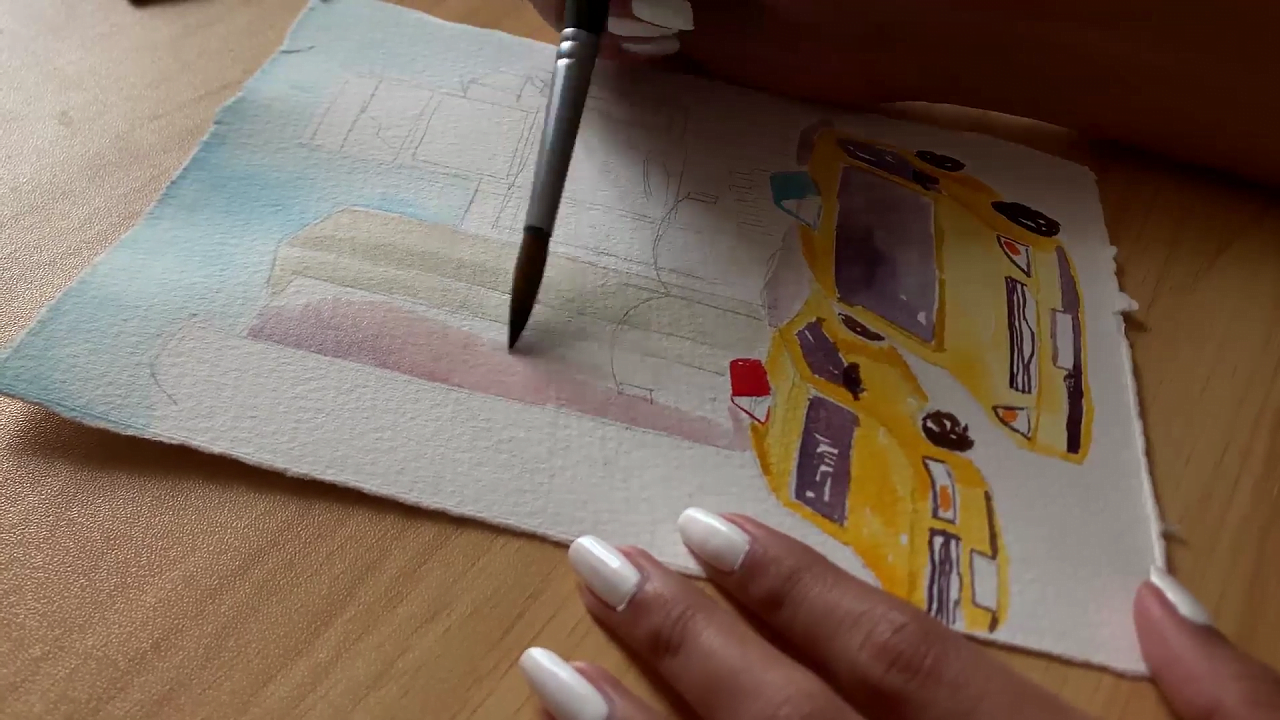
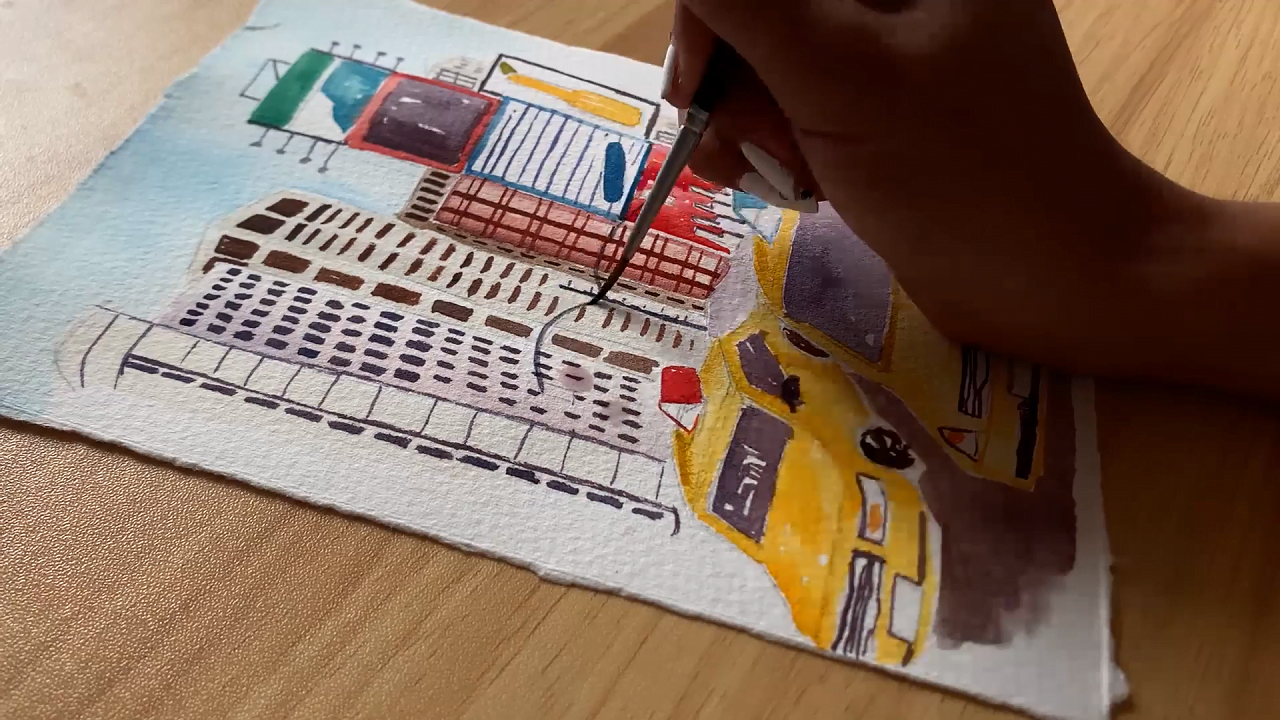
Next, I’ll paint the skyscrapers that make NYC dazzle from miles away. I’m going back to the thick brush I used for painting the first layer.
First, I’ll use gray and lightly paint the building in the center. Similarly, I’ll use other muted shades like lavender and brown for the rest of the buildings. I’d like to reiterate that you need not make any details right now. Simply block the general colors of each building to get the overall color scheme right.
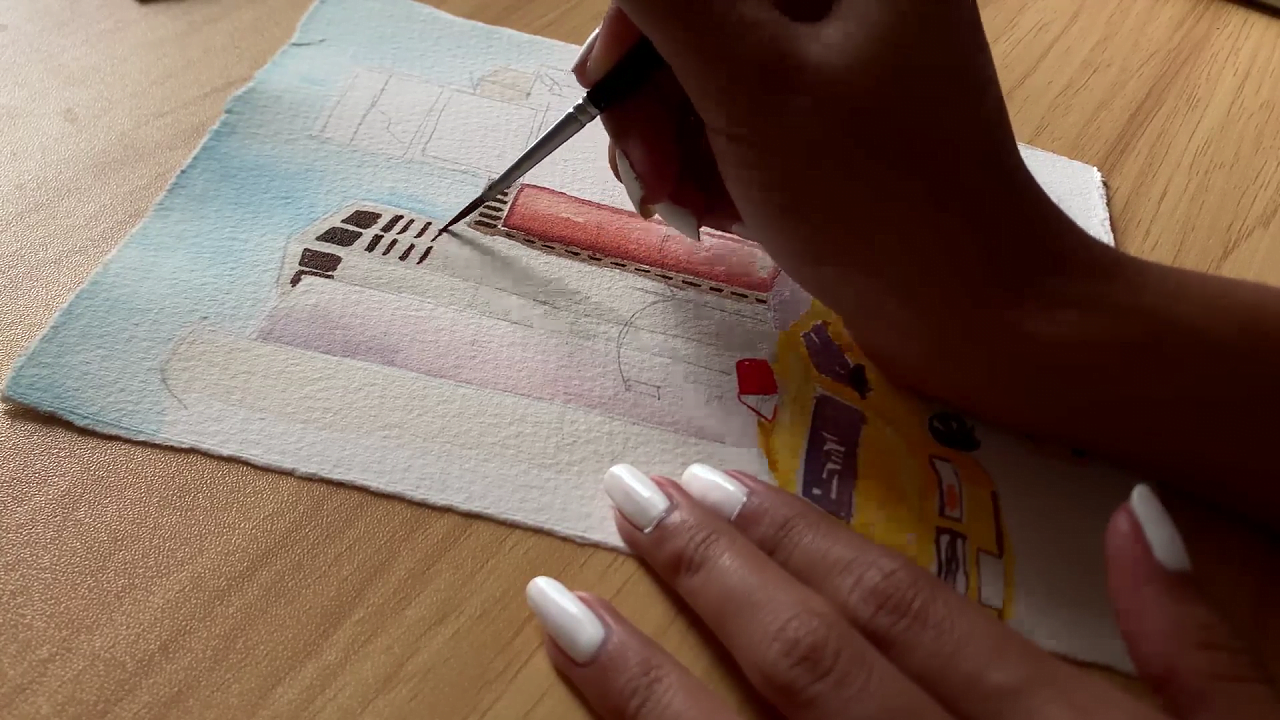
Once the first layer of the building is completely dry, I’ll paint tiny windows, doors, and other architectural features on each. I’m experimenting with various shapes to add a bit of variety.
As you can see, I'm adding small horizontal windows to the gray building, while the lavender building is full of vertical windows. For the last building, I’m going to add some stripes, giving it a modern, curved look.
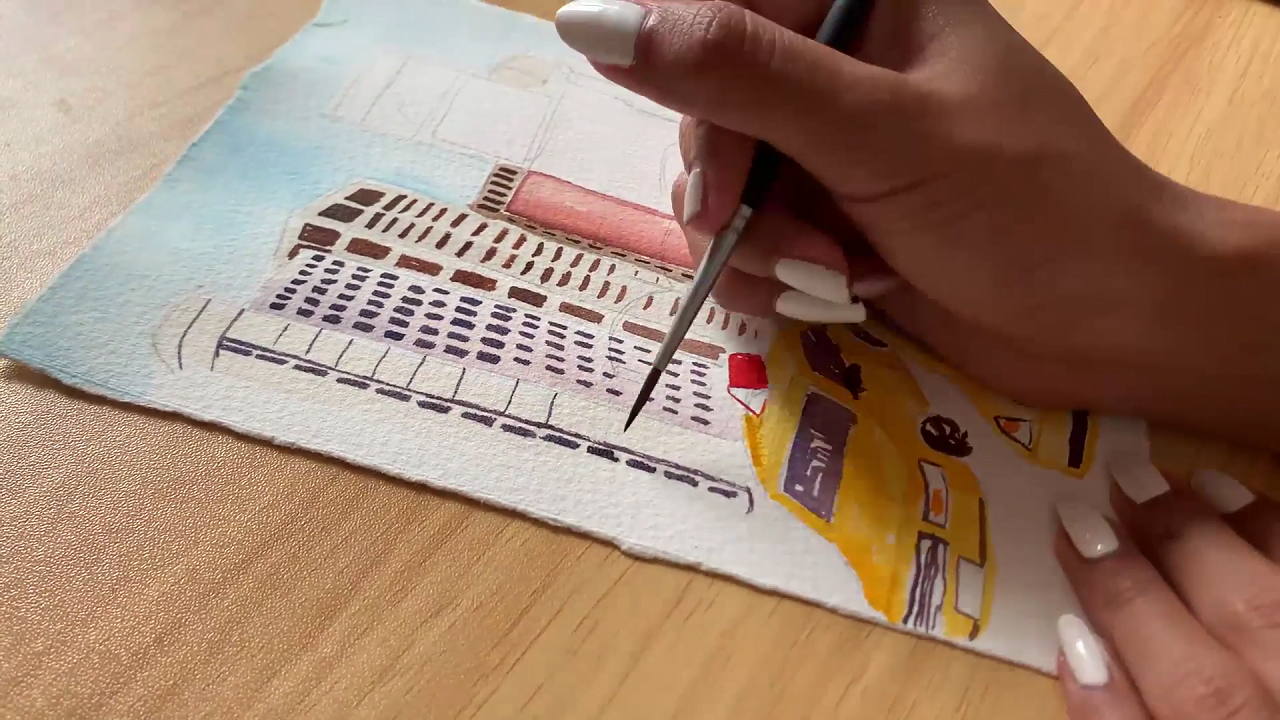
So, you see, I’m simply adding different types of patterns to the buildings to make each of them look unique and stunning - just how it is in NYC!
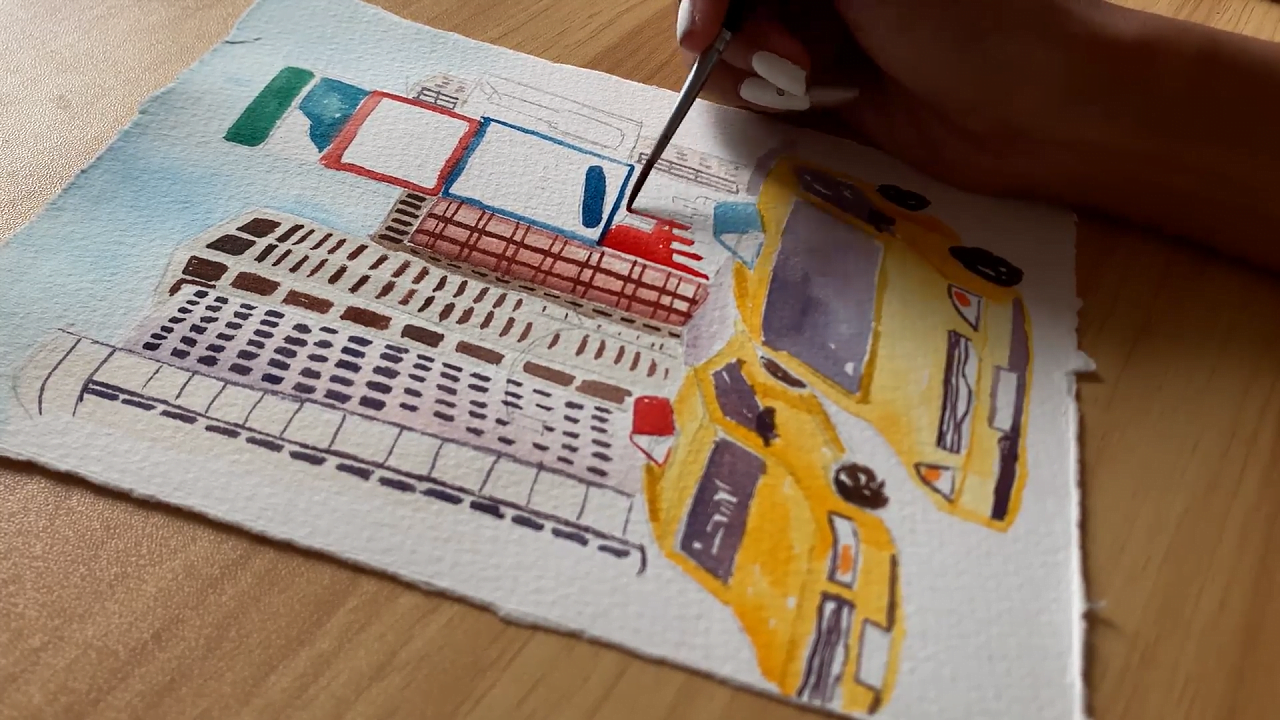
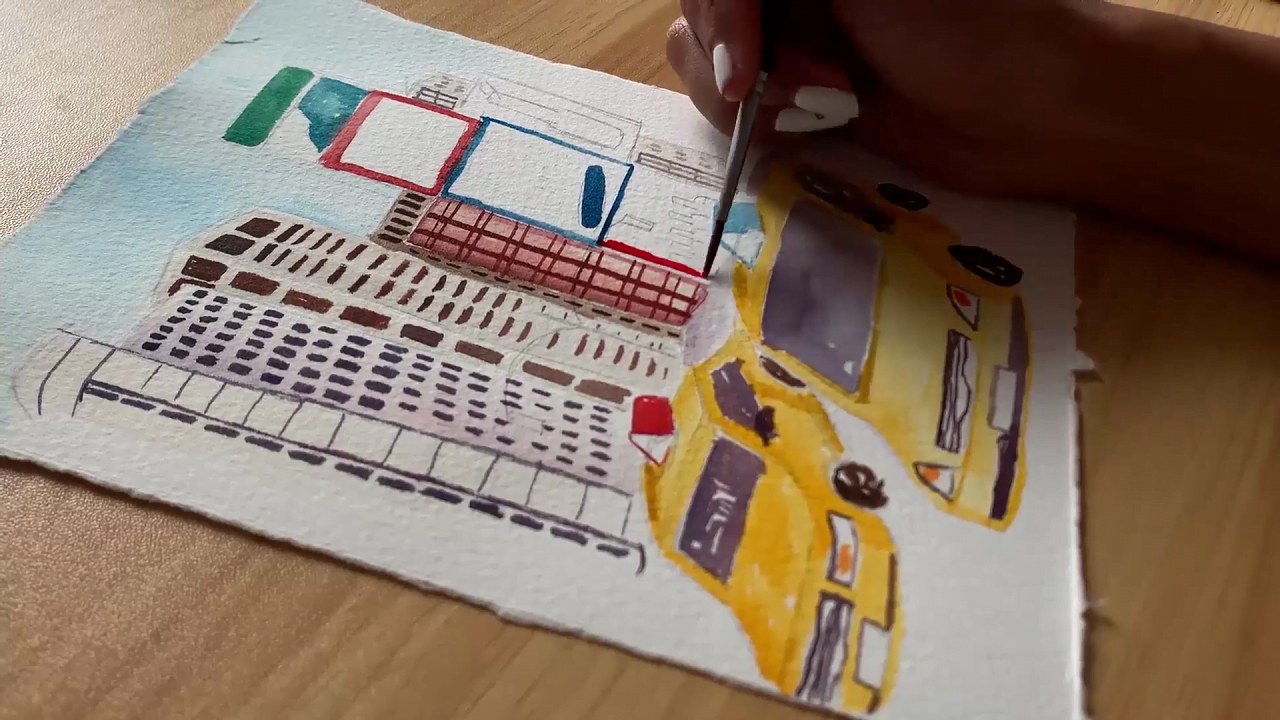
Since the billboard has a lot of different details, I’ll continue using the thin brush to paint it, despite it being the first layer. Here, I’ll go all out with vibrant colors like green, blue, purple, red, and yellow. I’m adding various patterns to some parts and keeping the rest simple with just some swipes of paint.
Alternatively, you can add logos of popular brands or product pictures on the billboard. Or how about adding your own name instead of signing at the bottom of the painting? Well, the sky’s the limit when it comes to art, so don’t be afraid to paint what your heart pleases.
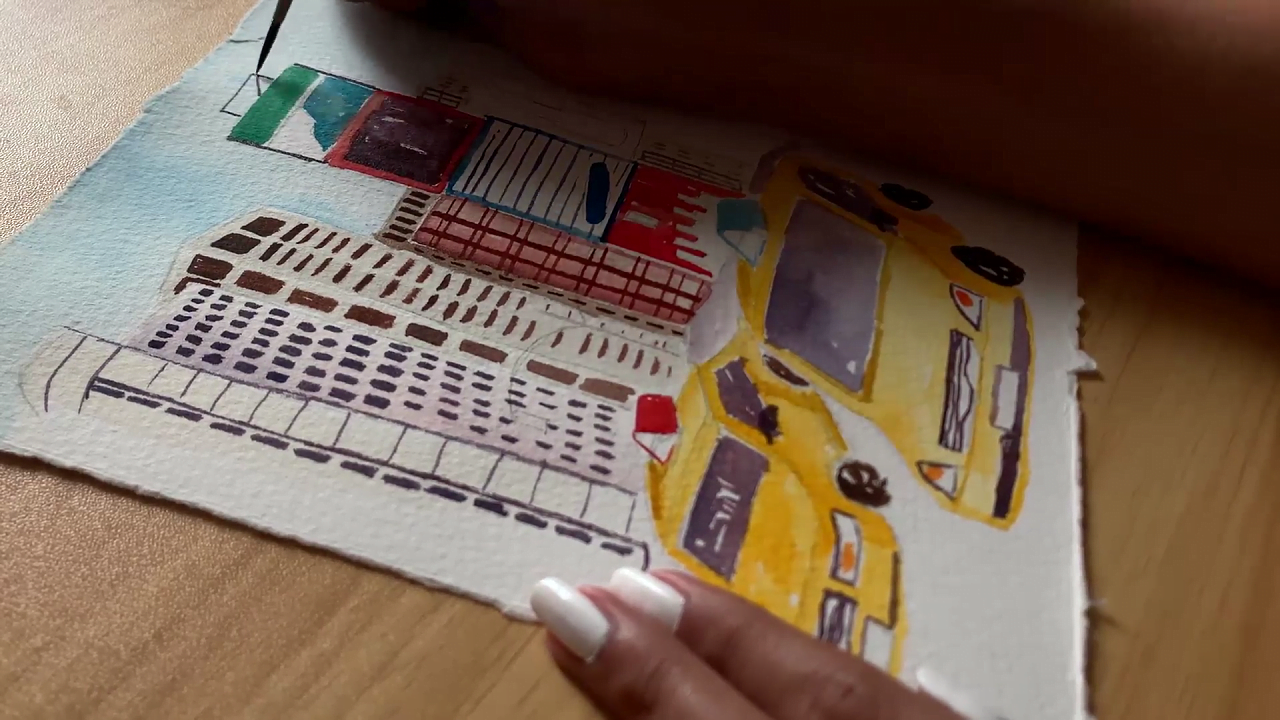
Now, I’m not an expert on billboards, so I definitely don’t know what I’m painting here! I’m simply relying on my memory and adding little details here and there to make the painting look more realistic. You could even check reference pictures on the internet to create a more accurate cityscape.
But for the purpose of this easy-to-follow guide, I’m not focusing on perfection. As long as it looks like a billboard, I’m good!
Of course, no cityscape is complete without the road, so I’m simply painting it with some brown watercolor. Again, you can use black, gray, or any suitable color. You could even paint a zebra crossing if you’re feeling creative!
Lastly, I’ll make a lamp post by the sidewalk, illuminating the already-glimmering streets of New York. And with that final touch - my rendition of NYC’s vivacious streets is ready. I can already hear the heavy traffic and smell some freshly baked bagels with cream cheese!
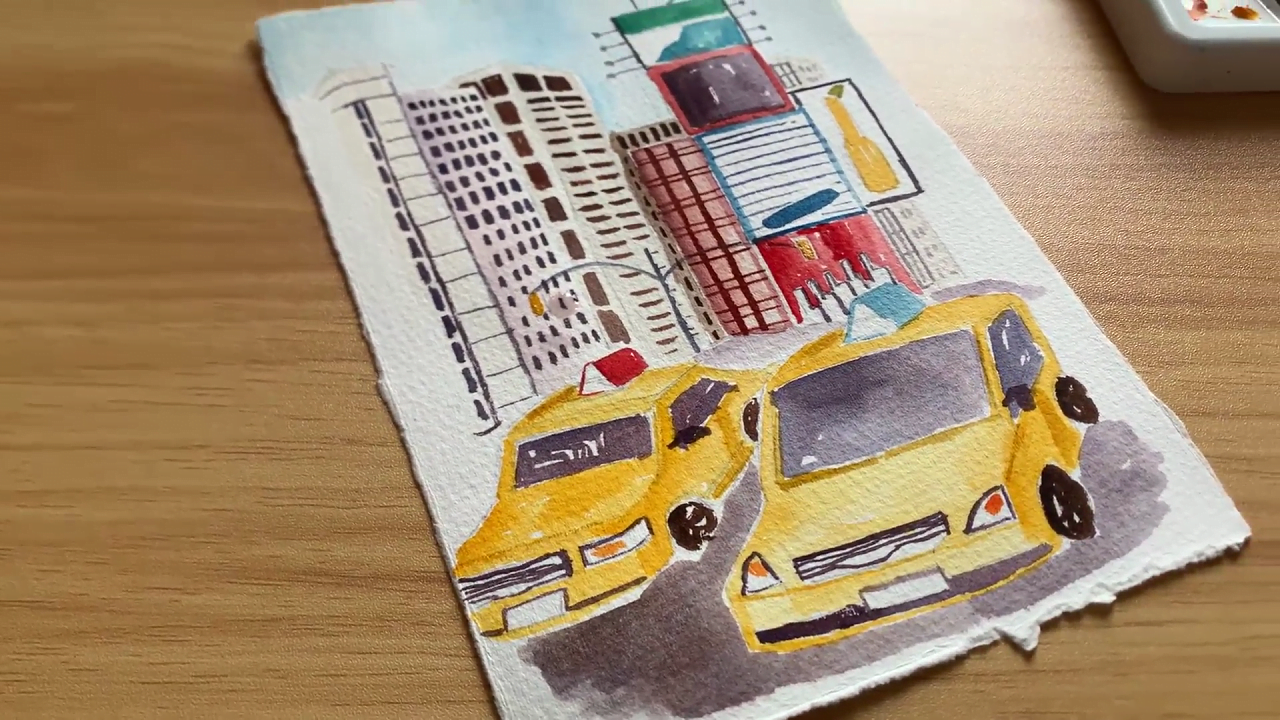
You could add more details to the composition, like some people crossing the road or an airplane far away in the sky. Simply continue to refine the painting, adding details and adjusting colors as needed until you are happy with the overall composition.
Or, you could take a completely different route and paint the city in the evening or at night. For the former, I recommend changing the color of the sky to orange or pink and using muted colors for the rest of the composition for a mellow “evening” vibe.
On the other hand, the night scene in New York is absolutely fantastic. So, I recommend adding lots of lights all around the street and keeping the background pitch dark for a stunning contrast.
Once the painting is complete, allow it to dry completely. I suggest adding a protective varnish or frame if it meets your expectations. If not, remember that painting is a process of trial and error. So, don't get discouraged if something doesn't turn out quite right. Just keep practicing and experimenting until you find what works best for you.
Before I sign off, I want to encourage beginners to use a reference picture of New York. Besides checking the main subject and colors, pay attention to the direction of light in the reference image. This will help you create realistic shadows and highlights.
Choosing the right materials can also help make the process a lot smoother and more rewarding. However, don’t be afraid to make mistakes! Trust the process, and don’t worry too much about the outcome, do exercise with other watercolor guides: How to Paint Amsterdam with Watercolor and How to Paint Berlin with Watercolor are great tutorials to try!
With practice, patience, and perseverance, you'll soon be able to capture the vibrant energy and character of New York City in your watercolor paintings.