Expertises: Art, Pastel, Brush, Drawing, Pencil
Updated on
Inspiring Ideas for Modern Home
Amsterdam is a city where gorgeous architecture coalesces with modern technology to create an urban wonder.

The Dutch city has something new to show you at every turn, whether it be a modern architectural marvel or a piece of history. Windmills, canals, and blooming flowers pepper the landscape, further enhancing its beauty.
And its beauty reaches a peak during the Tulip Festival, which marks the start of spring in the Netherlands. The festival lasts just under two months, and there is no better time to capture its likeness than in this time period.
Hey everyone. Today, I’ll be showing you how to recreate a scene from the Tulip Festival in Amsterdam using watercolor.
The painting process is very simple and easy to follow. I would highly recommend following along as I go through and explain the process. Let’s get started!
First, let’s gather the supplies needed for creating this painting. I used the following to create this painting:
Paint: Kuretake Gansai Tambi Watercolors 12 color | Paper: Saunders Waterford Watercolor Paper - White, 300gsm | Brush: Raphael Kolinsky Sable Fine Point Round Brush
If you don’t have supplies identical to what I listed here, you needn’t worry. Using different paper, different types of watercolor paints, or a different brush is a completely fine way to go about it, so long as you follow the process. Feel free to add or subtract the number of shades you use in the painting as per your preference, you can also mix watercolor paints in tubes or pans to get a bigger color palette! Staying true to life isn’t necessarily the point of painting, after all, so every color is fair game here. On that note, if the tulips here raised your interest, we have a guide on how to paint flowers with watercolor aimed at beginners, we also have a guide on how to paint New York with watercolor if you've enjoyed this watercolor city painting exercise.
Apart from that, you can experiment with different textures, using a brush or with a different paper altogether. Remember: experimentation is the key to creating something unique and fresh!
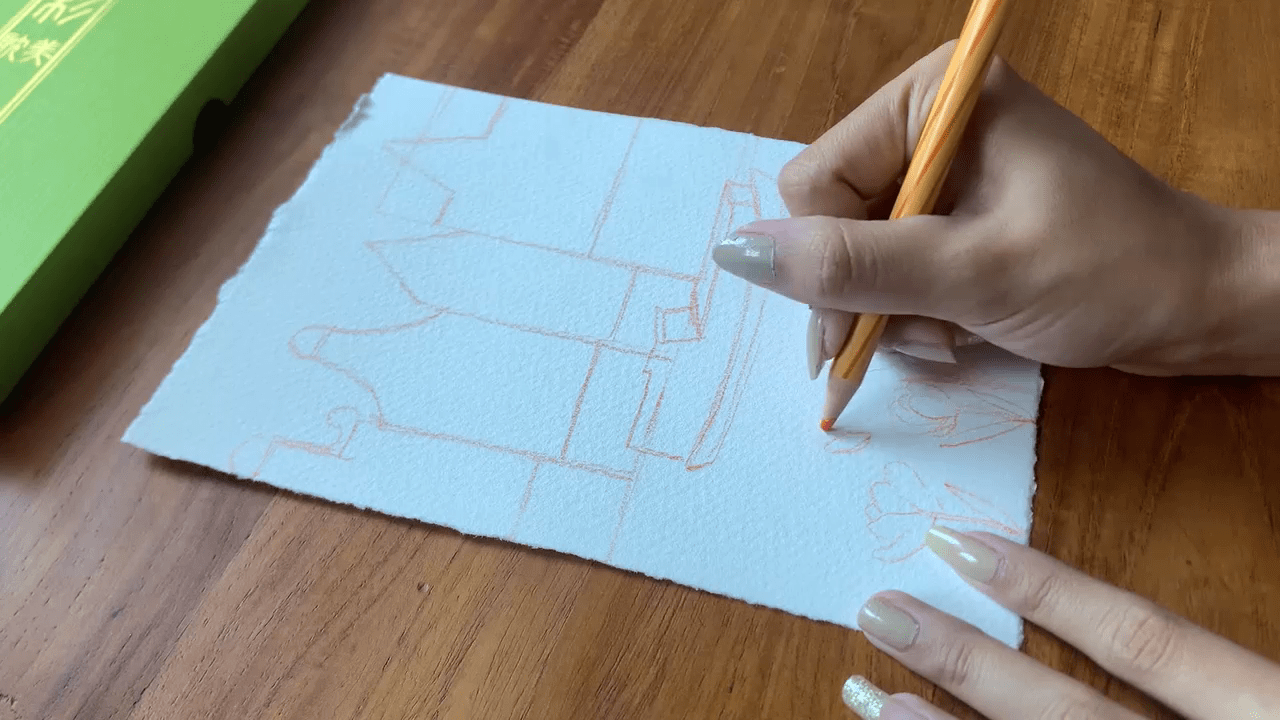
First, let’s start off by creating a sketch of our painting and plan out where each element of the city will be. By doing this, you will have a clear picture of what the final painting will look like from the get-go. Having clarity is extremely important while painting so that you don’t get wrapped up in any last-minute composition changes.
Here, I put special emphasis on the tulips as well as the boat, which is where most of the details will be concentrated.
Take note of the architectural uniqueness of Amsterdam, and try to replicate some of it. And remember to keep your sketch light! It’s for the best if the sketch doesn’t show up at all in the final painting.
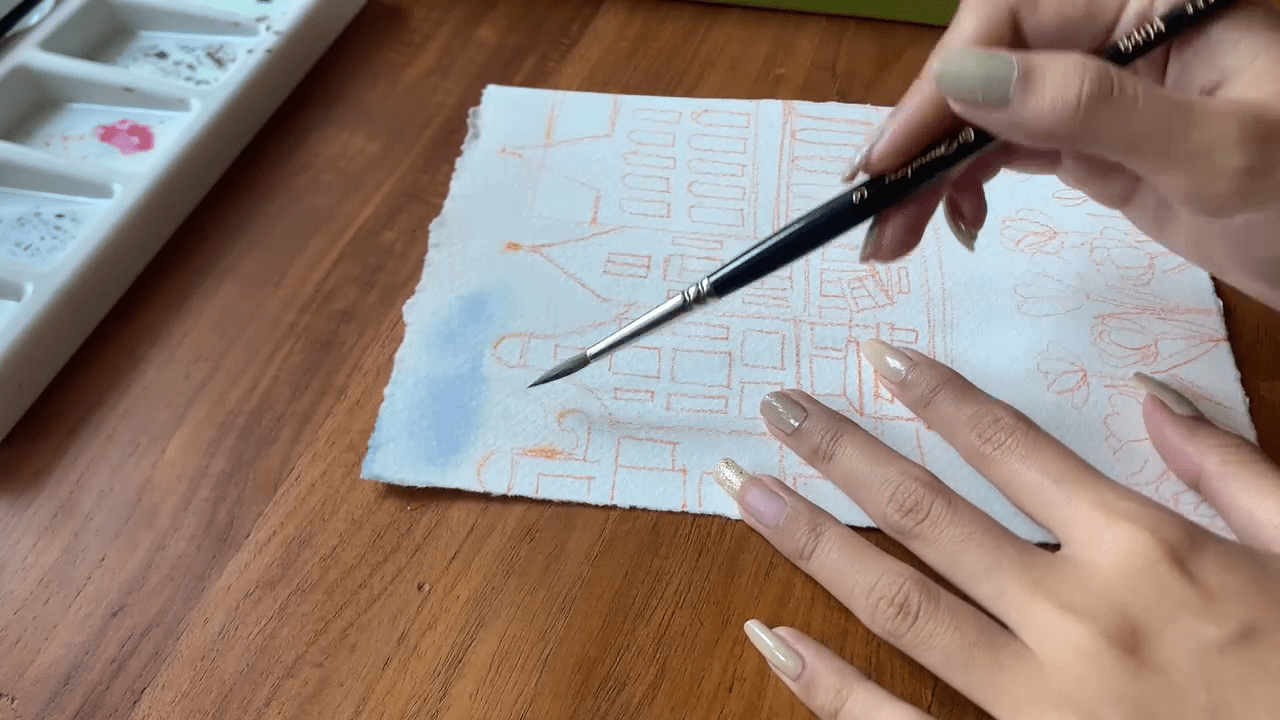
Next, I’ll paint the sky. Since this is a large space to paint, I’m using the wet-on-wet technique to fill it in. The gist of it is to apply paint to an existing layer of water or paint, which allows the colors to spread much more effectively. This is particularly effective for the sky, where a blotted finish makes it look a lot more realistic.
If you have any additional details or want your color to appear more saturated, consider waiting until the paint dries before adding them. Watercolor loses nearly half of its saturation as it dries, so add more layers only once it has dried completely.
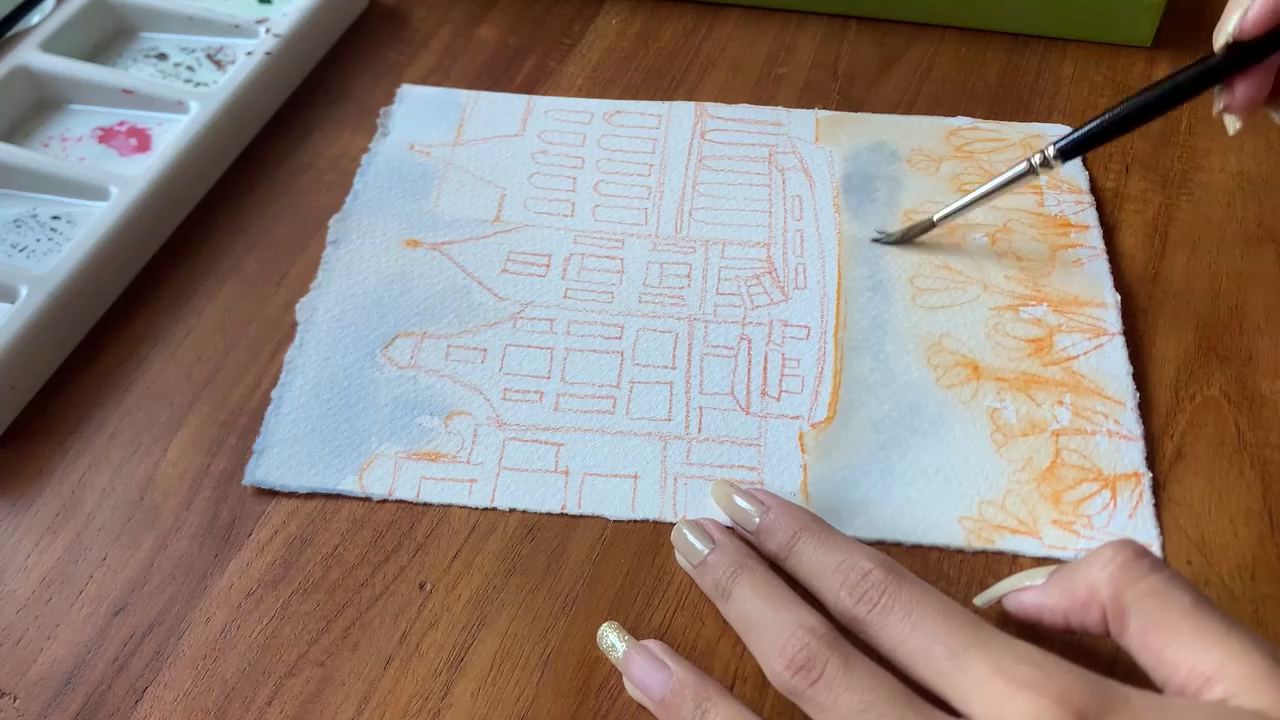
While the sky dries, let’s move on to the river. Painting the river is similar to the sky, so I’ll be using the same wet-on-wet technique.
Start by applying a layer of water to paint the river and add light blue to it. Spread the paint across the specific area until you’ve created the desired texture for the river. And if your sketch gets smudged in the process, don’t worry! You have plenty of room to fix it later in the process, so keep at it and move on to the next step.
Now comes the fun part! Here, you get to truly stretch your artistic imagination and experiment with the colors to the utmost degree.
Choose your colors and begin putting down the first layer on the buildings. You can use thicker paint to prevent the colors from bleeding into other parts of the painting and achieve a cleaner and more precise finish. Remember to let the paint dry before you add more layers to the buildings!
If you’re on the fence about picking the right colors, then I have a nifty little solution for you. Draw an equilateral triangle and place it over a color wheel to find a set of three colors that complement each other. You can find pictures of the color wheel online, on which you can overlay the triangle and rotate it based on which colors are needed.
Or, you can simply look for complementary colors online. There are several color guides that you can use to get a set of colors, no matter where you are on the color spectrum.
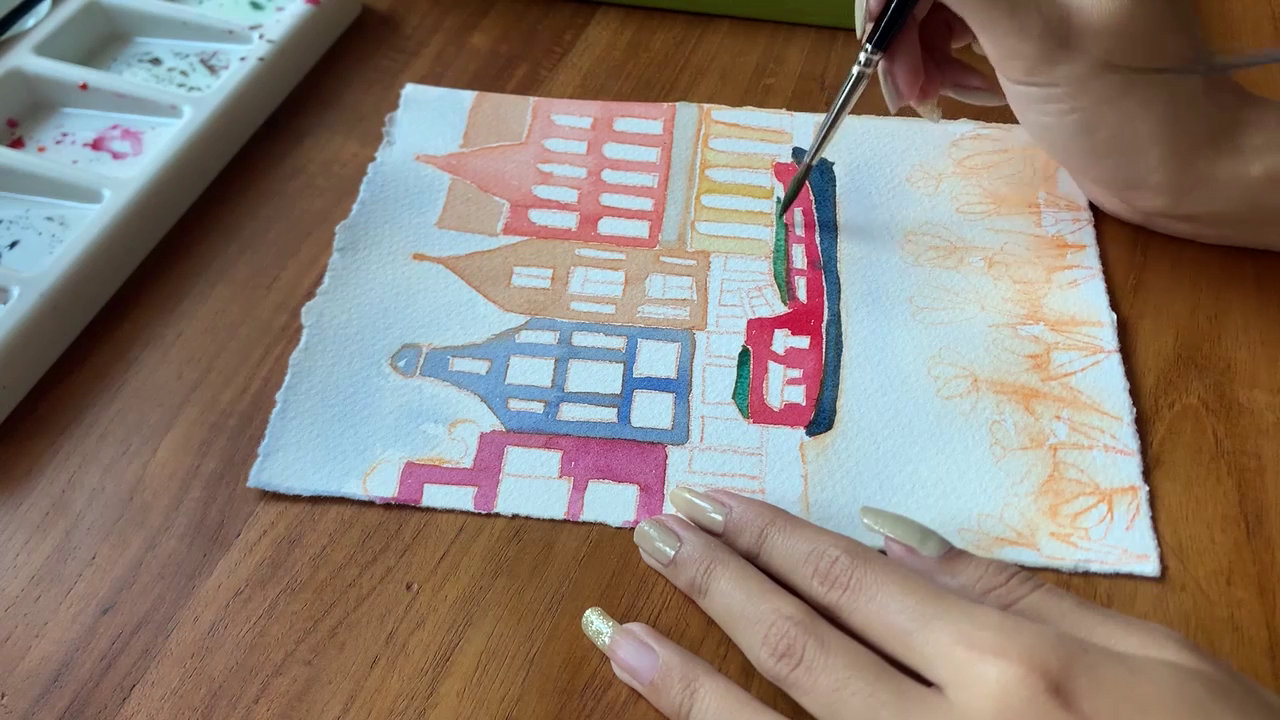
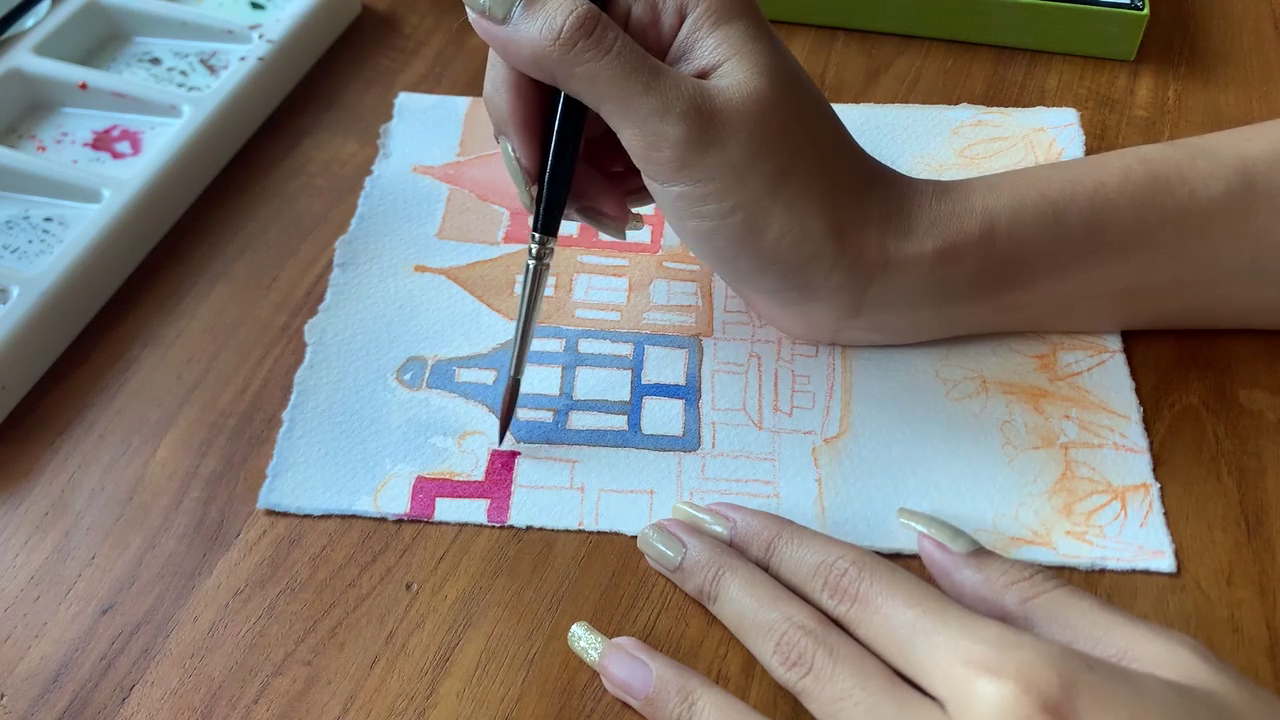
Let’s start painting the boat. If you’ve followed my sketch, your boat might be overlapping a couple of the buildings. And if this is the case, let the paint on the buildings dry before coloring the boat.
I’ve used a nice bright red and a navy blue to paint my boat. You can freely vary this based on your personal tastes and if the colors sit well with the rest of the painting.
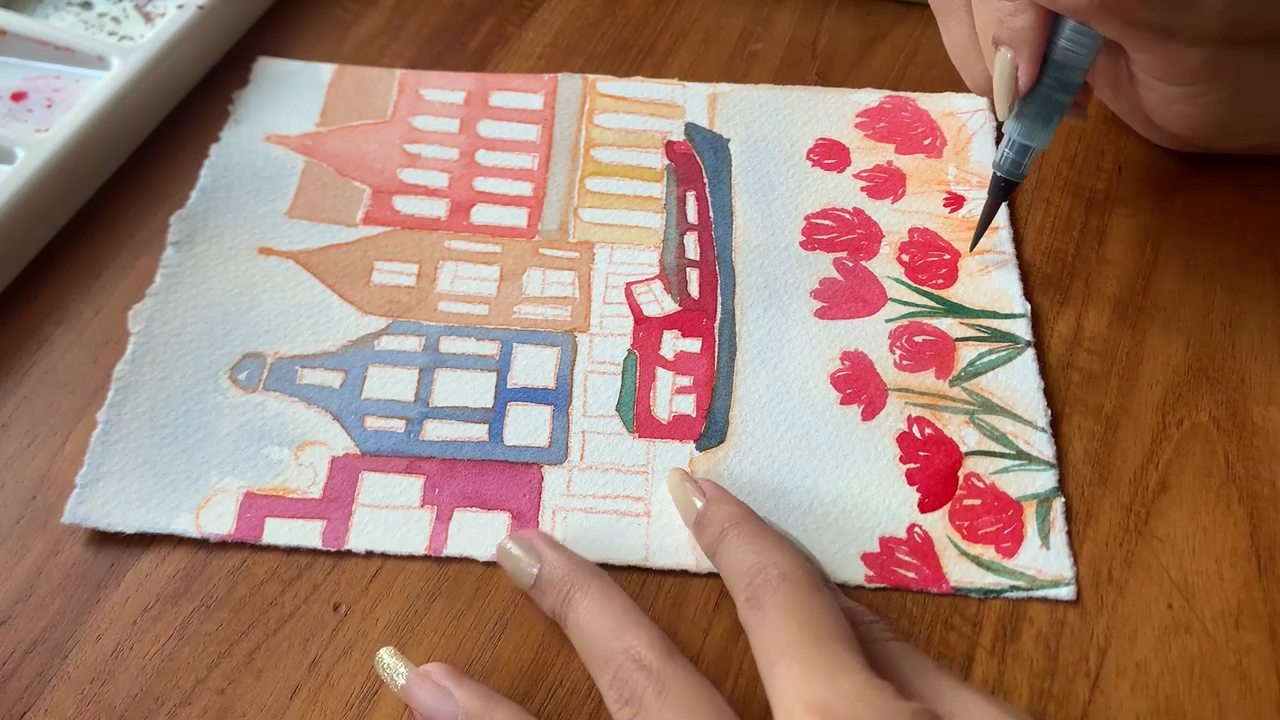
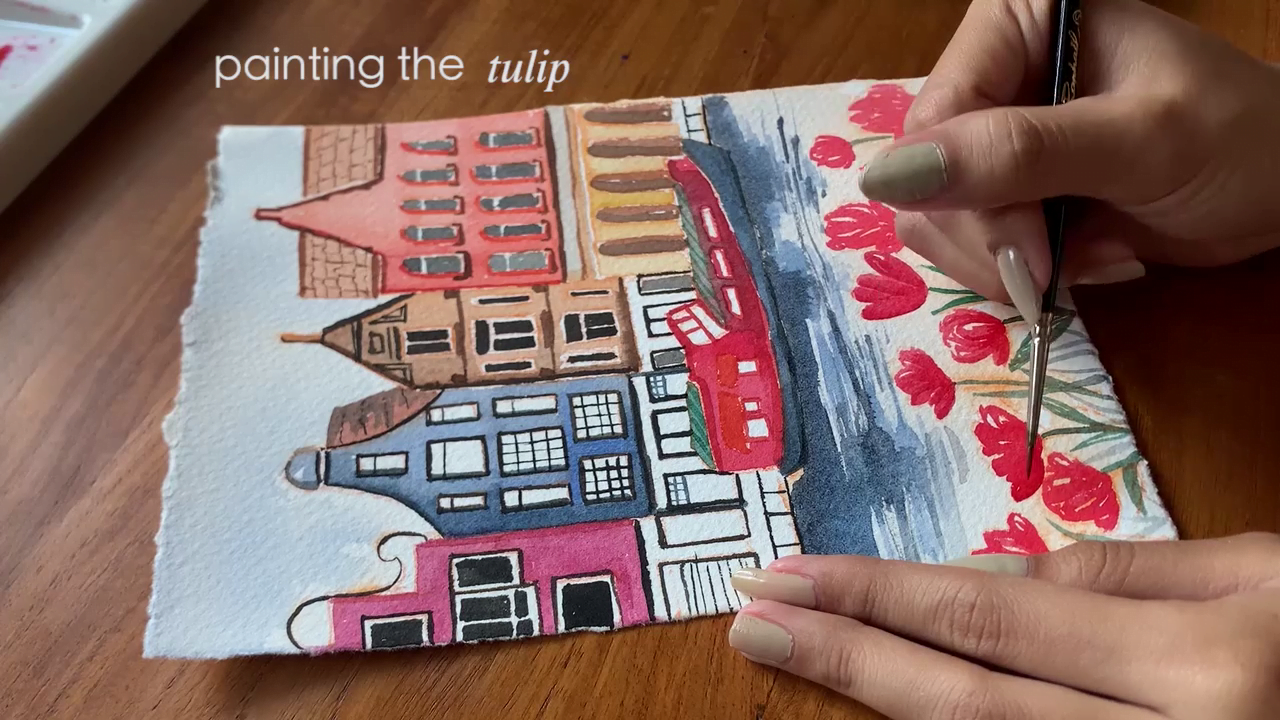
Next, let’s paint the tulips, my personal favorite! You can use a reference to find the right colors for them or simply let your imagination run wild.
Use a smaller brush with thicker paint to create tulips with ease, and vary the colors as you see fit. I like to stay as true to life as possible, which is why I’m using a stark red color to paint them.
An important thing to remember here is that you will need to create depth to separate the flowers from the rest of the cluster. Without that depth, the flowers may appear flat and lacking density.
As a general rule, you can desaturate colors the farther you move in the scene. This is known as depth of field, where the colors of an object become less bright as the distance between it and the viewer increases.
Since each tulip is not too far apart from the next in a cluster of flowers, you needn’t vary the saturation exceedingly. The variation should be slight but noticeable, and this principle can be best observed if all the flowers are of the same color.
Using the same principles with a detailing brush, I’ll paint the stems of each flower. Tulips have a dark green stem with leaf blades on their sides that vary from one flower to the next.
And finally, remember to size your flowers differently! A uniform size across each of your flowers will make them appear boring, whereas variation helps keep the scene visually interesting.
Start by adding shadows to the building to give them some form.
Every element on your building will cast a shadow, creating a darker spot of color. Even places like the window frame, the roof shingles, and the slant of the roof will have areas where the light won’t reach them.
So, use a more saturated version of the color you used to paint them and a thin brush to add shadows. Feel free to look back at your reference to get an idea of where to place your shadows!
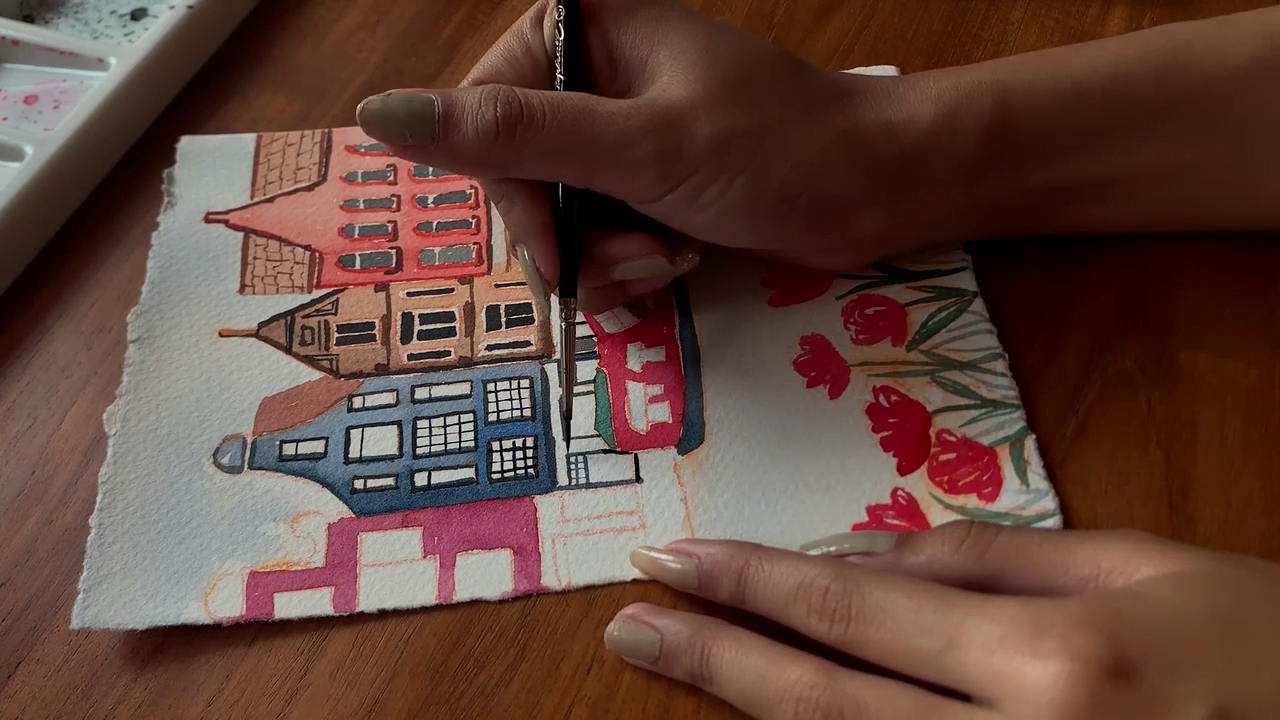
Next, add the windows and doors to your buildings once the shadows have dried. You can switch to a slightly larger brush if required. Here, I’ve continued to use a detailing brush for the same.
Repeat this process for each building on your painting, after which you can move on to detailing the boat and the river.

Next, let’s add details to the boat. This step refines its colors by improving the vibrance of the existing paint and accentuating them with shadows.
Start by adding borders to the windows of the boat, followed by creating a large shadow underneath. And based on your scene and reference, add more detail to the boat.
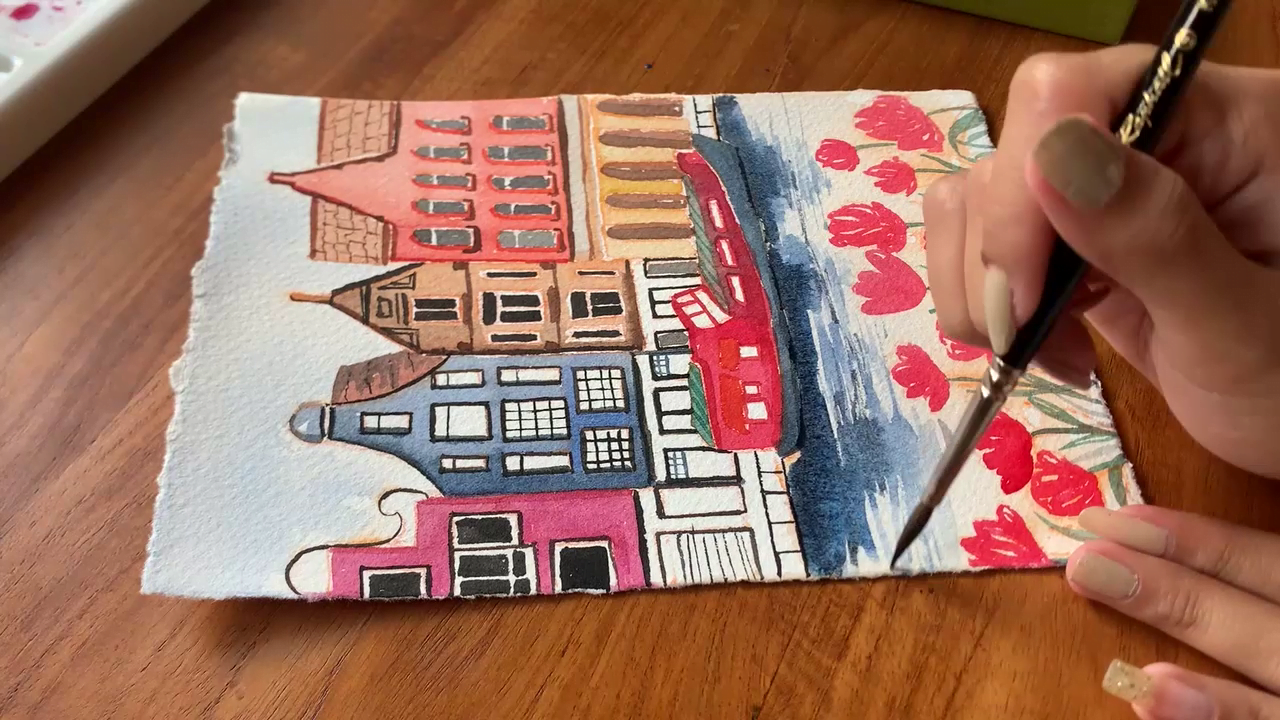
At this stage of the painting, the river may appear a little too dull, so let’s fix that in this step. Use darker shades of blue and wavy brush strokes to simulate ripples on its surface. Be sure to leave out gaps while laying down the paint to show the bright reflections on the river surface!
To finish up, I'll add another shade of darker blue to the river to create depth. Typically, a water body seems at its deepest the farther away it stretches, so darken your blues accordingly. And add a few spots of dark blue close to the viewer as well.
Just as we did for the buildings, let’s add a little depth and visual flair to the tulips. Use a brighter and more saturated version of the tulip color to add detail to the flowers. You can completely darken the tulips or use a darker shade to create shadows- it’s up to you!
Lastly, do the same for the stems as well. This will help add some visual consistency to the flowers, making them appear as if they are from the same scene.
And that’s it; the painting is finished!
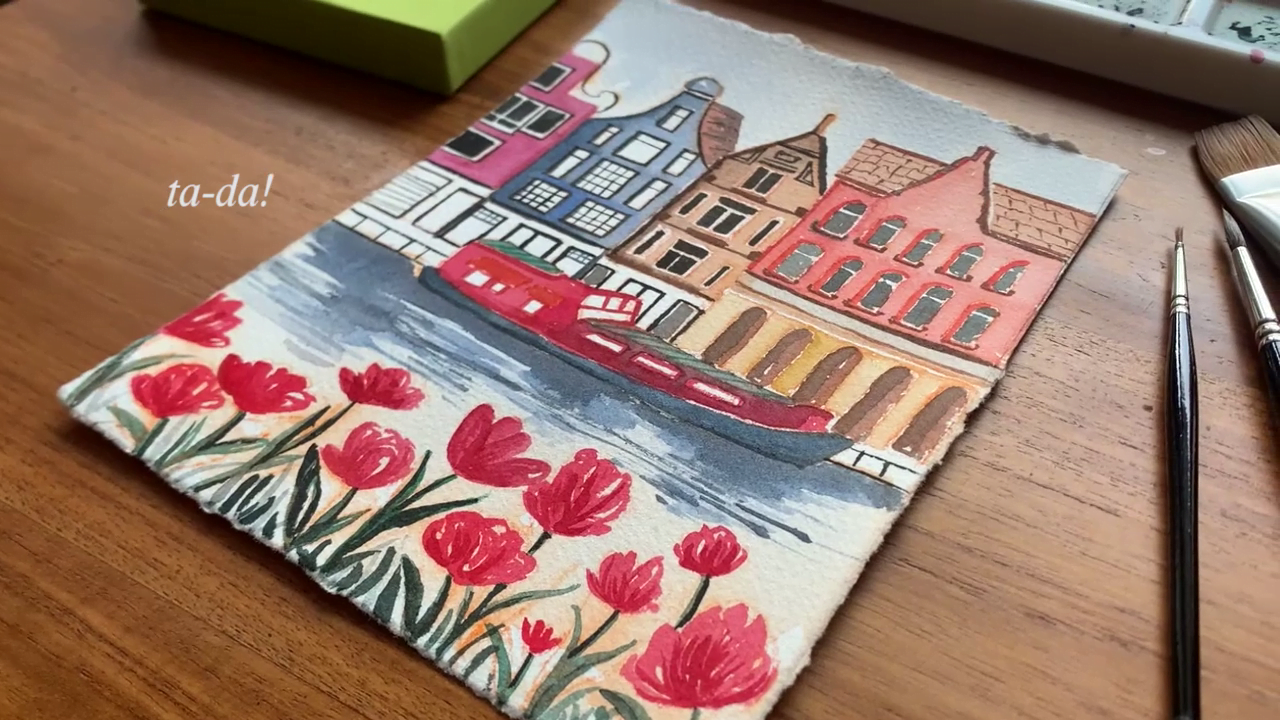
That marked the last step of this tutorial! Painting a scene in Amsterdam with watercolor using just a few basic art supplies is a fairly simple process. And now, you have a painting that is ready to be framed and put on display.
I would like to emphasize something about art in general before I take my leave, which is that it’s a long journey to partake in. Every journey has its hiccups, and the artistic one is no different. All that matters with it is that you remain persistent.
Mastery is a result of diligence, repetition, and understanding of the subject matter. So long as you remain mindful of these three aspects of painting, you will become a great painter in the future. Remember to experiment with different materials, take as much time as necessary, and express yourself fully.
Till next time!