Expertises: Art, Pastel, Brush, Drawing, Pencil
Updated on

Inspiring Ideas for Modern Home
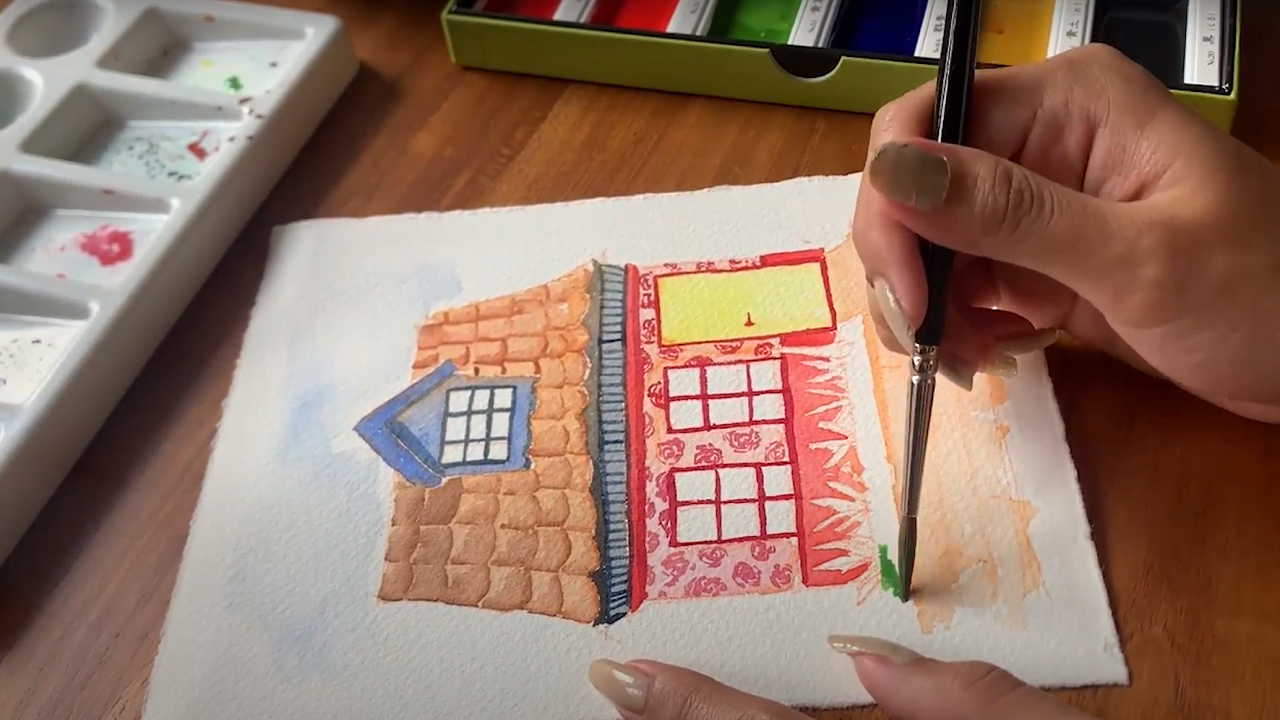
Watercolor painting is one of the most fun types of painting you can do to express your inner artist. Everyone has used watercolor painting to create beautiful sceneries in their childhood. But as we grow up, we tend to move away from this fun childhood habit.

If you’re thinking about connecting with your inner child by taking up watercolor painting and want to hone your watercolor painting techniques, look no further! My complete guide is filled to the brim with watercolor tips to help you get started!
Do keep in mind that, like with any other skill, watercolor painting has a learning curve. So, patience and practice is the key to perfecting the art of watercolor paint.
To get started with watercolor painting, you will need some basic watercolor supplies and materials. Luckily, all of these are extremely easy to find and inexpensive. Depending on your needs, you can get a lot of fancy materials. Or, you can just get some watercolor paints, some watercolor brushes, some paper towels, a jar of water, and watercolor paper to begin painting!
There are actually a few types of watercolor paints you can find in the market. As a newbie, you might be overwhelmed with choosing the right type of watercolor paint. But it’s pretty simple, actually.
Watercolor paints are usually available in pan, tube, and liquid watercolor forms. Tubes are generally better in terms of cost-effectiveness, but pans are better for beginners. So, I recommend starting your painting journey with pan watercolors and then moving on to the tube and liquid forms.
Contrary to popular belief, the choice of watercolor paper is actually the most important part of watercolor painting. If you make the wrong choice, no matter how expensive your paints or brushes are, your painting will not look good. So, you need to choose a good quality paper to make pretty watercolor textures.
Your paper needs to be graded at 140 lbs (300 GSM) for the wet paint to look good on it. If you want an even more sturdy option, go for watercolor papers graded at 300 lbs (640 GSM).
The watercolor paper also comes in two different varieties: cold pressed, which has a nice texture, and hot pressed, which is smoother.
Tip
GSM stands for gram per square meter.
You’ll be using your watercolor brushes to do all of your beautiful painting. So, you need to get one that is sturdy and durable enough to get you started. And, as if there weren’t enough types of watercolor paints, there are also quite a few types of watercolor brushes you can choose from. Here are a few to get you started with your collection.
Round Brushes
Everyone has used round brushes at some point in their life. This is actually the only brush you need to get started. It is one of the most versatile and practical brushes you can buy. You can also get this brush in multiple sizes, which will help your technique. Try to get a small, medium, and large brush to help you get the hang of watercolor skills.
Flat Brushes
Flat brushes are the best when you want to paint a large amount of space with one color. Get one to start improving your painting skills.
Angled Brushes
Just like flat brushes, angled paintbrushes have a hard and flat edge. Except, as apparent from the name, it has a diagonal angle to it. This brush is best for when you’re stuck in a tight corner and don’t want to mix paints.
Filbert Brushes
Since these paint brushes end in an oval shape, they are perfect for filling in round shapes. It’s not necessary to get this brush since it is only really needed in unique situations. But I always encourage experimenting with painting!
Detail Brushes
Detail brushes do precisely what their name says: they help you to add tiny details to your watercolor paintings. These brushes have really small tips and help you add finishing touches to your watercolor masterpieces.
Mop Brushes
Mob brushes can carry a lot of paint, helping you to quickly fill in a lot of space. This is not exactly a beginner brush. So, you can get this one once you start getting the hang of the basics of watercolor painting.
Watercolor Palette
If you purchase some watercolor tubes, you will definitely require a watercolor palette to help you take the paint out or mix paints together. A palette will help you create the perfect blend of colors you need for your desired watercolor painting.
Tip
Use a palette to create combinations of paints for colors you don’t have.
Jars Of Water
This should come as no surprise since it’s right there in the name. For the perfect watercolor painting, you need just the right amount of water. It will help you to blend in the colors and get that characteristic watery texture that makes watercolor painting so charming!
Tip
Use two jars of water during painting: one for cleaning your brushes and the other for painting and mixing colors.
Pens And Pencils
Keep some pens and pencils around to sketch your painting beforehand. This is especially important for a beginner. You can’t remove the paint from the paper, but you can erase pencil lines. So, keep a pencil and eraser handy before you start to paint with watercolor.
Other Watercolor Accessories
Apart from the supplies mentioned above, you can get other accessories to complete your watercolor toolkit. Note that these are not necessary to buy, and you can totally create beautiful paintings without them.
You need the right ambiance and workplace to start pouring your creativity onto watercolor paper. It will take some time and practice to figure out what setup works best for you. But here are some general tips to head you in the right direction.
You need some good lighting to do some good painting. Your best option would be natural light. Put your table against a window, and start creating art in the sunlight. If a window is unavailable, make sure you are in a well-lit area. This will help you see your colors clearly and add in minuscule details.
An easel stand is what comes to mind for most people when they think of a painter. You can totally get an easel stand to get in the painting mood. Or, to keep things simple, you can get started on a flat surface, like a basic table. A flat surface will enable your painting to turn out just like you want.
Watercolor painting is fun, but it is also messy. So, make sure to protect your workplace to ensure it stays neat and clean. Get an artboard to put under your watercolor paper. You can also use some masking tape to keep the paper in place. Keep some rags (or paper towels) around to clean up any mess that might happen.
Organizing your watercolor supplies in the right way is vital to keep the flow of the painting going. Keep the materials you will use the most near your dominant hand to have them in close proximity. On the other hand, keep the materials you will use less frequently near your non-dominant hand.
After you have collected all the necessary supplies and set up your painting workspace, you are ready to get started with some watercolor painting. Here are some basic techniques you can use to get the paint rolling.
This wet painting technique is very beginner-friendly and extremely fun to use. First, dip your brush in some clean water and spread it on your page. Now, add one or more colors on top of the wet area to create beautiful textures. You can also use this technique to blend complementary colors easily.
The paint will go where the water goes. So, you can use this simple technique to create highly innovative and creative designs.
In this technique, you don’t wet the paper first. Simply mix a little bit of water with some paint, and start painting directly on dry paper. With this technique, you have a lot of control over where your paint goes. It allows you to create definitive edges and add details.
Also, the dry paper does not necessarily mean a fresh blank piece of paper. You can use this technique on paint that has already dried.
Tip
Go in with the wet-on-dry watercolor technique after the wet-on-wet technique to add extra details and features.
You can use a dry brush to lift off some of the paint. You can use this unique technique to lighten some areas. You can even create fun patterns like stripes or polka dots using a dry brush.
The white of a watercolor paper should be preserved as the paper’s brightness. This helps to avoid muddy watercolor paintings since the white of the paper shines through the lighter areas. This can be achieved by using the glazing technique, where you layer transparent washes one at a time.
You can use masking tape to cover areas where you don’t want the paint to be while you paint around them. Just place a piece of masking tape on the area you want to protect, and then paint around it. After you are done, remove the piece of masking tape.
You can also use masking fluid, which is a liquid latex substance. Apply it carefully on the area you want to protect to get clean edges. After you have completed your watercolor painting, you can rub the masking fluid off yourself or use a block of rubber cement as a removal tool.
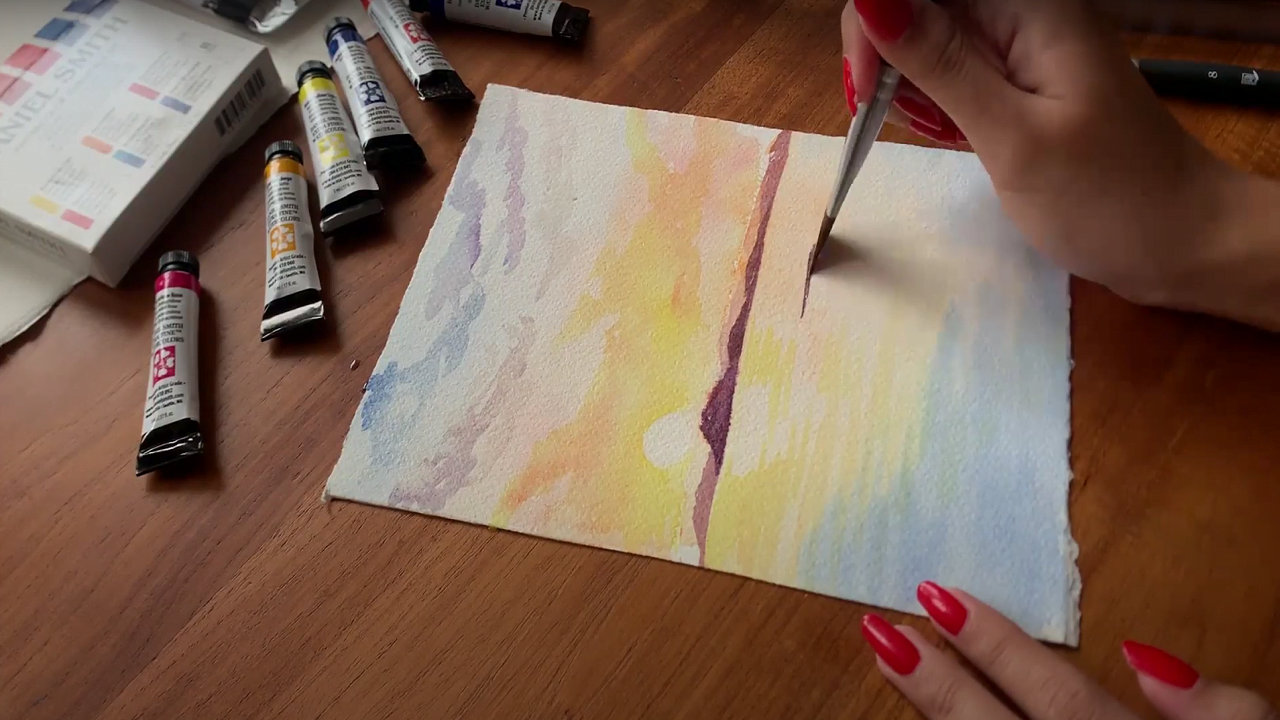
Watercolors can be used to blend elaborate gradients. First, select the shades of colors you want to blend together to create a gradient. Now, you will have to use a lot of water to create the gradient. Keep the paper wet at all costs. If the paper starts to dry up, you will be left with patchy and streaky areas.
So, keep going over the painted areas to keep them wet. Keep blending it till it is all smooth and a perfect gradient is formed. You can create single-color gradients, two-color gradients, and multi-color gradients.
You can layer different watercolors on top of each other to give your painting more depth. You can create shadows and highlights in your watercolor painting using this technique.
Choose a color and use it to draw a shape. After waiting for it to dry, apply a layer of paint on the shape, just slightly off-center. Keep doing this until you hit just the right amount of depth or shadow. You can also use different colors for this technique. Just remember to keep the lighter colors first.
Tip
Try to experiment using the wet-on-wet and wet-on-dry techniques to achieve interesting results.
A watercolor wash is just another term for covering up a large space of watercolor paper with paint. There are many different types of washes you can try to achieve this.
If you have completed your dabbling with the basic techniques, you can test the waters with some of these advanced watercolor techniques.
Although you obviously do most of the watercolor painting using different brushes, you can actually use different household items to create new textures. You can use salt, rubbing alcohol, sponges, etc., to change the textures of your existing watercolor painting.
Negative painting is quite tricky to pull off, but it is worth the effort if done right. Generally, you start painting your subject by building layers of paint and water. In negative space painting, however, you do the complete opposite. You paint around the subject of your painting. This will make your painting much more interesting and unique.
Watercolors can be used to create beautiful and intricate designs. But the skill actually starts to show when you combine it with other media, like ink, gouache, charcoal, acrylic, pastel, etc. So, not only do you paint with watercolor but also with all these other media.
Each medium has its very own unique textures and techniques. So, keep in mind how much paint of each kind you are using. Have fun mixing!
Color theory is the science that explains how humans perceive color. In color theory, there are three categories of colors: primary colors, secondary colors, and tertiary colors.
The color theory also talks about the color wheel in great detail. The color wheel consists of all three groups of colors. You can separate the cold colors (blues, purples, greens) and the warm colors (reds, yellows, oranges) by drawing a line through the center of the wheel.
Complementary colors are placed opposite to each other on the color wheel, while analogous colors sit right next to each other. All of this is just the basic color theory. You can use your knowledge of the color wheel to create enigmatic paintings with depth and perspective.
Using different brush strokes in your painting will create more exciting and captivating designs. A good brush technique will produce a good painting. Various factors can affect your brush strokes, like the amount of wetness, the intensity of your mixture, the amount of pressure you apply, the speed of your stroke, the direction of your stroke, etc.
The different kinds of brush strokes you can use are thick strokes, thin strokes, flick-away strokes, flick-towards yourself strokes, loose strokes, hard-edged strokes, dry brush strokes, etc. Begin with practicing your brush technique on a blank paper. Then, slowly start to incorporate them into your paintings.
Tips and tricks have made everyone’s life easier since time immemorial. So, here are some watercolor tips and tricks for you to get started.
After you have successfully learned the basics of watercolor painting, you can start painting using reference images. Choose a scenery or photo you would like to paint. Now, use that as a reference image. Try imitating the colors, the textures, and the depth you see in your reference image. Use your inner watercolor artist to channel your creativity.
Reference images make it a little easier to paint since you know exactly where to put your next brush stroke and which color to use.
Mixing colors to create beautiful blends and gradients is not a piece of cake. You need to have a thorough knowledge of the color theory to make sure that the vibrant watercolors you are mixing are going to produce a beautiful new color.
The three primary colors are red, blue, and yellow. All other colors are a combination of different proportions of these three. When you mix two primary colors, you get a secondary color, like green or purple. When you mix a primary color with a secondary color, you get a tertiary color, like yellow-orange.
Use your watercolor palette to test out the color theory and create unique and wonderful watercolor blends of your own.
You will have to keep in mind the wetness of the paper. If you’re painting watercolors using a wet brush on damp paper, the paint might not stay in your control. The brushstrokes might behave erratically and run in different directions. On the other hand, if you are painting on dry paper, you will have more control over what you’re painting. However, you won’t achieve any of the beautiful watercolor textures.
Mastering this will only come from experience. So, roll up your sleeves and get to practicing.
The amount of water you mix with your watercolor paints will yield varied results. Less water will lead to bold strokes. More water will make the color more pale and diluted. It all depends on the color and look you’re going for.
To practice this form of pigment and water control, you’ll have to mix varying amounts of water with paints and see what new effects you can come up with. Keep experimenting and practicing to learn how to watercolor paint.
Weak paints are the result of little paint and too much water. Stop adding water to the painting after the desired effect has already been achieved. Layering also needs to be done carefully to avoid getting a muddy result. So, knowing when to stop is very important while experimenting with watercolor painting techniques.
Since watercolor is transparent, you can’t really paint lighter colors over dark. So, you need to conserve some white space beforehand if you want to do that. This is where all that planning will come in handy.
Tip
You can use some sandpaper, a dry brush, or a sharp knife to scrape some of the dark paint off if you forget to leave some white space.
There are no shortcuts to success. Practicing with the paints is what is going to improve your skills and teach you how to watercolor paint. If you want to become a true watercolor artist, it is essential for you to take out your paintbrushes and get to painting regularly.
On the road to becoming a true watercolor artist, you are bound to make some mistakes during your first few paintings. However, you need not worry. Here is a list of some common mistakes and also ways to avoid them.
Overworking the watercolor painting happens when you over blend the painting with water and paint and try to add too many details. This ruins your watercolor painting and leads to the wastage of good-quality paper. This can be avoided by starting the painting with a plan. You should have a proper vision of what your painting should look like.
So, next time you sit down to paint, do some planning ahead. Visualize using a color wheel. Practice the basic and advanced techniques. And then start dabbling in watercolor paints.
Watercolor painting essentially means mixing water with some paint and creating beautiful art out of it. All the watercolor effects and textures depend on how much water you are using. So, using too much water might dilute your paint color. This would not let the actual color of the paints come out and will lead to blurry paintings.
This can only be avoided with experimentation and practice. Pick up a brush and some water-based paints every once in a while. Practice with different amounts of water till you find the right amount.
When you paint with watercolor, you need to have some patience. Painting on a wet wash using a wet paintbrush will lead to muddying of the colors. You will actually risk ruining the under wash; this is known as unwanted back-runs. So, your well-intentioned brush stroke will turn into a muddy sludge.
This can be avoided by just having some patience. Wait a little while for the under wash to dry before you go over it with another layer of paint.
Tip
You can buy a heat tool to dry your paints if you can’t deal with the drying time.
I do realize art supplies can be expensive, but the watercolor paper is not something you should compromise on. Essentially, you will be compromising on how your watercolor painting turns out. Cheap paper is made using cellulose, which absorbs water very slowly. This doesn’t let the true beauty and textures of watercolor paintings come out. Other cheap papers just disintegrate into a piece of pulp if you use too much water.
The solution to this is using high-quality cotton paper. Only good paper will lead to good paintings. You can even compromise on the quality of the paint brushes but only get good quality paper for your painting.
Tip
Practice painting on cheap paper before so you don’t waste any of the expensive good quality paper.
Whenever you paint with watercolor, you need to remember that watercolor paints tend to dry about 25% lighter than when they were wet. So, the colors might start to look too pale and dull after they dry up. This can only be solved through practice and experience.
Open up your painting notebook to a fresh page, and just start painting. Choose the darkest and the lightest colors, and see what creativity you can come up with.
So, remember this when you watercolor paint the next time. After all, it is better for your colors to show up darker than not show up at all.
The water you are using while you watercolor paint starts to become dirty throughout the course of the painting. Dirty water will discolor and contaminate your artwork. So, you need to remember to replace your water regularly.
Professional watercolor artists use 100% cotton paper to paint with watercolor since it provides sturdiness and durability. They offer the best painting texture and surface. If you’re not confident about your painting skills, you can start with wood pulp papers. After you have worked on your skills, you can then progress to better-quality cotton paper. Watercolor papers also come in two types: hot-pressed and cold-pressed. The hot-pressed paper has a smooth surface and even texture. Hence, it is ideal for fine details for mixed media painting, and the paint dries quickly. Cold-pressed paper, on the other hand, has a bit of tooth to it and is a great option for beginners. As a beginner, you can also buy a watercolor painting book to keep all your artwork in the same place. Mixing watercolors is pretty easy and fun. Here are some basic color combinations you can keep in mind: There are several techniques used in watercolor painting. You can start with simple techniques like blending, layering, dry brushing, etc. After you have successfully improved those, you can begin practicing some of the advanced techniques, like textures, depth, negative space, etc. Practice is the key to improving any skill. The same goes for watercolor painting. You need to work on your art and keep practicing regularly. Begin with the basic techniques, master those, and then move on to the advanced techniques. Slowly, you will start to notice the improvement in your paintings. Start with painting small things, like flowers, trees, skies, watercolor lettering, etc. Steadily, you can move on to more complicated and picturesque sceneries. And don’t compare your progress with anyone else’s. Everyone’s journey is different. You need to find some inspiration and then try to recreate it. If you are having trouble coming up with different ideas to paint while practicing, here are some wonderful watercolor painting ideas to get the ball rolling. Watercolor scrubbing is a technique painters use to hide or correct mistakes. Wet a special scrubbing brush or a stiff brush, and start gently scrubbing at the mistake. You will notice that the paint starts to lift off slowly. Just remember to clean the brush in between and be careful not to damage the paper during the scrubbing process. How to Watercolor Paint Related To FAQs
How do I choose the right paper for watercolor painting?How can I mix colors effectively in watercolor painting?
What are the different techniques used in watercolor painting?How can I improve my watercolor painting skills and take them to the next level?What is watercolor scrubbing?
Hopefully, this article inspired you and assisted you in taking your dip into the world of watercolor painting. One of the best tips I can give you is to start small and have patience. Practice makes perfect, and this absolutely stands true for watercolor painting.
With watercolor painting, you literally need to go with the flow. The flow of water will lead to interesting and charming designs. And slowly, you will learn how to control those designs.
Just remember to have and enjoy the process. After all, what are watercolors for, if not a little fun?