Expertises: Art, Painting, Drawing, Home improvement, Gardening
Updated on

Inspiring Ideas for Modern Home
If you always thought greenhouses are for professionals, we want you to think again.

The ever-increasing costs of food products around the world have virtually transformed homeowners into farmers. So, don’t be surprised the next time you see a greenhouse in someone's backyard!
Plus, greenhouse farming can be a cool upgrade to your gardening skills. But first-timers may face significant challenges while at it. And if you’re one such gardener with this thought in mind, you’re come to the right place.
To help you, here we are with a detailed guide on how to use a greenhouse. Without further ado, let’s begin!
As clinical and scientific studies continue to prove the detrimental effects of chemicals and preservatives on the human body, homeowners are opting to grow their food. Besides boosting the immunity system, freshly grown vegetables and herbs add a distinct flavor that just can’t be matched with canned or frozen produce. And anything that’s easy on the pocket is bound to be a favorite!
Although you may think of simply going for a vegetable garden, having a greenhouse is much more beneficial. For one, it prevents seasonal or intermittent issues from hampering the plants throughout the growth cycle. Secondly, plants grown in a greenhouse are physically less demanding as they are mostly waist-high as opposed to low on the ground.
Apart from that, it helps in moisture retention while allowing the gardener to control the temperature if needed. The closed room like structure also keeps pests away from delicate plants, thereby resulting in a healthy growth cycle.
Now that you know about the advantages of a greenhouse, let’s dive deeper into the details of building and maintaining it.
Before you can begin constructing a greenhouse, it’s essential to have a thorough understanding of the seeds that will grow inside. In this regard, starting seeds are usually planted in plain, level seeds trays, hydroponic trays, or plugin trays.
Furthermore, the preparation of different seeds depends on their specific needs. For instance, some seeds might have to be immersed overnight, stratified, and then planted in the trays.
Beyond that, there are some steps that you can undertake to ensure a proper starting seed process, which are:
Other than that, it’s also important to identify labels and record the date of planting so that you can keep track of the growing cycle. Each seed packet comes with a germination rate through which you can calculate the number of seeds required to achieve the desired saplings.
Generally, there are two types of seeds that are selected for greenhouse gardening. Each comes with its own sets of pros and cons, and you can choose one (or both) according to your needs.
Also labeled as F-1 seeds by seed companies, hybrid seeds are pretty easy to buy - you can get them at almost any gardening store. These are used for crossbreeding similar plants, and growing them to be tall and healthy. However, their biggest advantage is that hybrid seeds aren’t quite affected by ecological stress, pests, and diseases.
Not only do these seeds have a consistent production, but they also facilitate early harvesting with improved yields. That said, there are a few downsides to consider. Firstly, their superior quality comes with a significantly expensive price tag. Moreover, the hybrid plants from these seeds don’t have a long shelf-life. And some people just don’t find them appetizing enough.
If you're all for tasty food on the table, then heirloom seeds are the way to go. This category had been specifically engineered for flavor and taste. But they are more than just that. For starters, the seeds produce genetic varieties, which are great for future cultivation. Unlike the hybrid variant, these are more stable and can be stored for up to a year.
Again, this variety is not free from limitations, either. You may not always find heirloom seeds in your nearest garden supply store. They don’t possess strong hybrid capabilities, and the cross-pollinated species will need to be separated.
Apart from choosing the seed type, you’d obviously want to decide the vegetable to grow. In this regard, here’s a list of some simple plants that are ideal to start with for you to garner significant working knowledge:
Deciphering the label on the seed packet can also provide you with a lot of information. Especially for first-timers, they can get confused with the plethora of options on the market. Usually, you will find the following types:
Also called true-to-type seeds produce true plants, meaning the saplings are related to their parent plant. This, in turn, helps in seed conservation.
Organic seeds are marked with USDA organic standards of that particular area or territory.
GMO (Genetically Modified Organisms) seeds are produced via cross genes from separate plant species. Unless labeled otherwise, any seed can be open-pollinated, GMO, hybrid, or heirloom.
Non-GMO seeds are the ones that have been produced without the ‘recombinant DNA Technology’. Simply put, they are generated through random or specific pollination.
As the name suggests, hard seeds don’t generate readily due to the thick outer coating.
Dormant seeds need pre-treatment or weathering to sprout quickly.
Germ is the count of how many seeds will sprout easily. It’s recommended to take note of the germ count so that you know how many seeds will produce the required number of plants.
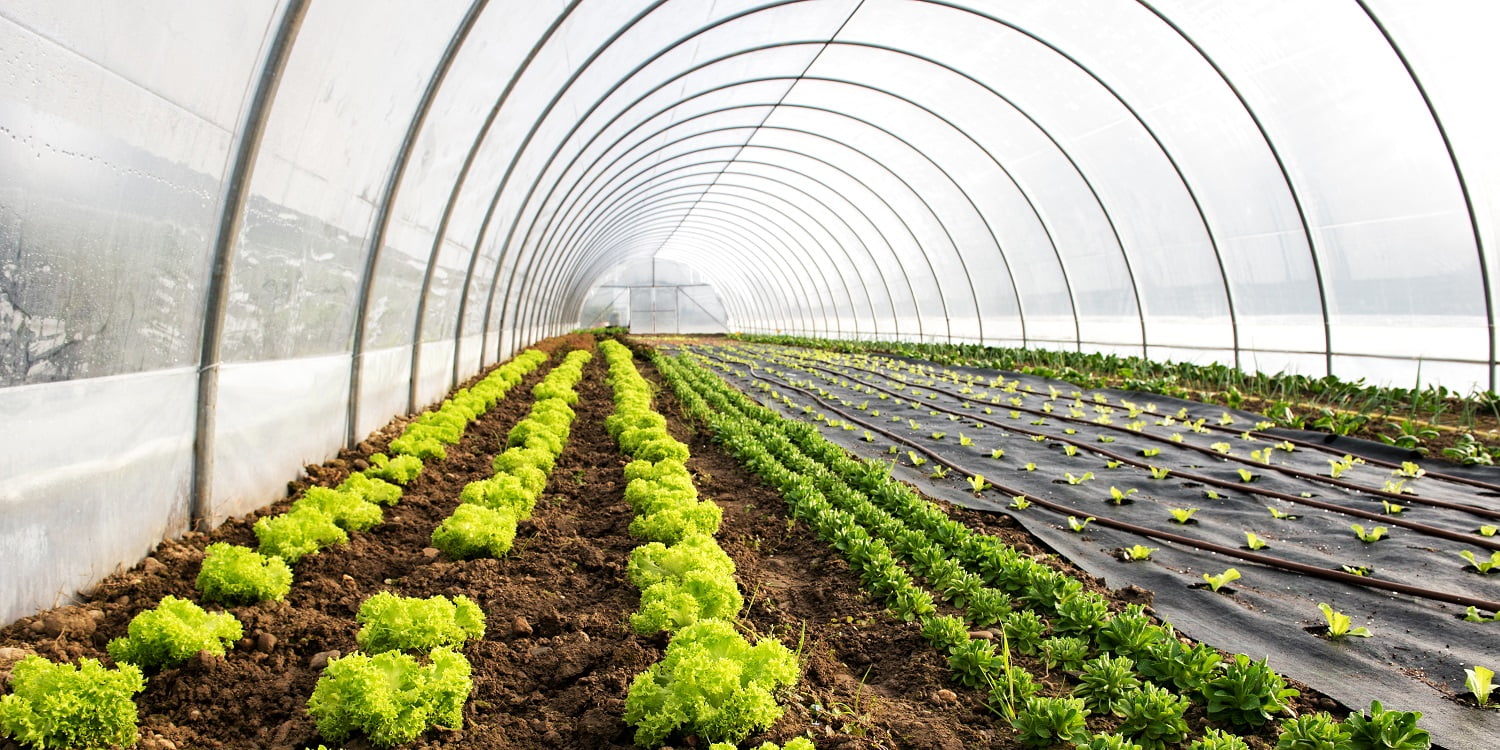
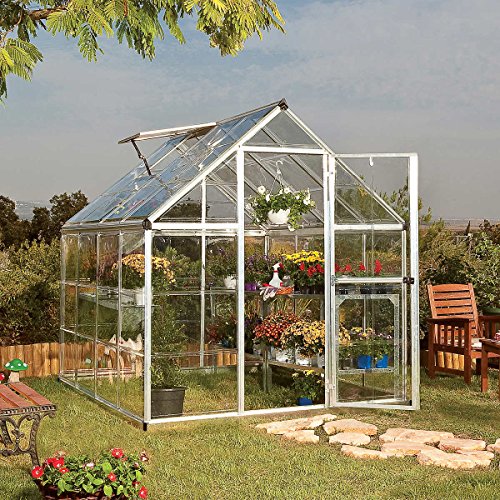
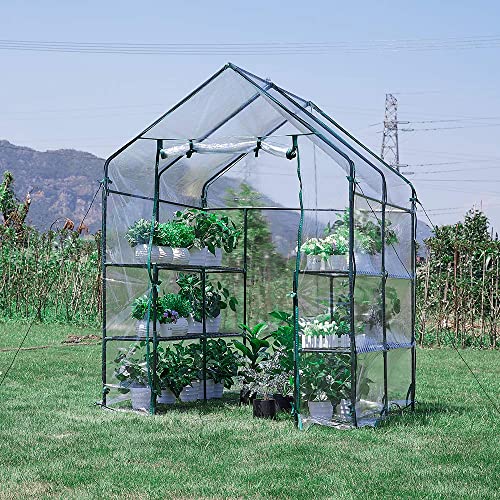
As far as constructing a greenhouse is concerned, there are several ways to go about the job. While some hardware stores or nurseries sell pre-assembled greenhouses, others may offer a kit that’s best suited for DIY enthusiasts. Plus, they are also available online.
No matter which method you go for, the basic structure of the greenhouse should also remain the same. It generally looks like a small building with a roof, four walls, and a single entry/exit gate. While the core structure is made of metal or wood, the surrounding material can be a plastic sheeting or any other stuff that allows adequate light penetration and air circulation.
So that your greenhouse can promote a positive and productive growing season, here’s a checklist of the features that should be taken into account during the setup. Even if you plan to opt for a ready-made one, make sure it has:
Like the surrounding material, the shape or style of the greenhouse can also vary. Depending upon the available space, homeowners tend to go for either a freestanding or leaning structure. While the former correlates to a stand-alone greenhouse, leaning structures have only 3 walls, with the third one being an existing wall of the house.
Although they are a good option for backyards with less space, it’s worth mentioning that one wall will not receive any natural sunlight due to its non-penetrative nature. Hence, adjusting the conditions inside to suit the growing needs becomes all the more important.
Most plants require light for the overall development and photosynthesis process, but not every light works the same for every plant. Various factors like the plant species, the current season, and the amount of daylight achievable influence the type of light source needed by the greenhouse.
Moreover, the intensity and span of light can cause different reactions in different plants. However, the need for light increases with the development of plants and the subsequent growth of leaves. The wavelength of red and blue colored lights are widely used in photosynthesis, and can be easily identified in the light spectrum.
Sure, greenhouses can’t make the sunlight last forever. But thanks to their controllable environment, gardeners are free to use artificial or man-made light sources that mimic the diverse color range of natural lights.
In ideal conditions, the greenhouse should receive adequate sunlight for plant growth or germination, especially during the summer and spring seasons. But if your area doesn’t receive the required light, LED grow lights and fluorescent lamp strips will do the job.
Not only do these high output light systems sufficiently cover a large area, but they also offer the full light spectrum to aid photosynthesis. Plus, you can use them to boost the development of specific plants, if needed.
Other than that, such supplementing grow lights will also come in handy if you’re looking to target the late autumn or winter months for growing plants. Northern areas, in particular, receive weak natural light during the winter months, so consider investing in an energy-efficient light system.
Fluorescent lights can also promote targeted propagation or germination in greenhouses that receive no natural light at all. For smaller spaces or crops, you can opt for simple fluorescent light strips and hang them 3 to 7-inches above the plant.
Ensuring proper ventilation in summer is a task cut out. As the heat naturally creates convection currents, it does more than enough to maintain adequate fresh air circulation consistently. All you have to do is keep the wall and roof vents open to drive away hot air while pulling in cold air from outside.
Since winter months promote the growth of mold, it’s crucial not to lose focus on air circulation. In this regard, you can use oscillating fans throughout the season to make sure all the moisture is drained out. Beyond that, prevent over watering the plants at all costs.
Without a second doubt, greenhouses provide for a controlled environment as opposed to open gardens. But temperature control still needs to be taken care of. Without proper temperature, the development process is likely to be hampered beyond repair. Long story short, don’t let the temperature run too high or fall too low during summers and winters, respectively.
First up, let’s talk about heating the greenhouse. For first-timers, we’d strongly recommend opting for electric heaters, which are easy to install, cost-effective, and have a wide range of use. A small 120-volt heater is ideal for a small greenhouse, while the larger ones may require a 240+ volt heater. Additionally, don’t miss out on a controllable waterproof thermostat.
Besides, you can also choose to have a gas heater. But unlike their electric counterparts, they are less economical and come with the hassle of added ventilation. Furthermore, you’d need to arrange for combustion and fume exhaustion supplies.
Programmable heaters that automatically turn on operation when the temperature drops below a certain point are a good means for propagating seeds or seedlings.
If being eco-friendly is at the top of your priority list, then you can explore the less energy-intensive options out there. For instance, some ventilation systems utilize the unwanted warm air from your home to maintain the desired temperature. In addition, there are other heat-absorbent elements like mats or rocks, which absorb heat during the day and release it uniformly at night.
A pro tip: if budget is a constraint, use a combination of heaters and heating-absorbing elements to keep the temperature consistent throughout the day.
Moving on to the cooing aspect, the simplest way to keep a greenhouse from being overheated is by opening the sheds from time to time. Moreover, try to set the greenhouse in a location that provides sufficient shade, just as it allows for sunlight.
That said, it might be necessary to install an evaporative cooling cooler, especially for dryer areas like Arizona, Colorado, and California. Besides regulating the temperature, these machines also help in adequate moisture retention.
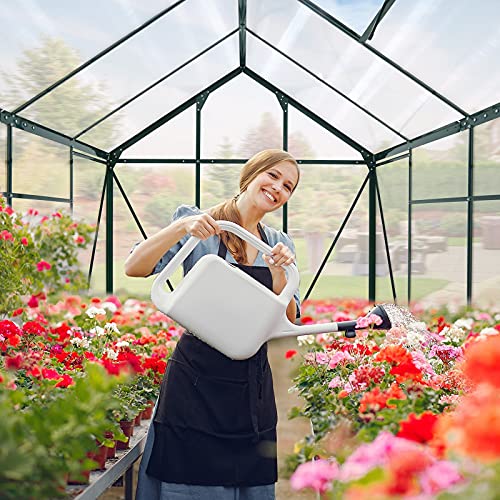
There’s no dearth of modern techniques and equipment for watering. But unless you understand the water requirement of the said plant, none of them will yield satisfactory results. On top of that, the temperature, humidity, and level of development also affect the water requirement.
A common mistake that first-timers make is to water the plants according to a fixed schedule, which often does more bad than good. For example, you may develop a habit of watering the seed every 10 days during winter. However, the frequency will invariably increase during summers. Failing to adapt to the situation can then lead to dead plants.
Similarly, certain alarming signs can warn you about inappropriate watering, including both under and over watering scenarios. Low shelf life, irregular drying, decreased root, or shoot growths can correlate to inadequate watering. If the compost appears too dry or flaky, it needs more water.
As a means of prevention, you can employ a drip irrigation system that regulates greater or smaller steam of water to pots or trays. Combining these systems with a water timer or drip gauge will lead to precise watering patterns.
Remember that it's the roots that trap moisture and not the leaves. Not only does sprinkling water on the leaves cause wastage, but it can also damage the plants in the long run. And overwatering happens when the soil is supplied with water faster than it can drain.
While moisture meters read the exact moisture present in the soil, you can also feel the soil to gauge the moisture content.
Despite having a closed and controlled environment, it’s not unusual for greenhouses to attract pests and consequent diseases. Many gardeners opt for installing insect screening equipment in all open areas like doorways, vents, and airways. But without identifying the pest and the related damages, choosing an appropriate pest control strategy will become a challenging task.
So, we’ve listed down the common pests and the threat they bring to the table.
Starting with aphids, these delicately colored, soft-body organisms love feeding on the green leaves. Therefore, observe the bottom of the leaves to check for aphid groups. Careful pruning and regular cleanliness drives are great ways to stop them from munching on your beloved plants.
Similar to roundworms, bloodworms also have an elongated shape. These limbless insects have well-defined brown heads but are red-bodied due to the presence of hemoglobin. In fact, this hemoglobin enables them to grow in water that has extremely low levels of saturated oxygen. Thus, maintaining a steady oxygen flow will keep the bloodworms at bay.
Increased moisture level is an ideal situation to invite snugs and snails. You will generally spot them after sundown when the environment becomes somewhat cool. Ensure that your greenhouse is free from any plant waste like used rocks, bricks, uprooted leaves, stems, etc. that make for a favorable hiding spot.
Varying in shades of brown to black, thrips can inflict damages that range from moderate to critical. Vent screens, regulation of weeds, and carefully examining new supplies are some of the effective ways to prevent thrip invasion.
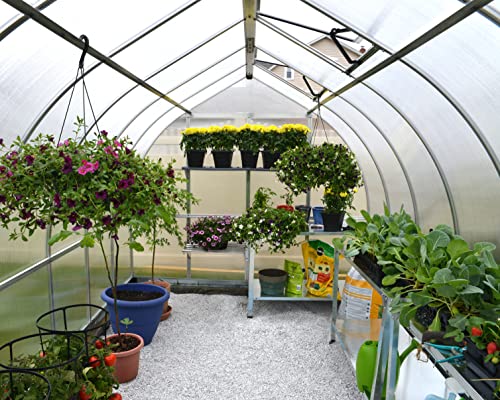
Apart from the more apparent accessories like containers, trays, fans, and coolers, there are several other accessories that can make your work easier. And although they may come across as enticing deals, not everything will be a fit for the greenhouse. In a nutshell, the requirement of an accessory will depend on the available space, and of course, the plant’s needs.
For example, some plants may need a slow and steady water supply, which is best achieved through a drip water irrigation system. Likewise, the need for mist systems, fans, or heaters largely depends on how much the environment is able to furnish for plant growth.
On that note, some accessories may be considered to be absolute necessities. A bench or shelf aids space organization, particularly for small greenhouses. While small fans can be used for targeted pest control by eliminating excessive dampness, larger fans help in air purification when coupled with proper ventilation systems.
Even a seemingly insignificant accessory like a thermometer can do wonders for plant development. Perhaps, it’s the best way to maintain precise temperatures that are suited for varied plant growth.
Lastly, regulating the intake of sunlight can be made easy with the application of shading. Besides preventing overheating, they act as filters for plants that don’t need a lot of sunlight to grow.
Not to the point of repeating, but successful greenhouse gardening involves knowing what needs to be avoided. So, here’s a quick roundup of the mistakes that beginners are most likely to commit.
The best way to ensure the full development of a plant is to adhere to the temperature needs. Even if you’ve planted the seed at the correct temperature, it’s not advisable to skip regular temperature checks, especially for delicate varieties. Use a basic or digital thermometer to assess both the temperature and humidity content.
While low humidity may dry out plants, making the greenhouse more humid will contribute to the mold and fungus growth. Instead of increasing the humidity at one-go, adopt misting techniques for a gradual increment.
Never use old potting soil as it has a high chance of carrying pests and diseases. In addition to applying nutrients and compost, try to go for a blended soil mixture for better results.
If there are a lot of trees near the greenhouse, the roots can suck moisture and nutrients from the greenhouse. Moreover, the overhead trees may dump leaves and twigs into the greenhouse, promoting the presence of pests. Likewise, too much shade can restrict sunlight from entering.

That’s that from us for today’s guide!
It was a tad lengthy because we didn’t want to miss out on any point. And honestly, we don’t want you to rush into the decision. Creating and maintaining a greenhouse is no child’s play, so you’d want to have all the necessary resources available in the vicinity.
On that note, it’s time for us to say goodbye. But before we leave, here’s another quick pro tip: spring is ideal for starting seeds, while summer is suitable to start growing flowers and small plants. On the other hand, fall is better for growing seasonal plants, and winter for cold-resistant varieties.
Hope our efforts have answered all the relevant queries. Signing off!