Expertises: Art, Painting, Drawing, Home improvement, Gardening
Updated on

Inspiring Ideas for Modern Home
While it is not child’s play, wiring an outlet is not impossible either!

Wiring a 220-volt outlet can be a tad bit risky if you do not know how to go about it. Since you are dealing with electrical points, you must go by the book.
But on the bright side, once you master this process, you will be saving so much money that would otherwise have to be paid to an electrician.
We have detailed the process in the form of steps to make it easier for you to follow.
Read on to know the process of wiring a 220 outlet!
It is essential to first switch off the circuit breaker. The breaker must be powered off, and the handle needs to be locked. After all, the primary circuit cannot be functioning during the process. Once you have made sure that this is done, move on to the next step.
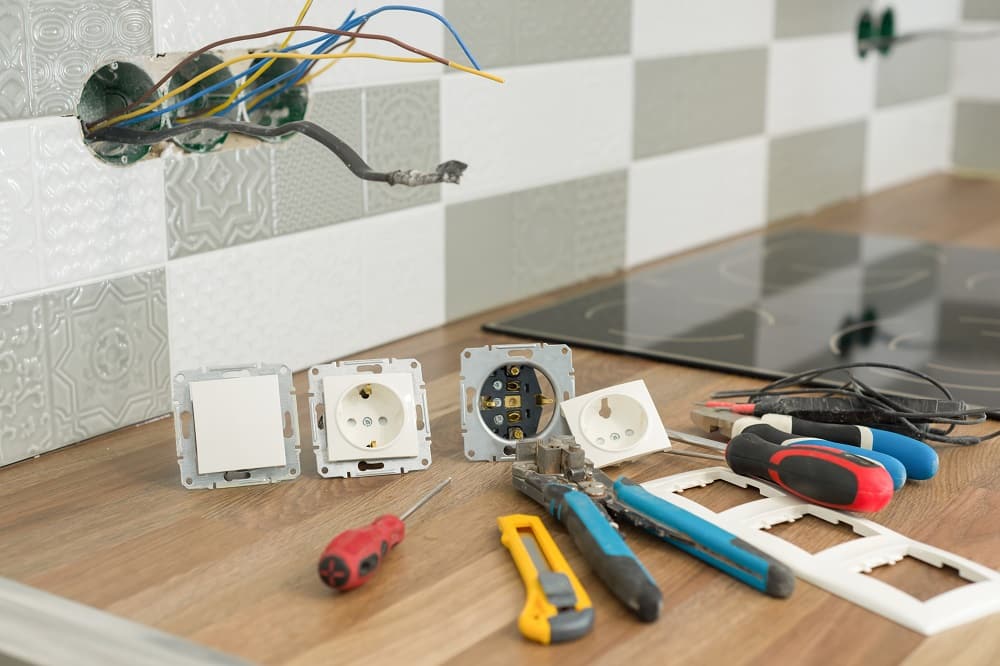
Firstly, remove the metal cover. This is important to get access to the breakers. After making sure that the circuit breaker is dead, plug in a 50 amp two-pole breaker into the box. The box should be able to support a two-pole breaker. Check beforehand if there are two spaces available to put in the two.
Once you are done determining, you can go ahead and hit the hardware or the electrical supply store. You need to purchase a breaker, some electrical wire, and an outlet.
It is time to attach the flush mount to two gang boxes on the wall surface. Make sure that it is adequately fixed and cannot be moved (use screws for this purpose). After you are sure the gang boxes are in place, proceed.
This is a crucial step - it is time to fix the wires. You must have a minimum of 6 inches of wire already inside the receptacle box. Some sheathing should remain exposed in both boxes. This includes the circuit breaker box and 2-gang box.
Now using that same cable ripper, you need to slowly pull out about 6 inches of the plastic sheath off the wire. The wire is the same one that is used inside our 2 gang box. Once you have achieved this, move on.
It is time to pull out 12 inches of the plastic sheath of the wire used. Use the same cable ripper to do that. This part of the wire will go inside the circuit breaker box. Please maintain the exact measurements while conducting the process.
Here you would need to strip off 1 inch of the sheath with the wire stripper. Be careful not to strip off any more than that.
It is time to fix the wires. Bring one end of the wire inside the circuit box and connect the other end inside the 2-gang box.
The next step involves implementing the wire connection. First, concentrate on the wire inside the 2-gang box to provide a connection with your outlet. To make this happen, you will require 3 wires - a black, red, and a bare one.
The bare one is the ground. There will also be a fourth white wire, but it is neutral, and you need to skip using that. To prevent any mistakes, wrap the white wire with electrical tape and seal it securely inside the 2-gang box.
After the wires are in place, put some non-corrosive agent at the tip of all those wires. This will keep the connection from corroding.
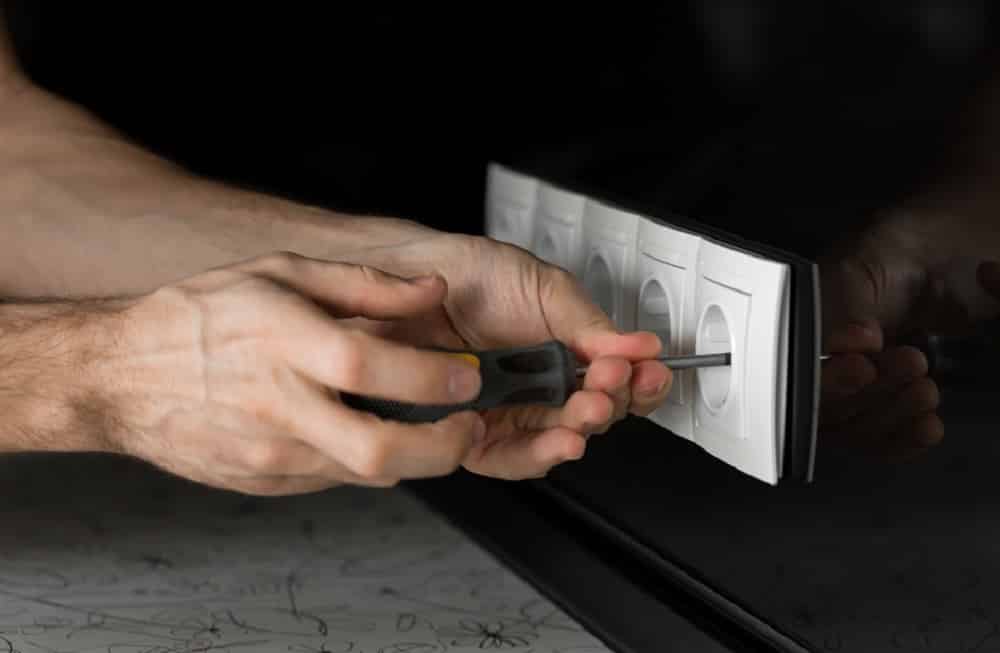
Now take the black, red, and bare wire and connect them to a receptacle. Hook up each colored wire against the correct screw. The black and red wire should be attached to the two-prong terminal, while the bare one needs to be connected to the ground terminal.
Place it with the screw facing up and now put the cover back on. You need to fix the cover properly to ensure that the job looks professional.
After you are done, connect the three wires to the breaker. Here you will again have the white wire which you need to fold and keep securely inside the box. These wires need to be stripped, and the non-corrosive stuff has to be attached to the end.
It is time to hook up the ground wire. Also, hook up the black and red wire in accordance with the breaker manual, and you are done.
When you go over to a hardware shop to buy the required products, make a note of the quality of the specified products you are purchasing. An overloaded circuit can be extremely hazardous and can cause a fire to erupt, or someone could get electrocuted. The whole equipment could also be damaged in one go.
Always choose a breaker rated at or above the required amperage for your welder. The gauge wire for the circuit size should also be perfect. Also, choose an appropriate outlet to match your welder’s plug. If you are not sure which one to go with, ask the dealer for help.
And with that, you are good to go - you can now proceed to set up your outlet.
Let us know how it worked out. Until next time!
Related Articles