Expertises: Painting, Art, Drawing, Pastel
Updated on

Inspiring Ideas for Modern Home

To the uninitiated, it is little more than the sort of doodling we used to when we were kids, except maybe with a canvas and some brushes.
But, the job of professional painters is not an easy one. Getting the perfect stroke, the perfect hue, the perfect… well, words fail us! Oil painting, specifically, is incredibly tough, as the solvents are toxic and the paints take longer to dry.
So, what’s a budding artist to do? What if you wish to follow the footsteps of da Vinci, Michelangelo, or Salvador?
Well, while an internet article won’t magically make you as great as any of them, in today’s day and age, it’s one of the best places to start.
So, without further ado, let’s give you some invaluable tips to kickstart your oil painting journey!

Well, you know what they say, safety first, and that is why safety makes the top of our list.
Oil paints come in many different mediums, and some of them, like turpentine, can emit fumes which might be toxic and could potentially be a health and safety hazard.
Apart from emitting toxic fumes, these mediums are also very flammable, so be careful while handling them. Make sure the rags you use have no traces of flammable oils like kerosene, and also that once the rag is used, it is disposed off or appropriately handled to prevent self-ignition.
Apart from fumes and combustion, oil paints can pose a threat to your skin. These paints contain hazardous chemicals which can seep into your skin, so make sure you wear some protective clothing which covers most of your body.
A budding footballer should not hope to flick the ball around like Neymar; instead, he should learn to dribble first. Similarly, an aspiring painter shouldn’t invest too much money and time into painting on large canvases.
Start with a small canvas and try out your strokes and techniques. It will also help you get a feel for colors on your palette. Start by investing in an 8x10 canvas, and if that seems like too much of an investment, you can even try it on a piece of paper!
Now that you know you need a small surface to work on, the next logical step is to determine what surface you should get.
There are three main surfaces to paint on: wood, canvas, and fiberboard. Each has its advantages and disadvantages, and these are as follows.
While it is widely believed that canvas was the surface of choice for the likes of Picasso and Van Gogh because it was the best surface in terms of quality, the real reason is very humbling!
Wood, its immediate alternative, was expensive, required a layer of primer and was cumbersome to transport, therefore, canvas was the surface of choice.
The reasons why canvas is preferred over wood remain the same, and that makes it the best choice for budding artists.
If you do decide to start your oil painting journey on canvas, keep the tooth and the texture of the canvas in mind before buying one.
The tooth refers to how well the canvas can grip the paint. Manufacturers can improve the tooth by adding a layer of primer. The texture refers to how consistent the canvas feels to touch and to paint on.
After canvas, the most popular choice for a surface to paint on is wood. There are many types of wood to paint, with the most popular being birch, plywood, and mahogany. Most people believe that solid wood panels last longer than plywood panels.
Should you wish to begin your oil painting journey with wood panels, the best option is to go for birch plywood. It is very cost-effective and compromises little on quality when compared to other types of wood.
As and when you master your craft and start charging commissions, you should probably upgrade to maple or other wood panels.
Bear in mind that wood panels need to be primed with some sort of a primer, usually gesso, otherwise all your paint will be absorbed by the panel. The best practice is to prime both sides of the panel, front and back, to lock the moisture in.
Since cost is a key consideration while choosing a panel, some artists may wish to make a panel for themselves.
While the reasons for choosing to go down the DIY path are understandable, bear in mind that the results so obtained will not be as great as a piece of mahogany purchased from the store.
Fiberboards come in two types, MDF and HDF.
MDF stands for Medium Density Fiberboard, and HDF stands for High-Density Fiberboard.
These panels combine the features of both canvas and wood and are made from a combination of hard and soft woods.
Fiberboards should not be confused with other particle boards, which are prone to flaking and cracking. Fiberboards are very dense and rigid, thanks to the way they are made.
Coming back to cost again, fiberboards are a great in-the-middle solution to the canvas versus wood dilemma. Since these boards come at an affordable price point (just slightly more expensive than canvas), they are perfect for those not quite ready to shell out for a wood panel.
However, if you want to reduce the cost even further by making the panel yourself, we recommend you to not go down that route as the production of a fiberboard panel is a complex process requiring knowledge of industrial processes, not to mention acquiring some hard-to-find materials.
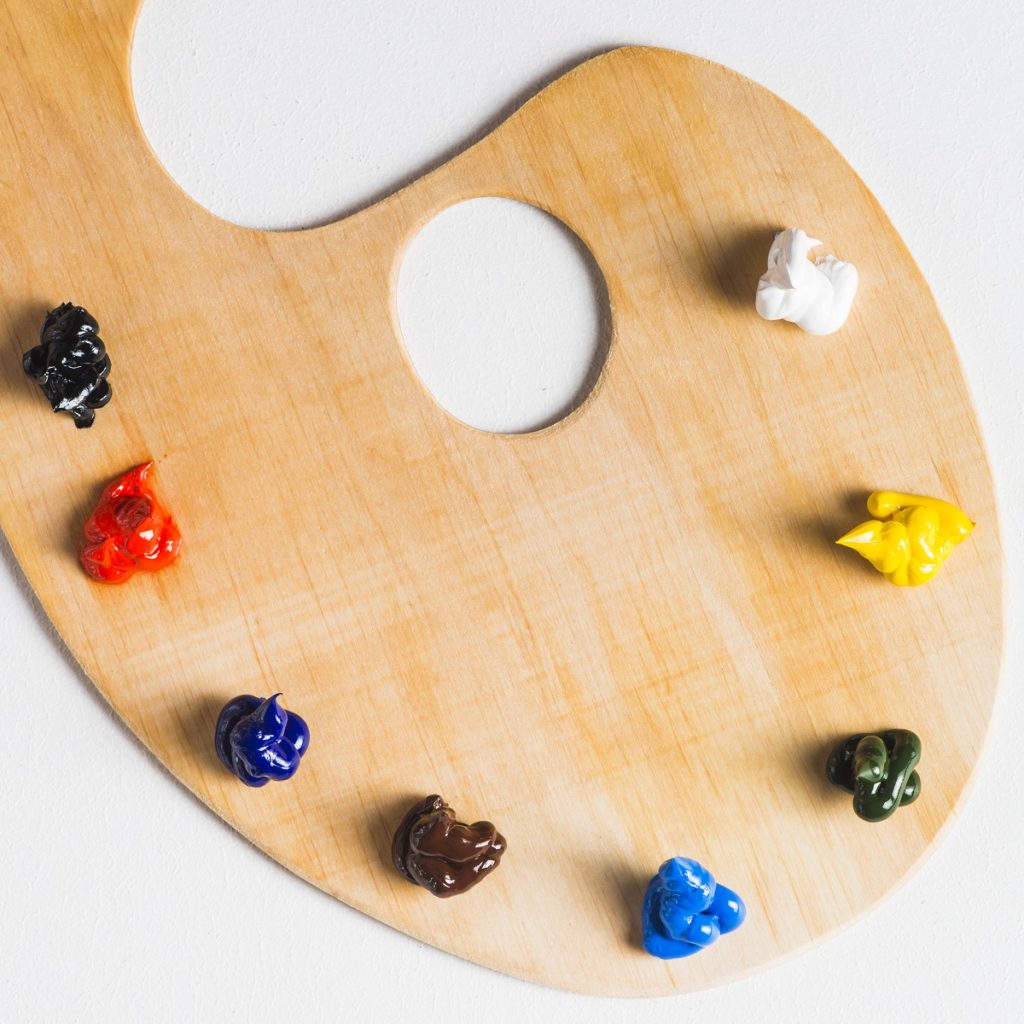
While it is very tempting to go to your local art store and buy their entire lineup of paints, it is not advisable to do so, especially for budding artists.
Setting your palette is more complicated than it seems and should be done with the utmost care, as it can influence your choice of colors and consequently, the painting itself.
Next, get contrasting colors. Budding artists are not very well-equipped to appreciate the hues, nuances, and applications of different shades of the same color. It also makes you appreciate the differences between light and dark colors.
Lastly, should you need more hues of a color, you’ll be surprised at how easy it is to create it yourself by mixing the colors you already have. This is an excellent way of reducing your expenditure and saving some money.

Okay, you now have a surface to paint on, and you now have paints to apply on the said surface, but how do you actually go about doing that?
Well, with a brush, of course!
However, if you have trouble differentiating one brush from another, don’t worry, we’ll help you. Let’s start with the different kinds of brushes, beginning with fibers.
Starting with one of the cheapest options on the market, synthetic brushes are slowly finding favor with budding artists, and for good reason.
Synthetic brushes, since they need not conform to Mother Nature’s constraints, come in a variety of shapes and textures, making them perfect for a multitude of specific applications, such as use with oil paints, acrylic paints, impasto, watercolors, etc.
Moreover, synthetic brushes also last longer when compared to natural brushes. Any drop in quality and/or performance is usually due to a mismatch between the brush’s intended application and its actual application.
Speaking of application, synthetic brushes offer another advantage over natural brushes. While you cannot use natural brushes between mediums (artists using natural brushes often have different ones for different mediums), synthetic brushes can easily be used between different mediums (oil, watercolor, etc.). You don’t have to worry about the bristles breaking down.
These brushes are often made from the fur of wild hogs and boar, and, as expected, the fiber and the brush and very thick and stiff.
However, the reason why we’ve mentioned synthetic brushes before bristle brushes is because they are very inconsistent.
This is because the bristles can be plucked from anywhere from the body, meaning that the point from which the fur was picked could be anywhere between incredibly soft or incredibly stiff.
While the quality of the bristles does depend from manufacturer to manufacturer, for the most part, the performance a bristle brush will offer will be spotty at best.
The only advantage a bristle brush has is price. These brushes are pretty cheap, which makes them an excellent choice for causal painters and amateur artists.
Kolinsky brushes are sourced from a Siberian weasel known as Kolinsky. These brushes are considered the best brushes for oil painting.
With reasonable care, maintenance and common sense, it is possible to make these brushes last a lifetime.
These brushes retain their stiffness, shape, and structure incredibly well, even when being used between different platforms. Unlike bristle brushes, which are prone to swelling when used with watercolors, Kolinsky brushes keep painting as nothing happened.
Look out for the shape of your brush as well. Brushes, apart from coming in a number of different sizes, also come in a variety of different shapes. Some of them are:
All these shapes have different effects and intended applications. Consult your local art store before buying one.
Having covered brush shapes, it’s now time to come to brush sizes.
As is the case with shoes, brushes come in a variety of sizes. However, like shoes, there is no uniform standard by which brushes can be measured, so a certain size of one brand may not be the same as another brand, so, choose wisely.
All of this can get very confusing for beginners; therefore, we recommend they get a ‘starter pack’ of brushes. These brushes are inexpensive, and the packs usually feature a wide variety of shapes and sizes.
While the quality of brushes you’ll get from a starter pack won’t be great, it doesn’t need to be. So, expect the hair of the brushes to fall out.
Lastly, if you’re concerned about the impact of your painting on the environment, then synthetic brushes are the best option as their production does not involve the use of animals or their fur.
What, you thought we wouldn’t cover actual painting tips as well?
This point is obvious, nevertheless, worthy of restatement because most budding artists end up quitting because they fail to practice.
It’s best to set a time for practicing your craft, usually early morning or in the evening. Once a time has been set, try to stick to it as much as possible.
Paint the same subject as often as possible. This may seem monotonous, counter-intuitive and completely at odds with the general perception of creating art. However, art, like math, requires a lot of practice and perfection, which can only be acquired with repeated practice.
Moreover, painting the same subject, again and again, will relieve you of the pressure of having to choose colors, brushes, and type of stroke, as this kind of intuition will be second nature to you.
Once you’ve mastered a certain subject, don’t stick to it. Having gained mastery, switch your subject matter as often as possible. Try to paint as wide a variety of subjects as possible.
Doing so will widen your ambit, enhance your skills and also make you appreciate the nuances of paintings in general. And, isn’t art all about nuance?
Having discussed potentially hazardous chemicals in the paints, it is now time to discuss whether solvents are a threat to artists’ health and whether they should bother themselves with solvents at all.
Solvents have very potent chemicals in them which could lead to unwarranted combustion, as they contain spirits, therefore, they must be handled very carefully.
Moreover, like the paints themselves, if the solvents come into contact with the skin, they can be incredibly detrimental to your health, especially your skin.
Solvents have two main applications, i.e., to thin paints and to clean brushes.
As oil paints tend to be very wet and do not dry as rapidly as other paints, laying down a base layer can become an incredibly difficult task, which is where a solvent can help you.
However, a classic mistake artists make is using a solvent for drying repeatedly; if you abuse the solvent, you will be left with a very thin painting. It’ll give the impression of a painting whose paint lacks substance.
For these reasons, it is advised to not use solvents for drying or thinning your paintings.
However, solvents can be used for cleaning your brushes.
As solvents are very effective at thinning paint, especially oil paint, they are excellent for getting rid of the paint that gets stuck between the hair of your brush, especially at the base.
Once you’re done washing your brushes, it is time for waste disposal. As discussed previously, solvents are incredibly potent and contain many harmful chemicals. If you were to flush the waste down your drain, it would contaminate the water supply of your city!
It’s unprofessional, unethical and could also be illegal, depending on where you live.
Therefore, take the waste to your local waste disposal unit. If there isn’t one, learn how to dispose of the waste properly, either by referring to other sources (such as the internet) or by contacting a waste management authority.
If for these reasons, solvent seems like a poor option, you could always wash your brushes with soap.
Get some warm water and some sort of liquid soap (dish soap works excellently). Pour some soap into your hand and swirl the tip of the brush with your other hand in the soap. This will ensure that the soap finds its way to the base of the brush. Lathe and rinse once the brush appears clean.
As a budding artist, it is very important for you to order your paints correctly through the layer. As you gain experience, you’ll get a pretty good idea of how to go about it, but for now, follow this thumb rule.
As you lay the base down, use thinner paint and oil. Begin by going over the canvas lightly with paint and turpentine. Then, using linseed oil along with turpentine, start applying more layers of paint. Make sure the ratio of linseed oil to turpentine is two parts to one.
As you progress through the layers, add more paint and also more oil. This is done to ensure that the thinner paint gets more time to dry and will prevent the paint from cracking.
And hey, speaking of oil…
When choosing the medium in which you wish to dissolve your paint, oils are inevitably going to find a mention.
If you wish to use oils, it is best to learn about the different types of oils and decide which one is best by weighing the merits and demerits.
Cold pressed oils are considered archaic in the face of refined oils (more on that later). They dry slower than refined oils and usually leave a yellowish hue (looking at you, linseed).
But, as cold pressed oils were what the Old Masters used, many still swear by them, and hey, if they impart gloss to your painting, who are we to complain?
The difference between refined and cold pressed oil is that during manufacturing, as the name suggests, the impurities are removed from the oil, thus making it refined.
Artists these days prefer refined oil over cold pressed oil as it does not leave a yellowish tinge over your painting and dries much faster. However, the painting will not be as glossy as one made using cold pressed oil.
Coming to the final point of this guide, choosing your palette is mighty important as it can make or break your painting session.
The reason we mention palettes at all is that we are dealing with oil paints, which tend to react very differently to different palette surfaces, unlike acrylic surfaces.
It is recommended to find a glass palette for yourself for painting with oil paint. Glass does not absorb oil paints and is very easy to clean; hence, it is favored amongst professional painters.
If that proves to be too expensive, you could use something cheaper, like a cut-up piece of cardboard. Abstain from using simpler palettes like a piece of paper, as the probability of the paint seeping through the palette is incredibly high.
Oil painting is a very tricky business and even professionals at times have trouble with it.
Oil paints contain many chemicals and substances which make them flammable, abrasive and a potential health hazard. The same could also be said for the solvents used to thin the paints.
Health and safety issues aside, oil paints have very specialized applications and their own set of complications to deal with. Budding artists need to balance a ton of factors, such as brushes, palette lineup, cleaning procedure, etc. to get the perfect painting.
However, as daunting as the activity can be, it is also incredibly rewarding. Follow this guide to make the world of oil painting a little less complex and kickstart your painting career.
Happy painting!
10 Best Canvases for Oil Painting | Beginner & Artist Grades Reviewed
8 Best Oil Paint Brushes of 2022 Reviewed
11 Best Oil Paints for Beginners & Professionals Artists Alike
Learn What is the Best Surface for Oil Painting Right Now
How Long It Will Take Oil Paint To Dry & How to Speed It Up
Learn How To Dry Oil Paint Faster Overnight
12 Oil Painting Supplies That Every Oil Painter Needs in the Studio
11 Best Palettes for Oil Painting Reviewed
5 Things You Should Know Before Painting Oil Paint on Glass