Andrew’s experience in the acoustic industry started in the music industry, a part of the acoustic industry in which absolutely everything matters, every sound wave, reflection, echo, resonance or reverberation, all pieces of the puzzle Andew played.
Fast forward almost 10 years, Andrew finds himself specialized in acoustic construction for more than 5 years now, being the Acoustics Manager at Clearsound Acoustics.
Responsible for the design of acoustics design, acoustic supply and installation of specialized gear such as noise barriers to reflect or absorb the energy of the sound waves, using damping structures such as sound baffles for absorption, or using active anti noise sound generators Andrew is today a full-fledged acoustic expert, permanently learning, researching and improving his craft.
As a sheer idealist, Anton’s approach in architecture and content curation is tedious and meticulous this clearly reflects in his work here on Homesthetics with each and every article, after a decade of work on Homesthetics, the content creation guidelines still being improved every month.
Expertises: Architecture, Design, Art, Home improvement, Painting
&
Updated on
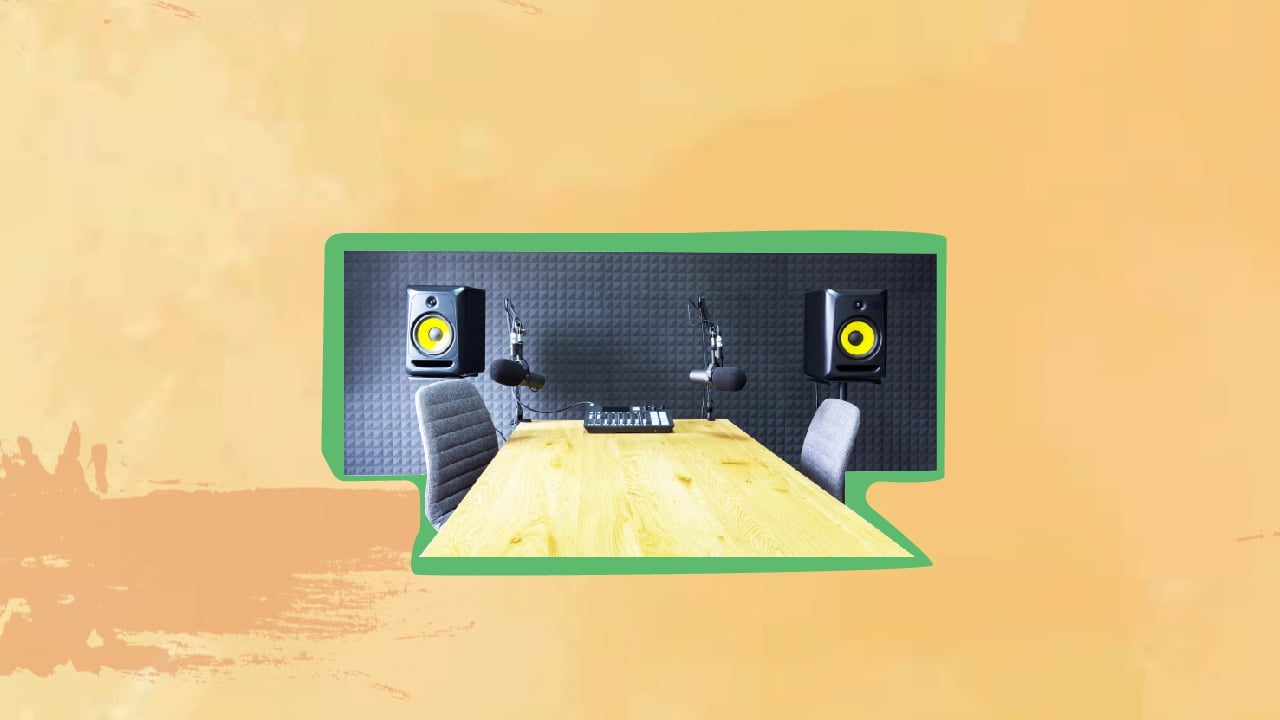
Soundproofing a room for music is no rocket science if you have the right soundproofing and sound-absorbing material like mass-loaded vinyl and foam gaskets to block sound waves. However, before getting started, it is important to understand the basics of soundproofing the doors, windows, and flooring of the room to achieve a quiet, distraction-free environment for recording music.
Do you often produce groovy beats during the wee hours of the night? Or are you a voice actor practicing for your next big gig?
No matter how good you are at singing, playing an instrument, voice acting, etc., your neighbors are probably not the best audience! So, to ensure your privacy and good relations with your neighbors, I’ve shared some foolproof methods tosoundproof a room for music. But before that, let’s get back to basics…
Soundproofing A Room For Music Cheaply
What Is Soundproofing?
Soundproofing is the process of blocking sound waves from traveling from one room to another. It involves adding mass and density to the walls of a room, using soundproofing materials like acoustic panels, mass-loaded vinyl, foam gaskets, etc.
The process may be as easy as filling air gaps or constructing new soundproof walls. So, the amount of effort, time, and money the soundproofing project may take will depend on the noise levels of your room/home. That said, completely soundproofing a room and preventing 100% of the sound waves from entering and leaving the area is impossible. However, you can prevent sound transmission to some extent, often enough to ensure your privacy.
Usually, the common types of noises that may disrupt your recordings include impact noise, external noise (like traffic noise), and equipment noise (from ACs, refrigerators, etc.). By soundproofing a room, you can keep the inside noises inside and prevent outside noises from entering your home studio.
Soundproofing Vs Acoustic Treatment
You must not confuse soundproofing with acoustic treatment. Soundproofing can only block sound, while acoustic treatment absorbs excessive ambiance for better sound quality in a recording room. As such, the latter, sometimes in conjunction with soundproofing methods, is used while constructing professional recording studios.
Four Common Ways To Soundproof A Music Room
1. Add Mass And Density To Block Sound Waves
Depending on the materials used for constructing the walls of your room, sound waves will vibrate and traverse through them. Hence, one of the easiest ways to reduce sound in a room is by adding weight to the walls.
As such, knowing the Sound Transmission Class (STC) rating and Noise Reduction Coefficient rating (NRC) of soundproofing materials is essential to create a quiet music room.
Tip
I recommend using a dense material like concrete for walls if you’re planning to construct a new recording space at home. However, to soundproof an existing wall, you can use mass-loaded vinyl, multiple layers of soundproofing drywall and green glue adhesive compound, etc.
2. Decoupling To Prevent Sound Transmission
Often the most overlooked process, decoupling involves creating a sound barrier or buffer between two structures/materials in direct contact. It breaks the path of sound vibrations that can often travel long distances, depending on the frequencies.
Most of the time, a dense material like rubber is used for decoupling. As such, you can try the following ways to decouple and soundproof a room:
Apply noise-proofing joist tape to isolate existing studs
Build a floating floor with dense rubber isolation pads
Isolate layers with resilient sound clips and resilient channels to create a “floating” ceiling or wall
Build double walls, leaving enough air gap to fill with additional insulation
3. Sound Damping For Improved Sound Quality
The process of damping works similarly to adding mass, but it dissipates sound waves to kinetic energy, producing heat. Again, green glue is an effective sound-damping compound that can attach twosoundproofing building materialslike MDF, plywood, drywall, etc.
Tip
If you do not wish to soundproof an existing wall, I recommend creating a sound isolation barrier with the aforementioned materials. You can then use it to temporarily cover openings like doors and windows as and when you want.
4. Filling Air Gaps With Acoustic Panels, Caulk, Etc.
How many times have you heard background noise or random sounds around you but never understood where they came from? I’ve experienced that, too, and it’s often because sound waves can enter through micro air gaps. So, covering all of those gaps and crevices is essential to block unnecessary noise.
I recommend using foam gaskets to seal air gaps on doors, windows, electrical outlets, etc. For other cracks on walls, floors, and ceilings, opt for acoustic caulk that’s pliable enough to fit into smaller, harder-to-reach areas. Or, use acoustic panels, preferably with a fiberglass core.
Lastly, I suggest investing in a door sweep to cover the small space between the bottom of a door and the floor of your music room.
Soundproofing A Music Room In 5 Easy Steps
Now that you know some of the most-used ways to soundproof a room, let me share how I combine them to create the ideal environment for music. Note that some of the steps given below may need construction skills, so if you’re not comfortable with that, feel free to skip those steps. And if all else fails, you can always contact a professional to construct a home recording studio within your budget.
That said, here’s what I do to soundproof a room for music.
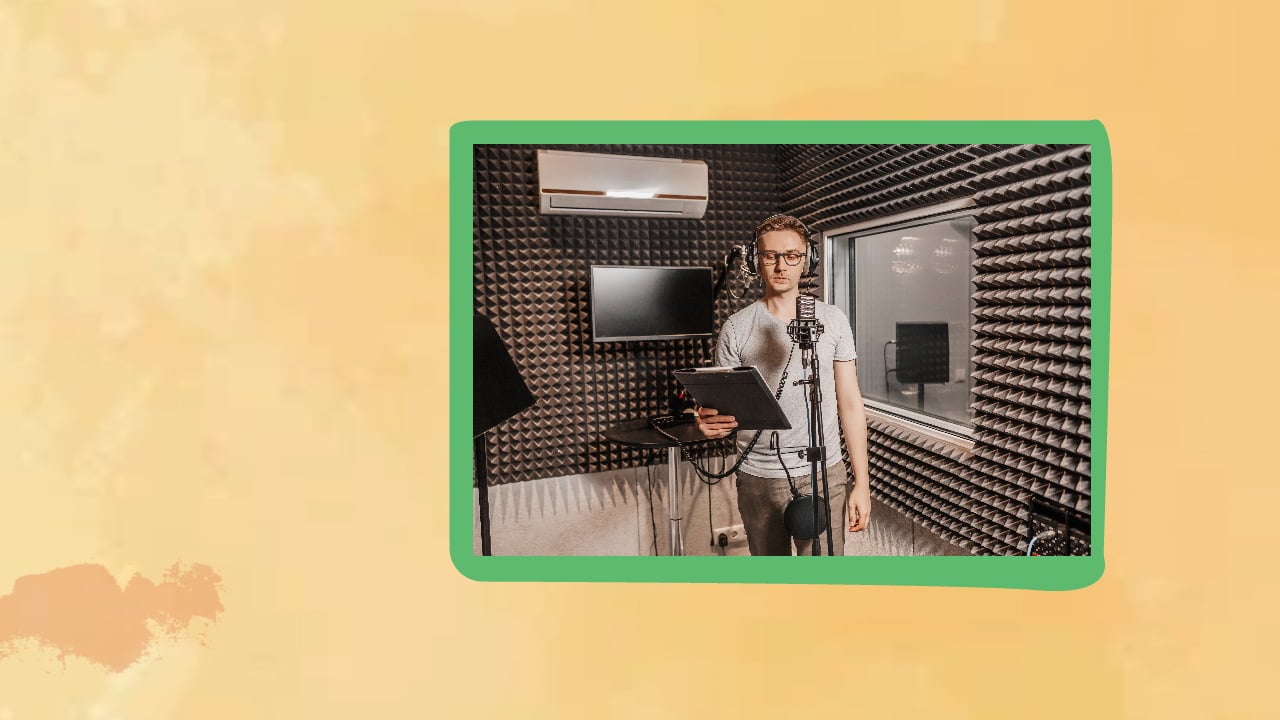
1. Select A Suitable Practice Space
You can use the best quality equipment, but none of it will be effective without a suitable space. So, choose carefully.
While it may not be possible to have a lavish room for yourself, you can try out a closet or any other small space. Think about how most recording studios have a smaller, separate room where the actual recording takes place. On that note, a closed space may be uncomfortable at first, but it can be effective in blocking as much sound energy as possible.
Tip
I recommend staying away from bathrooms, kitchens, or any other room with a lot of appliances. You should also try using a room with no windows or openings. If the walls do have holes or cracks, you can use a soundproofing or sound-absorbing material, like acoustical caulk, high-density foam tape, etc.
2. Employ Sound Insulation To Create A Quiet Environment
Sound insulation is a must to further keep inside sound inside and prevent outside noises from entering your recording space. I recommend equipping your music and practice room with acoustic foam tiles, bass traps, sound absorption (acoustic) panels, etc.
Tip
Don’t forget to check out your nearest home improvement stores for foam, cork, or natural rubber panel insulation.
You can also soundproof a room on a budget (with very limited effects) by hanging heavy curtains and thick blankets, installing a pillow headboard, laying soft rugs/carpets on the floor, etc. Additionally, try shifting couches and mattresses against a shared wall to prevent the transfer of sound waves.
Warning
If you use linens and clothes to soundproof room surfaces, ensure the layers are placed far enough from one another to prevent sound transmission through contact points.
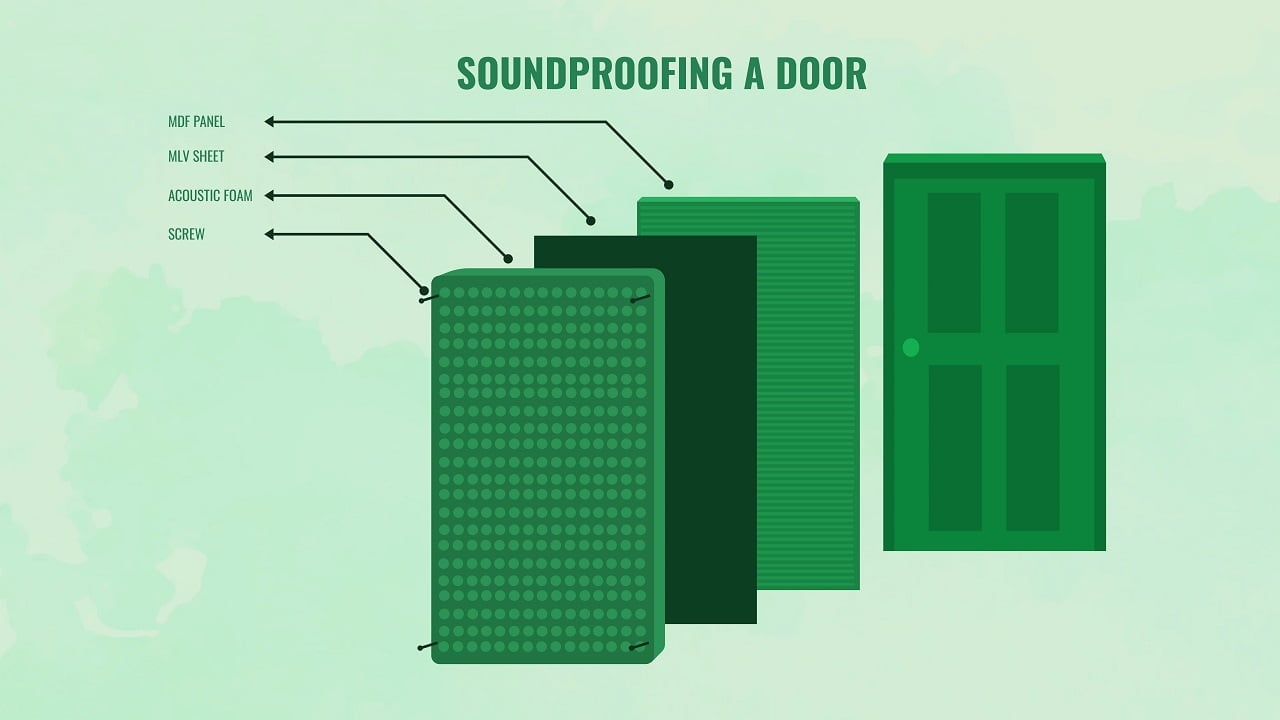
3. Soundproof Your Door To Block More Sound
When installing doors, try opting for heavier, denser materials. But if you have a hollow door, opt for spray insulation to fill the gaps. Additionally, as mentioned before, you can install a door sweep to close the air gap between the door and the floor.
4. Invest In Thick Carpeting And Other Soft Furnishing
Besides soundproofing walls, doors, windows, and other gaps in the room, soundproofing the floor will help with noise control. For this, you can construct a floating floor to block sound vibrations. Or invest in a high-quality thick carpet, and layer it with rugs, if possible.
For a floating floor, I do not recommend DIYing it, so contact a professional instead. They can use floor floaters or hard rubber pucks to decouple the second layer of flooring from the existing one. Conversely, they may even float your existing floor by changing the joists below your sub-flooring. However, remember that the latter option is quite challenging and may not be feasible in most locations.
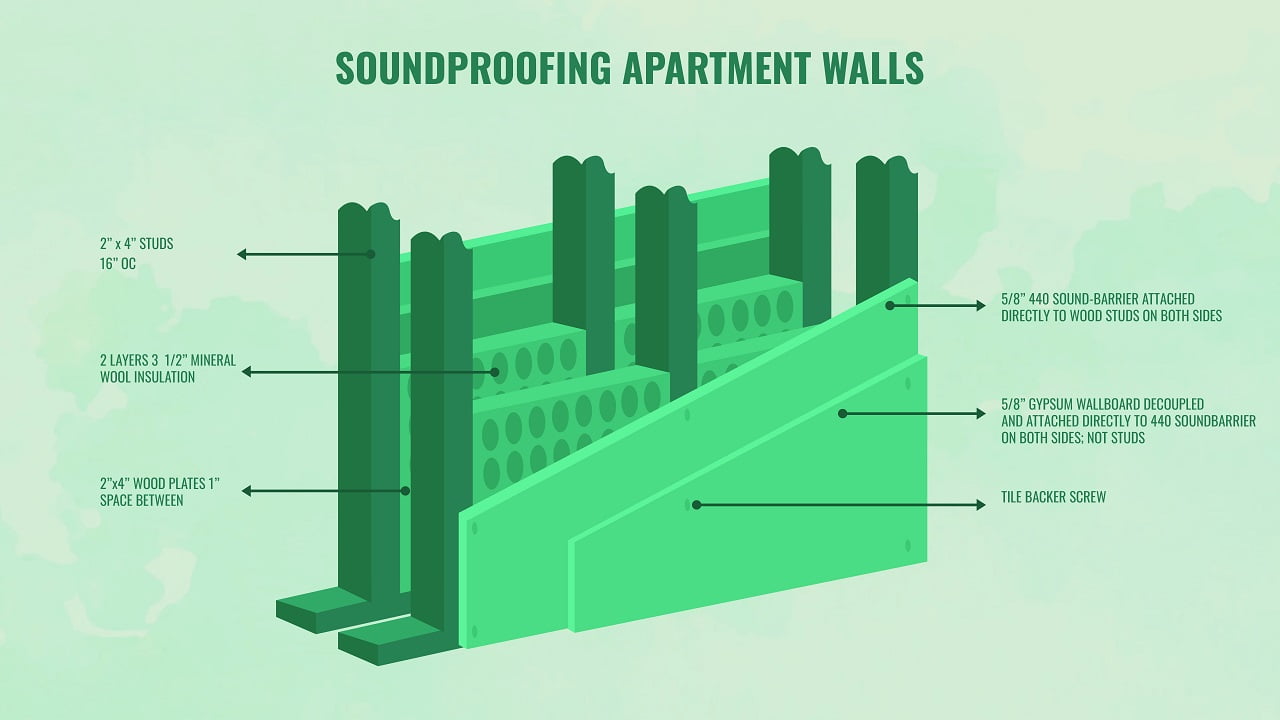
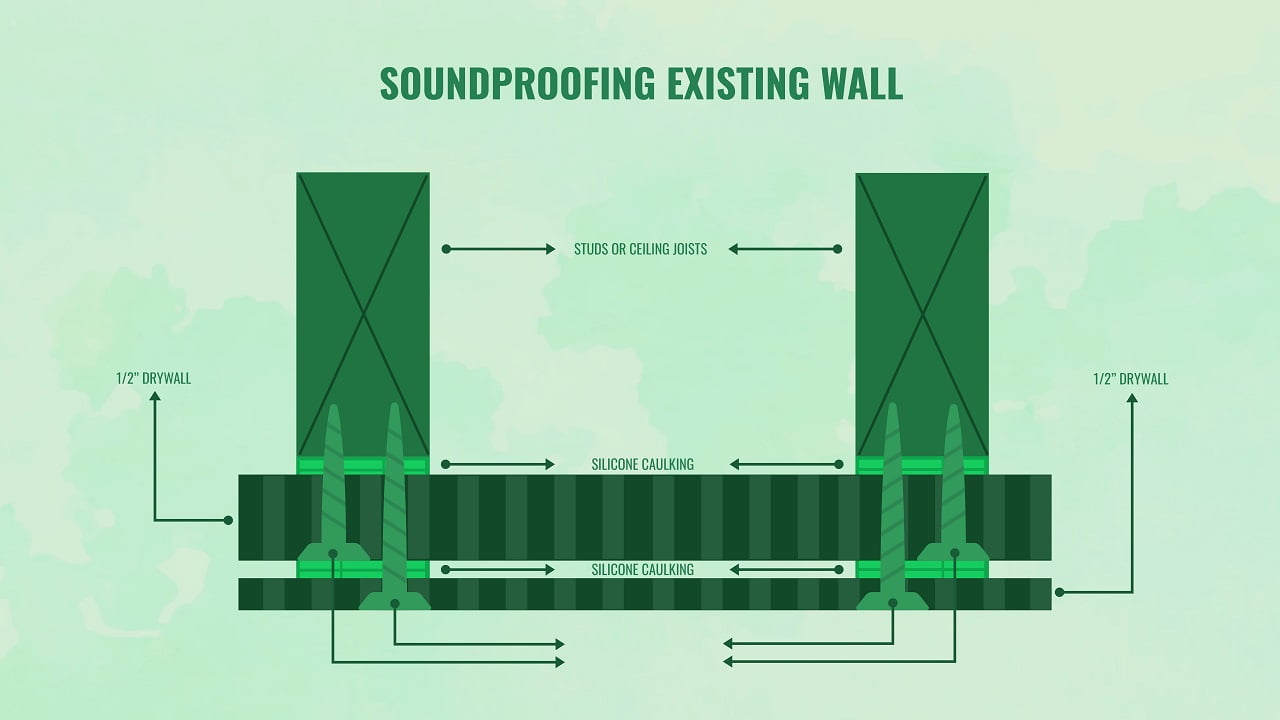
5. Add A Second Layer To Soundproof Walls
Although this step decreases the space in your room, I think it’s worth the extra soundproofing. This process can be done by amateurs, too, as long as you wear your safety gear. Simply stick multiple layers of drywall and attach it to the existing wall of your music room. Or, install multiple sheets of mass-loaded vinyl within the layers of drywall.
However, make sure you leave enough gaps between the layers to break the passage of sound vibrations.
6. Test The Room For Music
Last but not least, test your recording room before putting it to professional use. Doing so will help you analyze any weak points in the room. I recommend singing, playing the drum, or producing any other sound for at least 30 minutes to know if the music room needs further soundproofing.
If it does, even after incorporating all the steps mentioned above, you can opt for soundproof or blackout curtains. Even if the room does not have windows, installing either of the two can add another layer of soundproofing and reduce noises of low frequencies as well.
Soundproofing A Room For Music Conclusion
Although making a room completely soundproof is not technically possible, you can take certain measures to prevent noise in your music room. And the best part is that most of the soundproofing methods discussed above are easy enough for beginners and do not require advanced tools. Even the soundproofing materials I suggested do not demand much skill for installation.
For best results, however, I recommend using multiple methods in combination. For instance, you can consider soundproofing the wallsand adding suitable furniture to soundproof a room. Or, install a floating floor or ceiling, and invest in a white noise machine.
So, don’t force your neighbors to attend a concert or listen to a podcast they didn’t sign up for, and soundproof your home recording studio today!

 Reviewed by
Anton Giuroiu
Reviewed by
Anton Giuroiu