Expertises: Art, Pastel, Brush, Drawing, Pencil
Updated on

Inspiring Ideas for Modern Home
A forest may be one of the first things you imagine when thinking about natural beauty, followed by mountains and rivers.

Forests are a representation of life itself in nature, being home to lifeforms both small and large. Such is the beauty of the woods, in both literal and metaphorical senses.
Hey everyone. This time, I’ll show you how to paint a forest using watercolor in 6 simple steps.
You will benefit from following this guide as I walk you through what to do and why. So, grab your watercolor set and brushes, and let’s get started!
Before we start painting, the first thing to do is to gather art supplies. The equipment I used in this tutorial are:
Paint: Winsor & Newton: Cotman Series | Paper: Arches Watercolor Paper, Cold-Pressed 300gsm | Brush: Winsor & Newton Cotman Watercolor Brush Set of 5 | Additional Supplies: Tissue Paper, Masking Tape
Now, the important thing to remember here is that you don’t need the exact supplies I used. If you have an equivalent of each of these supplies, those will work just fine, keep in mind you can even use watercolors on canvas! As long as you stick to the painting process, the end result will be something to be proud of.
Creating a forest will need just a few colors to appear lush and lifelike, such as greens, yellows, and reds. Depending on the elements you choose to include, you can freely expand the palette as necessary.
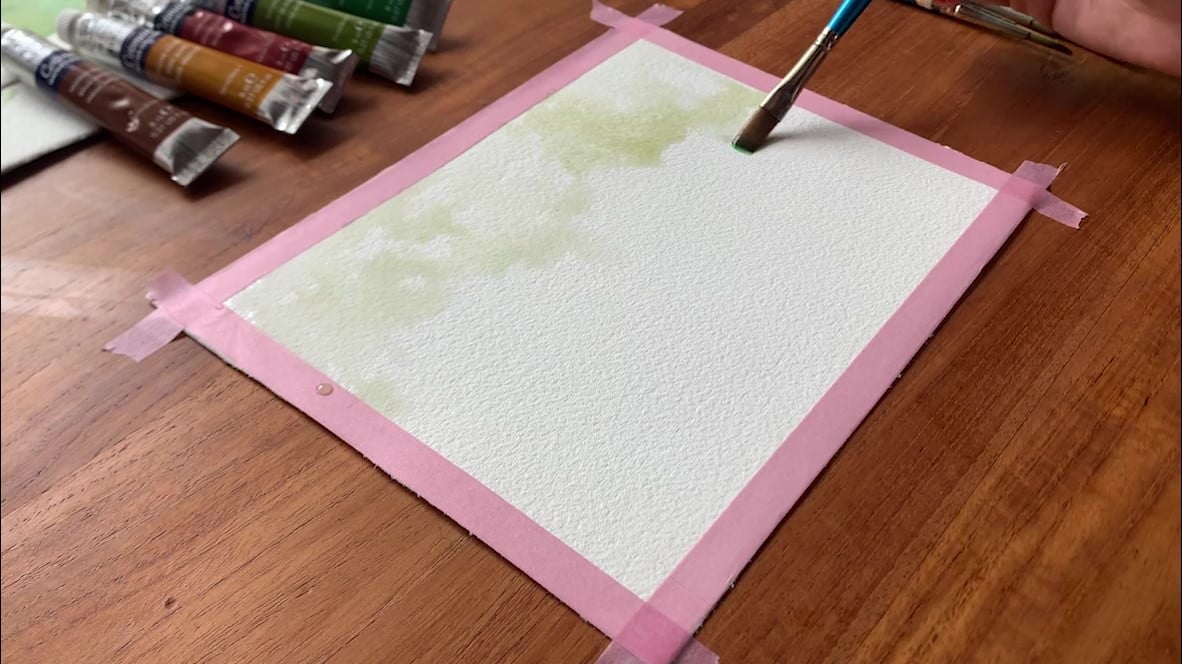
For the first step of the painting process, I will be using the wet-on-wet technique to prime the paper for painting. This technique involves applying a layer of paint to a previously applied coat of water or watercolor paint before the latter dries. By doing so, we can create some nice blurry texture for our background.
Start by applying a light coat of water to your watercolor paper, after which you can add a light color to it. Here, I’ve used a light green near the top and a slightly darker green underneath as the base tone for the forest, ground, and sky.
If you’re not feeling confident about the composition of your painting, consider using a light pencil to sketch in the details. That way, you will have an easier time keeping up with all the different elements in your painting.
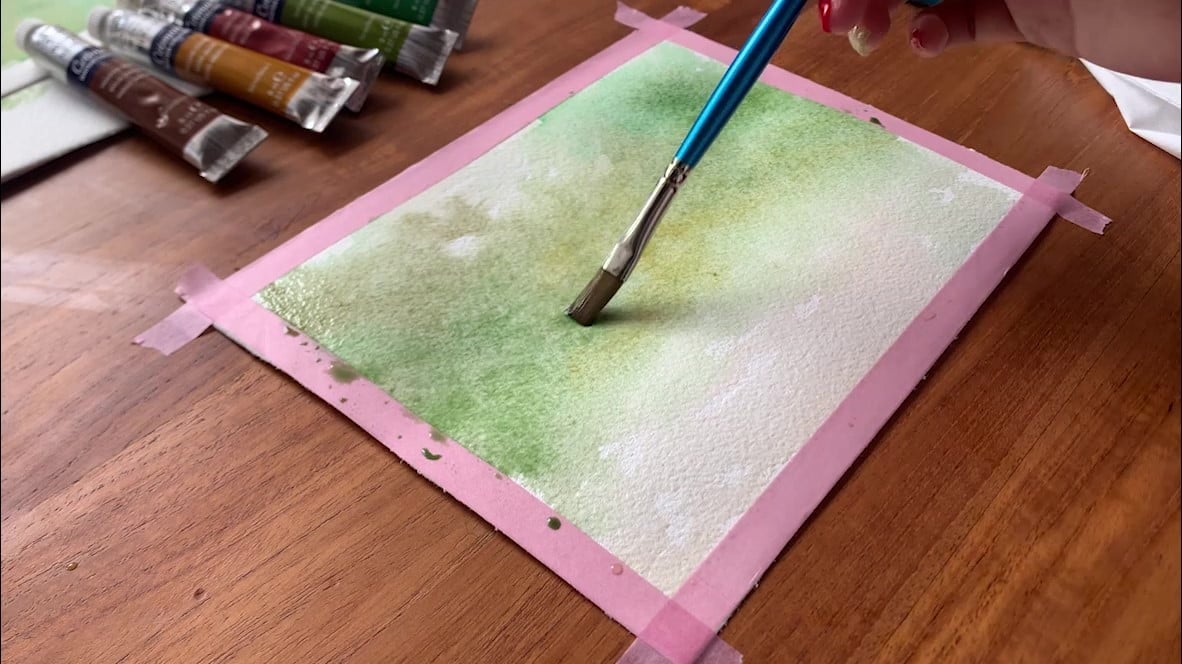
Next, we’ll start painting the background, and this is where you can get really creative. There is no real limit to the number of colors you can use for this, so feel free to experiment!
I’ve used five colors from the Winsor and Newton Cotman series: Hooker’s green light, sap green, yellow ochre, light red, and vandyke brown.
Before the base layer dries, start applying the colors roughly where your main elements will be. For instance, apply dark green where the leaves will be, yellow ochre for the ground, light red and vandyke brown for tree trunks, etc.
Don’t be afraid of letting colors bleed into each other! The key here is to set a mood and tone for the painting. And since nothing in nature is uniform, you don’t need to worry about keeping the colors separate. Just be mindful of your overall composition and what you would want the painting to look like at the end.
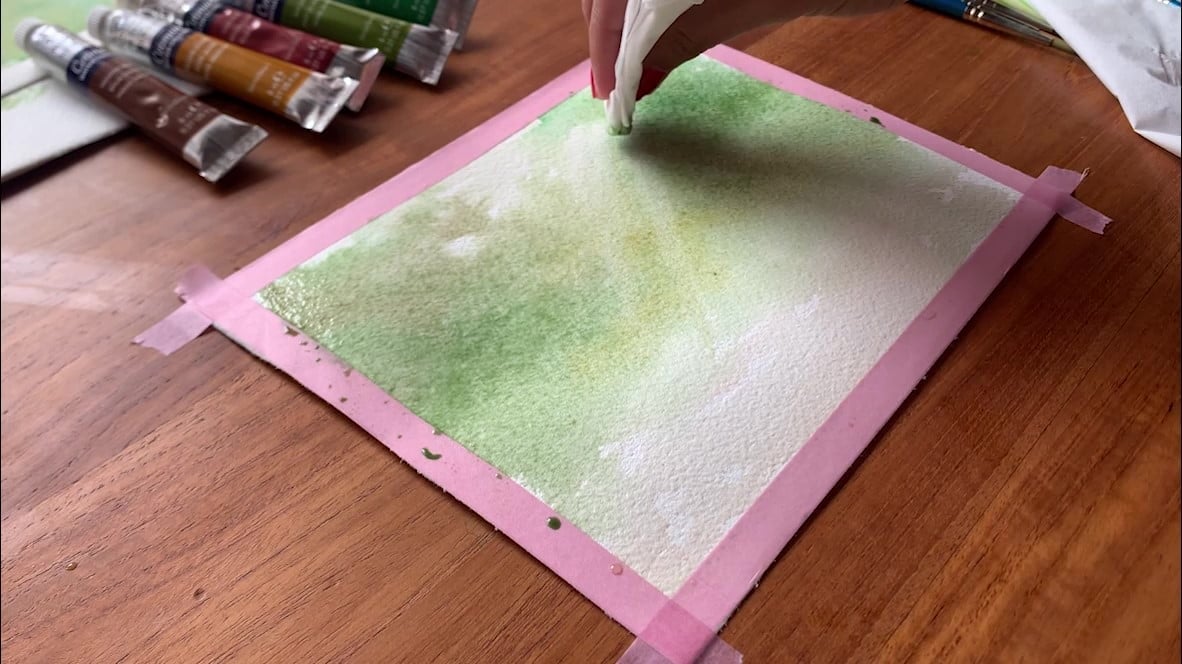
Have you strolled through a forest before? If you have, you may have noticed that not all of the sunlight hits the forest floor. A lot of it is blocked off by tree leaves, creating shafts of light that we call sunbeams. Adding these light shafts can bring an element of realism to the painting. And to do so, you can use tissue paper to create these light shafts quickly and easily.
The principle here is similar to blending stumps used by sketch artists. Blending stumps are sheets of paper heavily compressed into the form of a pen and are used to control the value of a sketch. What this means is that it helps the artist control the lightness or darkness of their strokes.
By using tissue paper, you will be reducing the amount of paint on the canvas, effectively lightening it.
Pick a spot from where you want the light to filter through and use single long strokes of the tissue paper to create sunbeams. Make sure you don’t create too many light shafts, and that you do this before the paint dries!
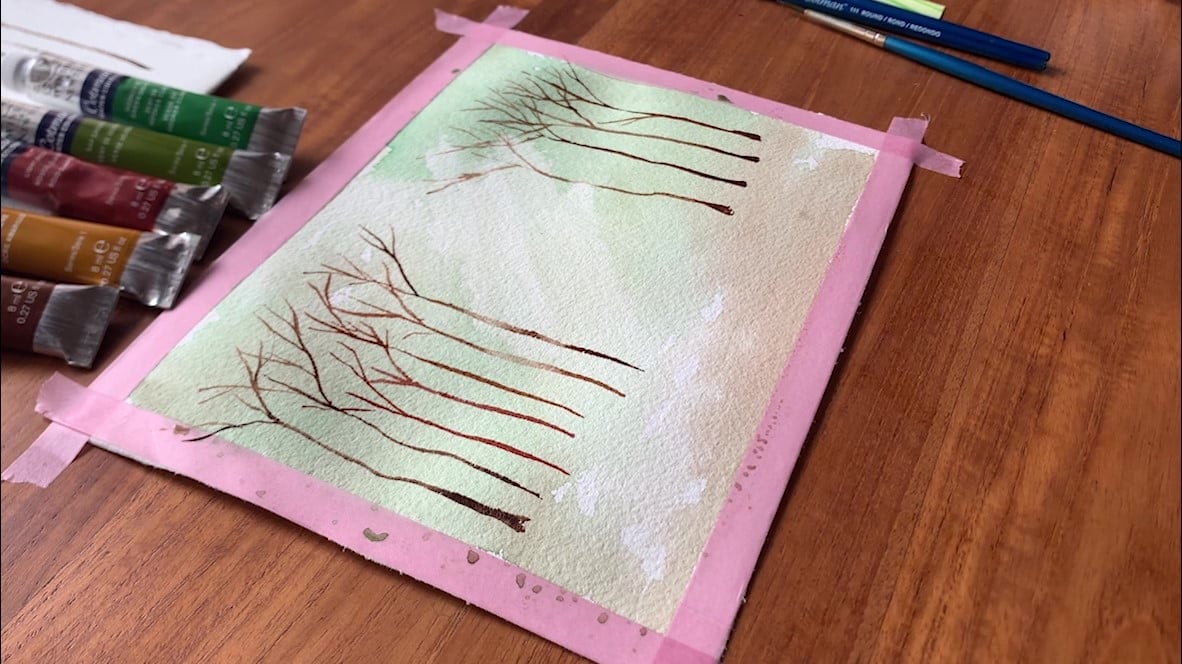
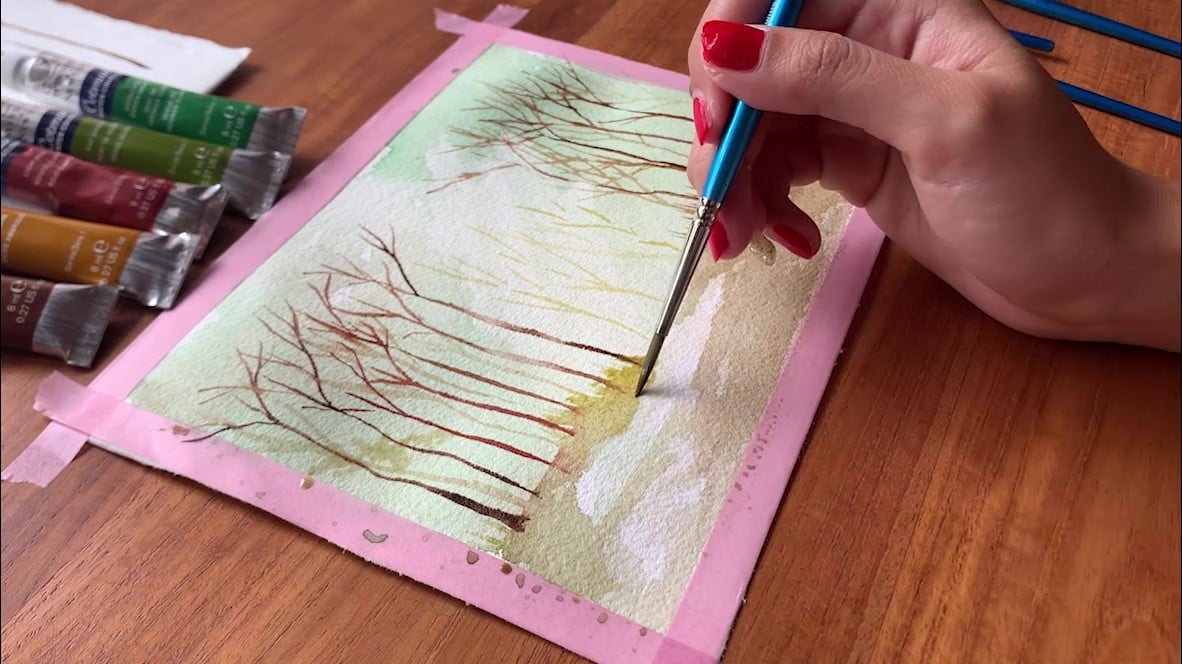
Now, we will move on to the most important part of the painting: the trees. And you will start to see what the painting will look like at the end of this step.
Once the base layers have dried up, switch to a detail brush to start painting the trees. Trees have a visually sharp edge, so you will want to keep the brush light on water. Keep your color-saturated and thicker to create its shape.
Here’s a tip for you that will help you in all forms of painting: the further away an object is, the less saturated it will appear.
Imagine a tree close to you and an identical one several miles away. When observed from the same place, the one further away will appear lighter and duller than the one closer to you.
This is known as depth of field, and you will find its applications everywhere, in urban and natural settings alike. By using it, you will be a step closer to a realistic painting.
So, I’ll paint the trees in the foreground with a darker color and thicker consistency. I’ll then use a lighter color for those in the background.
You should be more careful when painting trees in the foreground, as they will be the focal point of the painting.
Continue to paint trees until the painting has a sufficient amount of them. Make sure you don’t have too few or too many, as either can cause your painting to look less lifelike or cluttered. And no two trees should look the same. Remember: there is no such thing as uniform in nature!
Let’s start painting the ground. Using a shade of brown, such as the Vandyke brown I’m using, start applying paint where the ground is on your painting.
The important thing to take note of is the direction of your sunbeams. Lighten the shade of brown in places where the sunlight strikes the ground to maintain consistent lighting in your painting. And keep other areas dark for a nice contrast.
You can dilute your paint or mix in another color to lighten the brown around the areas where sunlight hits the ground.
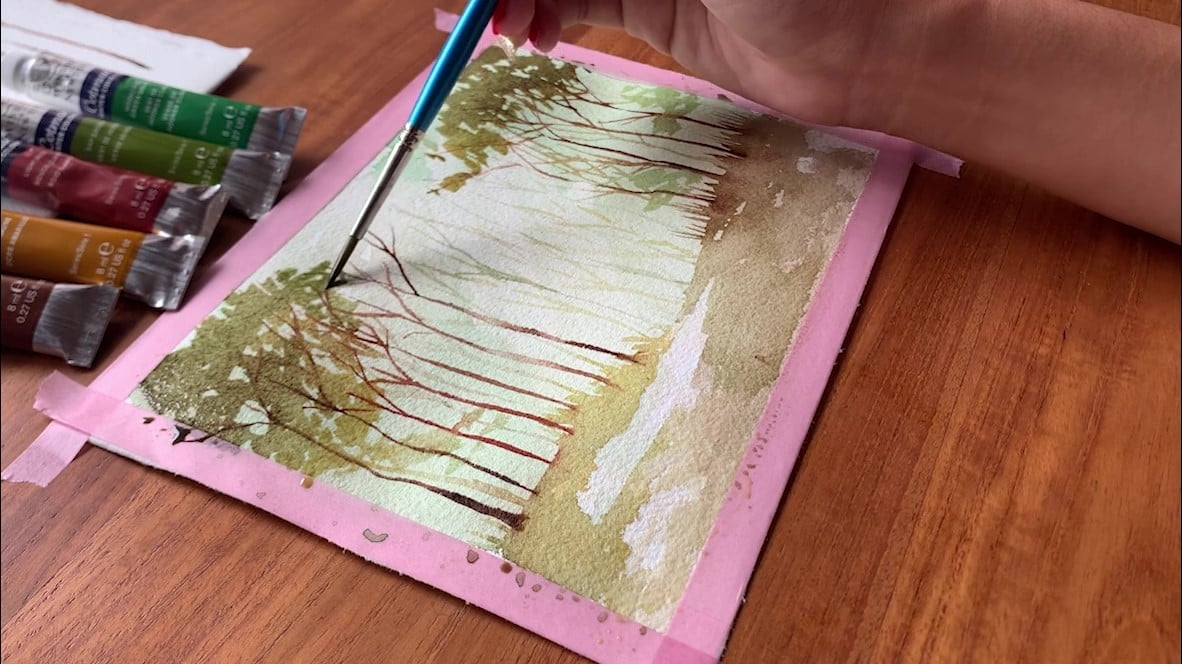
Painting the canopy might be the lengthiest step in this tutorial, but by no means is it a complicated one.
Using a darker color of a thicker consistency, you can start creating the leaves. I advise using a mixture of dark green and yellow to give them a believable sense of depth. And for creating varied textures, you can use different brushes and paint consistencies as well. One-stroke and round brushes no. 2 or 4 work well in this case.
Remember to use lighter colors for the leaves in the background. Maintain the depth of field as you did for the tree trunks and branches to ensure that your painting is visually consistent.
Lastly, you can create grass on the ground to fill up the empty spaces between trunks. I’m using a thicker paint and making single short strokes with a detail brush to replicate the sharp edges of grass blades.
And that’s it! Your painting is ready to be displayed!
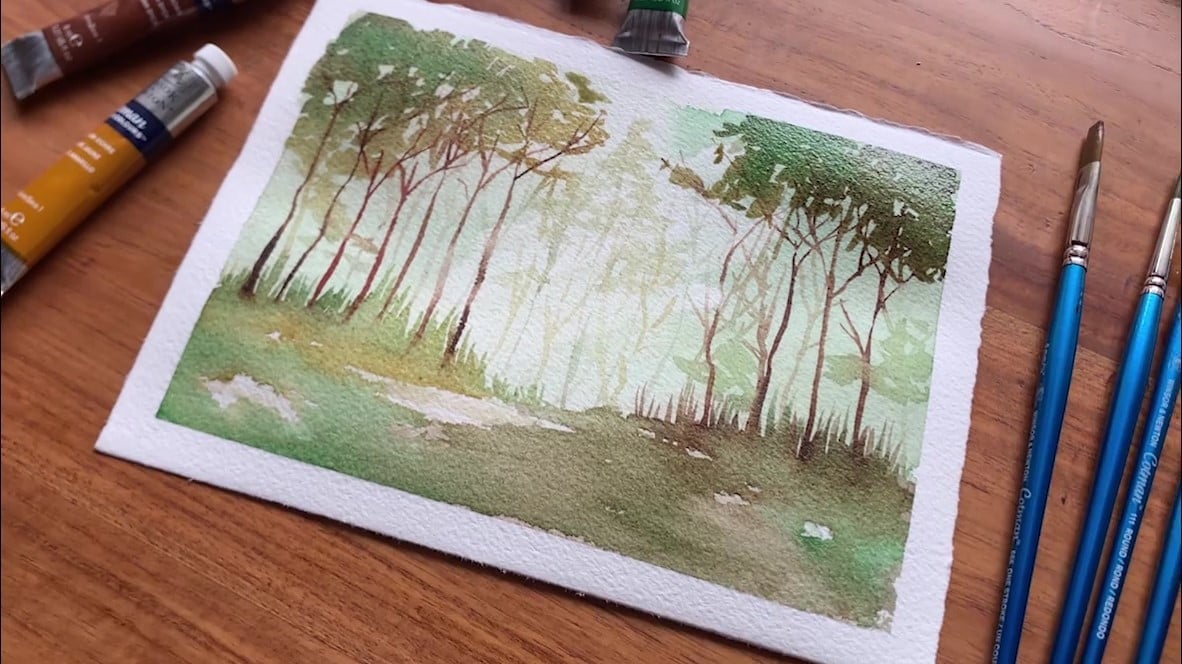
With that, you’ve reached the end of this tutorial and created a gorgeous rendering of a forest. Feel free to add a few more elements, such as animals, birds, or something else, to populate the painting even further. You can get as creative as you like when it comes to painting forests.
The nice thing about watercolor is that you don’t need a complex setup to get going. Just a basic set of art supplies and one handy piece of tissue paper will get you the results you desire. All you need to do is understand the principles behind the watercolor painting process.
Before I take my leave, I would like to offer one last piece of advice. Remember that art is not a quick process to learn and certainly not one that is easy to master. You may need several attempts to find the desired result.
But that’s the beauty of art! Even if you spend days on a single principle, the knowledge you accumulate will continue to serve you in the future. The expertise you gain isn’t lost, and the more you explore a particular technique, the better you will be at it. So, keep practicing with our watercolor pine forest tutorial and guide on how to paint different flowers in watercolor!
That’s about it from my end. Till next time!