Expertises: Art, Pastel, Brush, Drawing, Pencil
Updated on

Inspiring Ideas for Modern Home
If you want to create a realistic painting, there’s nothing better than using watercolors to achieve the desired effect, even as a beginner.

Not only do these colors blend extremely well, but they also render an element of flow to the overall painting for a seamless look. And one of the best ways to explore these advantages of watercolors is to create a forest scene with different shades of only a few colors.
So, today, I will tell you all about how to paint a pine forest in watercolor with just a few supplies.
Before you start with the painting process, it’s important to keep the essentials handy so that you don’t have to spend time looking for them while painting. After all, it wouldn’t hurt to try and eliminate any distractions beforehand!
On that note, here are the supplies I will use today to paint my pine forest. But you can use anything you have in the vicinity as long as they help you work easily, any watercolor paints, paper, and brush would do, you can even paint watercolors on canvas if that's what you have at hand!
Paint: Winsor & Newton: Cotman Series | Paper: Arches Watercolor Paper Cold Pressed 300gsm | Brush: Winsor & Newton Cotman Watercolor Brush Set of 4
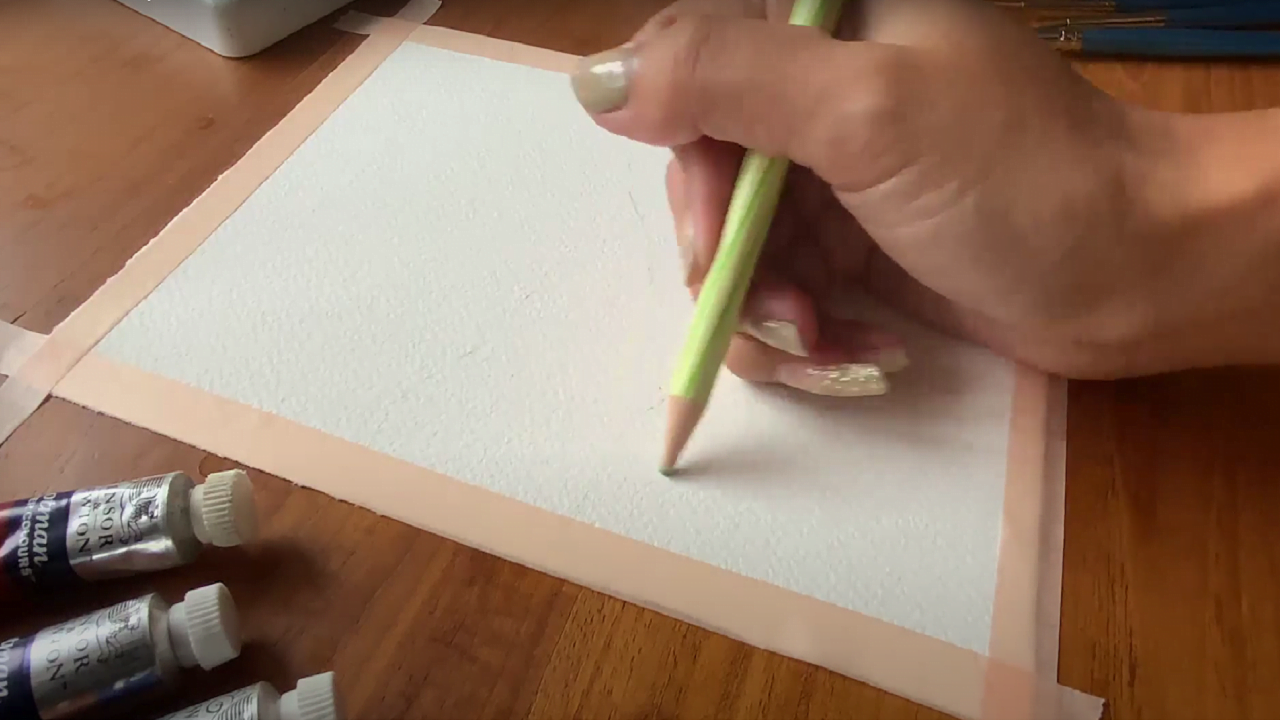
To start things off, I will sketch the outline of the landscape I have in mind with a light green pencil on the paper fit for watercolor painting. My pine forest is set on the backdrop of hills, with the trunks of the pine trees being closer to the eyes.
You can also use a normal pencil but don’t apply too much pressure. Otherwise, you may leave harsh, black strokes that can’t be erased and, ultimately, won’t blend with the watercolors. The green strokes, on the other hand, will seamlessly blend with the dominant color (green) of the painting.
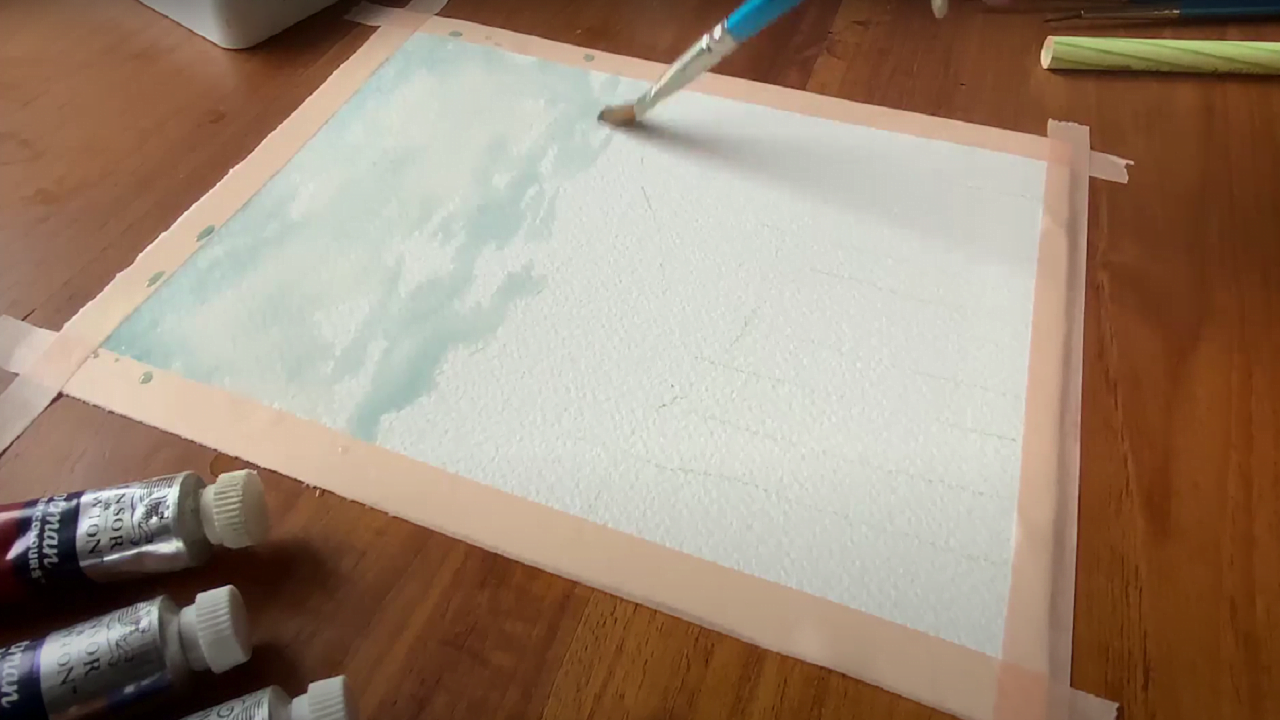
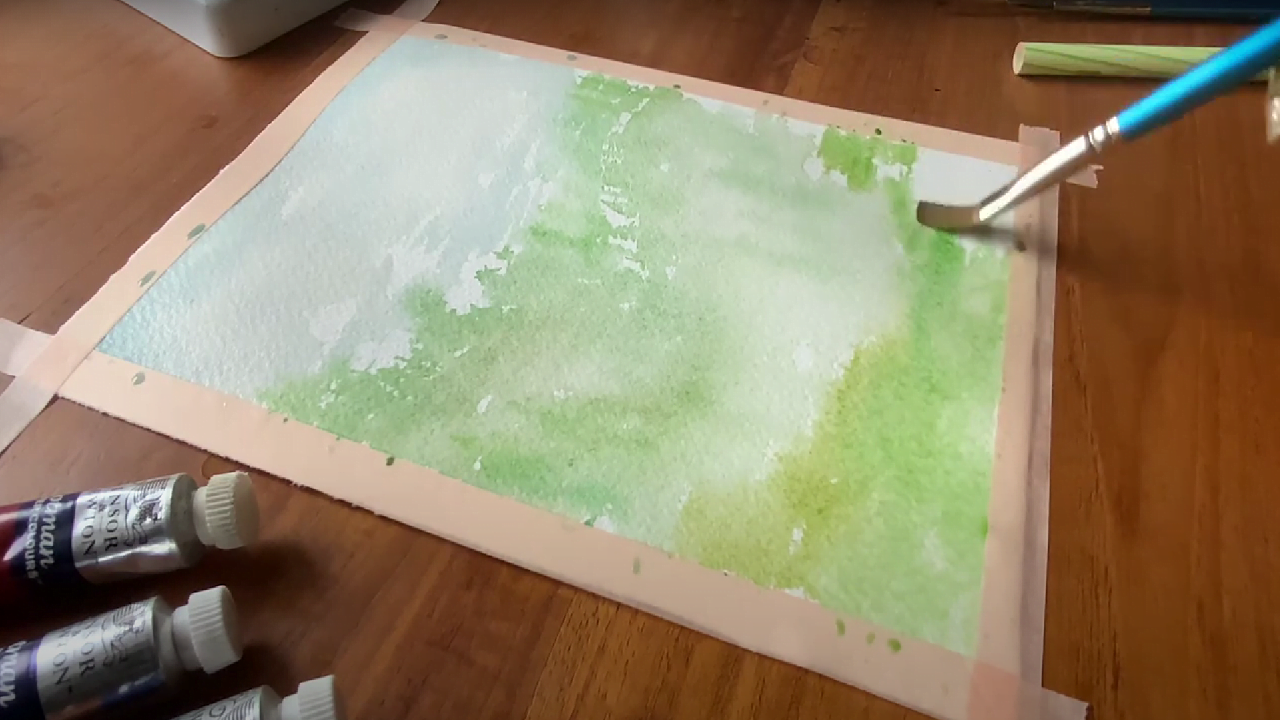
Now, it’s time to paint the pine forest, starting with the sky, which covers a significant portion of the landscape. Besides, starting from the top of the page will give the area enough time to dry and keep the paint from getting smudged later.
We will use the water-on-water technique here to paint faster with a realistic effect. For this, grab a flathead brush, dip it in plain water, and run it across the sky. Make sure there are no water droplets or trails, which can become nasty marks later.
However, if you feel that the paper has become too wet, gently dab it with a clean tissue to soak the excess water.
Before the water dries out, thin out a little dark blue (you can also mix different shades of blue) and paint the sky using brisk, dabbing motions. Doing this instead of simply dragging the color will render a nice texture to the sky. And don’t worry if you cannot cover the entire space and leave white portions- these will create the illusion of clouds to make your sky even more vibrant!
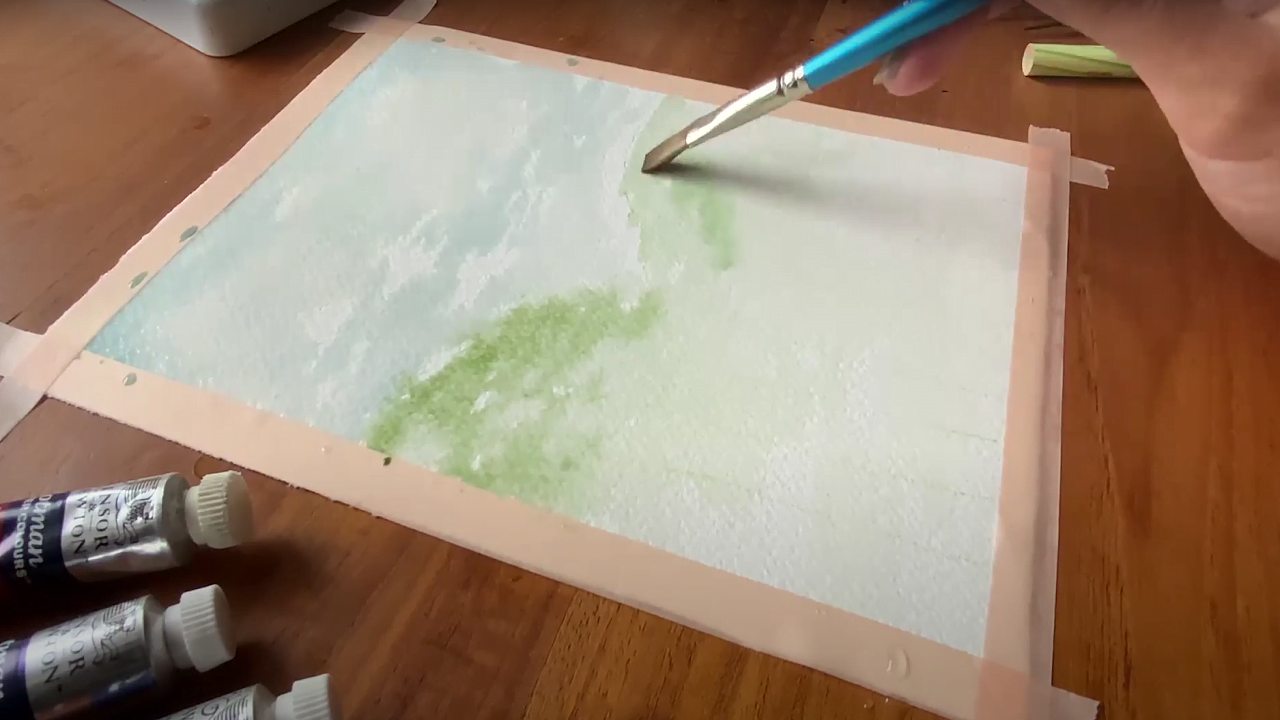
While the sky is drying, clean the flat brush (or use a new one) to apply water to the hills the same way as before and thin out some green color on the pallet with water. The goal here is to paint one side of the hill with lighter shades and the other side with darker colors to add depth and texture to the terrain.
So, I am using a little more color on the left, but without letting the water on the paper dry out. Remember, we still need the flow from the water-on-water technique for seamless color application.
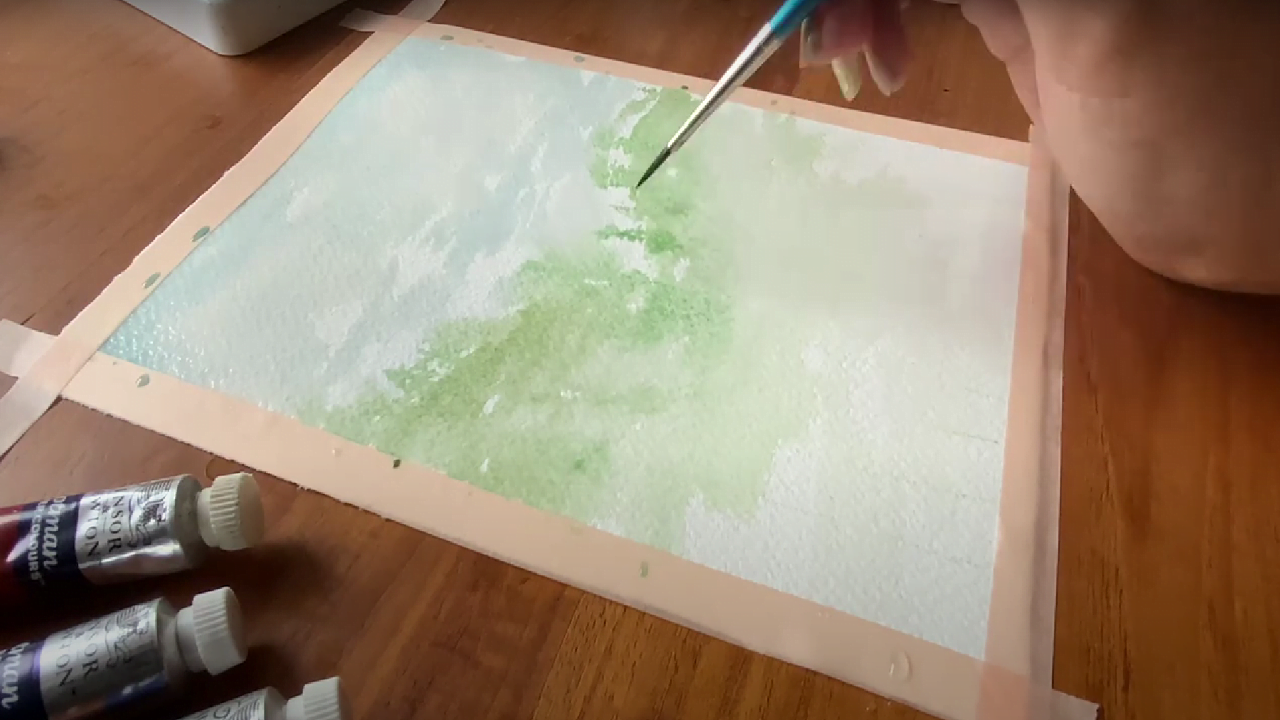
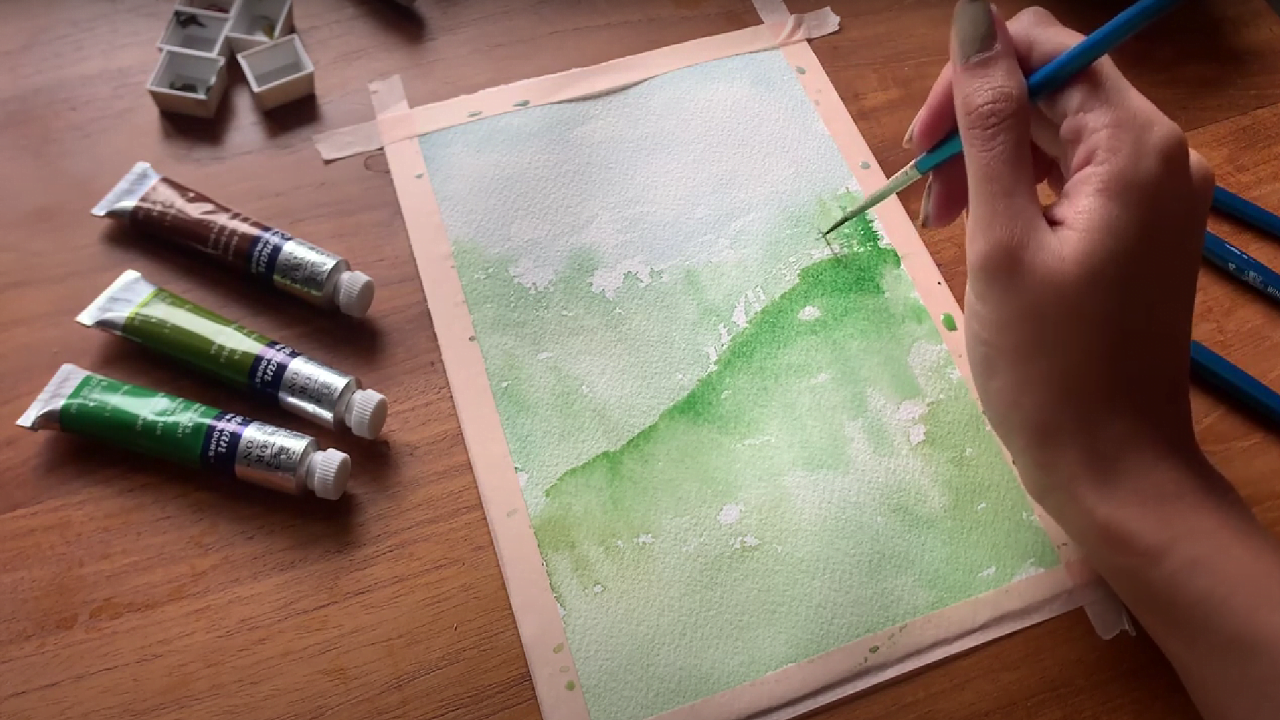
Once the base color of the hill is laid and it’s still wet, take a pointed brush to make pine silhouettes on top, covering as much or as little area as you want. These silhouettes are a way of adding perspective to the scene, so you can extend them further back in the sky to give the illusion of an extensive forest stretching far and beyond.
Simply draw a vertical line and add some spiral-like strokes covering it till about midway. Don’t worry about the smudging colors and shapes- that’s what we’ve set out to achieve.
With the background in place, we will now move on to painting the foreground or the land under the hills and pine silhouettes.
Again, I’m covering the area with water and using a lighter shade of green as the base color of this area. Paint with a flat brush using a similar technique to that of the sky, only this time, try not to leave any white spaces. The ground doesn’t have clouds!
I’ll follow up the light color with a darker shade of green by running the brush all over. This will help the two shades blend easily so there are no harsh contours.
Once the foreground has dried, you can use the same brush to lightly draw over the initial pencil outline of the pine trunks. Don’t apply too much pressure, though- we’re just looking to reinforce the reference lines and not create any prominent shapes at this step.
I will now make the hill appear more prominent and closer to the eye compared to the rest of the background to add some more perspective to the scene.
For this, I will need a thicker consistency of a dark green shade, but not too thick, so as to create rough contours. My target here is to enhance the presence of the hill by adding more color and not shapes. I’d also advise keeping the top of the hills darker compared to the base to create a gradient effect.
Similarly, I will take a pointed brush, dip it in the same color, and go over my pine silhouettes to make them more defined. Draw vertical lines and inverted ‘V’s extending on either end of the vertical ones to create the bushy look of pine trees.
You need not cover all the silhouettes with this technique, as we still need the ‘shadowy’ effect to represent pines in the distance. As you can see, I have only repainted the trees on the top of the hill line to bring them closer to the eye.
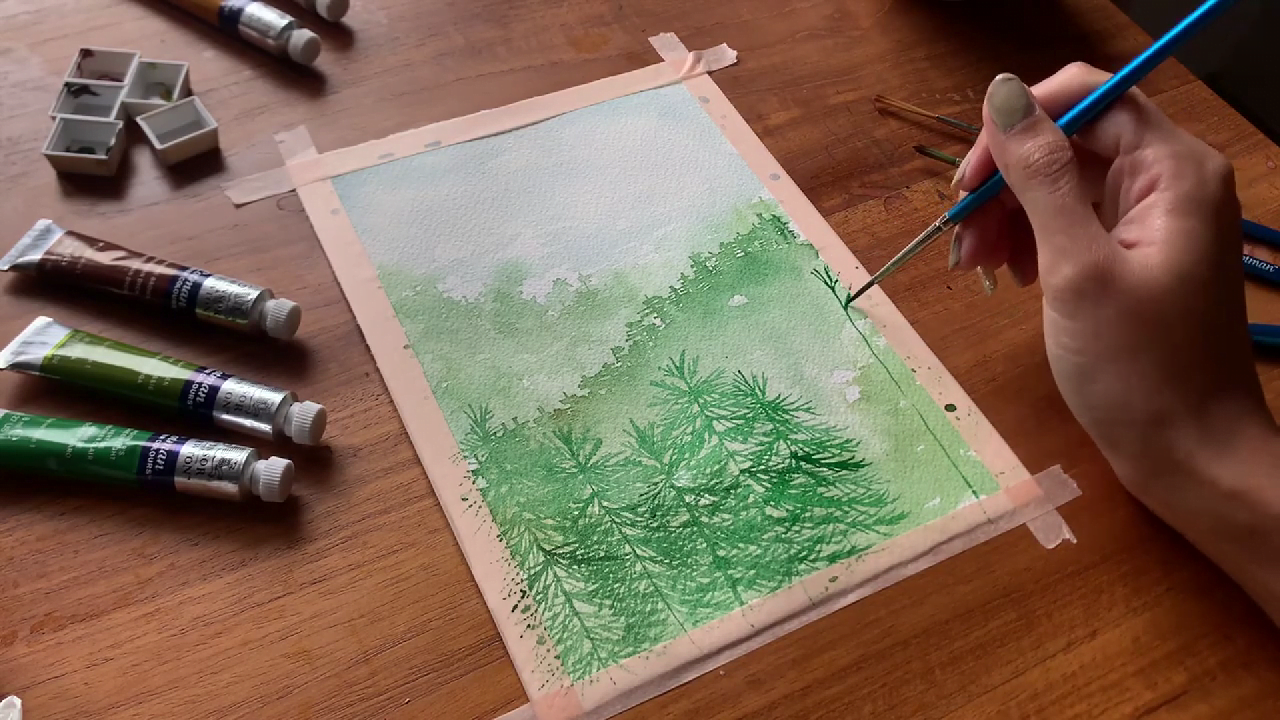
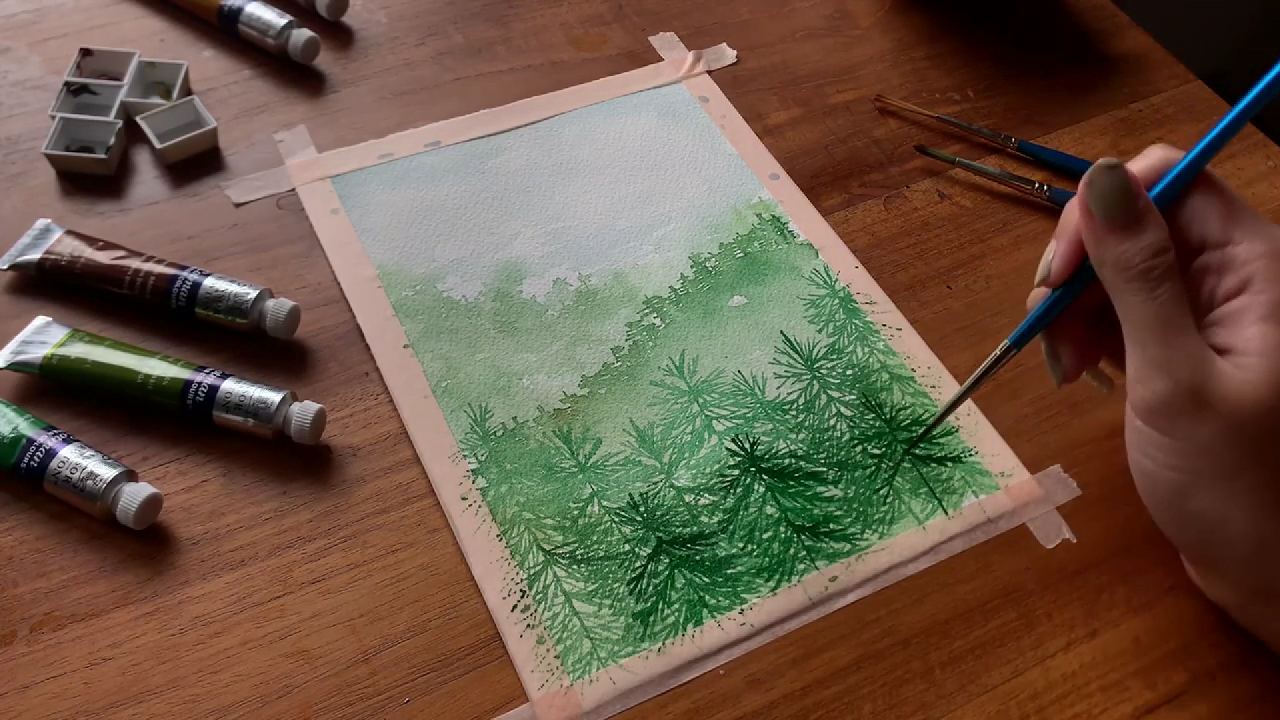
With everything else done, it’s now time to get started with the main focal point of the scene, aka the large pine trees in the foreground. Since the trees are the closest to the eyes, I’d want to create defined and precise shapes for them. But trust me, this step isn’t as complicated as it sounds!
First and foremost, grab the thinnest brush in your set (I have used a number 2), and dip it in some slightly thinned-out dark green color. Then, following the reference lines created earlier, draw vertical lines with the tip.
Using the same brush, draw inverted ‘V’s to paint the pointed leaves and a few strokes to give the branches a fuller look, like I am doing here. Don’t use too much color here, as we want to keep it lighter to create the illusion of a dense mountain forest. The trees will progressively get darker and shorter as we move to the ‘front.’
Now, lightly dip the brush in some dark green color and continue painting the trees darker than the ones already painted. You can even make the branches at the bottom of the tree a tad bit darker than the ones above. It’s all about perspective, you see!

Continue painting the pine trees one close to the other till you reach the other edge of the paper, with darker trees closer to the eye. It’s perfectly fine for the trees to overlap, as we don’t want to leave any barren land in our pine forest.
This can also be a great step to practice your strokes, so there are no fixed number of trees you should or shouldn’t paint. Allow the painting to dry completely and see if you need to add more color to certain areas by keeping in mind this rule of thumb ‘The closer the elements, the darker their colors.’
And with that, you have painted the perfect pine forest using watercolors!
Now, that wasn’t really difficult, was it?
I know the water-on-water technique can be a little tricky to master, especially if you haven’t used watercolors. It will require you some practice to get the hang of how to thin out the paints so that they don’t end up dripping. But you will easily get the proportions right after a few tries!
And here’s another tip I have for you. If you see that the color you applied has blotted the paper, use the dry tissue technique to absorb it. Or, using a dry flat brush, quickly spread it across to spread it on the paper. However, be careful not to mix colors where you don’t need them to.
If you are looking for more tutorials just like this one, my watercolor roses tutorial and the guide on how to paint a forest that is not pine are amazing watercolor exercises that I highly recommend.