Expertises: Art, Pastel, Brush, Drawing, Pencil
Updated on

Inspiring Ideas for Modern Home
Watercolor is one of the most popular painting mediums among artists today and with good reason.

With watercolor paint, you can develop striking art pieces of flowers with relative ease. It offers a lot of room for exploration so that you can create what your mind desires. Besides, experimenting with watercolor paint can be a really fun experience for most artists.
However, beginners may find it a bit challenging to use watercolor, especially when painting complex flowers like the lotus. Well, there’s no need to worry, for I am here to help you out with a very beginner-friendly approach to lotus flower painting but if you need more, my article on watercolor techniques for beginners ought to help.
Today, I will be showing you how to paint a lotus with watercolor. In this guide, I have provided a simple, stepwise process that you can follow to create a beautiful work of art.
So, grab your art supplies, and put on your creative hat, for it’s time to get started!
Let’s address the first things first - you will need to gather the necessary supplies and equipment before you start painting away. You can use the products I am using, or you can choose your own set of brushes and watercolor paper.
As for the colors, you don’t have to worry about getting a full set. I have only used a few shades of blue, pink, and green, along with a few extra options like orange and yellow for detailing. Of course, you can use a couple more shades in addition to the above if you are feeling a bit imaginative.
Still, for those of you who are curious, here is the list of supplies that I have used for this particular artwork.
Paint: Holbein | Paper: Saunders Waterford Watercolor Paper - White, 300gsm | Brush: Princeton Aqua Elite Professional 4 Piece Set 4851
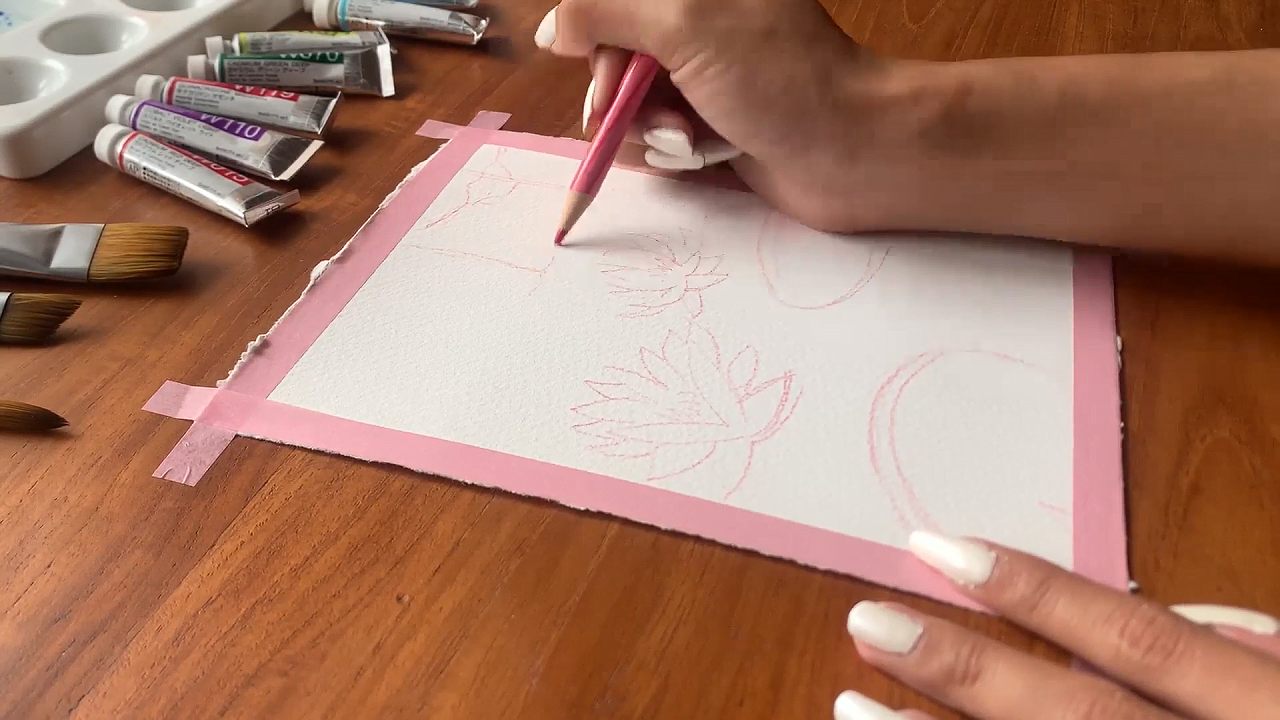
First, you need to create an outline of the painting with a colored pencil. I prefer using a single color for the whole sketch, but you can use different colored pencils for different elements if you wish. On that note, you should avoid using a regular drawing pencil, as the outlines will become too dark.
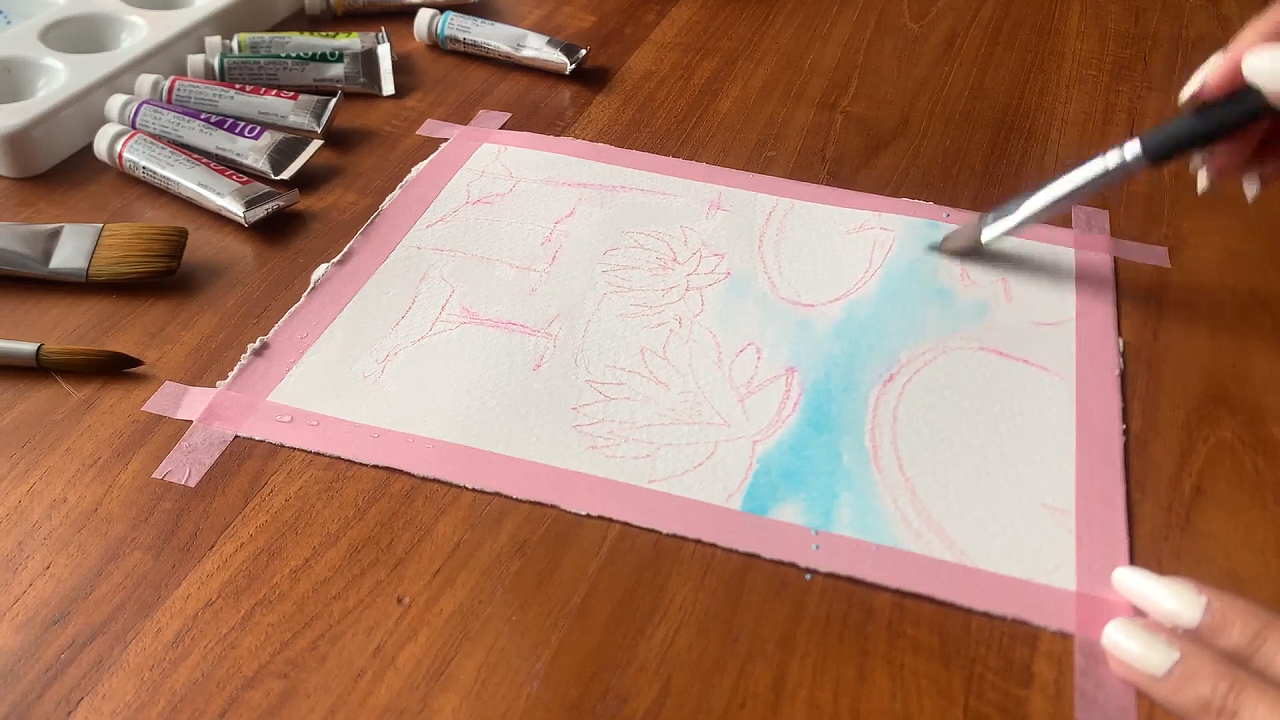
Once the outline is ready, you can start adding color to the painting. You can begin by painting the water since it acts like a background of sorts. Before applying the color, I suggest running a slightly wet brush through the water areas. This will help to disperse the paint, giving it an authentic, water-like feel.
After that is done, dip the same brush into the blue paint and begin coloring the water. Use small and gentle strokes throughout, and make sure to keep the brush only slightly wet. A dripping wet brush increases the risk of the paint bleeding out, which can ruin your painting.
Anyway, keep painting until you cover the whole water area. You don’t need to maintain uniform color everywhere, though. Make sure to keep some light and dark areas to give it a realistic finish.
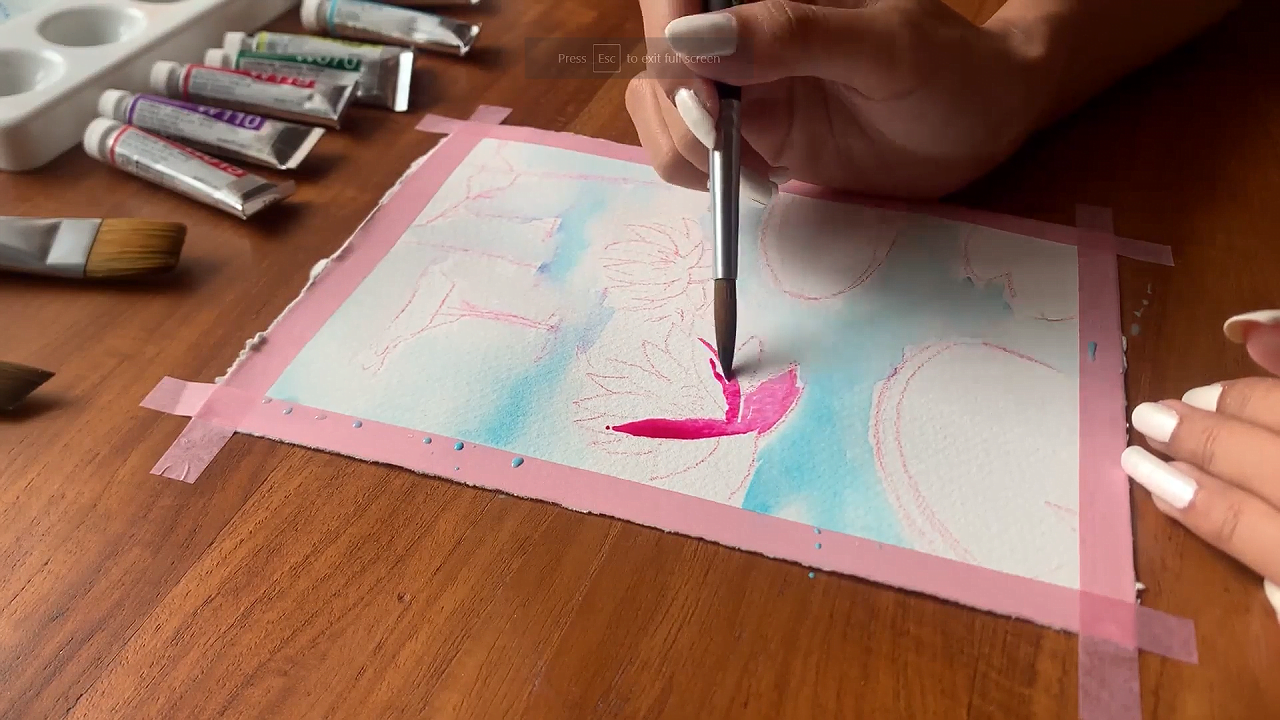
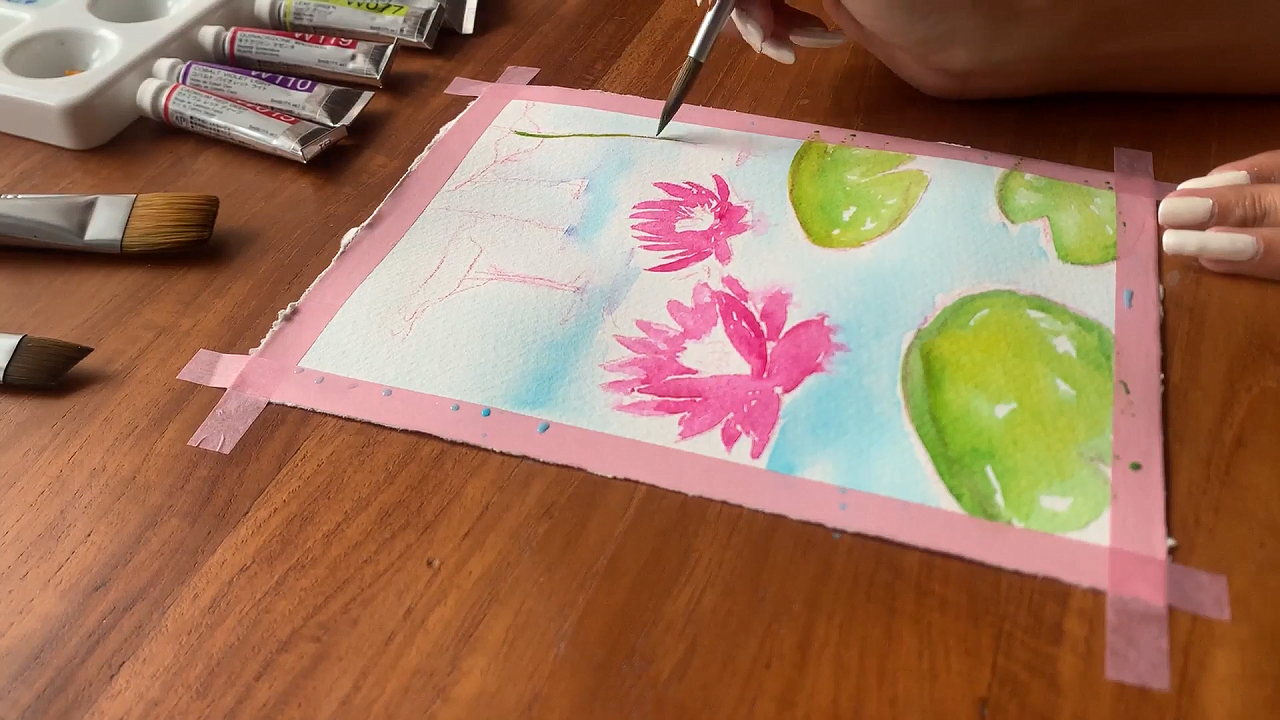
Next, you need to start painting the lotus, which is the main focus of the artwork. For this step, you have to use a finer brush, or else it will be difficult to control the strokes. Dip the slightly wet brush into the pink paint and carefully apply the color to the lotus petals.
Do not be alarmed if the first few strokes seem a little deeper than the rest - I’ll be addressing that soon. For now, just keep coloring the flower using short and gentle strokes. Also, you should leave the central area blank, as that will be painted later.
If you make any errors while applying the strokes, there’s no need to worry. You can use a soft and clean cloth to wipe off the color bleed quickly. However, you need to be a bit careful here since the color can become easily smudged if you apply too much pressure.
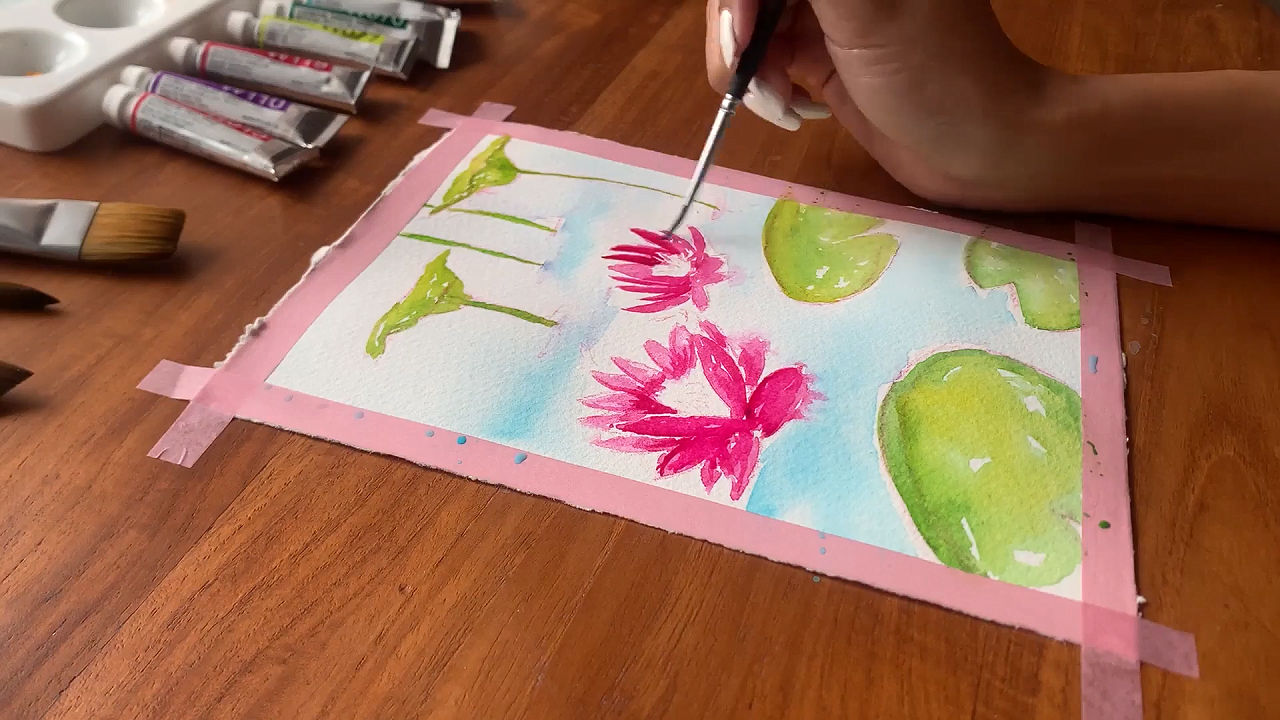
In any case, after you have finished applying the first layer, you should let the paint set for a little bit. Then you can begin applying the second layer using a slightly darker shade of pink. This will take care of the uniformity issues and give the flowers an even finish.
Moreover, it adds volume and depth to the shading, which is why I strongly recommend adding this secondary layer.
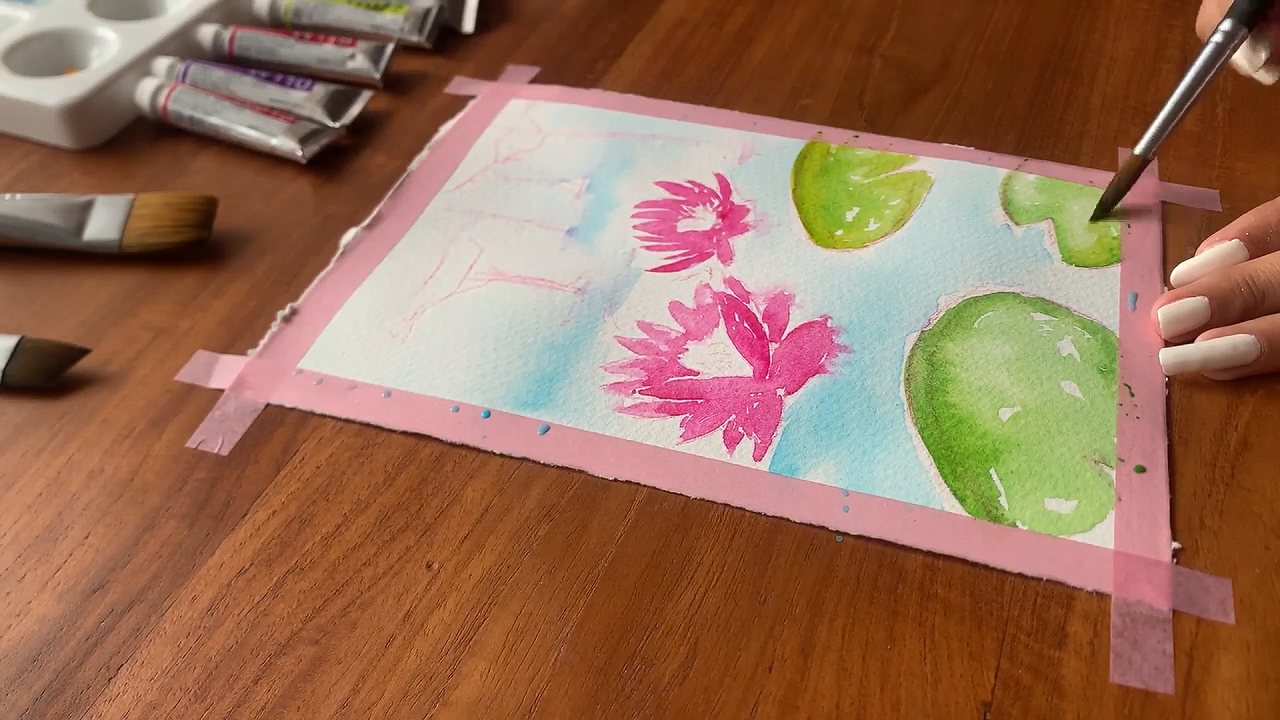
Now that the flowers and the water have been painted, it is time to turn your attention toward the leaves. Here, I have used a hybrid shade made up of light green and yellow colors. However, you can experiment with a slightly different shade if you want.
Once you have decided, dip the brush into the chosen colors (light green and yellow, in my case), and apply the paint onto the leaves. You need to use both short and long strokes to cover the leaf.
In order to prevent color bleed, you can use short strokes near the periphery. Conversely, for the central portions, you can use long strokes, which will help you cover the area quickly.
Same as before, you need to allow the base layer to set before proceeding further. Be advised - you do not want the paint to dry off completely here. If it does, you will not be able to achieve a natural shading effect on the leaves.
For the next layer, you can use the yellow color to get a more realistic texture. Or you use another color if you are feeling a bit creative. For instance, you can use a darker green to imitate a new leaf. Alternatively, you can use a light brown shade to depict an old or withering leaf.
Furthermore, you don’t need to cover the whole leaf in this case. Just paint the central portion and watch as the leaves come to life!
If you have included a few lotus stalks in your artwork, as I have, then you will need to paint them in this step. Given that the stalks have a narrow shape, you have to use a fine brush here, too.
Likewise, the color needs to be a bit darker than the shade used for the leaves. Ideally, I would suggest using a combination of dark green and yellow, but you can use only dark green or a mixture of dark green and brown for this purpose.
You need to paint the elongated portion of the stalk with a long, sweeping stroke. On the other hand, the wider leafy portions near the top need to be painted with short, gentle strokes.
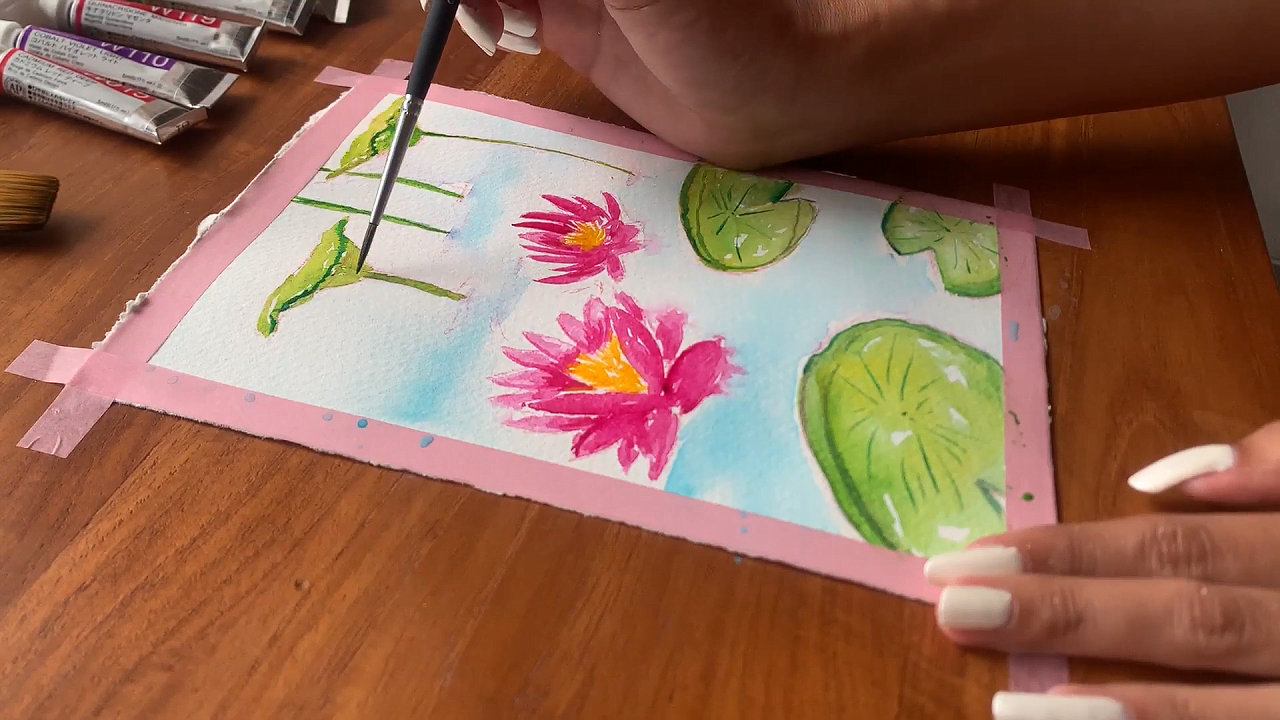
Once the primary areas of the artwork have been painted, you need to get into the finer details, starting with the flower. Needless to say, you have to use a very fine brush from now on. This is necessary if you want the details to be clearly visible.
After you get the brush, dip it into a dark shade of pink, and start detailing around the edges of the flower. You can also use a combination of pink and red if you wish.
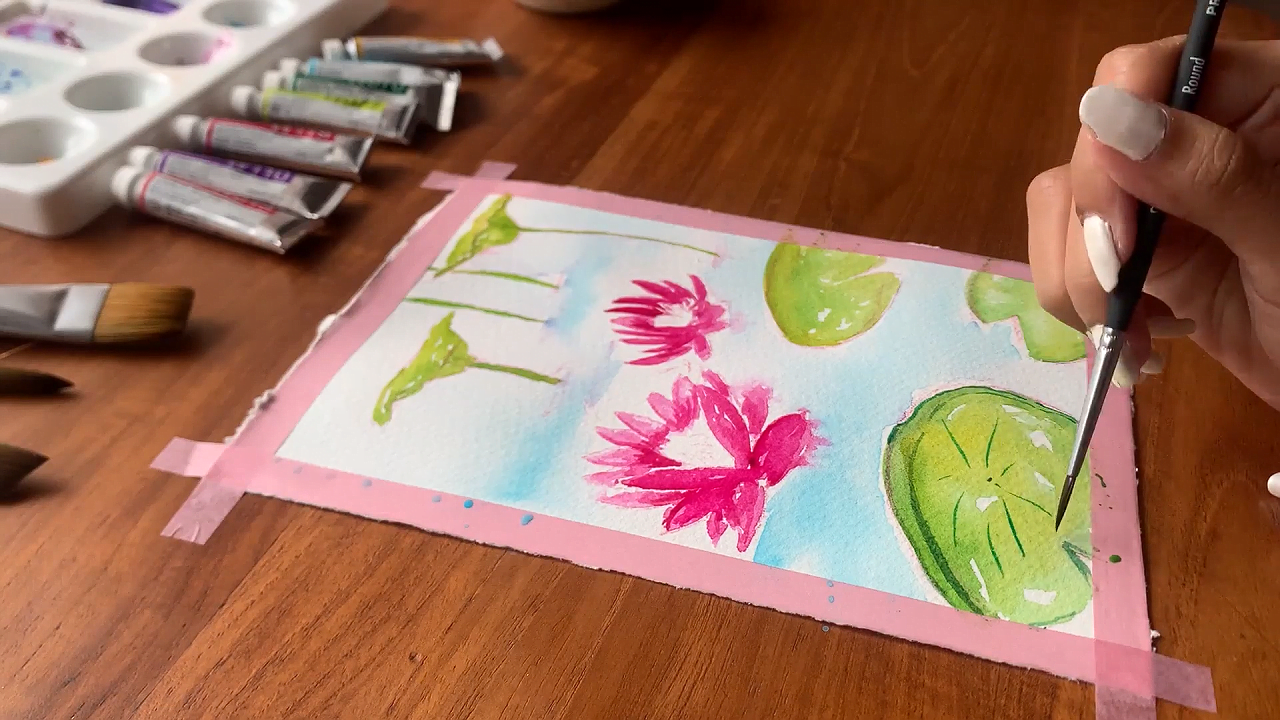
Here, you need to add details to the lotus leaves with the same fine brush. Of course, there is no restriction about this aspect, so if you have a spare brush lying around, you can use that too.
I have detailed only the larger leaves in this step. For the best results, I suggest that you use a dark shade of green to make the veins and other leaf details more prominent. Keep your hand relaxed, and draw the veins in the center using single strokes. Then, using the same technique, add the required details along the leaf edges.
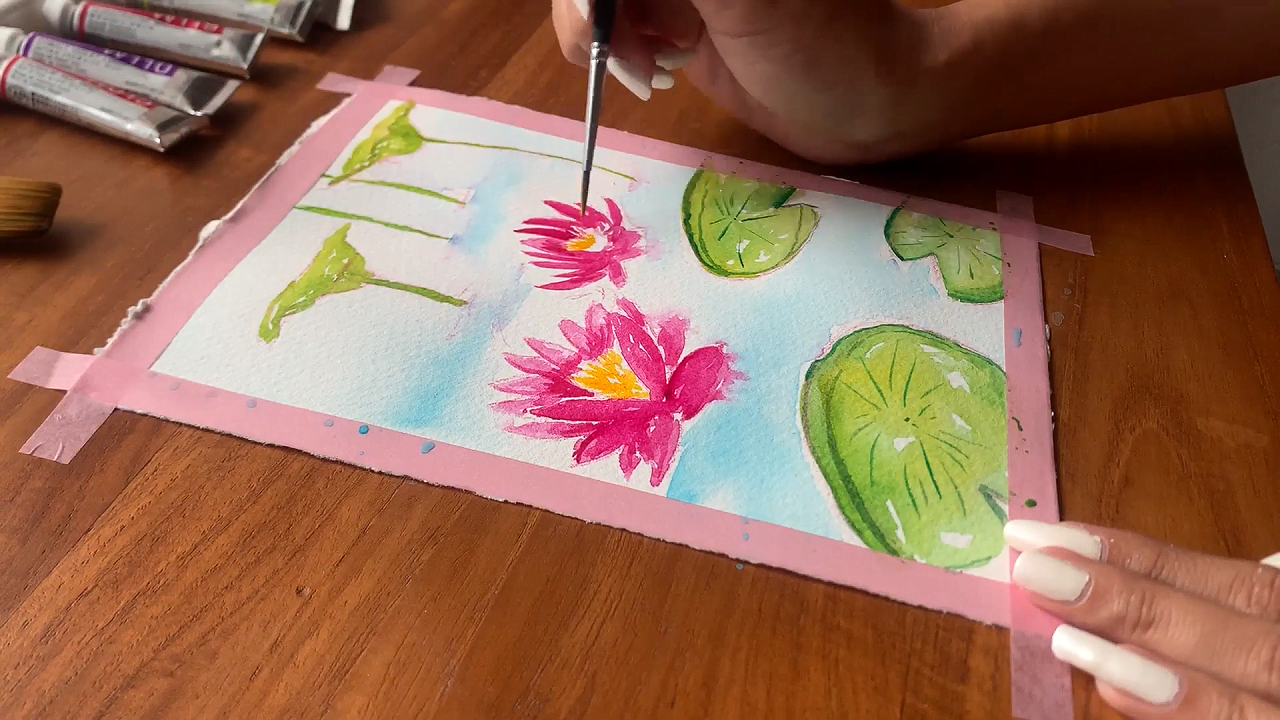
Now it is time to make the flower look livelier, which is done by adding more color details to it. Remember when I told you to keep the central part of the lotus blank? Well, that is what I have filled up in this step.
I have used a combination of yellow and orange here for a more vibrant feel. Using a wet brush and short strokes, I’m painting the center of the flower very carefully. As usual, I have used a fine brush for this purpose. Also, you don’t need to fill out the whole area perfectly - you just need to make sure that the color seems consistent with the rest of the painting.
In this step, I have added details to the leaf stalks and the smaller leaves. You will notice that I have used a similar dark green shade as the previous leaf detailing. And after adding a few highlights, I painted an extra layer of color to achieve a realistic shading. Now the painting is really starting to look gorgeous, isn’t it?
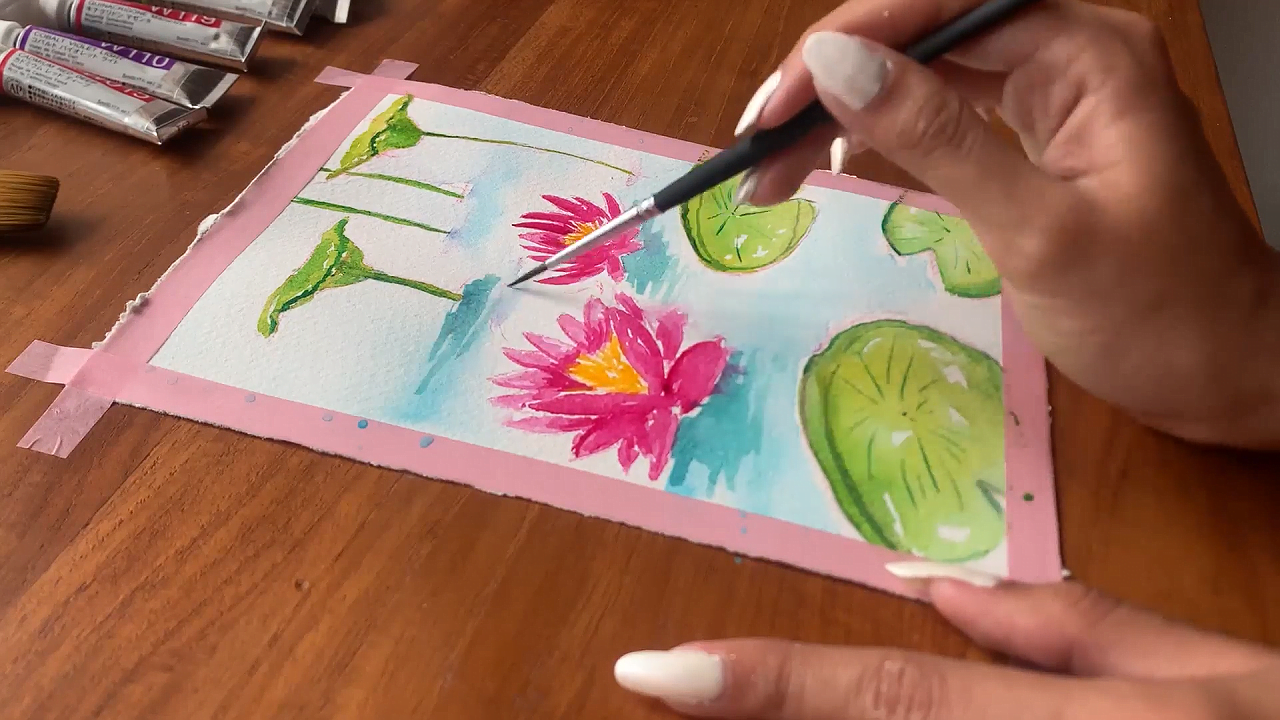
Of course, how can I forget to add details to the water? For this step, you can use a slightly thicker brush if you want, but I prefer using a fine brush as before. With the help of a darker shade of blue, you can add some fine detailing to the water’s surface.
Subsequently, you can use a combination of blue and gray to add shadows below the flowers and leaves. I recommend this shade because it will add more depth to the painting and will make the shadows look real.
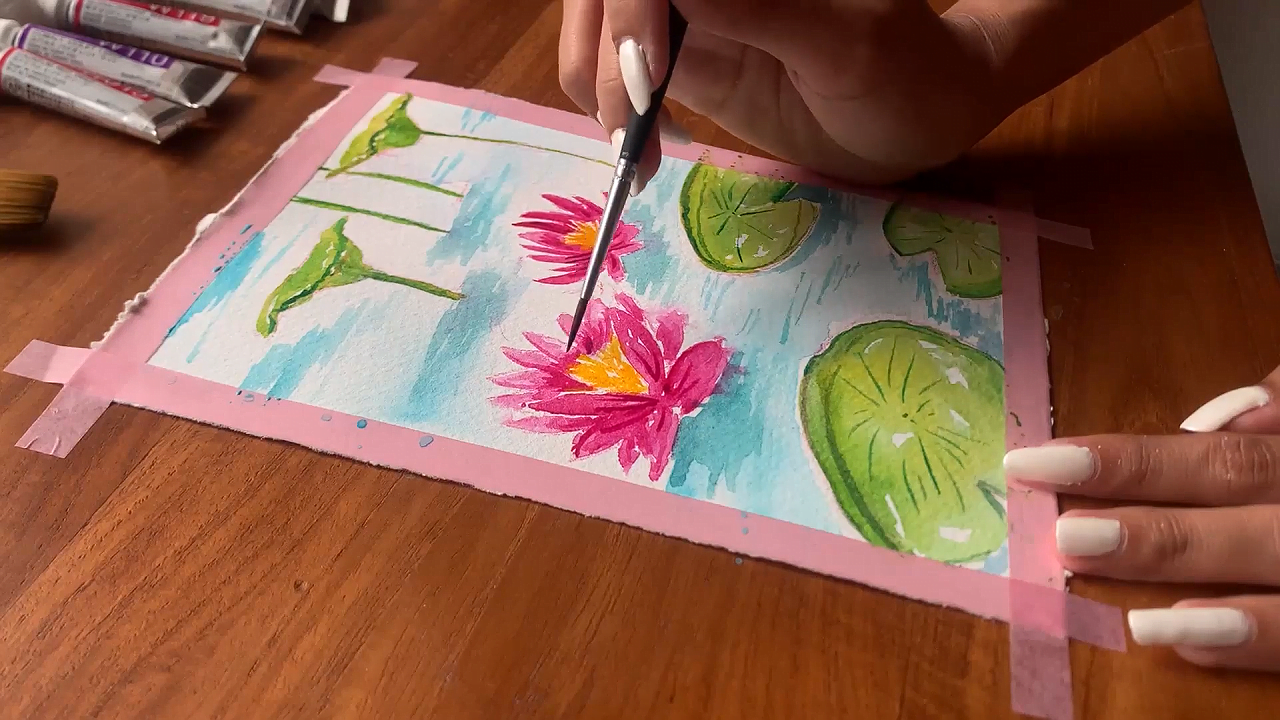
Now I am almost nearing the end, so it is time to add the finishing touches. Using a wet and fine brush, add some streaks and highlights to the lotus petals. You need to maintain high precision here, or else the painting might become messy. Believe me - you don’t want that to happen at this stage!
Once that is done, you can set the color to dry for a while. And with that, your lotus painting will be complete.
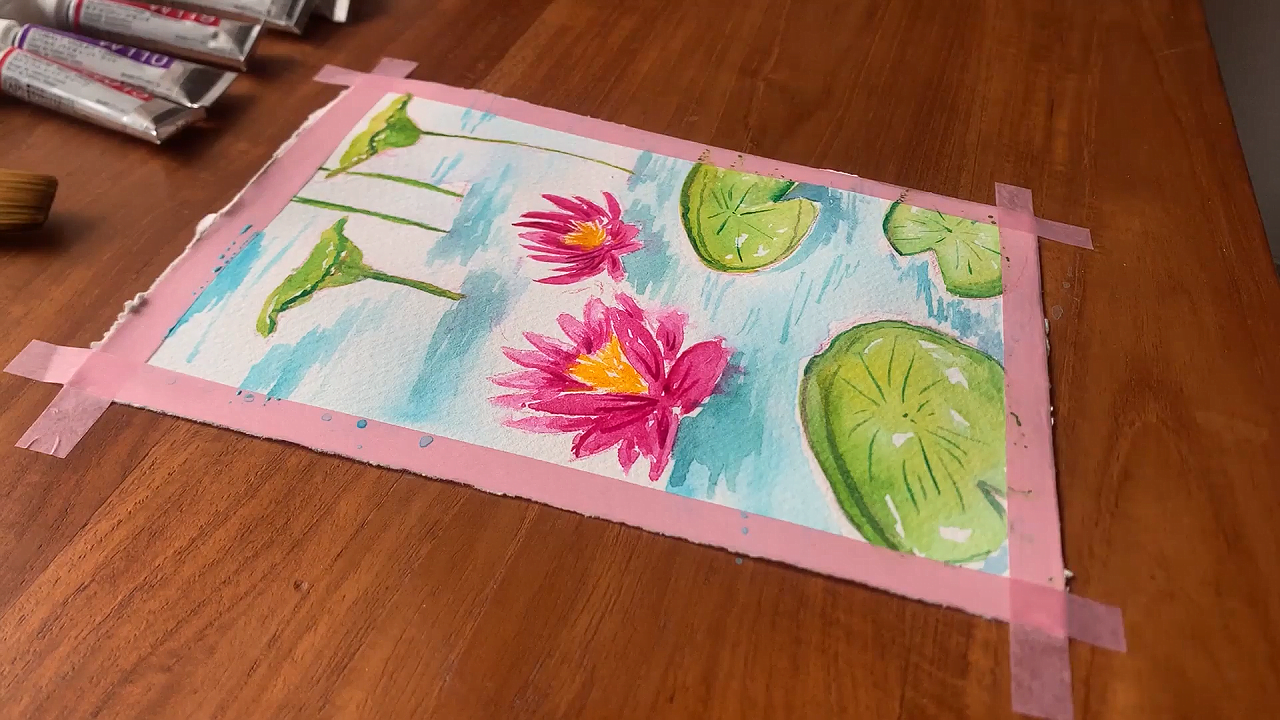
So, now you know how to paint a beautiful picture of a lotus in watercolor using only a few art supplies. As you can see, it isn’t that difficult to accomplish.
That said, you might make some mistakes early on, and that’s quite natural. In order to address those mistakes, you will need to practice a lot initially because practice makes perfect, after all.
Also, I advise you to observe these flowers in their natural environment to capture all the subtle details. And before you know it, you will be able to paint like a professional artist.
Anyway, that’s about everything I had to say in this guide. If you would like to see more guides that I created I recommend the watercolor sunset tutorial and the watercolor lake painting tutorial.
Until then, goodbye!