Expertises: Architecture, Design, Art, Home improvement, Painting
Updated on

Inspiring Ideas for Modern Home
Electric hand planers may leave lines because of blade defects, poor alignment, or a blocked blade. These can be resolved by sharpening or replacing the blade, adjusting its position, and cleaning it regularly.

An electric hand planer can be a great tool to shave off small amounts of wood for fine sculpting or final smoothing purposes.
This tool can be versatile when used for shaping doors, cutting grooves, chamfering edges, and more. Based on my observations, the hand planer may showcase issues like leaving lines on the wood, thereby leaving an unsightly mark on the woodwork.
Let’s look at the reasons why this happens, as well as ways to prevent and fix it for a better finish on your wood projects.
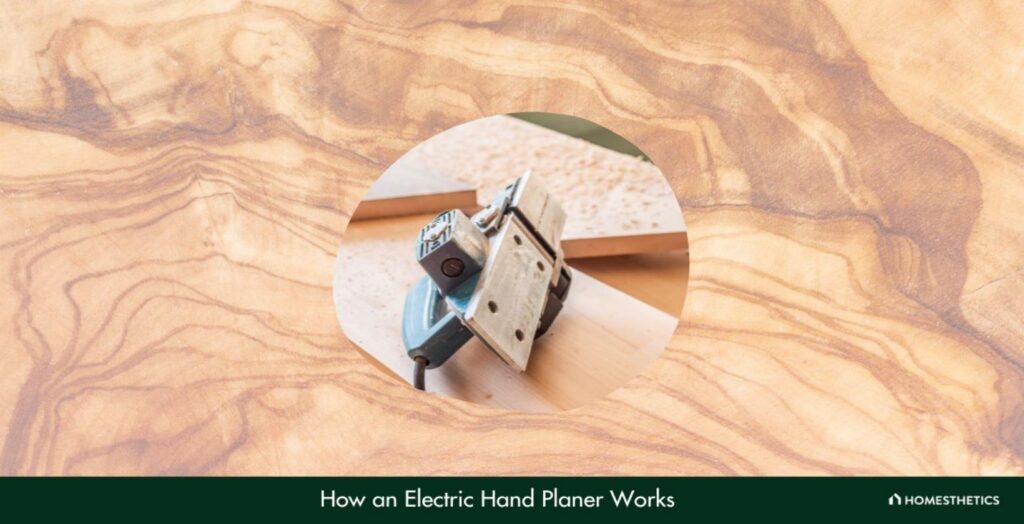
In principle, an electric hand planer operates in the same way as a manual one. The purpose of this tool is to flatten the edges and corners of wood while smoothing out irregularities through force. And both kinds of tools feature a thin steel blade to perform the task.
An electric hand planer features a rotating blade that can cut off more material quicker than a manual model. This blade sits between two metal plates that can be adjusted to move up and down, which dictates how much wood the blade will cut off. The depth of the cuts that this blade makes is usually limited to a little less than a tenth of an inch.
Typically, the RPM of the rotating blade sits between 10,000 and 20,000, which makes its cut edges smooth.
Due to its precise nature, an electric hand planer can be used in the refinement stages of any woodwork project. Here is a brief list of the projects it can be used on:
When working with an electric hand planer, it’s only natural to expect clean results during usage. Any small perfections can be sanded off, should they be minor and few. But that may not always be the case, particularly if your device or its blades are a little older.
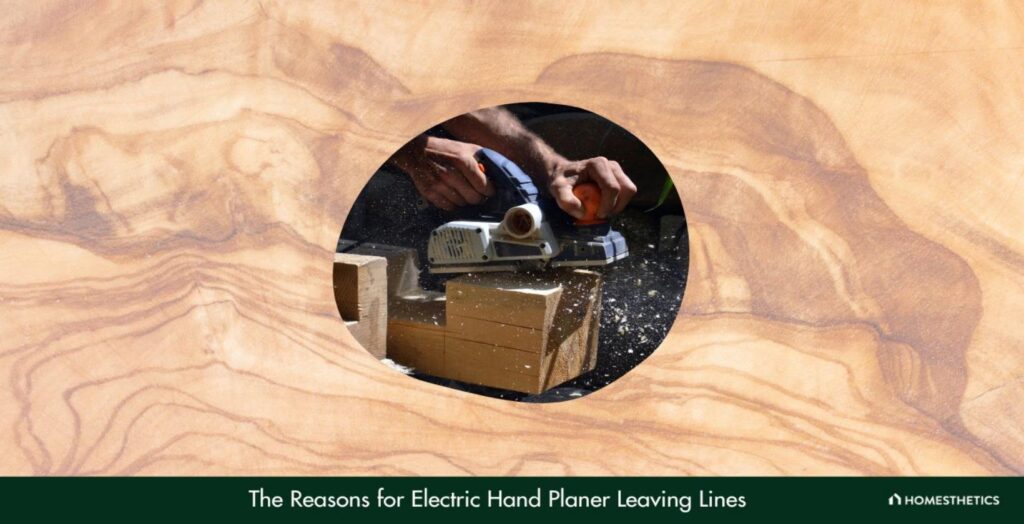
There are three primary reasons why your electric hand planer might be leaving lines. Let’s explore each to see how they affect the performance of the hand planer.
Like most woodworking tools, if the blades of an electric hand planer become too dull, the device won’t function properly. You will be left with jagged cuts or unsightly lines, which is far from the desirable outcome.
Consider checking your blades to see if they have a sharp and straight edge. Dull blades appear smooth and somewhat rounded, which will necessitate the usage of a sharpening stone.
To sharpen your dull hand planer blade, place the stone against it and swipe it against the blade several times. You will see the blade slowly reach the appropriate levels of sharpness as you continue to move it against the stone.
Tip
Try to ensure that you maintain an equal amount of pressure on the stone while sharpening the blades. This will make sure that the blade is evenly sharp across its circumference.
An incorrectly adjusted blade can spell trouble for your wood projects that stretch beyond just lines. It can result in an uneven finish or, in severe cases, messy ridges and gouges on the wooden surface.
This can be fixed rather quickly through a blade adjustment technique. The key is to understand the angle at which your planer cuts and make adjustments accordingly.
Start by ensuring that the blades of your planer are aligned properly by using a feeler gauge. Next, use the planer model-specific wrench or screwdriver to adjust the planer blades one at a time. You must be careful while doing so, as any errors can affect the balance of the tool, necessitating even more work on blade adjustment.
Finish by checking the alignment with the feeler gauge and seeing whether the blades have aligned properly or not.
The blades of electric hand planers being blocked is an issue that will present itself every once in a while. Should the blade of your hand planer end up being blocked, it can end up overworking or burning the motor out.
While working, this may be observed as your planer ends up creating lines in the woodwork because of the inconsistent blade rotation. This can be resolved fairly easily by clearing out the clogs and repositioning the blade appropriately.

Fortunately, you can prevent your electric hand planer from leaving lines quite easily through a few preventive measures. These measures only require vigilance on the user’s part, so prevention is a simple matter of checking the tool every once in a while.
Here are the ways you can prevent the planer from creating lines on your wood surface.
If you spot any blade-related issues before they cause major trouble, you can fix them before they occur at all. For dull blades, you may sharpen them before ever needing to replace them. And to prevent the blade from being misaligned, check its alignment before and after you use the tool.
Much like the blade-related issues, preventing the planer from cutting too deeply or not deeply enough can be fixed by checking the tool beforehand.
Simply rotate the adjustable knob to raise or lower the cutting depth. While the depth range may vary from one model to the next, it typically ranges between 0 and 3 mm.
A low cutting depth means your wood project will receive a smoother finish.
Keeping the blade clean and free of debris can stop it from clogging up, so be sure to clean the blade periodically.
To do so, you must turn the power off first and unplug the tool. Use a small brush to remove the debris clogging the blade from within the guard fence and around the blades and feed rollers. Try to make sure you’ve removed all the debris before using the tool again.
Tip
Consider using compressed air to force any large debris out of the tool if you face issues with a brush.
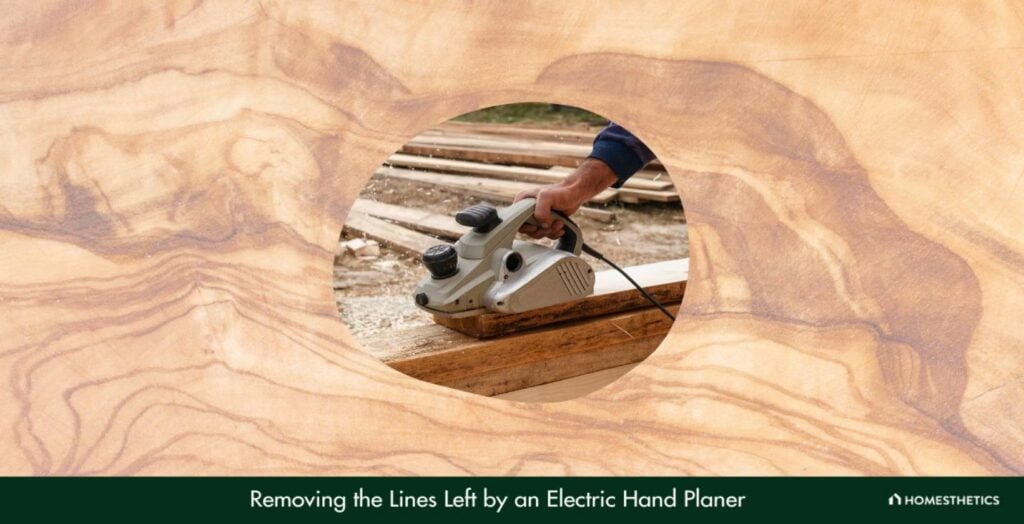
Fortunately, hand planer defects like lines are fairly straightforward to fix. There is a simple solution to each type of machining defect through the use of other manual and power tools.
Here’s how you can remove the lines left behind after performing a hand plane with the tool.
The easiest way of removing fine lines on your woodwork is to sand it down. While you can work manually using sandpaper, a random orbit sander or a belt sander is quicker and does a better job.
These machines are easy to find and are affordable to boot, which can make them a mainstay in your woodworking toolkit. Simply attach the belt sander to a power drill and move it over the wooden surface in slow circular motions. Within a few minutes, you’ll begin to see the beginning stages of a smooth finish.
Be sure to use very little force as you move the belt sander to scrub plane marks.
If you have it in your toolkit, a jointer can smoothen the hand plane marks left behind by the tool quite well. Jointers are also electrically-powered but are faster and require less effort to make a cut.
The blade in a jointer can closely shave the wooden surface smooth, effectively flattening and eliminating the lines made by the planer. You can also use it to create a beveled or straight edge and chamfering over a planer, if you need to.
That said, it’s worth noting that the control over jointer plane thickness is not as precise as that of a thickness planer. If you’re not careful, you may be left with a bigger machining defect than a simple line.
When using an electric hand planer, it’s imperative to be careful with the cut depth. You can always make multiple passes over the wood surface to remove more, after all.
If your planer has left lines in the woodwork, you can readjust the blade depth to even the surface out. Checking it after making one pass can help you keep the surface consistently smooth. Additionally, you can ensure that the blade sits in the middle of the floor plate and isn’t angled.
You can also use a different type of planer, like a table-top power planer, if you need such tools frequently. These machines ensure that wood surfaces remain smooth and accurate, requiring very little effort on your part.
The machining defects that can be left by an electric hand planer include lines, ripples, grains, or snipes which can put a damper on your woodworking spirit. Fortunately, similar to lines, they are easy to remove.
A snipe occurs when the ends of a piece of wood are cut thinner than the rest of the flat board. It can happen if the lumber isn’t secured well enough on the planer jig. To solve this, you can use multiple rollers to secure wider boards, after which you can start using the planer.
Sometimes, you may find that a piece of wood has developed ripples instead of being smooth. This can happen due to the planer blade being defective or misaligned, which can be solved using the methods listed earlier.
Lastly, the lumber may be riddled with grains instead, which can happen with woods with a large difference in density within individual annual growth rings. You can see it happening if the planer blade pushes the hard latewood into the soft earlywood instead of slashing through the wood fibers. This can be fixed through sanding or by making smaller cuts with sharp knives.
A planer blade should be sharpened to about 600 grit, which strikes a balance between sharpness and durability. Any sharper, and the blade will grow dull within a few uses. And any less sharp, and the blade will not be sharp enough to perform a lighter cut through rough lumber.
A manual hand planer is not generally considered better than an electric hand planer as it has a smaller working area and can be prone to producing more defects. Thus, hand planing with a manual planer is not preferable over an electric one with the results in mind.
Like most tools, electric hand planers have the potential to leave a few defects on your working surface. Defects like lines, grains, and ripples can occur, but they can be solved just as easily too.
Removing the possibility of a power planer leaving lines is a matter of taking care of the device and being mindful of the working surface. Often, the issues that may crop up can be resolved by sharpening or changing blades, adjusting the blade depth, or declogging the blade.
It’s best to approach any defects left by the hand planer with a calm mind and the right tool set. After all, they’re rarely complex and require very little effort to be eliminated entirely.