Expertises: Architecture, Design, Art, Home improvement, Painting
Updated on

Inspiring Ideas for Modern Home
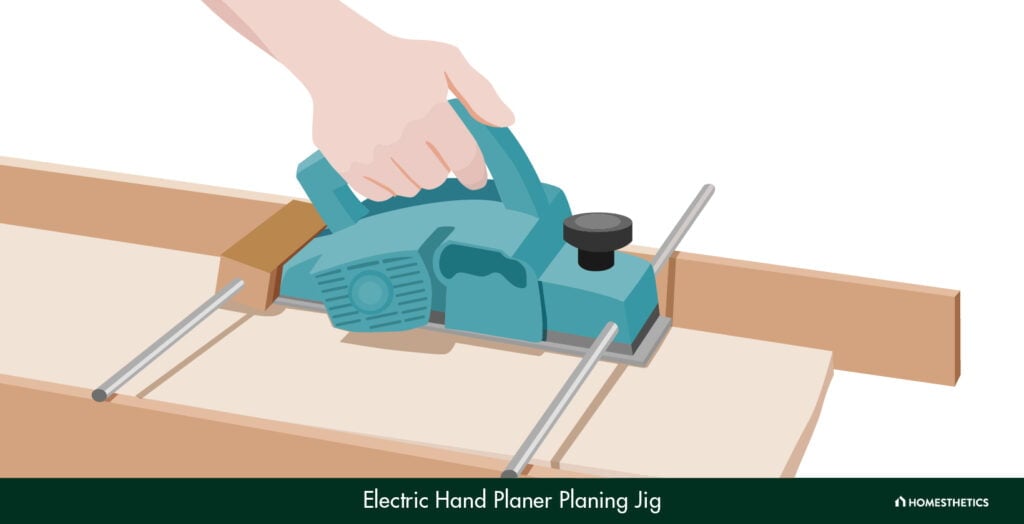
Electric hand planer jigs are tools that make it easy to use electric planers by ensuring consistency and precision in the planing process. The most common types of planer jigs include standard planing jigs, tapering jigs, beveling jigs, thickness planing jigs, and rabbet jigs.

An electric hand planer is a must-have tool that allows you to plane wooden surfaces by shaving off small amounts of the material. It generally has two or three blades and can remove up to ⅛” of wood when used in a single pass. The main difference between manual hand planers and electric hand planes is that the latter have blades that operate at high speed with the help of a powerful motor. Electric hand planers also tend to be more versatile and easier to use, especially if you have no experience with woodworking tools. They are generally used with jigs, which reduce the effort involved in the woodworking process while ensuring accuracy.
A jig can be defined as a woodworking accessory that attaches to a planer and guides it along a specific path. Since the effort involved is reduced, the user does not experience as much fatigue as when using a planer directly. Using a hand planer jig means your hands and fingers are away from the cutting edges, which ensures greater safety. Depth control mechanisms or adjustable stops are also often present on jigs and can be used to control the depth of cut. Finally, there are clamps that allow securing the workpiece to the jig so that it does not move or shift during the planing process.
A hand planer jig provides a stable platform on which the planer can rest or connect to. Depending on the type of jig you use, the manner in which it connects to the planer can vary, as indicated by our tests. It may have a secure platform where the hand planer can be inserted and locked into place with clamps. Alternatively, it may have tracks or guide rails that align with the hand planer.
Hand planer jigs, often called planing jigs or hand plane jigs, are tools in the woodworking industry that make it easy to use hand planers. They help guide the hand planer across the surface along a specific path to remove the material uniformly, both on smaller and bigger projects.
A standard electric hand planer planing jig is designed to help you achieve straight and even planing results. It is the most common type of planing jig and can be used for different purposes, such as creating straight edges on lumber, leveling uneven boards, and smoothing surfaces.
Before you can use an electric hand power planer, it is crucial to follow certain safety precautions. This involves putting on safety gear, including safety goggles, a dust mask, and ear protection. These can help protect you from wood chips, dust, and noise while using the planer.
The wooden piece you are working on must be placed on a flat surface, such as a workbench. Ensure that it is stable and will not move during the planing process. Clamps can be used to secure it and are usually required for irregularly shaped or larger workpieces.
Connect the electric hand planer to the jig, which may have clamps, brackets, or other features for connecting to the planer. Once you’ve properly inserted your electric planer inside the jig, it should be positioned over the wooden surface that has to be shaped.
To start shaping the wood, turn on the electric planer and place it on top of the lumber. Push it forward slowly so that the blade can precisely remove the required amount of material. Ensure the pressure is even and consistent while moving the planer across the surface.
A tapering jig is different from a regular planing jig and is most suitable for creating tapered cuts. It is used when one end of a cut has to be kept narrower than the other.
As such, tapering jigs are used for chair legs, table legs, or other old furniture pieces with tapering components. This type of jig ensures tapers are highly precise and uniform, which is impossible with freehand procedures.
Like when using a planing jig, it is advisable to wear proper safety clothing when using a tapering jig. You first need to decide on the length and degree of the taper to be created. This is important as the manner in which the tapering jig will be set up and positioned will depend on this.
Select the taper length and angle before positioning the tapering jig accordingly. Tapering jigs generally have markings or a scale that can make aligning it with the surface easy and are often used with a table saw. They have to be secured to the rip fence of the table saw.
The wooden board you will be working on has to be placed on the platform of the tapering jig. Make sure that it does not wobble and is supported properly. This may require the use of clamps or other fixtures. The workpiece should be aligned with the fence or guide of the tapering jig.
And the end of the lumber that needs to be tapered has to be positioned close to the narrow end of the tapering jig. The wider end of the piece aligns with the wider section of the jig, and the height of the saw blade should be adjusted according to the depth of the taper. Finally, turn on the jig to start shaping the wood.
The chamfering or beveling jig is commonly used to create consistent and precise bevels of chamfers on the corners of the workpiece edges. Bevels and chamfers are angled cuts created by removing material from the edges. They can either be used for functional or decorative purposes.
Generally, chamfers or bevels are created using hand power planers to soften sharp edges, providing the workpiece with joinery features or adding aesthetic details. Such jigs have a base on which you can rest the wooden board and a guide fence against which the board is rested and positioned.
They also have adjustable angle mechanisms, which are used to set the required bevel or chamfer angle, and a clamp to secure the workpiece while cutting. Some beveling jigs have a depth adjustment mechanism that allows controlling the depth of the bevel or chamfer cut.
To use a beveling jig, you first need to determine the angle at which the bevel or chamfer has to be created and adjust the angle mechanism accordingly. Then, place the workpiece on the base of the jig while aligning it with the fence. The portion to be cut should extend beyond the jig edge.
If present, the depth adjustment mechanism can be used to control the amount of material to be removed. To secure the wooden piece, hold the clamp before turning on the electric planer and pushing it along the edge of the workpiece. Multiple passes may be required to get the right bevel or chamfer depth.
A thickness planing jig is used with thickness planers to achieve a consistent level of thickness when planing wood surfaces. It is most useful when thicknessing or planing irregularly shaped wooden pieces or rough lumber. Like other types of jigs used with manual planers or electric planers, a thickness planing jig has a base.
This is the platform on which you place the workpiece while working on it. It also has brackets and blocks on the underside that elevate the wooden board slightly above the base. This allows the cutting head or blade of the planer to remove the material uniformly and evenly. Clamps and other mechanisms are also usually present to secure the workpiece to the base and prevent it from moving.
Using the thickness planer jig is not very different from using jigs commonly used with cordless hand planers or bench planers. First, you need to place the jig on a flat surface, such as a workbench, ensuring it does not move. Then, you need to adjust the height of the supports on the underside of the jig depending on the thickness of the piece and the amount of material to be removed.
The workpiece has to be placed on the base of the jig while ensuring that it is in contact with the supports to ensure consistency regarding the thickness level. It should be aligned in the direction you intend to use the planer. In this case also, the segment to be planed should extend beyond the edge of the jig.
Secure the workpiece using the clamps, and adjust the thickness planer as per the required thickness. Turn on the planer and feed the workpiece and the jig through the tool. After each pass, inspect the material until it achieves the desired level of thickness.
A cut-out or rabbet jig, also known as a router rabbet jig, is used to create consistent and precise rabbet cuts. These are open-sided or recessed channels used for fitting or joining purposes, including inset panels, creating strong joints, or using other materials like glass in woodworking projects.
Because of this, this type of jig is generally used with routers, which are heavy-duty power tools used for woodworking, rather than planers be it molding planers, joinery planers, or block planers. A rabbet or cut-out jig has a base where the workpiece can be placed and guide rails that help the planer make straight and precise cuts.
Adjustable stops are also present in this jig, which help control the depth and width of the rabbet cut and clamps help securing the workpiece to the jig. Different types of rabbet jigs are available, so putting enough time and effort into selecting the right jig is crucial.
The wooden block should be of the right shape and size for making the rabbet cut and it should be clean and flat to get accurate results. Then, the rabbet jig has to be placed on a flat surface before using the adjustable stops to set the desired depth and width of the cut-out. When placing the workpiece on the jig base, ensure it aligns with these stops.
Use the clamps to secure it to the base so it does not move during the process, and then install the right router for the cut-out to be created. You can adjust the depth setting of the router as needed to get the desired cutting depth. Finally, turn on the power tool and pass over the surface as many times as needed to get the rabbet.
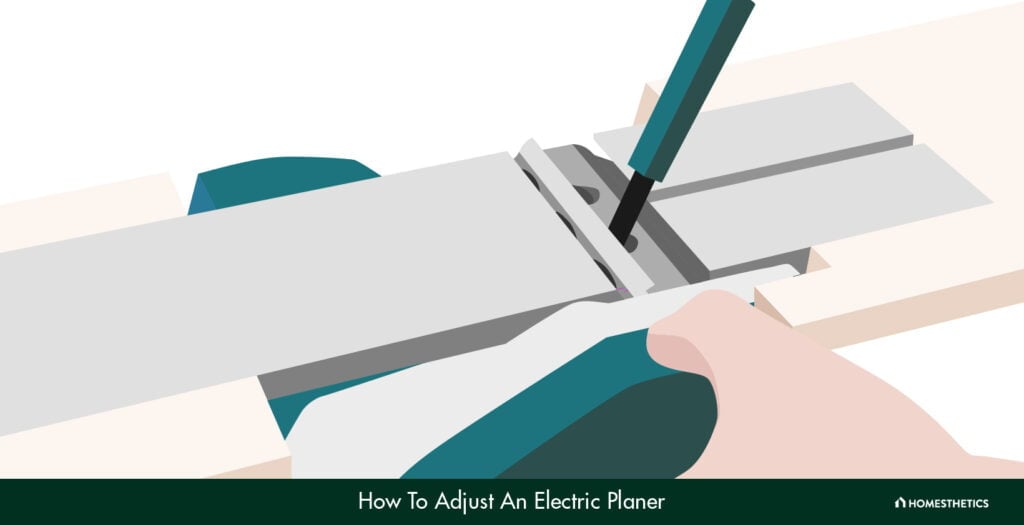
Adjusting an electric planer is vital to achieve the desired thickness of the material to be removed and to ensure precision and smoothness during the planing process.
The best electric hand planers generally have adjustment mechanisms that allow you to control the cutting depth of the blade, to get the desired level of thickness. That said, safety is of utmost importance when making any adjustments to power tools. As such, it is strongly recommended to disconnect the planer from the power source before you make any adjustments.
A dial or front knob is usually present on electric planers that allows altering the cutting depth. The condition of the blades is another factor that affects the performance of the planer. Undamaged and sharp blades can make the shaping and cutting process faster, cleaner, and more efficient. Some planers may have an adjustable sole plate or shoe for beveling or chamfering.
Fences or edge guides are also common on electric planers and help ensure a straight edge and control the width of the cut. Besides these, there may be additional features that further simplify the ease of use of electric planers. This can include a dust extraction port, and drawing from experience, we can say that great care should be taken to ensure it remains free of obstructions at all times.
Depending on the make, model, and type of the planer, it may be possible to switch the sides from which shavings are removed during the planing process. You can even use a vacuum hose or attach a dust bag to collect and remove the debris.
Tip
Before using a planer on the work surface, make sure to test the settings and always plane in the direction of the wood grain.
Even with top-notch modern electric hand planers, achieving smoothness, flatness, and straightness in woodwork can be challenging. Electric hand planer jigs simplify the process by providing stability and guidance, reducing fatigue during prolonged use.
The best jigs offer features like adjustable stops, dust collection ports, and a built-in kickstand for safety, efficiency, and a better user experience. Choosing the right electric planer jig is crucial, as it depends on the project, wood type, and size, among other factors, to achieve optimal results.