Expertises: Painting, Art, Drawing, Pastel
Updated on

Inspiring Ideas for Modern Home
DIY light fixtures are one of the fastest ways to transform the feel of a room without the cost of a professional lighting overhaul. A well-placed pendant lamp, chandelier, or wall sconce doesn't just illuminate a space — it defines its character. The problem is that designer lighting is expensive, and most budget alternatives look exactly like what they are. That's where DIY changes the equation entirely. From mason jar chandeliers and woven wood pendant lamps to upcycled wine bottles and plumbing pipe fixtures, the 33 ideas in this guide cover the full range of styles, skill levels, and materials you likely already own — so you can build something that looks custom without spending like it is.

Ever walked into a cafe or a bar and looked in awe at those beautiful light fixtures made out of mason jars and other glassware? Well, what you don’t know is that it can be replicated at your home quite beautifully and can be a wonderful addition to your dining space or kitchen counter, if you have a big one, that is!
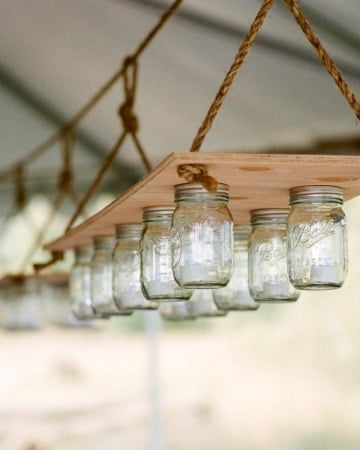
Tutorial in full at marthastewartweddings.com
All you would need for this project is a large plywood board, ropes, and of course, mason jars. These mason jars must be filled with an electric tea light so as to give a soft yet radiant shine and make the ambiance much more pleasant. They must be attached to the plywood board and suspended with the help of a rope to make the look complete.
If the one above is about planning and precision, these simple lamps could make a beautiful display for your living room, or even perhaps the garden area. It is way easy to make and could be a wonderful DIY project for your weekend. All you need are a couple of mason jars, a hanging lamp kit, and a perfect spot to hang the lights from.
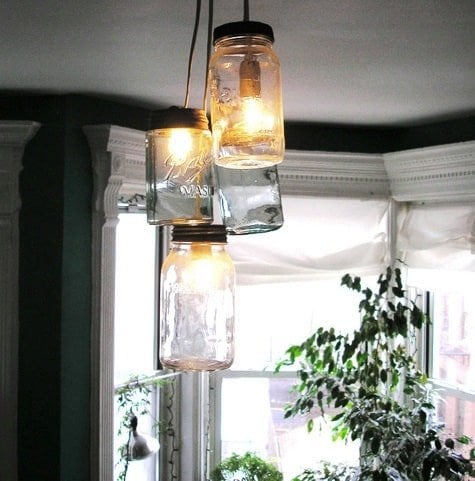
Source Unknown
Now, plastic glasses are something that can be available in any house. A beer night or a get-together, you’ll just have these lying around. But do you know that you could make a really beautiful glass lamp with something that’s available in our houses, as easily as these normal plastic glasses?
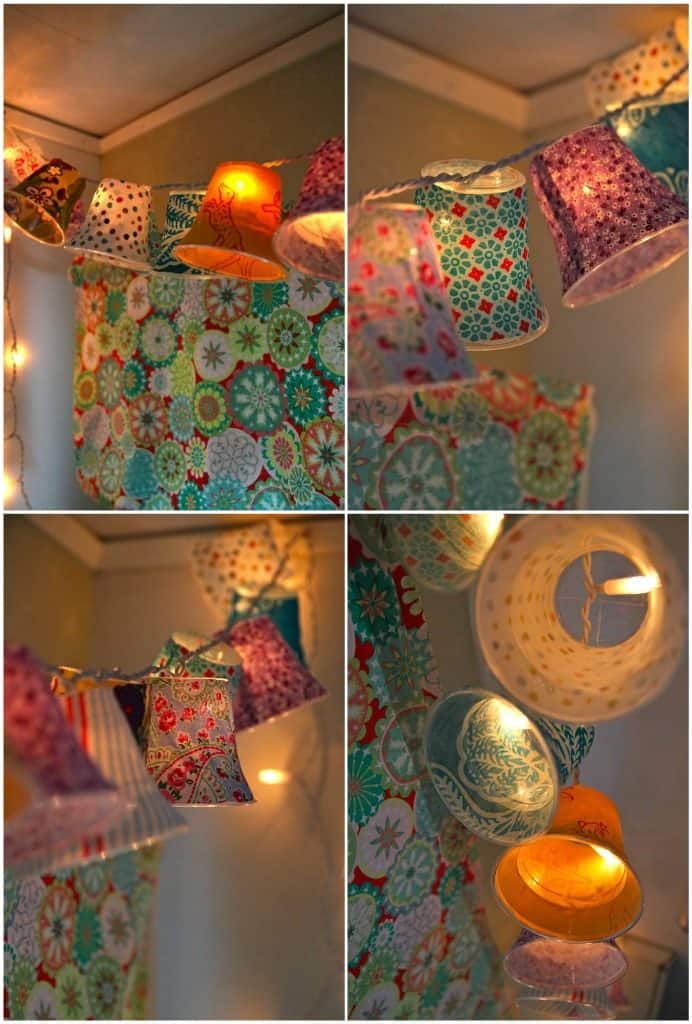
Put on your creative caps, and just think of ways to make it beautiful and colorful, if you aren’t that much of a creative, well here’s one idea. Wrap the glasses in colorful fabrics to make a lampshade. Now make multiple lampshades like these, tie them together with a thread, fix in some LED or fairy lights, and hang them above the bed, the picture gallery, or maybe even near the door.
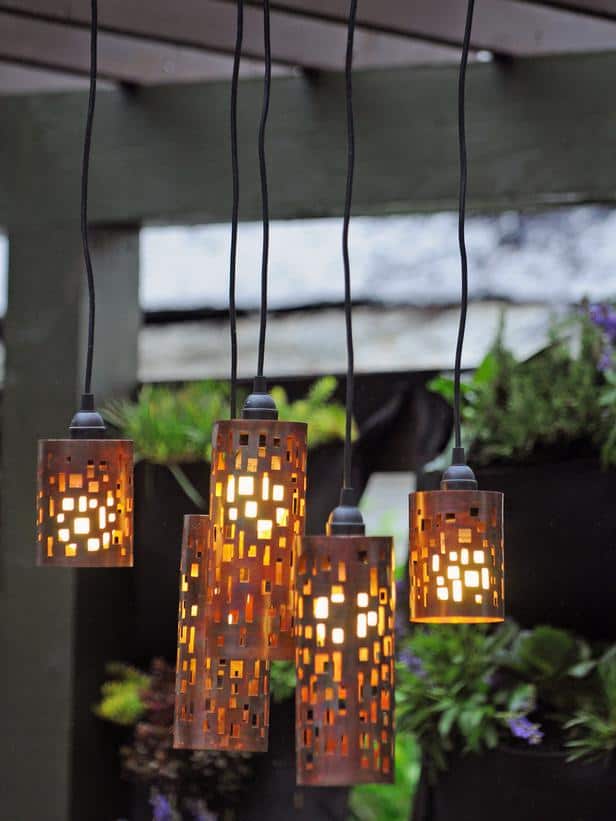
In case you’re looking for the perfect lighting for your outdoor dining area, this might just be the perfect one. Just collect a few candle holders and cut off the bottom from them and fix them around the usual pendant lights. Now just suspend them to a wire and place them in the outdoors. Voila, you are successful in creating a dabbled subtle light effect that you can enjoy during your dinners with family or loved ones.
I remember my parents buying me a globe during my school to help me study geography. As I grew up, I didn’t have any need for that and I guess it’s lying somewhere in those boxes. Now I think this would be a great idea for me to make use of that long-forgotten globe of mine and turn it into a study lamp or something. Perhaps, you should try it too if you have one.
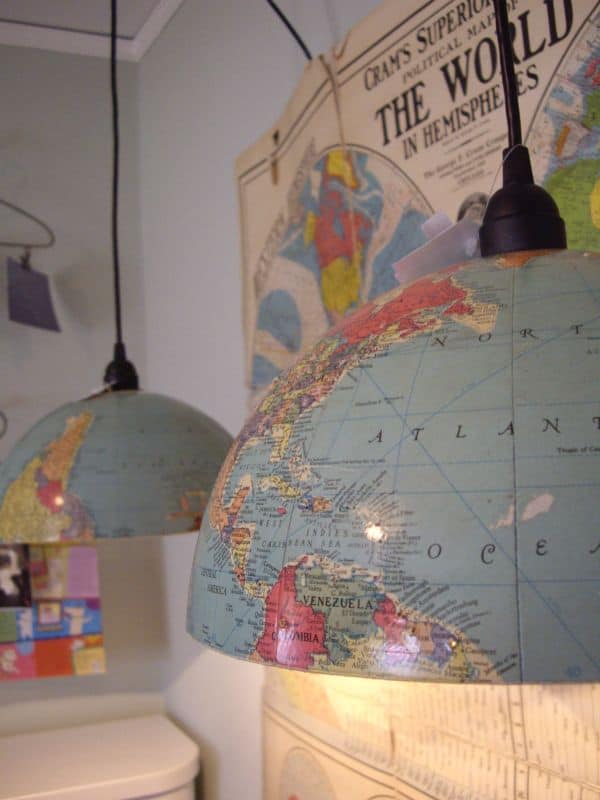
Tutorial in full at rosebudscottage.typepad.com
Just cut the globes into two halves and hang in from the ceiling. It’s that easy, and you can also flaunt your nerd side with these uber-cool lampshades. What’s also great about this is that you can make two shades with one globe, turning each hemisphere into one.
This is a wonderful idea for all those wine and drinks lovers out there. What do you do with the empty bottles left over after your drinking sessions? Why don’t you turn them into wonder lighting fixtures instead?
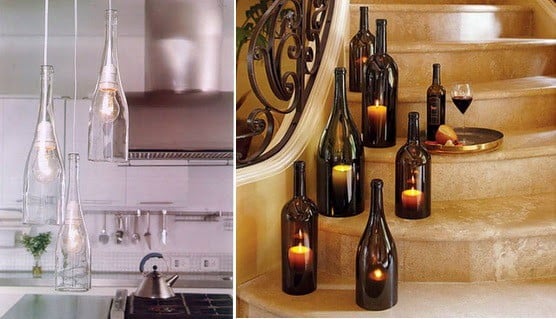
Tutorial in full at styleitchic.blogspot.ro
These could be done in two ways. You can cut off the bottoms of the wine bottles and fix a bulb into it and suspend it from the ceiling. This would be a great way to give subtle lighting to your kitchens, dining space, or living areas. You can also use the same bottom-cut bottles as candle holders or electric lamp shades, by placing them on the stairway or in the corner of the room.
If you are looking to get a chandelier for your house, look no further and indulge in this beautiful, sophisticated, and alluring DIY chandelier. It sure looks difficult to make and is time-consuming. But I believe that the end product is definitely worth it.
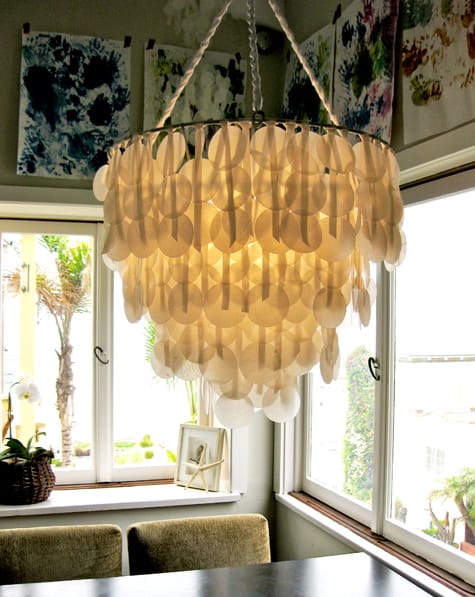
For this project, you would be needing, a couple of rolls of wax paper, scissors, white spray paint, parchment papers, ribbons, a hot glue gun, a circle cutter, an iron, and a cutting mat. Start off by spray painting a planter basket and making the capiz shells. Take the wax paper, cut them into three pieces, and place them in between the parchment paper. Fix ribbons to the planters’ basket and glue the capiz shells to the ribbons until the desired height and you are done.
A wonderful idea for houses with big dining spaces, a tree branch chandelier needs some branches, candelabra sockets, and lamp cords. You need to collect as many twigs, branches, and barks as you want, clean them, and screw them together into the desired shape. Then you have to wire the sockets together, screw them onto the branches and add a cord to give it a final touch.
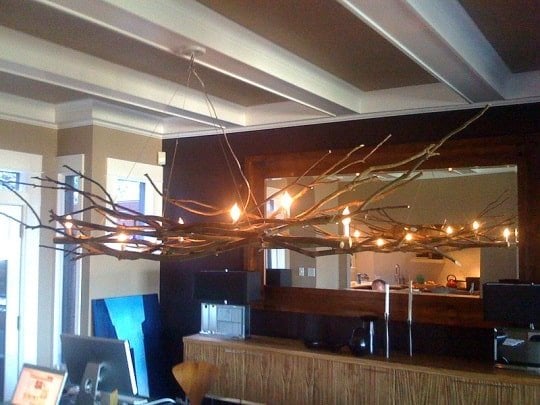
Tutorial in full at apartmenttherapy.com
This cute lamp looks like a tutu skirt for little children, but could definitely give a soft yet brilliant lighting effect to small dining spaces. All you would be needing is a large tulle, a light bulb, an embroidery floss, an embroidery needle, safety pins, and a cutting mat. Take the tulle and cut it into a 17” wide strip, and fold the piece that is larger of both so that the shade could be of three layers. Secure these with safety pins and sew them carefully. In the end, place a cord in the shad and fix a lamp and you will be done with your project.
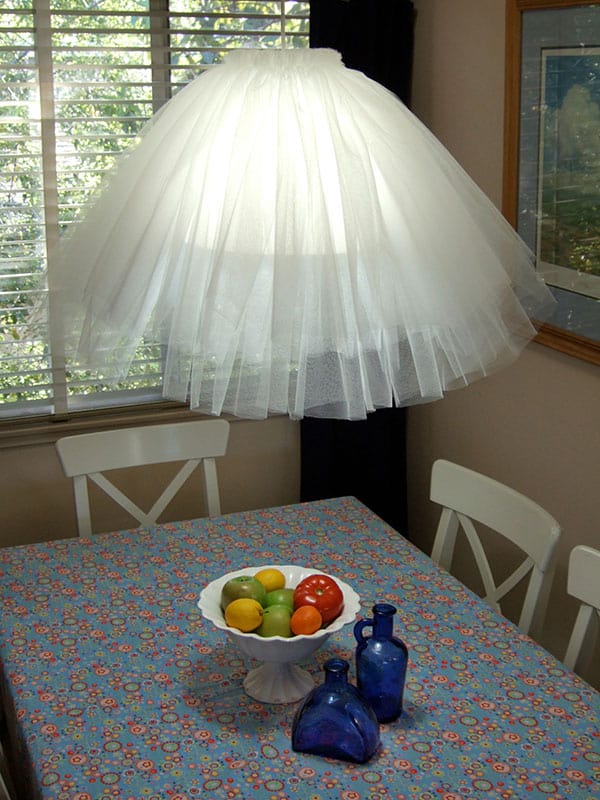
Tutorial in full at craftynest.com
This one is for those who enjoy the craft of origami and paper folds. It is simple and subtle but needs a lot of patience and time to make. So, perhaps you can sit on the couch and make this one while watching a movie or binge on a TV show. It would probably take around 7-8 hours to finish the whole thing, but the final outcome will never disappoint you.
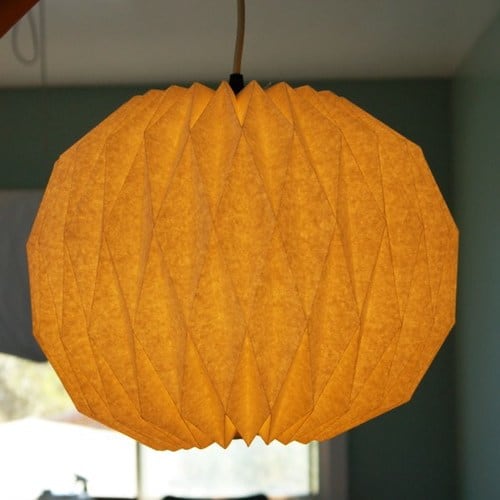
Tutorial in full at ahyiyi.blogspot.ro
This elegant lamp is made with bamboo strips and one CFL bulb and is said to resemble a Cassiopeia chandelier. The kind of bamboo used for this project is flexible and can be bent as per your need. More materials needed for this project include glue, cords, scissors, and mini spring clamp. You have to cut the strips and bend them to form a circle. Later, glue them together and fix the lamp from the top of the shade and suspend it from the ceiling.
Tutorial in full at craftynest.com
Perfect to be placed above the headboard of your bed, this light fixture can be done with the help of basket-shaped coffee filters, fairy lights set, and a sheet of hardware cloth. You have to take the cloth, fix the lights and place the filters in such a way that the hardware cloth would not be visible anymore. If you desire, you can even color these coffee filter ruffles by dipping them in paint.
Tutorial in full at craftynest.com
Just looking at this beautiful lampshade struck me with a Cupid’s arrow. For book lovers like me, this is perhaps a perfect lampshade. I mean, look at how the light sears through the pages of the book, giving it a brilliant aura!
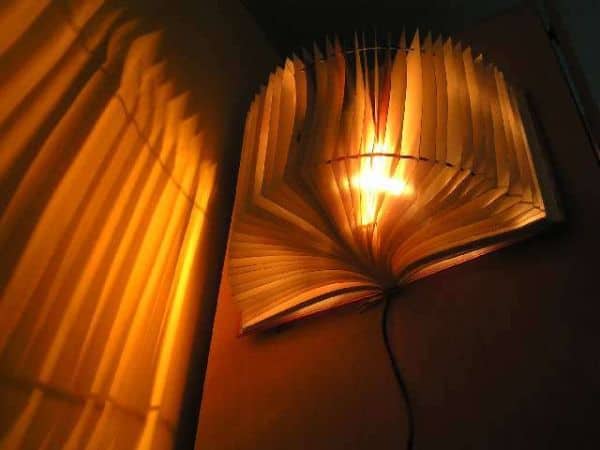
Tutorial in full at instructables.com
To make this project, choose one of those big books you’ve always hated to read or a book you’re willing to give up, and then, cut a rectangular piece big enough to place the bulb inside. That’s it and you’re done!
Another wonderful way to illuminate your dining areas is by making lampshades out of stainless steel utensils. They are easy to make and can be created just by modifying caddies. All you need to do is attach a cord to fix a bulb and suspend it from the ceiling. In case you want it colored, you can even go right ahead and paint them.
This is one of the DIY lamp projects that have been famous for quite a while now. So I wouldn’t be surprised if you have heard of this before. Though they look very intricate, they are very easy to make. You would just need a bouncy ball or a balloon, yarn, hemp string, or wool, and craft glue. Wrap the hemp around the ball/balloon, leaving a small circle on the top to fix the cord. You could apply the glue directly onto the ball, or dip the string in glue before wrapping it. Then let the whole thing dry, and burst the ball so that you can remove the deflated ball easily. Now you just need to attach a cord to the shade and suspend it from the ceiling.
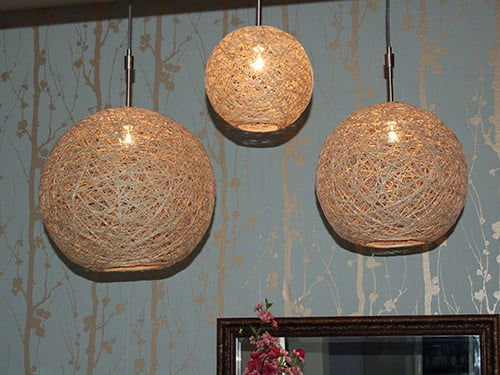
Tutorial in full at craftynest.com
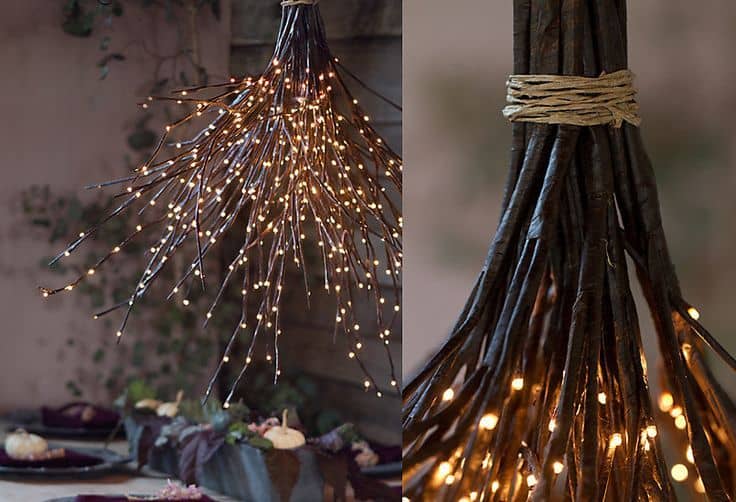
Another way to use twigs to make a chandelier is to collect some small twigs, clean them up, tie them together and suspend them with a cord. You have to take small LED lights and fix them to the twigs, all the way to the edge to give the perfect lighting. This one is much smaller, as compared to the one made with the branches mentioned above, but is perfect for the small dining areas, or tables in study areas.
Source Unknown
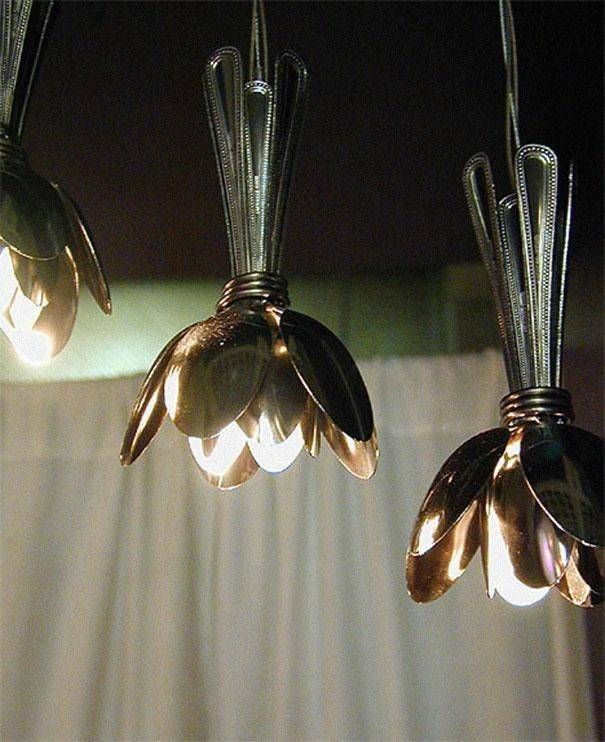
With some creativity and imagination, you can pull off something great even with the most unconventional of objects. This fixture is so simple and doesn’t need anything except spoons. Yes, you read that right. All you have to do is take some spoons and tie them around a lighting fixture in the shape of a flower, or a shade, to evenly distribute the light. Amazing, isn’t it?
Source Unknown
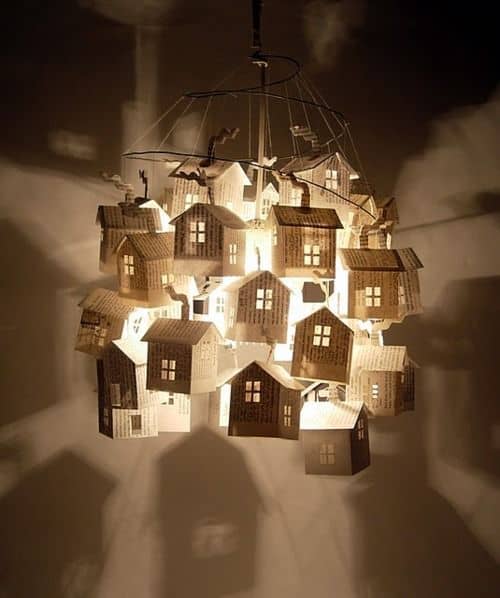
If you have the art of origami in your hand, then nothing is impossible. Earlier in the article, I talked about a DIY lampshade that can be achieved by folding paper. If that’s not your cup of tea, then you could simply take some newspapers and make these tiny houses with them and suspend them together with strings. Place a light amidst these tiny paper houses, and you’re left with a beautiful lighting effect.
 Source Unknown
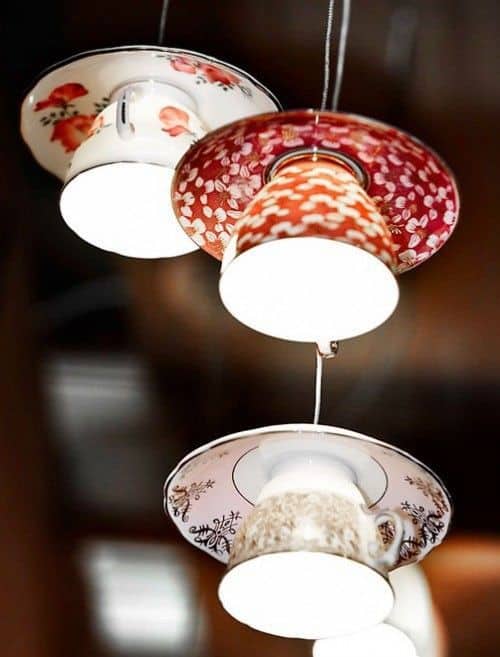
This one definitely looks like something taken straight out of an ‘Alice in Wonderland’ movie, doesn’t it? It’s simple to make and only needs those cups and saucers lying in your kitchen that you don’t use anymore. You have to attach the cups and saucers together with strong glue and suspend them upside down from the ceiling to achieve the desired effect.
Source Unknown
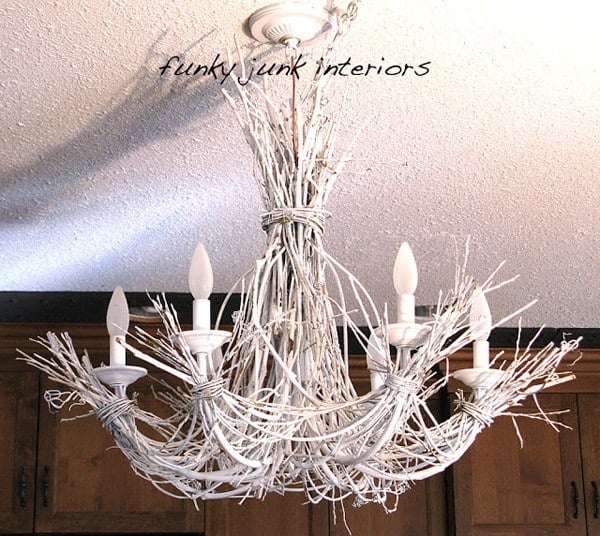
Twigs! We’re definitely talking a lot about them today. Well, this project doesn’t really need to build something straight from scratch. But rather upcycling something that’s already there. Take an old chandelier and decorate it with pieces of small twigs. You could repaint the whole thing together like in the picture to give it a different look altogether.
Source Unknown
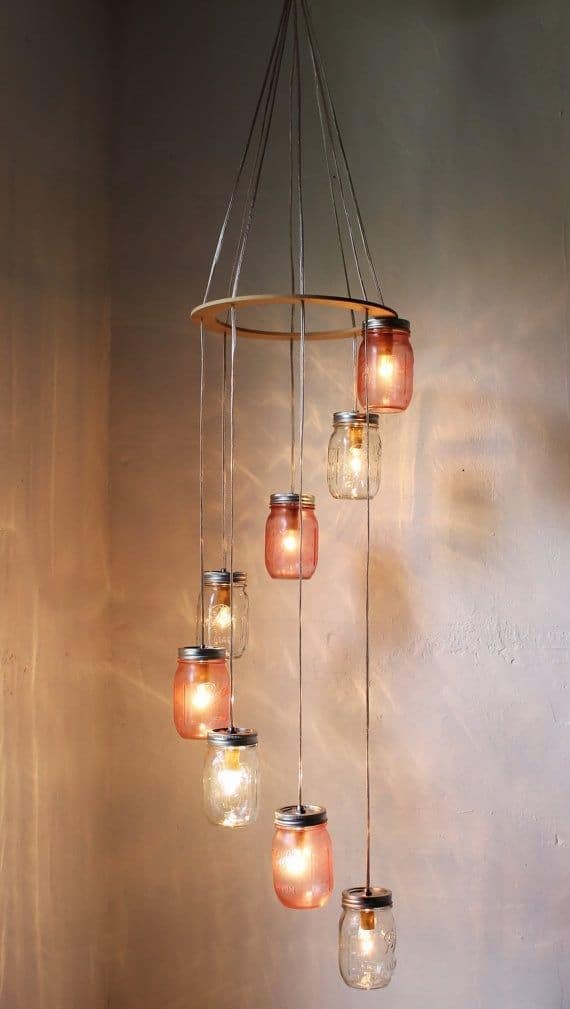
Here’s another kind of chandelier you can do with the help of mason jars. Pick a few mason jars, preferably in multiple glass colors, make holes on the top to attach a cord, and fix them to a circular frame using string, in an orderly fashion. This image places mason jars in the manner of ascending order of height. Once you are done, you can suspend the whole chandelier from the ceiling.
Source Unknown
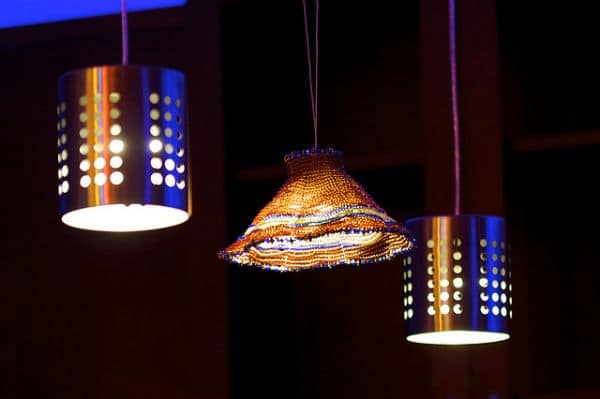
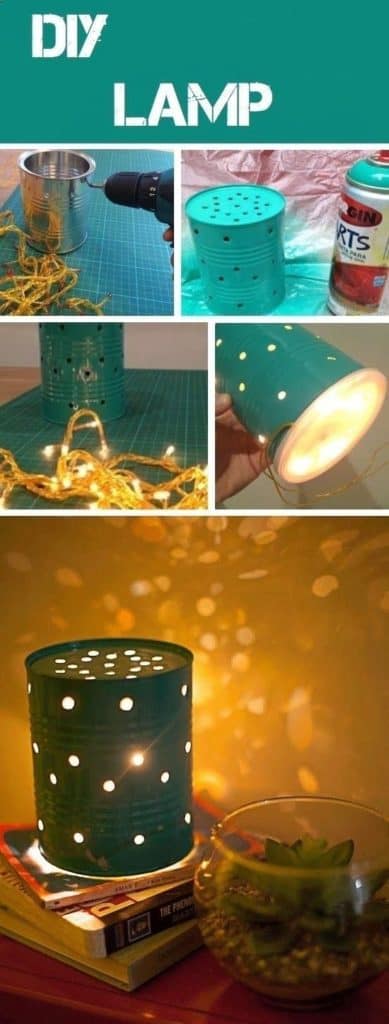
You can also use something as simple as tin cans to make light fixtures. I am sure that tin cans are available at almost every other house. Just take these, cans, clean them up, perforate them using a drill, and paint them in your desired color. Voila, you have finished making your lampshade. You can make a few like these and attach them together to suspend it like a chandelier, or just use single ones by placing a string of LED lights in it. Simple, right?
Source Unknown
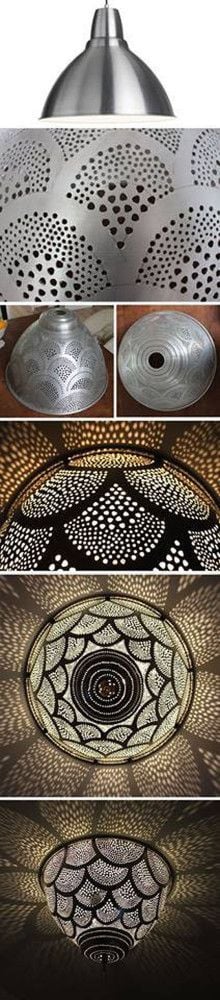
Like the twigs and old chandelier above, this project too, doesn’t need a lot of work, as it is just upcycling, If you want to renew an old lamp that’s already at home. You can perforate it in a graphic design to give it a completely new look. You have to choose how you want to drill holes in them, and what design to go with. Then sit patiently and start drilling holes in them. It might take a lot of time, but rest assured, the final outcome will be simply stunning.
Source Unknown
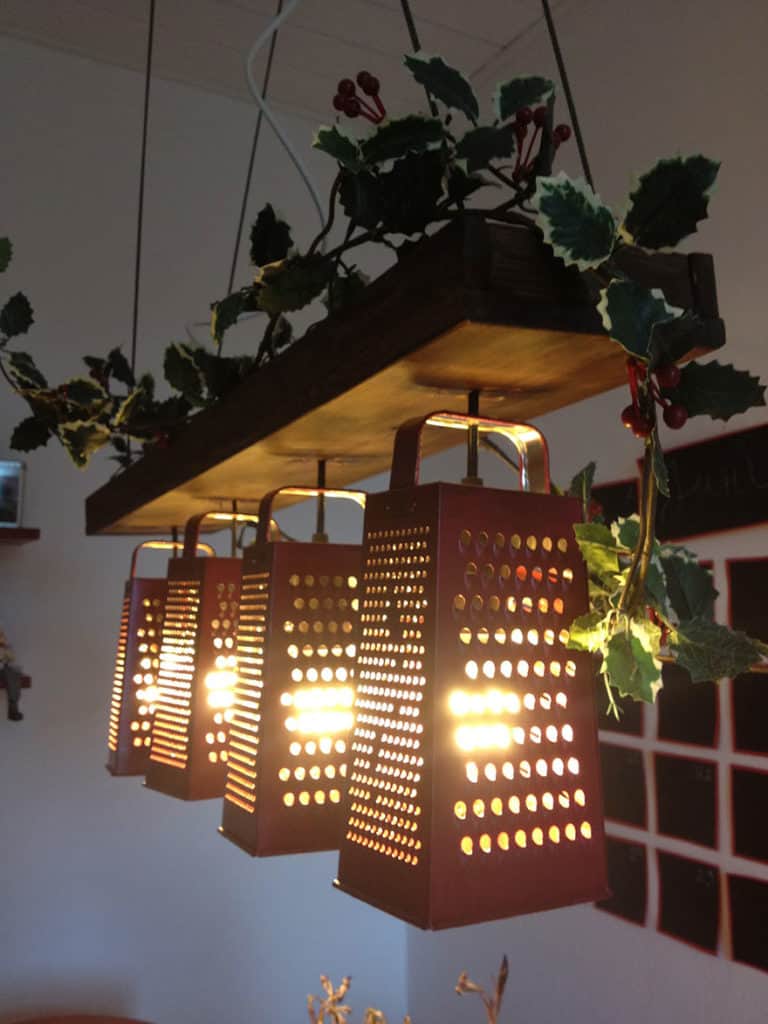
Another unique yet wonderful way of adding light in the kitchen is using graters as your lamp shades. It’s simple and doesn’t really need a lot of work. You have to just place the cords into the graters, and fix them to a plank of plywood. This whole setting can be suspended from the ceiling. You can even place a few artificial crawling flower plants to give the whole fixture an extra effect.
Tutorial in full at recyclart.org
This one is like the hemp string lamp, but only with lace. That means you have to replace the hemp string with huge pieces of lace instead. Just take a balloon, blow it into a round shape, apply loads of craft glue onto it, and fix the lace onto the balloon. Let it dry completely before bursting the bubble and attach a cord lamp kit. You can then hang the light from the ceiling. What I really love about this project is that it is so simple and even children can make it without any problem.
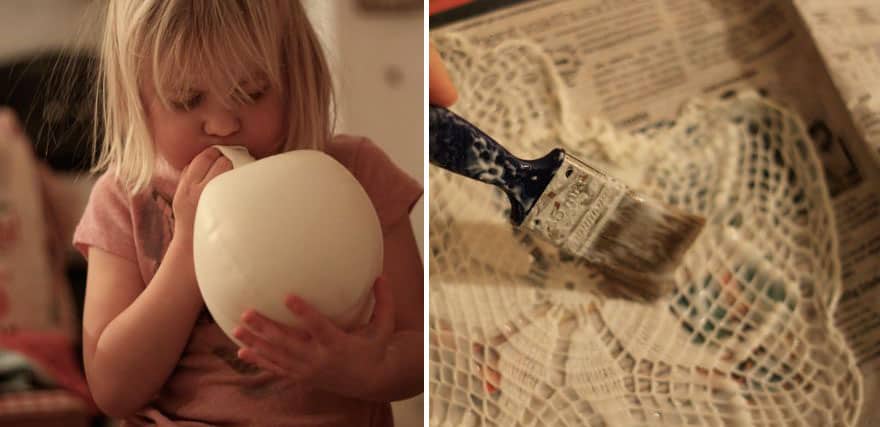
Tutorial in full at dosfamily.com
When I looked at the picture of this chandelier, I couldn’t even figure out that it was made of plastic bottles. It’s so simple and elegant. And now that I observed it, I noticed that it’s really easy to make as well. All you have to do is collect as many bottles as possible, preferably of the same size, and cut the bottom parts of it.
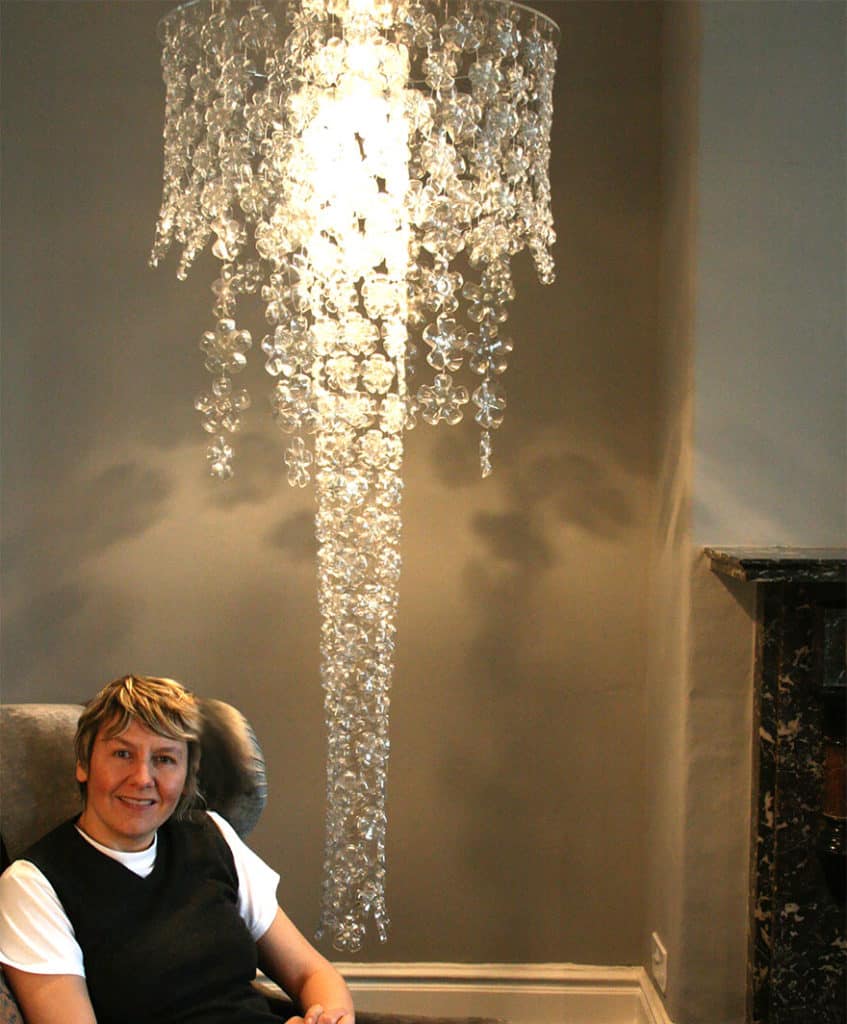
Tutorial in full at blogilates.com
Now this is what we will use for the chandelier. Simply attached these floral-shaped plastic bottle bottoms with string and suspend everything from a rounded frame, something like a planter basket. You can now fix a cord in the center of the chandelier for the bulb, and every time it lights up, it gives an angelic light effect.
Yes, this sounds crazy, but they actually make for an amazing texture. For this, you need a lot of plastic spoons and one water jug. Chop off the handles of the plastic spoons and stick them on the water jug. Start from the bottom of the jug. Now, for the light, place the cord on the brim of the jug and then suspend the whole lighting setup from the ceiling.

Tutorial in full at techeblog.com
For this, you can already use an existing plain lampshade or make one with paper yourself. You can then write verses from your favorite poem, movie dialogues, or quotes from the books using a black Sharpie. This gives an excellent way to reflect your love for words, even through the light.
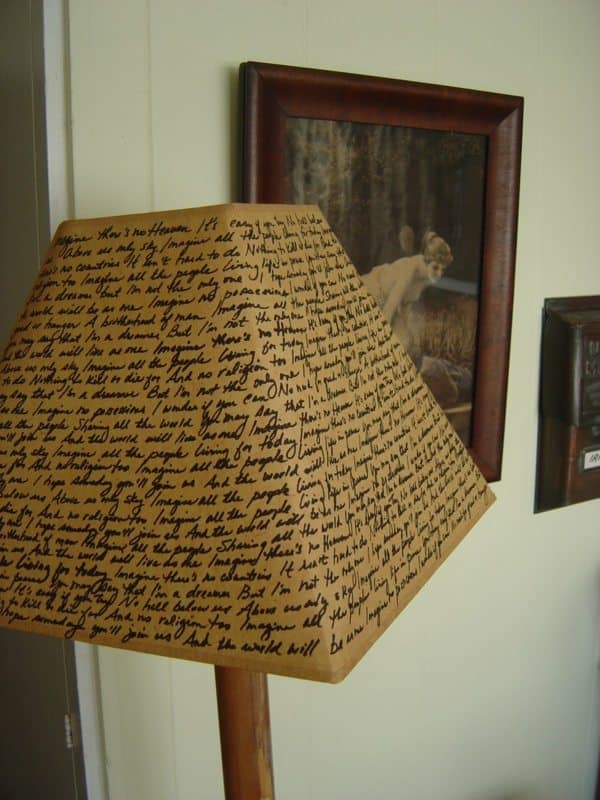
Tutorial in full at veryirie.blogspot.com
These days, using plumbing tools for interior decor has become quite the rage. So, you can try this pipe lighting fixture where you can fix the bulbs to the plumbing pipes and suspend them from the ceiling. What’s even better is that you can get this whole thing done for well under $100.
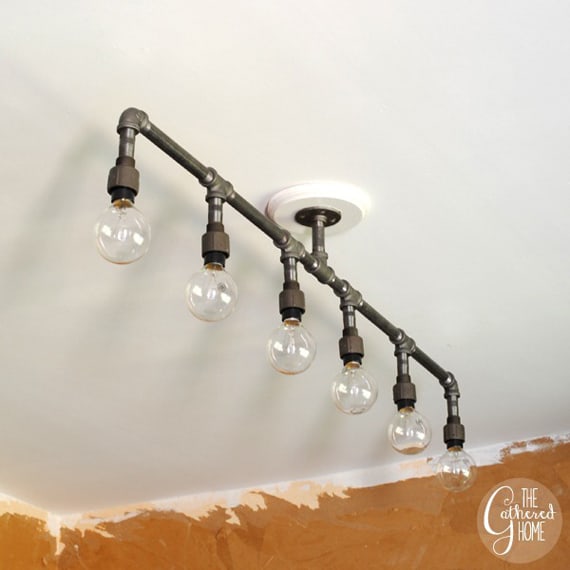
Tutorial in full at thegatheredhome.com
You can now make wonderful pendant light fixtures with the help of wood and cans. The number of cans depends on the length of the pendant you want. Fix these cans together and wrap them in wood veneer. You can then fix the cord light kit inside and suspend it from the ceiling. You can use different colors and textures of wood veneers for different pendants.
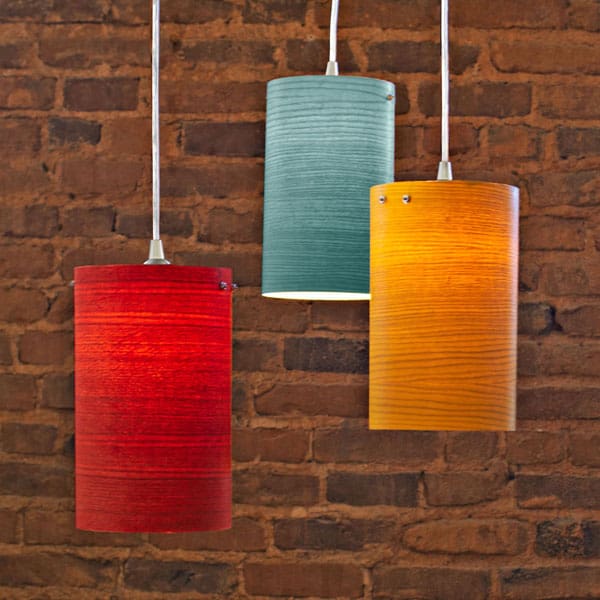
Source Unknown
This is another wooden lampshade, but here the wood is woven instead of being fixed to the tins. To make this kind, you would need a normal lamp shade, balsa wood strips, a glue gun, and glue sticks. You have to first take the lamp shade and weave the wooden strips around it and stick them tight with the help of a glue gun. The finishing look is elegant and worth having a second look.
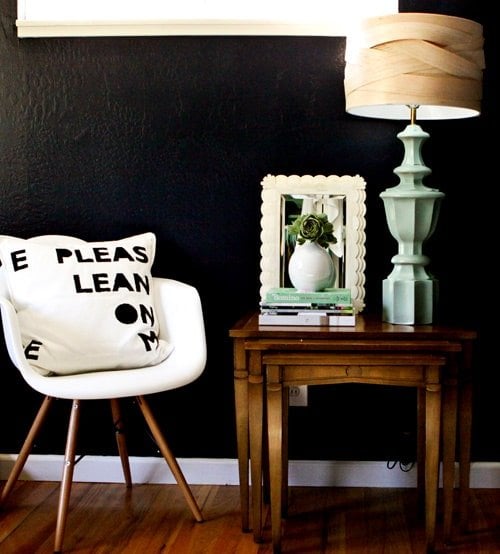
Source Unknown
This is a lamp that you can make at almost no cost. All you need are stirring sticks. Collect as many as possible and stick them together to form a pendant. You can paint them in any color you want. Then you can attach a light with the help of a cord and suspend it from the ceiling.
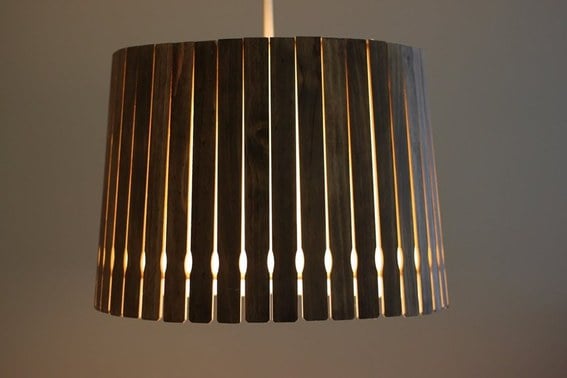
Source Unknown
This rustic wall lamp is simple and easy to make. All you need is some pieces of wood to support the lamp, a light bulb, hardware, and cable. First, you need to make a frame for the bulb and mount it on the wall. Then fix the setting for the light and add a bulb. That’s it, you now have a great light fixture that could be perfect for a reading spot.
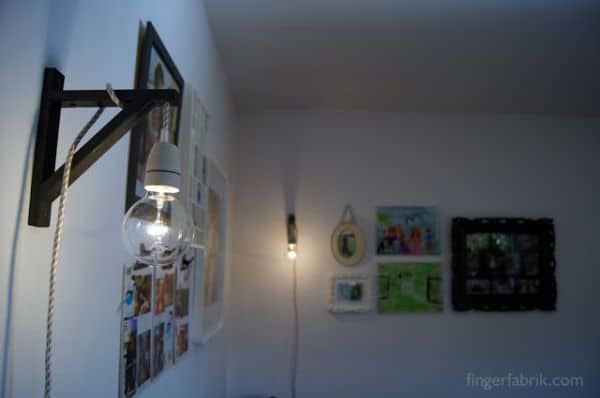
Tutorial in full at fingerfabrik.com
These are a few ways of enhancing your home decor while giving yourself some amazing DIY light fixture projects. With a little bit of imagination and these ideas to give you a kick start, who knows, you might just end up achieving something much better!
What do you think? We would love to hear from you!
Related Articles
23 Shattering Beautiful DIY Rustic Lighting Fixtures to Pursue
13 Best-Rated Solar-Powered Dusk-to-Dawn Lights
13 Best Low Voltage Landscape Lighting