Expertises: Architecture, Design, Art, Home improvement, Painting
Updated on
Inspiring Ideas for Modern Home
A table saw can be operated by ensuring that all of its components are in order, placing the workpiece properly, and pushing it through steadily. Being mindful of personal safety is a critical aspect of operating a table saw, no matter which type of cuts the operator wishes to make.

A table saw is one of the most central tools in any woodworker’s arsenal for its ability to produce clean and quick lumber cuts. That’s why we’ve created this guide to cover all aspects of table saw operation to help you use the power tool safely.
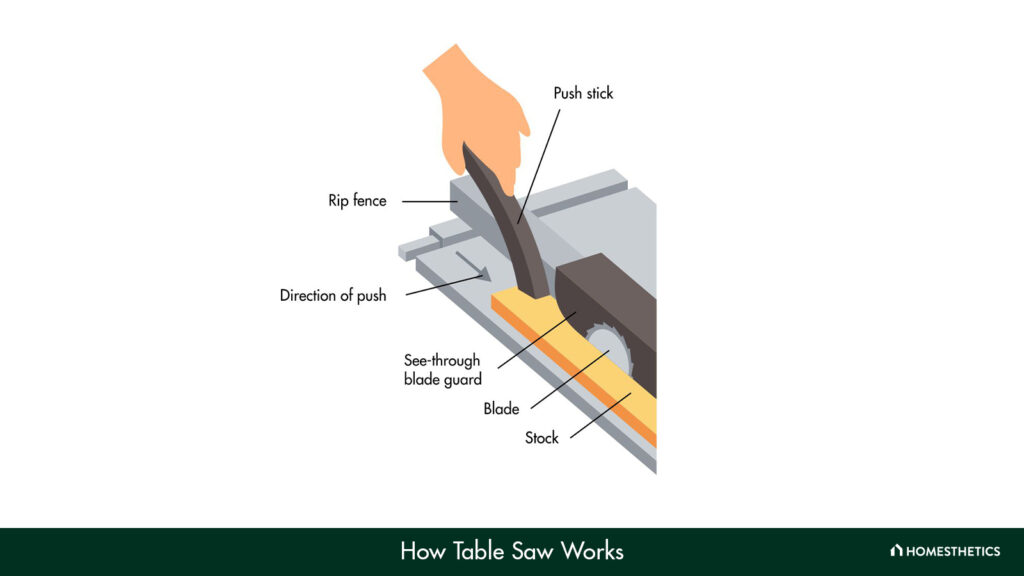
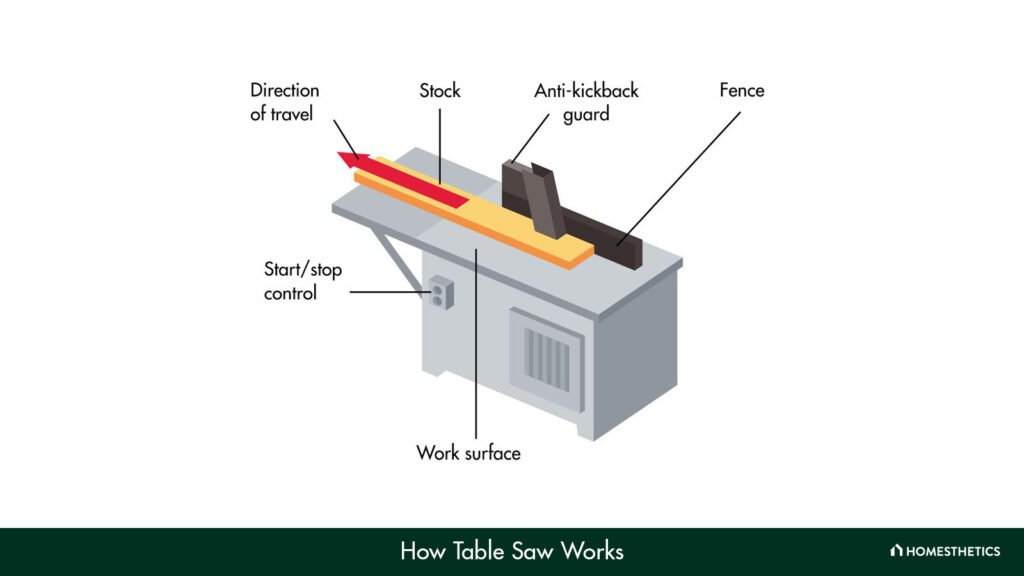
Now, the name "table saw" creates a clear picture of what the tool is: a table with a saw on it.
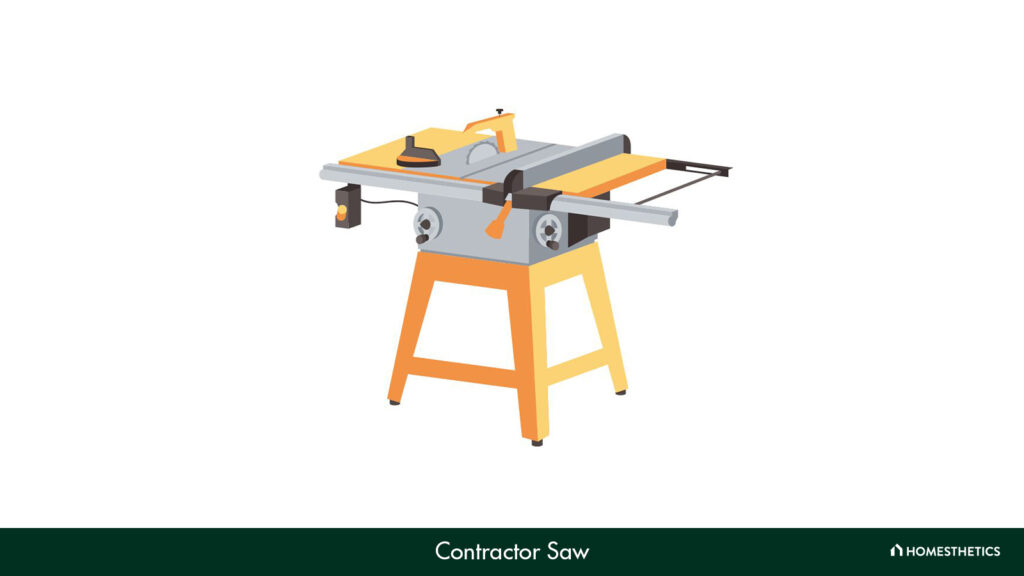
Typically, table saws, like the contractor saws, include an electric motor-powered circular saw blade that is mounted on a mandril or arbor. The blade sits in the middle of the table, with a fraction of it peeking above the table for cutting wood or other material.
That said, there is a clear distinction to be made between table saws and other saw types like track saws, miter saws, and circular saws. A track saw is the closest to table saws, with the difference being that it includes a track for steadying the material for straight cuts.
As for miter saws and circular saws, they operate completely differently from table saws, utilizing different mechanisms entirely. A miter saw makes use of a blade mounted in a miter box for precise cuts, whereas a circular saw includes a circular blade in a handheld frame.
Safety Warning: Following the proper safety procedure while operating any power tool is paramount. This is particularly true for table saws, as improper operation has led to many professionals and hobbyists being injured and losing a digit in the process. Consider checking the “Table Saw Safety” section later in this guide.
Woodworkers often rely on various tools and special cutting techniques like dado cuts and compound angles to get started on an elaborate project. And while these special cutting techniques are quite useful, none are as prevalent and useful in the woodworking world as the three basic ones. These cutting techniques are known as ripping, crosscuts, and angled cuts.
Let’s examine each of these in detail and find out how you can use them to make your woodworking job much simpler.
Ripping is one of the easiest to make cuts of all the cutting techniques, being a simple straight cut made along the wood grain. And it is also the type of cut that every saw type can make without issues.
Typically, woodworkers use the fence set on a table saw as a guide to measure the desired width of the lumber. This keeps the cut perfectly straight and free of any resistance or issues when the lumber is pushed into the blade.
Step 1: Prepare the table saw
First, adjust the table saw to make rip cuts on your desired material. A good starting point is to choose the correct saw blade for ripping lumber.
Typically, the saw blades used for ripping have fewer teeth than those used for crosscuts to keep the results as smooth as possible. A 10-inch diameter ripping saw blade will have about 24-30 teeth.
Once you have chosen the right saw blade, set the blade depth and angle to prepare the table saw for ripping. It’s always a good practice to have the blade depth be around ⅛th of an inch more than the width of the material. That way, the teeth of the blade will always be visible to you, reducing the chances of an accident.
To finish preparing, make markings on the material according to the desired measurements, after which you can move on to the next step.
Step 2: Adjust the table saw fence
Place the material on the tabletop and close to the saw blade in a manner that its teeth only barely touch the lumber. Ensure that the table saw miter gauge can firmly hold the material tightly, snap the miter lock, and make adjustments as necessary before starting the table saw.
Note that you must continue to adjust the position of your material while cutting. Table saws tend to shift the material they come in contact with by a small degree, which is usually close to the width of the blade.
Step 3: Begin making the rip cut
Before powering up the table saw, it’s important to don safety goggles, ear protection, and gloves. Make one final check to ensure that every element of the table saw, such as the power feed, lumber position, fence, etc., is in order.
Next, turn on the table saw and begin pushing the workpiece through the saw blade slowly. Keep applying light pressure on the fence and ensure that the blade cuts through the piece in one smooth motion. It’s imperative that you don’t vary the pressure much, or else the cut may end up being jagged or misaligned.
As you reach the end of the workpiece, use a push stick to finish making the cut. That way, your right or left hand will stay out of any danger of being harmed.
After completing the cut, power the table saw down and wait until the spinning blade has stopped completely. Be sure to unplug it as well to avoid any unfortunate accidents.
Crosscuts, or crosscutting, is a type of cut that involves making a clean cut across the wood grain. Being at a 90-degree angle to the wood grain, these types of cuts are typically more taxing on the saw blade as their teeth encounter more resistance. And because of this higher resistance, cross-cutting saw blades need to have more teeth to make clean and straight cuts.
While the most commonly used tool for crosscutting is a miter saw, most table saws can perform the task perfectly well.
Making crosscuts is functionally identical to ripping, except for the angle of the plywood you will be sawing. That said, there are some key differences that you should be mindful of, as detailed in the steps listed below.
Step 1: Prepare the table saw for crosscuts
As with ripping, the first step to making cross-cuts is to prepare the table saw for the task. Start by inserting the correct saw blade for crosscutting the material.
Typically, a crosscut saw blade will have between 60 and 80 teeth for the cleanest possible finish. You can choose a blade with up to 80 teeth of a cleaner finish, but that is not strictly necessary.
Follow the table saw adjustment procedure as listed in the first step of the ripping process.
Step 2: Adjust the miter gauge
Position the workpiece close to the table saw miter gauge and lock it in place. Ensure that the piece does not move in an unexpected direction to prevent accidents from happening during the sawing process.
As with ripping, you will have to make minute adjustments to the position of the workpiece to prevent any cutting offsets. With crosscuts in particular, making a cut that deviates from the 90-degree angle can create jagged results and may even end up causing kickbacks.
So, it’s important that you maintain that specific angle throughout the cutting process.
Step 3: Make the crosscut
With your safety gear on and all safety checks made, plug in the table saw and power it on. Begin pushing the material through the blade while keeping it as steady as possible while applying light pressure on the miter.
Continue pushing the material until you reach the end, where you should use a push stick to finish the crosscut. Try to make sure that the speed of feeding the workpiece into the blade remains roughly the same throughout the process.
Once the cut is complete, you can power the table saw down and collect your newly crosscut workpieces.
Angled cuts are cuts made at a particular angle and are not necessarily aligned with or against the wood grain. These require a bit more finesse in comparison to rip cuts and crosscuts since positioning both the blade and workpiece correctly can be challenging.
These cuts are typically more difficult to make using a table saw due to their relative lack of mobility. Additionally, since the saw blade must be able to work at any angle, you will need to use a combination saw blade. Typically, a 10-inch combination saw blade comes with 50 teeth, which increase as the size of the blade increases.
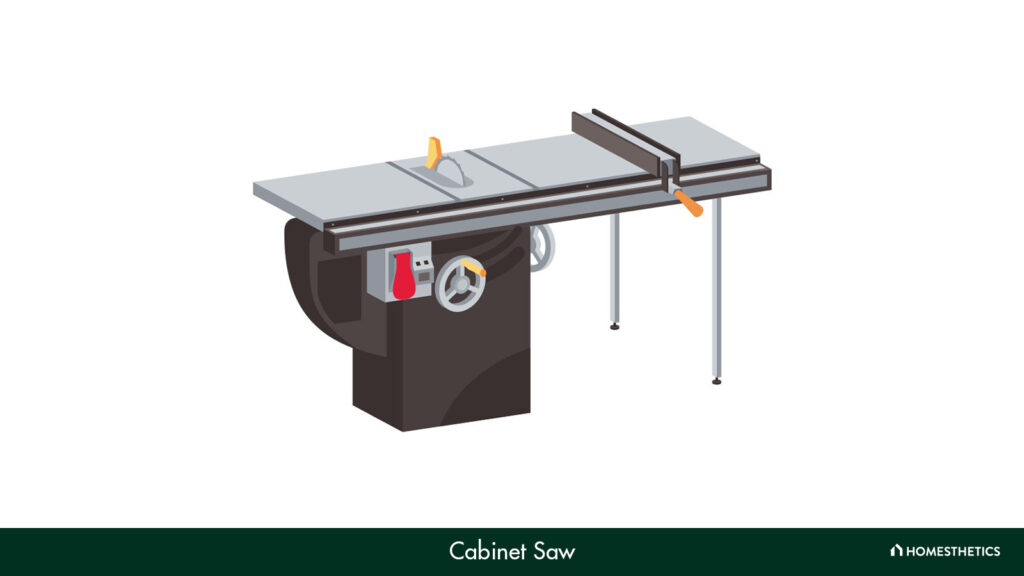
That said, it is still fairly simple to make angled cuts using even the largest cabinet saws with one of two cutting methods.
Method 1: Changing the saw blade angle
Usually, table and cabinet saws have a mechanism that allows you to change the saw blade angle up to 45 degrees at least. Some models may allow you to tilt the blade even further for particularly steep cuts.
To do so, use the handle on the crank system to move the blade freely. You can also check the saw angle on the indicator scale, which is typically located close to the crank. Of course, there is a chance of these indicators being a little off, so feel free to use a measuring instrument to check for errors.
After that, it’s just a matter of operating the table saw, as detailed in the previous sections. The overall cutting philosophy remains the same, save for the angle of the blade.
Tip
If your saw has no crank system, then it’s likely that its blade tilts using a pivot system. This system also operates using an adjustment handle that unlocks upon the first pull. Once you’ve adjusted the angle, you can lock it back in place to prevent further movement.
Method 2: Change the workpiece angle
The other method for making angled cuts is slightly more involved than changing the blade angle. But if you are more comfortable rotating the workpiece instead of the blade, you can make use of a miter gauge.
A miter gauge is a protractor that is affixed to the metal foot of a table saw. This foot can adjust the angle of the wood by sliding up and down, and it can be operated using a handle. Once you turn the wheel handle, the angle of a ledge will change to the precise degree that you desire.
Simply set the angle using the handle, place the wood against the ledger, and push it into the blade to make the angled cut. The overall saw operation, like in the first method, remains the same.
Note: Supporting your workpiece using a miter sled is always a good idea. A miter sled is a small and shallow box that includes slots at the bottom, which you can use to position your workpiece. You can go for an after-market miter gauge and a crosscut sled, or consider making one on your own since its construction is rather simple.
Setting the blade height is, arguably, one of the most important steps of operating a table saw. In essence, there are two ways one can try to set the blade height.
The first approach suggests that the saw blade should be positioned so that only about ⅛-th of an inch is above the workpiece. This is a safer approach as it prevents a large portion of the blade from being exposed but may result in fraying or tearing out at the bottom of the workpiece.
And that is where the second approach is often considered, which involves positioning the blade significantly above the workpiece. While this eliminates the chances of fraying and tearing, it is also a much more dangerous procedure. Any slips or accidents are much more likely to cause major damage to the operator.
At the end of the day, the first approach is still preferable for safety reasons. Plus, in some cases, the fraying and tearing can be fixed using sandpaper and wood filler.
The table saw fence plays a critical role in making sure that the length of each cut remains accurate. Square fences are typically operated using the lever present at its front edge.
You can adjust the square table saw fence by lifting the lever and sliding it laterally. Additionally, you can also lift the saw blade for more accurate length measurements, after which you can return it to its original position. Consider using a tape measure to double-check the measurements.
It’s important to note that fences of certain sliding table saws when lifted as high as possible, may become misaligned with the blade. This can become problematic if it goes unnoticed, which is why you must ensure that all the measurements remain correct before operating the table saw.
You can solve the misalignment by using a combination square, a miter gauge, and a ruler, as detailed below:
The table saw insert is a metal plate located close to the center of the table, which can be removed and replaced. It acts as a frame for the table saw blade, surrounding its edges to prevent the saw blade from touching the table.
Depending on the type of cuts you make, you will need to change the blades and inserts of the table saw. And since woodworkers change these parts often, manufacturers typically make the swapping process fairly straightforward.
Changing the insert of a table saw and inserting a zero-clearance insert is fairly straightforward. Simply lift it up from the front or push it down near the back. Doing the latter will pop the front up, allowing you to remove the insert completely. Once that is done, position the rounded side of the new table insert facing upwards and slot it where the old one used to be.
As for swapping the table saw blade, follow the instructions listed below:
Note that this process can vary slightly based on the table saw model. So, consider reading through the instructions manual for standard model-specific directions to remove the table saw blade.
Operating a table saw can be a fairly involved process, considering the number of moving parts even a basic model has. That said, it can be simplified if tackled in a step-by-step manner, as detailed below.
Kickback: Table saw kickback occurs when a stray piece of wood gets caught in the blade and shot in your direction. The speed at which the piece of wood gets thrown at you is often much faster than a human is capable of reacting to. Thus, it often leads to injuries if the machine operator is not wearing any safety gear.
Professionals and carpentry hobbyists alike have faced injuries because of improper table saw operation. These injuries can be as minor as small cuts and nicks or as major as a severed digit or a lost eye. Needless to say, it’s important to keep safety in mind while operating dangerous tools like a table saw.
One of the most common reasons for injuries is kickback, the chances of which can be reduced by following these table saw safety practices:
Additionally, as mentioned in the table saw operation section, always have your safety gear on. Make sure you understand the manufacturer’s instructions as well to understand how the saw reacts in certain situations.
Lastly, remember to unplug the table saw completely before accessing its internal workings, aligning the blade, or changing parts.
The types of cuts that a table saw is most proficient at include crosscuts, ripping cuts, and dado cuts. A crosscut is made across the grain of the wood, a ripping cut is made along the grain, and a dado cut involves creating a square-walled, flat-bottom groove across the grain using dado blades.
The three types of table saw blades are ripping, crosscutting, and combination blades. Ripping and crosscutting blades are used to make their namesake cuts, whereas combination blades can be used to make either kind of cut.
These blades differ in the number of teeth, thickness of the kerf, and tip coating, which makes each blade more efficient at its respective task.
By tackling the operation of a table saw in a systematic manner, cutting small pieces of lumber, plastic, steel, etc., can be a simple undertaking.
Making a rip cut, crosscut, or angled cut is a simple task when using a table saw. Even so, it’s important to remember that these cuts require different blades and a slightly different operation method.
Additionally, be sure to keep the table saw safety guidelines in mind. Even professional woodworkers face unexpected situations with workpieces, which makes the role of safety gear even more critical in the safe operation of a table saw.
Thus, it’s important to take the process one step at a time and try to take every detail into account while operating a table saw.