Expertises: Painting, Art, Drawing, Pastel
Updated on

Inspiring Ideas for Modern Home
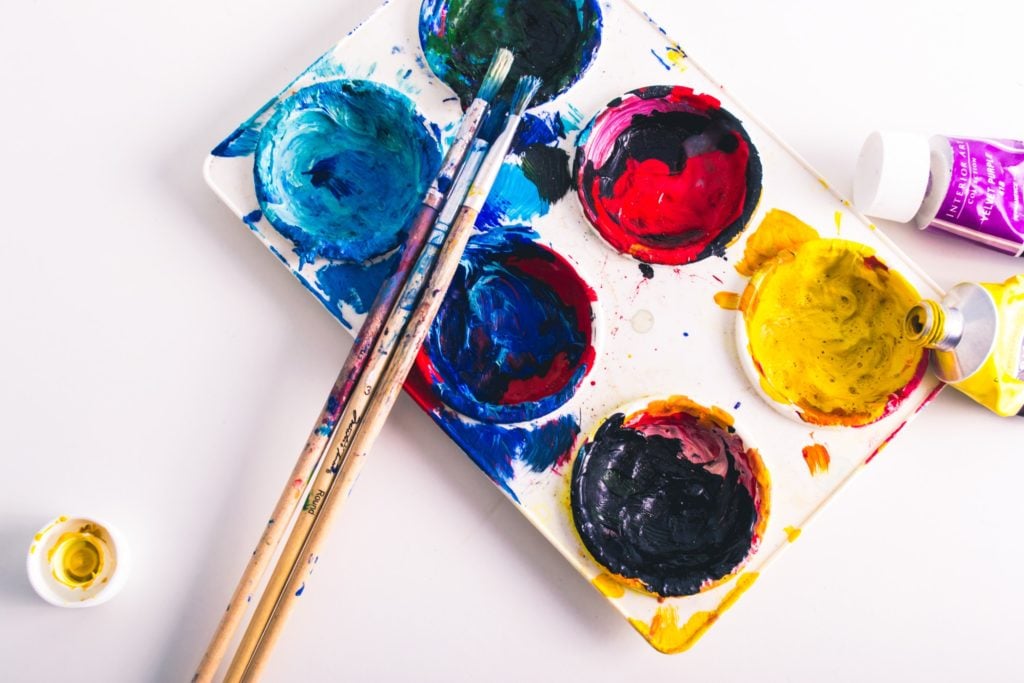
Acrylic paintbrushes require care and attention, especially when it comes to cleaning them after you’re finished with the painting.

Unlike watercolors, acrylic paints have a tendency to stick to the brushes, which can cause long term damage and render even the most expensive brushes useless.
Today we’re going to look into the causes of such damages, and help you avoid them.
First off, we’ll describe the process of getting your brush as close to the store-bought condition as possible.
Then, we’ll look into common causes of damage to your brushes, and help you mitigate these damages to the maximum extent possible. Finally, we’ll cover a few common questions you might have regarding care and cleaning. Without further ado, let’s begin!
Once you’re done reading this section, you won’t go back to your general methods of cleaning - for very valid reasons, too. With that in mind, next up is the walk-through.
While there’s no absolute need to perform this step, doing so can help you avoid damage later. Indeed, this step will take you some time - but that time will be well spent in caring for your brushes. Wrap the dry cloth rag or paper towel around the brush and get the excess paint out.
This has to be performed as soon as you’re finished with the painting. The only thing to keep in mind is to not delay this process under any cost - else it might be too late.
Until you notice the brush not making marks anymore, brush the bristles of the paintbrush with a paper towel or a cloth rag. You’ll remove all the excess paint this way.
You do not need to perform this step for too long, but until the time you have a significantly cleaner brush. Make sure you keep the brush straight and that the bristles do not get bent in any case. For this purpose, the water that you used while brushing (if you did use water) is good enough, you only have to get the remaining excesses out of the brush.
Hold the paintbrush under a medium strength faucet with both the hot and cold faucets engaged, until the water is mildly warm. Hold the paintbrush for around ten seconds to rinse it, while rotating the brush so as to hit all different sides of the bristles. The pressure definitely helps you in dislodging any leftover paints from dry cleaning the paintbrush.
You’re best off using a fine-toothed comb since blunt nails and fingers are not as likely to get those small pesky bits of paint out of the paintbrush. Do remember, however, that the paint isn’t yet fully clean, though it may appear to be so. Your best bet is to continue the water cleaning as described in step 1 of this method.
Turn off all the faucets, and take some smooth, preferably pH-neutral soap (or shampoo of similar quality), and get to work with gently massaging the bristles with the soap. For larger brushes, make sure you get the soap into all the different size bristles, whether large or small.
When you’re working the soap through the paintbrush, you should get the soap to the metallic part joining the bristles and the body of the brush, known as the ferrule. The ferrule needs to be cleaned regularly, otherwise you the bristles get hardened over time and eventually the shape of the bristles of the paintbrush changes.
This step follows the entire cleaning process as described above. You have to work your fingers through the water stream above, up until the soap has been completely rinsed off from the surface of the bristles and the ferrule.
You have to swirl the brush through a few drops of soap you’ve taken in one hand while holding the brush in the other hand. This is done to exactly copy the movements your brush makes while painting. Make sure you reach the bristles near the ferrule as well.
This step should be done under the same lukewarm temperature of running water that we’ve discussed earlier. This should result, ideally, in there remaining no bristles left with residual amounts of soap.
The brush has a tendency to adapt the same shape it has for long periods of time, whether dry or wet. Consequently, you should take care that you dry the brush with a gentle cloth or paper towel, making sure there’s no residual water left. However, once your brush is sufficiently dry, you should stop at this stage. Take a breath - you’ve successfully cleaned your paintbrush!
This wraps up our section on the best methods to clean your brush properly. Now, we proceed towards the next part of our discussion - common mishaps and pitfalls to avoid when dealing with acrylic paintbrushes.
This part of the article deals with avoiding mistakes one is likely to make while dealing with the care of paintbrushes. Let’s begin with the first such mistake:
Among the cardinal sins which one could commit against their paintbrushes, this comes up near or on the top. Your brush must, at all times, be either wet or at least moist when it comes in contact with the paint. A dry paintbrush means the harder it becomes to remove all the residual paint which accumulates on the bristles and near the ferrule.
To avoid this, always have a cup of water nearby which can help you keep the brush relatively moist if not fully wet. If you’re not using the brush, you should keep it on the rim of the cup. Also, it’s not as if brushes which go crusty have no use - there’s just some effort involved in reviving the paintbrush and getting it to good-as-new condition.
This is a common mistake people tend to make while painting. This is by far the easiest way to kiss your perfectly new paintbrush a fleeting goodbye. This causes the hairs to go all wonky and frizzled, and there’s no way to undo this damage. Even if you can get away with this because of cheaper brushes, we recommend not doing it just the same.
This is another problematic situation you want to avoid. The ferrule is the silver, metallic part of a brush which connects the bristles of the brush with the body (wooden or otherwise). The problem with getting paint on the ferrule is that even after washing the ferrule, some paint will remain stuck between the bristles and near the joint.
This wraps up the top few ways in which artists tend to take their paintbrushes on a one way journey to the bin. Avoiding these takes actively participating in care for your tools, and realising that caring for your paintbrushes is equally important as is being involved in the painting process.
Coming now to the final part of today’s discussion - questions you have regarding the process. Now, we will cover a few important questions artists tend to ask regarding brushes and cleaning in general.
We start off with ruined brushes.
Absolutely not! You can find a number of uses even for the most crusty and sticky of brushes. If you find yourself having to paint abstract art or know someone who does, these brushes are perfect for rough usage in this way. You can also use these brushes for any artwork which does not require many intricacies or complex detailing. Take 10 seconds and rotate your brush in water very gently yet quickly, and then squeeze out all of the excess paint on a paper towel or cloth rag. Swish it gently as before and then leave it resting across the rim of the water cup. This process generally takes anywhere between five to ten seconds.How to Clean Acrylic Paint Brushes FAQ
If my brush is ruined should I throw it away?What if I have to attend to a situation while painting?
10 Best Paper for Acrylic Paint in 2022 | Artist and Beginner Grade
10 Best Canvases for Acrylic Painting | Student & Artist Grade
8 Best Palettes For Acrylic Paint & How to Choose What You Need
Learn How To Make An Acrylic Painting Waterproof Right Now
Acrylic Painting Materials That You Really Need In The Studio
13 Best Acrylic Paints for Beginners & Professionals Reviewed
10 Best Acrylic Paint Brushes for Artists & Students Reviewed
Learn How To Get Dried Acrylic Paint Out Of Brushes Successfully
Learn How to Make Acrylic Paint in Your Studio
Painting on Paper with Acrylics & 5 Paper-Like Surfaces to Consider
Learn How to Thicken Acrylic Paint Correctly Right Now
Painting Surfaces For Acrylics | Acrylic Prepping 101
Best Cheap Acrylic Paints – Strength and Weakness of Brands Compared
22+ Delicate Beautiful Acrylic Painting Ideas To Try
Learn The Basic Acrylic Painting Techniques for Beginners- Ideas and Projects
20 Oil And Acrylic Painting Ideas For Enthusiastic Beginners