Learn how to stretch watercolor paper like a pro! My article will guide you through the process with tips and tricks for optimal results. So, let's dive in and get ready to stretch!

If you're a watercolor artist, you know that painting on stretched paper is the way to go. But why? The answer is simple: stretched paper allows you to control the paint better, leading to fewer accidents and more satisfying results.
Plus, it prevents the paper from warping or buckling as you apply the paint. In this article, I'll show you how to stretch watercolor paper and some tips and tricks to get it just right.
Essential Materials for Stretching Watercolor Paper

To get started, you'll need a few materials to prepare the watercolor paper. Let's take a look at what you'll need:
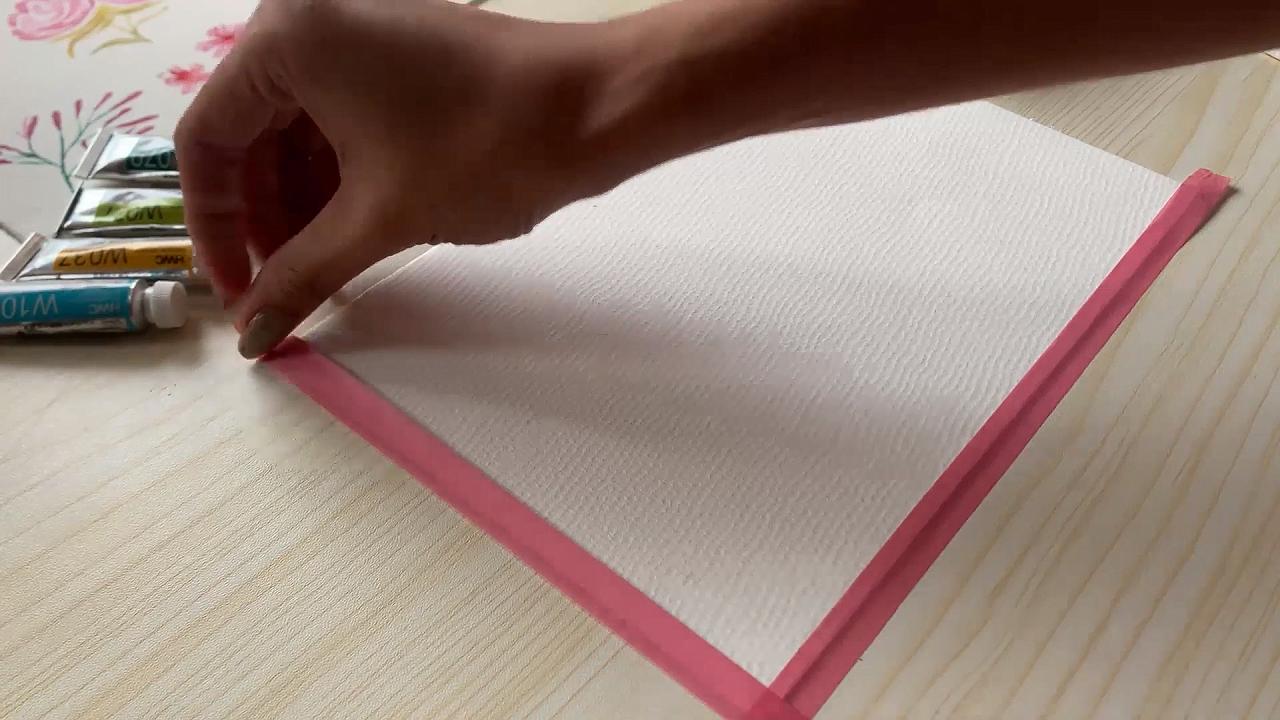
First up, you'll need some masking watercolor tape to secure your paper to the watercolor stretching board. A watercolor stretching board is also a must-have - this will keep your paper taut and prevent it from warping as you work. Butcher tape paper towel, and gummed paper tape are also great to have on hand to keep your workspace clean and tidy.
Of course, you can't stretch watercolor paper without, well, watercolor paper! Look for a large watercolor paper that is thick enough to handle the process but not so thick that it becomes difficult to work with. A watercolor block is great for smaller paintings, while larger watercolor sheets are perfect for bigger projects.
Next, you'll need some watercolor paint, a flat surface to work on, and a wet sponge. Thicker paper will also come in handy, as will a spray bottle for misting your paper as you work. You may also want to invest in a palette knife for mixing your paint and some blotting paper to soak up any excess water.
It's important to make sure your paper stays flat as it dries, so a sturdy board is a must. Marine-grade plywood is a popular choice, but any flat surface will do. And don't forget about watercolor cleaning supplies! You'll want clean paper and a clean watercolor stretching board to work with, as well as a damp sponge to clean up any messes.
Finally, you'll need a few hours and a lot of patience. Many artists opt to soak their paper before stretching it to help the fibers expand evenly. Once you've stretched your paper and allowed it to dry flat, you're ready to start your watercolor painting journey!
Unlocking the Magic: Benefits of Stretching Paper
Now that we have discussed the materials needed for stretching watercolor paper let's talk about the benefits of this technique. Trust us, stretching your large watercolor paper is worth the extra effort!
Firstly, stretching your watercolor paper keeps it taut and prevents it from warping or buckling when wet. This ensures that your painting will have a smooth and even surface, which is crucial for achieving those fine details and creating a professional-looking piece.
Secondly, stretching your paper helps to keep the paper fibers intact, preventing them from getting damaged during the painting process. This means that your paper will be more durable and able to withstand multiple layers of watercolor paints.
Thirdly, stretched watercolor paper is able to absorb water and paint more evenly, allowing you to achieve a wider range of textures and gradients. This gives you more control over your painting and allows you to experiment with different techniques.
Finally, the stretched watercolor paper makes the painting process more enjoyable and less frustrating. By keeping your paper flat and even, you can focus on your art without worrying about your paper warping or buckling.
So, there you have it! Stretching your watercolor paper may take a little extra time and effort, but the benefits are well worth it. Not only will it improve the quality and durability of your paintings, but it will also make the painting process more enjoyable.
How to Stretch & Prepare Watercolor Paper
Stretching watercolor paper is a fun and rewarding experience that every watercolorist should try. With a little bit of practice and patience, you can easily master this essential skill and create beautiful watercolor paintings that will leave everyone in awe.
So, are you ready to create beautiful watercolor paintings on stretched paper? Well, there are two common methods you can use: wet stretching and dry stretching. Let's dive into the step-by-step process for each method:
Wet Stretching Method
If you're looking to achieve a perfectly flat and smooth surface for your watercolor paintings, the wet stretching method is a great option. Here are the steps to wet stretching:
- First, cut your watercolor paper to the desired size.
- Next, soak the paper in cold water for about 5-10 minutes to help the fibers expand.
- While the paper is soaking, make sure you have a clean, flat surface to work on.
- After soaking, remove the paper from the water and place it on a flat surface, making sure the smooth side is facing up.
- Secure the edges of the paper to the surface using masking tape.
- Finally, allow the paper to dry completely before you start painting.
One of the benefits of wet stretching is that it allows the paper fibers to expand and relax, which creates a flatter surface for painting. Additionally, by soaking the paper before stretching, you can avoid any buckling or warping that may occur when painting on dry paper.
However, wet stretching can be a bit time-consuming and requires some patience, as you need to wait for the paper to dry completely before you can start painting. Additionally, it's important to use the right kind of tape to secure the paper to the surface, as some tapes may damage the paper or leave residue behind.
Overall, the wet stretching method is a great option for artists who want to achieve a smooth, flat surface for their watercolor paintings.
Dry Stretching Method
If you're looking for an alternative to wet stretching, the dry stretching method can be a great option for stretching your watercolor paper.
- Again, start by cutting your watercolor paper to the desired size.
- Using a spray bottle or watercolor brush, wet the back of the paper with water.
- While the paper is still damp, place it on a clean, flat surface, making sure the smooth side is facing up.
- Secure the edges of the paper to the surface using masking tape, ensuring that the paper is taut and wrinkle-free.
- Finally, allow the paper to dry completely before you start painting.
Dry stretching is a great option if you don't want to deal with a tub of water and the potential mess that can come with wet stretching. Plus, with dry stretching, you can start painting sooner, as it doesn't need as much time to dry as with wet stretching.
One thing to keep in mind with the dry stretching method is that the paper may not be as taut as with wet stretching, which can result in some buckling or warping. However, this can be easily remedied by flattening the paper after it dries using a heavy book or similar object.
Overall, both wet and dry stretching methods have their pros and cons, and it's up to you to decide which method works best for your needs and preferences. For wet stretching, soaking will help prevent tearing during the process. For dry stretching, wetting the back of the paper is key. Make sure your paper is completely dry before you start painting for the best results.
Don't be afraid to experiment and find the method that works best for you. With practice, you'll soon be creating beautiful, professional-looking watercolor paintings on perfectly stretched paper. Now, let's get creative!
Common Mistakes to Avoid
It's easy to make mistakes during the process of stretching paper that can result in a less-than-ideal painting surface. Here are some common mistakes to avoid while stretching watercolor paper:
1. Not Properly Soaking the Paper
Whether you're wet stretching paper or dry stretching, it's important to make sure you have thoroughly dampened or soaked the paper before securing it. This will help prevent tearing and ensure a smooth surface.
2. Using the Wrong Type of Tape
Not all tapes are created equal when it comes to securing watercolor paper. Avoid using strong adhesive tapes or tapes that are difficult to remove, as these can damage the paper or leave a residue.
3. Overstretching the Paper
It can be tempting to really stretch the paper tight to avoid any wrinkles, but overstretching can actually cause the paper to become too thin and fragile. This can result in paint bleeding through the paper or even tearing.
4. Rushing the Drying Process
It's important to let the paper dry completely before starting to paint. Using a hairdryer or other methods to speed up the process can cause the paper to warp or buckle.
5. Over-wetting the Paper
While it's important to wet the paper before stretching it, overwetting can cause the paper to become too delicate and prone to tearing. Make sure to only wet the paper enough to allow for easy stretching, and avoid soaking it for too long.
6. Under-taping the Paper
When securing the edges of the paper to the surface, it's important to use enough masking tape to keep the paper taut and wrinkle-free. If the tape isn't secure enough, the paper may shift or warp while it is drying, resulting in an uneven surface for painting.
By avoiding these common mistakes, you can ensure that your watercolor paper is properly stretched and ready for painting. Remember, taking the time to properly prepare watercolor paper stretchers will ultimately lead to a more successful and satisfying painting experience.
Creating Artwork with Watercolor Pencils on Stretched Paper
Creating artwork with watercolor pencils on stretched paper is a great way to experiment with the medium and produce beautiful, vibrant pieces. By following a few simple steps, you can create stunning artwork that showcases the unique qualities of both watercolor pencils and stretched paper.
First, start by stretching your watercolor paper using the method of your choice. Once it is stretched and dry, use a regular pencil to sketch out your design. Then, use your watercolor pencils to add color to your sketch.
When working with watercolor pencils on stretched paper, it's important to keep in mind that the colors will appear more vibrant and saturated than on regular paper. You can layer the colors to create depth and texture and blend them with water to create a more watercolor-like effect.
To blend the colors with water, use a clean, damp brush and work in small sections. Be careful not to use too much water, as this can cause the paper to become overly saturated and potentially warp or buckle. Instead, work slowly and allow each section to dry before moving on to the next.
Once you have finished adding color, allow the paper to dry completely. You can then add additional details using watercolor paints or other art materials if desired. When your artwork is complete, you can display it proudly, knowing that you have created a stunning piece using the unique qualities of watercolor pencils and stretched paper.
Overall, creating artwork with watercolor pencils on stretched paper is a fun and rewarding process. With a little practice, you can create beautiful pieces that showcase the unique qualities of both mediums.

Pro Tips For Mastering Watercolor Paper Stretching
| Pro Tips | Tip #1 | Tip #2 | Tip #3 | Tip #4 |
|---|---|---|---|---|
| Tips for Preparation | Choose the right adhesive for your paper, considering its weight and thickness. | Measure and cut your paper to the desired length before soaking it in water. | Avoid using too much water to prevent over-soaking. | --- |
| Tips for Soaking and Applying Adhesive | Use a tray to soak the paper and allow it to rest for at least 5-10 minutes. | Remove the paper from the water and place it on a clean surface. | Use a ruler to ensure the paper is straight and even. | Apply the adhesive to the edges of the paper using a paintbrush or your finger. |
| Tips for Stretching and Securing the Paper | Fold the edges of the paper onto a piece of medium-density fiberboard (MDF) or canvas and staple them down. | Use a utility knife to trim off any excess paper. | Hammer the staples down to ensure they are secure. | --- |
| Tips for Drying and Finishing | Allow the paper to dry completely, using a fan or hair dryer if necessary. | Once dry, remove the staples and trim off any excess MDF or canvas. | Applying a primer or sizing to the paper before stretching can also help improve its absorbency and prevent pigment from sinking into the paper fibers. | --- |
| Additional Tips | To prevent fingerprints on your paper, handle it with clean hands or use drawing pins to hold it in place instead of your fingers. | If you're having trouble getting the paper to stick to the MDF or canvas, try using a candle or wax to create a wax seal on the edges of the paper. | --- | --- |
Stretch watercolor paper with butcher tape, gummed tape, or stretching boards. Soak paper and place it on a flat surface, then use a spray bottle to apply excess water. Keep edges taped to prevent warping. Use a sturdy board and avoid air pockets. Clean and dry the paper before stretching. Use a large brush to apply glue on one side of the paper for a watercolor paper stretcher. Use watercolor sheets and ensure they are the same size.
Use a large brush or clean sponge to remove excess water and air bubbles, ensuring a smooth surface. The paper should be allowed to dry flat on the board. When purchasing art materials, it is important to choose a clean board and clean paper to prevent any damage to the surface.
Many artists prefer to stretch large sheets in the same direction to avoid any unwanted marks or creases. Heat and angle should also be taken into account during the papermaking process to prevent any unwanted watermarks or damage to the paper.
Metal should be avoided when working with watercolor paper, as it can leave scratches on the surface. Overall, stretching watercolor paper is an important step in creating successful paintings and should be done with care and attention to detail.
With these pro tips for mastering watercolor paper stretching, you'll be able to create a perfect surface for your watercolor painting, allowing you to fully express your creativity and achieve stunning results.
Alternatives to Stretching Watercolor Paper
Stretching watercolor paper isn't always feasible or desirable. Luckily, there are other methods for preventing your paper from buckling. Here are a few alternatives:
1. Using Heavyweight Paper
One way to prevent the paper from buckling is to use heavyweight paper. A heavier paper can absorb more water, making it less likely to warp or buckle. This method is a good option if you don't want to go through the stretching process, but it does have its drawbacks. Heavier paper can be more expensive, and it may not work as well for certain techniques.
What I like
- Can absorb more water, making it less likely to warp or buckle
- Can provide a smoother surface for certain techniques
- May not require stretching
What I Don't Like
- Can be more expensive than lighter-weight paper
- May not work as well for certain techniques
2. Using Watercolor Blocks
Watercolor blocks are pre-stretched pads of watercolor paper that are glued together on all four sides. Because the paper is already stretched, there's no need to go through the stretching process. This method can be convenient and time-saving, but it can also be more expensive than buying loose watercolor sheets of paper.
What I like
- Already pre-stretched; no need to go through the stretching process
- Convenient and time-saving
- Easy to transport and store
What I Don't Like
- Can be more expensive than buying loose watercolor sheets of paper
- Limited sizes and options available
3. Using Masking Tape
If you're looking for a quick and easy way to prevent your paper from buckling, you can try using masking tape. Simply apply masking tape to the edges of your paper before you start painting. This will help keep the paper flat as it dries. However, this method can be a bit messy and may not work as well for larger pieces of paper.
What I like
- Quick and easy to apply
- Can work for smaller pieces of paper
- Inexpensive
What I Don't Like
- Can be a bit messy and leave residue on the paper
- May not work as well for larger pieces of paper
- Can damage the paper when removing the tape
4. Using a Paper Press
A paper press is a tool that can be used to flatten and dry your watercolor paper. This method involves placing your wet paper between two pieces of absorbent material (such as blotters or towels) and then pressing them together using a press. This can be a good option if you don't have the space or materials for stretching, but it does require an additional investment in the press.
What I like
- Can be a good option if you don't have the space or materials for stretching
- Can provide a flatter surface than other methods
- Can be used for other paper-based art forms
What I Don't Like
- Can be expensive to purchase
- Can take longer to dry
- May require additional materials such as blotters or towels
Watercolor artists who want to try alternative methods to stretching paper have a few options to choose from. One popular method involves using a stretch fabric or textile, like cotton, to create a taut surface for the watercolor paper.
Another option is to use poly(methyl methacrylate) or gelatin sizing to prevent moisture from seeping into the paper. Some artists also use foam or punched tape to create a textured surface that helps keep the paper in place.
Additionally, natural rubber can be used to create a gummed paper tape that can be applied to the edges of the paper to prevent warping. It's important to note that these methods may have pros and cons, such as requiring more time and effort or not providing the same level of tautness as traditional stretching methods.
Each of these methods has its own pros and cons, and it's up to you to decide which one is the best fit for your needs. Whichever method you choose, remember that preventing buckling is crucial for achieving a professional-looking watercolor piece.
If your watercolor paper begins to buckle or warp and weft when it becomes wet with watercolor paints, it may need to be stretched. You will need watercolor paper, masking tape, a clean flat surface, and either cold water (for wet stretching) or a spray bottle/brush and water (for dry stretching). It’s possible, but it may be more difficult and could cause the paint to buckle or warp. It’s best to stretch the paper before starting to paint. There are two common methods for stretching watercolor paper: wet stretching and dry stretching. Both methods have their advantages, and it depends on personal preference. For wet stretching, soak the paper in cold water for about 5-10 minutes. It’s not recommended to use a hairdryer as it may cause the paper to warp or buckle. It’s best to allow the paper to air dry completely. If you don’t stretch watercolor paper, it may buckle or warp when it becomes wet with watercolor paint. Yes, there are alternative methods, such as using heavier-weight paper or a watercolor block. Yes, you can reuse stretched watercolor paper multiple times as long as it’s in good condition. It depends on personal preference and the specific paper you’re using. Some artists prefer to stretch every watercolor sheet, while others may only stretch large watercolor sheets or those with heavier washes. It is recommended to use acid-free paper masking watercolor tape or artist tape to secure watercolor paper during the stretching process. Yes, you can use a stretching board or a paper stretcher instead of taping the paper to a flat place. These tools can make the stretching process easier and more precise. Yes, you can use different types of water-based mediums on stretched watercolor paper, such as gouache or acrylic ink. However, keep in mind that these mediums may behave differently on stretched paper than watercolor, so it’s important to experiment and test the paper beforehand. Yes, it is possible to overstretch watercolor paper. Overstretching can cause the paper to become too thin and fragile, making it more prone to tearing or damage. It’s important to stretch the paper just enough to achieve a flat surface without overdoing it. To store stretched watercolor paper, it’s best to keep it in a dry and flat location, away from direct sunlight and humidity. You can store it in a portfolio or a cardboard sleeve to protect it from dust or accidental damage.Watercolor Paper Stretching FAQs

Conclusion
Alright, folks, I've reached the end of my guide about stretching watercolor paper. So, let's do a quick recap of the benefits of stretching, shall we?
Firstly, stretching your watercolor paper helps to prevent it from buckling or warping when you add water to it. This is especially important if you're using a lot of water in your painting, which is pretty common with watercolor.
Secondly, the stretched paper provides a smooth and even surface to work on, which is crucial for achieving those stunning watercolor effects. Plus, it just looks so much more professional and polished than a wrinkled or uneven surface.
So, there you have it, the importance of stretching and proper paper preparation for watercolor painting. Remember, practice makes everyone perfect, so keep experimenting with different techniques and find what works best for you. Happy painting!
Related Articles
Cold Press vs. Hot Press vs. Rough Watercolor Paper
Best Watercolor Painting Books
9 Best Water Brushes for Beginners, Professionals & Calligraphy
10 Best Watercolor Palettes for Beginners & Professionals
13 Best Watercolor Pencils and Water Soluble Art Supplies
12 Must-Know Watercolor Tips for Beginners & Pros
Why and How to Use Watercolor Mediums to Enhance Your Painting Game
Learn How to Use Watercolor on Wood
13 Best Watercolor Sketchbook for Creatives
11 Best Watercolor Brushes for Beginners & Professionals
15 Must-Have Watercolor Supplies for Beginners & Artists
Learn How to Paint Watercolor on Canvas Easily & Successfully
16 Must-Know Painting En Plein Air With Watercolors
Learn The Basic Watercolor Painting Techniques
