Expertises: Art, Painting, Drawing, Home improvement, Gardening
Updated on

Inspiring Ideas for Modern Home
When it comes to painting, many people have the notion that only born artists can create fantastic artwork. However, it isn't that tough at all!

And to support this fact, there can be no better example than acrylic pour painting as it can be created by anyone and everyone. All you need to have is a love for experimenting with colors and some idea about the different aspects of this artwork.
Plus, you don’t need to invest a lot of time in creating these paintings. So, let go of all hesitations about whether this will be the ideal artwork to engage in. To help you do that, we have curated this guide to put forward all the essential facets of acrylic pour painting. That way, things will seem much simpler to you.
With all said and done, let’s get going!
An acrylic pour painting is very different from most other types of artwork, and to master it, you need to learn about acrylic pouring first.
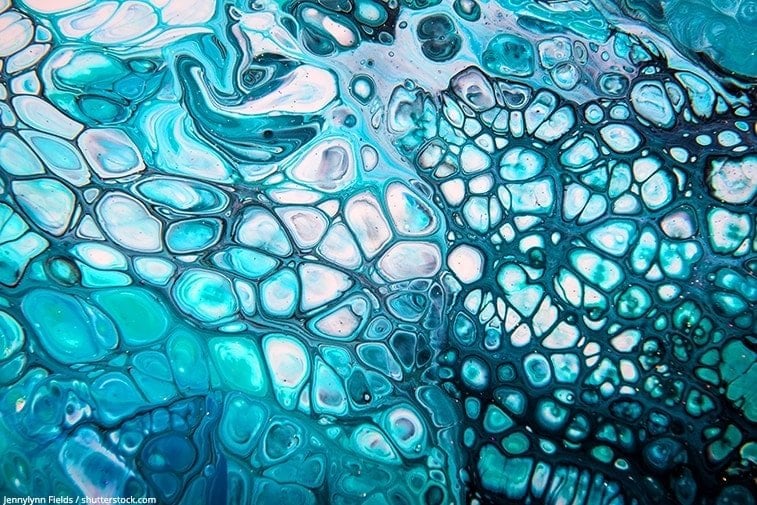
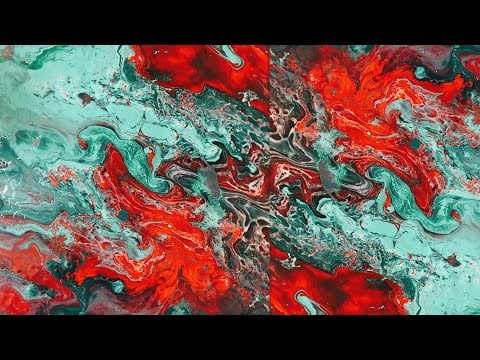
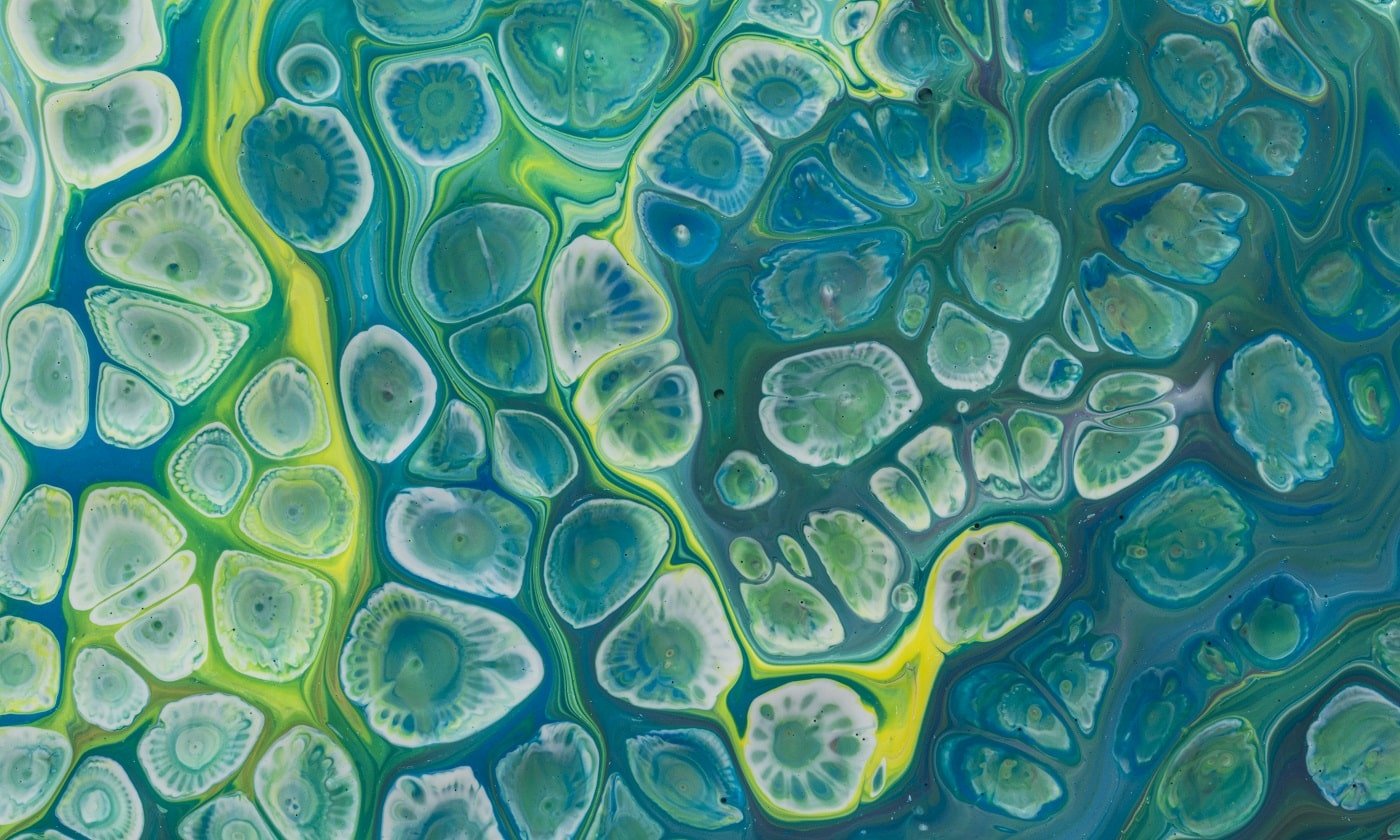
Acrylic pouring involves making acrylic paint pourable using a medium and then applying it on a surface to create abstract art. Usually, acrylic colors are made to flow into each other to give rise to the unique color effects and patterns that you will find in most such paintings.
That’s why it’s used to paint backdrops for dreamscape sceneries. Not only that, but it can also be applied for painting home decor such as coasters and countertops made of faux marble.
Now, there are several techniques for creating acrylic pour paintings and several important aspects to learn about before you take on your first painting project. In the subsequent sections, we will discuss all these techniques and aspects in detail, so let’s move on.
First and foremost, you need to have all the essentials ready for use before starting any artwork. In the case of acrylic pour painting, the primary materials required are acrylic paint, a pouring medium, and a suitable surface.
These requirements remain the same for almost all the pour painting techniques that will be dealt with later on in the article A few additional ingredients are needed for some of them, which will be discussed as and when we talk about the particular technique.
However, assuming that no other ingredients are mentioned for a technique, it will only require using a pouring medium and paint.
The pouring medium plays a key role in creating an acrylic pour painting since it is mixed with the paint to create the required flow and ensure proper mixing of colors. You may have to keep some colors separate for a particular painting, which can be effectively achieved with the help of a suitable pouring medium.
This way, you can make sure that the colors never combine into a slushy mix. Moreover, the colors remain bright and beautiful despite being diluted. And its benefits don't end here.
Using a good pouring medium also ensures that the paint mixture doesn’t dry quickly. This, in turn, eliminates the possibility of cracks developing in the painting. Besides, using the right medium helps maintain the adhesion on the surface.
Notably, different brands and types of mediums are available in the market. Each of them has a different visual influence on your pour art and also possesses different characteristics. So, make sure to choose one according to your requirements.
A canvas board is typically a cardboard or MDF board covered by canvas material but they don’t perform the same way.
Generally, the former is considered less suitable for acrylic pour paintings as the moisture trapped between the cardboard and the canvas may cause it to loosen as the moisture makes it more prone to warp and ripple after the paint dries. In comparison, an MDF board can be a quicker and more efficient surface to paint on.
While using a canvas board for your pour paintings, keep in mind that it has the canvas glued back and front. It’s the back that you must handle carefully as staining that part with paint might cause the glue to become ineffective.
Stretched canvas is a favorite among most acrylic artists as it helps them create a 3D look when the sides of the canvas are covered in paint.
Although there aren’t a lot of precautions to take care of, you should ensure wiping it clean before use and that its center is tight. One way to ascertain this is by tapping the center to see if it gives a thumping sound or has a sag in the middle. If you’re faced with the latter, the paint may take longer to dry.
To deal with this, all you have to do is spray the underside of the canvas with water and then dry it using a blow dryer. Rest assured that the middle portion of the canvas will tighten up in a short while.
Acrylic pour painting becomes all the more diverse and interesting for DIY-lovers due to the availability of a number of different techniques. As a result, you can produce different effects and patterns on the canvas, which make the paintings more attractive and intriguing.
In the following sections, we briefly discuss the most significant techniques. So, let’s get going!
Firstly, let us look at the techniques which are fit for beginners and pros alike. You can attempt these techniques using standard preparation and by utilizing simple tools available in most households.
We begin with the easiest of them all, the clean or simple pour. As the name suggests, it involves pouring the paints next to one another on a surface and keeping them separate. Following this, you can swirl the color in as many places as you like with the help of a sharp object, such as a toothpick.
For creating a simple pour, you need to follow a few straightforward steps. Start by mixing each of the colors with the medium of your choice to create a consistency like that of warm and runny honey. You should ensure that the flow is smooth yet not too drippy or too thick.
After you are done with the mixing, take the colors one at a time and pour them on the surface. Finally, you can manipulate the surface so that the colors move around and their edges blend seamlessly or use a tool as described above. Alternatively, you may leave the paint intact to keep the colors clearly distinct.

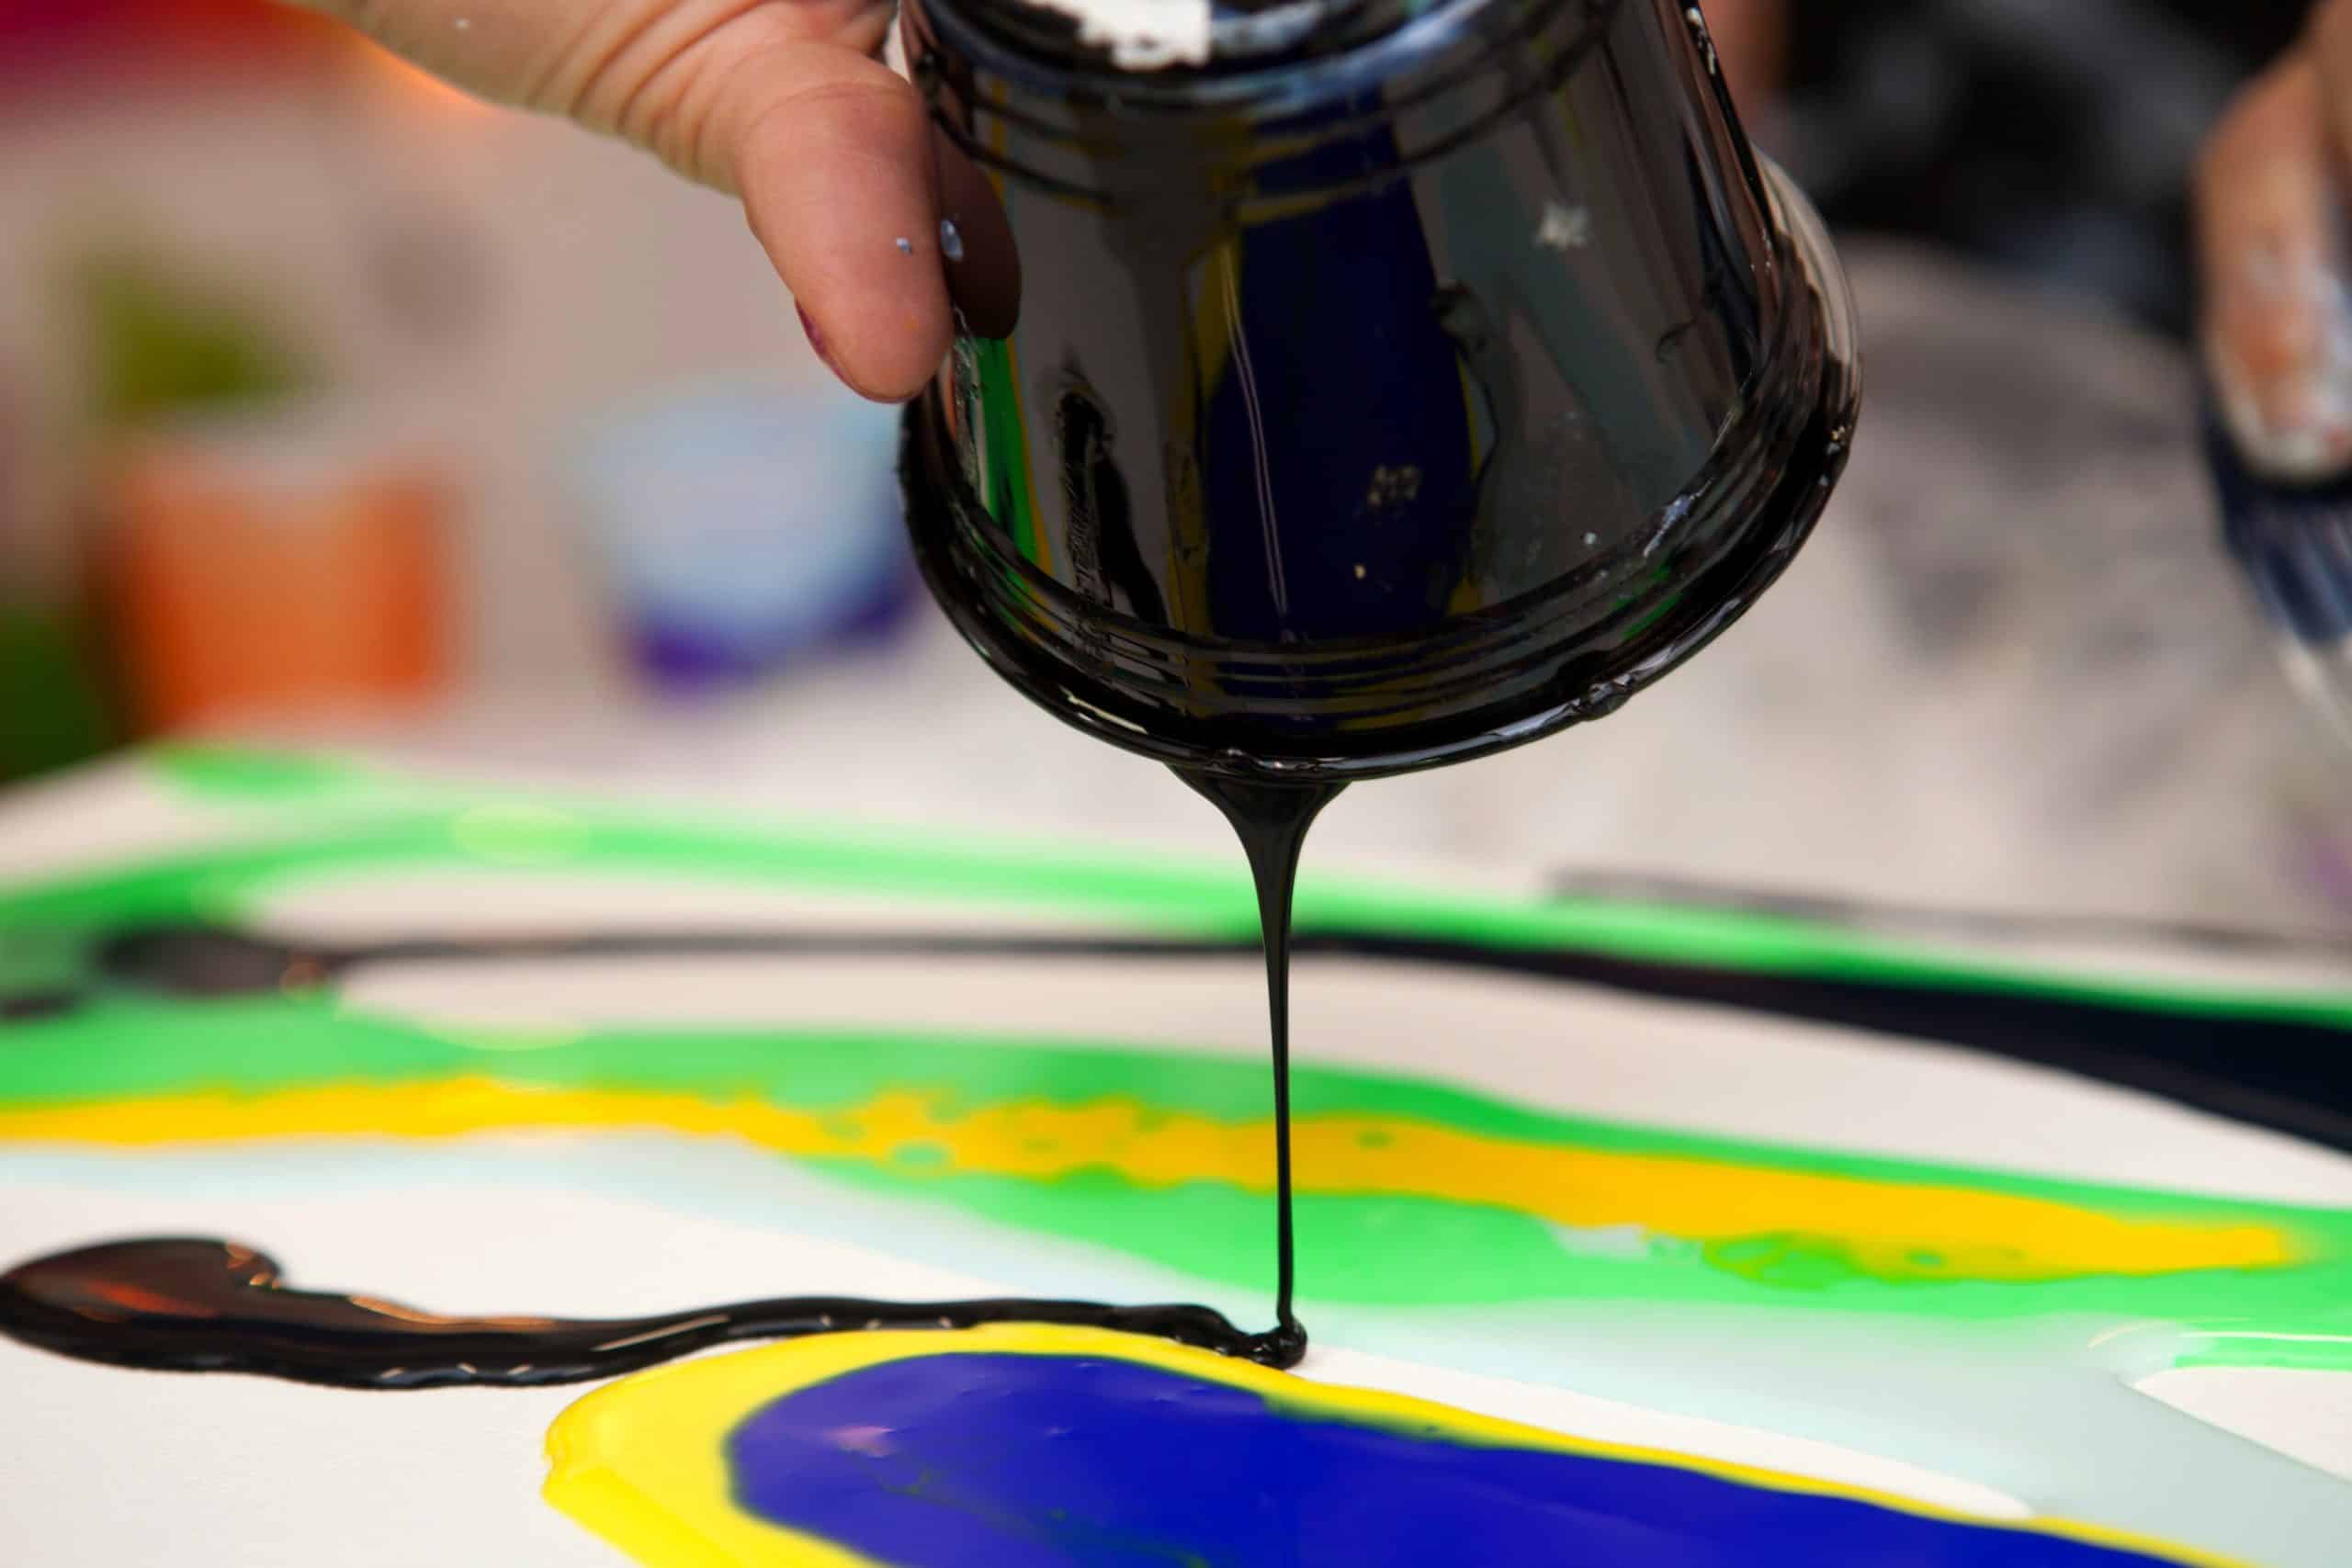
For this technique, place a cup full of the paint upside down on a surface, and then take it off to let it flow out. An alternative to the latter part of the technique is to poke holes on the top to relieve the pressure so that the paint comes out from under the cup.
An advantage of using this technique is that you can create ethereal blends and dynamic patterns and can even add cells, which we will talk about later in our guide.
For making an acrylic painting through this technique, start by mixing the paints with the medium in individual containers. At this point, you can also add dimethicone or silicone if you like.
Next, layer the paint in a glass or cup by plopping all the colors together in it or pouring them down its sides. However, the cup must be flipped in the right way to prevent the appearance of improper pouring. In case the cup is smaller, the best way would be to flip the surface over and place it over the cup first, and then grasp the cup and the surface simultaneously to flip them over again.
Similarly, with larger cups, you may use a piece of cardboard or plastic first and then manipulate it and place its edge on the desired part of your surface. Finally, slide the cup off onto the surface to create the flip cup pour painting.
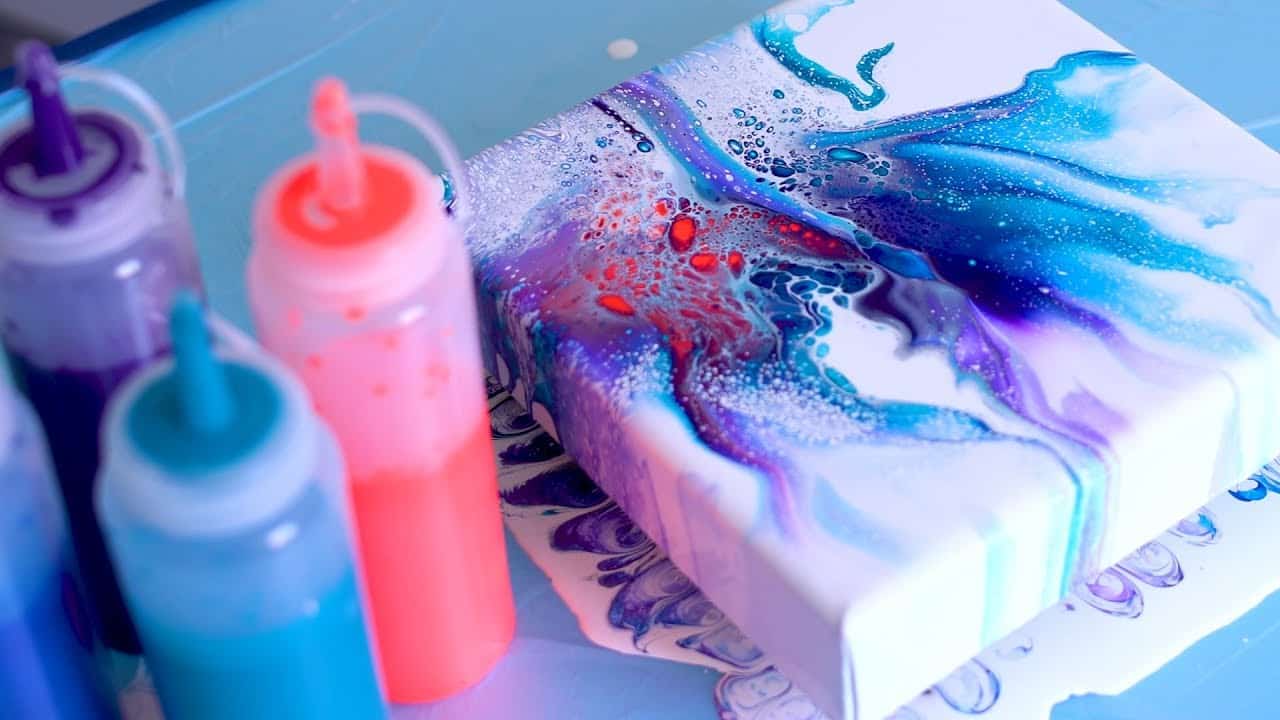
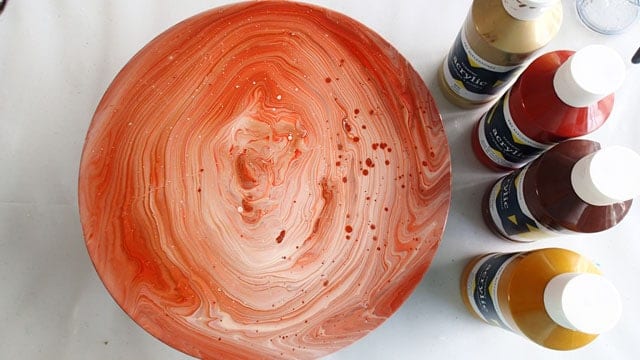
This technique is popularly used in finishes on faux marble, and can help produce absolutely amazing designs and patterns. Like the previous technique, this one also requires layering individual colors in a cup, followed by pouring them on the surface at once.
Once done, manipulate the surface to achieve the style and pattern that you desire, as with the simple pour technique. On a side note, you should avoid creating a very thick paint layer to prevent the painting from cracking.
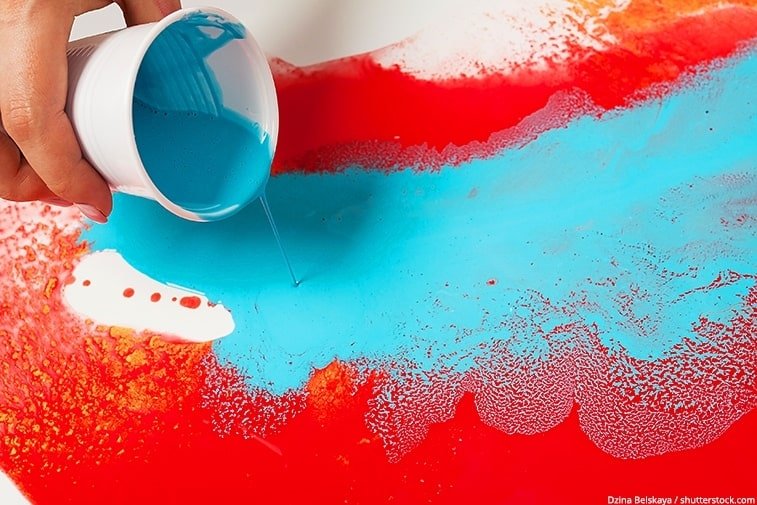
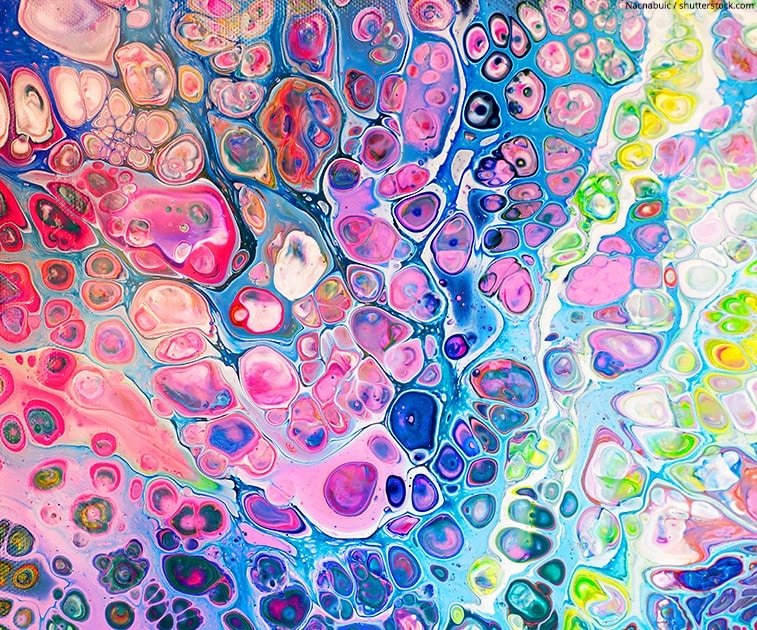
Another relatively simpler technique that you can try is the puddle pour. In this case, you’ll have to pour the colors one after another on a base color, and then move the canvas or use air to spread them all over it so that the color puddles are connected.
Since it creates a natural blend of all the colors, this technique is ideal for creating rainbow pours using three of the primary colors such as yellow, cyan, and magenta. In this regard, being familiarized with the color wheel will help you prevent the formation of muddy colors.
When you become accustomed to the basics of pouring and mixing paints, you can try out the next level of acrylic pouring techniques. Some of these may be slightly more lengthy than the ones discussed above, but they can yield quite amazing designs and patterns.
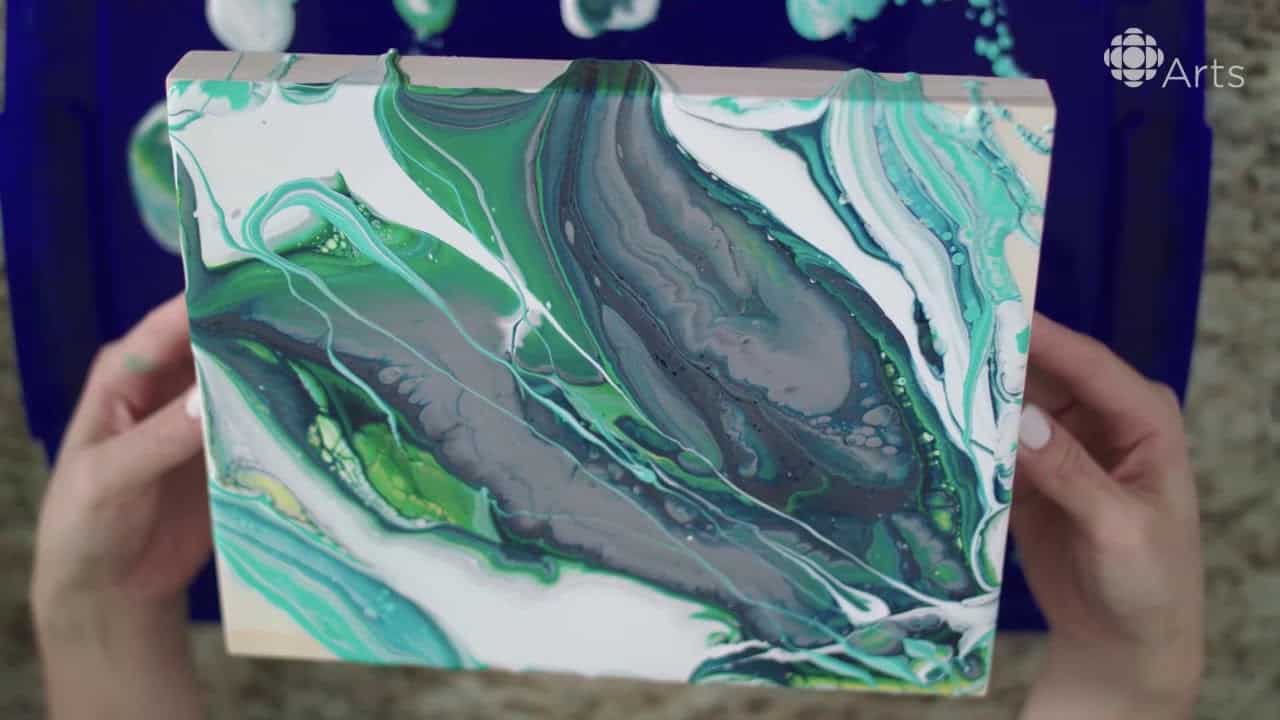
Applied for faux marble finishes, this technique is achieved using a carefully planned pour. Although a controlled marble pour painting can be created with the help of the flip cup pour technique, you may also do it by adopting a more intricate method, which is described below.
Right from choosing the colors to applying the finishing touches, this technique requires you to proceed wisely. To start with, we’d suggest choosing three different shades of one color, for instance, dark gray, white, and black. This will make sure that all the colors coat the different gradients of the marble surface with finesse.
Next, choose a suitable marble line color for making up the dark or light lines spread all around the marble and keep it aside. After this, combine each of your desired colors with the pouring medium and then layer the two main colors very carefully in a cup, while keeping the third line color separate.
Now, pour these layered colors on the surface and manipulate it gently so that they blend along the edges. Follow it up by creating a pour spout with the cup used for layering, then taking the marble line color and drizzling it in lines across the surface. On that note, making these lines run off the side of the painting would render a distinct 3D look to your creation, so give that a try!
Finally, manipulate the surface one last time to make the lines flow with the marbled background. Allow it to dry thoroughly.
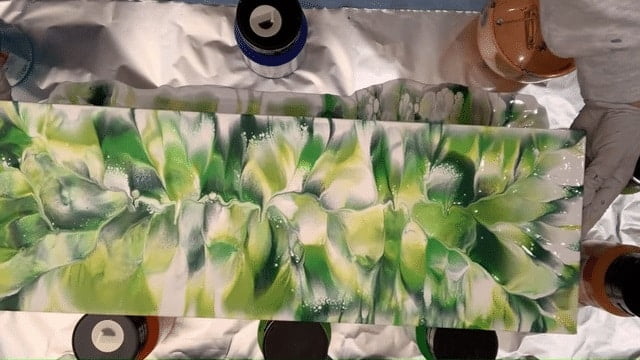
A swipe pour painting can be achieved by pouring different colors and swiping the paint using a tool such as a slightly damp paper towel or a flat frosting spatula. You should ensure that the mixture of the paint and medium has the right consistency to create the desired look. The colors can either be kept separate or mixed together as per your preferences.
Be careful to swipe the canvas from one end to another and follow the same pattern throughout. At the same time, don’t apply too much pressure on the surface as that may cause the paint to be scraped off or the colors to be mixed more thoroughly than desired, resulting in a muddy look.
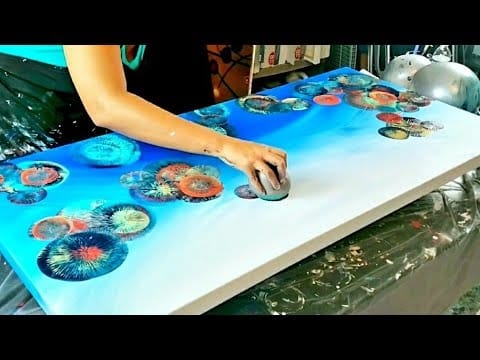
This name sounds fun, doesn’t it? Well, every bit of it is fun-filled indeed! The technique involves using a bouncy and inflated surface like a balloon to paint different shapes in several small puddle pours. Moreover, you can combine a balloon smash pour with a dirty or clean pour to create flower-like designs.
For putting it on a canvas, start by mixing a base color as per your choice with the medium. Then pour it in a thin layer over the surface and spread it to the four corners or edges of the surface frame. Now, pour the other colors or the contents of the dirty pour cup to make small puddles on the canvas.
Initially, you should create only one or two puddles to see how the blend of colors works and then create the others. Next, grab a beach ball or a balloon with a rounded side and smack the middle portion of each puddle either by applying force or gentle pressure. You can easily create captivating marine imagery or lovely abstract flowers using this method.
Though this technique utilizes dirty pours, the method of pouring the paint on the surface is different, which results in the creation of mesmerizing designs.
To create a tree ring pour, layer and mix your colors in a cup just as in the dirty pour technique. Then squeeze the pour cup to create a pour spout that is pointed and start pouring the paint circularly till all of it has been poured. Lastly, manipulate the canvas in a circular motion to make the pour look like a tree ring.
Tree ring pour is known to create immense depth in the paintings, but you should be very careful about choosing the colors and combining them. A good way would be to play with dark and light colors layered one on another to create eye-catching lines and blends.
You can explore some high-level acrylic pouring techniques after having mastered the beginner and intermediate techniques. As such, we’ve selected four such popularly practiced techniques in this section, for which you might need a few more tools or materials.
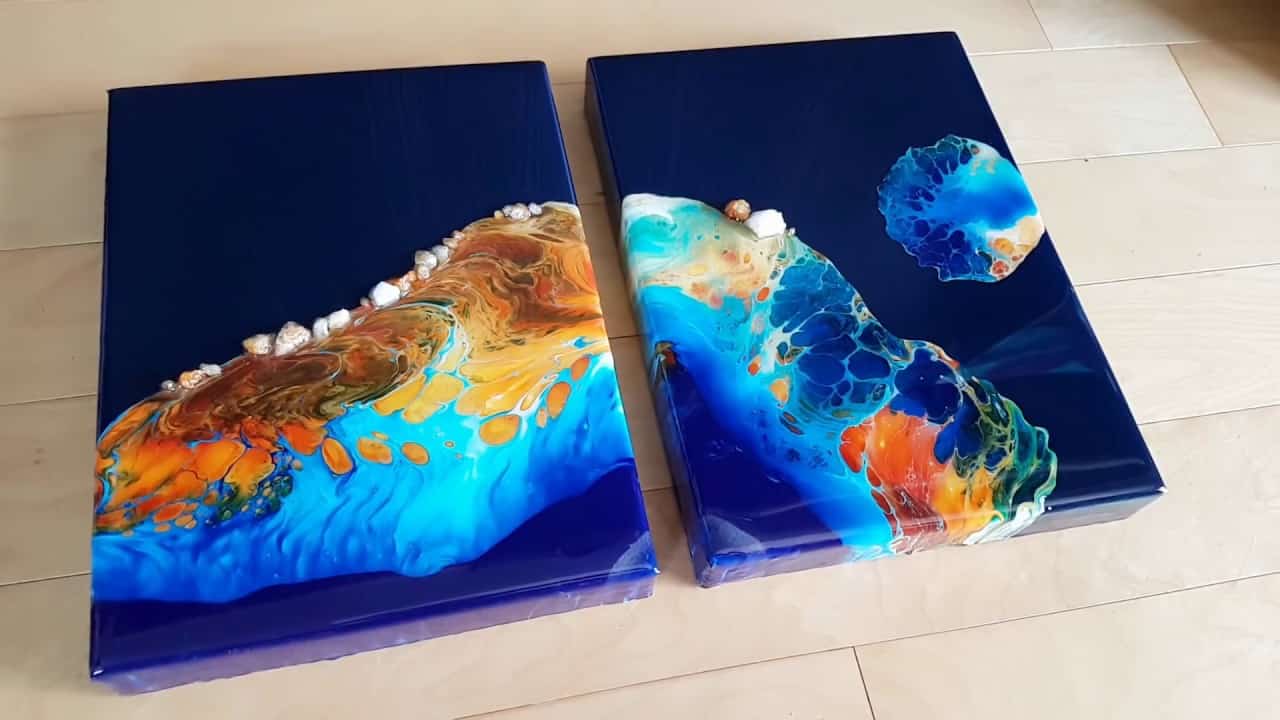
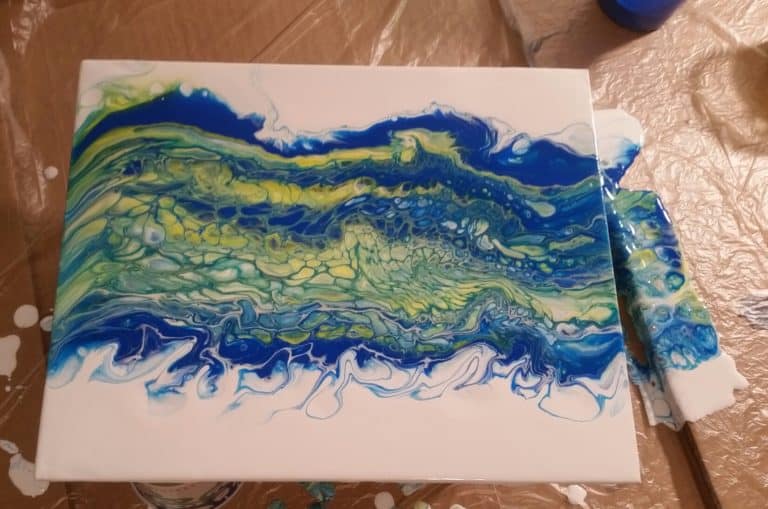
In the resin pouring technique, the acrylic colors are mixed with a two-part resin to create layers and depth in the painting. Remember that you should always add the paint to the resin and not the resin to the paint. Besides, you can tint the resin by adding a touch of acrylic to it, adding more resin is required if you need the final look to be opaque.
We love how this technique can be used to create stunning ocean pour paintings ideal for interior decoration.
While making the mix of resin and acrylic paint, you should ensure that both the components are incorporated properly. It is also essential to keep an eye on the working time of the resin to work faster but without compromising on the mixing time.
After the resin is mixed with the paint, pour it on the surface and then blend the colors with hands (while wearing gloves). Be cautious not to create a mix, otherwise the painting may turn muddy. Now, complete the process by popping the surface bubbles using a torch held a few inches away from the surface.
Wait for about a day (if not more) for the resin to dry up, and you will have a truly stunning painting! Don’t forget to keep your hands and eyes protected while working with resin as it is hard to remove from the skin and can be painful if it gets into your eyes.
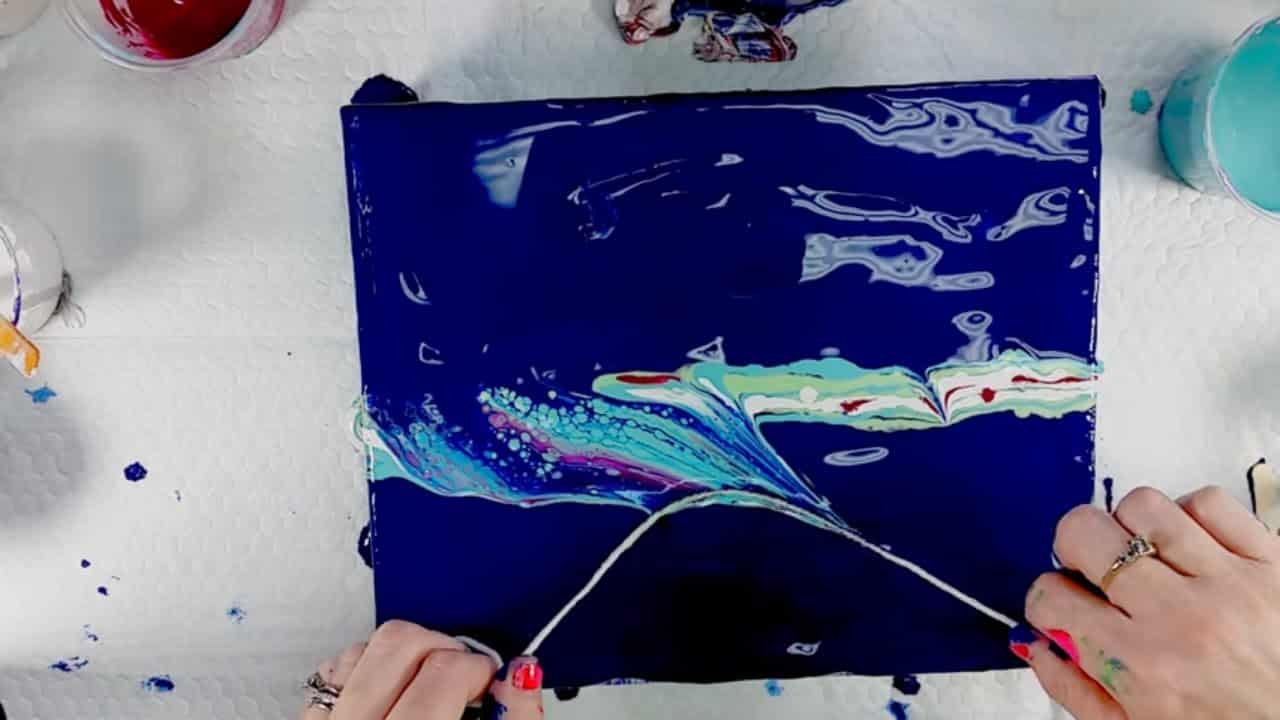
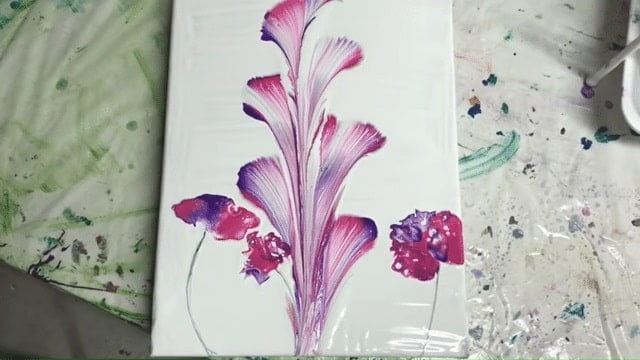
As is evident from the name, this technique essentially utilizes a chain or a string to achieve the final look. Simply put, it lets you create wisps similar to feathers on an acrylic-poured background. The “airy” and “light” designs thus created can be outlined to draw striking feathers or may even be left as-it-as to make the painting look more natural.
Furthermore, you can even create striking flowers through this technique. We would now explain how all this is done, but remember that the basic steps will be the same for both types of paintings.
First things first, the mixture of the background color with the medium should be slightly thinner so that it doesn’t swallow up the strokes made with the string. After you have mixed all the individual colors with the medium, pour the background color on the canvas and spread it evenly.
Now, the string should be loaded with a color as per your color placement needs. For instance, if you want the colors to be placed randomly on the canvas, creating a dirty pour and saturating the string with that mix will be the best way to go about it.
But in case you want specific placement of the colors on the canvas, you should create lines with alternate colors on a flat surface. As a result, the different segments of the line will be colored differently. After this, you’ll have to stretch the string and lay it on the line of paint to coat it evenly.
The next few steps will vary based on the painting that you would want to create.
For achieving this design, you should first take the string and lay it on the canvas vertically. Then the top of the string should be dragged towards the lower portion to create one side of the feather. Similarly, repeat the same process by pulling the string in the opposite direction to complete the feather.
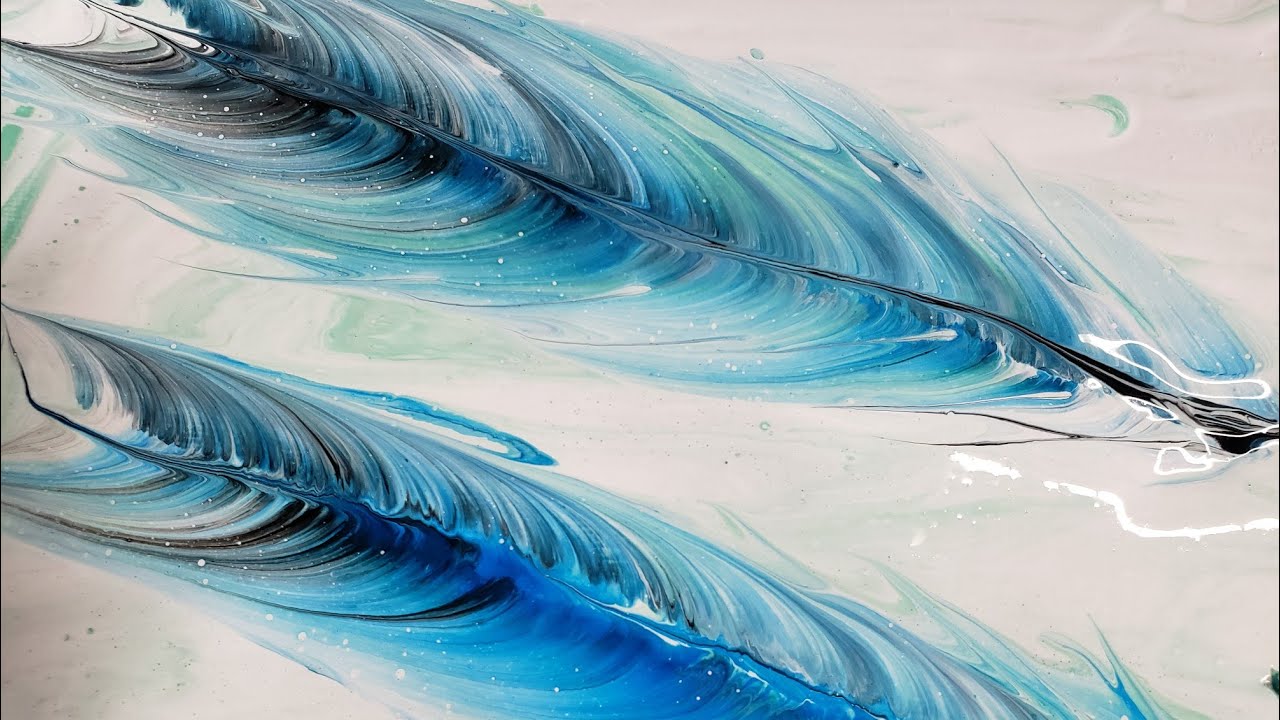
To achieve this design, lay the coiled string on the canvas with its other end pointing towards you. Then pull the chain or string towards you while still laying it flat on the canvas, allowing it to uncoil gradually as you pull. While creating any of these designs, you should be cautious not to over-manipulate them.
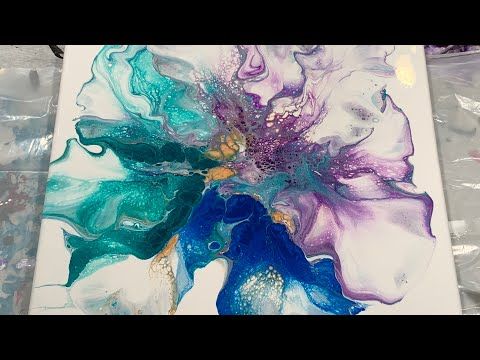
Also referred to as the “blow pour,” this technique requires you to pour paint on a canvas and manipulate it using a blow dryer or another tool to evenly spread the color. If you want to create unique and interesting shapes or abstract flowers, this is a great technique to try out.
The first step of this technique is the same as in the case of the string pull pour, where you need to pour a background color on the canvas. After this, layer the remaining colors in a dirty-cup style and then pour a number of puddles on the canvas. It’s then that you have to use a blowdryer to blow the paint so that the puddles are connected.
As an additional step, you may drizzle any metallic color such as gold on the surface to add that extra bling to the painting. Lastly, manipulate the surface using a straw or manually blend the drizzles to provide a natural look.

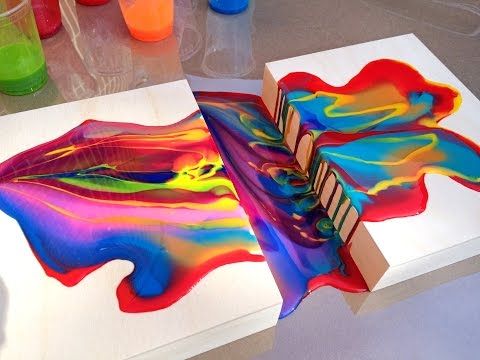
Interestingly, dip pour paintings have to be created using two canvases, viz., pouring paint on one surface or canvas and pressing another one against it. It’s a bit tricky as there’s a risk of the painting becoming muddy, especially if the artist isn’t well-versed with the color theory.
To achieve a dip pour painting, use a dirty pour or clean pour on one surface. Once you’re done with the pouring, press the other surface firmly against it and slowly pull them apart. After this, you may manipulate the surfaces if you wish or leave them intact if the paint applied isn’t too thick. This process can give rise to amazing waves, feathers and even ripple-like patterns.
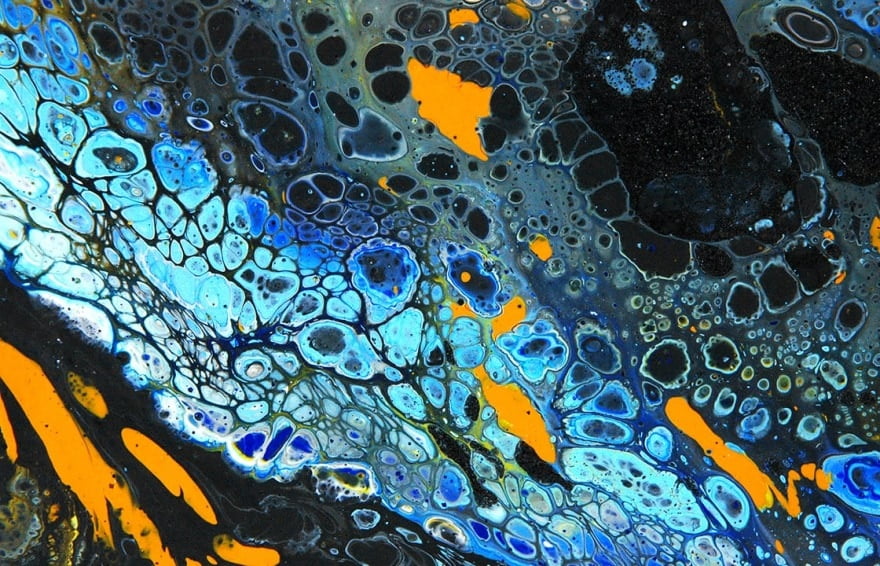
Cell-like patterns are formed mainly when the density of the different acrylic paints being used is different. There are lots of tricks to facilitate the formation of cells in pour paintings. However, the number and size of the cells primarily depends upon the density difference between the pigments in the colors.
Generally, artists use three techniques to achieve cells in their acrylic pour paintings, which differ according to the materials used. We describe each of these techniques briefly as follows:
Silicone oil helps in strengthening cell formation in pour paintings since silicone or oil doesn’t blend properly with water. As a result, pouring mediums or acrylic paints that are water-based separate them from silicone oil when mixed. Ultimately, there is a chemical reaction that leads to more cells building up in your pour painting.
At the same time, you should be careful not to use any random silicone oil since different oils and sprays have different properties and compositions, which may not work equally well. And the final look created by using the oils will also differ. For instance, some may produce smaller washed-out cells while others might give rise to larger and more clearly defined structures.
Most artists engaged in acrylic pour paintings aim to create as many clearly differentiated and contrasting cell patterns as possible. However, it requires using silicone oil with low viscosity since that can create stronger color gradients and make the colors flow faster.
However, a high-viscosity silicone oil is ideal if you prefer creating more smaller-sized cells throughout. By using such an oil, the colors will flow at a relatively slower pace, and the cells will be clearly delineated.
As for the amount of oil to be used, we’d advise adding 2 or 3 drops to all colors apart from white and the pouring medium itself. At this point, you should be careful not to mix the silicone too vigorously or for too long, otherwise you are less likely to achieve a successful cell effect.
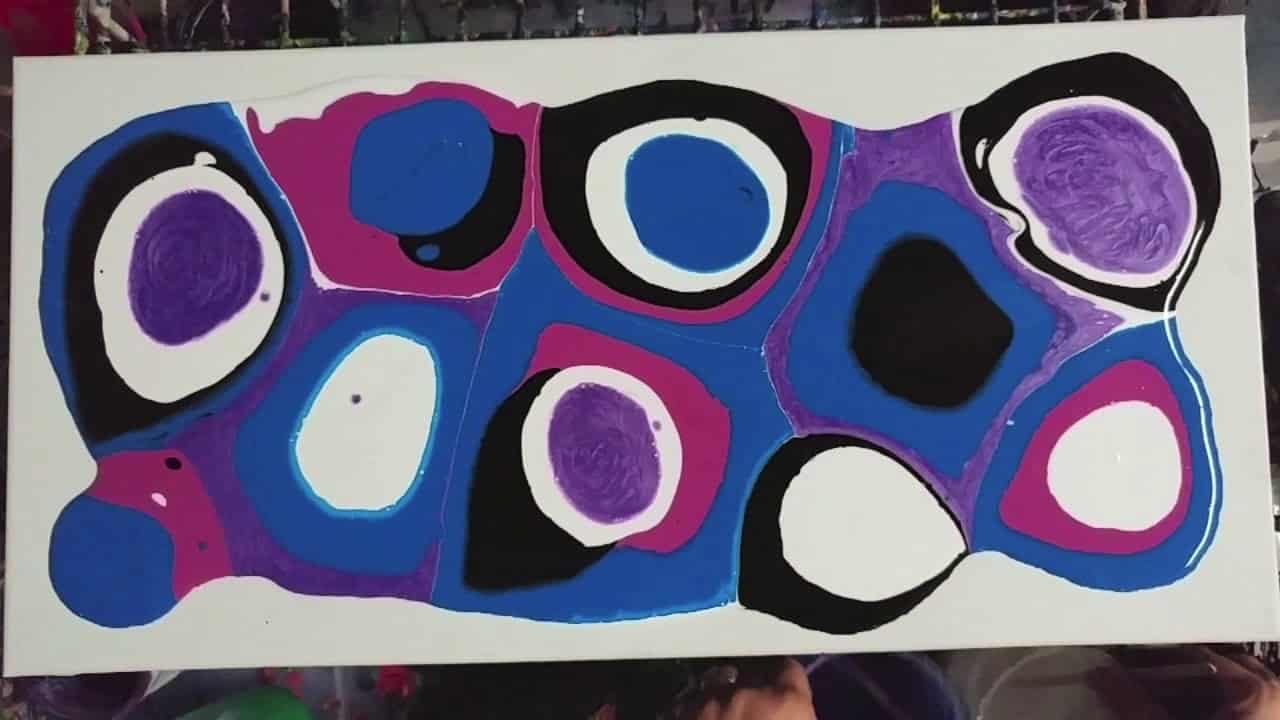
Cells are formed in pour painting on the basis of the difference in density of the color tones used. Hence, you should select colors of varying densities to create cells in the paintings.
The process involves layering the surface with a denser color (such as white) and using a less dense color (such as red) for the base. This results in the denser color pushing down and the color with lower density rising towards the top in the form of cells. As a result, the denser color forms the outline or the net structure.
So, if you take the red and white combination cited above, you would get a painting with red cells adorned with a white border. Such paintings are commonly referred to as “broken net” structures or layers.
The third and final technique is the most advanced and can yield larger or more controlled cells. We’d strongly recommend using a butane torch or heat gun for this technique as the heat emanating from these devices helps in making the cells more prominent on the surface of the paint layer and also considerably enlarged.
You can get the best-looking cells by moving a torch over a flip-cup pour painting. Apart from that, torching it again for a short duration will lead to the creation of additional small cells that can provide the final touch to your paintings. However, you shouldn’t use the torch for too long or hold it too close to the same spot as that might create dents and clumps on that particular spot.
You will always want to create the best-looking pour paintings to adorn your interiors. But to achieve that, all the steps involved should be followed accurately. So, keeping in mind a few key factors common for all techniques is essential as it will help you complete the process without any major hiccups. And in the following sections, we describe each of these factors briefly.
Irrespective of the technique you adopt, each color-medium mixture that you’re using must have optimum consistency. Hence, you should always use high-quality color additives and acrylic paints, which will ultimately help you produce perfect pour paintings.
In hindsight, you’ll be able to bring the ideal consistency in the colors as your experience in this painting style increases. For beginners, however, a syrup or honey-like consistency will be great as it can create a thin color stream. Here, we should also mention that you should be careful to see that it doesn’t become too watery.
Acrylic paint can be difficult to remove from most surfaces, so you should be extra cautious in ensuring that the work surface or other adjoining areas don’t get stained. Likewise, the color mixture might run into a spot that you don’t wish to paint, so that should also be taken care of.
That’s why it is essential to protect the said spots with a cardboard or plastic sheet and the floor (or the particular work surface) must be adequately protected. Aside from this, your hands must be protected sufficiently, so remember to wear gloves before you start painting. We recommend using rubber gloves for this purpose.
Air bubbles are a major hindrance when it comes to creating acrylic pour paintings. But that can be dealt with in the right way using a few techniques. Firstly, you can quickly run a torch over the painting, which will cause the bubbles to pop up. Other than that, you can avoid air bubbles altogether if you make the mixture one day before creating the painting.
The ideal quantity of pouring medium to be used will, of course, vary with the technique adopted, the paint used, and the final painting you wish to create. If a thicker paint is being used, it is best to apply more medium than usual as that will help in achieving a good consistency. In such cases, the typical paint-to-medium ratio used by painters is 1:3.
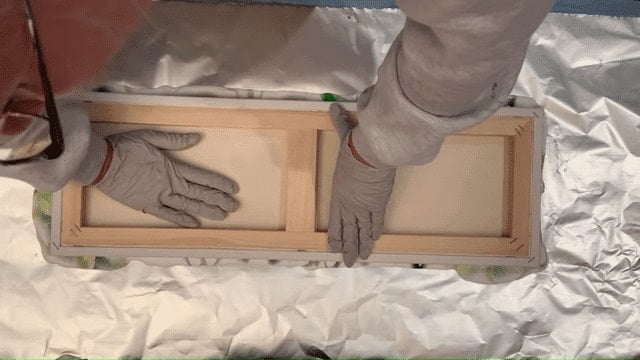
The painting surface must be prepared properly for creating the piece. Firstly, you must pre-treat it using Gesso to facilitate better adhesion of the paint to the surface and to prevent it from penetrating the substrate. Moreover, the painting ground should be level and balanced to avoid unwanted manipulation.
Also, after the painting is complete, you should rest the canvas in a raised position to ensure that the flowing paint doesn’t stick to its underside. You can use anything like drinking glasses, pinboard pins, or cups can be used to hold it in position.
This might seem nominal at first, but using a cup of the right size is important to ensure the proper mixing of colors. For example, if you layer 2 oz. of red, white, and green paint in an 8 oz. cup, the green and red paints will start mixing.
This mixture will also roll down the sides of the cup and continue mixing on the canvas. Ultimately, it will lead to the formation of a brown (red and green color combined) color that might not be required for the painting at all.
Long story short, using a cup that is too large may make the painting too muddy. So, if 2 oz of paint has to be used, a cup of 3 oz would work well for creating the artwork.
Since there’s a lot of mixing and pouring involved in the process, it’s natural to falter in some places. Here are certain common mistakes that should be avoided while creating acrylic pour paintings:
You should never pour and mix colors vigorously without any prior knowledge of the color theory, which may lead to the formation of muddy spots in the painting. So, researching a bit about the basic color theory is important before you proceed to make an acrylic pour painting.
After this, you need to consider three to four colors that will go well if used together. Starting with primary colors, i.e., blue, yellow, and red will be a good decision. Additionally, white can be included between the layers, so that the edges of each color are sharper and cleaner.
Most beginners tend to make their first color mixtures either too viscous or too fluid. This leads to the formation of broken cells, which lose their shape upon drying, and a lot of paint also runs off the canvas. So, to make the perfect mixture, amateur artists may have to carry out much trial and error.
You can’t expect the first few paintings to be extraordinary masterpieces, so give it some time and continue to experiment with different techniques. Use small canvases initially as it shall help you learn from mistakes and will also save material.
Preventing cracks in your pour paintings is an important part and hence must not be taken lightly. After all, your painting would get the perfect look only if the paint dries up without developing any cracks.
Usually, this issue occurs when the topmost layer of the painting dries up much quicker than the underlying layers. As a result, the topmost layer turns skin-like and hardens quickly while the lower layer is still wet, causing the top to break and cracks to appear. To avoid this possibility, here are some precautions that you must take:
Fluctuations in room temperature and humidity levels may increase the chances of cracks developing in your pour painting. In short, the painting shouldn't be exposed to excess moisture or dry conditions while drying as that may have a negative effect on the process.
If you aren’t satisfied with a particular pour painting, you may consider repainting it. And although this process may even be repeated several times, it might lead to cracks in the painting. So, you must avoid adding multiple paint layers on the canvas. While using two layers of paint is tolerable, using a canvas more than two times may not be the right thing to do.
A great alternative to avoid the possibility of cracks would be to wipe the liquid paint off the canvas immediately after you notice that the pouring is not proper.
Adding too much water will make the binding agent in the paints and medium weaker, resulting in loss of its adhesive properties as this will increase the probability of cracks developing in your painting. So, we’d suggest not to use more than 50% water in each mixture.
You should add the finishing touch only after the painting is totally dry. Hence, it is best to wait for at least 2 weeks before adding varnish to complete the look.
Final Words
Engaging in a new kind of artwork is like starting a new and beautiful journey as it offers a multitude of aspects to explore. And of course, nothing can match the joy of creating a beautiful painting all by yourself!
We hope you’ve enjoyed our sneak peek into the world of acrylic pour paintings. So, what are you waiting for? Get some acrylic colors and try your hand at a pour painting! We can say for sure that the hands-on experience will be even more enjoyable.
Keep painting, keep learning, and keep improving. Till next time, take care!
Related Articles
11 Best Polyurethane Protective Coatings
5 Epic Face Painting Supplies That Will Improve Your Designs
6 Best Body Paint For Cosplay Reviewed
Learn How to Body Paint With Brilliant Results Right Now
5 Best Airbrush for Body Painting Reviewed
16 Brilliant Face Painting Techniques to Feed Your Imagination
13 Best Paints for Bathroom Ceilings
7 Best Airbrush for Miniatures & Models
11 Best Epoxy Resin For Crafts
5 Best Epoxy Resin for Tumblers
9 Best Exterior Wood Stains Today
Acrylic Pouring Medium Guide [All You Need to Know]
Food Safe Epoxy Guide 101 [All You Need To Know]