Having an air purifier at home can keep your family and yourself safe from all the allergens and germs in the air, which can lead to various diseases and health conditions. For those of you who have started searching for and comparing air purifiers to choose the best one for your needs, you might have come across the name GermGuardian.
Manufactured by Guardian Technologies, GermGuardian’s top-of-the-line air purifiers are known for their incredible performance and durability.
Guardian Technologies is a company based in Euclid, Ohio. The company has received several awards over the years from Weatherhead School of Management, Ernst & Young Global and EDGE for its innovative approach to providing its customers with solutions for their everyday needs.
The manufacturer is one of the most renowned producers of ingenious and high quality appliances that deal with health and wellness. Among the most popular products made by Guardian Technologies is the air purifier.
While there are plenty of air purifiers out there with different features, their basic function remains the same. An air purifying unit comes with a one-speed or multi-speed fan. This fan is responsible for drawing in dirty air from the room it is in through the inlet on the machine.
As air passes through the air purifier’s filters, its particles and contaminants get trapped inside the machine. Thereafter, clean air is redistributed into the air through the outlet on the machine.
Some air purifiers offer various kinds of particle-destroying technologies like ionizers or UV-C lights that help clean air particles more rigorously as they pass through the machine before they are redistributed.
HEPA Filter Air Purifier: Equipped with a protective HEPA...
Clean, Fresh Air: A must-have air cleaner for homes,...
One basic thing to understand is that the larger a room is, the more difficult it is to control the air quality circulating in the room. Luckily, that is something you do not need to worry about if you have either the GermGuardian Elite 4-in-1 (AC5350W) or the GermGuardian 3-in-1 (AC5250PT). Both of these air purifiers are tall units, but they have manageable weights, which makes them easy to move around whenever you need to.
Both these GermGuardian models have decent clean air delivery rates and feature variable fan speeds. The GermGuardian Elite 4-in-1 AC5350W and the GermGuardian 3-in-1 AC5250PT are able to handle the workload required for cleaning large indoor spaces. At the same time, their ability to distribute clean air in spacious settings does not make them wasteful in terms of energy consumption. They require very little electrical energy to operate.
Each of the two models relies on a triple-filter system that removes harmful and irritating contaminants from the air. The 3-in1 model contains a special Pet Pure HEPA filter for animal fur. The Elite 4-in-1 and the 3-in-1 contain UV-C light bulbs, which give them extra germ-killing ability.
It is incredibly easy to control the UV-C light, the timer, the fan speed and everything else regarding the operations of both these models because of the digital control panels on the top of the units. The long lifespan of the filters in both of these models is also an attractive factor. The cherry on top is that Guardian Technologies also gives a generous manufacturer’s warranty on both these products.
Size and Placement
The major difference that you will find between the GermGuardian Elite 4-in-1and the GermGuardian 3-in-1 is in their color and shape. Of course, there are minor differences between the units other than their physical appearances. The Elite model has a rectangular shape, which is more like a white tower. In stark contrast, the 3-in-1 is a tower but black in color with a more oval-like shape embellished with a chrome chevron.
Both the GermGuardian Elite 4-in-1and the GermGuardian 3-in-1models are 28 inches tall. The Elite 4-in-1 has a length and depth of 6.7 inches by 9 inches while the 3-in-1 model measures at 6.1 inches by 9.5 inches. The Elite 4-in-1 is heavier than the 3-in-1, but it is only a minor difference with their weight being 11.25 pounds and 10.5 pounds, respectively.
You can use both of these comfortably in large rooms. They have 6 foot long power cords, which allow you plenty of room to move them around, based on their relative distance from the wall outlet. Moving both of the machines around is easy due to their light weight.
Filters
Guardian Technologies went all out with both the GermGuardian Elite 4-in-1and the GermGuardian 3-in-1 . Both units have three major air filters. The purifiers contain a pre-filter responsible for keeping large dust, coarse particles and hair from even entering the machine and disrupting its operations. The filter is covered with a layer of activated carbon that eliminates smoke, food and pet odor as well.
Both of these filters also contain the HEPA filter. This filter traps 99.97% of germs and allergens in the air, which are as small as 0.3 microns. The HEPA filter in the 3-in-1 unit is a Pet Pure HEPA filter that is infused with an antimicrobial material. This stops mildew, bacteria and mold from accumulating on the filter.
As effective and lasting as the air filters on both these purifiers are, their owners should make it a point to replace the product filters after every 6 to 9 months to make sure that they keep performing at their best. Each of the purifiers has a filter change indicator that can alert you to replace the filters.
Replacing filters is a simple matter of removing the back panel with a push of a button and accessing the filters to swap them out. It is as simple as that.
Extras
While the air filters in both the air purifier models by Guardian Technologies will clear the air properly for you, the company went a step beyond by introducing some bonus features for both of the air purifiers.
Both the GermGuardian Elite 4-in-1 and the GermGuardian 3-in-1 have 5-watt UV-C light bulbs. These UV-C lights interact with a titanium dioxide photocatalyst in the machines to break down the viruses and bacteria right down to the molecular level, so that they are completely destroyed as they enter the air purifier.
The timers on both the purifiers allow you to limit the use of the UV-C light filters to 8 hours per day so that you can cut down on the energy consumed. Setting timing for the UV-C light filter or simply turning it on and off is a simple matter of pressing the appropriate option right next to the digital display screen on top of the air purifiers.
Fan and Efficiency
The thing that makes the filtration and purification system of both the GermGuardian Elite 4-in-1 and the GermGuardian 3-in-1 so efficient is the five-speed fan you will find in both models.
The fan in the Elite 4-in-1 model uses just 56 watts of power while the 3-in-1 one uses 62 watts. Their low energy consumption means your energy bill will never spike up because of the air purifiers. In order to give you more peace of mind for their longevity, Guardian Technologies gives you a 5-year limited warranty on both the models.
If you have taken a look at the CADR numbers for both the GermGuardian Elite 4-in-1 (AC5350W) and the GermGuardian 3-in-1 (AC5250PT), you might have noticed that the 4-in-1 has lower CARD numbers than the 3-in-1 model.
For the 3-in-1 model, the dust CADR is 139 cfm [cubic feet per minute], the pollen CADR is 149 cfm and the smoke CADR is 125 cfm. For the Elite 4-in-1 model, the dust is 122 cfm, pollen is at 130cfm and smoke is at 111 cfm.
Picking between these two brilliant products can be a nearly impossible task, considering how similar the two of them are. Both of them have an activated carbon-layered pre-filter and a UV-C light.
The GermGuardian Elite 4-in-1 and 3-in-1 have lengthy warranty periods, programmable timers and five-speed fan settings. They have long cords and digital displays, which makes them look a lot more expensive than they are.
Both the GermGuardian Elites are similar in size. The Elite 4-in-1 model has a rectangular shape and it comes in both black and white colors. The 3-in-1 model comes only in black. That being said, when it comes to long-term consumption, the Elite 4-in-1 uses slightly less energy than the 3-in-1 model.
Regardless of which GermGuardian air purifier model you choose, your investment will be quite rewarding for you and your family.
Located in New Mexico, Country Club Residence sits heavily on its own private golf. Heavily because this particular modern mansion overlooks the surroundings with a bold attitude claimed by the tough marble used to cover itself, the bold angles and height at which it resides.
We like to call it a dream home with attitude, the L-shaped, common shape for such mansions, is used here to take advantage of the light and ambiance of a south orientation, giving the inner home warmth and animating the interiors through the huge glazed windows with shadows and light.
This project has been envisioned by Migdal Arquitectos and despite the bold bulky silhouette, the interior tries to be as breezy and as transparent as possible in order to focus the viewers attention to the breathtaking surroundings, the cliff view mansion with a golf course behind it uses big glass surfaces to create smooth transition between interior -exterior and public - private . Even though the house does not claim any sustainable features the focus towards the surroundings and natural light is much appreciated and we would like to hear your opinion about it.
READ NEXT Water Cleaning Station Converted in a Striking Modern Mansion
How would you like to add a sleek and elegant kitchen faucet to your kitchen? Sounds good, right! The K-596-VS will give you just that.
It is one of the latest offerings by Kohler and can enhance the look and aesthetics of your space immediately. That’s not all; this one ranks high when it comes to convenience and durability. Once you have it placed in the house, rest assured that it will serve you for years to come.
Moreover, you can move the faucet head easily, clearing up space for larger utensils in the sink. We were very impressed by the kind of value that is added along with the impeccable design.
Moving on, we will talk about its features and the pros and cons in the following sections. This is then followed by a buyer’s guide, which will help you in making a decision. So, get your favorite beverage and read on to know all about them.
Three-function pull-down sprayhead of the faucet for kitchen...
This pull down kitchen faucet's Sweep spray creates a wide,...
We have listed the features here for your benefit. Read on to know them all!
Durability
We had no questions about the durability of this product after having seen it for the first time. It is constructed entirely out of premium metal, so it will be able to survive for years without corroding, even after being in constant contact with liquids all day.
Next, it has a valve that is made of ceramic, and it prevents cases of corrosion inside. Now, corrosion is a problem that is related mainly to faucets, but rest assured that you will not be bothered by it.
Moreover, it has a very protective finish and will resist corrosion. You do not have to worry about rusting, too, thanks to this layer. The brand claims that it will look new for years to come.
What we would recommend here is to keep cleaning the surface to enhance its durability and prevent minerals from building up. It is equipped with the MasterClean™ technology, which will aid you in the process.
Convenience
One of the most important features here is the convenience that is offered. This is a pull-down faucet that can be handled easily. You can work with one hand and use the other to hold kitchen utensils and work with them.
Next, the neck can be rotated in all directions, and you can move it at 360 degrees while working. This way, you can use the entire sink space when needed. It will also help you keep large utensils or cookware without the faucet interfering.
Moreover, we were impressed with its excellent ergonomics, and its implemented ProMotion® technology. It has a braided hose and a swiveling ball joint, which makes it flexible, allowing continuous smooth movement.
Another feature that increases convenience is the DockNetik® magnetic docking system. This will lock the position of the spray head after you have set it. So, the position stays even when you are not using it till you make an effort to change it.
Moving on, it has a temperature memory feature to ensure that the faucet remembers your preferred temperature. This will let you turn it on later to get water of the same temperature that you had obtained earlier.
You will love its 3-function spray head that helps in making its cleaning and entire operation process versatile. There is a sweep-spray option that will leave a powerful stream to help in handling a large amount of grease or resist stains on plates.
Then there is the stream option, which is slower and works with less force. This is perfect for easy and moderate cleaning needs. If you want to shift to a stronger flow, there is a button that needs to be pressed. The water force is then increased by 30 percent. We also loved the ease of access, and you can easily shift among modes.
What’s more, this even comes with sculpted buttons that can be used with soapy and wet hands. You do not have to wash your hands every time before touching the buttons.
Finish
This is indeed a very elegant and beautiful product that has 3 premium finishes to choose from. You can choose among matte black, vibrant stainless, and polished chrome. None of them tarnishes easily, and the sophisticated finish lasts for years to come.
Simply select one on the basis of your kitchen décor, and you will easily add to the overall ambiance. For example, if most of your cookware is made of stainless steel, go for the polished chrome, and it will fit into the kitchen just right.
Moving on, it does not take up too much space, thanks to its design. We were very happy about its compact size, which allows it to fit into narrow spaces.
On the other hand, if you have a minimalist kitchen, then the matte black finish will look good. It is stylish and will fit right in with solid colors.
Installation
When it comes to installation, there are generally 3 ways of doing it. Thankfully this supports both 3-hole and single-hole configurations. It will easily blend well with most kitchens, and the pack comes with all the supplies needed.
There are rings and lines already provided in the pack, so you can hope for a smooth process without the need for professional help. If you have prior experience, choose the DIY route!
Some customers report that they have faced issues with leakage over time. However, this item is backed by a limited lifetime warranty and comes with excellent customer support. So, if you face any issues, rest assured that the brand will help you solve them.
Next, the product is not fit for low spaces as it has a considerable height. Measure the space that is available first and compare it with the size; if it fits, only then proceed to purchasing it.
In case the space is low, and you are using the sweep-spray mode, water might get spilled as it is very strong. This happens, especially if you have a small basin, but don't worry; you will get the hang of it over time. Once you do, this same feature will help you clean dishes quickly.
In this section, we will discuss some of the requirements that you should check for before purchasing. Make a note of this before proceeding, and you should face no issues.
Flexibility
Kitchens will see utensils and cookware of different sizes. And sometimes, the faucet may act as a hindrance and reduce space. Now, if you can turn the faucet head up to 360 degrees, then it can be moved out of the way when needed. This will allow you more flexibility, and you can work with ease.
Temperature
Gone are the days when you would only get cold water from your kitchen tap. Now in most cases, the water will be temperature controlled. Check if the faucet remembers the temperature and water flows at this same temperature even when turned on later.
Resistance
Since faucets are going to see a lot of water, it is important that the material used should be resistant to rust and corrosion. If that is not the case, you can get contaminated water that touches the rusted interiors before falling out.
The outer surface could also look old and dull. But with a proper metal finish and ceramic valve, you can get clean water at all times. Remember to check the description carefully before purchasing.
Spray Patterns
Some utensils can be delicate and would need a moderate or light flow of water, while some stains might require a lot of water force. A good product should be able to offer you both at the same time. You should have an option to shift between them when needed. Also, the shifting process should be easy. A simple button works great in this case.
Kohler K-596-VS Verdict
If you were looking for the ultimate faucet that ranks high in style, durability, and convenience, then you have finally found a match. The Kohler K-596-VS offers the perfect combination of features and will look beautiful.
Just ensure that it is installed well. If you have no experience with installation, it is best to get professionals for the task. But if you have worked with faucets before, you may immediately start the process as all the parts are provided.
With this, we will take your leave. Let us know if you have any further queries in the comment section below.
Owls are majestic creatures with a mystic allure and today these odd creatures are one of the most loved wild animals, slowly becoming a symbol for peace, calm and intelligence alike. The short adorable tutorial “Learn How to Draw an Owl “that follows is the fifth part of our Cool Things to Draw Collection that we highly encourage you to visit if you`re interested in sketching and drawing. More information on owls and the tutorial itself, after the break.
To further emphasize the educative process, fun owl facts for kids have been presented below, the points will cover various features from the way they hunt up to the title of a group of owls, cast a glance below.
More than 200 different owl species have been discovered to date.
Owls are active at night, nocturnal animals.
Interesting enough, a group of owls is entitled a parliament.
Most owl species are known to hung insects but a select group hunts small mammals and other birds as well, several owl species do hunt fish as well.
Owls use a set of powerful talons, their claws, to hunt, catch and kill prey.
A flat face and immense eyes are characterizing the face of the owl and to make things even more interesting, owls can turn their head 270 degrees.
Owls are farsighted, this basically means that they can`t see things close to their eyes properly.
Compared to other birds of prey, owls are very quiet in flight.
The owl uses the coloring of its feathers to help itself blend into their environment, camouflaging.
Barn owls are easy-recognizable by their heart shaped face.
Learn How to Draw an Owl
STEP 1 - one circle and one ELLIPSE
Easily enough the tutorial starts with one circled placed on one ellipse, both placed on the same vertical axis, each one with its horizontal axis.
STEP 2 - start shaping the body and draw the eyes
The body will now receive the bird's wings in different positions, its eyes will also be shaped.
STEP 3 - Start detailing the head of the owl
The owl`s head is not simply round. To bring forward the charm of the owl in this step preparatory lines for the head of the owl are being shaped.
STEP 4 - Detailing the head and the body
Our little owl now receives details on its wings and belly, the head receives here details as well.
STEP 5 - Beak eyes and more details
Things are getting there, detailing the eyes and placing the beak are now shaping the face. The body also receives additional detailing here.
STEP 6 - erase the construction lines and add more details
The construction lines are now gone, our little owl received its talons, claws and a cute hairstyle.
STEP 7 - place a branch under the owl and detail the eyes
Creating a little context is key. Pay attention to little details in order to humanize the petite creature. Here the eyes receive depth and a branch becomes the first background piece.
STEP 8 - add shades
The shading step is as always optional yet this helps one contour its drawing beautifully, providing depth, transforming a 2D volume into a 3D one.
STEP 9 - CREATE A BACKGROUND
Here creativity steps in. The entourage of your owl can be constituted of petite bird friends or simply a beautiful tree with a dense foliage. In the same manner flowers can be placed here and there.
STEP 10- Color The scene
Do not leave one spot untouched and make your drawing, your own. Drawing is a very beautiful process and so is coloring, do your best to mix the two in a phenomenal scene.
The owl is a little animal that will surely raise the interest of your little one and hopefully the drawing and coloring process of this petite mystical creature will be both creative and educative for all parties involved. What do you think? We would love to hear your opinion on the subject in the comment section below.
This feature is part of the "Things to Draw"Collection of drawings realized by Homesthetics Magazine in partnership with Designaissance Studio. The contents of the tutorial are copyright protected as it is the collection itself; if you are interested on sharing the drawings on your website or magazine please contact the magazine. Feel free to print or share the page for educative purposes as this is the definitory purpose of our mission with this collection.
A petite baby octopus constitutes the focal element in our next tutorial “Learn How to Draw an Octopus “, illustrated as a very positive, fun character with a really cute look; this tiny octopus is part seven of our Cool Things to Draw Collection that we highly encourage you to visit if you`re interested in sketching and drawing. More information on octopus and the tutorial itself, after the break.
Five educative interesting fun facts about the octopus have been presented below to complete the educational component of drawing and sketching, cast a glance:
The octopus is a marine animal that enters the mollusk category. The mollusk category includes soft bodied animals only.
The body of the octopus has no less than eight arms, each one bearing two rows of suckers, the rest of body is soft and its brain is highly developed.
The octopus spends a great deal of time hidden, camouflaged.
Most octopus reach 1 meter in length, about three feet long.
The octopus is known to be the most intelligent creature of the invertebrates, animals without a backbone.
Learn How to Draw an Octopus
STEP 1 - draw a circle
A simple circle and its two axes are the first simple step towards a cartoon octopus.
STEP 2 - completing the circle
The hat like shape that now appeared on the octopus is characteristic to the octopus and squid`s shape.
STEP 3- drawing its eyes
To highlight the circular attribute of the animal`s head the big, about to become, cute eyes, have been drawn on the edges of the head. A new set of axes highlights the slightly tilted head of the octopus.
STEP 4 - details to humanize the character
Octopus have no regular mouths nor do they have noses but in order to humanize our little character a bit we have drawn a mix between the two. The simple lines almost looks like a smile, a positive look.
STEP 5 - setting a direction for the arms
Simple lines will set the position and direction of the new arms. Short tentacles make a great fit with a big head, notice the cartoonist relation between the two.
STEP 6 - draw the tentacles
Simple cylinders constitute the tentacles now.
STEP 7 - detail the eyes with cuteness
STEP 8 - erase construction lines add shading and details
The octopus receives details on its tentacles and face, construction lines are erased and simple shades offer the drawing depth.
STEP 9 - create a context
The drawing is now ready to receive context and you have full liberty in this dimension. Get creative with simple elements and imagine a realm in which everything is possible.
STEP 10 - color the scene
Gaze for a moment at your drawing in black and white and prepare for coloring, you`ll enjoy every minute of it.
The process of drawing and coloring should be enjoyed by parents and children alike at the same table, numerous studies have proven that going through this process together can be highly beneficial for both parties. What do you think? How do you see drawing and coloring? We would love to hear from you in the comment section below.
This tutorial is part of the "Things to Draw"Collection of drawings realized by Homesthetics Magazine in partnership with Designaissance Studio. The contents of the tutorial are copyright protected as it is the collection itself; if you are interested on sharing the drawings on your website or magazine pleas contact the magazine. Feel free to print or share the page for educative purposes as this is the definitory purpose of our mission with this collection.
Zebras are animals known by any child, animals that help us define the letter Z in the alphabet, animals that have helped us tittle our pedestrian crossings today. They represent so much, they`re a powerful icon for the entire humanity thanks to their playful clothes. In a short adorable tutorial “Learn How to Draw a Zebra “ we will present this special character in a fun, educative light, this is the sixth part of our Cool Things to Draw Collection that we highly encourage you to visit if you`re interested in sketching and drawing. More information on zebras and the tutorial itself, after the break.
To enhance the drawing and coloring process, to highlight the educative component of the artistic environment, we have curated a list of fun facts about zebras that could come in handy, complementing the act with interesting knowledge.
Part of the equidae family, zebras are basically relatives with donkeys and horses.
Numerous theories have attempted to explain the zebras clothes and more are relating it to camouflage.
The wild zebra lives in Africa.
The common zebras are equipped with tails of around half a meter or 18 inches.
The pedestrian crossing wears the name of the black and white animal today.
To escape a predator a zebra would run from site do side when chased.
The eyesight and hearing of a zebra is highly developed, an evolutionary adaptation to its environment.
A zebra does not stand down to sleep, they sleep standing up.
A zebra`s diet consists mainly of grass.
One could find out the zebra`s mood based on its ears.
In 2005 in the animated film Madagascar a zebra entitled Marty stole the show.
Learn How to Draw a Zebra
Step 1 - one ellipse like shape and half a circle
The head of a zebra will be formed roughly in our first step with one ellipse like shape and one circle that would position the nose roughly. .
STEP 2 - detailing the head in perspective
To add the perspective dimension considering the axes built previously a nose detail an eye and two years have been drawn.
STEP 3 - shaping the body and highlighting directions
The zebra shaped here will be resting by a tree, this is how we`ve envisioned it and, as result, it resides under the horizon line. We will use the horizon line to roughly position the limbs of the zebra.
STEP 4 - shaping the limbs -drawing a book
Simple cylinders will form the limbs of our zebra, it will hold a book, it`s probably the Things to Draw Collection in which it was featured.
STEP 5 - detailing the zebra`s head
To highlight the great eyesight of the zebra and its attention to the wild things in nature we have equipped our zebra with glasses and curious eyes.
STEP 6 - erasing construction lines and drawing the mane
A zebra too has a mane and here it has been drawn proudly. The construction lines are gone, the cute allure of the animal surfacing.
STEP 7 - detailing the stripes tail teeth and EARRINGS
In the last step prior context and shading we have added the magic of the zebra, the stripes. The zebra`s glimmer in its eyes has been highlighted, an earring has been drawn for coolness and a tiny tail is now present.
STEP 8 - drawing the context and basic shading
The zebra is resting under a tree, reading happily in a green meadow, pretty far away from its natural habitat. Get creative in this step and create your own context, your own setting.
STEP 9 - coloring
It goes without saying that the sky is rarely purple and zebras are never blue but the realm of imagination and creativity is, happily, far away from our reality. Zebras do not wear earrings by choice nor are they allowed to read. Color your way through happiness and go wild with colors. There are no rules here.
A zebra is a character that our children have to meet in one form of another, the simple act of drawing can introduce in their life the concept of pedestrian crossing as a parallel, tying connections, helping them associate different things, helping them understand a little part of our world. What do you think? We would love to hear your take on the educational role of drawing and coloring and how you use it today.
This feature is part of the “Things to Draw”Collection of drawings realized by Homesthetics Magazine in partnership with Designaissance Studio. The contents of the tutorial are copyright protected as it is the collection itself; if you are interested on sharing the drawings on your website or magazine please contact the magazine. Feel free to print or share the page for educative purposes as this is the definitory purpose of our mission with this collection.
A splendid illustration containing one snail and sunflower depicts the natural environment in all its beauty. The tutorial "Learn How to Draw a Sunflower and a Snail "that follows is the fourth part of our Cool Things to Draw Collection that we highly encourage you to visit if you`re interested in sketching and drawing. More information about sunflowers, snails and the tutorial itself, after the break.
A few fun snail facts for kids and a few interesting facts about the sunflower have been featured below, these are here to sustain the drawing educative process. Cast a glance.
Snails are part of the gastropod mollusks, the family also includes sea snails, freshwater snails along land snails.
Snails can have either lungs or gills depending on habitat and species.
Snails without a shell are called slugs.
The giant African land snail reaches about 38 cm, about 15 inches. It can weight 1 kilogram, the equivalent of 2 lb.
The largest living snail species is entitled Syrinx aruanus and it can reach 90 cm, 35 in in length. The spectacular snail can weight 18 kg, 40 lbs.
The common garden snail averages 45 meters an hour making the snail one of the slowest creatures on our planet.
The mucus left behind is produced by the snail to reduce friction and advance faster. This element also helps the snail move upside down.
Snails live 5 to 25 years depending on the species.
In agriculture and garden snails are consider pests as they eat the leaves and stems of various plants.
The expression "a snail`s pace" describes a very slow and inefficient process where "snail snail" is commonly used when sending regular mail rather then electronic mail.
A few interesting facts about sunflower follow, stay tuned !
The flower head of the sunflower is actually made of tiny flowers called florets, this makes a large inflorescence. The central florets look like the center of a regular flower yet the outer florets look like simple yellow petals this forming the ensemble of the false flower. The whole act is brought on to help insects and birds see the sunflower easier, after pollination every tiny flower will produce the seed that we all know.
A sunflower can reach 3m in height, 10 ft and the head 30 cm, 11.8 in, in width.
The Guinness World Record for the tallest sunflower has been recorded in Germany for a Sunflower of 8.23 m, 27 ft.
A series of Sunflowers became famous after famous dutch painter Vincent Van Gogh painted them.
The flowers in the sunflower head are cluttered and each floret is oriented to the neighboring floret at the golden angle of 137.5 ° thus creating interconnecting spirals. The numbers of left and right numbers are consecutive Fibonacci numbers. Usually 34 spirals in one direction and 55 in the other are shaped, the largest sunflowers can create 89 in one directions and 144 in the other.
The sunflower is native to the Americans and Native American Indians were known to use it for food, oil, bread, medical ointments and dyes. Today Kansas is known as the Sunflower state. The sunflower is the national flower of Kansas and Ukraine alike.
Sunflowers are used to extract toxins like arsenic, uranium, lead from contaminated soil. Sunflowers were used to remove toxins from a pond after the Chernobyl disaster, similar projects were instated after the Fukushima disaster.
The sunflower head is not actually tracking the sun across the sky during the day, it is a misconception. The young flower buds do have a movement similar in behaviors and the process is called heliotropism but the mature flower points into a fix direction, commonly an easterly one.
Learn How to Draw a Sunflower and a Snail
STEP 1 - one ellipse and one circle
Draw one circle at the ground level and an ellipse that will become the sunflower gazing at the snail. The body of the sunflower can also be fixed here with a simple line.
STEP 2 - more circles and one more ellipse divided
Add two more circles for the snail, these will help you represent his body. The ellipses on the sunflower should be divided at this step to form the petals further on.
STEP 3 - shape the petals and detail the snail with eyes and a body
The petals have arrived and so did the rest of the sunflower. The snail now has a body constituted from the previously drawn circles. Two new circles will now look at the sunflower, about to form the eyes.
STEP 4 - humanize the drawing with faces
To form a three dimensional sunflower expression use construction lines aimed to articulate the round surface on which the eyes and mouth will reside. On the snail things are a little easier as his mouth is more or less in the same plane. His eyes should be now shaped with concentric circles in the spheres, circles earlier drawn. In this tutorial they kindly salute each other through a smile. Two leaves have also been added to the sunflower`s body.
STEP 5 - Erase construction lines and add details
In this step things become clearer. The eyes of the snail are being detailed along with the sunflower`s petal. The construction lines can disappear making things crystal clear.
STEP 6 - detail the scene
The beautiful meeting between the two happened in nature, we are to showcase this by adding additional elements into our composition. One more flower in the background, a bee and grass that grounds the scene joined the scene beautifully. Get creative and shape something unique.
STEP 7 - Add Shades
This step is optional yet the whole compositions gains depth and a bit of contrast when simple shades are added. The sunflower`s shade over the flower in the background makes the biggest difference here.
STEP 8 - color the scene
It is time to make things positive, colorful and cheerful. Take the brightest and happiest colors you have and color the piece and have fun in the process. Needless to say that the new artwork should at-least go up on the fridge if it`s not to be framed for the living room.
The beautiful scene is done and hopefully this process has been productive and educative for you and the little one alike. What do you think? We would love to hear from you in the comment section below.
This feature is part of the "Things to Draw"Collection of drawings realized by Homesthetics Magazine in partnership with Designaissance Studio. The contents of the tutorial are copyright protected as it is the collection itself; if you are interested on sharing the drawings on your website or magazine please contact the magazine. Feel free to print or share the page for educative purposes as this is the definitory purpose of our mission with this collection.
Mickey Mouse is a celebrity today, the character changed the world, it made the mouse an entity that can now receive adjectives like cute and adorable from children, a group that might have never seen the animal in such a manner if it wasn`t for the cartoon character. The black and white show was followed by Tom and Jerry, a distinctive approach with a phenomenal success. These shows date back decades and yet they remain relevant, they are timeless, here to stay. The drawing tutorial that follows brings our own twist on a cute mouse in a scene that can be interpreted through numerous means as it portrays a mouse in a cat costume eating its cheese happily. The short adorable tutorial " Learn How to Draw a Mouse" is a fun twist meant to represent the mouse and cat under an educative light, it is the 8th tutorial in the Cool Things to Draw Collection that we highly encourage you to visit if you`re interested in sketching and drawing. More information on cats and mice after the break.
To further emphasize the educational role of the drawing tutorial fun facts about cats and fun facts about mice have been curated, learn more about these animals in the following rows.
Mice
The plural of the mouse is mice, the animal is part of the rodent order and it is a small mammal widely spread around the world.
Characteristic features for the mouse are the pointed snout, petite round ears and long tails with little to no hair.
In the world there are more than 30 species of mice.
The house mouse is the most common species that one can encounter, other common species that can be found near the house are the American white-footed mouse, the field house and the deer mouse.
The mouse is a nocturnal creature with poor eyes-sight to which they make up with good hearing and smell.
Numerous predators target mice, a few common ones are cats, wild dogs, foxes, birds of prey and snakes.
In the wild, the mouse is a herbivore that feeds on fruit and grains from various plants.
The tail of the mouse can grow as long as the body.
The whiskers of the mouse can sense changes in temperature, with the whiskers a mouse can also map its path with ease.
A complex burrow nestles the mouse, this always features a long escape route and long entrances. The petite rodent is very clean and tidy being known to have separate areas for food, sleeping and toilet.
A mouse eats at least 15-20 times a day and their home is always built close to a food source to avoid travelling long distance. Their food source is always 8 meters away or closer.
Mice and rats are the most used animals for experiments.
In Zambia and northern Malawi the mouse is a delicacy and they`re often consumed as good protein source.
In the wild a mouse lives up to six months due to the immense number of predators. In laboratories or grown indoors as a pet the mouse can live up to two years.
1928 brought to us the Micky Mouse of Walt Disney as the first mouse character in children cartoons, multiple popular mice followed such as Speedy Gonzales, Jerry from Tom and Jerry and Stuart Little.
Cats
Cats are by far the most popular pet in the world, at least 500 million domestic cats being recorded so far.
The connection between human and cats is at least 10000 years old.
To conserve energy cats sleep 13-14 hours a day and they`re adapted to hunt small mice and rats, being equipped with claws and teeth adapted to the practice.
One group of cats is entitled a clowder, the male cat is called a tom where the female cast is called a molly or a queen, petite, young cats are widely known as kittens.
Domestic cats weight from 4 kilograms (8 lb 13 oz) to 5 kilograms (11 lb 0 oz) yet the record for the heaviest domestic cat is recorded at 21.297 kilograms (46 lb 15.2 oz).
Known to be lethal hunters, cats walk their back paws in almost the exactly same place as the front paws in movement thus keeping noise and visible track to a minimum, sneaky predators.
Cats unlike mice have powerful night vision that allows them to see at level of lights six time lower than humans, this feature works extraordinary with the excellent sense of smell and powerful hearing.
The older cats are known to be aggressive towards kittens.
Domestic cats and especially kittens adore to play, chase toys and play fight. In their play kittens also practice their skills for hunting and fighting.
The average cat lives 12 to 15 years and they spend a large amount of this time licking their coats to keep themselves clean.
The feral cat is seen as a pest and a natural threat to native animals.
Learn How to Draw a Mouse
STEP 1 - draw a circle
Start small, draw a simple circle along with its horizontal and vertical axes.
STEP 2 - add new axes
These will help you determine one ellipse that is about to border the cat costume on the petite mouse.
STEP 3 - start drawing the costume
The ellipse is now here along with the teeth of the cat costume and its eyes.
STEP 4 - the snout surfaces
Mice are known thanks to their adorable snout, so differently portrayed by each legendary mouse character in cartoons. The snout of our mouse is cute and short.
STEP 5 - Draw the eyes
In cartoons the eyes are highly relevant, we`ve drawn them big here and they are to become very cute, soon.
STEP 6 - Add ears
The cat costume now receives ears.
STEP 7 - Drawing the Body
On the vertical axis now a second circle appears to determine the belly of the cat costume.
STEP 8 - draw the tail hands and feet
The petite mouse will have his hand happily positioned on the belly, grasping the cheese triangle with immense delight.
STEP 9 - Erase the construction lines and draw the cheese
The cheese surfaces after the construction lines have been erased, the eyes are detailed, stitching appears as well as a patch that makes the costume more humane.
STEP 10 - shadowing and detailing
Ears are now more detailed along with the cheese and tail. Shadows have also been added here and there to offer depth.
STEP 11 - Add more shades and detail the body
The eyes of both presences have been detailed along with the body, more shadows have been added.
STEP 11 - create a background
An epic illustration set the scene for the petite mouse portraying the set from which he chose his food. Be creative, feel free to improvise your own background.
STEP 12 - color the scene
It is time to have some fun, color the entire scene with as much color as possible. Don`t leave a spot blank, have fun in the process.
The mouse is and will remain a big presence in cartoons and your setting is surely worthy of being part of this movement. Feel free to add you drawing in the comment section below or email it towards us and we will add it in this article proudly. We would love to hear from you in the comment section below.
This feature is part of the “Things to Draw”Collection of drawings realized by Homesthetics Magazine in partnership with Designaissance Studio. The contents of the tutorial are copyright protected as it is the collection itself; if you are interested on sharing the drawings on your website or magazine please contact the magazine. Feel free to print or share the page for educative purposes as this is the definitory purpose of our mission with this collection.
In the Cool Things to Draw Collection a world-wide beloved character is the element of our first drawing tutorial : the deer, a splendid cartoon scene that can bring the memory of Bambi into the picture. The tutorial will help you learn how to draw a deer in her natural scenery with a simple step by step tutorial. The beautiful picture to draw in this tutorial can become an important corner in the creative development of a child as basic shapes are being depicted more realistic, with each step the image gracefully slipping into the world of fantasy. The tutorial starts with basic shapes and uses simple axes for construction, ending with the simple entourage of our deer, the natural habitat.
Use bright colors to bring your drawing to life along your little one and proudly display the new wall art piece.
A handful deer facts for kids might come useful before one starts the simple drawing tutorial with the little one; cast a glance below:
The beloved deer is in the same family with the moose, reindeer, and elk, all part of the Cervidae family.
A male deer changes his antlers every year.
The antelope greatly resembles the deer yet the difference is in that they have horns instead of antlers and horns unlike antlers are not grown and replaced each year.
Various species of deer have been hunted across time for their antlers, today the haunting legislation preventing this as much as possible.
The large male deer is called a "stag", the male deer is called a "buck", the female deer a "doe", a young deer a "fawn" and their entire group is called a "herd".
The long legs of the deer are adapted to their environment, a construct of evolution.
Deer are known to be great swimmers and jumpers alike.
All deer are born with white spots but they fade out usually within a year.
The first steps of the deer are taken in half an hour after their birth.
Hopefully the facts above have been found interesting so without further a do let`s dive right into the tutorial.
Learn How to Draw a Deer
STEP 1 - Draw one ELLIPSE and one circle
Simply start by drawing the horizon line and a construction ellipse that would describe the body of the deer . The head construction lines follow, a circle should be placed asymmetrically on the top right side of the ellipse, simple lines point the intention of future elements like the ears, big eye pointed towards us and the nose of the deer.
STEP 2 - Draw the ears and nose - start detailing the head
The deer will be greatly characterized by its beautiful and innocent look so immense attention was given to her expression. The eyes are big as a result and the head even features a sweet haircut. Follow the lines cautiously and keep in mind that everyone's' results will be beautiful and quite different.
STEP 3 - Finalize the head lines and proceed on the body
The body lines should first and foremost depict the legs position as these might raise the biggest difficulties. Take your time and find the right look infused with naturalness. An eye contour has been illustrated as well.
STEP 4 - Add a tail to balance the body and shape the legs
To ensure that the legs are well balanced on the torso a small cute tail should be added. Start detailing the eyes to bring the beautiful drawing to life.
STEP 5 - Finalize the legs and detail the head -erase the main construction lines
Once you`re satisfied with the legs and the body is shaped you can add the beautiful to-be-white spots, powder the nose and add glare to the eyes of this extraordinary creature and erase the construction lines.
STEP 6 - place your deer into its natural HABITAT
Start contouring the main element with vegetation of different kinds and a sun. Here the scenery can be changed extraordinary, creativity coming into play. The happier the décor, the better.
STEP 7 - Add simple shadows
Depending on where you`ve positioned the sun one ought to place simple shades now, these can be a highly educative lesson for the little but moreover they offer great depth to the drawing, something that really brings the deer forward from that lush vegetation.
STEP 8 - color your drawing
Get coloring ! Your beautiful artwork is now ready to receive color and here too the individual should get creative as possible. Enjoy this splendid moment and do not stop till the artwork is complete.
The simple act of drawing is a great way to relief stress, a simply extraordinary method of encouraging the development of the child`s physical, cognitive and emotional abilities. Drawing is an acknowledged technique used to share knowledge with the little one, each drawing being an opportunity to share interesting facts about the chosen topic and art itself.
What do you think? We would love to hear your opinion about this swift tutorial in the comment section below.
This feature is part of the "Things to Draw"Collection of drawings realized by Homesthetics Magazine in partnership with Designaissance Studio. The contents of the tutorial are copyright protected as it is the collection itself; if you are interested on sharing the drawings on your website or magazine please contact the magazine. Feel free to print or share the page for educative purposes as this is the definitory purpose of our mission with this collection.
In this brief tutorial one will learn how to draw two of the world's most beautiful elements : the butterfly and the flower. Colorful, vivid and full of joy in sculpted shapes, the tutorial "Learn How to Draw a Butterfly on a Flower" is the third part of our Cool Things to Draw Collection. We strongly encourage you to cast a glance on the whole series if you are interested in drawing and sketching. The tutorial on how to draw a flower and how to draw a butterfly as well as some interesting things about the butterflies, after the break.
Drawing can be highly educative and it could play an important role in the development of the little one as the act itself boosts physical and cognitive development whilst encouraging social interaction, creativity, autonomy and confidence. Use fun facts about butterflies to raise the interest of the little one, these facts cover multiple points varying from their life-cycles to their diet to keep things interesting, cast a glance below.
Check out our range of fun butterfly facts for kids. Learn about the life-cycle of butterflies, their wings, what they eat and much more. Read on and enjoy a variety of interesting information.
Butterflies are insects and their life-cycle is split in four parts as they evolve from egg to larva - caterpillars to pupa - chrysalis to the butterfly adult status.
The butterflies have their own special glues with which they stick their eggs to leaves
Most caterpillars consume plants, they`re herbivores.
Mature, fully grown caterpillars find a suitable twig or leaf that they like before shedding the outside layer of skin to reveal a hard skin also known as chrysalis.
From a chrysalis an adult butterfly will eventually emerge; it will wait for a few hours for its wings to be filled with blood and dry properly before taking the first flight.
In the adult stage a petite butterfly can live from a week to a year, depending on the species.
The butterflies has four wings, four colorful wings with unique patterns realized from tiny tiny scales.
Butterflies feed on the flower`s nectar.
The feet of a butterfly contain taste receptors.
The exact number of butterfly species is unknown yet scientists estimate somewhere in between 15000 and 20000.
Bird-wing butterflies have larger, angular wings and are known to fly in a similar way to birds.
The Monarch butterfly is known for its long migration, traveling a great distance that sometimes exceeds 4000 km. The female will lay eggs once it reaches the destination and a new generation of monarchs will travel back to complete the circle.
Learn How to Draw a Butterfly on a Flower
STEP 1 - draw axes and sketch the first volumes
An ellipse and one offset on two axes will shape the beginning of the flower where two ovals will form the wings towards us, these will be backed by two offsets to form the third and fourth wing.
STEP 2 - draw an additional ellipse and split it
The new part will be naturally sectioned into smaller pieces only to form the petal further on.
STEP 3 - shape the flower petals
Once the petals are shaped, the flower awaits the butterfly to shine, its sculptural presence being very close to perfection.
STEP 4 - erase the flower construction lines and give attention to butterflies
The construction lines will disappear to surface your epic flower drawing. The butterfly can receive its petite beautiful body and with new construction axes additional butterflies drawn in two dimensions will join our drawing.
STEP 5 - detailing butterflies
Get creative with the new axes and shape the butterfly creatively, differently, showcase diversity at different scales. The construction lines of the first butterfly are now gone.
STEP 6 - shaping wings
We have now drawn the bodies of the new butterflies and each butterfly received a different set of wings. The most sculptural presence is naturally the butterfly drawing in three dimensions.
STEP 7 - detailing the drawing - create a context by drawing more flowers
All the construction lines have been erased and to emphasize the drawing various flowers have been added, once again all the flowers are different to highlight the naturalness of the natural environment.
STEP 8 - intricate flowers and butterfly wings
To complete the drawing, patterns are required on the wings of the butterflies, these will define them from various other insects, these will give them authenticity and sheer beauty in their habitat now enhanced by more vegetation. Be creative, use different shapes and whatever motif crosses your mind. Do your best to make each butterfly different and have fun in the process.
STEP 9 - add color
A butterfly without color would not be complete. Pick your wildest colors and complete your drawing.
What do you think about the exemplary butterflies above? We would love to see your butterfly drawing in the comment section below.
This feature is part of the "Things to Draw"Collection of drawings realized by Homesthetics Magazine in partnership with Designaissance Studio. The contents of the tutorial are copyright protected as it is the collection itself; if you are interested on sharing the drawings on your website or magazine please contact the magazine. Feel free to print or share the page for educative purposes as this is the definitory purpose of our mission with this collection.
Doodling is one of the most creative ways to spend time in moments of great boredom. Doodling can often help you relax seamlessly whilst passively improving your artistic skills, slowly developing the creativity and design lines indirectly. Needless to say that doodling can be done passively, without involving thinking, a great way to enhance your multitasking in an epic manner. In the following article we will present a fast doodle defined by density and diversity, one that captures creativity in a spectacular shape; the tutorial "Learn How to Doodle "that follows is the second part of our Cool Things to Draw Collection that we highly encourage you to visit if you`re interested in sketching and drawing.
A few tips on doodling will be featured here before we get to the tutorial itself; feel free to skip these if you are an experienced doodler just searching for inspiration.
At one point or another everyone will shape his own style of doodling so do your best to surge inspiration from all possible sources in the search of incredible. You`ll surely find a line that you`ll love and in the attempt to replicate that type of design, your own style will emerge. Doodling might take a while to actually look exactly like you expect it to look but worry not, practice and practice, results will surface.
Always focus on your drawings, follow your instinct, do not worry about the opinion of the ones around you on your doodles.
Learn from your mistakes and use them as guidelines in future doodles, they`re part of your work of art nonetheless.
Draw what you see around you caricatured if you`re short on inspiration. Try to copy simple items and add your own twist.
Doodling is based on either simplicity or on density. Small or huge the doodling should be. Density can come from the number of items and their scale not from details on the items themselves. Play with the scale.
It is not uncommon to find yourself doodling the same composition over and over again. Do your best to think out of the box and stretch your goals and creativity; reinterpret the design, add new elements or change it altogether.
Doodles can be simple patterns or complex compositions with multiple focal points. Play, experiment.
The doodles are supposed to look super fun by default, cartoonist and childish and expressive are great ways to describe them.
Real life items should appear only with your own twist, caricatured, with a cartoon look. Plant legs and arms on mundane items, noses and mouths and even a cool hairstyle can be considered.
Do not copy the doodles of another artist, surge inspiration but once you start doodling close all sources of inspiration and draw from creativity.
Draw stuff that you love. Cool things to draw like personalized animals, plants, items that you like, you are familiar with and are actually personal can become extraordinary characters in your little scene.
Don`t use an eraser. Doodling is about movement and flow, if you have wronged something to your opinion try to transform the mistakes into an advantage without spending time to make it perfect. It should feel free and fun, not perfect. The doodling scenes are perfect for each and everyone, there is no universal truth.
The reality should be distorted if it is to appear in your doodles. Monsters and creatures of fantasy are common elements. Come up with your own characters and sculpt creativity and authenticity in your artwork.
STEP 1 - Start with a simple element
In doodling it is recommended to fill spaces naturally. Finish the element before starting with a new one. The first element can take a simple but characteristic position like a corner or the center of the page. Notice how the first element below resides in the lower left corner but the eyes are pointing towards the page, to what is about to be unveiled in the blank space.
STEP 2 - doodling is all about creativity
The second creature is a small cat-raccoon inspired genie that serves an ice-cream with floating arms, It can also be a balloon with cat-like features. A doodle should never explain itself.
STEP 3 - add new elements - diversity is key
Plants appear now along with the previously mentioned balloon. Shape whatever comes to mind while doodling and keep things creative.
STEP 4 - maintain a direction
To keep things tied together and have a structure maintain a simple direction in the early stages. Don`t worry about the rest for now, tie one element to another .
STEP 5 - shape a beautiful odd universe while doodling
The whole should not make sense but the unity and the contents will surely mean something to you in one way or another. Even if it`s just a memory or an instinct shape, it is tied to you and it has memory.
STEP 6 - more of the same - reinterpret simple items
The flying carrot has now a counter-part in the drawing, a smaller rocket that flies around. A happy octopus lurks the scene and everyone seems happy.
STEP 7 - diversify and add more elements
Simply add elements and have fun while doing so, an aviator bird now gains attention in the scene.
STEP 8 - New stalker smiley face joins the scene
A new mushroom has grown into the clouds and a stalking smiley face does the job of smiling in the scene.
STEP 9 - continue until there is not blank space left
Simply continue to add elements until there is no space left. Dinosaurs, owls, flowers, ghosts, slices of pizza and even more happy clouds can have a good time in your scene. Enjoy the process.
STEP 10 - Color your doodle
Color it all or simply add accents here and there. Shading should be addressed too if one attempts to create depth into the scene. Make no mistake, any color can be used on absolutely any shape, it doesn`t have to be real or anchored in reality in any way. You direct everything.
The tutorial of a doodle naturally is not a tutorial per-say as the entire act of doodling, the construct of creativity has no rules and should be in no way guided. One ought to search for something beautiful in his mind only, in his desires and childhood dreams, creativity lies in each and everyone. Do your best to achieve the incredible and doodle or sketch as much as possible. Drawing is one of the most beautiful activities that one could do.
What do you think? We would love to hear from you in the comment section below.
This feature is part of the "Things to Draw"Collection of drawings realized by Homesthetics Magazine in partnership with Designaissance Studio. The contents of the tutorial are copyright protected as it is the collection itself; if you are interested on sharing the drawings on your website or magazine please contact the magazine. Feel free to print or share the page for educative purposes as this is the definitory purpose of our mission with this collection.
Sure, it may sound easy, but choosing the right screw to create long-lasting joints and hold particle boards together is challenging. Of late, Kreg has emerged in popularity, but which Kreg screws should you choose for joining particle boards together?
This guide reviews the three best options that you must consider. I have also provided a buyer’s guide to help you make the right choice.
500 Count Pack: Includes 500 zinc pocket-hole screws for...
Coarse Thread for Soft Materials: Optimized for softwood and...
What we like
Self-tapping auger eliminates the need for predrilling
Comes with rust protection
Holds the joints strongly without splitting particle boards
Large diameter steel shank adds to their durability
What we don't like
Cannot be used outdoors because they aren’t weather-proof
Unable to decide which pocket hole screw you should choose for your DIY projects? The Kreg Zinc Pocket Hole Screws could be a perfect pick for your needs.
These 1 1/4” pocket screws are supplied as a pack of 500, so you can use them in multiple projects without having to order another pack in the near future. Each of the pocket screws is constructed of carbon steel, so they are resistant to rust.
Featuring coarse-style threads, the #8 thread screws are ideal for use on softer woods like plywood, oak, cherry, maple, hickory, ash, birch, poplar, walnut, and mahogany, along with particle board. What’s more, the coarse thread screws sport self-tapping auger tips, so you won’t have to predrill holes on the board to make room for them.
All screws boast a steel shank of large diameter, which makes them highly durable. That said, though ideal for a variety of indoor projects, the Kreg Zinc Pocket Hole screws aren’t meant for outdoor uses.
Unlike drywall screws, they have a maxi-loc head, meaning the underside of their head is flat. Hence, they hold pocket hole joints perfectly without causing the wood to split when you drive screws into them.
Not to forget, these zinc-coated screws are 1.25”, which makes them ideal for joining particle boards of about 0.75”.
The screws come with a washer head that prevents them from overdriving into particle boards. Besides pocket-hole machines, they are compatible with the Kreg pocket-hole jig, so you won’t have to splurge money on such tools. And what makes them popular among professional woodworkers is that they are engineered explicitly for pocket hole joinery.
Long story short, if you’re looking for an affordable alternative to stainless steel screws, these Kreg Zinc Pocket Hole screws will fit the bill.
Material: Carbon Steel | Exterior Finish: Zinc | Screw Size: 1 1/4" length | Number of Screws: 500
50 Count Pack: Includes 50 Blue-Kote pocket-hole screws for...
Coarse Thread for Soft Materials: Optimized for softwood and...
What we like
Three anti-corrosion layers protect screws from rust
Needle-sharp edges eliminate the need for pre-drilling
Case-hardened steel prevents damage to the screws
Self-tapping tip doesn’t split particle boards
What we don't like
Comes with an expensive price tag
The Kreg Blue-Kote Pocket Screws are blue in color and have square drives like wood screws that keep the bit in place, preventing them from slipping while driving.
What distinguishes this screw set from other Kreg screws is the three-layer anti-corrosion coating. When compared to others, these screws can resist rust 400 times better than zinc-coated screws. So, rest assured that they won’t rust despite being exposed to elements for a length of time.
However, this doesn’t mean that the screws cannot be used indoors. Owing to their functionality and sturdiness, you can use them for a variety of indoor projects, like constructing furniture.
Every pocket screw is made of case-hardened steel, so neither will they bend, break nor snap. Like most Kreg pocket screws, these screws feature flat-bottom heads so that they sit firmly in pocket holes.
You can use a Kreg pocket-hole jig or any other pocket-hole machine for drilling pocket holes on the particle board. Or, you can simply insert the screw with a screwdriver into the surface, thanks to the self-tapping tip.
Adding to that are their coarse threads that drive aggressively into whichever surface you drive them in. Over and above that, you can use these screws to drill pilot holes for other screws, so they are highly versatile.
Each of the Kreg Blue-Kote Pocket Screw packs comes with 50 screws, which is less in quantity compared to my previous recommendation. So, if you’re planning to join multiple pieces of particle boards to construct furniture pieces, you’ll have to order in bulk.
One noteworthy aspect of these screws is that they go inside particle boards and hold them very well. So, whether you use them in railings, patio tables, or benches, this screw pack from Kreg won’t disappoint.
All in all, if you don’t mind spending a tad bit on screws, the Kreg Blue-Kote Pocket Screws would be a worthy addition to your toolkit.
Material: Steel | Exterior Finish: Blue | Screw Size: 2-1/2" length | Number of Screws: 50
500 Count Pack: Includes 500 zinc pocket-hole screws for...
Fine Thread for Hard Materials: Optimized for hardwoods and...
What we like
Zinc coating resists rust
Smooth shank keeps the joint together tightly
Self-tapping tips tap the hole as they are driven
Square drive keeps the bit in place
What we don't like
Screws aren’t weather-proof
On the hunt for fine thread screws for your next DIY shelf or cabinet construction project? Then the Kreg Zinc Pocket Screws would be a perfect pick for joining particle boards for cabinets.
Similar to the SML-C125 - 500 Zinc Pocket Hole Screws, these screws are coated with zinc so that they don’t corrode due to exposure to moisture and oxygen. However, you must not use them outdoors because they are only resistant to rust. They won’t be able to withstand the damage caused by other natural elements.
In addition to that, the brand supplies these screws in a pack of 500, so you can complete multiple cabinet construction projects without ordering another pack.
Woodworkers usually prefer these #6 fine thread screws for attaching frames to furniture, including wood frames, because of their great holding power. Furthermore, the pocket hole screws come with a type 17 auger tip that self-taps their own pocket hole without causing the wood to split.
On top of that, every screw has a square-drive head that is perfect for 1 1/2” particle boards. As such, the bit won’t slip when you make efforts to drive them in the particle board. Interestingly, their large diameter smooth shanks coupled with flat-bottom heads ensure a tight joint. However, if you wish to enhance the longevity of your creations, consider using wood glue to bond the pieces.
As is expected, these screws feature case-hardened steel, which means they’re highly durable. That means they wouldn’t snap or break despite the heavy load.
All things aside, the Zinc Pocket Screws have a dry-lubricant coating that reduces driving torque and are finished in a bronze color. Besides Kreg Pocket-Hole jigs, they are compatible with various other jigs, so you won’t have to buy a new tool.
Material: Case-hardened steel | Exterior Finish: Zinc | Screw Size: 1” length | Number of Screws: 500
Things To Keep In Mind Before Buying Screws For Particle Board
Shortlisting the top three screws from a plethora of options wasn’t an easy task. So, if you’re still confused about which screw to choose, know you’re not alone!
That’s because there are plenty of factors that you need to consider before buying screws for particle boards. To help you pick the right one, I’ve shortlisted a few important factors and discussed them in detail in this buyer’s guide.
So, without any further delay, let’s check them out!
1. Material And Coating
Mostly, particle board screws are constructed of stainless steel or only steel– both materials are highly durable, extremely tough, and resistant to impact. This means that screws made of these materials won’t bend or break, despite exerting pressure to drive them in the particle board.
On top of that, many screws feature a top coating that lends extra protection to them. As such, such screws are resistant to corrosion, which makes them ideal for exterior use. Screws that are coated do not rust even if the particle board is submerged in water or exposed to oxygen.
So, when buying screws, make sure you check whether steel/stainless is coated or not and decide accordingly.
One thing to mention is that most people prefer using metal screws over drywall ones because of their superior holding quality. So, if you’re wondering whether you can use metal screws for particle board, the answer is yes!
2. Size
By now, you probably know that screws vary in size and length, so when shopping for them, don’t forget to check the two aspects. That’s because the size is the only thing that will determine if it would correspond to the width of your particle board or not.
Like, screws that are 2.5” would be ideal for joining particle boards that are 1.5” thick. Therefore, take into account the size of your board whenever you’re purchasing screws for your projects.
As a rule of thumb, add one inch to the breadth of the particle board you’ll be working on so that you buy the right size screw.
3. Tip
The tip of screws could either be blunt or sharp. While you can go for any of the two, I suggest going for the latter so that you won’t have to go through the hassles of pre-drilling holes in particle boards.
Top Kreg Screw For Particle Board Verdict
Whether a seasoned DIYer or a novice woodworker, having the right screws at your disposal is essential to complete your projects with ease. Just make sure you keep a table saw or circular saw handy and know how to cut particle board.
Now that you know the top three options from Kreg, were you able to choose one?
Though all three options from Kreg hold particle board joints exceptionally well, my favorite is the SML-C125 - 500 Zinc Pocket Hole Screws. They are durable and don’t really need to be overdriven into the particle board.
Nevertheless, if you’re looking for screws that are weather-resistant, the Blue-Kote Pocket Screws are a better choice. That said, I shall call the curtains for the day!
Does the smell of wet earth, freshly watered plants, and the desire to be surrounded by greenery appeal to you?
Although gardening may appear complicated, we assure you that with the right ingredients and lots of patience, you too can have a beautiful garden. However, it's essential to discuss certain aspects of mulch, vital for flower beds and vegetables.
You may have often used the substance without knowing what it does or noticing the available varieties. As a result, a working knowledge about mulch and its various types will help you take better care of your leafy friends.
In our guide, we've also highlighted how it differs from compost, the conditions you can use it in, and most significantly, why you need it. So, let's not waste time – grab your shovel, bring out the cart…
BENEFITS: Drainage, enhances appearance, water retention,...
Everything to Know About Mulch
What Is Mulch?
The primary question we need to answer before delving into the intricacies is - what is mulch? It's a type of substance you use with the soil to help in your landscaping needs. Furthermore, it provides the platform for your vegetables and flowers to blossom and is an integral part of the garden.
While certain types of mulch are better at water retention, some other varieties may improve your soil or control weed. To make the correct decision, you need to have a clear idea of your purpose and then get to work. Moreover, there is a type of mulch for every need and, therefore, you don't need to worry.
Why Should You Use Mulch?
In modern-day gardening, using mulch is no longer a choice but a necessity. Mulch provides the first layer of protection to the soil and keeps weeds and termites from harming the plants. It has excellent water retention properties and maintains the earth at an optimum temperature that proves to be the most suitable for plantation. Moreover, you have much to choose from depending upon the goal you've in mind.
For instance, you can use glass mulch for decorative purposes, while organic mulch enriches the soil with nutrients as it disintegrates with time. You'll develop a better understanding once we discuss the types, so let's start without further ado.
Rubber Mulch is highly useful, given its environment-friendly properties. It mainly comes in handy should you wish to follow the golden principles of - reduce, recycle, and reuse. In that regard, you can use it for growing plants, but for the best results, we suggest you use it as a material for outdoor flooring.
The main ingredient of the mulch is the rubber available from tires after it has been reduced to scraps. You can also use buffings, in which case you would have to scrape the rubber from semi-truck tires provided it hasn't been retreaded. Irrespective of your choice, the not so organic substance does have its use in organic purposes.
One of the benefits is that rubber is much better at insulating the soil from heat than wood mulches. Moreover, because of the non-porous property of rubber, the earth doesn't lose valuable moisture, and the mulch allows water to reach the deeper layers. Likewise, it slows down the growth of weeds to keep your garden in prime condition.
But that's not all, and there are advantages outside gardening as well. For instance, rubber mulch is highly recommended as a material for the construction of children's playgrounds. By employing rubber mulch instead of wood mulch, the area becomes safer given the elastic nature of rubber, which wood lacks. Children can, therefore, run about and play without being restricted by injuries.
Meanwhile, given the high lifespan of the material, you will get a reliable output for years to come.
Our next recommendation for you is bark mulch, which is derived from the bark of trees. It's an entirely natural ingredient, and professionals carefully choose the bark from conifers like pine and fir, which have several excellent characteristics. Firstly, it's pleasing to the eye, and what better way to take care of your property than to use an ingredient supplied by mother nature herself.
You can use the bark chips to provide a striking contrast, but essentially it helps the garden to flower, thanks to the exceptional growing properties. Therefore, you don't have to worry about the soil losing moisture due to its fantastic retentive qualities, which keeps the garden in prime condition.
You'll love the fact that as the bark disintegrates with age, it nourishes the soil with nutrients to provide much-needed longevity. But there are certain aspects where it doesn't fare well, and one of these is the delicate nature of the substance. While it's more comfortable for you to work with, it can be moved around by wind and rain, which could be an inconvenience.
Similarly, it's too fragile, and you may find that the bark is starting to splinter. To counter the problem, you can try to get bark mulch in a shredded format if you don't feel like working with chips. It may retain its properties better, such as ensuring more moisture retention, while the small size helps it degenerate faster for soil improvement.
If you're looking for an affordable option, then you can't go wrong with hardwood mulch. The reason it's a money-saving option is that it's mostly made up of material that has been thrown away. In that regard, old wooden objects or the leftover stuff after you've trimmed a tree work like a charm.
Besides, it's readily available, and a polite word with your neighbor may present the opportunity to get some for free. All you need is to look for hardwood material that's been shredded into mulch, and you can use it for your garden or landscaping jobs. It's ideal for use with plants that don't require much acid to maintain their condition.
You can scatter hardwood chips around the plant and leave it alone while it slowly disintegrates into an alkaline form. Furthermore, you can complement the mulch with fertilizer to increase the amount of acid for other plants. But it would be best if you were careful about the level of acid since it can harm the plant in too much quantity.
Meanwhile, there are a couple of things you need to keep in mind when choosing hardwood mulch. With time, you'll see a noticeable change in the material, and once it turns grey, you'll have to rake and turn it. It means you'll have to start thinking about alternatives and stock up on a fresh pile of mulch since it will last for two years at most.
People are reluctant to use hardwood because it offers the perfect breeding spot for termites. So, having a hardwood garden that borders your home isn't advisable, and you might have to consider other options.
One of our top recommendations for you is hemlock mulch, but there's no need to be worried as we aren't talking about the poisonous substance. For those wondering, the toxic version of hemlock is a kind of bush having distinctly big leaves and a purple stem.
We are interested in the mulch that comes from hemlock trees, and the common misconception has led to unwarranted criticism of the material. You'll notice that it's a type of hardwood mulch and includes most of the same characteristics and disadvantages.
However, certain benefits, such as the presence of various tannins present in the trees, help keep your plantation safe. It stops bugs and insects from digging into the soil and harming your plants.
Moreover, we enjoyed its aesthetic properties, and hemlock mulch acts as a pretty material to use in your garden. We should also mention that it doesn't have a long lifespan and suggest you stock up on the material if you notice signs of deterioration.
We often find ourselves looking for the perfect material when it's actually in front of our eyes all along. If you're vigilant enough, you can make suitable mulch from fallen leaves that are scattered all over your lawn. As a result, many people prefer using leaf mulch since it's highly affordable and readily available in large quantities.
It doesn't involve a lot of hard work and most significantly delivers a fantastic performance. So, what are the steps you need to follow after you've made up your mind to use leaf mulch? For starters, get a rake to gather all the leaves once they have descended from the trees.
After you've covered all possible areas and gathered as much as necessary, you'll have to shred the leaves to turn them into mulch. To get the best results, you can use a shredder, a leaf blower with vacuuming function, or a mulching lawnmower based on your convenience.
It would help if you shredded the leaves since it offers a smooth passage for air and water to keep the soil healthy. Likewise, it ensures your plants will bloom, and you'll have a flourishing garden in no time.
It's important to note that you shouldn't use a thick layer of leaf mulch, which may have harmful side effects. The thickness could prevent air water from reaching the soil, and the mulch will fail to serve its purpose. Moreover, if water does manage to seep in, it certainly won't have an escape route, leading to rot and fungus growth.
It would be best to start with a thin layer of leaf mulch and observe the results. If you're happy, you can use the remaining leaves to make compost and further enhance the quality of your garden.
Sometimes the least likely substances can also be used as mulch, and we bet you had never thought of glass for your gardening needs. The primary objective of glass mulch is for decorative purposes for which the glass is recycled and tumbled down to remove sharp edges.
You can place it in most areas, but it looks best when used in combination with rocks and pebbles to create a stunning appearance. Even if you don't, it's not a worry since the many types of glass and the mixing of colors provide a distinctive look compared to other mulch.
The downside to choosing it is that you can't be afraid to loosen the purse strings. It's one of the costlier options, and in comparison, organic mulch will seem like a bargain. Moreover, the most crucial thing to consider is that you need to have plants that can thrive in rocky or hard soli.
We suggest you add a layer of cloth between the mulch and soil to prevent the glass from sinking too far in. But rest assured, you won't face any challenges if used with the right plants, thanks to the fantastic water penetration properties which nourish the soil.
If you're looking for an alternative to using rubber mulch, you can't go wrong with lava rock mulch. It's also known as pumice mulch, and the primary advantage of using it is that it allows for uninterrupted water flow. Furthermore, the material doesn't absorb the water, and all of it goes into the soil to provide the most suitable conditions for flowering.
Another attractive attribute is that it ensures the ground stays warm, much like rubber, but the principle involved is different. While rubber is an insulator of heat, lava rock mulch spends much of the day absorbing heat, which it then uses to keep the plants warm at night.
Besides, it helps to retain moisture, and, in that case, you can add a layer of cloth beneath it to protect your plants from weed. What we liked most about it is the robust nature, although it's considerably lightweight, and you can quickly move it to your favored spot.
However, be wary of dropping it in your yard where you might use a lawnmower since it doesn't yield easily and could damage your machine. It would help to keep an eye out on whether there's too much mulch between the rocks. Such a scenario could prevent air and water from reaching the soil, which may prove detrimental to your plants.
Red mulch is quite common, and even if you haven't used it yourself, you may have seen it in someone's yard. For those who are still confused, it's the bright red material that's scattered around the yard, and it's derived from different substances. So, it provides a lot of variety, which is sure to please most buyers.
In some cases, certain types of bark mulch could've got a reddish appearance, having been harvested from red bark trees. However, the stuff that's used explicitly as red mulch has been dyed for the purpose. It is obtained from the same place as hardwood mulch and is gathered from leftover substances found on construction sites.
The downside is that since the materials come from construction sites and certain unusual substances are used as dyes, it's not suitable for growing plants. We recommend you use red mulch for other purposes but abstain from applying it to the soil. It tends to leak toxic chemicals deep into the ground, which hampers growth and causes irreversible damage.
As the name suggests, enviro mulch is an eco-friendly alternative and is exceptionally convenient to use. It has similar properties to bark, hardwood, and wood mulch, but it has an added advantage, which is why it's a favorite among gardeners. Enviro mulch is predominantly made up of recycled materials that include everything from old wood, paper, cardboard, and most things derived from trees.
Moreover, it's dyed like some of the other products, and therefore you get a lot of variety. You can use it for decorative purposes, while biodegradable materials ensure the soil is healthy to provide suitable growing conditions.
The most significant aspect is that the positives of enviro mulch far outweigh the negatives like using recyclable materials, which cleans up the surroundings. Besides, it goes back into the soil with time, and since it's readily available, it proves to be an affordable option.
Types of Dyes
We've covered the types of mulches you can use, and during our analysis, you're likely to have picked up that certain products are dyed. Due to the availability of a range of colors, you can get mulch comprising red, black, green, and blue, which adds to the aesthetic beauty. But you might be wondering whether dyed mulch is suitable for your plants?
So, to assist you a bit more, we've decided to discuss why mulch is dyed and the types of dyeing it's subjected to. You'll get to realize whether dyeing is necessary or if ultimately organic products are the way to go. Let's find out.
Vegetable Based Dye
Vegetable-based dyes are derived from various plants to provide the color, much like in earlier times. People mostly use it for gardening, and since it's an eco-friendly product, you won't have to worry about your plants' health. Moreover, not only does it look good, but it offers the perfect solution to leaching issues.
Even if the material used to make the dye tends to leach, there's no need to be concerned, as it's beneficial for the plants.
Iron-Oxide Based Dye
One of the most common colors used for dyeing is red, and, in that regard, iron-oxide is the predominant material. The characteristic red color is made by combining iron and oxygen, leading to an iron-oxide formation that's used for dyeing. Iron-oxide is nothing more than rust, which is why the mulch has a similar hue.
Over time as the material disintegrates, it percolates into the soil and proves beneficial for the plants. It provides access to more iron, and if you've plants that need more metal, you can't go wrong with iron-oxide.
Carbon Based Dye
For mulch that has been dyed black, the critical component used is a carbon-based dye. The color for the material is obtained by incomplete combustion of several items, which gives rise to a compound called carbon black. You might wonder if it's suitable for plant growth, and barring one component; the answer is no.
The only product that does stand out is vegetable oil since it doesn't have any harmful effects on the soil. As a result, carbon black is obtained as a by-product of it and allows you to use it specifically for plants that grow food.
With time, it starts to break down and thereby releases carbon into the soil, which has much the same effect as charcoal. Additionally, in certain situations, black carbon acts as an effective medium for coloring food packets and trays.
Dye It Yourself
If none of the above products appeal to you, then you can take a chance by dyeing the mulch yourself. While it may seem like a lot of work, we assure you that dyeing mulch is not that difficult while being cost-effective.
You need to watch out for the quality of the mulch and check to see if it's starting to fade. If yes, it's time to add color and revive the mulch to its former condition.
To do so, you need to have a clear plan of how to go about things, and the best place to start is with the dye. You'll have to keep in mind the types of plants you've to choose the most suitable color. Furthermore, we recommend picking a dye similar to the one you had to attain a consistent shade.
Keep An Eye On The Weather
Not only will it make your garden look better but also help to rejuvenate the mulch. Meanwhile, one of the most important things to take into consideration is the unpredictable weather.
Don't dye in wet weather as it will render your work ineffective and if there's a rain forecast, wait for a couple of days. The ideal weather for dyeing is to have clear skies and bright sun for a minimum of six hours, which will help the dye set. So, once you spray it onto the mulch, it needs to dry, and any moisture will prove detrimental in that regard.
Take Proper Protection
It would best if you didn't dye on the sidewalk or driveway since the hue is designed to last a long time. Don't rush but instead take your time because you can't remove the color from the surface if you miss your mark. For that, we suggest you pick a spot which isn't used frequently and won't matter if it gets a little color.
Moreover, you should use a tarp and cover any objects nearby, which you might hit for added protection. It's essential to ensure that the area is adequately sealed and mix the dye to get a consistent coloration. Proceed to add it to the sprayer and check that the nozzle is fine.
Finally, maintain a distance of six feet, spray it onto the mulch and keep going until you cover all the chips or shreds. Try to stick to a uniform distance because swaying forwards and backward could affect the intensity of the color.
Common Problems
Now, you may be experiencing specific problems in your backyard, and for that, it's vital to know the types of mulch that work best. Consequently, we've highlighted the most common problems below to discuss which variety will eliminate the issue and the reason behind the excellent performance.
Weed
Weeds are a recurring problem in most gardens, and if you're not vigilant, it could damage your crops and leave your yard barren. Getting rid of weed requires effort, but it isn't impossible and what you need is teamwork. No, we're not talking about asking for help but using a layer of materials to complement each other that will solve the issue.
For starters, you can lay down layers of cardboard, fabric, and newspaper to stop the sunlight from reaching the soil. It will help to cut off the primary source of light for weed and keep your garden fresh. But for more safety, we suggest you pick up a stock of organic mulch such as hardwood or bark mulch, which works well with moisture.
Moreover, organic mulch forms the perfect habitat for little insects and microorganisms which feast on the weed. The insects move about and reach every nook and cranny to dig out the weed from the mulch or soil.
Bug Invasion
It's crucial to note that if you plan on using wood mulch, ensure that it isn't in contact or close to the walls of your house. The main problem with wood is that it attracts all types of bugs, who will find your home to be a comfy place.
Furthermore, of all the insects that turn up, you need to be particularly careful regarding termites, which can eat through the wood in no time. To bypass the problem, you can opt for organic or non-wood types of mulch like leaf or enviro. You may also try out lava rock mulch, which provides a striking contrast with the color of your home.
Not only can you enhance the beauty of your home, but the curb also looks appealing while there won't be any need to worry about termites.
Deep Mulch Gardening
We thought it's important to talk about deep mulch gardening, without which the guide would be incomplete. First and foremost, it's also known as sheet mulching and is an incredibly efficient method whereby you don't need much maintenance. After adding the mulch, you can let it be and watch as it nourishes the soil for several years.
All you need is to pick an area in your garden where you wish to grow flowers or vegetables. Next, add all organic substances, mainly those derived from trees, such as paper, cardboard, straw, or leaves, and pile it up on the designated spot. Keep going until you form a pile close to a foot tall that will pump the soil with nutrients.
As a result, it's an efficient way to rejuvenate the soil, particularly in an area that formerly compacted and was unsuitable for growth. With time, the ground becomes softer, and as leaching begins, the nutrients from the top of the pile seep underground.
You can use most types of mulch for the purpose but try to add elements that are easier to breakdown. In that way, the soil will replenish faster, and you can get to work with your plantation sooner. The most challenging part of this method is to gather the components as the pile has to be a foot high.
But rest assured that you will see fantastic results if you put in the time and effort. Meanwhile, rather than waiting for the pile to be high enough to start work, you can simultaneously soften up the ground with your gardening tools. Therefore, as soon as you have the necessary elements, you can pile it up and get to work.
Differentiating Between Compost and Mulch
Another area we must cover before signing off is the difference between mulch and compost. These are two of the essential components you need for gardening, and while they may appear similar, there are some striking contrasts. You must know how the two materials are unique to get a better idea of your gardening needs.
Straight off the bat, compost provides the perfect environment for bacteria, and you'll find the tiny critters crawling around in large numbers. The ideal conditions for the bacteria are created as soon as the components start to decompose under controlled temperatures.
It will please you to know that compost doesn't require much effort to make, and people have been known to add grass, manure, or garbage before allowing it to disintegrate in a large pile. Moreover, compost functions similar to mulch, as both materials are combined with the soil to enrich it with essential nutrients.
Compost allows the plants to flourish, and you may even spread it across the surface of the soil for noticeable results. But there's a slight difference given that the primary purpose of mulch isn't to replenish the earth as much it is to protect it. Consequently, mulch isn't mixed but added to the visible surface of the soil and helps to maintain the temperature.
It keeps the plants safe from weeds and retains water, which proves vital to their survival. One of the most critical factors for using mulch is its decorative properties, which compost lacks unless you like having bacteria adorn your garden. It's available in several excellent colors, which serves to enhance the overall look of your lawn.
What to Do?
Meanwhile, compost helps store the nutrients in the soil while mulch releases the nutrients only after it starts to decompose. If you're looking for a quick solution to enrich the ground, then you need to use compost because mulch takes longer to disintegrate. Besides, only organic mulch like enviro, hardwood, and bark serves to provide nutrients, so you need to be careful about which material you choose.
What you can do is use both compost and mulch to have the ideal gardening experience. Rather than trying to use one material to serve multiple purposes, you should focus on the strengths of each of these products. First, apply the compost to enrich the soil before adding mulch to the top layer to protect the surface.
The compost will add nutrients, and with time, the mulch will also assist in that regard. Also, based on the advantage of both materials, you'll get a potent combination to provide the best flowering conditions. The garden will be well protected from weeds and will continue to germinate consistently.
Final Words
We've reached the end of our guide, and hopefully, you've got a better understanding of mulch.
It's essential to consider your budget, the surrounding environment, and the prevailing weather conditions before deciding on the kind of mulch you need. But rest assured that mulch is exceptionally user-friendly, and the numerous options will surely please you.
It’s always about being the best at what we do, isn’t it?
We get how difficult drawing hands is, and every artist who wants to excel with their skills HAS to practice it. Art, indeed, is a powerful tool of imagination, communication of ideas and emotions, and brings out the best in those who appreciate it. Even if it isn’t your desired art career, you shouldn’t undervalue it as a contribution to your skill set, and the relaxing, calming effect of the drawing process on one's mind.
But, how do you do that drawing hands? Where do you start?
We will give you a hand.
You start by drawing from reference. We don’t learn, unless it’s from the best. So, we took it upon ourselves to dig out the best possible sources for hand drawing references (hint: we’re good at what we do), and we weren’t surprised.
Enough suspense, here’s a list of five best hand drawing reference photo sources we could find on the internet.
Whenever we look for any image-based research, Pinterest catches our attention the most. Because that’s what Pinterest is about - it’s a community of millions of users, who use images to spread information and educate each other.
We did a search on Pinterest for hand pictures, and we found hundreds of results, all for you to delve into. Some of these were just drawings, others were photographs of actual hands, and we think both work equally well to be used as reference material for artistic purpose.
Oh, and yes, it’s absolutely free (and hopefully always will be). You just need an active email ID to be a member of their community. We’d suggest that you sign up, or Pinterest will keep on pestering you to do so.
After you sign up, you may consider making your custom board featuring just hand photos, your pick of the litter.
If you have a hard time figuring out how to use Pinterest, there are plenty of guides online that could help you understand how it works and how you get started.
This has to be one of our personal favorites too, and we hope that will be true for you too, after we tell you how awesome it is.
Easy to use, diverse in its tools, and absolutely free.
You could start with their ‘hands & feet tool’, which helps you practice hands and/or feet, on the website itself. Just decide what you want to draw, hands or feet (or both), along with the model’s gender, and a time interval for which you want to draw. You could set a custom number if you’re practicing hands on a faster routine, or a slower routine.
Better than that are figure drawing generators and slideshows for gesture poses, with customized settings that you can choose as per your needs, based on the kind of stuff you need to draw.
But do you want to study human limbs? Line of Action is the pick for you. We kind of understand that hands can be really tricky to draw, so you should save this link in your bookmarks for all future references.
Additionally, a lot of artists are generous enough to share their works, and if you have a hard time learning just from photos, you can learn from humans. Though we suggest you don’t just copy from them, but there’s no harm in being inspired. After all, we want you to be the best at what you love to do.
In all, Line of Action is perfect for you to especially it takes care of your pace of learning too. It balances between just hand pictures and real artists who do the same thing that you want to practice.
Disclaimer: the name is a little misleading. Not everything is what it looks like.
This extremely popular art community has existed since as early as mid-200s, and now we know that old, is indeed, gold.
True, there are many such websites out there, but nothing comes close to DA. If you visit DA, and search for something such as “hand drawings”, you will be taken aback by how much you can find. Some of these photos are taken from other sources, some are from the artists. You could spend hours scrolling through the content you find it.
We believe that DA stands out purely in terms of the quality of search content you can find here.
How it’s a stronger community too, is because you can leave comments on posts, give your feedback and ask questions, and people really seem to value it. You can even personally get in touch with people, asking if they have something more to offer.
But if you’re new to this form of art, you shouldn’t hesitate being on DA. Many artists also share their practice pieces on DA, because well, it isn’t exactly a professional portfolio. It’s like a complete community - welcoming everyone under the sun.
There are a lot of other gems too, all for you to explore. One of them is the DeviantArt groups. You can join the ones that focus specifically on human anatomy, hand drawing and the like.
So yes, if you don’t already have a DA account, there isn’t really anything that stops you. It’s a place of artists, for artists and by artists.
It is really that obvious, isn’t? What don’t you get at Google.
Google Images has a plethora of great art you can look at, and take inspiration from. A lot of these pictures are subject to US copyright law, so you can’t claim them as yours. But like we always say, inspiration knows no barriers.
With Google you can actually find specific types of photos, even within the larger category of hand-photos. You could look for hand poses, or close-ups for fingers, bent hands or pronated hands. Why this is possible, is because Google finds you everything on the database, as a collection of multiple sources.
You’re more likely to find most of your desired pictures on Google itself, but if you don’t you can always look for other search engines such as Yahoo, or Bing. DuckDuckGo, as well, as its own image search results.
But nonetheless. Google remains to be our top choice in terms of search engines for images such as hand-pictures. It is after all, the largest search index on the web, so you’ll alost find everything you need.
We wanted to end the list with Proko because it is a great resource for reference photos, and beyond.
Proko gives us a Free Model SamplePack, to download from their website. We didn’t look into it too much, and thought of leaving it for your exploration.
It also offers ‘Free Lessons’, on titles such as “Human Figure Proportions – Average Figures – Dr. Paul Richer”, “How to Draw Balanced Poses”, “Drawing Measuring Techniques”, “How to Shade a Drawing”. There are many more such lessons that you can check out under their “free lessons” section.
After watching their videos, you can go ahead and implement them right away.
But then if you feel these free sample packs are not enough for you, and you want more of them, they offer ‘poses for artists’ that you can purchase. They’re not that expensive either, and constitute a set of around 1500HQ images. You’ll be gazing at all of them from multiple angles, various poses, holding a variety of objects. Perfect for practice, we think.
Some of their more premium resources are worth checking out too, as per the reviews we saw. You might get some package deals that come with some discount. These single packs are more than enough for you to spend months practicing hand drawing, casual sketches and even hand gestures.
Wrapping It Up
In conclusion, it’s not just the practice that matters, but the smart kind of practice. Working from reference is perhaps the best way to learn, and we believe that is just what everything is about - being the best at what we do.
We hope this list helped you in furthering your attempt at success.
What is cel animation? Is it still relevant after the advent of 3D and digitalization?
Cel animation is the traditional cel animation, hand-drawn animation technique that involves drawing and painting objects on celluloid (cel), a transparent sheet. Nearly all the cartoons in the pre-1990 era were created using cel animation.
One of the aspects of this technique is that it requires incredible attention to detail and an organized team of people with varying skill sets. Cel animation is not used much these days, as animators rely on computers.
2D animations still rely on many of the techniques and parts of the cel animation process, though most of the work is done digitally.
To give you a better understanding of what is cel animation and how to use it, we have addressed it in three parts – materials, process, and transition to digital animation.
What Is Cel Animation & How to Use It
Materials Used in Cel Animation
The first thing you need to know about cel animation is what the materials you will need are? Being a technique that was invented a century ago, it relies less on materials and more on human skill. And since there was negligible technological development back in the day, these materials are rudimentary.
1. Cel
As the name suggests, cel animation needs a cel or celluloid. It is a transparent plastic sheet – you draw on the front and paint on the rear side of it. It is the raw material of the cel animation process.
Cel has seen an evolution over the years:
The first half of the 20th century saw the use of actual celluloid, made from camphor and cellulose nitrate. It was flammable and tended to wrinkle, yellow, and generate toxic gases with time.
Cellulose acetate replaced actual celluloid, as the former was more chemically stable and safer than the latter.
It was discovered that cellulose acetate is also not ideal for the preservation of cels. Hydrolysis released acetic acid over time, thereby deteriorating the cels.
Cellulose acetate was eventually replaced by polyester, which did not require any plasticizers.
Today, computers are capable of carrying out entire animation projects, eliminating the need for cels.
2. Paint
Now that we have talked about the raw material for cel animation, it is time to discuss the primary tool – paint, or as animators like to call it, “cel paint.” Cel animation uses an opaque and heavy gauche, acrylic, or similar type of paint. Paint is applied on the side of the cel opposite to the inked drawing, to avoid brush strokes.
Just like the plastic sheets, the paint has seen an evolution. Colorists used to paint the characters, and special artists used to paint the backgrounds by hand. Nowadays, the painting tasks are completed digitally on a computer using specialized software packages.
Cel Animation Process
If you want to use Cel Animation, you need to know how it is done. It can be a bit challenging for beginners to get it right as the learning curve is a bit steep. Make sure you understand the animation process and the steps involved to get better at it.
The Cel Animation process is time-consuming, expensive, and tedious. It involves a large team of people with specialized skills to complete cel animations. We have divided the meticulous process into three large parts:
1. Communicate the Idea
Everything starts with an idea! A good idea is a prerequisite for good cel animation. Here are the steps you need to follow to communicate the idea:
An animatic is designed to check if the film’s timing works.
After approval of the story and timing, artists create characters and backgrounds.
Actors lend their voices to the lines in the recording studio.
Animators lip-sync the characters using the vocal tracks.
The director creates a dope sheet using the animatic and soundtrack. The dope sheet contains the timing of the sounds, movements, and scenes.
2. Draw and Paint the Cels
Once the idea has been communicated, the real work begins. It is the lengthiest and most intricate part of the entire process. Drawing and painting the cels involves the following steps:
Lead animator creates rough sketches of a scene’s keyframes (extremes of action).
Assistant animator cleans up these rough images, creating in-between drawings if needed.
The rest of the action (between the extremes) is drawn on separate sheets. The number of drawings is determined from the dope sheet.
After all the drawings are completed, a crude animation is done using a pencil test to detect any missing lines.
After a successful pencil test, the cleanup artist traces the rough sketches to ensure frame-to-frame consistency of the lines.
The inker transfers the cleaned-up drawings to the cels.
Cels are transferred to the paint department; special background artists paint the backgrounds.
Painted action cels are placed in front of the background cels in the photographing process.
3. Film the Cels
The final part of the complicated process involves filming the cels. This is where all the action starts to take shape. It can be done in the following order:
The camera person gets all the inked and painted cels. The backgrounds with matching cels are photographed according to the dope sheet.
Synchronize and edit the vocal tracks, music, processed film, and soundtrack.
The final film is transferred to the lab, which makes a project print or puts it on video.
If you are using digital equipment, all of these steps can be done on the computer before publishing the film.
The Future of Cel Animation and 2D
Cel animation and other forms of 2D animation prima-facie have a somewhat uncertain future. Can you use these techniques for any of your future projects? Is it viable to rely on these processes in the dynamic and challenging digital environment today?
1. Cel Animation – A Thing of the Past?
Is Cel animation a thing of the past or can you use it today as well? You can very well use it, but we don’t see why you should. With more powerful digital tools at your disposal, going through the long and tiring cel animation process is not feasible.
If you don’t want to take our word for it, take a cue from Disney. The last Disney-produced film that used 100% cel animation was way back in 1988. With “The Little Mermaid” in 1989, Disney started using the Computer Animation Production System (CAPS). CAPS was an efficient tool to lower the animation costs without compromising on the quality.
Today, most of the animation projects undertaken by reputed studios like Disney are completed using dedicated software packages, allowing for higher productivity at lower costs. So traditional cel animation is a thing of the past with close to zero practical uses today, except for students who want to explore traditional animation techniques.
2. Is 2D losing out to 3D?
It is not only the materials of cel animation that have evolved over the years but also the scope of animation projects. The 2D era was nearing its end with the onset of the 21st century, as the world of animation reaped the perks of a 3D perspective.
It would be incorrect to say that 2D has no place in the animation industry today. While 3D has undoubtedly become vastly popular, you can still find a decent number of 2D animation projects.
Animators’ preferences are subjective – some still prefer drawing sketches by hand to digital software, some still prefer 2D to 3D animation. 2D animation may not be as widely used as it was before we got introduced to 3D, but it is still going strong.
Disney’s “Winnie The Pooh” in 2011 was their last 2D feature, meaning that they have switched to 3D for all their projects since then. Japanese award-winning Anime films still use 2D animation with no plans to venture into 3D animation soon.
Most of the children’s cartoons are still developed using 2D animation. We don’t see that changing to 3D anytime soon. So it is safe to say that 2D animation is here to stay and it is not losing out to 3D animation.
Summing It Up
An animated feature would typically need over 100,000 cels. Cel animation used to be the only technique animators could use in the 20th century. There are far better tools and software packages in an animator’s arsenal today. Cel animation can still be used for small-scale projects that are not created for commercial purposes.
It is a tradition that animators across the globe value and learn from to this day.
If you’ve been following the game development scene of late, you’ll notice that the community is hyping up pixel art - a nostalgic throwback to the games developed between ‘80s to mid ‘90s.
However, the fact that the graphics follow this design pattern does not mean that the effort or realism takes a step back. Hence, you’ll need a total understanding to have the best of both worlds.
Aseprite comes into the picture here as it satisfies all the requirements - it gives you a wonderful way to blend the nostalgic artistry of pixel art with the graphic design and animation tools that we have today. Without further ado - let’s begin with our reviews of the best Aseprite tutorials on the market today!
The tutorial starts directly with action, rendering a pixel sphere step by step, an absolute godsend when you want to add complex shading effects to your characters, objects, scenes etc. With this tutorial, you get to know in depth about how shading can add another dimension to your art and game scenery.
The tutorial uses a simple colored approach render the classic sphere and adds a dimension to it just like that - teaching you shading mechanisms used to add depth and texture to a simple ball.
Congratulations on deciding to get started with Aeseprite - it's one of the best decisions you will take when it comes to working with pixel art. However, since there are practically tones of tutorials out there, you should be aware of the fact that most of them are either too trivial to qualify as tutorials, or too complex to understand by the absolute beginner.
Hence, it only makes sense that a tutorial which slots in somewhere in the middle would be the most recommended - and that is exactly the case with this tutorial. MortMort gives you enough background to understand what’s going on, but also has you going with making your own art in the form of layers. You will learn to break complex characters into simpler figures.
Further, it isn’t exactly in the middle, in that MortMort provides some information about the complexity Aseprite can handle, so you’re prepared to make your own designs in no time. Tons of examples, comprehensive review of the tools, and a direct comparison with Photoshop (which is the most popular tool here) - what else does a beginner need?
Sprite sheets is an amazing concept which completely transforms the depth and breadth of capabilities which Asepbrite has, since Asepbrite has pulled off making an intuitive and easy method by which you can integrate Sprite Sheets into your art. This tutorial by ETOSurvival helps you through integrating Sprite Sheets into your own work in a very easy manner.
The primary example taken by ETOSurvival throughout the tutorial is creating a four-dimensional cycle of the walking path of a certain character. The combination of all graphics onto one single image makes organizing all the game contents much simpler and reduces the file size of the game - it works as a handy compression technique!
One of the top tricks suggested by ETOSurvival is that you can make changes to a character on the move by editing the sprite sheet and hence saving the edited file. This reduces the overhead of having to manually update the character as it moves in animations all through the length of the game.
MortMort is a truly prolific creator of tutorials for people who want to pursue game design or pixel-based art, and hence another of his tutorials finds its way in this list. However, this tutorial is definitely not beginner-oriented - this tutorial is all about upping the bar by using the brush tool in the same way that professionals do it.
After the tutorial ends, you will have advanced knowledge of how to accelerate your working methods, but ensuring that your art comes out looking as publish-ready as it can be at the same time. The first thing you learn is tile painting - which is a wonderful technique, and the use of it depends all on you - the more you experiment, the more you’ll learn.
Next up, you see the ink settings covered in some detail, which is great because it’s one of those things about Aseprite which take some time to master. The real use of ink settings comes into the picture when you want to add shade to sprite sheets, or create textures which have subtle gradients or blending of colors going on in the artwork.
If you’ve gotten the hang of the tutorials above and feel comfortable in designing somewhat realistic objects, you should now move on to designing characters and animating them as well. This is perhaps one of the most important and difficult parts of designing a video game. Good characters improve the overall impression of the game, regardless of the complexity.
With this tutorial, you will learn how to design and implement an entire character on a 32x32 pixel canvas. You will be going through a number of basic techniques, wherein you will first design a silhouette and then move on to adding details to the character - typically, this is where beginners end up wasting a lot of their time.
This tutorial borrows a lot of basic concepts from what is taught in art school, specifically considering figure drawing wherein charcoal outlines are drawn first before filling in the details.
MortMort is back at it again. This time, he goes into some depth about the importance of anti-aliasing, which is a crucial part of designing any video game. However problematic and difficult it may appear at first sight, MortMort does a brilliant job of getting down to brass tacks and explaining the process of anti-aliasing and how to integrate it within your work.
Your work will only seem like it’s “in” the screen so long as you don’t apply anti-aliasing. To add that extra level of realism, it’s crucial to understand how graphics work, and how you can use them to your advantage, making your artwork seem truly realistic. Here, you understand the value of each and every pixel - anti-aliasing causes smoothing of jagged lines.
This smoothing effect translates into the illusion of a form, which is then responsible for the appearance of another dimension (i.e. depth) to otherwise two-dimensional images. It is not easy to master this topic, however, if done right - it can translate your game art/pixel art to the next level. MortMort also showcases a number of best practices for sprites in the tutorial!
Sadface_RL may not be the most popular pixel art tutorial channel on YouTube, but this tutorial is surely one of the most important ones out there when it comes to pixel art. It touches upon the subject of tiling, which is extremely important in the context of creating ground/background images.
Fun fact: the usage of tiles began as an effort to produce a number of background images while using very little computer memory. Computer memory is no longer a problem, but at the same time, this particular technique has remained a part of many pixel artists’ toolkit. There are a few rules with tiles, such as perfect wrapping in both directions.
Aseprite has a number of options you can configure to make tiling easy, and following the tutorial will teach you exactly what to do. Duplicating certain images vertically or horizontally is one good way to start - using the Tile Mode option on Aseprite makes tiling intuitive and effective.
TutsByKai’s tutorial on how to employ the tile mode methods you’ve learned above will help you understand how to create a stony texture using Aseprite. The Tiled Mode can help you create much more realistic textures and scenes in very little time, and also saving the computer a fair bit of memory when it comes to high-density scenery.
The basic premise in play here is that you need to learn how to create backgrounds using Aseprite’s Tiled Mode. Hence, the best way forward is to start with a basic sketch of the stones, while making sure that the design fits the entire area of the grid - and there’s no problem if the design goes out the edges.
You will generally see pixel artists and game designers speak of hiding the grid behind. This “hiding the grid” business is nothing but making the seams of the tiles disappear so the image appears as one coherent whole. You should mold the shading as per the location of the light source where the highlights are right above the shadows which have darkest colors.
TutsByKai appears on the list again, but this time, he brings something completely different to the table - a concise yet effective method to draw a wonderful little pixel house. Aseprite doesn’t make it particularly difficult to come up with methods for drawing objects, but watching this tutorial will give you certain insights which you won’t find anywhere else.
The end game here is to be able to draw objects quickly and with a reasonable level of accuracy as well. The method itself is not that complicated too: you start with the basic structural outline of the exterior, first drawing the roof and then moving on to completing a basic outline of the entire house.
Then, the next step us to draw up the doors, which should be followed by the windows. The details are to be dealt with next - details such as roof tiling, embellishments to the windows, etc. Texture expansion is best achieved by copy-pasting and operations such as rotation and flipping all done in conjunction - mastering this will save you a fair bit of time!
HeartBeast appears on our list for the first time, but the tutorial itself will teach you loads in one, decently-sized tutorial. Run cycles are an important part of any animator’s toolkit, and in Aseprite you have full opportunity of using these run cycles to the fullest extent possible. Working in pixels makes run cycles a bit more important, too.
An animation which actually has the “look and feel” of something having components in motion only need 8 frames, whether you believe it or not. This is made abundantly clear by HeartBeast while going over the basics of the 8-frame run. There are a number of things you can learn from the tutorial, from the way the ground is designed to the motions of objects.
Run cycles can be understood as basic units of an animation - they can easily be used to add a number of personality traits and quirky expressions to all the characters you have. The ground staying constant all through the cycle is one other important takeaway - watch the tutorial to know more.
If you’ve gained enough experience in working with all the tools and techniques which have been reviewed above, JebbyGD will show you how to change gears towards the next phase of design and development in Aseprite. There are tons of options in the toolbar, and this video mainly serves as an introduction to all of these options.
Changing colors and sprite sizes of objects and characters is a breeze with Aseprite - you wouldn’t have known this before unless you did a fine job playing around with all the tools. In terms of what else you can alter, the options are almost endless - from color curves on the pixels to creating your own custom brushes on the go.
You can also generate text very quickly with the help of a few options - check this tutorial out once you know you’re comfortable with all of the previous tutorials.
For those long-time, Digimon and Pokemon fans DYA Games brings an Aseprite tutorial video where they create the Charmander sprite and then animates it.
However, this is not a complete tutorial in some respects as it’s a time-lapse video, to begin with, and has no voice-overs where the creator explains every single step that he/she takes.
But, the video is pretty easy to follow nonetheless, and it can be the perfect introductory video for beginner Aseprite users as well, to show them all the various things that you can do with the platform with just a bit of practice.
The video also goes into showing certain Aseprite tools and techniques like onion skinning as well as anti-aliasing, which helps to get smoother edges and cleaner animations. DYA Games creates Charmander from out of a silhouette and goes on to show every single step that one needs to follow to get the result just right.
Making clouds or even some fancy cigarette smoke animation is perhaps one of the primary steps that a beginner needs to get the hang of making, before venturing further into more advanced animations.
Making some accurate smoke animations can indeed add that little bit of extra spark to your work.
And this tutorial from TutsByKai will help you to create your very own smoke for either a chimney, a campfire or some other form of magical art.
In terms of an RPG, necromancers and fire sorcerers can be equipped with some smoke animation to create a sort of a menacing allure about them and allow the player to remain thoroughly engaged to the character’s progression in the story.
The tutorial shows a very interesting method where the animator uses onion skinning to create motion between frames.
It teaches that starting with simple shapes when the animation process is always the best, as it will allow you to get used to the method and help you experiment with all the available tools.
This is another amazing and yet beginner-friendly Aseprite tutorial video from TutsByKai where the creator shows one in great detail how to go about making a pixel art house using the various features of the platform.
Now, routine and practice are important when it comes to mastering certain aspects of this designing platform. And those are precisely the things that TutsByKai stresses on in the video.
By showing a few designing methods and procedures which you need to incorporate into your routine, the creator goes on to suggest that once you get the hang of them, making pixel art houses will be a cakewalk.
The video starts by making an outline of the roof and then drawing the skeletal body of the house. It then follows up by putting in the doors and windows before moving onto the details such as the roof tiles and window trimmings.
Bringing It All Together
Today, you’ve seen how to go from zero to hero in pixel art/videogame design by using Aseprite, which is one of the easiest and most intuitive design tools there are. Especially when you consider 8-bit art, there are very few tools which help you explore this new art form. Once you get started, you’ll know just how easy it is to make wonderful art with it!
Hope you enjoyed reading about these tutorials - now go and watch these, and get started with learning this new semi-retro art form. Have fun creating!
Free painting softwares are the bread and butter for a lot of the professional digital painters out there.
From Photoshop to Corel Draw to the FireAlpaca, there are a lot of easy to use applications that help artists digitize their inspirations and concepts amazingly well.
However, out of all of them, Krita is the one that has been growing in popularity off-late.
And though the software is incredibly versatile and user-friendly, there are some aspects of its features which tend to have a strict learning curve.
A lot of beginners and even some professionals do struggle here, and this is precisely where video tutorials come in clutch.
The guides that we have listed out for you today are incredible, to say the least, and will help you grasp the various facets of Krita in no time at all.
For a lot of the digital painting beginners, when it comes to Krita tutorials, the more detailed the lessons, the better. And in our experience, we are yet to find a more immersive guide than what Phil Waclawski provides in his Krita Basics.
A professor as well as a master of the Linux OS, Phil Waclawski in this hour-long guide (more like a presentation in front of the ‘Phoenix Linux Users Group’) talks about the various advantages and functions of Krita.
As Krita is primarily a Linux based software (one of the very few painting apps that work outside Mac and Windows) not many artists are all that familiar with it, and neither with the OS.
So, even if you’re not all that used to Linux, you can still learn a lot about the Krita applications as Phil Waclawski provides a very thorough guide on it.
He covers almost everything about the Krita from brushes, to strokes, to color management as well as providing a short tutorial on how to create and manage open documents.
However, the presentation doesn’t just cover Krita, but also digital painting in general. It’s an amazing tutorial for budding artists, especially for those who are familiar with Linux.
There is a very popular YouTube channel called Mart’s Struggle with Drawing, which primarily deals with making easy to follow and interactive tutorial videos on digital painting for beginner and amateur artists.
Learning a new painting software from scratch is never as easy as it sounds. From learning how to use the new brush features, as well as the coloring and the stroke textures, a lot of time goes behind just familiarising oneself with the basics.
And when it comes to brushes, digital painting is absolutely pointless without the right kind. Hence, to help out the beginners with their brush struggles, this youtube channel has created a 10-minute long video on all the Krita basics and brush applications.
However, one amazing aspect of this tutorial is that it doesn’t cater to beginners alone. There are certain facets of it, which can be very appealing to a lot of the adept users and artists.
So, even if you’re familiar with or rather proficient with the Krita painting software, there are few new things that you can pick up from this tutorial.
Image special effects and layering are perhaps one of the hardest features to grasp on any digital painting software.
Now, Photoshop’s layer panel was not only the most-used feature but also the bread and butter for a lot of the professional graphic designers and artists out there. Being able to create a lot of effects while either editing a particular photo or painting an illustration is essential for any commissioned art job.
Krita has its own versatile, and fantastic range of layering and effects features as well. And this tutorial video from GDquest will help both the amateur and professional get up to speed with Krita’s layering tools and applications.
And though the video is just 6 minutes long, it’s incredibly detailed and will be able to help you to work through the material considerably fast. It will also provide you with an idea on the complete concept of layering and which kind of combinations will bring about the desired effect.
For intricate and detailed art pieces learning how to accurately layer on effects is vital in achieving the desired results. And the sooner you learn the basics of layering, the faster you can pick up Krita.
This is another amazing Krita tutorial video for beginners. This ‘how to get started’ guide is kind of like a personalized lesson from the YouTuber who makes this otherwise complicated drawing software look and feel as easy to use and as user-friendly as possible.
She will teach you every single basic of Krita and help you dive into it right away and inspire you to experiment with the brushes and strokes and help you to learn them the more you use them.
However, experimenting with brush strokes are one thing, and having complete control over the application is another. The next phase of Jenna’s video is on how to get a complete grasp of Krita and its various applications.
From helping you to learn how to create documents to managing your brushes and alter the layering settings along with the opacity, her tutorial covers a lot and teaches them rather effectively.
The video is 15 minutes long but does an amazing job in instilling the right amount of inspiration within all budding artists.
Additionally, do keep in mind that even though her video is on the Windows-based Krita, the lessons are applicable to all platforms.
Human anatomical features, especially the human hair, is one of the hardest things to accurately represent on any digital painting software.
This fact is also true for Krita, and this is precisely where this tutorial from Johnnybevo comes in.
The video deals with certain tricks one can use and the basic concept behind representing human hair digitally. One such amazing trick is to not look at human hair as individual strands but more as a complete object.
However, even if you’re considering it to be a single object, the final representation should not look bland. It must feel realistic, and that is one of the things that Johnnybevo tackles in this video.
The tutorial will help you gain a complete grasp of the different layering and special effect tools that will help you make hair, which is incredibly detailed and aesthetically pleasing.
The 18-minute long step by step guidance will get you up and going at trying your hand at representing this human anatomy as accurately as possible.
Digital work on such genres are a bit different than the rest of the subjects out there. So, if you ever feel like getting into drawing the human anatomy, this tutorial is a must watch.
Now, looking at Douglas Lopes’ channel and some of his more popular videos, not many will be able to readily believe the fact that he is quite new to graphic designing.
With just a few software tips and tricks, Douglas is able to conjure up some of the most intricately designed and detailed game assets and stock images which can capture anyone’s attention in an instant.
There are a lot of such tutorial videos on his channel; however, this 25-minute long guide is the one which we absolutely adore.
This video shows him painting a rock from scratch which has a kind of a sigil inscribed atop it. Such stock imagery is important when it comes to creating the perfect aesthetic element for RPG games, which has a somewhat medieval and fantasy setting.
The Witcher, Divinity, Dragon Age, etc., all these games depend on such stock accessories to help provide the gamer with an incredibly immersive experience.
Douglas in the video does the complete designing in Krita and explains the entire method of creation from using the toolbars to the brush settings and stroke modes to make it as easy to understand as possible.
This video from Mart’s Struggle with Drawing is just amazing when it comes to teaching one how to effectively deal with the various documents once scanned onto Krita.
A lot of beginners don’t know this, but Krita is an amazing platform where you can import your scanned drawing and very easily digitize them, with the help of the various toolkits.
However, one problem many users have is that after they get their art scanned, they often don’t know what to do next, and which necessary steps to follow to perfectly digitize their work. And this is precisely where this video guide comes in.
It charts out a detailed guide for those who still don’t have the hang of using Krita and creating artworks there from scratch.
Mart in the video will teach you how to efficiently work on top of a scanned drawing. The video is very detailed for a 6-minute tutorial, where he will also be showing you how to use this line of work as a sort of a template.
This type of digital painting can come handy for those who still prefer traditional painting over digital.
This video tutorial is more for the adept Krita users who already have a solid grasp on making art images on Krita and want to try their hand in animation.
For those of you who didn’t know, Krita isn’t just a simple painting program; it supports a lot of 2D animation making features which you can utilize to really show off your skills.
When you first learn to animate something, it’s always best to start with something that is very simple.
The YouTuber in this video shows a very easy animation, which is honestly not all that hard to replicate. In this 22 minute long video, he goes onto animate a ball and goes through the entire process of it in an easy to follow manner.
So, all he does in the animation is to make the ball bounce a couple of times. And across the entire guide, he will teach you not only the entire formatting process but also how to start a new document and create frames as well as the position along the way.
The resulting bounce motion is actually very smooth, and you will have the opportunity to learn a lot from this very simple guide.
Making a self-portrait is honestly a very fun activity, and there are many digital painters out there who try to make a digitized copy of their face for recreational purposes.
So, when it comes to learning how to make a graphic painting of your face, this video from Sycra does more than just cover all the basics.
Sycra has been publishing Krita based digital painting tutorials for some time now, and in this guide, he goes over some fun and exciting ways to make a self-portrait from scratch.
However, the video is not as detailed as one might like it to be. Sycra doesn’t show the step by step process of the painting method, but he does explain all the methods along the way and talks about everything that he is doing.
And as the video is in real time and narrated, you can indeed learn a lot from it. The tutorial is also very easy to follow, but you will have to practice all the steps on your own and experiment with the techniques which he shows so that you can make the most out of what he is trying to teach you.
Blending modes is another fantastic feature in Krita that will allow you to do a lot of cool and unique things to make your art stand out from the rest of the crowd.
Often times, when people hear the word ‘blending’ and ‘digital art’ in close succession, they think of Photoshop and photo editing.
What they don’t realize is that with certain blending modes artists can do a whole lot more than edit a particular image. However, learning how to blend accurately is not all that easy a task, and for that very reason, GDQuest has a guide which teaches blending from scratch.
The 12-minute video shows that if you’re feeling adventurous with your art, you can do so much with Krita blending and make something very unique and spectacular.
Blending might not be ideal for everyday use; however, the basics that GDquest goes over is easy to grasp and implement, and it’s a skill we believe would be helpful in the long run.
There are certain real-world scenario sketches that would look just magnificent with the perfect amount of blending.
Not all digital painting software will help you make a comic book page as easily or even as effectively as Krita would.
So, if you want to start your very own webtoon series or even a manga for that matter on Krita, then this tutorial video from David Reboy will help you get started on the right foot.
David, in this video, creates a full comic book page from scratch. This video is amazingly detailed as well: it’s about 2 hours long, and he goes over every single facet of what he does in great detail.
However, he provides no narratives with the video, and though there are written texts, he does speed up certain parts of the video to make it shorter and much more engaging.
Even with the lack of the narrative and the sped up parts, the video is not going to be all that difficult for anyone to follow. You can very easily follow David’s process and try and mimic what he is trying to do and customize the workflow and the various brush settings to your liking.
Not many Krita tutorial videos will be able to teach you the basic software fundamentals as effectively as this one from LearningByDoodling.
Hence, in that respect, this guide is quite unique and will help you to draw perfect shapes such as squares and circles very easily.
Drawing, solid, and uniform shapes on Krita can be rather difficult without the proper ‘tools and feature’ know how.
Sure, drawing such shapes are a piece of cake with a pencil and paper, but on a digital platform, it’s a completely different ball game altogether.
So if you’re looking to get into some serious digital designing, then this video is going to be able to help you out the most. It will show you not only to create perspective grids on the software, but also to sketch out incredibly accurate shapes in near-perfect perspective.
A 20-minute long video for drawing a box might seem rather excessive to many, but to us, it just goes to show how in depth the creator has gone to help out his audience the best he can.
The video talks extensively about the importance of perspectives and shapes, and how best one can go about representing them.
This is a very helpful time-lapse video from Griatch, which is just amazing in helping out both amateurs and professionals in getting a complete grasp over the coloring formats of Krita.
Accurately representing the colors of human anatomy such as skin and hair, and making them look realistic on the digital platform can be a rather complicated task to achieve.
And learning to finish a particular drawing, with the right coloring and blends is one of the toughest things for beginner artists.
This time-lapse video doesn’t particularly have a narrative or a detailed description per se; however, you learn the methods by watching and trying to mimic the movements. It will allow you to have a thorough grasp of the various tool choices and learn how to perfectly mix colors for skin tones.
But, if you’re looking for a guide that comes with a narrative, this video will not be able to serve your needs at all. But we still think that you should give it a watch, because the methods are really very easy to follow, and can help provide your art pieces with the much-needed finesse that can capture anyone’s attention.
Here is another brush tutorial, but this time it’s by GDquest, and it primarily deals with mixing colors with brushes.
Every digital painting software works a bit differently, especially when it comes to mixing colors. Now, Krita has a lot of ways by which you can mix colors to get the desired shade, and this is precisely why it is so very versatile.
Once you get it down to the workflow and get used to the customizing options, mixing paint with brushes in Krita is as easy as it gets.
But learning how to do it can take a considerable amount of time; however, this detailed tutorial guide will help you to grasp the concepts faster, and inspire you to experiment with the colors and mix them whichever way you want.
The entire video may not be useful to you, as it does deal with the complete coloring method in general and you may need to just discard away the things you will not be working with.
This tutorial by Sara tepes is a really fun and engaging introductory video to this amazing digital designing platform.
It offers a very brief yeat a surprisingly detailed introduction to Krita, with small explanatory lessons on how the various tools work.
In just 12 minutes the video covers a lot about the platform and can be an excellent follow up guide to those who just got into Krita and trying their hand out at some of its features.
And since you get through this tutorial fast and quick, you can then immediately get to pinpoint some areas of the GUI you have problems grasping and need to lay more emphasis on.
With so many videos on Krita, one might honestly be surprised to know that GDquest is not a Krita only community or channel.
They have a lot of videos on several platforms like FireAlpaca, 3ds Max, Krita, etc. And this 7 minute long video on how to learn painting in Krita is one of the many gems that’s present on their channel and website.
The video shows, how to start a digital painting on the software. It teaches the use of the several Krita brush tools , along with how to swap out colors fast and effectively.
It will all help you learn how to flesh out your ideas immediately or even when traveling, as Krita is a very flexible program and has a variety of user-friendly features which any beginner can take advantage of.
David Revoy simplifies the whole process and concept behind lieart amazingly well in this video.
Now, what a lot of beginners and newcomers are not aware of is that, lineart is one of the initial styles and drawing methods that one should learn before venturing further into more complex sketch works.
Practicing lineart gets you more comfortable with the software and you slowly start to become more and more adept with some of the Krita tools which are available to you.
The video shows that the best way to get started on it is by tracing scanned drawings digitally first. And then once you are done scanning the entire image, you then move onto a new layer and then start to paint all on your own.
This creates the much needed confidence which in the long run will help you grow as you experiment.
Final Thoughts
When starting out on a new digital painting software, learning the new tool settings and the brushes are the most challenging part of it. But we hope that our list of tutorials today will help you out with Krita and all its various applications.
Have you often wondered how you can design and paint your 3D models?
With digital sculpting, you will learn how to design different characters for animation and video games. Sculptris is a free software program for 3D sculpting and design.
The interface is user-friendly and straightforward, so it's a good option for newbie designers to learn the basics of digital painting.
There are some excellent free tutorials to help you get started in Sculptris. There is a wide range of features, tools, and texture patterns which are offered by Sculptris, which makes it entirely professional for free software. You can customize the brush size and style according to your needs.
You also have the option to transfer OBJ files, which are supported by Sculptris or you can start creating your models from scratch. This program is based on dynamic tessellation, which refers to creating a 3D mesh structure that is made of triangles.
If a 3D model, has a low-triangle count, then it tends to look coarse, but the opposite can also take place. There are programs which can subdivide your model for making multiple triangles which will give a smoother look to your model. Sculptris usually covers the model with wireframe mesh just when it's required to fix the problems by reducing or smoothing.
Let's look at the 15 best free Sculptris tutorials!
Best Free Beginners Sculptris Tutorials
1. Sculptris Basics
If you're looking for a clear introduction to the various available tools and brushes on Sculptris, then you should watch this tutorial.
John Maksym analyzes several tools, their functions, uses, and the different customization options for better control and flexibility. It will be an excellent starting point as you'll get a run-through of all the features available within Sculptris. The artist gives you an overview of all the brushes, along with a demonstration of their uses.
Not only does he covers lessons on sculpting, but he also focuses on the details related to painting your model. Maksym emphasizes only on the technical features in Sculptris and avoids focusing on the general art concepts. This tutorial will be suitable for those who have experience in the field of art and want to start using Sculptris.
2. Sculptris Digital Sculpting Tutorial
In this video, artist Ryan Kittleson gives a brief introduction to Sculptris. You will be able to learn the basics that will be required for you to start sculpting your models.
The topics which are covered in the tutorial are- Import the reference image, navigate the environment, configure the program settings, and use of various brushes to create a structure of a monster.
Do you want to know the various types of tools that are available for sculpting?
In this tutorial, there is a detailed discussion of the several tools available in Sculptris and a walkthrough on how they function.
Plus the artist also provides a few essential tips that will help you to progress by bringing your concepts to life. If you follow the tips, then you will be placing more focus on the design and its overall shape then on the intricate details from early on.
When you watch this twenty-minute video, you'll be able to understand what you can accomplish with Sculptris. You'll also get a clear picture as to why several artists prefer sculpting.
3. Combine Objects In Sculptris
Here you'll learn a useful technique of combining different objects to create more complex 3D models. This technique will help you to make such models quickly without deducing it from just a single primitive.
The video demonstrates the process of bringing multiple objects to a particular scene and then how you can combine them for making sculptures at the same time. You can use this method for both primitive and compound shapes.
Once you're clear with this concept, then you can create complicated scenes with a broad range of objects. If you have exciting ideas and a sound processing computer, then there will be no limit to what you create Sculptris.
4. How To Create Brushes
With this video, you'll learn how to create customized brushes for using it in Blender and Sculptris. These brushes are made using the GIMP image- editing software, which is an open-source program.
The artist Johnny Bevo explains this versatile process in a simple manner. You can add unique textures to your work for that sense of contrast and style by creating customized brushes. There is a significant number of things that you can make as you experiment by combining the custom brushes.
5. Model A Cube
From this video, you'll learn how to use the grab tool to manipulate a sphere, to make a cube-like shape. You can use the form either as a primitive for your upcoming Sculptris project or some other program, like a game engine.
This will be a good project for acquainting yourself with the technique of shaping digital clay and the main features of Sculptris.
It is essential to learn the basics to help you create more complex models. For instance, in 3D modeling, you can even create a dragon after you learn to form a cube.
6. Make A Female Head
At the beginning of this tutorial, Underground Education introduces the dynamic level-of-detail or the dynamic tessellation, which is a powerful feature in Sculptris.
With this feature you'll be able to maintain the topology or the geometric structure of the model, as you increase or decrease your number of vertices that are present. This brief demonstration revels the flexibility of the workflow in Sculptris.
If you want to transition to intermediate sculpting, then you need to continually practice the skills which have been highlighted in this video. We advise you to practice sculpting of the human head, for those interested in character art. This will help you to create the integral feature (human head) of your models.
Figure modeling might be a challenging skill to master, but for an aspiring 3D artist, it is the key to sculpting some great models.
7. Spider Hair in Sculptris
Sculpting hair can be a daunting task.
In this video, artist Borodante shows the entire process of making hair, and it will be a hilarious and informative watch at the same time. There are plenty of useful techniques that 'you'll be able to learn from this video. The tips can be used for the original art of 3D sculpting and for understanding the Sculptris workflow.
The video also highlights the importance of keeping the objects separate, as it will simplify the process of sculpting clothes or hair as different meshes.
The artist is open to making mistakes as he continues to experiment with different techniques in the video. It will be helpful for beginners to understand the process of trial and error that an artist has to go through for learning different skills. When you make mistakes 'you'll be able to acquire a new set of useful skills eventually.
If you want to mimic the techniques used by Borodante, then there is a link given in the information section for tool presets and free custom brushes.
8. 3D Modeling With Sculptris
Here is another video that gives you a detailed demonstration of every single tool used in Sculptris. The artist focuses on showing you the process of creating several objects from the ground up. This tutorial will help you understand the step-by-step creation of a female bust, horned 'creature's head, and a small dragon.
This video will be an excellent guide for a novice and those wanting to brush up on their skills for 3D sculpting. The artist explains the intricate details in a simplified manner, which makes it easy to follow the video.
If you want to watch a tutorial that is fun and informative at the same time, then you'll love this one. There is also a Q&A with the audience, which will help to clear out many of your doubts and guide you through creating a creature-like 3D model.
9. Piggy Bank in Sculptris
In this tutorial, you'll learn how to create a piggy bank. The techniques that have been used to make the pig can be applied for sculpting any quadrupedal creature.
With the completion of the brief modeling demonstration, the artist moves on to create a texture map and also paints the model with various material and tools in Sculptris. The video also shows how you can export the newly made piggy bank in Unity3D.
Finally, you'll learn how to customize the standard shader in Unity to match the model that was made in Sculptris. If 'you're interested in game asset creation and game design, then you should watch this video. This is a brilliant example of how you can create game models and then transfer them to the most popular indie game engine.
10. Texture Painting A Monster Concept
The process of creating 3D sculptures can be complicated, but the practice is the only solution to getting it done real quick. It is challenging for even a skilled artist to pull out an idea from their imagination and to create the image in three dimensions.
To bring a model to life does not end with sculpting, as you also need to paint it correctly. However, texture painting is less challenging than modeling or sculpting.
If you know how to paint miniatures for different board games like Warhammer or Dungeons and Dragons, then you'll be at ease while painting 3D models.
With this video, you'll also get a clear understanding of the required workflow for completing your painting work in detail. The process of painting is quite similar in most of the 3D sculpting program. You should apply the strategy of starting with an opaque base coat before you get into the details.
You can use multiple brushes with different opacity levels for adding exciting features to your models.
11. Sculptris to Zbrush Basics
From this video, you'll learn how you can bring your models from Sculptris into Zbrush.
It covers the vital steps that you need to take while converting your model for editing purposes in Zbrush. If your design has several objects, then you'll have to split them into small portions. And then turn the triangles of the object to quads using the DynaMesh tool.
The tutorial covers the technical aspects, so it will be an excellent guide if you're familiar with Zbrush and you want to learn the simple interface of Sculptris.
From the demonstration 'you'll be able to understand the distinction between sculpting in Sculptris and Zbrush. And why the experts of Zbrush choose to use the features of Sculptris to create their base models.
The second half of the tutorial covers the topic: QRemesher, which is a new feature in Zbrush. If you're an artist who prefers creating smoother geometry, then this tool will be an excellent substitute to DynaMesh.
12. Texturing & Texture Painting
Here's another video with a brilliant introduction by John Marksym for making game assets in Sculptris. After completing a brief demonstration on sculpting, the artist also shows you how to create a layered effect by using a variety of pre-made textures. You can create a realistic and complex appearance for the models by using multiple brush sizes and level of opacity.
After showing you the process to export the model and the texture map from Sculptris, John also demonstrates how to import them into Unity3D. And the process to include the assets in a particular scene of a mobile game.
Finally, you'll learn how to play with the standard shader, the lighting, and the camera to help you adjust the look of the assets. We recommend this guide for anyone interested in full asset creation and game design.
13. Sculpt Tangled's Pascal
The video runs like a speedpaint tutorial, but as you learn to use the Sculptris interface, you'll be to follow the process carefully. Pascal is a fun and super easy character for sculpting.
When you practice creating models like Pascal, it will be an excellent way to improve your skills as both a character designer and a digital sculptor.
The process of emulating the work of experienced artists is a long-standing tradition within the field of art, which gives ideas for your creation. The tutorial also has a soothing tone being played in the background, which makes it a relaxing way to focus on your artwork.
14. Sculpt John F. Kennedy
If you want to learn the workflow and procedure used by a professional digital sculptor, then you should watch this video by artist, Richard Kapuaala.
You'll understand how the artist focuses on the general shapes and proportions, and then moves into the specific details. To get an accurate representation of your image, you'll need to focus on the overall placement and shape of the skull.
Final Words
These tutorials will help you create your 3d models by setting the fundamentals correctly for you. For every person who is new to a particular field, there is going to be a starting point. And Sculptris is one of the programs that will help you experiment and learn the different tips and tricks for making some stunning artwork.
But, you need to give yourself some time to learn the skills and practice the exercises religiously.
Till next time!
When it comes to producing exceptional masterpieces, oil pastels are one of the best ways to take you there.
While these mediums are soft and vibrant to offer great performance on their own, it is important to equip yourself with techniques in order to be a master in the world of oil pastels.
Today, we will present 26 different techniques which you can try with these sticks that can really help enhance your oil pastel paintings.
Remember to always prepare and prime the board before starting out with the project so that you’ll get the best, desirable results.
Without further ado, let’s get into it!
Oil Pastel Techniques & Tips
Blending
Blending is a popular technique in the art universe. Almost every kind of painting requires blending for creating certain effects.
When you’re done applying one color on the surface, take another shade and apply it right beside the first one.
Using a blending tool or your finger, rub the shades together to form another color in between the original tones. Remember not to leave any visible harsh lines.
Pre-blending
While blending can be done directly on the surface, you can also do it prior to the application. Take the colors you are going to use and blend or mix them on a palette.
This is a useful technique because you can see the blended colors before applying them, hence, preventing disappointments if the shade does not turn out as expected.
Dotting
The technique is called ‘dotting’ because it requires consistent work to produce a texture using dots. It is also known as pointillism or stippling.
For this technique, use the tip of the oil pastel and progressively work towards creating the desired figures. It requires a lot of patience to finally complete one medium subject but the outcome is amazing and worth it.
Keep in mind to be gentle and not apply too much pressure on the stick because that can make the soft composition break and leave unwanted crumbs.
Overlaying
Overlaying is the process of working on a base and then proceeding to form a layer on top of it. The purpose of this technique is to form a sheet effect covering the paints below. Also, it thickens the shade to provide full coverage and synchronized background.
To successfully execute the technique, use the side of the oil pastel which will serve this intention.
Extenders for Gradation
When you’re done applying oil pastels, use fingers or any blending tool to rub them for achieving smooth effects. Have an extender in hand and put a little amount of it on the painted surface to form a texture. You can also use the extender to improve the transparency of the colors.
Another way of using an extender is to apply it directly on the surface before oil pastels so that it acts as a base.
Impasto
If you want to produce a piece with effects similar to oil painting, use the impasto technique.
This technique requires extra soft pastels which you have to blend over and over until they form a paste. We do not recommend mixing this directly on the surface because it will damage from the ongoing process. Instead, use a palette and mix some thinner if the oil pastels are still too hard.
Scratching
This is a simple method of achieving great oil pastel results. It is also known as sgraffito.
Sgraffito is when you use the oil pastels dry. In this state, oil pastels behave as soft pastels would except that it can produce a lot more effects.
What you can do is fill the paper with preferred colors. When you’re satisfied, take a single color (preferably black) and fully cover all the other colors with it. Wait for some time, then take a stick or a sharp-tipped tool and start scratching the black surface slowly. Draw any figure or shape that you want.
If you put more colors underneath, the results will be more beautiful and vibrant.
Stenciling
Using a stencil will not only reduce mistakes but will also be faster.
The first thing to do is cut a shape from any hard paper for the stencil. Lay it on the sheet and start coloring inside the shape to create a precise figure.
Or you can apply colors directly on the edge of the cut shape and start transferring the colors to a paper by rubbing it lightly with your finger. This will give your painting a light color effect.
Masking
The masking technique involves using tape over the actual paper in order to create different patterns. You can also use draft tape for this purpose.
The best part about this method is that you can shape the tape however you want to for the desired textures. Proceed to drawing when the preparation part is done.
But before taking on this technique, keep in mind you will not be drawing on the actual paper anymore but instead on the surface of the tape.
Resist Effect
Resist Effect refers to the appealing look of the piece.
You can achieve such an effect by using watercolors after finishing the drawing process completely.
Because the oil pastels contain oil and wax, they will naturally resist watercolors - and this is where the name of the effect comes from. Therefore, it will leave a beautiful and luminous effect when dry.
Short Strokes
Short strokes are perfect for creating multiple effects and textures. They are also great for creating a painting concept with strokes pattern.
When doing a landscape painting, short strokes can be used to draw grass with dynamic effects. You can use this for drawing rain and meteor showers or any other similar subjects.
But most importantly, this technique works wonders when filling in minor areas with oil pastels.
Surface Effects
When creating different textures or patterns, the artist can turn either create their own surface in the painting process or find a ready-made option from the local art store.
If you are a beginner who wants to create magnificent paintings but having a hard time with techniques, the shortcut is to find a surface which already contains textures.
As you progress, try creating unique surfaces by using extenders and other mediums to achieve special surfaces.
This is the most basic of all techniques and all it requires you to do is draw the certain features and shapes which you want to highlight in the piece.
By using your oil pastels and creativity, drawing can actually give the artwork the precise effects that you desire because you have more control over the outcome.
Long Strokes
Similar to short strokes, these are perfect for drawing an area filled with grass, but which is closer to you. You can also draw hair using this technique.
The length of the strokes do not matter as long as you keep going and they meet the requirements.
Some other ideas which you can draw with long strokes include hay, animal fur texture, as well as fireworks.
Rule of 3s
This method consists of 3 rules to create an effect and is developed by Patrick Neumann.
The first thing to consider is this technique relies on the choice of colors. You should pick three colors of the same shades to
What this technique does is give your piece a more natural and realistic look.
Underpainting
The best way to think of an underpainting is to think of the wash you normally see in watercolor paintings.
The purpose of this technique is to cover up the white areas of the paper so they don’t look obvious to the eye. Therefore, by creating a light wash, you can replace them with another color which suits the piece more.
Crumb Control
While using oil pastels is always exciting, there is also a price that comes with it - and it comes in the form of crumbs.
Here, crumb control does not refer to a technique to enhance your piece but instead point out ways to remove these unwanted inconveniences so that your artwork stays neat and clean.
One of the most effective ways is to use a kneaded rubber to remove or lift the crumbs off the drawing paper.
Thinner Wash
If you use solutions to thin oil paints, you can also use it for oil pastels which are water-soluble. The result will be similar to that of the liquid oil mediums.
There are also solubles such as linseed oil which are perfect for oil pastels in case you want the piece to have an oil painting effect.
However, the quantity of soluble depends on the number of oil pastels you want to use.
Wet Effects
If the oil pastels are water-soluble, you can use the sticks to produce effects similar to that of watercolors only by mixing it with water or other solutions such as linseed, turpentine, and other mediums.
When using this technique, remember that any application which is too heavy can be blended for a smooth feel.
This method comes in very handy when you want to create multiple effects within the piece.
Grass Effects
Beginners tend to have a lot of troubles when working on making grass textures look real. So as we have mentioned earlier, you can either use long or short strokes depending on the position of the grass.
Highlighting and using multiple shades will take the artwork a step closer to looking real.
Another tip to creating precise and realistic grass is to sharpen the oil pastel tips.
Layering in Tones
With layering, you can apply one color underneath followed by another color on top. When creating layers, keep in mind not to apply too thin or too thick as that can destroy the final look of the painting.
You can also blend the layers to achieve a natural and realistic appearance.
Creating Marks
By creating marks, we mean using the oil pastels and give the paper any kind of strokes including short or long strokes, dots, hatching, and scumbling.
Yes, this is a way to use different techniques in order to create a unique piece. However, remember to use these techniques as you see fit, otherwise it will just be a combination of methods put together not serving any purpose.
Shadows & Reflections
Another way of bringing your painting to life and making it look real is by adding shadows and reflections. Many beginners tend to forget adding possible shadows when opting for a realistic painting, hence, making it dull and lifeless.
The best tip we can give to get amazing and precise shadows is by fixing an object anywhere beside the painting and imagine that to be a source of light so that every time you make a stroke, you’ll know where the shadow should be.
Details
We can say that focusing on the smallest of details is sometimes overlooked as a technique. It seems every efficient artist does this and even beginners have an idea of it.
When you focus on the details, the artwork appears to be much more realistic and appealing to the eyes.
Working on details requires patience and skills but to make it an easy process, either sharpen the pastel or use the edge bit.
Reverse Drawing
This is a fun technique to use for learners. The idea with this method is to apply oil pastel all over the paper. Then, place another blank sheet of paper on top and start drawing any figure you want.
Once the painting is done, separate the papers and you’ll see that the colors from the painted paper are transferred onto the blank paper, creating a reverse artwork on its back.
Temperature Technique
This is one of the cool tricks which you can use when the pigments start to get lighter.
What you can do is place the paper in the refrigerator for a solid 20 minutes, while at the same time, use the warmth of your hands to heat up the oil pastel so that it becomes soft again.
We find this technique very helpful to regain the vibrant pigments and provide full coverage.
Conclusion
And with that, we’ll wrap up today’s article. We hope you enjoyed reading it and found some techniques that you can use for your next oil pastel piece.
Happy Coloring!
Summer is finally here and we all long for those perfect moments of laying in the sun and letting all the stress and worries slip away.But why not change the familiar summer seaside decor with something different, fresh, more...green?! We draw inspiration from the nature surrounding us and dare to dream of that dream cottage tucked away under a peak of a mountain or the green of a forest.
Flower canopy surrounding your dream cottage
Imagine that fresh, earthy smell of leaves and dirt and the joy of waking up surrounded by the smell of fresh flowers, songs of birds and soft sun rays. you can find such dream places to rent for your summer holiday or, if you feel a little bit wild, you can build your very own little piece of heaven away form the crowded busy city life.
First of all there are a few considerations you have to take into account before purchasing or building a wooden cottage.
Distance is an important factor. Although you might consider creating a retreat surrounded by greenery somewhere far away, such a place must be taken cared of all the time, especially if you love having a flower or vegetable garden.
Fresh food is always a plus but such requires work and patience in order to be kept alive and beautiful. The backyard landscaping design changes the entire aspect of a home,thus this is an important aspect to be considered. There are lot of tips and tricks of how to design your very own backyard and create a true oasis of serenity and comfort. We suggest you to take this matter into your own hands and not be tempted to use a professional. Thus your cottage will seem more of a home than a vacation home and will so have your own touch.
Rustic cottage retreat
Consider building a fireplace! Nothing compares to the smell of burnt wood and the warmth of a fireplace. And why not create a fire-pit as well for those summer evenings spent outside in the garden! Make it out of river stones or old bricks for a more rustic look and create even a small fountain or pond so that all the elements will come together in your own backyard.
Now lets talk about the architecture of the cottage itself! The most commonly used material for building cottages is, of course, wood.Its warmth and texture has always been appreciated and considered proper for retreats and mountain cottages. Nowadays there is a tendency of returning to other primary materials such as earth and stones to recreate the traditional cottage in an attempt of trying to live the way our ancestors did, int he hope of having thus a cleaner healthier life.We at Homesthetics encourage everything related to ecological and natural, hoping that more and more of us will understand the importance of respecting nature. We could go on and on about the benefits of creating a dream cottage where you could retreat and envoy your holidays, but instead we offer you a small collection of dream cottages to inspire you and make you long for that summer holiday away from home.
White wooden cottage
English style retreat
Beautiful Scandinavian cottage
Dream Cottages for Your Holiday Inspiration
Fairy-tale home
Nestled into the forrest cottage
Surreal landscape
River nested cottage
Fantasy dream cottage
Surreal escape
"Where the Tides Ebb and Flow" is a Land-Art Installation by Pedro Marzorati in which he approaches the issue of rising water levels caused by global warming, a problem that should concern everyone nowadays. The Argentinian artist grasps the climate disturbances to rise the importance of this major dispute, creating thus a controversial installation of our contemporary problems.
"Where the Tides Ebb and Flow" was introduced for the first time in 2008, as a part of Land Art "Kielzog" festival, near Amsterdam, and "Sentier du Rhone 2009" festival, in France. The sculptures illustrates the human silhouette that are more or less submerged in water and eventually they will be completely drown. The artistic projects of Pedro Marzorati relies on the reinterpretation of nature and the dematerialization of renown objects. He wants to change our perspective about the world, about the communion with nature and to warn us about the issues we created to our planet and implicitly to our lives. The global warming, one of the most vigorously debated topics on Earth, is unequivocal and tends to expand more and more each day because it is produced by human activities such as the burning of fossil fuels and deforestation. The effects of an increase in global temperature include a rise in sea levels and a change in the amount and pattern of precipitation. As the time pass by, more artists give us a warning signal transposed into their work, so we can acknowledge, hear, react. Pedro Marzorati quotes: "The statues speak for us, it's a way of interrogation, just ask yourselves!"
The Awakening (1980) is a 70-foot (21 m) statue of a giant embedded in the earth, struggling to free himself, located at National Harbor in Prince George’s County, Maryland, USA, just outside the District of Columbia. It was created by J. Seward Johnson Jr. and originally installed at Hains Point, Washington, D.C.
The statue consists of five separate aluminum pieces buried in the ground, giving the impression of a distressed giant attempting to free himself from the ground. The left hand and right foot barely protrude, while the bent left leg and knee jut into the air. The 17-foot (5.2 m) high right arm and hand reach farther out of the ground. The bearded face, with the mouth in mid-scream, struggles to emerge from the earth.
The sculpture was cast in five parts over a two year period. It was funded with a National Endowment for the Arts, Art in Public Places grant of $50,000 given in 1980 to the International Sculpture Center, Inc.
The sculpture was installed at East Potomac Park during the 1980 International Sculpture Conference, and remained at East Potomac Park on an open-ended loan to the National Park Service until 2007. In 2007 the sculpture was sold for $740,000 to the developers of National Harbor in Prince George’s County, Maryland. In February 2008, the sculpture was removed from East Potomac Park and installed at its new home in National Harbor, on a beach along the Potomac River.
Homesthetics Conclusion
First of all, the remarkable expression of the giant will never be forgotten once seen.
Second of all, personally, I highly appreciate the creativity of this piece of art and the effort invested in it and I fill satisfied that effort has been rewarded with a huge prize when sold the last time, all artists, from theater actors to architects should have a better life style. And their work should should be acknowledged, but it should also be worth creating in the first place.
Princeton is one of the most highly rated cities in the entire country, and if you’ve decided to settle in this city, you’ve made a great decision!
This beautiful little city, with a population of around 30,000, has a beautiful sub-urban charm but is still located in the heart of New Jersey with New York City and Philadelphia just a short train ride away.
Princeton performs remarkably in almost every field that decides the living standards of a place, and moving here will make you and your family more likely to have a safe, prosperous and fulfilling life!
Whether you're moving to Princeton for your job or looking to give your family a better place to live, it's always good to have the proper knowledge of the town you're moving in to.
So in order to help you out, we've come up with this detailed article which covers almost everything you need to know before moving to this city. This article will give you a fairly clear picture of what it is like to live in Princeton, New Jersey.
So let’s get started!
What is it like to live in Princeton New Jersey?
History of Princeton, NJ
Princeton was initially just a wooded piece of land considered to be a part of the nearby Stony Brook. However, upon the construction of the first house in the area, Princeton got its name in the year 1724.
The town has a rich past and has played a significant role in the history of both New Jersey, as well as the United States!
Shortly after the town’s establishment, it became home to the College of New Jersey - presently known as Princeton University. The entire College was housed inside the Nassau Hall, making it the largest academic building in the colonies.
Thanks to its location between New York City and Philadelphia, Princeton became the overnight stagecoach stop until the mid-19th Century and was considered an important town in the Trenton-New Brunswick line. With the construction of a canal and railroad in the 1830s, the town quickly a hub of commerce and real estate!
Since then, Princeton has evolved into a major town with one of the best Universities of the country right at the heart of it. Today, Princeton is considered to be a center of learning and culture, and is home to some of the brightest scholars, scientists, and writers of the world!
Location and Transportation
Princeton is situated almost midway between Philadelphia and New York City in New Jersey's Mercer County. It is one of the best places to live in New Jersey and has a charming suburban appeal while still being a hub of trade, culture, and learning.
According to the United States Census Bureau, the Princeton Township covers an area of about 18.363 Sq. Kilometers with plenty of parks, waterways, and trails within its territory.
Being a major city in the heart of New Jersey, Princeton is very well connected with the rest of the country. Getting around the city also very easy, even if you do not own a car.
By Rail – The New Jersey Transit operates a commuter train nicknamed the “Dinky” which provides shuttle service to the Princeton Station all along the Northeast Corridor. You can easily catch a Transit from Princeton Junction and head to anywhere along the NE Corridor including Transit hubs such as Trenton, New York Penn or Newark Penn.
By Bus – At present, there are three bus routes operated by New Jersey Transit that service all the major stops in Princeton, including Nassau Street, 701 Carnegie Centre, and Princeton Station. You also have to option of catching a CoachUSA from Nassau Street which services several destinations in New Jersey and New York.
Here’s a list of the bus services to Princeton’s Campus –
FreeB – Services from Princeton Station to all around the city
600 Bus Line Trenton – From Plainsboro (Forrestal Campus and 701 Carnegie)
605 Bus Line - Montgomery, Princeton, Quaker Bridge Mall
606 Bus Line Princeton – Hamilton (Palmer Square on Nassau Street)
100 Coach Suburban Transit New York – New Brunswick – Princeton
Crime and Safety in Princeton, NJ
The Crime Statistics and Safety Ratings of a town are a significant factor which influences the decisions of homeowners when it comes to moving. If you're moving to Princeton, crime is something you do not need to worry about all that much.
Princeton has one of the lowest crime rates in New Jersey, with violent crimes being almost non-existent. The Crime Index of Princeton is nearly half that of the United States as a whole, and all the crime that exists are mostly petty thefts.
According to the Crime Statistics of Princeton, there were only 22 incidents of Violent Crime in the city in 2022. Out of those, 16 were Assaults, and 6 were robberies. The National Average when it comes to Assault and Robbery are 286 and 136 respectively – so I guess we can all agree that Princeton is relatively safe.
Education and Learning in Princeton, NJ
One of the reasons why Princeton is so popular among families with school-aged children is the fact that this town has some of the best schools in the country, apart from an Ivy League University.
Princeton is one of the best places in the country for your children with a fantastic public school system which boasts of a significantly higher graduation rate than the national average. Apart from the outstanding Public Schools, there are also plenty of private schools in and around Princeton, a lot of which are nationally recognized.
The Princeton High School, with a graduation rate of 95 percent, earned a gold medal from the US News and World Report – National Rankings for its student's exceptional performance in the state required tests.
The Princeton Regional School System regulates the Public Schools in the Princeton Township and Borough Area. There are four elementary schools in this area – Community Park, Riverside, Johnson Park, and Riverbrook.
Witherspoon Middle School is the only middle school (6th – 8th) in Princeton, and it feeds to Princeton High School (9th – 12th). Apart from these, there’s Princeton Charter School which services right from Kindergarten to the 8th Grade. However, admission to the Princeton Charter School is done through a lottery.
Princeton University is yet another mark of excellence in education that this city has to offer. It is one of the world’s most prominent research universities, and also serves as one of the most dominant features of Princeton’s community.
Things to do in Princeton, NJ
If you're planning on living in Princeton, you can be assured that you'll almost always have something to do and enjoy in this city. With a lively and vibrant community, Princeton has a ton of can't-miss activities to do and special events to enjoy.
From dining at some of the most excellent restaurants to getting yourself involved in the local arts and cultural scene, there's a lot you can do in Princeton.
Here are a few things you can enjoy while living in Princeton –
The Princeton University Art Museum
The Princeton University Art Museum was founded in 1882, and it is a part of the world-renowned Ivy League College. It is one of the most brilliant museums of arts in the northeast and is home to over 72,000 works of art from cultures all over the globe.
You can find works from all cultures in this museum from varying periods – ranging from ancient American to the modern and contemporary arts!
Apart from the permanent works of arts, dozens of special exhibits are hosted by the museum every year. There are also special film screenings, symposiums, and concerts going on year-round in this museum.
Lots of Outdoor Activities
As a citizen of Princeton, you can expect to enjoy outdoor activities all year round with easy access to parks, waterways, and trails. There are plenty of jogging trails lining the Delaware and Raritan Canal that you can use anytime you need to go on a run!
Princeton also has a large number of public parks that you can run to whenever you want to enjoy a beautiful day under the sun. The Community Park North, Turning Basin Park, Herrontown Woods and the D&R Canal are just a few of them.
The Community Park north is, by far, the most popular with residents as it offers several walking trails, picnic areas, and even some wildlife. It also boasts of an amphitheater, ice skating, and fishing spots.
You can also go canoeing on Lake Carnegie or rent a boat in one of the launch areas in D&R Canal. There are also lots of fishing areas and walking trails along D&R Canal.
Comprising more than 140 Acres, Herrontown Woods is a county park featuring an arboretum, hiking trails and lots of wildlife. So if you’re an outdoors person, we can guarantee that you’ll have a fulfilling life in Princeton!
Shopping in Princeton, NJ
Living in Princeton, you’ll have plenty of choices when it comes to shopping. From big, mainstream shopping centers to small retail stores, you have it all in Princeton!
Quaker Bridge Mall is the most popular shopping center in Princeton and features more than 60 stores including Macy’s, JCPenney, Sears, Lord, and OldNavy. Then there’s MarketFair Mall with over 30 retailers including popular chain stores such as Victoria’s Secret, Banana Republic, and Barnes and Noble.
The Princeton Shopping Centre is also extremely popular with Princetonians and features upscale styling with plenty of retail and specialty outlets.
Downtown Princeton is home to a wide variety of shopping options – everything from small thrift stores to unique high-end boutiques. If you’re a fan of such stuff, head on over to Palmer Square and you’ll have a wide range of specialty shops such as Lululemon Athletica, the Papery of Princeton and jaZams.
Dining, Bars, and Nightlife
Thanks to a diverse demographic that comprises people from a lot of different cultures of the world, Princeton is home to restaurants that will serve you flavors from anywhere in the globe!
From sandwich shops and gourmet ice creams to farm to table fine dining restaurants – we are confident that Princeton has something to please everyone’s taste buds. You can get Asian, Middle Eastern, Latin American, Mediterranean and several other types of cuisines in Princeton.
When it comes to bars and nightlife, a lot of people often claim that Princeton doesn’t have enough of it. This is somewhat true, but only if your vision of nightlife is strictly restricted to nightclubs. There’s plenty of things to enjoy at night and on the weekends in Princeton.
There are lots of bars, café’s with live performances of poetry, comedy and music, dance clubs and live music shows throughout the city. There is no shortage of entertainment options in Princeton!
Why move to Princeton?
Princeton is simply one of the most dynamic, diverse and satisfying places to live in the country!
There’s something for everyone in this city. For all of you big city folks, there plenty of shopping, dining, sports, music, and theatre to keep you satisfied. And for all the country folks, there’s an endless list of outdoor activities.
Besides, living in Princeton, you’ll be able to enjoy some of the highest standards of living in the country and have access to ample educational and job opportunities right at your doorstep.
Princeton is also among the safest cities in the country, and living here will undoubtedly allow you to thrive and live your life to the fullest!
Conclusion
Princeton is an amazing place to live, and if you’re planning on moving there – we have a list of homes for sale in Princeton.
Real Estate in Princeton is booming at present, and we believe it is just the right time for you to make a move!
We hope you’ve enjoyed reading this article!
There is never to early to design for the future. And nowadays specialist predict a rather dark future for our civilization due to the end of fossil fuels and global warming.Our need for consumption has exceeded any expected limit and has transcended the actual human needs. We buy more than we need and consume more than our earth was meant to supply. Thus we must come up with new and innovative methods of creating food from nothing, preserving the little resources we have left and maintain a green, safe environment for the future generations. Top 27 Future Concepts For The Home Of 2050 will give you a small idea of what the future has in plan for us.
1.Smart Fridge Is Your New Recipe Card by Ashley Legg
The first concept was created for those lazy ones who end up cooking using just the microwave every day. Its intelligent interface provides you with cooking recipes depending on the contents of your fridge and offering you the necessary instructions while cooking. Quite smart don't you think?
2.The Meneghini La Cambusa is what a $40,500 refrigerator looks like
$40,500 for a fridge?! That sounds outrageous! But not if you are extremely rich! According to its product description, what makes this fridge so special is its ability to be customized, with optional extras that include “space for coffee maker, fitted pantry, double pantry, ice-maker, microwave oven, steam oven and multi-function oven." Well we are not sure who would need all those options put together in one piece, especially placing antagonisms like hot coffee and an ice maker, but when you are wealthy I suppose this may make sense?!
The 2nd Space Age
For its 2010 competition, Electrolux Design Lab went with the theme: The 2nd Space Age. The idea is to design an appliance that will come to the aid of the future and combat the space crunch, limited resources plus advocate energy savings at the same time for the year of 2050 when most of the population is predicted to live in the urban areas. The following 25 projects have been deigned by students which hope of a greener, eco-friendly environment.
3.Community Laundry Concept by Kai Wai Lee
A communal laundry for the entire apartment block! Each family has its own basket that he can take home with clean clothes and can bring back with the ones that need washing.
4.Bio Robot Refrigerator by Yuriy Dmitriev
The Bio Robot fridge works by cooling biopolymer gel through luminescence. Odorless gel encapsulates each piece of food individually.
5.Bio Tank, Robotic ‘FishWasher’ by Akifusa Nakazawa
The Bio Tank contains Robotic Fish which clean the dishes and turn the leftover food into bio fuel, while filtering the water as well. Talk about recycling!
6.Bx7 Preparation Unit by Losif Mihailo
This gadget transform capsules of zinc, magnesium, selenium into a delicious juice filled with nutrients and the necessary vitamins for your everyday need.
7.Clean Closet – All in One Laundry Concept by Michael Edenius
A scanner scans your hung clothes, finds the dirty spots and cleans them so you always have fresh, clean clothes in your closet.
8.In-home Clothing Printer by Joshua Harris
There is only one more small step to printing your own clothes in your home when ever you want to. Can't wait for this one to become real!
9.Community Fridge by Pedro Sanin Perez
Taking community living to another level. Sharing your fridge might seem unusual. But this fridge allows you to have a personal code which lets you choose only the food you have placed in the fridge. Don't really know what to think about his concept! It might work in a dorm room where you store snacks and sodas.
10.Dismount Washer – Wash & Go Laundry by Lichen Guo
The Dismount Washer is a machine drum/ basket you can take home after the washing is done.
11.Eco Cleaner by Ahi Andy Mohsen
12.Elements Modular Kitchen by Mathew Gilbride
Elements Modular Kitchen by Mathew Gilbride is a modular all in one kitchen for the wall with different shelves that have different purposes like cooking, refrigeration, air conditioning, lighting etc. in order to have everyhting you need at our reach.
13.External Chilling – External Refrigerator by Nicolas Hubert
Meant to be placed outside, on the balcony, the fridge uses the outdoor temperatures to save energy. While in the winter the cold keep it from consuming much energy, in the summer the solar panels attached to it gather the solar energy.
14.Freedge – The Inside-Out Fridge by Matthew McNaughton
Similar to the External Chilling, Freedge consisits of a wall included tube that uses the outside temperatures to its usage. Both concepts are designed for small amounts of food though.
15.GAIA Wall Mounted Air Purification by Ankit Kumar
A green wall offers temperature control, air purification, energy supply for your home, all in modular wall panels.
16.The Snail Micro Induction Heating System by Peter Alwin
Using high density sugar crystal battery for power, the Snail uses magnetic induction to heats up food according to its type ( sensors detect it).
17.The Inflower – Small Laundry Cleaning Units by Jianjiang Yin
Inflower uses solar power to charge and cleans through nanotechnology stains and freshens up stored clothes.
18.Instinct Vacuum Cleaner by Berty Bhuruth
The Sheep-like Cleaner is a robotic vacuum cleaner concept that creates a 3d model of the room and create s a cleaning plan which it then follows.
19.The Kitchen Hideaway by Daniel Dobrogorsky
Imagine your food and you shall have it. Robots see your desired food recipes and get it ready for you without you having to place an actual spoken order.
20.Lupe Hand Held Washing Machine by Il-seop So
Scan, wash and iron with one move with the Lupe Hand Help Washing Machine.
21.Mesh Cooker – Expandable Oven & Hob by Lucian Cucu
The Mesh Cooker is a fold-able portable device that can be connected to any socket and used to heat your food in or on top of it.
22.MESO- Food Injection by Bogdan Ionita
An injection that provide you with all the required vitamins an nutriments directly to your blood stream. A little over the top for us.
23.Space Saving Kitchen Range – Modular Kitchen Appliance by Shin Woosup
A toaster, a kettle and an induction hob, that’s what the Modular Kitchen Appliance offers for an entire breakfast.
24.Preserved Egg Sweep Robot by Kai Dung
The Preserved Egg Sweep Robot cleans your home for you and recharges in a station until the next cleaning day.
25.The Drum Washing Machine by Andras Suto
Another project designed for a community. Take the drum with you as a clothing basket and bring it back with your dirty ones,place it on the motor and wash your clothes.
26.Zephyr Integrated Laundry System by Dulyawat Wongnawa
Zephyr is a storage that uses‘Airwash’ technology (with ozone being created to remove bacteria and odors, as currently found in industrial cleaning) and steam to remove wrinkles.
27.Qumi Flexible Cooking Unit by Ilia Vostrov
Used for heating, frying and steaming a wide variety of food types (including water based meals such as soup), Qumi comes with no buttons or touchscreens, everything being controlled by phone or by a central command panel installed in the home of the future.
What do you think about these concepts? Do you believe any of them could come true and be useful for everyday usage? What does the future have in plan for us and what are we going to develop next for future generations? We would love to hear your opinions in the comment section below.
Sounds a little like an art project right? Maybe , but it`s actually much much more than that. D.A.R.E stands for Development Association for Renewable Energy, and they came up with the idea. Plastic bottles are pretty much the slowest biodegradable thing you will ever throw in your garbage can. So if they last so much why not build something with them? That`s what D.A.R.E thought I guess. The bottles are filled with earth or sand(preferably sand) , joined together at the neck by strings and cemented together with mud. This creates and incredibly sturdy , stable and lasting structure. The first house built this way is in Nigeria, where it solves another two big problems : the lack of housing, and the millions of plastic bottles laying around in rivers, on the streets etc. To make things even better, the project is designed to be self sustainable and will use solar panels, water filtration and a whole range of other eco sustainable toys.
Due to the building technique the house also provides an ideal thermal comfort, and is virtually bulletproof. That might come in handy in parts of Nigeria and the African continent for that matter.
So we have previously featured DIY wall art ideas meant to inspire you in the search of finding the perfect decor for your home. Thus we've considered narrowing down today the options to Top 30 Pallet Wall Art DIY Projects You Will Love in order to make the task easier for you. Pallets are easy to find,cheap and really fun to work with. You can turn them in literally anything and they will look good no matter how unskilled you are. So don't be afraid of trying these sort of projects, you might find you really like them. A simple bright paint over a wooden pallet that has been properly cleaned can look rustic and vintage and beautiful. A great project including wooden pallets are stenciled maps. The technique is easy enough and the result will definitely be impressive.Another good idea for a wall art project is a vertical garden. Because green is always better. Wooden pallets can serve as the perfect support for your garden. Just be careful to treat the wood properly. Enjoy our small collection!
Top 34 Pallet Wall Art DIY Projects You Will Love
Simple yet insanely useful and creative crafts have been prepared for you in this article. All of them are solving a problem or enhancing a design in a different manner beautifully contributing to the sustainable movements and proving the world that simple is better and not everything in this world needs to be branded by huge companies. Useful pallet crafts can solve problems in your backyard garden and interior decor alike, yet the wood texture in the sunlight is something rather special especially when doubled by a thriving vine and flowers.
"A garden is a grand teacher. It teaches patience and careful watchfulness; it teaches industry and thrift; above all it teaches entire trust." Gertrude Jekyll
If you are to be blessed with a small portion of land that you can call your own it is natural for you to shelter nature in it enhance through greenery creating a small oasis of serenity, your onw personal getaway at the end of the day.
A garden can become everything . A garden is asGertrude Jekyll, a grand teacher that spreads the ultimate lesson in this chaotic life : patience.
Use all the resource at your disposal to nurture and empower this small heaven, a simple pallet bed or a pallet support for you vertical garden can be realized with ease and with little to no costs. With the same thread of thought you can bring a piece of nature inside through a recycled pallet coffee table that infuses organic patterns into a blank state, making a statement for the sustainable lifestyle that more and more of us are trying to adopt every day.
Craft away!
47+ Extraordinary Useful Pallet Craft Ideas For a Refreshing Spring Follow
If you are to seek inspiration through simple and useful pallet crafts you have probably enjoyed this small little showcase in their favor. We invite you to leave your valuable feedback in the comment section below and spread the word that sustains a healthy lifestyle to your loved ones.
Envisioned by world renowned architecture firmBagnato Architectsthe mansion ahead strikes the viewer with an extraordinary volume, developed on a single level, wrapped in marble, giving the home a very powerful timeless vibe. The clients brief mentioned a large contemporary home spread over one floor that would host all space needed for a single family with four children. In addition, the clients requested a delimitation between the spaces designed for kids and the ones designed for adults without overwhelming the space. This delimitation would create the proper intimacy and the healthy environments needed in a family.
The architects are further relating:
"The house features high ceilings and a rear open plan kitchen/meals living area that opens onto an outdoor alfresco dining area and landscaped gardens. Central courtyards throughout allow light to enter the house and create private outdoor zones for each of the rooms. The use of natural materials such as travertine stone, marble, timber paneling, feature mirrors & extensive glass were used extensively to create a cohesive design".
The modern mansion materialized exudes style and luxury in a very theatrical manner, managing to be imposing with one single level, it looks like is breathing a superior air out there, achieved trough excellence .
The old brewery has been turned into a spa which enables visitors to swim and enjoy the mineral spring both inside the premises and in open air, on the roof of the building, a perfect vantage point for the city of Zurich.
Zurich is renowned for the hot springs that lie beneath the city. Some historians agree that it was not the Romans the ones who laid the first structures but the Celtics and the city’s name is derived from the word for water, ‘dur’ as a reference to the lake and the springs. One of these mineral springs is placed below the Hürlimann Brewery, which is placed somehow above the city, offering a great panoramic view. The building is very well preserved; in order to accommodate its new function the structure has been revamped, enabling visitors to swim inside and outside as well; the exterior pool has been placed on the roof, requiring some dramatic changes.
The architects have chosen wooden panels as material for redecoration, a material that relates to the hundred year old structure, preserving its countrified looks and taking advantage of the strong, authentic attributes of the complex. However, many of the architectural elements have been preserved and adapted to fit their new purpose. Parts of the stone cellar have been conserved and turned into crystal clear pools. The ensemble features emerald baths, pools for meditation with underwater music, Kneipp baths, Irish-Roman spas, massages and saunas, all of which are supplied with water flowing directly from Aqui source of the Helvetian capital.
Outdoor swimming is enabled by the angularly shaped pool; water temperature can reach 106 degrees Fahrenheit, 41 degrees Celsius. Considering the exquisite views of the city, it would be a delight to take a bath on the rooftop. The image featuring the top of the structure can be considered quite modern, proof that wood is a very flexible material which adapts to its surrounding, enhancing their characteristics.
Designed by E. Fay Jones, second of six “most admired” architects recognized by Architecture magazine, an apprentice of Frank Lloyd Wright, Jones’s Thorncrown Chapel displays characteristic organic architectural elements.
Demonstrating respect for the natural setting and landscape and integrating a sophisticated orchestration of space and light along with the use of simple, handcrafted, natural materials, Thorncrown Chapel received the American Institute of Architects (AIA) Honor Award and Jones was awarded the Gold Medal for his great contribution. The Architectural Record proclaimed that Thorncrown was“a brilliant testimony to the power of architecture to intensify experience and inspire contemplation.”
It is constructed mostly of wood and other natural materials indigenous to northwestern Arkansas. So the proposed design minimized material transportation costs. Though it looks like an open-air structure, the chapel is a glass-enclosed, conditioned space that still allows you to fell in the middle of a forest.
This chapel was listed on the National Register of Historic Places in 2000 .(Buildings less than fifty years old can only be listed on the Register if they are of exceptional significance).
Zaha Hadid Architects have completed all sorts of public architectural programs through which they have proved their majesty and one of a kind style. This museum bears the mark of their ingenuity through which they have developed a design that was inspired by the landscape and its profound meanings.
The exhibition is nothing short of extraordinary. Spreading over a surface measuring 7,000 sqm, it houses over 3,000 exhibits previously stored in the former building of the Glasgow Museum of Transport, a vast collection of relics from a prosperous past. Among them visitors can glance at items like the L. S. Lowry: Cranes and Ships, Glasgow Docks or the SAR Class 15F 4-8-2 steam locomotive, No.3007 - built by the Glasgow-based North British Locomotive Company.
The concept at the base of the project could not have been explained better than the architects themselves:
“The historical development of the Clyde and the city is a unique legacy; with the site situated where the Kelvin flows into the Clyde the building can flow from the city to the river. In doing so it can symbolize a dynamic relationship where the museum is the voice of both, linking the two sides and allowing the museum to be the transition from one to the other. By doing so the museum places itself in the very context of its origin and encourages connectivity between its exhibits and their wider context.
The building would be a tunnel-like shed, which is open at opposite ends to the city and the Clyde. In doing so it becomes porous to its context on either side. However, the connection from one to the other is where the building diverts to create a journey away from the external context into the world of the exhibits. Here the interior path becomes a mediator between the city and the river which can either be hermetic or porous depending on the exhibition layout. Thus the museum positions itself symbolically and functionally as open and fluid with its engagement of context and content to ensure it is profoundly interlinked with not only Glasgow's history, but also its future. Visitors build up a gradual sense of the external context as they move through the museum from exhibit to exhibit.”
The design is basically a giant tube, opened at both ends, which the architects have shaped in two ways. First of all there is the very intriguing roof which resembles a scenery from the Alps and, just like the mountains, it takes the shape of peaks and troughs, creating a very dynamic facade and a very interesting interior. Their second intervention consists of bending the shed twice, resembling the form of the letter “Z”. The visitors cannot see the other end of the building from the entry point, fact which turns the tour through the museum into a labyrinth-like route, creating some sort of mysterious and magical place and enhancing the will to go through the entire exhibition and to get a sense of the place. The interior does not benefit from any natural light, mainly because in an exhibition there should be no direct sunlight because it affects the perception of the exhibits. Instead, artificial light is used which can be manipulated to enlighten the internal space as the architects desire and to provide visitors with a proper perception of the exhibition. It also allows them to focus on the observation of the items.
Homesthetics conclusion:
The amazing thing about this project is the attention to detail given by the architects. Every aspect of the project has been properly designed and optimized to meet its purpose. I mean they have taken into consideration everything from the relationship between the architectural object and the landscape to providing the visitors with a most interesting route and not just with a storage space for the automotive relics. They sorted it all out. And above all of course its the exterior shape of the building which impresses and gives the museum a sense of personality and character.
Client: Glasgow City Council
Opening: June 20th, 2011
Cost: 74,000,000
Project Director: Jim Heverin
Project Architect: Johannes Hoffmann
Project Team: Achim Gergen, Agnes Koltay, Alasdair Graham, Andreas Helgesson, Andy Summers, Aris Giorgiadis, Brandon Buck, Christina Beaumont, Chun Chiu, Claudia Wulf, Daniel Baerlaecken, Des Fagan, Electra Mikelides, Elke Presser, Gemma Douglas, Hinki Kwon, Jieun Lee, Johannes Hoffmann, Laymon Thaung, Liat Muller, Lole Mate, Malca Mizrahi, Markus Planteu, Matthias Frei, Michael Mader, Mikel Bennett, Ming Cheong, Naomi Fritz, Rebecca Haines-Gadd, Thomas Hale, Tyen Masten
Competition: Team Malca Mizrahi, Michele Pasca di Magliano, Viviana R. Muscettola, Mariana Ibanez, Larissa Henke
Services: Buro Happold [Glasgow, UK]
Acoustics: Buro Happold [Bath, UK]
Fire Safety: FEDRA, Glasgow
Cost Consultants: Capita Symonds
Project Management: Capita Symonds
Size/Area: Gross floor area 11,300 m2 (excluding basement)
Exhibition Area 6600 m2 (including public areas and café)
Site Area 22,400 m2
Footprint Area 7,800 m2
Materials: Steel Frame, Corrugated Metal Decking, Zinc Cladding, Glass-reinforced gypsum interior surfaces
The Absolute Towers are also known as the Marylin Monroe towers, the nickname given by the local residents. The gentle twisting of the two structures was meant to resemble and express the fluidity that defines the natural world.
Also known as the Taipei World Financial Center, it is the former highest building in the world, surpassed in 2010 by Burj Khalifa but still a brilliant piece of architecture and engineering.
The Taipei World Financial Center is revolutionary from many points of view and a very intriguing project for both architects and engineers. The designers met many drawbacks and problems which nobody ever confronted before so they had to invent new ways of dealing with the opposing forces. Building the highest structure in the world means going over new boundaries set by enormous height and huge mass. The amazing size of the Taipei World Financial Center meant that the efforts produced by wind, weight and earthquakes were in a whole other dimension than for normal buildings such as a small home. But the materials that the designers had to work with were the same and had the same abilities to resist to various forces.
Structure
The first challenge was to design and build the foundation, the element that anchors everything to the ground and keeps it from falling steady, probably the most important part of the construction process. The main problem was that the site was only 600 feet away from a fault line and, moreover, in this area of the Asia-Pacific earthquakes are quite common and serious. These factors lead to the decision of making one of the most stable buildings ever constructed that will withstand gale winds of 134 mph and the most powerful earthquakes that could occur. The Taipei World Financial Center has five underground stories of which the foundation is composed. There are 380 piles that go 262 feet into the ground so that the base of the building would take a hold in the bedrock, the hardest layer that was to be found underground-each pile is 5 feet thick goes about 98 feet into the bedrock to ensure maximum stability. The engineers worries about the safety of the structure was put to a test on March 31, 2002 when a 6.8 magnitude earthquake shook Taipei and its buildings; many collapsed but the skyscraper which had reached 56 floors showed no structural damage, whatsoever. This fact gave the engineers confidence and work was soon resumed, considering that five people lost their lives during the catastrophe.
During the construction process, the number of earthquakes in the area increased. A scientist launched the hypothesis that the huge mass of the newly built skyscraper was so large that it had the power of severely influencing the stability and movement of the two faults, near which it was being built. Even if it was never demonstrated to be true, it is still very intriguing and gives a clear view upon the enormous, 700,000 tonnes mass of the Taipei World Financial Center.
After the foundations were completed, an even harder and more complicated part of the construction followed. To make the tower resist to wind forces but also inertia given by an earthquake, the engineers had to develop a mega structure, never built or designed before. The result is a not so complicated to comprehend but was very difficult to build and presented unforeseen challenges. There are eight main, mega columns that provide vertical support and conduct the efforts from each floor to the foundations and 28 smaller ones. They are all connected and reinforced, on each level, by a complex steel grid. Every eight floors, massive steel outrigger trusses further enhance the stability and compactness of the structure. In order to achieve a flexible but also strong structure to make the Taipei World Financial Center resist, the engineers had to combine concrete which is only good at being compressed but cannot resist to any stretching with steel ( about four different types of steel) which can do both. The eight main columns are made from a steel square frame into which the builders poured concrete. Sounds quite simple but welding steel parts that add up to nearly 1500 feet and transporting them to such a height was never done before and was only possible by using cranes that rise with the building. The huge demand of precise parts of steel was supplied by an industrial factory near Taipei.
The crown jewel of the structure is the world’s largest passive tuned mass wind damper, set at the top of the Taipei World Financial Center. The principle on which this element works is quite simple: it is a shock absorber that holds the building from moving swinging too much and it was placed as high as possible because that is the part of the building that will move the most, especially due to wind power. This unusual of keeping the building steady reduces in fact 40% of the movements that would normally occur; without this key structural element, the tower would probably incline beyond its capacity and break. The tuned mass damper weighs 660 tonnes and cost 4 million US$; the steel sphere measures 18 feet in diameter and consists of 41 circular steel plates, suspended from the 92nd to the 87th floor.
Design
The overall appearance was meant to evoke strong Chines beliefs and traditions, a building that would be an icon for the city of Taipei by illustrating its community's attributes. The number 101 symbolizes perfection by being a step further than 100. Dividing the tower into eight floor segments was also inspired by the Chinese culture, in which this number represents abundance, prosperity and good fortune. Both the interior and the exterior of the Taipei World Financial Center were diverted from the shape of a Chinese pagoda and the form of bamboo flowers. The concepts of financial richness and everlasting youth in Chinese culture are represented by a blossoming flower, which inspired the designers to make the building open upwards. Naturally there are many other small design elements that were inspired by the same beliefs, all pointing out to the idea that the designers were very fond of the Chinese culture and chose to include as many traditional elements as possible in the design of the Taipei World Financial Center.
Awards
Seven Wonders of Engineering by Discovery Channel in 2005
7 New Wonders of the World by Newsweek Magazine in April 2006
Best of What’s New Award 2004- Engineering, Popular Science Magazine
Guinness World Records of the World’s Fastest Passenger Elevators (Observatory Elevators 1,010 m/min)
Tallest Building in the World by the Council on Tall Buildings and Urban Habitat (CTBUH)
Homesthetics conclusion:
What is truly remarkable is the designers wish and force to confront issues that nobody has faced before and the intelligence that they’ve proved by pre-designing this huge structure which acts just as they've foreseen and imagined. If there is something that would even further prove their boldness and determination is Taipei’s World Financial Center’s singularity. It is the only skyscraper around, the first built in the area and the highest point for many miles. I also appreciated the way that the designers approached the concept, not forgetting their culture and beliefs, creating a symbol for the Chinese and Taiwan tradition.
Photo and image courtesy to C.Y. Lee & Partners and
Type :Commercial offices
Location :Xinyi District, Taipei, Taiwan
Construction started :1999
Completed :2004
Opening: December 31, 2004
Cost :US$1.8 billion
Architectural height :509 m (1,669.9 ft)
Roof height :449.2 m (1,473.8 ft)
Top floor height :439 m (1,440.3 ft)
Observatory height :391.8 m (1,285.4 ft)
Floor count: 101, 5 below ground
Floor area :193,400 m2 (2,081,700 sq ft)
Lifts/elevators :61 Toshiba/KONE elevators, including double-deck shuttles and 2 high speed observatory elevators
Owner: Taipei Financial Center Corporation
Management :Urban Retail Properties
Architect :C.Y. Lee & Partners
Structural engineer: Thornton Tomasetti
Main contractor: Samsung Engineering and Construction Company
Nature has various ways of expressing herself. Its beauty lies in its wildness and incredible force which has modeled shape and created surreal landscapes and sights. Today we are presenting you the simplest of houses lying down between a surreal landscape powerful through its rough terrain slopes and lonely surroundings. Located in the harsh Norway on a solitary island, the small home seems to camouflage wonderfully in the stony land. Its simplicity stands out, rising from the ground and overcoming its difficult site conditions.
“We have aimed to build a contemporary Naust with an unpretentious presence and a distinctive character, developing themes from the vernacular architecture. Seemingly growing from the landscape, the house sits on a rock beneath a granite shoulder negotiating the uneven terrain“, explained the architects.
Simple Scandinavian interior designs have been chosen to go with the overall theme where glass dominates the structure, allowing the incredible landscape in. Neutral tones create a cozy uniform atmosphere where you can relax and let go.
Would you choose to live in such harsh conditions? We believe that for a solitary soul such a landscape and home would be the ideal place. It can also serve as the most incredibly simple vacation home where you could actually disconnect and reestablish that necessary earth connect we all seem to have lost in our concrete cities. Fell free to share your thoughts in the comment section below.
As we all know, times are changing and so do people's needs, but when we change something that doesn’t fulfill our needs to the best , ( our home for example ) ,we want to leave there a piece of intact history behind, and architecture nowadays extends towards a merge between old and new buildings , with reinvigorating new functions that better suit our contemporary society.
In that manner, BKK Architects finished their latest project , the Enclave House. “Deep reveals to the upper floor windows shield the gaze from the surrounding neighbors. This also gives the residence a profound sense of containment, like a protective cocoon. The private courtyard garden links the studio space with the main residence. The landscape has been manipulated to frame the views between the two“.
Although the courtyard is small , the garden and the swimming pool look welcoming and generous .Large openings connect the inside to the outside spaces , providing an airy feeling and a light passage. The spaces are generous , the design is simple and minimalist , with few details and accents and no bold colors . Although the dining table is a little bit to majestic and large , placed in an open place filled with white,it brings a feeling of harmony and stability .
Homesthetics conclusion
We really enjoyed this project because we are generally interested in the merge of old with contemporary architecture styles. Although we weren‘t particularly impressed by the contemporary interior design, the successful style merge that invigorated the functions and the purpose of this home proved it as a true architectural mark.
All photos and images are courtesy of BKK Architects .
A career isn't just about scoring a job that helps pay the bills. In order to feel fulfilled and satisfied with your career choice, you need to find a role that you love.
This requires some amount of vision right upfront. Where do you see yourself in 10 years? I know most of us absolutely hate that question, and a lot of it is because we either don't know what we want or it might be that we just don't know how to get there.
That's because we're only looking at the big picture - however, everything in life requires design, including your career. The imagination and meticulous planning you put forth into your design project should be applied to your career paths as well.
No goal is unattainable as long as you manage to break it down into a set of small, achievable steps.
If you want to be a CAD expert, you need to develop software skills and start with internships in architecture planning jobs. If you want to focus on management, or construction or research, you need to get your foot in the door as fast as possible.
Here are a few tips to fast-track that journey.
How to Make and Accomplish Goals as an Architect
Learn from those before you
Life is a lot easier with a mentor - whether that's your college professor, or someone in the industry or even your dad. They will be able to provide you emotional support and help you with your decisions.
However, unless they're in the industry itself, they won't be able to tell you exactly who to approach, which companies to apply to and which door to knock on.
Thus, your best bet is to look online. Make a profile on LinkedIn and jump in. Chances are your friends already have profiles there with a lot of connections. Use their connections to check out other people who are doing the same thing as you are.
Take a look at how their career paths progressed, the companies they worked at, the projects they worked on, the people they worked with. The more people you look at, the more you'll get to learn about all the options that you have.
You can even look up alumni from your school itself and then reach out to them for guidance or advice. LinkedIn is a great place to do your research as you have so many different career paths laid out in front of you. If you want to follow someone's footsteps, this is how you do it.
Make smart goals
SMART stands for specific, measurable, attainable, realistic, and time-bound. This is exactly what we were talking about at the beginning. Having big goals is bound to seem overwhelming unless you have a plan.
With your long term goal in mind, it's time to reverse engineer how you try to get there. Break your career path into small chunks and then focus on going up the ladder one step at a time.
Set small goals for yourself, setting yourself up for small victories and celebrations, instead of large disappointments. Keep your goals specific - for example, getting a license by passing the ARE (Architect Registration Examination). This goal is realistic, achievable, and you'll be able to complete it in a certain time period.
Even with smart goals, it helps to have a timetable. For example, if you are presenting a paper, you'll have a deadline. Choose a subject which is doable for you, thereby keeping your goals realistic. Then start working on your presentation one day at a time, so you have measurable progress every day.
Goals which aren't smart include: I want to buy a big house and a car, or I want to make more money. Instead, aim for a 30% pay hike after a year. If it's not realistic, you're setting yourself up for disappointment and cynicism.
It's also worth noting that every one of your smart goals can be broken down into even more fundamental smart goals. This is where the timetable and the schedule come in. Rome was not built in a day, and as an architect, you know that you can't build a house without building a foundation. So go step-by-step.
Ask for help
You must have heard the saying, "If you want to go fast, go alone, but if you want to go far, go together." This is absolutely true, you can't make it on your own. You need to learn to ask for assistance, not just when you're in a tough spot, but also to make your day-to-day life a little easier.
Now when we say assistance, we don't just mean someone who will stick with you for the rest of your life or a mentor. You just need someone to help you get past the next big obstacle, the most immediate problem.
For example, you can try out your local AIA [American Institute of Architects] chapter.
It helps to have friends, and it helps to know your way around the industry. Industry professionals will always trust someone who comes well recommended and is well-known in the network.
Give it your all
I'm sure you're tired of hearing this by now, but there is no such thing as a shortcut to success. If you want to get to the top, you have to work harder than everybody else. And by that, we mean work smarter, not harder.
Abraham Lincoln said if he's given 10 hours to chop down a tree, he'll spend the first 9 sharpening his ax. You don't have to spend 60-hour workweeks, just make sure you cut down on duplication of efforts and focus on getting things right the first time. Also, make sure your work gets noticed. Credit is due where credit is due. Keep a log of your daily work so you can present it to your boss if anyone ever raises any questions about your work ethic.
But more importantly, you need to keep your eyes and ears open. Opportunity always comes knocking, but you need to get up and answer the door. It doesn't do you much to slave away at a meaningless job and then just go home and watch Netflix when there's a better one probably just around the corner. Your luck can change for the better, but you have to take the first step yourself. Fortune always favors the brave.
Go easy on yourself
Life isn't a competition, and often we are so hard on ourselves on issues which really don't matter much in the large scale of things. So your friend and classmate got himself a big fancy house, and he's only 25? It won't matter in a few years. The only person you should be competing with is who you were yesterday. Aim for better than yesterday, and that's all. It all adds up.
Also remember, it's unreasonable to assume your first job will be the field you'll stay in forever. You might like the idea of research work, but pretty soon you might get bored and want to switch over to something more hands-on like construction. That's completely okay, and it doesn't mean you're taking a step back.
Keep in mind that success isn't always a constant upward trajectory. You'll make mistakes, but you will learn from them, and that is the only way forward. Don't get stuck on something you don't like doing simply because you invested a lot of time in it, sometimes, you just have to cut your losses and continue your journey on another path.
Teamwork
Final Words
If you got nothing else from this article, then this is the short version. Visualize where you want to be a few years from now, and if you want ideas, look online, preferably Linkedin. Once you've sort of mapped a career path, start working at it one step at a time. Break down all your goals into small parts and keep moving forward.
If you keep doing this, it's not guaranteed that you end up where you had initially planned to be, but you'll definitely be in a better place than where you are today.
The name of this modern dream home made by Mayer Sattler-Smith Architects comes from the client’s occupation. He is a professional dog musher, a four time champion of the 1,161 mile sled race from Anchorage to Nome.
Designed for the Glaskoch Corporation by 3Deluxe, the Leonardo Glass Cube pavilion covers 1200 square meters on two floors and is used for product presentations, conference rooms, seminars and recreation.The glass facades suggest a hyper-naturalistic and esthetic style, the organic-like structure being borrowed from the surrounding landscape. The structure of the building is made of two parts: its glass rectangular shell and the undulating interior. The softly curved interior wall encloses an intimate exhibition area, the other side of the building being handled in the exact opposite way: a flood of natural light filtered by the glass wall. The surroundings of the building are treated in the same genetic style by designing a pavement similar with the structure of the facade, achieving a beautiful connection between the pavilion and the immediate encircling space.
The floors are connected by two intersecting bridges. From the entrance, the interior space reveals itself to the visitor on both horizontal and vertical plane. The artificial lighting is constantly and dynamically changed so that the inner atmosphere is in a permanent shift. I believe though that what makes this building stand out is the way its curved structure bonds with the rectangular glass facades, creating a wonderfully balanced architectural composition.
Homesthetics conclusion
Organic designs have always been a bit tricky and hard to materialize because they do not define what we see everyday. These architects have achieved an object that is both a proper architectural object and takes after the organic world.
Photo courtesy to 3Deluxe
Place:Bad Driburg
Architect:3deluxe,Wiesbaden
Lighting designer:Atelier Schiefer
Start of construction: April 2004
Opening: 24 May 2007
Cost: 8 million euros
Inside area: 2,800sqm
Outside area: 5,600sqm
Total height of building: 11m – above-ground: 7m
Height of glass panes: 6m, width: 2m
Materialized in a serene landscape, embedded in vegetation, in nature; PLACE materialized one of the most beautiful green modern classic houses in the world, deeply hidden in the forest.
PLACE is a rather special architecture studio, an award winning Vancouver architecture firm oriented towards the environment that tries to celebrate, nurture and enhance the methods of social cohesion in extraordinary manners. In their projects they work side by side with the client the entire time developing ideas and dreams into new establishments or simply into other dreams.
One of their soul creation it`s entitled The Harbinger, an extraordinary name for a spectacular home. The shelter is built entirely with sustainable materials whilst making no compromises on living quality and comfort; an eco-sensitive house using natural elements in an extremely beautiful and delicate environment.
The modern comfort and extraordinary spaciality has been envisioned for both entertainment and hosting, being situated on a sunny shy acre in the forest, surrounded by mature unique landscaping, a small sport court and a hot tub. The home features a humongous total surface of 5542 square foot from which the architects extracted five bedrooms, four bathrooms; each room being different entirely, comfortable and unique in a distinct manner.
We find the position of the establishment spectacular, it massively improves the whole project. Beside the forest it self the home has its own gardens which are lovely, extraordinary established and very intimate. We would love to hear your opinion regarding this green modern house subdued to wilderness.
Cozy, comfortable, intimate and unique. These are the keywords for this amazing project which presents a very different and unique type of architecture.
Northern London nestles an interesting complex building, six apartments in a simple, sculpted silhouette defined by brick. In this shape distinct balconies are brought forward, wrapped in a natural material, wicker. The volume has been envisioned by Amin Taha Architectsand it now features a cross-laminated timber structure, also known as a CLT structure in which layers of laminated wood are used as a skeleton thus replacing concrete or steel.
The brick play with which was surrounded is perforated to match its surroundings, on the sides two brick buildings neighboring it. Large bronze framed windows pierce the street facade to invite natural light and expand the floor with balconies thus creating a connection between interior and exterior spaces; the wicker balconies provide seated privacy for each apartment with the secondary purpose of shading the window below slightly, as a result each balcony receives the maximum amount of light and privacy.
The interior space is extraordinary special and particular thanks to its timber structure, there is simply no need for plaster walls or suspended ceilings. The cross laminated timber structure remains exposed in the interior beautifully tailored with parts of the brick facade into a balance of coziness and warmth; the architects further relate:
“Timber also has inherently more robust and is perhaps a better and warmer domestic aesthetic”
How do you see the home above? What do you think of its Cross-Laminated Timber Structure ?
The four-storey building centers on the steel staircase that connects all levels and creates an internal dynamism, just like a contemporary luxurious design should be and feel like.
I think we can all agree that today's' society is oriented towards the future and modernity. But who says that you can't express modernity and elegance through classical design elements? As the black will ever get old in matters of design, so does the neutral color scheme with classical accents, creating a rich, cozy atmosphere where one could really feel at home. The following example is a great example of a modern mansion that exudes elegance and a conceptual design unity. Located in Canada, this dream home makes use of a dark color pallet to emphasize its classical shape with the all-known arcs and facade details. Natural elements like stone, wood and leather create a composed scheme that offers its inhabitant the perfect ambient one would dream. The white walls have been used as a canvas for the entire display of furniture and decor, but not by overcrowding the space like the old interiors used to. The usage of large windows has created a perfectly illuminated space that can really put into value the created interior design, arranged around the central masterpiece: the classical stone fireplace.Overall, the entire house reflects a beautiful taste in details and design in general, a truly dream mansion.
This remarkable white modern mansion was designed by German practice Hornung and Jacobi Architecture is located in an open site in the countryside next to a forest in Southern Germany, benefiting from wonderful views of the natural surroundings.
Japanese are raw models for the entire world in matters of efficiency and simplicity at the same time, in every Japanese interior design that we have featured so far on Homesthetics every inch was properly used in a beautiful matter whilst respecting the design principles. Kenji Ido of Ido, Kenji Architectural Studio recently completed House Fin, a small minimalist Japanese residence situated in Osaka . It has been specially envisioned for a young couple and a strict narrow site, enclosed by an intriguing architectural mix where small minimalist houses coexist shoulder to shoulder with small offices and small factories alike.
The owner of the home asked for a garden on the south side of the plot and after considering the narrow site they`ve decided to go for a three level building that would overlook the beautiful green spaces created and gain so advantage. The end result is simple, quiet and comfortable and it respects the Japanese design line found in most of architectural objects, the interior is simple, bright, in white stark and light wood. The interiors are fluid, the regular doors are nowhere to be found, this allowing energy to flow around the home. The staircase is built entirely out of wood, light wood, the shelves and doors as well, giving the home a warm touch.
The spaces created are impeccable and inspiring, Japanese interior design surprised us again. What about you ? How do you like Japanese designs?
Courtesy of Architect Kenji Ido
Photography by Takumi Ota
You are probably expecting some airport warehouse sized ultra technological state of the art project from the man
that presented so many of these already. OK maybe the featured photo gave it away, but nonetheless this is a surprise(cabin might of been a antithesis, you are not supposed to suppose).
The project is made by McCloud himself, from next to scratch, mostly wood found on site and various recycled objects, and it`s the object of Kevin`s new series.
The cabin is covered with some 2000 handmade wooden tiles , the heating falls onto the metaphorical shoulders of a former safe, the one chair is part old tractor , part deer (only the skin) and the wallpaper is an old map.
The result is stunning : a cozy, homie, small retreat from the supersonic roller coaster which is urban living. It even has a draw-wall… yes you read well, one of the walls of the cabin can be brought down through a pulley system, providing a breathtaking view of the sunset in the woodlands. What more can you ask for ?
Minimal design , 100% ecological, peaceful, quiet. Kevin is even expecting visitors with a glass of marrow rum that he made himself.
When we imagine a place to live, most of us are thinking at some kind of equilibrium between old and new, modern or classic, somewhere isolated in the forest with a lake or even better the sea near by. A place to relax, find your inner focus and peace. A place where you can both work and have fun.
Oscar Niemeyer had a similar vision, Casa De Canoas was his family residence for a while, you couldn`t fault the house for everything, not even the dimensions or small details, all are seem to blend in the surroundings and take a part at the perfect scenario. We are sure that they`re people that can criticize the shape, or the big boulder that`s a part of the house but not even God can satisfy all of us. We are trying to offer our personal opinion.
The Casa das Canoas in Rio de Janeiro was designed by the legendary brazilian architect, Oscar Niemeyer, in 1951. It was used as his family house until 1965, year in which he had to leave Brazil due to the military dictatorship. Using tropical eroticism as a construction language, Niemeyer deconstructed the language of functionalist modern architecture: with the curved flat roof supported by light steel columns and the transparent glass walls making the house disappear within the tropical jungle that surrounds the home.
” I deliberately disregarded the right angle and rationalist architecture designed with ruler and square to boldly enter the world of curves and straight lines offered by reinforced concrete. This deliberate protest arose from the environment in which I lived, with its white beaches, its huge mountains, its old baroque churches, and the beautiful suntanned women. ”
- Oscar Niemeyer
Today this superb modern mansion can be visited if you`re doing an appointment, further on we will provide some details that may help you, and we strongly encouraging you to visit it if you have the opportunity.
Oscar Niemeyer Casa das Canoas
Estrada das Canoas, 2.310- São Conrado
Rio de Janeiro, RJ – Brasil
CEP: 22610-210
Tel/Fax- 55 21 3322 3581
http://www.niemeyer.org.br/
Winter and spring are the two season that will definitely make you dream of fairy-tales and wonders.Small, wooden, imperfect yet still dreamy, small cottages will definitely make you think of the Brothers Grimm and their tales. We then wish we owned such a dreamy place of heaven where life seams simpler and more beautiful and natural. Who wouldn't love to enjoy a hot cup of cocoa near a burning fireplace with that earthy smell of pine wood and cozy feeling? Or to enjoy the first snow in a beautiful little garden among cherry trees?
We are here to invite you through a wonderful journey through brick walls and magic forests where small storybook cottages hide their beauty. But the cottages themselves are not the only wonder. Sometimes if not most times the surrounding landscape and garden is what transforms that small home into a paradise. Climbing roses and an outdoor fire pit add the final touches to a perfect painting. Just add the image of a chimney` and the smell of a Christmas tree and you are off to wonderland.We hope some of you have the chance of staying for at least a couple of days in such a glorious place and enjoy the simple life without the need of a computer or cellphone, where you can really enjoy every day and every breath of air. Pleasant dreams everyone!
We have presented on a daily basis numerous articles regarding beautiful, new, controversial architectural pieces from world renowned designers and architects that have influenced modern history in one way or another. Thus we have decided to approach a different angle and to expose int the following 100 Architects' Houses Series a synopsis of one of the most important figures in architecture and design's private homes. Because where better to find the true ideas and personality of an architect than into his very own personal creation. So we have decided to start our series with a name that still inspires today architects from all over the world and whos's style and concepts will definitely survive over the years.
Born in 1898 in Kuortane, Alvar Aalto was profoundly influenced on an early age by his father who's work as an ordnance survey gave Aalto a deep understanding of the natural terrain and the merge of the building itself with it surroundings. His style varied from a classical influence due to its University of Technology Helsinki period to a functionalist character in its Turku living time. Inspired by Le Corbusier's ideas and by architect Erik Bryggman, Aalto builds his Paimio Sanatorium and the Editorial offices of Turun Sanomat, architectural pieces that have brought him an international reputation. Later in life, after moving to Helsinki, he starts to move away from functionalism and rationalism and focused on an architecture gravitating around the "man", to a better understanding of the basic needs and the connections we establish with the natural habitat. But his work and accomplishments move beyond architecture to the sphere of furniture design and to the art of glass so in vogue in the 20th industrial century.
"Alvar Aalto's legendary glassware includes the world-famous Aalto Vase. His vase design caused waves when Iittala presented the vases at the Pair world exhibition in 1937. Aalto simplified design elements to result in millions of combinations that let the end user decide the use. No matter what one sees in the mysterious form, the Aalto vase has become one of the world's most famous glass objects."
His work in furniture design remains impressive today: clear smooth lines residing in bold imposing pieces that make a statement by themselves and can truly empower an interior decor. "Alvar Aalto made his international breakthrough as a furniture designer. Aalto wished to learn "the language of wood fibres" and believed that there is a positive effect when our skin comes into contact with natural materials.In 1935, Aino and Alvar Aalto founded the Finnish company Artek to manufacture their designs. Today, Artek remains faithful to the Aaltos' basic values as their master craftspeople continue to produce Aalto designs in Finland with high quality natural material."
Alvar Aalto and His Riihitie 20, Munkkiniemi, Helsinki
As you would expect, Alvar Aalto's own house has been the result of his life-time thinking process and the influences of the turning point in his career when he got estranged with the rigors of functionalism and gave a closer attention to an architecture closer to the human heart and to nature.The one story home reflects perfectly his own thoughts on 1930's architecture with a perfect merge of different natural textures and materials whilst maintaining the clarity of the functionalist current and a rational organization of the plan. The Functionalist style is clearly stated by the the chosen locations of the windows and by orientation of every room's design according to proper natural lighting. But the brutal approach of the front facade is sweetened by the utilization of wood and climbing plants along with white brick, reflecting a romantic attitude. Overall, the exterior aspect in a non-pretentious one, simple yet clear an elegant in its simplicity.
The interior design is a hole different story. Warm wooden furniture contrasts with the purity of the stark white walls and a merge of different natural textures like ceramic, wood, concrete complete the overall design, giving it a rich, powerful atmosphere.What is very interesting is the approach to changes in surfaces and angles: every surface is treated with a different material and color, generating a vibrant creation pulsating with life and color. The design line is kept simple and clear, every piece being an unique creation fit perfectly into the design scheme.
"In 1934, Aino and Alvar Aalto acquired a site in almost completely untouched surroundings at Riihitie in Helsinki's Munkkiniemi. They started designing their own house which was completed in August 1936.
The house was designed as both a family home and an office and these two functions can clearly be seen from the outside. The slender mass of the office wing is in white-painted, lightly rendered brickwork. There are still clear references to Functionalism in the location of the windows. The cladding material of the residential part is slender, dark-stained timber battens. The building has a flat roof and a large south-facing terrace.
Although the streetside elevation of the house is severe and closed-off, it is softened by climbing plants and a slate path leading up to the front door. There are already signs of the 'new' Aalto in the Aalto House, of the Romantic Functionalist. The plentiful use of wood as a finishing material and four open hearts built in brick also point to this.
The Aalto House anticipates the Villa Mairea, a luxury residence where Aalto's creativity was able to come into full bloom. But in contrast to its larger sister, the Aalto House is a cosy, intimate building for living and working, designed by two architects for themselves, using simple uncluttered materials." [ via Alvar Aalto Museum]
Presented in 1937 in Arkkitehti Alvar Aalto describes his own project as follows: "The building situate din Munkkiniemi, on a fairly steeply rising hillside site, Riihitie 10. It is built as a single-family house combined with the office and studio rooms needed for normal architectural work. Internally, the building is divided into three parts: a two-storey volume containing the workrooms, which are separated by a roof terrace from a group of room intended for private use and a living room on the ground floor, complete with kitchen and patio for meals alfresco. The workroom can be combined with the living room by opening a sliding wall.The vertical load-bearing structure is partly brick, but mostly steel columns, both I-section and circular. Horizontal components are reinforced concrete, while the eastern and south-facing external walls are timber, wedged into special grooves in the concrete."
Aalto's design philosophy regarding the strong connection with the natural habitat is reflected in the Aalto House which has been built in a completely untouched surrounding. Making use of the natural surroundings as a starting point for his designs became Aalto's trademark. The Mairea Villa in Noormarkku is the perfect coronation of Aalto's life time work: a beautiful home responsive to the surrounding green landscape, blending into it harmoniously. Further one we will present you a few of Alvar Aalto's main projects and work that have given him his notoriety over the years.
Alvar Alto's Main Projects
1927-29 Editorial offices of Turun Sanomat
1927-35 Viipuri City Library
1928-33 Paimio Sanatorium
1938-39 Mairea villa, Noormarkku
1949-52 Saynatsalo municipal offices
1949-64 University of Technology, main building, Otaniemi, Espoo
1951-55 Rautatalo, office and commercial building, Keskuskatu 3, Helsinki
1955-58 House of Culture, Sturenkatu 4, Helsinki
1962-71 Finlandia Hall, Concert and congress building, Helsinki
Alvar Aalto will remain in the architectural history as one of the 20's iconic figures, a personality expressed beautifully trough simple, clear, rational designs with a touch of romanticism and sensibility.
Born in 1885, Gunnar Asplund is thought to be one of the most important architects in Scandinavia during the 20th century with influence rippling even in today's architecture.His designs merge the classicist style with modern influences, resulting in a clear, strict line but yet one that exudes warmth and that relates to the human. During 1918 and 1928 he created a series of projects with significant importance even to today's Scandinavian architecture like the Snellman Villa (Villa Snellman), the Lister county courthouse (Listers härads tingshus), and the small chapel at the woodland cemetery (skogskapellet),the Scandia-theater in Stockholm, as well as the Stockholm city-library. During the 20th century the Swedish architecture line was being influenced by the Neoclassical style and thus Asplund's main projects reflect an approach based on this current.
The appearance of functionalism in Sweden is also linked to the name of Erik Gunnar Asplund, him being considered to be the introducer of functionalist architecture here. As you can see from his main project gallery above, the Swedish architect's style varied through time and adapted along with the international directions, but all of the designs mentain personal interpretations of the modern ideas of form.
Asplund's private summer house at Stennas,Hastnasviken, Lison, 50 kilometers south of Stockholm reflects a certain coziness and simplicity you might not figure to find in an architects home.The design expresses a friendly, open and inviting atmosphere with its back resting on a cliff and front overlooking the beautiful sights of the bay.The beautiful green of the lawn and the stark white of the wooden board facade meet in an elegant synergy contraposed by a rough tile flat angled roof.The Scandinavian influences are very present in the overall design, but you have to admit that a certain sense of elegance and sophistication exudes from this architectural piece, even you can not quite seem to find at a first glance the source of it.
Following the main entrance from the wooden intimate deck you find the social spaces connecting the exterior and interior. " In plan the large room facing south is drawn towards the west and turned in order to make a wide angle by the entrance terrace." Such fine details that are bearably noticeable give this piece that air of elevation.The interior spaces have been skilfully divided into smaller ones that generate intimacy and coziness, whilst capturing incredible views of the Swedish forest and bay.
One of the most beautiful parts of Erik Gunnar Asplund's summer home is the wide tiled red staircase in connection with the vernacular fireplace.Set in the biggest room of the house, the drawing room, it separates this end of the home from the core of the house which contains the dinning room, followed by the kids' rooms and ending at the opposite end with the kitchen and maid's room, keeping, in a functionalist style, the work and leisure totally separate. The stone paved paths, the views of the bay and touch of the forest, the huge contrast between the insertion itself and the natural ambiance tells a story of an open friendly family and of beautiful evenings enjoying the beauty of nature and of warm cozy nights by the fire.
The house seems to be orientated strangely towards the evening light and his exterior facades have been treated with a more elegant care for details in contrast tot the uneven rough ceiling of the interior spaces, thus reflecting an important exteriorization and prioritization of nature's impact on the daily life.
In the end, this simple cottage-like home is perfectly inserted into the surrounding site, being a reflection of an era where styles merged and emerged daily. The design result, even though Asplund did not put accent on beauty but on personal comfort and coziness, is one of pure elegance and warmth. Looking from the cliff over the house and bay you can admire the perfect integration of the home into the landscape, its elongation towards the shimmering light and exposure to the near forest. Overall, a Scandinavian design with a modern twist and respect for nature.
Following we will present you a collection of Erik Gunnar Asplund's main projects that have influenced the Swedish architecture world and have a certain importance even today, especially due to the time frame they have been designed in and of the changes they have survived during the 20th century.
Erik Gunnar Asplund’s Main Architectural Projects
Villa Snellman 1917-1921
"During the years 1917-18 Asplund designed a villa at Djursholm for bank director Snellman. It was a simple yet subtly complicated structure comprised by a two levelled main wing and a kitchen wing in angle to it. The building is like as if it was cut out of a block and has an unusual small house-depth. This circumstance meant that all rooms faced the garden. In order to still create a connection between the garden and the entrance side, the hall is consistent along the house breadth. This room received a glass door with glass sections aside the main entrance door. With this solution a summer entrance and all season standard entrance was established. The two doors are very different, and are yet kept together by a common stair-section.On the top floor there is an oval room from which a straight corridor is based. Its walls are not parallell. One wall is skewed to the other. The facing is smooth and simple with rows of barred windows, of which one has twice the bars as the others. Note also that lower window row successively displace itself to the one above. The house is built in processed wood. The facings are light grey with window and door sections in white. Irregularities in the facing, to some slightly provocative, is in their refinement largely practically motivated and expresses the connections between rooms in the building."
[via Erik Gunnar Asplund's Architecture Foundation Site]
Woodland Cementary 1915 - 1940
"In Stockholm an international contest of ideas was launched regarding the enlargement of south Stockholm cemetery in Enskede. Asplund participated along with his old schoolmate Sigurd Lewerentz whose designs for the Helsingborg chapel crematorium had received much attention at the Baltic exhibition in Malmö.Together they developed the contribution “Tallum”, in which the woodland and its strong Nordic romantic feel was strongly emphasised. In their plan there also were antique visions with classicist gravelanes. Their contribution was awarded first prize “due to its respectful and excellent character”. The jury also praised the way it utilized the existing landscape as well as the connection to the local train station (these days the subway station “Skogskyrkogården”)..
The contribution was set as base for further development that eventually turned out to be lengthy. Up to 1934 both worked together with the design of the landscape, while they separately had worked with the woodland chapel (Asplund) and the resurrection chapel (Lewerentz). From this point on Asplund continued to work alone with the main chapel; the chapel of the holy cross and crematorium. The project was only finalized 1940 shortly before Asplund died.Lewerentz on the other hand had concentrated on the further development of the landscape and related details, such as entrance section, the surrounding walls, roads, burial grounds etc. and had as early as 1916 handed over a first version of their entry - “A long, hard and not very gratifying or spectacular work but perhaps the most remarkable and it will surely provide the character of the cemetery”, Asplund once stated in 1921. " [via Erik Gunnar Asplund's Architecture Foundation Site]
Lister County Courthouse 1919 - 1921
"The courthouse was designed 1919. The relatively small building has essentially only one significant facing, the broad gable facing with its segment shaped glass section that frames in the entrance door, has a connection to the older station structure, which is placed at the end of the extended alley. The purpose of this particular placement was to create a monumental and dignified environment.
The court hall has circular plan solution. The daylight shines thru the circular roof window along with a round and a squared window at the side which combined focuses the light on the supposed negotiators and members of the court, close to the bench. The colouring here is heavy and powerful. Asplund originally made the walls golden brown, while public section and the bench is painted black on top of grey.The inner traffic of the house was elegantly solved by stairs which leaps between the double walls that surrounds the main court hall. With this Asplund could create a direct connection between the garden and the judge’s quarters on second floor – without disrupting the connection with the offices on ground level. Similarly as the woodland chapel that also was on the drawingbord of the time, Asplund worked with shaping the architecture in a way that it expressed a process, approachment, expectance, preparation and finally, as in this case, the court halls own strong effect. In Sölvesborg, one could say that the path of procession begins already at the trainstation. Motion as a theme is ever present in Asplunds work and can be traced in several of his other works. A kind of distinctive element in Asplunds architecture. Today the court is not in use." [via Erik Gunnar Asplund's Architecture Foundation Site]
Woodland Chapel 1917 - 1920
"While one waited for the big crematorium chapel, there was a need for a smaller chapel at the woodland cemetery. In 1918 Asplund presented drafts to the “little chapel”, which in appearance connected to the main chapel (of the original suggestion).The building committee however wanted a smaller chapel in wood and shortly thereafter Asplund could forward new drafts as an answer to that demand. It was a small chapel with an almost squared room with pillars carrying a dome with a light entrance at the top. The exterior was dominated by the shake covered roof stretching out over a porch with slender supporting pillars.The small chapel is almost hidden away amongst pines and spruces which towers high above the roof to the building. It is surrounded by low processed concrete wall with a gate centred ahead of the chapel that is reached by a lengthy path in the forest. Against the shakes of the roof Carl Milles golden angel of death (made in copper) delineates. When the ironclad gates are opened, appears the light hall of the chapel thru the grid gate.The woodland cemetery was given its shape as a grand landscape by Asplund and Lewerentz together. During the 1920’s they designed a chapel each, but when the main chapel and crematorium was to be built 1934, it was based on partly new designs, which included two smaller and additional chapels, the intentions were that the two would cooperate on this. For various reason it turned out to be Asplund alone who made these designs." [via Erik Gunnar Asplund's Architecture Foundation Site]
Movie Theater Skandia 1922 - 1921
"In the Warodellian facility in Stockholm, built in the 1850’s, a cinema was fitted in during 1922-23. The yard was overbuilt while the entry facing towards Drottninggatan was treated with great care. The drawings to the yard overstructure were made by Ragnar Hjort while Asplund carried out the detailed plan for the cinema interior. As a starting point, he had the contractor’s conviction that the audience wanted to meet a festive, surreal and spectacular environment as a frame for the fictitious world of film.
A gate with coffer-ceiling conveys the transition from the street, with its dark asphalt suggesting that the dark floor inside is a continuation of the street outside. The vestibule is made in a grey colours-scheme with limestone, black metal and black leather. The clock was also black with white enamel digits. Two lesser vault decorated rooms in connection to the vestibule had stucco in a deep green nuance.In the promenade a few stair steps lower then the vestibule; the walls radiated shimmering white with warm red doorsections in contrast to the ceilings and outer walls deep and murky green. The actual auditorium was entirely in red. The side balcony’s and the rear gallery was clad in velvet, in the same nuance as the seats. This festive splendour was in contrast to the ceilings night blue sky. The ballshaped, velvet clad lamps soar under the dark night sky. The custom embroidered velvet on the balcony fronts, tailored with wool-, silver- and silk thread and relief applications is textile treasure with no equal for its time. The motif’s was designed jointly by Asplund and Axel Munthe. Skandias fantastic interior include both sculpture and painting. Among the artists that Asplund selected for this project was both established and untested ones. Behind the paintings stood Einar Forseth, Leander Engström and Hilding Linnqvist while Stig Blomberg, Nils Engberg, Gunnar Torhamn och Ivar Johansson was responsible for the relief’s and sculptures. As in many future projects Asplund develops a close relation to the leading Swedish artists of the time." [via Erik Gunnar Asplund's Architecture Foundation Site]
The City Library of Stockholm 1920 - 1928
"Due to a donation it became possible for the Stockholm administration to offer the inhabitancy a community-library, something that up to that point had not existed in Sweden. As the project was planned it was initially intended to launch a general architect-contest regarding it. However it did not turn out that way, since the man who had planned the contest, namely E.G. Asplund, received the commission to offer suggestions for it. To that end he travelled to the USA to study the subject.In Asplund designs the library was crafted as an introspective temple of knowledge. With a long way up to, and then into, the building for the supposed visitor. In this way he created preparation, expectation, and a possibility to shake of the street-clamour before we enter tranquilly within the great main hall. A well directed procession for visitors was thus achieved.
The circular main hall with its (book) terraces became the main theme in the architecture. The entire project was comprised of an inner room, an interior which the facings subdued themselves to. That which signifies the main facing was the path that leads to the main entrance since all facings are remarkably alike in their designs.
The central hall signified itself originally with a dome, visible over the lower wings. The dome however was changed to a cylinder with vertical windows. All this to secure better light inside the raw glass of the dome could offer.In order to create monumentality with the relatively small structure, Asplund displaced the scaling in friezes and the entry portal to successively narrow out on top, and hence achieved a simulated perspective that made the building appear as bigger then it actually was. The city library is amongst Asplunds most lengthy works, and it slowly grew on the drawing board. In almost 10 years the work slowly progressed. Almost immediately he returned to the project due to the expansion that was to be made, namely the bazaar lanes below the entry facing. As well as the storage-wings that was already included in the original plans. The building hence received a full squared plan solution. The bazaar structure is a first sign of Asplunds path to modern international style." [via Erik Gunnar Asplund's Architecture Foundation Site]
Extension to Gothenburg Townhall 1913 - 1937
"The enlargement of the Gothenburg Townhall had begun as a competition in 1913. The long and slow process of completing the project also meant there were to be plenty of changes over time. The work eventually became intertwined with designs regarding Gustav Adolfs square which was adjacent to the townhall. After another contest in 1918 Asplund was commissioned to do designs for this as well. His suggestion, which was radical for its time, turned toward the canal at first, and not as one might expect, towards the square.The continued work with the actual square however provided reason to turn the townhall entrance towards it. The expansion was now designed as an individual building with its own entrance. After some 20 years of investigations Asplund presented schematics in which he, by request, utilizes the existing facing of the original townhall and extends it over to the expansion. Behind the coulisse hid a modernist building that was to create confusion and uncertainty amongst members of the building committee. The project was postponed in wait for new facing designs which gradually was developed and eventually finalized to the results we have today. However, Asplund came to change the facings even as building had started. Once the scaffolds were removed the finished result was greeted with a public outcry. " [via Erik Gunnar Asplund's Architecture Foundation Site]
The Chapel Crematorium 1935 - 1940
"In the joint work with designing the landscape included the placing of John Landqvists resurrection-monument, which was bought in the Stockholm exhibition 1930. It wandered through the various suggestions from Lewerentz classicist half round entrance place connected to the main gate out to the landscape, placed upon an obelisk, thereafter to the ceremonial grounds and finally to the porch of the main chapel. Each step meant an increasing understanding of the importance of the grand and designed landscape. The main chapel came to be, as the years went by, displaced from the top of the ridge and eastwards to benefit the dominance of the landscape panorama. Asplund long considered the have the building in brick, as the porch’s quadratic pillars. The bricks soft material character would that way emphasize the kinship with the surrounding nature. When Asplund instead came to choose marble plates to cover the facings, these came to stand as a contrast with the landscape and heighten the effect. The modernist shapes and tradition thereby lent support to his vision. Asplunds care about function was expressed in many details in the chapel. For instance is all corners rounded, ahead of the closest bench intended for the immediate mourning family, lay a stone mosaic with cut ornaments to rest your eyes upon, a bench intended for three persons is angled to ensure that also the third person is able to participate fully. The actual crematorium section is anachronistic which has led to new contest with international participants has been conducted for guidance on the placing and creation of a new crematorium. " [via Erik Gunnar Asplund's Architecture Foundation Site]


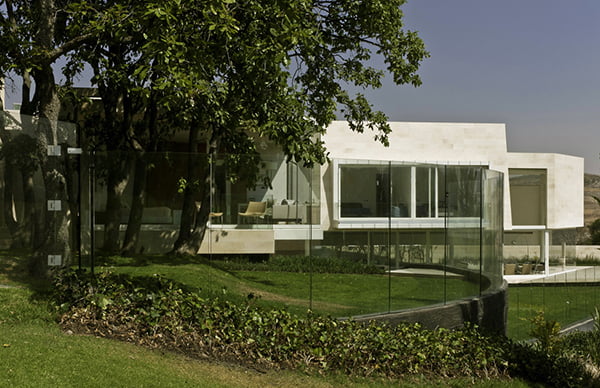


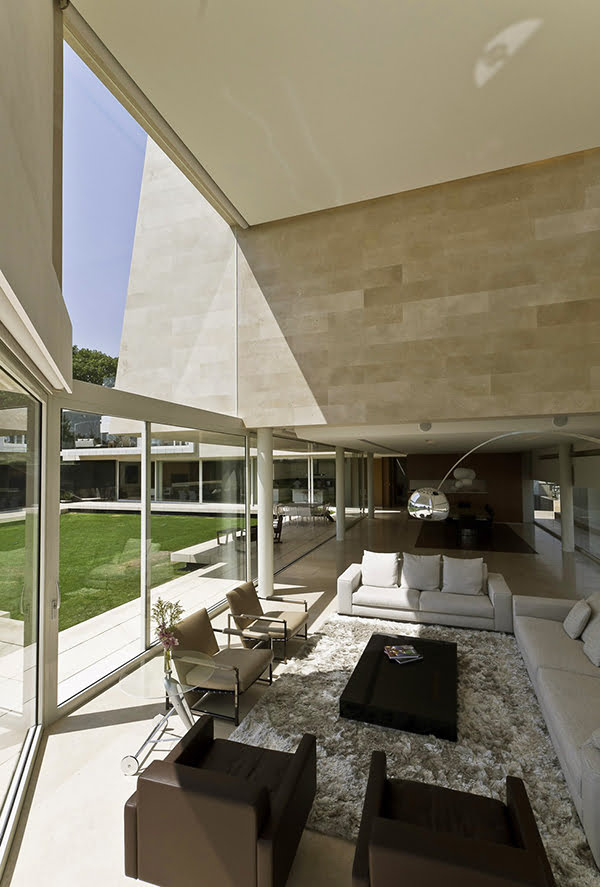


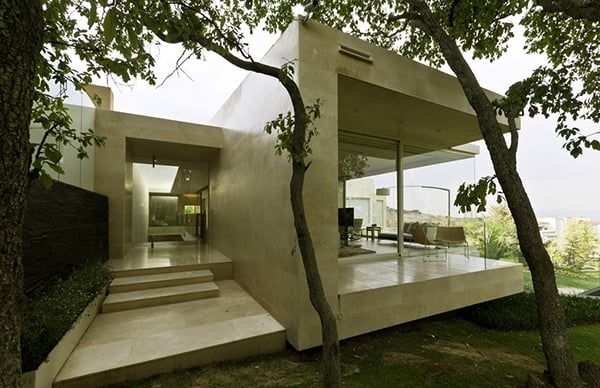


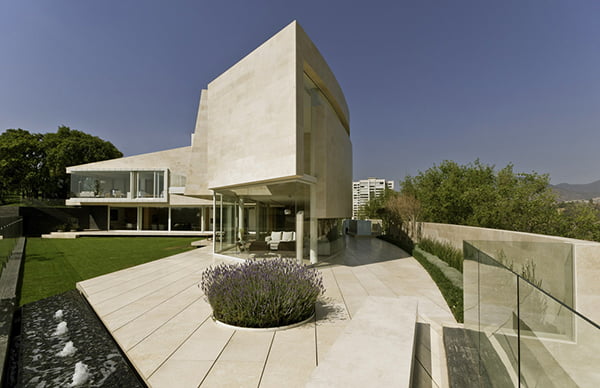


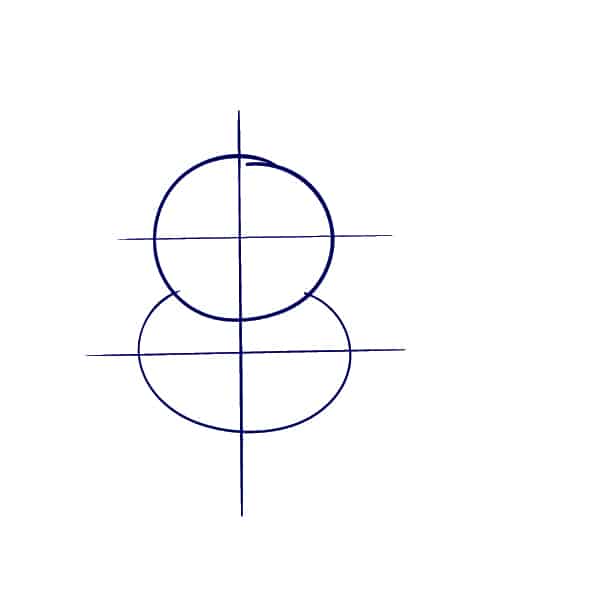
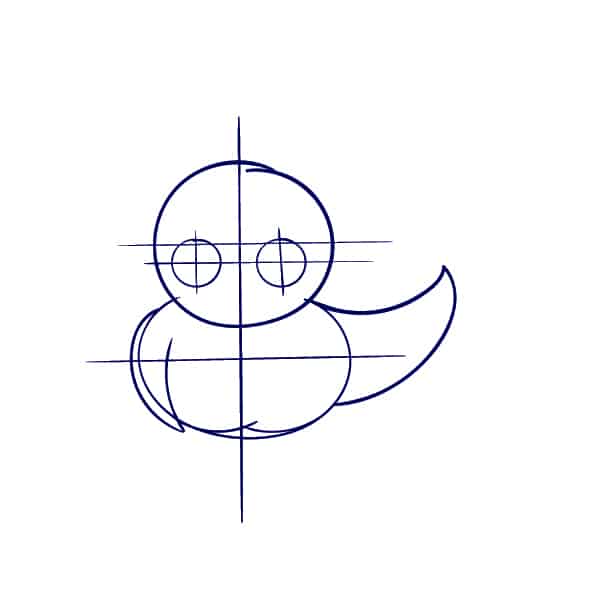
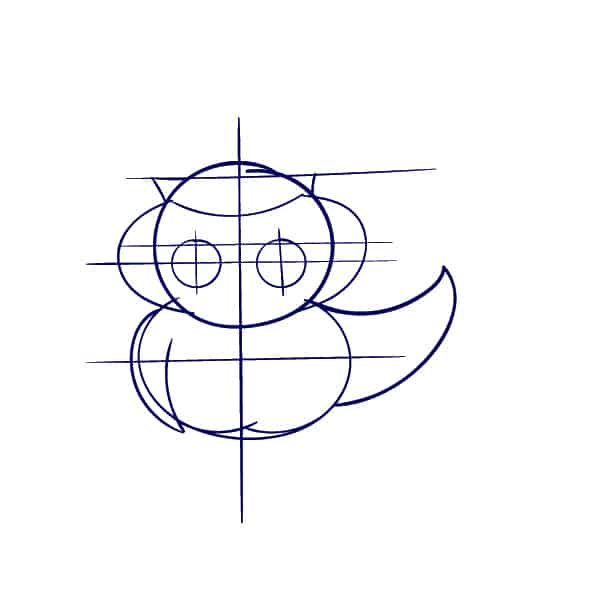
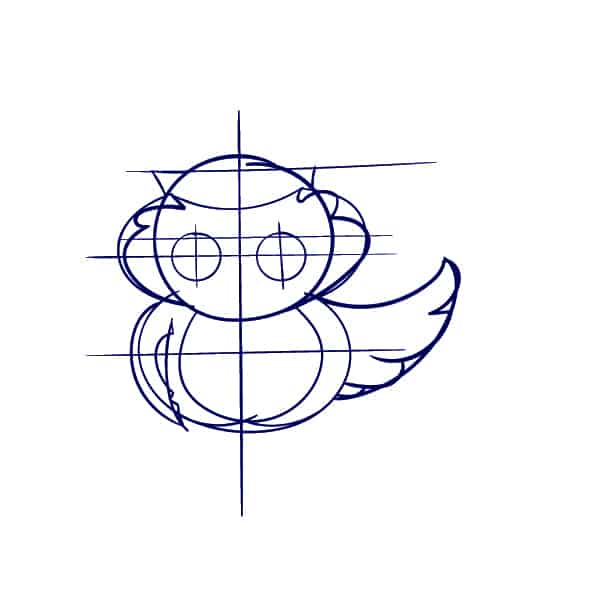
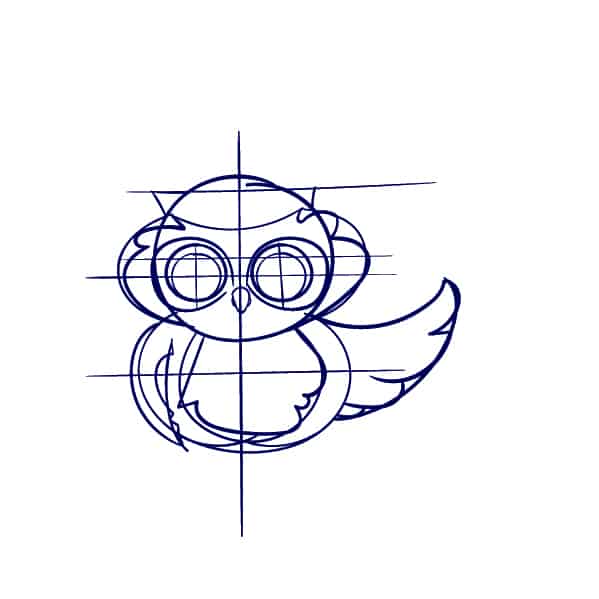


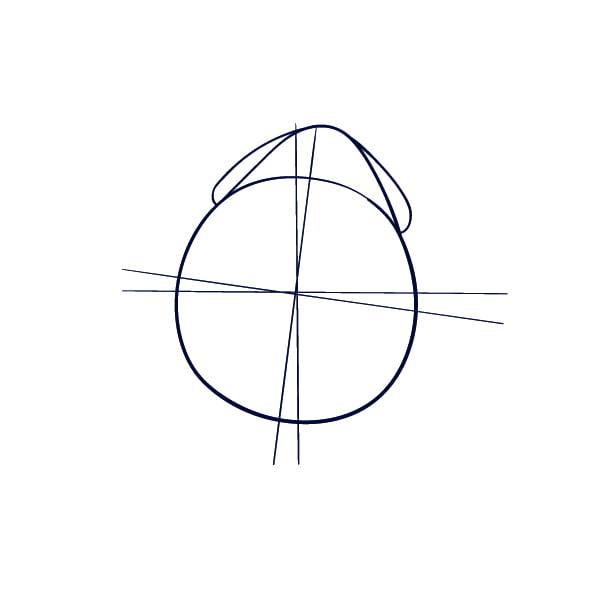
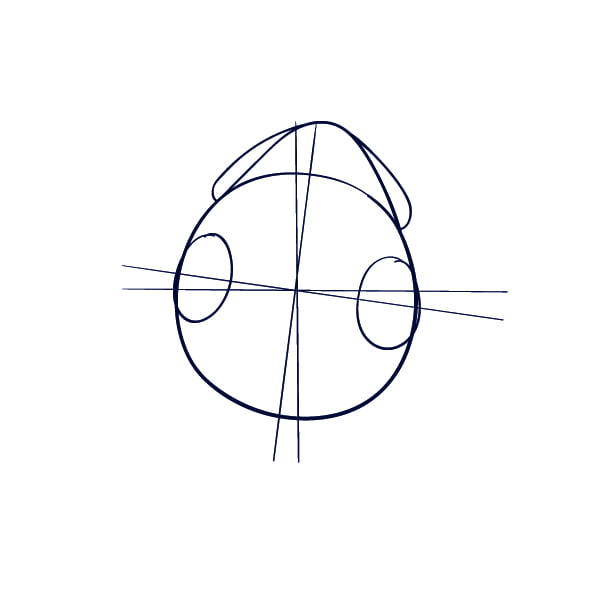
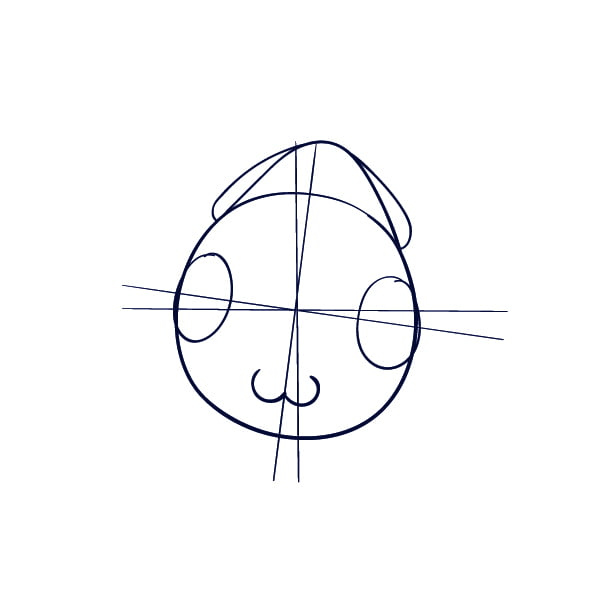


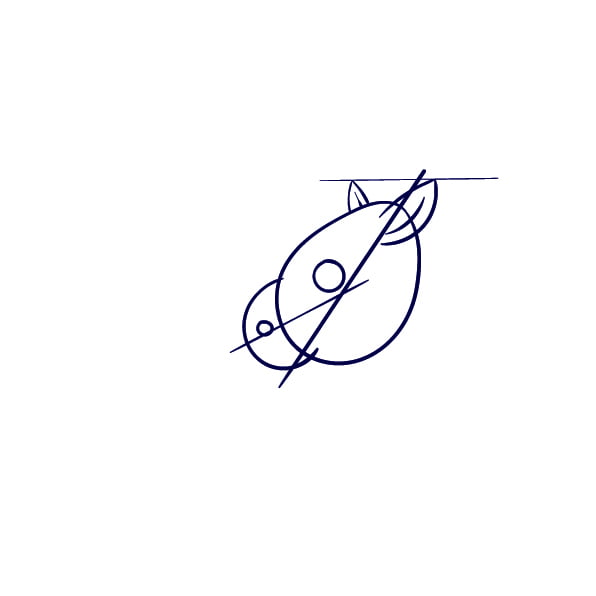
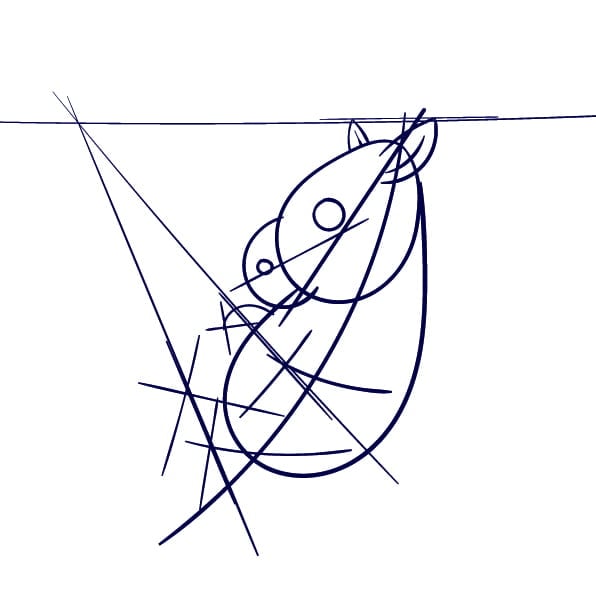
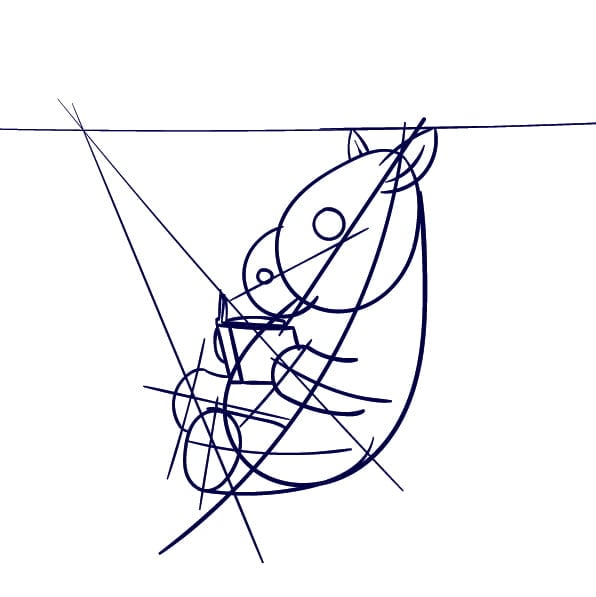
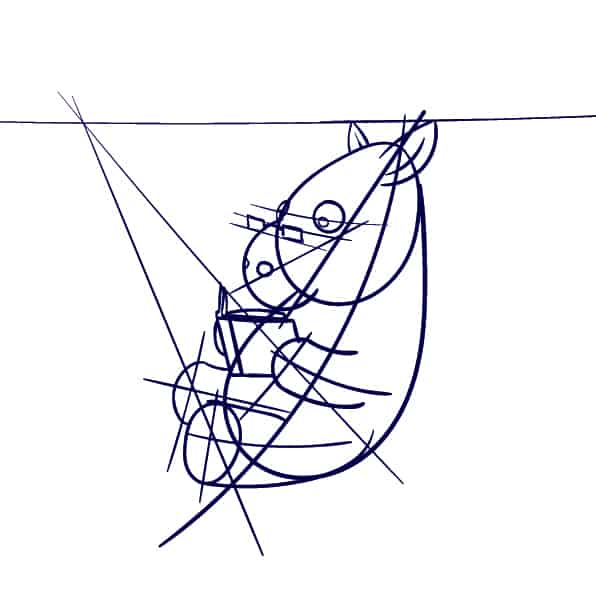


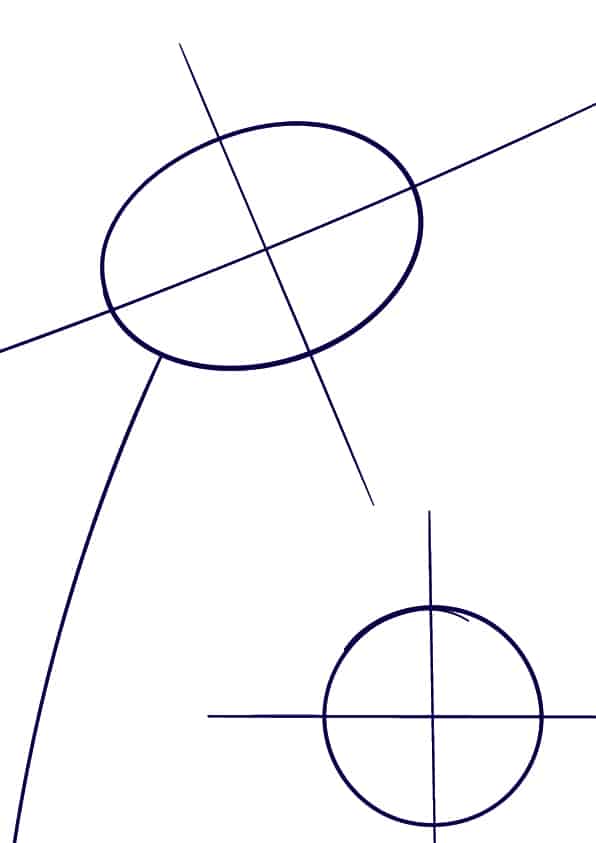
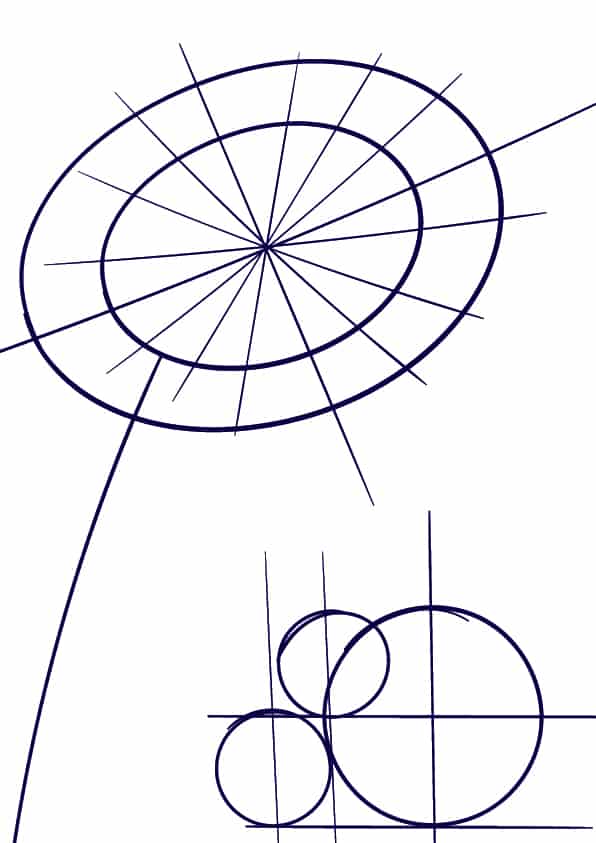
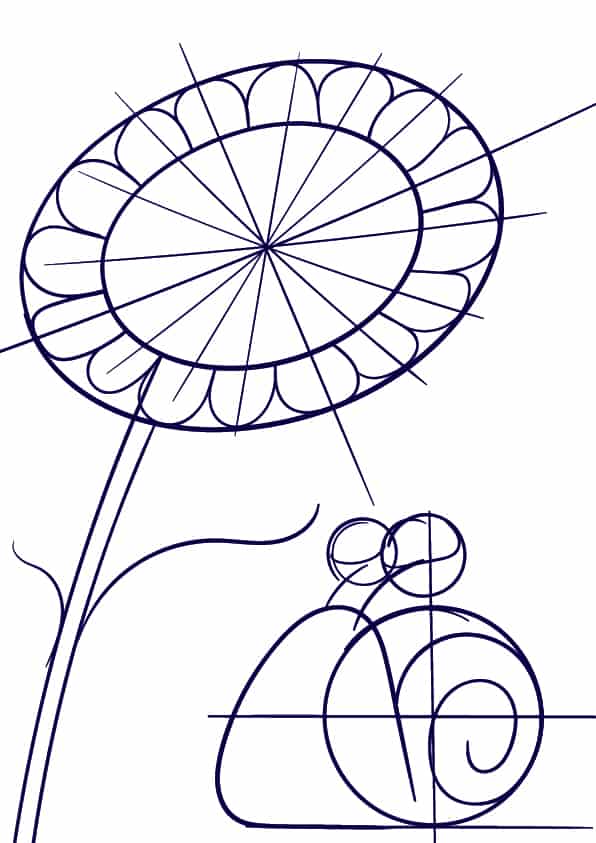
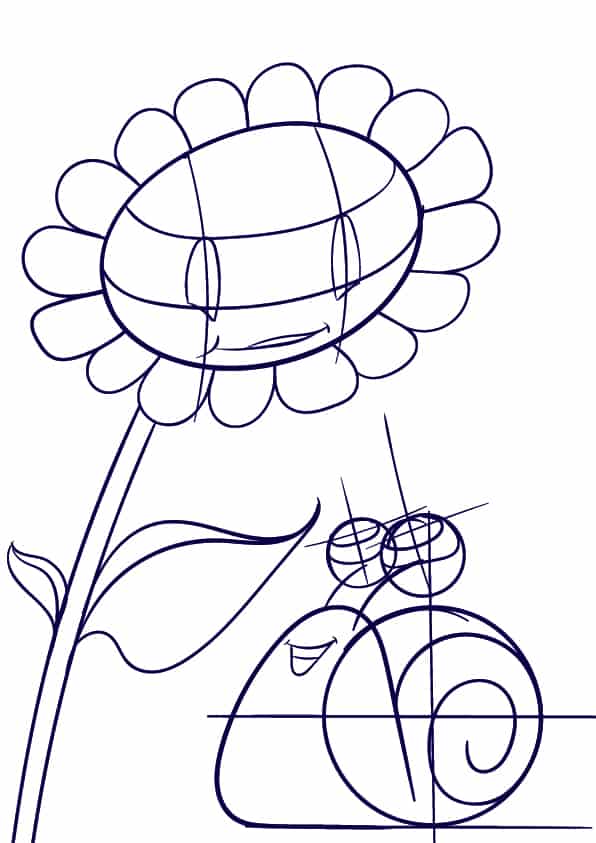


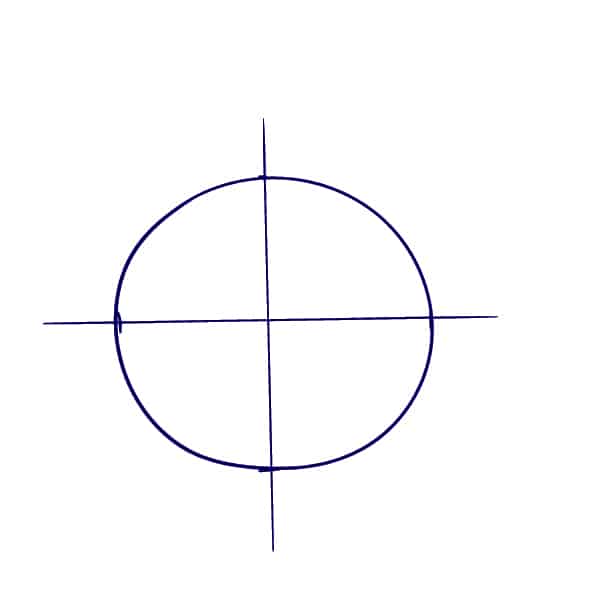
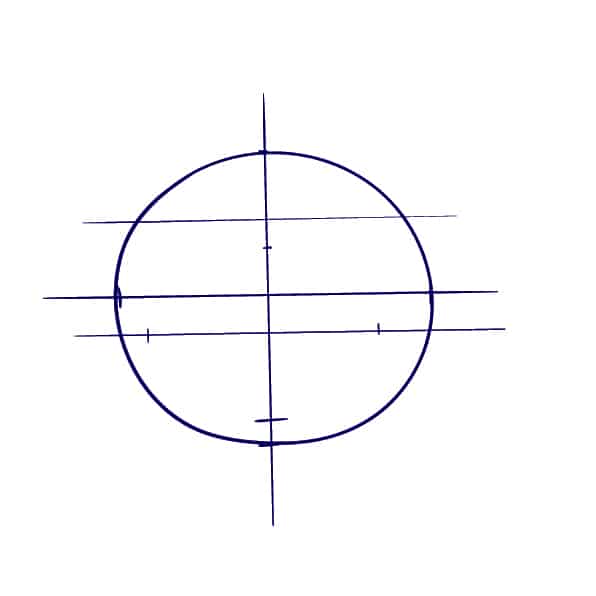
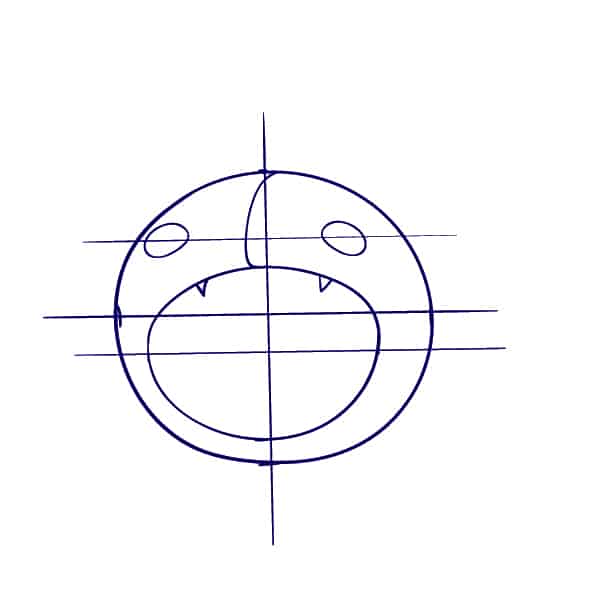
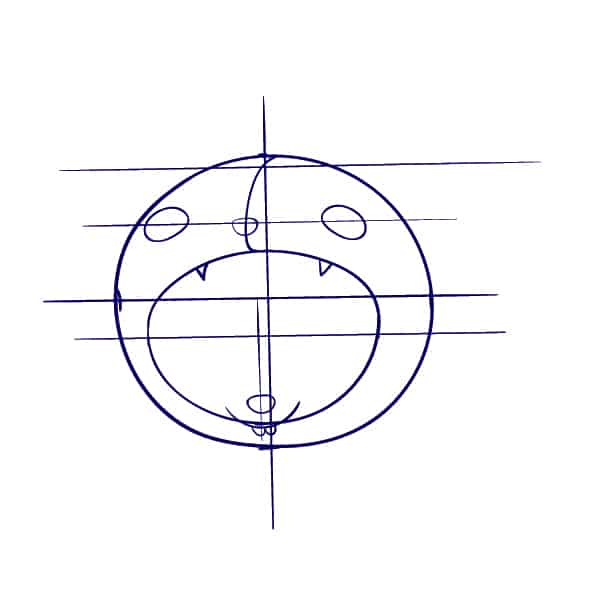
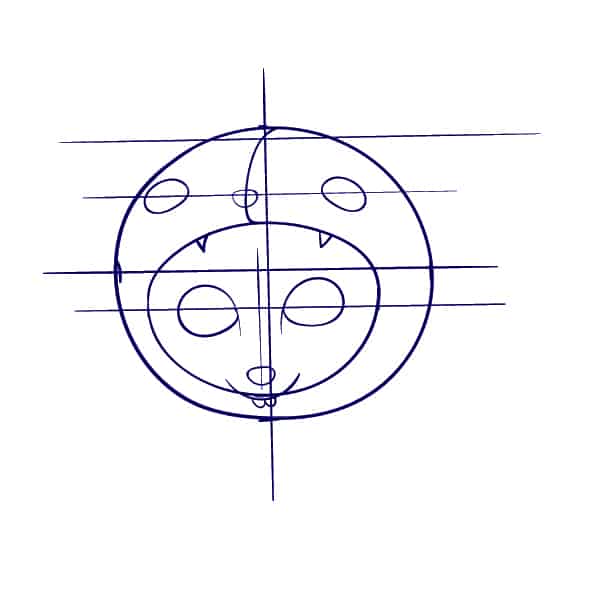
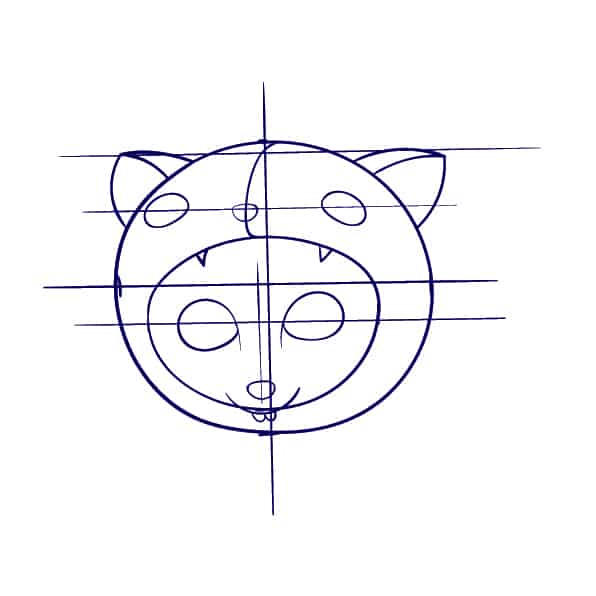
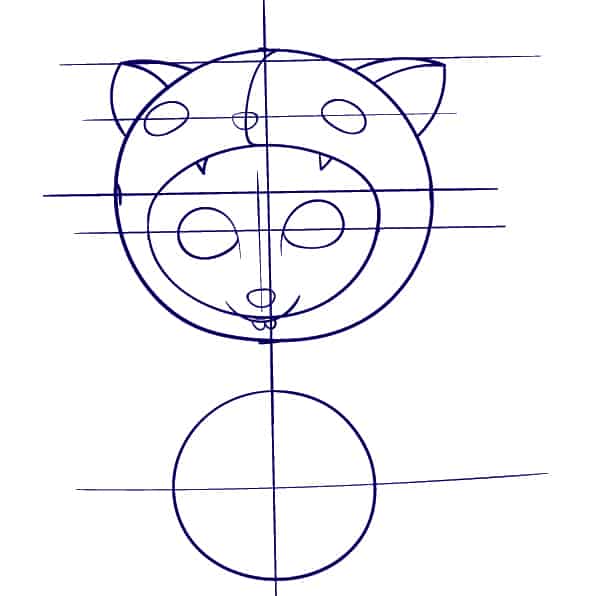
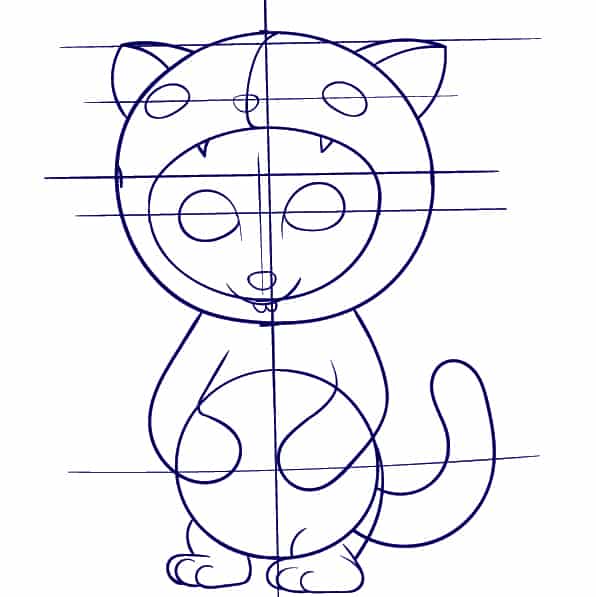
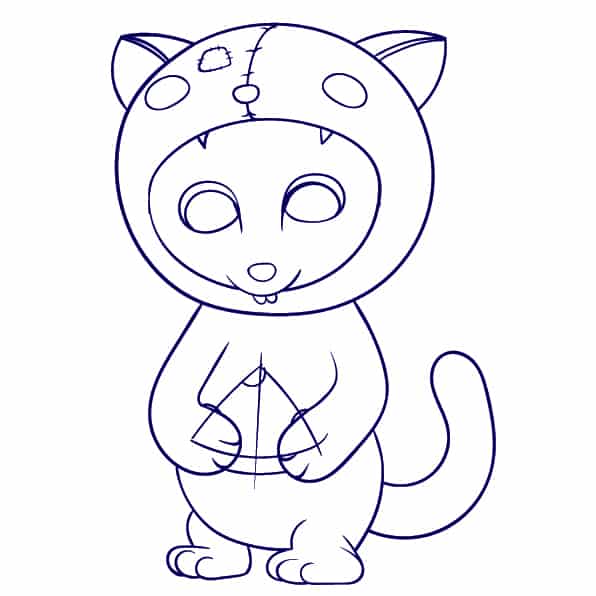


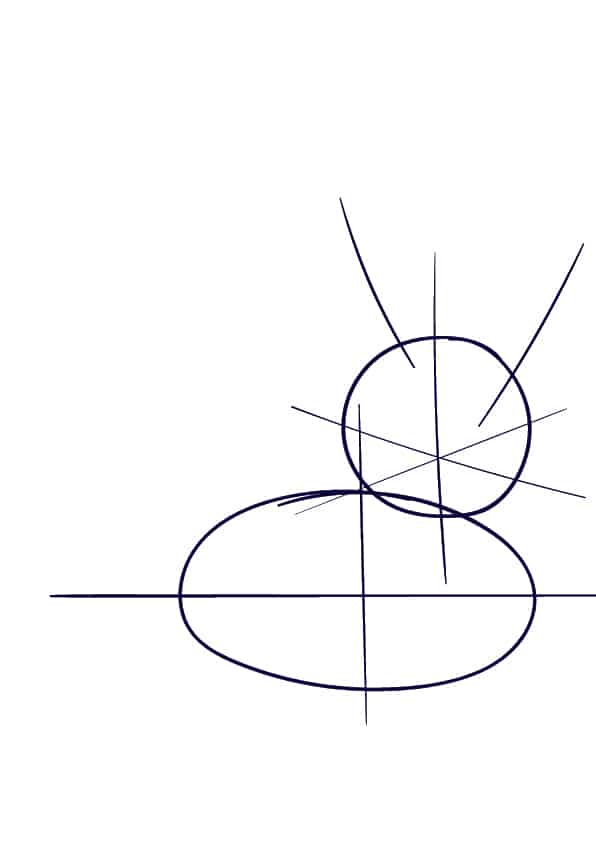
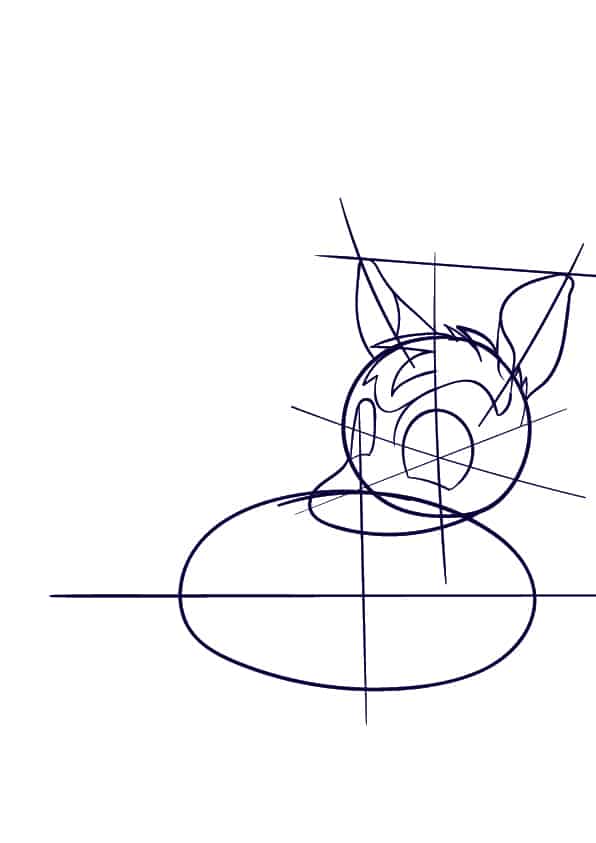
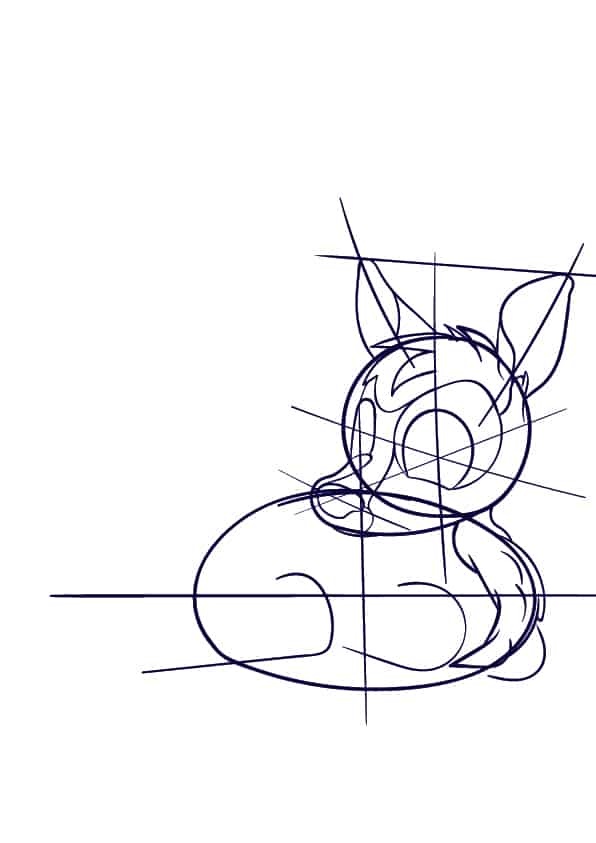
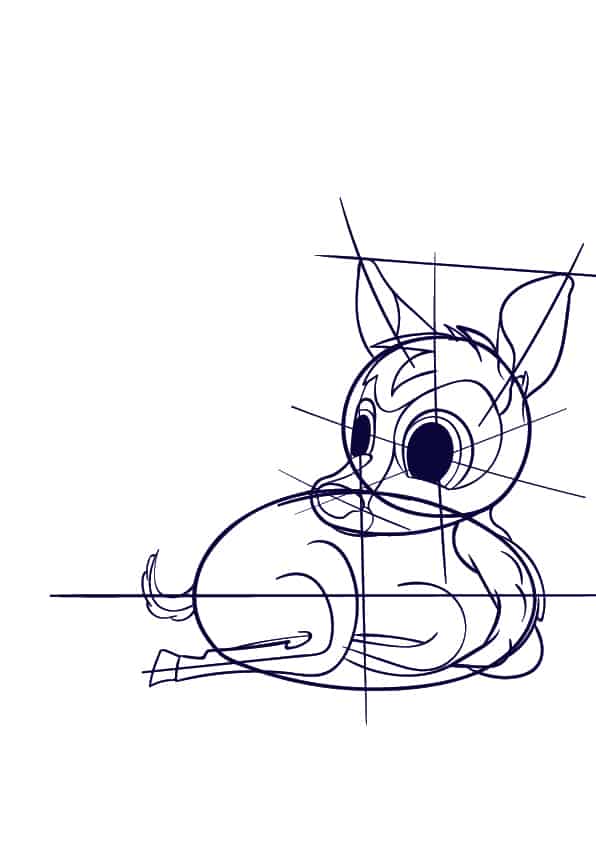
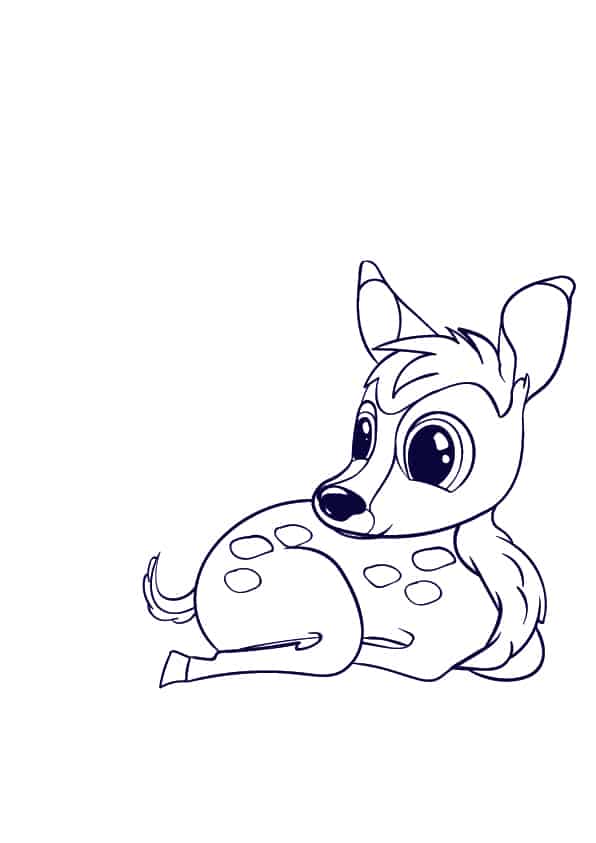
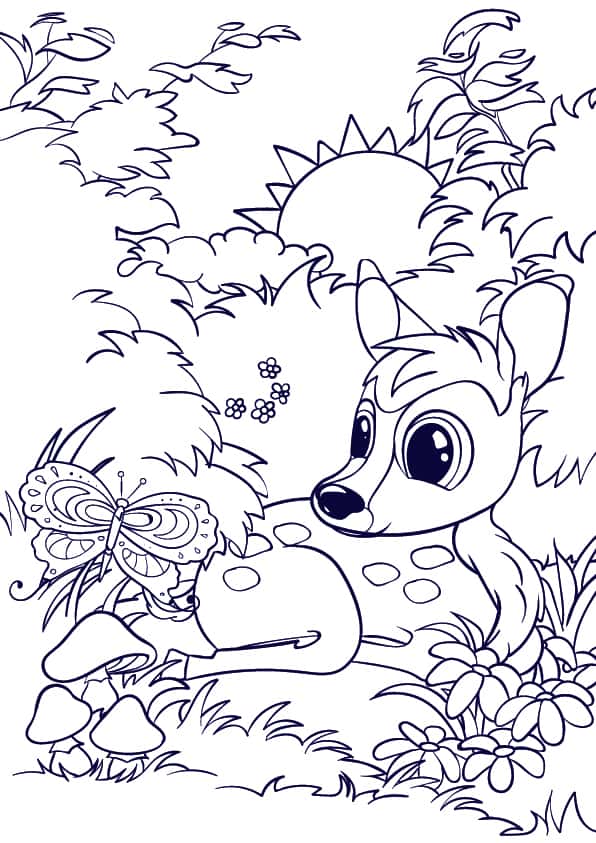


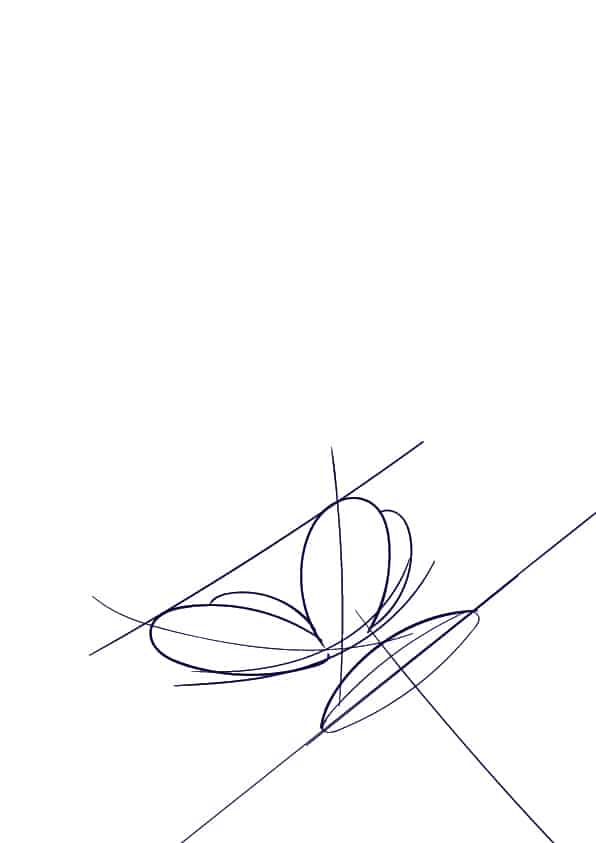
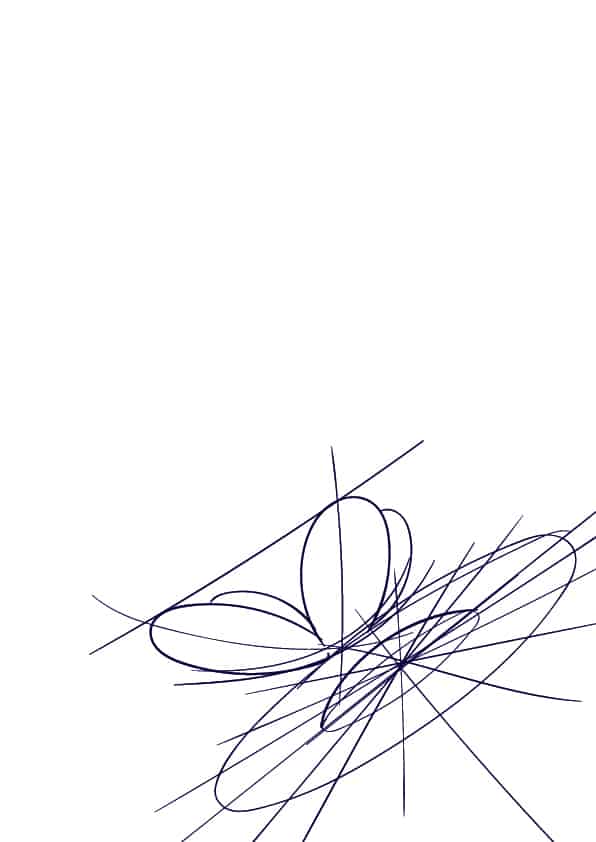
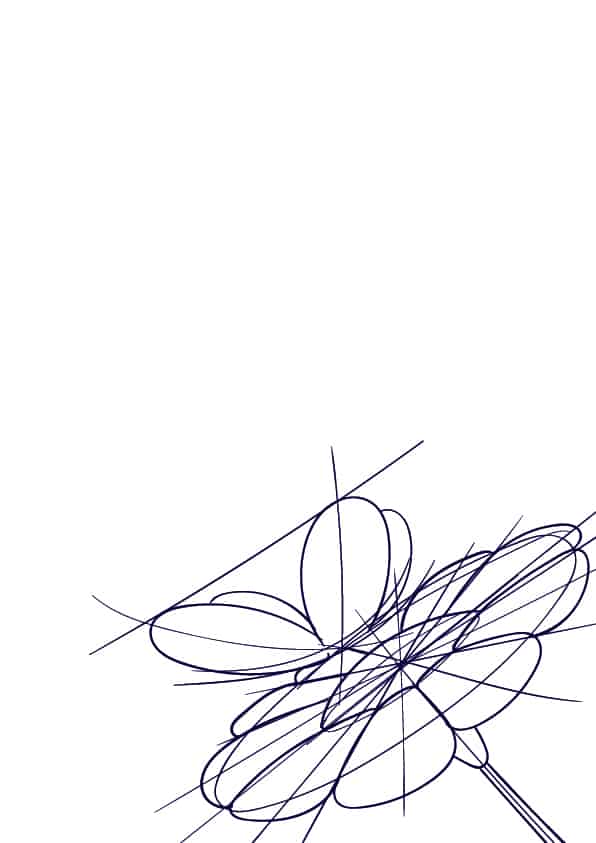
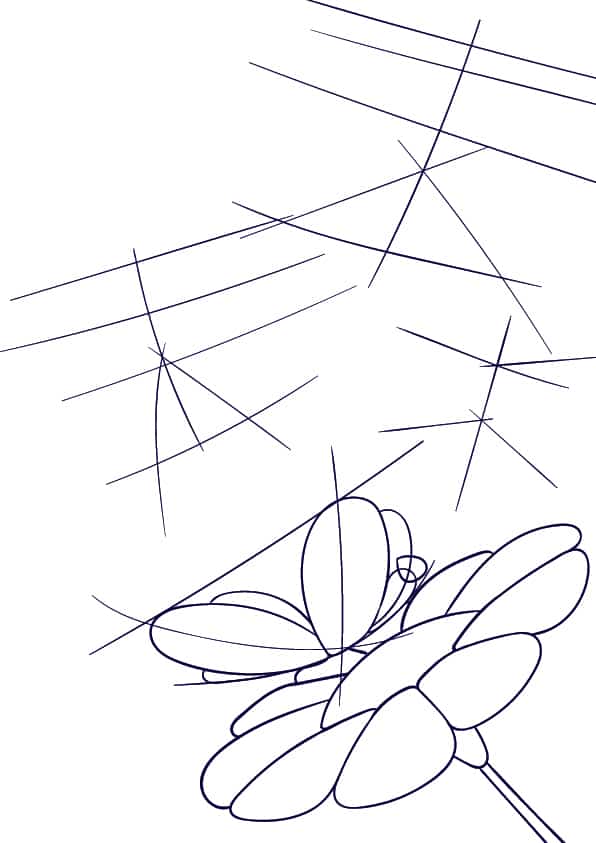
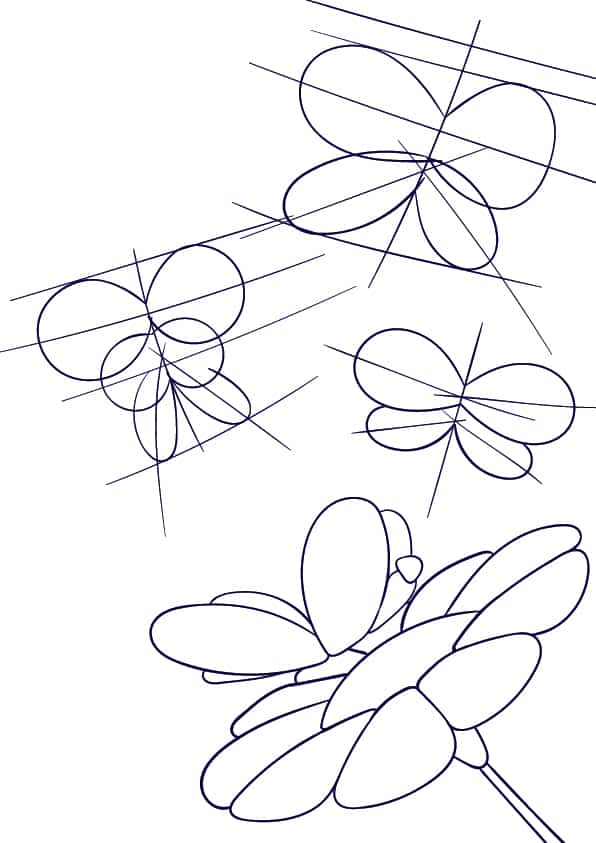


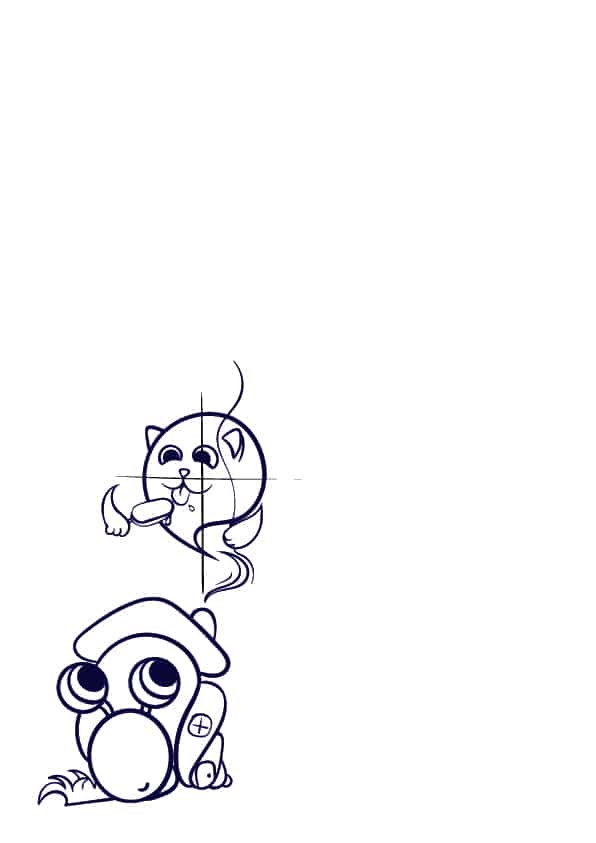
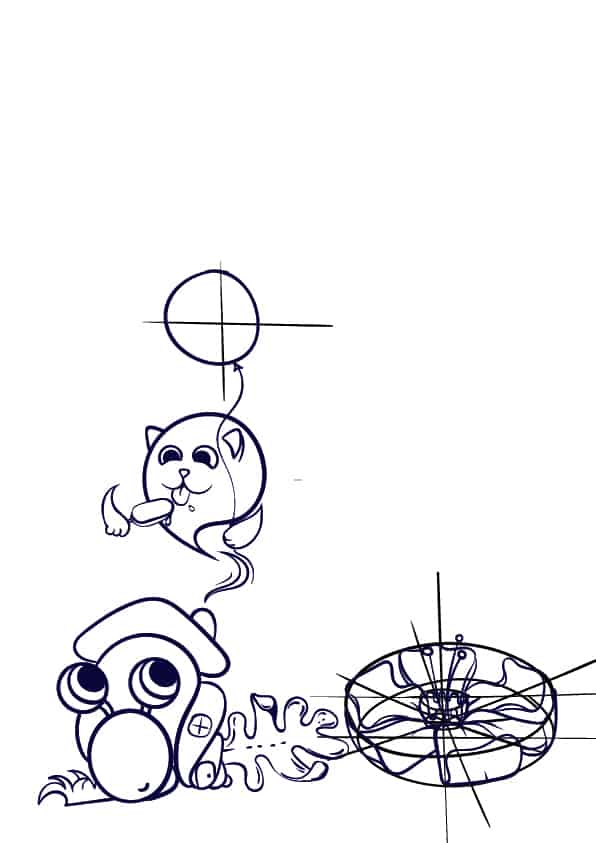

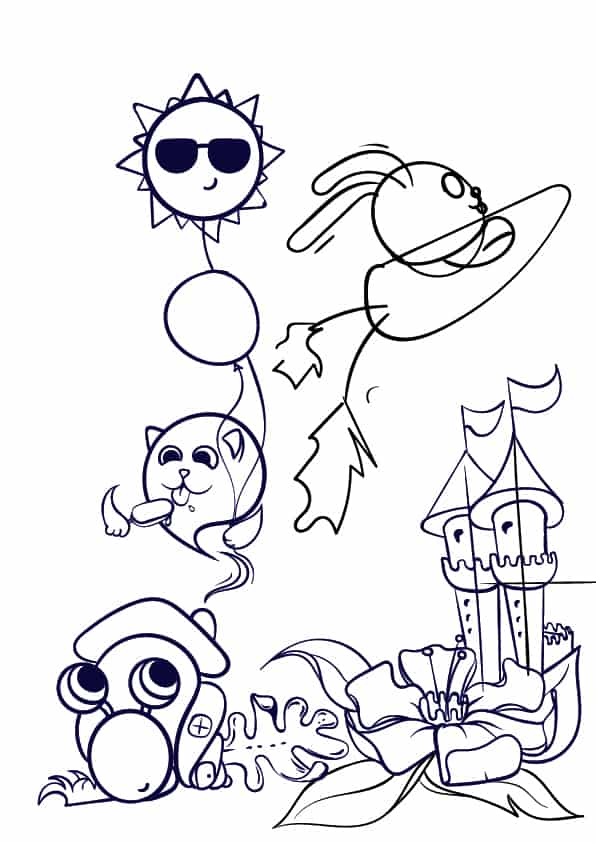
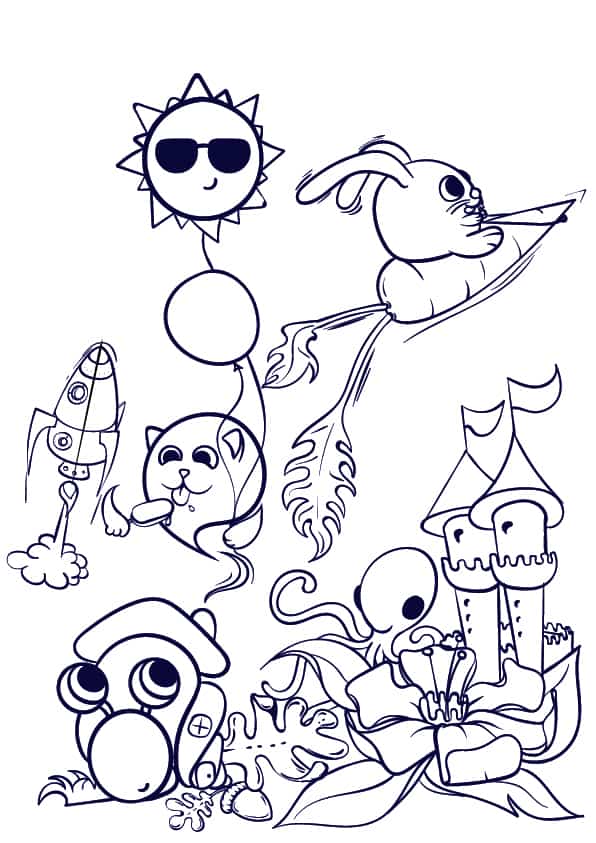


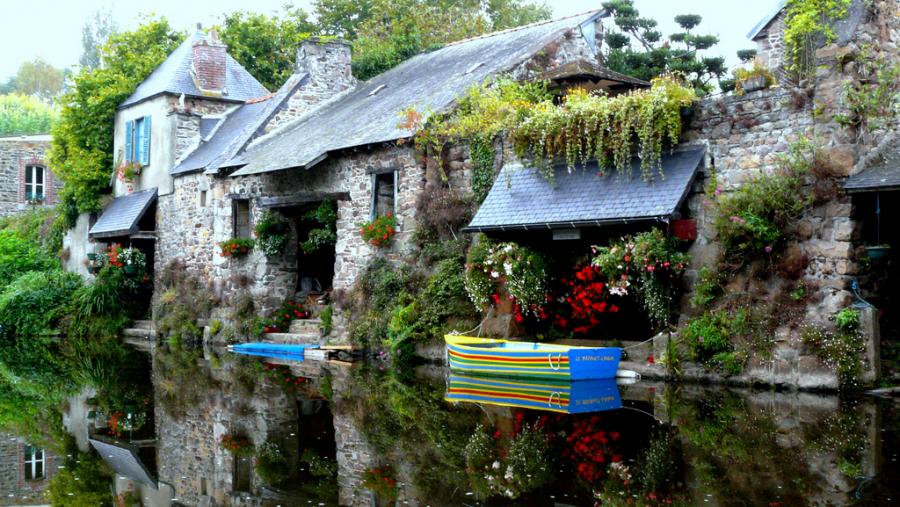
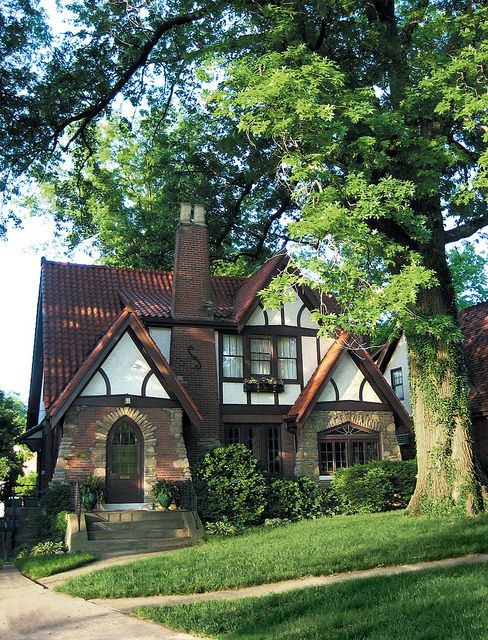


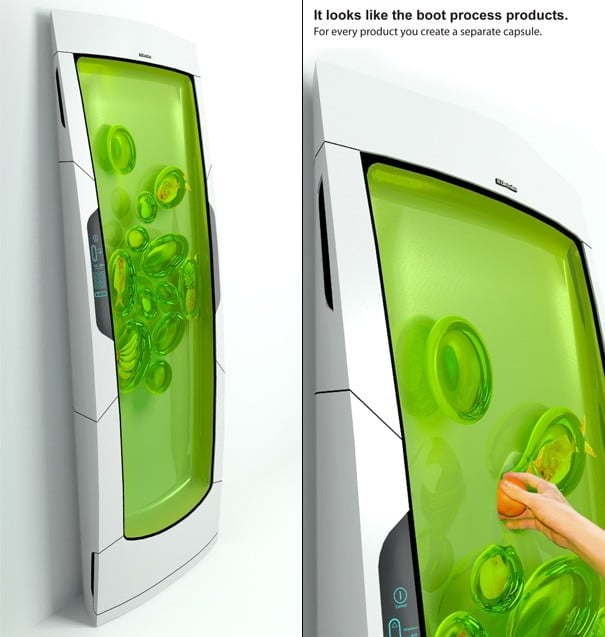
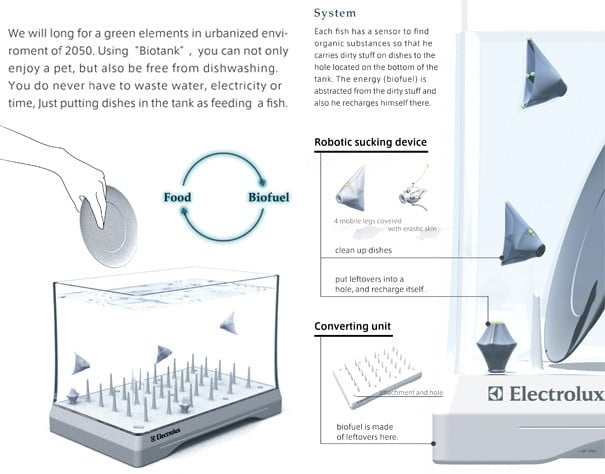


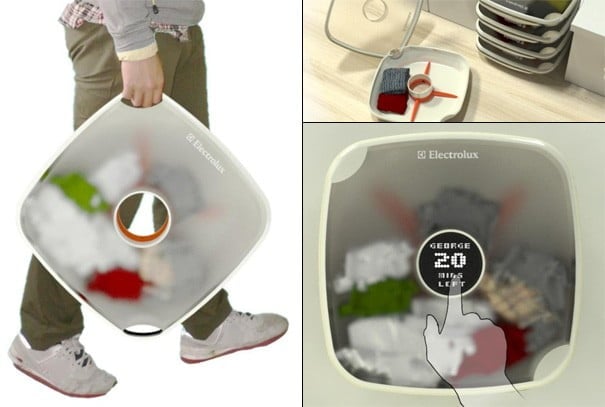
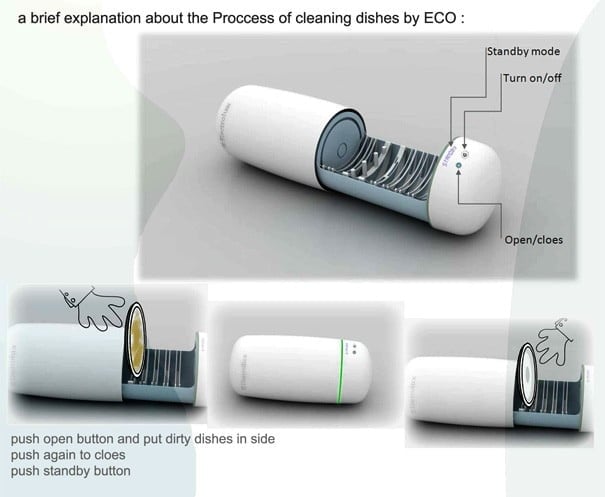
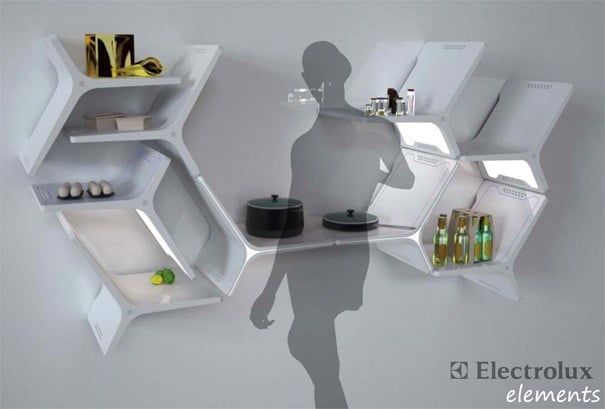


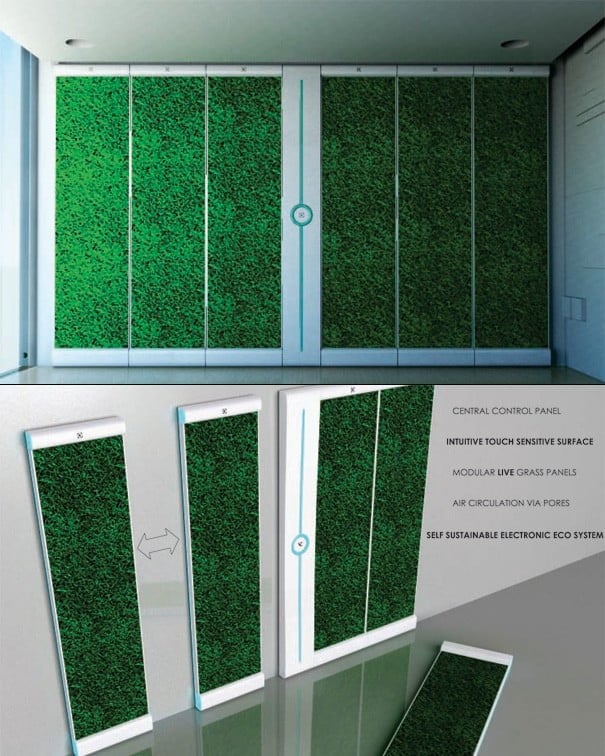

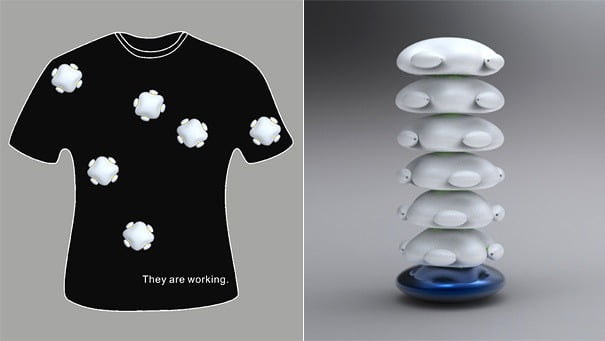


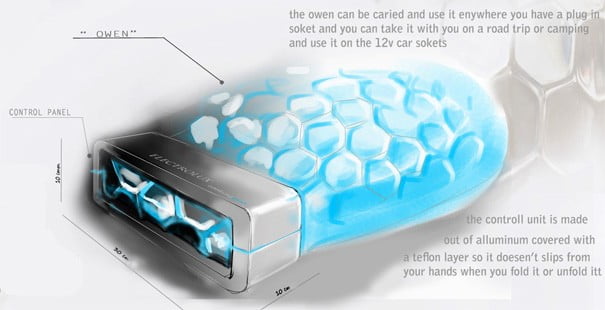
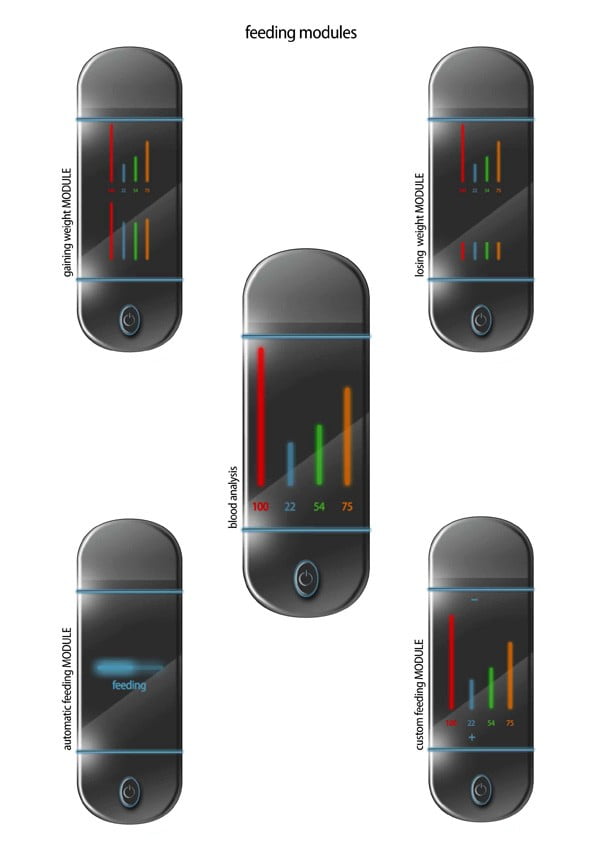
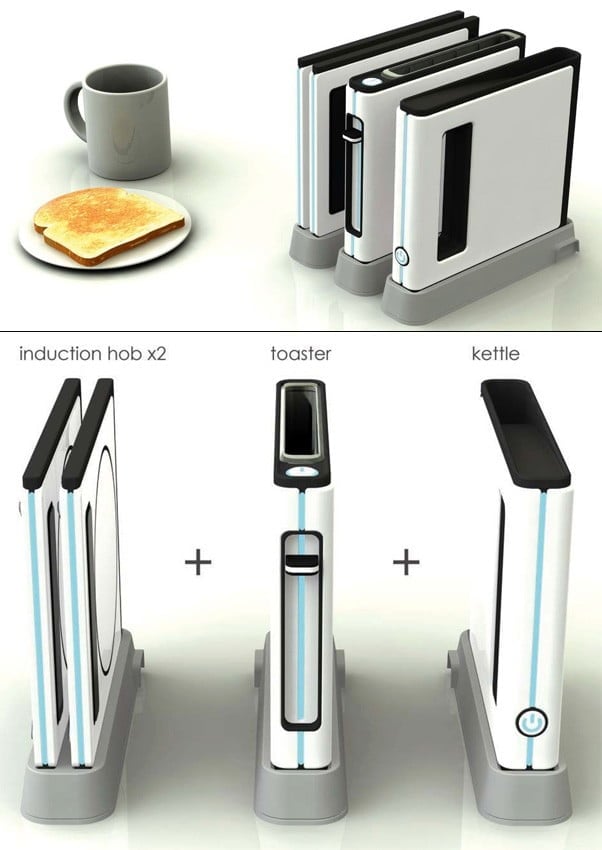
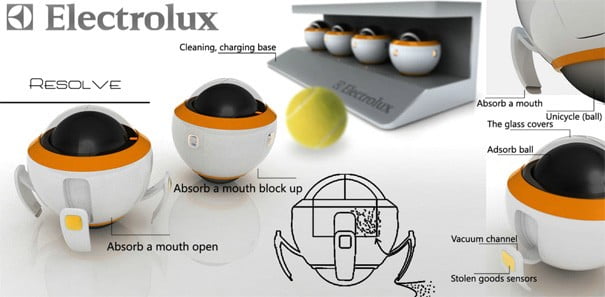
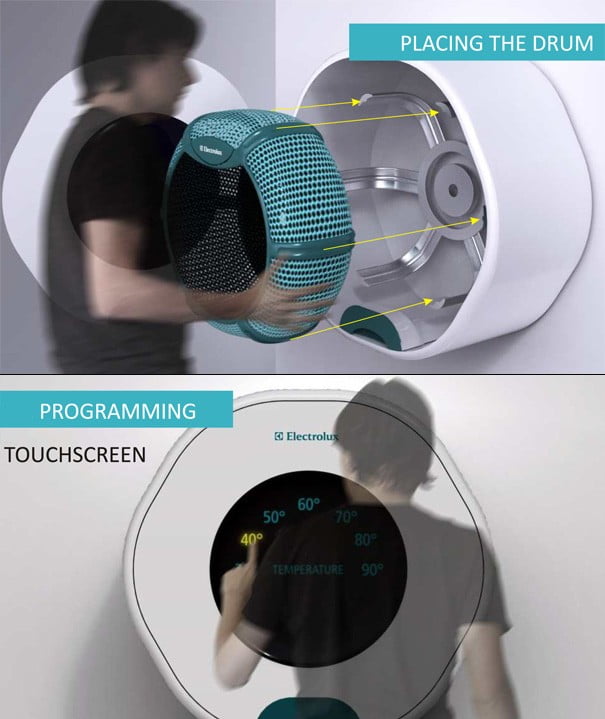


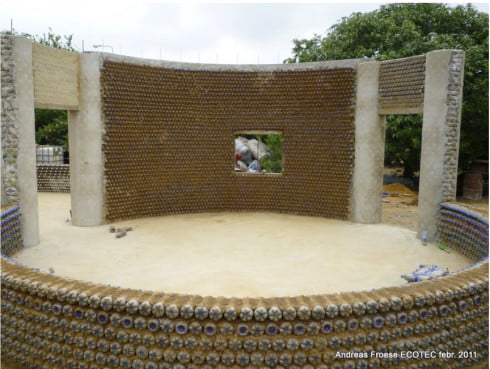
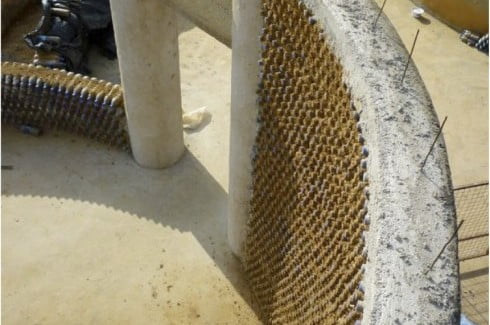

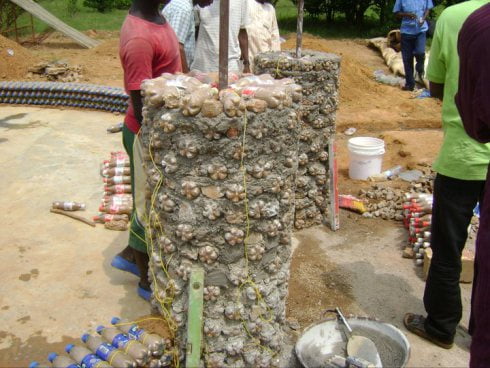


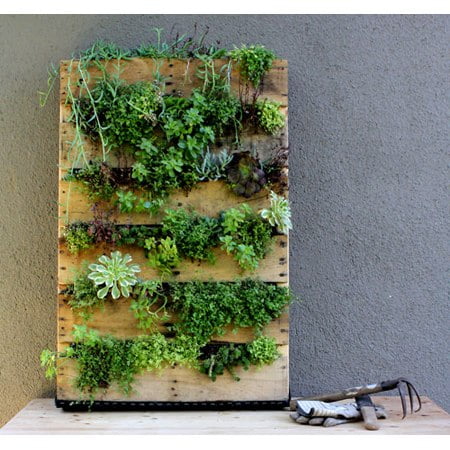
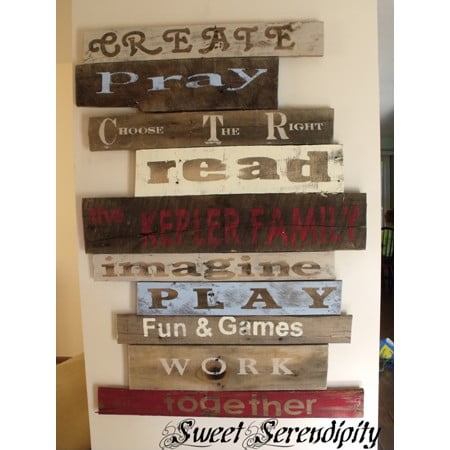
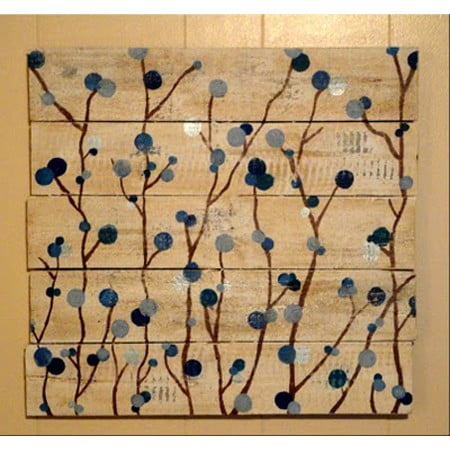
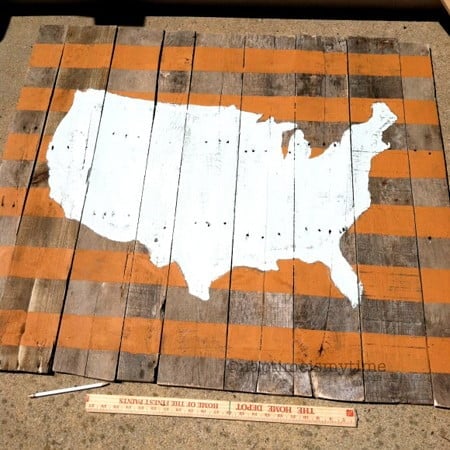
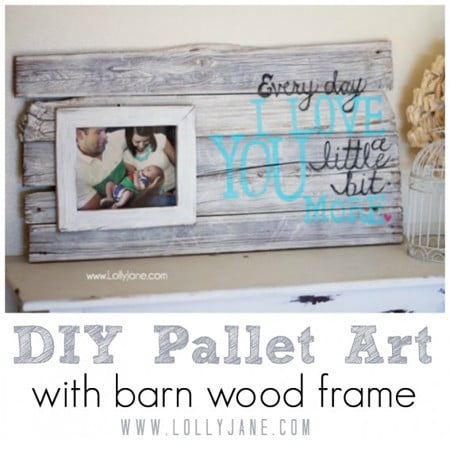
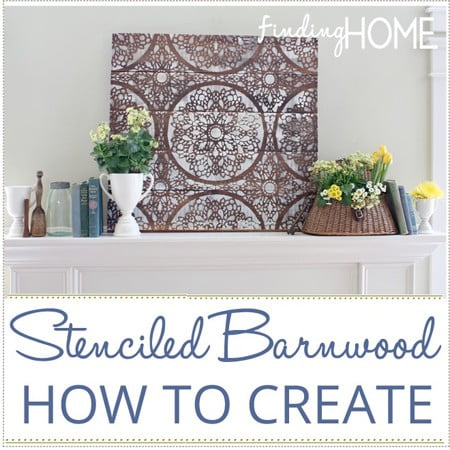
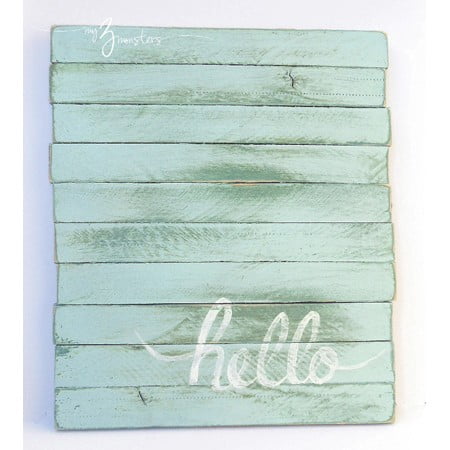

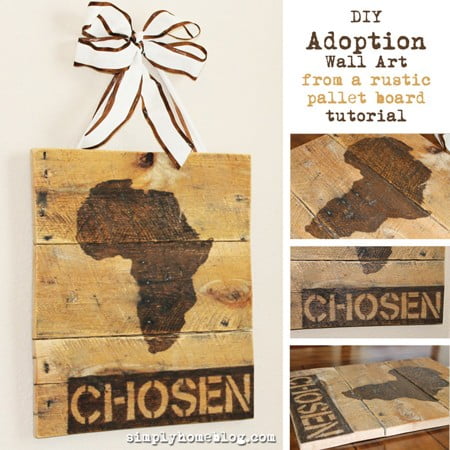


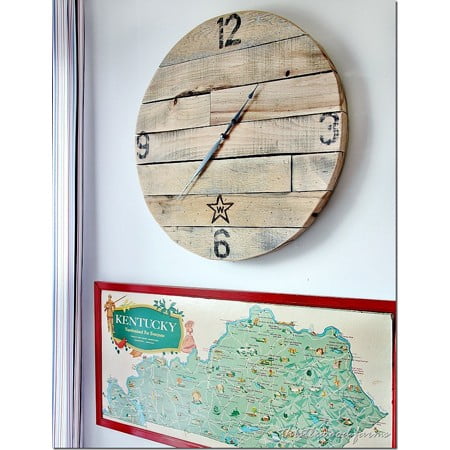
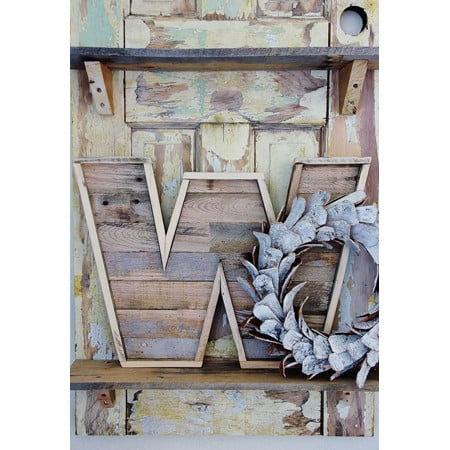

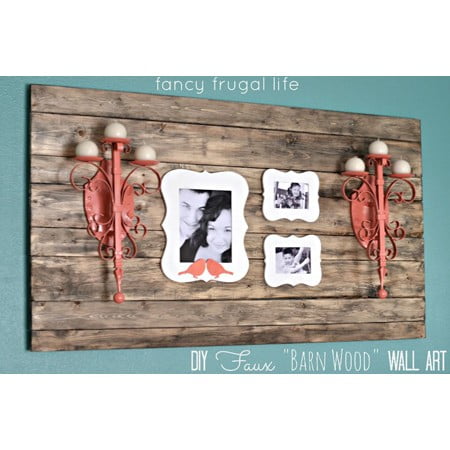


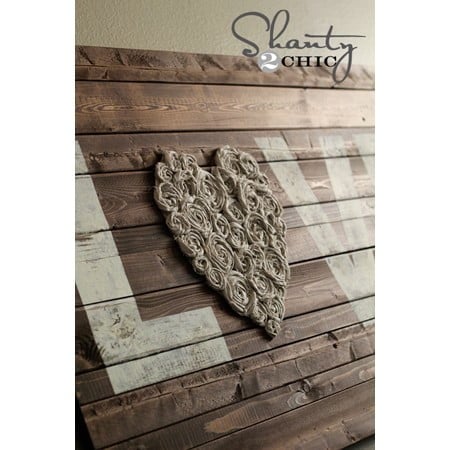
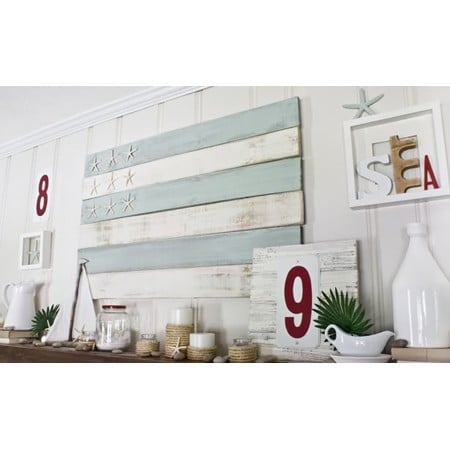


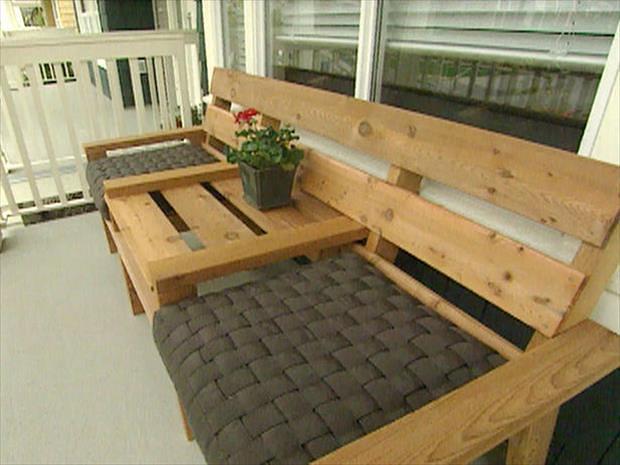

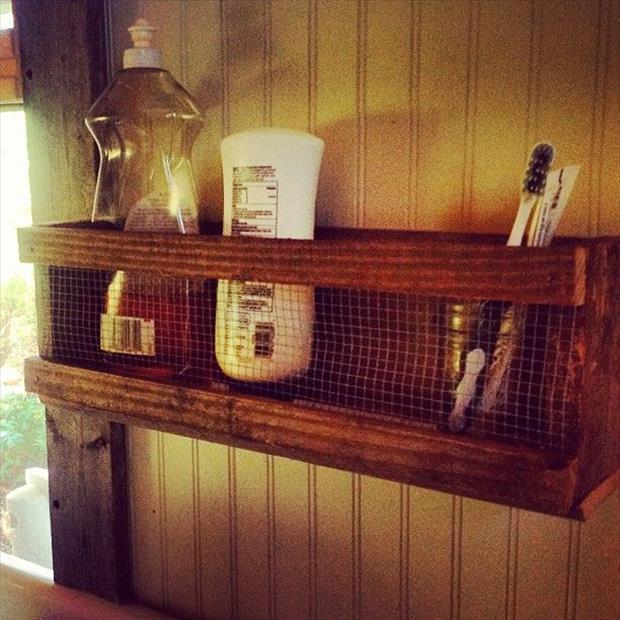
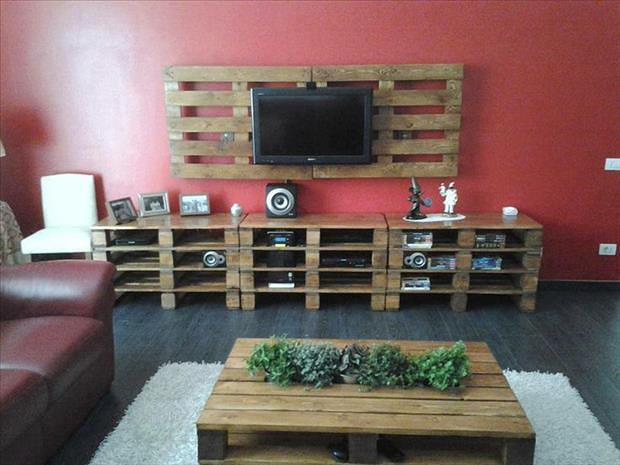

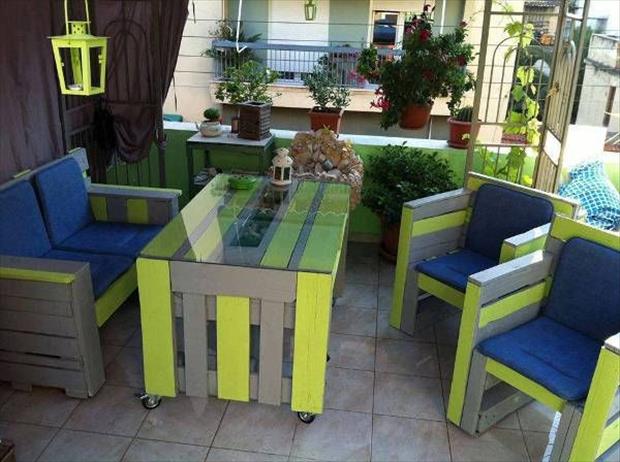
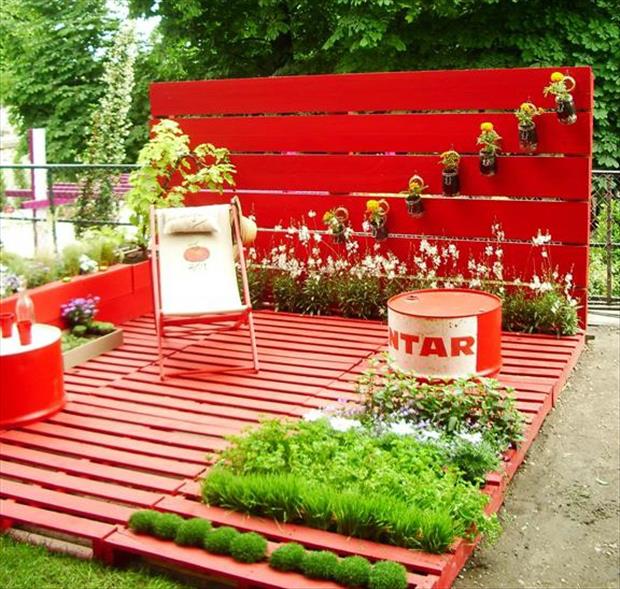
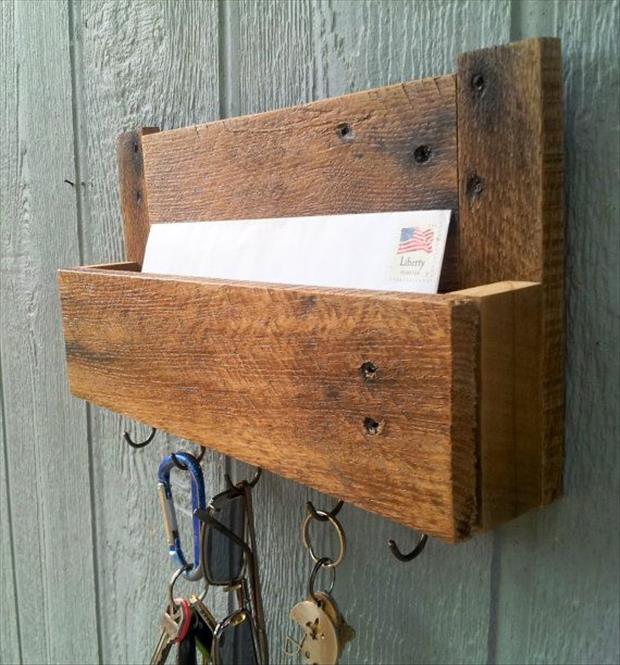
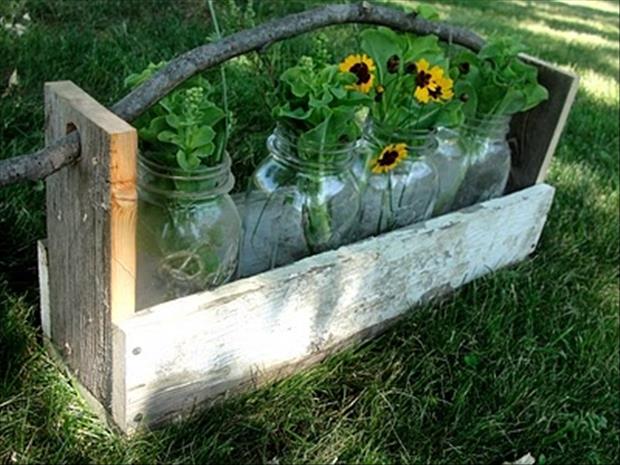
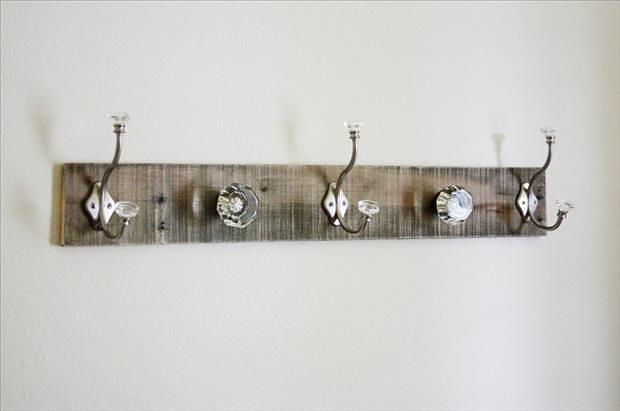


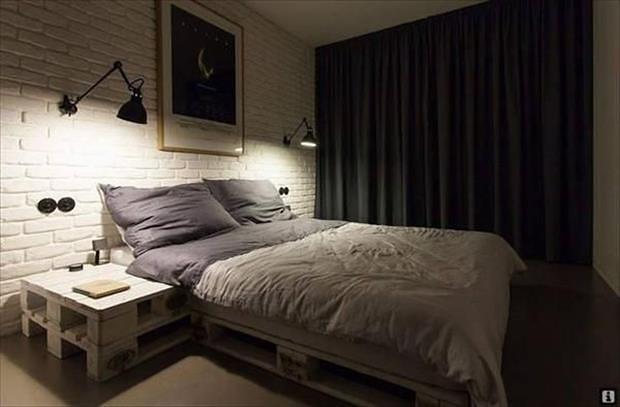
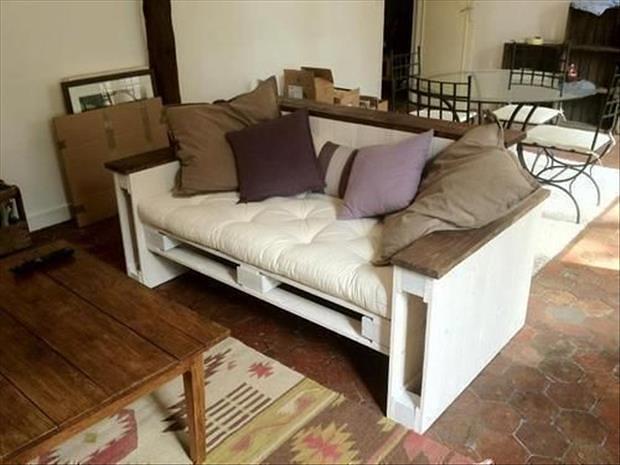
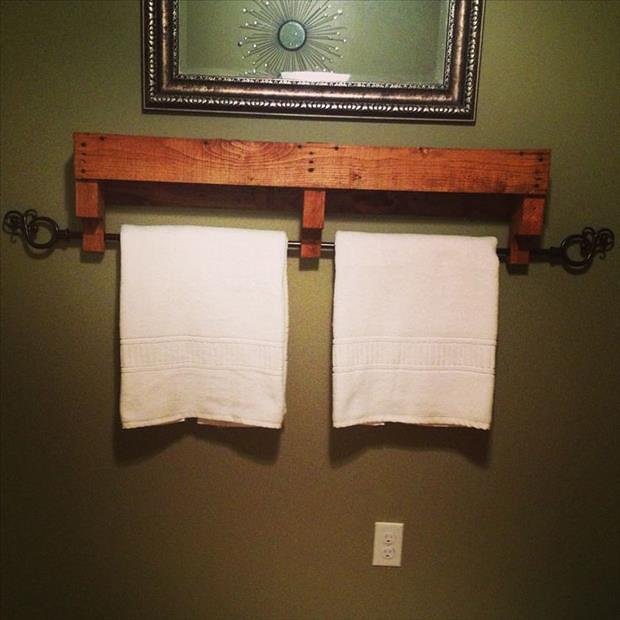
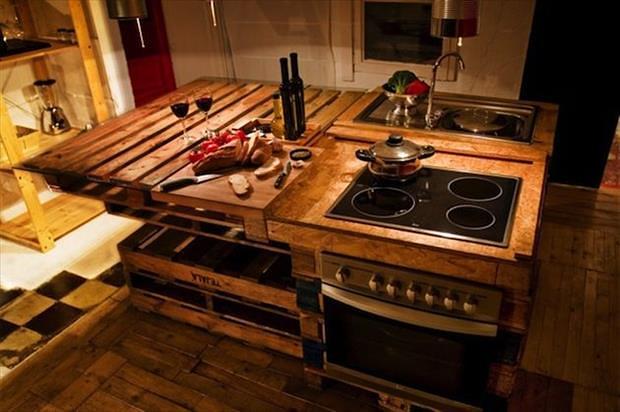

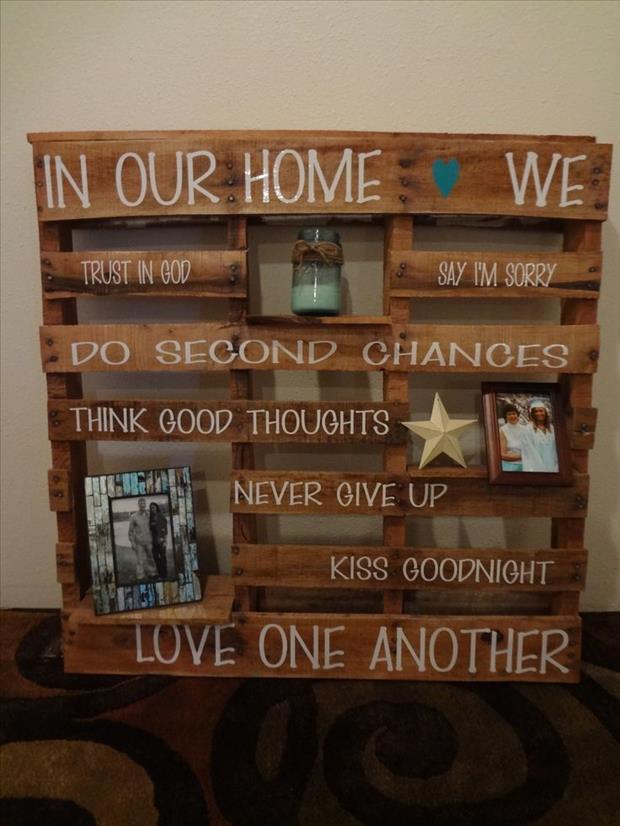
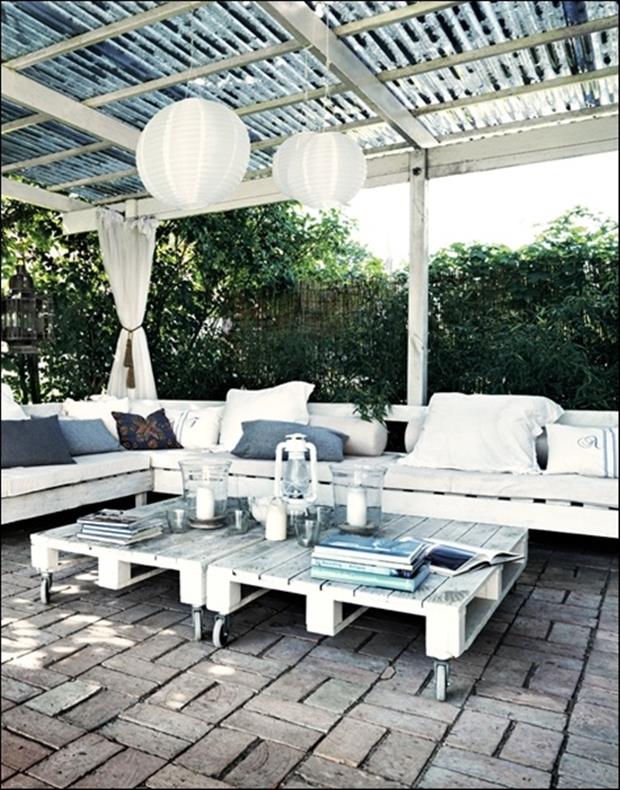
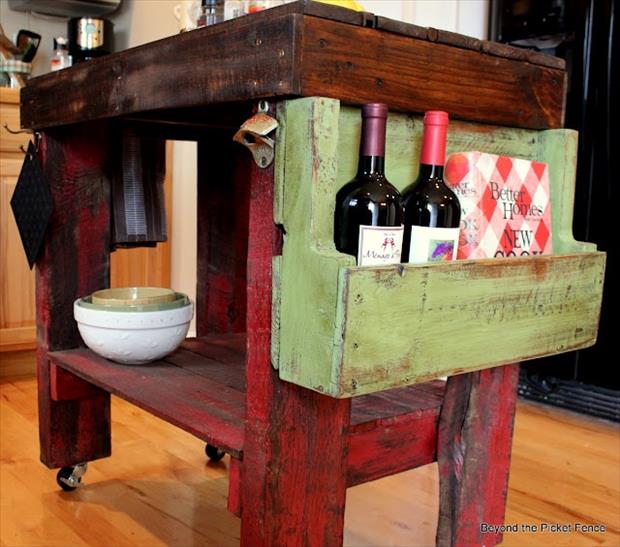


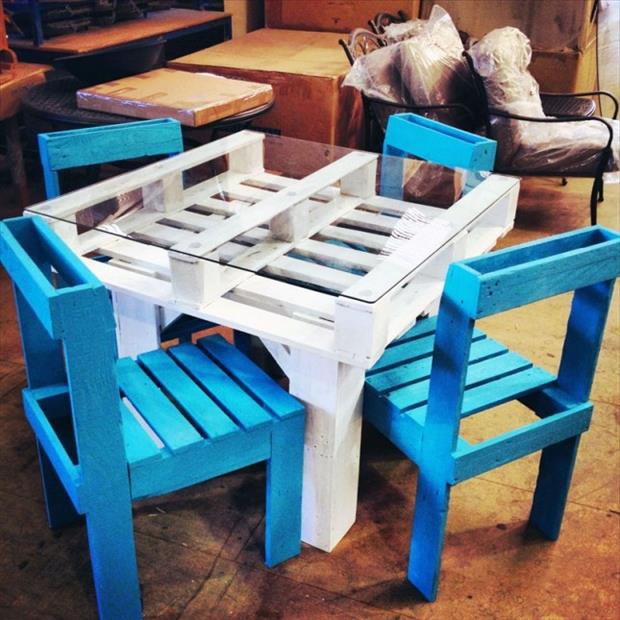
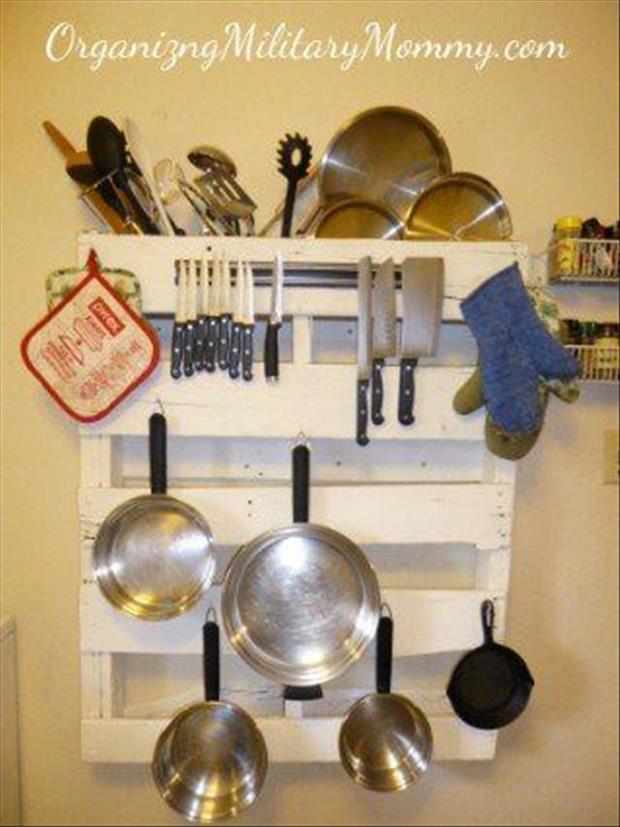
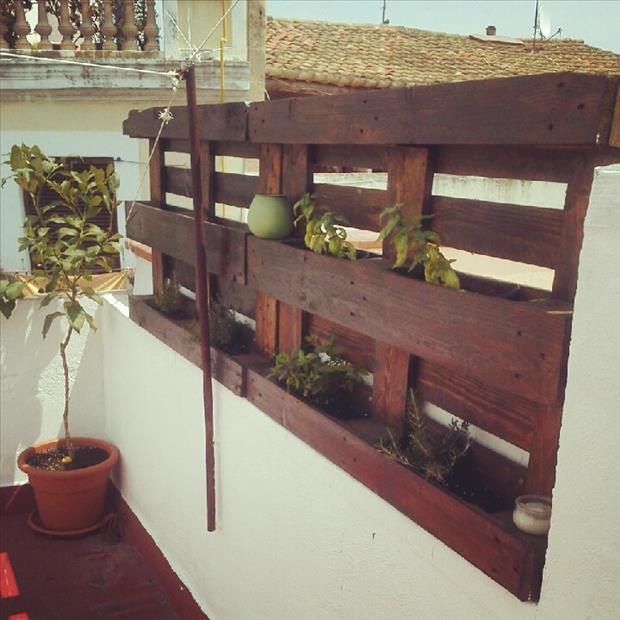

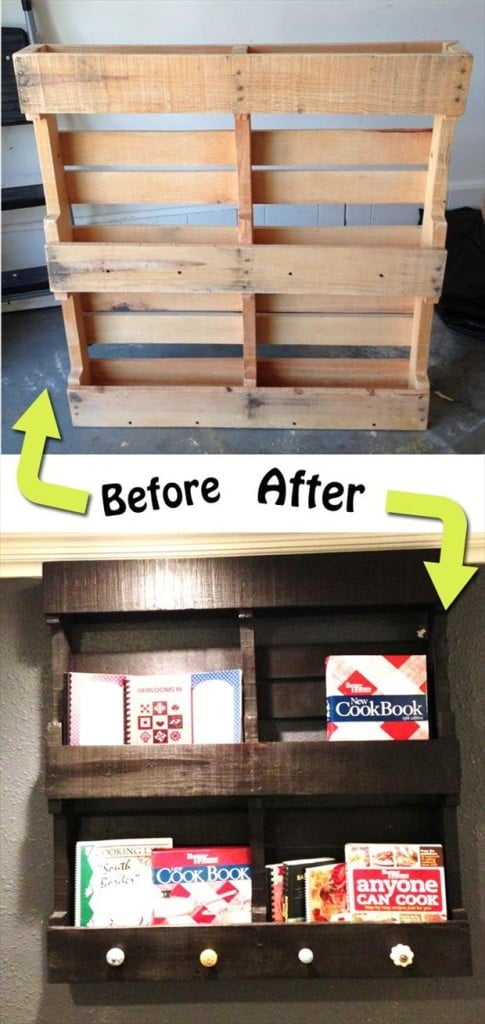

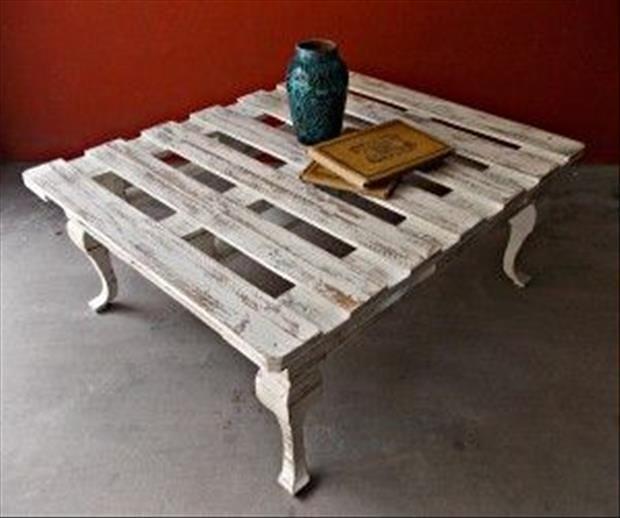
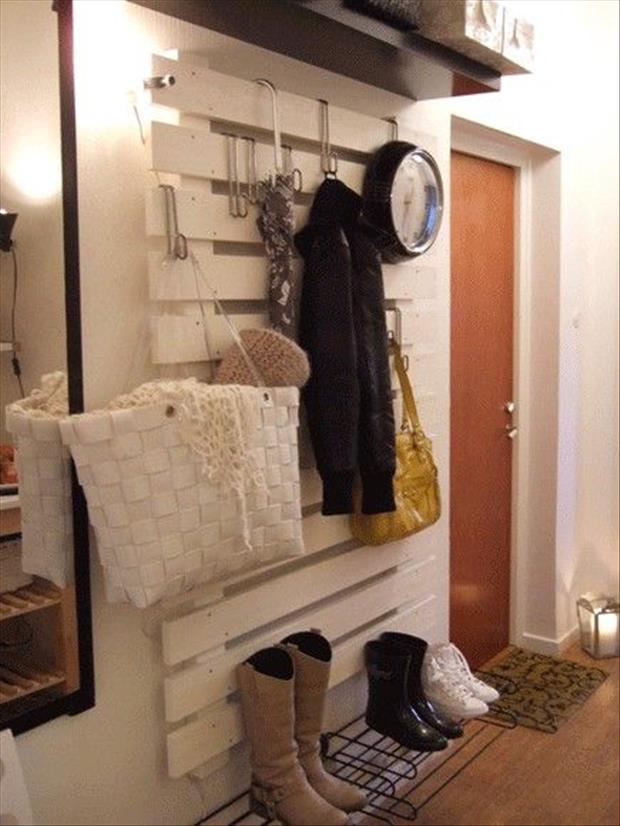
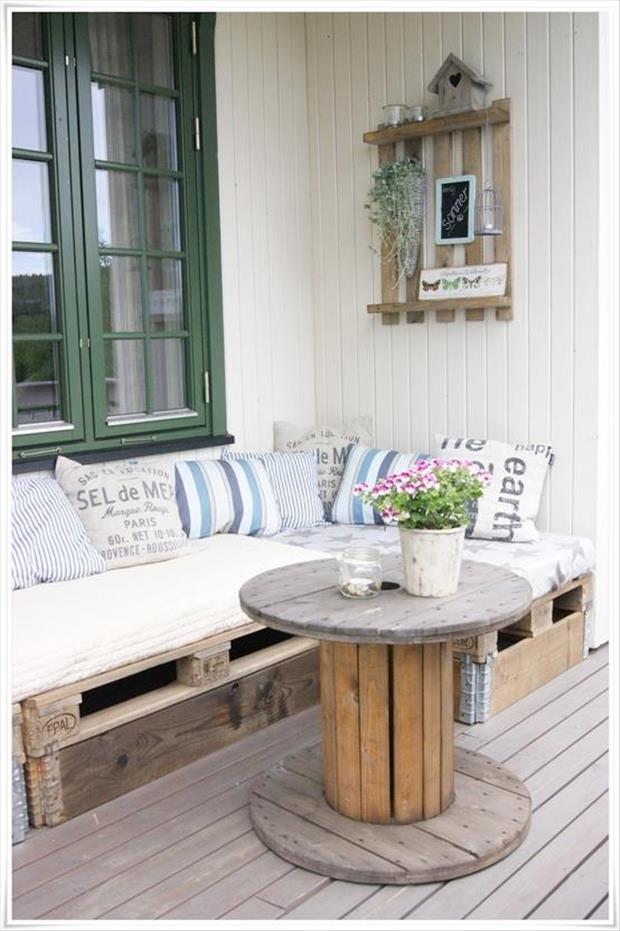
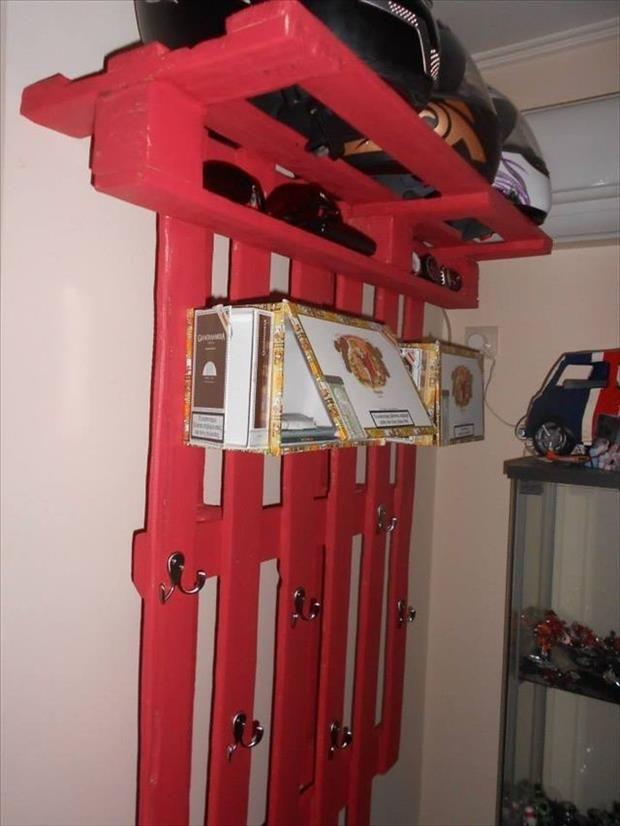
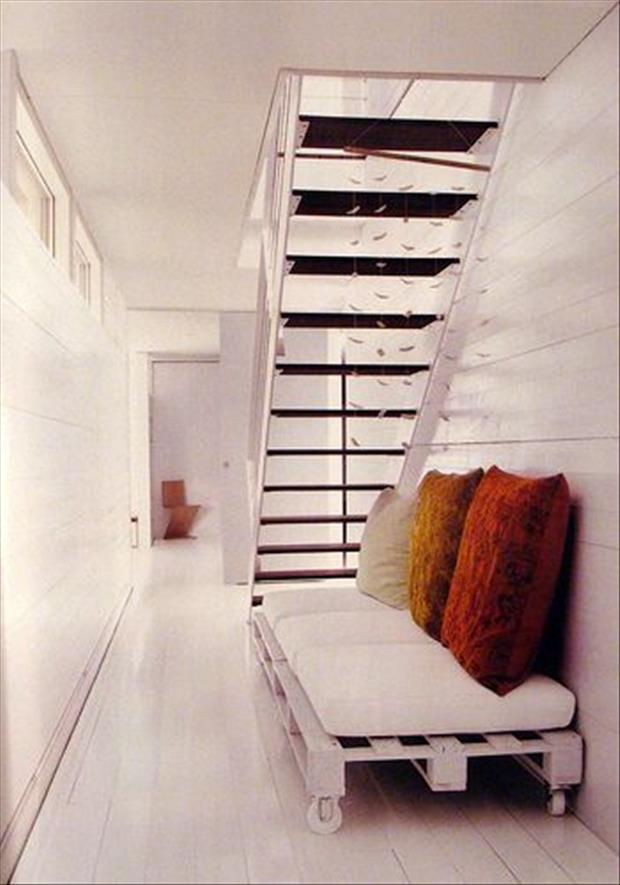
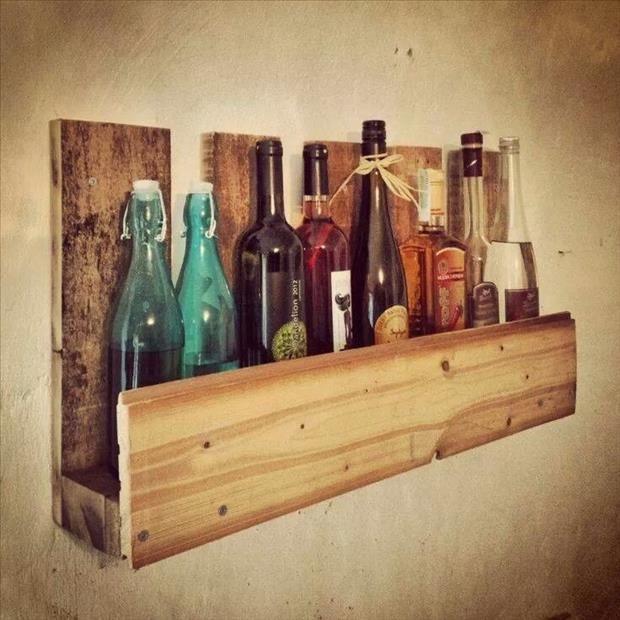
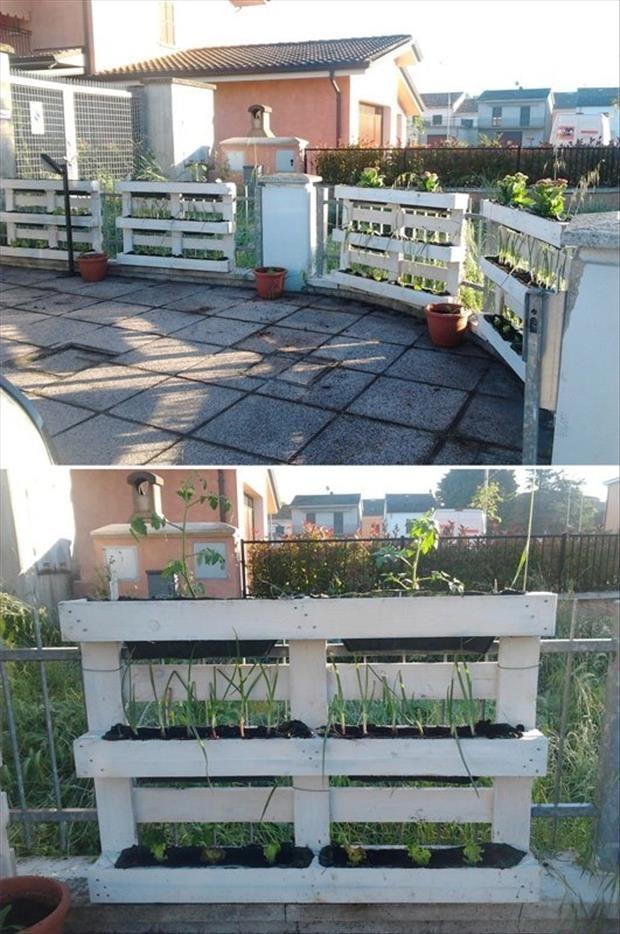


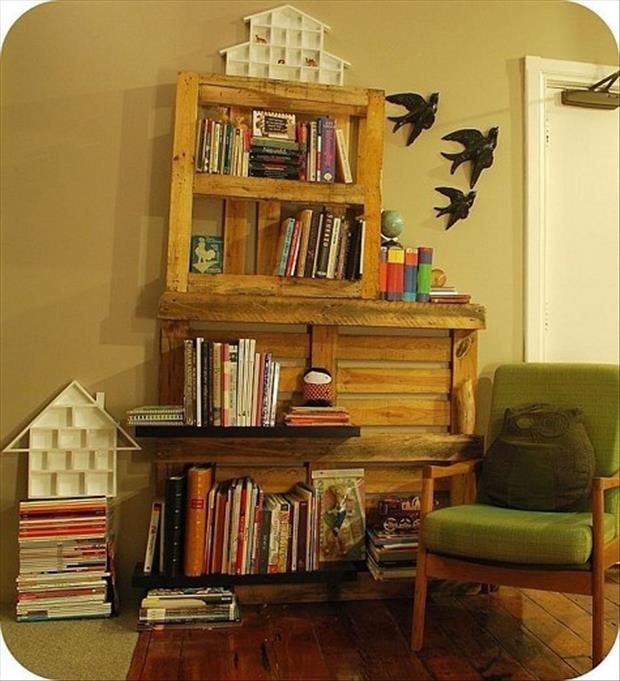
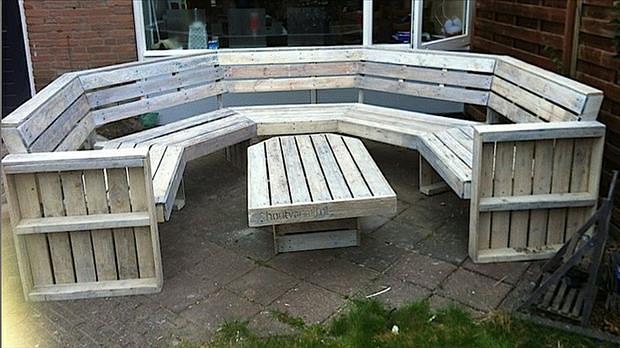

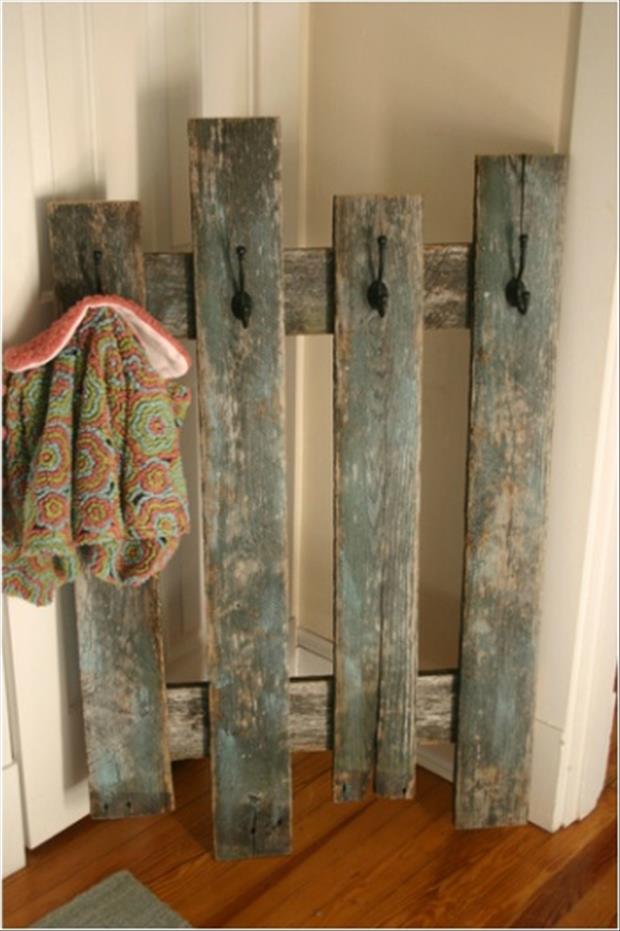
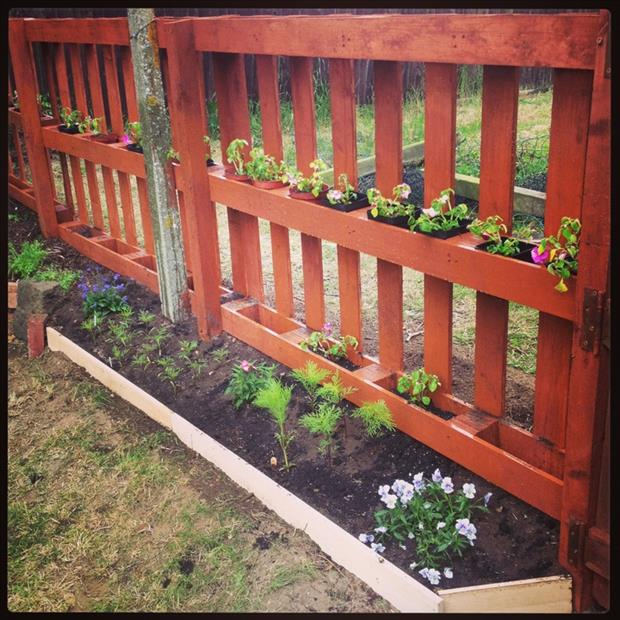
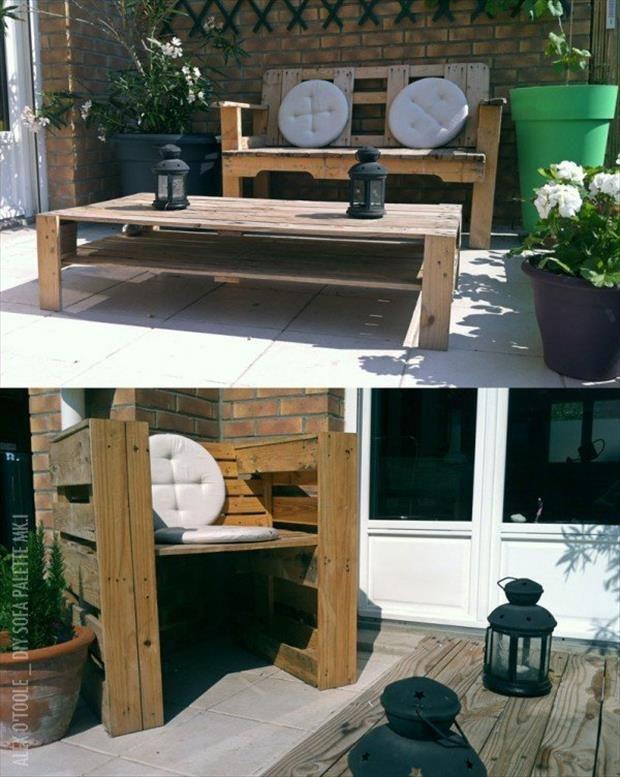
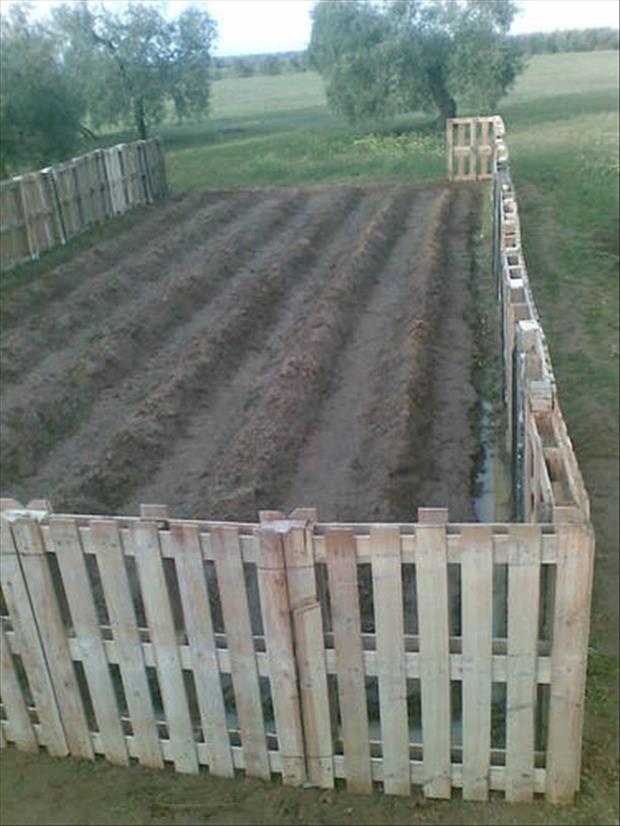


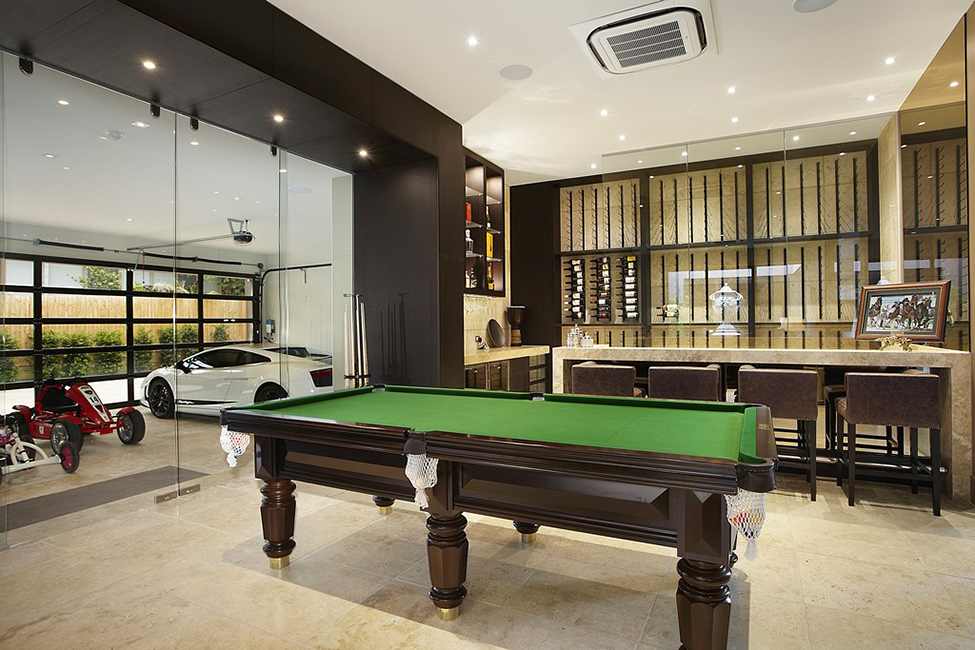


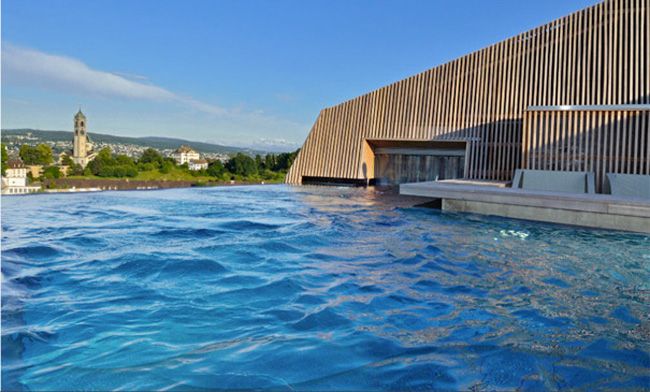
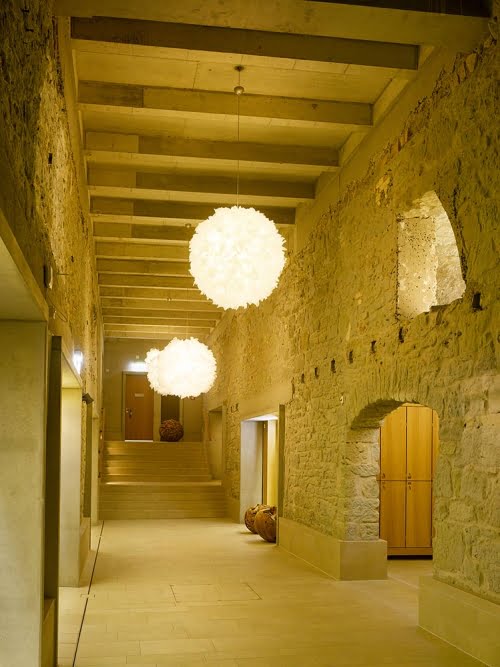


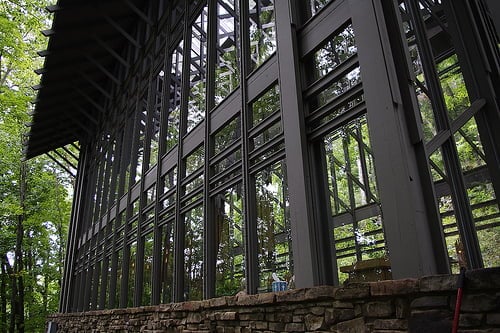
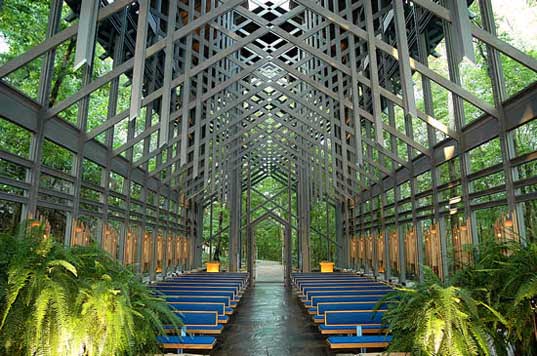
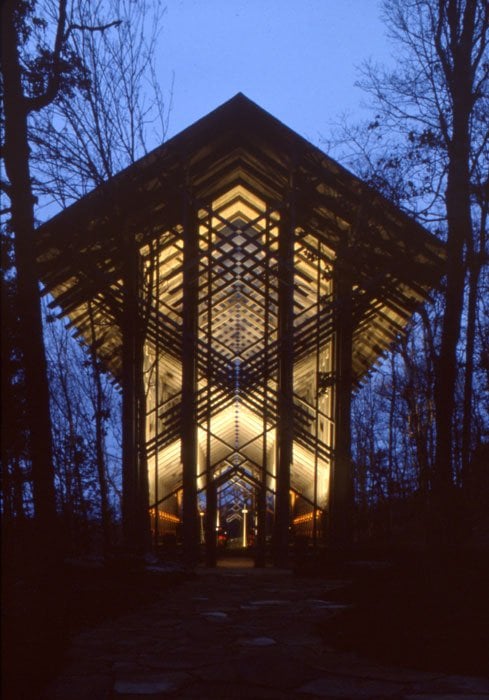


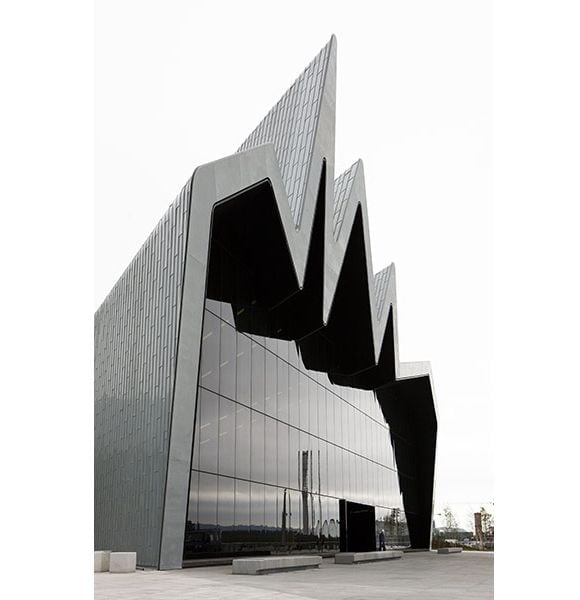


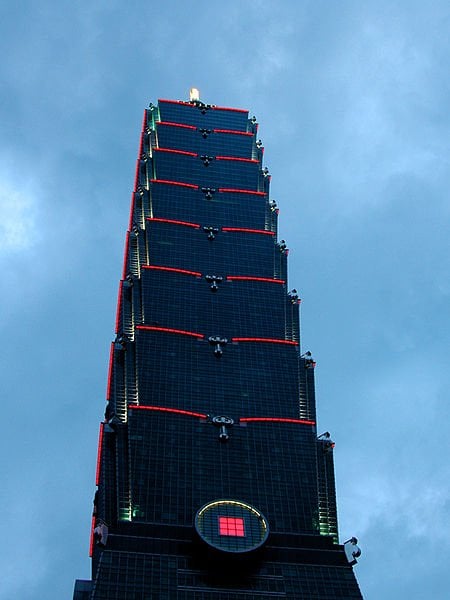

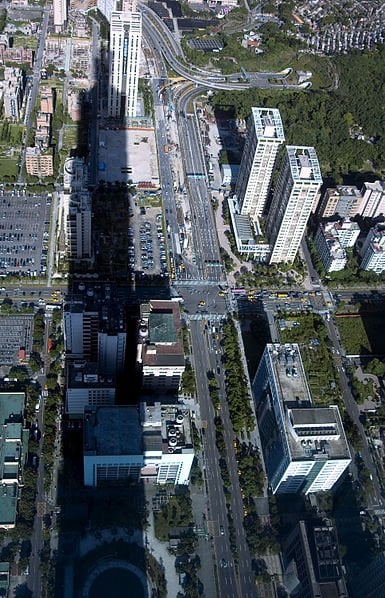


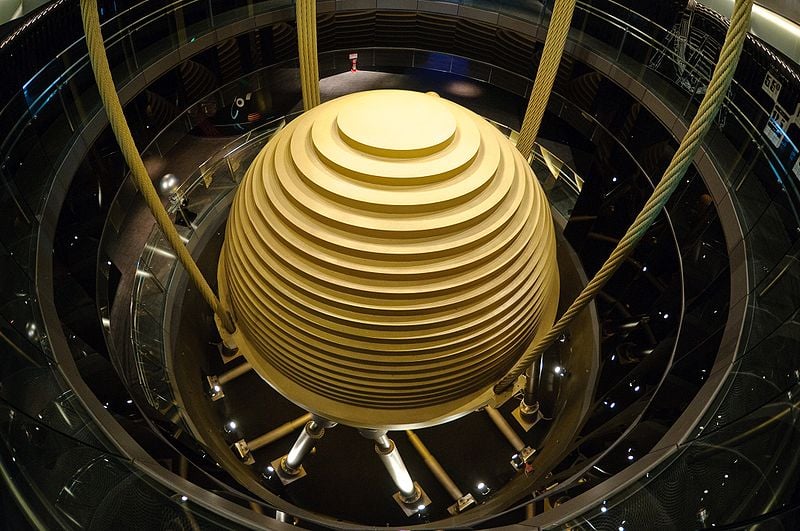
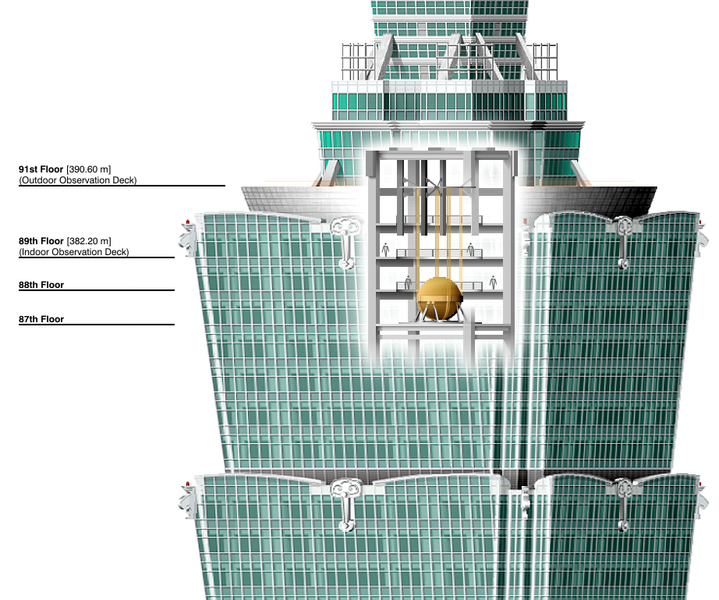
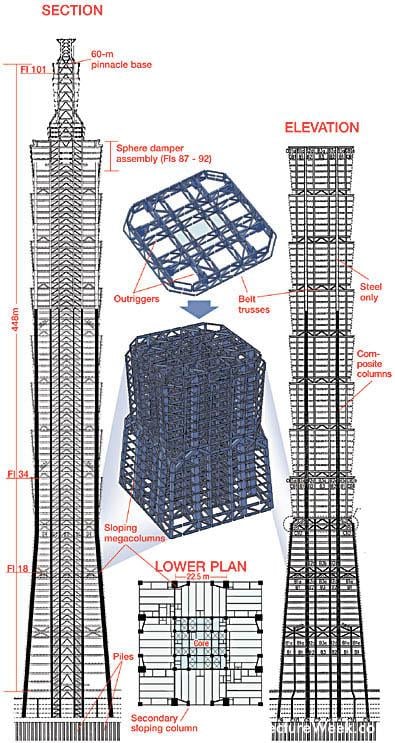


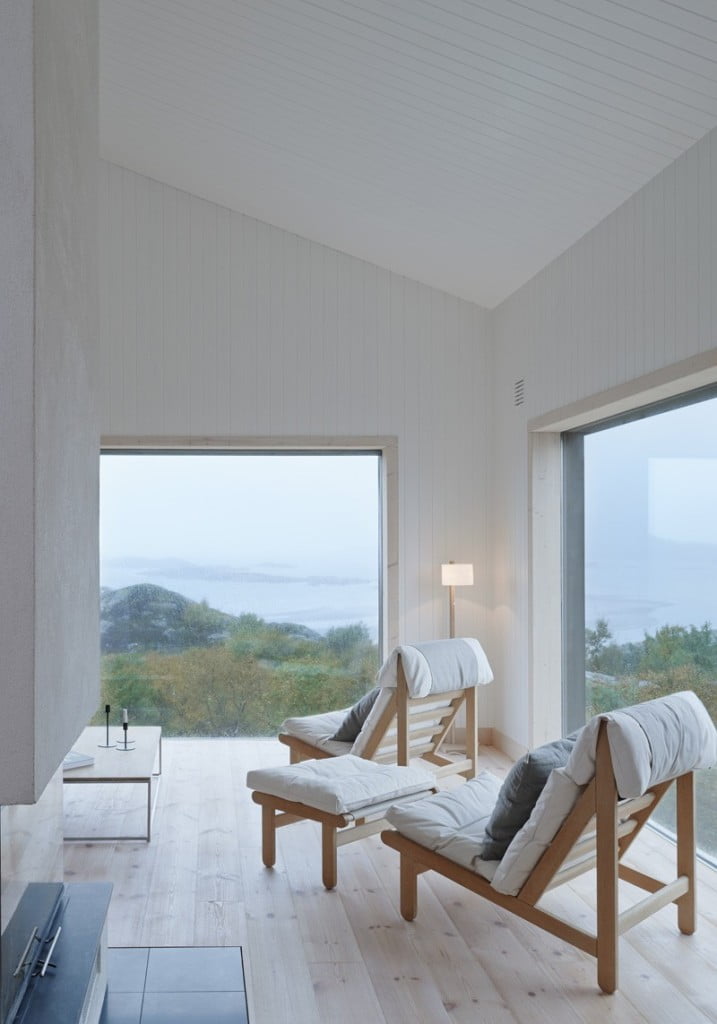
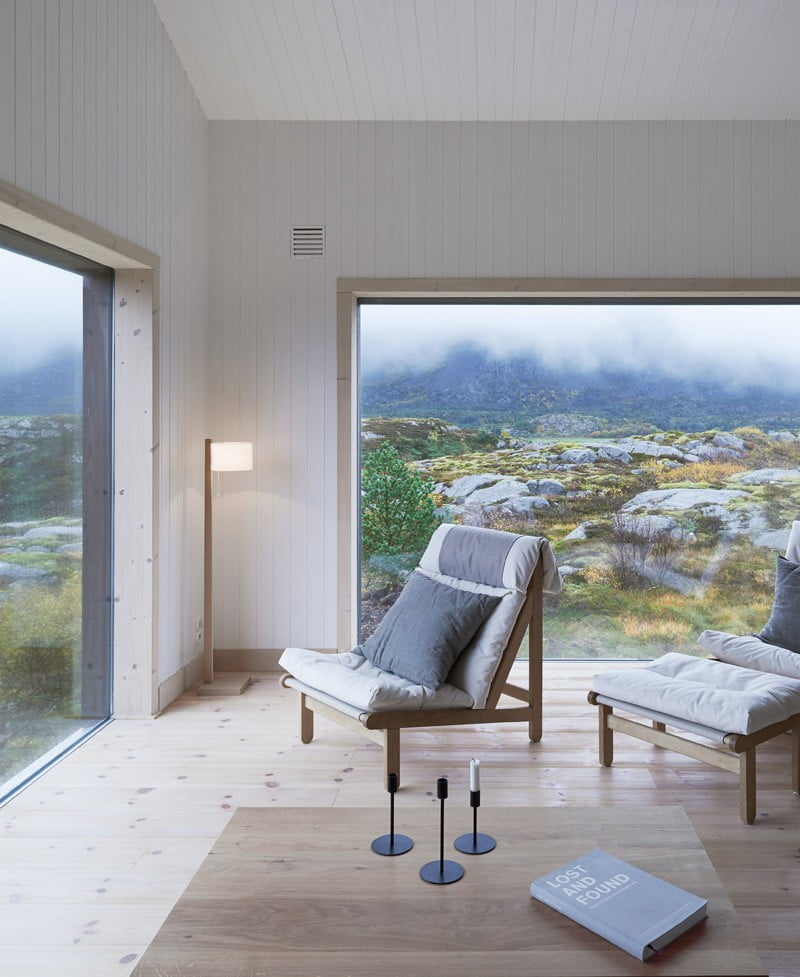
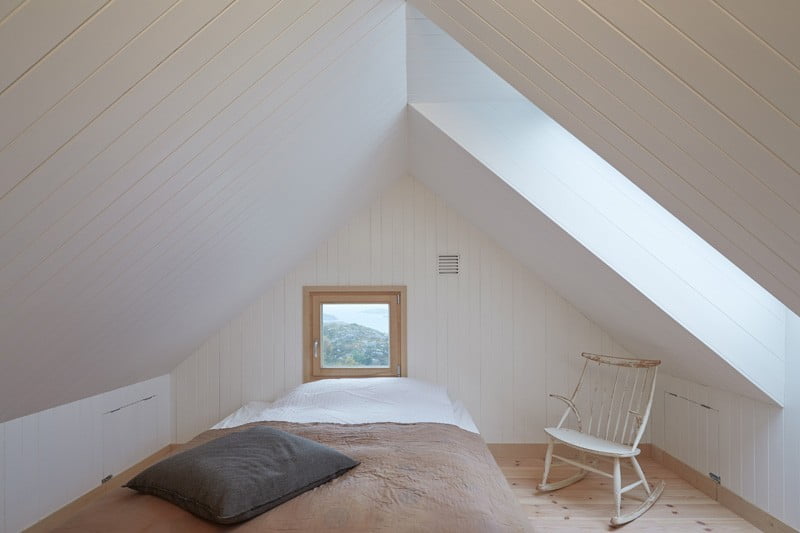
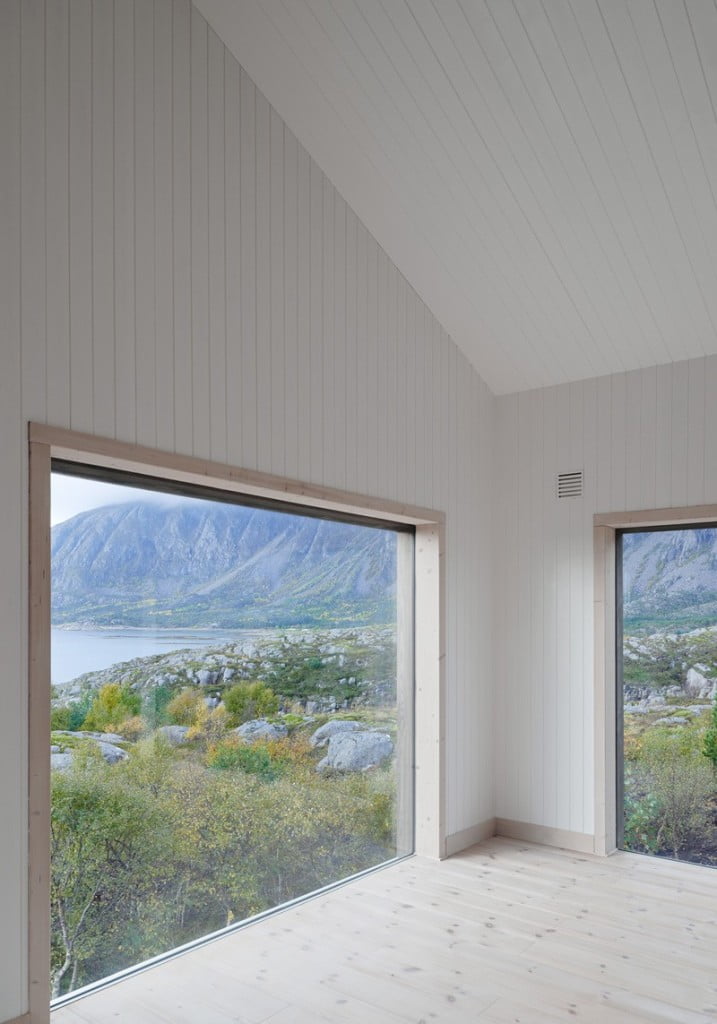

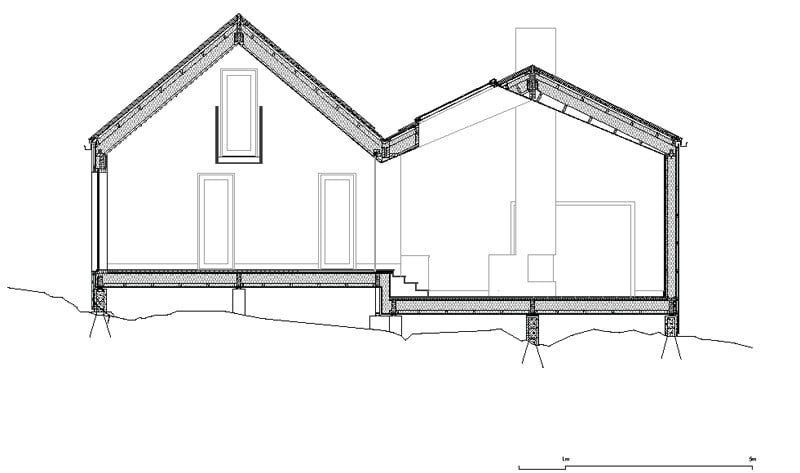
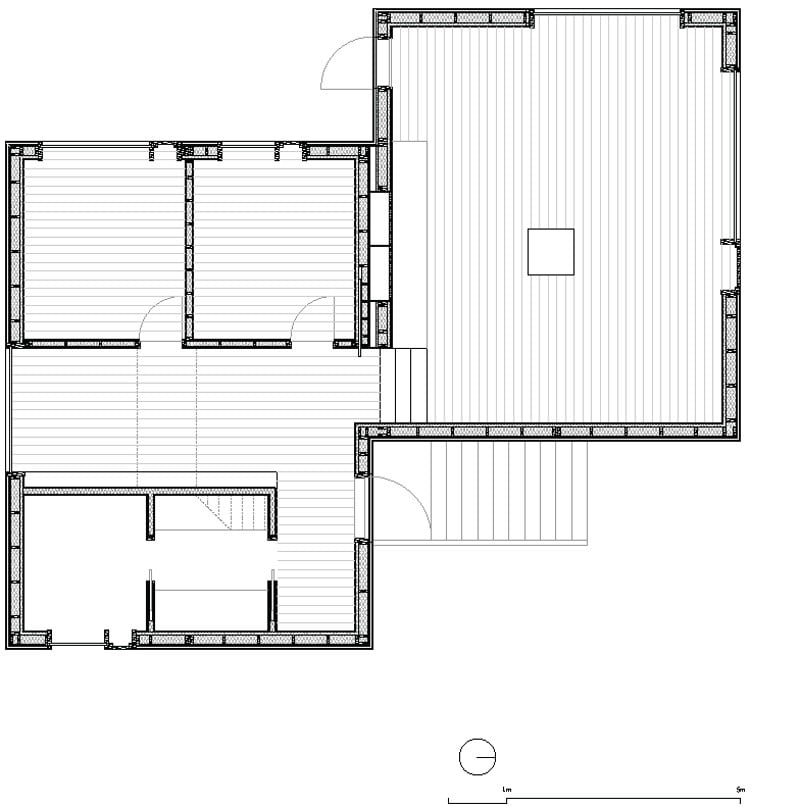


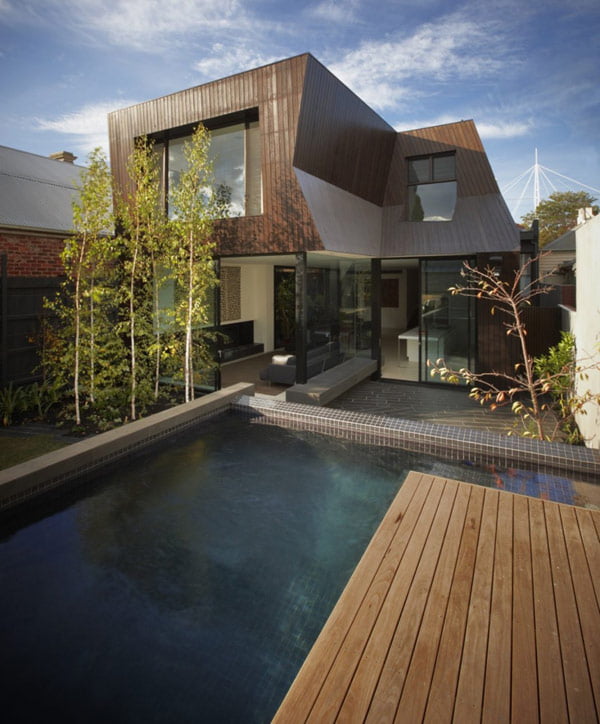


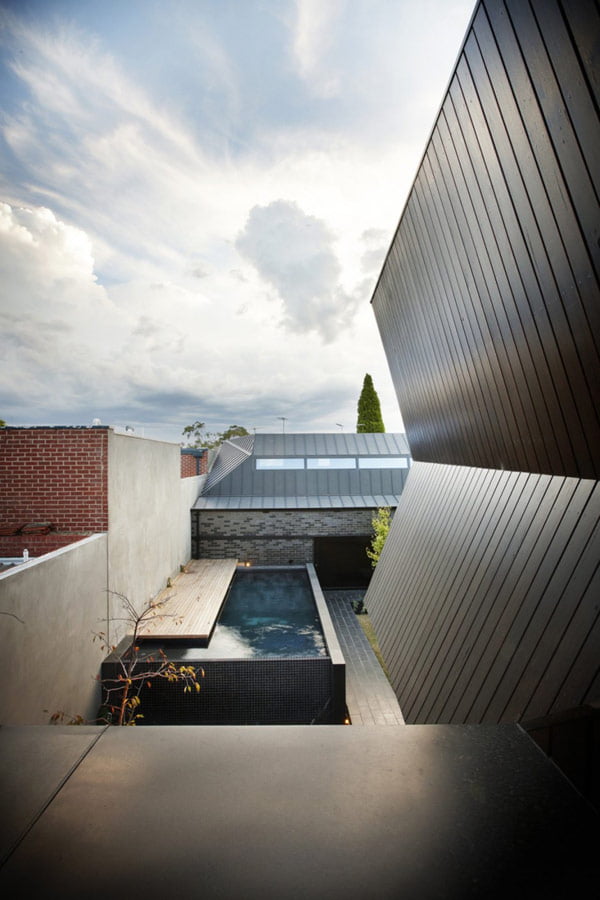


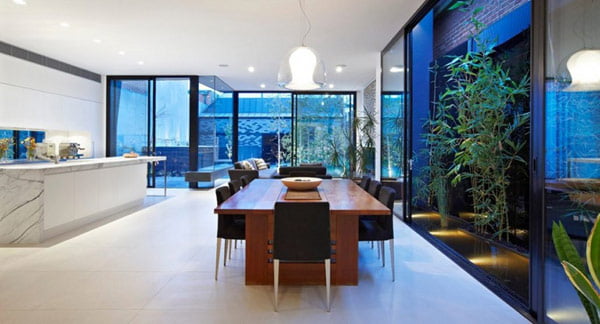
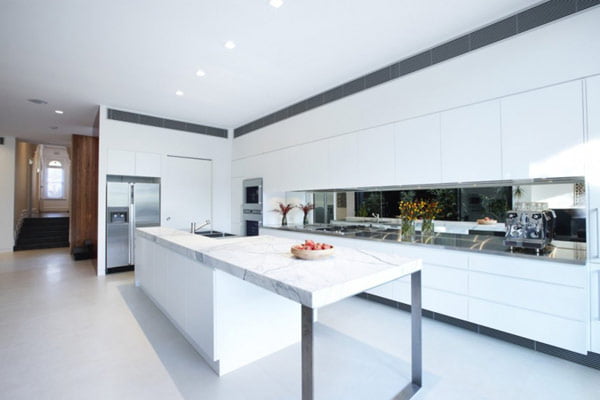

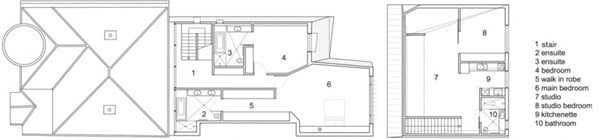
![How to Make and Accomplish [Short Term] Goals for the Architect in You](https://homesthetics.net/wp-content/uploads/2019/06/How-to-Make-and-Accomplish-Short-Term-Goals-for-the-Architect-in-You.jpg "How to Make and Accomplish [Short Term] Goals for the Architect in You")


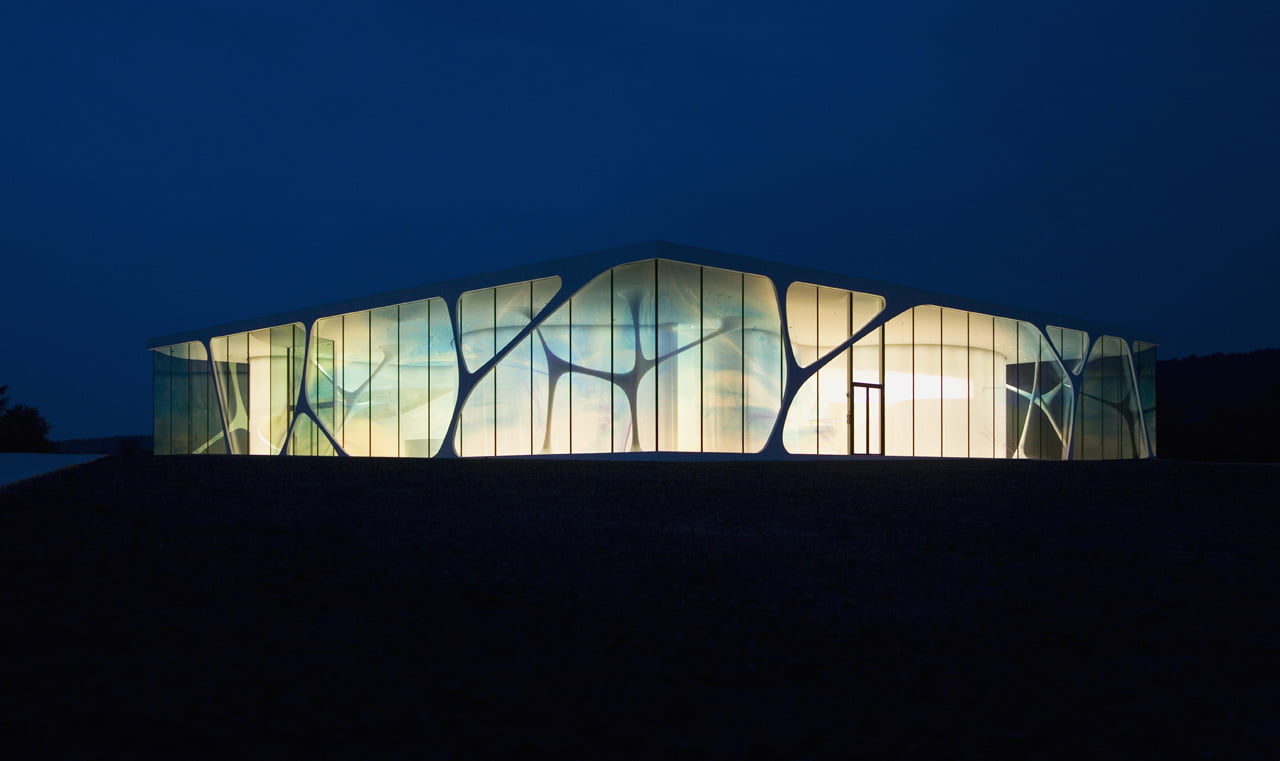

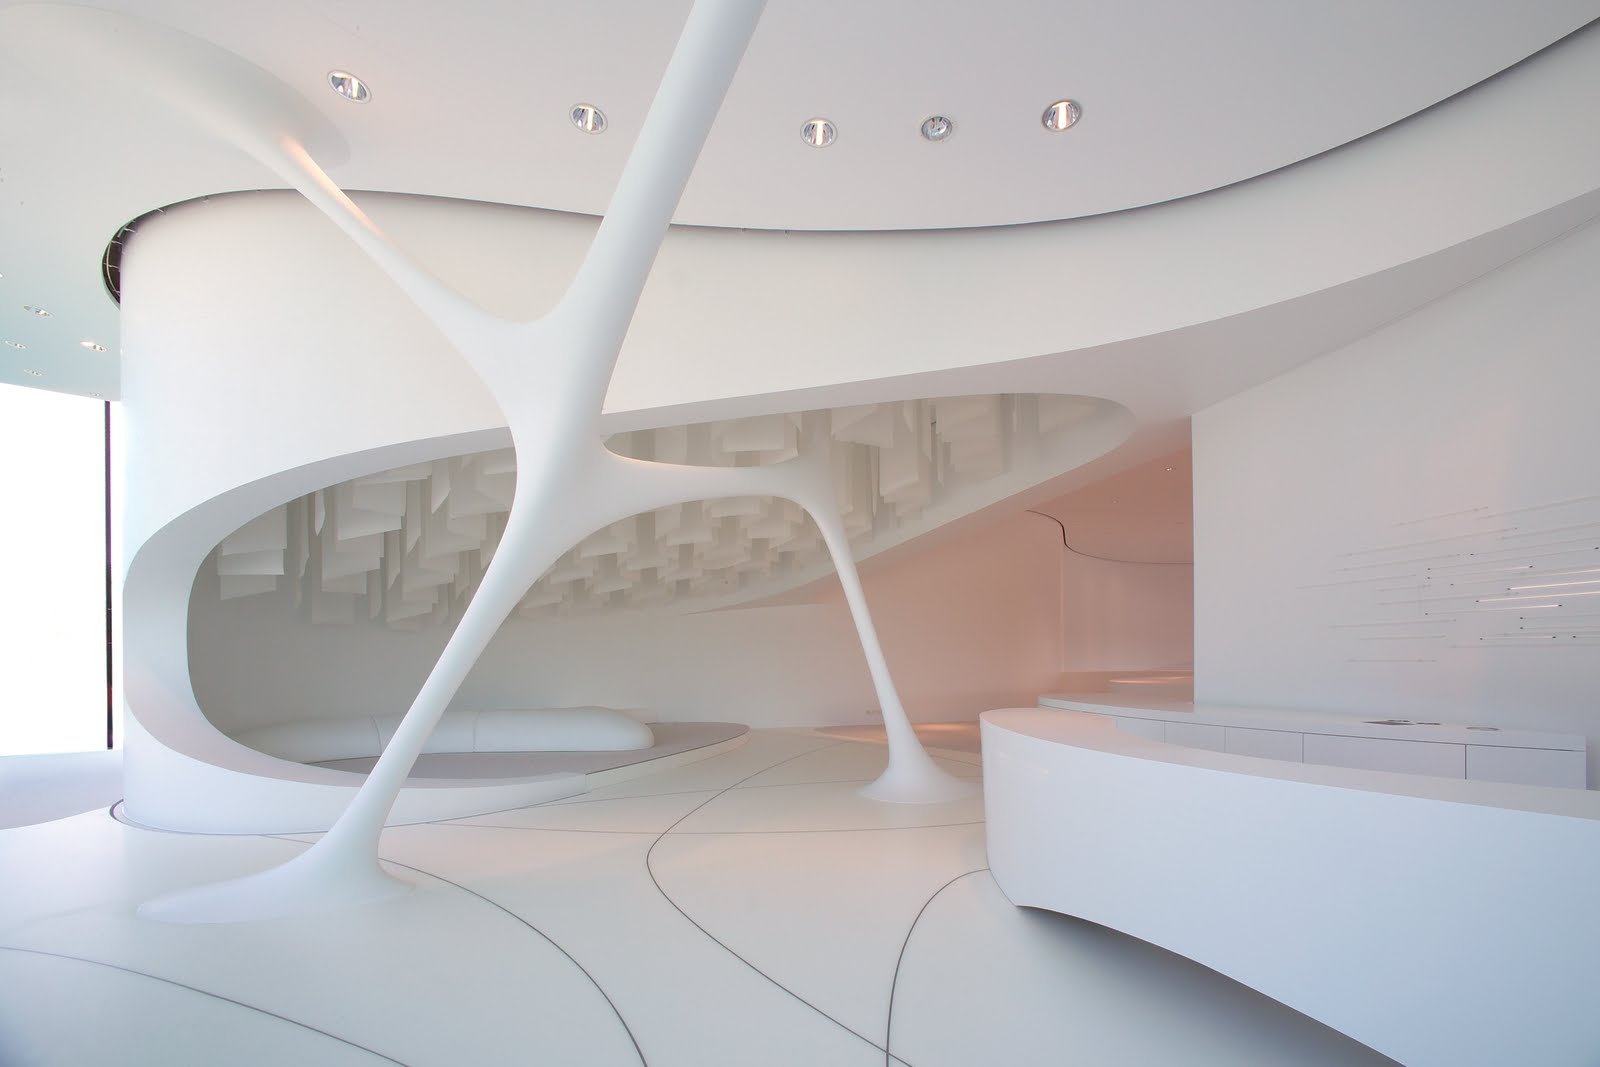


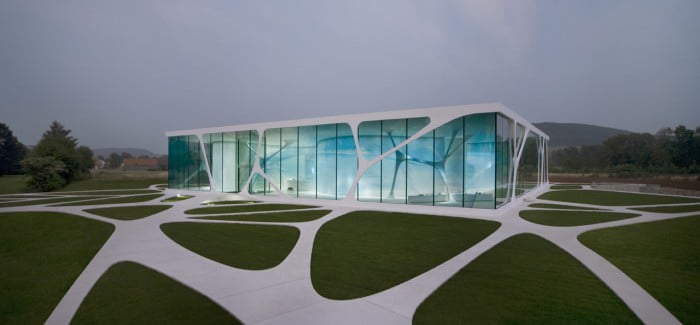
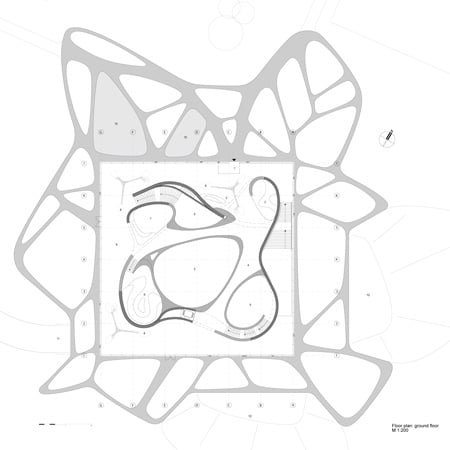
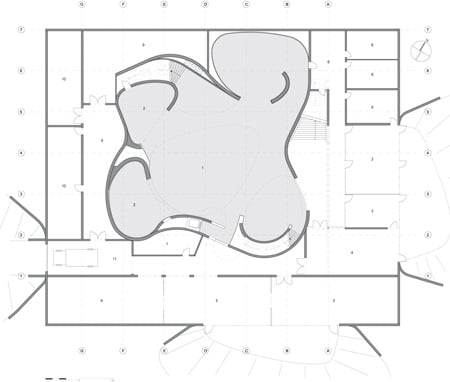


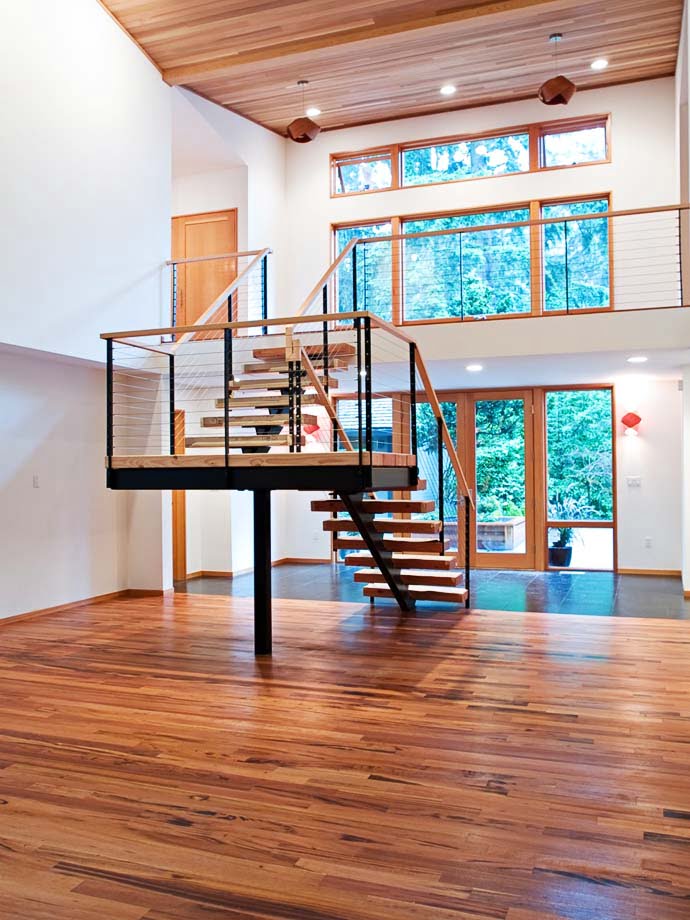


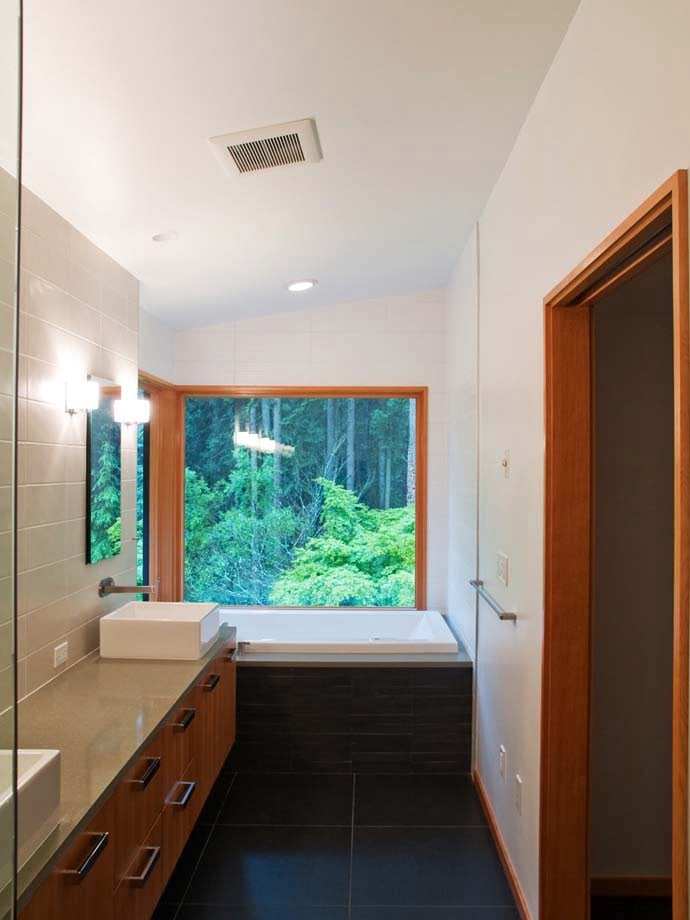
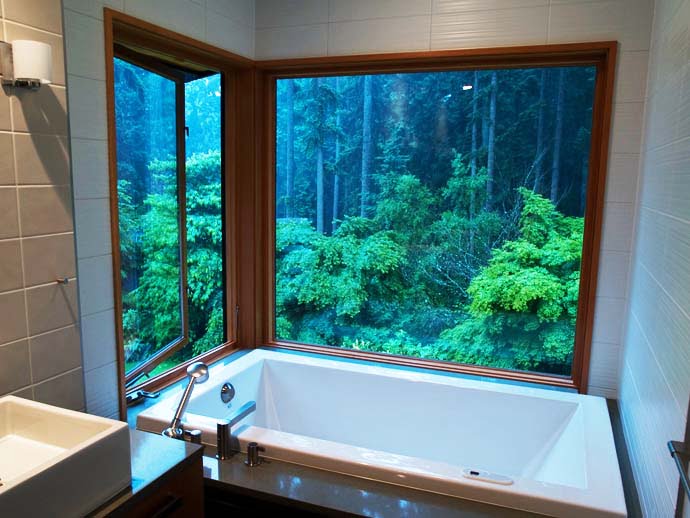
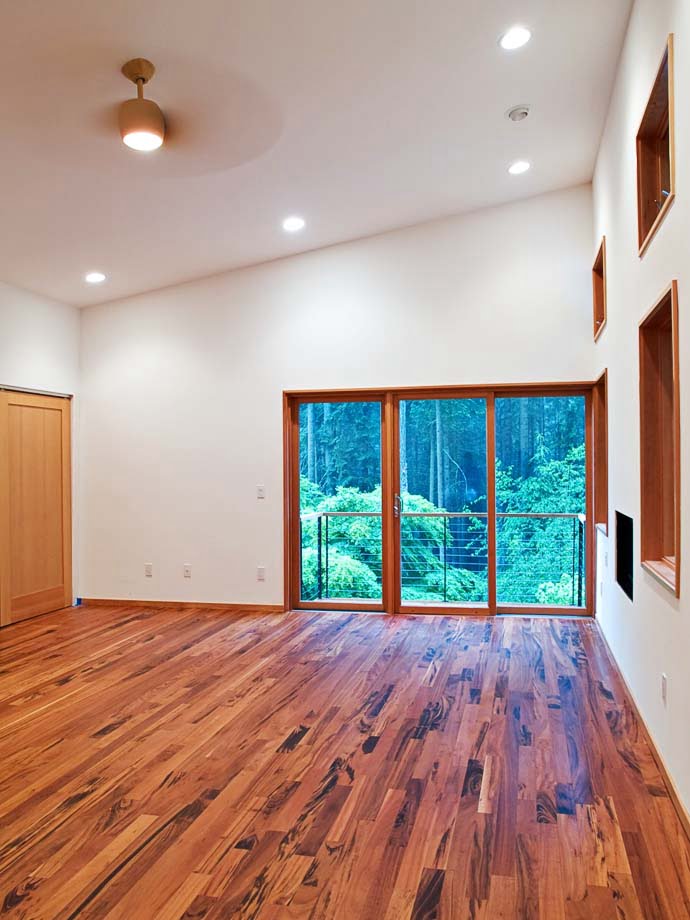

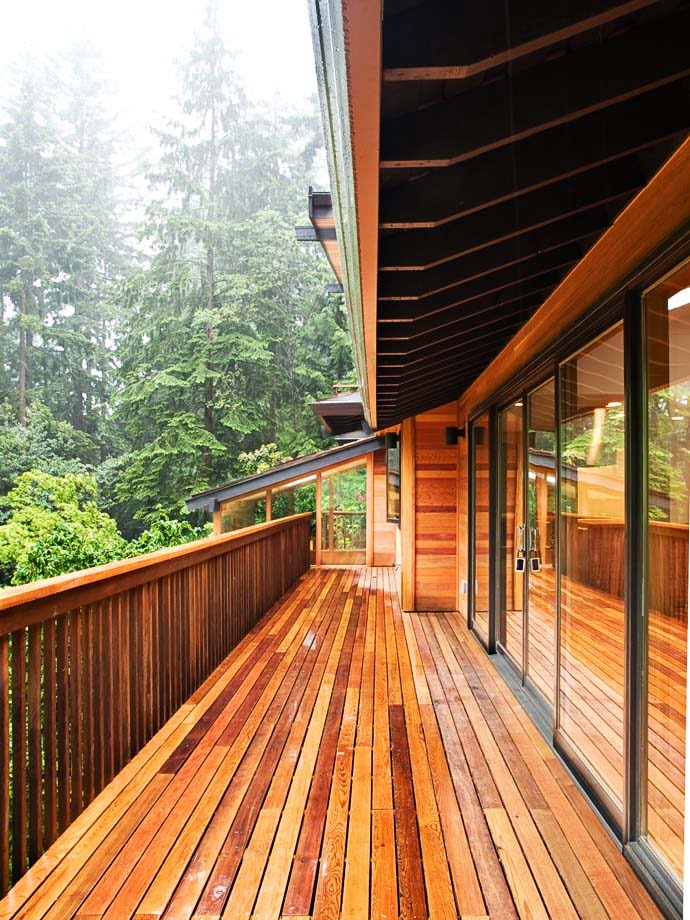


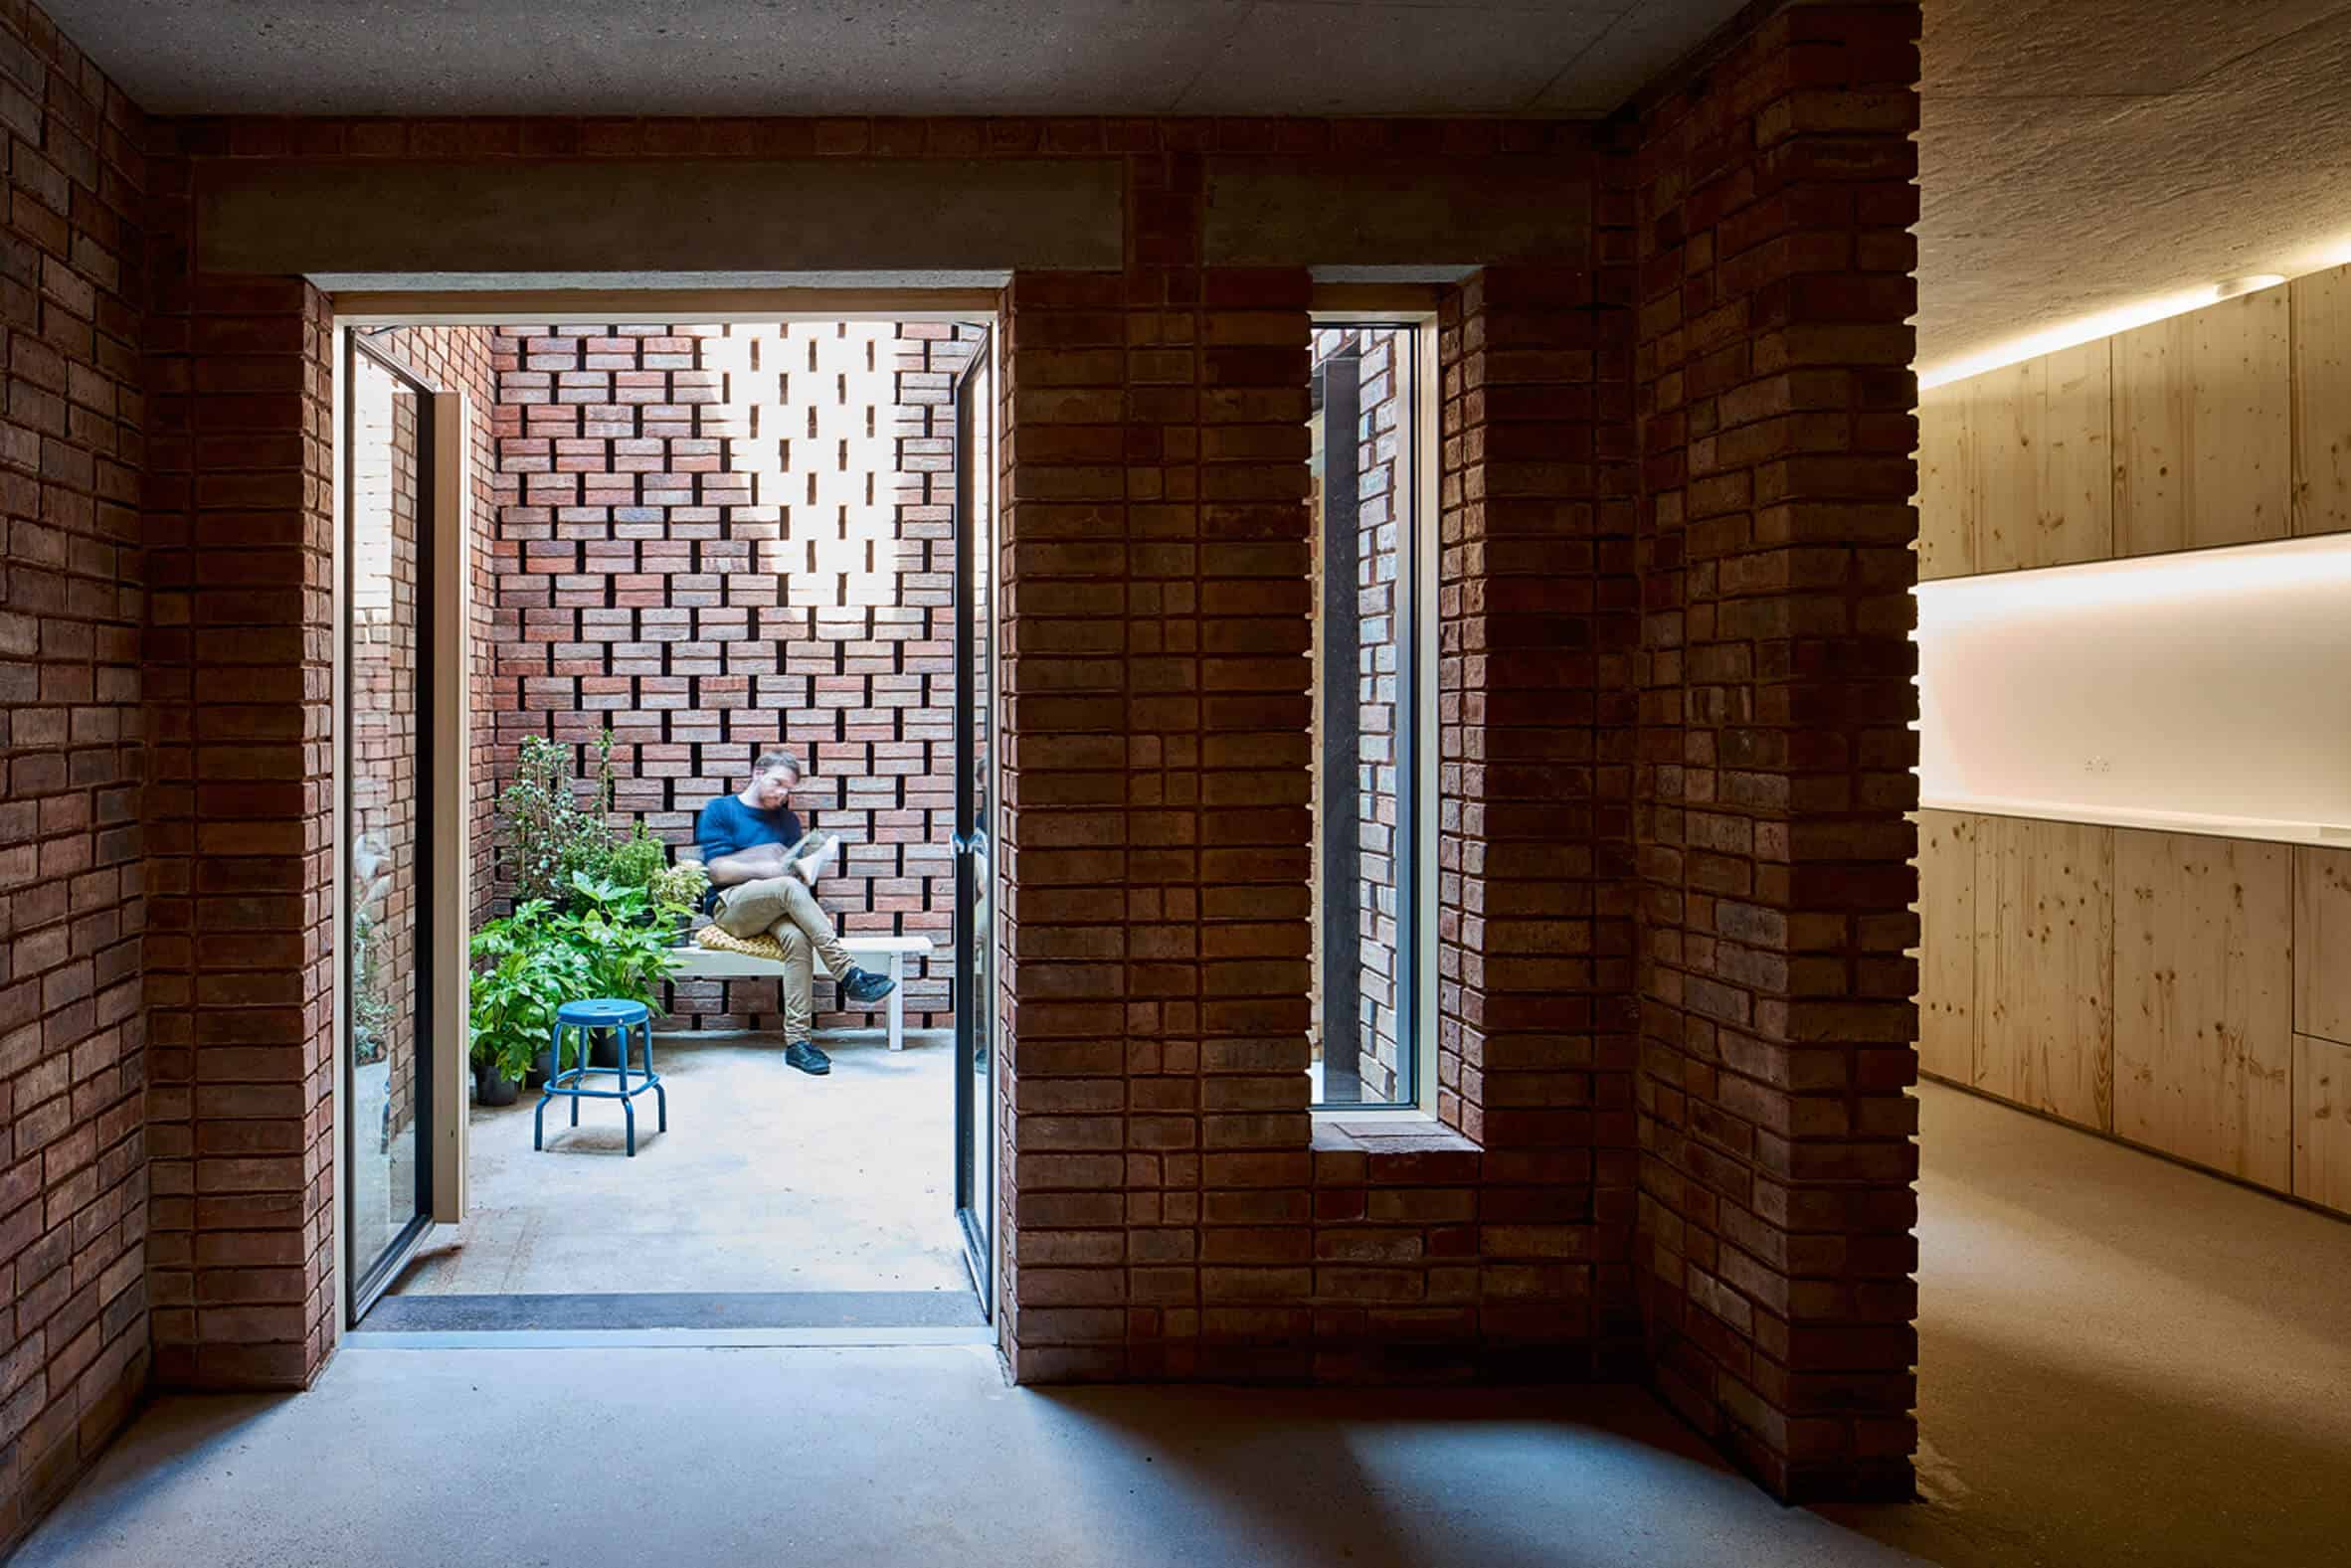
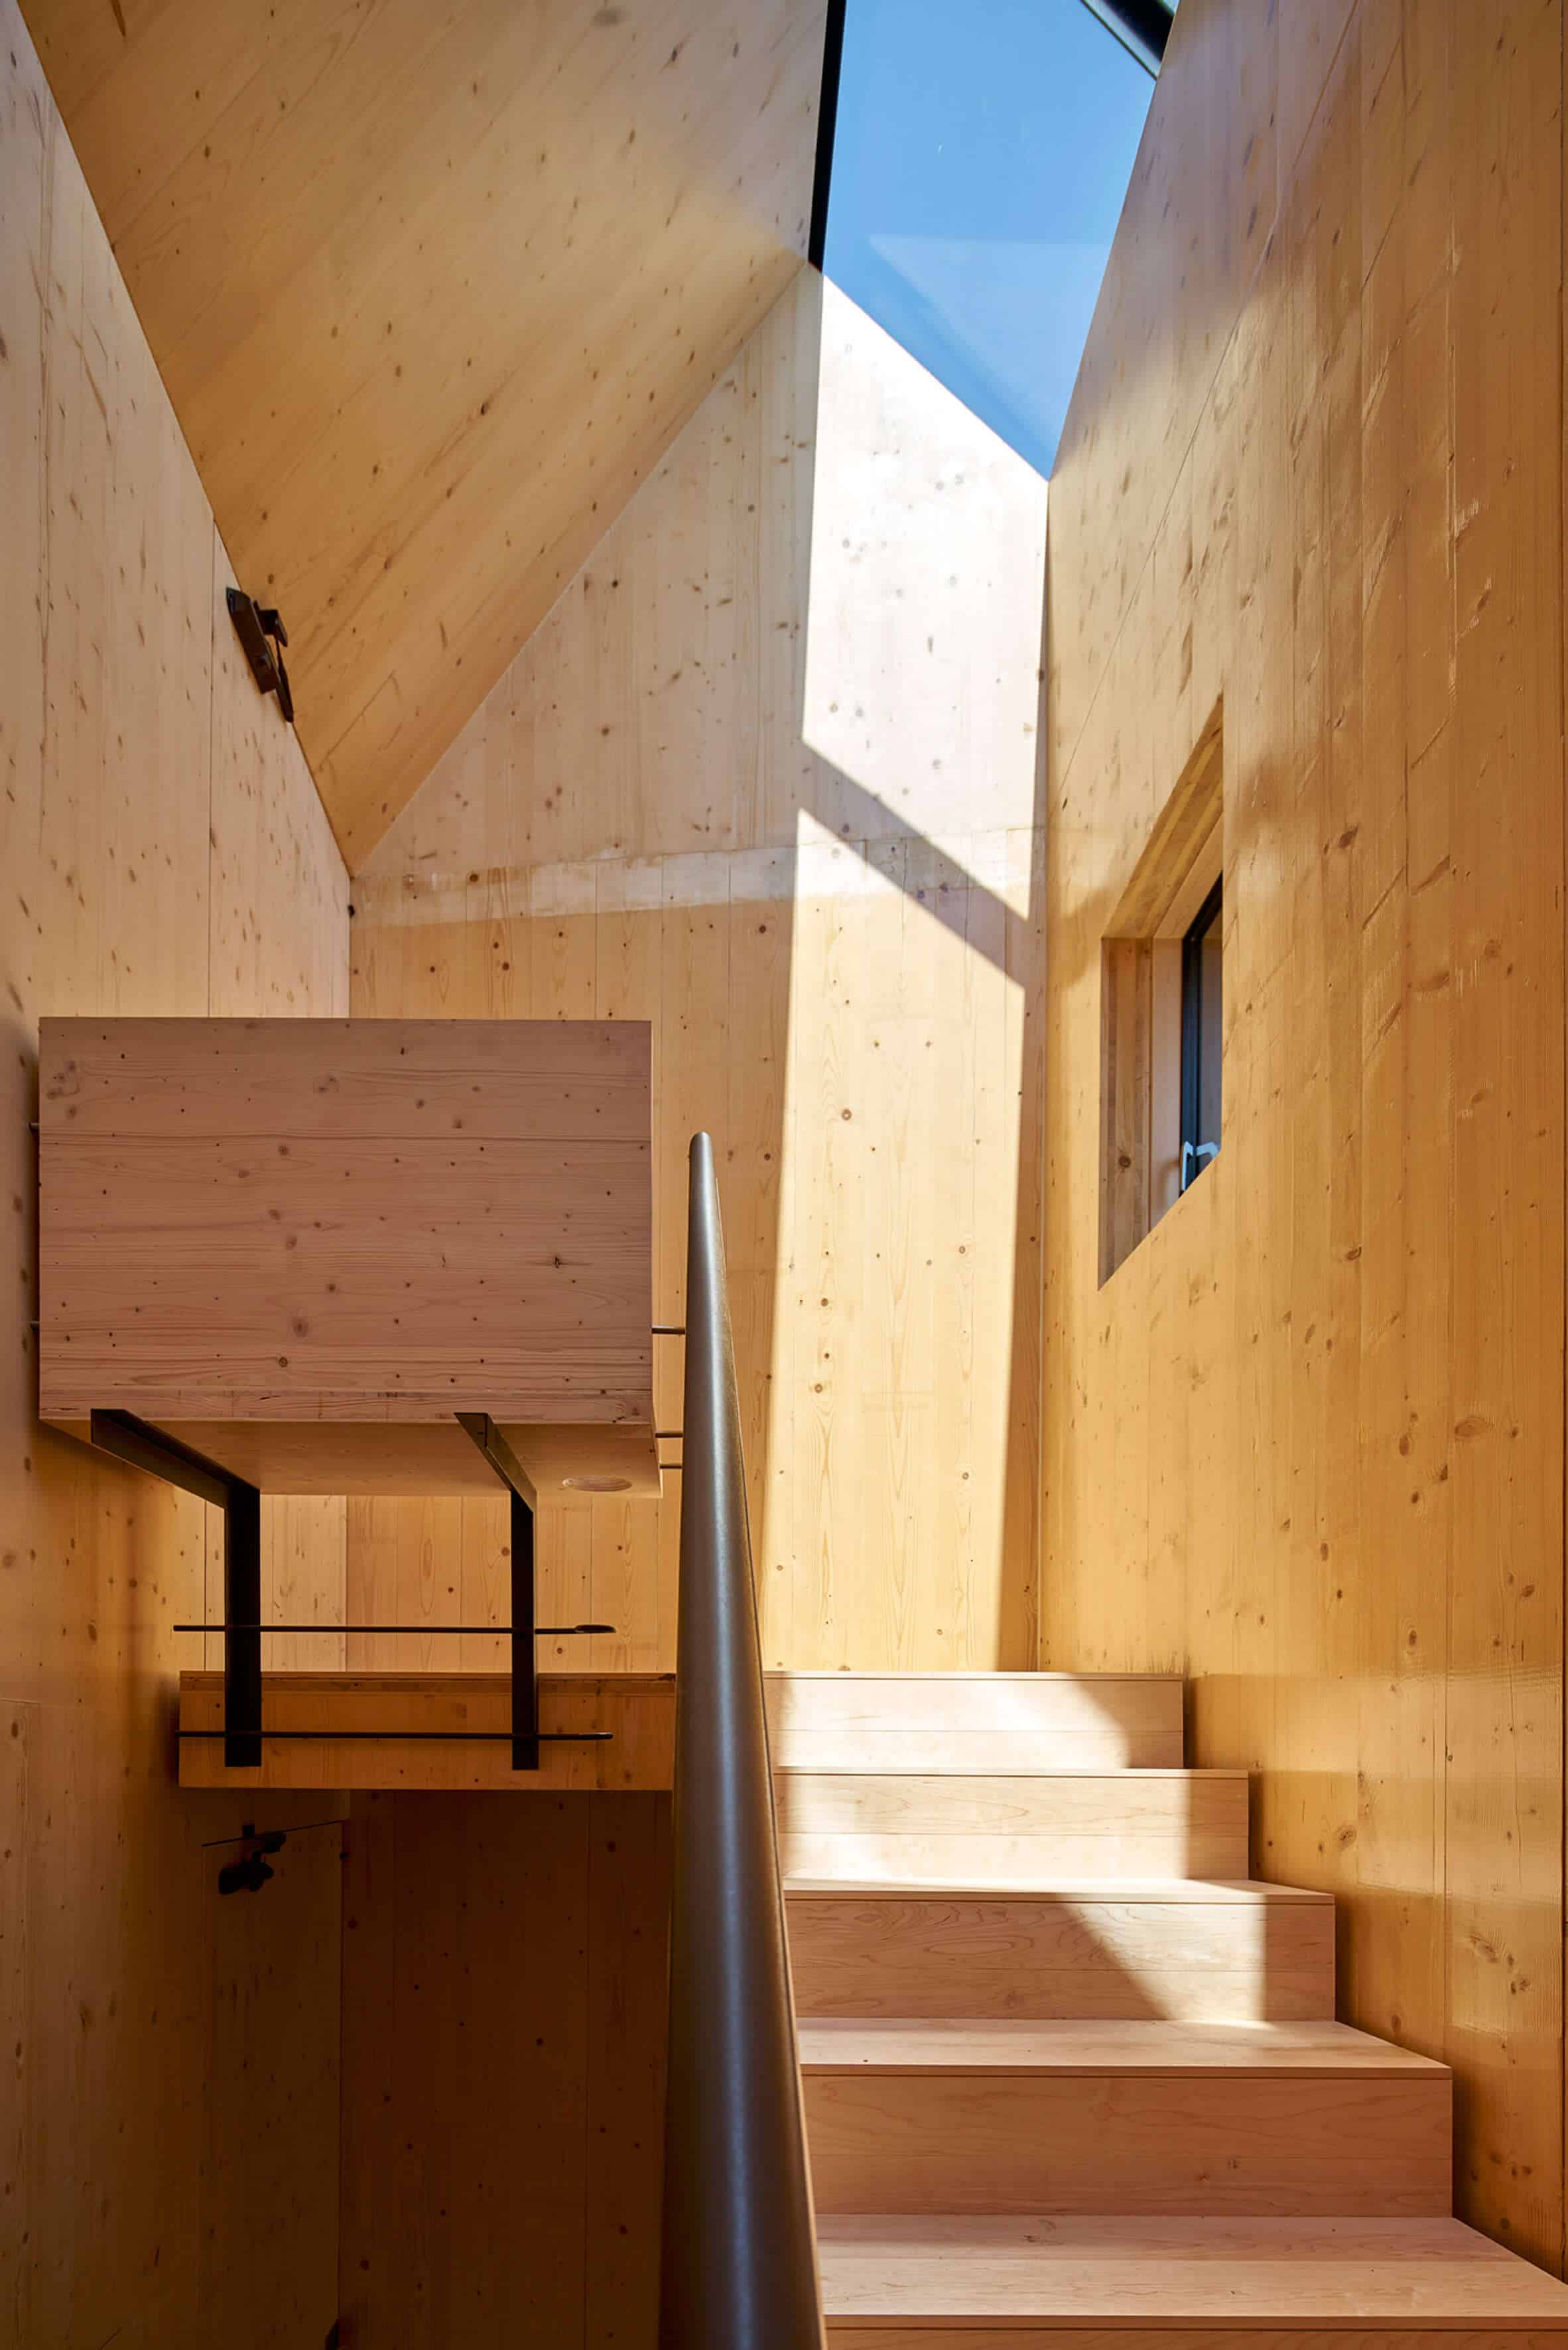


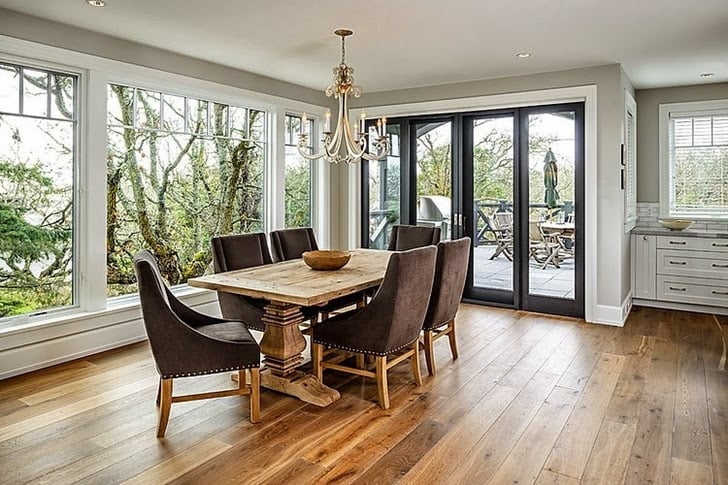


 All photos © courtesy of


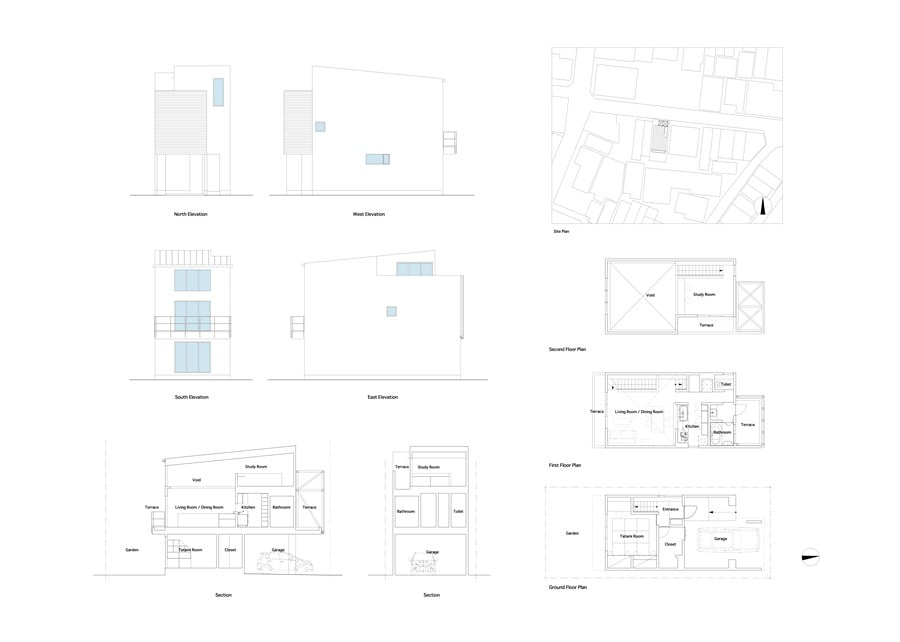

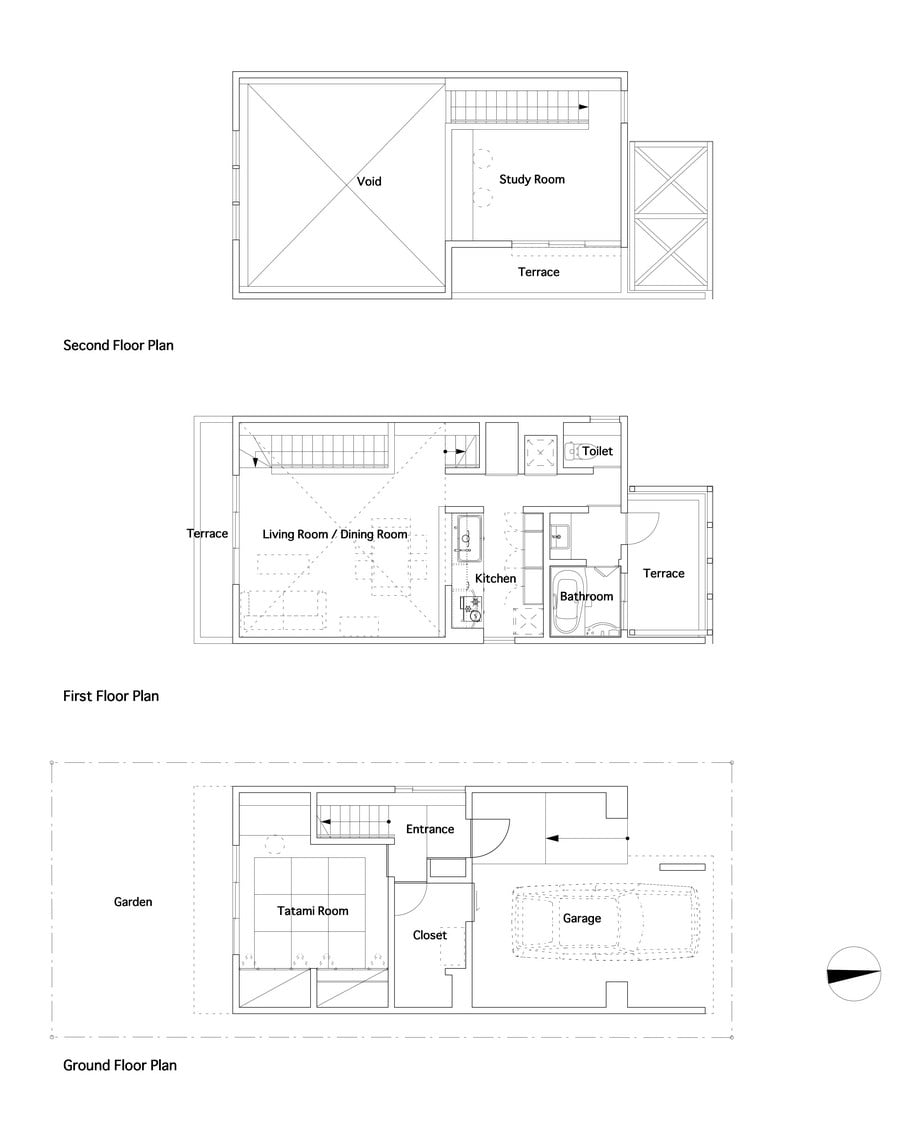
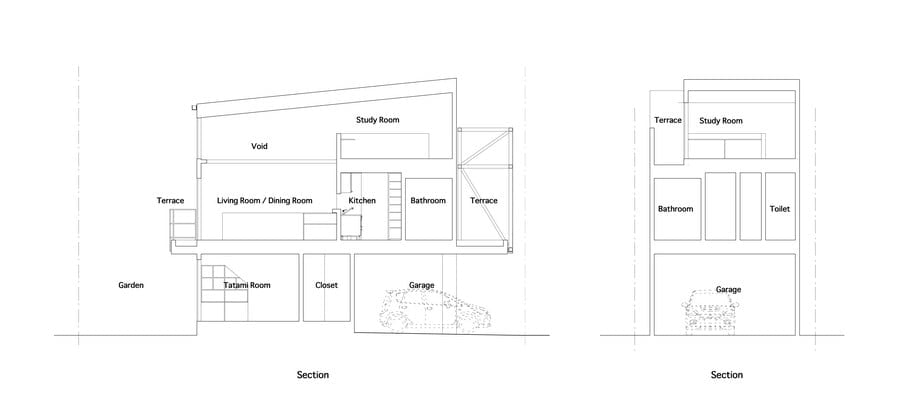
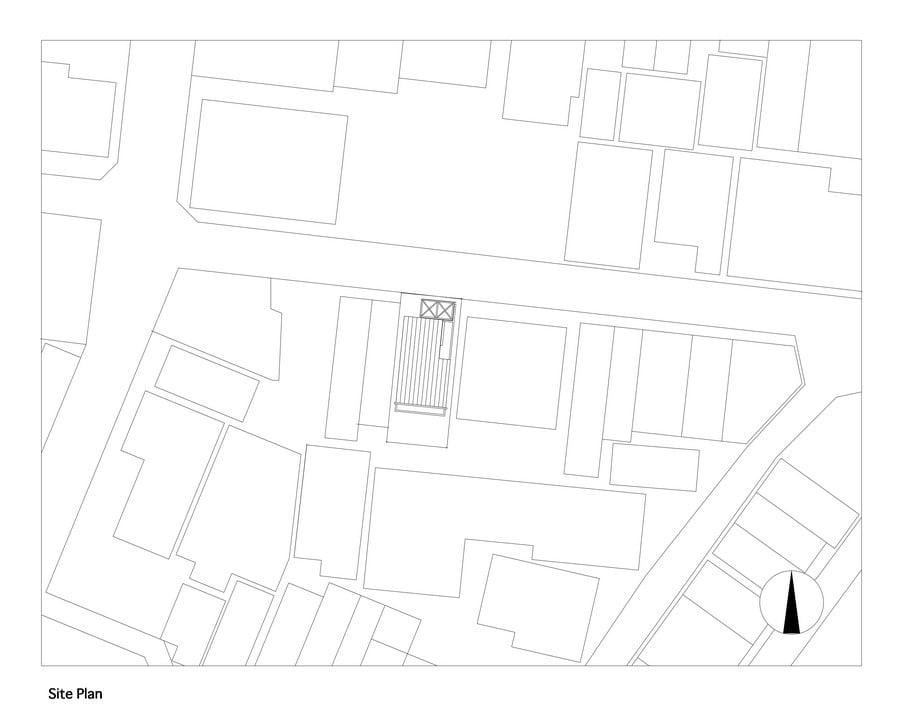


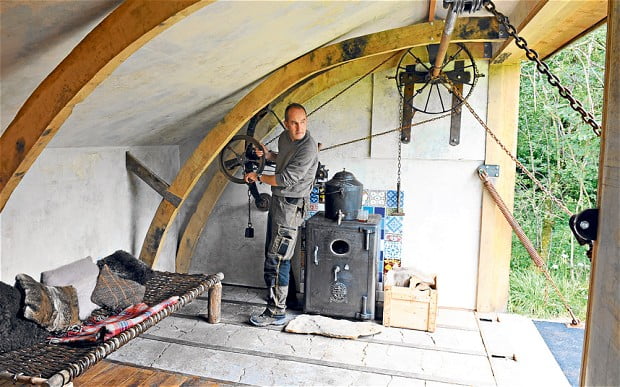
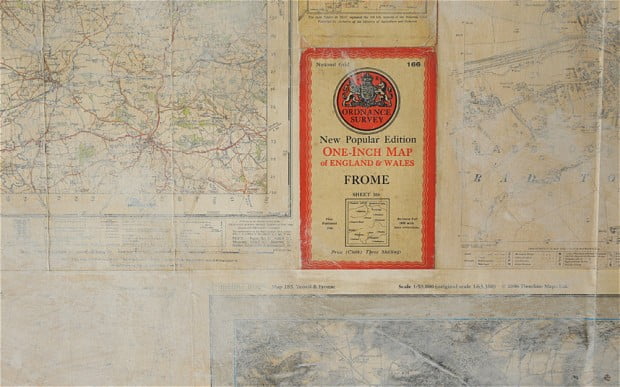


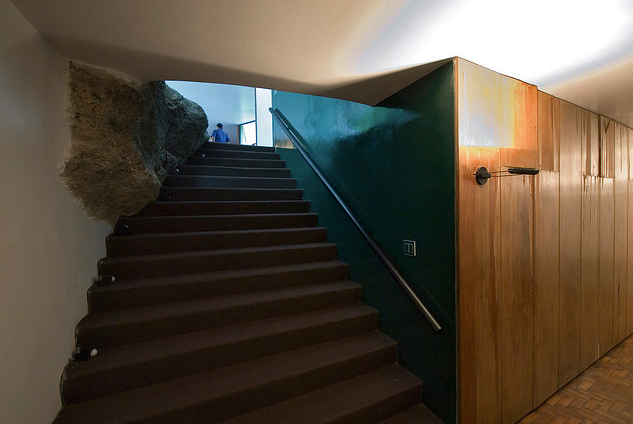

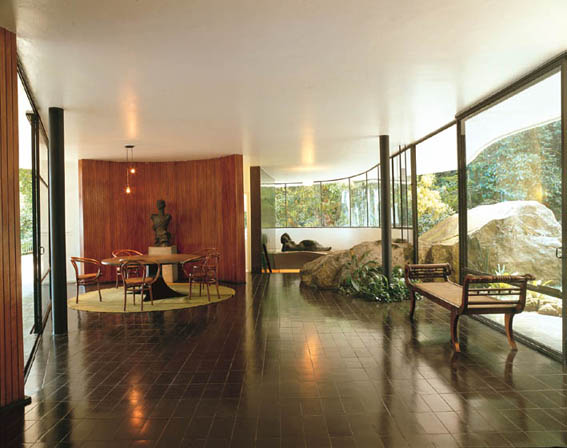
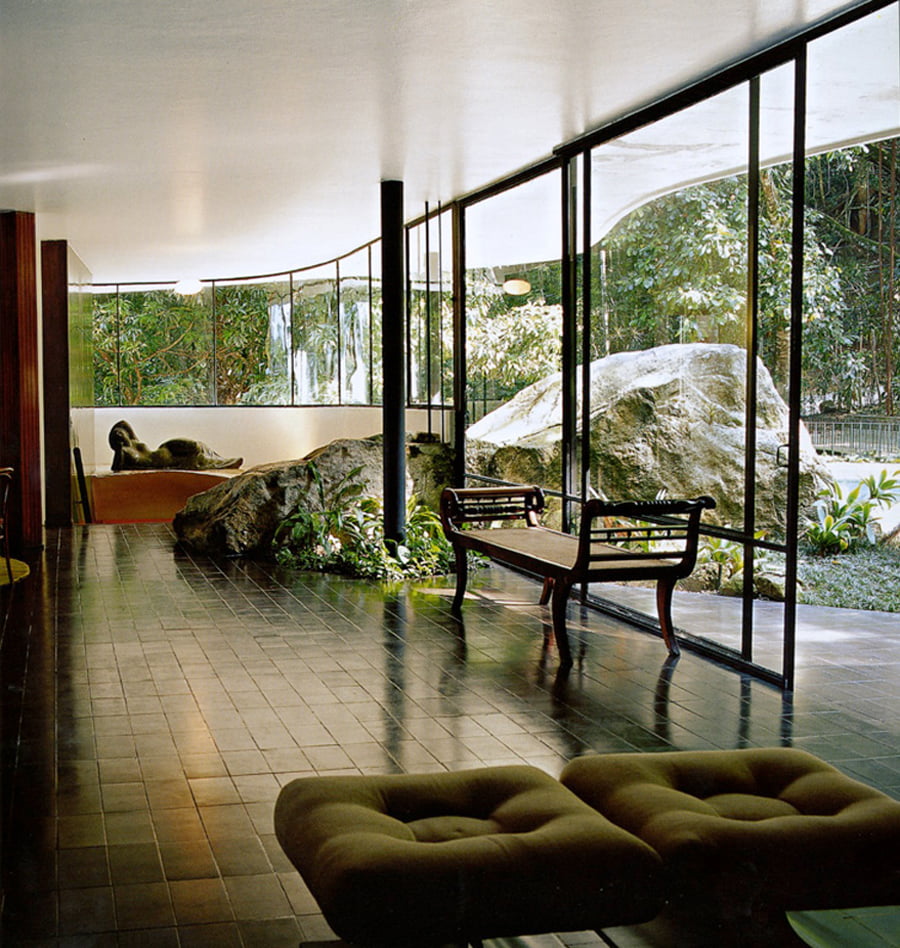

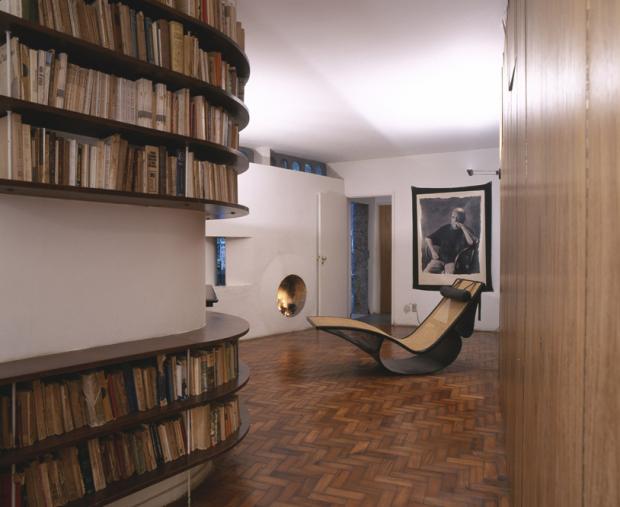


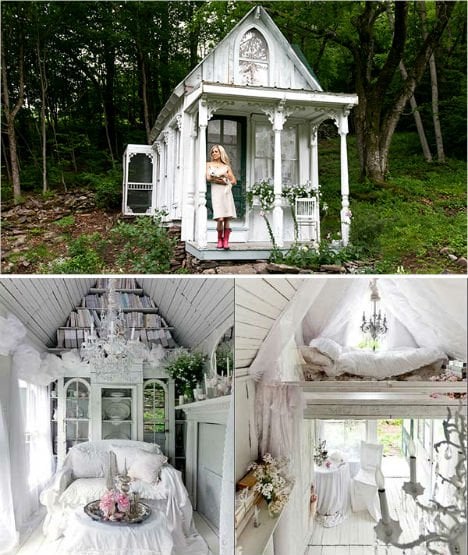

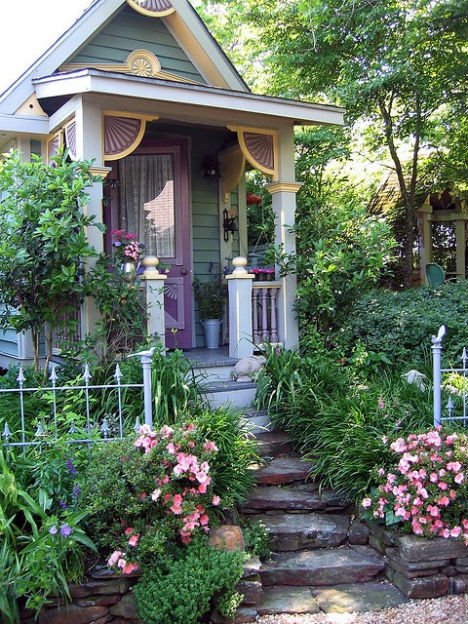
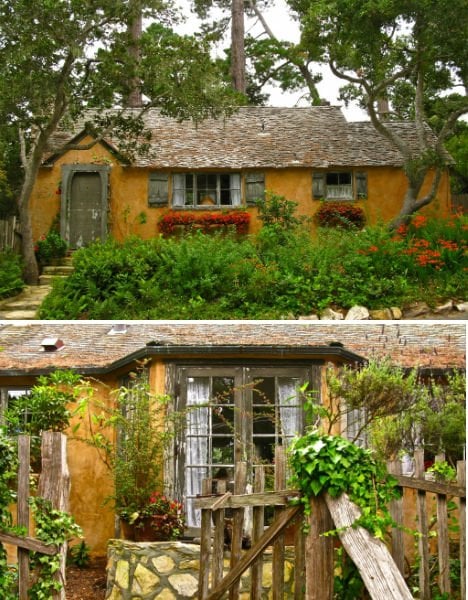
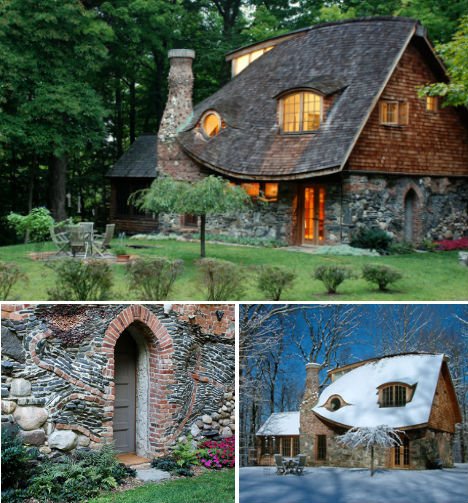

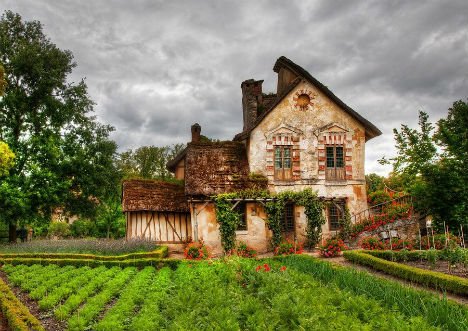


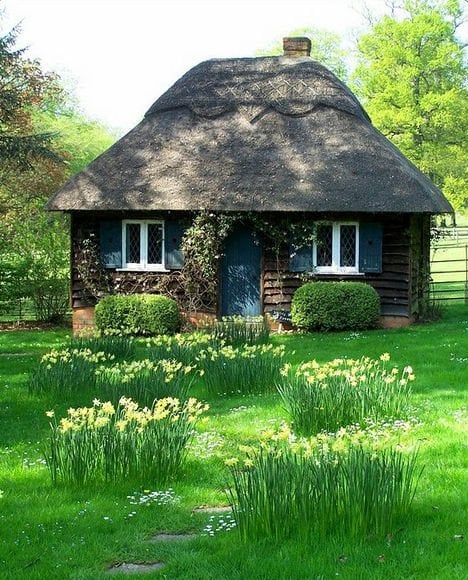


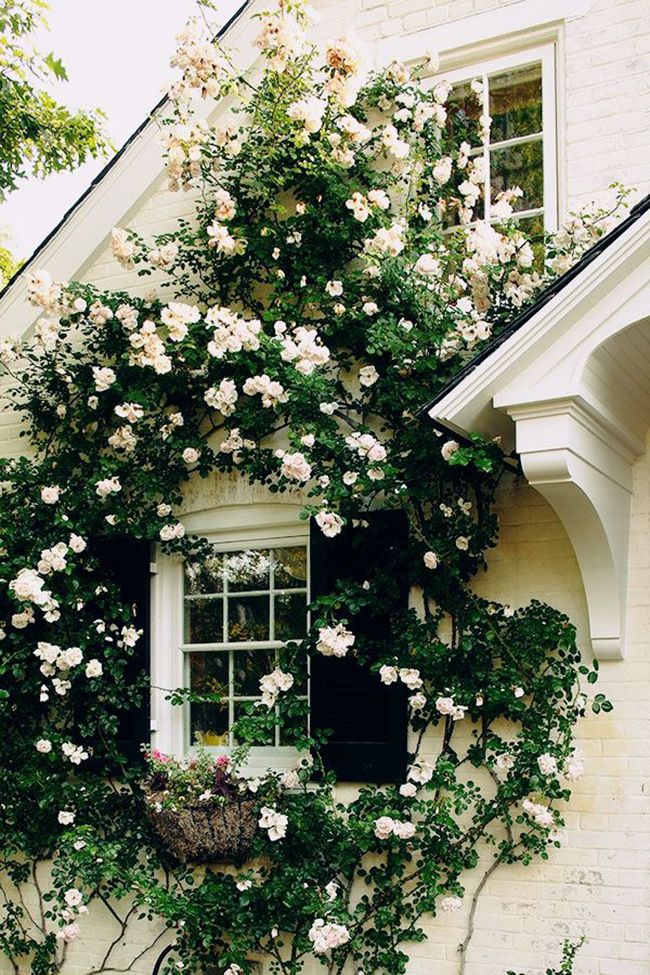
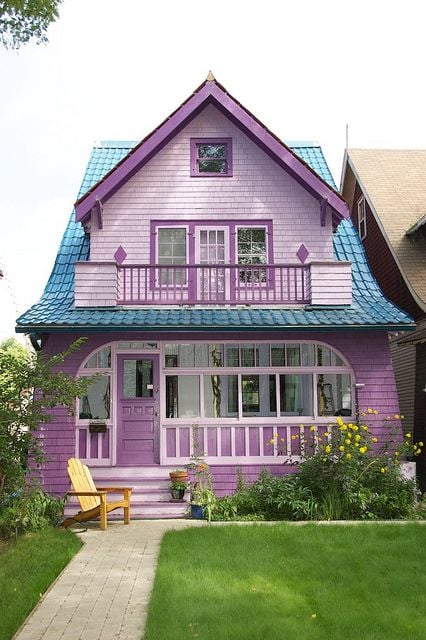

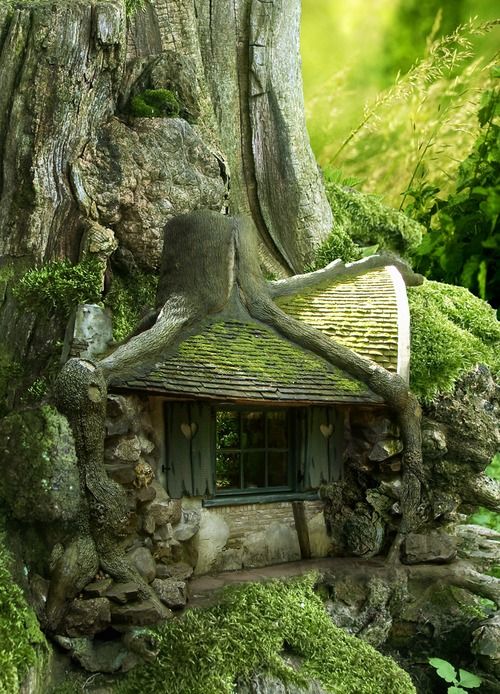
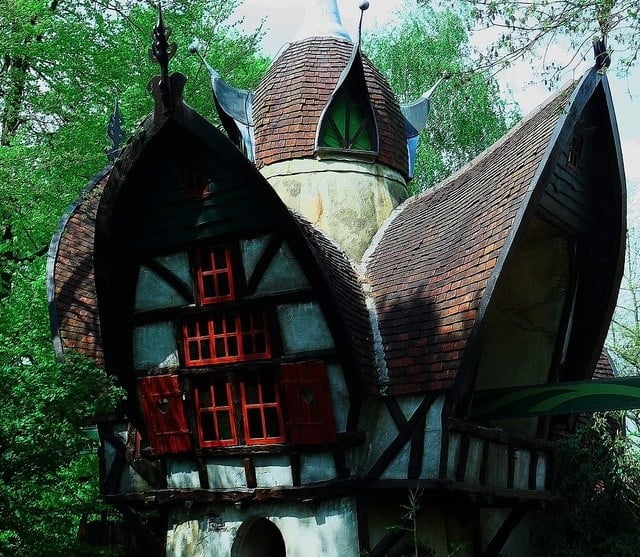


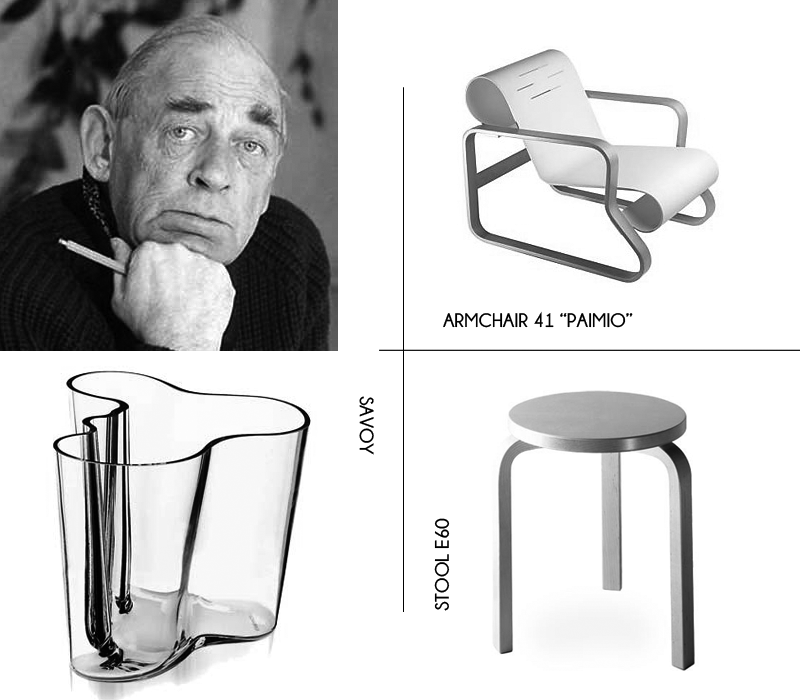
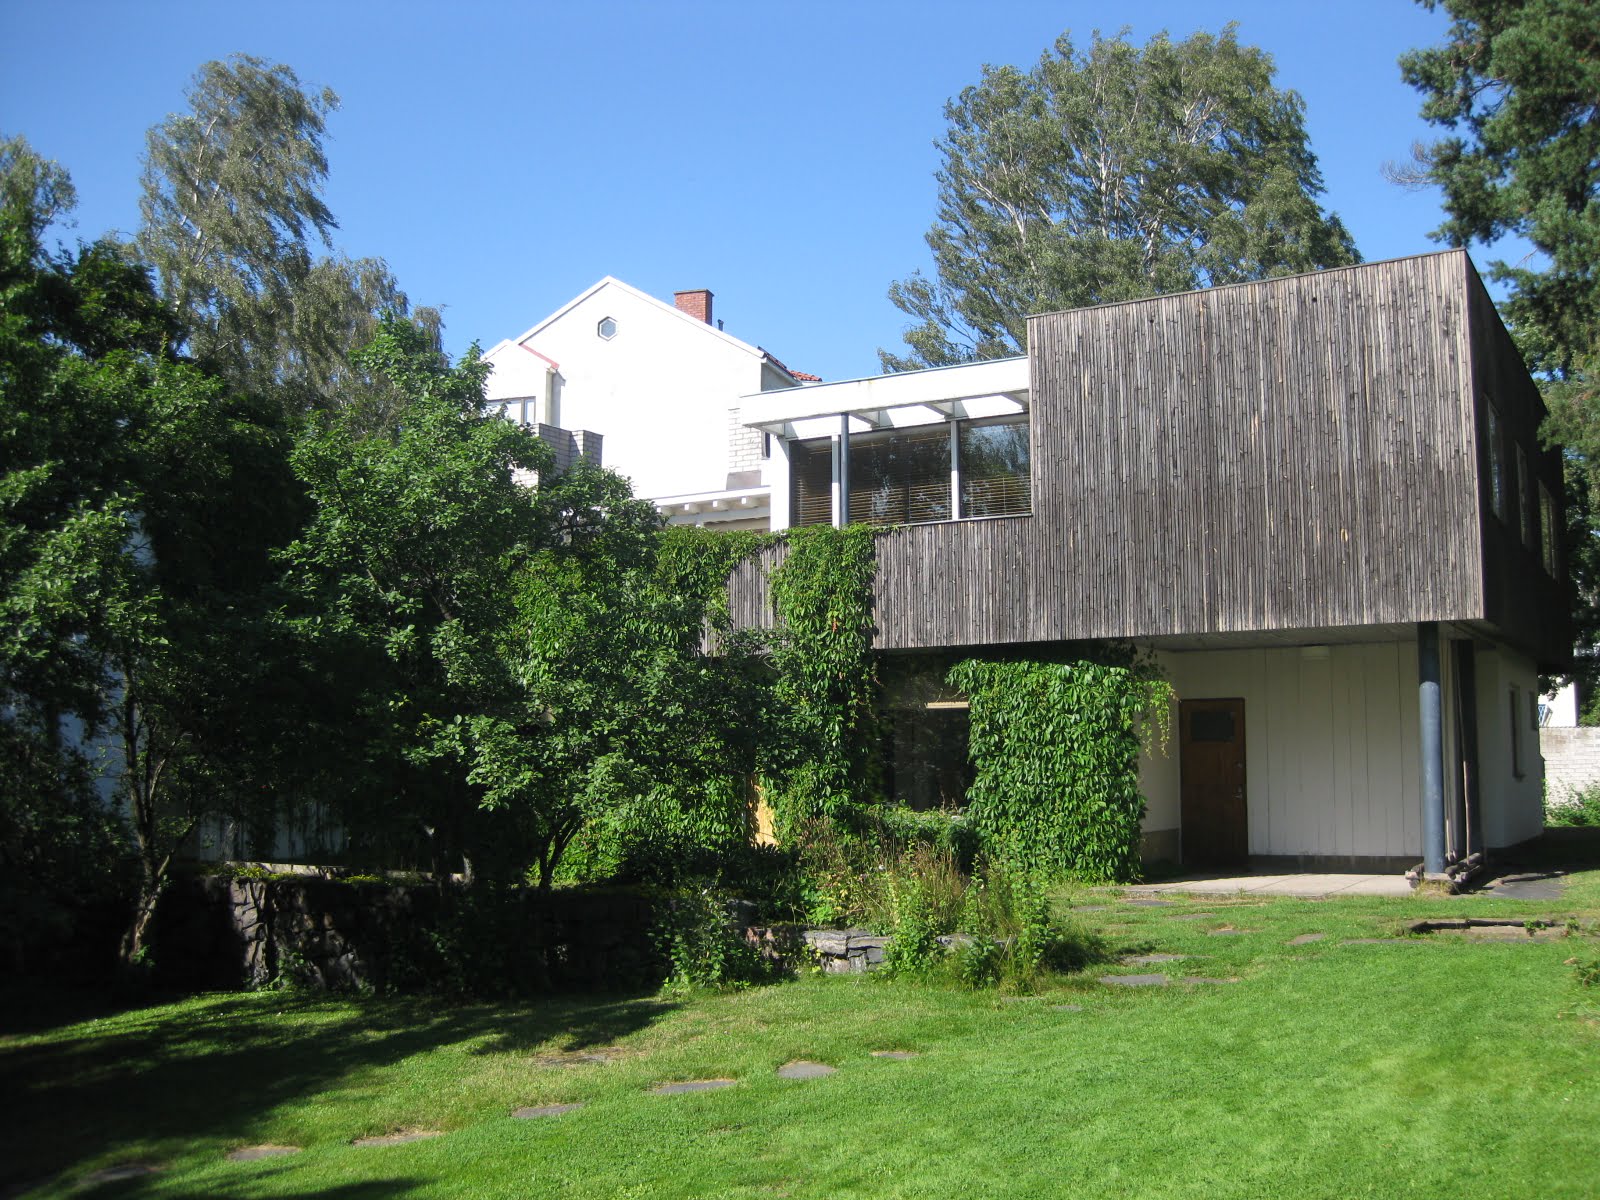


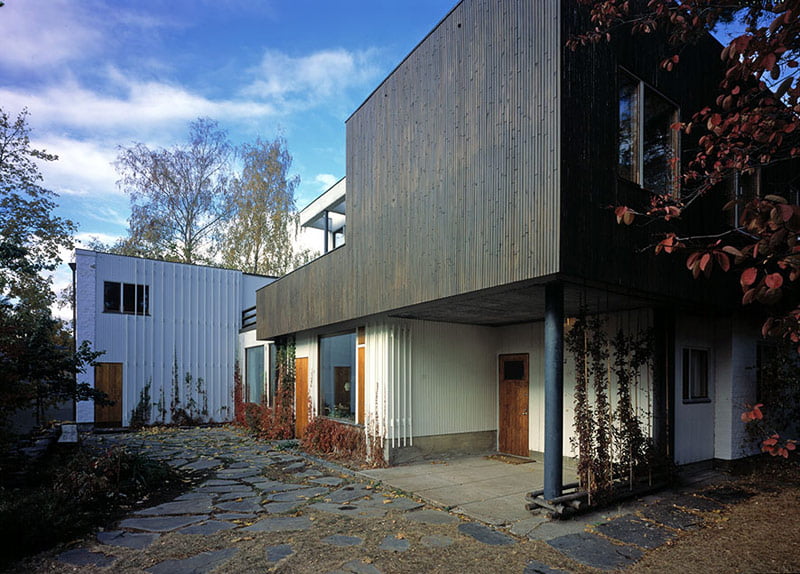


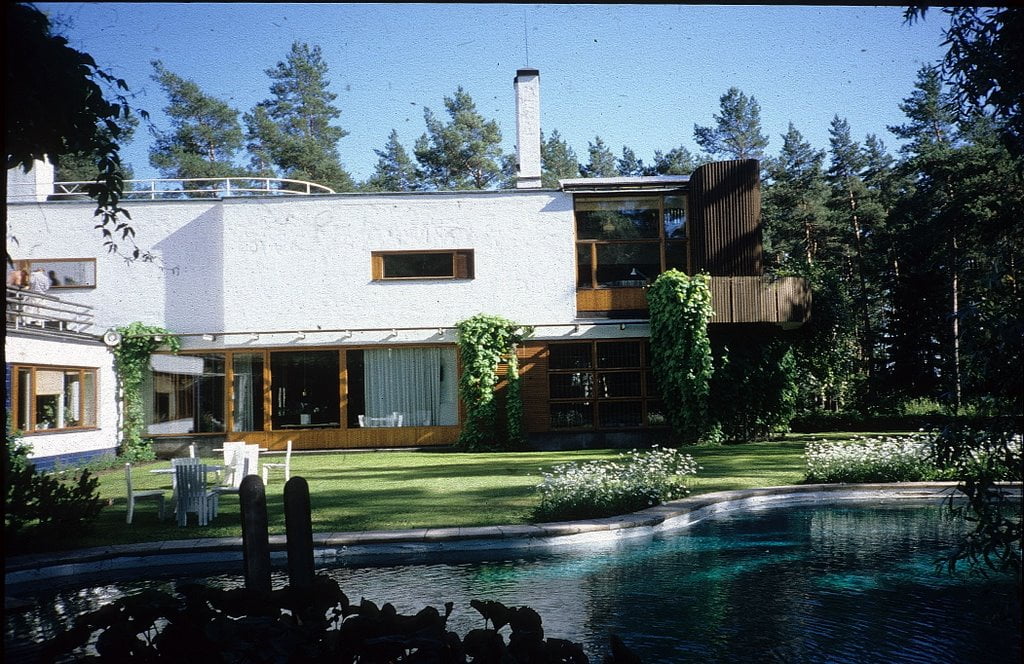
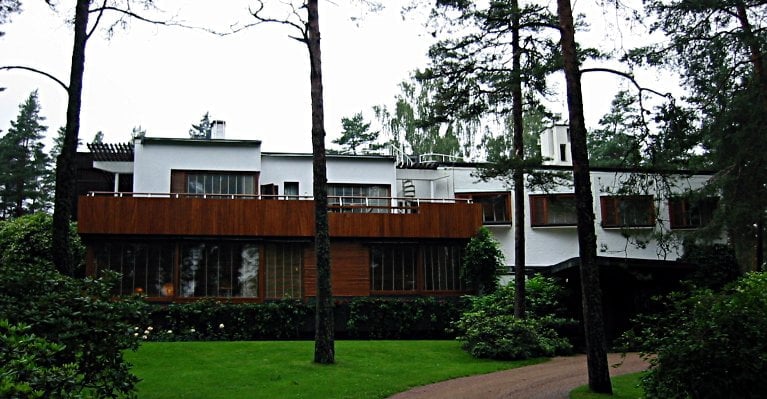


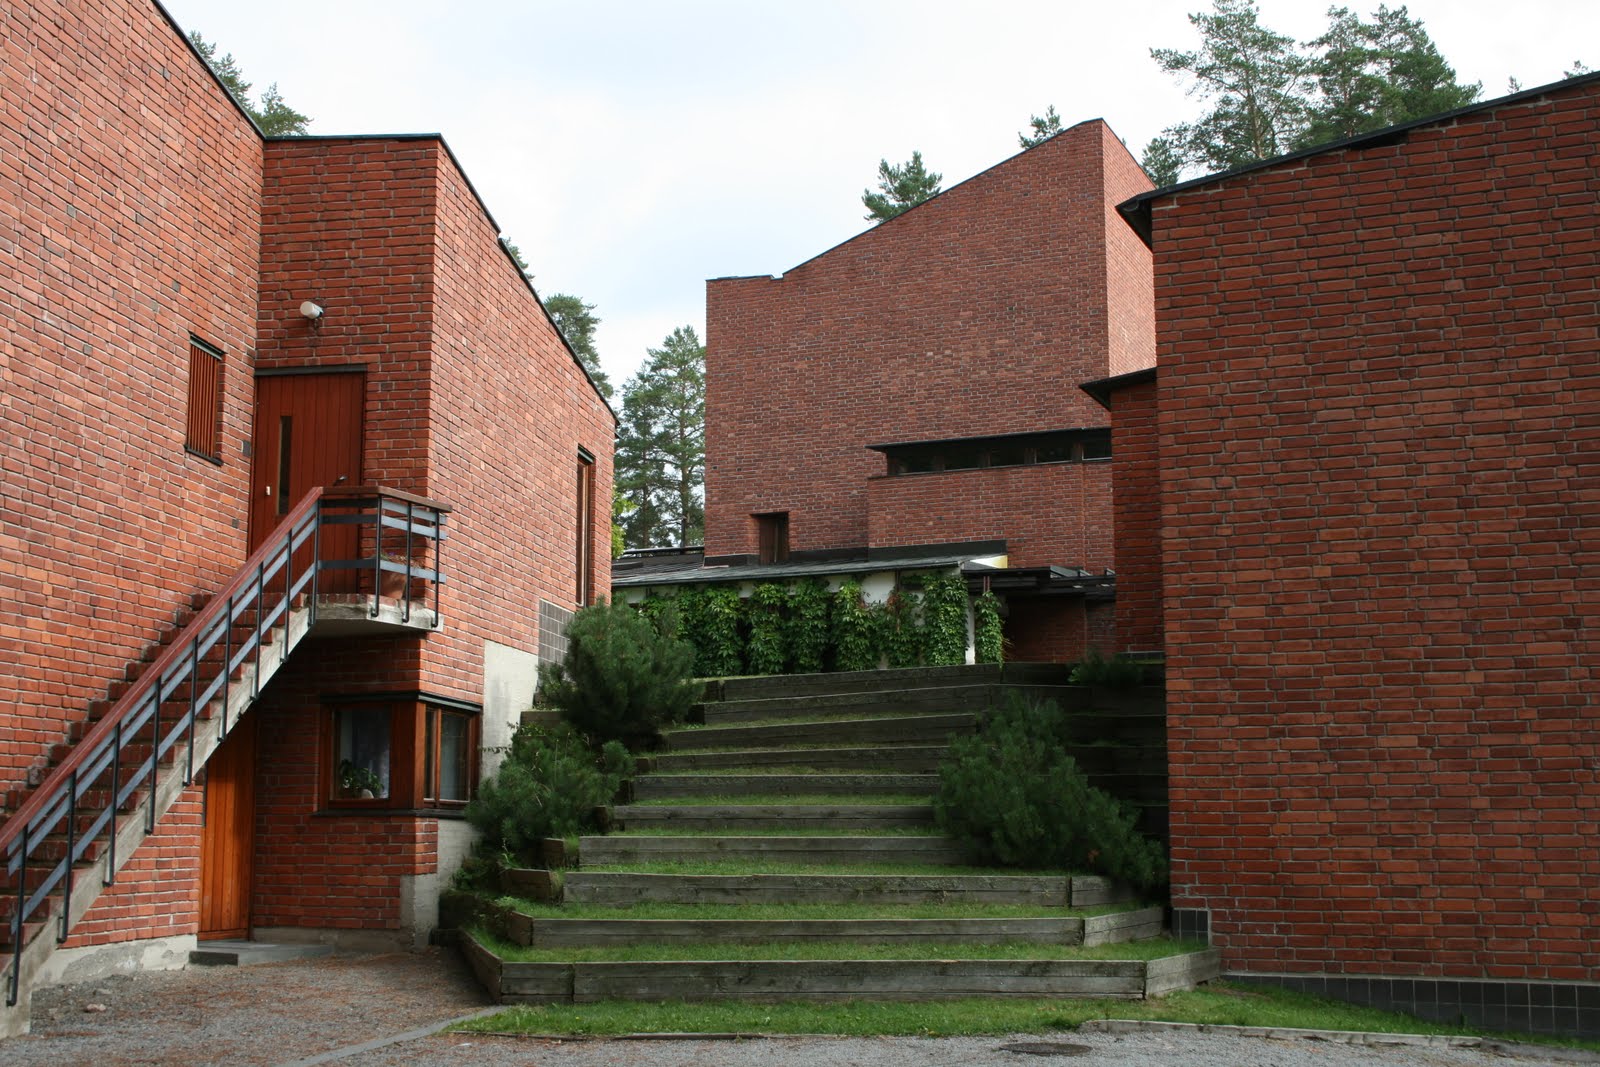


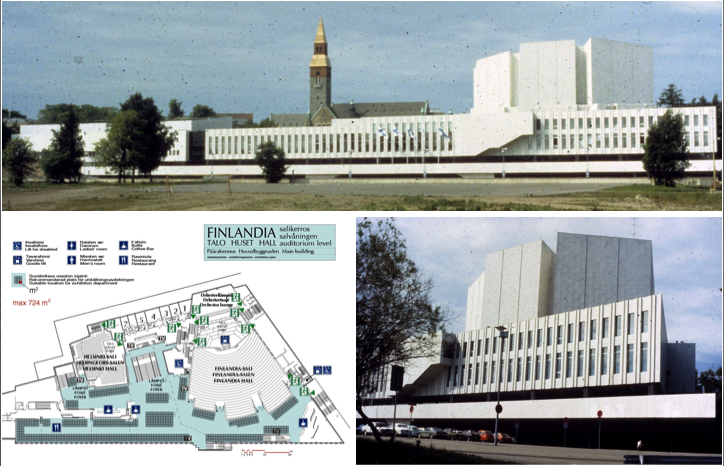
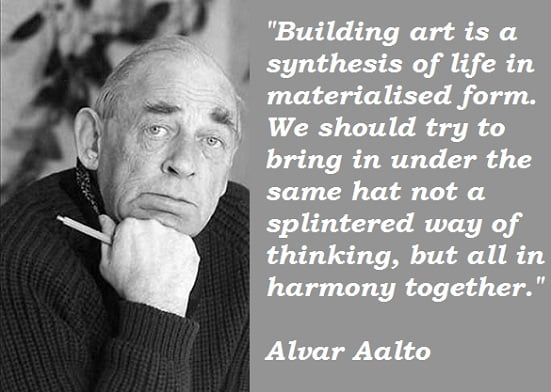


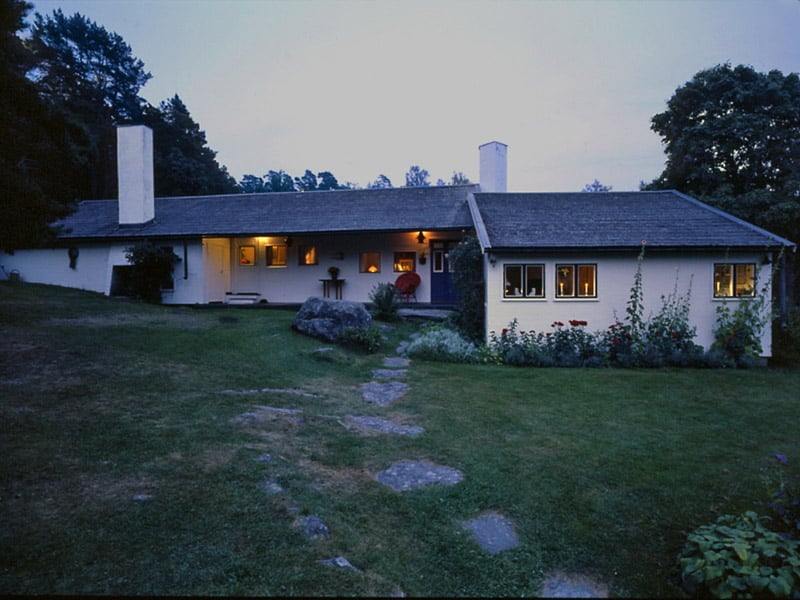


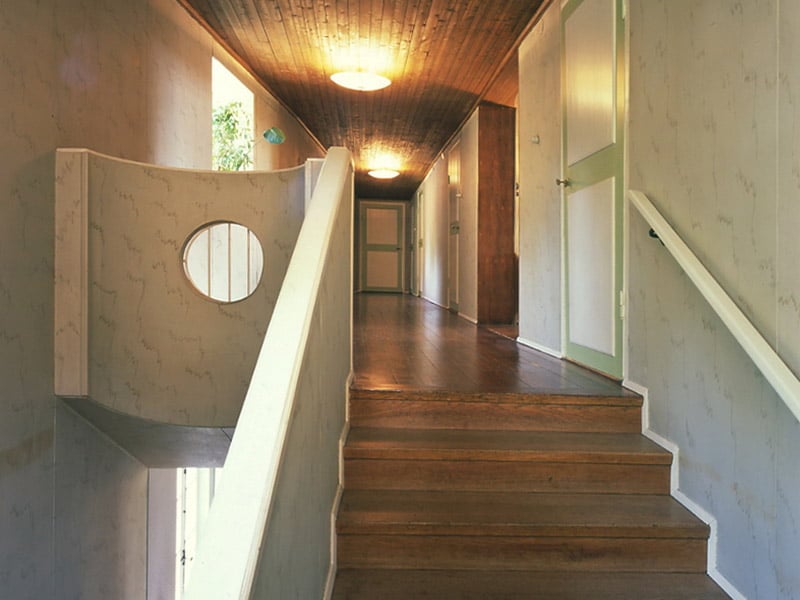


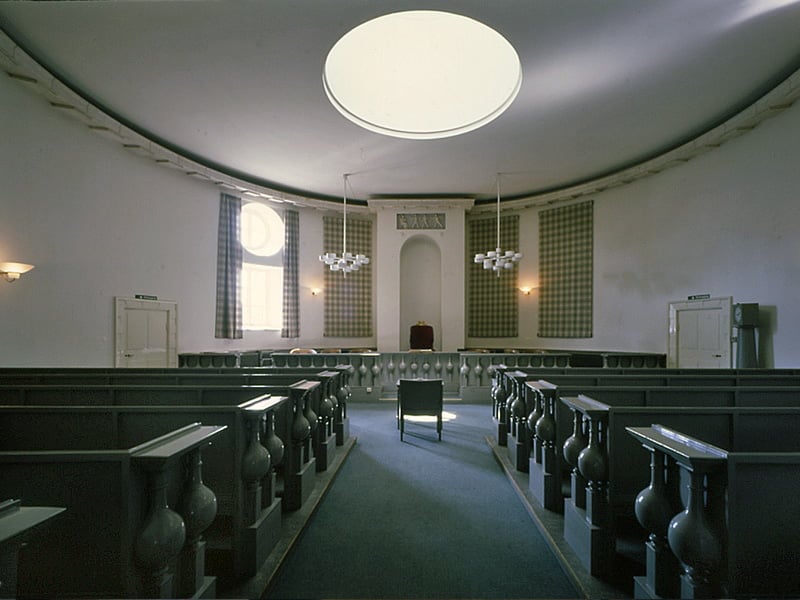

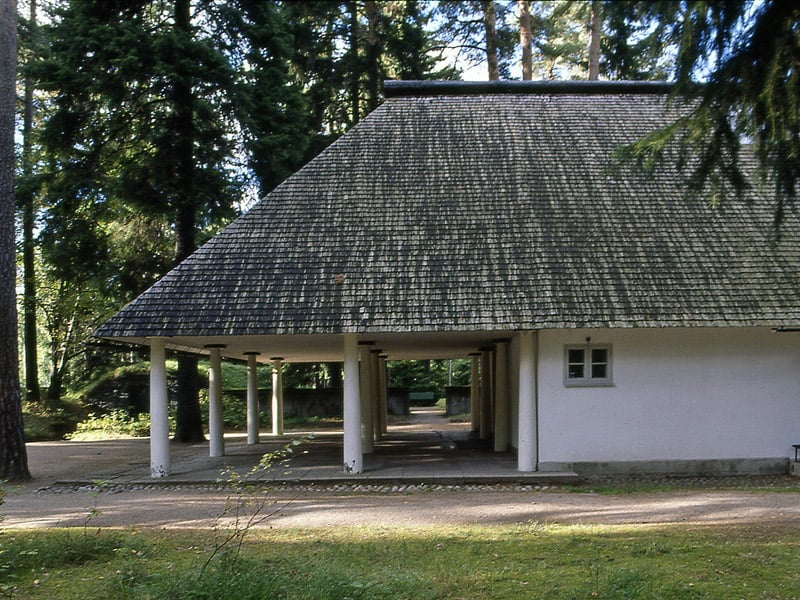


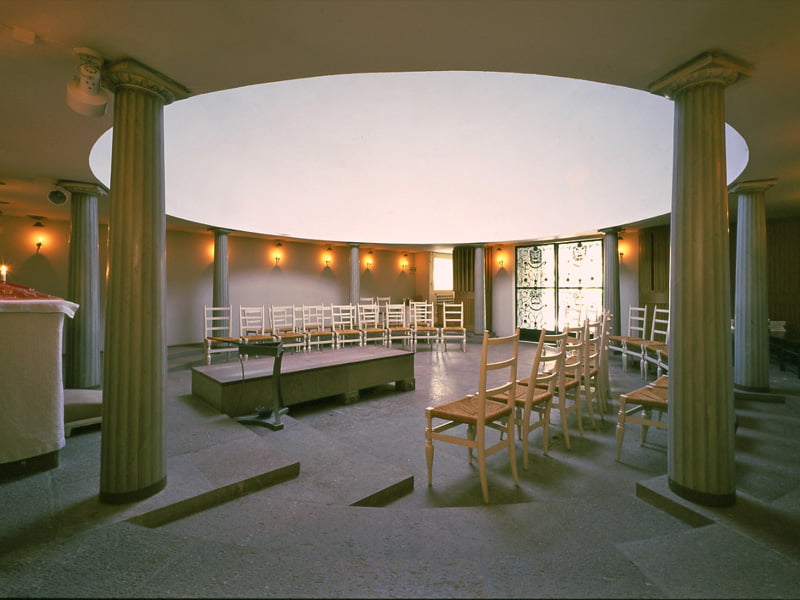


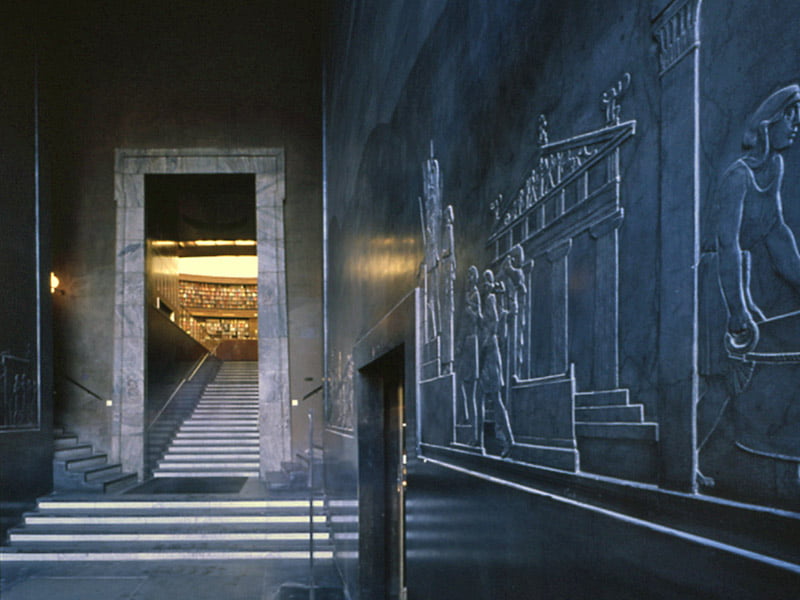
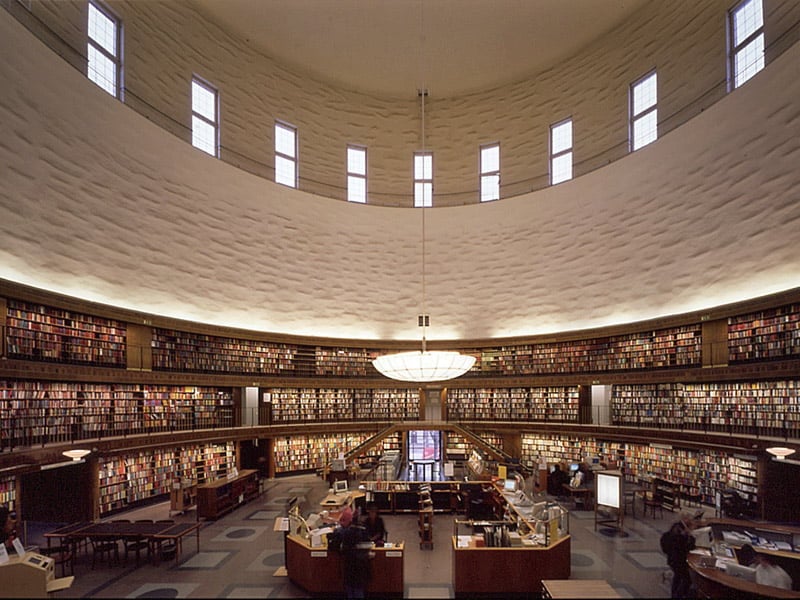


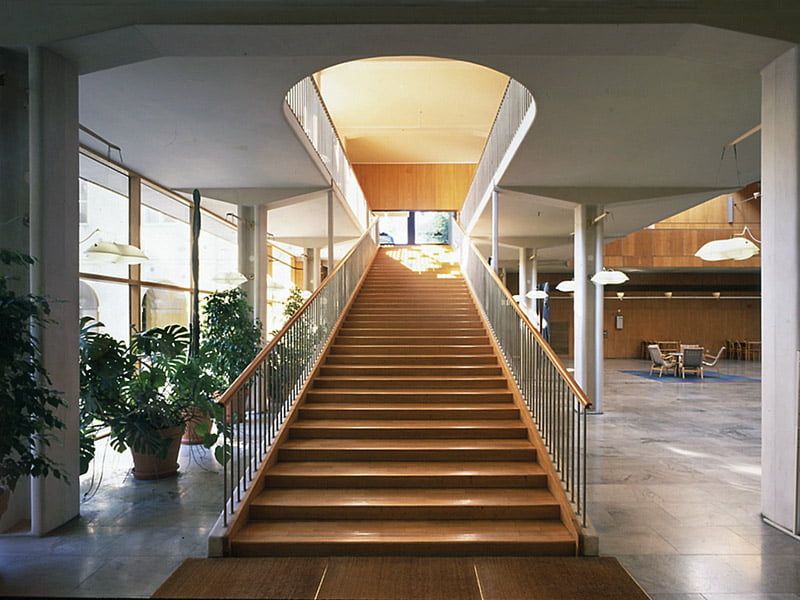


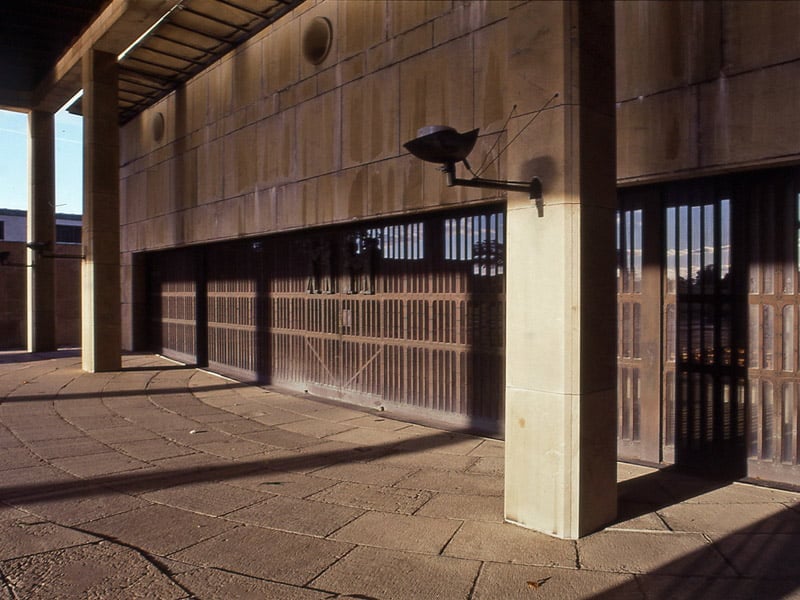

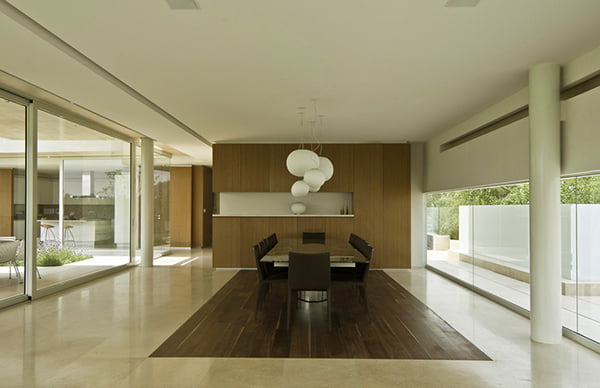