The Homestead Act first came into effect in 1862 when President Abraham Lincoln signed the bill to promote homesteading where a homesteader would be provided with a land to build a home, farm the land for a minimum of 5 years and make some improvements. This Act provided 160 acres of land to the people willing to homestead in exchange for a small filing fee and the amendments that followed increased the allotments further promoting homesteading in the US. This is now no longer in effect and ended in 1976 with the introduction of Federal Land Policy and Management Act. However, homesteading was allowed until 1986 only in Alaska.
US Places Where You Can Find Free Land
So, you might think that homesteading can be difficult and incur huge costs in today's times. To some extent this is true, but there are still free land available in the US in this 21st century providing the opportunity for homesteading though limited in number.
1. Lincoln, Kansas
With 3500 total population and no serious reports of any crime, this is a picturesque 720 square mile county with farm animals, buffaloes, and beautiful hillsides. The website of Lincoln states that it has broadband internet, nine miles of Interstate 70 and local medical care.
You will need to apply for free land which is also qualified for their ten-year property tax rebate program to homestead in a suburban setting. The plot sizes vary from 12000 square feet to 36000 square feet where you need to build your house within 18 months from the date of receiving your free land.
This city has a population of approximately 2000 with major city conveniences at a short distance. The lots are 155 feet wide by 93 feet deep where you have to build your new home with a permanent foundation within 18 months, and the construction should start within 12 months. The buyer needs to deposit $500 which is refundable after the end of the deed and must enter into a contract with a building contractor within six months. The lands are also exempt from at least 50% of property tax over a ten year period.
This is a small town with approximately 900 people where the major industries are agriculture, fishing, outdoor hunting, and healthcare. If you comply with all the terms, you will get free lands for homesteading. As of now, there are 26 lots available where the new home needs to be built in a minimum of 1200 square feet excluding the garage, basement, and porch.
The other building requirements are that it should have an overhang of minimum 18 inches and 5-12 pitch roof, two car garages, and three bedrooms. An agreement needs to be signed with a building contractor, and the building should be completed within two years after getting the possession of the designated lot. Also, at this time there are no assessments against these lots.
Interested individuals can find more details about the free lands here.
4. Marquette, Kansas
This beautiful small town is quite popular for the outdoor activities it offers. Free lands are on offer for homesteading requiring you to apply the same. Once you are allotted a designated lot, you need to start building your home within 120 days and completing it within 12 months. You also need to live in the home for at least a year. The home must be built on a basement or crawl space foundation with residential design standards and a minimum of 5-12 pitch roof.
If you`re interested in applying for Marquette homesteading land, click here.
5. Osborne, Kansas
This city is providing free land for both commercial and residential purposes. However, you need to deposit $500 to get the land which is refunded after the completion of your home. The city also provides with low-interest loans and business incentives.
You have to complete the home within 12 months from the date the land is allotted to you and needs to move in within 24 months. Also, your home needs to be minimum 1400 square feet on the ground level with a basement or crawl space foundation.
This city offers two separate sub-division offers with free lands for applicants who qualify for homesteading. All the available lots vary in size with all utilities and are on paved streets.
Reaping benefits from the original Homestead Act of 1862, this city has incorporated the Homestead Act of 2010 to promote homesteading so that the neglected properties can be put to use and also generate utility fees and taxes. Free lots are provided on a first-come-first-serve basis where the applicant needs to stay for at least five years. The population is around 12500, and the city is very accessible.
You can find more information here.
8. Loup City, Nebraska
This city offers lots that are completely free in two different options which are Market Rate Homes and Workforce Homes. The lots under the Market Rate Homes are provided on a first-come-first-serve basis with a deposit of $1000 which is refunded after the home is built. The lots are provided to the homeowners with limited income and assets that meet a set standard for the Workforce housing. They are also eligible for a loan of up to $20000 in down payment to build their home at extremely low-interest rates.
This beautiful village has ten free lots available as of now and to apply for the same; you need to contact or visit the village office. The homes need to be on a foundation but no specific details are mentioned, and so, it is better to drop in at the office to get all the necessary details of the lots.
This small town has a housing subdivision offering free lots. With all the basic amenities available for living, you can apply for homesteading in the free available lots. The cost of living here is also very low. To know more about the details of the lots and requirements, you need to get in touch with the City Office.
This small town has very little population with around 150 people and has many free lots available for an approximate average size of 80 x 120 feet. Your home needs to be completed within 18 months from the date the lot is provided to you and should be at least 1200 square feet. With no specific requirements, you can avail the free lands by applying with a proposed floor plan of the house intended to be built.
However, you are not allowed to do poultry farming or breed livestock or other animals for commercial purposes. Marne has all the requirements for living, and also, you can enjoy low crime rate and tax rate.
The information you will need to apply can be found right here.
12. New Richland, Minnesota
This town has a population of about 1200 and offers free lots of 86 x 133 feet with the requirement to build your home within one year. Though the land is free, assessments will be conducted for the cost of developing your property with sewer, gutter, streets, and water. This fee is around $25000 that can be reduced to $14000 through Tax Increment Financing (TIF) for candidates who qualify. This amount is to be paid semi-annually over a 15 year period with real estate taxes.
Though the lands are not free nor will you become the owner, this is mentioned because it is extremely cheap. The Government has begun this initiative to offer cheap farmlands with a lease for 60 years. The farmlands are protected along with a house already built, and the average rent is between $500 and $1000 per month.
This town is on Interstate 70 with great connectivity and has an approximate population of 650. The town has 480 acres of land which is on offer for free to set up business or industry which will provide employment as well. You need to check out the requirements as it might suit well to set up your homesteading business.
The town has all the basic services that are required to fulfill your necessities. It has excellent schools, services from high-speed internet providers, medical stores and clinic, restaurants, clothing stores, etc. The acquisition of 3 water wells recently by the Town of Flagler has boosted the water supply that will be ideal for irrigation in agriculture.
You will find all the information you need about their free land initiative right here.
15. Muskegon, Michigan
This city has a population of nearly 39000 is looking to attract energy providers, suppliers for industries and food processing industry so that it can employ many people. The lands are provided for free, and your homesteading business can fit in their requirements. You will be granted industrial park property, and they are also in low tax "Michigan Renaissance Zones."
If you can provide 25 jobs, you will be granted 5 acres of land. Similarly, 12 acres for 50 jobs, 20 acres for 75 jobs and 30 acres for 100 or more jobs. The city also provides tax benefits, incentives, and state business credits.
This town in the coastal region of Maine has a population of approximately 4000 and offering 3.5 acres of land for businesses that can provide at least 24 jobs. The town has all the necessities to run a business smoothly and for living like water supply, power supply, internet services, parking, etc. Camden is looking to attract sustainable businesses and industries like food processing, biotech, medical labs, financial services and information technology. Sustainable agriculture is more preferred as it is eco-friendly.
More details about the development program in Camden here.
17. Anderson, Alaska
This is a very small town in Alaska's interior that has no grocery stores, traffic lights or gas stations. The weather is very pleasant and is a picturesque place with the view of Mount McKinsey and Northern Lights. The population of this place is less than 300 but has plenty of free lands on offer an d ideal for homesteading (source: https://www.landcentury.com/).
Currently, 26 lots of 1.3 acres are provided to the people who are willing to apply. There is a refundable deposit of $500 that needs to be submitted for applying, and you can enjoy the benefits of no sales tax, property tax, state tax and apparently no crime and traffic.
In the Harry Potter movies, Albus Dumbledore said that people could swim in the deepest oceans or jump over the highest mountains in their dreams.
And it wouldn't be an exaggeration to say that at times we have all dreamt of traveling to faraway places, with nothing but mountains and trees all around. We long to escape the walls that enclose us, often feeling sad or frustrated by the dull colors that keep staring back.
Even though it’s possible to travel our sorrows away, you can do something more affordable and change your interior decor. Allow us to introduce you to the world of floral wallpapers, where you can find innumerable colors and designs reminiscent of some of the world's most awe-inspiring natural wonders.
Modern Floral Wallpaper Inspiration Ideas
1. Laundry Room
Floral prints are all the rage right now, with leading fashion designers adopting bold floral prints for redecorating different rooms of the house. An innovative technique to incorporate floral wallpapers is redecorating the laundry room with gorgeous flowers. So, you can enjoy the beauty of flowers in the garden and also be surrounded by them when inside.
Since laundry rooms are usually small, adding a floral print will guarantee a pop of color without any supporting accessories. We recommend playing with romantic and dark hues for a vibrant appearance.
2. Cherry Blossoms
Some home decor experts use pink and yellow detailing throughout the walls while ensuring that the shades don't overpower other features. Cherry blossoms are one of the most popular options when it comes to choosing a colorful floral wallpaper. It's especially suitable for a dining room that needs renovating as the bright colors improve the appearance of the old furniture by adding a modern twist.
3. Bold Floral Prints
A common misconception when using floral wallpapers is that the design consists predominantly of flowers which isn't the case necessarily. For instance, when redecorating your kid's room, you can create fun and whimsical animal shapes through floral prints, experimenting with different shades. You can repaint the whole space and have matching furniture, like a bright blue bookcase and bed.
4. Subtle Floral Feature Wall
As the previous three options dealt primarily with bright colors, we have mixed things up with this subtle floral pattern. Although a bit feminine for some homeowners, it's an ideal option for kids who love the outdoors. But you can use this design in any room, particularly if you don't like loud shades or if vibrant patterns won’t pair well with the interior decor.
You'll be pleased to know that the large roses deliver a lively appearance to any space having neutral colors.
5. Show Courage
If you're not new to floral wallpaper designs, might we suggest showing more courage? To take your interior decor to the next level, it would be best to add bold colors to the master bedroom. You can incorporate floral wallpaper to create a contrast between romantic and moody prints while there's no need for fancy furniture - simple accessories will suffice. Most designers suggest dark wallpapers or mural patterns.
6. Murals
Many homeowners are inspired by mural art and wish to replicate something similar in their homes. Unless your artistic talents are profound and you're planning to paint the walls, try using paneled mural wallpaper. This design looks great in the living room or study, lending an artistic appeal to a creative environment.
7. Graphic Walls
When most walls in your house are white or some other neutral shade, there's no need to tinker with the decor. Thanks to the ink-drawn lines and stunning patterns, this graphic texture is most suitable for floral wallpaper. The crisp lines will make the furniture stand out while creating an elegant vibe.
8. Nature
There are few better ways to decorate the bedroom than with the green hues of nature. We turn towards nature for peace whenever we are stressed, and you can replicate a similar feeling with these lush, rainforest florals. It would work better in a Scandinavian setting, whereby you can have eucalyptus plants instead of roses.
That said, the soothing tones would even look gorgeous in the bathroom or living room.
9. Geometric Florals
Carrying on from the jungle theme, this next option will please botanists, but it also has something for mathematicians. Geometric patterns look great on a large floral wallpaper because the intricate designs will please the perfectionist in you; use it in the nursery or at any entrance.
10. Vintage Floral Wallpaper
You can't go wrong by recapturing the old-world charm of simpler times by using bold and vintage floral wallpaper inside the house. It mostly consists of dark and moody tones, allowing this deeply romantic print to turn the bedroom into a lavish space befitting royals. Some people even use it in the dining room, while the remaining space retains its neutral appeal.
In other words, the gothic print perfectly contrasts with the existing simple design.
11. Whimsy
When you're confused about redoing the walls of your home, the easiest thing to do is start redecorating the halls or entryway. For that, this gorgeous floral wallpaper is ideal and will remind you of vintage greeting cards and times spent with grandparents. Simply add modern mid-century furniture in the foreground to pair them against the rivetting backdrop.
12. Rainforest
If we say rainforests, you would think of a luscious habitat teeming with birds and wildlife. And this wallpaper will transport you to the South American jungle right from the comfort of your home. We loved the neon shades contrasting with the olive and hunter green tones. Most exciting is that it pairs beautifully with beige and soft pastels.
13. East Coast
This wallpaper is perfect for people who dream about living on the East Coast and is suitable for a small space like the powder room or bathroom. It acts as a low-impact, high-effort design, complete with a black and white vintage print. You can use it as a graphic wallpaper as it pairs well with the bathroom tiles to deliver a chic appearance.
14. Monochrome
Rather than using colors, you can use monochromatic floral designs, comprising intricate drawings and sharp lines that will go well with light wooden floors. In short, it creates a unique sense of style.
15. Green Floral Wallpaper
If you don't have any specific idea of how to decorate the walls, we suggest going with green. You can play with subtle shades ranging from classy rainforest green to rich, velvety, and geometric patterns. It's also possible to add green furniture, like a vibrant green bedspread, that will tie well with the floral print of freshly cut flowers.
16. Rose Print
Although it's pretty common, rose wallpaper is a classic and looks the part in any nursery or kids' room. It’s ideal for people with a feminine and soft taste. But you can reprint it with a twist by using soft pastel shades, poppies, and, of course, a blend of roses to make the wall pop.
17. Darkness
Has anyone told you that darkness can be beautiful? That's exactly what we are advocating here because, contrary to what you may believe, light and brightness don't work all the time. Instead, try black, white, and dark blue with floral patterns to create a mixture of grit and elegance.
In the foreground, you can have industrial furniture to liven up the dark blue floral wallpaper in the background.
18. Pink
Any person looking for a colorful floral wallpaper would invariably think about using pink, but the trick is to include more details and less color. This wallpaper will look great at the entrance or in the hallway, provided you can add some vintage floral deets served with a modern twist. In short, it's a delicate way to enhance any space, such as a country-chic kitchen or formal setting.
19. Banana Leaves
Another shade of green that will add depth to the walls is banana leaves, which is a Pantone color with a lush appearance. This trendy hue looks inspired in the bathroom, and we love how it contrasts with a black tub. But you can also make the rich green banana leaf decor work in any room.
20. Artistic
Do you visit the museum and look at famous paintings for more inspiration? Then, you'll love this artistic wallpaper that features realistic floral designs combined with muted and modern colors. The tricky part is adding accessories that go well with muted shades, so you can try including mustard yellow, white, and purple furniture.
21. Succulents
If you have succulents at home, you know that they make a great house plant. But did you know that they are also great for designing walls? Wallpapers having succulent prints are at home on the staircase or in the powder room as they scream attention. The eye-catching design will be hard to ignore, increasing the attractiveness of your house manifold.
22. Upgraded Cherry Blossom
We have spoken about cherry blossoms previously, but here's a different take on this design. It's more of a high-class look, featuring darker shades of blue as a backdrop on which you can draw the cherry blossom tree. In the room, it would be best to have traditional furniture to create the appearance of an adult space.
23. Elephant Leaf
We have taken things up a notch with this elephant leaf wallpaper. Elephant leaves are big and create a stunning appearance even in a basic laundry room, thanks to various colors. While the predominant shade is green, you can experiment with other color gradations and install trinkets and shelves on the wall.
This will help tie the different elements together, making your laundry room as vibrant and energetic as the rest of the house.
24. Monkey
Monkeys are considered a nuisance in many parts of the world because of their mischievous attitude, but this very nature makes them a fantastic candidate for wallpaper prints. Rather than just adding flowers or trees, you can include a couple of monkeys or lemurs on the branches. It makes for an amusing yet attractive floral print, sure to be a conversation piece among guests.
So, to ensure that the wall doesn't escape people's attention, you can use the wallpaper in the living room, sitting room, or kitchen. We found that it works best with simple and rustic kitchen furniture.
25. Bold Wallpaper
Bold wallpapers make a statement due to their attractive patterns, eye-catching designs, and exquisite drawings. Every time you walk into the room, the colors will lift your mood. Long story short, most things have to be over the top, like matching splashes of red or orange with bright yellow furniture. As silly as it may seem, this design doesn't overpower the room but lends it a refreshing quality.
26. Girls' Room
Decorating girls' rooms is slightly tricky, especially when your kids are growing up. Going with a floral wallpaper is the obvious choice for most parents but opt for something unique, like gold and white floral patterns to cover the headboard. You can even choose watercolor wallpapers to strike a chord with the kids' artistic side.
Final Words About Floral Wallpapers
These are just some floral wallpaper ideas that you can try, and there are more options available on the market.
If you're not sure which one to go for, try using removable wallpaper so that you can take it off and redecorate the room again when needed. The bottom line is that there are so many colors and designs to choose from you are bound to find a desirable print worthy of any interior decor.
You'll be able to create a suitable atmosphere based on whether you're redecorating the study, bedroom, kitchen, or living room. Even your kids and pets will have fun at home, and won’t be bored by dull shades that sully the mood!
In most modern kitchens the storage space underneath the sink is unused. It is a space that requires maintenance from time to time, it is dark and dingy yet it still is a usable space. Space that can become storage easily. Showcased below we have a small short guide on how to build kitchen storage under the sink using roll-out trays, the same mechanism that you probably have already at each drawer in the kitchen. It rides smoothly bringing everything that you would need at a glance. Every item mentioned here can be found at a local hardware store or home center and the bill should not pass over 70 dollars. Hardwood plywood can also be found at a home center, lumberyard or in the hardware departments where you will also find at least one model of ball-bearing side-mount drawer glides. This is definitely one of the most practical projects we have materialized so far and we invite you to try it as well. Every modern kitchen should be as functional as it can be .
1. Start by measuring the cabinet opening to construct the base for trays on the bottom. Take in considerations any plumbing obstructions and design responsibly.
2. If you plan on creating two equivalent trays on the bottom carefully mark the center for this partition. In this guide, the thing that determined the width of each drawer has been the plumbing underneath the sink, exactly in the middle. If you have the plumbing underneath asymmetrically assembled it might be convenient for you to follow that line on the base as well.
3. Now clamp the partitions onto the base , drill pilot holes, glue them and screw them to the base.
4.Cut the parts for trays,glue and nail them together to create the trays. Pay attention to the measurements all the time.
5.Use a spacer to accurately fasten the glides on both partitions and tray sides.
6.Make tests and center the center base assemble inside the cabinet.
7.Upper trays now. Cut the parts, drill pilot holes and glue them together in the end product.
8.Now mount the cheats inside the cabinet, pay attention to the width of the cabinet on which you plan to mount them. You might want to avoid piercing all the material up to the other face in the adjacent cabinet. We suggest you to sand the side of the cabinet superficially to increase adhesion. In the end glue and screw the cleats on the sides.
9.Proceed by installing the upper trays for test fits at first. If everything goes smoothly end the DIY project by sealing the trays with two coats of polyurethane to make cleaning easier.
10.Be proud, enjoy your work and populate the trays with your items!
We would love to hear your opinion on this storage under the sink idea in the comment section below. We find it useful, creative and easy to materialize.
Your DIY bulletin board is there when you need it ! Crafted with love, great attention to details and now encompassing memory it is definitely one of the most practical items in your office; it motivates you, it reminds you what is worth remembering and it displays your memory and future travel destinations, a small area to which we can really relate too.
In the following galleries we have curated a list of exceptional DIY bulletin board ideas to revamp your home office, cast a glance and find something inspiring !
How do you see it and for what do you use this area most often?
1. chevron pattern embracing a cork board
Use a chevron pattern to integrate your new bulletin board in a modern setting wearing black, gray and white; the small detail scale and the beautiful dynamicity added greatly contribute to the overall design.
via annetheadventurer.com
2. glue buttons on THUMBTACKS, share color
Thumbtacks are sometimes difficult to manage due to their small caps, they`re also not that graphic pretty much all the time. Use a collection of buttons to create super cool retro thumbtacks dedicated to your interior. You can sort them by color, material, size, palette or you can simply share the rainbow and its diversity.
The golden thumbtacks here and the premium looking fabric create a really special look here; feel free to experiment with the fabric of choice and colorful thumbtacks.
via houzz.com
10. geometric diy painted cork boards
One line and one color will you shape you an extraordinary composition that can be easily scaled with great results.
11. SALVAGED old frame and retro fabric
The exquisite craft driven by decor above includes a pocket for you correspondence; the vintage fabric in reclaimed wood clothes balances the neutral color scheme.
13. artistic composition playing a functional role
A composition of framed cork boards can be used to create wall art; these can nestle different activities, different hobbies organized or simply the days of the week awaiting tasks.
One old window, a cork behind it and it already has a great functional value, the chic component speaks of authenticity.
via debbie-debbiedoos.com
16. black frame contrasts burlap
Natural elements like pine-cones and yarn string work to one`s advantage complementing the scene ready to share your memories in coziness and warmth.
via funkyjunkinteriors.com
17. map your future travel endeavors
Cork is the ideal medium and the travel map can beautifully function as motivation tool and wall art alike in your office.
Source Unknown
18. one row of wine corks
Your bulletin board can be as narrow as you need it. Here it keeps photographs in the right place, capturing smiles and laughter.
via shuterbugsage.com
19. Alternate patterns, create contrast
By creating contrast between colors and pattern on the same board you can easily shape a focal point in your office; this gives your tasks more coverage, more attention.
Spray paint and tape can help you shape a really graphic piece of wall art to double as a bulletin board; use the color that fits your interior scheme and feel free to experiment with the pattern.
via Pinterest
How do you see the DIY Bulletin Board Ideas above? The selection is inspiring and definitely share-worthy, we would to hear your thoughts in the comment section below.
Related Articles
When was the last time you thought of buying a clock, or you even admired one for its designs?
A clock is something that every person owns, but we usually never consider them to be a décor item. It can be stylish, fun, and super functional. When you have a beautiful clock, it’s a great way to complement your décor, to add some color, and to bring a sense of quaint touch to any room.
Most of the wall clocks these days have varied aspects like color, design, or purpose. Wall clocks have been part of our homes since many decades altogether, and they’re the silent contributors to the personality of your space. It doesn’t just help us to tell the time, but they also act as a reminder to value time.
They tend to merge effortlessly with every style of décor. You can choose a wall clock with a formal style to add a sense of elegance and charm to your living room, while an exciting, brightly colored clock for the kitchen or kids room. And a contemporary design will compliment any space in your office or home.
Best Copper/Rose Gold Wall Clocks
Without further ado, let’s read through the best rose/copper wall clocks!
MODERN WALL CLOCK DESIGN: This contemporary wall clock was...
SILENT SWEEPING QUARTZ CLOCK MOVEMENT: Each Ribbon wall...
This modern wall clock is made of high-quality metal and comes in a unique multi-ribbon shape. The eye-catching design given by Michelle Ivankovic helps to add a sense of charm, functionality, and class to your living space.
Also, the feature of a no ticking, noiseless, and sweeping Quartz movement helps ensure a maintenance-free and accurate performance. You need to power this clock with a single AA battery, which is not included in this set.
Experience
The design of this clock will blend in with the theme of your office and home perfectly. Even though it has a sturdy steel frame and bent edges, but you have to be careful while holding this clock because the edges are sharp.
We have used small finishing nails to hang this lightweight clock. But you can also use a wall anchor and a screw for the same. The ticking sound of the watch can be quite distinctly heard mainly at night, so you might prefer to place it in your hall room or kitchen.
We love the sleekness of the stainless steel frame, but if the same material were used around the mechanics that is placed inside, then it would have given the clock an expensive look. The product is pretty solidly built, and it lasts you for years to come. We admired the copper color as it's not found easily on wall clocks, which gives this piece a mid-century modern style.
Pros
Unique and stylish design
Easy, lightweight, and easy to hang
Easy to understand the difference between the hour and minute hands as the size has a bright contrast
Maintenance-free and does not require winding
Cons
The edges of the ribbon can be sharp
You need to buy the battery separately to operate this product
This is a vintage and antique wall clock, and if you prefer retro styles, then this product will be a great pick. The design blends in perfectly with the decor of your office, farmhouse, kitchen, bedroom, and living room.
The clock has a double ring round metal frame, with straight bars which indicate 3, 6, 9, and 12 o’ clock. It is an oversized clock with a stark look yet fascinating.
Experience
We placed this clock in our living room. It's a classy piece that gives a very edgy look to the entire space. You will appreciate the unique design, especially when you observe how stunning your walls start to appear. We couldn’t use the mounting hardware, which is a slot placed behind the clock, so we opted for a simple nail instead.
There is no ticking sound heard even during the quiet nights, so you can also keep it in your study or bedroom. You will need to buy a single AA battery to operate this clock. Therefore, you don’t have to worry about excess energy consumption.
Pros
Silent wall clock
Perfect for the living space due to its oversized shape
You have the option to select between the 16 inches and 20-inch design
It has a metal and vintage look
Cons
The mounting hardware might not be perfect to use for hanging your clock
This analog clock is known for its elegant and sleek design, that has a white dial with 3D rose-colored numbers. It is a non-ticking clock with a silent quartz sweep movement that helps to guarantee you with a quiet environment and accurate time.
You can place this beautiful and decorative piece in your office, kitchen, study room, living room, or bathroom. The front glass cover helps to guarantee a perfect view and enhances readability.
Experience
We selected this wall clock, for the rose gold color, which is electroplated on the frame and the 3D numbers of the same color. The color combination makes this clock stand out as a simple yet elegant piece of wall decor. You can’t even guess the real price of this product by looking at it; our friends always gave a higher estimate.
We found the customer service given by Jomparis to be remarkable. It is a very crisp, simple, lightweight, and attractive clock. We have used a nail to hang this clock rather than the given attachment as it seemed sturdier. Even though the case is made of plastic but it can’t be made out quickly, and because of the color, it appears to be high-priced instead.
You can operate this clock by just inserting a single AA battery. You can get this modern style wall clock in four different color combinations so that you can select them accordingly to your color preference.
Pros
Large 3D numbers with a front glass view that makes it easier for you to read the time
Has one piece of hook included, which makes it easy to hang the clock
Quartz sweep movement ensures a quiet environment that is free of any ticking sound
The high-quality movement in this clock will guarantee you with accurate time. This wall clock is of 12- inch diameter circumference. For eliminating any distractions or sound, this product has been made with a silent non-ticking technology. It also comes with a back nail slot that makes it easy to hang on the walls.
Experience
The luxury design theme used in this product will complement the decor of your home, both traditional or modern. We have not faced any disturbance while using this clock. And we never even had to worry about the constant ticking sounds that are heard in the regular clocks.
However, we have used this product for a long time, and there are no problems that we have noticed. The frame is made of metal, and it has a rose gold finish that gives this cock an elegant look.
We have used a nail to hang this clock, and since it’s lightweight, installing it was simple. You’ll also get a few color options, so you can select the one that will complement your walls.
Pros
Glass front gives you a proper view of the time
Sturdy built
Doesn’t make any ticking sound
Cons
The numbers are pretty small, so it can get challenging to read the time from a distance
WALL MOUNTED OR TABLE TOP: Infinity can be quickly...
MODERN & VERSATILE CLOCK: Stay on time with Infinity's...
This is a portable and battery operated wall clock, with a non-ticking mechanism. The product has been well built, which ensures longevity. It comes with a correct number display, easy-to-hang hole, glass cover, and an elegant colored rim.
This is a 12- inch timeless design which will tell you the time soundlessly and stylishly. It is powered by a single AAA battery, which doesn’t come with this clock.
Experience
The clock is battery operated, so we never had to worry about carrying around any extension cords. You can hang this clock anywhere you want, and the versatile design will blend well with any decor.
You won’t face any disturbance as there are no ticking sounds; it just has a sweeping mechanism which glides around the circle smoothly.
Also, the clock is lightweight, so the installation process is not going to be difficult. There is a keyhole at the back of the watch, so it makes it easier for you to hang the clock. You don’t even have to fear about the construction, as it’s built with quality materials and there is no fear of easy breakage.
This clock by Timelike has a simple and open design, with just an hour and minute hand. It is a statement piece that will jazz up your home decor in an effortless manner.
The quartz analog clock is made of aluminum, and the dial is around 10.4 cm with the hour's hand being 16.5 cm and the minute hand is 24.3 cm. It’s a lightweight (200 gm) piece, and a single AA battery powers it.
Wall Mountable: The clock hands are designed to mount on a...
3D Design: The clock hands have a unique 3D design that adds...
Experience
It is a simple and elegant piece that merged perfectly with the contemporary design of our living room. The clock is made of metal, and there is equal importance given to the functionality as well as the design of this product. We found the watch pretty lightweight, but it can travel with vibrations.
Overall, the clock is fragile, but with caution, it can work perfectly well. We loved the understated stylish appeal of this piece, and it’s a significant change from the boring wall clocks that we were using for years. We have received a ton of compliments for this clock, as it showcases your taste for a unique design.
Pros
Funky and minimalistic look
Maintenance-free
Priced reasonably
Lightweight
Cons
Not everyone’s taste
Not the most durable
Rose Gold/Copper Wall Clocks Buyer’s Guide
When you’re hanging the watch, you should pay attention to the small details in its design, that will make the wall space look attractive.
Buy a clock, that will last you for years to come and will be a prized possession to your home décor.
The quality of the watch is paramount as it helps to ensure reliability and accuracy of time.
The amount of light required by the clock should also be considered. And whether you can read the time just when you glance at the clock face.
Pick a different color tone for the wall clock that will contrast with the vibe of your wall space.
If you’re buying a clock for the study or bedroom, then get the ones with a quartz sweeping mechanism. There will be no ticking sound while you have a quiet environment.
There are different types of wall clock designs, but we can roughly divide it into two categories: decorative and functional. As the name implies, with a functional design, it will not just provide an excellent display or tell time, but it will serve as an instructional or highly specialized clock. Moreover, the decorative wall clocks help to add a fun element with its images and prints.
Rose Gold/Copper Wall Clocks Conclusion
There is a range of wall clock designs to choose from, while you're selecting the right one to compliment your home/office space. To find a clock that is unique and has been made with high-quality innovations is an excellent move for a refreshing change; be it classic or modern.
When we pick a clock for its exceptional design, whether ornate and vintage or sleek and modern, it transforms this functional item into a piece of artwork. Take your time to go through the designs to find the clock that fits in perfectly with the vibe and tone of your wall space.
You'd be surprised to know that there are more than 35 different types of houses, each having unique architectural features.
While most of us are familiar with the apartment and single housing style, there are several other types of residential properties that may seem like equally viable options. Whether you're buying or building a dream home, it's best to know all about the various structures used for housing.
That way, if you want to incorporate a particular architectural style, you'll have an authentic reference to fall back upon. So, here's a complete gallery of houses that will give you all the insight you need.
Without further ado, let the house hunt begin.
Different Types of Houses
Single-Family
This is the most common residential structure, given that about 70% of Americans live in single-family houses. These establishments are typically stand-alone and not attached to any other structures. That said, they're quite popular, especially in the suburbs of North America.
The main reason these houses saw a massive boom is the mass migration post-WWII. Thousands of families settled in the suburbs and the single housing style rapidly took over. The scenario was hardly the same before the war, given that only 13% of the population lived in the suburbs.
However, by 2010, about half of the US population was based out in the suburbs. Nevertheless, with the turn of the decade, downsizing became a reality due to increased property prices. Since then, there has been a rising demand for single-family home alternatives (condos, apartments, etc.)
Apartment
As mentioned earlier, apartments have become quite popular, primarily for their affordability and low maintenance requirements. These are essentially a group of housing units in a single building, owned by one entity.
More often than not, these units are leased or rented out to tenants. However, apartments are not the same as condos. The key difference between the two lies in ownership. Simply put, condos are owned by individual entities, whereas all apartments in a building are owned by one entity.
Condominium
By definition, a condominium is a building complex comprising several units, which belong to different owners. It's a home among many other similar homes, either in one building or multiple buildings, on a single plot.
Each owner has a title to their respective unit(s). Furthermore, the building or complex is governed by an elected body (HOA in the US and strata council in Canada) that frames regulations and passes decisions on behalf of all owners. Long story short, the members of this body make rules about maintenance, common areas, etc.
Condos can be further divided into the following categories.
Duplex - A duplex condo is a two-story unit, often the result of joining two buildings while renovating them or being built that way from the start.
Triplex - Same as a duplex but with three levels.
The terms duplex and triplex, while referring to condos, go back to its use in New York City. However, in other places, these words mean two and three-unit buildings, side-by-side. Therefore, the technical and literal meanings are frequently in conflict, and as such, it depends on where it's used.
In fact, some establishments that look like townhouses (houses in a row) can also be called condos, since the owners only possess the unit and not the shared space.
Townhome
A townhome is one among a series of houses, arranged in a row, sharing one or two walls. Usually, they have 2-3 stories, but you can also find taller structures. A townhome is different from a condo, as, in the case of the former, owners have legal rights over both the interior and exterior of the unit.
Therefore, they are financially responsible for the maintenance of the exteriors. On the contrary, with condominiums, the maintenance of shared areas is entrusted to the HOA or strata council.
So, a townhome is similar to a single-family house, only attached to another building either on one side or both.
Co-op
While it does appear similar to an apartment and condo, a co-op differs from them both, in terms of the legal and financial clauses. To explain further, in a co-op, individual entities that buy in on a certain segment of the building; instead of a whole unit. The owners are much like property stakeholders, who lease their parts in this setup.
Do the owners have a say in who can buy in? Yes, the co-op association can collectively decide and even reject a potential buyer from purchasing a part of the building. However, the co-op members may only turn down buyers based on financial reasons and reluctance to follow the rules framed by the governing body.
On the other hand, an HOA/strata council is not vested with powers to deny a potential buyer on such a basis, but they do have age restrictions with regard to property ownership.
Bungalow
The bungalow is an Indian word that essentially means 'belonging to Bengal'. These are typically small, single-story houses with front porch. These were initially built in India as an alternative to cottage-style homes with thick walls. However, their popularity soon spread to the rest of the world.
These single-floor establishments generally have steps on the front, which lead to the porch. Also, they often include a single dormer window integrated into the pitched roof. The USA saw the first bungalows in the early 1900s, and as of now, they're found all over the country.
That said, the demand for bungalows has declined of late, as more and more buyers want spacious options. Besides, with the advantage of computer-aided design, one no longer has to opt for simple styles to lower costs.
Cottage
The cottage is a housing type that originated in England. Although in the present context, it describes a vacation home, earlier it was a small, thatch-roofed house, including a single thick-walled room.
Ironically, even luxurious vacation retreats are called 'cottages' now, when historically, these establishments belonged to the low-income, rural populace. Take the example of the grand Newport, RI mansions, a Robber Barons project, often termed as 'cottages'. Needless to say, the buildings bear no resemblance to a traditional cottage.
Since the word 'cottage' is now associated with different types of structures, we've included a few photographic examples.
Historic English cottage
Grand Newport, Rhode Island cottage
Small vacation cottage
Ranch-Style
A ranch-style house (or rancher) is another single-story building, with a considerably bigger footprint than a bungalow. These houses became wildly popular in the 1950s, as large expanses of land were turned into suburbs, comprising bigger plots than urban housing spaces. Usually, these buildings are surrounded by plenty of open spaces, unlike apartments or condos.
Cabin
Let's just right away clarify that there's no distinctive feature that differentiates a cabin from a cottage. While a cabin implies a minimalist and rustic setup, a cottage, on the other hand, also refers to an upscale vacation dwelling (although, not historically).
However, if we go by commonly accepted meanings, cabins are less sophisticated than cottages. In fact, cottages are aesthetically enhanced with a proper finish. Furthermore, cabins are known to be rural, but cottages can be both rural and urban. Traditionally, cabins are log-built structures with a pastoral look.
Multi-Family
A multi-family residential building consists of two or more housing units. It's a broadly used term for a detached house with an in-law suite, townhouse development, apartment building, condo, etc.
In-law Suite (Or Basement Suite)
With the steep increase in real-estate prices, in-law suites are far more common than you can imagine. Most new developments come with them, and several older properties have added them. Since homeowners are finding it difficult to pay off their property loans, many rent a portion of their houses to supplement income.
Basically, an in-law suite is a separate unit found in single-family homes. They're, however, not detached from the main building. In case you're wondering what a separate structure for a similar purpose is called, you should look up the terms - carriage or laneway house.
Carriage/Coach House
Carriage or coach houses are structures built to shelter horse-drawn carriages. However, they are no longer used for the same purpose, and since then, have been transformed into living quarters made available for guests.
Presently, these buildings are used by owners to generate additional income through tenant or guest accommodation. While these structures no longer serve the original purpose, they have grown in importance commercially.
Chalet
Chalet is an old French word for a farmstead. These structures were originally built to provide housing to goats and sheepherders in Switzerland. But in the present scenario, it refers to a quaint vacation home in the mountains. Also, a chalet is usually a vacation retreat close to a skiing location.
Nevertheless, not all stand-alone structures on the mountain are chalets. These have some very specific design features, including a steep roof and long overhangs. As you can already guess, the roof is specially designed to withstand heavy snowfall.
Barndominiums
Barndominiums, as the name suggests, are a combination of a barn and a condominium. This integration creates a living area and sufficient space for housing livestock or other shelter needs. However, barns that are fully converted into housing spaces also fall under this category.
Tiny Home
If you're going through a cash crunch and need a detached living arrangement, a tiny home is a way to go. These structures can be stationary or mobile and range from 100 to 400 sq ft in size.
They are sought after for their efficient design and layout, and as such, many buyers favor them to avoid mortgage payments. They come as cheap as $10,000, but you can find more expensive options made of premium quality materials.
Mobile Home
A mobile home is a building that can be towed. But that does not mean that it can be moved around like a recreational vehicle. These structures are designed in factories and moved to the lot, where they remain in place. That said, mobile homes are inexpensive housing options that have become quite popular of late.
In fact, you can find mobile home parks where a large lot comprising multiple units is rented out or available for sale. These factory-manufactured houses are usually built on a steel frame fitted with wheels. Here's a modern example of a mobile home.
Mansion
A mansion is vaguely defined as a large, majestic house, but there's no legal information on how big a home has to be, so it's deemed a mansion. Besides, there's no consensus in the real estate industry either.
Since the size is not set in stone, 'mansion' is a term often used to distinguish a massive and luxurious house from average home.
Historic mansion
Contemporary Mansion
McMansion
McMansion is an uncomplimentary term for a shoddily designed, large house. Usually, you can find these in the suburbs, and are more often not built by a single developer. These detached structures are quite chaotic when it comes to incorporating architectural styles.
They include silly-looking parts and features that hardly contribute to the functionality of the house. It's not really an official category, but the word has gained momentum in the present parlance.
Yurt
You'd be surprised to know that yurts are the primary housing structure in Mongolia, among the nomadic Mongols. This is mainly because they can be transported from one location to another.
Typically, a yurt is round, with a roof and wall made of waterproof fabric. While the traditional varieties are pretty bare-bones, you can get yourself a custom-built yurt with all the amenities of a proper house. Some people live in yurts around the year in North America, while others use such buildings as vacation homes.
Floating on Water Residence
There are 5 types of water residences found in different US cities, including Vancouver, Seattle, Portland, and San Francisco. Each of these 5 floating options has its own unique features, distinguishing one from another.
Furthermore, they have different moorage arrangements that fall under strict regulations. If you want to learn more about such homes, get in touch with a real estate agent who has experience in handling such properties.
Castle
Castles are historic structures associated with royalty. However, presently most such castles are turned into museums and are maintained by the state. If you're a history or architecture buff, you will enjoy visiting these monumental buildings that once housed notable people.
Even with castles, there are multiple types, ranging from structures built in medieval times to those as recent as the 19th century. These were primarily designed to house and defend. However, the architectural style changed and was further enhanced in the preceding century.
Palace
While the word palace is often interchanged with the word castle, the former is different in the sense that it's a royal housing structure only. Long story short, palaces were not meant to defend royalty from enemies.
They were imposing and luxurious structures, specially built for the monarch and his/her governing council. As of now, most palaces are maintained by the state and accessible to the common public.
Chateau
Chateau is a french word for a manor house or a fortress built during the 13th and 14th centuries. These structures were usually located on the hills to have a strategic advantage over enemy factions.
Usually, they had thick walls, small windows, and crenelated parapets to resist any attack or invasion. With the decline of the feudal system, these structures were no longer built for the original purpose, and now chateaus simply resemble large, grand-looking residences.
Villa
A villa is the Italian counterpart of a chateau, which initially housed the Roman nobility. In the present context, these are large, impressive residences found in urban and semi-urban locations.
Manor
A manor is the English variety of a chateau. These originally were large country estates, housing feudal lords who owned and controlled the surrounding land.
Fort
A fort is a military stronghold, designed to defend and provide accommodation to the royal army. These structures include features that ensure strategic advantage over enemies and are constructed to resist any attack or infiltration.
Underground House
While a 'bunker' refers to a bomb shelter or any form of a protective hideout, some people actually live in underground homes. These are usually found on the hills and are parts of a larger property.
Cave
Caves are easily one of the oldest, naturally available forms of shelter. They're pretty much turnkey, albeit in a primitive way. And the reasoning behind them is - why build a home when nature is gifting you with one?
While these structures are considered crude and unfinished, in certain places, you can find whole cities comprising beautiful cave homes.
Dome/Round Houses
While not so popular, Geodesic dome houses or roundhouses are unique residential structures with a distinctive charm of their own. In fact, these round establishments are very intrinsic to certain cultures. For instance, yurts, tipis, huts, and fortress towers have their own cultural and regional significance.
Container Home
This is a recent trend in home construction, wherein existing containers are converted and used as residential structures. The smaller versions use a single container while the larger ones are designed out of two or more containers.
There are set rules in terms of configuration, and you may customize them as per budget and requirements. If you're interested in such housing, contact companies that specialize in designing container homes.
Treehouse
Very few people live in a treehouse, and they exist more like fun vacation retreats. These structures are built-in and supported by trees. Therefore, they're usually lightweight and have limited accommodation. However, you can also find larger structures, which are built around a tree and elevated.
Farmhouse
Technically, a farmhouse is a residential building in an agricultural or rural setting. Historically, these houses were attached to a barn and surrounded by vast open spaces. While farmhouses continue to serve the same purpose, many such properties are remodeled to include modern amenities with a rustic farmhouse look.
Hut
A hut refers to a small, humble dwelling, usually found in rural areas. These are built using naturally available materials such as wood, stone, palm leaves, hides, and mud. They are single-storied constructions with a simple roof and one or two rooms.
Huts are typical in most nomadic cultures, and some of them can even be transported from one place to another.
Igloo
An igloo is a dome-shaped, snow hut, associated with the Inuits and Eskimos. These are built using bricks of snow and are found in Canada's Central Arctic and Greenland's Thule region. The air pockets trapped in the snow provide insulation to keep the occupants warm.
The logistics of making and maintaining an igloo in any other place are almost impossible to achieve. Therefore, they're not practical anywhere else in the world.
Tent
A tent is a portable shelter, generally used while camping, fishing, hiking, or doing other outdoor activities. These are made with sheets of fabric, supported on a frame of poles, and secured by tight ropes.
The fabric is stretched and held in place by pegs driven into the ground. You can find tents for individual occupants as well as large circus tents that can accommodate hundreds of people. Therefore, the size mostly depends on the purpose and number of occupants.
Camper Van
A camper van is a motor home that can be driven around and includes amenities found in regular homes. These usually come with built-in toilets and showers, and some units even have separate living and cab areas.
They also include a small kitchen with a refrigerator, so you can literally live life on the road. Moreover, some of these vans have provisions for water and space heating, ensuring maximum comfort on the go. If you enjoy long road trips, then this house on wheels will surely charm you.
Dormitory
A dormitory (or dorm) is a building that primarily provides residential and sleeping accommodations to a large number of occupants, especially in schools, colleges, and universities. However, in certain countries, a dormitorium refers to a room with many beds that provide cheap accommodation to visitors and guests.
That said, dormitories in educational institutes usually have same-sex occupancy. However, some establishments (other than schools and colleges) allow mixed occupancy, although that's rare.
Construction Method
Houses are also classified based on the construction method. You can now choose from several options and decide how your home will be built. The following are some common methods.
Site-Built Home
Site-built homes, as you can already guess, are erected on location. This is undoubtedly the most construction process worldwide.
Modular Home
A modular home is a form of prefab housing, manufactured in a factory. These structures feature a cluster of modules or pods, connected together to build the entire residence on-site.
Prefab Home
A prefab home is a generic term used to describe a factory-built house. Generally, the individual segments are shipped and assembled on location. While units come with finished interiors and exteriors, others require touch-ups on-site.
Panel Home
These houses are made of panels, which are designed off-site and put together on location. Furthermore, you can select something from a range of panel materials, depending on your budget and the look you want to achieve.
Manufactured Home
As the name suggests, these structures are factory produced on a large scale. Built on a steel frame, manufactured homes are either transported in its entirety or in segments to the housing location. They're similar to mobile homes in terms of operation but closer in resemblance to regular houses than traditional mobile homes.
Frequently Asked Questions
When it comes to houses, all of us have our own set of queries. That's why we've put together this FAQ section to resolve most of them.
Take a look now.
How are houses classified?
The definition of a house is no longer limited to a structure featuring four walls and a roof. While the core idea still sticks, the meaning has evolved and now encompasses a variety of establishments, each with its own unique characteristics.
However, there are two ways of classifying houses, namely, based on architectural styles and by different types of residential buildings. In this guide, we've thoroughly discussed the latter.
How big is the average house in the USA?
From data gathered by NAHB and Census Quarterly Starts and Completions by Purpose and Design, as of 2022, the average single-family home has an area of 2,584 sq ft.
However, the average size has varied from time to time. For instance, in 1983, the average house was about 1,725 sq ft, while in 2003, it increased to 2,330 sq ft.
Can a house be moved?
Yes, a house can be moved, but it is no way simple or inexpensive. Moving a house means to completely lift the unit from its foundation, and transporting it, sometimes several miles away, before reestablishing it somewhere else.
Therefore, it's not something that's done on a whim. Only in extreme situations, such as imminent natural calamities or when a structure comes in the way of a development project, houses may be moved to a different location.
What materials are houses built from?
Homes are made using a variety of materials, including wood, concrete, brick, cement & mortar, and clay. Moreover, many units are built with steel frames, and strengthened with bolts and rivets.
Can a house sink?
Even though this rarely happens, if a house is constructed on poor-quality soil or on a place where water can damage and weaken the foundation, the structure may sink. While homeowners have little control over the soil underneath their houses, they can minimize water damage by installing mechanisms that deflect water away from the foundation.
Can a house withstand an earthquake?
Since every house is unique in the way it's built, the structural integrity of individual establishments depends on the age of the building, the materials used, and the design.
Generally, houses built after 1958 are considered more secure due to sufficient anchoring and bolting. However, this is just an observation and does not apply to all houses. However, some modern apartments and condos are made earthquake-resistant, thanks to the latest construction technology.
These buildings are usually constructed on top of flexible pads or have shock absorbers that reduce the impact.
Can a house get struck by lightning?
Yes, they indeed can, but most houses have a built-in lightning protection system that safeguards the structure from fire hazards and other damages. However, if the system fails or the unit does not have any lightning protection, the roof becomes the most vulnerable part.
Sometimes, the electric current that transpired through lightning can course through metal piping and the circuitry within the house. In fact, anything electrical and metal, including window frames and gutters, can act as conductors, inflicting damage.
Occupants in the house can be affected by lightning if they come in contact with any plugged-in electrical device or plumbing.
Can tornadoes lift a house?
Brick and concrete houses are considerably more stable and usually remain unmoved when hit by a tornado. Nevertheless, these super strong, rotating winds have the destructive force to rip off a house from its foundation and send it spiraling miles away.
In this case, mobile homes are especially at risk since they do not have a permanent foundation. While a tornado may not always end up lifting houses, it can cause severe damage and reduce properties to rubble.
How can a house be financed?
Not all buyers have disposable funds to purchase a house upfront. However, you can get it financed by taking out a mortgage. A mortgage is a secured loan, which is provided by a bank or credit union to the buyer.
Once you have figured out your total budget, which should include the interest amount, you can apply for a mortgage. That said, ideally, you should have a credit score of over 600 and a favorable debt-to-income ratio, so you borrow the necessary amount and pay it back on time.
Can houses lose value?
By losing value, we mean depreciation. While land prices may skyrocket, the saleability of a house diminishes over time. Usually, there are multiple factors that contribute to the overall loss in value.
For instance, physical damage, lack of maintenance, disturbed neighborhoods, and unfavorable economic climate can depreciate property prices.
Who appraises houses?
Houses are appraised by licensed and highly skilled professionals who have the necessary insight and training to carry out the process. In fact, many appraisers undergo training for years to gain an in-depth understanding of the housing market and the changing economic situation.
They're entrusted with the task of objectively determining the value of an establishment, without any bias stemming from its location. Appraisers have to justify their claims regarding anything inside or outside the house that could affect its value. Thus the entire process is strictly monitored to eliminate any personal biases.
Can squirrels climb houses?
Of course, they can. Squirrels can effortlessly scale walls, chimneys, and piping on the house exterior. They take shelter in nooks within walls, attics, and ceilings.
Can raccoons climb houses?
Much like squirrels, raccoons are excellent climbers, and they usually forage for food and shelter inside small hideouts. They can scale walls and use the gutters and downspouts for movement. Raccoons have a far more destructive nature, unlike squirrels, so make sure not to leave unattended garbage outside your home.
Also, keep your disposal bins closed at all times, as you do not want a family of raccoons to create mayhem in your front porch.
Can possums climb houses?
Possums can climb too, but they usually cannot scale high walls. Generally, they use tree branches to access an opening into the house. So if you have trees on your property, make sure they're a few feet away from the house.
Final Words
That's all, folks!
We hope you have sufficient information on different types of homes. However, buying or building a house involves a lot of decision-making, and we suggest taking every aspect into consideration.
In any case, your dream home should not wipe out your savings, so make sure to find a property well within your budget. Also, you'd want the house to have a high resale value in the future. And for that to happen, you should pay attention to the neighborhood, location, nearby facilities, and other factors that contribute to its overall value.
On that note, we would like to take your leave. Till next time!
One's mailbox is one of the first contacts with the household, being in the front yard, in an accessible area for the postman, it often enters the perspective of the pedestrian walking along; in some cases, the mailbox itself is the only item that connects you with the outside world, reason for which, cool mailboxes are carrying an immense responsibility, they`re meant to connect buildings with the pedestrians, with the road, they`re meant to function as small landmarks for households, and more importantly, businesses; in some cases they facilitate mailbox correspondence too.
Get inspired by simple elements, mark your mailbox with something that you like or find relevant to your business or household, there are no good reasons to overlook your mailbox design and it doesn`t necessarily have to be part of the "[easyazon_link keywords="cool mailboxes" locale="US" tag="homesthetics0a-20" link_id="257158" type="link" ref="misen"]cool mailboxes[/easyazon_link]" yet one ought to ensure is the right color, the right position and that it has all the important information labelled so it can be easier on you and your postman. It is worth mentioning that one should never go as far as making the mailbox itself unrecognizable, it ought to read as a mailbox in the end, it ought to facilitate correspondence.
Cast a glance below and find something that you like, we would love to hear your thoughts in the comment section below.
Unusual and Cool Mailboxes For Your Home
1. sculptural elf inspired mailbox carried by a tree
Metal offers you infinite possibilities, numerous artists are trying to showcase their work in viable, view-able areas and the mailbox sure is such a place, start your own artwork and call your best friend to aid you, make a day of it; alternatively, commission a local artist, it is a win-win situation that beautifies the neighborhood, the world.
This wall mounted mailbox on the front porch is not necessarily a viable option if your home is not close to the road, this is a far more intimate and important position, if you consider this option think about your neighborhood and your relation with it.
A tech-savvy individual might see this as an super cool thing, it can be realized in mdf or hdf, it can use an actual computer or one can transform an old monitor with ease, just find the appropriate mailbox post and the rest is history.
via morganhomeaccents.com
4. happy blue human keeping your mail safe
A joyful mailbox can share smiles with your neighbors and passing pedestrians, something simple, positive, can change everything. Sculptural options like this mail carrier need no mailbox post and they're a joy to see.
via mailboxesandstuff.com
5. pallet box for your mail
Create a super simple and super inexpensive correspondence, wall mounted mailbox, add a few hooks that can also hold your key or jacket while you get your snickers on.
via Pinterest
6. small trellis and greenery supporting your mail
Greenery ought to be emphasized through all possible means and happily, the mailbox can be enhanced with a simple lattice or trellis meant to nestle climbing plants swiftly, here the mailbox post offers you the opportunity to grow your favorite climbing plants.
This mailbox requires no description, the proud stallion mail carrier can relate to your business, your passion. It is simple, elegant and can be the result of a relatively inexpensive DIY project, note that you can work more on a less obvious mailbox post if you go towards a metallic support.
via morganic.com
8. disguise your mailbox in your fences
If you mark the mailbox discreetly in your fence make sure that it is recognizable and can still function as a mailbox.
An old wagon can be transformed to look like one of the first cars in the world or like a an old truck as your cool mailbox designates the engine on the front. It might take some time to carefully paint it and make it work but the result is definitely worth pursuing.
A small landmark can be simple yet elegantly noticeable, it can wear your street number too and it will certainly boost your curb appeal. This is technically a wall mounted mailbox?
via undercoverdiyer.com
11. scrape flea markets in the search of incredible
Certain mailboxes can beautifully surprise, the size is not important nor is the format even though the one above is far more common between the vintage, beautiful decorated cool mailboxes. Flea markets often hide the extraordinary relics of the past like this wall mounted mailbox, discover them.
The basic shape of the US mailbox makes the transformation above an easy project, a project definitely worth attempting with little ones, it can be an epic educative lesson.
via Pinterest
13. pursue a diy swan mailbox
The administration of your local park or the child`s kindergarten could definitely put a swan mailbox to good use, here too the shape of the basic US mailbox helps the craft itself.
via pinehill-woodcrafts.com
14. memories have no expiration date
A simple wall mounted mailbox is sometimes the best option, if you find the right one, stick with it, regardless of its current color, thickness of rust layers, put it to good use.
A multitude of elements surprise us, if you have the opportunity to assemble the ones that surprise you in something epic and significant for you, something that would speak about you, about your household to your loved ones, why wouldn`t you?
Little ones can be easily surprised with cool mailboxes but when the whole thing is easy read-able them for them too you are opening opportunities, you are showcasing creative options; by simply realizing the mailbox above as diy project you are revealing a whole new world, the realm of creativity. Needless to say that the more creative you get the more your home's curb appeal goes up especially in the eyes of the little ones.
A metal-worker that would like to advertise his workshop through a small installation can put a new spin on the mailbox, here the volume is still clearly recognizable and the ensemble will surely not be overlooked.
18. pursue art in any endeavor, sculpt your mailbox
If you`re a sculptor yourself the idea above requires no description but if you are not already an artist that doesn`t mean you can`t pursue something different, something that would speak of your hobbies and artistic endeavors.
via funniez.net
19. beautiful, simple crab mailbox
It will be an extraordinary pick for your beach home or a sea resort, children will adore the little creature.
A mayor could use the town mascot at the city hall, so can a school, an university. Make it fun, make it extraordinary.
via dumage.com
21. shape something fun, playful
The local theme Jurassic-themed Park could mark his presence easily on the road through a cool, colorful mailbox.
Source Unknown
22. mark your farm with a cow mailbox
A really creative mailbox and a really fun cow silhouette has been sculpted in the example above yet one could argue that the design is not easily recognizable as being a mailbox, this can be solved through some color accents.
via weheartit.com
23. praise nature with a tree trunk diy mailbox
A super simple and extraordinary graphic design for your mailbox nestled by natural components, mark it with a small red flag or notify your postman of its presence and you are good to go.
Public spaces can beat the norm in terms of scale, they can accommodate super creative solutions that will often be the result of small public contests, if you have the chance always contribute or join the discussions as these impact you and the whole community around you.
via imgfave.com
25. expose your dark side early on
Your passion for various hobbies, shows, characters, can be exemplified on your mailbox, the example above uses black and white paint to present the dark side, simple and graphic
Source Unknown
26. have fun with your mailbox
Winter brings you cool options, you can embellish your mailbox in snow, you can sculpt anything around it through snow, call your friends and loved ones to help you and make a day of it.
It is both funny and helpful, the postman can place commercials in spam and letters in the inbox, this doesn`t mean you should not check both but it saves you the hustle of filtering them yourself, in theory.
29. tailor retro mailboxes inspired by good design
Designers are always surging inspiration from well established objects, elements of grand designs that have gained the "timeless" status. Above the `70s of the american cars have inspired a great retro collection of mailboxes. Find inspiration in things that you love.
It might look odd but it happened nonetheless, if you`ve bought an old property and this has been presented to you on site, take advantage, clean it up, paint it with great care, make the best of it.
Source Unknown
34. swim your way towards epic mails
A diving instruction center looking for a new mailbox? No matter, the internet always has an answer; it is not always the right one, but is an answer nonetheless.
Source Unknown
35. EMPLOY the road-runner to catch your FAST-MAIL
An epic artist installation can be simple, here old pipe scraps have assembled an epic gentleman, rust gave it the right age and it now beautifies the day of many while carrying the mail of those in need.
37. veterans ought to design their own army inspired mailbox
It is a simple tribute, it signals the immense effort of the individual for a cause. The graphic mailbox above can signal a veteran club, a retirement center or simply a recruitment center. It can make sense in multiple settings.
The surreal mailbox above seems inspired by the Tolkien universe, its metallic presence has been emphasized by the presence of rust and paint on the leafy part.
42. REcycle old number plates into an epic mailbox
Simply salvage 5-6 old number plates, preferably, plates of different states, and embellish your classic mailbox carefully. It can mark the presence of many businesses or simply the home of a car enthusiast, a car nut.
It might look like a hard craft to materialize and for the amateur it might be so, especially considering the level of detail, but regardless, you all know that good carpenter, that friend with power tools or the architect that knows to work models in soft balsa wood, there are always options, and where they`re not, you can shape them.
A super simple craft that uses an old boat engine to facilitate correspondence. The engine case fits beautifully the role of a mailbox, simply epic result.
You can find a purpose to any object. The insanely cool Haley-Davidson composition above is surely a great solution for pieces that have suffered irreparable damage in an accident for example, they mark a strong passion, a lovely hobby.
via blog.bikerornot.com
46. the mailbox of a car nut, ENTHUSIASM defined
You know your passion better than anyone else, you know your needs and desires better than anyone else, pursue them, in everything.
Source Unknown
47. rust featured in a modern expression
Elegance can take many shapes, here a really simple modern solution signals a discreet mailbox and street number. How are you signaling yours ?
With design and diy projects we`re not entering the "right" or "wrong" land often, there is hardly any right or wrong in anything. We ought to pursue something that we live, something that we love without harming our own balance while doing so, we ought to break the rules of our existence everyday, we ought to brake the rules, not the law.
How do you see these cool mailboxes? We would love to hear from you in the comment section below !
It cannot be denied that construction is quite a difficult job, but with an excellent tool to measure distance, you can make it a whole lot easier.
While you may have known about a ruler and tape since you were kids, there are some other standard tools which help in finding out the length. We will tell you the key to achieve immaculate precision. Simply use the right device for the right length! While some are good with one unit, others can help you measure in multiple units.
You might be confused at this point about which tool will fit your needs? To deal with this, we have listed down the top 5 common ones which will help you in all kinds of construction and renovation jobs. You can sit back with a cup of coffee and read through our unbiased opinion with all the pros and cons listed.
We will begin with one of the most common tools in the market - the ruler. Also called a straight edge rule, it is used widely by professionals and students alike. Imagine trying to attempt architectural designs or drawing layouts without a tool to draw a straight line? Seems impossible, right?
Typically, the length of this equipment ranges from 30 cm to 240 cm and its body has markings at specific intervals, which helps you note down the length.
This tool is mostly used to measure small distances and symmetry of a plain. Students learn to use this for mathematical measurement and to check for straightness. On the other hand, you would find this on the table of almost every engineer, architecture, builder, interior designer as well as fashion designer, to name a few.
The measurement units that are engraved on each ruler differ, and there are some with centimeter, millimeter, and inches. While a few may have all of these units, others may be more specific with just inch or centimeter divisions.
What are the two types of markings?
We have already spoken about linear markings, and that is the most common use of a ruler. But there is another version of the tool with zero marking. These are used for finding the middle point of any item that is being considered and they are called center finding rulers.
There is a zero point in the center with numbers on both ends. It will help you find the midpoint of anything. The only limitation is that the item needs to be flat.
What is the preferred form of a ruler?
We can divide straight-edged rules into three common kinds - wooden, metal, and plastic. The most preferred one for accuracy and durability is the metal option. This is because the metal version is sleek and easy to use, while the sharp edges provide more precision in measurement.
Also, it lasts longer, the printed unit marks do not fade easily, and it would not break into two. It would be a Herculean job to break a metal ruler!
Moving a step further, the measuring tape is a very useful tool that measures medium distances. It is widely used for construction and renovation purposes. While a metal straight-edge ruler is a straight device with limited length, this one has a metal ruler too, but it is rolled inside a plastic body.
Since it can be rolled, the length is way longer and can extend from 6 feet up to 33 feet. While it can be folded inside, once you extend the ruler, it becomes stiff and would not lose shape when held against a wall or any vertical surface.
How to use it?
The product comes with a metal hook on the edge. This can be used to hold on to one end of the surface that is being measured while you stretch your metal scale to reach the other end. Note down the results once you’ve properly adjusted the tool.
To add to the convenience, there is a hole on the hook, through which a screw can pass easily. You can use it to attach one end, providing you with a safer way of measuring. With this feature, one can aim to handle the whole project by oneself without help.
Pros
Easily portable
Extendable and can be used to measure longer distances
While the ruler helped measure shorter distances, this one is made to measure very long stretches. Known as a distance calculation wheel, it needs to be rolled from point A to point B to find the exact distance between both of them.
The measurement will show on the counter, which is fixed on top of this device. It consists of handles with a wheel attached to it. The distance traveled by the wheel is what can be measured.
What is its purpose?
This is an essential tool for people designing or renovating a place. For example, if you are working on building a house, this tool will help measure the perimeter of your backyard, garden area, front porch, and maybe the fence too. These measurements will further be needed to add tiles, pave a path, grow seeds, or build fences.
Now, if you are wondering how it is different from a tape, let us explain. Straight lines can be measured by a tape easily, but if the concerned area is crooked, you will need help. For such spaces, you would have to divide the area into parts and measure separately. In the end, the sum of all parts will give you a total.
This is time-consuming, to say the least. However, with a wheel, you will face no such problem. Just roll it around the border of a space and note down the measurement.
What are the types available?
There are different versions of the base model itself so as to make this device fit for the terrain it is going to be used in. Your area of work defines the type you would want to purchase.
There are variations in the size of the tire. If it is a rough terrain that you are aiming to work on, we would suggest using bigger wheels. They have a lesser chance of skidding across. While on the other hand, if the area is flat with no obstacles, a smaller version can be used.
Coming to counters, there are three types, manual, automatic, and electrical. Manual counters work well with one type of unit and are less expensive while the electronic ones are more advanced and are suitable for multiple unit measurements.
This is a tool that falls between the regular measuring tape and a wheel. It can cover a distance of more than 100 feet and is a very commonly used product by professionals. This has been carried on since old times and has survived the test of time. The body simply has a long tape rolled up in a plastic frame.
What is its purpose?
While a metal tape is easier to carry, this one stands out for measuring longer distances. If you are trying to renovate a large space or construct a house, a long version is essential, and you would not find a single builder without it.
Also, it works brilliantly well with rough terrains. It is not made of metal and thus can accommodate any kind of space easily, but yes, two people are needed in this case. Most reels are made of nylon or fiberglass and have units printed on both sides. One has to hold on to one end while the other takes note and stretches the tape.
There are two types of reel tapes in the market, and you should purchase based on the distance that you need to measure. Open reel tapes are those which are suitable for longer stretches extending up to 300 feet.
These are big rolls and are not covered by plastic. Instead, they have a pointed stake, which allows one to attach it to the work surface. A handle is also included to make it easier for you to hold while fixing it in place.
This one usually needs two people where one has to hold the handle and keep the device straight in place while another one stretches its tape out.
Closed case tapes are those which are used to measure a shorter distance of up to 100 feet. They come with a plastic body.
Both types have a hook at the end, which can be used to keep it firm. Also, they boast of fractional/decimal units printed on both sides for easier calculation.
Are you looking to measure the height or width of a room easily? The laser tape is an exceptional option to achieve your goal. It is a new addition to the list and makes it super easy to measure anything up to 300 feet.
While the tape has been serving well for long, this is a new technology that has come up and works as a great alternative. It is much more accurate, and you do not have to worry about the type of surface that you are dealing with. Be it rough or smooth; the laser beam does not care! It will provide you with precision, no matter what.
How does it operate?
All you need to do is keep the device at the beginning point and then direct its laser beam towards your endpoint. Once you do so, a button needs to be pressed on the body, and the result will show on display. It is that easy!
In case you do not have anything to mark your endpoint and to define the edge, place an object, or put a tiny tape. This will define the point and you can then proceed to aim at it.
There are different types of laser tapes available, and they differ in specifications and price. The basic models measure only in single units while more expensive ones show double or multiple units.
There are some products which allow you to measure separate distances and then make a total of them and present the result. The summation is done automatically without any extra effort.
Also, you do not have to remember the measurements. The gadget will do it for you. With an internal memory which makes notes, you can store and recall previous measurements. What more could you have asked for!
Pros
Rubber grip makes it easier to hold
Compact and portable
Works for first-timers
Measures distance up to 300 feet
No rewinding required
Cons
It does not work well on shiny or porous surfaces
Conclusion
Every tool listed here has its own sets of advantages and disadvantages. We will suggest that before you choose one, pay attention to what you exactly need it for. If you want to simply measure a short object or a flat surface, a ruler will be the cheapest and most viable option.
Only in case of buildings and fences, should you opt for a wheel. A wheel would work great to measure the perimeter but will not work with measuring objects as you cannot wheel over it.
A laser beam is the most expensive device here. So, please consider your needs before buying one. It works for all surfaces except shiny or transparent ones, as the laser will not be able to detect the endpoint in such a case.
Let us know if you have any further queries in the comments section below.
Till next time!
Related Articles
Do you want an accent wall that would build up the ambiance? Canvases are becoming the most popular addition to creating this statement wall.
And that brings us to canvas printing services, which will help you choose and create art pieces that can liven up any room. You can cover the entire wall with art, thanks to various sized canvases available.
From offering a collection of pictures by famous artists and photographers to allowing you to use your photographs, there is a wide range of options. You can pick and choose among different materials too.
But when we set out to find out the best canvas printing service, we found multiple choices, and choosing one was rather challenging.
To save you from that hassle, this detailed and unbiased list of 15 top options has been curated. We have also included an FAQ section to help you choose the right one for your needs.
So, without further ado, let's get down to business!
If you are looking for great print quality and ease of use, CanvasPop is an excellent option to go with. They provide one of the best services in terms of efficiency as well as cost. The Canvas website says, "It's as easy as 1-2-3," and we don't disagree at all.
Why Did We Like It?
First of all, the website is not at all complicated, and we loved the user-friendliness offered. You can upload images easily from your computer or social media, including Instagram and Facebook. In case the image has a very low resolution, you will get a warning which will tell you that the image is unsuitable for use.
Now, most times, we are worried about the print quality. But CanvasPop thought of that too, and you can ask for a proof of print before finalizing. A person will review it beforehand and tell you about it. Once you are satisfied, you can place an order.
Although the prints might seem to be too expensive at first, we were happy to see that there were regular deals on them. You can easily buy one at 50% off, and that makes it a great deal.
Moving on, every photo is hand-stretched to ensure the best quality. The name of the craftsman is added in the frame on a removable sticker.
What Could've Been Better?
The website tells you that the product will reach in 2-3 days. The problem is that you cannot get it delivered earlier or choose the exact delivery date. This was slightly disappointing; you cannot set the date even by paying extra. So, we would recommend that you order well ahead of when you need it.
As the name suggests, they have a massive stock of images, and you will be able to find one that fits your needs perfectly. Known to be very popular among hotels, galleries, and office spaces, this company provides absolute professional results. You will truly be impressed by their exquisite work.
Why Did We Like It?
To begin with, ElephantStock uses high-resolution Giclee printing processes on the poly-cotton blend canvas. Every image is stretched to perfection to meet your size needs and North American pine frames are used.
Furthermore, the laminate is made to be resistant to UV rays and is waterproof and scratch-proof. It keeps the photos in mint condition for years to come. The frames do not lose their color, making them very efficient.
Also, the customer care representatives are very friendly and will help you throughout the process. You can reach out to them about any information required, and they will be guiding you well.
Besides, sizes range from 9×6″ to 48×32″, which makes it suitable for any space, be it a poster for a conference room or a hotel room. You can customize orders according to preferences, and you will be warned if the resolution of a picture is too low.
Lastly, this one also has great offers that keep popping up multiple times a year. The offers bring down the price to a great extent, making it quite affordable.
What Could've Been Better?
Although you will be getting free shipping if you shop above a certain limit for the USA and Canada, there is a considerable charge for shipping to other countries. So, we would recommend you to check the shipping charges first before you proceed. They range from $9.95 and can go up to $100 or more.
Pros
Resistant to UV rays and water
Efficient customer service
High-resolution Giclee printing
Cons
High international shipping costs
CanvasDiscount
If you are hunting for good offers and discounts, you have finally reached the right place. CanvasDiscount is known to have the lowest prices ever, and that is accompanied by flawless quality. In fact, they offer a 110% discount guarantee in case you find a lower priced product anywhere.
Why Did We Like It?
We were very surprised to see that the prices could go down to even $5 for some products, and we could not find a bargain similar to this anywhere. But rest assured, even if they seem unbelievable, the quality is superb. The canvas has a great texture, and every piece is strengthened to make them more durable.
Besides, they go the extra way to ensure that you do not have pixelated canvases. Whenever you upload an image, they will give you sizing options based on the JPEG image's quality and size.
Plus, it offers a great variety of products. While most of you will be familiar with the traditional canvas, this one allows you to get metal or PVC forex prints. You can also invest in accessories, including mugs, pillows, and blankets. Jigsaw puzzles can be printed with personal pictures too.
To top it all, it provides super-fast delivery in North America. You can get the product in a day or 2 if you live in this area.
What Could've Been Better?
The website is not very popular and does not have a big audience. So, most people around you might not know of it. But once you purchase from them, you will realize that it is indeed a hidden gem. Order something from their large range of options and see it for yourself!
Pros
Boasts of super-fast delivery
Wide range of items
Lowest price in the market
User-friendly website
Cons
Not very popular
iCanvas
One of our top recommendations is iCanvas, which is known for its easy service. They have made it their motto to make exquisite art affordable for everyone. If you are an art lover, this can help get the perfect prints for your home. Read on to know more about it.
Why Did We Like It?
The process of getting your personalized canvas prints is very easy. All you need to do is upload images and wait for them to send you edited versions of it. Once you approve the pictures, they are finalized and sent to print. It takes around 15 business days for the canvas to be delivered to your house.
Another great advantage is that they have thousands of options to choose from, and you can easily turn a room into the art space that you always craved for. Choose from among animals, abstract, floral, street art, modern, pop art, to name a few of the popular styles.
Besides, this offers a great service for those who are not confident about color palettes and patterns. There are segregations based on color palettes and rooms. So, you can select the room you want to keep the canvas in and then find prints based on it. Overall, we found this to be very beneficial, and the prices were reasonable too.
What Could've Been Better?
The only issue with this is that it does not accept images below 500 KB if you want a high-resolution canvas. So, you will probably not be able to get copies of the original work printed in high resolution. But again, if the quality of the images is good, then there is nothing more to worry about.
Pros
A great option for novices
Variety of art forms and styles
Easy consumer-friendly process
Cons
Prints only high-res pictures
Inktuitive
If you are looking for unique pieces of artwork and illustrations to print, Intuitive will prove to be an excellent forum. They are geared towards creating art that you would love to be surrounded with. Your environment determines your performance and mindset, and this brand will help create that positive space.
Why Did We Like It?
Every artwork has to meet strict quality requirements before they can be put up on the website. Hence you will get high resolution and flawless prints every time. They use top-shelf archival-quality ink, which will help print pictures with great depth and clarity. We loved the bright colors that emitted a very positive vibe to the surroundings.
Another great benefit is that you can avail free standard shipping. One can order from anywhere in the world, and standard shipping costs will not be applied. This is indeed a unique quality that sets it apart from its peers.
Plus, they offer complete satisfaction, and in case it does not add value to your life, the company will give you a full refund. This is something that most companies do not offer, and hence we were truly awed.
Also, the customer care is at your service at any time of the day, and you can call them regarding any issue.
What Could've Been Better?
The return process may take a little longer than you expect. It took us 10 days to get through as it involves a few steps. Also, you will have to ship the product back yourself. Once the company receives it, it will take another 5-7 days to begin the refund process.
Pros
Meets strict art quality measures
Free standard shipping
Eligible for a full refund if not satisfied
Cons
The return process takes time
Mixbook
If you want easy customization, Mixbook will provide you with it. The editors give the space to indulge in a variety of customizations, and you can design your own canvas in any way. With a set of preset themes, you can create artistic wonders right on their website.
Why Did We Like It?
To begin with, there are a number of designers on board who have specialized themes and designs for you to use. You can play around with stickers, graphics, and backgrounds to create wonders. Whether it is collaborating with family and loved ones or you just want to tell a story, this site is geared to make your prints memorable.
They also have a community of creators, and you can see their stories using the hashtag #mixbook. Once you buy one of their products, you can also join the community and share ideas and inspirations with others.
Further, the brand specializes in canvas, metal, acrylic, and poster prints along with photo books and calendars. You will get a wide array of products to print your preferred pictures on.
Besides, they have a clear pricing chart with the products and budgets mentioned depending on the kind of shipping and size that you choose. This will help you compare before purchasing it.
What Could've Been Better?
The production takes a few days, and then it is shipped. So, expect the whole process to take at least 10 days, which is longer than many of its peers. We would recommend that you keep ample time in your hands and then order. In case you have a party at your place, order at least 15 days before to make sure it reaches in time.
Pros
Special themes and templates
Community of creators on Instagram
Clear pricing chart
Cons
Lengthy production time
Social Print Studio
Up next is a company that has been in the printing business for more than a decade now. Social Print Studio is the hub of professional-quality prints that will cater to your needs well and give you high-quality canvases. We were very impressed with the flawless finish.
Why Did We Like It?
The company offers a museum-quality canvas finish using ink that is permanent and will not fade with time. This not only adds more depth to the photo but also extends its durability. The ink is resistant to light, water, heat and has no impurities in it. You can also opt for a glossy finish that looks very attractive.
Besides, it is an in-built photo editing software which we found to be very easy to use. All you need to do is upload pictures, and then there will be clear instructions guiding you throughout.
The company also makes it easy for you to get clear prints. To maintain clarity, minimum size requirements are put in place so that the pictures are not pixelated.
Further, we loved the customer service, and they were very supportive throughout the process. Our delivery was slightly delayed, but they made it a point to keep us updated about it.
What Could've Been Better?
Although high quality is something that it focuses on, the brand has a limited range of canvas sizes to choose from. It does not provide customized sizes, and we were slightly disappointed with the fact. We would recommend first checking the sizes before you proceed to decide the print.
Pros
Supportive customer service
Easy to use software
Professional-quality prints
Cons
Canvas sizes are limited
Walmart
You must already know how Walmart has almost anything that you can think of. With tons of images to choose from, this is one of the most versatile options. If you have a tight budget, this is the place to search for the best deal.
Why Did We Like It?
We cannot stress the variety of choices. Be it a hotel room, home space, boutique, or offices, the range of options is huge, and you are bound to find something nice. It will brighten up any studio or home and will leave your guests wondering where you got it from.
Plus, you have the liberty to choose a size that fits well in your room. Other than the theme and size, you can get it printed with no frame, floating frames, contemporary or traditional frames.
If it is the first time that you are sitting to make a choice, Walmart will prove to be beneficial. They have a very easy-to-use site, and you will be able to search easily.
Besides, they will not print low-resolution images. If the image that you have uploaded does not meet the criteria, they will warn you immediately.
What Could've Been Better?
Since Walmart has a huge range of pictures, you will have to be careful while choosing. This is because there can be some prints that may not meet your requirements in terms of clarity and resolution. We would suggest that you check the user ratings and reviews before proceeding.
Do you want a floating frame for your living room? Great Big Canvas is the perfect portal for that. It offers readymade prints that give your space a modern and classic look. Create a unique atmosphere with your favorite prints or self-made illustrations.
Why Did We Like It?
First of all, the company specializes in readymade prints and has a wide range of choices. From beaches to beautiful architectural structures, there are multiple options to choose from. Also, choose between prints ranging from 8 x 10" to 36 x 36" in size, which covers a large range indeed.
Besides, they use artist's grade canvas and archival inks, which add clarity and depth to the picture. Every canvas has UVB protection, which keeps it protected from moisture and fading.
Plus, the company has divided its products into various categories, and you can shop by subject, color, artist, style, room, and trend. You can choose between art, photography, and abstract.
Every piece that they are offering can be printed in various sizes and with numerous frame options. Choose among poster prints, wall arts, floating frames, and canvases. To help you further, there are different artworks recommended on the basis of the kind of room they are going to be put up in.
What Could've Been Better?
Although you will find a number of prints, they are going to be expensive and may not be affordable for everyone. But we will tell you that there are offers which keep popping up often. So, keep a watch on the site, and you can grab great deals.
Pros
UVB protection from moisture
Multitude of choices
Fast shipping
Cons
Expensive side
Easy Canvas Prints
If you have a very low budget and you still want something pretty, Easy Canvas Prints is going to turn your dreams into reality. They specialize in custom print and will provide you with ready to hang images with a sawtooth on the backside. From large canvases to small ones, you can buy it all from here!
Why Did We Like It?
To begin with, this company has amazing discounts. You can find sales with up to 97% discount on a variety of products. So, if you are a bargain hunter, this is the place that you need to be. With a budget of around $30, you could end up with a 30 x 40" canvas print.
Yes, the print quality will not be as great as expensive art pieces, but they are absolutely good for the price you will be paying. The company uses cheaper materials to ensure that you get a great deal. They work with polyester and semi-gloss surfaces instead of expensive alternatives.
To top it all, they also offer image enhancement services at an extra cost. This may include red-eye removal, oil painting effects, and teeth whitening. You can mail them regarding the changes, and they will make it happen. We were even able to restore old photographs, thanks to this website.
What Could've Been Better?
The only problem that we found here is that they will not warn you in case there are issues with the image quality. The site accepts low-resolution images too, and hence you need to be careful while uploading. Make a note of the properties of the image before going forward to print it.
Pros
Helps restore old photographs
Extremely budget-friendly
Responsive customer service team
Cons
No image quality warning
Canvas HQ
Up next is a family-owned company that makes ordering prints extremely easy. Canvas HQ will provide you with high-quality art that is authentic and can build up the ambiance of a room. They aim for quick delivery and will deliver the product to your doorstep in the shortest time possible.
Why Did We Like It?
We loved the fact they touch up the picture without any additional costs. If it has blemishes or spots, an artist on their end will remove them to provide you with the best version of your image.
Another great benefit is the 30 days return policy. If you are not satisfied with the product, you can return it within 30 days, and a full refund will be initiated. This made it a very trusted service, and we had no complaints with the print.
It is also very popular among photographers who are very particular about their image quality. This website promises clear images, and every picture is checked individually to ensure that there are no low-quality prints that get shipped.
Lastly, you can avail free shipping in all of the USA. This is very beneficial, and not many companies offer it. You will need to pay a nominal fee to ship outside the States, but it is not a hefty amount.
What Could've Been Better?
We would have preferred if there were more printing options. While you can get a great quality canvas and framed images, the options are limited, and you cannot get accessories printed. Make a note of this before you choose a print.
Pros
Free shipping in the USA
30 days return policy
Free touch up options
Cons
Limited print options
Walgreens
If you want a print very fast, Walgreens is a great choice to make. It has one of the fastest delivery services and will get the product to you in no time. It can even be available to collect within 24 hours of ordering. Read on to know more about its benefits.
Why Did We Like It?
The chances are that you have already been to a Walgreens store many times before. They have hundreds of stores across the US, and if you have one in the neighborhood or vicinity, you can actually get prints within 24 hours.
Pick it up from the store, and you have it within a day. Since the canvases are being printed at separate locations on the basis of your address, it is better off than its peers who generally have a central printing hub.
Other than that, Walgreens has a huge range of prints and ensures that your images are bright. They will work with the image exposure and brightness if needed to provide you with the best wall decor.
Additionally, they have the hanging hardware attached behind so that you can immediately hang it. Begin enjoying the artwork instantly with this service!
What Could've Been Better?
Although they have a fast and efficient service, the image print will not be of the same quality as that of museums. They work well for homes, but a professional artist or photographer will be able to notice the difference in quality. We would recommend that you check and give them only high-resolution images in case you want a customized print.
Pros
Perfect for decoration or gifting
24-hour delivery option
Printed at local locations
Cons
Image quality is slightly lower
CanvasChamp
Do you want to ship a portrait outside the US? CanvasChamp will do it for you easily and at nominal rates. It is known to provide great prints at wholesale prices, making it stand out among its peers. We were impressed with its bells and whistles, and you should check them out too.
Why Did We Like It?
This is a common choice for those who want to buy a number of products together instead of 1. If you are setting up an office or a co-working space, this will allow you to ship a number of paintings at once with the lowest delivery charges.
Also, images can be printed on a variety of surfaces like metal, rolled canvases, thick and thin wrap, and photo boards. The site is very user-friendly, and you should have any difficulties making a choice.
Plus, if you want customized canvases, they will make sure that the image quality is good enough for them to print. If the image does not meet the requirements, they will stop you immediately.
Next, the customer service is very responsive and will tend to all your queries immediately. If you face any issues with the ordering or deciding process, you can call them up for help.
What Could've Been Better?
The material that is used looks nice but is not durable and will not last beyond a few years. This is a letdown, but again for the price that it comes in, it is worth every penny. If the images are not going to be subjected to direct sunlight or moisture, then it will last for longer.
Pros
Perfect for bulk ordering
Efficient customer service
Multiple surfaces to print on
Cons
Not very durable
Snapfish
If you are looking for a service that will provide premium high-quality prints, Snapfish is a great option. It produces one of the finest photo canvases and is a preferred choice for artists and photographers. If you want a smooth experience, this is the one to choose.
Why Did We Like It?
We were very impressed with the website. It has a minimalist design and is simple to use. You will be able to order a print easily, even if you are a novice. There is also a wide range of personalization and embellishment options provided so that you can get the exact size and shape that you have in mind.
Secondly, the color and the vibrance is something we truly appreciated. The images are very lively and crisp. Bleeding on the sides is avoided, and edges are generally softened a bit for the perfect finish.
Lastly, the frames are also well built and designed to stay on your walls for years. They are resistant to discoloration of damage by moisture. They also provide extra support and make hanging very easy.
Overall we loved their service, and although the products are expensive, sometimes it is best to choose quality over price.
What Could've Been Better?
While the quality is impeccable, shipping might take some time, and you may have to wait. Hence keep ample time in your hands before ordering and expect it to take 10 days or more to arrive. We can only say that the product will be worth the wait.
If you are looking for exquisite wall art, Pictorem is the site to choose! With a huge collection of museum-quality canvases, you can showcase your love for art in a grand fashion. It has great customizing options and works well with large spaces.
Why Did We Like It?
One of its unique features is that it has amazing panoramic paintings. These consist of 4-5 canvases placed side by side with an image split among them. You will find these in multiple sizes and combinations.
Also, these can be used to cover entire wall surfaces. The canvases can be customized to be big or small depending on the wall. It is printed on 1.5-inch thick wood and is known to be very durable.
Customers choose to cover their wall with it, and hence they need it to last for long. Since it is printed on 410g/m2 premium matte canvas, there will be no discoloration or fading.
Furthermore, the company uses Giclee printing, which ensures that they are of high resolution, and you can rest assured that the quality is extremely good. This is because the paint is of superior quality and is used for art galleries to print their work. It is known to survive for 200 years without any signs of wear and tear.
What Could've Been Better?
Since this is a specialty printing service, you can expect the rates to be high. The prints may be unaffordable for the average homeowner. But if you want a statement wall in your house, this will offer a multitude of options. Plus, in comparison to its peers, it does not offer discounts very frequently.
Pros
Uses Giclee printing
Multi-panel split canvases available
Prints on acrylic, metal, and canvases
Cons
Expensive
Canvas Printing Service FAQs
Now that you have gone through the 15 top services, you will know that each one is unique in its way. There are variations in printing speeds, delivery, quality, and stock of images.
To help you out, we have put together a list of frequently asked questions. You can glance upon them to get a clear understanding of the types of services and what to look for in it. Take a look now. We hope this guides you towards buying the one that fits the best.
What Are The Kind Of Print Styles Available?
What kind of print style do you want? While some sites will only offer single image prints, others will offer to make collages. Single images can also be of various shapes, including square, rectangular, portrait, and landscape styles.
Make it a point to decide upon what kind of a frame will suit your room and then go on to purchase. If you are unsure, you could ask the company representatives for help.
What Happens If The Image Is Of Lower Quality?
Image quality is the most important part of selecting canvases. The image has to be of high resolution, and most websites will not let you proceed if your image does not meet the minimum requirements. Lower resolution images can get pixelated easily and hence will be very difficult to print.
How To Check If The Image Is Suitable?
If the website that you are ordering from does not have a system to already warn you of lower quality, it is best to mail them with the picture. Ask them if the quality is good enough before you proceed. Be very careful with this as a bad print may cost you money and spoil the entire decor of your room.
What Are The Kinds Of Canvases Available?
There are two main types of canvases to choose from. One has a matte finish and will not shine even when it comes under the light. The other type has a glossy or semi-glossy finish. These look good, but the surface may reflect or colors may seem distorted if placed under the light.
What Is The General Delivery Speed?
This varies a lot among companies. For those who have one central printing hub, the delivery speed will depend on how far the hub is from you. If it is in the vicinity, you could get a quick delivery, but otherwise, it may take a lot of time. We have had to wait for 10-15 days in some cases.
On the other hand, if a company has multiple printing stores across the country, you will be able to get your canvas faster. Some companies also allow you to go and pick up the order from the nearest store.
Also, some companies offer different delivery speeds at various prices. You can choose priority shipping and pay extra for it.
What To Do If The Canvas Has Fold Marks?
A good canvas will have no folds when it arrives. In case it does, send it back immediately. You do not want folded sides or lumpy corners. They look bad, and guests perceive it as cheap products. A good canvas will have bright colors and will be free of flaws.
Is There A Big Gap Between Normal And Premium Quality?
If you are an artist or photographer, you will know the difference between a good print and a premium quality one. There are some websites that will offer you museum-quality prints that look extremely good but are going to be expensive. On the other hand, you will get cheaper prints which will look decent but will cost you less.
If you want premium quality prints but you do not have the budget for it, wait for discounts and offers. Most of these sites give a lot of discounts, and one just needs to keep a watch.
Do Companies Help With Design Enhancements And Editing?
If you are going to customize your canvases with personalised pictures, make sure that they are not blurred or dark. It is best to opt for such services that have designers or editors on board who will fix minor faults with the picture. It should not cost extra, and your picture will come out to be flawless once printed if it has been edited.
Verdict
Let's face it; with the advancement of technology today, printing canvases is not a difficult job anymore. All you need to do is provide a picture, and the company will take care of the rest. Most of the websites are easy to use, and there are representatives to help you out in case you face any issues.
With this, we come to the end of this detailed guide about the 15 best canvas printing services today. But before we take our leave, let's go for a quick recap of our favorites. CanvasPop is our favorite overall for its excellent quality and easy-to-use website.
On the other hand, if you are looking for a massive stock of images, ElephantStock is going to be a wonderful choice. At the same time, if you are looking for the best offers, turn to CanvasDiscount.
Having a cabin in the woods of your own is a dream many share, some casually, some very passionately and for reasons that vary. But, even if your reasons differ, not many end up building a cabin in the woods. Why? Because it is not always easy to leave the hustle and bustle of city life or even the quaint and comfortable reliance of a small town and retire in the gorgeous yet daunting woods permanently. The challenges are plenty. From water to electricity to food and other home appliance supplies; there is a whole lot to take into consideration.
But, if you’re strong-willed and have a steely resolve to proceed and stay in the woods, then there is nothing in the world that can stop you, except of course the unavailability of land, something that is rarely the case. So, what to do when you finally make up your mind to head to the woods with all that you own? You look for two options. Either you purchase an already constructed cabin, or you make one on your own. The latter is definitely a cheaper alternative and also one that offers you several options for customization. There isn’t a single type of cabin; in fact, there are so many varieties even in the standard lot, that you are bound to be spoilt for choice.
Here are thirty-three small cabin plans for you to choose from. They range from homesteads to trailers to big and small and multi-storeyed cabins, each offering something that the other possibly couldn’t, and each fitting the style and need of different individuals. Some people want to make this move with their families, and for such folks, there are cabins that can accommodate a small-sized family easily. And again, there are cabins that are so small, only one individual can live in them and with not too many things brought along.
Whatever the case, you won’t be asking for more plans once you go through these. There are enough to catch your eye and leave you satisfied.
A Cabin For Small Families
This lovely wooden cabin is bigger than others on this list but is ideal for people who want to not only live alone but also for those who want to live as a nuclear family unit. It has enough space for a good sized wood stove and is the right size of cozy to feel right at home.
Sometimes the most precious things in life are those that do not cripple you with insurmountable debts. We would all fancy a huge suburban house with extensive facilities, but the housing market will not do many favors in that regard. The cost of a large and well-furnished home is just too high to afford, and in that case, a rustic and small cabin that you can make on your own feels very homely.
I adore beach houses. They are so compatible with the view around and actually complement their surroundings, regardless of where they are made. They are often painted in an array of colors and add glamor to the landscape. So, making a beach house, styled cabin would be a refreshing departure from the standard cabin design. Moreover, with a beach house elevation, you can be safe from flooding issues.
I love A-frame cabins and their attics. A-frame cabin attics are just so comfy and make me feel warm and secure with a strong urge to fill the place with books and idle away day after day reading a great many stories. And even if you’re planning to skip on the attic section, getting a vaulted ceiling creates a grand and spacious feel in the house.
There is always room for more even though sometimes we just don’t know yet if we want more. But, what to do when you aren’t aware if you’d require a larger space and go with a smaller sized cabin instead? Houses are mostly permanent in nature and expansion isn’t always easy. Thankfully, this house small cabin plan has a detailed instruction manual that shows how you can actually add more space later on if the need arises.
A mini-cabin is pocket-friendly, cute and resource saving. This specific design not only has an attic space for creating a small room on the top, but it also has a good fireplace area and one large room. The warmth of a home has never felt more comforting than when living in a small cabin and this one is pretty high on the list of options.
What a wonderful design to actualize. Its symmetry is perfect enough to impress director Wes Anderson, and the enormous porch space on both sides is great for lapping up the breeze. The fireplace brings warmth to this cottage in the winter and on cold nights, and the loft and bedroom provide enough space just to retire.
There is more than enough space in this cabin for an average family to live in. It has two bedrooms, one dining room, one bathroom and a kitchen. Additionally, it has a living room which is big enough to accommodate many and two porches for recreation apart from adequate storage space.
This small cabin has two bedrooms, one kitchen and one living room along with a lovely chimney. The wall and roof have detailed cross-sectioning, and the cabin comes with two porches.
A U-shaped cabin, this house has a porch that is surrounded and an enormous vaulted ceiling. The large living room gives way to three bedrooms, two bathrooms and one kitchen, all equally divided and spaced in perfect symmetry.
This cabin is not small yet is not feasible for a family. It can only really house a couple or a single person due to its one-room restriction. It does have a lovely open fireplace to sit in front of and warm yourself with.
Perhaps you can use this cabin as a summer getaway place or if you’re into hunting. Either way, it is small enough to be cozy yet not accommodate a lot of people. It has two floors and a very spacious area on the lower floor for both the bathroom and the kitchen. This is definitely one to fancy.
This is a large cabin with two spacious bedrooms, a fantastic open fireplace, a kitchen and a living room. It is a great plan to implement for cabin making if the piece of land you’re making your cabin on is sloped.
This isn’t big enough for more than one person, but can only house two occupants at max. It has big windows that face the sun in the noontime and hence keep the indoors well lit and just one small room for comfort and lazy days. I love cozy cabins hence, as they don’t waste space and are perfectly warm.
This adorable log home is double-storeyed and has a trap door entrance to the attic/secondary bedroom. It is too small to provide just about anything else but is cozy for a getaway and for a single person occupancy.
Ah! The perfect cabin for your summertime getaway or winter, if that’s your preference. It has a longer roof on both the front and the back, giving you more than adequate dual porch space. It also has a hot tub, which can be replaced with a sauna, and a kitchen, a bathroom, and an enormous room.
A more compact and sharper looking cabin than most, it has a very subtle yet instantly noticeable style that is bound to impress. Not only is it appealing to one’s aesthetic musings, but it also scores high marks on the functionality aspect. It has enough space not to make you feel like you’re trapped yet not big enough to make you feel haunted by the extra space.
A cabin that is so pretty, it is guaranteed to make visitors, people passing by and any onlooker wow out loud. It blends a very distinctly block design with both modern and older aesthetics to create something that really stands out. From the windows to the main entrance, the borders and the balcony, this tall yet small cabin is worthy of boast and pride.
Cabins are often representatives of self-sufficiency. They just signify a person’s will to go against the norm of the society and the fortitude to forge a home that does not conform to established standards. And if your lovely looking cabin is powered directly by the sun with no dependency on a power grid, you are defining your ideals very soundly. It is also very eco-friendly.
A small cabin with striated outer walls and simple yet welcoming color scheme is a lovely option to go with. Adding to this coziness is the covered entrance. It allows you space to sit during the rainy season or just to stand under without being drenched, and also cuts down the impact of the rain hitting your windows directly.
These free plans provided by the University of Tennessee are a blessing. They provide detailed blueprints and instructions for making cabins that fit your budget, style, and preference. Be it a cabin with multiple rooms or a gabled cabin; these plans are right for the task at hand.
You wonder what Universities do apart from teaching, and this is one of the answers to your question. Universities were formed not just as means of making money off education, an idea that bloomed way later, but as stalwarts of knowledge and these lovely plans provided by North Dakota State University are surely of immense aid.
This is a log cabin that is made with a porch, a small wall in the backyard and has the charm and comfort you definitely desire. It isn’t elaborate in its make yet its simplicity has its own unique allure. It isn’t too difficult to make this cabin either.
This is a really small cabin, barely 400 square feet yet it is immensely feasible for you. What I really like about this cabin is that it is tiny yet compartmentalized enough to give you the feel of a proper home, with more than one room. Compartmentalization is always helpful, after all.
This is a winner in my books. A cabin that has a basement and several bedrooms scream balance to me. It has a large front porch and a huge chimney and enough windows to keep the indoors airy and sun-kissed. I love a lot of sunlight and fresh air in my house. I tend to feel suffocated and depressed if there isn’t enough cross-ventilation in my house. It is always healthy to have ample airflow. So, yes, this is a perfect cabin.
What’s better than a studio flat? A small and gorgeous cabin that has all the charm of a vintage house. This living space can be quite compact and is recommended for people who like to live a solitary life or want to have a getaway on the weekend or in the summer and winter breaks and don’t want to build over a large space.
Whenever I think of cabins, I think of a cabin made of long logs. It’s just a very clichéd yet homely image that for good or bad has been embossed in my memory. And log cabins are classic. But, the best part about having your cabin made out of logs is that you won’t need to do anything extra to protect yourself from the chill outside because rounded logs are fantastic insulators.
What? An actual, full-sized basement in a cabin? Yes. This cabin with a basement is perfect for long-term winter storage, and provides ample protection from storms. It also adds to the space by having a loft for either storage or accommodation. And if you’re in the mood for making some money, you can charge college grads that are looking to make a low budget horror film for making use of both your basement and the loft for spooks.
This gorgeous cabin is stilted and has one living room and one dining room, two bathrooms along with a porch and three big sized bedrooms. Moreover, you have a carport and a storage room. With the added benefits, opting for this cabin seems like a sure shot deal.
This cabin has a distinctly pronounced A-frame structure, with enough upper room/attic space an entire family. What I love about it is how big the porch is and how it basically gives you the option of organizing a small lunch right there with a long table laid out for people to gorge away food from. Homesteading is a beautiful way of life. To grow your own food, and to make your own produce and be entirely self-sufficient is satisfying, even though taxing. It does make you appreciate the more invisible things in life and the processes of our daily supplies a little more.
A neatly finished brick house is a lovely house to make. It is modern enough to blend with the aesthetics of the day and has a connection to older times for the enthusiast. Continuing with its positively dual nature, this contemporary brick cabin is two-story even though it does not appear to be large enough at first glance.
I used to live in a duplex, and I miss it. Duplexes are not cramped up like apartments yet compartmentalized perfectly enough to provide ample privacy for its inhabitants. So, if you’re looking to share the burden of maintenance and construction with someone who isn’t immediately close to you or wants to set up some boundaries, then making a duplex cabin is perfect for you. This does reduce the cost of construction and also helps you reduce future costs, including paying EMIs for the purchased land, if you aren’t buying it in a single installment.
This is too small for an average family yet adequate for a couple or more people. It has two levels, one porch and a tiny balcony on the upper floor. It is small enough that you can build it on a wheel base so that you can carry it around like a trailer house. What a trailer house gives you is the added advantage of mobility. Sometimes, we tend to get bored of living in one place and here is where a trailer house rids us off our boredom. You can essentially take your home with you wherever you go.
You can wake up to the sunrise in a different place every day, every week, every month, every year, depending on how frequently you travel or like to be on the road. I personally love trailer cabins the most due to this very fact. I don’t have to return to my house after a long journey. I can always be home on my journeys. Wouldn’t you like to as well?
These small cabin plans are pretty detailed, aren’t they? You not only have written tutorials for building your dream cabin, but you are also aided with pictures for references, detailed blueprints, and step by step instructions. Some plans are a little complicated to understand while others are quite simple. But, all of them are accurate to scale and offer you a chance to build a beautiful cabin for yourself and for those you love, for half the cost of purchasing one that is ready-made.
Free Small Cabin Plans Conclusion
There are many purposes of a cabin and these small cabin plans cover all of them. From guest houses to vacation houses to hunting lodges and homesteads, all your reasons are pretty much taken into consideration. Moreover, you can always give these cabins your own spin by adding nifty personal touches here and there, whether it is in the painting or adding accents and decor or shifting a few things in the design.
Even though most cabins do not offer enough space for a lot of furniture, you can always add some that work great with the aesthetics of the cabin. Antique furniture always works better than modern one for cabins, but if you’re someone who wants to give your cabin a splash of color and liven it up with vibrancy, you can make the cabins as unique as you want them to be.
These plans are there just for your guidance, but what you choose to do ultimately depends solely on you. So, get going with your dream plan to nestle in the woods, and share the plan you have decided to choose.
A pendant of the latest design and make can never compare with a rare pendant from the Victorian era. Those of you who love everything antique will definitely agree!
Before online shopping came into being, you had to hunt several stores to chance upon an authentic vintage object. But those days are long gone! Now, you can access exclusive online antique stores as well as e-commerce platforms from your comfort zone.
Each website has a whole lot of categories of antique items to cater to antique lovers with different preferences. So, there are just plenty of places to search for antique and vintage stuff.
We bring this comprehensive list to help you find the right store from among innumerable options out there. Read on to find a suitable online store for you.
Ruby Lane is a great online platform where you can find some of the best collectibles. What sets it apart from other websites such as Craigslist, eBay and Amazon is that it exclusively deals in antique items. Despite being much smaller in scale than the e-commerce giants, Ruby Lane is a significant niche platform, and hence, is one of our top recommendations.
Founded in 1998, it is also one of the earliest online vintage platforms to be launched. The website features more than half a million antique products of different kinds. With so many options to choose from, we doubt if you won't find what you are looking for.
Currently, some of the featured products on Ruby Lane include a neck ring from Masriera, a vintage Chinese stone chop with exquisite carvings, and many others.
Ask fellow antique lovers, and they would surely vouch for this platform, which is another exclusive destination for vintage items. Etsy has carved its own world in the form of a marketplace dedicated to the sale of handmade and vintage products.
The two categories featured on the website include Art & Collectibles and Vintage. The former section has items such as beautiful vintage sculptures and fiber artworks. Furthermore, you will also find some amazing vintage furniture in this category.
But if you prefer something even more classic, the Vintage section would lead you to just what you want. You can add on to your collection of exclusive antiques with items such as classic jewelry and vintage floor rags from this section.
The next in line is this online platform, which we would highly recommend for antique lovers. The website lists all antique items under six separate categories, like jewelry, tools and craft supplies, art pieces, and entertainment. The wide variety of vintage items is something you would get in very few stores.
A relatively newer platform, Artfire is an ideal place for those who love classic handmade vintage jewelry pieces and other similar collectibles. For instance, the website had once featured a pendant of diamond glass with a design akin to the Victorian era.
Also, if you want your living room to be adorned with a century-old painting, then there isn't a better place than this. You will find a whole lot of options to choose from, and all of this is a few clicks away.
This well-known e-commerce giant is an excellent place to start if you are new to the world of antique items. Among the range of vintage products the website offers, you could come across some of the most intriguing antique pieces.
A HALONA bronze pendant from the Victorian times and an exquisite flower carved jewelry box are some examples of the amazing items featured on Amazon. With such products added to your collection, it does attain a priceless value!
Like every other category on the website, there are just plenty of antique objects, so many that it is impossible to exhaust. Overall, Amazon is surely one of the best platforms available for antique lovers to explore!
Similar to Amazon and other e-commerce platforms, vintage items feature on eBay's website along with electronic equipment, cars, and other categories. Nevertheless, vintage is among the most popular categories on the website.
The items featured include a variety of coins, notes, and artwork pieces. Vintage furniture needs a special mention, as you can browse through a vast collection. Just click on the furniture category, and you can browse by the room you want it for- living room, dining room, office, and so on.
Interestingly, at eBay, you will also find an unending collection of sports memorabilia dating back to several decades. This is something you will rarely find on other platforms and would definitely add a unique touch to your vintage collection. There are lots of other incredible items as well, including pendulum clocks, classic tables, and vintage stamps.
Our next pick, though tiny in comparison to its competitors, provides a pleasant consumer experience. Zibbet has an interface similar to Etsy, focusing on vintage and handmade products but is more minimalist in its approach.
The platform emphasizes showcasing smaller products, such as vintage accessories and jewelry, rather than bulky furniture. So, for vintage enthusiasts who love to add smaller items to their collections, Zibbet is just perfect. Also, a vintage section consisting of as many as 15 categories of products makes it all the more convenient for antique lovers to make their search.
Some stunning vintage items featured on the website include a pair of gold-plated artist's brushes and a beautiful Limoges porcelain container. So make sure to go through this interesting platform for an ideal antique piece.
This platform featuring lots of amazing antiques, vintage items, and collectibles, among other products, is considered quite reliable. The website is definitely among the most popular online destinations to search for products from several decades back.
In fact, a separate category under antiques lets you find rare currency notes and coins, furniture, and paintings from the olden times. Thus, if you want to give a unique touch to your vintage collection, do search for an exclusive item on Craigslist.
Among the items featured on the website is a chalk ware plate from 1962 with an inscription of the Seattle World's Fair. This is just one instance of the interesting products you will find here, so go ahead and check them all out!
An online marketplace majorly focussing on newer second-hand products, Bonanza is known to have a praiseworthy collection of artwork and collectibles. The items in these two categories would give tough competition to sites such Etsy and Amazon.
Talking about collectibles, won't you love to add a rare 1 dollar coin to your classic collection? Well, you are sure to get such enviable vintage items at Bonanza. Moreover, the website often has several products listed at incredibly cheap rates compared to other platforms.
Added to this, the website offers a very user-friendly interface to its customers, and a mobile-optimized version as well. Each shop at Bonanza also includes a built-in chat system, which is supplied for free. To round it up, this platform definitely has a lot to offer to antique lovers.
Selency is one of the first online marketplaces of Europe, specializing in vintage furniture and accessories for interior design. It was originally launched as Brocante Lab in 2014. The platform has each and every item hand-picked by its own team of professionals, vintage connoisseurs, and shoppers.
As such, the seller of the product, its genuineness, and its authenticity are all verified to ensure a perfect user experience. This also rules out any possibility of any product having a dubious origin and imperfect quality. Besides, the stock of vintage items at Selency is replenished each day.
The website has over 100000 items curated by its moderators, which include unique furniture pieces and room decor for every home. Selency also ensures all-around satisfaction of the customers by providing a secure payment system and excellent door-to-door delivery solutions.
Are you fascinated by furniture styles from the mid-century modern times? If so, then be sure to check out this online platform at the earliest. Being one of USA's leading dealers in mid-century furniture, this site offers your dream furniture from the '50s and '60s.
The items available in the collection are hand-selected through regular buying trips to Europe and Scandinavian countries and imported thereafter. Just think about it! Would you often find such an exclusive collection of vintage furniture online?
Besides, the site also offers efficient delivery solutions, ensuring swift delivery within a reasonable period of time. So if you are in search of some rare mid-century furniture, don't forget to log on to this online store.
Formerly called Dealfish, the site primarily listed job opportunities for aspirants. Over the years, it has evolved into a popular marketplace for products as well as services. The site currently has a wide range of antiques and vintage items as well. It is thus a great place to log on to for antique lovers.
Moreover, the platform can also hold surprises for such enthusiasts of vintage items. Sometimes, that one exquisite art piece or rare coin that you can't find on several websites may be there on OLX.
Many buyers are yet to discover the classic, vintage, and antique sections on this marketplace. So don't forget to browse through OLX when you search for a marvelous antique to include among your prized possessions.
Although not one of those big names in the world of antiques, this is a quite fascinating store to look for vintage art. You can primarily access the online platform through Facebook since there does not seem to be a website as of yet.
Nevertheless, this store has an impressive list of industrial, mid-century, and vintage items to offer. Ethereal paintings and eye-catching vintage furniture are available in plenty at Red Line. Some beautiful Japanese woodblock print paintings are an instance.
Thus, if you are a serious shopper of vintage objects, checking this online store is surely worth your time. Don't leave it out just because it doesn't have a website of its own yet. Sometimes, smaller places do have the most interesting antiques you will ever come across!
Similar to eBay, Amazon or other sites, this online auction store includes many categories of products besides vintage objects. It is a flourishing marketplace for buyers as well as sellers.
The site works like any other auction, wherein the highest bidder for an antique item takes it home. As easy as it can be! Believe this when we say, it is a great place for obtaining some of the most priceless antiques available.
Some currently listed antique objects on Webstore are a '50s Rhinestone ring with 5 ring bands and a Lubitel-2 vintage reflex camera from the '70s. So be sure to visit this online store at least one before moving on to other options. You never know, the search might end over there!
To those of you who have an eye for exceptionally crafted interior decor and artwork, this is the place! With more than 85,000 results in the vintage and used furniture section, you are sure to find not one but many favorite options.
Added to this, there are quite a few filters to narrow your search- price, style, and items available for local pickup. The style filter lets you choose between rare categories such as Hollywood Regency, Mid-Century, Art-Deco, and much more.
All such features have made this online furniture store a favorite among lovers of vintage furniture. on to the website and have a virtual tour through the world of vintage interior decor!
Another exclusive place for antique objects, this online store offers an unending list of such items. The categories are also diverse, ranging from jewelry pieces and furniture to lighting accessories and kitchenware.
Examples of some vintage items featured on this site include an oil painting from the 18th Century and Faberge cross pendant with a Victorian design. For women who love antique jewelry, the collection has the most exquisitely designed pieces to go with different outfits.
All in all, there are just so many antique and vintage objects on this online store that you will hardly miss what you are searching for. So, when buying an antique is on your mind, make it a point to visit Antiques and Chatchkes.
The site is one of the most amazing online stores dealing in classic antique items. It offers a list of vintage kitchenware, animal sculptures, and furniture that is quite well-curated. Besides, it also lists other fascinating home decor items such as vintage pottery, mirrors, and candle holders.
Each and every vintage object in the store has an authentic old-world charm that never fails to impress. Furthermore, this is the right place for those who are on the lookout for greater product variety.
The broad list of classic items available on the website goes on and on, and is impossible to exhaust! Hence, buyers of vintage objects must not miss out on this website by any means.
This unique online furniture store with exclusive pieces from different regions of Europe is our next pick. It is the ideal store to log on to for someone who has a fascination for the continent's cultural history.
The antique furniture that this site offers will take you back to the times when famous empires reigned throughout Europe. Examples of some rare pieces featured on the website are an 18th-century Bombe chest belonging to Louis XVI and an Italian Chandelier from the same period.
The list of classic European items that this online platform offers is prepared very efficiently and is surely one of the best you will find. So remember to check the site out before you move on to the others.
If you cannot find the antique piece you are looking for even after searching the popular platforms, we would recommend visiting this website. This online marketplace has different categories of products and services, including an exciting antique collection.
There is an endless range of objects from earlier times, including mid-century furniture pieces, rare sculptures, and other such vintage items. Interestingly, Shopify charges a much lesser procurement fee from buyers compared to other online marketplaces.
Though antiques is just one category of products that the platform offers, you can be confident that checking it out won't be disappointing. So go ahead and have a look.
This store in the USA began with just a couple of antique furniture pieces but gradually developed into a leading destination for rare vintage furniture. The owners of this venture have an 'obsession' for collecting the best antiques, so much so that they have made several trips to Europe.
Hence, while browsing their website, you might come across some stunning furniture from the Italian countryside or the English Midlands. The collection of cabinets needs a special mention, as you would find some of the best of those here.
Also, each and every furniture piece is very well curated and its authenticity is verified by a team of professionals. This ensures the utmost customer satisfaction for every purchase. There is a custom furniture collection as well, with hundreds of options to choose from.
Specializing in mid-century objects, the store is a great place with some timeless furniture, accessories, and lighting fixtures. The items in the collection date back to the 1950s and even earlier.
The most intriguing items featured till now are a Meridian Line George Nelson clock and an antique geographical drawing by Sir Staley Spencer, a legendary painter.
The platform offers an infinite catalogue of stunning classic objects which are definitely worth adding to any antique collection. So do take some time out to browse through the site. You won't be disappointed at all.
As the name suggests, this online store primarily offers a great collection of vintage furniture. It also features some amazing classic glass and ceramic objects that are rare to be found.
A general fireproof desk from the 1920s and a 1960's Steelcase steno chair are some instances of antique furniture featured on the site. You will also come across several classic paintings by legendary painters such as Vincent Van Gogh.
This online store has developed into one of the favorite sites for furniture and other exquisite antiques for interior decoration. So make sure you check out the website for getting home a perfect decor item.
Well, we all know that this is technically not a store, but it's actually better than many antique stores! Vintage enthusiasts regard it as a great place for finding authentic items. You can also find amazing deals from some solid dealers on this social media platform.
Browsing through any dealer's page on Instagram lets you understand much about their clients and their reputation as well as their expertise in the field. Once you have made a decision, search for them on the internet to see if they sell items on vetted websites or read some consumer reviews.
Through such research, you can make sure that you are comfortable buying from a particular dealer. For buying the product, you can even directly contact the dealers through the direct message option. Hence, Instagram is definitely one of the most convenient platforms you can use for buying vintage items.
Conclusion
Vintage objects have always appealed to people across all generations, and hence, shall never cease to be in demand. In a world that is increasingly homogenized with products of the latest design, some unique and old-world charm is much refreshing.
Online stores have simplified the search for antique items manifold and have opened up multiple forums for engaging buyers and sellers of antiques. We have gone through a plethora of such online platforms and their offerings to come up with the best ones for you.
All these platforms cater to either some particular niche of antiques or to a much wider range. Thus, you can easily go for the most suitable one according to your preferences.
So, what are you waiting for? Go on and browse through the websites that appeal to you the most.
With an increasing number of people beginning to get in touch with their creative side, crafting has become a common practice over the last few years.
Irrespective of whether one is a knitter, potter, painter, quilter, or even an all-rounder, the DIY projects require a good amount of handiwork. While there’s no substitute for talent and skills, the materials used in the projects do play an important part in ensuring its success and aesthetic appeal.
Thus, it is imperative to try and secure quality materials. But, where does one get such items? Well, there are numerous online stores that make the acquisition of artistic materials extremely seamless and save you from the hassle of carrying numerous art supplies to and from the workplace.
We’ve got a guide to the best stores for top art supplies at cheaper rates. Now, let us walk you through them individually.
It’s almost impossible not to have heard of Etsy if one is remotely involved in the world of art. The site is made available in nearly all countries, and connectivity is improving with an increase in international shipments.
When it comes to products, the site’s varied stockpile aims to amaze. Aspiring artists can find all kinds of materials, including fabrics, patterns, quilt software, and embroidery samplers. It’s highly unlikely for Etsy not to have a product an artist might want.
Of course, there’s a slight risk since most are individual sellers, but the feedback is genuine. Furthermore, the easy navigation with drop-down options allows buyers to streamline by date, price, relevance, and keywords. It makes for smart filtering and is an added benefit.
As perhaps the premier online retail site in the world, it should come as no surprise that Amazon has an impressive stock of crafting materials. The diverse products also have extremely competitive costing, which Amazon can bear, thanks to their magnitude. But, it does help up-and-coming artists, who can’t always afford to pay top prices for quality products.
Coming to the products, the site has everything DIY artists might desire, from cake decorations to craft tools and sewing materials to paper products.
Finally, the delivery system is also commendable. Although suppliers are usually in charge of individual shipping policies, there is a regional branch in most countries, so there are no difficulties for the conglomerate to best serve customers.
As one of the oldest retail sites, eBay is home to a wide variety of items. Art and craft supplies are no exceptions, though much like Etsy, there are only individual sellers here.
Artists have to check the feedback sections to filter out the good products from the bad, but it makes the purchase process more informed since the buyer becomes familiar with the item too.
All said and done, the chief draw of eBay is the price bargaining options the site provides. Of course, some sellers opt to let go of their goods at set prices. But, many have auctions, and artists might prefer such methods, to obtain them at a fraction of what the products might actually cost.
Nasco was started with a very different purpose but has now become a preferred destination for those seeking art supplies. The company started off with aids for teaching in vocational classes for agriculture. Now, although the site shines for its broad range of crafting and art materials, it hasn’t forgotten its roots.
Therefore, the truly commendable feature is the ‘extras’ section on the craft supply site. It helps aspiring artists to seek advice or even inspiration for their projects. All one has to do is head to the vast roster of lesson plans and videos, which are fantastic, not to mention highly informative.
Factory Direct Craft has had a long journey from the flea markets to inculcating a global base of customers. The site is best known for handicraft materials, apart from a wide assortment of home decor items, wedding supplies, seasonal crafts, and materials for scrapbooks. Accordingly, the company extends support to crafters, artists, and other creative individuals.
While their standard collection is designed to satiate all needs, some artists might prefer the sale section if they wish to obtain supplies at a bargain. Off-seasons are particularly beneficial since artists are likely to find a host of products listed there, at a fraction of the original prices.
Finally, if DIY artists wish to seek some guidance or inspiration, the site’s blog has several useful tips.
As the name suggests, the site was made as a solution for designers and craft professionals, who might run into troubles about the pricing while acquiring the necessary supplies. With the slogan “Create More, Spend Less,” the site aims at minimizing the cost and hassle that goes into doing an art project.
Essentially, Create For Less is a virtual warehouse for art supplies that can be accessed by interested parties. Accordingly, artists no longer need to browse different stores for supplies, since everything is hosted under one roof. The pricing is competitive, too, reflecting the company’s policy.
Buying in bulk helps DIY artists acquire all the supplies they need, in one go. Moreover, easy and safe shipping guarantees the delivery of the same.
Much like Create For Less, DollarDays is the go-to site for artists who want to get supplies at a bargain. The site enshrines the principle that they want to be a part of something bigger than itself, and is focused on supplying wholesale goods at extremely affordable prices.
Notably, it does not deal just with crafts and arts, but DIY enthusiasts can access a wide range of products, including kits, beading, as well as paper products. On top of that, all items are at affordable rates.
But, if someone is looking for a better bargain, DollarDays has clearance and ‘49 cents or less’ sections. Safe and secure international shipping is also an added perk.
With a simple and navigable interface, Stuff4Crafts is already a preferred choice for many. The site’s motto that buyers are guaranteed to save money is reflected in its extremely competitive prices.
At the same time, a vast roster of crafting materials is available here, including candles, jewelry, scrapbooking, sewing, and painting materials, as well as general crafts.
Being one of the biggest online sites, Stuff4Crafts keeps attracting new artists each day while retaining the existing base of clients thanks to an attractive points program. It offers splendid rewards to the customers who keep returning to Stuff4Crafts. The site also offers free and safe shipping within the US.
S&S Worldwide prides itself on being a helpful company and has around 110 years of experience in catering to those who seek hands-on learning products, which are fun. While providing quality products with more savings options, S&S urges artists to embrace their creativity and the spirit of learning.
Not only does the site have a well-stocked roster of artistic products, but it also offers international supply and delivery options, improving accessibility drastically.
Understandably, aspiring artists might be cautious about their budgets. But, if the price is a major factor, then one should check out the discount center on the site. It has an impressive collection of goods at heavily slashed prices, making it ideal for a bargain.
MisterArt has been around since the early days of online business. The site takes immense pride in having maintained the position of one of the largest global sources for online crafts and art materials at discounted prices.
Sculptors, painters, scrapbookers, and photographers can all flock to one destination, assured of finding the tools, solutions, and materials they might need.
Since MisterArt is home to a team of creative individuals, the site aims at providing the best services, products, and prices in the market. In fact, MisterArt makes it a point to ensure they match the prices. If a buyer shops around and sees a more competitive cost, the site not only matches it but adds a gift certificate toward future purchases.
JOANN has operated for nearly 75 years, inspiring creativity. All this while, the business has expanded from a single store in Cleveland to a burgeoning e-commerce business in the industry. Thankfully, the company’s principles have remained unchanged and still focus on being a one-stop shop for artists looking for guidance, supplies, or inspiration to live their dreams and passions.
Inspiring the creative spirit of DIY enthusiasts, the online site has an assortment of artistic products. These include lace, threads, embellishments, patterns, needles, decor fabrics, and even paper crafting. The JOANN stores often conduct classes on crafts, which helps artists come up with ideas for projects.
Since 1911, Blick has been committed to service, quality, and excellence. The site aims to support artists through all stages of their careers. So, whether you are an amateur or professional, Blick has the right products to cater to your needs.
The leading art company is preferred by students and artists due to its assistance, tools, and products that help individuals grow creatively and reach their complete potential. As the site aims to make the shopping experience seamless and enjoyable, buyers are bound to come across quality art supplies that are priced in a competitive manner.
Thanks to the fact that the team working behind the scenes is familiar with the art world, it helps Blick cater to the community more effectively.
Although the business has been around since 1985, it was a brick-and-mortar store before expanding into e-commerce. It is a completely employee-based company that focuses on satisfying all requests from budding artists and crafters.
Artist and Craftsman Supply is branded as America’s local store for art supplies and boasts a wide range of products, including paintings, brushes, crafts, drawings, and surfaces, among others. There are also special kits for students, not to mention how-to videos and blogs aimed at inspiring artistic creativity.
Those who wish to save some money on purchases can try to be part of the regular contests and giveaways hosted on the site, which makes products available at a bargain.
While Michaels might be new to the online market, the art store has been around for a long time. Not only did it focus on aggressive national expansion at one point, but it also backed it up with stellar products and top-notch infrastructure. Michaels brings the same ethic to its online store.
With a wide range of craft and art products, the site aims at encouraging creative individuals to reach the peaks of imagination, using their skills. One can find framings, wall and floral decor, and even seasonal merchandise here.
Due to its already strengthened base of operations, including carefully replenished inventories, Michaels is never out of the products an artist might need. The site also ensures safe delivery.
Oriental Trading has the simple goal of making the world a fun place. It offers over 40,000 unique products, many of which are perfect for artists and crafters looking to actualize their creative process.
It is an ideal shopping destination for budding individuals who cannot afford to spend too much on supplies. Oriental Trading has a fantastic option, labeled the 110% lowest price guarantee. If a buyer shops around and sees a site with a lower price for a product or shipping, not only does Oriental Trading match it, but slashes the rate by 10%.
All the while, Oriental Trading never compromises on the quality of the product or the efficiency of the delivery, which makes it a preferred choice among many.
OOLY makes arts and crafts fun. The site aims at providing products that bring happiness to artists of all ages - those who are young and those young at heart. OOLY’s products are colorful, inspiring, and fresh. They provide creators with several options to make the spaces around them livelier with the artwork.
With school supplies, art and craft products, DIY supplies, and writing items, OOLY attempts to make the world a more colorful place. Competitive pricing and secure delivery options also make this option a favorite among several budding artists.
Apart from bringing joy to artists through their products, OOLY caters to everyone’s artistic sensibilities via locally organized projects.
Discount School Supply was founded with a simple aim. The goal is to provide quality products at affordable prices while ensuring that the service is impeccable. Now that it has transitioned from a store to an online site, the core principles remain unchanged.
It is aimed at parents, teachers, and students, who can start their school year with these products. However, many of the arts and crafts supplies come in handy to those with an artistic mindset.
The shipping policy is a special draw for those ordering numerous art supplies. Discount School Supply has one invoice rule, where they bill customers for the products only after every item selected is shipped. Needless to say, shipping is safe and quick too.
Verdict
There are numerous options online from where one can buy art supplies. Most of these sites have competitive pricing, which makes it cheaper than going to a physical store. Moreover, with guaranteed deliveries, one can save the trouble of lugging art materials.
We have provided a comprehensive guide that should come in handy no matter the artists’ expertise. Those who need professional products can always head to sites like Blick, while casual artists should get all their supplies at places like OOLY.
Bulk buyers will find Create for Less to be ideal, while sites like Etsy and Amazon are already immensely popular.
Using this list of top online craft stores for DIY projects, one should be able to find all the supplies that might be needed.
But, that said, we would love to hear about your experience of shopping for art supplies online. So, do reach out to us!
Are the various permutations and combinations involved in deck design giving you sleepless nights?
Most people who are confused about how to design their decks ideally can do so with the latest deck design software. No longer will you have to wonder how a particular aspect will look or if the structure will fit in the required area.
You can use the software to get an exact estimate of how the structure will pan out. But the question is, how do you choose from the numerous available software options? For starters, it depends on the individual and whether they are willing to spend or prefer free tools for the purpose.
To avoid confusion, we've listed 17 top products, which include both free and paid options. It'll help you make an informed decision regarding which tools to use. At the same time, we’ve also added an FAQ section to answer some of your most common questions.
One of our top recommendations is the software from decks.com. The best part is that the developers have managed to make it free despite having numerous functions, so it's a highly convenient tool for your design needs. Moreover, it has cool graphics, and you can play around with your imagination to incorporate various facets.
Why Did We Like It?
First and foremost, decks.com comes with multiple deck designs ensuring you've got a wide variety of choices at your disposal. We loved the attention to detail, highlighted by the terrific graphics to give you a real-life description of what the deck will look like.
Moreover, you'll notice that the software allows you to work around furniture and other components of your home. It comes in handy to know how the project will look with everything in place rather than having to scratch your head later. Meanwhile, you can work with various shapes and create stairways to make your deck stand out.
It allows you to view the structure from various angles, so you get a clear idea that you're on the right track. Furthermore, thanks to the 3D viewings, you get accurate knowledge regarding the height and base diameter. You'll therefore know what's needed to make the construction stable and long-lasting.
What Could've Been Better?
When we used it, we realized it was a tad slow, which may not seem like a significant issue, but it's inconvenient. We suggest you sit down with time on your hands should you choose to use it. There's no let-up in performance, and all you need is to have a little patience. It's something the developers should've looked into, but we hope it won't cause too many problems.
The Fiberon Discovery Deck Designer is one of the most sought-after tools given its fantastic user-friendliness. Even first-time users won't have any difficulty navigating it, while seasoned users are assured to love all it offers. It has excellent functions like 3D plans to give you a comprehensive idea of the most suitable design.
Why Did We Like It?
If you thought our earlier recommendation was excellent, wait till you get a load of this one. Not only will you get the ideal deck design, but it will also help you decide what components of your outdoor setting work well together. Since it's free, you've got the option of using different types of templates and styles to produce a unique pattern.
It's easy to use, and you need to start by choosing the scene that most closely resembles the type of deck you want. Plus, the products you can design the deck with are present in the left-hand corner for convenience and needless to say, you won't find the work tiresome.
You can operate on various components like style, color, railing, and fascia. Similarly, you'll love that it gives you the chance to work on the exterior, ensuring the deck is in sync with the rest of your property.
What Could've Been Better?
While it offers many good things, you may not like to register with your details to save your project. It isn't too much of an issue, but many people may not enjoy sharing their details. Some of the other software allows you to save your work without any such requirement, which you may prefer, but we assure you you can't go wrong with this tool.
The JLC Professional Deck Builder is quite a favorite among the masses and with valid reasons. Of the many functions, what particularly stands out is the real-life descriptions that give you an accurate idea of the possible construction. You can then send it via email or take printouts of your project.
Why Did We Like It?
The software is highly adjustable and offers you the chance to design everything from the deck to your outdoor surroundings. Even first-time users who may take a while to find their feet will enjoy working with the JLC Professional deck builder, thanks to the standard rectangular design. You can stretch the deck from the sides or upwards to get the desired results.
Furthermore, you've got the option of adding steps to raise the deck to a second or third level. You'll especially enjoy that the 3D design presents a comprehensive idea due to furniture inclusion. It enables you to move them around, which will allow you to work with various shapes to make the project stand out.
Apart from that, it has regular features ensuring you can tinker with various colors for the best results. Once completed, you get to save the project in a suitable format.
What Could've Been Better?
Although it's highly user-friendly, it takes some time for you to get used to it. Even if you've used deck design software previously, you'll need to adjust to the different functions. On the other hand, first-time users will need to understand the dynamics of the tool, and it may be a while before you start getting the desired results. But it's not a significant problem.
If you're looking for an all-around tool, we suggest you give the Trex software a try. It helps you pick out the type of design you need and analyzes the various elements required for construction. No surprise that it has most bases covered, and we assure you it'll be worth your time.
Why Did We Like It?
What you'll notice right away is that you get to use the software on your mobile and computer. It's a highly suitable tool to work with and offers you the chance to have your project with you at all times. The significant addition is that the system allows you to choose the size of your deck and subsequently estimates the cost.
Moreover, newcomers will love working with various materials, and the strongest among them is a triple-coated layer of steel. But for a more refined look, you can opt for wood construction, but irrespective of your choice, you're guaranteed to get much-needed longevity.
Meanwhile, for customers who already have a deck, Trex allows users to build a dual or triple-layer construction on top of it. All you need is to select the shape and then choose the colors or combine different shades for the best output.
What Could've Been Better?
While it doesn't happen all the time, we've noticed that there are occasions when the software takes time to load. It's compatible with various applications, but users have complained that it tends to slow down on chrome or safari browsers. We suggest you continue to save your work at regular intervals and have a little patience. Whatever happens, we can safely say that it doesn't crash.
The Mitek Deck Designer is another versatile tool that professionals and amateurs will find easy to use. It's an interactive software that provides relevant information depending on the area in which the construction is to take place. It has numerous quality functions that aren't seen in other models, and you'll love all it has to offer.
Why Did We Like It?
While working with the Mitek designer, we loved how the software gives you the chance to start working for free. If you like what you see, you can pay the required amount to unlock more fascinating features and construct your suitable deck. It ensures you get to customize different deck aspects, such as the plank, size, and color.
Interestingly, as you design the project, the system generates all the materials you'll need. What's more, it presents cut lists and the necessary permits you should acquire, thereby allowing you to get professional help and various points of view. Likewise, even if you aren't tech-savvy, you won't face any problems using it.
You can efficiently save the project and then print out the results or email it to clients if you're a professional contractor. Thanks to the realistic portrayals, you have the option of importing images of your home to ensure the deck is in sync with your property.
What Could've Been Better?
To use the tool, you'll need to have the latest upgrades, which could make it inaccessible to certain people. We can understand that to use the numerous functions and match up to modern standards, the developers have made it compatible with the latest devices. So, you'll need to make sure that the application runs smoothly on your device, and if not, you may have to opt for some other option.
The SmartDraw Deck Designer is one of the best tools for you to consider, thanks to its ability to generate quick yet precise results. You won't have to spend much time on the computer, and the detailed results will allow you to get to work quickly. You're guaranteed to love the simple but efficient design.
Why Did We Like It?
Straight off the bat, the stunning accuracy is on full display, thanks to the numerous graphics for elevation posts, hot tubs, and plants. It presents a highly realistic view of your surroundings to help you decide the shape and the placement of various components. So, you can choose from the many preloaded templates on the website.
It saves valuable time and ensures you can work on an existing professionally designed template. You won't have to start from scratch, and you'll get a better idea of how to approach the project. Moreover, the software comes with a detailed library to deliver incredible accuracy, but you can also create custom symbols if you want.
It enables you to upload pictures of your area while the system automatically generates the dimensions. However, the most attractive part is the drag-and-drop function, which proves to be highly effective for all types of users.
What Could've Been Better?
Like some of the other tools, it also takes time to load, given the multiple features. You can opt for a faster internet connection to try and correct the issue. But in case you're wondering, we guarantee the slow loading speed won't lead you to miss out on any functions. All you need is to be patient and not lose your cool because it'll deliver the necessary output irrespective of the speed.
The Lowe's Deck Design Tool gives you multiple options to choose from. Apart from the usual 3D templates, you can custom make your designs to create the structure just as you want. It delivers a clear idea of the area and determines what plan of action is best suited to it.
Why Did We Like It?
If you can get Lowe's deck design up and running, then you'll also love its functions. It has several resources as part of the software to present an array of choices for your benefit. You can start working with a pre-loaded template for convenience, but you can design a custom template for more variety.
Furthermore, the 3D renderings ensure you can customize different deck aspects, like railings and posts. You get to choose what materials work best, and in case you're worried about the cost, the software has got you covered. All you need to do is pick the materials, and the system will provide an estimate.
Additionally, you can opt for professional help to make the correct choices, while the building plan enables you to start work quickly. It also provides tips to ensure you can maintain the structure in top shape.
What Could've Been Better?
For all that's good, it does have a couple of downsides. Despite having excellent compatibility with most browsers, you'll notice that it's not supported on chrome, which wasn't something we were expecting.
And since it can even run on Internet Explorer, we feel the developers could've made the necessary additions to make it usable with most of the leading applications. So, if you don't use the accepted browsers, you'll have to get them installed.
It's supported on numerous devices and applications making the TimberTech Deck Design Tool extremely versatile. You'll need to set up your account, which doesn't take much time. Plus, you've got the option to choose from the available templates, making it highly efficient.
Why Did We Like It?
Firstly, it's compatible with numerous browsers and multiple devices to deliver the best results at your fingertips. Therefore, you can view the many plans and color options in high resolution to make designing easier. All soon as you create an account, it opens the door for some exclusive functions.
You can save your project and also download a list of materials that you're likely to need. The plan is generated from the software based on your inputs, and once the estimate arrives, you can share the project professionals to get their perspectives.
Meanwhile, it allows you to work with different shapes to get the ideal fit for your area. And the designers have added an undo option, meaning you won't have to worry about making mistakes. Finally, the gallery delivers a comprehensive idea of the project needs while touch-ups of various aspects become easier with the 3D renderings.
What Could've Been Better?
Once you start using it, you'll realize it takes time before you get fully accustomed to the functioning. You can take help from someone who has used similar software before or contact a professional service. In case you're a DIY person, you would want to take your time to understand the components. Similarly, it's important to note that you might not get the desired result straight away.
We're at the halfway point of our list, but there are several quality options we're yet to review. Our next recommendation is the Azek Deck Designer, turning quite a few heads among prospective customers. It's incredibly fast while also being easy to use to make your projects stand out.
Why Did We Like It?
What immediately strikes you about this software is the excellent compatibility on offer. You can use it on your desktop or tablet to get 3D renderings of your deck design, making it an exceptional tool. The bonus is that it's free, which means all you need to worry about are the materials required for construction.
In that regard, the software generates accurate results while providing a fantastic range of options for you to choose from. You can effectively create an elevated deck with stairs and arrange the digital furniture, which presents a realistic perspective. It allows you to see how much room you've to work with and choose the materials accordingly.
Furthermore, you get to view your project from various angles and create railings or adjust the height. Most of the options are available on your right-hand side, from which you can decorate the walls and use shaping tools to work with multiple designs.
What Could've Been Better?
You need to ensure your device is compatible with the latest software; otherwise, it'll fail to load. It comes with detailed descriptions of the desk for which you'll have to upgrade your device or make the necessary installations. We understand that it might not present a feasible option for some users, and unless you're willing to buy a new model, you can choose from the range of available software.
If you're looking for a tool with exceptional versatility, then we suggest you use the BHG Deck Designer. It has over 25 different template options for you to choose from, and the easy-to-use interface makes it ideal for users of all age groups. Moreover, you'll enjoy the various color options and multiple shapes.
Why Did We Like It?
We're sure you can't wait to try out this tool, and that's because it offers 25 choices for your benefit. But that doesn't mean you'll be overwhelmed as you can effectively choose the deck that's most suitable to your area. In case you stumble across multiple options for the same space, you can try out the different combinations and pick the best result.
The software will ask for the yard size and then display the result based on your preference. There's also an option called extras, which allows you to work on an existing deck without compromising any aspect. Meanwhile, the drag and drop function makes it convenient to get fast output.
After completing the design, you can easily save your work and share it with professionals before shoring up the details. We loved the attention to minute aspects, and you get to pick the walls and doors to ensure everything is in sync.
What Could've Been Better?
It would be best if you were patient because it's highly unlikely you'll instantly see noticeable results. They're usually one or two characteristics on which one software varies from another, so you'll have to bide your time before you can come to grips with it. What you can do, however, is ask around and see if you can find someone who has some expertise in operating such software. It'll provide a better idea of what you need to do.
The SketchUp software is remarkable, given that its affordable nature hasn't played any part in diminishing the unit's quality. We loved the smooth controls and the various angles from which you can look at the deck you're building. Therefore, you can ensure that it matches the surroundings of your home.
Why Did We Like It?
Being one of the top players in deck designing, SketchUp delivers nothing short of the best. Initially, you get to work with the free version to get a feel for the tool, and if you like what you see, you can upgrade to the paid software. It offers advanced functions through which your 3D model starts to take shape.
Furthermore, all the options are available at the top of the page, and you don't have to waste time searching for them. As you progress along, the tool's versatility is on full display, and you get to experiment with various shapes.
The most exciting aspect is the 360-degree coverage, which allows you to examine the height and ground clearance. You get a comprehensive idea of how to take care of the structure and withstand the elements. Similarly, thanks to the many color options, you can create a striking design.
What Could've Been Better?
It takes time for the functions to load, which may prove to be a little frustrating. At the end of the process, it does deliver accurate results, as we've seen for ourselves. But if you're in a rush, then it's probably not the right tool for you, and you can choose from the other available options. However, if you choose to be patient and don't mind the slow build-up, you'll enjoy working with it.
Big Hammer has been around for a long time and has built a reputation for being trustworthy. In that regard, this state-of-the-art software is no different and delivers excellent efficiency in your tasks. You can select from the many templates available online or make one from scratch without any hassle.
Why Did We Like It?
Straight off the bat, remember to ensure you've internet explorer because that's all you'll need for optimum utilization of the software. It generates several fantastic designs for you to consider, thereby allowing you to make an informed decision. You can adjust the height and the width, but the most significant addition is the modifications in depth.
The tool asks you to input the specifications to produce accurate results. You can then decide the type of materials you need to make the structure long-lasting. Furthermore, thanks to the 3D renderings, you can work from various angles for greater convenience.
We suggest you play with your imagination to pick the shape most suitable for your needs. Then proceed to apply different hues of colors to make the construction a striking addition to your property. Finally, it ensures you can easily save the project and share it with others to get their input.
What Could've Been Better?
You've to make sure you've an internet explorer for it to be compatible with your device. It's understandable that despite having modern technology, the developers have asked customers to use the browser to cater to a broader audience. But if you can't make the required changes, it's best to opt for some other option. We suggest you ask for help, perhaps even a professional, to understand the intricacies of the tool.
The Punch Landscape Design is an all-around unit that offers you the chance to design your deck and home. So, you get to ensure that everything is in sync and, therefore, we assure you you'll enjoy all that it offers. Moreover, the developers have added the necessary tutorials to help you out.
Why Did We Like It?
For starters, it comes with many templates that allow you to get to work quickly. While the pre-loaded designs help you understand what shape is ideal for your needs, it also ensures you can come to grips with the software. Meanwhile, it offers both 2D and 3D viewings, and you get to see the changes in realistically detailed diagrams.
You're sure to love the terrific library, which is almost like leaving a kid in a candy shop. Due to the availability of furniture and other outdoor elements like plants, you can easily select one and drop them onto your project. Besides, it also generates the cost of different factors, meaning you can keep a tab on your expenses.
And the various options provide versatility in your 3D viewings, which isn't usually seen in other tools. Likewise, the developers have included short video tutorials that will come in handy for first-time users.
What Could've Been Better?
As seen with some of the other models, it takes some time before you can get the best performance out of it. If you're a first-time user, you can use the online tutorials to grasp the tool better. You may also ask someone to provide tips, but the key is to remain patient because it doesn't take long to figure it out. We suggest you sit down with time in your hands.
The Home Designer Landscaping Software delivers fantastic value for money to make your projects stand out. Like some of the other software, it allows you to work on all aspects of your home, which comes in handy to get the required finish. We loved the realistic descriptions, which show the attention to detail.
Why Did We Like It?
For those who are willing to shell out a couple of extra bucks, you won't go wrong with it. Not only can you design the deck but also take care of other housing activities. Thanks to the latest technology, the designers have taken the tool to an advanced level of realistic viewing.
You have the option of adding stairs to construct the deck on an elevated level, while for more refined living, you can incorporate a swimming pool or jacuzzi. Moreover, like some of the other models, you have the chance to integrate different flowers and plants for your landscaping needs.
We've also found that if you don't want to change your home's existing structure, then the software allows you to create a double or triple-layer deck. It's highly convenient to work with, and you can change the angles from which you're viewing the structure for the best results.
What Could've Been Better?
One of the first things that customers look at is the price, and this is one aspect where the software falls behind. It's one of the costlier tools, and we understand if prospective designers would be unwilling to dish out the big bucks. For one, we believe you can't compromise with quality, but if you've to adhere to a tight budget, there's not much you can do.
The Idea Spectrum comes in various versions, and you can pick one based on your preference to start working. It comes with highly professional options for you to take care of multiple aspects, and if you're an amateur, then the other versions will suit you well. We assure you that the easy-to-use functions make it worth the effort.
Why Did We Like It?
Straight off the bat, you'll notice that it comes with three versions meaning if you like working with it, then you can pay extra to unlock the advanced options. It's a highly versatile tool making it useful for amateurs and professionals alike. Additionally, the developers have included a function called deck wizard to assist you during work.
Among the numerous functions, you can create a 3D landscape, but you can also upload an image and design over it. As a result, it's incredibly useful and generates accurate results, which allows you to add landscaping options like a pool or waterfall. It's a complete package, so you don't have to look elsewhere.
Once the work is done, you get to save your project and share it with others to get their opinion. Moreover, if needed, you can create multi-story decks with the tool, which suggests different materials to produce long-lasting results.
What Could've Been Better?
You'll need to download the latest upgrades, and if you're not adept at using technology, you can ask someone to do it for you. Without the upgraded version on your device, you can't enjoy the state-of-the-art functions that make designing easier. However, if you're unable to accommodate the upgrades on your device, it's better to choose some other option, or if you're feeling a little adventurous, a new model.
The SketchUp Pro includes several quality functions, which makes it ideal for your DIY needs. You can focus on other areas of your home to get a complete performance along with deck designing. We found that it delivers fast results, thereby ensuring you can quickly complete your work, meaning it'll be money well spent.
Why Did We Like It?
We know you're itching to know about the unit, and given the response from users, we can understand why. Initially, the price may throw you off, but once you start exploring the functions, we're sure you'll realize that the developers were justified. It delivers excellent results, thanks to the multiple choices at your disposal.
You can mix and match various shades to complement the unique shape of your deck. It allows you to upload your images, and then you can modify it. But the most significant inclusion is that of the Geo-location tool, which recreates the actual image to help you decide the best way to proceed with the construction.
Furthermore, thanks to the attention to detail, you don't have to waste time making everything from scratch. You can download the file and add numerous elements to prepare a detailed blueprint for your work. Lastly, it allows you to share your project with others for feedback.
What Could've Been Better?
It's more expensive than the other tools that customers have used, which could deter potential users. We understand that the range of functions has contributed to the higher price, and you may not have the budget to use it. It's best to look at some other option in such a scenario, but we assure you won't be disappointed if you can be a little flexible.
The MiTek Deck Designer software features some of the latest technology, which makes it an excellent option. However, your device needs to be upgraded for you to use it, but you'll love its fantastic functions once you do. What's more, you can work from various angles to get the required precision.
Why Did We Like It?
First and foremost, you'll have to register yourself, and once that's done, you can get to work with your design. You need to start by choosing the shape, and in this regard, it's essential to have in mind the type of area you've. Once that's done, you can move onto the more nuanced aspects, such as the height and width.
It's relatively easy to use, and you've got the option of rotating the 3D image to opt for the best angle for your work. Significantly, however, the software allows you to set your preferences based on which it'll generate the results. You won't have to worry about the materials as the tool does all of that for you.
Moreover, you get to choose various colors to ensure it matches the exterior of your house. You can also select particular spots on the deck to place your furniture, so you don't encounter any problems later.
What Could've Been Better?
We found that although it's compatible with most devices, it won't work unless you've installed a specific plug-in. Therefore, we suggest you conduct a thorough check to see the installations you need, and if at all, if you can equip your device with it. If the answer is no, you can opt for some other options or ask someone to help you who has an idea regarding this type of software.
Pros
3D design
Numerous colors
Various shapes
Has options for using furniture
You can work from multiple angles
Cons
Requires a plugin
Online Deck Design Software FAQs
Does the price vary once work starts?
Since you're using deck design software, you'll get an estimate of the price beforehand. Considering the material and other aspects remain the same, the price doesn't vary. However, if you decide to opt for some other material or incorporate additional features, there's bound to be some difference.
Who provides the permit?
If you're hiring a contractor, then it's the person's responsibility to gather the necessary permit. But if you're a DIY professional, then you'll have to do it yourself. It's best to ask for help, so you don't miss out on any requirements.
Are composite and vinyl materials suitable?
Many people prefer using composite and vinyl materials because they don't need much maintenance. You're saved from the trouble of having to treat cracks that may occur in other materials. But the initial cost is a bit high, and it doesn't resemble wood meaning it's not a suitable replacement.
Should I go for vinyl railings?
While some people don't like the look of vinyl railings, the advantage is that it doesn't deteriorate. As a result, you get a clean finish while the cost doesn't vary compared to composite railings and may even be less on occasion. If you're looking to contrast the barrier with the rest of your deck, the vinyl will work well.
How often do I have to clean the deck?
Regular maintenance goes a long way in maintaining longevity, but certain materials require less time to clean. The best thing to do is wash it like you would wash your car or if you find that it has gathered too much dust. Similarly, after the monsoon, it's good to give the deck a once over and free the mud, but overall the maintenance needed is significantly less.
Final Words
We've reached the end of our guide, and hopefully, you've got a better idea regarding deck designing software.
It takes away the trouble of having to guess, thereby allowing you and the contractor to develop a definitive plan of action. You won't have to waste time in a trial-and-error method, and it saves valuable resources to reduce the overall cost of the project.
But before signing off, we've decided to assist you a bit more by narrowing down the top products in various categories. Our top recommendation would be the software from decks.com for its overall performance and easy-to-use functions.
Apart from that, the Fiberon Discovery Deck Designer provides excellent ideas, thanks to the 3D visuals. Finally, we must mention the JLC Professional Deck Builder, which delivers detailed descriptions to offer an all-inclusive idea of the construction.
Barns are a staple of the average homestead or farm. You need a barn for multiple purposes. Either it is to store your produce of grain, or to keep the livestock fodder dry and safe. Or you need space to keep the livestock itself, if not the tractor that you use on your farm. Barns are large enough for storage yet small enough to not take up too much land space.
What is also great about barns, and especially pole barns, is that they aren’t too difficult to make. Unlike other structures, they do not require elaborate planning or understanding of architectural techniques. It also helps that most of the barn on the inside is pretty empty.
But, what is required for building a barn is the know-how, both while constructing and before constructing. This is why following detailed architectural plans for building pole barns is important. Thankfully, there are 163 plans included here for you to choose from. From books to videos, pdfs to articles, there is enough research material to get going with.
Free DIY Pole Barn Plans and Designs That You Can Build Easily
Pole Barn Building Series
If you’re someone who prefers a more audio-visual tutorial and think it will be easy to grasp the concepts by observing them in real-time, then this series of videos on how to construct a pole barn will be the perfect fit for you. It also helps that the person who made the video is someone who has done it before and works on a homestead.
Iowa State University has been a great resource for architectural plans that people can procure on the internet. Whether you’re looking for plans to build a mansion, or plans to build a cabin, or in this case plans to build a barn, the ISU database has enough information for you to get started. Their website has fifteen plans for building pole barns, with a lot of pictorial references attached.
Iowa State University Barn Plans 16-29
As mentioned earlier, Iowa State University has a plethora of architectural plans at its disposal, freely available for perusal by the public. So, they provide fourteen plans for big grain storage containment complexes for large homesteads.
Comprehensive Barn Plans 68-85
Sometimes, a pole barn isn’t used just for storage of supplies or for vehicles. Sometimes, you need a barn large enough to turn it into a stead for your livestock, with its own elaborate inner mechanism and partitions. For this very purpose, this guide has eight plans to choose from.
The Detailed Barn Building How-To Guide
It can be quite a strenuous exercise, building something from scratch. There is just so much to consider when doing something of this sort all on your own. What if you make a mistake here or a mistake there? Will the entire thing collapse? Will you have to redo it? This guide answers all your queries and calms your qualms by covering all such worries. Moreover, the pictorial aid only adds to the effectiveness.
Homesteads are all about self-sufficiency, and a big part of being self-sufficient is cost management. What is great about this how-to article is the fact that it details how it can be really economical to build your own pole barn for storage if you make some smart decisions while constructing it.
This is a how-to guide that eases beginners through the process of the pole building. This book is great also because it focuses on low-cost construction. Once you read the book, you’ll be ready to build your own pole barn in no time and on a budget.
The University of Tennessee has a very comprehensive pole barn building guide for free usage. Providing the do-it-yourself enthusiast with twenty-three options, it ensures that you don’t have to stick to just one design and can mix and match and experiment to your heart’s delight. Aesthetics matter, after all.
Canadian Storage Barn Plans 100-109
There are some really lovely pole barn plans in here, both traditional and non-traditional. These Canadian building plans are for both animal steading and for grain storage, and even for tractor and other machinery storage. They have some lovely designs with ample details for you to start building.
The Pretty Barn Guide
These plans for a traditional yet very appealing pole barn are a little too complicated for novices and intermediate barn builders. They have a few bemusing details that will baffle the reader. But, an experienced eye will understand these plans better and if you aren’t the latter, you might want to ask someone who is and get to the job of building the plan.
These plans for making a pole barn a little elaborate and cover designs and needs. Dealing with both equestrian and livestock barns and also vehicle and grain storage, the options are comprehensive and the drop-down menu on the website will take you through the process in a very simple way. These plans are great for both small-scale farmers and homesteaders and for ambitious professionals with an eye for a large barn area.
The Cosy Pole Barn Plans
This is a pretty-looking barn that is sufficiently large enough for most users. It comes with a free-to-use plan which is comprehensible for builders of all skill levels. Lovely to look at and easy to make, this is worth considering as your option.
This plan is for a beautiful garage barn build. It is large enough to fit vehicles and naturally spacious enough for storing your produce. It is sturdy and has multiple doors and looks neat while doing what it is meant to. Plus, the plans are detailed enough and simple to follow.
The How-To Barn Build Tutorial
Building a structure is just not about the wood and brick and the shape of it. It is also about the preparation before you get to the actual building part. It is about the soil it will stand on, and the very foundation that will ensure it remains intact. This guide helps you through all that with thirty-one steps that make sure you are absolutely prepared to build a barn on your own.
Monte Bunch’s Barn and Outbuilding Guide
Monte Burch’s How To Build Small Barns & Outbuildings is a comprehensive guide. With twenty plans detailed in the simplest of instructions, this professional guide is a wholesome read.
This particular guide does not offer you a variety of plans, but where it lacks in diversity, it makes up for meticulously gathered information. The plans for building this pole barn are very finely drawn and the barn itself can be custom used for several purposes.
The Small Barn Shed Plan
There is enough detail for you to go with when building this particular 12 by 16 barn. The plans provided take into consideration different storage ideas, such as livestock steading and grain storage. They are free to use and come with a list of materials you will require to build this pretty-looking barn on a budget and in a small amount of time.
This list of plans is not free to access, but with a minimal purchase fee paid, you can peruse a hundred comprehensive pole barn plans that cover everything from barn sheds to garages, and workshops. If you think you are willing to spend a little extra cash on procuring these plans, then you should definitely go ahead and buy them.
The LSU AgCenter is most gracious in its efforts to help people build barns on their own. The list of plans is very detailed and covers barn usage of all types. What more would you need from this guide? Well, for one, it provides thirty-eight plans, and that number is enough for you to choose from.
North Dakota State University has a number of elaborate plans for all sorts of house building. They are comprehensive and simple to follow and cover everything that needs to be covered before you get onto the task of actually building something. Pole barn plans are a natural inclusion herein and the university provides seven plans for your perusal.
The State of Oregon is very generous in providing free-to-use barn-building plans for the common man. From six plans for traditional pole barn designs to more modern-looking and size-varying designs, the State of Oregon free barn building plans are sufficient and detailed.
The Garage, Livestock, and Grain Barn Plans 96-99
DIY pole barns come in all shapes and sizes, and sometimes they aren’t all too traditional in their make. This particular barn is more of a large house type than a standard pole barn. But, it is as effective as any barn with the additional advantage of looking great.
It’s a beautiful shed with a very spacious design. Adding to its functionality of it are motifs that bring a more aesthetic appeal to the barn. The storage areas are sufficient for grain and hay storage but can also be used for other purposes. Plus, the plans for it are pretty simplistic.
So, are you ready to take on your own DIY pole barn project? Do you have any new designs that have come to your mind poring through these plans? Perhaps you have a hybrid in mind. These plans are inspirational and educational at the same time and I believe they will be more than sufficient for you to embark on this endeavor.
There is, after all, a beautiful sense of satisfaction in making things on your own, right from scratch. The experience is rewarding and you get to master a skill that you had never thought of even trying before. It helps you in building more things and keeping your mind busy and productive, and maybe teaches others how to do it too.
So, whatever your purpose in building a pole barn, I hope you succeed in it and succeed fashionably.
Whoever said that the best form of beauty is the unadorned one was hitting really big in life with his philosophical knowledge.
But a plain, rustic kitchen is indeed one of the most beautiful places where you can nourish the body as well as your soul.
Since countertops are the center of any kitchen and quite a hassle to spice up, it could be a challenge to provide a rustic look to the countertops of a modern kitchen, to begin with.
But, if you’re reading this article in hopes of getting an answer to your prayers, consider it done!
Cause, today we’ve come up with 49 splendid rustic countertop ideas for your kitchen, that will bring the unadulterated beauty of a pastoral life into your contemporary cookhouse!
Traditionally, a polished and textured dark granite countertop can single-handedly own it in any kind of kitchen-décor whatsoever.
Paired with an equally unpolished wooden cabinetry design, red-cement floors, and mineral-washed walls, the look can drastically transform the atmosphere of a conventional kitchen, to make it cozier in look and feel.
We absolutely heart the minimalist glass pendant lighting with no extras, bundling the look up together in a mellow statement.
Source Unknown
2. Plank up the bar!
Using unpolished, crude plank furniture seems to be the new, raving in-thing for kitchen decors in recent times. Not only do these look fabulous, but it also makes for a clean, unadorned, and simple statement, especially if the rest of the kitchen is done in darker or richer tones. The tonal variations to a plank design provide shifts in color and textures.
A touch of corn flour blue on the cabinets contrasts beautifully with the wooden textures to bring you a beautiful rural décor.
One of the most stunning designs for a minimalist look is undeniably something that’s done in unadorned, raw grays. You could go for a monolithic statement with a singular long, gray counter complete with a sink slot, contrasting beautiful ivory or beige tones for the walls, and polished wooden cabinetry and floors in different textures.
The contrast looks marvelous and makes for a calming visual effect and feel. These colors also have the capacity to play with natural lights, bathing the place in soft natural shades.
Rough or broken-cut edges on countertops are swiftly becoming the new hot favorite for every kitchen that likes to play with wooden designs and textures. This is one look that puts the contemporary in the traditional.
Yet, surprisingly enough it appeals to the natural state of the art for decors, unlike futuristic designs that can look very mechanical and clockwork-ish in excess.
Polished or not, the broken or rough-edged designs could provide that unique and unconventional element to an otherwise bland look, drastically changing the style with a single touch.
Now that we have already discussed crude and unpolished plank designs for your cookhouse décor, it’s time to look at some richer, varnished tones in the same planky way.
Polished, cohesive plank countertops in luxuriantly darker colors could be the center of all attraction in a kitchen done in lighter to neutral shades.
A farmhouse kitchen done in varying tones and textures of white or gray could deliver a grand contrast scheme for such countertops. A little dash of natural colors could bring the entire look to life.
Mirror polishes for wooden countertops could be the ultimate game-changer in traditional kitchen designs. Varnished and epoxied darker tones possess the ability to scatter light stunningly and magnificently across the place and usher in a cheerful mood.
What we have here is a beautiful broken-edged dark wooden countertop glazed to perfection and entirely functional with an inbuilt kitchen sink. It brilliantly compliments a sandstone wall décor and eggshell lower cabinetry bringing in marvelous textural contrast in the place.
Wood can work exceptionally well for medium-sized kitchens, especially if it has too much going on with it. For the kind of kitchen that might be sharing its boundaries with an adjacent living, dining or reading room space, wooden countertops could balance out the structural integrity and cohesion of the area.
It looks and feels clean, it makes for a comfortable recreational environment, but most importantly, it manages to take the eyes of a congested situation by making the area appear spacious and inviting.
Coupling creamy marble tones with unpolished darker wooden panels could work magically to give you a pastoral and ethereal scullery. A speckled marble with soft tonal variations and a geometric oval design for the kitchen sink adds a subtle touch of luxury in a space that is otherwise tamed with unembellished dark wooden cabinetry complete with open shelves on a mineral white-washed wall.
This kind of a décor works for almost all kinds of cookhouse structures. However, it could work best in a smaller and cozier space.
via Tracy Lynn Studio
9. Central wooden counters
Singular polished wooden counter tables placed centrally in the kitchen is all you need to amp up the glam quotient in a simple kitchen. Not only does it make for an immensely sophisticated and dignified statement, but it also serves as a pretty functional unit that combines the utility of countertops and kitchen tables in a dynamic style and form.
It works best for medium to larger kitchens, especially if you’re going for a rustic, easy-going yet uncluttered look.
A simple yet dignified element of granite can put a charm in a casual and much-loved farmhouse kitchen. A bustling and lively kitchen space with a white subway-tiled backsplash and white cabinetry finds expression in textured, dark granite countertops that cut smoothly and beautifully through the monochromatic effect.
The visual appeal of such a place is heightened by the use of simplistic wooden counter-stools and huge pendant bell lights in glamorous brass accents.
Thanks to certain incredible developments in the field of kitchen décor and granite textures, you can now play and manipulate the basic atmosphere of your kitchen with variegated and multi-textured granite elements.
We love an ageless cool-toned kitchen with astoundingly serene colors such as peppermint blue or even softer pastel shades.
Pair the look with magnificent speckled granite in white or lighter grays and hail in the spirit of spring and bloom in the space, white and gray kitchens are sublime, airy, and awe-inspiring indeed.
We’re in love with the self-referential pendant lighting, bathing the place in a mystical aura.
Source Unknown
12. The epic rural cookhouse
For a completely rustic and tough, yet diplomatically suave statement, lock the rural sandy tones on marble countertops and go all woodsy with the rest of the kitchen décor.
A classic wood-paneled kitchen can seldom go wrong with whatever you might want to set it up with.
However, the polished stainless steel appliances add a touch of the intrusive modern in an otherwise starkly contrasting culinary set-up.
We absolutely dig the barn door and the wicker basket pendant lighting that accentuates the thematic importance of the place even more.
13. Of rural shelves
Basic, bare-wood shelves could look absolutely stunning in a minimal or futuristic layout. This is all that you need to have the perfect blend of rural and glamorous to spice up a bland, white wall.
Complete the look with crude, dark granite countertops and wooden lower cabinets are done in a refined and symmetrical layout, to balance out each of these elements in their tones, structures, and textures.
Appliances with metallic accents or even milky porcelain pieces could be all the adornments to amp up this look.
The basic wooden countertop is one thing that you can never go wrong with. Sweet, simple, and amply stylish, this is the perfect thing to opt for if you have a basic white kitchen.
The simple wooden countertop brings a very organic element into the space that you could further play with by putting a delectable dollop of natural colors. Put some greens on the adjoining window sill and a bit of red or yellow in a simple white bowl on the counter, and the look’s all sorted!
Usher in all the sunshine with this woodwork in your kitchen!
Go blissfully pastoral with a variegated and threaded woodwork wall panel accentuating posh, dark granite countertops. These find common ground with exquisite white open shelves.
Perfect for an absolutely minimalist look, this kind of style can subtly express an imaginative and perceptive individual preference where one would like to flaunt an array of select objects on the counters.
The stunning pendant light binds the look in a self-referential way to reflect a personal love for all things artistically beautiful in the kitchen space.
A hanging rack in the kitchen could be a very homely addition, especially if it’s put in a space having all modern designs. Visually, it gives the structure a look of comfort and amiability. If the kitchen is too sharp in décor with all bold colors or accents for the appliance, a sweet and simple hanging rack for the pots and pans could be a friendly touch for the eye.
So, go ahead and pair up that dark granite and richly toned wooden countertops with a simplistic rack for putting up your utensils to add a relaxing look to the décor.
White concrete and wooden accents can dramatically change the interior décor scene to bring in an agrarian look that is nonetheless stylish and fabulous!
A wooden cabinet space set in an all-white countertop looks marvelous and works especially well for smaller spaces with a curving cooking platform. Opt for wicker and woodwork for the rest of the space to really amp up the rustic look and top it off with a beautifully tiled floor to bring this look to a conclusion.
Unstructured and crude wooden fixtures could look stunning in an all-white minimal, rustic décor. A touch of stone and lush green on a bare-wooden counter brings in a raw and stunningly natural element to the space. A chink of glass for your spices and herbs will be the ultimate thing for providing a traditional overall look.
The bare bamboo pole serving as a hanging rack is a clear winner for the look!
It’s almost as if you’re cooking in a wooded area, blending up all the natural elements together for a meal for the heart and soul.
via Hale Mercantile Co
19. Contrasting polished and raw wood
Contrast and balance are crucial for a perfect décor, be it anywhere in the house. And when it’s about rustic, wooden designs, one could feel a little lost or even overwhelmed and end up piling on.
The right answer for this is how to play with different textures for a single element. What we’re looking at right now is a beautifully balanced kitchen décor done in all wood, yet played upon textures by bringing polished and unpolished surfaces together. You could go for polished countertops, counter stools, and floors getting some eclectic designs in raw wood for the rest of the space. Add a dash of polished metal: works well works wonders!
Source Unknown
20. The big, dark table
One of the most amazing things to put a rustic and raw touch in an otherwise, modern, contemporary kitchen is the large, rough-hewn, dark-wood table. Not only does it serve as the ultimate counter plus table for all your culinary chores, but it also magnificently contrasts a modern kitchen décor and conventional, dark granite cooktops in the rest of the place.
It looks brilliant and brings an essential organic and natural touch to the mechanical look. Pair it up with some classic vintage lights, and turn the space into a thing to behold!
via Nest of Bliss
21. The Arcadian setup!
Few decors can be as beautiful as a classic white and blooming space. Lock in the eternal spring with luxuriant wooden countertops spangled with lush blooms. Glass works magically in such a place. So, go ahead and flaunt your beautiful glassware on those open cabinets. Add a splash of rich copper or gold tones to the mix for upping the glam quotient of the place. Let the colors swill and unravel in this creamy white setting and in the meantime bring the look to a conclusion with a vintage brass chandelier, tying the entire look up.
Highly reflective surfaces and mirror finish for wood or other materials not only look stunningly beautiful, but they also give the space an immaculate and fresh feel. The only effort that you would require to make is to prevent the delicate surfaces from scratching, as they can scrape easily. But this doesn’t stop us from loving the look and feel they do provide. So, if you’re in for some high-shine surfaces, keep it simple and minimalistic on the countertop to show them off in all their glory!
Apart from traditional dark granite counters, you could also play with darker or multi-chromatic stone slabs to put a very rustic element in the kitchen. We love the cool feel and absolutely brilliant color options of this crude stonework that are easily available for use.
Although these could be a bit up there in price than conventional granite or marble, it is totally worth it as a single stone slab could drastically transform the atmosphere of a modern kitchen.
Source Unknown
24. Naturally-hewn wooden countertops
Roughly hewn wooden tops made from single hauls of wood look as beautiful as it feels.
You could go for this look for a completely organic feel. Natural cuts are increasingly becoming the hot favorites for every modern kitchen design since it brings in a perfect balance of biotic and mechanized.
And for the ones who want to take the woodwork up a notch, further extend it to cabinets and oven slots for an overall, cohesive, rural layout.
via Creative Kitchen
25. Crude, blackwood design
Unrefined, blackwood layouts can look incredible when coupled with brushed or polished metallic accents. This kind of look makes for a well balance of two similar décor styles, blending the seams evenly out on all fronts.
A dash of bright natural, colors (love the touch of peonies over here!), could really make this look bloom!
Go all out with rough, wooden open shelves on a similarly tinted wall, and spice it up with some delicate metal and glass to amp up the feel.
Source Unknown
26. Twinning with marbles and wood!
Experimenting with multiple, contrary elements has been there for interior design for quite some time now. And, it is swiftly gaining momentum in the changing scenario of kitchen décor as well.
What we have here is a stunning blend of rustic wooden accents and creamy white marbles, brought together beautifully for your countertops, in an all-white kitchen. A perfect design for a both suburban and urban residences, bringing the best of both worlds together.
via Pinterest
27. Bare it all kitchen!
A dark-wood kitchen with dark granites for countertops is hands-down one of the most breathtaking cookhouse décors. But the icing on this cake is undoubtedly the bare-brick walls and a cobbled floor which provide the overall layout with a beautiful texture.
Even one that’s pretty homespun in essence, the luxuriant gold and copper tones for the utensils, set off the polished dark of the wood, sending the natural lights cascading all over the décor.
Granites and marbles are undoubtedly two of the major contenders and rivals in the interior décor game. With awe-inspiring innovations taking place for both of these elements, the face-off is getting even more tremendous with the changing décor scenario.
But! It doesn’t have to be a competition if you bring them both on amicable terms for a fabulous new design! With alternating speckled granite and white marble, throw in some bare brickwork and spring hues as the ultimate truce-caller and beautifier! Keep in mind that the balance in a kitchen between these granite counters and marble counters can go back and forth a great deal, find the right one for you!
via Kelly Harmon
29. Where geometry rules
We don’t know about your experience with textbook theorems and mathematics in general, but what we do know is that geometric designs are the new smoking-hot thing to have in your kitchen.
And the good news they aren’t restricted to modern kitchen designs. Transform your kitchen with cutting-edge geometric, slanting, or straight-angled styles on wooden counters, kitchen sinks, and more to shock and amaze the conventional eye. Balance it out with appliances in metallic accents and fall in love with geometry all over again!
A little obsessive love for the kitchen hasn’t really done any harm ever. And, this could be aptly depicted in a fierce broken-edged counter-cum-table placed in the center of an otherwise dignifiedly minimalist kitchen to bring out the wild side of things!
The polished wood contrasts beautifully with an understated dark granite cooktop for a shocking appeal on the senses and a jarringly beautiful effect.
The herringbone pattern is probably becoming as popular as the act of fishing itself! From countertops to the backsplash, there are but a few things that you couldn't get in this layout.
A classic blue wall in the pattern with a magnificent wooden table in herringbone impression provides all that you could possibly want from a kitchen décor: style, depth, and for your friends to be endlessly envious of your new kitchen!
We recommend serving them fish to cure the burn. Enjoy!
via IKEA
32. Of lacework and porcelains
The coalescing of laceworks and porcelains with untreated, pure wood designs is undeniably one of the most ethereal and timeless kitchen designs. Flaunt your delicate wares in nothing less than the classiest way with pristine white cabinets and fragile laceworks topped with bare wooden tops. The white open shelves contribute to the overall style, single-handedly owning the look with a fine array of delicate glass making for a spectacular view.
The kind of colors you select, decide the mood and vibe of your space. Therefore, it’s essential to get a hue that creates the kind of environment you want for the kitchen. An unvarnished wooden countertop with a splash of calming blue on the upper cabinets can put a very cooling effect on the entire place.
However, a portion of dark polished wooden texture to the lower half brings in a balance that is indispensable for gathering the lookup in a beautiful unit.
A big ol’ place to dine is after all not just a place to digest food but a silent spectator to heartfelt conversations of love and life! And for the ardent lovers of all things natural, we have brought in natural countertops and open shelves hewn out of single hauls of timber.
A classic case of bringing the entire forest in, this kind of a décor works best for medium to larger areas and allows free play of natural lights.
Oriental patterns can weave a different kind of mystical love story with their enigmatic form altogether. Exquisitely intricate designs could enliven any space, and your kitchen wouldn't be an exception to this rule.
Stunningly beautiful floral or mandala designs on niche-wall tiles could now be the centerpiece to compliment those beautiful plain wooden countertops, balancing the creative with the organic.
For a starkly minimalist kitchen, centrally located singular counters could be the ultimate show-stealers. And if you’re going for wood, you really need not think about anything else.
It brings in a perfect balance of things and plays with natural lights, bringing in depth to the area. Opt for different or alternating textures for the counter-structures and tops so that the tones can comfortably blend in with the rest of the décor.
We have previously mentioned how tints of blue can bring in an extremely relaxing sensory feeling to the kitchen space. And when paired with wooden accents, it could work wonders to usher the natural aura into your house.
For an immensely rich and sensual feel, pair up polished, rich wooden textures on the countertops with darker blues on the cabinets. A touch of lush, dark green in the mix can calm the atmosphere and bring in the kind of peace you thought you could never have in a kitchen!
We noticed that even though we have gone on recommending the touch of natural colors and elements in most of our suggestions, we haven’t quite emphasized the importance of natural and organic elements for your kitchen.
Things like potted plants, and wooden or earthen-wares, can drastically change the environment of your kitchen, from a mechanical one to something that brings out the natural and passionate side of things.
However, be sure to not go overboard with the style to keep your kitchen from looking like the savannahs.
Source Unknown
39. Remodel, Refashion, Rework!
Going for a converted wooden countertop could be a wonderful idea if you want to keep it sweet, and simple, yet add a touch of funkiness! Remodeling wooden stuff like a door or even a previous, outdated counter for your new ones could be the perfect thing to bring the sexy back into your kitchen!
Mount such a piece on chequer designed structure to play with the textures and colors, and make it your own personalized and signature statement!
Softer, mute grays can really change the look of a wooden kitchen. And, what we like best is how gray-stonework achieves beautiful effects in more spacious cookhouses with wooden interiors. We absolutely love a singular gray-stone slab for the counter complimented by wooden seating and a basic stone floor bringing all the sunshine into the place. This adds a sharp edge to a kitchen interior that otherwise seems playful and at home with the familiar wooden accents.
Unrefined and raw cement countertops can look endlessly stylish in all its crudeness set up in a smaller kitchen. Go for simple layouts in course grays, preferably open cabinets without the hassles of doors, serving as a functional design for the lower half of the kitchen and looking dapper as countertop colors.
Metallic accents can really transform it into a sultry hot statement and bring about a dynamic collision of both worlds.
Speckled marble countertops not only bring every inch of glamour into the space, but these also dismiss the need of piling up numerous other things to make a place look happening, being the show-stealer for any kitchen décor.
Now if you go ahead and pair it up with dark, varnished, rich tones, you get what you call a regal and magnificent love affair between two winning designs!
The basic ceiling-lamps add the final touch to dress this kitchen in its perfect royal attire.
Low-rise countertops in the square, straight-angled layouts can bring in a stylish barn-house look into your otherwise modern kitchen. The style is becoming immensely popular especially in décor for smaller spaces, as it provides a pretty cozy touch to the entire area.
Gray marbles with wooden accents for such countertops work perfectly to whip a splendid mix of the modern with a rural tinge.
Unarguably one of the most stunning designs of all, a very rustic kitchen with rough-hewn rock basins, stone countertops, and tree trunks for open shelve pillars is not for the ones too scared to experiment.
This is fundamentally a look for outdoor cookhouse scenes but could be implemented in a space adjacent to a natural guardian or even one with large dimensions.
But even if you have a medium-sized area where you want to bring this marvelous touch of nature, simply go for a paneled mirror element which would visually widen the view for you!
45. The basic, small, cozy kitchen
For our beloved, basic, and beautiful white kitchen, you need not fret about anything extra. Simply bring in a sweet wooden table and dark granite countertops together against a textured herringbone backsplash to work up some magic in the space.
We love how they’ve chosen classic inverted glass lamps for the ceiling, transforming the feel of the area after sundown!
A white kitchen with a contrasting darker backsplash may be the perfect host for an equally amazing countertop design in wood and granite. But what makes it special is the play of natural greens and the element of glassware on the countertops.
A breezy look for any kitchen, this is definitely one of the most comfortable designs to go with.
A standard rural setup calls for some heavy-set crude cement counters and unrefined wooden doors for your cabinets. A plain whitewashed wall imparts a cohesive look to the structure and continues with the unadorned look and feel of the place.
A simple porcelain sink provides a homespun statement for the place, making the overall environment even more comforting and friendly.
Source Unknown
48. Contemporary wooden designs
Newer designs for wooden counters can be customized to have any kind of texture and finish that you would want in your kitchen. Since wood is an exceedingly versatile material, it has cheerfully welcomed all modern experimentations to come out looking even more elegant than ever.
So, go ahead and fish for the real deal with wooden accents out there, because even though the market has changed offering even more stunning designs, wood is here to stay in all certainty!
Alternating or asymmetric open shelves on your kitchen walls could make for a really natural design, yet being extremely functional in style and form. More than just holding up a lot of things in the kitchen, these give you the scope of utilizing all the space on the wall and customizing it in your own way.
So, we suggest keeping the counters clean and diving headlong with open shelves to flaunt your precious culinary collections in style!
via Pinterest
Conclusion
So this was our take on beautiful rustic looks for your kitchen countertops that are surely going to pull all eyes to themselves! We hope you enjoyed this read as much as we did putting it all together for you. We’re going to be back with more!
Till next time!
Pastels are utterly beautiful things. They are some of the easiest and most malleable mediums of paint that deliver great textures and highly concentrated pigments that result in vibrant colors and marvelous textures for your artwork.
There are several kinds of pastels: soft pastels, oil pastels, pan pastels, pastel pencils, etc. Although all four are practically the same grade and type of paint, they slightly differ from one another on the basis of the texture they each provide.
The essential ingredients in all four types of pastels make all the difference in their texture and color deliverance. This is the crucial point to understand about pastels. And right now if you’re keen to know literally all about these kinds of pastels, then the following extensive read has got you entirely covered on that!
Soft Pastels Vs. Oil Pastels Vs. Pan Pastels vs. Pastel Pencils
And, if you’ve been asking which kind of pastels deliver the best effects, you might want to go through this guide we have prepared just for you!
So, sit back and enjoy all the information about pastels that we have brought just for you!
So what are pastels basically?
Pastels are essentially an art medium or a kind of paint that consists of pure pigment powder and a binder. The pigments that are used to make pastels are the same as those used in all kinds of art mediums. This includes oil paints as well. The binder that is used for making pastels have low saturation and are of a neutral hue.
Pastels have been used since the Renaissance with a significant degree of popularity, especially in the 18th century which saw numerous prominent and acclaimed artists use them as a predominant medium for their artworks.
This form of coloring or drawing using a pastel color medium is known as pastel painting or pastel drawing, or simply called a pastel. The word “pastel” can alternatively be used as a verb that means to produce an artwork using pastel colors or even as an adjective, meaning “pale in color.”
The difference between [easyazon_link keywords="oil pastels" locale="US" tag="homesthetics0a-20" type="link" link_id="273652"]oil pastels[/easyazon_link]and [easyazon_link keywords="soft pastels" locale="US" tag="homesthetics0a-20" type="link" link_id="273653"]soft pastels[/easyazon_link]
Well, it’s easy enough to start using pastels - be it any kind, for drawing and texturizing any sketch. These can be easily maneuvered over any kind of surface, providing bright, vibrant imprints.
To start off with our explanations of the difference between the kinds of the different kinds of pastels, we have decided to go with the comparisons between oil pastels and soft pastels.
What are [easyazon_link keywords="oil pastels" locale="US" tag="homesthetics0a-20" type="link" link_id="273654"]oil pastels[/easyazon_link]?
Oil Pastels are composed of a non-drying oil and wax binder, having a buttery and creamy texture, with an intense color deliverance. These are pretty dense in consistency but have a more delicate hue than that provided by soft pastels. You don’t need a fixative to work these colors as these tend to be pretty waxy.
However, these can be a tad bit more difficult to blend than soft pastels. You are required to use a primer such as gesso so that the waxy binders are not soaked up by the paper strands, for that matter. This actually keeps the brightness of the oil pastels from dulling down.
One of the best things about oil pastels is that they don’t dry out or harden out entirely. Similar to oil paints, oil pastels could be spread across any kind of work surface (paper) that you’re using for your project by using a thinner. You could use a turpentine thinner for this purpose.
What are [easyazon_link keywords="soft pastels" locale="US" tag="homesthetics0a-20" type="link" link_id="273655"]soft pastels[/easyazon_link]?
Soft pastels are basically made using a combination consisting of pigment, gum arabic, and white chalk. This delivers more of a matte finish than that of oil pastels. Soft pastels have a higher amount of pigment with a lesser amount of binder, giving off a stronger color effect.
As these colors give off more off a chalky, dusty consistency, they can be smudged and blended to a greater extent than other pastels. They don’t stick to the surface, and the excess can be easily brushed off. This is why it is extensively used way more than other kinds of pastels.
However, the finished works made with soft pastels do require for you to protect the surface from smudging or getting damaged by using fixatives. Hairspray could also work as one but do use fixatives carefully as they may affect the colors of the pastels. You could also get your sketches framed for that matter.
In some instances, a filler agent such as white chalk could be used for producing pale, bright tones and hues, possessing a higher luminosity.
So, which one should you go for?
Well, this honestly is a very subjective thing for all. Both oil and soft pastels possess quite distinctive effects and whatever you choose to use will solely depend on your preference and requirements.
A few fundamental points of difference between the two are:
Texture
While soft pastels will provide you with the scope of blending the shades in better than oil pastels, these can crumble quite easily due to the lesser amount of gum binder present in them. While in the case of oil pastels, you could easily maneuver them to the required spots and have great effects, without having to take extra care in holding them firmly.
Oil paints can also create impasto effects, or you could acquire a glazed effect if you thinned these down with turpentine. On the other hand, soft pastels can be just the thing for you if you need to layer on colors and create other effects on your artwork.
Blendability
Oil pastels will give you a very creamy and buttery texture that you could use to create stunningly bright effects for your artwork. You could also thin it out for creating more effects and covering a greater surface area. While on the other hand, the powdery texture of soft pastels delivers strong colors that will not stick to the surface all that much.
However, due to this precise reason, soft pastels could be blended far more easily than oil pastels.
So, if you want to have a bright, creamy yet bright effect, then you could go for oil pastels, otherwise opt for soft pastels if you want a powerful, inky effect that is greatly blendable with other colors as well as offers a texture that could be manipulated to bring about different kinds of effects.
Assortment of colors
One of the things about soft pastels is that it always comes in a vast assortment of colors. This is twice as much as what you would get in oil pastels. The extensive range of colors that you do get in soft pastels could be especially advantageous for a beginner. This eliminates the need to brainstorm about effects and colors.
Oil pastels work great for those who are good with oil paints and know how the shades work.
So, if you’re looking to start out with a great set of pastels, then it’s better you go for soft ones, whereas, if you are looking to complete a specific project and know about what shades and textures would work well, then, all means, settle on oil pastels.
Affordability
Well, the cost for both oil and soft pastels will vary from brand to brand. And also, the cost will depend on where you buy from. You may get a hefty discount on an online shopping portal at a local store.
Or the reverse may happen if you’re having an especially lucky day. The quality and texture of the colors will also vary a bit from one brand to another, and this is where the price shoots up or falls in most instances.
However, oil pastels could be just a tad bit more expensive than soft pastels. But, you can get good brands at lower prices as well for the same amount of oil pastels as you would get in a standard set of soft pastels. So, the critical factor over here is to settle for one that you think is a good deal and helps you get great effects in your artwork.
Also, if you’re settling for soft pastels, you do get the option of getting them individually and in all kinds of shapes and sizes such as in half or full sticks or thicker sticks. This may help you create your own palette and could also be a great way to cut down on the cost if you decide to mix brands.
Note. You could also opt for water-soluble pastels if you’re looking for such a thing. This comes in both soft and oil pastel variants and could be thinned or blended together will water. These will give you a stunning watercolor-ish wash effect with vibrant hues. However, these may be more expensive than traditional pastels and will require a deft hand that knows how to manage it.
So now that we are done with thoroughly explaining the differences between oil pastels and soft pastels, let’s get moving on to our next segment that deals with Pan Pastels, and how they might be different from the two that we have already discussed above.
So what are [easyazon_link keywords="Pan Pastels" locale="US" tag="homesthetics0a-20" type="link" link_id="273656"]Pan Pastels[/easyazon_link] exactly?
Pan pastels could basically be called another version of soft pastels that are formulated with the least bit of binder contained in flat compact pans, such as those that contain makeup. These are applied to the surface using unique micropore soft sponge tools.
Although there’s no liquid involved in this, these come in a very creamy consistency. These could be used alone for completing a whole painting or could be used in combination with other pastel media such as soft or hard pastel sticks.
Due to the minimum binder amount, pan pastels provide the highest concentration of colors. The texture the least amount of dust that does not mess up your work area in any way. Pan pastels can also come in larger containers like standard paint pots and bigger jars. The packaging is such that it protects the pigments and prevents wastage of the paints.
One of the best things about these is that they are incredibly travel-friendly allowing you to carry them wherever you want. These can also be easily stored anywhere you want and don’t mess out on other objects with scratches and marks, which sometimes happen with soft or oil pastel sticks.
Advantages of [easyazon_link keywords="Pan Pastels" locale="US" tag="homesthetics0a-20" type="link" link_id="273657"]Using Pan Pastels[/easyazon_link]
Pan pastels are comparatively a much newer format the traditional pastels. But, they have made quite a massive fan following since their launch into the art market. One of the reasons that it is favored is the fun way of applying it. Art enthusiasts find it pretty interesting to lift them with brushes, sponges, or other tools similar to what is required for other paints as well.
Here the only difference that it makes is delivering a stunningly vivid and rich texture which is distinctly different from conventional paints or even other pastels, for that matter.
Also, there is an entire range of tools, in fact, applicators for pan pastels known as “Soft Tools” which you can easily get from the market for this purpose. These tools also allow you to manipulate the texture of the pastels to create details in varying degrees and other effects as well.
Blendability
Pan pastels are pretty easy to blend and, surprisingly, they can be erased entirely. These can also be used with different art mediums and on a variety of surfaces. Pan pastels are also a cleaner medium than most and don’t create as much dust as soft pastels often do. You can either buy these in a wide range of assortments in sets or individually from different brands.
Are these really better than [easyazon_link keywords="oil pastels" locale="US" tag="homesthetics0a-20" type="link" link_id="273658"]oil pastels[/easyazon_link] or [easyazon_link keywords="soft pastel sticks" locale="US" tag="homesthetics0a-20" type="link" link_id="273659"]soft pastel sticks[/easyazon_link]?
The disadvantages of working with pan pastels are that it might not be the best art medium for beginners who are just starting out with pastel. The colors and the texture might just be a tad bit too much for amateurs to handle. We suggest that you get accustomed to using soft pastels and oil pastels first before moving on to pan pastels.
The definite structure of oil pastels or soft pastel sticks could provide you with an idea as to how to maneuver the colors on the surface, to layer and blend, or when it comes to understanding the shades and textures that pastels, in general, can produce.
Textures
Also, pan pastels may not be the very best options for doing detail works for that matter. It does work wonderfully for fillers or flat bases which you can detail upon, but not so much that you can use to detail intricate spaces. This is where oil pastels or soft pastels will provide you with a wider scope to easily detail your project than pan pastels would.
Affordability
Pan pastels are actually more expensive than traditional pastel pigments and can really go up there in price with more reputed brand names. This is because pan pastels are relatively a newer development in the pastel game and whatever company brings it out earlier will automatically be known as the first manufacturer and seller of the product.
This gives them the power to name their price while enabling the other brands to do the same as well.
In this case, you do have to consider how much you exactly require to use them, the exact quantity that you require or if you do require it at all for that matter.
Again, if you’re just a beginner, we’ll always recommend getting used to traditional pastel sticks first before starting with pan pastels. Pan pastels are ideal mediums for professional artists who know how to modulate the textures to get the best hues and tones out of them.
But, in any case, do not let us keep you from enjoying a fantastic kit of pan-pastels if you do want to invest in them. Although we would advise you to always go for a good brand that would provide you with value for your money!
So, by now you would have probably understood how the basic pastel pigments work and what pan pastels can bring to your art table! With that, it’s time to discuss one last product in the pastel category that we have on our list and how is that different from the rest of the three kinds of pastel pigments we have explained already. And that is Pastel Pencils!
So let’s get right down to it!
What are [easyazon_link keywords="pastel pencils" locale="US" tag="homesthetics0a-20" type="link" link_id="273660"]pastel pencils[/easyazon_link]?
Pastel pencils are just like the standard color pencils that have a pastel lead. These are ideal for working on finer details, allowing you to exercise immense control over your art piece. The consistency of these can range anywhere from hard to soft textures.
Pastel pencils are the most versatile when it comes to pastel pigments. These can be used with other art media and in combination with other pastel mediums as well such as oil pastels or soft pastel sticks.
The best thing about using pastel pencils is that they can be blended like other pastels and could be used wet or dry! This provides excellent scope for experimenting with the texture of these pigments. And when you have to create super intricate details all you have to do is sharpen these pencils to a point to work up the finer lines. You can easily create smudge and shaded textures with a blunt point or create soft, hazy lines.
Advantages of Using Pencil Pastels
These pencils work exceptionally well for layering on colors and creating textures like the basic color pencils do. Also, many artists use pastel pencils for preliminary sketches and doodles as these come in handier than conventional graphite pencils. This is because graphite leads aren’t really that compatible with pastels.
One of the coolest things about pastel pencils is that they aren’t messy like conventional soft pastel sticks and cause no dust at all! These enable you to be pretty quick and spontaneous with your creativity, needing no cleaning after and letting you enjoy the joy of using pastel pigments.
These are mostly water-soluble pigments that can be blended with a bit of water to get a flatter, more textured surface than the chalky texture it may give off when applied dry. The wooden case keeps your hands clean, providing immense ease of usability and lets you maneuver the pencils gracefully. Also, the colors in these pencils could be easily blended using a brush, a color shaper or even your finger.
All of these make pastel pencils a perfect alternative for outdoor purposes, such as those involving en Plein art sessions.
Pastel Pencils are the most easily workable mediums in the pastel category. These provide enough scope for you to etch out your design or an image exactly how you want it.
Textures and Blendability
Texture-wise, it doesn’t differ much from the traditional soft pastels. But you can also go for the hard pastel variants for the pencils as well, which will give you finer lines and greater scope for creating intricate details.
However, we feel that the pencils would do just great as any other color pencil would when it comes to coverage. Meaning- these can be used for covering and texturizing small to medium areas. While on the other hand, the other three kinds of pastels can create brilliant layers, covering larger areas in an instant, which could be worked upon with ease.
Some artists don’t like using pastel pencils as these lack in providing the raw appeal of the beautiful smudges delivered by soft pastel or oil pastel sticks with much greater grains that could be worked up with bare hands. If you’re one of them, we wouldn’t suggest this product to you.
Assortments
Assortment-wise, pastel pencils are but a limited range of colors, with the largest set providing only up to a maximum of 80 colors. Although you can get these colors in a full set or even buy them individually, the range is still pretty small to provide a lot of color options.
We’d recommend you buy a smaller set if you’re just starting out with pastel pencils to understand the color and textures these provide and experiment extensively with them to master the art. If you like working with them, then you can invest in larger sets to create many wonderful projects with them.
Affordability
And like each of these media, the quality will differ with brands for pastel pencils as well. But the best thing about these is that they come at a really reasonable price tag that will allow you to get these pencils from all sorts of brands. This way you can create your palette of colors and decide which brand you like best.
One of the best brands for beginners and professional alike regarding pastel pencils are Stabilo CarbOthello which is considered to be one of the finest by artists all around the globe.
So which one amongst the four actually wins?
Well, in the battle of art, we simply don’t think that there could be a loser for something else to be the winner! And that is actually fair, isn’t it? Because no kind of art supply can be so bad as not to produce beautiful artwork for you.
So whatever you choose between these four pastel products- soft pastels, oil pastels, pan pastels, or pastel pencils, you would still get visually stunning results in every way. However, your selection of the kind of pastels you should go for will depend on factors such as- ease of use provided by each product, the individual texture each produces, affordability, assortment of colors, and the nature of the projects you require them for.
Hence, as long as you know which one out of these will suit your requirement the best, you’d always end up with the winning product, no matter what you choose!
A Guide for Pastel Painting
And since we’re on discussing extensively pastel pigments, we decided to include a guide on everything you require for pastel art in this segment, so that you could master the art of pastel-ing in no time at all!
And here’s everything you need to produce stunning artwork using pastels!
Set Of Pastels
While working with pastels, you would want to have a wide assortment of shades to create brilliant effects and textures for your drawings.
However, if you’re a beginner at this, we would duly recommend you start with a lesser number of shades in just the primary colors to see if you like the substance or not. This also provides you with all the scope of experimenting with the tones and textures of the colors and to see for yourself how they pan out for your project.
The best way of creating your palette would be to get individual shades from different brands. This will give you all the required shades from the very best ones in the market while at the same time costing less than a single set from a particular brand.
Similar to watercolor, pastel pigments, too, require certain specific types of paper that help them to adhere to it. The “tooth” or “texture” of the paper is the key factor that receives these pigments beautifully, helping them to stick well to them and last very long.
Certain brands such as Canson and Strathmore provide a fine line of pastel papers.
And if you’re using ordinary paper, make sure to prime them with gesso or other binding agents to create the appropriate surface for pastels.
A fixative is an essential protective agent for pastel artwork, especially if you’re using soft pastels or oil pastels. This prevents the pigments from scattering, smudging, or falling off the surface. This helps set the chalk and the pigment of the pastels in place. A layer or two of a nice fixative can provide the paper with an appropriate texture for pastel pigments, making it easy for you to blend and develop beautiful colors and effects.
Your pastel artwork depends entirely on how your color blends and communicates with each other on the paper. And although you could use your hands to blend pastel colors, specific blending tools such as the tortillon, a blending brush or stump can make the job considerably easier for you, keeping no room for mistakes or flaws at all!
These tools cost just a few bucks and would be great additions to your studio or worktop in every way!
Tape is always an essential art supply to have around your workstation. If you’re looking to fix a sheet of pastel paper to your artboard or desk, then you would need art tape to hold it securely in place while you work on it. This prevents the paper from moving or sliding as you put your coloring strokes on it.
The only thing to remember while getting these tapes is that they should be acid-free so that they don’t ruin the artwork.
An ideal alternative to fixative can be glassine. This is a sheet of glossy, translucent paper that you can gently press against your art piece to keep the pastel pigments in place. You can actually get certain pastel drawing art pads that offer both glassine papers and the usual pastel papers as a fixative option for you.
Art desks or drawing boards
A proper art desk or board is always an excellent thing to add to your studio or workstation as it provides all the comfort of peacefully creating incredible masterpieces along with offering a smooth and spacious, multifunctional worktop for all your projects.
However, if you like to keep it casual or do not have sufficient space to bring in a desk or large board, then a simple, medium-sized, portable drawing board will work just as fine!
Safety Tip
Remember that soft pastels can release fine dust particles into the air that you can just as easily inhale into your lungs, causing respiratory diseases and allergies. Due to this reason, it is crucial for you to select only non-toxic pigments to avoid inhaling pastel dust. You could also wear a comfortable breathing mask or could work outside if the weather’s fine enough.
Another way you can curb the problem is to install an efficient air purifier that could filter the particulate matter out of your working space, maintaining a consistent supply of fresh and clean air at all times.
Conclusion
Pastel pigments can create some of the most spectacular effects thanks to its beautiful delicate textures. It only requires for one to know the tip, tricks, and techniques of the trade and exactly which kind of pastel products to go for!
We hope you liked our efforts in creating this read for you and that you found it to be useful.
We’ll be back with more such stuff soon!
Till next time!
In this world, there are thousands of different homes and happily, they`re all different. I live in a tiny home, a small apartment in the capital of a certain country and I feel that my home is far cozier and warmer than various other big ones. Small apartment designs are in my opinion in no way worse than regular ones. A small space challenges you and imposes a different lifestyle in which you keep your surroundings clean, smooth, and always uncluttered whilst not sacrificing coziness and warmth.
In a small apartment design furniture will enhance its versatility and functionality beyond recognition, an organized small apartment can store a whole lot of realized well and we do see such examples every single day. With this thought in mind, we are going to present further a superb idea that helped us a whole lot in our design: foldable desks and hideaway desks.
Hidden/Camouflaged Desks
For most of us, this solution is ideal without a doubt: space-saving hideaways desks, smoothly camouflaged behind a closet or a dresser hiding away the computing unit that should not be seen by anyone or a simple small DIY desk that you have wanted so much to be yours and yours only. Bellow a small and efficient little desk entitled Junior Living has been showcased.
Hideaway Home Office in a Immaculate White Stark Small Space Interior Design
White Folding Desk
All these great desks, including your own, can look smooth and clean for your guests and friends behind an armoire whilst it remains colorful, vivid, and joyful for your taste. The clean aspect of a room will also enhance the feeling of space making it seem enlarged.
Warm White Fold Down Desk
Save space as much as possible with the floating shelf below can be opened and transformed into a wonderful small desk. There is also a small storage area to hide away necessary things that can come in handy quite often. It can be used in multiple setups to match your desires. [Via KMillar]
Minimalist Small Pull Out Desk
A small red accent will be a bold accent, an instant focal point for anyone that walks in the room. This technique enhances the feeling of space as well. The red refresh the design below as well, diminishing the frigid cold feel of the room and making it more joyful and personal. When closed, the small desk design fits perfectly into the scene through the vintage-like cabinet design.
It also has a small lock that will ensure the privacy of your correspondence or simply protection for sensitive materials that must be hidden from sight. [Via Country Living]
Small Red Fold Down Desk by the Window
Below an extraordinary piece of furniture embodies a wine rack, a bookshelf, and a desk at the same time, a very creative use of space and furniture for compact space designs. The tabletop is at your service when you need to, it folds down to the little wine rack on wheels which becomes rigid when the square in the middle fits the tabletop.
This method can be used as a dining space or as a working space if needed. In the kitchen, it can create a dining space that is used just once in a while. It`s amazing because the furnishing is highly aesthetic as well. [Via Dwell]
Highly Graphic Large Folding Down Table
If you can fold your unorganized messy desk into a small piece of art on the wall it would be just fantastic, the small piece below folds into a chalkboard on which you can materialize anything that you would ever want or need. It also features a small coup of storage to further enhance its functionality. [Via Amazon]
White Impeccable Fold Down Craft Desk
Above and below small and big closets alike are hiding a small desk for small use. Some of us are in need of a comfortable desk when working and this means along with hard work are not giving back a highly aesthetic piece of furniture. In this manner, you would be able to shut the desk closed when you have guests and resume your work later in a beautiful manner later. [Via Bourbon Daisy]
Scandinavian Interior Design With Closet Folding Desk
Hideaway Office Desk With White Sculptural Chair
Camouflaged desk by Korn Interior Design
Desks Exposed to Sight
A small folding desk should not be always closed, or hidden, especially if you like it or you`ve created it from scratch, you should be proud of it. A vintage desk design should never be hidden from sight for example. You can use antique kitchen accessories to enhance the vintage look
Rustic Cozy and Warm Fold Down Desk
Having a kitchen drop zone is simply marvelous and highly functional, preventing unnecessary clutter on the kitchen table. Use it just as a serving space while dining to keep the salad, to write a note or recipe when cooking, or as an extension of the bar when not needed. [Via My Home Ideas]
Simple Grey Kitchen Desk
In most cases, a home office is considered a bit of luxury but it can be done if your current setup allows you to take up a little space from other areas. Bellow small folding desks make a statement for their position in another small room, the place and spatiality give the furniture appurtenance easily without disturbing the ambiance. In such cases, in which the desk is a small part of another room the ability to fold it or hide it somewhere is very important. [Via Apartment Therapy]
Foldable Office Desk in Minimalist White Interior Design
We think these smart small space saving ideas can work in a multitude of designs and it would be sad not to take advantage of them. We would love to hear your opinion regarding space-saving solutions below on Facebook, Twitter, or G+!
Swing sets are quickly becoming relics of the past, which is quite depressing. There was a time when kids stayed outdoors right from the moment they were done with school for the day until it was pitch dark at the night. From tree forts to play sets, kids loved getting muddy and sweaty in the sun, but that has declined ever since technology took over. So, if you’re looking to change the course of this tide and make your kids proactive, healthy, and in love with the outdoors, then you should definitely make them a personalized swing set.
And choosing to DIY it all also gives you the chance to take the help of your kids and make them realize the importance of teamwork and also inculcate in them the skills of making stuff on their own. So, if you choose to go with even one of the following 47 DIY Swing Set Plans and play swing ideas, you will have contributed a great deal towards the mental and physical well-being of your kids!
I really love this playset. It is unique in spite of following the basic swing plus slide set designs for its core. On the left side, there is a small clubhouse made out of the A-frame itself, and this set has four A-frames with equal spacing. There is a slide installed on one end and two swings on the other. Pallets and planks are used to striate the A-frames on the slide side while the frames on the swing side are left bare. This set would look even more amazing if it were painted with some peppy colors.
This is a gorgeous swing set on the list, and it is not just restricted to kids. This is a special swing set designed for adults to recall their childhood and relax. Its color scheme is simply beautiful, and it is impressively aesthetic to look at.
Instead of adhering to traditional swing set or play set designs, this play set has built a mini-fort for kids. With a gabled roof and a small vaulted ceiling and high-walled fencing around the clubhouse, this play fort provides kids with a slide to get back to the ground while having fun and has a ladder in the back. It is covered enough to shield itself from the sun, and its vaulted ceiling beam protrudes outside to work as a support for a tire swing. Painting this play fort is a good idea.
This is a window-shaped swing frame that makes use of just four beams and four hoisters to hang the swings from. It does not take any great effort to build this swing frame and you can either buy readymade swings or make them on your own using a sturdy material for the seats, some hooks and hoops, and a whole lot of rope. What you can add to this swing to give it a personal touch is the color and patterns to be painted on the frame. The devil is in the details, and you can have a lot of fun making them.
This playset has all the essential components of a standard playset. It has a sandbox at the bottom of a moderately spacious clubhouse, with a slide attached to the clubhouse entrance. There is a ladder to get to the clubhouse, and the A-frame supports the swings. But, it is the swings that are different here and unorthodox though traditional. Instead of using the usual wooden plank or plastic seat swing, this playset chooses to have a pair of tire swings. Tire swings might not be popular today but they were all the rage back in the day, and there is no better way to reintroduce that nostalgia than to use them as the centerpieces of this playhouse.
This pretty playground doesn’t take much space but does offer a lot more in the same area. It has a trapeze bar installed on the outer side of the single A-frame which can also be used as a makeshift swing. On the inner side of the A-frame, there are two swings, while a baby swing is installed on a post connected to the clubhouse. The clubhouse itself has five platforms, a dizzying slide, and a swing connected to a beam on its far end. This packed yet sufficient playset is also quite easy to make on your own.
A simple swingset design with a slide and a ladder installed in the clubhouse can be made with a few days of hard work and with a thorough understanding of the plans. It is enough for more than a couple of kids to play in and has a trapeze bar for the ones with an adventurous flair. You can add more life to this playset by coloring it or asking the kids to color it instead. That’s surely a fun activity to partake in.
This swing set uses a basic design but upends it with a whole lot of style. The frames are accentuated, and so are the railings and the steps. The top area is spacious enough for kids or even adults to sit inside and have a meal or sleep or read books. The color scheme is very appealing, and I love how there are various shades of blue used in a striated form to make this play area stand out. Everything about this set is lovely and worth making.
A-frames look magical. There is something about A-frames that is grand, be it an A-frame used for vaulted ceilings or a swing set, and these A-frames are a real standout. Firstly, the color of this swingset is vibrant and very cool on the eyes. This shade of blue is a warm and soothing hue that goes well with its surroundings. Secondly, the horizontal wooden bars juxtaposed against a single vertical beam give a unique appeal to this swing set. I also love how the swings are so petite, plain yet so charming with their striking yellow color contrasting the blue of the swing set. Easy to make yet great to look at, you could give this one a shot.
More details athgtv.com
The Club House Swing Set
Every kid loves a clubhouse. Clubhouses are really cool and very special. They are like actual houses, yet much smaller but with all the coziness and prettiness required, in abundance! This particular clubhouse looks lovely and very charming, but it also has something that makes it a standout. This two-story clubhouse has an elaborate swing and slide set. On its right, it has an A-frame swing set with three sets of swings which are purchasable, and on the left, it has a great yellow slide that twists and turns enough to give kids a thrill and do it all over again, again, and again! And you can make it all by yourself!
More details atryobitools.com
The Homemade Playset
Parts of this playset resemble an outpost of a fort. I like how the terrace area of the playset that you need to access to get to the slide has large wooden boards for easily climbable steps. I like the wooden grills and the arrangement of them which makes them not only functional for security reasons but also aesthetically pleasing. The slide is premade and can be purchased. Besides this structure, the swingset stands freely, with a couple of swings hoisted on an A-frame structure for kids to swing on.
You don’t always need a full-fledged playset in your backyard. And it is not always a requirement to build swings just for the kids. You reserve the right to swing your tensions away and relish the experience, and you can do just that on a budget! This simple swing set comprises a lovely frame and thin planks for swings. I love the accentuated ends of the frame which are very oriental in design. This does not take much space and can be made with an elementary knowledge of carpentry.
Supported by two very large A-frames, this playground has nearly everything in it that other playsets do, but with the added twist of a refreshing new design. Between the frames is a huge sandbox and above it is a pretty big clubhouse space with a slide attached to get down quickly. A beam protrudes on either end of the clubhouse and has a swing hoisted on each end. This sturdy, well grilled, and expansive swingset is a great option goes to with if you want to DIY a playset for your kids.
Another amazing way to combine fun and productivity in the best manner possible. This swing and play set uses the extra space it has on the gabled roof of the clubhouse to install solar panels. As swing sets are set up in the backyard with a lot of sunlight on offer, attaching solar panels to the clubhouse helps you generate renewable electricity for your house and save on a lot of electricity expenditure. Moreover, it has a ladder and bridge that takes you directly to the clubhouse and helps you access the solar panels if you want.
I love how this particular swingset and playhouse design looks like. Firstly, this is way bigger than usual playhouses. Secondly, it has a clubhouse with a porch that looks like a fully furnished exterior of a real house. The A-frame is big enough to fit a few swings and a monkey bar. The area in the bottom can be used as a big sandbox. You can include a slide and perhaps even a small pool to relax in. Paint the clubhouse in any color you like and et voila! You have a brilliant playhouse set for your kids!
There isn’t a shortage of do-it-yourself material on the internet for just about anything and everything. IT is one of the prime advantages of taking the how-to business from print to digital. Easy access to information is a boon. So, having a lot of basic swing set design plans for your perusal is never a bad thing. Rummage through these plans to choose a swing set of your liking and get onto the task of building a swing set for your kids or for yourself or both.
The A-frame is the only part of a swingset to be in the spotlight for this DIY manual. Even though there are manuals that show you how to make big playsets, this particular one only focuses on making an A-frame swing and nothing more. In fact, it is simple in its concept and doable by those who haven’t really ventured into this before. This A-frame swing building guide helps you make just a swing and nothing else, and sometimes you don’t ask for more.
Jungle gyms are not just for those who want to join the forces in the future or be part of a boy or girl scout club. They are neat designs that encourage one to push beyond the limits and accustom the body to react to different physically demanding situations with reflex muscle memory. These jungle gyms are, hence, a great way to get your kids to exercise and be outdoors playing. This particular one has a few swings, a slide, a ladder, and a monkey bar.
This A-frame swing set is large. It has three swings hanging by the beam. Two swings are simple seater swings while the third one on the extreme left-hand side is netted and square and has a big standing area. It is great for the kids to swing in, with the rush of swinging experienced while standing instead of sitting. If you extend the beam on both sides beyond the A-frames, you can include more swings or if you want you can create more space between the frames too.
Here’s something unusual, but not unpleasant. Take away the elaborate swingsets, playsets, and slide sets and replace them with a space-saving, money-saving, and incredibly unique airplane swing. Great for toddlers when made in a small size, but also for kids of older ages with a bigger size, this airplane swing is easy to make and is extremely fun. With enough momentum, you can swing this airplane to create a magical feeling of flying a plane, and you don’t need a hanger to store it when you land!
I want this playset in my backyard, and yes I’m not a child anymore. It’s just such a stunning installation piece to have. I can imagine the sparks of imagination it creates for the children who play in this. It has two small rooms, one porch, one set of stairs, a fenced bridge, two terraces, and a winding swing. It looks neat and has two swings hanging under the bridge. It seems almost necessary to build and education for any child’s formative grasp of adventure. To top it off, it looks like a small fortress, and that is bound to inspire them to draw perhaps and write stories of grand designs!
A playset design that looks pretty standard but has the option of being customized, it can be made with the help of this very detailed playset-building guide. The instructions are easy to follow and comprehensive and will help you complete building this amazing playset in a short time. It is multipurpose and has a trapeze bar, along with a swing and a slide. The pictures included in this fantastic how-to guide make your task easier because the visual reference is simple to follow and understand the process much better.
An A-frame, sandbox, clubhouse, slide, and swing set, this is comprehensive and satisfactory. I like the small vaulted ceiling on the top of the clubhouse area and the stairs on the side. There are a total of five swings, with one double-seater swing and a backrest swing on either side of the A-frame. The sandbox is big enough for a few kids to fit in and the clubhouse above has a bench to sit on. The slide is big and looks perfectly wonky to have fun sliding on it.
More details at hot4cad.com
The Electric Swing Set
This is genius. Swing sets are all fun and games until someone decides to elevate them to a new level of greatness. This man decided to do just that with this otherwise simple, A-frame, metal swing set. Using an elaborate yet simple mechanism to generate electricity just by swinging in the swing, this man has figured out a healthy and easy way to renew your electricity and power stuff in the house. So, if you have kids who are obsessed with swings, have them swing on this particular electricity-generating swing and earn bonus cookie points for their efforts.
What if you don’t want to follow visual cues, references, and how-to blog posts to make your swing set? What if you want to make the swing set from scratch with minute attention to detail and a professional hand in the process of making it? For this purpose, these swing set plans come really handy. These blueprints are more than enough for you to get going with your swing set construction project. They are clear and to the point and with a little focus are pretty much comprehensible.
These adorable-looking plywood swings are made out of simple plywood boards, cut and shaped into lovely-looking swings, and painted to resemble flowers, planes, and other stuff that your kids will really like.
More details at dailyfix.co.za
The Swing Set Plans
I love detailed plans. They are extremely precise and give me a neat idea of what I need to do. Plus, the plans are lovely to look at. Somehow, architectural elements and furniture look great on paper and have a charm of their own. I found that this do-it-yourself swing set plans are just what I needed to build a sturdy swing set for my backyard. Though they are a tad complex for the inexperienced maker, with enough time spent in understanding and with a couple of helping hands, you can build the swing sets shown in these plans.
More details at playground-equipment.co.nz
The Big Tire Swing Playset
Apart from having two tire swings in this otherwise standard playset, the A-frame beam is extended a little to accommodate an additional pallet swing. What this playhouse also has is a single-sloping roof for the clubhouse instead of a standard gabled roof. There are always variations for any design and swingsets, of course, are no strangers to this rule. You can add more elements to it if you are looking for something a little more unique than usual. After all, it’s all about the imagination.
I love this swing. It is not just a swing that is installed to provide what it is meant to; it also is very aesthetically appealing. This petite swing has a single and simply carved white seat but two sets of A-frame ropes for the support that have a beautiful golden sheen interrupted yet linked by two metallic links and hoisted by two sets of ropes that go all the way up to the tree, with a slim, rectangular plank attached for support. It stands out and can be used by both kids and adults. It is a pretty piece to include in your outdoor furniture.
Simplicity does not always equate to blandness, because simplicity works wonders sometimes. This swing is for people who do not want or cannot have an elaborate swing set installed in their backyard. It is basic and doesn’t even require too many instructions to make it. It has two poles planted in the ground for the frame and a top piece for the swings to hang from. There is enough mud dug up and free of rocks and stones for kids to swing and fall on without getting hurt. The shocking red color is a real standout and is a welcome sight. The swings are made out of two wooden boards and ropes attached to them on either side and then hoisted to the top end of the frame.
More details at hgtv.com
The DIY Ultimate Swing Set
I like how architecture can sometimes look like installation art, and be breathtaking in the process. This particular swing set is one such piece that though appears simple in its make, is stunning to look at. It is a fully functional swing set with a rope bridge, a couple of swings, climbing sets, and slides. What’s great is that this swing set can be easily made by you! Just follow these instructions and get your kids to help you out and it will make for a rewarding family experience.
More details at blackanddecker.com
The DIY Swing Set
This is a neat swingset. It has a slide section with a ramp instead of stairs to climb. The roof area of the slide set is pretty enclosed apart from the ramp and the slide openings. It is amply high and supports the swingset beside it. The swing set is supported by a single A-frame, apart from the slide section supporting the beam. There are two swings installed in the larger area of the swingset and a third one on the other side of the A-frame partition. Here is also a bench and a seating area below the slide platform for the kids to rest.
Sometimes, less is more, and the least that you can invest in making a swing is by using an old car tire and turning it into a swing for the kids to have amazing fun with. I like tire swings. They are so easy to make and cost you practically nothing. They were really popular back in the day due to the ease with which they can be made and perhaps children today deserve a chance to discover just how fun tire swings are and make the kind of memories you did growing up.
More details at diynetwork.com
The Rock Wall Swing Set
Here is a playset that offers something new for you and your kids to try your hand at. Accompanying a single-seater swing set is a rock climbing board. Taking advantage of the A-frame and the angle it provides, this rock climbing board makes it really fun for kids to rock climb. The height is low enough to offer a safe landing in case someone slips or loses balance and falls on the ground and the rock knobs are easy to hold. You could add a small mattress at the bottom for extra security, and yes you can make this set on your own.
More details at diynetwork.com
The DIY Friendly Swing Set
I really love what this swing set looks like. The A-frame resembles a hut and is very stylish though simple. The swing set it is equipped with multiple options for children to choose from, and of course, try out one by one. There is a trapeze bar in the middle, which is always really fun though giddying sometimes. Flanking it is a seesaw and a swing on either side. Of course, you will need to buy the swing, trapeze bar, and seesaw, but everything else can be easily made by you.
A basic swingset design but one that is smaller than most, this swingset has two swings and one trapeze bar on either side of the A-frame. The clubhouse area is really small and has a small ladder and a slide to climb up to it and get down from it. You can add your own touch to this DIY swing set and perhaps color it to make it stand out from the rest. The sandbox in the bottom can be retrofitted to include something more unique. As for what that could be, the choice rests entirely in your hands.
Apart from elaborate swing sets, there are also small swings for kids that are pretty creative and easy and inexpensive to make, and also save a lot of space. Here are some really cool and simple designs for you to choose from.
Low-Height Swing Set
This is an extremely simple swing set designed for toddlers. Having a near ground-level height, it is safe for toddlers to swing in, all the while making them feel happy with this colorful and green fabric. A pretty simple DIY that won’t take too much of your time, it is also pretty cheap.
A skateboard swing sounds like a really super cool idea. Remove the wheels, and it looks like a miniature surfboard. So, your kids will be surfing, but on air! The how-to of it is pretty simple, and you can build it in no time.
Bucket Swing
Turning a bucket into a swing seems like a simple job, but this particular bucket swing has a very professional seeming shape that has been very neatly cut. So, following the tutorial is a bit essential if you want to make this one for your kids.
Turning an old and broken chair into a swing sounds like a pretty cool idea. It looks lovely and light and can be made in absolutely no time! Just follow these simple pictorial images.
More details at rustaupp.blogg.se
Quick To Make Tire Swing
This is as simple as it gets. All you need is a car tire with its other components still attached and then fix a rope to it which will then be hoisted on a tree. Extremely affordable, time-saving, and simple to make, and once you follow this heavy visual guide, you’ll be ready with this swing in no time.
This is one of the best-looking swings out there. It looks pretty complex at first but gets simpler as you read through it. Though this particular one is readymade and not really a DIY, you can make a similar one on your own once you compartmentalize the parts you need to make. It does require a little craftsmanship, but hey, a challenge isn’t a bad thing, is it?
More details at [easyazon_link identifier="B008VEYJJ0" locale="US" tag="homesthetics0a-20" link_id="190686" type="link"]Amazon[/easyazon_link]
The Handsome Husband Tire Swing
This tire twister swing made by Handsome Husband is pretty simple, yet the result is extremely fun. There isn’t much that you need to do, apart from some linking and drilling and hoisting, but the instructions cover the part of doing the job for you.
This tire swing was given a very charming makeover. Instead of looking drab and dull and not at all outstanding, this tire swing was painted like a ladybug and turned attractive for the kids and at the same time doesn’t give the appearance of a tire. You can paint other things on the tire instead of a ladybug, and you’ll have vibrant swings for the kids in no time.
Source Unknown
Multiple Tire Swings
Multiple tire swings are awesome and fun. They look unique and are packed from all sides, while also giving your children and their friends enough standing space that more than one person can swing at a single time. They also have a balanced weight and pretty easy to make.
This tire swing was made to look like a seat, and it is pretty cool! It isn't rocket science, and you can set up this swing in no time. Even though the site that shows you how to make this swing is in German, you can make out the process with the visual references provided in the guide.
There is a whole lot of tire DIY Swing Set Plans featured on this blog. You wouldn’t have known there could be so many different types of swings you could make from tires. And none of them look any more difficult than an elementary buildings.
More details at plus.google.com
So, which DIY Swing Set Plans do you think you can go for? There are a lot of them to choose from! Some are really beautiful, and some are very practical and cheap to make. In the end, it depends on the space, time, and budget you have to create a play area for your kids.
To quote Francis Poldark, a character from the 18th Century set series of novels titled Poldark, get ready for the ultimate house party.
Well, to figures of those times house parties involved balls, liquor, and tea. And that’s what you’re prepping for.
via Pinterest
One doesn’t need a specific reason to throw a tea party. A tea party just happens to be, pouring into occasions effortlessly and to everybody’s taste. There are many ways to throw a tea party and as many for decorating it. You, of course, are the warmest of hosts with the right amount of sweetness to delight your guests the way they would not expect.
For such an occasion, or one can say sets of occasions, here are some unique and exciting ideas for your tea party decorations.
Tea Party Decoration Ideas
Lights Tea Party Ideas
Solar Lights
Try looking for something that conserves energy and makes the best use of available light already. Solar lights are easy to install yet to wrap them as or around complicated things and shapes, you’ll need more than just lights. Get solar-powered LED strings, an old teapot, some craft wire, a large washer, a hot glue gun, and a wire cutter. Start with unwrapping the LED strings into 30-40 inches-long sections. Fold them in half, intertwining them into a single string section.
Continue with the process till you have several strands of string lights connected at one end. Take a craft wire of around 20-25 inches and loop it through the common end of the light strands. Make sure it’s tight enough so that you don't have rogue strands dangling around. Take the other end of the craft wire through the spout of the teapot and into the interior of it. Wind it through a washer and glue it inside the teapot. In the end, stick the lid of the teapot shut. Et voila, you have your very own Spilling Teapot Lights to hang around your garden.
Fairies in the Bush
Add a little magic to the garden while you and your guests have a sip of the chai. The requirements to make this happen are quite simple to acquire and don’t demand much work from your end: Old glass jars/wine bottles, Fairy lights, craft paper, long-lasting battery, hot glue. Now we’re going to make a standard fairy-lights-in-a-wine-bottle decoration piece, except we’re going to add a little bit of magical fairy dust to it.
Take an old glass jar or a wine bottle. Take a piece of craft paper equal to the circumference of the base of the container and cut it in the shape of a fairy with some grass around it. If you're using a jar, you can easily roll up the paper cutout and suspend it at the bottom. But if you're using a wine bottle, you could use some glue and stick the cutout on the outside of the bottle. Suspend the fairy lights inside the container and place it under a bush. Leave your guests awed at the magic happening in your backyard.
Fairy Lights
Fairy lights have been quite popular in recent years. You can create a firefly effect in your garden by hanging large glass globes around your trees and suspending fairy lights in them. You’ll get bonus points if you have multi-colored fairy lights in a single globe. This is a simple yet fascinating tea party decoration idea that your guests will love!
Floating Tealights
Decorate your table or backyard fountain with tealight candles floating on the water. Fancy and lightweight candle holders can add color to your floating garden.
Hanging Hats
This would require a trip to the thrift store or a wholesale dealer. Buy some top hats or bowler hats and drill holes through their top center. Pass the wire through them and attach a socket and bulb in the cavity of the hats. Install them from the ceiling or a tree branch, with an electric source on the other end and voila!
Glow Sticks and Bottles
Fill old wine and champagne bottles with glow sticks. You can additionally attach candles on the top of the bottles for a dual lighting effect that is guaranteed to impress. If both seem to be a little tough to do, you can fill the bottles with fairy lights too.
Pathways Tea Party Ideas
Colorful Pebbles
Create a colorful garden pathway with colored pebbles à la The Yellow Brick Road or the Rainbow Bridge, and see your guests lose themselves in a world of fantasy.
Gnomes
The old and weary yet happy-looking gnomes never grow old. Their decorative spirit is always high, though they are quite short themselves. You can litter your garden or your hallway entrance with colorful little gnomes.
Directions & Pointers
Directional arrowheads and signboards are of course merely decorative in this scenario, but they also add a little adventurous feel to this leisurely venture of tea drinking.
Ribbons
Ribbons are easy to buy, easy to use and come in large quantities for dirt cheap. They also look pretty fantastic and definitely add a lot of color to the occasion. With ribbons, you are free to experiment with shapes and lay them out along the pathway with the help of sticks buried in the mud.
Floral Tea Party Ideas
There are several floral designs you can go with to doll up your tea party and make it smell as good as your tea.
Hanging Flowers
Take a small, lean branch from a tree and tie a secure thread on two corners to create a sort of beam for the flowers to hang from. Hammer in a nail in the wall to hang this branch beam from. Before you hang the beam from the nail, get a bunch of strings, earthy colored preferably, and cut them in varying lengths, ranging from a feet to two. Tie the strings on the branch, spacing them out at a distance of three inches. To these strings attach the flowers to their stem and hang this little masterpiece on the wall.
Leave Shapes
Using long, unbroken stems of chinaberry leaves or leaves of similar shape and size, you can decorate the walls or tables with whatever shape you want to give to the stems. Use cellophane tape to bind the leaves together in shape, and use thin strings for extra reinforcement. You can add flowers to the leaves for that little more sass.
Leaf/Flower Rings
Instead of creating long-winded shapes with leaves, you can take average-sized plastic or fiber, or wooden rings and cover them half with the flora of your choice. You can then glue the rings together and hang them on the wall using nails or for a more temporary purpose, use detachable wall hooks.
Glass Pots
This one is standard and doesn’t require any effort at all. You can convert your glass jars and bowls into temporary homes for flowers. Fill them up with fresh water, attach ribbons to them, and add fresh flowers. Use them to decorate the table or accompanying furniture. Plus, you don’t have to go with just roses. The choice is up to you, and the flower shop will be of enough help during your selection.
Jar of Goodies
You can spice up the glass pots with more decoration by adding colorful pebbles, beads, candies, jellies, or anything that comes to your mind.
Crockery
It goes without saying that for a floral-themed tea party, laying the platter with floral crockery is the cherry on the cake. Your selection has a broad range, with floral crockery ranging in styles from Victorian to modern, minimalist to extravagant, and simple to elaborately floral-shaped designs. And this does not restrict itself to just the plates and cups. Even the spoons, sugar mixers, and pots have a colorful variety.
Wrappings
You can also use floral designs for your cupcake wrappings, for tissues to wrap the spoons in and to embellish other assortments that are on the menu.
Teapots and Cups
There is no better way to blend a tea party with a floral theme than to use sets of teapots and teacups as containers for a vibrant bunch of flowers. It only gets better if the pots and cups have flower embossing on them.
Cakes With Petals
This is a job more for your baker and caterer than for you, but if you’d like to give it a personal touch, you’re most welcome to. You can serve your guest's cupcakes in literal cups, with the cakes shaped like flowers and other floral designs. It would also be a pleasant surprise when you serve them.
Flowers In Your Tea
Use organic rosebuds to bring in that extra bit of freshness to your tea, serving them as condiments in the tea itself, floating in it and adding their essence to the taste. In some cultures, rose petals are consumed during ceremonies or for spiritual purposes, and rose in your tea adds a spiritual twist to your wonderful party.
Bonsai
Add a bit of freshness and greenery to your table by keeping bonsai pots on it. You can decorate it by keeping wrapped chocolates, cupcakes, and macaroons at the base of the pot, so you have a teeny tiny Christmas tree gracing your summer parties.
Tea Sets Ideas for Your Party
Tea sets are the eponymous decorative pieces of a tea party. You might add a whole lot of everything to your decoration, but in the end, your guests are going to want to be served tea, and impressing them with a tea set that leaves them wide-eyed is a good idea.
Minimalist
Plain does not always mean dull. There is beauty in simplicity; otherwise, minimalism would not be the go-to design palette for decorators today. When choosing a set for your tea party, going with minimally carved yet exotically colorful tea cups and pots are refreshing.
Victorian
Victorian teacups are exquisite in their make and design. Creating Victorian crockery is an art on its own with careful consideration for the shape, embossing and color schemes.
Floral
Be it patterns of flowers or elaborate floral shapes, teacups, saucers, and pots featuring flowers are always in demand. There is this unspoken camaraderie between flowers and tea that nobody really knows the reason for, but everyone accepts it as perfect. The market is rife with such intricately crafted flower tea sets.
Pot and Cup Sculptures
Less of a DIY and more of a purchase, depending on the level of complexity, pot, and cup sculptures are amazing decorative pieces, not only for your party but for permanent use. With a hot glue gun, you can glue cups one above another, or make sculptures like the pot pouring into the teacup, and hang them in your garden or your hall to wow them all.
Glow In The Dark Utensils
What if you light up your tea party indoors in absolute darkness but the subject of the party is the only thing glowing? Glow-in-the-dark cutlery, available through companies like Glow Company can provide you with cups, pots, plates, knives, and forks, all unremarkable in broad daylight but attention-stealing in darkness. Conversely, add shimmer to your plain white party balloons by dipping them halfway in dilute glue and coating it with golden or silver glitter. If you're going the fun way, use colored balloons with suitable colored glitter and hang them around like shiny disco balls.
Juice Pitchers
Contrast the serving of tea and its fancy crockery with colorful pitchers filled up with equally colorful fruit extracts ready to reinvigorate your guests if they are up for something cool to drink. Depending on the theme of your party, you can paint the pitchers or attach decorative add-ons.
Umbrellas Tea Party Ideas
Umbrella At The Table
If you wish to add shade and color to your tea party on a very sunny day, just hang up opened umbrellas overhead. This will keep the breeze flowing adding to the summer feel of the party. And if the theme you’re going with is Victorian or something old school, you can place a basket at the door filled with vintage seeming umbrellas or hang them on the coat hanger.
Umbrella Ceiling
Upscaling from the tabletop umbrella, an umbrella ceiling made by attaching twenty or more umbrellas together and tying them end to end by trees or beams will give the guests and people passing by a long moment of wonder.
Cloth and Paper Tea Party Décor
Name cards
Adding name cards is proper etiquette and shows that you care about that extra bit of work to make your party look all the more proper. You can place the cards on the table beside the plates, or you can keep them in the saucers by the cups, lay them down in the plates or fix them in the forks. You can also use them as flags masted upon the cupcakes. As for the size and color, there are innumerable options for you to choose from.
Lettering
Lettering your name cards can be a fun exercise. Thanks to the internet, you have the ability to choose from thousands of fonts, many of them free to use. According to the theme of your tea party, the guests that are due, and the occasion, you can pick and choose the type of font that will suit you best.
Origami
Paper origami is a wonderful option for decoration. If you’re not able to make origami of a wide variety, you can always call upon an origami craft maker for help. Based on the theme and occasion, you can order for the type of origami that will go with the party.
Newspapers
Tea and newspapers go hand in hand. What if you used vintage newspaper prints for table mats and napkins, and perhaps fancy your guests with a handful of the real ones from your nearby vintage store? You can also get newspaper prints on a cloth to cover the tables.
Magazines
Similar to a newspaper, but fancier when considering display, customized or theme-appropriate magazines are a fun way to add character to the party.
Menu cards
Give your guests a taste of the fine dining experience in your backyard with beautifully designed menu cards.
Ingredient Handbook
This one’s not common but is something your guests will definitely appreciate. You’re not only serving them great tea, dessert and course meal, but you’re also giving them a chance to replicate it in small, crafty handbooks telling them the secrets of your success!
Napkins
Need minimalist table decorations without spending a lot? Fancy napkin folding is a great bet. Use your origami skills to make colorful napkin patterns. Make sure you start with a pressed napkin to keep the creases sharp. You could also try some of the rare shapes from DIY tutorials. Napkins with different designs can add variety to your table, along with your food.
Custom Tablecloths
Bored with your normal white tablecloths? No worries. Use your old colorful bed sheets for this purpose. Cut two inches-wide strips from the dangling part of your table and braid them with similar underlying tablecloths. Or a simple knot with the rest of the strips flowing away can look thrifty yet chic.
Paper Clocks
Tick tock, it’s time for tea. A good way to add to the tea time theme is to get paper clocks or print and cut them out on your own and stick them with each other in whichever shape or form you please to hang them by the tree or shelves or the ceiling. You can also use them in place of table mats or print them out as stickers to paste on flat saucers. Using tea bags instead of clock hands will add to the theme of the party. You can glue them to the paper clocks using a hot glue gun or attach them with a string.
Paper Flowers
Paper flowers are easy to make and can look increasingly colorful if made from a wide variety of paper designs and shades. The size of the flowers is entirely up to you. You can use scrap paper and old newspapers too for this and save up on the expense. You can hang them on the walls or by the ceiling or behind chairs.
Door Knobs
Fancy or quirky door knob cards are a small but significant addition to the overall decoration of your party.
Card Tricks
Playing cards add an active flavor to any party. Not only are they engaging, but they are also customizable for making card sculptures. Moreover, they can be used as name cards too.
Curtains and Swings Party Ideas
Tyre Swings
Add a hint of nostalgia to your backyard with a few slabs of wood and old rubber tires. Hang them by the tree with strong nylon ropes, and you'll have your swings ready in no time. Your guests and your kids will thank you.
Pallet Swings
Pallet swings are both easy to make and light on expense. Buy a few pallets from the hardware store, and some small cushions and mattresses with colorful bed sheets and covers. You can go through DIY tutorials online for making pallet swings, and you can make them as single-seaters and as full-fledged swinging beds. You can also customize the shape and materials for a truly outstanding result.
Bling Curtains
Tie up long golden bling curtains by your verandah or gazebo for an afternoon tea party. The golden hue will complement the sunlight. Similar silver bling curtains can reflect the moonlight for your evening gatherings.
Candles
Antique Holders
Use antique metal candle holders for your evening parties. Aromatic candles can elevate the mood of the party. Mild scents like Holly Wreath, Rosemary, Jasmine, and Green Apple can be good yet less nauseating for the food table, whereas Vanilla, Ginger, and well, Tea scented candles can make your entire garden fragrant.
Crafty Candles
The image of a long, white candle is in everybody’s mind but buying theme-appropriate, differently designed, and colorful candles in bulk to litter your party with light will give people a refreshing alternative to the everyday electric lights.
Eco-friendly Lanterns
If you're looking for eco-friendly material to change the façade of your venue, hanging clay lanterns and lighting candles inside them can brighten up your theme. These lanterns can be long-lasting without adding to your plastic waste.
Thematic
This category has the potential for unlimited customization. Themed parties are always fun, be it Halloween or Christmas, movie or comic, literary or periodic.
Victorian
Hah. This is the ultimate tea party theme. Replicating the time when tea parties were the equivalent of modern-day raves, this theme can be a bit heavy on the budget side if you are going for a fully Victorian setting, but manageable and fantastic to look at otherwise too. From trays to the crockery, tables, and stools, there is much that you can do.
Alice In Wonderland
Definitely, the most popular tea party theme in the world, Alice in Wonderland is tailor-made for the occasion. There are fewer scenes in literature and classic stories more iconic than Mad Hatter’s Tea Party. A significant introduction for the eponymous Alice to the wonderful wonder of Wonderland, the tea party, is peppered with the various inhabitants being hosted by the fantastic Mad Hatter.
From the ‘We are all mad here’ quote featuring just about anything in your theme to arrows directing everywhere, an Alice in Wonderland theme party is rife for experimentation. You can make or order colorful Mad Hatter hats for each of your guests, line up cakes with floating pots, and decorate the party area with small or big colorful mushrooms, to either sit on or look at.
Beauty and the Beast
Another classic that has a dinner set as a centerpiece of its second act, Beauty and the Beast, like Alice in Wonderland, plays with costumed themes of the 17th, 18th, and 19th centuries. Lumiere, Mrs. Potts, and Cogsworth are characters that can be easily adapted as decorations for your party, while golden curtains and a snowball theme will liven up your party as they did for Belle. This theme also allows you to add French influences to the primarily British tradition.
Harry Potter
Moving on from the Victorian age but still retaining some of the old world essences, a Harry Potter-themed tea party also works for Halloween. Printing the Marauder’s map on tissues, embossing the school houses insignia on the napkins, hanging paintings from the films on the walls, and yes the floating candles will make your tea party a magical affair. For the candles, you needn’t do much.
Take a bunch of at least fifteen candles, drill holes horizontally right through the upper end of the candles and pass barely visible strings through them. Hang the candles by a mast or beam from the roof and hang them up. You can also effectively have a long table tea for dinner post-tea.
Downton Abbey
The television series is the very epitome of British high society manners and customs. Fewer stories can so easily blend humanity and royalty as Downton Abbey has. Bordering on the Victorian side, but with a knack for the flashy Twenties, a tea party themed after Downton Abbey is one for the history books.
Chinese/Japanese/Indian Tea Party
Why not surprise your guests with something so extraordinarily unique that it leaves them with the fondest memories of the experience? Given, this will require a lot of decorative endeavors for one party, in the end, it is worth the effort. Tea is an everyday commodity for people in India, China, and Japan.
Be it the classic Chai, or the herbal one, decoction or iced tea, people from the East love their tea. Reinvigorate the senses of both your guests and yourself by not only decorating your party in the style of the East but also serving them the plethora of aromatic flavors available in the region.
Turkish
Bringing an Ottoman-Arabian flavor to the party, with an exquisite seating arrangement similar to the Indian one but unique in its own way, a Turkish-themed tea party allows you to add refreshments like the shisha to the mix, even if it is only for show. Some esoteric Sufi music will set the mood perfectly for your party.
Halloween
Serve a spoonful of spooking with a Halloween-themed tea party. Jack-O-Lantern skins for your teapots sound like a cool idea, doesn’t it? The usual Halloween decorations would do fine for your tea party, but you’re always free to dabble in stranger imaginings.
The Hobbit/Lord of the Rings
This definitely gives you the perfect way to ask your guests if they’ll fancy a second serving. This 20th-century literary classic and beloved pop culture film series. You can lift several visual cues and witty quips from the films for this theme. Small hobbit holes, barrels of tea with a deep-necked spoon to pour it, or incorporating Victorian elements are some ways you can go about for your theme.
Due to the overbearing presence of the Elves in the lore, you have countless options for an Elven-themed tea party. No one gets more high society than the high-minded and dainty elves of Middle-Earth. They are royalty with a spoonful of ethereal wonder, and their abodes reflect the same. Floral and silken decorations come to mind when you think of them first. Using white lights for lanterns recreates the bluish aura of the Elven homes.
A Star Wars-y Party
Moving away from the medieval and folk themes and onto a galaxy far, far, away, a star wars themed tea party sounds fantastic. Saucers painted the Death Star, sugar mixers colored like the lightsabers, X-Wings, and the Millennium Falcon printed as paper hangings are a few ways you can incorporate the faraway galaxy into your tea party.
So, are you ready to throw the ultimate tea party? What ideas impressed you the most? Are your brain cells popping up with crafty new ways of making tea party decorations? Or perhaps you would like to mix and match a number of ideas for a truly unique décor. Of course, there is no limit to what you can do once you’re up to the task of wowing your guests with fantastic tea and remarkable decoration.
If you have ever dreamt of building and living in your own tiny home then this article might just make your dream come true. It is not hard to see why Tiny Houses are a thing these days. Not only does it let you avoid huge sums of debt, they also let you embrace life in the serenity of nature. So in this article, we have a list of 37 DIY Tiny House Plans that are pretty easy to build without incurring too much expense.
The Homestead Cabin is among the most popular tiny house plans thanks to the gorgeous exteriors and a decently spacious interior that will ensure a life of peace and tranquility. The house itself is a 12’x24’ one with a 12/12 roof and a loft. The lower level of the house has enough space to fit in a living room, a small kitchen, a bathroom, and even a laundry closet. The loft, which spans about half the house, can either be left as it is or utilized to construct a second floor for even more space.
Complete instructions at tinyhousedesign.com
2. The 8x12 Tiny House
This tiny house plan is for all those folks who want to stick with a basic design that provides a high level of utility. While this house, measuring 8’x12’, is significantly smaller than the previous one – its primary advantage lies in the simplicity of the design. This is definitely a great choice for those of you guys that are somewhat apprehensive about the idea of building your own home. The design is easy to implement and, with a little creativity, this home can really be turned into a show place.
If you happen to own a small, mobile business that requires you to move your mobile stall around a lot, then this is the plan for you. This isn’t exactly suitable for living but serves great as a mobile market. You can easily set this house up at different farmer’s markets or other vending areas where you can conduct your business. The Market House itself is a very compact 5’x8’ house and features a glass window in the front, next to the door.
This tiny house is perfect if you plan on living solo or maybe even as a couple. The tiny 8’x8’ house cannot hold a family but will surely suffice for two persons. The house itself is extremely minimalistic and is pretty easy to build as it does not have any complex structures. It has just enough space for the basic amenities such as a bathroom, a small kitchen and a sleeping loft which is accessed above the main living area.
This one’s for all those who love to live life without having to depend on any agencies for basic needs. Self-sufficiency is what this house offers you as its design has been based on the idea of being run on solar power. This is especially great if you’re looking to live off the grid in a place that does not have access to electricity. So if you’re a person who loves the idea of living in solitude in a self-sufficient manner, this is just the house for you.
Yet another solar-powered tiny house for those of you who prefer living self-sufficiently in a far-off place. This house is significantly bigger that the previous one, measuring about 8’x20’ and designed to run strictly on solar power. While the design may be a little more on the complicated side as compared to a lot of others in the article, it does offer you quite a lot of facilities for a house this small. Besides the plan has been prepared to show you how the home would look in both 2D and 3D which will ensure you know exactly what you’re going for.
Complete instructions at tinyhousedesign.com
7. The Writer’s Cottage
As the name suggests, The Writer’s Cottage is a safe haven for all those aspiring writers that dream of living in a state of blissful solitude and expressing their thoughts and beliefs on paper, undisturbed by the bustle of the city. This is almost like a tiny little paradise for people that dream of becoming a writer someday. The house itself looks very warm and welcoming, featuring all the basic amenities such as a small kitchen, a Sun-Mar composting toilet system, ample space for books and even a small folding writer’s desk.
Complete instructions at thesmallhousecatalog.com
8. The Sago Plan
The Sago Plan shows the house is a whopping 670 sq. feet which are quite big for a tiny house. This is perfect for those that plan on moving into a tiny home with their family and living in a cozy little home that has everything you need to live a wonderful life. The house even comes with its own little porch apart from a few other luxuries such as a basement with a cold cellar, a fireplace, and a full-sized kitchen. If you wish to live big in a tiny house, this is what you should be looking for.
9. The Ash House
The Ash house is a tad smaller than the previous house, coming in at an impressive 480 sq. feet of living space. The design itself is quite basic but pretty to look at and it is very easy to build without incurring many costs. This is great for singles, couples, and retirees that wish to live a minimalistic lifestyle. However, you do get everything you need in this house - a decently sized kitchen, a bathroom, a bedroom, and even a basement.
10. The Backyard Bungalow
As you might already have figured out from the pictures itself, the plan of this tiny house is very similar to the previous one and offers you pretty much the same amenities as the last one. The primary difference between the two homes is in its design which has been tweaked and modified to make it more suitable as a guest home in your backyard. The house features a crawlspace instead of a basement and is perfect if you plan to put up a small bungalow in your backyard for guests.
The Cascadia Cottage is probably one of the most adorable designs on the whole list and offers you more room than most other houses in the list. It has around 560 sq. feet of living space where you can comfortably spend your life. The house is designed to have only a single floor which comes with just one bathroom and a bedroom. If you are a true believer in living simply and have downsized your possessions to the tiniest extent, then you should definitely check out this plan.
If you are someone that loves to be on the move constantly and don’t want to restrict your home to just one piece of land, this is the home for you. The Bohemian-style home is on a trailer which will allow you to move it around as you, please. The house itself is quite spacious and cozy for a tiny house and has an organic flair to it thanks to the cedar shingle siding and a curved roof.
If you’re someone who loves to go against the norm and prefers unique designs over the same old boring stuff, then the Texas Round House should be your ideal choice. Round houses aren’t just unique but they also hold up better against the elements of nature as compared to traditional designs. The design of the house looks super cool and has a commendable 616 sq. feet of living space inside.
This is yet another unique design that serves great as a tiny house. The ladder house features two stories which equate to an impressive 531 sq. feet of finished space. Additionally, this house also comes with a basement underneath the building which can serve as a root cellar. So if the idea of owning a two-story tiny house that also comes with a root cellar excites you, you should definitely check out this design.
This is yet another house that is on wheels and is perfect for anyone that is on the move constantly. If you love traveling or your job requires you to move around a lot, you can easily take this house along with you and not have to worry about checking in to a hotel every time. This way you can cut down on your traveling expenses and also cut down on your living expenses as a tiny home requires a far lower monthly expenditure compared to a regular house.
The Hydrangea Tiny House is definitely one of the biggest houses in our list of the best tiny house designs. This house has a whopping 908 sq. feet of finished space which is definitely enough for a small family. The house comes with 3 bedrooms and 2 bathrooms and is perfect if you plan on moving to a tiny home along with your entire family. It also comes with a full-sized kitchen and high 8 feet ceiling.
Not all people have the luxury of taking their house along with them wherever they go. But you definitely can do so with this amazing design that is engineered to be mobile. You may have your own reasons to not lead a traditional settled lifestyle and hence this house has been designed keeping people like you in mind. The house itself is fully featured and comes with a bathroom, kitchen and a sleeping loft apart from a few other amenities.
18. The Forest Rose Tiny House
The forest rose house is, in my opinion, the most adorable design on the whole list. Being a tiny home does not stop this house from being as charming and aesthetically pleasing as a luxurious mansion. While the house may appear tall, it actually only has 440 sq. feet of living space with just one bedroom and one bathroom. This house will perfectly assure you a comfortable life if you plan on staying solo or as a couple.
Yet another tiny house that is on a trailer and designed to be on the go constantly. The design of the house is quite adorable and measures 24 feet in length while having a width of about 8’6”. That is an impressive amount of space for a house that is on a trailer. The real beauty of the house lies in its interiors which is beautifully designed to provide you with all kinds of convenience.
The Lookout Cabin is one of my favorite designs on the list simply because of the second-story balcony that comes with it. With just around 460 sq. feet of space, this cabin conveniently fits in two bathrooms, one bedroom, an all-purpose room, and a balcony. Besides, the cabin comes with a stairwell which is rarely seen in a tiny home. This can serve as an amazing vacation home for up to a couple of people.
Among all the unique and even bizarre designs that we have come across, this house is one of its own kind. The tiny home is actually a fully working amplifier and you can plug in any musical instrument of your choice into it. The best part is that the deck of the house itself can serve as a stage. The main part of the L-Shaped house is a 400 sq. foot stationary one while the “amplified” side can be attached to a trailer and taken on an adventure.
This is definitely one of the most amazing houses that I’ve ever laid my eyes upon. This tiny home comes with its own little greenhouse and the entire house can be moved around by attaching it to a trailer. The design itself is nothing short of a masterpiece and the house can easily accommodate a couple for a comfortable lifestyle. It has a total of 323 sq. feet of living space.
This tiny house, known as the Nugget, is definitely the most livable 12-foot home that you’ve ever seen. It is complete with full off-grid capabilities and you can easily use this as a weekend gateway or a travel companion and even live in it comfortably as long as you are alone. The house comes with a full bathroom, a lovely bedroom, and a huge kitchen sink.
This cottage is one of the coziest-looking houses that I’ve seen in my life. Living in this adorable little home, which you can also move around on wheels, must be a sweet experience. The size of this little home is enough for a couple to live comfortably and it also comes with all the basic amenities that you’d expect out of a tiny house.
The Cheddar Mountain Tiny House might look small when observed from the outside. However, a little peek into the house will reveal a big and grand farmhouse-style design that is bound to impress you. This house features repurposed accessories, subway tiles, rich hardwood floors, and shiplap walls, all of which combine to give it the perfect balance between a rustic-chic and modern convenience.
This design has been engineered by a Dallas-based designer named Paige Morse who renovated two century-old sheds in her backyard to create this comfy little home. This can serve as an excellent little guest house, in case you lack one in your own home. It has two rooms and 250 sq. feet of space which is sufficient for a single person to live comfortably.
As a child, did you ever dream of living in a tree house? Observing nature from the midst of the wilderness and living a life of full freedom. Well, the day has come when you can finally make that dream come true. This amazing tree house looks like something straight out of my childhood dreams and boasts of an impressive living room, an office and a comfy little bedroom.
This definitely is one of the sleekest and most unique tiny house ideas on the list and if you are someone who loves to travel, then you are bound to love it. The house is attached to a trailer and comes with 200 sq. Ft of living space. The tiny home features a farmhouse sink, shiplap, and subway tile all crammed into the tiny house. However, the most defining feature of this house is the sliding glass garage door that has a deck that pops out and can be used as a porch.
The Bestie Row was created by four couples in Texas it basically is a mini neighborhood that consists of four houses. The houses are all very basic and minimalistic consisting of just one bedroom, a bathroom, and a living room.
More details at countryliving.com
30. The Cabin by the Woods
This one is a dreamy little house nestled in the midst of the quaint wilderness, undisturbed by the chaos of civilization. The design of the house revolves around self-sufficiency and hence comes with solar panels on the South-East facing porch. The house looks warm and cozy and boasts an impressive 550 sq. Ft of space which is ample for a couple to live comfortably.
Named after the ship from Moby Dick, The Pequod is a prime example of creative living. It features some of the basic modern amenities and has upscale materials and looks nothing short of a work of art. The Pequod is 26 feet in length and weighs around 11,500 pounds and is perfect for all those artists that wish to live life off the grid.
Two mobile trailers were cleverly turned into one 400 sq. foot home by the owner of this Austin tiny home. Just one look at the house will reveal all the artistic details and vibrant colors that speak a ton about the owner of the house. The two trailers are connected only by a deck and look like an excellent little place to lay back and relax during the weekends.
A warm and cozy wave of sweet country characters greets you as soon as you step inside the 250 sq. Ft tiny home. The design is one of the neatest and most organized ones that I have seen in the hundreds of tiny house ideas that I have scoured through. The house features farmhouse-inspired wooden accents and is always teeming with natural light throughout the daylight hours.
This is certainly one of the most vibrant tiny houses featured on the list. Known as the “Savannah” this unique little house is one of the many such masterpieces in Oregon’s Mt. Hood Tiny House Village. The house features yellow cedar planks that are accentuated by the red shutters and white rim.
The Indigo tiny home by Driftwood Homes USA boasts of bold and contrasting interiors that lend a sleek and modern feel to it. Careful choice of colors and smart utilization of space sets this tiny 280 sq. Ft home apart from the rest of the crowd. The house is definitely an amazing place to lay back and take a break from the hectic life in the city.
This tiny home is a true minimalist’s paradise which is clad in a siding that is made of recycled pallet wood. The 196 sq. ft home feels spacious despite it being one of the smallest in the entire list. It is beautifully lit in bright incandescent lighting and comes with all the basic amenities required to live a cozy life.
Ending our list with one of the most unique and environment-friendly designs is this beautiful little home designed by Broadhurst Architects. The design of this tiny home is inspired by American Corn Cribs which were used for storing corn. This 250 sq. foot tiny home includes a sleeping loft, a fully functional bathroom an expandable kitchen wall, and even a living room. The entire house is constructed of sustainable and recyclable materials which can be dismantled and relocated elsewhere.
More details at www.thecrib.info
What do you think about our tiny house plans collection? We would love to hear your thoughts in the comment section below!
It's that time of the year again. It's time to go out into the pumpkin patch and look for the best pumpkin to work with. After all, pumpkin carving is a big part of Halloween fun.
But when adding Halloween décor to our homes, why stick to a classic jack-o-lantern when you can be creative with your designs? That's where this article comes in.
These are the best drawing ideas for pumpkins to help you carve the spookiest, most creative pumpkins in your neighborhood.
The 50 Best Pumpkin Drawing Ideas for Your Halloween Pumpkin
The sky's the limit when it comes to pumpkin carving. However, before you can start drawing and carving, it's best to look for inspiration online to help you.
These 50 designs should give you the perfect pumpkin carving idea to work on.
Carving a pumpkin head is a classic way to make a jack-o-lantern. However, you can easily step it up by adding the skeleton's torso to complete the spooky look. Others would even use three pumpkins to form a whole scary skeleton pumpkin.
Turning a pumpkin into a vase is one of this list's easy pumpkin carving ideas. Whether you're using this to decorate your front porch or dining area, this carved pumpkin will be a great way to display your fresh flowers this season.
Tip
You can use a plastic cup to keep the stems in place.
If you're into astrology, astronomy, or anything to do with the stars, why not add them to your lawn? This pumpkin carving design is sure to bring the cosmos closer to you. Making it with a hollowed-out pumpkin will also help those stars shine bright at night.
What can be more spooky than a haunted house? Instead of having the ghosts haunt your home, you can easily carve one out for them to live in. You can carve the place onto one pumpkin or carve it onto three pumpkins to make a whole mansion or tower.
This creative way of decorating your pumpkin doesn't require you to carve too much. You can hollow it out and create holes for your flower stems or hot glue the flowers onto the pumpkin shell. Either way, you'll have elegant pumpkin décor for your house.
Witches are a Halloween staple. If you can't find a green heirloom pumpkin for this project, you can use spray paint to turn your pumpkin green. Add a parsnip nose and witch hat, and your witch pumpkin will be ready to hex anyone that walks by your domicile.
Tinker Bell is a beloved classic for kids. This pumpkin can help you capture some of her magic. This type of carving may just attract pixies and fairies to sprinkle their dust around your home. Some of the trick-or-treaters might even match their costume with your pumpkin design.
This spooky pumpkin design is probably not for the faint of heart. You can use a linoleum cutter to carve out the face. Then, settle its victim made of a smaller gourd into the pumpkin's mouth to add to the fear factor. This pumpkin design is sure to scare some trick-or-treaters.
Add a little joy to this spooky time by creating a rainbow on your lawn. You can use mini pumpkins as the clouds for your design. If you don't have mini white pumpkins, you can simply paint over the pumpkin shell.
If you're looking for a more rustic vibe for your pumpkin, you can check out the different hen and chicks templates available online.
A large pumpkin would be the perfect mom for the chicks made of mini pumpkins. You can also attach chicken wire using hot glue to add a rustic vibe to your pumpkin design.
This pumpkin carving idea can end in one of two ways. It can be considered aesthetic, or it can induce intense trypophobia (fear of small holes). Either way, as one of the easy pumpkin carving ideas, it's also one of the most common designs you can work with.
This jack-o-lantern carving idea will have you singing, "Ba-ba-ba-ba-ba-nana!" Carving a Minion pumpkin has become a trend since the Despicable Me franchise took off, giving these adorable characters another way to appear in Halloween events.
This pumpkin design will surely be a Killer Queen with all the Freddie Mercury fans. While it won't give you a Sheer Heart Attack like the other scary carved pumpkins, at least you'll be sure to Keep Yourself Alive with a harmless pumpkin design.
If you're a Spider-Man fan, this pumpkin design should be great décor for your lawn. It only requires basic pumpkin carving for the eyes and the web shape, making it easy for anyone to make.
This pumpkin design should be a great reminder during Halloween that with great power comes great responsibility.
You would not believe your eyes if you saw this pumpkin design. It's perfect if you want more whimsical pumpkin carving ideas. Adding fireflies to the pumpkin shell is relatively easy to do, given its sheer size. Make sure your pumpkin is hollowed out so you can place a candle or tea light to make your fireflies glow.
Your pumpkins can even serve as the perfect bean bag toss game for fall-themed parties and events. All you have to do for this pumpkin design is carve out a deep hole for the bean bag.
Then, you can add any additional labels and accessories using hot glue to keep them securely in place during the game.
A white pumpkin can easily look like a friendly ghost if you follow this pumpkin design. You can effortlessly carve out its facial features to create adorable and friendly ghosts for your house.
You can also use butternut squash to have ghosts of different heights for this pumpkin carving idea.
Safety Tip
Be careful with the edges of your ghost because they can be a bit pointy. Sand them down to make them safer for anyone wanting to touch them.
Unleash your cottage-core aesthetic by creating an adorable cottage. It can be difficult compared to the other pumpkin carving ideas, but the end product will surely blow anyone away.
We recommend using a white pumpkin to help the small details stand out and fit the whole aesthetic.
Tip
You can hot glue rhinestones for the more minor details.
Give your pumpkin a tropical twist by carving a pineapple onto it! The vibe will make you feel like you're spending Halloween on a warm tropical island.
You can add the top of an actual pineapple in place of the stem to make it more realistic.
If you're looking for something to match the witch pumpkin, why not try out the different pumpkin carving ideas for their familiars?
The most common familiar would be a cat, which is an easy pumpkin design to work with. This adorable design would make a great companion for your witchy friend.
You can use this Mickey Mouse design if you're looking for more Disney-inspired pumpkin carving ideas. It can be a bit tricky with all the curves of the design, but they'd look amazing once you light your pumpkin up.
There are many fall-themed cookie cutters available everywhere. If you don't have enough carving tools, they can be used as an easy kitchen hack for pumpkin carving. Some of those designs can easily fit the season without you having to do the difficult carving.
There are many pumpkin carving ideas related to bees and their honey. If you're looking into adding a little sweetness to your Halloween décor, you can try following this pumpkin design related to them. You could even create your own hive with a collection of these pumpkins.
If you're a fan of vintage arcade games, try out this Pac-Man pumpkin design. You can customize the maze your Pac-Man can run through and even the ghosts' appearance.
It's best to work with a large pumpkin for this project so you can have a great map on your pumpkin surface. You're sure to unleash your inner child with this pumpkin design.
Medusa is one of the scariest Greek mythological figures, turning anyone to stone with a simple look.
Luckily, this pumpkin design won't freeze the trick-or-treaters on your street. However, it's sure to catch anyone's attention, especially with her intricate details and beauty.
If you're looking for other witchy pumpkin carving ideas, you can add this pentagram pumpkin design. This simple design only requires a 5-pointed star in a circle, making it easy to carve out. You can also try out other witchy symbols for your jack-o-lantern.
If you're a fan of Nickelodeon's Avatar franchise, you can check out the different pumpkin carving ideas about the show.
The easiest out of their designs would have to be the symbols of the 4 elements, which focus on simple lines and curves. Carve out all the symbols of four nations and bring balance to the world with this pumpkin design.
While we're back on the subject of pumpkin carving ideas involving other plants, why not try a cute cactus? There are plenty of stencils online for cacti and other succulents to give tribute to our desert friends.
You can use a green pumpkin to match the hollowed-out design and make the green color shine at night.
Another witchy familiar is the owl. This design can easily be drawn and carved out onto your pumpkin. However, small parts can be tricky to carve out, especially around the eye area.
However, it's sure to give a spooky vibe once you light it up. Imagine seeing this kind of pumpkin perched up a tree.
Bring this scary Jurassic animal back to life by carving it onto your Halloween pumpkin.
Carving dinosaurs onto a pumpkin is a great way to get the kids excited about decorating pumpkins. Be sure to help them cut it out, especially for the smaller and sharper details.
If you're looking for more beautiful pumpkin carving ideas, carving out a butterfly can be a great choice.
Their designs usually involve intricate and symmetrical features, especially on the wings. They'd go well with a garden or other pumpkins with flower designs.
A scarecrow could be a great option if you're looking for more spooky pumpkin carving ideas. It's fitting, as pumpkins are usually used as heads for these types of mannequins.
However, you can also carve out its creepy figure onto a pumpkin. The light from the inside will make it look scarier than a scarecrow in a field.
Out of all the pumpkin carving ideas on this list, we haven't discussed the creatures of the sea. The octopus is well-feared, especially with legends about giant versions of these creatures.
Carve it onto a pumpkin and light it up. Its tentacles are sure to give you goosebumps.
Try this zombie hand design if you're looking for pumpkin carving ideas about the undead. It can be easily patterned using your hand, making it easy to draw as well.
Bringing it back to life should be easy, and its design will give you the creeps.
You would need a big pumpkin and black chalk paint for this project. You can easily leave a unique pumpkin bowl on the front porch for trick-or-treaters visiting your house. You can also opt for a fake pumpkin for this project.
Safety Tip
If you're using a fake pumpkin, sand down the sharp edges to keep it safe for trick-or-treaters.
Who says you can only use your melon baller on a hot summer day? You can create any wacky design you want using this trusty tool to carve out the different parts of your pumpkin.
You can come up with numerous pumpkin carving ideas with this tool, and it'll be a great use of the pumpkin's guts.
This design is a twist on the classic pumpkin carving ideas for the jack-o-lantern. You can use a linoleum cutter to help carve out its facial features. Then, use hot glue to attach a zipper to the space for the mouth. It's a quirky and unique way to give your pumpkin friend a mouth.
If you're looking for extra challenging pumpkin carving ideas, you can create a whole graveyard inside your pumpkin.
This design will require you to use the entire pumpkin and a rotary tool to carve it out. This scary pumpkin design will surely set a little light on some of the spookiest places during Halloween.
Keep your lawn safe from villains by creating these pumpkin Avengers. Plenty of stencils and designs can help you with these superhero-themed pumpkin carving ideas.
They usually focus on the hero's logos. However, if you're feeling extra creative, you can try working on the heroes themselves.
There are many ways to show the world what goes on in space. You can use butternut squash as your rocket ship blasting off to space. A large pumpkin would be an excellent UFO for little white pumpkin aliens to use. It's all up to your creativity to create your little pumpkin solar system.
With this pumpkin design, the king of rock can easily make you dance to Jailhouse Rock. Its small details would have to be made with Burning Love to get it right. You Can't Help Falling In Love with this creative way of commemorating a legend.
This pumpkin design is excellent for having a spooky side of Wonderland on your lawn. The carving of the teeth can be a little tricky because of how intricate and uneven they are. However, it provides some freedom regarding how you carve them out.
Instead of carving out an ol' jack-o-lantern, why not raise the bar and let the skull stand out from the pumpkin? This design creates a more spooky effect, especially showing off its hollow insides. It would look even scarier with a light inside.
To close this off, here's another one for those creepy pumpkin carving ideas. You can use large pumpkins to create eyes. While it would require a lot of painting, it's sure to give the creeps to anyone passing by your house.
Tips for Turning Your Pumpkin Carving Ideas Into Reality
There are many ways to work on a pumpkin. However, there are times when you might not know where to start.
Here are a few tips to help you turn your pumpkin design into a reality.
Pick the Perfect Pumpkin and Materials
The first step to any pumpkin project is finding the perfect pumpkin. You must ensure that your pumpkin has no damaged areas or soft spots. These can make it difficult to carve your pumpkin, as it might not hold its shape.
Pumpkins tend to have wax on them, which helps preserve their quality. It can help make the markers easily erasable on pumpkins.
Ensure that your pumpkin is at room temperature. It helps make the pumpkin carving process easier, especially since the insides won't be too hard.
Some might opt for a faux pumpkin. If you're working with this, you must sand the edges to keep people from getting injured.
You would also need to gather a craft knife, a hot glue gun, and other materials to help you cut through a pumpkin. You can easily find a pumpkin carving set in local or online stores.
It's also best to start gathering your decorating materials before starting.
Look For Halloween Pumpkin Carving Ideas
Before drawing on your pumpkin, it's important to prepare your design to lessen the chances of wasting a good pumpkin.
It cannot be easy to think of great pumpkin carving ideas, especially with the many ways you can design a pumpkin.
Luckily, many inspirations online can help you find the perfect pumpkin design for your front porch.
You can use a stencil from an online site or create your own based on the pumpkin carving ideas online listed above.
Draw on the Pumpkin
Before cutting your pumpkin, it's important to know where to cut it. You can't undo something once you've cut it off the pumpkin shell.
Draw or print out your pumpkin carving ideas onto a piece of paper. Be as detailed as possible, and note where the negative spaces will be on your pumpkin.
Then, use the drawing or printed template as your guide when you draw on the pumpkin itself. Use a marker to keep your marks on the pumpkin shell.
You can also mark out the spaces that you should cut off the pumpkin. It will help lessen your carving mistakes later on.
You can use duct tape to keep the stencil in place while you trace your template. Edit the drawing depending on your changes in design.
Tip
Try using a dry-erase marker so you can easily get rid of mistakes.
Use the Entire Pumpkin
The best way to work on a pumpkin project is to use the whole pumpkin. It lessens waste and gives you a chance to be creative.
Cut your pumpkin on top or at the bottom to clean it out. It would depend on the design you're going for. The hole is where you'll gut the pumpkin and wash out the contents.
Depending on your design, you can use pumpkin guts or removed pumpkin shells to decorate your jack-o-lantern.
Be creative with how you use them, especially since this is 90% of your pumpkin.
If you have any remaining carved pumpkin guts and seeds left, save them. You can turn them into a great Halloween feast after all that hard work.
Light It Up!
Most jack-o-lanterns are hollow for two reasons. The first is to clean it out depending on your design. The second is to let it light up your porch on those dark Halloween nights.
You can use a candle or tea light to light up your pumpkin. However, it can be quite messy, especially with all the melted wax inside. They also happen to be a potential fire hazard.
You can also use a battery-powered light if you don't want to constantly clean candle wax.
Other options include Christmas lights and flashlights, depending on what would fit your pumpkin's aesthetic.
No-carve pumpkins don't have to follow this, especially since their designs don't allow you to put a light inside them.
However, you can set your pumpkin in brighter places where its unique design can be seen.
Pumpkin Drawing Ideas FAQs
You might have more questions about pumpkin carving and how to create the spookiest one.
We’ve gathered the most common questions you might ask before you start designing and carving.
What Can I Use to Draw on a Pumpkin?
A trusty marker is the most common tool to help bring your drawing and pumpkin carving ideas to life.
It’s best to use washable markers, especially if you have kids working on the designs. They’re easier to erase, especially with the pumpkin rind’s naturally waxy surface.
You can also use white or black chalk, depending on your pumpkin’s surface. However, it won’t be as long-lasting as a marker, which can be difficult for complicated designs.
How Do You Use a Sharpie on a Pumpkin Instead of Carving?
Sharpies are usually used for no-carve projects or if you’re a seasoned artist. It’s more difficult to erase compared to a dry-erase marker.
No-carve projects usually rely on your drawing skills when decorating a pumpkin. You can create patterns and symbols on the surface using different colored markers.
If using this, ensure you’ve cleaned your pumpkin surface from all the wax. This step will ensure that the marks stay longer even when the pumpkin is outdoors.
You can also play with flowers and other things from nature to complement any marks made by your marker.
Unless your project involves sticking lights onto the pumpkin, working with a Sharpie means your jack-o-lantern will lose its lantern element because of its lack of light from the inside.
These are better displayed indoors or on porches with bright lights to help your design be seen more clearly.
What are Some Easy Ways to Decorate a Pumpkin?
Many simple pumpkin carving ideas are available online, with carving being the traditional way of decorating a pumpkin.
You can follow simple stencils for carving or create a simple design. Usually, if you can draw it on paper, you can easily work on it once it’s on the pumpkin.
However, there are also many ways to decorate a pumpkin without carving it. The most common methods are painting or sticking other ornaments onto the pumpkin surface.
These methods can require additional materials, like a hot glue gun or black spray paint. Using metallic spray paint can also add a little shine to your carved pumpkin.
Don’t be afraid to use flowers and little gems to make your pumpkin stand out. They can add flare to your pumpkin without worrying about intricate details to carve.
You can use hot glue to stick these elements onto the surface.
Be creative when matching the season or simply expressing yourself.
Can I Erase Permanent Marker From a Pumpkin?
Despite the name, there are actually a few ways you can get rid of permanent markers from a pumpkin. It’s important to know these tips when you make mistakes on your project.
Fresh new marks can usually be removed using a mild adhesive on your pumpkin. It should go with the tape when you pull it off.
You can use a paste made from water and baking soda for older marks. Just mix the two ingredients and place them on the marks. Wait for a few minutes before wiping it off.
If these don’t work, you can use something stronger, like rubbing alcohol or nail polish remover.
What Is the Best Way to Gut a Pumpkin?
For some people, gutting a pumpkin might not be the best part of the carving.
However, using the right tools can help you get this done quickly with it, especially if you get squeamish.
One of the most common ways to gut a pumpkin is to use a measuring cup. You can scoop out the insides and save them for your pumpkin dishes.
However, to make the process faster, you can buy a pumpkin gutter and a clay loop tool to gut and thin out the insides.
You can also use these tools for other vegetables or crafting projects.
Using a measuring cup could take some time. Using a gutter would have your pumpkin clean and ready for washing in a matter of minutes, but it would cost extra for the tools.
Why Do Pumpkins Rot Fast After Carving?
Carved pumpkins usually start to rot within days of carving.
As mentioned before, more than 90% of the pumpkin gets carved off for these pumpkin projects. These parts also contain the pumpkin’s moisture.
You can try rubbing petroleum jelly to help prevent molding and decay. However, it could make marker-based designs easily erasable compared to a shell that doesn’t have jelly.
Pumpkin Drawing Ideas Conclusion
Whether it's to welcome trick-or-treaters in their Halloween costumes or to add a spooky flare on your front porch, having jack-o-lanterns is a great way to spread the Halloween spirit.
Which pumpkin design are you going for this spooky season?
The Christmas season calls for different activities for kids and kids-at-heart, including Christmas-themed drawing sessions for your Christmas cards, decorations, or just pure holiday fun.
We made this article to help you grasp different easy Christmas drawing ideas for you and the kids to practice over the holidays. Read through!
45 Easy Christmas Drawing Ideas
Here are 45 easy Christmas drawing ideas for your children's playdate or your next family gathering. Now, let's get the Christmas drawing ideas flowing!
Ho ho ho! This easy-to-draw Santa Claus can elevate the design of your personalized cards for your Christmas presents, thanks to the simplicity of the overall drawing.
It emphasizes clear lines and shapes, allowing anyone to quickly recognize Jolly-old Saint Nick. To make this Santa Claus drawing idea come to life, put on some Christmas colors of green, red, blue, and white.
While not shown in the drawing, you can always put on some dashes of yellow to embellish your Santa drawing idea.
You can't forget to take the snow globe motif when you decorate your cards or use it as a hanging banner on your main doors.
Similar to the drawing idea above, a snow globe is an easy-peasy drawing task that your preschoolers can make. It's also fun, especially when you draw a cute Christmas snowman inside.
Speaking of a cute snowman, a beginner skill-level-friendly sketch you or your kids can do is a snowman. You can't go wrong with a few circles, stick arms, and a triangular carrot nose.
To give it even more of a Christmas vibe, throw on a red scarf with a combination of curved and straight lines and a simple yet appealing hat on top.
A Christmas tree drawing completes your Christmas celebration and can even replace an actual tree if you have enough of them. To do this, you have to sketch simple lines with little precision.
After that, sprinkle in some green, brown, and yellow to create a Christmas-time feeling. You can add some red for the Christmas lights if you want.
A Reindeer is so dear in a Christmas-themed party because it reminds us that Santa Claus' giftings are coming through, so make it a part of your classic Christmas drawings.
You can even draw these on edible paper as toppers for your cookies and cupcakes as part of your Christmas morning activities.
What's the Christmas season without Christmas ornaments? These drawing ideas for Christmas ornaments can be used to design gift wrapping paper for a more festive holiday celebration.
Besides wrapping paper, it can also serve as the background for your Christmas cards and reflects authenticity and genuine love for family and friends.
A Christmas wreath tells us about the spirit of Christmas and the eternal life with Jesus Christ. Aside from its religious symbolism, it has also been widely used as door ornaments to establish the holiday spirit.
You can always give this wreath a fresh look through the drawing idea above, including simple red bows and gold highlights. After drawing, you can paste it on your kids' door rooms for some leveled-up Christmas decorations.
A candy cane a day takes your Christmas and holiday blues away! A candy cane is simple to draw; you can even pencil sketch it or add some colors if you like.
The best candy cane colors are green, blue, red, yellow, white, and shades of pink for some accenting.
This gingerbread house is a Christmas drawing that is easy to do but has a lot of cute little details that you can incorporate to make it more eye-catching, such as cupcakes, candy canes, snowflakes, and other shapes.
But, always remember to establish the brown house before drawing in the other ideas and their particular colors.
If you have a gingerbread house, make sure to add the gingerbread man for a classic Christmas treat.
A gingerbread man is a simple drawing idea that only needs an irregular-shaped human figure and some added-on details, like the red bow, buttons, sleeves, and pants.
With winter comes snow and beautiful snowflakes. A snowflake is usually complicated to draw, but with the drawing idea we have for you above, you can surely ace it even with your eyes closed.
Just blend it in with your favorite shade of blue, highlight it with white, and add black borders.
Sled your worries away as you integrate sled drawing ideas with your presents. You can even add Santa Claus to this drawing to make it more Christmas-y.
But if you don't want that, stick with this drawing and choose the best shades of brown.
Santa Claus will surely come to town when you draw him in his entire body suit while carrying his treats for everybody. You can even add a bell detail to make your drawings more festive.
What makes this Santa drawing a lot cooler is the integration of his cute eyes by drawing an upside-down C.
A Christmas stocking is an essential ornament to draw on your Christmas decorations. You can also draw a Christmas stocking in whichever size you want, big or small.
You can also write your name or friends over the Christmas stocking to make it more personal.
The five-pointed star makes its way up your trees and onto your drawing sheet this holiday season. It's one of the uncomplicated patterns to draw from this list.
To make it more appealing, color it with a fun red tone or other holiday colors that you love drawing!
A Christmas angel is an excellent ornament to match your tree drawing. You can make it as small or as big as possible, whichever drawing size you prefer.
But what's important is to draw some stars and trumpets and color the angel with light and vibrant tones.
If you want your drawing to stand out, combine your sleigh and sled drawing ideas with the north pole sign.
A north pole sign can be as easy to draw, similar to the sketch above, or as intricate as possible when you add colors and other Christmas drawing designs.
To draw poinsettias along with the other ornaments is something very fun to do. Most importantly, it's a joy to have once you put it as designs for your presents.
When you draw poinsettias, make sure that you vary their sizes and alternate the leaves to create the illusion of volume.
If the one you're giving your holiday gift is a cat parent, drawing a cat in a Christmas outfit can give it a nice touch of thoughtfulness and creativity.
As you draw the cat, make it more in-tune with the season by adding snowflakes in the background!
A little boy to pair with your little girl will benefit your overall Christmas-themed drawing because of how adorable and matching they are.
As you draw this little boy, don't forget his cane, bag, hat, and five-pointed star to complete his look.
Drawing Supplies You Need
To draw your Christmas-themed art, you need to have these drawing supplies beside you:
Art paper or sketchbook
Brushes, if you'll use watercolor or paint
Colored pencils
Eraser
Highlighters
Pencil
Ruler (optional)
What To Do With Your Finished Artwork
Once you finished your artwork, you can do these things:
Use it as a wrapper for your gift
Paste it on your doors and walls to add to the Christmas-y feel
Put it in a frame to commemorate this year's holidays
Use it as a greeting card for your holiday gifts
You can punch small holes in each drawing and make a banner
Christmas Drawing Ideas FAQs
We know you have some questions in mind, and we’re more than willing to answer some in this section.
What Are Popular Christmas Items?
Some of the most popular Christmas items are:
Trees
Balls
Lights
Santa Claus outfits
Gingerbread man treats
Candy canes
What Are Easy Christmas Drawing Ideas?
The easy drawing ideas for Christmas are all the 45 items listed in this article, such as stars, reindeer, candy cane, Santa Claus, wreath, snow globe, and more.
Christmas Drawing Ideas Conclusion
Now that you have all these simple Christmas drawing ideas for beginner artists to incorporate into your gifting, cards, and house decorations, you'll surely feel the Christmas spirit now more than ever.
Ho ho ho! Enjoy and draw to your heart's desire, and look back to this article for more inspiration.
Easter is a festive holiday for many people. From painting chocolate bunnies to hunting for Easter eggs, it's no wonder kids love it!
Aside from decorating eggs, making Easter-themed drawings is another excellent way to celebrate Easter.
We compiled this list of 45 Easter drawing ideas that both kids and adults can enjoy. Prepare your drawing materials, and let's get crafting!
45 DIY Easter Drawing Ideas
You don't need to be a master artist to draw Easter craft projects. With simple supplies you have at home, you can absolutely create DIY Easter drawings!
Let's look at 45 Easter drawing ideas to get your creativity going:
Let your kids join in on the fun by coloring this Easter bunny!
This illustration includes an Easter greeting with a cute rabbit surrounded by Easter eggs. Kids can fill it in with different colors or add decorations like glitter.
When the drawing is complete, it can make for a cute Easter-themed decoration around the house.
Encourage your kids to get creative with this beginner-friendly sketch.
They can easily color the Easter eggs in any way they want. They can even add glitter or special effects to the decorated eggs for a truly vibrant illustration.
Like decorating Easter eggs, Easter drawings are another fun way for kids to express their creativity.
Memorialize your family's Easter bonding time with this cartoon drawing!
It includes a mom and two children painting a basket of Easter eggs together on a table. Drawing is MORE fun with the whole family, so this print is something you don't want to miss.
This adorable drawing is a great way to inspire your kid to explore their artistic skills.
Your little girl can draw herselfdrawing a decorated Easter egg. Armed with just a pen, she can easily follow the lines to create a fun Easter-themed cartoon.
This print can also be colored in for better results!
You can scribble these Easter doodles on your sketch pad if you want a simple drawing idea.
You can draw a little Easter bunny and Easter eggs with flowers framing the illustration. This drawing doesn't require too much thought, so it's worth considering if you have free time.
It also includes more religious items like Jesus' cross and an angel to commemorate the true spirit of Easter.
Chocolate rabbits are an essential part of Easter (for your kids, at least). After all, the Easter bunny is known to leave treats and candy for good kids.
This Easter-themed drawing includes a chocolate bunny in a pile of Easter eggs inside a basket.
It's a colorful illustration that would undoubtedly excite your children for Easter!
Unleash your creative side with this customizable Easter egg spread!
If you want to keep your Easter eggs organized before painting, this print can help you visualize them.
It's also a great art exercise for children to design their own Easter eggs. The illustration also comes with pre-set patterns to make decorating easier.
At its core, Easter Sunday is about the resurrection of Jesus Christ after his crucifixion.
Easter drawings can be a way to teach religious topics to children. This illustration combines Easter eggs and Christian themes to emphasize the importance of Easter.
You can also draw different patterns on the Easter eggs if you want to personalize your art.
If you want a unique way to draw an Easter decoration, this drawing idea has great potential.
This illustration features a holy cross with flowers inside a decorated Easter egg. It's another Easter-inspired drawing that uses popular culture to emphasize religious themes.
You can create this quaint Easter-inspired drawing with a pencil and paper.
Hanging colorful Easter eggs on a tree branch was originally a German Easter tradition. Although the custom may seem mysterious, decorated eggs make for great ornaments!
Feel free to color this drawing however you like for a more vibrant Easter illustration.
For those who want more complex drawings, this floral Easter egg-shaped drawing gives you free rein to design what you want.
You can start with the rabbit in the middle and work from there to create your own floral pattern. Add bees and other little critters for that touch of springtime!
Color your work, and you've got a lovely Easter decoration.
Celebrate the coming of spring with this festive Easter artwork.
With a vivid floral background and a white banner, you can wish your loved ones a happy Easter! Feel free to spice up the colors and design it however you want.
This piece is easily one of the PRETTIEST drawing templates on this list.
Crafting Easter decorations can go beyond simple illustrations.
You can recreate this stunning Easter-themed artwork with colored paper, scissors, and glue!
If you want to bring your A-game this spring, you can't go wrong with this option. You can find a tutorial online to find out how to make this cut-out Easter rabbit.
Get crafty and get your supplies out with this pretty Easter collage!
You can use various paper crafts, magazine clippings, and stickers to create this patchwork Easter illustration. Add another drawing on the top half of this work to complete it.
Consider this one if you're looking for a fun project for you and your kids this Easter.
If you want to personalize your Easter design, this wreath illustration is a great choice to do just that.
It comes with typical Easter motifs like decorated Easter eggs and greenery, but it leaves a space at the center you can use to draw other decorations.
You can easily add rabbits or a cross to truly make the design yours!
This lovely Easter illustration is an easy drawing idea that anyone can do.
It has a charming blue bird on top of a brightly-colored floral decoration. Even with colored pencils and a pen, you can make your own Easter greeting card.
It looks simple, but it adds character to your Easter décor.
This Easter surprise can be an enjoyable drawing exercise for your kids this holiday!
It features a newly-hatched chick with a patterned Easter greeting. The drawing is big enough for your kids to add their own touch.
You can encourage them to use oil pastels to create the same textured design.
Easter Drawing Ideas FAQ
Below are related questions about Easter drawings that might be helpful to you:
What Drawing Materials Will You Need?
The materials you’ll need will depend on what type of art project you’ll be working on. This list includes different ideas you can try.
That said, there are essential art materials that are useful for most projects:
Paper
Graphite pencils
Eraser
Sharpener
Blending stumps
When working with color, you might also need various coloring materials, such as colored pencils, pastels, and watercolors.
How Do You Celebrate Easter?
Many Christians consider Easter the most significant religious holiday of the year, which celebrates the resurrection of Jesus Christ.
It is considered a celebration of hope and eternal life.
Easter also used to be a pagan festival to mark the coming of spring, explaining the association with rabbits.
In many cultures around the world, decorating hard-boiled eggs is a popular Easter custom.
Children participate in an Easter egg hunt where they look for hidden decorated eggs throughout the home.
Easter Drawing Ideas Conclusion
Painting eggs is not the only family bonding activity you can do this Easter Sunday.
Drawing is another way to hone your creative skills and encourage your kids to do the same too!
Even without a step-by-step guide, this list includes easy Easter drawings that kids and adults can enjoy.
This Easter, bust out your art materials and create your own Easter crafts!
Why not get inspired by outer space if you're looking for your next drawing project?
Much like art, there are endless possibilities when it comes to space drawing ideas. Many space drawings are simply out of this world, from the moon to the sun.
Space drawings are perfect for art projects or as a fun pastime for the whole family!
We look into 45 easy space drawing ideas that kids and adults alike can try their hands at.
45 Awesome Space Drawing Ideas
Aim for the stars and let your creativity shine with these fantastic space drawing ideas!
You can choose from different space objects to create your own illustration worth framing. Let's look at 45 space drawing ideas you can choose from for your next art project or sketch:
For space lovers (pun intended) who want a cute space drawing, this idea might be for you. It's an illustration of two astronauts making a heart with little stars.
It's simple enough that you can color it and add as many details as you want! Afterward, you can hang it up or give it as a gift to your special someone.
One subject that we can't miss is obviously aliens!
Add some whimsy to any art project with this fun alien illustration. It has everything you'd want, from funky aliens in UFO rockets to other space objects.
You can let your imagination run wild in designing the background and coloring each character.
Explore the vastness of outer space with this rocket ship drawing.
Complete with a ringed planet and a rocky landscape, it's a full-fledged illustration all on its own! This doodle is great for kids who want to get creative with their art projects.
What's fun about this rocket drawing is that you can even add details based on previous images.
Create a picture as pretty as the moon with this painting.
Aspiring painters can try to create this cute moon drawing with black watercolor. You can also add shooting stars and comets if you have gold and silver pens!
Simple but stunning, this illustration is a frame-worthy art project.
Blast off to a galaxy far, far away with this fun cartoon!
This drawing features a rocket ship cruising through outer space filled with planets and stars. It's a cool coloring page that will surely entertain your kids.
They'll have a blast adding more details, like astronauts and aliens.
This outer space-themed illustration is perfect for your little astronomer.
It is an easy-to-follow drawing with minor planets and stars to create added perspective. You can unleash your creativity by coloring the backdrop however you want.
It's a cute drawing idea that kids of any age will love to color in!
Let your kids create their own self-portraits with this project inspired by Georgia O'Keeffe's 1958 art piece Ladder to the Moon.
Your kids can use any art material or surface with this one!
It is a bit more complex than your average illustration, so you may want to help them get it right. That said, it's an absolutely stunning project you'd want to display.
Continuing with the astronaut illustrations, this drawing idea is another fun alternative for kids!
It includes an astronaut riding on a rocket as they journey through outer space. With cute clouds and planets, there's no shortage of details to doodle.
Add a little whimsy to your kid's room with this awesome space illustration.
Make learning fun with this watercolor illustration of the Solar System.
This drawing focuses on the planets, including Mercury, Earth, and ringed Saturn.
If you want to encourage your kids to try out watercolor, you can give this space-themed drawing a try! It's a simple but endearing rendition of our Solar System.
Among the whimsical drawing ideas we've listed, this illustration definitely takes the cake (or pizza).
Kids will definitely get a kick out of this astronaut sleeping on a galactic pizza. They can use glitter and sprinkle it on the surface for extra detail.
It's a fun drawing idea that would definitely get a chuckle out of anyone.
This drawing features a balloon of planets that playfully carries an astronaut into outer space. The best part is you're free to color it however you want.
It's one of the quirky drawing ideas you can try out for your next sketch.
Our galaxy is filled with many wonderful objects. Who wouldn't want to put it in a jar?
This space-themed illustration is a cute idea to admire our beautiful world! Shrink the planets into this galactic bottle and draw a little astronaut on the side.
Overall, it's a whimsical drawing idea you can try.
Even with pens and markers, you can create stunning space art!
This Saturn illustration features an entire galaxy inside its planetary body. Speckled with stardust and comets, it's a stylish sketch of the ringed planet.
For more advanced artists, this illustration is a great way to flex your skills.
It involves a precise hand to draw a symmetrical hourglass shape and make a stippling pattern. That being said, it gives beautiful results when done right.
To round up the illustration, draw an astronaut and add planets to create a fascinating galaxy artwork.
For colorful illustrations, this cosmic girl drawing is a great choice.
Her hair is transformed into a starry galaxy filled with planets and starbursts. This is a vivid, frame-worthy illustration you can create to brighten up your home!
Are you fond of stargazing? You can try and draw this cozy illustration.
You can try to paint it with watercolor to get that gradient effect. With a white gel pen, you can create a starry night with all the constellations in the sky!
It brings warm memories of stargazing during a clear night with a loved one.
When the night gets darker, thebrighter the stars shine.
To round out this list of drawing ideas, you can draw this dreamy illustration with your little one to remind them that magical dreams await.
You can use gold glitter and coloring materials to truly make this drawing sparkle!
Space Drawing Ideas FAQ
Below are commonly asked questions about space drawings that many people ask:
How to Create a Galaxy Background With Colored Pencils?
Creating a galaxy illustration is a great way to hone your artistic skills.
To get started, you’ll need printer paper, a white gel pen, a blending stump, and the following colored pencils (from lightest to darkest):
White
Deep red-purple
Violet
Violet blue
Indigo blue
Black
Whether you’re following a coloring page or making your own art, below is a general guideline on how you can draw a galaxy background:
Step 1: Use the side of the lightest colored pencil (deep red-purple) to create curved lines throughout the page. Apply light pressure as you shade.
Step 2: Use the second, lightest colored pencil (violet). Shade the edges of the previous color and overlay them slightly. Do the same with the next color (violet-blue).
Step 3: With the darkest color (indigo blue), fill in the remaining gaps. Use the same pressure and overlay the colors slightly.
Step 4: Use the black pencil to color the edges of the page.
Step 5: To layer and blend the colors, go from the darkest to the lightest color. Using the indigo-blue pencil, blend it into the next color.
Step 6: Go to the next lighter color (violet-blue) and do the same. Repeat until you reach the lightest shade (deep red-purple).
Step 7: With the white pencil, apply firm pressure to blend all the colors on the page. Start with the lighter parts and move to the darker areas.
Step 8: Add thick, curvy lines using the black pencil.
Step 9: Use a blending stump to blend all the details and conceal any hard edges.
Step 10: Lastly, use the white gel pen to add starbursts and small and big dots to create a galaxy effect.
Congrats! You’ve made your own galaxy illustration!
What Is the Difference Between 2D and 3D Art?
Visual art can be divided into two forms, two-dimensional and three-dimensional art. Let’s find out what makes them different:
2D Art: Two-dimensional art only has two surfaces, length and width. It includes everything drawn flat, like drawings, paintings, prints, and pictures.
3D Art: Three-dimensional art has three surfaces, length, width, and height. 3D art includes sculptures, installations, and 3D paintings.
Space Drawing Ideas Conclusion
Like the vast universe, there is a near-endless number of space-themed drawing ideas worth trying out!
Whether you're a parent, teacher, or budding artist, this list includes various sci-fi illustrations that will surely get you inspired.
With all the possibilities, which one of these ideas do you want to try out?
There is more than one method you can use to soundproof your tile floor. You can install acoustic underlayments, vinyl mats, or acoustic floor tiles. If you want a simpler option, you can lay mats and carpets over the tile flooring to reduce airborne and impact noises.
Installing tile floors has become a popular choice among many modern homeowners, thanks to their visual appeal.
However, regular tile flooring is not suitable for reducing noise. So, if you do not want the downstairs neighbors to complain about your spontaneous dancing sessions, you should get the tile flooring soundproofed right away.
But the question is - how can you accomplish this task? That is what I have discussed here, so let’s get going!
Why Should You Soundproof Your Tile Floor?
There are two main types of floor noises - impact noise and airborne noise. The former is caused due to impacts on the floor, while the latter is caused by ambient noises.
For instance, if you drop an object on the floor, it will generate impact noise. On the other hand, the noise generated while listening to loud music or watching TV is airborne noise. The latter is more of a problem since the impact vibration can travel through the floor quicker than ambient noise. Because of that, soundproofing your floor becomes important, no matter the material.
However, a tile floor is not very good at reducing or eliminating either type of noise. In other words, the tiles transmit all types of noises through the floor, and these noises eventually reach the ceiling of the room that lies directly below.
This shouldn’t be a cause for concern if you live on the first floor. But if that’s not the case, then the people living directly below will be able to hear whatever you are doing in your room. And if they don’t have an insulated ceiling, they are not going to be particularly happy about it either.
How To Soundproof A Tile Floor?
To be honest, soundproofing a ceramic tile floor is not that different from soundproofing a floor made of hardwood or concrete slab. There is more than one method you can follow for this purpose, as discussed below.
1. Acoustic Underlayment
Acoustic underlayment is an additional layer of insulation that is placed underneath the tiles. It is often made from rubber, which is possibly one of the best materials for sound insulation. As such, it helps to eliminate both airborne and impact noises.
Installing it is quite easy, for all you need to do is simply roll the underlayment mat on your subfloor and cut it to the correct dimensions. After that, you need to fill out any gaps with acoustical sealant, and then you can lay the tiles over them. If you wish, you can use adhesive on the tiles, but that is not necessary.
2. Vinyl Flooring
Vinyl is more efficient at eliminating noises than conventional ceramic tile. Thus, you can use a vinyl mat on your tile floor to eliminate airborne noises completely. It can also reduce the intensity of impact noises to a great extent.
Moreover, it is incredibly easy to use and can be placed even after your tile floor has been installed. Just roll it out on the floor, and you will be good to go. On that note, you could install it as an underlayment if you wish, which makes it a versatile option.
3. Carpets Or Mats
Another simple method to eliminate sound transmission on a tile floor is to use a carpet or a mat. If you lay out a carpet over the tiles, it will eliminate all airborne noises. Besides, it will provide cushioning on the floor, which reduces the sound generated by dropped objects.
You could also install an anti-vibration mat, which is much more effective at minimizing impact vibrations. With them, you can move your heavy furniture around without making life difficult for your downstairs neighbors.
The installation process is similar to the previous option - simply place the mats or carpets over the tile floor, and you will be done. You need to keep the floor dimensions in mind while purchasing them, or else they will not cover the whole room. In addition to that, you need to consider the thickness of the mat or the carpet too.
4. Acoustic Floor Tiles
Acoustic floor tiles are highly effective at eliminating sounds generated from airborne sources, such as people talking, loud music, and so on. These tiles can even eliminate impact noises, such as those arising from footsteps and dropped objects.
They are often made from sound-deadening substrates like foam, fiberglass, or any other materials recommended by the Tile Council of America. However, foam pads are used more than other materials since they are the most cost-effective.
The procedure to install them is the same as the one used for regular ceramic tiles, and therefore, they do not pose any challenge in this regard.
Tip
For the best results, I recommend using them in conjunction with mats, especially if you move your heavy furniture around a lot. But if you only want to eliminate airborne noises, then using carpets is optional.
Tile Floor Soundproofing Final Words
Let’s face it - everyone likes to enjoy some peace and quiet while at home. This is why soundproofing is essential - not just for your flooring but for other parts of your home as well.
In that context, making your tile floor soundproof is the most socially responsible thing you can do, especially for the people living below you. Besides, it helps to ensure that your flooring meets the impact insulation class rating. A low rating here will mean trouble - both for your neighbors and for you.
So, if you want to avoid compliance risks, you should get your tile floor insulated without any delays. And to do that, you can use any one of the methods I have discussed above.
Technically, you cannot make your house completely soundproof since sound waves can have wavelengths of several meters and can travel through micro gaps and partitions. However, identifying the type of noise prevalent in your surroundings and soundproofing hardwood floors by adding mass and decoupling can help to some extent.
Hardwood floors can become a nuisance without carpets, rugs, or any other soundproofing material.
While they are less noisier than the more affordable laminate flooring, a hardwood floor can hardly block impact and airborne noise. Hence, you will have to resort to installing an underlayment, using green glue sealant, inserting deck screws, and other soundproofing methods.
So, to make your task easier, I have discussed some of the best methods of hardwood floor soundproofing.
How Soundproofing Hardwood Floors Works 101
Types Of Noise
To choose the right soundproof flooring, you must understand the types of noise you are dealing with. Although there are various categories of noise all around us, I’ll be talking about the two categories that are most prevalent - airborne noise and impact noise.
1. Airborne Noise
This type of noise travels across the room, like the sound of your TV, pets, crying children, etc. Hardwood floors are not essentially soundproof, so airborne noise is bound to travel further distances and create an echo.
Generally, soundproofing airborne noise in a room with hardwood floors is difficult. You can get started by adding furniture, curtains, carpets, and more.
2. Impact Noise
Impact noise is created by objects coming in contact with the bare floor. Most impact-style noises are sounds created by feet stomping, dropping something on the floor, etc. It is no surprise that if you have children and pets, your house is more prone to impact noises.
Interestingly, it is easier to prevent impact noise despite its loud nature. Hence, hardwood floor soundproofing is recommended, especially if you live above neighbors.
Common Soundproofing Methods
1. Adding Mass
Adding more mass and density to objects, walls, floors, etc., allows them to absorb sound more effectively, thereby reducing noise in a room.
2. Sound Absorption
Using a soft material to cover weak spots in a noisy room can help reduce impact noises. Hence, thick carpets, blankets, curtains, etc., are recommended as easy soundproofing solutions.
3. Sound Damping
Using damping materials can reduce the oscillations of the soundwave, keeping noise levels at a minimum.
4. Creating Distance
Creating physical distance can help reduce the Sound Pressure Level and loudness of sound. However, this is just a concept and not a practical solution when it comes to soundproofing homes and living spaces that obviously cannot be moved!
5. Decoupling
Sound waves can travel through multiple layers of an object. Decoupling hampers the direct contact between such layers, breaking the path of sound waves. As such, the noise level can be decreased dramatically.
How To Soundproof Hardwood Floors
1. Use Green Glue On The Hardwood Floor
If removing and reinstalling the wood floor is possible, consider using a green glue soundproofing compound. This is one of the most common soundproofing materialsthat can be used between your subfloor and the new wood floor. It helps dampen flooring noise that can travel through the various layers of your wood flooring.
I especially recommend green glue to amateurs and DIY enthusiasts since it is easy to use, thanks to the tube and bucket packaging. Also, you don’t have to apply the adhesive compound in any particular pattern. Just use it generously to cover every part of the existing floor.
Besides, you can use green glue for soundproofing walls or attaching multiple layers of soundproof drywall. In fact, I highly recommend this soundproofing material for noisy apartment buildings with paper-thin walls.
Tip
Although green glue is easy to use, ensure that you are quick and stick the required layers while the glue is wet. Plus, you must wait for about a week for the glue to get completely dry and provide effective sound reduction.
2. Lay A Carpet Or Rug On Wood Floors
Using a thick carpet is the easiest way to reduce impact noise, as it acts as a barrier between the falling object and the hardwood floor. And although hardwood floors are quite attractive, preventing you from using fancy rugs and carpets, I highly recommend using both or either of the two. Both are made of soft material and hence, absorb sound effectively.
Moreover, you can always remove or change them according to the decor of your room, making them a highly customizable soundproofing solution. The fact that they are available in various shapes, sizes, colors, and patterns makes them all the more suitable for rented homes and apartments.
Tip
Consider adding a carpet or rug under speakers, music players, TVs, etc., to create a soft surface for effective noise reduction and tone softening.
3. Insert Deck Screw
This method requires a bit more effort, but I think it’s worth the resulting peaceful and quiet environment. Right off the bat, you’ll require a deck screw, a bit driver, and a drill bit with a countersink.
Start by analyzing any weak spots or areas that may be producing squeaky sounds. Then remove the top flooring to reveal the subfloor. Only focus on problematic areas and not the entire floor.
Now, employ a drill bit with a countersink and drill pilot holes on the squeaky surface. Ensure that the bit is slightly smaller than the screws you choose for this soundproofing project.
Finally, nail down hardwood floors in position and insert the sharp tip to gently screw wherever required. Repeat the process for other squeaky areas as well.
4. Opt For Hardwood Floor Underlayment
In case of new construction or renovation, I suggest planning well in advance and installing underlayment under the hardwood floor. The underlayment creates a soft surface for the hardwood floor to rest on. Owing to its soft materials, like foam and cork, most types of underlayment can prevent both impact and airborne noise, making it ideal for soundproofing floors.
Of course, installing hardwood flooring underlayment will add to your construction costs, but I think it is a small price to pay for some privacy.
5. Install Rubber Mats
Laying rubber mats is yet another effective way to soundproof floors, especially the existing floors in your child’s room. Alternatively, you could add natural rubber mats to pet areas or your personal workout room. Basically, they act as a buffer on hard surfaces like wood flooring and reduce noise levels.
Much to every homeowner’s delight, you can get a rubber mat in any color, size, shape, and design you want. Not to forget, they are easy to clean and maintain.
Moreover, when choosing a rubber mat for your kid’s playroom, you can opt for a colorful puzzle-piece style variant. They not only reduce sound but also prevent children from getting hurt, thanks to the softness of the material.
On the other hand, heavy-duty rubber mats are ideal for a workout room as they absorb both the blow and the impact of the noise on your hardwood floors. So, whether you run around or drop heavy weights on the floor, a good quality rubber mat is essential to prevent damage to you and the floor.
How Much Does It Cost To Soundproof Flooring?
Unfortunately, there is no exact cost estimation for soundproofing floors. The cost largely depends on the type of soundproofing materials you use and their price per square foot. You can search for square-foot calculators online to get an estimation of the overall cost.
If you’re on a budget and deal with more impact-style noises than airborne sounds, I suggest getting rugs that will cost approximately $100. Of course, the price may vary depending on the rug choice and the number of rugs you’d want to have in your room.
On the other hand, if you want to totally soundproof a room or apartment, depending on the size of the space, you may have to shell out $500-$2,000. Further, if you’re planning to renovate the space or any type of new construction, it is best to install soundproof flooring beforehand to reduce future expenditures.
Do You Have Soundproof Requirements?
Another point to consider before starting a soundproofing project is to check the building codes of your city or locality. The building codes throughout the United States are mandatory for the residents to maintain privacy and comfort.
Note that some building code inspections require field tests before issuing a certificate of occupancy, while others rely on design recommendations and specifications from the architect. Since purchasing or renovating a property is a huge investment in itself, I highly recommend ensuring that you’re following all the rules and codes. Doing so will save a lot of your time, effort, and money in the long run.
Why Is Soundproofing Difficult?
Sound waves travel through the tiniest of gaps and often through various surfaces, making soundproofing a tricky task. Moreover, there are different pitches and frequencies of sound vibrations all around us. Some may be soft and travel short distances, while others may travel longer and create louder noises.
For instance, you must have noticed how shrill children can sound or how loud dogs bark. This is because their sounds are high-pitched, which is often perceived as louder than lower-pitch sounds. However, low-pitched sounds can be transmitted through longer distances, allowing us to hear them even from far away.
Not to forget, oftentimes, we hear sounds but have no idea where they are coming from. This is another reason that makes it difficult to completely soundproof a room.
Soundproofing Hardwood Floors Conclusion
Out of all the methods discussed above, the cheapestnoise control solution is to add more furniture and soft materials to the room. Especially if you have a shared wall with your neighbors, it is best to use larger pieces like a bookcase to block soundslike people talking, electronics, etc.
I also recommend using multiple soundproofing methods together for the best result. You can even combine soundproofing with sound masking and sound insulation projects to further improve the sound quality in your space.
Soundproofing a room for music is no rocket science if you have the right soundproofing and sound-absorbing material like mass-loaded vinyl and foam gaskets to block sound waves. However, before getting started, it is important to understand the basics of soundproofing the doors, windows, and flooring of the room to achieve a quiet, distraction-free environment for recording music.
Do you often produce groovy beats during the wee hours of the night? Or are you a voice actor practicing for your next big gig?
No matter how good you are at singing, playing an instrument, voice acting, etc., your neighbors are probably not the best audience! So, to ensure your privacy and good relations with your neighbors, I’ve shared some foolproof methods tosoundproof a room for music. But before that, let’s get back to basics…
Soundproofing A Room For Music Cheaply
What Is Soundproofing?
Soundproofing is the process of blocking sound waves from traveling from one room to another. It involves adding mass and density to the walls of a room, using soundproofing materials like acoustic panels, mass-loaded vinyl, foam gaskets, etc.
The process may be as easy as filling air gaps or constructing new soundproof walls. So, the amount of effort, time, and money the soundproofing project may take will depend on the noise levels of your room/home. That said, completely soundproofing a room and preventing 100% of the sound waves from entering and leaving the area is impossible. However, you can prevent sound transmission to some extent, often enough to ensure your privacy.
Usually, the common types of noises that may disrupt your recordings include impact noise, external noise (like traffic noise), and equipment noise (from ACs, refrigerators, etc.). By soundproofing a room, you can keep the inside noises inside and prevent outside noises from entering your home studio.
Soundproofing Vs Acoustic Treatment
You must not confuse soundproofing with acoustic treatment. Soundproofing can only block sound, while acoustic treatment absorbs excessive ambiance for better sound quality in a recording room. As such, the latter, sometimes in conjunction with soundproofing methods, is used while constructing professional recording studios.
Four Common Ways To Soundproof A Music Room
1. Add Mass And Density To Block Sound Waves
Depending on the materials used for constructing the walls of your room, sound waves will vibrate and traverse through them. Hence, one of the easiest ways to reduce sound in a room is by adding weight to the walls.
As such, knowing the Sound Transmission Class (STC) rating and Noise Reduction Coefficient rating (NRC) of soundproofing materials is essential to create a quiet music room.
Tip
I recommend using a dense material like concrete for walls if you’re planning to construct a new recording space at home. However, to soundproof an existing wall, you can use mass-loaded vinyl, multiple layers of soundproofing drywall and green glue adhesive compound, etc.
2. Decoupling To Prevent Sound Transmission
Often the most overlooked process, decoupling involves creating a sound barrier or buffer between two structures/materials in direct contact. It breaks the path of sound vibrations that can often travel long distances, depending on the frequencies.
Most of the time, a dense material like rubber is used for decoupling. As such, you can try the following ways to decouple and soundproof a room:
Apply noise-proofing joist tape to isolate existing studs
Build a floating floor with dense rubber isolation pads
Isolate layers with resilient sound clips and resilient channels to create a “floating” ceiling or wall
Build double walls, leaving enough air gap to fill with additional insulation
3. Sound Damping For Improved Sound Quality
The process of damping works similarly to adding mass, but it dissipates sound waves to kinetic energy, producing heat. Again, green glue is an effective sound-damping compound that can attach twosoundproofing building materialslike MDF, plywood, drywall, etc.
Tip
If you do not wish to soundproof an existing wall, I recommend creating a sound isolation barrier with the aforementioned materials. You can then use it to temporarily cover openings like doors and windows as and when you want.
4. Filling Air Gaps With Acoustic Panels, Caulk, Etc.
How many times have you heard background noise or random sounds around you but never understood where they came from? I’ve experienced that, too, and it’s often because sound waves can enter through micro air gaps. So, covering all of those gaps and crevices is essential to block unnecessary noise.
I recommend using foam gaskets to seal air gaps on doors, windows, electrical outlets, etc. For other cracks on walls, floors, and ceilings, opt for acoustic caulk that’s pliable enough to fit into smaller, harder-to-reach areas. Or, use acoustic panels, preferably with a fiberglass core.
Lastly, I suggest investing in a door sweep to cover the small space between the bottom of a door and the floor of your music room.
Soundproofing A Music Room In 5 Easy Steps
Now that you know some of the most-used ways to soundproof a room, let me share how I combine them to create the ideal environment for music. Note that some of the steps given below may need construction skills, so if you’re not comfortable with that, feel free to skip those steps. And if all else fails, you can always contact a professional to construct a home recording studio within your budget.
That said, here’s what I do to soundproof a room for music.
1. Select A Suitable Practice Space
You can use the best quality equipment, but none of it will be effective without a suitable space. So, choose carefully.
While it may not be possible to have a lavish room for yourself, you can try out a closet or any other small space. Think about how most recording studios have a smaller, separate room where the actual recording takes place. On that note, a closed space may be uncomfortable at first, but it can be effective in blocking as much sound energy as possible.
Tip
I recommend staying away from bathrooms, kitchens, or any other room with a lot of appliances. You should also try using a room with no windows or openings. If the walls do have holes or cracks, you can use a soundproofing or sound-absorbing material, like acoustical caulk, high-density foam tape, etc.
2. Employ Sound Insulation To Create A Quiet Environment
Sound insulation is a must to further keep inside sound inside and prevent outside noises from entering your recording space. I recommend equipping your music and practice room with acoustic foam tiles, bass traps, sound absorption (acoustic) panels, etc.
Tip
Don’t forget to check out your nearest home improvement stores for foam, cork, or natural rubber panel insulation.
You can also soundproof a room on a budget (with very limited effects) by hanging heavy curtains and thick blankets, installing a pillow headboard, laying soft rugs/carpets on the floor, etc. Additionally, try shifting couches and mattresses against a shared wall to prevent the transfer of sound waves.
Warning
If you use linens and clothes to soundproof room surfaces, ensure the layers are placed far enough from one another to prevent sound transmission through contact points.
3. Soundproof Your Door To Block More Sound
When installing doors, try opting for heavier, denser materials. But if you have a hollow door, opt for spray insulation to fill the gaps. Additionally, as mentioned before, you can install a door sweep to close the air gap between the door and the floor.
4. Invest In Thick Carpeting And Other Soft Furnishing
Besides soundproofing walls, doors, windows, and other gaps in the room, soundproofing the floor will help with noise control. For this, you can construct a floating floor to block sound vibrations. Or invest in a high-quality thick carpet, and layer it with rugs, if possible.
For a floating floor, I do not recommend DIYing it, so contact a professional instead. They can use floor floaters or hard rubber pucks to decouple the second layer of flooring from the existing one. Conversely, they may even float your existing floor by changing the joists below your sub-flooring. However, remember that the latter option is quite challenging and may not be feasible in most locations.
5. Add A Second Layer To Soundproof Walls
Although this step decreases the space in your room, I think it’s worth the extra soundproofing. This process can be done by amateurs, too, as long as you wear your safety gear. Simply stick multiple layers of drywall and attach it to the existing wall of your music room. Or, install multiple sheets of mass-loaded vinyl within the layers of drywall.
However, make sure you leave enough gaps between the layers to break the passage of sound vibrations.
6. Test The Room For Music
Last but not least, test your recording room before putting it to professional use. Doing so will help you analyze any weak points in the room. I recommend singing, playing the drum, or producing any other sound for at least 30 minutes to know if the music room needs further soundproofing.
If it does, even after incorporating all the steps mentioned above, you can opt for soundproof or blackout curtains. Even if the room does not have windows, installing either of the two can add another layer of soundproofing and reduce noises of low frequencies as well.
Soundproofing A Room For Music Conclusion
Although making a room completely soundproof is not technically possible, you can take certain measures to prevent noise in your music room. And the best part is that most of the soundproofing methods discussed above are easy enough for beginners and do not require advanced tools. Even the soundproofing materials I suggested do not demand much skill for installation.
For best results, however, I recommend using multiple methods in combination. For instance, you can consider soundproofing the wallsand adding suitable furniture to soundproof a room. Or, install a floating floor or ceiling, and invest in a white noise machine.
So, don’t force your neighbors to attend a concert or listen to a podcast they didn’t sign up for, and soundproof your home recording studio today!
Mineral wool is the best soundproof insulation material that can be used for soundproofing purposes, but it is a pricey option. Meanwhile, cost-effective materials that can be used include blown-in fiberglass or cellulose insulation, foam, cotton, and batt insulation.
Soundproofing has become a necessity in many homes nowadays.
Whether due to the increased use of gadgets, more traffic on the streets, or to ensure privacy, more and more people are looking for ways to soundproof their homes. And while there are many soundproofing techniques available for this purpose, before you try them out, it is essential to learn about soundproofing insulation.
And this is just the guide that can help you out.
Types of Soundproof Insulation Explained
Fundamentals Of Soundproofing
To understand how soundproofing insulation works and what are the best materials for the purpose, you first need to know a few basic things about soundproofing.
What Is Sound?
Sound is a wave generated by a vibrating body and can travel through solid, liquid, and gas mediums. This means it can be transmitted through air, water bodies, and even solid objects, like doors and walls. For soundproofing purposes, sound can be classified into different types, including:
1. Airborne Sounds
Airborne sound travels through the air, and traffic noise, conversations, etc., are examples. Usually, such sounds can be reduced using sound insulation barriers.
2. Impact-Based Sounds
Impact-based sounds occur due to vibrations caused in a surface when another object strikes it and possesses more energy than airborne sounds. Some examples include the sounds of slamming doors, a hammer striking, and even of footsteps. Reducing these sounds is more difficult since vibrations are caused within various surfaces.
3. Flanking Sounds
Sounds that travel through surfaces like electrical outlets or ductwork are called flanking sounds or flanking noises, and it can be quite difficult to locate their source.
What Is Noise?
Noise is generally defined as unwanted sound that can cause disturbance in an area, but this is a subjective definition. What one person may consider as noise, another may not, but noise usually has the characteristics of being unpleasant and loud.
Measurement Of Noise Levels
Noise levels are measured in the following ways:
1. Sound Pressure Level
Sound Pressure Level the pressure level of sound measured on a logarithmic scale, and the unit used is decibels (dB). The use of a logarithmic scale means that the pressure level can change significantly even with a slight change in the scale.
2. Loudness
The loudness of any sound will depend upon factors such as the point where it is heard and the person hearing it. For instance, even a low-intensity sound may appear very loud in a quiet room.
How Effective Is Soundproofing?
The process of soundproofing aims to reduce sound waves from traveling through the various surfaces of a building, such as doors, walls, and the ceiling.
While it is possible to block out all sound from a specific room completely, it is not very easy to do in most cases. The reason is that many soundproofing techniques are generally very complicated and require a lot of time, resources, and effort.
Soundproofing methods that are usually used can only reduce noise and not eliminate it. Fortunately, for many people, a reduction in the noise level is adequate.
Sound Transmission Class - What Is It?
Sound Transmission Class or STC is a rating system that indicates how effective a building partition or assembly is in preventing the transmission of sound waves. A higher STC rating indicates that the building is more effective in reducing noise. But even insulation materials with a high STC rating may not be able to attenuate low-frequency sounds, such as bass-heavy music or sounds of machinery.
According to the International Building Code, an STC of 50 is required for buildings with multiple families, while an STC of over 60 is considered to be the best. STC ratings are generally used for airborne sounds like conversations.
Methods Of Sound Insulation
The most commonly used methods of sound insulation include the following:
1. Providing Additional Mass
It is more difficult for sound waves to travel through an object that is large and heavy. This means you can reduce sound by adding mass to surfaces that you want to soundproof, such as a hollow core door, which can help in sound reduction. And there are many ways by which this can be done, such as by installing drywall or using mass-loaded vinyl.
2. Decoupling
Surfaces that are in contact with one another make it easier for vibrations to travel through. Separating or decoupling them, such as the two sides of a wall, can reduce the sound that reaches your ears.
3. Insulation
The cavity of the wall that needs to be soundproofed can be insulated to reduce sound from one reaching the other side. Generally, this is done by adding some insulating material between two sides.
Advantages Of Sound Insulation
1. Improved Acoustics
Soundproof insulation materials are very effective in preventing noise from entering a specific space. This means that besides soundproofing, they can help improve the acoustics of a space and can be used in areas like a recording studio.
2. Effective Noise Reduction
Many extensive soundproofing techniques are quite complicated and require considerable time and resources. But with the right sound insulation materials, it is possible to get good results easily.
3. Reduced Transmission Of Heat
Many materials used for soundproof insulation offer additional benefits besides noise reduction, such as reducing heat transfer, which helps regulate the temperature of a space.
Soundproof Insulation Materials
You can use several types of insulation materials for soundproofing purposes, and some of the best ones are mentioned here.
1. Mineral Wool Insulation
Slag, which is produced when steel is manufactured, or natural stone is heated and spun to manufacture mineral wool insulation fibers. Then, oils and resins are added to enhance the strength of the wool. The biggest advantage of this material is that it uses recycled products and is fire-resistant.
That said, mineral wool insulation is among the costlier materials you can use for soundproofing walls. A cost-effective alternative to mineral wool insulation is fiberglass insulation. Mineral wool, also known as stone wool insulation, has an STC rating of 45, which is great for noise control.
2. Blown-in Fiberglass Insulation
Blown-in fiberglass insulation is manufactured by spinning the fibers of heated glass and combining it with plastic to make it more flexible. This material is among the most commonly used for sound-deadening insulation since it is affordable and is available in rolls, loose fills, and batts.
Fiberglass insulation, also known as glass wool insulation, has a good R-value and an STC rating of 39. On the flip side, it may not be the best solution for people who are prone to allergies.
3. Cotton Insulation
Cotton insulation is manufactured from cellulose fibers that are obtained from clothing items like jeans. It is available in batts that can be installed easily between stud boards. Since it is made from recycled cotton, this type of insulation is biodegradable and can be treated with boric acid to improve its fire resistance.
While it has a high STC rating of 51, cotton insulation can be a bit expensive.
4. Cellulose Insulation
This is another material used for sound insulation made from recycled and waste materials, like shredded cardboard and newspapers. It can be made fire-resistant by applying materials like boric acid and can be used in various spaces to make them quiet.
Cellulose insulation, also available as blown-in insulation, is affordable and has a good R-value with an STC rating of 39. But keep in mind that cellulose can produce a lot of dust, so those with allergies may not find it suitable.
5. Foam Insulation
Foam insulation is among the most popular building insulation materials and is available in various forms, such as solid boards or spray foam. Different types of plastics are used to manufacture foam insulation, and you can choose between open-cell and closed-cell foams.
Open-cell foam insulation is much better at absorbing airborne noise and can expand easily to fill up cracks and holes when used as spray foam insulation. Closed-cell foam is not as effective since it has lower porosity.
Spray foam insulation is a versatile option that can easily be used in many different spaces where rolls or batts cannot be used. Like many other soundproof insulation materials, foam insulation is treated with fire-retardant materials to make it fire-resistant. Also, it has an STC rating of 39.
Factors To Consider When Buying Sound Insulation Materials
To ensure you get the desired results, selecting the right insulation material for soundproofing is vital. For that, you need to consider certain factors, which have been mentioned here.
1. The Scope Of The Project
Depending on the scope of the project, you may be able to get results simply by installing sound insulation materials or may need to use additional soundproofing techniques. For instance, in a building where pests are a frequent problem or it is hard to work on the surfaces, sound insulation may not be adequate. Therefore, you’ll need additional materials and tools to work on such surfaces.
2. Budget
Before deciding on the materials, you should research and find out the prices of different materials available for soundproof insulation. This will help you come up with a suitable budget and decide which materials to use and how extensive the project can be.
3. Project Handling
The insulation materials that can be used to create a sound barrier will also depend upon who is going to undertake the project. If you plan to complete it yourself using DIY techniques, it is better to go with materials that are easier to use. On the other hand, if the soundproofing is to be done by professionals, using professional-grade insulation materials would be wise.
Tip
A useful tip to help you choose the right insulation material is to consider its mass. The greater the mass of the material, the more effective it will be in blocking sound. For instance, if you are planning to use mineral wool, go with rigid boards made from the material.
They will not only have the density of the wool but will also have more mass which can drown vibrations easily.
Soundproof Insulation FAQs
Are thicker insulation materials better for sound insulation?
The R-value refers to the energy efficiency of the sound insulation material, and high-mass materials have a higher R-value. A higher R-value means that the material requires less energy to keep your room insulated. Hence, materials with greater mass are more effective in preventing sound transmission.
Which sound insulation material is best for interior walls?
While there are several materials you can use to soundproof interior walls, in most cases, mineral wool offers the best results. This is due to its high density, which prevents the air between walls from transmitting sound waves. However, it is an expensive material, which won’t be suitable for those on a budget.
Soundproof Insulation Conclusion
Soundproof insulation can help reduce unwanted noise in your home. The materials available for the purpose can be used in a variety of situations and can even complement other soundproofing techniques.
While you may not be able to eliminate all sounds, these materials can help in noise control to a considerable extent. If you find selecting the right material challenging, it is a good idea to hire the services of a soundproofing expert.
They can perform an inspection of your home and recommend the most suitable materials that can be used for sound insulation. What’s more, in cases where you may have doubts about installing the material, such experts can perform the installations quickly and efficiently, saving a lot of hassle.
And with that, this comprehensive guide on soundproof insulation has come to an end. Until next time!
Using acoustic foam panels, along with adding extra soundproofing material and sealing the perimeter is one of the most effective ways to prevent noise from traveling through the garage door. Besides, acoustic blankets, noise-blocking curtains, and mass-vinyl barriers are dependable options to make your garage a quiet space.
A garage is one of the most versatile locations in any home, be it for jamming with friends or getting some me-time.
You can even use it as a workshop for your DIY projects. Whatever the case, a soundproof garage is what you need to tinker away without disturbing others. Today, I’ll share the five best soundproofing materials that prevent noise from entering or escaping the garage.
So, keep reading!
Reasons To Soundproof Garage Door
The primary reasons why every homeowner must consider soundproofing garage doors are as follows:
Preventing noise from traveling out of the garage
Minimizing the amount of noise that enters the garage
For instance, you might use the garage for band rehearsals or as a workshop for completing DIY projects. In either case, you will want to reduce the amount of sound that enters the space and work with as little distraction as possible.
In such situations, soundproofing your garage door would be wise, as it will minimize noise transmission.
Not only will it improve sound absorption (acoustics), but it will also prevent hot or cold air from entering(or escaping) the garage. Therefore, adding soundproofing materials in your garage will prevent heat loss, so you will save some money on energy bills every month.
Types Of Sound That Enter The Garage
Before kickstarting your garage soundproofing project, it’s important to figure out the type of sound that invades your garage space. That’s because the soundproofing material you must use depends largely on the sound that enters your garage.
Basically, two types of sound can enter your garage space– structure-borne noise and airborne noise. I’ve discussed them in detail– so let’s take a look.
1. Structure-Borne Noise
Also known as impact or structural noise, structure-borne noise transpires when any item collides with a solid structure, i.e., the garage door. This collision, in turn, results in vibrations, which are heard as noise.
The sound of rain thumping against the roofing and someone banging on the garage door is a classic example of structure-borne garage noise.
2. Airborne Noise
As the name suggests, airborne noise travels in and out of your garage via air. Sounds such as that of power tools, music, and voices are some examples of airborne noise that gets transmitted through your garage door.
So, is the noise in your garage airborne or structure-borne? One easy way to figure that out is by putting your hand on the garage door whenever you hear a noise in your garage.
If the noise is accompanied by a vibration, it’s structure-borne; however, in the absence of a vibration, the sound is airborne.
How To Soundproof A Garage Door
1. Install Acoustic Foam Panels
One of the most effective yet slightly expensive sound attenuation methods is to install acoustic panels in your garage. Unlike acoustic blankets, foam panels offer a polished appearance, making your garage appear more like a recording studio.
Installing acoustic foam panels is fairly easy, although you can hire a professional if you’re not into DIY. Adhesive spray, push pins, impaling clips, or double-sided tapes– you can use a variety of things to install acoustic panels on garage walls, doors, or the ceiling.
Note that if you intend to pull down the acoustic panels anytime soon, going for a less permanent installation method would be the best way forward. For maximum sound isolation, you can use these soundproofing foam panels to insulate the window pane and doors alongside the walls.
Do remember that these would only work when used in conjunction with an effective soundproofing system, with lots of additional mass applied to the entire surface.
2. Use Acoustic Blankets For Soundproofing Your Roll-Up Garage Door
Acoustic blankets are a practical solution for soundproofing roll-up garage doors because they are affordable alternatives to acoustic panels.
More or less, acoustic blankets are 78 inches in length and 72 inches in width and come with reinforced metal grommets for easy installation. What makes them a reliable soundproofing material for noise reduction is that they absorb sound. So, neither would unwanted noise enter the garage nor would the garage door screech or rumble while opening or closing.
For better sound absorption, hang the blankets after folding them, which would prove effective in reducing noise transmission.
3. Insulate Your Garage Door With Mass-Loaded Vinyl
Another popular option for soundproofing garage doors is mass-loaded vinyl which is known to improve the STC (Sound Transmission Class) rating of a wall. This flexible material attenuates excess noise, so it’s a practical option for noise control.
The mass-loaded vinyl barrier, a polyvinyl chloride-based product, is an easy-to-install material that can be adhered to the wall, floor, or garage ceiling using spray adhesives, nails, and screws. To make your garage a quiet space, you can use more than one layer, which would enhance sound isolation.
Not many know that mass-loaded vinyl absorbs sounds of all frequencies, making it a reliable pick for garages where band practice takes place.
4. Use Noise-Blocking Curtains
Sure, an insulated garage door blocks noise, but did you know it also offers thermal insulation?
If you’re looking for a soundproofing material that offers both thermal and sound insulation, noise-blocking curtains are worth considering. As against a regular curtain, a noise-blocking curtain is thick and dense, which is why it can be installed anywhere– surrounding walls, windows, or doors.
Unlike other soundproofing materials, they need not be attached to the wall using any adhesive or nail (fastener); instead, you’ll need a curtain rod to install them. All you need to do is slide the metal grommets in the curtain rods, and your garage will be soundproof within a few minutes.
Like blankets, noise-blocking curtains don’t do much to reduce bass noise, so keep that in mind. However, it makes the space comfortable as it prevents energy loss, so you’ll be able to work comfortably no matter the weather outside.
5. Get Rid Of Air Vents Or Create An Air Vent Sound Maze
Ever thought that air vents could lead to noise leaks besides letting in the fresh air?
Tackling air vents is the first and the most important thing when it comes to soundproofing projects; otherwise, all your efforts would go in vain. Here, as a homeowner, you’ve got two choices– get rid of air vents or create an air vent sound maze.
Getting rid of them is one of the easiest ways to soundproof your garage. But without air vents, your garage would be toasty, which would be problematic in summer.
One way to combat this issue is to install an air conditioner or oscillating fans in your workspace to keep it cool.
If you don’t mind undertaking a bit of DIY task, creating an air vent sound maze will help you soundproof your garage efficiently. All you need is acoustic foam and wooden sticks for the task.
First, you will have to trim the acoustic foam such that it’s of the same length and width as the wooden stick. Thin sticks aren’t much help in noise reduction, so make sure you use thick ones. Once trimmed, you will have to arrange them as shown in the diagram below, which will prevent sound from invading.
A Step-By-Step Guide On Soundproofing A Garage Door
The benefits of an insulated garage door are plenty. For anyone who wishes to soundproof their garage door on their own, here’s a step-by-step guide to help you complete the project with ease.
1. Gather Supplies
The first thing is to gather supplies needed to soundproof a garage door; having the right tools and equipment will allow you to complete the project quickly and efficiently. You need:
Sound insulation material like fiberglass panels, sound-deadening blankets, spray foam or acoustic foam panels
Weatherstripping tape
Spray or Green Glue adhesive
Garage door seal kit
Measuring tape
Cutting tool
Nails or fasteners
Garage door motor lubricant
2. Lubricate The Garage Door Components
After gathering supplies, lubricating the garage door motor is the next thing to do. Take the garage door motor lubricant and spray it over the motor along with the opening and closing mechanisms for smooth working.
3. Measure Your Garage Door And Cut The Soundproofing Material
Measuring the length and width of garage doors is crucial for garage soundproofing projects. So, grab the measuring tape, measure the door and keep the measurements handy because you’ll have to cut soundproofing materials accordingly.
No matter which material you intend to use, mark the length and width on it with a pencil and then start cutting to avoid mistakes.
4. Install The Insulation
When the material is cut, it’s time to install it, so apply Green Glue all over the garage door in generous quantities. You will have to apply the adhesive only if you plan to install MLV or acoustic panels. For fiberglass panels, you can use nails, screws, or other adhesives.
Also, make sure to clean the door before applying adhesive because a dirty door would prevent the material from adhering to the surface.
Tip
To seal gaps on the bottom of the door, you’ll have to use weatherstripping tape. Conversely, a garage door seal kit is considered effective for sealing the top and the sides of the garage door. Besides soundproofing, it will keep the garage insulated from outside weather, meaning you’ll save money on energy bills.
How To Soundproof A Garage Door Summing It Up
So, do you want to work peacefully on your carpentry projects in your garage, or does your garage make loud noises when opening or closing?
Either way, the only thing that can help you is soundproofing your garage doors. Of all the soundproofing materials, acoustic panels are effective in noise control, but they are slightly on the expensive side.
So, if you’re looking for materials to soundproof your side-to-side or roll-up garage door on a reasonable budget, acoustic blankets or noise-blocking curtains would certainly fit the bill.
Once soundproofed, you’re free to start your projects without the fear of getting noise complaints. However, if worst comes to worst, replacing your existing garage door with a ready-insulated one would be a wise thing to do.
Good luck, folks!
Soundproofing a gaming room using acoustic panels, mass-loaded vinyl, and other sound insulation materials like soundproof curtains can help you get the ultimate gaming experience. You can use various such soundproofing techniques for existing surfaces as well as when building a room from scratch.
Noise control and reduction when playing video games require much more than wearing the best gaming headset, especially if you have a dedicated gaming room. And thankfully, there are many soundproofing techniques you can use to keep outside noise from entering the room and inside noise from escaping outside.
Dive into today’s guide, where I will take you through the different methods for soundproofing doors, walls, windows, the ceiling, and the floor using soundproofing materials and through structural alterations. Do note that the field of acoustics is an extremely wide and complex, there is no "soundproof gaming foam" but there are simple enough ways to improve your acoustic gaming room performance in a DIY project, more on that, and others in the article!
How To Build A Soundproof Gaming Room
Whether you’re building a new gaming room or looking to modify the existing one, the following tips and tricks will come in handy in both cases. However, keep in mind that you may have to employ a combination of the soundproofing techniques mentioned below for optimum results.
Soundproofing The Door
Just like with any other room, the door of your gaming room will be a central structure that will facilitate the entry and exit of sound. Hence, most gaming room soundproofing projects begin with soundproofing the door to absorb or block sound. And there are a few ways to achieve this:
1. Covering Gaps
Gaps around your door frame are the main culprit for sound leakage, but thankfully, you can seal them to reduce noise entering or leaving the room. For this, I’d suggest applying a weather-stripping seal on the door frame, so there’s no gap when you close the door.
After applying one layer of the seal, close the door and see if there are any remaining gaps. If there are, you will need to apply some additional layers till there are no visible gaps remaining.
As for the gap below the door (between the door and the floor), you’re better off using silicone door sweeps, which are generally easy to install, thanks to the adhesive-equipped design. Simply measure the gap and cut the door sweep as required, after which you can paste it below the door.
2. Adding Mass To The Door
Unless your game room has an all-metal construction, sealing the door gaps alone won’t do much good. Since most gaming rooms are, well, like the other rooms in a house with almost the same features as a bedroom or guestroom, the door structure tends to be hollow.
What this means is that there’s enough gap within the structure of the door through which sound waves can travel easily without losing energy. So, the sound will come out pretty loud from the other side of the door, even when it’s closed.
However, you can solve this noise problem by adding more mass to the door, thereby thickening its structure and “forcing” the sound waves to lose energy when they travel through it. And the easiest and cheapest way to do it is by hanging a thick moving blanket on the door using screws or textile adhesives.
Aside from acting as a barrier to unwanted noises, these soundproof blankets can render better sound absorption properties to the door. As a result, you will be able to prevent sound from entering and exiting the room, as well as reduce echo in the room.
Tip
Add at least two layers of different soundproof materials on a thin door.
3. Installing Acoustic Panels Or MLV
If you don’t want moving blankets to spoil the look of your gaming room and can spend a little more onsoundproofing material, then acoustic panels can be the way to go. Depending on your needs, you can find different variations of these panels that serve different purposes.
For example, textured acoustic foam panels can enhance your door’s sound absorption and deaden sound by transmitting the sound waves that hit it in different directions. Likewise, foam panels with flat surfaces are generally considered better for sound absorption and reducing echo. In other words, they help improve the sound quality or acoustics in your room- an advantage that will benefit gamers who don’t have noise-canceling gaming headsets.
As for the installation of these panels, you can use hanging strips, screws, or even adhesives depending on the material of your door.
Alternatively, you can substitute acoustic panels with mass-loaded vinyl (MLV) panels that are cut into the right sizes according to the door surface you need to cover. And feel free to paint over the panels with textile paint or wrap them in thick fabrics to enhance the décor of your room.
However, if you need to cover a lot of space, using MLV panels won’t be one of the most affordable options for soundproofing.
Soundproofing The Walls
Aside from the door, the walls of your gaming room can increase the noise levels by allowing outside noise to enter the space. Oftentimes, you can cancel out all the noise in the room by simply soundproofing the walls.
Again, there are multiple ways to soundproof the walls of your gaming room. While some of them may be more suitable for DIY projects (as you don’t need to take down the wall), others may require the assistance of professionals.
As such, I always recommend my readers to start with the non-invasive methods and follow them with the invasive ones if desired results aren’t achieved.
1. Adding Mass To The Walls
Just like you’d do with the door, adding mass to the walls can increase the density of the structure and prevent the transmission of sound waves through it.
You can use soundproofing curtains or soundproofing blankets for this purpose, but they are typically more suitable for blocking low-frequency noises. Aside from that, MLV panels may come in handy, too.
Not only that, but you can also install more drywall layers to the existing wall surface to increase its density. Although standard drywall does a decent job, I’d suggest going for soundproof drywall panels if your budget permits.
The important thing to remember here is that the more layers you have on the wall, the better will be the noise blocking property of the wall. However, this can be a problem for smaller rooms, as you’d end up losing a lot of space. In such cases, you’d want something more effective that does the job just in a couple of layers.
Tip
You can stack furniture near the walls as a temporary solution until you get your hands on the right soundproofing materials.
2. Installing Sound Dampening Materials
If you aren’t looking for blocking noise per se but still want to improve the sound quality in the room, soundproof foam panels or thick acoustic panels can be the best solution. They aren’t very expensive or heavy and can be easily installed without you worrying about them coming off.
Gamers who record live streams or podcasts of their gaming experience prefer opting for this method in addition to more effective noise reduction methods for clear audio recording.
3. Soundproofing Treatment For Walls
If you’re bothered by too much noise in the gaming room, then you may need to go for invasive soundproofing techniques involving adding sound-insulating materials inside the wall. And to speak the truth, there’s nothing better than insulating the walls from the inside to facilitate active noise control at all times.
Let me now take you through the best methods for building a soundproof wall from scratch.
A. Installing MVL Panels
Installing MVL panels within the walls is one of the most effective noise-canceling options you can employ. In this technique, the panels are directly screwed on the wall studs, after which the drywall layers are added to finish the wall assembly.
B. Adding Insulating Material Between The Studs
Another way to prevent your walls from transporting the sound to the entire room is insulating the space between the studs with a soundproof material like mineral insulation wool batts. Although you can do this on your own when the wall is still being built, make sure to wear gloves and a face mask, as the slivers can cause injuries and breathing troubles.
C. Decoupling The Walls
If you’re building a new gaming room altogether or constructing a soundproof box (or soundproof gaming booth, as it’s often called), then you can also try decoupling the walls. Simply put, this technique involves separating the external drywall structures from the inside wall using resilience channels and sound isolation clips.
By employing this technique, you essentially reduce the contact points between the internal structures of the wall, thereby blocking the pathway for sound transmission.
Soundproofing The Window Panels
Most gaming rooms have windows, which can add to the sound transmission property of the wall through their glass structure or gaps in the wooden frame. However, the good news is that you can easily tackle these problems the DIY way by hanging soundproof curtains on standard curtain rods.
The added advantage of these thick curtains is that they may aid the insulation of the room, making it more energy-efficient to cut down on your energy bills in the long run.
For cracks in the wooden frame, you can use any acoustic caulk to fix them. A better way would be to cut small pieces of acoustic panels and paste them on the cracks using the caulk for reinforced soundproofing.
In case of severe sound transfer, you may need to build an additional window frame with plywood panels and attach it to the main window frame. Furthermore, install soundproofing curtains on the new window frame to reduce noise optimally.
Soundproofing The Ceiling
A soundproof ceiling is extremely important for designing a soundproof gaming room, especially if the floor above it isn’t treated for soundproofing. And here are a few ways that can get you success:
1. Adding Insulating Materials
Sound-dampening materials like foam panels and even rubber mats can be installed on the ceiling of the gaming room to absorb any unwanted noise coming from upstairs. But my favorite way to soundproof ceilings is adding acoustic tiles, which also help elevate the look of the ceiling like nothing else.
The best way to go about the job is starting with chalking out a grid-like structure, covering the areas that are more susceptible to noise leaks, and adding the tiles using the right adhesive. But this method can become a bit expensive, especially if you have a lot of area to cover.
2. Creating A Dropped Ceiling
If your gaming room is spacious enough and you’re looking to change its décor, consider adding a dropped ceiling structure using standard drywall. Additionally, fill the space between the main ceiling and the dropped ceiling with some sound-insulating material, as any unused space of light and plumbing fixtures can become “sound transporters.”
Apart from that, you can insulate the dropped ceiling using foam panels or rubber mat pieces, provided they don’t add too much weight to the structure.
If you’re constructing the room from scratch, you can fill the gaps between the ceiling joists using soundproofing material as you’d do for the wall studs. However, I’d suggest seeking professional help for this, so speak to your contractor in advance.
Tip
You can also soundproof the floor above the roof using rubber mats, thick carpets, and rugs, or a wooden subfloor to reduce noise transfer between the floor and ceiling.
Soundproofing The Floor
The final step in designing a soundproof gaming roof is soundproofing the floor. Now, depending on how much sound transfer your floor facilitates, you can employ simple techniques like adding thick rugs and carpets. For example, placing EVA foam or anti-vibration mats can absorb high-frequency sounds, so your family members can stay undisturbed if you love playing video games on loudspeakers.
Although these may not block the noise, they can absorb the sound waves to prevent echo and improve the sound quality in the room. Apart from that, you can install a subfloor (floor underlay) made of MDF or plywood panels on the floor and use a soundproof sealant like Green Glue compound to secure it on the floor.
Additional Tips For Building A Soundproof Gaming Room
Here are a few things you can try to keep your gaming room from disturbing your family members and neighbors:
1. Design A Soundproof Housing For Your Gaming System
If soundproofing the entire room seems too much of a hassle, simply build a soundproof housing for your gaming system using soundproof drywall. Or, you can use standard drywall and reinforce the surrounding surfaces with any of the sound insulation materials mentioned above.
Just make sure it has enough room for you to sit comfortably inside in front of the system. And poke some holes in the wall directly behind the system to keep it from overheating.
2. Place The Speakers On A Foam Mat
Placing the speakers and woofer directly on a hardwood floor can make the room extremely noisy, as the sound waves vibrate through the wooden structure and amplify. So, use an acoustic foam panel or mat below them to absorb the sound.
3. Use Anti-Vibration Fan Mouths
Anti-vibration fan mouths can be very effective in reducing the fan noise of your computer, especially when the fans are overworking to cool the system. I’d strongly recommend implementing this trick if you play graphics-intensive games (like Nintendo Switch) for long hours.
Soundproofing Gaming Room Final Thoughts
With that, it’s time for me to wrap up today’s guide.
But it won’t be fair if I end it without providing you with one more pro tip: in case you need to use multiple layers of drywall, attach them using an acoustic sealant like Green Glue compound for the best results. You can even use this hack to substitute a single layer of soundproof drywall if it threatens to burn a hole in your pocket.
Goodbye and happy gaming!
Soundproofing a garage may require soundproofing the door, walls, ceiling, or all using different soundproofing materials like acoustic panels, drywall layers, and Green Glue compound. Additionally, you can soundproof unfinished walls or design soundproof dropped ceilings.
Soundproofing your garage can be a great way to protect both your neighbors and your home from unwanted noises. Not only that, but it will also shield you from unwanted outside noise when working in the garage.
That’s why I’ve curated this exhaustive guide to help you soundproof your garage doors, walls, and ceilings using various invasive and non-invasive methods. Read on to know it all!
How to Soundproof a Garage
Why Should You Soundproof Your Garage?
Some of my readers may be asking about the need to soundproof their garage. After all, it is, in most cases, an isolated space that houses your car and sometimes acts as a storeroom. And yes, I agree that for cases like these, soundproofing will essentially be a waste of time and money.
However, some people use their garage as a DIY workshop, band practice room, home office, recording studio, or attached home theater. Hence, soundproofing the space becomes just as important, if not more, as soundproofing the rest of the home.
Besides, no one can predict the future, and you never know how you may end up using your garage in the coming years. So, it may not be a bad idea to soundproof it just after you finish reading this guide!
How To Go About Garage Soundproofing?
The process of soundproofinga garage actually starts with deciding on a few important things, the first of which is determining if you want to prevent sound from entering or exiting the space. This way, you can employ specific soundproofing techniques to make your soundproofing project optimally successful.
For example, if you plan to use the garage for band practice or DIY projects, you’d ideally want to keep the sound from escaping so that it doesn’t disturb your neighbors. The same holds true if you use it as a workshop and need to use any power tool frequently.
On the other hand, a garage turned into a home office should prevent outside noise from entering through the garage door and garage walls so that you have a peaceful environment to work in.
However, there may be some situations when you need to prevent the noise from entering and exiting the garage simultaneously. For example, if you want to turn your garage into a mini home theater, then you’d want to keep the sound inside for an immersive movie-watching experience as well as prevent outside noise from disturbing you.
Besides, soundproofing plays an important role in improving the sound quality inside the garage, which will be beneficial if you use the space for music practice. In hindsight, effective garage soundproofing techniqueswill facilitate better reverberation so that you hear better, especially if you play the drum or guitar frequently.
Is Your Garage Affected By Impact Or Airborne Noises?
Another factor that will play a large role in determining the right soundproofing methods for your garage is whether the space is being affected by airborne or impact noise.
For the unversed, airborne noise waves primarily travel through the air until they hit a surface, like your ears. Examples of this type of noise transfer include hearing people talking, dogs barking, or TV playing in the adjacent room.
Some airborne noise also travels via nearby structures, meaning you hear it after it passes through a solid surface like a wall or door. However, such noises are usually muffled as some of the sound waves are reflected before transmission and/or lose most of their energy during transfer.
Airborne sound leakage typically happens through gaps in the floor, door, or ceiling, fixing which usually doesn’t take a lot of effort.
The other type of noise to take care of is impact noise, produced by the interaction of an object with a structure. This interaction creates vibrations that travel through the structure and exit as sound waves. For example, the sound produced when you drag furniture on the floor or hammer a nail into the wall is impact noise.
How To Soundproof A Garage?
If you have a completely detached garage that is isolated from other rooms without windows, the task of soundproofing it will become a lot easier and less time-consuming.
But soundproofing a garage, in many cases, is a multi-step process that includes soundproofing the different structures like the walls, doors, and any window. This can include sealing any existing gaps as well as installing sound absorption materials, depending on the source of the noise and how it’s transported.
For instance, an empty wall will reflect the sound waves hitting it directly, causing an echo. In such cases, you may need to use acoustic foam panels or acoustic blankets for absorbing sound waves to minimize sound reflection. Aside from that, the uneven texture of these panels will transport the reflected sound waves in different directions, thereby reducing their intensity.
Sound leaks, on the other hand, are caused by gaps that allow outside noise to enter the garage or inside noise to escape. Hence, you would typically need to apply a sound barrier like acoustic tape to seal them.
What follows below is an exhaustive guide on the different ways of soundproofing a garage so that you can get all the bases covered. So, dive in!
How To Soundproof Garage Doors
If you have a metal garage door made of steel, know that it will generally have a hollow core and transfer more sound both ways. As such, the best way to counter this is to replace it with a solid-core garage door made of engineered wood. However, it may not be practical for everyone to make such a huge investment just to block noise.
That’s why here are a few ways you can try tosoundproof your existing garage door. You can use one specific method or combine two or more, depending on how severe the noise transmission is.
1. Sealing The Gaps
Sealing doors below the garage door can help in blocking sound both ways, and you can use compressible weather-stripping rubber seals for this purpose. Aside from blocking noise, these garage soundproofing products can add an extra layer of insulation to your garage for trapping heat during the winter, making it more energy-efficient.
For any leaks on the sides of the garage door (including the top), consider specialized seal kits that are easy to install the DIY way. All you need to do is size the strips according to the length of the sides and apply them firmly using screws or adhesive.
Tip
use some acoustic caulk to add an extra layer of the seal between the strip and the gap. You can use a caulking gun with a thin nozzle for even application.
Whether you aim to block sound completely or want to achieve overall noise reduction, sealing gaps is an essential first step to making the garage soundproof.
2. Deadening The Sound
Deadening the sound using soundproofing materials can help reduce noise transmission both ways, especially for low or medium-frequency sounds. For this, you can use heavy-duty soundproof curtains or hang noise-blocking curtains. But before that, make sure you measure the door properly so that you don’t end up with too long or short a curtain.
Alternatively, you can increase the door mass by installing any soundproofing material like mass-loaded vinyl (MLV) panels. The idea behind this method is that by increasing the density of the door structure, you can reduce both airborne and impact noises that use the door for transmission or bounces of it.
Use vinyl cement for securing the panels on the doors and the same acoustic caulk hack mentioned above to seal any remaining gaps between the panels and the door.
Aside from that, you may consider using sound-damping foam mats, which can add both sound-absorbing and blocking properties to the door. Such mats come with a “sticky back,” so you can simply paste them on the door. Plus, this is a cheaper solution compared to installing MLV.
No matter which option you choose, always ensure that you aren’t putting excessive weight on the door opener. Otherwise, it may interfere with the opening and closing of the door or the door seal.
Soundproofing Garage Walls
Once you’re done soundproofing the garage door, it’s time to move on to the walls. One thing to keep in mind here is that you may need to employ invasive techniques for the best results, especially for blocking loud noises. However, I’d recommend starting with the non-invasive ones and observing their efficacy for some time.
1. Install Acoustic Foam Panels
One of the easiest things you can do to soundproof your garage walls is to add acoustic foam panels to them. These sound-absorbing panels will be extremely useful if you want to reduce the echo inside the space without breaking the bank. And the best part is that you don’t need to resort to installing acoustic foam panels on every inch of the walls as long as you know the exact location of the noise leak.
However, installing acoustic panels alone may not help you soundproof a garage if used on its own.
This is because these panels essentially prevent the sound waves from bouncing on the surfaces inside and amplifying, but they don’t do much to stop the entry or exit of sound waves per se. You will find soundproof panels (or acoustic panels, as they are commonly called) in different shapes and sizes, meaning covering those odd spots or corners won’t be an issue.
Tip
If your garage acts as a workshop,install the acoustic panels on the walls right behind the workstation, where you use the power tools for maximum results.
2. Hang Acoustic Blankets
You can also soundproof your garage walls (including glass windows) by hanging acoustic blankets that deaden the sound waves before they reach the structure behind them. As such, this method is most effective in preventing airborne sounds by absorbing them in their way.
Heavy-duty acoustic blankets, like the industrial ones, come equipped with grommets that make the installation process easier and faster.
3. Soundproofing Unfinished Walls
If you’re just building your garage or remodeling it and it has unfinished walls, then you have the best shot at creating soundproof walls.
From what I have seen, most residential garage walls are made of cement blocks or thin timber blocks placed over metal or wooden studs. So, if you have exposed studs or empty wall structures, you can add soundproofing materials like MLV or mineral wool insulation before installing the final layer of panels or drywall.
Tip
Apart from mineral insulation wool and wooden panels, you can use other soundproofing materials like fiberglass panels before finishing the walls.
In case your garage walls are being constructed of concrete or cinder blocks, then soundproofing the exposed studs will require some additional effort. For this, I’d suggest covering them with wooden panels or a few layers of drywall. Being porous in nature, concrete can easily adhere to thin treated wooden panels, after which you can install the drywall on the studs.
Some other ways to soundproof unfinished garage walls include:
A. Opting For “Room-Within-Room” Construction
Well, no, I’m not asking you to build a new room within your garage, but by room-inside-room construction, I mean separating two layers of drywall to reduce the contact points between them. And this, in turn, will reduce sound transfer between surfaces. For this, remove the existing drywall structure and build another drywall frame in a way that's separated from the former.
This process of separating the drywall frames is known as decoupling; however, you will need to keep a few things in mind before employing this method.
Firstly, decoupling can be a costly affair, depending on how big your garage walls are. So, it’s generally not the best way to soundproof a garage cheaply.
Secondly, ensuring proper structural stability of the two frames can be difficult, especially if you aren’t into DIY construction projects. And lastly, you may lose a lot of garage space (about a foot or more) on average due to the separation of the walls.
B. Double Wall Construction
Much similar to a room within room construction, a double wall construction has less decoupling but high efficacy when it comes to blocking noise.
C. Staggered Wall Stud Construction
If you don’t have much space in the garage for performing the above-mentioned room-in-room construction, then a staggering wall stud construction can be an effective alternative. All you need to know is to replace the existing wall frame with a 6-inch wide framing that has staggered studs.
D. Using Resilient Channels And Sound Isolation Clips
If the other construction alternatives aren’t feasible for you, you can try attaching resilient channels or sound isolation clips on the inner side of the drywall frame to complete the wall assembly.
For the unversed, a resilient channel is a narrow metal bar that attaches directly to the walls, and you can attach the noise clip to it. Finish it off by attaching a layer of drywall to the open end of the isolation clip. This will help absorb sound so that the sound waves don’t transmit from the drywall to the studs.
Make sure to leave some room at the junction where the drywalls of the wall and ceiling connect and fill it up with a sealant to reinforce the decoupling.
Image of ceiling joist
4. Add Mass To Your Existing Garage Wall
Adding a couple of drywall layers to existing garage walls can improve the overall sound absorption (acoustics) of the space for absorbing sound waves with low frequencies.
I’d strongly recommend including a soundproof material (like insulation wool or Green Glue compound) between two or more layers of drywall for optimal sound attenuation. However, this may not be as effective as decoupling the wall.
Garage Ceiling Soundproofing
You can use pretty much the same methods mentioned above for soundproofing garage ceilings. For example, you can try installing acoustic foam panels on the ceiling to absorb sound waves, or you can substitute them with acoustic ceiling tiles. In either case, start by designing a grid-like structure on the ceiling and then fill the space with panels or tiles.
Apart from this, you can design a drop ceiling by using the main ceiling as the foundation, but make sure the space between the two is filled with some soundproof material like mineral wool. Leaving too much empty space or installing fixtures like pipes and lights can aid sound transmission.
In case of exposed ceiling joists, you can fill the space between the joists and the ceiling with any efficient soundproofing material to reduce the echo. But for better results, consider adding one or two layers of drywall, which will block sound more effectively, thanks to its density.
Soundproofing Garage Floors
Soundproofing the garage floor can be achieved by placing EVA foam mats or anti-vibration pads on the surface to absorb the high-frequency noise coming from power tools. In case of low-frequency noises, you may spread a thick carpet on the floor to see (read: hear) results.
But if these tricks don't solve the problem, you may have to install acoustic insulation or soundproof material underneath the flooring. Since this will involve removing the existing flooring, it’ll be a better idea to hire a professional for the purpose.
Garage Soundproofing Final Words
If you’re serious about using your garage as a full-time music practice room, home theater, or workshop, then it’s in your best interest to combine different soundproofing methods.
And in such a case, I’d strongly recommend checking the STC (sound transmission class) of the soundproofing materials being used. Measured in decibels, this rating will give you a fair idea of how much sound the material can block. Remember that a high STC decibel rating will give you better soundproofing properties.
Likewise, check the NRC (Noise Reduction Coefficient, ranging from 1 to 100) of sound-absorbing materials, which is measured in percentage. The combination of high STC and NRC ratings will determine how soundproof your garage will be.
You can soundproof your floor during installation or after it has been finished. Before installation underlayment, floor joist isolators, or dense acoustic insulation can be used while after installation you can use carpets, rugs, mats, and even proper furniture placement to minimize sound. Another popular method is to remove structural noises by replacing old screws and pins.
Tired of hearing noise complaints from your neighbors living downstairs? Well, it’s time that you make your floor soundproof.
Everyone likes to have peace and solitude at home, so you can’t really blame your neighbors if they complain about noises coming from your room.
Thankfully, by making your floor soundproof, you can avoid such complaints altogether. So, how can you soundproof the floor of your house? That’s what I have discussed here, so dive in!
How to Soundproof Floors
Soundproofing Basics
Before I delve deeper into the topic, let me give you a brief idea about what soundproofing is. Simply put, it is a process that aims to minimize or eliminate sound propagation. If you soundproof a room, you can prevent noises from leaving the room. The opposite is also true, which means that you won’t have to deal with any external noises.
Besides the floor, you can soundproof any part of your room. For instance, if you soundproof the walls, you can prevent noise from propagating through them. This means that people living in the adjacent room will not be bothered by noises coming from your room. Similarly, if you soundproof the ceiling, you won’t have to worry about the upstairs neighbors disturbing your sleep in the middle of the night.
In this regard, soundproofing is done to eliminate two types of noise - impact noise and airborne noise. The former is caused due to impacts, while the latter is caused by ambient sounds. For example, if you hit your walls with a hammer, it will generate impact noise. On the other hand, if you are playing loud music, the sound will travel as airborne noise.
Impact noises are normally more troublesome than airborne noises since the energy of an impact vibration can propagate quicker than ambient noise. Furthermore, the noises generated from impacts are a lot louder and more difficult to manage than the noises generated by a barking dog or talking people. This is because the vibrations from an impact travel directly through the materials of the walls and ceilings.
If it is a bit difficult to understand, then refer to the infographic below. It demonstrates how vibrations travel through the walls and floors to generate noise in adjacent areas.
Why Should You Soundproof Floors?
Soundproofing is essential because it helps to improve the absorption (acoustics) of sound inside a room. Many homeowners understand the necessity of soundproofing their walls and ceiling, but when it comes to the floor, they feel skeptical, especially if they live on the first floor.
Yeah, I admit that If you live on the lowermost floor, then it might not always be necessary to soundproof your floors. However, if there is living space below you, then floor soundproofing is required.
Besides, soundproof flooring is not just meant to reduce the noise nuisance for your neighbors. It is also required to improve the impact insulation class (IIC) rating of the floor. This, in turn, contributes to the sound transmission class (STC) rating, which is a mandatory requirement under the law.
According to the International Building Code 2021, the STC rating of a building needs to be above 50. Therefore, if you want your home to be legally compliant with the regulations, soundproofing floors is a must.
In that context, different types of floors require varying levels of soundproofing based on their sound transmission capabilities. For instance, floors made of stone or ceramic tiles transmit a lot more noise than floors made of hardwood or concrete slabs. Thus, you will need more soundproofing materials for insulating a tile floor than what you will need for soundproofing hardwood flooring.
That said, the overall procedure is more or less the same, regardless of the flooring type. You just need to decide when you want to soundproof your floor. That’s because the methods to soundproof finished floors are different from the methods implemented during floor installations.
How To Soundproof An Existing Floor?
There are many ways in which you can soundproof an existing floor, as you can see below.
1. Laying Carpets And Rugs
The simplest method to soundproof a finished floor is to use wall-to-wall carpeting. If you use a carpet on your tile or stone floor, it can efficiently absorb the sound from impact, thanks to the shag. Besides, it minimizes the force of impact, which prevents the items from breaking when they are dropped, which is an additional advantage.
If you want to reduce the impact noise in certain sections of the floor, you can use rugs, which are usually smaller in size than carpets. As a matter of fact, using rugs below your heavy furniture is an excellent idea, as it minimizes the impact of noise when you move them.
On that note, moving furniture becomes much easier if there is an underlying rug. Instead of carrying or dragging the furniture item across your floor, you can simply pull it with the rug, which requires considerably less effort. So, not only does it reduce unwanted noise, but it also increases convenience, which makes it an excellent pick for finished floors.
Installing carpets or rugs on your floor is pretty straightforward, which is another advantage of this option. All you need to do is roll it over your floor, and you will be good to go.
However, you need to measure the dimensions of your floor beforehand, especially for a wall-to-wall carpet that covers the whole floor. If you don’t, you will end up with uncovered areas on the floor that lack soundproofing.
You need to consider the thickness of the carpet or rug you want as well. A thick carpet can absorb more noise but is relatively expensive to get. On the other hand, a thin carpet is a lot cheaper, but it can absorb less noise by comparison.
2. Using Mats
Using floor mats is another method for soundproofing a finished or new floor. The basic principle is very similar to the one used for the carpets and rugs, as you need to lay them over your existing floor to make it soundproof. Even so, there are certain differences with this option that need to be considered.
The first and most obvious difference is the materials used. Typically, the shags of carpets and rugs are made from wool, cotton, or nylon. In contrast, soundproofing mats are made from rubber, cork, vinyl, plastic, or composite materials.
Natural rubber is an excellent material for sound insulation, which is why it is commonly preferred over other soundproofing materials. You can easily use rubber mats over your floor to minimize impact noise and ambient noise. Likewise, they can be used as carpet padding below your carpets to enhance their soundproofing capabilities.
Composite mats are generally made from a combination of wood, fiber, and plastic. They are pretty thick, which helps to absorb sound efficiently. On the flip side, they are expensive, which reduces their feasibility.
Regardless of the materials, most floor mats are available in two forms - rolls and interlocking tiles. This is another aspect that differentiates them from carpets, which are only available in a single form.
The rolls are similar to a rug, and you need to lay them over your floor. However, a roll of rubber mat is relatively large and heavy, which can make it slightly difficult to handle.
If you do not want to deal with that hassle, you can go with an interlocking floor mat. Installing it is much easier by comparison and feels a lot like solving a jigsaw puzzle. Besides, interlocking floor mats are available in different color options, which helps to improve the floor aesthetic.
3. Install Deck Screws And Nail (Fastener)
This is a method that is primarily used for wooden and hardwood floors. Such floors are generally made from wooden floorboards that are held together with adhesives or fastener nails.
In many cases, the adhesive wears off over time, or the nails become rusty and corroded. Ultimately, they come loose from the floorboards, which causes the floorboards to become squeaky. Squeaking sounds are a result of the floorboards rubbing against each other, and hence they can be considered to be a structure-borne noise.
If you want to eliminate the squeaking sounds (or any other structural sound, for that matter), you should install new deck screws. That will restore the integrity of the wood flooring and get rid of any odd structural noises.
To install the deck screws and nail (fastener), you will first need to remove the old nails and adhesives if they haven’t come off already. You can use a claw hammer to pry out the old rusted nails from the wooden floorboards.
In some situations, the rust may cause the nails to become stuck to the boards. If you come across such nails, you can use rust remover to loosen them up for easier removal.
Likewise, you can remove the old adhesives by scraping them off with a brush or sandpaper. You can also use vegetable oils to remove old adhesives. First, you have to pour the oil over the adhesive and let it soak for a while. Then you have to wash it off with water or wipe it with a clean cloth.
After that is done, you can install the new screws and nails. For the screws, you can install them with a screwdriver, and for the nails, you can use a simple hammer.
4. Furniture Placement
Have you ever wondered why an empty room sounds louder than a filled-up room? It is because objects, such as furniture, are good absorbers of sound. Therefore, you can make the floor (and, by extension, the room) soundproof by placing your furniture items in a specific manner.
Such a system is highly effective for blocking out airborne sounds. And with correct placement, you won’t have to worry about dropping objects on the floor either. For instance, if you have more than one table in the room, then a dropped item will likely fall on them instead of the floor, thereby eliminating impact noise.
As you can guess, there is no installation necessary for this method. All you need to do is move your furniture to the noisiest parts of the room, such as near your TV or music system. That will effectively soundproof your room for listening to music or watching movies loudly.
On that note, you can use this technique to soundproof an existing wall by placing the furniture items close to this wall.
However, one disadvantage of this method is that you will need lots of furniture to get the maximum level of soundproofing. If you have enough furniture in your apartment, it shouldn’t be a problem. But if you don’t, then it would not be feasible to buy furniture just to soundproof the floor. In that situation, you can opt for another soundproofing method.
Tip
I recommend using cushioned furniture items, such as sofas, couches, mattress beds, and so on. The cushioning on these items can absorb sounds better, thereby giving you a quieter experience.
How To Soundproof Floors During Installation?
It is always better to soundproof a floor when it is being installed. You don’t have to take my word for it, though; just ask any construction engineer, and they would suggest doing the same.
There is a good reason for this - the features of a floor under construction can be easily adjusted or modified to accommodate soundproofing measures. You cannot do such modifications with a finished floor unless you want to demolish and rebuild it again.
With that in mind, here are some methods that can be used to soundproof a floor during installation.
1. Use Underlayment
Floor underlayment is a layer of insulating material that is placed either below or just above the flooring material. They are typically used to provide thermal or acoustic insulation. The former helps with regulating room temperatures, while the latter is used for soundproofing.
Acoustic floor underlayment can be made from different materials, as I have listed below.
Vinyl - Usually consists of compounds like polypropylene or polyvinyl chloride (PVC)
Rubber - Uses either natural or synthetic rubber and offers excellent soundproofing
Cork - Works best for tile, stone, cement, or marble flooring
Felt - Most suitable for hardwood, bamboo, or laminate flooring
Foam - Made from polypropylene and works best for an engineered or a floating floor
Rubber is the most effective acoustic underlayment, followed by vinyl, which is comparatively cheaper. And the best part is that they can be used for almost any type of floor, which makes them highly versatile.
If you want to underlay them below the flooring materials, you need to place them right over the subfloor. Most underlayments come in the form of rolling sheets, which means that you will need to lay them out like a carpet over the subfloor surface.
After that, you have to apply adhesives to fix them in place. I recommend using an acoustic caulk or Green Glue due to their innate soundproofing capabilities. If the underlayment roll comes with pre-applied adhesive, though, this step can be skipped.
In any case, once they are secured, you need to fill out any gaps using a sealant. Following that, you can lay down the flooring material to complete the installation. You have to use adhesives to glue these materials in place. However, if you intend to use floor lamination or a floating floor, that won’t be necessary.
2. Use Dense Acoustic Insulation
Below the floor surface lies the sub-floor, and underneath that lies the ceiling drywall of the room below. In this regard, the space between the subfloor and the ceiling drywall can be stuffed with dense insulating materials, such as foam. This is just what you need to do here, and it will muffle most impact and airborne sounds from traveling through the floor.
Most buildings contain some level of sound insulation between these layers. Although, if you want better soundproofing, you can add more insulation. Simply stuff the hollow space with the insulating material, and then you can move on to the rest of the floor installation. But make sure not to use too much stuffing, as it may make it difficult to attach the subfloor.
3. Soundproof The Floor Joists
A floor joist is a structural component that lies below the subfloor. It bears the weight of the whole floor and everything that lies above it. So, it is essentially a load-bearing structure, similar to pillars.
In that context, if you soundproof the joists of your floor, you can eliminate all sound transfer through the floor. The best strategy for this purpose is to use floor joist isolators. They are thick pieces of rubber that are usually placed between the floor joists and the subfloor. This creates a gap between them, which prevents sound from propagating.
As for the installation of these joist isolators, you need to slide them in place over the joist frames carefully. Then, you can nail the subfloor in place and install the rest of the flooring components over it.
The gap created by an isolator also acts as a thermal and vapor barrier which prevents the entry of moisture and keeps the floor temperature under control.
What Is The Cost Of Soundproofing The Floor?
When thinking of getting a soundproofed floor, the cost is possibly the first and foremost thing to pop into mind. And to be honest with you, there is no simple answer to this question.
While the materials used for soundproofing do not cost a lot of money, the procedure for getting it done is a bit costly. This is especially true if you want to get the floor soundproofed during installation. Such processes require skilled labor, which is often expensive.
The costs for soundproofing also depend on the size of your room. If your apartment is a small one, you can get it done without straining your bank account. However, if you have a large apartment or home, you might need to shell out a lot of cash. Personally, I would not suggest going for full soundproofing in that case unless you can bear the costs.
That said, some options, such as buying carpets or mats, are considerably cheaper. So, if you have a tight budget, you can consider these options instead.
Soundproofing Floors Final Words
Soundproofing your floor is not just a matter of convenience - it helps maintain your privacy too. I mean, would you really want your neighbors to hear your private conversations? Of course not!
Thus, to make it easier for your neighbors and yourself, you should make the floor soundproof right away. And if possible, you should get your walls, ceiling, doors, andwindows insulated as well.
Anyways, that brings me to the end of this detailed guide. I hope you find the information here to be helpful.
See you around then!
Adding mass to the ceiling is the best way to soundproof a basement. However, if you can spend a bit more, adding resilient channels to the structure will eliminate noise coming from the floor overhead to a great extent. The easiest, most affordable way to handle sound absorption however is to apply foam, cotton, fiberglass or polyurethane acoustic panels directly on the basement ceiling, hanging ceiling baffles can also increase sound absorption.
One of the worst things about modern life in the city is noise, especially construction noise in the neighborhood.
But you have the freedom to turn your basement into a soundproof haven and relax in that quiet space. What’s more, a soundproof basement ceiling will allow you to throw basement parties or continue jamming sessions without disturbing anyone.
Let's start this article with a disclaimer, by creating a big distinction between soundproofing and sound absorption from the get-go though:
Soundproofing translates into the act of preventing sound from entering or exiting a space by using materials that block or reduce sound waves. Soundproofing materials are usually dense, thick, and heavy, such as drywall, mass-loaded vinyl, and acoustic foam, the most common soundproofing method is thus adding mass to existing partitions.
Sound absorption translates into reducing or eliminating sound by using materials that absorb and dissipate sound waves. Sound absorption materials, such as acoustic foam and fabric-wrapped panels, convert sound energy into heat energy, which is then dissipated into the environment, and thus adding acoustic panels to your basement ceiling is sound absorption method, not a soundproofing method.
To make this article a bit easier to read, and because popular culture uses the term soundproofing loosely for the general act of minimizing sound I will use it too, just not to get hanged up on technicalities but please do note in the filed of acoustics these two terms are not interchangeable.
Interested to know more? Then read on till the very end!
Basement Ceiling Soundproofing 101
What Type Of Noise Enters The Basement?
So, do you know what type of noise enters the basement?
Knowing the types of noise that get into the basement is important when it comes to soundproofing a basement ceiling. And if you aren’t much into DIY home renovations, you probably won’t know the type of noises that usually invade such spaces.
Basically, two types of noise break through the basement ceiling– airborne and impact noise. Traffic-related vibrations are also likely, though these are rather difficult to solve at later stages.
Since the first floor of any building is the busiest, you’re likely to encounter both types of noises in the basement. Whatever sounds you hear in your basement fit in either of the two categories.
Here I’ve discussed the two types of noises to help you decide which solutions would be effective for a basement ceiling soundproofing project.
1. Airborne Noise
As is understood, airborne noise refers to the unwanted sound that travels from one place to another via air after leaving its source. When the sound waves collide with a structure, some energy passes across while a fraction of it is reflected, and the remainder is absorbed.
Either airborne noise reflects off the ceiling or floor or passes through them to the basement.
Your toddlers screaming in the nursery while playing or your teenager blaring loud music on speakers are classic examples of sound traveling to the basement through the air. A few other examples of airborne noise are:
Barking dogs
Conversations between people
Cars starting or moving down the road
Radio and television
Airborne sounds can be blocked by adding extra layers to the structure rather than modifying it entirely. But one thing to keep in mind is that some airborne noises are low-frequency sounds, so blocking them completely might be challenging. Like, the sound of an airplane passing overhead or thunder would be more difficult to block than somebody’s footfall on the ground above.
2. Impact Noise
Impact noise, on the contrary, occurs whenever any object hits or touches a surface, because of which mechanical energy is transferred into the structure as vibrations. Later, these vibrations leave as sound waves from the other side.
The sound of the ball hitting the floor or someone thumping their feet while climbing stairs are classical examples of impact noise. Some other examples of impact noise are:
Moving furniture
Water sloshing through the pipes
A construction jackhammer
Impact noises are quite common in basements, mainly because the ceiling is on the first floor of the building. As against all other floors, the first-floor witnesses a lot of foot traffic, which is why blocking impact noises completely is slightly tricky.
Since they travel through the flanking, you might have to modify the structure of a building to alter or distort the direction of these sound waves.
Common Types Of Basement Ceilings
More often than not, soundproofing projects are DIY unless you wish to make structural changes.
Before you start the project, it’s important to know about the different types of basement ceilings, so you can understand how the two types of noise enter the space. Also, the soundproofing solutions you opt for will depend upon the type of ceiling you have in your basement.
Here’s a quick rundown of the common types of basement ceilings.
1. Dropped Ceiling
Also known as suspended ceilings, dropped ceilings are a sought-after option for basements.
Drop ceilings are fixed beneath the structural ceiling and feature lightweight tiles that are attached to a grid, which hangs from the joists overhead. Therefore, you get a large cavity to work with, and you can employ the principles of a decoupled ceiling.
In a drop ceiling, noise transfer is no doubt high, but it can be soundproofed effectively, which means you can use a variety of soundproof insulation materials.
2. Exposed Joists
Exposed joists, often referred to as open ceilings, reveal the bottom of the flooring alongside the joists overhead. Though sound transfer is high in this structure, you get plenty of space to work, which means you get the freedom to employ a variety of soundproofing methods.
On top of that, you won’t have to prep the surface to add soundproofing materials, which further cuts down the cost.
3. Finished Ceiling
Finished basement ceilings are often made up of drywall sheets that are fastened to the floor joists overhead. A finished ceiling may not have insulation material lodged in the cavity.
The opportunities to soundproof such a ceiling are limited unless you tear down the original drywall to add soundproofing materials. And it will double the cost, which means you might end up overspending on soundproofing.
4. Unfinished Ceiling
As against the finished ceiling, an unfinished basement ceiling is when the mechanical and structural design, such as beams, is left as it is, meaning in its natural state. In an unfinished basement ceiling, you need to start everything from scratch, so you can use whichever soundproofing material you want.
Elements Of Soundproofing A Basement Ceiling
After discussing the types of noises and ceiling comes the elements of soundproofing a basement ceiling. Essentially, there are four elements to soundproof the ceiling of a basement which must be followed for a flawless layout.
1. Adding Mass
Sound waves are made by vibrations, and when more mass is added, it becomes difficult for such vibrations to propagate. However, this is frequency dependent, and the efficacy of a mass panel is proportional to its thickness and density as well as the sound wave frequency.
So, remember to add a large volume of drywall to create a sound barrier and block unwanted noise from invading any space. However, since you cannot add too much mass to soundproof the ceiling, keep in mind that it will eliminate only airborne noise. That means it would be ineffective in minimizing impact noises.
2. Decoupling Joists
When two sides of a wall are separated mechanically to prevent noise from passing through, it is known as decoupling. However, decoupling isn’t effective for blocking sound waves of all frequencies. Therefore, I suggest using it alongside other principles to soundproof a basement ceiling effectively.
3. Damping
The third aspect of soundproofing is damping, which prevents sound vibrations in the joists of the ceiling. When it comes to damping, there’s no shortage of compounds, so finding one wouldn’t be a problem.
For instance, acoustic drywall is one option that dampens sound waves while absorbing them; hence, it’s more effective than traditional drywall.
4. Absorption
Absorption is the fourth and final principle of soundproofing a basement ceiling. As a rule of thumb, the thicker the material you use, the more effective it will be in absorbing sound of certain frequencies.
All you need to do is place the sound insulation material at the back of the barrier, and it will absorb sound, reducing noise.
7 Ways To Soundproof A Finished Basement Ceiling Cheaply
1. Seal Gaps
When soundproofing a basement ceiling, the most important thing is to seal gaps, no matter which part you’re working on.
Gaps are undoubtedly the biggest culprit that allow sound to travel from one place to another. Almost every basement ceiling has cracks or gaps, which may not be noticeable at first.
Use caulking to seal gaps on the basement ceiling because installing soundproofing materials before sealing the gaps won’t be effective in blocking noise. Remember, even the smallest gaps can contribute to noise transmission.
So, sealing gaps and cracks should be the priority for soundproofing your basement.
2. Add Rugs To The Room Above Your Basement
Anyone who wishes to soundproof their ceiling without spending a ton on sound insulation materials must get rugs for the rooms above the basement.
Rugs dampen vibrations that occur on the flooring above the basement ceiling. When shopping for rugs, opt for the fluffiest and thickest ones because they absorb sound better than thin ones. In this regard, I suggest opting for shag rugs because they are soft and voluminous.
However, if the room already has carpet installed and you don’t wish to spend money on rugs, add heavy-duty floor mats.
For maximum sound absorption, you must place mats in the middle of the carpet and the floor above your basement. Beneath the rag, you can add acoustic floor underlayment to improve its functionality. Besides damping sound, it will function as an anti-slip mat, so you can lay it on laminate and hardwood floors without worries.
Alternatively, you can place furniture like a bookshelf or couch on the flooring above the ceiling of the basement. Adding furniture is an excellent way to eliminate sound transmission without spending a penny.
3. Fix Squeaky Floorboards
Squeaky floorboards can also lead to sound transmission. So, you’ll need to fix them before installing a soundproofing solution to prevent noise transfer to the basement from the rooms above.
A bit of DIY work is needed to fix the floorboards, so be prepared for it. For this, you'll need to first locate the squeaky boards, identify the joist line and fasten the screws back down.
Here I recommend using screws with either removable heads or flat heads to make sure they do not protrude through the finished floor. Also, don’t forget to use a wood filler to fill the gaps between the finished floor and the subfloor.
Or, you can glue a wood block and place it between the subfloor and the ceiling joist beneath the squeaky board. By filling the gap, this wood block prevents the board from bending; you can join them using screws to enhance durability.
4. Insulate The Joist Cavities With Acoustic Insulation
Acoustic insulation is effective for sound absorption, not noise reduction. Usually, such insulation is used in ceiling and wall cavities to reduce the sound intensity so that airborne noise doesn’t pass through.
In this regard, acoustic tiles are also an excellent option for improving the absorption (acoustics) of a basement.
Mostly, basements have open floor plans, with some featuring a separate bathroom. So, one of the best ways to eliminate echo and reverberation in the basement is to install acoustic panels on both the ceilings and some sections of the walls.
In simple words, insulating the ceiling cavity will reduce the transfer of airborne noise; however, it won’t be effective in eliminating the transmission of impact noise.
Sound insulation materials can be used on both drop ceilings and open ceilings. For insulating a finished basement ceiling, you might have to tear down the drywall, install the insulation material in the cavity and restore the drywall.
On the other hand, you can use blown-in insulation to insulate existing walls; however, it’ll be costly. Besides materials, you’ll be spending on labor charges, which will further add to the expense.
Go for insulation materials that are three-inch thick, and make sure you don’t stuff them into the cavity too tightly. Hence, mineral wool insulation would be the best bet because of its performance and fire-resistant properties.
5. Rearrange Furniture In The Room Above The Ceiling Of The Basement
Rearranging furniture may not be the most efficient noise control strategy, but it’s a quick-fix option for soundproofing your basement. You must consider rearranging furniture in the room above the basement ceiling because placing couches, bookshelves, or other furniture in high-traffic areas will reduce footfall, minimizing impact noise.
Inspect the room properly to identify areas with the most noise pollution and place furnishings there. Besides couches and bookshelves, chairs and cabinets are considered effective in eliminating sound transfer, so you can rely on them for noise control.
6. Use Mass-Loaded Vinyl As Carpet Underlay
Made of polyvinyl chloride, mass-loaded vinyl barriers prevent noise from passing to the basement from the floor above, so it’s a dependable option for soundproofing basements. While there are several ways to install mass-loaded vinyl, attaching it to the ceiling or placing it under carpets blocks noise effectively.
Though dense, this material is highly flexible and comes rolled up, so even a novice would be able to install it without issues.
Another way to install this material is to staple it to the existing drywall ceiling without having to take it off. One thing to note is that the mass-loaded vinyl barrier is available only in black color. And if you want to keep it out of sight, install a drop ceiling with drywall and resilient channels after the MLV is in place.
7. Consider Hanging Acoustic Fabric Panels
All those who want to make their basement a stylish space can opt for acoustic foam panels instead of basic tiles. However, I’ve found that they don’t really block noise, as they are very porous. Instead, they allow sound to enter, and some of it gets absorbed. The rest is reflected from walls, and some amount is transmitted.
Other than hanging them on the walls, you can attach them using L-brackets or Z-clips.
As against the finished ceiling, soundproofing the ceiling of the basement, whose joists, trusses, ductwork, and beams are exposed, is slightly challenging. However, it’s not impossible– here’s how you can soundproof a basement ceiling with exposed mechanical and structural designs.
1. Add Insulation
Unfinished basement ceilings often have empty joists, which allow sound to pass through. So, the first thing to do is to stuff insulation into the joists; otherwise, preventing noise transfer would become impossible.
And if the basement ceiling was completed in a hurry, you'll need to inspect it to figure out if insulation material has been used or not. More often than not, the ceiling of basements is finished for aesthetic purposes. In such cases, you'll need to drill holes in the plasterboard to check whether it is insulated.
If it isn’t insulated, you know the drill– tear down the drywall, insulate it and reinstall it. Batt insulation is a popular pick among homeowners for soundproofing a basement ceiling because it’s easy to install.
2. Use Resilient Channels
The next step is to fix resilient channels to the studs at a right angle. When it comes to soundproofing a basement ceiling, resilient channels are important because they act as a shield between the drywall ceiling and the foundation. Hence, they will separate the foundation from the ceiling, which will prevent sound from transmitting.
You can also use hat channels or sound isolation clips to further soundproof drywall.
3. Install The Drywall
Now that resilient channels are installed, you can move ahead and attach drywall. To avoid last-minute trips to the local store, make sure you decide which type of plasterboard you want to install. Also, order enough drywalls to envelop the entire ceiling.
Another aspect is to make sure that the fasteners pass across the channels, not the joists. Or the process of decoupling would fail.
Throughout the process, keep in mind the ventilation and lighting process. So when installing the drywall, don’t forget to slit around electrical components and vents while making sure you place resilient channels away from lighting fixtures.
4. Use Green Glue To Coat The Plasterboard Before Layering
Green Glue is a substance that works as an adhesive between the layers of plasterboard and is an integral part of the soundproofing process. And while we’re on this topic, remember that applying Green Glue between two drywalls won’t be easy if you don’t have a drywall lifter.
Fasteners can also be used alongside Green Glue to securely join two layers of drywall. Keep in mind that this is a slightly lengthy procedure, so it may take a few days to complete. And in case you cannot spare much time, either you can construct a drop ceiling and/or install mass-loaded vinyl.
5. Use Acoustic Caulk To Seal The Gaps
As previously mentioned, any gaps between the subfloor and the joists will allow noise to pass through the basement. So, sealing gaps is a step you cannot skip, even if your ceiling features double layers of drywall; acoustic caulk is a good option for doing this.
6. Finish Drywall
After applying acoustic caulk, you'll need to smooth it out and add finishing touches, which encompasses a range of things from painting to installing light bulbs. Once you’re done adding everything, your basement will be ready to use.
Benefits Of Soundproofing A Basement Ceiling
Unable to decide if soundproofing a basement ceiling is a good idea? Here I’ve discussed a few benefits of soundproofing a basement ceiling.
1. Reduced Noise Pollution
We live in an overstimulated and sound-saturated environment, so noise pollution is becoming more prevalent.
Long-term exposure to persistent noise has been linked to negative health impacts, especially bass frequencies and acute noises. Soundproofing a basement ceiling will reduce noise pollution and lead to:
Improved focus and concentration
Better sleep
Decreased anxiety
Reduced risk of tinnitus or hearing loss
2. Sleep Or Read Comfortably In Your Basement
If your neighbors love throwing parties every now and then, understandably, the loud music may make it difficult for you to fall asleep or stay asleep. Soundproofing the basement ceiling will allow you to sleep comfortably or study in your basement, no matter the time of the day.
3. Save On Energy Bills
Even the smallest gaps can allow heat to escape and cold air to enter, which would lead to energy loss. Soundproofing the ceiling of your basement can prevent energy loss from your home, eventually reducing energy bills.
What Is The Cheapest Way To Soundproof A Basement Ceiling
Whether you’re running short of money or don’t want to spend too much, insulating the floor above the ceiling of the basement is the cheapest way to soundproof it.
Laying down rugs or carpets would effectively insulate the floor overhead the basement. And if you don’t mind spending a few more dollars, consider installing floor underlayment, which would make the floor denser and thicker. Hence, it would absorb sound and prevent airborne noise from entering the basement.
Tip
Before starting your basement soundproofing project, rent a drywall lifter for a couple of days or weeks so that you’ll be able to install drywall with ease. A drywall lifter is a handy tool that holds the plasterboard sheets, so you’ll be able to screw or glue them in place without hassle when soundproofing the basement ceiling.
Soundproof Basement Ceiling Summing It Up
Basements aren’t only meant for storing things; instead, they can be used to watch movies, record music, or even catch forty winks during the day.
But you can make the space usable by soundproofing its ceiling. Although it may sound like a daunting task, soundproofing a basement ceiling is a lot easier than insulating other areas of your home.
I suggest going for fluffy rugs and acoustic panels when it comes to soundproofing the ceiling of a basement because they are relatively easy on the pockets. And if budget isn’t an issue for you, installing resilient channels would be the best bet.
So, go ahead and try these soundproofing techniques in your basement and turn it into a soundproof oasis!
Most efficient ceiling soundproofing technique for both new and existing is to increase the mass and density of the ceiling, increasing sound absorption by adding insulation. This will reduce sound transfer through your ceilings through a combination of acoustic insulation, sound insulation clips, resilience channels, and soundproof panels, thus reducing sound transfer increasing acoustic comfort levels.
When soundproofing a home, many people tend to overlook the importance of soundproofing the ceiling. However, blocking, or at least reducing the sound from above, is important to create a peaceful indoor environment.
That’s why I’m here today to help you understand the different noises that your ceiling may be transferring and how to block them using sound-insulating materials. I will also tell you everything you need to know about building a soundproof ceiling from the ground up (read sky down).
How to Soundproof New and Existing Ceilings
What To Know Before Soundproofing Your Ceiling
Although you may be tempted to start with soundproofing your ceiling immediately, I’d ask you to hold your horses. That’s because there are a few important factors to be aware of before you begin, which will make the soundproofing optimally effective.
Firstly, let me start by introducing you to the types of noises your ceiling may transport to the rest of the room. Now, you may think that I’m being too technical, but trust me- this is the crucial first step to determining which soundproofing techniques will work the best for your needs.
Generally, there are two types of sounds that you should consider before soundproofing your ceiling:
1. Airborne Noise
As the name may have already told you, airborne noise is transported through the air until it reaches a solid surface like the floor or ceiling. Also known as acoustic noise, airborne sounds or noises travel through the vibrations created by the air-wave to reach the floor above you, and finally, the ceiling.
2. Impact Noise
Impact noise or structural noise is created when someone or something “impacts” a surface and creates sound vibrations that bounce off the surrounding surfaces from the point of origin. These vibrations ultimately hit the floor above you and travel to your ceiling through the structures in between, thereby making their way into your room if the ceiling isn’t properly insulated.
For instance, if you can hear the footsteps of your upstairs neighbors walking above you, it’s essentially the impact sound waves that you’re hearing.
However, keep in mind that not all noises in your room can be solved using ceiling soundproofing techniques. Your room may be impacted by flanking noise, which is picked by structures like the connecting points between your floor frame and walls. In such cases, effective noise reduction will require treating the wallsand floor.
Types Of Ceilings
Once you’ve figured out if you’re being troubled by airborne or impact noise (or both), it’s time to determine the type of ceiling you have. As such, most residential ceiling types are categorized into:
1. Solid Ceilings
A solid ceiling is typically made of drywall or plaster, and it’s generally easier to soundproof. Such ceilings are usually made from gypsum panels encased in paper, which make them a better acoustic barrier than ceilings made of hardwood, fiberboard, and hardboard.
Moreover, a single layer of a solid ceiling has more mass and fewer intermediary structures (such as pipes and light fixtures) between it and the floor. It also has inherent sound isolation properties, and it’s comparatively easier to add to its mass for reducing unwanted sound transfer.
Perhaps, the biggest advantage of solid ceilings is their affordability, which makes them a fit for all budgets.
2. Suspended Ceilings
A suspended or drop ceiling is a removable structure that uses a solid ceiling as its base and “hangs” from it. Drop ceilings are primarily used for aesthetic purposes, and these “sub-ceilings” have more room for accommodating structures like lighting fixtures and plumbing pipes. In hindsight, the presence of these fixtures promotes more sound transfer.
It’s generally more challenging to soundproof suspended ceilings, especially for people who don’t have the right tools or knowledge about their home structure. Besides, they aren’t as effective as drywall ceilings if less sound transfer is on top of your priority list.
Soundproofing Ceilings - All You Need To Know
With everything said and done, it’s now time for me to address the big question- how do you soundproof the ceiling? And let me start with a piece of good news, you can soundproof an existing ceiling as well as build a soundproof ceiling from scratch.
Soundproofing An Existing Ceiling
Soundproofing an existing ceiling includes both invasive and non-invasive methods, so you can choose the ones that best suit your needs and budget.
1. Design A Dropped Ceiling
Don’t get me wrong- I’m not contradicting the disadvantage of a dropped ceiling mentioned above by suggesting designing a dropped ceiling to reduce impact and airborne noise. Designing dropped ceilings below existing ceilings provides you with the opportunity to install more sound absorption materials for effective sound blocking through:
A. Installing Acoustic Ceiling Tiles
Acoustic ceiling tiles, when installed properly, can soundproof a ceiling by enabling sound absorption from the structures between the ceiling and the floor above. All you need to do is create a perimeter around the existing ceiling area using T-channels and L-channels to create a grid-like structure. Once this is done, proceed to install each tile using a strong adhesive, which will help absorb sound from the floor above.
Tiles with dB-ratings are also available which can offer excellent performance when combined with soundblocker strips. Acoustic hangers can also be used to reduce sound transference further.
Tip
Make sure you follow the instructions on the adhesive package for even application and the strongest bond.
B. Adding Mass To The Solid Ceiling
Adding more drywall or sheetrock layers can act as absorption mass for an existing solid ceiling, thereby reducing sound and facilitating better sound insulation. This technique can yield desirable results for both impact and airborne noise, which is why most homeowners employ this method before moving on to others.
For this, start by building a wooden frame on the ceiling and use it as the base for installing sound isolation clips or resilient channels. Cover it with another layer of drywall. You can even use two layers if you need more sound isolation, as impact noise reduction requires more depth and mass than airborne.
2. Use Sound Damping Methods
You can add mass-loaded vinyl (MLV) panels or apply dampening materials like Green Glue compound to your drywall ceiling. However, both these methods work best when used in conjunction with multiple layers compared to a single layer of drywall.
You won’t have to remove the existing drywall ceiling for this, as you can apply both these materials on it following the manufacturer's instructions. After this, place another layer of drywall on top and screw it in place. Finish it off by sealing the boundaries of the attached drywalls with acoustic caulk such as AC95 for maximum sound reduction.
The Green Glue compound or MLV will fill the space between the two layers of the drywall to prevent the transmission of sound waves and reduce vibration. Subsequently, it will convert the sound waves into other forms of energy, like heat energy, and dissipate it uniformly to “kill off” the noise.
And both these methods can be used to stop the transfer of airborne and impact noise without altering the construction of the ceiling too much.
You can also add an additional (third) layer of drywall on top with the same damping compound in between the second and third layers if the noise reduction isn’t satisfactory. This means you will end up with a double layer of damping compound.
But keep in mind that increasing the layers will make the ceiling bulkier, taking up more space and making the room look smaller. Hence, this technique may not be very suitable for smaller rooms.
Building A Soundproofing Ceiling
If you’re building a home or renovating your home, then here are a few methods you can try for effective ceiling soundproofing. Note here that most of these techniques will require the expertise of a professional, so make sure you speak with your contractor in advance.
1. Enhancing An Ordinary Drywall Ceiling
Although I’m all for installing soundproofing drywall ceilings to prevent noise transfer, I know that they can be a costly affair. And I’ve seen many homeowners use cost-effective techniques to make such ceilings decently soundproof, especially for reducing airborne noise.
One of the easiest ways to do so is to install a sound insulation material like mineral wool insulation or fiberglass insulation in the ceiling space. The latter, in particular, can achieve satisfactory results when used in thick layers. Plus, it won’t cost as much as mineral wool insulation.
2. Installing A Decoupled Ceiling
A decoupled ceiling essentially involves installing a sound-insulated ceiling with a double layer of ⅝-inch drywall and a damping compound like Green Glue compound. This entire structure is installed using hat channels and high-resilience soundproofing clips.
However, the hat channels aren’t connected to the ceiling joists directly, as doing so can impact the ability of the structure to work properly. Instead, the hat channels are fixed using soundproofing clips, excluding the areas of the wall joists and drywall. For these areas, small screws are used every 10 inches apart to fix the drywall.
The contractors measure the total area covered by the wall joists and divide the hat channels into small pieces accordingly.
For the next step, the hat channels are positioned with the smaller ends pointing toward the joists and the bigger ends directed toward the floor. Then, the clips are used to attach the channels so that there’s no space between the attachments and the ceiling for sound transfer.
3. Attaching Floating Ceiling Joists
If you’re looking for a budget-friendly method to reduce impact noises transfer through a standard drywall ceiling, then floating ceiling joists may be the right solution. These constitute another way for designing a decoupled ceiling that’s fixed (and not hanging like a dropped ceiling).
Attaching floating joists requires the addition of a new joist between an existing pair of joists so that the former extends at least 2 inches below the latter. At the same time, an uncompressed sound-insulating material is used to stuff the gap between the pair of joists. And you’re done!
4. Soundproofing The Floor Above The Ceiling
Here’s an intensive technique to soundproof the floorabove the ceiling - start by removing the drywall ceiling above you to expose and remove the subfloor above it.
Next, apply a sound-damping material on the drywall layer and keep it aside. To prevent loudnoise transfer, I’d suggest preparing two layers of drywall with the sound-damping material placed between them for replacing the subfloor. You can use hat channels to install the newly prepared ceiling.
Aside from preventing airborne and impact noises, this method may be effective in reducing flanking sounds.
Some Other Tips
1. Check The Sound Transmission Class (STC) Rating
Whether you plan to soundproof your ceiling the DIY way or with the help of professionals, I’d strongly suggest figuring out the STC rating of the soundproofing materials you want to use. Simply put, this rating, measured in dB, will help you understand how effective the material is in preventing sound transfer.
The ideal STC rating range should be between 20 and 60 dB, with better ratings signifying better sound transfer prevention. You can also seek help from a professional to determine the anticipated complete STC rating of the completed soundproof ceiling. This way, you can change the technique or combine different soundproofing methods for the best results.
2. Replace The Duct Work
As I have mentioned earlier, drop ceilings leave too much space for accommodating fixtures and ductwork that transfer sound waves between the floor above and your ceiling. So, if feasible, try to replace the existing right ducting with flexible ducts or install affordable duct liners to help redirect the sound away from your ceiling.
3. Soundproof The Floor
You don’t need to employ invasive or expensive procedures for low-frequency noise transfer. If you can get access to the floor above you, try using simple hacks like placing a thick rubber rug with an anti-slip bottom to improve the sound absorption (acoustics) of the floor.
4. Seek Cooperation
No matter if you need to work on existing ceilings or build new ones, always make it a point to inform your upstairs neighbors about your plans. And apologize in advance for any inconvenience that may be caused in the process.
Ceiling Soundproofing Final Words
If you want to soundproof existing ceilings, I’d suggest starting with non-invasive techniques like adding acoustic tiles and adding extra layers to them. After all, why go through the hassle of tearing down a ceiling if you can soundproof it from the outside?
But if adding acoustic tiles or extra layers of drywall don’t work for you, it will be in your best interest to contact a professional for a hassle-free ceiling soundproofing experience. Besides, professional contractors will be aware of the building code regulations of your area, so you don’t have to worry about running into any legal trouble later.
I’ll see you another day!
Considering how noisy an apartment with thin walls can get, it is unfortunate that most residential areas resort to the same to chase lower costs and more profits. That’s when you can use soundproofing materials like wall inserts and clearsonic isolation enclosures to increase the mass of your apartment walls and block sound.
Paper-thin walls hamper not only the integrity of your apartment but also your privacy.
And in the worst-case scenario - you may suffer from sleepless nights, thanks to the budding musician, a restless child, or a noisy dog next door! Hence, soundproofing your room,ceiling, floor, or the entire property/apartment becomes essential.
So, today, I’ll discuss how to soundproof your apartment, listing a few things you should keep in mind and busting some myths thereof.
Apartment Wall Soundproofing 101
What Is Soundproofing, And Why Do You Need It?
Soundproofing involves blocking sound and noise and preventing sound transmission from one room to another. Since a thin wall cannot block sound efficiently, a professional may add mass and density to the existing wall to enhance sound absorption.
For instance, to soundproof an existing window, you may need soundproof window inserts or a thick curtain. Similarly, to soundproof the front door, sometimes an acoustic door seal kit may do the trick, or you may require an acoustic door.
Rest assured that depending on your unique soundproofing requirements and location, you will get a wide range ofsoundproofing methods and materialsto choose from. Given below is a noise map of the United States (with yellow depicting the loudest noise) to help you choose a suitable soundproofing solution.
Now, coming to why your apartment may need soundproofing, the first and foremost reason is privacy. Thin apartment walls can easily transmit unwanted noises from one place to the other. Proper soundproofing allows you to maintain your and even the neighbors’ privacy, as it works both ways.
For this reason, soundproofing is a must in offices, movie theaters, and other commercial places. It allows people with different schedules to co-exist and work in harmony without getting disturbed by airborne noise. Additionally, a soundproof apartment building has the edge over other properties in terms of resale value.
Examples Of Soundproofing Materials
Window Inserts
AudioSeal Mass Loaded Vinyl (MLV) Soundproofing Barrier
If you recently moved into a previously-used apartment, chances are that the apartment walls are full of holes for transferring cables and other purposes. These holes can aid noise transmission, especially if the shared walls are paper-thin.
Hence, sealing these holes is imperative to reduce noise in your apartment. And while there are plenty of sealants on the market, I recommend opting for green glue. The substance is somewhat similar to gypsum, so it not only acts like a sealant but also makes an excellent sound barrier.
Warning
Note that there are different types of green glue, and not all of them can be painted over. So, to avoid ruining the look of a thin wall, it is best to choose a product that can adhere to soundproofing paint.
2. Insulate Impact Noise With MLV
Mass-loaded vinyl is yet another material ideal for reducing background noise in apartments. Even vinyl mats, in general, can effectively cut down any airborne sound. Notably, vinyl is not just suitable for sound insulationbut also thermal insulation. It is not a good conductor of heat and cold, thereby keeping the indoor temperature in check.
Vinyl mats essentially work like thick acoustic panels that block unpleasant and unwanted noises of low frequencies. They also lower the resonant frequency of the wall, letting it vibrate at lower frequencies. This improves bass frequency attenuation.
3. Use Furniture To Reduce Empty Spaces
A simple yet effective soundproofing method is to fill up an empty room with furniture. This reduces echo and other noises.
Consider adding a large bookcase to the shared wall. By storing more and more books, you can create a thicker sound barrier. Alternatively, you can place a wardrobe, hang wall décor, or shift other types of furniture tosoundproof an existing wall.
Warning
This method will not offer drastic noise reduction. But it is an easy way out for those living in a rented apartment with limited permission to renovate the rooms.
4. Install Acoustic Panels
Acoustic wall tiles can assist as soundproofing solutions for thin walls. They are affordable and easy to install, so you don’t necessarily need to pay for the services of a professional. However, they don’t have enough mass to block sound entirely, but instead reduce the ambient sound in a space. They should be used in combination with other soundproofing treatments.
Coming to the construction of acoustic wall tiles, most of them are made of polyester, making them oil-resistant, lightweight, and odorless. And thanks to the sticky side of the panels, you do not need many materials to install them. Just peel them off, stick them next to one another, and your soundproof wall is ready!
5. Use Acoustic Foam
Acoustic foam panels are yet another excellent soundproofing solution, especially for studios, since they block at least 70% of noise from external sources. However, I recommend using acoustic foam panels in conjunction with any of the aforementioned soundproofing methods.
Tip
Since acoustic foam panels effectively reduce airborne noise, it is best to use them with any material that blocks impact sound. While purchasing multiplesoundproofing materials may get expensive, I think it is a valuable investment to effectively soundproof walls.
6. Invest In A White Noise Machine
If you need an instant solution to stop noise from passing through your thin walls, I recommend purchasing a white noise machine.
White noise machines drown out background noise by constantly producing broad-band noise signals; this is called Sound Masking. As such, a non-distractive form of noise will replace other noises, allowing you to work without distractions and sleep without disturbances.
Tip
I suggest using a white noise machine along with other noise-reducing materials, like soundproof padding or soundproofing blankets. You can further invest in a sound masking system to reduce sounds of different frequencies.
7. Use Soundproofing Paint
Depending on the amount of noise controlyou need, you can try painting thin walls with soundproofing paint. If there is not much noise, using soundproofing paint can help eliminate half the noise entering your apartment.
But, unfortunately, if there is a lot of external noise, the paint may not help even a bit. Hence, given below is a chart explaining the noise levels of different types of sounds…
Noise Levels Chart
Soundproofing paint boasts a thick consistency, so I recommend adding extra layers after the first coat of paint. Doing so will help lower noise levels, as the paint keeps the room insulated against low frequencies.
If you recently moved to a new apartment, repainting the room with soundproof paint and adding furniture is your best bet for quick soundproofing.
8. Seal Doors And Windows
Use weatherstripping to seal gaps around windows and below the door sweep to reduce the noise level in your apartment. Since weatherstripping tape consists of vinyl, felt, foam, rubber, and silicone, it is ideal for blocking unwanted sound. Not to forget, installing the material is easy enough to do it yourself, as all you need is a putty knife for the process.
Another method for soundproofing your doors and windows is caulking. But ensure that you are careful while working with a caulking gun, as the slightest mistakes can cause major defects. Besides impact noises, cold air and heat can also enter through the gaps around windows and doors. Hence, sealing such gaps can result in efficient temperature control.
Warning: If you live in a rented apartment, always check with your landlord if caulking around the windows is acceptable.
9. Install Soundproof Curtains
Another budget-friendly way of soundproofing thin apartment walls is by installing soundproof curtains. Some of these curtains may double up as blackout curtains, preventing harsh sun rays from entering your room and thereby allowing you to get more sleep!
Much to every homeowner’s delight, most soundproof curtains are available in various sizes, fitting most standard window sizes. I highly recommend installing them in your bedroom for a more quiet and relaxed environment.
10. Block Weak Points With A Soundproofing Blanket
If you’re lucky enough not to have thin walls, know that noise may transfer through weak points in a wall. One of the common culprits of weak spots in walls is the plumbing system which may be relatively noisy in that area.
Using blankets in such weak points helps dampen the sound by up to 50%. You can use nails or mounting putty to fix the blanket on the wall.
11. Add Extra Layers Of Drywall To Paper-Thin Walls
Thin walls are excellent conductors of sound, and hence, soundproofing involves adding mass and density to the affected area. One way of doing so is by adding multiple layers ofsoundproof drywall to the apartment walls. The added thickness will work wonders in blocking sound coming from your surroundings.
B. With Construction Work
With large apartments getting split into smaller, rentable units, the shared walls end up becoming thinner and cheaper. Hence, you will have to add more mass and insulation to make soundproof walls for your apartment.
Given below are the things you will need and the method for constructing a soundproof wall from scratch.
Things Required
Note that the method provided below fills a space of 5x7 square feet. Accordingly, the measurements and quantities of the materials are as follows…
Basic building supplies, like masking tape, drill, ruler, rock knife, etc.
Two tubes of green glue noise-proofing compound
Full-sized caulk gun for green glue
Framing supplies (for outside the “wall” and 1-inch struts for every 16 inches)
R-13 insulation
3-inch drywall screws
Two layers of drywall of the sound transmission class (STC) rating you require
One tube of green glue sealant
Safety equipment, like gloves, face masks, glasses, etc.
Steps To Construct A Soundproof Wall In Your Apartment
Step 1
Start by building a frame for the wall and placing the studs 16 inches apart for standard insulation. For effective decoupling, I recommend maintaining a 2-inch gap between the wall and the doors. Also, try using a stud along the edges of the drywall for better adherence and an overall neat look.
Step 2
Use a few layers of tape to protect the floor and attach the frame to the doorway. You can use screws to easily install the doorframe. Depending on the floor material, you may require spacers to fix the frame along the floor.
Step 3
Next, you must add insulation to the wall but make sure you’re wearing all of your protective gear. Fiberglass insulation should not come in contact with your skin and eyes at any cost.
Step 4
Now, cut the two layers of drywall according to the size of your wall. I recommend keeping the seams staggered for easy construction and effective sound isolation.
For cutting, you can use a rock knife and break the seam by laying the drywall on a flat surface. Alternatively, you can use a power tool or saw for a neater cut.
Additionally, you can choose to cut the drywall big enough for a tight fit or leave a gap of around ¼ inches to fill up with soundproof caulk. However, ensure you measure the doorway properly before cutting the drywall to avoid any blunders in the following steps.
Step 5
Start by attaching the first layer of drywall, and use drywall screws every 16 inches. Finish it off by filling the seams with green glue. This step may not be necessary since it’s the first layer, but it does make the constructed wall sturdier and more soundproof.
Now, let everything dry for 24 hours.
Step 6
Take the second layer of drywall and lay it flat on the ground. Squeeze out two tubes of green glue all over the drywall, ensuring that every corner is covered.
Now, pick up the drywall and attach it to the previous layer before the glue dries out. Make sure you are quick and careful while performing this step. Use screws every 16 inches around the seam to keep the two layers affixed.
Step 7
Next, caulk the seams of the second layer of drywall; you could even use tape and mud for the same. Then add some texture if you’d like, and finally, paint the wall with your favorite color.
Apartment Wall Soundproofing Conclusion
Soundproofing your apartment is more than just using heavy curtains and thick blankets. You’ll require a professional or an experienced DIYer for properly soundproofing an area with soundproofing materials. And the fact that these soundproofing materials do not cost a lot of moneyis the cherry on the cake!
However, before I sign off, I’d like to bust some common myths about soundproofing. For instance, many believe that echo can be resolved with soundproofing, whereas, in reality, you’ll have to work on sound absorption to reduce sound bouncing.
Another myth is using soft furnishing and textile to block sound. While doing so can work in combination with other soundproofing methods, adding pillows and rugs alone will not do anything unless you address structural faults in your apartment. I suggest using acoustic panels and then topping them off with a sound-absorbing pillow headboard.
Installing an additional layer of acoustic drywall over an acoustic membrane between materials and closing all gaps with an acoustic sealant to block cracks and gaps in both new and existing walls is the most efficient noise reduction method but using resilient channels, applying blown-in insulation, or covering the entire wall with soundproof blankets and curtains are other common solutions known to reduce noise.
Whether you’re trying to get some shut-eye or working from home, a constant babble of noises from next door can become a source of frustration and affect your mental well-being. In such situations, the only sensible option is to soundproof existing interior walls through which the sound is heard.
My guide shares some of the best soundproofing methods by which you can do so!
Learn How to Soundproof Existing Wall
Soundproofing Elements To Keep In Mind
To ensure your soundproofing methods work properly, you must know what factors affect their effectiveness. While most materials function independently, they can be used together to deliver the best results when you soundproof existing walls.
1. Blocking Or Reduction
Sound waves function by creating vibrations in objects, which may be solid, liquid, or gas. But how easily they can travel through various objects depends upon the mass. A larger and heavier object will have more mass and it will be more difficult for sound waves to travel through it.
Thus, a solid surface that is dense enough can reduce sound when placed in the path of the sound wave, preventing them from traveling from one spot to another. What’s more, the solid surface needs to be boxed in at either end to prevent diffraction. Further, complete coverage of the target walls is essential to ensure effective soundproofing.
2. Absorption
Certain materials have sound-absorbing properties that help reduce sound and one common example of such a material is the fiberglass insulation used in walls. However, sound-absorbing materials are most useful in blocking mid- and high-frequency sounds that do not have as much energy as low-frequency waves.
To block low-frequency sounds, you will need to use a larger quantity of the material. Absorption efficacy and thickness have a causal relationship as far as the frequency response of a panel is concerned. In case the existing walls are hollow, the air is trapped inside, which vibrates when sound is created from sources like your neighbor talking or from traffic.
You can use insulation materials with sound-absorbing properties, such as low-density cellulose, to prevent this.
3. Mechanical Decoupling
Since sound waves travel through surfaces, it is possible to reduce sound by decoupling them. When two surfaces are not in contact with one another, it makes it more difficult for sound waves to travel through them.
For soundproofing an existing wall, decoupling can be done by using certain materials, such as studs.
4. Sound Damping
Sound damping is the process of eliminating vibrations that are causing the sound and may be done using an external agent. Some of the best items for sound damping are compounds made using a viscoelastic adhesive.
Factors To Consider When Soundproofing Existing Walls
1. Budget
The first thing to consider is how much money you are willing to spend on soundproofing walls. A larger budget will allow more extensive techniques to be utilized, while a limited one will restrict you to more basic methods. That said, the effectiveness of the methods does not depend on their cost.
2. Time
Time is another factor that will determine what methods you can use to soundproof existing walls. Different methods require varying amounts of time, and some may take longer than others to complete.
3. Noise
Which soundproofing method will work best will depend to a large extent on the source and type of noise. It may be a high or low-frequency noise or may be temporary, and such factors will affect how you can approach the problem.
4. Tolerance
The final factor to consider is your tolerance to sound. If the sound does not cause significant disturbance, you can get away with using basic sound masking techniques. On the other hand, if it is hard to ignore, more extensive methods will be required.
Types Of Noises
Before you can start soundproofing walls in your home, it is important to identify the source and type of sound to be blocked. Generally, two types of noise can cause disturbances - structure or impact-based sound and airborne sound.
1. Impact Based Sound
Impact-based sound occurs when an object strikes another object and causes it to vibrate. These vibrations travel through various surfaces in the building, such as the walls, until they reach your ears.
2. Airborne Sound
In the case of airborne sound, you cannot feel the vibrations through various surfaces but can still hear the sound. Some examples include the voices of your neighbor talking next door or the sound of traffic from outside.
Soundproofing An Existing Wall - Best Techniques
1. Using An Acoustic Sealant
If your existing interior walls have cracks or holes, there is enough space for sound to pass through. To prevent that from happening, apply acoustic sealant or caulk in the holes to fill them, creating an airtight seal.
Apart from the cracks, make sure to apply the sealant around the edges of the walls. This will reduce both impact-based and airborne sounds from passing through those walls.
But in most situations, that will not be enough to drown out the noise completely since vibrations can travel through cracks and gaps in other surfaces. That is why you should look for such openings in windows, doors, and other areas of the room to seal them up.
Once the caulk has been applied, you need to seal up the light switches and electric fixtures as well, which will require plate insulation gaskets. These styrofoam pieces can be placed around the outlets to prevent vibrations from traveling through them.
When using caulk, just make sure not to use regular latex caulk since that does not have good sound absorption (acoustics) capabilities.
2. Using Green Glue To Install Another Drywall
Drywalls are easy to install and highly durable, which makes them suitable for construction or remodeling jobs. You can install additional drywall to separate the main wall, allowing sound waves to bounce off against the drywall.
However, before using this method, make sure to use sound insulation materials on the surface of the wall. Green glue is well suited for this purpose since it can be applied easily and is inexpensive. You need to apply it between the drywall layers so it can effectively absorb vibrations of low-frequency, such as construction noise.
Once the compound has been sprayed, attach the drywall and use acoustic caulk to fill up any cracks and gaps. Alternatively, you can use sheets of acoustic drywall that have a better sound transmission class.
3. Using Resilient Channels
This method works on the principle of decoupling and requires isolation clips or metal channels for superior noise reduction. Once installed, you will get a separate space within a room where sound cannot reach. After that, drywall can be installed to isolate this structure from the rest of the room. This makes it much more difficult for sound waves to travel through.
Isolation clips used for this purpose usually come with rubber feet that can absorb sound vibrations. You can even apply some insulation and acoustic caulk in the space to further reduce incoming sound and keep the room quiet.
Using resilient channels can be very effective if you want to soundproof walls, but it is one of the more expensive methods. And it will require a lot of effort since the existing drywall will need to be removed before the channels can be installed.
4. Applying Blown-In Insulation
Another method that utilizes the principle of sound absorption is the application of blown-in insulation. Blown-in insulation is a material similar to foam that can be blown into your wall with the help of a blower machine for noise reduction.
This low-density cellulose insulation traps air pockets in the wall, thus reducing echoes generated from airborne noise. The advantage of using this material is that it is completely non-toxic, is manufactured after recycling, and is fireproof.
On the other hand, if you have limited time, using fiberglass may be a better option since it dries quickly without any heat. Installing blown-in insulation can also be quite complicated, so it is best to get it done through a professional.
5. Hanging Soundproofing Blankets
Soundproof blankets can also be used for noise control since they are good at absorbing sound waves from walls and work just like foam panels.
To put up the blankets, use heavy-duty adhesive hooks or curtain rails. This method is easier than those that require decoupling your walls or using acoustic tiles and is not as invasive.
A soundproof blanket absorbs vibrations rather than reducing them, and its effectiveness depends upon its weight. Heavier blankets work better for soundproofing purposes than lighter ones. Generally, such blankets may not be able to block out noise completely, but their foam can absorb sound waves and prevent them from bouncing off walls.
6. Using Mass Loaded Vinyl
Mass-loaded vinyl is a highly dense material made of polyvinyl chloride similar to natural rubber and is often used for sound masking. The extra mass can be very effective in blocking out sound to create a quiet space. It is also very flexible and environment-friendly and provides an additional layer over the walls for sound reduction.
MLV is a popular option as it prevents sound vibrations and waves from traveling through the walls. To use mass-loaded vinyl, install a double-layer drywall on top of it horizontally or vertically using a screw or nail. Then, apply an acoustical sealant to the seams to seal them and complete the drywall installation.
7. Applying Soundproof Paint
While it is not the most effective method, using sound dampening paint is another option worth trying out. It can add additional mass to dampen the sound waves and reduce noiseeasily. You can even find soundproof paints that contain latex, which offers the additional advantage of preventing sound waves from bouncing around the room.
When using soundproof paint, keep in mind that it is most effective in reducing high-frequency sounds rather than low-frequency ones. This means noises, such as that of an airplane, chainsaw, etc., can be insulated very well.
Also, when using soundproof paint, conducting proper research regarding the brand is recommended since it is not as commonly used as acoustic foam tiles or MLV.
8. Rearranging The Furniture
An empty room can make it easier for sound to travel through walls, so filling it with items can reduce noise without any high-end soundproofing materials. But this method will also not be as effective as mass-loaded vinyl or decoupling.
The easiest way to reduce soundis by adding or rearranging the furniture in the room. Chairs, tables, sofas, and other furniture can help prevent sound waves from reaching the walls, but you need to locate walls that are most exposed to noise.
In most cases, the interior walls require soundproofing since they are thinner than exterior walls. Heavier and thicker furniture, like a bookcase, wardrobe, or armchair, work well to block noise since they have a lot of mass.
Additionally, consider placing a rug or carpet on the floor to reduce the amount of sound that travels through the flooring.
9. Using QuietRock
QuietRock is a relatively new type of drywall developed especially for removing unwanted noise in a room. This method is similar to the one where you install an additional drywall layer but requires the use of QuietRock instead of drywall.
One sheet of QuietRock is as effective as four sheets of regular drywall. You can install QuietRock by screwing it onto the existing drywall, while applying Green glue between the layers will help you get even better results.
10. Installing Acoustic Foam Panels
Acoustic panels made from foam are designed to block noise, which they do by absorbing sound waves. These panels are often used in recording studios to ensure minimal interference from unwanted sounds. Hence, they are available in various thicknesses ranging from one inch to four inches as well as multiple color options.
To install acoustic foam panels, you need to use a special adhesive, which makes the process quick and simple. Aside from preventing sound from traveling through walls, acoustic foam panels can help improve the acoustics of any room.
11. Hanging Acoustic Fabric Panels
Like acoustic foam panels, you can use fabric panels which are great at sound absorption and are also aesthetically attractive. Acoustic panels can absorb vibrations easily, which makes them a good option for improving the acoustics of a room.
You can hang these panels in various arrangements as needed for absorbing ambient noise within a room. They can even be used on top of the wallpaper, along with other sound reducing measures, to keep a room insulated against sound.
12. Using Soundproof Curtains
If you want a quick and easy soundproofing solution, consider using soundproof curtains close to your walls. These curtains are available in various designs and colors, can easily be hung using regular curtain rods without much effort, and keep a room relatively quiet.
Multiple curtains can also be used in a space and you can remove them when needed. Soundproof curtains can be placed in front of glass windows to reduce the sound coming from the other side, or use them as room dividers. And since these textile fabrics are available in various patterns, colors, and prints, you can find one that matches the decor of the room.
Tip
When soundproofing walls, keep in mind that sound energy can enter a space through other areas as well, such as doors, windows, and even the ceiling. You can use solid core doors or a dropped ceiling to ensure silence in a room.
Soundproof Existing Wall Conclusion
These were some of the best Do-It-Yourself soundproofing techniques for existing walls without removing drywall. They do not require a big budget, and most of them can be completed within a short period of time.
However, since houses vary in their design and construction, not every method will prove suitable. But many of the methods in this guide can be adjusted and customized easily depending on the situation.
It is also a good idea to try out multiple methods of soundproofing rather than relying on a single one since the chances of success are higher.
The most effective way of soundproofing a door is to apply soundproofing rubber to the door perimeter or use weatherstripping. Other methods involve installing a door gasket, acoustic panels or solid core doors to absorb sound waves effectively.
When compared to old houses, modern-day apartments are noisier due to faulty construction, open floor designs, and extensive use of entertainment devices. These make soundproofing a necessity in many situations, such as if you have neighbors who create a ruckus or when working from home.
In such cases, soundproofing the door should be the priority since it is the main entrance to the house. So, my guide explains the most effective methods to accomplish that.
How To Soundproof A Door
Best Door Noise Reduction Techniques
1. Installing A Door Gasket
When sound travels through gaps, it gets amplified. Such gaps are usually present around the door frame, which can be blocked using a door gasket. A door gasket is generally made from high-quality neoprene and attaches easily to the top and sides of the door jamb, effectively blocking out sound.
You can find many types of door gaskets on the market to soundproof your door, even vinyl and adjustable ones. These also block moisture, dust, and light and can be used on doors that may not be rectangular or are warped.
2. Applying Soundproofing Materials To The Door Perimeter
Another excellent method you can try is to apply soundproofing materials to the door perimeter. Such materials may be made from highly dense neoprene but will require the removal of any existing molding around the door.
Once the molding has been removed, you can apply the material around the door edges. And to make this technique more effective, apply some insulating sealant or acoustical caulk in various gaps and cracks.
3. Using Weatherstrips
Weatherstripping is one of the most common ways of soundproofing a door. This allows you to fill in the gaps between the door frame and the door through which sound enters, while ensuring the door closes tightly.
When choosing weatherstripping, you should go with higher quality options since they can last for a longer period. To install it, first clean the area properly where it has to be applied and make sure that it is completely dry.
While applying, use a lot of pressure to create an airtight seal to block sound waves. You can also nail it to the door surface, as it will even prevent the door from slamming shut.
4. Installing A Door Sweep
In many cases, the largest gap that exists between a door and the door frame is at the bottom. To block sound from entering through this gap, you can install a door sweep at the base of the door. These are usually constructed using natural rubber, silicone, or dense metal like aluminum available in various sizes.
They are also widely compatible, can be installed under exterior and interior doors, and offer additional benefits besides soundproofing. For instance, a door sweep prevents bugs and insects from entering your home from under the door. And they can help control the temperature by covering the gap from where air can enter and escape.
That being said, keep in mind that installing a door sweep is not very simple. The reason is that most door sweeps have to be installed by drilling screws into the door, so you will need a drill, screws, and a screwdriver.
But finding a door sweep that is the perfect size for your door can take some time. Hence, getting an automatic door sweep is another option you can consider.
5. Getting A Solid Core Door
If you are willing to invest in long-term soundproofing techniques, then getting a solid core door might be the best option. A hollow core door is made using thin wooden sheets and tends to wobble, which is not the case with solid ones. Most interior doors have a hollow core, while exterior ones have a solid core.
You can get a metallic door or solid wood doors that absorb sound more effectively. Remember that wooden doors tend to dampen sound rather than block it completely, while metallic ones can reflect the sound waves back.
6. Applying Mass Loading Vinyl
Vinyl sheets provide additional mass to the door and help prevent sound waves from traveling through. Applying such sheets is also easy; you can get one or more heavy vinyl sheets and cut them to match the door size. These can then be applied to the door using sound-dampening glue or pressure-sensitive adhesive strips.
Alternatively, mass-loaded vinyl sheets can even be installed within the core of the door.
For best results, cover as much surface of the door as possible with the sheet, and you can even apply a double layer, though it can cost more money. These panels are usually available in thicknesses ranging from 1/16 to ¼ inch.
7. Installing Acoustic Panels
If you’re looking to soundproof your door without spending a lot, installing acoustic panels might be the perfect solution. Acoustic or soundproof panels are made from very dense foam or polyvinyl chloride, which provides greater air resistance. When sound waves hit these surfaces, they tend to bounce back rather than travel through.
The biggest advantage of such panels is that they do not cost as much as more expensive soundproofing solutions, like fiberglass soundproofing blankets, and can be used with drywall. Also, acoustic panels are made from many different materials, like wood and foam, and can even be used on the ceiling.
You can use adhesive strips to install soundproofing panels, but some people prefer splitting open the door and installing these panels within. But this is a very complicated process, and it might just be easier to get a customized door with such panels already installed.
8. Filling Cracks Using Gap Foam
Foam sealants are available for filling cracks and gaps in doors through which sound waves travel. These sealants expand as the foam grows, creating an effective barrier against vibration.
However, these tend to be most effective when a highly dense sealant is used since it has a good sound transmission class. In other words, the denser the foam, the better the result.
Gap foam is usually applied in the form of a spray, which should be sprayed from the inside before moving toward the outside of the door. Also, it is a good idea to apply the foam to door knobs that are hollow since these have holes that go right through.
Generally, gap foam is applied after other soundproofing methods have been used, such as acoustic panels and door sweeps. Or you can attach foam flooring tiles to the door using Velcro pads.
9. Using A Soundproof Blanket
Soundproofing blankets are usually made from fiberglass, a material that is excellent for absorbing sound. These are quite easy to install and can be placed or removed on top of the door as needed, but prove quite expensive.
An alternative to a costly soundproof blanket is a moving blanket, which is a textile made using durable fabric. But this usually lacks grommets for attaching and may not be available in the appropriate size. Also, such a blanket can affect the appearance of your door, so it might be ideal for an interior door that is usually hidden.
A soundproof blanket is best for places like a recording studio due to its excellent sound absorption capability. To install a soundproofing blanket, place suction cups on the back of the door from which the blanket can be hung.
10. Installing Soundproofing Composite Material
Composite soundproofing material consists of a noise barrier and a sound absorption material for use inside, outside, or under the door. Such material is available in the form of thick sheets that are quite heavy and can prevent sound transmission through the door.
The composite material can be screwed or glued onto the surface of the door. Soundproofing composite material can also be used as a mat under the door, but when used like that, it should cover the gap between the door and the floor.
Alternatively, you can use a custom-made door that has composite material within it.
11. Applying A Fiberboard
Fiberboards are similar to composite materials since they can be used on the outside and inside of the door. The difference between the two is that composite material is much more malleable and can be bent easily.
To install it, open the door and insert a fiberboard within to ensure proper sound insulation. You can place the fiberboard inside, outside, and around the sides of the door handle and frame to fill in cracks or gaps.
Keep in mind that a denser board will be better for soundproofing than thin ones, like plywood.
12. Using Sound Isolation Padding Tape
You can use sound isolation padding tape, which can create an airtight seal around the door and even serve as an alternative sound barrier similar to door gaskets and weatherstripping. Using sound isolation padding tape is also among the most cost-effective ways if you want to ensure complete silence.
Padding tape is generally used to install wallboards and is self-adhesive. So, it can be applied easily and even be used on windows as a temporary noise reduction measure until you decide on a permanent solution.
13. Getting A Soundproofing Kit
If getting individual soundproofing materials like panels and blankets sound too complex, you can get a premade soundproofing kit. Such kits include all the necessary items required for noise control, such as acoustic panels, door sweeps, weatherstripping, composite material, fiberboard, etc., and are easily available in the United States.
A soundproofing kit usually comes with items like water-based caulk, which can be used to fill up cracks and holes around the door. To do so, apply a bead of caulk into the crack while wiping away excess amounts using a utility knife. Similarly, in case the door has glass installations, you can use silicone to block sound.
14. Using Sound Absorbers
Another way of making a door soundproof is to absorb sound coming from the other side of the door. This is because the level of sound that a door can block will depend on the sound coming from the other side.
Many items usually present in a room can help reduce noise, such as wall pictures, floor rugs, furniture, and more. If the room on the other side of the door does not have many sound absorbers, more sound will reach the door and pass through it.
So, consider adding more furniture or items like rugs to the room on the other side of the door. This will reduce the need for soundproofing the door significantly. You can get an area rug or mat that can prevent sound from bouncing off the floor and creating echoes. Similarly, placing paintings on the walls will make the room much quieter.
15. Installing Meeting Stiles
In rooms with double doors, it may not be possible to soundproof them completely. For that, you can use meeting stiles which ensure a tight seal between the doors when they close. Meeting stiles may be made from various materials, such as composite material and rubber.
Installing meeting stiles is not a very complex process and doesn’t take much time. You just need to select the right-sized stile and screw it in place using bolts to check whether the doors shut tightly.
16. Using Acoustic Door Thresholds
Using an acoustic door threshold is another method you can try if you’re wondering how to soundproof a door. Such thresholds are generally made of neoprene and have rubber protrusions that prevent sound from passing through gaps between the door and frame. However, they have to be attached to the floor instead of the bottom of the door, unlike door sweeps.
This allows the door to be opened or closed without the sweep being dragged across the floor, which can itself become a source of noise. An acoustic threshold is often essential in rooms where the floor is carpeted since door sweeps are not very effective with a carpet.
Thresholds may be available in a flat shape or have an upward-facing extension to create a double seal when used with a door sweep. Here, I’d like to mention that apart from soundproofing door thresholds, it’s important to ensure that all perimeter gaps are sealed properly. Even a small gap can reduce the efficacy of a soundproof door.
17. Applying Soundproof Paint
Few people are aware that you can use soundproofing paint on doors for noise reduction. The reason is that such paints can only block mid-range audio frequencies, such as the sound of people talking. So, higher frequency acoustics, such as that of a flute or a phonograph record, or low-frequency sounds like that of traffic will not be reduced.
Soundproof paint is most effective when used on a large, flat surface but it can make the surface texture uneven. That is why you will need to apply multiple coats to make the coat a bit thick.
But this is an excellent alternative if you’re looking for an inexpensive method to make any space quiet. Just make sure to use other soundproofing methods along with it to get the desired results.
18. Filling The Door With Sand
You can use this method to soundproof a hollow door, but it is extremely complicated and will require a lot of preparation. The door will first have to be cut using a hacksaw so its interior can be filled with sand and sealed properly.
Also, to attach the door back, you will require industrial-strength door hinges since normal ones can be pulled right out due to the weight of the sand-filled door. An industrial-strength hinge will remain connected to the door jamb and support even the heaviest doors.
Once the door is reattached, it will be able to block out all sound completely since the sand will act as a sponge for maximum absorption.
19. Installing A Door Seal Kit
An acoustic door seal kit is an excellent solution for people who want to soundproof a door but have a limited budget. Such kits are used to seal the air gaps around a solid core door and are excellent for noise reduction purposes.
While it is possible to use a door seal kit on hollow doors, it is most useful when used with solid-core ones. When using such a kit on a hollow door, combine it with a soundproof curtain or blanket to enhance its soundproofing ability.
20. With A Soundproofing Curtain
You can use a soundproofing curtain to reduce the noise that passes through a door, but it is not an easy solution. This is because curtains hang in front of the door, with the sides left open, providing gaps through which sound can travel.
That is why when using a soundproofing curtain, you should try to attach them in a manner that creates a tight seal around the door. You can even sew different sides of the curtain to make it thicker but make sure it covers the entire length and width of the door.
Soundproof curtains are generally more affordable than soundproof blankets and serve as great temporary solutions for noise control.
Tip
If you’re looking for a temporary, tool-free solution without wanting to spend anything, use household items to soundproof a door. For instance, the gap at the bottom of the door can be stuffed with rags or towels to prevent noise from filtering through.
The Importance Of Soundproofing Your Door
Since doorways are the largest opening in a room, they are responsible for allowing maximum noise to pass through. This means any soundproofing treatment should make them the priority, so here are a few reasons why soundproofing the door is crucial.
1. Doors Always Allow Sound To Travel Through
Even when a door remains shut, the gaps around it, especially at the bottom, allow noise to leak through. In addition, most interior doors are hollow from the inside, so they do not offer any obstruction to sound waves. Due to these reasons, doors allow more sound inside a room than any other opening.
2. Soundproofing Can Also Provide Temperature Insulation
Many soundproofing materials provide excellent temperature insulation and keep the room temperature at the required level. This happens because these materials prevent air from passing through them, so you don’t have to experience extreme temperatures. And because of this, the thermostat will require less energy and time to make the room cooler or warmer.
3. For Privacy
Soundproofing the door can ensure proper noise controland privacy, preventing others from hearing what is going on inside your home. Alternatively, it can reduce disturbances in various rooms, especially important if you are planning to create a home music studio or have pesky neighbors who like to eavesdrop.
4. To Improve The Value Of The House
Whether you’re planning to sell your house in the future or making renovations and repairs for the long term, soundproofing can help. People will generally pay more for a house that has soundproofed rooms, and such houses are perfect for selling to music production studios.
5. For Fire And Smoke Protection
Soundproofing a door is also essential for protection against smoke and fire. Since door soundproofing essentially involves closing all gaps around a door, the same can be effective in blocking smoke and flames from getting in.
Things To Keep In Mind When Soundproofing A Door
Before you start soundproofing your doors, here are a few things to keep in mind.
1. Begin With The Most Affordable Solution
You can find soundproofing solutions at different price points, ranging from budget options to extremely costly ones. But not every solution is perfect for each home. So, it is a good idea to go with the most affordable option in the beginning before moving on to high-end solutions if that does not work.
Starting small will also offer the advantage that it will likely not require much time and effort. Plus, these are good techniques for people who do not want to make a lot of changes to the door, floor, or surrounding spaces.
2. Find Out Where The Noise Is Coming From
The type of soundproofing treatment which will be most effective will depend on where the sound is coming from. For instance, if the noise is coming from outside, the front and back doors will require more intensive treatment than the interior ones.
Similarly, if you have a noisy neighbor, you may require an effective soundproofing treatment for the door of the room.
3. Hire A Professional If You Find The Project Challenging
A DIY soundproofing and home improvement project may not always be successful, but this does not mean it cannot be done. If you find the project challenging, simply hire a professional to get the job done. Plus, many professionals can complete soundproofing projects at affordable rates.
Some Soundproofing Myths You Should Know About
There are several myths surrounding soundproofing, and knowing about them can be very helpful when undertaking such a project.
1. Glue Or Paint Can Be Used For Soundproofing
Sound waves can be obstructed by materials that have high density and mass. So, materials like glue or paint, which lack these properties, are not very effective for the purpose. That said, applying multiple coats of thick paint specially developed for the purpose can help reduce soundtransmission.
2. Rugs Are Very Effective For Soundproofing Purposes
Rugs can be used for absorbing sound but cannot block out noise completely. The reason is that even the thickest and largest rugs do not have enough mass to absorb all sound in the vicinity. That is why they have to be used along with other soundproofing methods.
3. Insulation, Foam Blocks, And Regular Blankets Can Be Used For Soundproofing
In this case, also, it is possible to reduce the sound but not get rid of it completely for the same reason. Generally, if you’re using such materials for soundproofing, make sure to use heavier and thicker blankets or foam blocks. They have more mass and thus are better at blockingsound.
4. Curtains Are Very Effective For Soundproofing Purposes
As explained above, curtains can help make a door insulated against sound, but they need to be installed properly for that. This means there should not be any gaps around the door or curtain through which sound can travel.
5. Egg Cartons Can Be Used To Soundproof A Door
Egg cartons can be used to reduce echoes in a room. However, they do not offer the same results when used for soundproofing a door.
How To Soundproof A Door Final Thoughts
Soundproofing offers several benefits, such as preventing disturbances and ensuring privacy. Generally, I recommend using more than one method to get better results, especially since not all the techniques are suitable for every house.
But if you are unsure about implementing these methods, the best thing to do is call a professional soundproofing service. Such companies send soundproofing experts to your home for a detailed inspection and help complete soundproofing quickly.
It may cost you between $500 and $10,000 to soundproof your rooms. However, different factors need to be considered for setting the soundproofing budget. These include the room size, the type and number of rooms, materials used, sections of the room that need soundproofing, and labor costs. One of the most important factors is how much sound we need to prevent from entering or leaving.
The levels of sound pollution are on the rise nowadays. Because of this reason, soundproofing your rooms has become a necessity.
In fact, that is the only way you can get some peace at home. Or else you will lose your sleep from all the external noises and keep your privacy at stake!
But the question many people have is - how much does it cost to soundproof a room? That’s what this guide is all about, so read on…
How Much Does It Cost to Soundproof a Room?
The Basics Of Soundproofing A Room
Before I get to the main discussion, let me give you a quick rundown of what soundproofing is. It is essentially a process to minimize or eliminate the propagation of sound. In other words, it blocks all external sounds from entering the room and prevents the sounds inside the room from going out.
You can soundproof any room in your house if you wish. However, it is most common for rooms that are frequently lived in, such as the bedrooms and living areas. On that note, you can soundproof different parts of a room as well, such as the wall, ceiling, floor, door, window, and even the curtain.
As a matter of fact, you will need to insulate these parts individually if you want to make your whole home soundproof. But if you want to make any single component soundproof, you can do that too.
How Does Soundproofing Work?
In order to understand how it works, you will need to delve a little bit into the science of acoustics. Any sound that you hear inside a room is a result of acoustic vibrations of a particular frequency reaching your ears. However, the source of these vibrations may vary, which gives rise to two types of noise - airborne noise and impact noise.
Airborne noise is the one that is generated from ambient sources, such as people talking, dogs barking, watching TV, and listening to music. On the other hand, impact noise is generated when two surfaces or objects strike each other. Some examples of impact noise are the sound of walking, using a drilling machine on the wall (this is a combination of airborne and impact), bouncing a ball off the floor, and so on.
It is a known fact that a sound wave travels faster through solid objects like walls than through the air. Therefore, the sound vibrations from an impact noise can travel directly through the walls. In contrast, the vibration generated from an ambient noise source travels through the air before reaching the walls or floor of your room.
The basic goal of soundproofing is to eliminate both types of noise. And because of that, the process involves using soundproofing materialsto block the propagation of acoustic vibrations. In other words, these materials absorb the noise to give you a quiet experience inside the room. Conversely, it prevents any sound from leaving, meaning that you can listen to your favorite music or reorganize your room without bothering the neighbors.
Why Should You Soundproof Your Room?
Soundproofing your room is necessary because it gives you (and your neighbors) a peaceful environment to live in. Besides, it ensures that your apartment is compliant with the sound transmission class (STC) ratings.
As per the International Building Code 2021, a building needs to have an overall STC rating of 50 to ensure compliance. Thus, if your apartment has an STC rating below that, it is not compliant with soundproofing regulations and can land you in legal trouble. So, if you wish to avoid that, you should make your room soundproof as soon as possible.
Which Parts Of Your Home Need Soundproofing?
I have already stated that you can soundproof different parts of your room, as well as the different rooms of your house. In fact, it is a great idea to soundproof your entire apartment in one go. However, doing so can be an expensive affair, and your bank account might not allow it.
So, it’s a good idea to soundproof some sections first and deal with the remaining parts at a later time when you have the money and resources. That way, you can manage the process better without going broke.
In that context, many homeowners may feel some degree of skepticism about soundproofing their doors, windows, and curtains, considering that they occupy very little area in your home. On that note, people who live on the first floor and on the topmost floor may feel skeptical about soundproofing their floor and ceiling, respectively.
Likewise, some people may think that soundproofing basements, garages, and attics are unnecessary since they are not lived in as much as the other rooms.
To a certain extent, I can understand their skepticism. But if you want to be on the safe side, it is best to soundproof all of them. Each of them contributes to improving the STC rating of your apartment, and the higher the rating, the better it will be for you.
How Much Does It Cost To Soundproof Your Room?
Now that you have some idea about soundproofing, it’s time to get to the business end of the topic. To make your home soundproof, you will need to spend between $500 and $10,000. In this regard, the costs of soundproofing may vary greatly based on different factors. I have listed each of these factors below.
Room size
Acoustic performance requirements
Number of rooms
Materials used
The section of the room
Labor requirements
The first two factors are pretty self-explanatory, and they are the first things to consider when looking to undertake a soundproofing project.
All of these factors are interrelated, and they need to be considered together to determine the cost. In other words, you cannot afford to ignore any of them, as that can drastically impact your budget calculations.
Keeping that in mind, I have discussed the soundproofing costs in greater detail in the subsequent sections.
A. Soundproofing Costs By Size
The cost of soundproofing a room depends on its size, which is usually measured in square feet. For soundproofing a finished room, the standard rate is roughly $10 to $30 per square foot of space. On the other hand, for a room that is under construction, the average cost of soundproofing varies between $12 to $25 per square foot of space.
Therefore, after measuring the dimensions of your room, you can easily calculate how much it will cost you. It goes without saying that you will need to shell out a lot more money for soundproofing a large room than a small one.
Of course, that is not the only factor you need to consider while making the budget. You also need to take into account the overall complexity of the project. For instance, soundproofing one square foot of area on your ceiling requires more effort than soundproofing the same area on your wall. So, the costs for the former will naturally be higher than the costs for the latter.
B. Soundproofing Costs By Rooms
The next factor to take into account is the room type. Some rooms, especially the ones that are lived in more, require greater soundproofing than others. For example, your bedroom needs a lot of soundproofing since you use that room for sleeping. In contrast, soundproofing your attic will cost a lot less since that room is not used as much.
With that in mind, here are the price ranges for soundproofing the different rooms of your house. Note that these are only the average prices, which means that the costs you need to bear might vary depending on the size, complexity, and other factors.
1. Costs For Soundproofing Bedrooms
The bedroom is one of the most common areas that people soundproof in a home, and with good reason. It is a place that is used for sleeping, so it needs to be free from outside noise and disturbance.
For that purpose, you need to soundproof the floor and the ceiling in addition to the walls. Likewise, it is important to soundproof the doors and windows of the bedroom to ensure maximum sound insulation.
Depending on the size and the number of tactics used, soundproofing a typical bedroom may cost between $500 and $5000.
2. Costs For Soundproofing Garage
Another area of a home that is commonly made soundproof is the garage. Besides storing your vehicles, a garage is often used as a utility room for do-it-yourself (DIY) projects. Apart from that, many people use their garages to practice music. All of these activities generate noise that might bother your neighbors, which makes it important to soundproof this room.
Soundproofing a whole garage can be an expensive affair because the garage typically does not have any sound-absorbing materials. This means that you will need to soundproof walls, doors, and the floor of the garage. If there are any windows, you will need to soundproof them too. All in all, if you want to soundproof your garage fully, it might cost you between $1000 and $5000.
3. Costs For Soundproofing Entertainment Rooms
This is the part of your home that you use for entertainment purposes. It generally contains a home theater, a music system, a gaming setup, and other means of entertainment. So, it can get quite noisy inside, which makes soundproof insulation essential for this room.
Usually, the level of soundproofing will depend on how you use the room. If you use it only as a home cinema, the level of soundproofing will be slightly different than what you need for soundproofing a gaming room.
On the contrary, if you want to soundproof the room for music, you will need to consider the acoustics of the room. This way, you can avoid disturbing your neighbors and ensure good sound quality within the room.
In any case, soundproofing your entertainment room can cost anywhere between $1,000 and $10,000.
4. Costs For Soundproofing Bathrooms
Do you consider yourself to be a bathroom singer? If you do, then it might be a good idea to soundproof your bathroom. Now, I am not judging your musical prowess, but your bathroom singing might not be appreciated by the neighbors, especially if they are trying to get some shut-eye.
Thankfully, soundproofing your bathroom shouldn’t be a particularly expensive affair, considering a bathroom is relatively smaller in size than the other rooms. However, to achieve complete sound insulation, you might want to install soundproof windows and a sliding glass door, among other things. Such components are a bit pricey, which can increase the costs.
No need to worry, though, for the prices will not be as high as other living areas in your home. In that context, the cost of soundproofing your bathroom may range between $500 and $3,000.
5. Costs For Soundproofing A Home Gym
If you have a gym at home, then it is a good idea to soundproof that room. A home gym typically contains mechanical equipment that generates a fair bit of noise. Also, many home gym users have sound systems to work out while listening to music, which creates even more noise. Besides, you wouldn’t want your neighbors to hear you huffing and puffing in the gym, believe me!
That is why most soundproofing projects for the gym should focus on the walls, ceiling, and floor. The floor, in particular, needs to have adequate soundproofing, as impact noises from gym equipment like weights will travel directly through it.
With all things considered, soundproofing the gym will cost you between $500 and $7,500, depending on the size and the type of gym activities.
6. Costs For Soundproofing The Kitchen
Cooking and its associated activities make a lot of noise, which makes it essential to soundproof the kitchen. You can stop sounds from entering or exiting the kitchen by installing soundproof drywall, insulated windows, and acoustic panels on the walls and ceiling. Some of these components can be a bit expensive, so you might need to dish out between $1000 and $6000 to make your kitchen soundproof.
C. Soundproofing Costs By Materials
Besides the size and number of rooms, the materials used play a major role in determining the costs. In this regard, I am referring not only to the soundproofing material but also to the materials used in the room. Both of them need to be considered if you are looking to soundproof your whole home.
Each part of your home is made from a different material. The sound waves travel differently through each material, which is why the soundproofing solution needs to be implemented accordingly.
For example, the floor is usually made from wood, tile, or stone, and in some cases, even concrete. The first few materials are not very good at absorbing sounds, and as a result, they will require greater soundproofing.
On the other hand, the walls and ceiling are normally made of concrete slabs or drywall panels. These materials can absorb sound to a greater extent, which means that the level of soundproofing required here will be less.
That is why it is important to consider the material used in the construction of the room, as it can help save a lot of money. With that being said, below are some of the most common materials used in soundproofing projects.
1. Drywall
Drywall is the material that is most commonly used for insulating existing walls and ceilings, as well as floors in some cases. Soundproofing drywall sheets are typically made from specialty materials that are acoustically enhanced and have a high density. Some manufacturers may use multiple layers of insulating materials to reduce sound leaks. In any case, it will cost around $30 to $40 per sheet of drywall.
For homes that have paper-thin walls, it is advisable to use double drywall to eliminate the propagation of sound. In that case, the costs will double, so you need to keep that in mind while preparing the budget.
2. Acoustic Foam Panels
Acoustic foam panels are commonly used for soundproofing walls and, in some cases, the ceiling too. The polypropylene foam materials absorb all airborne noises and minimize the intensity of impact noises traveling through the wall.
Such material is relatively inexpensive, and it will cost you around $2 to $3 per square foot of panel. Thus, it is a great soundproofing method if you are on a limited budget.
3. Acoustic Tiles
Acoustic tiles are generally made from sound-insulating materials like natural rubber or foam, which makes them different from conventional tiles. They can be used for walls, ceilings, and floors and can eliminate most airborne and impact noise.
The tiles are square-shaped since it helps make the installation process easier. There are different tile sizes available today, ranging from 4-inch square tiles to 20-inch square tiles. On that note, a 20-inch square acoustic tile costs around $10 to $20.
4. Mass Loaded Vinyl
Mass-loaded vinyl, or MLV, is a highly effective soundproofing material that is typically installed on the walls and the floor. It is often made from polyvinyl chloride (PVC) and comes in the form of rolled sheets that need to be placed over the wall or the flooring. They can also be placed along the inner linings of the walls and floor, but doing that requires a lot more work.
On average, a single roll of MLV covers 50 square feet of space. Each roll costs between $100 and $200 overall, or $2 to $4 per square foot.
5. Carpets
Carpets are used to soundproof floors, and they are fairly effective at eliminating most airborne and impact noise. They are made from sound-insulating fabric materials arranged in the form of a shag pile, which determines the carpet thickness. The thicker the carpet is, the more sound it can absorb, and vice versa. In any case, using carpets for your floor will cost you $3 to $10 dollars per square foot.
Tip
If the floor is too thin, you can spend a little extra to purchase a soundproof carpet pad. When placed below the carpet, it can enhance the insulating capabilities of a carpet considerably. Such a pad is made from natural rubber or vinyl, which are some of the best sound-insulating materials around.
6. Soundproof Curtains
Sound-dampening curtains are commonly used on the doors and windows of a house. They are made from sound-absorbing fabrics, similar to carpets. Likewise, the thickness of the curtain determines how effectively it can block out sounds.
They are ideal for use in living areas and in the room of a child. As for the costs, they can vary based on the thickness and quality of the fabrics used. But on average, buying a soundproof curtain will set you back by $100 at most.
D. Soundproofing Costs For Different Parts
Now it’s time to discuss the costs of soundproofing based on what part of the room you wish to work on. Such an approach allows you to soundproof the most concerning areas first. What’s more, it is a great strategy for those who have a short budget.
In that context, the key areas that you need to consider are the walls, floor, ceiling, doors, and windows. The soundproofing methods and materials for each section are different, which gives rise to cost differences for each of them.
Some of these methods are only used for a finished room, while others are implemented when the room is under construction. The methods used for the former are usually a lot cheaper but are relatively less effective. On the contrary, the methods used for the latter are a bit more expensive but are highly effective in blocking most sounds from the room.
Anyways, I have discussed the costs for soundproofing different parts of the room below.
1. Wall Soundproofing
The most important area of the room that needs soundproofing is the wall. You can choose to soundproof the walls either during construction or when the room is finished. If you choose the former, you need to use products such as Rockwool sound insulation or mineral wool batts.
These are stuffed between the wall frames, which helps to provide insulation against sound. The first option will cost you $1 to $2 per square foot, while the latter will cost you $2 to $3 per square foot.
You can also opt for acoustical caulk to seal the wall layers. It acts as an adhesive as well as a soundproofing sealant, which means you get multiple uses. That said, you will require roughly 28 to 30 ounces to cover a medium-sized wall, and it will cost you around $15 to $30. Apart from that, you can opt for double drywall during construction, which I have already discussed before.
If you want to insulate a finished wall, you can go with acoustic foam panels and tiles, both of which I have mentioned in the previous section. As an alternative, you can go with soundproof paint, which absorbs sounds much better than regular paint. It costs $30 to $40 per gallon or $2 to $4 per square foot.
Overall, it will cost you anywhere from $100 to $350 to soundproof a single wall.
2. Ceiling Soundproofing
The average cost to soundproof the ceiling of a room is around $200 to $500. It may vary based on the methods chosen, the area, and labor costs.
Similar to the walls, you can choose to soundproof the ceiling either when it is finished or when it is under construction. If you choose the latter, you can follow methods that are similar to soundproofing a wall. In the case of the latter, you can choose between installing acoustic foam panels or mass-loaded vinyl.
Another alternative is to use soundproof fiberglass panels, which will cost you $1 to $4 per square foot. In addition to damping sound, it makes the ceiling look visually attractive, especially if you have a dropped ceiling. That ultimately makes it an appealing choice for many homeowners.
3. Floor Soundproofing
Just like the walls and the ceiling, you can choose to soundproof the floor either during construction or when it is finished. Whichever option you choose, it will cost you between $200 and $2000 to soundproof the floor entirely. Of course, the area, labor costs and the number of rooms need to be considered too, as usual.
If you choose to soundproof the floor during installation, you can opt for a soundproof floor underlayment, which costs less than $1 per square foot. You can insulate the floor joists and subfloor with the underlayment, which eliminates all types of sound.
Conversely, for a finished floor, you can use floor carpets, rugs, or interlocking mats, which offer the best degree of soundproofing at a relatively low price. You can get floor mats and rugs between $1 and $3 per square foot.
4. Door Soundproofing
The average cost of soundproof doors can vary from $50 to $3,000. You can purchase acoustic door thresholds, which cost around $50 to $100 per door. Apart from that, you can use door sweeps or a moving blanket to prevent any sound from getting in or out. Both of these options will cost between $60 and $120 per door.
If you want complete soundproofing and have the funds for it, you can use acoustic panels. It will cost a few hundred bucks, depending on the materials and the number of doors you have.
5. Window Soundproofing
The windows are typically made from glass panels embedded in a wooden or metallic frame. These materials have poor soundproofing capabilities, which means that you will need to make a significant investment to soundproof your windows.
If you are on a budget, though, you can opt to use soundproof curtains, which I have discussed before. Based on your choices, the process may cost you anywhere between $100 and $1500 per window.
E. Labor Costs For Soundproofing
A soundproofing project is not an easy task to undertake. It needs to be done by qualified soundproofing contractors, or else it might not be as effective. Because of this, the costs of labor become a crucial aspect to consider.
In most cases, you will have to pay labor costs by the hour. So, it is in your best interests to get it done as quickly as possible. However, if the soundproofing project requires extensive work, that might not be possible.
Most contractors today charge between $15 and $60 for labor. Based on that, you can prepare a budget for your soundproofing project.
How Much Does It Cost To Sound Proof A Room Final Words
By now, I am guessing you have gained a pretty good idea about soundproofing costs.
In addition to the ones mentioned above, you need to take into account any complex structures you have since these require extra work. For instance, if you have lamination on the floor or wall, it needs to be removed before the actual work can start.
Before I wrap up, let me give you some tips to save money. Try to purchase the building insulation materials in bulk. By doing that, you can avail discounts and offers available only on mass purchases.
Similarly, you should do some research before hiring a contractor. That way, you can get quality service at an affordable cost.
When it comes to weddings I have never had an honest opinion. All I knew was that I imagined mine very classy and elegant.The following Floral Wedding Centerpieces Collection has got be thinking about the importance of such details in the making of the perfect day for yourself and the one you love. How do you choose the right flowers, the right combinations? What role does the lighting of the space have in the overall scheme? We are not entire sure we have discovered all the answers but lets have a look at the suggestions below.
Floral Wedding Centerpieces
A matched themed seems like an idea that adds elegance and uniformity to the wedding design. Silver tableware white candle light and a delicate white centerpiece create a romantic serene atmosphere best experienced in a private small gathering.
A floral dream with cascades of white flowers and a canopy of candles will create a true wonderland, the perfect choice for a winter wedding.
A colorful centerpiece with a variety of flowers all brought together and complimented by the golden tableware.
Bright fresh green complements an all white wedding theme.
There is always room for a little bit of sparkle, especially on your wedding day.
This centerpiece is really one of my favorites, exuding elegance and joy at the same time through its delicate pastel flowers.
For the perfect rustic elegant themed wedding, antique looking decors complemented by white flowers and candle light are the way to go.
There is such a thing as too many candles so not overdue it.
The above three examples are an abundance of flowers and decors which we do not particularly like but seem to have appeal at weddings.
A simple wedding centerpiece can be put to value by the proper lighting.
Gold or silver compliments flowers beautifully.
Don't go over the top and overcrowd the tables with decorations.
An elegant combination that takes into account its surroundings.
Sometimes a simple centerpiece is the perfect one. I adore the combination of wood and delicate white flowers.
For a french wedding choose lavender as a key element.
Tall wedding centerpieces might give length to the decor but are quite over the top in my opinion.
We end the gallery with an exquisite example of Floral Wedding Centerpiece both elegant and fresh and simple at the same time. We have chosen three favorites as you can observe in the main photo collage of this article, all delicate discreet and with a cozy warm laid back vintage appeal.Taste is something difficult to understand and accept, but the general truth is that each wedding is different and should reflect the personality of its main characters. You are free to choose the favorite flowers and as many candles as you wish on your special day and make it your own unique special memory.
Decorating a blank wall can pose a tricky challenge. You are put in an uncertain position, unable to decide and to choose the path you should take. Take a step back, breath in, take a look around and reflect on your style, taste and on the already existing interior decor of your home. Now imagine how a paper wall art piece can fit into everything and go with that decision forward. You can dare to create your own, you will be surprised how addicting and challenging this creative process actually is. We have selected 23 incredible pieces, realized by talented artists that prove how delicate, complex and superb paper art can be. Get inspired from the collection and start a wonderful journey through the land of paper crafts.
1. asian inspired paper wall art creations
Add an Asian vibe to your blank walls in an unexpected way.
Are you committed? This incredible paper craft exceeds expectations, it might take a while and a certain degree of patience but the results are surreal.
Have you ever considered taking on paper crafts? Feel free to share your thoughts and own creations in the comment section below.
Crochet is a wonderful form of textile art, and crochet hooks are widely used around the world and the 8 best ergonomic crochet hooks sets are here, they`re extraordinarily fit for carpal tunnel and arthritis!
However, crochet does have some very specific requirements as far as the tool-set goes.
In particular, among the huge variety of crochet sets, there are a few which stand out among the crowd.
This guide intends to introduce eight of the best products on the market today, as well as detail our experience of using those best ergonomic crochet hooks.
So, without further ado, let’s begin with the product reviews!
Best Ergonomic Crochet Hooks for Carpal Tunnel, Arthritis
Material: Aluminum, size: 15cm ( 5.9" ), color: Multi color...
The 14 pieces set by BCMRUN is rather unique, in that it gives you 14 hooks made completely out of aluminium from top to bottom. This is best for those who have difficulty holding regular, plastic/rubber grip crochet hooks. These are Boyle type hooks, rounded and tapered rather than the inline hooks which are narrow.
Experience
The BCMRUN 14 piece set gives you a wonderful experience, which come in some non standard sizes - but they measure up approximately equal to standard sizes. They are priced more than affordably, hence, the fact that you get almost every size which you can think of - and then some - is absolutely unbelievable.
The only snag here is that the crochet hooks do not exactly match up to letter sizes, but a small workaround is to label the approximate sizes on the hooks.
The aluminium feel, fit and finish mirrors that of much more expensive name brand items, and the experience is pretty similar to those as well. Also, the hooks come in a variety of colors, which again makes it less difficult to find the right hook.
The hooks come in a gradation of 0.5mm from 3.0mm to 10.0mm. Some of the sizes are very difficult to come across, so if you’re keen on a certain size, get this set for just that purpose.
Pros
Brilliant design and finishing at miniscule cost
Boyle styled hooks are hard to come by
The sizes on offer are pretty unique and rare themselves
Cons
The thin handles may be uncomfortable for some some
INTERCHANGEABLE NEEDLES: The ultimate in knitting...
INCLUDED: Set includes 9 pairs of 4.75" long interchangeable...
The Knit Picks Caspian Crochet set is finished completely in wood, making it a good addition to those looking for antique crochet hooks. The finish in Caspian is inspired from sea waves, and thus is finished in a mixture of green, blue and teal. This set comes with eight hooks, all finished in high quality wood.
Experience
These hooks evoke a lot of confidence from within, in that these hooks are incredibly comfortable and easy to hold. These have a deep groove which helps you grab the loops properly, which is a common complaint with aluminum tipped hooks.
These sit somewhere between the Boyle and the Bates styles of crochet hooks, which is a wonderful yet unexpected compromise. Your hooks are neatly kept and organised in a vinyl case which ships with the set.
The hooks themselves are fabricated out of birch, and that too with multiple layers of birch. This gives it another level of heft and strength, which is unique since traditionally wood-based crochet hooks are considered fragile and not at all long lasting.
Hence, this is a set of crochet hooks which you should keep if you’re missing any of the regular sizes - you will not be disappointed.
Pros
Incredible wood finish with Caspian color
Standard sizes, most regularly used
The vinyl case is a welcome addition since handling these hooks becomes a problem
✅100% ACCURATE USA STANDARD LETTER SIZING. This CROCHET...
✅SMOOTH CROCHET NEEDLES AND HOOKS makes crocheting with...
These are a slightly different variant of the crochet hooks that are offered by Athena’s Elements, which have been reviewed above. These hooks come with an extra ergonomic handle which makes it much easier to hold the hooks while crocheting. Also, the lengths of the metal hooks is long enough to go through 7 or 8 loops without any problems whatsoever.
Experience
What surprised us the most the length of the hooks. The lengths of the hooks’ metal ends is 2 inches for the wider hooks and 1.75 inches for the smaller ones, which gives it enough of a leeway to keep on performing without any problems whatsoever. The sizes of the hooks are always present on the hooks, with stamping of the letter sizes and the lengths written clearly and lucidly.
The hold of the hooks is strong enough to not give problems during use, but are comfortable enough to use for hours before any problems begin to show. The specialty is that people who are coming back to using crochet hooks after years of use, or suffer from medical conditions, are likely to face very little problems in adapting back to these hooks.
Another wonderful product from Athena’s Elements!
Pros
Lengths of the hooks are admirable and class leading
Letter size indication will definitely save time over use
Another contender finished in wood, the Knitters Pride Crochet Hooks set comes in a wonderful Simfonie Wood finishing which is conducive to long term crocheting. The set of hooks is available in 8 sizes, right from size E to size L (3.5mm to 8.0mm in metric sizes). These are handcrafted specifically by people who are experts are crocheting themselves.
Experience
The experience of using these crochet hooks was incredibly smooth and easy. These hooks are not at all hard to the touch, and the hooks are equipped with grooves which prevent slippage. Another plus point of these hooks is that they come in a variety of colors, which is a unique trait among wood-fabricated crochet hooks.
It also comes with a handy, clear vinyl case where you can store your crochet hooks rather easily. They are incredibly lightweight to boot.
The lightweight nature of these hooks ensures long hours of using this set of crochet hooks without any problems. Further, there is ample variety in the sizes which ensures that you can work on your projects without any hurdles.
Pros
Wide variety of colors in the set
Wood based hooks with protection against slipping
Wonderful experience of use
Cons
The variety in sizes may be less compared to competitors
The TRUSTYIWEN set of 12 bamboo based crochet hooks offers serious competition to other bamboo products reviewed as above, by offering 12 crochet hooks from size 2.5 US to size 15 (roughly 3mm to 10mm), they are comfortable and lightweight.
They are extremely well priced and easy to handle. In spite of the bamboo feeling a little brittle because of the low weight, be assured that the hooks are strong enough to use at all times.
Experience
Such is the nature of competition, that markets tend to bring prices down to almost unbelievable levels. This set of 12 crochet hooks is a perfect example of such a market condition, which makes it incredibly affordable to have all the sizes that you intend to have. The wide variety of crochet hooks make it easy to have multiple projects running at the same time.
The hold and finish of the hooks is as good as you could expect from a budget edition, but it doesn’t disappoint. The price is actually the really surprising point here - 12 crochet hooks, fabricated out of bamboo and then subjected to a carbonization process hence, at this cost - unbelievable.
Pros
Unbelievably low cost
Wonderful user experience
Cons
The wood finish is rather brittle, and you may feel it’s about to break at some point though actually it doesn’t.
This completes our review of the best ergonomic crochet hooks sets in 2023.
Before going out there and making your year end purchase, we recommend you to have a long hard look over the reviews above to find out which specific crochet hooks set meets your requirements.
Happy Hunting!
Hanging beds or suspended beds are great elements in interior design, comfortable, interestingly-floating around and practical they ought to be present in everyone`s home. Today hanging beds can be purchased from multiple online stores or crafted using numerous diy hanging bed tutorials brought forward by the crafting community but whether your buying or crafting the simple principles stand: comfortable, sturdy, airy in weight and simply incredible looking the bed must be.
Start by thinking how you are going to use the bed and where it will be positioned and you`ll start to realize how it ought to be to fit your needs and design standards. To help you in this endeavor a selection of incredible hanging beds have been curated; the examples vary a great deal and they range from do it yourself projects that an enthusiast can realize in 30 minutes to high end bed designs brought forward by huge retailers.
If you are looking for something that stays on the floor but still has sort of floaty feel, an easy to build platform bed might be a solution.
Cast a glance and find something inspiring !
A bohemian decor of extraordinary beauty uses intricate colorful patterns on a white background to create an airy, joyful atmosphere. Notice that the hanging bed uses branches and rope to provide comfort in mid-air.
Circular design that uses a radial structure woven with rattan can be extraordinary sturdy and graphic.
Source Unknown
A salvaged wooden boat can sail you towards peace, calm and tranquility. A simple setting can adorn this item of memory beautifully.
via Pinterest
Rope and branches have been used to shape the hanging bed above, here the wood`s naturalness creates a slight contrast with the airy, ethereal white ambiance. Plush textiles bring in coziness.
The paper white installation simply changes the perception on this splendid setting, despite the papers 2D limitations the garlands create a great 3D effect of depth beautifully building on the concept of suspension in an airy ambiance.
Wooden planks, a matching mattress and four strings of ropes keeping a bed in balance. That might be all it takes to achieve a truly beautiful and equally comfortable suspended bed.
The simplest bed frame that you can craft can be suspended in a matter of minutes. Simply make the frame to match its future mattress.
via anthropologie.com
A net in the right frame could represent the ideal concept of suspension yet the space to build this experience on is definitely not easy to find.
via babble
Swing your problems with a simple design in the right ambiance.
via Pinterest
Old furniture pieces can receive a second chance through numerous means yet to provide their owner comfort would be a great treat. Above, an old bench now floats in a splendid color to the owner`s delight.
Simple efficient graphic piece of furniture that you can craft and anchor to a tree.
via thedevotedwife.blogspot.com
The realm of dreams is filled of tranquility, calm and peace and to slowly fall asleep in the midst of the forest listening to nature`s melodies surely is a dream for many of us.
A bed that has been envisioned for the outdoors; the black and white design can be considered neutral if compared with the highly sculptural heavy chains used.
An intimate hanging bed that provides shade when needed is definitely worth considering.
via Pinterest
Pallets and a matching mattress are everything you need.
via richaldito.com
A simple design that follows the weaving technique of a dream-catcher inside a metal ring to provide the needed structure in a flexible form that boosts comfort.
The marvelous shabby chic design above looks nothing but adorable and insanely comfortable; a great setting to enjoy your morning coffee in fresh air on the front porch.
via designmom
A bedroom that opens up to your backyard should not be blocked by a stationery bed; there the suspended option greatly contributes in emphasizing the feeling of space.
Source Unknown
Simple and graphic design ready to rock your world.
If a tree is not an option nor is it a wooden beam in your terrace or pergola the alternative is a wooden frame; two triangles will provide excellent sturdiness and balance for your bed or sofa.
via gardeninglife.xyz
To use a floating piece of furniture to find peace at the end of a long day or week is an experience that ought to be pursued. Numerous diy tutorials make this task affordable and doable happily; what do you think? We would love to hear your thoughts !
There are a lot of Digital Painting platforms out there which allow artists to paint out their ideas and concepts amazingly well.
Krita being one of the most popular among them.
From being incredibly versatile, to amazingly user-friendly, this platform provides something unique for every user.
So, when it comes to Krita paint brush sets, there is a lot to choose from.
As more and more tool developers and artists are making their very own brush packs every day, it can be rather hard to pick the ones that you need for your project.
So, to help you out, we have comprised a list of some of the best brush packs for the Krita platform, which are sure to appeal to both professionals and amateurs alike.
In the Digital Designing world, the GDquest team has done some amazing work with the Krita software. From Making unique and helpful video tutorials to a variety of paintbrush and blending tools, GDquest has for some time now, inspired beginner and adept designers in creating their dream projects.
GDquest Krita brush set is the ‘freemium alternative’ to their more exclusive game art brush pack, which does cost a hefty sum. However, for the more amateur users, this free brush set is going to be more than enough in helping them achieve exactly what they are looking for.
Their more recent bundle is in v7.0, and you can very easily download it for free from their page.
One amazing thing about GDquest, which we absolutely love is that they update all their tools and features periodically. They hotfix bugs and feature crash as well, and are constantly aware of user feedback, as they try to make their applications some of the more convenient Krita tools out there.
Moreover, this brush set comes with its very own tutorial video and guide. Hence, if you’re quite new to Krita and don’t have a proper grasp of its brush stroke techniques, then this set can come rather handy.
This a fantastic brush pack made by Radian 1 and released in DeviantArt for the wider community to view and download.
The pack is a bit unique in comparison to some of the other free brush sets out there, as it comes with a lot of customizable options which are more of a characteristic trait for paid brush packs.
With this pack, you will gain access to a variety of custom patterns, as well as gradients and workspaces to get you fully equipped for your next art project.
As this, brush pack is mostly geared towards painting, it might not be a convenient pick for you, if you’re looking to do more with them like blending and surface detailing.
But do keep in mind that you will not be able to directly download the brushes form the DeviantArt itself. Instead, Radian 1 has the pack hosted on Google Drive, and all you need to do is visit that link and download the brushes.
Moreover, it’s also important to update your Krita application before downloading and using these brushes. They require a Krita v3.2 or higher to function, so do try and be up to date on it.
The 4th volume of the Modular Brush set series from Grind God is going to be one of the most versatile and varied brush pack set on the list.
It has over 120 brush presets with over a dozen custom styles that will allow you to make those final touches on your artwork to make it a very unique one.
Now, with so many presets and options available, it’s really not all that surprising that the download file size is much bigger than average. The 34 MB size doesn’t just contain the brushes but some convenient demos as well, to help orient you with the color textures as well as the brush strokes.
The reason why we list this brush set as a very varied one is because it contains a little bit of everything. From containing ‘fountain pen styles,’ to ‘loose worn-out paint brush marks,’ this brush set comes very highly recommended from our end for amateurs and professionals alike.
A new V5 version is out now; however, even though it’s a significant improvement in quality than the V4, it doesn’t have all the brushes that are available in the previous version.
This brush pack is from the Mumbai based illustrator Raghavendra Kamath, which has been there on several art sites for some time now. It supports Krita versions all the way back to 2.0 and is absolutely free to use and download.
You might be thinking that these brushes might just be too old and lacking in quality when compared to newer alternatives, but you will be quite surprised to find how consistent and versatile they are.
The pack contains a handful of some traditional brush styles like sponge brushes, custom pens, as well as some stamp-styled brushes, which are incredibly high in stroke quality.
Additionally, even though this brush set is up for grabs on so many art sites, it’s best to download it from GitHub where it was originally published.
But it’s important to note here that this brush set is quite old and the features have not been updated or patched with the latest Krito versions
Hence, some of the applications might be a bit buggy, and you may not be able to get what you want as a result. These are just some of the things to keep in mind when using this brush kit.
Jackpack’s Krita brush bundle is the newer design set which we have recently had the opportunity of using.
The presets and the features are pathed with the latest Krita 4.0 version and work seamlessly with the program to help artists have an amazing drawing experience.
However, just because these high-quality features are patched to the latest version doesn’t mean that they will not be supported in the older Krita models.
It will effortlessly run without a problem till V2.8, but for anything below that, it’s better to test out the compatibility first.
Now, in terms of the advantages: all of the brushes present in this brush kit are designed with ‘pixel-perfect’ strokes in mind. Hence, it will allow you to customize and resize the brushes in whichever way suits your art and style.
But, not all the brush features will support the same level of mirror symmetry, and you will have to experiment with it a lot to see which ones will work the way you want it to and which ones wouldn't.
The whole pack comes free of cost in the Gumroad main website; and if you do want to make a donation to them, there is an option in the website which will allow you to do just that.
These Hushcoil Brushes are a relatively newer set to the Krita 4 version and pretty unique in how it goes about its brush stroke use and the range of features it houses.
These brushes are quite detailed, to say the least, and contains about 280 different formatting features, allowing one to be very versatile with their art styles and designs.
Primarily, the brush kit has four bundle packs, each representing a different type of classification from Concept to Paintbrush, to the Pen and Pencil and the Basic work set.
Where the Concept and the Paintbrush category appeals more to the more adept professional users, the Basic brush kit, on the other hand, is just perfect for beginners as well as amateur Krita users.
Combining these different categories together, you will be able to create some very unique and different brush strokes and have access to a wider range of art styles which you otherwise wouldn’t.
If you want to download these brush sets, then you will find them hosted on Gumroad for free. Gumroad is an amazing site for marketing such brilliant digital painting tools, and it showcases a lot of the sets made by this particular creator.
Making cartoons and anime pages on Krita is incredibly fun and easy. So if you’re inner mangaka is itching to make its very own webtoon serial then this brush set is a must-have.
Now, this brush kit is pretty exciting to use. As it mimics the traditional cartooning tools like pens and brushes, it will allow any artist to make those classic comic designs and graphic novel sketches very easily.
However, even though they might mimic the traditional sets, don’t for one moment think that they lack any sort of stroke quality. Every brush in the set works at 300 DPI, and you will be able to design artworks in high-def quality and make unique designs for digital screens.
And if you’re not all that sure if you want to use these brushes at all or not, then the Deviant Art main page has a small sample of the brushes which you can use and get an idea about them.
So, do feel free to try out this amazing brush set whichever way you want, and experiment with different styles and stroke settings, to see which of those will match your tastes and which ones wouldn’t.
David Revoy is a superstar in the digital designing world. Apart from making high-quality graphic designing tool and brush kits for the Krita platform, he also has a YouTube channel where he teaches newer Krita artists various applications and features that the platform allows.
He helps to inspire them to try out new styles and stroke and also encourages them to learn as they experiment.
This brush set from him focuses more on the charcoal shades and strokes. However, these tools are primarily designed as custom brushes, and not every user will have much use for them, especially the ones who are much more experienced with actual charcoal work.
The brush kit comes with three separate brushes, each catering to a particular art style and art genre.
They are very easy to install and patches rather well with the latest Krita versions and has a set of convenient features as well
In terms of variety, the brushes range from super thin to very thick and painterly. So, if your art needs more detailed strokes or broader outlines, you can rest assured that you will be able to achieve both with this brush kit.
The second version of Nylnook’s brush pack series is, without a doubt one of the best sets geared towards the traditional pen and paper style.
This pack is not all that well known and has slipped through the notice of many professional users. It has about 36 brushes and stroke styles available, which may not be much, but the sheer quality of these strokes is just astounding.
Moreover, we believe that these brushes might just be exactly what a beginner needs to get a better grasp of Krita and all of its various features. The pack also comes with full details about the brushes, as well as the techniques, along with the installation instructions on both the Faramagit page and the original blog post.
The brush tool is well patched by the creator and is regularly updated to fix bugs and compatibility issues which may occur with the improving Krita versions.
However, with the limited amount of brushes and stroke styles, this pack might feel insufficient by the more adept users. But these 36 brushes are ideal for the beginner who is still getting the hang of Krita.
The Krita V2 Brushpack is the more user-friendly brush pack set from David Revoy which a lot of beginners tend to opt into when getting into the Krita platform.
So, what makes the David Revoy beginner set one of the best?
Now, the popularity of this brush set has a lot to do with the variety and versatility of the brushes that are present in them. They are also very easy to use, comes with their own instructions, as well as a tutorial guide to help get you up and going.
From light sketch pencils to digital inking pen to even eraser styles and paint brush sets, this brush pack comes with a lot of amazing tools and features.
It has around 64 brush styles and is going to be our recommendation if you are new to Krita and want to master the platform as efficiently as possible.
If you want an example of what this brush set is capable of, then you can take a look at David’s work on Patreon.
He does the whole work with the brushes available on the set and goes about manifesting the art in such a way that it’s going to be rather easy for anyone to mimic and follow.
Though made initially for the Krita 2.9, you will still be able to use the David Revoy Painterly Brushes on any version of the painting platform.
This set of primary brushes are more catered towards the needs of more adept Krita users than beginners really. But the newer users can still try out this set as the brushes here are very easy to use and install, and is very rich in stroke quality as well.
These painterly brushes are modeled after the real bristle brushes and mimic most of their stylistic patterns and strokes.
The pack comes with a handful of brushes that David often uses and showcases on a lot of his Krita tutorial videos. He basically uses them to paint certain art tropes like backgrounds and stock images.
These are also the brushes which he uses in his webcomic series called ‘Pepper&Carrot.’
In many of his tutorials, he teaches how one can use these brushes to make a lot of unique color blends. The blending styles is where the real magic of these brushes lie; being able to work with opaque colors as well as lighter ones to create new blends is what makes this set so very fun.
The quite popular digital artist Vasco Alexander Basque has created a very special set of custom watercolor brushes just for Krita users.
The brush set has a varied collection of brushes and stroke styles, with features that support dabbing as well as splattering. Dabbed and Splatter brushes can help you get a wider style range with your strokes, and make certain works like bricolages and abstracts that can truly refine your skills with the Krita platform.
However, these two are not the only brush styles that come in this set; there are other such tools which offer a much-refined stroke for detailed works, which can be easily controlled and used.
If you’re fairly new to water coloring in Krita, you can try your hand at small projects with this set. They are free to download from GitHub and is compatible with all the versions of Krita above 2.8.
But, do keep in mind that the strokes of these brushes are designed to be fairly small with a size range of 30px to 100px. They might be a bit low in quality, but the amount of things you can achieve with them is just amazing.
The minimalist brush pack by Aliciane is another brush set which is just fantastic for the newer Krita users.
Elésiane Huve (aka Aliciane) is a freelance illustrator and digital painter who uses Krita as her main digital platform for all her works.
He has made this brush set for the newer users, derived from the David Revoy amateur brush sets, with some changes here and there. She has tried to make this a very basic set which will help the newcomer get an idea of how Krita works and how he/she can go about the platform to make whatever they want.
When compared to David’s set, the brushes here have altered line widths, a different line cleanliness, and opacity sensitivity, especially while making marks with more pressure.
It comes with a few unique brush types as well, such as the smudge brushes as well as a custom move tool to add the much-needed versatility to this otherwise simple and minimalist set.
The pack comes with 8 brushes in total, which is pretty small, but considering these are aimed to aid beginners, one can hardly complain. They are also free to download and work flawlessly with Krita 2.8 and higher.
Aldys Brush Pack has been around in Krita for a very long time now, and may just be the oldest on our list today, even older than the Raghavendra set.
Now, what makes them such a popular choice for a brush pack tool in Krita, is how beginner-friendly these brushes are. The brushes are incredibly basic and consist of a little bit of everything, and is just fantastic if you ever feel like flexing your artistic skills and trying out something new once in a while.
From containing airbrushes to oil brushes to smudge graphite as well as some pattern brushes, they have a lot of versatility amongst them.
However, these brushes are quite outdated, and we would not recommend that you do any form of commercial work with them as there might be some compatibility issues with the latest Krita versions.
The DPI is also not all that high, and it may disappoint in certain aspects of your professional work, and you may not be ultimately able to achieve what you set out to.
Final Thoughts
For digital painting, concept creation, or even for making your very own webtoon, Krita is an amazing platform to have. And we hope that our list of brush sets today was able to help you in understanding this platform a bit more.
The structure of a home is an important element which defines the outward look but also the interior spaces which will be used. Since the inception of a plan , a structure may define the future living experience , a variety of materials can be used and time again new materials appear , at first they are quickly dismissed but in time they gain momentum and their use is widespread. Today , the choice in materials and structural components is greater then ever , and materials tend to take into account not just the immediate issues of weight flexibility but also the larger economical context , its easy use etc. Containers fall into a specific category of structures , because through their shape they can be easily adapted into a living space and as far as structure goes they are more or less a complete metal box . Their wide use makes them easy to come by and their geometry creates an opportunity to create a comfortable home while at the same time repurposing materials and making a great conversion from transport/cargo to a more enduring role suitable to their metallic components.
Architects offer a wide range of solutions , both stylish and contemporary , proving that design can go a long way when it comes to conversions , but also the fact that the metal box-like structure and its basic layout can easily be adapted . The material itself has many uses , but in this installment it doesn't just justify costs but also provides an adequate use for a material so precious and enduring such as metal , thus offering houses with a sturdy flexible structure.
Shipping Container Homes
#1 Maison Container Project by Patrick Partouche
Maison Container Home Realized by Patrick Partouche
First is the House designed by Patrick Partouche-called the Maison container project. The containers create here an interesting volume through their position in relation to each other, creating an interesting and simple facade . Located on a 2,240 square feet area near the river Lille in France , it cost some € 221,000 to build this lovely house.
The interiors make full use of the container structure and their ability to join and create wide spaces , thus a comfortable interior is located inside with a grand opening toward the garden . This container home is perfectly balanced both in its outward looks and in its interiors.
Shipping Containers Left Intact to Enhance Privacy
Lovely Hammock in the Living Area Providing a Comfortable and Care Free Seating Option
Spiral Staircase Leading to the Top Floor of the Container Home
Bright and Bold Shades Adding a Vibrant Touch to the Furniture
Contemporary Kitchen Featuring a Stainless Steel Countertop
#2 Old Lady House by Adam Kalkins
Adam Kalkins-Old Lady Home
Made almost entirely out of shipping containers , Adam Kalkin proves that a great solution that takes into account landscape and textures can transform the containers into a genuine living space.Taking terrain into account and having a central court/garden the house offers many wonderful perspectives and views and with its carefully selected interior textures , sliding glass windows and doors and eco-friendly materials creates a warm cozy home.
Container Home Lit Beautifully
.
Snapshot Inside a Container Home
Colorful and Bright Bedroom in the Old Lady House
Massive Use of Glass Allowing Natural Light and Ventilation
#3 Containers of Hope by Benjamin Garcia Saxe Architecture
Bright and Bold Design in a Bold Color
Benjamin Garcia Saxe Architecture and his "Containers of Hope " provide quite a high standard of living and an inexpensive option available to wide range of people. They are designed using just 2 containers , and giving a total area of just 1000 feet of living space , however coupled together with a minimal interior design and the way windows are positioned within the volume according to the function of a room , a spacious area can be simulated . They can easily provide an alternative for an apartment , and at just 40 000$ they can be a viable option for either a home , or a vacation retreat for the entire family . This specific design can be found outside San Jose, Costa Rica.
Access Into an Elevated Container Home
Containers of Hope Warmly and Cozy Lit Through Lighting Fixtures
Container Home Using a Glass for Transparency and Extensive Viewsa
Superb Interiors in Muted Tones
Bath Area Separated Through a Glass Partition
Striking Pendant Lamp Steal the Show in a Cordell Shipping Container
Cordell Shipping Container House with a Smart Use of Flowing Space
#4 Crossbox House by CG Architects
Green Shipping Container Home
Nest up is Cossbox House designed by CG Architects. Made out of shipping containers , it creates a playful and stylish image , one that can easily be integrated into the look of contemporary architecture . With carefully selected textures and colors an interesting outward image is projected on to the viewer . But this is not all because the interior is just as chic as the exterior and relates in an interesting way with the surrounding landscape. Its an intelligent design with refined look and use of lavish wooden tones , simple finishing of the walls in white coupled with wide space impression given by the simple geometrical shapes of the containers .
CrossBox Shipping Container Home With a Modern Look
Green Shipping Container Home
CrossBox Shipping Container Home Sheltering Exquisite and Extravagant Interiors
CrossBox Container with a Lovely Warmly Lighting and Expansive View
#5 Private Cabins at the Alterra Beach Resort
Container Cabins at the Alterra Beach Resort
Alterra Glamping on the Pinamar beach in Argentina is a wonderful colorful resort and with the help of architect Clorindo Testa an eco-friendly touch was added by using old re-purposed shipping containers as private cabins on the beach for tourist and guests . The cabins offer all contemporary luxuries in this resort hidden from the noise and hustle of the modern world . The design is based on the relation of the cabin with the surround natural background , thus ensuring a serene and peaceful atmosphere for the occasional guest/tourist.
Lovely Patio Area in Permanent Connection with the Exterior
Shipping Container Cabins Located at the Alterra Beach Resort
#6 Shipping Container Guest Houses by Poteet Architects
Poteet Architects bring you an alternative to the tradition guest house with this cheap and minimal design that couples the simple geometry and looks of a container with a warm interior design using wooden finishings for the wall and floor . The design even provides a patio space on which you can enjoy the surrounding landscape . The patio and giant glass sliding doors create an interesting connection with the exterior landscape and add up to a very crafty idea . This way you can easily incorporate the design into any any housing plan easily!
Elevated Platform Offers A Stable Base for the Container Home
Vivid Decor Nestled in a Compact Interior Design
Glass Windows Connecting the Exterior With the Interior in Magnificent Manner
Natural Vegetation on the Rooftop Regulating the Temperature Inside
#7 Vivacious Shipping Container Homes by Marcio Kogan
Marcio Kogan creates and interesting experience through the use of painted shipping containers , but the trick is they are just the main part of his composition that uses shipping containers to play with color and texture. Unlike previous examples he does not utilize exclusively just containers but rather they are an important element in the entire house as a whole . The space is carefully crafted around the idea of a more traditional house but every space complements the other so that together with the containers create an interesting living experience.Its colorful design is natural for the brazilian lifestyle , creating an interesting volume that is exciting and enticing .
Brilliantly Colorful Painted Shipping Container Home
Modern Interiors with Cool Pendant Lights
#8 Casa El Tiamblo by James & Mau Arquitectura and Infiniski
Casa El Tiamblo Realized Out of a Shipping Container
Designed by James & Mau Arquitectura and Infiniski, Casa El Tiamblo brings a new option to the table , using blue shipping containers , they create a metallic rough exterior that opens up the interior spaces towards the garden. Other than the standard shape of a container that gives the rooms a specific geometry , the interiors can fool anyone into thinking that containers are not part of the house design. This project showcases the fact that comfortable living conditions can be achieved using minimal and cheap structures such as shipping containers, with a clever and extravagant interior design much can be achieved in the way of atmosphere and feel.
Luxurious Bedroom Inside the Casa El Tiamblo
Open Modern Kitchen a Container Home
#9 Shipping Container Home in Colorado by Studio H: T
Designed by Studio H: T, the volume of this house is made by wedging together 2 shipping containers , but coupled with the context of the landscape it creates an unique solution , that shows how containers can be used to create high standard home. While the intersection of two simple geometrical figures may not sound like much ( since shipping containers are used) , what they manage to achieve with this in the interior is truly remarkable. Passive cooling technology, water recycling units and solar energyensure that the house is autonomous and independent, especially given its location in wild landscape of Colorado.
Colorado Rocky Terrain Carrying a Shipping Container Animated by Life
Interior Design in Dark Hues
#10 Take a Break with Starbucks Crafted from Shipping Containers
Innovative Starbucks Design in Washington Crafted from Shipping Containers
The Starbucks drive-thru in Tukwila, Washington has been created using 4 shipping containers , the same used by the company . The idea to use the shipping containers that are used by Starbucks belonged to Tony Gale , the company architect. The idea suits well the purpose , and conveys very well the feeling of mobility that a drive-thru should have. While not exactly a house or a home it proves the infinite possibilities of shipping containers , and how a high quality architecture can be achieved and at the same time a great conversion of older , long serving shipping containers is achieved.
Four Starbucks Containers Used as a Structure
Starbucks Drive Through
Innovative Starbucks Design in Washington Crafted from Shipping Containers
#11 Green Frame House by Studio Astori De Ponti Associati
Minimalist Look Inside the Minimalist House
This modern home design by Studio Astori De Ponti Associati presents itself as minimalist stylish and even futuristic option. while it does use the conventional structure of a shipping container it communicates with the exterior far more then other designs based on shipping, thus relying more on intelligent interior design to create a pleasant and stylish living space both inside and outside . Through its large windows the interior communicates and transmits the interior image to the exterior , so its transparence helps make up for shortcomings in exterior geometry and texture. A truly smart design indeed !
Green Frame House
Minimalist Design Showcased in Shipping Container House
Container Home Exuding Italian Flair
#12 Prefab Shipping Container Home from Home Contained
Prefab Container Home
However you try , the original look of a container will always be industrial and rugged, and while some may like it , it wont fit anywhere and everywhere and in every context .The prefabricated container homes designed by ‘Home Contained’ tries to create home , but using the cheap structure of a container, adding to this structure not just by changing the color but also by using more elaborate interior textures co cover up the original appearance of the container. This includes numerous other additions such as glass curtains , concrete patios and anything that can be added to alter the image of "life in a shipping container". Home Contained creates in this way viable alternative for more traditional homes.
Elegant Flowing interiors Nestled in a Shipping Container Home
Lovely Patio Area in Permanent Connection with the Exterior
Cool Blue Hues Enhancing a Refreshing Bath Area
Colorful Decor Giving the Home a Vibrant Look
Lavish Bedroom Interior Design in Calm Relaxing Tones
Neat Organized Shelf Space and Floating Cabinets Enhancing the Feel of Space
#13 Shipping Container Office Space by Lab Inc.
Shipping Container Office Space by Lab Inc
After a coffee shop , we can't ignore a more traditional use for shipping containers such as offices. The solution is based on the idea of creating a pleasant comfy work place using a cheap structure close to home . This option offers an interesting solution , the design coupling two of the main uses of shipping containers , the office has an ergonomic , minimalistic design that is pleasing and comfortable for the every day work , from 9 to 5 !
Office Area Nestled in a Beautiful Natural Setting
Beautifully Organized Ergonomic Interior Design
Patio Area Meant to Break The Routine
#14 Fascinating Shipping Container House in California by Leger Wanaselja Architects
Container Home in California With Superb Aesthetic Values
Container homes don't come in just one floor , this option gives its user not just the first floor , but also the look of normal house . Incorporating two shipping containers , it manages to create a traditional house image , without any difficulty . Using shipping containers and not being able to tell is a great achievement , and this design looks every bit like the house "next door ", but also using a cheap , fast structure that is enduring and durable. Leger Wanaselja Architects created this house by stacking 2 container , one upon the other and then intelligently arranging the interior to create a large living space and comfy bedrooms. Having 1,350 square feet and a two-floor living room , coupled with the solar powered energy this is a very attractive option.
California Container Home Wearing a Traditional Structure Apparel
Regular Interior and Exterior Design In a Container Home
Living Room Area in a Stacked Shipping Container House
#15 Colorful Cordell Shipping Container House by Numen Development
Home Realized out of Cordell Shipping Container
Architect Christopher Robertson from Numen Development brings another home from a container , that looks and feels both spacious and complete . Through use of various other materials and clever interior design , the classic image of a container home is completely covered . Robertson's design creates some of the most interesting spaces and images , rivaling those found in a conventional home , with a much more expensive structure. Using 4 containers , 2 40 foot for the living room and bed rooms , another container 20 feet long for the kitchen and the final one as a guest-room , a complete comfortable home for any standards was achieved.
Cordel Shipping Container Home With Impeccable Interior Design
Cordell Shipping Container Home Seamlessly
Cordell Shipping Container Home Sheltering a Contemporary Kitchen with an Ergonomic Form
Cordell Shipping Container House with a Smart Use of Flowing Space
Striking Pendant Lamp Steal the Show in a Cordell Shipping Container
#16 -2+ Weekend House by Jure Kotnik Arhitekt
Crafted from ConHouse container units, the 2+ Weekend House from Jure Kotnik Arhitekt this house is the embodiment of fast easy and chic . Although these shipping containers were crafted for this specific purpose , it is proof the ever growing popularity of containers as homes. Emphasizing mobility and ease of access and construction , its a cheap fast solution that provides some architectural quality for people who want either a cheap solution or tend to move a lot.
2 Plus Weekend Retreat in Black and PInk by Jure Kotnik
Narrow Creative Staircase Leading to the Top Floor
#17 Jean Nouvel’s Les Grandes Tables
The Les Grandes Tables of Seguin Island in France is a perfect example of how using basic recycled shipping containers as a structure , with enough additions a completely different image can be achieved , opposite to the basic geometry of the containers. It embodies the idea that with minimal resources architecture can achieve a maximum effect . Located inside the structure is a restaurant for 120 guests and greenhouse for more exotic plants , which are uncommon on the island. This a shining example of how modern architecture can achieve a spectacular result using minimal means and resources.
The Jean Nouvels Les Grandes Tables Restaurant in France
A Shipping Container Restaurant in Paris
Audacious Design Combining Creativity With Low Costs
#18 Boxpark Shoreditch: London’s First Shopping Mall Made Out of Shipping Containers
Containers as a high-quality shopping space (akin to a mall ) is a new idea and concept and the Boxpark Shoreditch is the first in this line , crafted using 61 containers, it appeared after several small business owners could not buy or rent any shops in the urban area of London . Hence came this idea that would solve this problem . More interesting through its use rather then design it uses 41 containers on the lower part and 20 on the upper floor. The flexibility and adaptability of the design makes up for the more rugged design providing a solution for customer and owner alike.
A Mall Realized Out of Containers Wearing Black
Shoppers Delight with Ample Choices in Black and White
The Boxpark Shoreditch Has Been Assembled Out of 61 Containers
London`s First Shipping Container Mall Interior Design
#19 Quebec Container Home by Maison IDEKIT
Shipping Container in Quebec
Bernard Morin and Joyce Labelle took the idea of a homes as shipping containers to a whole new level. Several designs often strive to either make a point out of living in a container and flaunt its exterior rugged and industrial looks , or try to cover it up as much as possible and make it look like a usual home as much as possible . This design answers the question "what if you only use the structure of containers and invest the same amount of money as you would in a normal house ? , how would the end result look ?", so here it is , a good looking villa . Though at its 3000 square feet and five bedrooms , costing a whopping 175, 000 $ it can no longer make a case for cheap fast and easy .
#20 WingHouse Unravels its Magic
WingHouse is truly unique in the way it adapts to the surrounding space and how it is built to generate spaces. The first odd thing about it is the fact that everything is cramped around in the same space. But here is where the design truly shines , using extendable wings ( extended through the use of a crane) the house can extend and create additional space for all your requirements. A great option for both a home but also for an office or business place , that can extend and expand to accommodate new offices .
#21 Redondo Beach House by DeMaria Design
DeMaria Design Envisioned Redondo Beach House
DeMaria Design brings us another design that integrates the containers both within the landscape and creates a nice exterior image without using the industrial look so often found in other container homes. Located in Redondo Beach California , the house's main attraction is the way in which it communicates with the exterior by way of access through the two containers which generate a hallway . The interior is thus quite introverted , da use of other materials like concrete to mold a beautiful modern exterior facade also helps bring this home to a higher standard than its original intended structure may have permitted.
Redondo Beach Home
A Sneak Peak Into the Interior Design of the Redondo Beach House
#22 Tommy Hilfiger’s Berlin Shipping Container by Artdepartment-Berlin
Apearing at the Bread & Butter Fashion Trade Show for internationally renowned Tommy Hilfiger brand, this idea takes shipping containers and turns them into an exhibition space , for Tommy Hilfiger. The interior is in this case WAY more interesting than the exterior , with a mix of containers placed in a witty way , some large spaces have been created inside this structure. The true nature of this container-museum is revealed inside , a place that showcases Icons in style and and fashion and the changing world trends . On the outside , the containers a direct aproach with painted on images , while on the inside entire rooms , streets and spaces of varying volume and atmosphere are recreated !
The Brand Hilfiger and Its Essence Is Carried Through
Fascinating Art Work in Vibrant Hues Splattered on the Facade
Fashionable Interior Design Flooded by Natural Light Enjoying Expansive Views
#23 Ergonomic Container Home in Mojave Desert by Ecotech Design
Container House in the Heart of the Mojave Desert
It seams we have another great design made entirely out of container units. Ecotech Design comes with this house employing 6 shipping containers , creating a modern looking villa with a single bedroom in the mojave desert. The design is all the more inspiring since it creates a modern looking home , without covering up the containers or using additional materials for better textures. Instead it uses white and grey for the volumes of the house , which against the background of the Mojave give it a very good contrast. The project emphasizes high-energy efficient design and low cost , making it a viable option for any place not just the Mojave Desert.
Container Home Located in the Mojave Desert
Mojave Desert Shipping Container House -Entrance View
Mojave Desert Shipping Container House Meant To Keep Away the Heat
Mojave Desert Shipping Container Home with a Lavish Design That Replaced the Traditional Residence
Bedroom Offering Expansive Views
Wooden Hues Giving the Home a Natural Touch
Ample Living Space Inside a Container Home
#24 Del Popolo Mobile Pizzeria provides a Great Idea for Budding Businesses
Del Popolo Mobile Pizzeria Truck
Homes are not just the only final means of the shipping containers , so if you are interested in a going into business venture that involves a mobile platform for serving and cooking food we have the thing for ! This is the Del Popolo mobile pizzeria and its a marvel to behold since this is a mobile italian traditional style pizzeria with an old wood heated oven to make the classic italian pizza recipes come true anywhere and anyhow . Jon Darsky spent about 180 000 $ to convert this container , but now he bring to anyone anywhere a classic italian pizza parlor , so tis worth the money!
Mobile Pizzeria Forged From a Re-purposed Shipping Container
#25 Danze & Davis Give an Extreme Shipping Container Makeover to a Texas Home
Extreme Transformation of Some Shipping Containers Into a Home
Finally we have this lovely home in Bastrop Texas , that proves once and for all that given enough containers you can achieve any final effect , in this case the end result being a warm comfy cozy house that offers a living experience of a very high standard. Despite using containers , this house is not constrained either in the interior space or the exterior look. This house makes the list for the fact that a great effect was achieved with few resources , not many exterior materials are used beside the containers to give it a modern and yet rustic and traditional look. Inside a comfy and cozy home awaits us . Danze & Davis have managed to create a genuine home that feels like so much more then the temporary industrial look of shipping containers. For its functionality and simplicity , but also for achieving a rustic traditional and overall pleasant outward look without using a lot of material other then the containers themselves , this design showcases the flexibility and adaptability of containers as a structure for our homes!
Inside the Container Home With Exposed Steel Surfaces
What do you think about these shipping container homes?
We would love to hear from you in the comment section below!
Any person dedicated to its backyard landscape must poses a small space in which s/he can shelter the tools needed and another space in which plants and flowers in pots would be deposited during the winter.
Agneta Enzell chose a beautiful black and white design for a shed dedicated to an orangery situated just a couple of meters away from the house. She advised us to look for the simple, neutral background for our shed in order to highlight the colorful landscape around it. A simple black and white shed with classical Scandinavian influences became her second home; she united the utility with pleasure and created a simple small shed in which she finds peace calm and for herself, she is listening to the rain, taking breakfast and dinner surrounded by nature, enjoying the sunset in a serene atmosphere, a warm and cozy environment of herself to sustain her passion.
Black and white decor has become a traditional combination that can be both playful and elegant at the same time. Ok, so we know it might seem like we are all set on black and white decor inspiration, but honestly, we can't get enough of them. The contrast between these two non-colors is the one that generates a certain tension in the design scheme, being able to be at the same time a perfect background for the main pieces of the decor or the focal point of the entire room. The more usage of black the more sober the atmosphere so be careful not to overdue it and create a claustrophobic chamber. Accents are of the most importance, whether colorful or with a specific design or texture because they are the ones that unite all the components and merge them into one solid creation.
Black and white decor collage
White creates the sensation of openness and liberation. Thus it should be used in open spaces like open-kitchens and living rooms and even in the bedroom if you like a more serene clam atmosphere. In contrast the black, a grave, strong non color implies a more intimate, serious state of mind and it is suitable for the privacy of you bedroom or study. Nonetheless don't feel obliged to not use it in the kitchen where combined with a steel furniture can turn it into an industrial designed room. Add touches of crystal and gold and choose rich textures and materials like silk and velvet, leather and transform your living room into a luxurious decadent space perfect for romantic evening or dinner parties. Just keep in mind to find that balance and to have fun with the design itself.
Black and white decor-picture frames wall
Black and white decor- vintage bathroom
Simple interior design with black accents
Modern interior design with simple black and white elements
Minimalist black and white kitchen decor
Modern black and white decor kitchen
Simple living room design with a black and white color scheme
Rich black color scheme
Scandinavian interior decor
Black and white sitting nook
Black and white living room
Elegant bedroom designed in black and white
Patterned bedroom in black and white
Minimalist interior design
Small industrial black and white kitchen
Luxurious black and white kitchen
Modern living room decor
Stripped black and white wallapaper
Simple yet elegant open ktichen
Retro inspired living room with black and white and yellow pillows as accents
White and black wall and ceiling transiiton
Chalk black wall
Black shiny leather living room furniture
Minimalist decor of a living room in black and white
When someone close to us says black and white interior design we all instantly imagine a modern minimalist interior design; while our imagination is definitely feeding us a good thread we should start feeding it with some classic traditional black and white interior designs as well. Starting with this article today we are going to slowly review some interior designs that are wearing black and white on a beautiful traditional style.
We are starting the series with the living room because it is our inner home, our center around which we all orbit trough the day, trough the weeks, months and years. Moreover the black and white living room design is definitely the black and white design that will be showcased to most of our guests, for the special ones that will get past the living room we will have other spaces dressed in tradition black and white published soon.
Depending on the living room you might want to think the black and white ratio and to paint different items within the interior if you would like to manipulate the perception of the viewer. For example black walls are making the space seem smaller yet very pretentious, noble and elegant where stark white walls are going to brighten the space and emphasize the feel of space, enlarging the room.
The proportion of black and white in the interior will also discourage or encourage tones as accents, in a interior design in which the black and white ratio is balanced an item in this color palette or close to it will be hardly remarked while a red one will be the main focal point at an given time.
It is up to you to decide how your small universe will get dressed in black in white, our point being that a black and white living room design can very well be classic or traditional, a far cozier and warmer space then a black and white minimalist living room.
We encourage you to take a look on the pictures selected bellow and leave us your opinion in the comment section bellow.
Floating bed designs are rather special, they evoke a feeling of superiority, and they seem to flow above the floor emphasizing the feel of space allowing air to pass through the room easier. In contemporary interior design and architecture, modern homes and interiors are being designed as simple and as clean as possible featuring well-defined lines in an open space. In certain spaces the floating bed design presents a certain appeal, a shattering vibe that places it above everything else, seen from the ground level it looks monumental and through materials and textures, you can surely match any design line.
The aesthetic values presented by the futuristic minimalist look are unparalleled in elegance and style always offering that holiday-like experience: a relaxing and rejuvenating immersive look.
Floating Bed Design Ideas
An ethereal ambiance flooded by light and coziness to cherish, embrace and pursue.
The brick wall mural becomes a focal point that greatly emphasizes the floating bed stance.
In this setting the pattern is gained by the brick wall, intensifying the vertical plane where the flooring remains a constant. The immense rug continues the headboard upwards yet again defying the normal setting, constructing something beautiful; surreal.
The powerful wooden texture and the sober elegant charcoal gray can be beautifully nestled in a timeless setting.
A minimalist take on the floating bed can definitely make the concept justice; here the red textile and the sculptural geometric gain one`s attention in an instant while the added modern lighting fixtures do provide comfort and functionality whilst remaining graphic.
Elegance wrapped in wooden textures complemented by contrasts between black and white.
Source Unknown
Simple Chic Modern Bedroom With a Gray Bed Floating by Kia Designs
Floating beds are nestled in sleek minimalist contemporary designs, especially urban looks seamlessly but they can be easily introduced in any traditional or playful setup as well. The collection showcased below is meant to inspire you into adding such a bed to your own master bedroom as well, they can easily enhance small bedroom designs.
Levitating Bed Upholstered in a Beautiful Eco Leather Respecting The Environment
Floating Bed Offering a Sophisticated Look to a Black and White Bedroom Design
A simple setting can always work with something extraordinary; here the epoxy floor shines throughout the room emphasizing the feeling of space with the support provided by the floating bed.
An interesting tropical experience.
Contemporary Golden and Brown Hues Embracing a Modern Bed
by Vicki Bergelt Interior Design
Vivid Bedroom with a Classy Looking Floating Bed
Superb Minimalist Floating Bed With a Bookshelf in the Corner
by Daniele Lago
Higher Up on a Floating Bed
You can guess that the idea started from the concept of floating, flying, and levitating, a dream that has been on people's minds for a long while now. Contemporary designers have enhanced this allure by generating stunning decor in which the bed has the main role, floating above other furnishings.
Hanging beds are an excellent option as well with a more casual look but the floating bed sure exudes innovation, elegance, and class above it. Unassuming simplicity and a refined form can be bold statements for your magnificent bedroom, present them through a floating bed design!
Fascinating Exquisite Bed Embedded in a Sculptural Shape
Bed Design With Storage Units Underneath Enhancing The Space
by Mark English Architects
Wood and Expansive Views Enhancing a High Ceiling Master Bedroom with a Floating Bed
by Square Three Design Studios
Wherever you reside and breathe the strongest enemy of architecture is gravity, the structure ruins an architecture piece unless the artist managed to include it seamlessly. The strong appeal of the floating bed comes from this contradictory state in which the bed defies gravity laws.
Plush Bed Surrounded by Wooden Surfaces Offering Warmth and Coziness
Stylish Contemporary Bedroom with Giant Floating Bed
Built In Storage Units Underneath the Floating Bed Keeping the Clutter Away by Moon Design + Build
A floating bed that allows the inhabitant to enjoy the extraordinarily colorful traditional rug below. The attic space accentuates the importance of this floating bed that indirectly emphasizes the feeling of space.
Jaw-Dropping Design in an Extreme and Exclusive Floating Bed
Unique Chandelier Above a Bedroom with Expansive Views Surrounding a Floating Bed by Audrey Matlock Architects
Providing a Panoramic View
In today`s architecture, the residences tend to connect with the exterior world more than ever, they are offering expansive views of the outside world whether it`s a grim city sky silhouette or the most extraordinary or an infinite ocean. Modern homeowners and architects are spending their efforts into obtaining the best snapshots possible on their sites.
Floating beds are emphasizing this chain of thought by being able to provide a 360-degree view as they can reside in the center of the room. Regular bed designs are often chained to a wall or corner sadly. Imagine a glass home surrounded by green lush vegetation in the center of which a stunning bed will float allowing you to enjoy any image.
Graceful Serene and Stylish Floating Bed
by Susan Kennedy Design
Black and White Bedroom Design Featuring a Floating Bedroom
Modern Bedroom with a Chic Warm and Cozy Atmosphere
A floating bed is a superb piece of furniture. A relaxing place that can help you kick out your woes. It is a piece of art that shines and enhances any surroundings. Most essentially its aesthetic values are filling you with a sense of delight and calm.
Majestic Black and White Bedroom with Fascinating Floating Bed
by Imagine Living
Impeccable Magnetic Floating Bed For The Most Exclusive Bedrooms
Simple Compact Floating Bed Design in an Elegant State
Expansive Views Offered to a Floating Bed Positioned in the Center
by Bertram Architects
Sleek Modern Bedroom Design Enhanced by a Pendant Light and a Floating Bed
Perception Equals Reality
As with any piece of furniture these days, floating beds are coming in a variety of forms, colors, and textures, you can even have wooden accents or insertions of different materials to complement the design line in which it will be installed. This encourages homeowners to move towards floating beds.
Moreover in high-end designs, the interior designers go as far as manipulating every perspective in the room through a smart design and savvy interiors, here the floating beds are making a statement for their selves. In a small studio apartment with limited space floating beds can be even more effective as they will enhance the feeling of space through a fresh and light impression.
Floating Bed Design Protected by a Sloping Roof
by Stanislav Ermolenko
Serenity and Tranquility in a Bedroom With Expansive Views and a Floating Bed
by Abramson Teiger Architects
Huge Queen Size Floating Bed in an Ergonomic Bedroom Design by FORMA Design
Floating beds will definitely turn up the style quotient of your bedroom by several notches. They give your home an unconventional and innovative vibe by blending in sleek modern minimalism with a warm and inviting atmosphere managing to achieve the perfect aesthetic values, just ensure your mattress is ready!
High-End Minimalist Floating Bed Design with Wall Support
A floating geometric design can be enhanced with the proper lighting.
A neutral color palette can bring tranquility; calm and peace.
via modernambition.co
Playful Bedroom Design With a Read Floating Bed
by HILIT
Your wooden cabin can receive a floating bed just as easily as your modern flat; proper craftsmanship and woodworking describe a modern-rustic look. The added floating nightstands emphasize practicality to one`s advantage.
Bold Modern Floating Bed in a Soothing Setting
Stylish Floating Bed Enhanced by the Surroundings
by David Gray Architects
Minimalist Open Bedroom Design
by Diego Bortolato
A child floating bed can look exquisite whilst emphasizing the feeling of space and being entirely safe with an added safe rail.
A beautiful season to start crafting and gardening is upon us and slowly, step by step along with nature we start shaping garden projects and simple diy projects alike, infusing our creative mindset into our cozy household. A short collection of up-cycled furniture ideas for your home and garden has been curated for this marvelous spring season, the gallery includes simple crafts that mainly present re-purposing crafts, these now wear color and vegetation, greatly emphasizing their new position.
If in your spring cleaning process you decide to make a furniture change the article below is here to help, showcasing how a simple element can be re-purposed in your garden or home in a matter of minutes, conserving energy. A refreshing change indoors can become a refreshing change outdoors, old windows, doors and headboards can become swing sets, pergola ensembles or garden sheds, items that could enhance your household, provide additional storage or comfort.
Cast a glance at the ideas showcased below and surge inspiration, we would love to hear your feedback in the comment section below.
Upcycled Furniture Ideas for Your Garden and Home
#1 Up-cycle a headboard into a beautiful outdoor couch
In a matter of minutes with and old door or headboard and wood from a pallet you can create a new patio furniture piece of great beauty.
#2 use an old dresser on your porch to adorn greenery
Feature greenery, vegetation, the most beautiful decor piece on your patio from an old piece of furniture. You can display the address as well along a welcome message.
#3 Build a small shed out of old doors and store your tools
Three four old doors can become a new small shed to nestle your garden tools; an old phone cabinet can also do the job well but needless to say that they`re not easy to obtain. Get creative with simple elements.
#9 paint an old chair and transform it into a new flower garden ensemble
A chair treated like a raised flower bed can boost color and greenery a great deal; simple and fast to realize this craft will surely change the image of your garden or patio.
#10 Re-purpose an old kitchen cabinet into a potting station
Your potting station should be properly organized for the sake of your flowers. Repurpose an old furniture piece, paint it in vivid color and make the process easier and more interesting.
#11 two old doors can become a beautiful arbor-pergola ensemble
Two doors can sustain a few slabs; these will encourage vines to climb over the ensemble and beautify your garden.
#12 use your old sink to shape a small bird bath
The sound of the little animals can really animate your garden. A sink can be their new bath.
In the bedroom we can freely sigh at the end of the day, glancing at the ceiling, slowly closing our eyes; undoubtedly one of the most extraordinary feeling, certainly one of the most overlooked ones that we really appreciate. In the bedroom we recharge our batterie and in the bedroom we seek comfort and calm, regardless of its size, we know its our sacred refugee, a place in which none will bother, none will disturb.
Today we address once again the issue of small spaces, small bedrooms in particular. We have collected 15 ingeniously smart and functionable bedroom space saving solutions able to complement and emphasize the feeling of space in our tiny bedrooms. Along with these crafts and a few smart tips and tricks on space saving solutions you can refresh the atmosphere in your bedroom in no time. Cast a glance at the gallery below and craft away !
We would love to hear your opinion on the subject in the comment section below; we think smart spaces are cozier and warmer, they describe a more personal intimate space where the individual can really make a change by infusing his own style into the spatiality, what do you think?
No matter how much you try, you will never achieve that level of home organization where you won't need any extra storage space. There will always be something else that you need to stow away but you don't have the appropriate storage solution. However, you can work on improving the storage and organization potential of your home by constantly adding new and more practical solutions.
Shelves are one of the best ways to add more storage to your home without much hassle, but I am not talking about shelving units that you can buy at any furniture store. No, what I want to show you is a way to make your own shelves that can also become a part of your home decor.
The shelves that you use for storage in your home don't have to be a purely practical piece of furniture. On the contrary, you can use the shelves as parts of your decor in a couple of ways. The easiest way to jazz up your home decor is by displaying decorative items on your shelves. But that's not enough. We are going to show you some rustic shelves that are a decorative piece by themselves. Oh, did I mention that you can DIY them? The rustic shelves that we are going to show you in this collection are actual DIY projects that you can make by yourself.
We've made sure to include tutorials that are going to guide you with step by step instructions. This way you will have no issues building these rustic shelves for your home. At first, working with wood might seem like a really difficult task but the projects that we've included really only require simple operations. There is nothing complicate at all so you have nothing to worry about!
DIY Rustic Shelves Ideas
1. Use reclaimed wood to create these classic farmhouse flair shelving unit
The DIY Rustic Shelve collection above sure is something else but we would love o hear your thoughts first hand ! How are you using wooden boards and rustic shelves in your home ? Leave your valuable feedback in the comment section below !
The garden is finally starting to get the attention deserved with summer just around the corner and spring in all its splendors these days. DIY projects in this area are starting to feed the imagination of many gardeners, inspiring to recycle and up-cycle creatively in their own backyard landscape in a glance. Simple items can now be put to good use through inexpensive garden projects realized with clay pots or wine bottles, maybe even your own handmade pottery items sculped from modeling clay. You can create entire fairy tale setups with broken pots or a brand new miniature pond through multiple up-cycled items. All you need is ambition.
Collect the graphic items that you would like to transform, in this case clay pots and seek the suitable project for your small garden, from that to reality only time stands. Below you will find enough details for each idea through the link to materialize them happily with your loved ones.
Simple and Inexpensive Garden Projects
1. Transform a Cracked Clay Pot Into a Gnome House
We found the ideas showcased above insanely creative and purely joyful especially if realized with your little loved ones around you. These up-cycling ideas can easily become highly powerful and educative life lessons on responsibility and sustainability. We would love to hear your opinion on these garden projects realized with clay pots in the comment section below.


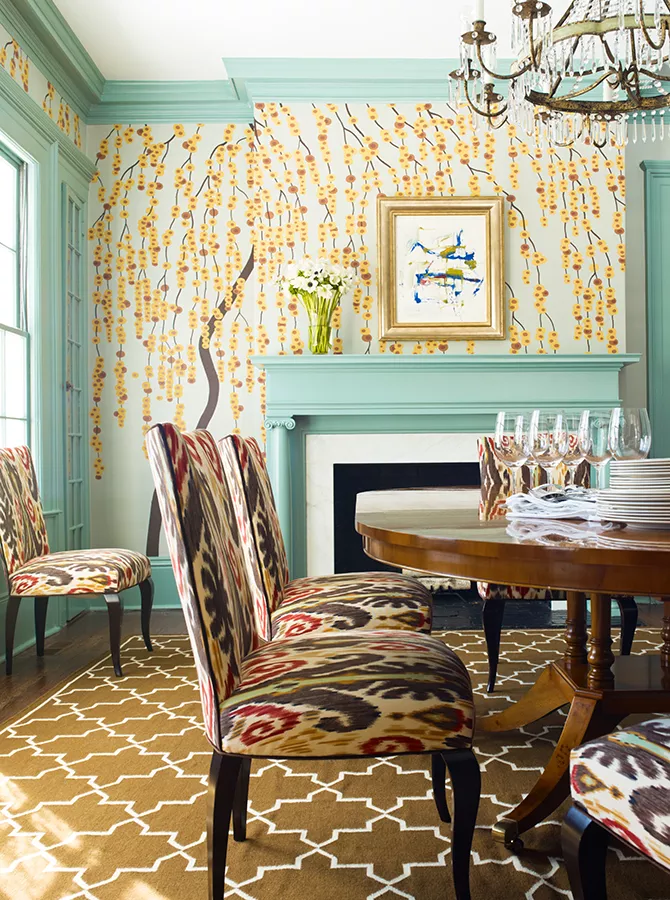

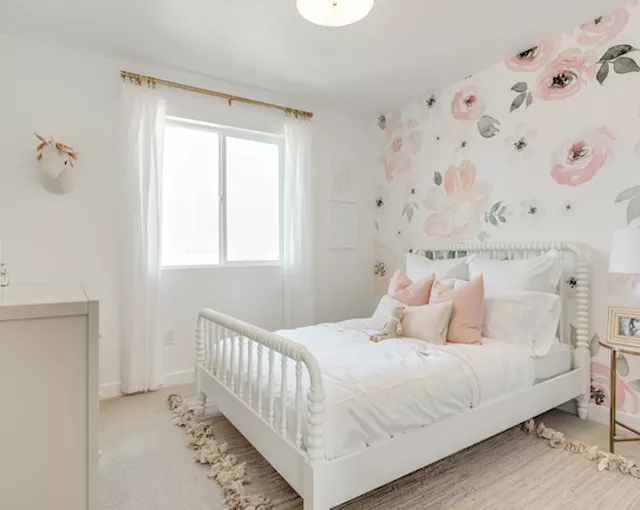
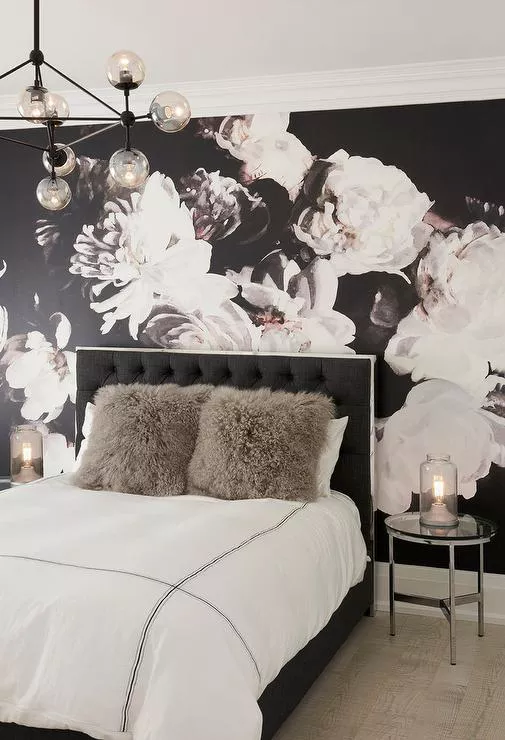

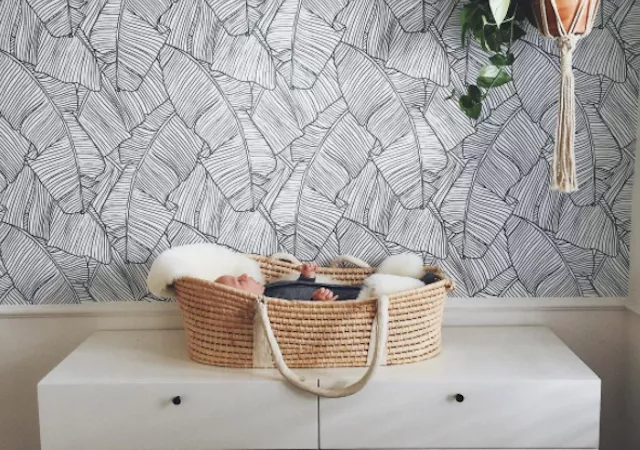
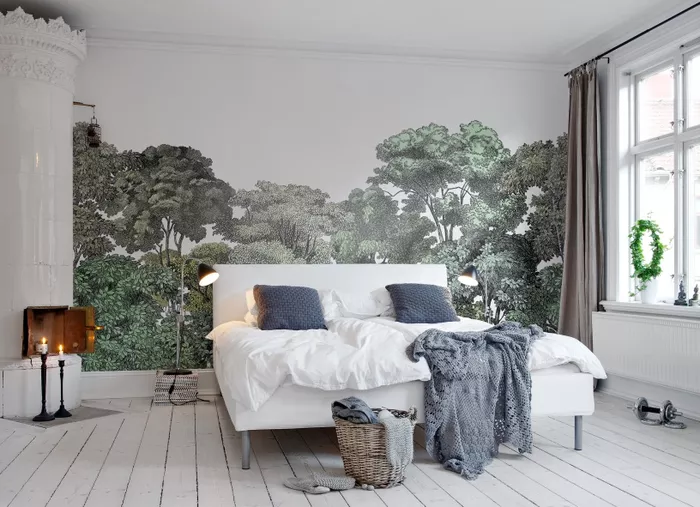
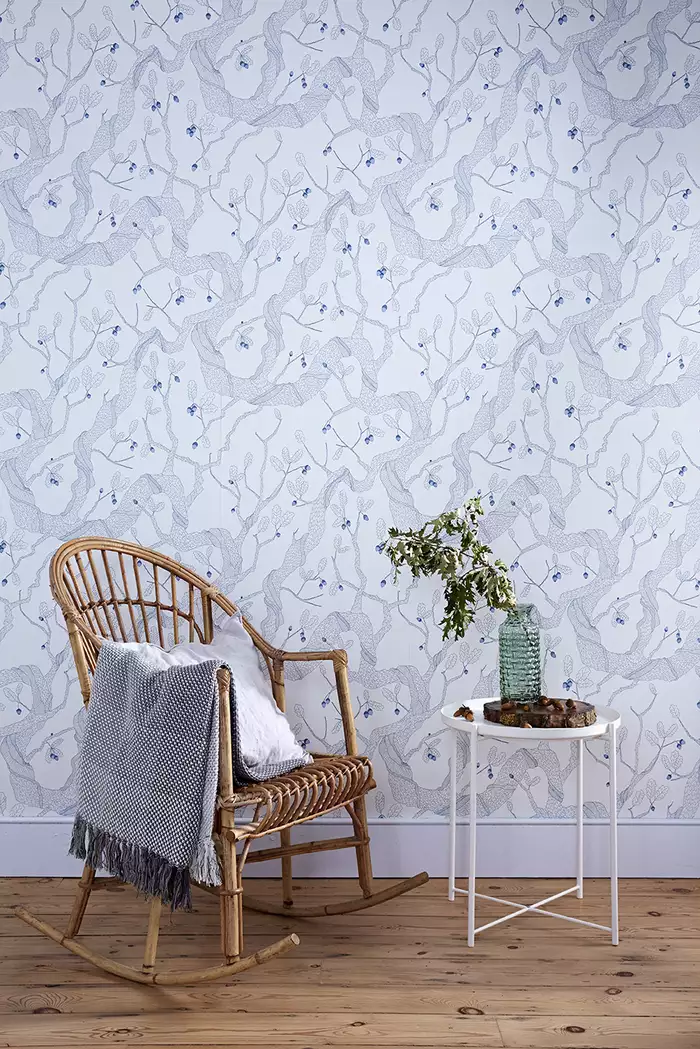

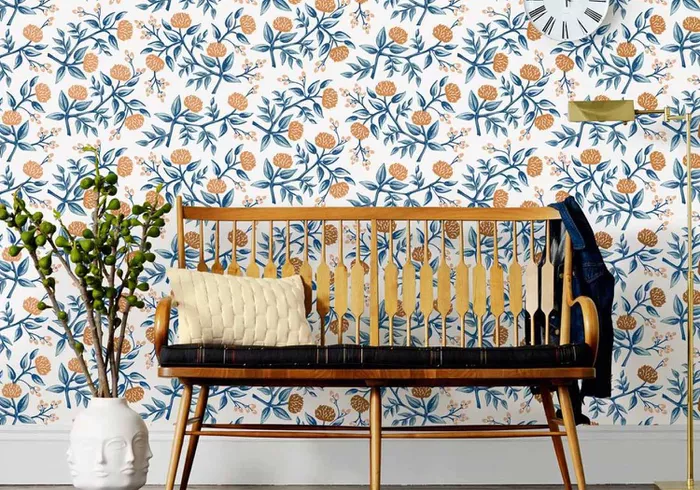

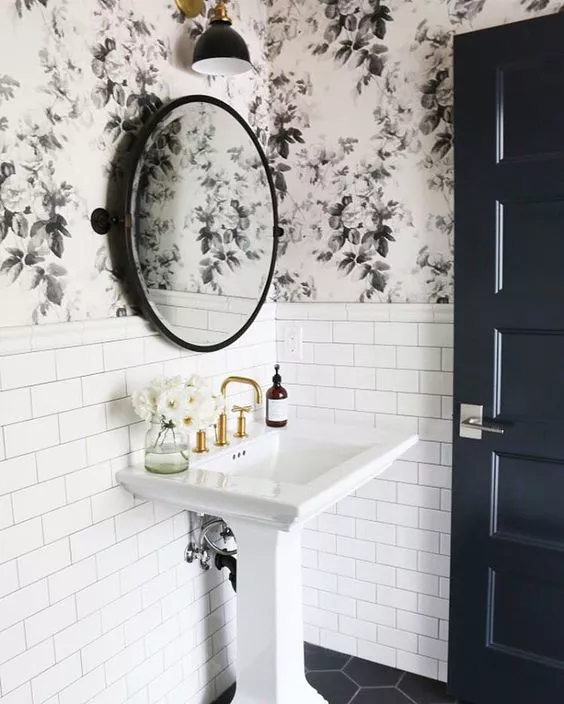


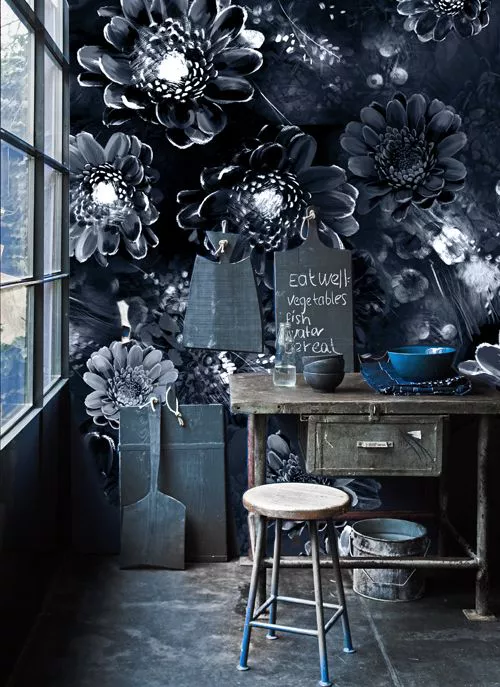
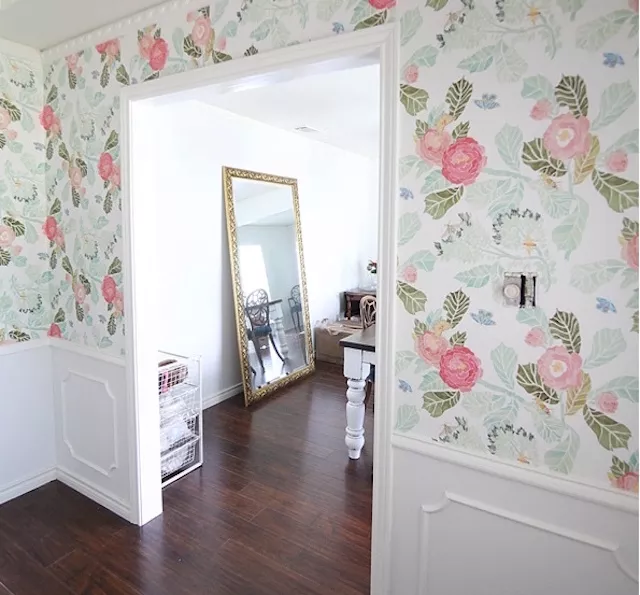


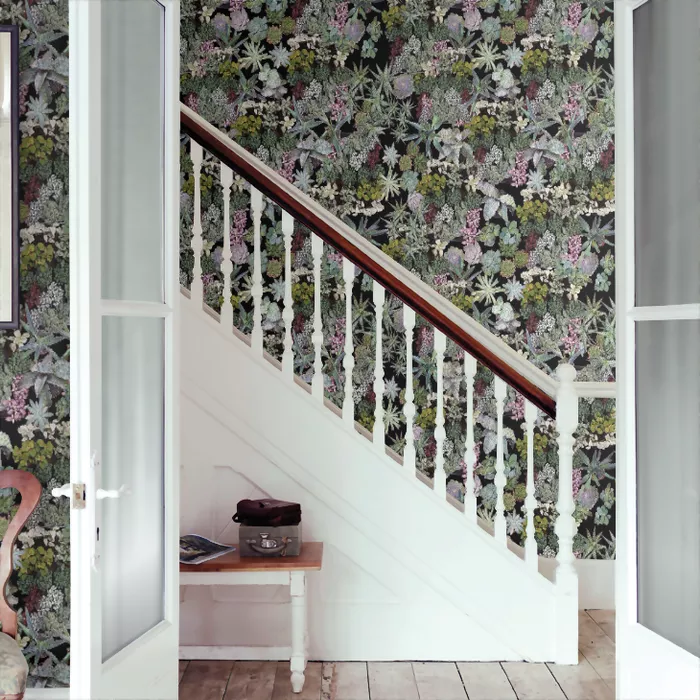


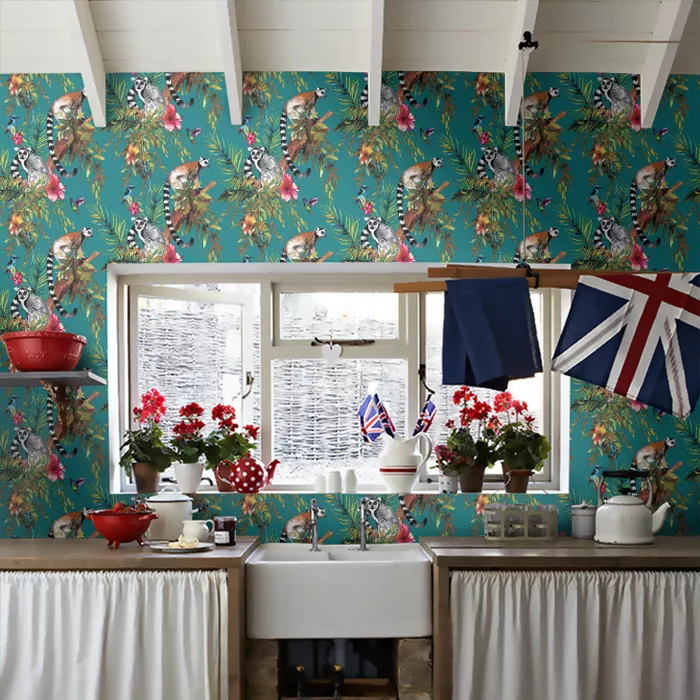


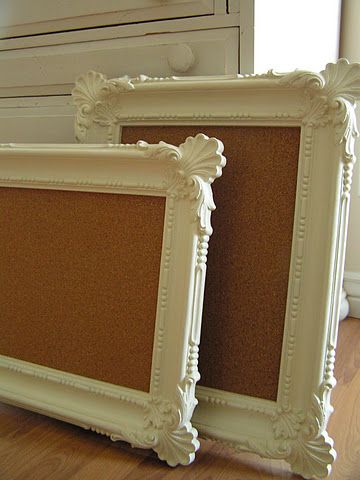
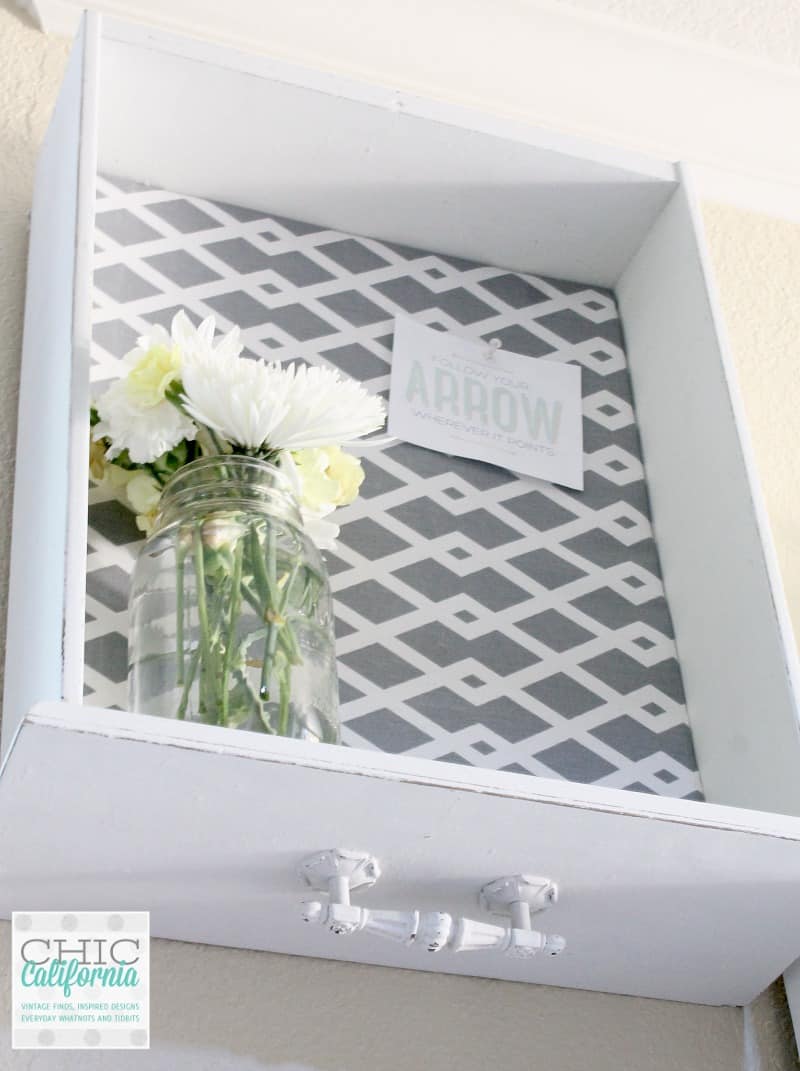
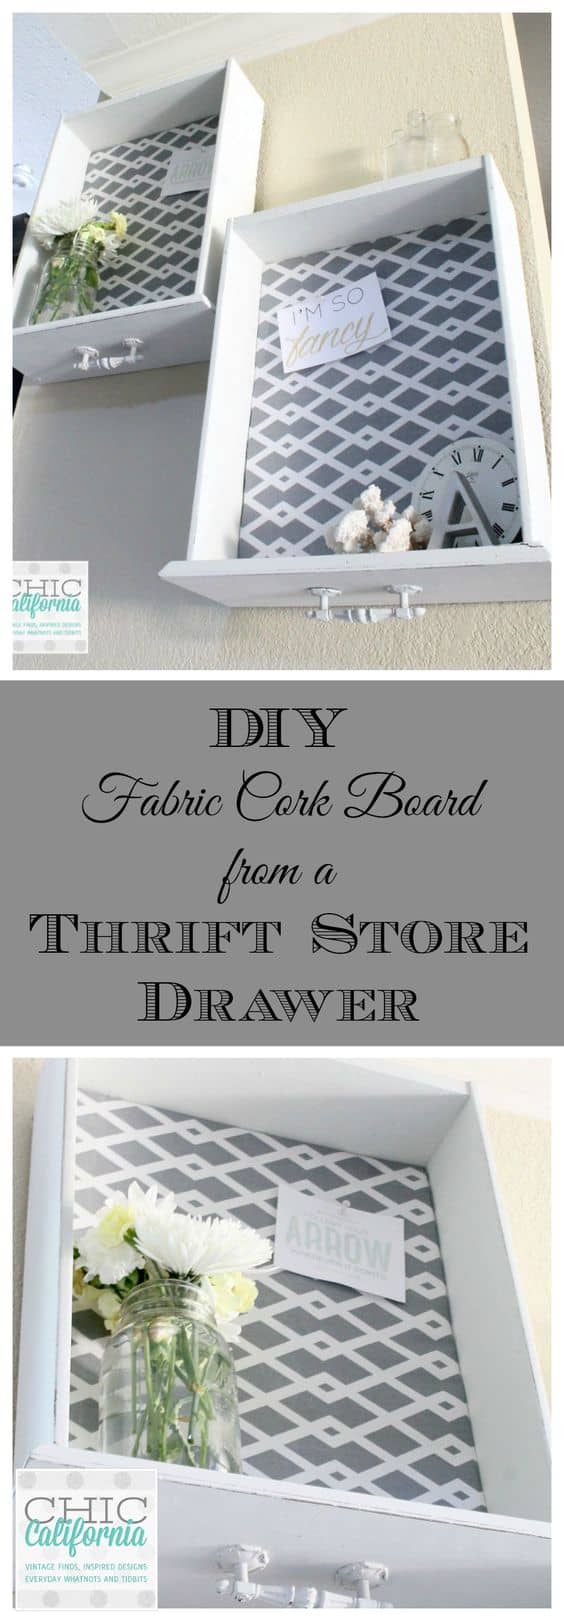
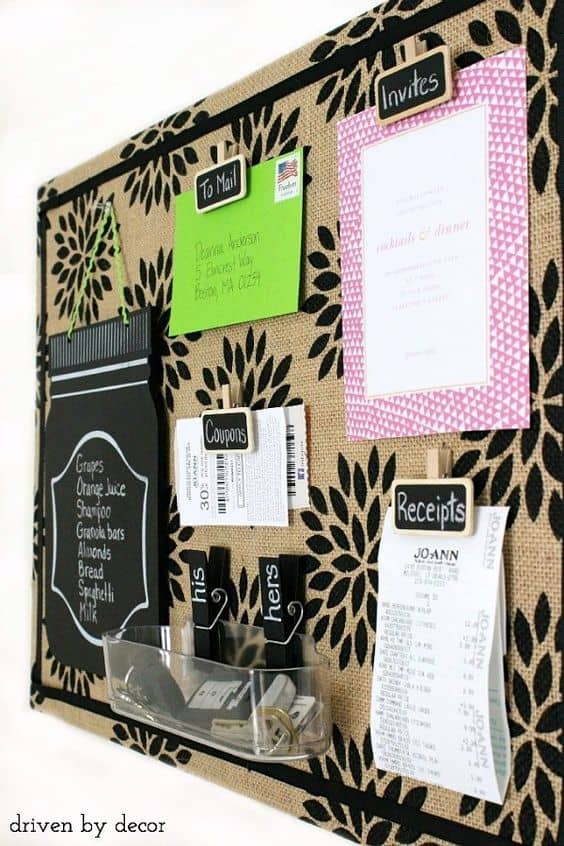
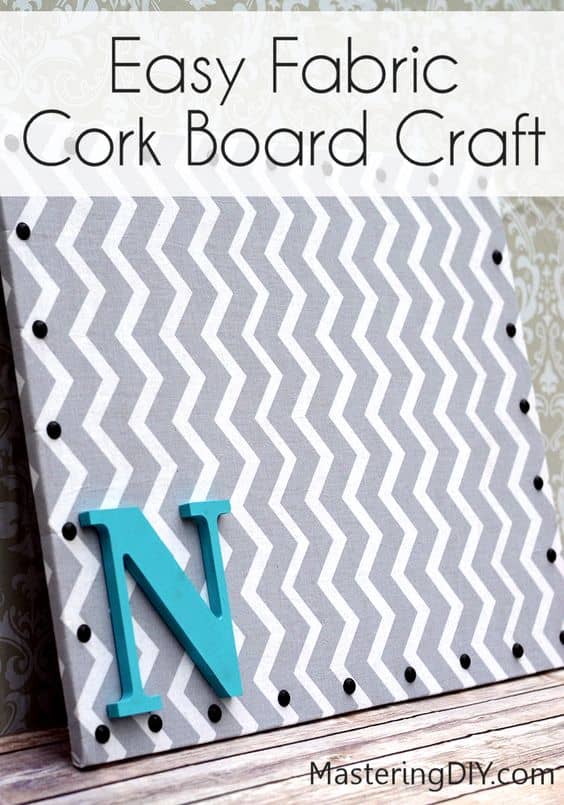
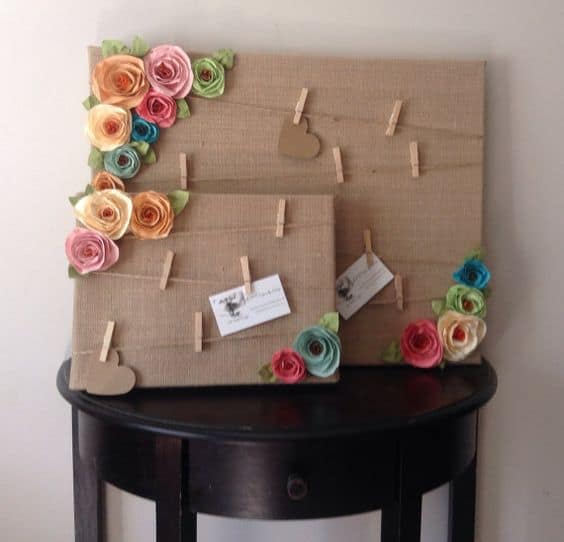
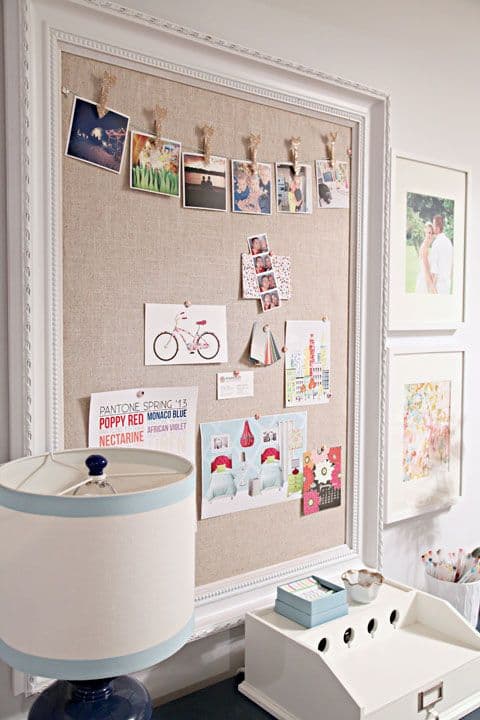
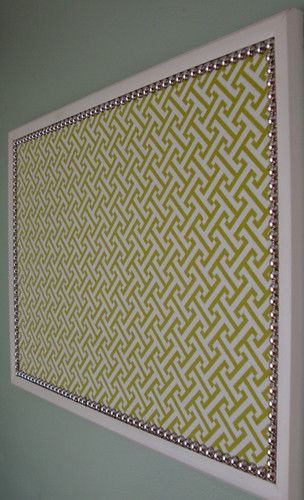
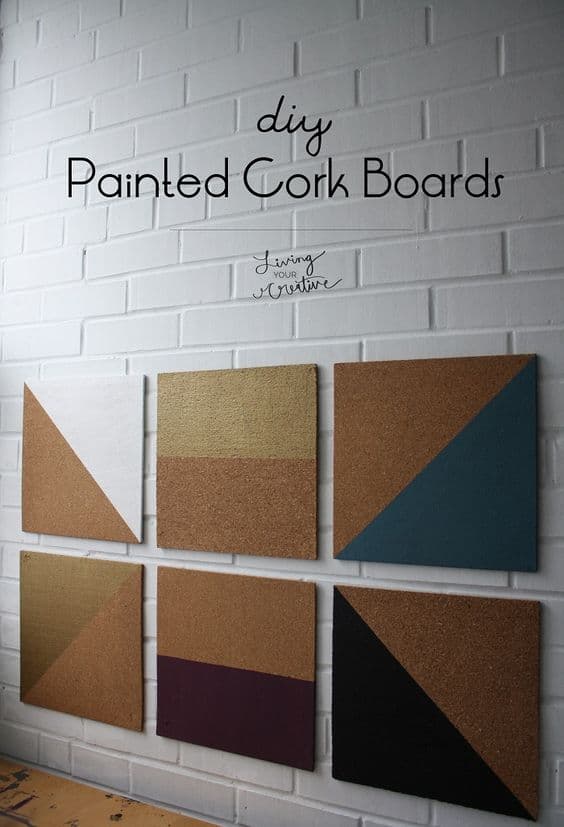
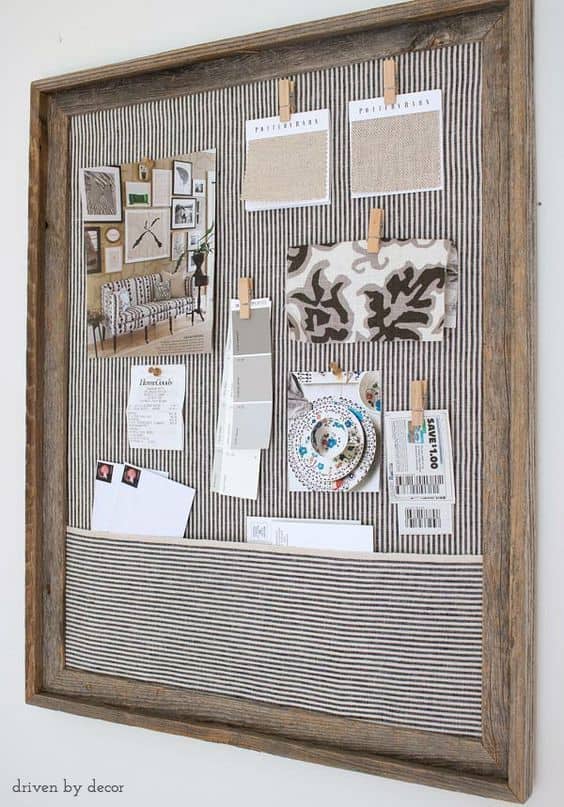


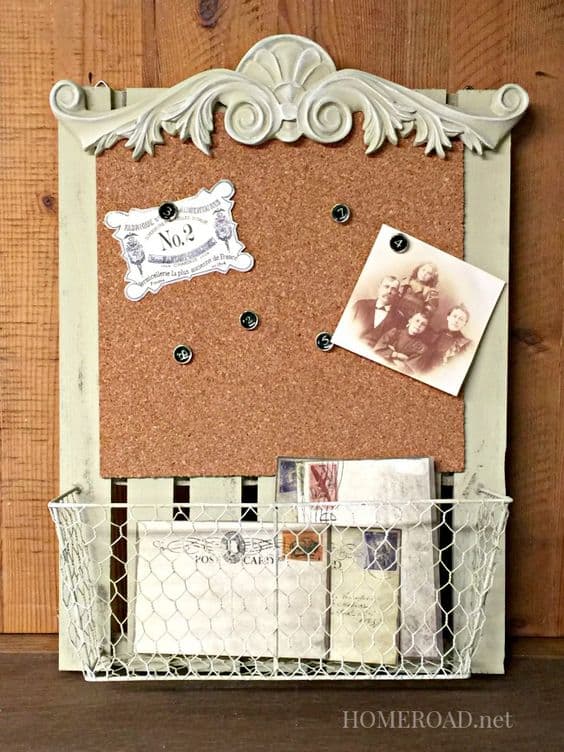


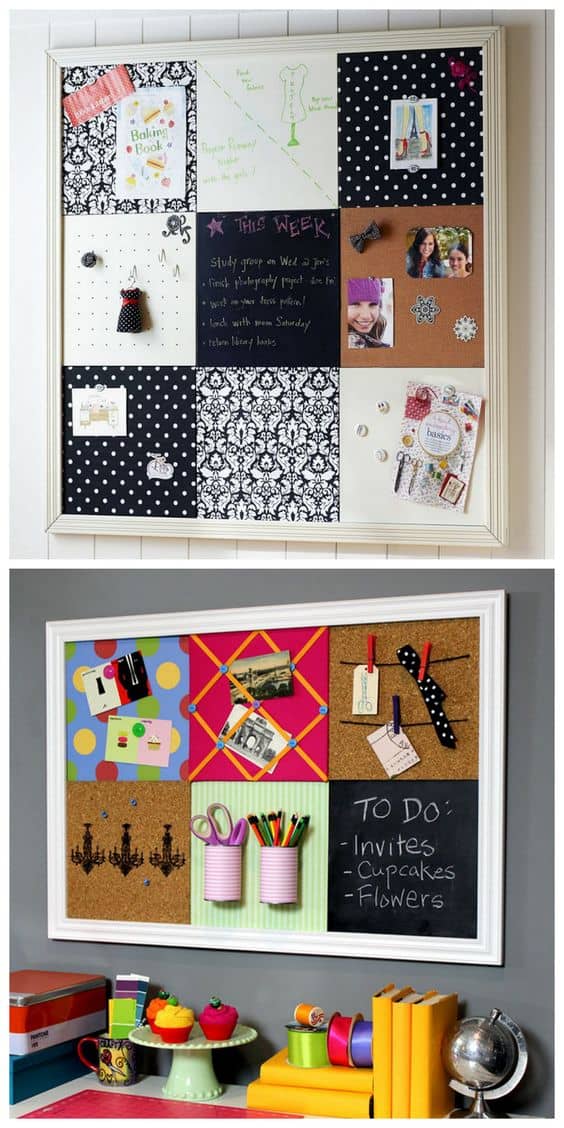
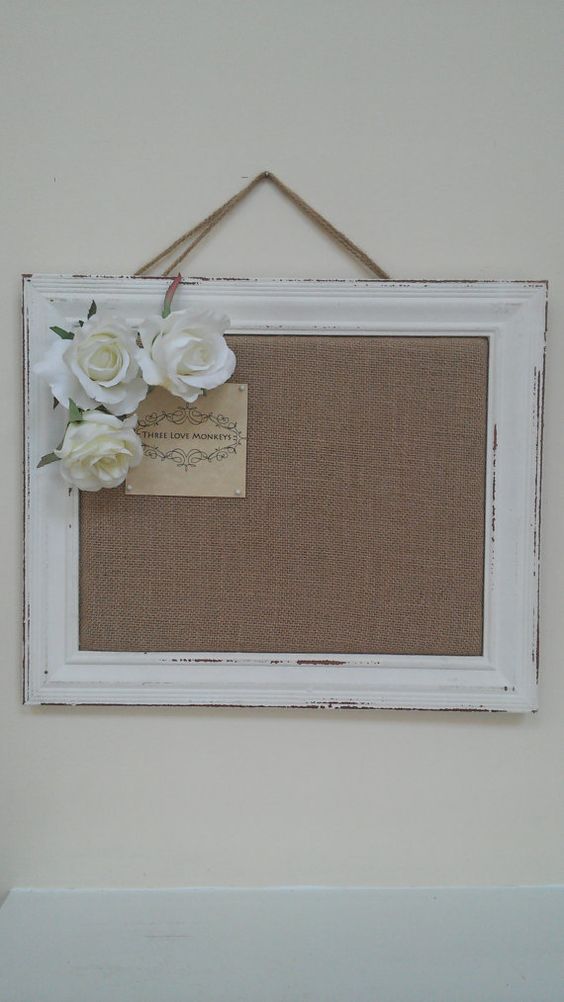
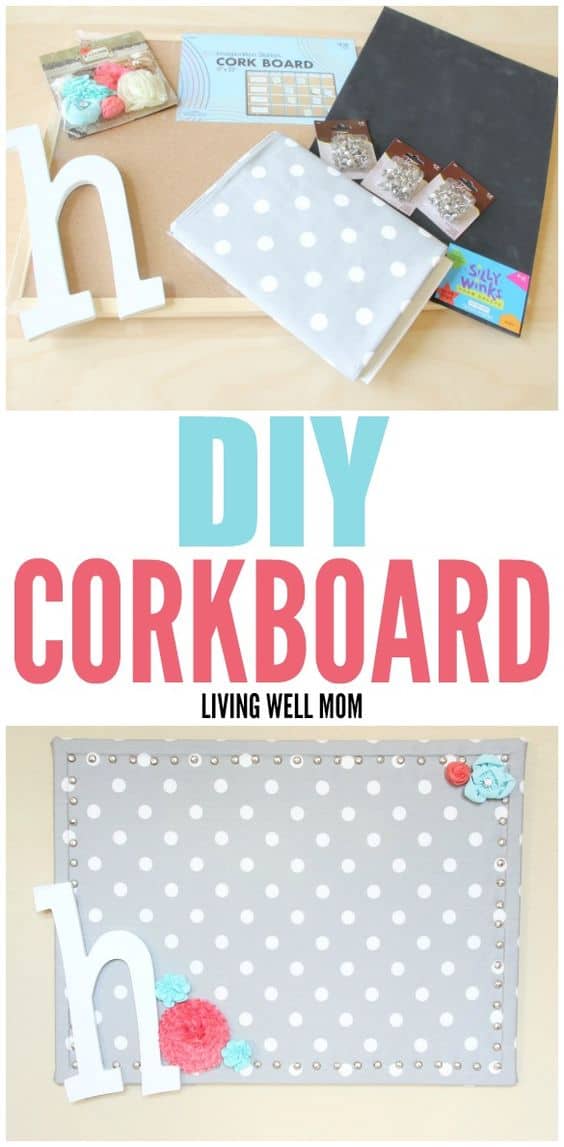
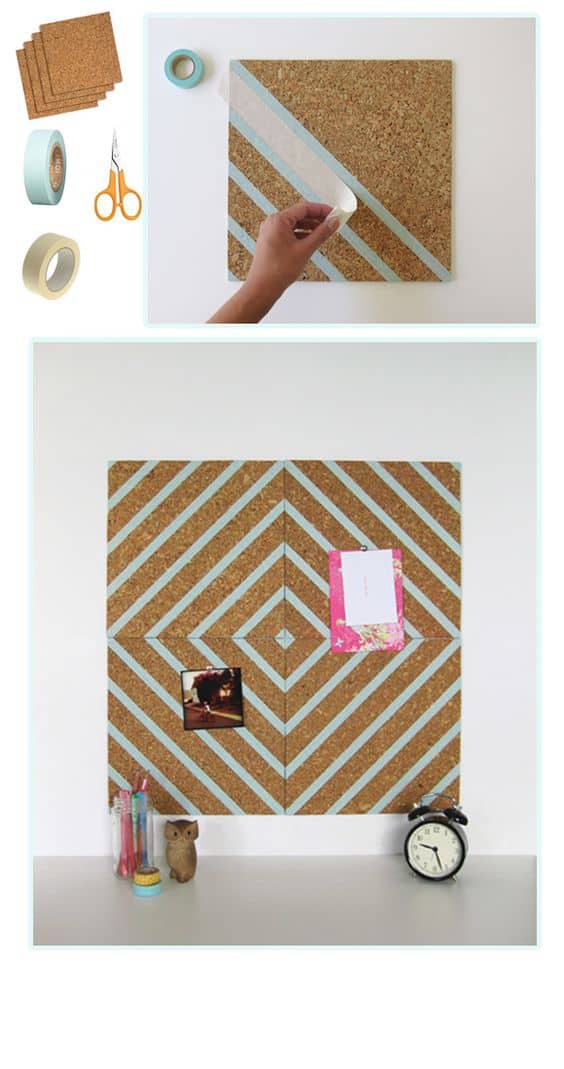


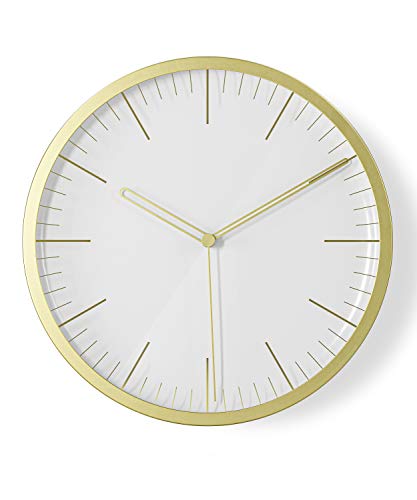
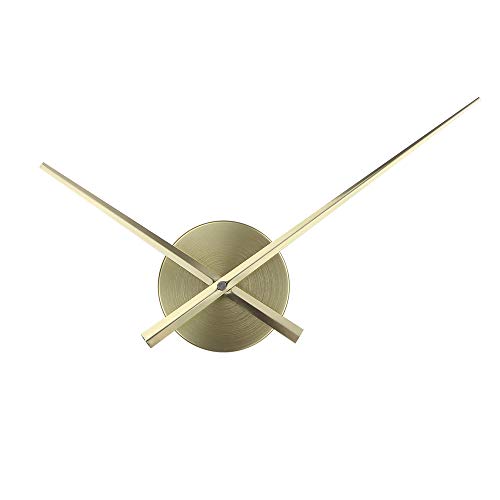


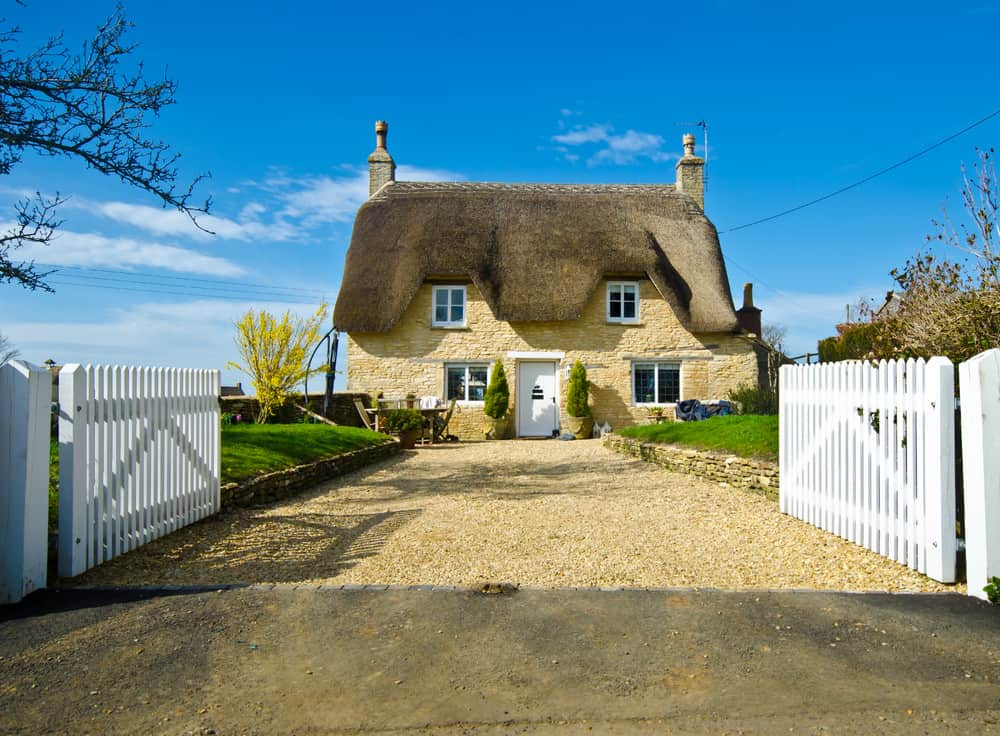


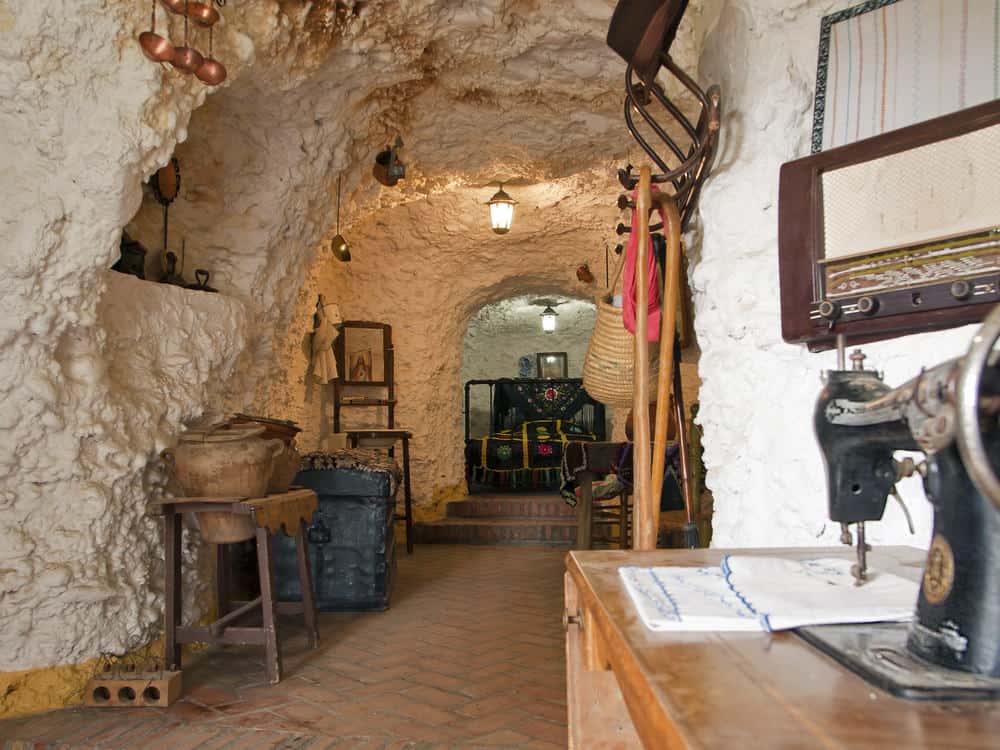


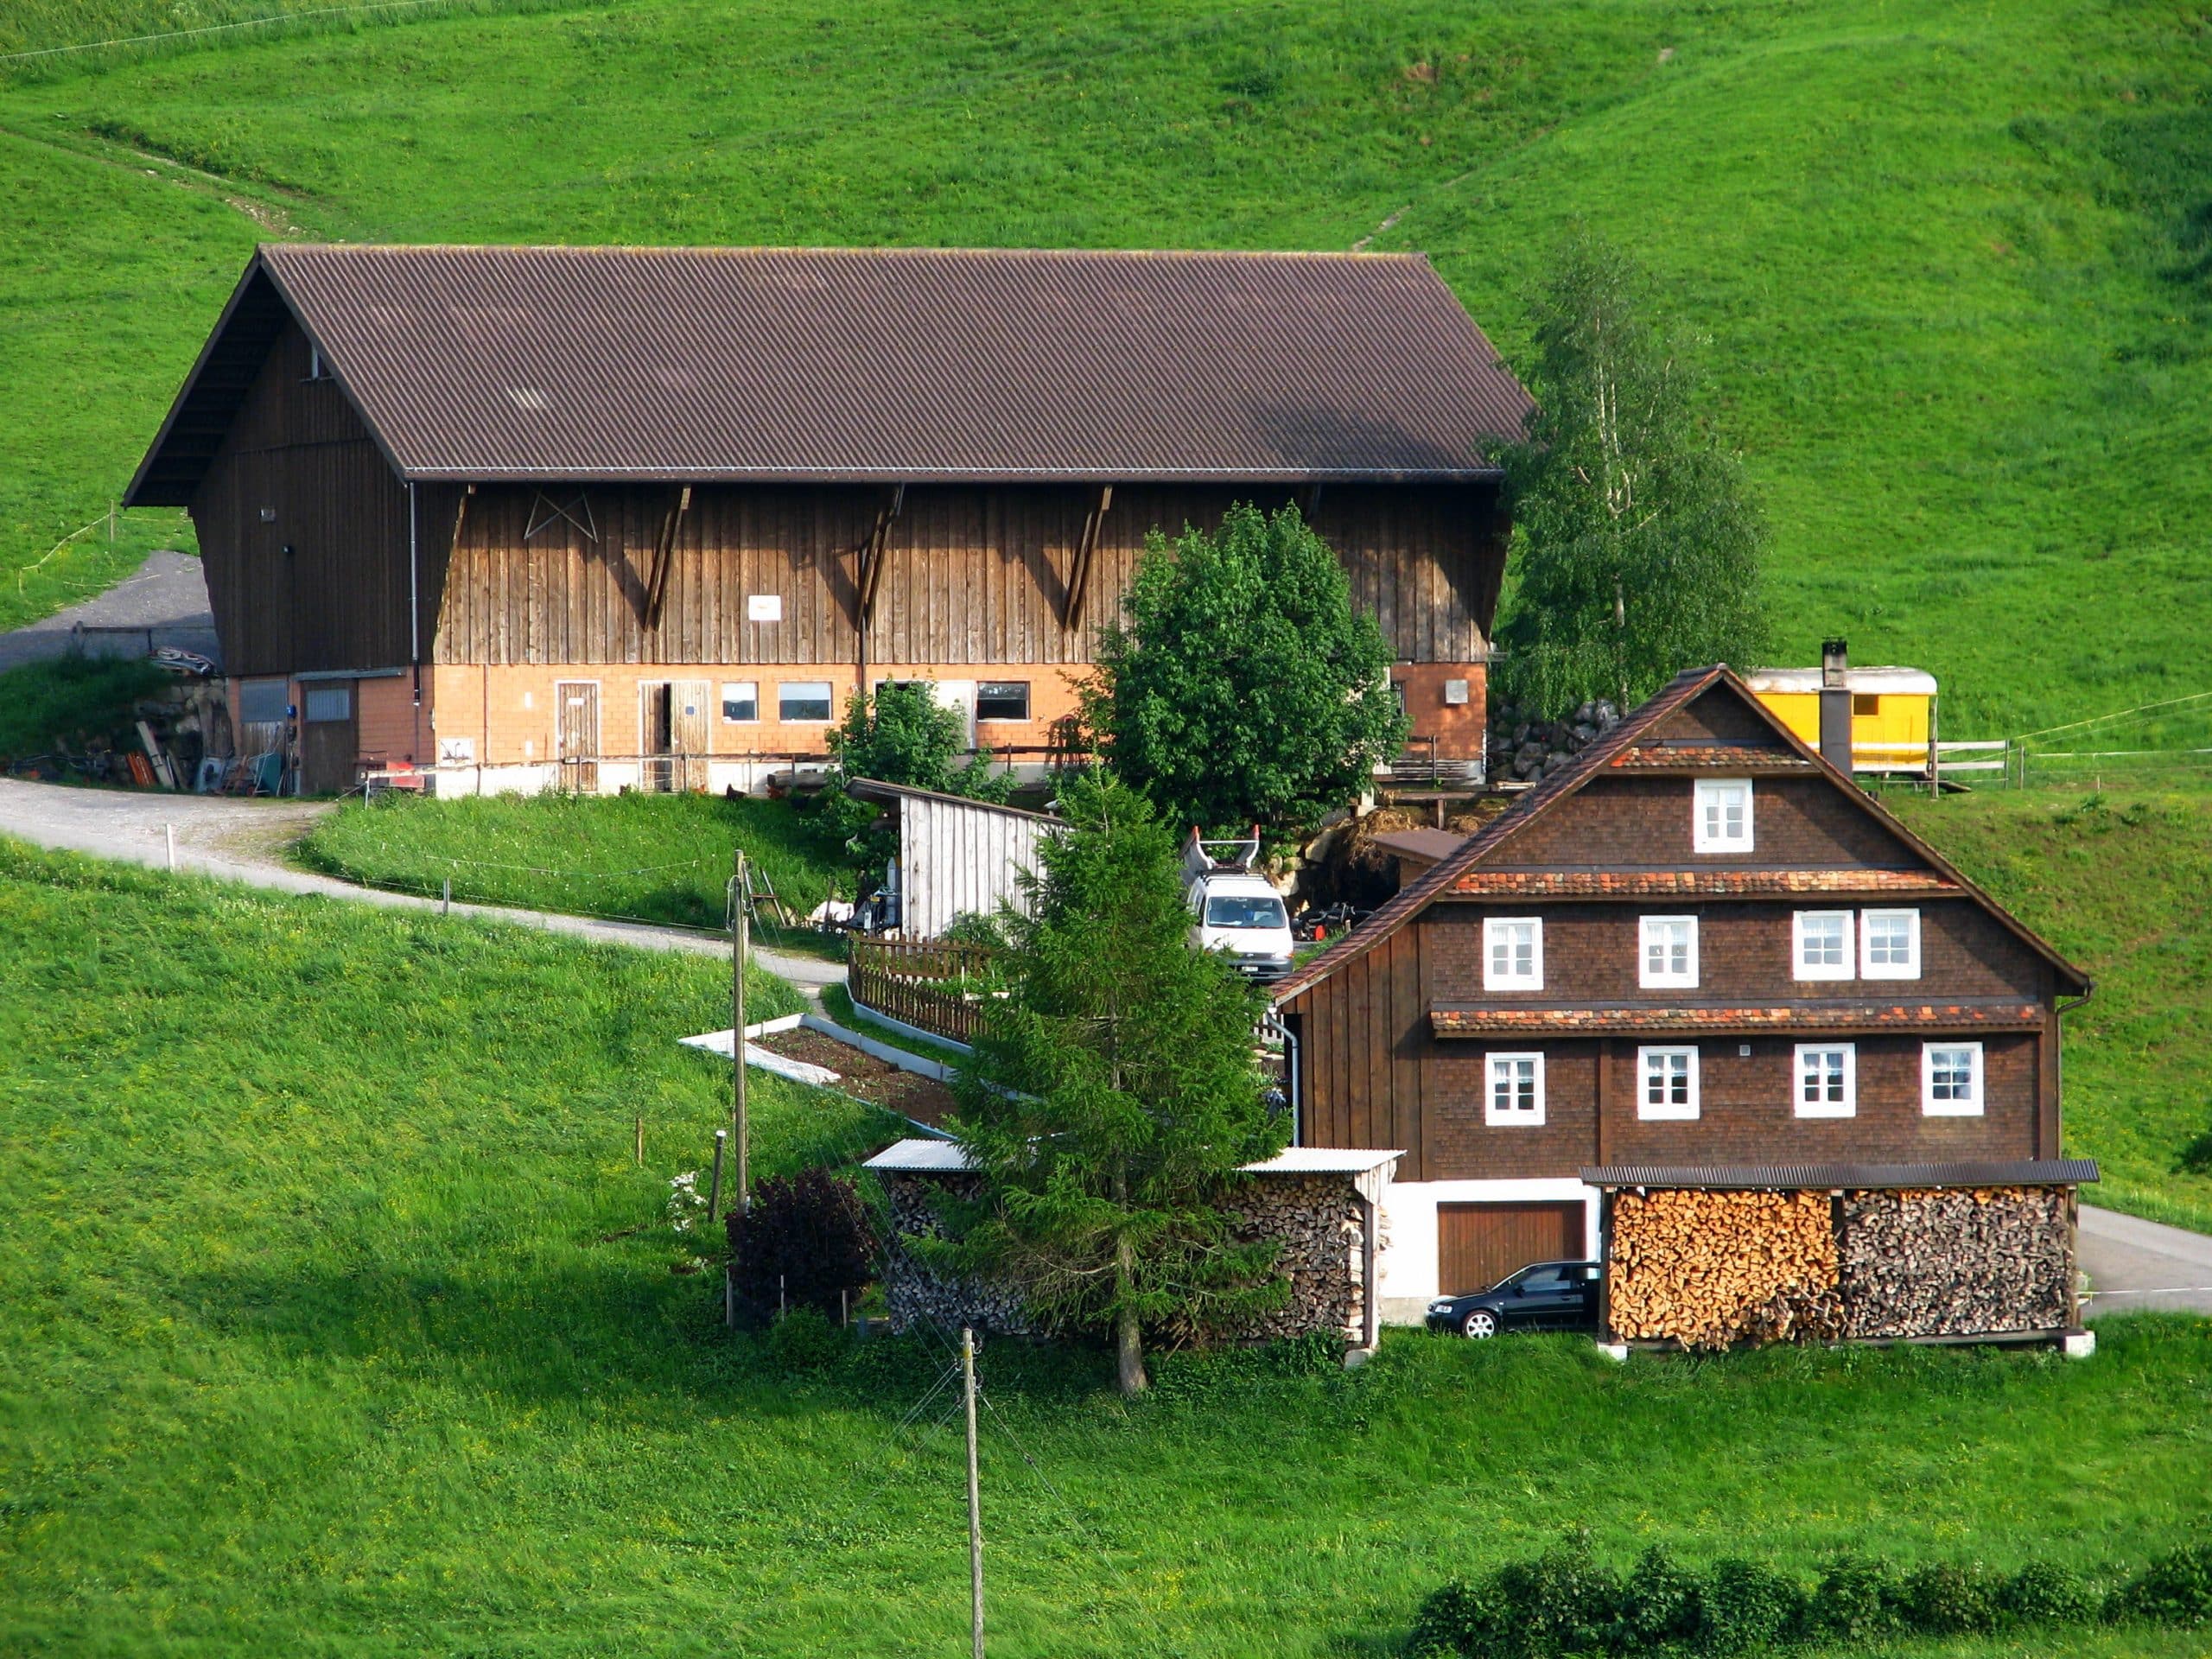


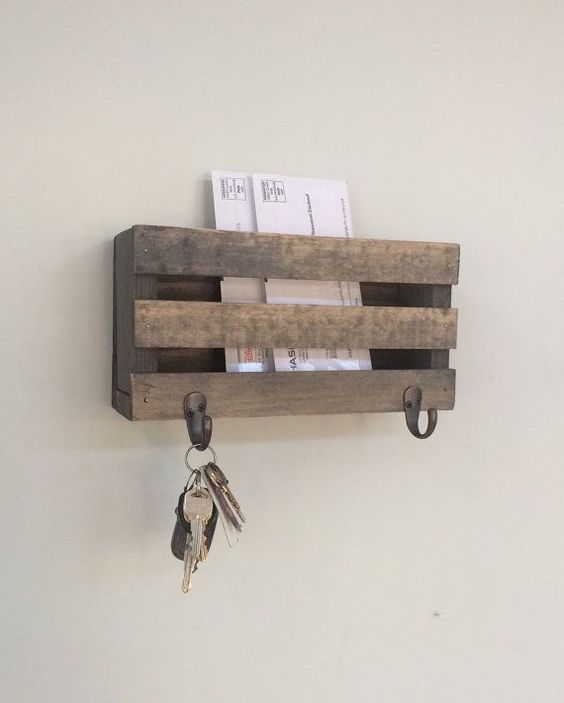


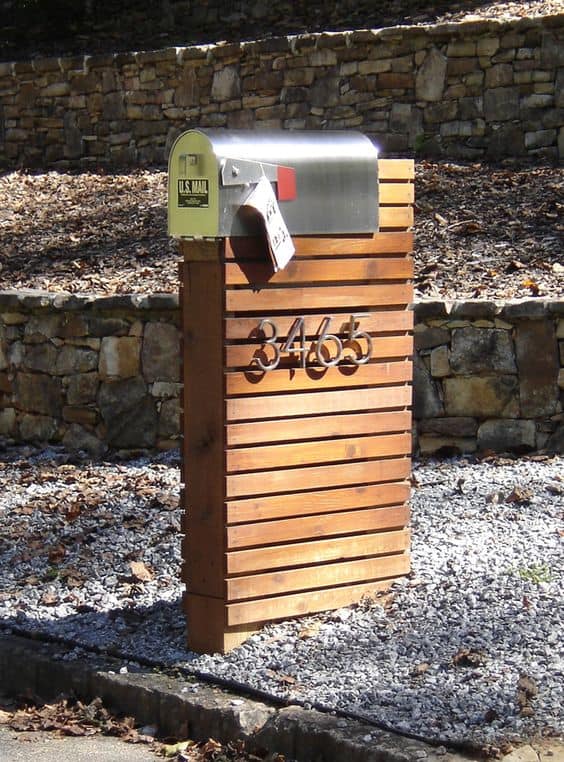

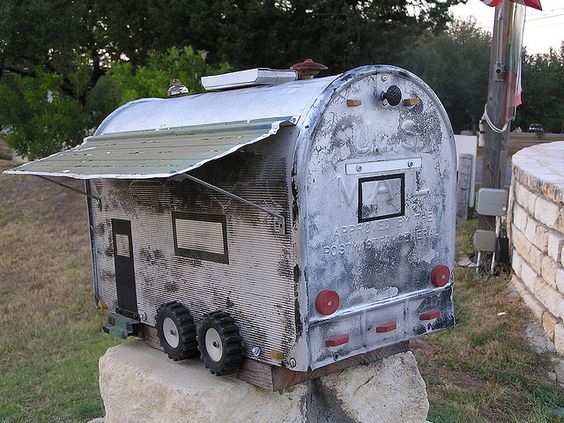

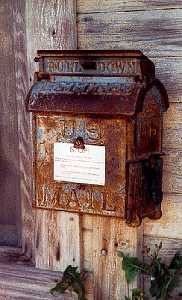


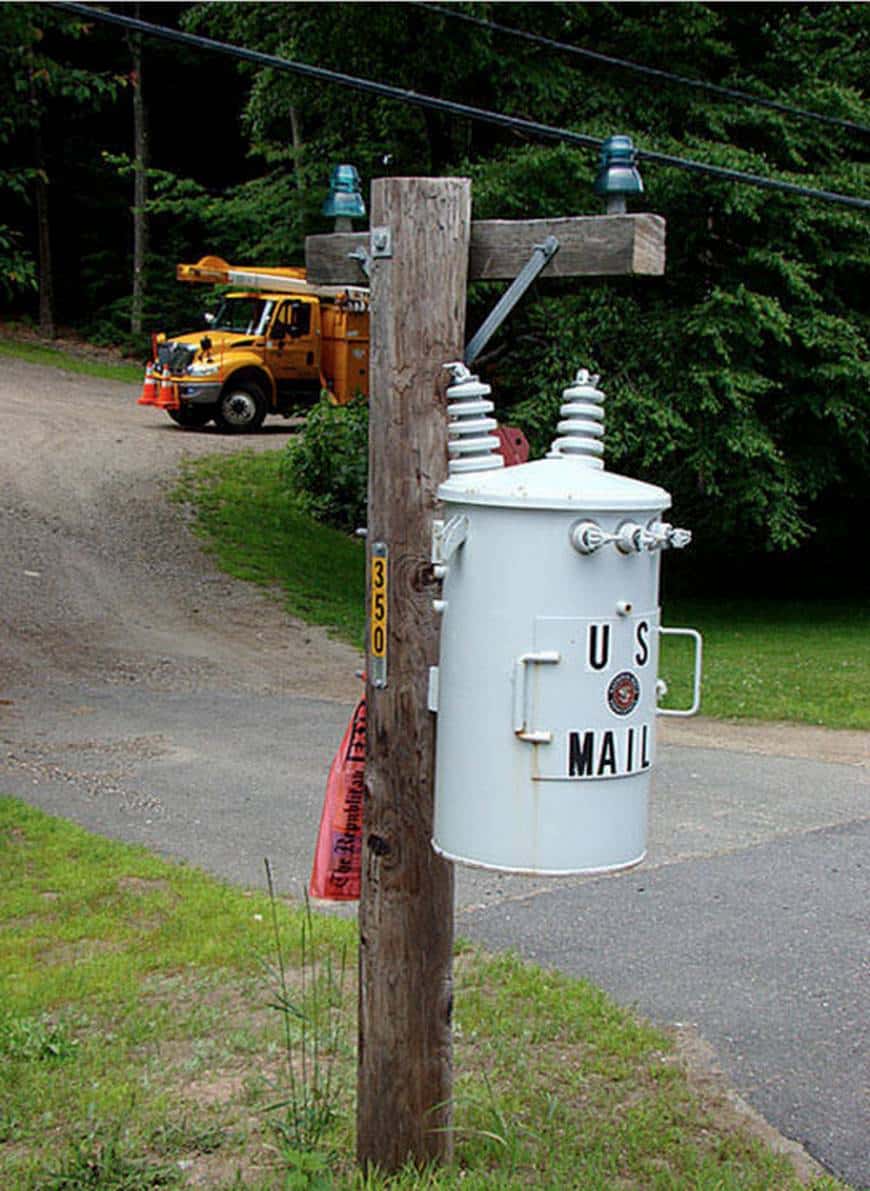
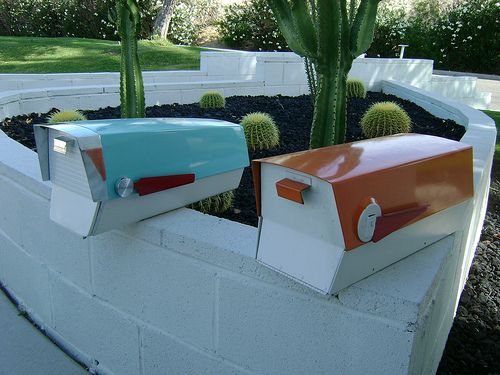


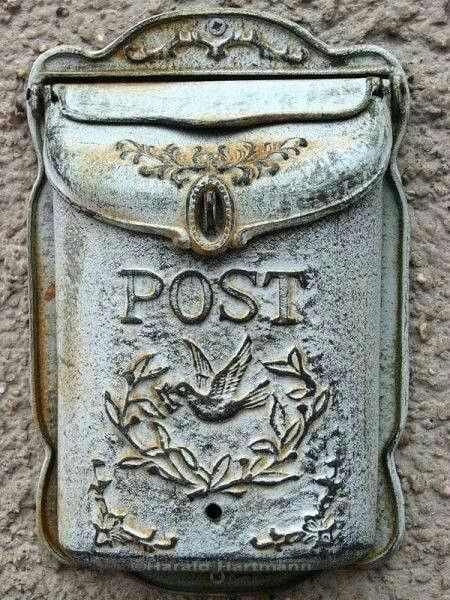

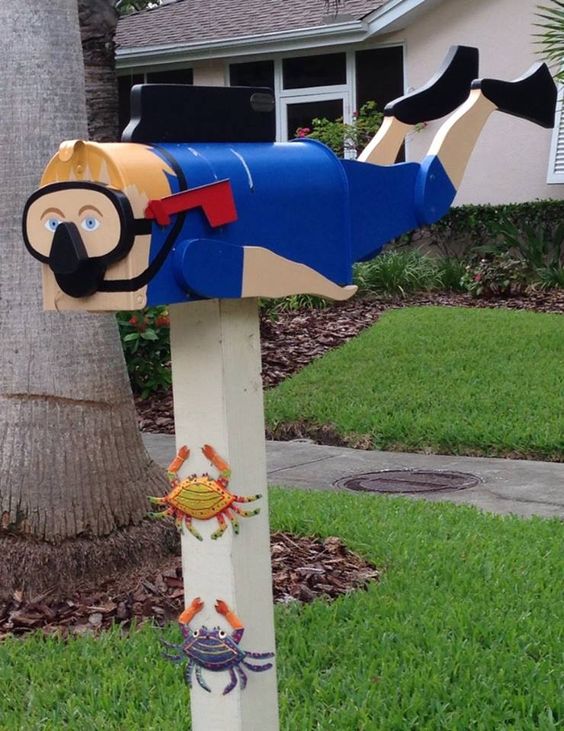

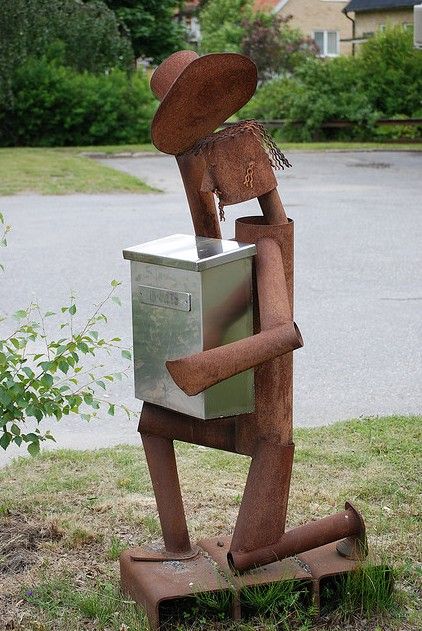

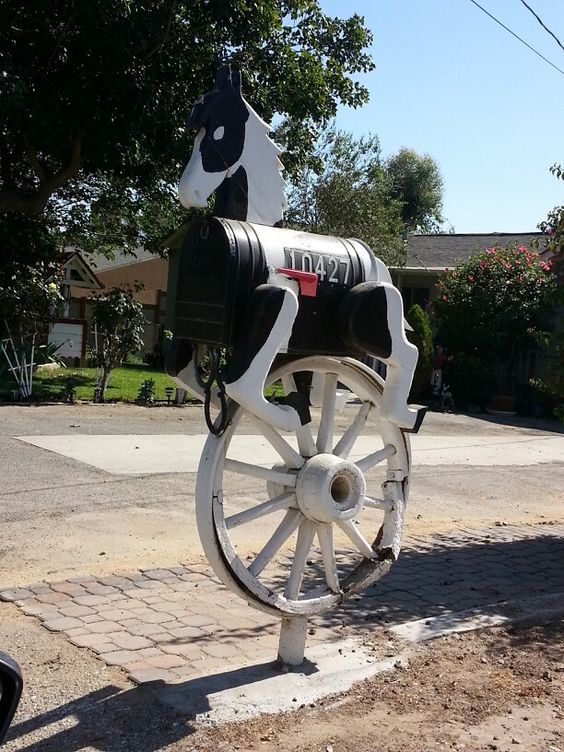


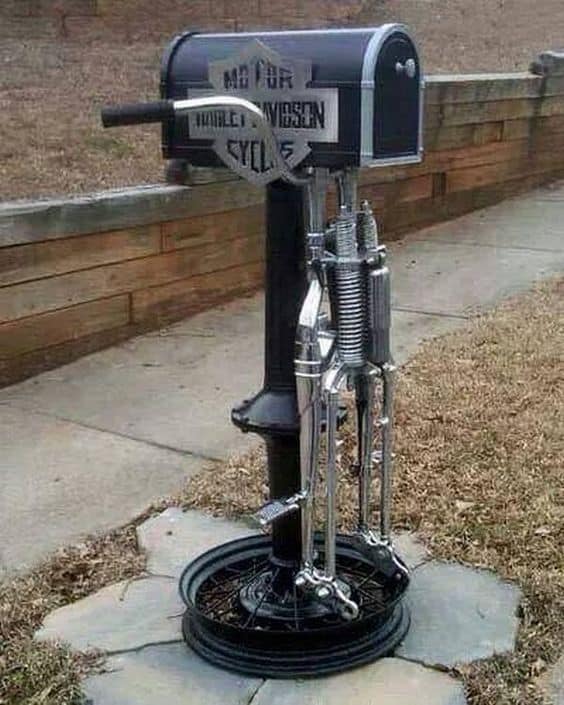


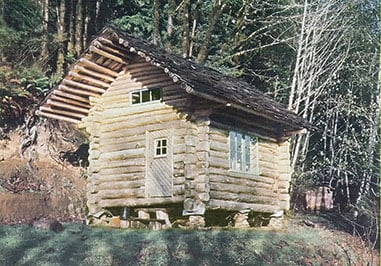

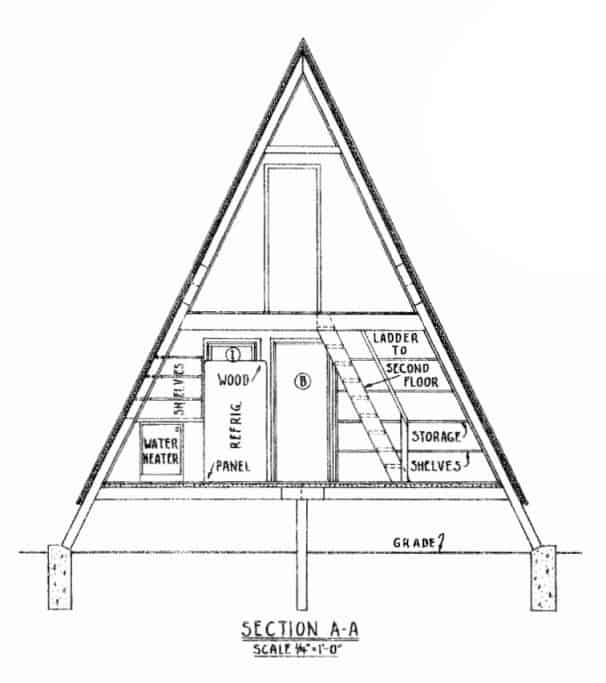
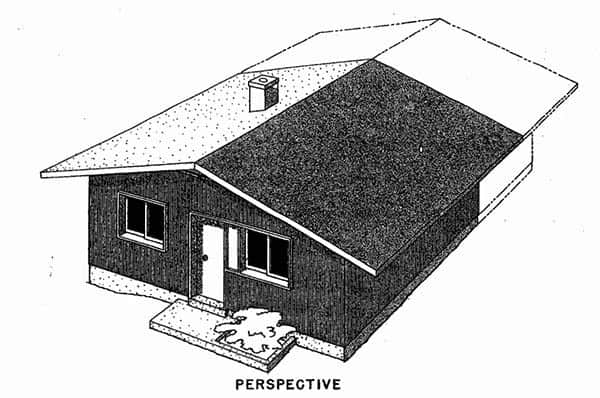
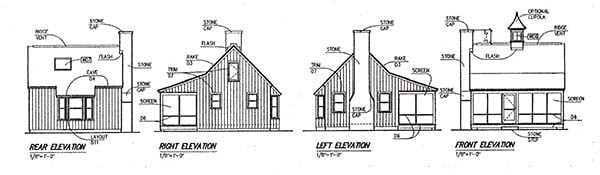


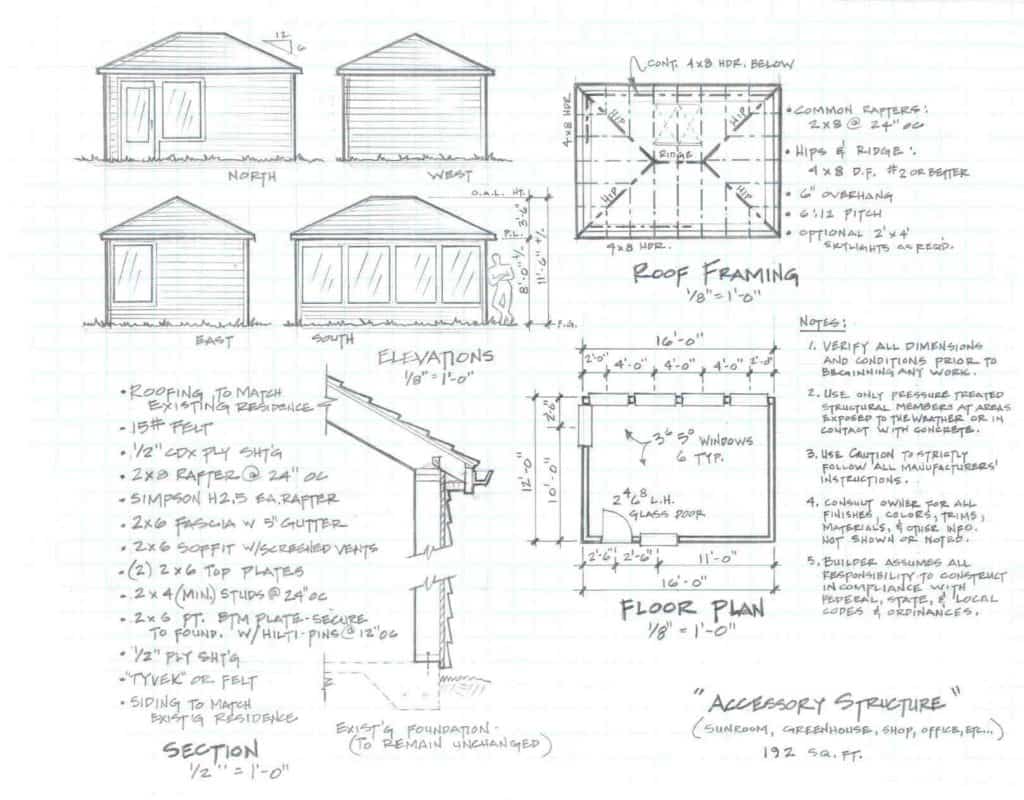

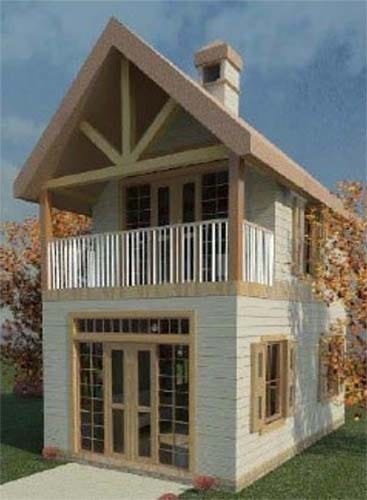

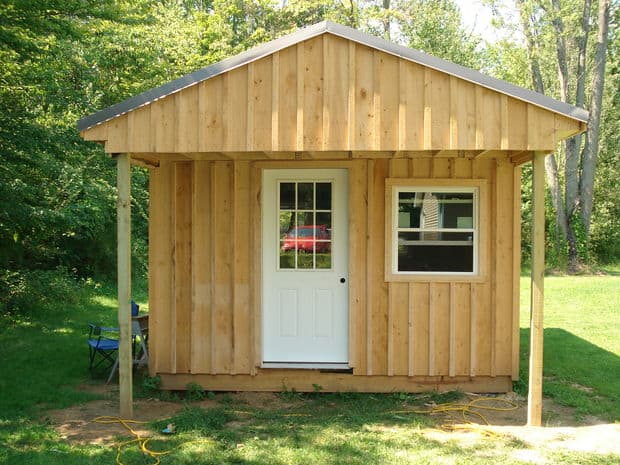
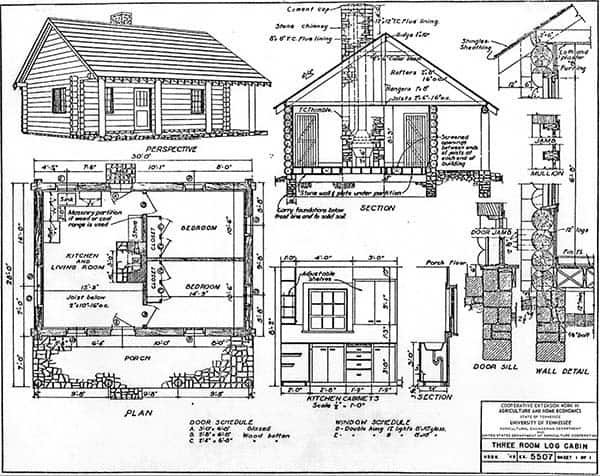


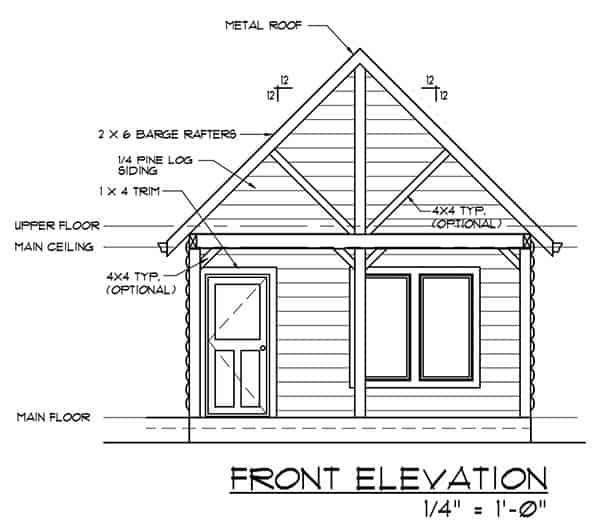
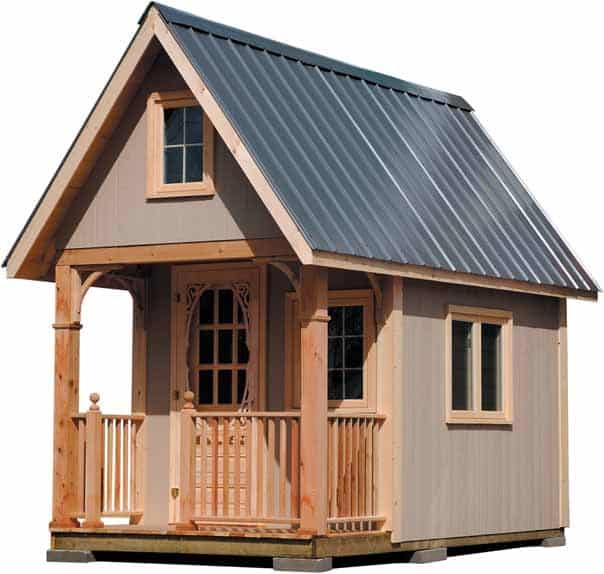


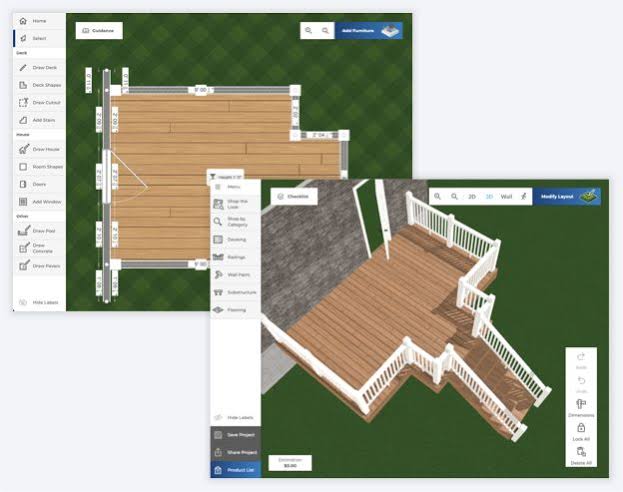

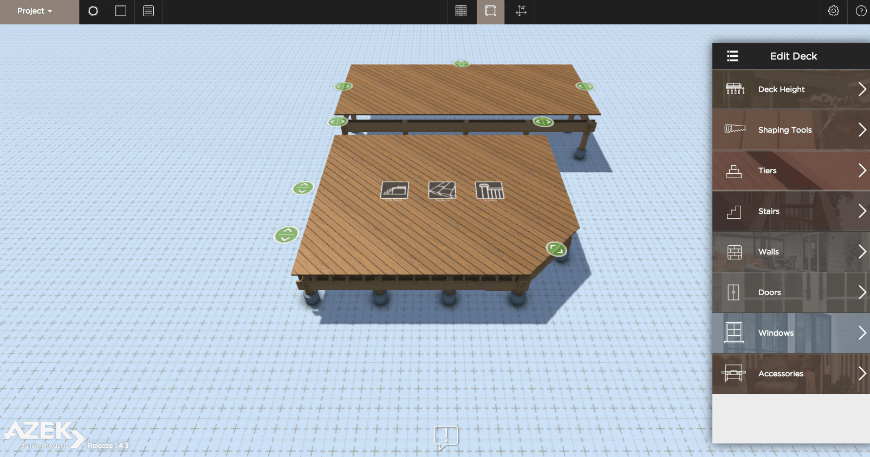


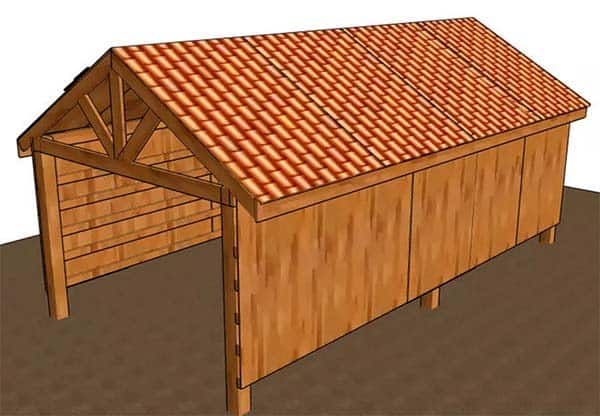
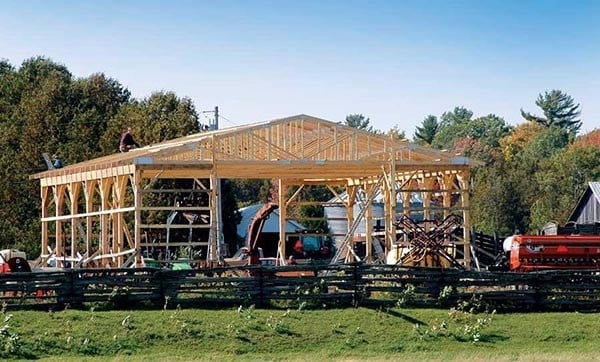

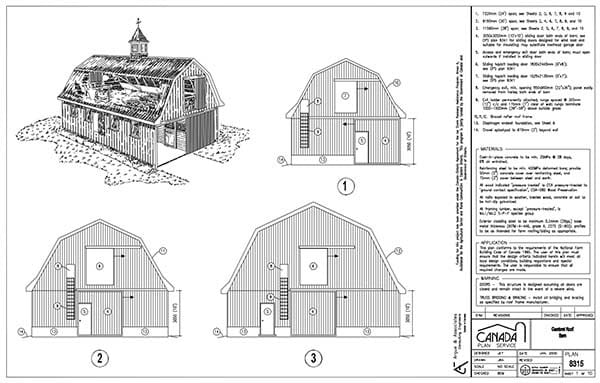
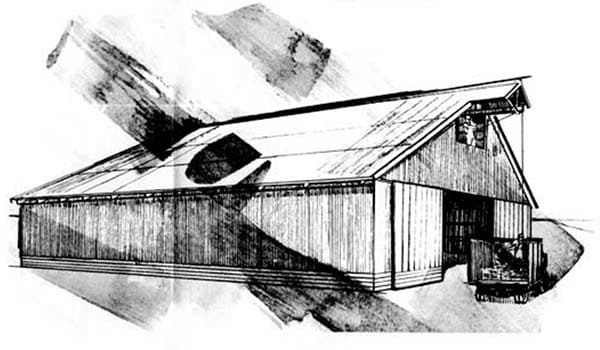

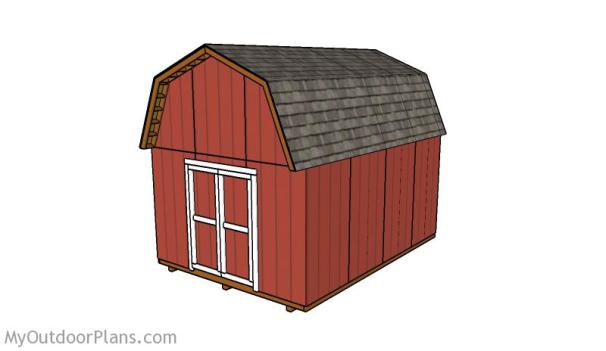
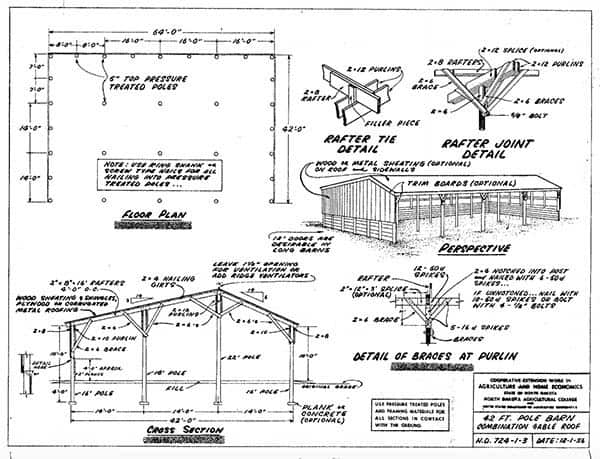

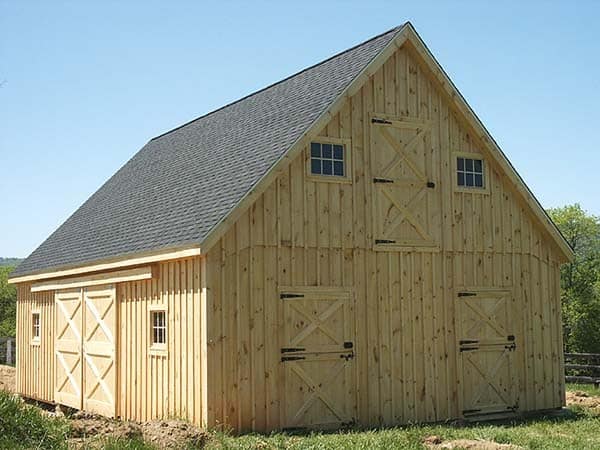

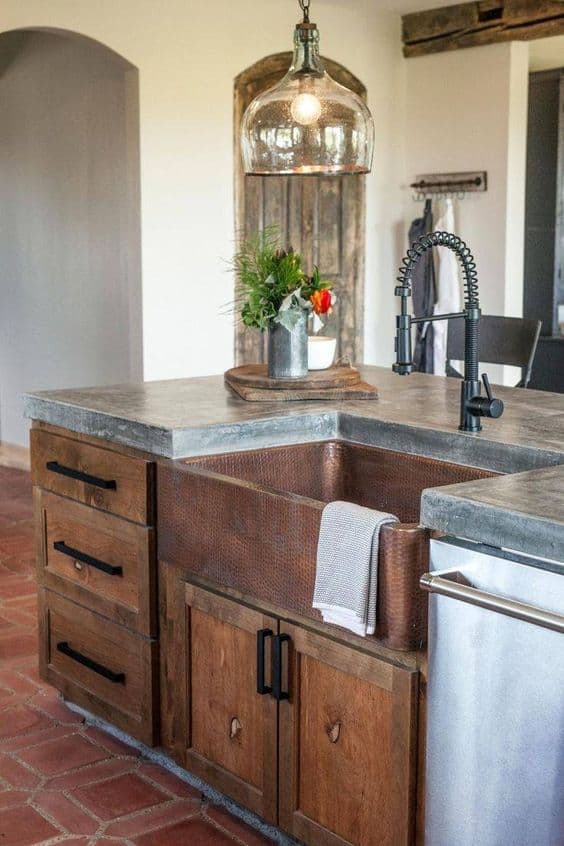
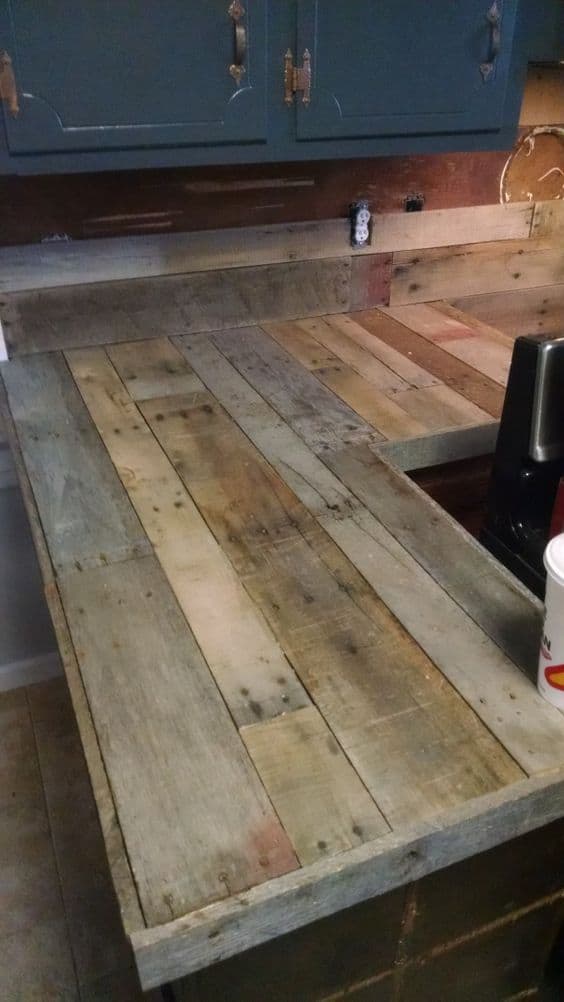
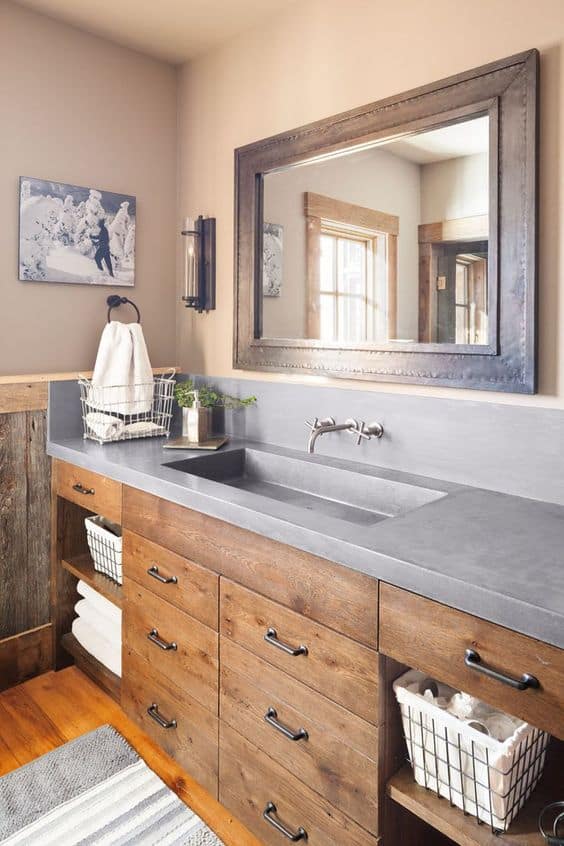
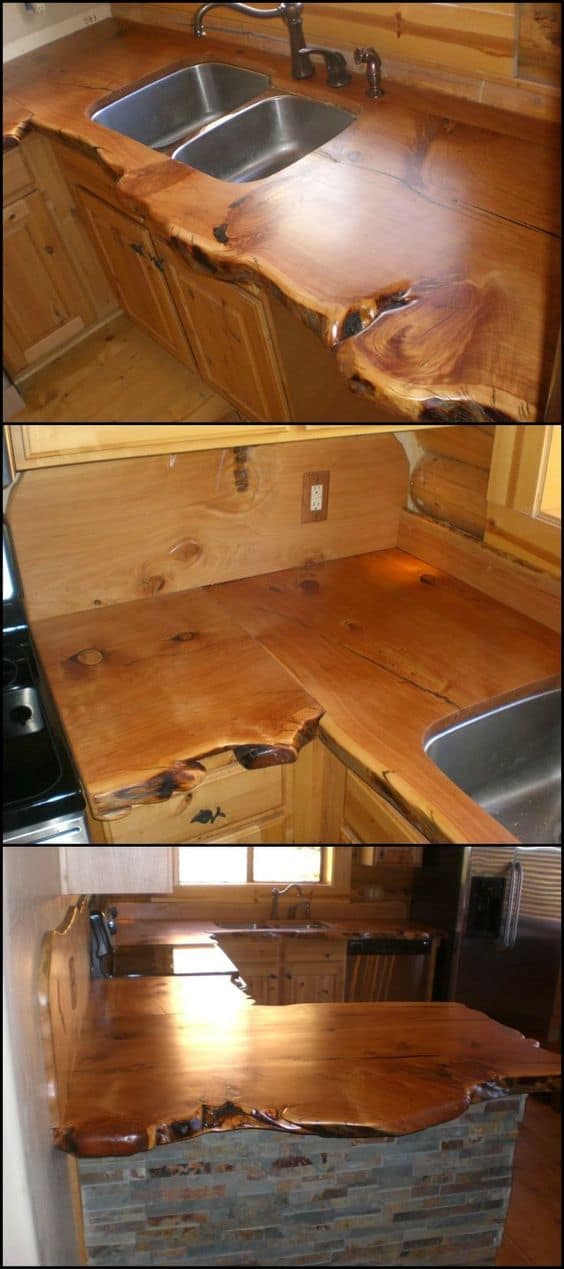
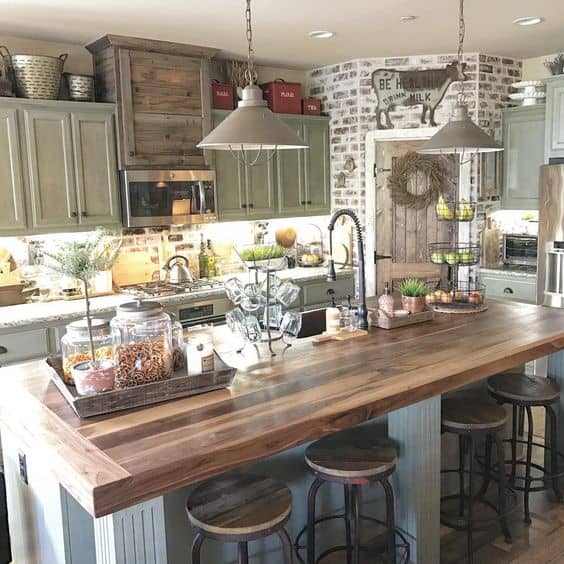
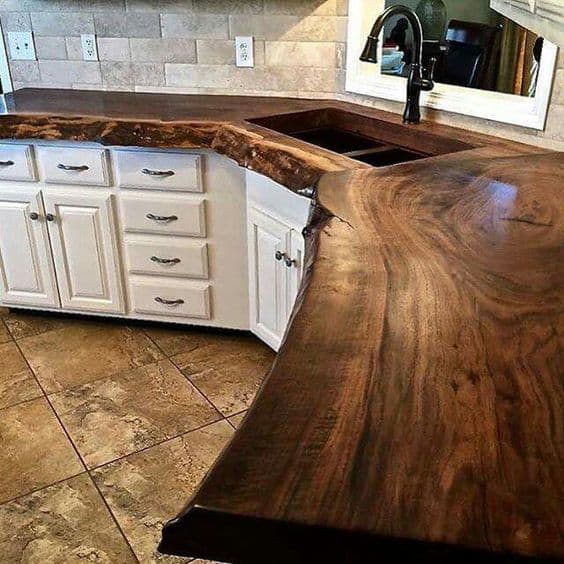
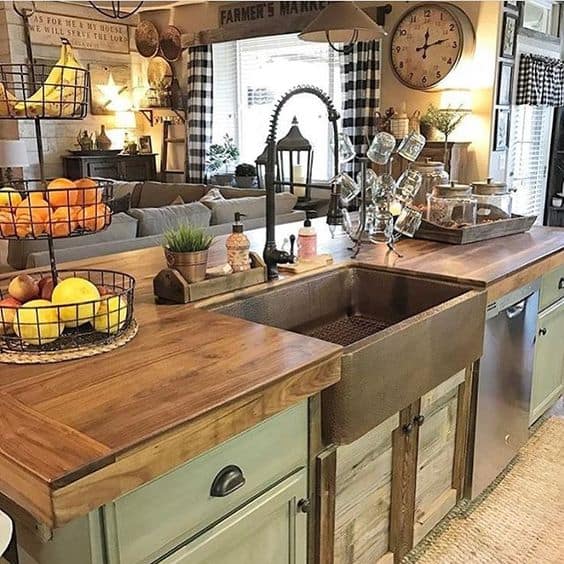
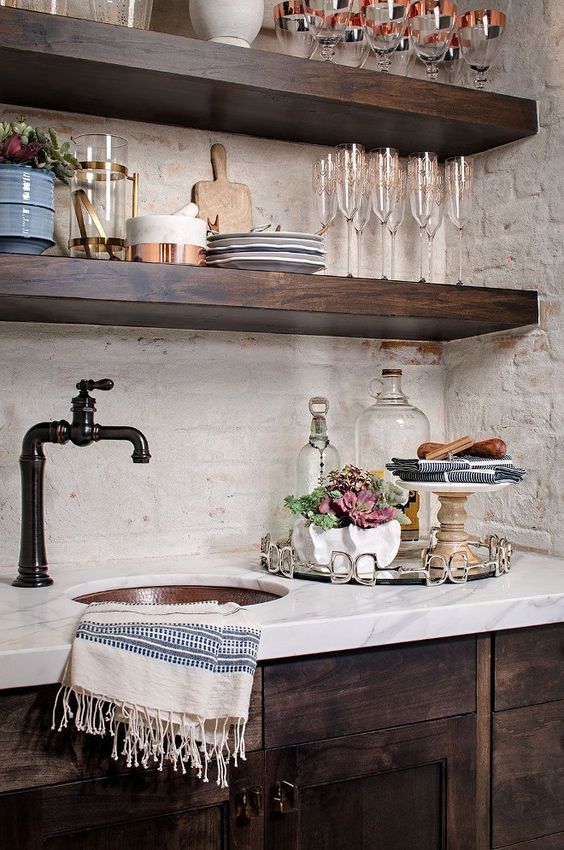
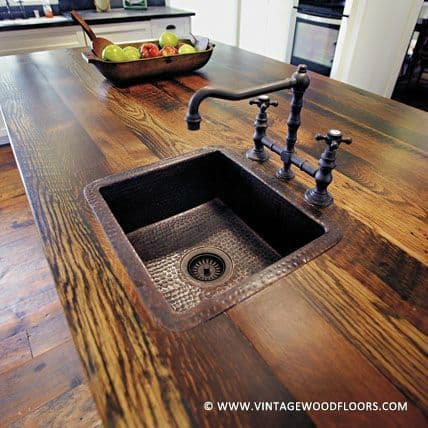
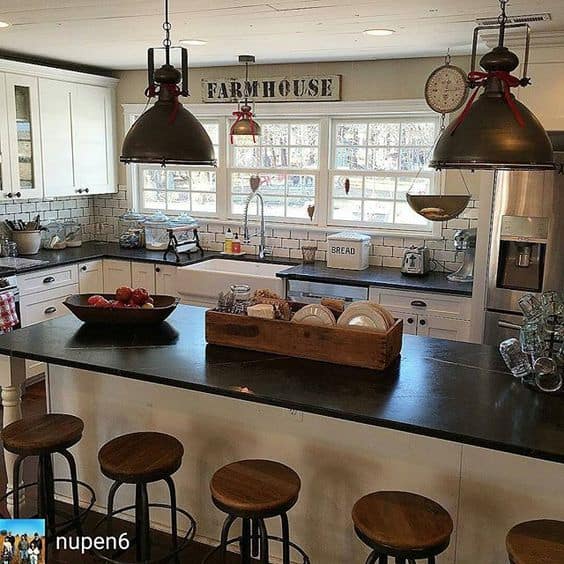
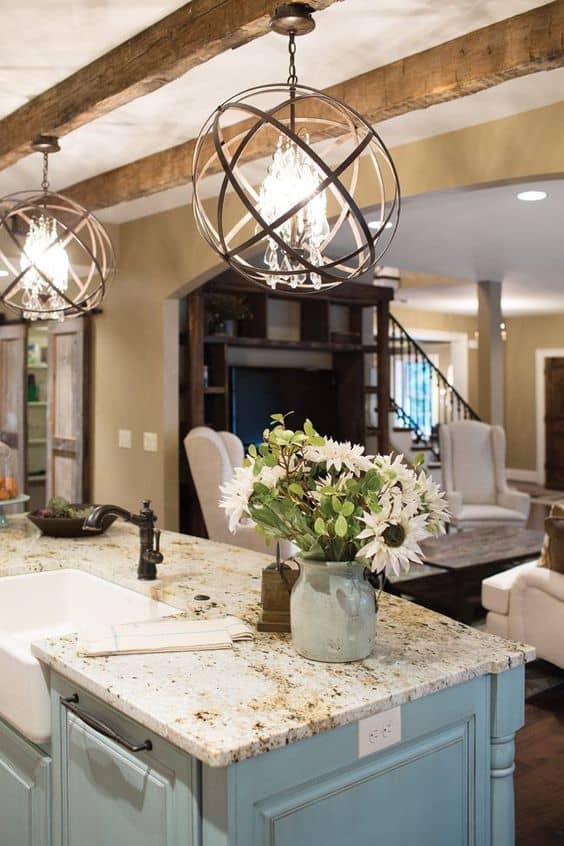
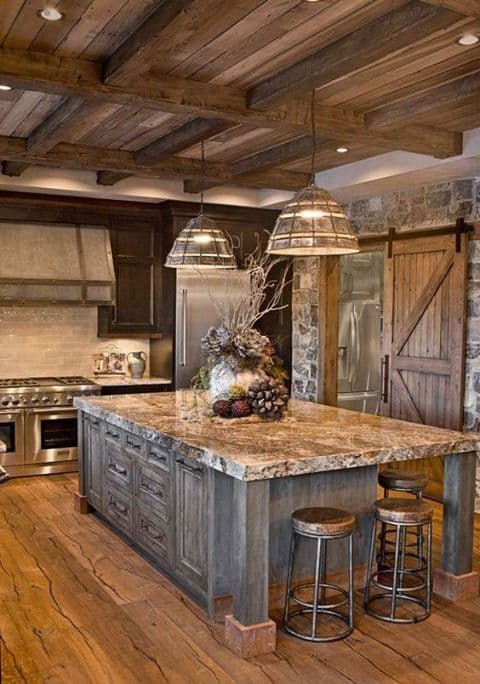
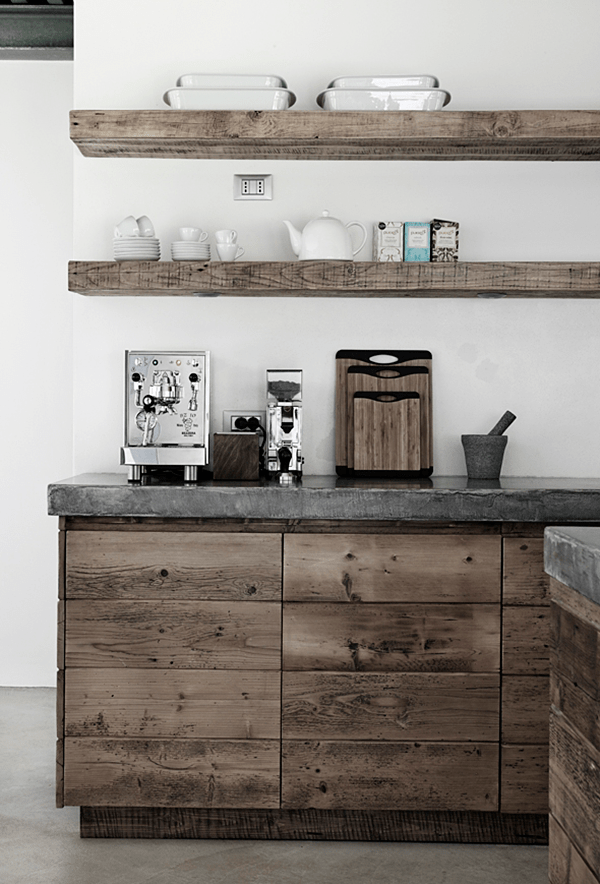
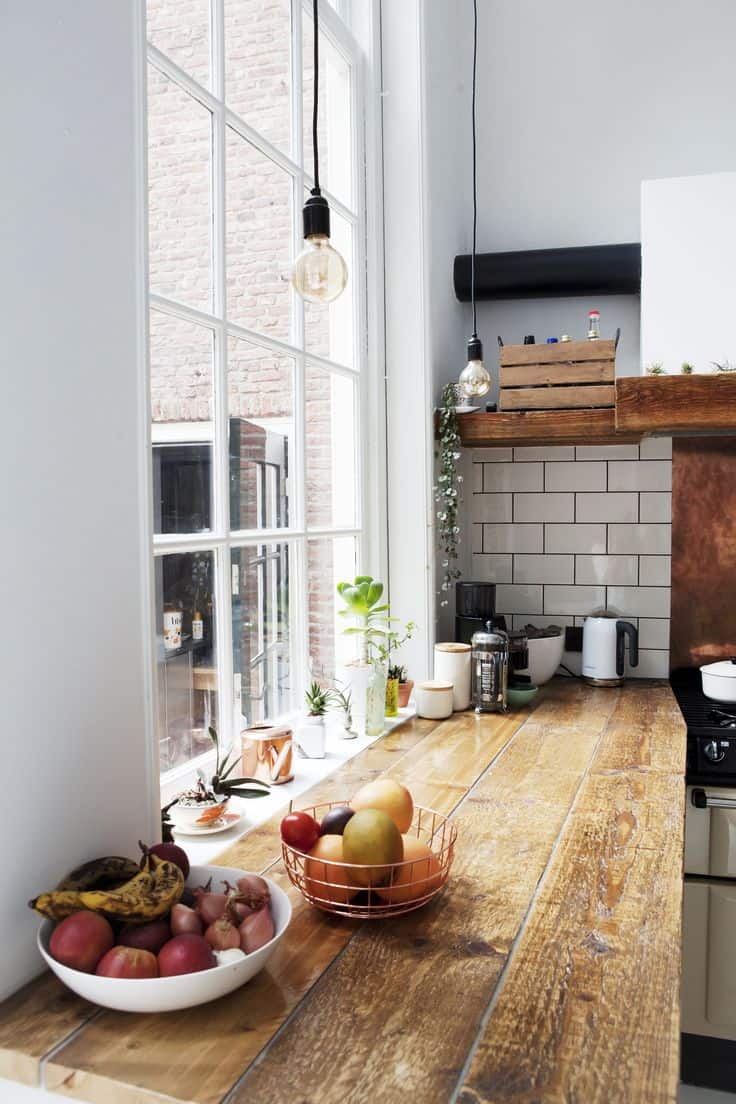
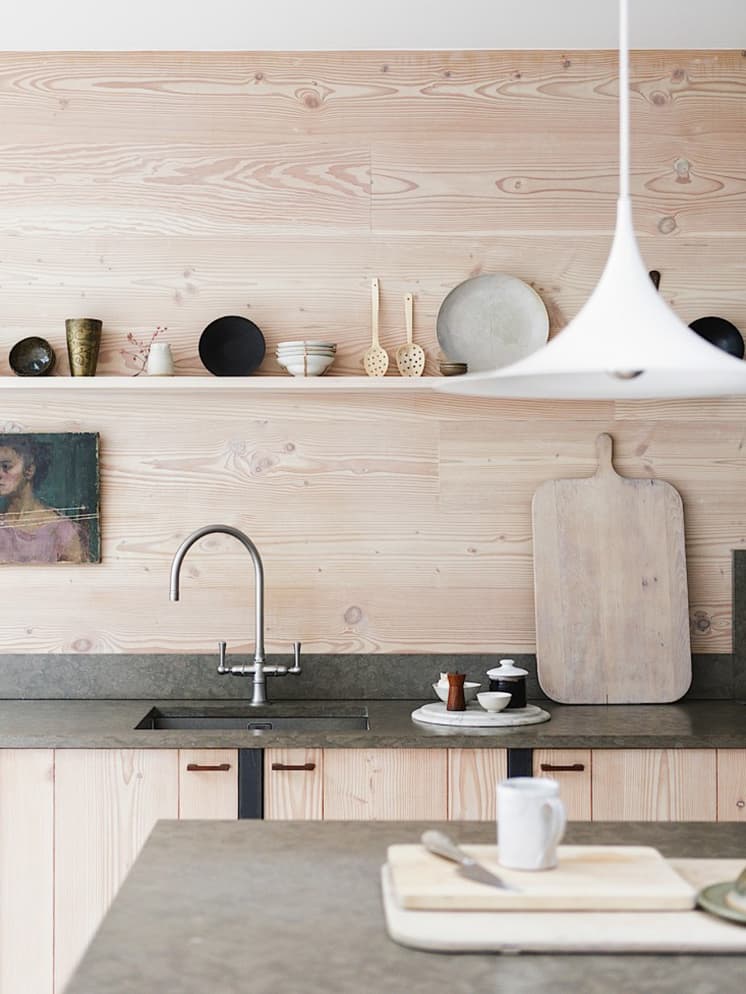
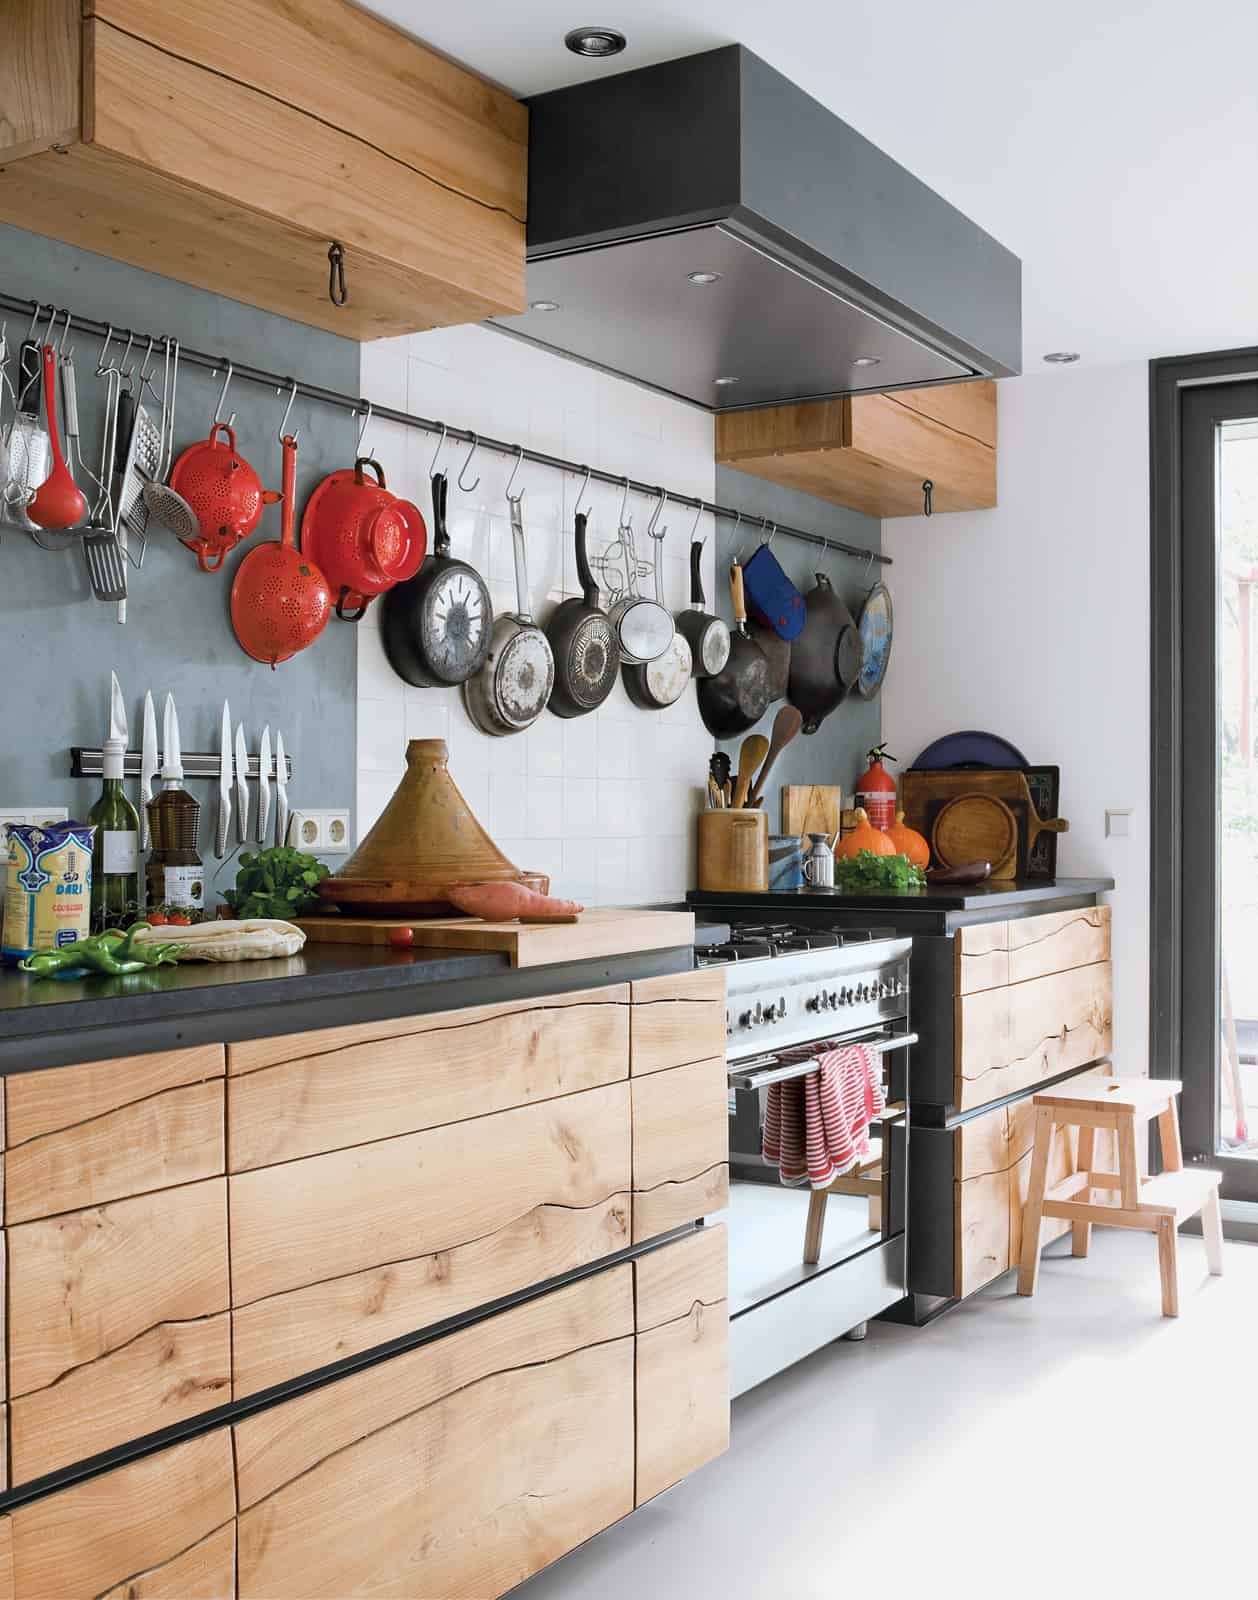

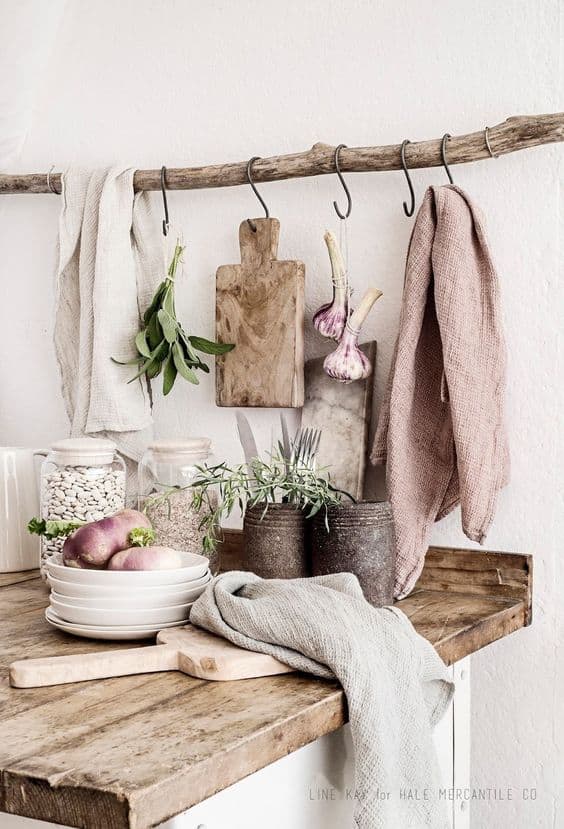
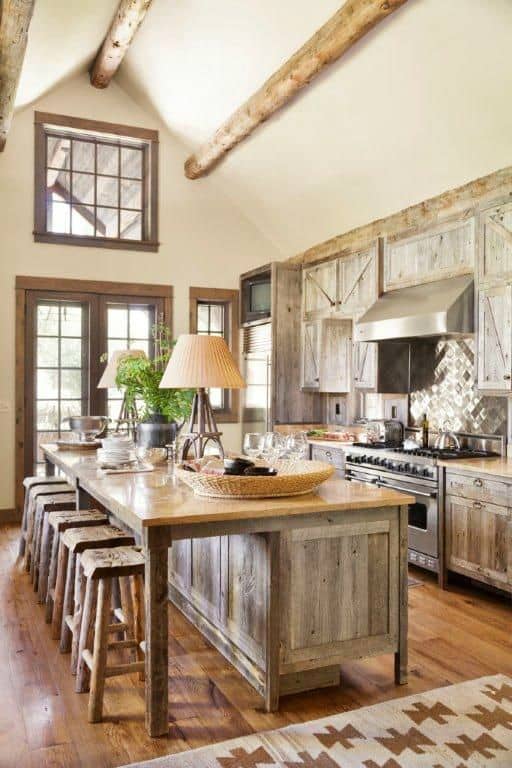
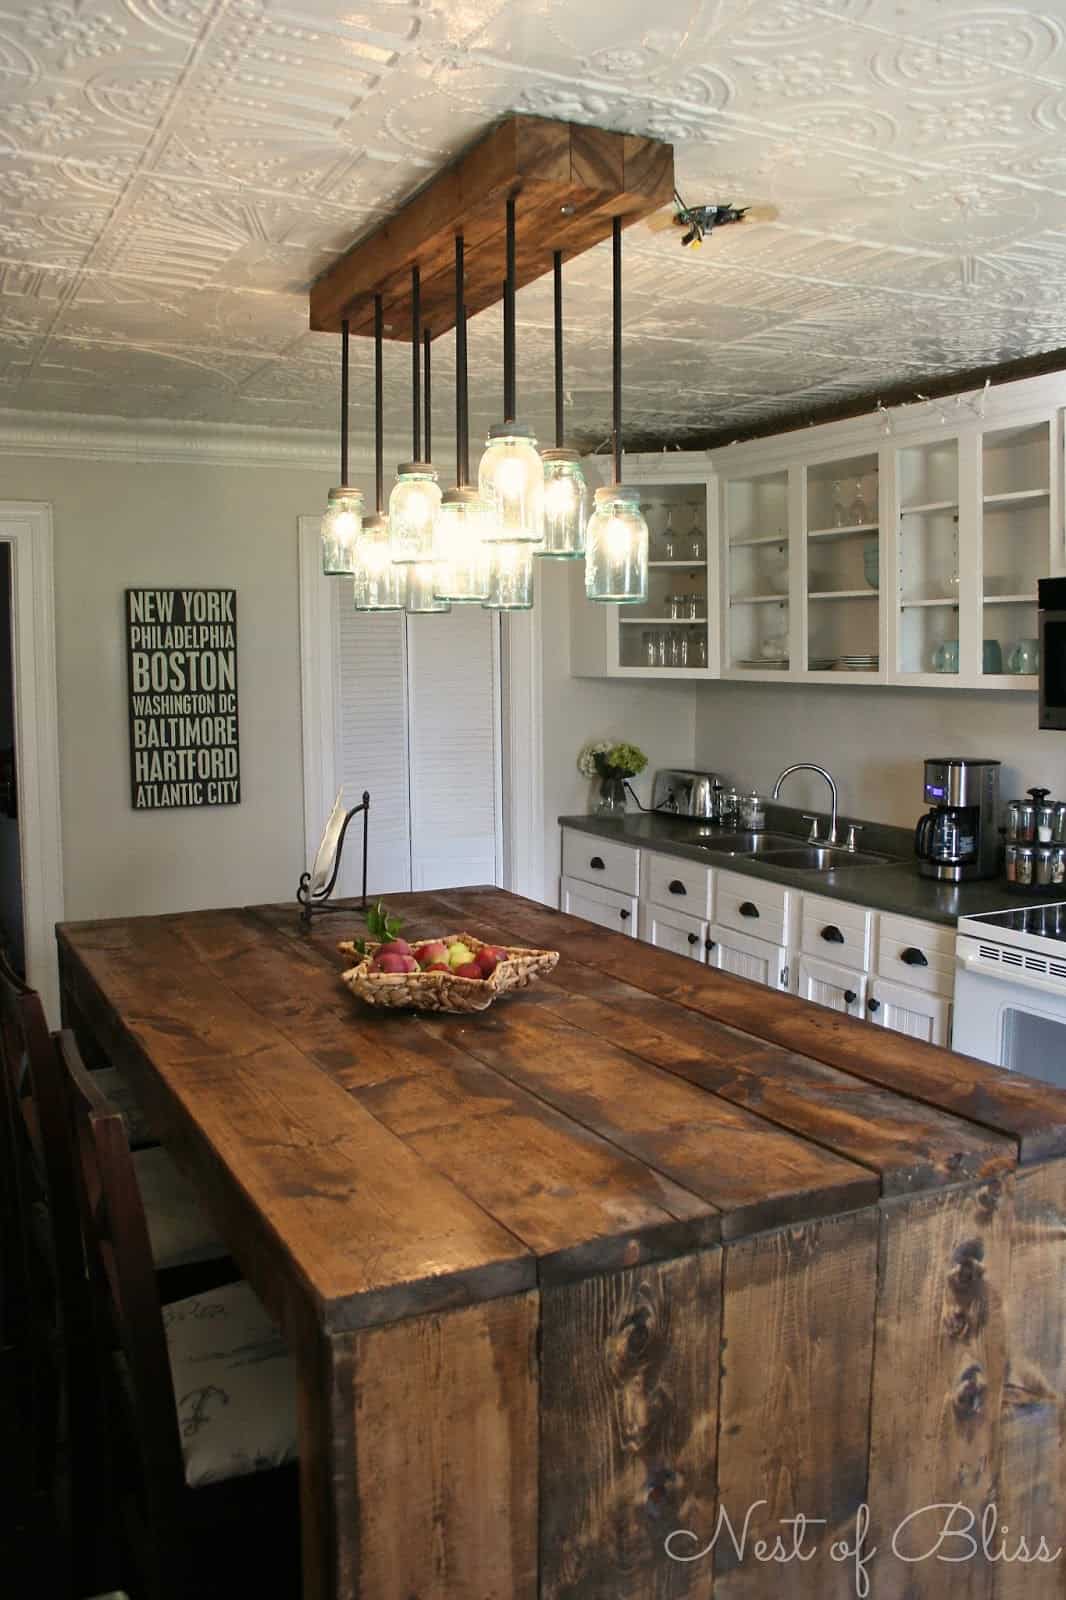
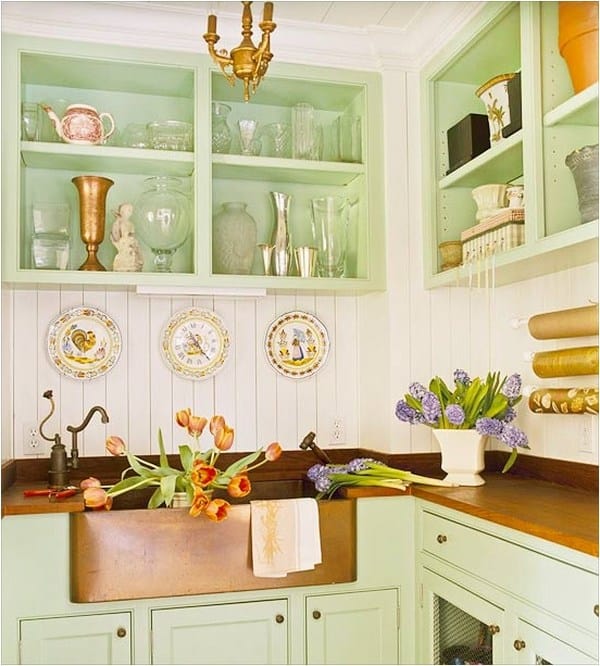

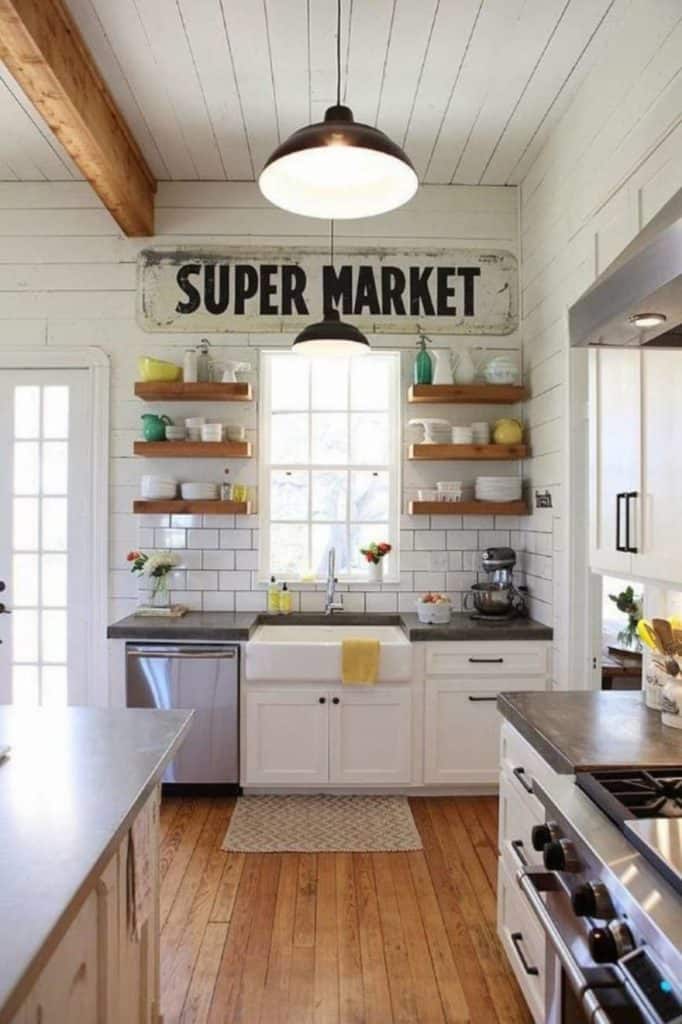
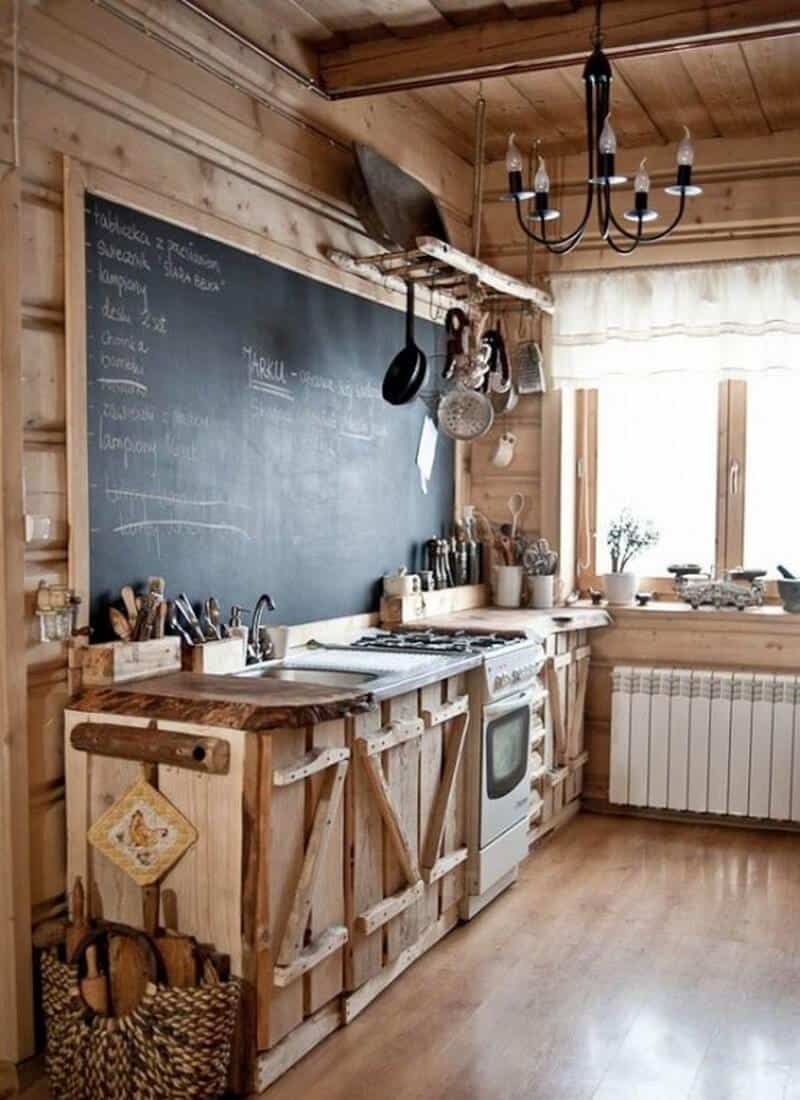
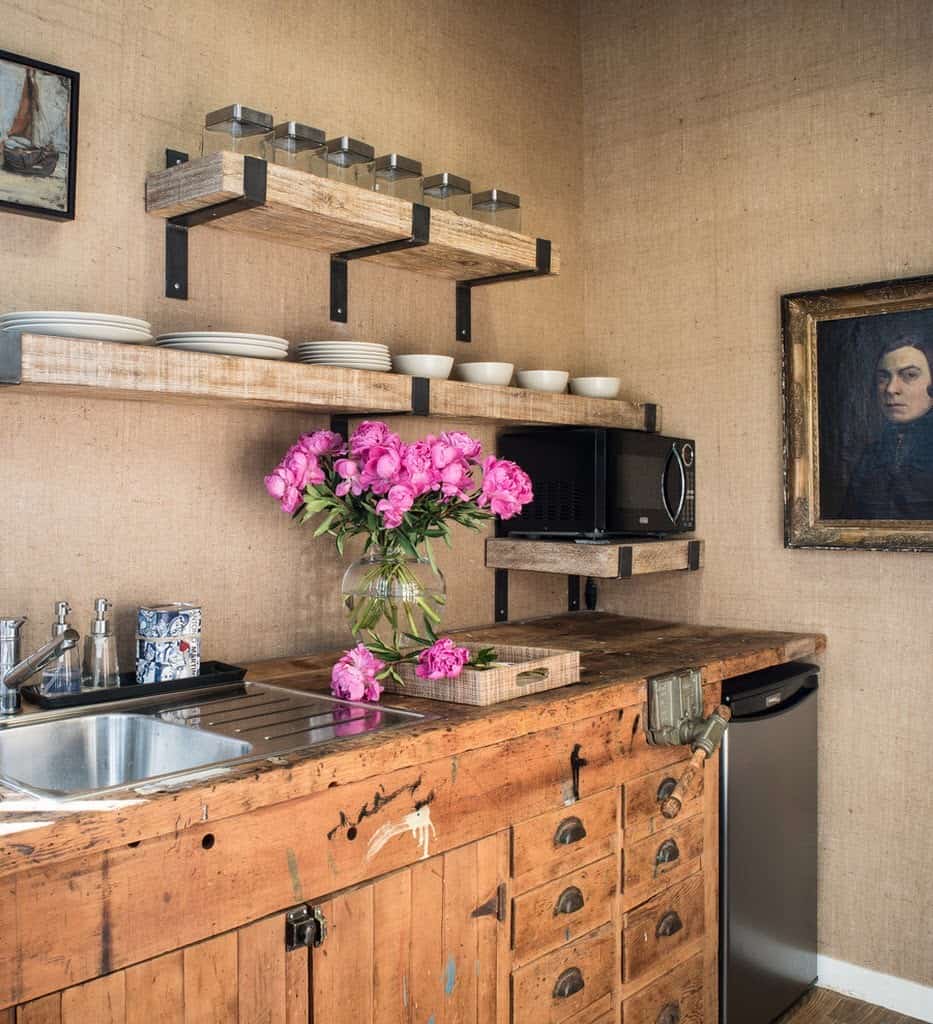
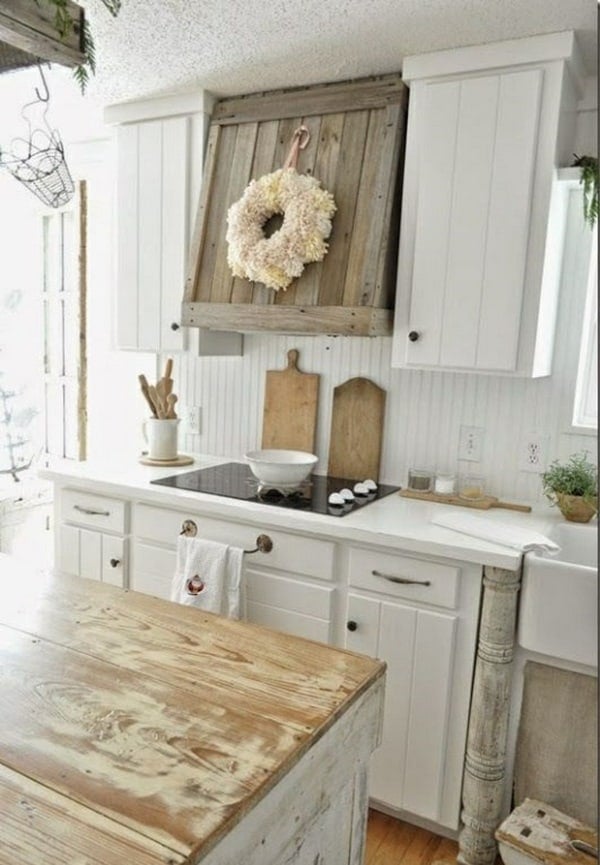

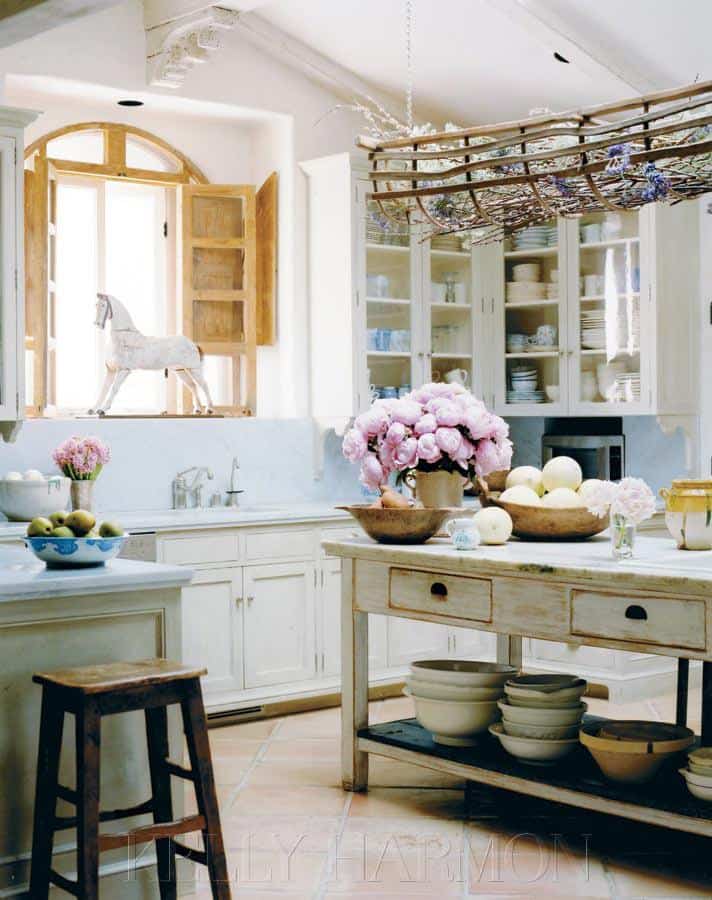
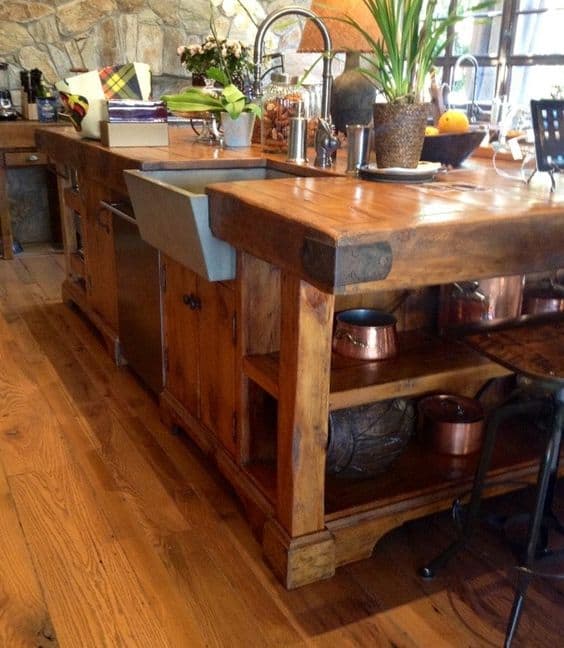
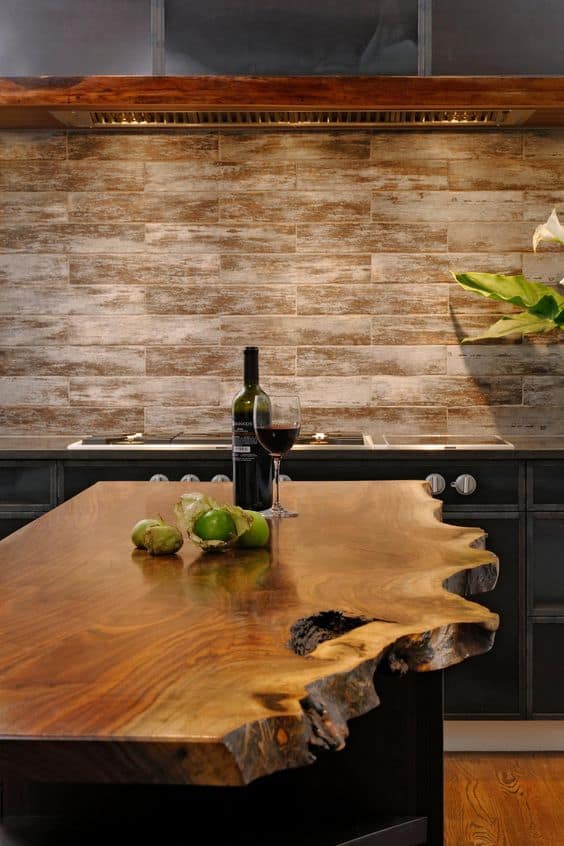

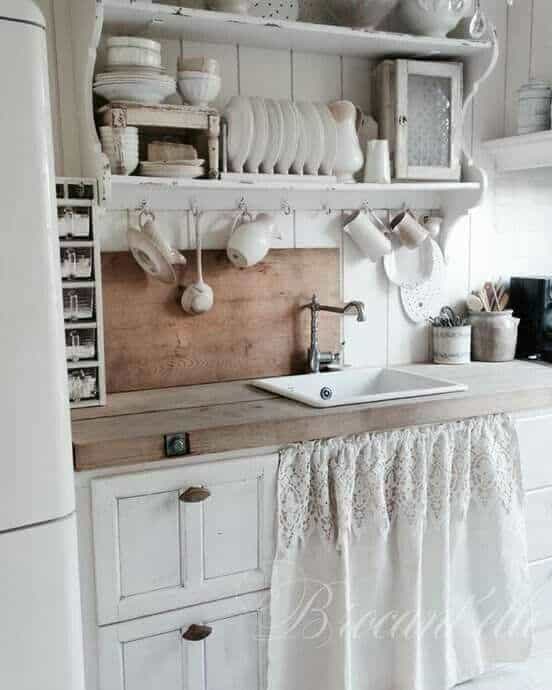

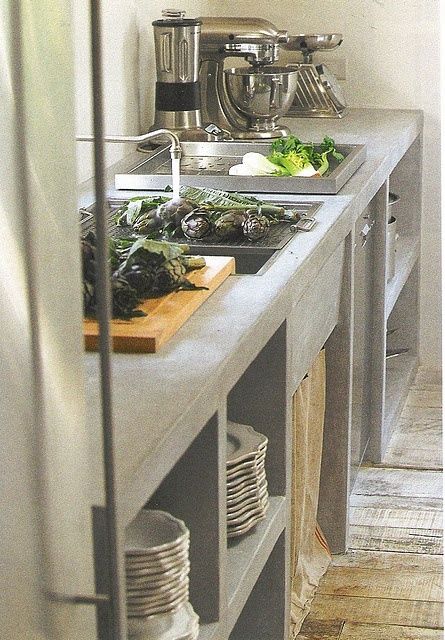
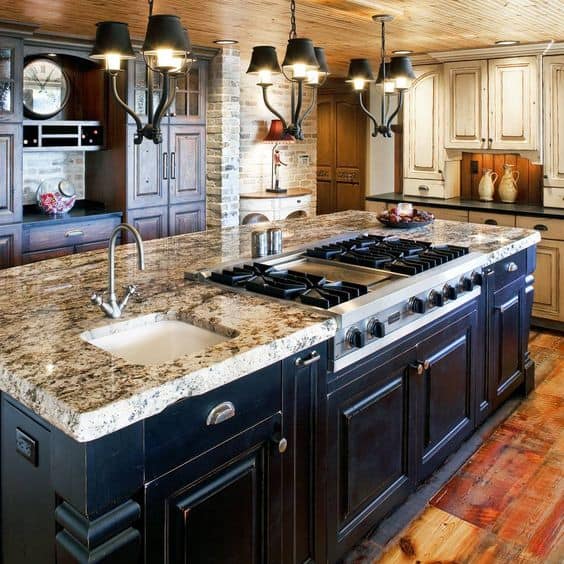

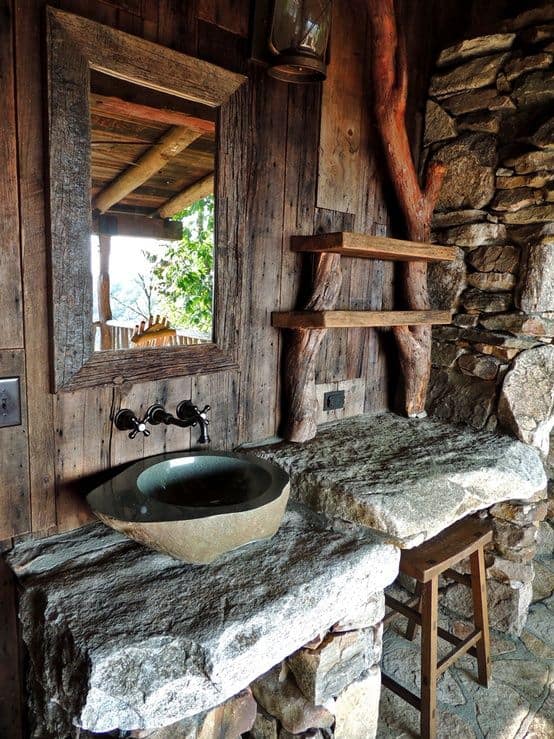
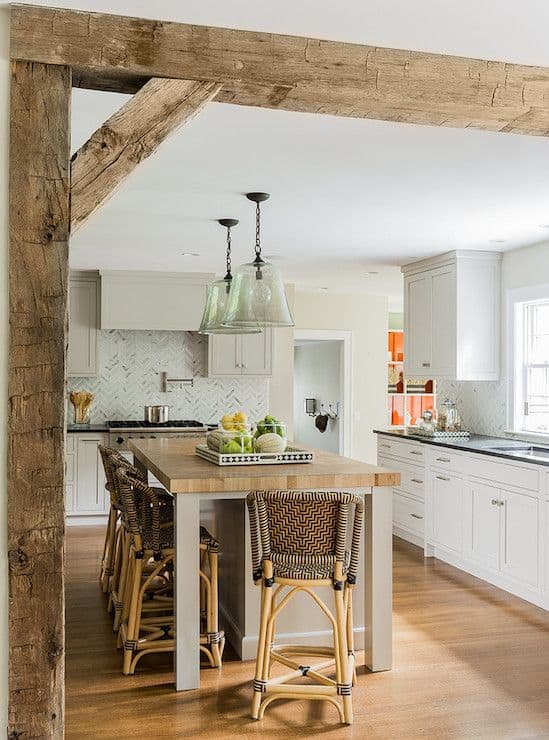

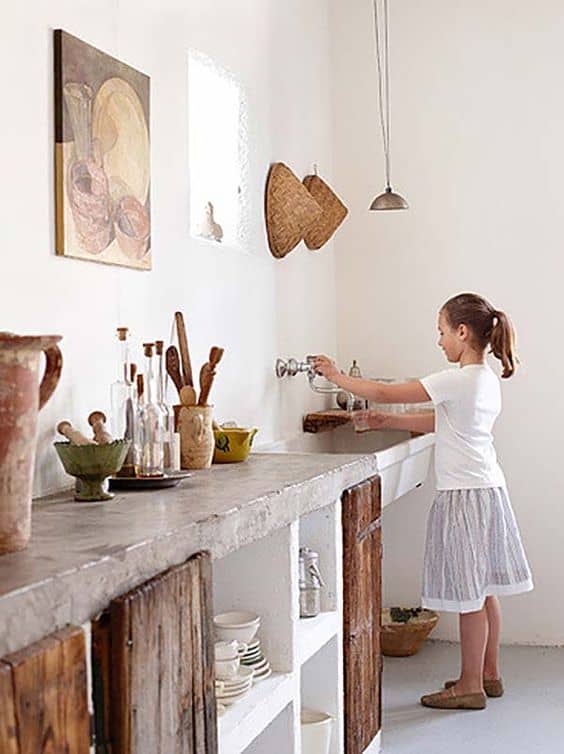
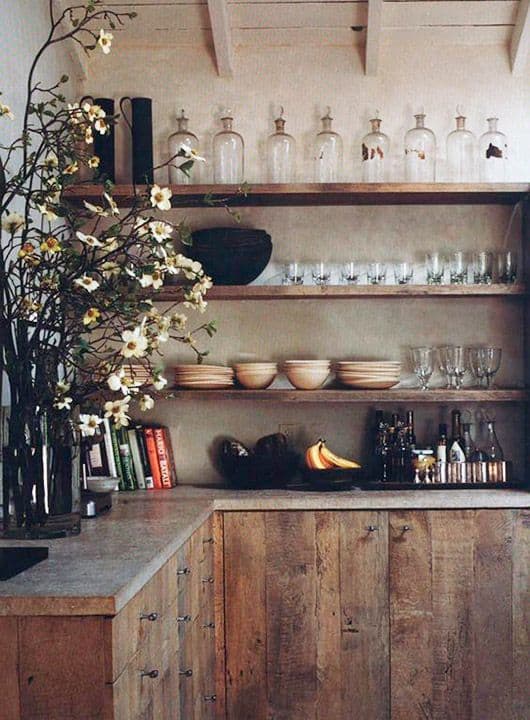
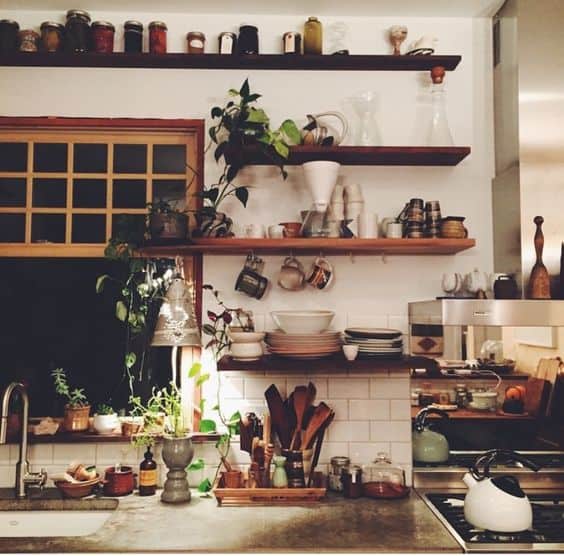


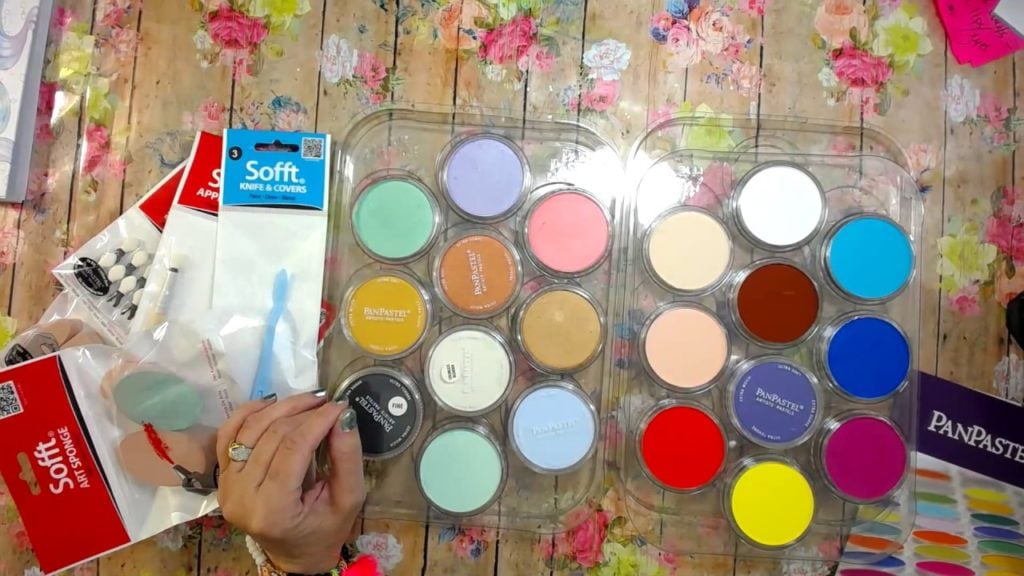
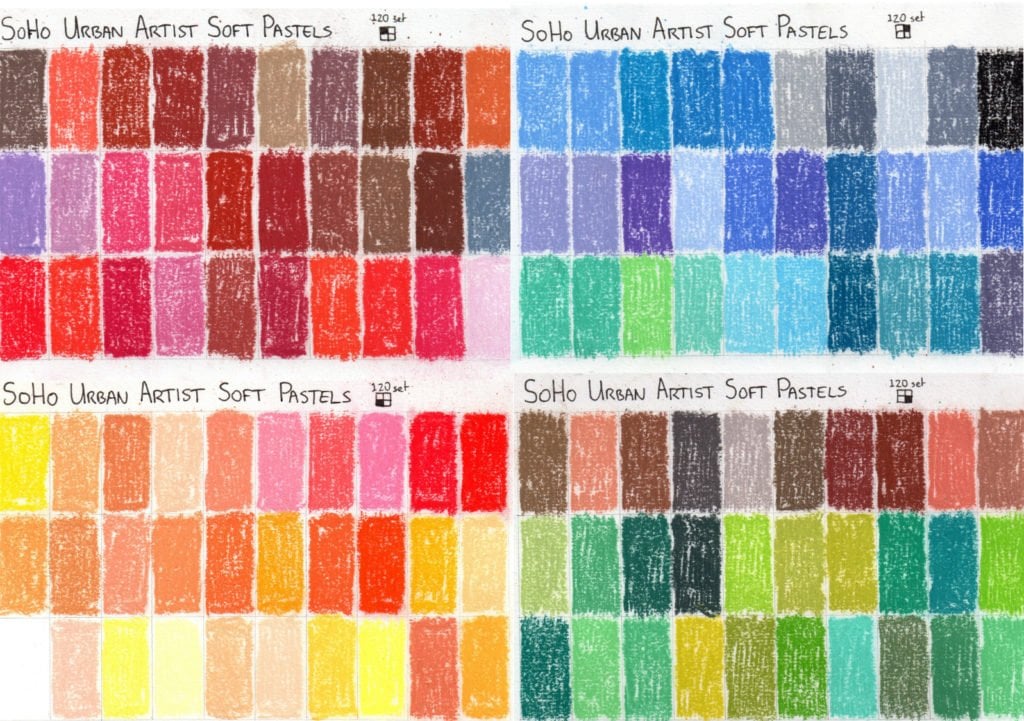


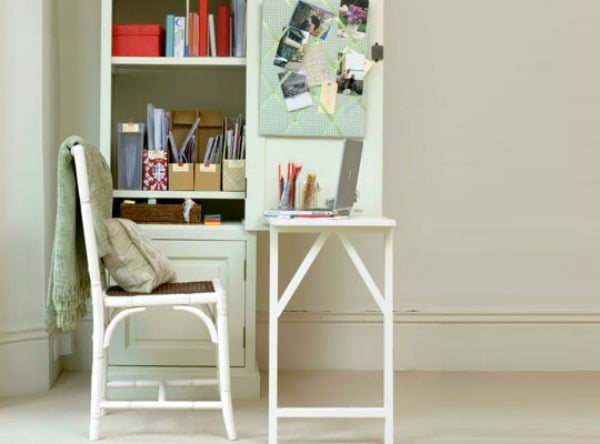
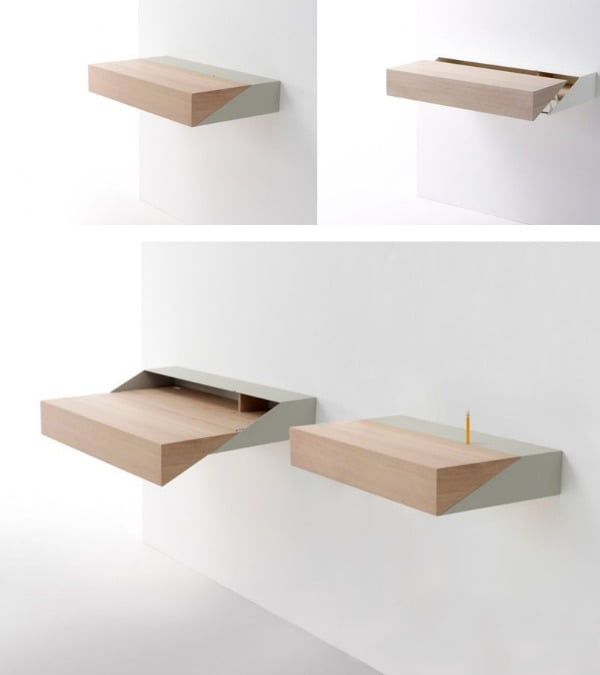
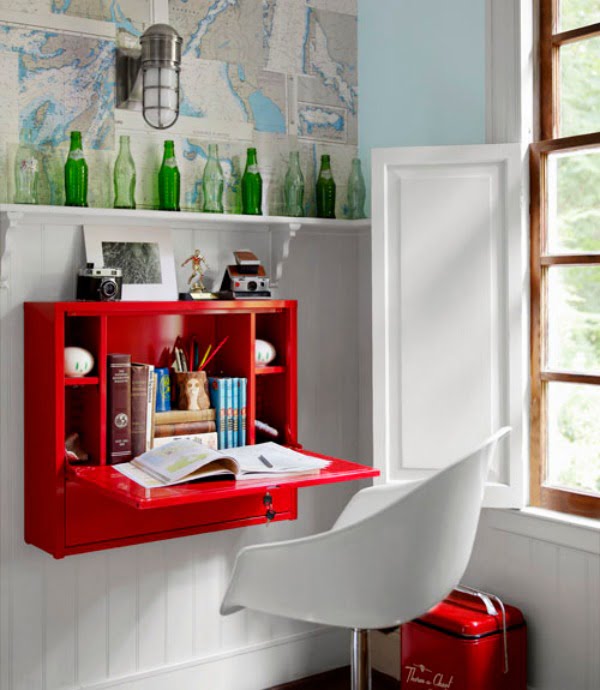
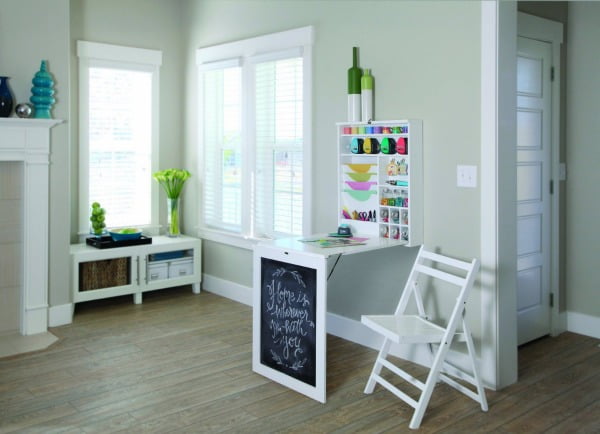
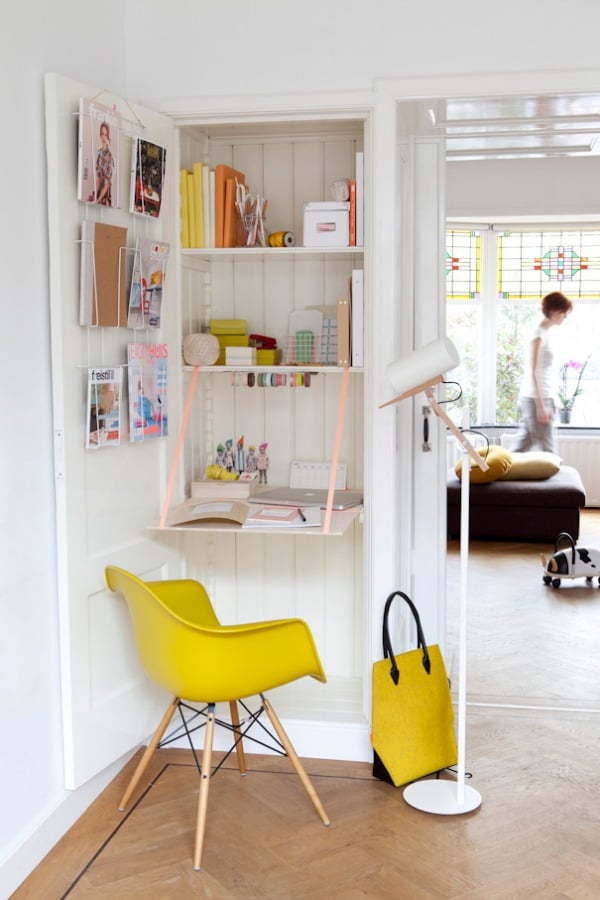


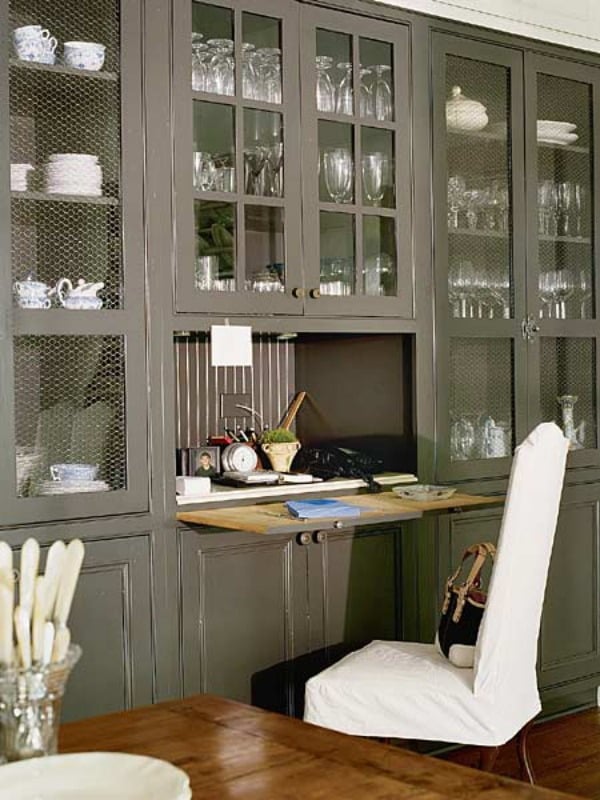


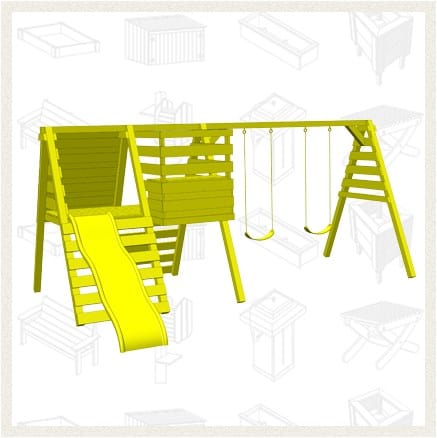


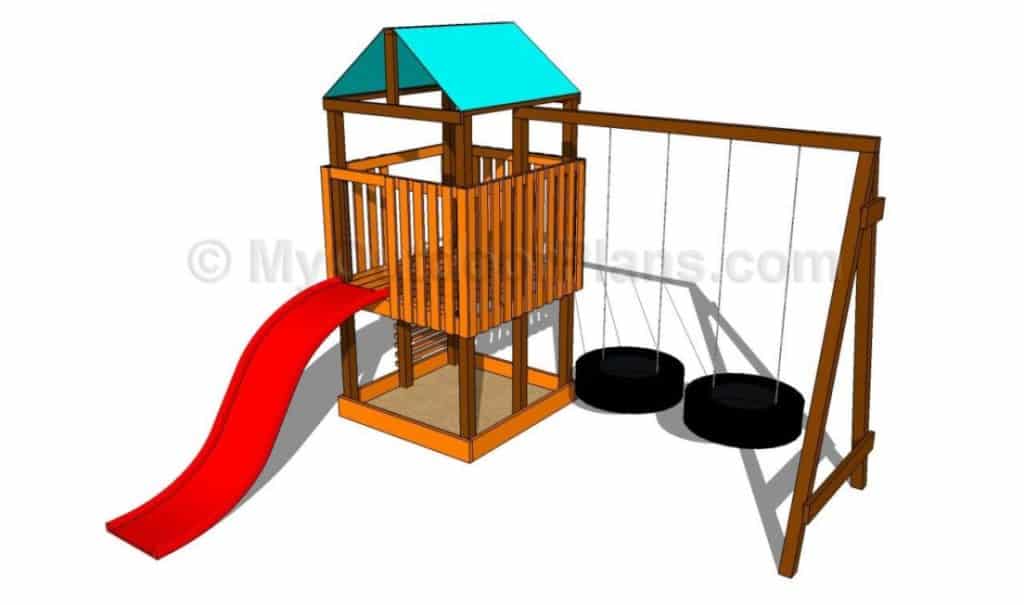


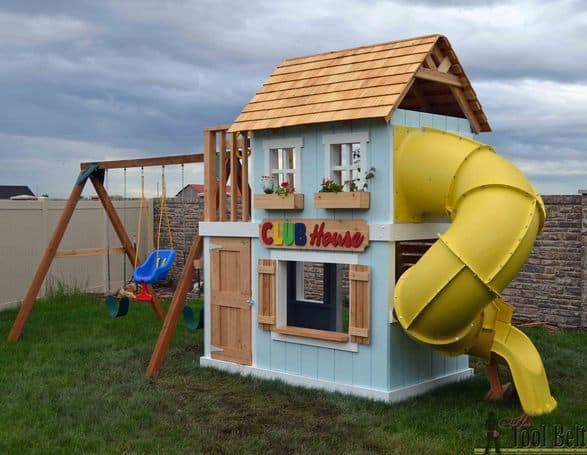


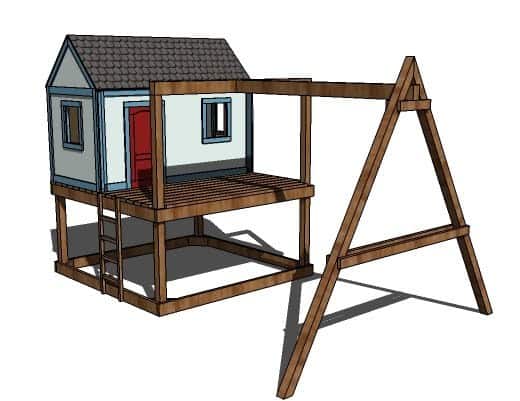
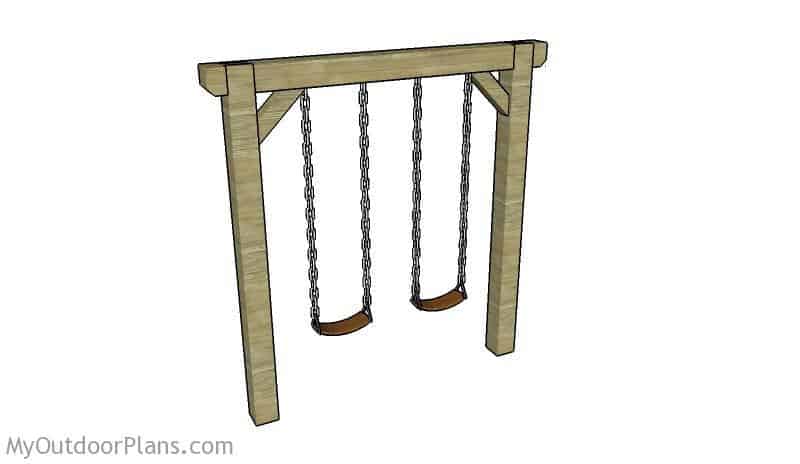


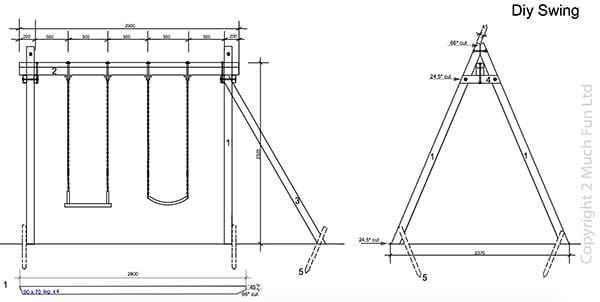
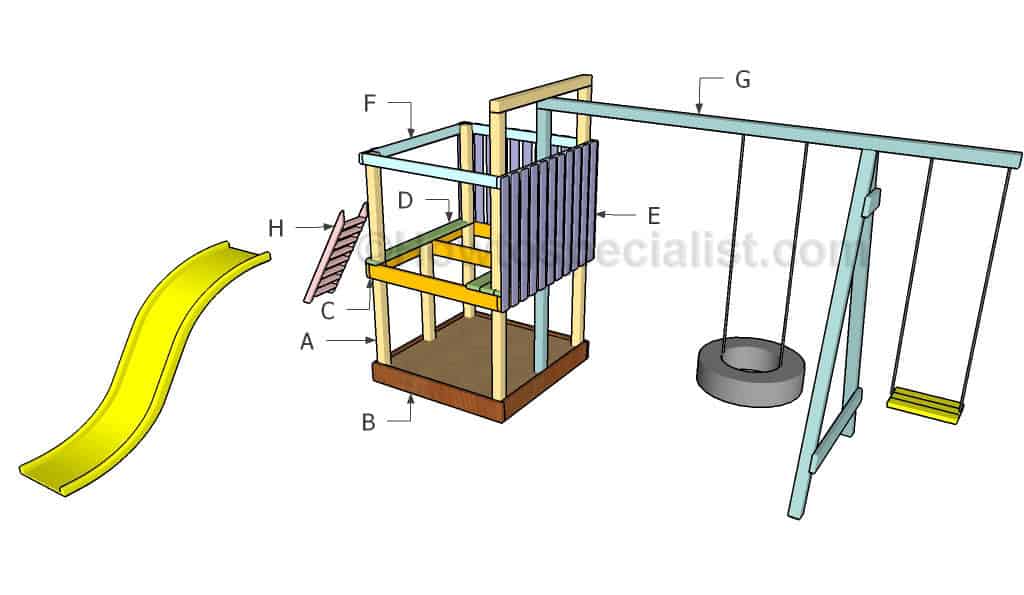


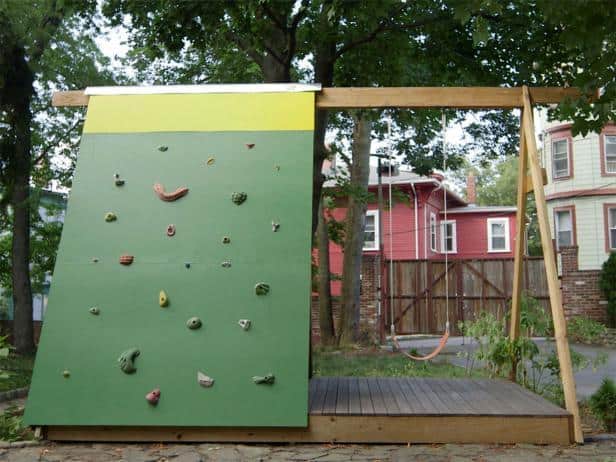

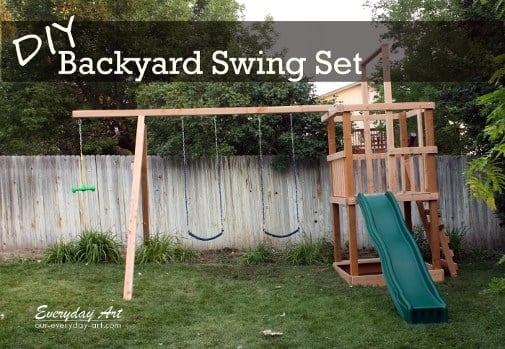


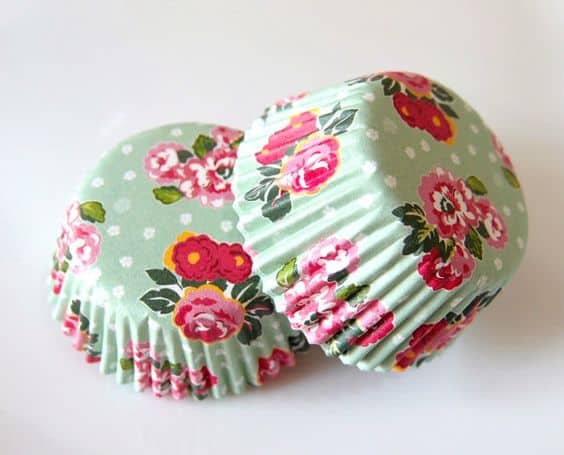


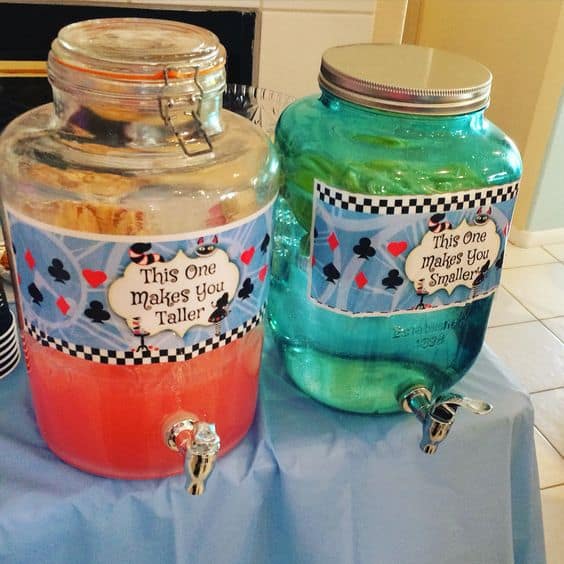


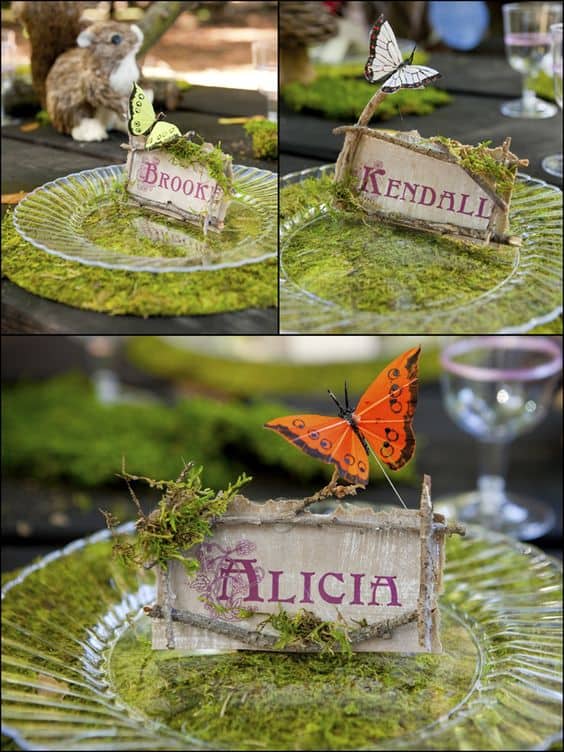


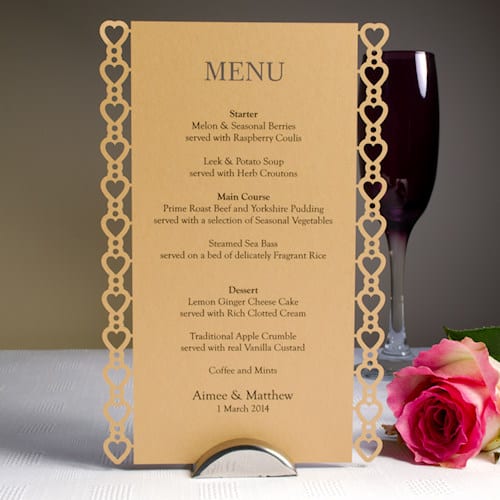


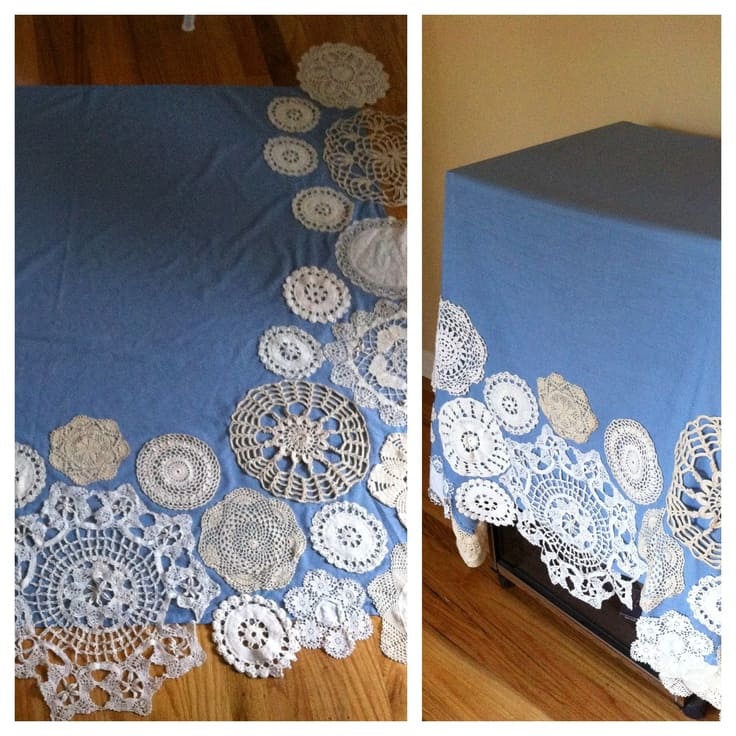


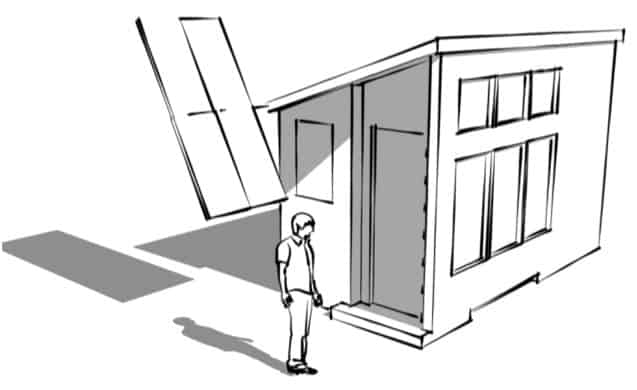


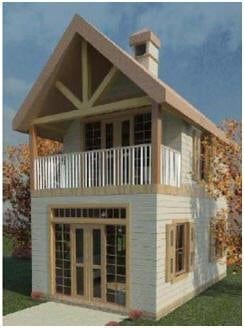


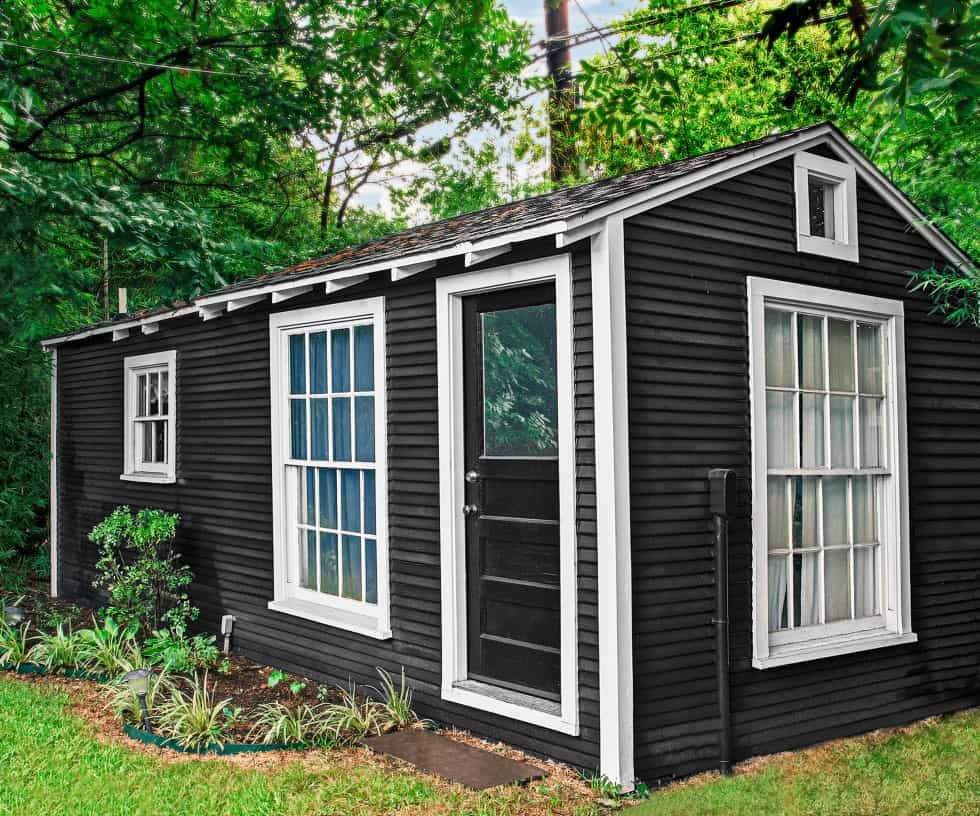
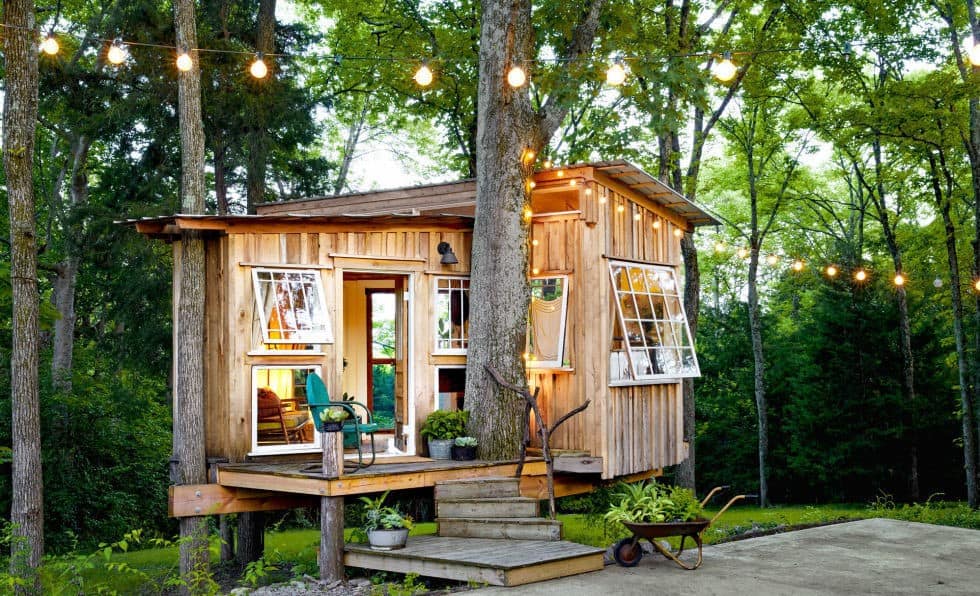


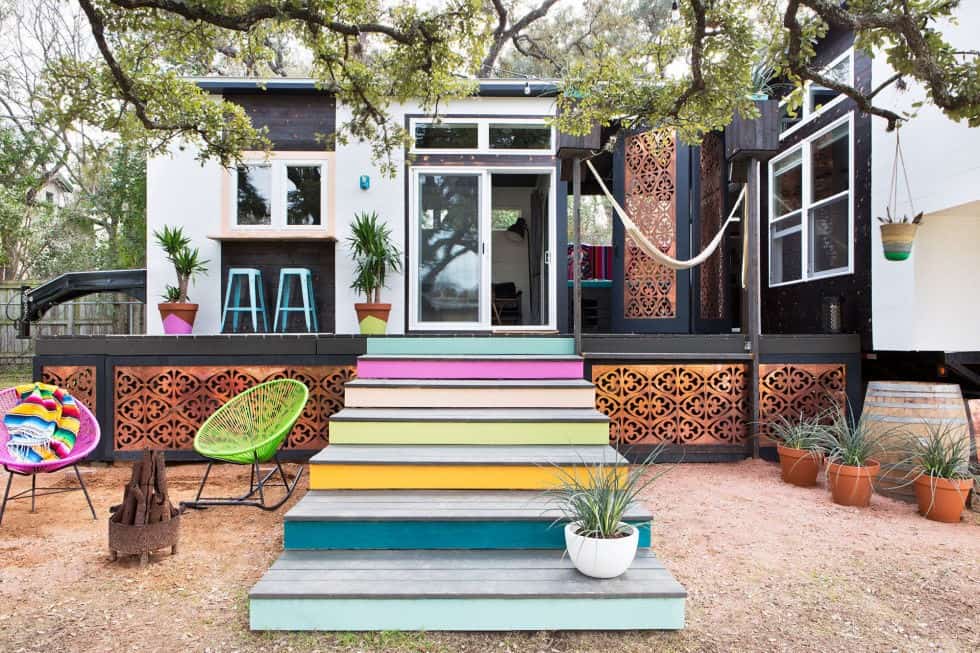
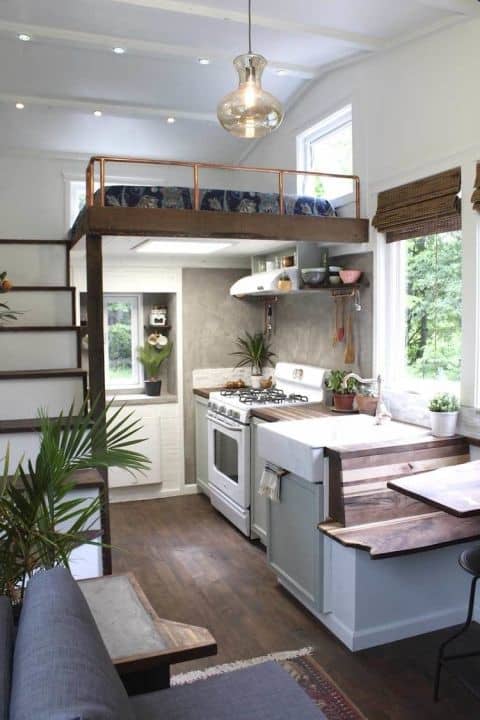


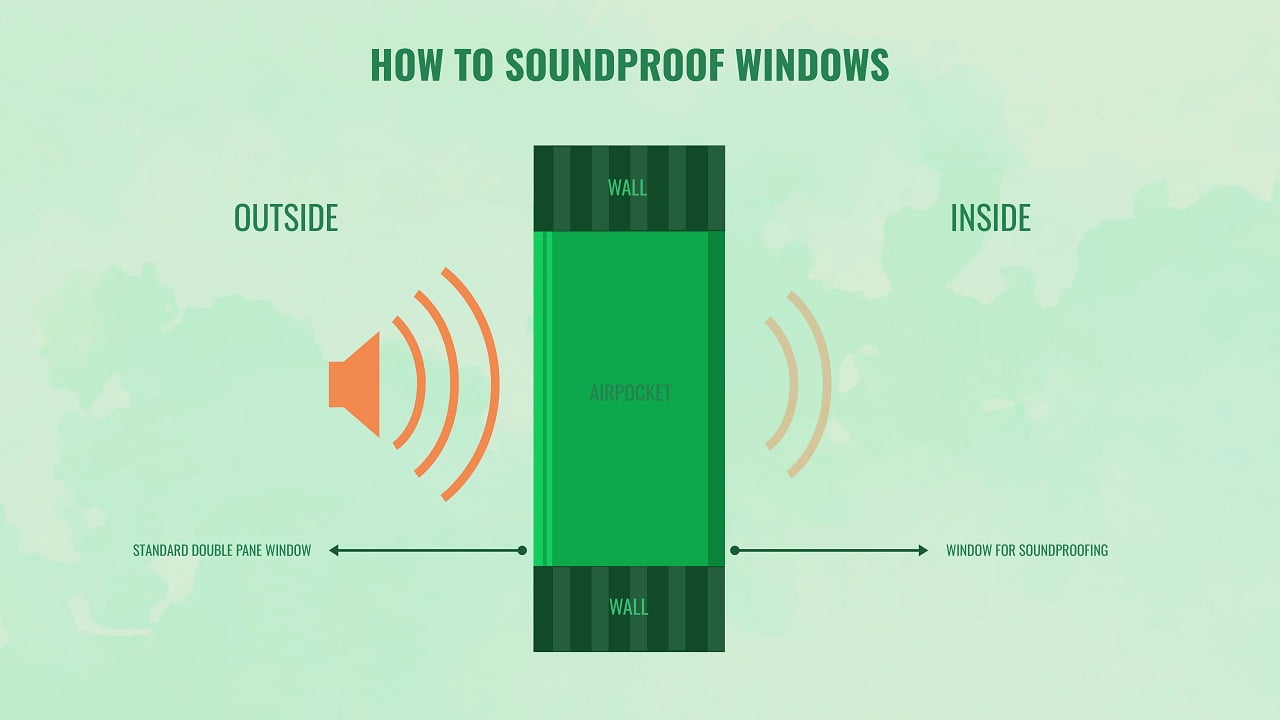


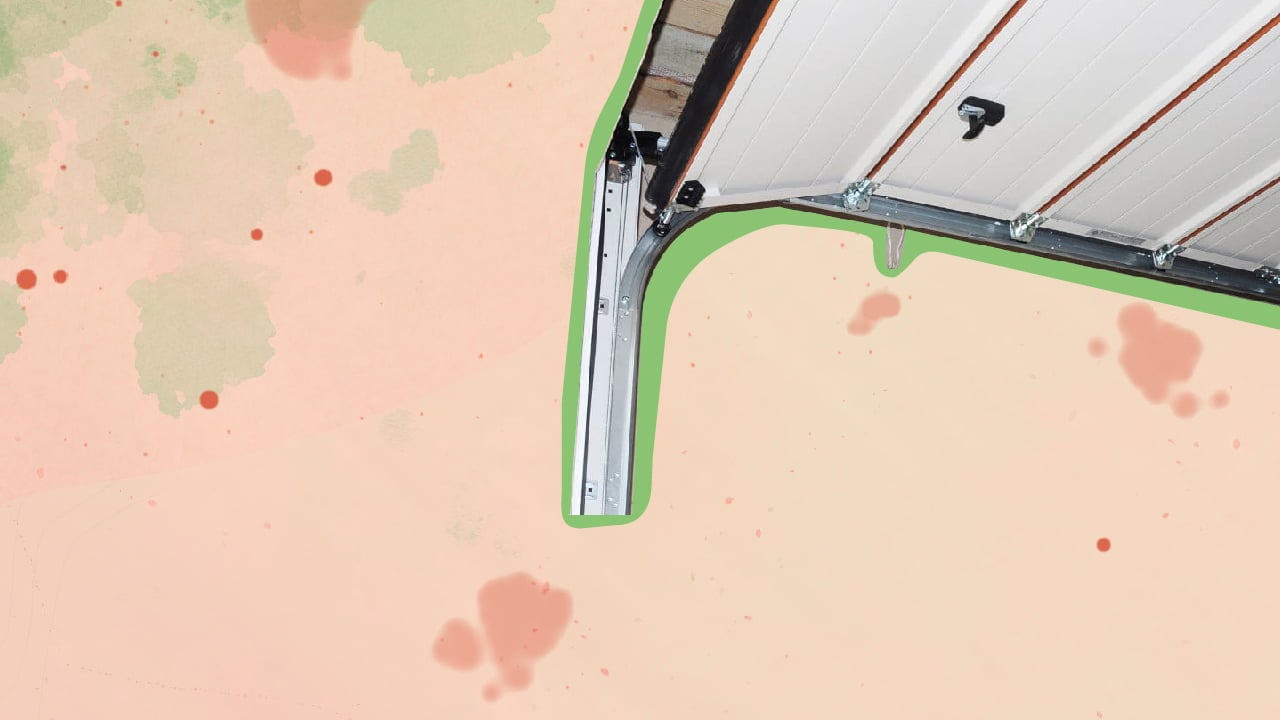


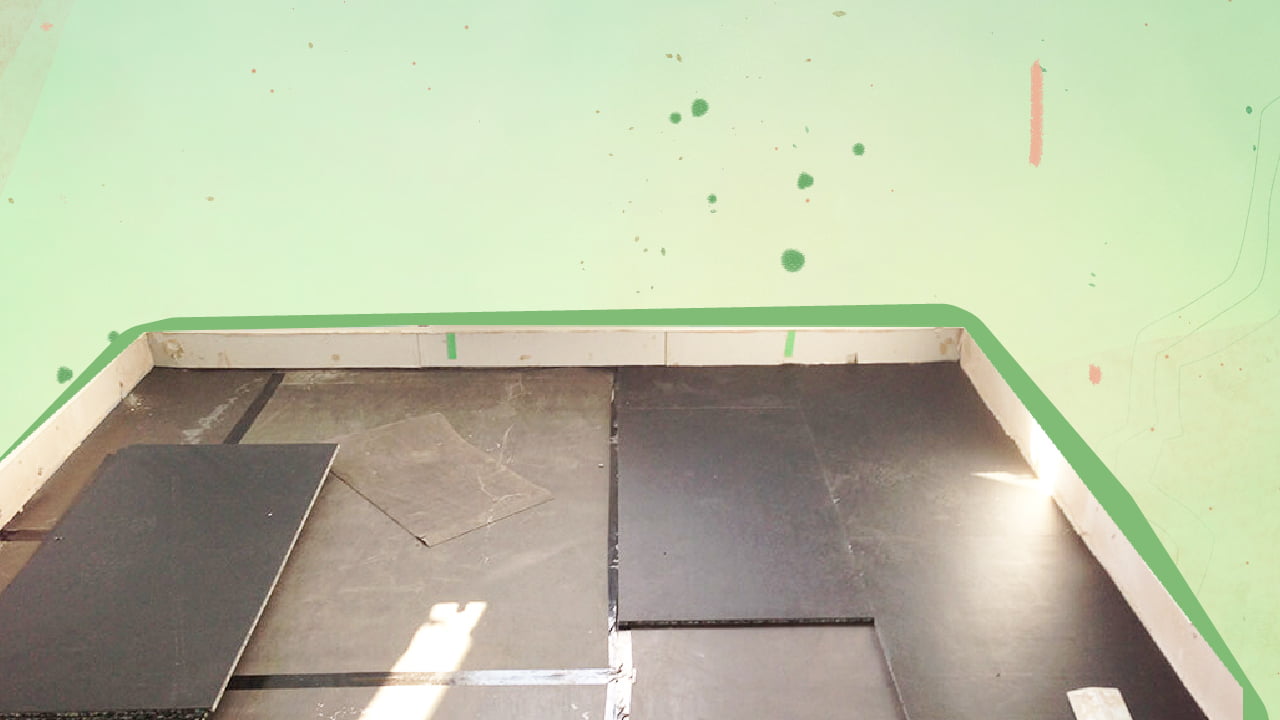


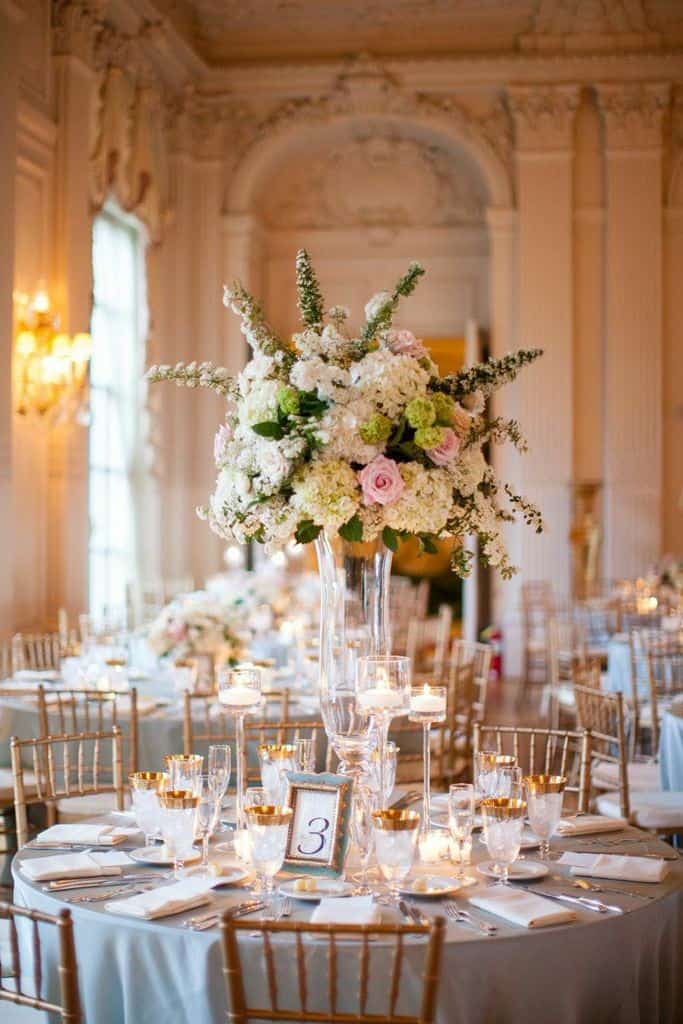


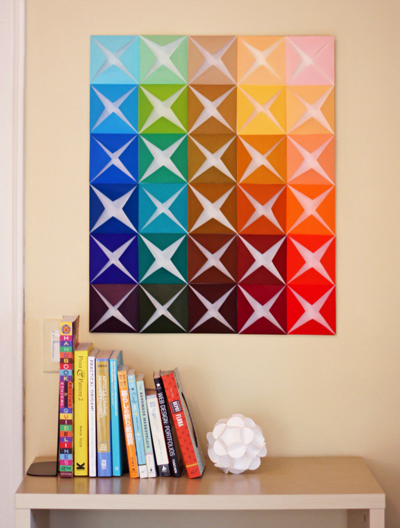


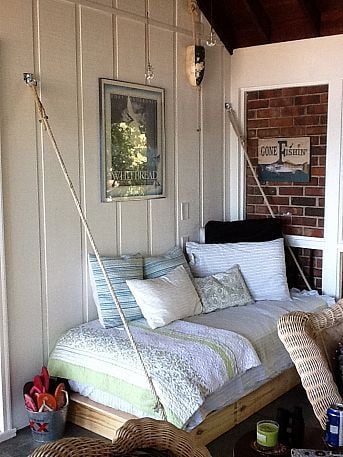
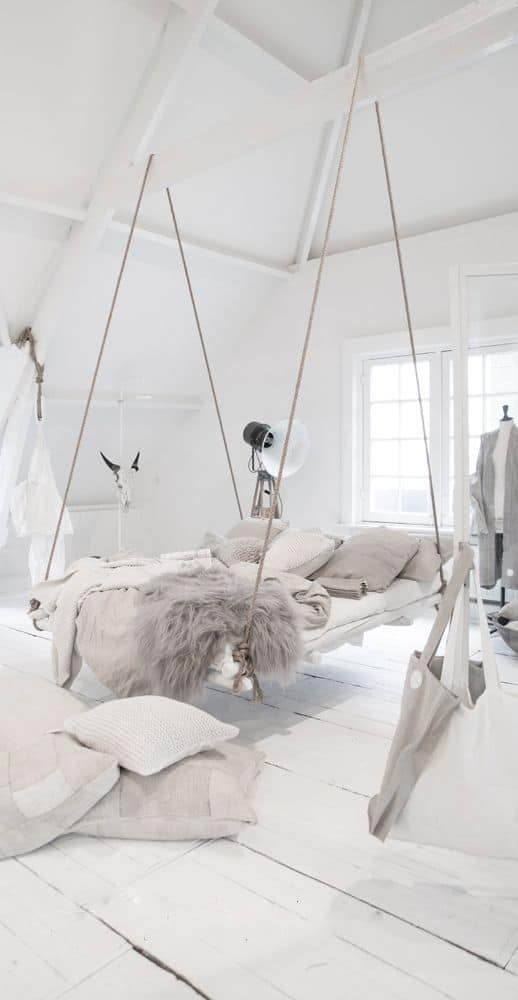
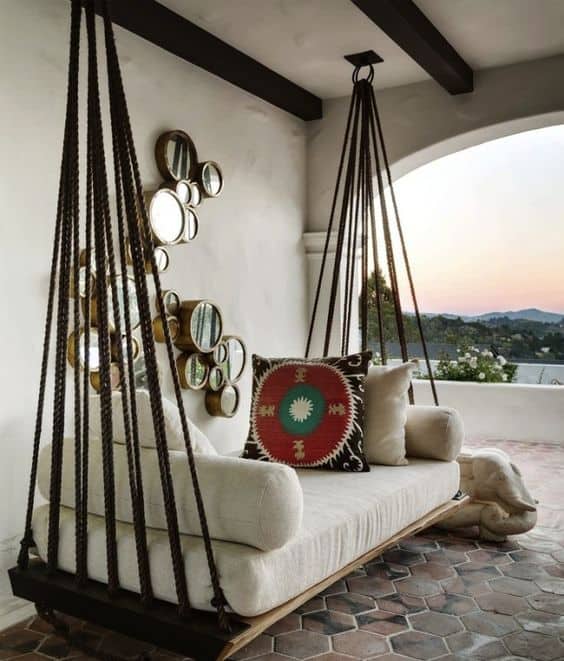
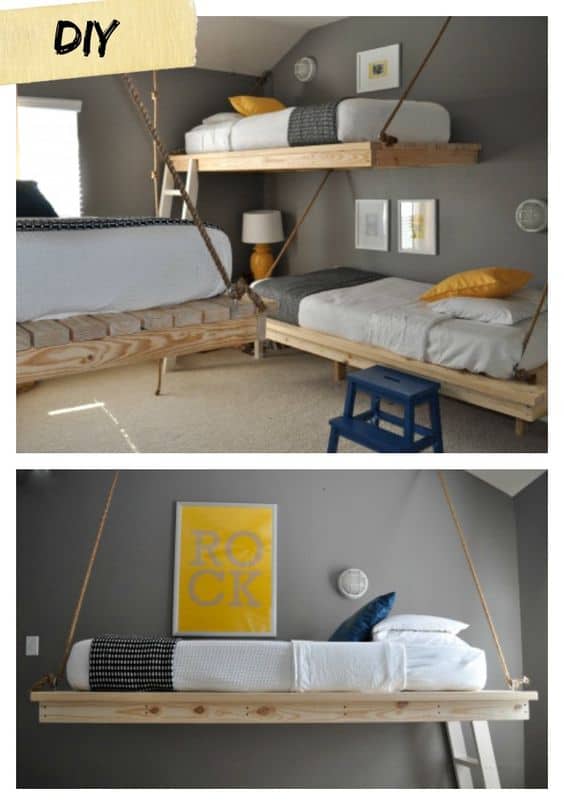
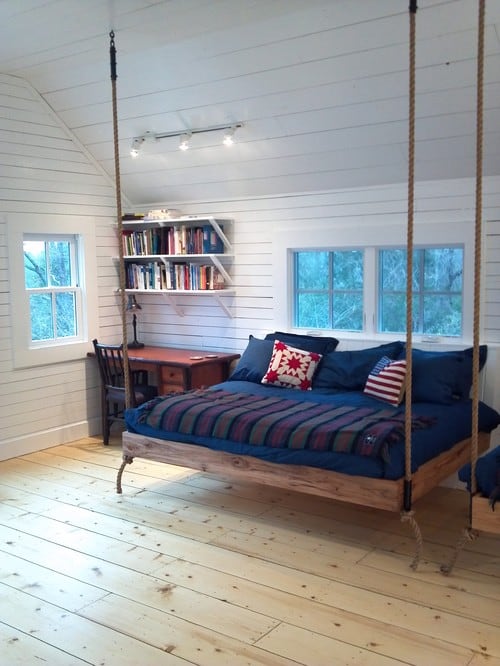
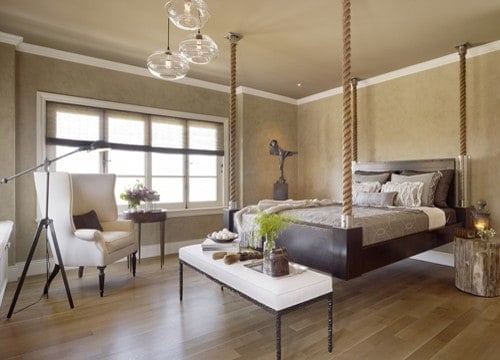
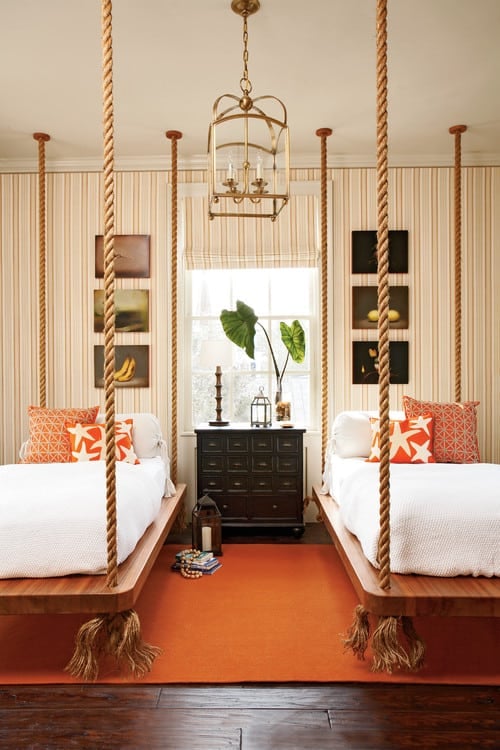
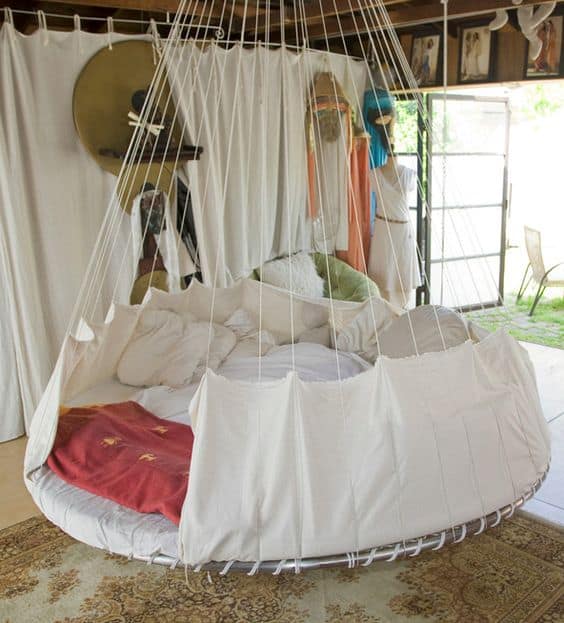
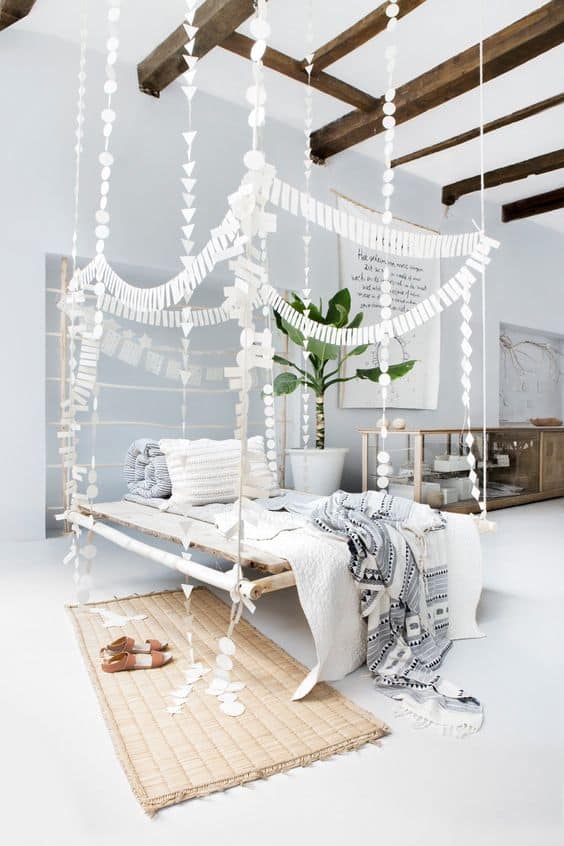

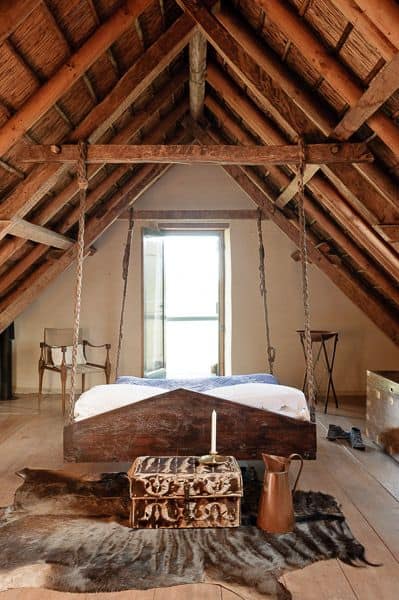
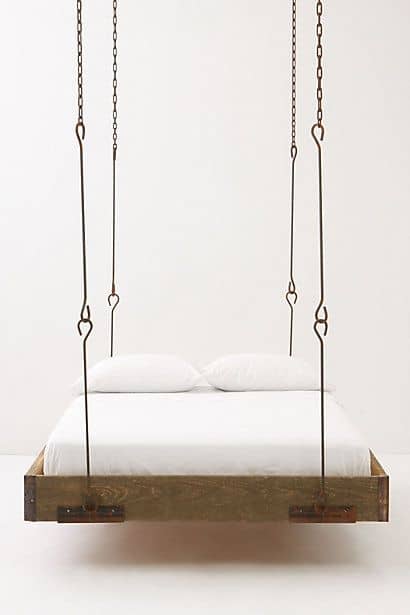

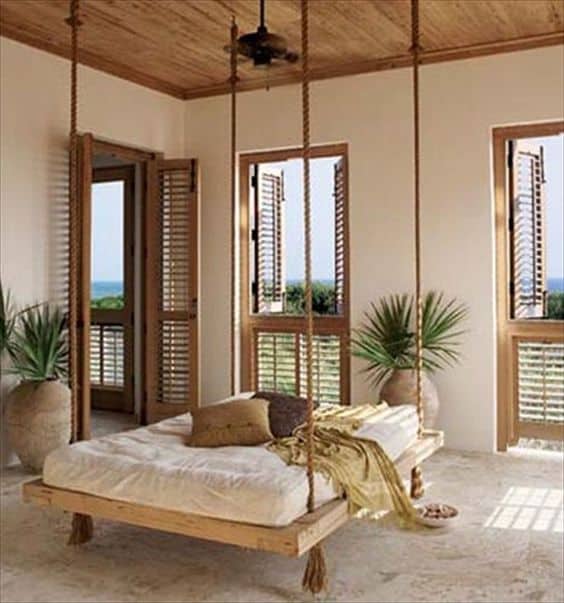
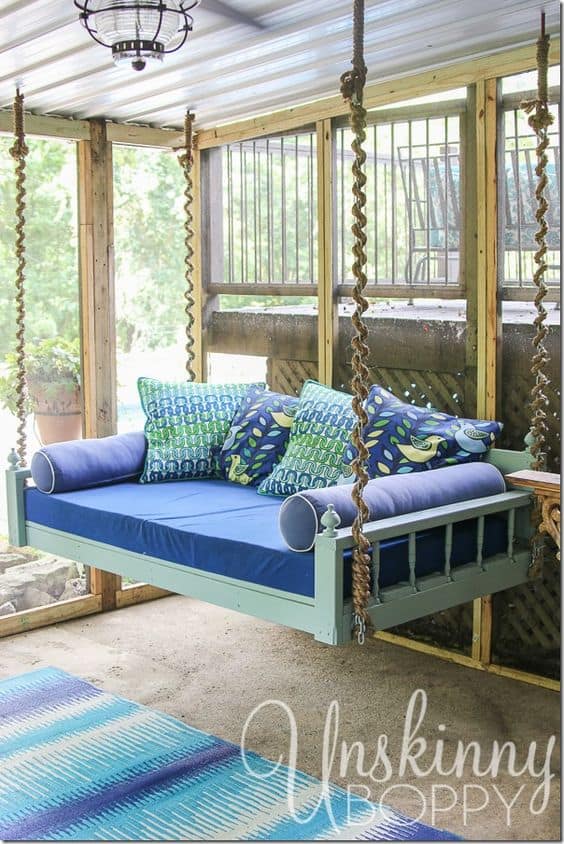

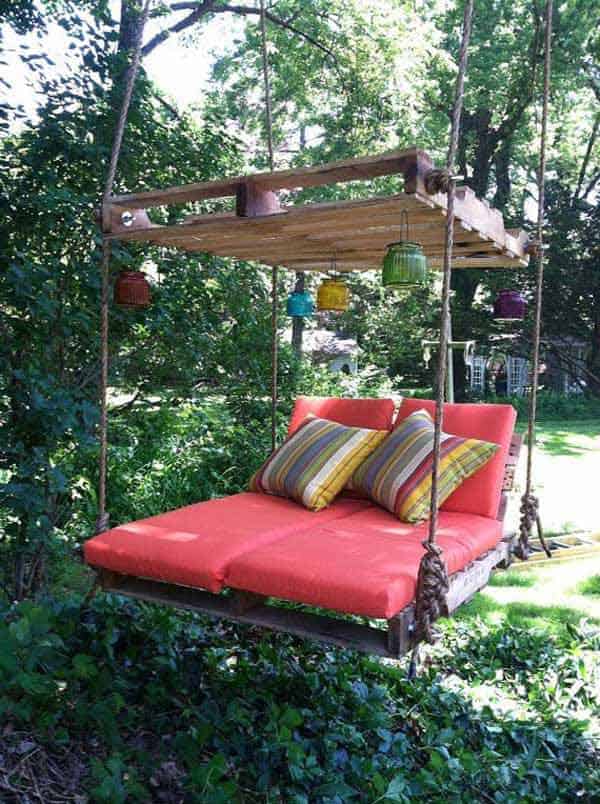
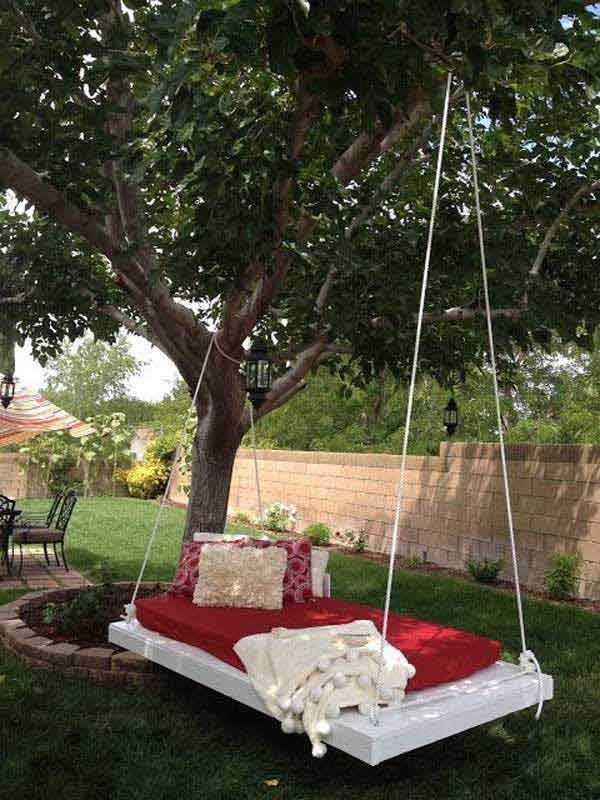

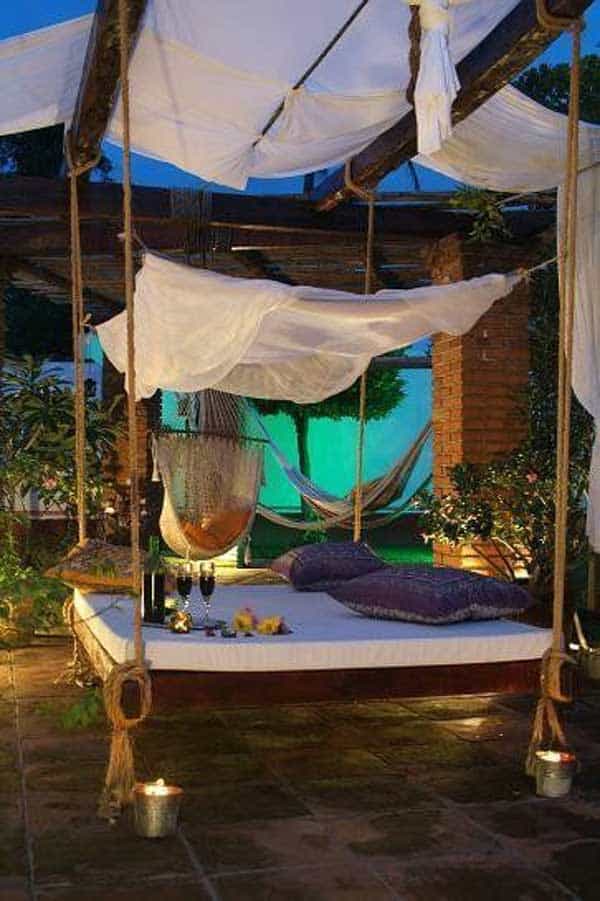

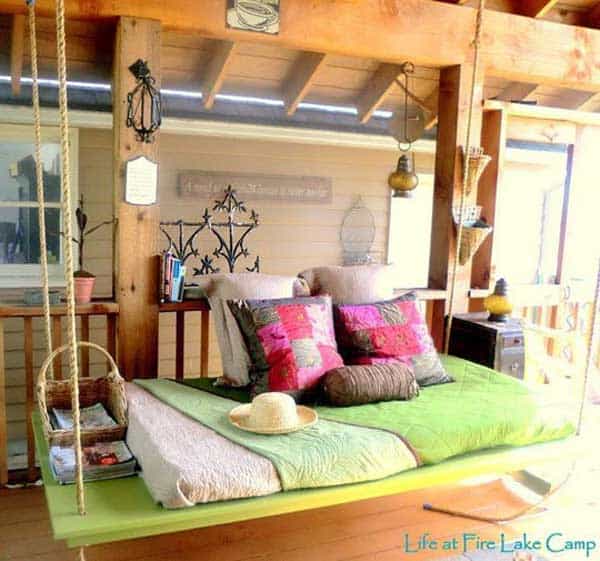
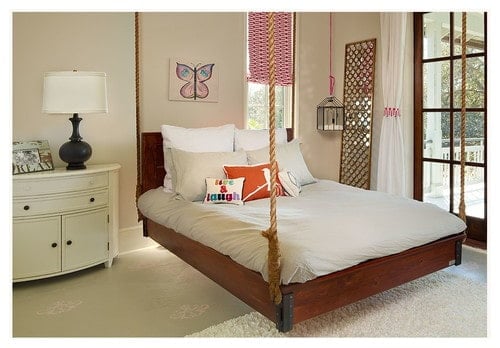


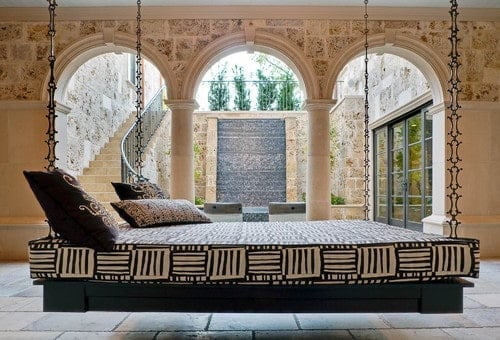


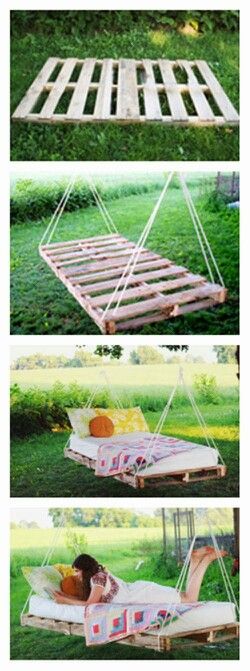

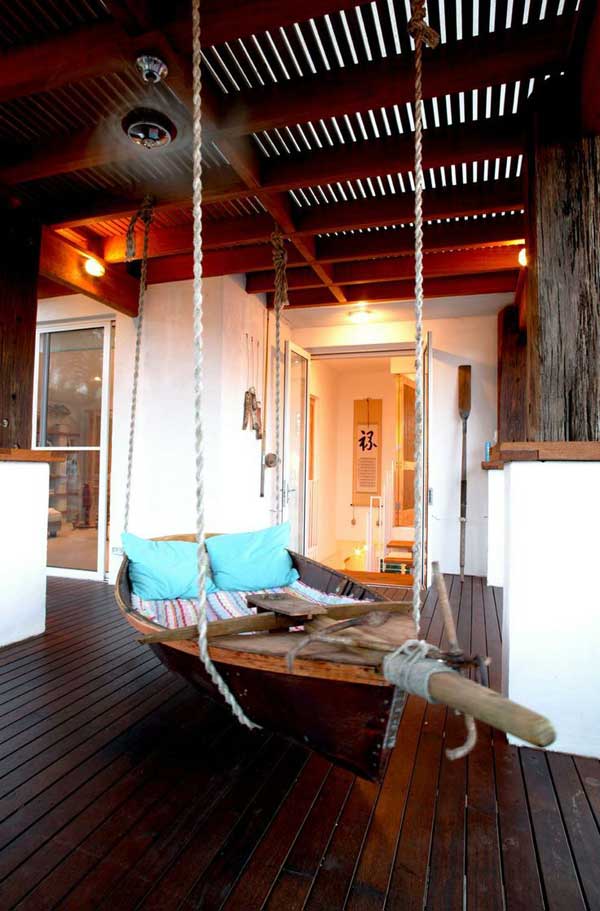
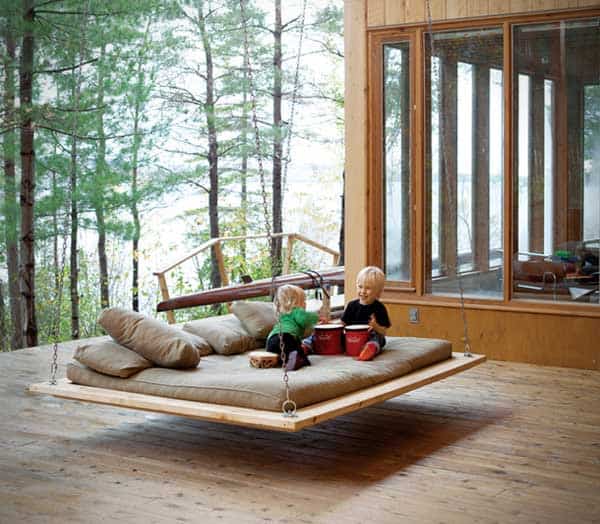

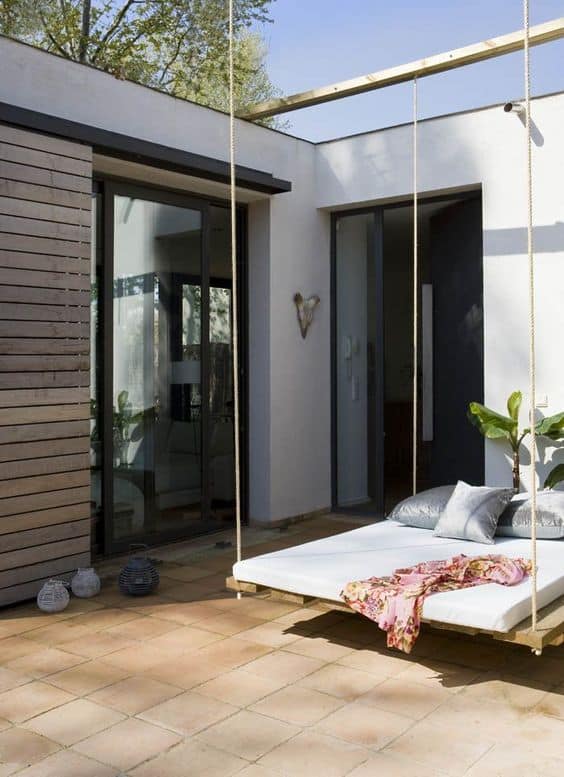


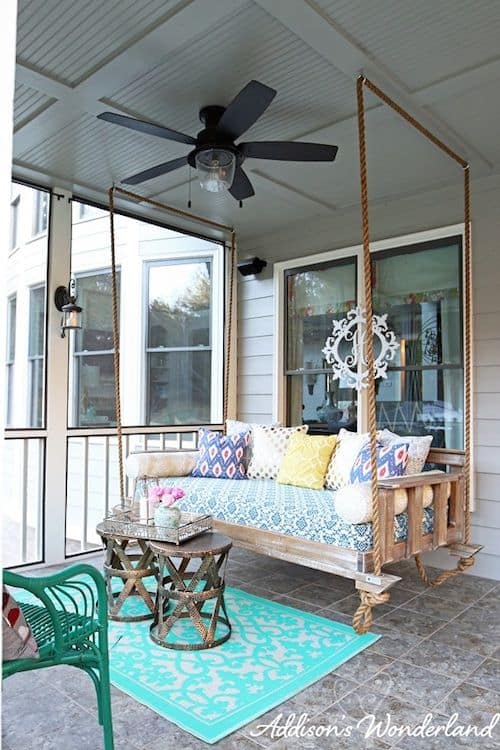
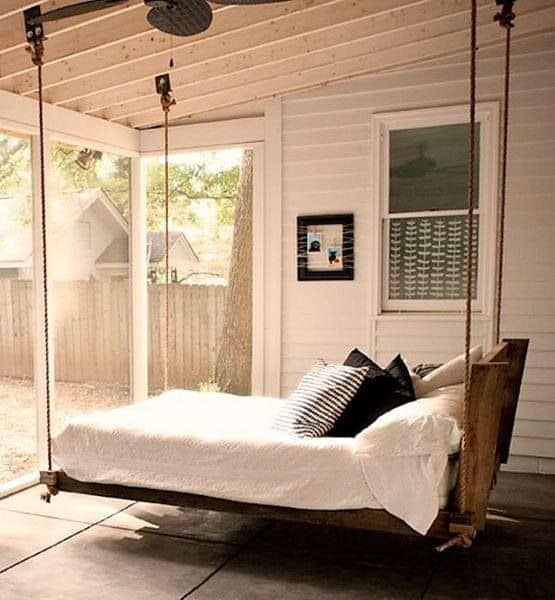
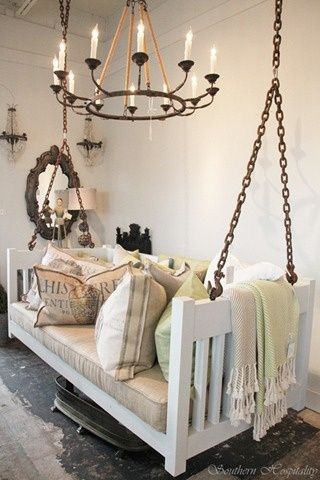
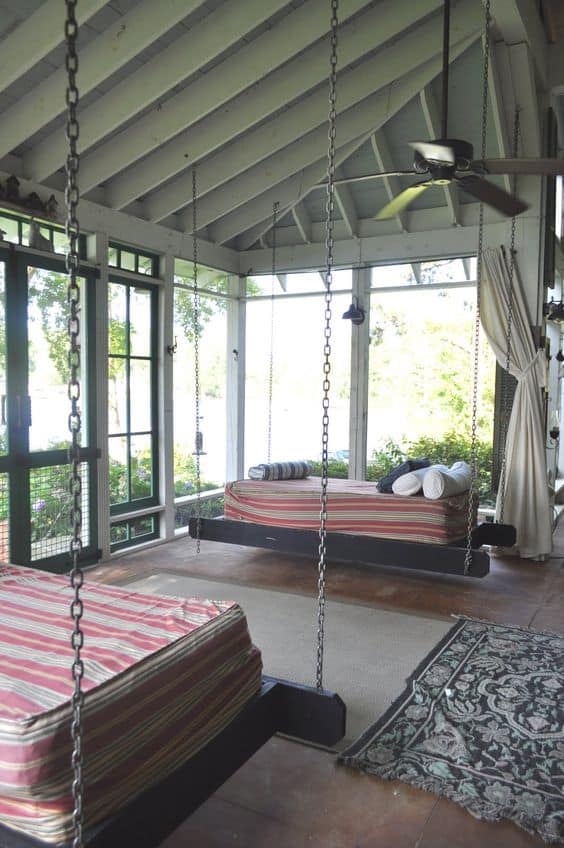


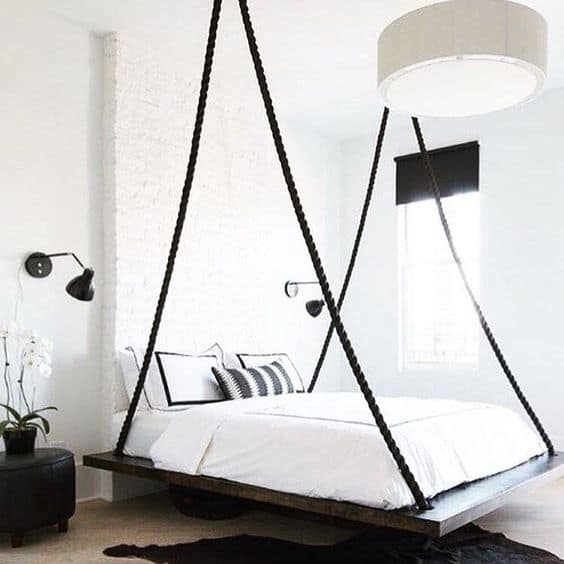


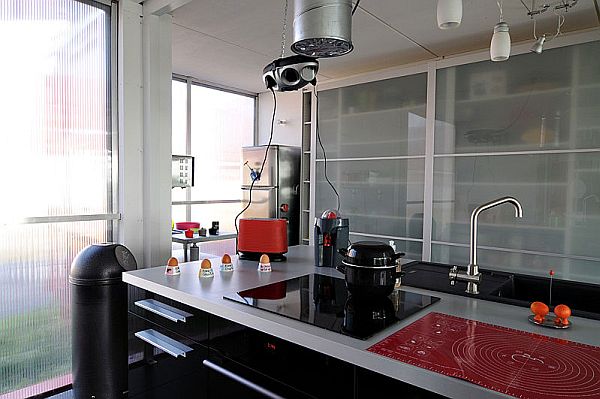
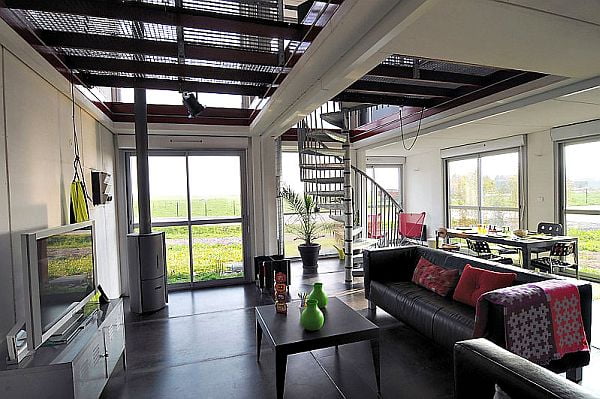


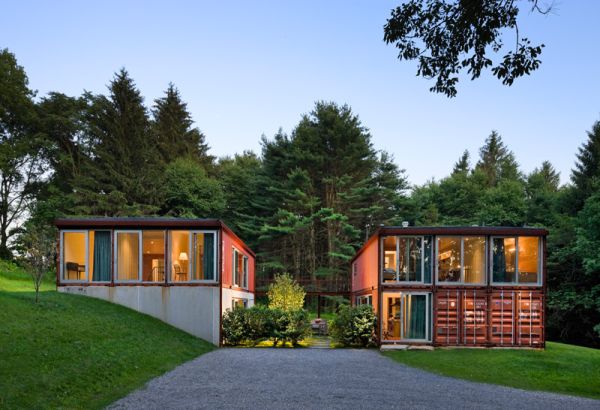
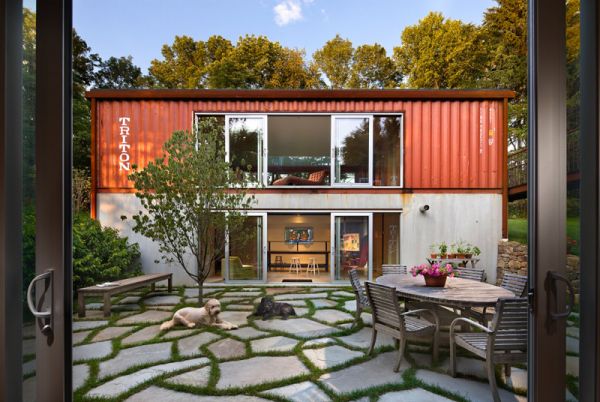


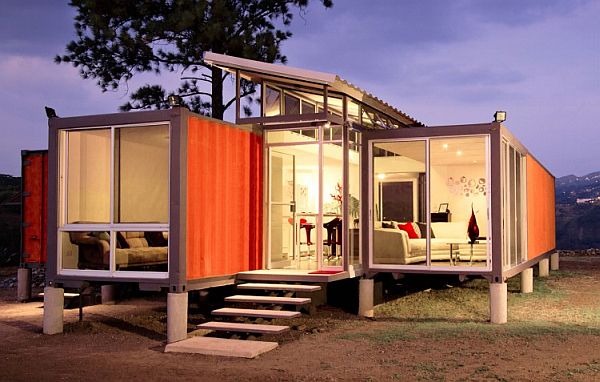
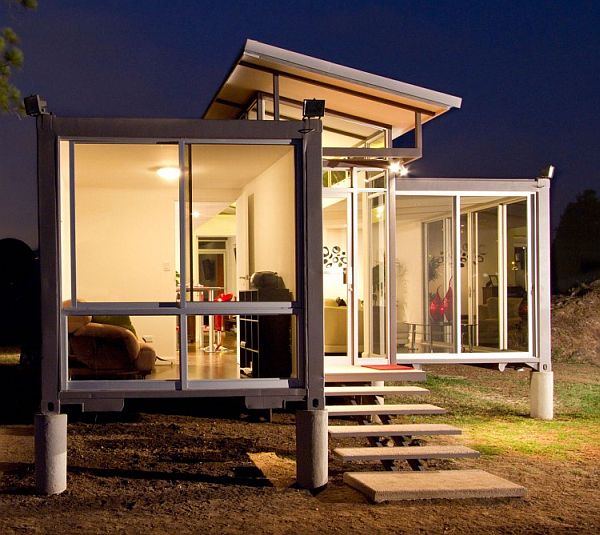

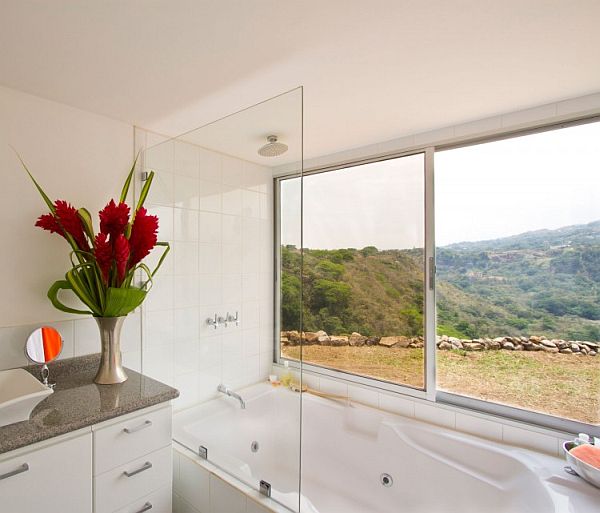
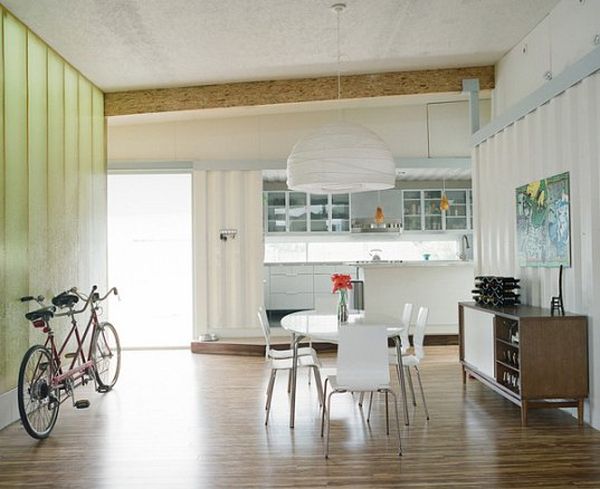
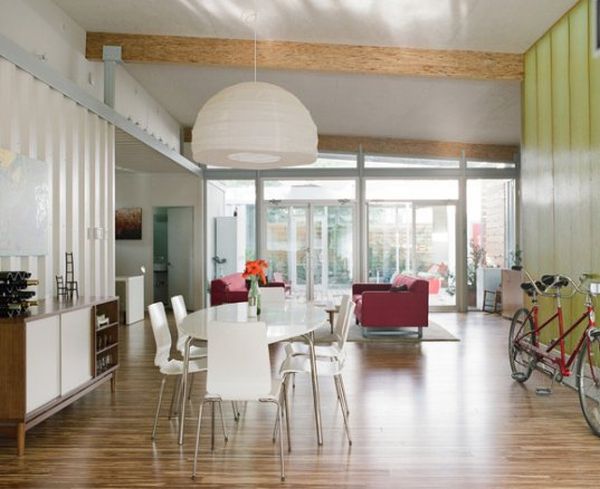
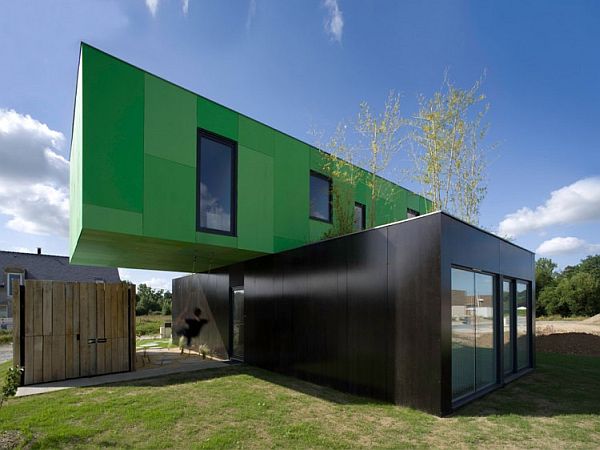
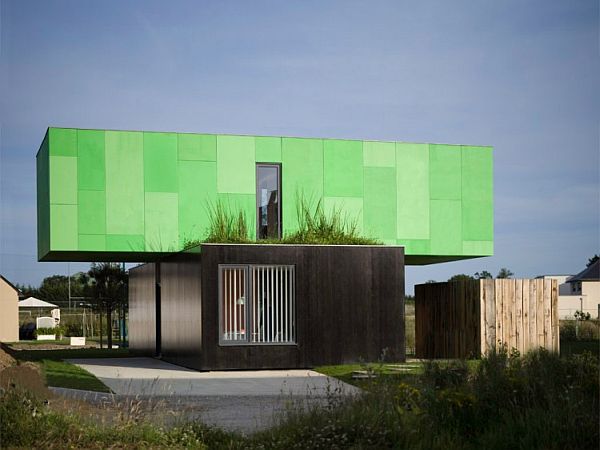
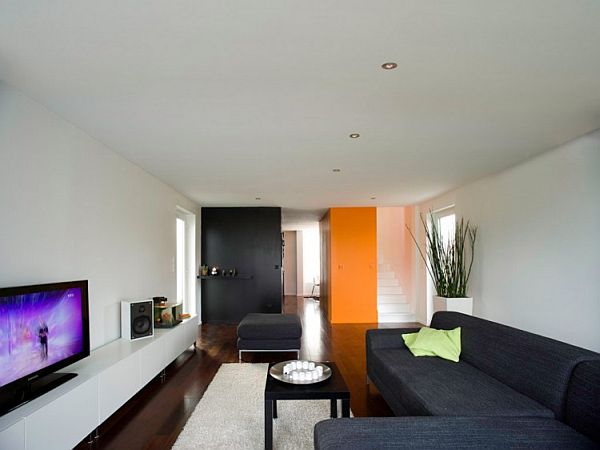

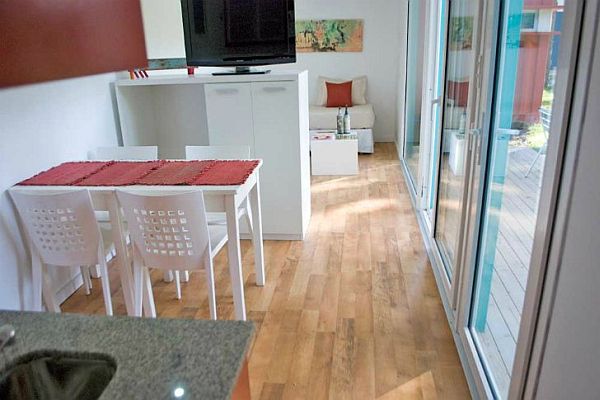
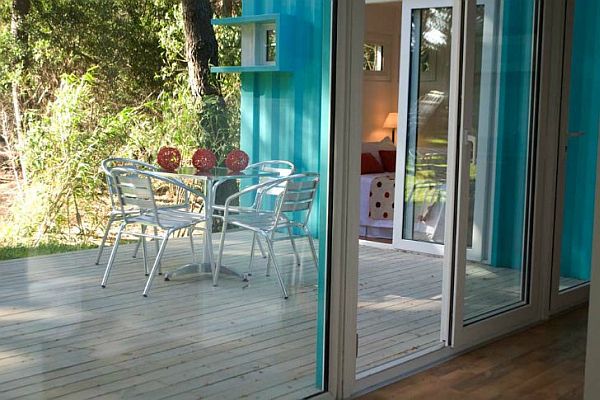
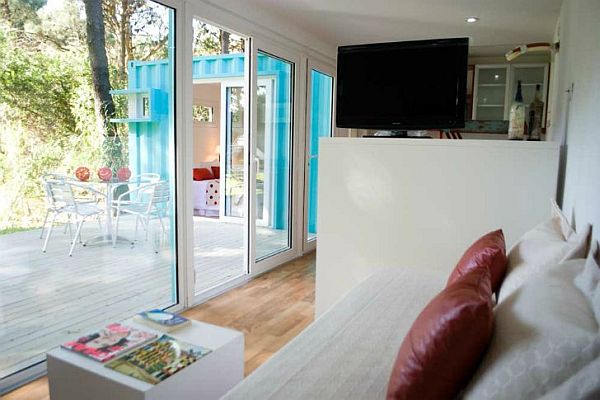


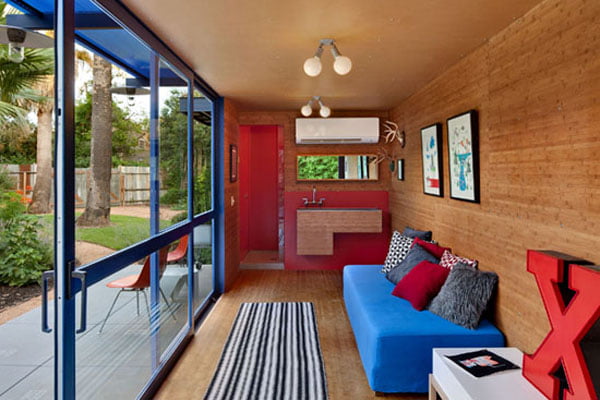


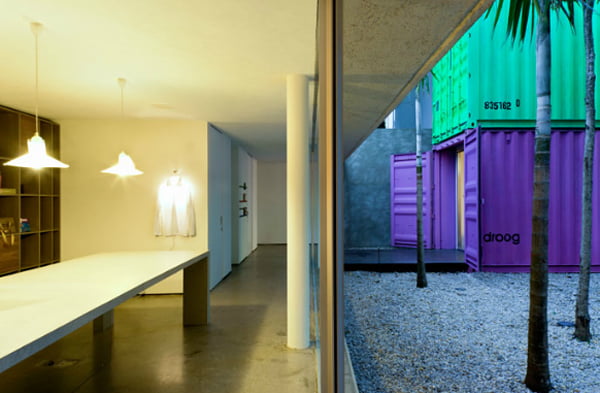
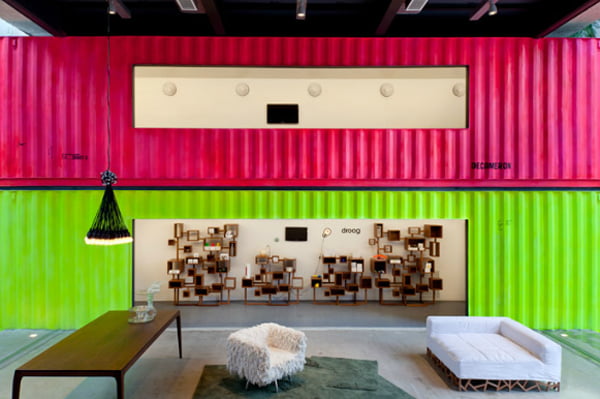


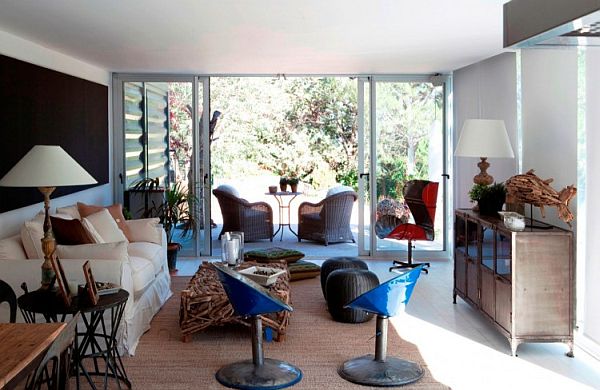
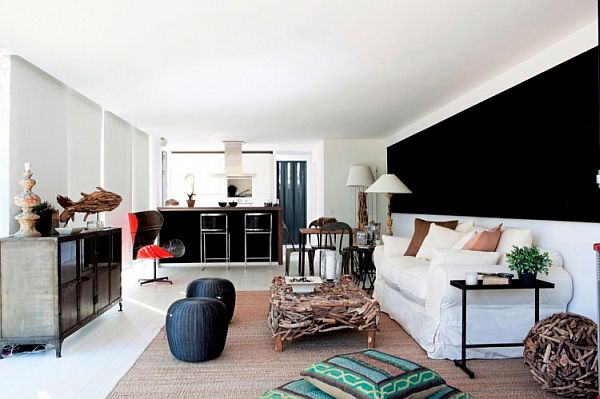
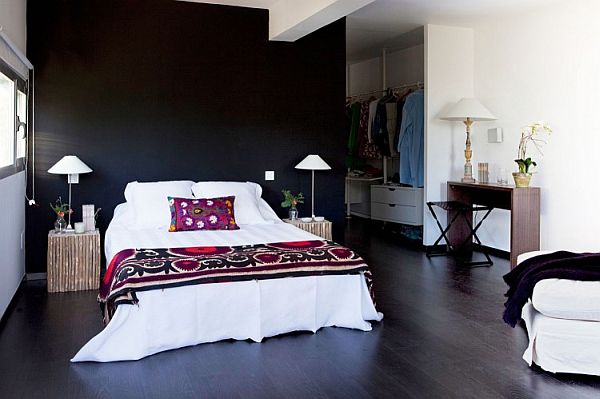
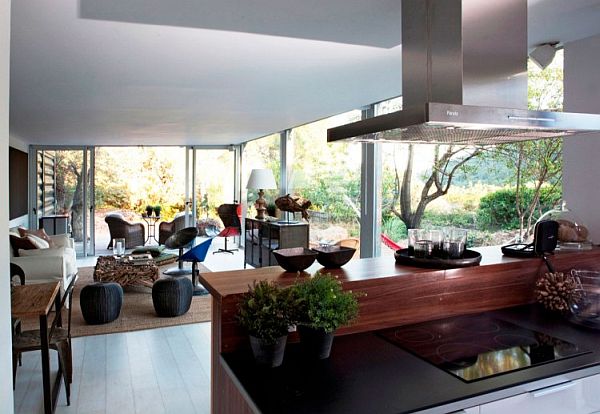


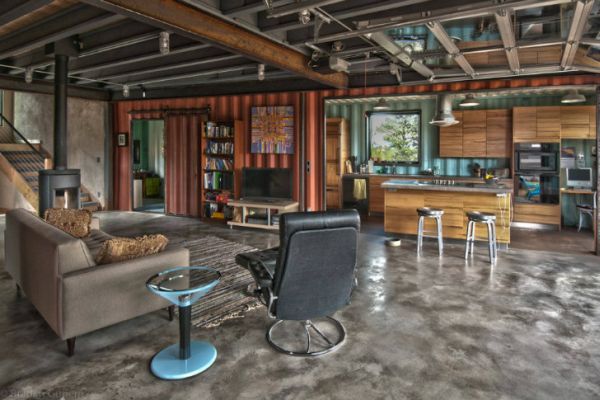


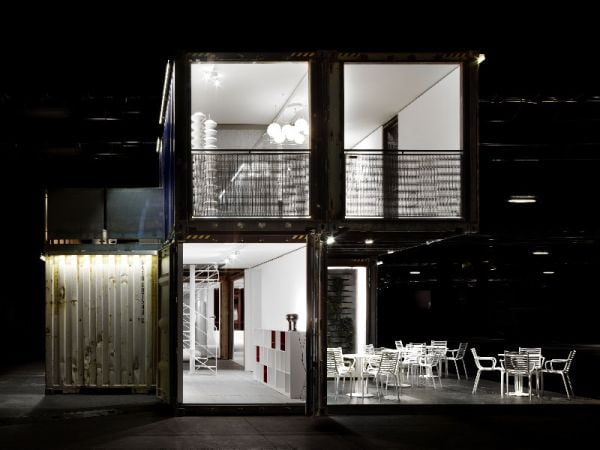


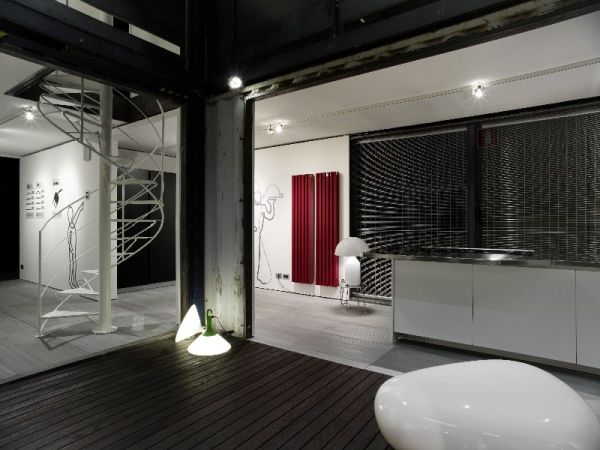


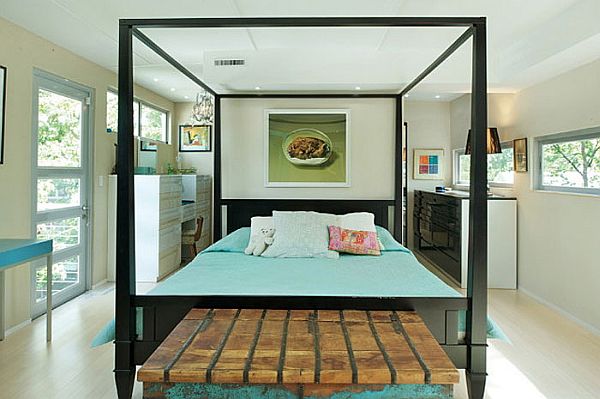

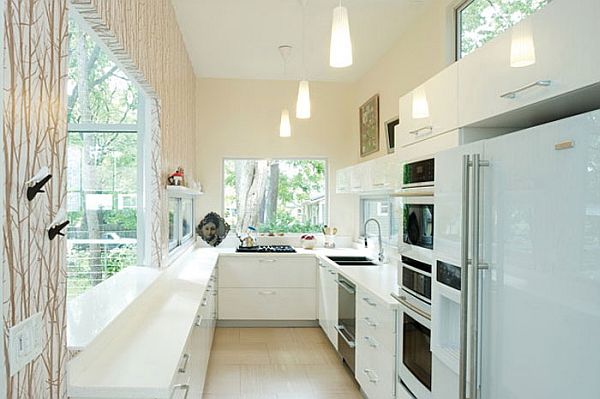

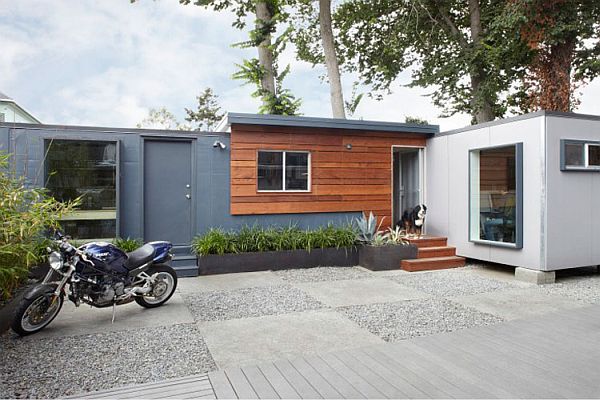
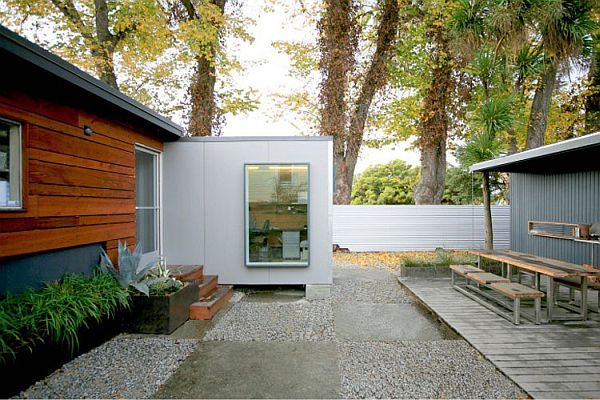
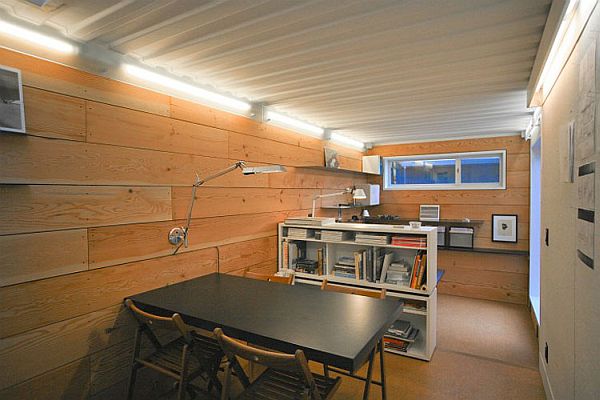
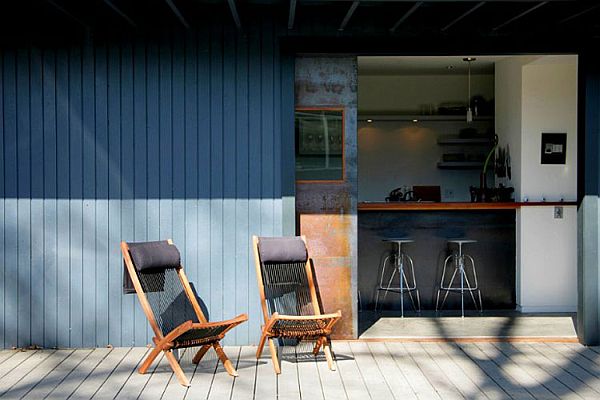
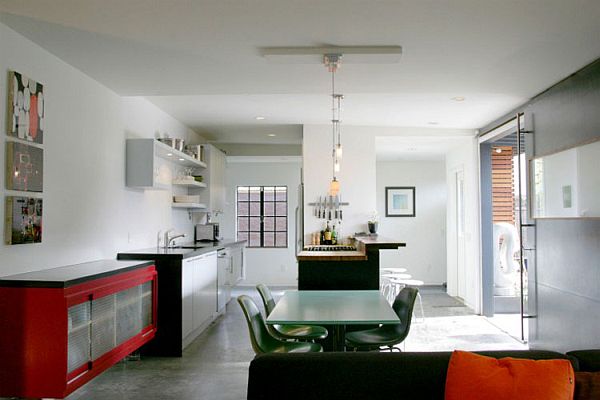
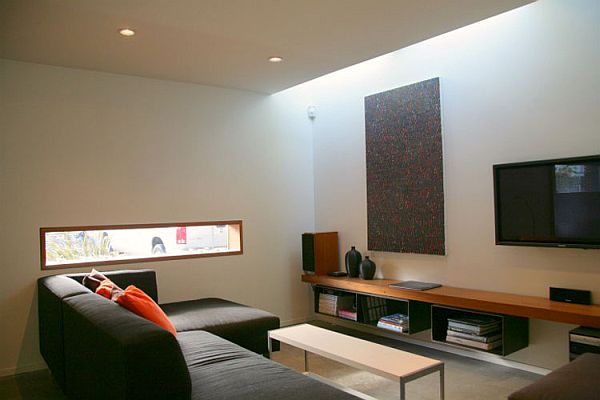


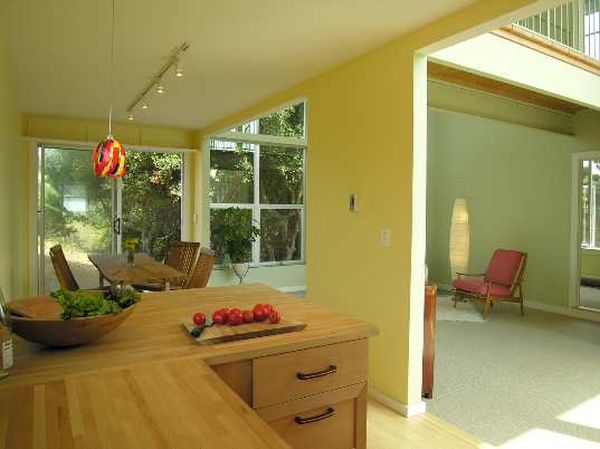
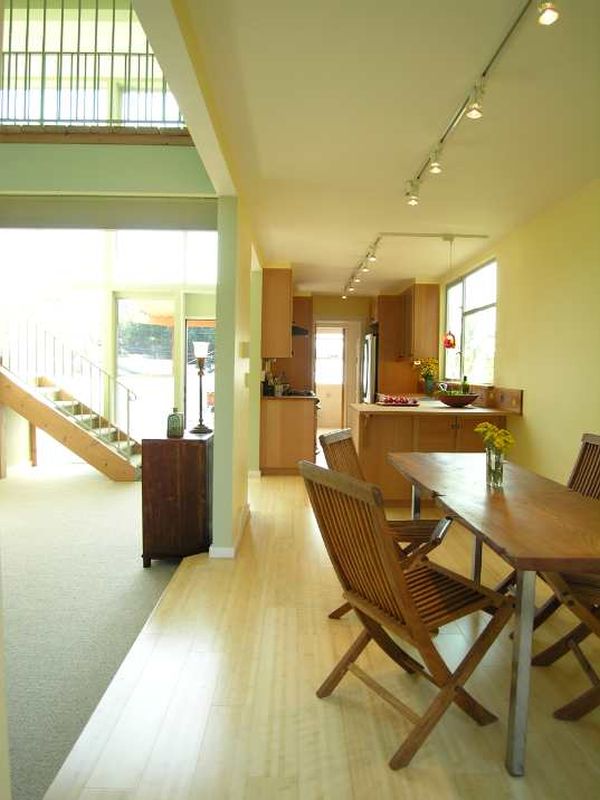


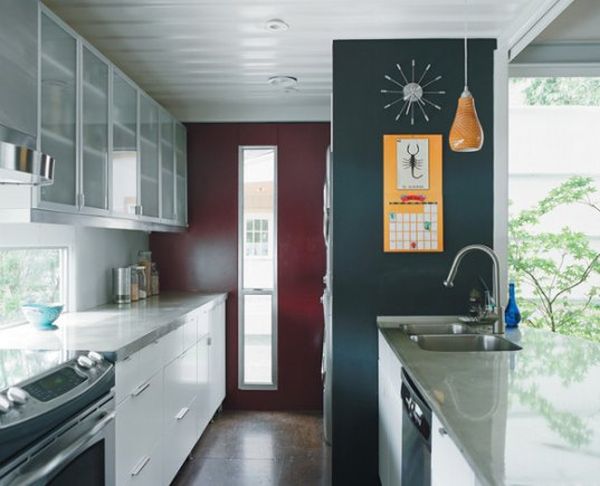

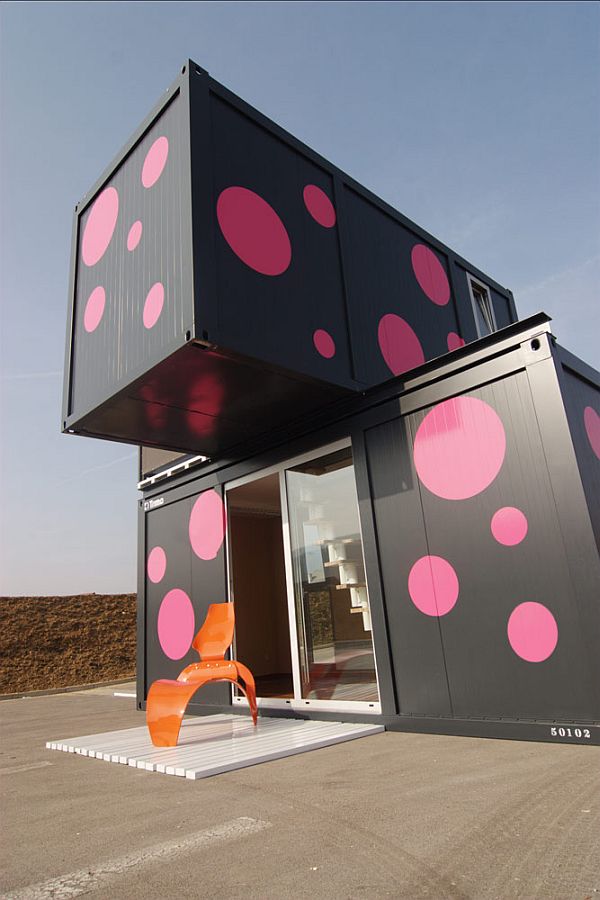
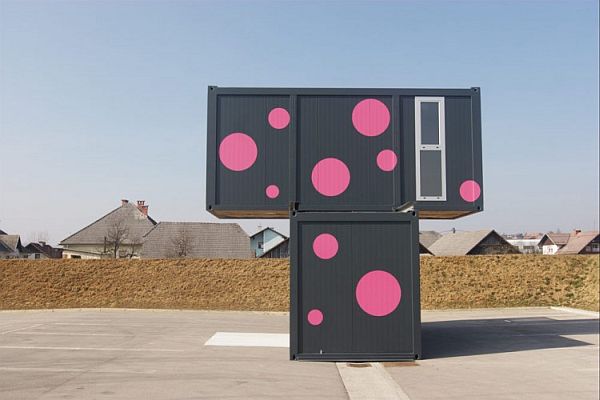
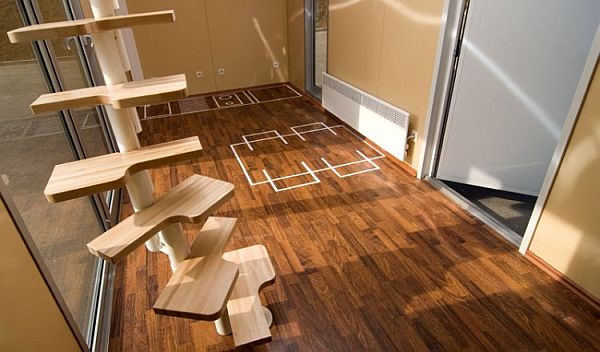


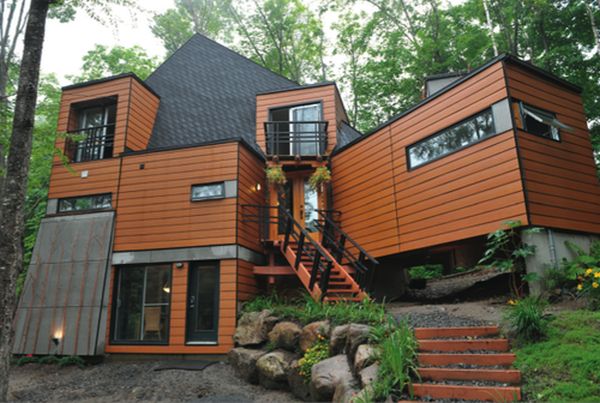
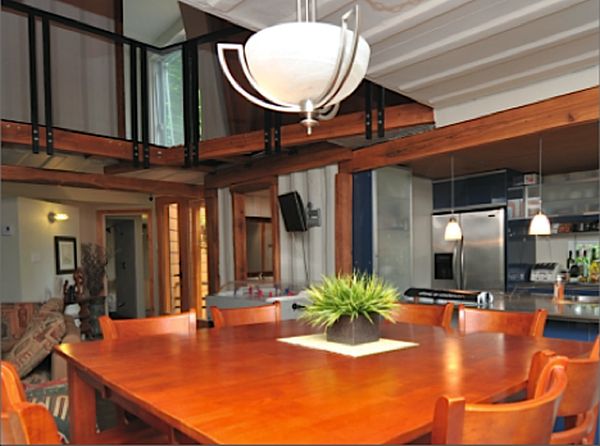


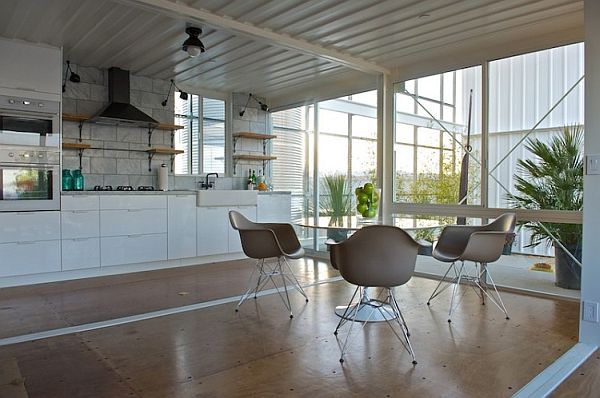


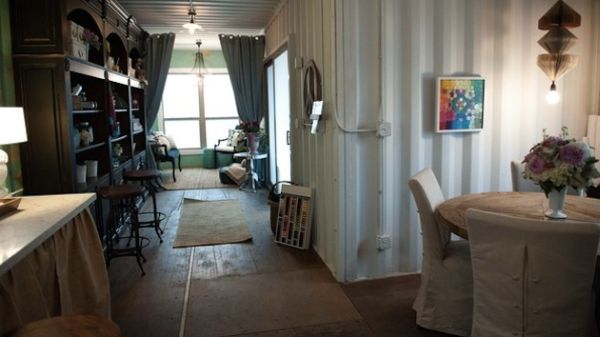

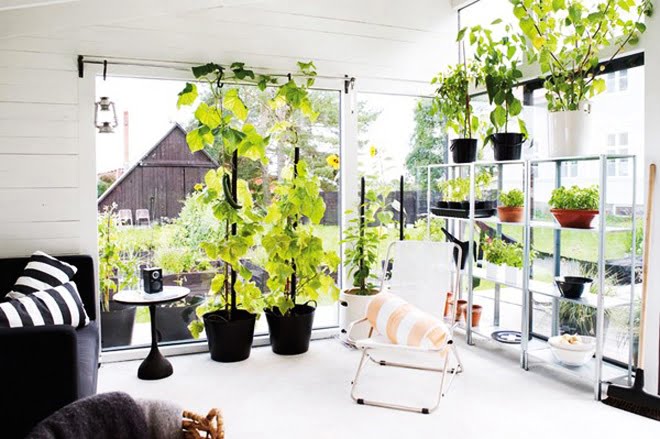
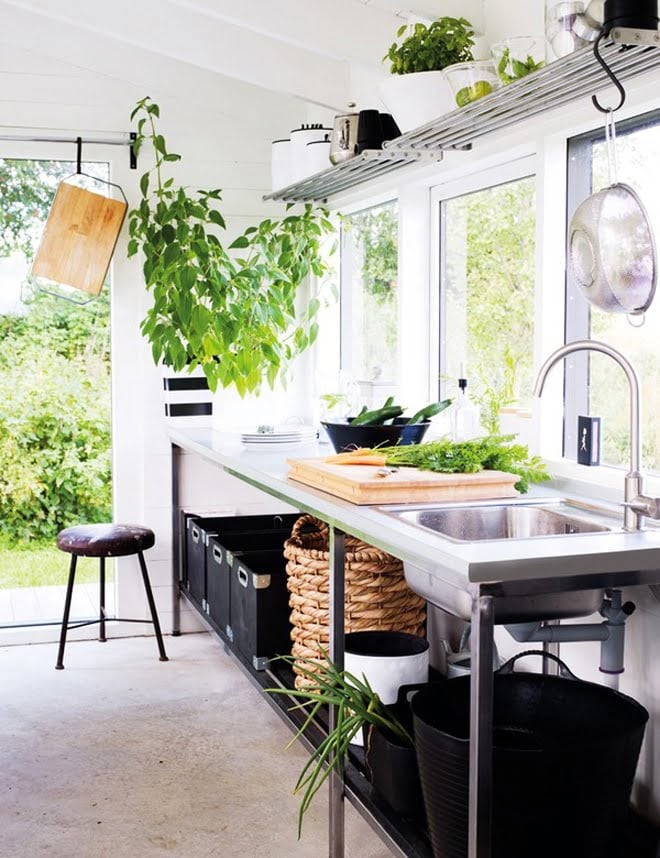
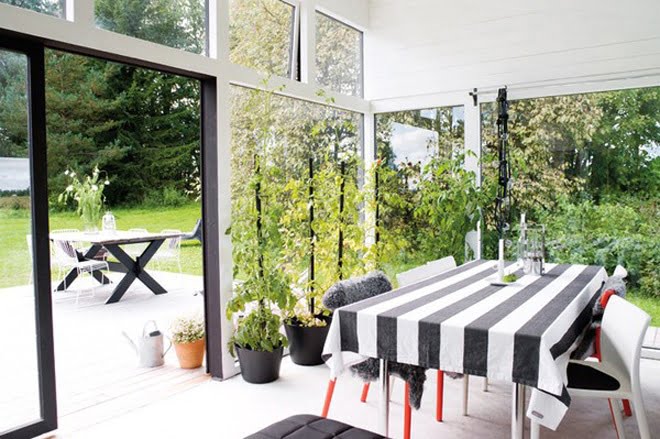
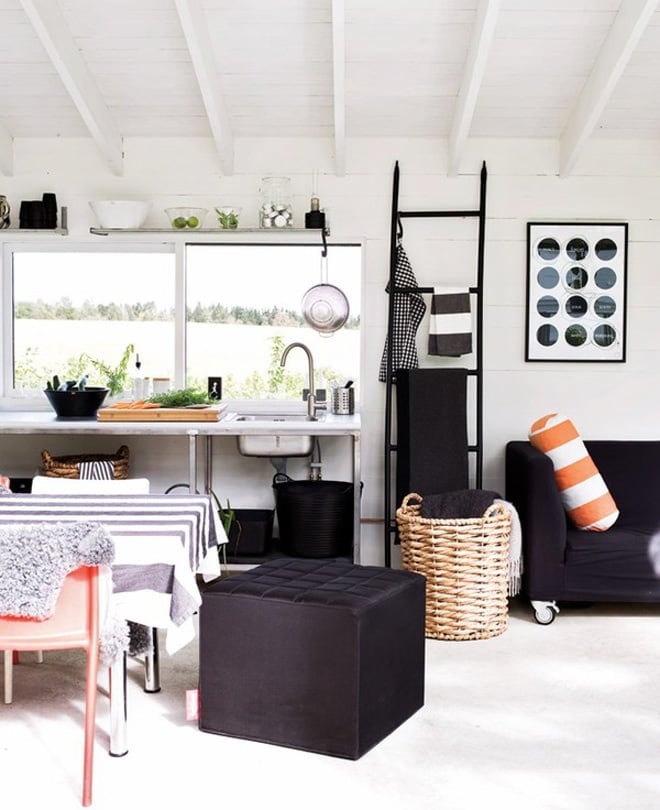

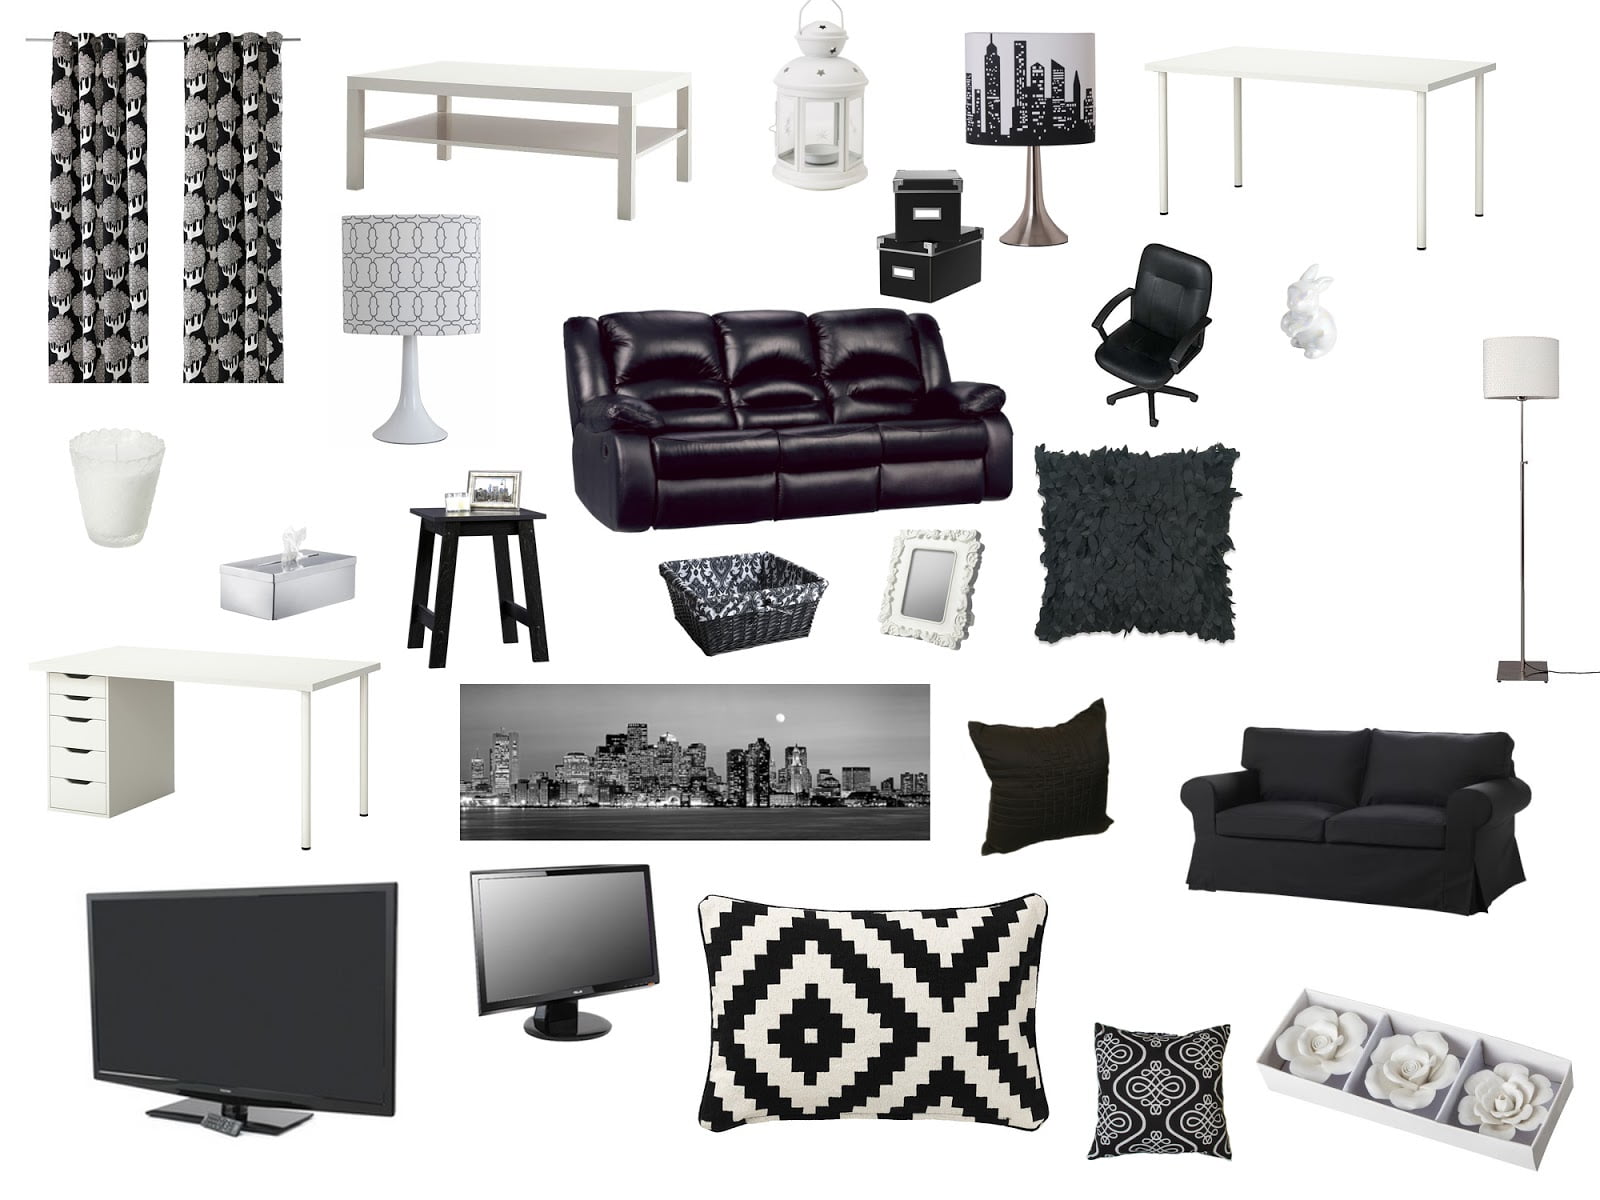


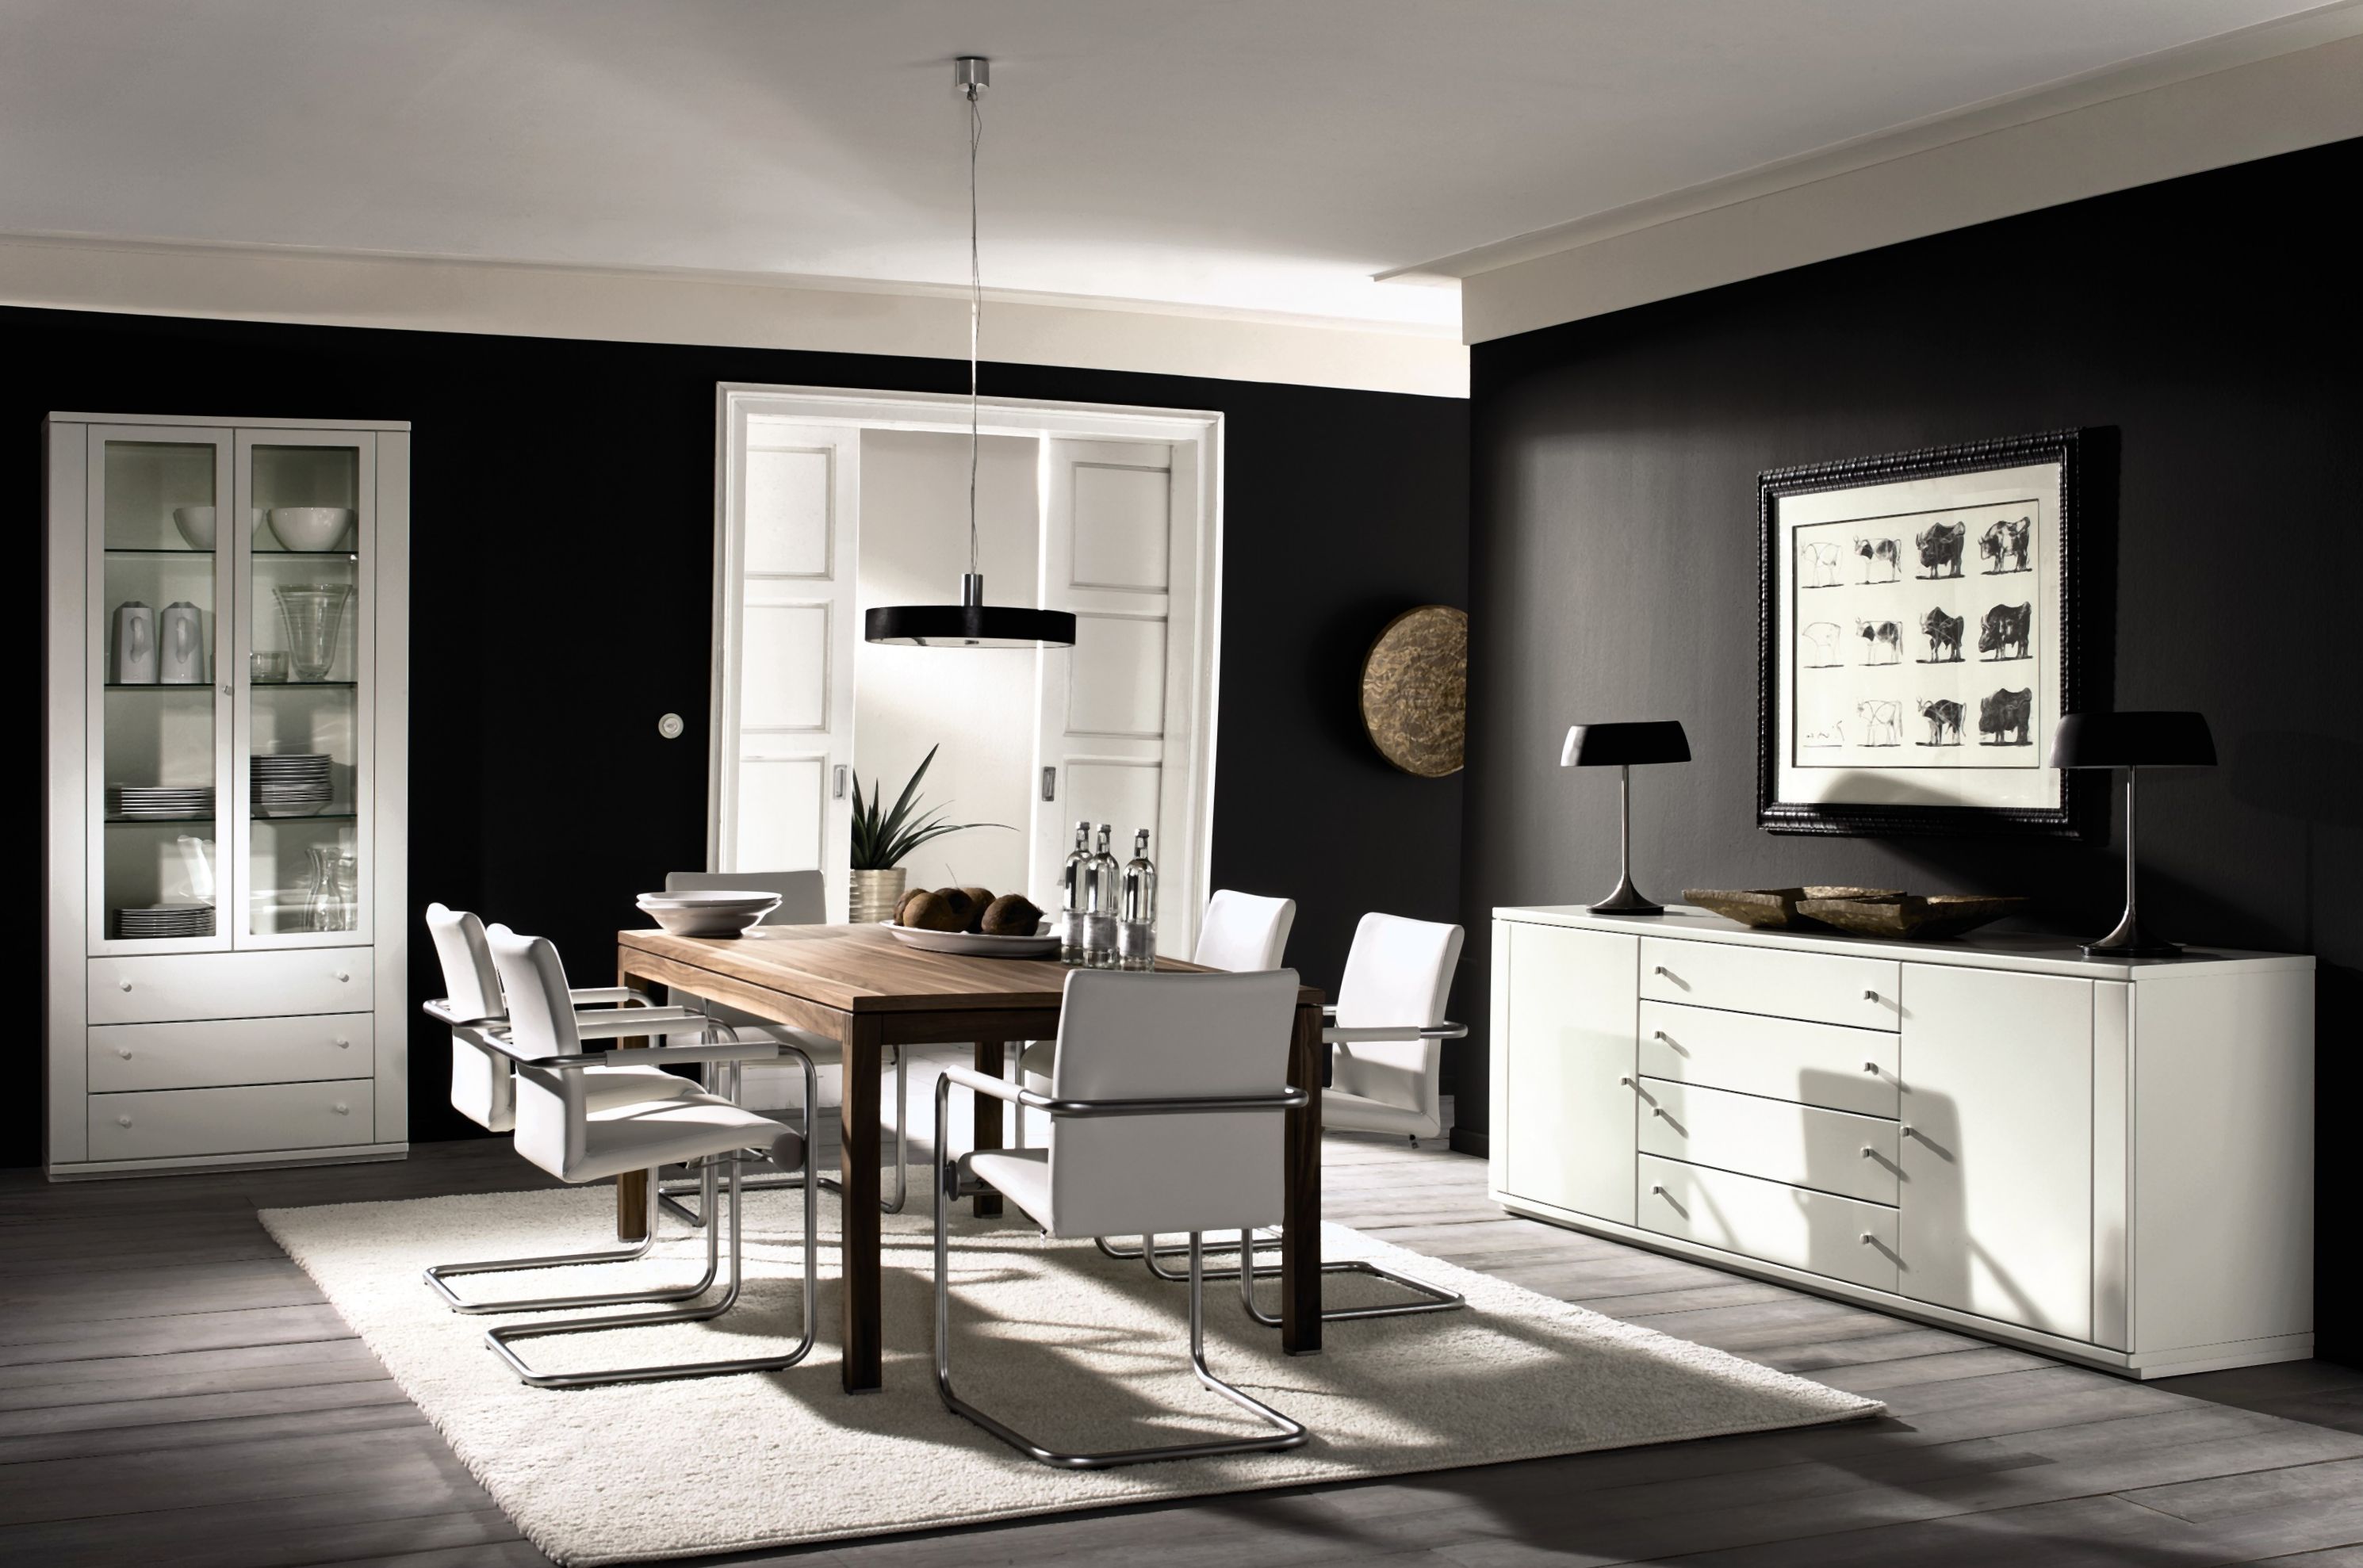

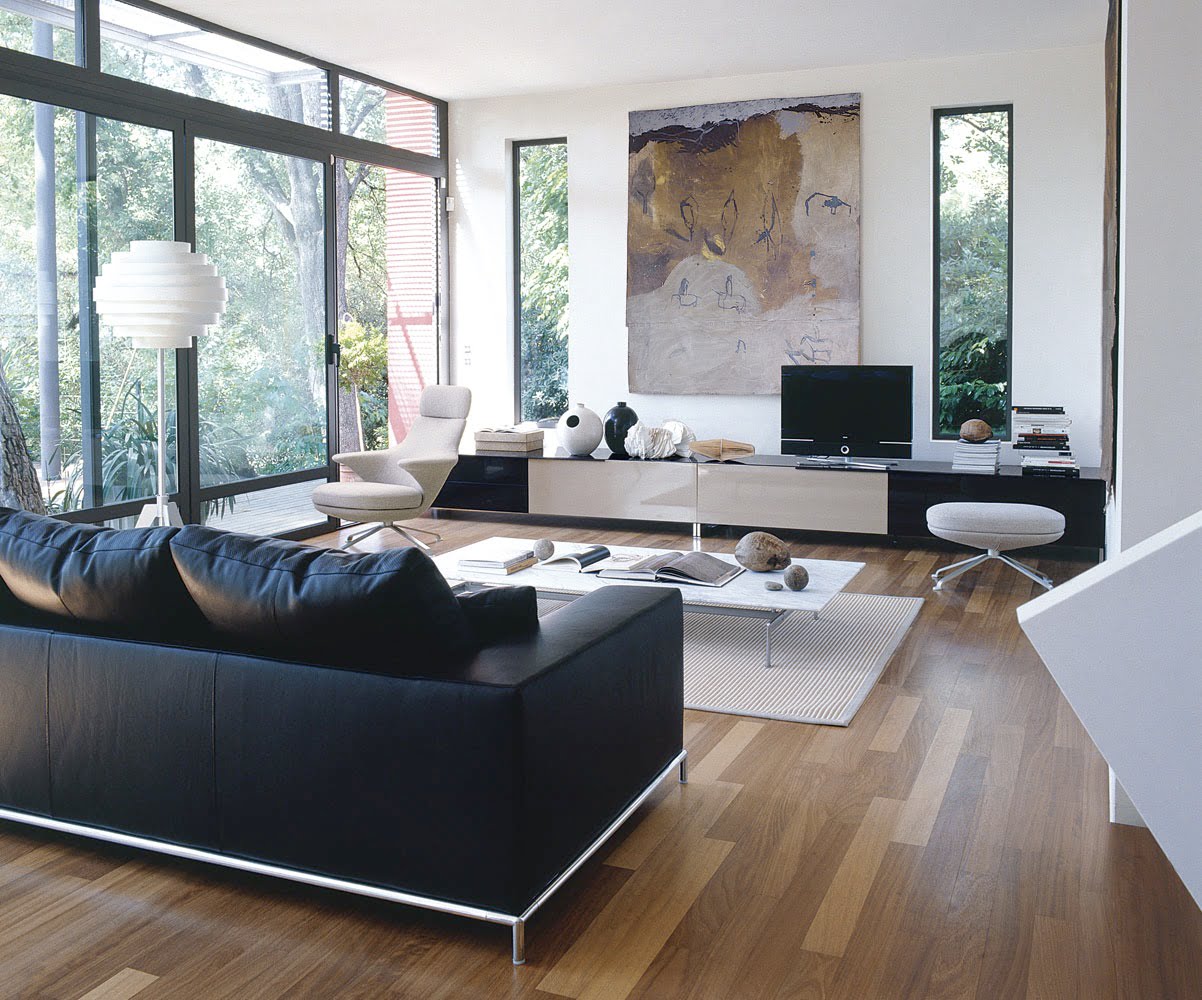

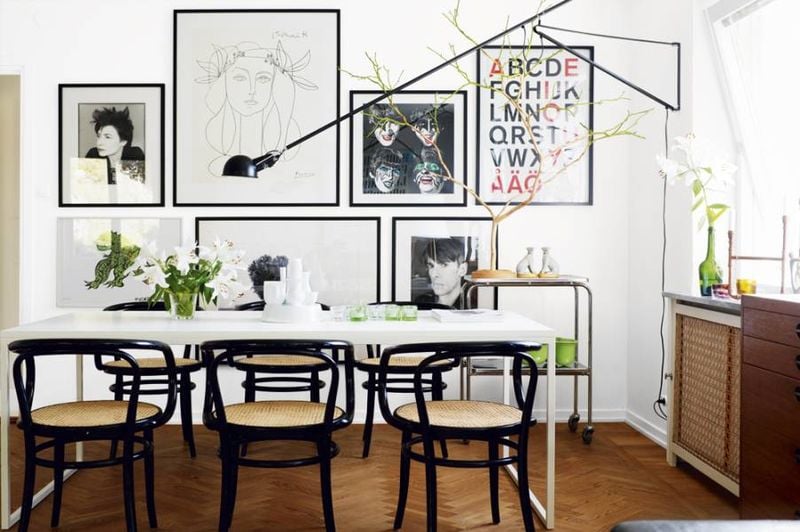
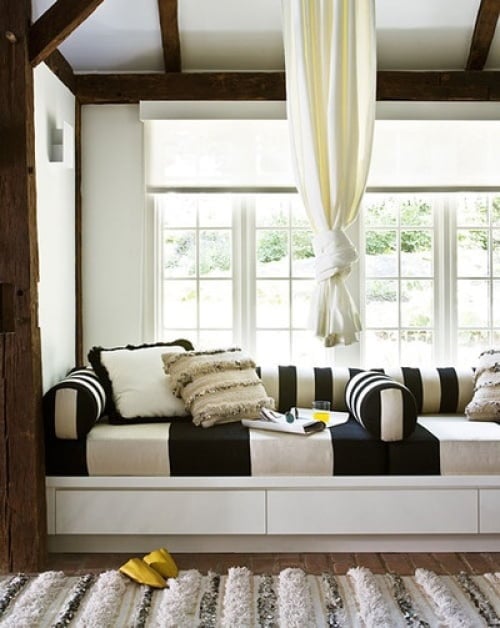

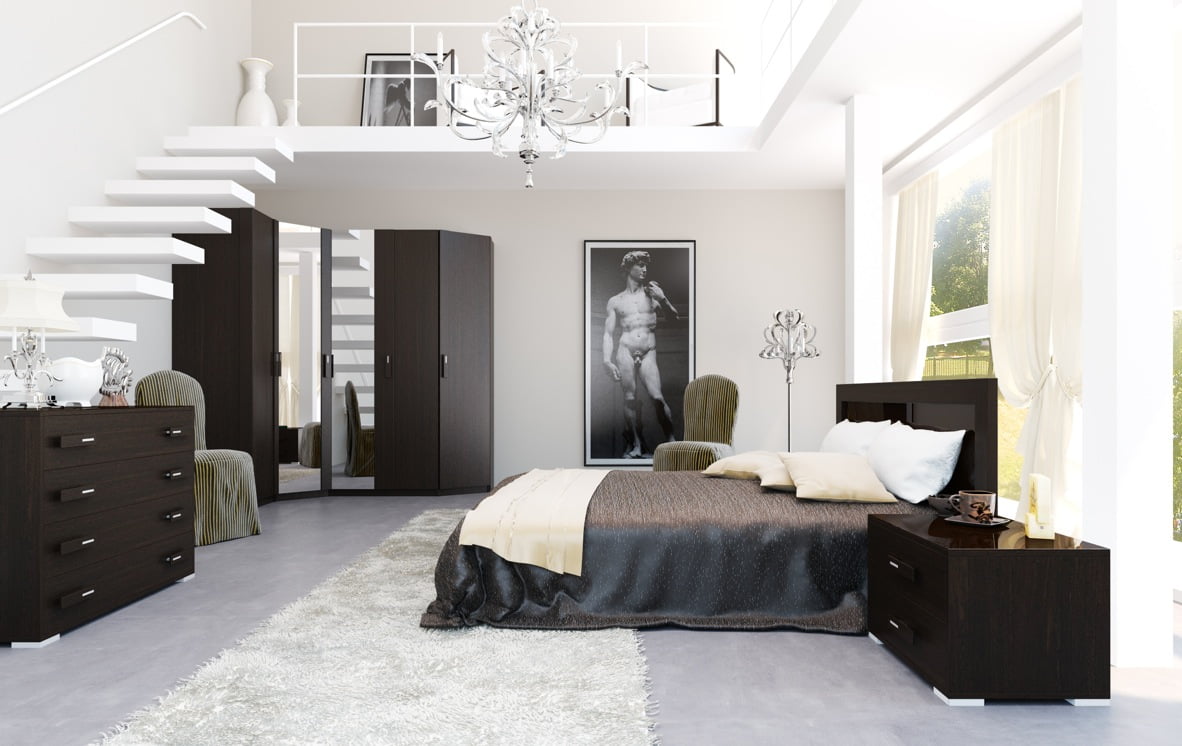


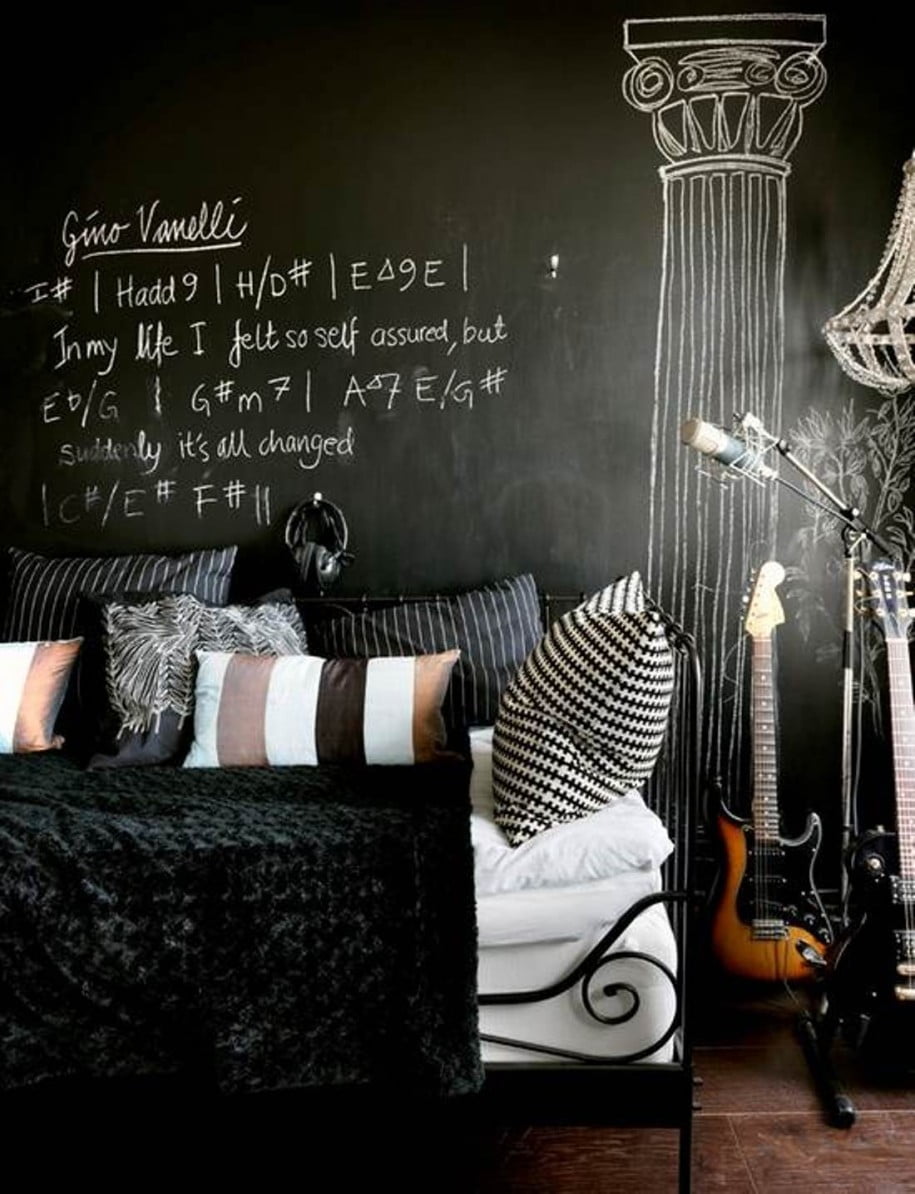


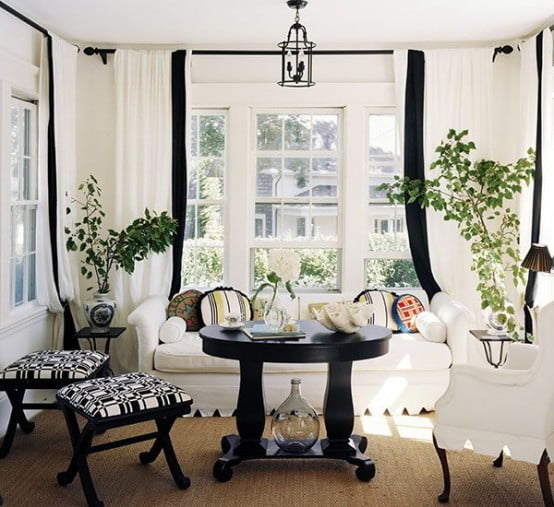
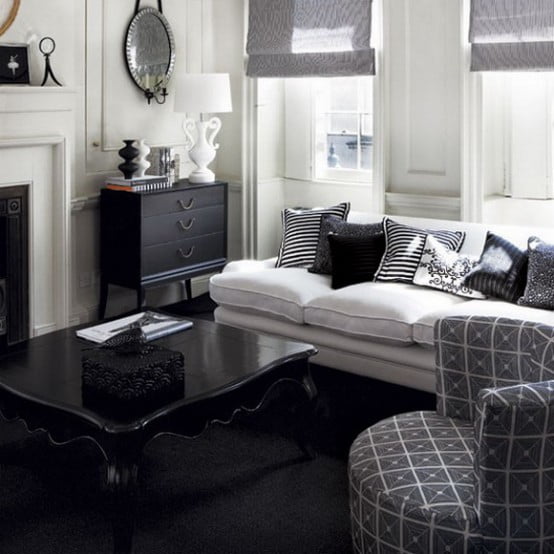

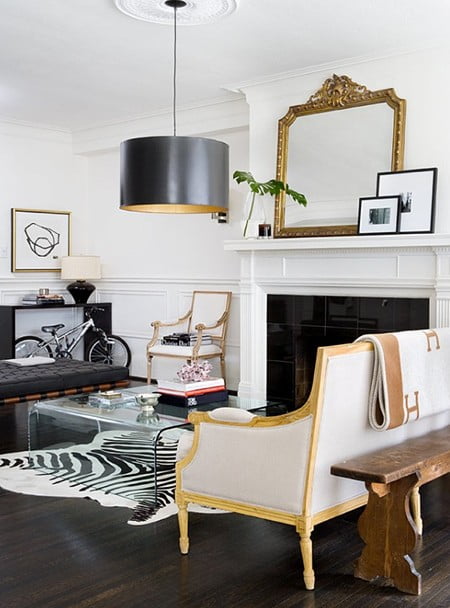
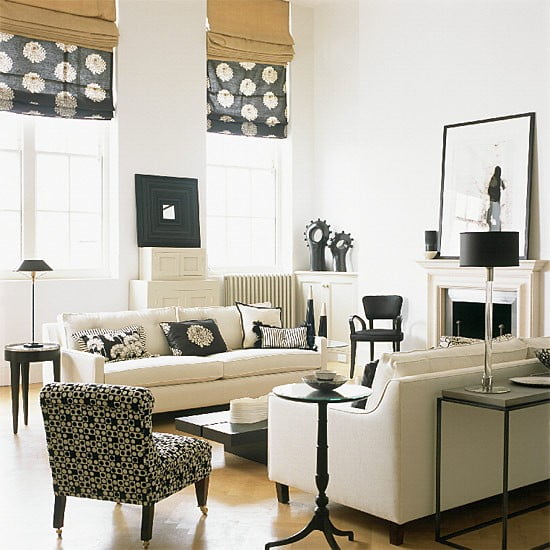


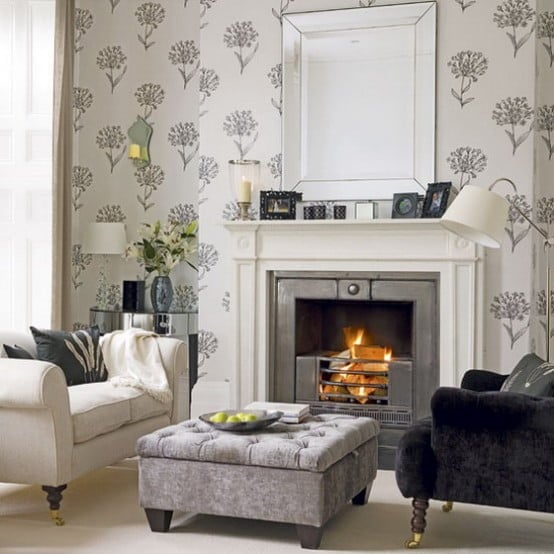
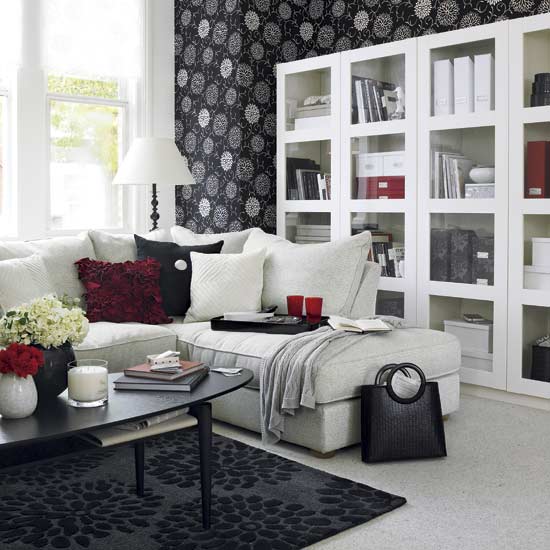

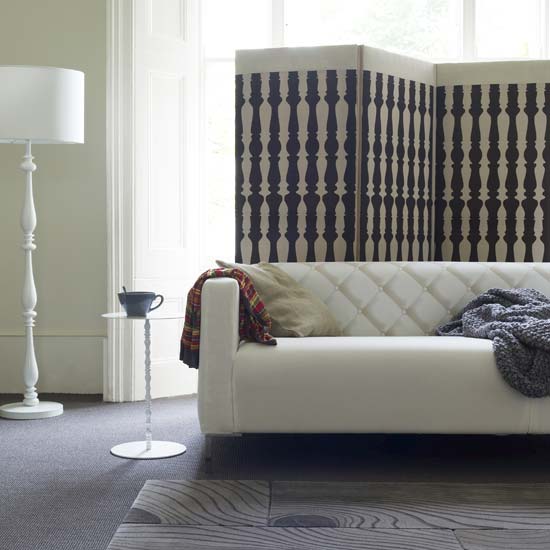
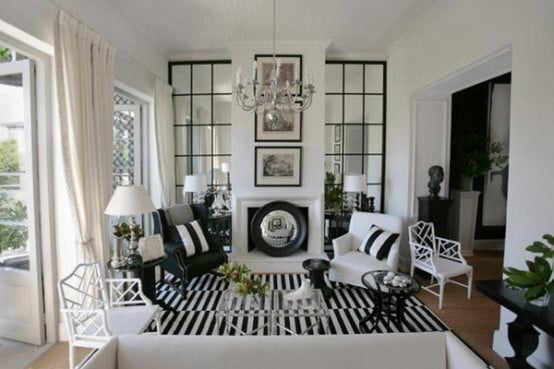
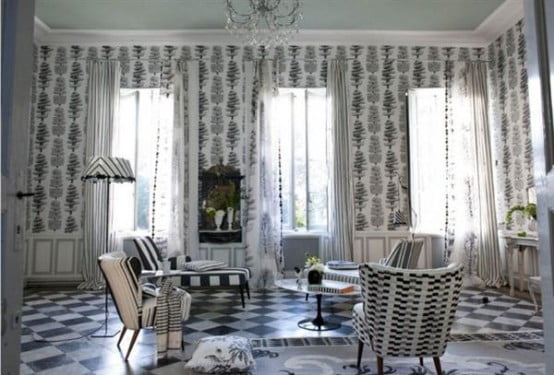

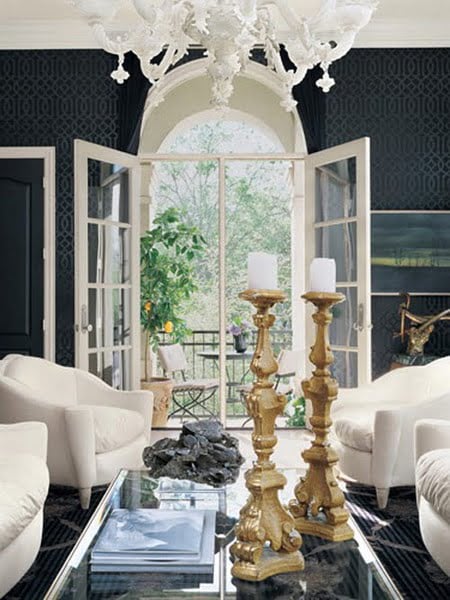


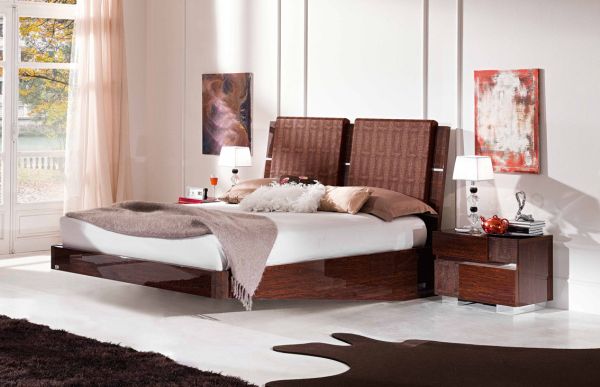
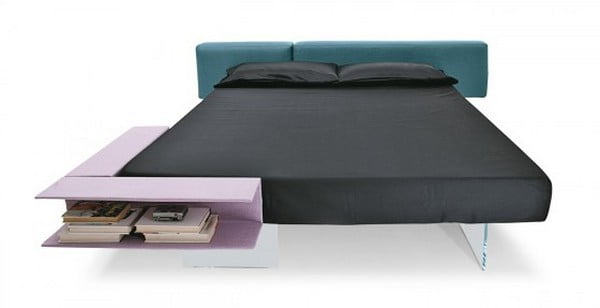
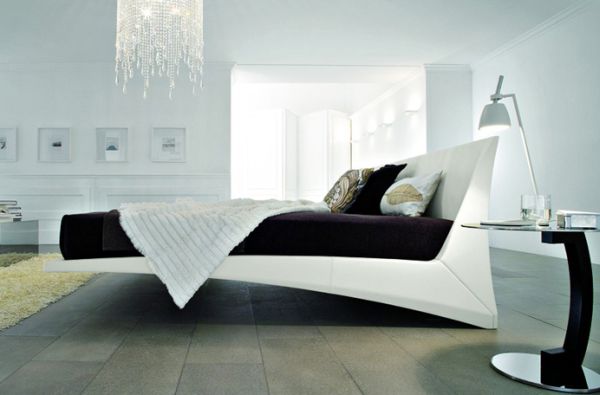


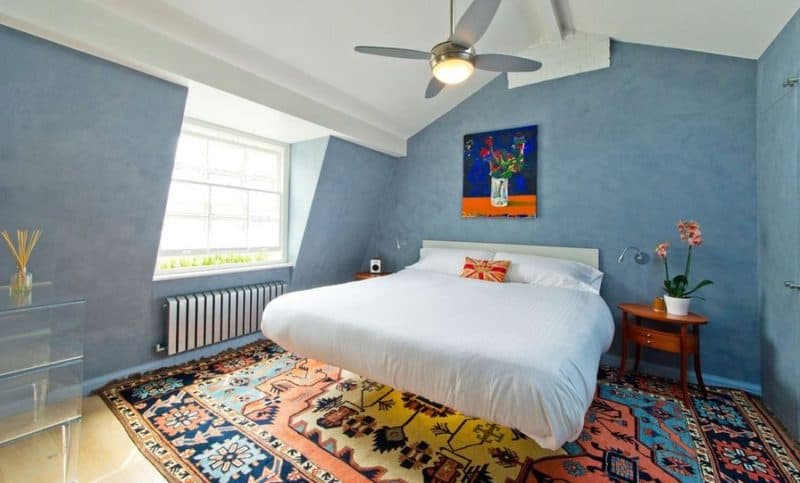


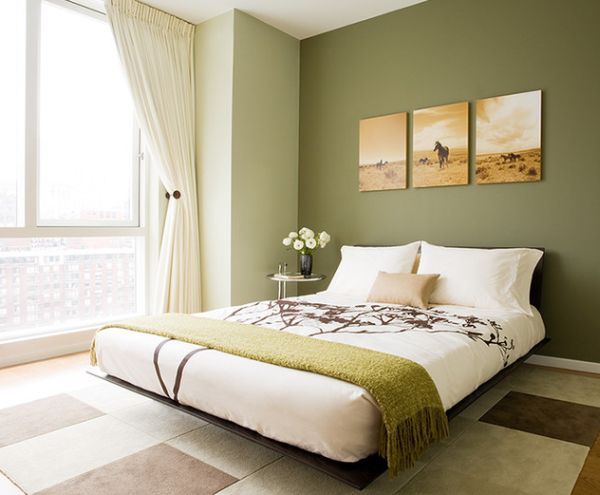

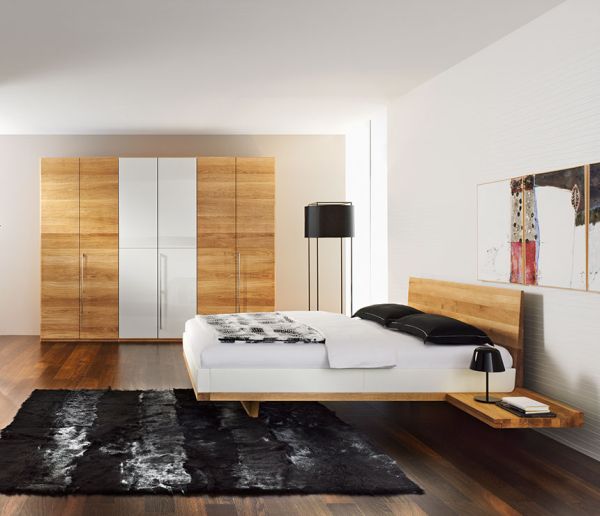


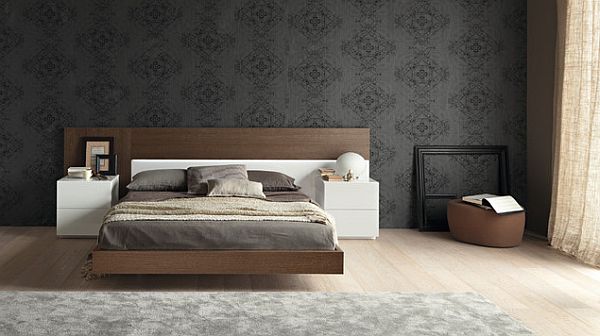


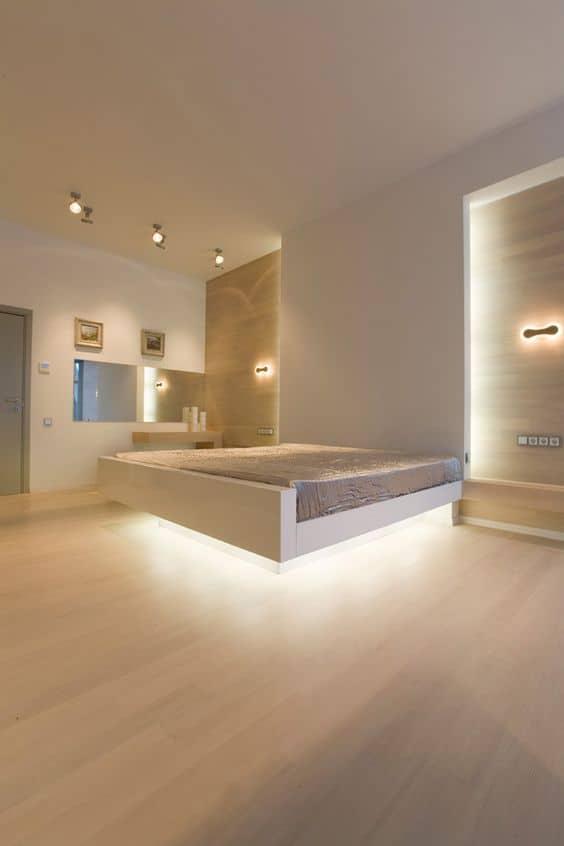


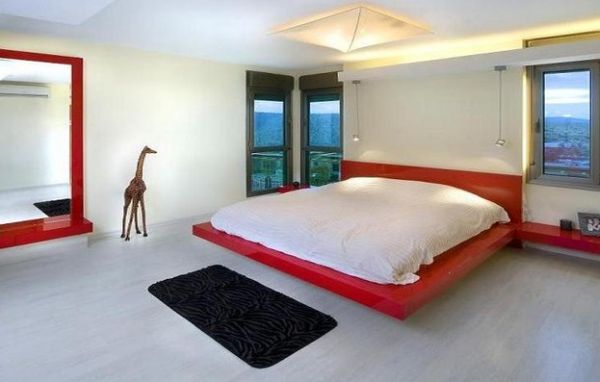


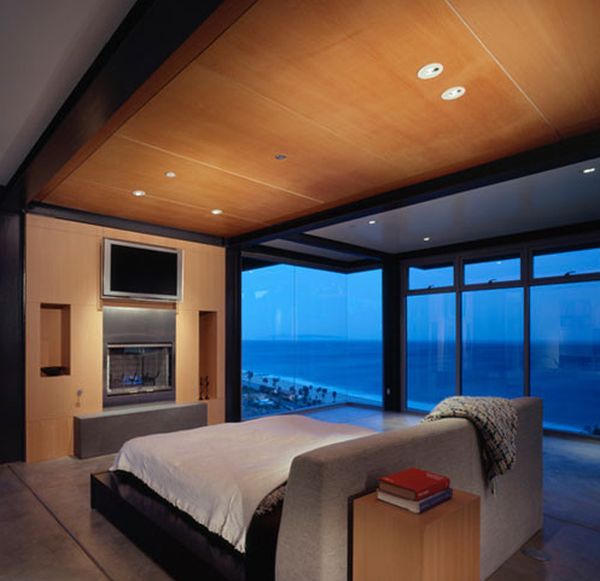

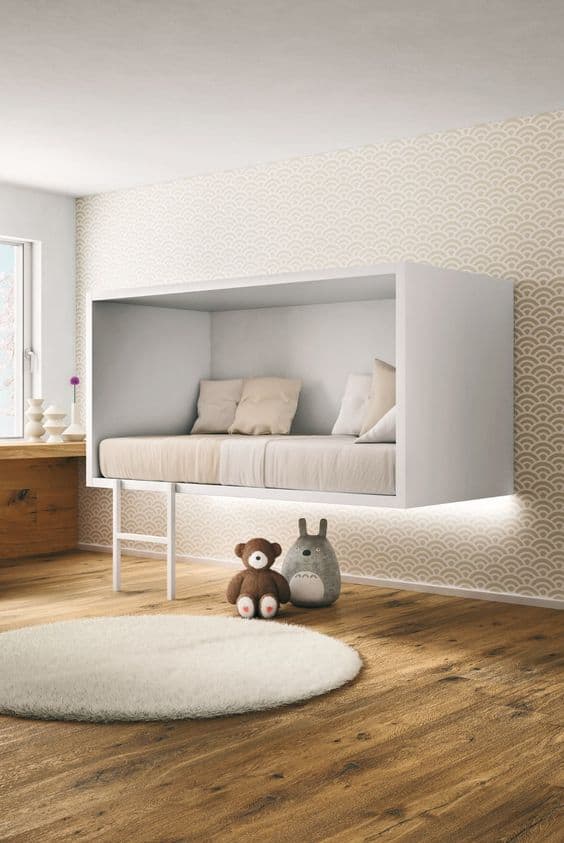


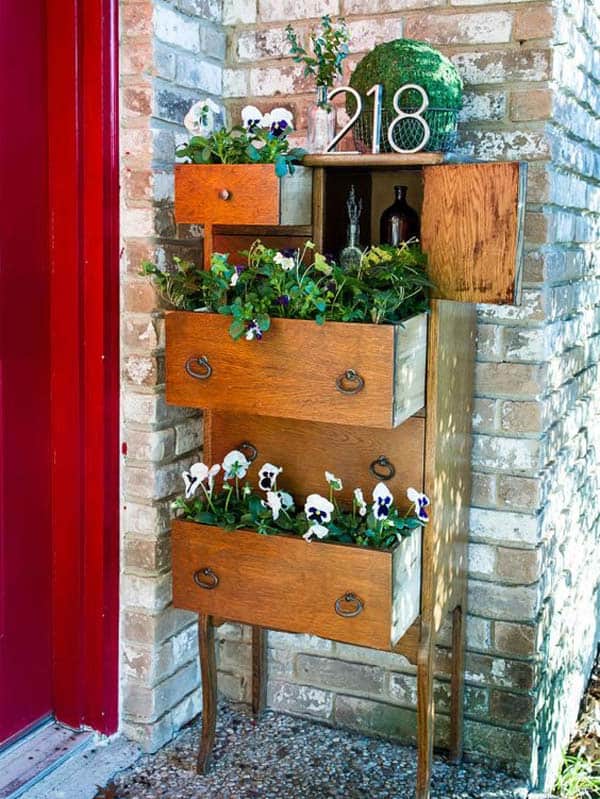
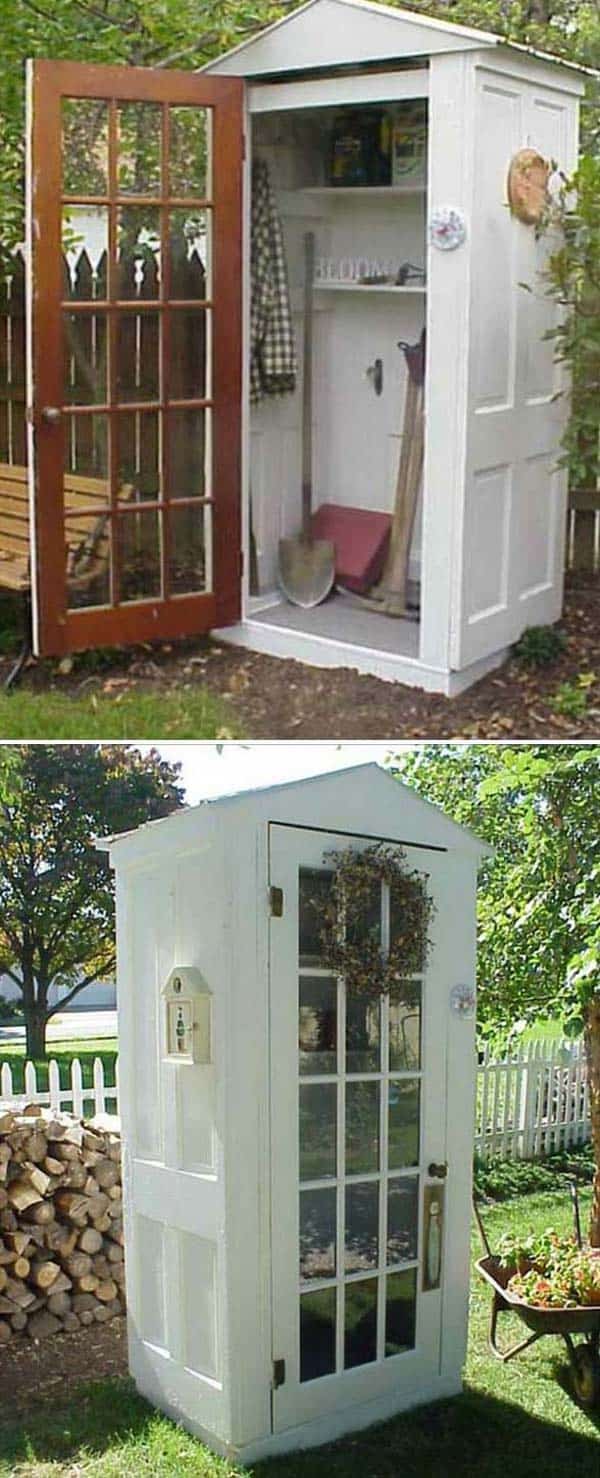

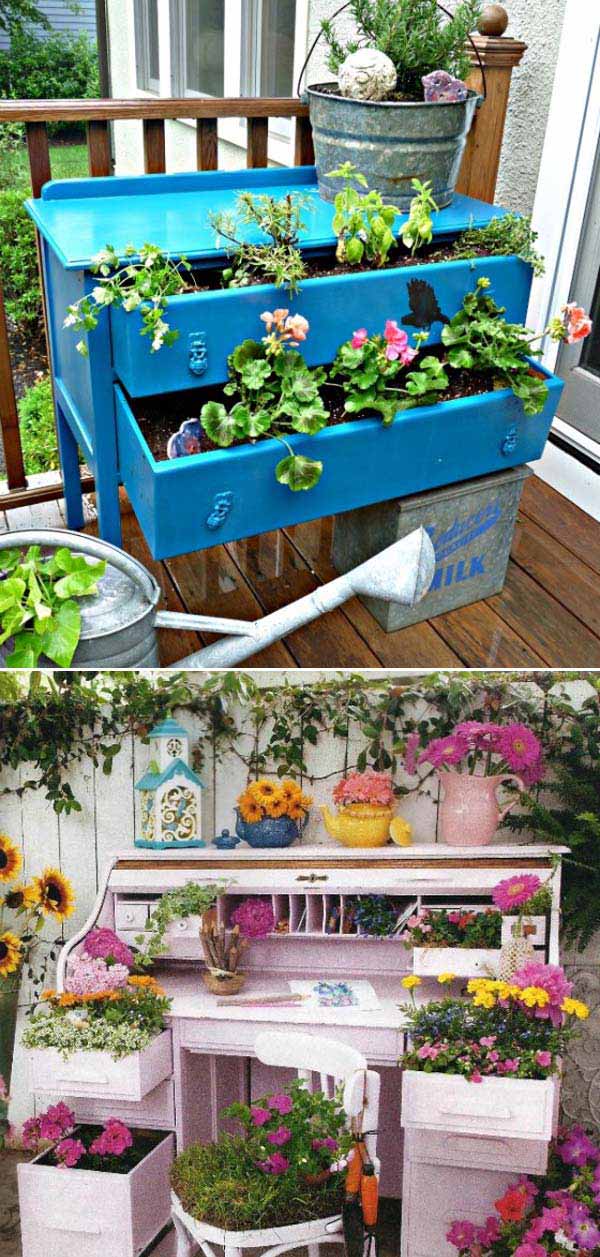


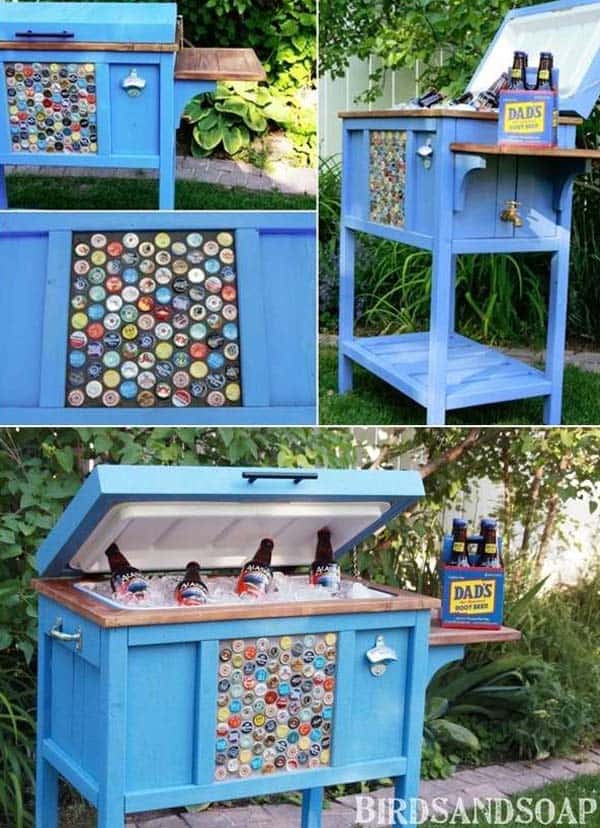

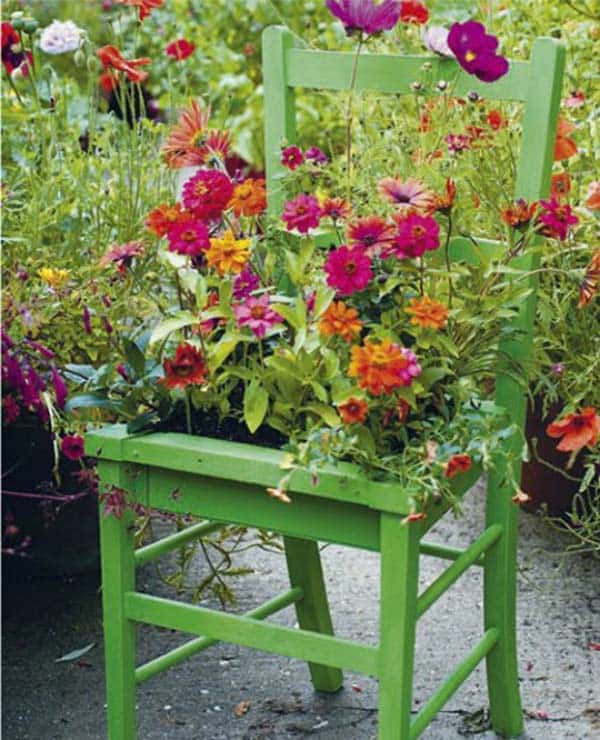
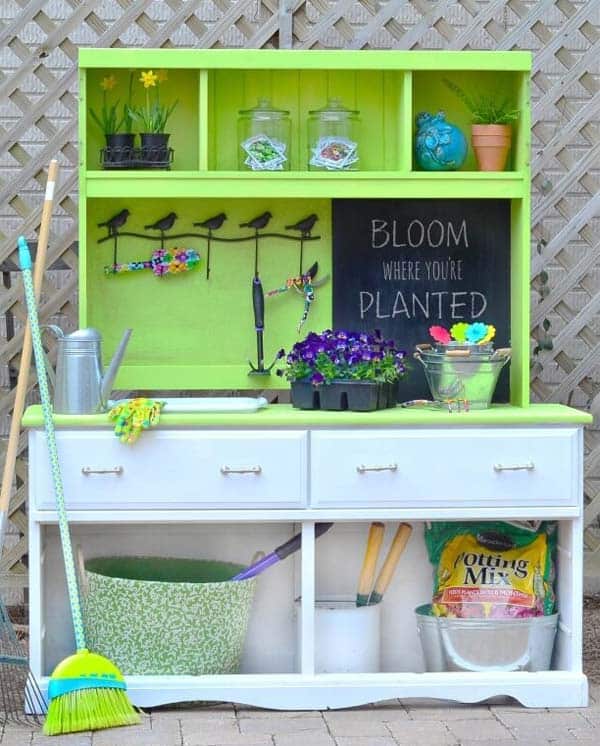


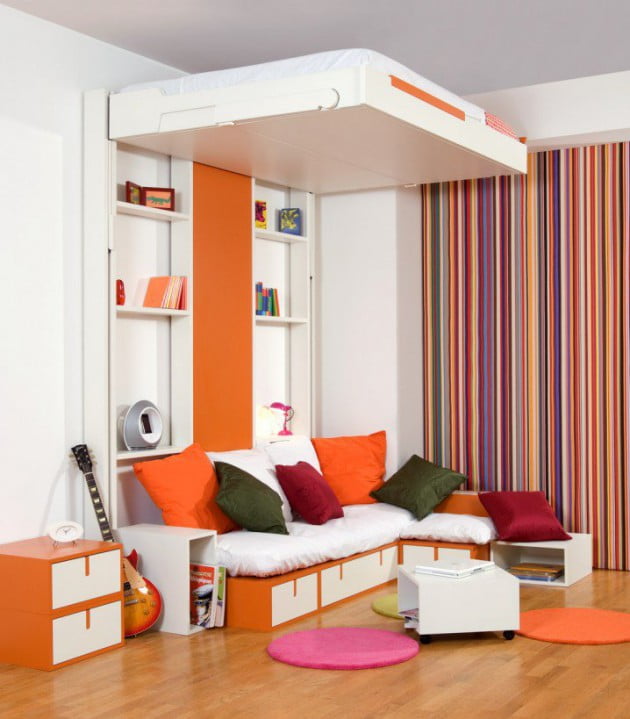


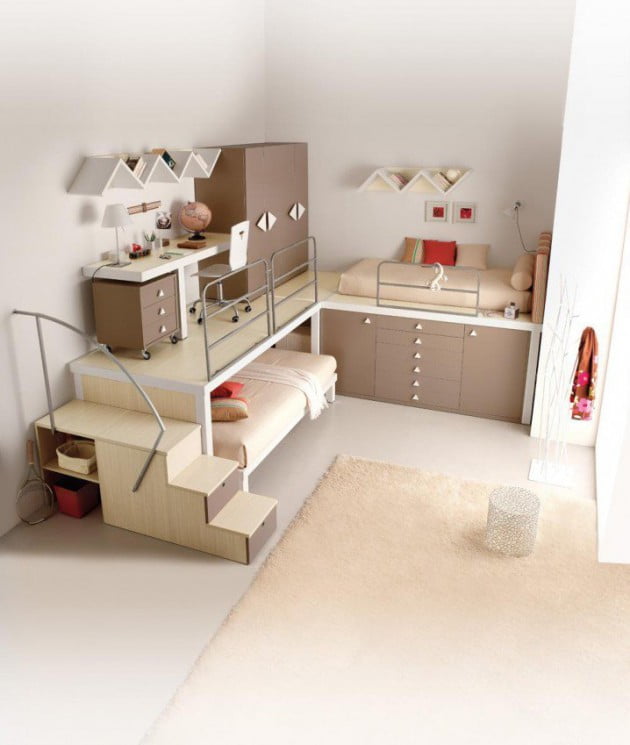
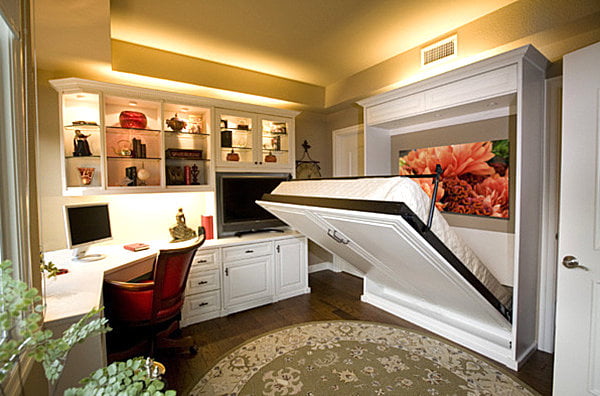


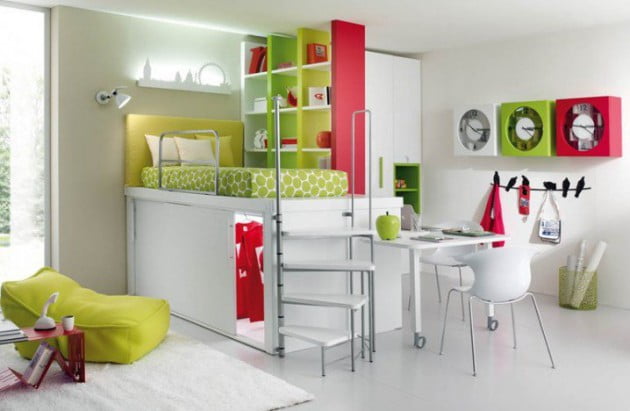
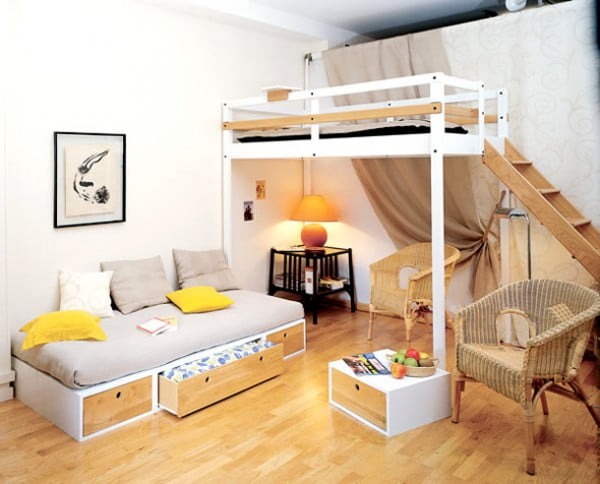
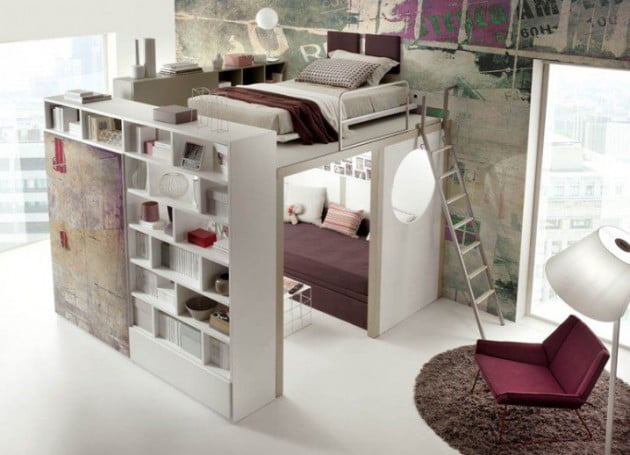


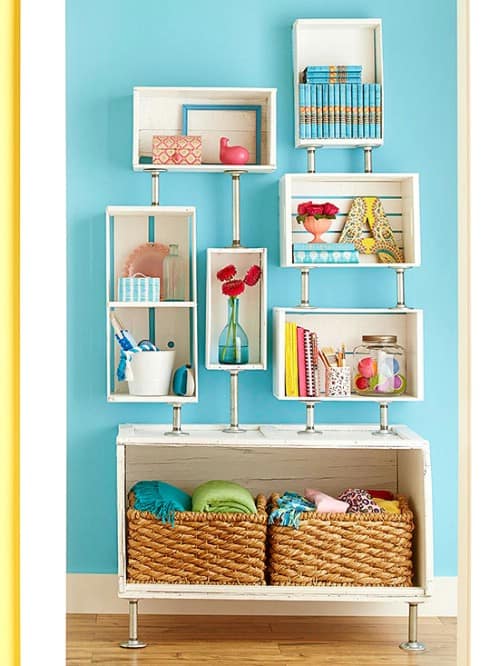


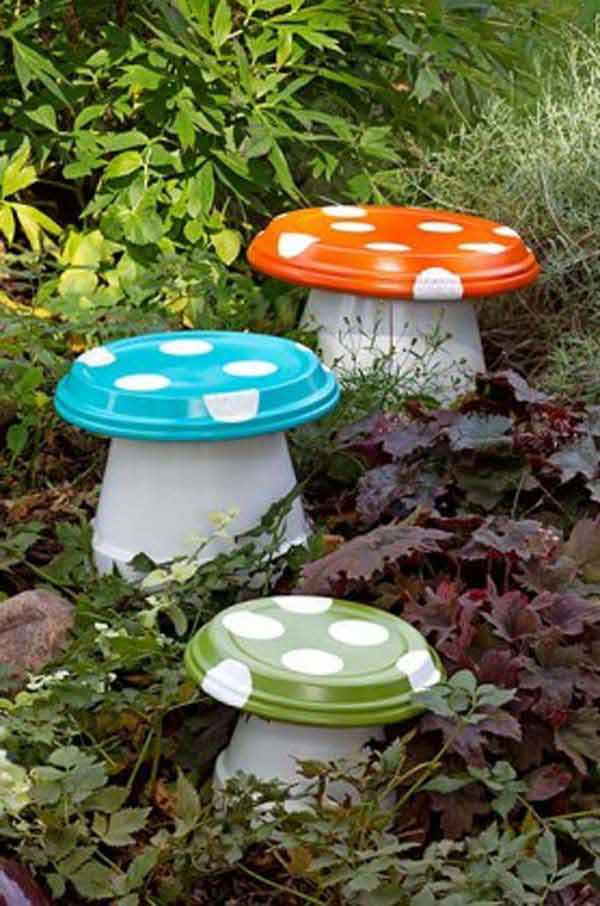

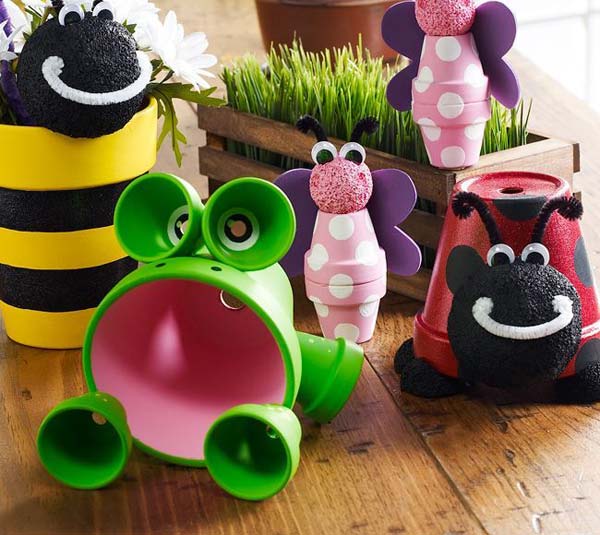


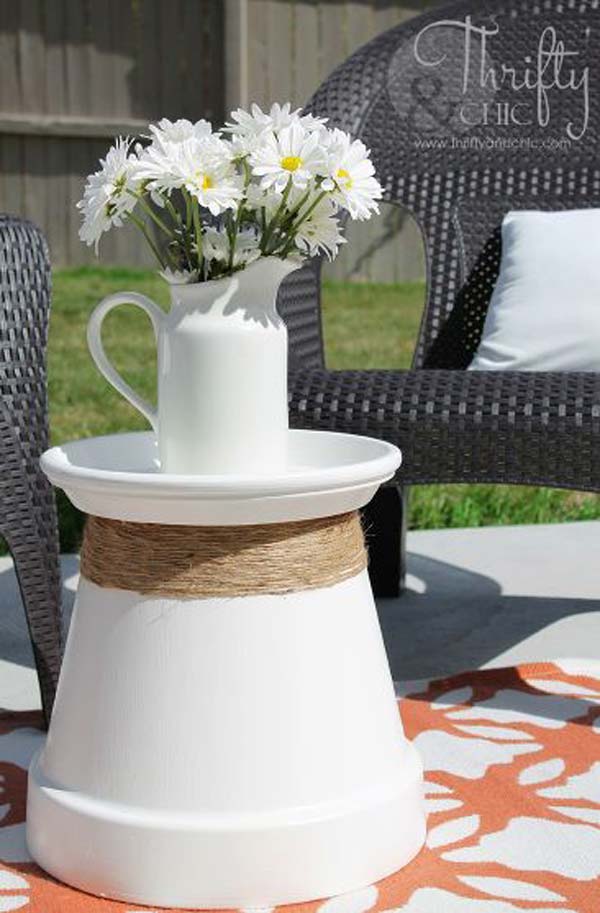
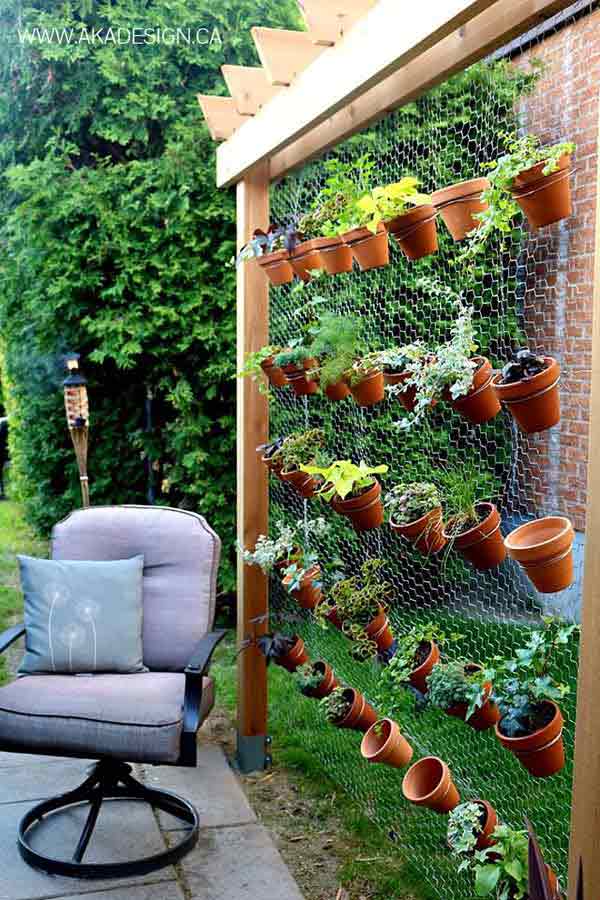

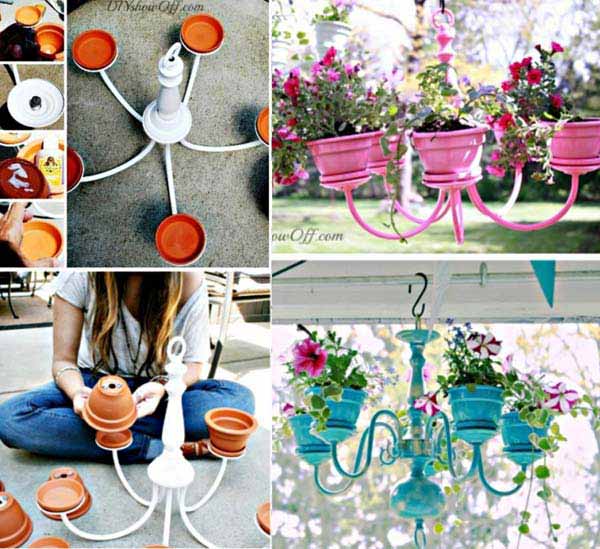


