Have you been redecorating recently? If you have installed new affordable windows and replaced your old window shutters with better ones, then you have plenty of material for lots of DIY projects. Here I'm going to show you How To Repurpose Window Shutters In Your Home in some pretty awesome ways. Your only limit is creativity as you will soon see the window shutters can be turned into furniture pieces with ease. DIY enthusiasts and amateurs can make wonders with these pieces as they`re super graphic all on their own, cast a glance in the gallery that follows and surge inspiration.
Make a closet by using only 6 window shutters
Add a few shelves and you are good to go, a super shabby chic dresser has been created !
use the old window shutters to create new bookcase for your living room
the window shutters can be easily repurposed and turned into barn doors
add the shutter in the bathroom and use it as a toilet holder
A really simple and inexpensive project that will surely turn heads. Shabby chic at home.
These DIY crafts are really unique don`t you think ? We invite you to use your imagination and creativity and reinterpret these with new, interesting methods of re-purposing window shutters at home !
Whether you are an artisan, a creative individual that loves DIY projects or you simply recycle and creatively repurpose some old objects from time to time, you ought always to seek inspiration. Creativity has deep roots in experiences and memory and with this thought in mind we are trying to serve and feed your imagination, fuel your creativity. Ahead are lying 10 creative examples of household items repurposed; we found them useful and hope you will too.
1. Door Repurposed Into a Temporary Coffee Table
Teal Door Transformed Into a Quite Large Temporary Coffee Table
image via phantasticphinds.org
2. Old Boxes Used as Shelves
Simple, Classic and Widely Used The Wooden Boxes are Evoking a Rustic Vibe
image via bomeng.org
3. Eclectic Shelve Ensemble Obtained Throughout Creativity
Eclectic Shelve Ensemble Obtained Through Creativity
Elegant Dining Table on a Farm Shaped Out of An Old Door
image via phantasticphinds.ro
10.Door Coat Hangers
White Door Transformed Into a Coat Rack With a Rustic Scandinavian Look
image via phantasticphinds.blogspot.ro
If you’ve been following the game development scene of late, you’ll notice that the community is hyping up pixel art - a nostalgic throwback to the games developed between ‘80s to mid ‘90s.
However, the fact that the graphics follow this design pattern does not mean that the effort or realism takes a step back. Hence, you’ll need a total understanding to have the best of both worlds.
Aseprite comes into the picture here as it satisfies all the requirements - it gives you a wonderful way to blend the nostalgic artistry of pixel art with the graphic design and animation tools that we have today. Without further ado - let’s begin with our reviews of the best Aseprite tutorials on the market today!
The tutorial starts directly with action, rendering a pixel sphere step by step, an absolute godsend when you want to add complex shading effects to your characters, objects, scenes etc. With this tutorial, you get to know in depth about how shading can add another dimension to your art and game scenery.
The tutorial uses a simple colored approach render the classic sphere and adds a dimension to it just like that - teaching you shading mechanisms used to add depth and texture to a simple ball.
Congratulations on deciding to get started with Aeseprite - it's one of the best decisions you will take when it comes to working with pixel art. However, since there are practically tones of tutorials out there, you should be aware of the fact that most of them are either too trivial to qualify as tutorials, or too complex to understand by the absolute beginner.
Hence, it only makes sense that a tutorial which slots in somewhere in the middle would be the most recommended - and that is exactly the case with this tutorial. MortMort gives you enough background to understand what’s going on, but also has you going with making your own art in the form of layers. You will learn to break complex characters into simpler figures.
Further, it isn’t exactly in the middle, in that MortMort provides some information about the complexity Aseprite can handle, so you’re prepared to make your own designs in no time. Tons of examples, comprehensive review of the tools, and a direct comparison with Photoshop (which is the most popular tool here) - what else does a beginner need?
Sprite sheets is an amazing concept which completely transforms the depth and breadth of capabilities which Asepbrite has, since Asepbrite has pulled off making an intuitive and easy method by which you can integrate Sprite Sheets into your art. This tutorial by ETOSurvival helps you through integrating Sprite Sheets into your own work in a very easy manner.
The primary example taken by ETOSurvival throughout the tutorial is creating a four-dimensional cycle of the walking path of a certain character. The combination of all graphics onto one single image makes organizing all the game contents much simpler and reduces the file size of the game - it works as a handy compression technique!
One of the top tricks suggested by ETOSurvival is that you can make changes to a character on the move by editing the sprite sheet and hence saving the edited file. This reduces the overhead of having to manually update the character as it moves in animations all through the length of the game.
MortMort is a truly prolific creator of tutorials for people who want to pursue game design or pixel-based art, and hence another of his tutorials finds its way in this list. However, this tutorial is definitely not beginner-oriented - this tutorial is all about upping the bar by using the brush tool in the same way that professionals do it.
After the tutorial ends, you will have advanced knowledge of how to accelerate your working methods, but ensuring that your art comes out looking as publish-ready as it can be at the same time. The first thing you learn is tile painting - which is a wonderful technique, and the use of it depends all on you - the more you experiment, the more you’ll learn.
Next up, you see the ink settings covered in some detail, which is great because it’s one of those things about Aseprite which take some time to master. The real use of ink settings comes into the picture when you want to add shade to sprite sheets, or create textures which have subtle gradients or blending of colors going on in the artwork.
If you’ve gotten the hang of the tutorials above and feel comfortable in designing somewhat realistic objects, you should now move on to designing characters and animating them as well. This is perhaps one of the most important and difficult parts of designing a video game. Good characters improve the overall impression of the game, regardless of the complexity.
With this tutorial, you will learn how to design and implement an entire character on a 32x32 pixel canvas. You will be going through a number of basic techniques, wherein you will first design a silhouette and then move on to adding details to the character - typically, this is where beginners end up wasting a lot of their time.
This tutorial borrows a lot of basic concepts from what is taught in art school, specifically considering figure drawing wherein charcoal outlines are drawn first before filling in the details.
MortMort is back at it again. This time, he goes into some depth about the importance of anti-aliasing, which is a crucial part of designing any video game. However problematic and difficult it may appear at first sight, MortMort does a brilliant job of getting down to brass tacks and explaining the process of anti-aliasing and how to integrate it within your work.
Your work will only seem like it’s “in” the screen so long as you don’t apply anti-aliasing. To add that extra level of realism, it’s crucial to understand how graphics work, and how you can use them to your advantage, making your artwork seem truly realistic. Here, you understand the value of each and every pixel - anti-aliasing causes smoothing of jagged lines.
This smoothing effect translates into the illusion of a form, which is then responsible for the appearance of another dimension (i.e. depth) to otherwise two-dimensional images. It is not easy to master this topic, however, if done right - it can translate your game art/pixel art to the next level. MortMort also showcases a number of best practices for sprites in the tutorial!
Sadface_RL may not be the most popular pixel art tutorial channel on YouTube, but this tutorial is surely one of the most important ones out there when it comes to pixel art. It touches upon the subject of tiling, which is extremely important in the context of creating ground/background images.
Fun fact: the usage of tiles began as an effort to produce a number of background images while using very little computer memory. Computer memory is no longer a problem, but at the same time, this particular technique has remained a part of many pixel artists’ toolkit. There are a few rules with tiles, such as perfect wrapping in both directions.
Aseprite has a number of options you can configure to make tiling easy, and following the tutorial will teach you exactly what to do. Duplicating certain images vertically or horizontally is one good way to start - using the Tile Mode option on Aseprite makes tiling intuitive and effective.
TutsByKai’s tutorial on how to employ the tile mode methods you’ve learned above will help you understand how to create a stony texture using Aseprite. The Tiled Mode can help you create much more realistic textures and scenes in very little time, and also saving the computer a fair bit of memory when it comes to high-density scenery.
The basic premise in play here is that you need to learn how to create backgrounds using Aseprite’s Tiled Mode. Hence, the best way forward is to start with a basic sketch of the stones, while making sure that the design fits the entire area of the grid - and there’s no problem if the design goes out the edges.
You will generally see pixel artists and game designers speak of hiding the grid behind. This “hiding the grid” business is nothing but making the seams of the tiles disappear so the image appears as one coherent whole. You should mold the shading as per the location of the light source where the highlights are right above the shadows which have darkest colors.
TutsByKai appears on the list again, but this time, he brings something completely different to the table - a concise yet effective method to draw a wonderful little pixel house. Aseprite doesn’t make it particularly difficult to come up with methods for drawing objects, but watching this tutorial will give you certain insights which you won’t find anywhere else.
The end game here is to be able to draw objects quickly and with a reasonable level of accuracy as well. The method itself is not that complicated too: you start with the basic structural outline of the exterior, first drawing the roof and then moving on to completing a basic outline of the entire house.
Then, the next step us to draw up the doors, which should be followed by the windows. The details are to be dealt with next - details such as roof tiling, embellishments to the windows, etc. Texture expansion is best achieved by copy-pasting and operations such as rotation and flipping all done in conjunction - mastering this will save you a fair bit of time!
HeartBeast appears on our list for the first time, but the tutorial itself will teach you loads in one, decently-sized tutorial. Run cycles are an important part of any animator’s toolkit, and in Aseprite you have full opportunity of using these run cycles to the fullest extent possible. Working in pixels makes run cycles a bit more important, too.
An animation which actually has the “look and feel” of something having components in motion only need 8 frames, whether you believe it or not. This is made abundantly clear by HeartBeast while going over the basics of the 8-frame run. There are a number of things you can learn from the tutorial, from the way the ground is designed to the motions of objects.
Run cycles can be understood as basic units of an animation - they can easily be used to add a number of personality traits and quirky expressions to all the characters you have. The ground staying constant all through the cycle is one other important takeaway - watch the tutorial to know more.
If you’ve gained enough experience in working with all the tools and techniques which have been reviewed above, JebbyGD will show you how to change gears towards the next phase of design and development in Aseprite. There are tons of options in the toolbar, and this video mainly serves as an introduction to all of these options.
Changing colors and sprite sizes of objects and characters is a breeze with Aseprite - you wouldn’t have known this before unless you did a fine job playing around with all the tools. In terms of what else you can alter, the options are almost endless - from color curves on the pixels to creating your own custom brushes on the go.
You can also generate text very quickly with the help of a few options - check this tutorial out once you know you’re comfortable with all of the previous tutorials.
For those long-time, Digimon and Pokemon fans DYA Games brings an Aseprite tutorial video where they create the Charmander sprite and then animates it.
However, this is not a complete tutorial in some respects as it’s a time-lapse video, to begin with, and has no voice-overs where the creator explains every single step that he/she takes.
But, the video is pretty easy to follow nonetheless, and it can be the perfect introductory video for beginner Aseprite users as well, to show them all the various things that you can do with the platform with just a bit of practice.
The video also goes into showing certain Aseprite tools and techniques like onion skinning as well as anti-aliasing, which helps to get smoother edges and cleaner animations. DYA Games creates Charmander from out of a silhouette and goes on to show every single step that one needs to follow to get the result just right.
Making clouds or even some fancy cigarette smoke animation is perhaps one of the primary steps that a beginner needs to get the hang of making, before venturing further into more advanced animations.
Making some accurate smoke animations can indeed add that little bit of extra spark to your work.
And this tutorial from TutsByKai will help you to create your very own smoke for either a chimney, a campfire or some other form of magical art.
In terms of an RPG, necromancers and fire sorcerers can be equipped with some smoke animation to create a sort of a menacing allure about them and allow the player to remain thoroughly engaged to the character’s progression in the story.
The tutorial shows a very interesting method where the animator uses onion skinning to create motion between frames.
It teaches that starting with simple shapes when the animation process is always the best, as it will allow you to get used to the method and help you experiment with all the available tools.
This is another amazing and yet beginner-friendly Aseprite tutorial video from TutsByKai where the creator shows one in great detail how to go about making a pixel art house using the various features of the platform.
Now, routine and practice are important when it comes to mastering certain aspects of this designing platform. And those are precisely the things that TutsByKai stresses on in the video.
By showing a few designing methods and procedures which you need to incorporate into your routine, the creator goes on to suggest that once you get the hang of them, making pixel art houses will be a cakewalk.
The video starts by making an outline of the roof and then drawing the skeletal body of the house. It then follows up by putting in the doors and windows before moving onto the details such as the roof tiles and window trimmings.
Bringing It All Together
Today, you’ve seen how to go from zero to hero in pixel art/videogame design by using Aseprite, which is one of the easiest and most intuitive design tools there are. Especially when you consider 8-bit art, there are very few tools which help you explore this new art form. Once you get started, you’ll know just how easy it is to make wonderful art with it!
Hope you enjoyed reading about these tutorials - now go and watch these, and get started with learning this new semi-retro art form. Have fun creating!
Today's society has placed women among men an equals, leading successful businesses, taking take of their families and home. But we are the more delicate, needy and prone to stress and over-exhaustion so we deserve to have a small piece of heaven in our bedrooms through design and a general serene atmosphere meant to relieve stress and relax our bodies and minds.
Designing a women's room is a very complex task. The possibilities are endless and multiple combinations generate different possibilities of the same idea.Today we have inclined towards a calm, floral fresh design line where small accents do count and change the hole ensemble. A touch of pink,a shade of silver or gold, a glass flower vase filled with wonderful roses and delicate white string light pendants will absolutely transform your bedroom into an oasis of relaxation and serenity. We invite you to browse though the 14 Lovely Girly DIY Room Decor Ideas gallery below and to leave your valuable feedback in the comment section placed at the end of the article.
1.String pendants in a delicate composition
2. Fun accents like a chalkboard used as an ever-changing painting
3. Your valuable fashion accessories exposed
4. Elegant composition that adds femininity to your interior design
5. Choose wisely where exactly to add pops of color
6. Flowers and glass is a wonderful must combination
How does your perfect refuge look like? We would love to hear your opinion on this subject in the comment section below.
Leaf by leaf flower by flower we sculpt the ambient in which we reside, the backyard and sanctuary in which we seek peace and calm. In your backyard you are the architect and the design handling nature in all its beauty to a state of equilibrium. Countless possible and infinite combinations cannot be defined nor followed as recipe towards a beautiful garden, seek inspiration and start planting, it will be one of the most rewardful activities you will ever do.
Cast a glance at the beautiful and attractive gardening design ideas showcased below and surge inspiration from the wonderful greenery setups tailored. We would love to hear your opinion in the comment section below.
Fairy Tale Gardening Design Ideas
#1 Beautiful Iron Forged Decoration Sheltering Three Different Planters
#15 Multiple Planters Nestling an Entire Bonsai Farm
Beautiful and attractive gardening ideas are born from creativity and experience more than anything else. The items surroundings are opening up endless possibilities for the creative mind; think twice before throwing something away and always donate or reuse the items that you`re no longer using.
Free painting softwares are the bread and butter for a lot of the professional digital painters out there.
From Photoshop to Corel Draw to the FireAlpaca, there are a lot of easy to use applications that help artists digitize their inspirations and concepts amazingly well.
However, out of all of them, Krita is the one that has been growing in popularity off-late.
And though the software is incredibly versatile and user-friendly, there are some aspects of its features which tend to have a strict learning curve.
A lot of beginners and even some professionals do struggle here, and this is precisely where video tutorials come in clutch.
The guides that we have listed out for you today are incredible, to say the least, and will help you grasp the various facets of Krita in no time at all.
For a lot of the digital painting beginners, when it comes to Krita tutorials, the more detailed the lessons, the better. And in our experience, we are yet to find a more immersive guide than what Phil Waclawski provides in his Krita Basics.
A professor as well as a master of the Linux OS, Phil Waclawski in this hour-long guide (more like a presentation in front of the ‘Phoenix Linux Users Group’) talks about the various advantages and functions of Krita.
As Krita is primarily a Linux based software (one of the very few painting apps that work outside Mac and Windows) not many artists are all that familiar with it, and neither with the OS.
So, even if you’re not all that used to Linux, you can still learn a lot about the Krita applications as Phil Waclawski provides a very thorough guide on it.
He covers almost everything about the Krita from brushes, to strokes, to color management as well as providing a short tutorial on how to create and manage open documents.
However, the presentation doesn’t just cover Krita, but also digital painting in general. It’s an amazing tutorial for budding artists, especially for those who are familiar with Linux.
There is a very popular YouTube channel called Mart’s Struggle with Drawing, which primarily deals with making easy to follow and interactive tutorial videos on digital painting for beginner and amateur artists.
Learning a new painting software from scratch is never as easy as it sounds. From learning how to use the new brush features, as well as the coloring and the stroke textures, a lot of time goes behind just familiarising oneself with the basics.
And when it comes to brushes, digital painting is absolutely pointless without the right kind. Hence, to help out the beginners with their brush struggles, this youtube channel has created a 10-minute long video on all the Krita basics and brush applications.
However, one amazing aspect of this tutorial is that it doesn’t cater to beginners alone. There are certain facets of it, which can be very appealing to a lot of the adept users and artists.
So, even if you’re familiar with or rather proficient with the Krita painting software, there are few new things that you can pick up from this tutorial.
Image special effects and layering are perhaps one of the hardest features to grasp on any digital painting software.
Now, Photoshop’s layer panel was not only the most-used feature but also the bread and butter for a lot of the professional graphic designers and artists out there. Being able to create a lot of effects while either editing a particular photo or painting an illustration is essential for any commissioned art job.
Krita has its own versatile, and fantastic range of layering and effects features as well. And this tutorial video from GDquest will help both the amateur and professional get up to speed with Krita’s layering tools and applications.
And though the video is just 6 minutes long, it’s incredibly detailed and will be able to help you to work through the material considerably fast. It will also provide you with an idea on the complete concept of layering and which kind of combinations will bring about the desired effect.
For intricate and detailed art pieces learning how to accurately layer on effects is vital in achieving the desired results. And the sooner you learn the basics of layering, the faster you can pick up Krita.
This is another amazing Krita tutorial video for beginners. This ‘how to get started’ guide is kind of like a personalized lesson from the YouTuber who makes this otherwise complicated drawing software look and feel as easy to use and as user-friendly as possible.
She will teach you every single basic of Krita and help you dive into it right away and inspire you to experiment with the brushes and strokes and help you to learn them the more you use them.
However, experimenting with brush strokes are one thing, and having complete control over the application is another. The next phase of Jenna’s video is on how to get a complete grasp of Krita and its various applications.
From helping you to learn how to create documents to managing your brushes and alter the layering settings along with the opacity, her tutorial covers a lot and teaches them rather effectively.
The video is 15 minutes long but does an amazing job in instilling the right amount of inspiration within all budding artists.
Additionally, do keep in mind that even though her video is on the Windows-based Krita, the lessons are applicable to all platforms.
Human anatomical features, especially the human hair, is one of the hardest things to accurately represent on any digital painting software.
This fact is also true for Krita, and this is precisely where this tutorial from Johnnybevo comes in.
The video deals with certain tricks one can use and the basic concept behind representing human hair digitally. One such amazing trick is to not look at human hair as individual strands but more as a complete object.
However, even if you’re considering it to be a single object, the final representation should not look bland. It must feel realistic, and that is one of the things that Johnnybevo tackles in this video.
The tutorial will help you gain a complete grasp of the different layering and special effect tools that will help you make hair, which is incredibly detailed and aesthetically pleasing.
The 18-minute long step by step guidance will get you up and going at trying your hand at representing this human anatomy as accurately as possible.
Digital work on such genres are a bit different than the rest of the subjects out there. So, if you ever feel like getting into drawing the human anatomy, this tutorial is a must watch.
Now, looking at Douglas Lopes’ channel and some of his more popular videos, not many will be able to readily believe the fact that he is quite new to graphic designing.
With just a few software tips and tricks, Douglas is able to conjure up some of the most intricately designed and detailed game assets and stock images which can capture anyone’s attention in an instant.
There are a lot of such tutorial videos on his channel; however, this 25-minute long guide is the one which we absolutely adore.
This video shows him painting a rock from scratch which has a kind of a sigil inscribed atop it. Such stock imagery is important when it comes to creating the perfect aesthetic element for RPG games, which has a somewhat medieval and fantasy setting.
The Witcher, Divinity, Dragon Age, etc., all these games depend on such stock accessories to help provide the gamer with an incredibly immersive experience.
Douglas in the video does the complete designing in Krita and explains the entire method of creation from using the toolbars to the brush settings and stroke modes to make it as easy to understand as possible.
This video from Mart’s Struggle with Drawing is just amazing when it comes to teaching one how to effectively deal with the various documents once scanned onto Krita.
A lot of beginners don’t know this, but Krita is an amazing platform where you can import your scanned drawing and very easily digitize them, with the help of the various toolkits.
However, one problem many users have is that after they get their art scanned, they often don’t know what to do next, and which necessary steps to follow to perfectly digitize their work. And this is precisely where this video guide comes in.
It charts out a detailed guide for those who still don’t have the hang of using Krita and creating artworks there from scratch.
Mart in the video will teach you how to efficiently work on top of a scanned drawing. The video is very detailed for a 6-minute tutorial, where he will also be showing you how to use this line of work as a sort of a template.
This type of digital painting can come handy for those who still prefer traditional painting over digital.
This video tutorial is more for the adept Krita users who already have a solid grasp on making art images on Krita and want to try their hand in animation.
For those of you who didn’t know, Krita isn’t just a simple painting program; it supports a lot of 2D animation making features which you can utilize to really show off your skills.
When you first learn to animate something, it’s always best to start with something that is very simple.
The YouTuber in this video shows a very easy animation, which is honestly not all that hard to replicate. In this 22 minute long video, he goes onto animate a ball and goes through the entire process of it in an easy to follow manner.
So, all he does in the animation is to make the ball bounce a couple of times. And across the entire guide, he will teach you not only the entire formatting process but also how to start a new document and create frames as well as the position along the way.
The resulting bounce motion is actually very smooth, and you will have the opportunity to learn a lot from this very simple guide.
Making a self-portrait is honestly a very fun activity, and there are many digital painters out there who try to make a digitized copy of their face for recreational purposes.
So, when it comes to learning how to make a graphic painting of your face, this video from Sycra does more than just cover all the basics.
Sycra has been publishing Krita based digital painting tutorials for some time now, and in this guide, he goes over some fun and exciting ways to make a self-portrait from scratch.
However, the video is not as detailed as one might like it to be. Sycra doesn’t show the step by step process of the painting method, but he does explain all the methods along the way and talks about everything that he is doing.
And as the video is in real time and narrated, you can indeed learn a lot from it. The tutorial is also very easy to follow, but you will have to practice all the steps on your own and experiment with the techniques which he shows so that you can make the most out of what he is trying to teach you.
Blending modes is another fantastic feature in Krita that will allow you to do a lot of cool and unique things to make your art stand out from the rest of the crowd.
Often times, when people hear the word ‘blending’ and ‘digital art’ in close succession, they think of Photoshop and photo editing.
What they don’t realize is that with certain blending modes artists can do a whole lot more than edit a particular image. However, learning how to blend accurately is not all that easy a task, and for that very reason, GDQuest has a guide which teaches blending from scratch.
The 12-minute video shows that if you’re feeling adventurous with your art, you can do so much with Krita blending and make something very unique and spectacular.
Blending might not be ideal for everyday use; however, the basics that GDquest goes over is easy to grasp and implement, and it’s a skill we believe would be helpful in the long run.
There are certain real-world scenario sketches that would look just magnificent with the perfect amount of blending.
Not all digital painting software will help you make a comic book page as easily or even as effectively as Krita would.
So, if you want to start your very own webtoon series or even a manga for that matter on Krita, then this tutorial video from David Reboy will help you get started on the right foot.
David, in this video, creates a full comic book page from scratch. This video is amazingly detailed as well: it’s about 2 hours long, and he goes over every single facet of what he does in great detail.
However, he provides no narratives with the video, and though there are written texts, he does speed up certain parts of the video to make it shorter and much more engaging.
Even with the lack of the narrative and the sped up parts, the video is not going to be all that difficult for anyone to follow. You can very easily follow David’s process and try and mimic what he is trying to do and customize the workflow and the various brush settings to your liking.
Not many Krita tutorial videos will be able to teach you the basic software fundamentals as effectively as this one from LearningByDoodling.
Hence, in that respect, this guide is quite unique and will help you to draw perfect shapes such as squares and circles very easily.
Drawing, solid, and uniform shapes on Krita can be rather difficult without the proper ‘tools and feature’ know how.
Sure, drawing such shapes are a piece of cake with a pencil and paper, but on a digital platform, it’s a completely different ball game altogether.
So if you’re looking to get into some serious digital designing, then this video is going to be able to help you out the most. It will show you not only to create perspective grids on the software, but also to sketch out incredibly accurate shapes in near-perfect perspective.
A 20-minute long video for drawing a box might seem rather excessive to many, but to us, it just goes to show how in depth the creator has gone to help out his audience the best he can.
The video talks extensively about the importance of perspectives and shapes, and how best one can go about representing them.
This is a very helpful time-lapse video from Griatch, which is just amazing in helping out both amateurs and professionals in getting a complete grasp over the coloring formats of Krita.
Accurately representing the colors of human anatomy such as skin and hair, and making them look realistic on the digital platform can be a rather complicated task to achieve.
And learning to finish a particular drawing, with the right coloring and blends is one of the toughest things for beginner artists.
This time-lapse video doesn’t particularly have a narrative or a detailed description per se; however, you learn the methods by watching and trying to mimic the movements. It will allow you to have a thorough grasp of the various tool choices and learn how to perfectly mix colors for skin tones.
But, if you’re looking for a guide that comes with a narrative, this video will not be able to serve your needs at all. But we still think that you should give it a watch, because the methods are really very easy to follow, and can help provide your art pieces with the much-needed finesse that can capture anyone’s attention.
Here is another brush tutorial, but this time it’s by GDquest, and it primarily deals with mixing colors with brushes.
Every digital painting software works a bit differently, especially when it comes to mixing colors. Now, Krita has a lot of ways by which you can mix colors to get the desired shade, and this is precisely why it is so very versatile.
Once you get it down to the workflow and get used to the customizing options, mixing paint with brushes in Krita is as easy as it gets.
But learning how to do it can take a considerable amount of time; however, this detailed tutorial guide will help you to grasp the concepts faster, and inspire you to experiment with the colors and mix them whichever way you want.
The entire video may not be useful to you, as it does deal with the complete coloring method in general and you may need to just discard away the things you will not be working with.
This tutorial by Sara tepes is a really fun and engaging introductory video to this amazing digital designing platform.
It offers a very brief yeat a surprisingly detailed introduction to Krita, with small explanatory lessons on how the various tools work.
In just 12 minutes the video covers a lot about the platform and can be an excellent follow up guide to those who just got into Krita and trying their hand out at some of its features.
And since you get through this tutorial fast and quick, you can then immediately get to pinpoint some areas of the GUI you have problems grasping and need to lay more emphasis on.
With so many videos on Krita, one might honestly be surprised to know that GDquest is not a Krita only community or channel.
They have a lot of videos on several platforms like FireAlpaca, 3ds Max, Krita, etc. And this 7 minute long video on how to learn painting in Krita is one of the many gems that’s present on their channel and website.
The video shows, how to start a digital painting on the software. It teaches the use of the several Krita brush tools , along with how to swap out colors fast and effectively.
It will all help you learn how to flesh out your ideas immediately or even when traveling, as Krita is a very flexible program and has a variety of user-friendly features which any beginner can take advantage of.
David Revoy simplifies the whole process and concept behind lieart amazingly well in this video.
Now, what a lot of beginners and newcomers are not aware of is that, lineart is one of the initial styles and drawing methods that one should learn before venturing further into more complex sketch works.
Practicing lineart gets you more comfortable with the software and you slowly start to become more and more adept with some of the Krita tools which are available to you.
The video shows that the best way to get started on it is by tracing scanned drawings digitally first. And then once you are done scanning the entire image, you then move onto a new layer and then start to paint all on your own.
This creates the much needed confidence which in the long run will help you grow as you experiment.
Final Thoughts
When starting out on a new digital painting software, learning the new tool settings and the brushes are the most challenging part of it. But we hope that our list of tutorials today will help you out with Krita and all its various applications.
Spending time outdoors is an essential crucial part of a healthy lifestyle, one that eases the mind and delights the senses. And when it comes to your own backyard, the entire idea of a floating deck comes as a solution to how you can organize a small corner outside that will complete your backyard design whilst serving as an entertaining, relaxing space, the ideal vision for a summer night spent with friends and family. The simple structure of a floating deck confers an airy fresh vibe to your yard and offers all the necessary space you desire to organize an outdoors dinning area or a pallet lounge zone with little trouble. You can even take the idea further and build the deck around a majestic tree without it being connected to your actual house or terrace or, why not, around a round pool or Jacuzzi with the sole purpose of ultimate relaxation.
As you will see in the gallery presented below, wood, especially pallet wood is the main material utilized due to its beautiful texture, adaptability to any type of structure and exuded warmth. Recycle old wooden pallets to create the most beautiful deck without spending a fortune on building materials and taking the environment into consideration. In time, the natural tone of the pallets will gradually fade, transforming itself into an incredible grey-greenish tone that will accentuate even more the greenery surrounding it. Invest time into creating your special corner an feed your imagination with the following 15 Stunning Low-budget Floating Deck Ideas For Your Home.
#15 backyard emphasized through a deck and potted greenery
What do you think about the chosen topic? Feel free to share your ideas in the comment section below.
Have you often wondered how you can design and paint your 3D models?
With digital sculpting, you will learn how to design different characters for animation and video games. Sculptris is a free software program for 3D sculpting and design.
The interface is user-friendly and straightforward, so it's a good option for newbie designers to learn the basics of digital painting.
There are some excellent free tutorials to help you get started in Sculptris. There is a wide range of features, tools, and texture patterns which are offered by Sculptris, which makes it entirely professional for free software. You can customize the brush size and style according to your needs.
You also have the option to transfer OBJ files, which are supported by Sculptris or you can start creating your models from scratch. This program is based on dynamic tessellation, which refers to creating a 3D mesh structure that is made of triangles.
If a 3D model, has a low-triangle count, then it tends to look coarse, but the opposite can also take place. There are programs which can subdivide your model for making multiple triangles which will give a smoother look to your model. Sculptris usually covers the model with wireframe mesh just when it's required to fix the problems by reducing or smoothing.
Let's look at the 15 best free Sculptris tutorials!
Best Free Beginners Sculptris Tutorials
1. Sculptris Basics
If you're looking for a clear introduction to the various available tools and brushes on Sculptris, then you should watch this tutorial.
John Maksym analyzes several tools, their functions, uses, and the different customization options for better control and flexibility. It will be an excellent starting point as you'll get a run-through of all the features available within Sculptris. The artist gives you an overview of all the brushes, along with a demonstration of their uses.
Not only does he covers lessons on sculpting, but he also focuses on the details related to painting your model. Maksym emphasizes only on the technical features in Sculptris and avoids focusing on the general art concepts. This tutorial will be suitable for those who have experience in the field of art and want to start using Sculptris.
2. Sculptris Digital Sculpting Tutorial
In this video, artist Ryan Kittleson gives a brief introduction to Sculptris. You will be able to learn the basics that will be required for you to start sculpting your models.
The topics which are covered in the tutorial are- Import the reference image, navigate the environment, configure the program settings, and use of various brushes to create a structure of a monster.
Do you want to know the various types of tools that are available for sculpting?
In this tutorial, there is a detailed discussion of the several tools available in Sculptris and a walkthrough on how they function.
Plus the artist also provides a few essential tips that will help you to progress by bringing your concepts to life. If you follow the tips, then you will be placing more focus on the design and its overall shape then on the intricate details from early on.
When you watch this twenty-minute video, you'll be able to understand what you can accomplish with Sculptris. You'll also get a clear picture as to why several artists prefer sculpting.
3. Combine Objects In Sculptris
Here you'll learn a useful technique of combining different objects to create more complex 3D models. This technique will help you to make such models quickly without deducing it from just a single primitive.
The video demonstrates the process of bringing multiple objects to a particular scene and then how you can combine them for making sculptures at the same time. You can use this method for both primitive and compound shapes.
Once you're clear with this concept, then you can create complicated scenes with a broad range of objects. If you have exciting ideas and a sound processing computer, then there will be no limit to what you create Sculptris.
4. How To Create Brushes
With this video, you'll learn how to create customized brushes for using it in Blender and Sculptris. These brushes are made using the GIMP image- editing software, which is an open-source program.
The artist Johnny Bevo explains this versatile process in a simple manner. You can add unique textures to your work for that sense of contrast and style by creating customized brushes. There is a significant number of things that you can make as you experiment by combining the custom brushes.
5. Model A Cube
From this video, you'll learn how to use the grab tool to manipulate a sphere, to make a cube-like shape. You can use the form either as a primitive for your upcoming Sculptris project or some other program, like a game engine.
This will be a good project for acquainting yourself with the technique of shaping digital clay and the main features of Sculptris.
It is essential to learn the basics to help you create more complex models. For instance, in 3D modeling, you can even create a dragon after you learn to form a cube.
6. Make A Female Head
At the beginning of this tutorial, Underground Education introduces the dynamic level-of-detail or the dynamic tessellation, which is a powerful feature in Sculptris.
With this feature you'll be able to maintain the topology or the geometric structure of the model, as you increase or decrease your number of vertices that are present. This brief demonstration revels the flexibility of the workflow in Sculptris.
If you want to transition to intermediate sculpting, then you need to continually practice the skills which have been highlighted in this video. We advise you to practice sculpting of the human head, for those interested in character art. This will help you to create the integral feature (human head) of your models.
Figure modeling might be a challenging skill to master, but for an aspiring 3D artist, it is the key to sculpting some great models.
7. Spider Hair in Sculptris
Sculpting hair can be a daunting task.
In this video, artist Borodante shows the entire process of making hair, and it will be a hilarious and informative watch at the same time. There are plenty of useful techniques that 'you'll be able to learn from this video. The tips can be used for the original art of 3D sculpting and for understanding the Sculptris workflow.
The video also highlights the importance of keeping the objects separate, as it will simplify the process of sculpting clothes or hair as different meshes.
The artist is open to making mistakes as he continues to experiment with different techniques in the video. It will be helpful for beginners to understand the process of trial and error that an artist has to go through for learning different skills. When you make mistakes 'you'll be able to acquire a new set of useful skills eventually.
If you want to mimic the techniques used by Borodante, then there is a link given in the information section for tool presets and free custom brushes.
8. 3D Modeling With Sculptris
Here is another video that gives you a detailed demonstration of every single tool used in Sculptris. The artist focuses on showing you the process of creating several objects from the ground up. This tutorial will help you understand the step-by-step creation of a female bust, horned 'creature's head, and a small dragon.
This video will be an excellent guide for a novice and those wanting to brush up on their skills for 3D sculpting. The artist explains the intricate details in a simplified manner, which makes it easy to follow the video.
If you want to watch a tutorial that is fun and informative at the same time, then you'll love this one. There is also a Q&A with the audience, which will help to clear out many of your doubts and guide you through creating a creature-like 3D model.
9. Piggy Bank in Sculptris
In this tutorial, you'll learn how to create a piggy bank. The techniques that have been used to make the pig can be applied for sculpting any quadrupedal creature.
With the completion of the brief modeling demonstration, the artist moves on to create a texture map and also paints the model with various material and tools in Sculptris. The video also shows how you can export the newly made piggy bank in Unity3D.
Finally, you'll learn how to customize the standard shader in Unity to match the model that was made in Sculptris. If 'you're interested in game asset creation and game design, then you should watch this video. This is a brilliant example of how you can create game models and then transfer them to the most popular indie game engine.
10. Texture Painting A Monster Concept
The process of creating 3D sculptures can be complicated, but the practice is the only solution to getting it done real quick. It is challenging for even a skilled artist to pull out an idea from their imagination and to create the image in three dimensions.
To bring a model to life does not end with sculpting, as you also need to paint it correctly. However, texture painting is less challenging than modeling or sculpting.
If you know how to paint miniatures for different board games like Warhammer or Dungeons and Dragons, then you'll be at ease while painting 3D models.
With this video, you'll also get a clear understanding of the required workflow for completing your painting work in detail. The process of painting is quite similar in most of the 3D sculpting program. You should apply the strategy of starting with an opaque base coat before you get into the details.
You can use multiple brushes with different opacity levels for adding exciting features to your models.
11. Sculptris to Zbrush Basics
From this video, you'll learn how you can bring your models from Sculptris into Zbrush.
It covers the vital steps that you need to take while converting your model for editing purposes in Zbrush. If your design has several objects, then you'll have to split them into small portions. And then turn the triangles of the object to quads using the DynaMesh tool.
The tutorial covers the technical aspects, so it will be an excellent guide if you're familiar with Zbrush and you want to learn the simple interface of Sculptris.
From the demonstration 'you'll be able to understand the distinction between sculpting in Sculptris and Zbrush. And why the experts of Zbrush choose to use the features of Sculptris to create their base models.
The second half of the tutorial covers the topic: QRemesher, which is a new feature in Zbrush. If you're an artist who prefers creating smoother geometry, then this tool will be an excellent substitute to DynaMesh.
12. Texturing & Texture Painting
Here's another video with a brilliant introduction by John Marksym for making game assets in Sculptris. After completing a brief demonstration on sculpting, the artist also shows you how to create a layered effect by using a variety of pre-made textures. You can create a realistic and complex appearance for the models by using multiple brush sizes and level of opacity.
After showing you the process to export the model and the texture map from Sculptris, John also demonstrates how to import them into Unity3D. And the process to include the assets in a particular scene of a mobile game.
Finally, you'll learn how to play with the standard shader, the lighting, and the camera to help you adjust the look of the assets. We recommend this guide for anyone interested in full asset creation and game design.
13. Sculpt Tangled's Pascal
The video runs like a speedpaint tutorial, but as you learn to use the Sculptris interface, you'll be to follow the process carefully. Pascal is a fun and super easy character for sculpting.
When you practice creating models like Pascal, it will be an excellent way to improve your skills as both a character designer and a digital sculptor.
The process of emulating the work of experienced artists is a long-standing tradition within the field of art, which gives ideas for your creation. The tutorial also has a soothing tone being played in the background, which makes it a relaxing way to focus on your artwork.
14. Sculpt John F. Kennedy
If you want to learn the workflow and procedure used by a professional digital sculptor, then you should watch this video by artist, Richard Kapuaala.
You'll understand how the artist focuses on the general shapes and proportions, and then moves into the specific details. To get an accurate representation of your image, you'll need to focus on the overall placement and shape of the skull.
Final Words
These tutorials will help you create your 3d models by setting the fundamentals correctly for you. For every person who is new to a particular field, there is going to be a starting point. And Sculptris is one of the programs that will help you experiment and learn the different tips and tricks for making some stunning artwork.
But, you need to give yourself some time to learn the skills and practice the exercises religiously.
Till next time!
A small home represents a challenge and an opportunity alike, it is the place you are to soon call high-maintenance as well as cozy and warm. Small spaces require custom solutions, solutions tailored for you and your home and to help you in this interior design endeavor we have prepared a list of small kitchen hacks, this includes smart multi-purpose accessories as well as tiny customization tricks that can make the whole organizing process easier; you will learn how to organize things that are often overlooked in the planning process and how to use residual spaces to your advantage.
Emphasize your home, optimize your kitchen and enjoy the coziness and warmth of your small home in full comfort with the small hacks that follow.
Epic Small Kitchen Hacks For Your Household
1. Use your available sink space with a [easyazon_link identifier="B07KYHTX16" locale="US" tag="homesthetics0a-20" link_id="177101" type="link"]roll-up drain rack[/easyazon_link]
via [easyazon_link identifier="B00P8KHRIU" locale="US" tag="homesthetics0a-20" link_id="177102" type="link"]Amazon.com[/easyazon_link]
2. Use a [easyazon_link keywords="plastic shoe holder" locale="US" tag="homesthetics0a-20" link_id="177103" type="link" ref="misen"]plastic shoe holder[/easyazon_link] to store items efficiently
Find it on [easyazon_link identifier="B01D58DRVC" locale="US" tag="homesthetics0a-20" link_id="177104" type="link"]Amazon.com[/easyazon_link]
3. Incorporate a [easyazon_link keywords="dish drying section" locale="US" tag="homesthetics0a-20" link_id="177105" type="link" ref="misen"]dish drying section[/easyazon_link] in your cabinets
5. Use [easyazon_link identifier="B00G4JLZE6" locale="US" tag="homesthetics0a-20" link_id="177106" type="link"]stretchable food covers[/easyazon_link] to transform all your pots into efficient food containers
via [easyazon_link identifier="B0087PRSBY" locale="US" tag="homesthetics0a-20" link_id="177107" type="link"]Amazon.com[/easyazon_link]
6. Store useful consumables under your kitchen sink
7. Use a [easyazon_link identifier="B00OI0WT5W" locale="US" tag="homesthetics0a-20" link_id="177108" type="link"]grid system pegboard[/easyazon_link]that combines functionality with aesthetic values
Alternative on [easyazon_link identifier="B00OI0WT5W" locale="US" tag="homesthetics0a-20" link_id="177109" type="link"]Amazon.com[/easyazon_link]
8. Nestle a [easyazon_link identifier="B0042QB6M4" locale="US" tag="homesthetics0a-20" link_id="177110" type="link"]smart mechanism in your cabinets to pop-up heavy appliances[/easyazon_link]
Find the [easyazon_link identifier="B0042QB6M4" locale="US" tag="homesthetics0a-20" link_id="177111" type="link"]mechanism required here[/easyazon_link].
9. Utilize a [easyazon_link keywords="space saving beverage dispenser" locale="US" tag="homesthetics0a-20" link_id="177112" type="link" ref="misen"]space saving beverage dispenser[/easyazon_link] in your fridge to emphasize functionality
Courtesy to chezlarsson.com and [easyazon_link identifier="B000QRAMNC" locale="US" tag="homesthetics0a-20" link_id="177113" type="link"]Amazon.com[/easyazon_link]
10. Use a wire rack on your cabinet doors to store kitchen utensils efficiently
Baking sheets and cutting boards can be accommodated as well by simply placing a couple of zip ties on the bottom.
12. Use small c[easyazon_link identifier="B07CKGTB4M" locale="US" tag="homesthetics0a-20" link_id="177114" type="link"]abinet organizers for your spice jars[/easyazon_link]
[easyazon_link identifier="B00YFCQRRE" locale="US" tag="homesthetics0a-20" link_id="177115" type="link"]Available for purchase here.[/easyazon_link]
15. Use [easyazon_link identifier="B00H46MF7O" locale="US" tag="homesthetics0a-20" link_id="177116" type="link"]small drawers in front of your sink[/easyazon_link] to maximize storage
16. Use [easyazon_link keywords="wax paper" locale="US" tag="homesthetics0a-20" link_id="177117" type="link" ref="misen"]wax paper[/easyazon_link] to keep your refrigerator clean with ease
17. Use a [easyazon_link identifier="B0019HQH32" locale="US" tag="homesthetics0a-20" link_id="177118" type="link"]plate rack to organize Tupperware lids[/easyazon_link] and cooking sheets inside your drawings
via [easyazon_link identifier="B0019HQH32" locale="US" tag="homesthetics0a-20" link_id="177119" type="link"]Amazon.com[/easyazon_link]
20. Nestle two [easyazon_link keywords="wire baskets" locale="US" tag="homesthetics0a-20" link_id="177120" type="link" ref="misen"]wire baskets[/easyazon_link] under your kitchen sink for easy access
All you need is two curtain rods and the space under your sink becomes highly functional and practical.
22. Use [easyazon_link keywords="vintage wooden boxes" locale="US" tag="homesthetics0a-20" link_id="177121" type="link" ref="misen"]vintage wooden boxes[/easyazon_link] to organize spice jars
Wooden textures paired with glass and the diversity of spices is definitely an image worth pursuing.
22. Use [easyazon_link keywords="simple hooks" locale="US" tag="homesthetics0a-20" link_id="177122" type="link" ref="misen"]simple hooks[/easyazon_link] in your cabinets to plant baking stools efficiently
25. IKEA rails under a shelf can nestle your cutting boards
26. Organize a deep drawer for vertical silverware storage
27. Narrow cabinets can be planted all around the home
These small storage spaces emphasize functionality a great deal, accommodating items that otherwise would not be stored in bigger storage options. All homes have inefficient corners, gaps, put them to good use today.
28. Use [easyazon_link identifier="B01J8IGRCO" locale="US" tag="homesthetics0a-20" link_id="177123" type="link"]tiered storage options[/easyazon_link] to save counter space
Available at [easyazon_link identifier="B00QJN3ETQ" locale="US" tag="homesthetics0a-20" link_id="177124" type="link"]Amazon.com[/easyazon_link]
29. Use smart options to store things in the vertical plane
34. Find convenient little things to make your life easier
Source Unknown
What do you think about the efficient ideas presented below?Feel free to share your thoughts in the comment section below.
A small portion of string can beautifully sculpt an installation, a piece of wall art or a Christmas tree decoration to beautify your splendid holiday. Wire art sculptures and wire wall art are known today in design thanks to their amazing naturalness and organicity as well as for their immense accessibility, ease of use and versatility, the little element can shape something extraordinary in minutes and the unimaginable in hours, weeks as numerous artists have previously showcased.
A selection of unique wire art pieces lies below, cast a glance and surge inspiration.
Wire Art Sculptures
1. Craft a Fender Guitar
A simple swift shape that can be used as a thematic decoration or as a simple beautiful diy gift.
A simple process with great results, extraordinarily idea to materialize with children, family, loved ones.
You only need a rock, copper wire and some colorful beads to create this exemplary wire tree, something so simple to craft yet so powerful, easy wire art at its best.
DIY wire art with simple elements from our reality can sculpt extraordinary mini-settings that would nurture the creativity of little ones. Play along, nourish their creativity with wire art ideas and you will be amazed on how much it will boost their morale.
Color creates contrast with white and black and this simple fact gives birth to extraordinary art pieces. The naturalness of the black wire surely stands out yet it`s the perfect balance of the over -all scheme the thing that really stands out.
An artist can experience great moments with wire and string in its artistic endeavors by simply changing the pencil with a different mean like string and wire.
Break a pattern with something simple; above a simple power line with doves has brought a really cool, natural element in a very cozy and elegant woodish atmosphere thus creating a wonderful balance.
String can function like a structure and textile can work as skin, needless to say that with these two into the picture, light becomes an interesting element.
Have fun with a small, simple, adorable birdy shaped with wire, the element can become a prize, a really cute wire art figurine that will surely be loved by little ones !
Wire art sculptures can be extraordinarily easy or complex but regardless of difficulty, in a matter of minutes, everything can be changed. How do you see this spectacular pieces of art, do you see wire art sculptures as special sculptures? We would love to hear from you in the comment section below !
Pottery is an art of using ceramic materials to mold into artifacts, tableware, stoneware and porcelain to name a few. Many people take up ceramic art as a hobby or master the skill as a way of making a living for themselves. The Chinese are one group of people who take ceramic or porcelain making and pottery painting more seriously and to a higher level. Through a few documentaries, many of us learned how to cover up a once broken ceramic tableware with pottery painting skills. Ceramic making involves the use of clay and other relevant materials. With ceramic materials, the modeling clay is molded by the hands while spinning in a circular motion into whatever object the potter desires to create. The bare hands are constantly exposed to mud, dirt, clay and in some cases animal or cow dung. So this art requires the artist to always have his hands immaculately clean when he is not at work. Finger nails must be always clipped and kept low to avoid as much as possible fungi and bacteria from taking up residence. Here are 16 examples of pottery art and ideas you can use for your own do it yourself pottery painting at home.
15 Do-It-Yourself Pottery Painting Ideas
#1 This pottery painter is simple creating a lot of dots to form a pattern
This just goes to show you don't need to be a professional to get started on your love for painting your ceramics. A simple idea of using a strong bright color on a -lain white ceramic ware will do.
#2 adding humor and fun to your pottery painting
Try including the kids into your pottery making ideas, a great starter skill for them to learn and with their appreciation for such art, you may have to bother with them disregarding or destroying it.
#3 unique ways make your pottery painting more versatile
Redesign that plain coffee cup into a two colored pattern. Just use crepe paper to cover the part you don't want painted in case the paint spills over.
Unless you have knowledge and experience in pottery painting, can you tell this is a plate at first or second glance? Me neither.
#9 multicolored pottery painted canister for home use
Can be used for decorative or functional purposes.
#10 pottery painted tea pot depicting a place by the sea
Using words to bring your tea pot to life is just as creative as using paintings. Better yet painting a memorabilia on your ceramic tableware to always remember an important event in your life.
#11 express your feelings on your flatware using pottery painting
Now here is a great gift to give to that special little person in your family or even at a kindergarten school event.
#12 heart shaped pottery painting plate purely for decorative purposes
A Valentine's day gift maybe? Very artistic skills demonstrated here which I am sure is not for beginners.
#13 A lady bug tea pot designed from pottery painting
This red and black pottery painted tea pot speaks for itself in terms of how brilliantly creative one can get when taking up the skill of pottery painting.
Here is a pottery painted piggy bank to teach your kids how to save their little pennies.
Just love those pottery painting do it yourself ideas. Go ahead and share yours in the comment section below if you are a pottery painter or lover of ceramics and porcelain.
Awnings protect you and your family from rain and bright sunlight, allowing you to utilize your outside spaces at any time of year. However, a permit may be necessary based on where you live and how you intend to utilize the awning. You should research to see if there are any building permit regulations you must be aware of.
Retractable awnings keep the direct exterior of your house cool and shady, even on a hot summer day. Whether you want to cover your patio or the yard, they are perfect for covering any area of your house.
However, a gray area in this aspect is whether you need permission to install a retractable awning. Since the rules and regulations vary in every region, you should reach out to the homeowners association, local government, or anyone else who can give you a clear idea.
Check Out The Rules In Your Area
Before you decide to install a retractable awning, I’d suggest always checking for the permits that are available in your area or state. There are several places where you directly need permission from the local government before making any major change to your house.
If you have an old home or you’re a member of a homeowner’s association, you can easily look into the rules and regulations of the area. These regulations are intended to ensure safety, give some uniformity in the look of houses in a community, and encourage inhabitants to appreciate it.
Different Permits For Different Situations
You might need permission based on two factors: where do you live and how are you going to use the awning? There is no specific answer to getting the permit for the awning installation.
However, there are certain situations where you don’t need permission at all:
If you’re just replacing or repairing your awning
If you’re installing the awning within your property
If the shade structure of the awning does not trouble your neighbors
If rain does not fall directly on nearby houses as a result of your awning
How To Get Approval For Installing A Retractable Awning
Before installing an awning, you should contact the building department or town hall to know the rules and regulations for installing an awning in your area. Make a list of questions you need to ask, like what shade structures and sizes are allowed in your locality.
If you get approval verbally, then don’t rely on it. Try to get written approval from the concerned authorities. In most cases, you have to pay a certain amount of fees to start the installation process. And the cost can vary according to the area in which you live.
Tip
You might have heard of the ‘grandfather clause.’ If you have an old home built way before the current rules were set, you need to ask about the grandfather clauses to know your limitations to the changes that can be made.
Do You Need A Permit For A Retractable Awning Final Words
Yes, you need permission before setting up an awning in your condominium or any other community commercial properties.
Awnings are an amazing way to turn your open space into a canopy-like structure where you can enjoy your time with your family. But it's not unusual for neighborhoods to have previously decided on awning proportions, design, color scheme, and materials.
So, whenever you plan to have retractable awnings installed on vinyl siding, I suggest you apply for a permit from the Homeowner's Association or any authority handling such matters.
If you’ve found this guide insightful, I’d suggest you give my informative guide on “How Do Utility Pumps Work?” a read.
A retractable awning can be attached to the exterior of your home to protect the patio from extreme weather conditions. However, I recommend installing a retractable awning on vinyl siding only after determining the required type of awning.
Retractable awnings are ideal for homeowners who wish to enjoy the outdoor view without committing to a permanent outdoor structure.
And the best part is - installing a retractable awning is much cheaper and requires less space than building a fixed structure. Hence, usually, homeowners with smaller gardens and patios opt for awnings.
Now the question arises - can you install a retractable awning on vinyl siding? The answer is “yes,” and here’s how you can install it yourself…
How To Install A Retractable Awning On Vinyl Siding
Step 1
Use a tape measure to determine the length and location of the awning. Ensure that you measure up to 7 to 8 feet from the deck or patio.
Step 2
Take a pencil and make marks every 2 feet, and connect the dots with chalk.
Step 3
Thereafter, use a stud finder to locate the exterior wall studs. Accordingly, mark the location of each wall stud along the vinyl siding.
Step 4
Now, along the chalk line made previously, place the 2-by-8 board to use as a header board. Then, you can drill holes into it to mark the location of the studs.
Tip
Since you’ll be using a power drill for this step, I recommend wearing safety gloves and other protective gear.
Step 5
Fix the holes with lag bolts and use a socket wrench to tighten them.
Step 6
Measure the awning and mark the location of the soffit mount brackets. Now, use these measurements to place the mounting brackets on the header board.
Step 7
Place the mounting brackets at the location of the wall stud on the header board. You’ll also need to pre-drill a hole on the flat mounting surface for this purpose.
Step 8
Next, insert the awning brackets over each hole along with a lag bolt. Again, use a socket wrench to tighten the bolts.
Step 9
Finally, install the awning cover on the roof brackets and insert the bolts from the bottom. Secure the brackets with a socket wrench, and you’re done!
Why Should You Get A Retractable Awning Installed
If you’re still on the fence about installing an awning on a vinyl siding house, let me tell you that doing so can reduce energy costs significantly.
This is because most retractable awnings are installed strategically to reduce the amount of direct sunlight entering through your doors and windows. Plus, an awning can provide shade to your outdoor AC unit and protect it from extreme weather conditions. As such, your house will remain cooler and more comfortable, keeping your AC bills under control.
Similarly, motorized awnings can effectively reduce the surface temperature of your deck and outdoor space. So, your pets won’t burn their delicate paws while walking outside. Any furniture in the deck/patio will also benefit from the extra protection, ensuring they last longer.
Can Retractable Awnings Be Installed On Vinyl Siding Conclusion
Now that you have an awning cover outside your house, I further recommend installing a bird netting to keep birds out of the retractable awning. Consequently, your awning motor will be safe from all the pecking while keeping the clueless birds out of danger.
Birds always look for sheltered and covered areas like an awning for nesting. Luckily, there are many ways to keep birds away from your awning like keeping fake predators like owls, using bird spikes, a motion-activated sprinkler, and bird control products.
With the best retractable awnings available on the market, you can easily enjoy your time with your family under the cool shade of your patio. However, you might not be the only person enjoying the shade. You may find birds trying to make nests in the awning frame, hood, or fabric.
These critters can be a nuisance and, sometimes, even cause damage to your retractable awning. But don't let them ruin your fun evenings. I have researched some ways through which you can keep the birds away from the retractable awning and enjoy your "patio" time.
Deterrents To Keep Birds From Building Nests In Your Retractable Awning
You might wonder - “are retractable awnings worth it?” - Well, the answer is yes. But you will need to take the necessary precautions to keep birds away, preventing them from building nests.
The concept here is that if they are deterred from building a nest in a comfortable space, they will move along and find a new safe corner. Here I have discussed a few ways to go about this:
1. Choose A Cassette Style Awning
Birds that live in retractable awnings usually do so on the squared anchoring bar beneath the fabric rolling tube on versions with exposed bars. Whenever you plan to have retractable awnings installed on vinyl siding, I suggest getting a cassette-style awning so that the birds don't have space to build their nests.
2. Bird Spikes
Installing clear acrylic bird spikes can be a good way to keep the birds away. You can easily mount them all along the top of the square mount bar of the awning or any covered flat locations on your property.
Rest assured these spikes are not sharp enough to hurt the birds. All they do is prevent them from landing.
3. PVC Tube Along The Square Bar
To prevent birds from living in your awning, you can easily insert a 1.5" diameter plastic pipe (normally used in plumbing work). The length of the pipe will take up the space required for the birds to build their nest.
4. Install A Scare Device
You can install various scare devices like fake predators to keep the birds at bay. A rubber snake or an owl, for instance, works great as a bird deterrent.
I’d suggest using the bobblehead versions to scare the birds away. And make sure to frequently change the position of these devices so that they look real.
5. Use Your Awning Often
This method of keeping the birds away from the awning is the safest and most effective. Identify the times of the year when birds are more active in building nests and try to use your awning more frequently during those times. Through these actions, the birds will get the idea that the awning is frequently used, meaning they cannot build their nest there.
6. Use Bird Netting
Installing a bird netting over your awning can make it easier for you to keep the birds away from it and prevent them from building nests.
Tip
Always ensure that the mesh netting is compatible with the dimensions of the awning. If birds accidentally get inside the awning and can’t get out of it, they might die in there and cause you more trouble.
7. Use A Motion-Activated Sprinkler
Another good idea to prevent the birds from entering your awning is to use a motion-activated sprinkler. The sprinkler can easily sense when a bird enters the awning and spray water on them to scare them away. However, you need to install this device in a place where birds frequently build nests, and not where people sit.
How To Keep Birds Out Of Retractable Awning Final Words: Avoid Attracting Birds To Your Backyard To Build Nests
Like every other animal on the planet, a bird is in search of food, water, and shelter. If you have bird amenities like a bird bath or hanging bird feeders, the flying species will be attracted to your house and build a nest whenever and wherever possible (your retractable awning, for example).
Listening to the chirping of the birds can be relaxing at times, but when they build a nest in your awning, it can be a mess to clean up the surroundings. With some of these simple remedies I have listed above, you can easily keep pigeons, sparrows, and other small birds at bay.
Retractable awnings pare worth investing in as they provide ample shade for your patio or deck and protect it from all the natural elements like rain, sun, wind, and snow. They are easy to use and store away, making them last longer.
While on the lookout for the best retractable awnings, I’ve come to realize that people are still very much unaware of their pros and cons.
Hence, many people aren’t sure if retractable awnings are worth it. But after extensive research and using a couple of them, I have compiled the pros and cons of purchasing a retractable awning. Here is a summarized list of all of them.
Pros Of Retractable Awnings
1. Retractable Awnings Can Cut Down On Energy Costs
The main reason I purchased a retractable patio awning is for providing shade to my deck from natural sunlight. This made the outdoor space more comfortable. Besides, the initial cost to purchase and install retractable awnings is less when compared to the cost incurred for other backyard amenities.
The retractable patio awnings helped me save significant energy in the long run. Aside from the outdoors, the shade can cool down the inside of your house, meaning air conditioners don’t have to run for long to keep you cool.
Besides, an awning can help make the cooling of your AC more effective, helping you save money on your power pills.
Tip
Make sure to get your retractable awning installed by a professional who knows his way around it. Doing it the DIY way can result in errors and the retractable function of the awning not working properly.
2. They Have A Longer Lifespan
Non-retractable awnings do fall on the cheaper side of the spectrum, but they do not last as long because they are more likely to be damaged by bad weather conditions like rain, high winds, or heavy snowfall. You can easily fold them and store away to keep them from getting damaged.
Besides, sun exposure affects everything just like it does affect humans. When the fabric on the awnings is exposed to the direct sunlight for extended periods of time, it can end up being bleached and faded. Non-retractable awnings cannot be retracted, so the chances of the fabric being ruined due to sunlight are much higher.
3. They Protect Indoor And Outdoor Furnishings
Purchasing retractable awnings helped significantly in protecting my outdoor furniture. But that’s not all, as they also shielded the furniture inside the house from the elements, especially sunlight.
Since the shade will also extend to the interior of your home, the furniture near the door and windows won’t be exposed to excess heat and sunlight. This, in turn, will protect all indoor and outdoor patio furniture from getting bleached due to sun exposure, fading over time, or getting cracked.
Some Other Things To Keep In Mind
1. Retractable Awnings Are More Expensive
Retractable awnings are expensive compared to other awnings like the manually operated ones. Hence, make sure you factor in features like durability and water-resistant fabric to make the most out of them. You may even go for remote control operation for ease of use.
I’d recommend getting retractable awnings only from a reputed company so that you have greater peace of mind about its quality.
2. Cleaning And Maintaining A Retractable Awning
All types of awnings require cleaning and maintenance on a regular basis. Since retractable awnings have many foldable joints, the probability of dust and grime accumulating in the corners is high. This means you will have to clean the retractable awning frequently to help it function optimally.
Furthermore, water from rain can accumulate on the roof fabric of, which, in turn promotes unhealthy mold growth. You will also need to clean the metal parts of the awnings to ensure they stay free of moisture and debris and function efficiently.
3. Replacing The Electric Sensor Can Be Pricey
There are two main kinds of retractable awnings: manual and motorized. Motorized retractable awnings cost quite a lot, but they are more convenient to use. A lot of motorized awnings come with their own remote controls that make it easy to operate them, while others have sensors that cause them to retract automatically when it rains.
Certain electrical awning sensors can be obsolete, so you may need to manually retract the electric awning. To make sure that the electric awning works efficiently, its sensors have to be replaced periodically, which ends up adding to the expense.
Retractable Awnings Conclusion
Given the utility and durability of an retractable awning, I’d say it can be a worthy addition to your outdoor setup. These models also come in various colors and sizes so that you can choose the right one for your preference.
A retracting electric awning is an adjustable accessory that can extend either manually or by a power awning switch. They offer shade and comfort when attached to an RV or trailer, especially during extremely hot or rainy days.
I highly recommend a retractable awning if you enjoy holding tea parties outside your house or campsite. Plus, it is fairly easy to find the best retractable awningsthat cater to your individual needs and environment.
However, since retracting awnings can often get stuck, I have explored the procedure that can help with such situations. Although a YouTube video may also help, a detailed step-by-step written manual can offer better hands-on guidance. So, let’s get started…
How To Retract A Power Awning
Awareness of the basics is crucial when using any tool or device. Thorough research helped me identify potential issues and their possible solutions. To share my experience with my readers, here’s a manual or guide I have put together that I found helpful.
Reasons Why A Power Awning Can Stop Working
There are many reasons why a power awning may stop working. However, the three leading causes why an awning retraction system may malfunction are as follows:
Broken mechanical parts
Motor failure
Power problems
I have listed the possible solutions using minimal tools and effort based on each of these issues.
1. Broken Mechanical Parts
Broken or malfunctioning mechanical parts are one of the primary reasons why the power awning of the RV may stop working.
First, initiate a manual override to begin looking for possible broken parts. Most awnings have a hole on top of the motor cover, which you can use to override the power awning. Use a drill and socket to rotate the motor.
Warning
If you find that the motor is grinding and does not slide smoothly, you may have a mechanical problem. You can address it by removing the plastic cover from either side of the awning and looking for broken gears and damaged fuse or wire on the motor.
2. Motor Failure
I bought a replacement motor when I found that my RV awning had a motor failure. If the motor does not respond even after connecting it to a 12 V, there might be a potential motor failure.
Tip
To check the power awning for similar problems, try to see if it is disconnected from the power source.
How To Replace A Motor On A Power Awning
Replacing the broken motor of the electric awning is not as challenging as it sounds. The whole process usually takes 25 to 30 minutes to complete if you can figure out the details. Here’s a step-by-step manual to replace the motor.
Tools Required For Replacement
Screws and screwdriver
A ladder
10 mm wrench
A ratchet
Step 1
The first thing I did was extend the awning up to two feet. If the motor is not moving at all, you will need to override it to make some room for the replacement.
Step 2
Then, tie the awning arms to the bracket that can attach to the side of the RV. Remember to do the same on the other side when done with one end.
Note
Tying the awning arms to the bracket helps to stabilize the awning while removing the motor.
Step 3
Next, you must remove the motor covers from the front and the back. These are usually placed on the right side of the awning.
Step 4
Pull aside any wire that comes in the way and access the plugged motor. Proceed to unplug it.
Step 5
Find the three bolts connected to the motor and remove them using a 10mm wrench. This will loosen up the motor, after which you can gently remove it.
Step 6
Replace the old motor with a new one, align the gears and rotate it back into place. Once the screws are all lined up, tighten the screws and reconnect the wires.
Step 7
Begin operating the motor to see if it is working correctly. If things look good, replace the plastic covers and untie the arms.
Once you have followed these instructions, the motor should be able to retract the awning.
3. Power Problems
Perhaps the most common issue with RV retracting awnings are power problems and electric failures. If the awning motor receives insufficient power, it might be unable to retract the awning. The two possible reasons for such power failure are:
A. Loose wiring
An unstable electrical connection can sufficiently damage the retracting system of the awning and lead to electrical fires.
To test the wiring, you can unplug the fuse and awning motor and connect the battery to a 12 V power source. After connecting, if the awning moves properly, you might have a problem with the switch.
Checking the switch connection is essential to address this problem. I used a small piece of wire to connect it to a 12V power terminal and then retracted the switch. If the awning retracts smoothly after this, the awning switch needs to be replaced.
However, you might damage the awning while looking for loose wires, so it is best to call in a dealer.
B. Low Power
I have discovered that low power in the RV can lead to faulty rolling. This usually happens when the RV battery is low quality, or the 12 V power source is unstable.
The manual way to check for low power is to place a voltmeter on the battery and see the reading. You can also figure out a faulty battery by running the awning with the meter on. If the meter reading drastically drops, a battery change is required.
However, it is essential to remember that different motors have different power limits. Living in an area with strong winds requires a more powerful motor, so consider looking for the best retractable awnings for windy areas.
How To Retract An Awning Manually
If an awning is simply stuck and does not require fixing, retracting it can be pretty easy. Let us look at the retraction manual that works for me:
Step 1
Unlock the travel latch connecting the awning to the side of the RV. Also, an awning that is spring-loaded may have knobs that require loosening. Repeat this for the other side. Then, turn the locking lever to a “roll down” position using the awning rod.
Step 2
Pull and attach the rod to the strap loop. I often walk backward with the rod to help with the pulling. However, two people are sometimes required to be present for this. Since one end of the awning can get stuck, the other person may need to tug the arm.
The arms remain in place even after letting them go on awning models that do not have a spring. Thus, it is essential to know your type of electric awning.
Moreover, spring-loaded awnings may require you to slide the inner arm towards the upper arm and press on the arms until the fabric is taut. After that, tighten the knobs and repeat on the other side.
You can also adjust electric awnings according to your height and angle of comfort by simply pulling the lever or latch on each arm.
Step 3
When this process is complete, remove the strap and secure it to the RV.
Warning
If the strap is allowed to hang loosely, someone might accidentally tug at it, which can collapse the awning. To prevent this, ensure that the strap is secured.
How To Manually Retract Electric Awning Final Thoughts
Retractable awnings can keep our vehicles cooler and more comfortable. Moreover, they are convenient since you can retract the awning with just the touch of a button. Or if things go south, you can quickly fix it using a manual.
In my experience, the outdoor space looks much more attractive after attaching an electric awning to my RV. It also helps when I wish to step out in the dark or the rain without the risk of getting wet.
That ends my manual on how to retract an electric awning. I have published another informational guide titled “What Size Pool For Volleyball?” where I share my insights on pool sizes.
That said, I’ll be signing off now. Until next time, stay safe!
Decorating a bedroom for your child is definitely not an easy task. The interior should be the mirror of her personality and it should be able to make her/his life easier, include their hobbies and interesting activities and encourage them in persuading them . Decorating a bedroom or any room for a teenage girls is even harder. Young ladies have diverse interests, they have a strong personality and they pay attention to details more than boys therefore is harder to find ideas for teenage girls rooms. We've featured severalcar bedrooms for boys that would do trick with ease for boys and today we are showcasing more than fifty interior designs that should aid you and your loved ones in designing theperfect castle for your princess.
Decorating young girls`s bedroom should be easy if you follow to principles that you will wrap in the colors and textures that your child loves. The interior design should be practical and cozy. This is it. Basically you should make sure from the very beginning that the storage space is efficient and organized, that are plenty of cabinets and shelving systems to accommodate her interests and clothes. This will also shape her organization skills which are mandatory in the education of every child. Lighting is also a crucial aspect to which you should pay attention your child`s room, they should have as much natural light as possible, carefully complemented by artificial lightning where is the case.
Colorful Airy Girl Room
After deciding on the storage, bed size and shelving you should let your child dictate the ambiance and colors, by feeding her imagination with hundreds of pictures, she has to know her options so make sure you are showing her what you can create for her. You choose what options you present her but she should be making the final calls, giving her the feel that she shaped the interior, she designed, she chose the patterns and colors. This will offer her confidence and it will create a more intimate and personal interior space.
Black and White Zebra Inspired Young Girls Room
Young Teenage Girls Bedroom Idea Subdued to Elegance
Young Lady Bedroom Design With a Royal Vibe
Teal White and Simplicity Empowering a Young Girl Bedroom
Relaxing Bedroom In a Warm and Cozy Color Palette
Elegant Vanity Teenage Girls Room Design
Elegance Showcased in a Vanity Teenage Girl Room
Modern Simplicity Exuded by In This Teenage Bedroom Design
Tropical Inspired Teenage Bedroom Design With Space Efficient Bedroom Ensemble
Highly Colorful Girl Room In a Pink Color Palette
Super Floral Warm and Cozy Pink Interior Design
Calm, Noble and Colorful, The Teenage Girls Sanctuary
Teenage Girls Room in Red and Pink Stripes
White Teenage Girls Room Ideas
Playful Teenage Girls Bedroom Interior Design
Simple and Space Efficient Suspended Bed in Teenage Girls Rooms
Study Corner in Pink
Elegant and Relaxed Teenage Girls Bedroom
Colorful Floral Bedroom Theme
Immaculate White and Pink Bedroom Idea
Patterns and Textures Densifying a Colorful Bedroom
Young Lady Bedroom With a Huge Headboard Above a Huge Bed
Small Bed Enhancing a Luxurious Bedroom Interior Design
Large Young Teenage Girls Bedroom Design
Highly Graphic Canopy Bedroom Design
Sculptural Furnishings in a Girls Bedroom
Gossip Girl Bedroom Design Empowered by Simplicity
Girl Bedroom Ideas With Highly Efficient Storage Ideas
Purple Stripes and Space Efficient Design in a Small Bedroom Design
Red Bedroom Interior Design Flooded by Natural Light
Olive Green Girl Teen Room
Orange Girl Teen Small Bedroom Design
Purple Colorful Interior Design
Space Efficient Bedroom Design For Teenage Girl in Purple
Olive Green Small Bedroom Design
Space Efficient Bedroom Interior Design For Girls
Colorful Bedding in a Bedroom Designed For Twins
Stripes and Color Emphasizing The Simplicity of This Bedroom Interior Design
Creativity Unravelled in a Cool Teenage Girl Room
Superb Creativity Showcased in a Cool Young Girls Room
Bubbles and Colors in Style
Edgemere Girl Room Wrapped in Style and Elegance
Elegant Cozy and Airy Interior Design
Colorful Flowery Teenage Girl Room
Immersive Bubbles Colors in a Teenage Bedroom
Space Efficient Purple Bedroom Interior Design
Super Space Efficient Girl Bedroom Design
Highly Space Efficient Girl Teen Room
Airy Pastel Colors
White and Red Stripes in a Teenage Girl Bedroom With Two Beds
Elegance, Nobility and Maturity Caught in a Bohemian Inspired Teenage Bedroom
Blue Pastellate Colors in a Young Girl Room
Blue and Green Girl Room
Dense and Space Efficient Bloom Headboard in a Teenage Girl Bedroom
Soft and malleable - there are not many options better than clay for sculpting unique figurines, structures, and more!
Whether beginners or professionals, modeling clays are something everyone can try to bring shape to their imagination. It’s probably the best therapeutic hobby one can take up.
And making clay sculptures with your children also aids in their early development. It nurtures their creativity and imbibes self-confidence. Clay modeling also helps develop visual-spatial skills among children, especially toddlers.
However, for that, you must give them the best entry-level clay to start with. Now the problem is that finding one isn’t as easy as it seems, and the availability of many options makes the task even more challenging.
That’s where we come in! We've compiled a list of the top 11 beginner clays on the market so you can pick the best one for your kids.
Stress-Free Crafting - DAS airdry clay boasts a smooth, even...
Artistic Versatility - This modeling clay can be used to...
Kicking off our list with an air-dry clay by an iconic Italian brand, DAS, which has been providing superior modeling clay since 1963. The brand and its clay are well-known amongst artists, professionals, enthusiasts, and children.
DAS clay is available for people of all ages, like DAS Junior for kids and DAS for professionals or more experienced artists.
This clay is an air-dry type, so you won’t need a kiln or oven. Apart from that, it sticks to and supports any material so that you can use the clay to make things like jewelry and large sculptures with ornaments. Or, if you’re running short of the DAS clay in the middle of the project, you can mix it with other clay types to complete it.
Although it’s available in only two colors: white and terracotta, you can use any paint you want. Acrylic paint also works fine with it.
Soft air-hardening modeling clay is easy to knead and shape.
Create forms by hand or use to cover frames made of wire,...
The next product we have is an air-dry clay by Jovi. Based in Barcelona, Spain, this brand has been offering premium modeling paste to customers of all ages. Its clay is gluten-free, non-toxic, and CPSIA-certified, which makes it a safe item to work with.
Children often make a mess when working with modeling clay and stain or damage their clothes. But with less sticky and stain-proof Jovi clay, there are fewer chances of that.
Besides that, what makes the clay ideal for beginners is that there’s no need for any specialized tools for clay sculpting. You just need to channel your inner creativity into making something unique. And similar to DAS clay, you don’t need to heat or bake it; keeping it in the open will give a fully-dried clay.
Easy Cleanup - This modeling dough will not crumble or stain...
Simple to Use – These pack of modeling dough is...
Available in several colors, Sargent Art Plastilina Modeling clay is a popular product amongst people who are into clay art, be it beginners or more advanced sculptors. Its mineral-based formulation won’t harden anytime soon, unlike our previous two options.
The modeling clay is non-toxic and conforms to ASTM D 4236 standards. So, rest assured you can hand over the clay to your kids and let them explore their creativity to make new things every day. The product is also small enough to fit into kids' tiniest hands. Further, you can use its 5lb size variant for crafts projects, flower arrangements, and many more.
NATURAL CLAY – This 10lb block of white clay will help you...
NO KILN NEEDED – Slowly and evenly air-dry clay creations...
If you are looking for natural air-dry or water-based clays, then take a look at our following product. This 10lb block of white clay is a versatile piece that you can use for hand-modeling, sculpting, or throwing on a pottery wheel.
Being an air-dry clay, it’s easy to mold into different shapes and designs, making it a suitable choice for beginners. And once you complete sculpting, keep it outside for a few minutes to harden well.
However, the only issue with this unit, as it is with every air-dry clay, is that it might dry up while you’re sculpting. In such cases, sprinkle some water on it to smoothen it again. But, ensure not to pour too much water, as cracks might develop.
Easy to Use: Sargent Art polymer baking clays are great for...
Multipurpose: Perfect for home projects, school projects,...
Sargent Art is a one-stop destination for art essentials, supplies, classroom supplies, and accessories. The brand uses decades of experience to offer the finest products to its customers. So, rest assured, you get high-quality clay for molding clay figures and models.
Unlike the air-dry clay of Craftsmart, the versatile polymer clay remains soft and pliable for a long time and hardens only after it’s baked. Nevertheless, the hardened clay can be sanded, painted, and drilled without breaking the structure. It makes the item perfect for multiple applications, including school, home, or science projects, jewelry making, crafts, etc.
However, this clay is a blend of several polymers, so make sure to supervise children when they use it to mold. Children have the habit of putting things in their mouth, and although the brand claims it to be non-toxic, consuming it can have serious consequences for their health.
SCULPEY III is a great introduction to oven-bake clay...
1 OUNCE BARS: The ideal size for sampling multiple colors....
Sculpey III Polymer oven-bake clay comes in a set of 30 vibrant colors that are easy and soft to sculpt, making it an ideal gift for beginners of any age. It’s perfect for any type of modeling project or sculpting, and you can showcase your creativity by blending a bunch of different colors to mold something. Kids can have great fun using this!
Being available in different colors means you don’t have to paint them separately after molding. Also, with polymer clays, you can take your time to sculpt things without worrying about the clay drying out.
Next on our list, we have yet another polymer clay kit that is suitable as a gifting set for kids and adults. This kit includes five wooden sculpting tools, nine different accessories, one rolling pin, and 50 vividly colored polymer clay.
Its modeling clay blocks are well-tested to be non-toxic and eco-friendly, making it a perfect molding paste option for kids to show their creativity. But make sure the kids are working under parental guidance.
In terms of hardening the uncured clay, you have three options - air drying, blow drying, and oven baking. Usually, air drying doesn’t work with polymer clay, and it might take 7-8 days for a final clay sculpture to dry, but it’s better than letting your kids go near a fire.
Heating with a hair blower works for smaller projects (1-2 inch size), where you put your artwork in an enclosed paper box and blow it for 3-5 minutes to harden. And the oven bake method is suitable for professionals only. Put your clay art wrapped in a foil sheet and heat it at 135℃ for at least half an hour.
Perfect clay for all craft projects including jewelry
Includes 3.75-pound clay
If you are looking for a budget-friendly clay for your kid to start their artistry journey with, then look no more. The Sculpy polymer clay is a perfect option for new sculptors looking to practice pottery before switching to more professional clay.
It comes in three basic colors - terra cotta, white, and granite, which look like ceramic clay and add additional texture to your finished sculpture. And engaging your kid in clay art allows them to take time off the mobile screen and use their imagination to make unique sculptures.
Moving on, we have another air-drying clay by Remarkable U, which, like any other traditional clay, is simple to work with and a good starter item for children. This 10lbs clay block is perfect for kids as they can just use their little hands to mold it into an exceptional piece of art.
The most fun aspect about using this item is you can use markers, paints, and other mixed media to color your dull white piece of clay. And, being made of 100% natural and non-toxic ingredients, it’s safe to use for kids.
PREMIUM QUALITY - Bring life to your creative ideas with Old...
GREAT FOR CLAY CREATIONS - Formulated with a smooth...
Explore your imagination with this premium-quality Old Potters sculpting clay. The smooth consistency and exceptional plasticity of the clay allow you to mold it into any shape you want.
You can cut this block of clay into small chunks for sculpting on a wheel or hand-building. This Terra cotta clay is available in two sizes - 5lbs and 10lbs, so you can purchase any according to your needs. A 10lbs block is sufficient to sculpt 15-20 small-sized art pieces.
Aside from that, this clay is suitable for people of all skill levels, where beginner to proficient potters can use it for projects of all shapes and sizes.
Main material: The raw material of this natural air-dry clay...
Non-toxic and odorless: The natural air-dry clay uses raw...
Ending our list, we have this natural clay by Biggun, made of kaolin, which boasts good light transmittance and plasticity. What makes this product a bit different from other air-dry modeling clays is that you can repeatedly fire it in a kiln to harden and deliver a glaze to it.
Before you start making sculptures with this clay, you first need to knead it properly and spray a bit of water on it to make it smoother. It makes the clay smooth enough to be molded into various shapes and forms.
Beginner Sculpting Clay Buying Guide
Now that we’ve mentioned some of the best clay for beginners in the market, it’s time to tell you about aspects or features you need to look into before purchasing.
1. Clay Types
People generally use two types of clay for sculpting - synthetic and natural clay, also known as polymer and air-dry clay. Other types of clay are dough clay, ball clay, and paper clay. But it’s recommended for beginners to stick with the conventional clay types.
Natural or air-dry clay is water-based, and exposure to a bit of air can make them dry, so you don’t need to bake them separately. So, it is the right clay if you don’t have access to a kiln or an oven. And, if you want to practice sculpting techniques, then soft water-based clay is an excellent option.
Furthermore, this clay is reusable, provided you keep it in an airtight container. But, even if it hardens, don’t worry. Sprinkle a few drops of water on it, knead it properly to remove any air bubbles, and smoothen it, and you are good to go.
But remember that, too much water can destabilize the structure and cause cracks to form.
On the other hand, synthetic clay is an oil-based clay that doesn’t dry naturally. Instead, you need to put it in an oven for a few minutes to finish your masterpiece. These clays are generally made from oil, clay flour, and wax.
2. Flexibility
The flexibility of clay is different for different types; some are pliable, while others are firm. The soft or pliable clays are easy to work with and, therefore, suitable for kids and beginners. At the same time, the firm type requires modeling tools to mold.
It’s entirely up to you which type of clay you choose. Some beginners having specialized tools prefer working with firm clay, while many professionals like to use their hands to manipulate the soft clay. So, there’s no hard and fast rule to choosing a clay type.
3. Texture
The texture of clay depends on the brand you are opting for. Air-dry clays of some brands have coarse particles, while some come with smooth ones. The latter type is preferred for beginners who lack the required tools and prefer using their hands to mold their clay.
On the contrary, professionals with experience in wheel sculpting use coarse clay as they don’t have to use their hands, thereby lowering the risk of hand abrasion.
4. Strength
You can only determine the strength of clay once it dries. Some types of clay (air-dry clay) crack more than their counterparts (polymer clay) while drying, while some maintain their smooth surface even after drying. So, it’s evident that polymer clay is more durable than air-dry clay. Nevertheless, if you stay cautious and carefully handle them while molding, both types of clay can stay intact.
A word of advice here - apply a shellac coat on your finished air-dry sculpture to enhance its strength.
5. Toxicity
Another critical aspect to consider is the inclusion of toxic substances in clay. Whether you’re molding by hand or using a potter’s wheel, the clay comes in contact with your skin in one way or another. And the presence of any toxic substances can result in skin and respiratory problems.
So, ensure the clay you choose is made of 100% natural ingredients and is approved by safety standards like ASTM D-4236. Go through the product description thoroughly before purchasing a clay.
6. Quantities
As you’ve observed in most of the products mentioned above, each comes with a varying quantity. So, before you look to purchase clay, estimate how much clay you’re going to need for sculpting. If this is your first time trying to make a clay sculpture, five pounds or less would be ideal.
On the other hand, if you’re a professional working on a project where the requirement is more, you might need 10 pounds or more clay.
Beginner Sculpting Clay
Is clay toxic?
Most clays on the market are non-toxic, but you must check the label to confirm if they’re marked safe. Some clays contain toxic sulfur, but there are sulfur-free options as well.
What should you do if the clay you were working with dried out in the middle?
You can warm up the air-dry clay and knead it to smoothen them, or you can spray some water onto it and knead it more. On the other hand, oil-based clays don’t harden in the air but become less flexible in cooler temperatures. You can place it in your household oven for a few seconds to make it more pliable to work with.
Can you fill the cracks in your sculptures?
To avoid this issue altogether, take the best quality clay to start with. Oil-based clays are less likely to crack, but brush some water over the clay while working. Or, in case some cracks are formed on the surface, use clay slips to cover them.
Can you use a kiln for drying an air-dry clay?
No, you can’t. Exposing an air-dry or natural clay to high temperatures results in the formation of cracks and eventually breaking down. As already mentioned, these clays dry up if kept in the open air; therefore, no kiln or oven is needed to dry them up.
How long does it take for air-drying clays to dry?
To completely dry the clay, you must keep it in the open air for at least two to three days. Nevertheless, the time varies according to your sculpture size, and bigger ones might take even a week.
How to paint clay?
If you want to paint the clay on your own, it would be best to take a white base clay. And once the project is complete and hardened, use tempera or acrylic paints to color it. The presence of white background makes each color look more beautiful compared to brown or gray backgrounds, as with most clays.
How can you give a glossy look to your clay sculpture?
To make your modeling clay glossy, apply two layers of varnish to it, where the first layer would be thin. And once it’s dried completely, which takes around six hours, add another layer to it. Although two layers of quality varnish do the trick, you can apply as many layers as needed until you have the desired look.
Beginner Sculpting Clay Final Words
That’s all we have to tell you about beginner sculpting clay!
Now it’s up to you to visit the market and get the best beginner clay to sculpt with. Along with clay, we have shared some starter kit options, which will be helpful for first-timers. So, you can opt for them as well.
These beginner clays are easy to work with. However, you should be careful with kids, as some tools are pointed, and they might hurt themselves while working with them. Or rather, just buy them clay and make them use their hands to sculpt. Make sure to supervise them throughout the process and encourage them to experiment all they want.
That said, we’ll wrap up this guide now. Adios folks!
I just love a vintage decor! Old paint, pastel colors, wallpaper, tons of storage ideas and those glamorous jars and boxes where you can store flagrant soaps and bath salts. Going vintage is one of the safest methods of designing a bathroom. And if you are among the many who face the small bathroom problem, well here you have a few tips and tricks that will add glamour to your small space. Starting with the small colored bath tub that will definitely remind you of times long passed and continuing with glass jars filled with colorful soaps, ladders used as shelves and storage for your soft, white towels and even small decorative signs with floral accents that will lift up the atmosphere.
We all know storage is usually underestimated when you redesign a room, but sooner or later piles of items come crushing over you and you find yourself looking desperately for help.
There re always options which will solve any small bathroom emergency: use shelving over the door for additional room because, usually, that is a guaranteed dead spot, as well as maximize the space over the toilet with shelves filled with wicker baskets. This storage solution is compatible with any interior design scheme and will fit perfectly in a vintage decor. A great idea of transforming a tiny bathroom into a cozy oasis is utilizing wood as a theme. You can use it on the walls and even as counter top for a white modern sink. Thus you will keep something of the old glamour of rich dark wood and the elegance of today's modernity.
Colors are another trick you can use to enlarge your room and make it glamorous. A white room will look big no matter of its actual size and with a few silvery or gold accents you have got yourself an elegant vintage bathroom. In contrast, dark colors can minimize a space but not necessary in the wrong way. A navy blue wallpaper matched with pure white vintage furniture would look divine in any bathroom, big or small. And, if you feel wild and adventurous, choose bold colors like the mint green showcased below. As I've said, the possibilities are numerous. It's just a matter of mixing and matching and choosing the right items, colors and designs for your space and taste. Because, in the end, your home should reflect yourself and your personality. Enjoy!
No matter how many bathroom designs you`ve seen so far you need to cast a glance at the following 15 tropical bathroom designs meant to enhance the rest of your summer with serendipity and tranquility, they`re simply extraordinary and rejuvenating. In the collection showcased bellow several different tropical areas of the world are present in order to offer you a more comprehensive ensemble image over the infinite possibilities.
Probably the most graphic and the most present design element is the presence of tropical plants within the interior or the extension of the tropical bathroom towards a small garden especially to enhance the interiors through vegetation and fresh air. In resorts like Hawaii and Bali various types of wood such as bamboo are providing the interiors with coziness and warmth whilst contrasting with minimalist design lines and creating a highly aesthetic interiors with a soothing and rejuvenating vibe.
In tropical areas huge glazed walls are an important game changer as well, this granting the interiors magnificent snapshots of the exterior and allowing the establishment to natural ventilate and enjoy with natural lighting. Reducing the need of artificial lighting everything is being far more immersive .
What do you think about these tropical bathroom designs? Which of the designs bellow seems the best in your eyes?
Form and material combined into a new innovative trendsetting product. Making the old and boring new and exciting or just playing with sensations, light and textures ,we bring you some bright ideas that we ourselves find catchy.
Blue vintage suitcases, which we don’t come across often, recreated into comfortable classic chairs; Relegs chair-A chair that is able to go down to its knees for your personal comfort; Cactus chair - an experimentation to investigate the effect of visual data to the user’s experience(the existence of the Barrel Cactus gives a temporary discomfort, even though the user knows that the cactus behind the glass is not a real threat ); Affinity chair- exploring our relationship with light and space beneath; Chair inside a chair –a very comfortable and versatile sitting that reduces storage space .And the list can easily continue. Just take a look and let your imagination wonder .
Modular furniture, expandable furniture, smart furniture; today's market offers the most unique and innovative solutions when it comes to the huge issue of small spaces and how to better utilize them without giving up on commodity and functionality. We adapt as we have constantly done and we''ll continue to move forward at a more and more rapid pace. Today we are talking about an expandable table, one that costs a fortune to acquire but has its advantages: the Fletcher Capstan Table. This circular table was developed on a system that allows it to double its size when open and contains its expandable leaves within itself, without occupying unnecessary space.This little piece of ingenuity will cost you though a few pennies: $50,000 to $70,000 to be more precise, quite a spicy price if you ask us. So is it worth it?
“It is a round table which, when rotated at its outer perimeter, amazingly doubles its seating capacity and, just as astonishingly, remains truly circular. Very importantly it stores its expansion leaves within itself. Existing tables can seat six persons when small, and twelve or more when expanded, but there are other design possibilities. Operation, which has been described as ‘pure magic’ by Boat International magazine, really is a sight to behold and extremely quick, it taking only three seconds to complete an entire expansion or reduction cycle.”
The initial idea for this smart table was created in the 19th century by Robert Jupe in 1835. The design was very similar with its radial expansion but lacked the storage capacity of its own expansion leaves the Fletcher Capstan table has.It was also a table very difficult to operate and one that could not maintain its circular shape in every stage.
The table is composed based on the principle of layering: the top surface is made out of 6 pie shaped planks and a circular skirt similar to a drum table, the second layer is also made out of 6 planks in the shape of arrows and the third layer is a large star shaped leaf.The entire system is supported by the rotating mechanism and pushing mechanism constructed out of anodised aluminium and stainless steel.
Do you think this creative design is worth its price? We would love to know your opinion in this topic so feel free to share your ideas in the comment section below.
In a hectic world where everything is digital and online, having a quiet time alone with a favorite book is luxurious to say the least. There are many people who would love to add a reading nook in their homes but have little to no idea on how they would like their reading nook to look like. A reading nook is a particular part of a home where a person will find comfort and quiet while having a great time with a book or two, and there are a lot of designs that can fit any style of a home.
surrounded by all the precious books
A reading nook is meant to have enough space for all the books that a person will and have collected. The more space for books, the better! This is why this reading nook is just as perfect as it can be since it has several shelves for a large collection of books.
Reading nooks are often in an open space, besides a large window to allow natural light in. However, open windows may not be available for some homes, and noise can be a nuisance. This hidden reading nook can prevent noise, provide the comfort of books without the noise or any other disturbance.
a cozy chair and steampunk lamp
A cozy, classic upholstered couch is never a bad mix with a steampunk floor lamp. Add a lovely side table to hold the books and comfortable pillows and have a personal reading nook that fits any small corner of the home.
Reading needs an ample amount of light and is necessary for a reading nook. Choosing the sunniest part of the home and making it a reading nook is perfect. A couch that complements the color of the wall and usually in neutral colors is ideal for this type of reading nook.
Creating a nook does not mean spending money for a small space of the house. Repurposing old furniture can be a perfect option for people who want to achieve the best reading nook bench, complete with storage for books. The use of light-colored finishings can even make the reading nook bench a lovely place to stay on for hours.
For homes that do not have much space, setting up a canopy for a makeshift reading nook is also a lovely idea. Using dainty fairy lights will help the nook stand out from the rest of the room. The canopy even gives a little more privacy for a person than other designs.
Attics can either become a room or a storage area that accumulates dust. The attic is also a place where the noise can be minimal and the light that comes in is abundant. Building a reading nook in the attic using pallet wood and cozy country pillows will be a great option rather than keeping the attic just as a storage area.
suspended pallet table for books and coffee
Pallet wood is useful in many ways, and using it in a creative way is the best way to go. This suspended table is perfect for an unique reading nook. The suspended pallet table is big and strong enough to hold books, drinks and other items and convenient enough for anyone who will use it.
Having a reading nook this cozy, with the right color and winter plants to add the right mood will make anyone grab a cup of hot chocolate or coffee in the cold winter days. This setup is also very flexible since changing the flowers and the pillows can easily make it ready for warm, summer days.
People want to have the perfect accessory in their reading nooks, like this witty pillow. It is simple but says all the great things in life in simple print. The white pillow and black print also go well with any design of the reading nook.
lovely suspended rattan cocoon
While benches and couches are lovely as a reading nook, cocoon chairs are also very desirable since comfort is part of it and cocoon chairs are aesthetically beautiful. If a regular cocoon chair are stunning enough, imagine having a suspended one and with lovely patterns. Add colorful pillows, a cozy blanket and have a reading nook that can make anyone want to sit and read.
a mix of white and gray
While many will say white and gray are just plain boring, this reading nook setup surely shows otherwise. The soft white drapery makes a perfect background for the gray pillows and stuff toy. Kids will not find this design boring and will probably want to spend time reading, and snoozing in this cozy little place.
The space under the stairs often gets left unused or just used for storing knick knacks, but making it into a reading nook is one idea that can be a better option to maximize space. It can be fixed with the right light, a little decor made with love and a cozy couch and earthy tone pillows and you have a reading nook that even kids will love.
Getting all warm and cozy for winter also means getting the right book to spend time with. This cozy chair will entice any winter and book lover to just sit for hours. The soft candle light complements the drapes and the autumn look of the whole chic setup.
rustic reading nook with colorful pillows
Rustic home settings certainly deserve a rustic reading nook. The earthly tone is enough to get this cozy nook the right appeal for lovers of rustic design. The colorful pillows and couch upholstery are refreshing to the eyes and pop out from the rest of the design.
Kids and young adults will definitely love this whimsical reading nook. The dainty fairy lights highlight the DIY canopy made with soft drapes. The big teddy bear is enough to find this small area a cozy place to spend hours reading books.
Whether for kids or for adults, this all white reading nook layout is enchanting. The soft lights with different shapes give enough light to illuminate the nook. The soft drape and the cozy makeshift couch will entice anyone of any age to just chill on this spot.
highlighting the best times and things on the best spot
Reading nooks can be as personal as they get. The accent wall which highlights memories, photographs and personal paraphernalia looks lovelier with the pallet wood background. The lively and cute chair also stands out because of its soft pink color. The table, though small, fits perfectly with the whole setup of the reading nook.
'
Have you ever considered building your own reading nook? Feel free to share your ideas in the comment section below.
Renowned for his famous architectural projects, Mies van der Rohe also designed items of furniture and interior decoration.
A walk-in closet can a unique flair to your home. If you’re tired of using small, inaccessible closets to store your clothing, it’s time to consider a walk-in closet instead. But what does something like this cost? Though you may not think so: A walk-in closet doesn’t have to break the bank, as there are many varieties and sizes to choose from that vary in the price range. Sure, they can get expensive- but so can any home improvement.
In this article, we’ll discuss a few of the elements you’ll need to consider when pricing-out your new walk-in closet.
How Much Does A Walk-In Closet Cost?
You’ll Need Someone To Build It
If you’re not a contractor yourself, it will likely mean you’re going to need to hire someone to build your walk-in closet for you. A private contractor may give you a better deal than a construction company, but it’s important to research both for more than just price.
With either option, you’ll want to be sure the company or individual has a reputation for good, quality service. A walk-in closet probably means getting rid of parts of the wall, a job which, if done incorrectly, can leave your wall looking uneven or even damaged. In the same light, you’ll want to make sure that your contractor or builder understands the blueprint of your home.
Depending on the closet size, you may have to even build completely new walls to accommodate for the new space you’re building into the closet. Don’t trust something of this magnitude to just anyone. After all, your walls are a large part of what keeps your house standing. Be sure your contractor is professional and has reviews or testimonials you can read. A general contractor will probably cost around just under $1,000 to complete the work.
Size Determines Cost
A normal reach-in closet is around eight foot high by three or four foot wide. A typical walk-in closet can be anywhere from six foot by six foot to even larger. Keep in mind that the size of your closet will help determine the cost. If you’re looking for a closet that’s 12 ft long, be prepared to pay the cost.
A larger closet will require more materials and labour, and therefore will be more costly. It’s important to consider the size you truly need before making a decision. Six by six foot is actually quite a lot of space, but if you have a large wardrobe or want to save space for future additions, you may need more than the typical size. Your construction company or contractor should be able to guide you to the best option for your home while keeping your desires and blueprint in mind.
A typical walk-in closet on average will cost you right around $1,500. We’re talking the standard six by six-foot space, with materials and labour included. If you want any extras, such as special shelving, styling, or any other customization, the price goes up from there. Remember that the more you customize something, the more it will cost. Some designs may even knock you $5,000.
Design
Before you actually build your walk-in closet, you’ll want to consider different designs. You can create these yourself, or consult with a walk in closet design company to generate some great ideas. There are thousands of variations on the traditional walk-in closet to choose from. More importantly, this company is known for closet design that wows.
When you’re designing the closet, be sure to consider how much space you’ll actually need for your clothes and extras and whether or not someone else will be using the closet as well. A good strategy is to take inventory of everything you want to put in the closet. If you’re sharing it with a spouse or partner, you’ll need more space since you’ll have double the clothing.
Designers will usually offer a free consultation on your closet, so you can get a good idea of what you’ll need and the ball-park cost for the entire project. Be sure to use a trusted design company when you’re designing your walk-in closet and get multiple quotes. Much like any big purchase, you want to shop around and get quotes to ensure you’re getting the best price for the work.
Materials Are Costly
Buying the materials for your walk-in closet can be a costly endeavour. You will almost always need to build a frame from wood and use drywall to cover the frame. The cost of both will vary from company to company, but you should generally find that wood has similar cost across the board, depending on the type of wood you use. Pine is generally inexpensive, whereas harder woods such as white or red oak are more costly.
In addition to the frame, you’ll want to account for any shelving or racks, the type of flooring you want inside the closet (carpet is usually the cheapest material to work with). Metal is usually cheaper than wood for things like racks and wall studs, so you should consider this material as a cost-effective alternative where you can (keeping in mind which parts of the closet will be visible to you).
Consider the storage you want in your closet and whether or not you want drawers, shelves, racks, or other storage options. What you choose here will depend on your storage needs and budget. An intricate shelving system will probably cost more than a simple rack and a single shelf for shoes.
Check Your City’s Codes
Depending on your city’s building codes, you may actually need to obtain a building permit to begin construction of a walk-closet in your home. It’s important to check this before you begin construction, as you don’t want to incur any extra fees for building illegally. These will make the original cost of that walk-in closet rise dramatically, and put a halt to building altogether. This information can be easily found in your state’s revised code- or with a simple call to the building and zoning department. Either way, a quick Google search should provide you with all the information you need.
The Take-Away
Walk-in closets can add value and a unique feature to your home. They’re spacious, typically inexpensive, and provide the one thing you can never have enough of in your home: storage space. To add to that, walk-in closets can do a lot for your home value. Not only are walk-in closet more appealing to buyers, but they’re also typically on the list home improvements classified as ‘luxury’ on the MLS listing.
Picking the right contractor, design company, and materials can mean the difference between an affordable and quality closet doors and one that breaks the bank. A little research can go a long way in these situations, so be sure to investigate the contractor’s reputation before hiring, and decide beforehand what you’ll need in the closet. Use metal over wood where you can, and consider carpet instead of extending a wood or tile floor into the walk-in closet.
Are you considering building a walk-in closet? What are your concerns? Likewise, if you’ve already built a walk-in closet in your home- Leave a comment. Your experience may help a new builder.
When it comes to producing exceptional masterpieces, oil pastels are one of the best ways to take you there.
While these mediums are soft and vibrant to offer great performance on their own, it is important to equip yourself with techniques in order to be a master in the world of oil pastels.
Today, we will present 26 different techniques which you can try with these sticks that can really help enhance your oil pastel paintings.
Remember to always prepare and prime the board before starting out with the project so that you’ll get the best, desirable results.
Without further ado, let’s get into it!
Oil Pastel Techniques & Tips
Blending
Blending is a popular technique in the art universe. Almost every kind of painting requires blending for creating certain effects.
When you’re done applying one color on the surface, take another shade and apply it right beside the first one.
Using a blending tool or your finger, rub the shades together to form another color in between the original tones. Remember not to leave any visible harsh lines.
Pre-blending
While blending can be done directly on the surface, you can also do it prior to the application. Take the colors you are going to use and blend or mix them on a palette.
This is a useful technique because you can see the blended colors before applying them, hence, preventing disappointments if the shade does not turn out as expected.
Dotting
The technique is called ‘dotting’ because it requires consistent work to produce a texture using dots. It is also known as pointillism or stippling.
For this technique, use the tip of the oil pastel and progressively work towards creating the desired figures. It requires a lot of patience to finally complete one medium subject but the outcome is amazing and worth it.
Keep in mind to be gentle and not apply too much pressure on the stick because that can make the soft composition break and leave unwanted crumbs.
Overlaying
Overlaying is the process of working on a base and then proceeding to form a layer on top of it. The purpose of this technique is to form a sheet effect covering the paints below. Also, it thickens the shade to provide full coverage and synchronized background.
To successfully execute the technique, use the side of the oil pastel which will serve this intention.
Extenders for Gradation
When you’re done applying oil pastels, use fingers or any blending tool to rub them for achieving smooth effects. Have an extender in hand and put a little amount of it on the painted surface to form a texture. You can also use the extender to improve the transparency of the colors.
Another way of using an extender is to apply it directly on the surface before oil pastels so that it acts as a base.
Impasto
If you want to produce a piece with effects similar to oil painting, use the impasto technique.
This technique requires extra soft pastels which you have to blend over and over until they form a paste. We do not recommend mixing this directly on the surface because it will damage from the ongoing process. Instead, use a palette and mix some thinner if the oil pastels are still too hard.
Scratching
This is a simple method of achieving great oil pastel results. It is also known as sgraffito.
Sgraffito is when you use the oil pastels dry. In this state, oil pastels behave as soft pastels would except that it can produce a lot more effects.
What you can do is fill the paper with preferred colors. When you’re satisfied, take a single color (preferably black) and fully cover all the other colors with it. Wait for some time, then take a stick or a sharp-tipped tool and start scratching the black surface slowly. Draw any figure or shape that you want.
If you put more colors underneath, the results will be more beautiful and vibrant.
Stenciling
Using a stencil will not only reduce mistakes but will also be faster.
The first thing to do is cut a shape from any hard paper for the stencil. Lay it on the sheet and start coloring inside the shape to create a precise figure.
Or you can apply colors directly on the edge of the cut shape and start transferring the colors to a paper by rubbing it lightly with your finger. This will give your painting a light color effect.
Masking
The masking technique involves using tape over the actual paper in order to create different patterns. You can also use draft tape for this purpose.
The best part about this method is that you can shape the tape however you want to for the desired textures. Proceed to drawing when the preparation part is done.
But before taking on this technique, keep in mind you will not be drawing on the actual paper anymore but instead on the surface of the tape.
Resist Effect
Resist Effect refers to the appealing look of the piece.
You can achieve such an effect by using watercolors after finishing the drawing process completely.
Because the oil pastels contain oil and wax, they will naturally resist watercolors - and this is where the name of the effect comes from. Therefore, it will leave a beautiful and luminous effect when dry.
Short Strokes
Short strokes are perfect for creating multiple effects and textures. They are also great for creating a painting concept with strokes pattern.
When doing a landscape painting, short strokes can be used to draw grass with dynamic effects. You can use this for drawing rain and meteor showers or any other similar subjects.
But most importantly, this technique works wonders when filling in minor areas with oil pastels.
Surface Effects
When creating different textures or patterns, the artist can turn either create their own surface in the painting process or find a ready-made option from the local art store.
If you are a beginner who wants to create magnificent paintings but having a hard time with techniques, the shortcut is to find a surface which already contains textures.
As you progress, try creating unique surfaces by using extenders and other mediums to achieve special surfaces.
This is the most basic of all techniques and all it requires you to do is draw the certain features and shapes which you want to highlight in the piece.
By using your oil pastels and creativity, drawing can actually give the artwork the precise effects that you desire because you have more control over the outcome.
Long Strokes
Similar to short strokes, these are perfect for drawing an area filled with grass, but which is closer to you. You can also draw hair using this technique.
The length of the strokes do not matter as long as you keep going and they meet the requirements.
Some other ideas which you can draw with long strokes include hay, animal fur texture, as well as fireworks.
Rule of 3s
This method consists of 3 rules to create an effect and is developed by Patrick Neumann.
The first thing to consider is this technique relies on the choice of colors. You should pick three colors of the same shades to
What this technique does is give your piece a more natural and realistic look.
Underpainting
The best way to think of an underpainting is to think of the wash you normally see in watercolor paintings.
The purpose of this technique is to cover up the white areas of the paper so they don’t look obvious to the eye. Therefore, by creating a light wash, you can replace them with another color which suits the piece more.
Crumb Control
While using oil pastels is always exciting, there is also a price that comes with it - and it comes in the form of crumbs.
Here, crumb control does not refer to a technique to enhance your piece but instead point out ways to remove these unwanted inconveniences so that your artwork stays neat and clean.
One of the most effective ways is to use a kneaded rubber to remove or lift the crumbs off the drawing paper.
Thinner Wash
If you use solutions to thin oil paints, you can also use it for oil pastels which are water-soluble. The result will be similar to that of the liquid oil mediums.
There are also solubles such as linseed oil which are perfect for oil pastels in case you want the piece to have an oil painting effect.
However, the quantity of soluble depends on the number of oil pastels you want to use.
Wet Effects
If the oil pastels are water-soluble, you can use the sticks to produce effects similar to that of watercolors only by mixing it with water or other solutions such as linseed, turpentine, and other mediums.
When using this technique, remember that any application which is too heavy can be blended for a smooth feel.
This method comes in very handy when you want to create multiple effects within the piece.
Grass Effects
Beginners tend to have a lot of troubles when working on making grass textures look real. So as we have mentioned earlier, you can either use long or short strokes depending on the position of the grass.
Highlighting and using multiple shades will take the artwork a step closer to looking real.
Another tip to creating precise and realistic grass is to sharpen the oil pastel tips.
Layering in Tones
With layering, you can apply one color underneath followed by another color on top. When creating layers, keep in mind not to apply too thin or too thick as that can destroy the final look of the painting.
You can also blend the layers to achieve a natural and realistic appearance.
Creating Marks
By creating marks, we mean using the oil pastels and give the paper any kind of strokes including short or long strokes, dots, hatching, and scumbling.
Yes, this is a way to use different techniques in order to create a unique piece. However, remember to use these techniques as you see fit, otherwise it will just be a combination of methods put together not serving any purpose.
Shadows & Reflections
Another way of bringing your painting to life and making it look real is by adding shadows and reflections. Many beginners tend to forget adding possible shadows when opting for a realistic painting, hence, making it dull and lifeless.
The best tip we can give to get amazing and precise shadows is by fixing an object anywhere beside the painting and imagine that to be a source of light so that every time you make a stroke, you’ll know where the shadow should be.
Details
We can say that focusing on the smallest of details is sometimes overlooked as a technique. It seems every efficient artist does this and even beginners have an idea of it.
When you focus on the details, the artwork appears to be much more realistic and appealing to the eyes.
Working on details requires patience and skills but to make it an easy process, either sharpen the pastel or use the edge bit.
Reverse Drawing
This is a fun technique to use for learners. The idea with this method is to apply oil pastel all over the paper. Then, place another blank sheet of paper on top and start drawing any figure you want.
Once the painting is done, separate the papers and you’ll see that the colors from the painted paper are transferred onto the blank paper, creating a reverse artwork on its back.
Temperature Technique
This is one of the cool tricks which you can use when the pigments start to get lighter.
What you can do is place the paper in the refrigerator for a solid 20 minutes, while at the same time, use the warmth of your hands to heat up the oil pastel so that it becomes soft again.
We find this technique very helpful to regain the vibrant pigments and provide full coverage.
Conclusion
And with that, we’ll wrap up today’s article. We hope you enjoyed reading it and found some techniques that you can use for your next oil pastel piece.
Happy Coloring!
Summer is finally here and we all long for those perfect moments of laying in the sun and letting all the stress and worries slip away.But why not change the familiar summer seaside decor with something different, fresh, more...green?! We draw inspiration from the nature surrounding us and dare to dream of that dream cottage tucked away under a peak of a mountain or the green of a forest.
Flower canopy surrounding your dream cottage
Imagine that fresh, earthy smell of leaves and dirt and the joy of waking up surrounded by the smell of fresh flowers, songs of birds and soft sun rays. you can find such dream places to rent for your summer holiday or, if you feel a little bit wild, you can build your very own little piece of heaven away form the crowded busy city life.
First of all there are a few considerations you have to take into account before purchasing or building a wooden cottage.
Distance is an important factor. Although you might consider creating a retreat surrounded by greenery somewhere far away, such a place must be taken cared of all the time, especially if you love having a flower or vegetable garden.
Fresh food is always a plus but such requires work and patience in order to be kept alive and beautiful. The backyard landscaping design changes the entire aspect of a home,thus this is an important aspect to be considered. There are lot of tips and tricks of how to design your very own backyard and create a true oasis of serenity and comfort. We suggest you to take this matter into your own hands and not be tempted to use a professional. Thus your cottage will seem more of a home than a vacation home and will so have your own touch.
Rustic cottage retreat
Consider building a fireplace! Nothing compares to the smell of burnt wood and the warmth of a fireplace. And why not create a fire-pit as well for those summer evenings spent outside in the garden! Make it out of river stones or old bricks for a more rustic look and create even a small fountain or pond so that all the elements will come together in your own backyard.
Now lets talk about the architecture of the cottage itself! The most commonly used material for building cottages is, of course, wood.Its warmth and texture has always been appreciated and considered proper for retreats and mountain cottages. Nowadays there is a tendency of returning to other primary materials such as earth and stones to recreate the traditional cottage in an attempt of trying to live the way our ancestors did, int he hope of having thus a cleaner healthier life.We at Homesthetics encourage everything related to ecological and natural, hoping that more and more of us will understand the importance of respecting nature. We could go on and on about the benefits of creating a dream cottage where you could retreat and envoy your holidays, but instead we offer you a small collection of dream cottages to inspire you and make you long for that summer holiday away from home.
White wooden cottage
English style retreat
Beautiful Scandinavian cottage
Dream Cottages for Your Holiday Inspiration
Fairy-tale home
Nestled into the forrest cottage
Surreal landscape
River nested cottage
Fantasy dream cottage
Surreal escape
One of the most beautiful things in nature to look upon is flower gardens. Unfortunately people with allergies cannot enjoy their natural beauty,so the spring and summer time is pretty hard for them. Flowers are mother nature's furnishings over this earth. They grow and bloom in a variety of colors,they take on their own unique shape, style and form. If planted and grown properly, they can transform any corner into a garden of Eden. Some flowers permeate an unpleasant odor while others help you to understand where some perfumes originate from.
Flowers can be planted in your own flower garden, or just among your other plants to add beauty and versatility but sadly most flowers can only be appreciated during summer and fall seasons. Man made flower gardens are those that have been planted deliberately in a certain way to create a certain euphoria, style and beauty for special occasions. This is why we call them flower gardens. Certain colored lights are strategically placed to enhance, illuminate and exaggerate their color and beauty. While flowers of various colors can stand on their own in a garden, undeniable some green trees and lawn grass really take it a notch higher to add more decor. Red roses, white carnations, morning glory, lady of the night, yellow bell flowers, lilies and tulips, all have taken up their place into the vases and gardens of many flower lovers and gardeners. Here are thirteen reasons to love the most beautiful man made flower gardens in the world.
floral arch covered in light and dark colored pink flowers
Are you a flower lover? Gardener? Do you only appreciate natural flowers, or man's interference as well? Share your thoughts and experiences with flower gardens. Do you do this as a favorite hobby? More so, are you a flower lover but struggle with seasonal allergies? What are your favorite flowers and why? Freely put your answer/answers in the comment box below. Thank you for your input in advance.
Small personal and cozy a narrow space can be. When it is your courtyard, backyard or balcony it is your responsibility to take advantage of it, regardless of shape and size. Through one-two potted plants and a bench to read outdoors everything can be changed. Breathe more oxygen, enjoy a better view in your own yard. Creative landscaping ideas for narrow outdoor places have been showcased and explained underneath. We invite you to cast a glance and identify the elements that manage to manipulate compositions, perspectives by emphasizing the feeling of space in a highly positive manner.
#7 Create Rhythm Through Various Elements Without Intensifying The Space
Notice how the first stair is linear to sculpt a very important perspective along with the stone wall. The floor breaks this dynamic in small elements creating a rhythm subdued by the channeled perspective.
via lilou73.tumblr.com
#8 Organic Elements Can Blur The Straight Lines Beautifully
via hgtvgardens.com
#9 Certain Elements Can Bring Another Sound or Focal Point Into The Perspective
This will simply distract the individual from perceiving the narrow space along his path. Needless to say that the sound of water will change the ambiance entirely widening the psychological space of the lot for anyone, calming and relaxing the pedestrians.
via botanicalconceptschicago.com
#10 Multiple Elements of Natural Origin Can Enlarge a Space
#12 Greenery Transforming a Straight Yard Into a Sinuous Walk In The Park
via philadelphiagreen.wordpress.com
#13 Airy Elements and Light Colours Will Emphasize The Feeling of Space
Notice how the gray round stepping stone seem to levitate over the white gravel. The wire-frame bench emphasizes the feeling of space through its color and transparency while the French glass door allows extensive views through it.
via thegardeningcook.com
#14 Mineral Elements Constructing a Bold Attitude Aided by Greenery
via hollanderdesign.com
#15 Simply Breathtaking Organic Walkway and Bench Area Sculpting Space With Naturalness
via skonahem.com
#16 Subdue Useful and Practical Elements to Greenery
Organizing and living in a narrow space might be difficult for some of us but we stand by the firm belief that smaller spaces are far more personal and cozier to the individual . We think everything can become beautiful and everything can be nourished, healed by a lovely soul. We would love to hear your opinion in the comment section below on these beautiful and unique designs.
Are you looking for possible ways of adding a dose of vintage style in your garden for the upcoming season? If yes, you are just at the right place. Here I have collected for you some breathtaking designs that will turn your garden into a magical oasis meant to stand out from the rest of the crowd.
You will see lots of old and rust decorative pieces which look totally stunning outdoors, scroll down and you will find the Mesmerizing Vintage Gardens That Will Make You Fall In Love With Antique Designs. All of the gardens are very attractive, and those reclaimed and salvaged goods work really great in nature. When paired with the green grass and colorful flowers they will make your space appear more than magical! I believe that the photos below will inspire you and that you will get some tips to decorate your own vintage garden in style!
The old wheelbarrows which can't be used anymore can serve you an aesthetic purpose in your garden if you think creatively. You can turn them into your new super unique planters that will catch the attention of anyone who comes to visit you.
Don't leave bikes out of the picture when you are thinking about decorating your garden in the vintage theme. A bike filled with flowers is an outstanding decoration for your outdoor area, so think about finding an old one and incorporating it in the decor.
Did someone say old carts? Hell yes! This is the perfect way to give your yard an old feeling and introduce the vintage style with ease! Ask some people who own goats if they have an old cart that you can borrow or buy. It's totally worth the investment!
Have been wondering how you can get rid of the old bed that has been taking up space in your home? Well, you don't have to go long distance. Put it in your garden and use it as a decoration and a flower planter. Is there someone who wouldn't love this flower bed in their vintage gardens?
There's something special about old vintage plates. If you are not the type of person who is into DIY project, this is the ideal decor for you that you can easily pull out. Just get the plates and use them to add some character to the old and dull fence. How do you like the idea?
What do you think about these mesmerizing vintage gardens ? We would love to hear from you in the comment section below !
I spent a good amount of time recently working in my backyard and with this opportunity I have payed some attention to new areas in it. As a result I started xeriscaping my side yard and while I have to be sincere and tell you that it wasn`t easy it I also have to mention that it was definitely worth the hassle.
I kept on looking for inspiration online and I thought it might be worth sharing here, it`s not easy to find extensive garden ideas so I`ll try and do just that: present you a selection of modern xeriscaping ideas that we`ve found helpful. Xeriscaping is far simpler than it sounds, it`s a sustainabile form of landscaping that has the goal of saving water. In Xeriscaping are used drought-tolerant plants frequently along with much an gravel.
If you think you are not ready to remove the beautiful green grass and lush vegetation in the favor of a more sustainable form of landscaping it`s ok. I personally wasn`t ready either, I started with the side yard and kept the lush vegetation in backyard exactly the same. In this manner you will add a lot of depth to you outdoor space by creating different areas and layers. For example I have used rock garden of different sorts in small quantities. This very different special part of the yard accentuated the greenery in the backyard even more, gave it a whole another aspect.
Beautiful Xeriscaping Pathways and Steps
In modern xeriscaping techniques pathway and stair-steps are very often used as little landmarks. These really important because they`re transitional areas on which a great array of plants can be displayed to draw attention and create a beautiful design, gravel and stepping stones are used along the plants of course. [from Huettl Design]
A couple of native grasses in a xeriscaped landscape
You can use gravel and stepping stones to create a modern looking path which is afterwards surrounded with native grasses and other graphic pebbles as displayed in the beautiful xeriscaped outdoor space below . [from Huettl Design]
Stepping stones surrounded by xeriscaped areas
Despite Zaha Hadid`s opinion you can really get creative by forming an angular path rather then an organic irregular path, you can use small gravel, limestone can work, and edging to obtain a controlled design, clean and highly aesthetic.[from All Seasons Gardening and Landscaping]
Modern xeriscaping following an angular pathway
Materialize a special area at the top or bottom of the steps; this accent can be a wonderful surprise in a modern yard, it can accentuate a detail that you love on the stairs or simply change the tone upon entering the home. In the example bellow the grid formed by stepping stones and ground covers are creating a rhythm on two directions before dematerializing into just one direction with the steps, accentuating the monumental stones before entering the home in a special manner.[from All Seasons Gardening and Landscaping]
Intriguing modern xeriscaping near the steps of a modern yard
If you have the space required on the steps you can use the actual the stairs to create an xeriscaped area. You can fill them with gravel native plants and offer your modern yard a discrete beautiful touch; consider involving the edging of the stairs in the design as well.[from Phillips Garden]
Another xeriscaping "step"
Why would you not use a variety of xeriscaping materials? In the photo bellow there are displayed many interesting features such as stepping stones, stairs, gravel, mulch, metal trim, various different plants and a large sculptural rock; all in an excelent outdoor paradise. Who draws the line if not you?! [from Big Red Sun]
Example of xeriscaping with mulch and gravel
Xeriscaping The Yard
Now we already have a couple of transitional areas in the yard itself . Wehteher you are going to xeriscape the whole backyard, front yard or side yard you definately need to begin with a plan. It`s indeed fascinating and sweet to see things taking shape as you work but in this manner you might want to measure your outdoor space if you want to obtain a highly nuanced design, you might realize half way, or worse in the end that you do not have space for everything you desired if you`re not using a thoughtful strategy. [fromJeffrey Gordon Smith Landscape Architecture]
Composition of mulch and rocks in a xeriscaped yard
You have your yard in one single horizontal plane? And if so, do you want to remain that way? You can use stepping stones to create a beautiful terraced effect on which you can use a wide variety of plants . [from Big Red Sun]
Different layers of xersicaping in a modern yard
In how many different areas you will divide your site? You can make a simple lawn or an elaborate play area. You can group and mix plants or arrange them in groups by type, you can use a plant in particular to create visual borders as displayed bellow or just mix and match. [from Jeffrey Gordon Smith Landscape Architecture]
Xeriscaping meant to match Mid-century homes
A harder and more rough materials like concrete stepping stones can help you define your outdoor space. These graphic borders can guard large plants or trees or just small arrangements. We advise you to start small and enlarge the project when you feel satisfied with the result of the little spot in the first place. If you have a bigger outdoor space we strongly advise you to consult a professional or an experienced friend. [from Big Red Sun]
Xeriscaping in a lush green backyard
You can use cement and gravel to achieve a custom geometric look in your yard, your own design can be materialized easy with concrete and patience, strategically planning your pathways and design lines can help you obtain the desired result. [from Jeffrey Gordon Smith Landscape Architecture]
Xeriscaping in a contemporary yard
You can accentuate a beautiful geometric effect by shaping the lawn in an unusual manner and actually sculpting an effect. Gravel can help you in this problem with ease even with trapezoids and harder shapes. [from Phillips Garden]
Simple and efficient angular xeriscaping
A critical aspect in your xeriscaping endeavors is obviously making sure that you choose greenery that will thrive in your area. Most of us have learned this the hard and expensive way, selecting plants for a sunny yard that would not survive the summer or winter would not be that great, time and resources elapsed into nothing. After you have the selection of plants that will thrive ready opt for some colorful choices that would really enhance your backyard and offer depth. [from Phillips Garden]
Xersicaping a colorful manner
In some cases the most interesting pops of color can be created with only one bold hue in a ocean of greenery. Changing the texture and creating rhythm with it can be marvelous, a selection of cascading silver that falls dichondra, wispy Mexican feather grass or along with long full red foliage as displayed can work extremely well too. [from Big Red Sun]
Terraced xeriscaping in a contemporary yard
You can create massive amounts of colors just by juxtaposing shades of green, it`s simple extraordinary. Bellow a succulent range from minty to blue and limes surprised in a very beautiful manner. If you want to place an intruder object in hot pink or any other candy colored accent you can fool someone into actually eating them . It just look extraordinary. [from All Seasons Gardening and Landscaping]
Superb use of color in xeriscaped yard
If you have the luck of owning an expansive yard consider grouping up a variety of different sectors into hues, in this manner you will generate an extraordinary dept, you will have a variety of extremely beautiful colors from yellows, purples and pinks that are extremely eye-catching up to more neutral blue and green tones. Consider completing these extraordinary painting with small gravel that would further define and highlight the design line. [photo by Hunter Ten Broech for Waterwise Landscapes]
Dense and extensive xeriscaping on an albuquerque property
The last but not least image is living proof that no space is to small for a proper xeriscape. You can always use colorful plants to give an extraordinary vibe to a compact yard. These become a focal point in your design, popping into the eyes of the viewers, surprising everyone. [from Shelley Gardea Photography via Houzz]
I started xeriscaping a little small area in my side yard to see what I can do and it will definitely pass the time test but I`m starving for more, I think larger pieces of rocks that will slowly move towards the backyard into the lush vegetation as transition along with some stepping stones and gravel to merge would work extraordinary but time will tells. How you are treating your outdoor spaces? We would love to hear your opinion bellow regarding xeriscaping, we find it a magnificent alternative and a great complement to regular backyard landscaping ideas.
Backyard landscaping ideas come in all shapes and sizes, with special focus on a certain design line and a spot on a certain area desired to be emphasized. The natural can be tamed and molded to your liking, creating intricate complex areas meant to delight the senses and ease the mind and soul. In such a creation a variety of elements are involved, starting with the basics: earth, water and greenery. The exact method of how these three are combined leads to numerous options and solutions, modern, classy, contemporary, chic, according to your taste and desire.
Today we are focusing on the role rocks have to play in the garden.Specific for Japanese creations, rock gardens have started to appear in other cultures as well as a mixture of the static and the dynamic.They are used in certain zones of the garden to form a fire-pit, an elegant arch, to mold a water fountain or as simple stepping stones merged in vegetation. Mixing and matching is the key here if the goal is to obtain a complex balanced garden design, not one that falls into the arid garden type. So let's dive into the beuatiful world of rock garden ideas.
As you well know, each garden is suppose to have a fire-pit /fire-place area. This essential element plays the role of attractor, generating a specific design around it meant to emphasize its position and shape.Positioning a fire-pit in a specific zone involves taking into consideration the presence of a sitting, resting area where one can relax on summer nights or cozy autumn evenings with loved ones.
Lighting is another important element when considering designing a rock garden. Try inserting tiny solar chargeable lanterns that will cast a delicate glow on the rocky paths you have created. Remember to put to light specific areas that are worth accentuating. Notice how the actual path flows organically around the trees, with larger rocks limiting the track and merging naturally with the natural environment.
Also inspired form the Japanese culture is the wooden bridge usually inserted into the garden to connect two points over a small pond. In this case the water element is missing but the overall imagery is so elegant and beautiful you can let the details slide. Rocks of similar dimensions have been used to form the organic path intersected by larger stepping stones and the actual bridge.
Succulent plants are easily associated with a rock garden as they represent the natural environment of the arid areas. Large rocks can be used and transformed to nestle these delicate incredible resilient plants, placed strategically around the garden.In time greenery will take over naturally and fill every crack and nook as life goes on each day.
A cement path can be defined by a rocky limit where all sorts of flowery plants nestle and evolve in the sun. The irregularity of the limit is what enhances the design and delights the eye.
Although when you think of stones and rocks you instantly associate them with weight and gravity, a certain amount of patience and creativity will defy the rule. The incredible arch below can find a proper place in a rock garden where greenery can climb on, vines and roses will embellish it and claim it their own.
Stepping stones are usually used on the important alleys leading to your house. Here, drought resilient plants have been planted on the sides and in between the actual stones, the bold green balancing the grey hues perfectly.
For important zones where you are trying to direct the attention use medium size rocks and ceramic flower pots to create a flowing arrangement. Nestle succulents in this newly formed environment and allow them to grow in the sun.
If you are dealing with slopes, work the terrain to your advantage and use large rocks and various plants and flowers to accentuate a certain direction.
Large stones have been used to create an exotic waterfall and build it cave for this luxurious swimming pool. Lush vegetation comes in from the sides to embrace the fountain and complete the imagery.
Layers with different textures have been used to limit the natural from the anthropic. Smooth swimming pool margin, river rock limit, various larger rocks and lush vegetation complete the imagery of this swimming pool area.
For the diy enthusiast, a rocky path can prove to be a real challenge, especially if the design is even remotely similar to the creation below. A flowing design has been created using different sized stones that have been placed to emphasize a certain direction, moving along a larger stone placed in the center of the composition.
Have you ever considered building a rock garden? What are your thoughts on this topic? How do you see the garden ideas above? Feel free to express your ideas in the comment section below.
There are lots of features that can be added to a backyard landscaping design like swimming pools and pergolas but probably the most attractive and mesmerizing are the fire pits. Easy to build of great affect, they are certainly a very good way of making your own backyard much more relaxing and entertaining.
The Japanese are considered to be artists in matters of backyard landscaping ideas and their gardens are truly peaceful sanctuaries designed out of natural elements like sand, stone, water and, of course, plants. The right combinations transform any small garden and their method take into account three principles: small reduced scale, symbolization and recreation of certain views. In the following we'll present you a few tricks and methods of creating your very own Japanese garden meant to inspire and relax.
Backyard Landscaping Ideas - Japanese Gardens
1. Koi Fish Ponds
One of the most important elements of a Japanese garden is a pond populated with colorful Koi fish. Their purpose is to bring a little piece of a lake or ocean into your own garden and empower your senses with color and life. The dimensions of koi pond can vary so you can fit this element in any garden.
2. Bridges
A bridge is usually used to connect pieces of land and here it is used with the same purpose. Red or just simple unadorned stone, the bridge is a main element in a Japanese backyard landscape design and can offer a romantic flair to the entire garden.
3. Rock gardens
As stated above, one main principle in Japanese design is the reconstitution of certain natural elements. Rocks are utilized to represent mountains, sand to represent water and rivers. Traditionally, stones are supposed to be placed in odd numbers but the specific placement is not a given; you can choose your own personal way of arranging the rocks in your garden, creating thus a mineral landscape.
4. Moss Gardens
Moss is associated to green everywhere, anytime and due to its capacity of endurance it is very widely utilized in Japanese design. Its versatility makes it easy to use in any combination ( like a chess table with square stones as presented below) and is a source of green and life in any season.
But some climate conditions like a certain amount of shade, humidity, moisture can really make your moss garden blossom.
5. Bamboo and water
Bamboo water pipes are generally used in order to scare away birds and other animals that may harm your created environment. A bamboo tube is used with a water source which drops into the lighter end causing the heavier end to lift off the ground, emptying the tube. When it comes back down on the rock, the crashing sound is the scare tactic.
6. Japanese Lanterns
You may be tempted to think of paper lanterns that you lid and let flow into the air, but here we are referring to stone lanterns. Their main purpose is to offer light to remote secluded places of your garden, to beautify your garden and transform it by night into a little piece of heaven.
There 6 elements are sure to transform your garden into a Japanese design. And the beauty of it is that you do not really need all the elements to transform your space. All you really need is patience and dedication to organize and create that Zen atmosphere.
Accommodating a Jacuzzi as the ultimate means of relaxation in your backyard is something people usually seek. Many might prefer gardens or pergolas to fill their small space or backyard, but for people who find comfort and relaxation in water, it's the classical Jacuzzi that comes to mind. Pools on the other hand require a large area for placement and therefore are not always a viable option for some homes. Jacuzzi have been used since 1915 and have, in time, become a symbol of luxury and comfort, the perfect alternative for the long desired swimming pool. 20 Outdoor Jacuzzi Ideas for a Relaxing Weekend have been featured below, cast a glance.
the perfect jacuzzi design for small space
With small spaces, a Jacuzzi is a much welcomed idea. This layout works well in a small backyard, allowing enough room for plants and the classical picnic table. The pallet wall inserted creates the privacy a person needs during a time for rest in the Jacuzzi.
the comfort of being surrounded by nAture
Hot springs often come with the perk of enjoying nature at its finest. This outdoor Jacuzzi design captures such delicate beauty and relaxation brought by nature. The green background is soothing for the eyes and the natural breeze coming from the area will surely make the dip in this outdoor Jacuzzi even more enjoyable.
Pallet wood is an industrial miracle for people who want to save more and still get their desired design for any home craft. While distressed pallet wood is a good choice, a cleaner look suits this elevated outdoor Jacuzzi. The light brown color of the pallet becomes a perfect backdrop for greenery.
lovely pergola for jacuzzi shade
The sight of a pergola encourages relaxation and though the shade is very minimal, it can still feel very comfortable under one. The white outdoor Jacuzzi and the pergola creates the perfect mix of comfort, while plants and the bamboo wall create a lovely background that allows the white Jacuzzi to stand out.
for the romantic movie marathon night
A date night can change with the perfect setting- and this one might just be the best. Wine on hand, relaxing hot water, the soft glow from the candle light and a favorite movie can complete the romantic atmosphere this outdoor Jacuzzi brings.
Kids can be envious of how their elders relax during the night in a "mini pool" and might want to have their own. This outdoor Jacuzzi serves the purpose of being a water pen for kids in the day time and a relaxing hot tub for the grownups during night time. The metallic Jacuzzi is emphasized by the crates and the natural background of trees, allowing anyone, young or old, to get enticed to dip into the water and make a splash.
This outdoor Jacuzzi design screams Greek inspiration in every corner. The white bedding and pillows match the faux white-gray wall and the brown faux tiles. The plants in classic white pots still keep the natural green within the picture even at a small space, exuding a look that is so serene, one that can surely help a person relax.
People find the sound of flowing water relaxing and inviting, encouraging the soul to take a break. Hot tubs create the same effect for the human body by releasing the tension accumulated from daily stress. The natural flowing water on the boulders create the best backdrop, along with the natural hues of green of the plants. The wood planks make the whole outdoor Jacuzzi look stunning.
Outdoor Jacuzzi are fun but not all appreciate being so fully exposed. This design helps keep as much privacy as possible without compromising the outdoor view. Soft, light-colored drapes and sliding doors are used to increase privacy.
romantic jacuzzi for a sunset dip
This outdoor Jacuzzi is perfect for rooftops and enjoying the sunset while the wood finish on the platform creates a beautiful contrast on the marble finish and the Japanese bamboo.
Outdoor Jacuzzi need not have elaborate designs to be stunning and this design is proof. The off white tub and white background become stunning with just large lush plants as its main decor. Sensual, simple and surely enticing.
when red wood and lovely green collide
Red in wood is beautiful when lighter contrasting colors are mixed with it, such as the natural green hues of plants. This elevated outdoor Jacuzzi made from red planks of wood and surrounded by greenery is stunning. Adding the natural light of candles creates a dreamy atmosphere.
Outdoor hot tubs are very popular in Japan, usually made from wooden planks and on natural springs.
flowing wAter to ease stress
Imagine having a personal hot spring bath that can be used any time of the day. This very design encompases the natural stress relieving benefit of hot springs and its natural beauty.
A pergola can be used to protect an outdoor Jacuzzi, sheltering it from bad weather and offering a little bit of privacy.
dreamy and romantic night of relaxation
An alternative way of spending time with a loved one can become even more special with this outdoor Jacuzzi idea. The soft drapes create privacy even when outdoors, while the soft candle light sets the right soothing atmosphere.
clAssic hot tub with a waterfall backdrop
Going back to the powerful sounds of nature, this waterfall backdrop can create the sublime noise that can drown stress easily. With the hot water from this classic outdoor Jacuzzi, all cares in the world can be swept off by this marvelous design.
This design is a perfect setting for that ladies' tea party you are waiting for.The flowers create a softer design against the lush greenness and the softer hue of the wood used for the outdoor Jacuzzi promotes a more feminine touch.
a closer design to what nature offers
Hot tubs and jacuzzis are the immitation of natural hot springs, and creating a design close to the natural will transform the appeal. The boulders and mix of plants and ferns in this design draw the attention of any anyone on first sight.
This is a simple design but one that can still captivate a modern and chic person easily. The black Jacuzzi stands out from the lovely polished wood. The pillows also stand out from the hue of the wood and add a bit color to the entire ensemble.
Have you ever considered incorporating a Jacuzzi into your backyard design or do you already own one? Feel free to share your thoughts on the matter in the comment section below.
Spending time outdoors is a wonderful experience that all people enjoy all year round no matter what's the weather like. The nature has soothing properties and makes us feel good about ourselves. A dose of fresh air and sun is beneficial for our health as well, and having a walk or just sitting outside is recommended.
Have you decorated your yard in such a way that you can enjoy the rays of sun just outside your home?
You don't have to do much, a bench or two would be just fine.
There are so many ways in which you can create your own bench using different types of materials.
What's the style of your backyard?
In this article I have collected an abundance of benches, and I believe that you would be able to find the one that will match the existing decor beautifully. Check out the Attractive Bench Designs That Will Make You Enjoy Your Garden Landscape More and pick your favorite; please take note that you may be having a hard time picking just one design cause all of the benches are just amazing!
If you have two broken chairs at home and you are about to throw them away, stop and think for a while. What do you say about turning them into a wonderful bench that your family can use for relaxation in the yard? It's not a difficult DIY project and you would be able to do it quickly and easily!
The swing bench will be your favorite spot in the garden, so take this design in consideration. It will make you feel at peace and relaxed, so you would just love to go outside and free your mind.
The combination of wood and stone is just perfect when it comes to decorating the yard. This bench has a unique design that everyone is going to love!
Paint your wooden bench in an eye-catching color and see how it adds a dose of charm in your backyard area. Decorate it with pillows and make it more comfy. You will definitely enjoy reading your favorite book here!
How would you like to have a cement bench in your yard? This is a durable design that will last for lots of years, and you just have to add some pillows to make it more enjoyable and comfier.
You should always consider placing your bench around a tree. You will have shade during the hot months which is a smart way to go!
What do you think about this attractive bench designs? We would love to hear from you in the comment section below !
Gardens can do wonders to our well-being and it's scientifically proven that people who have them live better lives. If you are one of those lucky people, and have the privilege to live in a house with a wonderful garden then you should definitely spend some quality time on its decoration and do create some fabulous landscapes that you will enjoy even more. In this article you are going to see 19 Stunning Garden Pathways That You Can Make On Your Own with ease and without having to ask a professional for help.
The garden pathways create spaces in your garden where you can move freely, so you don't destroy the grass and the rest of the landscape. They define the areas that are for walking around, and they will make the walks more enjoyable than ever. If you have been thinking about creating a pathway in your own garden the photos below are going to get your imagination going. There are lots of materials that you can use to make them, so see which design works the best for your existing garden décor.
There are some really carefully-planned designs that will require more time and lots of patience, so if you are a perfectionist you will definitely enjoy playing with pebbles and stones while creating this eye-catching pathway.
Did someone say glass bottles? Yes, you can repurpose the glass bottle in an awesome way and create a unique path for your garden. It's a super eco-friendly idea that you should copy if you have tons of bottles and you don't have a clue what to do with them.
If you are using cement for creating an interesting pathway we suggest you to have fun and decorate it with a big leaf while the cement is still fresh for a unique and natural look.
If you are living near a forest and you have to make a long pathway super easily and quickly, we have the perfect idea for you. Use pallets and get the job done in no time.
The combination of pebbles and wood is totally adorable, and all of the pathway designs that feature these two look more than amazing. There are plenty of ways to put them in combination and create versatile designs.
Gardening and stepping stones require no introduction. It is only natural not to distress nature, not to intervene in your own beautiful garden more than you should, stepping stones are able to do that, stepping stones will offer you a safe beautiful path through your greenery, to your interest points, without taking more than it needs. Moreover if you're going to use DIY stepping stones you can actually tailor them through your refugee, you can use a personal design that means more to you than a block of concrete .The collection below showcases mesmerizing stepping stone crafts realized by DIY enthusiasts with patience and dedication, we invite you to browse through it and draw inspiration.
What do you think? We have found the examples simply breathtaking beautifully and equally authentic. We would love to hear your opinion in the comment section below.
Every house wife knows all too much about the woes of finding the right pot plant to edify the face of their home. Many flowers bloom according to the seasons, so if she desires to have real flowers, then she knows she has to go along with nature's path. Nothing looks more gorgeous than a hanging basket of flowers in front of any house. So now you have the right flowers or plants whatever suits your fancy, time to get something appropriate to place them in. You can buy flower baskets, buckets or simple improvise by using an old bucket nobody has use for. Here are 16 ideas on how you can use hanging flower pots, buckets or anything that you can get your hand on that would do the job.
#1 Old English style of hanging flower baskets to enhance your veranda
#16 if you don't trust yourself to take care of your flowers - plastic ones will do - these are real
The whole idea of hanging flowers is to enhance and beautify what ever area or canvas you wish. Hanging flower pots is an old English tradition is being continued today by many people. To ensure the healthy growth of your flowers, you will need to purchase the right manure and fertilizers. Remember to water them daily, and ensure that they are free from parasites and weeds. Avoid mixing them with other plants or flowers that will drown out the beauty. All that being said, now you can share your flower pot stories or ideas with us in the comment box below. Any advice for those wishing to go this way in edifying their home will greatly be appreciated.
Even though safety is not a highly discussed issue in home design and home improvement websites, here on Homesthetics, we are going to try and approach the subject little by little with the purpose of improving our safety measurements, our confidence in our homes and ourselves without overreacting. Today we are going to present you 30 smart hidden storage ideas that can help you secure your valuable items. We have presented here a few obvious large sized storage ideas that can be disguised only by being dressed or covered by something and few others containing small recipients that can easily be placed wherever you want.
Most of these ideas are impossible to detect, even assuming that the burglar reads this article, the position of a coin, a bolt or a bottle buried in your backyard is almost impossible to trace if placed random for an unknown, strategically for you. These are only a few ideas, meant to feed your imagination and plant seeds in our minds, the will be developed and shaped by our experience, adapted to our home needs into something completely different, making the entire procedure failproof.
Painting, Poster, Collage; Whatever Wall Art It Is, It Can Double a Storage
Old Painting Nestling a Hidden Jewelry Compartment
Create a Hidden Spot in the Library by Sticking All The Pages of a Book and Cropping the Middle
Create a Hidden Spot in the Library by Sticking All The Pages of a Book and Cropping the Middle
Hidden Secret Compartment Behind a Bathroom or Kitchen Tile
Cabbage Storage Box; You Can Buy These Online And Store It Nestled in Veggies
Stair Storage Space; Even Though It May Be Visible It Is Uncomfortable to Search Into + A Simple Rug On Top of It Can Help
Secure Your Valuable Items in a Doubled Wall Art Piece
Built In Bookshelf Hiding a Huge Storage Area Behind
Small Compartment Built in The Door Maintaining Valuable Electronic Information and Money
Simple Plastic Bottle Buried in the Ground and Marked by One Rock
Socket Hidden Storage Design
Toy Gun With Hidden Compartment
Wall Painting Nestling a Jewelry Storage Space
One Coin in Your Collection Can Contain Valuable Information in Electronic Format
Hidden Compartment in a Trimmed Log In The Backyard. Extremely Natural Looking
Different Cans Accommodating Valuable Items Can Be Found Online; All Resembling Highly Used Containers in General
The Classic Loose Board. If This Resides Under Heavy Furniture You Are Most Likely Safe
Huge Storage Compartment Under a Luxurious Bathtub
False Socket Containing Valuable Items in Plane Sight
Wool Scarf With Hidden Money Pocket
Store a Few Back Up Bills in a Lighter
Extremely Well Hidden Door Making Use Of The Space Under The Stair
Cufflinks Sheltering Sensible Information in Plane Sight
Hidden Storage Ideas Bolts With Hidden Compartments Can Be Stored in The Garage, The All Items Kitchen Drawer Or Buried in The Ground; Be Creative
Massive Suspended Shelve Sheltering a Hidden Compartment
Layered Hidden Jewelry Compartment
Old Functionable Keyboard Design Sheltering Sensible Information In Electronic Format or Bills
What do you think about these smartly hidden storage ideas? Would you use any of them?
The attic is the space of the house just beneath the roof, and most of the time it's left unused, often people just use it as storage. But, when designed well the attic can play the role of any other floor with ease. It has a special charm, and the living spaces in the attic are more welcoming and inviting. Here you are going to see some Cozy Attic Interiors That You Would Love To Live In.
We have to mention that the attic, the last floor of the house, is usually the most quiet one and people love to use this space to relax or find focus, installing home offices. If you are planning to redecorate your attic soon, the photos below will give you some directions which you can follow.
There are lots of challenges when it comes to designing an attic and most of the time you will need custom-made furniture to fit in all of those specific dimensions.
I especially love attics because of the big windows and the direct sunlight. If you have roof windows you can enjoy the stars at night, and the sun throughout the day.
Usually, there are not walls in the attic to separate the rooms, and you have to decorate in an open-floor plan. That means that you have to separate and define the areas through furniture. The attic space usually open, spacious, and you can experiment with furniture of all sizes.
Make sure you position the windows right because if you are facing south and west, you will be getting too much sunlight and it will be very hot.
The space in the attic is ideal for a bedroom, so if you are using more floors in the house, make sure you place the bedroom in the attic. You will fell at peace here, and the tranquility will give you the rest you need.
When you are placing the furniture, think smart and arrange it in spaces where people can move around freely. In the places where the roof is too low you can always insert storage units which are not used too often.
Once you move in the attic you'll regret it that you haven't done that earlier. It's the most coziest space of the house, and when you decorate it according to your personal style, you will enjoy it even more.
You can consider yourselves lucky if you attic space has a balcony too! What a view from the top!
What do you think about these attic interiors? Aren't they just amazing? We would love to hear from you in the comment section below !
The dining setting speaks about a shelter, about the household, it expresses emotion and part of the inhabitant`s personality.
The article that follows is defined by authenticity and identity thanks to no less than 23 spectacularly inspiring mismatched dining chairs compositions carefully curated and beautifully envisioned by their home-owners into sculptural presences ready to receive guests, seat and shape extraordinary memories with family, friends and loved ones.
A setting that sends the right message and transcends out of the ordinary due to diversity around the dinning table.
via instagram.com
6. same color on different shapes
In a setting defined by airiness color cannot contest the light- subdued atmosphere that sculpts everything hence the color becomes a constant in the setting above, shape varies though, elegantly highlighting the interior with the dominant color. Different shapes invite different shading.
To emphasize the feeling of space and break monotony thin designs can be used to your advantage.
via hdbuttercup.com
11. contrast surfaces elegance
Authenticity can be brought in by items with memory, items with a story, items that become timeless once acquired. Define your space with identity and memory.
In the green armchairs and in the oak benches strength presents itself differently. The metal chairs on the other hand complement the sober elegant atmosphere. Airiness greatly contributes to the extraordinary interior.
via Jen Langston Interiors
22. scale play
Mix and match diverse elements; a bench and two armchairs shine in the setting above. Highly different elements at highly different scales shaping a beautiful composition.
Mismatched dining chairs in different compositions and settings can be extraordinary, spectacular. What do you think about the items above, we would love to hear from you in the comment section below !
Bonsai trees have come to our lives from China and Japan and the art of having, growing and grooming a bonsai art is one very difficult to learn.Their small size and interesting, contortion, unique shapes have always seemed appealing to us. A beautiful bonsai tree can fit any interior decor wonderfully, drawing attention to it and keeping the focus of the room there.Therefore, if you have in mind to buy a bonsai plant, keep in mind to offer it the right location in your home so it will not overwhelm the room, but improve the overall decor. Our article featured 6 of the most renowned and unique Bonsai trees in the world along with other 80 examples of pure beauty. Enjoy!
History of Bonsai in China
"Shallow basins or flattened bowls – “pen” or “pan” or “pun” – had been made out of earthenware in what we now call China since about 5,000 years ago. A thousand years later during the Chinese Bronze Age, these were among the chosen shapes to be recreated in bronze for religious and political ceremonial purposes. About 2,300 years ago, the Chinese Five Agents Theory (water, fire, wood, metal, and earth) spun off the idea of the potency of replicas in miniature. By recreating a mountain, for example, on a reduced scale, a student could focus on its magical properties and gain access to them. The further the reproduction was in size from the original, the more magically potent it was likely to be. Two hundred years later, importations of new aromatics and incenses took place under the Han Emperor because of newly opened trading with its neighbors. A new type of vessel was created, incense burners in the form of the mountain peaks which rose above the waves and symbolized the abodes of the Immortals, the then-popular idea of the mythic Islands of the Blessed. Primarily crafted out of bronze, ceramic or gilded bronze, some of these burners rested on small pen dishes to either catch hot embers or to hold a miniature symbolic ocean. The removable lids to these burners often were covered in stylized portrayals of legendary figures climbing the sides of forested hills. From the perforations in the lids the incense smoke arose out of the cave openings like the mystic vapors in the full-size mountains. It is thought that some later lids made out of stone may have been found with lichens or moss already attached – natural miniature landscapes.
From about the year 706 AD comes the tomb paintings for Crown Prince Zhang Huai which included depictions of two ladies-in-waiting offering miniature rockery landscapes with small plants in shallow dishes. By this time there were the earliest written descriptions of these pun wan – tray playthings. As the creation and care of these was somewhat already advanced, the maturation of the art had taken place (but its documentation has not yet been discovered by us).
The earliest collected and then containerized trees are believed to have been peculiarly-shaped and twisted specimens from the wilds. These were “sacred” as opposed to “profane” because the trees could not be used for any practical, ordinary purposes such as lumber. Their grotesque forms were reminiscent of yoga-type postures which repeatedly bent-back on themselves, re-circulating vital fluids and said to be the cause of long-life.
Over the centuries, different regional styles would be developed throughout the large country with its many varied landscapes; earthenware and ceramic containers would replace the porcelain ones displayed on wooden stands; and attempts would be made to shape the trees with bamboo frameworks or brass wire or lead strips. Many poets and writers each made at least one description of tree and/or mountainous miniature landscapes, and many painters included a dwarfed potted tree as a symbol of a cultivated man's lifestyle. After the 16th century these were called pun tsai or “tray planting.” The term pun ching ("tray landscape," now called penjing) didn't actually come into usage until the 17th century."
An 800 year-old Bonsai tree at Shunkaen, by Kunio Kobayashi
A remarkable tree which is well known for its extremely high age; the tree is reported to be over 800 years old, one of the most expensive bonsai trees! Its owner, master Kobayashi, is one of the most well known Bonsai artists in the world and has won the prestigious Prime Minister award in Japan 4 times. His nursery, ShunkaEn, is located in Tokyo and is open to visitors.
Goshin ("protector of the spirit") is a bonsai created by John Y. Naka. It is a forest planting of eleven Foemina Junipers, the earliest of which Naka began training into bonsai in 1948. Naka donated it to the National Bonsai Foundation in 1984, to be displayed at the United States National Arboretum; it has been there ever since.
This tree is an Azalea species of only 14 cm (5 inches) high. The picture is taken in late spring / early summer, the moment when Azalea trees bloom (shortly, but very vividly!). The tree is planted in a Japanese pot.
Walter Pall is a kind of bonsai rock-star among the culture’s enthusiasts. He has received several dozens national and international awards for his beautiful, dramatic bonsai. He has won the most prestigious Crespi Cup Award of Italy for his well known Rocky Mountain Juniper, and has come in among the top six, every time he has entered. He has also won second and third and other places places in the Gingko Cup Awards of the Belgium bonsai competition held every two years. The most controversial information about Walter pall is that, although world renown, he considers himself an amateur working professionally. That’s because he styles trees for his own amusement and not for commercial purposes. In time he managed to put together one of the most comprehensive bonsai collections around.
Walter Pall’s Crab Apple Tree
This is my personal favourite from Pall’s collection: an incredibly sweet 65 cm high apple tree. I have no idea how anyone that sees it live could resist not to taste those tiny apples, but I guess Mr. Pall keeps it in a safe place, away from leering guests. Fruit trees training is an ascending trend among bonsai growers. The fascinating part about it is that the fruits are indeed edible, especially those belonging to the citrus category. Common fruits that can be obtained in small size include: cherries, apples, lime, lemons, tangerine and figs. The bonsai fruit tree success strongly depends on meteorological and topographical factors, like humidity, temperature and soil.
Semi-cascade Juniper Bonsai
A Juniper bonsai collected, designed and developed by Harry Hirao and displayed at the National Bonsai and Penjing Mueseum at The United States National Arboretum. This very old, semi-cascade style bonsai was probably collected in the White Mountains of California. The shari (deadwood on the trunk) is very prominent on this bonsai, leaving only one stripe where the tree is connected between its leaves and the roots.
The esthetics behind this type of contorted and twisted trunk is called literati and it was influenced by the political and academic conditions in the Tang Dynasty period, when penjing was once widely practiced by the elites. Literati is a contemplative, lyrical style displaying tension (in the trunk) and release (in the cascading branches) like the universal law of Yin and Yang.
Kasokudo Bonsai Planter Inspired by the Automotive Industry
“Referencing speed forms and manufacturing processes used in transportation design, this piece juxtaposes movement applied to what is usually a static object.”
“The piece gives the impression of an accelerating form that effortlessly floats to house a bonsai tree, evoking a perfect balance of dynamic harmony. The latest manufacturing processes of the highly polished finishes of the planter and 3D-printed ‘mountains’ contrast to that of nature that usually takes many decades to grow, sculpt and form the gnarled bonsai forms. In all, a unique synthesis of cutting-edge precision with the imperfect beauty of nature.”
The balcony and terrace alike, are spaces used to connect the interior space with the outdoors, a transition we all enjoy. Take note though, one does not equal the other, between a balcony and a terrace there are differences, some of them major and the terms should not be miss-used, they`re not interchangeable. Learn the difference between terrace and balcony today in the article that follows.
terrace definition
The term terrace originates from the Latin "terra", term that translated into "earth", a clear indication that the terrace is actually built on a raised plan, above ground, constructing a flat surface that today is more often than not at the top of a building or residence but it can also be found as a natural extension of the living room at the ground floor, covered by a pergola.
An oasis of relaxation and serenity should be the main function, a terrace can hold a Jacuzzi, a pool or an immense garden. In the urban environment terraces are retreats, often used as dinning or meeting areas. The modern terrace happily evolves into a green state, embellished in vegetation, that even potted can be used to refresh and rejuvenate the dense urban environment.
A terrace is very different in terms of accessibility when compared with a balcony as it describes a bigger surface, one that can have a single access way through a staircase on the roof for example, or multiple as two or more building volumes open towards it. The private terrace in the urban environment often resides at the top floor, serving immense apartments or a single penthouse.
In a private home the terrace can be accessed from multiple spaces depending on its position and surface, no rule being defined.
balcony definition
The term balcony originates from the Latin "balcone" the term signifying a large window. Today the balcony is an extension of the indoor floor space, a console that pierces the facade plane. It can be attached to a single room or multiple spaces and it creates a private transition between one or more rooms and the exterior.
The balcony is naturally an extension of the indoor living space outdoors and its presence is dense in apartment buildings, as this console simply breaks the volume of the apartment, of the box, allowing the inhabitant to experience the exterior on its own floor-space. In small apartments and countries that experience heavy winters this floor-space is often used as an extension of indoors, the balcony is enclosed with windows and the wall separating the spaces destroyed. This allows the inhabitant to use the balcony throughout the year as a small garden where potted plants can grow through winter. An oasis of vegetation separating your indoors from the outdoor environment can emphasize your living through its simple presence but furthermore it can shield you from unwanted views or simply a grim perspective. In cases in which the balcony had access from the kitchen, this space can also contain vegetables and fruits fresh at your grasp, the slight difference in temperature favoring this .
ACCESSIBILITY
The balcony is always connected to at least one room of the apartment or house and the access is in most cases, private in residential buildings, rare being the case in which the access is done through a common hallway. In office buildings most often the balconies are naturally commonly shared by its users, the private-public relation being different entirely.
Terraces and balconies are very different as you`ve surely noticed. One of the first things we ought to point out is the surface; terraces are far larger than balconies usually.
They have a different floor plan, where a balcony can be an described as a line, whether is straight, curbed or L shaped, the terrace is more often than not, more rectangular offering the individual more liberty in furnishing and possibilities in general.
The balcony is always horizontally-attached to an indoor space regardless of its nature where a terrace can reside in your garden isolated or at the top of the building accessible only though a staircase, vertically.
Last but not least balconies can be enclosed or open, with the inner wall demolished or not in either case. The terraces cannot be covered that easily, few being the cases in which the authorization is released for modifications.
What do you think? How do you use your terrace or balcony? We would love to hear your valuable feedback on the subject in the comment section below.
Glass is transforming the world; from immense underwater hotels to the tiny bell jars. Cloche and bell jars have been used in the past by farmers to protect infant seedlings and the practice is today used beautifully to emphasize the decorations of special moments, magical weddings. Sweets and succulents alike take advantage of the smart glass shield that protects them whilst carrying thousands of reflections able to transform the decor.
Creativity has no limits and the sensibility infused by tiny plants along glass and candles arouses the interest of thousands of designers around the world. We invite you to take a moment and cast a glance at 31 Simply Breathtaking Cloche and Bell Jar Decorating Ideas For Magical Weddings showcased below.
Use simple delicate elements to beautify your composition
via Leah Haydock Photography
here the breathtaking elements are used as card holders for the bride and groom
via Edyta Szyszlo Photography
naturalness can inspire calm and add equilibrium
you can use vintage elements as focal points
via Braun Photography
the combination of glass and candles is timeless
via Lauren Fair Photography
Succulents can add greenery in small packages effortlessly
via Marion Heuteboust Photography
Simple beautiful rose in a glass recipient
via Daniel Price Photography
miniature gardens shaping beauty
via N. Barrett Photography
mini floral buckets can enhance the decor without stealing the show
via Stacey Windsor Photography
bell jars can change everything in a glance
via Susan Stripling
one succulent surrounded by candles and PROTECTED through a bell jar
via 100 Layer Cake
use greenery and bell jars to create breathtaking memorable centerpieces
via My Inner Landscape
via Carlie Statsky
via Kristyn Hogan
use wooden logs to bring warmth into the composition
via Red on Blonde Photography
a bell jar protected succulent may be the ultimate wedding gift
Wild Orchid Baking Company & Flower Wild and Carlie Statsky
Leslie Hollingsworth Photography & Bushturkey Studio
Sweets in bell jars gain new valences
via Francisca Neves
a rustic decor can enhance the scenery in a breathtaking manner
Oak and The Owl & Ellie Rose Photographie
via Maggie Conley Photography
Showcase the sweets in a really memorable manner
via Sweet and Saucy Shop
via Melissa Schollaert Photography
We would love to hear your feedback on this beuatiful topic in the comment section below.
Men are different from women. You can easily tell the difference between a girl’s and a boy’s room. Guy’s tend to be a bit more simplistic when decorating a room, and, the more spacious, the better. However, that doesn’t mean that their rooms should only have a bed and a TV. A lot of styling can be done and the outcome can be brilliant.
The traditional style is one of the most popular choices in interior design, but why is it so popular and what really is traditional style? Everybody has different traditions so the word "traditional" can have a different meaning for each of us.
Unlike what many people think, the traditional style is a design direction inspired by 18th century European decor. The style itself is a timeless example of comfort and elegance and is perfect for anyone who loves deep wood tones, thorough architectural details and elegant furniture design. This style is often referred to as the classic home style because it has that "homey" feeling that the modern styles lack.
But don't let that fool you because the traditional style also emphasizes simplicity and comfort. There is no space for clutter or excessive furnishings.
So how will you know if this style is for you?
If you feel comfortable with dark wood finishes, refined colors as well as rich tones, then you are probably in the right place. Do you like plain walls? Because the traditional decor mainly relies on neutral paint color on the walls so that the colorful furniture and accents can be in the foreground.
We are going to show you how the traditional decor looks like in the dining room. You will immediately notice that, symmetry is paramount in the traditional interior design. Pretty much anything comes in pairs. If there are 3 chairs on the left side of the table, there have to be 3 chairs on the right side. You get the idea. This symmetry creates a balanced space around a focal point and in the case of the traditional dining room , it is the dining table. Enjoy!
1. Display shelves break the monotony on a plain wall
Your locations, your traditions and what feels natural to you in design ought to define the traditional design that you ought to pursue. We are the sum of our experiences and in design too we ought to expressed that, what do you think?
Origami paper is the art of folding art and is often associated with the Japanese Culture. Here on Homesthetics we have featured a big variety of articles that have paper as the common factor yet few have been as extraordinary as the ones that you will see below. Keep in mind that pieces are realized without using glue or scissors out of just one single sheet of paper. Origami paper art requires a patient, accurate and creative mind as the pictures underneath will point out.
#16 Dragon Family -Based On Designs By Edwin Corrie And Gilad Aharoni
#17 Origami Fairy-Designed By Yoshihisa Kimura
#18 Eric Joisel's Rat
Washed up wood, white decors, freshly cut flowers and bright accents add glamour and charm to the shabby chic living room designs. A mix of different elements all brought together into an unique fresh cozy ambiance that represents a laid back unpretentious lifestyle. Comfortable but bright and elegant at the same time, a shabby chic decor will express your personality and personal taste. It will tell a story about your life and family in a discrete lovely manner, containing long time loved items recycled reconditioned and brought back to life in the most normal composition possible. Every design is one of a kind and representative for that particular home so if you like having a space hat reflects your style try the shabby chic design line.Cast a glance at the gallery below and allow this relaxed elegant style glamour your senses.
1. the most BEAUTIFUL coffee table-simple and everlasting
2. neutral color pallet exuding such a comfortable atmosphere
3. a modern shabby chic decor with a stilish French twist
4. elegant and delicate in its simplicity
5. delicate and feminine with pink accents
6. cozy and fresh in an scandinavian inspired decor
7. shabby chic with minimal accents
8. french styled living room
9. fresh and girly flowery decor
10.elegant and SUMPTUOUS in a perfectly merged decor
11.simplicity goes a long way
12. cozy and warm with little effort
13. elegant decor filled with one of a kind pieces
14. a marine vibe to an all white living room
15. pastel pink adding delicacy
16. choose a piece of furniture to make it stand out
17. TURQUOISE tones accentuate a cozy living room
18. An all white design filled with a personal touch
Are you a fan of the laid back shabby chic design line and its comfortable style? We would love to hear your ideas on this subject in the comment section below and see your own shabby chic designs as well.
Nothing is more important in the world then having a place to call home. Most of us have already imagined how our dream homes would look like, on the exterior at least, we thought about the big lawns, the huge swimming pools yet we`re all leaving aside the most important thing, the interior design.
Absolutely every dream home should start from the inner home, from the interior, the real home in the home. We need shelter everyday both psychological and physical and the most important contact with it it`s trough the feelings evoked in the interior.
As a result our article today points out an interesting approach that we consider appropriate for a modern dream mansion, it encapsulates coziness and warmth in a serene atmosphere using high end materials. The home is located in one of the most expensive pieces of land in the world, Australia. It`s of course, an escape, a retreat, a shelter, entitled Brighton Escape and designed by Georgia Ezra, the head of G. A.B. B. E. studio. The home manages to gain her aesthetic values trough the simple and very clean combination of materials used in airy spaces with amazing natural lightning, here and there you will definitely notice beautiful accents from the sculptural white staircase to the slowly textured materials that would create a totally different effect if they were flat.
The interior further on expands trough the huge windows to the exterior creating a bridge between the tranquility of the amazing natural environment found on the site and the interior, therefore expanding the comfort zone of the inhabitants. The whole backyard landscape has the corners designed with zen pebbles and extraordinary green emerald grass that protects the home.
“The space was treated from its genesis, with the same respect for design as a museum. Carving of ceiling, walls and floor not only creates sculptural partitions throughout the residence, but with the spirit of a rock pool, provides channels to flow through and delineates ample space in which to dwell together.”
If you are living in an open-floor plan, then you will be interested in this article a lot since I'm going to show you some excellent ways to define the areas and divide your home. The Contemporary Room Dividers That Will Add Style To Your Home are truly amazing because they will add a unique statement in your home.
The room dividers come in so many different designs and styles, and it won't be hard for you at all to pick the one that will work the best for your space.
The bamboo room divider is great for you if you are looking for eco-friendly materials. We have to admit that it makes the home look just marvelous.
Instead of building a real wall in your spacious area, the room dividers are an inexpensive and smart way to define the functional areas in your home, and not make it look tiny at the same time.
Some of the room dividers can be purely aesthetically pleasant to the eye, while others can be really functional and practical. Look at the design below which holds a fireplace and lots of shelves at the same time. Isn't it just stunning?
The investment that you will make for incorporating a room divider into your home is small compared to the difference it will make in its look. It will not only make it look more comfortable and cozy, but it will also make a fashion statement and will elevate the style of your home.
What do you say about using wood for your room divider? The wood is a natural material that adds warmth to your living space and gives it a special charm.
PVC dividers are a hot thing nowadays, and lots of people decide to add them in their homes. You can get super unique and unusual shapes, which will make your home distinctive and different from the rest of the homes.
If you don't have enough space for lots of flowers and plants inside your home, here's an idea that you will look forward to recreate. This room divider that will hold your flower pots in an outstanding fashion will separate the dining room from the living room with ease. How do you like it?
Source
Aren't these room dividers a contemporary way to define the areas in your home? Has some of the designs already caught your eye? I hope that you found your inspiration and that you are going to add one in your home really soon!
The one design of sofa that conveys a drama and mystic into the interior and make an easy statement in the area is the Chester sofa. This deep-buttoned sofa has been in trend since ancient times and it doesn't have an intention to go anywhere anytime soon. You can find it in an array of fabrics, colors, patterns, shapes and sizes, so that means that it can fit almost in any interior design. If you are planning to add a Chester sofa in your home, scroll down through the photos below and get some ideas. Check out the Super Modern Chester Sofas That Will Make Your Home Look Classy and fall in love with their beauty and style. Furniture is an important investment, and we guarantee you that it won't go out of style and won't decrease in value.
If you are about to redecorate your living room, this is the perfect sofa to purchase. As soon as you enter the room, it will be the first thing that you spot and it will stay in your mind for a long time!
A Chester sofa in a bold color will be the focal point in the room. Don't be afraid to go for an eye-catching color because it works great on this design.
The incredible versatility of the Chester sofas makes them great for any home and they have the power to fit beautifully in every room in the house. Choose them for your living room, for you home office, library or just add them in the guest room. Wherever you add them you can be sure that the room will have a timeless look!
rating your home in the industrial style, the brown Chester sofa is the perfect choice for you. Your industrial living room will be complete with this type of sofa, and it will be your favorite piece of furniture in the room for sure.
The Chester sofas are really modern and popular, and you can never go wrong with them. Add them in your home and give it a classy and stylish look with ease.
What do you think ? How do you see the Chesterfield Sofa or in short, Chester Sofa ? We would love to hear from you !

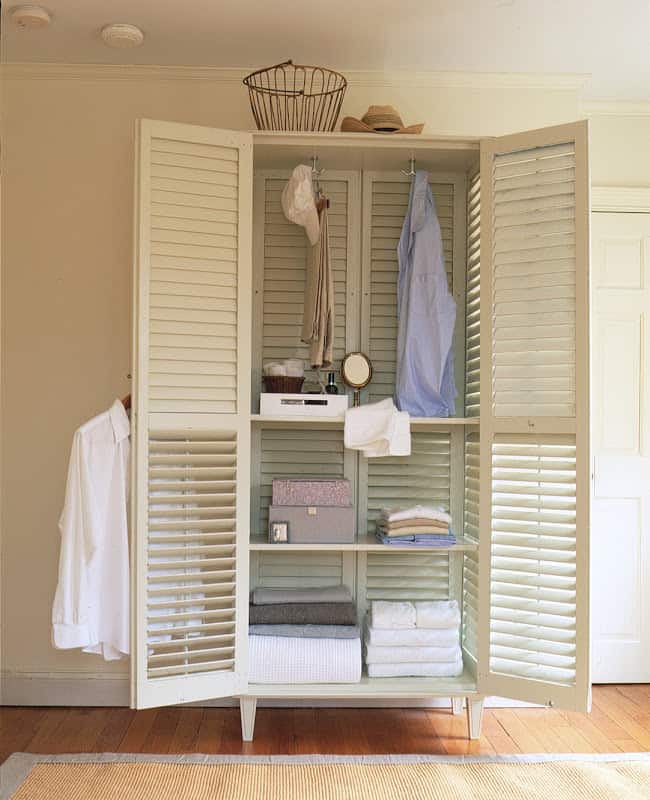
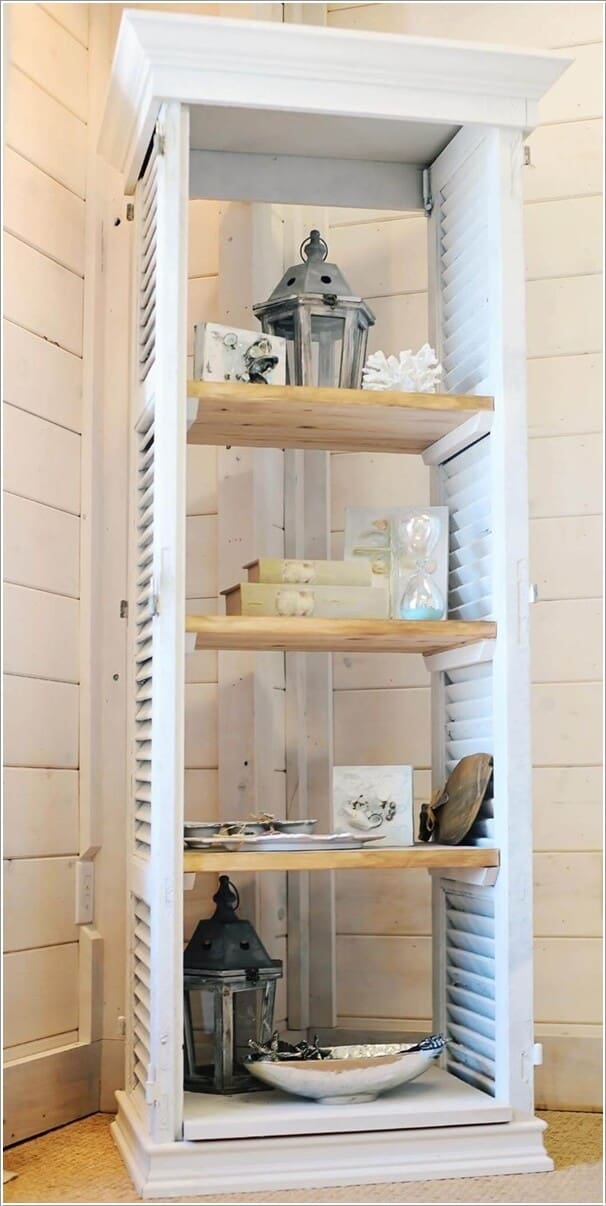
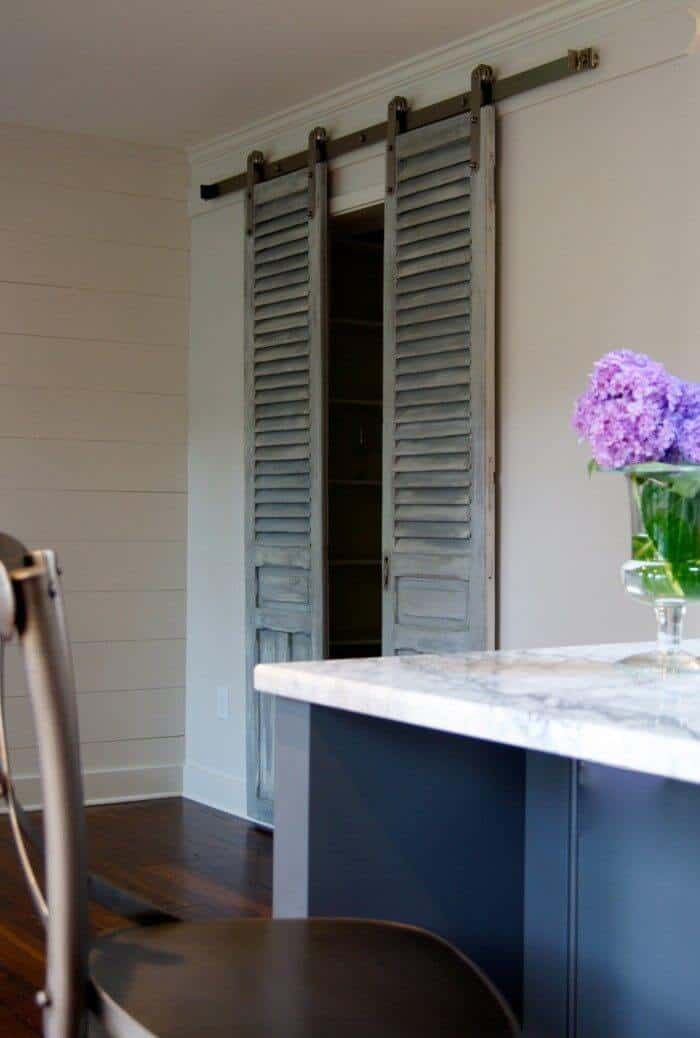
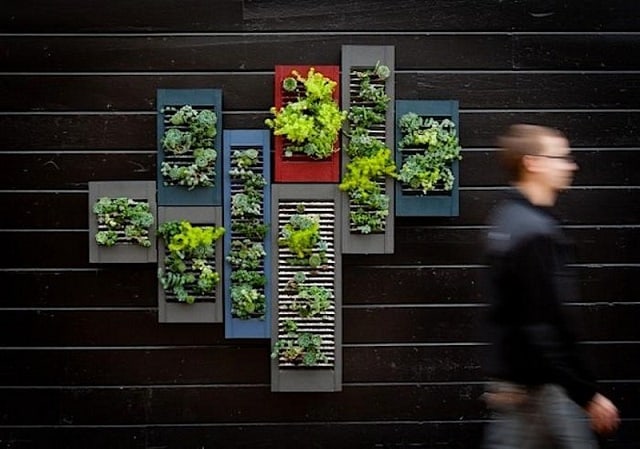
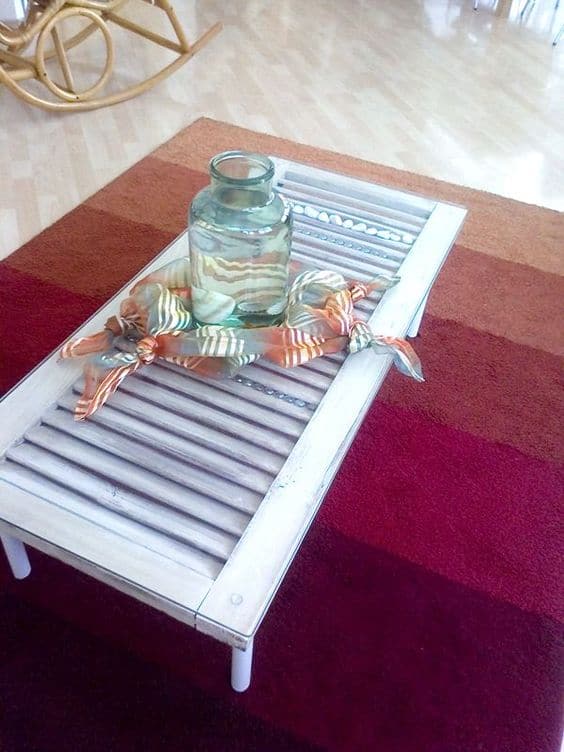
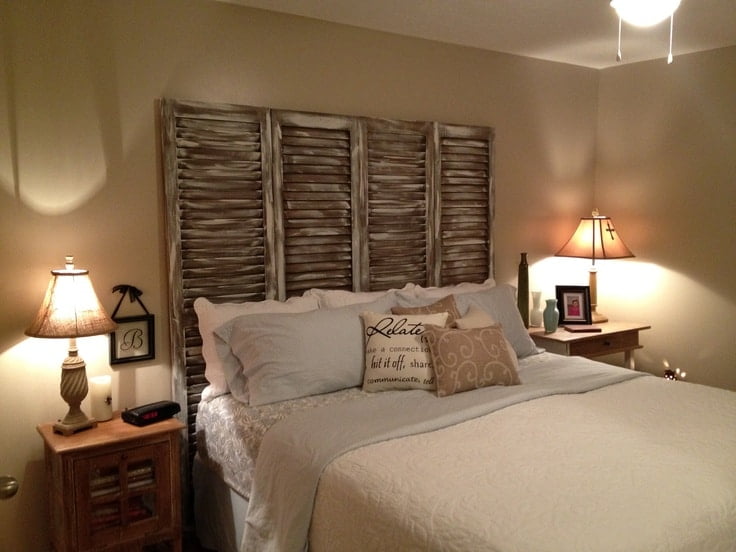
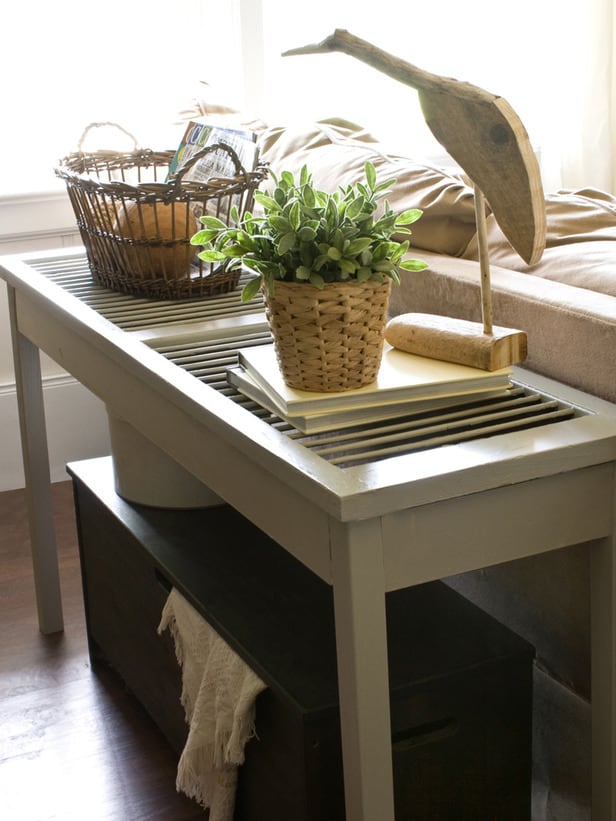
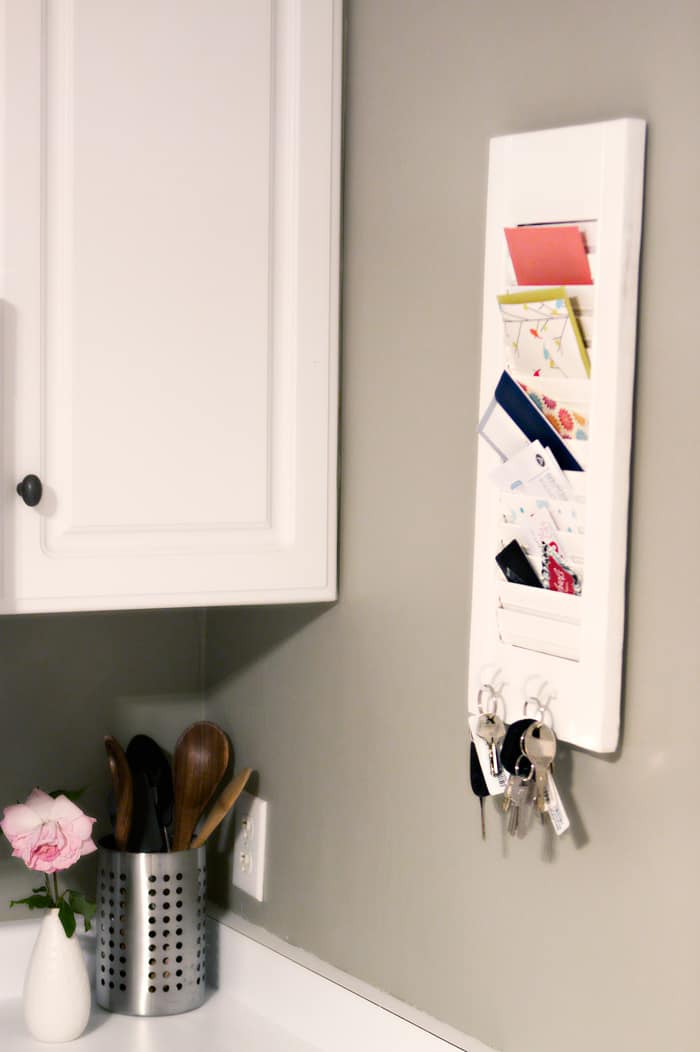
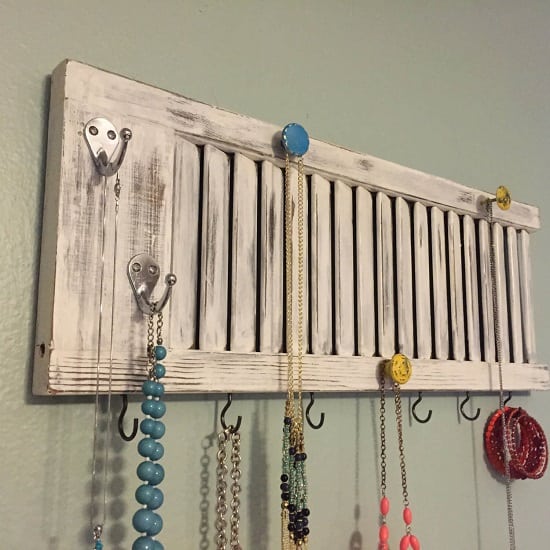
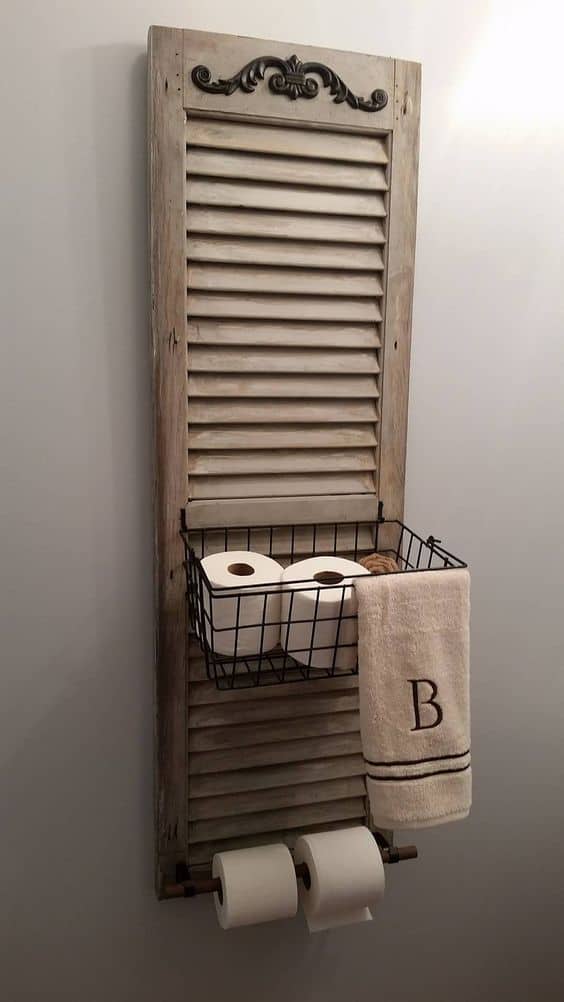

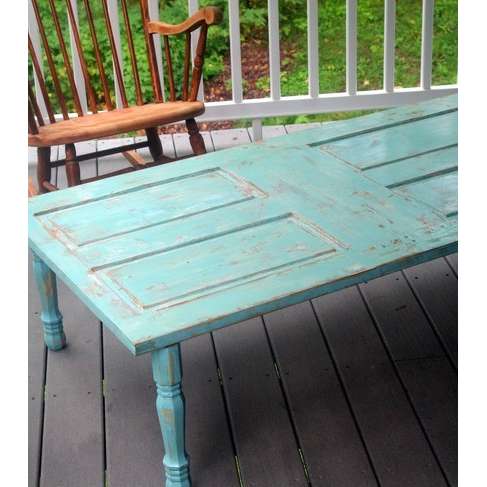
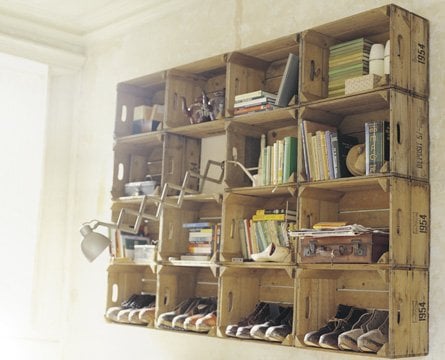

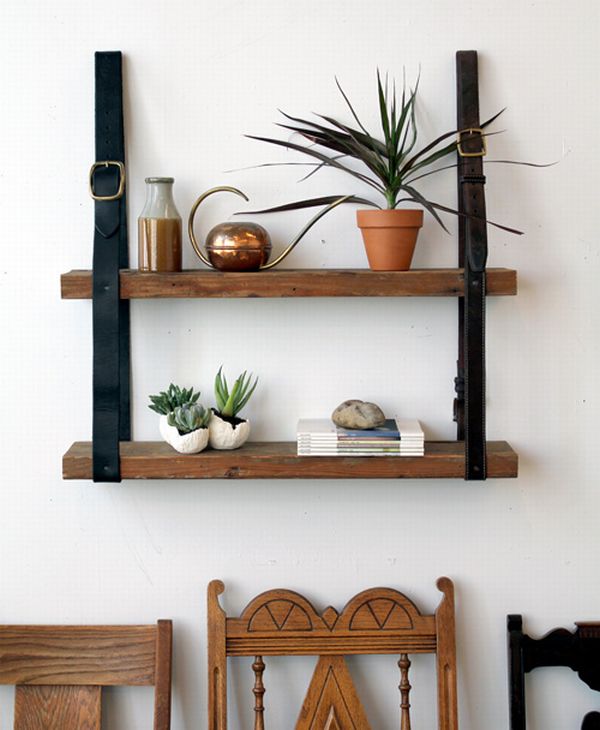


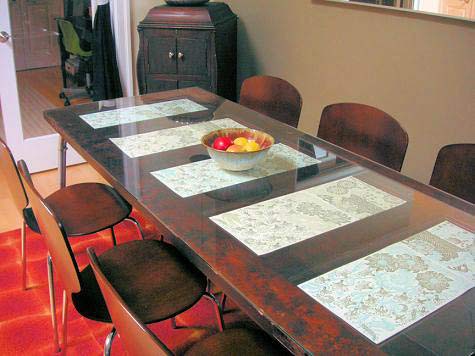


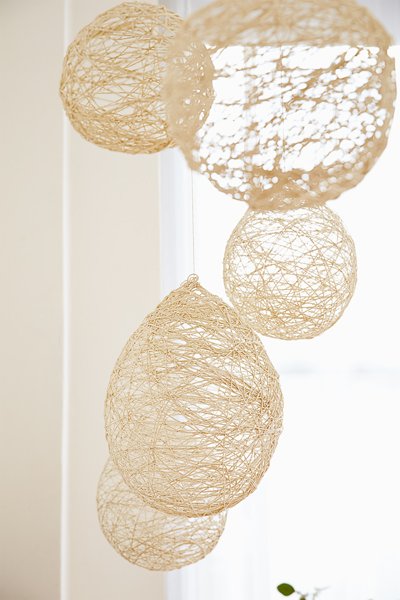
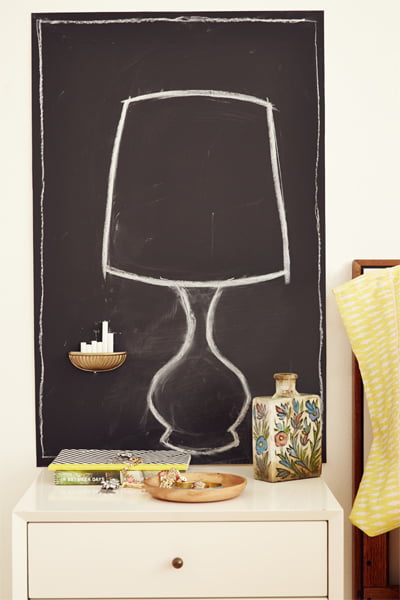


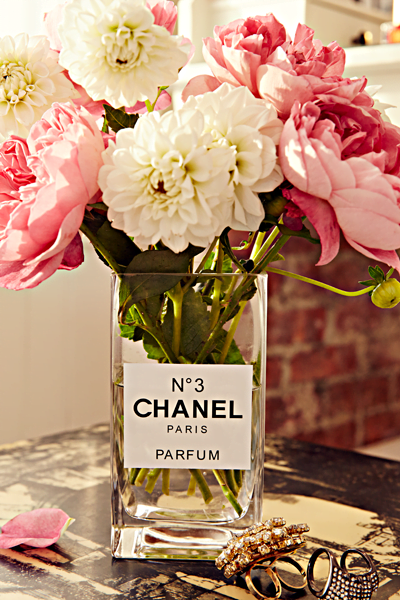
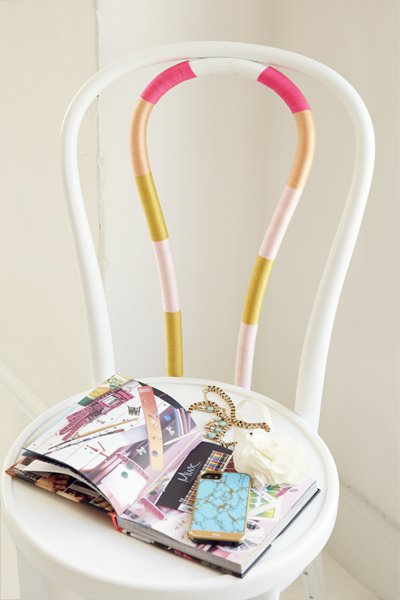

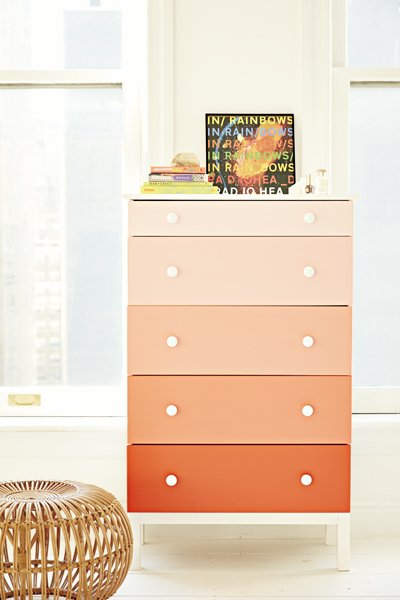
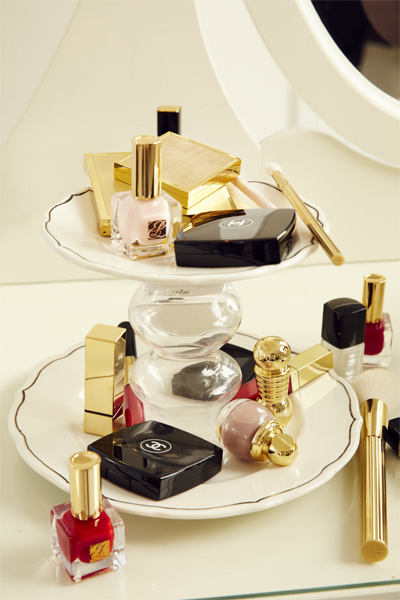


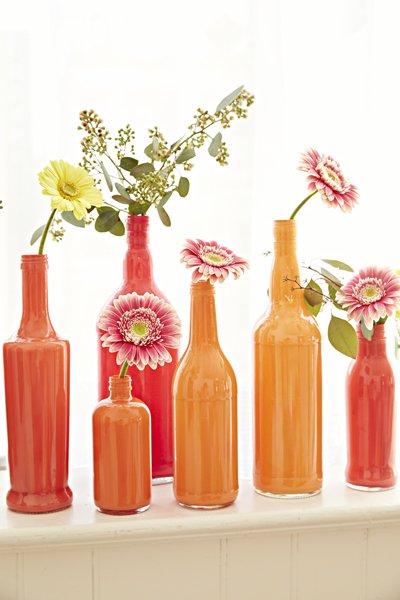

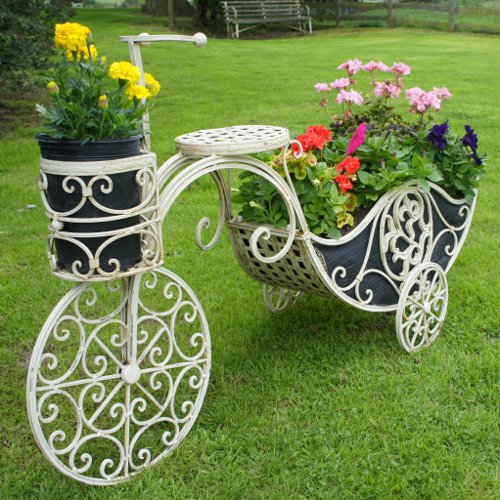
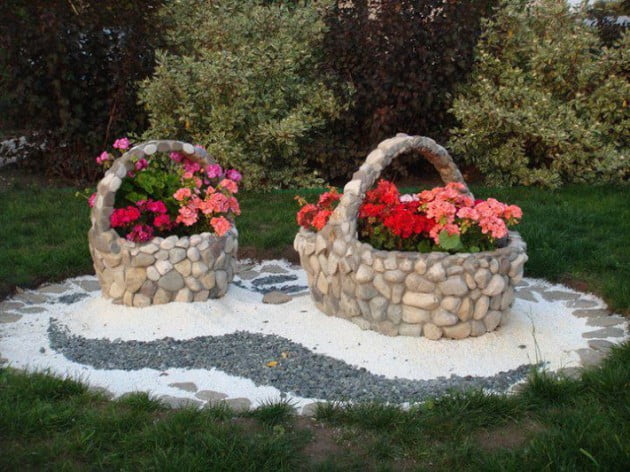

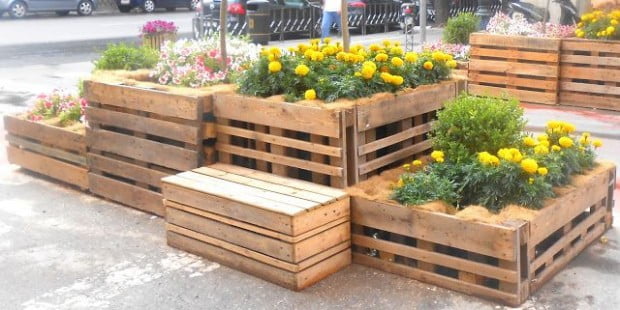
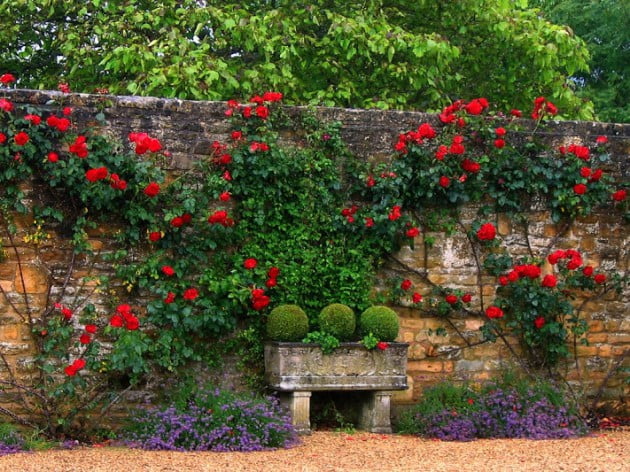
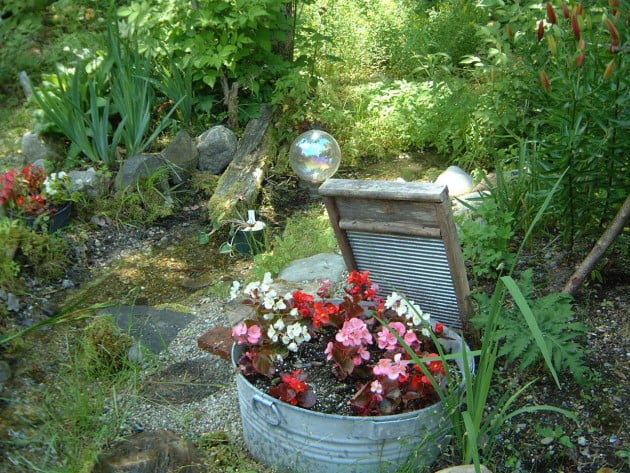
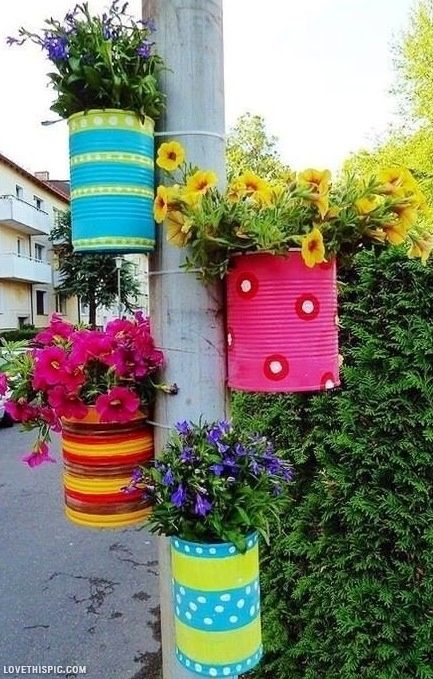
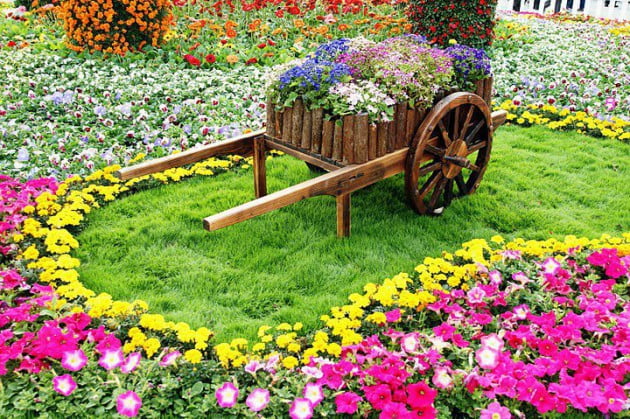
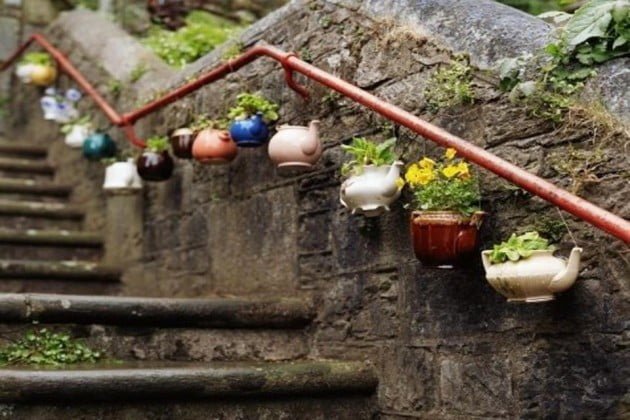

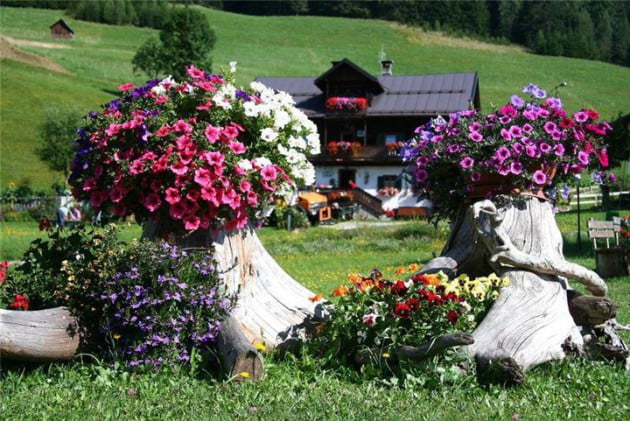
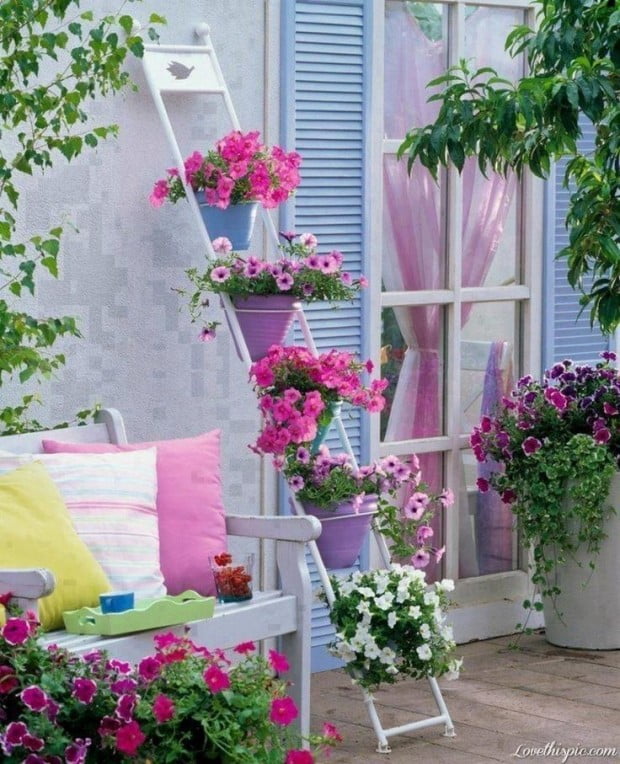
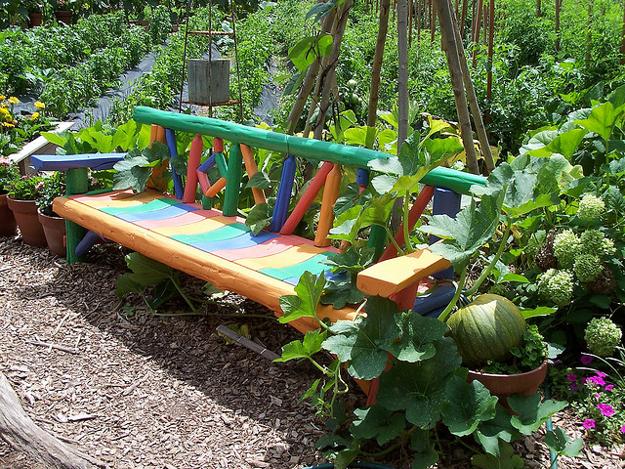

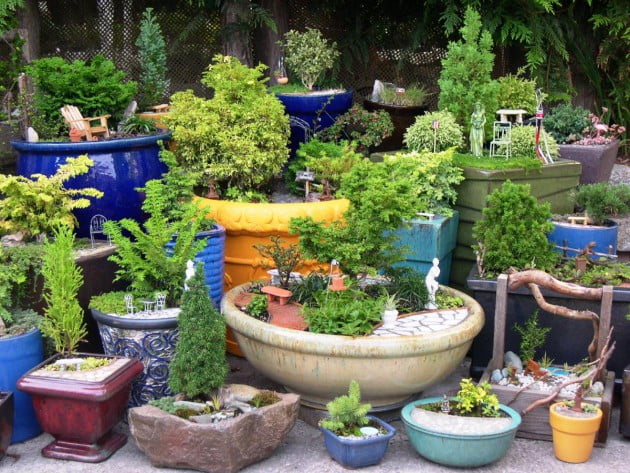


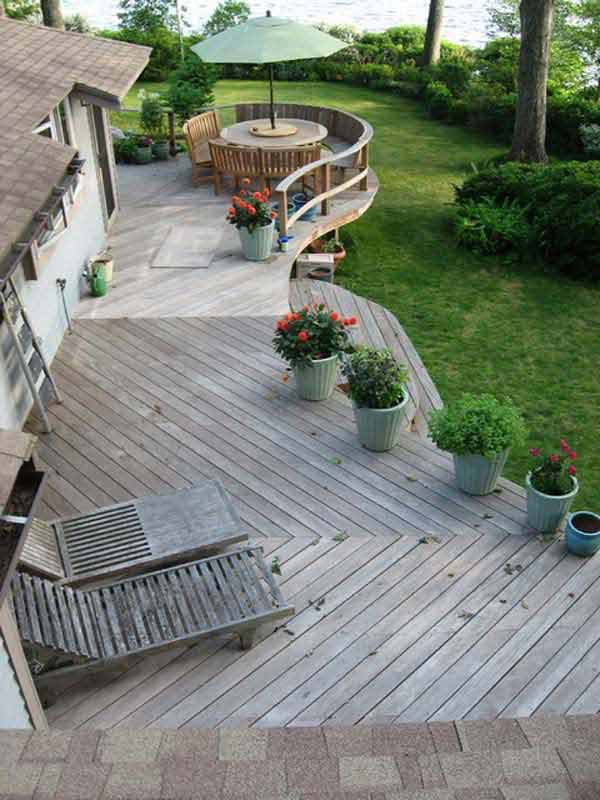
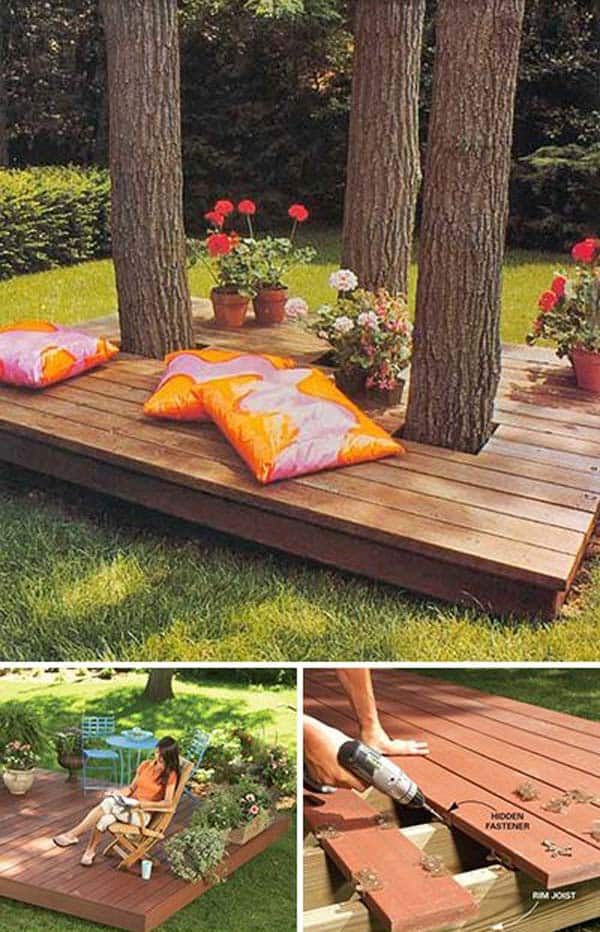
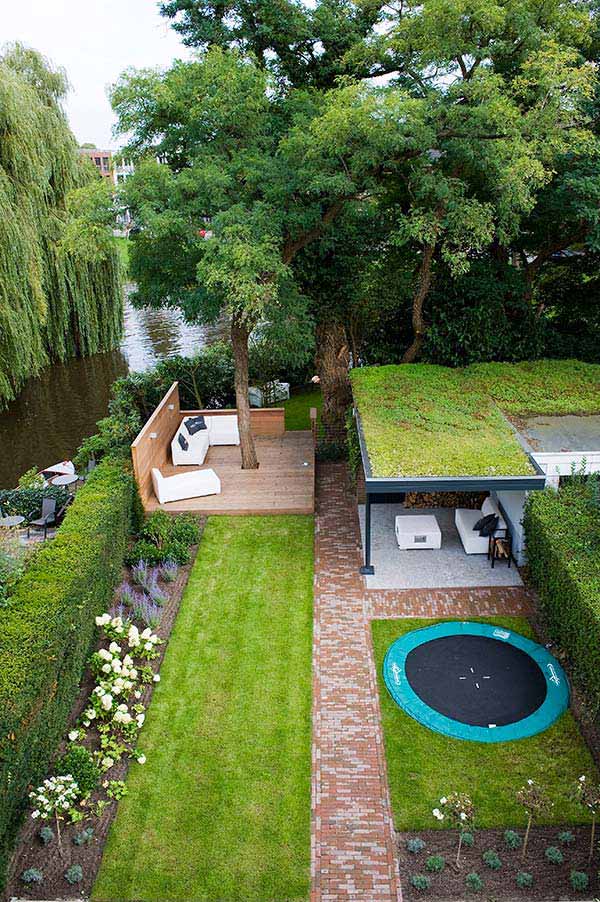

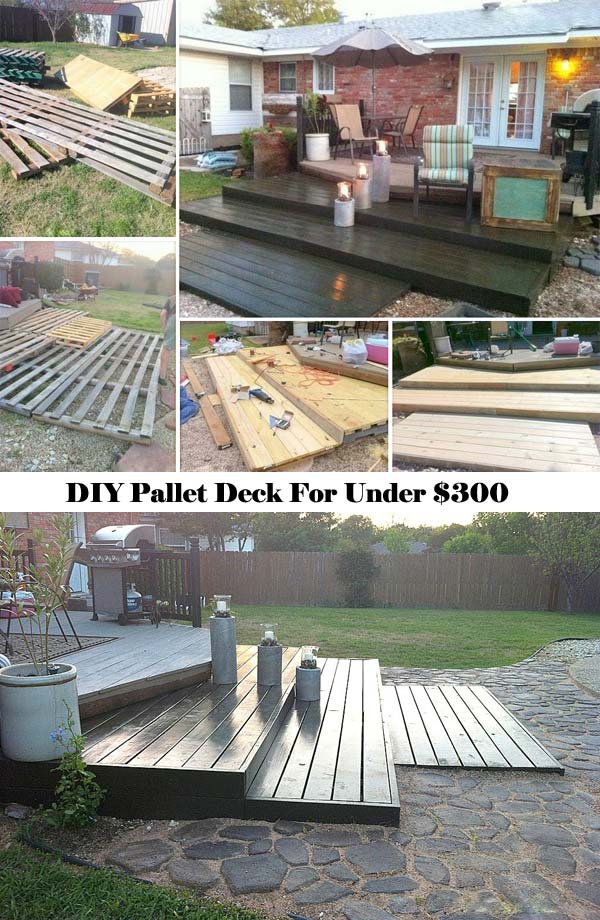

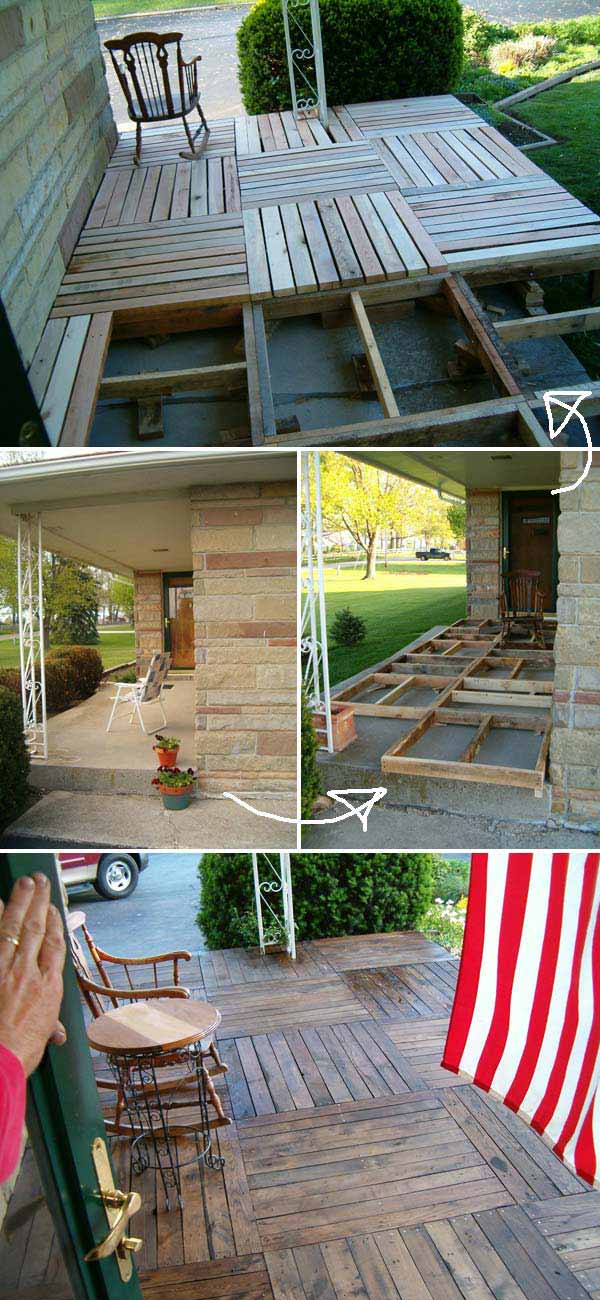
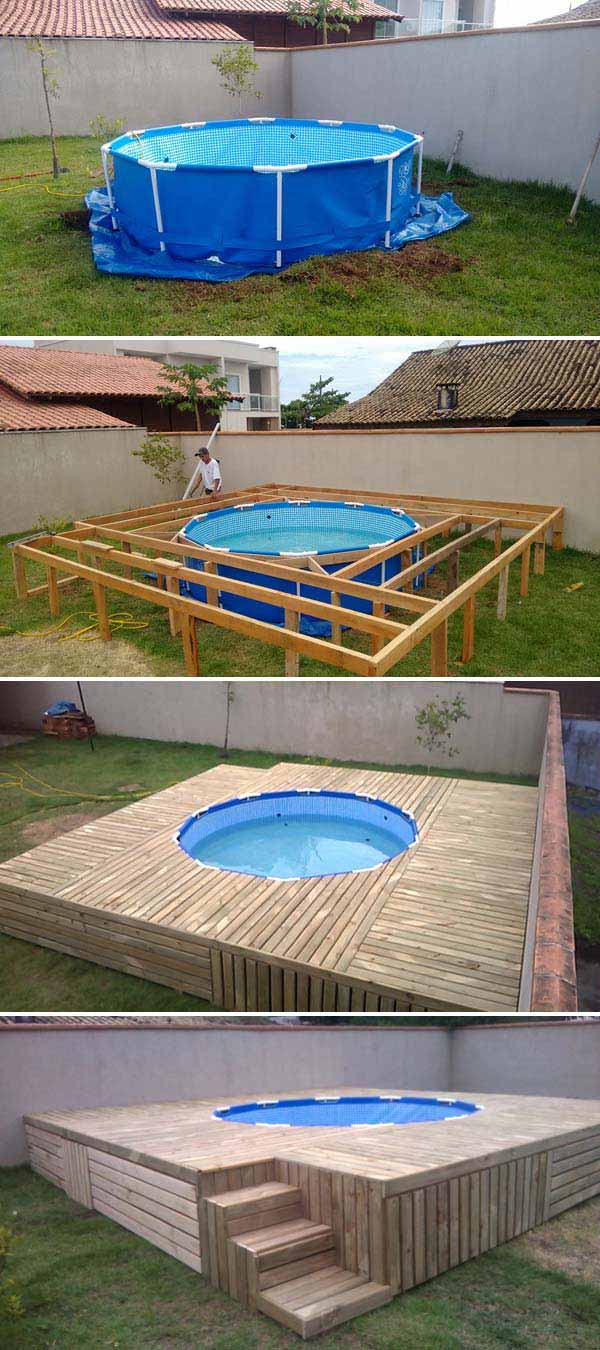
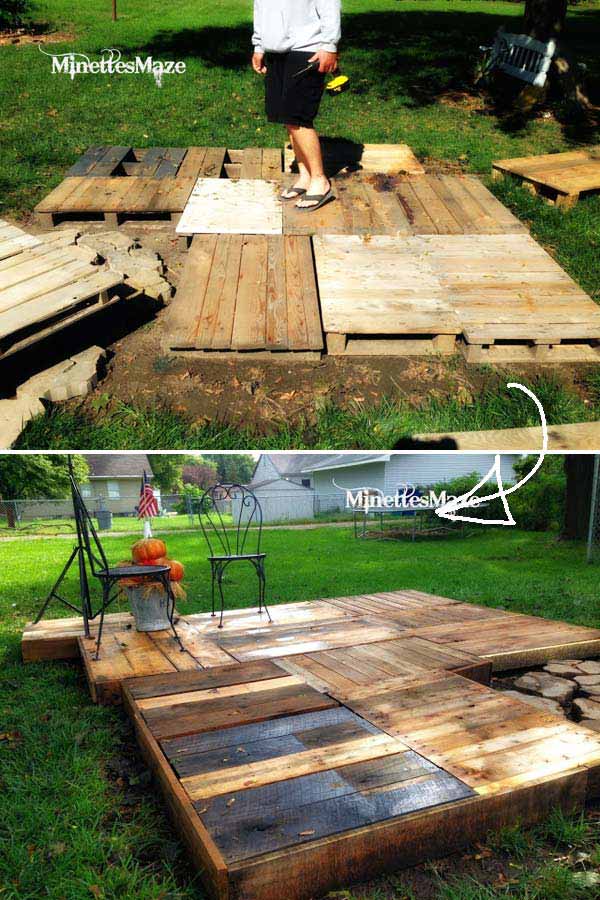
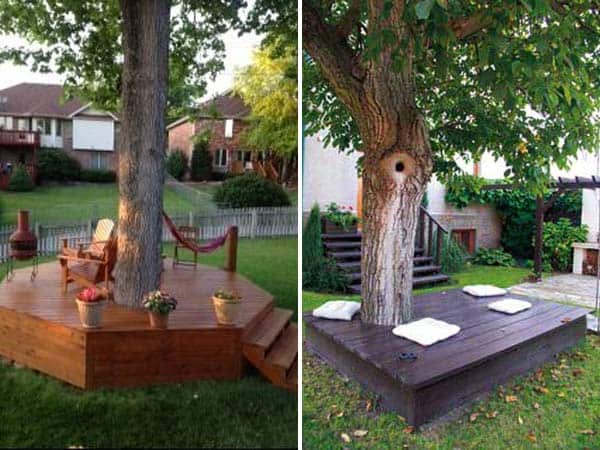
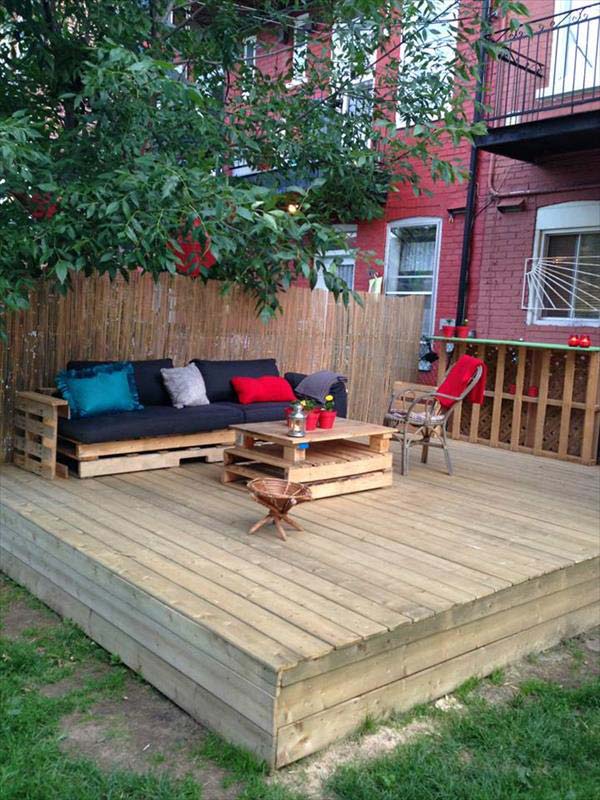
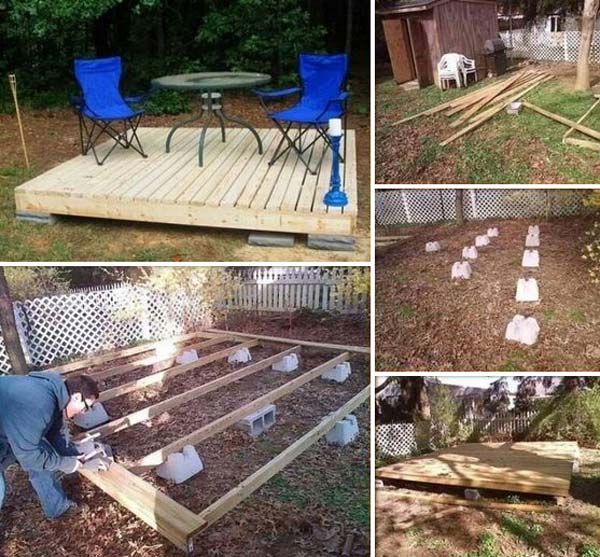
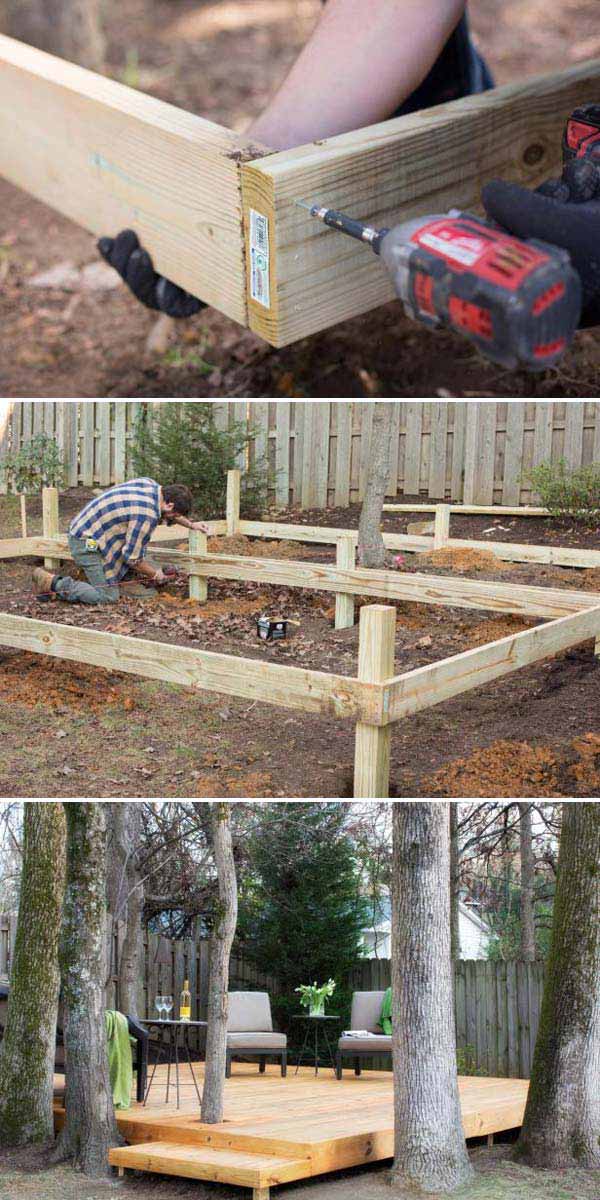
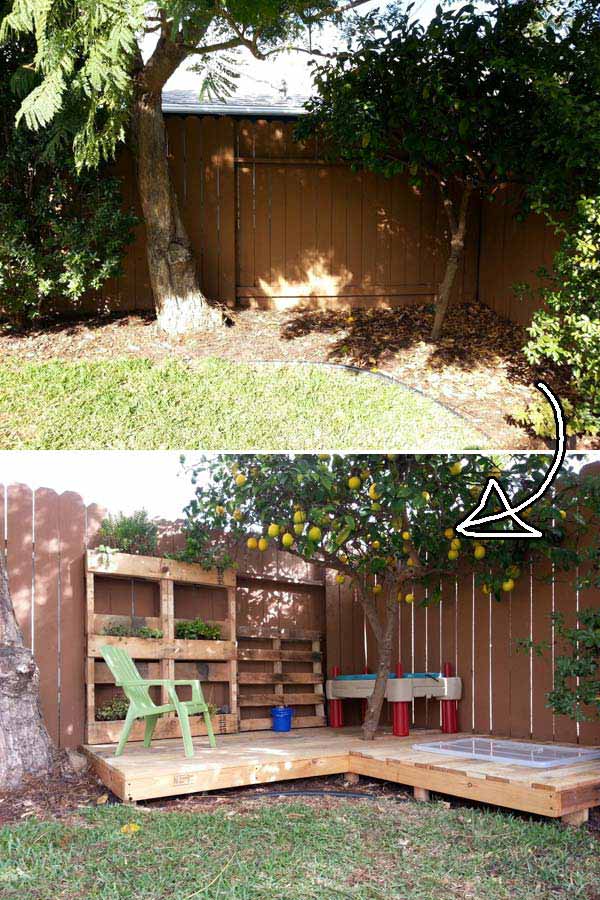
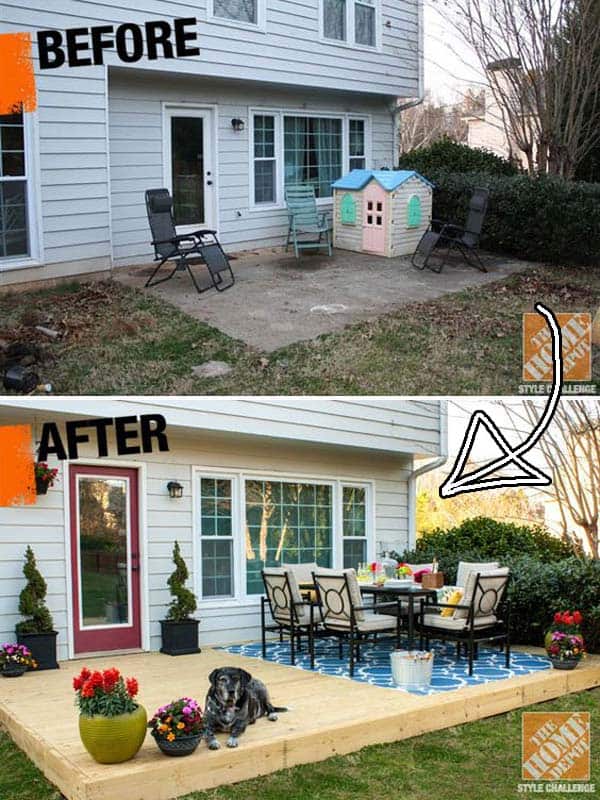


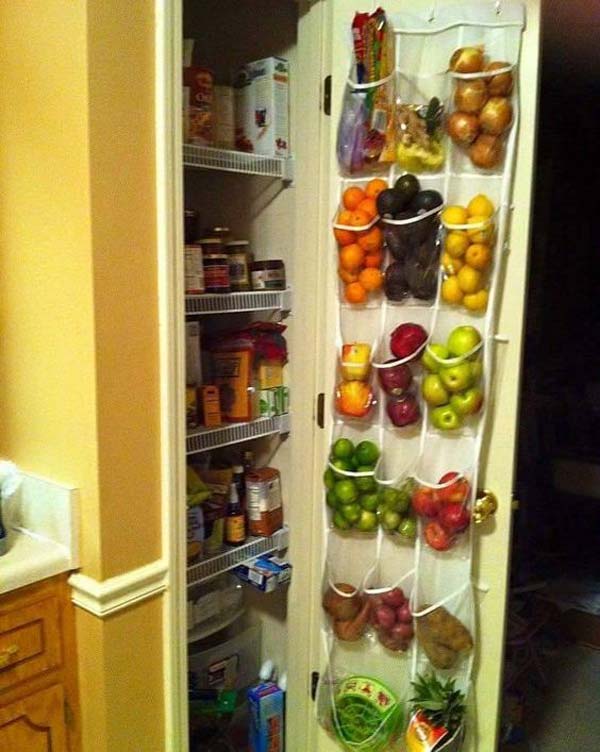
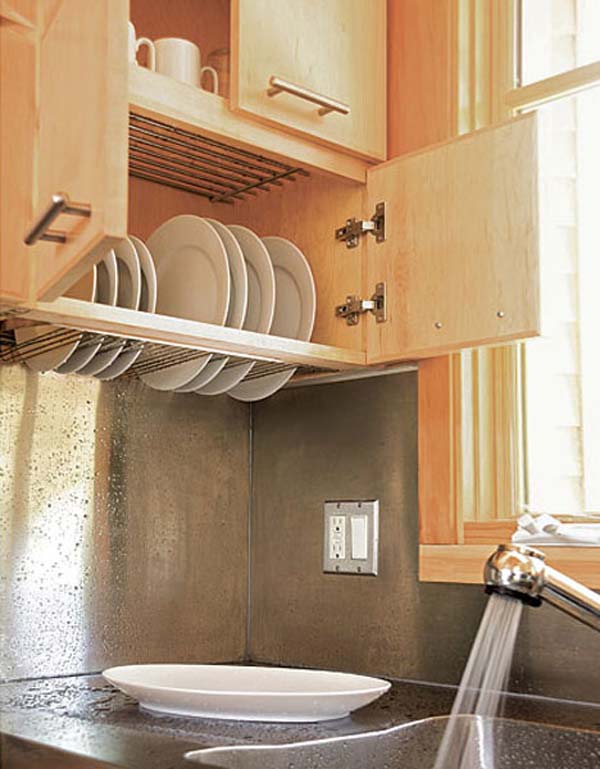

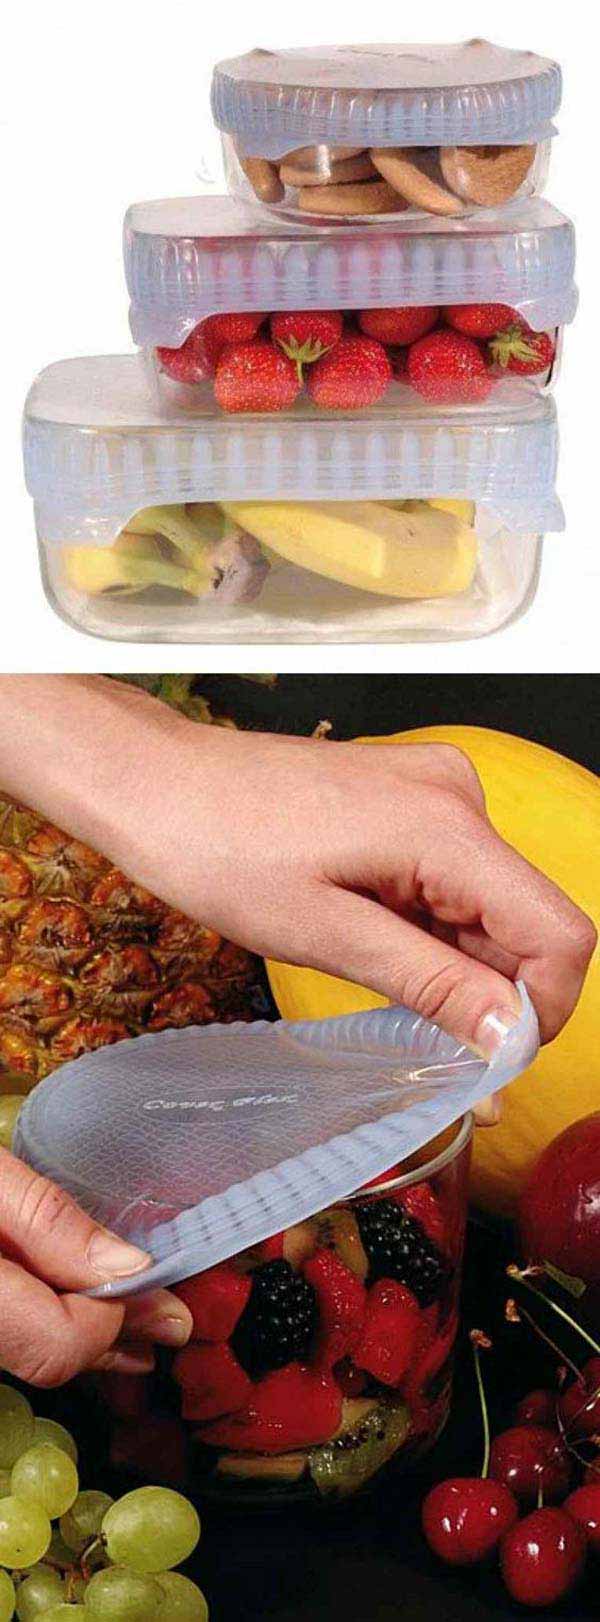

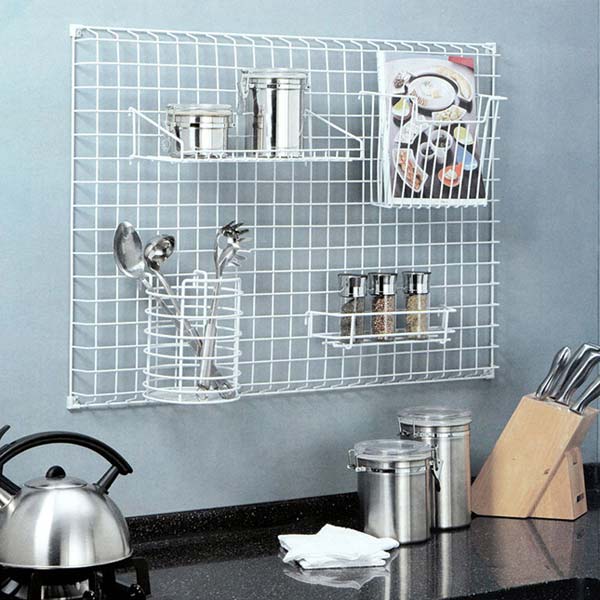
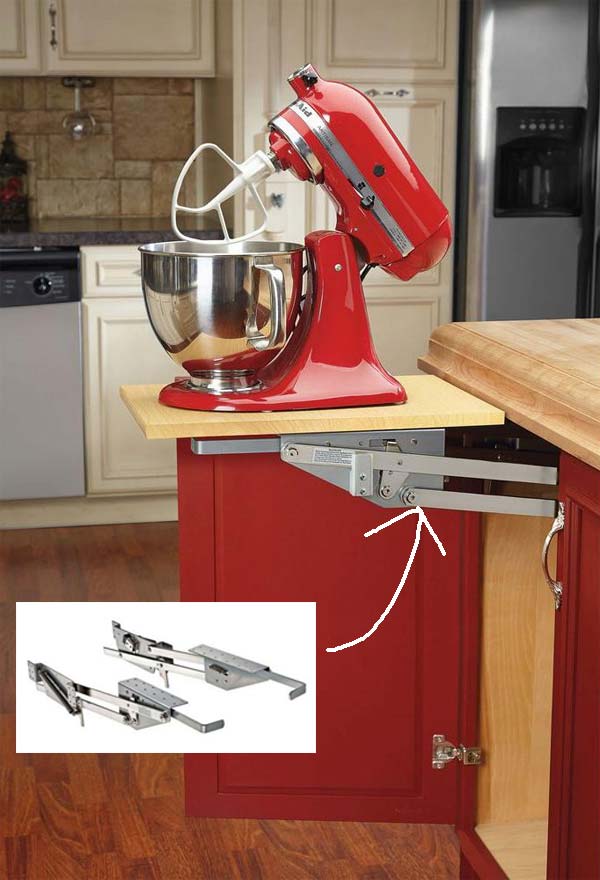

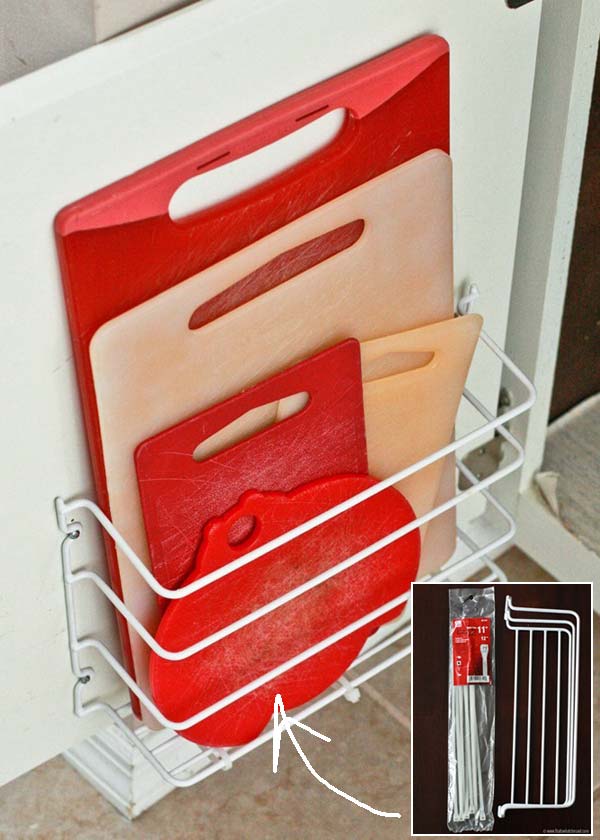

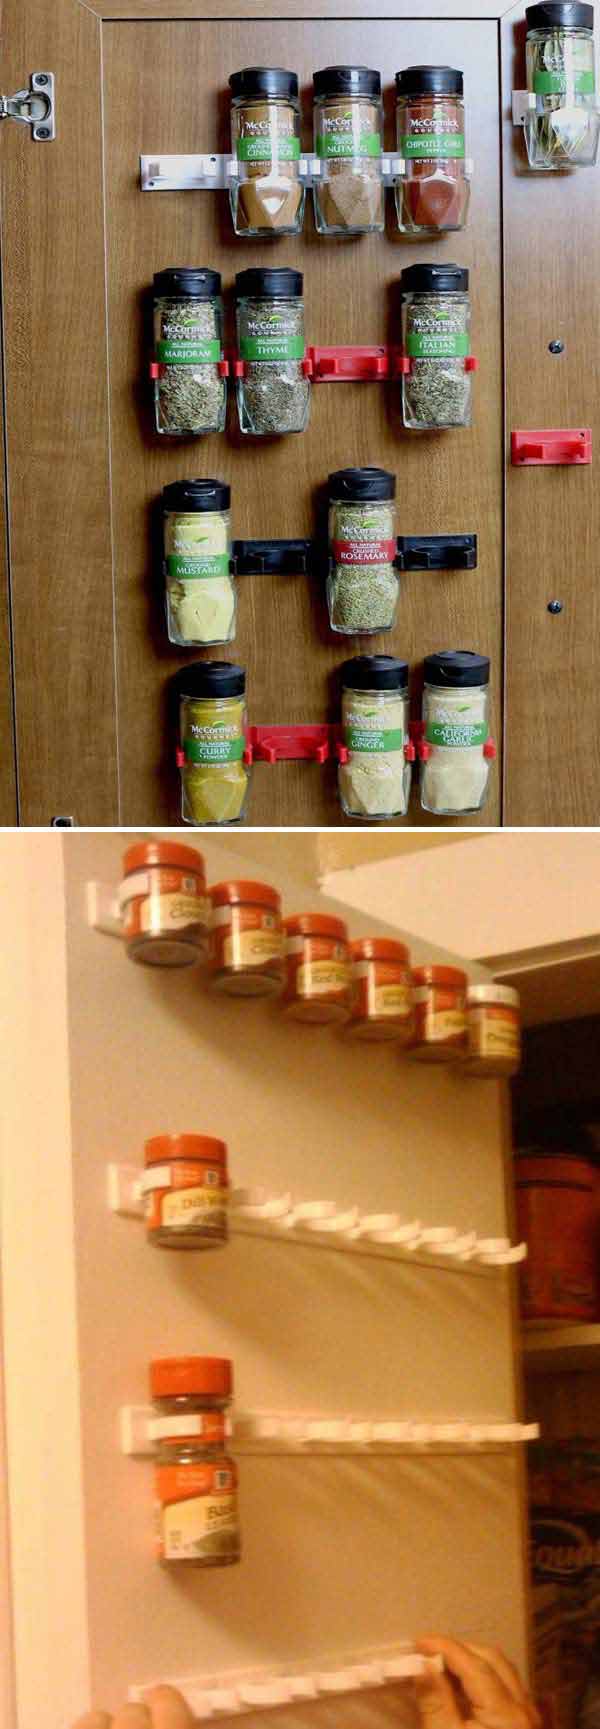
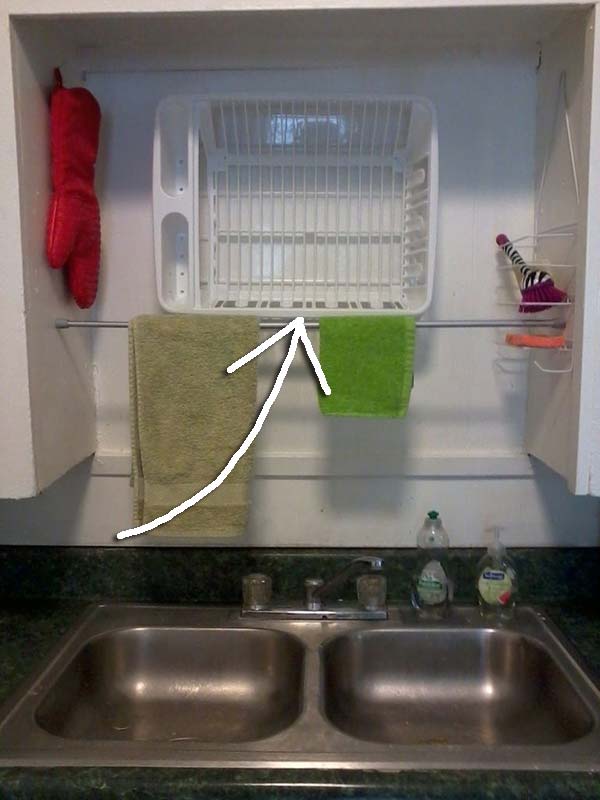
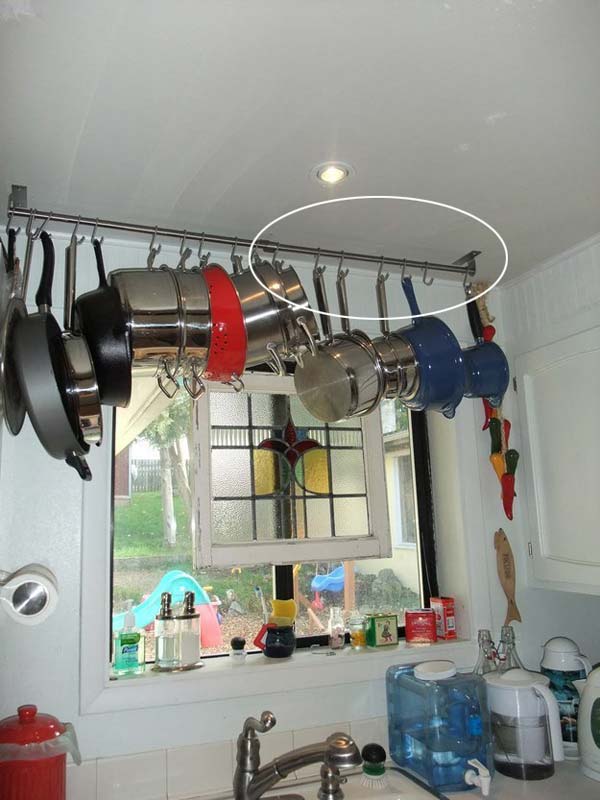

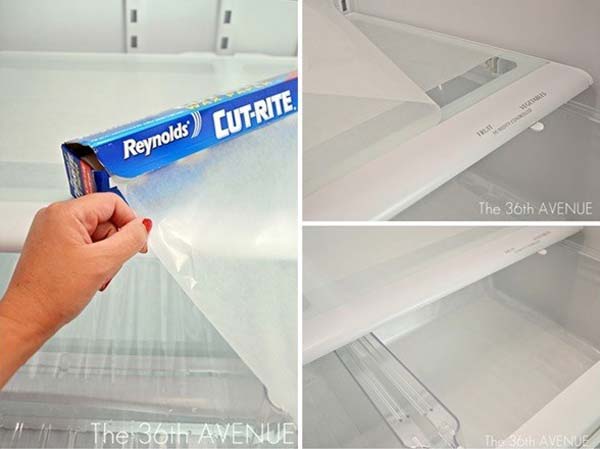
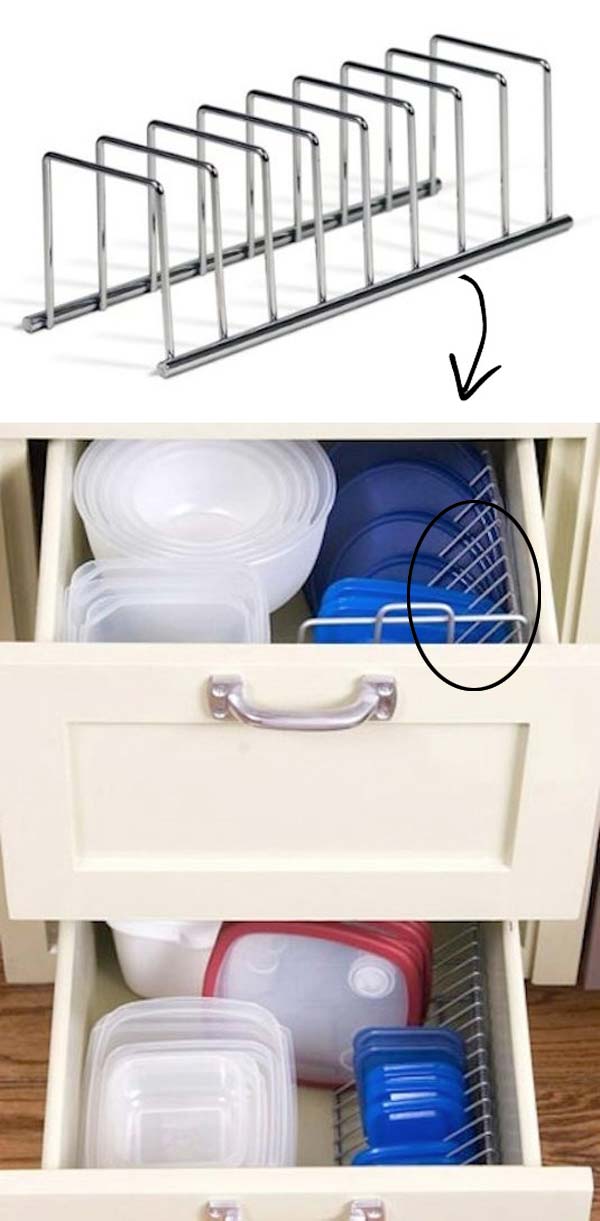
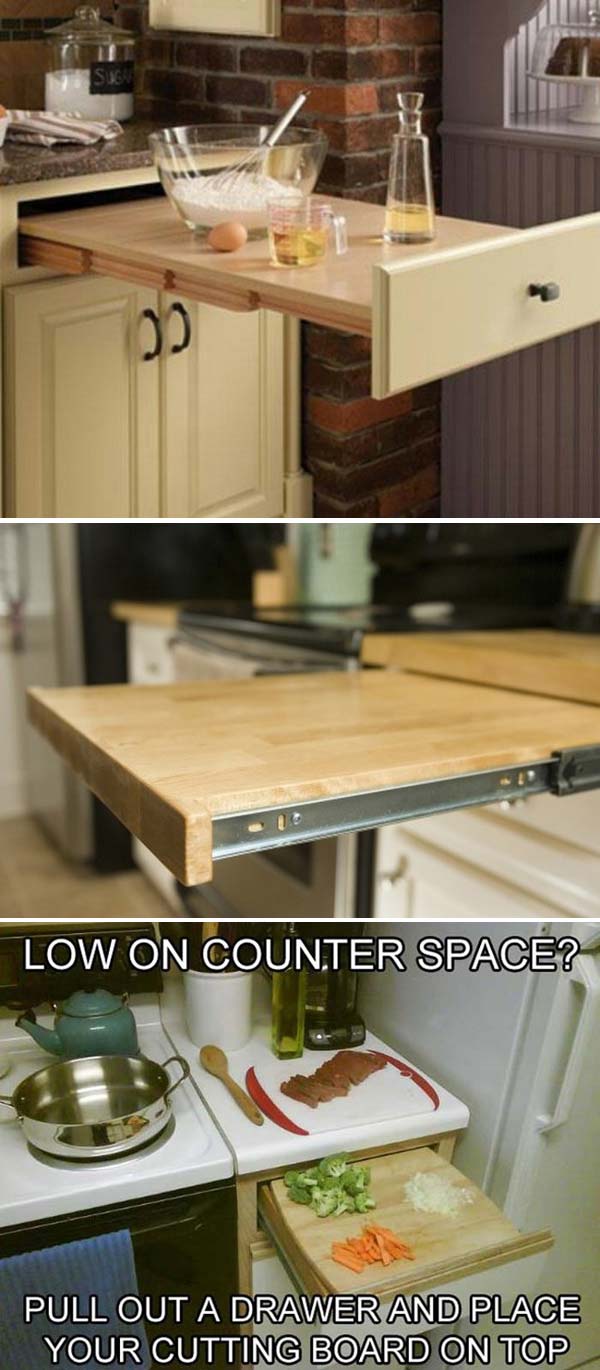
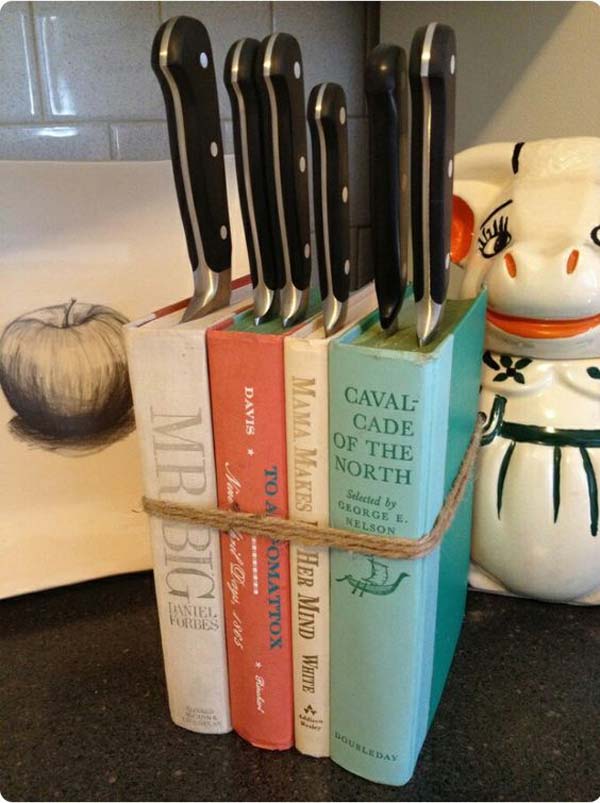
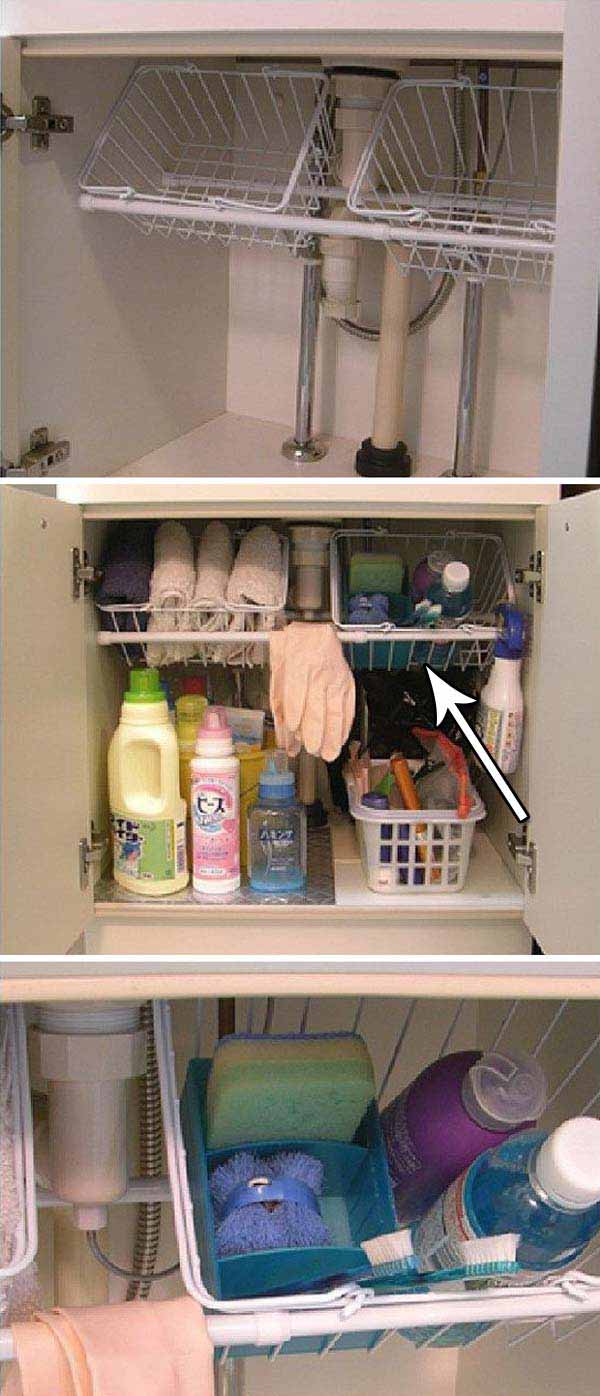
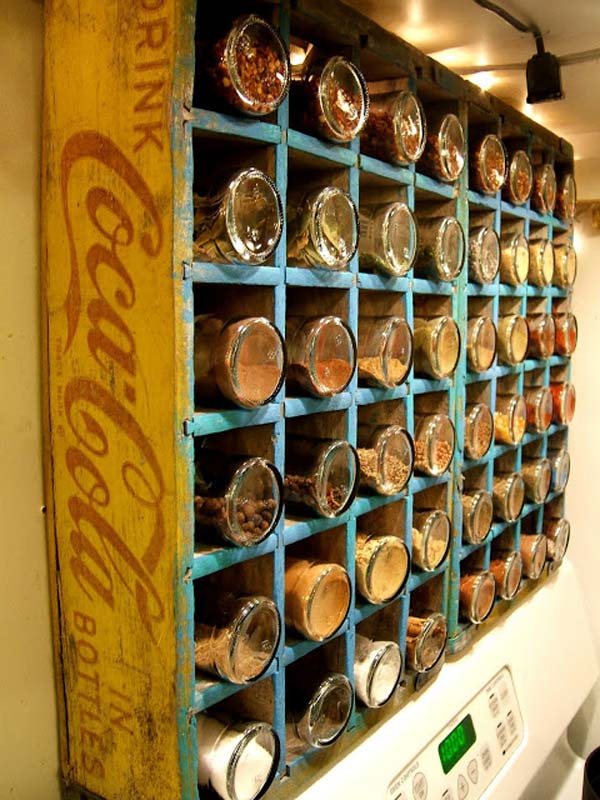
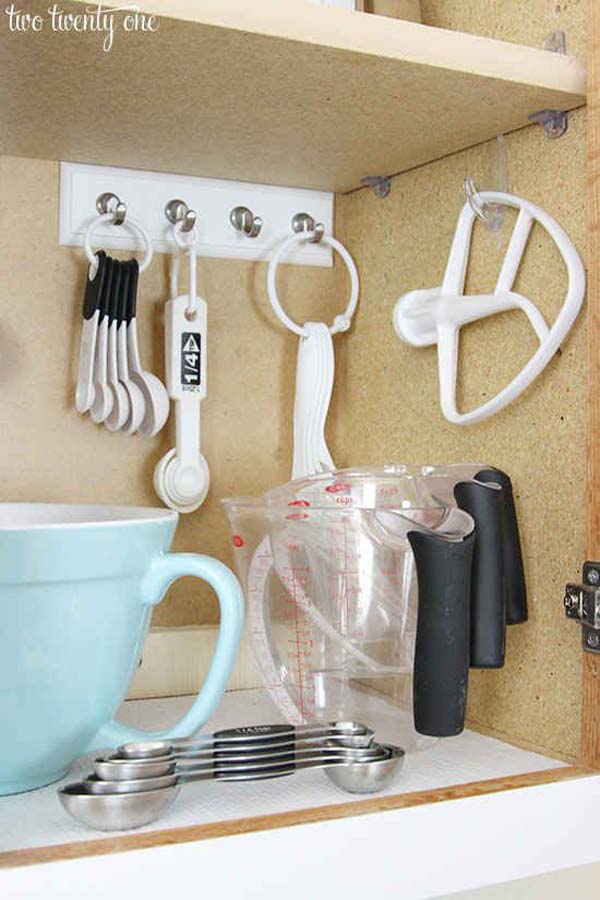

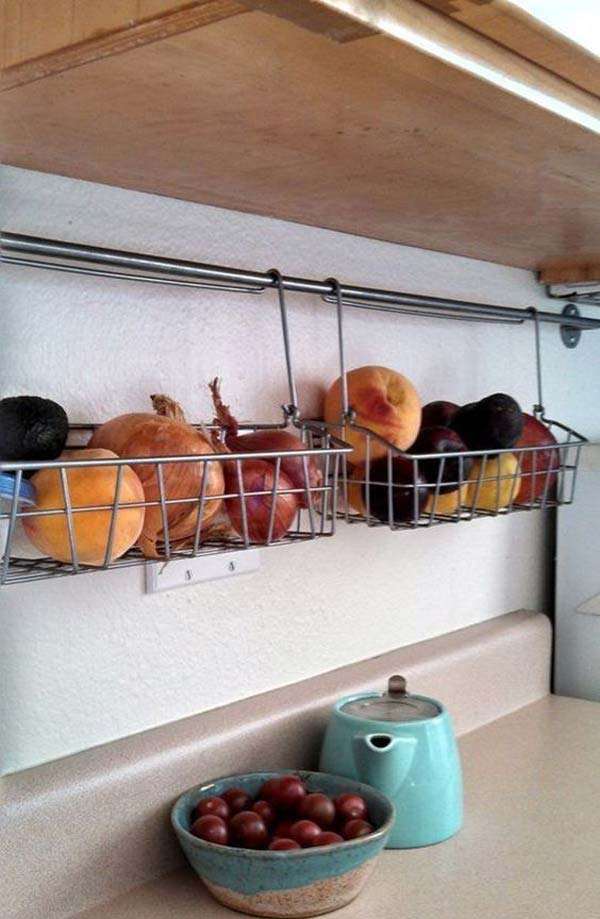
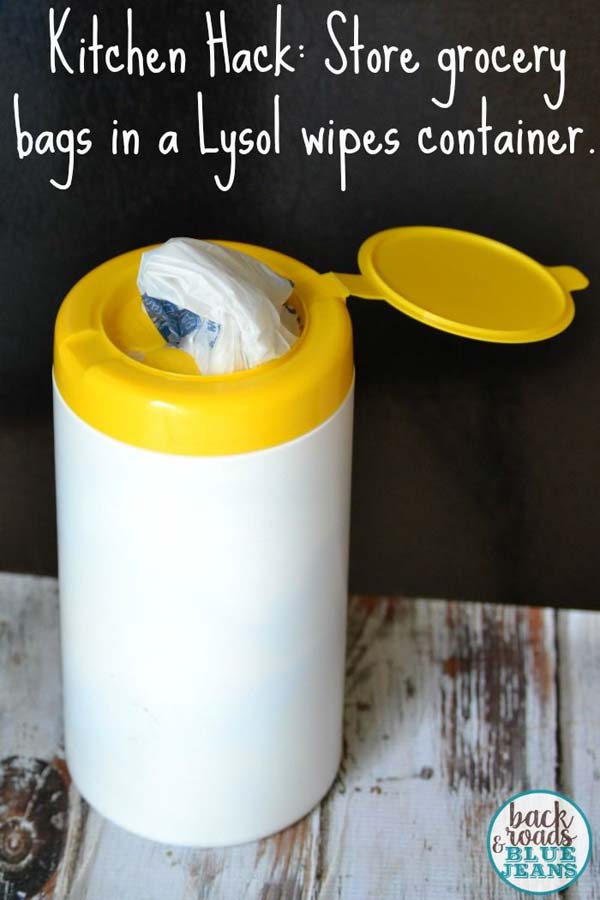
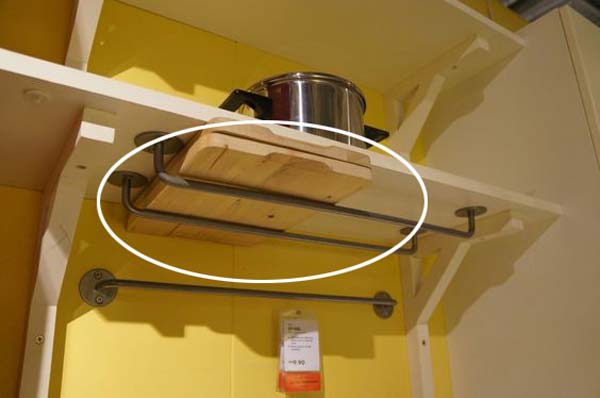
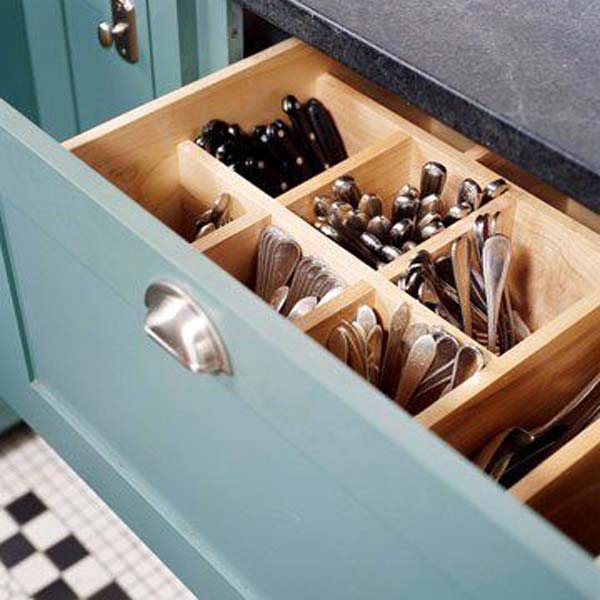
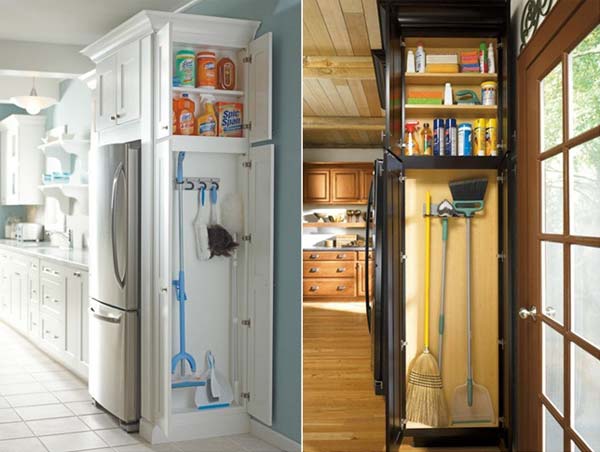
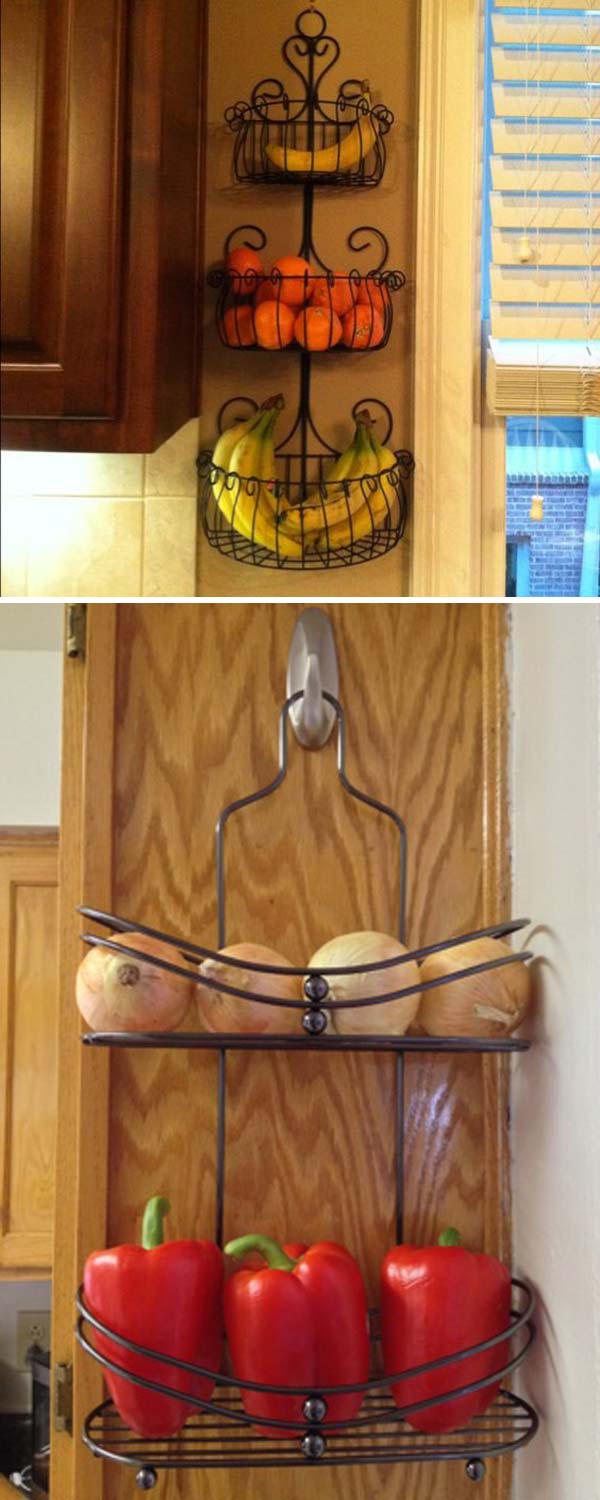
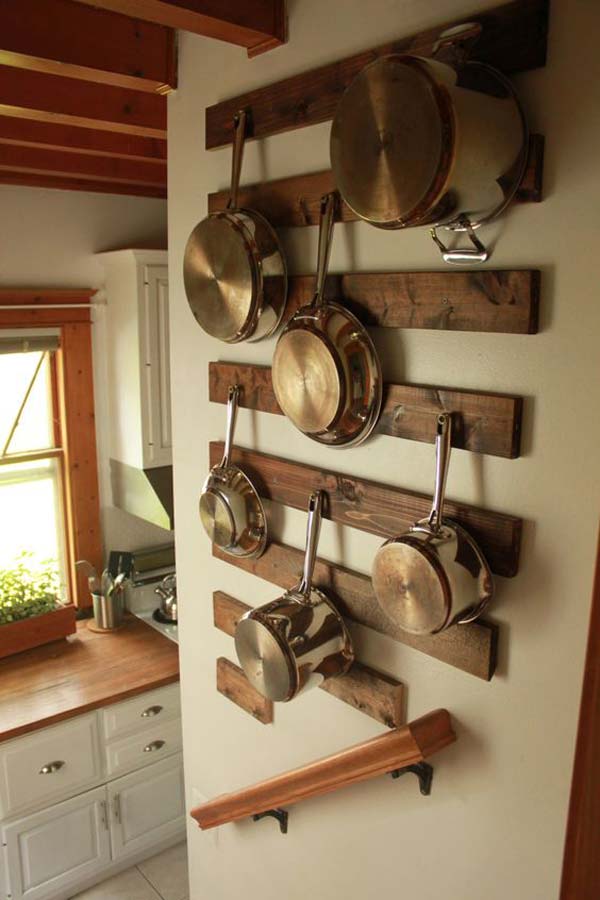
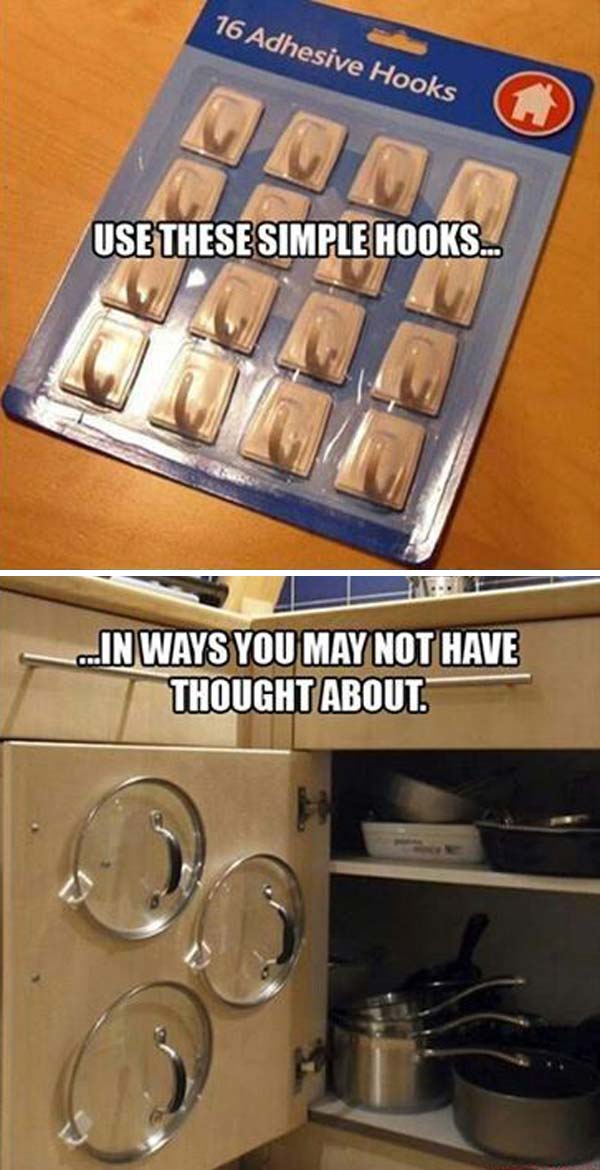


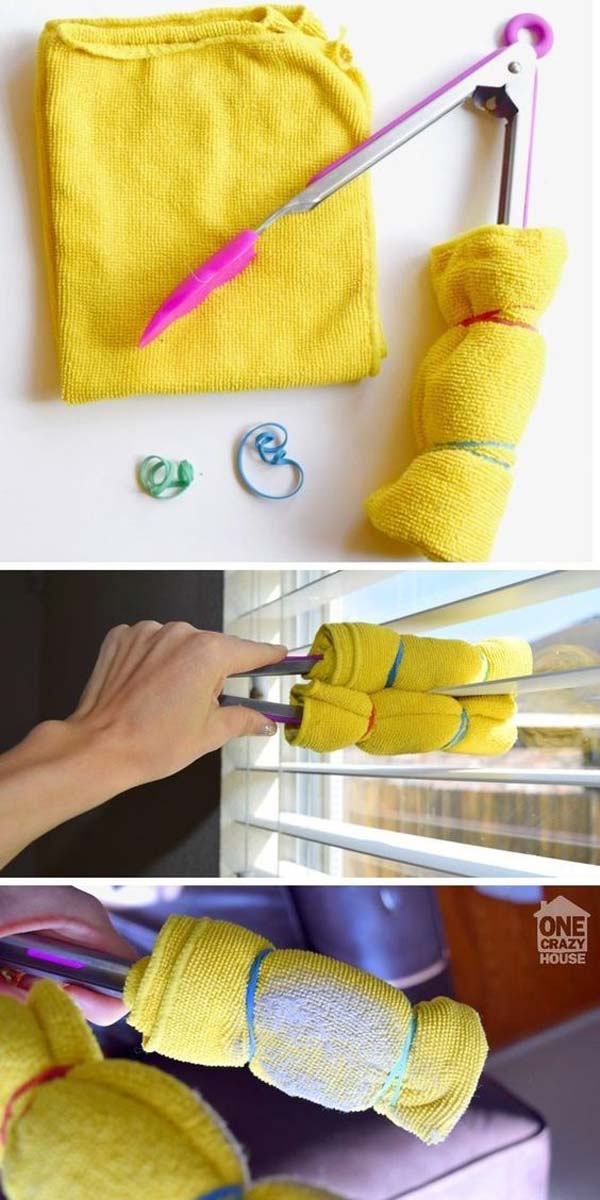
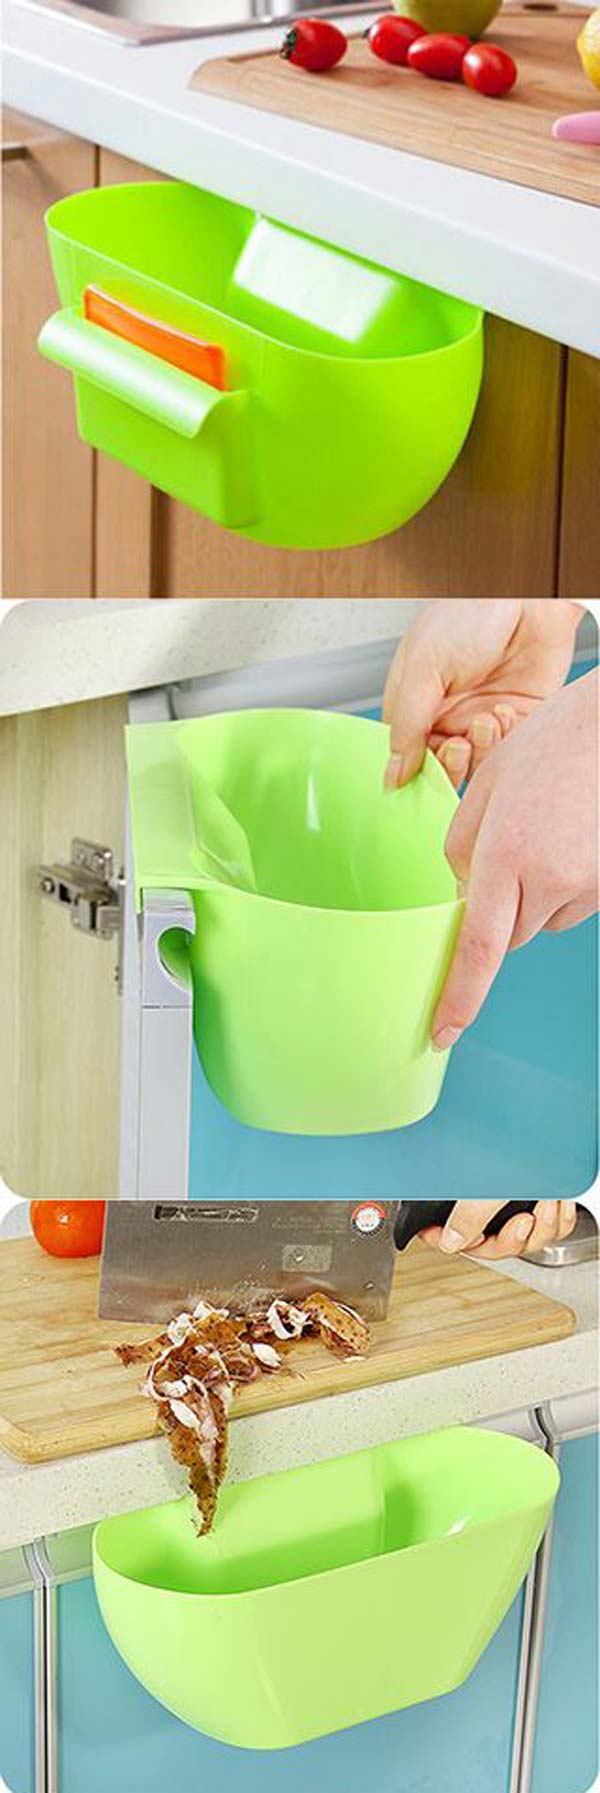

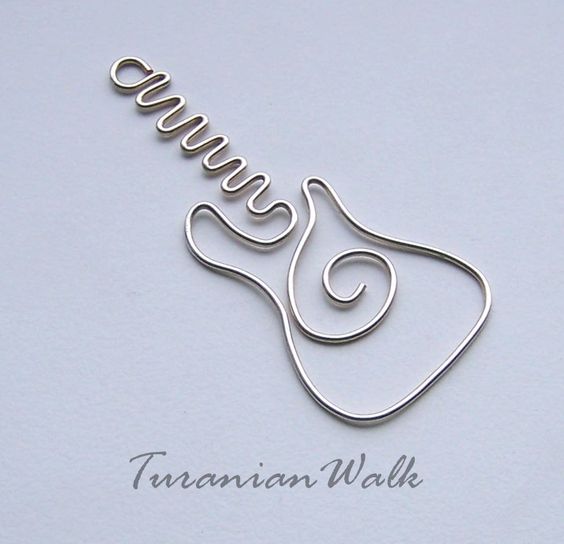
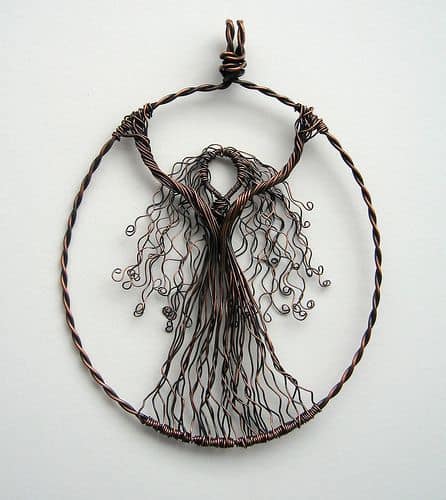
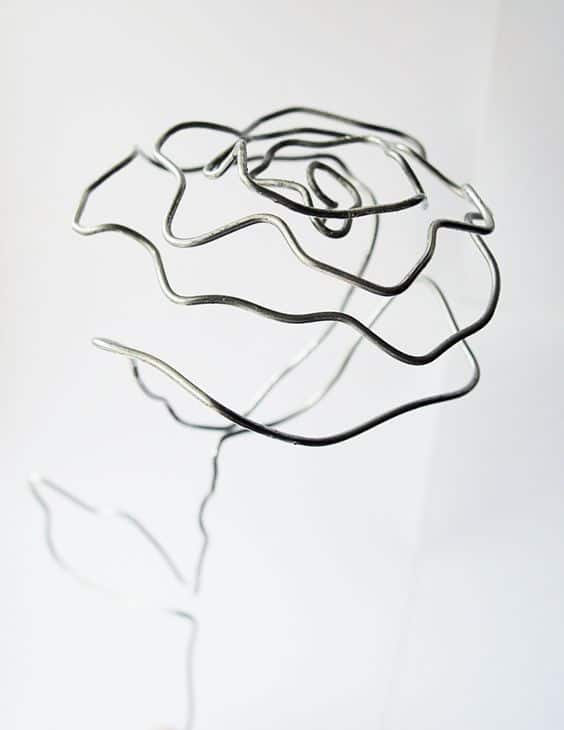

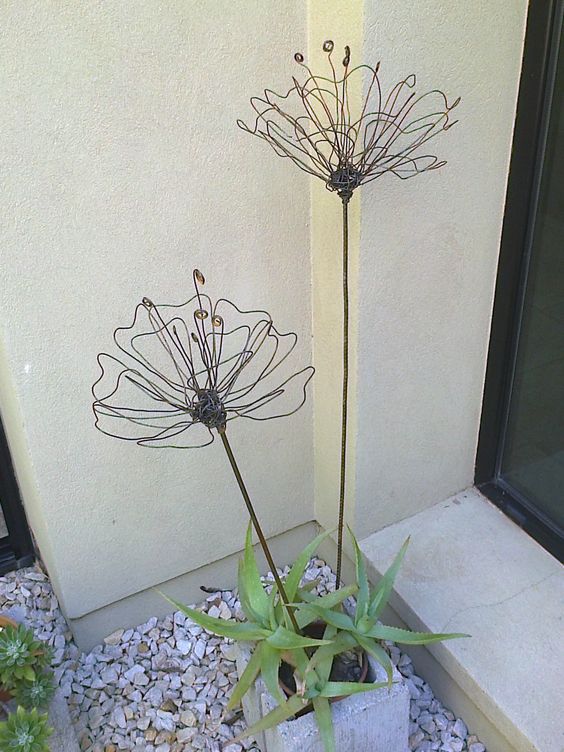
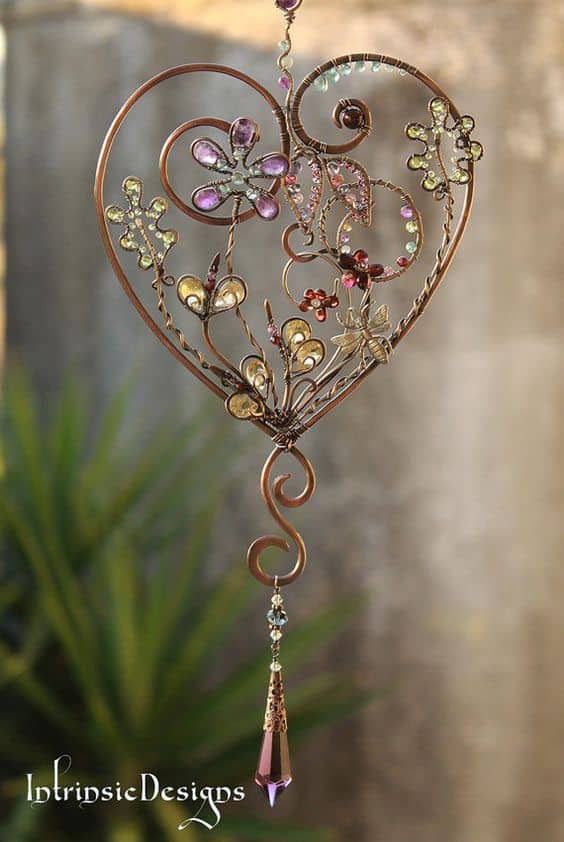
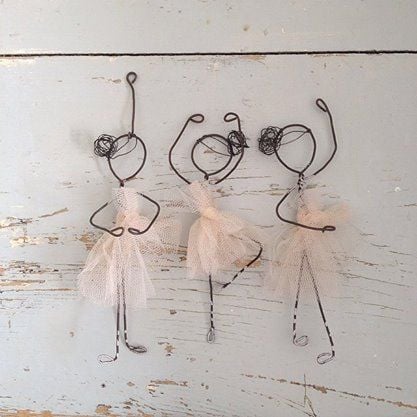
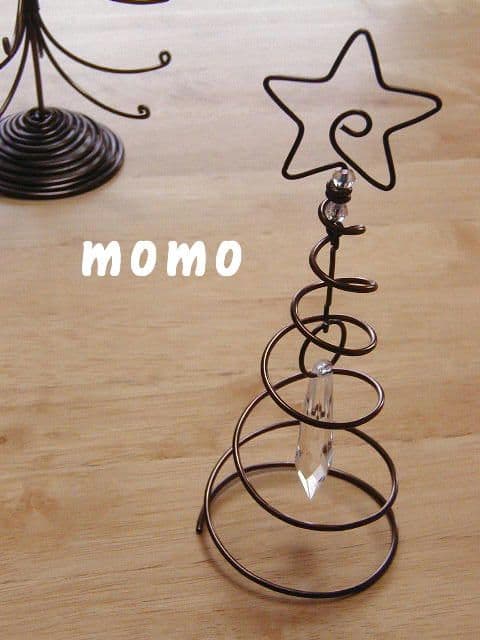
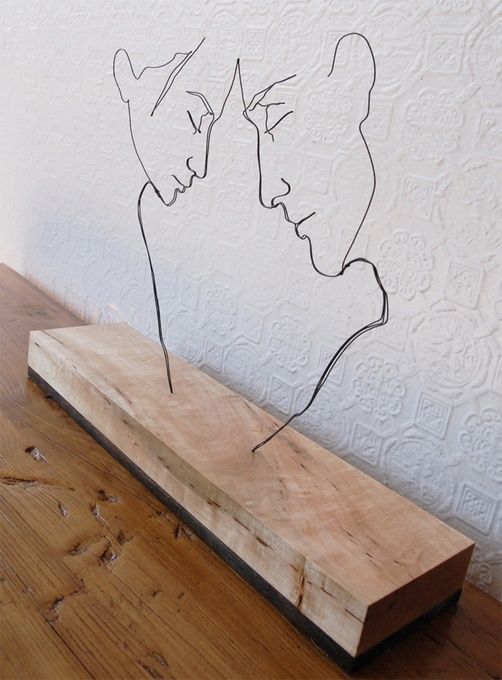
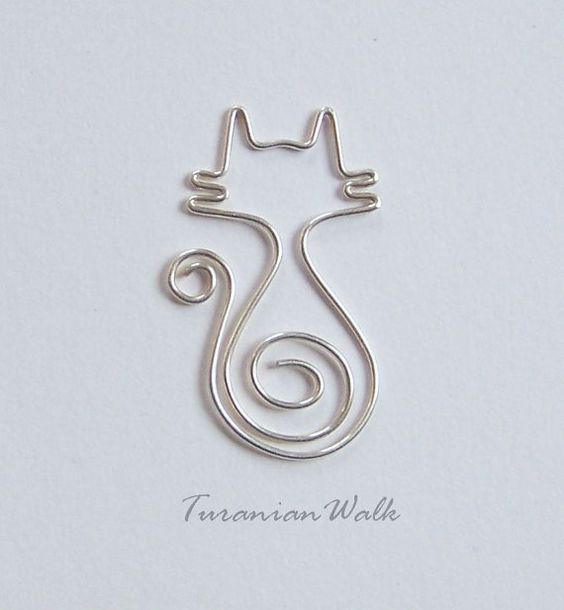
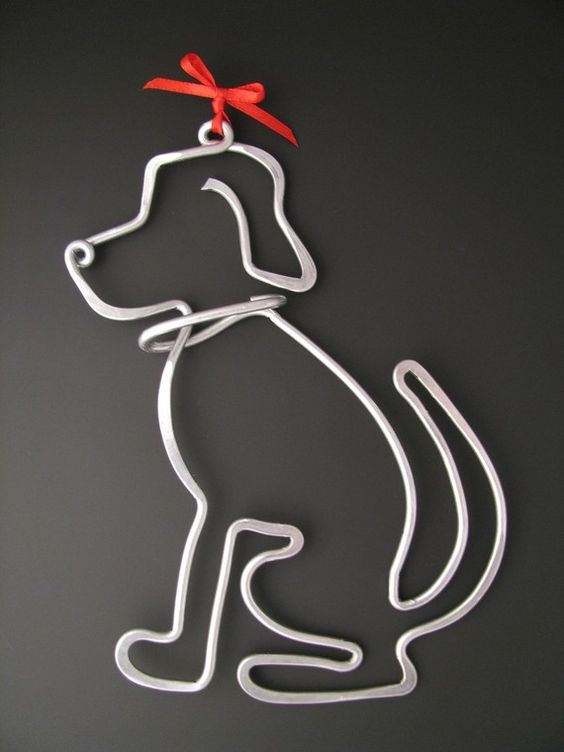
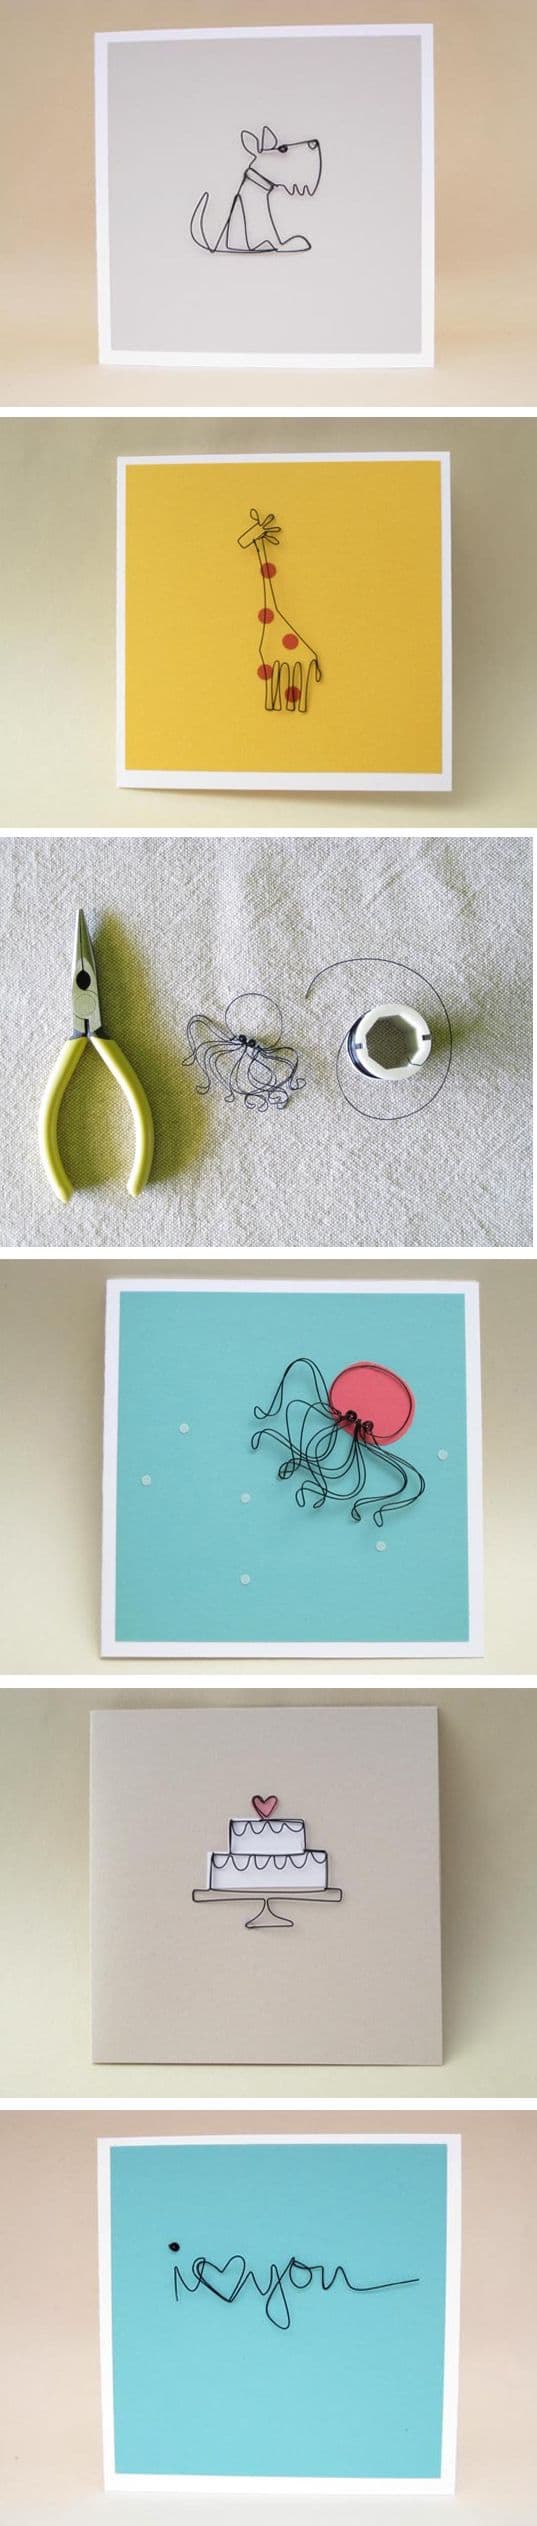
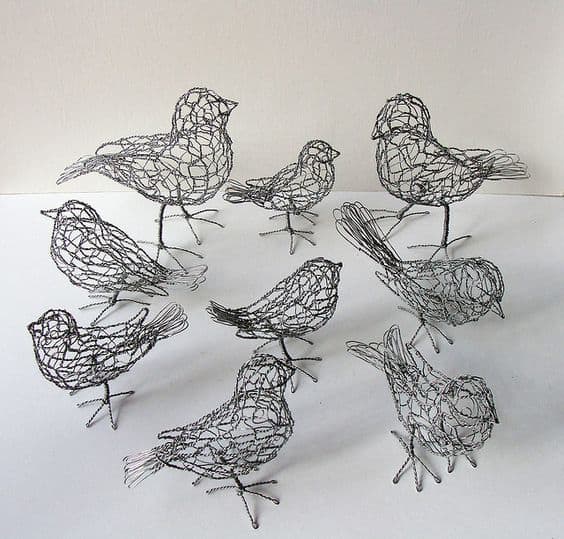
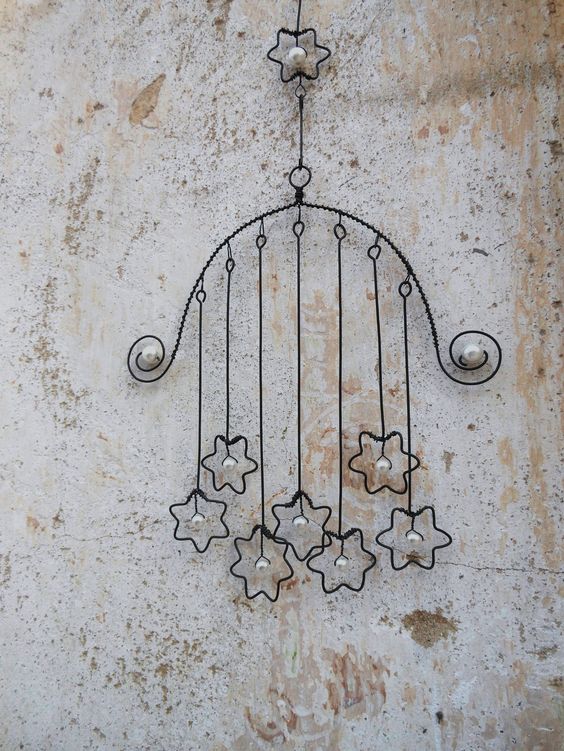
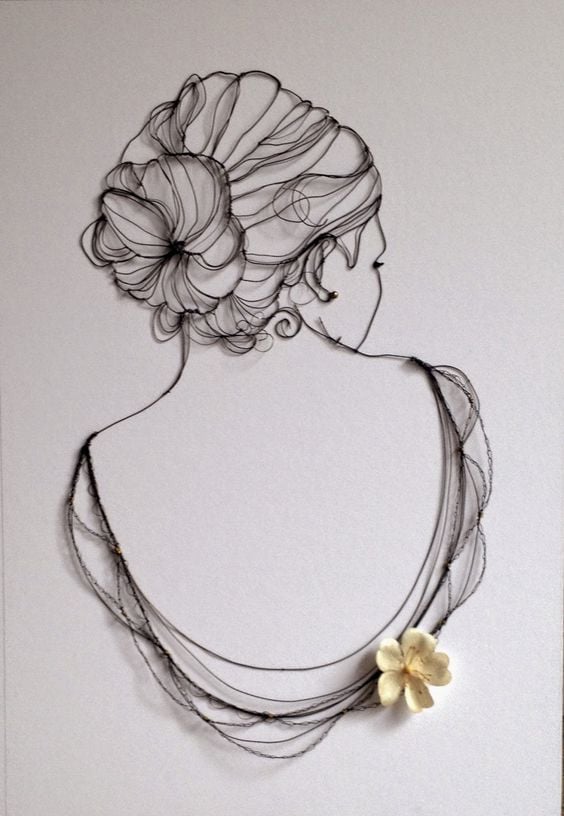

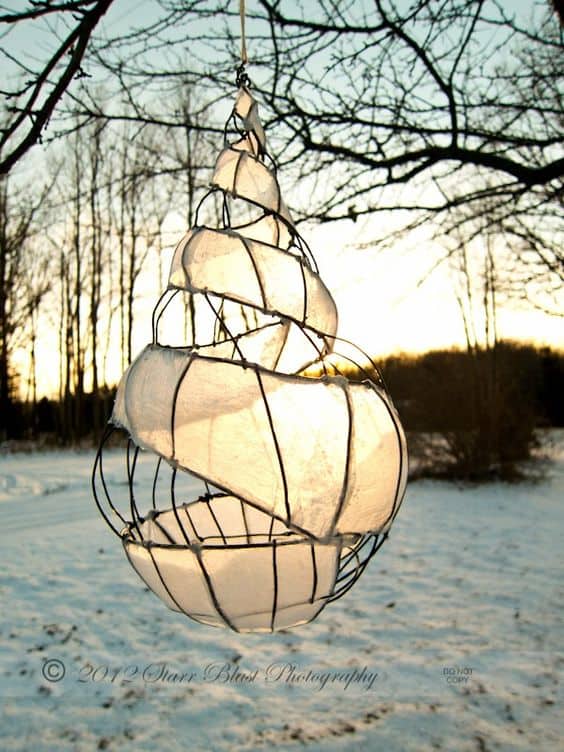
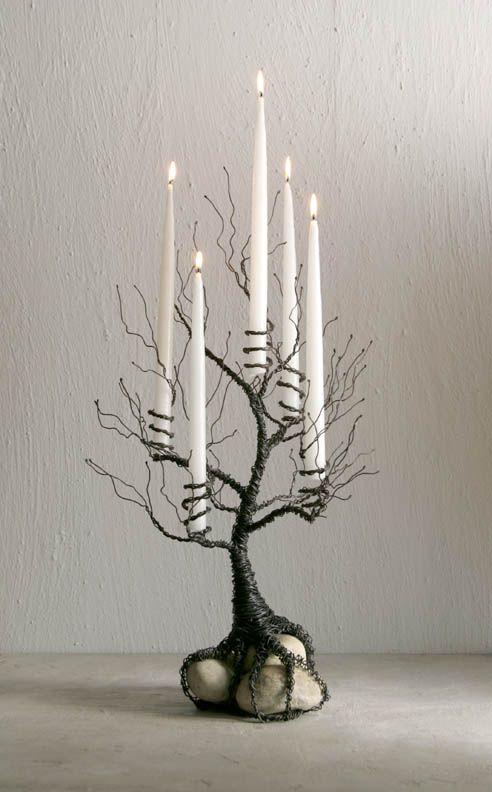
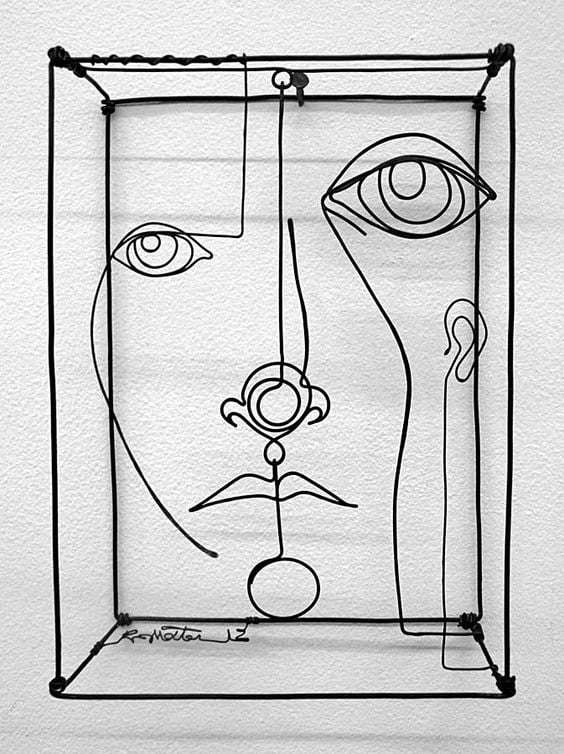
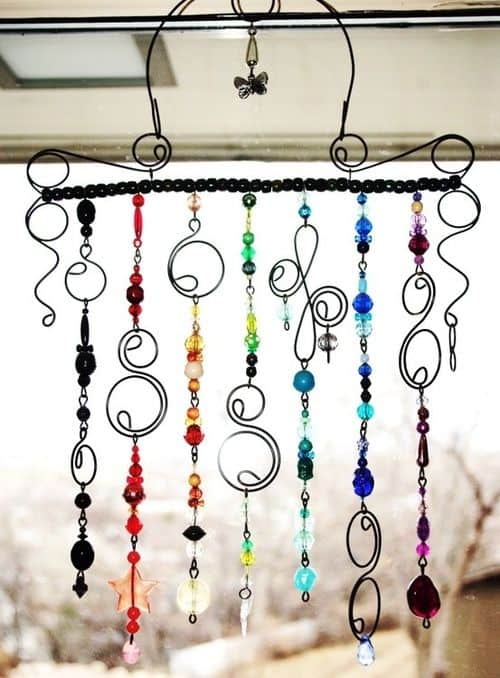
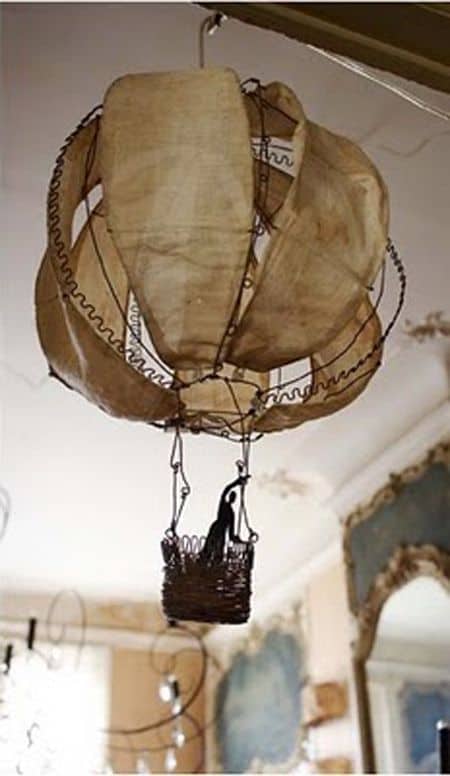

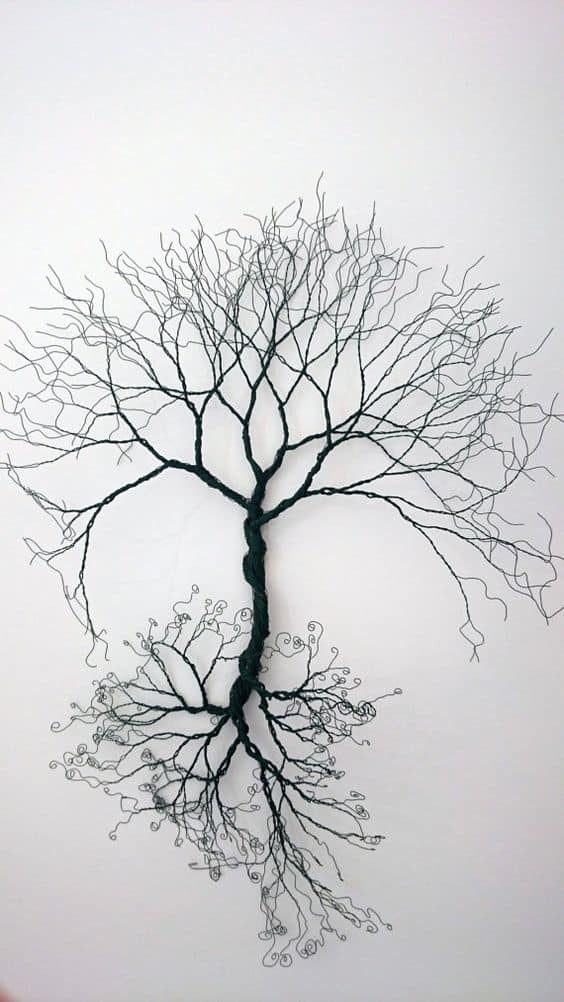
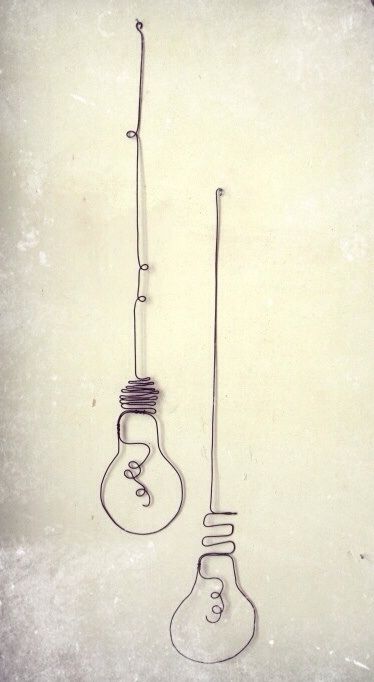


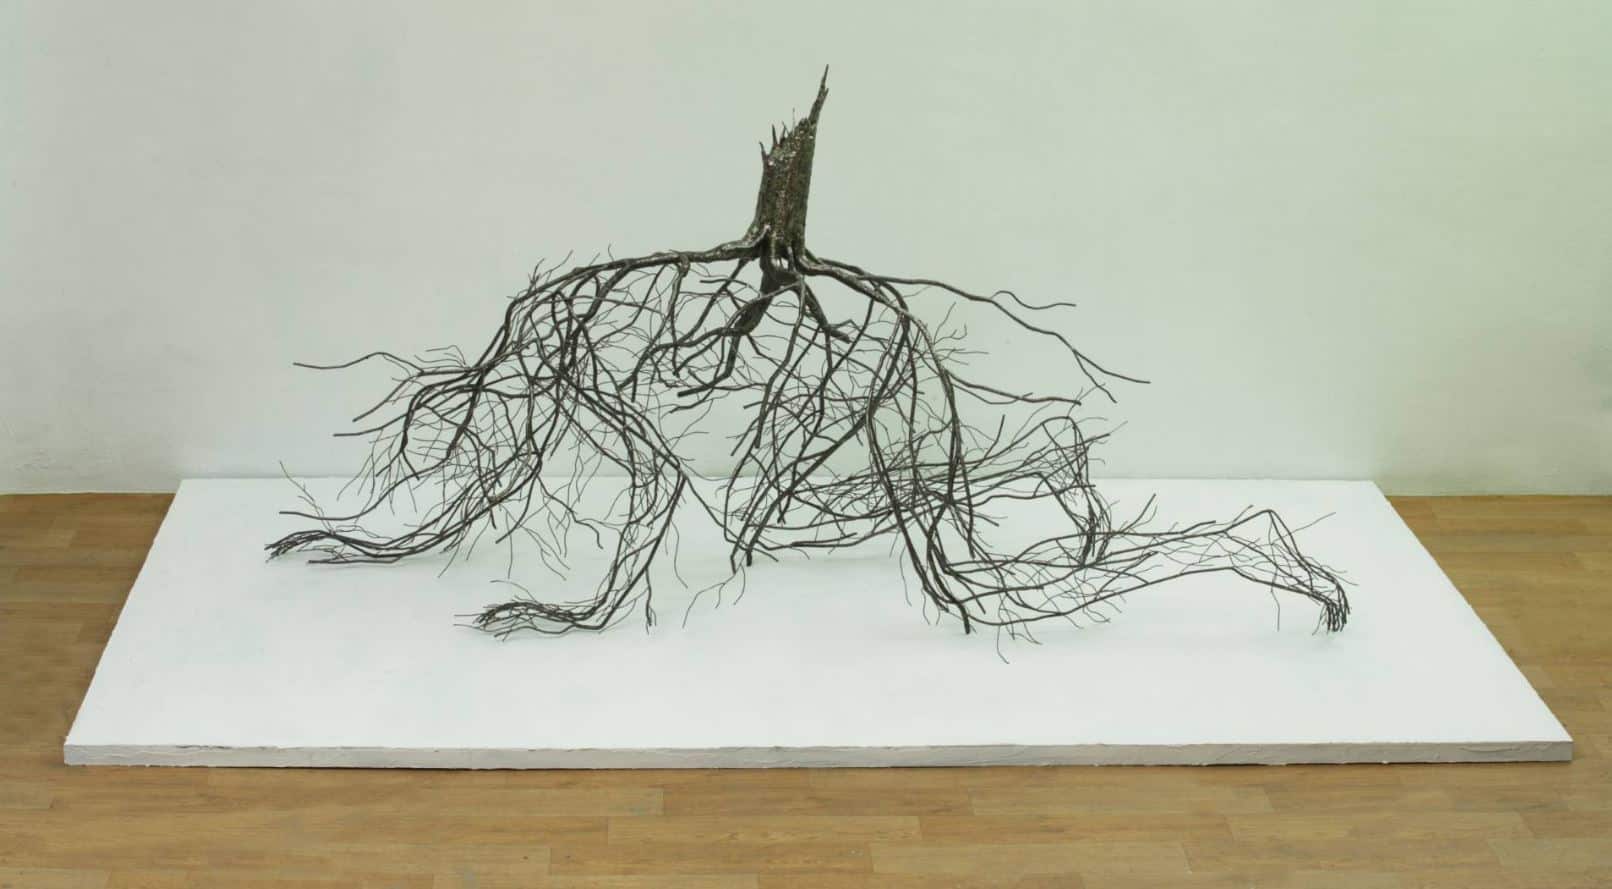

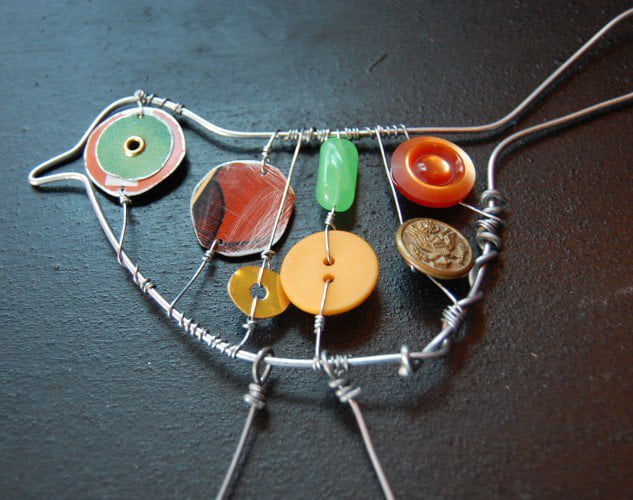
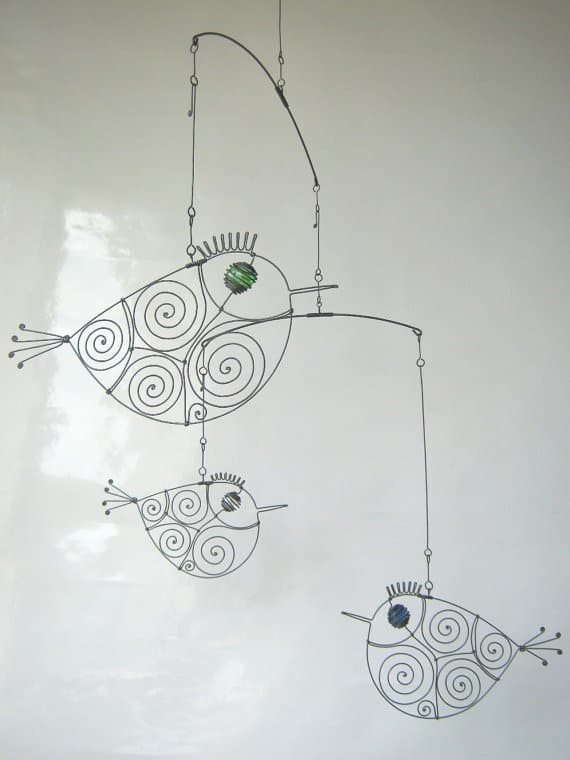
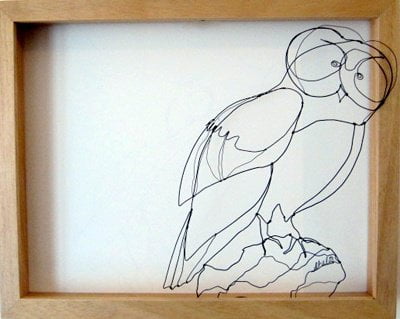
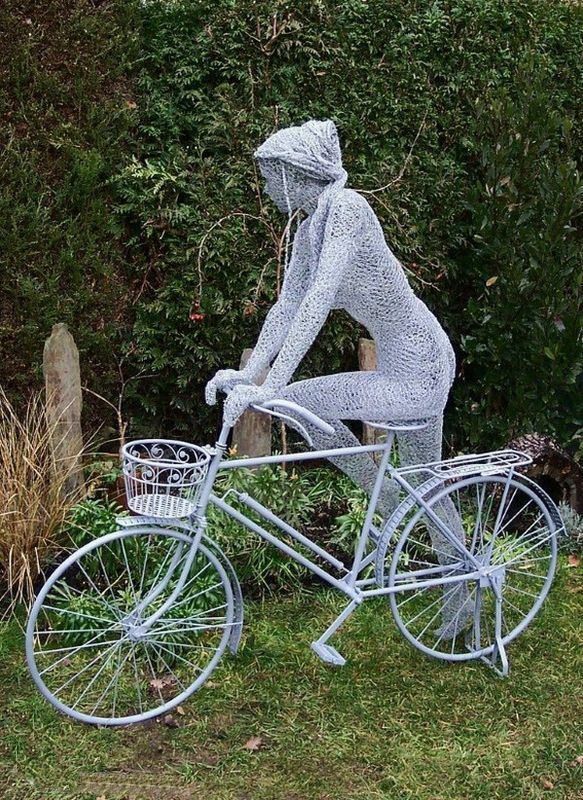
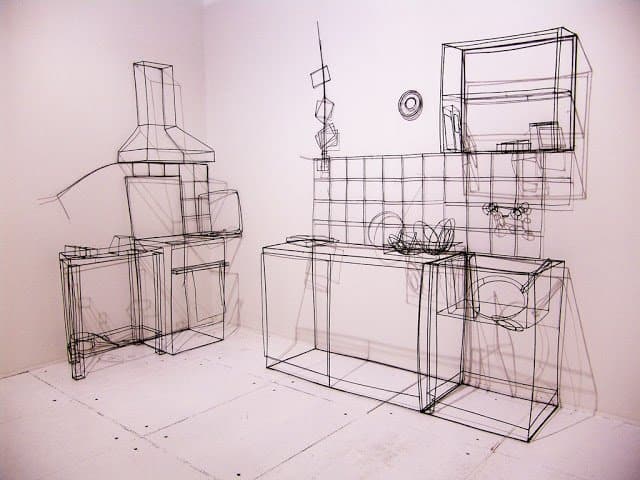
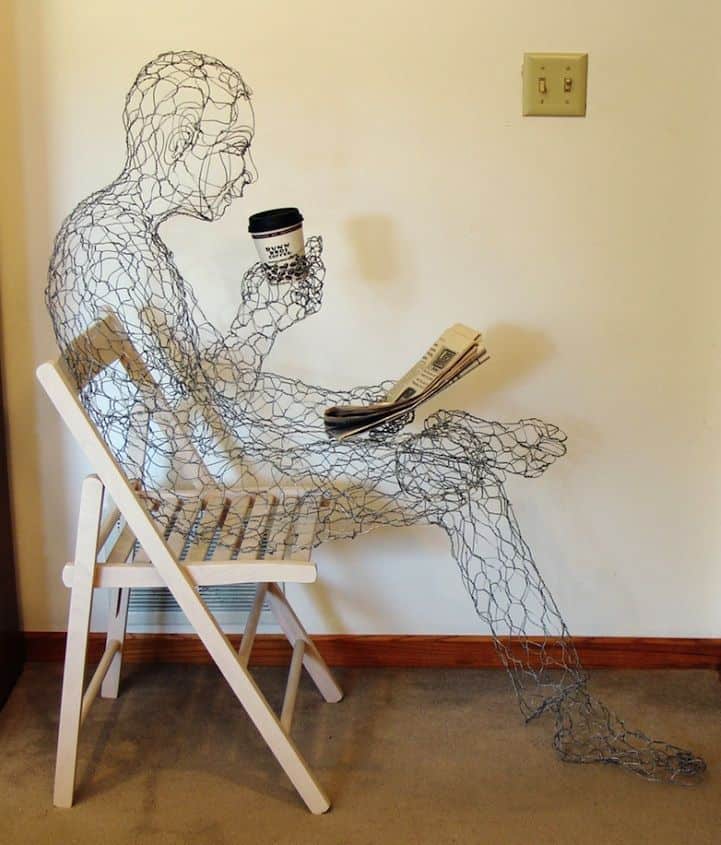
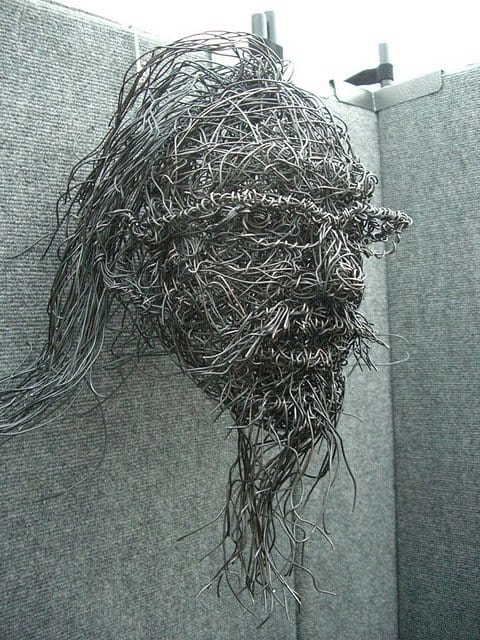
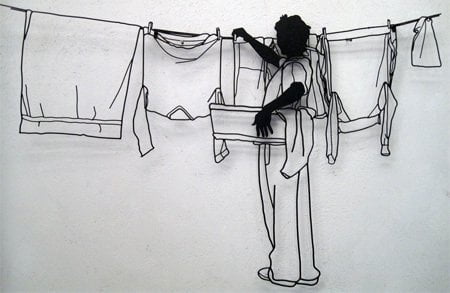


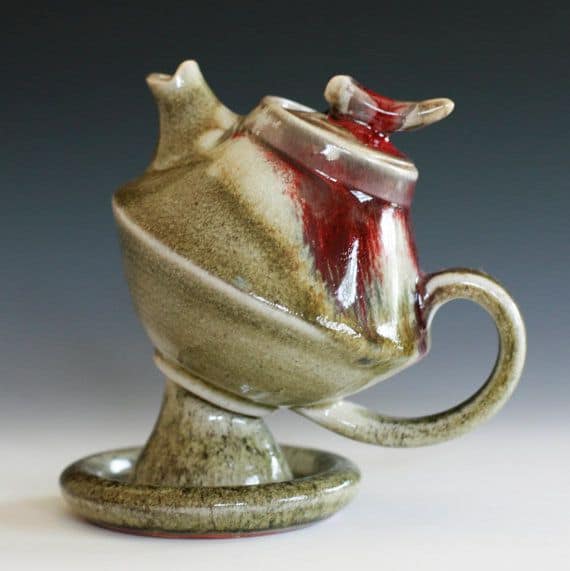
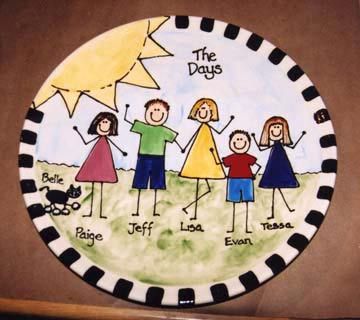

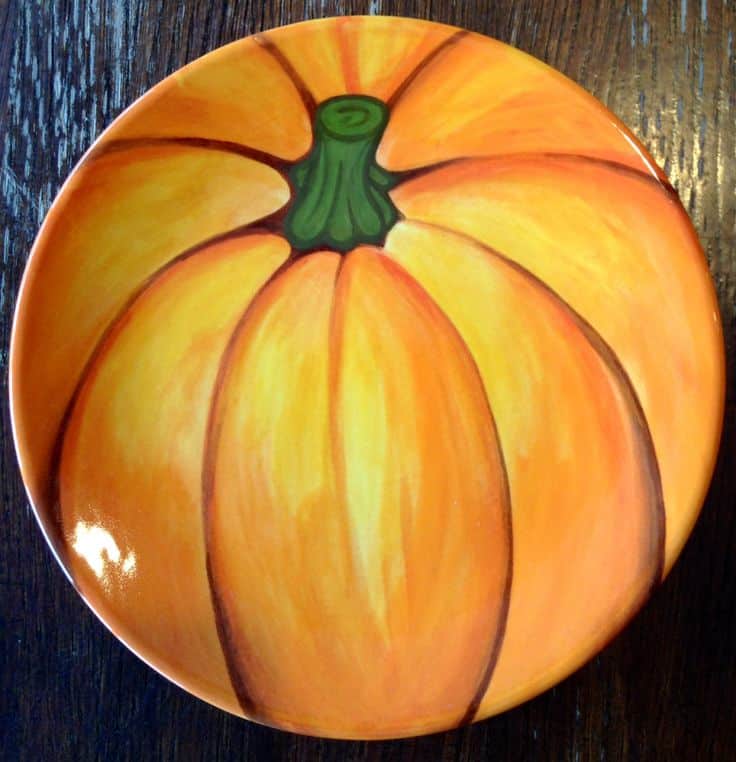
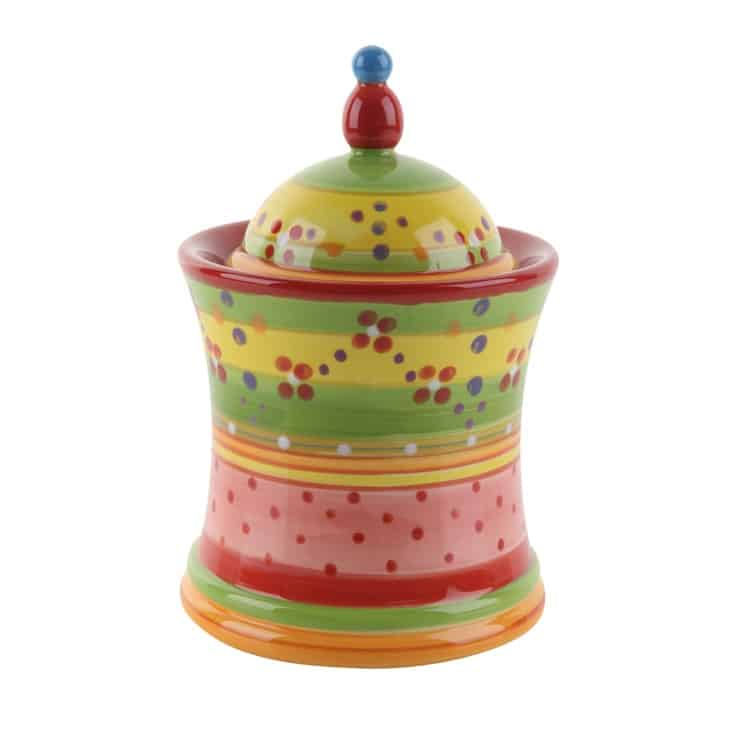

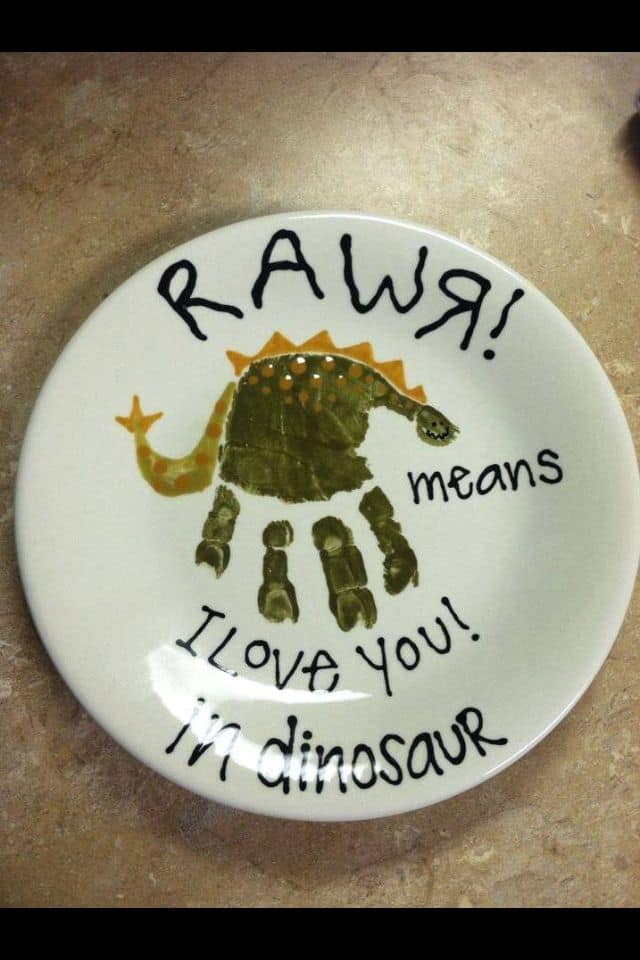
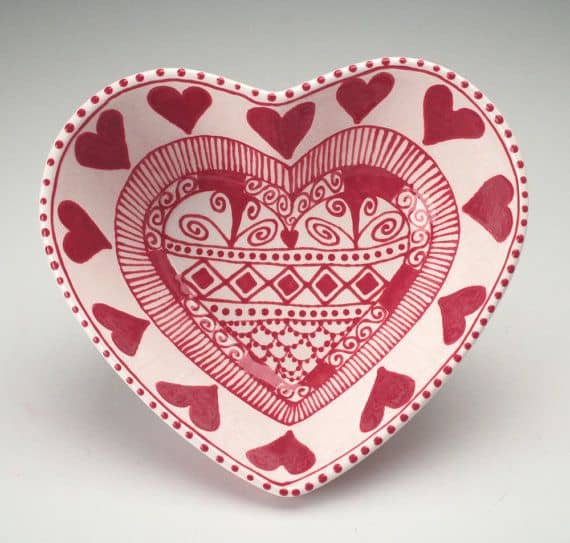
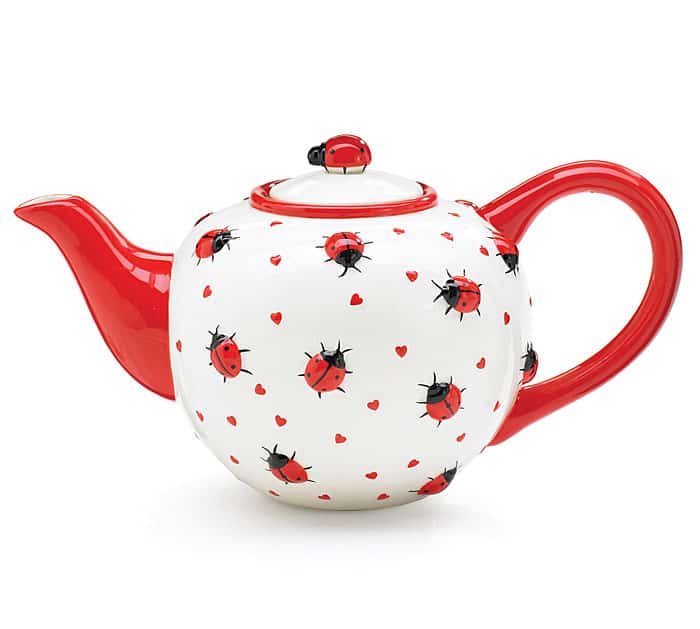


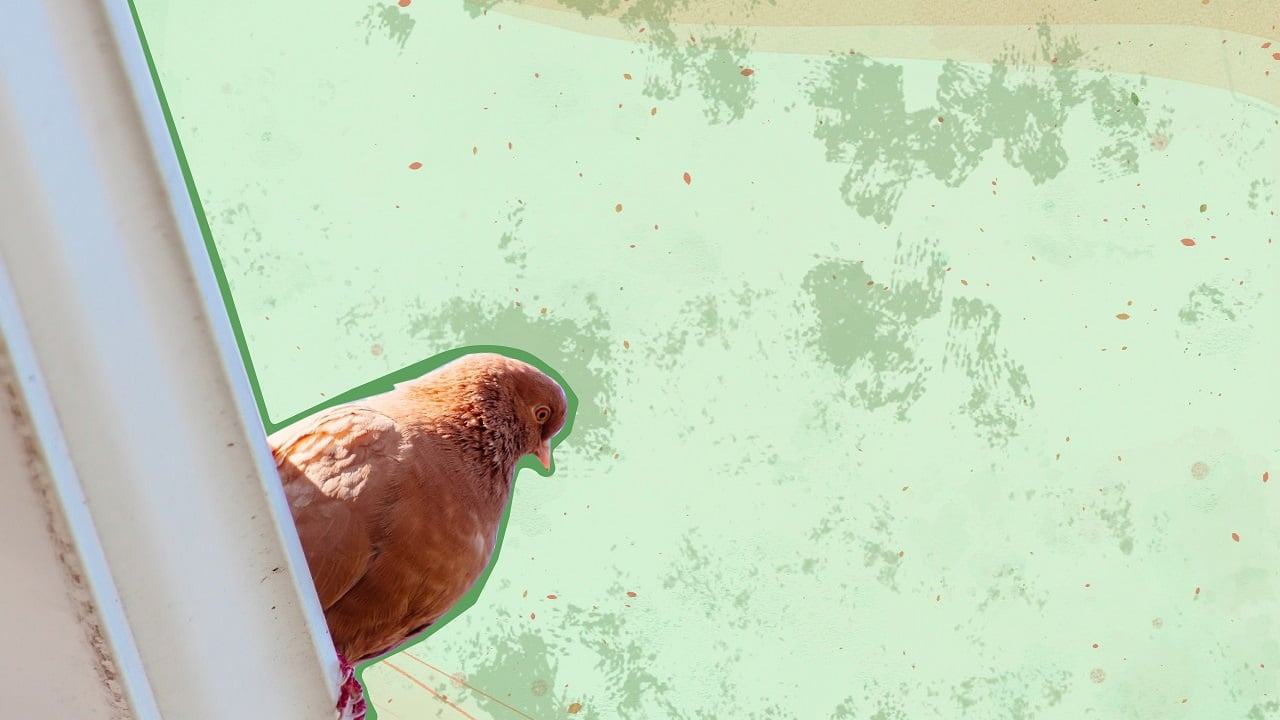


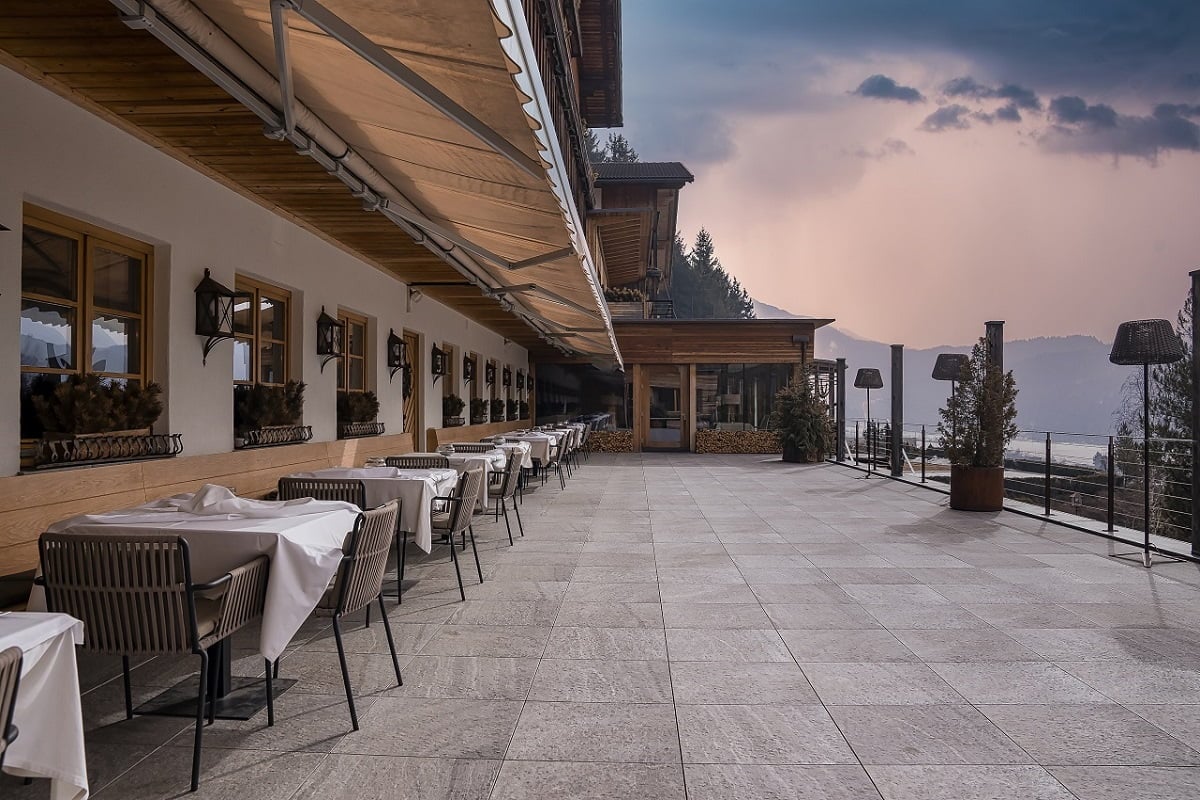


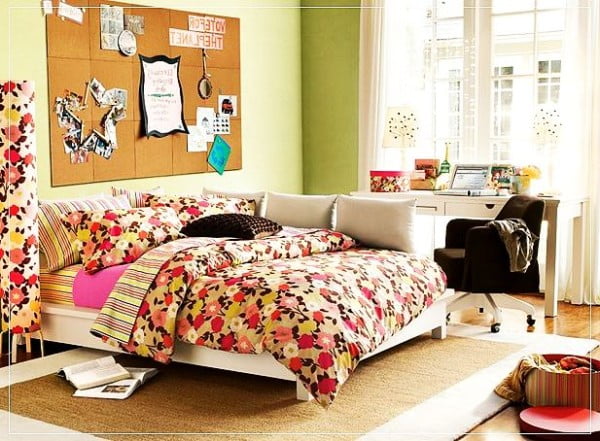
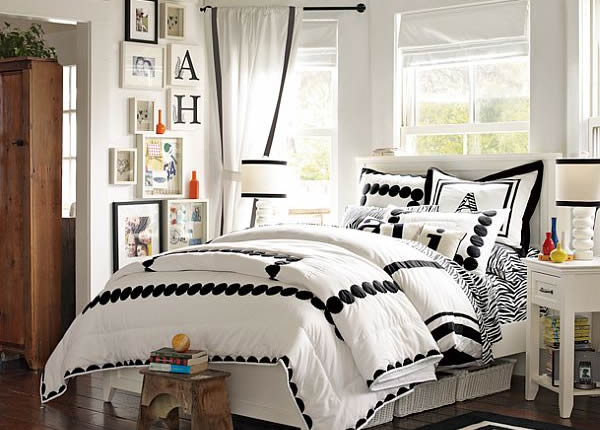
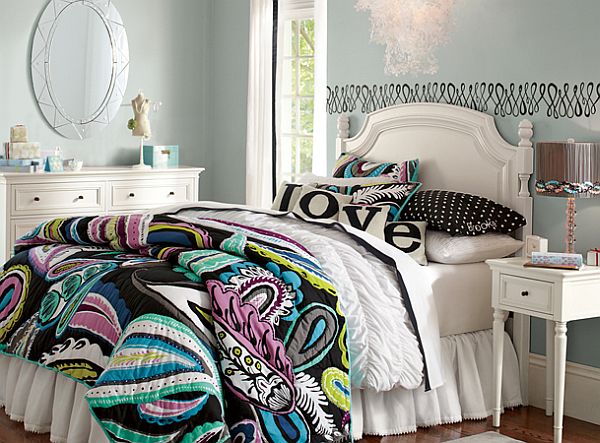
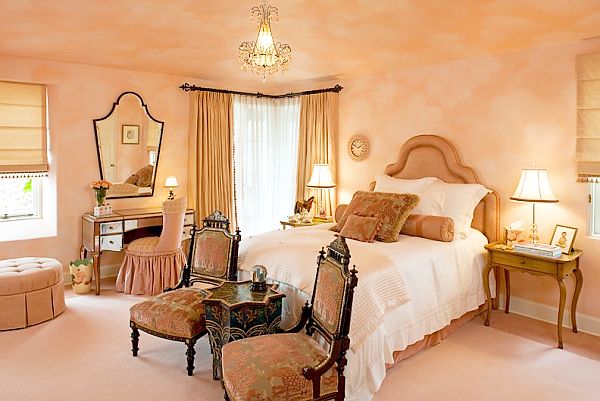
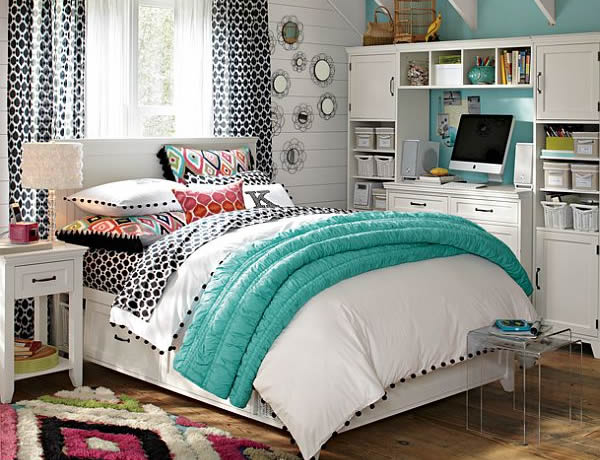
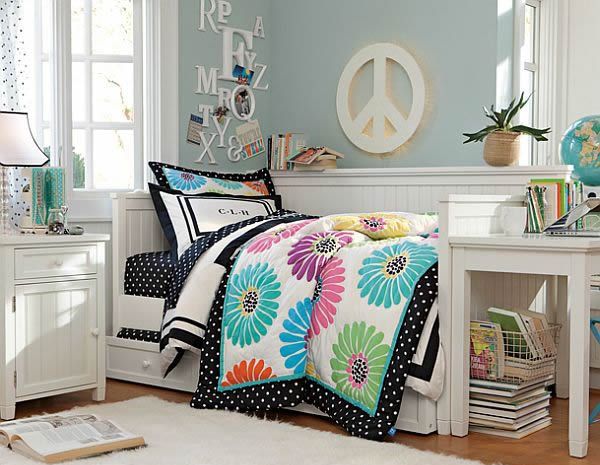
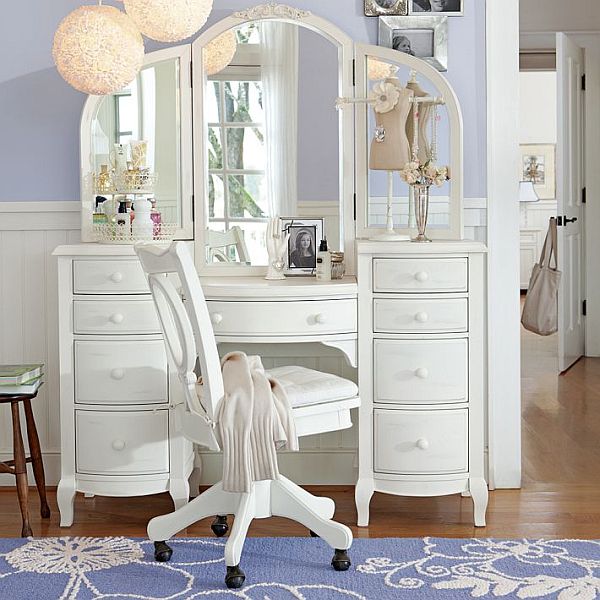
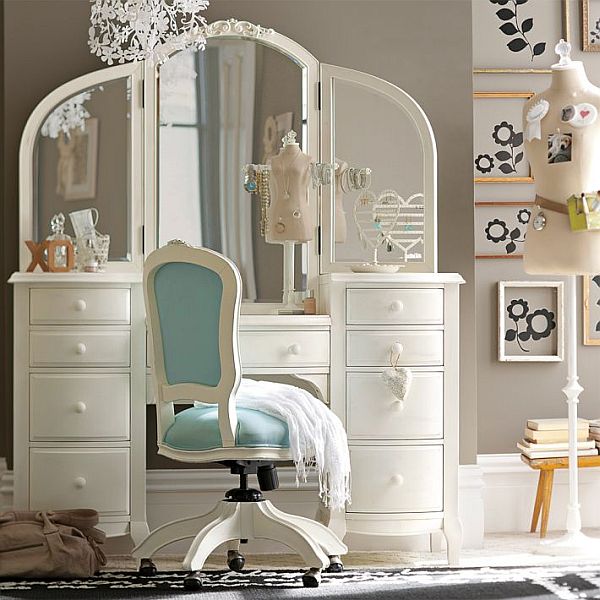

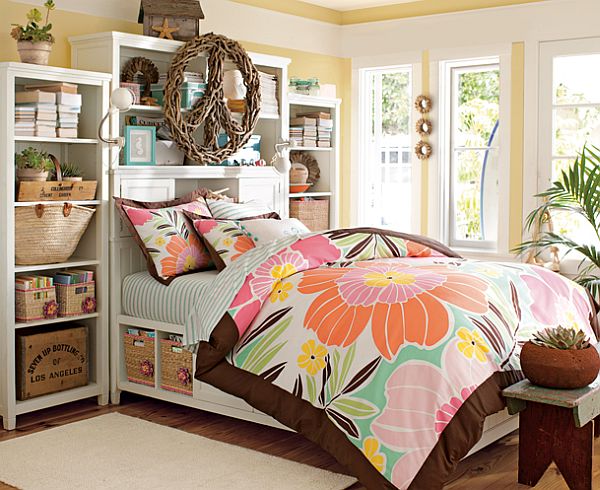
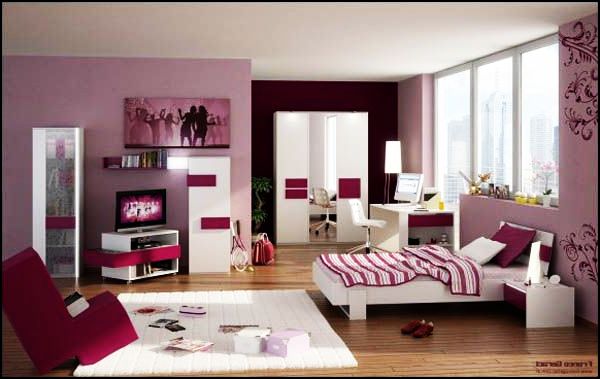
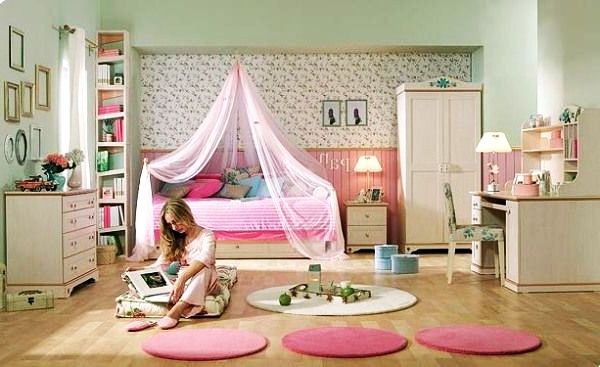
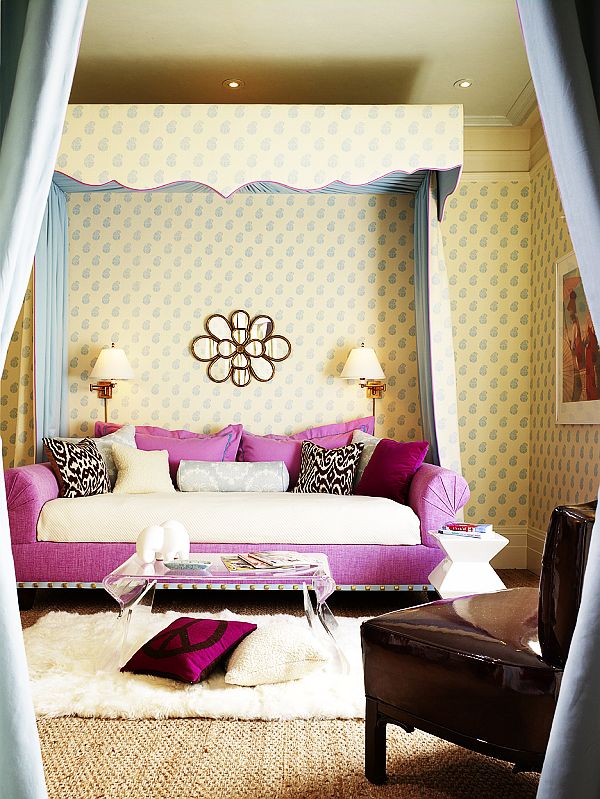
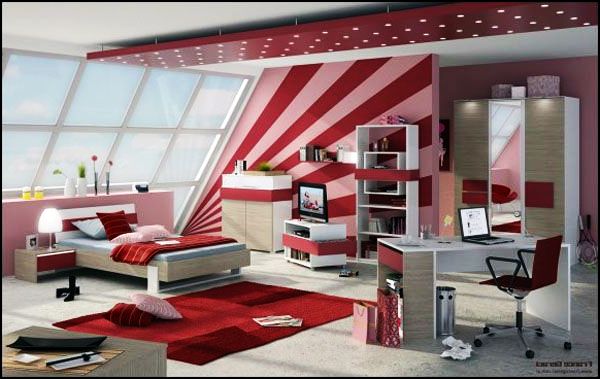
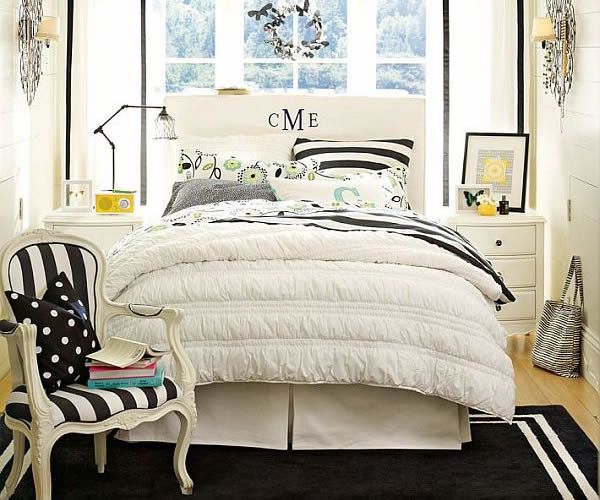
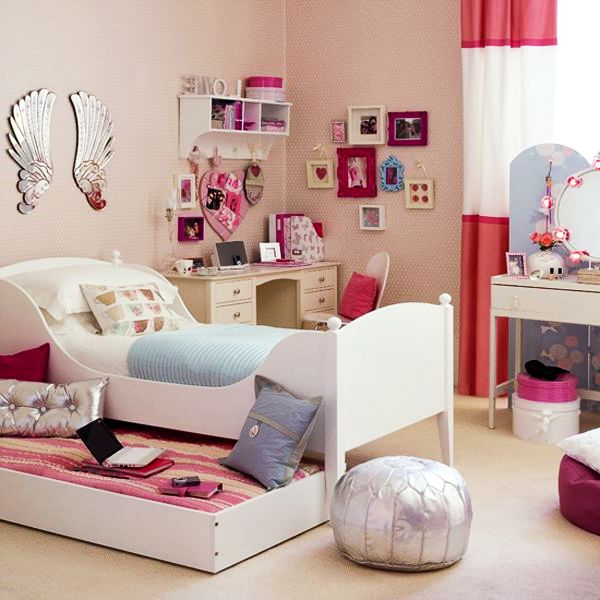
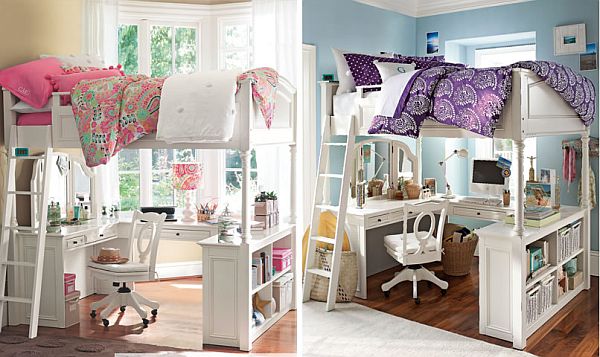
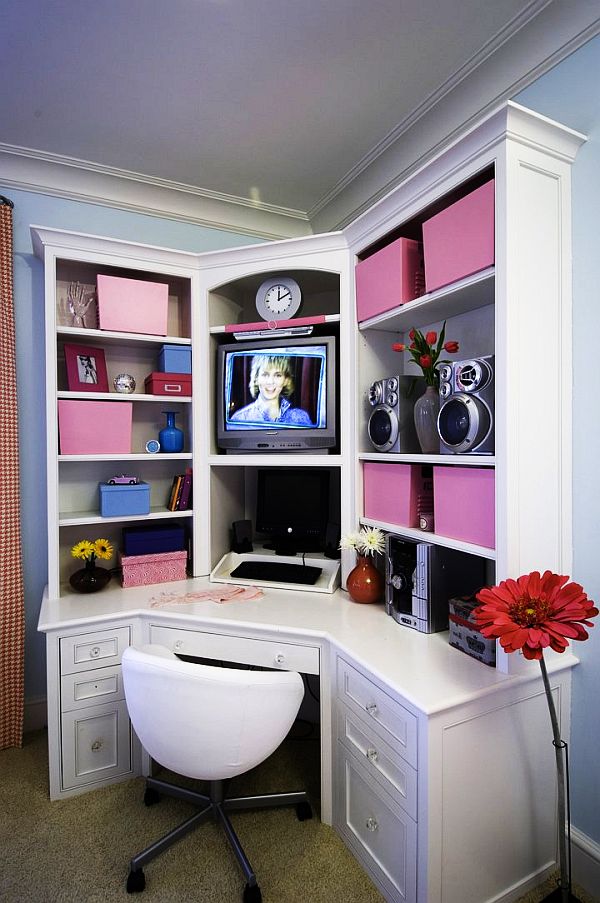
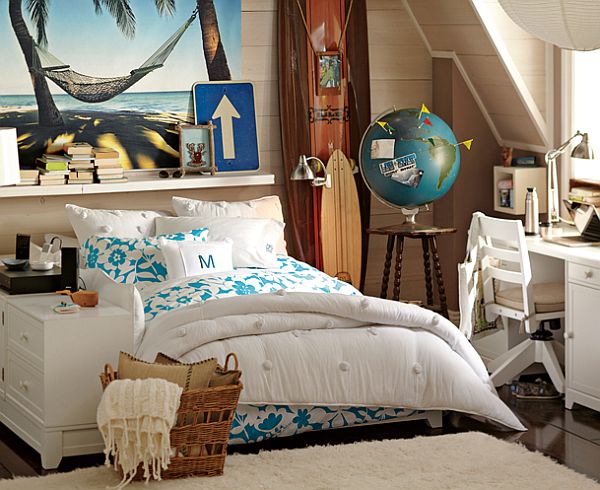
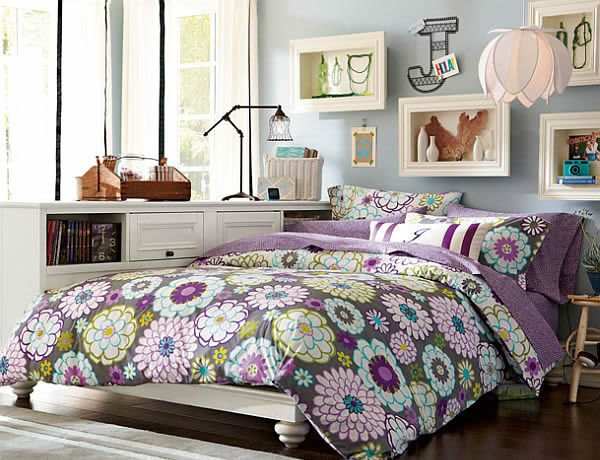
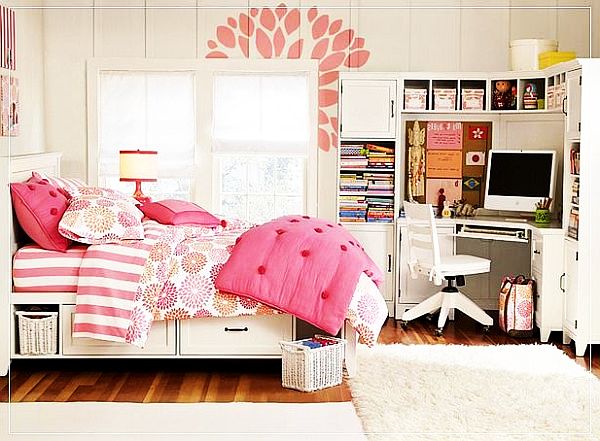


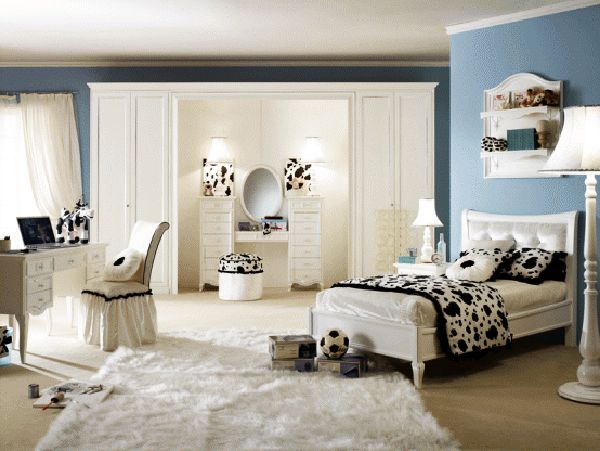


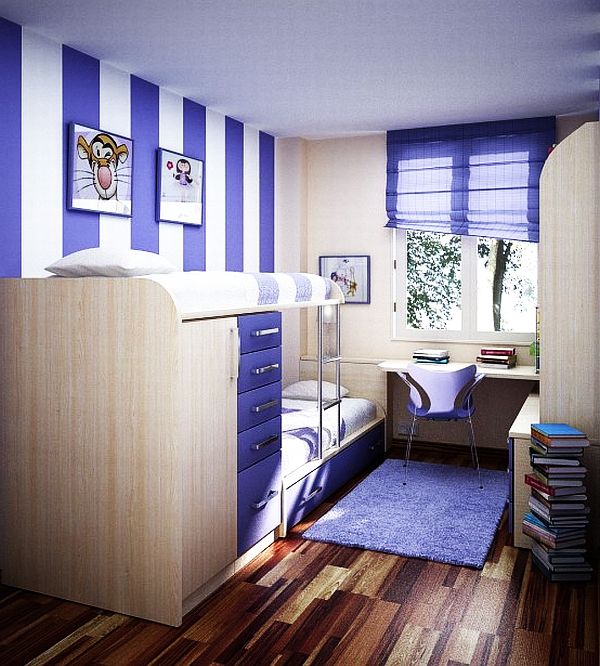
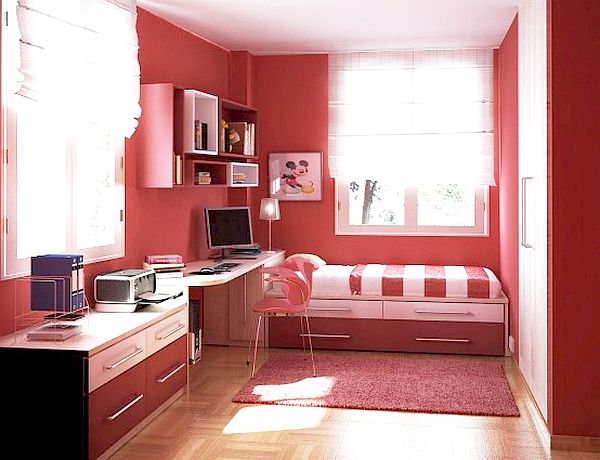
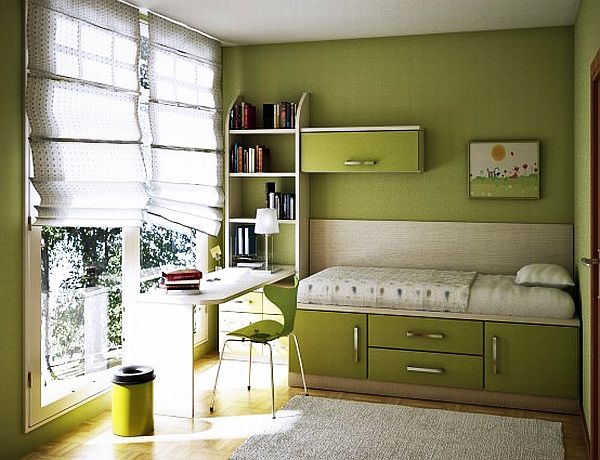
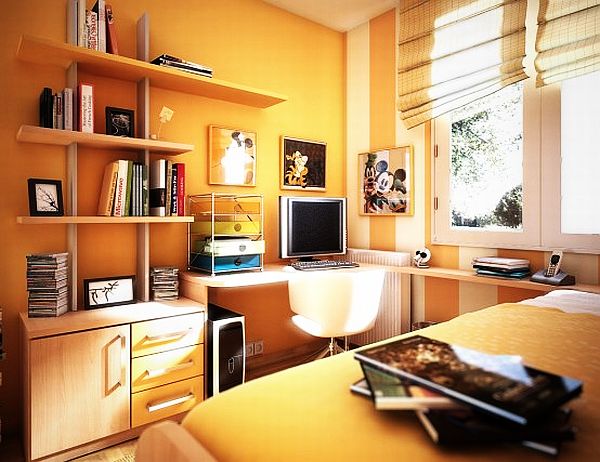

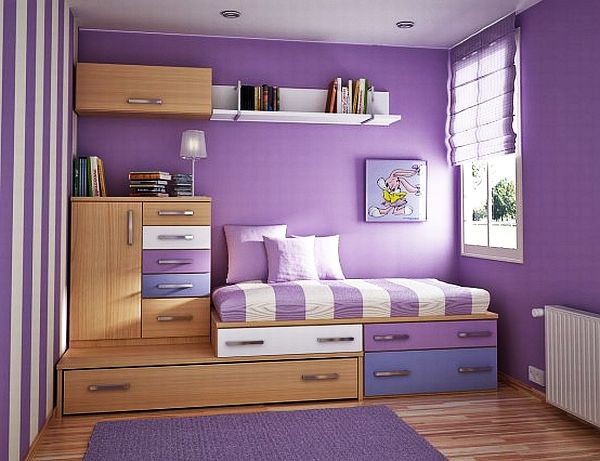
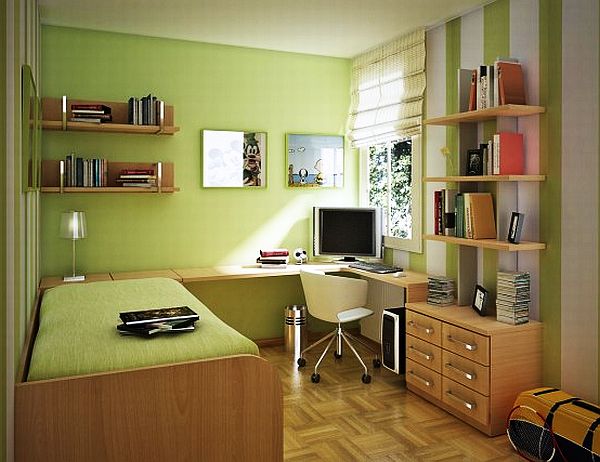
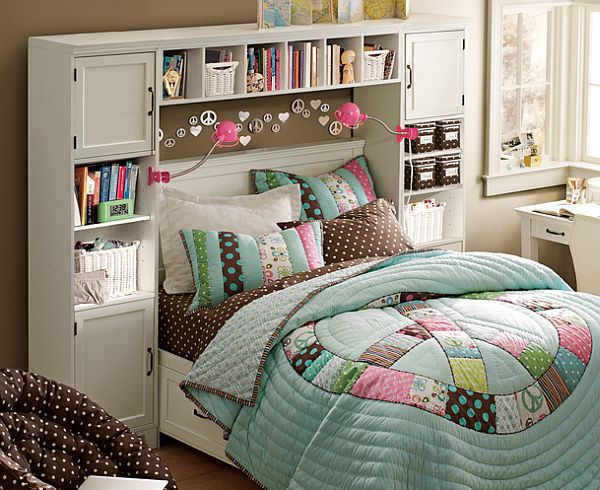
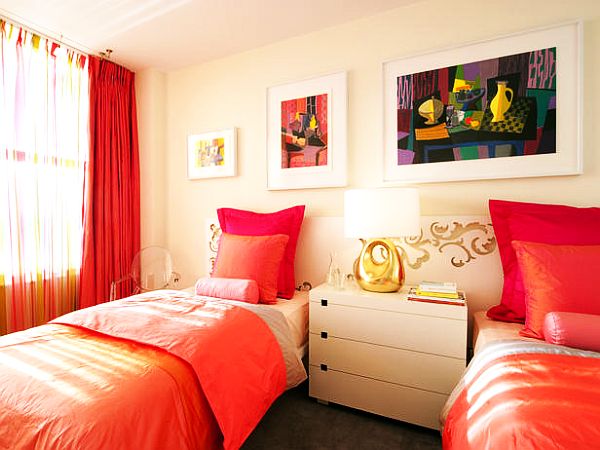

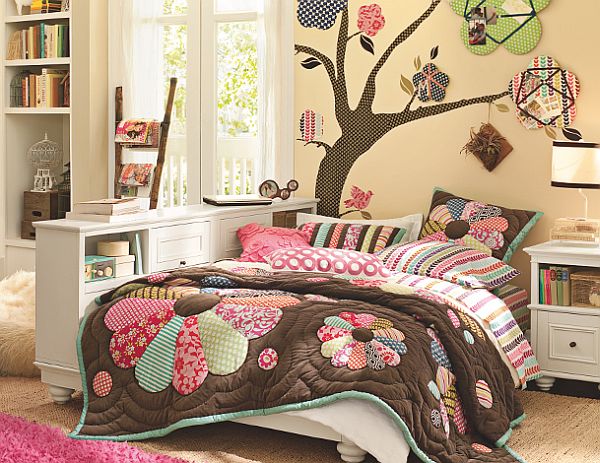
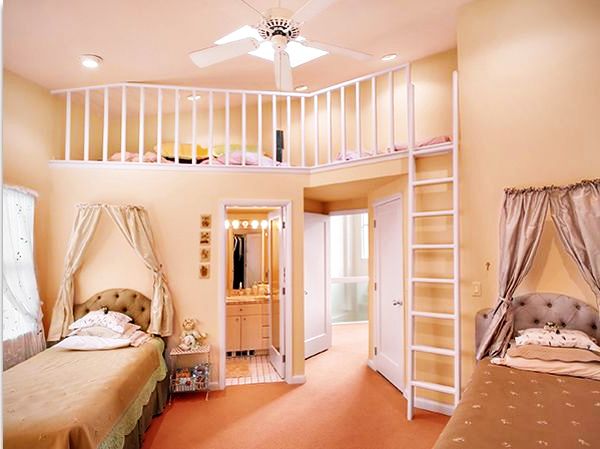
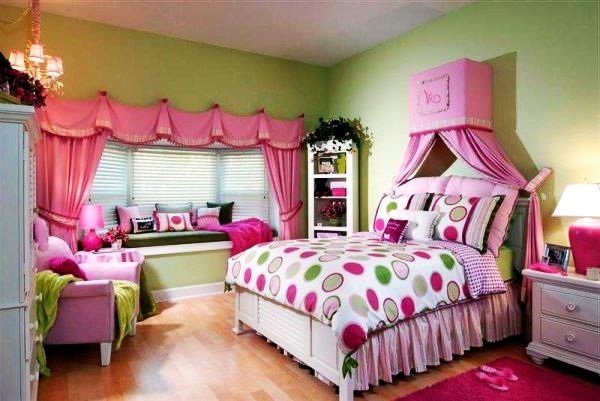
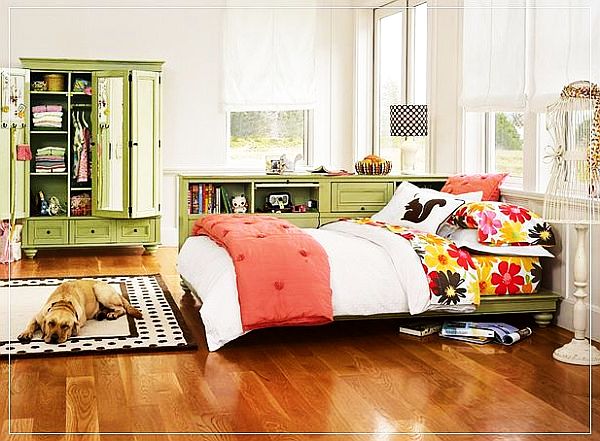
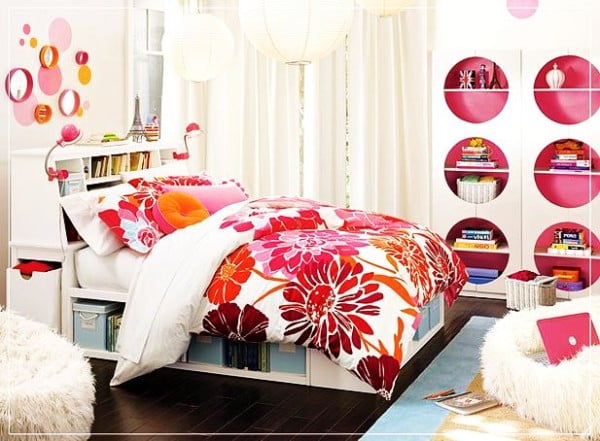
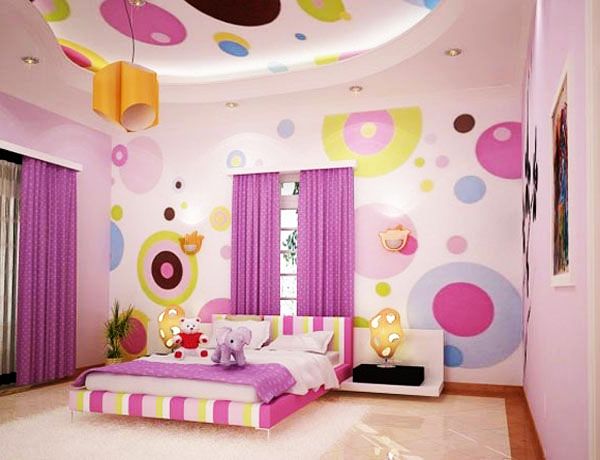
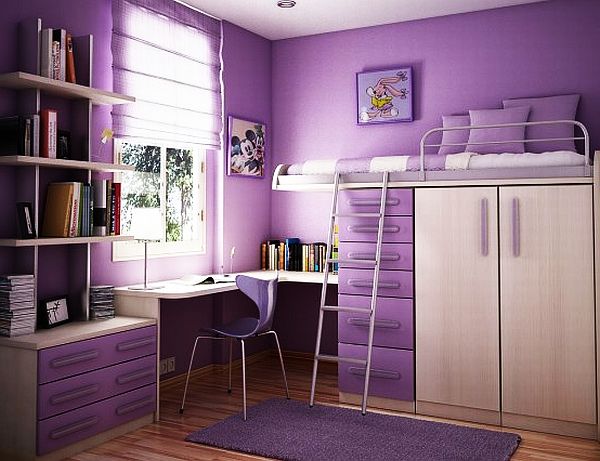
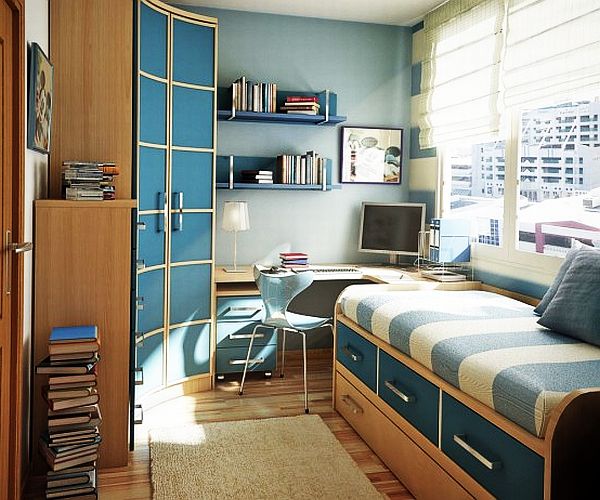

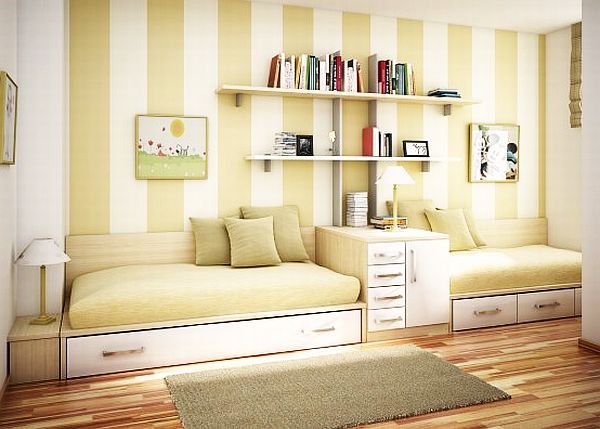
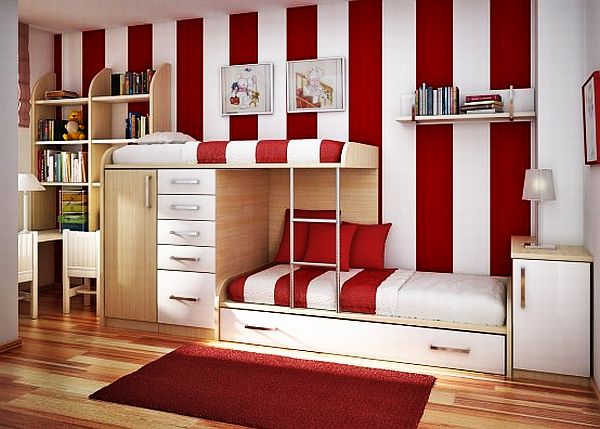

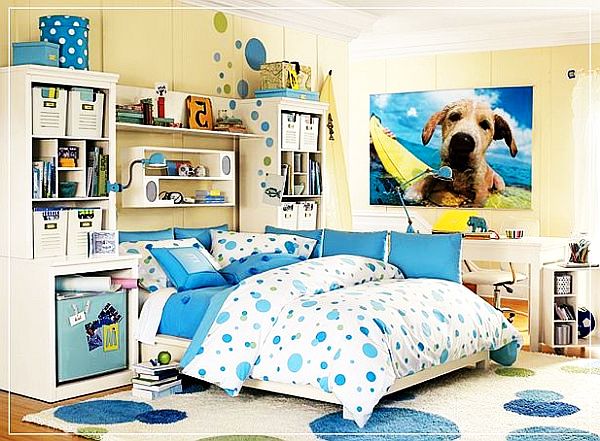
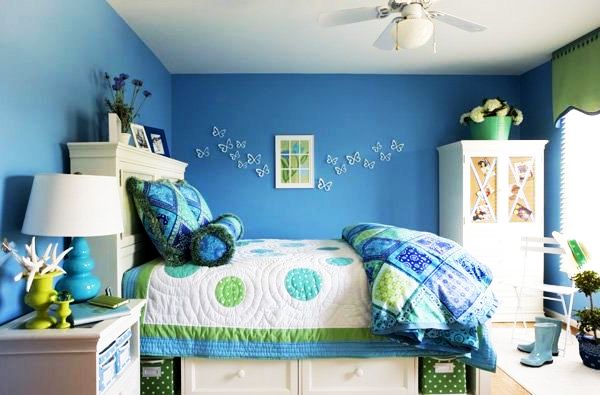


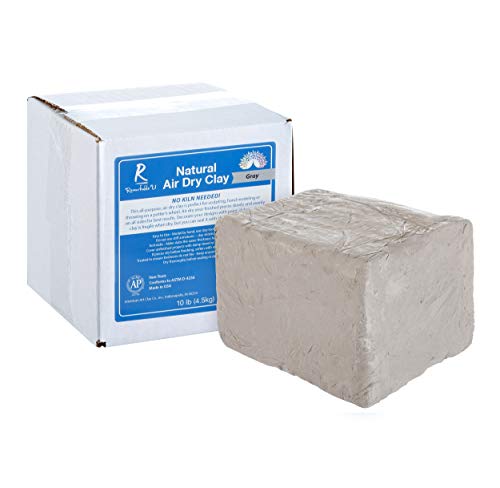


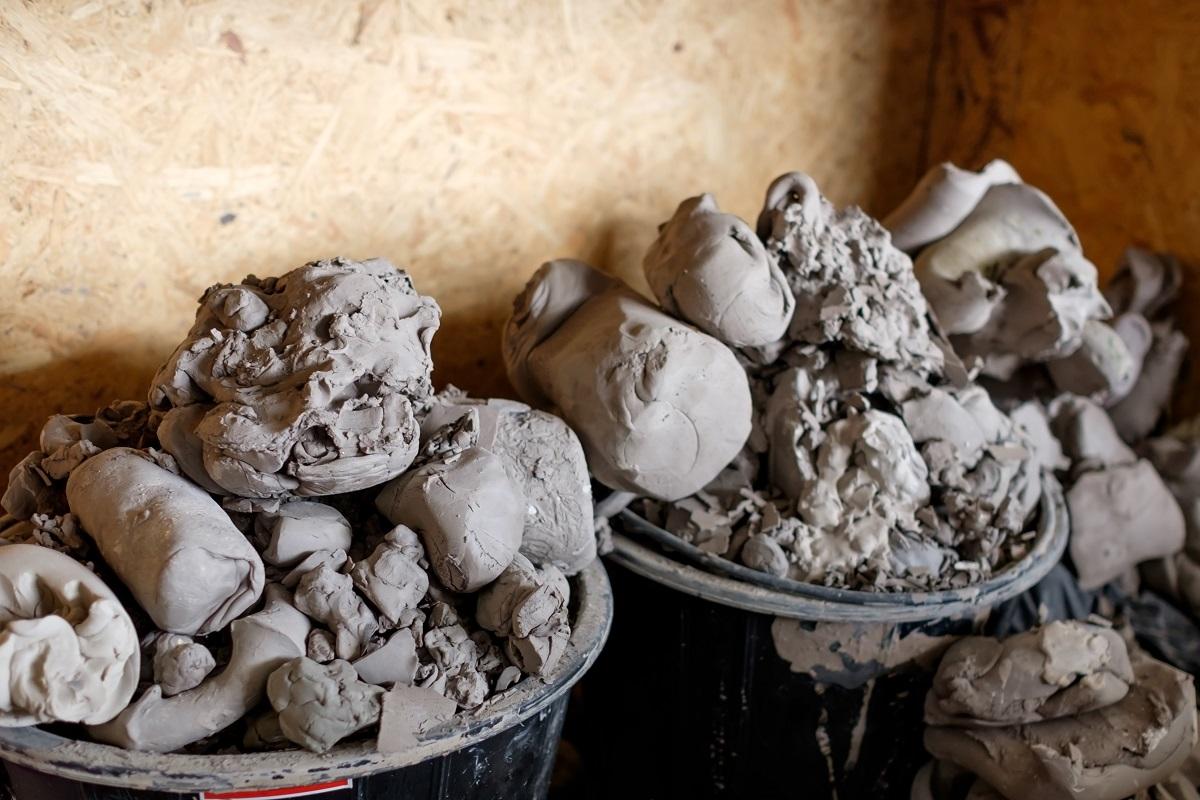


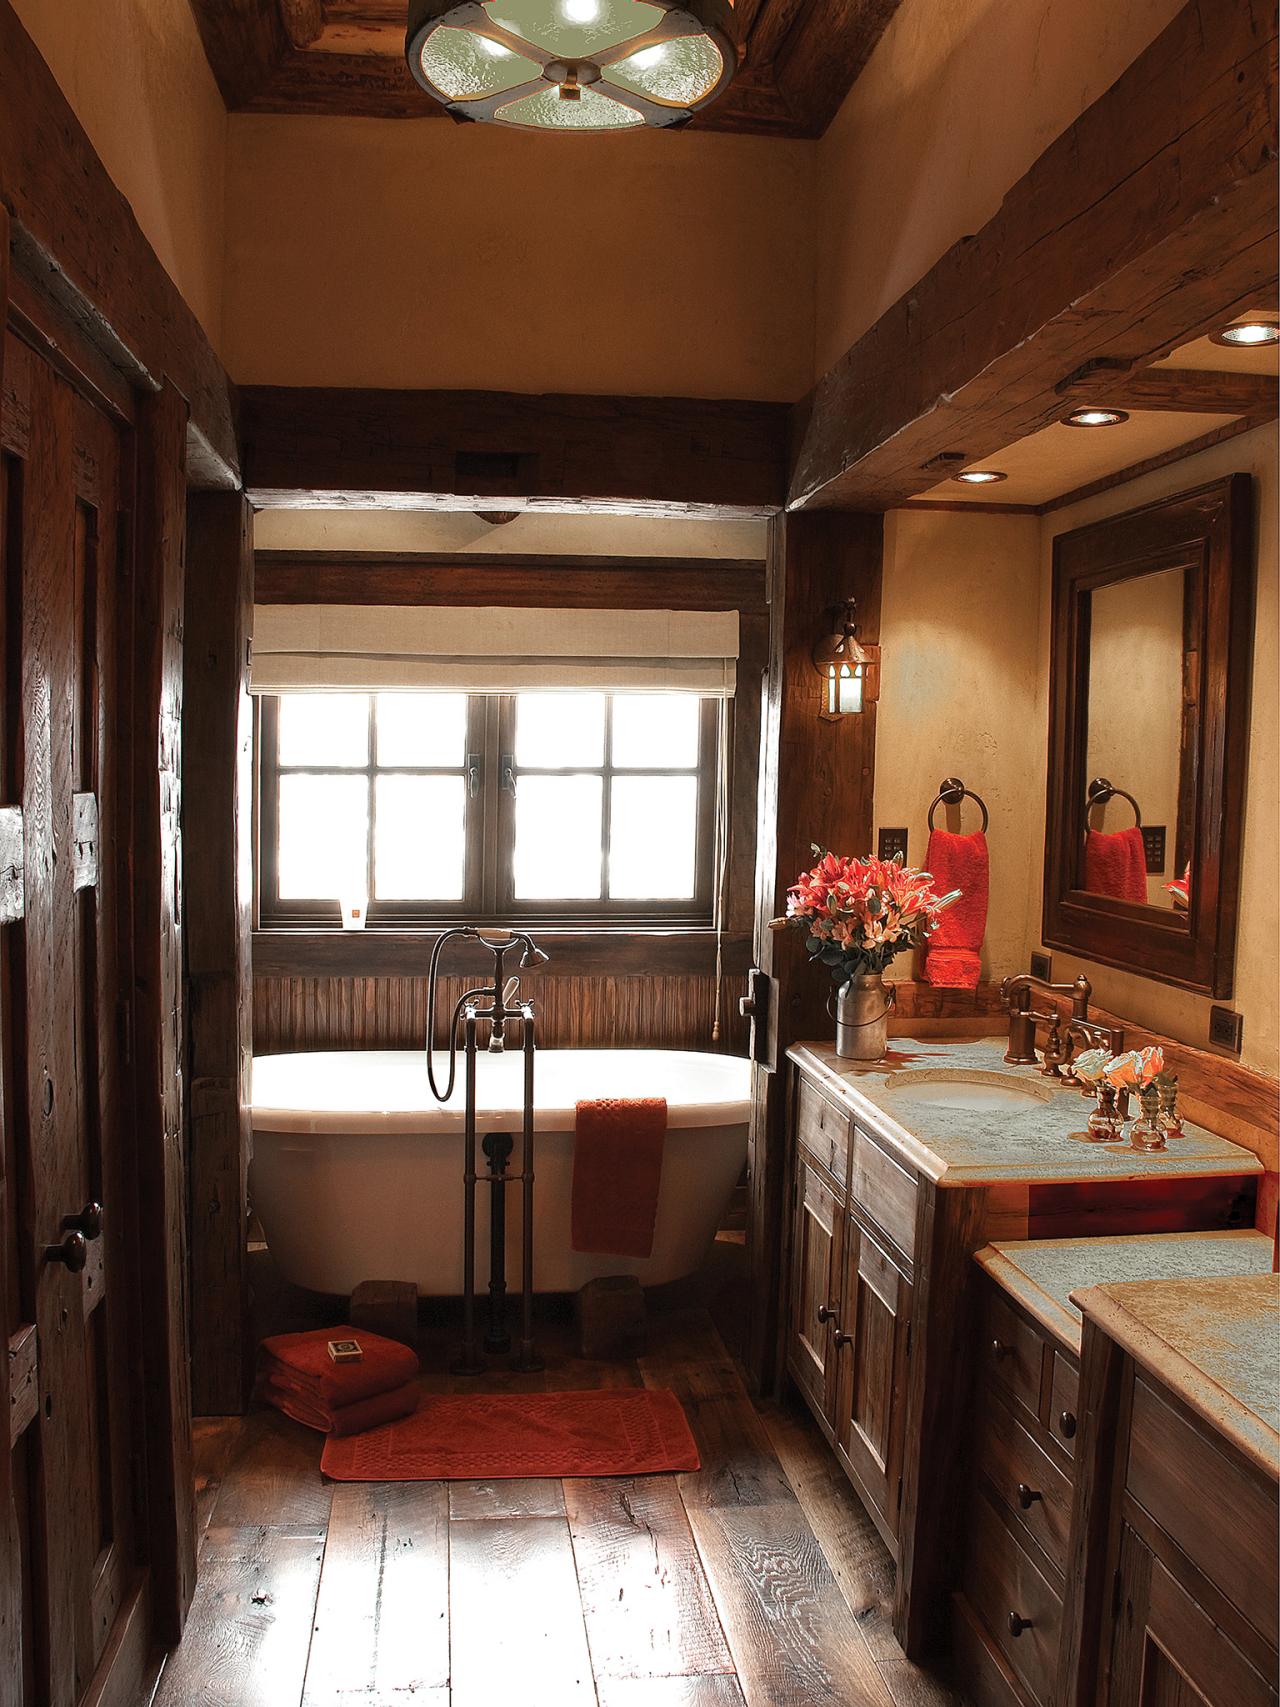

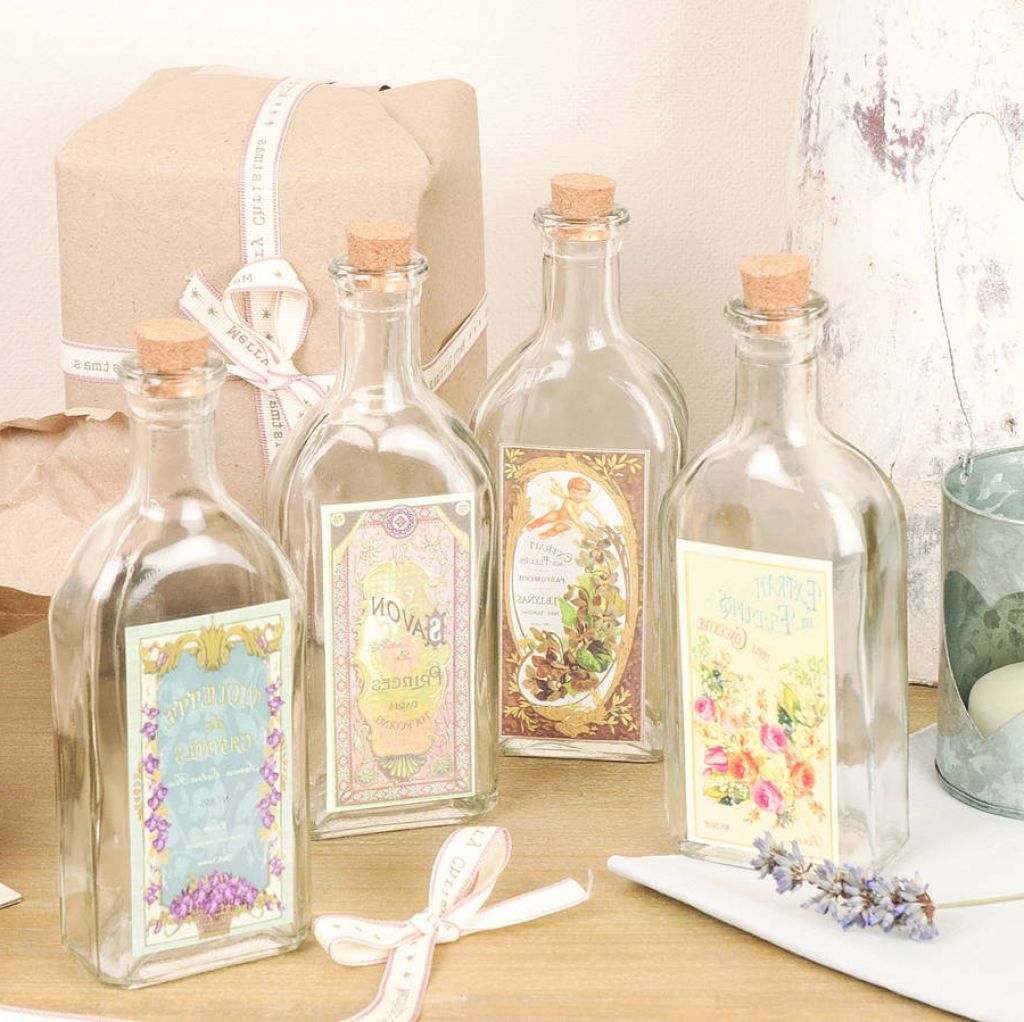
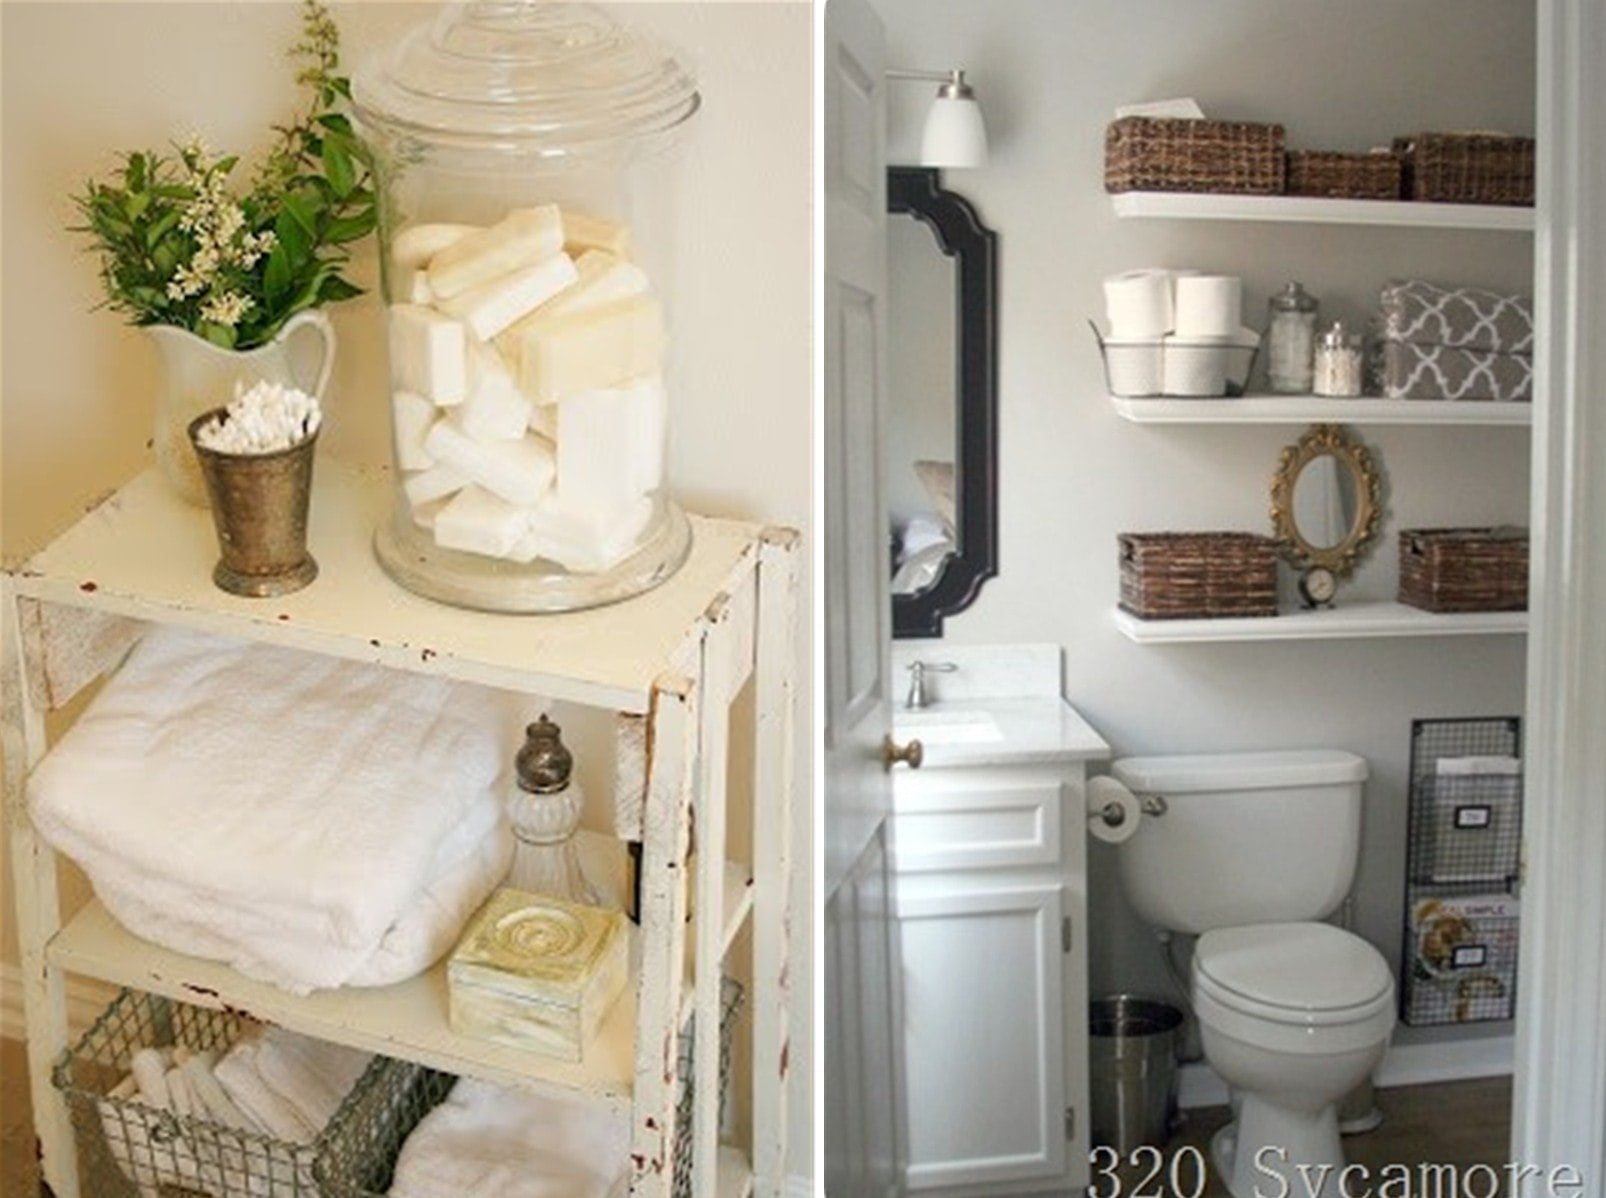
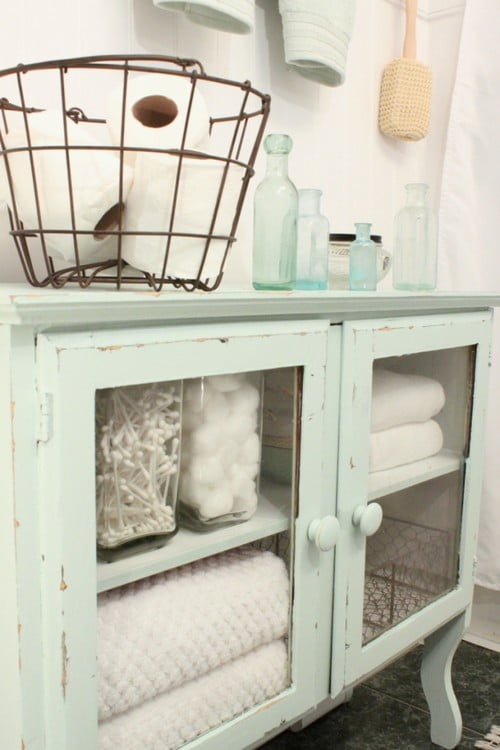
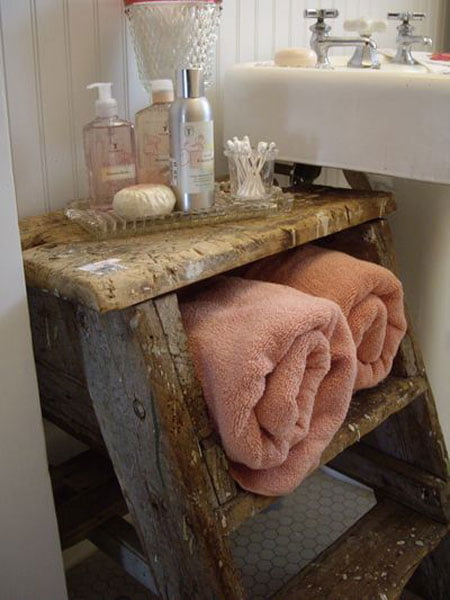
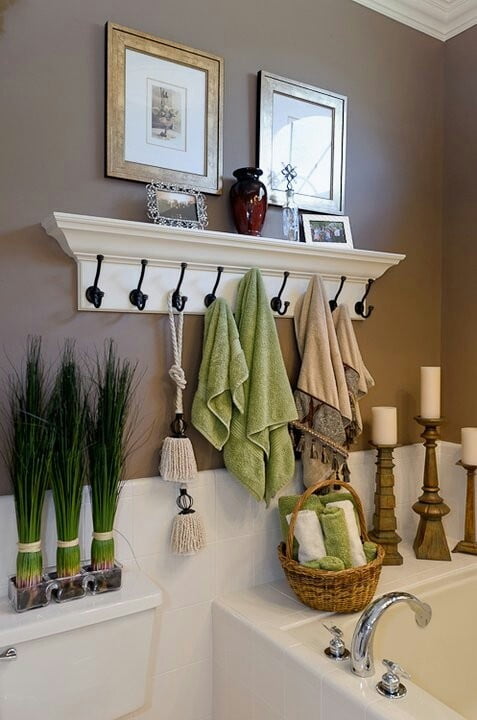


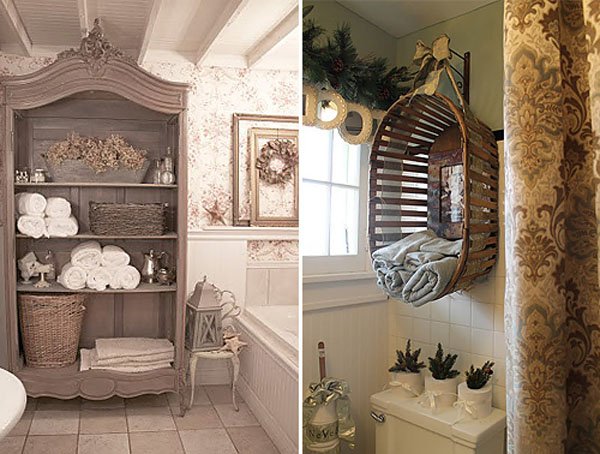


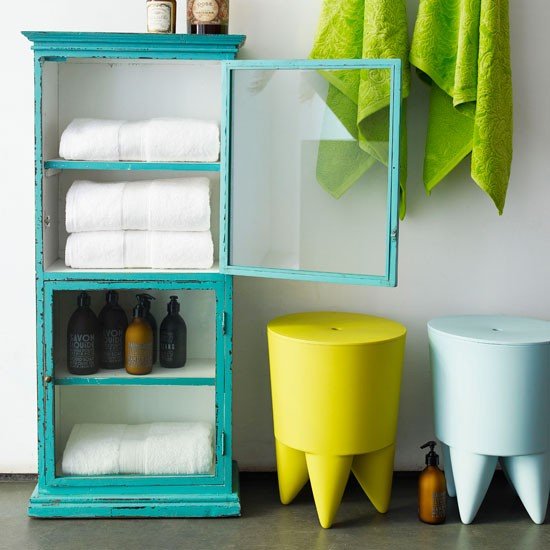
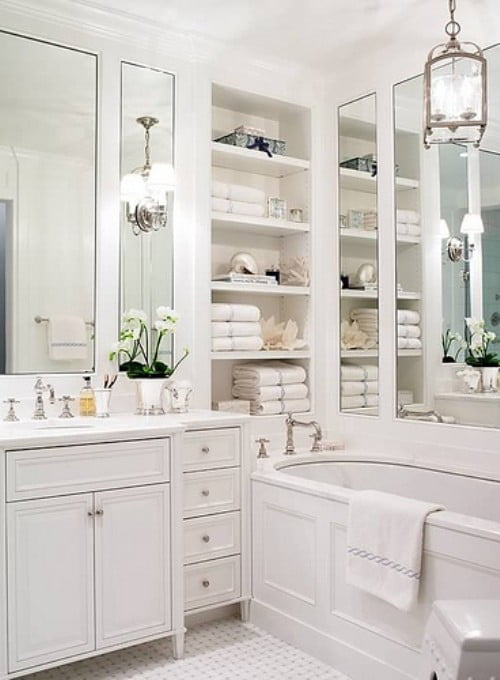
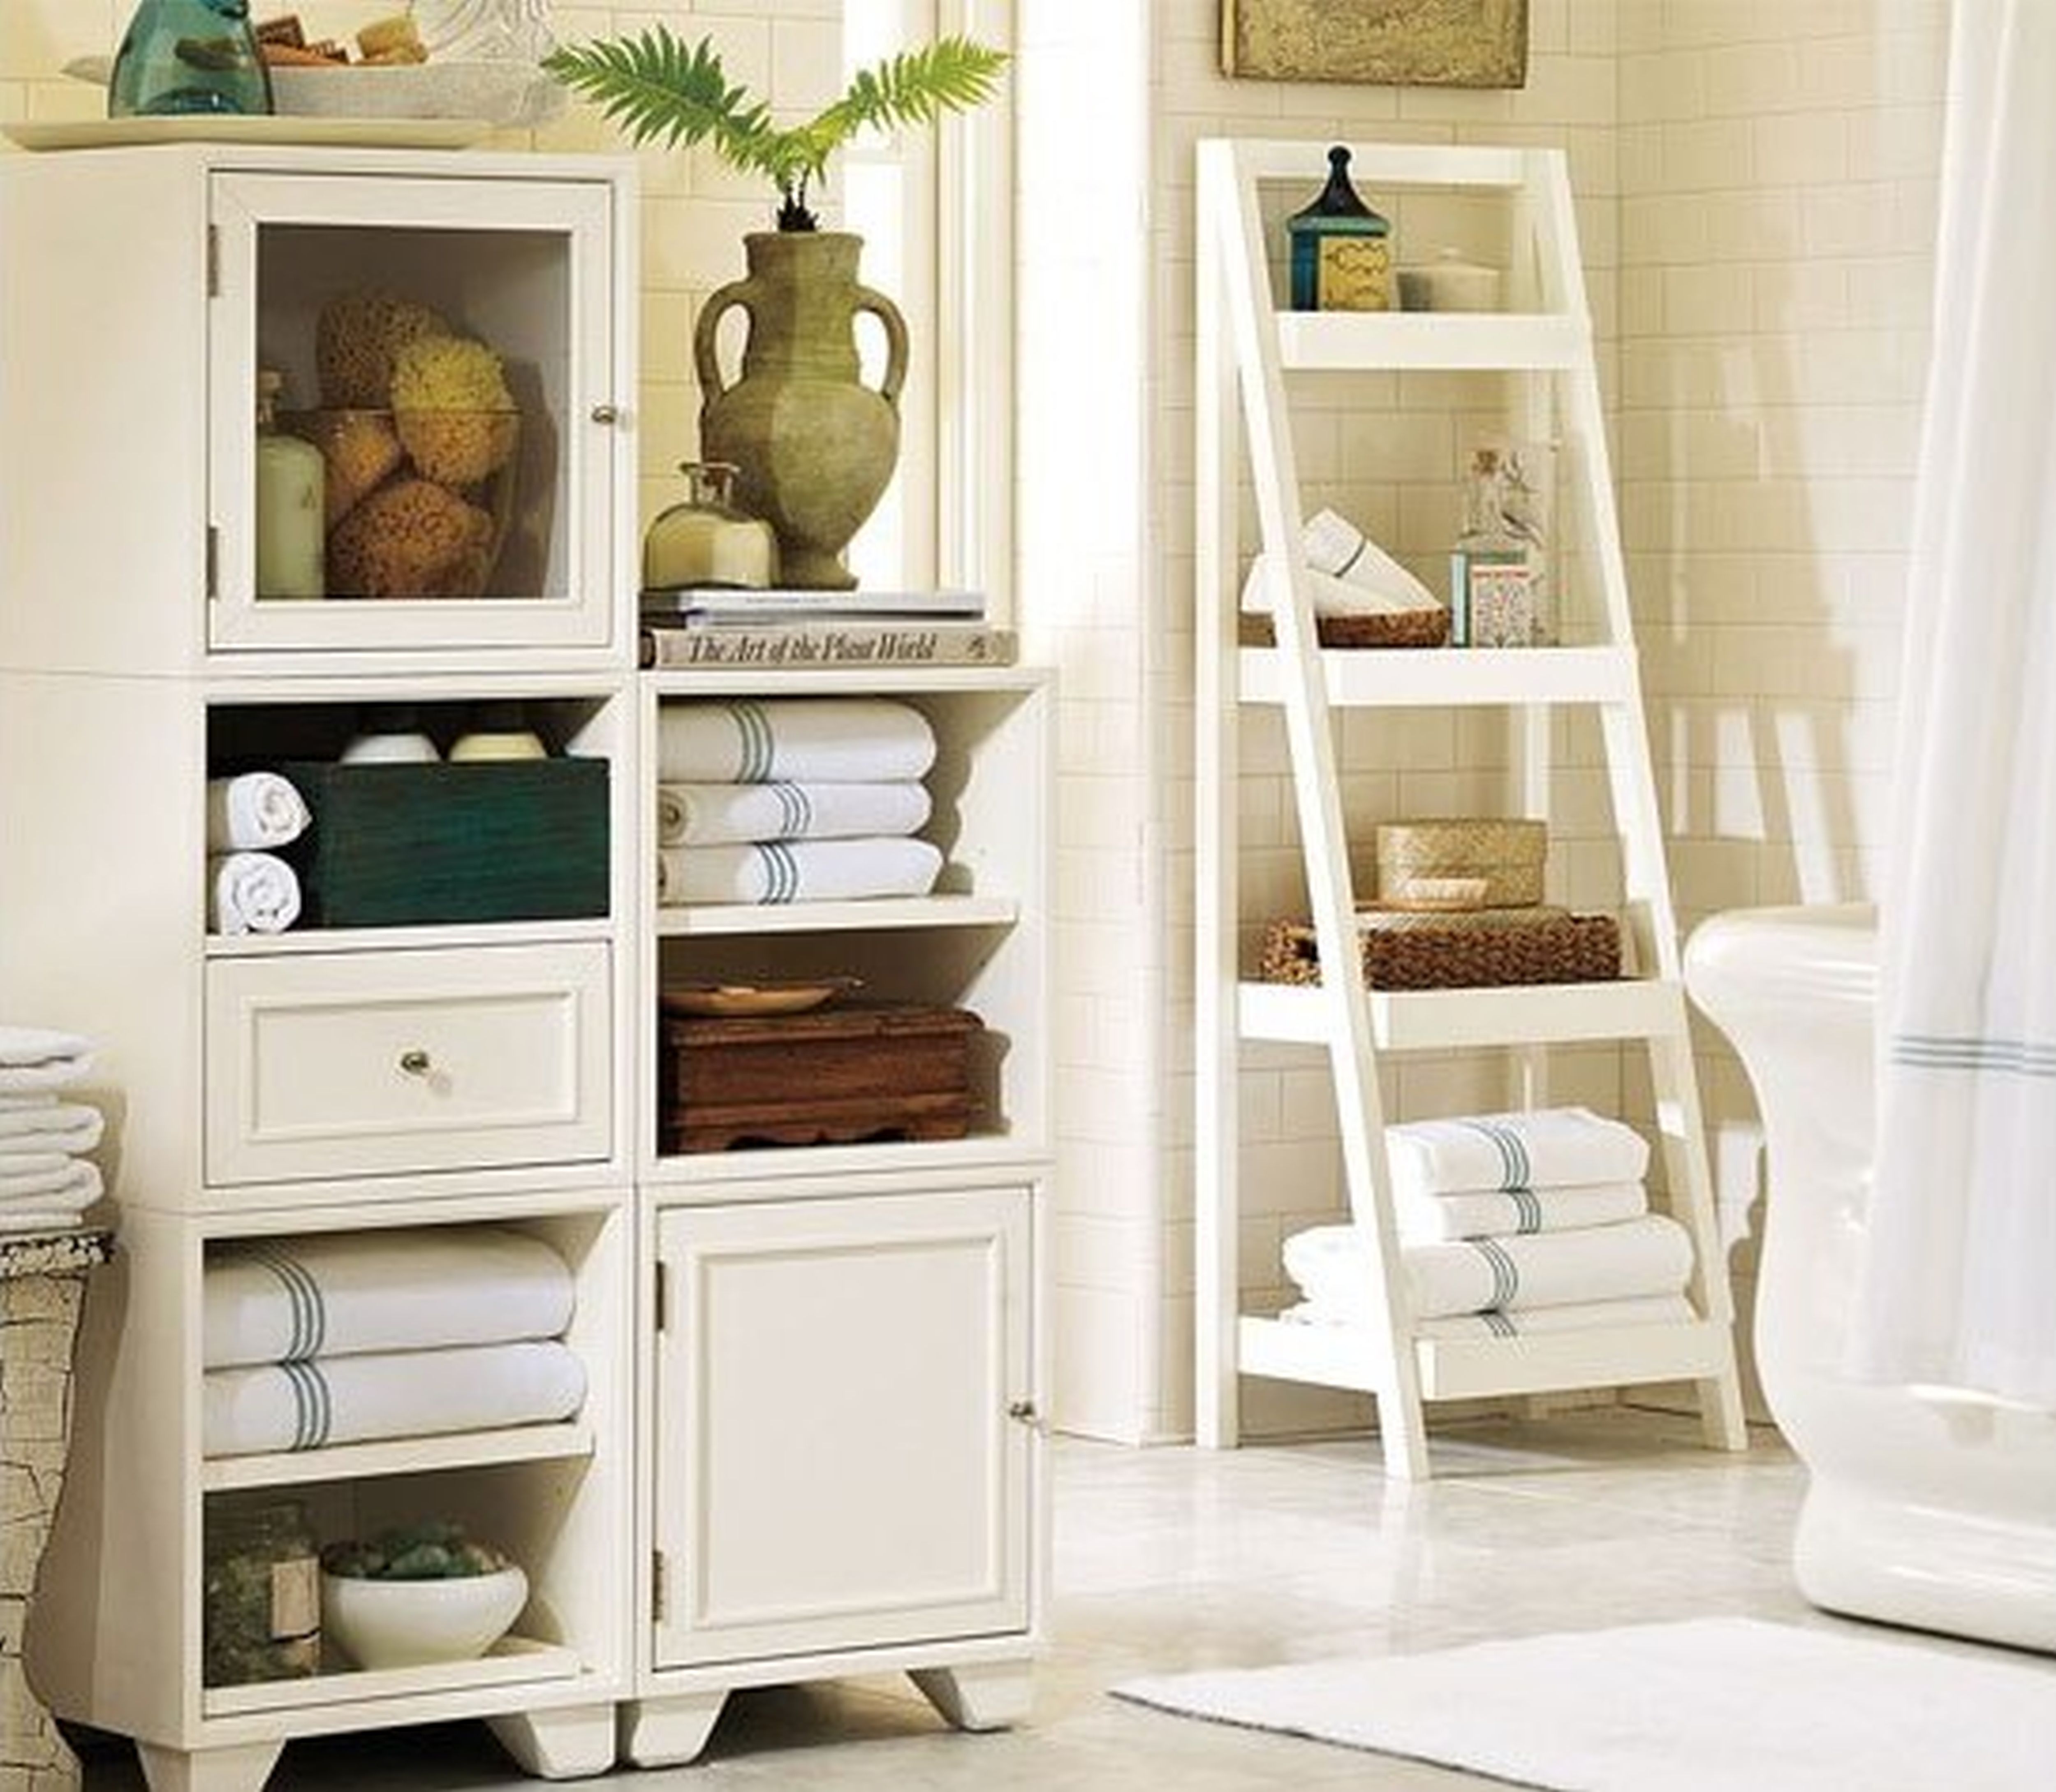
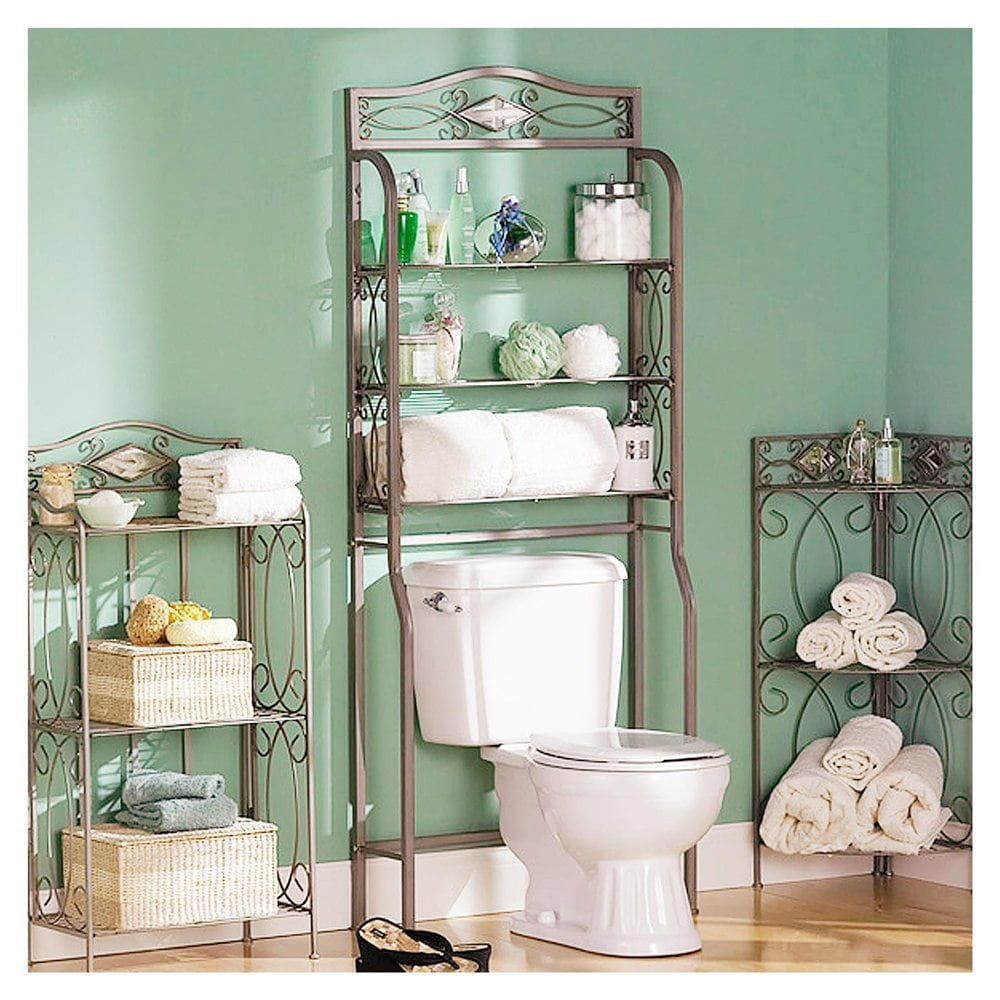

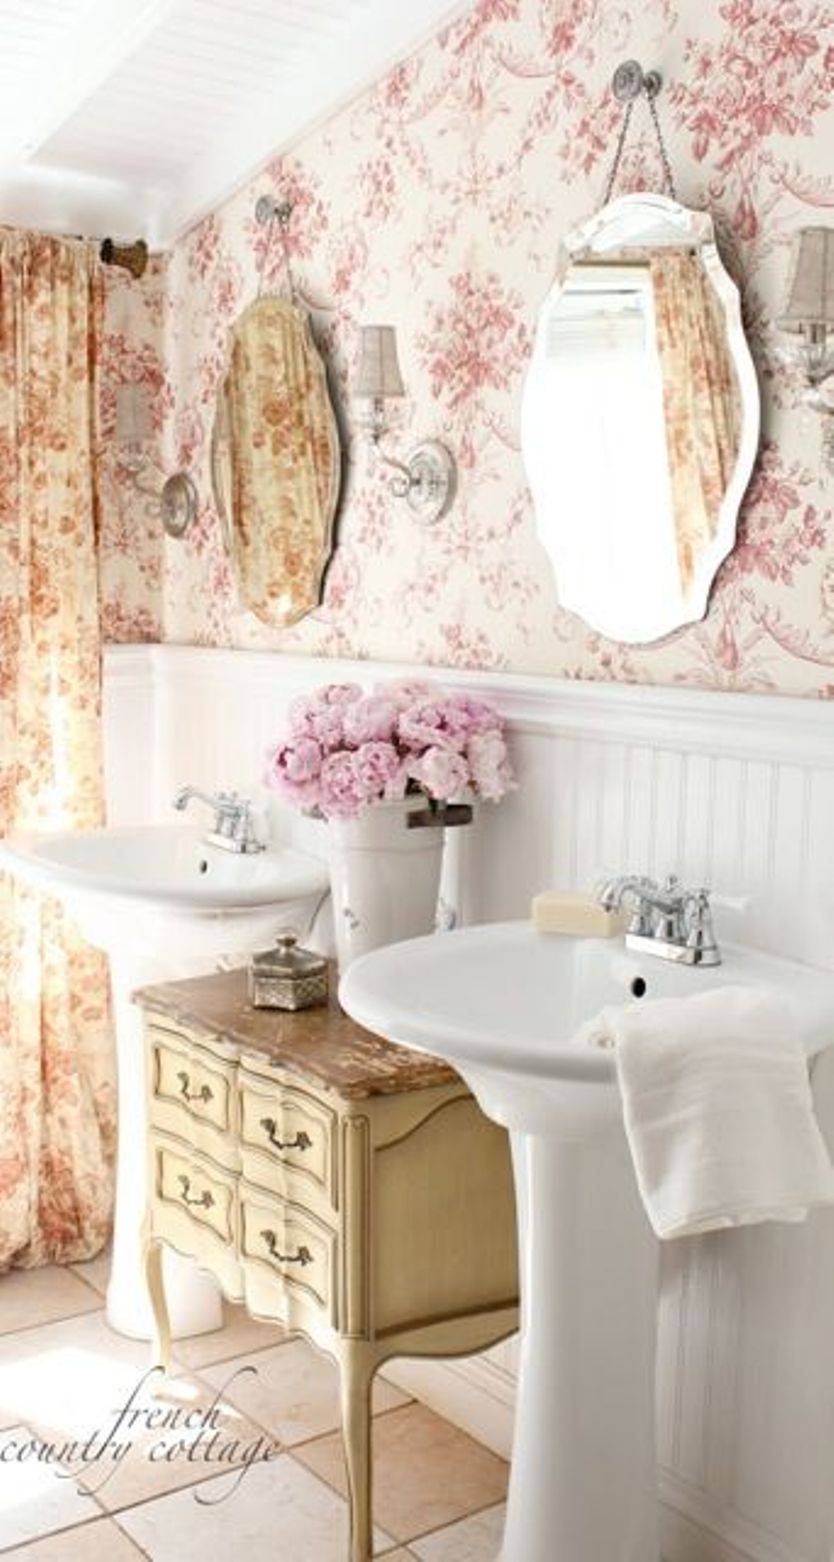
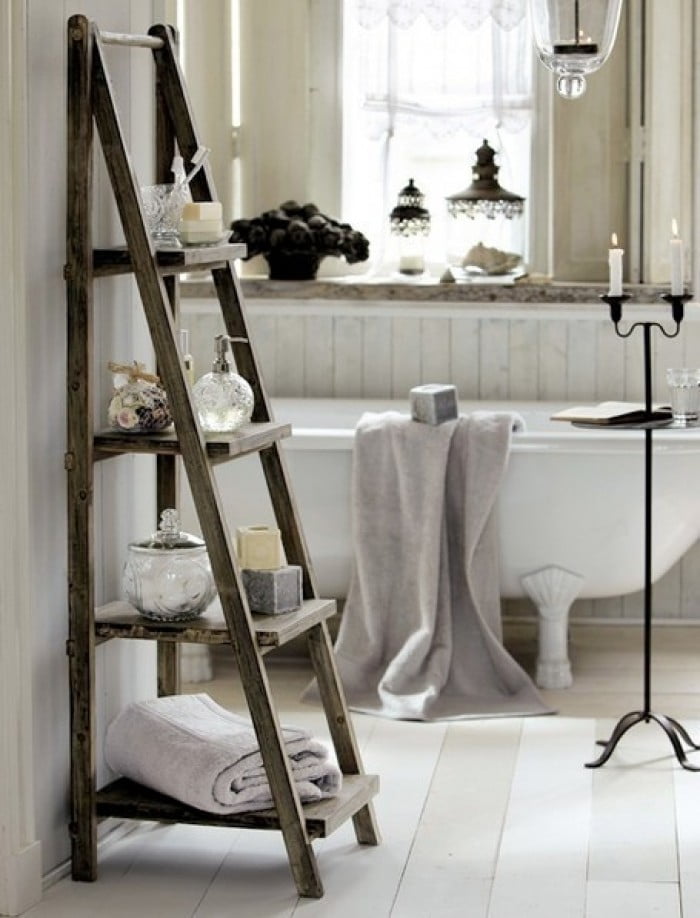

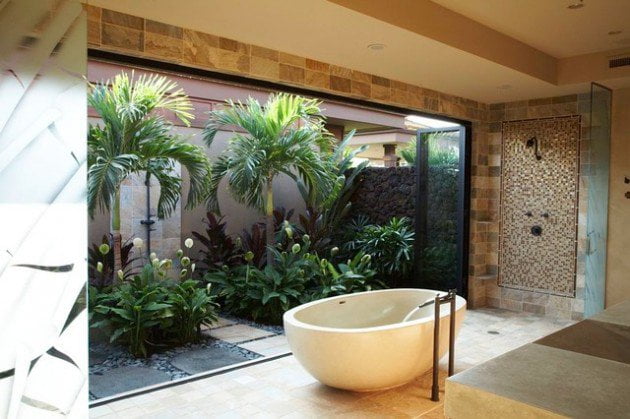
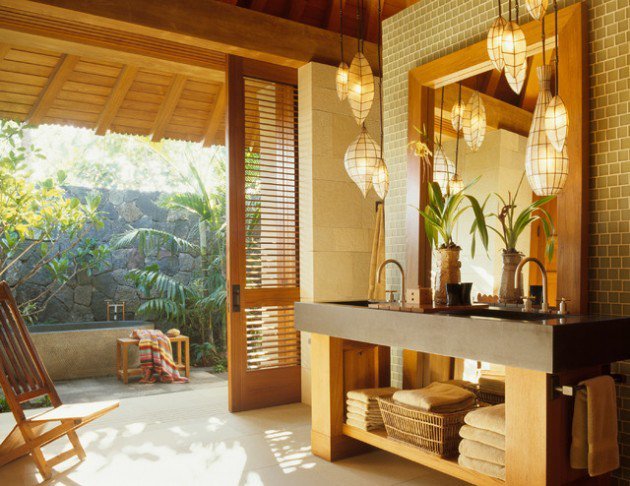
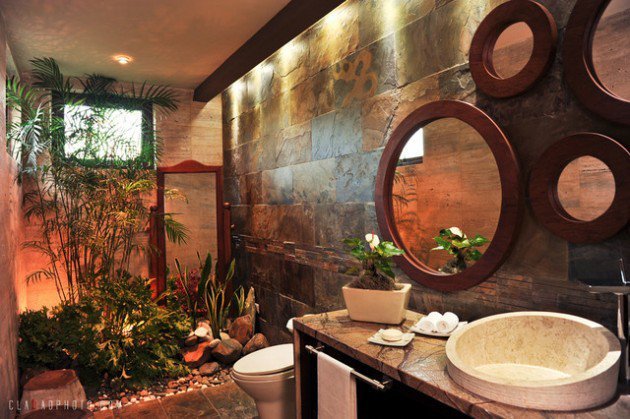
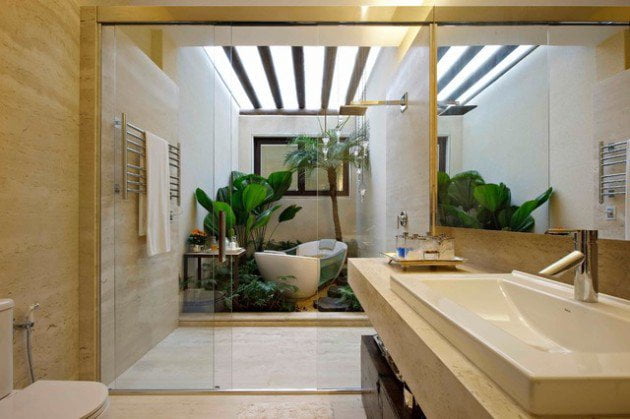
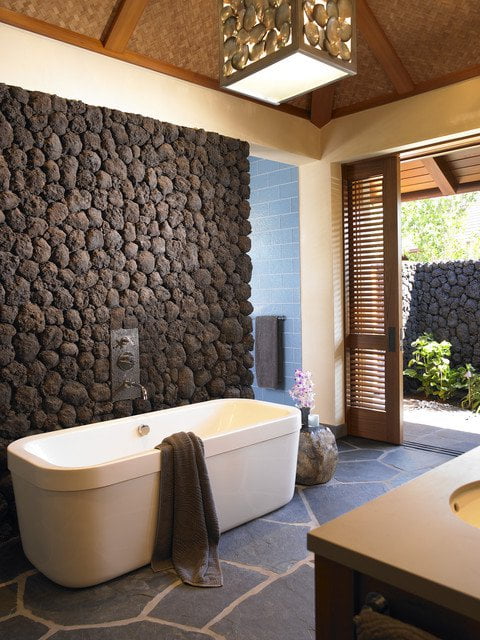
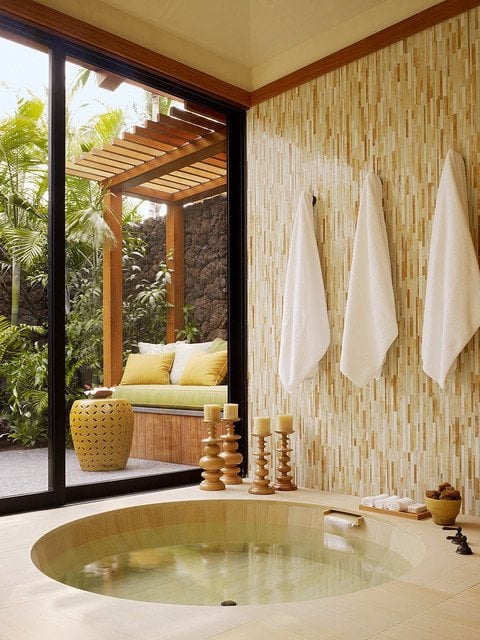
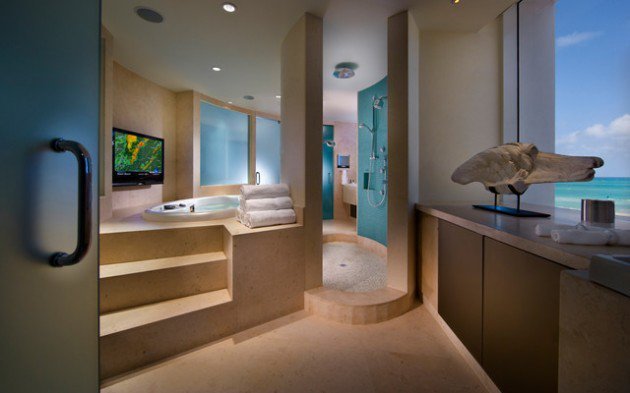
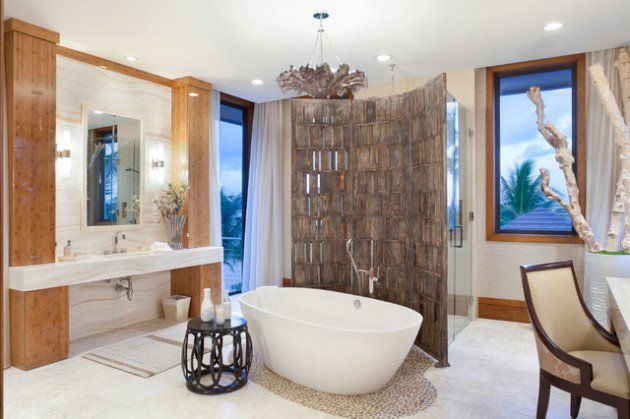
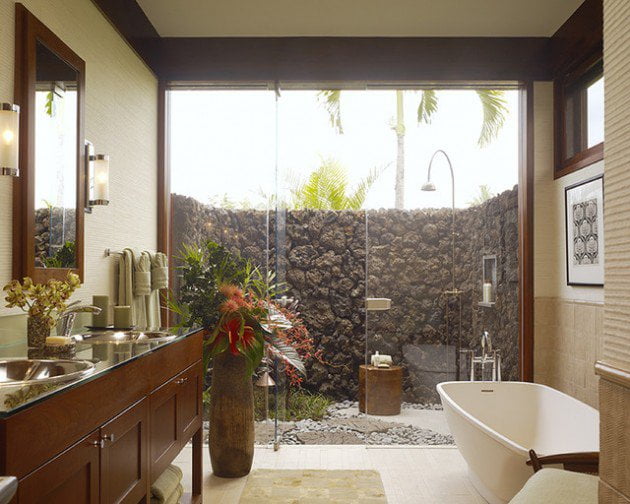
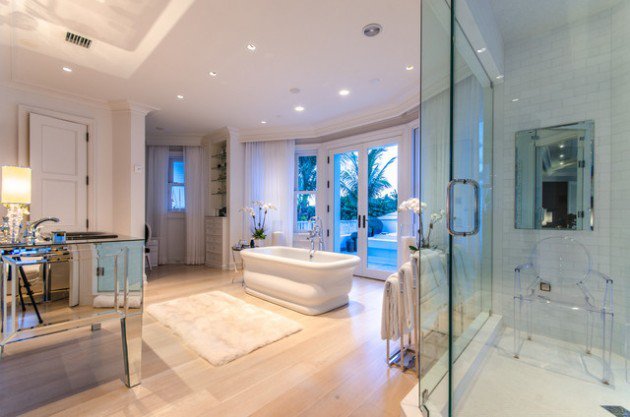
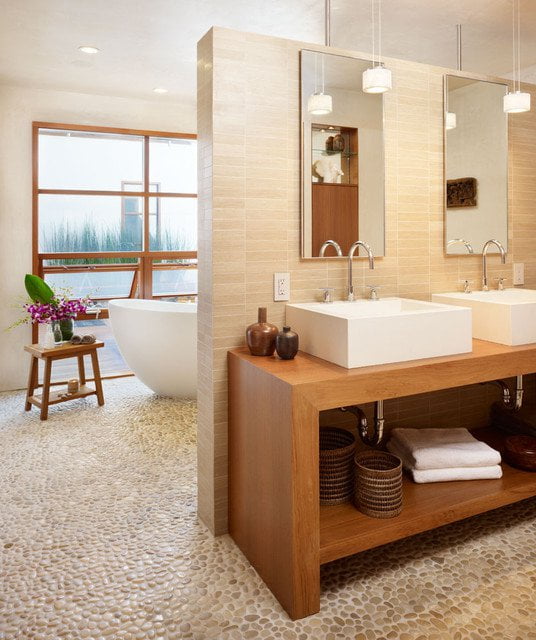
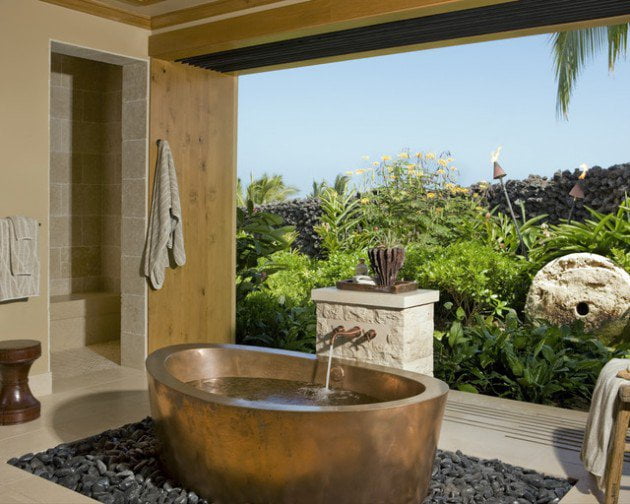

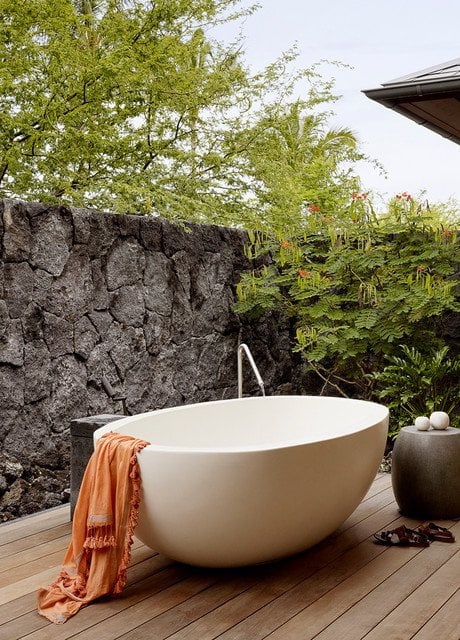


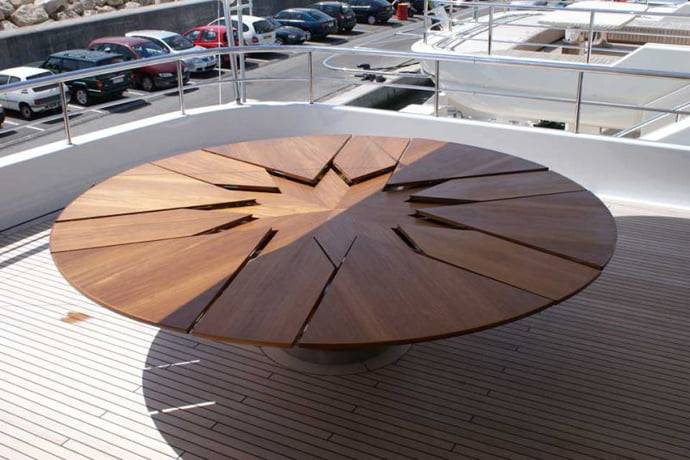
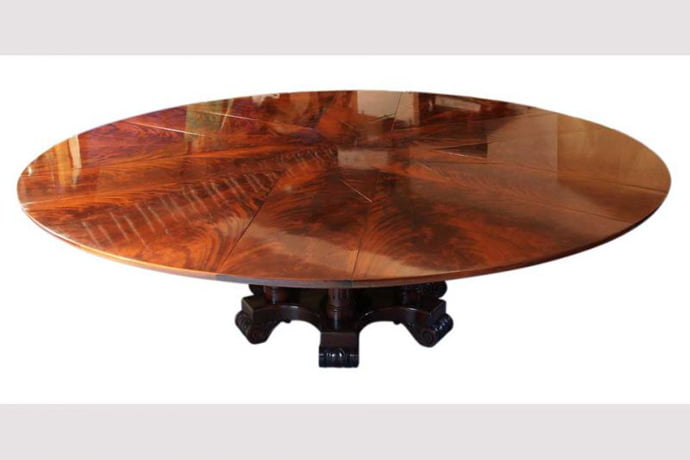
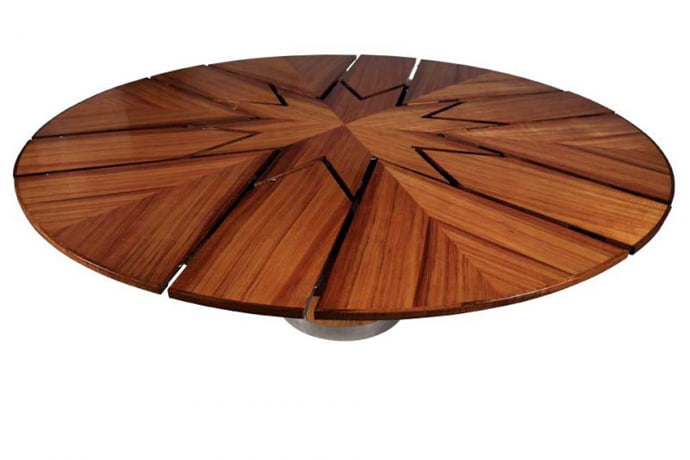
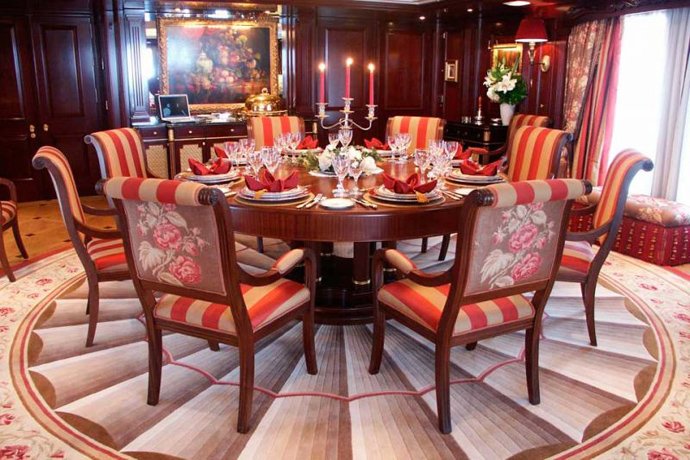
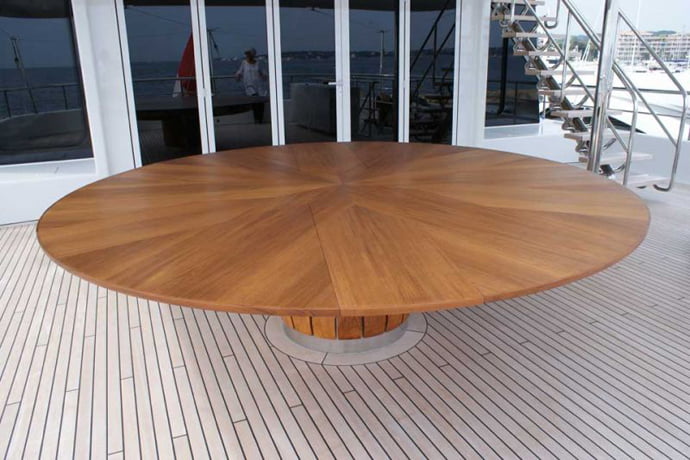
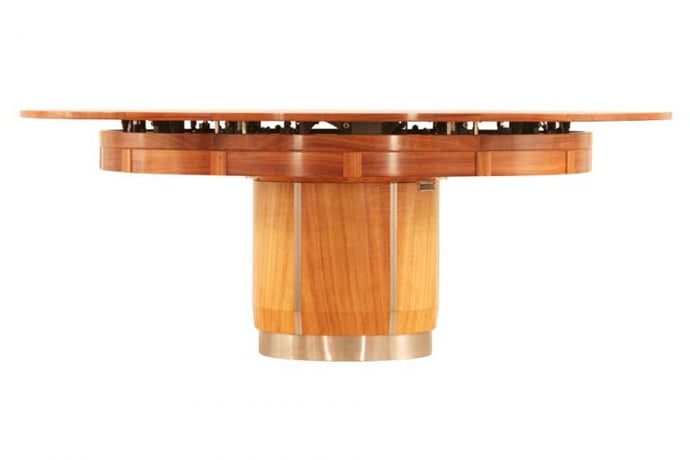
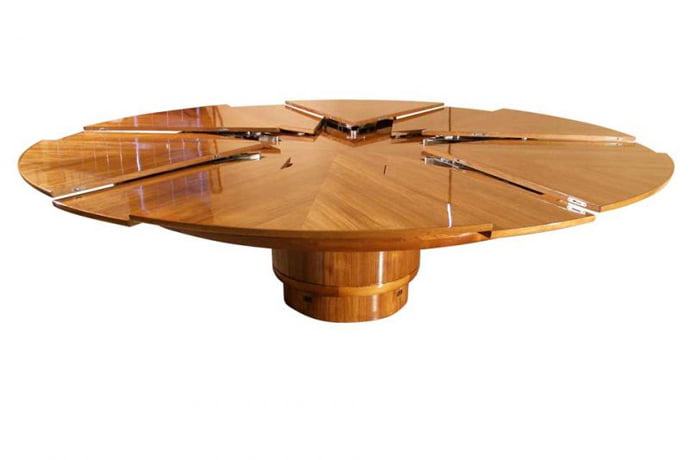

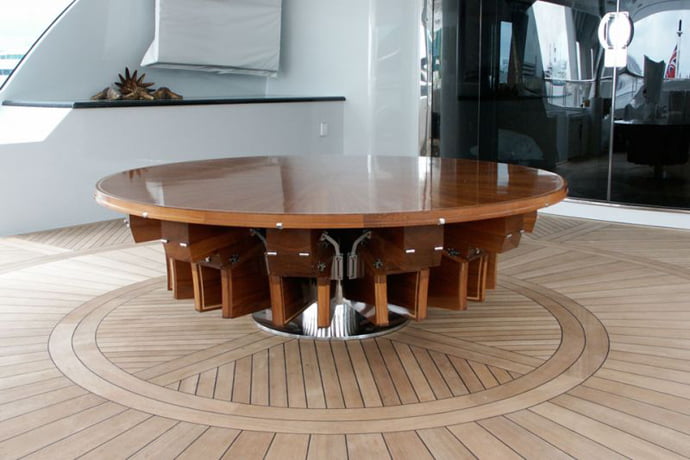
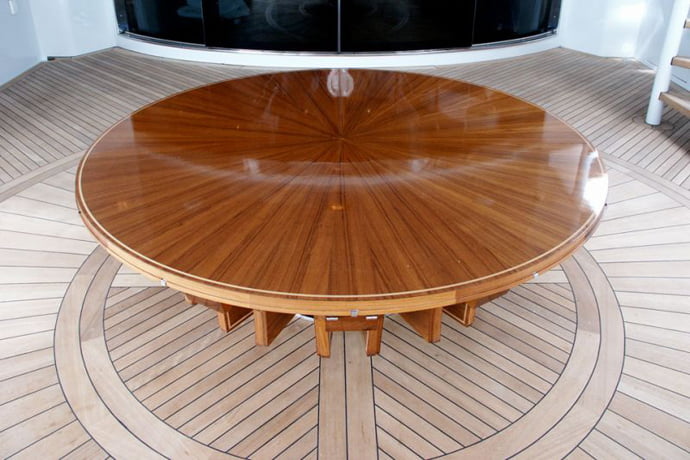

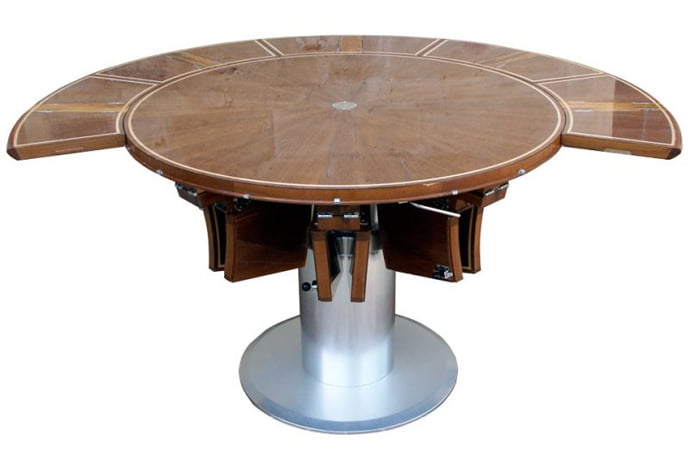
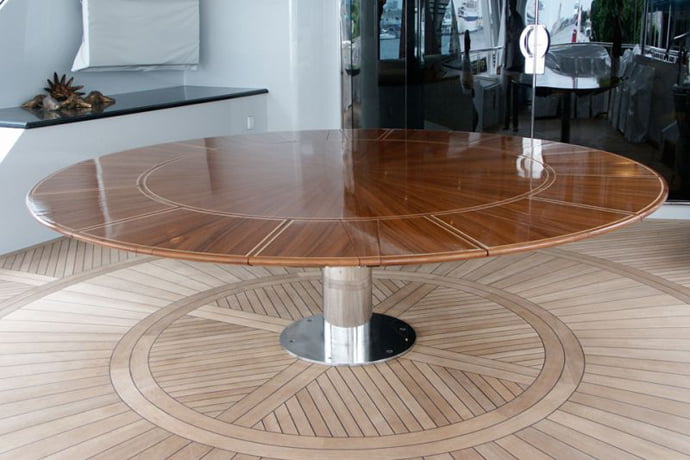
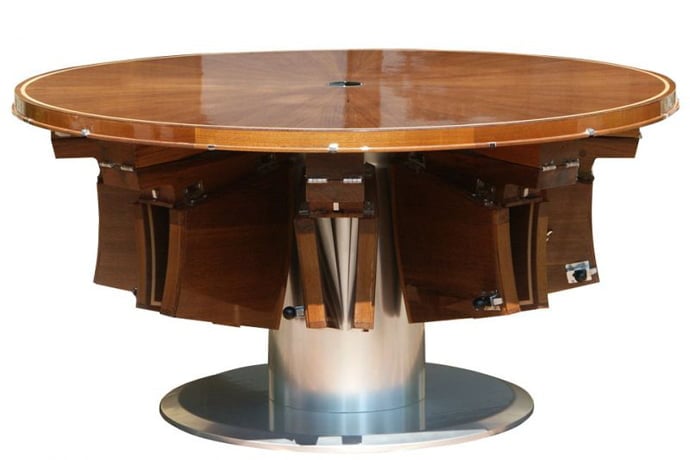
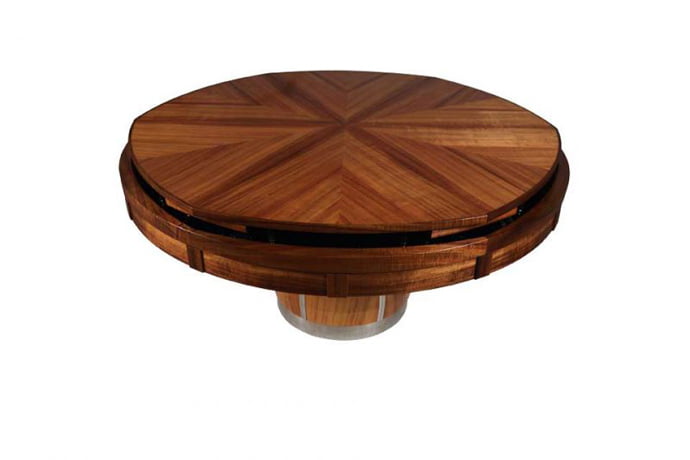
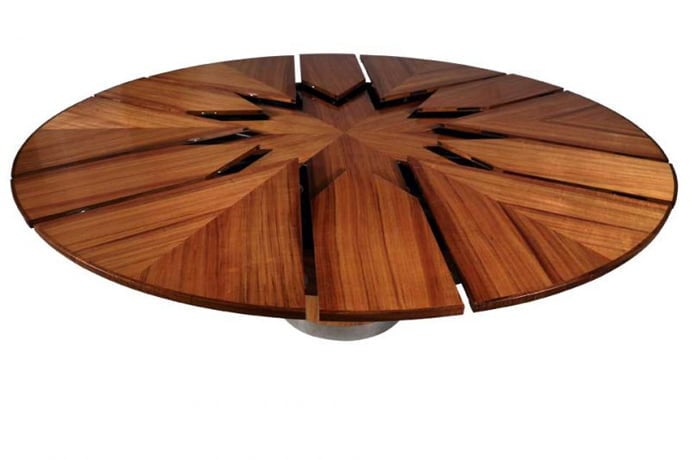
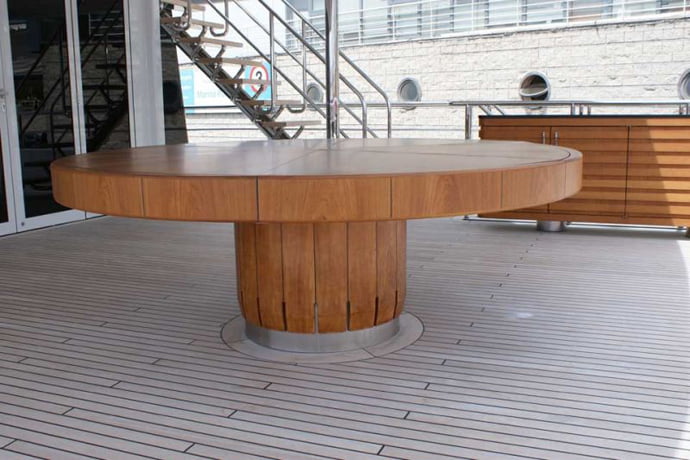

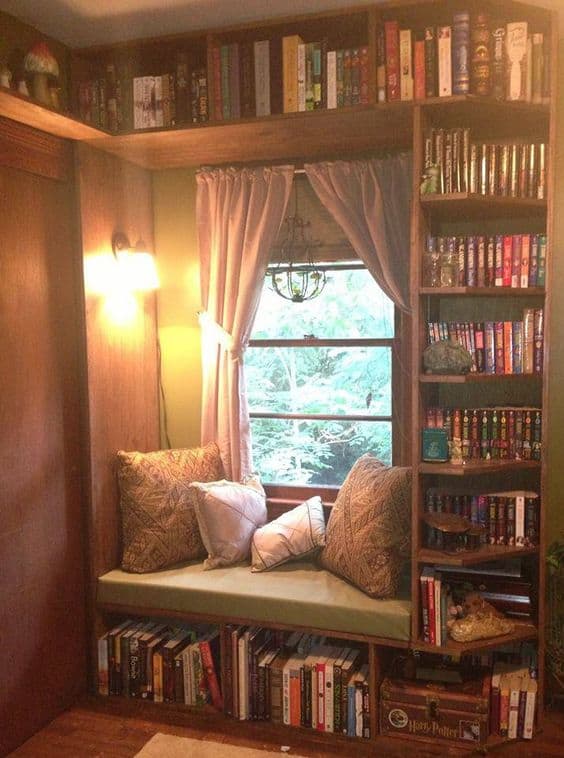
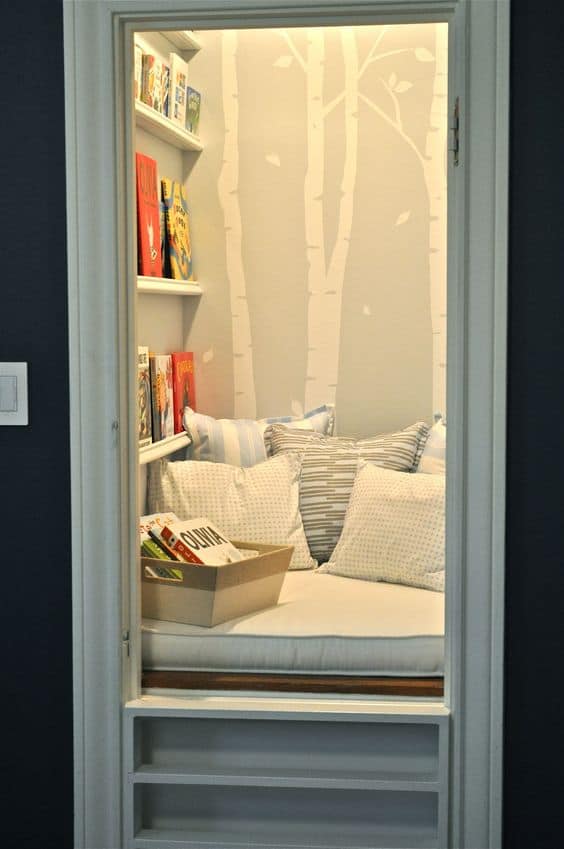

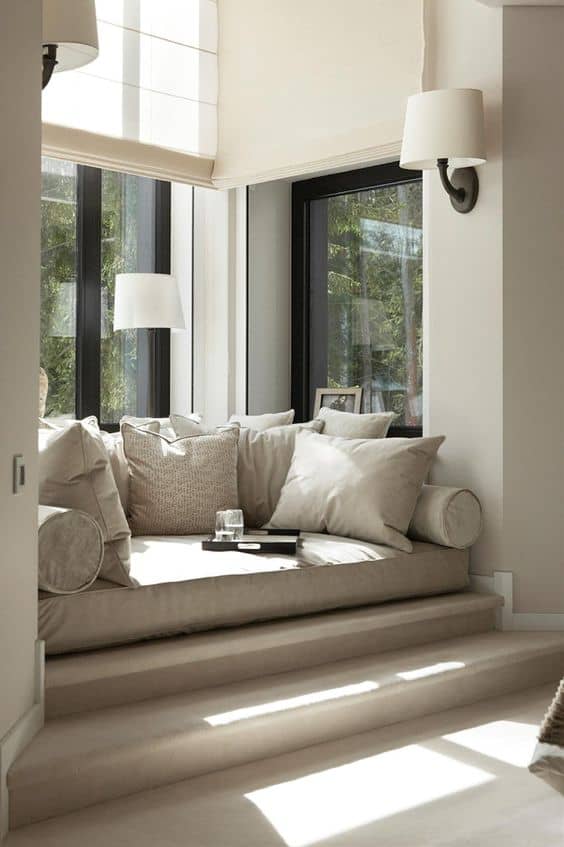
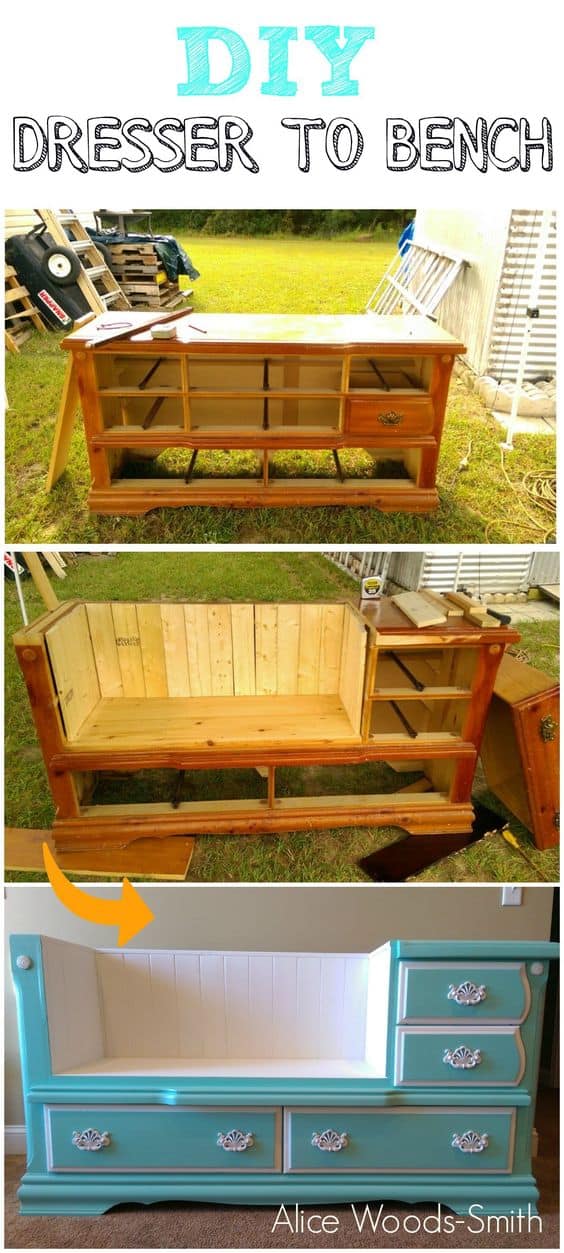
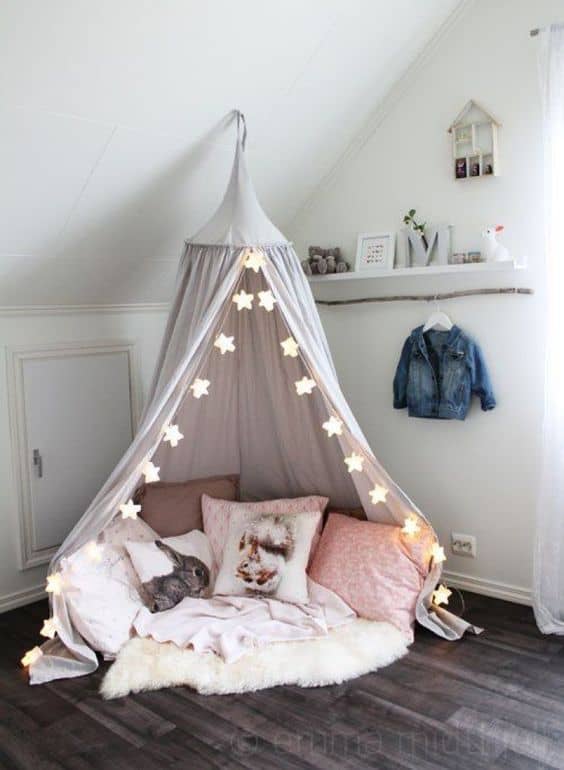
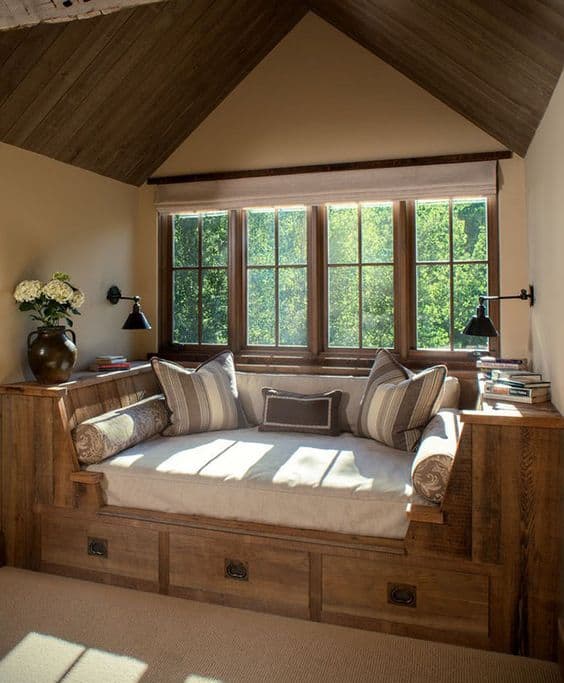
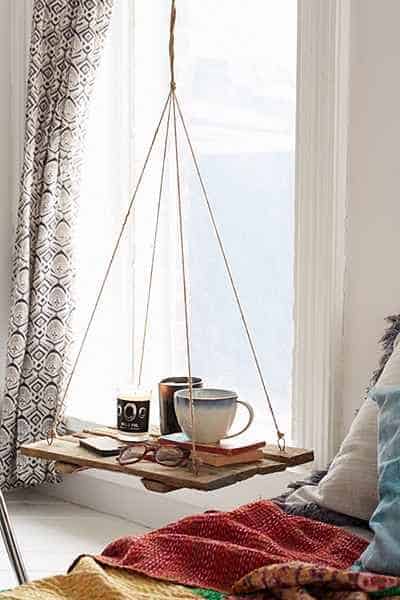
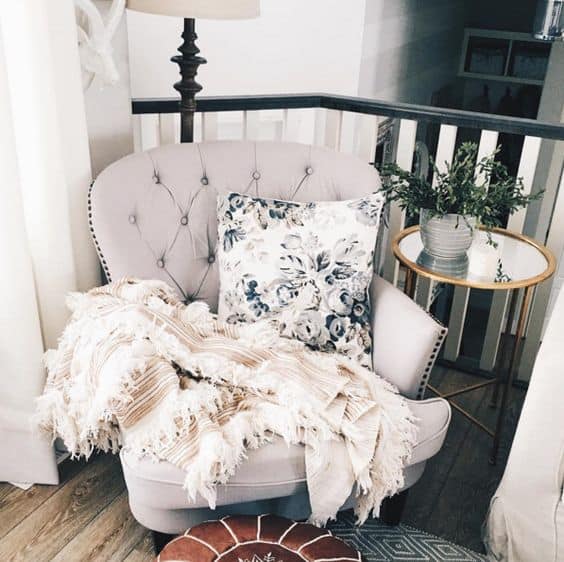

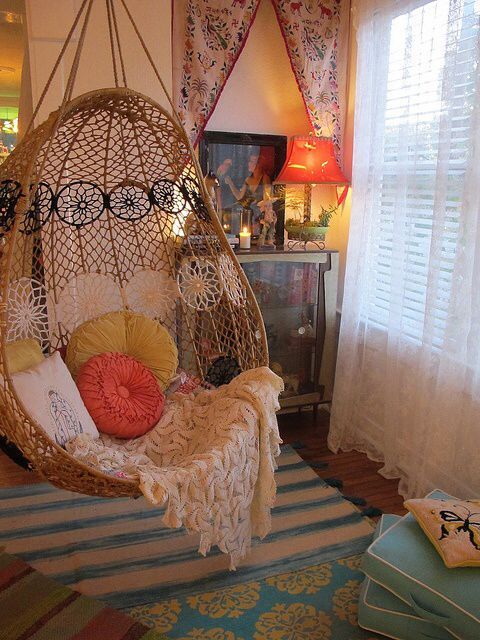
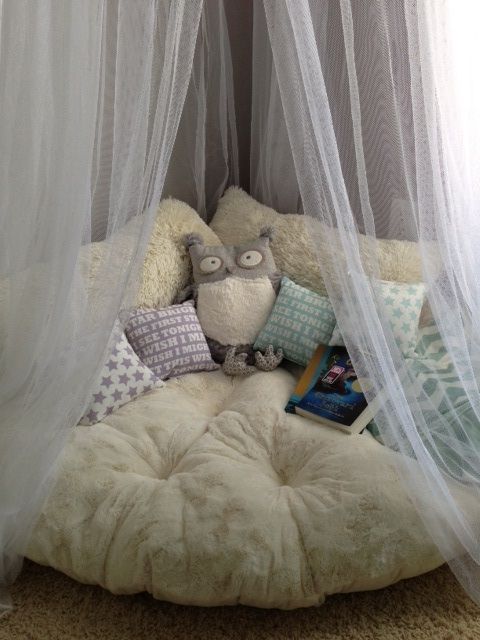

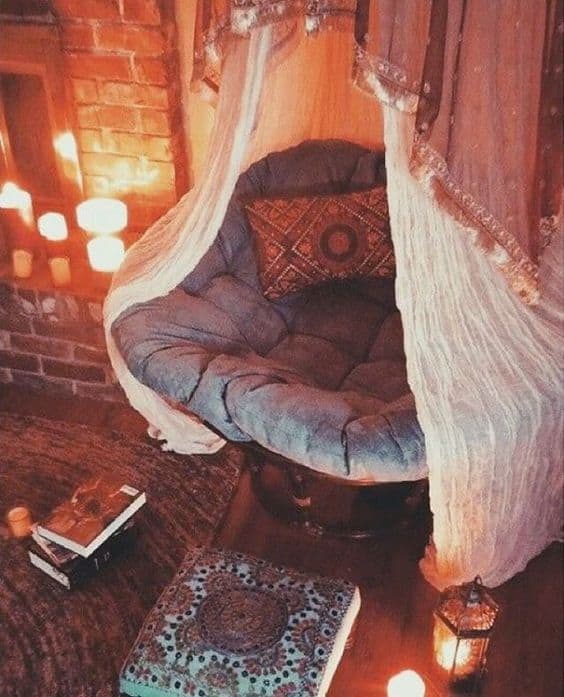
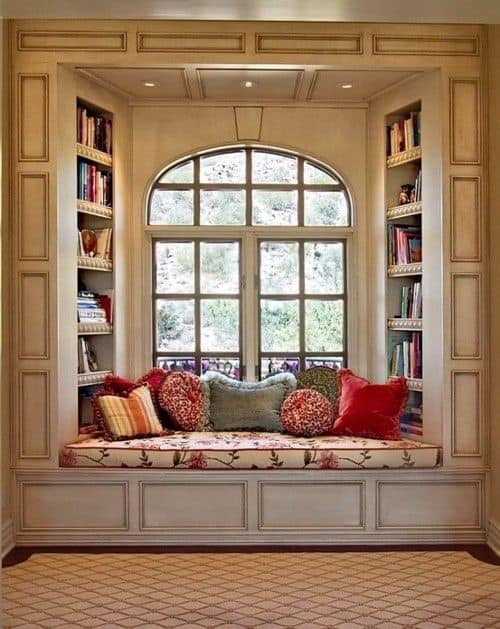
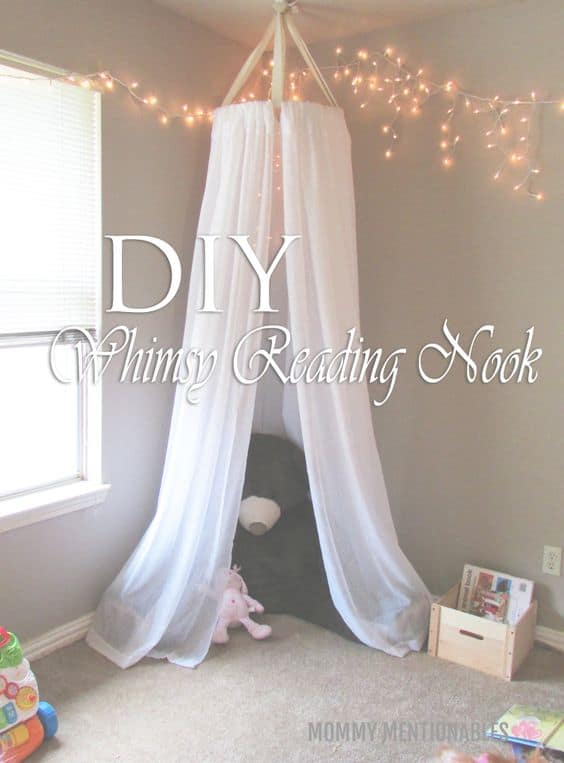
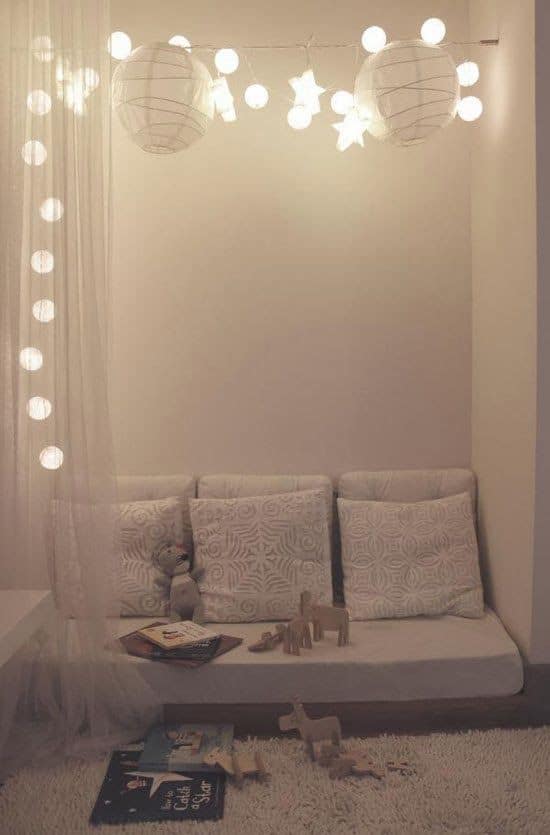
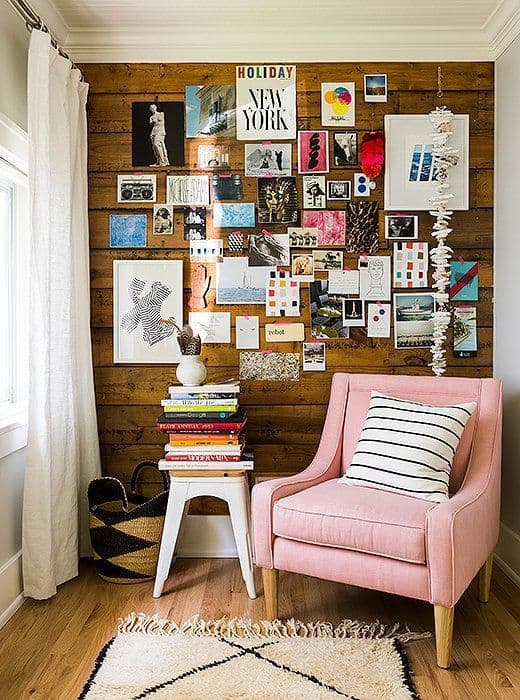 '
'


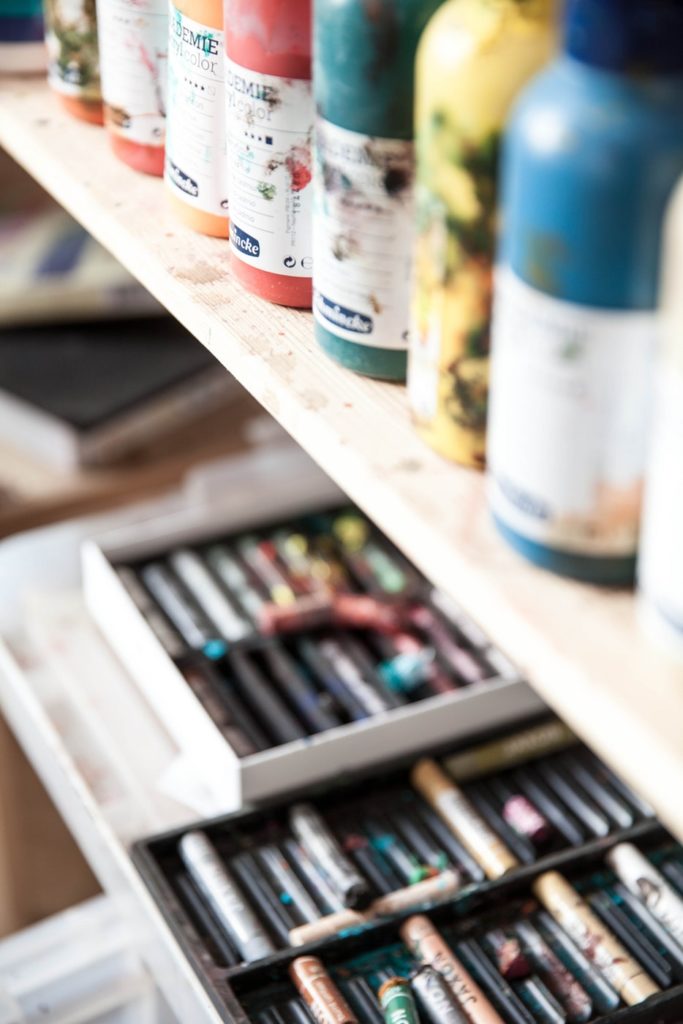


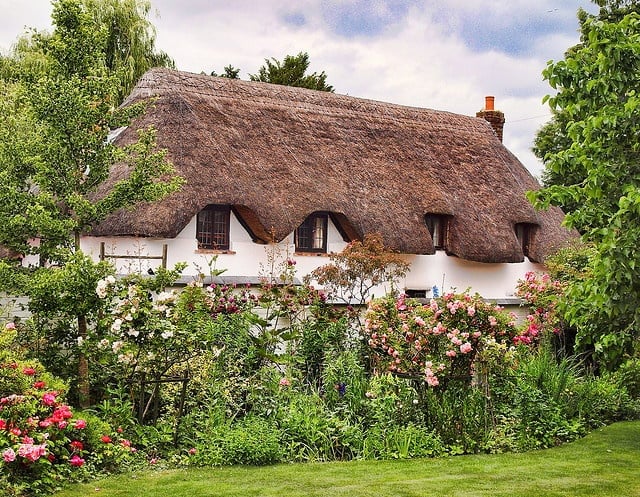
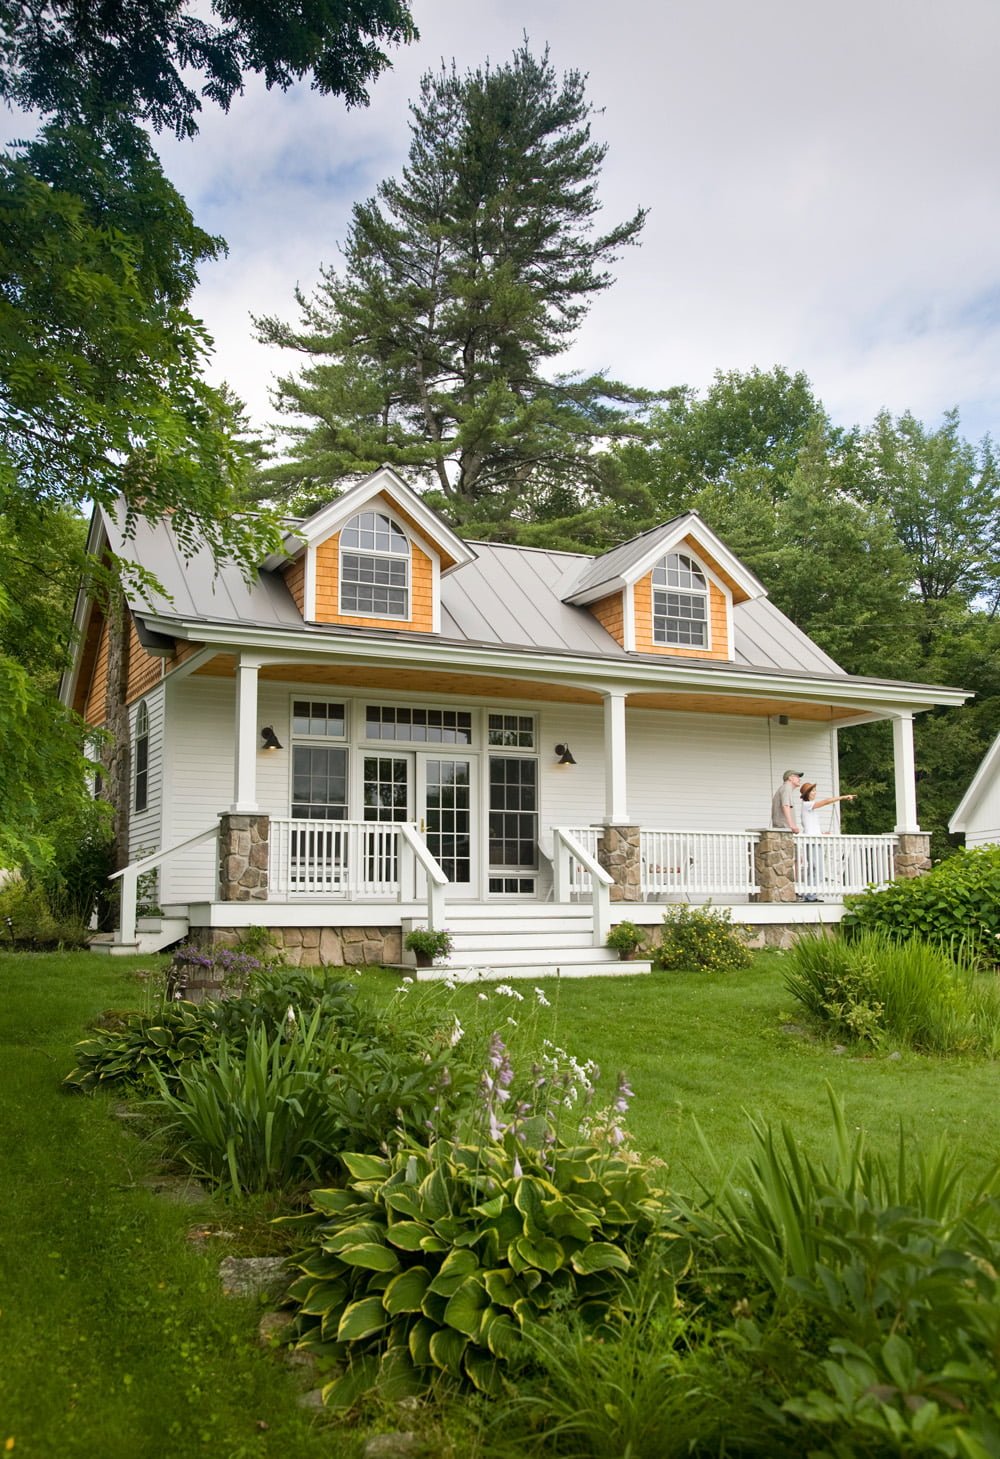
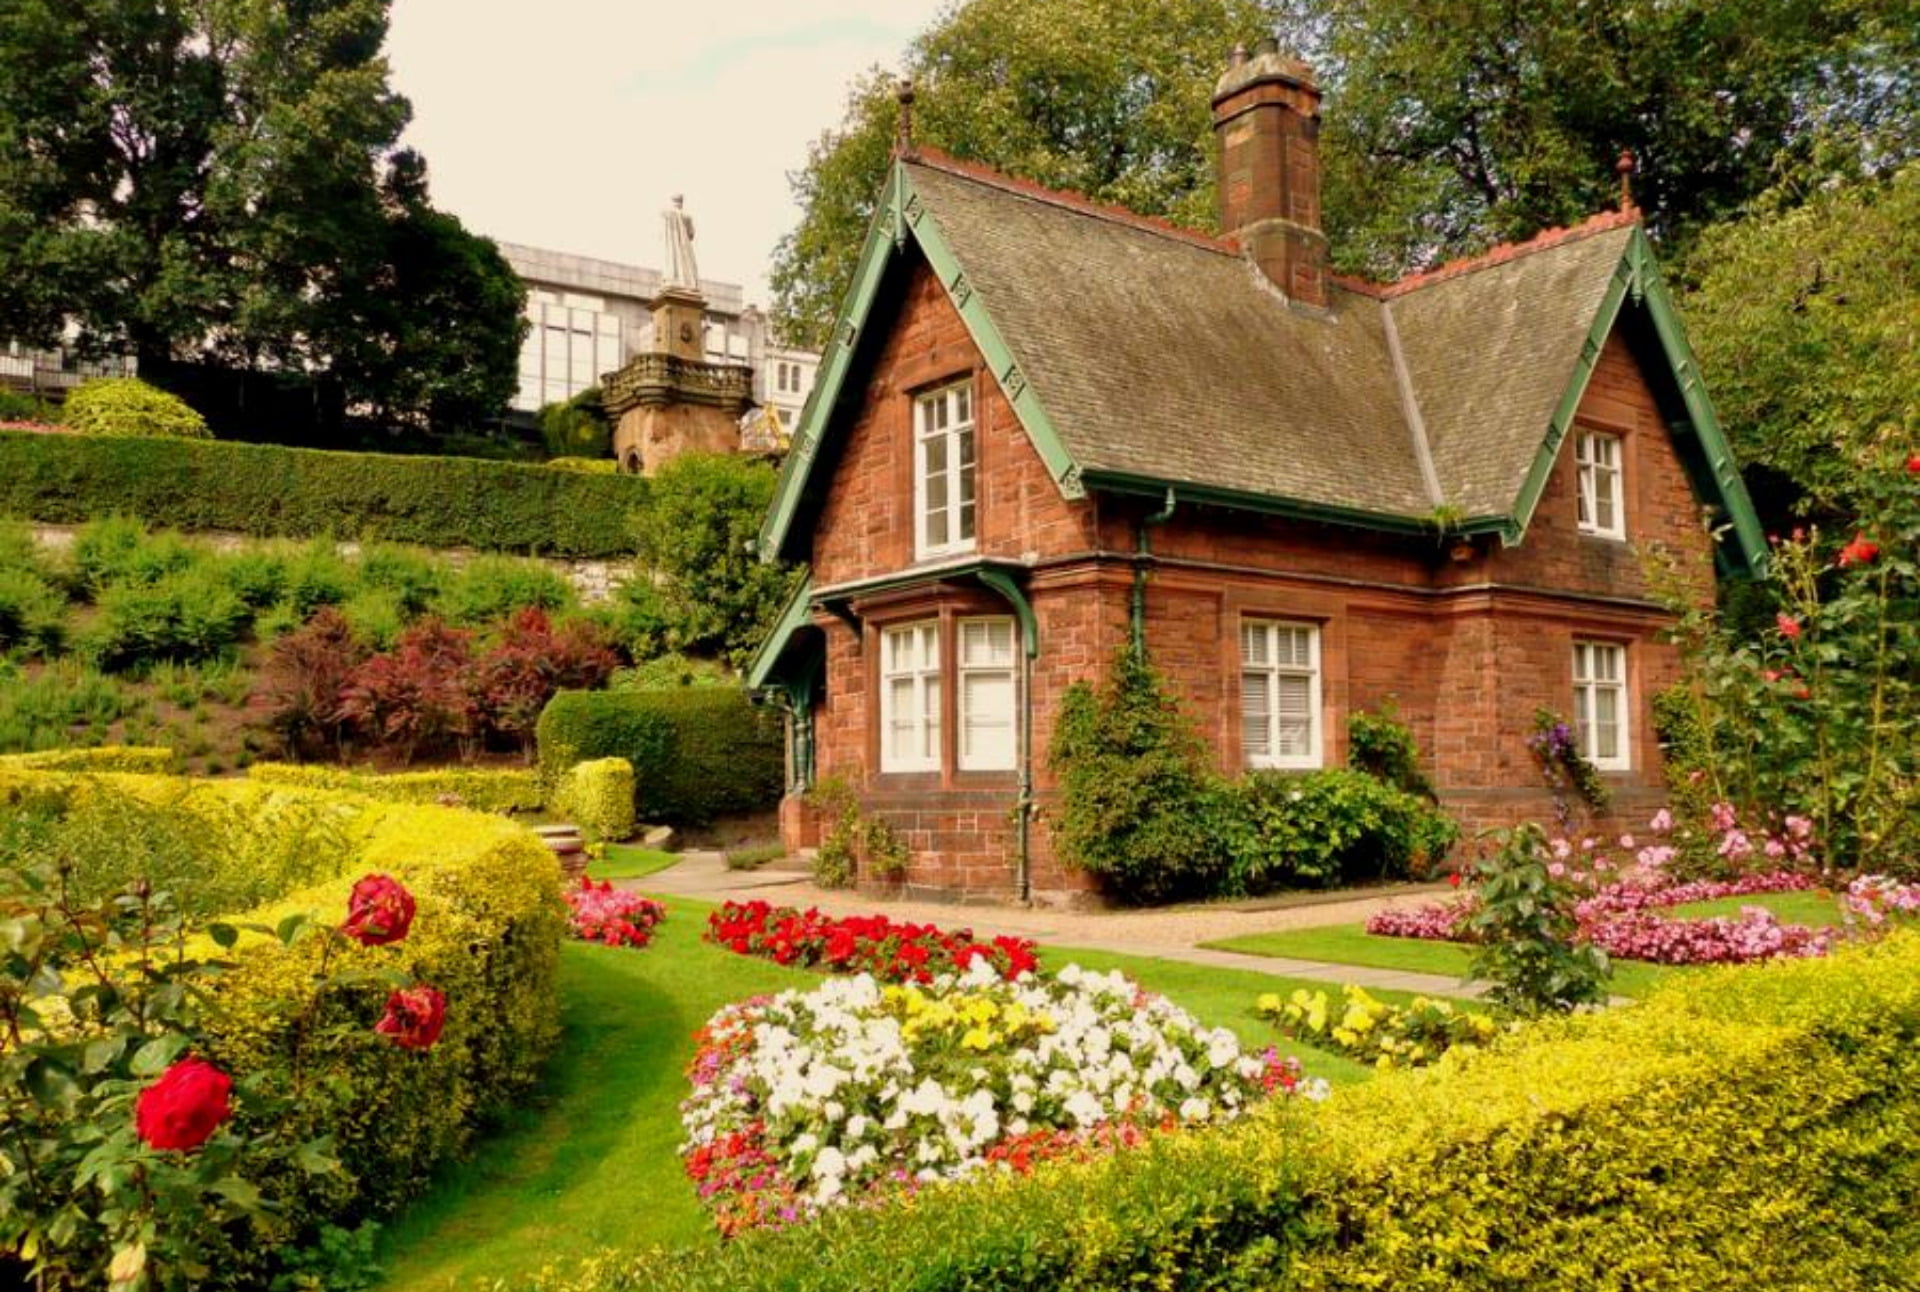
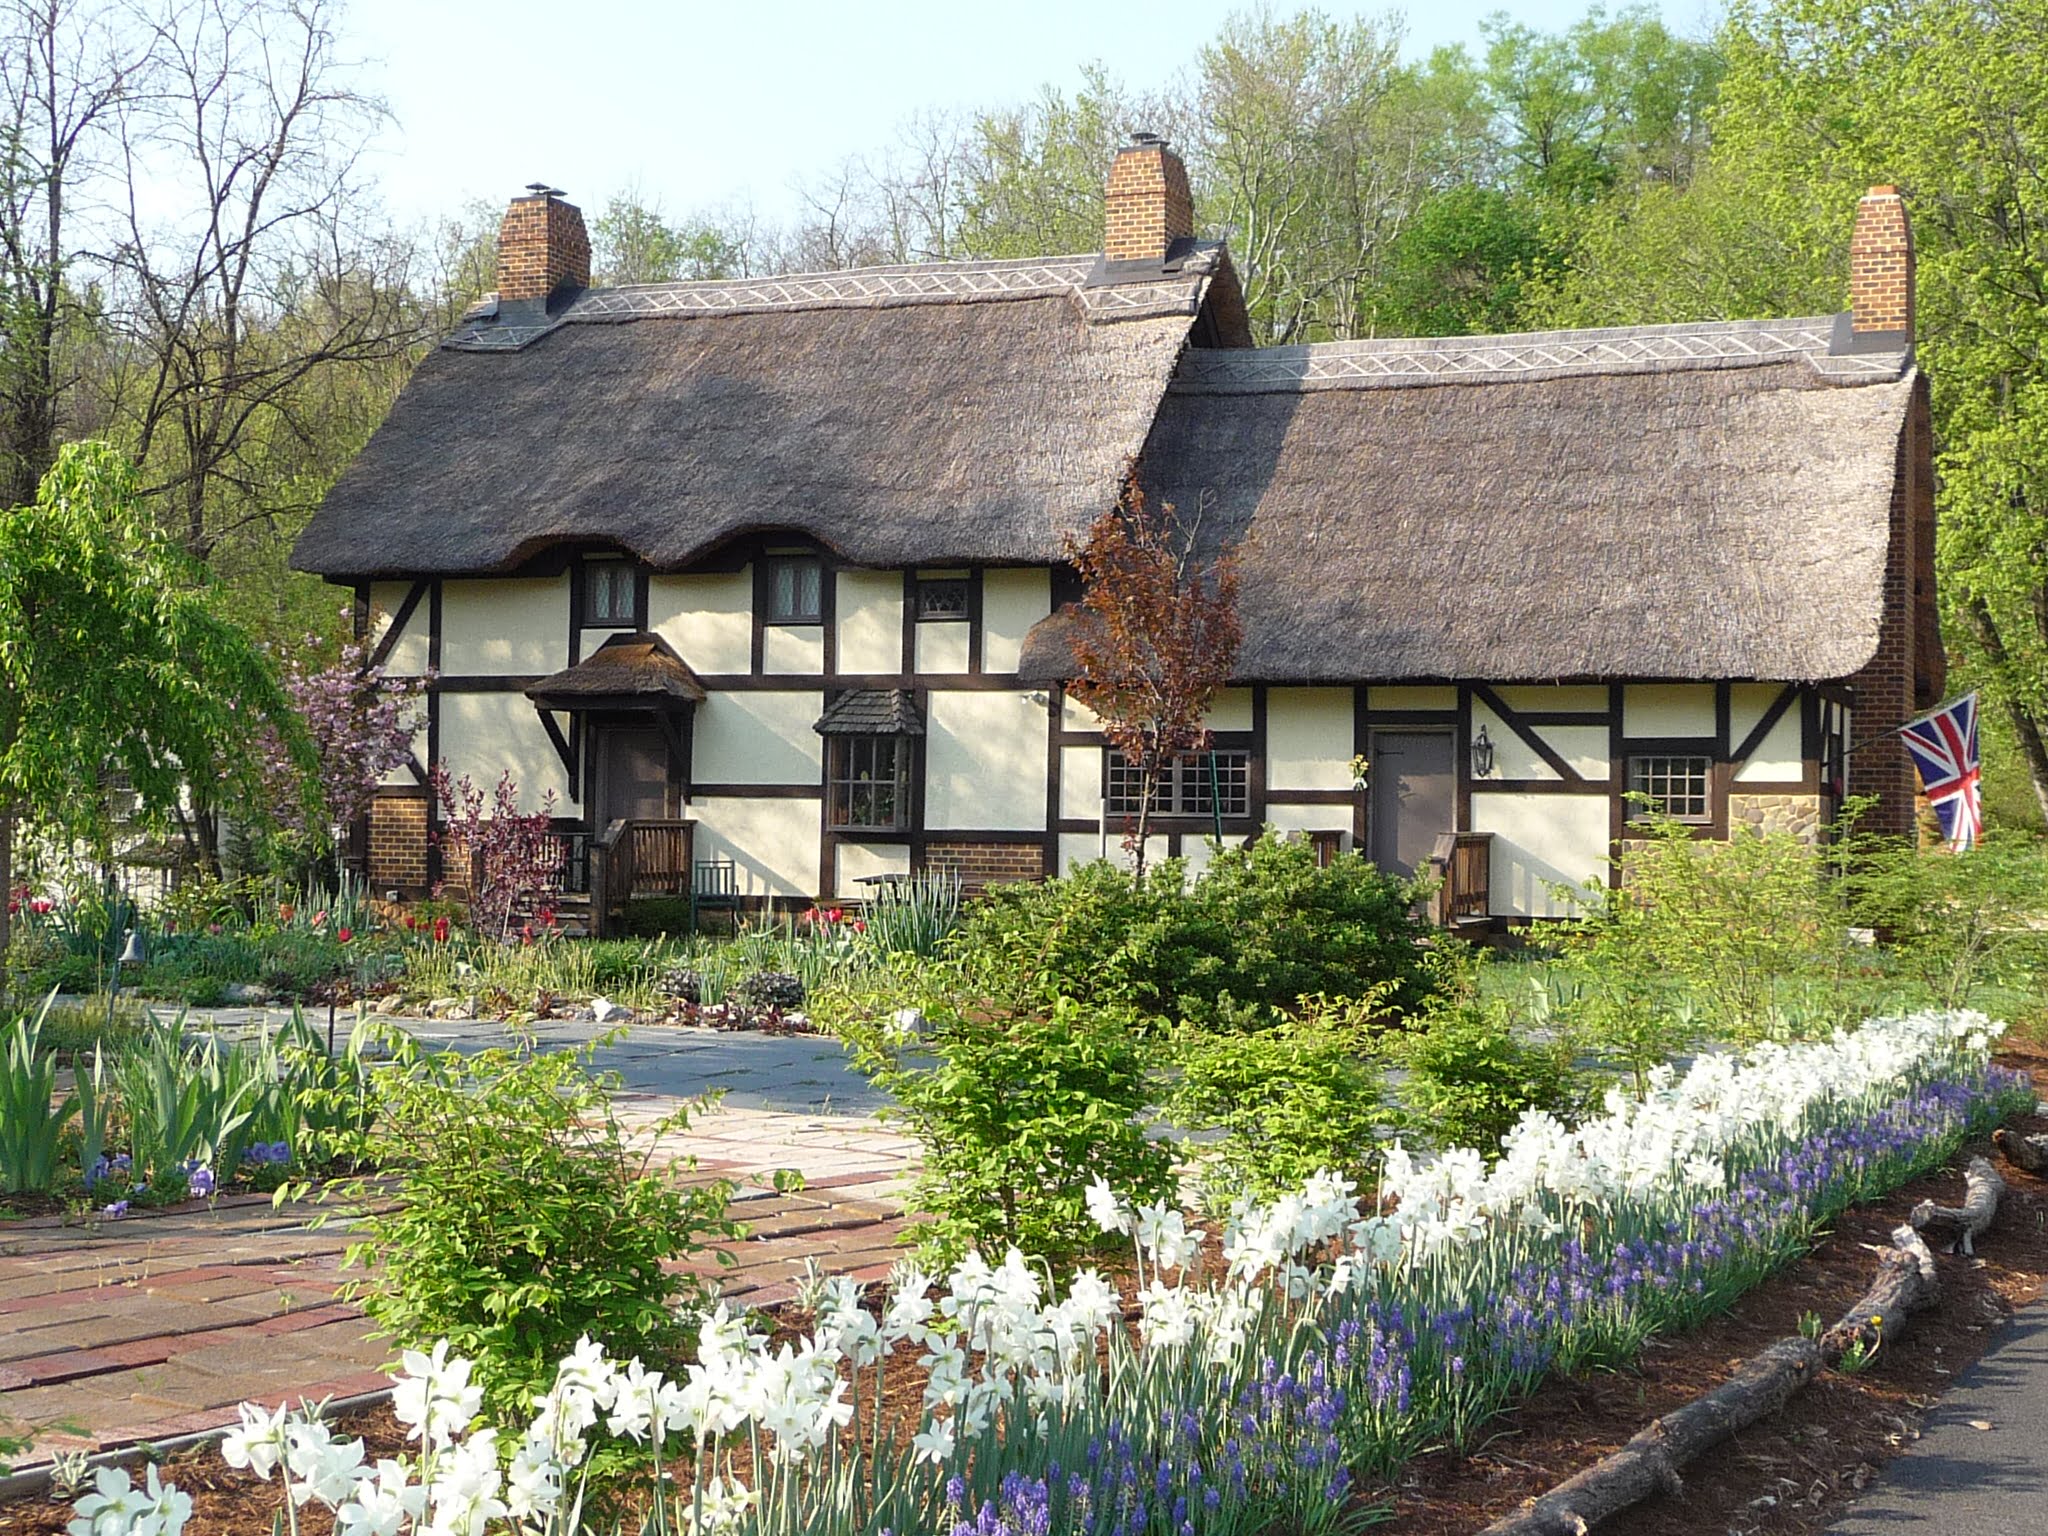

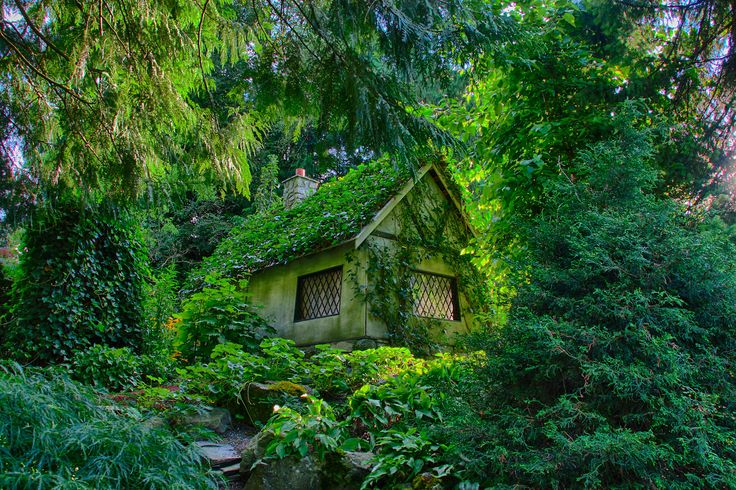
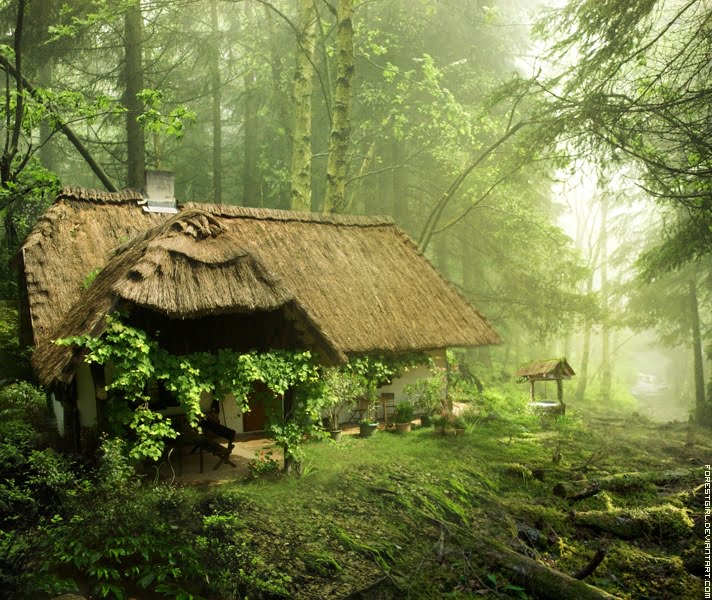
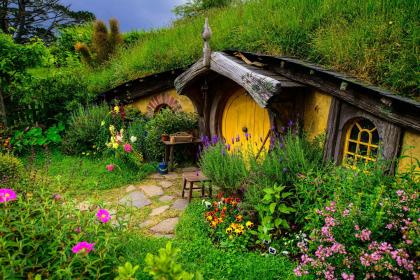
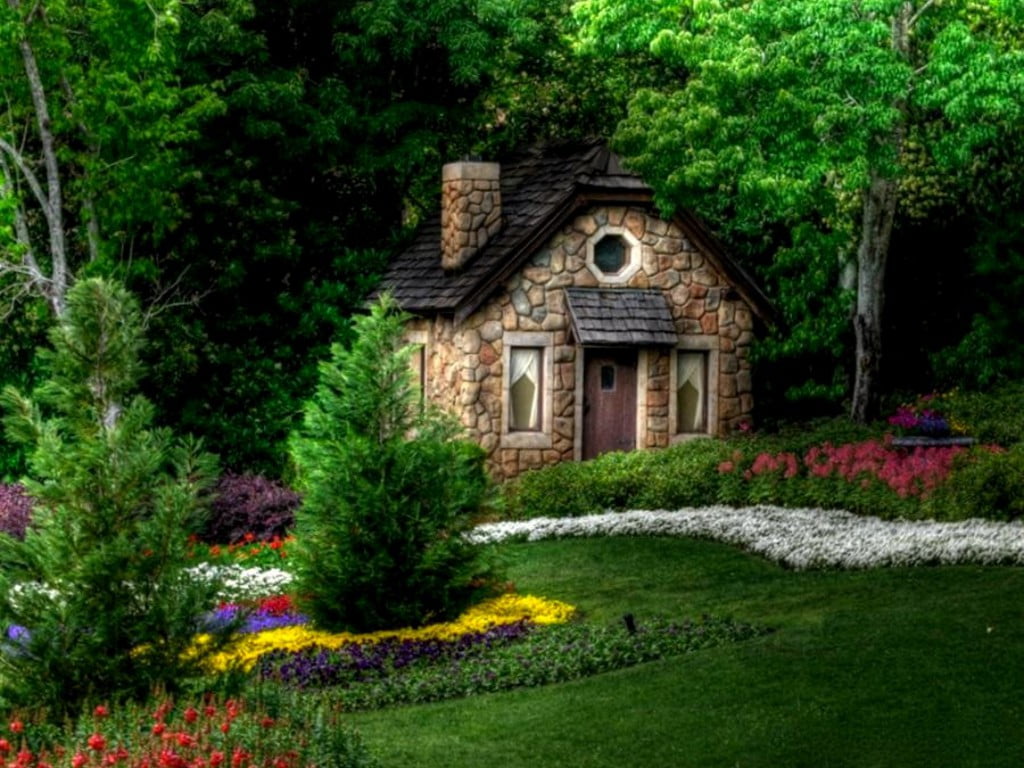


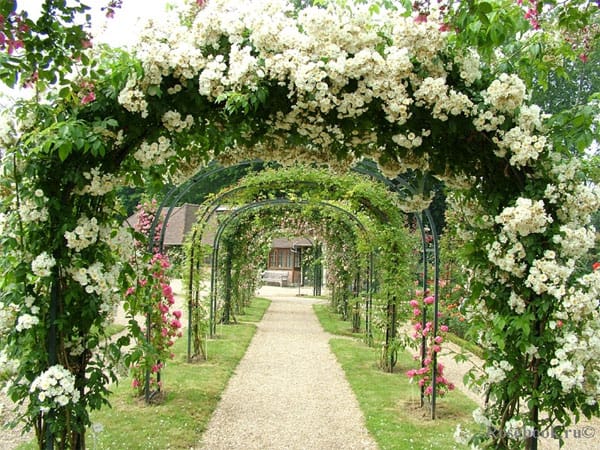
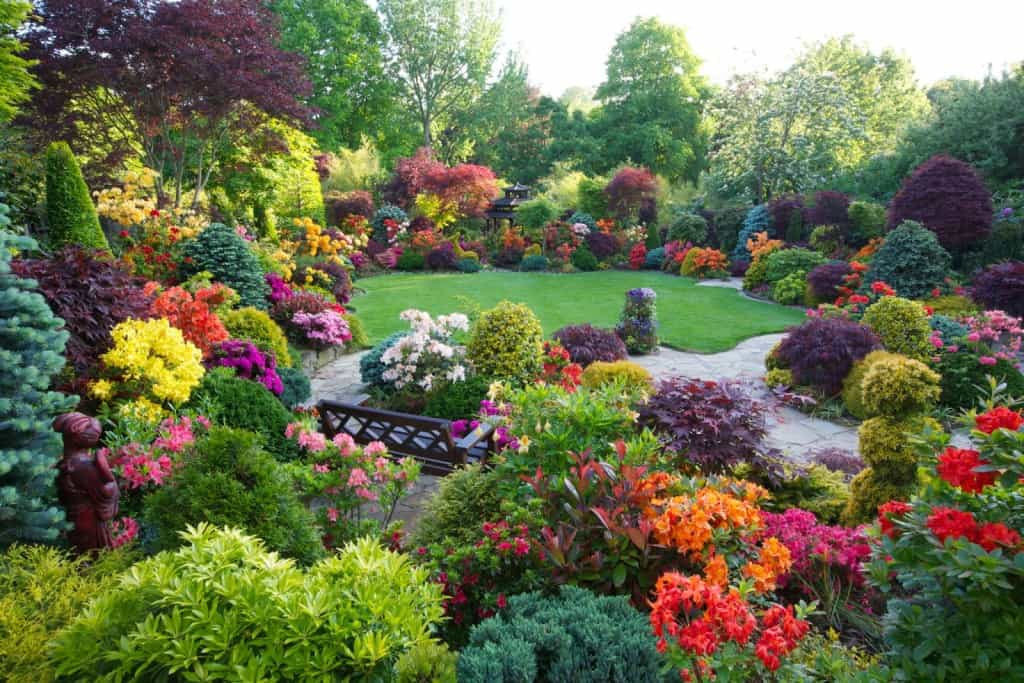
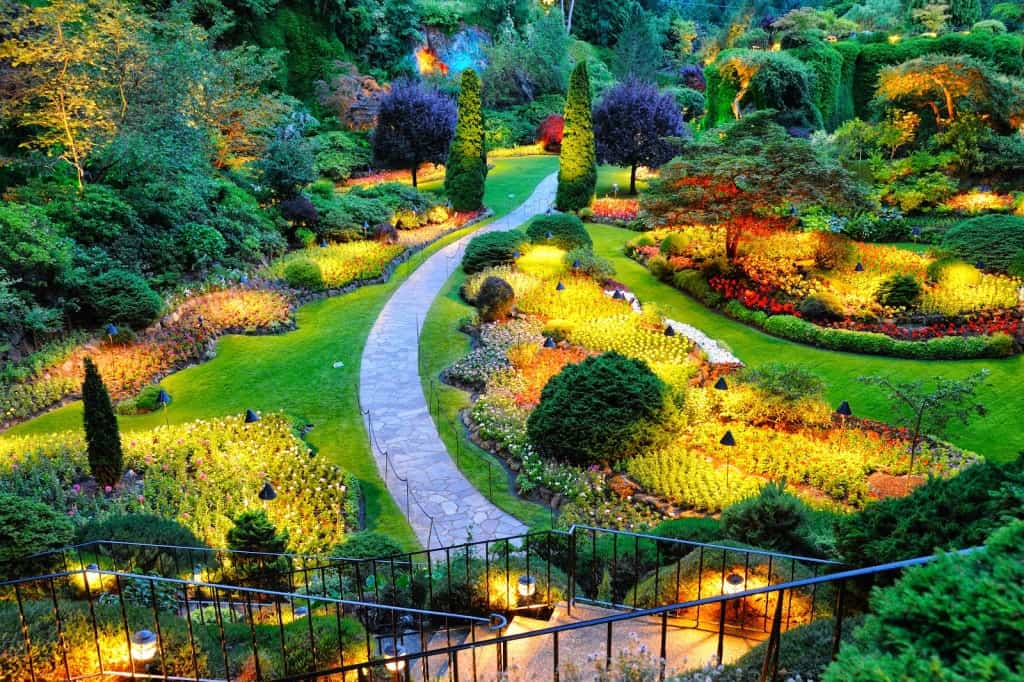
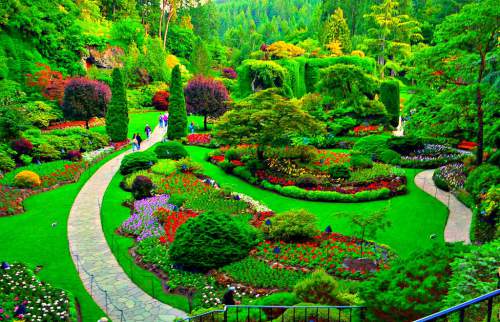
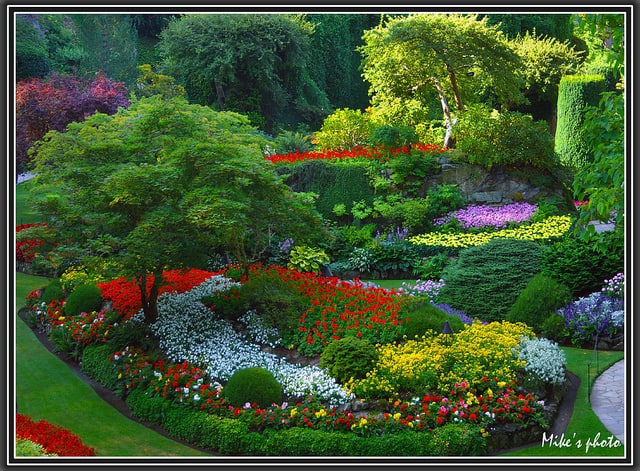
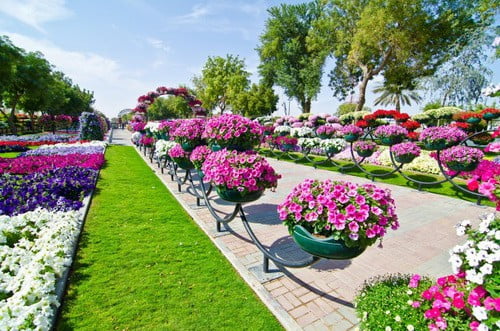
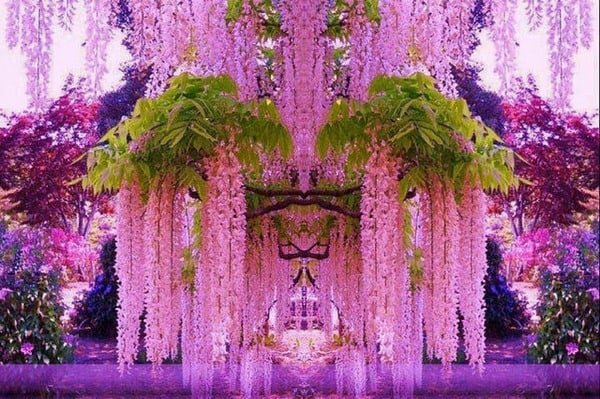

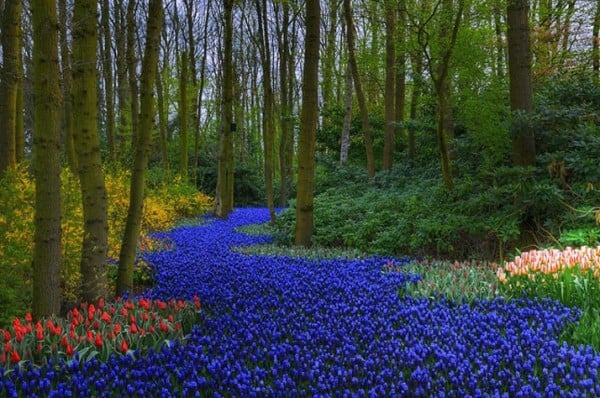
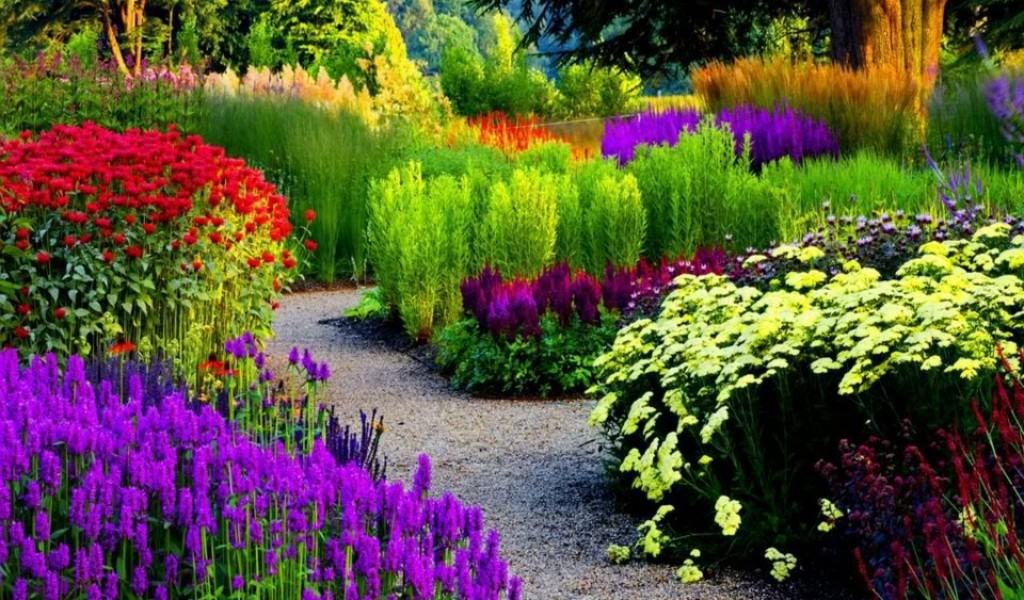


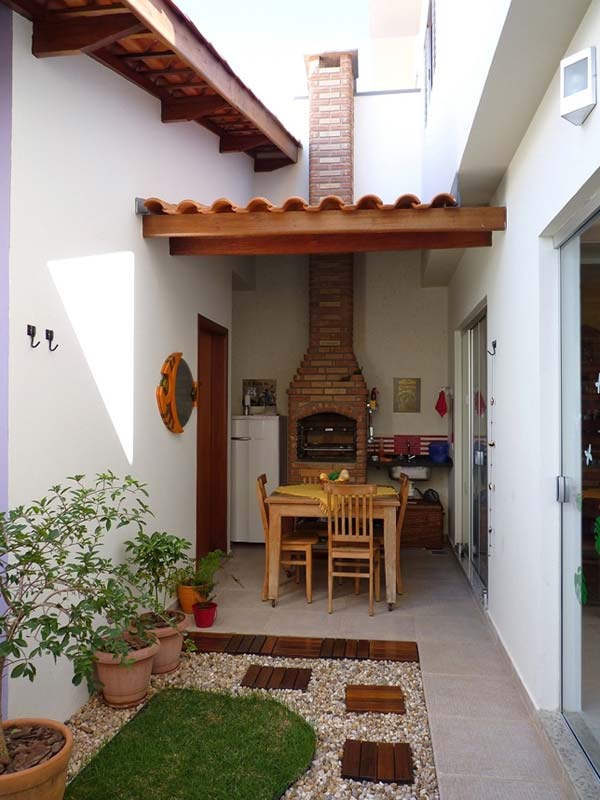
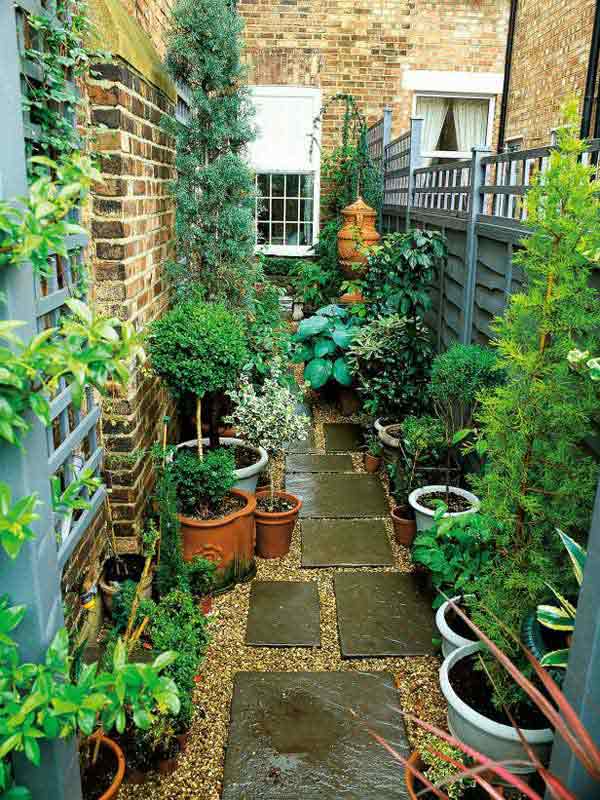
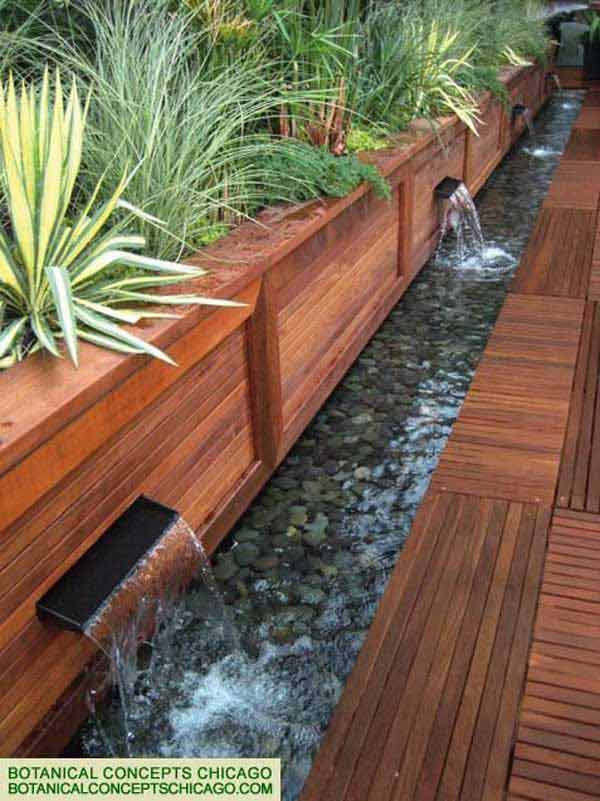
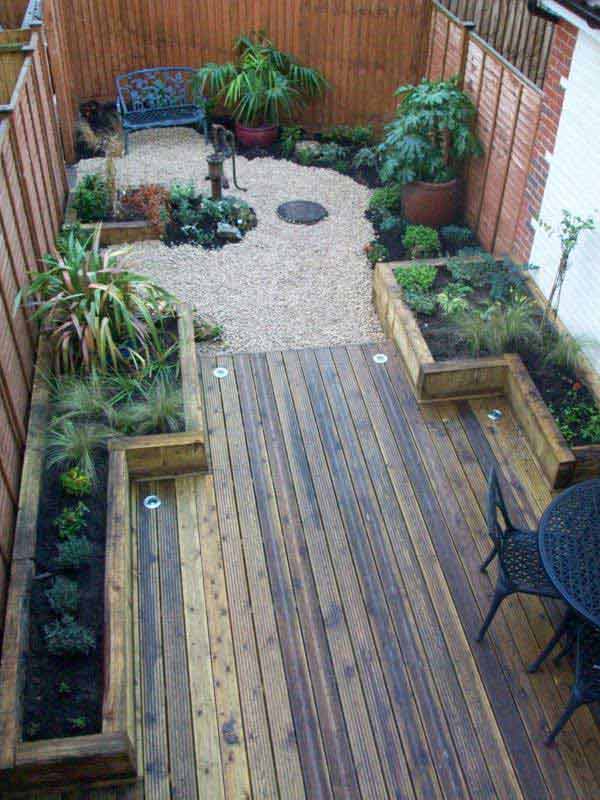
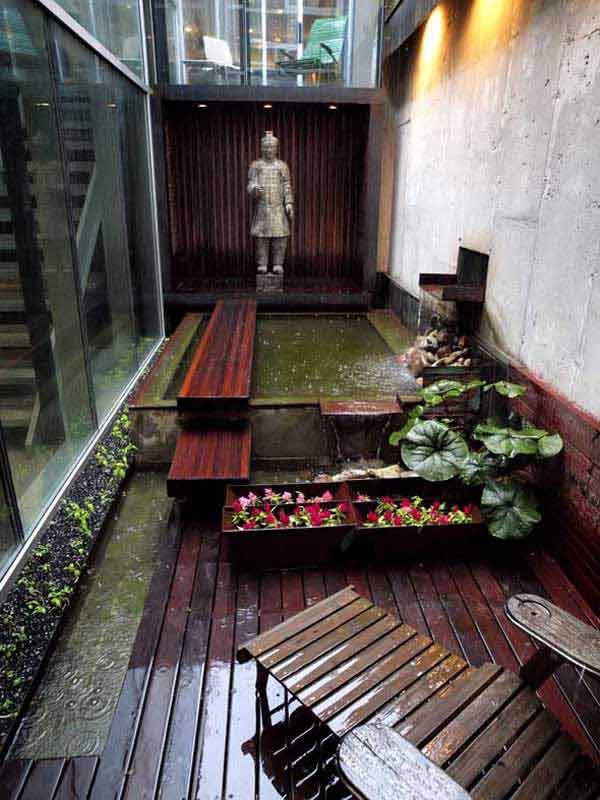
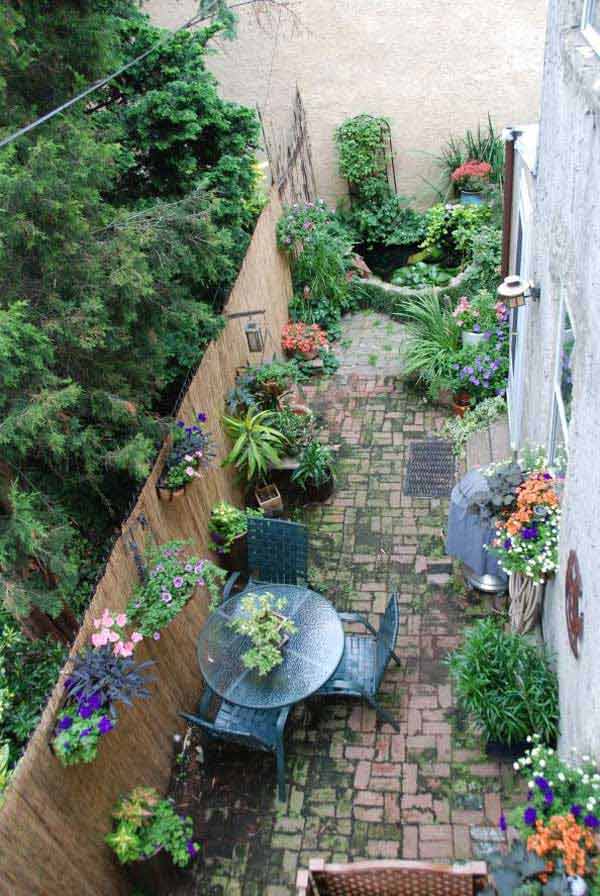
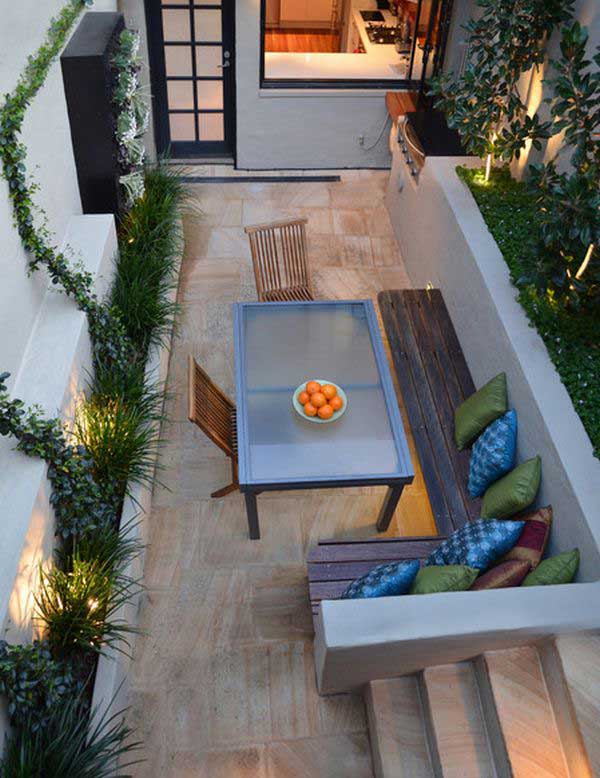
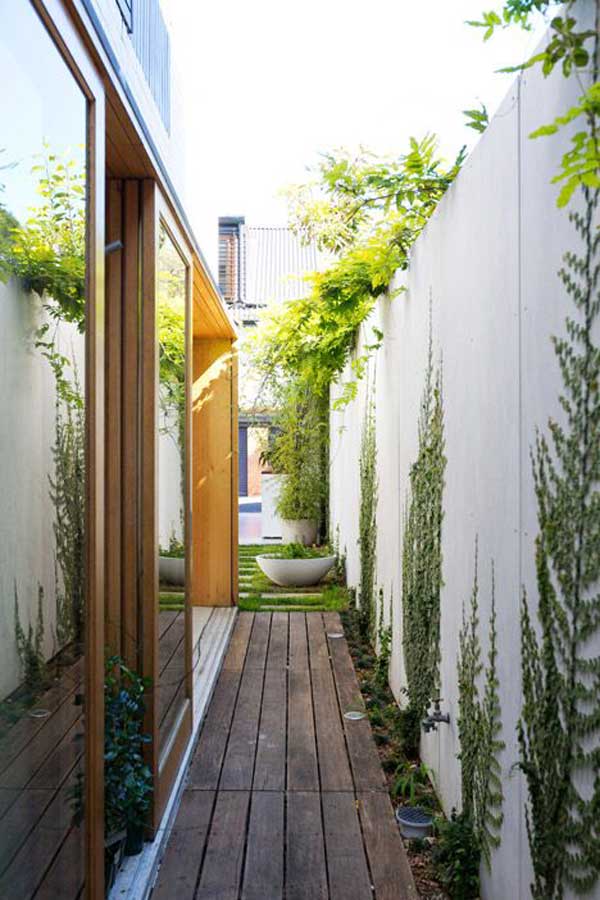

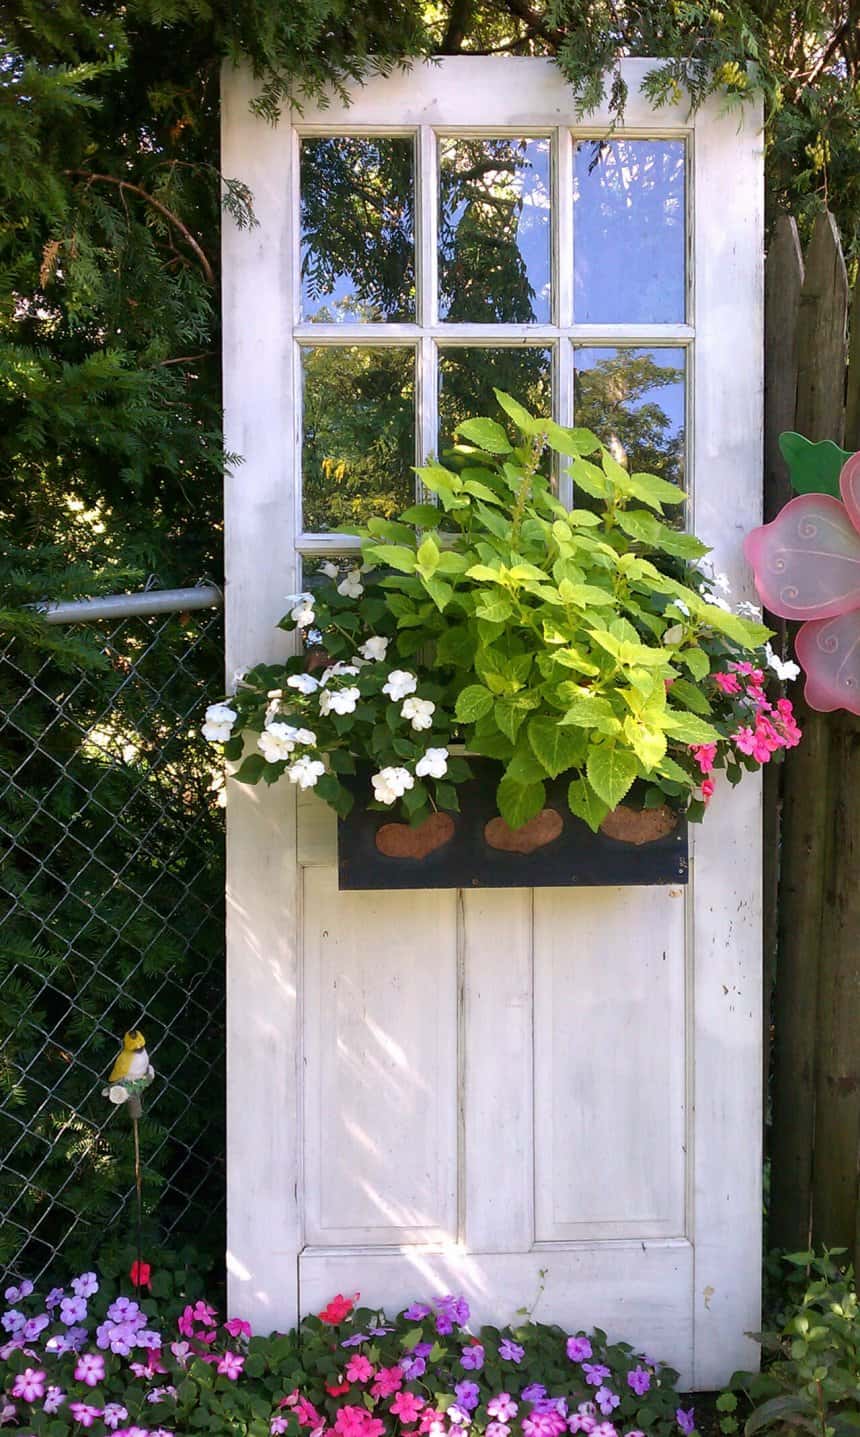
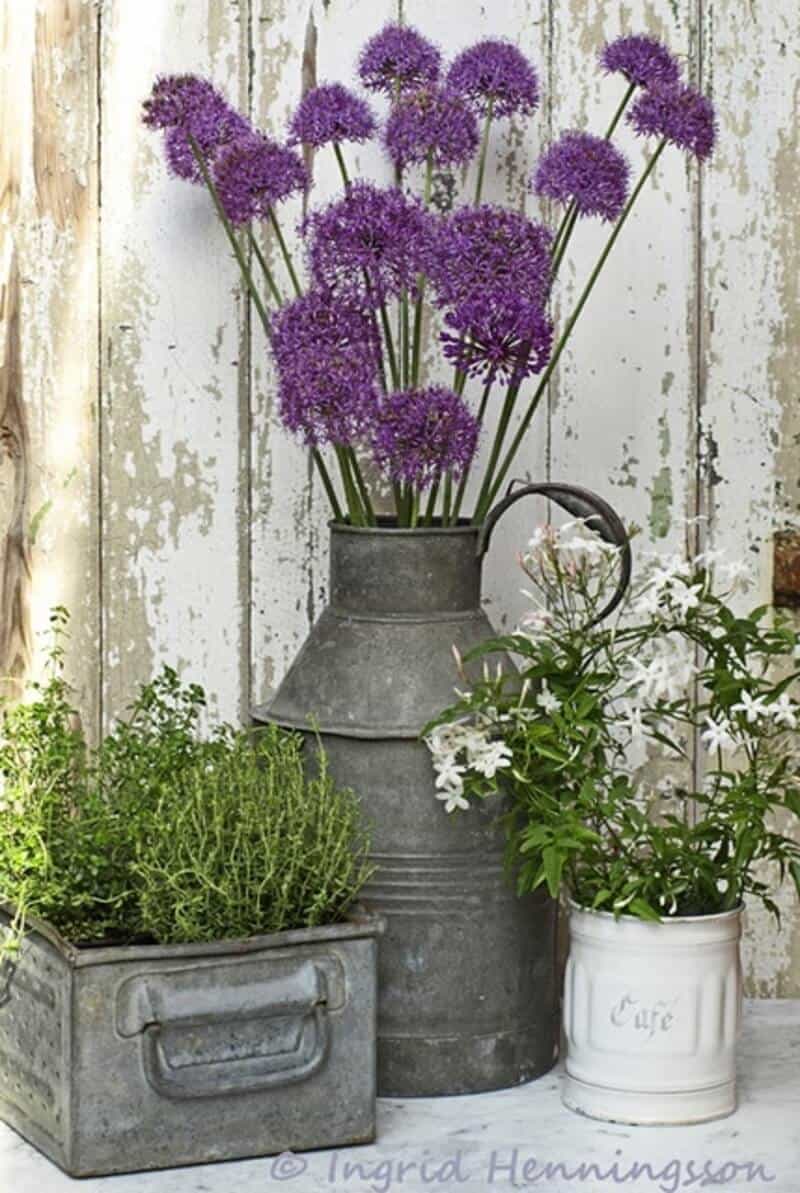
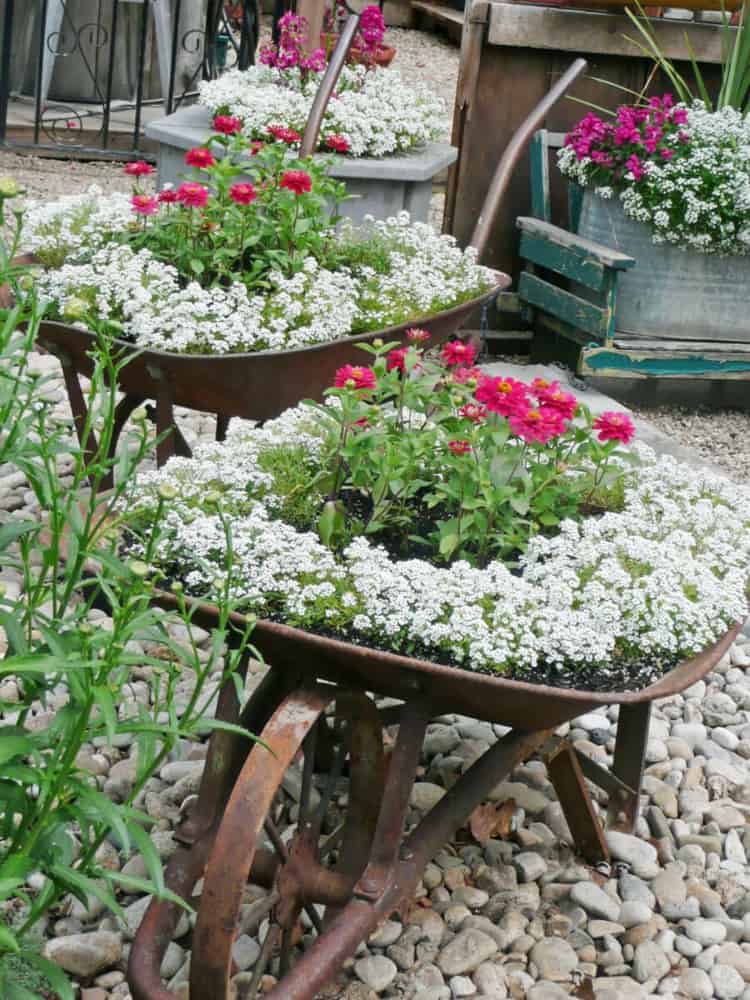
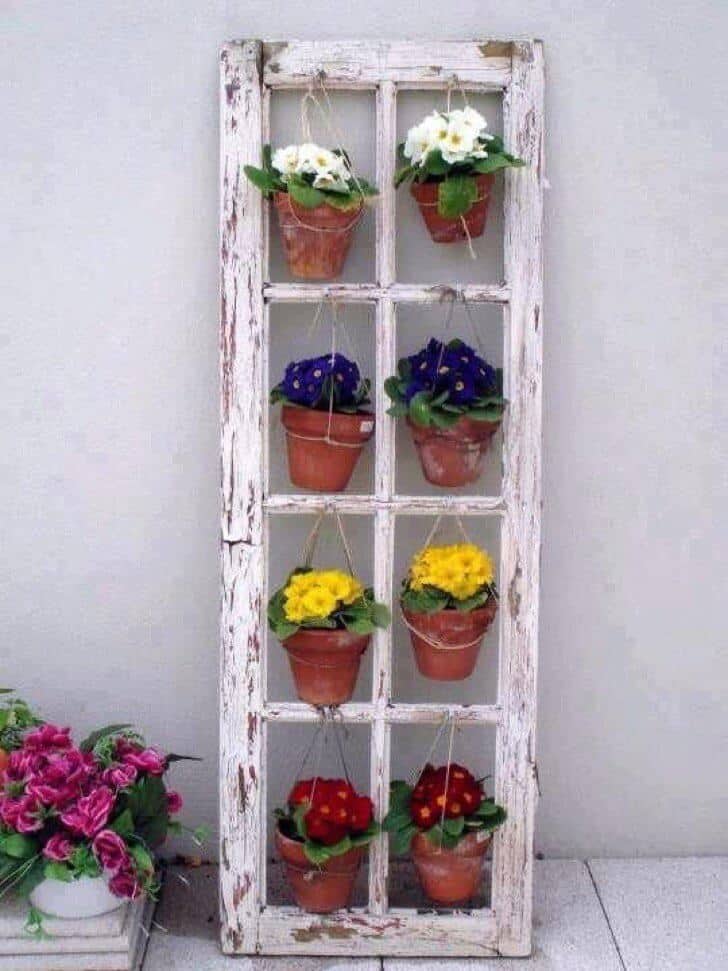
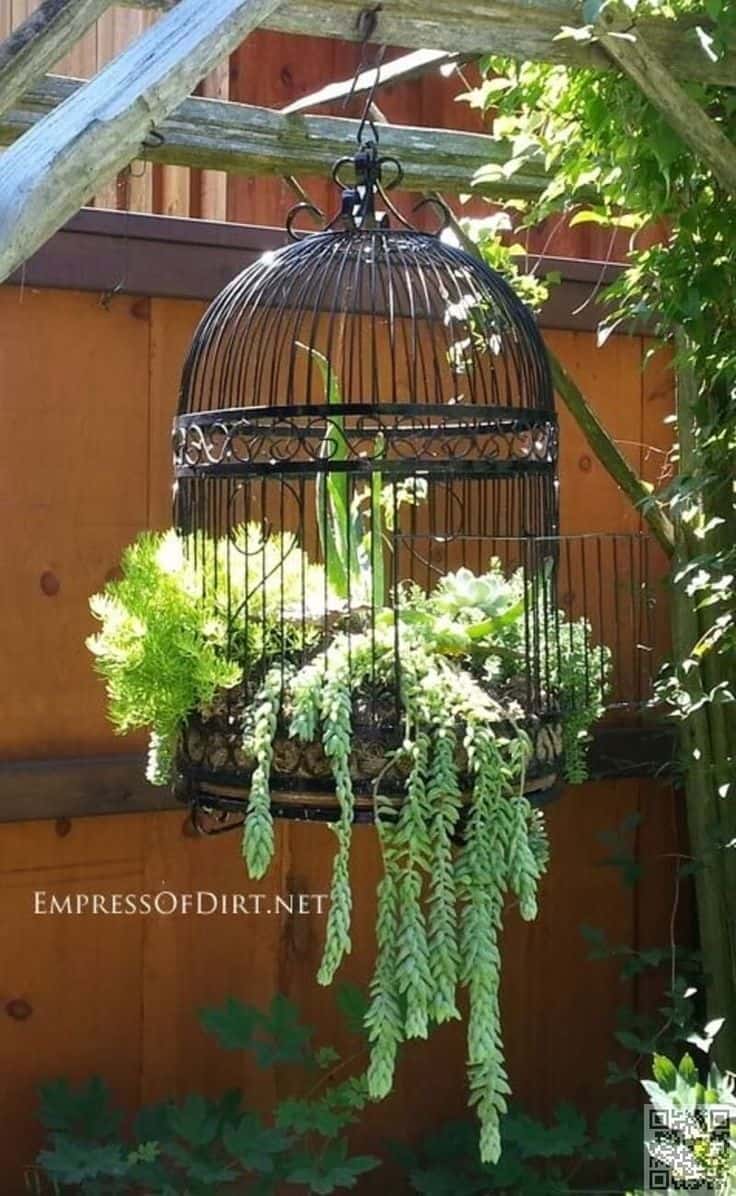
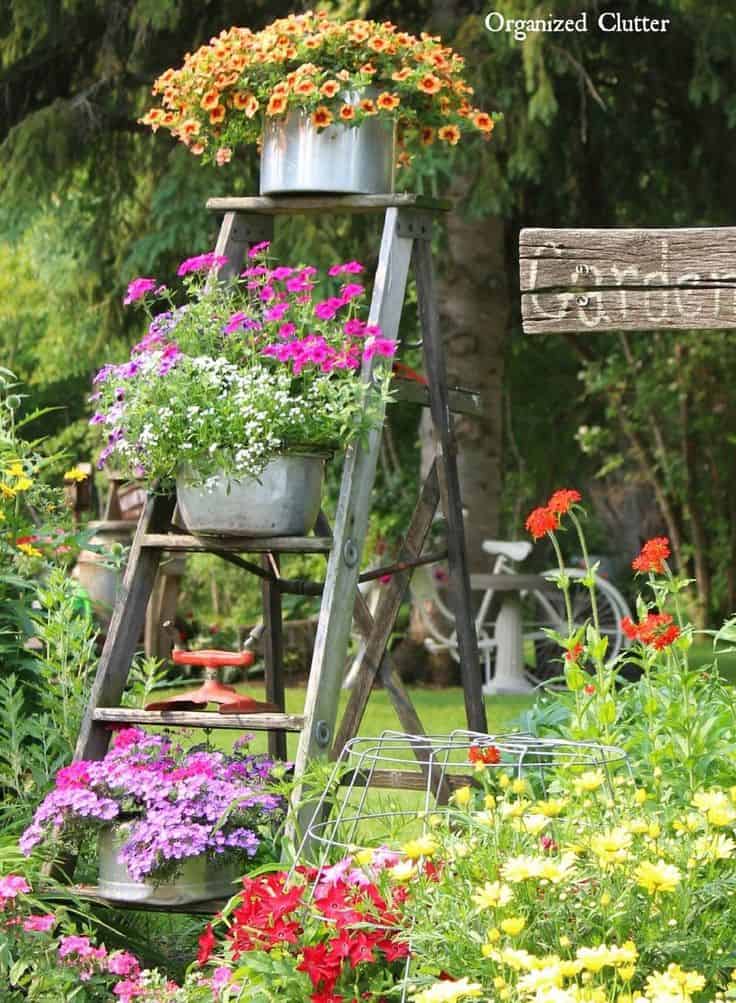
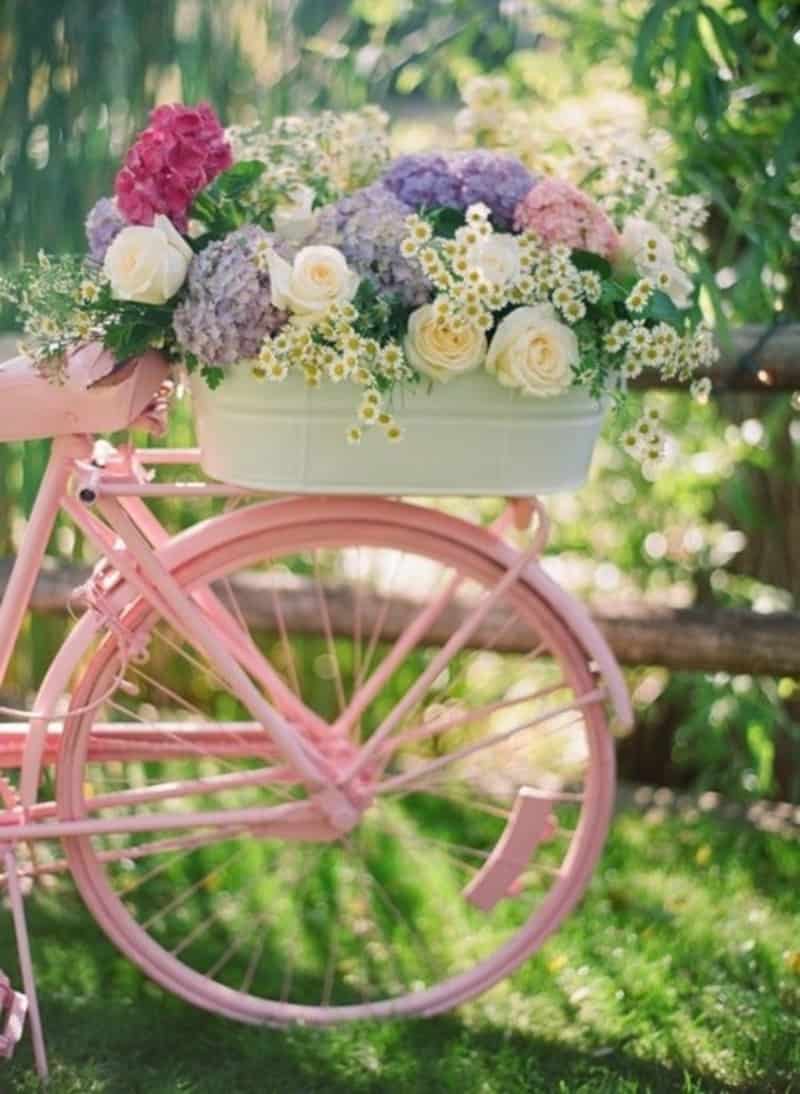
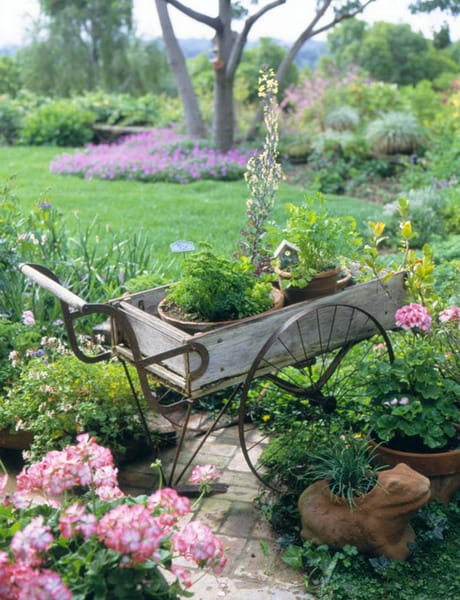
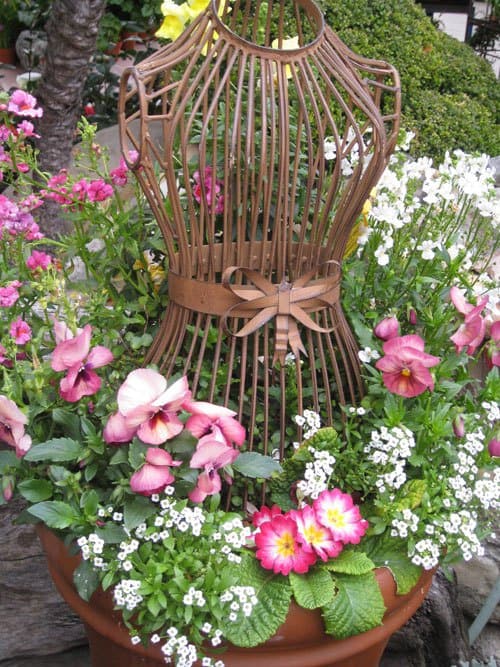
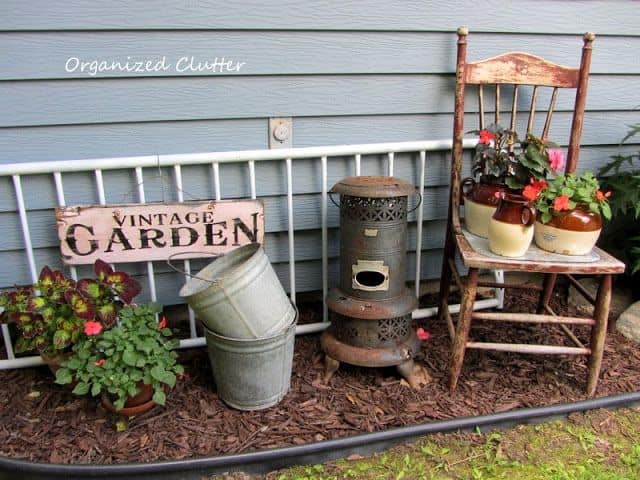
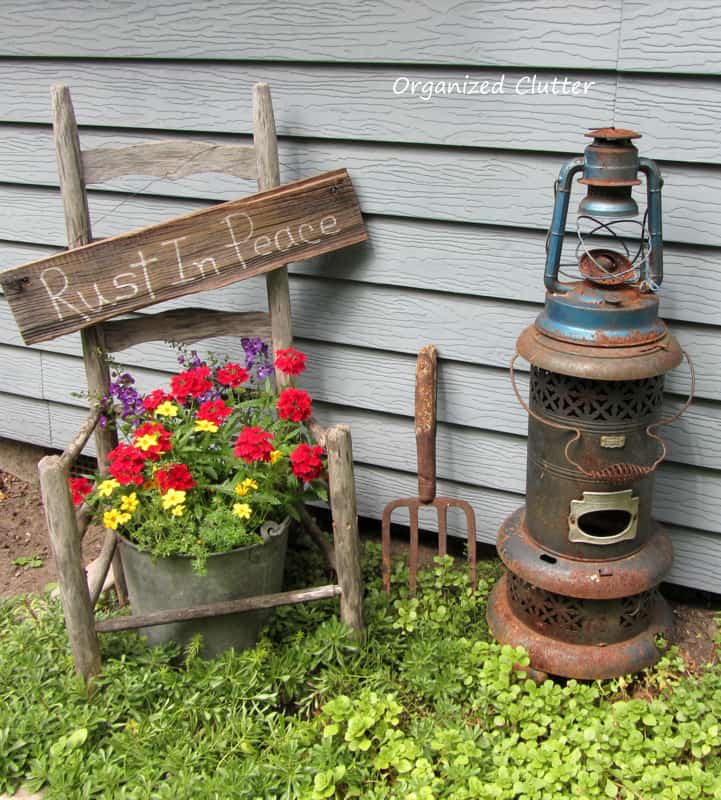
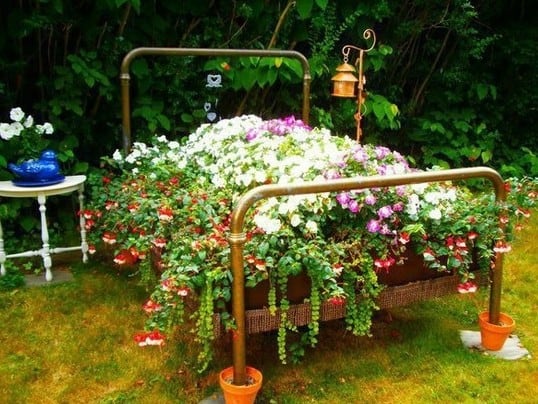
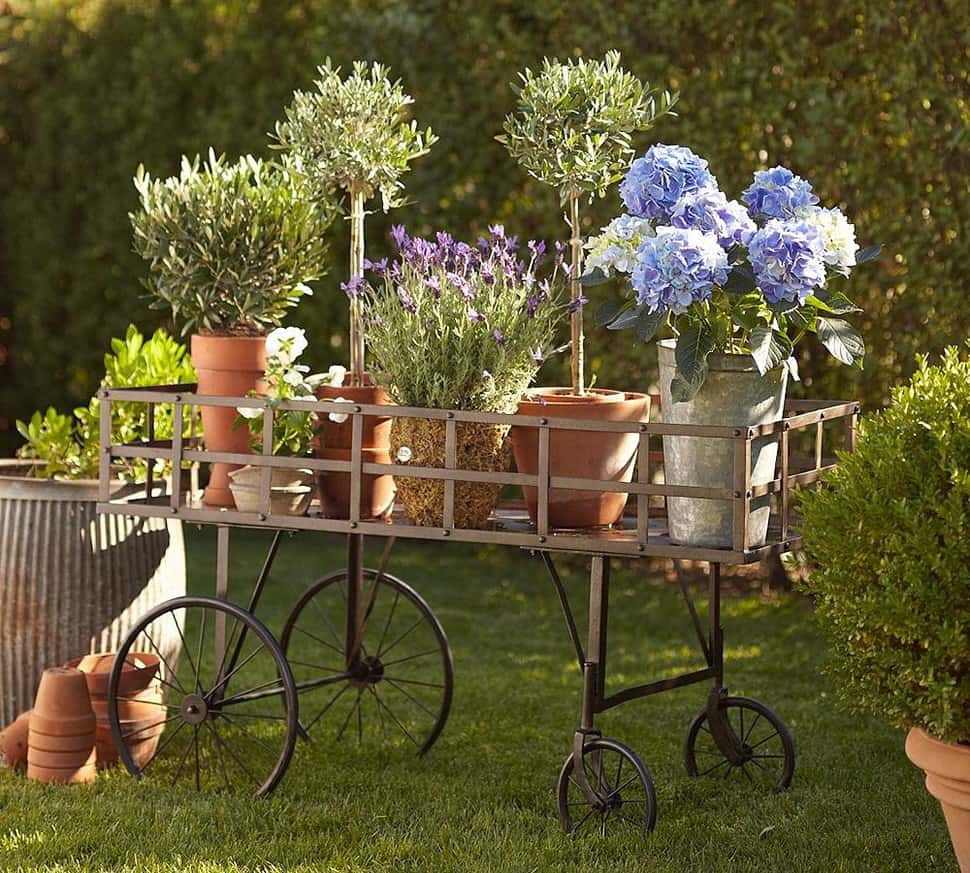
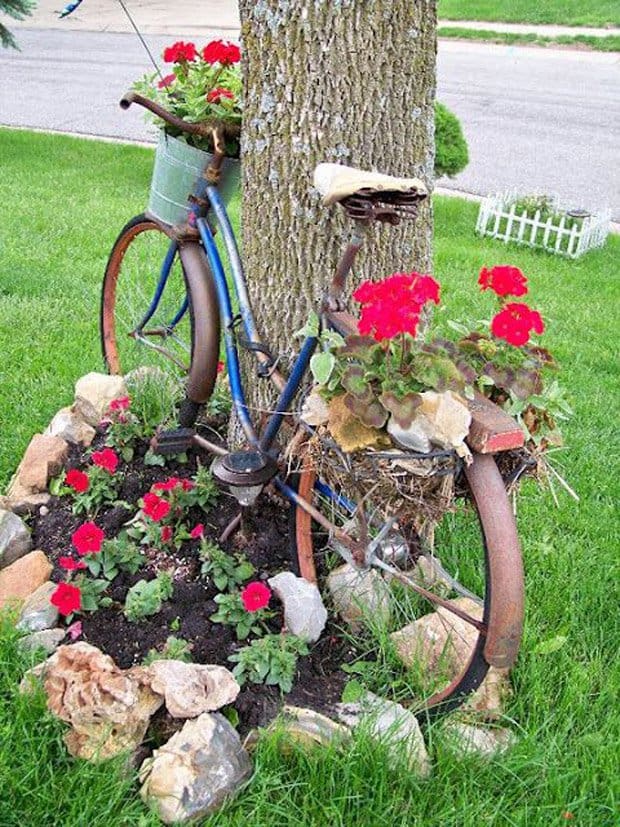
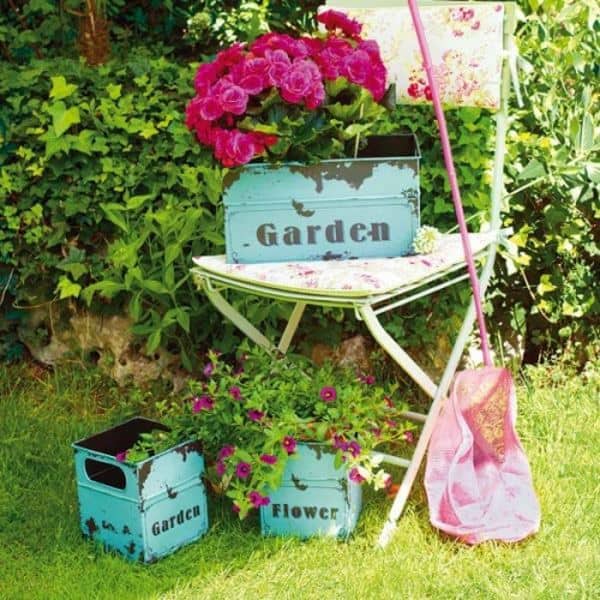
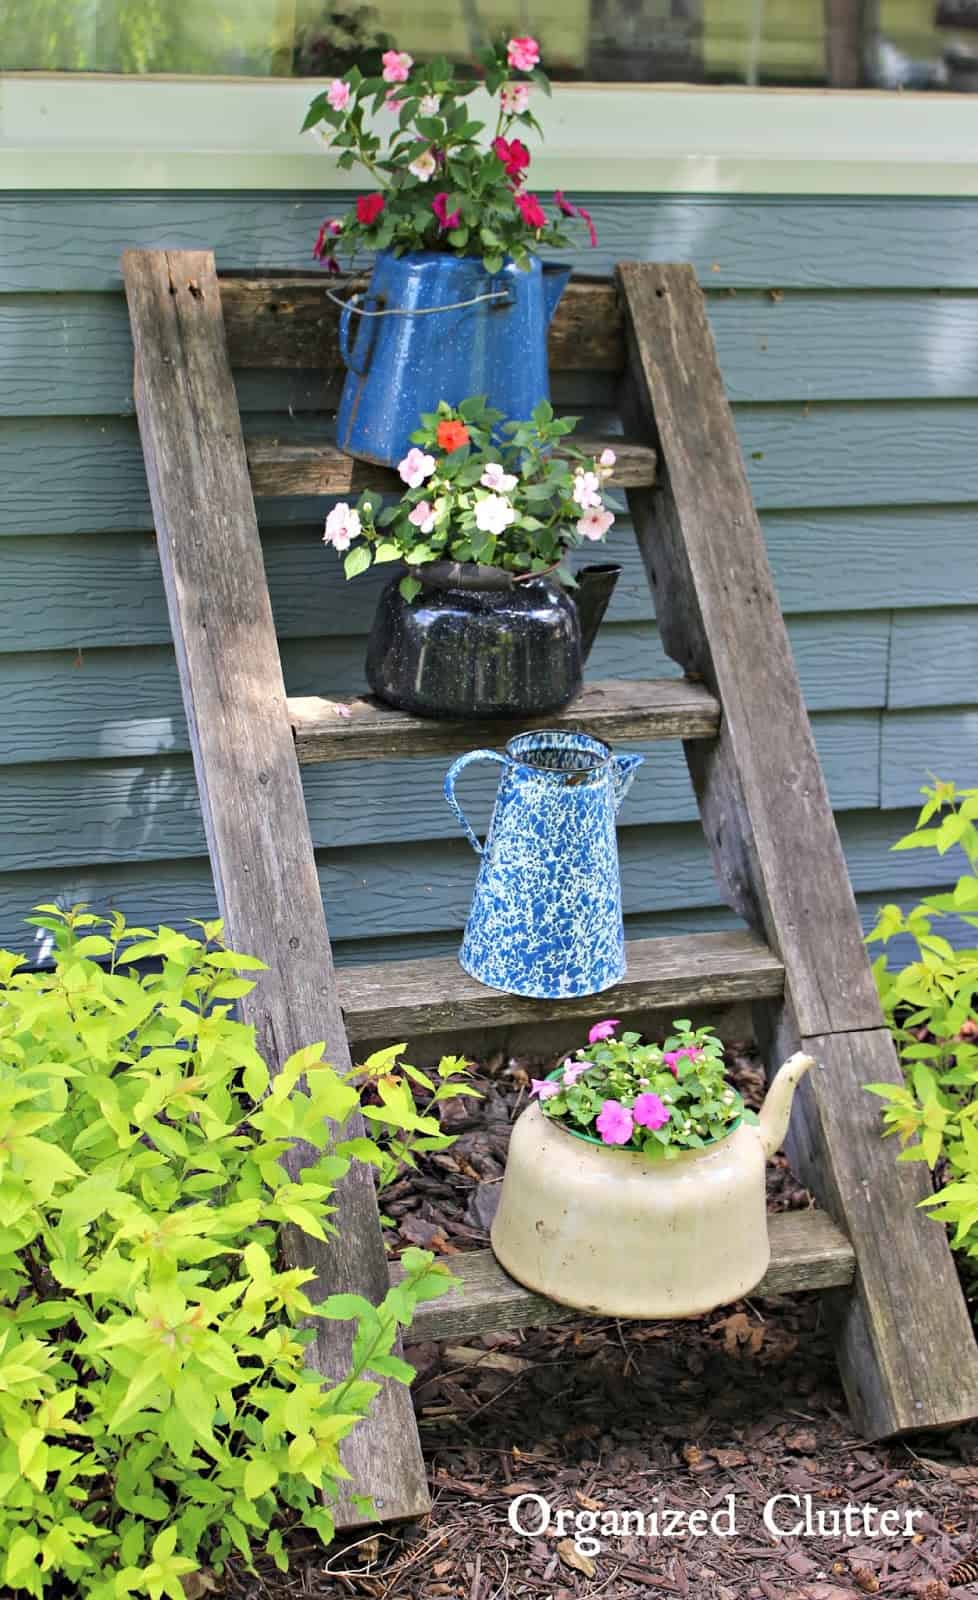
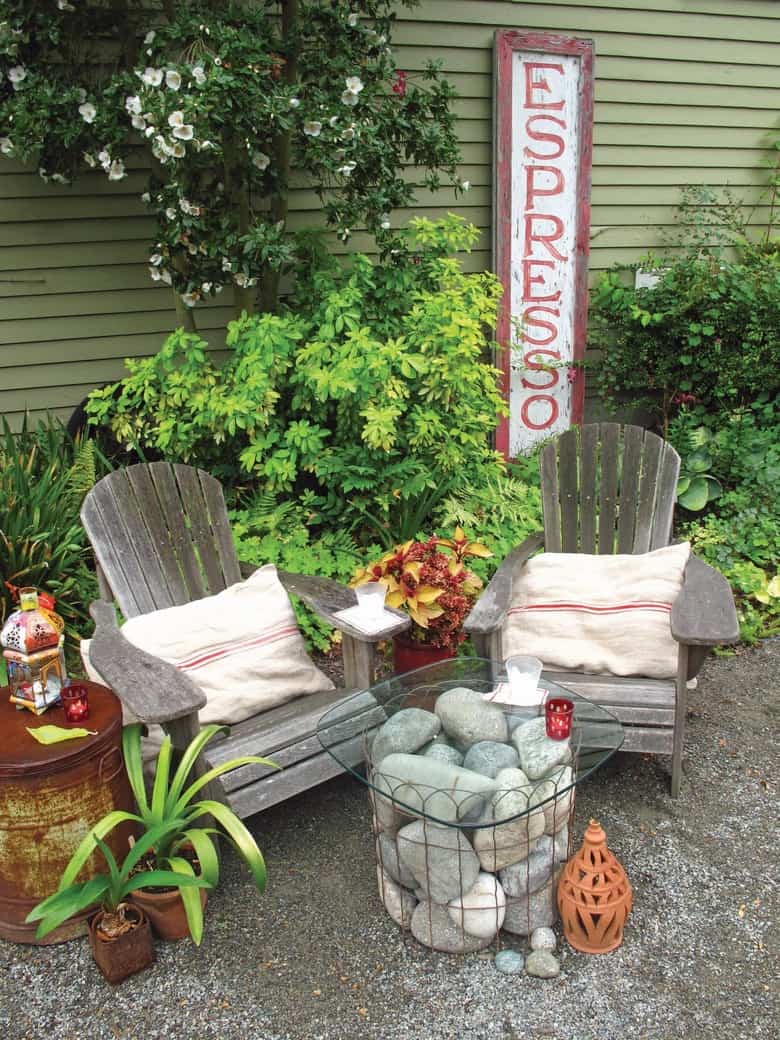
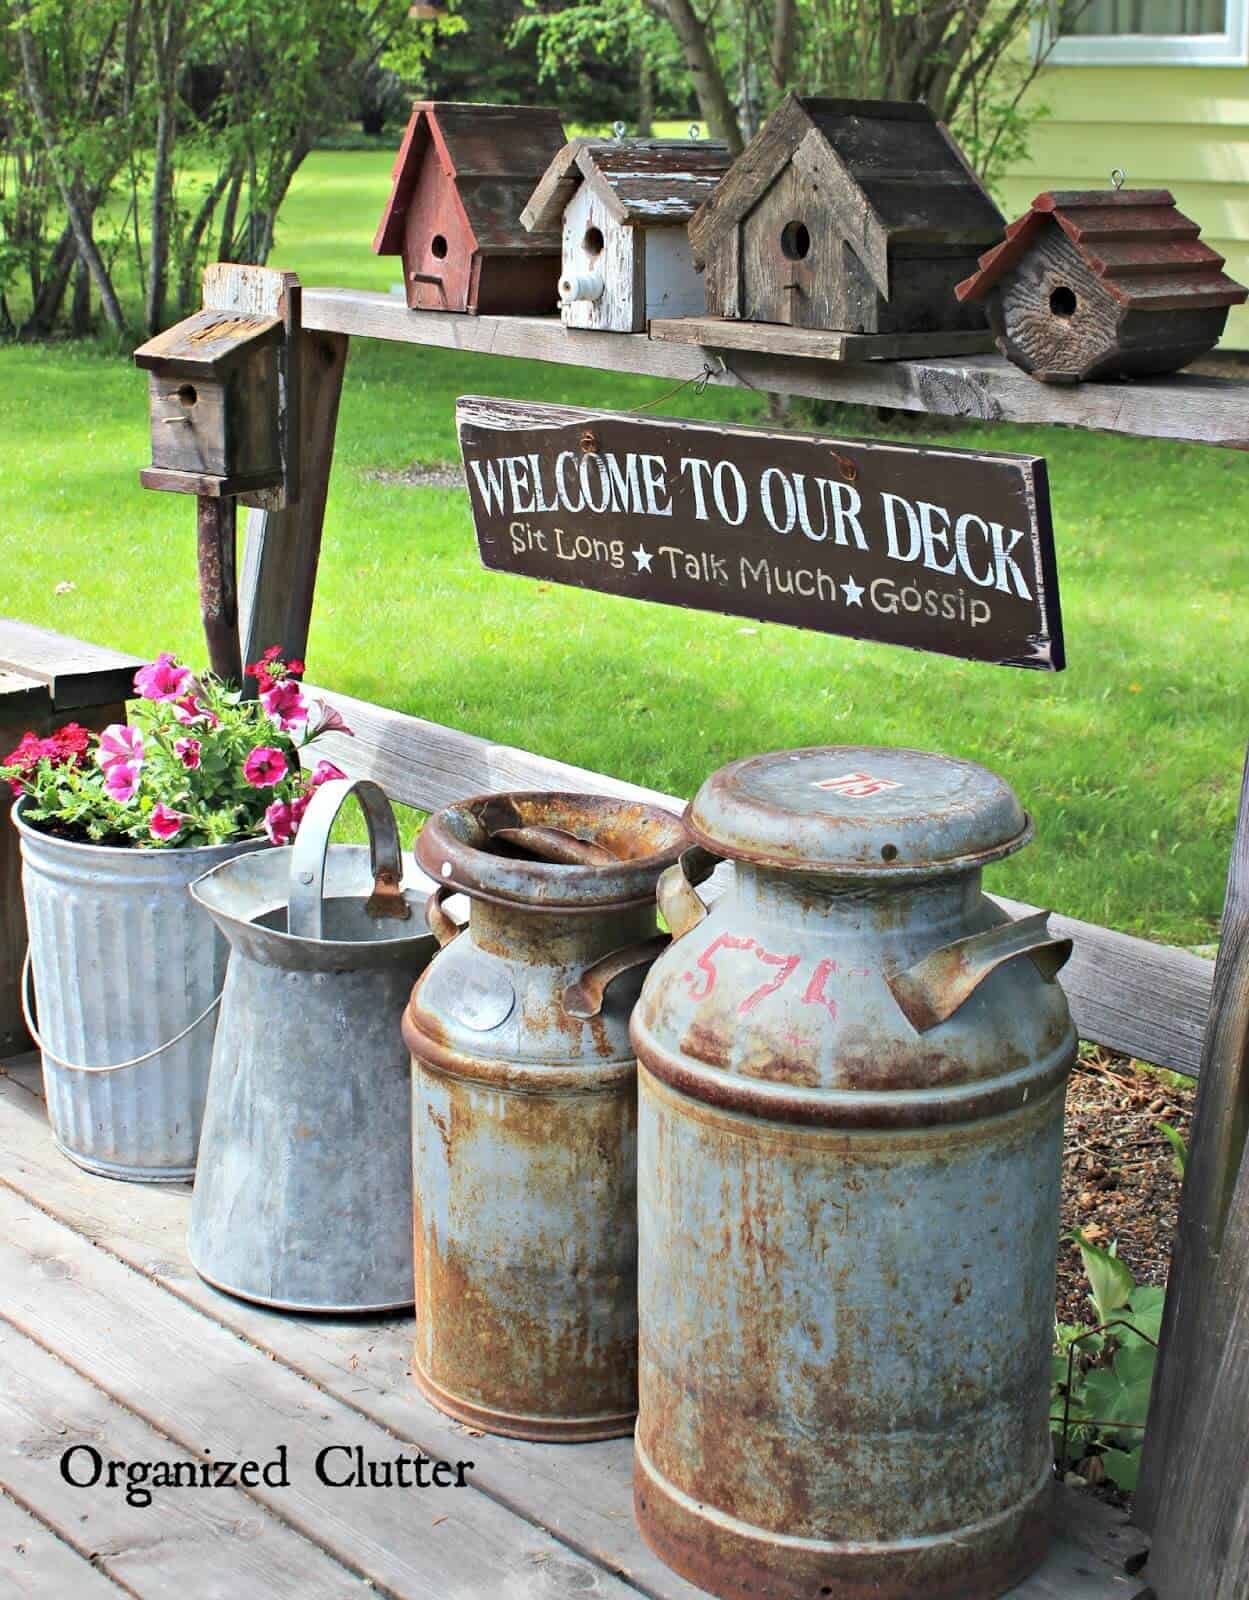
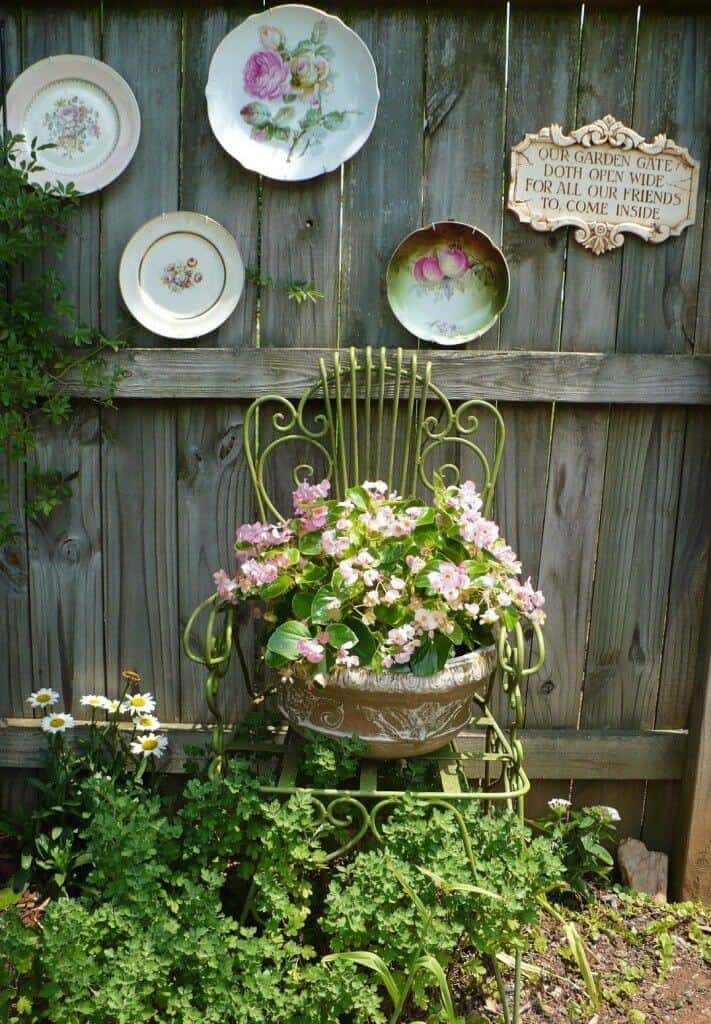

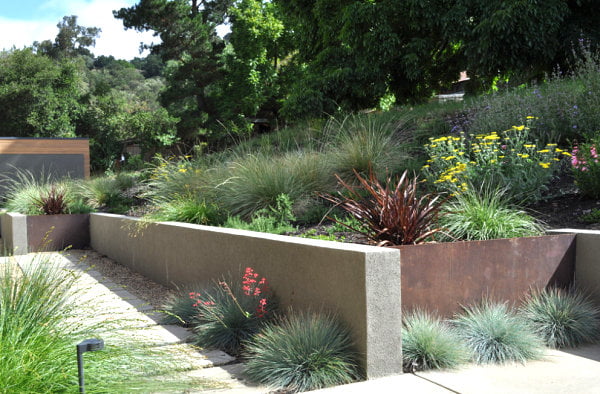
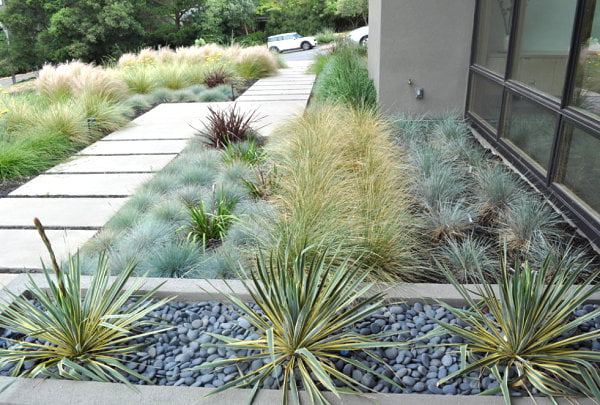
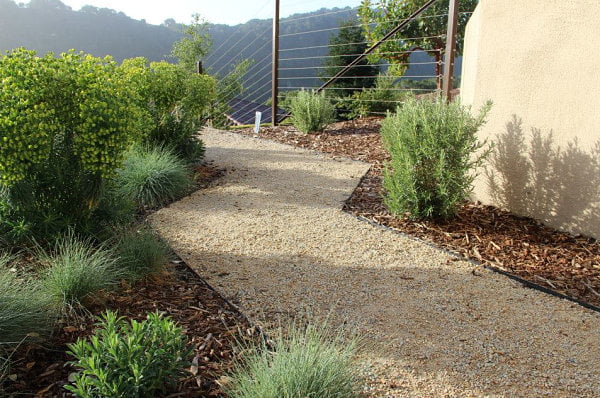
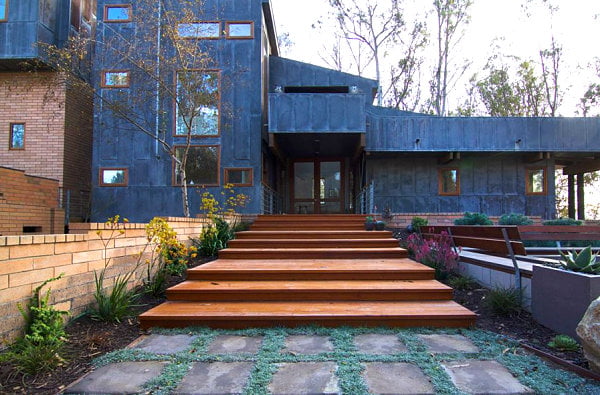
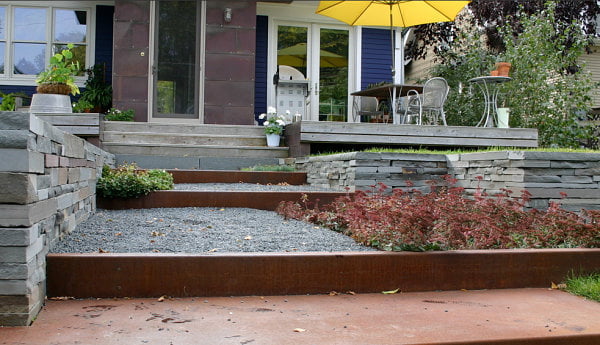
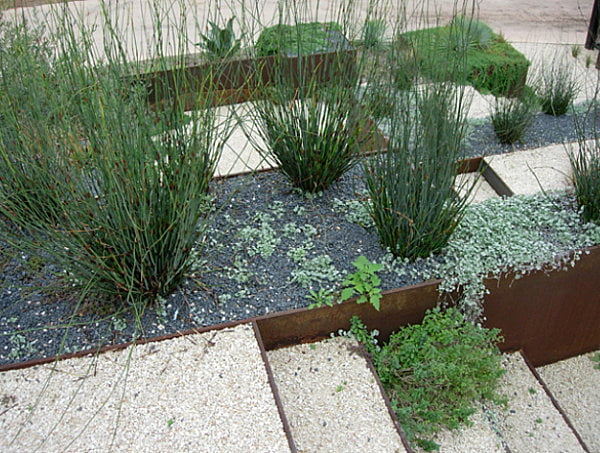
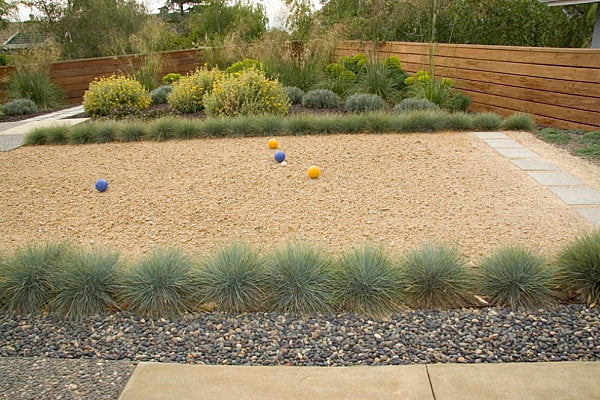
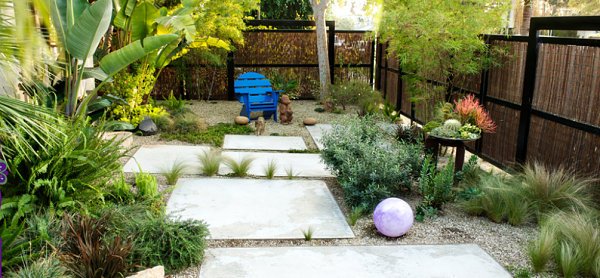


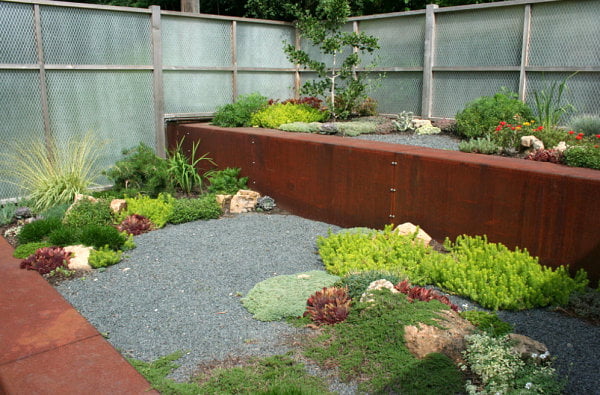
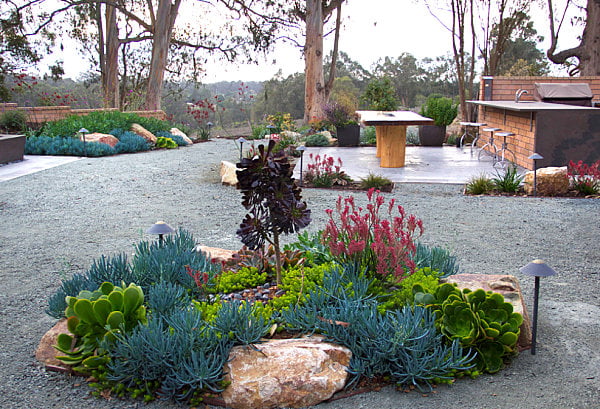


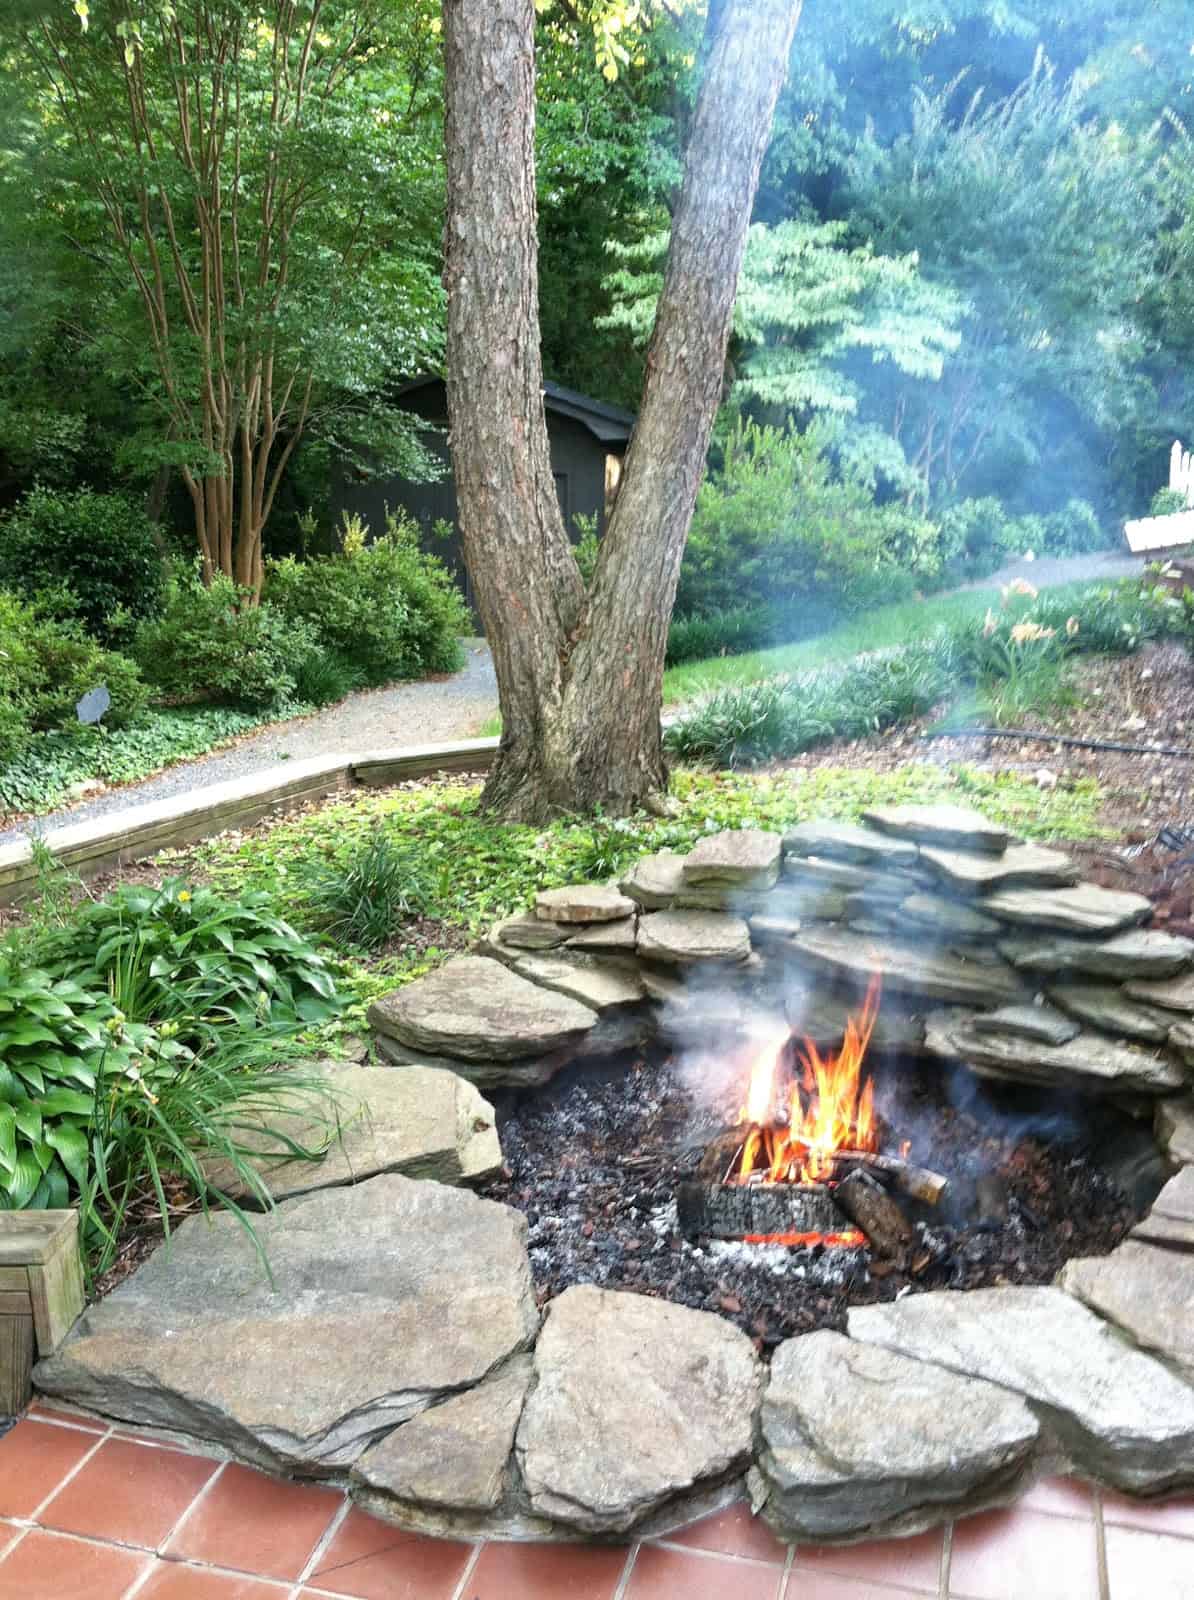

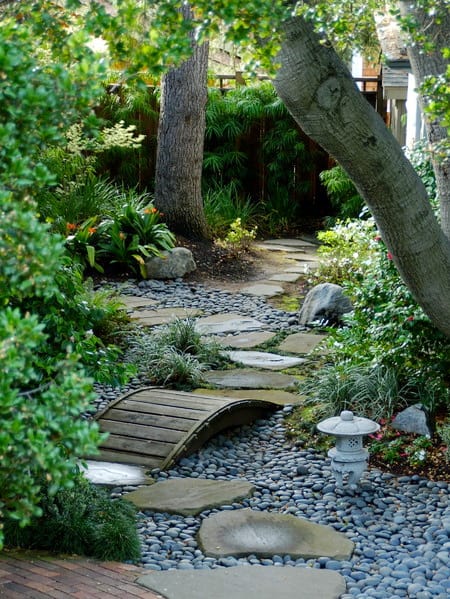
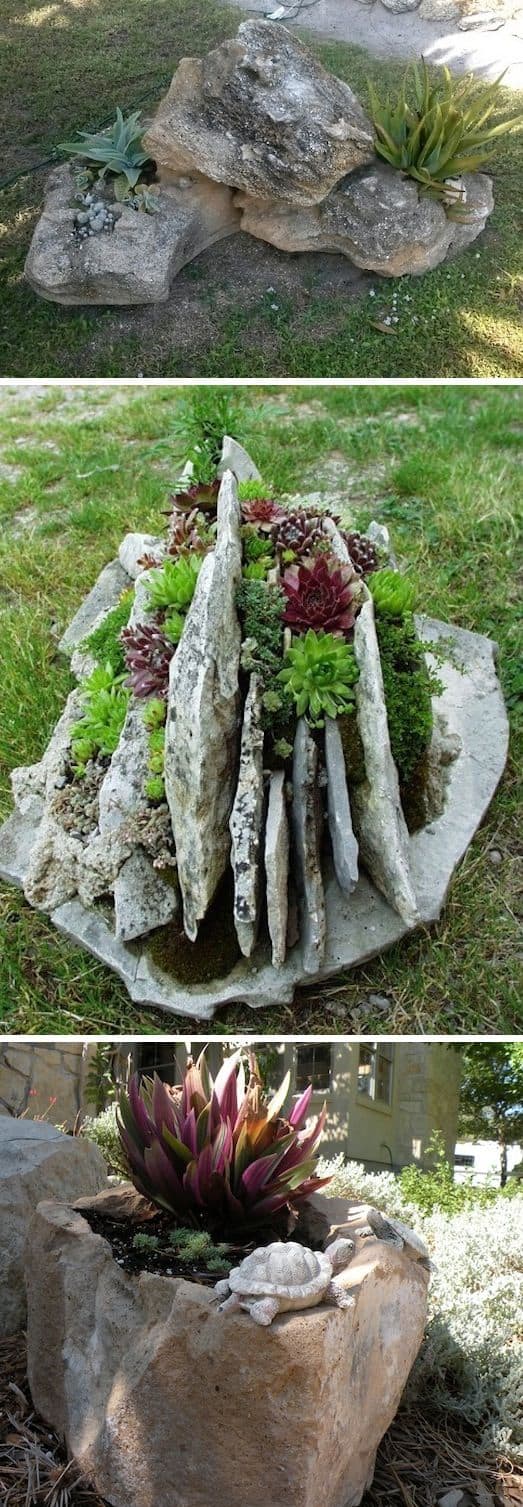
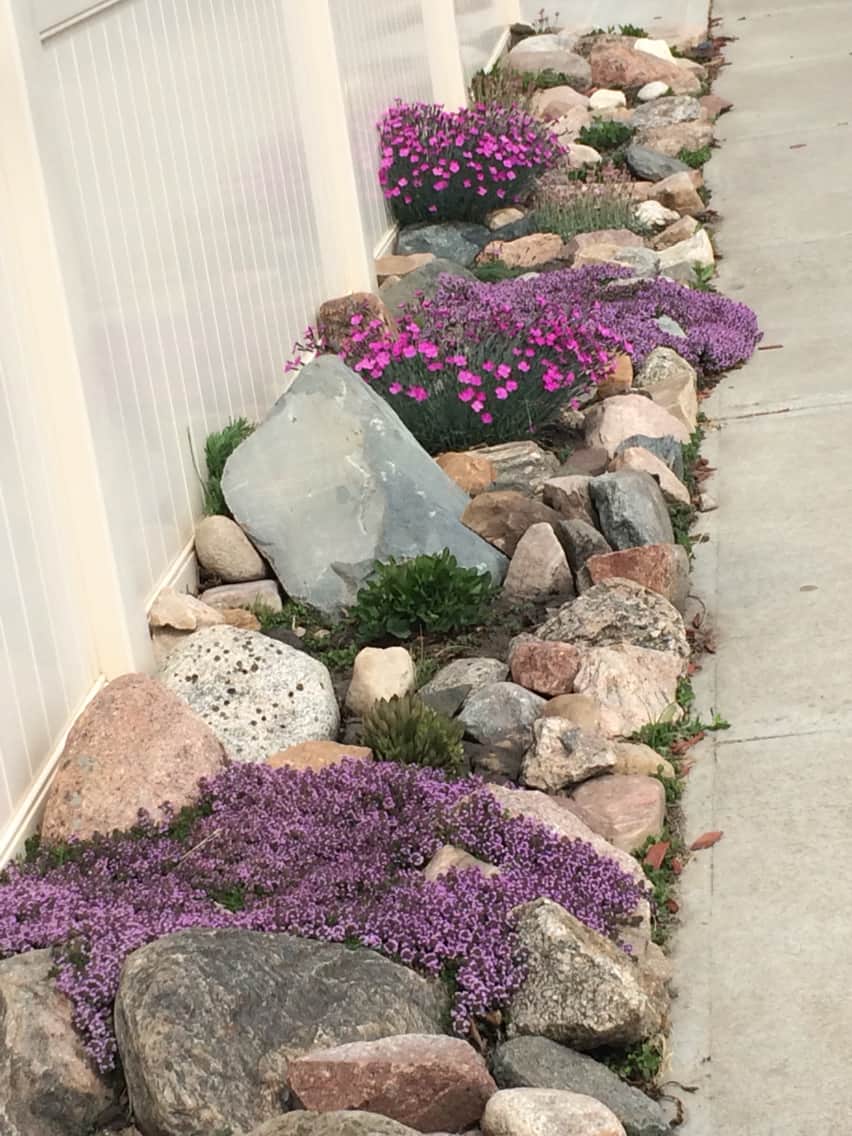
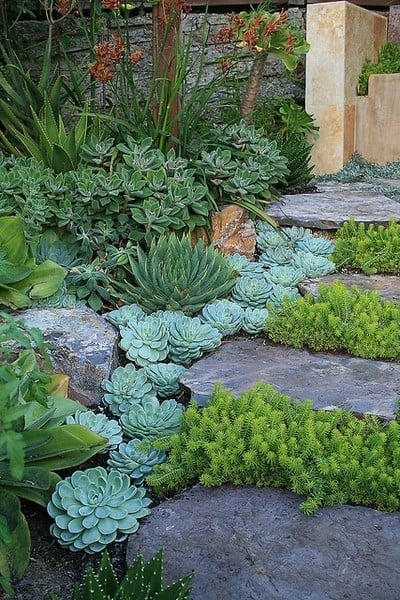
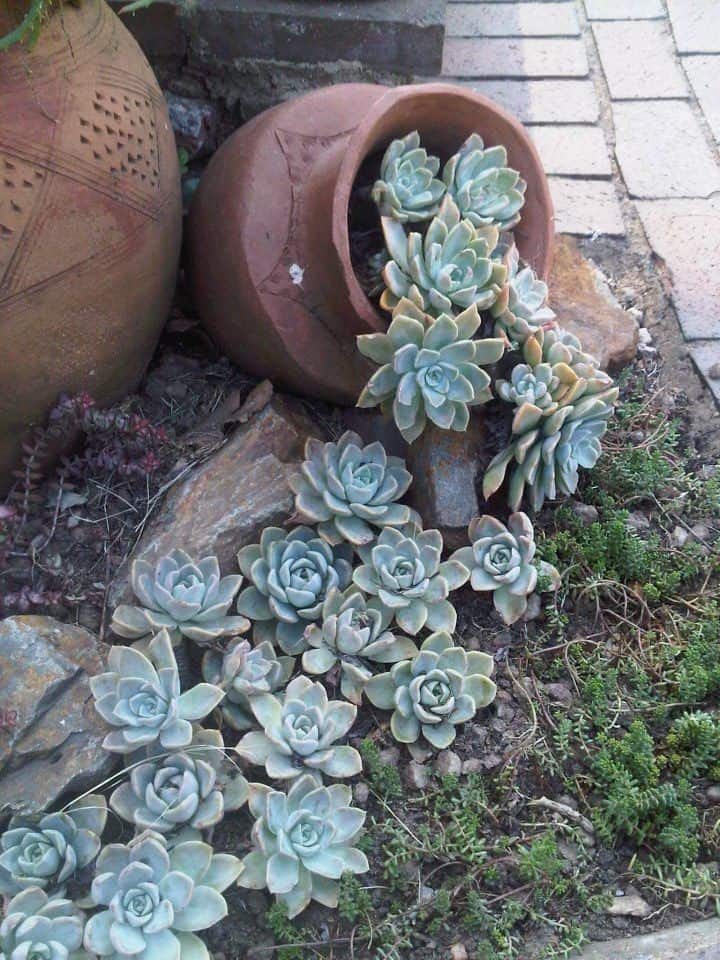

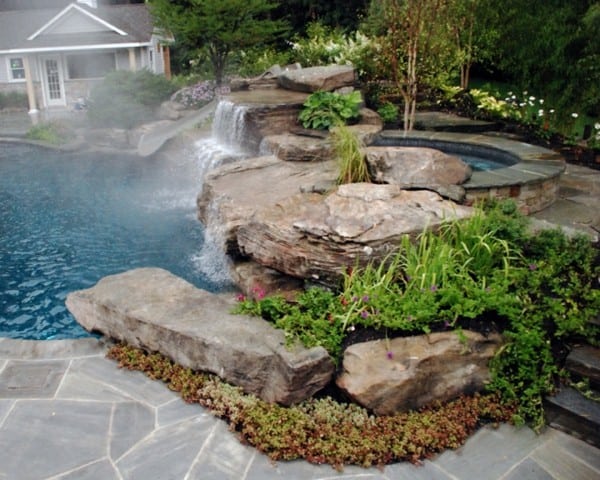
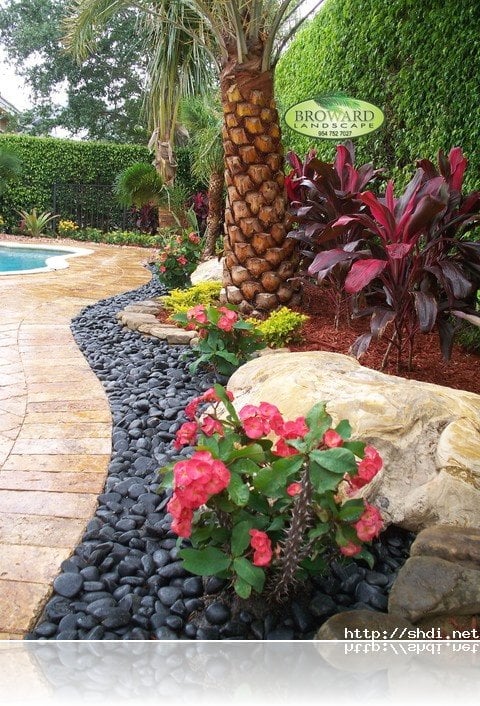
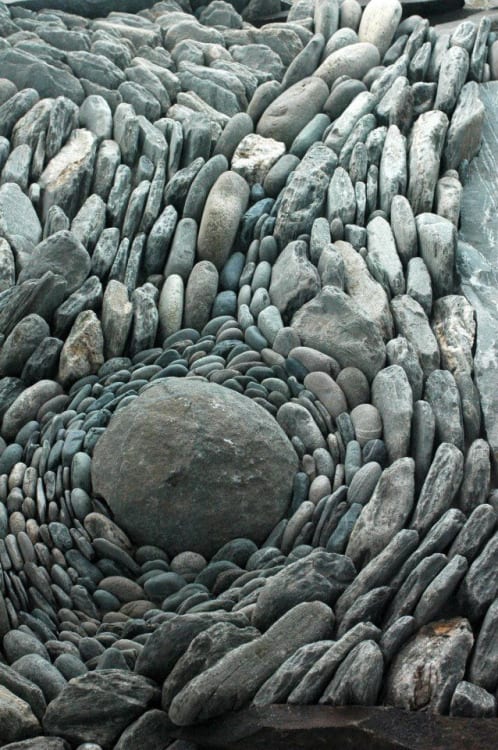


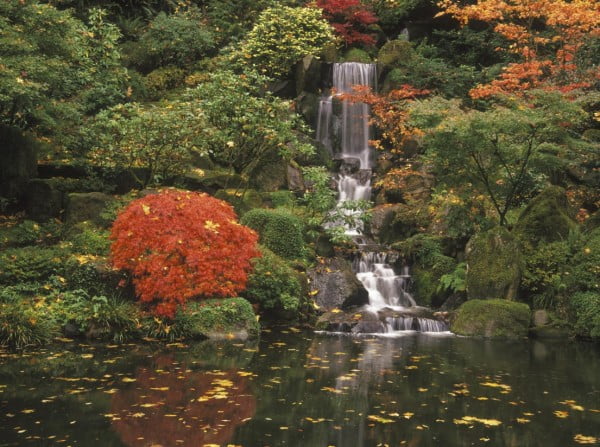
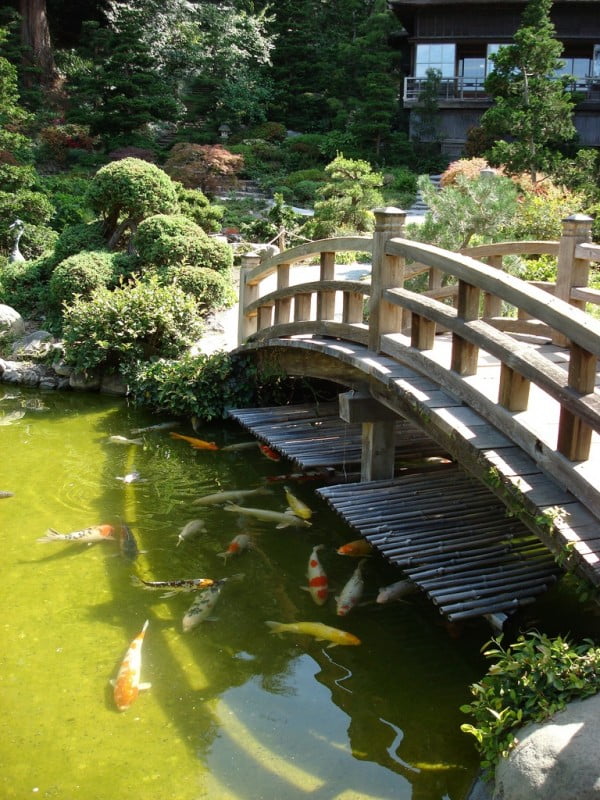
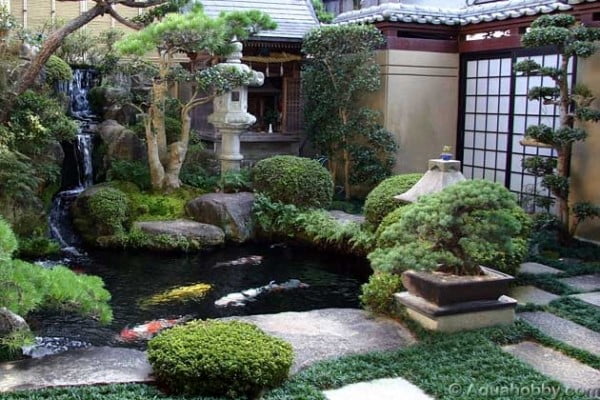
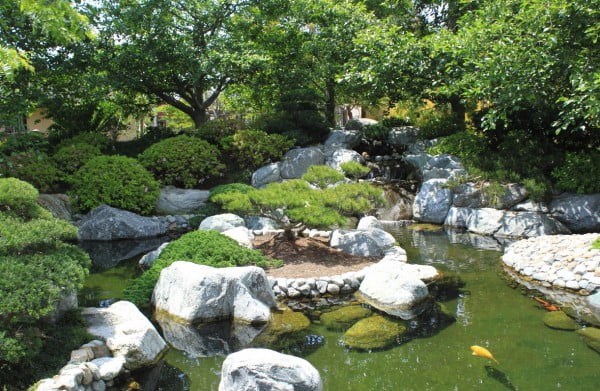
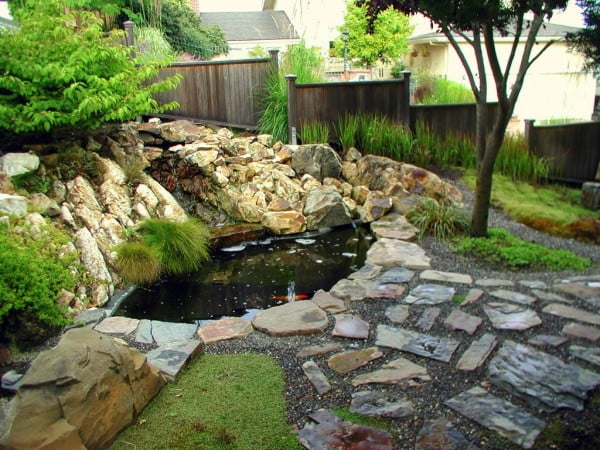
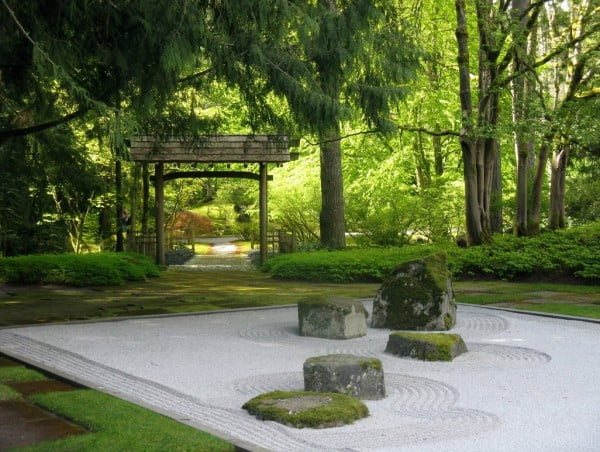
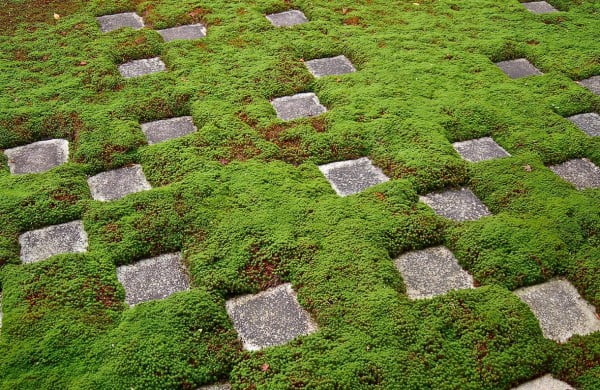
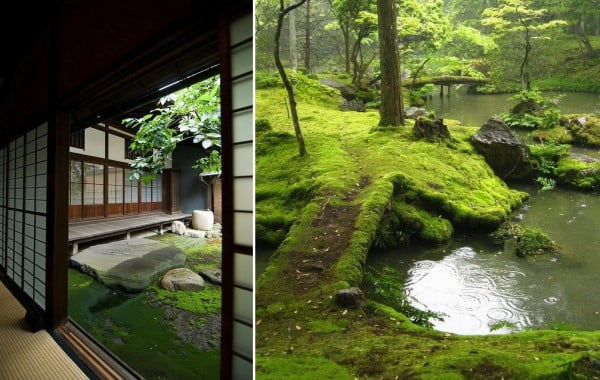
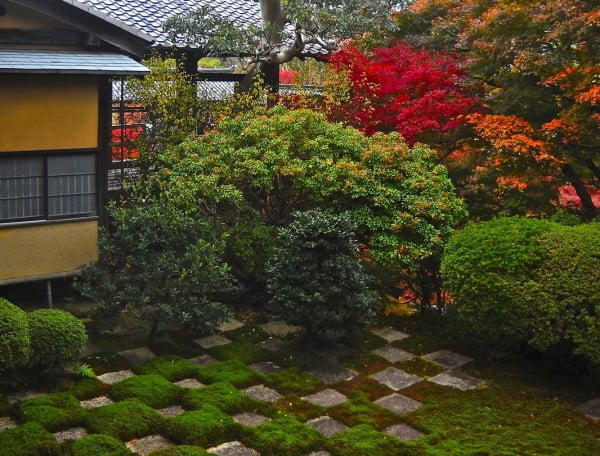

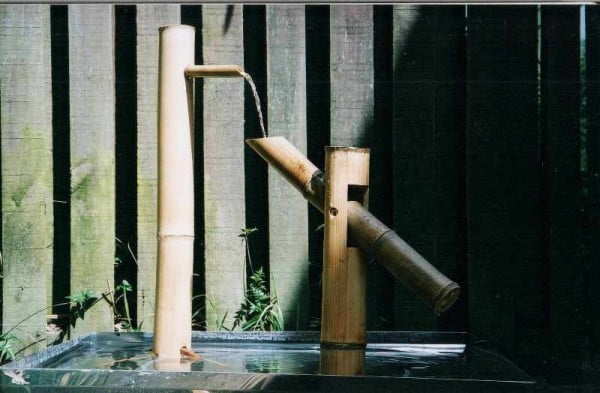
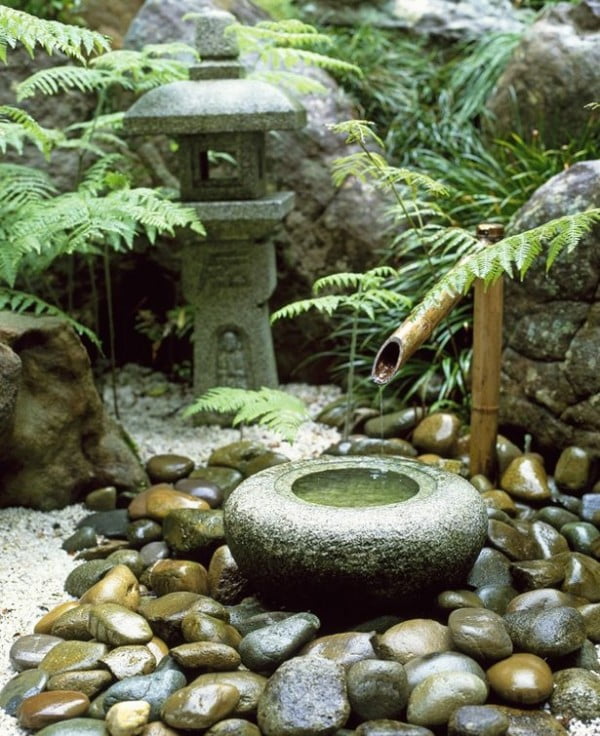
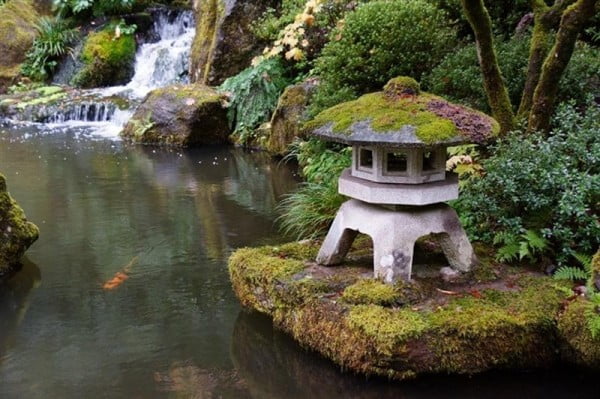
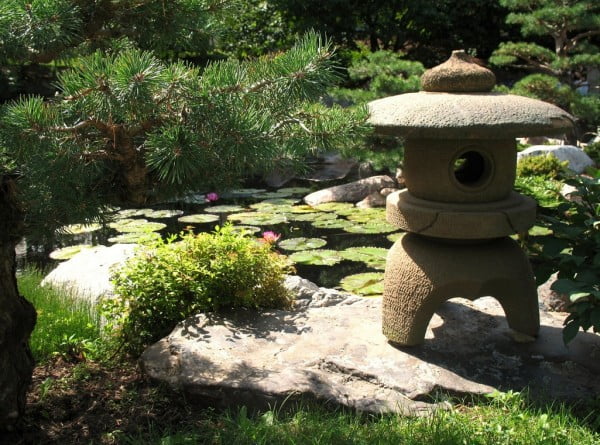

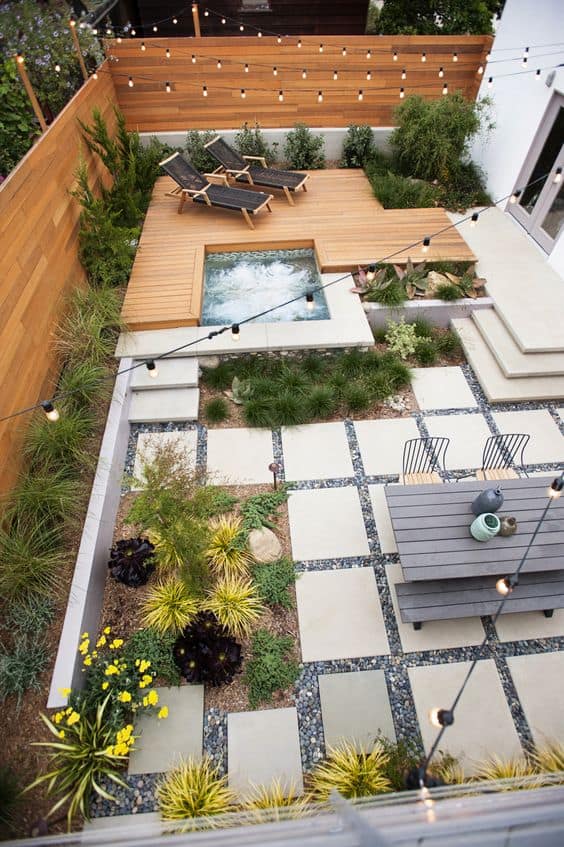
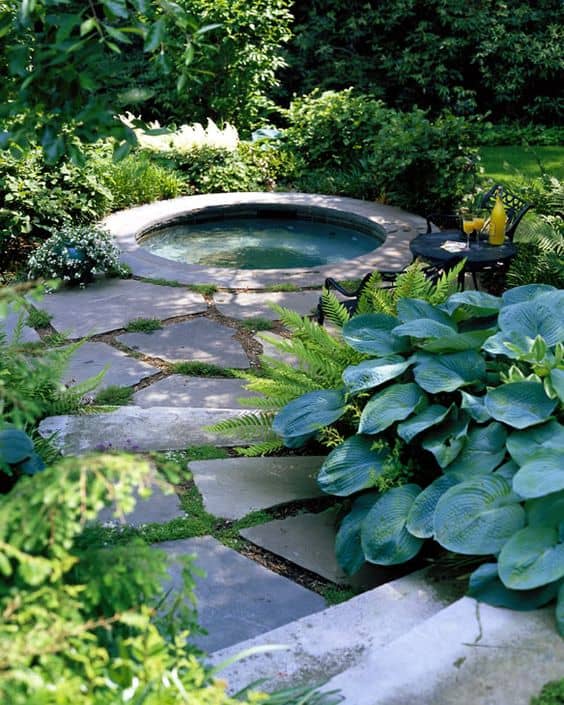
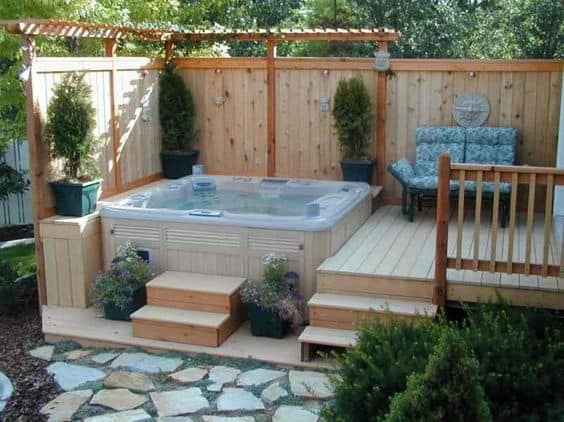
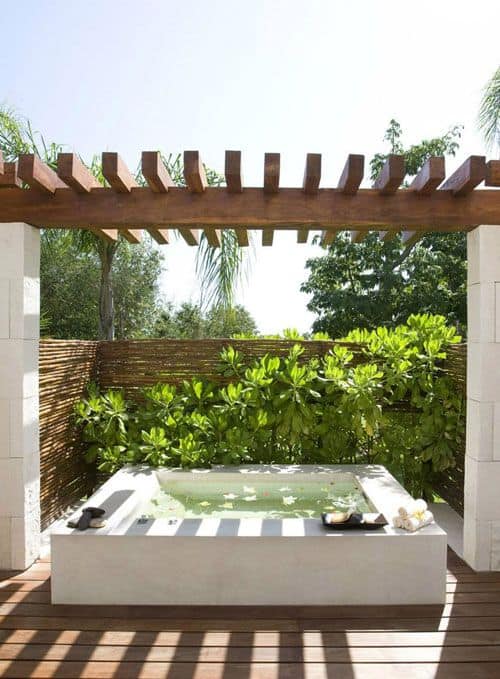
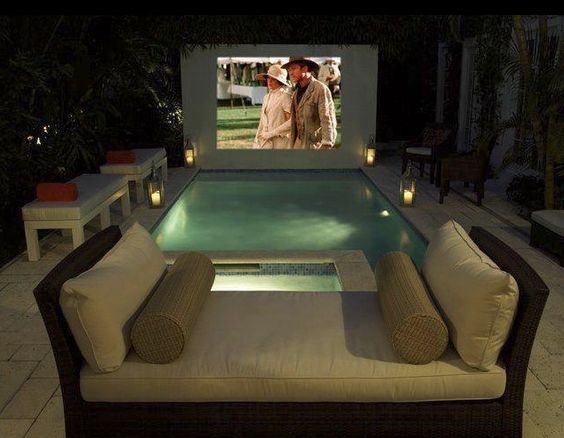
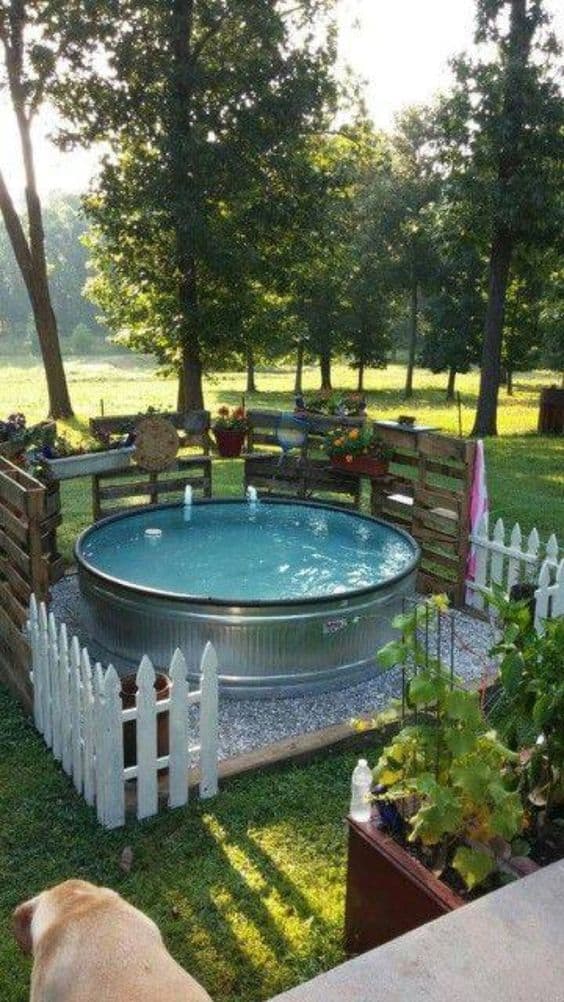
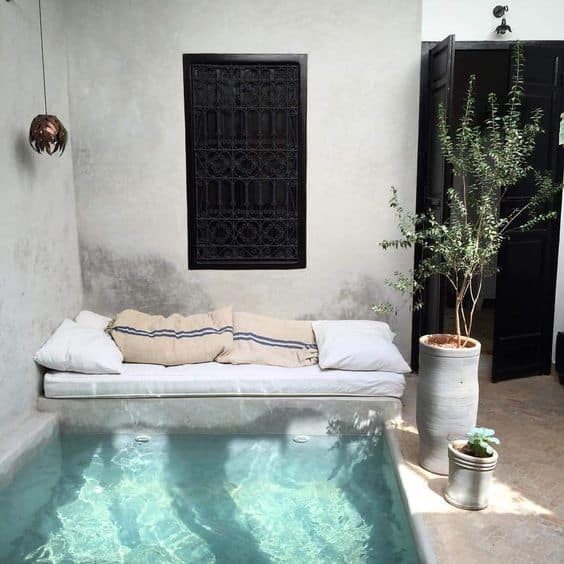
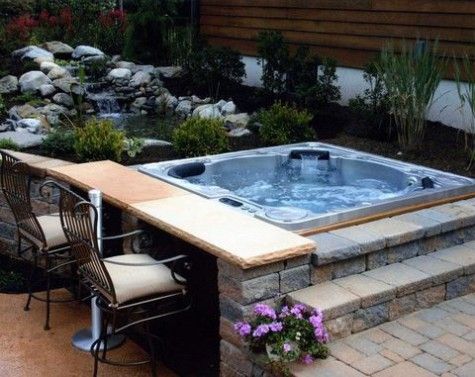
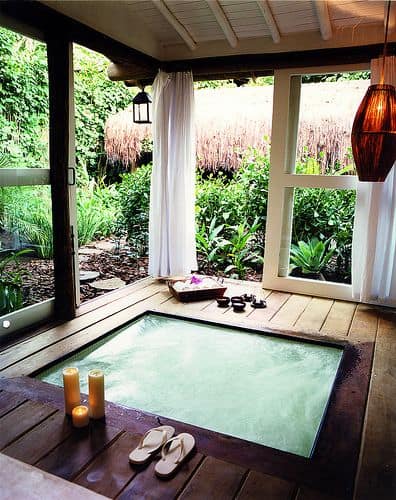
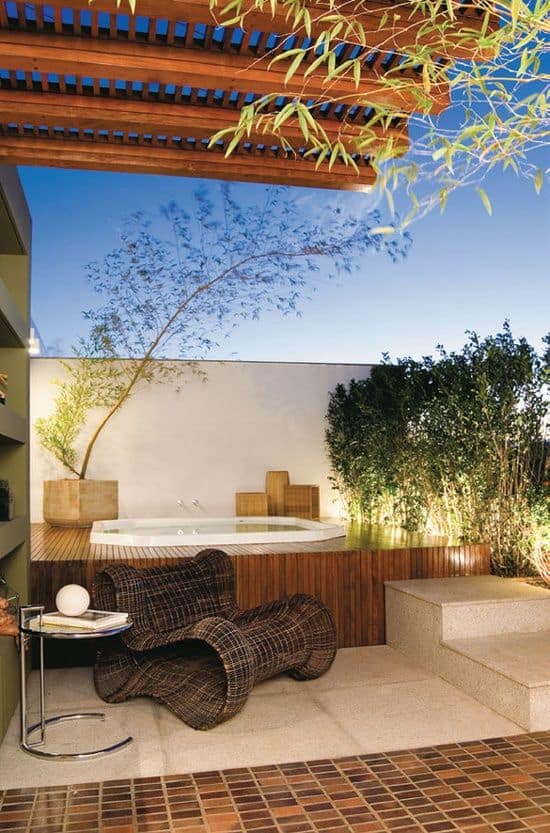
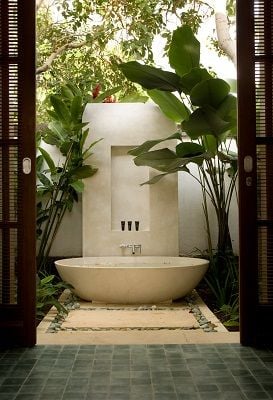

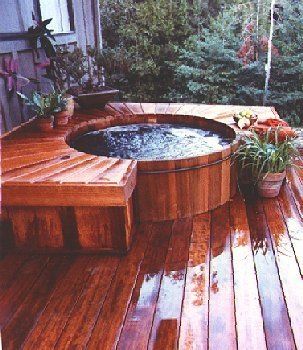
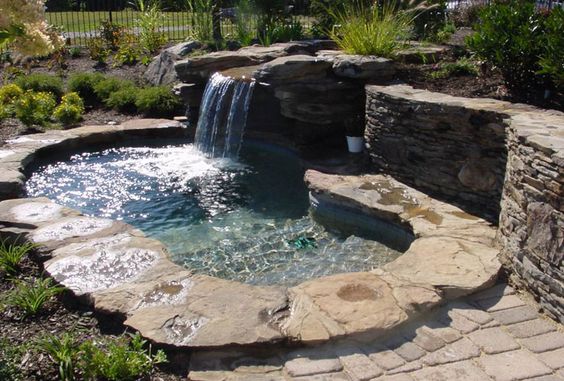
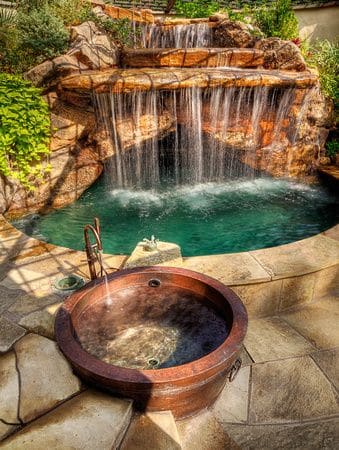
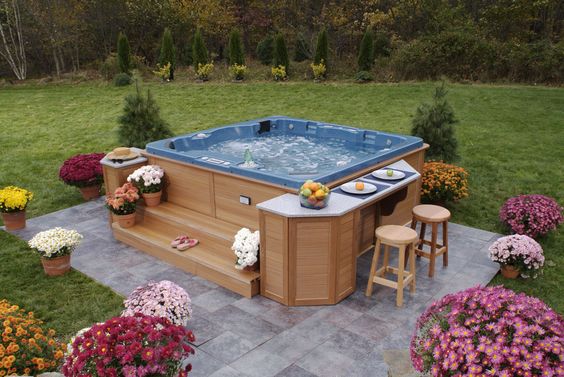
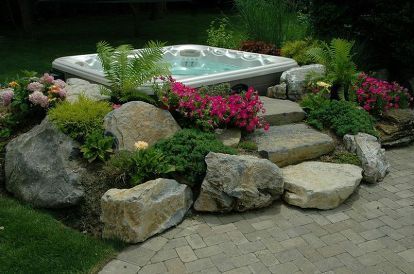
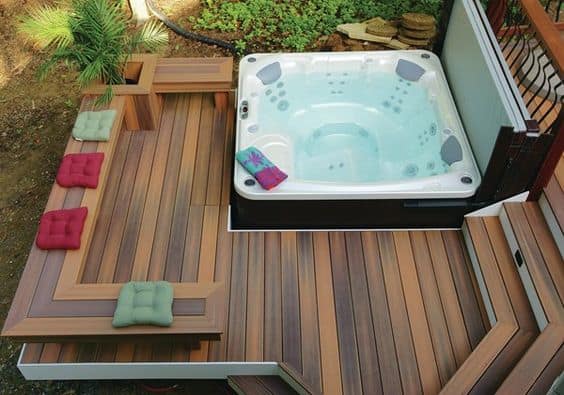

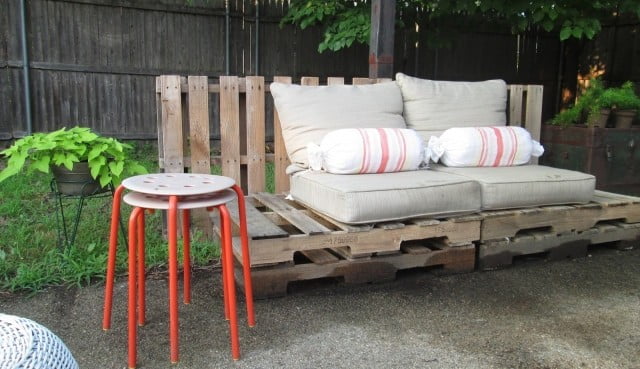
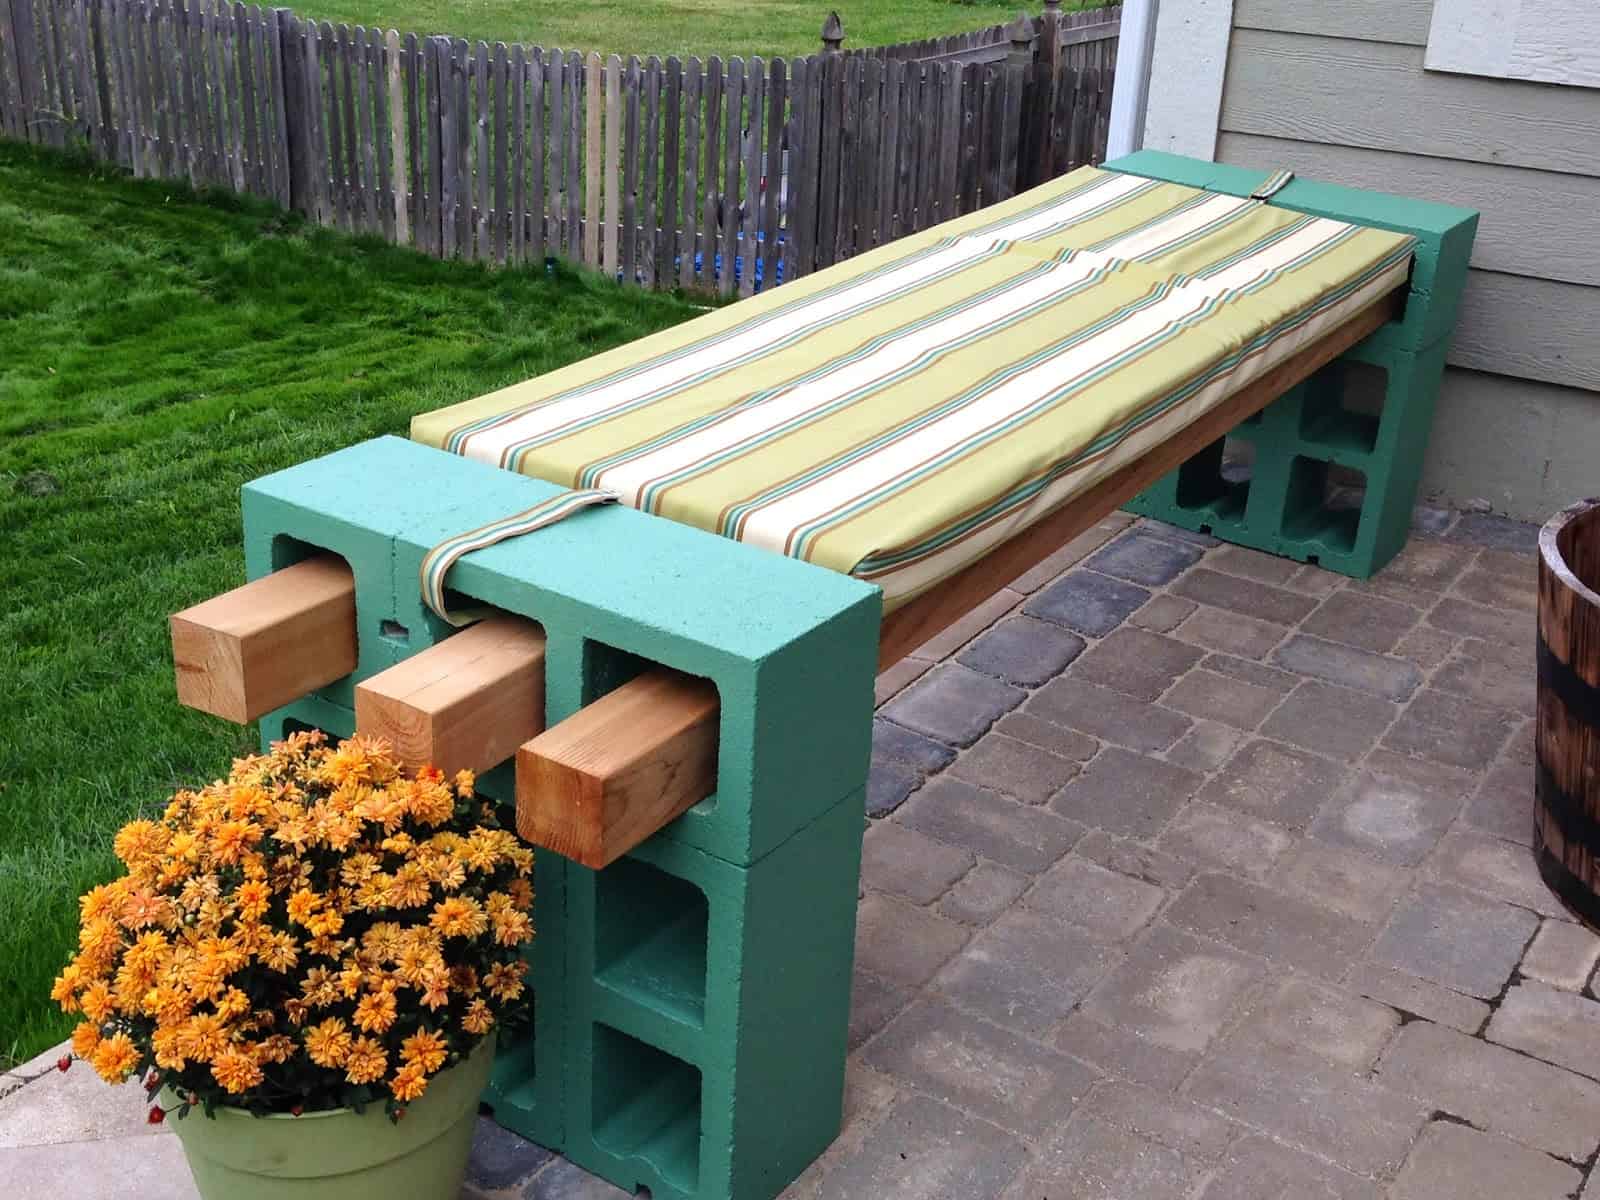
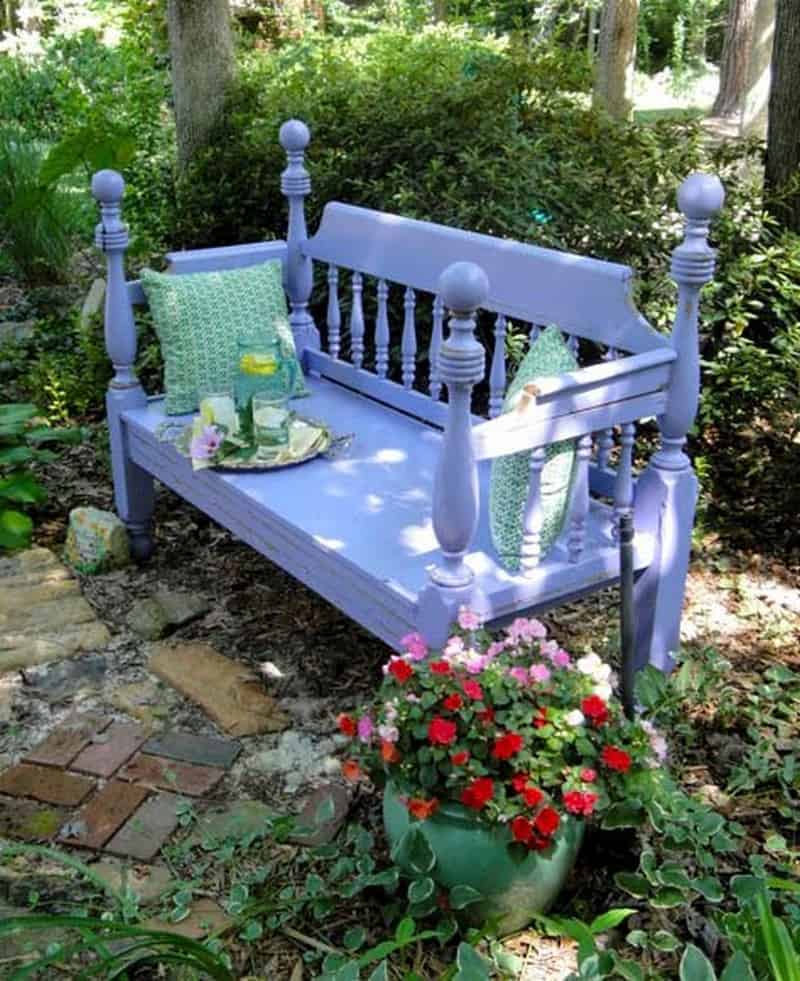
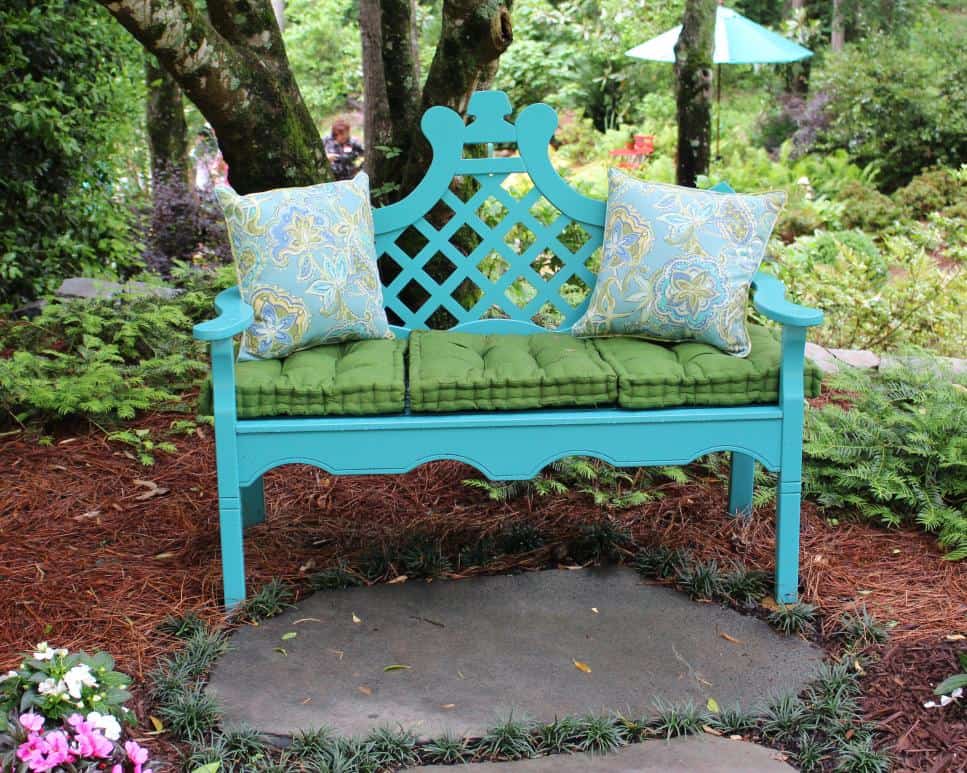
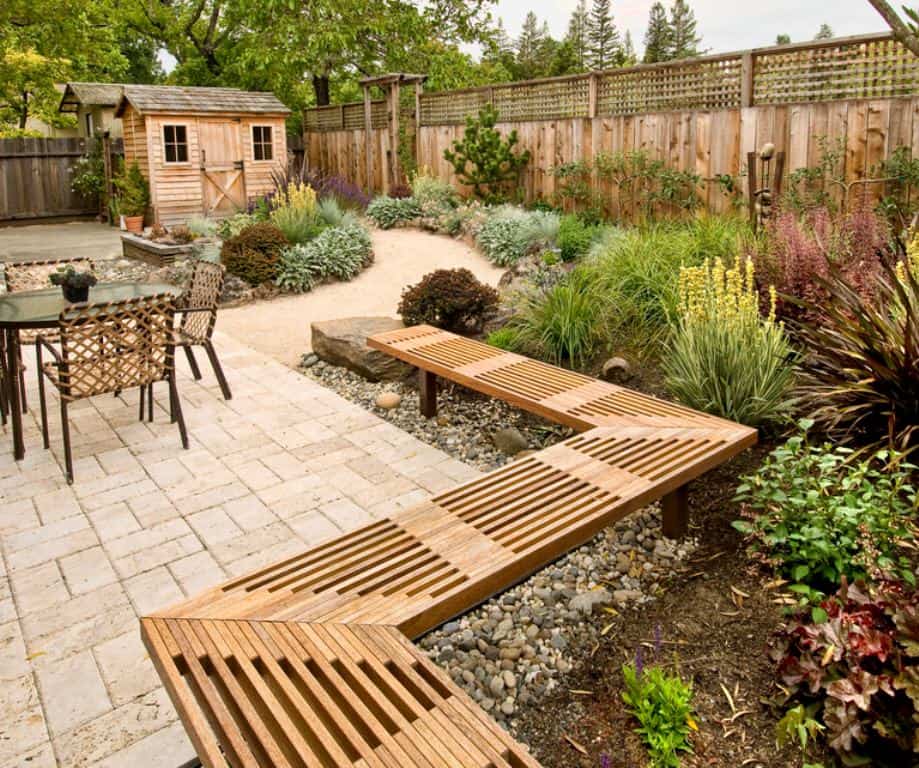
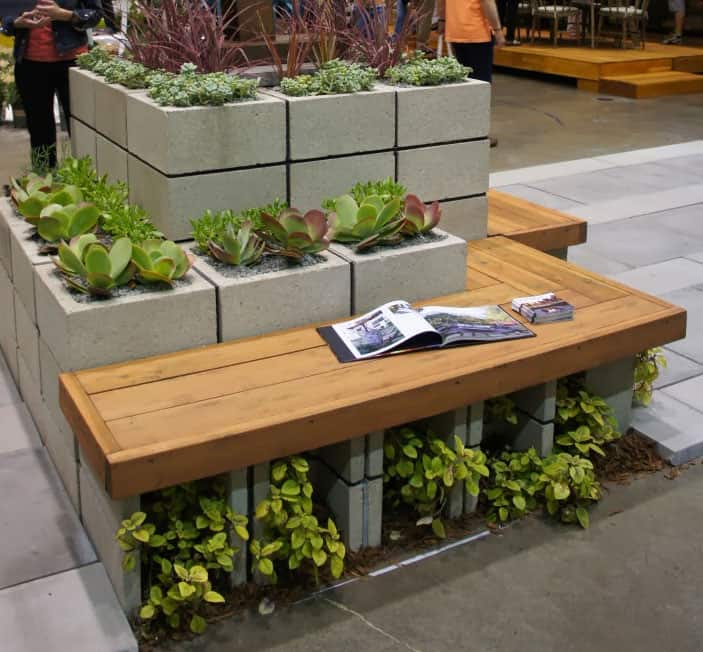
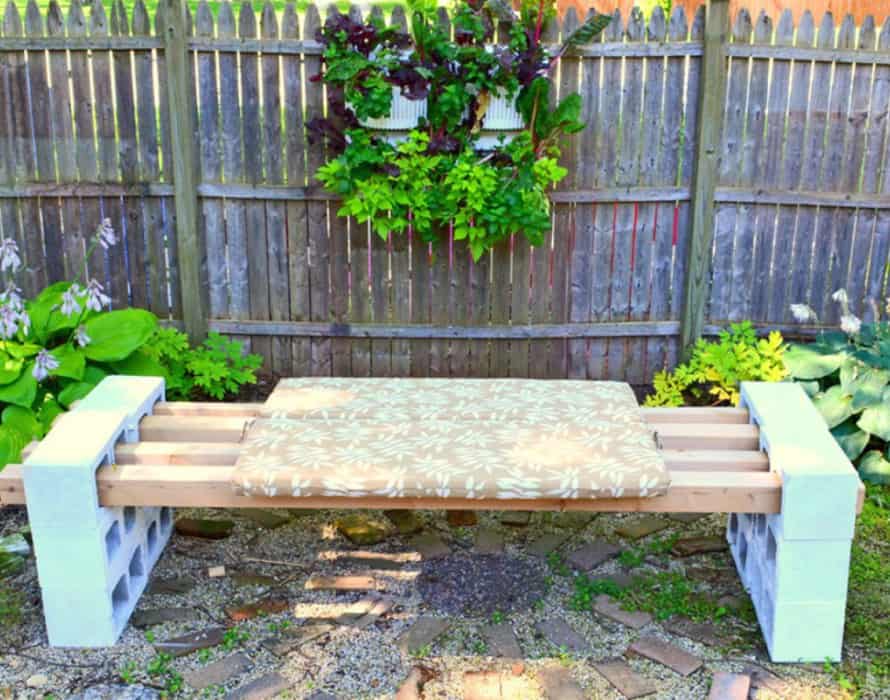
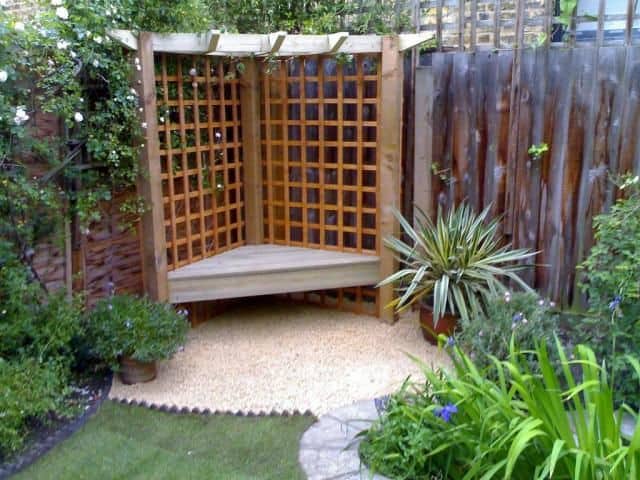
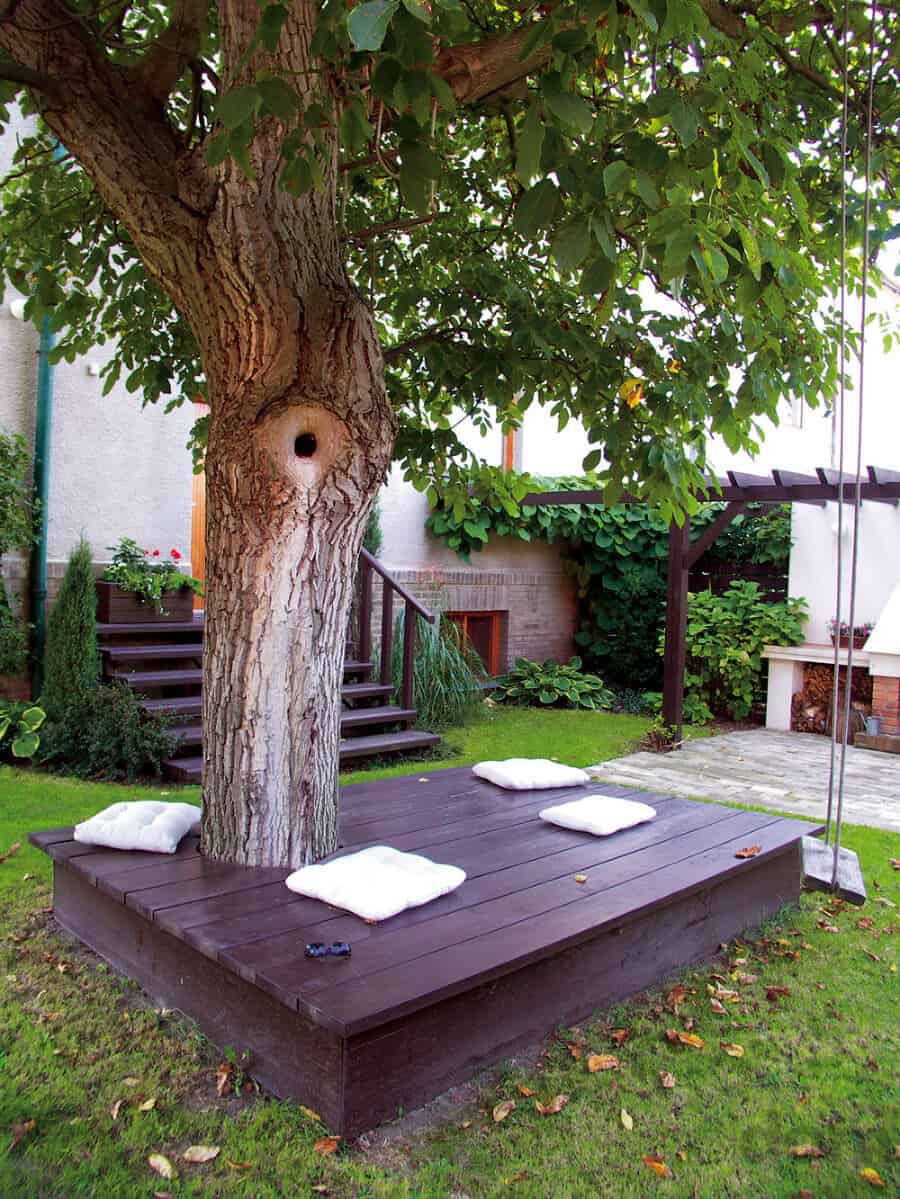
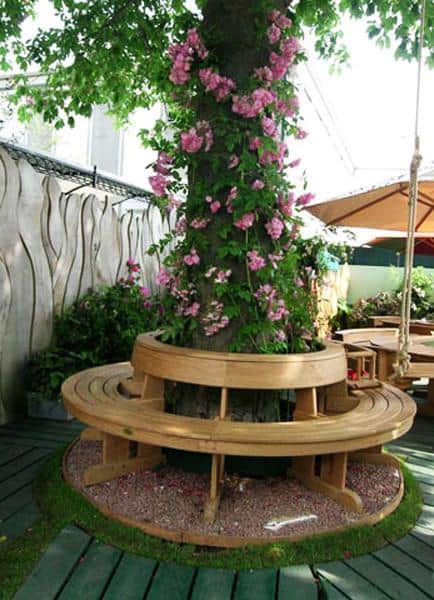


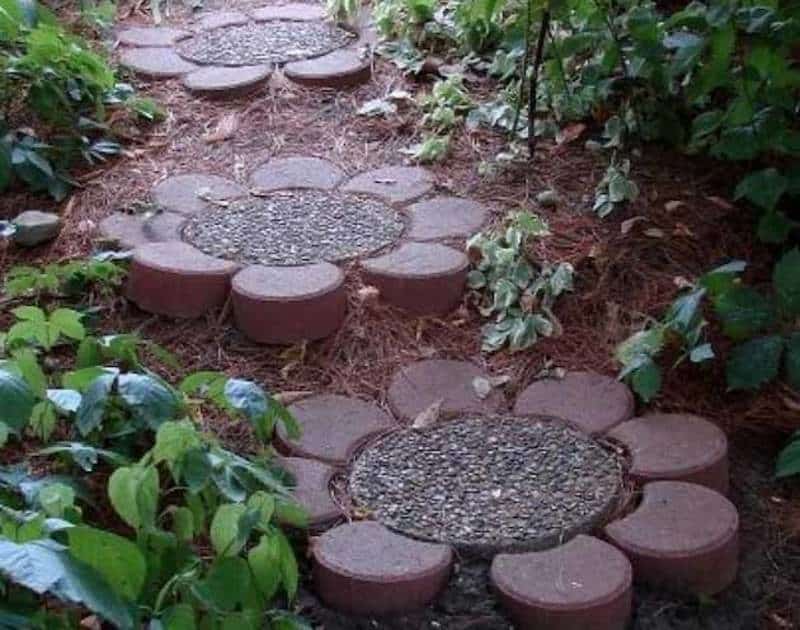
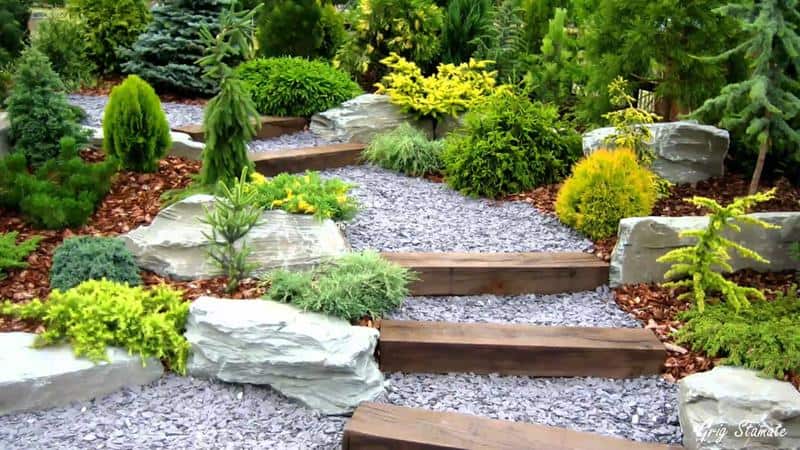
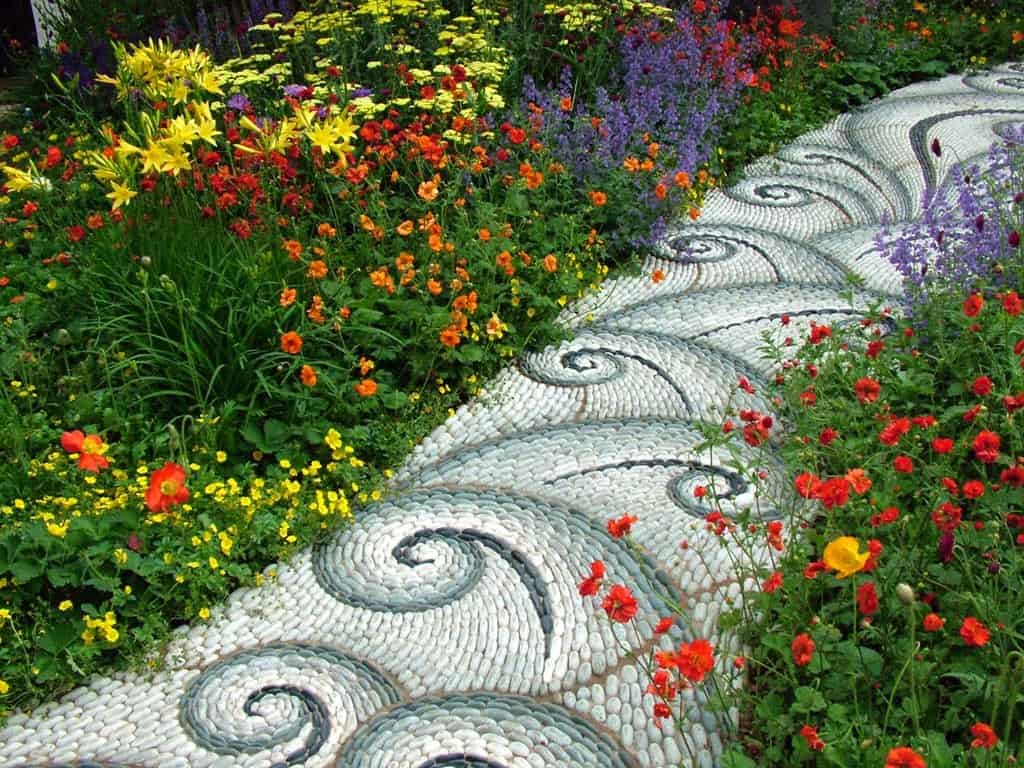
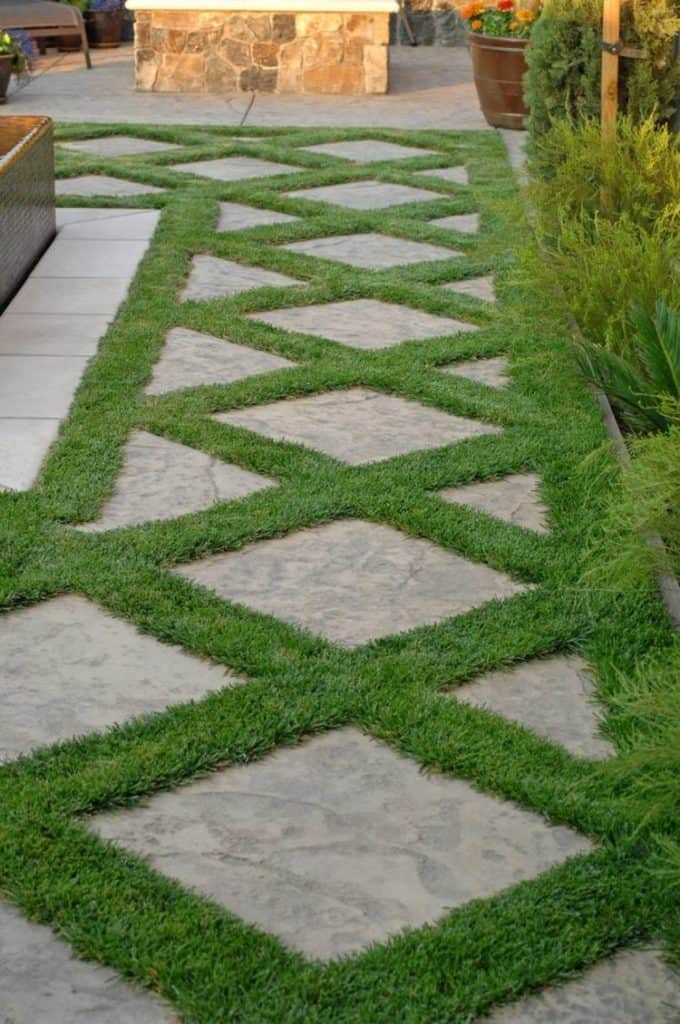
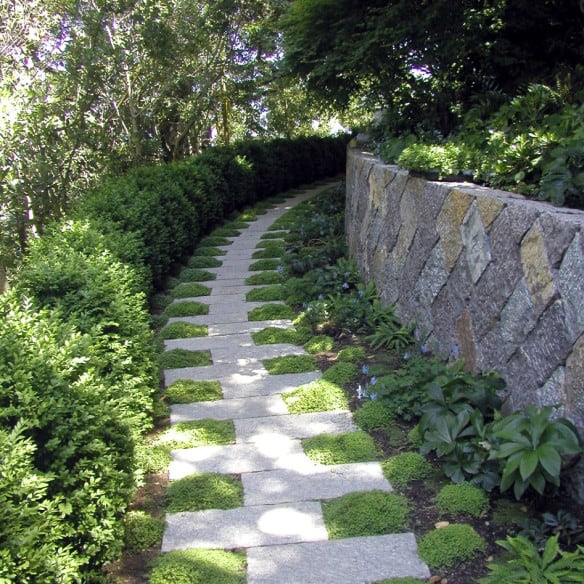
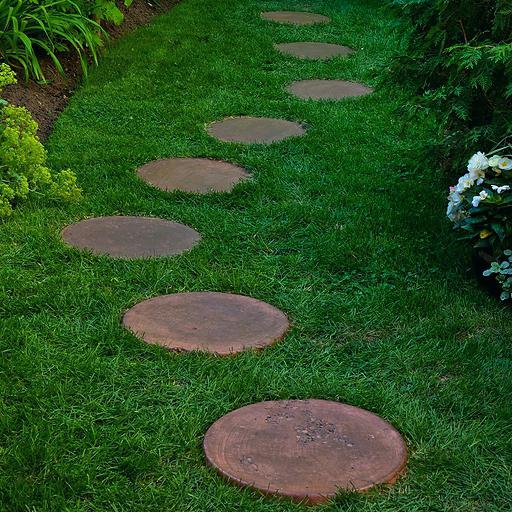
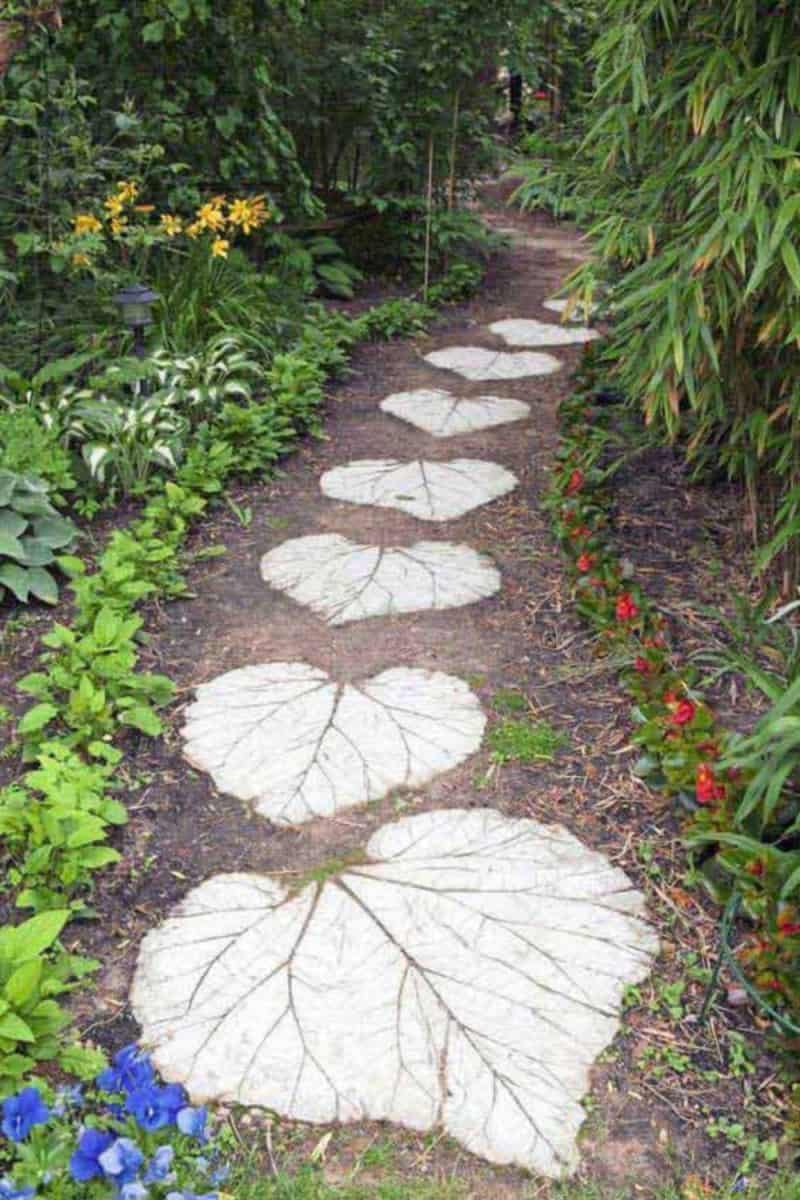
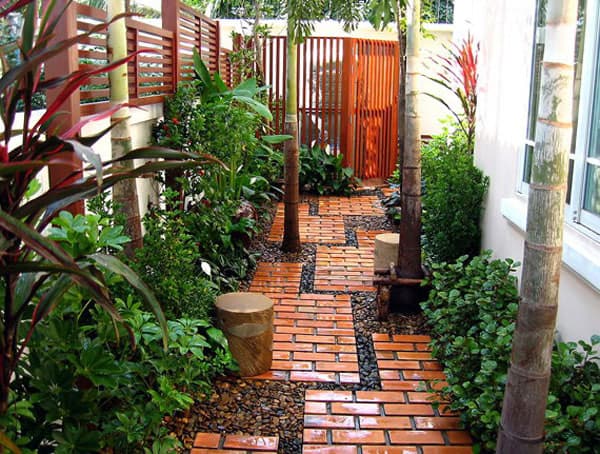
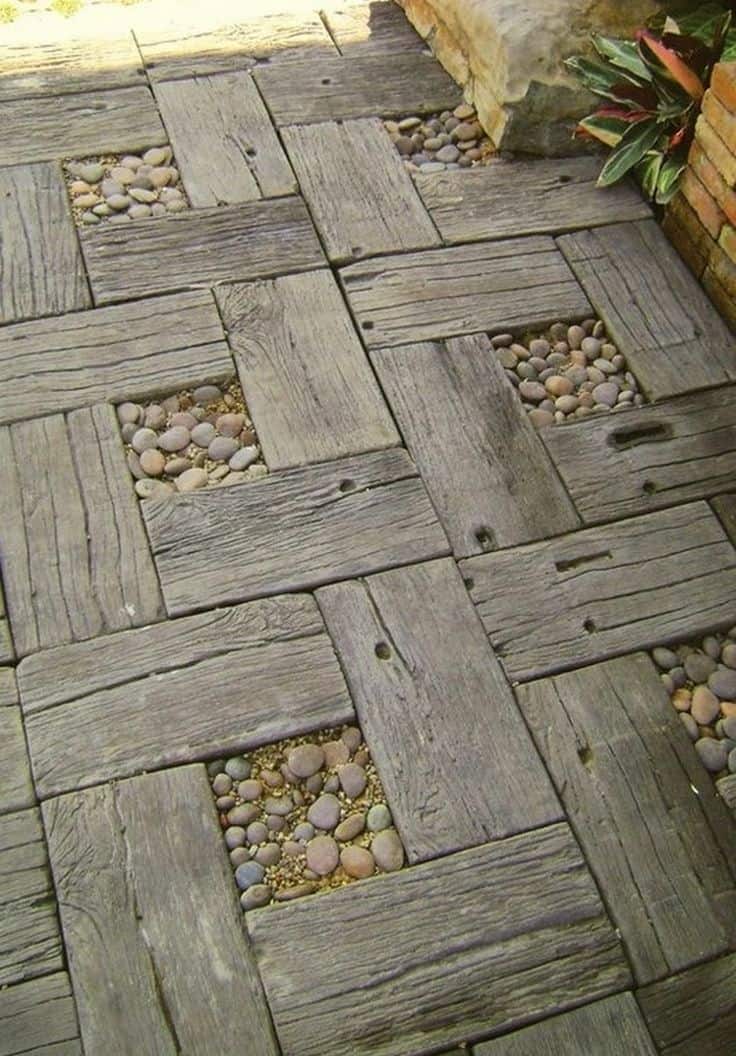
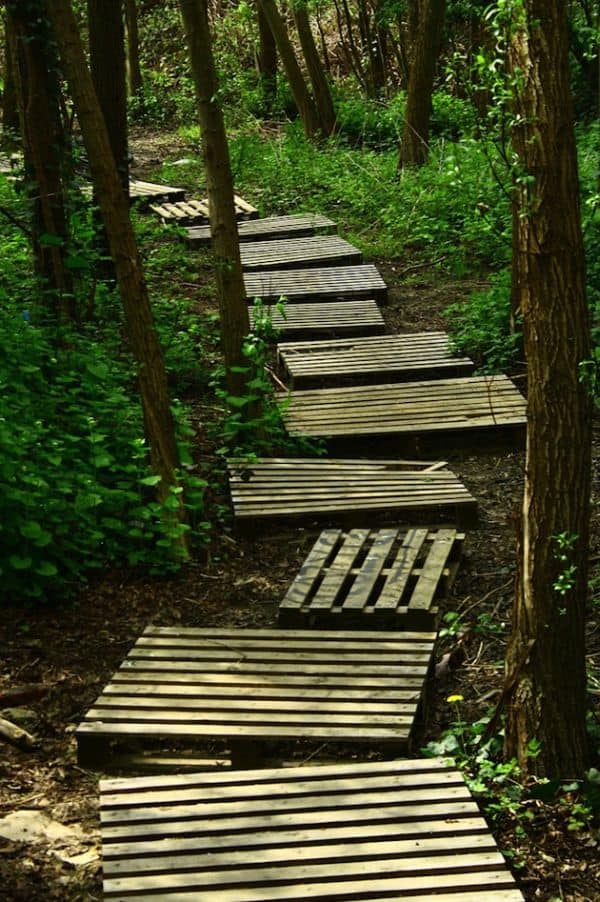
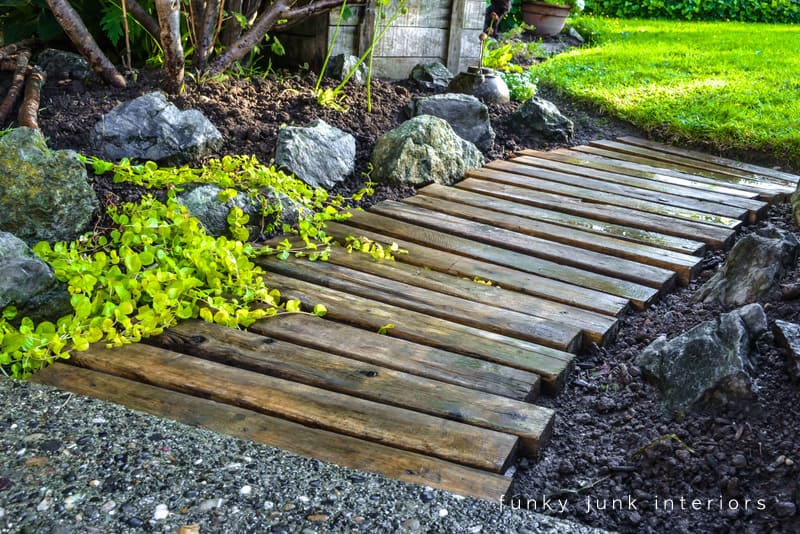
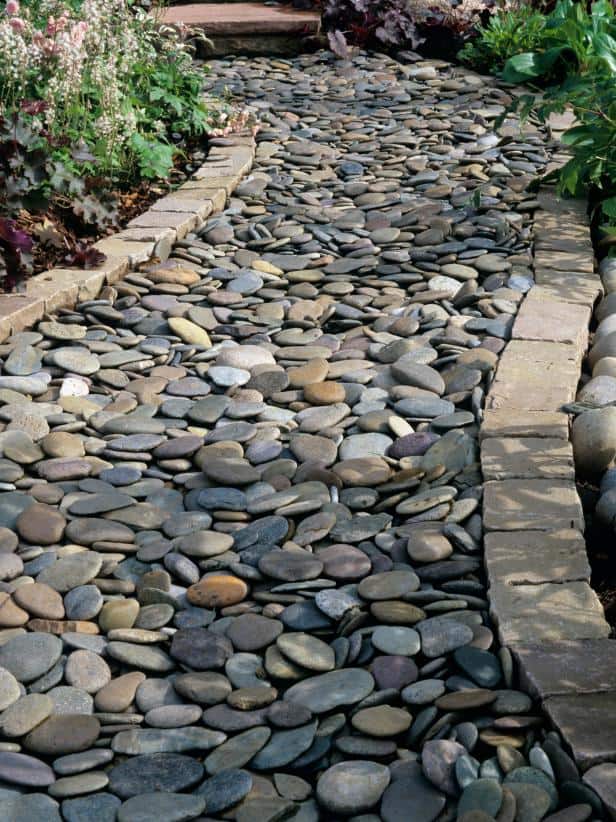
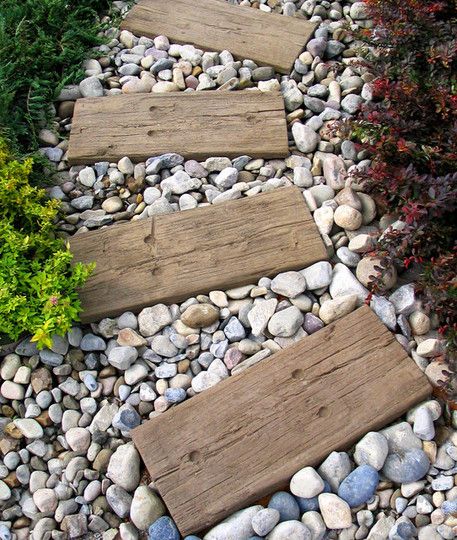
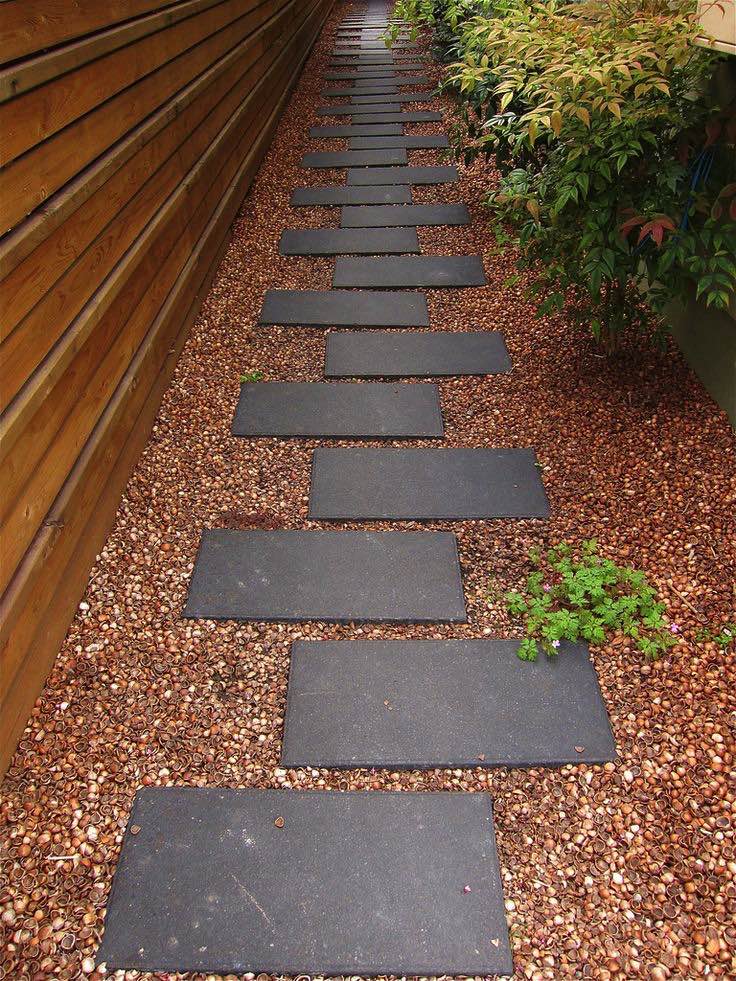
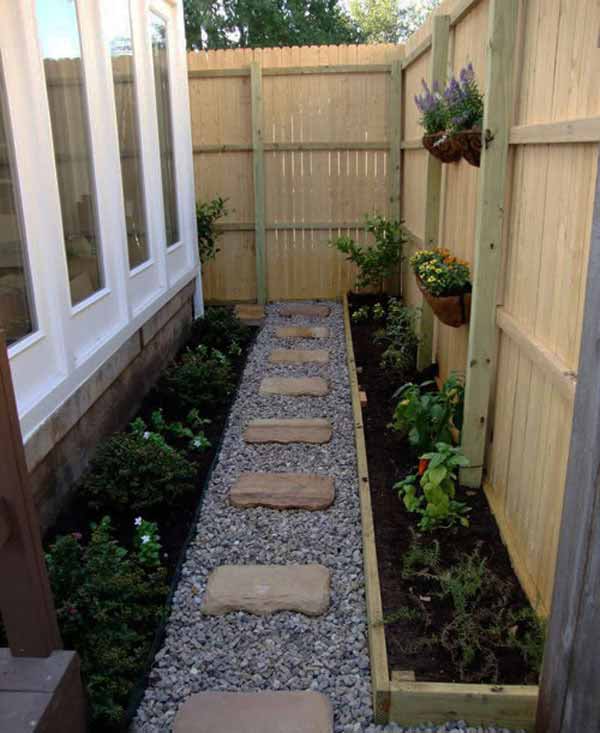
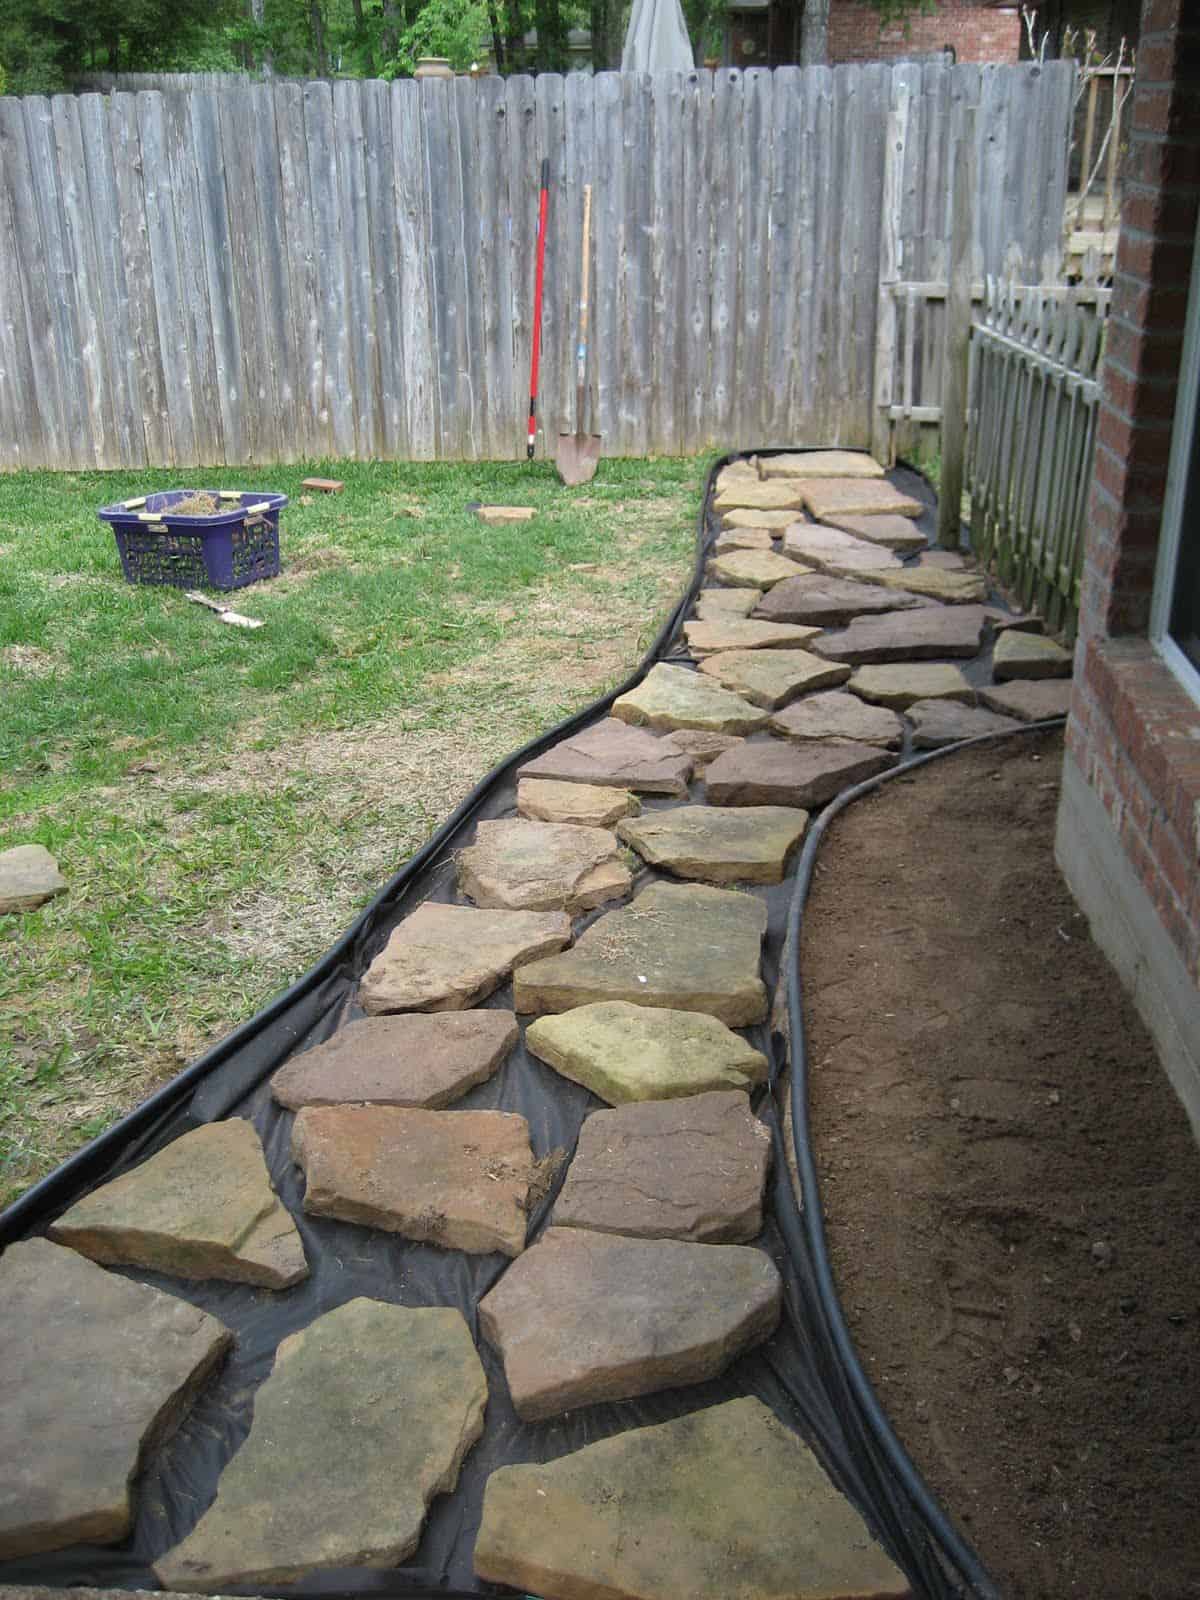
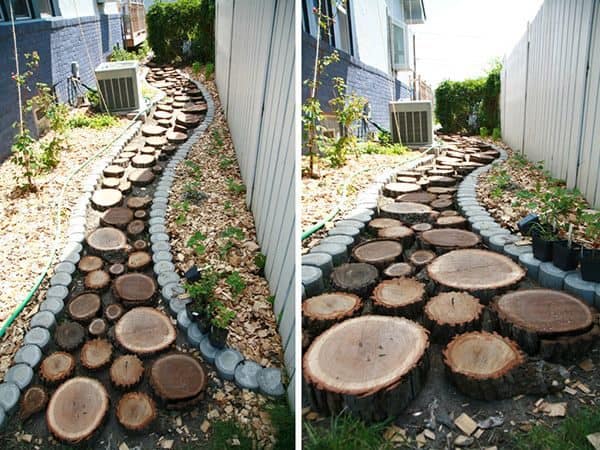

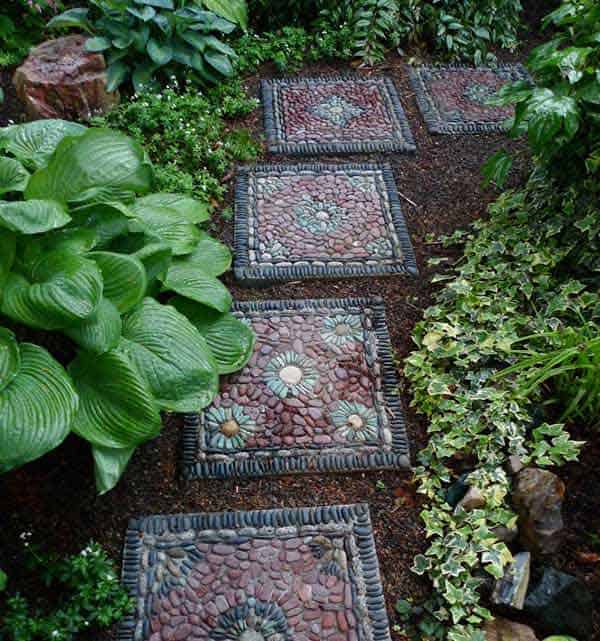
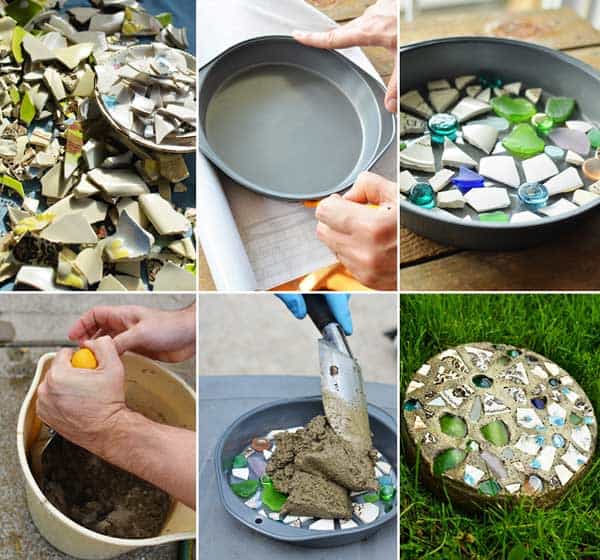
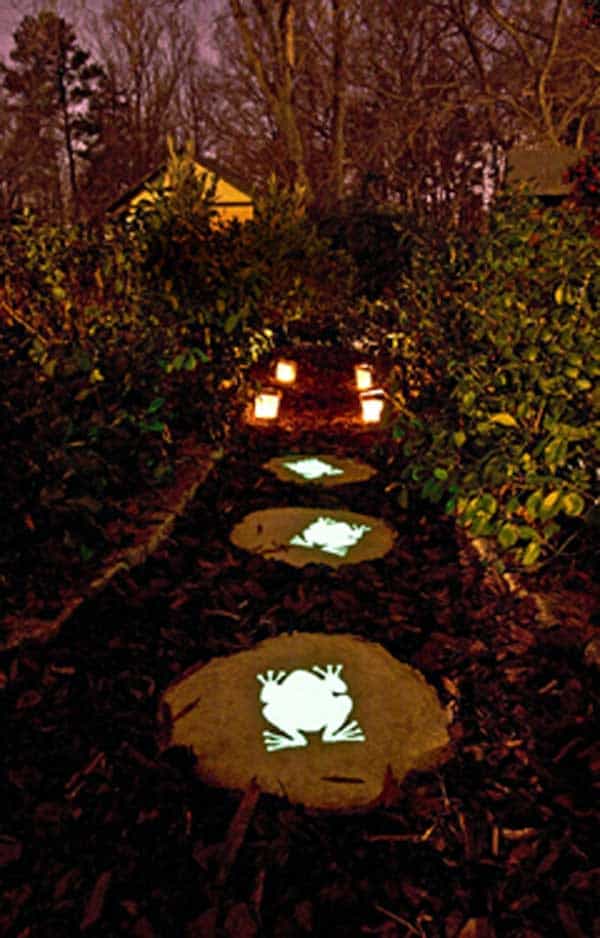
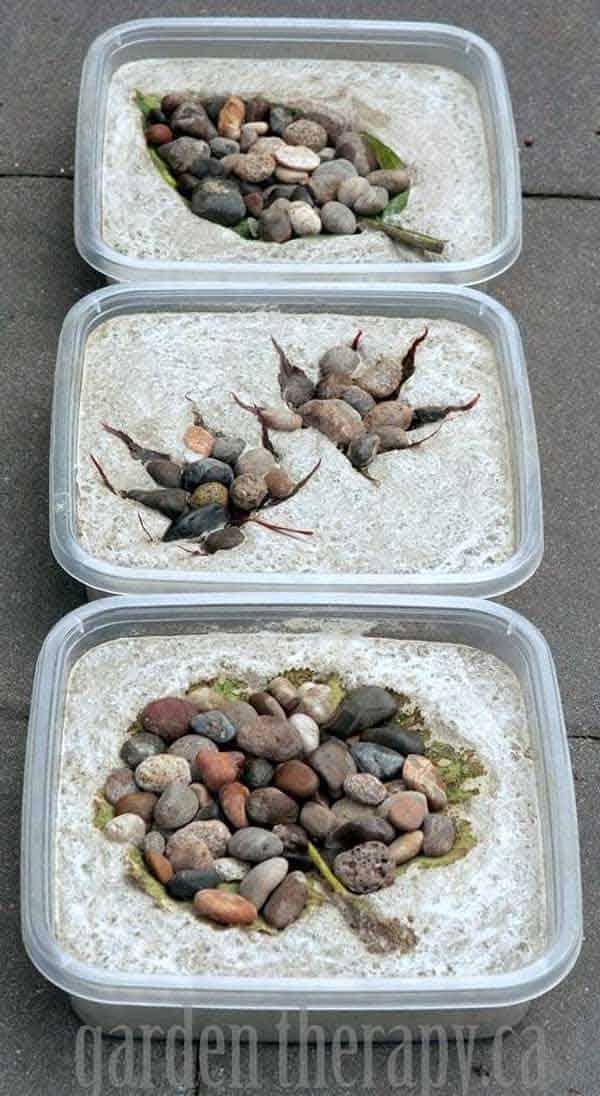
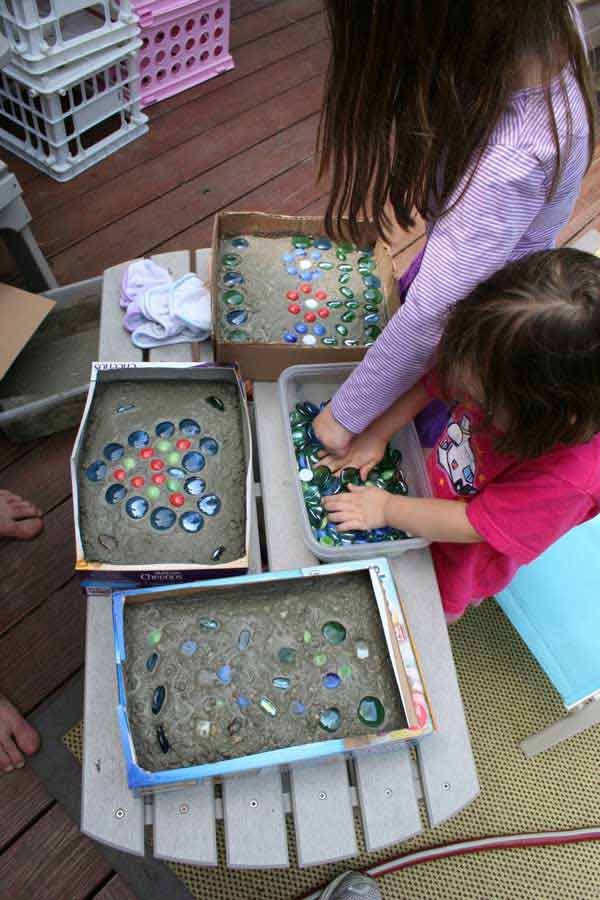
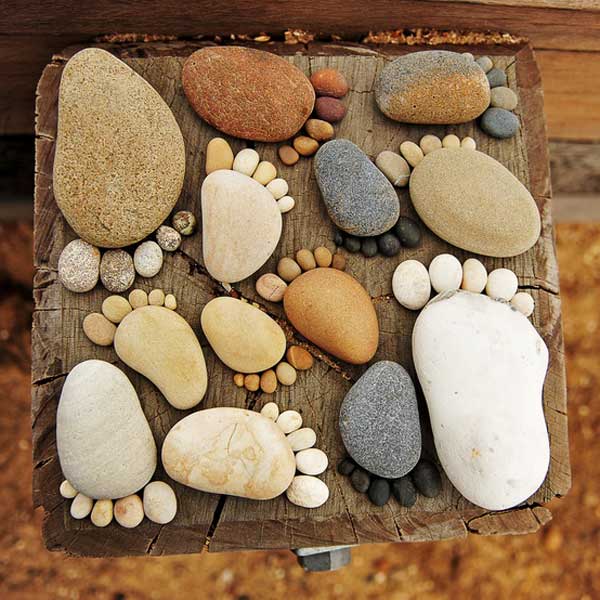
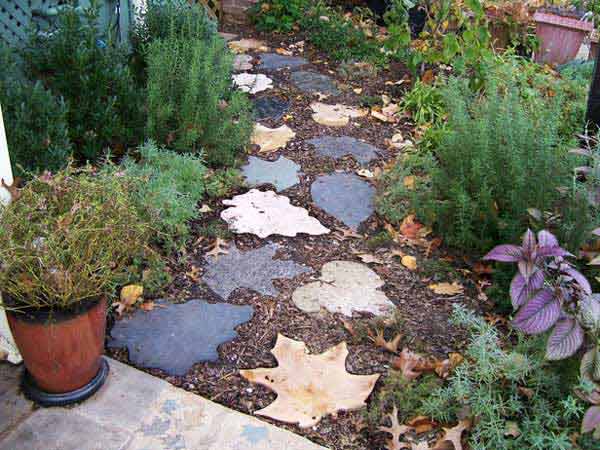
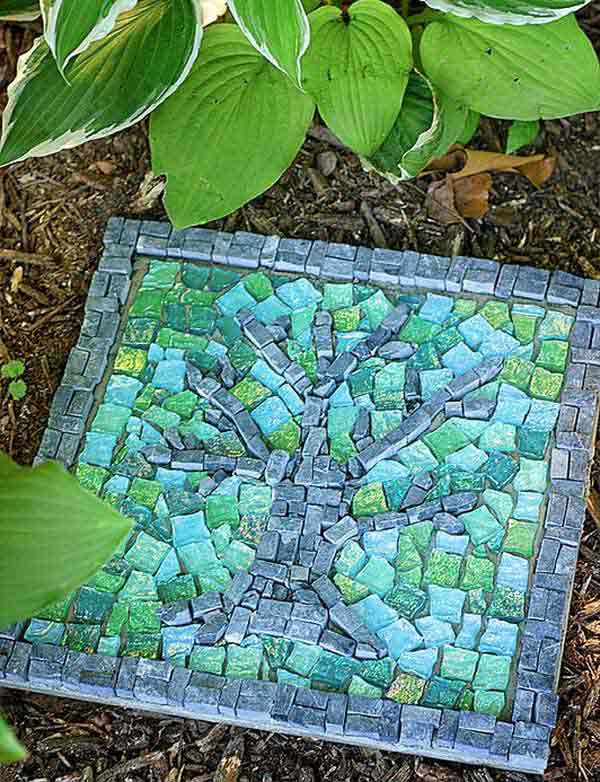
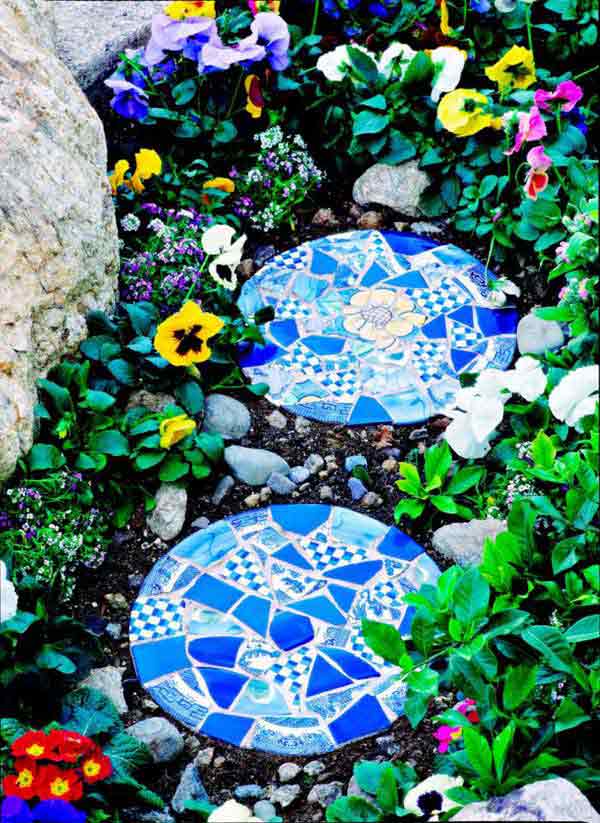
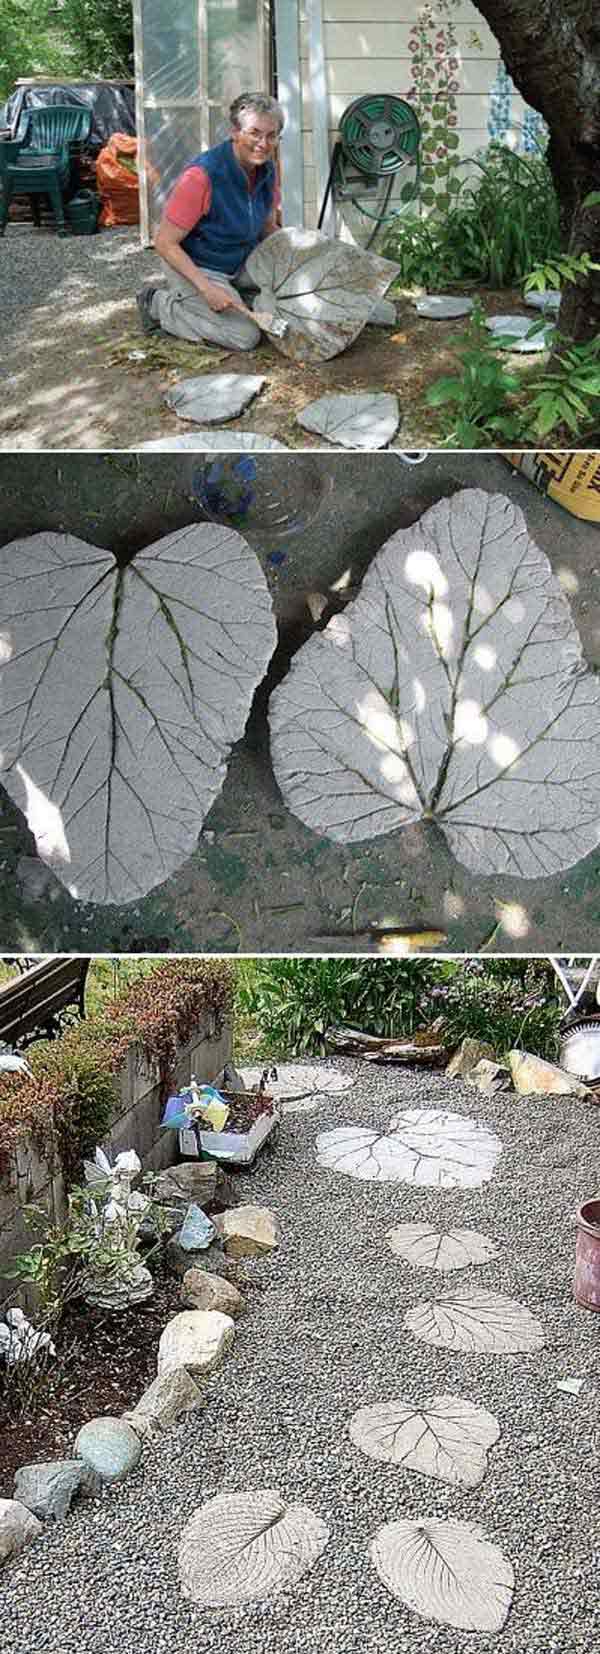
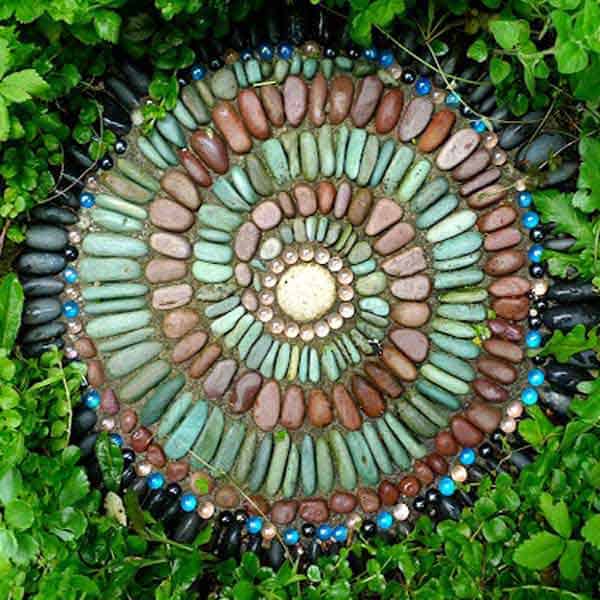
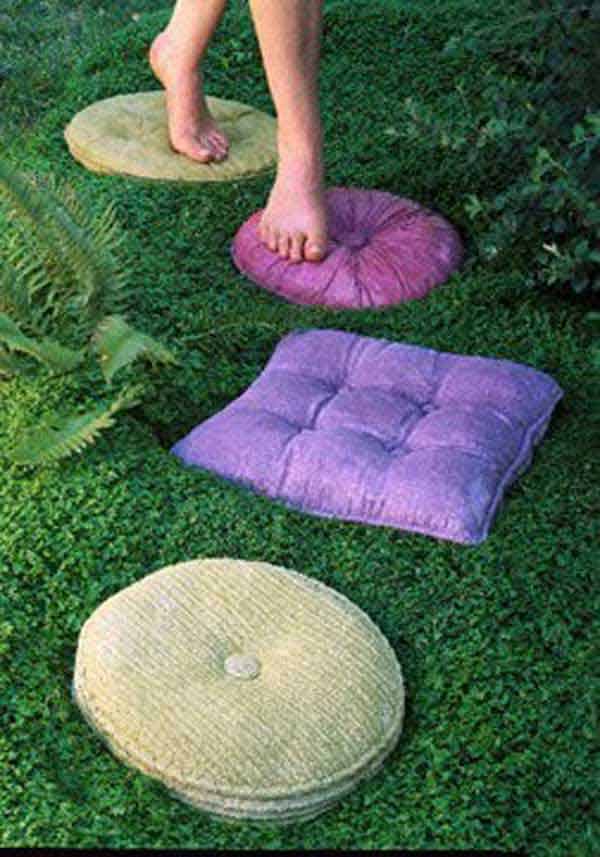
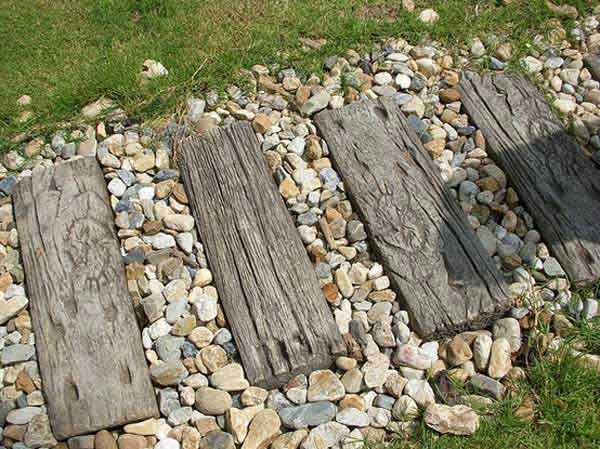
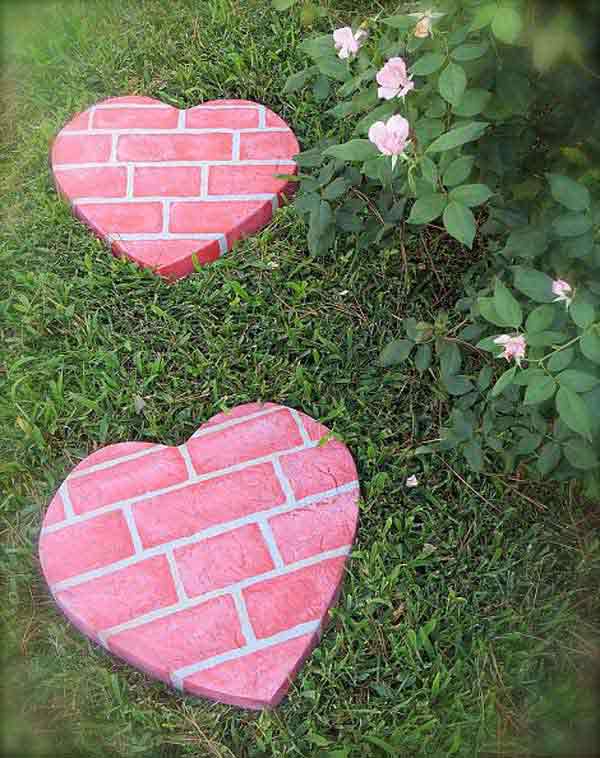
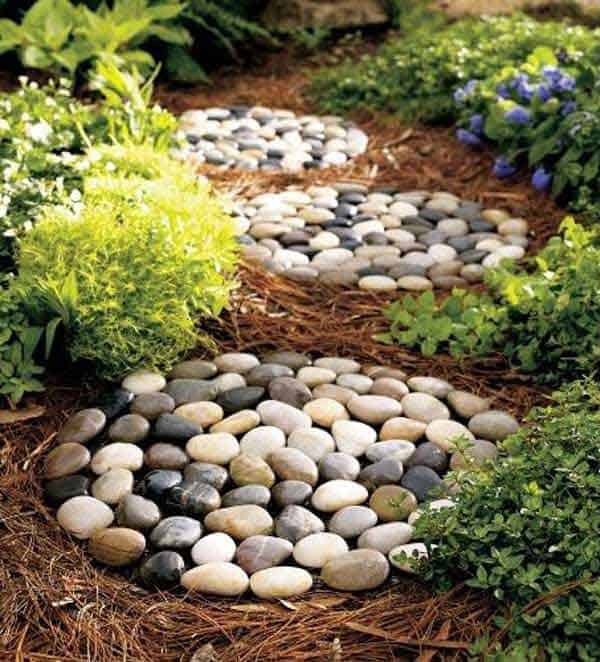
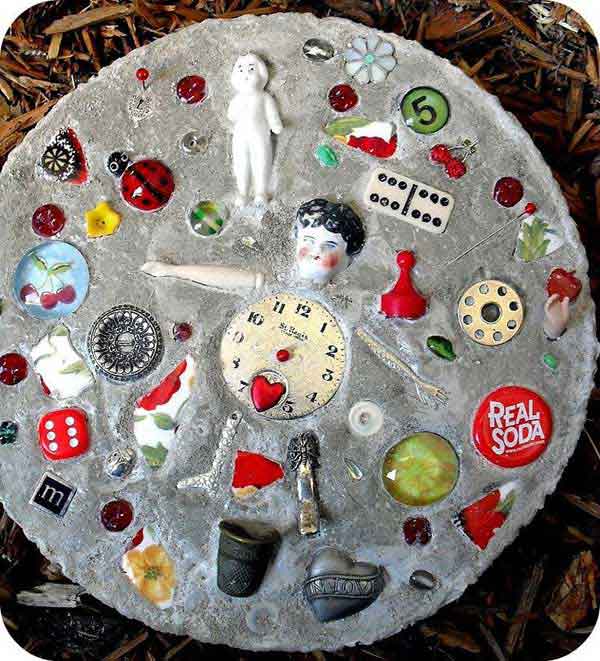
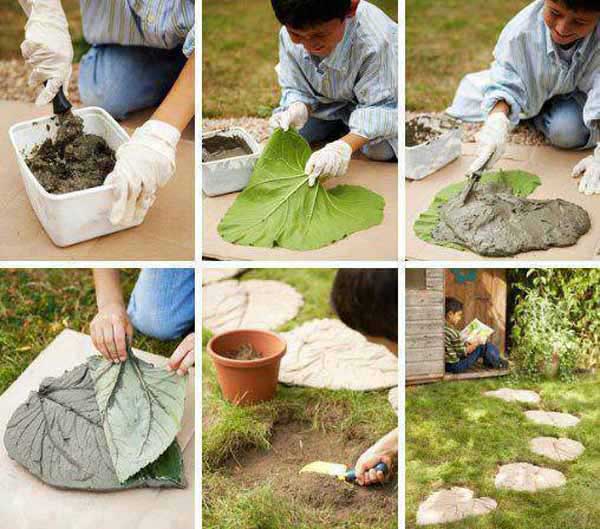
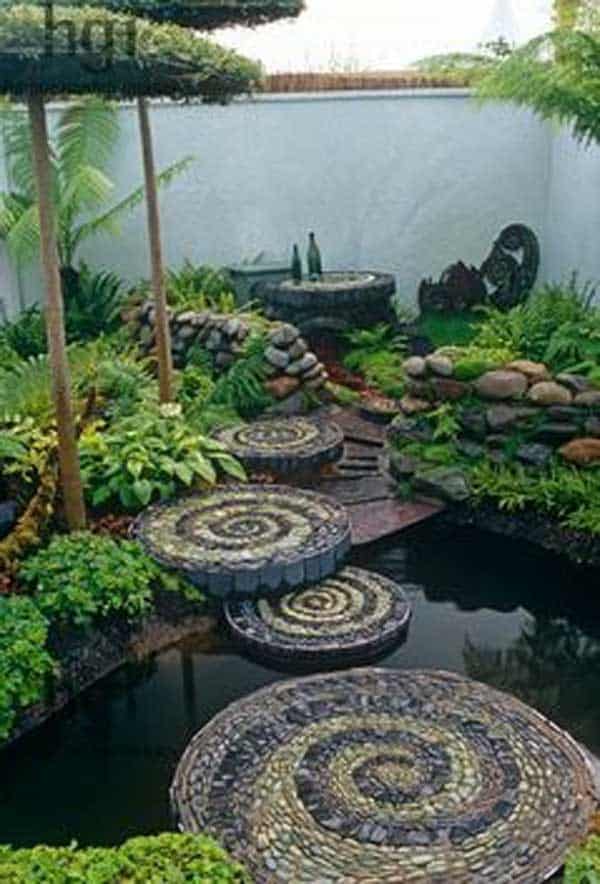


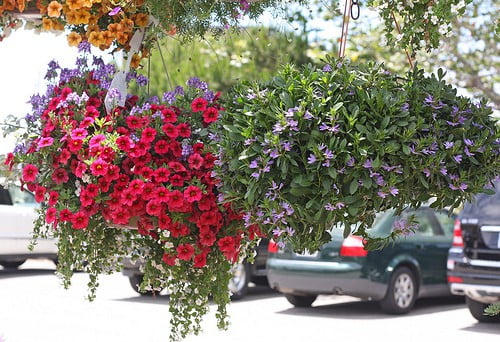

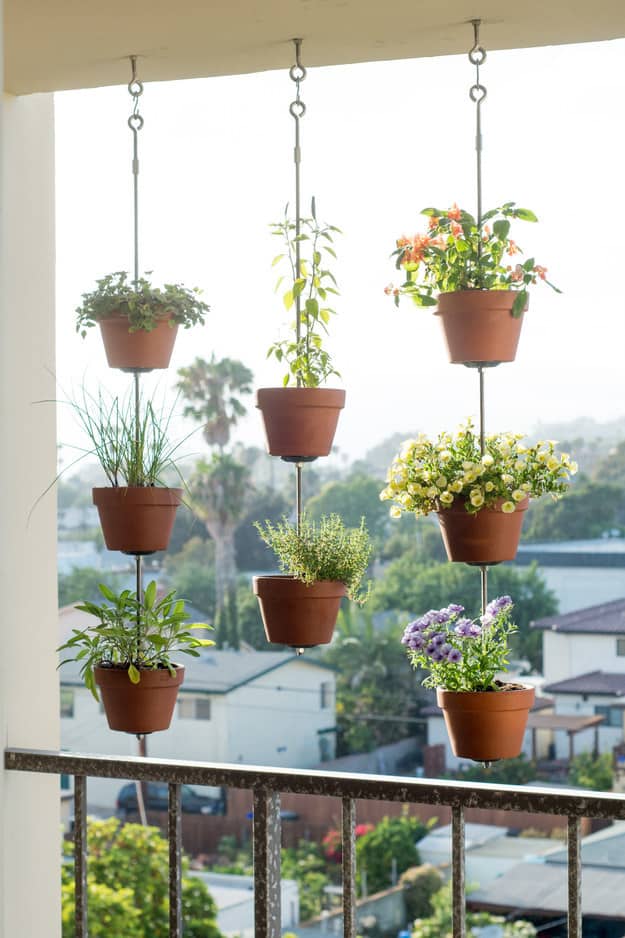
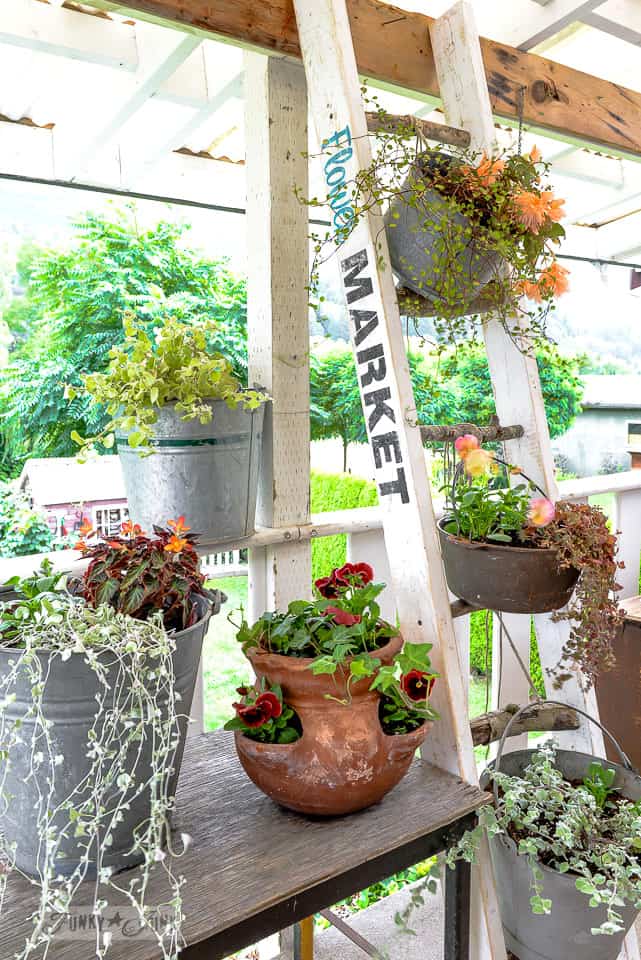
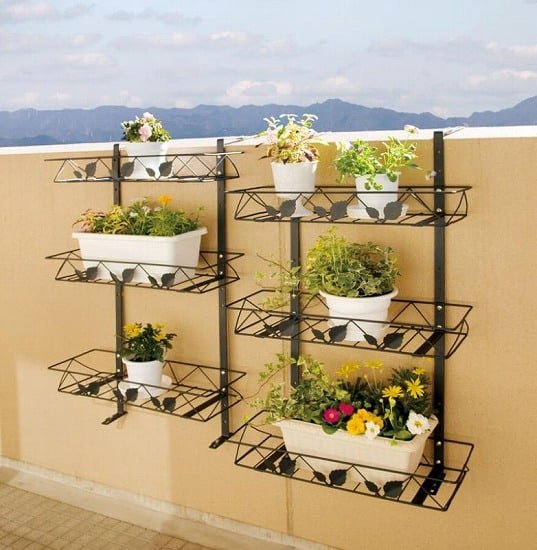
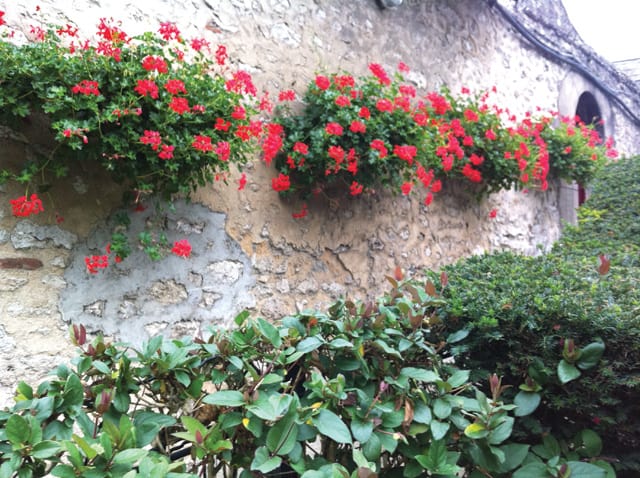
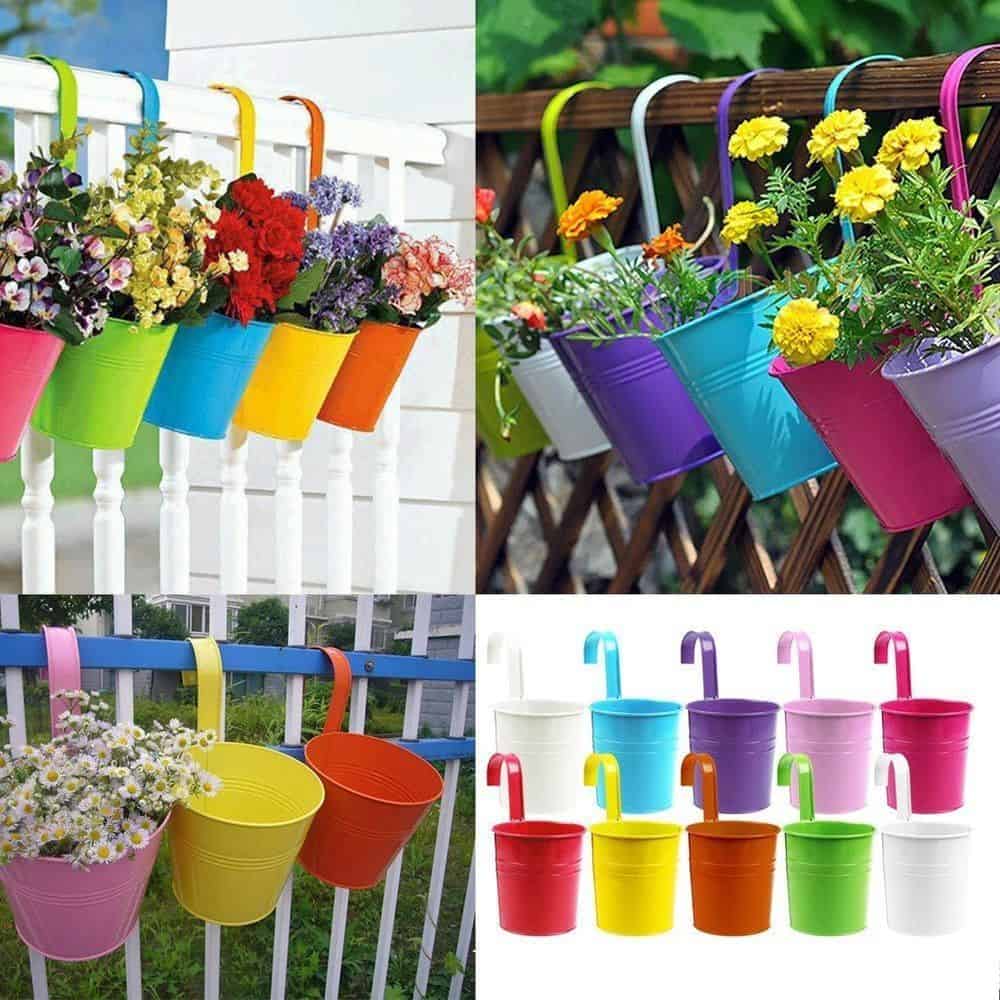
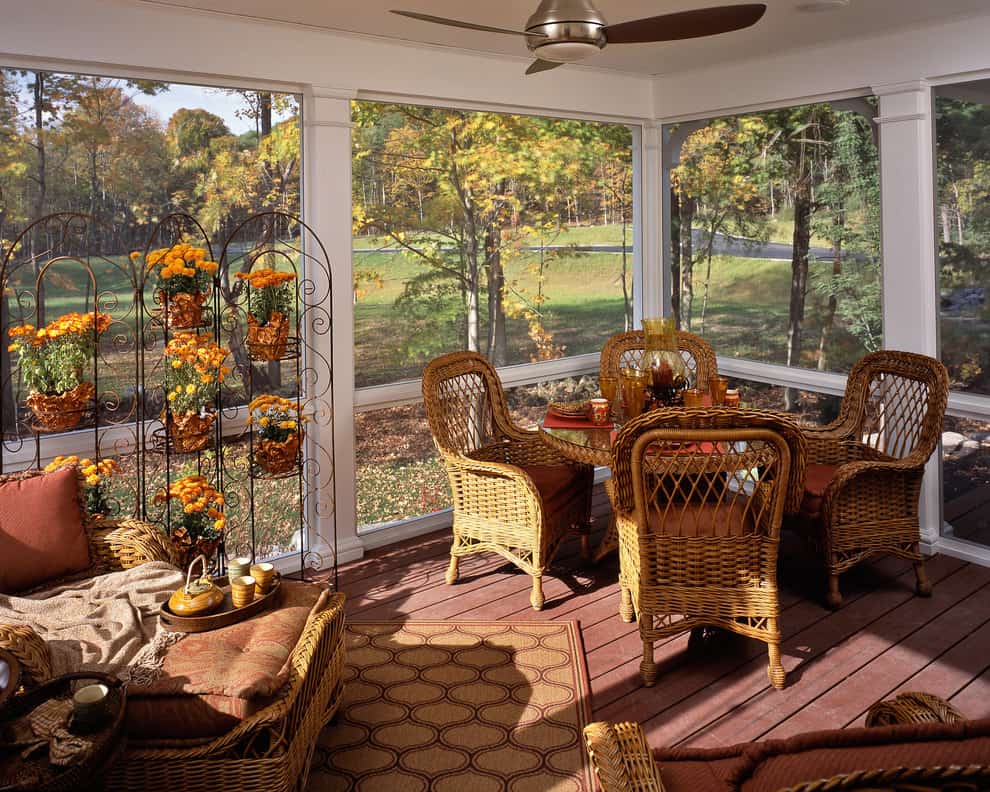

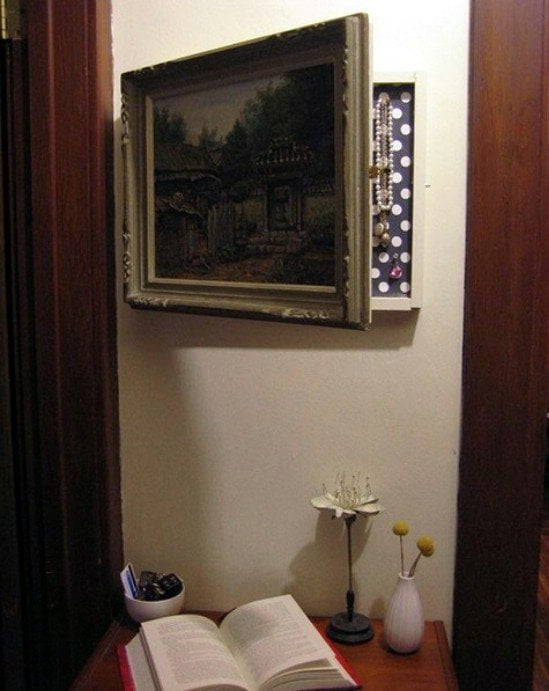
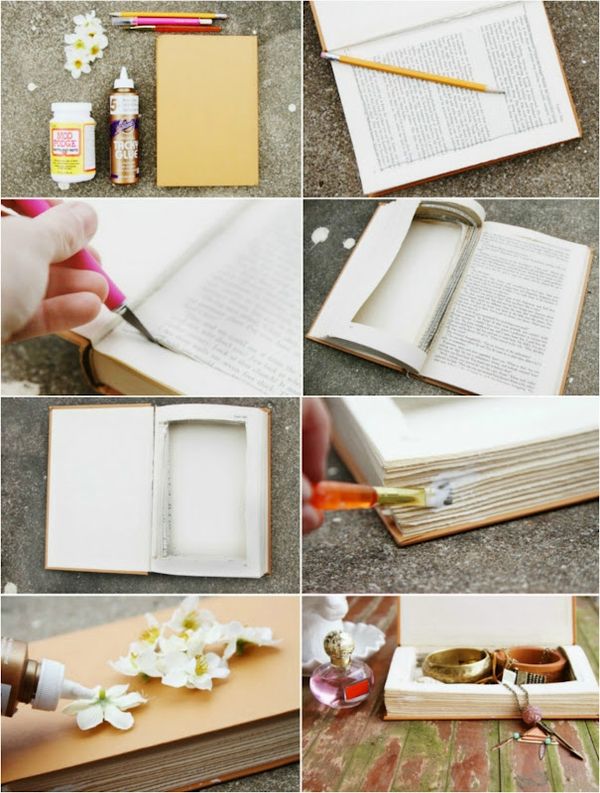

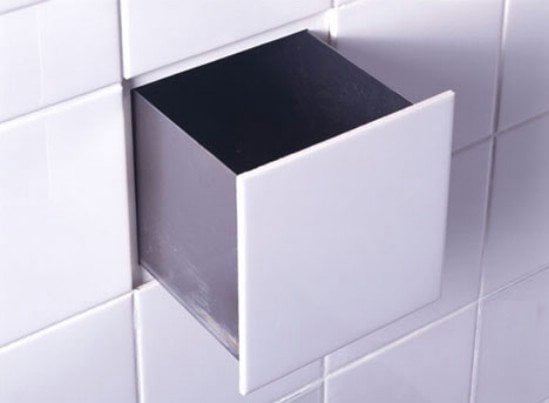


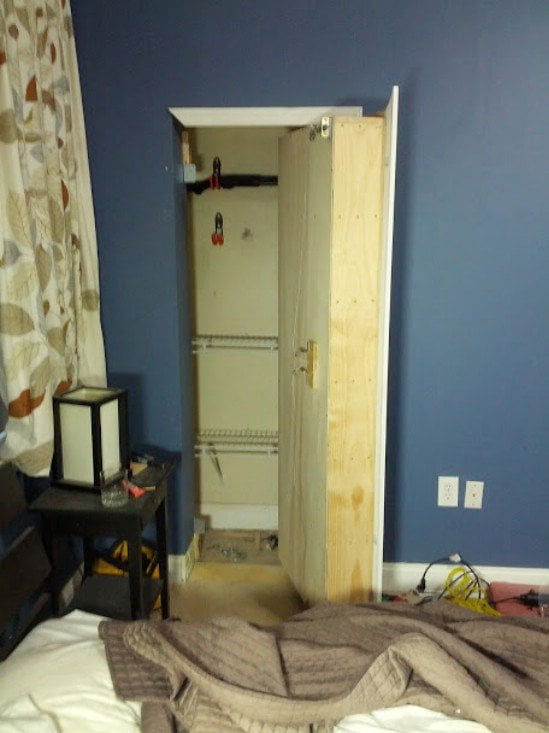
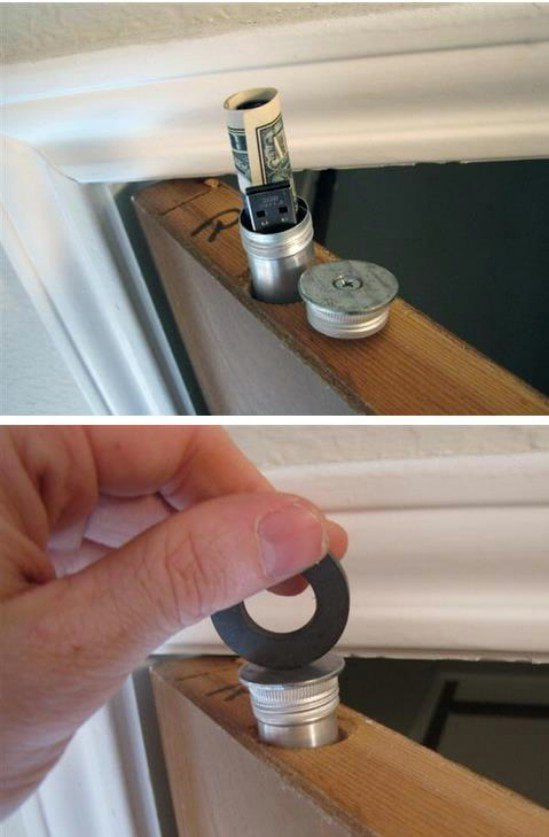
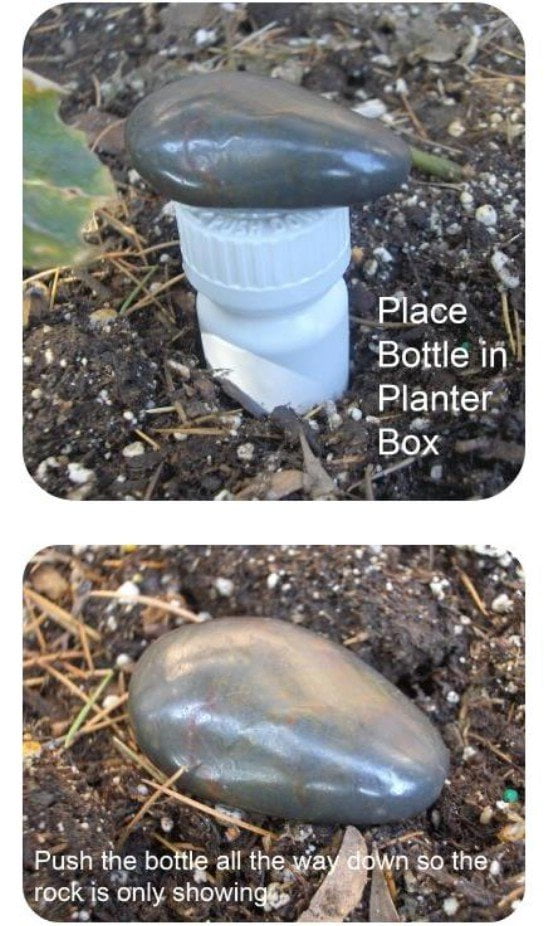


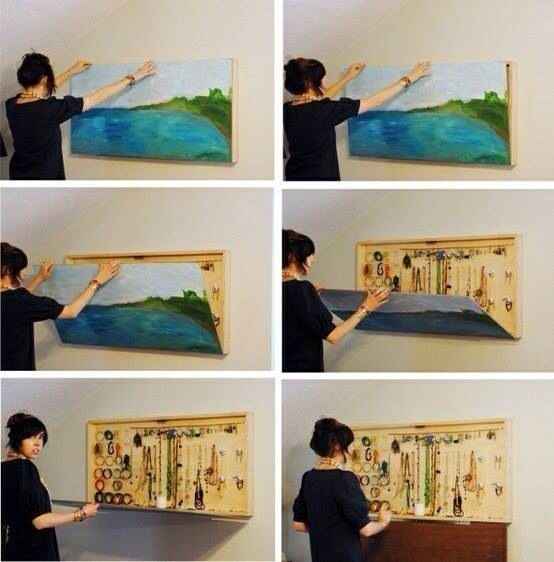


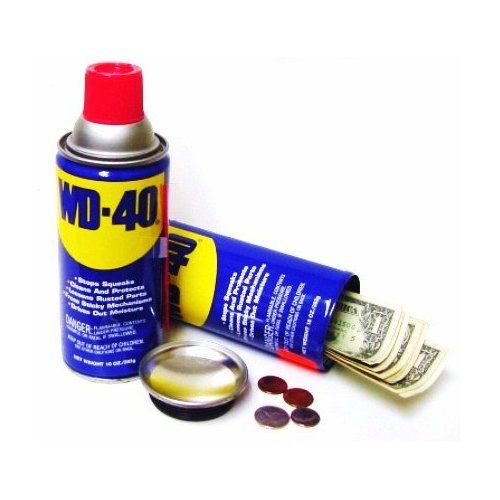

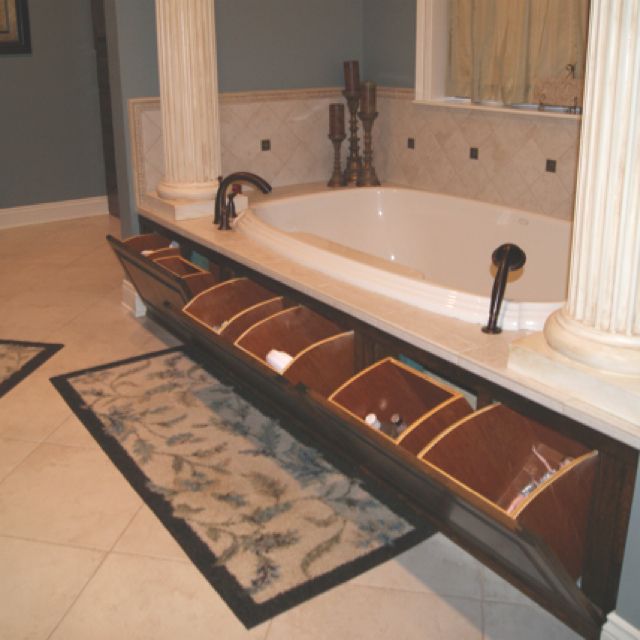
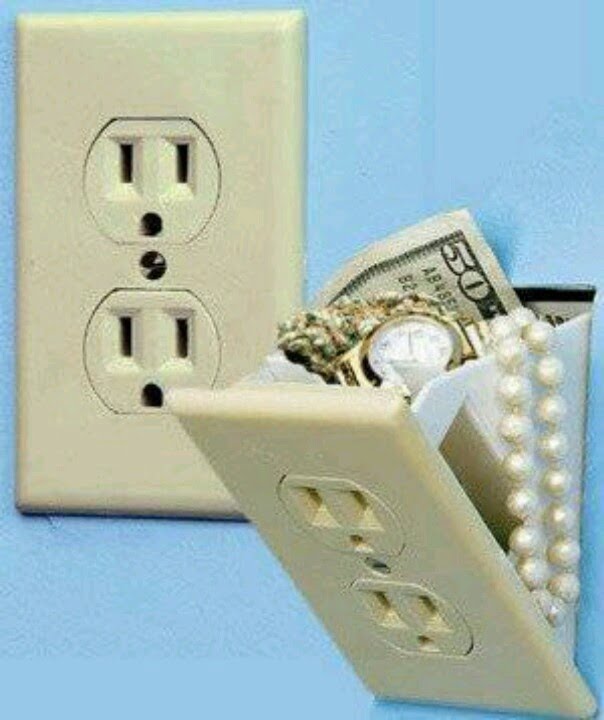


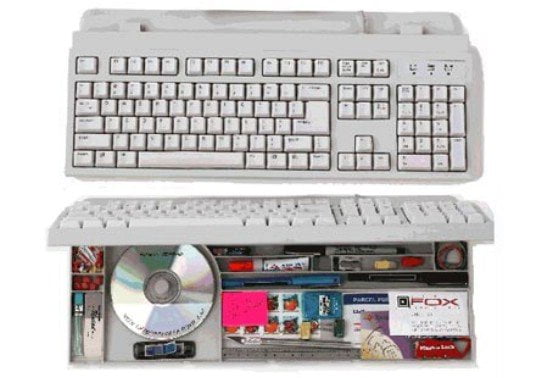

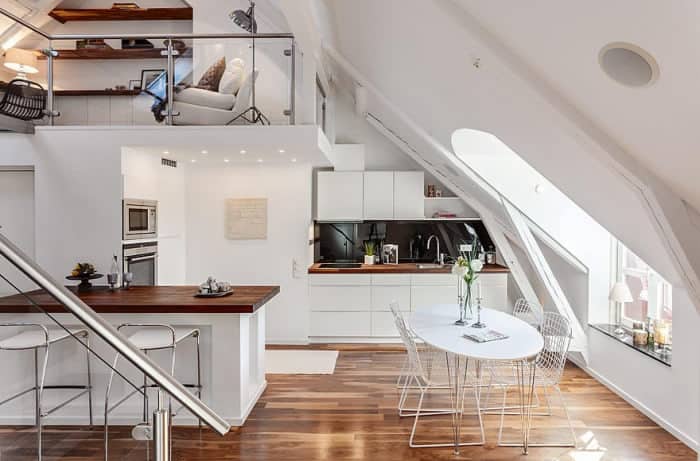
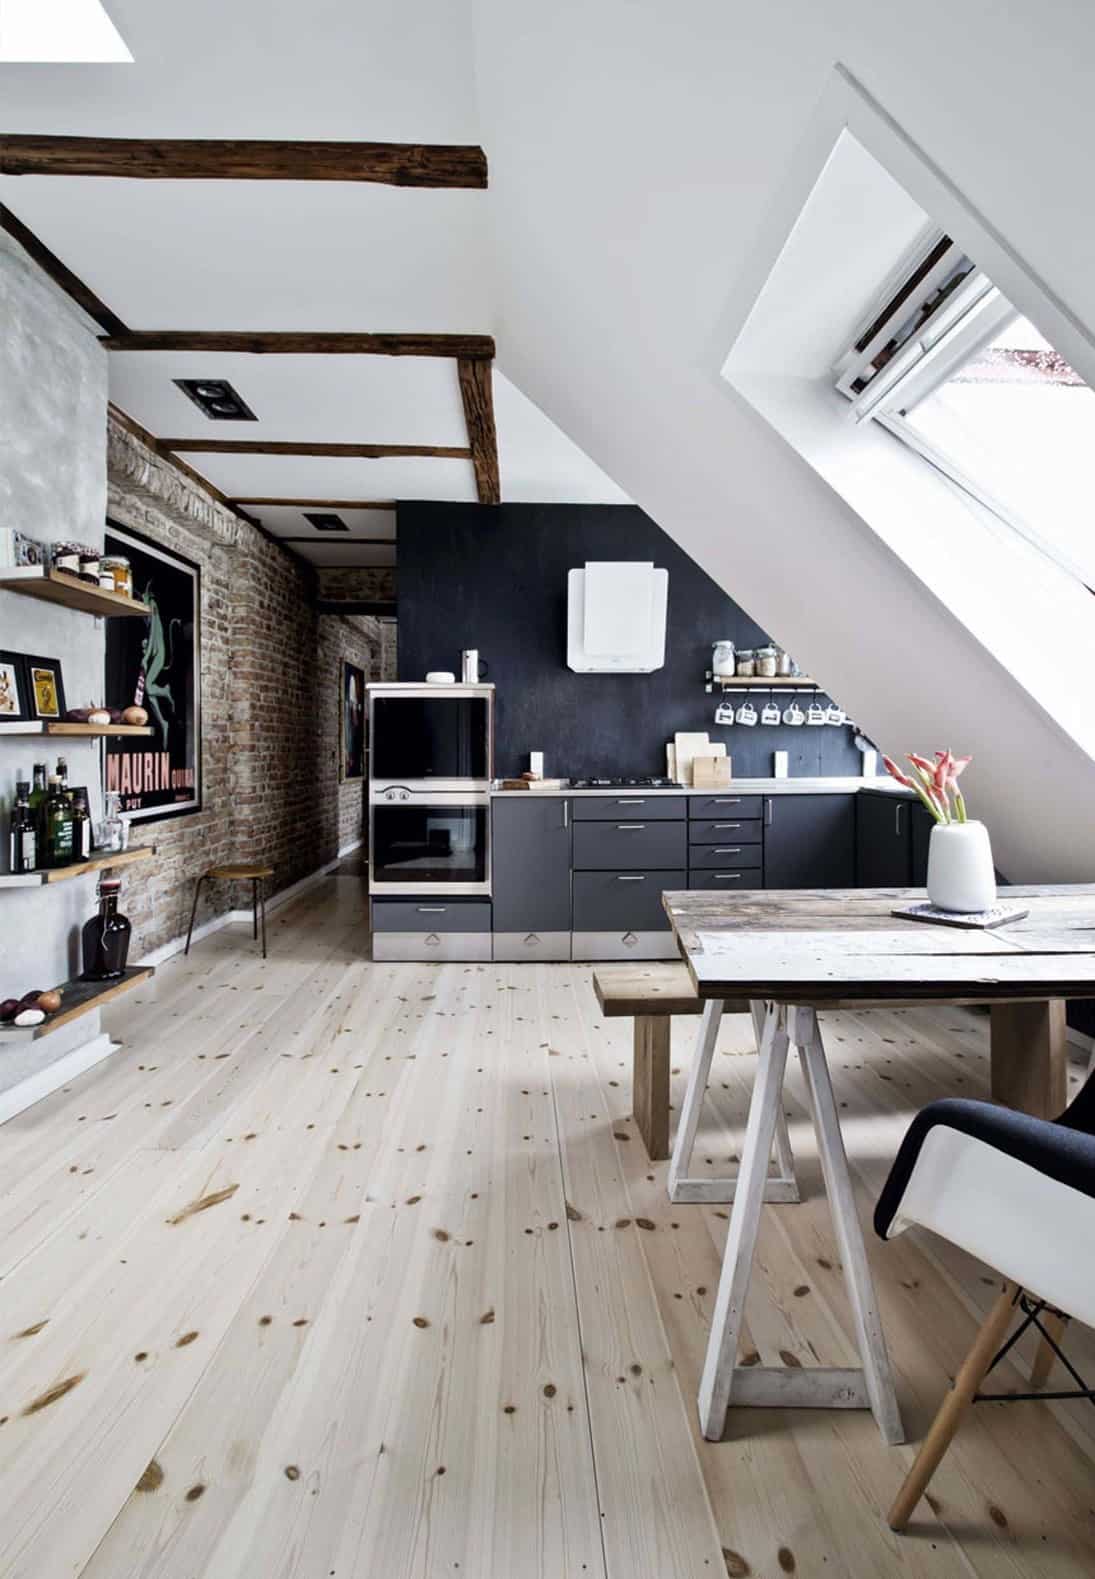
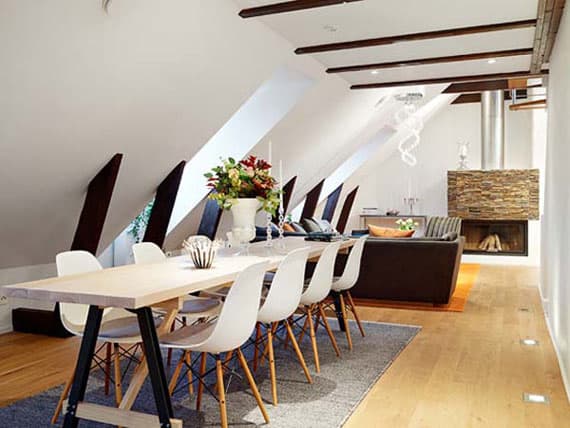
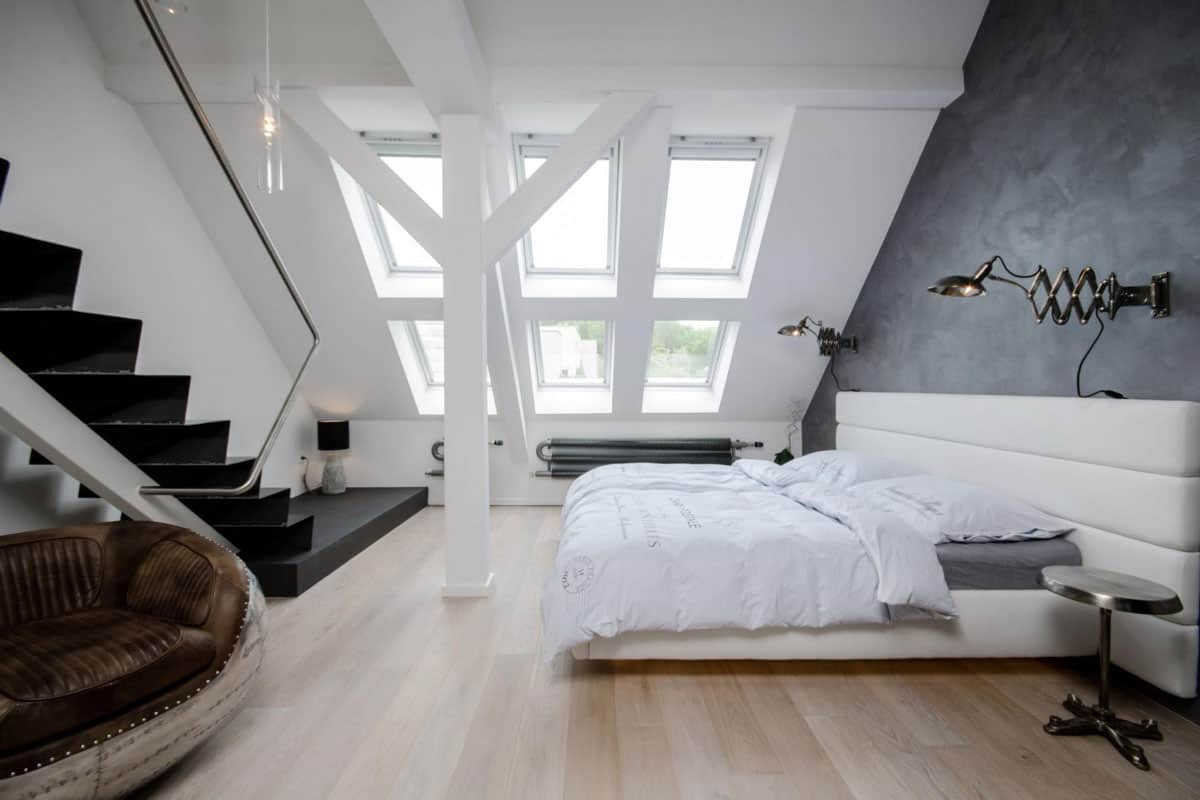
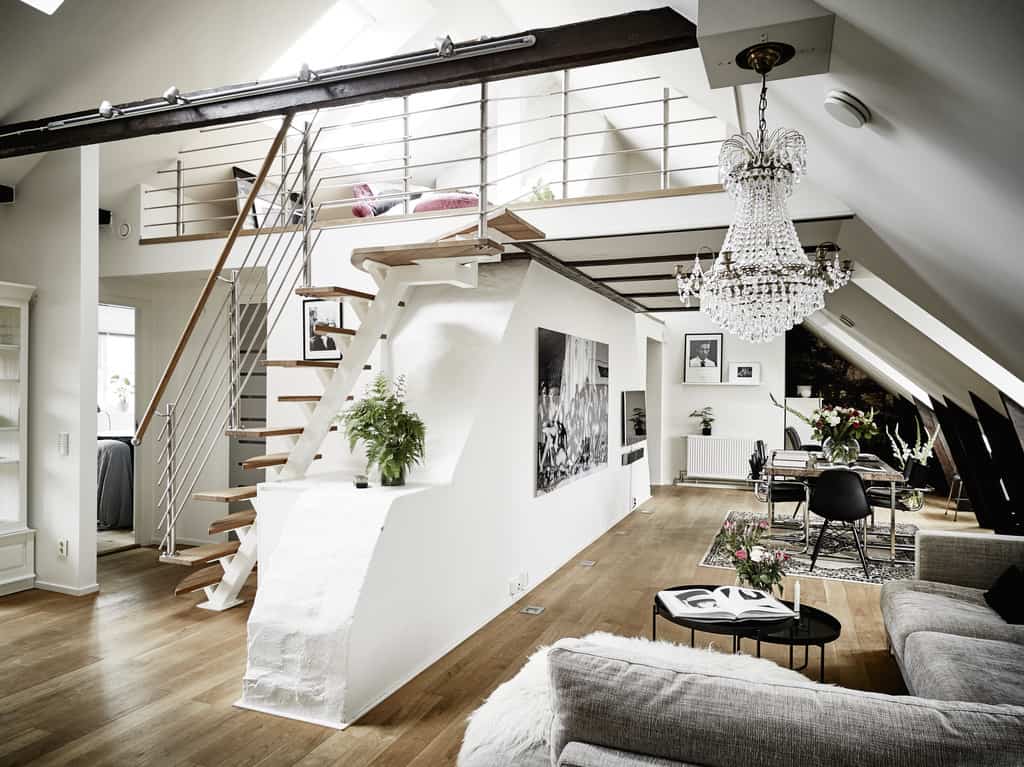
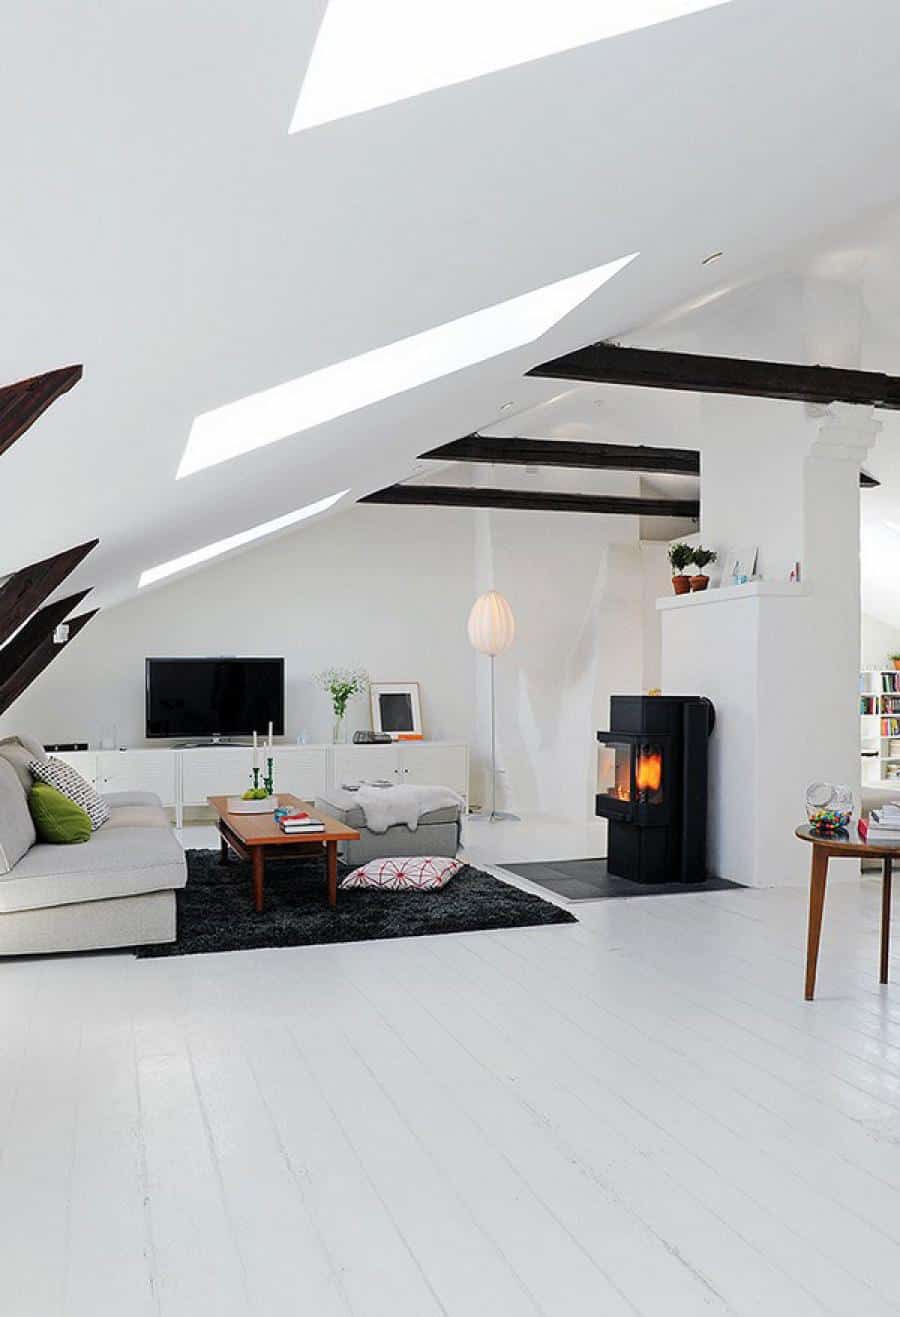
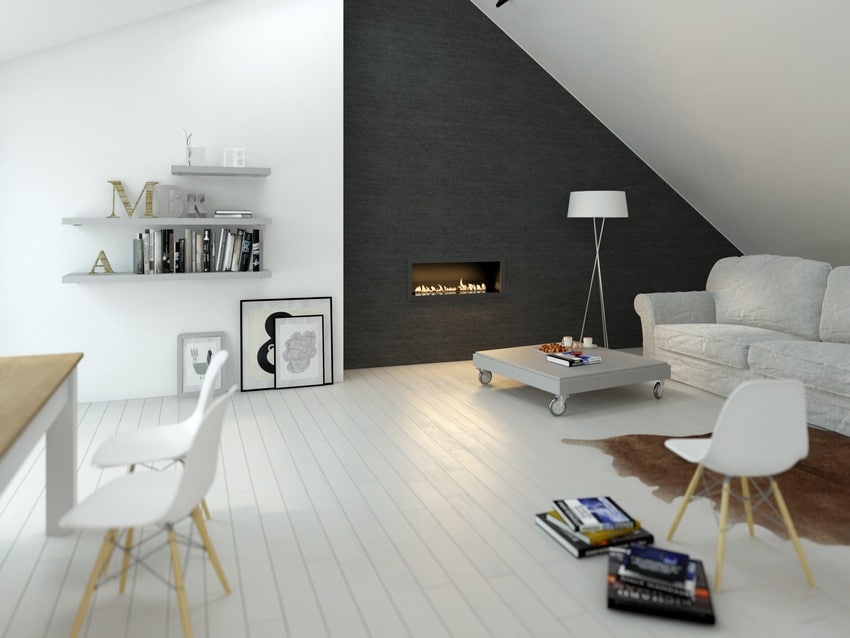
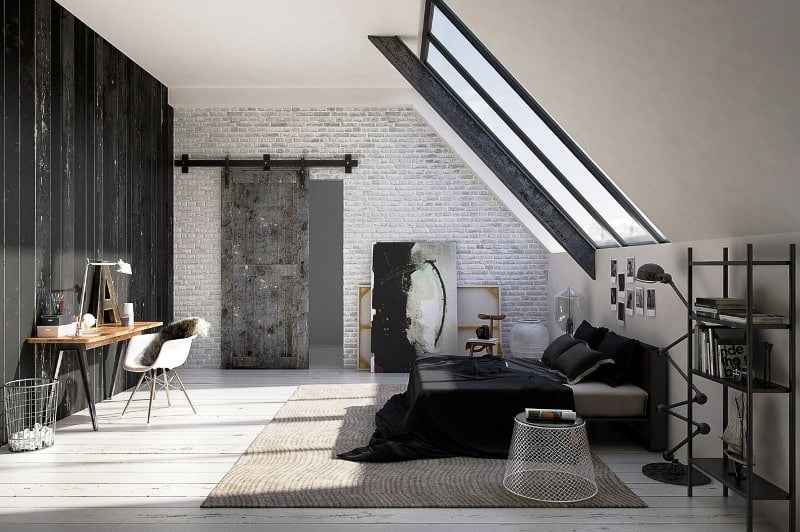
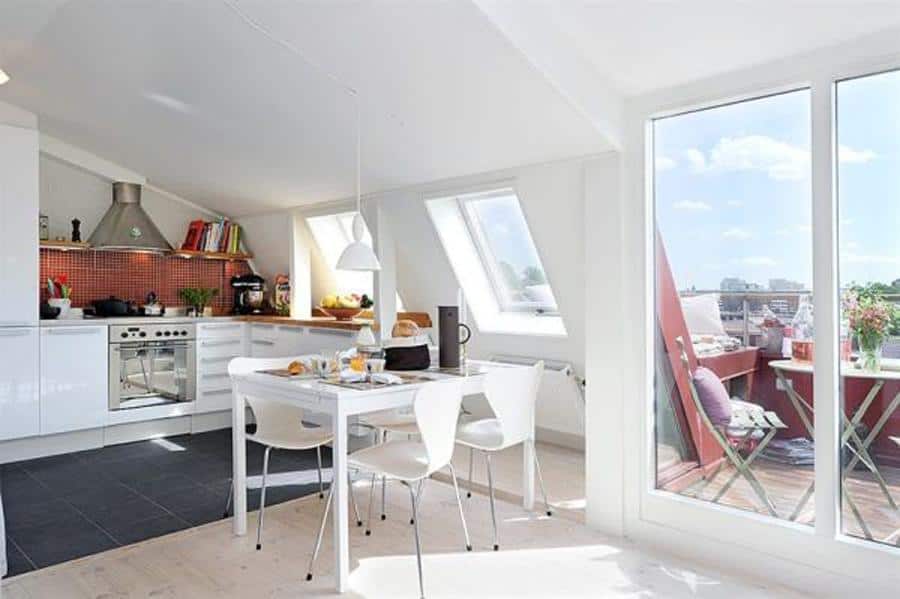

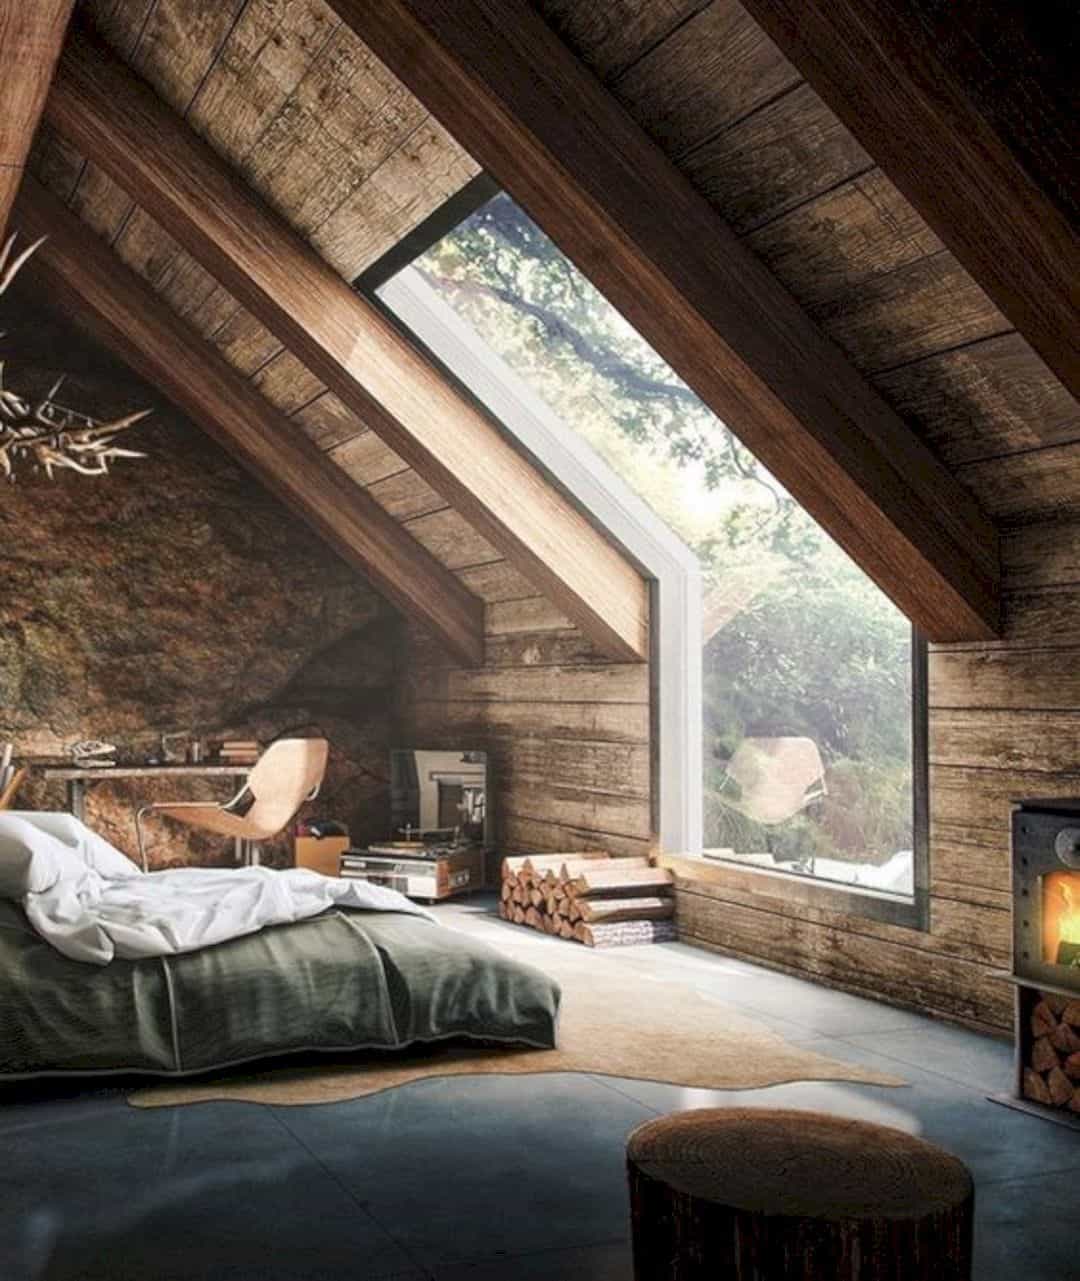
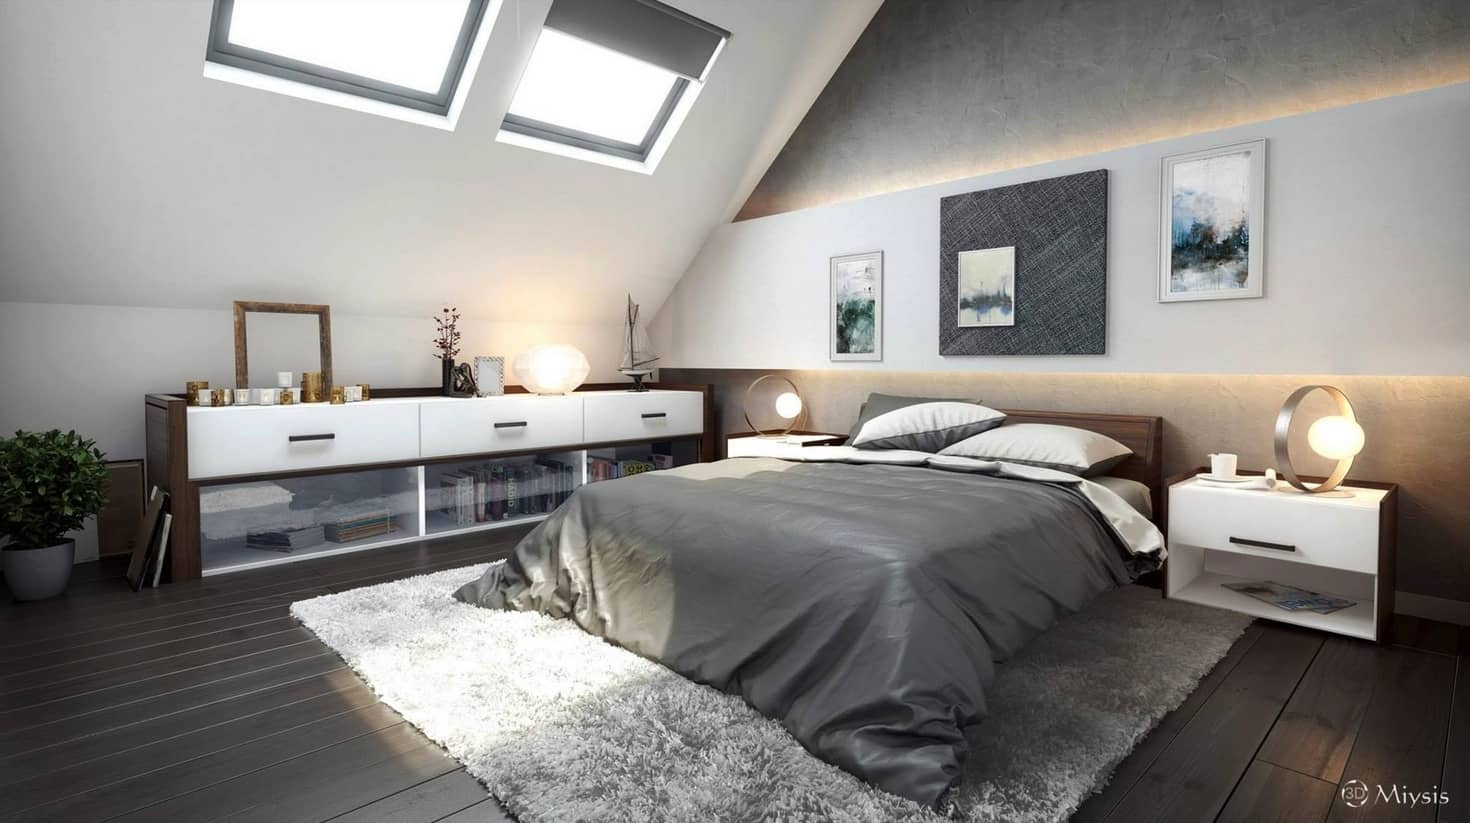
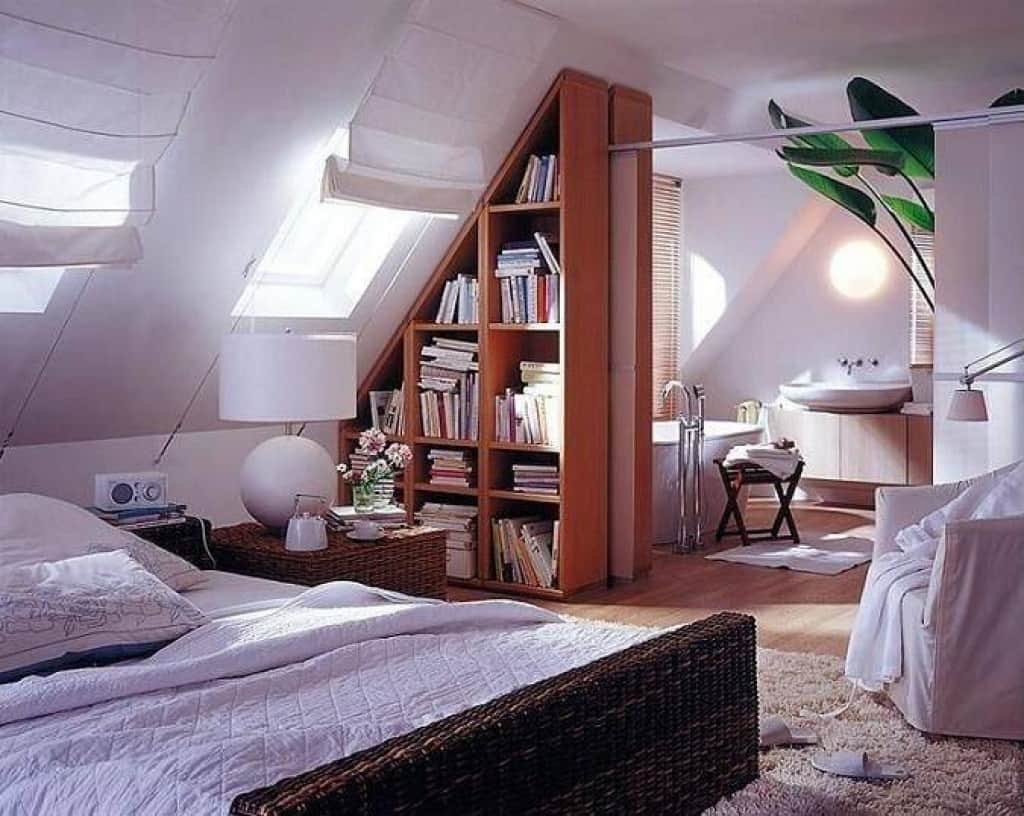
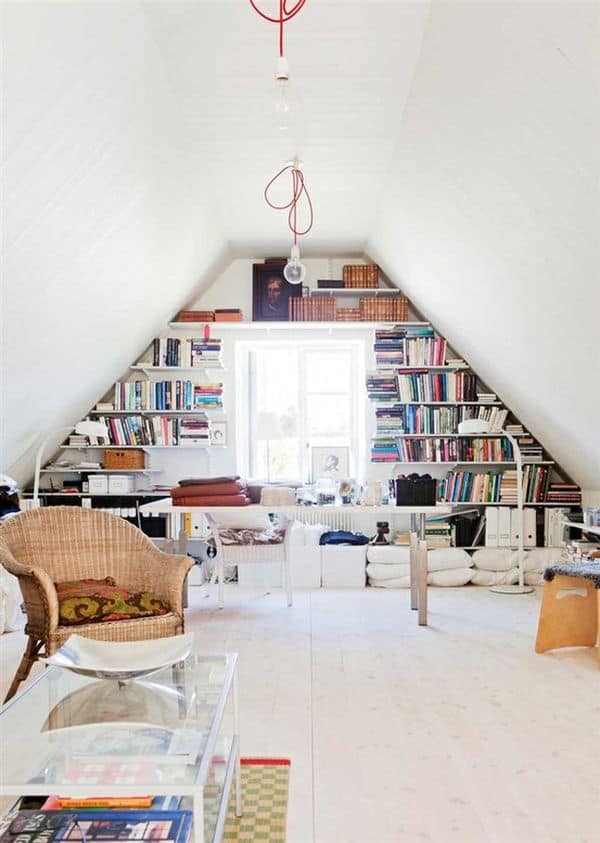


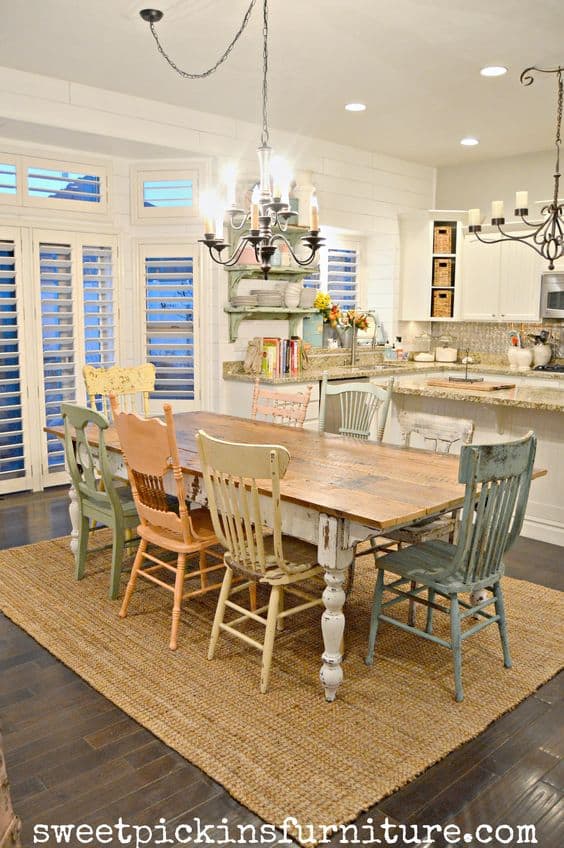
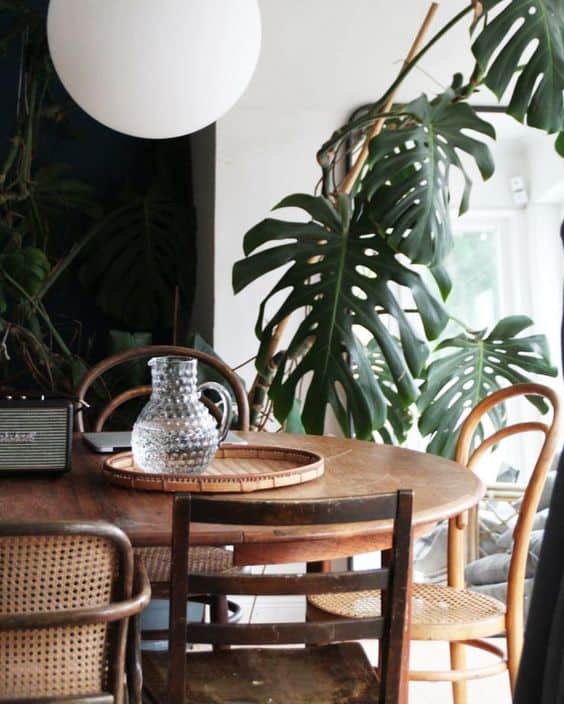
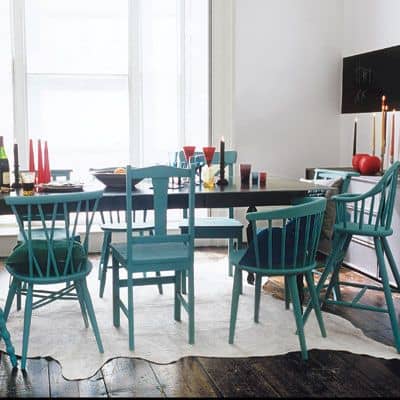
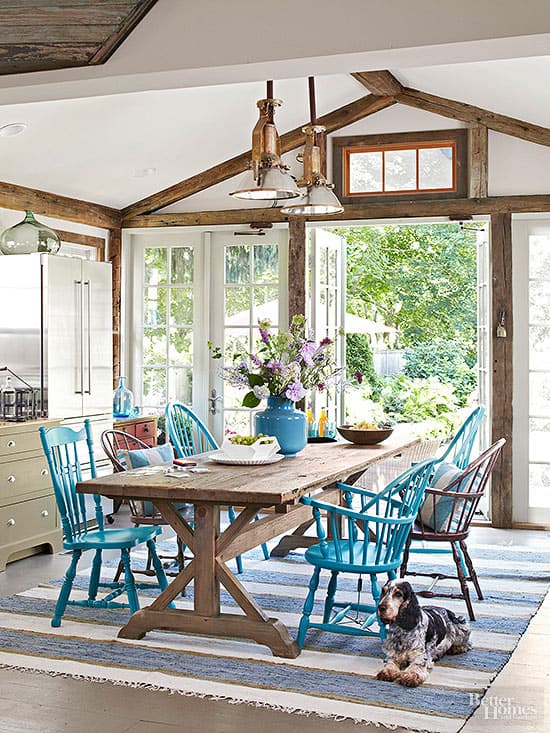
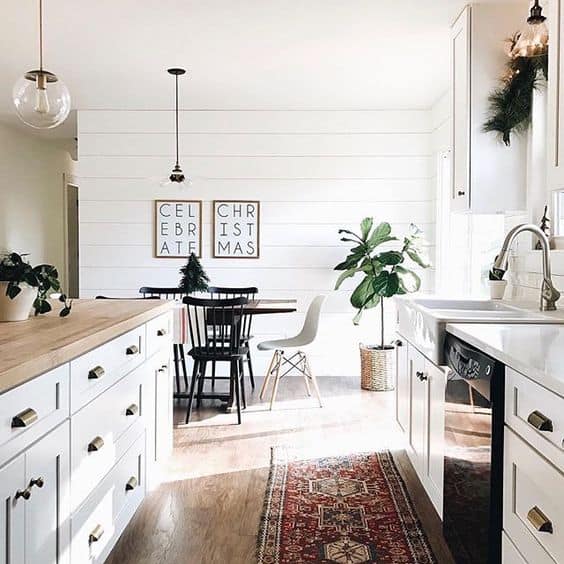

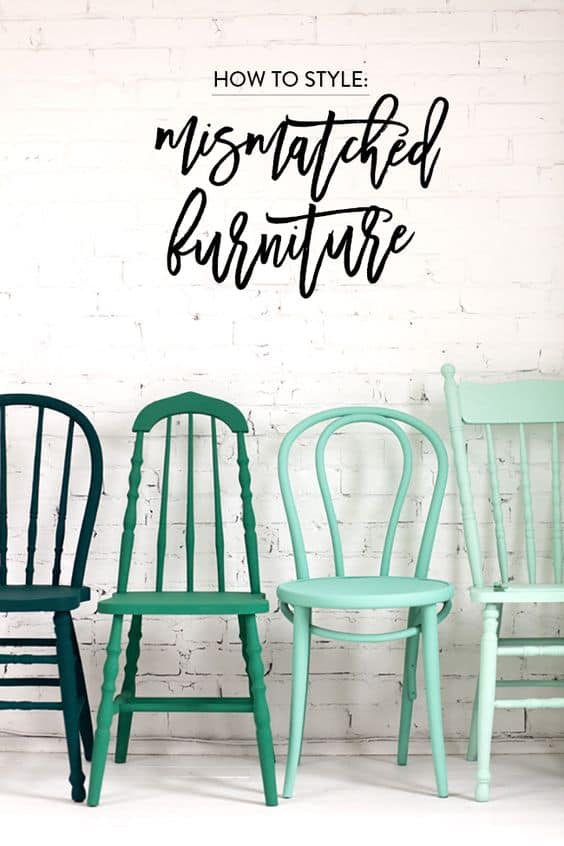
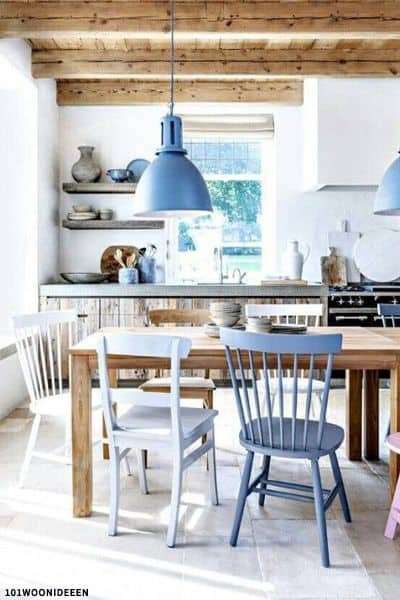
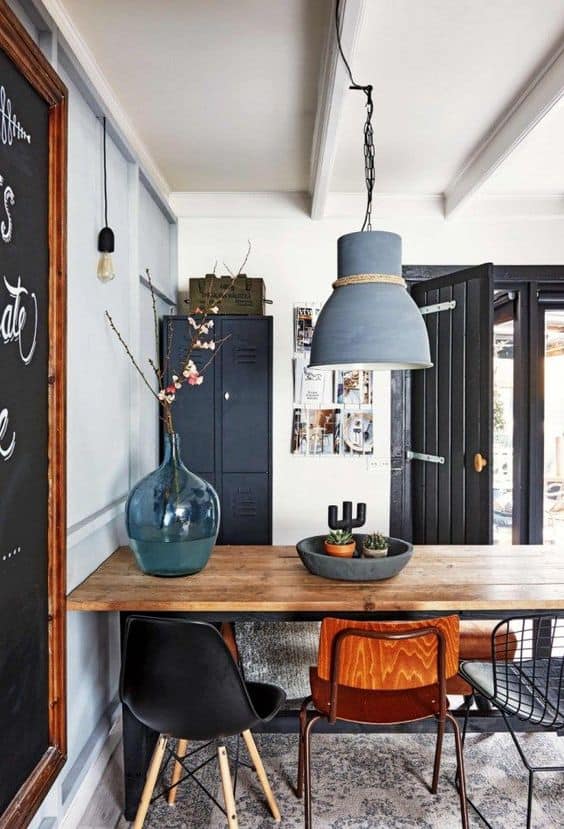
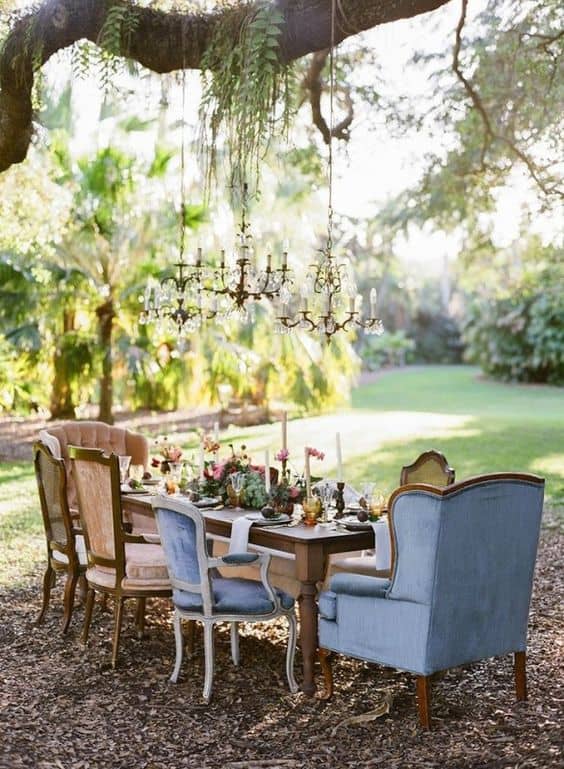


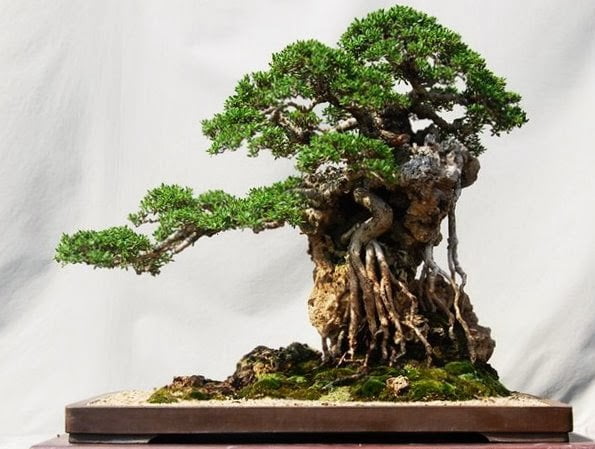
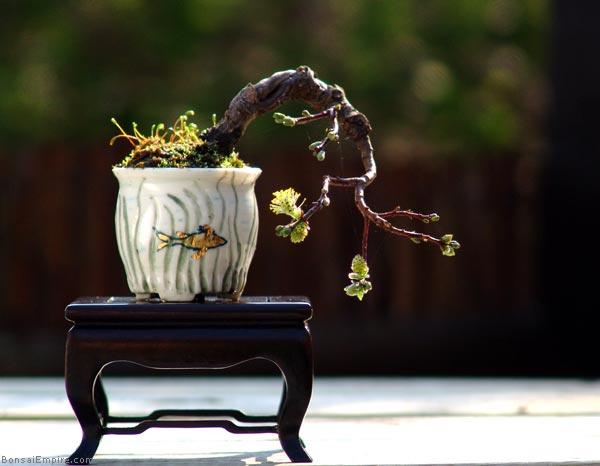
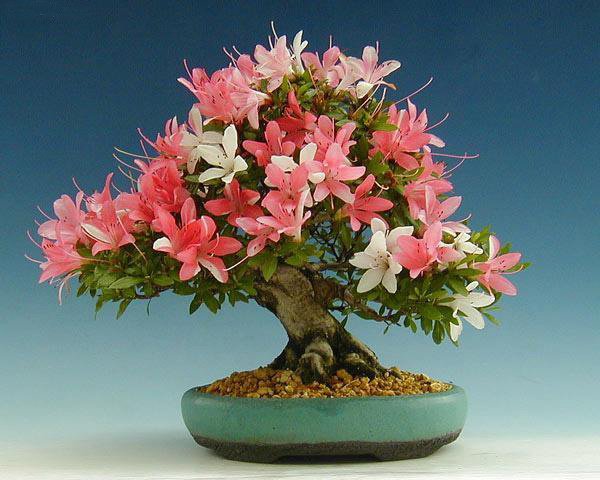


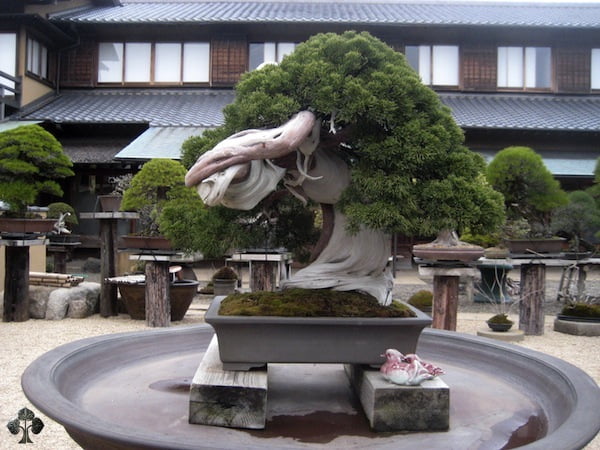

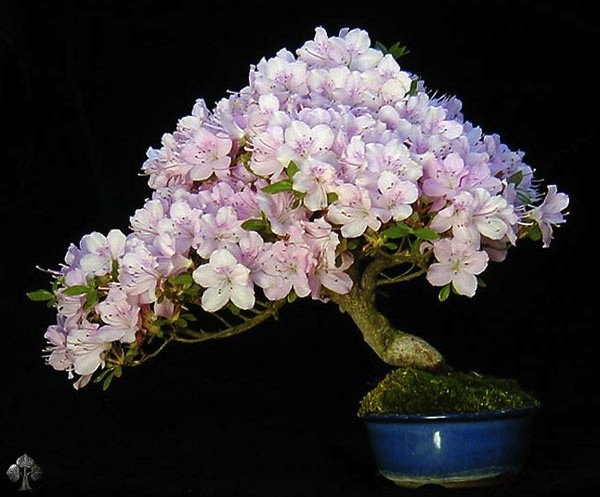
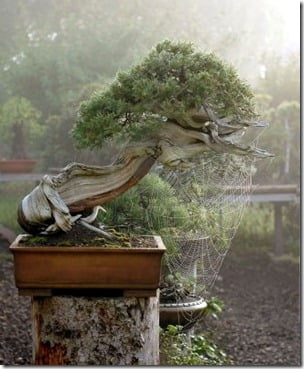

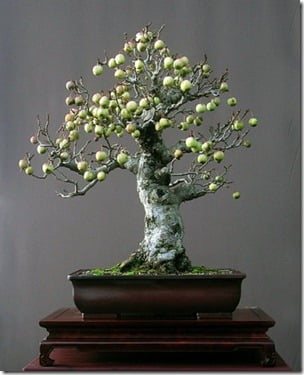


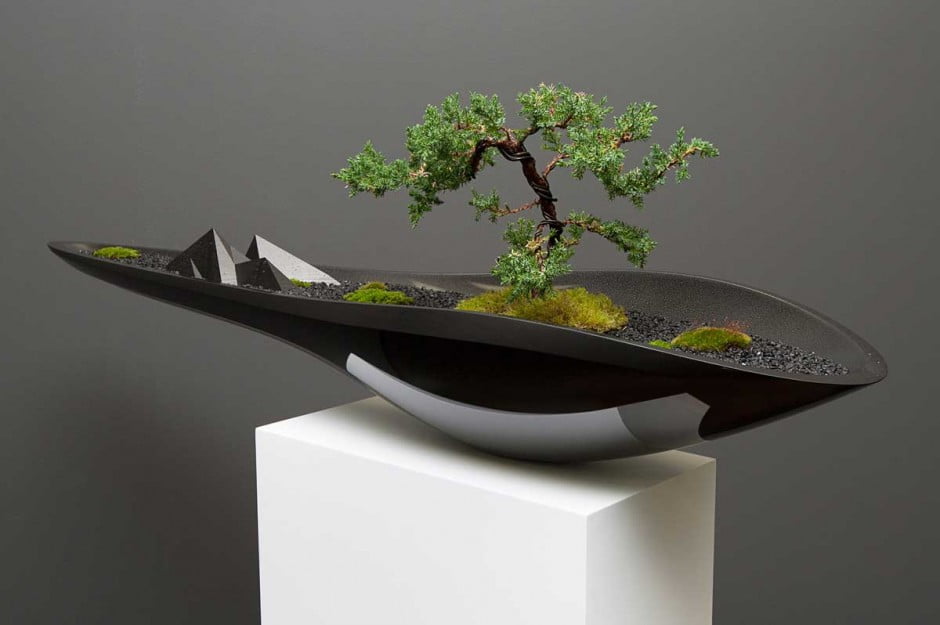
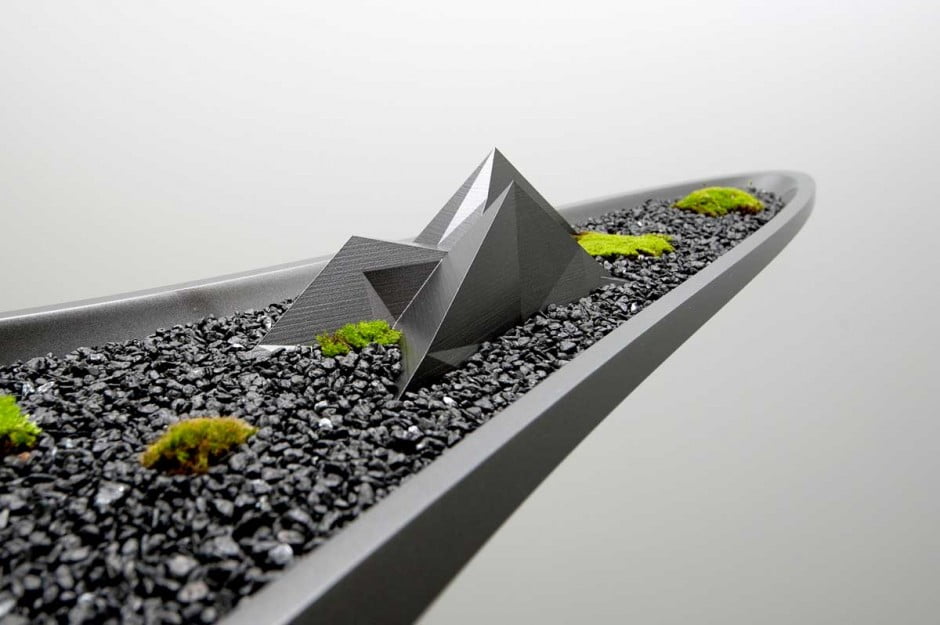
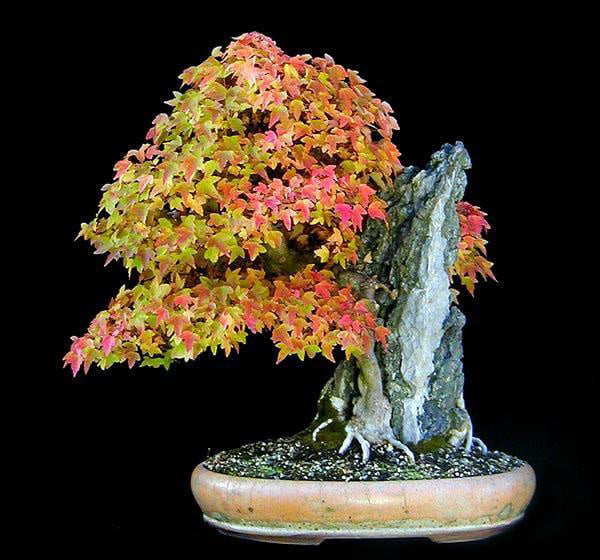
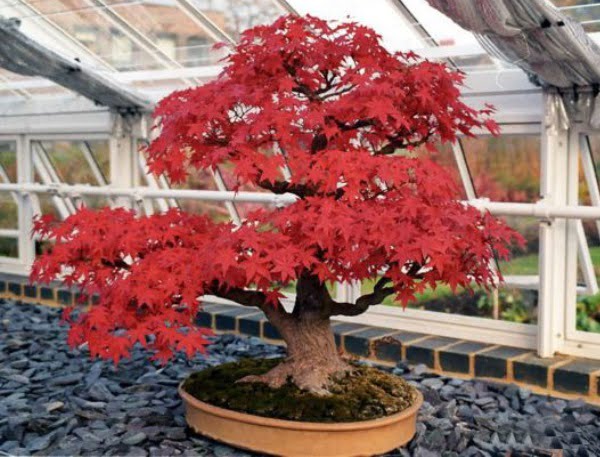

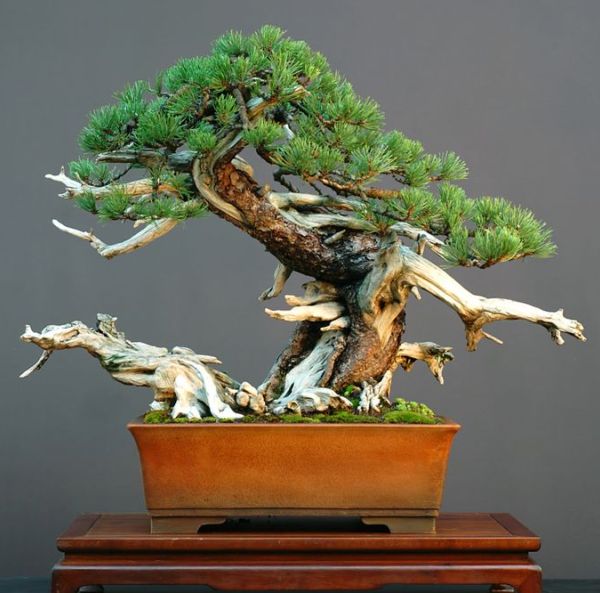


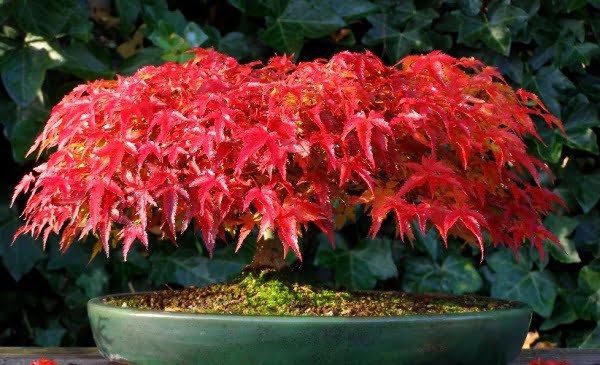
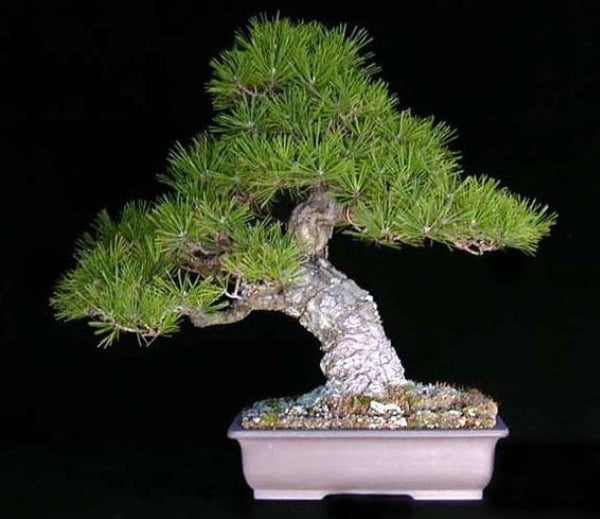
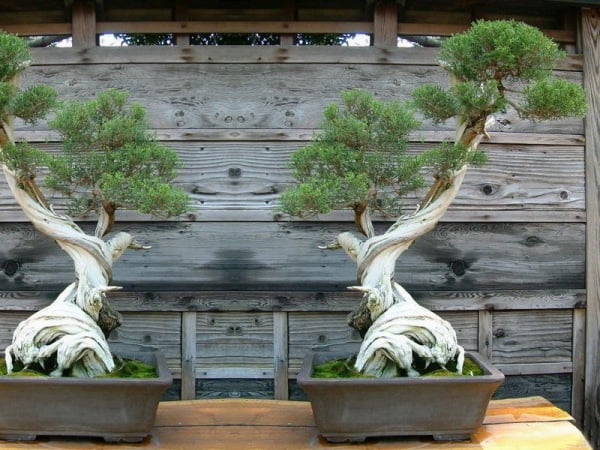


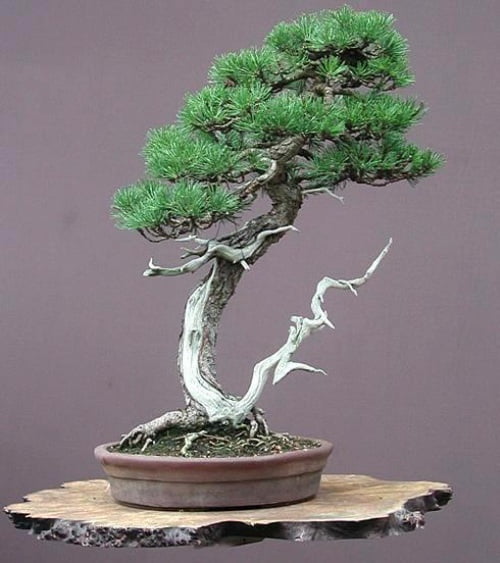
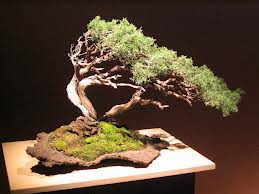
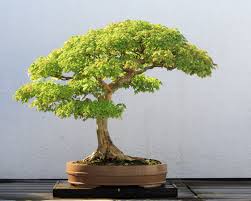
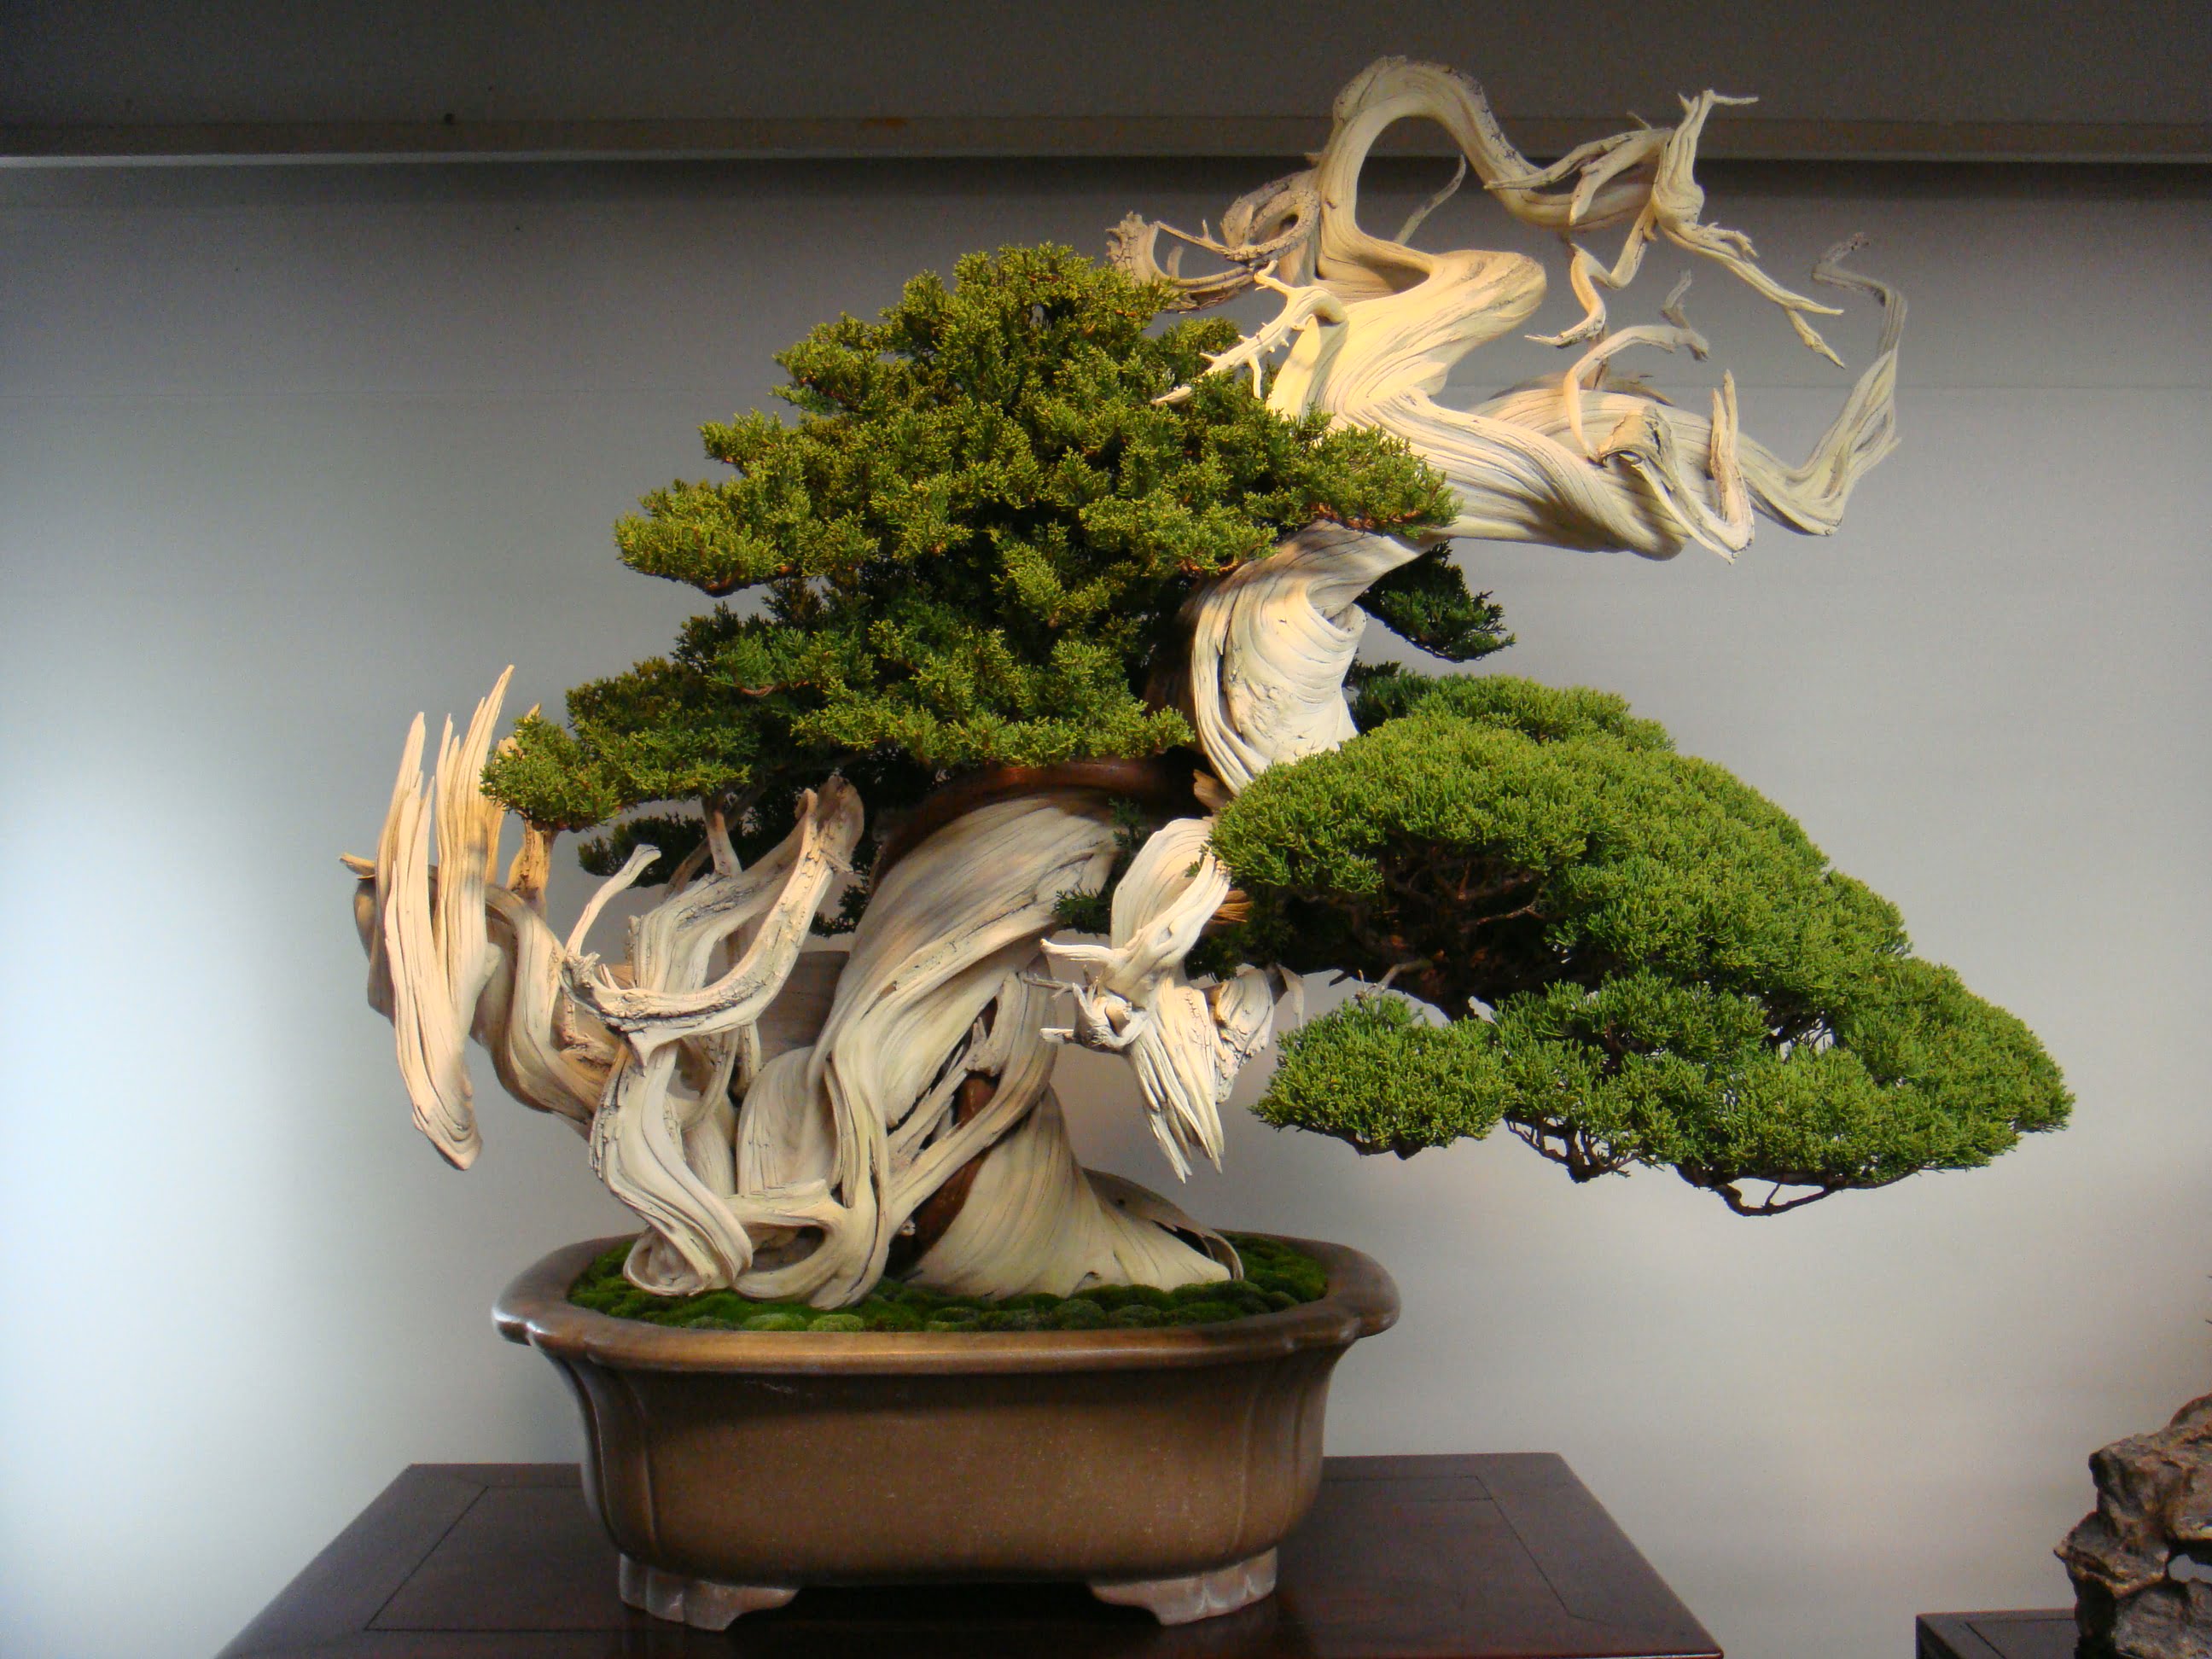
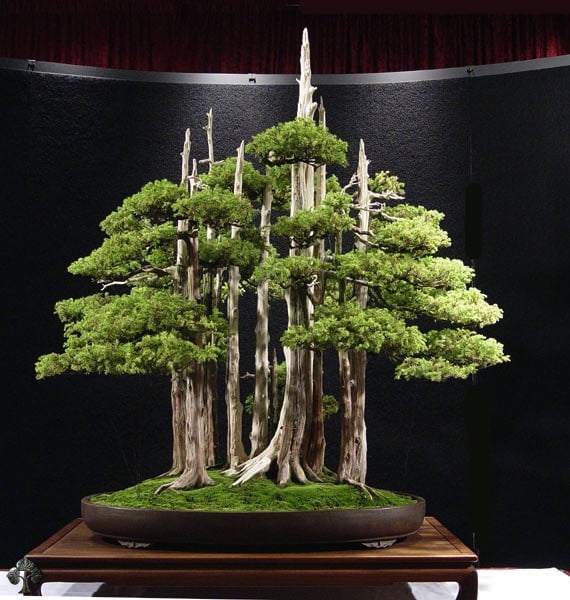
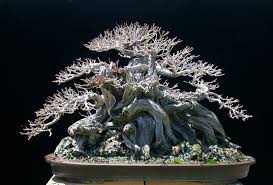

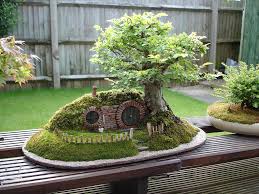
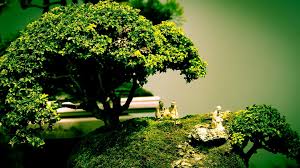
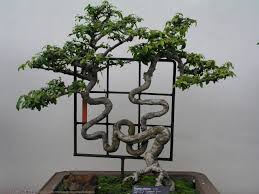

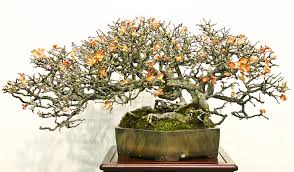

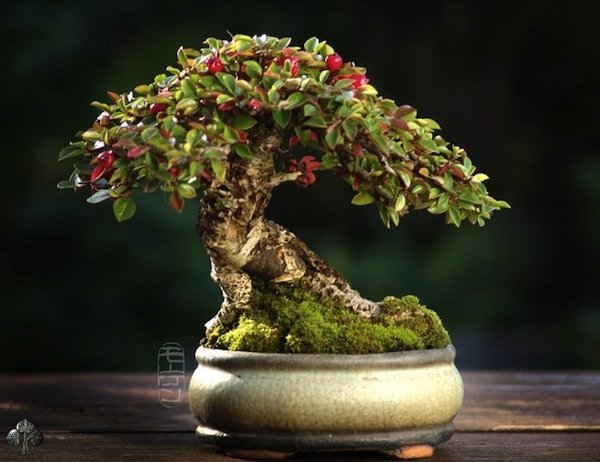
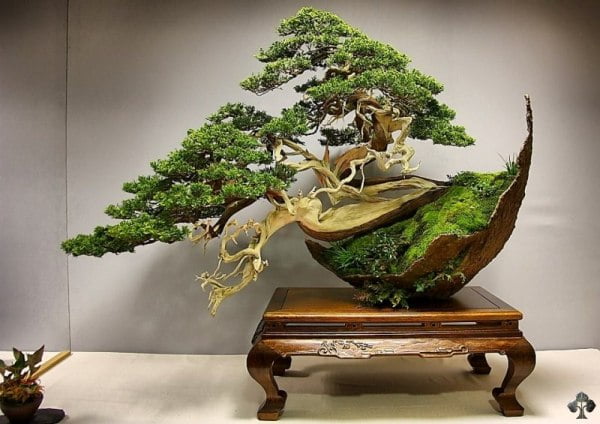

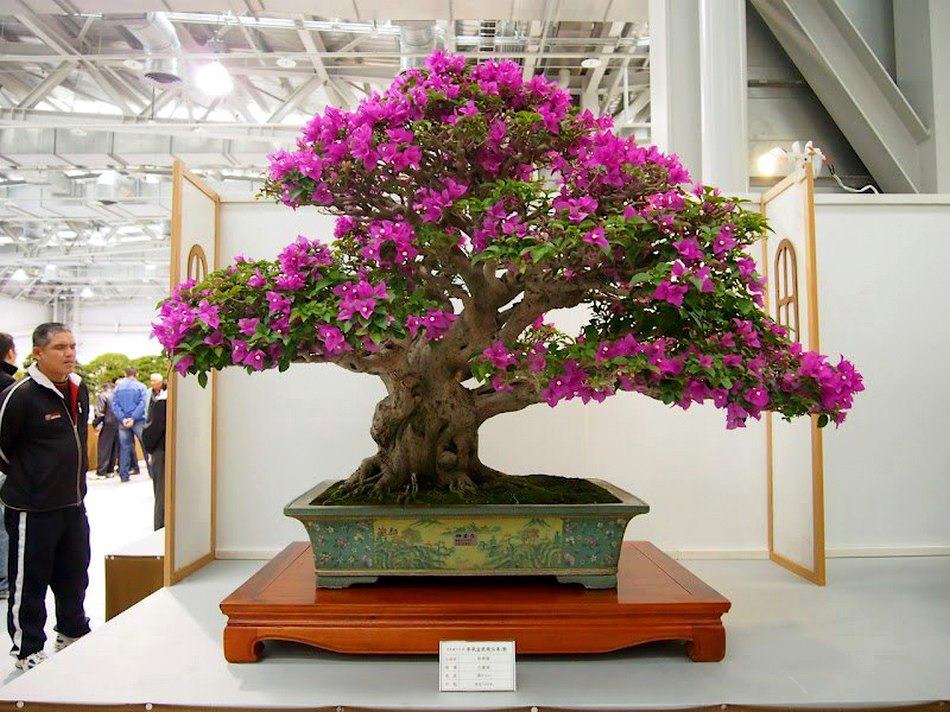


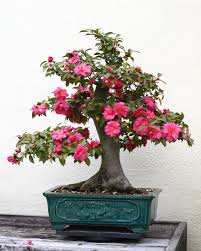
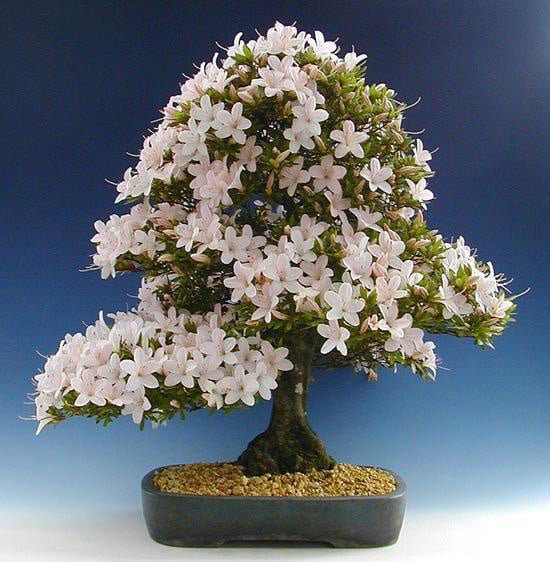

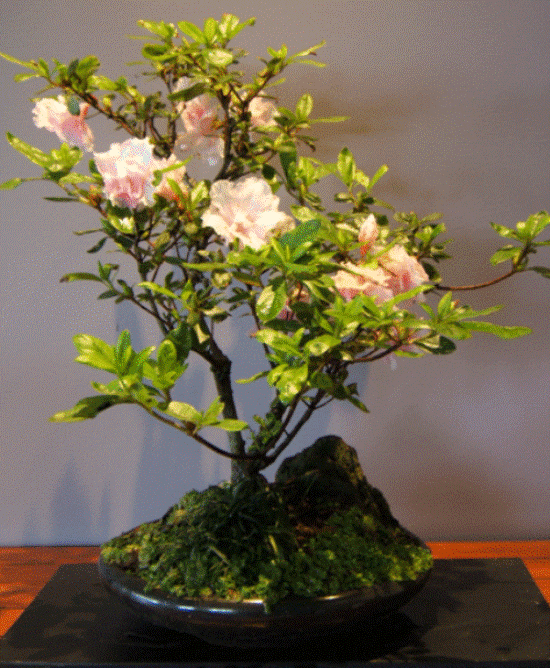


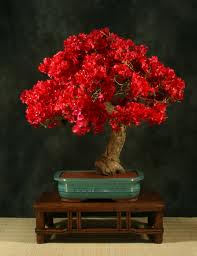
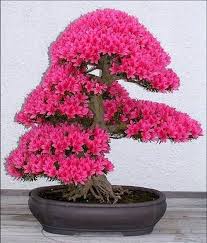

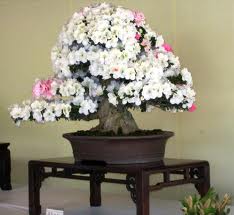
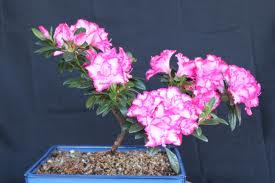
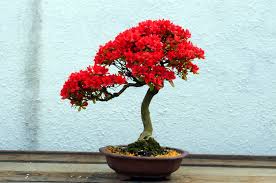
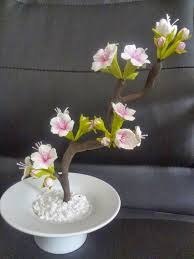
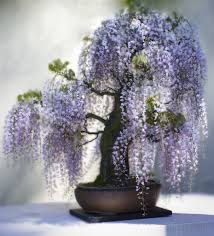

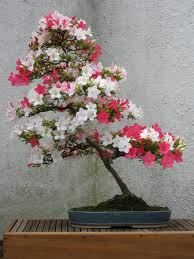
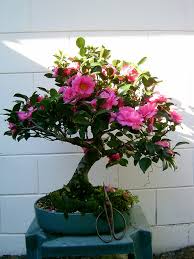

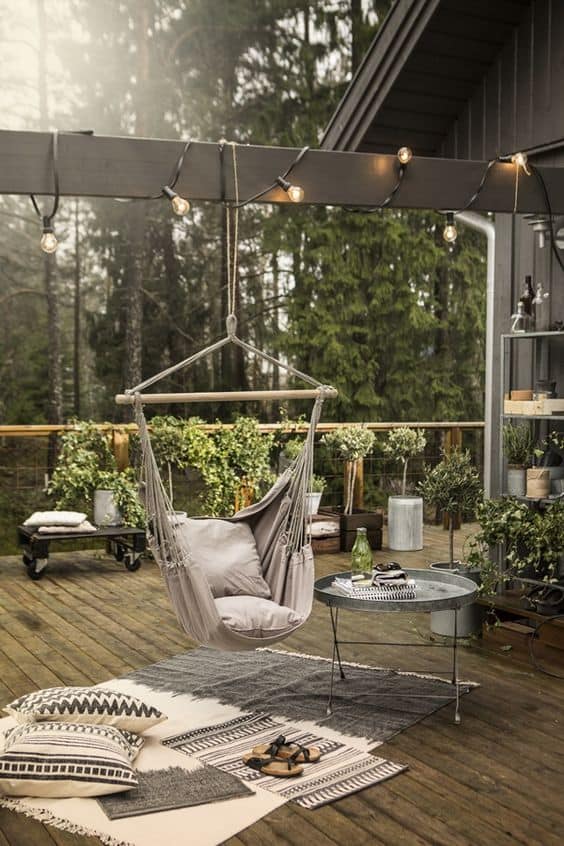
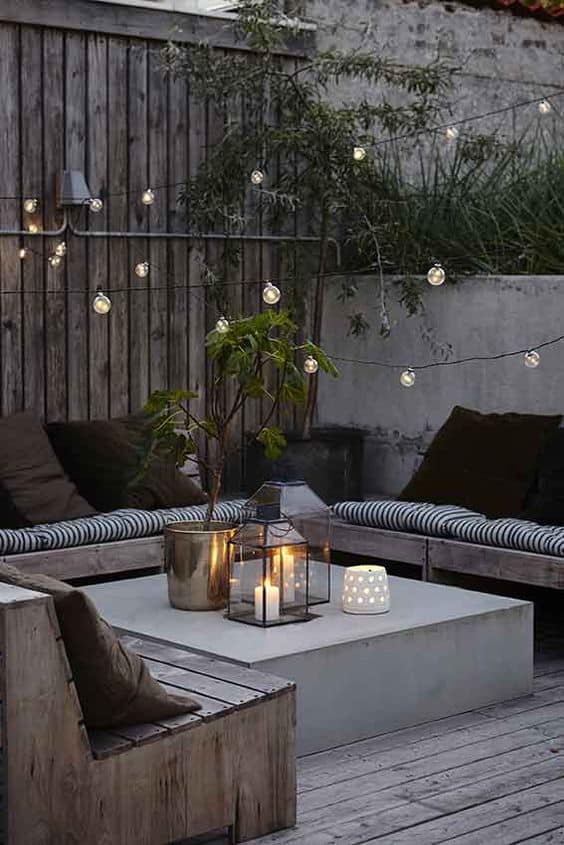
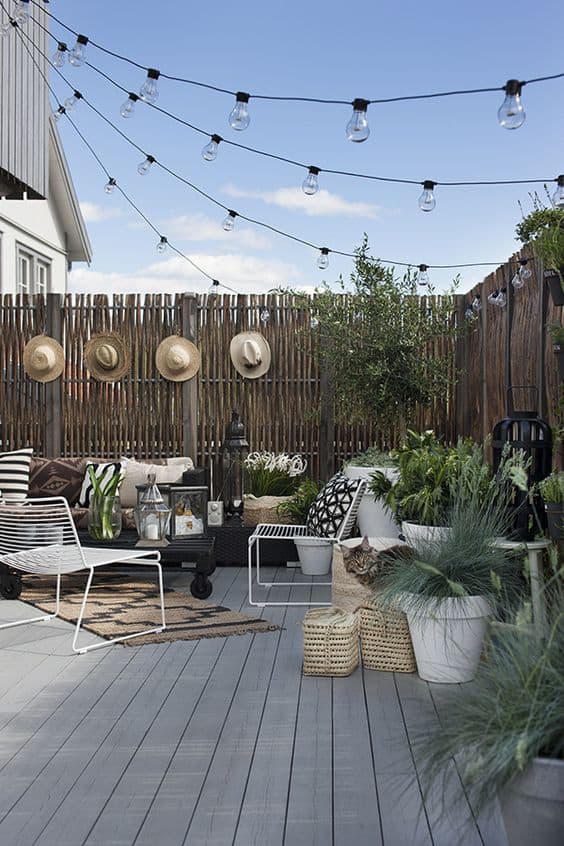
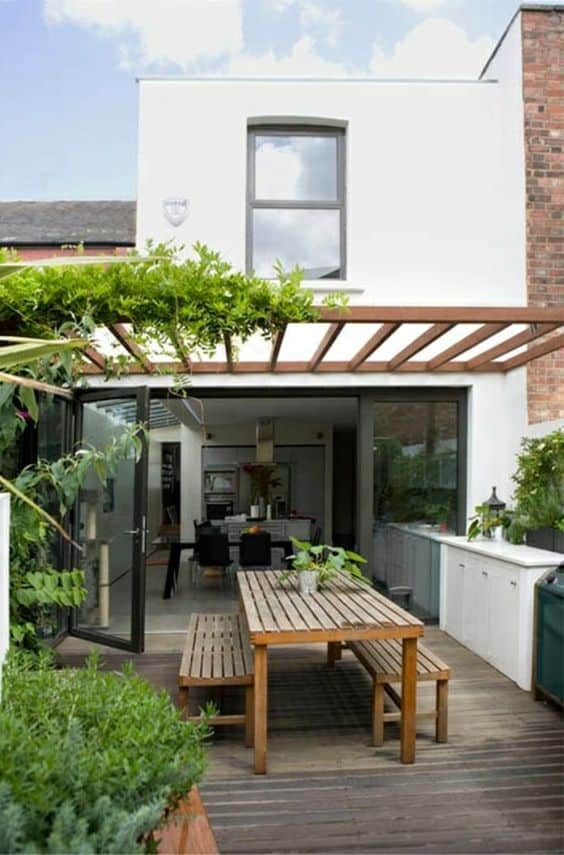
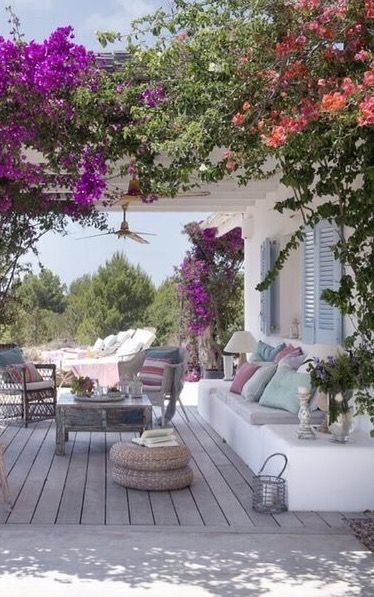
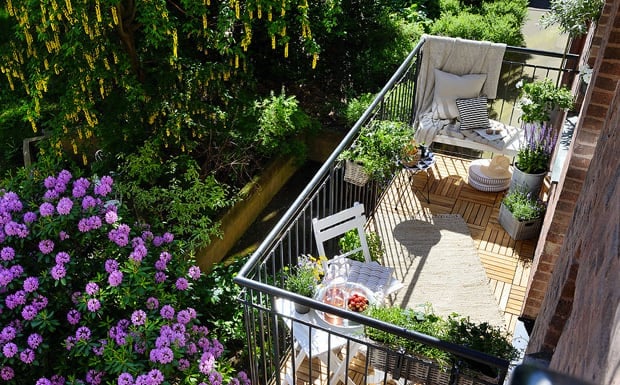
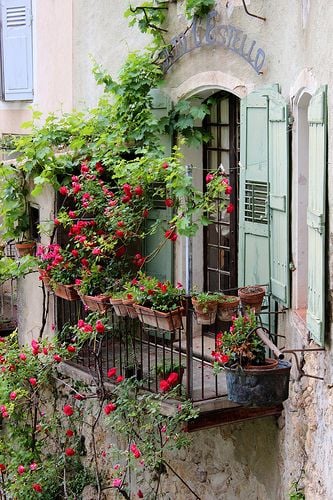
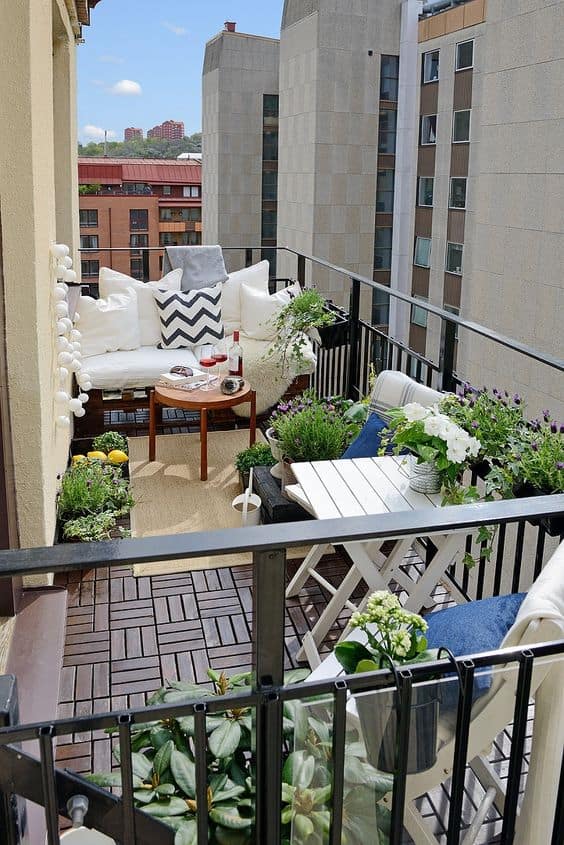

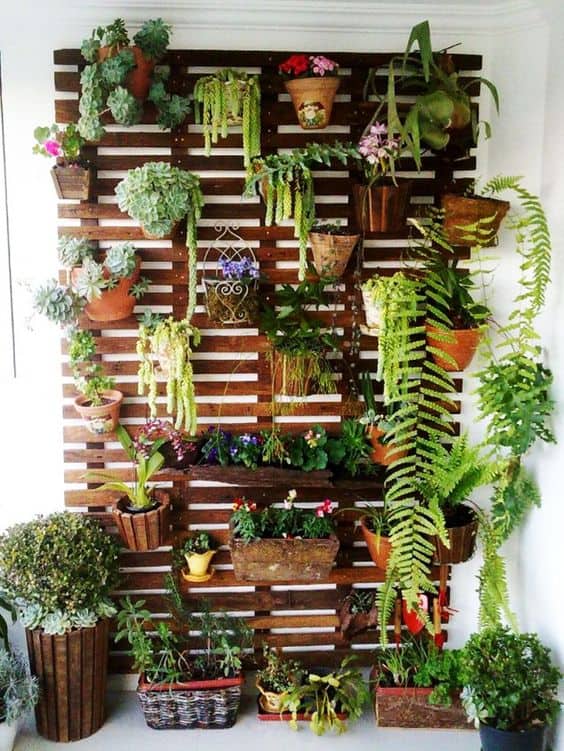
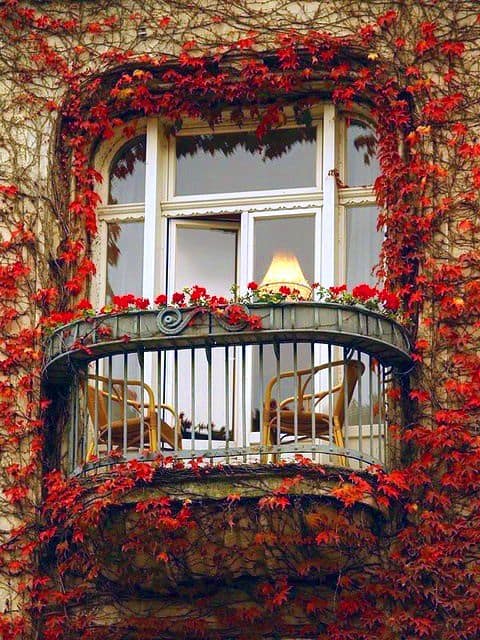
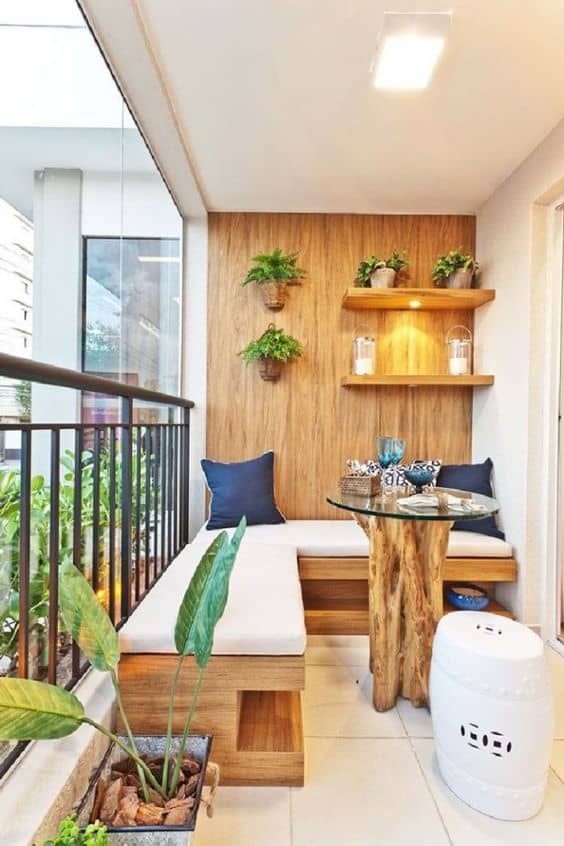
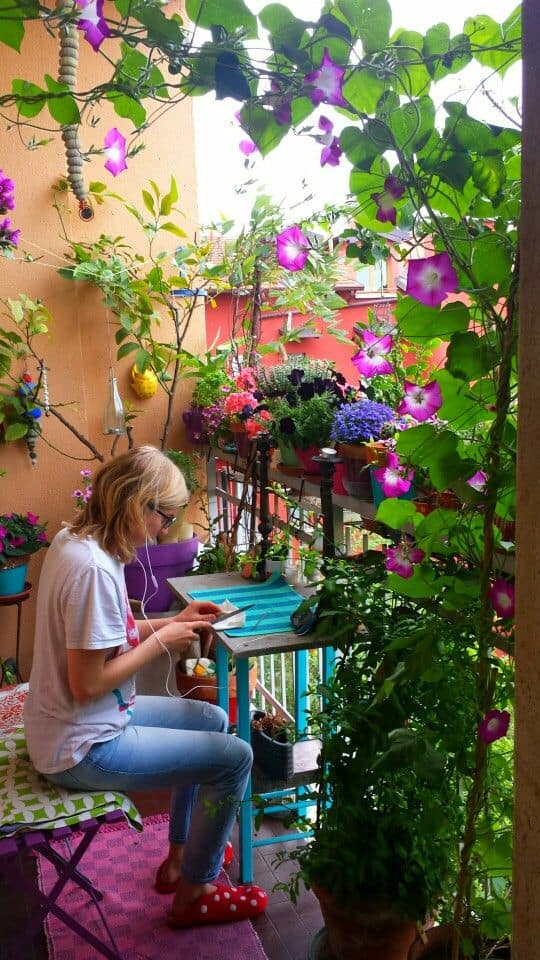

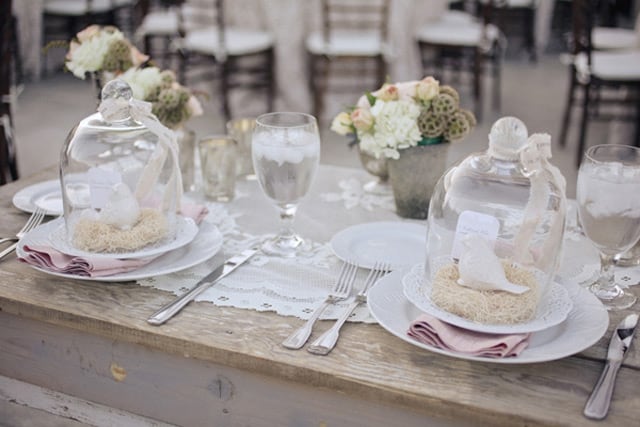


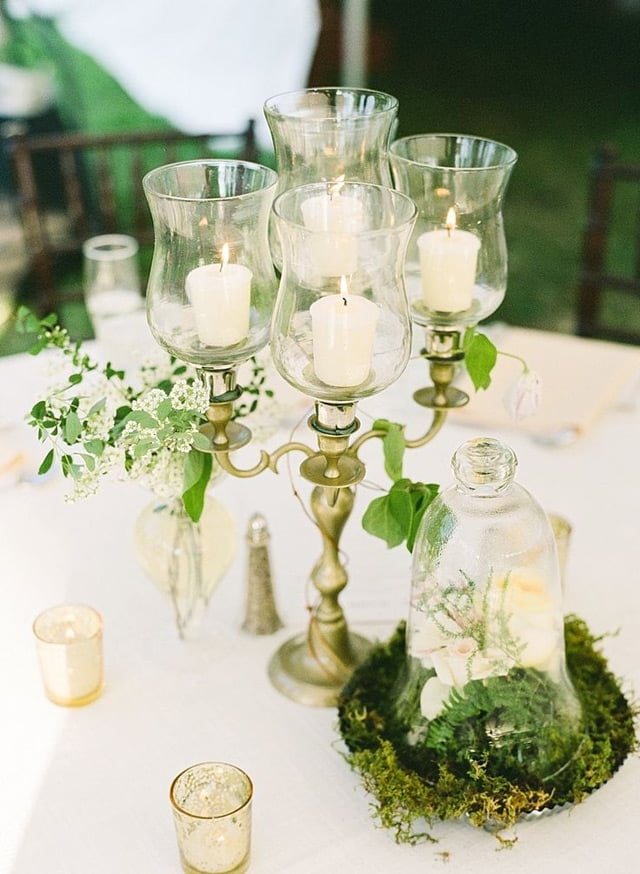
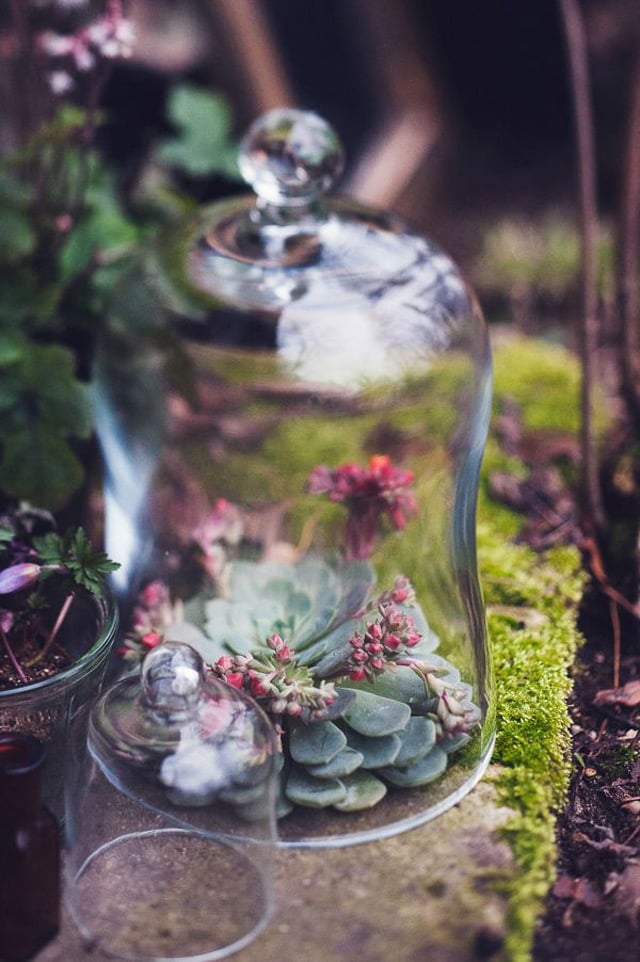

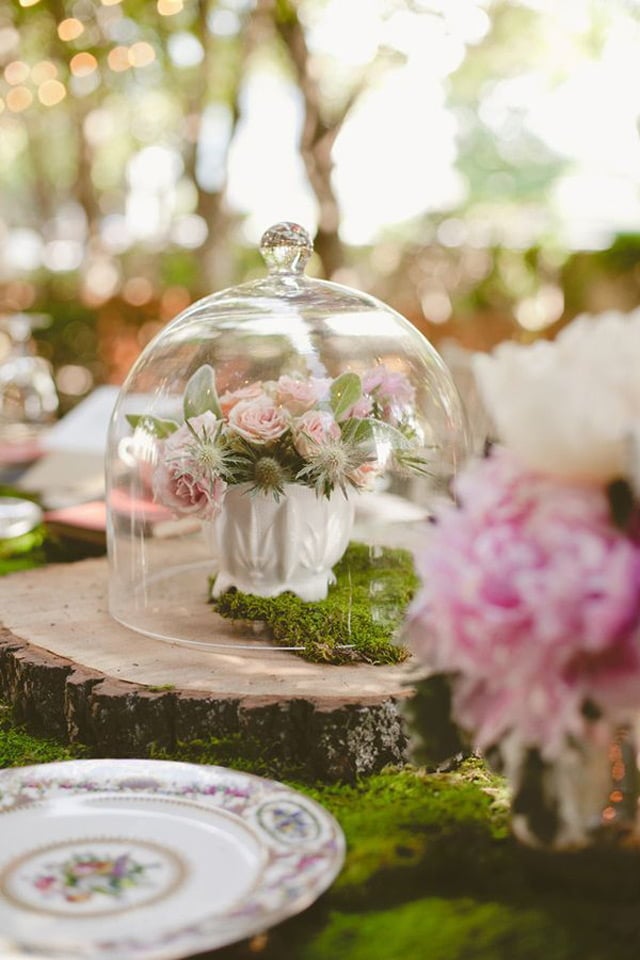

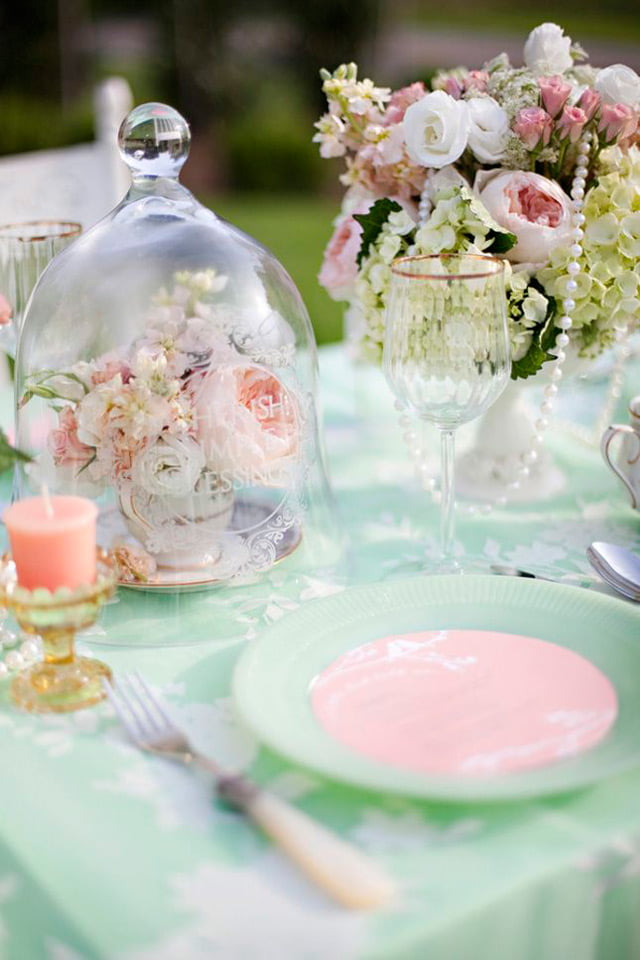
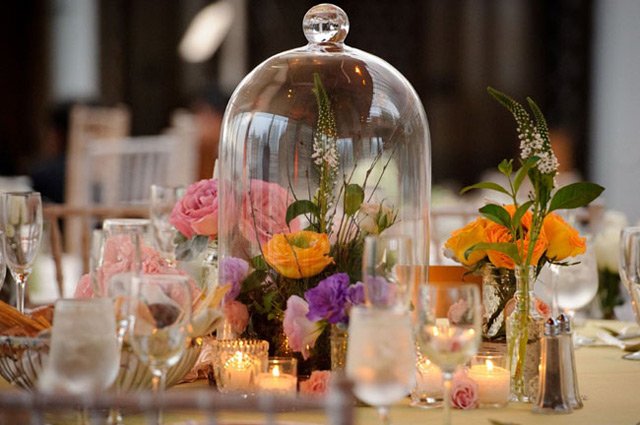
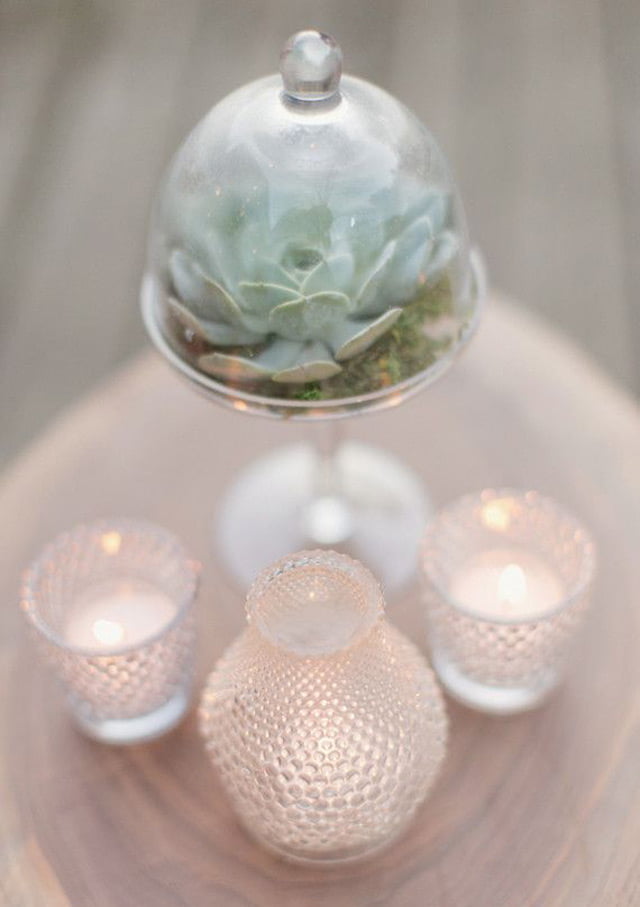
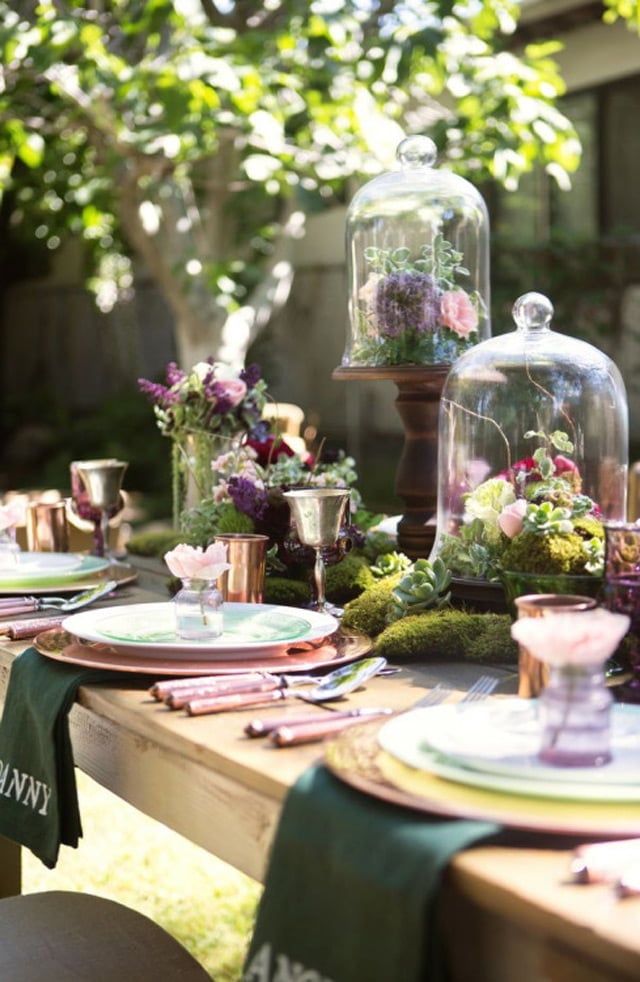


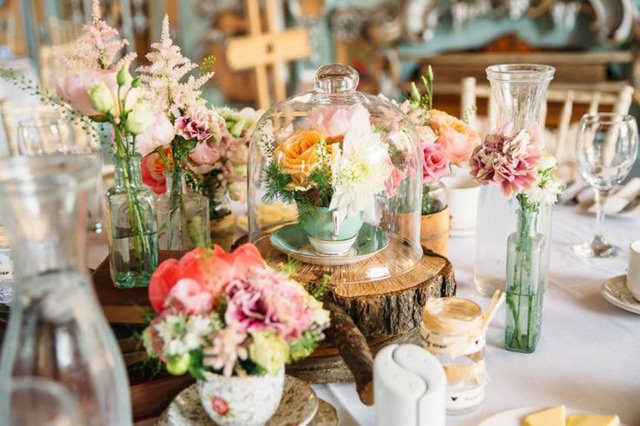

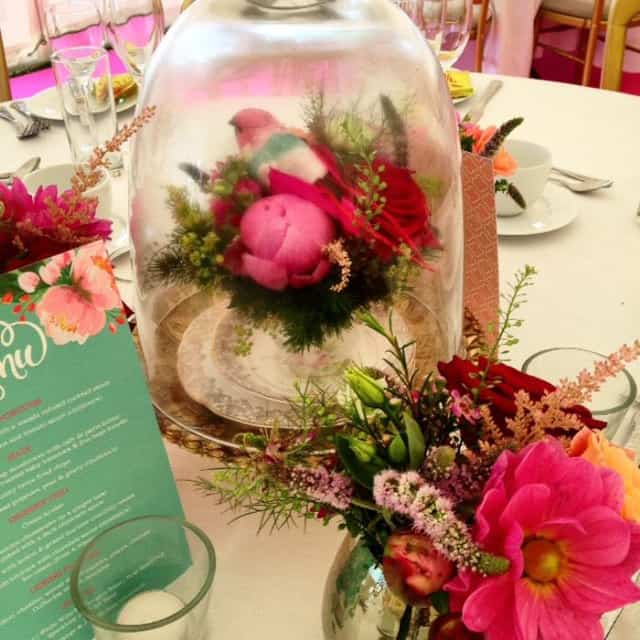


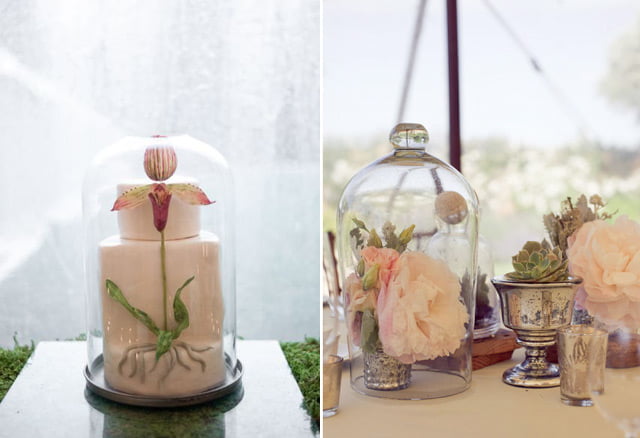
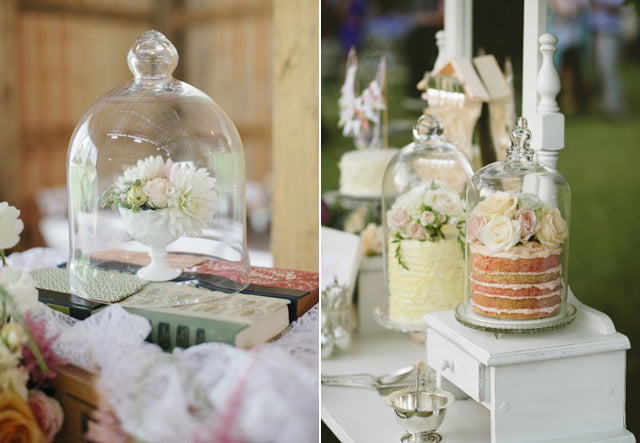

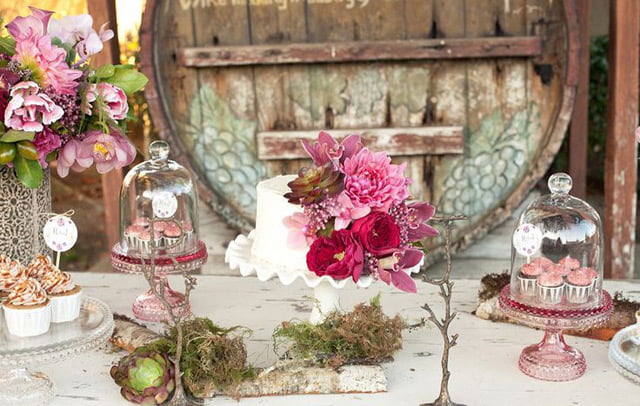
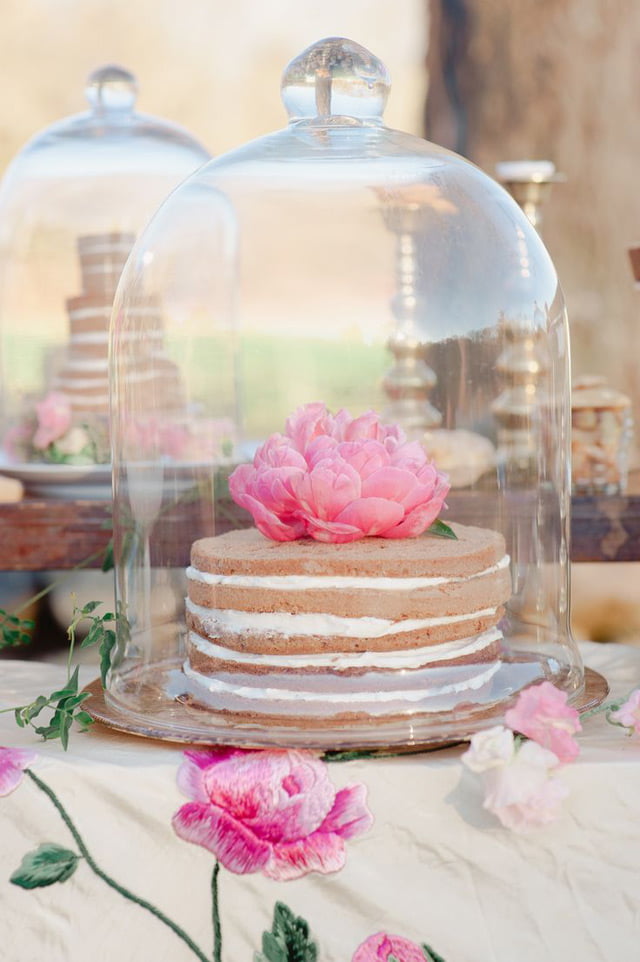
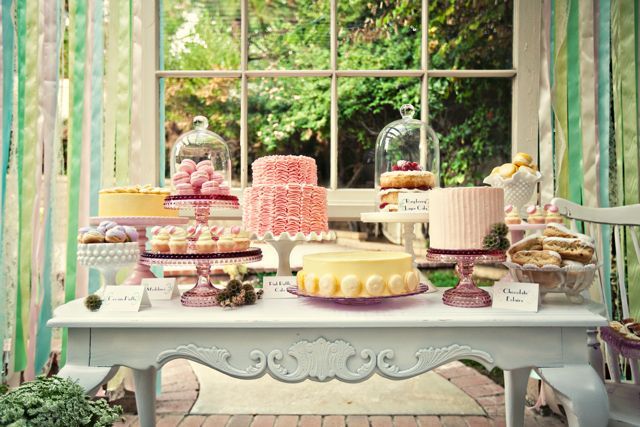


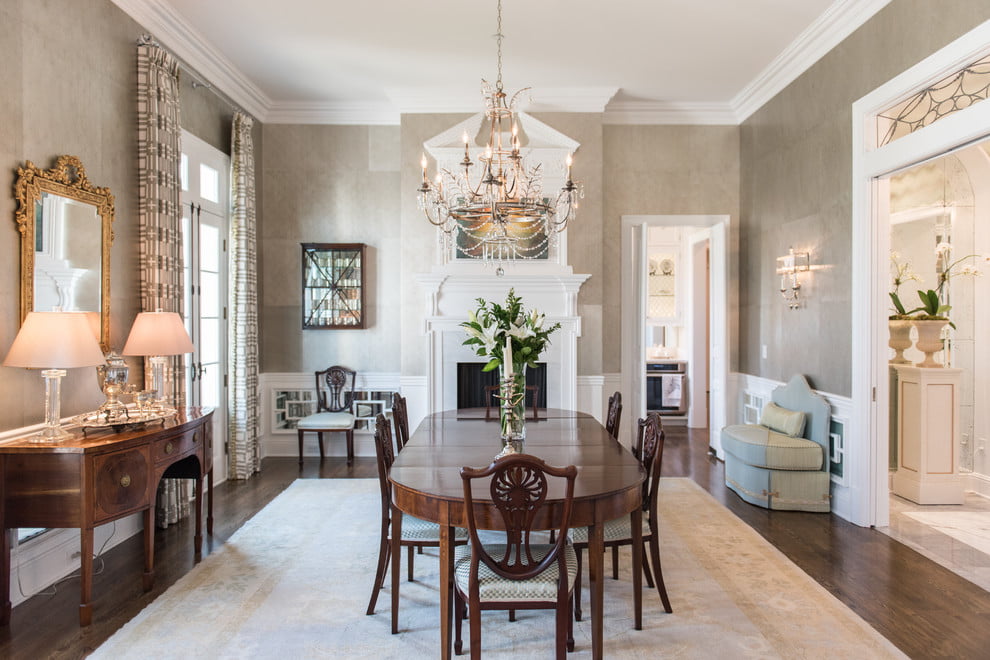
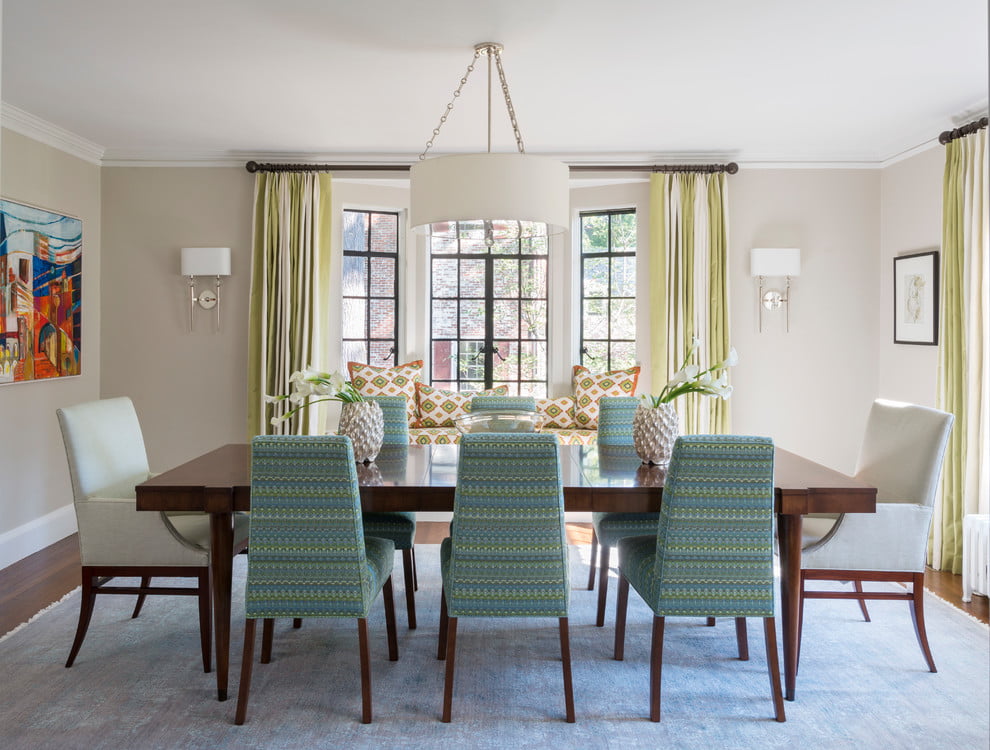
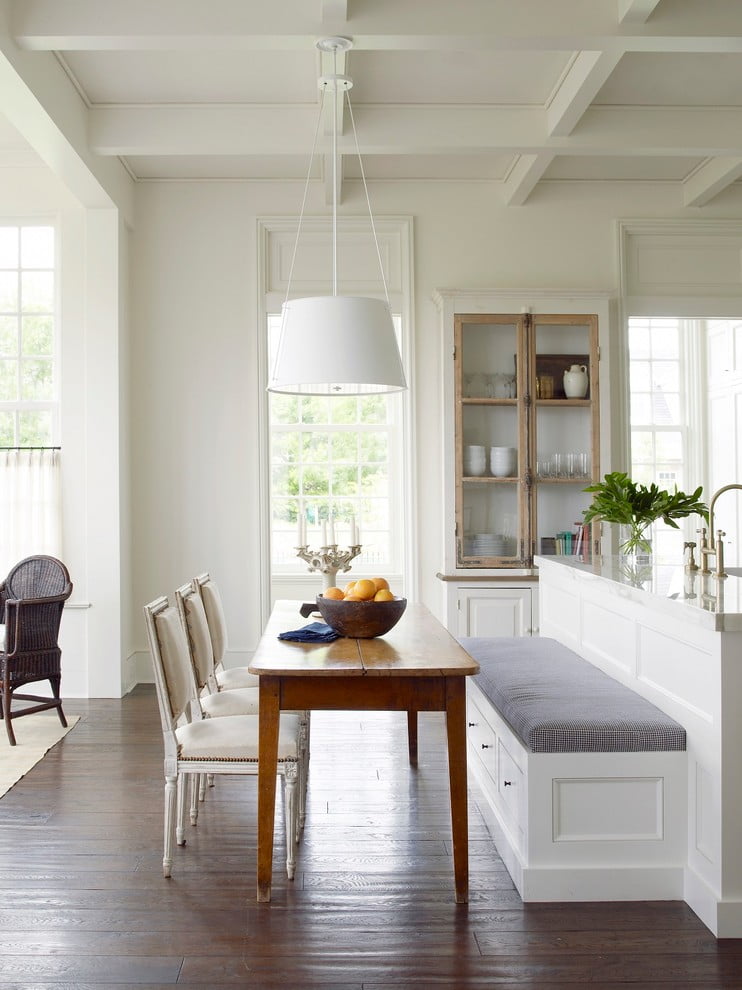
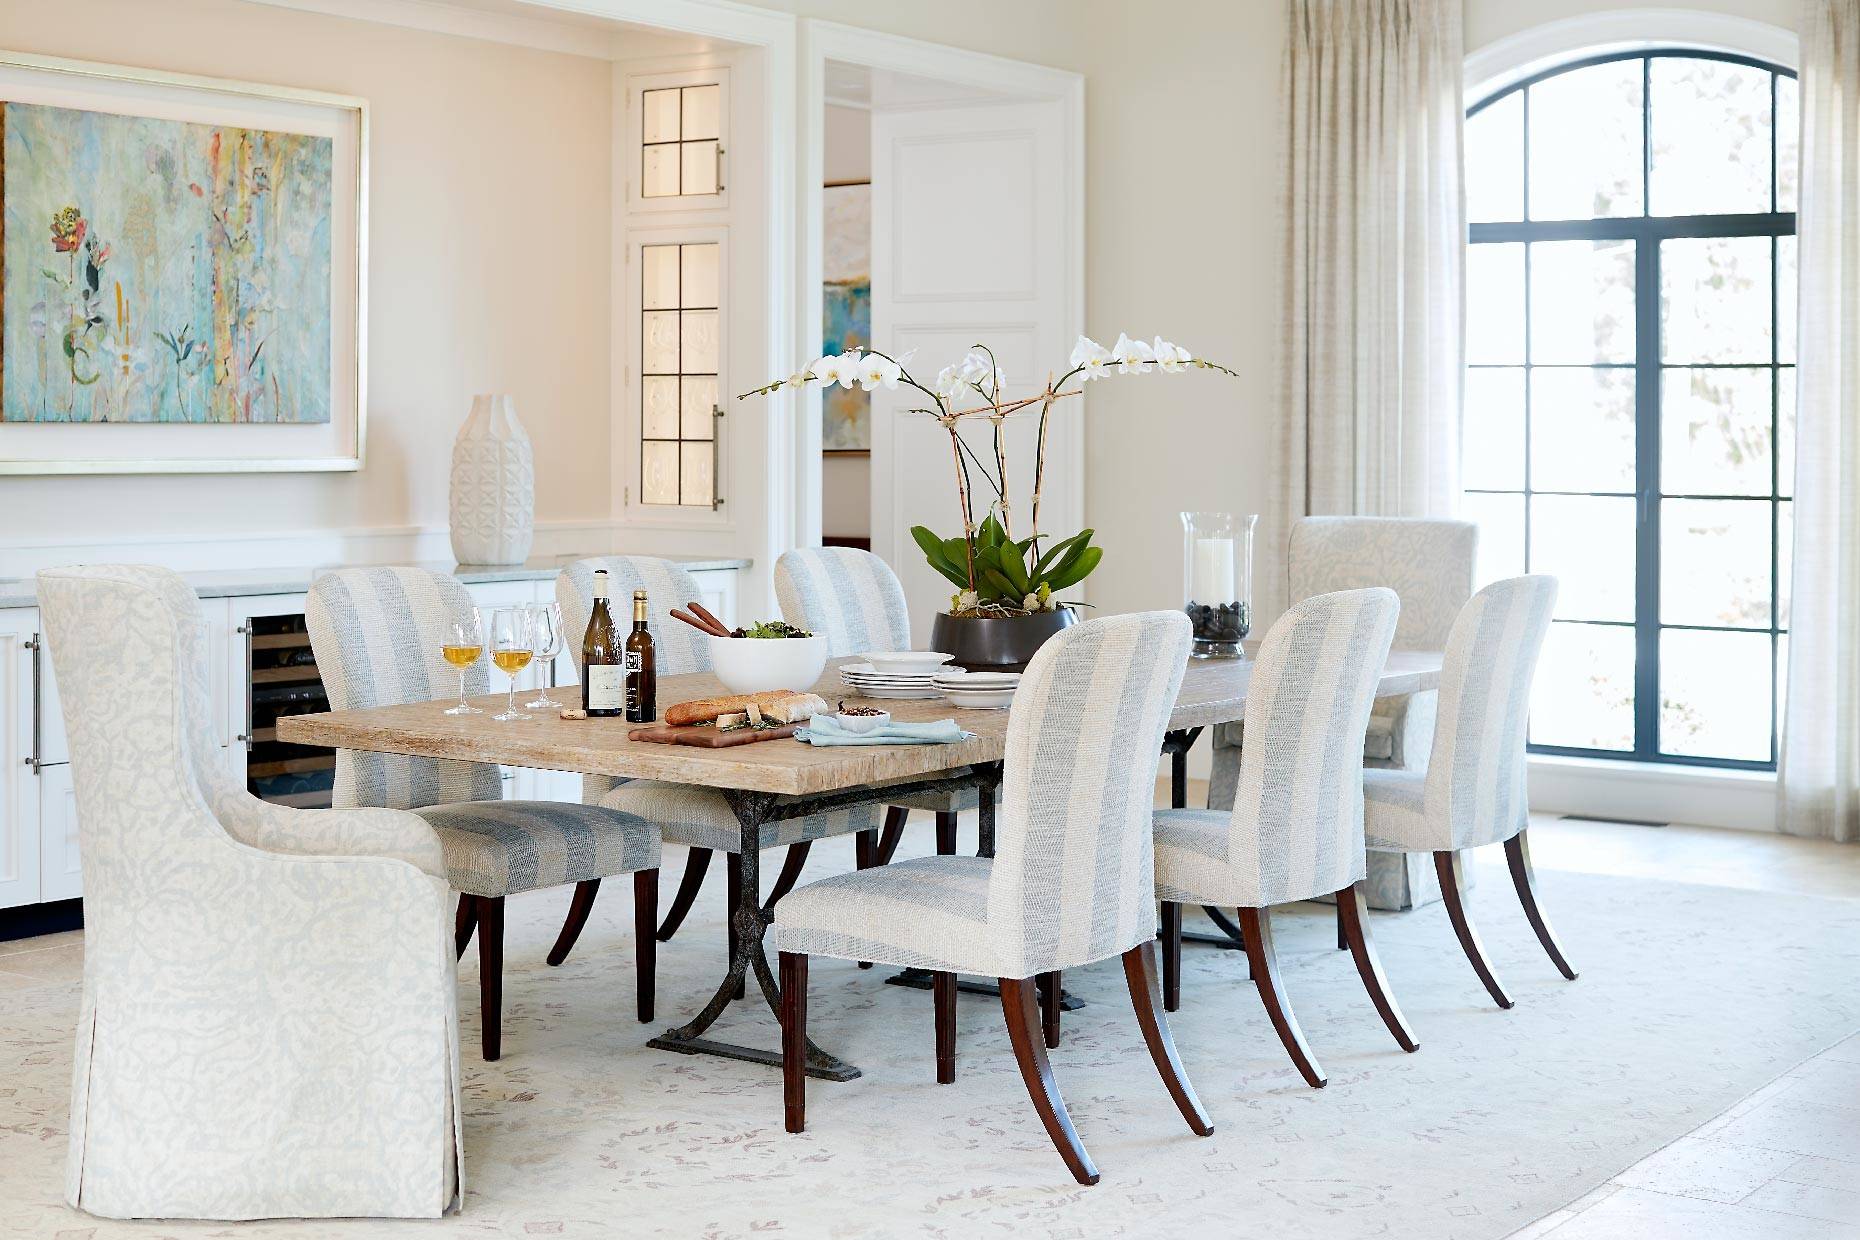


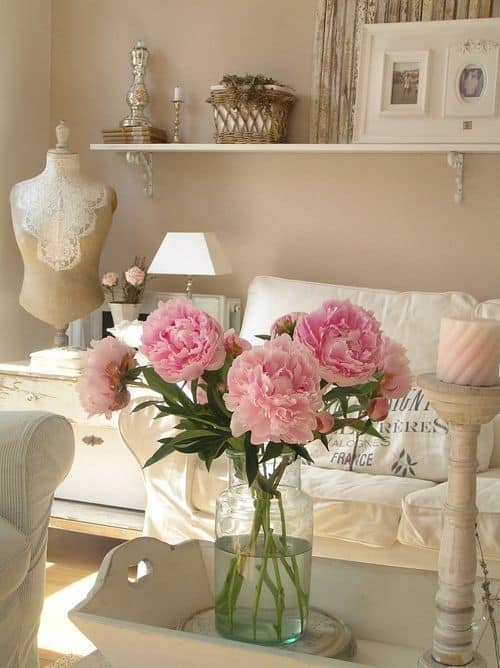
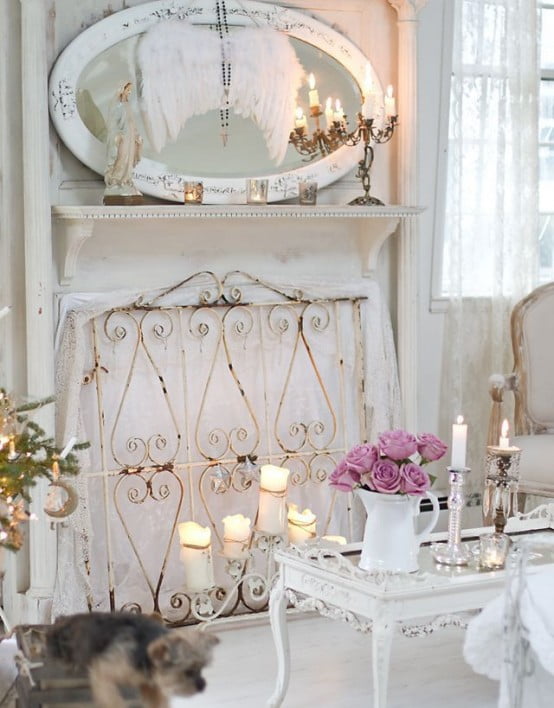
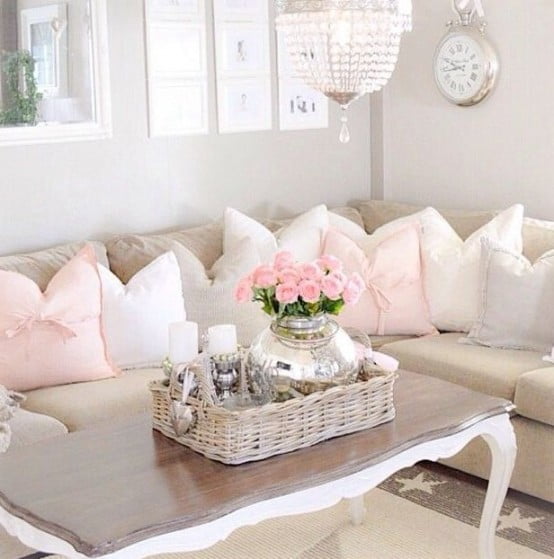

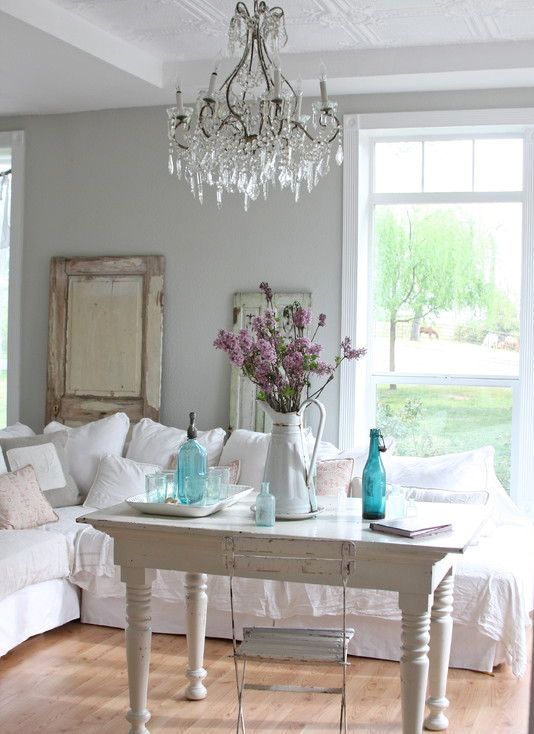
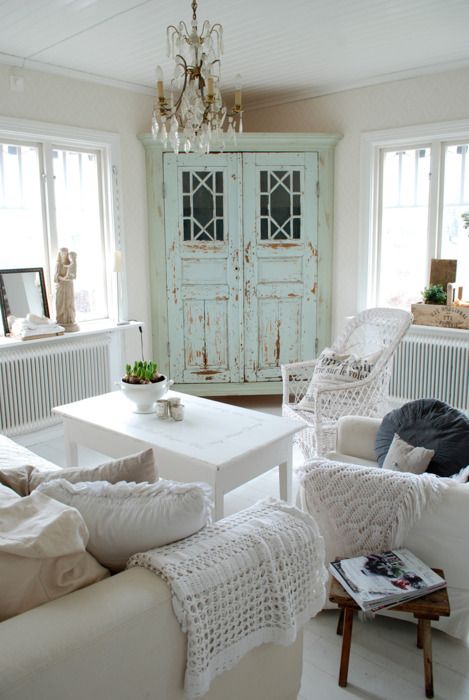
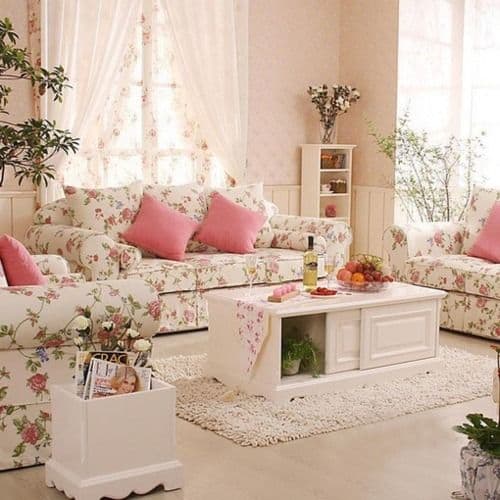
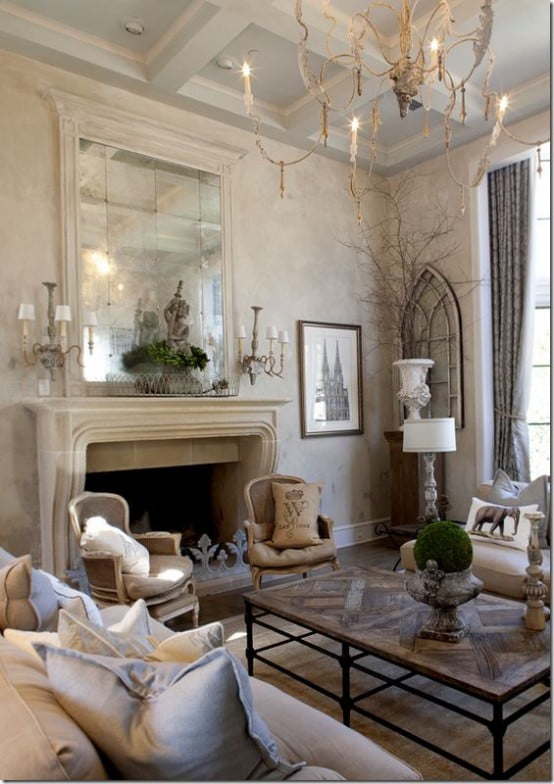
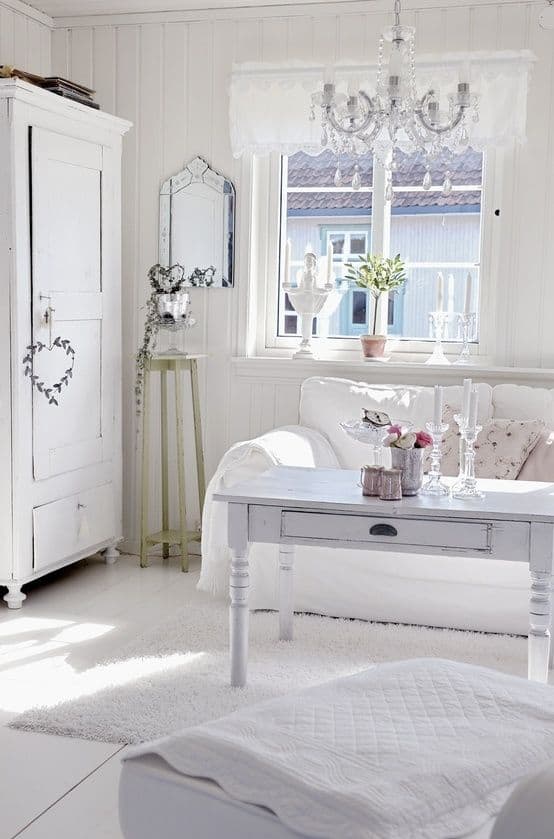
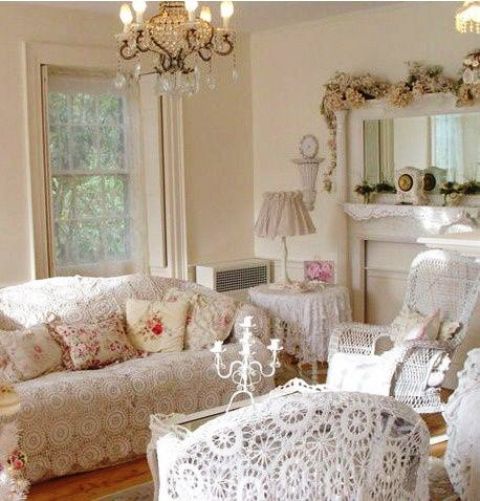
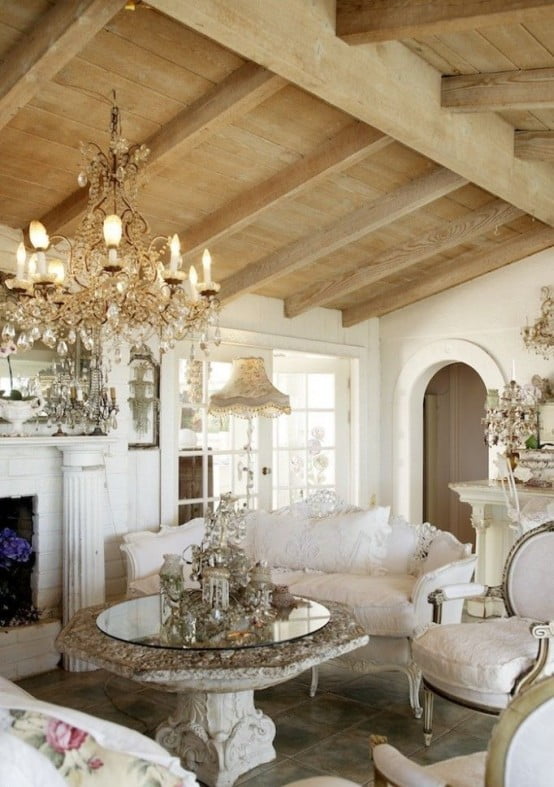
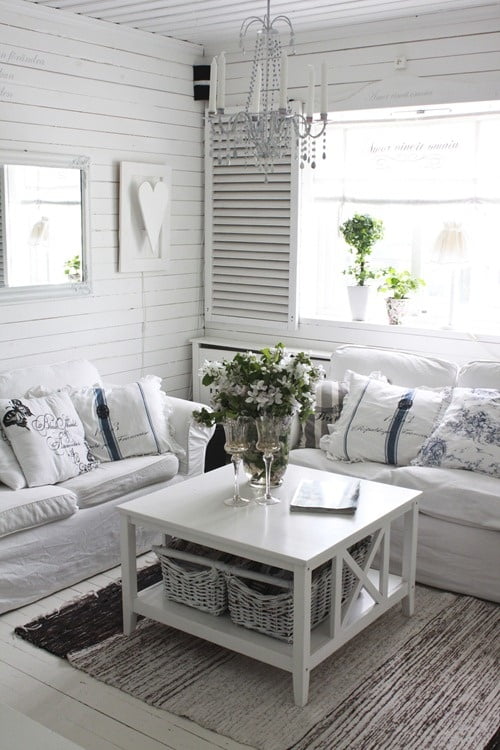
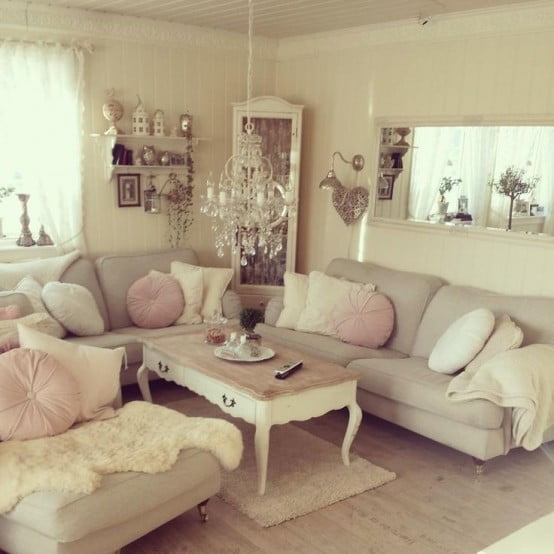
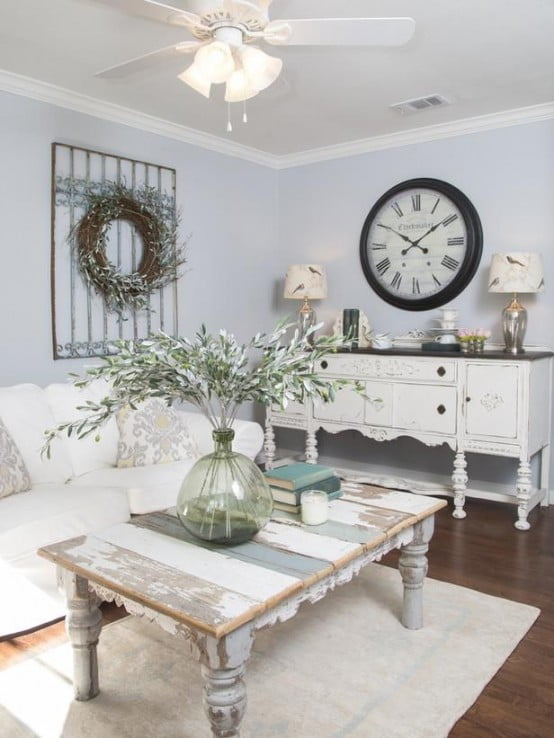


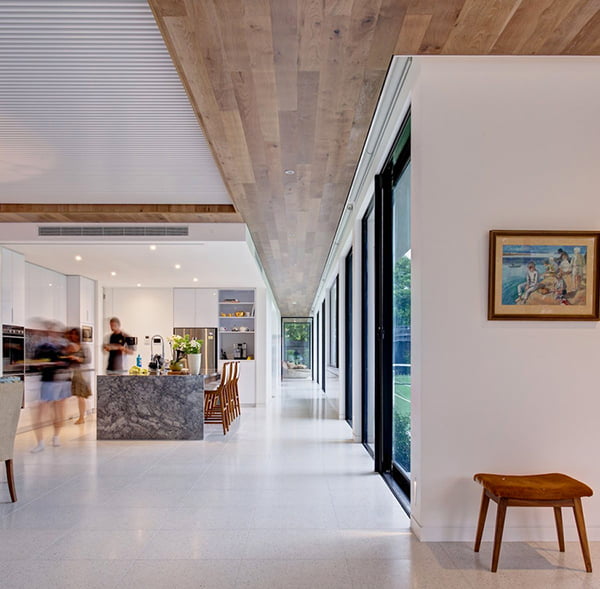
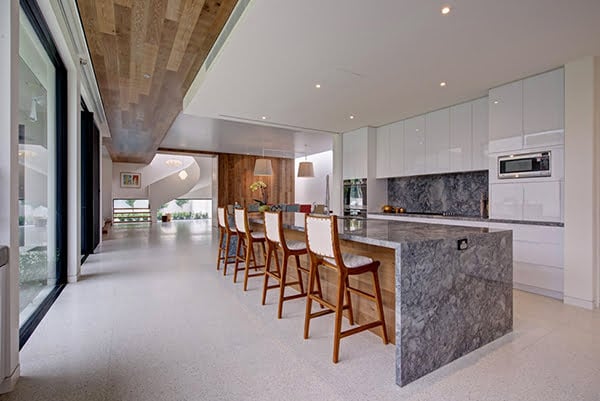

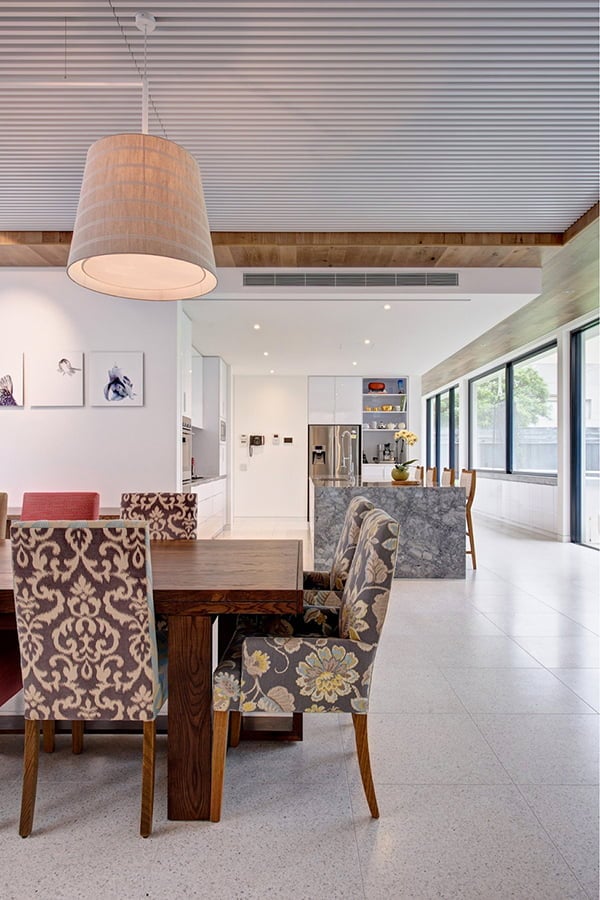


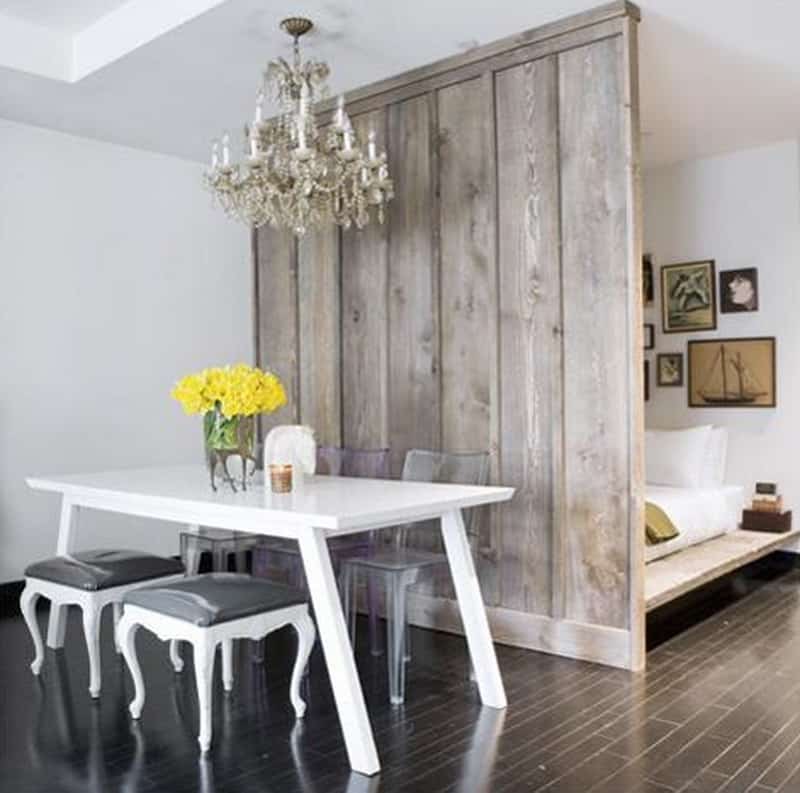
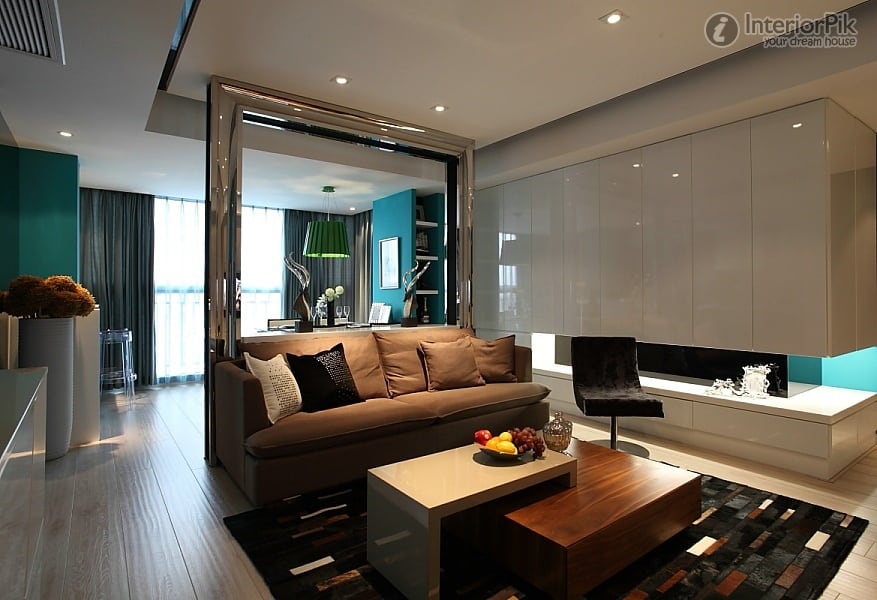
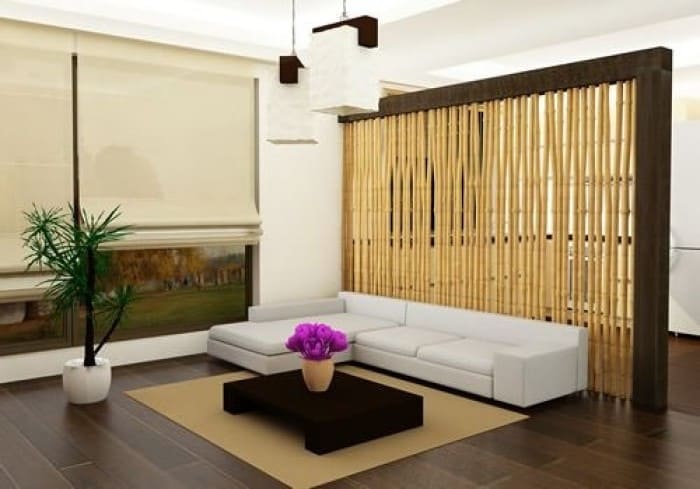

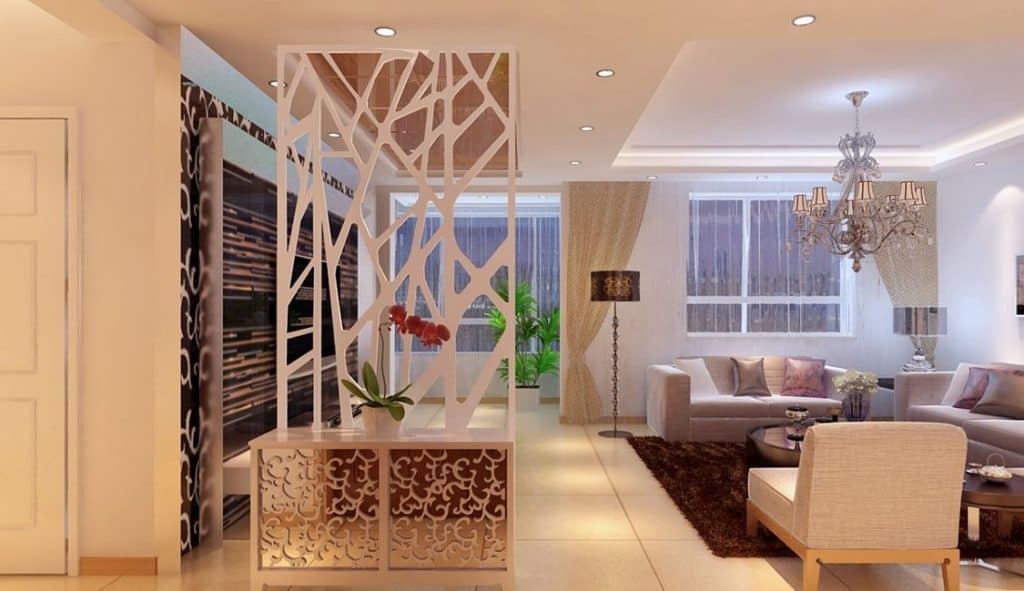
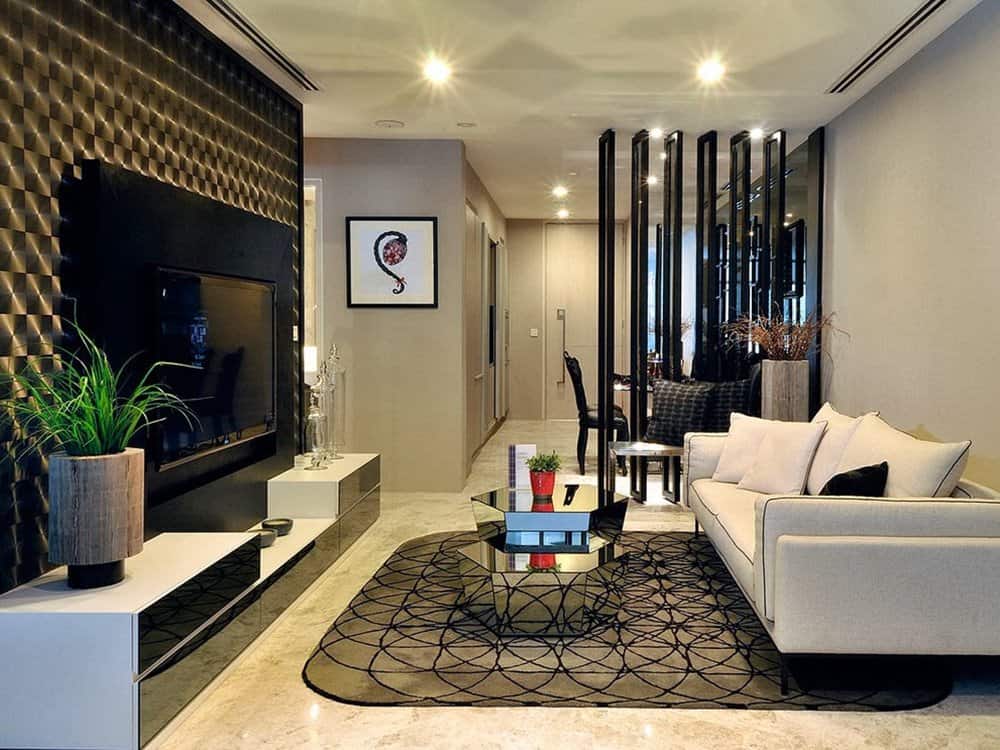
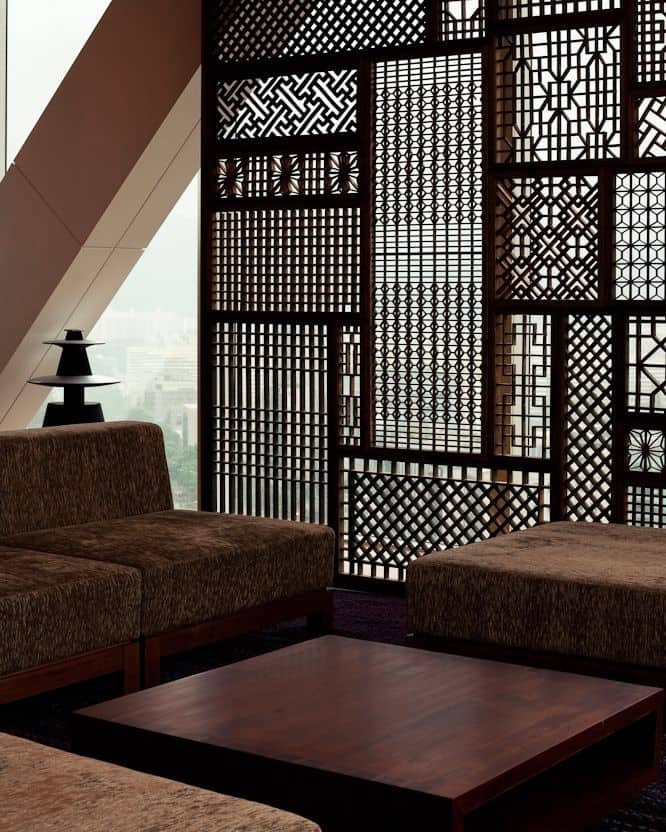
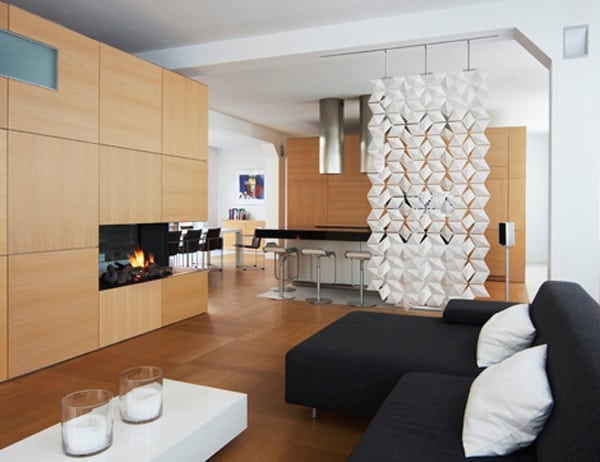
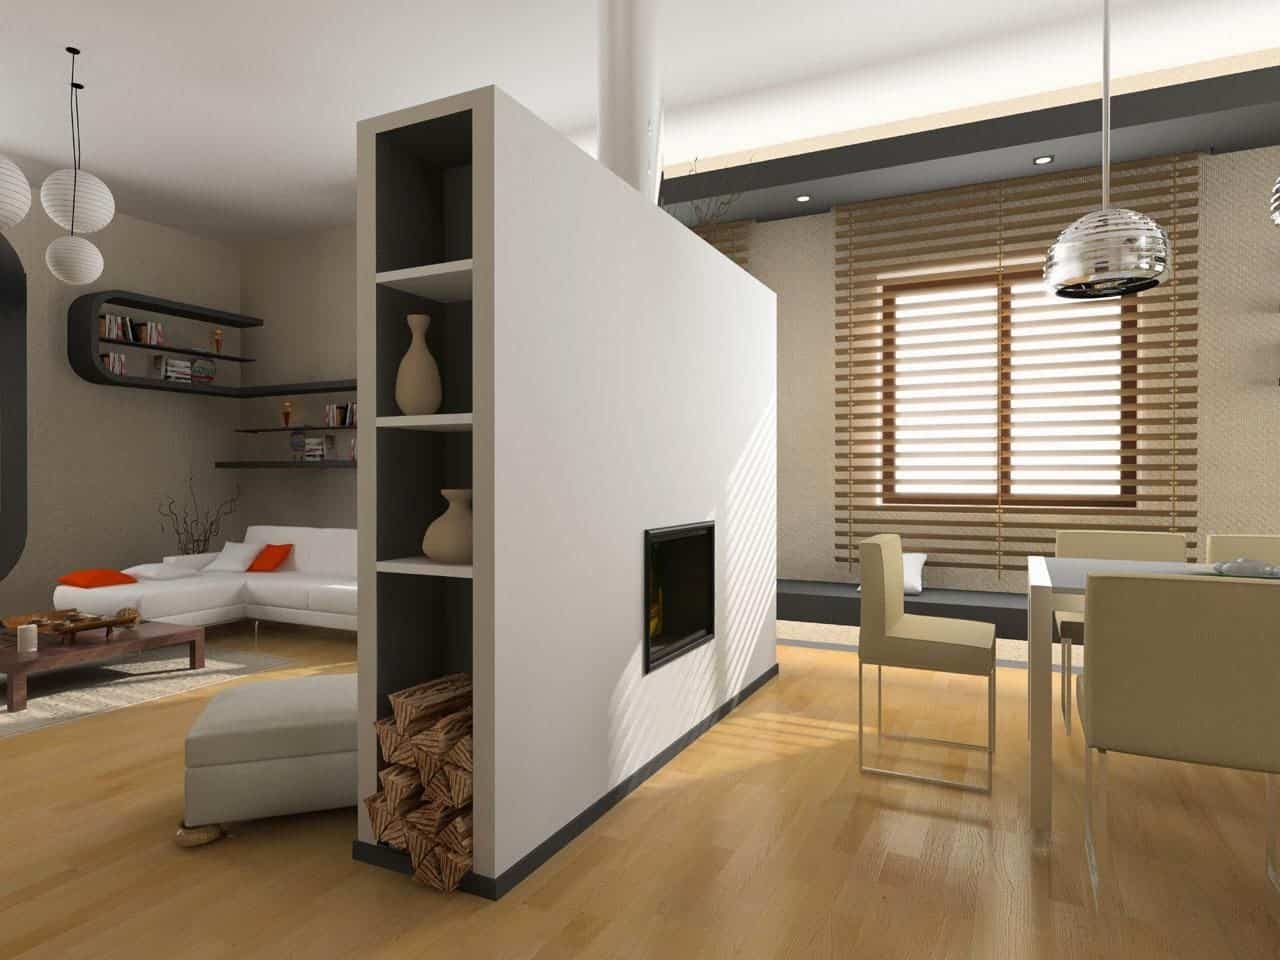
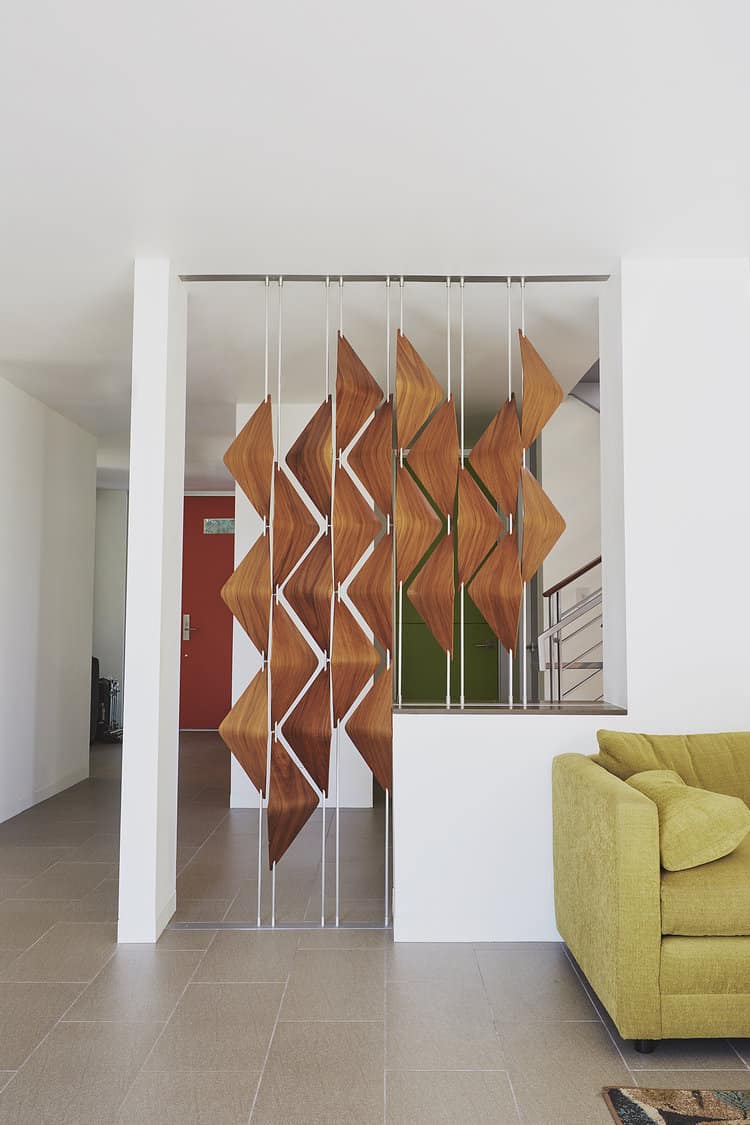
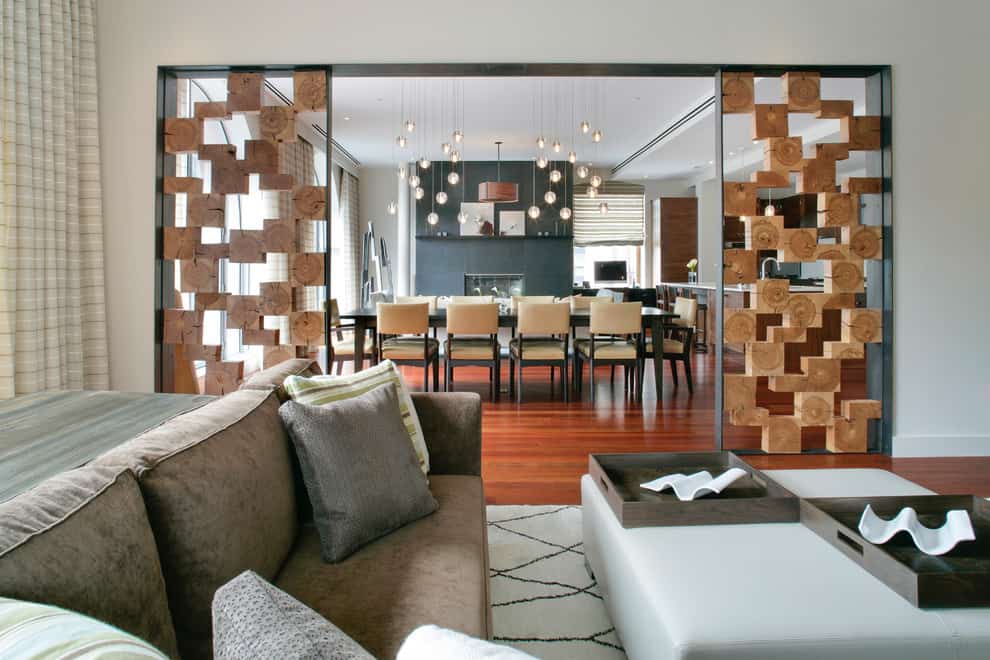
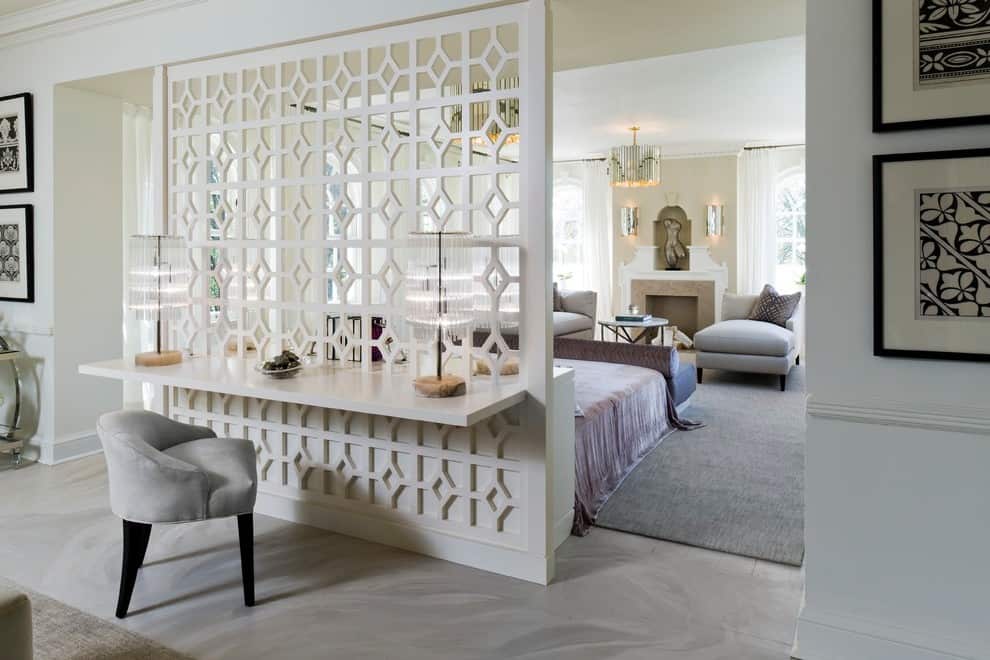
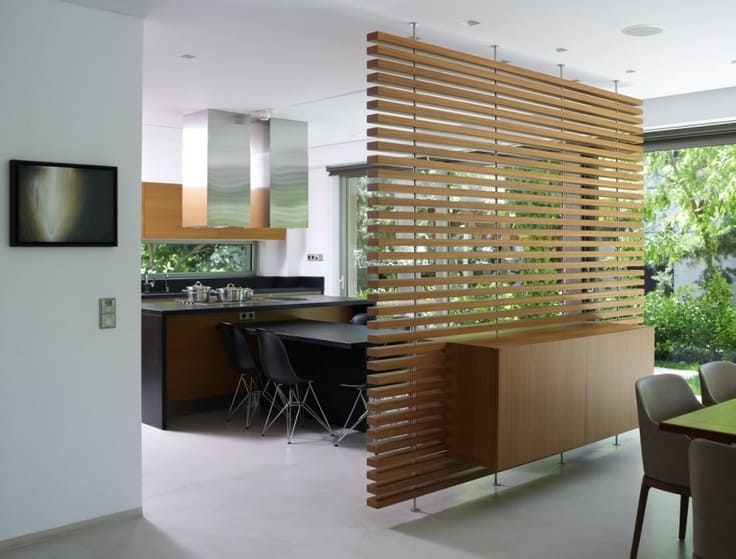
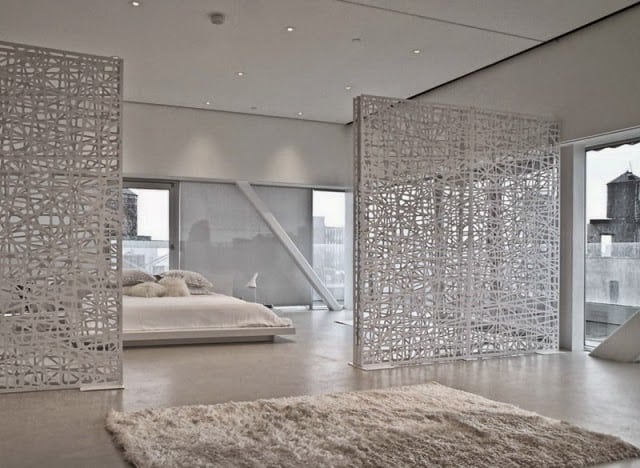
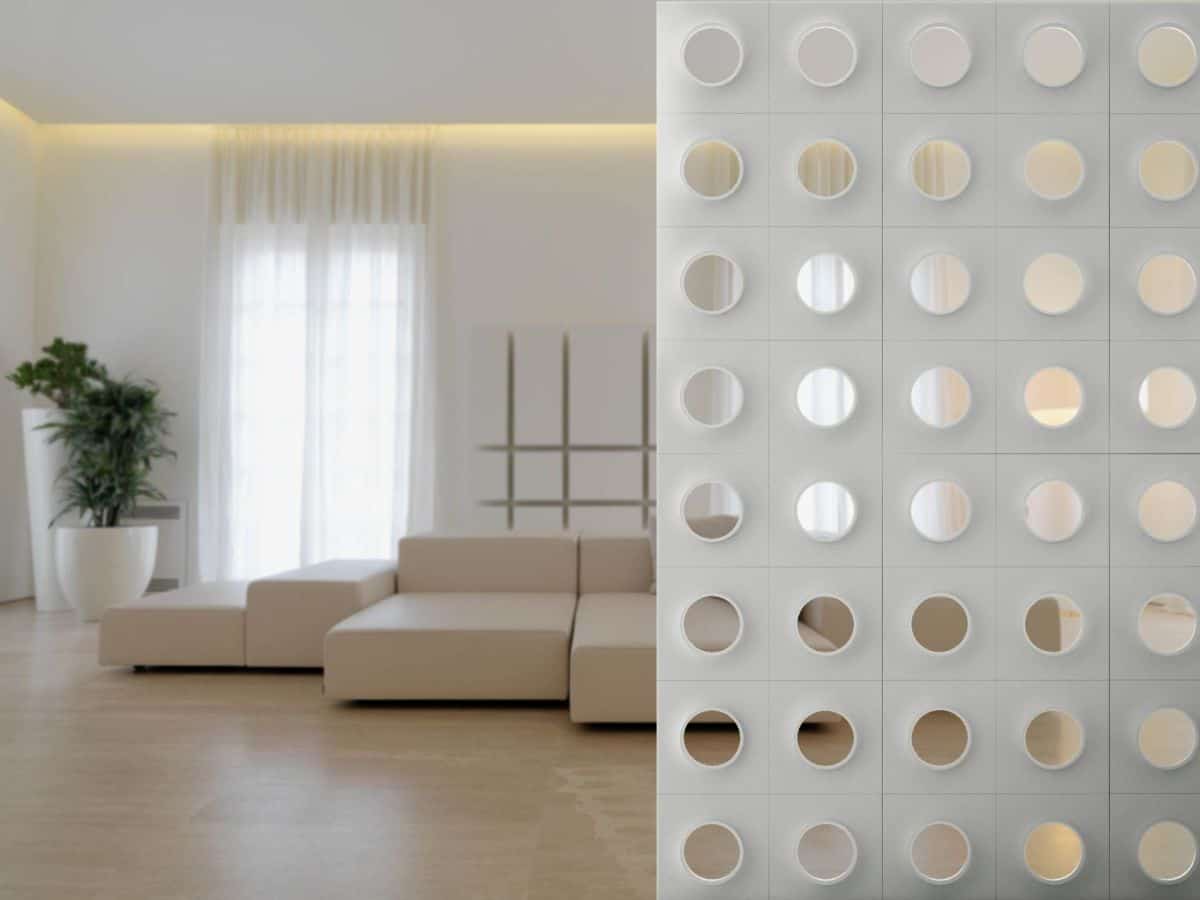
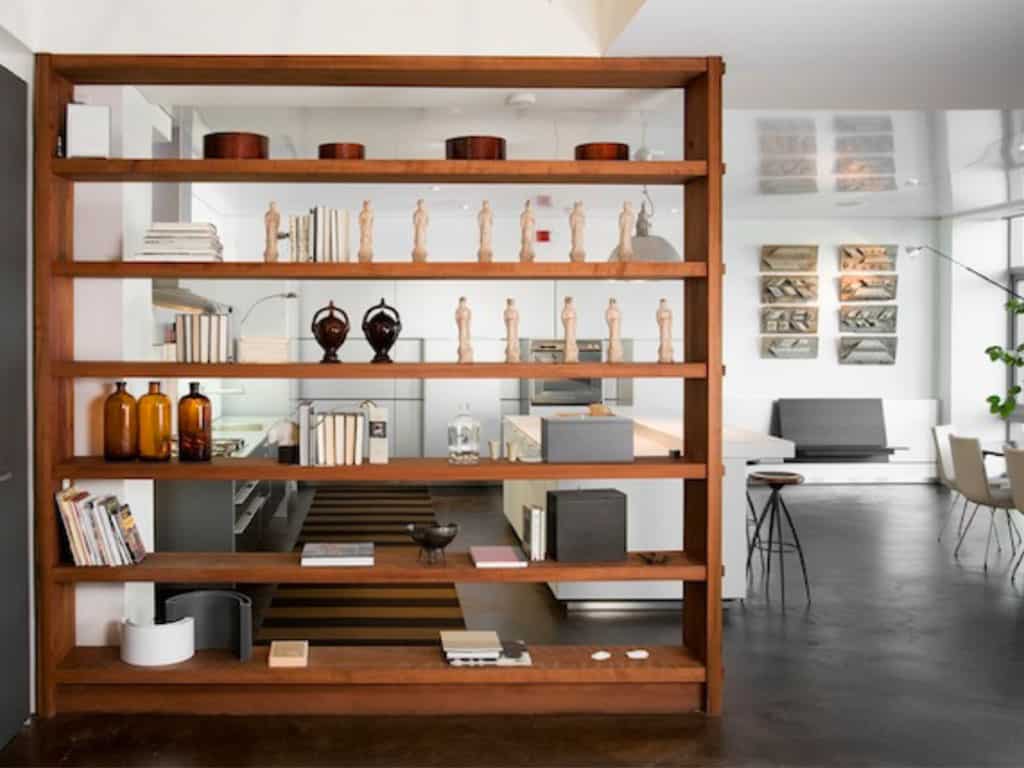
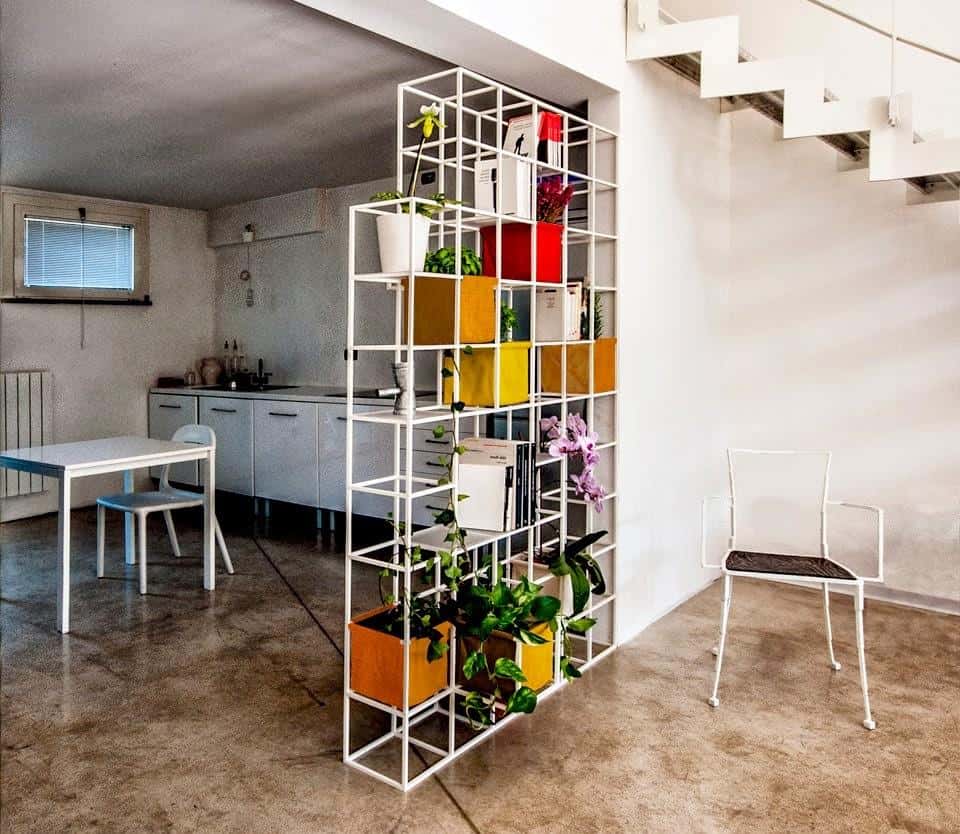


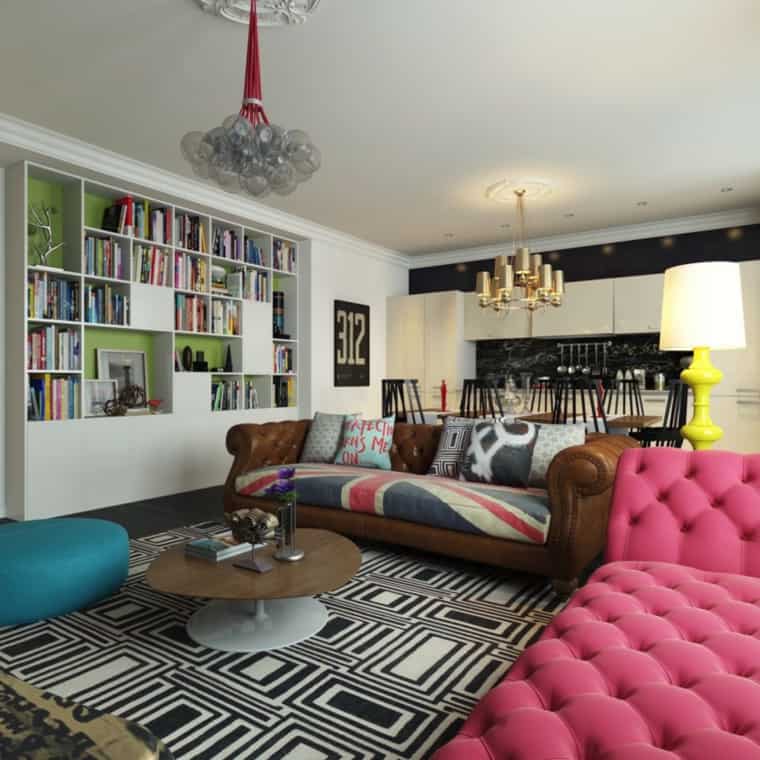
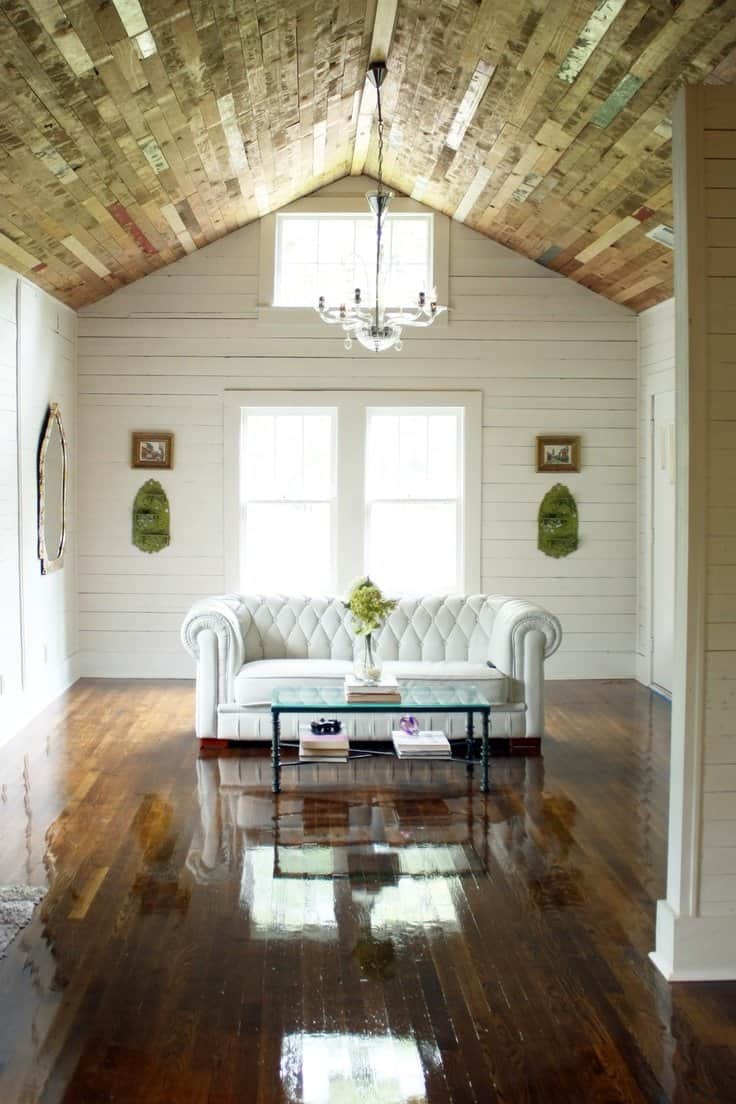
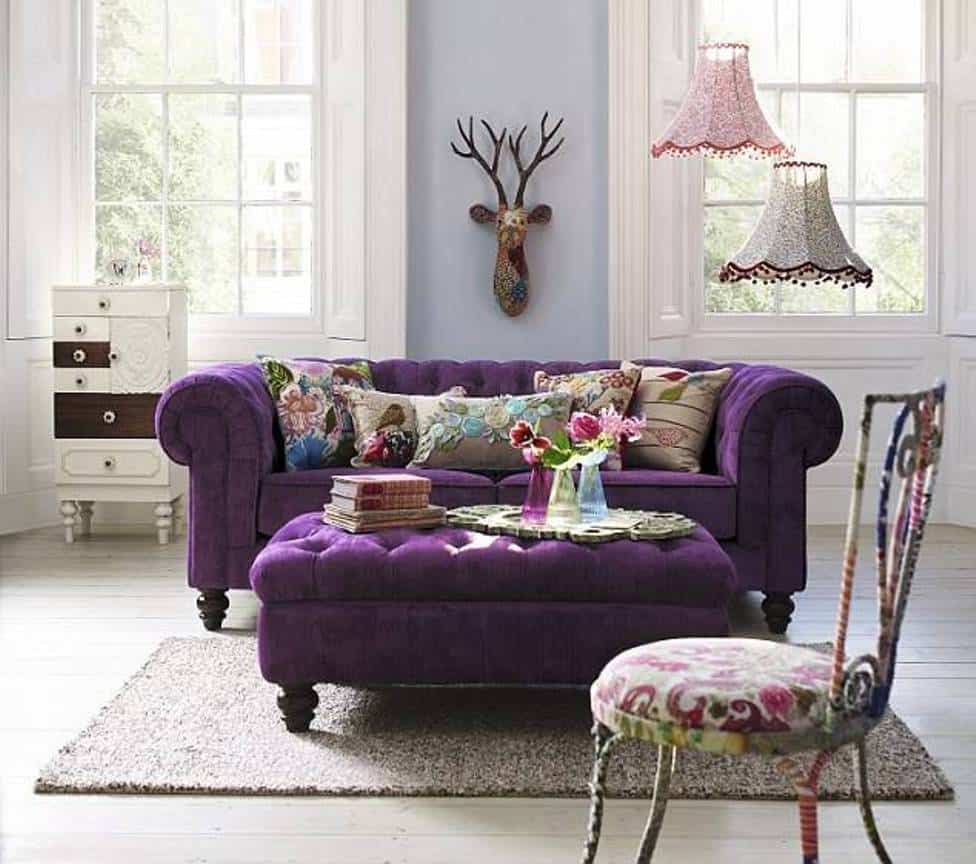

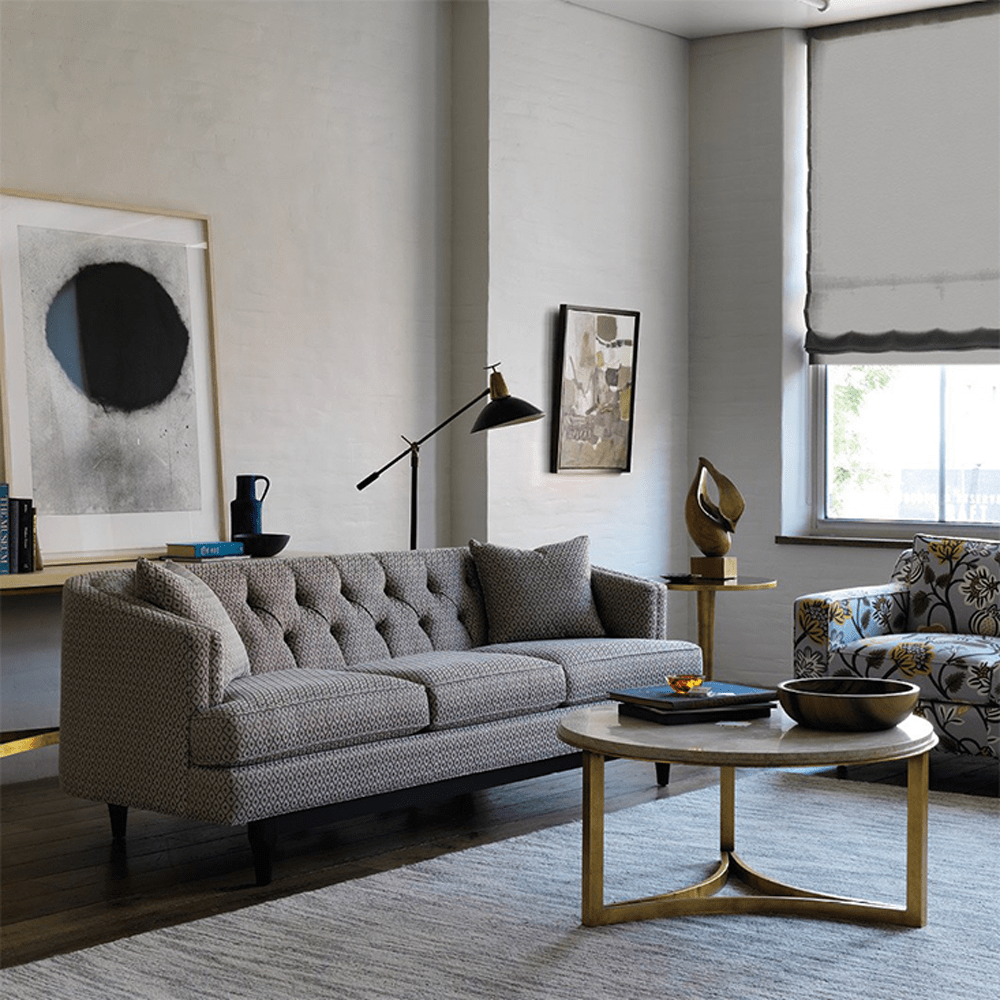

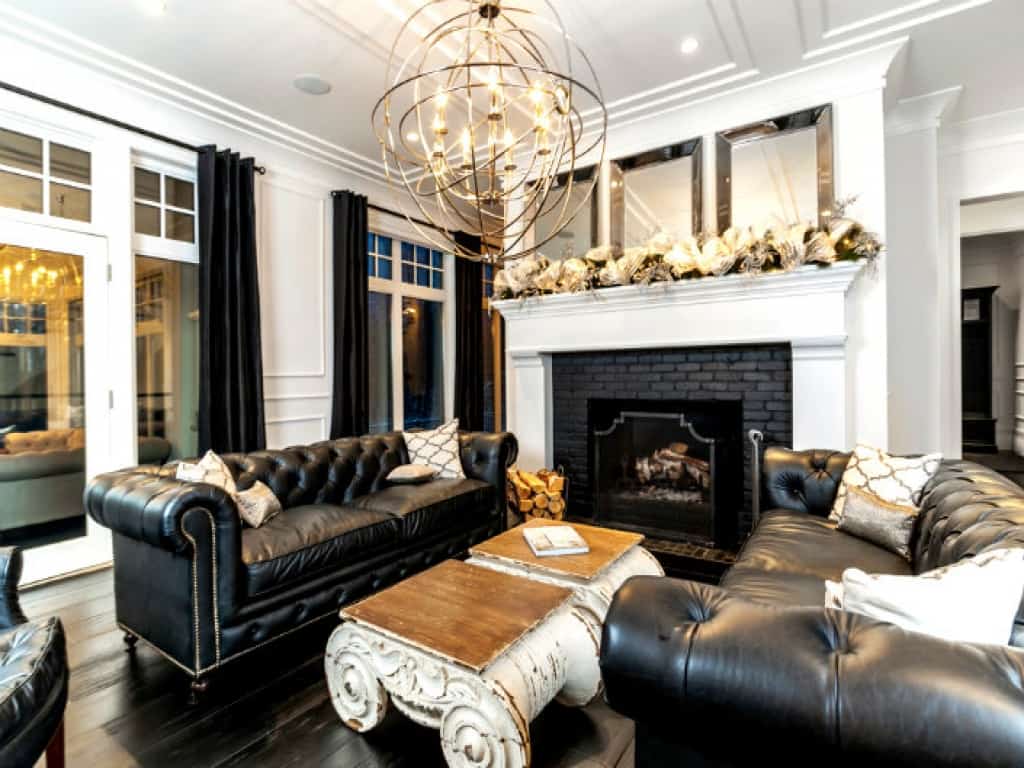
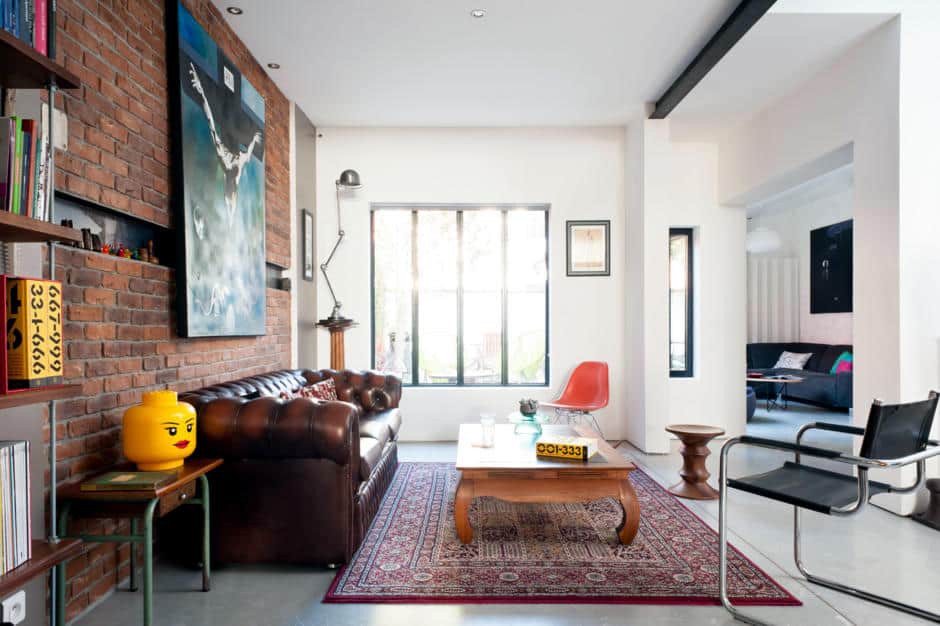
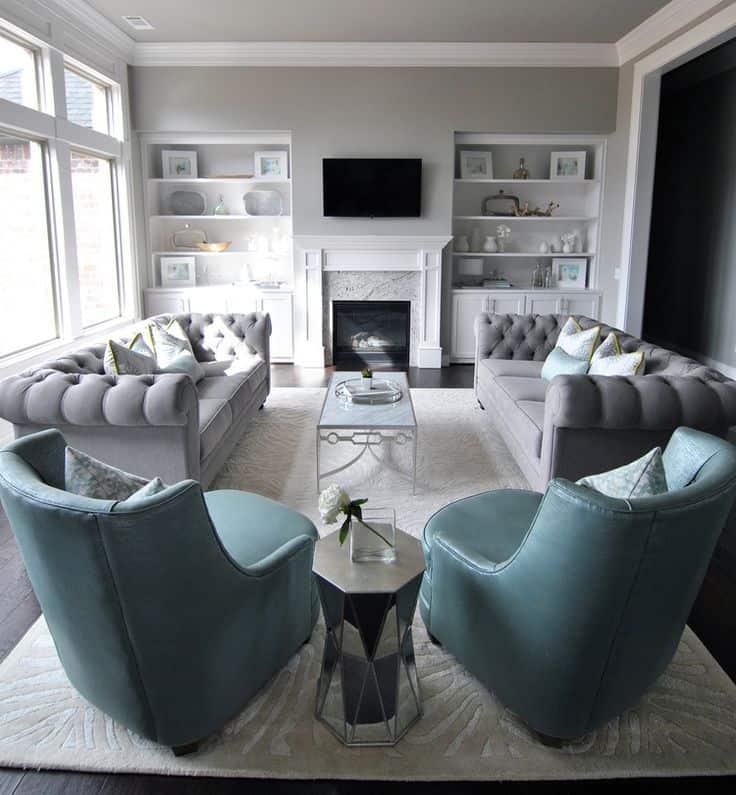
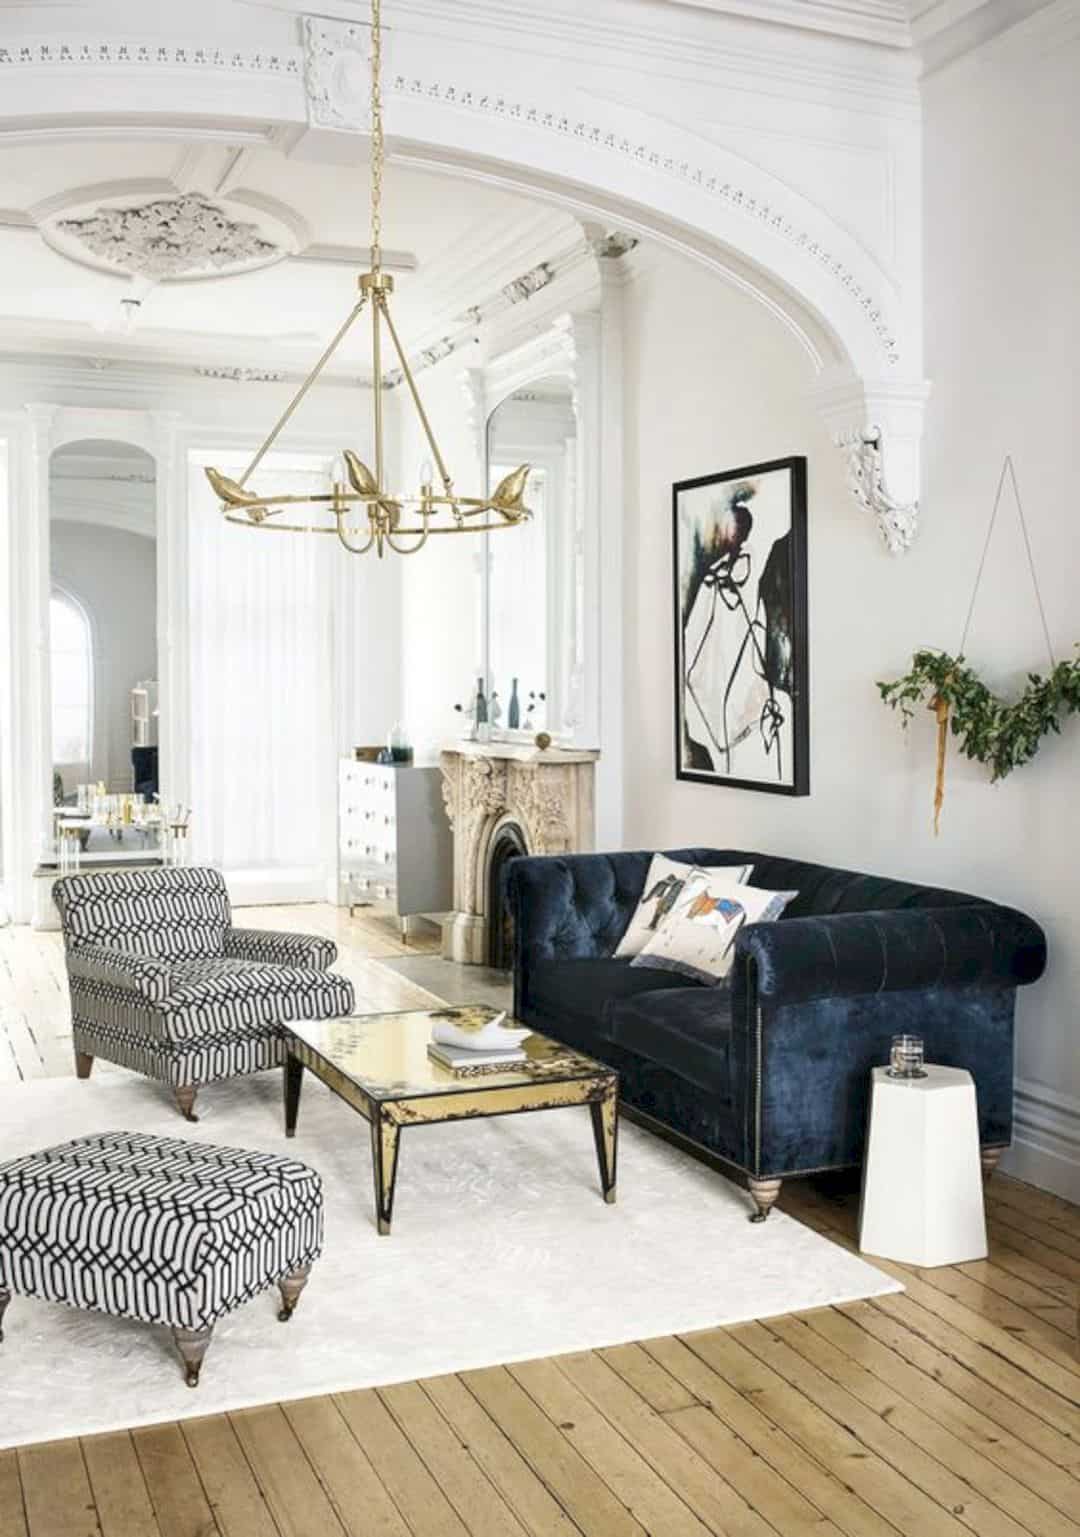

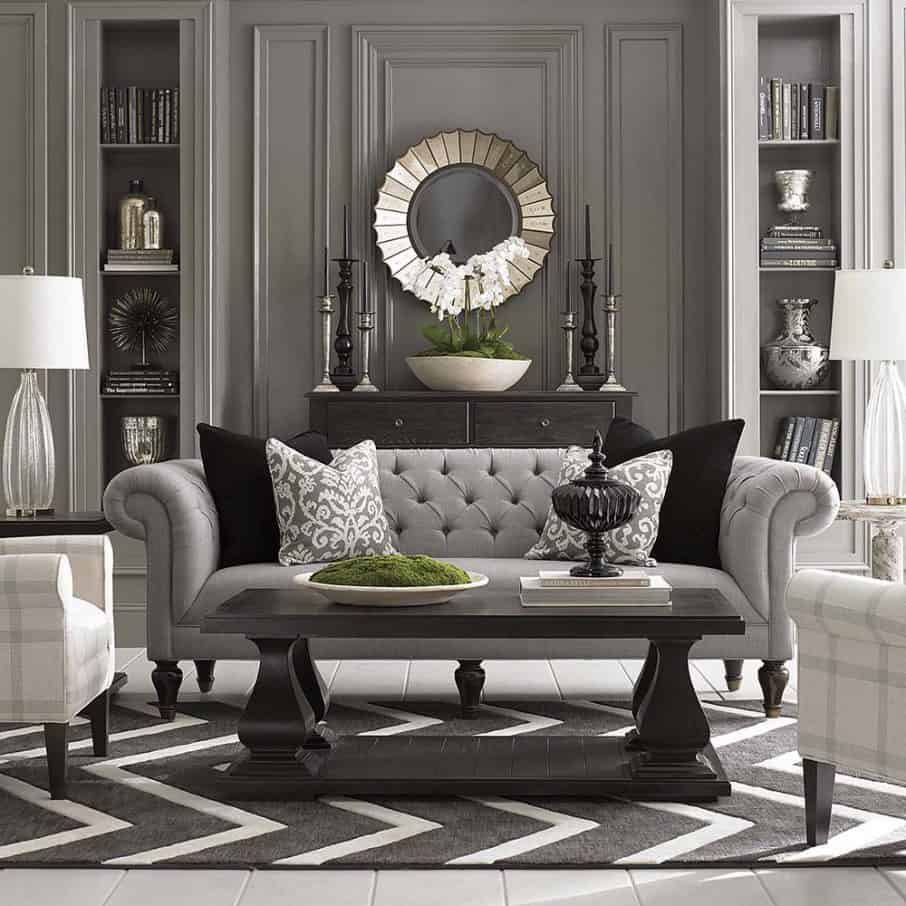

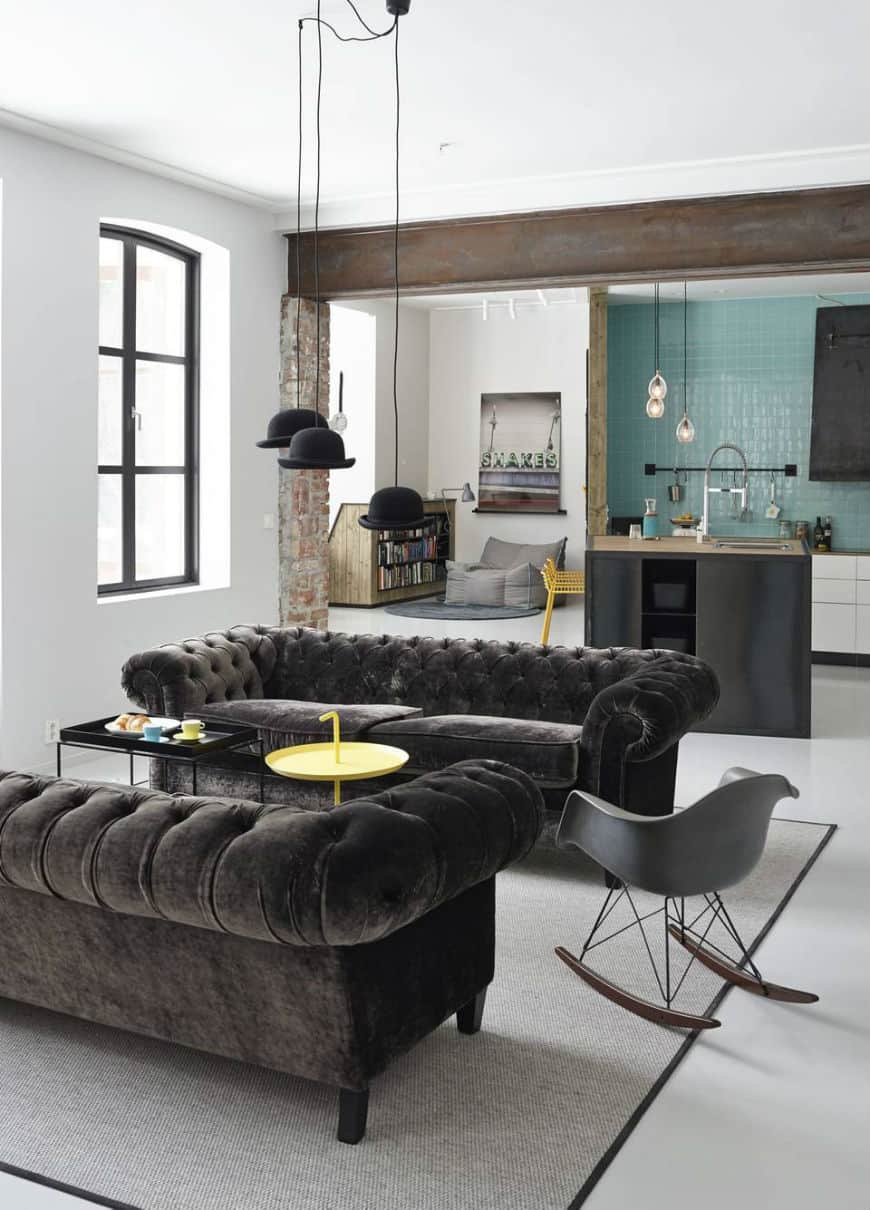

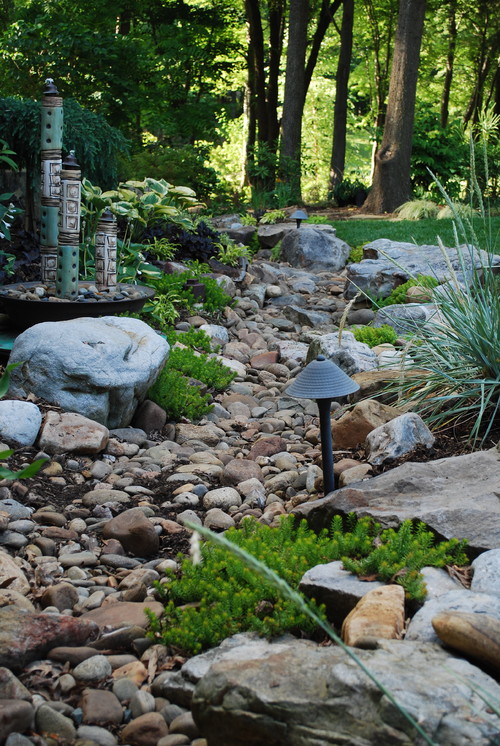
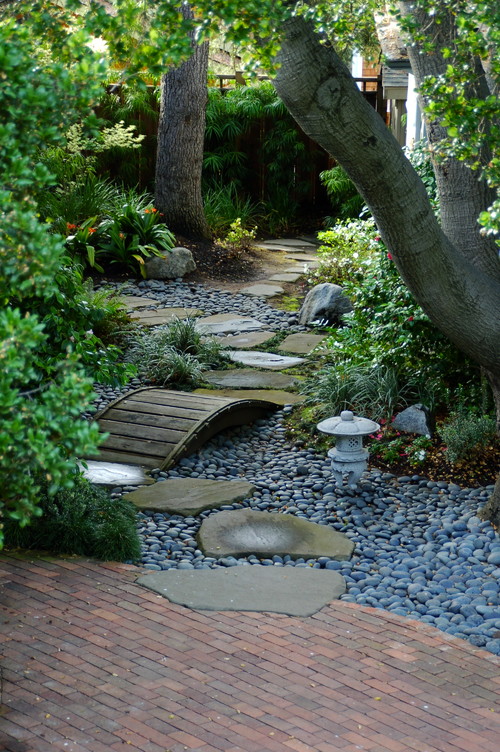