Painting is a fantastic hobby that I have pursued in my leisure for years now. It is a productive way to vent my emotions and creativity.
I started painting on canvases about 4 years ago. Now, I have given up my sketchbooks just because of the experience I get on a canvas.
But paint behaves very differently on canvases and to many these mediums may be new as well.
Therefore, it’s extremely important to get the right paint for the job. You may already know that acrylic paint and oil paint work on canvas. But it can be confusing to choose the right medium for yourself.
So, here are some paints that I have fallen in love with over the years, the best paints for canvas are here!
Listed below are the 5 best Paints for Canvas from our list:
Liquitex BASICS Paints for Canvases: Distinguished for providing a budget-friendly painting option for beginners with impressive color stickiness and mixability.
Winsor & Newton Acrylic Set for Canvas Painting: Stands out for its consistent performance on canvas, bright colors, and excellent color retention, rendering it perfect for multilayered painting.
Golden Open Acrylics: Recognized for its slower drying time akin to oil paints, making it an excellent choice for detailed works and touch-ups that require more time.
Old Holland Classic Oil: Esteemed for its historical brand value, these paints provide the best experience with high-quality pigments, impressive lightfastness, and long-lasting nature, making it a favorite among professionals.
Holbein Duo Aqua Water-Soluble Oils: Celebrated for their high industry standards and water-soluble nature, these oil paints provide vivid colors and a healthier painting experience by eliminating harmful chemicals associated with most oil paints.
From traditional oil paints to modern acrylics, we have got you covered. So, without further ado, here's the list of the 5 best paints for canvas.
Liquitex BASICS Paints for Canvases - Best For Beginners
If you are getting started with painting and want to keep the budget on down low this is your best bet.
I used this acrylic paint set for quite some time when I started and still use it from time to time for my side projects. The reason is that this budget variant doesn’t make too many compromises in quality to achieve the price tag.
The color sticks well to the canvas and is viscous. What I love the most about it is that it also mixes well with other colors and mediums which gives me the modularity to get specific colors while painting.
But keep in mind that you’ll have to experiment quite a bit for it because the pigments don’t mix as expected all the time.
Unlike other cheap variants, this acrylic paint works incredibly well in layers and even when it’s thinned out with water, it sticks to the canvas well.
Due to its consistency, it sticks excellently with brushes. I use white horsehair flat brushes for most of the painting and I am amazed at how well it all works out. It functioned well with nylon paintbrushes as well.
For a beginner, I don’t think there is any better option in the acrylic paint market. It sticks well to canvas, works fabulously in layers, and sticks well to brushes. All you have to get used to is mixing colors on palettes. That’s more of a problem for veterans than for newcomers in my humble opinion. But even as an experienced individual, I have no complaints about this paint.
Type of Paint: Acrylic | Quantity: 48 tubes | Finish: Matte | Drying Time: 15-30 min | Lightfastness: Poor to Good
Winsor & Newton Acrylic Set for Canvas Painting - Best For Professionals On A Budget
This paint satisfies everyone’s needs even though it’s harder on the wallet than the previous entry.
Winsor & Newton has been a part of my acrylic paint set for a long time because I love how consistently it performs on canvas. The colors are strong and bright and work fantastically when mixed as well.
The color retains incredibly well on canvas which is great for multilayered painting. The pigments are of great quality and I am astounded that it’s as good as some of my oil colors. It totally justifies its price.
Even though it’s meant for more experienced and serious artists because of its price and quality, I’d recommend it to beginners as well because it reduces the steepness of the learning curve of painting - especially, on canvas.
The colors are very clean, behave truly on canvas, and it has a certain satin texture. That may not work with some art styles but artists around the world admire the finish of acrylic paints. Even I do.
It comes with 10 colors and it’s enough to create most other colors, especially because the color mixes so well and accurately. One gripe I do have is that this paint is softer than my liking. If it grinds your gears as well, I’ll advise getting some texture paste for medium. In my experience, it’s the most straightforward solution to the problem.
Even though this set is meant for students, I think this is well suited for professional use as well. The consistency and the grip leave no room for asking for more. I see this set as a budget option for professionals. It can very well be used for any side or personal project.
Type of Paint: Acrylic | Quantity: 10 tubes | Finish: Matte | Drying Time: 20-30 min | Lightfastness: Good to High
Golden Open Acrylics - Best For Detailed Works
This paint set is great for working on shades. It works great for softening, blending, and shading as it’s clean and bright. I use this for detailed works that most people call a “touch-up”.
Golden Open Acrylics dries more like oil paint - slower and giving you more time to work on it. It is a welcomed attribute because I use this paint for working on dried layers of paint when I need more time to work out the details. That's why I think that adding this paint is so necessary for your arsenal to be complete.
There are eight colors in the set which is enough for creating most colors. The colors blend very well and you can work it to make translucent spreads very easily. The pigments are of great quality as well, providing strong and consistent colors.
Most of the “touch-up” work needs a lot of mixing of colors to make it consistent with your primary application. I found these colors to be excellent for that job as the pigments are of top-notch quality and leave no room for complaint.
I recommend this acrylic paint set for working secondary and tertiary layers only. Mostly for shading, blending, and glazing. The properties these colors have are perfect for that. Now as a beginner, you may skip it. There are way many things to work on before you start perfecting “touch-ups”.
But if you have already been in the game for a while now and are serious about making your artwork more vibrant, then I can’t recommend Golden Open Acrylics more. Especially it works so much like oil paints. It has no comparison.
Type of Paint: Acrylic | Quantity: 8 tubes | Finish: Matte | Drying Time: 20-30 min | Lightfastness: Good to High
Old Holland Classic Oil
Now we are moving to oil paints. Oil paint is the best way to put your ideas on a canvas. And it’s just not me, many artists and professionals agree as well.
It’s just the way the oil paint blends and behaves on canvas that makes it the perfect experience with the best results.
Old Holland is one of the oldest brands of paint. It was established in the 17th century and has been used by several famous artists, like Van Gogh.
Of course, these colors don’t mess around. Starting from the pigments to the viscosity and consistency, there’s nothing that tops Old Holland in quality and experience.
There are no cheap fillers in this color, all you’ll get is the best pigments for the most accurate colors and consistent spread and behavior. Not only this, these colors don’t lose color and texture over time. In the community, it’s called lightfastness.
Except for Cremnitz White and Madder Lakes, every color is completely lightfast and even these two are almost lightfast as well.
May it be landscapes, still lifes, or figures, there’s nothing you can’t do with these paints as they offer transparent as well as opaque paints with excellent pigments.
These paints also last a lot longer than others as the medium has fantastic tinting strength and although it’s expensive, at least it’ll be quite some time before these run out.
The oil paint stretches quite a lot which not only saves paint but also is easy to paint with and looks more natural and pleasing. As expected, the spread and mixing are fantastic as well, although I’d recommend getting natural hair brushes for the best results. Old Holland deserves the best anyway.
Type of Paint: Oil | Quantity: 10 tubes | Finish: Gloss | Drying Time: 2-12 days | Lightfastness: Excellent
Holbein Duo Aqua Water-Soluble Oils
This is the modern-day standard for oil paints. Holbein Duo Aqua Water-Soluble Oils are meant for professional use through and through, and they scream quality in every way possible.
Unlike most oil paints which use linseed oils for spread and turpentine for the wash, these oils are crafted so that it can be used with water as well, as the name suggests.
These colors meet industry standards on every term and undergo rigorous testing procedures, like thermal stability, adhesion, and color tone. It even undergoes bacterial testing.
It even eliminates all the harmful chemicals and toxins that are associated with most oil paints and gives a healthy experience for the modern-day user.
If all of this sounds too scientific and less artistic to you, don’t worry. The paint performs excellently and is worth every penny of its high price tag. The paint is thick and has a beautiful consistency that feels mesmerizing on the first touch of a paintbrush.
The colors are more vivid and expressive than some of the other brands but I don’t see that as a negative trait. In my experience, it brings more life to my creation. It mixes accurately as well and it comes in a variety of colors, so you can go as close as you can get to your imagination.
The color even blends well within different layers and it comes with a dryer solution which, if added, makes the paint dry faster. Perfect for people who don’t want to wait for the oils to dry up. But I, for one, love the wait because in my opinion the color seems more vibrant and blends better when I let it dry naturally.
Type of Paint: Watercolor | Quantity: 20 tubes | Finish: Matte | Drying Time: 20-30 min | Lightfastness: Good to High
What is the Best Paint For Canvas?
Outlined below is a comparison table, diligently constructed to highlight the essential qualities of top-tier paints designed for canvas. The table examines each option in terms of paint type, quantity, finish, drying time, and lightfastness, a measure of color durability under light exposure.
Choosing the right paint for your canvas is crucial for achieving the effect and result you desire in your artwork. To help you make an informed decision, we have compiled a comprehensive buying guide that covers all the important factors you need to consider when purchasing the best paint for your canvas.
1. Type of Paint
There are three main types of paint that work well on canvas: acrylic, oil, and watercolor.
a. Acrylic Paint
Acrylic paints are versatile, quick-drying, and have vibrant colors. They are suitable for various painting techniques and can be used on different surfaces. They are also easier to clean up due to their water-soluble nature.
b. Oil Paint
Oil paints are classically favored by many professional artists. They provide rich, deep colors and allow the painter a longer working time to create details, blend colors, and achieve a specific texture.
c. Watercolor Paint
Watercolors are well-suited for beginners, offering translucency and ease of use. They dry quickly and can be reactivated with water, allowing for corrections and modifications.
2. Quality: Student vs. Artist Grade
Consider the quality of the paints you choose. Student-grade paints are more affordable but may lack pigment concentration, resulting in less vibrant colors. Artist-grade paints are typically more expensive, but they have higher pigment concentrations, better color quality, and improved lightfastness.
3. Pigment Concentration
Higher pigment concentration gives better color coverage and vibrancy. However, it also adds to the price of the paint. Determine the right balance based on your needs and budget.
4. Lightfastness
Lightfastness refers to how well a paint retains its color when exposed to light. Higher lightfastness ratings mean the paint is more resistant to fading and discoloration over time. Ensure you choose paints that have a good lightfastness rating.
5. Drying Time
Drying times vary among different types of paints. Acrylic paint dries the fastest, followed by watercolor, and then oil. Choose the paint type that suits your working style and preferred drying time.
6. Brand Reputation and Reliability
Choose a paint brand that has a good reputation for quality, consistency, and customer support. Some reputable brands include Winsor & Newton, Golden, Liquitex, Gamblin, and Daler-Rowney.
7. Safety and Toxicity
Many paints can be harmful if ingested or inhaled. Be sure to choose paints that comply with safety standards and are labeled as non-toxic. This is especially important if children or pets may come into contact with the materials.
8. Budget
Lastly, consider your budget when purchasing paint for canvas. While it is essential to invest in quality materials, it is also important to be mindful of your spending.
Important Tip: Remember that experimentation is essential in the world of art. Consider trying different paints and brands to find the one that suits your painting style and technique the best. It may take time, but discovering the best paint for canvas will ultimately lead to more fulfilling and enjoyable artistic experiences.
What is the difference between student and artist-grade paints?
Student-grade paints are less expensive and have a lower pigment concentration compared to artist-grade paints. Artist-grade paints are more expensive but have a higher pigment concentration and are of higher quality, making them ideal for professional artists.
How many coats of paint should I apply to a canvas?
The number of coats of paint required on a canvas depends on the opacity and thickness of the paint. It is recommended to apply at least two coats of paint for even coverage and to allow for a more durable finish.
Can I mix different brands of paint on canvas?
Yes, different brands of paint can be mixed on a canvas. However, it is recommended to use the same type of paint (oil or acrylic) to ensure compatibility.
Can I use spray paint on canvas?
Yes, spray paint can be used on canvas, but it is recommended to use a primer to prepare the surface before painting to ensure good adhesion and prevent the paint from soaking through the canvas.
Can I paint on a canvas without stretching it first?
Yes, you can paint on an unstretched canvas, but it is recommended to stretch the canvas first to prevent it from warping or buckling over time.
How long does it take for paint to dry on a canvas?
The drying time of paint on a canvas depends on the type and thickness of the paint, as well as the humidity and temperature of the environment. Acrylic paint dries faster than oil paint and typically takes about 30 minutes to an hour to dry, while oil paint can take up to several days to fully dry.
Thank you for taking the time to read our article on the best paints for canvas! We appreciate your interest and hope the information provided has been helpful and insightful. Now that we have looked at all aspects of the available paint options, it's time for the moment you've been waiting for – our top three expert recommendations.
Out of these 5 best paints for canvas, here are the top three expert recommendations:
Best for beginners: Liquitex BASICS Acrylic Paint Set is an ideal option. With budget-friendly pricing and decent quality that doesn't compromise too much on color vibrancy, this set is perfect for those starting their artistic journey or working on side projects.
Best for professionals on a budget: Winsor & Newton Acrylic Set is a good option. A trusted brand offering consistent performance, strong and bright colors, and excellent blending abilities make this acrylic set suitable for serious artists, whether they're students or professionals.
Best for detailed works: Golden Open Acrylics is the right choice. These paints behave more like oil paints, drying slower and providing more working time, making them excellent for secondary and tertiary shading, blending, and glazing layers.
As you continue to explore the world of canvas painting, remember that practice and exploration are key to finding your unique style and preferences. With these expert recommendations, you should now have a solid starting point to choose the best paints for your needs. Happy painting, and let your creativity flow!
The subject of perspective in art is extremely vast and requires a lot of dedicated studying and even more drawing practice to get a firm grasp on it.
Artists often spend years studying the subject before it fully clicks, and even more on applying the concepts in their artworks. It is not something you learn in a day, but something that you need to study thoroughly and then put your ideas into practice over time.
If you're a beginner in the world of art, you most likely do not possess a lot of knowledge on this subject. However, it is one of the fundamentals that you absolutely need to learn as an artist.
Perspective is what defines how your artwork looks from different points of view. It applies to everything that you create in your art, be it a character or an environment.
While the subject is exceptionally detailed, there are plenty of books out there that can help you get a decent grasp on the subject in a fairly short amount of time.
Mastery will take time, but these books will definitely help you get started!
Listed below are the 5 best perspective books from our list:
Perspective Made Easy: Especially suitable for beginners, this book simplifies perspective's complexity and is celebrated for its affordability and easy-to-understand material.
How to Draw: Designed for intermediate artists seeking an in-depth understanding of perspective, it covers basic to advanced concepts, making it an ideal choice for artists past the beginner phase.
The Art of Perspective: The Ultimate Guide for Artists in Every Medium: This comprehensive guide offers a nifty blend of simple and complex techniques useful for artists at any skill level, creating a thorough analysis of perspective drawing.
Perspective Drawing Handbook: With a concise structure, this handbook provides an efficient shortcut toward mastering perspective drawing and is suitable for both beginners and experienced artists.
Perspective! For Comic Book Artists: This book focuses on perspective drawing specifically for comic artists, offering strategies for landscapes, characters, and animals, making it the go-to resource for comic book artists looking to enhance their perspective work.
Here is the list of the 10 best perspective books to help you hone your skills and perfect the technique of perspective drawing.
1. Perspective Made Easy - Best for Absolute Beginners
When it comes to understanding perspective in art, Norling's Perspective Made Easy is one of the best books for beginners to get started with!
At present, it is widely regarded as the best introductory text for beginners who wish to master this complicated subject. There are very few books out there on this subject that explain perspective in such a simple and straightforward manner as Ernest R. Norling has managed to do in this book.
Apart from being an extremely easy read, this book is also highly affordable. So if you're someone who has no idea where to get started on this topic, I highly recommend you get your hands on this.
Perspective Made Easy is one of the first books out there that was entirely devoted to clarifying the laws that govern perspective. The book begins with clear and concise discussions on topics such as vanishing points, horizons, and the relationship between eye levels to perspective drawings.
Irrespective of how much experience or pure talent you possess, you'll almost certainly be able to apply the techniques taught in this book instinctively once you're done studying it!
Author: Ernest R. Norling | Publisher: Dover Publications | Edition: Republication Edition | Publishing Date: January 19, 1999 | Number of Pages: 224 | Format: Paperback | Dimensions: 5.39" x 0.47" x 8.46" | Weight: 0.65lbs | Other Format/s: Hardcover, Audiobook, Kindle
2. How to Draw - Best for Intermediate Artists
How to Draw by Scott Robertson is a book that I keep on recommending to artists who are looking to get in-depth with the different concepts of perspective. It is a practical guide to constructing and seeing different objects in perspective and is primarily aimed at teaching how to draw from your imagination while inventing perspective.
Robertson, who currently teaches at Pasadena's renowned ArtCentre, is one of my favorite authors when it comes to Concept Art. His teaching style is one of the most unique that I've come across, and the vastness of his knowledge becomes evident as soon as you go through a few chapters of this book.
In this book, you'll learn all the basics of perspective, such as 1-point, 2-point, and 3-point perspective, apart from a lot of advanced concepts that require a lot of dedicated study. Every chapter follows the previous one with each of them building on top of one another.
While this book is one of the best on this subject, it's not exactly something that I'd recommend to complete newbies. If you have no prior experience in perspective drawing, you'll find it quite hard to go past the first few lessons. But if you've gone past the beginner phase, this is one of the best books to go for!
Author: Scott Robertson, Thomas Bertling | Publisher: Design Studio Press | Edition: 1st Edition | Publishing Date: December 15, 2013 | Number of Pages: 208 | Format: Paperback | Dimensions: 9.1" x 0.8" x 11.03" | Weight: 2.5lbs | Other Format/s: Hardcover
3. The Art of Perspective: The Ultimate Guide for Artists in Every Medium - Best Comprehensive Guide
The Art of Perspective by Phil Metzger takes a very different route on teaching perspective, making it a must-have for all those of you who want to get a detailed analysis of the subject.
This is a relatively new book on perspective drawing, and also one of the most simple and straightforward ones I've come across in a long time. In this book, you'll be guided through a series of exercises and mini-lessons that will help you grasp the different notions associated with perspective.
The author has taken a brilliant approach towards demystifying perspective. The book offers simple but effective techniques that will help you achieve a convincing illusion of distance and depth, irrespective of whether it's only a few inches or miles.
You'll start with simple, intuitive techniques and atmospheric perspectives and then slowly make your way towards more sophisticated challenges such as curves, stairways, and reflections. It is one of the most effective texts for all those artists who are getting started with perspective drawing.
Author: Phil Metzger | Publisher: North Light Books | Edition: N/A | Publishing Date: June 12, 2007 | Number of Pages: 208 | Format: Paperback | Dimensions: 8.53" x 0.55" x 11" | Weight: 1.81lbs | Other Format/s: Kindle
4. Perspective Drawing Handbook - Best Concise Handbook
This is one of the most concise books on perspective drawing that you'll find out there with only 96 pages worth of information. But don't let the tiny size fool you, this is one of the most effective resources to have by your side when you're doing perspective drawings!
This short and sweet guide on perspective drawing provides tons of insights and shortcuts to efficiently sketching perspectives. It's also an extremely versatile text that both beginners and experienced users can learn from.
The early chapters of this book by Joseph D'Amelio cover concepts such as foreshortening, diminution, convergence, and shading. As you gradually make your way deeper into the text, you'll come across discussions on more advanced techniques, and how you can master them quickly.
Apart from the written discussions, there are more than 150 illustrations throughout the book that explain every single feature in great detail. So irrespective of whether you are an experienced artist or just starting out, this is a book that you should get your hands on.
Author: Joseph D’Amelio | Publisher: Dover Publications | Edition: Republication Edition | Publishing Date: May 17, 2004 | Number of Pages: 96 | Format: Paperback | Dimensions: 8.2" x 0.3" x 10.7" | Weight: 0.6lbs | Other Format/s: Hardcover, Kindle
5. Perspective! For Comic Book Artists - Best for Comic Artists
As the title suggests, this book by David Chelsea is primarily dedicated to comic artists who wish to learn perspective drawing and apply different techniques in their work. It is one of the few books out there that teach perspective with a particular focus on Comic Artists.
The book was first published in 1997 and is widely considered one of the best texts for learning the fundamentals of perspective art and its subsequent application in comic strips. It teaches various core concepts such as landscapes, characters, animals, and the different techniques you can adopt to draw almost everything from a realistic perspective.
With this book, you'll learn how to draw the spectacular landscapes and fantastic interiors that you find in comic books. It's one of the best books for comic artists to step up their game and improve their artwork significantly.
However, I do not recommend this book to total beginners that are just getting started. This is for those of you who have a decent bit of experience with perspective drawing and wish to start doing comic strips.
Author: David Chelsea | Publisher: Watson-Guptill | Edition: N/A | Publishing Date: October 1, 1997 | Number of Pages: 176 | Format: Paperback | Dimensions: 7.05" x 0.48" x 9.98" | Weight: 0.98lbs | Other Format/s: N/A
6. Perspective for Artists
For all those of you who are looking to learn drawing and concept art on a budget, Dover Art Instructions has some of the best resources for you to choose from. Perspective for Artists is among a few of the publisher's best books on perspective drawing with over 400 diagrams and illustrations spread throughout the book.
Rex Vicat Cole has managed to make the process of learning perspective a highly fascinating and enjoyable experience through this book. The book comes with concise instruction, clear and straightforward language, and tons of illustrations to make learning a lot of fun.
You'll come across over 80 illustrations of drawings by old masters, as well as the author himself that demonstrate how perspective is utilized practically. The illustration problems are so well depicted that you'd not even need to depend on the text references to solve them at all.
However, since the book was written over a hundred years ago, some of the illustrations and the language may feel outdated. Apart from that, this is one of the best books out there for beginners to get started with.
Author: Rex Vicat Cole | Publisher: Dover Publications | Edition: Republication Edition | Publishing Date: June 1, 1976 | Number of Pages: 288 | Format: Paperback | Dimensions: 5.38" x 0.56" x 8.58" | Weight: 0.65lbs | Other Format/s: Kindle
7. Creative Perspective for Artists and Illustrators
Creative Perspective for Artists and Illustrators by Ernest W. Watson is one of the more advanced books in this list that is targeted mainly towards more experienced artists. This is not a text that you'll be able to grasp without a strong knowledge of the fundamentals of Perspective drawing.
You might have noticed how most illustrators, animators, and cartoonists exaggerate perspective in their artworks. With this book, you know how you can master this art while still abiding by the rules of perspective drawing.
The author, Ernest W. Watson, is a master on the subject having taught at Pratt for over 20 years. His style of writing is very clear, and he knows how exactly to reach his students through this text.
In this book, he teaches some of the more complicated techniques that can be used to manipulate perspective while still being consistent throughout your art. It is full of diagrams and illustrations by real artists to help you get a firm understanding of the complexities of perspective.
Author: Ernest W. Watson | Publisher: Dover Publications | Edition: Republication Edition | Publishing Date: January 14, 1993 | Number of Pages: 160 | Format: Paperback | Dimensions: 8.35" x 0.39" x 10.94" | Weight: 0.76lbs | Other Format/s: Kindle
8. Perspective Without Pain
Perspective without Pain is one of Phil Metzger's best works, and also one of the simplest books on perspective drawing that you'll find in the market. This is one of the author's older works and is recommended for beginners looking for an introductory text on perspective drawing.
As the title suggests, 'Perspective without Pain' attempts to teach new artists how to create perspective without complicated equations, mechanical terms, and T-Squares. The book adopts a hands-on approach with simple instructions to teach students how to create depth and perspective in their drawings and paintings.
The earlier chapters cover different techniques that will help you impart a sense of depth to your paintings by gradually decreasing the distances between similar objects and then decreasing their sizes. You'll learn how to manipulate color and value and draw from any viewpoint.
It covers pretty much everything that you'd need to learn as a beginner, and a lot more!
Author: Phil Metzger | Publisher: North Light Books | Edition: Reprint Edition | Publishing Date: March 15, 1992 | Number of Pages: 144 | Format: Paperback | Dimensions: 8.5" x 0.47" x 11" | Weight: 1.25lbs | Other Format/s: Kindle
9. Basic Perspective Drawing: A Visual Approach
Basic Perspective Drawing by John Montague is one of the most comprehensive guides on perspective drawing that you can find. It is incredibly detailed and covers a vast array of techniques, concepts, and theories that artists of all skill levels can make use of.
If you're looking forward to learning perspective drawing right from the basics to some fairly advanced concepts, this is one of the best books to go for. There are loads of illustrations, apart from tons of links that lead you to video tutorials to supplement the theories written in the book.
The thing that makes this book so effective at teaching perspective is the step-by-step approach adopted by the author. The book progresses gradually from simple concepts to distinct tools and methods, illustrating how to create perspective one step at a time.
Apart from the written theories and illustrations, there are also plenty of exercises wherein the readers can shade and highlight sections to reinforce their understanding of the book's contents.
Author: John Montague | Publisher: Wiley | Edition: 6th Edition | Publishing Date: January 29, 2013 | Number of Pages: 288 | Format: Paperback | Dimensions: 8.4" x 0.8" x 10.8" | Weight: 1.7lbs | Other Format/s: Kindle
10. Theory and Practice of Perspective
This book by G.A. Storey is considered to be one of the best books on perspective drawing, covering almost everything that an artist should know regarding the subject. This comprehensive guide on perspective drawing will help you understand and examine the theories of perspective from all angles.
G.A. Storey has designed the scores of chapters in this book in a highly concise format, thus covering a wide range of topics on the subject. There are discussions on theories that are both scientific as well as informal, apart from over 300 diagrams and illustrations.
Once you're done with the text, you'll master how to reproduce distance, shape, shade, proportion, shadows, reflections, and other effects that enhance two-dimensional works with realistic and lifelike qualities.
Author: G.A. Storey | Publisher: Dover Publications | Edition: N/A | Publishing Date: February 10, 2006 | Number of Pages: 288 | Format: Paperback | Dimensions: 5.25" x 0.75" x 8.25" | Weight: 0.85lbs | Other Format/s: Kindle
What is the Best Book for Perspective?
Subsequent is a comparison table, meticulously organized to highlight the salient features of the finest books that impart perspective. The table dissects factors including the author, publisher, edition, date of publication, number of pages, format, dimensions, weight, and the presence of other formats.
Can I use these perspective books alongside other art courses?
Yes, you can use these perspective books alongside other art courses. In fact, combining the knowledge gained from these books with additional courses can help reinforce your understanding of the concepts and techniques, allowing you to develop a well-rounded skill set.
It is essential, however, to ensure that the courses you choose complement the books and provide consistent information so that the combined learning experience is effective and meaningful.
How can these perspective books improve my overall drawing skills?
These perspective books can improve your overall drawing skills by providing detailed explanations, step-by-step instructions, and exercises to teach you the techniques and principles of perspective drawing. By learning and mastering these concepts, you will be able to create a realistic sense of depth, distance, and dimension in your artwork, enhancing the overall quality and appeal of your drawings.
These books cater to various skill levels and artistic styles, so you can find one that suits your needs and helps you improve your perspective drawing abilities effectively.
Are there any books on the subject of perspective drawing specifically for comic book artists?
“Perspective! For Comic Book Artists” by David Chelsea is a book dedicated to comic artists who wish to learn perspective drawing and apply various techniques in their work. This book covers the fundamentals of perspective drawing and its application to comic strips, making it a great resource for artists in this specific field.
Are there any books that focus on teaching perspective drawing without complicated equations and technical terms?
“Perspective Without Pain” by Phil Metzger is a book that aims to teach new artists how to create perspective without complicated equations, mechanical terms, or T-squares. The book adopts a hands-on approach with simple instructions, making it an enjoyable way to learn perspective drawing.
Is it necessary to have prior knowledge of perspective drawing techniques before using advanced books like "Creative Perspective for Artists and Illustrators"?
Having a strong understanding of the fundamentals of perspective drawing is recommended before delving into more advanced books like “Creative Perspective for Artists and Illustrators.” These advanced books often discuss complex techniques and concepts that might be challenging for beginners without a solid foundation in the subject.
As we reach the end of our journey through the top perspective books for artists, it becomes clear that the ideal book depends on your skill level, focus, and preference. Each book has its unique strengths, catering to different needs and expertise levels.
From the above 10 best perspective books, here are the top three expert recommendations:
The book Perspective Made Easy is an ideal option for absolute beginners. Ernest R. Norling's simple and straightforward approach makes understanding and mastering perspective achievable for newcomers to the subject.
How to Draw by Scott Robertson is a good option for intermediate artists, focusing on in-depth concepts and teaching how to draw from your imagination while inventing perspective. This book will help you elevate your skills and polish your techniques.
Lastly, The Art of Perspective: The Ultimate Guide for Artists in Every Medium is the right choice for artists seeking a comprehensive guide. Phil Metzger's book offers an effective combination of easy-to-follow instructions and challenging exercises, accommodating artists of all levels in their journey toward mastery.
No matter the stage of your artistic growth, the perfect perspective book awaits you, ready to help unlock your full potential and spur your creativity to new heights. Happy drawing!
CR123A batteries have become a primary power source for wireless devices and various home devices such as alarm systems. Since CR123A batteries are extremely compact and powerful, they fit easily in all types of alarm systems.
Nowadays, many alarm manufacturers are making alarm sensors and systems that run on CR123A batteries.
Notably, alarm systems that use standalone batteries don’t require any wired connection. As such, you can easily place them wherever you want without any hassle. Besides, CR123A batteries can be used by many appliances, such as web cameras, smart doorbells, and others.
So, in this guide, we have listed some of the best CR123A batteries for alarm systems on the market. So, let’s begin!
Listed below are the 5 best CR123A batteries from our list:
Duracell CR123A 3V Lithium Battery: This lithium battery stands out with a 10-year shelf life and compatibility with a variety of wireless devices, besides being offered by a trusted brand.
Panasonic Lithium 3V Batteries: These affordable, efficient batteries by Panasonic feature a 10-year shelf life and are versatile enough to support most household appliances.
Voniko CR123A Lithium Batteries: Known for their robust safety measures and leak-free design, these batteries also offer operation in extreme temperatures and are environmentally friendly.
Rapthor CR123A 3V Lithium Batteries: These high-capacity batteries provide more power than regular batteries; they feature overheat and overcurrent protection, carry a 10-year shelf life, and come with a one-year free replacement guarantee.
AHJ Cr123A 3V Lithium Battery: Providing a stable output for high-current appliances, these batteries outperform regular alkaline batteries by lasting three to five times longer and come with multiple layers of protection.
1. Duracell CR123A 3V Lithium Battery
Duracell is one of the most trusted brands on the list since it designs some of the best batteries in the industry. The Duracell CR123A 3V lithium battery is designed to be compatible with a wide range of wireless devices, such as lighting equipment, wireless sensors, alarm sensors, security systems, photography devices, etc.
In addition, it has a shelf life of 10 years, which is rare to find in modern batteries. As such, you can easily store extra units for a long period without having to worry about them getting spoiled.
Another thing worth noting is that the batteries come in packages of 1, 2, 4, 6, and 12. Thus, you can stock up as much as you want for emergencies. Also, the battery comes in a standard battery size which makes it a universal power source.
Type: Lithium Ion | mAh: 1550 | Voltage: 3
2. Panasonic Lithium 3V Batteries
If you are looking for something affordable and efficient, then you should try the Panasonic BAT002 3V lithium batteries. Apart from making batteries, Panasonic also designs various household appliances such as TVs, air conditioners, music systems, and many more. The ultimate goal of the brand is to bring a smile to every customer’s face through innovative and high-performance products.
The Panasonic BAT002 3V Lithium batteries have an average shell life of 10 years, so you can store them for future use. Moreover, each battery is capable of delivering 3.0 volts and has a size of 0.67” Dia X 1.36” H, making it compatible with most household appliances. The brand also offers a reliable after-sales service if you face any problems while using the batteries.
Type: Lithium Ion | mAh: 1400 | Voltage: 3
3. Voniko CR123A Lithium Batteries
The Voniko CR123A lithium batteries come in a pack of 6, with each battery weighing around 3.84 ounces. One of the things we liked about these batteries is the RoHS certification. As such, each battery has PTC protection, circuit overcurrent protection, and an intelligent voltage surge safeguard to prevent accidents. This also protects your home appliances from getting destroyed.
Another handy feature of these batteries is the leak-free design. Therefore, you can store them anywhere without having to worry about them leaking in the future. Besides, the batteries can operate in extreme temperatures ranging from -40℉ to 140℉. Plus, the battery is environmentally friendly since it lasts longer and doesn’t cause any environmental hazards.
Type: Lithium Ion | mAh: 1500 | Voltage: 3
4. Rapthor CR123A 3V Lithium Batteries
Next on our list is Rapthor, a brand that specializes in producing high-capacity batteries. Each CR123A 3V lithium battery has a high capacity of 1650mAh, which is more than a regular battery can offer. As such, it can deliver 10% more power than a normal battery. Apart from that, the batteries have an in-built PTC protection design which prevents the batteries from getting damaged by overheating and overcurrent.
The batteries also have a low discharge rate which gives them a shelf life of 10 years. Thus, you can easily store extra units for future use. However, you must ensure to store them in the right temperature condition given by the brand.
Unlike most brands that don’t offer a warranty for the battery, Rapthor offers a one-year free replacement if the batteries show any defect. You can also ask for a refund if you are unsatisfied with the product.
Type: Lithium Ion | mAh: 1650 | Voltage: 3
5. AHJ Cr123A 3V Lithium Battery
AHJ CR123A batteries have one of the most steady voltage curves when it comes to delivering stable power for high-current home appliances and devices. As such, the batteries last three to five times longer than regular alkaline batteries. Besides, they are compatible with a wide range of appliances such as medical equipment, toys, smoke detectors, alarm systems, digital cameras, and more.
Each battery comes with multiple layers of protection which protects them from overheating, overpressure, and over-voltage. They also offer protection against corrosion, leakage, and explosion, making them safe for long-term use.
Type: Lithium Ion | mAh: 1600 | Voltage: 3
6. Enegitech CR123A Non-Rechargeable Batteries
Enegitech is an eco-friendly brand that produces reliable power sources that don’t cause any harm to the environment. Each battery has a capacity of 1600mAh, which is more than a standard battery can offer. The low self-discharge feature ensures that the cell doesn’t discharge quickly while storing them. This further ensures that the batteries last longer without losing any power.
Apart from that, the battery has a smart protection chip that provides advanced protection against power surges and overheating. The brand also offers a small family comic on the packaging, which provides interesting facts about the batteries through funny images and jokes.
Type: Lithium Ion | mAh: 1600 | Voltage: 3
7. EEMB CR123A Batteries
EEMB is a well-known battery manufacturer that has provided some of the best battery and power solutions since 1995. It designs a wide range of products ranging from lithium batteries to rechargeable batteries. In fact, EEMB is one of the best battery manufacturers on the global market.
The batteries have a reliable shelf life of 10 years without having a memory effect. This ensures that batteries don’t lose much power while staying ideal. Besides, each battery has received a UL certification, making them safe for household use. Additionally, the batteries have a high energy density core which allows them to deliver three to five times more power than regular alkaline batteries.
Type: Lithium Ion | mAh: 1700 | Voltage: 3
8. Bevigor CR123A 3V Lithium Batteries
Bevigor CR123A 3V lithium batteries have a capacity of 1500 mAh, which makes them ideal for various power-intensive home appliances such as security systems, flashlights, and many more. In fact, these batteries can last five times longer than normal alkaline batteries. Apart from that, the batteries have a self-discharge rate of less than 2% per year.
As such, the batteries will have plenty of power to spare even if you use them after a couple of years or so. Similarly, the new winding structure ensures that the batteries are protected against corrosion and leaking.
Type: Lithium Ion | mAh: 1500 | Voltage: 3
What is the Best CR123A Battery for Alarm Systems?
This section presents a comprehensive comparison of the top-performing CR123A batteries tailored for alarm systems. The ensuing table gives you each product specification such as battery type, milliampere-hour (mAh) rating, and voltage specifications.
Nowadays, most household electronic products and modern gadgets are dependent on CR123A batteries since they are a portable power source. Some devices that require CR123A batteries are music players, cameras, high-density flashlights, and home security systems. Moreover, these batteries are extremely efficient and capable of delivering high performance while being small and compact.
However, each battery type delivers a different performance, which makes it tough to choose the right one for the alarm system. As such, we have listed a few factors that can help you find the best batteries according to your requirements.
1. Battery Life
While choosing CR123A batteries for the alarm system, you should always ensure that they are durable and have long battery life. Most brands provide all the necessary information related to the battery life on the packaging. As such, you should always check the packaging to see which brand offers a longer battery life.
A longer-lasting battery is not only durable but also great value for money since you don’t have to replace it frequently. One of the best ways to check a battery life is to see the power rating score on the packaging. Batteries with high power rating scores can serve a longer lifespan without causing any hazard or harm to your home appliance.
In fact, some devices mention which power rating score batteries they require to run efficiently. For example, high power ratingCR123A batteries are ideal for Arlo cameras. Thus, you should always choose the one that is compatible with your device.
2. Affordability
Apart from being durable and long-lasting, you should ensure that the batteries are affordable. If the brand sets a high price for the batteries, you might not be able to purchase multiple batteries for your home appliances and electronic products. Nevertheless, you should never compromise by purchasing a cheaper battery with a poor power rating or short battery life.
But, if a brand offers more units for a slightly lower capacity, you take the deal since you can power more devices through one set of batteries. The excess batteries that are left out can be stored and used later on when old batteries run out. Such sets are actually more affordable since you can purchase a bunch of batteries at an affordable price.
3. Shelf Life
Another important factor to consider is the shelf life of the battery. This is especially important if you are planning to store excess batteries for a longer period. In general, CR123A batteries are well known for having a long shelf life since they don’t go out easily. As such, the backup supplies can stay ideal on the shelf for about 10 years or so.
In addition, high-capacity batteries are capable of lasting for a decade without having any drops in performance. On that note, it is advisable to check the shelf life of the batteries if you are planning to stock them for a long time. Some brands even offer rechargeable batteries, but they tend to be a bit more expensive than regular CR123A batteries.
Just ensure that the excess units are stored in a cool and dry area since excess heat and humidity can damage the cells within the battery.
4. Eco-Friendly Design
Lastly, you should always consider purchasing an eco-friendly product that doesn’t harm or cause any harmful pollution. Most brands prefer to design eco-friendly batteries since they cause less pollution and help to bring down e-waste significantly. Instead of purchasing use-and-throw batteries, you can always opt for rechargeable batteries that can last for a long time.
Normally, a regular dead battery contains harmful chemicals such as lead, lithium, cadmium, and more, which can be hazardous to your health as well as the environment. Fortunately, a lot of brands are now shifting to more sustainable and eco-friendly alternatives.
What is a CR123A battery?
A CR123A battery is a type of lithium primary battery commonly used in photographic equipment, flashlights, and home security systems due to its high energy output and long shelf life.
What appliances use CR123A batteries?
CR123A batteries are commonly used in a variety of devices such as cameras, flashlights, smoke detectors, alarm systems, and various medical equipment.
How long does a CR123A battery last?
The lifespan of a CR123A battery can vary depending on usage, but on average, it tends to have a shelf life of 10 years.
Are CR123A batteries rechargeable?
Typical CR123A batteries are not rechargeable. However, there is a rechargeable version of this battery known as an RCR123A or a 16340 battery. Always ensure the device can accommodate rechargeable versions before use to avoid damage.
What is the voltage output of a CR123A battery?
A standard CR123A battery outputs 3 volts.
Can different brand CR123A batteries be mixed in a device?
It is generally not recommended to mix batteries of different brands, types, or levels of charge in a device, as this might lead to leakage or damage.
What makes a battery like the Rapthor CR123A stand out?
The Rapthor CR123A stands out due to its high capacity of 1650mAh, which delivers more power than a standard battery, and its built-in protection design against overheating and overcurrent.
What are the safety measures for using CR123A batteries?
When using CR123A batteries, one should avoid short-circuiting, disassembling, or disposing of them in fire to prevent potential hazards. Also, brands like Voniko and AHJ CR123A batteries provide additional safety features like protection against overheating, overpressure, and over-voltage.
Staining your walls with lovely colors and reinforcing them with a polyurethane finish has become so much easier. Just take a roller, dip it in paint, and apply.
But before we get deep into discussing rollers, let’s know what polyurethane is. It is a wooden finish that can add to the beauty of your kitchen walls, deck flooring, tabletops, cabinets, and other wooden surfaces.
Not only does it add a stunning look to it, but it also protects the surface against uneven moisture and seals even scratched surfaces. Rather than using a paintbrush, you can use a roller for its easy application.
You will find a whopping collection of these rollers both offline and online. But does each product deliver a perfectly even and smooth polyurethanefinish to your surface?
We know it will be difficult for you to select a suitable roller for your painting job. But don’t worry, as we have prepared a list of the best rollers for polyurethane application. So, without further ado, let’s dig in!
Listed below are the 5 best rollers for polyurethane from our list:
FOAM PRO 184: A compact yet versatile foam roller known for its durability and reusable quality, it excels at giving a smooth, spray-like finish and covers a commendable area with a single dip, ensuring a durable, even coating, especially when applying polyurethane, even though initial grip familiarity takes a bit of time.
FoamPRO 164: Esteemed for its detailed coverage given to small projects or hard-to-reach areas, this roller pairs well with oil-based finishes and offers a sturdy grip that ensures a consistent, lint-free finish, though its usability is somewhat limited to smaller workspaces and its lint needs regular replacement.
Katzco: A top-tier paint roller offering professional working experience and lint-free finishing, its foam cover provides an even finish with each stroke while the free-spin movement reduces paint splatter, earning brownie points for working in compact spaces, even though it's less compatible with thicker paints.
Bates: Providing a comprehensive painting package, this Bates Choice model comes with a lightweight roller and handle brush that holds more paint, thus offering extensive coverage and using synthetic filaments for a fine finish, even though those fibers can wear off over time.
Pro Grade Paint Roller Set: The Pro-Grade set is a thorough 10-piece kit designed for interior and exterior painting needs, known for the effortless application of paint and the ability to cover large areas swiftly for a smooth finish. However, it tends to leave behind brush strokes which can necessitate additional coats.
Foam Pro 184 mini roller is a multi-functional polyurethane foam roller. Besides its small size and functionality, its durability and repeated usability make it one of the best available models to complete your painting jobs effortlessly and effectively. Without wasting much time, let’s dive into the features of this unit.
When it comes to painting, this mini roller works like a pro and gives a smooth and gleaming finish to your walls. In fact, people might get deceived by the finish, which is equivalent to spray works.
In terms of functionality, the roller does everything from varnishing to painting. The foam applier absorbs an adequate amount of paint giving it a lint-free and consistent finish. Besides, foam can retain its finish for a longer time. As the roller absorbs more paint, it will be possible to cover more space with a single dip.
It can be considered the best foam roller on the market to apply polyurethane. The rounded sleeve edge leaves a thick and spotless coating that ensures greater durability of the finish, making the roller a perfect finishing tool for wooden surfaces. In hindsight, the combination of this roller and polyurethane can prolong the life of your wood floors, furniture, or other wooden surfaces.
Lastly, it has a washable build, and you can use it more than once. Moreover, you get two refill sleeves free on purchasing this unit.
Although the roller secures a firm grip, you might need some time to get used to the application process. Other than that, we have not found any major disadvantage of the product, as it can surely deliver the expected high-quality finish to your walls.
What We Like
Gives a spray-touch finish
Quick and easy application
Easy to clean
Provides solid coverage
Leaves no steak on the finish
What We Don't Like
Users might need time to get used to the grip
Size: 4" | Weight: 4 Oz | Material: N/A | Tray: No
2. FoamPRO 164
FoamPro has always committed to making it easy for people to complete their painting jobs in less time and achieve better results. And they have taken the FoamPro 164 to the next level in terms of functionality and ease of use. It provides a smooth, even, and glossy finish to your wooden furniture and other surfaces. Plus, you can have an effortless and exceptional painting experience by covering a large area with a single dip.
This unit by FoamPro goes perfectly with any oil-based finish and works wonders with varnish, paint, stain, and polyurethane. It provides an even and smooth finish with detailed coverage. Hence, it becomes a suitable choice for smaller projects, which require more attention to detail.
Being small-sized, it can cover hard-to-reach places and give users greater control over the painting. But that doesn’t mean it lacks speed. The greater soaking capacity of the foam allows you to have sufficient liquid in a single dip, thereby allowing you to work without interruptions. Also, the sleeve can easily be cleaned and dried out for subsequent uses.
Using this foam roller, you won’t have to worry about the grip and it glides smoothly with hand movements, thereby leaving a spotless finish with each swipe. A tight grip also means it doesn’t release a nap during application and a thick coating ensures greater durability. Moreover, you wouldn’t have to worry much about lint in the finish.
Despite being a quality high-density roller, it certainly has some downsides. The roller has limited usability and is more suitable for detailed works in small spaces. Also, you might need to change the lint regularly to make the most out of it.
What We Like
Smooth and clear oil-based finish
Leaves no lint on hardwood floors
Covers narrow areas
Gives lint-free finish
Easy cleaning and application
What We Don't Like
Limited usability
Regular changing of the lint can be a burden
Size: 4" | Weight: 2.08 Oz | Material: N/A | Tray: No
3. Katzco
Katzco, a household products manufacturing company, has been delivering innovative solutions to its customers. And this paint roller is no different. It provides a professional painting experience to users and ensures quality results without the need for too many coats. You can have a lint-free finish using this unit.
If you want a professional and quick painting experience, then the Katzco 743841487844 is tailor-made for you. Its design is such that the foam cover is secured with a 5-wire cage frame.
Moreover, this unit can fit in any cover due to its small size and interlocking pattern, which enables better absorption and release of paint. As a result, a user achieves an even finish with each stroke and can ensure that the paint is applied quickly.
Added to it, the free-spin movement of the roller minimizes splatter during painting, which ensures quicker application and cleanly. You can rest assured about obtaining a smooth and glossy finish every time.
Last but not least, it is suitable for any tight areas due to its small size and free-spin movement. Also, it can cover a large area with a single dip, which means you need not invest more in buying paints.
Despite providing impeccable performance in terms of finish and application, it is only suitable for small-area applications. Apart from that, the roller might not be suitable for extra thick paints. However, if you are looking for rollers to paint a smaller area and a clean finish, then this one will definitely fit the bill.
Bates Choice has always been passionate about manufacturing and producing high-quality paint equipment like paint sprayers, paint brushes, rollers, and others at prices that won't break the bank. Its Le23 roller is one such high-quality polyurethane roller that delivers faster and long-lasting painting results.
his comprehensive package by Bates Choice is a true luxury for DIY workers. It includes everything you will need to paint your house and make it shine. The professional-quality foam paint roller is meant to deliver guaranteed satisfaction due to its high-quality, durable, and superior finish. What else would one want from a roller?
Both the roller and the wooden handle brush are lightweight and easy to maneuver, ensuring that you can carry on with those prolonged and tedious paint jobs with ease. Moreover, the paintbrush made of synthetic filaments is designed to hold more paint at a time.
Its top-quality ½-inch nap is perfect for painting a house and is durable and long-lasting. This means it saves time and gets the finish you are looking for. Long story short, it saves your money and is easy to use, meaning you do not have to be a professional to use it.
Although this paint roller is bound to deliver a durable, smooth, and long-lasting finish, there might be some issues if you use it for a longer time. The synthetic filaments of the roller might come off readily, thereby making it messy and time-consuming. In that case, you will need to change it after a few uses.
This 10-piece all-in-one painting set by Pro-Grade is best for achieving professional quality painting results for anyone. This is just the perfect set if you are struggling with your staining projects. Just guide the rollers and brush to get excellent results every single time.
This complete painting set makes your work look professional and provides you with an easy application experience. You can use it to decorate the house with the colors of your choice.
The Pro-Grade set is designed to serve all of your interior and exterior painting needs, from walls, and ceilings to fences. Its applicators are made of high-quality materials and glide smoothly with your hand movements. Hence, you can carry out your tedious painting jobs with ease and ensure a smooth paint application.
Apart from that, these paint rollers are extra-durable, washable & made for repeated use. You can easily wash these rollers and use them again and again. Moreover, its no-shed covers ensure a lint-free finish or perfect paint for stunning results.
Last but not least, the roller leaves thick layers in a single coating and covers large areas in a short time. You no longer have to apply a final coat and save the liquid. These roller sleeves also retain more polyurethane for delivering a smooth and spotless finish in each stroke.
The toolset can be very convenient for DIYers, but it isn’t perfect. Its rollers leave brush strokes behind it, making walls look messy and dull. You might need to apply further paint coats of polyurethane to cover the brush marks, making it a costly affair.
What We Like
Extra durable and long-lasting polyurethane rollers
Rollingdog focuses on providing a range of quality and affordable paint applicators to its customers worldwide. Super-micro rollers of the company can be an excellent choice for a painter who will use them more than once. This durable, reusable, and washable paint roller provides you with a professional painting experience and gives your surface a satin finish.
An all-around paint roller by Rolling Dog is a pocket-friendly choice for anyone who provides professional painting services or who does a single-term painting project. It does not leave brush marks or lines on your surface and gives a clean and smooth polyurethane finish.
The unit is easy to hold, which makes it glide smoothly over rough or flat surfaces according to your needs, and provides the right balance and control for perfect application. Additionally, its high paint retention ability gives a thick and beautiful solid coating that enhances the durability of hardwood floors, walls, furniture, and other surfaces.
This unit can be regarded as the best polyurethane roller for arts and craftworks. Moreover, it serves as an optimal choice for people owing to its easy application and ability to deliver a satisfying experience.
Although the rolling hand roller provides an easy and smooth painting experience and a durable frame, many customers have complained about the poor quality of the main part. They claimed that small roller pieces start falling off and stick to the surface after a few uses. You need to pick up the pieces yourself, which can be a hassle.
Microfiber Roller Kits are specially designed for professional painters, woodworkers, carpenters, and epoxy artists who always expect the best results. This multi-functional roller is capable of doing a wide number of tasks from painting to varnishing.
A countertop paint kit is everything one needs to complete a painting job quickly and with a superior polyurethane finish. The microfibers of the foam cover don't allow the solvent to stick in and are perfect for applying finish in tight areas.
The ergonomic and comfortable handle of the unit is designed for easy usability and therefore ensures a smooth finish even in tough-to-reach areas. Along with that, its durable arm lasts through a number of painting jobs while providing an even and solid finish. Its multi-functionality and durability allow users to perform a wide range of jobs using a single roller.
Furthermore, the high-density roller ensures retaining more paint for a longer period and avoids any dripping, thereby minimal or no wastage of paint. The light, small but durable roller covers rough and flat surfaces in one coat, without any bubbling or stippling.
Apart from its exciting features, it might present a number of disadvantages to a user. The major one is that it leaves many odd dot traces after finishing and bits of lint. Other than that, it might not be suitable for all epoxy resin and people might find it easy to use. However, as stated above, this product is mainly suitable for professional painters and workers.
What We Like
Perfect for wet or dry rolling
Can be used for a range of jobs and projects
Easy to use on edges and trims
Easy to attach with extension poles
Ergonomic and comfortable handle ensures a firm grip
What We Don't Like
Leaves traces of odd dots
Not suitable for all epoxy resins and difficult to clean
Size: 6.5" | Weight: 8.1 Oz | Material: Micro-Fiber | Tray: No
What is the Best Roller for Polyurethane?
This section presents a comprehensive comparison of top-rated rollers designed for polyurethane applications. The table below meticulously outlines critical attributes, encompassing size, weight, material composition, and tray specifications.
Now that you have gone through our comprehensive list of the best polyurethane rollers on the market, it might help you make an informed choice of purchasing one according to the task at hand. However, prior to purchasing a roller that gives a lustrous shine to your surface, you need to look at the same thing from various angles. So what are these angles?
Not all rollers are suitable for applying polyurethane and using any traditional roller, you will see a lot of brush marks or lines on your surface no matter how well it is being prepared. In order to get a smooth finish, you need to look into factors including roller frame, length, cover material, and others. Let's get into the details.
Roller Frame
The material of the roller determines its durability and how long you can use it for polyurethane painting projects. Besides, a good and sturdy design will ensure a tight hold over the sleeve and prevent it from wobbling during the application of paint. It ensures a better workflow with minimum splatters and that your hands do not get strained from holding it for a long time.
Best polyurethane rollers are made of heavy-duty steel which keeps the rollers intact and ensures better paintwork. Also, these frames are easy to wash off compared to woodenones.
Length
A mini roller is suitable for applying polyurethane paint in small areas and ensures a smooth application. Also, it is suitable for staining corners and edges. On the other hand, long stick rollers are best suited for long area applications, like walls or a hardwood floor.
Cover Material
Roller covers come in different fabrics and sizes. Besides, the sleeve edge impacts the quality of the finish as well.
Wool cover absorbs and releases a better paint finish during application and can cover a greater area in a shorter time despite its small size. Wool roller sleeves are perfect for polyurethane paints and provide more gloss to your surface.
The foam cover holds a lot of paint at a time and delivers an impenetrable coating with each stroke. In terms of absorbing liquid better and getting an even finish, foam rollers tend to be a better choice.
On the other hand, a fiber paint roller works well with all kinds of paints respect rather than specializing in one. These covers deliver a smooth and shiny finish with all kinds of urethane. Besides, they are more long-lasting and easy to wash. Additionally, these rollers prevent lint or dust from mixing with the finished surface.
Nap Size
The nap size of a roller determines the uniformity of the finish. In this case, a thin one can deliver a lint-free and even finish compared to a thick one.
Resistance Capability
Synthetic and wool covers come in double-layer sleeves and their core is composed of highly resistant fabric. It prevents any waterborne urethane and solvents from sipping in. This in turn enhances the texture and durability of covers. As a result, using these covers will enable you to save money and cleaning time.
Clean Finish
In the end, the quality and texture of the finish matter. A polyurethane roller that delivers a spotless polyurethane finish without shedding on the surface will be most suitable. Therefore, it will be viable to look for a roller that gives a lint-free and bubble-free finish during polyurethane application.
How are polyurethane rollers made?
Polyurethane rollers are typically made through a process called casting or molding. Liquid polyurethane is poured or injected into molds and allowed to cure. The resulting material is then machined to achieve the desired specifications.
Can polyurethane rollers be customized to specific applications?
Yes, polyurethane rollers can be customized in terms of size, shape, hardness, and other properties to suit specific applications. Customization may be necessary for specialized machinery or unique operating conditions.
How long do polyurethane rollers typically last?
The lifespan of a polyurethane roller depends on factors like the application, load, and environmental conditions. Generally, they have a longer lifespan compared to rollers made from other materials due to their wear resistance.
How do I choose the right hardness for a polyurethane roller?
The hardness of a polyurethane roller is measured in durometers. Softer durometers provide better traction and are suitable for applications with delicate surfaces. Harder durometers are used for heavy-duty applications. Consider factors like load, speed, and environment when choosing.
Oil pastels are one of the easiest mediums to work with since they don’t require extra work to get started.
If we think about paint mediums that are great for a number of surfaces, oil pastels are one of them. With good preparation on a fine platform, these mediums can give any surface a colorful and rich appealing look regardless you are using canvas or other heavy-weight papers. And in the case of paper surfaces, oil pastels give out exceptional results even though it depends on the type and quality of the paper.
Finding the best paper surface for oil pastels artwork can be tricky especially when you’re a beginner and not certain which one will best meet your expectations. There are many good brands out there that offer a wide range of papers for oil paints. Speaking of which, we have a list of 9 paper surfaces that we personally find to be the best in the market.
Listed below are the best papers for oil pastels:
Strathmore Assorted Pastel Paper Pad: The Strathmore pastel paper has an 80 lb paper weight, acid-free composition, and different size options. Its light surface texture is less capable of enabling thick layers of oil pastels compared to Faber-Castell's smoother texture.
Faber-Castell Black Oil Paper Pad: A paper that shines with a unique black canvas that boasts a 74 lb paper weight and a smooth texture, excellent for bringing out bright colors. The tooth is very shallow, unlike the Canson Mi-Tientes, limiting the creation of effects and textures.
U.S. Art Supply's Premium Pastel Paper Pad: The U.S. Art Supply pastel paper pad has a paper weight of 80 lb and offers a medium texture. Its requirement for fixatives for long-term paint preservation is a weak point compared to other options.
Canson Mi-Teintes Pad for Pastels: The Canson Mi-Tientes is a pastel paper with a 98 lb weight that excels in versatility, catering to both dry and wet medium artists. It's more expensive than most other options.
Hahnemuhle Bugra Oil Pastel Paper: Hahnemuhle Bugra oil pastel paper is crafted in Germany. With an 88 lb weight, it's notable for its high lightfastness and acid-free features. It needs fixatives like the U.S. Art Supply pastel paper for paint durability, which is a drawback.
1. Strathmore Assorted Pastel Paper Pad - Best for Budget-friendly Versatility
Strathmore is a brand that has been around for 100 years and above and is very popular among students. It would be a rare case if any dedicated art student has not heard of the brand before. Their products are available in most art stores.
The reason they are widely used by students and art schools is the price of their products - and it’s no exception with the Assorted Pastel Paper Pad as well.
Experience
One might think that because the price is reduced, the quality is also compromised. No doubt, it would drop by a certain extent since the price is meant to be affordable for students. But the fact stands that these pastels still produce amazing pieces.
We find the availability of these pastel pads in almost every local art store very convenient.
First of all, it saves the artist a lot of time from hunting for decent papers all over, especially if it’s someone with a tight schedule.
Secondly, we don’t personally prefer to buy art supplies online because then we get to inspect the products firsthand before purchasing unless, of course, the items are not available anywhere else besides online.
This is because sometimes the products you expect are nowhere near the real ones. So, we find the Strathmore pastel pads to be very useful for artists with similar preferences.
Besides the availability, these pads are also wallet-friendly and great for artists who like to try out papers with other colors for their artwork. The colors of the papers inside this pad are medium brown, green, blue, pink, cream, and white.
The feature we love most about paper pads is their versatility. Although they work wonders with oil pastels, they are also great for other mediums such as soft pastels, chalk pastels, and even crayons.
Besides that, they can take some liquid paints too except for heavy watercolor projects since these papers are more on the lightweight side.
They are also available in three different sizes, which leaves us with more options to choose from.
But given these are light paper pads, we find there is only a little amount of tooth. Nonetheless, there are many artists who prefer light teeth when working with a few layers of oil pastels.
All in all, the Strathmore 400 Series pastel papers are great for archival purposes because they are acid-free.
What We Like
Easily available in many local art stores
Affordable
Works well with other pastel mediums
What We Don’t Like
Lacks tooth for thick layering on paper
Paper Weight: 80 lb | Texture: Medium | Acid-free: Yes | Size Options: 9 x 12 inches, 11 x 14 inches, 18 x 24 inches
2. Faber-Castell Black Oil Paper Pad - Best for Highlighting Bright Colors
In the world of art, any form of creativity is always welcomed. And today we have the Faber-Castell Black Paper Pad which as the name suggests, is black in color.
This may not seem like the traditional paper one would look for but with the thought of getting totally different results, you might just love the idea of having this in your collection of oil pastel surfaces.
Experience
First off, this is perfect for all those bright colors we’ve always kept aside for a long time. The black background just enhances those shades which would normally go unnoticed on regular white paper.
Although it totally depends on your preferred techniques, this truly brings out the unique appeal which you don’t get with bright-colored papers.
We also noticed that this paper is quite versatile with other mediums besides pastels because of its thickness and color itself. Media such as crayons, gel sticks, and metallic pencils can be used on this surface. Even when it comes to papers for crafts, this also makes a great pick for fancy DIY projects.
We would recommend keeping liquid mediums away from them as much as possible. Since they are meant for oil pastels, it is not expected that they can’t take any kind of liquid paint. However, through research and experiments, we found these papers can take acrylic paints given that they are not too watery.
But overall, we like that the papers are not that expensive which means they are great for students and artists who are on a budget. Not only that, but they are also ideal for young artists and children to practice on.
Since it is a black paper pad, it is already obvious that it will not highlight dark colors as it does with bright colors. However, we can say that the only setback we found with this paper is that it has a very shallow tooth which is not ideal when working on effects and textures.
But keeping that aside, the paper’s quality is amazing for archival purposes.
What We Like
Ideal for bright shades & other dry mediums
High quality with archival properties
Affordable for students, budget artists, & kids
What We Don’t Like
Minimal tooth in paper challenges effect creation
Paper Weight: 74 lb | Texture: Smooth | Acid-free: Yes | Size Options: 9 x 12 inches
3. U. S. Art Supply Premium Oil Pastel Paper Pad - Best for Mixed Media Enthusiasts
Similar to Strathmore, U. S. Art Supply is a brand that is easily available mostly everywhere. From its great quality and high-performance products to its affordable prices, the brand has become very popular among students and learning artists.
Their Premium Pastel Paper Pad in Natural Tone Colors is great for both professionals and beginners because it is easy to use and delivers good-quality artwork.
Experience
We will first look into the natural tones of the papers. They include light beige, cream white, beige grey, and eggshell white.
We find every single color perfect for doing beautiful landscape pieces. All these colored papers make great backgrounds for such portraits. Apart from that, they also work well with other preferred concepts.
The quality of these papers is smooth, yet still, has enough thickness in terms of mixing paint mediums. They can actually accept mixed mediums in case the artist wants to try out different effects.
You can tell from the touch of the sheet how much moisture it can accept because if the paint is too runny, it can cripple and damage the paper. We would suggest having a separate page for testing the consistency if you are unsure while using mixed mediums.
Keep in mind that liquid mediums such as acrylic paints can be used while watercolors can pose a risk to the paper.
As we have mentioned earlier, the paper has a perfect combination of texture/tooth and smoothness which makes it easy and pleasurable to use throughout the painting.
But the papers require the use of fixatives if we plan to keep the pieces in the long run.
Overall, the sheets are very affordable and great for self-taught beginners and art students.
What We Like
Balances smoothness & tooth for exceptional art
Thick paper receptive to mixed media
Affordable papers suitable for students & beginners
What We Don’t Like
Fixatives needed for long-lasting paint adherence
Paper Weight: 80 lb | Texture: Medium | Acid-free: Yes | Size Options: 9 x 12 inches
4. Canson Mi-Teintes Pad for Pastels
Being one of the popular brands that produce quality art supplies, Canson is a name that we’re sure everyone in the art world knows.
Because they have been focusing on this line for about 450 years now, you can be sure the pastel sketchpad too is of the best quality.
It not only serves oil pastels but markers, soft pastels, colored pencils, charcoal, and crayons as well.
Experience
We can’t help but appreciate the versatile feature of this paper. Unlike other oil pastel papers, with this one, we can actually venture into using a wider range of mediums. Because it is made from cotton with just the right level of thickness, it also receives liquid paints such as oils and watercolors.
This helps save the artist a few bucks to purchase surfaces for each and every media they own. In fact, they can use this with almost any kind of paint medium.
Furthermore, what sets this sketchpad apart from the rest is the papers that come in delicate colors such as moonstone, buff, champagne, eggshell white, light blue, and steel gray.
In addition to its wide versatility, we can also use these colored papers for our DIY crafts which saves us time looking for some.
From a lot of reviews and research, this paper earns a gold standard in quality and performance when working with oil pastels.
We hardly need to rely on the paints because this paper is truly magnificent in highlighting and enhancing even the most average mediums.
With a more than enough deep tooth, the artist can manipulate the effects as much as they want with no unnecessary concerns about the pigments wearing off too soon or the binder popping up to the surface.
Working with oil pastels, we always tend to focus on layering bit by bit. And with a tooth like this, there is no problem adding multiple layers to our piece.
Coming to a very similar feature, the paper excels in providing texture as well. On one side of the sheet, we have a rough texture while on the other, a fine one.
This is an aspect that most of the other papers don’t offer. If you want to work on different surfaces every now and then, this would be a great choice since this and many other features are included.
They are also available in two different sizes which gives us a choice to pick out one that best suits our requirements. Besides, we can always cut them into our preferred sizes.
And the best part of this pad is that it contains sheets with 50 different tones so you can choose the one that is best for the artwork every time.
Finally, the papers are available for purchase both in a pad and individually. This way, if you ever run out of your favorite tone, there is no need to buy the whole pad anymore instead, you pay only for the desired one.
It would be no surprise if the price of this sketchpad costs more than most of the other pads out there given its variety of great features. However, we would recommend this if you are looking for a worthy investment.
What We Like
Versatile for dry, wet, & non-oil pastel mediums
50 toned papers for diverse color selection
Sheets sold individually or in a pad
Sheets feature rough & fine textures
What We Don’t Like
Price is significantly above the average range
Paper Weight: 98 lb | Texture: Medium | Acid-free: Yes | Size Options: 9 x 12 inches, 12 x 16 inches, 16 x 20 inches
5. Hahnemuhle Bugra Oil Pastel Paper
Here is a paper that is crafted in Germany.
The Hahnemuhle Bugra Pastel Paper is dual-sided and is entirely made up of alpha-cellulose. Similar to the Mi-Teintes Pad, this sheet also has one side with a rough texture and a fine one on the other.
Although it is made of color charcoal and pastels, it also works pretty well with graphite, pencils, and other dry mediums.
Experience
We like that these sheets are highly lightfast because most of the time, papers with poor composition face degradation as years pass by.
The good news is these papers contain pigments that resist UV light for a long period of time. Therefore, our paintings remain good as new for years to come.
Along with that, we can say these papers aim to last for a very long time because they are acid-free as well. There is no need to worry about discoloration or brittles as long as the papers are assured to have a normal pH balance.
We also find the size to be pretty much convenient for normal-sized artwork with just the right thickness to use oil pastels.
The amount of tooth and fine binder makes the process of creating effects very simple and easy. Other artists find that they have more control over the texture.
One downside would be that the surface is not able to hold the paints for long without the help of both workable and final fixatives.
All in all, we would highly recommend this for oil pastels if you’re searching for long-lasting papers.
What We Like
Paper's surface gives artists control over texture & effects
High lightfastness & acid-free for long-term artwork preservation
What We Don’t Like
Fixatives needed to stop future paint cracking
Paper Weight: 88 lb | Texture: Medium | Acid-free: Yes | Size Options: 33 x 41 inches
6. Sennelier Oil Pastel Card Pads
Sennelier is a French-based high-end brand that produces one of the best art supplies. From research, we found that many famous artists like Picasso and Van Gogh used art products by Sennelier.
And coming to pastel papers, we know exactly the kind of quality we expect from them.
The Sennelier Oil Pastel Card Pads is a perfect substitute for the Canson Mi-Teintes except that it’s more expensive.
Experience
We can list down many reasons why this paper is favored by artists all over.
First of all, the sheets come in 4 different sizes to meet the normal requirements of the artist. This already provides us with more options than most papers would.
Before we move further, the pad only contains 12 sheets in white color which are too less compared to the price tag.
But keeping those aside, there are more advantages to these sheets. For instance, the pad is not glued but spiral bound which is good to preserve for future use.
With glue, there is always a chance of the chemicals or acids interfering with the quality of the paper in the long run, but that is not the case with spiral binding. Another advantage of this particular binding is that they are relatively strong.
But the best part about the pad is the glassine paper. If you have not heard of it before, it is a glossy and smooth paper sheet that is used by laying it on the artwork to prevent pigments from transferring to the immediate sheet while the work is paused.
Glassine also acts as an alternative protection layer to fixatives whose price is much higher.
To sum it up, all the paper’s features - from the spiral binding to the glassine - are made to serve the artist who loves to work and travel. Also, the papers are thick enough to resist wear and tear while hitting the road.
What We Like
Available in four sizes for variety
Spiral-bound pad for longevity & damage prevention
Includes glassine sheets to protect unfinished work
What We Don’t Like
Pricey for a pad with only 12 sheets
Paper Weight: 160 lb | Texture: Medium | Acid-free: Yes | Size Options: 11.75 x 15 inches
7. Art Spectrum Colourfix Coated Pastel Paper
Art Spectrum is an Australian brand whose product quality is very similar to that of UArt, which we shall review in a minute.
This is a sanded paper which is good for both beginners and intermediates since the price of each sheet is only $2.69. Along with that, they also provide discounts for purchasing in bulk.
Experience
With their inexpensive price tag and high-quality sheets, we would absolutely recommend these for any artist who is looking for a steal deal.
There are 20 sheets in total, each with a different tone. Although the colors seem less than other papers we reviewed, we find that they complement any kind of desired artwork with the right application of oil pastels. And the results this pad delivers are excellent and stunning.
Since Art Spectrum uses high-quality binders, the papers have a strong grip over the oil pastels, as well as they are acid-free. We love this aspect because it is perfect for archival purposes, allowing the piece to stay fresh for years to come without any yellowing issues.
One of the most preferable features of these papers is that they are sanded in medium-coarse grit type. This is the reason why oil pastels can stay on paper for a long time without cracking.
These are available in two sizes: 9” x 12” and 5” x 27.5”. For normal pieces, these two will work out perfectly, otherwise, we would suggest looking at other brands for larger sizes.
We find that the tooth is fine and deep enough to allow the artist to manipulate the outcome as much as possible. While layering can be tough with other inferior-quality binders, these papers make the process seem simple and easy.
Most importantly, both intermediate artists and beginners love using these papers because they meet all the requirements one has while learning the art of oil pastel work. But rather than buying one sheet after another, it is better to get them in bulk quantities since the price would be lesser.
What We Like
Quality binders in pad enable desired effects
Affordably priced for beginners & intermediate artists
Features uniquely toned papers for any artwork
What We Don’t Like
Only 20 sheets of paper within the pad
Paper Weight: 140 lb | Texture: Coarse | Acid-free: Yes | Size Options: 9 x 12 inches
8. UArt Premium Sanded Paper Drawing Pad
Within the period of time spent searching for the best oil pastel surfaces, we found that UArt is one of the most highly-rated companies that produce art supplies.
Among many of their endless list of products is the Premium Sanded Paper.
Experience
This is another sanded paper that we find perfect for oil pastel artworks because of its ability to cover all the requirements that we look for in our oil pastel surface.
But the first thing worth mentioning is that out of all the other papers we have seen, UArt offers its papers in 6 different sizes. That is more than enough options to match our basic intentions.
On top of this, every paper has unique grit options which make these papers even better when it comes to versatility. If our artworks call for a moderate or a fine grit size, we can choose any one of these papers without any hassle.
However, the only setback is that the papers come only in two colors: dark and natural. Although the natural tone will undoubtedly go with any art concept, it still won’t serve artists who like to explore other creative ideas for their pieces.
On the other hand, the dark-tone paper will be perfect when working with bright oil pastels since it serves as a perfect background.
But what most artists usually would look for in an oil paper surface is its texture or tooth. With this paper, we are not even a tad worried about the tooth since it is deep enough to let the artist work smoothly and has full control over the effects.
Therefore, if you are looking for a fine tooth that can grab the paints tightly without having to worry about them flaking or peeling off, we would recommend going for this option and not getting disappointed.
What We Like
Six unique sizes for diverse artwork needs
Papers come in various grits for specific effects
Deep, flexible tooth ideal for oil pastels
What We Don’t Like
Limited to two tones
Paper Weight: 400 lb | Texture: Coarse | Acid-free: Yes | Size Options: 9 x 12 inches
9. Arches Watercolor 140 lb Hot Press Papers
So far, we only discussed surfaces that are made for oil pastels purposes.
But like the Arches Watercolor 140 lb Hot Press Paper, there are many surfaces out there that are not meant for this sole purpose but surprisingly fill the position very well.
Hence, we find this paper to be highly versatile and we are sure you will too.
Experience
As the name suggests, these are originally made for watercolor projects but we cannot deny that it works magic when it comes to oil pastels as well.
In case you’re wondering about its versatility, this paper can be used for printmaking, calligraphy, and digital printing as well. It is a multipurpose paper and it saves us from spending money.
The reason we find this perfect for oil pastels is because of so many reasons. Firstly, besides the multipurpose aspect, the papers come with the most amount of surfaces, grits, and textures on this list.
If you do not like the idea of having to look for other brands frequently in order to find the right paper size or texture, then this is the best pick we found.
Secondly, knowing that they are also acid-free ensures that our artworks will stay safe and fresh for a very long time, and not worry about the improper aging process.
Since this is not an oil pastel paper surface, we’re not surprised if it does not include all the features of oil pastels. One of them being the paper is only available in the color ‘Natural White’ which limits the artist to work with only suitable projects.
But if you want to save a decent sum of money and look for an inexpensive oil pastel as well as a multipurpose paper, we would suggest giving the Arches Watercolor 300lb Hot-Press Paper a try.
What We Like
Multipurpose for non-oil pastel or watercolor uses
Varied sizes, textures, & grits available
Price is relatively inexpensive
What We Don’t Like
Limited to natural white tone only
Paper Weight: 140 lb | Texture: Smooth | Acid-free: Yes | Size Options: 9 x 12 inches
What is the Best Paper for Oil Pastels?
If you're looking for the best papers for oil pastels, listed below is a table that compares paper weight in pounds, texture, whether it's acid-free, and available size options measured in inches.
Before getting oil pastel paper surfaces, there are a few things that require some considerations to ensure the surface is right for you and your artwork.
Tones
The tone is nothing different from the wash you create with liquid paints - it highlights the painting. So, always make sure the tone you get will go along well with any concept, or find one that is perfect for your piece.
Type of Paper Surfaces
For oil pastels, papers are available in the form of pads, sheets, or sanded.
Because papers can come either as an individual or a pad, you would want to purchase them in bulk quantity so that you can get a lot of discount with it.
Sanded paper, on the other hand, is harder and stronger than the two. A single unit will also cost higher. But we still recommend buying them in bulk for a pretty good discount.
Texture and Tooth
As we have stated, the top features most artists would first look for is the tooth or texture of the paper. The final look of the piece depends on how much control the artist has over it.
Also keep in mind that with a fine or deep tooth, the paint will stay firmly onto it, preventing them from cracking. But most importantly, artists get to create different effects and textures with a good tooth.
Versatility
If you’re on a tight budget, finding versatile papers can really help. Although it does not have to be as versatile as the Arches Hot-Pressed paper (unless you own a printing studio as well), one that works for other mediums is more than enough.
Interestingly, we find that the thickness or weight of a paper is pretty responsible for making it versatile. For example, if the paper is too thin, it will not work with wet mediums. So, we advise looking for one that is about 160 gsm.
Can I use regular paper for oil pastels?
While you can use regular paper for oil pastels, it's not typically recommended because regular paper lacks the necessary tooth or grain for the pastels to adhere properly, and it may not hold up well to the oil content in the pastels. Specialized pastel paper or canvas, which has a textured surface for better pigment grip and is more durable, is generally a better choice for oil pastel artwork.
What is the difference between sanded paper and pastel paper?
The difference between sanded paper and pastel paper lies primarily in their texture and durability. Sanded paper has a gritty surface that holds more layers of pastel and can withstand erasing or heavy application of pastels without getting damaged. Pastel paper, on the other hand, has less grain and a lighter texture, which might not hold as many layers of pastel but provides a delicate touch for lighter pastel works.
Can I use watercolor paper for oil pastels?
Yes, you can use watercolor paper for oil pastels. Watercolor paper, particularly rough or cold-pressed variants, have a textured surface that can hold the oil pastel quite well. Due to the oil content of pastels, some artists prefer to use a barrier such as a pastel ground or gesso to prevent the oil from seeping into the paper over time.
How do I choose the right paper for oil pastels?
Choosing the right paper for oil pastels involves considering the paper's texture and its weight. Paper with a texture or 'tooth' will allow the pastels to adhere better, leading to richer color application. Heavier weight paper (like cardstock) or specially designed pastel paper is preferable as oil pastels can be heavy and regular paper might tear. The choice may also depend on your personal style and the intended effects of your artwork.
Can I use acrylic paint on oil pastel paper?
Yes, you can use acrylic paint on oil pastel paper. Oil pastel paper typically has a texture that can hold paint well, and its heavier weight can withstand the water in acrylics without warping. That being said, you should still consider using a primer, such as gesso, to seal the paper and stop the paint from soaking in and causing the paper to degrade over time.
How do I prevent oil pastels from smudging on paper?
To prevent oil pastels from smudging on paper, artists often use a fixative spray. This substance is lightly sprayed onto the completed artwork and forms a protective layer that helps keep the pastel pigments in place, reducing smudging. Another method is to place a piece of glassine paper, a smooth, inert paper, over the artwork to protect it from being disturbed.
Thank you for taking the time to explore our comprehensive article on some of the best papers for oil pastels. We are confident that you found the information valuable, and now have a better understanding of what to look for when purchasing oil pastel papers. Now that you're equipped with this valuable knowledge, you're ready to create beautiful masterpieces with your favorite oil pastels.
Out of these 9 best papers for oil pastel, here are our top three recommendations:
Strathmore Assorted Pastel Paper Pad is an ideal option for artists on a budget in search of a versatile and easily available paper. It works well with different mediums, offering convenience and variety.
Faber-Castell Black Oil Paper Pad is a good option for artists looking to highlight bright colors and experiment with unconventional backgrounds. This affordable paper works best with dry mediums and can be effectively used for fancy DIY projects.
U. S. Art Supply Premium Oil Pastel Paper Pad is the right choice for those who appreciate a perfect balance of smoothness and tooth in their pastel paper. It works well with mixed media and is suitable for students and beginners.
With these recommendations, we trust that you will have an exciting and exhilarating time creating vibrant and unique artwork on your chosen oil pastel papers. So, go ahead, unleash your creativity, and let your imagination soar with every stroke of oil pastel on these incredible papers. Happy painting!
Scale modeling, an enduring pastime since the 1950s, has its roots reaching back to humanity's earliest days. Realistic scale models serve as the culminating phase in the evolution of a design, providing a tangible manifestation of a concept. They are invaluable for their precise depiction of scale and volume, offering an immediate visualization that closely mirrors reality and provides an accurate sense of dimension.
Contemporary history has witnessed the transformation of realistic scale models from purely functional prototypes to forms of art. While retaining their foundational purpose, these models have acquired an aesthetic dimension, transcending their role as mere technical tools.
Below are dioramas that defy verbal description, their beauty transcending language.
When integrated into the planning phase, realistic scale models engage viewers interactively, much like toys captivate children, allowing for an intuitive grasp of the object’s true form and scale. This characteristic is not only pivotal in the design phase of an object but also vital for our imaginative faculties, enabling the sharing of a vision where the object is realized, operational, and fully functional. The unique attribute of realistic scale models is their ability to depict anything in a static or mobile form.
Static models offer a snapshot, portraying objects as if time has stood still. They provide a fixed view that, unlike mobile models, does not grapple with replicating motion—a task that can sometimes lead to a loss of immersive experience due to scale-related discrepancies. While mobile models may be better suited for digital animations where real-world physics can be challenging to replicate, static models have recently reached an extraordinary fidelity in detail, approaching miniature replicas of reality. They cover an array of themes, from the quotidian to the fantastical, requiring diverse techniques to authentically recreate the desired atmosphere.
Realistic scale models come in various scale ratios—1/48 and 1/32 for aircraft, and 1/35 for vehicles being the standard. Larger scales such as 1/16 or 1/24 are often reserved for cars and some aircraft, but the universal scale for all types is 1/72. These scales cater to the true dimensions of the models, as different objects have different real-life sizes. For example, a military vehicle's gun may measure between 5.25 to 5.75 meters, which equates to a manageable 15 to 16 centimeters on 1/35 scale—a size conducive to desktop display. The choice of scale typically aligns with ease of manufacturing and the ability to produce well-proportioned models that comfortably fit in a display case or on a shelf. The thematic range is vast, spanning from the Napoleonic era to the Cold War for figures, with military vehicles and cars predominantly featuring designs post-1920s, with a particular prevalence of World War II and Cold War-era military models, and automotive models from the 1940s to the 1980s.
The following examples delve into various dioramas, particularly those representing military vehicles and aircraft. They illustrate the art of capturing life in miniature, highlighting the skill of rendering scenes from reality with convincing authenticity.
Science fiction is that unique genre in any literary or artistic medium that brings the best out of an artist’s mind. It juxtaposes whatever abstract thoughts the mind produces, forming the most extraordinary shapes and shadows and grotesque structures with a practical line of scientific thought and explanation.
This is interesting as although the scientific and rational mind strives to explain these strange figures to lessen their terrific effect on the psyche; ironically, it ends up pulling these fascinating thoughts to the verge of reality which intensifies the horror of the unreal!
And this is precisely why, humankind has always had a horrifying fascination with science fiction and fantastical interpretations, more in the area of visual renditions than in any other medium, driven by the inspirational effect it can have on an individual's imagination.
This is precisely why artists have turned towards sci-fi and fantasy art books time and again to be thrilled and to be inspired enough to be as thrilling in creativity as the mind that creates the most unbelievable of all unusual things.
Here's the list of the 21 best sci-fi art books for artists, curated to ignite the imagination and unleash the creative potential by exploring the captivating world of science fiction and fantastical interpretations through visual renditions.
1. The Art of Ian Miller - Best for Gothic Art
The ‘Art of Ian Miller’ is an extensive retrospective and analysis of Miller's unconventional artwork. Miller has been greatly influenced by the master storyteller and artist of gothic and fantastical fiction, HP Lovecraft himself which stunningly reflects in his creations.
Most of Miller’s grotesque, fantastical outlines and gothic imagery have been used on HP Lovecraft’s book covers and Games Workshop publications along with incorporating his signature style into the concept art used in films.
Miller’s mastery of the techniques of making the art of macabre seems to hold no hostage when it transforms his imagination into magnificent visual art forms. The book contains everything from some of his most disturbing and haunting depictions to enchanting Tolkien-esque characters and unnerving illustrations that may remind of the etching by Gustav Dore.
Length: 160 pages | Dimensions: 9.29 x 0.73 x 12.5 inches | Weight: 2.62 pounds | Publisher: Titan Books
2. H.R Giger’s Necronomicon - Best for Sci-Fi Art
Published in the year 1977, ‘Necronomicon’ was the first significant compendium of images that were created by prestigious Swiss artist, H.R Giger. This book was subsequently given to Ridley Scott during the pre-production of his movie, Alien, after which he hired Giger to create the conceptual designs and artwork for the film.
Sphinx Verlag first published the book. Thereafter, Morpheus International took it upon themselves to republish the book in the year 1993 along with a significant part of the designs produced by Giger for Alien.
A second collection of Giger’s images came out in print in 1985, known as the Necronomicon 2 which was published by Edition C in Switzerland.
Interestingly the title of Giger’s book is named after H.P Lovecraft’s fictional grimoire, “Necronomicon” which he invented and used as a “plot device” for his stories. Lovecraft’s “Necronomicon” is a compendium of “pre-human” lore enmeshed in Gothic elements of storytelling and depiction that was compiled by Arab Abdul Alhazred, a fictional mad Arab of Lovecraft’s creation, circa 700.
The fact Giger’s book of images has been republished and produced in numerous sci-fi art books makes it a unique and precious object for all lovers of the genre.
Length: 92 pages | Dimensions: 12.25 x 0.5 x 17 inches | Weight: 3.69 pounds | Publisher: Morpheus International
3. The Art of Chesley Bonestell by Ron Miller - Best for Space Art
Co-written with Frederick C. Durante with a forward from Sir Arthur C. Clarke, ‘The Art of Chesley Bonestell’ displays over 300 images by famed space artist and architect, Ron Miller.
These include drawings from the illustrations of the chief engineer’s plans for the Golden Gate Bridge for the benefit of investors. It also contains one of his favorite paintings from the ones that he had himself made, ‘The Engulfed Cathedral A Fantasy’ and his pre-space-travel lunar along with Martian landscapes created for magazines such as ‘Galaxy and Astounding.’
It can be safely remarked that if you aren’t an astronaut for real, then all your conceptions of how outer space might look have probably been formed by Chesley Bonestell's super-realistic paintings of the planetary scenes. And this was also the fact that caused a tremendous sensation when some of the images were published by ‘Life’ in 1944.
Length: 256 pages | Dimensions: 9.1 x 1.1 x 11.65 inches | Weight: 3.54 pounds | Publisher: Paper Tiger
4. The Art Of John Harris: Beyond The Horizon - Best for Science Fantasy Art
John Harris is unquestionably a name to reckon with when it comes to science fantasy fiction, and we could definitely tell why, as he grew up with books written by legends such as Arthur C Clarke, Isaac Asimov, and Alfred Bester. The influence of such writers on Harris has been profound, and the effect seen is unmistakable in his art books.
Harris is known as one of the most influential contributors to the sci-fi genre, creating a myriad of spectacular visual imagery in his books since the mid-’70s.
The Art Of John Harris: Beyond The Horizon stands to be a celebrated example of artwork that includes everything from vast and expansive landscapes and tower cities to ethereal, floating cities. This marvelous hardback consists of illustrations created by Harris over a span of four hefty decades that sound like an absolute treasure-house of imagery.
Although Harris worked mainly with watercolors taking them as his essential color medium for all sorts of illustrations, he was also known to experiment extensively with acrylics. He also has a book containing illustrations in colored pencils that capture his surrealistic take on fantastic world scenery.
Length: 160 pages | Dimensions: 9.35 x 0.7 x 12.5 inches | Weight: 2.59 pounds | Publisher: Titan Books
5. Middle-Earth Envisioned - Best for Tolkien-inspired Art
Few authors have been known to aspire and achieve the kind of creative grandeur that Tolkien had with his unbelievable portrayal of the magical Middle Earth in his equally mystical and unparalleled fantasy fiction, The Lord Of The Rings.
This literary milestone has been impacting and influencing art for decades and continues to inspire spectacular visual adaptations.
‘Middle-Earth Envisioned’ captures the wide spectrum of Tolkien-inspired art from the first unauthorized Canadian broadcast in 1953, comic books, Peter Jackson, and letter-known adaptations such as one for Russian TV.
All in all, this is one book that all fans of Tolkien’s fan should have by means.
Length: 216 pages | Dimensions: 10.5 x 1 x 12.38 inches | Weight: 3.55 pounds | Publisher: Race Point Publishing
6. The Art of Jim Burns: Hyperluminal
Hyperluminal celebrates 40 years’ worth of Jim Burns’s works and stands to be one of the most precious sources of inspiration for all die-hards of the fantasy art genre. Burns is known for the covers that he has created for some of the most esteemed contributors to the fantasy-fiction genre such as Peter F Hamilton, Anne McCaffrey, and George RR Martin.
And if you find these to be some of the finest works of Burns, then do get yourself a copy of Hyperluminal right away. This is one book that will help widen your perspective of the fantasy world, helping you to understand how artists can draw distinct parallelism between it with the mundane world.
The art of Jim Burns shows all the proofs of having transitioned and transcended the traditional techniques of art, pervading and imbibing all the essentials of Photoshop and methods of digital illustration, truly establishing as a prolific artist in the field.
Length: 160 pages | Dimensions: 9.3 x 0.7 x 12.5 inches | Weight: 1.25 pounds | Publisher: Titan Books
7. E338: The Art Of Loic Zimmermann
The cinematic art genius Loic Zimmerman is a celebrated and greatly sought-after visual artist for renowned filmmakers who have redefined cinematic art in itself! Zimmerman’s profound knowledge and incredibly deft handling of both 2D and 3D mediums has not only influenced other subgenres of fantasy in cinema substantially but has also earned him the reputation of having a “hotch-potch punk” attitude towards his work. This is because of the rebellious spirit that is often reflected in his works.
Zimmerman's own nature is not very different from the nature of his art itself. A unique and quirky character himself, Loic Zimmerman brings a new perspective to legendary pop culture icons that include names like Wolverine and Bob Dylan.
This reflects the extent of his imagination, his understanding of the subject, and his skills as an artist. E338, made from equal parts surrealism, eroticism, and nightmarish horror, stands to be magnificent proof of Zimmerman’s genius.
Length: 152 pages | Dimensions: 10 x 0.5 x 10 inches | Weight: 2.25 pounds | Publisher: 3DTotal Publishing
8. Substrata: Open World Dark Fantasy
The game, Darksiders by Vigil Games had shot up high in fame owing to its stunning art and battle levels that were created and developed by the esteemed game illustrator, Paul Richards. After the eventual collapse of the game, Richards gathered over 80 artists who have previously created some of the top video games ever from all corners of the world, together compiling what is known as the book of “what-if” on the Darksiders 3 concept art.
In the absence of studio constraints, the genre of dark fantasy fiction saw the unrestrained flow of imagination and absolute creative genius of the artists’ minds which came together to give birth to some of the most beautifully gruesome characters that there could ever have been.
These included monsters, designs, vast open spaces and locations, monsters, and all that a video game fan can ever dream of seeing in print. Also, one of the best things about this book is that it provides you with precious insight into their WIPs and gives you an idea of the world of video game concept design.
Length: 240 pages | Dimensions: 9 x 1 x 12 inches | Weight: 2.56 pounds | Publisher: Udon Entertainment
9. The Art Of Greg Spalenka
Greg Spalenka is no short of being a legendary illustrator who has produced simply bewitching visual art in his career that spanned more than four decades in time. His level of expertise involved creating concept film art and illustrating boxing heroes as well as marvelous Polaroid photographs. There is simply no section in the field Spalenka has not been known to have experimented with.
The Art of Greg Spalenka chronicles and showcases almost all of the artworks that Spalenka has produced in his entire career up until the point where he gracefully transitions into the world of digital illustration.
The highlights of the book include all that we would want to have from Spalenka, including the spectacular vistas and characters from the Chronicles of Narnia: The Voyage of the Dawn Treader illustrations!
Length: 160 pages | Dimensions: 9.34 x 0.79 x 12.5 inches | Weight: 2.72 pounds | Publisher: Titan Books
10. Sci-Fi and Fantasy Oil Painting Techniques by Patrick Jones
Patrick Jones during his learning days had been influenced and inspired by prominent names in art such as Frank Frazetta and Boris Vallejo which compelled him to leave his native Ireland and settle in London where he pursued his artistic career.
Over time Jones developed a brilliant understanding of traditional methods of art including a steady focus on oils, eventually exploring the field of digital art mediums, with Corel Painter becoming his favorite software.
His profound understanding of both forms of art foregrounds some of the crucial rules for getting it just right in fantasy oil paintings. So, if you’re aspiring to learn more about the traditional art methods in the fantasy genre, then this is a book that you should use as a definitive guide and reference tool for the purpose.
Length: 192 pages | Dimensions: 8.5 x 0.9 x 11 inches | Weight: 2.13 pounds | Publisher: Korero Press
11. Spectrum 25 The Best in Contemporary Fantastical Art
The Spectrum 25 is almost hailed as essential for fantasy art as anything can ever be in the field itself for all ardent admirers of the sci-fi and fantasy art genre. The edition that was launched on the book’s 20th anniversary is also the last book that was written and compiled by its celebrated author and illustrator, Laurie Lee Brom.
With the kind of magically beautiful visual art that the artist creates for the book, it would just be a mistake not to have a copy of it if you’re a fan of mystical and fantastical art. And this is precisely what makes Brom every bit a worthy recipient of the Grand Master Award along with the reputation of having been featured on the cover of every issue.
The book contains all that our imagination can spell out when it comes to fantasy art and all forms of it be it in comics, editorials, or even unpublished works. You will find a new, curious character on every page waiting for you to get to know the story of their origin.
Length: 304 pages | Dimensions: 9.35 x 1.25 x 12.25 inches | Weight: 1 pound | Publisher: Flesk Publications
12. Guillermo del Toro: Cabinet of Curiosities
Guillermo del Toro needs no introduction. The Mexican filmmaker has acquired enough accolades for the world to know of his brilliant works as a master storyteller and an artistic genius. And in this semi-autobiographical book, you will all of the works of del Toro that speak of his admiration and fascination with occult art.
The ‘Cabinet of Curiosities’ is replete with scribbled notes, sketches, doodles, storyboards, collections, and interestingly enough, “obsessions” that take us on a tour of del Toro’s enlightened, mystic mind from which he fashions a strategy of infusing all of his absolute masterpieces with the essence of the supernatural.
The book also gives us a visual slice of his sprawling mansion in LA that is considered almost like a museum containing oddities full of film memorabilia and original props, portraying del Toro’s larger-than-life imagination.
‘Sexy Robot’ was that work that had extolled Hajime Sorayama’s genius as an artist and brought him global recognition. The author paints a very organic picture of robotic forms inspired by pin-up art, where the “feminoid” robots appear as chrome-plated gynoids striking suggestive poses.
His next science fiction book, ‘Pin-up’ also follows the same pattern. The works of the author seem to follow similar themes involving figures in suggestive poses with one that includes a substantially realistic depiction of leather and latex. Sorayama’s art is considered to be highly explicit and meant strictly for adults. The futuristic and erotic illustrations resonate loudly in the mind’s eye owing to their hyperrealistic nature, creating the kind of visual landscape that is impossible to achieve in photography alone.
Length: N/A | Dimensions: 9.25 x 0.25 x 11.5 inches | Weight: 1.5 pounds | Publisher: Books Nippan
14. Journeyman: The Art of Chris Moore and Stephen Gallagher
The illustrative book, ‘Journeyman’ was the first collection by Chris Moore, a globally recognized science fiction illustrator, that included a stunning range of paintings, complete with book covers, albums, and posters. These were hyper-realistically created fantastical depictions of simple as well as elaborated colored sketches that foregrounded the versatility of Chris Moore’s illustrative universe.
It is an absolute feast for the senses that is bestowed with the best of expressions penned by the critically acclaimed author of the thriller genre, Stephen Gallagher, through a series of conversations in the book.
These conversations tell the story of the modern-day journeyman and during the course of the story reveal interesting details about the process of creating art.
Length: 112 pages | Dimensions: 9 x 0.75 x 10.75 inches | Weight: 1.74 pounds | Publisher: Paper Tiger
15. Frank Kelly Freas: The Art of Science Fiction by Frank Kelly Freas
It is a belief amongst a section of the community that is formed of ardent lovers of sci-fi art and literature that Frank Kelly Freas could possibly be the best sci-fi artist to have ever lived. And we certainly have solid reasons to believe so, as everything ever created by Kelly Freas has lived to define an entire era of science fiction in itself. And this immense adoration and fascination with science fiction are lovingly represented in this sci-fi artbook.
Freas’s work is unconventional and somewhat, way ahead of its time in its depiction of a state of being that celebrated an upliftment of emotions and humanity, connecting all of his illustrated characters whether human or otherwise with a much broader perspective on relationships and life. This grand scale of art could be seen in some of the earliest sci-fi covers that he had created for the likes of Algis Budrys’s work, ‘Who?’ and Tom Godwin’s ‘The Gulf Between.’
Length: 120 pages | Dimensions: N/A | Weight: 1 pound | Publisher: The Donning Company
16. Sci-Fi Art Now by John Freeman
John Freeman brings a refreshing mix of the finest sci-fi illustrations created by some of the most distinguished figures in the science fiction genre. These cutting-edge art forms and illustrations hail a revolutionizing impact on budding and aspiring artists everywhere through the spectacular images and concept designs it opens up for the world to see.
Freeman had been a former editor for official magazines for projects and franchises such as Babylon 5, Doctor Who, Star Trek, and Star Wars. The successive phases in his career saw him turning his outstanding takes and understanding of science fiction and everything related to magnificent pieces of art.
And this is precisely what you can expect from this ornately illustrated anthology to show you: the creative processes of speculative fiction’s latest and coolest upcoming stars. The book also celebrates some renowned creators who have continuously been breaking and creating new turf to expand the vividly colored and portrayed territories to great extents!
Length: 192 pages | Dimensions: 9.9 x 0.9 x 9.8 inches | Weight: 2.35 pounds | Publisher: Harper Design
17. The Art of John Berkey by Jane Frank
John Berkey was an immensely respected and inspiring space artist who was also considered one of the titans in the history of science fiction history who did have a prolific and richly productive career producing celestial fantasy art that began sometime in the 1950s.
He had initially been one of the leading creative heads for concept art working for many different studios up till the point he got into Brown & Bigelow, the famed calendar-publishing company spending eight formatives mastering his definitive style under his mentors.
It was at this place and time in his life that he developed extensively his stunning landscape skills that were depicted in scenes of Americana and similar genres.
When he turned to freelance, he made complete use of his marvelously evocative neo-impressionist style in the area of science fiction which made him a revered figure for all in the community of science fiction.
Length: 160 pages | Dimensions: 8.5 x 0.5 x 11.25 inches | Weight: 1.9 pounds | Publisher: Paper Tiger
18. The Mind’s Eye: The Art of Omni by PowerHouse Books
Omni had always been a gem among popular science magazines during 1978-1998. Magazines such as Science News, Scientific America, Discover, and Science Digest might have been favorites for armchair scientists, but Omni had been that innovative and masterful cutting edge of conventional science news and fiction that could stun and mesmerize all of its readers.
With just the perfect amount of flashy graphic design coupled with the images created by a generation of artists who were completely free from the restraints of general rules and principles with just a touch of sex, Omni topped quite a few charts when it came to sci-fi artwork.
It was created by the legendary artist Bob Guccione, the founder of Penthouse. Guccione handpicked all the illustrators and artists who eventually made Omni happen, turning it into a legacy, creating works ignited by intellect and passion which were two of Guccione’s principle ideas. ‘The Mind’s Eye: The Art of Omni’ extolls the spectacular work that has appeared throughout the history of publication.
Length: 180 pages | Dimensions: 12.38 x 1.23 x 11.29 inches | Weight: 4.67 pounds | Publisher: PowerHouse Books
19. Star Trek: The Art Of The Film By Mark Cotta Vaz
J.J. Abrams takes an entirely different approach to the greatest space adventure ever: Star Trek! It features a younger crew selected straight right out of the academy. Abrams has created a completely new rendition of Star Trek even while paying homage to those sci-fi storytellers who are known for their versions of the famous spaceship, The U.S.S.Enterprise of the 20th century.
The film quickly became a critical as well as a commercial success across the world.
This visage of Abram’s new vision is stunningly portrayed in this brilliant sci-fi art book, which traces the evolution of the film’s productions through a spectacular collection of concept art and designs that the world had not seen previously.
Length: 160 pages | Dimensions: 9.35 x 0.72 x 12.2 inches | Weight: 2.7 pounds | Publisher: Titan Books
20. The Art Of The Barbarian by Arthur Suydam
The image of the Barbarian reflects raw, elemental power, brute force, and the vicious spirit of survival. The “seductive” imagery from the genre in a way, romanticizes this raging and violent era in the history of human evolution.
Arthur Suydam is notable for his fascinating work in this genre that depicts primal clashes on the battlefield, vivid shades of carnelian, and the thunderous gnashing of the swords done with astonishingly precise details.
The vividness and vibrancy of the images make almost a tangible visual impact where one can almost smell the fear, blood, and rage prevailing in the very atmosphere of the time.
And all of these are wonderfully assembled for you to enjoy in the ‘The Art Of The Barbarian.’
About Arthur Suydam, it has been famously remarked that the artist has been known to explore his own opinions and approaches on the primeval character of the Barbarian that expertly renders in a style that belonged to the old Dutch Masters.
The book is a highly resonant and reflective masterpiece done in fabulous shades that foreground Suydam’s immense caliber and justifiable global recognition for his works on the characters of Tarzan and Conan.
It brings you an in-depth and extensive analysis of the creative genius and inspiration of the artist.
Length: 64 pages | Dimensions: 8.5 x 0.25 x 11 inches | Weight: 0.6 pounds | Publisher: Image Comics
21. Progressions: The Art Of John Foster by John Foster
John Foster is known and globally celebrated for his hauntingly beautiful imagery that reflects immense visual power. His works include the renowned Dark Horse Comics where the Star Wars covers created by him have become a “collectors’ favorites” item and the sensational images of ‘Dungeons and Dragons’ portrayed bewitchingly by his deft hand.
You get to see all of it in ‘The Art Of John Foster’ which is a transfixing, yet at times, quite unnerving, provocative compilation of his best works. It is not for nothing that they say that Foster indeed knows the ways to capture the soul with his art!
Length: 80 pages | Dimensions: 8.75 x 0.5 x 10.75 inches | Weight: 1.3 pounds | Publisher: Steve Jackson Games
What is the Best Sci-Fi Art Books for Artist?
This table provides an overview of various Sci-Fi Art Books, including information on page count, dimensions (in inches), weight (in pounds), and publisher details.
Buying Guide for the Best Sci-Fi Art Books for Artists
The best sci-fi art book for artists is subjective and depends on your personal preferences and artistic goals. Use this buying guide as a starting point to explore different options, and choose the book that resonates with you the most.
Content and Variety
Look for books that offer a diverse range of artwork, including illustrations, concept art, landscapes, character designs, and more. The book should showcase the artist's versatility and provide a comprehensive overview of their work. This variety can inspire you to explore different techniques and subjects within the sci-fi and fantasy art genres.
Book Length and Dimensions
Consider the length and dimensions of the book. Longer books with more pages often provide a more in-depth exploration of the artist's work. Larger dimensions can also enhance the visual impact of the artwork. However, keep in mind that larger books may be less portable and harder to handle.
Weight and Binding
Check the weight of the book, especially if you plan to carry it around or travel with it. Heavy books can be cumbersome and may not be suitable for frequent use or mobility. Additionally, consider the type of binding used. Hardcover books tend to be more durable and long-lasting, while softcover books may be more affordable.
Reviews and Recommendations
Read reviews and seek recommendations from fellow artists or art communities. Their insights can provide valuable information about the quality, content, and usefulness of the book. Consider the credibility of the sources and look for reviews that align with your specific interests and needs.
Price and Budget
Set a budget for your purchase and compare prices across different platforms and sellers. Keep in mind that high-quality art books with extensive content and premium features may come at a higher cost. Consider the value you will gain from the book and prioritize quality over affordability if possible.
What are the essential elements to consider when choosing a sci-fi art book?
When choosing a sci-fi art book, consider the content and variety of artwork, book length, and dimensions, weight and binding, reviews and recommendations, as well as the price and your budget.
What should I look for in terms of content and variety in a sci-fi art book?
Look for books that offer a diverse range of artwork, including illustrations, concept art, landscapes, character designs, and more. The book should showcase the artist’s versatility and provide a comprehensive overview of their work.
Does the length of a sci-fi art book matter?
The length of a sci-fi art book can influence the depth of exploration into the artist’s work. Longer books with more pages often provide a more extensive collection of artwork and insights. However, shorter books can still offer valuable inspiration and guidance.
How important is the weight and binding of a sci-fi art book?
The weight of a sci-fi art book is crucial, especially if you plan to carry it around or travel with it. Heavy books can be cumbersome and may not be suitable for frequent use or mobility. Additionally, consider the type of binding used – hardcover books tend to be more durable, while softcover books may be more affordable.
Should I prioritize quality over affordability when choosing a sci-fi art book?
If possible, it is advisable to prioritize quality over affordability when choosing a sci-fi art book. High-quality art books with extensive content and premium features may provide more inspiration and value in the long run. However, it’s essential to find a balance between your budget and the value you expect to gain from the book.
Introducing the top recommendations for sci-fi art books, we have explored a vast selection of titles that cater to different artistic preferences. After careful consideration and analysis, we present the three standout choices.
For artists seeking inspiration in gothic art, "The Art of Ian Miller" is an ideal option, showcasing Miller's unconventional and haunting creations influenced by HP Lovecraft. If you're looking for sci-fi art, "H.R Giger's Necronomicon" is a good choice, with its iconic images and conceptual designs from renowned artists. Finally, for those interested in space art, "The Art of Chesley Bonestell" is the right choice, featuring over 300 super-realistic images that have shaped our visions of outer space.
And with that, we come to the very end of this vast and extensive guide on some of the best sci-fi and fantasy art books that will tickle and enrich the imagination and soul of every artist in every corner of the world.
We hope you liked our endeavor as much as we loved making this effort for you.
Hope to see you soon! Till next time!
Concept art is about the illustration of an idea, that is later fleshed out to create characters, landscapes, buildings, etc.
Finding the right book to learn concept art can be tricky since this field is vast. You need to find guides that cover- the fundamentals of art, skills for technical painting, and conceptual ideas and give you a clear picture of the career prospects in the concept art industry.
You need to be well-armed with your skills in traditional art to use different painting software, create your portfolio, and build a professional network. These days concept art has a lot to do with workflow, speed, and accuracy, but the main focus lies in design.
It is essential to understand how things are designed. If you look at any of the animated movies, will you be able to describe what went into making that film roughly? Or at least guess the ideas behind the creation of each scene?
If you can answer them correctly, then you are on the right footing.
For a budding artist, it's challenging to create a masterpiece with an undeveloped set of art skills. When time is invested in learning the basics and practicing exercises given in the books, your skills will improve gradually.
Let's look into the list of different books that can help to build your base in concept art!
Best Concept Art Books for Artists
Here's the list of the 25 best concept art books for artists everywhere, encompassing essential guides that cover the fundamentals of art, technical painting skills, conceptual ideas, and valuable insights into the concept art industry.
Art Fundamentals
If you're an aspiring concept artist, it's essential to understand the fundamentals of art. For every piece that you create, you'll have to use the skills that you gain from the fundamentals. The skill set includes measuring, figure drawing, light and shadow, rendering, perspective, colors, forms, and several others.
1. Light for Visual Artists
The concepts of light and shadow can get a little tricky if you're new to the field of art. These concepts relate to value and how values are rendered in a painting or drawing. Light for Visual Artists will help you to understand the artistic techniques and raw scientific points of getting the benefits down correctly.
As you read through the given resources and tips, the concept of light will be crystal clear. However, you cannot expect to become an expert at rendering value or a master draftsman by just reading this book. Constant practice of the ideas that are given in this book will help you to improve your skills.
Lighting plays a massive role in every piece that you're trying to create. We advise you to get this book if you're having any problems with light in your artwork, the book explains the intricate details of this subject.
Length: 176 pages | Dimensions: 8.5 x 0.75 x 11 inches | Weight: 1.95 pounds | Publisher: Laurence King Publishing
2. How to Draw - Best for Perspective & Imagination
If you want to learn about perspective and drawing from the imagination, then this book by Scott Robertson will come of great use. He is an educator to digital artists and concept artists at the Art Center and also conducts various presentations all across the US.
For a concept artist, it's essential to learn about imaginative drawing and realist life drawing as these concepts amalgamate to help you create any piece from your mind with realistic rendering.
The teaching style of the author is pretty detailed yet pristine at the same time. If you're a novice or an inexperienced artist, then it can get a little tricky to get your concepts clear from this book. However, if you're ready to put in an ample amount of practice, then the lessons will get easier to follow.
Length: 208 pages | Dimensions: 9.1 x 0.8 x 11.03 inches | Weight: 2.5 pounds | Publisher: Design Studio Press
3. Figure Drawing for Artists: Making Every Mark Count - Best for Foundation & Tips
When you focus on learning about figure drawing from a book, it's more like learning to cook from a book. You cannot gain these practical skills until you get hands-on practice with them.
Moreover, several books share different tricks and techniques of figure drawing that can be effectively applied while you practice this art. Figure Drawing for Artists by Steve Huston will help you get the basics right for every figure drawing that you create.
If you're a new artist facing trouble in analyzing the figure or rendering it correctly on paper, then this book will act as your guide. Steve has included his figure drawings in this book to give you a visual presentation of the techniques that he has employed.
But you cannot rely on just this book to improve your skills, because implying the techniques in the studio will be your most excellent teacher. However, we advise you to get this book if you want to know the foundational concepts or pick up a few tips on figure drawing.
Length: 192 pages | Dimensions: 8.63 x 0.75 x 10 inches | Weight: 1.5 pounds | Publisher: Rockport Publishers
4. Art Fundamentals: Color, Light, Composition, Anatomy, Perspective, and Depth
In this concise publication of 272 pages, the purpose was to introduce the reader to the fundamental topics. There is no in-depth information on the main fundamentals of art, like perspective, anatomy, or form.
The book will help you understand the different techniques and their importance to digital art. However, this book is suitable for beginners to get the basics right, but it cannot be used as a professional study guide.
Length: 272 pages | Dimensions: 8.5 x 1.25 x 12 inches | Weight: 2.55 pounds | Publisher: 3DTotal Publishing
5. Human Anatomy for Artists: The Elements of Form - Best for Mastering Anatomy
The Human Anatomy for Artists by Eliot Goldfinger has everything you want to know about mastering the human figure. It is one of the most detailed books that you can find on human anatomy.
If you want to draw something from your imagination, then focus on studying the general concepts of your subject- looks, behavior, and the way it operates. To gain explicit knowledge of human anatomy can be difficult, but for drawing a figure, it's vital to master every part of the anatomy.
As you have a good understanding of the muscles, facial features, and poses, then your figure drawing will turn out to be perfect. Human Anatomy for Artists is a scientific manual that gives all the lessons on muscles, bones, and tendons. Every professional artist has learned all these bits and pieces to become an expert in what they create.
Length: 368 pages | Dimensions: 12.32 x 9.32 x 1.11 inches | Weight: 3.79 pounds | Publisher: Oxford University Press
Digital Painting
As you complete the fundamentals of art, you'll gradually want to move into painting. Few artists will get into the traditional medium (oil paints), but if you're interested in concept art, then you should focus on digital painting.
The three aspects of digital painting are:
To gain an understanding of how the graphics tablet should be used.
To understand your choice of painting software.
Focus on your skillset and goal.
1. Digital Painting for the Complete Beginner
The book focuses on the process of transitioning from the traditional medium to digital painting. It will be of more value for artists who are into oil painting than for the ones who have experience in drawing with a pencil.
However, an aspiring digital artist having a base knowledge of the fundamentals and experience in the different mediums of traditional art should read this book. The methods and goals of painting are the same in a conventional and digital forum. This book will help you understand the change in techniques and medium when you're new to digital art.
Length: 160 pages | Dimensions: 8.28 x 0.49 x 9.28 inches | Weight: 1.16 pounds | Publisher: Watson-Guptill
2. Beginner's Guide to Digital Painting in Photoshop
If you're starting with digital painting, then you should pick up Beginner's Guide to Digital Painting in Photoshop. The fundamentals of working with Photoshop in a creative studio have been covered in detail in this book.
Many artists prefer to select their software for painting, but animation studios and game studios mostly prefer Photoshop. The painting canvas and the brush panel are clearly explained in this book by 3DTotal.
The book has a few exercises that will help you understand the groundwork of painting in the Photoshop environment. If you're going to pick up this book, then you should have some artistic experience. Moreover, without the fundamentals, you will not understand much about painting from this book.
Length: 224 pages | Dimensions: 11.5 x 0.25 x 8 inches | Weight: 2.19 pounds | Publisher: 3DTotal Publishing
3. Digital Painting with Krita 2.9
Photoshop comes with a big price tag, but everyone might not have that kind of budget. So, Krita, a free and open-source painting software, will be a good option that works on all operating systems.
If you want to start using this software, then Digital Painting with Krita 2.9 by Scott Petrovic will greatly help. The book begins with a clear description of the interface in Krita and gradually moves into the techniques for digital painting.
Once you cover the basics, the book moves into the shortcuts along with a few quick tips that will help to broaden your knowledge. The book appears more like a Krita software book and less like a book on digital painting.
The author also mentions the different techniques that can be used to improve your workflow in digital painting. We recommend this book for semi-experienced artists who have an idea to paint on a tablet, but it might not be of great help to beginners.
You need to know the proper use of a graphics tablet before you dive into this book. Scott has done an excellent job of presenting Krita, but do watch a few tutorials to understand if this software will come of use to you.
Length: 232 pages | Dimensions: 6 x 0.55 x 9 inches | Weight: 0.7 pounds | Publisher: Louvus Media
4. Digital Painting Techniques
The goal of this book is not to help you master the skills and techniques that you will require while painting digitally. This book of 288 pages is a gem that targets semi-experienced advanced artists.
There is sufficient practical information given in this book to paint different objects and render them accurately. This book is from 3DTotal, and it's part of a more extensive series. You should start with this book, but we advise you to read the other books in this series too to understand the teaching style.
As you get your hands on the other volumes, you'll be able to learn a lot about the 3DTotal staff while the given exercises will enhance your painting skills.
Length: 286 pages | Dimensions: 10.9 x 8.5 x 0.6 inches | Weight: 2.35 pounds | Publisher: Routledge
5. Digital Painting Fundamentals with Corel Painter X3
If you're looking for another alternative to Adobe Photoshop for digital painting, then a quality substitute is Corel Painter. This book does an outstanding job introducing Corel Painter. The 256 pages in this book cover various fundamental topics like color theory, mixing of colors, balance, and composition.
You can probably learn the entire interface of Corel Painter, through the given practice exercises. Most of the projects focus on shortcuts and techniques in Painter to help you progress in this field.
For a beginner, this book will be of great use if they are ready to put in the required effort to learn about digital painting. The fundamental concepts are given a lot of focus throughout the book, which makes this piece great for any artist.
Length: 288 pages | Dimensions: 7.5 x 0.75 x 9.25 inches | Weight: 1.54 pounds | Publisher: Cengage Learning PTR
Concept Art
If you have an excellent foundational knowledge of art and you know how to paint, then it's all about practice. As you repeat the techniques that you have learned, you'll gain a clear insight which will lead to constant growth by fixing the gaps
Concept art act is the guideline, inspiration, and mood that is prevalent for film or game production. We have a list of a few concept art books you can use to construct new ideas and make a mark in this field. However, if you want to gain some excellent skills in concept art, then these books will be your guide.
1. The Art Of Mulan
In this book, you'll find that the main text has been broken down into four parts which have been detailed pretty well. This book gives a clear description of how this movie was created. Disney puts a significant emphasis on the story, and that is prevalent in this book. Some subtle and exquisite pieces of art are present in the first two sections of the book.
The research process that was followed by the artist is an exciting part of the book, as they visit China, and travel throughout the country. For a book from the nineties to have such details about the research trip will you keener towards following them on this journey. The artists explain the learning process and how they were inspired to create every different scene.
This large piece explains the philosophy and details that went into the story, art, and production of the film Mulan.
The design and layout of the book are fantastic as they connect well with the world of the film. If you're an ardent fan of animation, then we advise you to treat yourself to this book.
Length: 192 pages | Dimensions: 10.5 x 1 x 13.5 inches | Weight: 4.46 pounds | Publisher: Hyperion
2. The Art of Pixar: The Complete Color Scripts
When we think of a book by Pixar, it's pretty normal to expect some playful and funky concept art. Unlike the other books on concept art, this piece features an extensive collection of color scripts.
Many of us got to know about color scripts only after Pixar books made this concept famous.
This book goes beyond the intricate details in the images and the artistic style used in each of the color scripts. The Art of Pixar: The Complete Color Scripts is a visual anthropology, which is made by the art directors from the most influential studio of filmmaking.
Length: 320 pages | Dimensions: 9.25 x 1.25 x 11.25 inches | Weight: 4.3 pounds | Publisher: Chronicle Books
3. Surf's Up: The Art and Making Of A True Story
This book is filled with sketches, concept art, movie stills, and 3D WIP imagery. You will find an adequate amount of character designs of penguins, along with the color keys and concepts of different sequences from the film.
The various extracts from the film that are present in bits and pieces within the book make the book and the reader travel along with the film.
You are also given a small sneak peek into the character creation phase, where you'll get to see the different stages from 3D models to concept sketches.
On the whole, if you love animation, then this is a must-have book for your collection!
Length: 148 pages | Dimensions: 10.5 x 1.1 x 11.3 inches | Weight: 3.1 pounds | Publisher: Insight Editions
4. The Art Of Robots
This book is similar to any other art book by Pixar. As you take a glance at the images, you'll understand the amount of thought that was put into highlighting every intricate detail.
The selection of art and the quality of the designs in this book is vast. There is a lot of sets and character design. Interestingly, you'll also find pages with photos of materials and characters that were used for texturing the 3D models.
If you're already a fan of the Art of Pixar books, then you'll enjoy this piece. This art book has some of the most amazing, talented, and awe-inspiring pieces of work.
Length: 144 pages | Dimensions: 9.2 x 0.8 x 11.4 inches | Weight: 2.38 pounds | Publisher: Chronicle Books
5. The Skillful Huntsman: Visual Development Of A Grimm Tale
The three artists Mike Yamada, Khang Le, and Felix Yoon share their experiences as students of the Art Center in Pasadena, CA. They explain their journey and the unique sketches that eventually paved their way into the entertainment industry.
As you read this book, you'll realize how it feels more as though you're going through a student project or a journal. Each of the concept artists has created the characters, props, environment, and other paintings for The Skillful Huntsman by following the Brothers Grimm story.
In this jam-packed book, you'll get a collection of design techniques and beautiful concept art. The book is filled with conceptual sketches, where you can see the process of an idea giving birth to an entire piece.
With this book, you'll be able to get a glimpse inside the minds of the three artists as they continue to develop their vision and create a well-known story.
Scott Robertson, who is a renowned teacher from the Art Center, leaves comments beneath each page where he critiques and gives an insight into the work. It's amusing to see how a teacher continues to critique the piece being created by his students.
The descriptions are brief enough and will not take your focus away from the designs. It is also exciting to read how the students of concept art create a piece that is based on an existing storyline.
If you love interpreting folklore and creating stories, then this book will be a gem in your collection.
Length: 160 pages | Dimensions: 10.28 x 0.77 x 10.24 inches | Weight: 2.55 pounds | Publisher: Design Studio Press
6. The Art Of Star Wars Episode II: Attack Of The Clones
This part of the trilogy has more details about concept art than The Art Of Star Wars Episode I: The Phantom Menace. In this book, the pages are filled to the brim with environmental paintings, storyboards, character designs, ships, and sculptures.
The book shows how the different aspects- the weapons, the characters, the location, and the crafts had evolved in various stages before it came on screen.
Every page has captions given by the artists which describe the idea that they are trying to put across through every image. It is like the artist is providing you with behind-the-scenes details to present an artistic side to help you understand the movie-making process.
As usual, the sketches and character designs in this book appear larger than life, especially the environment paintings. Moreover, you'll get the entire script of the movie at the back of the book.
We recommend this book to Star Wars fans, concept artists, and sci-fi artists. You'll be amazed by the talent that was put into effect to create such a stunning piece of concept art.
Length: 224 pages | Dimensions: 9.5 x 0.88 x 12.25 inches | Weight: 2.95 pounds | Publisher: Del Rey
7. The Disney Archives Series: Design
The Design edition of The Disney Archives Series is one fantastic book that will take you through the complete visual development history of Disney Animation. The book also has a few excerpts from other abandoned projects.
Try looking into The Disney Archives Series: Design, which is a concept art book that was written way further than the last decade. We advise you not to compromise on your creative potential, by just focusing on books from this decade.
Length: 256 pages | Dimensions: 13 x 11 inches | Weight: 5.4 pounds | Publisher: Disney Editions
8. The Art of How to Train Your Dragon
The character designs in this book are not over-rendered they have been well-balanced with some epic environments and high-resolution pieces.
The book features around 350 pieces of development artwork, which includes concept paintings, story sketches, and character designs.
If you're looking to have reference material that will guide your sketching work, then getting this book will help you to a great extent.
Length: 160 pages | Dimensions: 11.5 x 1 x 10.5 inches | Weight: 0.22 pounds | Publisher: Newmarket Press
9. The Art of Monsters, Inc.
The Art of Monsters, Inc. is filled with a ton of set drawings and character designs. Other than the credits and caption in this book, there is no other text that you can find.
The various art concepts in this book are very colorful, and you'll enjoy every panel of the pastel drawing by Ralph Eggleston and Dominique Louis. With this book, you can get inspired as you observe the excellent quality of skills used in creating art.
This collection of concept art has been created by using different mediums, and it was made before digital painting came into the arena.
Length: 144 pages | Dimensions: 9.4 x 0.9 x 11.4 inches | Weight: 2.35 pounds | Publisher: Chronicle Books
10. The Nine Old Men & The Art of Animation
The Nine Old Men & The Art of Animation has some expert animation drawings, and it consists of the grandfathers who are part of the history of Disney's animation.
Each chapter in this book talks about the projects and careers of each of the animators along with sequences that give you more explanation.
When we consider how rare, strong draftsmanship has become these days, we understand that such pieces of books are essential to set the standard in concept art.
Length: 310 pages | Dimensions: 9.25 x 1.25 x 12.25 inches | Weight: 4.86 pounds | Publisher: Disney Editions
11. Big Bad World of Concept Art for Video Games
If you're studying art and you choose to make your career in the field of concept art, then you'll love this book. In this book, the author Professor Eliott Lilly speaks about the student's work and his experience of teaching young minds who aspire to be artists.
The Big Bad World of Concept Art for Video Games offers a few distinct tips for selecting the right classes, the right school, and the practice exercises to focus on, along with suggestions to help you improve your portfolio. There are also tips shared by the author on how a young artist wanting to make a career in the video game industry can get jobs.
The works of students and professionals are widespread in this book to help you understand the level of progress and quality skills of different artists. By following this book, you'll gain the required knowledge to prepare you for the competitive path in the life of a concept artist. This will, in return, help you to hone your skills as an artist.
The author is straightforward and transparent with his thoughts, which helps to make this piece a good read. It is going to inspire you to learn different techniques to improve in the field of concept art, or it will make you second guess your career choice.
Irrespective of the outcome, we believe that this book will be of great use for you to understand the field of concept art.
Length: 144 pages | Dimensions: 8.7 x 1 x 11.2 inches | Weight: 1.6 pounds | Publisher: Design Studio Press
12. Imaginative Realism: How to Paint What Doesn't Exist
If you're an aspiring concept artist, then you should read Imaginative Realism. The book will help you understand how you can paint the things that don't exist and gives you different tricks over 224 pages.
Every concept artist is paid to create designs of things and characters that don't exist in real life. You might find that the book is not written for concept artists, but only if you focus on the details hidden behind each page will it be helpful for you.
In this book, James Gurney shares different techniques for helping you render various concepts like humans, creatures, buildings, the environment, and more.
It's simple to have different imaginative ideas in your mind, but the real test comes when you have to render them correctly. With this book, you'll understand how to represent your ideas on paper.
Length: 224 pages | Dimensions: 9 x 0.6 x 10.5 inches | Weight: 2.01 pounds | Publisher: Andrews McMeel Publishing
13. Drawing Basics and Video Game Art
If you're into video game art and you want to use your skills with a purpose, then you should try to give this book a read. You'll understand how concept art is applied to the world of video games.
The complex and rich history of gaming, along with a description of the different artistic styles have been covered in this book. A large portion of the book focuses on describing how video game art can be efficiently interwoven with fine art and how this concept has advanced over the past decades.
Many sections in this book talk about the different fundamentals of art like lighting, figures, composition, and general techniques used for sketching. This is an artist's book, even though it takes a dip into gaming.
Drawing Basics and Video Game Art has more to do with the history of game art and is not much of a drawing book.
Length: 240 pages | Dimensions: 8.49 x 0.67 x 10.02 inches | Weight: 1.97 pounds | Publisher: Watson-Guptill
14. How to Become a Video Game Artist
Sam R. Kennedy, who is a renowned game artist, has several years of experience and fellow workers who are employed in the gaming industry. The help that was rendered by his colleagues was put to productive use by the author in making How to Become a Video Game Artist.
In every chapter, you'll find a description of the different jobs in the field of concept art- animators, environment art, character art, and GUI designers. Each of the chapters consists of stories from professionals who are employed in this industry and the advice given in this book helps to guide aspiring concept artists.
The book describes the skills, requirements, and demands of each job, which gives you a clear overview of the professions. The last chapter has tips by the author for aspiring concept artists to refine their portfolios and how they should be preparing themselves for the field of game art.
When you have covered the basics of traditional art, you'll be left wondering how you can advance toward concept art from an ideal point of view.
When you plan to design a piece, it should be technically creative along with it being philosophical to a certain extent. The topics that have been covered in Beyond Art Fundamentals cannot be easily found in any other book.
In this book, you'll find several professional artists sharing their opinions and views gestures, moods, and emotions, and giving you ideas to create designs that will fit in perfectly with the storyline.
According to the view of professional artists, every image should have a specific emotion, purpose, and feeling associated with it. This book helps you to understand these subtle nuances that need to be incorporated into your artwork and the different approaches that you should use for creating every piece.
Length: 224 pages | Dimensions: 8.25 x 0.5 x 11.5 inches | Weight: 2.12 pounds | Publisher: 3DTotal Publishing
What is the Best Concept Art Book?
This section provides an informative comparison of top-rated concept art books. The accompanying table highlights key specifications for each product, including their length, dimensions, weight, and publisher.
Concept art is a form of illustration used to convey an idea for use in films, video games, animation, or comic books before it is put into the final product. It typically consists of sketches, paintings, and 3D models that help the creators visualize the world and characters of their stories.
Characters, places, stories, and entire worlds that do not exist are shaped as concept art through numerous iterations.
A concept is the first step in any design process.
Buying Guide for the Best Concept Art Books for Artists
When purchasing concept art books, it's crucial to consider several factors to ensure you make the right choice. The following comprehensive buying guide will help you navigate through the options and find the best concept art books for your needs.
Content and Focus
Look for books that cover the fundamentals of art, including figure drawing, perspective, color theory, composition, and rendering. Consider the specific focus of the book, whether it's character design, environment design, creature design, or general concept art techniques. Choose books that align with your interests and goals.
Author's Expertise and Reputation
Research the authors of the concept art books you're considering. Check their credentials, experience, and reputation within the industry. Look for books written by established concept artists or industry professionals who have worked on notable projects. Their insights and knowledge will be valuable.
Demonstrations and Step-by-Step Guides
Books that provide detailed demonstrations and step-by-step guides are highly beneficial for learning and practicing new techniques. Ensure the book includes clear explanations, visual examples, and exercises that allow you to apply the concepts and improve your skills.
Variety of Art Styles and Artists
Choose concept art books that showcase a range of art styles and feature different artists. Exposure to diverse styles will broaden your understanding and inspire creativity. Look for books that include interviews or profiles of successful concept artists, providing insights into their creative process and career paths.
Quality of Artwork Reproduction
Check the print quality and paper type of the book. High-quality reproductions of artwork will allow you to appreciate the details and nuances in the illustrations. Consider books with large, clear images that effectively showcase the artwork, making it easier to study and learn from.
Industry Relevance and Application
For aspiring concept artists, it's crucial to choose books that are relevant to the current industry trends and practices. Look for books that discuss digital painting techniques, software applications commonly used in the industry, and workflow processes for concept art production.
Reviews and Recommendations
Read reviews and seek recommendations from trusted sources, such as professional concept artists or reputable art communities. Consider joining online forums or communities where artists discuss and recommend concept art books based on their personal experiences.
Important Tip: Continual Practice and ApplicationWhile concept art books can provide valuable guidance and knowledge, remember that practice and application are crucial for skill development. Here's an important tip to keep in mind:
Regularly practice the techniques and exercises provided in the books to strengthen your foundation and improve your art skills. Apply what you've learned to personal projects and create your concept art to build a diverse portfolio that showcases your unique style and ideas. Seek feedback and critique from fellow artists or mentors to identify areas for improvement and refine your work.
Remember, concept art is a constantly evolving field, so keep learning, experimenting, and staying updated with the latest industry trends to excel in your journey as a concept artist.
What are some recommended concept art books for understanding light?
Light for Visual Artists” is a highly recommended book for understanding light in art. It provides insights into artistic techniques and the scientific aspects of rendering light and value in paintings or drawings.
Are there any books recommended for beginner artists to learn the basics of art?
Art Fundamentals: Color, Light, Composition, Anatomy, Perspective, and Depth” is a good book for beginner artists to grasp the basics of art. It covers various fundamental topics and techniques, providing a solid foundation for further study.
What book is suitable for beginners transitioning from traditional to digital painting?
Digital Painting for the Complete Beginner” is a book that focuses on helping artists transition from traditional to digital painting. It offers valuable insights and techniques for adapting to the digital medium.
What book is suitable for advanced artists looking to improve their digital painting skills?
Digital Painting Techniques” by 3DTotal is a book recommended for advanced artists looking to enhance their digital painting skills. It offers practical techniques and exercises for painting different objects.
Are there any books specifically about concept art?
Yes, there are several concept art books available. “The Art of Mulan,” “The Art of Pixar: The Complete Color Scripts,” “Surf’s Up: The Art and Making Of A True Story,” and “The Art Of Robots” are some examples of concept art books that provide insights into the creation of specific films and animation.
Conclusion
Use these books to your benefit to help you develop the fundamental skills of art, a professional network, and the right portfolio. These will pave the way for you to become a professional concept artist. There is no better way to learn than practicing religiously and following the experiences of other artists in this field.
These books provide valuable insights and practical tips to aid artists in their artistic journey and creative development.
Till next time keep exploring the field of art!
Top-freezer refrigerators are BUDGET-FRIENDLY options for moms, homeowners, and kitchen connoisseurs alike.
These refrigerators may not have the fanciest accessories and features. Yet, there are many reasons why people opt for this style.
Specifically, they're best for shoppers on a budget who want more fridge than freezer space. Additionally, it's a good choice for users with little space to spare at home.
If these three things resonate with you while searching for a new fridge, a top-freezer refrigerator could be your best bet!
To simplify your shopping experience, I've reviewed several brands and came up with the five top-freezer refrigerators of 2023.
A top-freezer refrigerator features a freezer compartment at the top of the unit and a fridge compartment at the bottom.
Top freezer refrigerators are the mostbasic fridge models you can purchase. As mentioned, they don't have fancy attachments and features; most are very STRAIGHTFORWARD, yet some offer more spice to their fridge models.
1. Whirlpool WRT518SZFG 18.2 cubic feet Top Freezer Refrigerator - Best Overall
This 18.2 cubic-foot, stainless steel top freezer from Whirlpool comes first on my list despite not having as many unique features and attachments as the other products listed.
While it lacks a deli drawer and only offers an optional ice maker model, I can say it's justifiable at its LOW PRICE of only $729.
It offers ample storage space for all your groceries, especially with the flexi-slide bins that quickly move side-to-side to make room for taller items.
Additionally, it has two crisper drawers with selectable humidity levels to keep fruits and veggies fresh, plus customizable door bins.
It also features a freezer temperature control that allows you to adjust the cold air in the freezer shelf. Hence, you can use it as an additional refrigerator compartment when you need more space.
The Whirlpool top-freezer also has an electronic temperature control, so you can set your fridge's coolness depending on the food you're storing.
What We Like
Large refrigerator capacity and flexible storage space
2. LG LRTLS2403S 20.2 Top-Freezer with Ice Maker - Best Value for Money
This stainless steel LG top-freezer fridge is pricier, but I assure you it's worth every dollar.
It offers a HUGE refrigerator capacity, featuring 24 cubic-foot storage for both the fridge and freezer spaces. It also has an ice maker plus an internal water dispenser — a rare find in most traditional models!
I also like the multi-flow air technology that maintains superior humidity and temperature levels to keep food fresh. Its linear compressor also REDUCES temperature fluctuations.
Food storage in this LG top-freezer model is also impressive. It features spill-proof shelves designed to contain spills in the fresh food section. These glass shelves are also height adjustable, so you can customize them to your liking.
Aside from the adjustable glass shelves, it also offers door-in-door bins, a folding shelving system to fit in taller items, and a 3-tier freezer space.
One major thing that sets it apart from other top-freezer models is its integration with the LG ThinQ app. Yes, it's SMART-ENABLED! This allows you to set the temperature using your smart devices.
3. LG LTCS20020S Top Freezer Refrigerator w/ Multi-Air Flow and Reversible Door - Best Energy-Efficient
This 20 cubic-foot stainless steel fridge from LG is your best bet if you want to go for ADDITIONAL STORAGE SPACE.
It has two crisper drawers with superior humidity and temperature controls, adjustable shelves, and 2-gallon door bins.
Additionally, its reversible door lets you decide if a left or right door swing fits your space and minimizes installation issues.
I can also say that this fridge is thoughtfully designed since it features contoured doors, hidden hinges, bright LED lighting, and other great internal features, which make it look and feel sophisticated.
It is also equipped with a digital sensor and smart diagnosis to consistently monitor the conditions of the fridge, maintain its cool temperature, and even help you troubleshoot issues.
4. Frigidaire FFHT1425VV 13.9 cubic feet Top Freezer Refrigerator - Best for Small Spaces
If you live in a small home and don't need as much storage space, this 13-cubic-foot stainless steel fridge from Frigidaire is your best choice.
For a $500 fridge, you gettwo full-width glass shelves, a half-width deli drawer to store your meat products, and humidity-controlled crisper drawers.
It also has three full-width racks for door storage, a glass shelf for the freezer, and two freezer door racks to store all your frozen foods.
The EvenTemp technology on this fridge also ensures that its airflow is evenly optimized for a consistent temperature.
What We Like
Energy Star certified
Ample storage capacity
2-gallon storage on the door bins
Meets the standards set by the Department of Energy
What We Don't Like
Does not freeze quickly
Attracts fingerprints
Capacity: 13.9 cubic-foot capacity (10.0 cu. ft. fridge and 3.9 cu. ft. frozen foods) | Dimension: 59.88 x 27.63 inches (H x W) | Installation depth: Standard depth | Depth: 31.25 inches | Finish: Stainless steel
5. GE GIE18GSNRSS 17.5 Cu. Ft. 28-Inch Top-Freezer Refrigerator - Best for Ice Maker Feature
This top-notch appliance stands out from the crowd with its functionality and convenience, setting a high standard in the refrigerator market. Let's delve into exploring the attributes, qualities, and benefits of this product.
GE GIE18GSNRSS defies the norms of top-freezer refrigerators by coming with a factory-installed ice maker. This automatic, energy-conscious system generates ice into a convenient storage bin, a feature often seen in appliances priced considerably higher.
The spaciousness of this model is undeniable, allocating 17.5 cubic feet of storage space in an intuitive design that maximizes utility. The lower section offers a hefty 13.49 cubic feet for fresh foods, with ample room in two crispers, a deli drawer, a butter keeper, and versatile shelves and door bins. The top section, designed for frozen goods, includes an adjustable wire shelf, allowing you to bifurcate the 4 cubic feet space to suit your needs.
Aesthetics are given due consideration with four available finishes; modern slate, as well as the more traditional black, white, and stainless steel. These choices allow for seamless integration with any kitchen décor.
To top it all off, this unit is Energy Star certified, marking it as an energy-efficient appliance designed to reduce environmental impact and save on utility bills.
Despite the numerous beneficial attributes, the GE GIE18GSNRSS Refrigerator is somewhat on the expensive side, which might deter a cost-conscious customer. Additionally, it would have added value if this model was designed to be garage-friendly, increasing the utility factor even more.
What We Like
Built-in ice maker with energy-efficient design
Spacious 17.5 cu. ft. capacity with smart organization
Energy Star certified for excellent energy savings
Comes in four attractive finishes for various decors
What We Don't Like
Slightly higher price may deter some cost-conscious customers
Which Top-Freezer Refrigerator Is Best for Your Needs?
The table below provides a comprehensive comparison of the best Top-Freezer Refrigerators for 2023. It outlines essential details, including capacity, dimensions, installation depth, depth (measured in inches), and finish, for each notable model.
As previously mentioned, top-freezer refrigerators feature a freezer compartment at the top of the unit and a fridge at the bottom — they're the most similar to traditional styles of refrigerators and come in counter-depth and standard sizes.
Top-freezer fridges are straightforward, simple, and budget-friendly. Most top-freezer models don't include as many attachments and special features as other options.
A top-freezer refrigerator offers adjustable shelves, compartments, storage bins, and LED lighting. It also offers MORE FRIDGE SPACE than freezer shelf space.
Benefits of Top-Freezer Refrigerators
Despite its straightforward design and functionality, many prefer purchasing a top-freezer model for their homes.
If you're looking for more reasons why you should go for top-freezer fridges, here are some of the benefits these models offer:
Cost-effective - given its simple and traditional style, top-freezer fridge manufacturers didn't spend too much time and resources to re-design these models, making them budget-friendly options for shoppers—most top-freezer refrigerators' costs range from $600 and $1000. You can already get a decent and highly functional fridge at this price point.
Simplistic design - although it doesn't have as many attachments and special features as other refrigerator styles, the simplistic design makes it easier for users to access the freezer and fridge of these models. They're not too complicated to use and don't require the user to bend over to access the fridge and freezer compartments. Additionally, these types of fridges are not difficult to clean and maintain. With fewer repairs and maintenance issues, you're also ensured that your fridge will last long.
Space-saving - most top freezer refrigerators are designed to be compact, plus there are counter-depth options to choose from. They are great for users living in small apartments with less room to spare. They're also not difficult to install, unlike other refrigerator styles on the market.
Extra storage capacity - if you're looking for a unit that offers ample storage space, a top-freezer fridge might be a good choice. The freezer in some models can even be converted and used as a fridge alone, which means it can provide adequate space to keep food cold and fresh and also makes it a good fit as a second fridge.
Factors to Consider When Choosing a Top-Freezer Refrigerator
At this point, you already know why you should (or shouldn't) consider buying a top-freezer fridge for your kitchen, plus great models to choose from, as provided in this list.
But it's still crucial that you know the factors and minute details you shouldn't miss when shopping for the best top freezer refrigerator.
This way, you can choose the model that would fit your and your family's needs. I suggest that you always look for these details to narrow down your choices:
Dimensions
Considering the size of the top freezer fridge is essential in ensuring it will fit your space. Should you get a counter-depth or standard-depth fridge?
While a larger fridge means greater storage capacity, you should note the maximum dimensions your place can cater to.
Hence, before shopping, measure the space where you plan to install your new fridge. Additionally, ensure that it can handle the width of an open-door swing.
Capacity
Top-freezer models are designed to be smaller and more compact compared to modern styles, such as French door models.
A top freezer has an average storage space of 16 cubic feet for your groceries, with the freezer occupying four cubic feet of this space. You can already picture that this is ideal for smaller family sizes or couples.
High-capacity top freezers offer up to 24 cubic feet and an adjustable shelving system to free up the fridge and provide more storage space. But we can't deny the fact that its capacity is generally limited.
Cost
You must also consider your budget when shopping for a new refrigerator. If you are looking for budget-friendly options, you've hit the jackpot; this is probably the best fridge you can get.
Plenty of top-freezer models you can choose from are HIGHLY FUNCTIONAL at a low price. But these don't come with modern features like the others.
The less sophisticated the fridge is, the lower the cost. But, if you're looking for additional attachments and features, like built-in ice makers and a sliding deli drawer, you should expect they'd cost a bit more.
Style
These traditional refrigerators aren't as impressive when it comes to style. Its color options are limited to black, stainless steel, and white. Other brands offer several colorways (black stainless steel, red, and bisque), yet rarely.
The style would also determine how to install the fridge in your home.
Others are meant to sit on your counter (like a counter-depth fridge), making it appear like it's built-in. This is contrary to the standard-depth fridge that needs to sit on the floor.
Energy Efficiency
One of the benefits of top-freezer fridges is energy efficiency because of their freezer placement.
You can also check if the fridge you're eyeing is Energy Star-certified to ensure that the fridge model is indeed energy-saving.
By saving energy, you're not only being eco-friendly. You're also cutting the cost of your utility bills!
Deli Drawer
If you don't know it yet, a deli drawer is used to store meat products to keep them fresh.
This is common in the side-by-side, French door, and bottom fridges but not in traditional models, so adding this to top-freezer models makes it a stand-out feature.
When integrated into top-freezer refrigerators, it mostly features a half-width deli drawer which might not be enough for some. So, try looking for a model that offers a full-width deli drawer.
Flexible Interior Storage System
Freezers are supposed to consistently have low temperatures to maintain the freezing point. Some models allow you to adjust the internal temperature to double as a refrigerator compartment and increase capacity.
From 0, you can crank it up to 32 degrees Fahrenheit, so it will be cool enough to store food and keep it fresh without freezing it completely.
Note
If your freezer refrigerator has this feature, make sure to give it enough time to adjust to the newly set temperature before stashing in fresh food, extra produce, or leftovers.
Ice Maker
An ice maker is a total giveaway for fridges. Many people like options with a built-in ice maker or those suitable for an ice maker kit. This is a great feature, especially when you like preparing drinks at home.
Having a built-in ice maker in your fridge eliminates the need for separate ice cube trays or the hassle of installing one separately.
Just a heads up; an automatic ice maker is NOT COMMON for top-freezer refrigerators. If you ever find one, you shouldn't be surprised it would cost more than the other top-freezer models.
Temperature Control and Cooling Performance
Temperature control and cooling performance are probably the most important criteria you shouldn't miss.
Obviously, if you're looking for the best top-freezer refrigerator, you should choose one with outstanding cooling performance since that's the primary purpose of a fridge.
Cooling performance is indicated by the EQUAL DISTRIBUTION of cold air in the fridge, compressor performance, and integrated cooling technology.
Warm spots in a fridge are a major red flag, and it's less likely to keep your food fresh for a long time.
Additionally, you should be able to control the temperature to adjust to seasonal temperature swings and maintain the performance of your fridge despite hot weather.
What are the Differences Between a Top Freezer Refrigerator and Bottom Freezer Models?
Top-freezer refrigerators feature a freezer shelf at the uppermost part of the unit, contrary to bottom-freezer refrigerators. However, aside from freezer placement, they also differ in energy consumption.
Top-freezer refrigerators use 10% to 25% LESS ENERGY, making them energy-efficient choices and cheaper to operate. But, if you’re looking for more freezer space, bottom-freezer fridges are the one to go for.
How Long Do Top Freezer Refrigerators Last?
Most freezer fridges are built to last between 10 and 15 years due to their lack of attachments and other features that need frequent maintenance. Compared to modern fridges that last 6 to 8 years, this is a great bargain.
How Much Does a Top Freezer Refrigerator Cost?
An average top freezer costs between $600 and $1000. Other brands and models are a bit cheaper, while the others are more expensive and can exceed $1000.
The price greatly depends on the brand, features, and technology integrated into the fridge.
Conclusion
That's a wrap! I hope you can find the best top freezer of your choice in this article. If not, it's your call! Just remember to consider the important factors when shopping for one.
Feel free to refer to this guide if you have more top-freezer concerns.
Happy shopping!
Drawing is much more than just putting pencil to paper and sketching what's in front of you.
Professional artists will tell you that it's a medium for exploring human emotions and evoking real-life feelings in a 2D medium. So, you can understand the challenge that artists face and realize now why famous paintings sell for millions.
If you're a budding artist looking to make a name in the world of art, it would be best to read a few books about drawing concepts and techniques. To help you, we have narrowed down the 50 best drawing books for beginners that explore various ways of bringing art forms to life.
Best Drawing Books for Beginners
Here's the list of the 50 best drawing books for beginners, a comprehensive collection that will inspire and guide you on your artistic journey.
To become proficient in different drawing techniques, it's important to practice, and that's where Bert Dodson's book comes in handy. It focuses on simple techniques so that you can create your own style.
All the techniques are easy to follow and suitable for new artists to help them apply clean strokes by controlling the movement of their hands and elbows. You'll find that the realistic drawing exercises have been divided into several lessons for quick understanding.
Number of Pages: 224 pages | Dimensions: 8.47 x 0.45 x 11 inches | Weight: 1.6 lbs | Publisher: North Light Books | Publication Date: August 15, 1990 | Book Format: Paperback
This book acts as a portal to the world of professional artists, especially for budding painters who need to practice realistic drawing exercises. Published in 1979, it’s a bestseller in the USA and has been translated into several languages.
The author, Betty Edwards, taught at California State University and has provided essential tips and tricks to be a successful painter. There's even a section about using the left and right sides of the brain to good effect.
Number of Pages: 291 pages | Dimensions: 8 x 0.75 x 9.5 inches | Weight: 1.45 lbs | Publisher: Tarcher | Publication Date: August 30, 1999 | Book Format: Paperback
Every famous artist was once a beginner, but you will have a slight advantage because they didn't have the luxury of reading this book. Written by Mary and Mark Willenbrik, it will help improve your drawing skills in short, effective strokes.
All the methods in this book are pretty straightforward, while the narrative tone is simple. We came across several useful tips that will help you grasp basic art forms and styles with ease.
Number of Pages: 128 pages | Dimensions: 8.51 x 0.37 x 10.86 inches | Weight: 0.22 lbs | Publisher: North Light Books | Publication Date: November 2, 2006 | Book Format: Paperback
Novice artists who one day aspire to bring various art forms to life will love this book by Claire Watson Garcia. You can learn to draw nature, people, still life, objects, textures, and basic shapes. The best part is that it has a separate section on charcoal shading and graphite pencil sketches for drawing realistic portraits.
Number of Pages: 160 pages | Dimensions: 8.5 x 0.4 x 11.1 inches | Weight: 1.31 lbs | Publisher: Watson-Guptill | Publication Date: October 1, 2003 | Book Format: Paperback
To make your drawings stand out, it's essential to understand the interplay between light and shadow. We recommend studying the techniques in this book by Richard Yot but don't worry because it's not difficult to understand. The book isn't filled with complicated terminology despite talking about technical concepts.
It's perfect for creating detailed illustrations in visual art and proves to be a valuable resource for animators, photographers, novice artists, and professional painters.
Number of Pages: 176 pages | Dimensions: 8.8 x 0.75 x 11.2 inches | Weight: 1.59 lbs | Publisher: Laurence King Publishing | Publication Date: July 16, 2019 | Book Format: Paperback
At times, the best way to leave your mark as a painter is to look at things from a different perspective. To explore new drawing techniques, you can read this book about perspective drawing, which contains more than 250 line drawings related to the vanishing point and horizon.
Ernest R. Norlingod discusses the importance of seeing things at eye level to create shadows, shapes, objects, and figures to build your foundation as a painter.
Number of Pages: 224 pages | Dimensions: 5.39 x 0.47 x 8.46 inches | Weight: 0.58 lbs | Publisher: Dover Publications | Publication Date: January 19, 1999 | Book Format: Paperback
Another bestseller for art study is this book about drawing objects and figures by taking inspiration from real life. If you're committed to gathering practical knowledge, then follow the exercises carefully crafted by the author, Kimon Nicolaides, from his experiences.
Having learned from stalwarts like Sloan, Bridgman, and Miller, he explores his passion for teaching art in this detailed book. We found that it's ideal for beginners and slightly advanced painters.
Number of Pages: 240 pages | Dimensions: 6.88 x 0.69 x 9.25 inches | Weight: 1.13 lbs | Publisher: Mariner Books | Publication Date: February 1, 1990 | Book Format: Paperback
As far as figure drawing books go, the Vilppu Drawing Manual is one of the best and helps beginners make life drawings with ease. The author was employed at Disney for 15 years and passed on his knowledge by writing this comprehensive art course.
We found that the three main topics in this book are: gesture drawing, form construction, and hand action.
Number of Pages: 177 pages | Dimensions: N/A | Weight: 1.3 lbs | Publisher: Vilppu Studio | Publication Date: January 1, 1997 | Book Format: Spiral-bound
As professional painters will tell you, there's no need to look far for inspiration because humans are some of the most interesting subjects. If you want to draw a life-like human figure, we recommend Andrew Loomis' book to make this seemingly difficult task easy.
He details the intermediary steps involved in the process so that you can draw figures by maintaining the correct proportions of different body parts. Even though the methods described might appear outdated, they are extremely useful.
Number of Pages: 208 pages | Dimensions: 9.2 x 1.02 x 12.3 inches | Weight: 2.8 lbs | Publisher: Titan Books | Publication Date: May 31, 2011 | Book Format: Hardcover
Serious art teachers will always encourage you to travel because there's so much to see and paint. But don't forget to carry this sketchbook to capture the emotions of different places and their people. Instead of taking photos, this old-school technique of recording memories will help you develop human connections.
Thanks to its unique combination of lessons, the book discusses the techniques for painting nature, the environment, and urban scenes.
Number of Pages: 200 pages | Dimensions: 8.5 x 0.5 x 11 inches | Weight: 1.01 lbs | Publisher: Butterfly Books | Publication Date: April 1, 1991 | Book Format: Paperback
Suppose you chance upon an interesting scene while on a beach and want to paint it, but don't know how. It so happens that artists often fail to replicate the objects in front of them, so this book helps make that easier. We believe it's ideal for sketching objects in still life and explains how to add detail with each stroke.
Number of Pages: 303 pages | Dimensions: N/A | Weight: N/A | Publisher: Watson-Guptill | Publication Date: September 7, 2011 | Book Format: Kindle
This book written by Terry Rosenberg and Peter Stanyer will be great reference material for serious art students. It extensively discusses drawing skills involving space, shape, light, and texture.
Several fun exercises keep you engaged and prove most suitable for artists who have some proficiency. You'll especially love topics covering landscape, movement of figures, abstract subjects, and still life.
Number of Pages: 240 pages | Dimensions: 8.5 x 0.75 x 12 inches | Weight: 1.7 lbs | Publisher: Watson-Guptill | Publication Date: January 1, 2003 | Book Format: Paperback
If you're a budding storyteller, this book will hold great value for your career. It's one of the rare books for graphic novelists who wish to engage with the audience through their illustrations. And, thanks to Marcos Mateu-Mestre, a comic artist himself, you'll get to know about composing engaging shots through single images.
Apart from art techniques, readers will have clarity about choosing a relevant topic and using light to depict day/night scenes.
Number of Pages: 128 pages | Dimensions: 8.56 x 0.55 x 10.95 inches | Weight: 1.45 lbs | Publisher: Design Studio Press | Publication Date: August 31, 2010 | Book Format: Paperback
The absolute beginner should know that drawing and painting are two different mediums, even though they share many similarities. To learn about them both, order your copy of this book today since it highlights how drawing and sketching can improve your painting skills.
You'll find hands-on lessons discussing charcoal and pencil sketches by drawing lines, scales, patterns, depths, contours, and perspective exercises. Best of all are the multiple color illustrations to describe art-making.
Number of Pages: 320 pages | Dimensions: 8 x 1 x 10.25 inches | Weight: 2.2 lbs | Publisher: Watson-Guptill | Publication Date: October 1, 2003 | Book Format: Paperback
Drawing doesn't simply mean sketching nature or still life; in fact, model building is one of the most interesting concepts covered in drawing fundamentals. You can read this book which focuses primarily on design and the various model processes of rotations, volumes, and ellipses.
We loved the images and video tutorials that made the different techniques easier to understand.
Number of Pages: 208 pages | Dimensions: 9.1 x 0.8 x 11.03 inches | Weight: 2.5 lbs | Publisher: Design Studio Press | Publication Date: December 15, 2013 | Book Format: Paperback
This is another book by Andrew Loomis that discusses the artistic techniques of drawing different body parts. To be more precise, he talks about the skills needed for drawing heads and hands by developing your perspective through the topics covered in the book.
All the methods are pretty simple, and you'll get a clear idea of how to sketch a proportionate human being with heads and arms that don't seem out of place.
Number of Pages: 160 pages | Dimensions: 9.2 x 0.8 x 12.3 inches | Weight: 2.19 lbs | Publisher: Titan Books | Publication Date: October 25, 2011 | Book Format: Hardcover
Although there are several books on figure drawing, very few tackle the subject from an anatomical standpoint. Michael Hampton understood this and believed that knowing about human anatomy would help people sketch life-like figures. The book discusses the mechanical techniques of sketching a human figure, and you can also transfer these techniques to other mediums.
It is divided into several sections for easy understanding and explores various skill sets for the benefit of budding artists.
Number of Pages: 235 pages | Dimensions: 10 x 7.5 x 1.2 inches | Weight: 1.89 lbs | Publisher: M. Hampton | Publication Date: December 27, 2009 | Book Format: Paperback
No, we aren't reviewing the same book twice - this is a different book by Steve Huston that explores figure drawing. You'll learn how to add detail to artwork, thanks to the author's instructions and advice to focus on the tiny things.
It's a comprehensive guide for intermediate and advanced artists discussing the importance of gesture, light, perspective, and structure. Most importantly, you'll find artworks by famous artists for inspiration.
Number of Pages: 192 pages | Dimensions: 8.63 x 0.75 x 10 inches | Weight: 1.5 lbs | Publisher: Rockport Publishers | Publication Date: June 1, 2016 | Book Format: Flexibound
As we have discussed earlier, it's crucial to know the human anatomy for figure drawing, and this is another book that believes in that school of thought. There are diagrams and photos, including translucent overlays, to help you understand the skeletal structure.
Sara Simbet explores the various muscle groups and encourages artists to capture the balance, poise, and grace of the human form. And all the illustrations are pretty detailed to help you draw a model accurately.
Number of Pages: 255 pages | Dimensions: 10.25 x 1.25 x 12 inches | Weight: 3.65 lbs | Publisher: DK Publishing | Publication Date: October 1, 2001 | Book Format: Hardcover
Beginners can read Andrew Loomis' book - Successful Drawing, which explores a realistic and clean style so that you can master 3D drawing. He discusses some pretty advanced skills related to proportion, planes, perspective placement, and patterns in the book.
We especially liked the emphasis on light and scale, the major components of three-dimensional drawings. After reading it, you should have a better idea about construction, character, contour, consistency, and conception.
Number of Pages: 160 pages | Dimensions: 9.3 x 0.9 x 12.2 inches | Weight: 2.3 lbs | Publisher: Titan Books | Publication Date: May 8, 2012 | Book Format: Hardcover
Whenever we think of people, we think about adults, but Barbara Bradley teaches us that even babies and teenagers can be intriguing and fun subjects. The professional artist was a Director of Illustration in San Francisco for the Academy of Art College. So, you can trust her when she discusses how to realistically draw people and their clothing in this book.
Particularly interesting is the attention to detail, with regards to the folds on clothing and how they respond to the environment.
Number of Pages: 176 pages | Dimensions: 8.7 x 0.7 x 11.1 inches | Weight: 2.15 lbs | Publisher: F+W Media | Publication Date: October 27, 2003 | Book Format: Hardcover
Circling round to anatomy again, this book talks about surface anatomy and how it's influenced by anatomical infrastructure. In short, Joseph Sheppard's book discusses figure drawing from the point of view of muscles and bones related to their position and movement.
It's pretty interesting, and artists get to examine the surface structure of live models. You can view a finished figure in two forms - its muscles and skeletons.
Number of Pages: 144 pages | Dimensions: 8.33 x 0.46 x 11.17 inches | Weight: 0.91 lbs | Publisher: Dover Publications | Publication Date: May 1, 1991 | Book Format: Paperback
Master artists need to be aware of their surroundings and how it holds their drawing together, believes Eliot Goldfinger in the book Human Anatomy For Artists. It's considered by many artists to be the definitive guide for drawing a human figure.
The author is a well-known sculptor and has experience drawing bones, muscles, and skeletons. This book analyzes the human form in detail and discusses all the essentials for drawing realistic figures.
Number of Pages: 368 pages | Dimensions: 12.32 x 9.32 x 1.11 inches | Weight: 3.79 lbs | Publisher: Oxford University Press | Publication Date: November 7, 1991 | Book Format: Hardcover
Even though the title may sound complicated, this is not a scientific or medical-themed book. It's pretty easy to read, thanks to the life-like illustrations of models in different poses, coupled with the position of their muscles.
Like the previous book, you also get to understand the surface anatomy of the human figure through photos and illustrations. Arthur Thomson has years of art experience and knows how to convey a thought easily.
Number of Pages: 624 pages | Dimensions: 5.5 x 1.25 x 8.5 inches | Weight: 1.36 lbs | Publisher: Dover Publications | Publication Date: November 24, 2011 | Book Format: Paperback
An often unexplored technique is drawing with pens, as it delivers a vibrant appearance unmatched by most pencils. But a valid concern among artists is that they won't be able to erase the lines, which is where this book proves useful.
It provides an in-depth view of using pens and has several beautiful drawings to awaken the artist in you. We read the book and found it thoroughly entertaining due to the lucid language.
Number of Pages: 166 pages | Dimensions: 8 x 0.38 x 11 inches | Weight: 0.9 lbs | Publisher: Three Minds Press | Publication Date: December 11, 2015 | Book Format: Paperback
To draw great characters, you need proper knowledge about body language, shape, facial expressions, and interactions between various elements. Beverly Johnson's book talks about all this by looking at a subject from different angles based on the setting. And there are plenty of practical exercises for much-needed practice.
Number of Pages: 144 pages | Dimensions: 8.5 x 0.5 x 11 inches | Weight: 1.42 lbs | Publisher: IMPACT Books | Publication Date: December 3, 2019 | Book Format: Paperback
Understanding the fundamentals of art involves having a working knowledge of the various theories, concepts, and conventions. But don't worry, you can refer to this book to become a successful artist, owing to its diverse topics, such as the rule of thirds and divine proportions.
You'll also find discussions on subtle nuances for depicting human emotions.
Number of Pages: 288 pages | Dimensions: 8.19 x 0.94 x 11.57 inches | Weight: 2.8 lbs | Publisher: 3DTotal Publishing | Publication Date: May 12, 2020 | Book Format: Paperback
Life drawing involves accurate representations of the human body on paper, for which this 100-page book comes in handy. There are detailed instructions about tone, texture, position, line, and shade. Beginners will love the step-by-step depictions, especially since it doesn't have complicated terminology to overwhelm them.
Number of Pages: 96 pages | Dimensions: 8.56 x 0.27 x 11.06 inches | Weight: 0.94 lbs | Publisher: Search Press | Publication Date: June 4, 2019 | Book Format: Paperback
We often get caught up with drawing a perfect landscape or a human face, but even drawing from imagination has its challenges. This book talks about sketching creatures and monsters and displays the work of 50 artists from across the world. You'll find the mechanical structures of dragons, fairies, etc., represented in black and white.
Number of Pages: 320 pages | Dimensions: 8 x 0.75 x 9 inches | Weight: 2.1 lbs | Publisher: 3DTotal Publishing | Publication Date: June 25, 2019 | Book Format: Paperback
Alongside figure drawings, one of the important techniques to learn for a serious artist is how to draw portraits. This book focuses on the essential steps of portrait drawing to make it easier for beginners by exploring different techniques and analyzing the subtleties of structure and facial expression.
Number of Pages: 112 pages | Dimensions: 5.25 x 0.75 x 8.2 inches | Weight: 0.55 lbs | Publisher: Rockport Publishers | Publication Date: April 24, 2018 | Book Format: Flexibound
Sometimes you need ideas for drawing practice, so this book has over 1,000 art projects to tingle the little gray cells in your brain. The primary concepts covered include sketching, line drawing, building up, and completing the finished figure. It also has topics discussing famous landmarks, buildings, vehicles, and nature.
Number of Pages: 504 pages | Dimensions: 9 x 1.5 x 11 inches | Weight: 4.14 lbs | Publisher: 3DTotal Publishing | Publication Date: October 30, 2018 | Book Format: Hardcover
Once beginners have grasped the concept of still-life drawings, they can focus on the gesture drawing process to bring human emotions to life. You should note that the entire book is a compilation of lectures by Walt Stanchfield, the famous Disney animator. Rest assured, it will help you capture the moment through sketches.
Number of Pages: 403 pages | Dimensions: 10.8 x 8.4 x 1 inches | Weight: 2.99 lbs | Publisher: Routledge | Publication Date: March 23, 2009 | Book Format: Paperback
If you aren't interested in drawing, you will be now, thanks to this book that teaches artists to draw their favorite Marvel characters. To sketch the superheroes that Stan Lee conceptualized, you'll learn about shot selection, composition, character dynamics, and perspective. All of these useful traits are depicted through vibrant color illustrations.
Number of Pages: 192 pages | Dimensions: 8.5 x 0.4 x 11 inches | Weight: 0.85 lbs | Publisher: Atria Books | Publication Date: September 14, 1984 | Book Format: Paperback
Figure drawing isn't as easy as it seems, and you can refer to this book to learn about drawing the head and body in perfect proportion. There are tons of illustrations and a step-by-step guide, which many artists believe is easier to follow than Andrew Loomis' methods. You won't face any shortage of helpful tips.
Number of Pages: 128 pages | Dimensions: 8.2 x 0.3 x 10.8 inches | Weight: 0.65 lbs | Publisher: TarcherPerigee | Publication Date: January 15, 1982 | Book Format: Paperback
Developing character traits is important to be well-known as an artist, and what better person to learn from than Stephen Silver, the designer of shows like Kim Impossible. This book details simple steps and explains the best drawing techniques for encouraging, guiding, and inspiring you to sketch a character.
Number of Pages: 248 pages | Dimensions: 12 x 1 x 9 inches | Weight: 3.1 lbs | Publisher: Design Studio Press | Publication Date: April 7, 2017 | Book Format: Paperback
Cartooning as concept art is an intricate form, and Christopher Hart will help you tap into your real potential through his brilliant book. You'll find simple methods to design cartoons but especially pleasing is the attention to bodies, faces, and backdrops. All these bring any cartoon to life.
Number of Pages: 160 pages | Dimensions: 8.51 x 0.44 x 10.87 inches | Weight: 1.42 lbs | Publisher: Watson-Guptill | Publication Date: March 26, 2013 | Book Format: Paperback
For concept artists, one of the keys to drawing animations is to take inspiration from photos, storyboards, sketches, and paintings. This book by two well-known Disney animators, Frank Thomas, and Ollie Jonhston, talks about the 12 principles of animation while providing helpful tips to design your own characters.
Number of Pages: 576 pages | Dimensions: 10.66 x 1.4 x 11.39 inches | Weight: 6.28 lbs | Publisher: Disney Editions | Publication Date: October 19, 1995 | Book Format: Hardcover
To learn all the fundamentals of designing a graphic novel, you can read this book about sketching creatures and characters from your imagination. We found many projects and exercises that you can practice for drawing any creature to bring the novel to life.
You'll also like the beautiful illustrations and tips that the author offers from his own experience as an artist.
Number of Pages: 192 pages | Dimensions: 8 x 0.55 x 10.01 inches | Weight: 1.45 lbs | Publisher: IMPACT Books | Publication Date: October 12, 2016 | Book Format: Paperback
The best drawing books often talk about how to draw, but Anthony Ryder takes a different approach and discusses what you should draw. He builds on the idea of capturing what an artist sees rather than what they expect to see. You'll especially like the topics covering life, form, shape, and lines to create realistic drawings.
Number of Pages: 160 pages | Dimensions: 8.25 x 0.39 x 10.79 inches | Weight: 0.95 lbs | Publisher: Watson-Guptill | Publication Date: June 1, 1999 | Book Format: Paperback
To apply the fundamentals of figure drawing in real life, Mike Mattesi talks about sketching the human body in its purest form. But he also discusses how attention to clothes can elevate the artwork to another level. This book is the perfect guide for people to convey emotions through art.
Number of Pages: 211 pages | Dimensions: 8.4 x 0.6 x 10.9 inches | Weight: 1.84 lbs | Publisher: CRC Press | Publication Date: March 29, 2017 | Book Format: Paperback
An important book for art study is A Foundation Course In Drawing, with university lecturers Terry Rosenberg and Peter Stanyer co-writing it. The book contains many realistic exercises to help students grasp the concept of different art forms and apply them to their projects. It's ideal for beginners to learn real-life applications of various drawing techniques.
Number of Pages: 408 pages | Dimensions: 7 x 1.5 x 9.5 inches | Weight: 2.15 lbs | Publisher: Watson-Guptill | Publication Date: October 1, 1999 | Book Format: Hardcover
Any concept artist will find this book to their liking as it discusses visual development through various sketching techniques. It mostly deals with creating fantasy worlds comprising castles, forests, huntsmen, and monsters by encouraging artists to explore their creativity. However, some of the concepts about perspective might be a little complex.
Number of Pages: N/A | Dimensions: N/A | Weight: N/A | Publisher: N/A | Publication Date: January 1, 2008 | Book Format: Hardcover
This is a fairly new book published in 2007 and focuses on atmospheric perspective to explain how values and colors can add depth to any artwork. There are topics covering one, two, and three-point perspectives, while the author also deals with unique perspective-related problems like wheels, reflections, and stairs.
Number of Pages: 208 pages | Dimensions: 8.53 x 0.55 x 11 inches | Weight: 1.81 lbs | Publisher: North Light Books | Publication Date: June 12, 2007 | Book Format: Paperback
If you want to draw popular anime characters, you can't go wrong with this book. It's most suitable for beginners and will help you draw school girls and boys, villains, and fantasy characters. Most of all, it offers detailed insight into developing emotions and sketching accessories.
Number of Pages: 144 pages | Dimensions: 9 x 0.5 x 10 inches | Weight: 1.2 lbs | Publisher: Drawing with Christopher Hart | Publication Date: July 7, 2015 | Book Format: Paperback
This is another popular book for drawing Manga and other fictional creatures like Pokemon to help you capture figure poses quickly. The primary discussion revolves around accurately depicting their facial expressions, shapes, sizes, and unique character traits to leave a mark on the audience.
Number of Pages: 160 pages | Dimensions: 8.5 x 0.48 x 9.99 inches | Weight: 1.35 lbs | Publisher: Watson-Guptill | Publication Date: November 17, 2009 | Book Format: Paperback
Both beginners and advanced Manga artists will enjoy the topics covered in this book, including character development and setting a scene. After reading it, you can expand your skill set and draw exquisite Manga characters, thanks to the detailed illustrations.
Number of Pages: 128 pages | Dimensions: 8.5 x 5.43 x 0.3 inches | Weight: 1.1 lbs | Publisher: IMPACT Books | Publication Date: March 8, 2012 | Book Format: Paperback
This is a classic drawing book for developing anatomical sense, thanks to the 800 illustrations depicting the movement of muscles and bones in the body. We found that it's divided into three sections - muscles and their actions, skeleton, and movement.
It's ideal for an intermediate artist, and the easy instructions make it convenient for you to quickly grasp the subject.
Number of Pages: 304 pages | Dimensions: 9.33 x 0.91 x 11.23 inches | Weight: 3.21 lbs | Publisher: Watson-Guptill | Publication Date: December 23, 2008 | Book Format: Hardcover
You can buy this comprehensive book when you aspire to draw realistic figures of animals, humans, inanimate objects, and the environment. Co-written by Rick and Carrie Stuart Parks, this book takes a deep dive into the basics of drawing.
You'll find topics on anatomy, form, and structure with several helpful tips to improve your drawing skills. And both advanced and novice artists will like the friendly narration.
Number of Pages: 224 pages | Dimensions: 8.51 x 0.5 x 10.84 inches | Weight: 1.99 lbs | Publisher: North Light Books | Publication Date: June 13, 2009 | Book Format: Paperback
Out of all the books we have reviewed, this is one of the rare ones that only contains pictures of artistic inspiration. Various artists have shared their creations from their library, which makes An Illustrated Life unique.
As you can understand, it's not a tutorial on how to draw, even though there are certain helpful tips. This is down to the author's interviews with the artists, where they talk about their creative process.
Number of Pages: 272 pages | Dimensions: 10 x 0.6 x 8 inches | Weight: 2.2 lbs | Publisher: HOW Books | Publication Date: December 1, 2008 | Book Format: Paperback
Who knew that drawing the head could be so challenging? That's because William Maughan discusses Leonardo Da Vinci's chiaroscuro technique, which is the interplay between light and dark.
Artists will learn about using toned paper, and dark and white pencils to create shadow, light, and other interesting forms. There's even a detailed guide on drawing accurate facial features through soft pastels for visual awareness.
Number of Pages: 160 pages | Dimensions: 8.31 x 0.4 x 10.99 inches | Weight: 1.26 lbs | Publisher: Watson-Guptill | Publication Date: January 1, 2004 | Book Format: Paperback
Buying Guide for the Best Drawing Book for Beginners
Now let’s look at the factors that will help you choose the best drawing books for novice artists. But before that, here are the answers to a few common questions that budding artists usually have.
A. Easy to Understand
The best drawing books are easy to understand despite the complex concepts and structures of shape, light, and form. This will help beginners grasp the concepts quickly and apply them to their painting projects.
It will help if you look for books that explain how to use different painting mediums to evoke subtle expressions. For instance, a slight tilt of the eyebrow can draw your attention to a person's face, which enhances their facial expressions.
B. Wide Range of Topics
To hold value for beginners, drawing books should cover a wide range of topics even when the book's primary focus is on a singular feature. You have seen in our reviews that many books deal with drawing the head or arms, but even then, they are pretty detailed.
They cover concepts of proportions, reflections, perspectives, etc., to bring your sketches to life. Moreover, search for books that discuss brush strokes, color gradients, and adding depth to the drawings.
C.Price
Although you would want to buy the best drawing books, we are not recommending that you spend a fortune on them. We understand that buying art accessories is pretty expensive, so you want to look for an affordable book.
Most of the books in our guide are reasonably priced, and books for the slightly advanced artist are priced higher. So, depending on your proficiency, you may have to spend a little extra to purchase a relevant book.
What should a beginner first learn in drawing?
As a beginner, you must first learn about perspective to skillfully portray 3D objects on 2D paper. There are different perspective techniques that visual artists use for life drawing to make their work stand out.
What are the five basics of drawing?
The five basics of drawing that complete beginners should know about are:
Perspective
Color schemes
Proportions
Edges
Putting thought into action
What are some important drawing methods?
The four most crucial drawing methods are:
Hatching and cross-hatching
Rendering light
Shading and blending
Adding highlights
Conclusion
That's all the drawing books we had to cover for beginners; hopefully, now, you can choose one based on the skills you want to develop.
It's essential to keep innovating and pushing yourself to learn about the latest techniques and trends in the world of art, so reading the best drawing books will be worthwhile. You can take inspiration from the pictures and illustrations in many of them to incorporate them with your unique sketching style.
Also, don't forget to try out pencil, pen, and brush strokes, as each medium adds something new to a drawing. With that, we will leave you to brainstorm for your upcoming project, so take care and read this guide before purchasing drawing books.
For those who are working professionally with tools or on a smaller scale as a home project, the rotary tool has now become a staple.
With all the attachments that a rotary tool offers, no wonder they are favored as a multi-purpose tool. The compact machines pack a punch to overcome any challenge you may come across while working on a project.
A well-known and respected brand for its rotary tools, Dremel offers two unique models of their Dremel rotary tool-the 4300 and 4000. Taking these model names at face value, it seems that one is just an upgraded version of the other.
However, while both models have their similarities, there are also unique features to each that merit a closer look. These differences can make or break the choice between the 4300 and 4000, so which is the right option for you? Find out!
A rotary tool with a 1.8-amp motor that can move at speeds of 5,000-35,000 rpm, the 4300 is powerful and versatile. The kit is bundled with a number of attachments for the 3-jaw chuck attached to the Dremel.
Using a 3-jaw chuck design has allowed the 4300 to have attachments without the need to use a collet. It is a new version of the previous collet lock designs, maintaining durability and ease in switching between attachments for the Dremel.
Utilizing a 360-degree ergonomic design is a staple of the Dremel brand, and the 4300 is not lacking in this department. With an all-around comfortable grip, it places the controls at your fingertips in a comfortable spot.
Now, when it comes to the kits available for this model, there are currently two in the market: the 9/64 and the 5/40. This means one kit has nine attachments with 64 accessories or five attachments with 40 accessories.
The number of attachments and accessories in a kit may not always equate to a superior kit. So, it is essential to know what these attachments and accessories are and whether they would be helpful in your projects.
Some useful accessories that the 4300 comes with are listed below.
Shield Attachment
This attachment protects you from any debris that may be thrown by the rotary drill. It is a great safety feature to have when working with dangerous materials that can cause harm.
High-Speed Cutter
A standard accessory when it comes to rotary drills - the high-speed cutter is a circular cutting wheel that can break down materials with minimal overheating. Additionally, the 4300 comes with cut-off wheels, a multi-purpose spiral cutting bit, and a lock-wood cutting wheel.
Cleaning Brush
An underrated accessory to have, a cleaning brush is helpful in cleaning the material being worked on. Be it rust removal or just a polishing finish; the cleaning brush accessories can bring a higher quality finish to your projects.
Sanding/Grinding Bit with Guide
Another common accessory, the sanding, and grinding bits make wearing away material a more accessible experience with a handheld machine like the rotary drill.
These bits are available in a range of various sizes to provide precision or a larger working area where it is needed. The range of bits included goes from ½” 60-grit sandpaper to a ⅜” aluminum oxide grinding stone.
Additionally, Dremel has included a guide that will enhance the precision you have while sanding or grinding. Utilizing this with the speed-control of the 4300 and any material you have will be easy to mold and wear away.
Flexible Shaft and Detailer’s Grip
The 4300 has excellent flexibility right off the bat to work at different angles. To extend this flexibility even further, the shaft can be extended to reach tighter areas for detailed work.
On the topic of detailing, the detailer’s grip will ease the comfort and stability when using the 4300 to have a steady hand. This is essential for the precise work required when detailing a piece.
Tool Sharpener
Having the ability to touch up the included bits in the kit is a helpful touch. By sharpening the bits, you can extend their lifespan and save money by replacing them when they get dull. What’s more, there is a specific sharpener accessory to touch up your gardening tools.
Pivot Light
Arguably the standout feature of the 4300, the included pivot light is a newer addition to rotary drills from Dremel. This light can illuminate darker areas to increase precision and navigate the drill better.
Additionally, the light can rotate around the drill, so it never obstructs your view in tight spaces. It is built into the drill itself, so there is no need to attach or remove it; it is always ready to go.
Drawbacks of the 4300
While the Dremel 4300 has many great features, it is not without its share of drawbacks. They may be few, but they are still worth noting to ensure a more informed decision can be made on which model to pick up.
One issue with the 4300 that some may have is the storage case provided for the drill and attachments. If compact storage space is a requisite for you, then this model may disappoint.
With a hard storage case, it does feel large when carrying around. This may not be a deal-breaker for many, but it can become a hassle to lug the bulky case around for those who need to move the drill regularly. However, it does offer the benefit of protection and more space to keep the bits and drill organized.
Another aspect that may deter some from the 4300 is the price point it comes at. It is definitely an investment, similar to any tool purchase. While the price may be steep for some, the value that it brings in performance is worth the expense.
The Dremel 4000 is admittedly an older model of the 4300, yet it still holds up in many ways to its newer counterpart.
It has many features that laid the foundation for the development of the 4300, such as the 5,000-35,000 variable speed RPM. On the other hand, some features are a slight step down from the 4300, for example, the 1.6 amps of power.
Furthermore, the attachment set-up on the 4000 model is an older collet lock system. This collet lock is more than adequate and ensures the attached bits are locked into the drill securely. An EZ twist nose cap with this collet lock makes removing and attaching bits and accessories easier to access.
Sporting an older system of attachment, the 4000 model offers a wider variety of bits and accessories. It comes with the standard attachments in the included kit, such as a right-angle attachment, shield guard, dust blower, and more.
If there is a particular bit or attachment you need for a specific project or material you are working with, a number of different kits are available. A specialized kit for cutting may not have the same bits as the carving and engraving kit.
These specialized kits may not have many attachments and bits. However, they have been curated by Dremel to provide all the necessary accessories you may need for a specific project or job.
Four kits are available for the Dremel 4000, with a varying number of attachments and specific catering to specific tasks for the rotary drill-a 2/30 kit, 3/34, 4/34, and a 6/50 kit are available. The first number being the number of attachments, and the second being how many accessories are included.
There is a customized kit with the attachments you need to get the job done no matter the job. Otherwise, the all-purpose kit has a range of bits to cater to any general task you may have for the rotary drill.
An ergonomic handle gives the 4000 rotary drills a comfortable fit in the hand even when used extensively or at various angles. The button layout has been made to keep the power and speed control separate. As a result, the adjustment of the drill’s speed can be made precisely and with little to no thought.
Another great feature is the ability to replace the motor brushes. By replacing the worn-out brush in the drill with a new one, the life of the 4000 rotary drills can be extended for many years.
Drawbacks of the 4000
As the Dremel 4000 is an older model than the 4300, there are bound to be a number of drawbacks that were improved upon in the newer model.
One such drawback is the collet lock attachment system. While it is able to accommodate a wide variety of bits and attachments, the collet lock is of a fixed size. This indicates that smaller or larger bits may not be able to be securely attached.
In order to fit bits of a different size than the collet lock, the entire lock must be removed and replaced with an adequately sized collet lock for the attachment. The whole process can be a hassle, especially when working with a number of differently-sized bits in succession.
Another area that the 4000 model suffers in is the air circulation within the drill. When used for an extended period, there is a considerable heat spike. The temperature is not so high as to be uncomfortable when holding the drill, but it is significant enough to be worrisome.
Of course, this rise in temperature occurs only if the drill is left running under strain for a more extended amount of time. For light users of the 4000 rotary drill, they should face no issues with overheating.
Comparing Dremel 4300 Vs 4000
Looking at both these rotary drills side by side, they share many similarities. Dremel has kept features that worked well in the 4000 model in their newer 4300 model. Similarly, there are some features that were improved upon or entirely new added to the 4300.
Build
The saying “Don’t fix it if it isn’t broken” is very relevant in the case of the Dremel rotary drills. Both the 4000 and the 4300 have the same ergonomic design for a secure grip no matter how you hold the drill.
Admittedly, the 4300 has a slightly thinner build than the 4000, but it is not a drastic change in design. This design choice makes the 4300 more comfortable to hold for extended periods of time.
Attachment System
An area where there is a drastic overhaul of the 4000 design in the 4300 is the attachment system design. With the traditional system of a collet lock, the 4000 was prone to regular dismantling to accommodate larger or smaller bits and accessories in the drill.
What’s more, it became necessary to purchase a separate differently sized collet lock just to use some attachment. The extra expense, along with the specialized accessories, can be a hassle just for a unique task or job.
Of course, switching out a collet lock for another size is not a regular occurrence but rather for specific tasks. Attaching and removing bits is made easy with the EZ twist nose cap system, giving fast transitions between different attachments while keeping them securely fixed.
Comparatively, the new three-jaw chuck design in the 4300 improved the collet lock system by removing the need for additional tools to change the attachments. There is no need to buy different-sized collets just to attach a specific bit to the drill with the 4300.
The three-jaw chuck design saves on not only money but also time and energy spent attaching certain bits. This can be especially useful for projects requiring different bits and accessories.
Furthermore, the strength and security that the three-jaw chuck design brings in securing attachments is on par with that of the collet lock system; easily a notable upgrade from the 4000.
Diversity of Attachments
Moving from the attachment systems to the attachments themselves, there are differences in the kits available for each model. As the attachment systems were overhauled in the 4300, the bits had to be reconfigured to accommodate the three-jaw chuck design.
Not only is the attachment design different, but the number of attachments in the kits has changed. In the 4000 model, the largest kit available is the 6/50 kit with 50 accessories and six attachments.
Comparing this to the 4300’s largest kit available, the 9/64 kit with 64 accessories and nine attachments. When it comes to Dremel rotary drills, the more available attachments, the more versatile your drill will be.
Of course, this is just an illustration as not everyone will be using every single attachment; you should get a kit that caters to the purpose you need the drill for. Any extra accessories included in the kit will become a safety net should you need them in future projects.
Power
Looking at the power of both models, there is not much of a difference on paper. The 4000 comes in at 1.6 amps, while the 4300 sports 1.8 amps. Despite the difference in power output, both models are capable of variable speeds from 5,000 to 35,000 rpm.
This incremental difference may not seem like much, but there is a noticeable difference in performance when each is pushed to its limit.
With a higher power output, the 4300 can operate at higher speeds for heavy-duty jobs for an extended amount of time. As opposed to the 4000 model, which is prone to overheat when used extensively for more extended amounts of time.
Due to the complex nature of the many jobs a rotary drill is used for, this slight difference in power between the 4300 and 4000 can make all the difference in getting a quality result.
Noise Level
A small difference that may be inconsequential to some is the noise level at which both models operate. If noise is a factor that you need to consider when deciding on a model, the 4300 is the better option.
The older 4000 operates with average noise levels for a rotary drill, but the airflow is not as ideal as the 4300. This causes the drill to make more noise compared to the 4300, which is quieter and runs cooler.
LED Swivel Light
Perhaps the most significant difference between both models is the built-in LED light in the 4300. This is a newer addition to the Dremel rotary drill design and brings an added level of efficiency when using the rotary drill.
By illuminating dark areas, the LED light can help guide the drill through tight spaces. Furthermore, it is battery-powered, so even if the drill becomes unplugged, the light will still function.
As it is built into the drill, the LED light can pivot around the tip to change the angle of the light on the piece being worked on. This is especially useful for close-up detailing work where the shadow of the rotary drill can obstruct the view.
The rotation of the built-in light is a feature that is lacking in the 4000 model. While not a deal-breaker, it is still a helpful feature to have and is a standout feature for the 4300.
Value
Pricing of each model is where the differences between features are made evident of whether it is worth it or not. The 4300, being a newer model, is priced higher than the older 4000; however, it does not require additional purchases of different collets to attach various sizes of accessories and bits.
Depending on what task the rotary drill is being used for, the actual value for money varies. If all the features are utilized extensively, then the investment can be worth the money. However, it is not necessary to splurge if you are not going to use the unique features offered by the 4300.
Choosing the Right Model for You
When choosing between the 4300 and 4000 models, there is little that sets them apart from each other. They both sport a six-foot cord and a comfortable ergonomic handle. Furthermore, the rotation speed is the same in both models.
To ensure the most informed decision can be made, different aspects of where each rotary drill model shines or falls short must be considered. Other aspects such as price and convenience are a consideration to be taken into account.
Unique Features
Having certain features in your rotary drill can change the entire experience you have working with it. If these features are what you need to elevate the quality of work or just to ease convenience, then the newer 4300 model is the clear winner.
It has an in-built pivot LED light that can help to guide your bit while working in dark areas. Not only useful for dark spots, but it is also a helpful feature to have to keep a clear view of what you are working on. Better visibility increases the performance capability.
Additionally, the newer three-chuck attachment system is an upgrade from the 4000’s collet lock system. It saves time and energy when using multiple bits by removing the need to constantly change collets to fit different-sized bits.
Power
For those who require more power from their rotary drill, the 4300 is the ideal choice. Having a 1.8 amp power output, this is only slightly higher than the 4000’s 1.6 amp power output.
Both rotary drills work at a speed of 5,000 to 35,000 rpm, so the performance of either model is dependent upon the power source. The slightly higher power output in the 4300 allows it to work at the maximum rpm for an extended period of time with no heating issues.
As the 4000 model has a slightly weaker power output than the 4300, it struggles when performing high-speed jobs consistently. This draw on power causes the drill to heat up considerably.
From this, it is evident just how far a little extra power goes in the performance of the drill. This extra power can go a long way when working with heavy-duty materials or for longer work sessions.
Attachments
Due to the multi-purpose nature of the rotary drill, any specialized tasks can be performed by the same tool, just with a different tip. The variety and number of attachments available can determine the range of tasks the drill is capable of.
On one hand, the new three-chuck attachment system in the 4300 allows for a faster transition between attachments with no extra tools necessary. On the other hand, there are currently only two kits available. However, the largest kit has a wide range of accessories included, more so than the largest 4000 kits available.
As it is an older model, the 4000 uses the old collet lock attachment system, requiring additional purchases of different-sized collets to accommodate specific specialized attachments. However, with this older system, you do get a wider variety of bits and accessories to choose from. Although, the time and energy that is needed to switch between attachments are considerably more significant in the 4000 model.
Comfort and Convenience
Using a rotary drill for extended periods of time can be a strain on your hand. The build of both the 4300 and 4000 models is almost identical, save for a slightly slimmer body in the 4300. This can be less strain on yourself when working on a big project; however, this difference in size is not immediately apparent.
Additionally, the attachments to aid in comfort and convenience, such as the detailer’s grip or the flex shaft, must be considered. These can negate any minor differences in the size of the actual rotary drill. The comfort of using the drill with either of these attachments can change the experience completely.
Pricing
The price tag of tools can be on the expensive side, so every purchase becomes an investment. As an investment, the value for money is a crucial aspect to be taken into consideration, especially for those on a budget.
Between the 4300 and the 4000, the 4300 is the more steeply-priced option of the two. Of course, this does not make the 4000 model inferior in any way. It is just a matter of whether or not you consider the added features of the 4300 worth the extra bit of cash or not.
Safety Attachments
Included in the rotary drill kit is a basic set of safety attachments to protect you and the drill from injury. However, when working with certain materials, you may need to purchase additional attachments explicitly made for that material.
It is important to take the necessary precautions to protect yourself from potential harm. Look into what safety attachments are available for a rotary drill model, and if it is suitable for the materials you are working with.
Which attachment kit should you buy?
Every rotary drill will have a general-purpose kit with a range of bits and accessories for every job you may need the tool for. As these are just the basic attachments, they are sufficient for the general public to use with no problems.
However, if you are working with a specific material or require a certain set of bits for a particular job, Dremel offers specialized kits. They are made with a particular task in mind. Be it cutting, sanding, engraving, or cleaning; there is a kit for every possible use of a rotary drill.
They include more detailed tools you would need to get the job done. It is a simple matter of finding the kit that relates to your specific task and attaching the bits to the drill.
Can the Dremel cut through metal, glass, and ceramic?
To answer this question briefly, yes, it is able to cut through these materials as both models have a motor capable of handling the strain.
However, special bits must be used in order to cut through glass and ceramic. Additionally, safety attachments must be used when working with glass and ceramic as they can cause injury or damage to the drill.
How do you use the collet lock to change attachments?
The standard collet lock mechanism can accommodate ⅛” shanks but sometimes falls short or is too large for certain bits and accessories. To remove the bit from the collet, simply twist the EZ nose and pull the bit free.
To replace the entire collet for holding a different sized attachment, press the button on the front of the rotary drill to release the EZ nose. Then, use a wrench to remove the entire collet and replace it with the appropriately sized collet and screw the nose back on.
Dremel 4300 Vs 4000 Conclusion - The Winner
After considering all the features that make each rotary drill model unique, what would be the best choice to get the most value for money?
Between the 4300 and the 4000 model from Dremel, the safe choice would be to go for the 4300 model. Although it has a higher price point, the unique features that it offers make up for the price tag.
That’s not all; the convenience of having the pivot light illuminate the surface, as well as the extra power, is what sets it apart from the 4000.
On the other hand, if a simple rotary drill with light use is what you require, or if you are on a budget, then the 4000 model is still a great option. It offers a more extensive selection of specialized accessories as it uses the older collet lock attachment system.
Both models do what they were designed to do. So, purchasing either will undoubtedly be a great decision to add to your workshop’s collection of tools.
The Hoome window seal for portable air conditioners stands out because of its cheap cost, dual hose suitability, and universal fit. The next best is the Jeacent and Gulrear window seals, with their easy installation and durability. And if you have a casement window, the Airly window seal kit is the best option.
Portable air conditioners offer a practical and cheap cooling solution to the intense summer heat. But their efficiency is affected by their ventilation and the window gaps. To avoid hot air from the exhaust hose coming back inside, it is important to give the window an airtight seal.
Window seal kits are a temporary and cheap solution to this problem of a portable air conditioner. And today, I’ve curated a list of window seals to help you decide the best one for your portable AC unit.
Best Portable AC Window Seal Kits
Here is the list of the 5 best portable AC window seal kits that you can use to improve the efficiency of your portable air conditioner unit.
Adhesive too durable to remove during the non-AC season
The Hoome portable air conditioner window seal helps keep a closed environment and prevents the warm air inside the AC hose from getting into your room. It seals around your window and then wraps around the nozzle of the hose, blocking the return flow of hot air. This protects the efficiency of your own mobile air conditioning unit.
This window seal is pretty easy to install as well. You just need to apply the adhesive hook tape to the inside of your window frame and the window itself. Hence, installation is a piece of cake. It has two zippers, so it will work even if your portable air conditioner has two hoses.
Additionally, the window seal is suitable for most portable air conditioners. They are also suitable for most windows, whether they open to the left or the right, whether it's a bottom-hung window or a skylight. Just note that the maximum allowed perimeter of the window is 400 cm or 157 inches.
The Jeacent window seal for a portable air conditioner is easy to install and comes with two different fixing methods. The product box includes most of the things you need for the installation, making it a quick and easy process.
Its exclusive bottom panel joint leads to a seamless design, keeping all the hot air out and leaving no gaps. It uses durable and thick PVC to help you keep your room cool for longer, leading to savings on energy costs.
Additionally, since it helps to regulate the air exchange efficiently, it helps keep out dust and rain. So, not only does it keep the hot air out, but it also helps to keep the indoor air clean.
Note that the seal supports hoses with an external diameter between 5.1 and 5.9 inches.
The Gulrear window seal for portable air conditioners is pretty easy to install, with the panels being easily adjustable due to their slider nuts. It’s designed specifically for exhaust hoses with a diameter of 5 inches so it won’t be compatible with all AC units.
The product box includes most of the tools you need for the installation, along with the user manual, making installation a breeze. The sealing tape is also provided and is posted at the connection between the sealing plate and the window. This helps to effectively avoid hot air coming in.
This window kit is designed for sliding windows that open either horizontally or vertically. Additionally, it supports two hoses. So, you can easily use it with your dual hose portable air conditioner.
Most of the window seal kits on this list support all kinds of windows, but casement windows are very different. This Airly seal is one of the best options for window seals if you have casement windows.
Casement windows, though popular, don’t have a lot of options when it comes to window seals. So, this Airly window seal is specifically designed to fit any casement window. It is also very easy to install since all the tools you need are included in the product box.
Just note that the window seal will support casement windows measuring less than 158 inches. So, measure the perimeter of your window before purchasing to make sure it’s compatible.
Also, you don’t need to worry about bugs or insects creeping in. The sturdy zipper makes for easy hose access as well as keeping the insects and the hot air at bay.
Type: Single hose | Window Size: 158 inches | Window Type: Casement windows | Price: $22.84
The Sikadeer window seal for a portable air conditioner comes with an instruction manual and is very easy to install. It is suitable for sliding windows as well as sliding doors. The boards included in the seal kit allow you to adjust the size of the kit freely. Thus, it supports windows measuring between 17 and 60 inches.
Make sure the diameter of your hose is 5.1 inches before purchasing to ensure compatibility. The window seal kit is made using PVC material, making it high-temperature resistant, non-toxic, and pollution-free.
The window seal can also be embedded in the window rails, leading to a tight sealing effect. This helps effectively prevent hot air from coming inside the room.
Type: Single hose | Window Size: 17 - 60 inches | Window Type: Sliding window/Sliding door | Price: $23.99
Buying Guide for the Best Portable AC Window Seal Kit
Any portable air conditioner is bound to send some hot air back inside the room, reducing the efficiency of your portable air conditioner and also hiking up your energy bills. Window seals are an effective solution to this problem.
Here are a few things you should remember to buy the perfect window seal to meet your needs.
1. Types of Windows
You’ll obviously need to know what kind of window you have before you buy a window seal for it. Unfortunately, window seals don’t work with all kinds of windows. They only work with windows that slide or crank open, like:
Sliding windows
The most popular window style, sliding windows can be single or double-hung windows and might open horizontally or vertically.
Sliding doors
Most window seals that are compatible with sliding windows will also be compatible with sliding doors as well. Just make sure to get the measurement right.
Casement windows
Casement windows are windows that crank open. And though they offer an unobstructed view of the nearby scenery, they are pretty difficult to seal completely. So, your best option with this window type is to buy mesh kits with zippers.
Thus, windows become very important for the effective functioning of a portable air conditioner. In case you don’t have windows available, through-the-wall window conditioners are also available, which don’t require any window to cool air.
2. Window dimensions
Window dimensions are a significant measurement you need to keep in mind while purchasing a window seal. Measure all the sides of your window to get the perimeter, and then check the window dimensions for the window seal you are purchasing to make sure it is compatible.
The perfect size match will ensure a tight seal and lead to the higher efficiency of your portable air conditioner.
For sliding door seal kits, like the Sikadeer window seal for portable air conditioners, you don’t need the exact measurements. This is because you usually get a sliding door seal bracket to make the installation easier.
3. Installation
The installation process of window seals mostly depends on the type of window you have, as well as your portable air conditioner. To make sure the instruction process is as hassle-free as possible, check whether the product box comes with everything you need.
Adhesive tape, adhesive fasteners, and hose connectors are some of the things the product box absolutely needs to include. So, check the product details carefully before going all in. You can also look for installation instructions or user manuals.
For casement windows, mesh kits with zippers are the best option. You can find step-by-step instructions for the installation of this kit in the user manual or on videos online.
Installing a window seal on a sliding window is even easier as long as your measurements are correct. You can also find step-by-step instructions or video tutorials for these online to make installation an easy process.
The complete installation process of the window seal kit should not take more than 15 minutes.
4. Style of Window Seal
Many portable air conditioners are dual-hose models. In case you have a dual hose model, make sure your window seal supports that particular portable air conditioner. On the other hand, most window seals are suitable for single-hose models.
If you don’t want to go through the hassle of dual hoses, vents, and window seals, you can check out some window fans for another effective cooling solution.
What is a portable air conditioner window seal kit?
A portable air conditioner is an effective solution to the intense summer heat. But it cannot perform at its maximum efficiency without proper ventilation. Hence, a window seal is a perfect temporary solution.
The window seal helps you to seal the gap created by the exhaust hose, helping to prevent hot air from coming back inside the room. Without a proper window seal, it is like you’re basically running a window air conditioner with the windows open. This really reduces the cooling of your portable air conditioner and also drives up your energy bills.
So, after checking the type and dimensions of your window, you should buy a window seal to make the window airtight.
How do I install a portable AC window seal?
The installation of window seals for a portable air conditioner is a pretty easy task. Most of the tools you need are already included in the product box. The user manual also contains instructions to make installation an easy process. You can also find video tutorials online if needed.
Just make sure to correctly measure your window before purchasing the window seal kit to ensure a smooth installation process.
Will using a portable air conditioner window seal affect my electricity bill?
Yes, it will. But it’s all good news! Because a window seal for portable ACs is meant to drive up the efficiency of your portable air conditioner. If the efficiency goes up, your room gets cooled at a much quicker rate. This means you will need to use the AC for lesser time, leading to savings on your energy bills.
Can I use a portable AC window seal with any brand of portable AC?
Yes, you can. You can use a portable air conditioner window seal with any brand of portable air conditioner. You just need to make sure the dimensions of the window and the type of window match the window seal you’re buying. Make the measurements and calculations beforehand to make sure there is compatibility.
Your portable air conditioner can also have two hoses, so make sure your window seal is dual-hose compatible if that’s the case.
Can I still open my window with a portable AC window seal installed?
For some window seal kits that don’t block the opening of the window, yes, you can open your windows. However, for some, you might have to remove the window seal before opening the windows. However, opening the window with the window seal installed would be quite counterproductive, given why you are installing it in the first place.
Can a portable AC window seal kit be used with sliding windows?
Yes, a portable air conditioner window seal kit can be used with sliding windows, whether they open horizontally or vertically. Just make sure you get the measurements of the window and the outlet hose right before making your purchase.
Conclusion
Having a portable AC window seal kit is an excellent accessory to keep your environment temperate and energy-efficient. These kits prevent the return flow of warm air, thereby augmenting the working of your air conditioner and saving on energy bills. However, not all kits bring the same quality, support, and adaptability.
From the above 5 best portable AC window seal kits, here are the top three expert recommendations:
The Hoome Window Seal for Portable Air Conditioner, due to its versatile compatibility with various windows and easy-to-install design, emerges as the best overall and is an ideal option for those looking for maximized performance and value.
Next, for people looking for longevity, the Jeacent Window Seal for Portable Air Conditioner stands out as the best for durability. Its robust and thick PVC design makes it a good option offering extended service and more bang for your buck.
Lastly, for easy installation and user-friendly adjustments, the Gulrear Window Seal for Portable Air Conditioner takes the crown. If you happen to prioritize convenience and simplicity of setup, this product is the right choice.
To make the most out of these fantastic products, ensure you check out the specifications of each seal kit to match your window and hose sizes before making a purchase. Enjoy the comfort and energy savings that come with having the right seal kit for your portable AC unit.
Cartooning is so much more than simply drawing a few figures - without good writing, the best of artwork has no value.
And similarly, if the cartooning characters aren't expressive enough, even the wittiest of one-liners and jokes fall flat.
Drawing cartoons isn't just about exaggerating a few facial features or comedic timing. Every artist has a style of their own, which they display in their stories and characters and their perspectives on the goings-on of the world around us.
Such a complicated craft requires a deft master and someone you can look to for advice. If you have to reach the top, you have to stand on the shoulders of giants first.
Without further ado, the best cartooning books follow!
Best Cartooning Books
Do you want to learn how to create your own cartoon characters and comics? Cartooning is a great way to express yourself creatively and tell stories. Here is the list of 8 best cartooning books to help you get started:
If you're new to the game and you don't know where to start, this is it. This book isn't exactly a step-by-step guidebook rather, it's about the art of cartooning itself and what it's all about.
This book takes an in-depth look at how storytelling works, what's most important when conceptualizing characters, and all the types of media and tools you can experiment with. But it also delivers solid knowledge of all the fundamental elements of comic book design.
This is the ideal book for forging your personal style and discovering your own design and virtual language. In the beginning, you'd be in dire need of some perspective, and there's no better person to learn from than Ivan Brunetti, who has been featured several times in the NY Times and the New Yorker.
Contents
Ivan Brunetti presents 15 distinct lessons on cartooning and its progression through the ages. All these lessons are very wittily worded and have a lot of detail on common terminology, popular techniques, helpful tools, and of course, theory.
Brunetti's own illustrations make this a very lively book -and you will start with spontaneous drawings and then move to single-panel strips and ultimately, complicated multi-page stories. Simple exercises and assignments will help you move past your fears and will help you become more confident in your skills.
Author: Ivan Brunetti | Publication Year: 2011 | Format: Paperback | Page Count: 128 | Target Audience: Adults, Art Students | Skill Level: Intermediate | Key Topics Covered: Cartooning concepts, exercises, history
Everything about a cartoon begins at the face -all emotions are conveyed through the face, and the comic panel starts with a cartoon character's facial expressions.
This book focuses on all the elements of a cartoon character's face and how it can be painted to elicit specific emotions from the characters and the readers. Christopher Hart is one of the best in the business when it comes to writing art books, and this one is no exception.
If the last book on our list was about getting an overall perspective, this is the step-by-step guide.
Contents
This book is the ultimate tutorial on the head, face, and expressions. This book has detailed sections on the eyebrows, mouths, and eye shapes so that you can cover a wide spectrum of emotions.
If that's not enough, there are also chapters on both male and female faces, from newborn babies to adults, in differing shapes and sizes.
It's not enough to know just how to draw a face, you will also need to learn how to turn that face in different directions, all the while maintaining the visual integrity of the character. There is also a chapter on shading the face and a bonus chapter on how to draw body parts conforming to the face.
This book is geared towards absolute beginners who have no background in art but have a knack for coming up with comic situations and witty words.
The caricature is the only form of the comic which have real-life people as their inspirations. Most celebrities and world-renowned people have a unique set of facial characteristics, which are then exaggerated to comic effect.
It can be hard to teach someone to distort facial features while still keeping the rest of the features proportional. Thus it can only be taught by someone like the award-winning Tom Richmond, who draws on three decades of experience as a caricaturist, in various fields such as books, advertising, video games, film, television animation, and even MAD magazine.
Contents
Every chapter focuses on something different, and it will teach you how to notice subtle differences in everyone, and then you can decide on what to exaggerate.
You'll be taught how to observe faces and people and then what to exaggerate to make for a successful caricature. You'll learn about all the different types of caricatures depending on what you're drawing for.
Put simply, "The Mad Art of Caricature!" is the Holy Grail of the book drawing caricatures. It is the most comprehensive and complete book on the art of caricature to ever be published with over 500 illustrations, laid out in a very reader-friendly way.
This book is regarded as one of the classic art books and is one of the most popular cartooning books available for sale online. If Cartoon Faces only covered the face, this book provides a more holistic and all-around approach to drawing cartoons.
This book is targeted to everyone regardless of age or artistic talent or experience. The only requirement is that you are a fan of doodling and you want to get better at it.
Contents
It's hard to find a book that simplifies things to a greater extent than this one. The whole human anatomy is broken down into a series of very easily realizable shapes. It has over 3000 illustrations, to teach you how to draw everything from facial muscles to postures to motion.
The best feature about this book is that it is designed so that you can go at your own pace from one chapter to another. You can also very easily pick up where you left off, even if you took a months-long break.
However, the only drawback is that the painting style feels like the Sunday comics in a newspaper. It might feel a little dated and old-school, but it is still an excellent book for beginners.
This is the second book by Christopher Hart that's on our list. Anthropomorphizing animals is nothing new and has been around since Tom and Jerry. Early MGM Studios and Disney did a lot to make animal cartoons popular.
This book regularly makes the top 50 Art Books lists and is super popular online, in no small measure due to its immense simplicity and the sheer number of different animals you will learn to draw with the help of this book.
Contents
This book is divided into chapters depending on the kind of animal you wish to draw. Each of these chapters has in-depth information on how to capture every different emotion and how to draw each body part of that animal like faces, paws, feet, wings, and tails. In total, this book numbers more than 200 pages.
All the popular animals are present - which includes cats, dogs, horses, lions, penguins, bears, tigers, and elephants. Apart from that, you also have all the sidekick animals like pigs, kangaroos, giraffes, and turtles.
Simple, guided tutorials show you how to portray every emotion from cutesy-sweet with huge eyes to begging to scheme with malicious eyes. There are similar instructions for drawing animals that fit certain roles from baby animals to villains to completely clueless animals and much more.
Leaving the generic title aside, this book does have a lot of cool stuff in it. At its heart, it is a very simple drawing book aimed at teachers and students. As a result, it's mostly suited for children and early beginners.
If you've got some amount of experience as an artist, it's better to buy a more advanced book. In fact, this is a series of books. If you want a more advanced book, you could consider purchasing the other, more focused installments in this series.
Contents
Each chapter of the book starts off with a small introduction to the technique, fundamentals, and how to start your paintings with an end goal in mind.
However, right after, it wastes no time diving right into step-by-step illustrations. This book teaches you the basic principles of illustration by showing you how to draw simple shapes that eventually turn into complex drawings.
The best feature of this book is that, at the end of every chapter, there is a series of fun and hands-on exercises. These exercises will help you look at an object or a figure as an artist would - as a series of interconnected lines, shapes, and other elements. Also, these exercises will ensure you retain whatever you learned in that chapter.
From hyperrealistic portraits to holiday themes and tropes to drawings of tattoos, How To Draw Cool Stuff makes everything a cakewalk and explains everything as you would to a 5-year-old, literally.
Author: Catherine V. Holmes | Publication Year: 2014 | Format: Paperback | Page Count: 253 | Target Audience: Kids, Teens, Adults, Art Students | Skill Level: Beginner/Intermediate | Key Topics Covered: Optical illusions, 3D shapes, shading, textures
This is the third book by the same author on our list and is one of his best-known titles. This one takes an in-depth look at character creation for illustrators.
Creating a likable and engaging character is the most important facet of creating a cartoon character. Before you get started with telling your stories, you first have to make up an enigmatic character.
Contents
This book takes away all the guesswork and uncertainty when it comes to creating a cartoon character by simply providing the reader with a very fresh and easy approach. This book is highly influenced by the most popular cartoon characters of our times and aims to show certain similarities among them.
It's s 160 pages long and is full of lively illustrations that provide a guided approach to conceiving and creating interesting characters. Chris's guides are super detailed, and he teaches the reader to observe a drawing and then improve upon it with their own ideas.
This book is chock-a-block full of useful tips and hints, and it will give you all the help you need to let your imagination run riot.
Author: Christopher Hart | Publication Year: 2013 | Format: Paperback | Page Count: 160 | Target Audience: Teens, Adults, Art Students | Skill Level: Beginner/Intermediate | Key Topics Covered: Cartooning styles, character design, storytelling
All the other books on this list either focus on certain types of cartoons, like faces, people, animals, etc. or they are beginner's guides to getting started.
None of them are complete or all-around books, though, which cover every aspect of creating cartoons. This book aims to accomplish the hardest task of all - give the reader an artistic vision so they can give their cartoons their own distinct style and shape.
It's the most all-around cartooning book you can buy, which has a huge amount of depth and covers almost everything in today's world of cartoons, making it great value for money.
Contents
This book has over 200 pages and teaches you how to draw almost everything from fantasy characters to background designs to common pop icons.
This book has step-by-step guides on how to draw cartoon people and cartoon animals, retro-style "toons'," and even robots like Wall-E. These guides are detailed and complete in every respect from the design to the composition to explaining exactly what is appealing about the cartoon.
The Humongous Book of Cartooning isn't just big, it has a huge number of tips and hints that Chris is famous for. The eye-catching characters and extensive visuals pack with them more instructions and guidelines than any Chris Hart book before it. In short, if you want to buy one book that covers most of everything about drawing cartoons, this is it!
Author: Christopher Hart | Publication Year: 2011 | Format: Paperback | Page Count: 256 | Target Audience: Kids, Teens, Adults, Art Students | Skill Level: Beginner/Intermediate | Key Topics Covered: Cartooning techniques, character design, storytelling
Cartooning techniques, character design, storytelling
Are there any free online resources for learning cartooning?
Yes, there are many free online resources for learning cartooning, including tutorial videos on YouTube, blogs, and forums where artists share tips and advice. However, keep in mind that not all online resources are of equal quality, and it can be difficult to gauge the accuracy and reliability of information found online.
Can cartooning books help me develop my own style?
Yes, while cartooning books typically teach a specific style or approach to cartooning, they can also provide a foundation for you to develop your own unique style. By learning the fundamentals of character design, anatomy, and composition, you can experiment with different techniques and create your own cartooning style.
Do I need to have drawing experience to read cartoon books?
No, you don’t necessarily need to have drawing experience to read cartooning books. Many books are geared toward beginners and provide step-by-step instructions for drawing basic shapes, characters, and expressions. However, having some basic drawing skills and familiarity with art supplies can be helpful.
How long does it take to learn to cartoon?
The time it takes to learn cartooning can vary depending on your level of commitment and dedication, as well as your natural talent and artistic abilities. Some people may pick up the basics quickly and be able to create simple cartoons within a few weeks, while others may need months or even years of practice to develop their skills.
Are there cartoon books specifically for children?
Yes, cartooning books specifically designed for children use simple language and illustrations to teach basic cartooning skills. Some popular options include “Cartooning for Kids” by Mark Bergin, “How to Draw Cartoons for Kids” by Christopher Hart, and “The Kids’ Guide to Drawing Cartoons” by Mark Kistler.
Can cartooning books help me make a career as a cartoonist?
While reading cartooning books can certainly help you develop your skills as a cartoonist, there are many factors that go into building a successful career in this field. In addition to artistic talent and skill, you may also need to develop business skills, build a portfolio, network with other artists, and seek out professional opportunities in the industry.
Conclusion
Thank you for taking the time to read through our article on the best cartooning books! It's evident that there are several amazing choices out there, each addressing different aspects of the art. We hope that the insights provided in this article have fueled your excitement for cartooning and will assist you in taking your skills to new heights.
Out of these 8 best cartooning books, here are our top three recommendations:
Ivan Brunetti's Cartooning | Philosophy and Practice is an ideal option for those who want to forge their personal style and discover their design and visual language. With Brunetti's lively illustrations and engaging lessons, this book is perfect for intermediate artists who want to deepen their understanding of the cartoon world.
Cartoon Faces | How to Draw Heads, Features, and Expressions by Christopher Hart is a good option for absolute beginners or intermediate artists who want a step-by-step guide on drawing cartoon faces. The detailed sections on various facial features and the coverage of different age groups make this book an essential resource for mastering the ability to convey emotions through cartoon expressions.
The Mad Art of Caricature | A Serious Guide to Drawing Funny Faces by Tom Richmond is the right choice for those who are passionate about caricature art. This book offers a comprehensive guide to observing real-life people and their features, teaching you how to exaggerate them effectively for the perfect caricature. If you want to level up your skills in this specialized form of cartooning, this book is the one for you.
As you continue to explore and develop your cartooning skills, remember that practice is key. Keep experimenting with new techniques, learn from these excellent resources, and most importantly, let your imagination run wild. Stay passionate about your art and have fun on this exciting journey! Happy cartooning!
A ducted air conditioning system comes with a high price tag and installation costs, which can range from $3000 to $10,000 in total. However, the overall cost of one depends on factors like buying price, installation, running cost, usage, and product specifications.
Ducted air conditioning has the benefit of cooling multiple rooms through vents or ‘ducts,’ unlike conventional air conditioners.Besides circulating cool air throughout the house, some ducted air conditioning systems have ‘zones,’ meaning you can set different rooms to different temperatures.
And to help you understand them better, I will walk you through how ducted systems work and how much they can cost. Let’s dive in!
Factors Affecting Ducted Air Conditioning Costs
Before you install ducted air conditioning, there are several factors you need to consider to get a better insight into the potential overall expenditure–short and long-term. Even professional ducted air conditioning installation services look into these facts before giving you a quote.
1. Property Size And Layout
Considering the layout and size of the room is very important to find the right spot for installation. This will also help you determine the right size and wattage required, which will play a crucial role in influencing the overall cost of installing the ducted AC.
For example, if you want to add central heating or cooling to an apartment or single-story home with three to four rooms, you will likely require a 7-10 kilo-watt system, costing $5,000- $7,000.
Likewise, if you have a two-story house and require ducted air conditioning units on both floors, you will require a 14-16 kilo-watt system with an expenditure ranging from $7,000 to $9000. However, it is important to note that if the central air conditioning is installed below the floor or above the roof space, there may be an additional expenditure of $500-$1,000.
2. Location Of Your House
Since the U.S. has different types of climates and weather conditions, several factors may lead to the corrosion of your air conditioner. If you live on the coast or near the sea, there is a high chance that salt water might corrode the condenser, the external split systems, or even your entire air conditioning unit. This usually leads to blocked airflow and higher energy consumption, leading to high electricity prices.
However, some reliable brands like Daikin or Fujitsu have an anti-corrosive outer coating and stainless steel mounting for protection and efficient energy use.
3. Control Features
It is no surprise that the ducted air conditioning cost will be higher if there are more features. And modern air conditioning systems have more efficient features, especially when it comes to control and operation, making them easy to use yet pricier. Here are the most common types of control features found in ducted air conditioners:
Standard Control- It has the most basic settings (on/off and timer) required for everyday operation
Zoned Control- This is an additional feature that lets you control the temperature in different, individual units or ‘zones’ for greater energy efficiency
E-Zone Control- The E-zone controller app helps manage the temperature in your home all year round from your phone screen. You can also restrict the airflow to empty rooms, thereby reducing your energy bills.
Amazon Alexa or Google Assistant- Most WiFi-enabled ducted air conditioning units are compatible with Alexa or Google Assistant, which will help you set the temperature from anywhere.
Voice Activation feature- a ducted air con system with its own smart app can have the voice activation option, which you can use to control the air flow or temperature.
4. Brand
Some brands cost more than others; however, you usually pay for better quality and energy efficiency in these cases. You can also find ducted air conditioning systems at low prices, but they might end up costing more in the long run.
Quality issues and warranty are the main reasons why it is always better to go for branded companies with high ratings, such as Daikin, Mitsubishi, Samsung, etc. However, I recommend talking to your ducted air conditioner installation professionals to help decide which brand will suit your needs.
5. Installation And Maintenance
The installation cost is one of the major contributors to the overall expenditure required for heating, ventilation, and air conditioning. If your unit is difficult to install, you’ll likely spend more on installation, so it is better to go for an easy installation split system.
Moreover, if your ducted aircon system has easy-to-clean, removable air ducts, you can maintain the unit at home without hiring professionals. From my experience, hiring air conditioner cleaners can be quite expensive, especially for ducted systems with a larger surface area to clean.
How Much Does Ducted Air Conditioning Installation Cost?
Installing ducted air conditioning is more expensive compared to other types of air conditioning systems. To give you a better idea, I’d say it typically costs 20-30% more than installing a split system or evaporative AC units.
For instance, covering an average one-story home with three or four bedrooms will cost $5000-$7000 in total. And if you have multiple stories, the overall installation cost will be substantially higher, so you must be prepared for a bill ranging from $7,000-$18,000.
Tip
If you live in an apartment with only one or two rooms, you should consider going for mini splits or other cooling systems to reduce installation and running costs.
The exact price you pay to professional suppliers may vary depending on a few factors such as property size, number of floors, electrical outlets, building insulation, construction types, etc. Thus, these price approximations are general, and only professional suppliers or air conditioning experts can give you the right quotes to help you understand and compare prices.
On that note, here are some of the factors that will influence the installation costs:
1. Zoning Systems
Even though categorizing the ducted air conditioning into different systems may seem to be unreasonably adding to your costs, it can actually save you money in the long run. It is an energy-efficient way to install your ducted air conditioning since you won’t need to have the entire ducted system on at all times.
2. Location
Professional installers usually charge more if they have to commute to places that are harder to reach and get transport. So, you might need to pay a higher-than-average installation fee.
3. Roof Size
For installing the ducts for the air-con system, the installers need to access the roof; however, it might be quite challenging if you have less roof space. If you have a small roof, chances are that they might install or adjust the roof trusses, further adding to the bill.
4. Distance Between Units
The distance between the outdoor and indoor air conditioning units can largely determine the installation cost. If the distance between the two is less, the technicians will require fewer materials for installation, thereby lowering the total cost.
Tip
Always look for multiple installation quotes from different installation services to be aware of the price range you’re dealing with. If there is a huge difference between them, ask them about the materials they’re providing for the ductwork.
Ducted Air Conditioning- Running Costs
It is quite difficult to come up with a decisive amount regarding the running costs of a ducted air conditioning system. These costs will largely depend on how many zones you regularly operate since your electricity and maintenance bills are directly proportional to this factor.
However, most air conditioning units nowadays have inverter technology, which is extremely energy efficient. Unlike their non-inverter predecessors, these air conditioning systems promptly go into the energy-saving mode or simply turn themselves off when it reaches the ideal temperature. This has further closed the enormous expenditure gap between ducted ACs and other cooling systems.
On average, ducted air conditioning costs a household around $170 to $350 per year, which is quite affordable, especially if you have a large house. However, it can vary depending on the electricity provider and energy taxes, which you can figure out by asking an electrician for a site visit. If you want to save more energy, there are plenty of energy-efficient ways, such as inverter compressors, temperature timers, insulation, etc.
Reasons To Choose Ducted Air Conditioning
Even though ducted air conditioning costs higher, there are several reasons why they might be more efficient in the long run:
Firstly, a ducted air con can serve as a central air system providing cooling, heating, and ventilation to larger homes with different layouts, making it quite cost-effective. They can even cool or heat hard-to-reach corners with superior airflow and circulation, unlike split systems that limit themselves to specific zones. These are great air conditioning solutions, as they won’t require multiple compressors and wall units, which can ultimately increase the upfront costs. So, even if you’re paying higher installation costs, you’re guaranteed full home coverage.
Secondly, many interior designers prefer hidden air conditioning units to achieve a cleaner, minimalist aesthetic. However, other systems like mini splits, window units, etc., cannot be completely hidden since their indoor component needs to be mounted on full display to produce cool or warm air.
Thirdly, most ducted AC air conditioning systems today come with a ducted reverse cycle, meaning it can produce both hot and cool air in the same capacity. So, going for a ducted AC unit is the best way to avoid purchasing a separate gas heating system. It is a versatile and one-time investment for homeowners who want their air conditioning to do it all through the different seasons.
Final Thoughts
Besides these variable factors, you must consider the future repair costs before buying a ducted air conditioning system. However, a ducted unit is appropriate if you have more rooms and require maximum output for heating and cooling.
Another thing I should mention is that though choosing the lowest installation quote may seem like the right thing to do, don’t forget to look into the details and check whether you’re getting durable and quality materials. And as a thumb rule, always ask for ductwork that doesn’t overheat or isn’t prone to grease so as to reduce the need for frequent maintenance services.
On that note, I’ll be signing off for now. Stick around for more such guides!
Ductless mini split air conditioners consist of small-sized compressor outdoor units, air handlers, and indoor evaporators that combine to form a wall-mounted unit. Their lack of ducts makes them easier to install and handle. They can be installed on the wall, ceiling, or floor units; and can be paired with existing air conditioning systems to save on energy bills.
On that note, here are the best energy-efficient ductless mini split AC I found on the market.
Best Mini Split Ductless AC
Here's the list of the 11 best mini split ductless AC, offering energy-efficient cooling without the need for ducts for easy installation and energy savings.
[ENERGY EFFICIENT COOLING] This 18000 BTU/h, 17 SEER,...
What I like
18000 BTU/hour cooling capacity
Pre-charged air conditioning
Wi-Fi-enabled control
Quiet mode
Affordable
What I don't like
No installation instructions
The Della brand has manufactured this mini split air conditioner with an 18000 BTU/hour cooling and heating capacity for efficient energy use. It has a pre-charged air conditioning outdoor unit with proper certifications that has a ductless inverter, including heat pumps and dehumidifiers to help in heating, ventilation, and air conditioning. I have tested this AC to find that it has a cooling and hearing coverage of up to 650 square footage.
Moreover, these mini splits can be fully functional in cooling or heating multiple rooms, even on low temperatures such as 5 degrees Fahrenheit. While set to the cooling mode, this mini split AC unit will adjust the room temperature and show the updates in the remote control instead of the indoor unit. You can use the Wi-Fi-enabled control to adjust the temperature and airflow to your preference for improved efficiency and comfort.
What’s more, the DELLA 18000 BTU Mini Split Air Conditioner works at 40 decibels only, making it incredibly silent in quiet mode. Providing equal airflow to the entire space, its air handler can adjust itself from 60 to 90 degrees quickly. It also comes with an installation kit that can help you undertake a Do-It-Yourself installation easily.
Cooling Power: 18,000 British Thermal Units | Seasonal Energy Efficiency Ratio: 17 | Voltage: 230 Volts | Dimensions: 8.82"D x 37"W x 12.44"H | Power Source: Corded Electric
Cooper & Hunter MIA Series 12,000 BTU, 21.2 SEER2, 115V, 1...
Quiet & Reliable Operation: Designed with low-noise...
What I like
AHRI-certified and ETL Intertek-approved
12,000 BTU/hour capacity
Whisper technology
Long-lasting warranty
Budget-friendly
What I don't like
Requires professional installation
AHRI-certified and ETL Intertek-approved, this ductless mini split system from Cooper & Hunter evenly cools and heats the room with its WiFi-friendly mechanism. It has a 12,000 BTU/hourcapacity, and its whisper technology ensures noise reduction, making it ideal for bedrooms, living rooms, and even commercial spaces.
Running on a massive cooling power, Cooper & Hunter’s ductless mini split air conditioner evenly heats and cools down the rooms in the entire house, thus increasing its energy efficiency. It comes with pre-charged refrigerant, which easily circulates through the indoor air handlers in less time while reducing energy costs.
Moreover, the indoor and outdoor units are ready to install with their 16 feet copper line set, drainage extension, and communication wires. However, I highly recommend going for a professional installation instead of a DIY one for this product.
Lastly, Cooper & Hunter’s ductless mini splits have a 7-year warranty on the compressor and a 5-year warranty on the other parts. So, you can count on using this ductless air conditioner for a long time!
Cooling Power: 12,000 British Thermal Units | Seasonal Energy Efficiency Ratio: 20 | Voltage: 115 Volts | Dimensions:31.6"D x 7.4"W x 11.7"H | Power Source: Corded Electric
High Efficiency Diamante Ductless Mini Split Inverter Heat...
Use for both cooling and heating: 12000 BTU/hour with 20...
What I like
Targeted performance
Double-directional air handlers
Remote control
Dimmable LED display
Strong outdoor unit
What I don't like
Requires sturdy building insulation
Pioneer’s mini split air conditioners from its Diamante Series are specifically designed for single-zone use and bring individualized comfort to the targeted areas. Ideal for residential and light commercial cooling experience and home automation, Pioneer’s ductless mini split air conditioner has a remote control operation for a wireless temperature adjustment. Its 12,000 BTU/hour capacity and automatic double-directional air handlers can control variable airflow and reduce energy costs.
These mini-split ACs deliver cooling, dehumidification, heating, and ventilation at just the touch of a button. With its large LED dimmable display, flat panel, automatic dual swing cooling system, and air louvers, the unit aims for energy efficiency and high performance. What’s more, its washable air filters make it easy to maintain while the multi-speed fan operates quietly.
Pioneer’s mini split system has a DC power inverter outdoor compressor with high efficiency in maintaining variable speed. Moreover, its galvanized metal construction coupled with electrostatic epoxy paint helps it withstand extreme climates and protect the thermostat. This unit from Pioneer also comes with different modes, including turbo mode, follow-me, ECO, sleep mode, and Freeze Protection.
Lastly, this mini split AC comes with a 16 feet line set, installation kit, free vibration absorber, and other accessories for easy professional or DIY installation.
Cooling Power:12,000 BTU/hour | Seasonal Energy Efficiency Ratio: 20 | Voltage: 115 Volts | Dimensions:8.12"D x 32"W x 11.5"H | Power Source: Corded Electric
MRCOOL is one of the leading brands in the ductless mini split system industry in the United States and is highly rated by customers on most shopping platforms. Equipped with heat pumps and Wi-Fi-engineered remote control, the MRCOOL DIY Ductless Split System is easy to set up with just a few settings from your smartphone. These mini split air conditioners are a part of the Energy Star series, which can be installed anywhere without expensive installation equipment.
Furthermore, its 12000 BTU/hour capacity can easily heat or cool a room up to 750 square footage in dimensions. I observed that MRCOOL’s ductless mini splits are their own SmartHVAC App, compatible with Alexa and Google Assistant, so you can control them from any Android or iOS smartphone. Its leakage detection alarm is another smart feature that makes it stand out among other mini-split systems.
This ductless mini split air conditioner can be an ideal energy-efficient solution for greenhouses, server rooms, and other spaces that require cooling all year round. It can improve air conditioning with low ambient cooling even in low temperatures such as 5 degrees Fahrenheit.
Lastly, it has a 25-inch pre-charged line set that allows DIY installation without special tools or professional help. And MRCOOL’s shipping, which divides the outdoor and indoor units into two packages for reduced chances of damage, is quite innovative.
Cooling Power:12,000 BTU/hour | Seasonal Energy Efficiency Ratio: 20 | Voltage: 230 Volts | Dimensions:16"D x 30"W x 22"H | Power Source: Corded Electric
Klimaire promises an energy-efficient solution to modern problems of indoor air quality with their ductless mini split air conditioner with a high SEER rating of 20.8. Another unique technology I have been looking for in mini split ACs is the self-cleaning function which can be activated through the remote control. Here, it cleans and carefully dries the evaporator, preventing mold, mildew, and bad odor while operating.
Similar to the best mini split ACs, this product also has a specialized design for its outdoor compressor, which allows defrosting the unit even in very low temperatures. Moreover, the outdoor unit is pre-charged and includes a base pan and space heaters to improve the performance of the capacitor. It also has a built-in anti-corrosive Golden Fin, which helps the indoor units perform with noise as low as 25 decibels.
What’s more, the mini split system series from Kilmaire has low ambient heating and cooling, which can be operated via a remote. And unlike window air conditioners, this ductless mini split AC has multiple modes, including customizable infrared settings, auto-restart, sleep mode, turbocharger, follow-me, etc.
Kilmaire’s single-zone ductless mini splits are ideal for detached or small rooms with minimal floor space or where the ceiling or attic is not suitable for ductwork. It also comes with a 15 feet installation kit with cables, mounting brackets, and other accessories to minimize installation costs. And finally, Kilmaire provides a 5-year manufacturing warranty on their mini splits.
Cooling Power: 12,000 British Thermal Units | Seasonal Energy Efficiency Ratio: 20.8 | Voltage: 115 Volts | Dimensions:Not Specified | Power Source:DC
OLMO Alpic 9,000 BTU, 110/120V Ductless Mini Split Air...
UL Listed, AHRI Certified. Works for heating with ambient...
What I like
Toshiba internal compressor
Programmable smart remote
Leak detection ability
Warranty
Multiple modes
What I don't like
Requires professional installation
This is a small-sized mini split AC with a ducted system suitable for bedrooms and living rooms that require energy-efficient heating and cooling all year round. I find this mini split AC reliable due to its built-in sturdy internal compressor from the trustworthy brand Toshiba. Moreover, its heat pump and indoor air handler can maintain both hot and cold temperatures for a long time, even during cold weather.
Its outdoor unit is designed to improve comfort and decrease labor costs during cleaning and maintenance. The OLMO Alpic Ductless Mini Split AC has a programmable smart remote for precise temperature control and mode navigation. You can choose the sleep mode for overnight air conditioning or the Turbo mode for fast conditioning.
Besides these, there are other modes, including intelligent defrosting, 24-hour timing, etc. Its leak detection alarm is also helpful in resolving internal damage or installation issues before it severely affects the living comfort. This mini split system comes with a pre-flared line set with accessories such as nuts and communication wires for a speedy installation. However, the company OLMO recommends professional installation over DIY.
Lastly, the Toshiba internal compressor has a 5-year limited warranty, while the rest of the air conditioner has a two-year limited manufacturer warranty.
Cooling Power: 9,000 British Thermal Units | Seasonal Energy Efficiency Ratio: 16.5 | Voltage: 120 Volts | Dimensions:20"D x 7"W x 7"H | Power Source: Corded Electric
With its 9,000 BTU capacity, the ROVSUN Mini Split air conditioner can quickly circulate the cold air in bedrooms, living rooms, offices, or apartments up to 450 square feet. Its high-quality compressor unit and multiple air handlers are AHRI certified and, therefore, have higher efficiency. With its efficient 19 SEER rating, ROVSUN’s mini splits can help you save more money and energy, making it an eco-friendly option.
I found this ductless mini split air conditioner from ROVSUN quite easy-to-use since it comes with clear instructions and an easily programmable remote. You can enjoy a cooling experience ranging from 61-88 °F along with various modes, including mute mode, 24-hour timer, turbo, sleep mode, and fan speed selection. Besides, it can add an elegant touch to your space due to its minimalist, sleek design while working with noise as low as 32 dB.
Equipped with a four-Way Swing technology, it can evenly distribute hot or cool air according to your preference in just a few minutes. Further, I have noticed that this mini split AC is speedily delivered within two to six business days, while the other central air or single zone ACs take quite a long time. ROVSUN also has responsive customer service that prioritizes accurate and timely assistance.
Cooling Power: 9,000 British Thermal Units | Seasonal Energy Efficiency Ratio: 19 | Voltage: 115 Volts | Dimensions:31.92'' W x 8.07' D' x 11.49'' H | Power Source: Corded Electric
5-YEAR COMPRESSOR WARRANTY 1 YEAR ON PARTS: We heard our...
SINGLE SHIPMENT: Unlike competitors, indoor and outdoor...
What I like
Toshiba or GMCC Compressor
10 Heating Seasonal Performance Factor (HSPF)
Alexa-enabled
Thermostat protection
PTC strip
What I don't like
WiFi connection problems
Classic America is a small business brand that manufactures energy-efficient mini splits delivered in simple, eco-friendly packages. Their One-Ton Ductless Wall Mount Mini Split operates with the help of an ETL-approved Toshiba or GMCC compressor, which makes it durable and resilient. Powered by 110-120 VAC electricity and 12 amp minimal current draw and with a 20 SEER rating, these mini split air conditioners can reduce your energy consumption.
This air conditioner also comes with a Wi-Fi, Alexa-enabled remote with easily controllable settings, including auto, heat, dry, cool, and fan speed levels. Besides, the timer function and dimmable display screen are other energy-saving features that can reduce the electric load on the mini split AC. Plus, the built-in air louver sends the airflow evenly throughout the room rather than in a single direction.
With its timer, automatic air swing, switchover, and three-speed fans, you save up to 30% energy with Classic America’s mini split ductless AC. What’s more, you need to worry about damage during low temperatures as the temperature monitor and thermostat protection prevents the air handler and compressor from freezing. Further, the additional PTC strip allows the unit to release hot air even in extremely low temperatures.
Classic America provides 16 ft. insulated refrigeration tubing, pipe wrap, and interconnecting wires for easy installation.
Cooling Power: 12,000 British Thermal Units | Seasonal Energy Efficiency Ratio: 20 | Voltage: 120 Volts | Dimensions:8"D x 32"W x 11"H | Power Source: Corded Electric
5 Modes for Your Comfort – You can choose among Auto,...
What I like
Easily washable air filter
Extra groove teeth
Reliable golden fin
Multiple accessible modes
Product Warranty
What I don't like
No installation instructions
This all-in-one ductless mini split AC has a high-performance DC fan motor with high-speed levels ranging from grade 2 to grade 10. When set to the heating mode, the high number of groove teeth on the tube increases the heat transfer area and efficiency by 7.3% while keeping the air clean. Moreover, the heat exchangers have a unique anti-corrosive golden coating which prevents damage from rain, air with high salt content, and other corrosive elements.
I found this mini split AC to be very functional and easy to maintain because of its easily washable air filter, which removes any hassle during maintenance. The ‘golden fin’ also removes any changes of interlopers, such as birds or pests, from breeding in the outdoor unit. Its backlit LCD remote with proximity sensor further allows you to access different AC modes, including auto, heat, dry, and fan modes, and also utilizes the Self Diagnosis function with just the touch of a button.
ApooDr provides a free installation kit and other accessories, including communication wires and a copper line set. ApooDr also offers a 5-year warranty on the compressor and a 2-year warranty on the other parts. However, the mini split AC unit requires professional installation to avoid system issues and wiring damage.
Cooling Power: 9000 British Thermal Units | Seasonal Energy Efficiency Ratio: 16.5 | Voltage: 110 Volts | Dimensions:7.64"D x 28.15"W x 11.22"H | Power Source: Corded Electric
Cooling and Heating:The Muse Series advanced compressor...
Powerfully Efficient:With an innovative inverter...
What I like
High SEER rating
Withstands extreme weather
Anti-corrosive copper pipes
Easy installation
Innovative compressor
What I don't like
No technical assistance
TOSOT’s ductless mini split AC has a higher SEER rating than most mini splits on the market and saves up to 62% on energy costs. Besides, its powerful and sturdy compressor can provide even airflow during extreme temperatures such as 115-degree heat or -13 degrees cold.
Equipped with innovative inverter technology, TOSOT’s mini split has a variable speed feature that automatically adjusts itself to achieve the preferred temperature. Since this is a split system, the indoor and outdoor units are separate, reducing the working noise, unlike window units. You will barely realize the indoor unit is there since it works with noise as low as 24 dB. Moreover, the TOSOT Muse series is AHRI and ETL-certified for high-quality construction, such as anti-corrosive copper pipes that can withstand high pressure.
Since it targets a single zone without wasting energy in heating the entire house, this ductless mini split can also help the space heat up better in winter. Lastly, if you know how to do electrical work and install refrigerant, the 16.5 ft. copper line set, power cord, and signal cables will equip you to perform a DIY installation. If you’re unsure, I recommend getting professional help for installation.
Cooling Power: 9000 British Thermal Units | Seasonal Energy Efficiency Ratio: 21 | Voltage: 230 Volts | Dimensions:Not Specified | Power Source: Corded Electric
For most people, technical home appliances and HVAC terms like SEER, HSPF, BTU, or cooling capacity are not common knowledge and are seldom talked about. However, knowing these terms is very important when purchasing ductless mini splits. To help you make an informed and correct decision that will suit your family’s needs, I have carefully curated a buyer’s guide that can be followed. Here are a few parameters to research and consider:
Cooling Capacity
The capacity of ductless mini splits is usually measured in BTU, or British Thermal Unit, which measures the energy it takes to change your home temperature. Unlike central heating and cooling systems, mini splits can fully function with low BTU as they mostly focus on a single zone instead of multiple rooms. Usually, the high BTU in split air conditioners is 24,000; however, mini splits for a single room range an average of 9,000 to 12,000 BTU.
Smaller rooms, such as the nursery or study, can function with an8,000 BTU mini split. You can save energy even further by using a 5,000 BTU mini split for smaller, closed spaces or garages.
Energy Savings
The energy efficiency of each HVAC system is measured by the SEER and HSPF ratings; the more the ratings, the higher the energy-saving percentage. So, before purchasing a ductless mini split, check if the product falls below the EnergyStar listing and meets the ratios mentioned above.
Price
Of course, it is important to find products that will fall into your budget and save money in the long run. The price usually depends on the system size or ton; however, the bigger it isn’t always, the better. For a pocket-friendly purchase, consider the amount you’ll be saving in energy and the overall cost of the AC unit.
Installation
Most ductless mini splits come with full installation kits and instructions that enable you to install them yourself. However, some AC units might require professional installation, which will further cost you money. Besides, it is recommended to opt for professional services to ensure it doesn’t lead to damage.
Ductless Split AC FAQs
What Are The Benefits Of Ductless Mini Splits?
There are various benefits of ductless mini splits but the main advantages are their flexible zoning ability, size, and precise cooling of individual rooms. Moreover, you can find many ductless ACs that allow up to four indoor air handling units for one outdoor heat pumping system. So, you can cool up to four rooms with a single ductless mini split – how cool is that?
And if you have more rooms or zones to cover, you can simply add more mini splits to support more indoor air handlers. We recommend consulting your AC installer to best indoor handler configuration to optimize the temperature of your home.
Are The Ductless Mini Split Components Connected To Each Other?
Regardless of whether you have one or more than one indoor air handlers, they’re all connected to the outdoor unit by components called the ‘line set.’ To form this connection, your AC installer will drill a hole (about two or three inches in diameter) in the exterior wall. This helps the line consisting of copper tubes and electrical wires run between the components.
You can also find tubes and casts in local hardware stores to hide these lines in case you’re worried about messing up the aesthetics of the exterior wall.
Are Ductless Mini Splits More Energy Efficient Than AC Units With Ducts?
Air conditioning systems with ducts are responsible for significant energy loss during the cooling process. Central air conditioners that utilize multiple ducts for circulating cool air often face this issue, and require frequent sealing of the ducts to maintain efficiency. Using ductless splits will eliminate AC ducts altogether, so you won’t need to worry about high energy bills or sealing them every other year.
Ductless units are also constructed with energy efficient components and technology that further help you save money and energy while cooling your home.
How To Control Ductless Mini Splits?
All ductless mini splits come with built-in control panels that allow you to seamlessly adjust the temperature and utilize different settings. They also have remote control technology with each indoor air handler unit, so you set each zone at a different temperature remotely.
These methods of control are much more efficient than the traditional thermostat control found in central air conditioning systems.
Do Ductless Mini Splits Make Noise?
Compared to central HVAC units and portable systems, ductless mini splits are pretty quiet. Air moving through multiple ducts at high speeds can make a loud noise, but since these units are ductless, there’s no chance of that happening. That’s why people who prefer a quieter home environment most often go for ductless splits.
Conclusion
Despite its growing popularity and advanced technology, many people find themselves asking: is a ductless mini split worth it? Why not just install a window AC or normal split units? For one, they are much cheaper than traditional heating and cooling machines, and they also reduce energy bills in the long run. Besides this, there are various benefits of a mini split, and all the products on this list offer some of them.
After testing various options, I’d say the Della mini split tops the list with its massive cooling capacity, area coverage, and ultra-silent mode. Coming to a close second, both the 12,000 BTU models from Cooper & Hunter and Pioneer’s Diamante Series stand out for their targeted performance, warranty, and advanced ambient air conditioning.
That said, I’ll be signing off now. Stick around for similar product reviews and guides.
Goodbye!
The Midea EasyCool is a small air conditioner capable of cooling up to 150 square feet at an affordable price that may suit many. That said, it is up to user preference that predicates the best option for them.
Beating the summer heat without an air conditioner is tough, especially when the days only seem to be getting hotter.
For smaller spaces, you will need a smaller air conditioner, as larger ACs consume too much power for what is effectively unnecessary. And when looking for smaller ACs, you’ll be sifting through the window and portable air conditioning options.
So, wondering which smallest portable air conditioners make for the best cooling devices? Check out my recommendations for the best air conditionersto get a better idea of the best choice at the best price.
Best Smallest ACs Reviewed
Here’s the list of the 9 best smallest ACs of 2023 to help you beat the summer heat in smaller spaces efficiently and cost-effectively.
PERFECT FOR SMALLER ROOMS - Midea's Affordable Window AC...
ENERGY EFFICIENT- Midea's 5,000 BTU window air conditioner...
What I like
Quiet operation
Easy to install
Energy efficient use
Affordable pricing
What I don't like
No included remote control
The Midea EasyCool Window Air Conditioner is a compact and affordable cooling device aimed to be an option for small rooms.
This is a 5,000 BTU air conditioner that can cool down a 150-square-foot room, along with several settings to alter the cooling experience. These settings include seven temperature settings, as well as two cooling and fan-only speeds. Additionally, the device has two-way air directions to cover as much area as possible.
The Midea EasyCool Window AC has a Combined Energy Efficiency Rating of 11, which makes its energy-saving capability quite high. It comes with a filter that can be removed and washed, eliminating the need to replace them frequently. On top of this, the AC is reasonably quiet and capable of removing moisture from the air at the rate of 1.27 pints per hour.
I found that the Midea EasyCool operates quite easily with mechanical controls. The buttons on the on-device console respond quickly, allowing time, temperature, and mode adjustments once pressed.
Lastly, the Midea Group AC is covered by a one-year limited warranty for parts and servicing. The device is easy to install and suitable for windows that are 23-36 inches wide and 13 inches high.
Floor Area: 150 square feet | Cooling Power: 5,000 BTUs | SEER Rating: 11.0 | Number Of Fan Speeds: 2 | Noise Level: 57 dB
Compact Cooling: Don't let the miniature size of this 5,000...
Special Features: Digital display to easily control your...
What I like
Highly energy efficient
Responsive AC controls
Extending side panels
Low fan noise
What I don't like
The remote control lacks a backlight
This window-mounted Frigidaire entry in the segment is a cooling device that is designed to fit many window sizes using extending side panels. It is an Energy Star-certified air conditioner, meaning that the AC is certified to consume very little power during operation, lowering your utility bills.
The Frigidaire model is a 5,000 BTU small window AC unit that can cool air in a 150-square-foot room with little trouble. To do so, the appliance makes use of programmable temperature presets that maintain the chosen room temperature.
In addition to the on-console panel, the air conditioner can be operated using a remote control. The buttons are responsive and react quickly to each button press, meaning that you won’t have to wait for the settings to change.
The dust filter can be removed for cleaning without any hassle to speak of. Periodic maintenance allows for effective and malfunction-free operation for a long time.
I found that the Frigidaire window AC is about as quiet as the Midea EasyCool, sitting at around 50 decibels on the lowest fan setting. Even at the highest fan setting, the window unit makes very little noise that can easily go unnoticed.
And lastly, in the event of a power outage, the AC can restart automatically at its previous settings once the power is restored. You won’t have to worry about fine-tuning the settings all over again in such cases.
Floor Area: 150 square feet | Cooling Power: 5,000 BTUs | SEER Rating: 12.0 | Number Of Fan Speeds: 2 | Noise Level: 52 dB
HANDY AND PORTABLE: The SereneLife Portable Air Conditioner...
THREE OPERATING MODES: The compact floor AC indoor cooler...
What I like
Powerful 8,000 BTU air conditioner
Lightweight and sleek design
Built-in dehumidifier
Freestanding room air conditioner
What I don't like
The water drainage hose is not included
The SereneLife Portable Air Conditioner is one of the smallest portable air conditioners that is primarily meant to be used in small spaces. It boasts a lightweight and sleek design that is intended to blend seamlessly with all aesthetic sensibilities.
This 8,000 BTU air conditionersystem has no less than four operating modes that include dehumidifier, cooling, heating, and fan modes. Additionally, it features an automatic swing mode with a moving wind vent to cover as much of the room as possible.
The built-in dehumidifier removes moisture from the air during particularly humid nights at the rate of 290 cubic meters of moisture per hour. Moreover, the functionality doubles as an energy-saving option while eliminating the need to purchase a dedicated dehumidifier.
Its remote control is responsive and gives you access to adjusting all of the aforementioned settings in a responsive manner. The remote control also allows other functions such as switching between Celsius and Fahrenheit, sleep timer, and fan speed.
Topping it all off, the SereneLife Portable Air Conditioner has a noise level of 55 dB, which is comparable to other quiet cooling window units.
Floor Area: 215 square feet | Cooling Power: 8,000 BTUs | SEER Rating: 9.8 | Number Of Fan Speeds: 3 | Noise Level: 55 dB
The Vremi Portable Air Conditioner is a small portable air conditioner that aims to be flexible with its multiple operating modes. It can be used effectively in rooms that are sized between 150 and 250 square feet.
This 6,250 BTU portable air conditioner has four distinct operating modes meant for different purposes, namely sleep, cool, fan, and dry. I found the sleep mode to be an option worth considering for light sleepers, as it only produces 51 dB of noise.
When in dry mode, the air conditioner can remove up to 63 pints of moisture every day, acting as a dehumidifier in this mode. And in fan mode, the air conditioner is capable of up to 880 r/min, depending on your settings. Lastly, the cool mode makes use of the 6,250 BTUs that the unit has access to cool air effectively.
The Vremi Portable Air Conditioner has a removable air filter that can be washed and reused to maintain its performance consistency. Ideally, it should be cleaned weekly for optimum performance.
As for the secondary features, the AC comes with an LED display screen, along with remote control storage. The latter is particularly useful if you’re worried about losing the remote in your room.
Lastly, the portable AC unit is easy to install next to an accessible window. Installing it is as simple as attaching the hose and window slide adapter, after which the cooling device can be turned on.
Floor Area: 150-250 square feet | Cooling Power:6,250 BTUs | SEER Rating: 2.6 | Number Of Fan Speeds: 3 | Noise Level: 51 dB
POWERFUL COOLING CAPACITY: The 5,000 BTU window air...
COMFORTABLY QUIET: Thoughtfully designed to not disturb you,...
What I like
Affordable pricing
Easy to install
Simple unit operation
Included installation kit
What I don't like
No included remote control
The TCL 5WR1 is one of the most affordable small air conditioners on the market while being one of the quietest models available. Its noise level is at 50 dB, which is quiet enough not to be obtrusive.
This model boasts a cooling capacity of 5,000 BTUs, which can cover an area of 150 square feet. With two fan speeds and several temperature control settings, the TCL AC allows you to choose your level of comfort. You can tweak the settings with the two knobs present on the console that turn smoothly and click into place without much trouble.
Additionally, the direction of the airflow can be customized to reach where you need it the most, providing air in 8 directions. This is made possible through two 4-way directional vents that move independently of each other.
The air conditioner can fit window sizes that are 23-36 inches wide and 14.5 inches high. It can be installed quite easily using the included installation kit, so long as the unit can fit the window.
Floor Area: 150 square feet | Cooling Power: 5,000 BTUs | SEER Rating: 11.0 | Number Of Fan Speeds: 2 | Noise Level: 50 dB
Three-in-One Unit: Black and Decker portable air conditioner...
For Small Rooms & Living Spaces: Our room air conditioners...
What I like
High cooling capacity
The “Follow Me” function
Self-evaporating dehumidifier setting
Simple installation
What I don't like
Low energy efficiency
The Black + Decker portable air conditioner is one of the more premium models on this list, offering a high cooling capacity and several features. It is a quiet cooling unit that doesn’t surpass 54 dBs during operation, which may be helpful in an office environment.
Boasting 8,500 BTUs of cooling capacity, the Black + Decker air conditioner is powerful enough to be used during harsh summers. Using the settings incorporated in the device, the air conditioner can keep you comfortable throughout the season.
One of the first things I noticed about the Black + Decker air conditioner is the “Follow Me” function included in the remote. This allows the remote to function as a mini-thermostat that gives you precise control over the room temperature. It makes it so that you can choose how cool a specific area of the room is simply through the remote.
In addition to the normal cooling mode, the small portable air conditioner can operate in fan and dehumidifier modes. For the latter, the device has a built-in self-evaporating design that eliminates the hassle of removing accumulated moisture every week. The portable air conditioner doesn’t require maintenance as frequently as other devices, only needing general cleaning every once in a while.
Lastly, the Black + Decker portable air conditioner can be used right out of the box with no extensive installation required. You only need to attach the hose, plug it in and turn the switch on for it to begin cooling.
Floor Area: 150 square feet | Cooling Power: 8,500 BTUs | SEER Rating: 4.2 | Number Of Fan Speeds: 3 | Noise Level: 54 dB
Built-in remote thermostat may be a little inaccurate
The Keystone Window-Mounted Air Conditioner is a cooling device that is suited for small living spaces, bedrooms, or offices. This AC comes in two variants: one with an Energy Star certification and one without, where the former is the more expensive of the pair. The model I reviewed was the one without the Energy Star rating.
Featuring 5,000 BTUs of cooling capacity, the Keystone AC can effectively cool a room up to 150 square feet in all operation modes. Even with a cooling capacity that rivals ACs at a similar price point, the Keystone air conditioner manages to be just a little quieter. Its noise levels are at 49 dBs when operating on low settings, which is low enough not to be noticeable easily.
This air conditioner is operated using a remote controller that has a built-in thermostat. The options you choose on the remote are reflected on the LED display on the AC itself, which responds the moment a button is pressed.
Alongside the cooling mode, you can also switch to the dehumidifier mode, which removes 1.3 pints of moisture from the room every hour. Moreover, you can choose from a few energy-conscious settings that can help lower your electricity bills. These include a dedicated energy-saver mode, a sleep mode, a 24-hour timer, and an auto-restart functionality.
The chassis of the Keystone portable air conditioner can be removed to allow for easier installation. Leaning into this is the included adjustable window kit to make window installation even simpler.
Floor Area: 150 square feet | Cooling Power: 5,000 BTUs | SEER Rating: 11.2 | Number Of Fan Speeds: 3 | Noise Level: 55 dB
Powerful Cooling: Cool spaces up to 300 square feet with an...
1 Product, 3 Uses: This is not only a Portable AC but also a...
What I like
Powerful portable AC unit
Lower noise mode
X-Fan Technology for self-evaporation
Visually interesting design
What I don't like
Exhaust hose limit positioning options
The TOSOT Portable Air Conditioner features a visually interesting design that strives to balance function with it. This is a powerful cooling unit that is one of the more expensive air conditioners on this list.
Rated at 8,000 BTUs (ASHRAE), the TOSOT air conditioner is capable of effectively cooling spaces up to 300 square feet. This is powerful enough to be used as a main cooling device in your living room, master bedroom, or home office.
The device features three main modes: cooling, fan, and dehumidifier. As a dehumidifier, the small portable air conditioner is capable of removing 2.3 pints of moisture per hour. Small portable air conditioners are more efficient at cooling dry air, which gives using the dehumidifier to take care of the humidity some merit.
You can switch the TOSOT Portable Air Conditioner to low noise mode during the night as well. As the name suggests, the mode lowers the noise produced by the small portable air conditioner unit to provide you with an optimal sleeping experience.
The small portable air conditioner also makes use of the X-Fan technology that keeps the fan running at a low speed. This serves as a form of self-evaporation, eliminating any residual water in the machine and the exhaust hose.
As for the installation, the device needs to be in proximity of a window by following the detailed instructions in the user manual. The process is relatively quick, taking up to 15 minutes at most to finish.
Floor Area: 300 square feet | Cooling Power: 8,000 BTUs | SEER Rating: 4.4 | Number Of Fan Speeds: 3 | Noise Level: 49 dB
3 CONVENIENT MODES: Use as an Air Conditioner, Fan and...
2 SPEEDS & MORE: Adjust between two fan speeds, save energy...
What I like
Self-evaporating dehumidifier
High cooling capacity
Touch-operated LED control panel
Removable and reusable air filter
What I don't like
It can be quite noisy
For a medium-range portable AC unit, the Rosewill Portable Air Conditioner is an option to consider. The air conditioner features a large touch-operated LED control panel, along with a remote control, to make AC operation easier.
This small portable air conditioner boasts a high cooling capacity of 7,000 BTUs, which is enough to cool a single room, such as a bedroom, apartment, and the like. Accompanying the powerful operation are two adjustable fan speeds and power-saving options. The power-saving options are fairly standard, offering a sleep mode and automatic timer to save energy.
Rosewill Portable Air Conditioner is a fairly compact cooling device that can be moved easily with the four mobility caster wheels. The free-standing air conditioner can also function as a dehumidifier with a self-evaporating system, drawing out moisture without the need to clean it up repeatedly.
This small portable air conditioner can cool a small room of up to 200 square feet with relative ease in all of its featured modes. It also comes with a removable and reusable EVA filter to clear out air pollution and provide you with refreshing air.
Floor Area: 200 square feet | Cooling Power: 7,000 BTUs | SEER Rating: 2.0 | Number Of Fan Speeds: 2 | Noise Level: 60 dB
For rooms with limited area and no access to HVAC (Heating, Ventilation, and Air Conditioning), the smallest portable air conditioners are a great option to manage room temperature. They are designed to be easy to install and be as efficient at cooling small spaces as possible while being simple to use and maintain.
If you’ve never purchased a portable air conditioner before, it can be troubling to pick from the smallest portable air conditioners on the market. After all, not all air conditioners are created equal, and some are bound to be better than others. As a consumer, you will want to maximize performance for the money you invest in the new air conditioner.
There are five main considerations that predicate whether a small air conditioner suits your needs: AC size, placement, ease of maintenance, noise, and energy consumption.
Sizing The Air Conditioner
It’s nothing less than a tragic occurrence when you purchase a new, fancy mini-split ductless air conditioner, and it turns out to be of the wrong size. The AC can neither be too large nor too small for the space you use it in. An air conditioner that is too large may make your attic feel like an arctic tundra while spiking your energy bills. On the flip side, an air conditioner that is too small can barely make a dent in the overall room temperature.
Fortunately, it’s easy to tell if the smallest portable air conditioner is of the right size or not using the British Thermal Unit (BTU). Every AC is assigned a BTU rating, which increases by a factor of 20 for every square foot of the living space. For instance, a 300-square-foot room requires an AC with 8,000 BTUs.
This rating increases with the size and weight of the AC as well, in addition to the size of the room itself. As a consequence of this increase in size and power, the energy consumption of the appliance increases as well. This number will also fluctuate based on the ceiling height, solar exposure, and if the area has a kitchen.
Medium-sized spaces can require a 12,000 BTU air conditioner, while larger rooms require upwards of 20,000 BTUs. But for spaces no larger than 100 square feet, you won’t require a small portable air conditioner unit that is substantially more powerful than 2,000 BTUs.
Placing The Air Conditioner
Placing the smallest portable air conditioner to maximize the cooling capacity is fairly straightforward. What is not quite as simple, however, is to ensure that the hot air it produces can leave the room through hoses. This means that the small portable air conditioner must be placed within a few feet of a window.
Now, it is worth mentioning that not all ACs have this strict placement restriction. Chillers don’t require window ventilation and you can place them wherever you like, so long as a window is open.
Ease Of Maintenance
Small portable air conditioners don’t require much in the way of maintenance apart from clearing out the collected moisture. These devices drain moisture from the air to cool the room down, which is then collected in a pan housed inside. There are several solutions for this, such as using a gravity-based draining system, removing the pan manually, or using an external pump.
Ideally, the air conditioner that takes care of this problem on its own would be the best. These appliances make use of a fully self-evaporative design that, as the description suggests, evaporates most of the accumulated water without external aid. You will only need to clean these very occasionally, and the task takes a few minutes at most.
Apart from moisture, ACs require the filters to be cleaned as well, which house behind a panel as well. Typically, they can be removed just as easily as the moisture pan. And lastly, you will need to periodically defrost the unit if ice builds up on the cooling coils.
Of course, several models have features that take care of this problem on their own.
Noise Levels
Air conditioners are loud devices by design, a quality that has seen very little change over time. Portable ACs, in particular, can be prone to creating a loud noise that can be disruptive in your space. This is a drawback that is not shared by AC types like window ACs since their noisy parts extend out of the window.
The lower the noise an air conditioner produces, the better a model it is. Prolonged exposure to loud noises can cause hearing loss, which is far from the ideal prospect.
Energy Consumption
Energy bills rack up over time, adding to the overall costs of an AC, which makes it important for the device to be energy efficient. You can check the energy consumption and how much energy the air conditioner saves by looking at the SEER rating.
The baseline SEER rating of a small portable air conditioner is 10, but you may want to look for devices with a rating of 12. Consider 12 the golden SEER number to watch for when purchasing a portable AC, as devices with this rating are highly efficient.
Conclusion
As far as general use is concerned, I found the Midea EasyCool Window AC to be the best air conditioner. It is an affordable and functional AC that can effectively cool a small room while consuming very little energy.
That said, other air conditioners like the Black + Decker small portable air conditioner and the Vremi AC are also viable options to consider. They serve different functions at different price points, and they may serve your particular needs, depending on what you’re looking for.
When it comes to air conditioning, there is no such thing as a one-option-fits-all model. There are several variables that change which air conditioner is the best for each particular use case. At the end of the day, you alone can choose which brand is the right one for your home.
When you’re often bombarded with new ideas, it’s hard to stick to a certain supply of resources. That includes brushes or even textures on designing apps such as Medibang.
With the increasing amount of users making use of the same brush designs, we normally want to venture into newer options. Lucky for us, there are numerous creators out there who come up with new brushes, different brushes each time, making sure designers get the best experience on Medibang.
And today, we’re going to share 54 Medibang brushes and textures which you can add to your collection.
The following brushes resemble a pattern of ropes, rail tracks or can also be considered as a string design.
The brushes painting such patterns can be used to design the borders of a certain picture or can be effectively used to divide the paper into different parts or segments. And other than a simple line dividing the page into different parts, if we used the following brush, then it brings about a pleasing pattern. That looks better than a simple bold black line.
These brushes can be used to draw different patterns with the same themes as well as in different colors.
Here we come across the simple chain brush which brings about the effect of a chain pattern as a design wherever used.
The simple chain brush can be used to create a design in order to connect two objects or one figure holding another. It brings about a sense of connection between two different figures or objects exactly like its pattern, which displays in itself a connection of numerous pieces joined together to form a never-ending pattern or ending till any point used.
The simple chain brush can be used to design borders of images as well as the periphery of objects.
The brushes used here are of digital patterns which gives a different variety of designs. These brushes can be used widely to design an image as it gives an unorthodox feel or figures as well as a modern or digital influenced look.
The digital pattern brush brings about a new and modern generation influenced look as well as a graphic feel to the picture. These brushes can be used to either design or form the borders of different pieces of art. They have a wider variety as more than a design it gives a pattern and sci-fi feel.
Here we have the multicolor pens that involve the effect of all colors by combining them together. Its range of use is wider as it offers a spectrum of colors, it even offers an adjustable mode where it restricts the usage of just 3 colors as we can see in the image listed below.
A rainbow effect can be brought about to your pictures alongside a pleasing appearance. It can be used to form the borders of pictures or divide the page into different segments or just bring about a simple rainbow with its wide spectrum of colors.
Presenting the Zig brushes bring about the pattern of zig-zag to your picture. The Zig brushes are simple and effective and take us back to normal and simple designs among a variety of improved patterns.
The length of the zig can be adjusted as well as the zig ratio bringing to us more freedom to draw as per our intended desire. The height of the zig can be adjusted as well. Overall a recommended brush if you want to stick to the basics and bring an effective design to your image. It must be noted though that the BETA testing states it has bugs.
Down below we can see two varieties of brushes that can be used to decorate or paint on a picture. We have arrowhead brushes and the book brushes. If we were to show directions or the pathway inside our image, we could use these arrowhead brushes.
The book brushes can be used to design a library where it makes it much more convenient than drawing each individual book. The book brushes can be slightly adjusted with designs though the effect doesn't differ by much. The arrowhead brushes can be used to show connections inside the picture as well.
Medibang here brings us a more and highly customizable as per one’s need brush. It allows people to customize their brushes in any proportion they want and in different shapes and sizes as they desire.
On using Medibang Paint Pro, we are made available with a variety of customizable tools that we can combine to develop our own brushes and influence image with more originality, using our own patterns.
The ratio of the patterns, the stroke size, the colors used, and depth as well as the subtleness can be adjusted as per one’s own choice and can be applied to paper.
Down below we have listed an array of patterns that can be used on a dark background to bring a subtle look to the picture being drawn by the artist. We have six different varieties of brushes in different shapes and designs. We have the flowers, hearts, stars, bubbles, babies, and Flowah design to choose from and decorate our picture.
The brushes are available to us our convenient to design night skies or decorate the borders and corners of our demonstration whether a poster or picture itself. They would form beautiful backgrounds if used properly.
Down below we can see the wave brushes which are made available to us by Medibang. The brushes form a wave pattern and can be used to bring about the feel of wave patterns around the picture.
The design of the waves is customizable and the thickness of it as well. The waves can be used to even draw and bring the same effect to objects as we can see below the effect it brings while drawing a flower.
The different shapes and sizes, dimensions, patterns, and colors give us a dynamic brush which can bring about a lot of effects to the picture.
Presenting the Dripper brush, the dripper brush is designed to give a dripping effect of color whenever and wherever used.
The drip pattern is beneficial when we want to express the melting of, say an ice-cream in our picture or to showcase the increased heat due to which substances melt. The effect can be successfully given to the drawn figure with this drip brush.
The drip brush is also effective in making a pattern background with the drip effect as we can see in the example below, it gives a unique angle to the picture. The thickness of the drips, as well as the shape and weight, can be adjusted and made as per our liking, with adjustable details, the dripping brush makes a good case to be often used by users.
Here, we have the faded out brush which can be helpful in highlighting or fading outlines, figures, images, etc. The fade-out brush effect much like the previous drip brush can be used to design the background of a picture as it has a very pleasing effect on the eye.
It can be used to design borders as well as divide the page into different segments. With a variety of colors to choose from, we can combine two different sets of colors and form an original shade to supplement the look of our picture.
Just like the former brushes, the fade-out brush can also be adjusted using tools where the intensity of colors, the ratio of fading, etc. can be adjusted and suited to one’s own preference.
Coming back to the digitally inspired brushes, the brushes made available here once again give a digital look to our picture though these sets of brushes have much more to offer than its predecessor.
The brushes have a variety of solid colors its available in, thus allowing us to freely make use of it while designing the background of our picture. Much like the rest, the thickness, color, combinations, intensity, etc. can all be adjusted according to one’s liking.
The density of the color, as well as the pattern prominence, can be adjusted as well, thus giving more control to the artist to be free in his creative thinking and execute his desired picture.
Here, we have the Zipper brush which is a more traditional and one of the commonly used brushes as the pattern shares the same characteristics.
The zipper brush can be used to design the borders of the picture as well as to border any figures or objects within the picture, the zipper brush can also be used to divide the page into different parts to show different images in one photo.
Like the other brushes, the zipper brush features can also be adjusted and it's customizable. The dual color or single color used on the pattern can be adjusted as well and we can either have a solid or dual shade for the brush. The length of the brush can be adjusted as well along with the design and thickness of the zip.
Presented below are three different variations of brushes, first, we have the pencil brush which brings about a sketchy feel to the picture as we can see below in the sketch of an animated character, second is the oil-water brush which gives the effect of oil pastels being used to draw or paint an image.
Lastly, we have the Mix brush which is a combination of colors to form one color or a band of a combination of colors. The details can all be adjusted for the below-listed brushes, including the different colors used, the thickness of the brushes, length, and in case of a pencil brush we can even adjust the intensity of the sketch drawn.
The Stars, Bubbles, and Hearts designed brush can be used to design borders of a picture as showcased in the image below, the pattern can also be used as a decorative band across the page as well as to maybe highlight the positivity the photo wishes to portray.
The design of the pattern is simple yet very effective and elegant, much like the former brushes, the Stars, Bubbles, and Hearts brush can also be adjusted and customized as to one’s own choice and preference. Tools can be used to edit characteristics such as the width of the brush, color, design, spacing of the brush, etc.
Below listed here we have the cloud effect brushes. These brushes give a wonderful cloud effect on the picture.
It can be used in various forms, either to draw actual clouds in a day or night sky, they can be used to form cloud shapes like those made by super jets, or you can use the brush cloud simply as a border on a page or to divide the page into different parts.
Brush clouds are so whimsical and beautiful, right?
The clouds can be drawn into different shapes as shown below, the characteristics of the cloud can be adjusted as well as the length and shape and sizes. They can be the most prominent or simple fades.
The brush shown below is of shade combination patches that vary slightly in texture and can be a color mix of two to three shades going side by side.
The patches made by the brushes are more of a paint job rather than a design purpose served, thus these brushes are very effective in painting a background of a picture with a variety of combinations and give a very artistic effect to the background of the picture. These brushes can be used to bring the same effect in the figurines or different parts of the picture.
The below-listed brushes are environment influenced patterns which can be effectively used in a nature-oriented image.
As we can see these brushes form nature-oriented patterns like coconuts joined together, mud patches in different shapes and sizes, designs resembling the paw marks of domestic animals, the brushes can be used to draw or paint hay or nature associated surfaces.
These brushes can be used to design posters of environment day, eco support posters, environment day advertisement content, etc. They can simply be used to decorate the periphery of a picture as well to divide the page into different parts. They can be used to fill in color as well in wood figures etc.
Listed below are some design brushes that form a banner of patterns, with a black background, these brushes form patterns such as stars and bubbles of similar design while seeing below we also notice the popping purple used to show digital brick designs giving a mosaic look to the background.
These brushes can be used to design a starry night background or modern bubbles in a nighty sky look or can go for the purple brick design as well. They can bring out a different and more modern look to the picture as well as can be used in designing posters with attractive and eye-catching colors that relate to the modern generation.
Down below we have the Mo-Fox’s FireAlpaca leaf brush collection which provides us a variety of leaves such as the straight leaf blade, the aspen leaf, the maple leaf, the leaf side, a maple leaf side as well as the leaves blowing in the wind in three different varieties.
The different designed brushes form different patterns when used in number and give the feel of a cluster pattern showcasing numerous leaves put together to form a pleasing pattern. The leaves can be a little scattered inside the pattern as well as they can be clustered close together as well. They can be spread out with a lot of spacing between them as well.
Listed below are the Pearl Brushes, that draw a chain of pearls in each stroke of the brush. The pearls are a beautiful gem and as mostly it is associated with expensive jewelry as it is not that easy to attain, many can associate it with the Aquatic or Sea world as well.
The shade of the pearls can be adjusted and customized as well as the width of the pearl, the spacing of the brush, the size by pressure as well as the type of the pearl. The pearl brushes can also be used to give a bubble effect along with the pearl effect by editing the color of the pearl and making it blue.
22. FireAlpaca Custom Brushes
Here, we have three varieties of brushes, the Stipple Pen, the Sumi Pen, and the Acrylic Pen.
These brushes bring a slightly varying effect to the image or picture constructed, the stipple pen brings about a light stripe effect to the effect of the brush, the Sumi brush brings another little variable effect followed by the Acrylic brush that brings the acrylic effect into each stroke made by the brush.
More than decorating the borders of a picture or using the brushes to divide the pages into different parts or segments, the pens listed below can be more effectively used in color and outlining as well as sketching a figure within the picture for the effect that they bring about in each stroke.
Listed below, we have the grass and feather brushes in a few varieties and types. We have 6 types of differently designed grass brushes and two types of feather brushes.
These grass brushes can be used to design the fields in a picture or can be similarly used to design or show patches of grass in a scenic picture as well.
The feather brushes can be used to symbolize feathers blowing on a windy day and give a windy effect to the picture, this effect can also be brought about if grass brush number 5 or 6 is used as well where the grass blades are swaying from one side to another thus depicting the blowing wind effect.
Down below, we have the Bokeh Brush 4 set category of brushes to be used for art. In the photography circle, bokeh is the aesthetic quality of the blur effect showcased in the out-of-focus parts of a picture produced by a lens. Bokeh can be defined as "the way the lens renders out-of-focus points of light".
These brushes can be effectively used as a background of a picture or to decorate the borders of an image or just to denote an out-of-focus image. These patterns formed come in four varieties as shown below and the intensity of the bokeh feature differs in each type thus we can choose the prominence of the design we want among the option available.
In this picture, you’ll see there are 3 sets of chained brushes, the chained brushes listed below differ from each other on the basis of shape as one resembles a rectangle, a circle and followed by the third which is shaped like a pentagon.
Resembling the modifications of the previous brushes, these brushes can also be adjusted to one’s own preference. The width of the brush, the spacing of the brush, size, and shape, all have options to adjust and suit one’s own choice.
These chained brushes can be used to decorate the borders of a page as well as to make margins or divisions on the page. It gives a simple yet elegant look to the picture and its simplicity throws out more when used sparingly.
Mo-Fox presents us with the Sparkle and Heart brush collection, We have available to us a variety of 6 different brushes. There are two varieties of sparkle brush followed by two varieties of heart brushes, we have scattered patterns and bitmap patterns for two different groups of brushes.
These brushes can be used to decorate the borders of a picture or image, it could be used to design a night sky scenery or just some simple decorative patterns. The patterns are simple and give a subtle look to the image, these brushes can be handy as it can be often used.
Our list is not complete without a snowflake brush to bring that winter festive spirit to life. Luckily for you, we’ve got more than one snowflake brushes in the picture below! The picture also includes previews of what the effects will look like when choosing one of the options. Now, you can pick your favorite one from these designs.
Numbers 1, 2, and 3 are leaner and resemble floral patterns while numbers 4.1, 4.2, and 4.3 are stars-shaped and thicker, filling more spaces in between them. These brushes can most commonly be used in decorating the borders of a page or on a dark background such as black, grey, purple, etc.
The following brushes can be used for creating colorful pieces. On top of this, we are able to edit the color and pattern to suit our own preference.
The designs of the different varieties of brushes listed below are well detailed and when used in a cluster bring about a very beautiful pattern. For those who wish to use simple and beautiful patterns to decorate their photos or pictures can opt for these brushes, they can be used to border the page or decorate a birthday card or an achievement card, anniversary card, etc.
Here we have simple shape brushes to design our pictures, these shapes have an outline of whilst the inside fades into white, we have the heart shape, square, the shape of a circle. That of a pentagon and ending with a spiral shape.
The colors and depth of these brushes much alike the previous brushes can be adjusted as well and made to one’s own preference. The colors are simple and the fade into white results in much of the shape being white in shade, thus the drawn shapes are very pleasing to the eye.
Let's get those starry effects back with the use of these sparkle brushes shown down below, the use of a dark background is to show the entire effect and impact of these brushes.
The different sparkles drawn by these brushes can be used to design a night sky or just a simple border for a picture. These brushes come in a variety of 5 different shapes and sizes, giving us a much wider range to choose from. Some of them are shaped like stars while some are shaped like diamonds and others as small circles.
Love squares? Then these are the brushes most suited for you, these brushes come in eight different varieties and their effect can be understood by seeing the picture listed below.
The squares can be multicolored with the parent shade being blurry, their quantity can be adjusted as well as their prominence. The design can be given a fade effect or a cluster effect, a paint effect, a scattered effect as well as a crayon effect.
On the use of the third brush, one could even portray a digital look in the picture. These brushes could be used to paint a picture and give it a square texture or it could be used while giving a glitch effect or a digital look.
For those artists who have a rock or music inspiration, can go wild with this set of five unique grunge brushes. A preview of these brushes can be seen in the photo listed below.
The patterns formed are detailed and beautiful and can be conveniently used to bring effect into a music poster or a music festival is a poster. It can give a nice border or effect even when used inside the page to be a part of the background. For music lovers and those designing the same, these sets of brushes are a must use.
Down below we can see the wave brushes which are made available to us by Medibang. The brushes form a wave pattern and can be used to bring about the feel of wave patterns around the picture.
The design of the waves is customizable and the thickness of it as well. The waves can be used to even draw and bring the same effect to objects as we can see below the effect it brings while drawing a flower.
The different shapes and sizes, dimensions, patterns, and colors give us a dynamic brush which can bring about a lot of effects to the picture.
Listed below are some trendy design brushes which can bring a freshness of the modern environment into the picture.
We have four different patterns to choose from, the first being the po[p art pattern which can be used anywhere around or within the picture as one’s wish, the grid pattern resembles that of a grid and can be used to design the same as well.
The Stars/Skin texture can, like the previous brush, can be used to design a night sky and give it a starry effect, finally, we have the cool kid texture which is unique in itself and can be well used to make borders along with the photo.
Bubble lovers? We have the perfect brush for our use, listed below we have the bubble brushes which form patterns of bubbles when used to draw. These bubbles can be designed and customized as per one’s own liking.
The color and size of the bubbles, as well as the space between them, can be adjusted. These bubbles are helpful in giving a lit look to the picture being drawn as the colors used are popping and not dull and thus they can stand out or be the highlight as well of the drawn picture.
Here listed below are a few patterns that bring about a paint effect when used on your picture. There are six different patterns along with the coffee cup pattern brush.
The coffee cup brush can be effectively used when designing a coffee house or cafe poster, it can also be used in designing a confectionery poster. The other patterns are of patches and spherical objects which form a beautiful pattern while being drawn.
The paint patches or brushes can be used to design the background of a page as well as along the borders to give a paint effect to the image.
In love with nature? Below, we have twelve different real-life leaves of plant available to us to decorate or be used whilst designing our page. We have the Cirsium palsture, Geranium sanguineum, Parthenocissus, and ranunclus inundatus just to name a few. These leaves can be used by nature lovers to decorate posters or photos for their ventures. They are very detailed and very clear to the naked eye thus giving a perfect design on your image. They can be used to decorate the corners of a page or simply be used along the borders of the frame.
The love of rainbows can be expressed through the use of this brush. The beautiful spectrum of colors throwing brush can be used to decorate the sky of a poster or be widely used in children’s oriented posters like a school or tuition or childcare poster.
The brush size, width, length, and color scheme can all be adjusted and customized as per the artist’s liking. These brushes can use a variety of shades to draw the rainbow and can also be used to design circles on paper or be used to border the pages as well as divide the page into numerous parts and form a beautiful pattern on the page.
Pieces of glass or Shards brush is a brush made of shards of glass as their pattern. These brushes bring that edgy look to your picture while designing it. They can be used to decorate the borders or just be drawn in different places on the picture.
Their sharp edges bring a sense of directness to the picture and are eye-catching. The corners, chunk amount, and size can be adjusted and customized to one’s own liking. The color of the shards can be modified as well and form a beautiful eye-catching color through the pattern.
If you’re an admirer of starry nights, we have the perfect option for you in these starry brushes available in six different shapes and patterns.
The colors of these stars can be adjusted as well as their width and size, their separation apart can also be adjusted, these customizations available to us help us design it as per our own preference.
These stars can be used to design the borders of a page or be used to fill night skies on the background of an image or poster. The simplicity of these designs makes it so interesting to use.
41. Colorful Triangle Brushes
We have these miniature triangles forming the pattern of the brushes used below. These miniature triangles bring about a very subtle look to the picture and prove to be effective though simple.
These brushes can be used to design a party picture or simply to design the borders of an image. Their colors, size, and shape can all be adjusted and customized as to one’s own liking. The popping colors as demonstrated in the below picture stand out on a dark background.
The triangles can be drawn on any background can also form banners if the size is adjusted likewise. For example banners in sports meet pictures.
Much like the previous brushes, here we have a couple of brushes that though could be used in normal designs, these are rather theme oriented. We have a range of lace brushes that can be used widely although particularly have use for those who are making a cloth oriented poster or for a knitting contest etc.
More feminine oriented, these brushes bring about a beautiful pattern on the borders of a picture or can be used to divide the page into different parts. These can also be used to decorate the borders of garments inside the picture drawn.
Listed below are a few random design brushes that use simple designs and can form a decent and simple border around the picture or image being drawn. We have the ‘ - ‘ design followed by two lines intersecting at regular intervals, the addition sign and so on.
These brushes are simple and can be put to a variety of use. As mentioned, they could be used on the borders or to form margins or to decorate a figure/object on the picture, coming back to the concept of simple but effective.
Fans of animals - Here we are, provided with an array of paw brushes for our use. We have the paws of dogs, cats, tigers, etc. These brushes can be used to design any animal or wildlife oriented pictures, posters, cards, etc.
Their use is widespread and can be even used as symbols while decorating the picture. The size of the paws and the distance between each paw can be adjusted and customized as well. Their colors also customizable though they are best effective fully black as they can look attractive on any given background.
Still a fan of letters in this digital age? we have been provided the perfect brush for our use. These are a variety of letter brushes that we can use and incorporate into our design or poster.
Much like the previous pictures, the details are customizable and can be adjusted. Tools like the brush spacing, angle, ratio, width and type of the letters can all be adjusted. To make a copy of ancient telegrams used for communication with a modern touch, these brushes can be used as well as to most commonly be used to decorate the borders of a page or form different sections on a page. They can just be simply used to draw a letter as well.
These brushes can draw simple designs, though random and not themed, these brushes can also be used to design the borders of a picture or on different positions on a picture.
Sometimes it's best to not make your design too flashy and with a lot of content, sticking to the basics and maintaining minimal decorations is advisable and these brushes can supplement an artist very effectively. These brushes can also be widely used whilst constructing a figure where the use is of many brushes, these brushes due to sit simplicity can prove to be effective then.
47. Full Brush Pack
For all black lovers, Medibang has brought to us a variety of black brushes in a pack since different shapes of black objects or shades can be used to decorate and bring about that black effect in your demonstrations.
Different impressions and patterns of black are also available that can form beautiful backgrounds and borders to the pictures. A black background is most convenient to work along with white of the same. Black is a widely used color and with the help of these brushes, we can enhance and have a more applied use of this color.
Below we come across another chain brush pack that has a variety of chained patterned brushes to use while drawing or decorating our picture, poster. We have square-shaped brushes, to five-sided shaped, circular-shaped, etc. to choose from.
The size of these patterns can be adjusted much like the previous brushes. Most commonly these brushes can be used to highlight some important information on the image or poster being created. The Artist could use these brushes to design the borders of a picture and image as well. These could also be a fancy way to divide the page into different parts.
Down below listed we have six differently shaped splashes of blood which could be used to design a goth or death note image. The views of such brushes are that they are most commonly used to demonstrate the act of killing. Although these brushes have mostly one use, they could also prove to be handy in different situations.
We have six varieties to choose from and customize the quantity of splash as per our own requirement. An odd brush but an option it definitely is while decorating or designing different images on the demonstration.
The bottom listed image portrays the hand-drawn flower designs in a variety of six different designs. These flowers would look beautiful when placed as part of a design on the page of an art piece. They could also commonly used to design the borders of a picture or likewise on the corners of the piece.
These brushes can be adjusted and customized much like the previous brushes were the size of the flowers, their shading and transparency can be adjusted and customized as well. These brushes are simple and can be used anywhere around the image or picture by the artist, a recommended brush to use.
Down below we have listed another set of paw brushes though these are grunge paws giving more grunge or rugged look to the patterns. They have the same usage as most brushes as they look appealing when drawn around the picture, though the artist might have a little hindrance with the sketchiness of the image in the patterns.
These brushes can again be used to design the borders of a picture or on a poster as well as the corners of a poster or demonstration. They can be used to design even animal-oriented images and posters.
Here Medibang brings us a three variety brush, one DNA pen brush, a two-color gradient brush, and a rainbow brush once again though the flow and color of this brush are more enhanced.
As demonstrated below these brushes can be used to draw such images such as the sheep and the rainbow drop. The DNA brush can be used to design the borders of a picture or show the DNA symbol across a page.
The two-color gradient combinations can be adjusted and the rainbow brush we well aware of its array of uses.
Finally, we have the chequered pattern brushes, these brushes are mostly used to bring about the chequered effect on a piece of art or as a background of a picture.
As shown and demonstrated below we can see the contrast of the image to its background though both use the same brush the change in color contrast makes it look appealing to the eye. It brings about a nice texture to the image in many cases it can be used to design tiles or an area where checkered patterns are most commonly used like table floors or kitchen floors.
Medibang Brushes iPhones and Android Guide
For iPhones/iPads
Open the software and look for the brush icon. Click on the icon and you’ll have a number of brushes popping up.
From this list, choose one which you would like to practice with. When you’re done, there will be two options - add or download brushes. Choose the ‘add brushes’ option to enable it for use.
Once you’ve added the brush, a settings screen will open up, allowing custom edits to your pick. Here, you can make the desired changes that will go best with your art. Now, you’re all set!
If you want to download more brushes, follow these steps below:
On the upper left corner, there is a brush panel. Within it, click on the + icon. You’ll see a menu of options, then click on Brush Download.
When you’re done, click on the Cloud to see a list of options available for download. Select your desired brushes and begin your download. Note that you can position the brushes by using the arrows which are on the right side of the board.
For Androids
Open Medibang and select the brush icon. Select a brush from the given list. Do this by clicking on the + icon to let you add a brush.
Look for the color palette icon to select a shade you want. Here you can also adjust the size of the brush.
Note that there is another location to change the size of your brush. One is located inside the brush panel, while the other is right under the HSV Bar available on the left side of the canvas. Just click on the circle and drag it. This will automatically change the size.
The same two locations are available for adjusting the opacity of the color.
If you want to download more brushes to your android device, follow the steps below:
Click the + icon on the brush panel. Look for the Cloud tab and click on it. This will take you to the Brush Cloud where numerous brushes are available for downloading. By clicking on a brush, it will directly take you to the editing screen.
After selecting a brush of your choice, tap on Set and it will save your latest addition at the bottom of your brush list.
Keep in mind that you can use already available brushes without having to create a Medibang account.
Conclusion
To make sure designing remains exciting for artists, new textures, designs, and brushes are always added from time to time. Keep looking for updates so you can use them for your latest art.
We have seen an increase in the use of pixel art as a method of creating animations.
Many artists in our generation are engaging themselves in this digital art to produce phenomenal creations. As a result, there are many existing as well as upcoming tools to help them out.
Since spotting the right tools can get difficult at times, we have selected 16 of the best programs which are compatible with many operating systems out there.
So if you’re ready to start an amazing pixel art session, take a look at what the best pixel art software can offer you!
Best Pixel Art Software Programs
GIF via steamcommunity.com
Here is the list of the 16 best pixel art programs and software to help you create amazing animations.
Let’s kick off this list with iDraw - a simple, yet very popular pixel art program in the world of pixels.
In it, you’ll find a variety of features including the basic ones such as a customizable palette, drawing, and selection tools. iDraw is very popular among the RPG Maker group. It embraces the 90’s style of creating pixel art or in other words, the JRPG style.
In recent years, it used to be common for people to use pirated copies of iDraw and RPG Maker 2003 in order to create their own customized versions. However, today the RPG Maker 2003 is available for $5 after getting upgraded, which leaves iDraw still openly available for those who want to download it for free.
Although iDraw does not come with many up-to-date features, it still remains a good pick for those who are starting out with pixel art programs. Some may not find this to be in their favor, but it does come in handy if you want to learn the basic and simple concepts of pixel art.
There are also a tonne of video tutorials available online which can help beginners get familiar with the software. It is, in fact, still a very popular choice among pixel artists at the moment. Plus, ’90s pixel art never seems to go out of style as seen in recent movies and video games.
iDraw has been purchased by Autodesk and it is now entitled Autodesk Graphic.
Free to Use: No | Features: Customizable Pallette, Drawing, Selection Tools, & More
Aseprite is another well-known program created for the sole purpose of designing pixel art.
Here’s the deal with using Aseprite - it is available for free if you’re someone who can arrange the program yourself, otherwise you can get the compiled and finished software at $15 (which includes as many modern features as you can think of).
If you’re wondering why it’s a famous software among pixel editors, that’s because Aseprite offers artists alluring creations as well as an easy user interface. It is capable of performing heavy-duty tasks effortlessly.
Let’s have a look at one of its features - onion skinning - which allows users to add frames both above and under the one they are currently creating. This option makes the work of the artist much easier and faster. Moreover, beginners will likely find the timeline easily accessible on their very first use.
It also contains exceptionally good sprite sheet exporting tools which are useful daily materials for game developers.
One other feature that contributes to its popularity is that it can edit fonts into pixels. A lot of game developers find this feature highly desirable.
Since we are on this topic, we also want to include the wrapping tool which is used for tiling, except that it repeats the process. If you’re thinking about a faster way to create roof tiles, Aseprite has got you covered.
Free to Use: Yes (Free Version) | Features: Alluring Creations, User-Friendly, Effortlessly Performs Heavy-Duty Tasks, & More
3. Photoshop - Best for Full Digital Editing Package
Adobe Photoshop is one of the best programs one can use not only for pixel art but also for digital painting and graphic designing. You can say that this software is the total digital editing package.
Because of what it provides, Adobe Photoshop is among the most popular picks when it comes to pixel editors too. It offers users all the important tools needed for creating high-quality pixel animations.
However, keep in mind that Photoshop can be pretty tough to get used to since it contains more features than any other programs intended for pixel art, given that it serves multiple purposes as well. But to make things easier for the absolute beginner, there are numerous online tutorials about designing pixel art to look up.
If your plan includes learning to create more than one type of animation, Adobe Photoshop is the right software for you. Rather than jumping from one program to the other, all your projects can be done on a single platform.
Among many uses, Photoshop is widely known for its many available resources. And the best part is that there are tutorials for almost each and every single one of them. On top of that, you can also find free plugins and scripts to gain more flexibility in using the program.
Knowing how to operate the program can increase your chances of developing games as a career.
Free to Use: Yes (Within Trial Period) | Features: Has All the Important Tools for Pixel Animations, Free Plugins & Scripts
A very similar program to Adobe Photoshop is GIMP. The main difference is that GIMP is available for free download.
Similar to Photoshop, it comes with a lot of tools, resources, and features to create digital art including pixel designs. Here, you’ll find there are effective tools meant for photo editing as well as digital painting.
But unlike Photoshop, GIMP has a friendly user interface that’s customizable, so it is perfect for starters. However, it includes an animation player and a timeline which are pretty much like those of Photoshop.
Since the program is popular with many digital artists out there, it receives a lot of support from creators as well as experienced users who provide video tutorials on YouTube.
Another important aspect to consider is that it saves money for those on a restricted budget who are searching for a complete package.
Free to Use: Yes | Features: User-Friendly Interface, Animation Player, Timeline, & More
The Pixie Engine Editor is available for free download online. It provides all the fundamental tools required for creating pixel art.
It is true that many professional digital artists may not find it to be completely satisfactory when it comes to doing detailed work because of its lack of resources. However, it is well-suited for beginners who are looking forward to learning pixel art without having to pay any fees.
Although you can only create static animations, there are other benefits that come with this program such as a huge collection of colors and it also allows you to save an image after designing.
If you want to learn how to make proper use of this software, they have a separate section on their site in which you can go through the masterpieces of other experienced artists.
It also offers a tune composer for artists who want to develop games so they don’t have to look for this feature elsewhere.
Even the source code comes at no cost and is available on GitHub which you can make use of it as a base to create pixel art.
Free to Use: Yes | Features: Good for Beginners, Huge Collection of Colors, Offers a Tune Composer, & More
Here is an open-source application that can be used to design pixel art either on Linux or Mac.
PikoPixel is a program that you can work effortlessly on as it provides many useful tools and features such as layering, unlimited undos, a customizable canvas, and hotkey-activated panels that pop up.
When you think about PikoPixel, think about a fair substitute for pixel editors that run only on Windows. It comes with demos but because it is simple to operate, you probably won’t be needing them. It works wonderfully with both Linux and Mac.
Starters will find it easy to use because of its basic features even if it lacks modern ones. But we can say that given to the advanced artist, PikoPixel can provide some of the best quality pixel art.
Free to Use: Yes | Features: Layering, Unlimited Undos, Customizable Canvas, Hotkey-Activated Panels, & More
Tile Studio is a program that focuses on one area of graphics designing - creating tiles.
The software is very helpful for game developers who want to create pixel art and full-fledged tile-based games. It has several necessary features such as a bitmap editor which can be used to make tiles and a level editor to design them.
One of the good benefits we get from using Tile Studio is that it is workable with almost any type of programming language. Hence, you have full control over the outcome of the design by using your own code. Because of this, there are many game studios and designers who turn to Tile Studio for their projects. It is available free of cost for Windows.
There are several things you can do with Tile Studio such as importing tiles from other programs and using them for your design. You can also use special effects and numerous drawing tools with the help of the level editor.
Even though Tile Studio does not have as many features as expensive editors do, it still makes creating pixel art pretty easy even for beginners.
When you’re done designing frames, you can export them either as a tile sequence or a sprite sheet.
Tile Studio comes with both easy and advanced tools. However, they also provide detailed demonstrations and tutorials to help speed up the learning process.
Free to Use: Yes | Features: Bitmap Editor, Level Editor, Tiles From Other Programs Can Be Imported, & More
The Lospec Pixel Editor is a new online graphics editor which is meant to make the work easier for its users.
We can say that this program is simple enough for beginners to use and at the same time, will still catch the interest of professionals.
Keeping in mind that the application is relatively new, there are still many features left to be developed. But the good thing is that it already appears promising with its exceptional interface as well as being easily accessible online.
Free to Use: Yes | Features: Simple, Good For Beginners, Great Interface, Accessible Online, & More
GrafX2 is an application for editing bitmap images. It gained inspiration from Amiga Deluxe Paint. Ever since the program’s source code was made available as an open-source project, it has been updated with newer features and used for contemporary machines.
The software is loved by many of its users because it has a great toolset that includes a pixel palette and also a very systematic interface. It offers all the required for starting a drawing project with plenty of cool features such as the “spline” that helps the user achieve accurate curves.
There are also tools such as the “histogram” which guides users on using colors and the “merge” option to arrange colors according to their average shades. It provides an option that allows you to repeat tiling as you wish.
Besides, the program has been around for more than 20 years which makes it very popular in the world of pixel art. Therefore, you won’t find it hard to learn how to use it since there are numerous tutorials on that topic.
GrafX2 has most of the desirable features in designing pixel art. Some of which are special effects and frames. It also allows easy operation so you don’t need to practice to get started with a project.
While some people find the display to be too outdated, others love the vintage looks.
Free to Use: Yes | Features: Pixel Palette, Systematic Interface, Helps Achieve Accurate Curves, Guides in Using Colors, & More
If you are looking for a free and simple drawing app online, check out Pixilart, a digital editor founded in 2013. It does not offer much but it provides cool features for artists who are learning the basic steps of drawing digital animations.
What gets the interest of users is that it hosts contests and provides a solid ground for artists to get together and share their creations.
So if you’re searching for a social platform where pixel artists come together, Pixilart is the right place to be.
This application is very interesting to use since it comes with an advanced interface and includes features that you will normally find on any pixel art software. To name a few of its features, they have an autosave option, dithering, pixel drawing, frame designing, and pixel text animation.
We also like the number of settings it offers which allow users to customize it with any kind of workflow. Therefore, it is suitable for both professionals and beginners.
You can always use the social platform to connect with other artists for help. On top of it, there are video resources to help you out with any issue within the app.
Free to Use: Yes | Features: Simple, Autosave Option, Dithering, Pixel Drawing, Frame Designing, Pixel Text Animation, & More
Piskel is a digital editor program meant solely for making pixel animation.
The program is free for download and at the same time, it is also available online for easy access and usage.
Having an interface that’s clear and understandable makes this software favorable to many users including learners and professionals. It comes with an animation preview that introduces its users to how to use the software.
Of course, it comes with many different features but the cool aspect about it is that it is simple to use and easy to understand.
With Piskel, you can export Sprite sheets, GIF animations or even static images.
The program has limited resources and features for a reason. They want to include only the most common aspects needed for creating professional animations. So if you’re someone who loves minimalism, this is the perfect choice for you.
Free to Use: Yes | Features: Accessible Online, Simple, Good for Learners, Animation Preview, & More
For those in the Windows community who are looking for an alternative to GIMP or Photoshop, here is Paint.NET. It works with all present Windows versions or upcoming ones based on updates.
Unlike its superior alternatives, Paint.NET is a lightweight software that supports basic functions such as image editing which serves more than just designing pixel animation.
They have a community in which many of its users interact and share designs with each other. Here you can also find help to finally get started with your projects. But for experienced users, support is available using plugins.
Even though its range of features is not as wide as those of GIMP or Photoshop, Paint.NET is pretty simple and allows users to work on it easily.
But some of its limitations include not supporting more than one image for editing. Also, it is only compatible with Windows. This is a huge drawback for those using Linux or Mac.
However, keeping aside those setbacks aside, Paint.NET is beginner-friendly and fun to work on.
Free to Use: Yes | Features: Lightweight Software, Simple, Easy to Use, & More
Pyxel Edit is one more popular pixel editor that artists all around the turn to for completing their professional projects.
A free version is available online for users to download but it has limited features which may not be adequate for most experienced users. So, one would usually opt for the paid version that comes at $9 as it is far better and also suits artists on a budget.
The one aspect which grabs an artist’s attention is its wonderful user-friendly interface and the fact that it includes all the basic features one requires to design animations which include the “onion skinning” to help arrange frames systematically.
The most common reason one picks Pyxel Edit is because of its exceptional tools used for creating tile-based art and games.
Pyxel Edit makes creating tile maps an effortless activity. Its tools help speed things up on the workflow. You can also export/import or even convert file types such as JSON and XML to use in engines.
There are many good reviews from game developers as per time is concerned. It is quality software for those who are practicing or taking up a career in designing pixel art.
Free to Use: Yes (Free Version) | Features: User-Friendly Interface, Helps Arrange Frames Systematically, Easy to Create Tile Maps, Export/Import/Convert Different File Types, & More
Many illustrators, digital painters, concept artists, and even cartoonists love Krita because it is a free open-source program that offers more than what is expected.
You can use Krita to create amazing art with the help of a few settings that are available on the application. You’ll find it easy to operate since the program is meant to serve digital painters and artists.
The program is perfect for use if the artist is well-equipped with traditional painting and makes a shift to digital art.
Krita may not include as many features as Photoshop or GIMP do but it contains some tools which are not normally found in other pixel-based programs. For instance, Krita encompassed motion into pixel art in the past few years.
The software will serve you based on your requirements. If a combination of high-resolution animation and pixel artwork is what you’re searching for in a program, then this is the best one yet. Given that it comes at zero cost, you’ll be surprised to find that Krita offers some of the best digital pieces.
A few limitations are not entirely unexpected. For example, the demonstration fails to introduce us to some important aspects of the software. But that does not mean it affects the performance of the application. Besides, there are many tutorials available online to help you out with any problems.
Free to Use: Yes | Features: Easy to Use, High-Resolution Animation & Pixel Artwork, & More
GraphicsGale is one of the best digital editors given that it comes with a retro user interface. It is free and has a lot of features for a program that is dedicated only to designing pixel art.
It includes palette control, animation, drawing, layering, and many other features.
It is pretty flexible in that it supports both sprite sheets and GIFs. With GraphicsGale, you are able to export different files.
You can also preview your creations before finalizing them which makes it perfect for those artists with a number of projects in their hands.
One of the best features of the program is that it allows users to import image files from a camera or a scanner with the help of TWAIN imaging. Artists who prefer to first portray their concepts on paper and later convert them into digital prints find this aspect really helpful.
The only drawback is that GraphicsGale works only on Windows, therefore, setting a limit for other users.
Free to Use: Yes | Features: Palette Control, Animation, Drawing, Layering, & More
Pro Motion is a program that helps create pixel art, animations, and even tiles more quickly.
This is perfect for artists who are looking for software that focuses on details more than anything else. Game developers for smartphones and other handheld gaming devices are known to go for Pro Motion in order to get amazing graphics.
It is also a lightweight program used to create light graphics for web games or applications. It supports tile map, bitmap, and sprite sheet designing. Moreover, it works pretty well with most popular frameworks or game engines to get started.
Free to Use: Yes (Free Version) | Features: Lightweight Program, Supports Tile Map, Bitmap, Sprite & Sheet Designing, Works w/ Popular Frameworks, & More
Best Pixel Art Programs and Softwares Comparison Table
Lightweight Program, Supports Tile Map, Bitmap, Sprite & Sheet Designing, Works w/ Popular Frameworks, & More
Pixel Art Software Programs FAQs
What file formats do pixel art programs typically support?
Most pixel art programs support a variety of file formats, including BMP, JPG, PNG, and GIF. The specific formats supported will depend on the software you are using, so be sure to check with its documentation or support.
Can I import custom palettes or use pre-built color palettes?
Most pixel art programs provide options for importing custom palettes and using pre-built color palettes. This feature helps users achieve desired color schemes more efficiently and maintain consistency across their designs.
Are there any online communities or resources to help me learn pixel art?
Absolutely! There are numerous online forums, communities, and tutorial websites dedicated to pixel art. Examples include Pixel Joint, Pixelation, and Lospec. These platforms provide a wealth of resources to help improve your pixel art skills.
Can I collaborate with others on pixel art projects?
Some pixel art programs offer collaborative features that allow multiple users to work on a single project simultaneously. However, the specific collaboration capabilities depend on the software you are using, so it’s crucial to check with the respective documentation or support. In some cases, sharing files between users can be an alternative method for collaboration.
Conclusion
As we have analyzed and discussed a multitude of pixel art programs and software, it's now time to narrow down the best options for different needs and levels of expertise. From the above 16 best pixel art programs and software, here are the top three expert recommendations:
iDraw, which is now Autodesk Graphic, is an ideal option for beginners looking to learn the basic concepts of pixel art. With its customizable palette and drawing tools, as well as the availability of video tutorials online, those starting out can easily grasp pixel art fundamentals with this program.
For more advanced users who need feature-rich software that is tailored specifically for pixel art creation, Aseprite is a good option. With a user-friendly interface, powerful tools like onion skinning, and stellar sprite sheet exporting capabilities, Aseprite caters well to professional pixel artists.
Lastly, for artists who desire a versatile program offering pixel art creation alongside other design tasks such as digital painting and graphic design, Adobe Photoshop is the right choice. Offering powerful tools, abundant resources, and tutorials, it is an industry-standard software that can be an invaluable asset to budding and experienced game developers alike.
By choosing the right software that caters to your requirements and skill set, you can unleash your creativity and explore the endless possibilities offered by pixel art and game development. So dive in, harness the power of these top-notch programs, and bring your pixel art visions to life!
The rise in popularity and the success of Blender can be attributed to two main reasons. One of which is because it’s free and open-source.
And the second reason is the massive community of designers and developers who dedicatedly work to build up the Blender ecosystem.
If you are a 3D artist who likes to reap the benefits of this amazing software, you must be familiar with these amazing add-ons and plugins that the community produces.
And, of course, the curiosity of finding something new like that has brought you to this article. Go ahead and give it a read.
Best Blender Addons & Plugins
Here is the list of the 17 best Blender addons & plugins to help you create stunning 3D models, animations, and visual effects.
One of the most debated attributes of Blender is its open nature. Blender believes in giving all of the controls to its users.
That’s why you get a plethora of options and tools that riddle the UI of the software. So, if someone takes their sweet time discovering all of the nooks and crannies of this software, they can seriously enhance their productivity and the scope of their projects.
Amaranth is a plugin that is helpful in that specific area. With this plugin, you get loads of shortcuts and extensions for Blender’s most used features that seriously step up one’s workflow speed.
The aim of this plugin is to speed up the workflow by making the UI easier to manipulate with shortcuts. This removes the friction of working in this software and you’ll see a drastic improvement once you get used to the plugin.
There are too many shortcuts that this plugin offers and it’s not feasible to list them all here but we highly recommend you check out their website and learn all about it.
Overall, if you want to work well and work fast, this plugin must be in your arsenal. Once you get used to it, Blender won’t feel the same without it.
By: Pablo Vazquez | Guide/Demo: Text-Based, Images, GIFs
If you indulge yourself in a lot of character modeling and character design work, then you are going to love this.
You may be a game developer or make 3D animations, but, in any case, if you like fleshing out your characters and modifying the minutest of details then RetopoFlow must be in your arsenal.
This add-on brings a whole slew of powerful and handy tools that will make sculpting your 3D models a piece of cake.
Even if it doesn’t make the work too easy, it’ll surely give you a lot more control and you’ll be a fan of RetoooFlow, especially, if you like to work on details.
Working with these high-res objects and animating them will first require you to craft a simpler model using the process of retopology. Unfortunately, Blender doesn’t have a lot in this regard by default.
And that is when RetopoFlow does its magic. The tools provided by it can help artists retopology their objects.
It gives you an intuitive that lets you draw new contours over the default objects and gives you immense control over its geometry. The best part is that the clean new mesh automatically covers the surfaces of your initial object and with its quad-based geometry you can even finetune the animations.
So, if your work falls in this category, there’s no reason for you to skip on RetopoFlow.
By: CG Cookie | Guide/Demo: Text-Based, Images, GIFs, Video
In the pursuit of achieving beautiful and realistic textures on your models, you’d require a nice UV Layout. But for some reason, Blender doesn’t have anything more than the bare minimum in terms of UV.
That’s why you need TexTools to get professional-looking UV and texture tools that work in Blender.
First of all, you get more than eighteen baking models to work with that can give you the best-looking textures in Blender.
But more importantly, you get all of the other tools that can help you align your UV layouts and really smoothen out your topology.
BLAM is an amazing tool that can help you to manipulate the 3D camera in Blender.
It is extremely helpful, especially, if you work in special effects or simulations.
Basically, this plugin uses a photo to determine the focal length and orientation of the camera that was used to take the photo. Consequently, it calibrates Blender’s camera to match the imagery in the photo.
BLAM is even more useful when you do projection mapping. You can even feed vanishing lines to the plugin in reference to the photo and it’ll recreate the geometry on its own.
For obvious reasons, this trick is extremely useful and almost pure magic because you reconstruct a 3D architecture using just a photo.
Simulation artists and game developers are going to love this tool!
Ragdoll Tools is an awesome plugin to generate hitboxes in the bones of the model that will eventually help you to achieve more realistic animations and Ragdoll physics.
The tools let you edit the armature and the settings of the rigid body without a hitch and make it extremely easy to manipulate the physics.
Apart from these basic tools that are impeccably helpful, if you want to take it up a notch, you can even take a look at the custom options of the tools.
By: XBodya13 | Guide/Demo: Text-Based, Images, GIFs, Video
We have already talked about TexTools that help you out UV layouts but if you want even more control over your UV workflow, then you should go for Magic UV instead.
It fulfills all of Blender’s shortcomings in the department of UV and gives you a less frustrating experience of UV work than Blender’s minimal and ineffective controls.
But if you have updated yourself to Blender 2.7, you don’t need to worry about this because, after several community requests, Blender added this plugin by default.
This tool might seem weirdly specific to a novice but it’s one of the best examples that glorifies the freedom and helpfulness of the Blender community.
As you might have already guessed, this tool lets you generate a huge number of books on simple commands.
You can fill up 3D shells and cupboards with as many books as you may want. It also takes care of the variety of books in terms of shape, size, and colors to provide you with an interesting and unique setting every time.
The tool becomes immensely helpful once you actually deal with the tedious nature of making highly detailed backgrounds.
Artists who create models of interior decor or architects can really improve their workflow with this tool. So, be sure to check it out!
By: Oliver Weissbarth | Guide/Demo: Text-Based, Images, Video
Lighting is one of the key components that you have to take care of while working in Blender. And Gaffer is a must-have if you are anywhere near serious in terms of lighting Blender.
Blender’s default setup is, unfortunately, not that good in terms of lighting. Not just in terms of access and organization but also in terms of its capabilities in getting natural lighting.
So, if you want to take your lighting game up a notch there’s no option for you but to opt for Gaffer.
This tool not only organizes multiple lights and makes it convenient to access but it also provides a wider range of settings so you can tinker with each and every light source to make it as realistic as possible.
Moreover, it also improves your productivity because instead of hunting for the right settings, it places them at a convenient location for you.
The best part is that each light source can be manipulated individually and the settings don’t mingle and create a mess with each other.
Along with this, you also get an HDRI handler that makes managing your HDRIs a piece of cake. It lets you cycle through them without a hitch.
So, if you want to make the lighting in your projects really realistic and natural, you can’t really skip on this handy add-on.
By: Greg Zaal | Guide/Demo: Text-Based, Images, GIFs, Video
If you are a game developer and plan to work with the default engine of Blender for making a game, you should really be acquainted with this add-on.
FPS Setup gives you most of the necessary tools and presets to make a simple First-person shooter.
In our experience, we don’t think this tool is capable to meet the needs of a veteran developer but even then it sure helps. A more ideal user will be a video game enthusiast who is still testing waters.
It takes care of the basics like controls, motion, and collision, so, if you are interested in making a first-person shooter, you should really check it out.
Blender, in general, is really great at generating simulations of complex surfaces such as cloth or fluid.
But if you want to improve your results beyond just the very basics, then you have to make this simulator yours.
It can make it possible for you to create high-quality cinematic fluid simulations that are otherwise not possible.
Not only does it make the settings and options more readily available and easier to manipulate but it also enhances the default capabilities of Blender.
One of the most amazing simulations that we found in the FLIP is the whitewater simulation. It's an amazing simulation that can work for any water body you can imagine.
For Blender users who are used to using Sculpting software to make character models, etc., this tool kit will provide you with everything you need for the same experience in Blender.
It gives you complex Boolean and modifier actions that can help you to work better with models in Blender. The workflow also gets a speed boost because of it.
One of the most intuitive and amazing tools is the grease pencil. Grease pencil lets you shape 3D objects in an extremely natural way and is similar to other sculpting tools.
So, if you work a lot with sculpting in Blender, there’s no way for you to skip this because it will make your workflow faster and streamlined.
Asset Management is a wonderful add-on that does exactly what it says, i.e., manage your assets.
There hasn’t been anything better in improving work speed irrespective of the type of work you do with Blender than this add-on.
Basically, this tool lets you create a library of all the assets you create, like, scenes, HDRIs, etc. And the best part is that you can even share these assets across projects.
Moreover, when you actually get riddled with the huge variety of assets you create, this can help you to manage your assets in a more convenient way.
You get a plugin that is essentially a custom thumbnail generator that can help you keep track of your assets when you work with extremely complex scenes.
This add-on is also helpful with HDRI maps.
Ultimately, it’s an amazing management tool that is, according to us at least, crucial for good speed in Blender!
By: Pitiwazou | Guide/Demo: Text-Based, Images, GIFs, Video
Texture painting is one of the cumbersome tasks in Blender and no matter what you use Blender for, if you want to make your work authentic, you'll have to do a lot of it.
In that case, you should seriously consider this fantastic add-on called BPainter. Even though Blender does have good-quality painting tools, there are a lot of factors that hamper the workflow while painting textures.
First of all, this tool adds a layering system that resembles a lot of other 2D painting software like Photoshop.
Moreover, it also cleans up the UI and makes it less cluttered. Along with that you also get a plethora of brushes and textures that smoothens out the work.
One often overlooked feature that it adds is that of blending options. So, it adds a few blending options like Overlay, Subtracts, etc. for your textures to give you more control while drawing.
The color picker tool is also improved using this add-on. All of it is awesome, but you will have to shell out about $40 for the add-on, which, in our honest opinion, is totally worth it.
Blender's default modeling system is quite impressive but it struggles with curved and round surfaces.
To avoid that hassle, one of our top recommendations is MESHmachine. It’s a fantastic modeling tool that gives you better control while modeling curved surfaces.
It provides you with more flexibility than Blender’s default beveling tools and will help you achieve a smoother workflow.
For full information, you will have to shell out a few dollars to add this to your arsenal but if you happen to deal with a lot of rounded and beveled surfaces, this is worth it.
Are you also annoyed with the default node-based material setups in Blender? You can now say goodbye to that whole array of hassle with this simple plugin called Material Pipeline.
This plugin comes with over a hundred unique PBR materials that will surely make your life easier. And if that doesn’t satisfy you, you can also create your own custom PBR-based materials with the included node group.
The best part about this node group is that it lets you simulate any material that you can imagine, which is similar to Disney’s Principled Shader.
But if you happen to be looking for a particular set of materials then you can also consider using their Material Pipeline add-on that lets you use the material packs of your choice.
So, there’s really no reason to skip this one out!
By: ONELVXE Studios | Guide/Demo: Text-Based, Images, Video
Game developers already know the pain of designing levels and any Blender user who has ever tried to work with a load of assets in a complex scene knows how hard it is to work with Blender's default tools.
While we are not saying that Blender’s default situation is bad, it sure is less than adequate for someone who has to work on such projects frequently.
One of the biggest problems that this add-on deals with is the annoying nature of constantly placing assets in your scene.
With Asset Sketcher, you can directly draw assets in the scene and that already makes it a lot less tedious.
There is also a huge variety of randomizing options and customizing features that provide the designer with a lot more control over the scene.
The quality of work is also improved as you can directly place your assets on a ground plane that snaps according to a grid. And an included physics calculation will also settle those assets accordingly.
Overall, this add-on is a godsend for level designers, and if you happen to be one, you really shouldn't skip this one.
By: ndee | Guide/Demo: Text-Based, Images, GIFs, Video
Both free and commercial addons/plugins are available. Blender itself is open-source, which means that many free addons are available; however, some developers also offer premium addons for a fee.
Are there any compatibility issues with Blender addons/plugins?
Compatibility issues may arise when Blender updates to a new version. Addons/plugins may need to be updated by their developers to function smoothly in the new version.
Can Blender addons/plugins slow down the overall performance of Blender?
While addons/plugins offer additional functionality, excessive use can potentially slow down Blender’s performance, especially on low-end hardware. It is recommended to enable only the addons you currently need for your project to optimize performance.
How do I install Blender addons/plugins?
Simply download the addon/plugin, open Blender, go to Edit > Preferences > Addons > Install, and then locate and select the downloaded file. Make sure you have the correct file format (.zip, .py, etc.) for the addon.
How do I enable and disable addons/plugins in Blender?
In Blender, go to Edit > Preferences > Addons. Then, search for the addon you want to enable or disable, check or uncheck the box next to the addon’s name, and click Save Preferences.
How can I troubleshoot Blender addon/plugin issues?
If an addon/plugin is causing issues, try the following steps:
Update Blender and the addon/plugin to their latest versions
Disable other addons to determine if there is a conflict
Consult the addon/plugin’s documentation or contact the developer for technical support.
Can I create my own Blender addon/plugin?
Yes, if you have knowledge of Python programming, you can create custom addons/plugins to fit your unique requirements. The Blender API documentation (https://docs.blender.org/api/current/) provides guidance to get started with addon development.
Conclusion
As we have explored the numerous addons and plugins available to enhance Blender's functionality, it becomes evident that the right tools can significantly improve an artist's workflow, modeling, texturing or the overall user experience. Based on our analysis of the top 17 options, we would like to present three expert recommendations to fit various needs and preferences.
From the above 17 best blender addons & plugins, here are the top three expert recommendations:
For those who are looking to streamline their workflow and reduce friction while working within the Blender interface, Amaranth is an ideal option.
RetopoFlow is a good option for artists focusing on character modeling and design, allowing them to retopologize objects with ease and control.
Finally, TexTools is the right choice for artists who require professional-looking UV and textures, offering extensive functionality beyond the built-in Blender tools.
Each of these plugins offers distinct advantages that cater to different areas within the world of 3D design. Whether your focus is on improving productivity, refining character models, or producing realistic textures, these addons and plugins are sure to enhance your artistic experience within Blender. Don't hesitate to explore these tools further and find the perfect fit tailored to your individual needs.
Colored pencils are some of the most under-appreciated mediums of artistry. They are easy to use, inexpensive, versatile, and can make some of the finest pieces of art.
Some artists think that colored pencil is an immature medium that is only meant for kids. This distaste might be because erasing any colored pencil drawing is simpler than other types of paintings or drawings. But that is certainly not the case.
Many professional artists have created some of the best works of their life using these handy pencils. And while there are certainly inexpensive colored pencils for the casual, the market is also saturated with professional-grade pencils.
So, today, in this discussion we are going to highlight some of our top picks of colored pencils for artists everywhere in the world – both professional and beginners alike.
So, without any further adieu, go ahead and give it a read!
Best Colored Pencils for Art
Here is the list of the 11 best colored pencils that you can use to create incredible artworks.
By far, one of the most popular brands in the world of colored pencils is Prismacolor. The reason behind their popularity is their price-to-performance value, even if some consider them to be on the pricier side. And with flexible size options, varying from 12 to 150 different colors in a single set, we absolutely fell in love with them!
Experience
Even though these are wax-based colored pencils, like many others on this list, the performance is astoundingly good. The set that we used in our testing is one of the basic sets, but there are many other options to choose from as well.
The lead has a fairly high pigment count and even though these are wax-based pencils, the colors are significantly softer and blend more evenly than the other wax-based pencils we have used.
The colors are also very vibrant and no matter what color we used from the set, it looked attractive and gave results that are very close to something we’d expect from a professional-grade pencil.
But even though the pencils have an excellent performance, arguably the best among all the other brands of wax-based colored pencils, we’d still not recommend it for professional use. Due to the lack of any lightfast rating, we don’t trust its permanence.
Overall, the pencils are a great value for money, with each color costing roughly $0.60, for any casual beginner or even intermediate artist.
Pros
Great value-for-money option for beginners
Arguably the best wax-based colored pencil in terms of performance
Versatile set sizes ranging from 12 to 150 colors in a set
Cons
Not meant for professional use
Point Type: Fine | Color: Multicolor | Quantity (Per Set): 72 | Dimensions: 8.15″ x 1.15″ x 10.25″
VIBRANT COLOUR: With a round 4 millimeters soft core, the...
SOFT TEXTURE: The velvety soft core helps emphasize the...
Derwent’s ColourSoft colored pencils perform remarkably well, which honestly surprised us. With its soft core lead and vibrant colors, these pencils are so good that they can steal the heart of a professional.
While there are a few objectively better brands of colored pencils that professionals abide by, the value these pencils offer for the price is seriously astounding.
Experience
The colors are incredibly lightfast and you can get the exact information of each color with the attractive color chart that is included in the box.
The lead is extremely soft and produces some of the most vibrant colors we have seen when a pencil is put on paper. And the soft nature of the core also makes it excellent at blending and shading.
Some of us were worried that the soft core of the pencils would break often and would chip while sharpening but, fortunately enough, the lead is extremely resistant to breaking, and there was no case where it broke off unexpectedly when we put pressure.
The lead, however, is a little on the thicker side - roughly, 4mm. While that is a problem for detailed work - because you’d need to constantly sharpen it, it proved excellent for blending and filling out the larger parts of the painting.
Overall, these pencils are excellent for professional-grade use, and they come at a fairly reasonable price, unlike some other brands of similar quality and performance.
Pros
Incredibly attractive colors and great lightfastness
Soft leads that are great for blending
A durable core that won’t break easily
Great value-for-money options for professional artists
Cons
Off-brand blenders don’t suit the pigments
Point Type: Fine | Color: Multicolor | Quantity (Per Set): 72 | Dimensions: 13.95″ x 1.02″ x 7.8″
Tombow Irojiten is a Japanese company that manufactures some of the most unique art products that we have had our hands on. Their products have stolen the hearts of many artists since 1913 because of their impeccable quality, and their quality of standing out in the market. And these colored pencils also stay faithful to their formula.
Experience
The colors are vibrant, and the pigments are soft and produce an even tone, which is great for blending.
As for lightfastness and permanence, it seems to be excellent in that regard. But the sources we’ve used are not very reliable.
And these unique colors are packaged according to the palette instead of size. Because of that, you get sets like Cool Grey, Seascape, Woodlands, etc. And all of these sets have a different number of colors as well.
We found this on the favorable side because you can just buy colors on the basis of the piece you are doing. If you are doing an art piece with Earth shades, then you can just go ahead and buy only those.
But this argument becomes a little redundant because the pencils are also sold individually but at an extra charge.
They also have many unfamiliar shades and colors that we hadn’t experienced before. So, if you are looking to bring some newness to your artworks, then you have found your match!
Pros
Unique palette of colors, providing 90 colors in total
Can be bought in sets on the basis of colors
Can also be purchased individually
Incredibly good performance and vibrant colors
Cons
It is kind of expensive
Point Type: N/A | Color: Multicolor | Quantity (Per Set): 90 | Dimensions: 9.7″ x 8.3″ x 3.6″
Progresso woodless color pencils 24/pkg assorted colors
Brand of Chartpak
Koh-I-Noor Progresso Woodless Colored Pencils redefine the fundamentals of a pencil at an extremely inexpensive price point. And yes, you heard that right! These pencils are indeed made without wood. These are just leads that are wrapped in lacquer. The result of which is positively interesting.
Experience
Since the pencils are all-lead, you can toggle between fine lines and broad strokes with just a slight movement making them extremely flexible to use. Filling out large areas also becomes way easier.
In our experience, we couldn’t help but draw parallels between brushes and these pencils. And don’t worry, the lacquer covering is great at preventing the colors from spreading and making it all messy.
In terms of performance as well these pencils do remarkably well. The colors are vibrant and the pigment density is enough to provide softness to the colors, which is great for blending purposes.
There are two gripes that we have with this color set though. One is the lack of color charts and lightfast ratings and another is the inability to be bought individually.
But when each pencil costs about only $0.58, we couldn’t hold any grudges against it.
Overall, these pencils have a unique feature that we haven’t witnessed in other brands before. And although we would not deem it fit for professional work, we consider it an excellent product for any other use case.
Pros
Unique woodless pencils that are great to use
Extremely affordable pricing with each pencil costing about $0.58
Great colors and performance in terms of vibrancy and softness
A huge variety of possible strokes due to its woodless nature
Cons
Not fit for any professional use
Not sold individually
Point Type: Flat | Color: Multicolor | Quantity (Per Set): 24 | Dimensions: 7″ x 4″ x 0.91″
Unsurpassed Lightfastness: Features pigments that resist...
Faber-Castell is a company that needs no introduction to the art community. They make some of the best quality art products that artists all around the globe abide by.
Their oil-based Polychromos colored pencils constitute one of those fine specimens. These pencils check all the boxes of an excellent colored pencil set and offer interesting advantages over other wax-based colored pencils.
Experience
These are oil-based pencils and these are extremely reminiscent of oil pastels or oil colors in terms of flow and how the colors behave. So, it’s way smoother than wax-based colored pencils which makes it better at blending.
Oil-based colored pencils are not that common – as evident from the abundance of wax-based pencils on our list as well. Other than being better at blending, these pencils are also resistant to water, and since oil is a stronger binder, the lead is way less prone to breaking or chipping.
As for the performance of these pencils specifically, the colors are well-saturated and behave consistently. And the lightfastness is absolutely amazing! Hence, we deem it fit for professional use.
The pencils also have a thicker core - about 3.8 mm - so, you get a wider range of strokes capable of both detailing and blunt blending.
Overall, these are excellent oil-based pencils that are great for almost any kind of artist, even though the slick feeling is a departure from more popular wax-based colored pencils. And if you are unsatisfied with wax-based pencils, then surely give these a try!
Pros
Oil-based colored pencils that are great for blending
Incredibly lightfast and great permanence
A thick core that is capable of providing a wide range of strokes
Great performance in terms of color vibrancy
Great for professional use as well
Cons
Can be considered to be on the pricier side
Point Type: N/A | Color: Multicolor | Quantity (Per Set): 120 | Dimensions: 3.94″ x 1.97″ x 7.87″
There are some brands in the art supplies industry that represent the state of the art. These brands don’t care about compromises for a smaller price tag. All they aim to do is to make the best product possible to cater to the needs of professionals all around the world. Caran d’Ache is one of those companies, and their colored pencils exhibit that commitment as well.
Experience
These pencils are at the top of the ladder. The finest pencils a professional can lay a hand on.
The pencils feature thick 8 mm lead cores that can be sharpened to the finest tip possible, and they’d still not break or chip. Of course, this provides a wide variety of strokes that’d not be otherwise possible.
They also surpass any other colored pencils in terms of lightfastness and permanence. Over 80% of their pencils belong to class I of lightfastness, which means they will remain unhindered for over 100 years. And the remaining colors belong to class II, meaning they will maintain their luster for 50 to 100 years.
The colors are also impeccably good-looking and the pencils flow smoothly no matter what kind of paper we used. And blending is also jaw-droppingly graceful.
Of course, the best of the bests will also be valued at a similar price point but that would never be a problem for a professional who is making a living from the quality of these pencils.
And you can get these pencils in 5 different set sizes.
Pros
Impeccable performance, barely rivaled by any other colored pencil brand
Impeccable durability of colors in terms of lightfastness
A balanced palette and immensely beautiful colors
Intended for serious professional use
Cons
It’s one of the most expensive pencil sets we’ve ever used
Point Type: Fine | Color: Multicolor | Quantity (Per Set): 76 | Dimensions: 5″ x 1″ x 1″
Beautifully Pigmented - The colored pencils in this set...
Surface Versatility - These colored pencils for artists are...
A fair competition to Faber-Castell Polychromos colored pencils set is LYRA Rembrandt Polycolor Art Pencils. These are also oil-based colored pencils but these offer a different set of pros & cons compared to the aforementioned brand.
But that doesn’t change the fact that these pencils are of excellent quality as well, and hence, they are worthy of competition.
Experience
Like the Polychromos, these pencils also flow incredibly smooth and blend effortlessly as well. The colors also perform outstandingly in terms of vibrancy and vividity. The pigments can also be manipulated with turpentine or any odorless mineral spirit.
The purchase options for these pencils are also very lucrative. You can buy these in 5 different size options – 12, 24, 36, 72, and 105. But the best part is that you can buy any pencil individually, which is great news for professional artists.
What’s not so great though is that the pencils don’t come with a color chart and that’s not suitable for many professionals.
When compared to Polychromos, these pencils are indeed a little more affordable but still fall on the expensive side of the spectrum with each pencil costing roughly $1.33 when bought in a set of 24.
Some artists have complained online that the lead chips and breaks but we never had such an experience. Hence, we also recommend using manual sharpeners with these pencils instead of electric ones.
Pros
Incredibly smooth oil-based pencils
Great performance in terms of color vibrancy and consistency
Various size options are available and can also be bought individually
Cons
It is expensive
Point Type: Bold | Color: Multicolor | Quantity (Per Set): 72 | Dimensions: 13.19″ x 0.83″ x 7.36″
The excellent quality chalk-pastel coloring pencils come in...
colors can be mixed and blended.
All of the colors we have talked about until now were either wax-based or oil-based colors. But we wanted to vary this list with an entry from Stabilo CarbOthello. These pencils are chalk-pastel, and they bring a fairly unique experience to the table, fundamentally different from all the other entries on this list.
Experience
Chalk-pastel colored pencils are significantly different in experience from conventional colored pencils based on wax or oil. The powdery nature of the colors makes blending way more fun.
These pencils belong to the premium category, and hence, are followed by a matching price tag.
The pigments are of top-notch quality, and they are smooth and vibrant. The colors blend together extremely well and with a mix and match of different kinds of paper, you might just witness a unique artwork that’d not have been possible with any other brand of pencils.
As for lightfastness, these colors are extremely resistant to fading due to light and it defines the premium nature of these pencils. So, we think that if you love the experience, and the results you get from these pencils, then don’t be afraid to use it for professional artwork.
The pigments are also partially aquarellable, meaning that you can use these pencils with brush and water, and the contours of your artwork will remain intact. And the range of colors in the set is quite satisfactory too with 60 different colors.
Pros
Premium quality chalk-pastel colored pencils that have a unique experience
Extremely enjoyable blending because the colors are smudgeable
Top-notch quality of pigments. Vibrant and consistent colors
Can be used with brush and water to a certain extent
Cons
Falls on the expensive side of the spectrum
Point Type: N/A | Color: Multicolor | Quantity (Per Set): 60 | Dimensions: 13.25″ x 8.05″ x 1.35″
An extremely unique way to use colored pencils is by using them in a combination with other mediums, especially, watercolors. For those who are looking for colored pencils capable of such artistry, we have brought you Creative Art’s Materials colored pencils.
Experience
While we have had some other oil-based pencils on this list like Polychromos and Lyra, these pencils are better for mixed media because they are significantly softer and silkier than other oil-based colored pencils.
Hence, the pigments latch onto the paper better, and the result is more vibrant colors and expressiveness when used alongside other mediums like watercolor.
Other than that, this set of colored pencils behaves pretty much similar to any other oil-based colored pencil. Its feeling is silky, and the blends are more realistic than the ones created with waxed-based colors.
The durability of the lead is also better than wax-based pencils because oil is a stronger binder. There will be no chipping or breaking after sharpening.
Along with all these redeeming features, the lead is also sufficiently thick. This allows a wider range of strokes.
And the colors are fairly lightfast as well, which makes it capable of being used in a professional project.
Overall, it’s an outstanding colored pencil set like its other oil-based siblings. And its soft lead also makes it the best choice for mixed media.
Pros
Excellent oil-based pencils of incredible quality
Outstanding performance in terms of saturation and consistency
Superbly durable with no possibility of chipping or breaking
Incredibly lightfast and resistant to fading
Softer and silkier lead that is perfect for mixed media
Cons
Like other oil-based colored pencils, these are also very expensive
Point Type: Fine | Color: Multicolor | Quantity (Per Set): 40 | Dimensions: N/A
It is adjusted to meet the high demands of professionals; It...
Soft and shaped oil-based colouring pencils with fine and...
Holbein Artist Colored Pencils is one of the most elaborate sets of colored pencils that we have seen that comes at an affordable price point. Even though the 150 different shades of colors steal the show, the pencils themselves are of remarkable quality and perform quite magnificently.
Experience
The number of colors that you get in a box can be quite overwhelming. When you get 150 different shades of colors stacked in two layers of a box, you don’t really have room to complain.
We deem it the most comprehensive set of colors for a beginner and casual artist. As for performance, the colors are quite excellent as the pigments are saturated and blend excellently.
The lightfastness and the permanence of the colors are also quite satisfactory. Although, we don’t recommend this to professional artists who need it to be pitch-perfect.
We’ll rate these colors well above average in terms of performance, meaning that it’s superb enough to deal with the needs of most artists until it’s some serious business.
One thing that was pleasing for us to note, was the thickness of the lead. It’s 3.8 mm, and since it’s on the thicker side, you get a wider range of strokes.
Overall, it’s an excellent colored pencil set for casual beginner and even intermediate artists. But unfortunately, the lightfastness of these colors makes them fall short of any professional use.
Pros
A huge number of colors with 150 colors in a single set
Great performance in terms of vibrancy and blending ability
Adequate lightfastness and permanence
An excellent comprehensive option for beginners
Cons
Not meant for professional use
Point Type: Medium | Color: Multicolor | Quantity (Per Set): 150 | Dimensions: 7.9″ x 2″ x 18.1″
Blick is one of the most beloved brands in this industry. They have found a perfect balance of price-to-performance that seems to please a lot of artists all around the world. And to no surprise, Blick does it again with their colored pencils as well.
These are the perfect middle-of-the-ground pencils that are priced in a beginner-friendly fashion but perform like a professional-grade tool.
Experience
Right off the bat, the performance matches and even rivals some of the professional-grade pencils that are way more expensive than these ones.
The colors are vibrant, and they blend extremely easily. The pigment density is also high.
And the best part is that your artworks will maintain their luster for years to come because the colors are incredibly lightfast. Nothing about the performance felt short, especially, when considering the price.
And the purchase options are incredibly flexible too. First, there are 5 different sizes you can buy – 12, 24, 36, 48, and 72. If that doesn’t suit you, you can also buy them in thematic sets called Greys, Landscape, and Portrait. And if that doesn’t feel right to you, then you can also purchase them individually!
So, if you are looking to move on from rudimentary colored pencils and get into some serious works of art, there is no better option than this. And once you do move on, you won’t change soon because these are nearly gems.
Pros
Great price to performance and impeccable quality
Amazingly vibrant and attractive colors
Good quality pigments for great blending
Incredibly lightfast and great permanence
Huge variety of purchase options. Can be bought individually as well
Cons
May not suit artists who need super-premium pencils
Point Type: N/A | Color: Multicolor | Quantity (Per Set): 72 | Dimensions: 13.10″ x 8″ x 1.40″
By now, you must have realized that there are a number of color pencil options on the market and that choosing one can be difficult. In this section, we will discuss the factors that can help you purchase the right set of colored pencils.
Type of Pencil Set
Today, most colored pencils are wax-based, which provides a smooth texture. The pigment flows well, and you can create many layers on the paper. There is no need to worry about adhesion or smearing, and the layers will be clearly visible.
The only issue is that you may see wax bloom, which may give a splotchy look to the picture. However, you can wipe the excess colors with a cloth to perfect the sketch.
Next, there are oil-based pencils that have some wax in them. These have a different consistency, and they do not cause a wax bloom. They are firmer than wax pencils but will provide a smooth finish. Also, the lead does not break easily, and the pencils last longer.
But oil-based colors can be harder to remove, and they smear easily.
Then, there are watercolor pencils where the binder is water-soluble, and the pigments can mix with water. They contain a dry watercolor pigment, which can be used along with water and brushes.
Another type to mention is chalk-pastel pencils, which are perfect for blending. These have a chalky texture, and you can use your fingers or cotton to blend them together.
Experience Level with Colored Pencil Art
If you have used pencil colors before, then you must have noticed that some are easier to use than others. The ones available for schoolchildren have a harder lead, and they do not break easily. They are easier to sketch with and have less blending capacity.
On the other hand, for advanced painters, there are more delicate and fragile pencils. These have better blending capacity and a soft lead. Also, if you are using watercolor pencils, then the colors could react with the slightest amount of water and help you blend well across surfaces.
These artist-grade colors can be more expensive as they contain more pigment and are of higher quality.
Durability
With normal use, colored pencils can easily last for two to five years at a stretch. But, if you keep them in a cool dark place in appropriate boxes, then they can easily last for a longer time. Artists who use colors regularly have even used color pencils after 25 years of storing them.
Today, there are woodless colored pencils that can last for 100 years. But, please remember that the colors are susceptible to breaking or chipping in the long run. This is especially true for thin wooden pencils. So, make sure that you keep them properly and do not drop them off often.
If you are teaching your kids how to use these colors, it is best to sit on the floor and work to prevent the pencils from dropping from a higher surface. For school use, purchase pencil colors that are thicker to prevent easy breakage.
Lightfastness Quality
Lightfastness rating helps one understand how resistant the color pigment is to fading. If you are just purchasing colored pencils to practice and do not plan to preserve your work, then this is not going to be an essential factor.
However, if you are planning to sell your work or frame them, then the colors have to be resistant to fading. Most professional-grade color pencils available today are not prone to fading.
Colored Pencils for Art FAQs
What kind of paper should I use with colored pencils?
Heavyweight, acid-free paper with a slight texture is recommended for colored pencil art. The texture provides tooth for the pigment to adhere to, while the acid-free quality ensures long-lasting artwork without yellowing or deterioration.
Do I need to use fixative when working with colored pencils?
Fixative is not always necessary for colored pencil art, but it can help prevent smudging, reduce wax bloom, and protect the artwork. However, it may alter the overall appearance of colors, so testing the fixative on a small sample is recommended.
Can I blend colors with colored pencils?
Yes, colored pencils can be blended using various techniques like layering, burnishing, and solvents. These techniques help create smooth transitions, gradients, and more depth in your art.
What is lightfastness in colored pencils?
Lightfastness refers to a colored pencil’s resistance to fading when exposed to light. Pencils with higher lightfastness ratings will retain their colors better over time, allowing the artwork to remain vibrant and colorful.
Are artist-grade colored pencils better than student-grade ones?
Artist-grade colored pencils typically have higher pigment concentration and better lightfastness than student-grade alternatives, which can result in more vibrant, long-lasting artwork. However, they are usually more expensive, so the choice depends on your budget and needs.
What are some techniques used for creating art with colored pencils
Common techniques include hatching, cross-hatching, stippling, and scumbling. Artists may also use layering, burnishing, and blending for richer, more dimensional results. Experimenting with different techniques can open up a range of creative possibilities with colored pencils.
Can I sharpen my colored pencils with a regular pencil sharpener?
While you can use a regular pencil sharpener for colored pencils, specialized colored pencil sharpeners are better suited for the task. They have less aggressive blades that prevent the fragile colored cores from breaking or crumbling during sharpening.
Conclusion
Finding the best colored pencils for your artistic needs can be a challenge, as the options on the market are varied in terms of price, performance, and suitability for beginners or professionals. However, our thorough review has made it easier for you to choose the best product based on your requirements.
From the above 11 best colored pencils, here are the top three expert recommendations:
For casual beginners, the Prismacolor Colored Pencils and Sets are an ideal option. With a high pigment count, soft colors, and excellent blending capabilities, casual artists could fall in love with these pencils.
Professional artists looking for value should consider the Derwent Colored Pencils ColourSoft. With lightfast and vibrant colors, a soft lead that is great for blending, and excellent durability, these pencils are an impressive choice.
If you're looking for unique palettes, the Tombow Irojiten Color Pencils are the right choice. Featuring vibrant colors, great blending capabilities, and unique palette options, these pencils can help you explore new artistic possibilities.
Regardless of your artistic experience or preferences, our expert recommendations can help guide you to the best colored pencil product for your unique needs. So, go ahead and unleash your creative potential with these exceptional colored pencil options.
One of the most popular 3D sculpting animation programs today is ZBrush.
We are sure most animators are familiar with the tool, yet not everyone can operate it - at least not without a proper guide.
There are many tutorials about the ZBrush application available online, but choosing which one is beneficial for you can be time-consuming. Therefore, today we have prepared a list of 25 detailed and helpful video tutorials - since many people understand better if they simply see it with their own eyes.
These tutorials cover all skill levels, so, perhaps you’ll find one which suits your needs perfectly. Beginners can have a good start to using the application while advanced users will find more new steps as they progress.
Here is the list of the 25 best ZBrush tutorials & courses to help you to create amazing digital sculptures, master the essential tools, and take your ZBrush skills to the next level.
Here’s a video tutorial you can find on YouTube by North Pixel whose specialization is in 3D animation and entertainment. Their video’s intro focuses on sculpting from scratch. Their aim is to let people know how to sculpt without being too hasty in the process.
The video is about an hour long, so it contains a lot of tips and lessons that can be quite useful for beginners.
While it’s true an hour is not enough to learn everything necessary, however, it does offer more information on the basics that starters need to know. It will come in pretty handy if you are self-taught as well.
Here is another introduction video to the application, except that it is specifically meant for version ZBrush 4R7.
In this video, you’ll learn about 2.5D designs including some basics about 3D workflow. Other subjects include ZSpheres, ShadowBox, ZModeler, and a few more..
There aren’t a lot of differences regarding the features, but Justin Marshall gives a very detailed introduction in this 4-hour long video. You would want to watch it because there is a lot of visual guides about what and how you can do your tasks.
Moreover, the instructor also happens to be an author of Pluralsight who focuses on this area of work. Therefore, if you are a beginner this would be highly beneficial for you.
If those two are not enough, we have here another introduction to ZBrush which is meant for beginners only. The instructions are presented by Edge-CGI-3D which has its own channel on YouTube.
Before starting an actual project, one needs to have enough practice on the basics of sculpting - and this is exactly what the video provides. Besides the basic concepts, it also describes what ZBrush is all about, hence, making it perfect for the absolute beginner.
Although it can be short to include a complete fundamental guide, we also have to consider the fact that not everybody has the time to spend on more lengthy videos. So, paying close attention to the instructions will do just fine.
By: Edge-CGI 3D Tutorials and more! | Duration: 48 Minutes (Video) | Free: Yes
A more systematic approach to help you get familiar with the basics of using ZBrush is this video by artist Richard James Cook who came up with 10-part ZBrush series. It is also one of the most viewed ZBrush tutorials on YouTube.
Every one of his videos is about 30-60 minutes long. Going through each of them at a time can help you get a wider understanding of the program. But most importantly, all of the tutorials are free, so you can learn them at your own pace without having to shed a penny.
This video tutorial is not necessarily for beginners but for users who are shifting from one sculpting program to ZBrush. So basically, it is an introductory course for those who are already familiar with 3D animation concepts.
The instructor, Ryan Kittleson, covers many of the common techniques and tools used for both sculpting and painting in a program.
Although the video is a bit old, most of the methods remain the same, making it still applicable for reference to date. And since it is a course, fees are required except for the one-month trial which is completely free of cost.
This one is not a video - it’s a platform. The platform allows you to sign up with Pluralsight for a free trial and have access to many video tutorials on ZBrush. Through these tutorials, you get to learn many sculpting processes you need to know in proper detail.
If you go to Pluralsight, there will be some tests to help analyze your sculpting skills on ZBrush so it can assign which level suits best for you.
Yet, another popular video to help learners is this one by Liam Shaw. In this tutorial, the instructor takes his viewers through a process to sculpt characters from scratch.
You can follow similar steps if you’re planning to create patterns or designs. We assure you that beginners will find this guide very effective.
One of the features which make a character look more appealing is the hair. If created precisely, your character will look almost life-like. And lucky for you, here is a video that will help you achieve that. You will see how the artist sculpts perfectly fine lines to make hair or fur. Besides, it is short and is not as complicated as one might think.
If you are someone who wants to create their own human characters and not download free ready-made ones, this guide might be the perfect one for you.
With this tutorial, you will be able to construct a whole realistic humanoid anatomy from nothing. The software program allows you to mould any form you desire which makes it ideal for such sculpting.
By: Jakub Chechelski | Duration: About 10-15 Minutes (Article) | Free: Yes
The environment or background of your project is as important as the character itself. Therefore, you need to be very detailed with it.
This video is particularly made to achieve that purpose. The tutorial stresses making fine details on objects such as walls or rocks since they have a strong influence in making the project appear realistic.
Now, we are going to shift our focus to creating clothes for our human characters. In ZBrush, the user can color, model, as well as add a finishing touch to the characters’ clothing.
This next video by David Jones is around 3 hours long. It is about sculpting clothes, and as usual, it also aims at making them appear real so that they fit the characters’ look.
We have to admit that making clothes in 3D animations is never easy, and that is why we included this video.
It will be very helpful for those who are struggling to create clothing designs by offering them a step-by-step guide. You will also get to know the basics of where the body’s tension areas are so that it becomes easy to sculpt the clothes better.
By: David Jones | Duration: 185 Minutes (Video) | Free: Yes (Within Trial Period)
Moving away from designing human anatomy, we will now introduce you to the video that teaches ZBrush users how to create a fantasy character.
The instructor, Raul Tavares, explains everything in a simple manner so that everybody, including beginners, may understand it perfectly. However, it would be much better if you already know a thing or two about using ZBrush first.
As a sample, this video will show you how to create a fictional character (or anything similar) using the methods it provides, also by starting from scratch. You can start by sketching the thumbnail, coming up with a concept, and finally creating a 3D model.
In case you have ever made or at least tried designing a character, then you know that in ZBrush there is a lot of posing and modeling needed. Keep in mind that it does require a smooth workflow to accomplish the process.
Kyle Green, the artist, has had a lot of experience in the field, hence, users will find his tutorials more convenient for practicing posing in ZBrush.
His tutorials embrace easy language, tips, and techniques, so the course suits beginners and novice 3D animation designers. You can manipulate the characters’ poses in any manner possible.
In this tutorial, Darrel Abney shows us how to create an alien face. By acting as a sample, you can draw inspiration from his video to create anything alike.
The reason this artist chose ZBrush for his work is due to the features it provides. Lots of tools for sculpting is one of the main reasons.
A very interesting technique to enhance the realistic look of a character/creature is to use both Photoshop and ZBrush to modify it - and that’s exactly what Adam Dewhirst did.
In this project, the artist shows us the methods of using these two programs in order to create a fantasy creature.
We have here a video series that will help users design their environment by following these simple, yet very effective methods instructed in detail.
One of the important things to keep in mind is that the environment requires a lot of props and structures. This video series is perfect for those who have never tried this area of designing before but want to create realistic environments.
The video series shows how to use the different tools in ZBrush to create and mold such structures as desired.
By: Dan John Cox | Duration: 137 Minutes (Video) | Free: Yes (Within Trial Period)
Besides the character and the environment, texture painting is another part of ZBrush which plays an important role in 3D animation designing.
Here, you’ll be able to see how to use texture painting for creating 3D objects. Some videos already featured the types of tools that can be used for poly painting or workflow.
In time, it will become very easy for creating amazing elements as you learn how texture painting works.
As we mentioned about poly painting, here is a video by Paul Gaboury which explains what and how to use it. You will see how he creates helmet panels followed by throwing some gold paneling to the ring of this character.
While it’s not a complete guide, this video shows how you can create tile texture by explaining how it works, therefore, it is perfect for the absolute beginner.
We recommend going through this course since tiling is a must for all 3D artists. Note that, this video also uses Photoshop to create realistic tiling.
This video is by ArtStation, a channel on YouTube, that places its focus on 3D animation designing. Among many of their content, we found this to be the best tutorial on using ZBrush.
There are many series providing techniques to create characters while this one shows us how to create the base of a creature.
If you’re thinking of creating a monster/demon for your project, take a look at this video where the artist, Titouan Olive, demonstrates how to model-making tips that are commonly used for Hollywood animations. The bonus is that he also provides a few tricks to use in order to make the creature looks real.
For a more specific creation to help users have a sound understanding of using ZBrush, we have here a project of Star Wars’ Stormtrooper done by Juan Martin Gracia Forn.
Using both ZBrush and Photoshop, he tells us that we must first plan the construction carefully before proceeding to the modeling. He also mentions and proves that rendering is a hard task in ZBrush.
By: Juan Martin Garcia Forn | Duration: About 10-15 Minutes (Article) | Free: Yes
If you are a beginner aiming to better understand the concept of environment textures, we suggest giving this video series a try. The complete time amounts to only 3 hours. It is available through the Pluralsight library which offers you a one-month free trial.
However, creating incredible environment textures is not possible without the help of 3D Max. Many artists go for this option because of the professional methods it provides.
Finally, after all the tutorials you might want to check out some of the tips on using ZBrush which are provided by Madeleine Scott-Spencer, the instructor who shares her own tips for sculpting with ZBrush.
Are there any prerequisites for taking ZBrush tutorials and courses?
Most beginner ZBrush tutorials and courses have no prerequisites. However, some basic knowledge of 3D modeling concepts, computer skills, and familiarity with other 3D software may be helpful in enhancing your learning experience.
Will ZBrush tutorials and courses stay up-to-date with new software updates and features?
While some older tutorials and courses may not cover recent features, creators of ZBrush tutorials and courses often release updated content or additional lessons to address new software updates and techniques.
Are paid ZBrush tutorials and courses worth the investment?
Paid ZBrush tutorials and courses usually provide more structured learning experiences, downloadable resources, and instructor feedback, which can be valuable for mastering ZBrush. However, make sure to check reviews before making a purchase.
Conclusion
Navigating the wide variety of ZBrush tutorials and courses can be overwhelming, especially for beginners and those looking to learn efficiently. To help streamline the process, we have sifted through and analyzed 25 of the best tutorials and courses to find the top three expert recommendations for various learning needs.
For beginners who want a comprehensive introduction to ZBrush basics, Introduction to ZBrush is an ideal option, offering a solid foundation in sculpting without rushing the learning process.
For users specifically working with ZBrush 4R7, Introduction to ZBrush 4R7 is a good option as it provides detailed instructions on the unique features of this version.
Finally, for those seeking a shorter learning time, ZBrush for Beginners is the right choice as it offers a concise overview of the fundamental concepts.
From these top selections, you can make an informed decision on the best ZBrush tutorial or course that best suits your learning goals, preferences, and available time. Dive in and start mastering the powerful features of ZBrush to unleash your creative potential!
Adult coloring books have been on the market for long - however, it’s only recently that they have begun to find footing as an acceptable, regular everyday product.
There is a lot of research that suggests that these coloring books are a wonderful way to let go of stress, whether it’s personal or professional.
It’s not odd to see adults, especially millennials, travel with a set of colors and books which helps them de-stress after a long time of constantly working.
To avoid burnout, a coloring book is one of the best ways. The question, then, remains: which coloring book is best for me?
Fortunately, today it’s incredibly easy to find a variety of coloring books, which are all different and created keeping particular consumers in mind. Without further ado, let’s begin!
Best Adult Coloring Books
Here is the list of the 11 best adult coloring books that can help you to relax, unwind and explore your creativity.
This book is aimed specifically at people who prefer colored pencils and can spare a few hours at a time in order to finish up their coloring. The designs come straight from Disney’s classic movies such as Pocahontas and Aladdin, and the paper is thick enough to handle all but watercolors. The coloring is done in the same manner as Thomas Kinkade’s originals!
Experience
The stories depicted in the book are typical of all that one relates to their childhood - a great way of relieving stress. The book has pages that are finished in matte rather than glossy papers you expect to see on generic children’s books.
There are sixty-three such intricate works, so you’ll be covered for a fair bit of time. Going through all of those stories like Sleeping Beauty, Snow White, The Beauty and The Beast, and so on will surely put you in a meditative state as you forget the world and immerse yourself in a time where there were no worries, where you could just be yourself.
Most books generally focus on the patterns and designs and the colors - this one, being story-based, does a great job of keeping you involved. However, if you’re just starting out, you may want to get a hang of coloring on another (easier) coloring book before going for this.
Pros
Sixty-three drawings for you to fully explore
Wonderful with colored pencils, can handle anything but watercolors
Matte finishing on the pages is a neat touch
Cons
Might be a little difficult for those just starting out
Author: Thomas Kinkade | No. of Drawings: 63 | Book Binding: Paperback
50 Hand-Drawn Mandalas to Color. Relax and unwind with 50...
Durable Hardback Book Covers. Color anywhere at any time...
Mandalas are a class of Buddhist religious symbols, which tend to be incredibly intricate and colorful. They symbolize peace and prosperity and ultimately, attaining Nirvana. Many books use mandalas - this one does only Mandalas though it does them very well. The page quality is amazing so you can use any kind of medium in order to fill between the lines.
Experience
If you want the best quality of paper among mandala coloring books, this makes for a very interesting choice. Mandalas are complex, intricate designs and you don’t want to fumble around too much with colors - they take as much time as it is. Therefore, the card stock-esque paper quality is something to write home about - it’s that good.
Furthermore, you get to use any medium you want - from watercolors to colored markers, you can color with whatever is comfortable. Another wonderful feature is that it is spiral-bound, which means you can frame or showcase your coloring if you so wish! Hence, if it’s a calming and high-quality coloring experience you seek, this should be on top of your list.
Pros
Incredible paper quality, the lines are very neat
Mandala designs vary from the simpler to the more complex, so you can start off wherever you wish to
Comes in a spiral binding, so you can easily pin these colorings on the wall
Cons
Quite a bit more expensive than the rest
Author: ColorIt, Terbit Basuki (Illustrator) | No. of Drawings: 50 | Book Binding: Spiral-Bound
This book is meant strictly for adults because the blanks that you’ll be filling in are only relatable when you’re an adult. This book takes the concept of an “adult coloring book” to the most literal extent possible, resulting in one of the most fun and rebellious coloring books you’ll see on the market today.
Experience
The adult experience is often full of not-so-great things, but also full of other great experiences which are unique to adults. This book does a wonderful job at bringing together those parts of our lives which give us pleasure and pain - as well as happiness. The drawings themselves range between being moderate to complex.
There are twenty-one pages full of tidbits from our lives that we can color up - anyway we wish to. There are also (thankfully) two pages that serve a different purpose - these are the test pages that you can use to try out various media like colored pencils, pastels, and watercolors (we wouldn’t suggest acrylics) before going for coloring the designs.
It’s inexpensive, it’s fun, and it’s a bit different from the generic coloring books you see on the market.
Pros
A breath of fresh air in a market that is full of similar designs otherwise
Page quality is good enough to withstand most media without issues
Test pages are useful even if you go for other coloring books later
Cons
Twenty-one drawings won’t last you as long as some competing books will
Author:: Sasha O'Hara | No. of Drawings: 21 | Book Binding: Paperback
For people who are completely done with their work and can’t handle more stress, this book may come to the rescue. This book is targeted squarely at the crowd which usually attempts to color these books on getaways from work, or during breaks from high-pressure work. The pages are of decent quality as well.
Experience
This book will be perfect for those who want to do coloring, but on a budget. Further, nature lovers will be impressed by the theme of the book, which revolves around butterflies and flowers and sometimes mixes the two as well! The designs aren’t very complicated compared to many others we’ve reviewed, so feel free to get one if you’re just starting out with coloring.
The book has thirty one-sided pages which are all meant to give you a meditative experience as you go through the drawings one by one. The patterns themselves are open-ended - you can color them in any way you wish to go about it. Though we feel that there could have been more variety in some designs, the book overall does a great job.
Pros
Thirty-one relatively inexpensive and high-quality pages for you to color
Some of the designs are truly breathtaking
Easier to complete than many other books, which may get too complex for beginners
Cons
A few of the designs tend to be repetitive
Author: Cherina Kohey | No. of Drawings: 30 | Book Binding: Paperback
If you’re on a shoestring budget but still want to achieve some kind of mental piece, or are unsure of whether adult coloring is really worth any of the attention it is getting - this is for you. In terms of value, nothing else on the market comes within shouting distance - you could even give away some of these if you’re a fan of coloring and want your dear ones to get started.
Experience
Who said adult coloring had to be an expensive hobby? Adult coloring can be as expensive or cheap as you want it to be - and this coloring book serves as a prime example of that. A set of 12 colors of any medium, and this book will ensure you’re well on your way to attaining mental peace at a fraction of the cost of other books. There are very few compromises, too.
The only compromise here comes in the form of paper quality, which is predictable enough because high-quality paper costs a lot. However, with this book, if you stick to colored pencils or wax crayons, you’ll be good to go - you do get forty-eight of the most diverse designs spread across experience levels. Inexpensive it may be, but it’s a pretty solid book.
Pros
Undercuts the competition by at least half the price
Designs are varied and range from easy to fairly complex
Can easily be given away as a gift
Cons
Paper quality is decidedly not the best
Author: Two Hoots Coloring | No. of Drawings: 48 | Book Binding: Paperback
If you’re looking for designs that are a bit out-of-the-blue and don’t have a problem with somewhat dark designs, this is what you’re looking for. A small caveat first: there are drawings on both sides of the page, so your markers will bleed through in all probability. If you stick to drier media, you’ll be alright though. Otherwise, it’s a pretty solid coloring book.
Experience
Posh coloring books are the latest trend to hit the market, and this one is no different in being as hip as the others are. These designs are much more modern and sophisticated, and sometimes a bit dark as well. It doesn’t have anything close to the mandalas and nature-based scenery we’ve covered in some other offerings - it has a different audience.
It is also much larger, having more than 100 drawings for you to fill up and make artworks out of! The paper itself can’t handle more than strong pastels - so markers and watercolors are off the table. If you can manage that, the rewards are immense - the drawings themselves hardly ever disappoint. A solid recommendation from our side!
Pros
Enough material to last multiple vacations and breaks
Wonderful, non-repetitive material which is sure to soothe you
High-quality material used for the pages
Cons
Printing on both sides of the page causes bleeding even though the pages are thick enough
Author: Andrews McMeel Publishing | No. of Drawings: 100 | Book Binding: Paperback
For the lover of all things swirl, here’s your way to all-but-guaranteed relief. The best part about this particular coloring book is that you get a large variety of swirly patterns which will definitely uplift your mood and color up all the greyness you might have been feeling. The book comes with a variety of difficulty levels, so it is easier for you to start at your ease.
Experience
Sometimes, books don’t have to follow a set subject - they can cover a variety of designs and subjects while following one certain theme. This book focuses exclusively on swirls in all the varieties that are possible - as well as some you may have never thought of. This book excels in providing a few out-of-the-world highly creative designs that you won’t find elsewhere.
It’s one of the least expensive items which are being reviewed today, and that has an obvious consequence - the paper quality suffers in comparison to a few others. Hence, it’s possible that you may see some bleeding around some parts if you do use media such as wet-erase markers, or watercolors. Otherwise, you should not face any problems.
Overall, the swirly designs in this book are abundant and you should have no problems in going about the business of bringing back some peace of mind.
Pros
Comes with a large number of drawings and designs to keep you occupied
Relatively inexpensive
Cons
Paper quality is decidedly not as good as the best
Author: Selah Works | No. of Drawings: 40 | Book Binding: Paperback
Optimism is contagious and focusing on these cheerful images...
The Good Vibes Coloring Book is a perfect fit for those who need some cheering up after a particularly hard week/month/year - it is also a brilliant gift for those who you know are going through a particularly hard time and could be helped by some positivity and optimism headed their way. So whether it’s you or people who you hold dear - this gift is wonderful for all of you!
Experience
The way in which this book unfurls alone makes it worth a purchase, with a number of positive (but not overwhelmingly so) messages lined up for you to give color to. These messages will surely help in uplifting your spirits after a hard time personally or professionally - or if you have been facing problems for a while, this can be a good place to start finding yourself.
The thing about coloring books like these is, they are not only a way to find peace but also to start working towards happiness which may have been lost for a number of reasons.
The quality of paper is such that it can handle any medium, and it’s hard enough to not let any color bleed over to the next page. There are plenty of uncolored illustrations for you to go through and fill up in any color you wish to!
Pros
One of the few books which emphasize positivity and happiness instead of indirectly leading you to peace
You can fill it up with any medium you wish to
Plenty of designs for you to fill up and rediscover happiness
Cons
Some may think it’s too expensive for what it offers
Author: Thaneeya McArdle | No. of Drawings: 30 | Book Binding: Paperback
Laurence king publishing Secret gardens coloring book
Laurence king publishing Secret gardens coloring book an...
The Secret Garden is one of the more niche entries on today’s list of the top coloring books for adults. It’s niche even though it’s sold millions of copies worldwide and is probably one of the most popular coloring books to have hit the shelves and online bookstores. It’s niche and popular because it’s a color-as-you-go storybook, and you can even color the back and front!
Experience
This book has been on the market for a while today, and it’s for good reason - it has a connection between each of the pages that you fill up with color, and it’s a damned good book otherwise too. The pages are of exceedingly high quality and allow one to use any medium they want to.
The creatures that the book makes you color include octopi, anemones, and more! There are tons of different scenes in the book which you can fill up and create a world that looks absolutely the same way you want it to. This book is great for all ages, should you want to get this for your kids or young ones in the family.
Pros
The coherent story flows between the pages
Not recommended for detailing and precise art
The shades are not sold individually
Cons
None
Author: Johanna Basford | No. of Drawings: N/A | Book Binding: Paperback
For someone who is a fan of all the wonders that lie under the horizon, this book makes a whole world of sense! As children, many of us get to see so many of these creatures for the first time in coloring books. Hence, it makes sense to encourage the kind of peace we found in colors with books like these.
Experience
The first thing that you see about this book is that the difficulty level is tuned a few notches below the rest of the book. That’s because this book is not meant exclusively for adults - this is a book that children and adults can use all at the same time. However, the contents of this book are sure to keep you hooked if you enjoy coloring.
The paper quality is far away from children’s coloring books - which means as always, the choice is yours for which media to go to. The general medium of choice is, of course, pencil colors because they’re the lightest of the lot - but if painting with brushes is more appealing, you’re free to do that as well. A great book all around.
Pros
Comes with a number of drawings to keep you thoroughly occupied
The page quality is incredibly decent and good
One side page drawings which can be easily removed if you wish
Cons
May seem somewhat childish at times because of the low level of difficulty in coloring it
Author: Patricia J. Wynne, Creative Haven | No. of Drawings: 31 | Book Binding: Paperback
The last book on our list is a blast from the near past - a reminder of when things were much better (as is the general consensus). Seinfeld was on TV, video game graphics weren’t half as realistic and people actually talked to each other (or as the kids say, in real life - or is that IRL?). Jokes apart, this is a brilliant book.
Experience
While most of these books soothe you by teleporting you to unknown worlds, this one just takes you 20 years or so into the past. Surprisingly, however, it does the job of taking you there very well. With easy-to-fill-in pages, and a free box of crayons included in the bundle, this is one solid book for the nostalgic adult.
While it is nostalgic, the paper quality remains modern. You can bring other materials to the mix, should you wish to do so. All in all, it remains a solid addition to anyone’s coloring book collection. It’s also one of the best ones to start off with because of the ease of coloring in the beginning.
Pros
Comes with its own set of crayons so you don’t have to bother
A nostalgic trip back to the nineties is guaranteed
Wonderful designs
Cons
Might not be very relatable for younger adults
Author: James Grange | No. of Drawings: N/A | Book Binding: Paperback
Can coloring books really help improve mental health?
While individual experiences may vary, many adults find that coloring helps to relieve stress, anxiety, and depression. Coloring allows for creative expression and can promote a sense of accomplishment and relaxation.
How to choose the best adult coloring book?
Consider your interests, art style preferences, theme or subject matter, paper quality, and desired level of complexity. It’s important to find a coloring book that matches your aesthetic and skill level for the best experience.
What are some popular themes in adult coloring books?
Popular themes include nature, animals, patterns, mandalas, cityscapes, fantasy, and inspirational quotes. There is a wide variety of themes catering to different tastes and interests.
Is there a specific type of coloring tool best suited for adult coloring books?
The choice of coloring tool depends on your preference, skill level, and the paper quality of the book. Popular options include colored pencils, gel pens, markers, and watercolor brushes.
Do adult coloring books cater to different levels of skill?
Yes, adult coloring books come in various levels of difficulty. Some cater to beginners with simpler designs, while others have more intricate and detailed drawings for advanced colorists.
Are there benefits in digital coloring books compared to physical coloring books?
Digital coloring books offer convenience and portability, as they can be accessed on smartphones or tablets. They also provide unlimited ways to experiment with colors without damaging original illustrations. However, physical coloring books provide a tactile experience that can be more satisfying for some users.
Will coloring in adult coloring books help me improve my artistic skills?
While coloring can help develop your understanding of color theory and shading techniques, it might not substantially improve your drawing abilities. However, consistent practice in coloring and exploring other artistic mediums can contribute to overall artistic growth.
Conclusion
Finding the perfect adult coloring book to help you unwind and de-stress is essential, as it can greatly impact your overall coloring experience. Our list of 11 best adult coloring books provides a variety of options to cater to diverse interests and skill levels.
From the above list, here are the top three expert recommendations:
For those seeking spiritual and mental relaxation through the intricate patterns of mandala art, the Mandala Coloring Book for Adults is a good option with its incredible paper quality and spiral-bound design.
With these top recommendations in hand, it's time to pick up your coloring tools, explore your creativity, and immerse yourself in the comforting world of adult coloring books. Happy coloring!
If you want to buy the most economical yet high-quality paper for colored pencils, you have come to the right place! Today, we will discuss the best paper you can buy!
There are a few kinds of paper you can buy for art with colored pencils. However, there are certain factors where you must not compromise:
Every artist wants the best possible archival properties, so there should be no yellowing with time.
The paper should not tear easily.
It should be able to absorb multiple layers of colors for compound finishes.
The paper should be of a reasonably high quality
With these qualities in mind, we’ve chosen the ten best papers for colored pencils you can buy this year. Without further ado, let’s get to the product reviews!
Best Papers For Colored Pencils
Here is the list of the 10 best papers for colored pencils that you can use to create vibrant and captivating artworks.
When we talk about performance and value, very few products come close to the Canson XL Series Mix Media Paper Pad. Canson has been manufacturing papers for over five centuries. The XL Series Mix Media Paper Pad is one of the cheapest papers you can buy and has relatively decent quality too!
Experience
This Mix Media Paper Pad is terrific for beginners since it costs very less per sheet. It is available in many different sizes, ranging from 5” x 8.5” to 18” x 24”. These sheets have negligible flaws when it comes to creating art with colored pencils, but they are known to bleed with sketch pens.
The surface has a smooth and buttery texture. It is sturdy enough to bear multiple layers of pencil colors. In case you are looking for multiple pads to draw on - say one for home and one for the studio, you should probably buy two of these. The texture is quite similar to medium watercolor paper.
Pros
Excellent texture for its price
Decent quality for use by most artists
Smooth finish and offers excellent value-for-money
Cons
It is known to bleed with other media, so not the best option for liquid inks
Sheet Size: 7" x 10" | Paper Weight: 160 GSM | Acid-Free: Yes | No. of Sheets: 60 Sheets
Legion Stonehenge Drawing Paper Pad - 9" x 12", Warm White,...
Warm White
The second product in our recommendations comes from Legion, a company known for making cotton-based drawing paper pads for a long time. The Stonehenge series is renowned for being the best-colored pencil paper you can buy. It is 100% acid-free, comes with no chlorine or optical whiteners, and is made very responsibly.
Experience
The Stonehenge Pad comes with Legion’s printmaking expertise, thereby giving you an enjoyable experience overall. It is made out of cotton, which provides you with a superb drawing experience with almost every top-notch colored pencil on the market today.
The paper does not bleed ink, gives you supreme control over colors, and withstands several layers of colors on the surface without any problems. It allows you to be flexible and create almost anything that comes to your mind! We undoubtedly recommend this to professionals and experts. Beginners should not spend so much to practice.
While it is expensive, you wouldn’t expect the highest GSM paper to be value-for-money. It is definitely worth the outlay - especially if you’ve become a professional artist.
Pros
250 GSM paper, which is the best you can get for colored pencils
100% non-toxic
Features a best-in-industry texture
Cons
Expensive and suitable only for professionals and experts
Sheet Size: 9" x 12" | Paper Weight: 250 GSM | Acid-Free: Yes | No. of Sheets: 15 Sheets
Technically, this isn’t colored-pencil paper. However, once you use it, you will fall in love with the weight and the smoothness. While using this paper and colored pencils, you’ll soon forget that it wasn’t made to be used with colored pencils at all! It is recommended for pencils that are slightly harder so that the paper won’t break the pencil nib.
Experience
Besides the Legion paper, this paper is one of the few which comes with a high GSM rating of 300. Don’t be fooled by the rating - these two papers are worlds apart in all other contexts. The Fabiano is hot-pressed, while most other papers tend to be cold-pressed, so they give a bit more texture.
You can get this paper in a variety of sizes and in different quantities as well - you may want a roll if you’re a professional, but if you’re experimenting, you might want to go for single sheets. However, there is one problem - the cost. For a paper that isn’t even technically colored-pencil paper, it’s one of the most expensive options out there.
Pros
Incredibly high GSM paper; the heaviest you can find in the market
Papers are hot-pressed, but they work well
Comes in various sizes and quantities
Cons
Incredibly expensive, even for a watercolor paper
Sheet Size: 4.92" x 7.08" | Paper Weight: 300 GSM | Acid-Free: Yes | No. of Sheets: 25 Sheets
MOLESKINE ART COLLECTION: From sketchbooks and sketchpads to...
DURABLE COVER & ELASTIC CLOSURE: Hold writing projects &...
Moleskine comes to the market with a wonderful product that shines because of its portability. Moleskine’s claim to fame is their notebooks, which are some of the best you can find in the market. Their sketchbook is brilliant, irrespective of which set of colored pencils you use with them.
Experience
Moleskine’s Art Sketchbook comes in four sizes, ranging from pocket-sized (5” x 5.5”) to full-fledged A3. Paper quality is one of the most important aspects of this notebook - it outshines most of its competitors when it comes to this attribute. Moleskine is known for high-quality paper, and this product certainly does its best to uphold the company’s reputation.
This sketchbook comes with a pocket up front, which is useful for storing tidbits.
We especially liked the shade of the paper, which is a toned ivory color. Another great feature of the pages is that they are acid-free and have rounded corners, which helps when you’re keeping the notebook in your pocket. For drawing something up quickly or sketching while traveling, there are very few products that come close in quality.
Pros
165 GSM paper, which is perfect for drawing something quickly
Highly portable and comes with a neat pocket
Has a rare toned ivory color, which is hard to find on sketch pads
Cons
The A3-sized Moleskine notebook has better substitutes and isn’t the best product for its price
Sheet Size: 8.25" x 11.75" | Paper Weight: 165 GSM | Acid-Free: Yes | No. of Sheets: 96 Sheets
With this, we come to the real deal - the actual sketching pads which are directly aimed towards colored pencils and shading pencils. This paper is slightly more textured than the best color pencil sketch pads on the market but does the job just as well in most circumstances. Vellum used to be made from animals but is now made from plant material.
Experience
This sketchpad is a little different from regular colored pencil sketching pads, in that you get multiple ply sheets on one page and hence, a heavier sheet with a 270 GSM weight to it. This pad is ideally suited for a studio because it is too large to be used on the go. We especially liked the paper quality, which is beyond reproach.
The shade of the page is slightly light grey/yellow, because of the way vellum is prepared. The 400 series and the 300 series differ in that the 400 series is somewhat more expensive and slightly better when it comes to performance with a variety of color pencils, such as the Prismacolor and the Faber-Castell ranges.
Pros
Excellent color performance and can efficiently deal with multiple shades of colored pencils
The tone of the page is a bit different from the generic white pages you get in sketch pads
Vellum’s texture is worlds apart from usual sketch pads
Cons
If you can afford the outlay, the 400 series may be a better product for you
Sheet Size: 14" x 17" | Paper Weight: 270 GSM | Acid-Free: Yes | No. of Sheets: 20 Sheets
Clean white toothy surface ideal for colored pencil...
100lb Heavy-weight all purpose white paper
The OG Strathmore Colored Pencil Pad has 100 sheets with some of the best quality paper you can buy today. We especially liked the price of this pad - merely above the average price you would expect from normal sketchpads. It offers brilliant value for money and is one of the better choices you can make if you want the regular sketch finish.
Experience
This set of pages is very polarising among the artist community, mostly because it’s one of the few sketch pads which allow the tooth to show through the work. Hence, artists with softer leads such as Prismacolor have an affinity for the 400 series. However, it remains a solid choice, even in light of intense competition and its unique tooth property.
Strathmore has taken into account the needs of users who like to move around with their colored pencils. They have introduced a portable variant that measures approximately 6” x 8”. It will easily fit into a small bag or a purse - you can draw with ease pretty much anywhere you wish to. The paper is acid-free and comes in at around 270 GSM.
Pros
Very high GSM rating for its price, relative to other products
When used with softer tips, it can become a handy tool, somewhat like more expensive brands of papers
The pocket series fits into a small bag quite handily, giving stiff competition to the Moleskine notebook in terms of value
Cons
It is not meant for use with harder pencils
Sheet Size: 9" x 12" | Paper Weight: 163 GSM | Acid-Free: Yes | No. of Sheets: 30 Sheets
HIGH QUALITY - 50 acid free, natural white drawing sheets...
TEXTURED - 30% post consumer recycled sheets have a natural,...
It is another one of the few rare sketchbooks which were explicitly designed for colored pencils. It comes with 50 pages and is geared mostly towards those starting with colored pencil-based art. Many competitors are primarily concerned with covering all kinds of art possible, which makes this product a bit different.
Experience
It is a beginner-level colored pencil pad - it has neither the GSM heft nor the tooth expected from more premium surfaces such as those recommended above. However, it brings a few remarkable features to the forefront - including 100% acid-free paper. It is a spiral-bound notebook rather than individual sheets, which gives you great archival benefits.
The pad is available in three sizes - 5” x 8”, 5” x 11”, and 8” x 8”. Thus, it makes a lot of sense for students who are just starting out with colored pencils or want more practice to get this pad. 50 sheets for as little as this pad offers is a bargain you do not want to miss out on! It’s also great for the outdoorsy types and has gotten rave reviews from a lot of people as well.
Pros
Comes with a reasonably high GSM for its cost
Offers some tremendous archival properties, allowing you to display your work later on
Sizes available make a lot of sense
Cons
Professionals may want to look elsewhere for a better-quality paper
Sheet Size: 8.5" x 11" | Paper Weight: 147 GSM | Acid-Free: Yes | No. of Sheets: 50 Sheets
Developed for Professional Artists — The Canson Artist...
Dependable Sketch Paper — A finely textured surface for...
If you’re looking for a smoother paper and want to introduce more detail into your work, the Canson Universal might be what you’re looking for. However, be warned - adding more detail to your work comes at the cost of allowing more colors into your work. Hence, it only makes sense to go for this pad if you’re sure you don’t want to mix colors too much.
Experience
This sketch pad comes with everything you need if you want to try less color but more detail. The surface is incredibly smooth for the price, which means that standard artwork will be a breeze to put on these sheets. They also come at somewhere around the average price mark, so they’re neither too cheap nor too expensive to buy.
The pages are finished in a natural white, so you won’t have any problems when it comes to color reproduction. These pages are acid-free, which means they have excellent archival properties as well - though not the best. The pages are also perforated, and it comes in a spiral binding which should give you an exceptional finish. Hence, you’ll be quite happy if you want to create art on these papers.
Pros
Decent GSM rating for the price
Acid-free papers tend to last long
It is micro-perforated, so you won’t have issues with tearing pages apart
Its natural white shade of paper is hard to come by
Cons
It cannot take too many layers of color before it starts curling up
Sheet Size: 9" x 12" | Paper Weight: 96 GSM | Acid-Free: Yes | No. of Sheets: 100 Sheets
There are 24 sheets per pad of 80 pound / 130gsm paper
Perfectly suited to line drawings and technical artwork
With Strathmore’s third entry into our list of reviews, you should get an idea of how well they have mastered the art of making papers for all kinds of purposes, especially colored-pencil papers. It is a much larger pad with an 8” x 10” size, which means it is another excellent product to have around in the studio.
Experience
The papers are a fair bit heavier than you’d expect your generic sketch pad to be, but that’s a pretty good sign - in both archival properties and color absorption. It comes in at one of the best medium-weight papers that we’ve reviewed, both in terms of archival qualities as well as range.
It only comes in a specific size - which is 8” x 10”. If you’re looking for pads that come with a bit more in terms of size, you should have a look at the other offerings that we reviewed earlier.
Pros
Medium-weight papers are hard to find, which also gives you so much range
It makes a lot of sense in the home or studio setting
Great archival properties
Cons
Only comes in 8” x 10”
Sheet Size: 8" x 10" | Paper Weight: 130 GSM | Acid-Free: Yes | No. of Sheets: 24 Sheets
Artist-Recommended Sketch Paper - Loved by artists for...
General Purpose & Heavyweight - Tackle sketch projects like...
Jack of all trades but master of none - this idiom sums the drawing pad up pretty well, in our opinion. The drawing pad gives you more range than you need when it comes to colors but also gives you enough tooth to get some excellent detail going. The sketch series is aimed at all artists and not just colored-pencil users, but it behaves quite nicely with it too!
Experience
As the last item on our review list, it leaves little to be desired. It is a beautiful combination of natural-looking colors, with enough heft to allow good quality designs with as much color as you wish. At the same time, it has enough smoothness for you to detail your designs as much as possible. The GSM rating is 74, the least of all here - but it does give you a great experience!
The low GSM points to it being strictly practice paper, but this is not the case. It is useful even if you want to showcase the odd drawing or two. This set of pages, in fact, turns out to be one of the best-rounded products that we have reviewed today.
Pros
It comes with a tremendous quantity-to-price ratio
Generally, one of the best papers a beginner can buy
8.5” x 11” size is decent enough for the studio or desk at home
Cons
Other papers come with more archival properties and better GSM ratings but at a higher price
Sheet Size: 5.5" x 8.5" | Paper Weight: 89 GSM | Acid-Free: Yes | No. of Sheets: 100 Sheets
How does paper texture affect colored pencil drawings?
Paper texture plays a crucial role in how colored pencils lay down pigment. A rougher texture provides more tooth, allowing for stronger color payoff and improved blending, while a smoother texture is better suited for fine details.
How can I prevent my colored pencil drawing from smudging?
To avoid smudging, you can use a fixative spray, place a protective sheet between your hand and the paper, or carefully work on your drawing from one side to another, avoiding resting your hand directly on the artwork.
Can I use toned or colored paper with colored pencils?
Yes, you can use toned or colored paper to create unique and dynamic effects, as it provides a base color to work with and can affect the overall appearance and mood of your artwork.
Can I use the same paper for colored pencils and other mediums?
Some papers, like mixed-media or heavyweight drawing papers, can handle various mediums, including colored pencils. However, performance may vary, and it’s typically best to use papers specifically designed for the type of media you’ll be working with.
Does the weight of the paper matter?
Yes, the weight of the paper is important, as heavier papers, typically around 300gsm, can handle more layers of colored pencils and prevent the paper from buckling or tearing.
Conclusion
Selecting the best paper for your colored pencils is vital to ensuring a pleasurable and quality experience in creating stunning artwork. Different paper products cater to varying needs, involving factors such as skill level, budget, paper texture, and weight.
From the above 10 best papers for colored pencils, here are the top three expert recommendations:
The Canson XL Series Mix Media Paper Pad is an ideal option for beginners and hobbyists, offering excellent value for money and a smooth finish.
The Legion Stonehenge Colored Pad is a good option for professional artists, with a high GSM and top-quality texture.
Lastly, the Fabriano Artistico Aquarelle is the right choice for heavyweight paper lovers due to its high GSM and hot-pressed variety.
Consider these top suggestions when selecting the best paper suited to your needs, requirements, and level of expertise. Enjoy the creative journey, and always remember that practice and quality materials will help elevate your work to greater heights.
When you invest in good quality colored pencils, you want to keep them in good shape and prolong their useful life.
For that to happen, one of the crucial things to be careful about is sharpening. Now, there are three different types of tools you can use to sharpen your pencils - a sanding block, a manual sharpener, and an electric sharpener.
While two of those tools include careful and meticulous methods of sharpening a pencil, an electric sharpener is a fast and convenient way to do the job.
However, getting the right electric sharpener for your precious colored pencils can be a little more complicated than you’d like. The primary reason for this complication is the diversity in the market and the many factors that make each sharpener unique for a specific case.
But don’t worry because we have handpicked the best electric pencil sharpeners for colored pencils in 2023!
Go ahead and give it a read!
Best Electric Pencil Sharpeners For Colored Pencils
Here is the list of the 6 best electric pencil sharpeners that you can use to quickly and easily sharpen your colored pencils for your next art project.
If you have ever bought a sharpener on your own before, there is no way you haven’t heard of X-ACTO. Their wide range of sharpeners caters to the needs of many artists around the world.
X-ACTO has also been a prominent brand for almost a century. And their expertise and experience have led them to make products that are fine-tuned to an artist’s needs.
XLR sharpener is an affordable product that meets most of the standard requirements while also being long-lasting. For the price, you get an excellent sharpener that does the job with no frills.
We found the product to be extremely reliable, and many of our fellow artists have been using these sharpeners for years without any complaints.
You can expect to get the sharpest tips after using this sharpener and it also doesn’t chew away the pencil with its pencil-saving technology.
The product is also safe to be kept around kids and toddlers because of its safety measures. It won’t turn on the blades if the tray is open.
One downside is that the sharpener is not portable. You’d have to use an electrical outlet to power it up. So, we don’t recommend it to painters who like to work outside mostly.
Overall, it’s an affordable, durable, and functional sharpener that will faithfully serve you for years. Also, it has a 2-year warranty.
Pros
Super affordable, extraordinary quality
Genuine and reliable brand with a legacy
2-year warranty
Safe for keeping around children
Cons
It’s not portable and doesn’t offer any bonus values as such
Dimensions: 7.25" x 4" x 6" | Weight: 1.8 lbs | Power Source: Corded Electric | Auto-Stop: Yes | Warranty: 2 Years
Like the EX-20, OfficeGoods Electric & Battery Operated Pencil Sharpener is a feature-packed tool that comes at an immensely modest price.
The quality is more than just satisfactory, and the product itself has been top-rated in the community, even proving to be one of the favorites of professionals.
Sharp and versatile - This electric pencil sharpener offers...
Safe for kids and adults - The OfficeGoods automatic pencil...
Experience
OfficeGoods’ offering is akin to our previous entry, EX-20. And it is equally eligible for admiration for its value-for-money proposition.
Despite being in the moderate price range, this sharpener offers the feature of variable tip sharpening. So, you can get blunt, medium, and sharp pencil tips on the switch of just one button.
Artists have also raved about its quality and performance. Its online reviews are adorned with positive remarks for not clogging in long-term use and producing pin-sharp tips.
It can also be used with other pencils that have graphite or lead cores.
As for power options, like the EX-20, it can also be powered by batteries, USB, and directly from an outlet. And like the EX-20, it’s capable of catering to any artist’s needs.
Overall, it’s also a splendid pencil sharpener that can work even on soft and delicate pencils without chipping while also providing immense flexibility.
Pros
Affordable price and doesn’t skimp on quality
Extremely portable with 3-way power options – batteries, USB, and from the wall
Variable tip sharpening options
Cons
Only one year of extended warranty
Dimensions: 5" x 2" x 3.5" | Weight: 0.53 lb | Power Source: AC & Battery-Powered | Auto-Stop: Yes | Warranty: 1 Year
LINKYO’s electric pencil sharpener is not about being full of features to attract customers. Its value stems from its impeccable design, which is both smart and gives the machine an elegant look.
And along with several safety features and intelligent design elements at an extremely reasonable price, it stands to be the best option for classroom environments.
LINKYO Electric Pencil Sharpener is one of the most handsome sharpeners that we have laid our hands on. The design is not only beautiful but also very smart and innovative.
It has a vertical design where the pencil is fed in a top-down fashion. It’s not only unique but also incredibly smart because the shavings get collected with ease.
Also, it’s one of the safest sharpeners we have tried yet. There are several small but thoughtful safety features, such as preventing the blades from rotating when the tray is out.
In our opinion, it is perfect for use in an art class where several people use the sharpener in a day, and you’d want to ensure that no accidents happen.
Moreover, the sharpener also intelligently turns off after the pencil is sharpened. So, no worries about over-sharpening your pencils!
A 1-year warranty accompanies all of these attractive features.
Pros
Affordable and moderate pricing
Impeccable and intelligent design – elegant and smart
It has a 1-year warranty
Plenty of safety features that make it perfect for art classes
Cons
No battery option or portable usage options
Dimensions: 6.97" x 3.39" x 4.8" | Weight: 2.57 lbs | Power Source: Corded Electric | Auto-Stop: Yes | Warranty: 1 Year
When it comes to quality, reliability, and minimal design, there’s nothing that tops this premium sharpener from Bostitch. With its excellent durability and industrial design and a warranty of 7 years, it has remained to be a professional favorite and has found its home in many art classes around the world.
Tool-Free Removeable Cutter Cartridge for fast and easy...
10x Longer Cutter Life – The SharpGlow has an extra...
Experience
For a professional, the reliability of a product is way more important than having extra features that would rarely be used.
That requirement of reliability and long-term use is the key focus of this premium sharpener from Bostitch.
It has a super quiet motor that will keep serving you without a hitch for several years. You can straight away sharpen a 170 pencil set with its stall-free motor.
Moreover, its blades can also be replaced without any hassle with just $10 worth of replacement blades, so you can keep on using it for as long as you like.
Of course, due to its impeccable reliability, it’s also an excellent choice for a classroom where all the students can use it while learning.
Ultimately, it’s a quality product that will keep running without a hiccup, and if for some reason, it does fail, you still have a 7-year warranty.
Pros
Quiet stall-free motor that will work for years without failure
Easy-to-replace blades that ensure long-term usage
Perfect for professional use and classrooms
Excellent support and a 7-year warranty back it
Cons
It is expensive or better put, a one-time investment
Dimensions: 10.63" x 6.13" x 9" | Weight: 4.03 lbs | Power Source: Corded Electric | Auto-Stop: Yes | Warranty: 7 Years
The School Smart Vertical Pencil Sharpener stands out as a robust and efficient tool for classrooms and artistic environments. Designed for quick and reliable sharpening, this electric pencil sharpener handles colored and standard graphite pencils with ease, ensuring finely sharpened tips in just a few seconds.
Seriously Sharp: Made of alloy steel, the single-hole...
Smart Design: The transparent shavings bin is extra-large to...
Experience
The School Smart Vertical Pencil Sharpener boasts a range of noteworthy features. For one, its speed and efficiency are impressive thanks to a fast, high-performance motor with helical steel blades. This combo guarantees uniform results each time.
Secondly, the integrated autostop function both prevents over-sharpening and extends the life of your pencils.
Lastly, the sizeable shavings receptacle enables a hassle-free sharpening process for multiple pencils, as you can easily discard the shavings after a large amount. The clear design of the receptacle also allows users to see when it needs emptying.
Pros
Affordably priced
Quick and resilient
High-performance motor
Hassle-free sharpening process
Cons
Somewhat noisy due to its powerful motor
Blades aren’t replaceable
Designed for only one standard pencil size
Dimensions: 6.5” x 5” x 7.25” | Weight: 2.9 lbs | Power Source: Corded Electric | Auto-Stop: Yes | Warranty: N/A
The AFMAT Electric Pencil Sharpener is a heavy-duty, classroom-ready pencil sharpener created to handle 6.5-8mm No.2 and colored pencils. With its UL-listed industrial design and robust helical blade, this top-of-the-line sharpener is an excellent choice for school classes, art settings, or home use.
Sharpen 10000 Times Without Wearing out: This heavy duty...
UL Listed Electric Pencil Sharpener: Our classroom pencil...
Experience
The AFMAT Electric Pencil Sharpener stands out due to its impressive efficiency and versatility. Its powerful motor allows users to sharpen over 200 pencils without any signs of overheating, while the large helical blade can sharpen more than 6,000 pencils throughout its life.
Perfect for regular use across various environments, this pencil sharpener works well with both wooden and colored pencils, making it an ideal tool for artists, teachers, and students alike.
Pros
Powerful motor can sharpen more than 200 pencils
Capable of sharpening more than 6000 pencils
Works well with both wooden and colored pencils
Reasonably priced
Cons
Slightly louder than other pencil sharpeners
No option to adjust the sharpening style of the pencil nib
Dimensions: 6.65” x 3.15” x 3.55” | Weight: 2.7lbs | Power Source: Corded Electric | Auto-Stop: Yes | Warranty: 2 Years
Best Colored Pencils Electric Sharpeners Comparison Table
Buying Guide For The Best Colored Pencils Electric Sharpener
Buying an electric pencil sharpener can be a tricky task if you are doing it out of the blue. There are a lot of things to consider for ensuring a sound purchase.
This section is dedicated to discussing all the factors you should keep in mind to make the right decision when buying an electric pencil sharpener.
Price
The money you have to shell out for an electric sharpener can vary drastically depending on the quality. But you can roughly estimate it to be somewhere between $15 and $45.
While, of course, you can pay more to get the best in quality, we found out from our experience that spending somewhere around $25 is enough for almost everybody.
We would recommend buyers to not cheap out when buying one of these sharpeners because a low-quality product will damage your pencils way too often, ultimately costing more in the long run.
Blades
The blades of an electric sharpener can’t be taken out and sharpened manually for long-term use. Instead, you’d have to take them out and fit new ones in the machine.
Hence, to extend the life of the machine, you’d have to consider something called replacement blades.
If you plan on using the sharpener for personal use, then you can buy it without considering this factor because the blades will likely last decades.
But if you are buying it for an office or a class, then go for brands that have cheap replacement blades, which can be purchased conveniently.
Portability
Compromising on portability is not an option for many artists who like to paint or sketch on the go. More so for artists who do live landscaping, portrait, or meet clients at their place instead of working in a studio.
A portable sharpener is the best option in such cases. These sharpeners are usually lighter and more compact than conventional sharpeners. And you can pack them in your backpack and carry them around conveniently.
These are typically powered by AA batteries and are significantly quieter than other sharpeners. But don’t just go for these for the sake of it. These are less powerful and less durable than regular corded sharpeners.
So, if you plan to only use your sharpener in and around your office, studio, or home, then opt for a non-portable one. Otherwise, these are better suited for your use.
Multi-use
Even though today we discussed all of the electrical pencil sharpeners in the context of colored pencils, these sharpeners can be used for other mediums as well.
Most electrical sharpeners can work on more than one medium and of course, we believe, the more mediums, the better overall value it has.
So, before you plan on buying one, see if it has some added value in terms of working on other tools like charcoal pencils, graphite pencils, watercolor pencils, pastel pencils, and hard pastels.
Electric Pencil Sharpener FAQs
Are electric pencil sharpeners easy to use?
Yes, electric pencil sharpeners are generally very easy to use. The user simply places the pencil in the sharpener and the motor does the rest. Some models may have additional features, such as automatic shutoff or adjustable sharpening angles.
Are electric pencil sharpeners noisy?
Some electric pencil sharpeners may be noisy due to the sound of the motor and sharpening mechanism. However, there are many models available that are designed to be quieter and less disruptive in a classroom or office environment.
Can electric pencil sharpeners sharpen different types of pencils?
Most electric pencil sharpeners can sharpen standard-sized pencils, but some models can also sharpen larger or smaller pencils. It’s important to check the product specifications before purchasing to ensure that it can sharpen the type of pencil you need.
Do electric pencil sharpeners require any special care or maintenance?
Electric pencil sharpeners generally require very little maintenance. It’s important to keep the blades clean and free of debris, and some models may require occasional lubrication. You should always follow the manufacturer’s instructions for care and maintenance.
How long do the blades on electric pencil sharpeners last?
The lifespan of the blades on an electric pencil sharpener will depend on the frequency of use and the quality of the pencils being sharpened. In general, the blades will last for several years with proper care and maintenance.
Can electric pencil sharpeners overheat?
It is possible for electric pencil sharpeners to overheat if they are used for an extended period of time or if they are plugged in for too long without being used. Most models have built-in safety features that prevent them from overheating, but it’s important to use them properly and take breaks if necessary.
Are there any safety concerns with using an electric pencil sharpener?
As with any electronic device, it’s important to follow the manufacturer’s instructions and safety guidelines when using an electric pencil sharpener. It’s also important to keep the device out of reach of children and to supervise their use to prevent injury.
Conclusion
The journey to find the perfect electric pencil sharpener can be daunting, considering the myriad of options available on the market today. To make this choice more accessible and enable you to pick the ideal product that meets your specific needs, we have selected six of the best electric pencil sharpeners, carefully examining their features, quality, and performance.
From the above six best electric pencil sharpeners, here are the top three expert recommendations:
The X-ACTO XLR Electric Pencil Sharpener is an ideal option for those in search of affordable reliability, backed by a trustworthy and well-established brand that ensures a durable, functional, and safe product.
Finally, the LINKYO Electric Pencil Sharpener is the right choice for classrooms prioritizing safety and an intelligently designed sharpener.
Selecting the best electric pencil sharpener ultimately depends on your specific requirements, whether you are considering aspects such as reliability, portability, or safety. We hope this article has provided valuable insights into the top options available to help you make a more informed and confident decision.
Colored pencils are one of the mediums which children and professionals can use proficiently, shoulder to shoulder.
The first thing worth mentioning is that they are also the easiest to use since they are portable and do not require preparation except for a quick sharpening, of course.
While many out there may doubt the power of colored pencils still, good artists, however, create masterpieces through this medium.
Therefore, if you’re a beginner inspired by colored pencil artworks, we recommend getting yourself started with these affordable, yet great quality pencils for practicing before proceeding to the high-end brands. These are also ideal if you are tied with a budget but still want good pencils for your drawings.
Best Cheap Colored Pencils
Here is the list of the 9 best cheap colored pencils that provide great quality without breaking the bank.
SUPERIOR QUALITY PENCILS - Looking for the perfect set of...
24 VIBRANT COLORS - Add water and release rainbows of...
Reeves colored pencils can be found in many well-known art stores. They deliver very good results and come at a very affordable price.
Based on your requirements, you can find these pencils in three different sets of 36, 24, and 12. They also come in very simple and neat packaging which can be used by artists of any age.
Experience
We are surprised to find that these pencils are very smooth while applying - nearly as those expensive brands in the market.
As a result of this feature, they become pretty easy to blend when we have to mix shades or layer them on our textured surface. The pigment firmly grabs onto the paper without flaking off after leaving the artwork untouched even for hours.
The pencils also provide full coverage to every artwork and that’s something that exceeds our expectations from an inexpensive set.
We would suggest this set for those who are still learning to blend with colored pencils, and they will work well for other basic purposes too.
We can say that the only drawback with these pencils is that the number of colors is limited and that makes blending highly necessary if we want to create a desired shade outside their collection.
But all in all, the pack is an ideal starting option or a gift for learners that comes at a very low price.
Pros
The pencils deliver a smooth touch and a nice feel on the surface
They can be blended with ease on rough and textured surfaces
Great for achieving full coverage in drawings
Cons
Limited colors make blending necessary
Dimensions: 0.61" x 3.54" x 6.99" | Weight: 3.52 oz | Color: Multicolor | Blendable: Yes | No. of Pencils: 24
The Studio Series Colored Pencil Set is made by a book publisher who is mostly known for his contribution to the adult coloring books collection with Doodle Design, Tropical Paradise, and more.
The reason we included the set on this list is that it has most of the properties of good colored pencils, given that it comes from a manufacturer with much experience in coloring.
Experience
What we feel is worth mentioning first is how affordable this colored pencil set is. It's perfect for any artist with a highly restricted budget, or even better, for students who want to purchase art supplies from their own savings.
On top of this, the pack comes with a kneaded eraser and one good-quality sharpener, which we can say is free if compared to the overall price. Instead of having to choose from good brands and buy them separately, the ones included in the pack are more than enough to fulfill your needs.
While the eraser may not be as good as those from higher-end brands, we find that it leaves patches of colors that are faintly visible and will disappear once covered with another shade. And personally, we find this additional feature to be good enough for something that technically came for free.
However, they only have 30 shades in their color range for now, and this means we have to rely on blending to create the intended colors.
But keeping that aside, the pencils blend very well on paper and deliver great results altogether. With the inclusion of an eraser and a sharpener, this is the perfect pack of colored pencils for learners and budgeted artists.
Pros
This set contains colored pencils which blend pretty well on a paper surface
Very affordable, making these colored pencils accessible to anyone including students
It comes with an extra sharpener and an eraser
Cons
The number of colored pencils is limited only to 30 colors
Dimensions: 12.25" x 0.25" x 9.5" | Weight: 0.6 oz | Color: Multicolor | Blendable: Yes | No. of Pencils: 30
High-quality art pencils designed for beginning artists and...
Soft, smooth leads for superior blending and shading
Not everyone will expect to find the brand name Prismacolor on this list because of their price range but their particular Scholar Colored Pencils and Set is surprisingly affordable so we had to include it here.
The set contains a total number of 48 different shades with which we can produce more colors while mixing.
Experience
The pigments from the Prismacolor colored pencils are very rich and vibrant and they can make your drawings appear almost natural to the observer’s eye.
Working with these pencils is easier than expected since we don’t have to stress on each stroke because the colors are already vivid, which means only a few light strokes on one area are more than enough to provide full coverage.
The reason the pencils are rich in pigments is that they contain wax in their core and therefore, they are smooth to work with. At the same time, it does not take too much time or effort to blend the colors because of the waxy ingredients.
Although the pack is slightly costlier than the others on our list, we still think it’s a worthy investment considering the inexpensive price tag.
All in all, this is the ideal setting for those who are looking for a well-known and reliable brand.
Pros
Pencils blend really easily, and that is what most artists look for in a good set of colored pencils
They provide vibrant pigments without having to add too much pressure or spend too much time In the process
Cons
A little costly for artists who are strictly looking only for cheap pencils
Dimensions: 8.25" x 4.75" x 0.75" | Weight: 11.4 oz | Color: Multicolor | Blendable: Yes | No. of Pencils: 48
Blick is one of the most popular brand names which many artists turn to when it comes to purchasing art supplies.
When it comes to colored pencils, their Artists’ Colored Pencils are sure to live up to your expectations too.
Experience
This widely known brand is famous for its high-quality products, and sure enough, its colored pencils are no exception.
First of all, this set is pretty cheap compared to the contents inside. It’s a good choice for anyone who seeks to experience professional quality products at the lowest price possible.
They are also available in 5 different sets including packs of 72, 48, 36, 24, and 12. We think they have a good range of sizes which can fit many requirements including children, students, beginners, and even professionals.
If you are new to this brand and want to check out the effects of these pencils, you can start with the pack that contains a minimum number of 12 pencils at a very low price.
The best feature about the Blick sets is that each pencil is also available for individual purchase. So if one of them either breaks or finishes, we can easily buy a new one without having to waste money on a whole new set. Therefore, there is no need to worry about working with a larger artwork.
Moreover, the casing is made from cedar wood which makes the pencil very comfortable to hold while working, and that will add to the improvement in your drawing.
But we can say the price for purchasing individually can be too much for some artists.
Nonetheless, there is more to gain than lose with these pencils because the lead core is also just the right size (3.8mm) to create perfect drawing strokes. So these are the perfect pick for everyone, ranging from learners to experts who are on a restricted budget.
Pros
Blick colored pencils are available in 5 different set sizes, aiming to meet most drawing needs
They are comfortable to hold which is good for producing amazing results
These professional-grade pencils come at a very low price if bought as a set
Each color is available for individual purchase
Cons
The price of buying an individual colored pencil is expensive
Triangular shape with grooves promote proper grip, even...
Smooth core delivers vivid, blendable colors and soft...
Prang is well known for producing art supplies that are affordable for everyone. For many years, it has been serving artists with wallet-friendly materials.
Their colored pencils are great for young artists who are getting themselves familiar with this line of artwork.
Experience
The colored pencils by Prang are neither too expensive nor too cheap, they come in a medium price range.
Because they are targeting mostly young artists and children who have a passion for art, the shape of the pencils is carved in a triangular barrel so they are easy to hold while at the same time, allowing the user to dominate their strokes and control the outcome of the drawing.
One aspect of these pencils that stand out from the rest is their lead core size, which is 3.3mm small. It serves both as a benefit and a loss for the artist, depending on how you want to use it.
You will achieve more precision when working with a 3.3mm lead and enhance those minor details or highlights. But when it comes to large projects, it takes a lot of time and patience to see visible effects.
Note that sharpening the triangular pencils does not require you to use a knife or blade. Instead, just a regular mechanical sharpener will work fine. We do recommend using a sharpener because the casing is really tough.
If you’re looking forward to doing small and simple artwork without spending too much time on it, these colored pencils would be the right choice. Keep in mind they need pressure for leaving vivid marks and lines.
Pros
Prang colored pencils are shaped in a triangular barrel to ensure comfort and full control while working set sizes, aiming to meet most drawing needs
The pencils are great for working on fine lines and little details
Cons
The lead core of the pencil is very thin for working on larger artwork
Dimensions: 7" x 9" x 0.5" | Weight: 4.8 oz | Color: Multicolor | Blendable: Yes | No. of Pencils: 24
Artlicious is a brand that produces a lot of art supplies - from wet paints to multiple extras. And not to mention, they are all of the great quality too.
Since we are looking for colored pencils, expect to find one of the best quality at a very reasonable price from this name.
Experience
Despite being cheap, it took us by surprise when we compare it with the performance it delivers - it almost seems like a steal!
Not only for this reason that we included this set on the list but also because it comes with a good-quality sharpener which saves us from spending more time and money in the search for one from a good brand.
The pencils blend pretty well when mixed together and they offer opaque coverage after a few strokes or layerings.
With 50 shades in the set, we find it to be a great deal given the very affordable price. Since they blend very well, we can mix two or more colors together if there is a shortage of one particular shade.
One amazing aspect of the pencils is they don’t contain toxic chemicals or ingredients which means they are safe for kids to use as well. So, they would make a perfect gift set for your little one who shows a keen interest in colors.
Another good feature we found with these pencils is that they have softcore lead. When it comes to sharpening, artists would take extra care of their soft leads by using either a knife or blade. But on the contrary, these pencils can be sharpened using both mechanical and electric sharpeners, and they still won’t damage the core.
As far as we know, the only setback here would be the diameter of the core which is just 3.3mm. While we can achieve perfect strokes, this can also take a lot of time and energy when working on larger pieces.
Pros
At a very low price, the pencils provide excellent performance
Blending and mixing can be done easily with these colored pencils
Since they are non-toxic, they are safe for children to use
The soft lead core does not get damaged by either mechanical or electric sharpeners
Cons
With a diameter of 3.3mm, it will be hard to create large drawings since it takes a longer time
Dimensions: 7.25" x 0.7" x 7.75" | Weight: 11.5 oz | Color: Multicolor | Blendable: Yes | No. of Pencils: 50
Colored Pencils: Set of 50 neon colored pencils with 12...
Sharpened: Pencils come pre-sharpened for quick use right...
Here is another brand that offers 5 different set sizes of 52, 50, 36, 24, and 12 to ensure artists find the desired one for their drawing.
The 50-colored pencil set, for example, is one of the cheapest on the list. Sargent Art has done budget-conscious beginners and artists a great service for coming up with this set that can fit both budget and quality.
Experience
One might think that the fact that it's so cheap, the quality is definitely compromised. But before we go further, we would clarify that it is not.
Of course, they may not be as great as higher-end brands but they do deliver amazing results, nonetheless. They hold all the basic properties of good colored pencils for getting started.
Because they are intended for beginners, the pencils are more than enough to fulfill this purpose. These are ideal for young artists and children to prepare themselves for a journey in this line of artwork.
The size range is also highly admirable because then it prevents artists from getting the wrong set or colors which they probably do not intend to use.
We would also recommend this pack for beginners who want to explore the world of drawings starting with a good set of colored pencils.
Pros
The pencils have most of the basic properties artists look for when getting started with this medium
They are both beginner-friendly and easy to use
With a range of 5 different set sizes, artists can choose which one will best meet their requirements
Cons
Its properties suit beginners, but might not work for advanced artists or professionals
Dimensions: 8.11" x 7.56" x 0.71" | Weight: 10.2 oz | Color: Multicolor | Blendable: Yes | No. of Pencils: 50
If you’ve been around the world of art for some time, you’ll know that Faber-Castell is one of the most popular brands which deals with a variety of art supplies.
When it comes to colored pencils, they also have a wide range of them, including their Premium Color pencils which we will review in a moment.
And if you’re a beginner looking to find a trusted brand, we assure you that Faber-Castell is one of them.
Experience
We find that the Faber-Castell Premium Color Pencil set is one of the best in terms of quality among affordable colored pencils.
These particular pencils are ideal for intermediate or professional artists who are looking for affordable colored pencils with quality that’s enough to showcase their artwork. But that does not mean beginners should shy away from them as they can be good for learning how quality pencils work.
No doubt, they are not the cheapest on the list but they are worth investing in if you want to get amazing display results.
Similar to Prismacolor and Blick’s colored pencils, these are also very smooth and they make application very easy. Because of this, we don’t have to press too hard on the paper in order to achieve brilliant and colorful lines. Instead, just consistent light touches will do the work.
And if you are looking for eco-friendly colored pencils, you’ll be glad to know the casing is made of 100% reforested wood, which means they have a lesser impact on our environment.
We would recommend these for those who are conscious of the environment while still looking for good-quality pencils which are easily removable with kneaded erasers.
Pros
These pencils are made from reforested wood, therefore, having a much lesser impact on our environment
Soft and easy to work with, so you don’t need to put too much pressure on the application process
Can be used by both learners and professionals
Cons
Might not fit the budget of some artists looking for cheaper options
Dimensions: 7.9" x 6.8" x 0.8" | Weight: N/A | Color: Multicolor | Blendable: Yes | No. of Pencils: 60
MADE TO MAKE IT EASY Ultimate range of 120 pencils arranged...
SOFT YET DURABLE Latest advanced formulation by in-house...
Last on the list, we have these colored pencils by Castle Art Supplies, a band name that is known for producing a range of affordable art supplies.
Likewise, the colored pencils also come at a very cheap price which is a pretty good deal compared to the number of 72 colors in the box.
Experience
Among all the other sets we mentioned, this one has got the most number of colored pencils which are available at a very low price.
On top of that, the colors are all vibrant and rich in pigments, which makes this an even better deal.
With that many colors, we are able to find a lot of shades, and this reduces the necessity to mix colors in order to find the perfect shade.
The quality of these pencils is also not compromised as they can deliver amazing coverage with only a few strokes. The color sticks firmly to the paper, although they work better on a rough surface while producing natural pieces.
For their price range, the pencils are almost as good as those from professional brands, ranging from the quality of the lead core to the comfortable grip. Moreover, each pencil has a number printed on the top to prevent the artist from confusing similar shades.
Above all these, we feel that the box deserves its own attention as it is attractive and organized. It will make a perfect gift for someone who loves color
We would say that the only drawback is that the case can consume a lot of space if you’re a traveling artist.
Pros
Because the pencils are soft, they provide a smooth feel to your drawings
They come in a very attractive box with a number of 72 different shades
The pigments are rich and they offer full coverage
Cons
The case may not consume too much space for the traveling artist
Dimensions: 14.29" x 7.48" x 1.34" | Weight: N/A | Color: Multicolor | Blendable: Yes | No. of Pencils: 120
Wax-based colored pencils are the most commonly used type of colored pencil, they have a wax core, which encases the colored pigment. The wax core is made from a combination of waxes, such as paraffin wax, carnauba wax, or other waxes.
Wax-based colored pencils have a high wax content and are easy to blend, making them ideal for creating smooth gradients and blending colors. Wax-based pencils produce a matte finish, which makes them well-suited for sketching and drawing.
Oil-based colored pencils
Oil-based colored pencils are another type of colored pencil, unlike wax-based pencils, oil-based pencils use an oil-based core instead of a wax-based one. This type of pencil has a higher pigment content and produces a more intense color.
Oil-based colored pencils are also more difficult to blend and create gradients with, as the oil-based core does not melt as easily as wax-based cores. Oil-based pencils are better suited for creating detailed, vibrant artwork, as they produce a glossy finish.
Buying Guide For The Best Cheap Colored Pencils
Color Variety
The number of colors available in a colored pencil set can greatly influence the decision of buying it. A wide range of hues, tints, and shades will allow a coloring artist to capture the desired range of tones and create a more vibrant and realistic end product.
Pigment Quality
The quality of the pigment used in colored pencils can make a huge difference in the vibrancy and longevity of the finished product. The high-quality pigment will look more vibrant and will be less prone to fading over time.
Lightfastness
Lightfastness is the ability of a colored pencil to resist fading when exposed to light. The higher the lightfastness, the more vibrant the colors will stay over time.
Durability
The durability of a colored pencil set is important for longevity. A set of pencils that is well constructed and features strong wood or metal casing will be less likely to break and last longer.
Blending Ability
A good colored pencil set should feature a variety of blending capabilities. Different types of pencils and different brands will have different levels of blending capabilities, so it is important to consider which type of pencils will be best suited for the desired effect.
Cheap Colored Pencils FAQs
What kind of quality can I expect from cheap colored pencils?
While cheaper colored pencils may not provide the same vibrancy, lightfastness, or ability to blend as more expensive options, many affordable sets still offer reasonable quality. It’s essential to read reviews and do some research to find the best option within your budget.
Is it possible to find lightfast cheap colored pencils?
While lightfastness is generally associated with more expensive colored pencils, several cheap options on the market have reasonable lightfast ratings. Look for pencils that specifically mention their lightfast properties and check user reviews to verify their performance.
Are cheap colored pencils suitable for blending and layering?
Blending and layering abilities can vary among cheap colored pencils. Some may perform well, while others may be more challenging to blend or layer effectively. Experimenting with different techniques or using additional blending tools, like blending stumps, can help improve results.
How do cheap colored pencils differ from more expensive ones in terms of pigmentation?
Generally, more expensive colored pencils have better pigmentation and color opacity, meaning that you can achieve stronger and richer colors with fewer strokes. Cheap colored pencils often require more layers and pressure to attain the same level of color saturation.
Conclusion
Choosing the best cheap colored pencils can be a daunting task, but our thorough research and testing have provided great options for artists on a budget. These pencils perform well, offer a smooth touch, and are easy to blend, making them perfect for learners, students, and even professionals looking for affordable art supplies.
From the above 9 best cheap colored pencils, here are the top three expert recommendations:
The Reeves Colored Pencils deliver impressive results at an affordable price and are perfect for those still learning to blend or for basic purposes. With a smooth touch to the surface and great blending qualities, this pack is an ideal option for learners or as a gift.
On the other hand, the Studio Series Colored Pencil Set offers excellent value for money and comes with an additional sharpener and eraser. This set is accessible to students and budgeted artists alike, making it a good option for those looking for a practical and complete pack.
Lastly, the Prismacolor Scholar Colored Pencils and Sets may be slightly more expensive than other options on this list, but the rich pigments and easy blending make them well worth the investment. For those looking for a reliable and well-known brand, this set is the right choice.
Remember, exploring your creativity doesn't have to be costly. With these affordable colored pencils, you can express your artistic vision while sticking to your budget. Happy coloring!
Already built up your game engine but have no game assets or sprites to work with?
Then we have just the perfect list of websites for you today, which house some of the most versatile and unique range of game images and models present on the internet.
When one is planning to create their very own indie game, developing the game engine itself is not all that difficult. Especially when compared to choosing and picking the right sprites and stock images that can go incredibly well with the narrative and gameplay.
And with so many game assets sites out there today, it can indeed be difficult to invest your time browsing through one and looking for particularly free and public domain images.
Featured Image | Creature Quest by West Studio & Heather Poon
However, with our list today, we seek to solve this very problem that most beginner developers tend to face.
So, here is our top 7 list of the best websites for free game assets and sprites.
Free Game Assets and Sprites Websites
League of Legends by Riot Games Worldbuilding Team
A lot of beginners and amateur game developers today, have made the digital marketplace Itch.io their number-one go-to because of the variety and versatility of game sprites and assets that the site provides.
However, most of their more premium content is not free to download, but the ones that are free are incredibly amazing, to begin with, and are capable of serving multiple purposes.
Just make sure that when you’re browsing through their content, you filter the results based on what you need and what comes with and without a license.
Each of the game assets and sprites present on the website comes in different resolutions ranging from 8-bit to 16-bit, each with a different appearance and texture.
There are 3D-rendered models as well which you can opt into if you’re looking to design a much more complex game.
One amazing thing about Itch.io is the Itch community. They have a lot of members who are small-time indie game designers and have created a lot of games that are up for download on the website itself.
Some of the games you need to pay for, while the others are absolutely free. You can install and play these games and get an idea about all the amazing things that you will be able to do with the game assets present on the website.
This website is just perfect for beginner game designers and artists who are looking for some simple yet effective game sprites to work with.
Now, OpenGameArt is by far the largest game asset website today. It caters to the needs of both amateur and professional game designers alike and comes with a range of assets that will help you to design anything you want from scratch
The best part about this website is that it was made solely for Creative Commons art, which means that every single sprite and game asset on it is free to use and download.
In terms of licensing, most of the assets fall under the public domain; hence, you will be able to use them for a lot of commercial purposes as well without having to worry about credit.
Their game asset range consists of 2D along with a lot of 3D art. There are also smaller asset categories that have items like sound FX and background music, which can help you to add the final touches to your game design.
There is one aspect of this website, which professionals absolutely love, and that is the concept art panel. There is this specific place in the website, which allows any artist to post their own concept art for free and is open to the wider public to view, share, and provide feedback.
However, the website design and the filter bar are not that easy to use and take a rather long time to get the hang of. But once you do start getting used to it, you will definitely find their library to be absolutely amazing.
The GameDev market is much like Itch.Io when it comes to its library and supports a mixture of free as well as premium game assets.
They also have a panel where artists are allowed to sell their games, as well as provide them to the public for free.
To be able to browse all the free content, you can look through the categories in the main menu, and use the convenient filter to search the ones which you need.
This is what makes GameDev Market one of the easiest-to-use and beginner-friendly game asset websites today. The sidebar has all the categories listed carefully, so if you’re looking for some 2D art or sprites which are absolutely free, then all you need to do is to click on the right options.
When it comes to the category of free character assets, the site provides a lot of easy downloadable links to help you out.
Moreover, to make things even easier for the newer developer and artist, the asset pages apart from housing, the content zip file also has detailed information about what's inside it. It also catalogs as well as houses the download links of the software that are compatible with these assets, so that the newcomer doesn't have to worry about much.
GameDev Market is just amazing when it comes to promoting indie game developers and indie concept artists. With the right marketing and game design, this website can indeed help you with making your own customer base as well as securing a decent side income.
The Game Art 2D website has one of the biggest catalogs of 2D arts, assets, and sprites in the entire world.
They have an incredible gallery of royalty-free game assets which is perfect for making both commercial as well as personal game projects and artworks, without having to worry about credits all that much.
However, many of the assets do tend to come with a price tag on this website, and the content of free stuff is quite limited in comparison to some of the other websites out there.
As the site mainly deals with having a vast library of 2D assets, the 3D and sound FX category suffers as a result, but there isn’t all that much to complain about here.
The quality of the assets is incredible, to say the least, and the wide range of versatile uses that they offer the designer is just amazing, making the website a must-visit for every game developer.
The game sprites, like a lot of the conventional stock images, come in many styles ranging from your more popular sprites to tilesets to even some basic concept art.
Though their collection of free downloads is rather small, there are still worth checking out, as you can really do a lot of amazing work with just the ones that they have.
This site is not exactly capable of being a staple go-to for any designer, but its unique and trustworthy library does have a lot of assets that you can look into from time to time.
CraftPix is a relatively newer website and features some of the most unique and craziest game assets and sprites that one can ask for.
It will allow you access to a lot of casino GUIs for making mobile games, as well as custom 2D backgrounds for side-scroller games.
As it caters to helping developers make games for various platforms, its library and asset formatting are quite versatile and sizeable. Hence, this website will not make you feel limited if you’re planning to do something different with the available assets.
But, what we love the most about CraftPix is that their asset list is constantly growing, and newer sprites and character designs are being added almost every day. Moreover, most of these game assets are added by the creators of the website themselves; this makes the forum highly personalized and well-maintained with a convenient search bar and filter.
However, this doesn’t mean that the website is not open to others offering their very own sprite and model designs. CraftPrix is a fantastic platform to upload and share your own character images on and get a considerable customer base as well as a fan following.
The website is also an incredible indie game developer’s hub. The custom sprites and assets that are already present in their library are just perfect for making a lot of engaging and interactive side-scroller games.
So, when it comes to building recognition for your work and promoting premium assets as well as some high-quality freebies for some extra income, then this website is simply one of the best.
No matter what you’re looking for, Reddit will most probably have it.
It has a community for almost everything, so, it’s really not all that surprising that there are a lot of subreddit forums on art, digital painting, and innovative game assets.
However, we will not be asking you to scour through every Reddit forum to find the one that houses the best game sprites and character models. We have done the hard work for you and found that /r/GameAssets is going to be the best page for all game assets-related content.
/r/GameAssets has an amazingly large library of curated free game assets from all across the web.
There is no designated character model that you will not find here. From fanart to even cosplays to unique and creatively designed sprites, the forum has some of the best assets that the internet has ever come up with.
However, the submissions are not exactly direct in this forum. It’s done through the inclusion of primary links, which leads to the main website from which you can very easily download the zip file.
The community here is also not as big as some of the other websites out there, but even with just 9,500 subscribers, the users are much more active than most groups and provide links to fantastic 2D and 3D models every now and then.
This might seem rather slow to the more active game developers, but if given the right time and patience, this forum can indeed provide you with some gems.
This Netherlands, based game asset website, has for some time now created some of the best RPG-themed character art and game sprite.
So, if you’re looking to create your own role-playing adventure, then this website is going to come incredibly handy in providing you with all the elements for your project.
They have some really cool free assets which have been made part of the public domain, and you are not going to have any problems with their licensing and crediting if you wish to use them for commercial purposes.
The site search bar and filter tools are also very easy to use, and you can browse through all the free game graphics sections by just selecting the category and then filtering out the themes and genres that you’re looking for.
Moreover, Kenny.nl also makes sound FX as well as game sources to help more beginner developers along to getting their first project up and running.
The site is very beautifully designed and is often frequented by indie game developers who are trying to achieve a wider customer and earn some money on the side by selling their games to the wider public.
Conclusion
Picking the perfect website that has the exact images that you are looking for in your game is not all that easy to achieve. But we hope that out of the seven that we have listed today, at least one out of them was able to provide you with what you wanted.
The mobile app Procreate is a creative application that has become a popular choice among digital artists.
This is not just a drawing tool but will help to bring your tablet to life. The designs that were previously possible to be created only on the graphics monitor or the desktop computer can be made now on your iPad.
There are some stunning third-party brush sets that you can download for Procreate which have been made by different creators. The brushes are designed in a unique way so they can emulate various media, such as pencils, inks, and paints. Few of the brush sets can be downloaded for free, while you have to purchase the brush packs which are of high quality.
The wide range of available brushes makes it possible for you to create projects with different styles, strokes, textures, and forms. This guide will cover all the types of brushes which you need for sketching, drawing, lettering, painting, and more.
Without further ado, let’s look into the list of the 80 best Procreate sets of brushes!
This comes in a set of 42 brushes and is suitable if you don’t like a mess while working (who does?). And you prefer the look of pastel and charcoal.
These paid brushes provide a dirty look to the pastel or charcoal which have been applied lightly. You can also find different textures of chalk. Moreover, these custom brushes give a shine to the heavily used pastels that give full coverage.
Irrespective of your drawing style the brushes are perfect for use in illustration and concept art.
If you want to have the same effect as watercolor techniques (Salting, drops, washes, sponging, and wet on wet) used in real-life, then get this set of 50 brushes.
You can select different brushes to help you adjust the amount of water that is preferred in the brush. It will help you to control the texture of the brushes.
The final texture can be further played with to adjust the level of opacity. There are a few brushes that can also emulate the look of watercolor on different kinds of paper, this is a paid brush set.
If you’re looking to try out different kinds of brushes for Procreate, then you should get this megapack of 450+ brushes.
Will be a good investment if you love the look of traditional art mediums, and you want to try digital drawing. These brushes tend to closely imitate the look of physical art mediums like pastel, oil, graphite, paint, and ink.
With some practice, you have the chance to find the Apple Pencil to be a more comfortable option than the traditional mediums. They also tend to work in the same fashion.
When you purchase this megapack, it also includes updates to the collection and brushes of artists. This gives you the privilege to work with top-quality and up-to-date brushes.
You can get this natural fiber brush to give an appearance of paint to your canvas. If you prefer the look of acrylic painting or oil, then get this brush to look at your work on Procreate.
This brush is free of cost, and you can also get it by making a small donation.
Get this set of 10 Procreate brushes if you’re looking to create some stunning, painterly illustrations with different kinds of textures, from busy and scratchy to well-blended and smooth.
These brushes can appear like graphite and gouache as you can use it in different textures and sizes.
Get this set of 8 highly textured brushes for your digital painting to help you create some scratchy, fun, and gritty layers.
These eight brushes come in different textures; some appear like splatter spray paint while some appear like chalk. The set is suitable for illustration work or concept art when you want to create a texture of stone or concrete, or if you’re looking for softer shapes.
If you have recently shifted from Photoshop to Procreate, then this set is perfect for you. The brushes available in this pack are similar to the ones in Photoshop so you can easily get adjusted to using them.
You’ll get a few cool scatter brushes to give a unique detail to your artwork, as well as line brushes and primary markers with various textures. The artist also provides you with guidance on how the different brushes can be used.
Here you’ll get a set of 20 brushes for pencil drawing and inking, which makes it perfect for any artwork. This is a well-built set, as the different brushes can also be blended easily.
You can use them for your complete drawings, for the base sketches, or to add small details to your entire piece.
This set of 16 brushes has quite a competitive edge to them. It gives you the look of charcoal that is perfectly blended, which is challenging to get without getting your work smudged in real life.
If you like to blend your work, then you’ll love this set!
Custom-designed for sketching, the brushes that are given in this set can be compared to just any number of pencils that are available in the standard drawing pack.
The set also comes with brushes for adding an excess amount of pressure to create deep values and for cross-hatching with the Apple pencil.
These brushes can help you improve your shading skills and to save time.
This mega pack of 68 gouache brushes has all that will be required by you to add perfect textures and details to your illustrations.
It allows you to select your level of opacity to create an acrylic look, dried gouache, or watercolor-like appearance. You can choose to create an entire illustration with just these brushes, or you can mix them with other mediums.
This natural media brushes come in a set of 15, which gives your work a traditional, artistic appearance that you’ll generally find in acrylic or oil paintings.
Besides, you’ll also get five smudge brushes for lifelike blending and for adding textures. These brushes can be used for creating broad strokes that will give your work full coverage. You can also add fine details to provide an edge of realism in your work.
This set will be perfect for pastel artists and painters who are switching to Procreate.
The brushes give a unique look of an oil painting, that is completed with a characteristic of chunky blending and canvas texture that you’ll usually get with a palette knife or a paintbrush.
You also have the option to blend smoothly if that’s what you prefer. The pack contains different brushes which are similar to the traditional oil painting brushes and the ones used for different canvas textures.
Learning to draw portraits accurately will require a reasonable amount of time, especially when you’re shifting from the traditional medium to digital art. But this set of 20 brushes will make your work a lot easier.
By using these brushes, you can create the textures for the eyelashes, freckles, hair, and skin quite seamlessly. It also includes a few custom brushes for blocking and blending colors in your portraits.
Airbrushing your illustration work will give it a smooth, soft, and smoky effect. You can try this set of custom-style brushes for creating a classical airbrushed look.
You can use just this set of brushes to create a texture for your drawings, or you can mix it with other brushes.
This massive pack of 130 brushes has been specially designed for inking purposes. Whether you’re a novice in illustration or a cartoonist and seasoned illustrator, you’ll get all that is required for blocking in and inking of color.
When you get this pack, you can try exploring the brushes one at a time to understand the different line qualities and textures of them. Getting just this pack will be sufficient for your inking requirements.
Out of all the premium packs, this is the most affordable one. It is perfect for charcoal, pastel, or chalk-style drawings. The textures of these brushes are fantastic as they add a lot of life to your pieces.
From the set of 15 brushes, you can choose to recreate any texture that you can see in real-life chalk pastels.
If you’re a fan of Manga, then you’ll love this pack, as it will help you create the dynamic-looking pages of Manga right from scratch.
All of the brushes in this pack have been tailor-made for coloring, texturing, drawing, and inking traditional Manga. You’ll be getting brushes that mimic watercolor, graphite, and charcoal perfectly along with brushes that give a unique texture for foliage.
If you’re a painter looking to get the same texture, layering effects, and brush strokes in Procreate, then this pack will be perfect for you. Just like oil paint, these 25 brushes also help you push and mix different colors on your canvas.
You can choose to use dry brushes for a dusty and lighter texture, or chunky strokes with brushes loaded with paint. This pack can be used for your complete painting, and it also comes with a pastel painting brush for creating the base sketches. By using this pack in your artwork, it gives your piece the appearance of traditional mediums.
This pack of 52 brushes will help you add any texture that you want in your work with a spark of life that adds an extra dimension. The different textures available can be used for fur, wood, smoke, particles, denim, stone, cross-hatching, various dry brushes, and other surfaces which you can use in different manners.
It will be a perfect package if you want to add just texture without having to draw everything by hand or for giving a touch of roughness to your piece.
The 50 pieces of markers in this pack will make you feel like you’re working with natural material. There are different textures and marker ‘tips’ like a classic fine tip, chisel, or brush pen that you can experiment with within this pack.
You can select the brushes that give perfect color coverage or the drier and inky markers, which are best for texture. There is a tutorial that comes with this pack along with a user guide of 17 pages on Procreate; highlighting the benefits for you to get this brush pack!
These 15 brushes have been made with a unique design for illustration work. It captures the mid-century aesthetics of American illustration.
The brushes can be used to give your work a retro and vintage finish. They are perfect for comics, logos, ads, and children’s book illustrations, while the possibilities have no limit. The entire appearance of your art can change by using just a few of these brushes. So, do give it a try!
If you love the radiance and opacity of the alcohol markers, then we’re sure you’ll love this set of 28 markers for your digital work.
To help you get the authentic marker to look as it comes with a free tutorial. As you follow the tutorial and practice along, you’ll get better at using them for cartooning, illustrations, and whatever you want to create.
Using markers might not always give you a smooth finish, but this set allows you to try out different levels of coverage and texture, which is an added benefit.
These markers give your work a very realistic outlook, which makes it challenging to understand whether it's made from Copic markers or not.
Do you want to recreate the look of any vintage superhero?
Then you should give this set of 15 brushes a try! This pack comes with many brushes that have different dot patterns usually found in old comic books and a pair of inking brushes.
You can play with bright colors if you want a punchy and classic appearance of a comic strip, or for a dark look, you can choose black, white, and gray tones. You can create an entire piece of work by just using these colors or, if you want different styles, then try mixing them with other brushes.
This is an unusual set; it comes with ten stamp brushes and six roller brushes. If you want to give your piece a crisp monotype appearance, or grungy texture then getting this is a good option for you.
Once you learn how to use them, you will be able to understand the range of variety available in these brushes. There are a few roller brushes that apply more ink, while some apply less, depending on the look you want to create.
Using the stamp brushes makes the work appear like it has been made by applying ink with a monotyping technique, block, or sponge.
When you use a fine-tipped pen, and you opt for a dense texture, then cross-hatching by hand can consume a lot of your time.
By using these 15 brushes, you can make cross-hatching appear pretty straightforward. These brushes will help you to create scratchy shadows using different line qualities, textures, and styles for cross-hatching in your drawings.
If you want to make drawings using a mixed media style within a few seconds, then you’ll enjoy using this set of brushes.
This massive kit has 150 brushes, out of which 137 of them are stamp brushes. It will help you to quickly add whatever you want like different branches, paint splatters, branches, dashes, dots, swirls, scribbles, leaves, cross-hatching, and several others.
This pack has been designed for comic book drawings, so it comes with a unique brush setting. Even though Procreate has several great brushes, it can get difficult to figure out the right settings for your work.
If you like drawing cartoons or comics, you should get this artist’s set up to help you seamlessly draw, ink, and color. This will be a high starting point to work classically, while you can change the settings later in Procreate.
This digital pack emulates the traditional drawing set, and it includes brushes for graphic pencils and traditional charcoal in Procreate.
Using these brushes will help you avoid smudging, while you get the look of different types of charcoal and pencils for a realistic appearance. These brushes will be perfect if you want to create traditional-style charcoal and graphite drawings or add some real deep shades to your work.
Getting this pack will help you to master different qualities and textures of charcoal, which might be tedious while using traditional charcoal.
Learning to draw hair can be time-consuming and difficult; even the artist who has mastered the art will tell you the same. But using these brushes can help you save time and make the process more straightforward.
This pack gives you the option to draw different types of hairstyles, while there are also brushes to help you add highlights or tendrils and make the drawing appear real. If you want curls, then there are brushes for that too! Getting this pack will fulfill your needs for hair rendering as you draw an animal, a wig, or a human.
This pack of 16 brushes will help you to make your portraits and to capture the different skin tones.
For creating smooth-looking skin, you can use high-quality brushes while for setting up a portrait opt for the essential brush. The pack also includes some special brushes to help you render the eyes and hair quickly.
Mastering the art of making portraits can get a little tricky, and making the eyes can get a bit difficult.
Getting this pack will help you to render the eyes more easily and quickly. The different innovative stamp brushes will help you layer the iris within a few seconds. Eventually, you can explore the other brushes to add a spark of life to the eye by adding veins and eyeshadow.
Learning to draw fur can be as tricky as drawing hair, but having good brushes will simplify the process. If you’re into drawing furry fantasy creatures or animals, then you should give this pack a try.
This pack of 8 brushes is a stunning combination for drawing fur with a mix of lifelike fur and cartoony fur. It comes along with options for choosing a brush to create coarse fur, porous fur, thick fur, matted fur, messy fur, and brushes which help you add strands of hair to make the coat appear polished.
This set of unique brushes focuses on creating pixelated drawings with the right geometry. The 20 brushes in this pack pair up with the shape tool in Procreate to help you draw perfect pixelated squares, triangles, and circles.
The set also has pixel brushes with variations in opacity level, shading and blending brushes, and brushes for dirt, bricks, dots, and more. Overall, this helps you add a slight texture to your pixelated drawings.
This single piece of light effect brush helps you to add an instant glow to your artwork. The possibilities of the way this brush can be used are endless, even though it might appear dull.
This brush will help you add a bioluminescence effect to different environments and fantasy characters, and it also creates dramatic lighting in your work.
This is a small marker set with just three brushes which come in three variants. They have different ‘tips’ such as translucent flat tip, opaque flat tip, and round tip for creating layers that give the marker effect. It also helps you to create different types of line quality.
As you get comfortable using this set, you can then get the larger packs of marker brushes, and mix them to create some fantastic pieces of art.
Just like the Prismacolors, which are high-quality color pencils, this set of 11 brushes also provides you with different textures similar to the traditional medium.
Try these versatile brushes in your Procreate art to add some new and colorful lines.
If you’re a fan of the Tombow brush, then you’ll enjoy using this set. These brushes were created to work and look just like the Tombow brush pen. It is perfect for doodling and lettering, as they feel very flowy and smooth while it is being used.
When you have this set in your toolbox, then your linework and doodling will turn out to be great.
If you’re looking to create a piece of art with some fun messiness, then get this pack of 20 brushes which will help you get paint splatter marks with a realistic appearance.
These brushes come in a variety of splatter densities, opacity, and sizes. Few of them tend to look like a spray bottle has been used to apply watered-down paint, while some of them are compressed and opaque speckles.
Some of the brushes help to create a look as though you have applied paint using a dry brush and some appear like huge, loose droplets.
Use these brushes to create a sense of movement in your illustrations.
This set of 17 ink brushes will help you create some fun textures with different levels of splatter. You can draw backgrounds by using a few of the ink wash brushes and create fine lines with the pair of ink drawing brushes.
These brushes help you to make perfect ink artwork as you can also use them to add a messy or drippy quality to your illustrations, drawings, and paintings.
It is a set of 11 tailor-made pastel, pencil, marker, and ink brushes. It will help you create some fantastic calligraphy or other artworks that you want to make; stylistic scrawling or print lettering for logos, comics, and anything else which you can make digitally.
The brushes are sensitive to tilt, and they are super flowy so that you can manipulate the lines quickly. It can also be used for sketching, doodling, or drawing.
If you’re new to using Procreate, then this might not be the most feasible option for you as the price is slightly on the heavier side.
By using this brush pack, you can get any paint texture or brush stroke. This pack has several brushes for smudging, dry brushing paint, applying solid colors, and literally everything that you will require to work as a master in Procreate.
You can also use them in your illustration to create a fuzzy and soft look.
This set of 18 brushes is tilt and pressure-sensitive, so you can use them as a real brush to help you get the same design just like the ones in real life.
The brushes come in different shapes and are generally used for oil painting. You can also have a variety of textures by selecting smooth, dry, or wet paints.
When you use these brushes, the canvas also tends to shine to look at a realistic painting. It is an excellent option for digital painters shifting from an oil background.
Blending and smudging comprise a large part of creating beautiful artwork, irrespective of whether you’re using traditional mediums or Procreate.
This comes in a set of 18 brushes which is perfect for smudging, blending, and creating pieces with smudgy textures. Using these brushes can alter the mood of the entire piece by changing the look of the color gradients.
You can get this fantastic pack of art markers, water brushes, and ink; it will be of great use to illustrators. You can use them for your illustration work or for designing different characters and creatures.
These marker brushes emulate different ink saturation levels and marker tips. The other brushes mimic textures like dry water brush effects, salting with watercolor, and sponging.
You will also get a variety of fine pens which can be used for any sketching or drawing that you would want to do digitally.
This pack has ten custom-designed shadings, and stippling brushes can be used to add shadows and grainy textures to your work. This list includes brushes that have different densities and grain qualities which can be used for every design.
You can try these brushes to add a faraway, distressed, or faded look to your different illustrations. You can also use them to add stars to your night sky.
This massive bundle comes with brushes for graphite, paint, marker, ink, pencil, and every material that you can think is included. You get the option of several painting brushes and around 50 colors to select from the set.
As you download this, you’ll also get different texture brushes to choose from according to your preference, which will help you to apply paint using various thicknesses and styles.
There are plenty of opportunities waiting for you as you get this bundle.
If you get this free set of 3 simple brushes, then you will probably feel like using this set every time you’re creating art on Procreate.
This pack comes with a dense grain pencil, a grain pencil, and a Copic marker. It is a fantastic mix to help you unleash your creative power. This basic set is a good option for you when you're a beginner, or you are looking towards branching out from the default settings Procreate.
This set of 48 media brushes will give your work a watery finish, by making it appear like there is a splash of water and give it a watercolor effect. These features go beyond the tools that are available on Procreate.
It is a free pack, but donating will help you to fund the brush projects in the future.
This brush kit by Milo Garret is ideal for helping you create neon signs which appear like it has been handwritten in real life. Using these brushes will help to give your work a stunning glowing appearance. In this set, you’ll get around 12 brushes for neon writing, along with a brush to create effects and three light pen brushes to add life to your artwork.
The list doesn’t end there as you get a bonus of 19 ready-to-use background images.
The collection by Studio Burg is a fantastic package, as it offers a selection of brushes that will help you with your basic graphic design and illustration requirements.
To help you select your desired signature, this pack also comes with a pencil, pen, and paintbrushes.
This texturific bundle by Lisa Bardot has 14 pastels, 14 liners, and 30 shaders. The different textures in these brushes will help you create different art styles and effects without needing to use a traditional pen and paper.
All of the 58 brushes in this set are made with different varieties of high-resolution, texture sources, and they are also pressure sensitive.
This set is perfect if you’re into comic illustration. When you get this pack, it will be an ideal addition to your collection of creating illustrations on Procreate; it includes the SFX additions and inking brushes from the ’50s. Mark has created this set to pay tribute to Will Elder the reputed comic book illustrator of American origin.
This collection of brushes has been inspired by the old faithful of the artist Ian Bernard. Once you get this set, you’ll feel like using them every time you start lettering. The brushes have varying textures which give your work a textured or a solid finish depending on the look you want to create.
The vegetation brush set by Matthew Baldwin will help you to instantly set the scene right and create a painterly effect, which will make your job as a concept artist much more comfortable. Baldwin has ensured that these brushes can help you to get any type and style of stroke, which usually concept artists try to master all the time.
There are a plethora of free brushes for Procreate which is available on the website of designer Missy Meyer. The brushes are perfect for helping you create a graphic script. This dearest dotty set has a unique retro vibe which gives a touch of versatility to your lettering work.
This pack created by Summit Avenue has 12 confetti brushes along with 24 glitter and foil textures, which helps to give a touch of sparkle to your designs. Using this set will help you design different wedding invites and event flyers.
The Nitty Gritty Set of texture brushes by Jammie Bartlett is going to be a brilliant selection to help you add an aging effect instantly and give a fine gritty texture to your pieces.
This MilksKS brush set will help you to create the look of the black and white classic engraving. Using this pack of brushes, you will be able to add a delicate touch to your design project or illustration. You can combine a few of the brushes to create a cross-hatching effect with a vintage look while you pick a clean-cut style.
By using this set, you can create different designs of hand lettering, the form and style appear perfect, and you wouldn’t require any further illustrations. This bistro marker by Leftyscript is going to be an amazing freebie pen that will help you capture different type-faces of hand-written styles.
This set has three essential freebie brushes such as the round-edge calligraphy brush, the rough-edge calligraphy brush, and the original calligraphy brush. The brushes from this set will help you to get down to the basics and will help you to create some simple and beautiful designs.
This Procreate brush kit by Nicole Mauloni, who is a reputed calligraphy artist, has over 100 brushes. Getting this set will you to decorate your digital calligraphy works as you can also create different design stamps with various shapes, flourishes and motifs.
The brush pack by Studio FabianFischer has four brushes for Procreate which are feline-named textured for hand lettering. All of the brushes are pressure-sensitive and will help to give your work a realistic edge.
This brush set by Guerilla Craft will help you create different chalked masterpieces on your digital iPad. This pack will help you avoid dusty hands, and you can select from the different varieties of chalk such as round chalk, loose chalk, wet chalk, flat chalk, smudge chalk, and more.
70. Rad & Happy
Tara, who is the founder of Rad & Happy, has made these brushes for making different lettering designs, and you can download them for free.
71. Thin Ink
The ‘ Thin Ink’ brushes by Sasha Hickson are famous for making modern and quirky designs. They can easily emulate the thin and thick strokes and help you add feminine flourishes quickly to your designs.
If you’re looking for bold brushes which will help your lettering to pop off and stand out then get this pack. This set by Sarahtype comes with a super smooth brush which will help to create a sense of contrast between the thin and thick strokes in your work.
73. Dry Marker
If you love the effortless look of a dry marker, then you’ll enjoy using this Ben Ralec’s collection of 15 varieties of marker pens that you can select from. This set also has an original calligraphy brush that will help you in creating your calligraphy designs.
This extensive brush set produced by calligraphy artist Jake Rainis, who is Boston-based has researched different sets that are available on the market to create this collection.
Nikolai Lockertsen is a highly reputed Procreate digital artist, who has made his favorite set of 5 brushes available for you to download. There are some unique designs that you can create using this set of brushes.
This set of 14 custom lettering brushes by Ryan Hamrick will help you to create some high-end, lettering work like a professional on your iPad. The collection has been entirely curated by Hamrick, and these brushes have several uses.
This brush is similar to the quill of the 18th century and its quite sensitive to pressure, which makes it an excellent option for calligraphy. You can also this brush for making your grey and black line drawings.
This is a small package of ink brushes by Dizzy Tara which has board marking brushes and different ink-shaped pens. You can use this pack of inky brushes for your sketching.
80. Whiskers
This brush by Inky Hand is a fantastic tiny brush, which is a perfect choice for helping you create scratchy effects and unique hand designs. This brush will be suitable to create rough sketches and to add a slight touch of originality to your artwork.
You can find this brush pack here.
Price: Free
Conclusion
Each of these brushes can help you create some amazing artwork on paid your tablet. Don’t overlook any of these precious tools, as you try finding the right brushes which will help to make your overall work become simpler. You might need to go through them again, to get your hands on the perfect set.
Clip Studio Paint, or Manga Studio as it was known earlier, remains a preferred tool of many Manga and Anime designers. If you haven’t used it yet, you should try it as soon as you can - simply because it’s one of the most useful tools out there and thanks to a wonderful community you can find the best manga studio & clip studio paint brushes free of charge.
This software has proved to be a wonderful companion to all digital artists who work on animations or integrate animated components into their work. The brush functionality is one of the most flexible ones amongst software you can get today.
While there are a number of paid brush sets available for use, many people have been kind enough to make their implementations available to the general public for free.
Today, we’ll get to know about 21 of the best free brushes you can get for Manga Studio online.
This brush set on DeviantArt by user martinacecilia is one of the best ones we could find for Manga Studio, which still works well with Clip Studio Paint. These clip studio paint brushes give you a wonderful feeling like you’re painting with oil colors, which is especially useful for people who are frequent digital painters.
This set of brushes gives you the classic Manga Studio feels - while this doesn’t offer you anything beyond the basic designs, it does that pretty well. It comes highly recommended from the designer community as well; simply because they’re easy to use and offer a wide variety of patterns and finishes.
Solid brushes, as well as some which emulate “hairy” brushes, are just some of the brushes this pack features. Even if you’re just beginning with digital art, you should give this set of brushes a try. You will be surprised how these brushes just “do” what you want them to do.
This set of brushes gives you a number of basic tools which you can use to design complex characters, environments, and objects. Hence, you should give this brush set a chance if you’re looking for something to either get started with or to fine-tune your brushes to get more control over the scene.
This brush set delivers on both varieties as well as offering a fair amount of control over the drawing. You get a number of brushes such as a Variable Rectangle, a Variable Sponge, and a Variable Ink Smudge - these are all pretty self-explanatory in their use. The Cel tool helps you to give your detailing chops regardless of the size of your brushes.
Also, if you want to go for a more paintbrush-like feel, the Digi Bristles tool on this brush set will do the job perfectly well. Further, there’s another tool that you may like - Ink Paint 8, which gives you a starry, speckled finish for those days when you just need to get a night scene done. Hence, these brushes work well for almost any scenario - give these a shot!
3. SerketStalker’s Assorted Brushes
If you’re someone who just wants one brush set to cover as much ground as possible, here’s your best shot. SerketStalker has uploaded this vast, comprehensive brush set which includes a few speed painting brushes which are useful in almost any scenario when deadlines approach or you have other things to attend to.
This brush set gives you small brushes, brushes shaped like crystals, a number of spray-like and dot-like brushes as well as certain complex patterns such as flowers. There are 18 of these brushes in particular, but the great thing here is that they’re all useful in their own right. For the average artist who works in multiple areas, these brushes cover a lot of ground.
One more point - you should usually have some idea about using Clip Studio Paint before you end up using this set. It can get a bit tricky and technical at times, and some prior experience with the default brush set is very helpful for gaining mastery of the brushes in this set.
These Gouache Brushes will be of immense use to the artists who are already used to painting with Gouache as a medium. Thus, these brushes are perfect who intend to transition from traditional to digital painting, as well as those who want to get started with a new set of brushes. The brushes have a fair bit of variety in width and work well with mice or styluses.
When someone is transitioning from traditional media to digital media, especially as an artist, the biggest complaint is that it doesn’t “feel” the same way - and this is generally a valid criticism. However, there’s no reason why you can’t get to work on digital media with brushes like this even if you don’t have too much experience working on screens.
There are 10 brushes in this pack, with the most possible finishes that gouache can give you whilst painting.
TheInkyWay gives you a number of brushes that can do calligraphy. Not only that, they can do them very well. Part of the overall experience of designing on Manga Studio/Clip Studio Paint is creating written art as well, which includes calligraphy. These clip studio paint brushes are one of the best ones we could find which do calligraphy in as varied a fashion as these do.
The brush gives you a wonderful way of interacting with the screen via text. Calligraphy is one of the cornerstones of manga and a lot of digital art, especially comics. The range of brushes in this set is astonishing - we’ve never seen as wide a collection of calligraphy brushes as this for free. However, it also has a number of other brushes as well for general drawing use.
Many of the brushes on this set can be anti-aliased in order to render it better. You can also use the pencil, the repeating pattern brushes, as well as use 1, 2, and 3-point perspective with this set.
Keeping in line with the Gouache brushes above, the same designer went ahead and published this free dry brush pack. It carries many of the same aspects of the Gouache brushes which we reviewed earlier, only it’s much closer to dry brushes rather than gouache painting. Dry brushes have a certain distinct finish to them which Gouache brushes or other brushes can’t give.
This set of brushes gives you a lot of mobility and flexibility in what you’re drawing. Dry brushes are a wonderful method for painting scenery right from scratch. This is generally avoided by digital artists since digital art is compiled from a number of sources and not necessarily drawn from scratch. Hence, these brushes make life easier.
However, they are kind of loose when compared to regular brushes you see for Clip Studio Paint which are used to draw a number of environments, objects, and characters. There’s a wide variety of natural-looking brushes on offer in this pack, some of which rival paid brush implementations as well!
Variety is the spice of life, and there is a lot of variety in this set of brushes. This set gives you all of the brushes you can think of, including cloud brushes, pencil based brushes, you can also choose between a variety of flat brushes. These are perfect for making artwork such as digital illustrations and are also useful while working on digital paintings.
These brushes are some of the best you can fit Clip Studio Paint with, simply because of how many brushes and settings you can change easily. You can change the opacity, the sizes, and the shapes on the fly, making sure you can get the finest of details just right based on your preferences.
There’s one caveat - these brushes are generally used only by experts since they require a fair amount of effort to get the hang of. Beginners are, however, requested to try this brush pack as well since it gives you a lot of brushes and it’s worth learning how to use them, even if the learning curve is somewhat high for beginners.
Custom brushes are a far cry away from the generic brush packs which can give you variety, but not specificity. These brushes come in a pack with cloud brushes, some nature brushes as well, and a bunch of custom shapes which you are unlikely to find in any other brush pack on the internet. These brushes are super high quality and give you a very easy experience.
Generally, one expects brushes found on the internet, that too for free, to be very difficult to use since Clip Studio Paint didn’t officially make these. There are a number of clip studio paint brushes in this set which are truly unique, including bubbles, thorns, flowers, candy patterns, stars of course as well as special designs which are repeated in patterns.
You also get a few chaotic patterns that you generally don’t get elsewhere. Also, you obtain a number of eccentric yet well-designed fish patterns. This kind of quirkiness is largely the domain of independent designers who make stuff for themselves and end up publishing it. While you may find better quality brushes that are paid for, you cannot get such uniqueness in design.
Some brushes find themselves being used very frequently, while others give you the option of being used only if you really want to use them on special occasions. This side pencil brush has just one job: to help you make the digital equivalent of a side pencil sketch. While it does only one function, it does the job very well.
There are few other brushes that can pull off the side pencil as well as this particular brush can. A few brush packs can come close to this brush, but don’t have an easy-going feel. This brush is highly recommended by digital artists and painters alike. This brush gets flattened with tilting, a wonderful feature you usually don’t see in brushes.
Hence, this brush makes a lot of sense if you’re into using pencils and pencil brushes.
These brushes are the only free set we could find which can handle digital inking just as well as the professional paid sets of brushes. Digital inking is a wonderful skill that you can learn - it’s helpful particularly when you are into digital illustrations or tattoo design. Tattoo design, when digitally done, can help you give a wonderful touch to your designs.
While digital inking does not nearly have the same feel as doing it on a piece of paper or better yet, on the skin, it does help you get an idea of what it really would look like. Furthermore, you get the feeling of an actual ink design. This particular set of brushes gives you a feeling as similar to actual inking as you can.
Hence, go for this set of brushes if you’re into inks, even though no set of brushes really comes close to actual inking on the Clip Studio Paint.
The Essential CSP set by hattersarts gives anyone who takes this brush set a huge advantage in terms of getting started with Clip Studio Paint. This set gives you textured or smooth sketch brushes, then the flat brush which is wonderful. Couple this with all the other brushes you get with this set, and you have a wonderful starter pack that will teach you a lot about CSP.
This CSP set gives you a wonderful kickstart when it comes to drawing as a beginner using Clip Studio Paint. The Essential CSP doesn’t give you a whole lot of brushes, but the ones which it does have will prime you with the basics well enough to give you a great start in digital artistry. However, it doesn’t mean that professionals can’t be helped by this brush set.
This brush set, courtesy of hattersarts, lets you explore Clip Studio Back inside and out, so you gain a whole lot of expertise with this brush set.
They say one-size-fits-all doesn’t exist - however, this one set will give you a whole lot of brushes that are usable at all stages of learning how to design. They also give you a number of varied brushes, including simple shaded brushes, rectangular brushes, circular brushes as well as the ubiquitous line brush.
This brush set will give you the best possible drawing experience you can possibly have on the Clip Studio Paint - and imagine, this is just the free sample of the actual brush set! You have enough variety to get started on almost any kind of design that you may have in mind, and especially beginners will have a field day with this set of brushes.
There are only a few brushes that pull off the fantasy-themed look well, however, this is one of the few free brush sets for Clip Studio Paint. This is one of those essential brushes which you absolutely have to have as a digital artist working in the fantasy domain. The fine spray, the marker, the soft texture, and the other brushes really make it invaluable for working with CSP.
This brush set doesn’t come with a lot of brushes but be assured that the quality of brushes that you get with this set is surely among the best you see on this list. Why’s that? Each and every one of the brushes in this set is crucial to drawing almost any character, object, or environment you can think of.
The brushes make it incredibly easy to conjure up the images that you have in your mind right onto the drawing area. Angular ink is another brush that makes life much easier if you’re switching over from traditional painting to digital media. Hence, you should definitely give these brushes a try, whether you’re a beginner or a professional.
When it comes to learning new software for animation, graphic designing, or even manga drawing, having the right set of brushes at your disposal is key to grasping the various facets of the platform.
And the DeviantArt user Yetten knows the very issues that artists face when mastering CSP.
Yetten has created its very own brush pack set to use for the CSP platform, which is one of the more user-friendly sets out there. This set is a very basic one and comes with a set of handy and easy-to-use brushes to make patterns such as markings as well as some foliage designs.
The pack might seem small at first, but it’s surprisingly versatile and every user can find something useful here that they can add to their art piece. This set will help you get a proper grasp of the platform along with its tools.
The second brush set from Yetten is a bit more catered to fit the needs of the more advanced CSP users. It’s a much more enhanced version of the previous pack and comes with additional features which adept CSP users will find helpful when working on their next art project.
The pack contains a lot of foliage brushes mixed in with a bit of spackle brush sets as well as brushes that are perfect for making certain designs like forests as well as custom tree tops.
On first thought, these improved and additional sets may not sound much or even as versatile, but you will be surprised by the various amount of patterns that you can get out of them.
They even have a lot of textures for each brush along with certain cloud brushes, making it one of the more popular packs out there.
This is a much older set and comes with 14 Manga Studio 5 brushes which are just perfect for making background themes and various outline patterns.
Though these brushes were primarily made for the previous versions of Clip Studio Paint, it works perfectly on the newest version as well, without any glitches or bugs.
Now, what makes these brushes perfect for setting a particular theme is that each of the 14 models represents a particular theme. They consist of simple cloud blending brushes, as well as patchy charcoal-style brushes along with glitchy pixel-y brushes, which are rarely ever found inside most free brush packs.
Some of the pixel brush designs borrow their design inspirations from Minecraft, making them quite versatile in their approach to what you can ultimately make out of these sets.
The custom brush pack set from Elisven is just amazing when it comes to creating some of the most unique color art pieces in CSP.
Elisven has designed the brushes to fit a variety of painting styles, hence, it comes with a handy pack of brushes that is versatile enough to fit into any project or theme.
The pack boasts a couple of concept brushes along with brushes that deal primarily with the texturing of the stroke and varies greatly in terms of quality and clarity.
There are a few organic brushes thrown into the mix as well, which are ideal for making a lot of landscape and nature-themed art pieces.
In total, there are 6 brushes in the set, which might seem rather small, but their versatility more than makes up for it. These brushes cater to the needs of professionals and amateurs equally well.
The Mama madzia custom set from MagdaProski is going to be one of our favorite custom CSP brush packs.
The brushes included in the pack are just top-tier and boast incredibly high-quality strokes which will help you to focus on painting and making intricate art pieces.
The DeviantArt user MagdaProski makes this free-to-download pack rather unique by including particular brushes like oil brushes, textured brushes, wet and dry stroke mixes as well as ‘hairy’ brushes.
The so-called ‘hairy’ brushes are amazing when it comes to making particular animal features such as fur and human hair and beard. None of the brushes are all that hard to grasp, so it can be easily used by both amateurs and adept CSP users.
The brushes also come with their very own tutorial, on the main DA page of the creator. So feel free to grab it and give it a try.
19. The Blue and Red Pencil brushes by SerketXXL
Using red and blue color pencils to mark sketches or even practice drawing, has become a very popular and traditional trend among artists.
SerketXXL now makes it possible to do the very same on the digital platform of CSP, along with helping you to add a bit more color to your art projects as well.
Now, just two pencil brushes included in the set might not seem like much at all, but what grants these brushes their fantastic versatility and a spot on our list is the various textures that both these brushes come with.
From looking like pencil sketches to thicker paint strokes, the textures on them are just amazing and you can get a lot of use out of them and make both simple and complex art pieces.
The DV brush set by Darkodev contains one of the highest amounts of brush styles on our list today. The whole pack comes with over 100 different styles, so you know that you will have the exact type of brushes that you’re looking for in this set.
It’s quite surprising to know that a free-to-download brush pack has so many different varieties and styles inside it. Darkodev includes a lot of stylistic models inside the pack, like weather brushes, custom textures, as well as many ‘basic’ brushes which most artists use almost daily.
So from amateur-friendly to more complex brushes, this pack has something to offer for every CSP user.
If you feel like doing some landscape painting or making animal fur, dinosaur scales, or even intricate meadow scenes, these brushes are bound to have you covered.
This is a very simple brush pack from the DA user DAUB. They are ideal for short, regular projects as these brushes are quite easy to use, without boasting many intricacies in their stroke texture or tool functions.
The pack has 20 brushes inside it that work perfectly well with both Manga Studio 5 and CSP and are fantastic for getting the newer user thoroughly oriented in either of the platforms.
Additionally, DAUB includes some extra textures into the pack, so that you can alter some of the stroke patterns of the brushes and ultimately change the final laydown to suit your theme and match the style that you’re looking for.
The various styles and textures include watercolors, oil paints, pencil sketches as well as ink.
It’s the perfect artist’s brush set, for those who are looking for some unique brush styles to add to their next art project.
Conclusion
This brings us to the end of the top 21 brushes you have available for free for the Clip Studio Paint or Manga Studio as known earlier. These brushes are all different in their own ways, but they all give you the same high-quality experience. Best of all is the fact that you get all of these from the community, free of charge.
Clip Studio Paint is a wonderful piece of software that you can use to create some absolutely stunning visuals and designs. These brushes represent only a small part of the totality of brushes you can find online - however, these are some of the best today. Have fun trying them out and inching closer to being a better digital artist!
Learning how to draw poses is one of the key skills artists must possess, whether digital or traditional. Hence, knowing where to derive some inspiration becomes a fundamental task for any artist.
Traditionally, this inspiration has come from live figure sessions - but inspiration does not necessarily strike at the same moment as you might be at those sessions. Further, you may need to draw some figures which aren’t derivable from live figure sessions.
Hence, to take back control, it’s best to keep gesture poses in your hands by either keeping pose photos on your computer or using online resources in order to achieve the same.
Today, we walk you through the latter process of using online pose reference photo websites which give you access to the best quality material. We feature the 7 best resources you can find online today; let’s begin with the reviews!
Line of Action is one of the websites which gives you access to some of the highest-quality pose and figure content you can get. You get access to photos of animals, human figures, and faces are available as well. Their figure drawing tool is one of the best you can find out there.
The figure drawing tool gives you the option of having either semi-nude, fully nude, or fully clothed figure models as per your need. After this, you can decide the sex of the desired figure as well as the duration of the models - and you’re off to work!
Options similar to what you find on Quickposes are also useful for quick drawings, but also for longer studies. Now, while the duration can be set anywhere between 30 seconds to 5 minutes, as leading figures point out, short gestures and longer poses are both equally important and hence need to be practiced equally.
While there is no non-timed option on the poses, you can set the timer to 99999 seconds to have access to the pose for as long as it’s possible. The website is neatly partitioned into different areas for each subject, so you can focus on different kinds of subjects on your own time.
One of the best features is that you can see the work of other artists, so you can get some direction in case you ever get stuck while drawing while looking at poses.
Quickposes is one of the oldest and most wonderful pose-drawing websites you can find out there. It is less a helping website and more of a system that slowly helps you get better at drawing poses and figures. They have a timed web app where you can queue up your desired set of photos with a time slot of your choice, and get to drawing!
You can set timers for poses from 30 seconds to 90 seconds. You can also design sessions where you focus on some parts of poses which you feel you’re not as confident doing with custom time slots.
However, if you so choose, you can let the poses be decided by the website randomly just to see how well you can do with unfamiliar or unknown poses. For the reference images flashing, you can choose between:
The type of poses; the website has a huge variety of these
The gender of the model
Clothed/semi-nude/fully-nude
Portrait/landscape/90-degree rotation
One of the best things about this website is that you can see all the pose photos independently and download those photos whenever you want to practice by yourself, offline. Most websites don’t have downloadable images - this is one of the few which does. These are a few reasons why this website remains so popular to date.
Different from the other websites we have reviewed so far, this website is completely community-run. All of the images on the website are licensed under Creative Commons and hence are available for free! There are plenty of community-sourced gesture images you can use for free, and most of the images come from DeviantArt.
There are many different gestures you can choose from. However, what if you want to have timed and structured practice? The SenshiShock Sketch website gives you the opportunity to do exactly that - it’s a very well-structured website that gives you a number of options.
You can also use your mobile devices (devices such as the iPad Pro and Note 9, especially) to draw as well!
You will notice one major difference between the usual pose web apps and this one. While this gives you the timer like other apps, the photographs are curated by means of tags.
These tags give you photos that belong to different categories as per your intended types of figures to practice.
It’s very easy to get started, though the UI feels a little clunky and unintuitive at first - it gives you an easy way to practice, much easier in the long run than most other competing platforms. The best part is that their website is optimized for all platforms and makes for some great figure-drawing exercises.
Some community efforts take a very different approach towards helping out their own - and an example is this. This particular tool comes as a community project from the Reddit “SketchDaily” subreddit community. A few of these people decided that what they needed was an easy-to-use and intuitive online tool that could handle much of their design needs.
At reddit.com/r/SketchDaily, you’re forced to face the unknown as compared to most other apps which gives you a fine-tuned degree of control. This makes it perfect for those who are looking for something challenging.
The online tool, however, is much more flexible. You get to choose your intended poses from among human gesture poses, human body parts, or animal photos. You also decide how long each photo stays on the screen, like most other tools.
Unlike most other tools, this one is absolutely free, with a decently large repository of images with a variety of different poses and figures. You can also tune those settings on the go, should you get tired of your current setup while sketching.
You can leverage the fact that this is a community-built tool in a number of ways. First off, there’s the comprehensive software support - since this has been built by this community, it’s quite easy to find solutions to problems.
The small caveat this website has is that even though it comes from the community, the number of images and the variety of poses is lesser compared to many other sources we have listed today. Furthermore, some of the other sources have better curation of resources than this tool.
This tool makes a lot of sense for people who are just starting out and want to get a taste of what figure drawing feels like when you have digital references.
Proko is something of a deity in the figure-drawing arena. He has a wonderful sketching course that teaches you how to sketch like a professional which is available online. The real kicker here is the fact that you can access some of the most useful learning materials for free on the Proko Poses website.
The newsletter will give you a number of insights on how to be a better artist, hence it’s beneficial to subscribe to the newsletter regardless of the free images you get.
When you sign up for the Proko Poses newsletter, you instantly receive a set of high-quality images that you can use for figure drawing practice. If you want to see how to utilize these photos to the maximum possible extent, make sure to check out Proko’s free playlist on figure drawing.
The best part about these photos is definitely the resolution you get. You can easily get a very high-quality, high-definition set of figure-drawing images. There is one caveat, however - you get only a very limited number of images to work with. For more of the same kind of images, you should get the (paid) image packs.
One of his general packs features around 300-400 photos, but some of the recent packs are more comprehensive and feature over 1500 of the highest quality, most detailed pose photographs with some rarer parts of the body on them.
While this may seem like generic advice at first, Pinterest does have a large repository of figure drawing pose reference photographs. However, it’s not as easy as simply searching for photos on Pinterest with this tagline - there are more photos on Pinterest than one can count.
Further, the origins of these images are sometimes suspect as they may have been taken without the necessary permissions, but they’re available anyway. Hence, it makes sense for beginners to stick to more trustworthy and structured sources of images on websites that preferably have some features related to figure drawing.
At the same time, you should also know that the variety of images on Pinterest is immense. It’s clearly a much larger repository of images than any of the websites listed above. However, finding images is a very problematic and time-taking proposition on Pinterest. It’s like finding a needle in a haystack but is worth the trouble in quite a few cases.
For the professionals who’ve got their timing down, heading to Pinterest and using that as a figure drawing reference happens to be a pretty hard task to pull off.
However, there are some features unique to Pinterest that make it a credible alternative to other websites. First, you can create your own private boards for your specialized figure drawing references that cover either different techniques, objects, body parts, and much more.
Then, Pinterest has one of the largest selections you can think of. While creating your own board is very time-consuming, you can easily take a peek at how people have designed theirs. This way, you can easily create a board by taking some much-needed inspiration from people who’ve been using Pinterest for a long time.
What to look for in a figure drawing website
These seven websites are not the only ones that are available on the market today - even among those which offer a free tier or are free, these rule the roost. What connects all of them despite their apparent differences is the fact that you can easily get to work on them, and they’re highly customizable.
Going for websites that allow downloading is always a good bet, especially if you can get to the point where seeing sources that you aren’t familiar with is not a challenge anymore.
Another problem that plagues many websites is the user interface. If the websites do not offer a reasonably easy and fluid interface, it becomes hard to look at pictures you want to take inspiration from after a while.
Conclusion
Figure drawing is a skill that accumulates after much effort. It is the end product of countless hours of toil, getting stuck, redoing your sketches, taking a better look at the subject (if possible) - rinse and repeat. Hence it becomes essential to have good quality resources to practice figure drawing.
The ubiquity of the internet is immense. Being the behemoth it is, everything you need or want is available after a few clicks from the website of your choice. Figure drawing, once an arduous process with lots of waiting and luck involved, has become much easier than anyone would’ve imagined.
Hence, don’t waste time - pick a website and get to work! Have fun painting!
Doing groceries is fun until you are left with the dilemma of stacking them in the fridge, almost like you are stacking stones with fear that one wrong move and everything will fall apart.
Worry not; upright freezers are becoming popular because of how many items you can put into one freezer.
If you're like me, who constantly runs out of space for my frozen foods, then an upright freezer might be the one to solve your storage space problems.
The only problem is which upright freezer is the best for you. Why? As you can see, thousands of upright freezers are on the market today, and choosing one can be challenging.
Fortunately, I have done the hardest part of trimming down your choices to 9 of the best upright freezers today.
What Are the 9 Best Upright Freezers You Can Buy?
These are simply the best upright freezers on the market today.
They are all packed with convenient features that will make your life easier, and there is nothing to worry about having limited space.
The Frigidaire Brand has given us the best upright freezers in recent years.
This upright freezer, courtesy of Frigidaire, is made to keep your fruits, foods, and veggies frozen for longer periods while having plenty of extra storage space for additional items.
This upright freezer features EvenTemp technology that allows cold air to circulate evenly inside while reducing warm spots and keeping uniform temperature across all door shelves.
Most upright freezers don't have features like this, and it is a sight for new eyes knowing some of these features make the upright freezer purchase all worthwhile.
Overall, I'm impressed with the capacity of this upright freezer.
It has four freezer shelves, and while the upright freezer capacity is smaller than others, the internal layout's orientation is more than enough to keep your food frozen longer than expected.
Size: 29 x 27.75 x 67.75 inches | Capacity: 15.5 cubic feet | Product Weight: 143 pounds | Frost Type: Frost-free | Control Type: Electronic temperature control
The Insignia Frost-Free Upright Convertible Freezer is not your average upright freezer, as it's equipped with convertible features perfect for homes with small spaces.
In addition, it can handle any ambient temperature range between 5 to 109 degrees and regulate internal temperature with just a simple knob. I find this the best upright freezer for families on a budget.
It doesn't cost that much but packs the necessary features you want to keep your frozen fruits and food longer than usual.
The only problem with this upright freezer is you have to manually defrost it by simply unplugging the freezer. While I don't consider this a major drawback.
Size: 22.4 x 21.7 x 56.3 inches | Capacity: 7 cubic feet | Product Weight: 191.8 pounds | Frost Type: Manual defrost | Control Type: Mechanical
Don't let the size of this upright freezer fool you; despite its size, its food storage capacity is more than enough for a family of four. This is the best upright freezer if you need extra freezer space.
What I love about this product is despite its size, the internal layout makes it easy for me to store my food and frozen fruit without problems. It's wallet-friendly, and its 3 cubic feet capacity doesn't feel like it.
It feels this isn't a compact upright freezer. Despite putting all my groceries inside, I was shocked at how much storage space was left for me. It also has a reversible door for added convenience.
Size: 21.3 x 22.7 x 34.9 inches | Capacity: 3.0 cubic feet | Product Weight: 57.2 pounds | Frost Type: Manual | Control Type: Mechanical
GE's 17.3 Cubic Feet Upright Freezer ranks on top of the upper echelon in storing your meat, ice cream, and frozen fruit on a whole new level.
It comes with fixed shelves at the top, two adjustable wire shelves at the middle part, and two deep drawers that are great for storing food.
Other features making this upright freezer convenient are its easy-to-use temperature control panel, LED lighting, and a lockable freezer door to keep your kids from accessing the inside.
Overall, its large capacity creates more floor space for your entire home while keeping your frozen veggies and fruits frozen longer than expected.
Its consistent internal temperature range and circulating cold air should avoid food waste.
Size: 32 x 64 x 31 inches | Capacity: 17.3 cubic feet | Product Weight: 195 pounds | Frost Type: Frost-free | Control Type: Electronic
Energy efficiency is often the major factor when making money splurges, as it can save you money in the long run. Since upright freezers are plugged in 24/7, you'd want an energy-efficient upright freezer.
Look no further than the GE Garage Ready Frost-Free Upright Freeze, as this will be more than enough to hold loads of food, veggies, and fruits while keeping electricity consumption to a minimum.
Another feature that makes this one of the best upright freezers on the market today is it can handle ambient temperatures in your garage, making it a good addition, especially if you find yourself working longer.
Lastly, it has an audible temperature alarm, a lock with a key, and slide-out freezer bins. The electronic temperature control allows controlling temperature inside without releasing cold air, which is impressive.
Size: 31.3 x 32.8 x 76.5 inches | Capacity: 21.3 cubic feet | Product Weight: 215 pounds | Frost Type: Frost-free | Control Type: Digital
AMPLE STORAGE CAPACITY: Easily store backup meats, frozen...
SPACE-SAVING DESIGN: The flush back design and recessed...
What I like
Adjustable wire shelves
Reversible door
Compact and sleek
Adjustable temperature control
Power outage safe
What I don't like
No frost-free features
If you're cramped up on floor space and are looking for the right upright freezer on the market, look at the Frigidaire Upright Freezer Platinum design series.
It's the best upright freezer for homeowners with less floor space and looking for a reliable upright to store their food. This upright freezer has reversible door features, which makes it more impressive.
The sleek and elegant design makes you think this upright freezer is worth a premium, but thankfully it's not. It's the best upright freezer for compact space while packing several features that are icings on the cake.
Its sliding storage basket and LED lighting make it visible in the darkest environment. Superb performance, and you can feel the cold air circulating inside.
Size: 21.26 x 22.24 x 55.91 inches | Capacity: 6.5 cubic feet | Product Weight: 93.8 pounds | Frost Type: Manual defrost | Control Type: Mechanical
The GE FUF14DLRWW Garage Ready is one of my top nine picks because it serves its purpose extremely well. For one, it has a ton of storage space for the price, and the product is also Energy-star certified.
Another feature that makes this upright freezer impressive is its clever storage orientation. It locks your frozen food up securely while accessing other snacks, foods, and beverages.
This model is also garage-ready, as it can withstand temperatures from 0 to 100 Fahrenheit with no problems.
It also has a turbo freeze setting, lock, and key, and it is power outage safe as it can hold frozen food for 48 hours.
Size: 62 x 28 x 32 inches | Capacity: 14.1 cubic feet | Product Weight: 168 pounds | Frost Type: Frost-free upright freezer | Control Type: Electronic
This upright freezer, courtesy of Insignia, is a great addition if you want to squeeze more freezer space for some of your frozen goods, fruits, and veggies.
While it has a small capacity, this model makes up for it with its internal design. It has reversible door features that are great for families having cramped spaces.
Controlling the internal temperature is quick and easy with a simple knob, and the cool air radiates throughout the entire freezer inside. This model is also noted for being garage-friendly.
The only downside I found with this upright freezer courtesy of Insignia is you have to unplug the upright freezer to manually defrost the entire thing, which I feel is quite a bummer.
Size: 22.4 x 21.7 x 56.3 inches | Capacity: 7 cubic feet | Product Weight: 99.2 pounds | Frost Type: Manual | Control Type: Mechanical
If you have all the money looking for an amazing upright frost-free freezer, the Whirlpool WSZ57L18DM 17.7 cu. Ft. SideKicks might just be up to the challenge of becoming one.
What I love about this product is its thoughtful design; it has a shallow depth and a wider opening giving you easy access to frozen foods and goodies.
It can also operate under extreme temperatures from 0 to 110 Fahrenheit, making it a great garage freezer for anyone. Its compressor constantly bombards cool air inside to ensure a uniform temperature.
Lastly, it can trap cold air inside for up to two days to ensure your food doesn't go to waste. The auto-close door functions and door alarm are like the cherry on top for this great upright freezer.
Size: 33 x 72 x 28 inches | Capacity: 20 cubic feet | Product Weight: N/A | Frost Type: Frost-free | Control Type: N/A
Before you go to your local store and make your purchase, there are some things you need to consider when looking for the right upright freezer.
Capacity
The capacity of an upright freezer is often measured in cubic feet, which means the higher the number goes, the higher the freezer's capacity.
However, as the capacity increase, so does the price. So, I recommend you weigh everything out, as you can only go as far as your money goes.
The average capacity of most freezers is around 16 cubic feet, and anything above that is more than enough to keep foods frozen for your entire family.
But if you have a bigger family, you can always opt for a much larger capacity to accommodate every piece of grocery you have.
If you don't need a bigger capacity, you might want to opt formini freezers.
Temperature Control
Temperature control is a major factor when choosing the best upright freezer.
In most freezers today, the interior temperature can range from -10 to 10 degrees Fahrenheit, which is more than enough to store food for long periods of time.
To get the best upright freezer possible, consider what type of food you will store to ensure it never goes to waste and prevents untimely spoilage.
Defrosting
There are two types of defrosting, manual and automatic. A manual defrosting freezer means ice and frost will slowly build up over time, and the only way to defrost is by manually unplugging the cord.
This part usually takes time as you need more time to melt the ice away before returning your goods.
On the other hand, an automatic upright freezer doesn't have to go through this routine. Instead, the upright freeze regulates itself to ensure foods and goodies remain frozen without frost buildup.
While most automatic upright freezers are pricier than manual-defrosting freezers, nothing beats the convenience it brings you and your family.
Freezers will run 24/7, so having an energy-star certified freezer is a surefire way to keep electrical costs to a minimum.
An upright freezer that has energy-star certification uses energy efficiently while still operating at normal settings.
Additionally, airtight insulation and doors will keep cold air inside, allowing the freezer to keep the whole foods and goodies frozen longer while using less energy.
Additional Features
Some additional features can help make your life easier when storing food.
Door Safety Lock
Whenever you have kids at home, it is important to have upright freezers with door-safety lock features. Kids are always curious and often wonder what's inside the fridge.
To avoid this problem, it is better to be safe than sorry, which is why it is highly recommended to have door safety locks rather than nothing at all.
Ice Maker
Upright freezers with ice makers are a plus. Nobody wants to sip room-temperature water when everything is hot during the summer.
While this is optional, having an ice maker will do wonders, especially during summertime. Most of the time, these freezers have this feature already installed.
Touch Screen
Most of the time, upright freezers with touchscreen features are already at premium prices. While this feature can be enticing, I find it not useful enough for that added price.
Upright freezers still work the same way with freezes having a touchscreen. They can keep your food frozen for long periods without this additional miscellaneous feature that only adds to the cost.
Wheels
Having built-in caster wheels can make your life easier when moving your freezer from one location to another. Fortunately, most freezers today are equipped with this kind of feature.
However, you must check if they are installed to ensure you can smoothly change your freezer's location.
Shelves
Having more than five door shelves is a plus if you're looking for an upright freezer. Remember, you need an upright freezer to accommodate frozen fruits, veggies, and foods.
The higher the number of shelves, the more it can accommodate. The same goes for having more than five door bins; having more than five spacious door bins is advantageous for you.
Again, this depends on how much stuff you will put inside your upright freezer.
Interior Lights
Having interior lights is a bonus. This feature is helpful whenever you crave that ice cream or smoothie late at night. It keeps every stored food visible within your grasp.
Thankfully, most freezers today have built-in interior lights that make your life easier when trying to find your stored food in the dark.
Upright Freezers FAQs
If you have additional questions regarding upright freezers, you might find some answers below.
How Do You Do Temperature Control in an Upright Freezer?
Temperature controlling is usually done by either a single push-button or a temperature control knob.
How to Avoid Freezer Burn?
Freezer burn happens when stored foods are exposed to cold air, causing them to lose moisture. To avoid this problem, the best solution is to keep your stored food in airtight bags or containers.
What Is Better, a Chest Freezer or an Upright Freezer?
For me, personally, it is just a matter of personal preference. It also depends on the intended use of the freezer. The only difference I can see from these freezers is how you open them.
Chest freezers mostly lay flat on the ground and can be opened from the top, whereas upright freezers can be opened on different sides.
For chest freezers, you might want to take a look at this if you plan on buying achest freezer.
Conclusion
There are a lot of brands selling dedicated freezers to many consumers. Some of these reputable brands include Frigidaire, GE, Magic Chef, and Whirlpool, to name a few.
Regardless of which one you choose, what I've listed on top should serve its purpose of keeping your stored foods frozen for longer periods of time without fear of spoilage.
This article about the best upright freezers should give you plenty of options to add to your home. If you're planning to opt for a refrigerator, you might want to take a look at the best refrigerators.
A chest freezer can be an excellent investment for those who need extra storage space for frozen foods.
Whether you're a large family or someone who likes to stock up on bulk items, a chest freezer can provide you with the added space you need.
In this article, I'll look at the best chest freezers on the market, their features, and what to consider when choosing one.
I'll discuss different sizes, energy efficiency, temperature control, and capacity to help you make an informed decision.
Best Chest Freezers
A chest freezer is designed to provide additional frozen food storage space or keep food cold.
Here are my top picks for the best chest freezers on the market right now!
[Large Capacity] With a capacity of 7.0 cubic feet, Midea...
[Adjustable Temperature Control & Fast Cooling Design]...
What I like
Energy efficiency
Compact design
Affordable price
Easy access to temperature change
What I don't like
Manual defrost
Only comes with one wire basket
No interior light
This 7-cubic-foot model from Midea might be worth considering if you're searching for an affordable chest freezer for small spaces.
The chest freezer includes a removable wire storage basket to help keep frozen foods organized and handy. Sadly, the limited number of bulk storage baskets limits the number of frozen goods you can place in this compact freezer.
Additionally, the chest freezer offers an external dial temperature control, allowing users to change the temperature without opening the freezer and letting cold air escape.
However, you must manually defrost this chest freezer, which can be time-consuming and inconvenient.
In addition, this Midea Chest Freezer has no interior light, making it difficult to see what's inside in low lighting.
When I trialed this product, I noticed the freezer also contains hinges that can hold the door open at 45 and 75-degree angles, allowing easy access to the contents without holding the door open.
Free Parts - Insulated Protective Cover & 12 Feet-Long...
Max & Eco Mode - Eco mode is the function which can slow...
What I like
Portability
Large Capacity
Energy-efficient
What I don't like
Expensive
Requires power source
For individuals who need to transfer frozen goods or keep them frozen while they are away from home, the ICECO portable refrigerator freezer offers the perfect answer.
The ICECO is a portable freezer. Its sturdy handle and wheels allow you to move it around easily, making it one of the best portable freezers.
Despite being a portable refrigerator, the ICECO JP40 has a large capacity of 40 liters, enough to hold up to 60 cans of soda or beer.
With a weight of 38.8 pounds, the ICECO JP40 Portable Freezer is lighter than some other portable refrigerators, which may make it more convenient to transport.
The ICECO is an energy-efficient, high-performance compressor that can run on a 12/24V DC power source. It also has an Eco mode that can help save power.
This device has an adjustable temperature range between -7 and 50 degrees Fahrenheit for frozen and chilled goods. But this is not just your typical refrigerator.
After conducting experiments with it, I found the following:
If you select the ECO mode, the compressor will use less energy and won't turn on until the interior temperature has climbed by 6 to 9 degrees from the set point.
If you select MAX, the device will cool down more quickly. Each model comes with 12/24 DC and 110- to 240-volt AC cables, enabling use in homes and cars.
Are you trying to find the best chest freezer for a garage? Think about the 15.7 cubic foot Garage Ready chest freezer from GE.
The GE Garage Ready Freezer can be used to store and arrange frozen meats, ice cream, and other items inside the 15.7 cubic-foot capacity and four sliding storage baskets.
It comes equipped with multiple sliding bulk storage baskets for easy access to frozen items.
My findings showed that users could use a second-level rail to position one to two removable wire baskets at various heights. The power-on indicator light allows users to know if the freezer is running.
Moreover, it includes GE's Power Outage Guarantee, which ensures that the inside temperature will remain below freezing for at least 48 hours during a power outage.
This could be a hassle for some, but it is worth noting that it doesn't have an automatic defrost feature, so you'll need to defrost the deep freezer periodically.
By alerting users if the freezer's temperature starts to rise, the temperature alarm can help prevent food waste. Also, the safety lock and key feature enable users to secure their food.
PERFECTLY QUIET - Unlike other chest freezers, the Northair...
OPTIMAL STORAGE - At 3.5 Cubic Feet, the Northair Chest...
What I like
Energy-efficient
Easy to use
Compact design
What I don't like
Manual defrost
No temperature indicator
Limited warranty
With this Northair 3.5 cubic foot chest freezer, you may save your utility bills. This small device helps users save money by using as little as 0.45 kWh of energy every 24 hours.
The Northair Chest Freezer - 3.5 Cu Ft is Energy Star rated. This translates to lower energy bills and a more environmentally friendly appliance.
Additionally, as per my expertise, the soft-close lid mechanism and silent compressor technology maintain a low noise so users won't disturb the rest of the house.
Other freezer features include the external adjustable front temperature controls and auto-hold hinges. However, unlike most chest freezers, this freezer has no alarm to alert you if the temperature rises above a certain level.
All-Purpose Deep Freezer Chest – Ideal for storing meats,...
Consistent Cabinet Temperatures – Utilizing a 1/5 hp...
What I like
Large capacity
Stainless steel construction
Digital thermostat
What I don't like
Expensive
Heavy and bulky
The KoolMore chest freezer is nice if money is no object. It's a powerful machine with the features you wish more home appliances had.
The freezer features a sleek, modern design with a stainless steel exterior that looks great in any kitchen.
This freezer has two sliding clear glass doors rather than a hinged top. When combined with bright LED lighting, you'll always be able to see inside without opening the doors.
Based on my observations, I can easily move this big, strong unit when cleaning the floors because it has optional casters. It is also simple to drain extra water when defrosting.
Being an expensive freezer, the KoolMore 16-Cubic-Foot Chest Freezer is a high-end appliance with a luxury price tag, making it less accessible than many chest freezers.
When shopping for a chest freezer, there are a few key factors to consider:
First, you should think about the size of the freezer you need. Choosing a size that will fit the available space and meet your storage needs is important.
Second, you should consider efficiency. Look for models with an Energy Star rating, which indicates that they are energy efficient, even during a power outage
Some models also feature frost-free technology, preventing frost and ice buildup, making maintenance much more manageable, and keeping food frozen without the freezer burn.
Consider the storage size and features. Some freezers come with hanging baskets or storage baskets for extra freezer space.
Some may even have a temperature alarm for when the internal temperature gets too hot or if too much cold air is escaping the chest freezer.
Chest Freezers vs Upright Freezers
Chest freezers and upright freezers are both standalone appliances designed for long-term storage of frozen food, but they have some key differences:
Storage size: Chest freezers tend to have a larger storage size than upright freezers. This is because they are designed with an open storage area.
Footprint: Chest freezers have a smaller footprint than upright freezers with the same storage capacity. This means that they take up less floor space.
Organization: Upright freezers come with shelving and compartments that make them easy to organize. Chest freezers require more effort to organize and access items.
Cooling: Chest freezers are better at cooling goods as they are deep freezers. Cold air sinks to the bottom, keeping food cooler than an upright freezer.
Chest Freezer FAQs
Need to know more about buying a chest freezer? Here are the most frequently asked questions.
What Is the Difference Between Mini Freezers, Upright Freezers, and Refrigerators?
The main difference between a mini freezer, an upright freezer, and a refrigerator is their size and purpose.
A mini freezer is a compact unit designed to fit on a countertop or in a small space and is typically used to store a small number of frozen foods.
An upright freezer is larger than a mini freezer and is designed to stand upright, with shelves and compartments for easy organization of frozen foods.
On the other hand, a refrigerator is designed primarily for storing perishable food items such as fruits, vegetables, and dairy products at a temperature above freezing.
To deal with frost in your freezer, you should first unplug the freezer and remove all of the food. Then, use a plastic scraper to remove the frost from the walls and shelves carefully.
Once you have removed as much of the frost as possible, use a damp cloth or sponge to clean the freezer’s interior. Be sure to dry the interior completely before plugging it back in.
Yes, a chest freezer can be worth buying if you need additional freezer storage space or want to save money by buying bulk and freezing food.
Chest freezers can also be more energy efficient than upright freezers, and they can keep food frozen for longer periods in the event of a power outage.
However, it’s important to consider the cost of the freezer and any additional energy costs before making a purchase and whether you have the space to accommodate it.
Summary
Here's a summary of my top picks when choosing a chest freezer.
Choosing the best chest freezer requires consideration of several factors, such as size, energy efficiency, price, and features.
It's important to assess your freezer storage needs and available space to select a chest freezer with adequate capacity.
Researching various brands and models, reading customer reviews, and comparing prices can help you choose the best chest freezer for your home.
One of the reasons artists prefer to use watercolor is its transparency, by using high-quality watercolor paint one could create depth through the use of glass objects and their reflections.
However, this can make painting clear and reflective objects like glass quite tricky, very different from painting grass with watercolors. Many watercolor artists often challenge themselves to paint transparent objects in a photorealistic manner for an extra edge and to convey a sign of expertise.
So, how to paint glass with watercolor sound impossible to achieve? Don't worry, as we have come up with some basic steps and tips that will help to make the painting process a tad simpler regardless of whether you use watercolor pads or watercolor paints in tubes. Remember to practice before beginning to paint, as replicating the right shapes is the first step toward capturing the reflectivity of glass.
So, without further ado, let's get started!
How To Paint Glass With Watercolor
Materials Required To Paint Clear Glass
Before you can begin the process of painting, it's important to gather all the art supplies. Here are some of the things you'll need:
Some fine watercolor brushes
Masking fluid
Watercolor paints
Watercolor paper
Graphite pencil
Eraser
Two containers with water
You should also print out a photo of a glass object that you'd like to draw. It's best to start with an object that has been placed in front of a white background. Make sure to study it for a while to note how light interacts with glass, creating highlights and shadows. Some artists like to think of these areas as jigsaw puzzles that need to be arranged in the right manner.
Another thing we would like to point out is the importance of having a color palette dominated by grays and blues. Even though we perceive glass as colorless, mixing grays, blues, and the occasional white will help the painting process.
Steps To Paint Glass With Watercolor
1. Make The Drawing
As we have stated already, one of the most important steps in painting realistic glass objects is to create a good outline. With the help of your reference photo, make a fine representation of the object on watercolor paper. Remember to be light-handed with the pencil, as deep impressions look bad when applying watercolor paints.
While sketching, don't forget to add the thickness of the glass as it helps the object stand out from the background. Through the sketch, you must mark the shapes with hard-line edges. In turn, this will help you divide the drawing into areas that can be easily filled with colors. Pay extra attention to adding the small curved lines present in a glass, representing the distortions.
2. Apply Masking Fluid
One of the easiest tricks used by watercolor artists is to place masking fluid in places of highlights and reflections. Having said that, some people prefer to directly start with a watery light gray paint and place it in the dark areas of the drawing.
You can easily figure out the light and dark areas using a nine-value scale. Use the values 0-1 for highlights and 8-9 for dark areas usually seen in the thick edges of the glass.
3. Applying the First Wash
Let the masking fluid dry completely and wet the paper with a wash of clean water. Mix a bluish-gray paint, and use a thin brush to add the form shadow and the cast shadow of the glass while the paper is wet.
4. Applying Second Wash
After the first wash has dried, start the paint by darkening the cast shadow. Next, use a wash of light warm gray to highlight the color of the glass. Also, add a warm yellow-gray wash in the foreground to signify the light source.
5. Paint The Background
If your glass is placed against a colored background, it's time to add that color to your painting. Any shade of blue usually works well when painting water or glass. Remember that you'll need to use a similar color while adding the areas with distortions to the glass.
6. Add The Midtones To The Glass
You might have noticed distortions while looking through a glass, which usually takes place due to refraction. Remember the curved lines you drew at the beginning? Take a similar color to the background and apply it to the mid-tones, which would help the object look cohesive with the settings.
7. Add Another Layer Of Distortions
This time you should take a darker shade of the color used in the mid-tones and add them to areas with a value of 6-7. Let this dry, and then darken up the color a bit more to paint areas with a value of 8-9. At this point, your glass would appear three-dimensional.
We want to point out that beginners often forget to add colors to the bottom of a glass. Don't repeat the mistake, as the thick bottom of the glass often demands some of the darkest tones.
8. Fixing The Reflections
Start this step by removing the masking fluid once the last layer of paint has dried. If some of the reflections seem too bright, you can apply a wash of light bluish-gray paint to tone them down.
Tip
When painting glass with watercolor, it's also important to consider your left hand. Holding the glass in your left hand lets you observe how light interacts with the surface and use this information when painting. This can help you capture the unique qualities of glass, such as reflections and refractions, and make your painting more convincing.
FAQs Related To Painting Glass With Watercolor
How can I achieve a convincing illusion of three-dimensionality when painting glass with watercolor techniques?
Use light washes to portray the transparency of the glass, and gradually build up the darker tones to create the illusion of volume.
How can I avoid making the glass in my artwork look too flat or glossy?
Vary the intensity of the colors and use dry brush techniques to create texture and subtle variations on the surface of the glass.
Can I use masking fluid to paint glass with watercolor techniques?
Yes, you can use masking fluid to preserve areas of white paper or to create crisp edges when painting glass with watercolor.
What should I do if I make a mistake while painting glass with watercolor techniques?
Try to lift the paint with a damp brush or sponge. If that doesn’t work, let the paint dry completely and gently scrape it off with a blade. Alternatively, you could incorporate the mistake into your composition.
What are some tips for creating a composition that features glass objects using watercolor techniques?
Experiment with different lighting conditions and angles to capture the reflections and distortions in the glass. Consider the placement of the objects with one another and the background.
Are there any special considerations when painting stained glass with watercolor techniques?
Consider the colors and patterns of the stained glass and use them as inspiration for your painting. Notice how light passes through the glass and creates colorful shadows on surrounding surfaces.
Paint Glass With Watercolor Final Words
With that, we have come to the end of this guide. You must have noticed that we haven't gone too deep into the process. That's because the crux of the technique lies in figuring out the shapes made by the distortions.
If you're still confused about starting to paint glass with watercolor, first try observing how light interacts with transparent objects. You can even begin by creating some rough sketches of glass objects and the shapes made on them by different angles of illumination.
Also, definitely try the color mixes on a piece of scratch paper before applying them to your painting. And bear in mind that it's best to work from light to dark when working with watercolor. If you would like to experience different materials when painting with watercolors, you can also use watercolors on wood, certainly a fun experience!
Until next time, goodbye, and take care!
PS: If you are looking to paint on glass, and create glass ornaments, glass bottle centerpieces, custom mugs for your friends, or even plates for decor you can find the best paints for glass here.
New York - an urban jungle brimming with life, color, and energy, is constantly evolving and presenting a dynamic landscape for artists to capture.
From the iconic yellow cabs to the glittering skyscrapers, every corner of New York is a sight to behold. So, it’s no surprise that the diverse neighborhoods, rich history, and classic landmarks of NYC have inspired artists for ages, wouldn't that make it an extraordinary watercolor plein air painting?
You are right!
That said, among all other mediums, I believe the unique vibrancy of watercolors is ideal for capturing the essence of the city that never sleeps. In this step-by-step guide, I’ll take you through everything you need to know to create a stunning watercolor painting of the bustling streets in NYC in a simple, and beginner-friendly guide.
So, grab your watercolors and brushes, and let’s get artsy!
How To Paint New York In Watercolor
First things first - you must have a set of watercolor paints and watercolor brushes that are comfortable enough for you to use throughout the process. You obviously don’t need to splurge on expensive art supplies, but it definitely helps to find something that works for you. Also, note that unlike some of my previous works, this painting requires quite a lot of colors, so I recommend investing in a set of at least 12 colors, you can learn more about the types of watercolor paints here but don't forget to mix colors to discover new shades and colors as you paint.
That said, here’s a list of equipment I’ll be using for today’s artwork:
Paint: Daniel Smith George Politis MA Set 1 6x5 | Paper: Saunders Waterford Watercolor Paper - White, 300gsm | Brush: Princeton Aqua Elite Professional 4 Piece Set 4850
As always, I’ll start today’s painting with a rough sketch. I’ll lightly sketch two cabs as the main subject of my composition. Notice how I’m adding details in the first step already? Well, that’s because, considering how busy the streets of NYC are, I think it’ll be best to draw every little detail right away. This will make coloring easier and prevent mistakes in the later steps.
However, there’s no right or wrong way to sketch. I’m making it detailed today, but usually when I’m making natural landscapes, I stick to the basics and add details later. So, you can proceed according to your expertise and comfort level.
Before you paint, always remember to start with the largest area with no details in between. As such, I’ll start by painting the sky. Since it’s the first layer, I’ll use just a light flush of blue and keep the brush wet enough for the paint to spread seamlessly. But make sure the brush is not dripping wet unless you want the colors to bleed and the paper to tear, even with the proper watercolor paper.
Just be slow and careful, and paint very lightly. You can always darken certain parts later. This will help you achieve a more realistic and lifelike look.
Coming to the star of the show - NYC’s signature yellow cabs!
Start with a light yellow layer and paint both the cabs, leaving the windows and headlights. Again, you can always build up the saturation later, so paint with very little pressure. Otherwise, you might end up painting over smaller areas that aren’t supposed to be yellow!
Similarly, paint the windows and tires too. I’m using brown, but you can opt for gray, black, or blue. Here, too, you can begin painting roughly and add more color later. As you can see, I’ve left some portions blank to mimic the effect of shiny mirrors reflecting the city lights.
Now, switch to a smaller brush for the finer details, like the grille, bumper, headlights, etc. In this step, make sure your brush is not as wet as it was in the previous steps. This is because you’d want to paint more precisely now, and a dripping brush will only make things messy.
Again, I’m using brown for a muted effect, but you can always use black or make the parts of the cab more realistic with metallic colors. Basically, feel free to experiment!
With the same brush, I’ll also add some colorful details on the top of each cab.
Thereafter, you can proceed to add some shading to the cab. Doing so will create more depth and dimension. Here, all you need to do is swipe a single line wherever you want the shadows to fall, and it’ll instantly bring your painting to life!
Next, I’ll paint the skyscrapers that make NYC dazzle from miles away. I’m going back to the thick brush I used for painting the first layer.
First, I’ll use gray and lightly paint the building in the center. Similarly, I’ll use other muted shades like lavender and brown for the rest of the buildings. I’d like to reiterate that you need not make any details right now. Simply block the general colors of each building to get the overall color scheme right.
Once the first layer of the building is completely dry, I’ll paint tiny windows, doors, and other architectural features on each. I’m experimenting with various shapes to add a bit of variety.
As you can see, I'm adding small horizontal windows to the gray building, while the lavender building is full of vertical windows. For the last building, I’m going to add some stripes, giving it a modern, curved look.
Since the billboard has a lot of different details, I’ll continue using the thin brush to paint it, despite it being the first layer. Here, I’ll go all out with vibrant colors like green, blue, purple, red, and yellow. I’m adding various patterns to some parts and keeping the rest simple with just some swipes of paint.
Alternatively, you can add logos of popular brands or product pictures on the billboard. Or how about adding your own name instead of signing at the bottom of the painting? Well, the sky’s the limit when it comes to art, so don’t be afraid to paint what your heart pleases.
Now, I’m not an expert on billboards, so I definitely don’t know what I’m painting here! I’m simply relying on my memory and adding little details here and there to make the painting look more realistic. You could even check reference pictures on the internet to create a more accurate cityscape.
But for the purpose of this easy-to-follow guide, I’m not focusing on perfection. As long as it looks like a billboard, I’m good!
Of course, no cityscape is complete without the road, so I’m simply painting it with some brown watercolor. Again, you can use black, gray, or any suitable color. You could even paint a zebra crossing if you’re feeling creative!
Lastly, I’ll make a lamp post by the sidewalk, illuminating the already-glimmering streets of New York. And with that final touch - my rendition of NYC’s vivacious streets is ready. I can already hear the heavy traffic and smell some freshly baked bagels with cream cheese!
You could add more details to the composition, like some people crossing the road or an airplane far away in the sky. Simply continue to refine the painting, adding details and adjusting colors as needed until you are happy with the overall composition.
Or, you could take a completely different route and paint the city in the evening or at night. For the former, I recommend changing the color of the sky to orange or pink and using muted colors for the rest of the composition for a mellow “evening” vibe.
On the other hand, the night scene in New York is absolutely fantastic. So, I recommend adding lots of lights all around the street and keeping the background pitch dark for a stunning contrast.
Once the painting is complete, allow it to dry completely. I suggest adding a protective varnish or frame if it meets your expectations. If not, remember that painting is a process of trial and error. So, don't get discouraged if something doesn't turn out quite right. Just keep practicing and experimenting until you find what works best for you.
Before I sign off, I want to encourage beginners to use a reference picture of New York. Besides checking the main subject and colors, pay attention to the direction of light in the reference image. This will help you create realistic shadows and highlights.
Choosing the right materials can also help make the process a lot smoother and more rewarding. However, don’t be afraid to make mistakes! Trust the process, and don’t worry too much about the outcome, do exercise with other watercolor guides: How to Paint Amsterdam with Watercolor and How to Paint Berlin with Watercolor are great tutorials to try!
With practice, patience, and perseverance, you'll soon be able to capture the vibrant energy and character of New York City in your watercolor paintings.
A Pioneer mini-split heat pump costs more than a window air conditioner or portable unit, allowing you to alter the temperature in each room. But opt for a wall unit delivering high energy efficiency for a more budget-friendly option.
Choosing a suitable air conditioner for your home that offers effective cooling but doesn’t incur high energy bills can be confusing. Moreover, you can’t afford to spend frequently on repairs and must opt for a reliable model backed by a warranty.
When facing the same dilemma, I spent a bit more and got a Pioneer mini split unit. Today I will explain what it has to offer.
Overview Of Pioneer Mini Split
As far as air conditioner brands go, Parker Davis HVAC Systems are among the most popular. Founded in 1995, the company is well-known for manufacturing high-quality heating, air conditioning, and cooling equipment that proves energy-efficient.
One such unit is the Pioneer Mini Split system, available in three models -
Ductless
Multi-zone mini split system
With duct
Among these, the ducted model has 2 further variations, including a central split and ceiling concealed system. And within these 2 models, you will find six cooling capacity options, ranging from 9,000 to 48,000 British Thermal Units(BTU). These products even have a Seasonal Energy Efficiency Ratio(SEER) number, complete with an Inverter++ of 230V.
The multi-zone mini split system can be further classified into dual, triple, quad, and quid zone models with 4 cooling capacity options. You can choose any model with a cooling capacity ranging from 9,000 to 24,000 BTU, featuring an outdoor and indoor unit as component choices.
Apart from these options, the ductless mini split system has 5-mounting variations, namely -
Ceiling cassette
Wall-mounted WYT
Floor mounted
Wall mounted WYS
Floor-ceiling mounted
Together, these ductless units have 7 cooling capacity options, starting from 9,000 BTU and going up to 48,000 BTU. You can choose from 2 SEER options - Inverter+ and Inverter++, available at 115V and 230V.
Along with these features and upgrades, every Pioneer Mini Split system comes with -
An indoor unit
An outdoor unit
Flare connection leak guard sealer
Wireless remote control
Benefits Of The Pioneer Mini Split Unit
After telling you about the different mini-split systems available, let me shortlist certain benefits of any Pioneer system.
1. Environment-Friendly
One of the best features of Pioneer mini splits is their eco-friendly performance, and they are more eco-friendly than other mini split systems or a window air conditioner. This is because they run on the R-410A refrigerant that doesn’t lead to ozone depletion while decreasing UV radiations on the Earth’s surface.
2. Remote Control And Leak Detector
Two of the most important accessories of the Pioneer mini split system are the inclusion of a remote and leak detector. You will find that these mini-split systems consist of a wire control and front desk feature complete with an infrared remote to turn on/off the air conditioner even from a distance.
They also come with a refrigerant leak detector that automatically prevents leaks after discovering a leakage. This reduces the chances of damage and keeps the condenser safe.
3. Anti-Cold Air Function
The anti-cold air function of the Pioneer mini split system works well with several Pioneer mini splits equipped with different seer and mounting options. As a result, finding a suitable AC for your requirements becomes easier.
Disadvantages Of The Pioneer Mini Split System
The price is one of the few downsides of the Pioneer mini split system. They cost more than other brands or window units, especially considering the installation charges. These units can only be installed by a professional due to their slightly complicated assembly instructions.
So, people on a tight budget would invariably think twice before bringing one of these mini-splits home.
Pioneer Mini Split Review: Overview Of Features
To better explain the effectiveness and shortcomings of a Pioneer mini split system, I have narrowed down the essential aspects and looked at each point in detail.
1. Energy Efficiency
Any Pioneer HVAC system or mini split system guarantees efficient energy use with a high SEER rating of 16 to 19.5 and a high-quality compressor. Thanks to this rating, you can determine how much energy the unit will consume to manage your electricity expense better.
The Pioneer mini split system also has a high energy efficiency ratio of 19.
2. Performance
If you have a large room ranging between 200 and 500 square feet, opt for the mini split system with a 12,000 BTU pump. This will guarantee effective cooling and optimum performance with heating, ventilation, and air conditioning or dehumidification.
3. Durability
One of the best parts about Pioneer mini split units is their high durability. The brand has used only the best parts to manufacture all components, including the outdoor unit, remote control, installation kit, and ductless inside unit.
4. Filtration
Like most mini split models from Pioneer, the filters are easy to maintain as they are removable and washable. When you clean the filters after regular use, they prevent dust particles from hampering the longevity of the unit. Moreover, you can enjoy better performance with the turbo mode, provided you choose the right filter, as several options are available.
5. Price
The cost of a Pioneer unit varies depending on the model you want to use. Mini split systems with a duct cost between $1,268 and $3,998, whereas the ductless models are priced around $798-$4,288.
The least costly option is multi-zone mini split units ranging from $298 to $778. However, you will have to pay more for additional accessories, like -
Optional filters
Condensate drain hose extension
Convertor adapters
Flare connection leak guard sealer
Programmable thermostat
Replacement remote controls
Wrapping tape
Piping kits
Drain hose extension
The price for these upgrades varies from $0.99 to $134.99.
6. Maintenance
To keep the mini split system in top condition and ensure it performs at optimum capacity to deliver effective cooling, it’s essential to invest in proper maintenance and care of the unit. The first thing I do before cleaning mini-split systems is shut down the power and disconnect them from the circuit.
This reduces the chances of accidents, allowing me to check the vents for dust and debris. Cleaning the vents properly is important to prevent bacteria, germs, and allergens from breeding within the unit and affecting the air quality.
I also use a disinfectant kit with the air conditioner to guarantee healthy air circulates throughout the room. Along with that, always use a clean and damp cloth to wipe the outdoor window unit and filters. While cleaning them, check whether the filters and outdoor vents appear frayed or damaged to opt for timely repairs or replacements.
Apart from these components, the pipes gather a lot of dust and dirt debris that you can remove with a commercial disinfectant. Use a clean cloth to remove all impurities and prevent blockages, mold, and mildew from the condensing unit.
Most importantly, keep all household furniture away from the line of the air vents for uninterrupted airflow. Do the same for the outdoor unit, installing it away from outdoor furniture for the best results.
7. Installation
Only an HVAC professional and technician can install your preferred mini split wall unit because the steps are complicated. DIY enthusiasts with knowledge of using an installation kit may be tempted to assemble the unit, but it would be wise not to.
From experience, I can tell you that following instructions is challenging, and improper assembly increases the chances of damage. Tech support will tell you only a licensed professional can check whether the indoor and outdoor units have the same capacity, voltage, and efficiency.
Most importantly, always take professional assistance to identify the right location for installing the mini split system. This should ideally be some spot with proper air circulation, a firm base, and smooth drainage. As a rule, find a spot away from direct sunlight, obstructions, flammable items, and heat.
8. Additional Benefits
The brand provides a 5-year warranty for all its mini split systems, ensuring you can repair a unit without spending a fortune. Note that the warranty is active from the day of the installation and applies to commercial and residential air conditioning systems. I checked the brand website and found the warranty covers -
Diagnosis
Removal
Installation
Repair and replacements
Costs of all supplies and materials required
9. Value For Money
All things considered, and after reading through the above factors, you can rest assured that Pioneer mini split systems are worth the investment. Although you might have to spend a bit extra compared to other window units, the high SEER rating, powerful cooling, variable speed mode, and positive reviews from other consumers make it worthwhile.
Pioneer Mini-Split AC FAQs
How long do pioneer mini split systems last?
There is no definite answer regarding how long a pioneer mini split system might last. But with proper care and reliable use, these systems can last for 10-15 years.
Does a mini split system run all the time?
It’s important to ensure that a mini split system runs all the time because it uses less energy and maintains a consistent temperature, in such instances. Most importantly, there’s no need to turn the units on/off or adjust the temperature when you’re not at home, like with a central cooling and heating system having a thermostat.
Are pioneer mini split systems loud?
Pioneer mini split models are among the quietest units available on the market, with an average noise emission of 32 decibels.
How much power does a pioneer mini split system use?
On average a pioneer mini split system uses 600 watts of power. Some owners have noticed that the running cost of their units is less than 600 watts and around 560 watts. But this mostly depends on a person’s cooling needs and the same system may require 800 watts of power for effective cooling.
Why does my mini split system keep turning off?
If your mini split system keeps turning off, there’s a problem with the unit. They are designed to run 24/7 but if the compressor excessively overheats, ductless mini split systems may shut off frequently. In some cases, older compressors are susceptible to breaking down and you will have to switch to a modern compressor to use the air conditioner at optimum capacity.
Conclusion
The Pioneer mini split is the best option for people looking for a high-quality unit that reduces environmental impact. You can also choose from numerous products based on the size of the apartment, energy-efficient performance, and your specific requirements.
Moreover, with multi-zone systems, you can raise or lower the temperature in every room easily for greater versatility. These units are a fantastic alternative for other high-end air conditioners without compromising performance.
And positive reviews from happy customers vouch for the same, so don’t hesitate to try them out!
Discover the different types of painting techniques that have captured the imagination of famous artists and art lovers alike throughout history. From abstract painting to realistic to miniature painting, read about the unique characteristics of each genre.
Welcome to the colorful world of art! From the delicate brushstrokes of watercolor to the bold and vibrant hues of acrylic, paintings have the ability to evoke emotions and capture moments in time. At least, I, for one, am always enchanted by a good painting!
Whether you're an art enthusiast or a curious newbie, today I will take you on a journey through various painting techniques and styles. Who knows? You may discover a whole new world of artistic possibilities!
Timeless Beauty of Classic Masterpieces
Ah, classic masterpieces! These painting styles have stood the test of time and continue to captivate audiences even today.
1. Baroque
This art style emerged in the 17th century and is characterized by dramatic lighting, vivid colors, and ornate details. Baroque artists sought to convey intense emotion and movement, often depicting religious or historical scenes.
One of the most well-known Baroque artists is Gian Lorenzo Bernini, a famous artist of sculpture and architecture. His works, such as The Ecstasy of Saint Teresa, showcase the Baroque painting style with their intricate details and dramatic poses.
Overall, the Baroque style represented a departure from the restrained classicism of the Renaissance. Its emphasis on emotion and movement paved the way for the expressive painting styles that followed.
2. Byzantine
Byzantine art is a unique blend of Greek, Roman, and Christian traditions, resulting in a distinctive art style that was both spiritual and worldly. One of the hallmarks of Byzantine art is the use of icons, which were paintings of religious figures meant to be used for devotional purposes. These icons were often adorned with gold leaf and precious stones, giving them a sense of otherworldliness.
But Byzantine art wasn't just limited to icons - it also included mosaics, frescoes, and illuminated manuscripts. These works were often commissioned by the wealthy and powerful, who wanted to show off their purity and wealth.
And while Byzantine art may seem ornate and intricate, it was also highly symbolic, with each element carefully chosen to convey a particular meaning.
3. Renaissance Art Style
Speaking of the Renaissance, this period from the 14th to 17th centuries marked a resurgence of classical ideals and artistic innovation. Famous artists such as Leonardo da Vinci and Michelangelo produced some of the most iconic works of all time during this era. Renaissance art is characterized by its realism, perspective, and attention to detail.
Renaissance art was not only limited to paintings but also included sculpture, architecture, and other painting mediums. It reflected a renewed interest in the classical past, as well as a focus on humanism and individualism.
One of the most famous works of Renaissance art is Leonardo da Vinci's Mona Lisa, known for its enigmatic smile and use of sfumato, a technique that creates a soft, smoky effect.
4. Rococo
Rococo art is known for its extravagant style and delicate details, often featuring pastel colors and intricate designs. It starkly contrasts the more subdued nature of watercolor paintings, which rely on the transparency of pigments to create a soft, dreamy effect on the canvas.
However, despite these differences, there is a certain charm to be found in combining these two painting styles. Imagine a rococo-inspired portrait painting with delicate watercolor washes highlighting the subject's features.
Or perhaps a landscape painting with a rococo-inspired border, painted in watercolor hues to create a sense of depth and texture. The possibilities are endless for combining different art styles and techniques. Experimenting with different painting mediums is a great way to explore the boundaries of what's possible in art.
If you're looking for a lighthearted escape from the seriousness of other art movements, Rococo might be just what you need!
5. Romanticism
Romanticism was a reaction to the rationalism of the Enlightenment. This 19th-century painting style emphasized emotion, individualism, and imagination. Romantic paintings often featured sublime landscapes and historical or mythological scenes.
Romanticism was a period of rebellion against the prevailing social norms of the time, and artists sought to break free from the strict conventions of academic art. They celebrated nature, often depicting it in all its grandeur and beauty, and embraced the individual spirit over conformity.
One of the most iconic Romantic artists is Eugene Delacroix, whose works such as Liberty Leading the People and The Death of Sardanapalus convey a sense of emotional intensity and passion. His use of bold colors and dynamic compositions capture the essence of Romanticism.
6. Trompe-l'œil
Trompe-l'œil is a French term meaning "deceive the eye," and that's exactly what this art style aims to do. Trompe-l'œil paintings are so realistic that they appear three-dimensional or even real. This painting style has been used throughout history to create optical illusions and trick the viewer's perception.
Trompe-l'œil paintings often feature everyday objects, such as a letter or a book, as if they were sitting right in front of you. Some famous artists have even taken it a step further, creating entire rooms or scenes that look like you could walk right into them. The level of detail and precision required to create a convincing trompe-l'œil painting style is truly remarkable.
This painting technique has been popular throughout history, particularly in the Baroque and Renaissance periods. Even today, trompe-l'œil can be found in modern arts and advertising. It's an art style that truly captures the imagination and challenges our perceptions of reality.
7. Gothic Art
Gothic art emerged in the late Middle Ages and is characterized by its ornate, decorative style. Gothic paintings often feature religious subjects and were used to convey a sense of awe and reverence. The intricate details and towering structures of Gothic architecture are also reflected in the style's paintings. Gothic art is a fascinating and dramatic style that has captured people's imaginations for centuries.
One of the most striking features of this art form is its intricate and delicate details, which are often enhanced by the use of bright colors and elaborate patterns. Gothic art was also used to tell stories, particularly religious ones. Many Gothic paintings depict scenes from the Bible or the lives of saints.
Overall, Gothic art is a striking and powerful style that has impacted the art world. Its influence can be seen in many different art styles, and its legacy continues.
These classic masterpieces are a testament to the enduring power of art and the creativity of the human mind.
From Chaos to Precision: Modern Styles in Painting
Let's dive into the world of modern painting movements! From the colorful chaos of Fauvism to the mathematical precision of Geometric Abstraction, there's a painting style for everyone to create art, appreciate and enjoy.
8. Abstract Expressionism
First up on our list of modern movements in painting technique is Abstract Expressionism. This art style emerged in the 1940s in the United States and quickly became one of the most influential art movements of the 20th century.
Abstract Expressionist paintings are characterized by their large size, bold colors, and spontaneous brushwork. The famous artists who created these works sought to convey emotion and to feel through their art rather than depict recognizable objects or scenes.
Some famous Abstract Expressionist painters include Jackson Pollock, Mark Rothko, and Willem de Kooning. Their works are still highly prized by collectors today and can be seen in museums worldwide.
9. Cubism
Next is Cubism, which developed in the early 20th century in France. This movement is known for its use of geometric shapes and the fragmentation of form.
Cubist painters sought to depict the world from multiple viewpoints rather than a single, fixed perspective. This resulted in works that appear almost abstract at first glance but, upon closer inspection, reveal recognizable objects and scenes.
Pablo Picasso and Georges Braque are two of the most famous Cubist painters. Their works continue to inspire artists today and can be seen in many major museums.
10. Dadaism
Welcome to the chaotic and irreverent world of Dadaism! This movement emerged in the early 20th century as a response to the horrors of World War I. It rejected traditional artistic conventions to embrace randomness, absurdity, and nonsense.
Dada artists sought to undermine the seriousness of the art world by creating intentionally nonsensical pieces, often incorporating everyday objects or even garbage into their works. Some of the most famous Dada works include Marcel Duchamp's "Fountain," which was simply a urinal turned upside down and signed with a fake name, and Hannah Höch's photomontages, which blended images from popular culture into surrealist collages.
11. Fauvism
Fauvism was a French painting style that emerged in the early 20th century and is characterized by its use of intense, saturated hues and its rejection of traditional representational techniques. Fauvist artists aimed to capture the emotional impact of color rather than realistic depictions of the world around them.
One of the defining characteristics of Fauvism is its use of vibrant watercolors. Famous artists like André Derain and Henri Matisse often used watercolor oil paints to create bold and expressive works that capture the intensity of their subjects.
For example, Derain's "The Dance" features bright oranges, pinks, and yellows in a fierce depiction of a dance scene. At the same time, Matisse's "Joy of Life" portrays a group of nude figures in a lush, colorful landscape painting using vivid watercolor washes.
These works showcase the unique ability of watercolors to convey emotion through color and brushwork, which made them a natural fit for the Fauvist movement.
12. Geometric Abstraction
Looking for something a bit more cerebral? Then you might enjoy the clean lines and mathematical precision of Geometric Abstraction. This style, which emerged in the early 20th century, was characterized by its use of simple geometric shapes and its rejection of figurative art.
Geometric Abstraction artists aimed to create a sense of order and structure through their works, often using precise, repetitive patterns and shapes to achieve this effect.
Some of the most famous Geometric Abstraction pieces include Kazimir Malevich's "Black Square," which is simply a black square on a white background, and Piet Mondrian's "Composition II in Red, Blue, and Yellow," which features bold, primary colors arranged in a grid-like pattern.
13. Minimalism
Less is more, as they say, and that's certainly the case with Minimalism. This movement, which emerged in the mid-20th century, is characterized by its use of simple, stripped-down forms and its rejection of ornamentation and excess.
Minimalist artists aimed to create works that were as basic and essential as possible, often using industrial materials and emphasizing the physicality of the artwork itself.
Some of the most famous Minimalist pieces include Donald Judd's untitled boxes, which are rectangular metal or plexiglass forms, and Dan Flavin's fluorescent light installations, which use light as the medium for the artwork.
14. Neo-Expressionism
Finally, if you're looking for something with a bit more emotional punch, then Neo-Expressionism might be up your alley. This movement, which emerged in the 1980s, was a reaction against the cool, detached aesthetics of Minimalism and other modernist painting styles.
Neo-Expressionist artists aimed to create works that were raw, visceral, and emotionally charged, often using intense colors and thick, gestural brushstrokes. Some of the most famous Neo-Expressionist pieces include Jean-Michel Basquiat's graffiti-inspired paintings, which blend street art with fine art, and Anselm Kiefer's massive, layered canvases, which explore themes of history and memory.
So there you have it, folks - a quick tour of some of the most exciting modern painting movements! Whether you prefer the emotional punch of Neo-Expressionism or the clean lines of Minimalism, these painting styles continue to inspire and captivate artists and art lovers worldwide.
Realism and Beyond
The world of art is vast and varied, with countless painting styles and movements that have emerged throughout history. Each movement has its unique characteristics and techniques and has been shaped by the social, cultural, and political forces of its time.
15. American Impressionism
One of the most prominent movements in the late 19th century, American Impressionism, was heavily influenced by the French Impressionist movement. American artists who Impressionism inspired aimed to capture the essence of a moment in time through the use of light and color.
They often depict scenes from everyday life, such as landscapes, urban settings, and leisure activities. One of the most notable American Impressionists is Mary Cassatt, who is well-known for her delicate and intimate portraits of women and children.
Another famous American Impressionist is Childe Hassam, who was known for his vibrant and colorful paintings of New York City, capturing the bustling energy of the city in a way that was both lively and captivating.
16. Tonalism
Tonalism is an American art style that emerged in the late 19th century. This movement is about creating art emphasizing color and light to create a mood or atmosphere.
Tonalists often depicted landscapes, focusing on the mood and emotion that the scene evokes rather than the specific details of the scene. Tonalism is known for its muted colors and hazy, atmospheric quality.
Some of the most well-known Tonalists include James McNeill Whistler, who created many paintings of the Thames River in London, and George Inness, who created many paintings of the American landscape.
17. Social Realism
Social Realism is an art movement that emerged in the 1930s. This movement is all about creating art that reflects the social and political realities of the time. Social Realists often depicted everyday people, including the working class and marginalized communities.
Social Realism often deals with issues of poverty, inequality, and injustice. Some of the most well-known Social Realists include Diego Rivera, who created many murals that depicted the struggles of the working class, and Ben Shahn, who created many paintings that addressed issues of social and political justice.
Through their powerful and thought-provoking works, Social Realists sought to shed light on the harsh realities of society and inspire change toward a more just and equitable world.
18. Pointillism
Pointillism is an art movement that emerged in the late 19th century. This movement is about creating paintings using small dots of color that blend together to create a larger image.
Pointillists use precise brushwork and attention to detail to create paintings that are incredibly detailed and vibrant. Pointillists often depicted everyday scenes like landscapes, cityscapes, and portraits.
One of the most well-known Pointillists is Georges Seurat, who created many paintings using this technique, including his famous work "A Sunday Afternoon on the Island of La Grande Jatte." Pointillism produces paintings that are both dynamic and captivating, with a luminous quality that is unmatched by other techniques.
19. Hyperrealism
Hyperrealism is all about creating paintings that look almost like photographs. Hyperrealists use precise brushwork and attention to detail to create paintings that are so realistic they can be mistaken for photographs.
Hyperrealism often depicts everyday scenes like cityscapes, still life paintings, and portraits. A prominent Hyperrealist is Audrey Flack, who is known for her incredibly detailed still-life paintings that are created by painting layer upon layer of paint to create a sense of depth and texture.
Hyperrealism requires a high level of technical skill and a keen eye for detail. Hyperrealists often spend countless hours studying their subjects, photographing, and making sketches before beginning their paintings. The resulting works are often larger than life and create a sense of wonder and amazement in viewers who may question whether they are looking at a painting or a photograph.
20. Regionalism
Regionalism is an American art movement that emerged in the 1930s. This movement is about creating art that reflects the cultural traditions and values of specific regions within the United States.
Regionalists often depicted rural life, including landscapes, people, and animals. Some of the most famous Regionalists include Grant Wood, known for his iconic painting "American Gothic," and Thomas Hart Benton, who created many paintings of the American Midwest.
By emphasizing the importance of regional identity and culture, Regionalists helped to establish a sense of national pride and unity during a time of significant change in America. Today, Regionalism remains an integral part of American art history, serving as a reminder of the rich diversity and complexity of American culture.
21. Contemporary Realism
Contemporary Realism refers to the art movement that emerged in the late 20th century and is still prevalent today. This movement is all about creating art that truly represents the world around us.
Contemporary Realists use precise brushwork and attention to detail to create paintings that look almost like photographs. You'll often find them painting everyday scenes like cityscapes, still lifes, and portraits.
A prominent Contemporary Realist is Chuck Close, who is known for his massive portraits that are created by meticulously painting individual squares to create a larger image.
22. Early American Folk Art
Early American Folk Art is a type of painting technique that emerged in the late 18th and early 19th centuries. This art was created by everyday people who didn't have formal art training. Instead, they used their unique painting styles and techniques to create arts that reflected their everyday lives.
Early American Folk Art often depicts everyday scenes like farm life, rural landscapes, and portraits of family members. One of the most well-known Early American Folk Artists is Edward Hicks, who created many paintings of animals, including his famous "Peaceable Kingdom" series.
Each painting style and movement has its unique story to tell, and through the work of talented artists, we can glimpse into the past and understand the world from their perspective. By studying and appreciating these painting styles, you can gain a greater understanding and appreciation of the diverse and rich history of painting.
Artistic Traditions in Various Cultures
Famous artists often utilize different tools and techniques to achieve their desired effects. For example, some painters use a palette knife for more precise lines and texture. Others may use a heat gun to create intricate designs in sandpainting or to speed up the drying process of their work.
In addition, some painters may use a varnish or emulsion to add a glossy finish to their paintings, while others may focus on waterproofing their work to preserve it for a longer period.
In terms of materials, painters have used a variety of substances throughout history. Milk, for instance, has been used in casein paint, a type of paint that dries quickly and produces vibrant colors.
Graphite, on the other hand, is a common material used in pencil drawings and can be manipulated to create various shades of gray. Textiles have also been used in painting, such as silk in Chinese art, to add texture and depth to works.
Furthermore, different regions and cultures have their unique traditions and styles of painting. Japanese painting, for example, often incorporates calligraphy and gesture, while East Asian art may focus on the concept of balance and harmony. The Netherlands, on the other hand, has a rich history in figure painting, while Paris has been a hub for modern art and innovation.
Visual Art Forms
Visual art has always been a captivating and inspiring medium for people, with each form showcasing the artist's unique vision and creativity. From bold acrylic paintings to delicate ink drawings, every artwork has its charm.
Watercolor has been a favorite medium for many famous artists throughout history. So, grab your paintbrush and immerse yourself in the world of watercolor!
23. Acrylic Paints
Acrylic painting is a famous painting technique that uses water-soluble acrylic paints. Acrylics can be used on various surfaces, including canvas, paper, wood, and even metal.
One of the reasons why acrylic painting medium is so popular is because of the range of effects it can create. From bold and bright colors to subtle and muted tones, acrylic paint can create various textures and finishes.
Acrylic paint can be diluted with water to create a watercolor-like effect, or it can be layered to create a thick and textured surface. With its versatility, fast-drying properties, and easy cleanup, acrylic painting is a perfect choice for creating beautiful and long-lasting artwork.
24. Charcoal Drawing
Charcoal drawing is a traditional technique that uses charcoal sticks to create dark, smudgy lines. This technique is perfect for creating atmospheric pieces of art that evoke a sense of mystery and emotion.
Charcoal drawing is also known for its versatility, allowing artists to create various effects by varying the pressure and texture of the charcoal on the surface. It's an excellent technique for capturing the mood and tone of a subject, mainly when working with subjects like portraits, landscapes, and still life.
Artists often favor charcoal for its ability to create dramatic contrast and depth, and its forgiving nature allows for corrections and adjustments to be made easily. Whether you're a beginner or an experienced artist, charcoal drawing is a skill worth mastering.
25. Egg Tempera Paintings
Egg tempera paintings are a fascinating technique used for centuries to create stunning works of art. It's known for its unique texture and luminous finish, which makes it a popular choice for artists who want to create works of art with a timeless feel.
One of the most distinctive features of egg tempera painting medium is using egg yolk as a pigment binder. This gives the painting a rich, creamy texture that's hard to achieve with other types of painting. In addition, egg tempera dries quickly, which allows artists to create intricate details and fine lines with precision.
26. Watercolor Painting
Watercolor painting is a beautiful medium that offers a lot of creative freedom to artists. With their unique properties, watercolors can create various effects, from delicate washes to bold, vibrant colors. This versatility makes it a popular choice for artists who enjoy experimenting with different techniques and styles.
The watercolor painting medium also offers a lot of room for experimentation and creativity. Because the paint is water-soluble, it can be used in various ways, from thin washes to thick, opaque layers. Artists can also use various tools, such as brushes, sponges, and even salt, to create unique textures and effects.
Overall, watercolor painting is a wonderful medium that offers a lot of creative possibilities to artists. Whether you're a beginner or an experienced artist, there is always something new to learn and explore with watercolors. So why not give it a try and see what beautiful creations you can come up with?
27. Encaustic Painting Style
Encaustic painting is an incredibly versatile medium that allows artists to experiment with various textures and colors to create unique works of art.
The encaustic painting technique involves mixing pigments with melted beeswax and then applying the mixture to a surface, typically a wooden panel painting. The wax is then heated and fused onto the surface, creating a durable, long-lasting encaustic painting.
One of the advantages of encaustic painting is that the wax can be layered and built up to create a rich, textured surface with depth and dimension. The hot wax painting can also be carved and manipulated with tools to create intricate designs and patterns. Encaustic painting allows artists to create various effects and explore techniques to achieve their desired results.
28. Fresco Painting Medium
This ancient technique has been around for centuries and is still used today by many artists. So, what exactly is fresco painting? Well, it's a form of painting where pigment is applied to wet plaster on a wall or ceiling, creating a stunning mural lasting hundreds of years.
One of the most impressive things about the fresco painting technique is how it captures light and color. The wet plaster absorbs the pigment, making the colors part of the wall. This creates a unique depth and richness that can't be achieved with other painting techniques.
Another fascinating aspect of the fresco painting technique is the history behind it. This technique was used by the ancient Egyptians, Greeks, and Romans and was later revived during the Italian Renaissance. Many of the most famous frescoes in the world can be found in churches and cathedrals throughout Europe.
29. Gouache Painting Medium
Gouache painting is a medium that is often overlooked, but it definitely deserves some attention. It is a type of opaque watercolor used by artists for centuries.
One of the unique qualities of gouache is its versatility. It can be used for various applications, from illustration and design work to fine abstract art. Gouache paintings have a distinctive look that sets them apart from other painting mediums.
The opaque nature of the paint means that the artist can paint light colors over dark without needing multiple layers. This makes gouache painting a great choice for creating vibrant, colorful compositions.
30. Ink Wash Painting
Ink Wash Painting is one of the oldest and most versatile forms of artistic expression out there. It involves using various tools to create lines and shapes with ink on a surface, such as paper or canvas. The beauty of ink drawing lies in its simplicity and ability to convey various emotions and moods.
Many artists work exclusively with ink, while others use it as a starting point before moving on to other painting mediums. Some artists combine ink with watercolors or oil paints to create stunning mixed-media pieces.
Ink drawing is a fantastic way to experiment with different techniques and styles, and it's accessible to artists of all levels. So why not grab your pen or brush and start creating your own ink masterpieces today?
31. Oil Painting
The oil painting technique is a timeless and beloved form of the abstract art medium that has been around for centuries. It's a medium that allows for incredible depth, texture, and richness of color. The process of oil painting involves mixing pigments with oil, usually linseed oil, to create a paint that can be applied to a canvas or other surface.
But, as with any art form, the oil painting technique takes time and practice to master. From choosing the right brushes and oil paints to understanding color theory and composition, there are many elements to consider. However, the beauty of oil painting lies in the process itself. The tactile experience of mixing colors and applying paint to a surface can be both meditative and exhilarating.
32. Pastel Painting Technique
One of the most appealing aspects of a pastel painting is its ability to capture the softness and delicacy of subjects such as flowers and landscapes. Pastel paintings have a distinctive, powdery texture that gives them a unique visual appeal. They are also known for their ability to create vibrant, luminous colors that can bring a painting to life.
However, pastel painting can be challenging, as it requires a delicate touch and a great deal of patience. Pastels are a dry medium, and unlike paint, they cannot be mixed on the canvas. Additionally, the powdery texture of pastels can make them difficult to control, so it takes skill and practice to master this medium.
Despite the challenges, pastel painting remains a famous and beloved medium among artists and art enthusiasts alike. It offers a unique and expressive way to capture the beauty of the world around us, and its versatility allows for a wide range of painting styles and techniques.
Visual art forms are a beautiful and dynamic way for artists to express their creativity and share their unique perspectives with the world. No matter the medium, each piece tells a story and invites the viewer to connect with the artist and their message. So, grab your brushesand let your imagination run wild!
Futuristic Flair
As the world becomes increasingly complex and technology advances, artists have embraced futuristic themes in their work. From the streets to the galleries, there is a growing fascination with the possibilities of the future.
33. Graffiti Art
A graffiti artist does more than just spray-painting random words or images on walls. It's an art form that's been around for decades, and it's only getting better. The vibrant colors and intricate designs are a feast for the eyes, and they have the power to transform dull, drab buildings into works of art.
One of the most exciting things about graffiti art is its temporary nature. You never know when or where the next masterpiece will appear. It could be on a busy street corner or tucked away in a hidden alley. Either way, the thrill of discovering a new piece of graffiti art is like finding a hidden treasure.
In short, graffiti art is more than just a bunch of words and images on a wall. It's a dynamic and evolving art form that has captured the imagination of graffiti artists and art lovers alike. So next time you're out and about, keep your eyes peeled for a piece of graffiti art. Who knows what you might discover?
34. Afrofuturism
Afrofuturism is an exciting artistic movement that combines elements of science fiction, fantasy, and Afrocentricity. It's a celebration of African culture and identity while also exploring the future of black people in the world. Think of it like an imaginative blend of Sun Ra, Octavia Butler, and George Clinton, with a healthy dose of funk and soul thrown in for good measure
One of the coolest things about Afrofuturism is how it uses science fiction and fantasy to imagine new possibilities for black people. In a world where black people are often portrayed as marginalized or oppressed, Afrofuturism creates a space where black people can be powerful, creative, and visionary. It's a way to dream of a future where black people are at the forefront of innovation and progress.
35. Street Art
Street art is a form of creative expression that takes art from the confines of a gallery and puts it on the streets. It's an art form that thrives in public spaces and encourages artists to create pieces that speak to the community. Whether it's a giant mural or a small sticker, street art is an important part of modern culture.
Another great thing about street art is that it's often created by anonymous artists. This anonymity adds an air of mystery and intrigue to the art form, making it even more fascinating to observe. It's also a way for artists to escape the traditional art world, which can be exclusive and limiting.
Whether it's through the raw energy of graffiti, the thought-provoking messages of street art or the Afrofuturist visions of black artists, the theme of the future has inspired a wide range of artistic expressions. As we continue to look to the horizon, we can expect to see even more exciting and innovative creations that push the boundaries of what we thought was possible.
Diverse World of Painting: Styles, Techniques, and Influential Artists
Various types of painting include ink wash painting, Chinese painting, cave painting, spray, fresco-secco, portrait miniature, en plein air, mixed media, and Western painting. These styles utilize a range of materials, such as aerosol, chalk, vellum, resin, and vitreous enamel paint. Famous artists use different techniques, including chiaroscuro, texture mapping, and drip painting, to achieve their desired effect.
Painters throughout history, including Michelangelo, Rembrandt, Claude Monet, Vincent van Gogh, Salvador Dalí, Caravaggio, Johannes Vermeer, Wassily Kandinsky, Andrea Mantegna, Edvard Munch, Sistine Chapel, Andy Warhol, have contributed to the diverse world of painting.
Different cultures, such as Japan, Italy, China, and Greece, have their own unique artistic traditions, including calligraphy, Veduta, Warli, and Madhubani art. In contemporary times, technology has revolutionized the art universe with the use of computer programs, water-miscible oil paint, and aerosol spray dispensers. Painting can be a powerful form of expression, conveying messages, allegories, and emotions.
FAQs Related To Types of Painting
What is expressionism in painting?
Expressionism is a modernist movement in art that originated in Germany in the early 20th century. It’s characterized by bold colors, exaggerated forms, and emotional intensity, with the aim of expressing the artist’s inner feelings and experiences.
How do artists use space in their paintings?
Artists use space in their paintings to create a sense of depth, perspective, and composition.
What materials and techniques are used in traditional Indian painting?
Traditional Indian painting uses a variety of materials, including natural dyes, minerals, and precious stones, as well as traditional tools such as bamboo pens and brushes made from animal hair.
What distinguishes photorealism from other painting styles?
Photorealism is a painting style that seeks to replicate a photograph in exact detail, often with the aim of challenging our perceptions of reality. It’s characterized by hyper-realistic detail and precise attention to lighting and shadow.
How does the use of beeswax impact the texture and appearance of a painting?
When mixed with pigment, beeswax can create a rich, textured surface that is both translucent and opaque. It can be used to create a variety of effects, including depth, luminosity, and a sense of movement in hot wax painting.
What are some techniques for achieving the desired effect with oil painting?
Techniques for achieving a desired effect with oil painting include layering, blending, glazing, impasto, and scumbling. Each technique can create a unique effect, depending on the artist’s intention.
What are some benefits and challenges associated with digital painting compared to traditional painting techniques?
The benefits of digital painting include greater flexibility, faster workflow, and easier editing capabilities. Challenges include the need for specialized software and hardware, as well as a potential loss of tactile experience.
How does an artist's chosen style impact the way they approach a painting?
An artist’s chosen style can impact everything from their subject matter and color palette to their brushwork and composition. It can also influence their conceptual art approach and the message they are trying to convey through their work.
How do art movements emerge and evolve over time?
Art movements emerge and evolve over time as artists respond to the cultural, political, and social climate of their time. Factors that contribute to their popularity and longevity include their influence on subsequent generations of artists and their ongoing relevance to contemporary issues.
What distinguishes pop art from other styles of contemporary art?
Pop art or digital art is characterized by its use of popular culture imagery, such as advertising, comic books, and mass-produced goods. It often employs bright, bold colors and a sense of irony or satire.
How do different types of painting strokes contribute to the overall look and feel of a painting?
Different types of painting strokes, such as short or long, thick or thin, can create different textures, tones, and moods in a painting. For example, short, choppy strokes can convey a sense of energy and movement, while long, flowing strokes can create a more serene or peaceful atmosphere.
How is linseed oil paint used in oil painting, and what are some alternative binders that artists may use?
Linseed oil paint is a common binder used in oil painting to mix with pigments and create paint that can be applied to a canvas. It dries slowly and allows for the blending and layering of colors. Some alternative binders that artists may use include walnut oil paint, poppy seed oil paint, and safflower oil paint, which have different drying times and properties.
How do artists create the illusion of three-dimensional space on a two-dimensional surface?
Overlapping objects in a painting can create a sense of foreground and background while varying the scale of objects can create a sense of distance. Perspective can create the illusion of depth by drawing lines that converge towards a vanishing point. Shading and lighting can also be used to create a sense of form and volume in a painting.
So, there you have it - a colorful exploration of some of the many types of painting out there! From the bold, bright hues of expressionism to the delicate lines of miniature painting, the world of painting art is a vast and varied one.
Whether you're an artist yourself or simply an appreciator of the arts, I hope this overview has inspired you to explore new styles and techniques or to simply enjoy the beauty of the paintings around you.
And with new technologies and materials constantly being developed, the world of paintings is sure to continue evolving and expanding in exciting ways. So pick up a brush, choose your colors, and let your creativity flow.
The best TV mounting height and viewing angle depend on several factors, which can vary considerably from one case to the next. These factors include the TV size, viewing distance, clearance required, and location, among others.
Having the best TV-watching experience does not depend just on the quality of your TV.
There are other factors at play as well, and these include the height at which the TV is mounted and its viewing angles. Unsurprisingly, many people find it immensely confusing to determine the proper height at which the TV should be mounted for the best viewing experience.
This guide aims to help solve the problem by answering that question.
Factors Determining The Optimal Mounting Height For Your TV
It is crucial to determine the right height for mounting your television before starting to drill. Not doing so can lead to wastage of resources and time and also cause damage to your walls.
Aside from that, positioning the TV at an improper height can lead to discomfort while watching and will require removal and reinstallation, resulting in a lot of hassle. That is why you need to keep in mind a few factors when mounting the TV.
1. TV Size
When planning to mount your flat screen TV on the wall, the first thing to do is to measure its size. This size will determine how high it should be and will also help you get an idea of how much space it will require. Additionally, such information will be useful in case additional accessories need to be installed.
When taking measurements, make sure to measure the distance between the TV center to the floor. Also, the TV size is always measured diagonally, not horizontally or vertically. To help you out, I’ve mentioned some of the common distances ideal for different-sized TVs here.
In the case of 42-inch TVs, there should be a distance of 56 inches between the floor and the TV center. Similarly, 55-inch TVs should be mounted at a distance of 61 inches, while 65-inch ones should be mounted at a distance of 65 inches. Finally, 70-inch TVs should be mounted at a distance of 67 inches from the TV center to the floor.
2. Viewing Distance
The optimal viewing distance will closely depend on the TV size. Ideally, this distance should not be so much that the details are lost, nor should it be so less that it requires straining your neck. A larger distance between the viewer and the TV can result in a less enjoyable experience, while a smaller one can cause headaches.
Also, the viewing distance or VD will be affected by the optimal height, which will depend to a large extent on personal preference. You can divide the TV size (in inches) by 0.55 to know the optimal viewing distance.
Alternatively, you can use the following formula - (VD)=TVS*1.67. For instance, if you have a 55-inch TV, the optimal viewing distance will be 55*1.67, which will be 92 inches.
3. Viewing Angle
Another essential factor to keep in mind when mounting your TV is the viewing angle and eye level. This has to be calculated from the sitting position in which you are going to watch TV. Absolute precision is not required, but try to get a general idea of the location where the TV should be mounted to provide a great viewing experience without causing any pain.
If you want to be sure, follow the guidelines laid down by the Society of Motion Picture and Television Engineers (SMPTE). According to this, the viewing angle should not exceed 30 degrees. That being said, the maximum that the majority of people incline their heads when watching TV is between 10 and 15 degrees.
4. Individual Height
Individual Height is another factor to keep in mind when mounting your TV. And this problem becomes more complicated as the number of people watching increases. This is because people with different heights may find different viewing heights and distances comfortable. So, there is no standard solution that can fit everybody’s needs.
In such cases, you should think of the people who will be watching the TV and mount the TV accordingly. This will require measuring the ELH, which is the distance between the floor and your eyes while watching TV and is measured in inches.
Measure the distance from the average eye level to the floor while sitting. This will ensure that the TV should be comfortable for the maximum number of people.
5. Hanging Height And Location
The TV hanging height will also be determined by its location and will, in turn, determine its viewing angle. For instance, if the TV is to be mounted in a game room, there will most likely be a laid-back couch that will decide the optimal viewing height and viewing distance.
This will require considering the reclining angle or RA, which depends on your sitting position. Normally, when a person is sitting straight and watching TV, their torso forms a 90-degree angle with the floor, and the RA is zero.
But when you recline, the RA changes and has to be measured from the vertical angle. If you tend to recline more, the TV mounting height will need to be higher. And as mentioned, the maximum reclining angle lies between 10 and 15 degrees.
Additionally, different rooms will have seating options with varying heights. For instance, in the case of an open floor plan, there may be bar stools or a low chair or sofa. These may make it difficult to determine the best height for mounting your flat-screen TV.
In such cases, the best approach is to take the average of all sitting heights or the most used height when calculating the distance to the TV screen. Alternatively, if it is located in a home gym or game room, where most people watch TV standing up, I suggest using the average standing height when taking measurements.
6. Other Factors
There are some other factors that can determine the TV mounting height as well. For instance, a structural element, appliance, or furniture might prevent mounting the TV at the optimal viewing height. If that is the case, position the TV close to the viewing level while leaving space between the TV and the obstruction.
Such obstructions may include an entertainment center or shelves, in which case you should leave around four to six inches of space. And if you have children, it is a good idea to mount the TV at such a height that it is unreachable.
Some people also like to mount the TV over the fireplace, in which case, you need to install non-combustible barriers between the TV and the fireplace. This will protect the TV screen from damage caused by heat. Additionally, for such installations, I would advise checking the building regulations before installing the TV.
Determining The Ideal Viewing Angle
When mounting your TV, try to get the TV screen perpendicular to the eye level of the people watching it. That said, newer TVs come with high refresh rates, wider viewing angles, and greater clarity that allow more freedom so far as viewing angles are concerned.
So, even if you have the TV screen set at more than 25 degrees horizontally, you can still get a good experience while watching. It is more important to try and reduce glare while maximizing viewing comfort than focusing on the viewing angle itself.
Steps To Determine The Ideal TV Mounting Height
Before mounting your flat-screen TV, I recommend consulting with other household members to ensure that everyone gets the best experience while watching TV. You can use paper and a tape measure to mark the area where the TV will be mounted and ask the other household members to take a look. This will help ensure that it is the right spot for TV mounting.
Make sure you have all the necessary tools and the proper mount kit for the process before starting. Then, follow these steps to determine the ideal TV mounting height.
1. Attaching The Mounting Arms
First, you will need to screw the vertical brackets or mounting arms included in the mounting kit to the TV back. Once each bracket is attached, secure it to the wall plate in the same manner as when completing the assembly.
2. Taking Measurements
After the adjustable brackets have been secured to the wall plate, you need to measure the height of the mounting center up the wall. Take these measurements from three horizontal spots, and mark each spot using a pencil. This will indicate the point where the TV centerline will rest.
3. Determining The Top And Bottom Markings
Once you know where the TV centerline will lie, divide the TV height by two. Then, take a measurement of this distance and use a pencil to mark it over the center counting mark. This point will be the place where the TV top will lie against the wall.
Repeat the process for the TV bottom as well.
4. Creating Markings
The next step will involve creating an outline of the shape of your TV on the wall. You can use painter’s tape for the purpose and also make similar markings around the corners of the mounting plate.
5. Final Steps
Finally, use a level to check the outlines and ensure that it is the ideal TV mount height before starting the drilling process.
Calculating The Mounting Height Using A Mathematical Formula
Another way to determine the optimal TV height at which you should mount your TV is by using a mathematical formula. The formula is (TVMH) =0.22*VD+ELH. When using this formula, it is assumed that a reclining angle of 12.5 degrees exists.
To determine the height between the TV bottom and the floor, you need to measure the TV height before dividing it by two. Then, subtract this number from the result obtained by using the formula.
Or you could use another formula to calculate the screen height, which is TVMH=tan(RA)*VD+ELH. In this case, if the tan(RA) is zero, the reclining angle is absent, and you are sitting straight. So, the TV mounting height (TVMH) will be the same as the eye level height (ELH).
TV Mounting - Tools Required
Mounting your flat-screen TV may seem challenging, but using the right tools can help simplify the process considerably. That said, keep in mind that some tools are indispensable when you need to mount a TV, while others are only required to make the job easier.
The tools you will use to mount a TV include:
Power drill
Stud finder
Screws
Wall mount
Level checker
Hammer drill
Need For Additional Mounting Hardware
When considering the height at which you will mount your flat screen TV, make sure that the maximum amount viewers need to tilt their heads is 35 degrees. According to the Society of Motion Picture and Television Engineers, this is the maximum amount of tilt that allows comfortable viewing.
In cases where your flat-screen TV is mounted at eye level, this is easy, but when it is mounted at a significant height, it can cause neck strain. To avoid that from happening, you can lower the top of the flat-screen television, but it will require specialized wall mounts.
Instead of a standard stationary low-profile wall mount, you can use a tilting wall mount or a full-motion wall mount. A tilting wall mount can be adjusted vertically, while a full-motion one can be adjusted in different directions.
Whichever type of TV mount you choose, it should be suitable for the TV size and weight and should be easily attachable to your wall. Different types of walls, like plaster and lath walls, stud walls and block walls, require different mounts.
Benefits Of A TV Mount
A TV mount can make it easier to mount your flat-screen TV with a flat panel display to the wall and helps improve the viewing experience. It also offers other benefits, such as:
1. Helps Save Space
A TV mount can help you save a lot of space, which would otherwise be occupied by a table for keeping the TV. This means you can use the space below the TV in other, more productive ways.
2. Is Economical
Compared to a TV table, a wall mount is more economical, and you can even get different types of mounts. Thus, a TV mount is a good option if you want to save money.
3. Better Utility
In some situations, it is not possible to use a table for keeping the TV, such as when the TV has to be situated near a fireplace. TV mounts solve this problem by allowing you to mount the TV above the fireplace.
Things To Keep In Mind
1. Keep The Middle Third As The Focus
People usually focus on the middle third portion when they watch TV. That is why it should also be the area you should keep in mind when determining factors like viewing angles and viewing distance. And it is why I advise keeping the center of the TV as the point from where to estimate a comfortable viewing level.
2. Learn About The VESA Compatibility Of Your TV
Some TV manufacturers provide VESA mounting holes at the TV bottom, while others provide them in the center. Knowing the type of mounts your TV supports can make the mounting process significantly easier.
3. Consider The TV Weight
TVs can be incredibly heavy, and in many cases, it may not be possible to mount them to regular drywall using standard screws. You may need to screw into the wall studs to ensure proper support and prevent the TV from falling.
Tip
If you’re unsure about the proper height and angle for mounting your TV, I would advise calling up a professional mounting service. Such services can help determine the proper height and angle and help select the most suitable mount and additional hardware needed for the job.
Alternatively, you can get an adjustable mount that allows adjustments later after the TV has been mounted.
Conclusion
Determining the right height and angle to ensure the best TV viewing experience can be a bit challenging. However, it is possible to mount your TV as required by taking proper measurements, using the right hardware and tools, and investing adequate time.
While keeping in mind the factors mentioned above is important, it is also a good idea to plan for the future. This is especially vital if you plan to mount additional equipment on the same wall, such as a music system. Moreover, a well-placed TV mount can improve acoustics significantly by ensuring that the speakers are positioned optimally for an enhanced audio experience. Proper placement helps in directing sound waves toward the listener and mitigating distortions, thus providing an immersive audiovisual experience.
Considering the future and potential equipment additions will save you a lot of hassle in the long term and ensure the best viewing and listening experience in your home.
To paint on Yupo papers, you need paints, brushes, water, and masking tape. Before you begin painting, it is crucial that you clean your paper and then prime it (optional). There are various techniques that you can use to apply watercolor on Yupo paper, such as pouring and dripping, blending and brushwork, and stenciling and stamping.
If you have ever tried painting methods such as acrylic painting, you must know that the traditional watercolor paper doesn’t do justice to them. Yupo paper is considered to be a great alternative for such techniques of creating art.
The polypropylene fibers of this paper create a smooth and non-porous surface. This finish is ideal for watercolor painting because it allows the paint to sit on top of the paper instead of getting absorbed in it. As a result, you can create more vibrant art pieces using Yupo papers.
In this blog post, we will be taking a look at how you can apply watercolor on Yupo paper easily. We will also discuss the various techniques and materials involved in this process. Let us begin!
It does not take rocket science to guess the first and the most important material required for Yupo painting - Yupo papers! The non-absorbent surface allows the painter to create a variety of effects using different colors. Moreover, the tree-free paper is available in a range of thicknesses and sizes, and you can choose one according to your preferences.
2. Watercolor Paint
Although you can paint on Yupo papers with a variety of mediums like acrylic paint and alcohol-based ink, it works best with watercolor paint. You should ensure that the set of watercolor paints that you choose to go for are of high quality so that they work well with Yupo papers.
3. Brushes
You will require a variety of decent-quality brushes to blend the watercolor on Yupo paper. There are several round, flat, and thin brushes easily available on the market. Hence, you can buy one according to your landscape painting requirements.
4. Palette
Artists need a good-quality watercolor palette to mix their watercolors. Ideally, you should choose plastic or ceramic palettes that have a decent number of wells. Further, it is best if you go for the light-colored options because they help you stay closer to creating precise shades of colors.
5. Water
Every watercolor artist is aware of the importance of water while making a watercolor painting - and this case is no exception. Ensure that you have a jar of clean water by your side to clean your brushes and avoid any form of muddiness.
Additionally, water helps artists dilute the intensity of pigmentation on their brush. Hence, if you want to create a lighter hue on your Yupo paper, you should have a mug of water by your side to dip your brush in!
6. Masking Tape
It is best to use masking tape around your Yupo paper and secure it to your board. This will help you keep your painting surface still in a comfortable position while you create beautiful art on it.
How To Prepare For Yupo Paper Painting?
Yupo paper is synthetic, and hence, you need to prepare it before you begin working on it. Here are two steps that you need to follow to prepare your Yupo paper:
Preparing The Yupo Paper For Painting
1. Cleaning The Surface
You must use a clean surface for painting. The Yupo paper should not have any dust or dirt accumulation on its surface, which is why it is advised to clean it before using it. Use a soft dry brush or a lint-free cloth to gently clean the paper.
2. Priming The Surface
The next step in preparing your Yupo paper is priming its surface. However, the method of priming that you choose to go for depends on what kind of paint you will be painting with. Some of the most common types are listed as follows along with how you can prime your Yupo paper accordingly:
A. Watercolors
Take equal parts of water and rubbing alcohol and mix them. Transfer the mixture solution to a spray bottle and spray a layer of the mix over the surface of your Yupo paper. Ensure that the paper is not saturated in the solution, or else it might warp. Let it dry before you begin painting.
B. Acrylics
If you want to paint with acrylics, you should prime the Yupo paper using acrylic medium and water. Mix one part acrylic medium with three parts water. Dip a brush in this solution and give the paper a quick wash. And let it dry.
C. Oils
Before using oil pastel or paints, it is best to prime the sheet’s surface with an oil-based primer first. It will create a stable surface, which is much easier to paint on. Simply apply the primer on the paper using a brush (or a roller). Let it dry completely, and then begin oil painting!
Tips For Priming The Yupo Paper
While priming the surface of Yupo paper is not a difficult task, there are a few tips that you should keep in mind. Doing so will help you prevent any wear and tear to your paper, and help you bring out the best priming results. Some of them are listed as follows:
Use a fine mist while spraying the primer solution over your Yupo paper instead of a heavy mist.
Test the primer on a small scrap of Yupo paper first to avoid any unwanted effects.
Whenever you use a brush to apply the primer on Yupo paper, ensure that you use a light touch because it can get damaged very easily.
While you should consider sticking to white primers for better visibility of colors, you can choose other color options depending on the hue you wish to provide your painting with.
If you want to create abstract designs on Yupo paper, it is best to use the pouring and dripping technique. To do either (or both) of these techniques, you first need to collect the necessary art supplies like paints, palettes, brushes, pouring cups, and so on.
To prepare your paints for pouring, aim for a consistency that is somewhere between medium and thin . Next, pour this mix on your Yupo paper. Tilt the paper at different angles to allow the wet paint to blend organically. You can also use a brush to create the desired effect using the poured paint. This technique is usually used to create effects like the waterfall effect.
Many artists like combining pouring with dripping. To do the latter, all you need to do is drip a little bit of paint on the paper. Let it mix with other colors by tilting the paper, or use a brush to create desired effects.
2. Brushwork And Blending
You can never go wrong while using traditional painting techniques, and brushwork and blending fall into the same category! Since Yupo paper does not absorb the paint applied on its surface, you will have ample time to blend and work with colors.
To carry out this technique, take your choice of paint. Add a small amount of water in it to bring it to a thinner consistency. Next, use a brush to apply this color on your Yupo paper.
You can then easily blend the different shades in layers and create a variety of effects using different types of brushes or your finger. There are several tutorials on YouTube that you can refer to for this step.
3. Stenciling And Stamping
Sometimes, all your painting requires is a little depth. Stenciling and stamping are popular techniques to achieve this goal. Both of them are used to create designs and patterns in artworks.
For stenciling, place the stencil on your Yupo paper. Next, using brushes or sponges, apply paint on the open spaces of the stencil. Once you are done adding the colors, lift the stencil carefully, and voila! Your designed image is created.
Stamping is another easy process that you can use to create repeated patterns. Dip your choice of stamp into the paint and press it onto the Yupo paper.
Tip
Repeating the stamping process multiple times can help you create different patterns and designs.
More Tips And Tricks For Working With Yupo Paper
1. Using A Mister Or Spray Bottle To Wet The Surface
While the non-porous property of Yupo paper is beneficial in many ways, there is a major downside to it - difficulty in controlling water and paint flow. Hence, it is a good idea to wet certain sections of the paper for better results.
Using a mister or spray bottle to spray water on Yupo paper can allow you to create a large variety of effects, such as color runs. Such bottles also let you control the amount of water applied to the paper. As a result, the paper does not get saturated and warped.
2. Allowing Each Layer To Dry Completely Before Adding Another
If you are using a lot of water and paint while painting on your Yupo paper, it is best to allow each layer to dry completely before adding another. This is also a recommended process for other forms of painting, such as using watercolors on wood.
Since synthetic papers take longer to dry out as compared to traditional watercolor paper, adding layers onto a wet surface can lead to possible wear and tear.
Further, adding another layer of paint or water before the previous one has dried out can also lead to muddiness and unwanted effects. If you can’t wait long enough to let the paper completely dry out naturally, you can use a hair dryer, clothes dryer, or heat gun to speed up the process. However, you should be careful while doing so because excessive amounts of heat exposure may damage the paper.
3. Experimenting With Different Media, Such As Acrylics Or Alcohol Ink Art
Yupo paper is compatible with different media, such as watercolors, acrylics, and alcohol-based inks.
For instance, using acrylics on Yupo paper is a great idea. You can either dilute them with water for a watercolor effect or use them straight out of the tube for a bolder punch. Similarly, alcohol inks can be used to add different kinds of textures to your painting.
It is best if you can use a combination of different media (mixed media) to discover what suits best with your style. Experimenting with them on Yupo papers can help you unleash and broaden the horizons of your creativity.
4. Use A Palette To Mix Colors
If you like complete control over the intensity and consistency of your paints, it might not be a good idea to mix colors directly on your Yupo paper. It is always advised to use plastic color palettes to mix your colors before you begin painting. This way, you can ensure that the consistency of paints and intensity of pigment are exactly as you need them to be.
FAQs Related To Painting On Yupo Paper
What is Yupo paper and why is it different from other papers used for painting?
Traditional art papers are known to be absorbent due to their high porosity levels. This means that when we apply paint on their surface, the fibers of such papers soak the paint in. As a result, the paint dries out quickly, leaving less room for creating unique designs and textures.
On the other hand, Yupo paper is a synthetic paper made up of 100% polypropylene. It is also water-proof and stain-resistant, so you can explore your creativity and experiment as much as possible.
What kind of paints are suitable for use on Yupo paper?
It is best to stick with non-water-based media. Acrylic inks and paints, alcohol-based inks, and oil paints are a few of the many options that you can choose to go for when creating paintings on Yupo papers.
Do I need to prepare the Yupo paper before starting to paint on it?
Yes, you should prepare the Yupo paper before you begin painting it. The first step of this preparation should be cleaning the paper to remove any debris or dirt accumulation from its surface.
You may prime the paper for better results. To do so, apply a suitable fluid primer on the Yupo paper depending on the kind of paint that you will be using to paint. You can also lightly sand the paper so that your paint can stick better. These steps of preparation are optional, but the first step – cleaning – is a necessary step of preparation.
Can I use watercolor techniques on Yupo paper?
Using watercolor painting techniques on Yupo paper can be quite challenging. However, there are certain watercolor techniques that you can try out on Yupo papers.
For instance, you can layer using different paints to create a variety of layers in your artwork. You may also try out the method of lifting, which requires you to lift paint off the surface using a damp brush.
How do I control the flow of the paint on Yupo paper?
The best way to control the flow of the paint on Yupo paper is by using a spray bottle. Fill your spray bottle with a decent amount of water. Use it to spray the water on the desired section of your painting where you want to control the flow of paint.
There are various ways through which this process can help you control the flow of paint on your paper. For instance, once you spray water on the Yupo paper, you can tilt your painting in different angles or directions to let the paint flow naturally. Similarly, you may also use the techniques of manipulating the surface or use gravity to facilitate the flow.
Can I lift or remove paint from Yupo paper once it has dried?
Yes, you can easily lift or remove paint from these papers even after it has dried out.
To do so, take a cloth or paper towel and dampen it. Next, use it to scrub off the paint from the paper gently. You can also dab the paint off of the surface.
It is important to note that excessive moisture or pressure can potentially damage the surface of your Yupo paper. Hence, it is crucial to use a light touch.
What kind of brush should I use for painting on Yupo paper?
While painting on smooth surfaces, it is best to go for flexible brushes. After all, you need to have good control over your strokes to create your desired effects and textures.
A soft synthetic brush is a great option to go for while painting on Yupo paper. You may also go for a natural hair brush since it is easier to paint with it on a smooth surface.
Can I use other materials like ink, markers, or pencils on Yupo paper?
Yes, you can use other materials like India ink, markers, or pencils. However, different tools will have different effects on the paper depending on various factors.
For instance, ink can be used to create vibrant and bold components of your painting. It is translucent and smooth and blends amazingly. The effect of markers will depend on the type of marker used and the texture of your Yupo paper.
How do I protect or frame my finished Yupo paper painting?
The best way to protect your finished Yupo paper painting is to keep it away from sunlight. The UV rays of the sun turn the white Yupo paper into yellow, which can damage the overall quality of your painting. Similarly, you should store your painting away from moisture after waterproofing it.
You can frame your Yupo paper painting just like a traditional watercolor paper artwork. This will ensure that contaminants like dust and dirt do not accumulate on your painting. Hence, your artwork will stay protected and last for a long time.
Can Yupo paper be used for other art techniques besides painting?
Yes, these papers can be used for other art techniques besides painting. For instance, they can be used for printmaking to create monotype prints.
Artists like using Yupo papers for collage-making too. They stick a variety of tissues, photos, or clippings throughout the paper. This is because it is durable enough to stand the adhesive that is applied to it.
Since you can use graphite, charcoal, or watercolor pencil on it, Yupo paper is also used for drawing.
Yupo paper is a unique innovation in the field of art. It is a 100% polypropylene synthetic paper that is completely non-absorbent and non-porous. The various advantages of using this paper include a smooth surface to paint on, paints not drying out quickly, and versatility.
You can easily apply watercolor on Yupo paper by preparing it first. Clean any dust or dirt that may have collected on your paper. You can also prime its surface for better results. Then, you can use techniques such as pouring and dripping, blending, stenciling, brushing, and stamping to create paintings.
The Yupo papers allow artists to have as much fun as they want. The versatility and functionality of this paper can let you do anything from drawing to painting and creating collages.
So, let your creativity drive you to experiment with the various painting techniques on Yupo papers!
Dallas is home to some of the best furniture stores in the country, and once you check them out, you will surely be left spellbound.
Tourists from all around the country flock to this design district to buy sturdy and stylish furniture. And for natives who are trying to feather their nest, you would have to visit the right furniture store.
Some people have a knack for creative decor, while there are others that like a more classy look for their home. In whichever category you fall, there are enough options for you to explore. In fact, there are way too many, and that might lead to confusion.
To make the job easier for you, we decided to design this guide with the top 10 of our favorite furniture stores in Dallas. After much research, we were able to compile this list, and you can rest assured that it is quite exhaustive.
Without much delay, let's check them out!
Best Furniture Stores In Dallas
1. Weir's Furniture
The founders of Weir's furniture believe that styles come and go. However, quality furniture can stand the test of time. This store has been providing the best home furnishings in Dallas for the last 3 decades.
It is one of those furniture stores that will help you get new furniture, whether you are creating a new home office or redecorating the dining room.
This store is dedicated to presenting its customers with the latest outdoor and patio furniture. Whichever kind of accessories that you are looking for, rest assured that you will find it in one of their 4 stores that are spread across Dallas.
Furthermore, their helpful staff makes shopping furniture from their store worth every dollar. When it comes to living room furniture, this is one shop that we can completely rely on. Not to mention, they have their stores in both Dallas and Fort Worth.
2. Canales Furniture
Tucked in a cozy Texas lane is Canales Furniture that has managed to remain a customer favorite for living room furniture. Not only is it good for dining room decor, but you will also find some of the best outdoor furniture in this shop.
This store also has some of the best patio furniture in town. On top of that, it is a great place to purchase home accessories, meaning you will find quality appliances or contemporary lighting at the most affordable rates.
So, if you are looking to decorate the rooms in a modern fashion, this place can be your best bet.
3. DFW Home Furnishings
Located in Farmers Branch, this store opened in 2019 and has gained much popularity in a short time span. It is because of the excellent service and beautiful furniture that it provides to the clients.
We were quite impressed with the kind of modern sofas that they have in their collection. Apart from that, they house lighting, chandeliers and appliances of the top brands in the city.
During their sale season, they also offer the best discounts on inventory, rugs, and recliners. If one is in luck, they can even find lamps and chairs of their favorite brand at a heavily discounted price at their showroom.
Instead of telling you more, we suggest that you visit their store to know more about their furniture stock and service. Their address is not too difficult to locate, and in case you have any trouble, you can find the details from their website.
4. BT Furnishings For Quality Furniture
If you are looking for the best furniture stores in Dallas that have been in business for more than a decade, you need to give this shop a try. They give you the option to shop from their website, and you also have the choice of shopping directly from their store.
When you visit their showroom, you will see that they provide exceptional furnishings at the most affordable rates. Plus, they are quite popular among their customers for the exceptional service that they provide.
But their focus is not just to sell and forget about their customers. They strive to bring interest-free credit plans that will ensure that you can style the home in any way you want to.
In case you are anywhere near Fort Worth or Dallas, there's no way you should miss out on visiting their store.
5. Living Modern Furnishings & Design
In case you are looking for customized living room furniture, you cannot afford to miss out on this shop. They are one of those furniture stores in Dallas that are popular for providing customized home furnishings.
Even if you are planning to redo the home office, this store can come to your aid. They are good at adding a contemporary flair to your home decor. Next time you have a family gathering, rest assured that there will be interesting conversations about the furniture in your house.
The major reason why it made it to our list is that the owner of this company allows you to pick any of their furniture and customize it any way you want to. That's a great deal, and you are bound to leave the shop happy!
6. Room & Board For Quality Furniture
When we think of a company that makes furniture that is high on utility and beauty but less in price, Room and Board is the name that pops into our head. Be it bedroom furniture or high-end storage appliances; this store has it all. And the biggest deal that this company offers is free designing services.
You can visit their website to see if your kids like their animal rugs. Even the other members of your family might like their exquisite bed collection and the different types of floor designs that they offer. They have great dining accessories under their wing as well.
Not to mention that this company provides excellent customer service and a no-hassle return policy. We would suggest that you drop by their store location to know more about the kind of furniture that they sell.
7. Welch's Furniture
If you are checking out furniture stores in the Fort Worth area, there's no way you can miss out on Welch's Furniture. People visit this store regularly for the great outdoor furniture collection that they have and also the excellent service that they provide.
There's no arguing that the prime location of the company works to their benefit! But that does not discount the fact that they have super helpful staff. They are one of the most popular stores located at Trinity Mills, and over the decades, they have made sure that they don't have one-time customers.
And the prices of their furniture won't drive a hole in your pockets. But all the appliances and dining accessories that they house look pretty high-end. When you use them to decorate your dining room or use them as outdoor furniture, no one will be able to tell that they are budget buys.
Now, that's a win-win!
8. Zoe's Furniture
Only taking care of interior furnishing is not enough when you are decorating your house. It is also very essential that you have the right kind of outdoor furniture. And for that, Zoe's furniture is one of the best furniture stores in Dallas to check out! They have another outlet in Texas too, and you can visit that location as well.
The accessories, chairs, lamps that they offer are all within affordable prices and will surely add some life to your home decor. In case you are planning to repurpose any of your old furniture, visit their location to talk to the owner of this store to see how they can help. What makes them stand out among their contemporaries is how fun and quirky their furniture is.
9. Designer Furniture 4 Less For Best Living Room Furniture
Be it about decorating your dining room or living room, Designer Furniture 4 Less can help you turn your home into a modern dreamland. Especially when it comes to redoing your bedroom, we would suggest that you visit this store.
They are one of the most popular furniture stores in the state and have something for everyone. We love them for how versatile they are in terms of design. And they have an in-house consultancy team who can help you find what would work best for your house. So, if you are in Dallas, make sure you find their address and drop by their store.
10. Zuri Furniture
Situated in three different locations all across Dallas, Zuri Furniture is the embodiment of contemporary comfort. All their furniture is designed in a way that their clients do not have to compromise on style for the sake of comfortable use. It is only fair that one can experience both!
The multiple locations of the store is a major advantage as you can visit the one nearest to you. You can easily find their address on the internet or give them a call in case you have any difficulty finding their location.
Final Words
With that, we have reached the end of this comprehensive guide.
We hope that after reading it, you will have a good time picking out the best furniture showroom in Dallas. You can always take your kids and friends to these shops where they can help pick out what is best for decorating the house.
Be it cosmopolitan décor or a classy mid-century feel; you will surely find a shop that will suit your needs. Even if you want to introduce the most unusual of furniture, there is a shop to cater to your demands.
In case you have any other suggestions, we would love to hear about them in the comments section below. And for more exciting reads, keep a watch on this space.
This product is currently discontinued and no longer available in the market.
Portable AC’s can be a blessing in disguise, especially for people with housing restrictions and limitations regarding installations.
Gone are the days when getting a new air conditioning unit meant a time-consuming installation process and unnecessary expenditure. With the demand for portable air conditioners on the rise, you can cool any room in half the time and effort. And, in a sea of air conditioners, the Shinco YPL3-10C has stood out for many.
Now, we aren’t saying that this product is devoid of faults (technology may be advancing but not at that rate!). But, it does have many promising features, and after using this AC for a while, we strongly vouch for it.
But don’t just rely on that one sentence. Read on below for some specifics on why this product stands out from the rest.
Shinco YPL3-10C Review
Why Buy This Product?
Shinco is a popular brand when it comes to air conditioners and other home appliances. A great thing about the company is that it offers a one-year warranty, a 30-day money-back guarantee, and lifetime tech support on all products. But that’s not the only reason why it’s becoming a household name. This portable AC has a ton of other eye-catching features like...
Design
Starting with the way this product looks, it is very simple and has a seamless make. We understand aesthetics are important, and it's crucial to have a unit that does its job while looking good. This is why you will appreciate that this unit has a neutral color and can easily blend into any interior style.
When it comes to products like these, they need to be easy to handle. Fortunately, this one only weighs about 54 lbs and is much lighter than others in the market. Plus, the dimensions are 17 x 31.3 x 13 inches, making it ideal for rooms sized between 300-350 sq. ft.
It also has handles on the sides and wheels on the bottom to effortlessly transport it from one room to another. We tried rolling it on wood as well as carpet, and this unit did not disappoint.
Power
One of the most important things to expect from a portable air conditioner is its cooling power. For this purpose, it is crucial to pick one that is appropriate to the size of your room(s) so that the cooling is effective.
With the dimensions offered and a cooling capacity of 10K BTU, it can fully cool a 300 sq. ft room and partially cool a 350 sq. ft one. It is a powerful product that does not need a lot of time to cool any space, thanks to the dual-fan speeds. Moreover, the cooling is even because the air blows in four different directions.
Cost
Another essential aspect to look at when buying anything is the price. No matter how good the product may be, no one likes to spend their entire life’s savings on it.
This is why the Shinco YPL3-10C is so popular. Despite being powerful and having many exciting features, it’s budget-friendly and less expensive than most of its competitors.
User Friendliness
Having a cost-effective, powerful air conditioning unit with an ergonomic design is every homeowner’s dream. And, that is where Shinco stands out again as it does not just work efficiently but is also very easy to operate.
This unit comes with a remote control that makes it extremely user friendly and allows you to operate the unit from any point in the room. The days of standing right in front of the AC unit and aggressively pushing the buttons are long gone.
Moving on to another user-friendly feature: installation. All you need to do is spare 10 minutes of the day, connect the exhaust pipe to the unit and place the other end out of a window. In a nutshell, this AC unit has features that are mainly aimed at making it easy to use, and it does not fall short.
Self-Evaporating
One of the biggest reasons people avoid portable AC’s is because of the condensate. Many units in the market require manual emptying, which can become tedious to do daily. This is where the Shinco YPL3-10C is different.
The brand has ensured that this unit is effortless to use by making it a no-drip air conditioner. What this means is that the condensate evaporates by itself without accumulating. The unit has no water tank, and all the condensate is recycled for cooling. However, there is a tray provided on the off chance that the water does drip.
The self evaporating feature can be pretty beneficial for people living in areas with less humidity.
Safety
One prominent concern people have with portable air conditioners is safety-related. Since it is not a window-mounted AC, it can be easily accessed by kids and pets. But what makes it safe is the exhaust pipe through which hot air can be directed outside the house via windows. This prevents the heat from getting trapped in the room and keeps the unit cool to touch.
The Shinco YPL3-10C has an exhaust pipe specifically made for this unit, making the installation less tedious and safe. Plus, it has a 6-foot power cord that allows enough flexibility in terms of the unit’s placement. We advise referring to the instruction manual to ensure that the installation has been done correctly.
Extra Features
As we mentioned, the unit comes with a remote control. In addition to that, the surface of the unit has an easy-to-understand interface. All the buttons are labelled clearly, and there is a small display screen. With the availability of this feature, coupled with the remote, operating this unit is an absolute breeze.
This portable AC also has a 24 hour on/off timer, which makes it energy efficient. With this, you can set a schedule for the AC and get it to turn off automatically once it reaches the desired temperature. This way, it will help save energy and not generate a high electricity bill.
Another feature that is not available in many ACs within this price range and is appreciated by a lot of customers (and us!) is the adjustable vents. These are quite beneficial since you can easily direct the air to blow out in any direction you like. Moreover, it is particularly helpful if you do not want a full blast of air on the face.
This unit also has a built-in dehumidifier that can remove 62.4 pints of moisture, and washable filters. We suggest washing the filters on regular intervals to improve the efficiency of the AC. To sum it up, it has all the essential and additional features which make it a great buy.
What Could’ve Been Better?
As we mentioned earlier, every electronic device has faults and this one is not an exception.. However, we don’t think they overpower the benefits of the product. The first minor issue we noticed was the noise the unit made. It has a decibel level of about 55, which is considered a bit much for an AC this size.
It isn’t just us; there are a few customers who have complained about the same. One user even said that during the initial time of usage, the AC noise drowned the sound of their ringing phones. However, it isn’t something that you cannot get used to overtime, so don’t be discouraged.
Another issue we found was that the exhaust pipe tends to pop out of the window at times. There is no particular reason as to why that happens, but it’s easy to fix. Adding some tape to secure the pipe to the window will help.
Pros
Affordable unit
Lightweight and portable
Easy to assemble
Simple digital interface on the unit
Attractive design
Cons
A bit loud initially
Exhaust fan needs to be secured tightly
Shinco YPL3-10C Buyers Guide
We think, by now, it is clear that the Shinco YPL3-10C has the potential to cater to your needs. It cools any space effectively without costing a fortune. That being said, you may want to explore a bit more, and that’s fine. Finding the perfect portable AC can be a tedious task, considering the options available.
To make it easier, we have put together a buyers guide that discusses the essential features to look out for in any portable AC.
Price
Although cheaper than a window AC, a portable air conditioner can cost a considerable amount depending on several factors. The power of the unit plays a significant role in fixing the price. If you are looking to cool a large space, you will need a bigger unit which will cost more (and that is obvious).
Additionally, brand names matter too. If you want a unit that guarantees quality and service, turning to bigger and popular brands is the way to go. The only issue that there is a chance you will have to pay more. However, it will be worth it since there won’t be a need to spend money on such a unit for a long time.
Finally, additional features like a digital interface, remote, dual-functionality are all considered when fixing a price for any AC. This boxes it within the $100-$800 price range with an occasional hike to about $1000 for commercial units. Ultimately, the idea is to buy something that performs according to your expectations within an appropriate price range.
Energy
Everyone that’s looking to buy new electronics needs them to be energy efficient. Not only is this good for the environment, but it helps keep the electricity bill low. Most units displayed, online or in a showroom, have information of how much energy they utilize written on the unit itself. It is always advisable to keep an eye out for that.
Secondly, features like auto-on/off, energy-saving mode, timers, sleep mode and programmable thermostats are of great help. These automatically switch the unit off once the room reaches the temperature you set it at.
Installation
This is an essential factor since this is where portable ACs differ from window ACs. Most people buy the former because it is easy to install and can be done in under 20 minutes. The only thing requiring effort is fixing the exhaust hose to the window.
To further enable this, the unit must come with clear instructions and illustrations. Most units come with a kit and all the hardware necessary. And although installation of these units are very beginner-friendly and can be done by anyone, having an extra hand to help is always appreciated.
Room Size and BTU
For effective cooling, having a good idea of the living space is essential. It is vital to know how big or small the room is because, on the one hand, you wouldn’t want to pay more than required. On the other hand, you don’t want to buy a unit that does not cool effectively.
Keep an eye out for information on the ideal room size for any unit (manufacturers mention that at times). If it is not mentioned, we advise doing a bit of research after measuring the room. Also, remember that certain obstructions like excessive doors or thick walls can hinder the cooling process.
Ventilation
Most portable ACs come with a window kit that will allow you to set up the unit accurately. It is reasonably straightforward and can be done in any room. If the unit is kept far from the window, check how long the exhaust hose is and whether it can be extended.
There are two kinds of hoses used for ventilation. The single hose unit is the kind where only one hose takes in and exhausts the air. On the other hand, a dual-hose unit is one where there is one hose each for intake and exhaust. They both work efficiently, but the dual-hose one is more popular.
Noise
Certain electronics like washing machines and air conditioners make noise, no matter how quiet they claim to be. A noiseless machine is a myth, so it is futile to look for something that will make no noise. However, the volume is the thing to be wary of.
Noise from an electronic product can range from low white noise to “my house feels like a construction site” type noise. The key is to ensure it’s the former, not the latter. The best way to determine that is by going through reviews (like this one!). Moreover, if the units USP is that it makes less noise, it will be heavily advertised.
Additional Features
Now that we are done with some of the basics, let’s move on to the fun stuff. Having a unit that is easy to install and functions efficiently is what everyone needs, but it helps to have few extra features to make it fun. In this regard, design is the topmost priority.
A portable AC is one of the few products in the house that can be utilized in every room. This is why having a unit with a seamless make, and neutral color is preferred. This way, it does not cause any visual obstructions when kept in the room.
Moreover, since it has to be moved around, it should be easy to transport. Having wheels in the bottom and handles are appreciated since they make it effortless to move the unit.
Shinco YPL3-10C FAQ
How Is A Portable AC Beneficial?
Summer heat can be really exhausting, and for some, it can cause illness. For those people, having a portable AC in the house can reduce the chances of falling sick. Moreover, it is a smarter option when compared to a window or ductless AC since it takes less time to install and consumes less energy.
Is A Portable AC Safe To Use?
Yes! As long as the installation is done correctly. One pressing concern with these units is the release of heat from them. To make it safe for residential use, it comes with an exhaust hose which ensures the heat does not get trapped in the room.
This is why there is an emphasis on proper installation. The exhaust hose is fixed to the window to let the heat go out, and till it remains secure, there is nothing to worry about.
How Long Should The Exhaust Hose Be?
Ideally, it should be about 3-4 ft. However, it depends on the model and brand. In case you need a longer one, they are easily available to purchase. It is generally advisable to buy from the same company and not try and make your own (which is very possible).
Another thing to keep in mind is that a long hose will make it difficult for the AC to cool the room. As a general rule of thumb, a hose shorter than 10ft will allow the unit to function correctly.
Can The ACs’ Efficiency Be Improved?
Of course, it can! With time, the efficiency of any electronic device tends to deteriorate. But there are certain things that you can do to ensure it works properly. The first thing will be to install it with care and ensure that it remains secure. Keep an eye out for gaps and loose screws, as those make it worse.
You can also use the AC with the fan on since the combination of the two will cool the room faster. Additionally, keep it in a cool place under shade and make sure it is not exposed to harsh sunlight.
Shinco YPL3-10C Verdict
To sum it up, the Shinco YPL3-10C is an excellent buy. It is ideal for anyone looking for a compact unit that has a lot of power. And since the design is simple and neutral, it will blend into the room and won’t be a visual obstruction.
For the price range that it is in, it’s quite a steal. Yes, it does have its flaws but nothing a little extra care cannot fix. We think it can be a great addition to homes that often feel like a furnace during the summer months. We urge you to try the Shinco YPL3-10C out yourselves and let us know how the experience was.
Any kid or beginner requires good watercolor instruction books to start becoming a watercolor artist. For kids, it is very helpful to gain perspective by painting in illustrated watercolor books. This way, they can work on their watercolor techniques before moving on to landscape painting or portrait painting.
Hence, here are some of the best watercolor books available today.
THREE WATERCOLOR ACTIVITY BOOKS: The Melissa & Doug Paint...
What I like
Kid-friendly
Mess-free painting
The watercolor paint palette provided
Charming front covers
What I don't like
Low-quality paint provided
The Melissa & Doug watercolor painting book is a three-pack water-coloring book, with each painting book featuring adorable animations on the front cover: a jungle scene, barn animals, and underwater ocean scenes. Hence, this is a perfect book for children to enjoy and learn watercolor painting and coloring.
The most special feature of these books is that they include watercolor paint palettes inside on each page! This means you just need a watercolor paintbrush and a jar of water, and you are all set to paint. There is no mess-up and no cleaning required since the paints are already included in the book. This makes it an excellent painting book to give to budding artists as an introduction to watercolor painting.
However, you will require actual watercolor paints to fill in all the drawings in spite of the watercolor palette provided. This is because the quantity of paint provided is very less and they are not really vibrant or pigmented either. Nonetheless, it can be a fun activity to do with a kid.
Number Of Pages: 60 (20 pages per book) | Product Dimensions: 8.25 x 11.2 inches | Recommended Age: 3 years - 6 years
Includes a watercolor paint palette and a paintbrush
Kid and beginner-friendly
What I don't like
Not enough paint included
This Ghantoy watercolor painting book is pocket-friendly and an excellent option for a small watercolor painting book. Being made of high-quality wood pulp, the paper is very durable and sturdy.
The book contains 20 different patterns to fill in with watercolor paints. The 20 thin cards can be used to create an entire beautiful painting. Additionally, you can also use each painted card as a charming bookmark. Hence, this watercolor painting book is perfect for not just kids, but also any beginners wanting to get into watercolor painting and learn new techniques.
Apart from showcasing a cute illustration, each page also includes a watercolor paint palette. So, all you need is some water and a watercolor paintbrush to get started. This means mess-free paintings and no cleaning required. This makes the watercolor painting book perfect for young aspiring artists looking to learn to paint.
Number Of Pages: 20 | Product Dimensions: 7.36 x 3.07 inches | Recommended Age: 3 years - 10 years
This Bamagoo set is a collection of 4 watercolor books in a budget-friendly pack. Each painting book contains 20 different drawings and 2 swatches. The two swatch cards can be used to improve painting techniques and encourage the creative process of young watercolor artists.
Since this is also a pocket-friendly watercolor book, you can use the small cards to create a big watercolor painting. Additionally, you can also use each card separately as a bookmark.
Each page also contains a watercolor paint palette. You can activate the paints using a little amount of water, and you are ready to start painting with the included handy paintbrush.
This particular set has a biological theme, consisting of animals and oceanic life. However, you can also get this same painting book in other themes like gardens, fantasy, and holidays.
Number Of Pages: 80 pages (20 pages per book) | Product Dimensions: 7.56 x 3.23 inches | Recommended Age: 3 years - 10 years
The Kawaqiwa watercolor coloring and painting book is a handy and spiral-bound painting book. The book contains 20 different illustrations to fill in with watercolor pigments. The illustrations are very beginner and kid-friendly, perfect for learning texture techniques and sample paintings.
Each page contains six squares of dried watercolor paint, which can be activated using just a little amount of water. Hence, you don’t need to worry about the storage or cleaning of leftover paint, making the painting process very easy and mess-free. Moreover, the paint pigments are odorless and non-toxic, making this painting book safe for children.
Additionally, the paper is also quite heavy-weight, not allowing the watercolor paintings to bleed through. Also, the paper shows minimal warping or buckling, making it a perfect everyday watercolor book.
Number Of Pages: 20 | Product Dimensions: 7.87 x 5.91 inches | Recommended Age: N/A
This is a set of five Pureadee watercolor painting books, each book made out of the high-quality wood pulp. These watercolor books are not just good for kids but also for beginners to start painting watercolors.
Each page included a watercolor paint palette, which is easy to activate with just a little bit of water and ready to use immediately with a paintbrush. Additionally, each book contains 20 drawings, each drawing is unique to practice your watercolor techniques.
All 5 watercolor books have a different theme: World Adventure, Wonderful Holiday, Fairytale Dream, Wonderful Forest, and Enchanted Garden. Thus, this is a great modern watercolor book set for creative watercolor art and practicing basic techniques.
Number Of Pages: 100 (20 per book) | Product Dimensions: 3.15 x 1.57 inches | Recommended Age: 3 years - 14 years
This is also an affordable set of 5 Avitorry pocket watercolor painting books. Made from high-quality wood pulp, the watercolor book is very safe and durable for any kid or complete beginner to use.
Each watercolor painting book contains 20 different illustrations, with the small size making each card a perfect bookmark. Additionally, you can also combine all the small, painted cards to create a big watercolor painting. This way, you can work on your common watercolor mistakes and create stunning paintings.
Moreover, each page also has its own watercolor paint palette. All the dried paint squares require just a little amount of water for their activation. You can use the included paintbrushes to practice brush techniques and improve your artistic skills.
Number Of Pages: 100 (20 pages per book) | Product Dimensions: 8.27 x 8.27 inches | Recommended Age: 3 years - 10 years
Quick Comparisons Of The Top Watercolor Painting Book For Kids
Buying Guide To Watercolor Painting Books For Kids
Whether you are buying watercolor paints or watercolor books, you should always know what features to look for to make an informed purchase. This is especially true for watercolor painting books for kids since you need to check the paper's quality and safety standards. Hence, this handy buyer’s guide! Hopefully, this will help you make your decision.
1. Safety Standards
When buying something for kids, safety should be the utmost priority. This also stands true for watercolor painting books since the paper quality and paint pigments can cause harm to a child. So, before you buy a watercolor book for your kids, make sure that the paper is made from high-quality wood pulp. This will ensure its durability and non-toxicity.
As for the included paint palettes, check that the quality of the paint pigments meets the American standards for toy safety. High-quality paint pigments also mean high vibrancy and lightfastness. This way, you and your kid can enjoy and start to paint watercolor paintings.
2. Types Of Illustrations
When buying a watercolor painting book for a child, you need to consider the kid’s choices and preferences. Maybe they would like a space-themed watercolor painting book or an animal-themed watercolor painting book. So, before you go splurging your money on a pack of watercolor painting books, keep your child’s preferences in mind.
Choosing the child's preferred illustrations and drawings will also motivate them to paint more. This way, they can move on to complex techniques after practicing all the fundamentals.
3. Watercolor Book Size
The size of your watercolor painting book is important. When buying a watercolor book for your child, you need to take into account many different factors. If your child attends art classes, you need to make sure that all the art supplies fit perfectly in an art backpack, including the watercolor book.
As you read, many of the watercolor books on this list are pocket-friendly. The reason for that is that these watercolor books are perfect for beginners and art students since they can carry around the watercolor book easily. Additionally, these books are perfect options for plein-air painting.
4. Paint Quality
All of the watercolor painting books mentioned on this list include a paint palette on each page, meaning you get all the essential tools for painting right in the book. The paint palette is a few squares of dried paint stuck right on the top of each drawing. All you need is a little bit of water to activate the dried watercolor paint. This makes watercolor painting so simple, even for an absolute beginner.
But you should keep in mind that the watercolor paint palette provided will not contain high-quality pigments or be very vibrant. You can also expect the quantity to be quite less. So, you will need to keep the basic tools handy in case the provided watercolor palette does not have enough paint.
5. Age Group
Most of the watercolor books mentioned on this list have a recommended age between 3 to 10 years. So, these books are focused on helping kids to begin their journey to becoming advanced artists. Additionally, you can also use these watercolor books for beginners. Complete beginners will benefit from the practice and can use the book as warm-up exercises.
FAQs Related To Watercolor Painting Books
Can I do mixed media painting on watercolor books?
Yes, you can. Apart from watercolor work, you can also use other art mediums to paint on these books. You can color the illustrations using acrylic paints, oil paints, watercolor pencils, colored pencils, gouache, ink, etc. Thus, these books can support a broad range of dry and wet mediums.
How can my children improve their watercolor painting skills?
The watercolor books provided in this list are a perfect introduction to the world of watercolor painting. Since the illustrations are already provided, all a child needs to do is wet the paints provided and practice different painting techniques, like wet-on-wet painting, wet-on-dry painting, layering, etc. Slowly, after achieving an eye for the basic techniques, they can move on to advanced techniques.
With more experience and knowledge, you will start to notice improvements in your child’s paintings. Since these books are already illustrated, you might need to get another plain watercolor painting book so that your child can start practicing painting landscapes and trying to imitate nature.
Start with simple and small stuff like a leaf, a flower, a fruit, or a plant before moving on to more complicated concept art.
Additionally, your child can take inspiration from popular watercolor artists like Gordon MacKenzie, Cathay Johnson, Jenna Rainey, Matthew Palmer, Leslie Frontz, Jean Haines, and Ray Hendershot.
Can I paint en plein air using a watercolor painting book?
A watercolor painting notebook is very handy and easy to carry, especially a pocket-friendly one. Additionally, they even have a paint palette provided inside. This makes them exceptionally good options for plein air painting. All you need to do is carry a jar of water and a paintbrush to start painting en plein air.
Are the paints provided in the watercolor book enough?
To be completely truthful, no, they are not. You can expect the paints to be low in quantity as well as quality. They will not be very vibrant or pigmented and will also have a low lightfastness rating. Hence, it would be helpful if you kept some good quality watercolor paints around. Only with good watercolors can you really improve your painting skill.
What is some basic knowledge I need to have to begin watercolor painting?
You don’t need to have complete knowledge about paints to start painting compositions with watercolors if you are painting just as a hobby. But additional information can never go to waste. So, you can get a complete guide to watercolor painting and learn about color theory, different watercolor techniques, and different lightfastness ratings to improve your skill level.
Verdict
Coming to the end of this article, it is time to talk about the top watercolor books. The Melissa & Doug watercolor book is the best on this list due to its endearing illustrations, watercolor paint palette, and exceptionally adorable front cover.
Hopefully, this article helped you find the best beginner watercolor book for your kid or for yourself. Here’s to becoming a watercolor artist soon!
To use watercolor tube paints, squeeze out some paint on a mixing palette and use a paint brush to mix it with sufficient water, depending on the shade and consistency you desire. Then, apply the paint on paper using techniques like wet-on-dry, dry brushing, glazing, splattering, or salt technique, stippling or dry-on-wet.
Watercolor paints in tubes have always been a popular choice when creating art. They are convenient and versatile, which is why both professional and beginner watercolor artists prefer using watercolor tubes.
You can easily squeeze out the paint from the tube and mix it with water to create a variety of shades and effects. Moreover, watercolor tubes are made by mixing pigments with honey (or glycerin) and gum arabic binder, which is why they stick together so well. In this context, I consider them the clear winner in the battle of watercolor pans vs tubes.
That said, what are the painting techniques that you can try out using this paint? And what materials and preparation are required for the same? In this article, I will try to answer all these questions and more. So, let’s begin!
What Are The Materials Required To Paint With Watercolor Paint Tubes?
It is a no-brainer that watercolor paint tubes are one of the most important art supplies in this case. These types of watercolor paints are available in a wide range on the market, and you can buy several of them to create a variety of hues for your paintings.
However, only invest in a good quality watercolor paint tube brand for better results. And you should always read the label on paint tubes to get the right shade.
2. Brushes
Artists need different kinds of brushes for painting, each serving a purpose. Hence, make sure to have all the brushes that you may need. For instance, you can purchase brushes with thin bristles for detailing, whereas you should invest in ones with large bristles to paint bigger sections of your painting. Again, quality is king, so keep that in mind as well!
3. Watercolor Paper
You should use watercolor paper instead of traditional paper when using watercolor paints. This is because the former is designed in such a way that it absorbs water to stabilize the paint. Hence, they can hold the paint better on their surface.
4. Water
Always keep a jar of water near you while creating any painting to clean your brushes from time to time. Additionally, you can use this water to dilute the paints to create lighter hues for your artwork.
5. Palette
Often, your shade choice might not be readily available on the market. In such cases, you can use a mixing palette to create colors on your own! All you need to do is mix the required primary colors using a paint brush on the pallet to create the desired shades.
6. Masking Tape
Masking tape is primarily used to keep your painting still at a surface. You can also use this tool to create crisp edges or borders in your painting.
7. Pencils And Erasers
If you want to paint figures in your artwork, it is always a good idea to sketch it out first. For that, you will need pencils and erasers to draw on your sketchbook. It is advised that you only stick to the basic ones available on the market since you only need them to create a rough outline to adhere to.
How To Prepare The Paint For Use?
Preparing The Watercolor Paint Tubes For Use
1. Squeeze Out The Paint On A Clean Mixing Surface
The first step is to squeeze out your desired paint colors from their respective tubes on a mixing palette. You can also use a mixing dish if you do not have a palette.
It is best to squeeze out only a small amount of tube paint when you begin this step. Doing so will allow you to understand factors like pigmentation intensity carefully. Once you have assessed such factors, add more paint as needed.
2. Add Water
You need to add water to watercolor paints for better activation while painting. You can use a clean brush, dip it in water, and then use it to mix the paint with water.
The amount of water you add to the paint depends on several factors, such as the consistency of the paint you wish to achieve and the intensity of the hues you want to create. For instance, add more water if you want your tube paints to have a thin consistency.
3. Mix The Paint
You can use a mixing palette knife or a clean brush to mix the water and paint effectively. Use circular motions to mix the two elements thoroughly. It is an important step, and you must ensure no clumps or dry spots in the paint mixture.
4. Test The Paint
Sometimes, the pigmentation and consistency of the paint on your mixing palette may differ from what appears on paper. Hence, it is best to test the paint on scrap paper first.
Once you apply a small amount of paint on the scrap paper, assess whether or not factors like the shade of the paint seem right to you. If not, you can add more water or paint per your needs to fix the issue.
Tips For Preparing The Paint
If possible, use distilled water instead of tap water to avoid any sort of color contamination due to the mineral concentration in the latter.
Experiment with different ratios of water and paint to achieve a variety of shades and effects, such as transparent washes and opaque layers.
Label your paint mixtures with the paint colors and ratios that you used for future reference.
7 Watercolor Painting Techniques You Can Use With Tube Paints
1. Wet-On-Wet Technique
As the name suggests, the wet-on-wet technique involves the application of a wet wash on the surface of your paper before you add paint colors to it. This technique can be used to create various effects like wood grain or water ripples and is a great way of using watercolor paint tubes.
Doing the wet-on-wet technique can help you blend colors more easily. Further, it facilitates the paint to spread across the paper much more efficiently. It is most commonly used to create soft and blended backgrounds in watercolor paintings. To apply the wet-on-wet technique using watercolor tubes, you can follow these steps:
Step 1
Dip your brush in clean water and stroke it across your paper. Ensure that the paper is evenly wetted and there are no dry spots. Alternatively, you may use a spray bottle to dampen the surface you wish to paint.
Tip
You should never over-wet the paper. Since your paper may get damaged after it reaches its saturation point, it is always a good idea to stick to only moderately wetting its surface.
Step 2
Squeeze out your paint and mix it on your mixing palette. You can use different amounts of water to achieve your desired level of consistency and add different shades of tube paints to get the precise shades you want to create.
Step 3
Apply the watercolor paint directly on the wet surface of your paper. You can add more colors to blend with the background as you see fit in this step.
Step 4
Once you have created all the textures, patterns, and designs using the tube paint mixtures, let the painting dry completely. Remember that wet-on-wet paintings can take longer to dry out because the paints and the surface are wet.
Example Of Finished Paintings Using Wet-On-Wet Technique
2. Dry Brush Technique
You might like the dry brush technique if you like creating rough textures in your paintings. It requires you to apply a small amount of tube paint on a dry brush and then stroke it to create a variety of textures and highlights in your artwork.
You get a lot of control over your brush movements with this technique. As a result, you get the creative freedom to create a range of effects - from light to dark aesthetics.
The dry brush technique is popularly combined with other techniques, such as the wet-on-wet method of watercolor painting. You can follow these steps to try the dry brush technique:
Step 1
Take a clean and dry brush. Dip it in a small amount of paint and remove any excess paint using a paper towel.
Step 2
Hold the brush at a slightly tilted angle and create light strokes on your watercolor paper. Ensure that you do not apply too much pressure while doing so to avoid microtears. Wait for this layer to dry.
Step 3
Once your first layer dries out, add the next layer of dry brush strokes. Keep adding layers until you have reached your desired textures or patterns in your painting. You can experiment with different kinds of brushes, tube paint tones, as well as with textures like toothpick scratches.
Examples Of Finished Paintings Using Dry Brushing
3. Glazing Technique
A richly colored surface can change the look of your painting completely - and that is exactly what the glazing technique helps you achieve. It requires you to layer multiple thin washes one over the other.
The glazing watercolor painting technique can help you create a strong depth in your artwork. It can also help you strengthen the complexity of color in your painting. You can follow this step-by-step guide to apply the glazing technique easily:
Step 1
Mix the watercolor tube paints thoroughly and clean your brushes. Add water to the paint mixture as per your consistency requirements.
Step 2
Use a large damp brush to apply the first thin layer of this paint on your watercolor paper. You can also use a sponge for application. However, make sure that you do not use too much water, or else you might damage the surface of your painting.
Step 3
Let the first layer dry out completely before adding the subsequent layers. Remember that you may need to add several layers of the same color to achieve your desired textures and gradients.
Step 4
Once the layers of your glazes dry out completely, you can add fine details to your painting. These include highlights, outlines, and additional colors for a bolder punch.
Examples Of Finished Paintings Using Glazing
4. Salt Technique
More than washing and detailing is required to create an artwork that stands out. Hence, trying the salt technique with watercolor tubes is a great idea! It can help you create a unique texture and add an interesting visual treat to your painting.
When salt is sprinkled on the wet watercolor wash of any painting, crystalized patterns start forming on it. Since the salt crystals absorb water and pigment, a beautiful texture is produced. Here is a step-by-step guide to try out the salt technique with tube watercolor paint:
Step 1
Use a large brush to apply a wet wash on your watercolor paper.
Step 2
Add the salt crystals on the surface of your watercolor paper while the wash is still wet. You can choose your choice of salt depending on the texture that you wish to create. For instance, you can add coarse-grained salt to create rough textures or stick with fine-grained salt if you want delicate textures.
Step 3
Let the salt crystals sit on your painting until it is completely dry. This painting process can take several hours in this case since a tube of watercolor paint takes longer to dry.
Step 4
Once the paint dries, use a clean and dry brush to remove the salt crystals from the surface of your painting. Or, you can use your fingers (like how I do) to scrub off these crystals gently. Ensure that you do not apply strong pressure while doing so, or else you might damage your watercolor paper.
Examples Of Finished Paintings Using Salt Technique
5. Splattering Technique
If you ask me, the splattering technique is one of the best ways to create interesting and creative effects in your artwork. It requires you to spread random splatters of tube paints on your painting to create abstract effects.
Splattering can add textures and depth to your artwork and facilitate enhancing certain sections of the painting. You can use this technique to perform several tasks, such as creating an enticing background in your painting. Here is how you can use watercolor paint technique to try out splattering while painting:
Step 1
Pick the watercolor paint tubes that you want to splatter on your painting. Mix them with water to achieve the desired level of consistency in your paints.
Step 2
Dip a clean brush in this smooth mixture of paint and water. Lift it and hold it right over your watercolor paper.
Step 3
Use your free hand to tap or flick the brush. This will cause the paint accumulated on the bristles of your brush to splatter on your painting, thus creating your desired effect. Repeat the process with as many colors as you want.
Examples Of Finished Paintings Using Splattering
6. Stippling Technique
Stippling is a popular watercolor painting technique where a professional artist is supposed to use watercolor paint to make small dots or paint marks to create various effects. I often use this technique with watercolor tubes to create several kinds of patterns.
The key to creating a wide range of designs using the stippling technique is assessing the perfect size of dots or marks your painting needs. For instance, you can vary the density and size of your dots and marks based on whether you want to create subtle or graphic details. Here is a step-by-step guide for trying out this technique with watercolor tubes:
Step 1
Take your watercolor paper. Sketch the area you wish to stipple on using a pencil.
Step 2
Squeeze out the watercolor paint from the paint tubes on your mixing palette and dip a dry brush into it. Ensure that the brush is small, round, and clean.
Step 3
Hold the brush at a 90-degree angle over the space you wish to stipple. Then, dab its bristles lightly to create small dots and marks on your painting. You can play with spacing and pressure while creating each dot to make various designs and patterns.
Step 4
Once you have added enough dots to your painting, use another (preferably dry) brush to blend certain areas to create a softer look.
Examples Of Finished Paintings Using Stippling
7. Wet-On-Dry Technique
As the name suggests, wet-on-dry requires applying wet paint from the watercolor tubes to your dry paper. You will like working with this method if you want to create precise details in your paintings.
The tube paints remain in place when applied on a dry surface because they are thicker in consistency and hold their position on the paper. As a result, there is no issue of bleeding or spreading in this case. Here is a step-by-step guide to using the wet-on-dry technique to create controlled details:
Step 1
Take a bit of paint from the watercolor paint tubes and mix the pigments on your mixing tray. Using a wet brush, lift this mixture off of your plastic or ceramic palette.
Step 2
Using the tip of the wet brush, apply the watercolor paint on a dry sheet of your paper. Ensure that your brush is not dripping with water and is just damp enough to work with.
Step 3
Create all the designs and effects that you want in the first layer of your painting - fine lines, edges, and so on. Let it dry before you add the next layer of watercolor paint to the tube.
Step 4
Keep repeating the process until you achieve your desired design.
Once you have tried out the various techniques you can use with paint tubes, it is essential to clean up too. Doing so ensures that the watercolor paints in tubes won’t get degraded due to neglectful maintenance. Further, cleaning your art tools after painting with watercolor paint tubes can also help ensure that your future paintings are not muddy or dirty.
Tips For Cleaning Up After Painting With Watercolor Paints In Tubes
1. Clean Your Brushes
The bristles of your dirty brush can get hard over time, making the process of painting way more inconvenient than it is supposed to be. To avoid this issue, cleaning all your brushes right after you paint your beautiful artwork is always a good idea.
To clean your brushes, rinse them with clean water. Use your fingers to gently remove any stubborn dried paint from the bristles of your brushes. You can also use a mild soap for a better cleanup. Once you have cleaned the bristles of your brush, reshape them.
2. Clean Your Palette
Since artists use their personalized watercolor palette a lot while creating any painting, it becomes crucial for them to remove the dried paint from its surface. Working with a dirty paint palette can lead to the residue of the dried paint and dust mixing with your fresh paint - thereby causing muddiness in your fresh paint mixture.
Using a paper towel, remove the excess wet paint from the surface of your mixing palette. You can use mild soap to scrape off the dried paint from your mixing palette and rinse it under water. Hence, it is a good idea to clean your mixing palette right after you are done with one painting session.
3. Clean Your Workspace
While most artists remember to clean their mixing palettes and brushes, they commonly forget about cleaning their workspace too. Painting in a dirty workspace can cause a strong negative impact on you, such as a lack of motivation, due to the accumulation of clutter around you. Additionally, dirty tables can lead to staining on your paintings as well!
Hence, it is best to maintain a clean workspace. Collect all your art tools and put them back in their storage places. It would be best to clean your workspace with a damp cloth in areas where you might have spilled too much paint, such as tables or floors.
How To Store The Paint And Equipment Properly?
1. Store The Watercolor Tubes In A Cool And Dry Place
The best way to prevent dried watercolor paint tubes is to store them in a cool and dry box with a tight lid. Since heat and moisture speed up the tubes drying out, it is best to keep them away from areas with direct exposure to sunlight.
2. Seal The Watercolor Paint Tube Caps Properly
If you want to work with fresh paints every time you use watercolor paint tubes, you must seal their metal caps properly. By doing so, you can prevent the moisture from getting trapped inside the tubes to a great extent. Tighten the nozzle properly to prevent air from entering the paint tube.
3. Place Your Watercolor Tube Paint Set In An Upright Position
Since we squeeze out the paint whenever we use watercolor paint tubes, it is best not to store them by placing them horizontally. Instead, stick to storing your tube paint set in an upright position. This way, you can minimize the chances of your tubes leaking.
FAQs Related To Watercolor Paints In Tubes
How to restore dried watercolor paint tubes?
Most of us who have been using watercolors for a while will have old, crusty paint tubes lying around the house. As watercolors don’t really have an expiry date, you can easily restore them with a few simple steps.
Cut open the metal or plastic tube.
Remove the paint into a mixing palette or pan.
Add a bit of gum Arabic, and water to revive the paint.
Let the paint soften, and add a bit more binder or water if required.
Stir the wet paint with a toothpick to create a smooth paste for getting a consistent color.
You’ll need a little more patience while restoring old dried paints, but it’s worth it and can be done with only a few supplies.
Can you use watercolor paint straight from the tube?
Yes, you can directly pick up paint from the tube while working on a spot color. You need to unscrew the cap, and lift a little paint from the tube with a wet brush. Just make sure that the brush is absolutely clean to avoid contamination. But we don’t recommend using this technique frequently as it may promote mold growth.
How to properly store watercolor paint tubes?
After you use watercolor paint tubes, it’s pretty essential to store them properly to prevent mold growth and contamination. Remember to clean the mouth of your tubes with a damp cloth or paper towel to remove any excess paint that may get dried and clog the cap.
To avoid the paints from cracking or getting separated, store the tubes in a cool, enclosed space and an airtight container. Properly stored watercolor tubes may last a long time and remain vibrant, which can sometimes be more than ten years.
Artists love experimenting with new pure paint sets. Hence, if you are bored of using watercolor pans, it is best to switch to paint tubes. Watercolor paints are semi-liquid, highly pigmented, and can help you add bold color punches to your paintings - unlike watercolor pan cake paints.
You can use watercolor tubes to paint pigments through several kinds of painting techniques, such as wet-on-wet, dry brushing, and so on. With watercolor tubes, you have the flexibility to choose between using a watercolor paper or painting on a watercolor canvas. Even though such paints may have a higher cost price, they are definitely worth every penny!
Summing up, the best way to use watercolor paints in tubes is to experience and discover your own style. Don’t shy away from experimenting with different shades and hues, no matter how bold it may seem for your comfort zone.
If you’ve found this guide insightful, don’t forget to give my article on how to paint glassa read.
If you’re new to watercolor painting, you may think that painting natural landscapes is the best way to get the hang of the process.
However, this isn’t completely true, as you can also start your journey by painting buildings and structures. The fluidity of watercolors makes it quite easy to successfully create the effects of light, shadows, and different textures. So, you don’t have to worry about missing out on any finer details and a realistic finish!
That’s why for today’s tutorial, I will walk you through the step-by-step process of painting the famous Berlin Cathedral with watercolors. Clear your table and dive into the deets! It goes without saying that this would make a great En Plein Air painting, even if you don't live in Berlin, painting the reference and enjoying this process outdoors is worth considering!
Painting Berlin Cathedral In Watercolor
Before I explain the steps for painting the Berlin Cathedral with watercolors, let me quickly tell you about the supplies I will use today. The good news is I won’t use many watercolor paints or brushes, and you don’t need these exact products either. I am using whatever I have handy, and you can follow suit!
Paint: Daniel Smith George Politis MA Set 1 6x5 | Paper: Saunders Waterford Watercolor Paper - White, 300gsm | Brush: Princeton Aqua Elite Professional 4 Piece Set 4850
The first step for any painting, especially as a beginner, is to draw a rough sketch of the landscape or structure you have in mind on your watercolor paper. This will act as an effective reference to keep you from mixing the colors later.
My sketch today is a pretty simple representation of the exterior of the Cathedral (with domes and windows) and a bushy foreground. But you can seek inspiration from online images to better understand the overall structure and the different sections. Likewise, feel free to use a ruler for drawing straight lines.
The only thing I’d suggest here is to use light pencil strokes so that you can erase them easily without leaving any nasty marks if required. And don’t worry if sketching the structure takes more time and you have to do it multiple times.
Once you’re satisfied with the sketch, it’s time to get started with the real deal! Thin out some light and dark green with water separately in a palette and start painting the bushy foreground, using the two shades alternatively.
I am using short and quick dabbing motions to add texture as well as help the shades blend seamlessly. You can also apply more dark green to the sections where you want more shade than light. However, I haven’t covered the entire space with green, as the little white ‘‘specks’’ create a more realistic effect.
Continue doing this till you’ve completely covered the base of the Cathedral, but make sure you don’t enter the walls above.
With the foreground ready, the next step is to start painting the Cathedral walls.
For this, thin out some yellow ochre and paint the walls and the beams of the structure. You don’t need to use the same paint for all the walls, though, as we want to create the illusion of light and shadows.
So, use a darker shade of yellow or some light brown to add shadows to the walls like I’m doing here. As you can see, I’m using a deeper shade for the left side to create natural-looking shadows.
For the domes, I’ll be using a light shade of blue to paint the domes of the Cathedral, but you can also use turquoise. Thin out the paint with water and start painting these portions, barring the circular windows.
I’d suggest using only one layer of paint for the domes, as it will darken eventually upon drying. So, adding too many layers at once may make the domes appear too dark, thereby disrupting the overall balance of the painting.
Additionally, you can use the same color without adding much water to add shadows to the sides of the dome. In this case, wait for the domes to dry out completely to see how much they darken, and then take a call accordingly.
Now, take the thinnest brush in your collection and dip it in some dark brown color to paint the details of the Cathedral. Go over the joists between the upper and lower floors as well as the roof-like structures, followed by the perimeter of the walls and the circular windows.
A little tip: paint at least two lines for the triangular roofs and horizontal joists to accentuate these sections to give the illusion of dimension. This will keep your painting from looking flat. Similarly, make small strokes on the front roof and wall, as I have done here.
This step will also require a thin-tipped brush, so make sure you clean the one used in the previous step completely to eliminate any excess color. Or, you can use another thin brush if you have it handy.
I will be using some deep blue watercolor to paint some of the larger windows of the Cathedral while leaving a couple of them for the time being. Likewise, I have not painted the arch-like section of the windows on the bottom, as I felt using too much color will make for a crowded look.
Since we will be adding more details to the windows, let the base color on them dry properly to prevent it from smudging later. Meanwhile, let’s add some more details to the dome of our Berlin Cathedral.
Take a thin-tipped brush and dip it in the same color you used for painting the domes. Now, go over the ‘boundary’ of the domes using the pencil line as a reference. I am also adding a curved porch-like effect on the base of the main dome through horizontal and some vertical strokes.
You can use the same brush to add borders and fill in the circular windows on the domes like I’m doing here. For the final touch, I am using a thicker consistency of color to paint the structure of St.Paul and the apostle (besides the dome) to make it more prominent.
For this step, start by mixing some brown with yellow to paint the upper side windows. Here again, you may darken and lighten the color to create the illusion of shadows and light, respectively.
Using the same color or picking up some brown on the tip of the brush, add the boundaries of the top-most blue windows to give them dimension. Now, fill in the windows using vertical and horizontal lines to create the illusion of wooden panes. Repeat this process for the bottom windows and fill in the empty ones withthe ‘wooden panes.’
At this point, I felt my Berlin Cathedral could use some more detailing and highlights. So now, I am simply going over certain areas to create more shadows and darken the existing color.
I am also adding some brown highlights just below the dome to make the overall structure appear more vibrant.
To add the final touches, we will paint small brick-like structures on the bottom walls with some light and dark brown watercolors, again, to create the illusion of shadows and light. Use a fine-tipped brush to ensure precision, as the shapes should be clearly identifiable.
Finally, use some yellow watercolor to paint the vertical structures on the top of the three domes. And there you have it- the Berlin Cathedral painted in watercolors!
That’s all I had for you today! Although there are many detailed images of the Berlin Cathedral available on the internet, I’d advise first-timers to sketch a simple layout as I did and use only a few colors.
This way, you can focus more on practicing the different strokes and techniques of using watercolors. And once you have your hands set, feel free to sketch more complex versions and invoke life in them with the use of more colors.
As for the time being, you can practice creating light and shadows using lighter and darker shades of colors, as well as natural strokes, to create realistic effects before starting with painting the Cathedral. Or, you can use this painting as your practice guide!
Lastly, don’t lose hope if your first few trials don’t turn out perfect. Remember that practice and patience will always be the key to success, the beginner-to-expert guide on how to paint in watercolor might be helpful if you're feeling stuck!
The most common types of watercolor techniques for beginners include the wet-on-wet technique, dry brush method, and wet-on-dry technique. Lifting, layering, glazing, and the salt technique are a few additional watercolor techniques through which artists can create an enticing artwork. An understanding of the various concepts of color theory makes the overall process of creating watercolor art much easier.
Understanding how to use different kinds of watercolor techniques can help you create a wide variety of elements in your vertical or landscape painting. From textures to transitions, every step can be smoothly established if you are well-versed in such techniques.
In this article, I will be walking you through the basic watercolor techniques for beginners through which you can easily create beautiful art using watercolors. I will also be touching upon the concept of color theory.
Let’s get started!
What Are The Materials Needed For Watercolor Painting?
One of the first and most vital materials that you need to get started with watercolor painting is a decent set of paints. There are a variety of options available on the market, and you can choose the one that suits your needs the most based on factors like the diversity of colors and brands.
If you do not have much experience with watercolors, you may have to go through your share of trial and error to land on the perfect set of watercolor paints.
2. Paper
While you may want to use any kind of paper lying around your house to create art, it is best to stick to watercolor paper when trying to learn the basic watercolor techniques for beginners. The texture and design of the papers in a watercolor painting book are manufactured in such a way that water-based colors do not damage them.
3. Brush
Another essential material required for learning the various watercolor techniques is a brush. One brush is not enough to learn the basics of such techniques. As you will go through the section that covers these watercolor techniques, you will realize that creating a watercolor painting requires you to use more than one brush.
Hence, you should have at least the three primary sizes of a brush handy. These include a small, a medium, and a large-sized brush. The varying widths of the watercolor brushes will help you establish different tasks.
For instance, a big brush can be used to paint a large area whereas a small brush will help you when you want to outline a drawing. You may also use a combination of different types of brushes, such as fan, angular, flat, and linear brushes, to create a variety of effects.
4. Palette
A palette is a base that is used to hold all your paints. Its function also includes acting as a surface for all your mixing requirements. Hence, you can create new colors by mixing two or more pigments on such palettes.
There are a variety of palettes available on the market, and you can choose one that fits your needs the best. For instance, you can either go for the traditional plastic palettes or its metal alternative. If you cannot arrange a palette, you can use substitutes like paper plates too.
5. Water container
If you have ever used watercolor to paint before, you must be aware of how quickly the brushes get dirty. After all, they are constantly dipped in different shades and colors, which leads to accumulation of debris on the bristles.
All watercolor painters keep a water container by their side to clean their brushes. Moreover, water is an important medium that helps watercolors spread easily on the paper, allowing you to paint with ease.
Tip
Keep a paper towel handy as watercolor can be a messy method of painting. You can also use paper towels to add variety to your watercolor painting by creating designs and patterns.
Whenever you wish to create a soft and blended effect in your artwork, it is best to use the wet-on-wet technique. As the name suggests, this method requires you to apply wet paint on a wet surface. You may need to apply a masking fluid to protect the white areas of your art while using this watercolor technique.
This method is most commonly used for creating soft and natural transitions between colors. The colors spread easily on wet paper, which is why this technique is also used for painting a sky or clouds.
Step-By-Step Guide To Practice The Technique
Step 1
Use a spray or paintbrush to carefully wet the paper with clean water. You need to carry out this step carefully, as an excessively wet surface might ruin the paper’s quality.
One might spray the water on the canvas, or use a damp paper towel to wet the surface. Keep this paper at a 45-degree angle for easy application of watercolors.
Step 2
Take your palette and mix the colors that you want to paint with. You can either create a color by mixing two pigments or apply the paint directly on the paper as per your needs.
Using a brush, dab the paint slowly on the wet paper. Rest assured of smooth application with no visible harsh lines.
Step 3
Once you add the first layer of colors, you can tilt the paper a little to cause the watercolors to spread on the paper. But I’d suggest refraining from doing this if you don’t want the colors to bleed into each other.
Additionally, ensure that the first layer of the paint dries out completely before you repeat the cycle of adding the second layer of paint.
Tips
Ensure that the quality of paper used is decent so that it can absorb water without getting ruined.
Paint as quickly as possible, so that the wet paper does not dry out while you are in the middle of carrying out the wet-on-wet technique.
2. Dry Brush Technique
Sometimes, you may be required to add texture to your paintings. In such cases, it is best to use the dry brush technique. It requires you to only use the dry brush and not wet it so that the rough look can be brought to life.
The ideal type of paper for using a dry brushing technique is the cold pressed watercolor paper. It allows you to create elements like fur, wood, and rough ground easily. This fun technique also ensures that the paint does not lighten in terms of saturation after drying.
Step-By-Step Guide To Practice The Technique
Step 1
Choose the correct brush to create the dry brushing effect. The best one to go for in this case would be a brush with firm bristles, ideally the ones that are made of goat hair.
You can also choose the brushes that you have had for a while now since they must have absorbed a decent amount of moisture over time, thereby becoming firmer in texture.
Step 2
Make a thick paint mix and dip your brush in it. Use it to apply watercolor on a dry piece of paper. Then, create soft and quick brush strokes on the paper to give your painting a rough and textured touch to it.
Step 3
Keep adding the strokes until you feel the need to stop. Using this technique, you can also create highlights and other relevant details to the background of your painting.
Tips
Use a decent quality of paper to paint on because dry brushing may tear thin or poor quality papers.
Do not add excess paint to your brush to have more brush control over the creation of strokes in your painting.
3. Wet-On-Dry Technique
As the name suggests, the wet-on-dry technique requires you to use wet paint on a dry surface. This is the best method for beginners since it gives them a decent amount of control over the movement of brushes and paints on paper.
If you want to create a defined and crisp painting that has all its elements well defined, then you should practice mastering the technique of wet painting on a dry surface.
Step-By-Step Guide To Practice The Technique
Step 1
Take a dry sheet of paper. Wet the medium-sized brush that you will be using to create your watercolor art in clean water, and then dip it in your desired shade of watercolor.
Step 2
Apply smooth strokes to create defined shapes of the figure that you want. Since the surface of the paper is dry, you will be able to easily apply the watercolor in whichever direction you want.
Step 3
Once the paper dries out, add the next layer of paint to it. Watercolor fades to a lighter tone after drying when applied using this technique, so you might be required to layer the colors more than once to create a smooth and opaque finish.
Tips
Don’t wet the brush too much because an excessive amount of water may hamper the process of creating well-defined figures.
To prevent different colors from mixing or bleeding, add the next layer of paint only when the previous one dries out completely.
Color Theory
Why do some colors suit certain elements of art better than others? It happens due to color theory, which is the study of how different colors work with each other and how humans perceive them. Before you start exploring the various watercolor painting concepts, it is crucial that you are aware of this theory to produce better art pieces.
Colors symbolize different things, thereby affecting human emotions. The understanding of this concept helps designers and marketers create designs that people can relate to and connect to on a personal level.
For instance, red and yellow are known to induce appetite - that is the combination used by food outlets such as McDonald’s in their logo. This theory also involves understanding how different primary colors are mixed to formulate the differing shades of secondary and tertiary colors on the color wheel.
1. Basic Color Mixing
The three primary colors - red, yellow, and blue paint - do not need to be mixed with any other pigment to be created. On the other hand, secondary colors are formed by mixing an equal ratio of two primary colors in a balanced amount.
An example of this basic mixing can be mixing red and yellow paint to create an orange pigment.
Similarly, when we mix a secondary and a primary color, we obtain a tertiary color. For instance, if you mix blue, which is a primary color, with green paint, which is a secondary color created by mixing blue and yellow - you can create the shade of blue-green.
2. Complementary Colors
Understanding the concept of complementary colors and color theory can help you create a more suitable piece of artwork for your audience.
Complementary colors are nothing but the colors that lie opposite to each other on the color wheel. These opposite colors, when used together as a combination, give a more vibrant touch to your watercolor painting.
It increases the contrast of your designs as well. A few examples of complementary colors include pairs of red and green, yellow and purple, and ultramarine blue and orange.
3. Warm And Cool Colors
You can use warm and cool colors to accurately depict certain emotions through your art by setting its mood. Colors like red, yellow, brown, and orange fall under the category of warm colors. Such tones are used to give off the emotion of passion and energy.
On the other hand, colors like blue, green, and purple are cool colors. Hence, they can be used to symbolize the emotions of calmness and peace. These shades also create a sense of objects being placed far away in the painting.
Additional Basic Watercolor Techniques For Beginners
1. Glazing
If you need to create a sense of depth in your painting, or maybe add a layer of shimmer to it - glazing is one of the best watercolor techniques to do so. It involves applying a thin layer of watercolor paint over your painting, such that it appears close to being transparent.
Glazing can help you establish a variety of tasks, such as adding a rich layer over your entire painting to create a layered effect. You can also enhance a certain section of your painting to make it stand out by glazing it.
2. Lifting
No one is perfect, which is why it is common for even veteran painters to make a mistake while creating their artwork. Fortunately, watercolor techniques like lifting can help them correct such mistakes easily.
To carry out this technique, all you need to do is take a wet brush or a paper towel and blot it over your painted paper to take off the extra little pigment from it.
You can also purchase a specialized lifting tool for a more precise result. While it is a popular technique used for rectifying the mistake of adding too much pigment, you can also use it to add highlights.
3. Layering
Layering is another commonly used watercolor technique, which requires the artist to add layers and a flat wash of watercolor paint on top of an already existing layer. It is used primarily to enhance a few sections of the painting, create depth, and for adding texture to paintings.
An important thing to note about layering is that you need to wait for one layer to dry out completely before you put the next layer of watercolor paint over your art. This would ensure that the colors of your painting do not mix and bleed.
4. Salt technique
If you like giving interesting textures to your paintings, you need to try the salt technique! You need to apply paint on your paper for this and keep it wet by sprinkling a generous amount of water on it.
Next, sprinkle a decent amount of salt over the region where you wish to create the textures. The size and shape of the salt crystals will influence the design of textures formed in your watercolor painting.
Let it dry overnight. Then, remove the salt by rubbing your fingers over the textured paper. And voila! You have created an interesting textured effect.
FAQs Related To Basic Watercolor Techniques For Beginners
What are the different types of watercolor brushes, and how do I use them?
There are various kinds of watercolor brushes. The most common ones include round, flat, fan, mop, detail, and angle brushes.
You should keep them clean at all times, and reshape the bristles of your brushes to ensure that they don’t dry out.
Additionally, brushes may be categorized based on their size. Hence, there are small, medium, and large brushes as well with varying widths. You may use either of them based on factors like the area that you wish to paint.
For instance, you should use a large brush while painting the background of your painting and a small brush for precision.
What is the best way to mix watercolors to achieve the desired color?
To achieve your desired shade of color, you should always start by mixing a small amount of the necessary colors on your palette. It is important to not take a large amount directly, since there is no guarantee that you will create the shade that you want on your first try itself.
You should also use water to dilute the watercolors as and when required. Even after you feel satisfied with the shade that you have created on your palette, it is best to test it out on a piece of white paper first to ensure that it looks like the shade that you were aiming for.
How do I create different textures and effects with watercolors?
You can easily create interesting textures and effects using different watercolor painting techniques, such as dry brushing. This method requires you to dip your dry brush in paint and create a thick stroke directly on dry white paper to give off a textured and rough look.
Similarly, you can use other watercolor painting techniques such as the wet-on-wet method to create soft transitions and salt watercolor techniques to create a textured background. You may also create a look of splattered water using the splatter method, or use the method of scratching with a sharp object such as a toothpick to create textures like grass or fur.
What are some common mistakes to avoid when starting with watercolor painting?
One of the most common mistakes that people make when starting with watercolor painting is investing in cheap supplies. While buying high-quality paints and papers might seem too expensive, it is worth the outcome that you produce in the end.
Another common mistake is not letting the paper dry out completely before adding the next layer of paint. The colors bleed into each other as a result. You should also not forget to clean your brushes routinely using water and wiping them with a dry paper towel.
How do I care for my watercolor brushes and other materials?
One of the best ways to care for your watercolor brushes is to clean them right after you are done with painting. This will help you prevent any form of buildup on their bristles. Similarly, you should also reshape your brushes regularly and store your materials properly to avoid any form of damage.
It is also crucial to take care of your color palette. Since you will be mixing different shades on it, you should ensure that it is clean at all times to avoid compromising the desired shades.
Can I use watercolors on other surfaces besides paper?
You can use watercolors on other surfaces besides paper too. However, most of them need to be compatible with this form of paint. For instance, you can use watercolor paints on surfaces, such as boards and canvases that are specially designed for this medium of paint.
Apart from that, you can use watercolors on porous surfaces like wood and textile. However, you may be required to prep some of these surfaces by priming them a bit so that the colors don’t seem dull.
How do I know when a watercolor painting is finished?
Knowing when a watercolor painting is finished depends significantly on your personal goals. It is best to step back and check out the various aspects of your painting to assess whether or not they are balanced up to your desired level.
For instance, if you are making a realistic painting, you might want to evaluate whether or not your work is finished by seeing if the art needs any more detailing. Similarly, you can assess the tones of your watercolor painting and adjust the areas that seem to sway away from the intention that you had in mind.
Where can I find resources for further learning and improvement in watercolor painting?
Many free tutorials on YouTube can help you learn and improve your watercolor painting skills. You can also find relevant resources on platforms such as Quora and Reddit, where people share their experiences of anything new that they try out or take a course on reputed platforms.
Although watercolor paintings are a visual treat, the watercolor techniques to create the same may seem a little difficult to master. However, with the right amount of dedication and practice, you can easily use these watercolor techniques to paint your ideal form of artwork.
The best way to apply all these watercolor techniques is to use them as a combination of more than one method. This will allow you to create a wide variety of elements on one sheet of paper itself.
The basic watercolor techniques for beginners include wet-on-wet and dry wet watercolor techniques, dry brushing, layering, and lifting. Apart from them, you can use the salt technique or glazing to add an interesting texture to your paintings.
With that, I have reached the end of this article. Feel free to share your creativity through watercolor paintings as you experiment with the different watercolor techniques mentioned above.
Goodbye for now!
A new bathtub does not have to cost a bomb!
If you are looking for a new tub, try the acrylic models that have flooded the market due to their popularity. And while you're at it, why settle for just another tub when you have limitless options for gorgeous and luxurious tubs at similar costs?
People nowadays prefer acrylic bathtubs over others because they are affordable, easy to maintain, and above all, look great. But the question arises- which brand should you go for? Worry not; we've compiled a list of the best acrylic bathtubs for you to choose from.
We've also added a buying guide, so be sure to check that out as well.
Best Acrylic Bathtubs
From renowned brands to innovative designs, this list encompasses a range of features and styles to elevate your bathing experience. So, without further ado, here’s the list of the 14 best Acrylic Bathtubs that will transform your bathroom into a haven of relaxation and indulgence.
Modern bathtubs are a specialty of the brand Kingston Brass. They have come up with a new model, the VTDE603122L, that is made of superior-quality acrylic. With a clean and straightforward design, this acrylic bathtub would fit right into any bathroom. Along with an easy installation method, this option tops our list as one of the best acrylic bathtubs.
Product dimensions – 30-11/16" W x 60" L x 22-1/6" H |...
Why Did We Like It?
Let's start with some unique features of this white acrylic bathtub by Kingston Brass. This model is constructed using fiberglass and resin reinforcement, so there is no doubt about its durability and strength. It is comfortably sized at 30-inch width, 60-inch length, and 22-inch height and is not too heavy, weighing not more than 95 pounds.
Moreover, this acrylic bathtub has a three-wall clove installation so it can fit into your bathroom space from three sides, leaving only one open. Along with that, it also includes a tile flange and an integral tub apron. These features make the model modern and sturdy while allowing easy installation.
Speaking of the installation process, we thought the entire process of fitting this option in the bathroom was a breeze. The construction is simple and pristine, with a polished finish over the interiors. Also, this left-hand drain bathtub has a pretty good tub capacity of 58.2 gallons.
What Could've Been Better?
We couldn't find any significant issues with this product. Its sturdy design, ease of installation, along with positive customer reviews told us pretty much all we needed to know. Those of you who enjoy minimalistic designs for acrylic bathtubs will appreciate this model. However, if you're looking for an artistic approach to bathtubs, this unit may not be your cup of tea.
Pros
Effortless installation
Large capacity
Affordable
Polished and attractive appearance
Cons
Basic bathtub design
Size (inches): 60 x 31 x 22 | Shape: Rectangle | Installation Type: Alcove | Capacity: 64 Gal | Drain Kit: No | Overflow: Yes | Jets/Whirlpool: No
We present another Kingston Brass product to you, but this one is the right-hand drain model, VTAP663222R. While it is similar to the previous unit in many aspects, this model has a few features that differentiate it from other acrylic bathtubs from this brand. Yes, it is still an alcove bathtub, but it has a larger water capacity.
Acrylic construction with fiberglass and resin reinforcement
Alcove tub with apron
Why Did We Like It?
First of all, this tub by Kingston Brass is an alcove type which is a pretty popular choice for home developers and contractors. Not only does this design look great with its three sides closed and one apron for entering, but it's also easy to install.
When it comes to acrylic tubs, you need a timeless glossy finish that stays. And, this is precisely what you can expect from this acrylic bathtub. It is also quite large at 32 inches in width, 66 inches in length, and 20 inches in height. While the water depth is 16 inches before it flows over the tub, it also has a larger tub capacity at 62.17 gallons.
Also, we think that shape matters immensely when trying to find the perfect fit for the bathroom. For instance, a modern bathroom with limited space calls for a rectangular acrylic bathtub since it is the easiest to fit in a corner.
What Could've Been Better?
Despite coming at an affordable price, this acrylic bathtub appears high-end and improves the aesthetic of the bathroom. It's also spacious enough to fit tall people. However, it is a classic rectangular bathtub that may appear boring to some people. So, make a note of that if it concerns you.
Pros
Large water holding capacity
Sturdy acrylic construction
Easy installation
Can fit in bathroom corners
Cons
Very simple design
Size (inches): 66 x 32 x 20.5 | Shape: Rectangle | Installation Type: Alcove | Capacity: 62.17 Gal | Drain Kit: No | Overflow: No | Jets/Whirlpool: No
Up next, we have an acrylic bathtub by the well-known brand American Standard. This model by American Standard is an acrylic, white, deep soaking tub for full-body immersions. If you are looking for a tub to enjoy rose petal soaks to relieve stress, this might be the tub you are looking for!
Right off the bat, we knew we had to include this model by American Standard. It was one of the few models that checked all the boxes for a good-quality acrylic bathtub. But this product specializes in one particular feature, i.e., full-body immersion. That's right; it is so large that you can use this for deep soaks for therapeutic benefits.
In case you are wondering, this model weighs only 7 pounds because it is an under-mount or drop-in style tub. So, it's also 36 inches wide and 72 inches in length. At this length, it is easy to accommodate even those of you with long legs. Also, at 18.5 inches deep, the water level will be enough to cover the entire body.
Another good thing about this model is that it has dual molded-in armrests and a pre-leveled tub bottom. These features allow you to rest your arms and maintain good posture for the back.
What Could've Been Better?
This brand has been known for its quality and style for 130 years, and the model in question is a clear example of that. However, the installation method might not be convenient for everyone. With this model, you will need to pick and drop it in the bathtub section, which is not as straightforward.
Pros
Spacious for total body immersion
Slip-resistant tub floor
Budget-friendly
Comfortable for back and spine
Cons
Complicated installation
Size (inches): 72 x 36 x 21.5 | Shape: Rectangle | Installation Type: Drop-in | Capacity: 60 Gal | Drain Kit: No | Overflow: Yes | Jets/Whirlpool: No
Now we introduce to you a beautiful standalone tub by the brand Vanity Art. The model VA6610-L by Vanity Art is an oval, freestanding tub that is luxurious and comfortable for a relaxing soak at the end of the day. Thus, this high-gloss white acrylic tub is a royal option for your modern bathroom.
First of all, who can resist a tub with a high gloss finish in pure white? This acrylic bathtub is a piece of art that would be a fantastic addition to your bathroom. The model is made of lucite acrylic and is reinforced with ash-land resin and fiberglass. These ingredients should give you a good idea about the product's quality.
Moreover, this freestanding bathtub is a textbook definition of luxury mixed with comfort and chic design. The size is appropriate for modern-day bathrooms with a width of 29.5 inches, length of 59 inches, and height of 23.6 inches. It also has a flexible drain pipe that levels all four legs.
Nothing can replace the pleasure of a relaxing bath, and freestanding acrylic bathtubs give you this comfort even if you have small bathrooms. They are designed to fit in modern and traditional bathrooms alike and include sloping lines that follow your body's natural curves.
What Could've Been Better?
All you need is warm water and this tub to destress after a long day. This beautiful model is a truly stunning addition to the bathroom and can be used for any bathroom renovation. But even though this acrylic bathtub is incredible, we wish it were slightly larger than its current size.
Pros
Stain and scratch-resistant
Fits in small bathrooms
Durable fiberglass material
Easy to clean
Cons
May be too small for some users
Size (inches): 67 x 30.5 x 23.6 | Shape: Oval | Installation Type: Freestanding | Capacity: 60 Gal | Drain Kit: No | Overflow: No | Jets/Whirlpool: No
Next, we have another sleek and trendy acrylic bathtub by Vanity Art, once again. The VA6814-S is a freestanding bathtub that is similar in size to other models by Vanity Art. This model comes in pure white color and has a glossy polished exterior.
No products found.
Why Did We Like It?
We decided to check yet another Vanity Art product because this one was as unique and elegant as the previous one. This model is a drastically different style compared to the previous model we reviewed, even though there are many similarities. In our opinion, what’s similar is the use of white acrylic material, which is the best option for acrylic bathtubs.
Furthermore, this design also falls in the category of freestanding bathtubs. But the shape is much more sleek and sharp as compared to the oval designs. But what differentiates this model from the rest is the polished chrome finish that shines, giving the tub a smooth and luxurious feel.
Apart from that, with this acrylic bathtub, you can mount the tub spout, diverter, and showerhead at either end of your choice. You even have the option to add these fittings to either side.
What Could've Been Better?
This model has a durable construction, making it the ideal acrylic tub for any bathroom. We say that because there was one issue that came to our attention. With high-quality products, you would expect a scratch-resistant surface. But this tub tends to develop slight scratches over time.
Pros
Fits all bathrooms
Can add shower accessories
Anti-slip floor
Affordable
Cons
Prone to scratches
Size (inches): 59 x 29.5 x 24 | Shape: Rectangle | Installation Type: Freestanding | Capacity: 60 Gal | Drain Kit: Yes | Overflow: No | Jets/Whirlpool: No
Here we have another high-end option for modern bathrooms. The 67" Luxury Freestanding Bathtub by Empava is made of white fiberglass and is very durable. It has a brushed finish that is pleasing to the eye, and the oval tub shape is comfortable to sit in.
Elegant Modern Look: Upgrade your bathroom with a...
Deep Soaking Comfort: Immerse yourself fully in the...
Why Did We Like It?
One of the first features we liked about this acrylic bathtub was the new-age design of the tub. This pure white freestanding tub that features 100% glossy acrylic complements all kinds of bathrooms.
It also sports an ergonomic design that makes it comfortable to lie in for as long as you like without straining your back.
Besides this, it has a versatile system that allows pairing with any tub filler of your choice. These additions can change the way you view bathing and transform it into a therapeutic experience. If you place this model in your bathroom, it will inevitably become the focal point due to its gorgeous curved appearance.
It is wide enough to fit one person comfortably with a length of 66 inches, a width of 31 inches, and a depth of 26 inches. Finally, it has an impressive tub capacity of 58 gallons.
What Could've Been Better?
The curved design with its pristine white glossy finish makes this option a gorgeous addition to the bathroom. However, we thought that one aspect might not make this one a good choice for everyone. It falls on the smaller side, so taller people might have a hard time fitting in.
Pros
Glossy acrylic material
It goes well with modern homes
Comfortable for long soaks
Easy installation
Cons
Slightly small
Size (inches): 66.9 x 29.5 x 26.38 | Shape: Oval | Installation Type: Freestanding | Capacity: 58 Gals | Drain Kit: Yes | Overflow: Yes | Jets/Whirlpool: No
Another option we decided to include in this list was the Ruby 65 in. model by Ove Decors. This contemporary acrylic bathtub is a freestanding model that has a pop-up drain and waste overflow feature. This brand has different sizes ranging from 59 to 70 inches; however, we wanted to look at the 65-inch model.
Ove Decors has a really interesting service policy that lasts all of 25 years. They guarantee that their acrylic bathtubs will be defect-free in construction, and you can ask for repairs and services for 25 years from the purchase date. That is a confident claim, but the brand has the quality to back it up.
Essentially, the materials are entirely certified and constructed using high gloss acrylic and reinforced fiberglass. These acrylic bathtubs are incredibly durable and do not wear quickly, and they are easy to clean and maintain.
Apart from that, the design is perfect for modern-day bathrooms and is ideal for relaxing deep soaks. And the soaking depth is good enough for a medium-sized person to fit in comfortably. The best part is, this model has the correct amount of slope for supporting the back. This efficient design maximizes comfort allowing you to spend more time in the acrylic bathtub.
What Could've Been Better?
After reading some online reviews, we found that a couple of customers had issues with surface-mounted bathtub valves. They claimed that the regular-sized valves they purchased were not the correct match for this tub. So, it's better if you research further because you don't want to end up buying the wrong parts.
Pros
Service for 25 years
Ideal for immersive soaks
Sturdy material last long
No leakage issues
Cons
Accessories not easily available
Size (inches): 65 x 29.1 x 28.4 | Shape: Oval | Installation Type: Freestanding | Capacity: 53.9 Gals | Drain Kit: Yes | Overflow: Yes | Jets/Whirlpool: No
Next, we have another freestanding acrylic bathtub that comes in a rounded, oval shape. This model, B-0018 by Woodbridge, is made of premium materials that other manufacturers do not as often use. The superior quality of the materials reflects in the cleaning aspect too. This acrylic tub is much easier to clean and maintain.
Now we come to another great option - an oval freestanding bathtub made of the most premium material. This acrylic bathtub is made using 100% high gloss lucite material in the color white. It is also reinforced with Ashland resin and fiberglass, making it a superior-quality product.
This elegant bathtub is 59 inches long, 31 inches wide, and 22 inches deep. It also has a decent water holding capacity of 55 gallons at any given time. The brand has taken time and care in developing a non-slip bathtub that ASTM approves. The tub floor is smooth but will still keep you safe by preventing slipping.
Apart from that, this acrylic tub is easy to maintain and clean. After purchase, it does not easily develop stains and scratches and retains its glossy finish for a long time.
What Could've Been Better?
All in all, this option was one that we could not leave out from the list. We were impressed by the inclusion of a brushed nickel drain and overflow with the packaging. To top that, they also provide a one-year limited warranty. However, this option is costlier than other models.
Pros
Strong enough to bear 1000 pounds
One-year limited warranty
Many accessories included
Comfortable design
Cons
Slightly pricey
Size (inches): 59 x 31.5 x 22.8 | Shape: Oval | Installation Type: Freestanding | Capacity: 55 Gals | Drain Kit: Yes | Overflow: Yes | Jets/Whirlpool: No
The 1957-LA-0 model by Kohler is one of the acrylic alcove bathtubs you should consider. This model is rectangular with built-in white acrylic material deemed to be the standard for most bathtub options. What's unique about this option is the integral flange which is responsible for preventing water leaks and seepage.
Luxurious, deep soaking experience with 68-gallon capacity...
Molded lumbar support and sloped backrest for enhanced...
Why Did We Like It?
Let's get one thing out of the way. The material used for the construction of this alcove tub is the regular solid acrylic material. But simply because it is common does not mean that they are not high-quality materials. This rectangular is a frontrunner when it comes to alcove tubs and can easily compete with its competitors on the market.
Apart from that, we'd like to mention a few features that make this tub worthy of consideration. This acrylic tub measures 60 inches in length, 32 inches in width, and 21 inches in height. It can also contain 68 gallons of water at any given time.
Also, it contains an overflow drain that you can use for immersed soaks. While resting in the tub, this model takes care of back support with its ergonomic design.
What Could've Been Better?
At first, we were not sure if this product would live up to our expectations, but we were pleasantly surprised. But, after digging into the product details, we found the drain kit is not included in the packaging. Basically, you'll have to spend extra to get the complete kit.
Pros
Clean design
Affordable
Fewer water spills
Easy to install
Cons
Accessories are not included
Size (inches): 60 x 32 x 21 | Shape: Rectangle | Installation Type: Alcove | Capacity: 68 Gals | Drain Kit: No | Overflow: No | Jets/Whirlpool: No
While we have already mentioned a different acrylic bathtub by American Standard earlier, we had to include this one too. After all, it's not our fault that this brand has more than one option for decent acrylic bathtubs. The 2461002.020 model, in particular, is a right-hand drain-style model with a painted finish.
Americast engineered steel with glossy porcelain finish
Full Stansure slip-resistant floor surface
Why Did We Like It?
First of all, this model is slightly different from the ones we have reviewed so far. Some features like the materials, finish, and functions vary from other models, but we thought you might find this option interesting. This tub is made of a material called americast, which is lighter than cast iron.
Compared to cast iron tubs, this model is far more durable too and easier to handle. Also, the final coating consists of a porcelain enamel finish which is pretty glossy, non-porous, and scratch-resistant. This coating also creates a slip-resistant floor automatically. The textured floor allows the feet to get a grip, thus preventing accidents.
Next, we have to mention the heat retention qualities of this tub. Simply speaking, it keeps the water hot for a long time for a relaxing bathing experience. Finally, the Americast backing helps to insulate the bathtub allowing for a quieter shower or bath.
What Could've Been Better?
There is no doubt that this model delivered when it came to the durability and a pleasant bathing experience. Yet, a few reviewers felt that the glossy appearance was lost after using it consecutively for a long time.
Pros
Heat retention properties
It prevents slipping and accidents
Insulates tub for quiet showering
Scratch-resistant
Cons
Loses gloss over time
Size (inches): 60 x 32 x 14 | Shape: Rectangle | Installation Type: Alcove | Capacity: 50 Gals | Drain Kit: Yes | Overflow: No | Jets/Whirlpool: No
When it comes to minimalist designs, the Shangri-La bathtub by FerdY is by far the most pleasant and user-friendly one. This oval, freestanding bathtub has a brushed finish that gives it a glossy appearance that is generally sought after for tubs. It also has a feature that allows for heat retention.
🛀 CLASSIC DESIGN: Clean, elegant, and contained, FerdY...
🛀 A PERFECT BATHING EXPERIENCE: With 47-inch length and...
Why Did We Like It?
The first thing that caught our eye was the minimalistic yet elegant design of the acrylic bathtub. It is an oval acrylic tub that allows for deep, immersive soaks while also providing back and spine support. This model features a cast resin material that forms the perfect curves, while the hand-finished detailing adds personality to the tub.
Speaking of which, the material used for its construction is glossy white acrylic that is reinforced with fiberglass that makes it durable. Not many tubs can boast that their materials are sourced from the most environment-friendly and non-toxic courses. But this option guarantees these benefits along with non-cracking, stain-resistant, and easy-to-clean features.
Moreover, the user guide is simple to understand and gives detailed steps that will help you with the installation. It provides instructions on tub accessory placements like the plastic and brass drain pipes located on the inner side of the tub. Finally, another impressive feature is the adjustable foot leveling it provides.
What Could've Been Better?
This freestanding tub is a worthy contender for several reasons. Its double-wall insulation and its 1750-pound load capacity are only a few of the reasons. However, the use of plastic in drain pipes doesn't sound like a good idea. Our doubts were seconded by reviewers who found leakages in the tub.
Pros
Glossy and pleasing appearance
Easy installation instructions
Keeps water warm
Pre-installed brushed nickel drain
Cons
Plastic drain is not durable
Size (inches): 47.24 x 25.59 x 22.83 | Shape: Oval | Installation Type: Freestanding | Capacity: 40 Gals | Drain Kit: Yes | Overflow: Yes | Jets/Whirlpool: No
Who doesn't enjoy a good soak? We're sure you would love to check a variety of tubs for soaking and relaxing before purchasing the perfect one. This is why we have searched the market and found the following product, the FT-AZ090 bathtub by the brand ANNI.
One Piece Marine Grade Acrylic Construction: Fabricated From...
Integrated Chrome Overflow And Reversible Drain: Features A...
Why Did We Like It?
Let's face it, even though you are going to buy only one bathtub; it's nice to see the options available. And, making the right choice might seem complicated because there is no shortage of brilliant options out there. Take this model from ANNZI, for example - it's a beautiful modern glossy white acrylic bathtub that gives the feeling of a spa at home.
It's exciting to see an acrylic bathtub built of incredibly durable materials. It is Rhino Alloy certified and has the best acrylic and fiberglass in its construction. Besides, these materials are known to retain gloss over a long time and do not easily develop scratches or stains.
What's more, this high-quality bathtub is quite spacious. It measures 71 inches in length, 35 inches in width, and 30 inches deep. With a 52-gallon water holding capacity, it makes for a roomy, relaxing experience to soak in this tub.
What Could've Been Better?
While this beautiful acrylic bathtub has tons of impressive features, we think it comes with a share of drawbacks. This option is not the best acrylic bathtub for reliable customer service. A few online reviewers faced issues with the motor and airflow but did not receive a timely response from the customer service team.
Pros
Scratch and stain-resistant
Limited lifetime warranty
Perfect for a spa experience at home
High water level for submerging
Cons
Poor customer service
Size (inches): 67 x 31.5 x 28.3 | Shape: Oval | Installation Type: Freestanding | Capacity: 79.26 Gals | Drain Kit: Yes | Overflow: Yes | Jets/Whirlpool: No
While we are on the topic of bathtubs that feature several additions for maximizing relaxation, another worthy option comes to mind. Enter the Acrylic alcove whirlpool bathtub by the brand Empava! This tub has a multitude of features like a self-leveling base, removable pillow, and water jets.
[SPECIFICATIONS] Outer Dimensions: 59. 49 in. L x 29. 53 in....
[PREMIUM QUALITY] The acrylic whirlpool tub featuring...
Why Did We Like It?
While on the lookout for the best acrylic bathtub, we came across this alcove model by Empava. This tub also features water jets that improve the bathing experience. There are a total of 11 water jets spread across the tub - four near the foot area, three jets near the body, and four small ones near the lumbar region.
Besides this, the tub differs from others in shape and style. It is constructed using the best acrylic material and reinforced with fiberglass, but that's not all. It also has a stainless steel frame that has a load-bearing capacity of 660 pounds. The front panel is unique because it is made of tempered glass which adds to the appeal of the bathtub.
Furthermore, operating the system is easy due to its ergonomic controls. And, with a length of 59 inches, an average-sized person can easily fit in the tub with room to spare.
What Could've Been Better?
While this is a pretty attractive option for relaxing baths and soaks, we think a few things need care while using it. You need to handle the glass at the front of the tub with care. If too much weight is applied, the glass might break.
Yet another model we liked by the brand Empava was this 72-inch acrylic whirlpool bathtub. This model is the largest option we checked. The rectangular alcove tub can hold a tremendous amount of water, and it's also much wider than a regular tub.
Empava Whirlpool Tub with 10 Water Jets: With careful...
2 Person Whirlpool Tub:The 2 person whirlpool bathtub can...
Why Did We Like It?
Before we talk about anything else, we want to point out that this might be one of the best acrylic alcove bathtubs for two people. It has a generous length of 72 inches which is big enough to stretch legs, and the width is a comfortable 48 inches. Also, it has a timeless double-ended design with lumbar support.
Along with that, the tub has a set of 10 water jets. It has two water jets along the body, four near the feet, and four jets near the lumbar area. The 1.2 HP water pump is powerful enough to work all the jets simultaneously. You could also adjust the water pressure according to your liking.
Moreover, the three-year limited parts warranty covers the overflow, jets, knobs, and drain pipes. Even if there are any leaks, you can get a replacement within three years of purchasing.
What Could've Been Better?
Even though there are several attractive features of this option, there are some downsides too. During our research, we found that this option needed more upkeep than regular models. It is much more delicate and prone to leaks as compared to other tubs.
Now that you have seen the top options available on the market find out what features to look for before selecting the final tub -
1. Bathtub Type
Arguably one of the first things you should determine is the kind of tub required for your home. It's possible that you already have an idea about what would look best in your bathroom. An alcove type might be better suited than a freestanding acrylic bathtub if you have a smaller bathroom. Alternatively, if there is room to spare and you prefer the bathtub to take center stage, a freestanding option would be the best choice.
2. Durability
The best acrylic bathtub is one that is durable and lasts long. No one wants a bathtub that cracks soon after the purchase, and that's not the only issue with low-quality tubs. If the materials used for the construction are not up to the mark, the glossy white color fades quickly too. Make sure you select an acrylic tub that is reinforced with fiberglass. This material is super tough, and the color will remain pristine white for ages.
3. Depth
The gallons of water a tub can hold varies across companies and models. But if you are looking for complete body immersion, go for a tub that holds above 65 gallons of water. An immersion of 18 inches or above should be enough to cover the entire body.
4. Warranty
If parts happen to break or you face leaks pretty soon after purchasing, it can be costly to get these issues fixed. But, you would be saved from this stress if you had a warranty from the company. Look for a company that offers at least one year warranty for the bathtub. It's best if it provides a replacement for all parts; if not, check which parts fall under the warranty blanket.
Acrylic Bathtubs FAQ's
What are the advantages of acrylic bathtubs?
Acrylic bathtubs offer several advantages. They are lightweight, making them easier to install compared to heavier materials like cast iron. Acrylic is also a good insulator, meaning it retains heat well, providing a comfortable bathing experience. Additionally, acrylic bathtubs are highly resistant to stains, scratches, and fading, and they are available in a wide range of designs and colors.
Are acrylic bathtubs durable?
Yes, acrylic bathtubs are generally considered durable. Acrylic is a sturdy material that resists cracking and chipping. However, it is important to note that the durability can vary depending on the quality of the acrylic used. It is advisable to choose acrylic bathtubs from reputable manufacturers known for their quality and craftsmanship.
Can acrylic bathtubs be repaired if they get damaged?
Acrylic bathtubs can be repaired if they get damaged. Small scratches or scuffs can often be buffed out or repaired using acrylic repair kits available in the market. For more significant damage, such as cracks or deep scratches, it is recommended to seek professional assistance to ensure a proper and long-lasting repair.
Can acrylic bathtubs fade or discolor over time?
Acrylic bathtubs are designed to resist fading and discoloration. However, prolonged exposure to direct sunlight or harsh cleaning chemicals can potentially cause some color fading or discoloration over time. It is best to follow the manufacturer’s care instructions, avoid abrasive cleaners, and limit prolonged exposure to direct sunlight to maintain the appearance of the acrylic bathtub.
Can acrylic bathtubs be customized or modified?
Acrylic bathtubs can be customized or modified to a certain extent. Some manufacturers offer customization options, such as different colors, finishes, or additional features like jets or whirlpool systems. However, it’s important to note that major modifications may not be possible once the bathtub is manufactured, so it’s best to discuss customization options with the manufacturer before making a purchase.
How long do acrylic bathtubs last?
The lifespan of acrylic bathtubs can vary depending on usage, maintenance, and quality. Generally, a well-maintained acrylic bathtub can last for many years, even decades. High-quality acrylic bathtubs from reputable manufacturers often come with warranties that provide an indication of their expected lifespan. It’s advisable to choose a bathtub from a trusted brand and follow proper care guidelines for optimal longevity.
Conclusion
Here we reach the end of our review-based guide for the best acrylic bathtubs. While all the options we reviewed are efficient and durable, we did have a couple of favorites. For us, the clear winner was the VTDE603122L bathtub by Kingston Brass. This option is constructed using durable materials, spacious enough for long baths, and easy to install.
The second best option was the VTAP663222R model by the same brand Kingston Brass. Its glossy finish and large water-holding capacity were unmatched, in our opinion.
We hope this guide helped you pick the best acrylic bathtub for you. See you next time, take care!
Finding a furniture store with a variety of furniture styles and designs can be a tiring chore. Even more, it can be costly and have indifferent customer service.
To narrow down the search, we have compiled a list of the best furniture stores in the Chicago area where you can rest assured of the best customer service and quality furniture pieces.
Putting together your room’s aesthetic will be a breeze with these suppliers. Read on to find the best store and begin turning your house into a home!
Best Furniture Stores In Chicago
57st. Design
Truly a furniture store of Chicago-based residents, 57 st. Design has its beginnings in the city itself.
Beginning as a bookshelf builder 30 years ago, the founder started his company on the 57th street of Hyde Park. Since then, it has expanded, and now the company does everything from designing pieces to manufacturing and selling the products in their own showroom on Cermak Road.
As every piece of furniture is designed in-house, they are also able to customize anything down the inch to suit your home’s specifications.
Additionally, they give the option to buy a piece that has been pre-owned and restored for a discount. This same piece can be sold back to them, regardless of its condition; restored to its original state, and then sold to the next owner. In exchange, you get store credit to purchase your next piece of furniture.
All pieces are hardwood and finished by hand, ensuring quality that allows it to be repaired and restored back to a brand new condition. This system of circulation allows for furniture that has been built to last to actually last a lifetime.
New Age Chicago Furniture
A family-run store, New Age Chicago Furniture has been on the market since 1910. This company has been providing years of quality customer service and long-lasting furniture for Chicago’s indoor and outdoor needs.
It supplies loveseats, curio cabinets, pub tables, chaise lounges, and Cheval glass pieces, just to name a few. These are testament to the wide variety of furniture types and designs available for purchase.
What’s more, when you shop at a family-run store like New Age, they treat you like family. Their financing options can be accommodating even for those who may be getting on their feet. The New Age family does not discriminate just because you may have an unsatisfactory credit history.
Modern Classics
Inspired by the Bauhaus Modern design, Modern Classics aims to bring high-quality furniture with a mid-century modern touch that they call a modern classic.
Originally an online retail website, the store has expanded to a physical location in the Michigan Avenue Fine Arts Building to showcase its pieces. If modern furniture is what you are looking for, then Modern Classics is the perfect blend of modern styles to create a truly unique piece of furniture.
All designs are manufactured and sold by them. From daybeds to sofas and benches, the most iconic designs from the modern era are available. Every piece is handmade to ensure a quality finish can capture the essence of the original design.
There is also the option to customize the piece you select. You may opt for a different material, upholstery, or for changing the color of the finish. Additionally, they offer free shipping for any retail and design trade orders.
Plain And Simple Furniture
A unique furniture store out of Everton is the Plain and Simple Furniture boutique. What makes this boutique so unique is its entire Amish-made collection. You can choose from one of their many contemporary and traditional designs or have a custom-made piece just for you.
While the majority of their furniture is made-to-order, there are still simpler designs for instant purchases. However, the more common options are the made-to-order pieces to have complete control over design, material, and wood finish.
Employing a number of skilled Amish builders, they can modify any of their pre-existing designs available to fit your taste. Additionally, there is a choice to select what wood you would like and any other details on the piece. Standard delivery can be done within a 25-mile radius, which includes assembly and placement.
Every furniture item is a quality build from solid hardwood like maple, walnut, oak, and cherry. With excellent branding, this is a perfect option for those who are looking for simple designs.
What is more impressive than the craftsmanship is their delivery service nationwide. You can have your furniture delivered even if you aren’t in the Chicago area! More than ten years of experience will ensure that you are getting the best value for your money.
Wrightwood Furniture
For those who have a particular taste for rustic pieces of furniture, Wrightwood Furniture out of Lakeview is a perfect place to start. All the pieces have a certain Chicagoan vibe in their material of wood and dark metals. Some colorful pieces are also available, sure to catch the attention of any room.
From bedside tables to coffee tables and media cabinets, Wrightwood can help channel the Chicago spirit and energy into your home. Quite literally, if you choose to pick up one of their Chicago flag-themed items from benches or throw pillows.
Truly a unique experience with beautifully crafted furniture, Wrightwood Furniture is an excellent stop for channeling the proud Chicago spirit into your home.
Pagoda Red
A one-stop-shop for those who wish to bring a touch of the Orient into their homes, Pagoda Red offers unique antiques and furniture locally. Located on the corner of Bucktown and Lincoln Park, the 15,000-square-foot warehouse stores its collection of over 4,000 pieces.
All antiques were carefully collected over more than 20 years of traveling. Every piece has a story behind it and is sure to be the conversation starter in any room you place it in.
Besides antiques, there are beautifully designed furniture pieces with their own flair of elegance and grace. These are similarly based on traditional designs to replicate old Chinese furniture from different dynasties.
Pagoda Red may be a niche store, but it is more than enough to satisfy any search for that Oriental touch you are looking for.
Interior Define
Finding a sofa that fits your home perfectly can be a difficult chore. There is always an issue with either the sizing or material, which may not match; the smallest detail can make the most significant difference.
Interior Define allows you to take control of every aspect of your custom sofa. Everything from the size, build, legs, and material, there is not a single detail of your couch that you can not change. After picking out what you want your sofa to look like, Interior Define will do the rest,
Beyond couches, Interior Define provides their customization service to beds and chairs as well. Recently they have expanded to providing dining collections.
Ever-changing and adapting to the times, Interior Define truly defines what a modern furniture store is. The brand has its own iOS augmented reality app that can show you what your custom furniture piece will look like.
Milwaukee Furniture
Milwaukee Furniture is a family-owned establishment that has become widely recognized in the Chicago area as an assured quality provider for furniture. They have consistently been available to customers who need a refreshing new look to replace their old, worn furniture.
Milwaukee Furniture is a great budget-friendly option with a quality service paired with their range of furniture and accessories. Going to their showroom feels like being treated like family; getting great advice of what accessories or design choices would pair well. Not only are the staff friendly, but they are knowledgeable. Any question on a specific piece was answered right away from availability all the way to the different colors it came in.
Chicago Best Furniture
Carrying a wide range of name-brand furniture, Chicago Best Furniture offers excellent service and prices to match.
Established by two brothers in the business for 20 years, they worked their way up to build a chain of stores in the Chicago and Illinois area. Carrying a variety of brands such as Sealy, Englander, Ashley, and others, the choices are bountiful, and all are priced low to get you the quality furniture you need for less.
It is difficult to find the same quality name-brand furniture pieces at the price offered at Chicago Best Furniture. Their variety in furniture, as well as free delivery to your door, makes the entire buying process that much smoother.
Staff members are patient with you to determine what it is you’re looking for and what models available can fit those criteria. To have a good experience at the store is just as important as the fantastic price and any discounts offered.
Room & Board
Established in 1980, Room & Board is a beautifully designed modern furniture store on the Magnificent Mile in Chicago.
With a stunning view of the city skyline, this four-floor establishment has settings to inspire your own designs for any room. From children’s rooms to living rooms and outdoor areas, as well as matching home decor, Room & Board has a great collection to choose from.
The staff are friendly and will talk you through selecting pieces that will complement your house and personality at the same time. Understanding the rich culture that Chicago has, these Design Associates are there when you need a helping hand but also allow you to shop freely with no pressure.
Additionally, their delivery service with flat rates includes the complete package. Not only will they deliver the furniture to your door, but they will handle setup as well as clean up afterward. All this applies to every item purchased; there is no cap on how many items can be included in the one-time delivery payment fee.
Roy’s Furniture
Based in Lincoln Park, Roy’s Furniture has a welcoming environment and staff to help you have a smooth experience when buying that new bed or couch.
Providing quality furniture is what Roy’s prides itself on. While the delivery times may vary, Roy’s is able to deliver the quality it prides itself on. Customer service is a priority at Roy’s as the Design Associates will understand your needs and recommend what the best model would be to meet those needs.
Besides providing furniture, Roy’s also handles furniture customization. This can elevate a simple, basic couch into a personal, colorful one-of-a-kind work of art in your living room.
Any piece of furniture can be customized to change out the material for any you choose. To help you pick the best material, the Design Associates are knowledgeable in selecting the best material for your needs. Their catalog of materials is extensive and covers many designs and aesthetic choices.
Inside Home
Located in the Ukrainian Village neighborhood of Chicago, Inside Home is a furniture store that supplies curated pieces, both new and old.
For those who are looking for a vintage designer aesthetic, Inside Home is your friend. They specialize in Mid-Century Modern and Hollywood Regency pieces, but they can also cater to your style. Restoring old pieces to new, the staff are not only helpful in guiding you to the items you need but are friendly and conversational as well.
The furniture has a blend of both modern touches and vintage aesthetics. If you are unsure of what you are looking for, the staff of this family-owned boutique will do their best to cater to your tastes. Finding the perfect piece of furniture for you is what they strive for.
Additionally, they offer a custom, made-to-order upholstery route. Using only the best quality materials, you can determine every detail of your furniture. Anything from style, fabric, size, wood stain, and cushion inserts, the custom piece will be unique to your needs specifically.
Al-Mart Furniture & Bedding
Situated in Oak Park, Al-Mart Furniture & Bedding offers excellent prices and discounts for name-brand and quality furniture.
Affordability is the main draw when browsing Al-Mart’s collection. Offering regular discounts on their name-brand items is a common occurrence at Al-Mart. They make sure you get the furniture you need at an affordable price.
It truly is a furniture store for the Chicago people; not only are the prices low, but the customer service is exceptional. Delivery times are fast, and even on-the-spot purchases can be delivered on the same day itself.
The owner, Alan, is an accommodating businessman and understands the Chicago people. He has a hands-on approach in providing only the best customer service that will make you want to visit again.
Hay
Founded in 2002, Hay is a Danish company that aims to bring the Scandanavian design ethos to a larger audience. Being their third location in the US, their Lincoln Park branch is a 3,500 square foot area of Scandinavian designed furniture and accessories.
Combining the contemporary design of Scandinavian furniture with the modern living environment, their furniture has a fresh and simple design. Each piece is designed with extra attention given to durability and functionality.
When buying a piece of furniture or accessory from Hay, the genius of its simple design, while remaining functional, immediately stands out. From rugs to outdoor seating, you can rest easy knowing every aspect of the furniture has been meticulously designed by hand.
Cassona Home Furnishing And Accessories
Operating out of Chicago, this store is well known as a brand of high-quality service and products. All pieces in-house are American-made with a design that will add a modern touch to any home. From sofas and lift-top coffee tables to media units and nightstands, Cassona has it all.
If decorations are all you are looking for, then the store has many pieces that can help tie a room together. Sculptures, rugs, and wall art are just a few of the many different accessories they provide.
To browse their complete collection, their entire catalog is available on their website. If you can’t make it to their physical store, there is also the option to add it to your online shopping cart. They can have them delivered right to your doorstep.
Conclusion
Chicago is a beautiful city with vibrant character and people with different backgrounds all living together. The reflection of individual personality in a house is what truly makes it a home.
So, no matter where you may choose to pick up and furnish your home, the Chicagoans have your back. Fill up your home with beautiful pieces of custom furniture or more traditional designs that will never go out of style.
There is no one who can ultimately say what looks good and what doesn’t match. Express yourself through your furniture, and live life to its fullest in a house you can call home.
Out of all the construction materials, concrete is one of the most commonly used types due to its durability and versatility.
However, this durability does not last forever as it is still exposed to various elements which erode the concrete’s bond. Over time rain, UV rays, wind, and freeze-thaw damage weaken the concrete’s structure.
To combat this inevitable breakdown, bonding agents are used in maintaining the integrity of the concrete. In this guide, we will highlight a few of the best bonding agents for concrete, as well as some pointers to keep in mind when choosing an option.
Without further ado, let us begin!
Best Concrete Bonding Agents
Here's the list of the 11 best concrete bonding agents to help you maintain the durability and integrity of your concrete structures against the damaging effects of weather and time.
Loctite provides a highly versatile adhesive in their PL Premium line. It adheres to many different material types even under tough weather conditions. A strong bond is formed within 15-20 minutes and claims to give an adhesion three times stronger than standard adhesive. Additionally, waterproofing and freeze preventative measures further increase durability.
While using the Loctite PL Premium adhesive, the fast dry times were probably the most appreciated feature. Not having to wait for the adhesion to set in allowed for more efficient applications on multiple surfaces.
As for the strength of the bond formed, it held together exceptionally well. In fact, it’s three times stronger than other adhesives and gives a solid bond nonetheless.
The versatility of this premium adhesive included many common construction materials. From concrete to masonry, stone, and even metal, the adhesive had no problem in securing two surfaces together.
Of course, painting the adhesion may not be an essential feature, but it is a good option to have. Should you so choose to paint the adhesive once dried, it can give a cleaner look to the repair or project overall.
What Could've Been Better?
Due to the application method of the adhesive, the more precise application procedures were challenging. The solution is expelled at a constant steady flow which is by no means thin. This makes surfaces that require a thin, precise application almost impossible to reach.
Pros
Weather-resistant
Versatile application to different materials
Low odor
It doesn’t shrink in freezing or wet conditions
Cons
Struggles with precise applications
Compatible Materials: Polyurethane | Dimensions: 10.75 x 7.25 x 9.75 inches | Weight: 4 oz | Cure Time: 24 hours | Waterproof: Yes
Gorilla is a well-known brand in the adhesive market. The heavy-duty construction adhesive is popularly used due to its flexibility in the materials it can be used with. Withstanding various weather conditions and accommodating its shape to changing expansion and contraction makes it stand the test of time.
All purpose glue: A waterproof glue formulated for virtually...
Fast grab: Despite being a heavy duty glue, this adhesive...
Why Did We Like It?
What made this heavy-duty adhesive from Gorilla stand out is its ability to fill in gaps of the surfaces being bonded. The solution will permeate and fill these gaps to create a stronger bond. Having those gaps filled not only kept the two surfaces bonded well but held each individual piece together better.
As the Gorilla adhesive gives off little odor and is VOC compliant, it can be used indoors as well as outdoors. Its flexibility of adapting to changes in size due to temperature is especially helpful. Freezing or expanding due to heat is no problem; the adhesive will adjust to maintain its hold.
A fast drying time further helps the adhesive to be used comfortably for larger projects. Once dried, the bond is sandable and paintable for a more polished look.
What Could've Been Better?
There are multiple cases of the nozzle breaking or bending, causing the adhesive to leak out. Additionally, the screw-on cap has a tendency to become clogged, requiring a deeper cut to be made to access the formula. The resulting exposure can cause the glue to dry faster in the tube.
Pros
No solvent or water
VOC compliant solution
Low odor
Indoor or outdoor use
Cons
Weak nozzle and screw-on cap
Compatible Materials: Brick | Dimensions: 1.92 x 1.92 x 11.28 inches | Weight: 9 oz | Cure Time: 24 hours | Waterproof: Yes
Epoxy gels are incredibly strong in forming bonds, albeit they do require preparing the epoxy before applying. This epoxy gel from PC Products is a two-part epoxy that works great with concrete. With the ability to fill in the cracks in the concrete, it can give a lasting seal against water and extreme temperatures.
Two-part epoxy adhesive paste to fill and repair cracks in...
High-tack paste resists moisture for application in damp...
Why Did We Like It?
Mixing the two epoxy parts is not as big of an issue, and the application process is relatively easy even for novices. There were 20 minutes or so of working time, which allowed the material to be adjusted before the epoxy bonded securely. After that, the adhesion was set within a few hours.
PC Products used a high tack paste for this epoxy, which means any moisture is resisted when it is applied. Additionally, this high tack consistency makes vertical applications easier. The epoxy was able to be spread evenly to fill in cracks better.
After the epoxy is cured and dried, it becomes waterproof for extra protection throughout the concrete. It can then be sanded or painted to complete any restoration or construction project.
What Could've Been Better?
Two mixing nozzles are included with the epoxy by default. These nozzles provide an easier mixing of the epoxy in perfect ratio and can then be immediately applied. However, these nozzles are for one-time use. For multiple uses, either the nozzle must be cut, or more mixing nozzles must be purchased.
Pros
Resists moisture for damp applications
Gray finish for easier cleanup
Easy mixing of epoxy in one tube
High viscosity for filling gaps
Cons
A limited number of mixing nozzles
cons
Compatible Materials: Concrete, Masonry, Grout Filled Block | Dimensions: 3.5 x 2 x 10.3 inches | Weight: 1.76 oz | Cure Time: 4 hours | Waterproof: Yes
Another standout product from Gorilla is their Ultimate Construction Adhesive, with an advertised zero-second bonding time. While this claim may be difficult to believe, the fact remains that this adhesive is robust and tough. Capable of underwater application as well as an outstanding level of durability, this adhesive performs exceptionally for a range of projects.
Touted as the Gorilla brand’s most durable formula, expectations were high. As is the norm with Gorilla adhesives, this particular product was able to adhere to a variety of surfaces with ease. Any concerns of whether or not a specific material was compatible with this adhesive were not an issue.
Performance-wise it held its own in various degrees of moisture, expansion, and contraction due to temperature changes. Furthermore, being able to fill in the gaps of the materials is always welcome to create a more closed-off seal.
Durability is the key feature of this adhesive. No moisture will be able to penetrate past the gap-filling adhesive once it is dried. What’s more, the adhesive is durable enough to be able to work underwater as well! Once dried, the bond is 100% waterproof.
What Could've Been Better?
An almost instant, zero-second dry time is one of the biggest pulls of this product. However, under different circumstances and use cases, this drying time can vary drastically. Under certain conditions, it can range from a few minutes to a few hours. While it is not an instant bond every time, the drying time does remain minimal.
Pros
Applicable to a wide range of materials
Fills gaps
Shrink proof against changes in temperature
Paintable once dried
Cons
Varying drying times
Compatible Materials: Wood, Fiberglass, Ceramic, Concrete, Stone | Dimensions: 1.9 x 1.9 x 11.2 inches | Weight: 9 oz | Cure Time: 4 hours | Waterproof: Yes
Not to be confused with the previous PL Premium Polyurethane Construction Adhesive, this formula differs in its application method. This adhesive uses a tube rather than a caulking gun to be applied, with similar durability. Able to be used inside or outside on almost any construction material, it is incredibly versatile and easy to use.
Adhesive comes in a 4 oz. Tube, is perfectly safe to use,...
Constructed of 100% polyurethane, this adhesive is perfect...
Why Did We Like It?
Packaged in a four oz. tube, applying this adhesive is a walk in the park as compared to the caulking version. So long as the instructions are correctly followed, a strong bond can be formed on almost any surface.
Additionally, cleanup is easy with a putty knife when the adhesive is semi-cured and has a clay-like consistency. When dried, it has a grey-tan finish, so cleanup is essential to maintain a clean look before the adhesive dries.
When it comes to the actual strength of the adhesion, it does form a secure, permanent bond when applied correctly. Filling gaps is ideal with this adhesive, thanks to its thick viscosity. It is rated to be able to fill up gaps of up to ⅜”, which is a sizable allowance for most projects or repairs.
What Could've Been Better?
A downside to using an adhesive stored in a tube is the strong dependence on the nozzle of the container. In the case of this Loctite adhesive, the nozzle did tend to become clogged with dried formula and needed to be cut away. In some extreme cases, the entire tube needed to be replaced.
Pros
VOC compliant
Waterproof
Cures even in extreme temperatures
Easy application from tube
Cons
Nozzle frequently becomes clogged
Compatible Materials: Wood, Concrete, Stone, Granite, Marble, Brick, Carpet, Metal, Stainless Steel, Ceramic, Fiberglass, Drywall, Pvc Trim | Dimensions: 3.89 x 9.7 x 23.2 inches | Weight: 4 oz | Cure Time: N/A | Waterproof: Yes
Cracks are one of the most common repair jobs when working with concrete. The Slab sealant from Sashco is an excellent option for easily filling these cracks. The formula has been textured to best match the look of concrete to have the cleanest result possible. Additionally, it can flex to adhere to the shifting concrete for a long-lasting repair.
Thanks to the numerous features the Slab sealant has, it is an ideal choice for repairing cracks in concrete. The texturing of the formula, as well as the flexibility and durability, all work together well to give a quality result.
Needing to touch up repairs to concrete constantly can be a bothersome chore. This is not the case with the Slab sealer, as it adjusts to any shifts the concrete goes through over time due to temperature.
Although this sealant may not fill the cracks within the concrete, it keeps the separate pieces bonded together at the surface level. Once dried, it can withstand any foot and vehicular wear and tear similar to regular concrete.
For a more comprehensive repair, the sealer can be applied along with a backing rod for internal support. This can give the solution a firmer grip within the concrete, filling the hole beyond the surface level.
What Could've Been Better?
Weather and humidity can affect how long this adhesive takes to dry and cure. In order to have complete protection from moisture, the Slab sealant requires a long curing time. This can range from a full day to a full 48 hours. This is a large window for possible contamination and can affect the durability of the sealant.
Pros
Seamless repairs
Adhesive’s elasticity adjusts to shifting material
Easy application
Ideal for fixing cracks in concrete
Cons
24-hour cure time for rain
Compatible Materials: Wood, Fiberglass, Ceramic, Concrete, Stone | Dimensions: 3.5 x 2 x 10.3 inches | Weight: 14.8 oz | Cure Time: 24 - 48 hours | Waterproof: No
Another adhesive from Loctite is a construction adhesive with a few unique features. Where this adhesive shines is in its durable and flexible nature. Air pockets are no problem for this adhesive. Loctite has developed this adhesive to have a stronger bond than their PL Premium line, definitely one for heavy-duty uses.
Strong, Versatile Adhesive: PL Premium MAX is strongest,...
Solid Durability: Doesn’t develop air pockets for better...
Why Did We Like It?
Having peace of mind that no air pockets will bubble up once the adhesive has settled is a great feeling. No air bubbles mean the overall bond remains solid throughout the material’s recesses. It keeps the entire structure together and resists any minor movements due to temperature changes.
Applying the adhesive is relatively easy as it takes hold of the material quickly. Additionally, there is some allowance given for cold temperatures; the adhesive will not dry out even if it is exposed to colder weather.
Furthermore, the fast grab that the adhesive has helps when working with surfaces that are difficult to clamp or are positioned awkwardly. However, there is no rush as the fast adhesion time still allows you to reposition the material before it sets and dries.
What Could've Been Better?
Once this adhesive dries, it becomes incredibly solid; keep in mind there is not even room for air pockets to form. This rigidity has its drawbacks as the adhesive can potentially crack and brittle up. Possibly even breaking under extreme pressure, this adhesive may be strong, but it is not the most flexible.
A two-part epoxy from PC Products, this is an exceptional choice for any projects involving moisture or water. The high resistance to water is the standout feature of this epoxy. A tensile and cohesive structure makes this epoxy hold its shape even when applied vertically or overhead.
Two-part marine epoxy adhesive paste bonds materials in dry,...
Bonds many materials, including fiberglass, concrete, many...
Why Did We Like It?
Waterproofing in this adhesive is impressive no matter where it is used; the bond will hold strong with no problem. Even in projects that are underwater, like a pool or tank, this epoxy holds its own without allowing any moisture to pass through.
Furthermore, the mixture has a thicker consistency that prevents dripping or sagging while it sets and hardens. There are not many adhesives that are strong enough to hold their own shape after application, so this is a truly unique feature.
There are 35 minutes of working time which is more than enough time to set the epoxy in position. Once it begins to harden, the total time to cure is eight to 15 hours. Once set, the epoxy takes on an off-white finish.
What Could've Been Better?
Due to the thick viscosity, this epoxy has many strengths against water and holding its shape. On the other hand, this thick consistency can make it difficult to mix or work with, especially when using a large quantity. Of course, it is still entirely feasible to work with when using smaller amounts.
Pros
Can withstand up to 1710 PSI
Fresh and salt water-resistant application
No dripping or sagging
Indoor and outdoor use
Cons
Thick viscosity can be challenging to mix and apply
Compatible Materials: Fiberglass, Glass, Ceramic, Concrete, Metal | Dimensions: 5.75 x 3 x 3 inches | Weight: 17.92 oz | Cure Time: 8 - 15 hours | Waterproof: Yes
This caulk from General Electric was designed to seal cracks in concrete and masonry with a quality bond, more of a repair or touch-up adhesive. Once thoroughly dried, it is completely waterproof and resistant to cracks and shrinking. For sealing minor cracks and recesses in concrete, this caulk is a quick and easy fix.
Applying any concrete bonding agents on a rainy day can be challenging as the rain can wash away any applied adhesive. The General Electric silicone caulk is rain-proof within three hours of application, so any rain forecasts are no longer a threat.
Besides the fast rainproofing feature of the silicone, the caulk remains permanently flexible. There is no deterioration or yellowing over time; it will shift and adapt to changes in its surroundings. As a result, the need for future touch-ups is unnecessary.
The caulk itself is easy to apply using a caulking gun. It is pushed out of the tube smoothly with a nozzle that makes precise applications easy. Once applied, it can be worked on using a putty knife to have a cleaner adhesion between the caulk and the material.
What Could've Been Better?
Once the caulk is applied and set, any excess caulk can be difficult to remove. Using the appropriate materials to remove the caulk can still leave a residue or cause some discoloration. As such, it is crucial to have as clean an application as possible.
Pros
UV-resistant
Resistant to freeze-thaw damage
Fast cure time
Easy application
Cons
It can be challenging to clean up
Compatible Materials: N/A | Dimensions: 2 x 2 x 11.5 inches | Weight: 10.1 oz | Cure Time: N/A | Waterproof: Yes
Outdoor stonework and concrete are most prone to breaking down due to constant exposure to different weather conditions. Liquid Nails landscape adhesive is the weather-proof solution to keep these pieces together and looking brand-new. It holds them together as one solid piece and prevents any shifting due to weather or temperature.
Whether it is a quick touch-up or a repair project, this adhesive gives excellent performance when binding exposed stone or concrete. These pieces tend to shift due to extreme temperatures or as a result of freezing and thawing.
This landscape adhesive keeps the entire structure bonded and resists the external factors trying to break the material apart. Not only does the structure become more solid overall, but the adhesive can also fill the gaps to repair the pieces.
Weatherproofing is a versatile, helpful feature to have in an adhesive. The numerous effects that weather conditions have on stone and similar materials is a tough challenge to prevent. Liquid Nails achieves this protection in their adhesive with astonishing success. The adhesive can maintain its bond through heavy exposure and climatic conditions.
What Could've Been Better?
A clean application is imperative with this adhesive, as once the adhesive is applied to the recess, working it into the desired shape can be challenging. The adhesive takes on a putty consistency that only hardens over time. As such, make sure the adhesive does not get anywhere you don’t want it to go.
Pros
Weather-resistant adhesion
Heavy-duty strength bond
Fills and repairs gaps
Low VOC
Cons
Challenging to spread once applied
Compatible Materials: Brick, Concrete, stone | Dimensions: 2 x 2 x 11.4 inches | Weight: 13.92 oz | Cure Time: N/A | Waterproof: Yes
Truly a feat of adhesive engineering, Weldbond offers a universal adhesive that works as a versatile option. Depending on the material type and application, the adhesive will have different effects. Plus, it is incredibly easy to apply and clean up, making for a high-quality bond between various materials.
BONDS MOST EVERYTHING: No need to carry multiple types of...
GREAT FOR CARPENTRY: Bonds stronger than wood! Easy to sand...
Why Did We Like It?
There are many reasons to like this universal adhesive, almost a fix-all solution for any adhesive needs. The versatility and flexibility that Weldbond brings make using it a breeze no matter what skill level or experience you may have.
A clear finish maintains the underlying material’s aesthetic. However, if a particular color is needed, it can be painted over once dried. Additionally, once the adhesive has dried, it acts as a sealant and priming coat that flexes with minor changes in the concrete.
All these useful features packed into one product increase functionality and durability. The adhesive is not the only benefactor of this incredible bond strength - the material it is applied to is protected all around.
What Could've Been Better?
Although the Weldbond universal adhesive has a fast drying time, there was a notable change in colder temperatures. The adhesive would lump up within the container and become difficult to apply. What’s more, once it is on the material itself, it would be difficult to spread and adhere to the surface.
It can be overwhelming to choose a suitable option with all the different terminologies and various unique features of cement bonding agents. Using the most appropriate type of concrete bonding agent can determine how effective a bond is formed.
Concrete binding agents come in five main variants with particular applications depending on the materials being bonded. Knowing these types and their use cases can help you make a more informed decision.
Two-Component Agent
As is evident from the name, this agent is composed of two components mixed together to form a surface bond. A common type of two-component agent used is an epoxy resin.
This type of agent is suitable for large projects. Waterproofing is an important feature to look for in a two-component bonding agent, especially for outdoor applications.
Use cases, such as binding wood to a concrete surface, are where this bonding agent performs well. Additionally, the two-component agent can be used with insulating foams to insulate concrete.
Concrete Glue Adhesive
A versatile variant of a bonding agent, the glue adhesive has a straightforward application. This adhesive is ideal for quick touch-ups or if a simple adhesion is all that is needed.
It does not need any preparation or tools; a simple coating is sufficient. Consider how much strength is required for your project as the glue adhesive is available in a wide range of bond strengths.
Assembly Adhesive
This variant of concrete bonding agent is designed to handle heavy-duty projects. Perfect for indoor and outdoor use, it has an easy application thanks to a nozzle and narrow tip.
Additionally, it can be spread over larger areas once it has been applied. Once the adhesive has been set, the bond formed is incredibly durable and stable.
Cement Adhesive And Filler
What makes this bonding agent unique is its ability to fill up the gaps in the concrete as compared to the other agents which only form a surface bond.
This particular agent is able to level concrete while maintaining an adhesion. It is a great choice to use where maintaining an even surface is vital, such as in replacing tiling or filling drill holes in a wall.
Silicone Concrete Adhesive
Typically, this type of bonding agent is used on concrete that is part of a building. It forms a tight seal between the pieces. There are two types of bases used in silicone adhesives-acrylic or silicone. These adhesive agents are not as strong as other options, so making sure the compound has sufficient bond strength is important.
Where this bonding agent shines is in its resistance to moisture. Furthermore, the adhesive strength is suitable for delicate materials such as ceramic or glass. If binding glass to cement is in your project description, a silicone adhesive can give you the performance you need.
Concrete Bonding Agents FAQs
What are concrete bonding agents?
Concrete bonding agents are substances used to improve the adhesion between concrete surfaces or between concrete and other materials. They help create a strong bond by enhancing the bond strength and ensuring a durable connection.
When should I use a two-component concrete bonding agent?
Two-component bonding agents, such as epoxy resin, are suitable for large projects and outdoor applications. They provide a waterproof bond and perform well when bonding wood to concrete surfaces. They can also be used with insulating foams for concrete insulation.
How is cement adhesive and filler different from other bonding agents?
Cement adhesive and filler not only form a surface bond but also have the ability to fill gaps in concrete. It is particularly useful for maintaining an even surface when replacing tiles or filling drill holes in a wall.
Can I use concrete bonding agents for vertical surfaces?
Yes, most concrete bonding agents can be used on vertical surfaces. However, it is essential to follow the manufacturer’s instructions and ensure proper surface preparation for optimal adhesion.
How do I apply a concrete bonding agent?
The application method may vary depending on the specific bonding agent. In general, it involves cleaning the surface, applying the bonding agent according to the manufacturer’s instructions, and allowing it to cure or set before proceeding with the desired application or bonding process. It is important to follow the guidelines provided by the manufacturer for the best results.
Conclusion
Selecting the perfect bonding agent for concrete can be a tough choice. Hopefully, knowing all the factors to look out for and a selection of a few options to get you started, can help you make the right choice.
From the above 11 Best Concrete Bonding Agents to Use this Year, the top three expert recommendations are Loctite PL Premium Polyurethane Adhesive, an ideal option for its fast dry times, strong bond formation, and versatility in application.
Gorilla Construction Adhesive is a good option for its ability to fill gaps, flexibility in accommodating changes in size, and low odor. And lastly, PC Products 72561 is the right choice for its easy mixing process, resistance to moisture, and high tack consistency for better crack filling.
Depending on what project you need the bonding agent for, pick the option which has the most relevant features to you. These unique features can be the difference between successful adhesion or not.
Owning the best colored pencils can give you an edge over competitors and artists since it offers rich pigments and bright colors.
However, choosing the right one can be tricky since every brand claims to be the best on the market. In addition, colored pencils come in different shapes, sizes, and types, which makes it all the tougher to choose the right one.
For instance, artist-grade colored pencils are designed to offer a wide color range and smooth texture finish. Some artists prefer to use professional colored pencils because they can try more complex techniques and designs. But they are one of the most expensive types of colored pencils, so you must think twice before purchasing them.
So, in this guide, we have listed a few brands that offer some of the best colored pencil brands. We have also specified the various benefits of different types of colored pencils so that you can make the best art piece.
Best Colored Pencil Brands
1. Prismacolor Premier Colored Pencils
Prismacolor is one of the oldest brands that specialize in art supplies, and it was founded by the Eagle Pencil Company in the year 1938. It primarily manufactures three types of pencils which are soft pastels, colored, and graphite pencils. Over the years, it has started making color paints and charcoal for professional art.
Colored pencils are one of the best sellers of this brand, and they are divided into two main categories; scholar and premier. The scholar pencils line of Prismacolor colored pencils is made from a hard wax with fewer pigmentation properties. However, this line of colored pencils is cheaper than the premier ones. Moreover, there are around 150 different shades of colors that come in packs of 12, 24, 48, 60, 120, and 150.
On the other hand, the Prismacolor Premier is specifically designed for professionals and experienced artists. The wax used to form the lid is smooth and easy to work with since it blends well. However, you must be careful since the tip can easily break from excessive pressure or sharpening.
2. Crayola Colored Pencils
Next on our list is Crayola pencils, an American crayon manufacturing company with expertise in art supplies. When it was first launched in the industry, it focused entirely on making crayons, but eventually, it started to manufacture art supplies such as markers, chalks, colored pencils, and more.
Moreover, all Crayola products are non-toxic; therefore, you don’t have to worry about your kids using them since it is safe for children to use. The oil-based pencils and softcore pencils are two of the best sellers of this brand since they provide vibrant colors and depth while drawing and coloring.
Also, the pencils are available in a wide range of colors which makes it easy for an artist to choose their personal preference
3. Arteza Colored Pencils
Unlike most pencils brands that focus on a business perspective, Arteza's main priority is to inspire the young people around it with art and creativity. The brand wants to keep the spirit of art alive; therefore, they manufacture all types of art supplies, such as student-grade pencils, wax-based pencils, water-soluble pencils, and many more.
It also prefers to make some traditional colored pencils since it wants to inspire young artists to learn old art techniques. In fact, you can use these colored pencils for all types of colored pencil skills, such as cross-hatching, shading, drawing, depth creation, and many more.
Although wax-based colored pencils have vibrant colors, you might experience some wax bloom if you blend multiple colors in a single spot. However, there is nothing to worry about since practice will reduce the chances of having wax bloom on the drawing surface.
4. Faber-Castell Polychromos Color Pencils
Lastly, Faber-Castell is known for producing high-quality colored pencils for children, but it also specializes in making professional-grade colored pencils. Interestingly, Faber-Castell was first founded in the year of 1761, which makes it the oldest brand in the art industry.
At the beginning of the 1850s, the brand started using graphite and cedar wood to make its pencils, leading to affordable, higher-quality pencils. Later on, the brand started producing slide rulers, which were quite famous between 1880 to 1975. Some of the main products include Professional Art and Graphic pencils, pastel, and sharpeners, as well as kid's pencils such as watercolor pencils.
Buying Guide For The Best Colored Pencil
Now that we have discussed some of the best colored pencils on the market, we would like to share a few important factors that can help you make the right choice.
Color
Nowadays, most colored pencils come in a wide range of color options which makes it extremely difficult for artists to blend them and find the perfect hue. Nevertheless, you can still do many things with different colors since art is all about experimenting. On that note, we recommend purchasing a pencil set that contains at least 24 shades of color.
Apart from this, you can purchase additional pencils since they are also sold individually.
Blendability
Just like any other traditional art form, colored pencil drawings require the artist to blend and merge different layers of shades to achieve the right color combination and hue. Artist-grade pencils are one of the best choices you can go for since they are designed to mesh well with different colors without causing any difficulty.
Besides this, you should ensure that the shades are naturally cohesive and pleasing to the eyes.
Lightfastness
Lightfastness is defined as the amount of light the color can resist so that it doesn’t fade away and remain bright for a long time. Hence, you must choose a colored pencil with a high level of lightfastness. This will ensure that the colors remain more permanent and they don’t fade away easily.
Vibrancy
These days most colored pencils are optimized to be more vibrant and dynamic while producing a beautiful art piece. To have vibrant colors on the canvas, you must choose a pencil with a higher level of pigment in the lead. However, excess pigment can cause the drawing to lose its luster over time due to exposure to light.
You can avoid this problem by optimizing the lightfast pencils to be more complex and vibrant. In addition, they are usually expensive, but they are ideal for large art projects.
Durability
Colored pencils are made ofwood; therefore, they tend to break if you don’t take the right precautions. Hence, fine artists prefer to use pencils made from premium wood since it offers better durability. Moreover, high-quality wood is less likely to break when it is accidentally dropped from a high height. In fact, professionals find it easier to use firmer pencils since they offer a better grip while drawing and shading.
Similarly, you must ensure that the colored pencils can offer realistic and stellar art while being extremely durable. There is no point in selecting a durable pencil if it can’t get the job done. As such, testing the pencils before purchasing can help you find the best choice for your personal needs.
Furthermore, you can opt for mechanical pencils if you don’t trust the durability of wooden colored pencils. In fact, they don’t require any strict storage requirements since the pencil leads are within the mechanical pencil itself. However, you will need to purchase the pencil leads separately.
Colored Pencil Brands FAQs
How Long Do Colored Pencils Usually Last?
Normally, a colored pencil can last for around two to five years if you use them sparingly; however, you can prolong the duration. For instance, we recommend storing them in a cool and dark place since exposure to heat will eliminate the moisture and leave the pencil dry.
This can cause your colored pencils to turn brittle and become difficult to use. Nowadays, professional artists prefer to store their colored pencils in a special case that preserves the moisture of the pencils.
How Should You Sharpen A Colored Pencil?
When it comes to colored pencils with soft leads, we recommend not to sharpen them too much. Long points can easily break, and this will cause you to waste more energy and resources. Instead, you can use mechanical colored pencils since they don’t require any sharpening and they are beginner friendly.
On the other hand, you can test out different sharpeners to see which one suits you the best. Sometimes, brands will offer a pencil sharpener with the pencil sets.
Conclusion
With that, we have reached the end of this informative guide. Before signing off, we would like to share tips to help you enhance your artistic skills using these colored pencils.
Firstly,you can use colored pencils on a canvas as long as you prep the surface. For instance, oil-based colored pencils can easily damage the integrity of the canvas. Hence, applying a primer will prevent the oil from damaging the surface of the canvas.
Besides this, we recommend choosing premier pencils over affordable pencils since they offer vibrant color and a very fine point, which plays a crucial role in art.
That said, it is time to sign off. See you next time!
Age like fine wine – I often heard this quote growing up because, like the best things in life, they say the best wines taste better through time.
Yet, the problem is that some wines age faster than usual because of improper storage and temperature.
The good news is I know how to deal with it, and I want to share it with you by giving you the top eight best wine fridges in 2023.
Read on to get to know each of them, their benefits, and which works best for you!
Best Wine Refrigerators Available Today
Preserving and storing wine is the best way to keep your wine collection's pleasant and rich flavors intact.
The key for wine aficionados like you is to use wine fridges, which can be beneficial for home improvement, too.
So, I've listed the eight best wine fridges available today to help you on your wine education journey. Let's get started!
The Wine Enthusiast 32-bottle Dual Zone MAX wine cooler is a $499 product(price at time of publish) designed in the United States that delivers small top and large lower zones to cater to different wine needs and bottle sizes, such as:
Champagne bottles in 12-1/4 inches
Large California Red in 12-7/8 inches
Sparkling wines in 12-1/4 inches
Standard Bordeaux in 11-3/4 inches
Turley in 11-1/2 inches
Typical Pinot Noir in 11-7/8 inches
Typical Riesling in 13 inches
Additionally, this wine cooler can hold up to 32 bottles and is equipped with compressor cooling technology to ensure the wines inside are stored in unchanging, consistent temperature zones.
What I liked about this dual zone wine cooler was the molded polystyrene interior liner embedded in this digital touchscreen Wine Enthusiast wine cooler.
This material is known for its durability and helps prevent bacteria and moisture buildup.
However, I agree with some customer feedback that the Wine Enthusiast 32-bottle dual zone MAX wine cooler produces some noise contrary to its 40 DBA rating.
Yet, despite this dip from the full-glass-black-trim wine cooler, it still works well, just as it's marketed.
Capacity: 32 bottles | Shelving style: 4 - Wavy Wire, 1- Fixed, and 1- Wire Bin | Door: 2 glass panes; full glass | Temperature zone: Dual zones | Noise: 40 dBA | Installation: Free-standing | Warranty: 1 year for parts and labor; 3 years sealed system | Dimension: 33.4 inches (height), 19.5 inches (width), 16.9 inches (depth) | Other features: Electronic touch for temp. zones control; Chrome wine shelves for rust-resistant wine holders; Removable shelves for easy wine access
The dramatic blue LED lamp lighting disrupts the overall design
There's always space for wine collectors' wines with the Wine Enthusiast Classic 70 Dual Zones Wine Cellar that retails for $1,099 (price at time of publish).
First and foremost, it is undeniable that this wine cellar caters to 70 standard wine bottles, one of its characteristics collectors would love to have.
Aside from that, this dual-zone wine cellar has an adjustable thermostat that ensures stable cellar temperature zones to store wine. With stability in humidity comes the perfect pace at which chilled wines can age.
The Wine Enthusiast Classic 70 is about more than just functionality. It also shows its finesse as it offers natural wood trim details on the shelves, fitting for those who prefer a modern minimalist interior design.
However, I do not like the dramatic blue LED lighting, especially when viewed from the right and left sides, because it does not complement the overall design.
Capacity: 70 bottles | Shelving style: Rolling | Door: Triple pane glass door | Temperature zone: Dual zones | Noise: 39 dBA | Installation: Free-standing | Warranty: 1 year for parts and labor; 3 years sealed system | Dimension: 40.87 inches (height), 23.5 inches (width), 25 inches (depth) | Other features: Rolling shelves; Non-VOC natural wooden shelves; UV protection
The removable racks offer easy access to wines and create more space
The sturdy, airtight seal secures the wine away from UV light and moisture exposure
What I don't like
The compressor makes loud noises
The innovation in the Ivation 28-bottle compressor wine cooler fridge will surely put wine connoisseurs like you in a good mood for only $339.99 (price at time of publish), thanks to its fully-stacked features.
One of the features that caught my attention is the built-in fan responsible for uniform air circulation, which means stable temperature and preservation of intrinsic wine flavors.
Aside from that, the entire wine cooler is sealed with sturdy materials that prevent spoilage and untimely stoppage of natural aging, such as:
UV-resistant dual thermopane glass
Smoked door
Moreover, the removable racks are essential to all these features. Although this is not a high-technology characteristic, it holds the following benefits:
Easy access to all the stored wines
Creates larger space for bigger wine bottles
It provides a convenient way to clean racks
However, just like the previous wine fridge, it creates loud noises that can distract a peaceful home. Nevertheless, you can get a good deal from its price and features.
The digital control panel enables visual and audio alarms
The integrated handle and locking system keep the wine fridge secure
The detachable cellar lighting system makes it easier to read the labels in the dark
What I don't like
It is quite expensive
Suppose you are looking for a wine cellar that can give security and a modern design in one, regardless of the price. In that case, you can consider the EuroCave Premiere S Wine Cellar as a possible solution.
The Premiere S is armed with a digital control panel with alarms which is an efficient way to track if there are changes in the cellar temperature.
It also offers a sensitive touch button to access the said features, which makes it possess these characteristics:
Interactive
Convenient
User-friendly
Another thing I liked about this wine cellar refrigerator is that it puts security on top with the alarms and the integrated handle and locking system. It even comes with a leather material keyring and two keys.
Aside from security, you can count on the usability of the Premiere S thanks to its detachable cellar lighting system. It is a functional element you can use whenever you want to read the labels or check on the insides of your wine fridge.
However, $2,295.00 for a solid door and $2,495.00 for a glass door with black trim is quite expensive. Yet, its features speak for themselves.
Capacity: 74 bottles | Shelving style: MDS adjustable | Door: Glass | Temperature zone: Single | Noise: 38 dBA | Installation: Free-standing | Warranty: 1 year for parts and labor; 5 years sealed system | Dimension: 38" (height), 27" (width), 27-1/4" (depth) | Other features: Light timber shelves; MDS adjustable shelves; Low emission UV-protected door
The double pane glass with UV protection prevents chemical reactions with the wine
Great budget option
What I don't like
It does not have dual temp. zones
If you're the type of wine collector that likes to see the labels even without touching the bottles, the Wine Enthusiast VinoView 28-bottle Compressor wine cooler is a good catch at $399(price at time of publish).
This free-standing compact wine cooler is equipped with the VinoView design and a PVC-coated steel wire for the shelves, making it sleek, functional, and sturdy.
Moreover, its double pane glass with UV protection makes the VinoView 28-bottle wine fridge an efficient storage system that secures the wines away from ultraviolet rays that can distort the innate characteristics of sparkling, red, and other chilled wines.
It is also equally important to note that it has an adjustable thermostat that can be maneuvered from a temperature range of 39 F to 65 F to balance the humidity.
However, unlike most wine fridges from this list, the Wine Enthusiast VinoView 28-bottle does not have two temperature zones. It could have been a competent feature to make this an all-in-one fridge.
Capacity: 28 bottles | Shelving style: Sliding | Door: Two glass panes; black stainless steel door | Temperature zone: Single | Noise: 39 dBA | Installation: Free-standing | Warranty: 1 year for parts and labor; 3 years sealed system | Dimension: 32.7" (height), 17" (width), 18.9" (depth) | Other features: LED lighting; Molded polystyrene interior liner
The electromechanical temperature regulation maintains ambient temperature
The vibration-free feature protects the wine
What I don't like
The single-zone unit feature
In the long list of wine fridges, it wouldn't be right to exclude the EuroCave Artevino S Wine Cellar, which has notable features, including shelf capacity, temperature range, and others, at the cost of $2,299.
To start, it features a large shelf capacity that can accommodate 98 bottles of different sizes. Aside from that, it is paired with a low shelf profiling, making it more spacious.
It also has an electromechanical temperature regulation that is reliable for keeping the desired temperature for white, sparkling, and other chilled wines.
Yet, the EuroCave Artevino S is streamlined to cater to red wines, which explains why it focuses on a single-zone unit rather than a dual-zone wine fridge.
What I like best is that the design prevents vibrations because the latter can negatively affect the chemistry of the wines. The vibration can even halt the aging and instead proceed to spoil the wine.
Capacity: 94 bottles | Shelving style: Adjustable sliding | Door: Two glass panes; Black glass | Temperature zone: Single | Noise: 37 dBA | Installation: Free-standing | Warranty: 1 year for parts and labor; 3 years sealed system | Dimension: 38" (height), 27" (width), 27-1/4" (depth) | Other features: Spacious shelves; Cold wall cooling technology; Beechwood shelving material
The full-length glass door provides a snippet of your wines
The beech wooden shelves offer durability and visual aesthetics
The LED lighting makes it easier to view wines in the dark
What I don't like
The lack of tinted glass doors with UV protection
Any list of excellent wine fridges must include the Eurodib 168-bottle single temperature range full glass wine refrigerator for $1,589.
It has a full-length door that enables a full view of the wine you need before opening the wine fridge, making it energy efficient because of its energy conservation (electricity-wise).
With the LED lighting, the searching and reading part has become even more accessible because it illuminates the wines, unlike other wine fridges.
Also, the shelves are made of beechwood, offering a non-porous surface that provides resistance against moisture and bacteria.
However, even with its glorious visuals and the usability of the full-length glass door, I must acknowledge that this wine fridge needs a more modern tinted glass door with UV protection.
A tinted door could spell the difference when preventing light sources from entering the wine fridge to stop unnecessary disruptions in the aging process of wines.
Capacity: 168 bottles | Shelving style: Sliding | Door: Full glass with steel frame | Temperature zone: Single | Noise: N/A | Installation: Free-standing | Warranty: 1 year for parts; 3 years compressor | Dimension: 71-1/3" (height), 23-2/5" (width), 26-4/5" (depth) | Other features: 41-64 degrees Fahrenheit temperature control; 15 beechwood shelves
The advanced cooling technology keeps the taste intact
The smart digital control
What I don't like
The upper zone temperature fluctuates from time-to-time
Kalamera knows best about catering to left and right-handed wine collectors, as this model is equipped with a reversible door you can open on either side for $719.10.
A frost-free design is also incorporated to elevate the Kalamera's door game. Yet, don't fret because even if it's not tinted, the door showcases double-tempered glass for wine protection.
Aside from the reversible door, it has advanced cooling technology that keeps white, rose, sparkling, and other chilled wines in their natural aroma, crispness, and acidity.
To efficiently control everything inside the wine fridge, the Kalamera 46-bottle dual-zone wine refrigerator provides a smart digital control that is user-friendly and readily accessible.
However, I agree with other customers when they say this wine refrigerator occasionally acts up, resulting in a fluctuation in upper zone temperature.
Nevertheless, Kalamera has reliable customer service support to address issues within business hours.
Capacity: 46 bottles | Shelving style: Sliding | Door: Double-layered tempered glass; stainless steel | Temperature zone: Dual zones | Noise: N/A | Installation: Built-in and free standing | Warranty: 2-3 years (case-to-case basis) | Dimension: 33" (height), 23.4" (width), 22.4" (depth) | Other features: Blue LED cold light system; Two interior fans
Wine fridges are also called wine refrigerators, coolers, and wine cellars. All these pertain to one thing: a way of storing wine in a controlled space that has ambient temperature efficient for helping finely age wine.
There are two types of wine fridges:
Built-in wine fridge
Free-standing fridge
A built-in fridge can be embedded into your furniture(cabinetry, pantry drawer, other shelf storage) as it has front ventilation.
On the other hand, the free-standing wine fridge needs enough space to exhaust the air and energy through its side ventilation.
Why Would a Wine Enthusiast Need a Wine Fridge?
A wine enthusiast with a wine collection needs wine storage for the following reasons:
A wine fridge can keep the wine safe from moisture and heat.
A wine fridge can prevent external elements from producing chemical reactions in the wine that can affect taste and aroma.
A wine fridge can secure the collection in one place and can act as a wine display storage.
A wine fridge can help make the wine age in its standard aging time.
Benefits of a Wine Fridge/Wine Coolers
Now that you know what wine fridges are, it is time to understand the benefits of having the best wine refrigerators. These include:
A great wine fridge can keep the wine in an ideal temperature range (cool or ambient)
A dedicated wine cooler can shield the wines from UV rays, especially when tinted and with double-tempered glass.
A small wine fridge is a plug-and-go home appliance.
Factors to Consider When Choosing a Wine Refrigerator
In choosing the best wine fridges, there are certain factors to consider, such as their purpose, capacity, shelving, doors, temperature zones, noise, installation, and price.
I have listed everything you MUST assess to find the right one for your needs.
Purpose
The first thing you need to consider is the wine storage's purpose. It can be for display, keeping the wines cool for a specific time, or preserving it until it has aged to your liking.
To know what you intended a wine refrigerator for, here are the questions you need to ask yourself:
How do I want to use it?
Am I one of the serious wine collectors that need these electronics?
Where should I put it?
Moreover, remember that it differs from the typical beverage fridge with a crisper drawer for frozen foods, snacks, meats, condiments, vegetables, fruits, cheeses, and other grocery store and Delicatessen finds.
You can proceed with the other considerations only after knowing why you need a wine refrigerator rather than the usual fridge.
Tip
To differentiate it from typical refrigerators, read this article on the best refrigerators available today!
Capacity
Next in line is the capacity of your wine storage. There are wine fridges that can only accommodate around 12 bottles and others that are big enough to store more than 100 bottles of wine single-handedly.
Choosing the capacity is a matter of getting the average between how many bottles you have and how many bottles you intend to have in the future. It is better to think long-term regarding capacity because it is more cost-efficient.
If you buy a fridge that can only accommodate a few bottles but intend to expand, it will leave you with no choice but to buy another one at the same price. In turn, it will just leave you with more expenses.
Shelving
The shelving design and material are also important to consider as it dictates the durability, accessibility, and security of the wines.
Different shelve designs are on the market, such as sliding, rolling, adjustable, and removable shelves. With this, the decision on what design to choose is up to your preference.
However, a removable rack is a better option as you can quickly arrange, see, and check your wine bottles.
Moreover, the materials used are usually beechwood and stainless steel, which are durable and resistant to damage. Yet, it will depend on your overall kitchen design on whether to choose sleek stainless or aesthetic wooden shelves.
Doors
You must also consider doors, especially what they are made of, how they are designed, and how you can open them.
The best door choices are made of glass, double-paned, and designed with tints and double-tempered glass, as these characteristics can help preserve the aging of the wine.
Moreover, a bottle wine cooler can be opened from the left, right, or reversible. Again, it will depend on how you usually open a door and where you are most comfortable.
A bottle wine cooler made of a full glass that can make the insides visible is an excellent choice for those who want energy-efficient products.
It is also worth considering whether to buy a single-zone wine cooler or a dual-zone wine fridge.
For one, a single zone can only cater to a single temperature range at a time, so you must only put wines with similar temperature needs inside the fridge.
On the other hand, buying dual zone wine fridges will give you the liberty to store wines of varying temperature needs in a single place and put them under different temperature ranges.
The decision on whether you go for the single-zone wine cooler or the dual-zone one depends on the assortment and needs of your collection.
Noise
Also, consider the noise levels of each wine fridge, as it can also say a lot about the longevity and efficiency of the best wine fridge.
To give you an idea, average wine refrigerators have 35 to 45 dBA of noise. Of course, it is much better if under 35, but it can be a cause of concern when it goes over 45.
Installation
The installation is a critical factor that needs to be pre-determined because you must choose between a built-in and free-standing wine-collecting fridge.
Consider your kitchen counter space, indoor environment, and preference in choosing. On the one hand, you can squeeze a built-in bottle wine cooler into your furniture because it has front ventilation.
On the other hand, the free-standing quality wine fridge stands alone and needs ample space from other furniture and machines because its ventilation is located on the sides.
Nevertheless, if you are looking for a cheaper option, it is usually the free-standing wine cooler that comes at a lower price.
Price
Speaking of price, it is most important to consider the cost of coolers and fridges, and in getting a good grasp of the best value, always ask yourself these questions:
Is the purpose of having a wine bottle fridge achieved with this price?
Do the capacity, shelving, doors, temperature range, and noise set off the price?
Is it necessary for a free-standing or built-in fridge to cost like this?
Is it energy efficient?
If you have the answers to the questions, you can choose whether to invest high on the first buy or start small and invest big in the future.
Wine Refrigerator Related FAQs
I know you are not just here to see the wine coolers I think are the best but also to have your questions answered. So, in this section, I got the answers to some of your FAQs.
How Many Bottles Can You Fit in a Wine Fridge?
A wine fridge can hold at least 12 bottles to 168 bottles and above, depending on the design and make of the wine fridge.
How Long Should You Chill Wines in a Wine Refrigerator?
It depends on the wine you are storing, but it should be between 45 minutes and 2.5 hours on average. Here are some of the common chilling time examples:
Full red wines: 90 minutes
Light red: 45 minutes
Sparkling wines: 2 hours
White wine: 2 hours
Champagne bottles: 2.5 hours
How Long Does Wine Last in a Wine Fridge?
Unopened wines in energy-efficient coolers and fridges with the proper temperature settings can last one year to five years. For example:
White wines: 2 years
Red wines: 3 years
Champagne bottles: 4 years
Sparkling wines: 3 years
My Top Picks
I know that you want to get straight to the point, and I will give you that by sharing my top picks for the best wine fridges in this summary.
When you are included in the list of serious wine drinkers, and your primary purpose is to store 28 wine bottles while staying within your budget, this Ivation wine cooler can be your best buy for only $339.99.
The wine refrigerator cost is less but does more with its UV-protected smoked glass door, airtight seal, and removable racks that bring your wine protection and ease of access.
If you are stuck on a budget and need wine fridges that can accommodate more than five dozen bottles, then the Classic 70 Dual Zones wine cellar from the Wine Enthusiast line will knock you off your feet for just $1,099.
Aside from that, it offers visual aesthetics for your modern minimalist home with its natural wooden shelves that balance the sleek black design.
The best overall wine refrigerator comes from the Wine Enthusiast series, and this is the Wine Enthusiast 32-bottle Dual Zone MAX compressor wine cooler for $499.
For a relatively affordable price (at time of publish), you can get a 32-bottle-capacity wine beverage fridge with dual-zone temperature control.
On top of that, its shelves are made of durable materials that can withstand the test of time and the weight of your wine.
Conclusion
After all the information I've poured in this article, I am sure you're now ready to choose the best wine coolers, whether it be dual zone fridges, small ones for your kitchen counter, thermoelectric wine coolers, or others.
Remember that as wine lovers, the passion for consuming and storing wine must be paired with the right mindset to factor in purpose, capacity, shelving, doors, temperature zone, noise, installation, and price in every purchasing decision.
Get the ball rolling, and start your wine collection with your preferred wine coolers and fridges' brand!
What is the best game engine? Why should you use a game engine in the first place?
Gaming has seen a total revolution – from independent (indie) games to Triple-A (AAA) games. But there has been an exponential rise in the popularity of indie games in the last couple of decades.
What is an indie game? It is an independently created and published game without the backing of a big publisher. If you are an individual or a team of game developers sans an extravagant budget, you will be developing indie games.
So how does a game engine come into the picture for an indie game developer? A game engine helps solve some problems that may arise in the development of any game. It is a software framework or environment that pre-designs physics, user input, rendering, lighting, and other aspects.
Given the budget constraint for indie game developers, we should only be concerned about free game engines.
There are many free game engines available today. And choosing the best free game engine can be challenging, especially for beginners who have limited game development experience.
So, here is a list of the best free game engines for professionals and beginners. Make sure you stick around till the end to get some valuable insight about how to select a game engine.
If you have been using or want to learn to use Blender, Armory is the best free game engine for you. Blender is one of the most renowned free, open-source 3D graphics applications. Blender had its game engine, which was recently removed.
Armory has been built in the Kha-multimedia framework using Haxe programming. It features full Blender integration so you can do all your game development work in one space. Who likes switching to and fro between multiple applications?
We especially liked Armory’s nodes orientation, which enhances performance without complicated setup. Armory’s render system includes pre-compiled materials and fully scriptable render paths.
The Armory game engine is a one-stop solution for 3D game development in Blender. It has the following features:
Physics
Audio
Rendering
Scripting
Networking
Navigation
A key highlight of this engine is that it prevents large package sizes through asset compression, efficient build tools, and binary data format. Armory employs a top-notch animation system that supports events, action blending, and GPU skinning.
Armory is compatible with various platforms, including:
Unity is one of the market leaders in game development, with many popular games like Rimworld, Pokemon Go, and Hearthstone under its belt. It boasts of an advanced rendering engine, a real-time platform, and pre-made assets. You can create a basic prototype easily and quickly using Unity.
Here is a list of some of the win-win features of Unity that explain why nearly half of all the games in the world are created using it.
Unity’s all-in-one editor supports 2D as well as 3D development.
It is compatible with Mac, Windows, and Linux.
It includes a comprehensive suite of developer tools as well as a wide range of artist-friendly tools.
Unity Prefabs are preconfigured objects that you can use in the game.
It supports over 25 platforms across desktop, mobile, VR, AR, Web, and TV.
You can use Unity to build light, small, and fast instant games.
With Unity, you can avail the benefits of game server hosting from Multiplay and game communications from Vivox.
Unity’s cloud diagnostics allow you to get real-time feedback.
You need to know that Unity is not 100% free. If your revenue or funding exceeds $100K per year, then you have to choose from Unity Plus at $25 per month or Unity Pro at $125 per month.
We recommend Godot engine for developing 2D games. It works well with 3D development too but has a considerable edge when it comes to 2D games. Godot’s fully dedicated 2D engine comes with these features:
Use pixel units to scale to any aspect ratio and screen size.
Choose from spite-based or cut-out animation.
A more realistic look with the help of normal maps and 2D lights.
Rotation, auto-tiling, multiple layers, and custom grid shapes.
You will also like the following overall features of Godot:
It has hundreds of in-built nodes and allows you to create customized nodes.
Godot Visual Editor has an efficient and context-sensitive interface.
It features physically-based rendering with complete MSAA support.
Its global illumination provides beautiful real-time graphics.
It supports various scripts and codes, including C++, GDScript, C# 7.0, and visual scripting.
Troubleshoot runtime errors and bottlenecks with its in-built debugger.
It is compatible with almost all desktop operating systems.
It can be used to deploy your developed games across many platforms.
If you want a dedicated game engine for 2D game development, try Defold. A couple of popular games that have reaped the benefits of using Defold are Pet Rescue Puzzle Saga and Blastlands. While it is possible to develop 3D games using Defold, it will require most of the heavy lifting to be done by you – the developer.
Defold can be used to publish your games to six platforms:
HTML5
Android
iOS
Linux
Windows
Mac
Defold uses the OpenGL ES 2.0 for rendering graphics. It uses lightweight and powerful Lua programming language. It is an effective one-stop solution for 2D game development. There are various in-built tutorials to help you get accustomed to the engine.
Defold allows you to add your native code and extend the engine, as well as setup local build environments – flexibility and customization at its best! You can even integrate your projects with external tools like Spine, Tiled, and Atom.
A list of the best game engines will be incomplete without Unreal Engine. It is our top pick for professional developers and experts who aim to develop AAA games. Beginners should not feel left out – you can use Blueprint, which lets you use Unreal Engine even if you do not have extensive coding knowledge.
Some of the popular games that have been created using this powerful engine include Abzu, Snake Pass, Street Fighter V, Batman: Return to Arkham Asylum, Fortnite, GTA V, and Kingdom Hearts III. If you want to create a high-end game with stunning graphics, this is the perfect game engine for you.
The only other free game engine in this list that can compete with Unreal’s graphics is CryEngine. But Unreal gains a competitive edge as it is more user-friendly. Unreal Engine has its asset marketplace, but it is not as good as Unity’s asset marketplace.
It is a dependable cross-platform engine that supports 2D as well as 3D game development.
CryEngine is one of the premium 3D game engines in our list of recommendations. If you are looking for the best graphics and breathtaking visuals, this game engine will not disappoint. Using CryEngine can seem challenging to beginners, but the learning curve gets more straightforward with the help of:
Clear and easy-to-follow tutorials.
Full source code.
Detailed documentation.
Great development community.
Ready-to-use assets in the marketplace.
One of the advantages of using CryEngine is that you get unparalleled VR support. It packs all the tools you need for creating AAA games. Some of the popular games that have been created using it are:
Aporia: Beyond the Valley
The Climb
Hunt: Showdown
Miscreated
SNOW
War of Rights
Lichdom: Battlemage
CryEngine has many win-win features that you are bound to love. Here is a list of some of its features that convinced us to include it in our list of recommendations:
Sandbox has a suite of efficient WYSIWYG (What You See Is What You Get) tools that allow real-time creation, editing, and a preview of each feature and aspect of a game.
It has the Audio Controls Editor (ACE) and the Audio Translation Layer (ATL).
It supports multiple platforms like Windows PC, Oculus Rift, PlayStation 4, and Xbox One.
Although CryEngine is free to use, you have to pay 5% royalty when publishing a commercial game developed using it.
Phaser is one of the most straightforward game engines in this list. It is an open-source framework that allows you to build HTML5 games for mobile and desktop straight from your browser. It relies significantly on Flixel.
If you are a beginner who wants to learn 2D game development, Phaser is the perfect game engine for you. Phaser has many tutorials and examples to help you learn and master an array of game development skills.
If you have some experience in Flash and web development, using this engine will feel like a piece of cake! The only drawback is that Phaser is not 100% free and many of its features can be unlocked with purchase.
Pool Club, Magikmon, and Stranger Things: Monster Flash are some of the recent popular games created using Phaser.
Some of the top-notch features of Phaser are:
It supports legacy HTML Audio as well as Web Audio.
If you are an XNA developer on Windows or Xbox 360 who wants to port games to other platforms like Android, iOS, Mac, and so on, MonoGame is the ideal game engine for you. It is an open source framework with a community comprising of thousands of games.
If you have used C# or Microsoft’s .NET languages, developing games using MonoGame will feel like a walk in the park! If you are a beginner, you can benefit from the active community of MonoGame users. One of the most popular games that have been created using this game engine is Stardew Valley.
Despite its many features, MonoGame does not provide adequate features and tools for non-coders to use it. If you do not have coding knowledge, using this game engine can be a real hassle initially. You can use 2MGFX for compiling stand-alone effects and MGCB for building pipeline content.
Corona is an excellent cross-platform 2D framework for game development. Unlike some premium engines, there are no hidden royalties or charges – it is 100% free. When you opt for Corona, you get some excellent benefits like:
A dedicated, comprehensive community of developers and the Corona support team.
Open source code allows you to add features as per your requirements.
A robust marketplace that is full of graphical assets, sound effects, plugins, and project templates.
You get priority support from the Corona engineering team.
It is ideal for creating apps and games for desktop and mobile devices. It uses the easy-to-learn and powerful Lua language along with native extensions for C, C++, Java, and Obj-C. We especially liked the option to view and monitor projects instantly across multiple devices with the help of Live Builds.
You can use Corona to publish your developed games to a variety of significant platforms without having to rewrite the code. The Corona Simulator instantly responds to changes in the code.
Game Maker Studio supports both 3D and 2D game development. Some of the popular games created using this engine include:
Hotline Miami
Undertale
Hyper Light Drifter
Orphan
Whether you want to create simple 2D games or AAA 3D games, this game engine has the tools and features to get the job done. One of the most versatile engines on this list, it works perfectly for beginners as well as professional game studios.
Here is a list of the best features of GameMaker Studio:
It has a custom scripting language and a dynamic physics engine.
Its intuitive drag and drop feature allows you to create games without writing any code.
It has a Room Editor that gives you complete control of layers, inheritance, and tile brushes.
The Image Editor provides animation support and allows brush-based editing.
GameSalad is the perfect game engine for beginners. Even if you have zero knowledge of coding, you will not find it challenging to create and publish games using this engine. The drag-and-drop scripting feature allows you to develop behaviors effortlessly.
It is an efficient engine for creating 2D games. It does not have a lot of features or stunning graphics capabilities like some of the premium engines we have reviewed in this list. You can use it to create games that apply simple rules to objects. Some of the games created using this engine are Milo & Me, Steam Punks, Super Spin Tanks, and Help Volty.
GameSalad has been used for teaching programming skills. It can publish to multiple platforms including mobile, web, and PC. You can benefit from its extensive community and reliable support.
The only demerit we could identify with this engine is that it has limited features and a subscription system for its Pro version.
Construct 2
Construct 2 is an exceptional game engine for creating 2D games. It comes equipped with a highly intuitive drag-and-drop feature that makes the learning curve fast and straightforward. If you frequently use Microsoft products, you will appreciate the interface of this engine, which is very similar.
It does not have a Mac OS version. The games you develop using this engine can be exported as HTML5 only, so you may have to use a third-party service to convert to other platforms like Android and iOS.
Some of the games created with this engine are the Next Penelope, Airscape, Mortar Melon, Cosmochoria, and Super Ubie Island.
It is not 100% free. After using the free trial version, you can unlock all of its features for $80. It also has a robust marketplace consisting of several plugins.
Amazon has diversified into the game development industry with its Lumberyard Game Engine. It can integrate directly with Twitch. If you are looking to build games that are equally fun to watch and play, this is the game engine you should be using. Fabulous performance and top-notch visuals are guaranteed with this engine.
Its source code is written in C++ and is open to developers, adding a ton of flexibility and control over each aspect and feature of the game in development. We especially liked the thoughtful inclusion of a comprehensive suite of tools for artists, including:
Dynamic global illumination
Particle effects
Volumetric Fog
Physically-based shaders
Some of the features of Amazon Lumberyard that make it a noteworthy inclusion in this list are:
It supports cloud integration.
It has built-in multiplayer deployment.
It has mod-friendly support.
Guidelines for Game Developers
Choosing the right game engine is crucial to ensure that your game development endeavors do not go in vain. There are many factors to consider when selecting the optimal game engine. These guidelines will help you pick the perfect option.
Features of a Game Engine
You need to know what features you need for the game you wish to develop. The majority of game engines offer four types of functions:
Coding – You may come across a game engine that has its scripting language, making it extremely easy for beginners to learn to code. On the contrary, there are game engines that rely on established scripting languages that you can master to gain total control over the game.
Drag and drop – One of the features that require zero coding knowledge is drag and drop. You can choose properties or events from a comprehensive list and drag and drop them to create them.
Full game templates – A full game template is a significant blessing for beginners. You get a ready-made game where you may change minor details. You can import your artwork or move some sliders to alter essential elements.
Visual Scripting – It is the best feature for beginners who want to understand how the code works but do not know how to code. You won’t have to type codes; instead, you can choose various functions that replicate conventional code. It is more effective than drag and drop but can take a while to learn and master.
Other Factors
There are some other factors that you should consider before choosing a game engine.
Game Genre – If you are developing genre-specific games, you should choose an engine for that specific genre. You may use the Adventure Game Studio for creating adventure games or the RPG Maker for creating role-playing games.
Perspective – You can choose either a 2D or 3D perspective for your games. Most of the new game engines support both 2D and 3D. 3D game engines are relatively complicated and involve a steep learning curve.
Computer – Are you using a Mac or a PC? There are a few engines that do not support both systems. Your computer specifications have to be good enough to run more powerful game engines.
Art Skills – You get in-built visual editors with some game engines, enabling you to create art – terrain maps or pixel art. You can choose to import backgrounds and characters from other programs.
Target Platform – Every game engine is not equipped to develop games for all platforms. Where do you want your game to be available – web, Android, iOS, PC, Mac, or VR? Choose a game engine compatible with your target platform.
Game Genres
The selection of a game engine depends much on the genre of the game you wish to develop. There are four game genres:
Simple 2D Games – It is the most straightforward game genre, but you will still have to invest some time to get used to the game engine. You can use drag-and-drop engines to develop 2D arcade games, puzzles, text adventures, and racing games.
Simple 3D Games – Developing 3D games is more complicated than 2D. 3D game engines are sophisticated and require considerable time and effort on your part to learn and master. You can develop survival games, adventure games, and first-person shooting games.
Complex 2D Games – Complex 2D games rely on AI, physics, multiple features, or multiplayer. You can create adventure games, fighting games, tower defense, and role-playing games using sophisticated 2D engines.
Complex 3D Games – Complex 3D games are meant for professionals and experts. Beginners will likely find it next to impossible to develop one of these games. It includes vehicle simulation, real-time strategy, sports, MMO, MOBA, VR, life simulation, and war games.
Final Words
Beginners will face a steeper learning curve, irrespective of which game engine they use. We have shortlisted 13 of the most user-friendly and productive game engines, which will surely be capable of developing your dream game.
Picking one of the 13 recommended engines depends on your requirements, but we hope our guidelines and tips help you make that choice.
Till next time!
Aspiring to create your very own indie game? But having trouble picking the right game-designing platform to do it on?
Then let us help you out a bit with that today.
When it comes to game designing software, Godot is going to be one of the very best in the current market. From supporting a wide variety of tools to boasting user-friendly and versatile coding features, it offers way more than most of its competitors.
However, Godot can feel a bit complicated to the newer user. And so if you are having trouble grasping some of the basic concepts of this platform, then we have just the perfect article for you.
Today we bring you a list of some of the best video tutorials on Godot, which are bound to help you get comfortable with the platform in almost no time.
The Platform Game Tutorial on 2D and 3D game designing from HeartBeast is one of the more detailed YouTube videos out there on mastering the platform.
It runs for about 27 minutes, and in that time span, the video will try and teach you the very basics of Godot and also guide you through making a very basic platformer game from scratch.
Now, HeartBeast as a YouTube channel is a treasure chest of some of the most incredible and easy-to-follow game development guides this video about Godot for beginners takes the spotlight because of how effective it is at teaching the amateur about the platform.
The video is very conveniently divided into two sections so that it’s easier to grasp. One section deals with coding while the other lays great stress on the importance of design work and how to incorporate them into the game.
However, design work will need some custom game assets beforehand for it to work. If you already have a nice collection of them or know some amazing websites which house some excellent 2D and 3D game assets and sprites, then you’re all set.
But make sure that you have some basic scripting knowledge before diving headfirst into the tutorial.
When it comes to Godot tutorials for the Windows OS, there are not many videos that are as effective as this getting started guide.
This video will help you get a jump start right away and teach you about the entire Godot basics from start to finish.
Although the Godot setup and basic tool use is quite similar to that of Mac and Linux, there are still some minor features here and there which differ, and can get quite complicated for newer users.
This guide is just amazing when it comes to helping amateur developers have a better grasp of the various aspects of Godot 3 and even help them with making some demo projects and teaching them to learn as they experiment with the various tools.
The main webpage of the YouTuber has a lot of demos that are up for grabs. You can download them and see how the creator went about making this side-scroller game and how to incorporate the various game assets into the program.
Moreover, these demos will also allow you to have free access to some great coding samples, to study and learn from.
In Godot or in any other game designing software out there 3D model and environment making are significantly more difficult than their 2D counterparts. This fact is especially true for side scroller games, and there are a lot of things that one needs to keep in mind before venturing into making their first 3D project.
Needless to say, it can indeed be quite daunting for the newer users or even some more adept ones to get a complete and proper understanding of this aspect of the platform.
And that is precisely where this video tutorial comes in. It’s specially designed to get you started with a free guide on making a very easy game based on golf physics and very easy gameplay and design mechanics.
In the tutorial, you will learn to take a bunch of different objects and shapes and move them around in the virtual world.
Jeremy Bullock, the instructor, has an amazing tutoring style, which is quite easy to follow, and even if you have a minimal background in game design, you will still not find this tutorial to be all that complicated.
The GDquest youtube channel is a rockstar in the animation and game-designing world. From housing some of the most amazing tutorials on the use of FireAlpaca and Krita, it also has quite a number of incredible guides on video game design along with character creation.
The Introduction to Tileset video from them is a basic introduction for amateurs in the use of tilesets in Godot. Tilesets are one of the most important aspects of world creation in both ‘top-down’ as well as ‘side-scroller’ games.
Hence, having a complete grasp of them is essential, to say the least. And this video will help you to get acquainted with all the basics of tilesets use in Godot.
The video also provides links to the main webpage which houses a lot of the premade tilesets, so you will have some graphics ready to use for your project at a moment's notice.
For just an 8-minute long video, this one is amazingly detailed and covers more than just the basics, and goes into some of the more advanced 2D tileset features as well.
However, this is not the only Godot tutorial in the channel; you can check out some of the others as well.
Remember those childhood days (depending on when and where you were born) when the first generation of Pokémon games came out for the Nintendo and Game Boy?
That was a rather exciting time for the world of video gaming, wasn’t it?
Well, you can also create a similar game like FireRed and LeafGreen too, and Stein Codes in this video will tell you exactly how.
Games then were all pixel art, sprites, and basic game assets, and the video will teach you exactly how to replicate the various game elements from those early Pokémon games and incorporate them into your very own project.
You will learn how to precisely create the overworld sprites from Pokémon characters as well as how to create a fluid movement around the various objects in the game. The video will help you to try your own hand at making a game reminiscent of those initial Nintendo titles.
So if you’re aspiring to create something like Chrono Trigger, Final Fantasy, or just your very own bootleg Pokémon or Digimon game this video is a must-watch.
However, this one is just the first part of a longer series that is yet to be uploaded by the creator, so do follow the channel for his upcoming content.
This is again a very practical Godot tutorial guide from GDquest and deals mostly with the creation of base character models both in 2D and 3D rendering qualities.
One great thing about this tutorial is that though it comes from GDquest’s more premium library, it's free access, and download.
The tutorial dives right into the topic of character creation but doesn’t deal with the modeling aspect of it alone. It also teaches about character movement and how to navigate the game assets around to best fit the environment.
Additionally, with this video and the associated GDquest course, you will have a premade graphics and scene setup, which you can use to learn how character modeling and movement actually work.
However, in terms of the complete coding algorithm, GDquest doesn’t go into too much detail about it in the video. As it’s a free preview, GDquest has kept the coding tutorials for the premium library which you will have to pay for on their Gumroad website.
But for beginners, this video is more than enough to get them started, and then they can opt into their more premium content if they like their tutoring style.
Now, this amazingly detailed game design tutorial from Jeremy Bullock is suited more for adept Godot users who have a nice idea about coding and are intermediate coders themselves.
This tutorial is a multi-part video that covers some of the basic aspects of first-person control features. All of the code that goes behind making the game present on the tutorial is available for free on GitHub, so if you want to take a final look at the game yourself, then you can access it whenever you want.
The tutorial combines a great deal of 3D knowledge for setting up the scene, as well as the camera along with the controller and certain movements like climbing the stairs and walking forward.
However, even though we are recommending this tutorial for the more advanced Godot users, that doesn’t necessarily mean that the newer designers will not benefit from it.
The video is very easy to follow, and Jeremy Bullock does a great job in step-by-step showing all the various things that one can do with this amazing game-designing platform.
So even if you’re not all that good with Godot yet, give this video a watch.
This tutorial from Stein Codes is much more useful for intermediate Godot users than the newer beginners who are yet not completely familiar with the platform.
Godot contains some of the most versatile range of shader types, which, when used efficiently, can be the difference between a good game design and a great game design.
Now, in the video, Stein teaches how to create a complete side-scrolling game from scratch with the help of just shaders. He takes the existing shading options present in the software and spins them into something amazing.
Moreover, the Godot shading language that Stein uses in the tutorial is up for grabs for anyone who is trying to replicate what he exactly did, or even to study coding in itself. The code comes as a part of the tutorial, and beginner Godot users can take a look at the code and get an idea as to what is possible with this amazing platform and what isn’t.
Some parts of the tutorial might look rather complicated to even some adept Godot users, as Stein goes into a lot of detail, but it’s important to tackle this subject a bit at a time.
It seems like GDquest has done a tutorial on almost everything now, doesn’t it? Well, it’s not all that surprising when considering the fact that there is a vast community of professional game designers who’re behind the making and content of this channel.
However, unlike some of their other tutorial videos which deal with particular designing aspects in Godot 3, this one is created solely on Godot 2.
There are some interface changes between the two models and versions, but all in all, in terms of functionality and the things that you can do with them, they are quite similar. Hence, you’re not going to have too much problem implementing all those lessons in Godot 3 itself.
Coding horizontal movement for your characters and in-game sprites is one of the easiest things to do on Godot. But there are some beginners out there who are having some trouble grasping the basics of horizontal movement, and for them, this video tutorial is a must-watch.
However, even though achieving the whole movement is easy, there are certain aspects of this that are a bit lengthy and complicated. And this video does an excellent job of not just covering the basics but complex scripting issues as well.
Making 3D games, even just basic side-scrolling ones is so much harder than making their 2D counterpart.
Hence, this particular topic does tend to deserve more care and minute attention than some other parts and features of Godot.
Now, as this video from Mr. Jed doesn’t go too much into the scripting process of making 3D games, you can search online for a few free-to-download codes to work with this tutorial and help you out with the learning process.
This video teaches you how exactly cameras and angling work in a 3D platformer. In just 12 minutes the YouTuber talk about the camera rig in Godot 3D and how one can efficiently go about to set up a rig which apart from being fully expandable is easy to manage as well.
However, though the video can be very educational for beginners, we would still recommend it for those who are a bit comfortable with the basics of creating new files for a game in Godot.
Having a pre-existing idea of how to set up a 3D world helps as well. For only when you’re comfortable with the basics can you move on to camera work?
The Game Interface from Scratch is the final tutorial mentioned on our list; it’s also the longest one and comes yet again from GDquest.
Now, a game interface is the first thing that attracts the gamer and is one of the most integral parts of gameplay that allows it to be accessible to a wider audience.
Most games, follow a very similar gameplay interface trope, from having a health bar for indicating the total HP, to showing a separate bar just below for the available mana, SP, or even the number of lives that the player is left with.
So, this amazingly detailed 30-minute video will show you exactly how to design a custom game interface all within Godot.
However, the video will be using some preexisting graphics for the coding aspect, so if you have some already in your library, feel free to use them as you go along implementing the lesson.
But, if you don’t have any sort of graphics with you; the video provides a link from where you can download them for free and use them accordingly.
The guide touches upon some of the most basic aspects of interface design, which are incredibly important for those who are learning how to develop their very own indie game.
Final Thoughts
With so many versatile and user-friendly tools to work with, it’s honestly not surprising why Godot has been such a fan favorite for so long. So, we hope that our list today was able to help you out with using this amazing game-designing platform.
Are you a fan of intricate architecture that offers a luxurious living experience? We think you’ll be interested to know about some of these beauties.
The high-end lifestyle is a dream that all of us aspire to have. Choosing the right house is the first stepping stone in entering the world of an extravagant lifestyle. Whether it’s the beautiful view of the estate or the luxurious design of the architectural homes itself, get ready to be mesmerized.
On that note, we present to you some of the most expensive houses currently available in the US. You can have a look at what the finest homes in the country have to offer. It can be the beautiful widespread estate, the high-end architecture, or the posh interior design of the houses- there’s a mansion to suit every taste!
So, without wasting any more time, let’s get on with it!
Most Expensive Houses In The US
The One
The One has taken the number one spot among the most expensive homes in the US that took eight years to develop. This private residence is a modern masterpiece of Nile Niami and is spread over a five-acre plot in Bel Air, Los Angeles, California.
Moreover, the house comes with a view of one of the dreamiest sceneries in California. You get a full 360-degree view of the San Gabriel Mountains, Downtown LA, and the Pacific Ocean. This 105,000 square feet house is the architectural wonder of architect Paul McClean. It also has a modern and minimalist interior design that is the dream child of Kathryn Rotondi.
Moreover, this extravagant private residence comes with 21 bedrooms and 42 bathrooms that’ll be more than enough for you, your entire family, and some uninvited guests! With its 26 feet high ceilings and five swimming pools, The One is your ultimate dream house.
Bel Air Four-Story Mega Mansion
This luxurious mansion, located in Bel Air, LA, California, is indeed one of the most expensive homes in the US. Designed by Bruce Makowky, the mansion features a collection of rare and expensive artworks. It took four years and 300 workers to complete this ginormous piece of real estate.
With an interior space of 38,000 square feet, 12 bedrooms, and 21 bathrooms, it is a real catch for anyone who has a knack for luxurious living. You also get 17,000 square feet of outdoor deck area, along with a swim-up bar.
Furthermore, you get an exquisite 270-degree view of the entire LA skyline, including the breathtaking mountain and ocean views that the city has to offer. You also get seven full-time staff members with the house who’ll cater to your every need. Hence, this mansion offers you the best high-end living lifestyle that you can dream of.
La Follia Estate
The La Follia Estate became one of the most expensive real estate properties in the history of Palm Beach back in 2019. It belonged to the famous Broadway producer Terry Allen Kramer in 2018 and landed on the real estate market in the following year.
Constructed during the mid-1990s, the Italian Renaissance-style design provides a lavish and dramatic appeal to the mansion that is surrounded by five acres oflush tropical greenery. It also offers direct access to the Lake Worth Lagoon and the ocean, along with 210 feet of private beachfront.
The mansion also comes with 13 bedrooms and 18 bathrooms, a movie theatre with exceptional soundproofing, and private staff quarters. It also has a master suite of 4,500 square feet accompanied by dual dressing rooms and a private office. Thus, it is the ultimate billionaire dream house with its elaborate and intricate design, as well as exquisite and jaw-dropping views.
The Manor
This grand estate is a prime example of a luxurious heritage house. Located in Holmby Hills, Los Angeles, California, it is one of the most expensive residential places in the country. So, if you’re looking for an older luxury mansion, this might be the right choice.
It was built by James Langenheim and Associates in 1988 in the style of a French chateau. It was later renovated in 2011 to incorporate a more modern and contemporary design into this luxury mansion.
With an interior space of 56,000 square feet, 14 bedrooms, and 27 bathrooms, it offers enough space to entertain guests. It also comes with an exquisite landscape that offers beautiful hilltop views. Moreover, the mansion is equipped with several amenities, including a rectangular pool, a full-size tennis court, and a decadent double-stair entryway.
The Beverly House
The Beverly House has been a showstopper in several famous Hollywood movies, including The Bodyguard and The Godfather. Located at the very heart of Beverly Hills, the property offers all the grandeur and extravaganza of Old Hollywood.
This Mediterranean Revival-style luxurious mansion was built in 1926, and it sits on three acres of spectacularly landscaped grounds. The architectural design of the house features high-arched ceilings, gilded furnishings, as well as decorative paneled walls.
It also comes with an 82-foot hallway, 25 bathrooms, and 18 bedrooms, along with a two-story library and two dining rooms. You can easily accommodate 1000 visitors within the mansion grounds. Moreover, the Olympic-sized swimming pool and the tennis court make it ideal for entertaining guests. So, the mansion is one of the most sought-after real estate properties in the country.
Manalapan Megamansion
The Manalapan Megamansion has a unique historic charm, along with all its grandeur and luxury. Situated in Florida, the mansion was built in the 1940s, and it features some of the most delicate architectural details.
It sprawled over a widespread green landscape that comes with a botanic garden featuring over 1500 tropical plant species. The mansion also offers 1200 feet of sandy beachfront property and direct access to the ocean. Additionally, the private oceanfront makes it ideal for hosting extravagant beach parties.
With 22 bedrooms and 57 bathrooms, the estate is also ideal for hosting and entertaining guests. It also comes with a fully equipped sports complex and a treehouse for the kids. Hence, you get all the facilities of a luxurious house with this mansion.
Beverly Hills Estate
This beautiful estate is located in Beverly Hills, LA, California, and was the home of billionaire casino and business tycoon Steve Wynn till 2015. However, the property became available on the market in January 2021 and was soon considered one of the most expensive houses in California.
Wynn turned the house into a masterpiece of modern art and architecture under his ownership. At present, this three-storied mansion comes with an interior space of 27,150 square feet that includes 14 bathrooms and 11 bedrooms. It also features high-end furnishings and architectural elements that go perfectly with its eclectic décor.
Moreover, the mansion has a movie theatre, a bar, a gym, and a wine cellar that offers five-star hotel vibes. You also get a beautiful view of Downtown Los Angeles from the terraces. It is a brilliant piece of real estate that showcases modern architecture at its best.
Great Island Estate
The estate offers you natural surroundings and wildlife while you’re just an hour away from the Manhattan metropolis. So, you basically get the best of both worlds with this luxurious estate. You get to enjoy the peaceful rural area and take a break from the busy city life.
The main house of the estate sits on fourteen acres of the conservation area that is surrounded by meadows and lavish gardens. Along with the main house, the estate also comes with several smaller houses and beach cottages.
It was built in 1902, and it features a very traditional European architectural design. The main house comes with ten bedrooms, four fireplaces, eight full and two half bathrooms, dining rooms, a beamed living room, and other facilities. You’ll also get the benefits of other amenities, such as a greenhouse, terrace, dock, and veranda.
Briar Patch
Briar Patch is the most expensive home in the Hamptons, which automatically gives it a spot on this list. The waterfront estate hit the US market in 2014. The house is set on 11.3 acres of beautiful open landscape that comes with spectacular water views.
It features ten bedrooms, nine full baths, one partial bath, and four fireplaces, along with hot tubs, a gym, a spa, and tennis courts. It also comes with a lavish teak-bordered 60-foot outdoor pool. Moreover, the quarter-mile private beachfront makes it ideal for an extravagant beach retreat.
The interiors show numerous high-end architectural elements, including French doors and handmade wallpapers designed in a Georgian Revival style. So, this can be the perfect house for spending a lavish summer vacation in the Hamptons.
Chartwell Estate
The Chartwell Estate was one of the priciest real estate listings in 2017. And it remains one of the costliest residential houses in the US. Located in Bel Air, Los Angeles, California, Chartwell can easily compete with any historic fairytale French chateau.
It was designed in the 1930s by architect Summer Spaulding as a French Neoclassical-style mansion. The main house sits on ten acres of lush green land with an interior space of 25,000 square feet. Along with numerous formal dining rooms, living rooms, and ballrooms, it also features 24 bathrooms and 18 bedrooms.
The lavish interiors of the house are decorated with the finest furnishings and architectural materials. Moreover, the estate grounds feature exquisite gardens and elaborate fountains found in European palaces. So, Chartwell offers an extravagant palatial grandeur that very few modern-day mansions can.
Il Palmetto
The architectural design of Il Palmetto is a major tribute to the 1930s Italian Renaissance style of design. Located in Palm Beach, Florida, the mansion also comes with a magnificent interior design that was developed by Fairfax and Sammons.
The 60,000 square feet interior space includes ten bedrooms, two elevators, and a formal dining room having 16th Century carved ceilings. It comes with a fully-equipped kitchen, pantry, library, home theater, and offices. Additionally, it has a decadent two-storied dramatic entrance. The main house also has a fine wine cellar that holds around 20,000 wine bottles.
Furthermore, the estate grounds feature a lavish courtyard with an elaborate fountain. It also comes with protected private beach access that offers you a magnificent view of the Atlantic Ocean. This luxurious estate is a fine blend between traditional Italian Renaissance style and modern contemporary architecture.
Mylestone Mansion
The modern Tudor-style mansion is one of the most prestigious and lavish houses located at Meadow Lane in Southampton. With an interior space of 15,521 square feet, Mylestone is the most expensive house in the neighborhood. It is one of the best waterfront retreats that Southampton has to offer.
The house sits on eight acres of land with direct access to the open waters of Shinnecock Bay and the Atlantic Ocean. It also comes with its very own helipad, which makes it the dream retreat home. Additionally, the lavish interior has a timeless aesthetic appeal that goes perfectly with the contemporary coastal decor and the neutral ocean tones.
It also comes with twelve bathrooms and eleven bedrooms, along with numerous living rooms, a dining room, and a breakfast room. Furthermore, the master suite has a 660 square feet oceanfront terrace that features a hot tub. So, you can enjoy beautiful landscape scenery from every corner of the house.
Rancho San Carlos Mansion
This historical residential home is located at East Valley Road, Montecito, California, offering exquisite views. The Colonial Manor was built in 1931 and designed by Reginald Johnson. With an interior space of 29,483 square feet, the main house has more than thirty rooms.
The architectural design of the house ensures privacy and offers a magnificent view of the surrounding natural terraces. Furthermore, the living rooms surround the central courtyard as the master and family wings of bedrooms extend down from the high terrace.
Apart from the main residence, the estate also features ten residential cottages, orchards with fresh produce, and other equestrian facilities spread over a private property of 237 acres. So, it offers the perfect getaway for you and your family amidst the lavish and magnificent scenery of California.
Casa Encantada
Casa Encantada is a real estate masterpiece that hit the US market in October 2019. This is a majorly sophisticated pad that was built in 1937. Located in the posh Bel-Air neighborhood of Los Angeles, California, the house sits on an eight-acre plot.
Designed by architect James Dolena, this Georgian-inspired mansion comes with sixty luxurious rooms that offer exquisite ocean, garden, and city views. The mansion has been the home of many high-profile billionaires over the years. So naturally, it is one of the highest-priced real estate properties in the country.
With an interior space of 40,000 square feet, each room is furnished with the finest architectural elements and materials. It comes with seven bedrooms, twenty bathrooms, a living room, a family room, and a walnut-paneled library. The property also offers maximum privacy to its occupants due to its unique design. Hence, it sets new standards for luxurious home design.
West Creek Ranch
This is one of the largest and most expensive home listings in the US. The estate stretches over 8700 acres, and its area is so expansive that it covers two states, Utah and Colorado. The property first became available on the real estate market in 2017.
The main home has an interior space of 22,000 square feet, along with several resort-style lodges having a total of 72 rooms. The interior is a unique blend between rustic touches and elaborate architectural flourishes.
Additionally, the four-storied main residence comes with eight bedrooms and eight bathrooms, a two-story library, a gym, a swimming pool, and other facilities. The estate also features a 400-square-foot observatory, along with a car museum and equestrian and bison pastures. Hence, the property takes billionaire backyards to a whole other level.
Las Varas And Edwards Ranches
Located in Goleta, California, these ranches sprawl over an area of 237 acres. The estate offers picturesque views of pastures and is surrounded by forests of Live Oak, Eucalyptus, and Juniper. It also offers optimum privacy to its occupants with ten thousand feet of private access oceanfront.
The main house also comes with ten bedrooms, ten bathrooms and is surrounded by a beautiful landscape. Moreover, the estate features a Victorian-era guest house, horse barns, a manager’s cottage, and other amenities.
It offers a luxurious and lavish living experience with exquisite views, beautiful lemon and avocado orchards, and high-end architectural elements. So, if you are planning to taste the ultimate luxurious lifestyle, this estate can be a good place to start.
Fifth Avenue Duplex
This Fifth Avenue duplex occupies the seventh and eighth floors at the very heart of New York City. So, if you’re planning to enjoy the ultimate luxuries of the Big Apple, this can be your dream home. With amazing views of Central Park, this house offers one of the best living experiences in the city.
Built-in 1931, it has an exquisite limestone exterior that was designed by famous architect Rosario Candela. The two levels of the duplex feature twenty rooms that include a master bedroom, along with a wine cellar, sitting room, fireplace, a full dressing room, high ceilings, hardwood flooring, and a palatial entrance. It also comes with a library furnished with 17th Century leather walls.
Additionally, this residence comes with 24 apartments, which makes it ideal for entertaining your guests. The interior of the duplex is elegantly furnished in a marble style featuring 1930s mirrors in the bedrooms and bathrooms. So, you can experience the ultimate luxurious city life with this house.
Brookline Estate
Located five miles away from Downtown Boston, Massachusetts, Brookline Estate offers a nice escape from all the hustle of city life. It comes with an interior space of 23,623 square feet and is currently owned by the former CEO of Reebok, Paul Fireman.
The main residence is beautifully designed with a limestone exterior and sits in the very heart of the country club and golf course of the estate. It also features 24 rooms, including eight bedrooms and twelve bathrooms, along with eight fireplaces.
Additionally, the main comes with an attached garage with four places and central air-conditioning. The paved driveway also adds to the luxurious appeal of the estate.
Silicon Estate
Situated in the Los Altos Hills, California, this estate is one of the most expensive house listings in the US. At present, it is owned by the Silicon Valley tech mogul Kumar Malavalli. The house has an architectural design that is suitable for both work and residential living.
It comes with five bedrooms and separate girliest rooms, along with a freestanding office. The main house sits on eight acres of land that is suitable for organizing any major events for both business and pleasure.
Furthermore, the house features a retractable room with an indoor swimming pool. It also has a sauna that offers a lavish experience, along with a massage room. Hence, this piece of real estate property offers a luxurious residential living experience as well as all the facilities necessary for office work.
Kings Point Estate
The Kings Point Estate features three residences of palatial grandeur. Located in Long Island, New York, the estate offers outstanding views of the New York City skyline. It also comes with a private waterfront property of eight acres.
Built-in 1928, the three residences of the estate celebrate high-end architectural elements that add to the palatial quality of the property. It comes with 35 bathrooms and 13 bedrooms, along with a wine vault and a hair salon.
Moreover, the residences come with other amenities such as a bowling alley, several indoor pools, an indoor racquetball court, a casino, and a private yacht pier. So, this estate has all the amenities that can offer you the lavish billionaire household experience.
Final Words
And thus, we come to the end of our list of the twenty most expensive houses in the US that you can consider if you’re looking to step into the world of grandeur and luxury. Whether it is to experience the billionaire lifestyle or to admire the architectural brilliance, you can have a look at any of the real estate properties that we’ve mentioned in this list.
The list covers various types of properties that can offer you the convenience of city life as well as the peace and tranquility of rural areas. However, we’ve only covered the tip of the iceberg. There are several other lavish high-end houses in the US that you can check out. So, you can always dig in and do some research to find your dream luxury home.
And on that note, we’ll be taking our leave. Low about some of your favorite luxury homes in the US in the comments below. Take care, and we will see you next time!
The Midea window AC is a smart air conditioner with a U-shaped design, DC inverter technology, and Energy Star rating. Similarly, the hOmeLabs window air conditioner features several cooling modes, a 24-hour timer, and is CSA, DOE, and CEC certified.
When compared with portable air conditioners, window ACs are much more efficient and affordable. They are also easier to install and last for a longer period. But for many people, they are the best choice just because they are quieter, and the noise produced is considerably less.
But finding the quietest window air conditioner isn't easy, with so many options available. That's why I've reviewed the best ones in today’s guide.
Midea is among the largest manufacturers of home appliances, and this smart window AC with ultra-quiet operation is one of its best offerings. It features a unique U-shaped design that helps block noise, ensuring a comfortable experience.
Noise levels, measured in decibels (dB), are also reduced thanks to the inverter system, which is extremely efficient and operates with minimal vibrations. In fact, the noise levels are as low as 42 dBA, which is similar to that in libraries. This makes this appliance ideal for bedrooms, studies, and similar areas.
Another thing I liked about this smart window AC from the Midea Group is its DC Inverter technology, which helps save energy and brings your electricity bills down. Thanks to this technology, this AC can save about 35% more energy compared to many competing options. And it is the first air conditioner to receive the Energy Star Most Efficient 2022 certification.
Aside from that, the U-shaped design allows your window to open even after installing the AC. But this window air conditioner further comes with an Anti-Theft Mechanism that allows locking the window for security purposes.
I love that it is Wifi enabled, and you can control it easily via the Midea Air smartphone application available on Android and iOS devices. You can even use the voice user interface to activate the AC using Google Assistant or Alexa.
Cooling power: 12,000 BTUs | Weight: 58.9 pounds | Energy Star: Yes | Special Feature: Dust filter, fast cooling, dehumidifier
Smart Control Air Conditioner – This WiFi enabled 6,000...
Energy Efficient - Higher energy efficiency offers more...
What I like
Smart controls
Multiple certifications
Multifunctional
Quiet operation
What I don't like
Slight smell after first use
Coming with features like multiple cooling modes and a 24-hour timer, this option from hOmeLabs is another quiet window conditioner worth considering. It has 5 cooling modes, including cool, dry, fan, Eco, and Follow Me, that make it suitable for different air conditioning requirements.
The window air conditioner can be installed in any room having up to 250 sq ft of space. It is also Wifi enabled and can be paired with your smartphone using the hOmeLabs app. Once paired, you can remotely control the cooling, while the air conditioner even works with Google Assistant and Alexa.
There is also a remote that makes it easy to adjust the settings. Apart from that, this window air conditioner operates noiselessly, with sound levels ranging between 52 and 56 dB. So, you can keep it running while reading a book, watching TV, or sleeping without getting disturbed.
Furthermore, this is one of the most energy-efficient options and comes with Energy Star certification. But that's not all; this quiet window air conditioner is also CSA, DOE, and CEC certified, making it an incredibly safe option for everyone.
Another thing you should know about this hOmeLabs product is that it is a multifunctional AC. It can be used to cool a room, remove humidity, or eliminate stale air. Plus, it is very easy to install and does not require a professional, taking as little as 15 minutes.
Cooling power: 6,000 BTUs | Weight: 44.4 pounds | Energy Star: Yes | Special Feature: 5 cooling modes
TOSOT is a well-known brand specializing in the manufacturing of high-quality cooling appliances, such as this window AC with adjustable cooling vents. I've included it on this list of the quietest window ACs since it operates at 42 dB, which is barely audible in most cases.
It is also a powerful window air conditioner with 8,000 BTUs of cooling power, and you can use it in rooms having up to 350 sq ft of space. This means it is suitable for bedrooms, dormitories, and even small apartments.
The standout feature of this window AC unit is its adjustable air vents. These are slanted vents that you can adjust as required, and they blow air up to 20 feet away. This makes it possible to cool the room quickly and efficiently.
Speaking of efficiency, the TOSOT quiet window air conditioner comes with an Energy Efficiency Ration or EER of 12.0 and has an Energy Star rating as well. This means you can enjoy lower power bills while ensuring lesser environmental impact. There is also a drain plug which makes it easy to remove water from the unit when required.
You can control the AC using the provided remote and the LED Light Touch control panel. As for installation, the AC window air conditioner comes with all the required components, such as side panels and foam. Detailed instructions are also provided so you can complete the installation quickly.
Cooling power: 8,000 BTUs | Weight: 62 pounds | Energy Star: Yes | Special Feature: Fast cooling
The next window air conditioner on this list comes from Haier, featuring 4 cooling modes and 3 fan speeds for meeting different cooling needs. It is also an energy-efficient option with an Eco Mode that turns the compressor and fan off to save energy.
Additionally, it is among the quietest window air conditioners since the noise levels remain around 42 dB when the unit is running. So, you are not likely to get disturbed while sleeping, working, or watching TV, even with continuous operation.
The Haier Ultra Quiet window air conditioner has a cooling capacity of 6,200 BTUs, making it most suitable for rooms having up to 250 sq ft of space. This means it is ideal for guest rooms, small bedrooms, home offices, and studio apartments.
To make it easier to control the unit, you get a remote with simple digital settings that can be adjusted easily. Or you can use the controls provided on the panel of the unit itself.
The air conditioner is multifunctional and can be used to remove humidity from a room. Another feature that I found to be quite handy is its drainless design. Unlike many other window air conditioners, the moisture that condenses does not drip onto the floor as water. Instead, it evaporates, so there is no need for a drain pan or bucket.
Cooling power: 6,200 BTUs | Weight: 56 pounds | Energy Star: Yes | Special Feature: Remote control
Another option worth considering when looking for the quietest window air conditioner is this dual inverter smart window AC from LG. It features a Dual Inverter technology that makes it one of the most powerful yet efficient air conditioners in the segment.
The LG dual inverter AC is up to 25% more efficient than other regular units with Energy Star certification. This means you can get better cooling while saving more on utility bills, which is another reason why this air conditioner is a worthy choice for most households.
Controlling the unit is also quite easy, thanks to the LG ThinQ technology, which allows you to start or stop the cooling and change the operating mode remotely. You can even adjust the temperature in a similar manner, while the AC is compatible with Amazon Alexa and Google Assistant.
I also found that this quiet window air conditioner from LG Corporation has multiple fan speeds for different cooling requirements. There are four speeds to choose from and an Auto Cool function for the most customized cooling experience.
Despite its powerful performance, the unit does not make much sound, and the noise levels can go as low as 44 dB when the AC is in sleep mode. Also, you can install this air conditioner in rooms having up to 800 sq ft of space, making it an excellent choice for large rooms.
Cooling power: 14,000 BTUs | Weight: 98 pounds | Energy Star: Yes | Special Feature: Auto-restart
Next up is another quiet window air conditioner from Haier, which comes with an Energy Star certification and an LED display. Having a cooling capacity of 6,000 BTUs, this window unit can deliver efficient cooling in rooms with an area of up to 250 sq ft.
Being an Energy Star-certified product, it is an efficient option with a 12.2 energy efficiency ratio. So, those looking to get a reasonable level of cooling without a corresponding increase in their utility bills will find this a suitable option.
As for the cooling functions, this unit offers four modes: a cooling mode, an energy saver mode, a fan mode, and a dehumidification mode. The last one can be pretty handy when you need to get rid of moisture and bring down the humidity levels.
But the feature that I found to be most useful is the light-emitting diode (LED) display on the front panel of this quiet window AC unit. This digital display accompanies the electronic control panel and makes it easy to adjust the settings as per your cooling requirements. In addition, there is a button lock and a timer that add to the user experience.
The window AC unit also does not make a lot of noise during operation, which is possible due to the compressor blanket. When the air conditioner runs on a low setting, the noise levels can go as low as 44 dB, which is one of its biggest advantages.
Cooling power: 6,000 BTUs | Weight: 55.6 pounds | Energy Star: Yes | Special Feature: LED display
ULTRA QUIET - This quiet air conditioner reaches sounds as...
SMART, EASY OPERATION: Integration with the SmartHQ app...
What I like
Wifi enabled
Energy-efficient
Easy installation
Multifunctional
What I don't like
Setting up the app isn't easy
A smart AC that offers quiet performance, the GE Appliances window AC is the quietest air conditioner for medium-sized rooms. It is most suitable for those who like to control their devices using their smartphones, thanks to its SmartHQ app that makes home automation easy. This mobile app allows you to control the air conditioner easily, as well as create cooling schedules and monitor its operation.
Additionally, the unit supports voice assistants like Alexa and Google Assistant, making it very convenient to turn the appliance on or off remotely. And it comes with four cooling modes and three fan speeds for different requirements. There is also an Eco Mode that can be used to turn off the compressor and the fan to save electric power.
Another thing I liked about this quiet air conditioner from GE Appliances is that it comes with a dehum mode. This mode can be turned on to get rid of humid air in the room for greater comfort and breathability. And the unit already uses less energy than many competing options since it comes with an Energy Star certification.
Coming to the cooling capacity, this is an 8,300 BTU air conditioner, which means you can install it in rooms having an area as large as 350 sq ft. Thus, it is a great fit for most medium-sized rooms.
The installation kit includes everything you require to set up the unit, such as the window seal kit, and the installation process is also simple.
Cooling power: 8,300 BTUs | Weight: 58 pounds | Energy Star: Yes | Special Feature: Remote control
Cools Large Rooms: Efficiently cools down your room or...
Install in Minutes, Cool 4 Seasons: Thanks to its...
What I like
Large cooling capacity
Quick installation
Low noise operation
Faster cooling
What I don't like
No smart features
Moving on with the list, I bring you the Dreo window air conditioner, which has a cooling capacity of 8,000 BTUs and a 15.0 CEER rating. With its large cooling capacity, this can be counted among the quietest window AC units available for large rooms.
Directional air louvers are also present that blow air in all directions, which allows more effective cooling for areas having up to 350 sq ft of space. Additionally, its variable speed feature helps the unit operate more efficiently and quietly.
The pre-assembled design is also noteworthy since it makes installation a simple affair that won't take much time. You can save up to 50% of the time spent on installation when compared to many other window air conditioners.
Aside from that, the noise canceling mechanism does a good job of reducing sound while the unit is operational. The sound levels are maintained at 42 dB, so this is a good option for bedrooms, offices, and studies.
Then, there is the fact that this is another of the quiet window air conditioners that come with an Energy Star certification. And the Dreo Inverter Compressor inbuilt into the unit can provide you with up to 35% more energy savings than regular compressors. Despite that, cooling is faster since this air conditioner operates at higher frequencies right from the moment it is powered on.
And for those who like greater control, this Dreo air conditioner comes with five cooling modes.
Cooling power: 8,000 BTUs | Weight: 62.7 pounds | Energy Star: Yes | Special Feature: Inverter compressor, dehumidifier, fast cooling
3-in-1 Window Air Conditioner: This powerful window unit...
Smart Capabilities: This Wi-fi enabled, window ac unit with...
What I like
Large cooling capacity
Compatible with voice assistants
Efficient operation
Dual air exhaust vents
What I don't like
Unclear installation instructions
Now I'll be reviewing the quiet window air conditioner from Emerson Quiet Kool that comes with smart voice control and a programmable timer. This is a powerful AC with a cooling capacity of 15,000 BTUs making it suitable for areas having up to 700 sq ft of space, such as large rooms. And it operates with minimal sound, with noise levels not exceeding 52 dB.
The Emerson Quiet Kool AC is also a good choice if you need a smart option since it is Wifi enabled. It even supports voice commands through Google Assistant and Amazon Alexa and can be paired with these AI assistants using the Smart Life feature. Moreover, you can easily control the air conditioner using the HE Smart smartphone application.
I especially found the 24-hour programmable timer to be quite handy, which can be set using both the remote control and the onboard controls. This mode, combined with the intelligent sleep mode, delivers the best automatic cooling without needing to fiddle too much with the controls.
And when using these features, the window air conditioner will automatically control the temperature and fan speed to ensure efficient energy use. So, you can expect more savings on your power bill.
Another impressive thing about the unit is that it comes with split air exhaust vents, which work effectively with different fan speeds to blow cold air in the required directions. This ensures proper cooling in the entire room, even in the most extreme heat.
Cooling power: 15,000 BTUs | Weight: 119 pounds | Energy Star: No | Special Feature: Split air exhaust vents
Reliable Cool and Supplemental Heat: Our powerful 18,000 BTU...
All in One: Enjoy cooling, supplemental heating,...
What I like
Powerful cooling
Heating option
Easy installation
Value for money
What I don't like
No heat pump feature
The KEYSTONE quiet window air conditioner is one of the highest-rated ACs in the United States and features a huge cooling capacity along with a powerful heating option. With a cooling capacity of 18,000 BTUs, it is an extremely powerful window AC that can cool even the largest rooms easily and quickly.
But its standout feature is its heating option, which can work with other heat sources and keep the room comfortable in extremely cold weather. There is a single heat speed option for that purpose, along with three fans and three cooling speeds.
In addition to that, the unit is capable of dehumidification and can remove up to 3.8 pints of moisture in an hour. This feature is indispensable in keeping the room dry and comfortable during humid weather. And if you need to control the direction in which the air blows, the four-way adjustable airflow direction feature makes it easy to do so.
As for the noise levels, this quiet window air conditioner from KEYSTONE, despite its large cooling capacity, operates at 60 dB. This means that the sound produced will not be much louder than that of people talking and can even go lower when the unit runs in energy-saving mode.
Installing this quiet window AC unit is also easy since it has a removable chassis and a window kit. And you can view the settings on the LED display and change them as required using the provided remote.
Cooling power: 16,000 BTUs | Weight: 117 pounds | Energy Star: No | Special Feature: Heating
Since Emerson Quiet Kool is such a popular brand, I decided to include another offering from the brand here. This one comes with a 3-in-1 function that can help cool the room, improve air circulation, and get rid of the humidity. There is also a large LED digital display that makes it easy to monitor the settings while the window AC is operational.
Like other smart window air conditioners, you can pair this one from Emerson Quiet Kool with smart assistants like Amazon Alexa and Google Assistant since it is Wifi enabled. You just need to download the HE Smart application and use the Smart Life skill to do that.
Installing the smartphone application allows you to remotely control the quiet window air conditioner. This includes the programmable 24-hour timer and sleep mode, which can automatically adjust the fan speed and temperature to maximize energy efficiency.
And speaking of energy efficiency, this air conditioner even comes with an energy star rating, so you can expect greater savings on your utility bills. Then, there is the washable filter that can be removed easily for cleaning and makes maintenance very easy.
Also, like the other option from the brand I mentioned above, this one comes with split air vents. Two vents on the unit allow controlling the direction of the air that comes out from the window air conditioner. This, along with the three fan speeds, makes it easy to adjust the cooling as required at any given moment.
Cooling power: 6,000 BTUs | Weight: 44.5 pounds | Energy Star: Yes | Special Feature: Easy-access filter
No list of the quietest window air conditioners is complete without mentioning the Acekool smart window AC, which has an easy-to-remove air filter and a powerful Eco mode. It has a cooling capacity of 8,000 BTUs, which is well-suited for rooms having up to 350 sq ft of space.
You can control the cooling remotely by downloading the smartphone application since this quiet air conditioner is Wifi enabled. Because of this, it can even be used with voice assistants like Google Assistant and Alexa.
The Acekool smart window air conditioner operates at a noise level of 53 dB, making it ideal for situations where you do not want to be disturbed. Since it can help maintain sound levels similar to that found in libraries, it is a great pick for bedrooms, studies, offices, etc.
Besides the low-noise operation, this window AC unit features easy installation. You will not require professionals and can complete the installation yourself. And the window air conditioner can be installed on the windowsill of both single-hung or double-hung windows.
Maintenance is also quite easy on this AC model, thanks to its easy-to-remove filter. This does not require disassembling the entire unit, and you just need to pull out the handle and wipe it clean. The filter can even be washed when needed, simplifying the process.
Finally, the R32 high-efficiency refrigerant helps lower the temperature quickly while reducing energy consumption. So, you can enjoy faster cooling along with greater savings.
Cooling power: 8,000 BTUs | Weight: 45.3 pounds | Energy Star: Yes | Special Feature: Google Assistant, Wi-Fi
Even after knowing about the quietest window air conditioners available, picking the right one from the list can still be confusing. Not only do the various options offer different features, but they are designed for specific requirements. That's why it is important to consider certain factors, such as the cooling capacity, power requirements, price, etc.
In this section, I've mentioned some of the most important factors to consider when selecting the quietest window air conditioner. These factors will help make it easier to determine the most suitable option.
1. Cooling Capacity
The cooling capacity of air conditioners is measured in British Thermal Units or BTUs per hour. One BTU refers to the rate at which the temperature of one pound of water can be increased by one degree. This means an air conditioner with more BTUs has a larger cooling capacity and is more powerful.
In general, window air conditioners have a larger cooling capacity than other types of air conditioners. However, it is crucial to select a unit with a BTU level suitable for the room where it is to be installed for the best cooling. Installing a window air conditioner that does not have enough cooling power (BTUs) to cool the space will force it to run continuously.
This will result in higher power bills and lead to faster wearing out of the AC components as well as a reduction in the lifespan of the unit. Cooling will also take much longer, and the noise levels will increase as the unit struggles to function properly.
But getting the quietest window air conditioner with the largest cooling capacity is also not a great idea. A window air conditioner with a much bigger cooling capacity than is required for the room will cause uneven cooling. It will also result in the AC turning on and off repeatedly, which can lead to more power consumption.
In such cases, you may find some areas of the room to be uncomfortably humid despite the air conditioner being operational. That is why I recommend determining the cooling requirements for the room before deciding on the AC unit.
2. Durability
Window air conditioners require considerable investment, so finding an option that won't break down quickly and can last for a long time is crucial. Keep in mind that the major portion of a window air conditioner remains outside the window where it is installed and is exposed to the elements. So, it should be sturdy enough to withstand the most extreme weather conditions.
Going with reputable brands when looking for quiet window air conditioners is one way to ensure you get a reliable option. Such brands have been in the industry for a long time and have built their reputation by providing high-quality, durable products. However, that does not mean you should not look at other options.
Finding a sturdy window air conditioner from a relatively new brand is also possible. Alternatively, there have been instances where products from established brands have failed to meet the standards of durability expected from them.
So, the best method of ensuring you can find a durable window air conditioner is to check out the customer reviews of different options. Customers who have used the air conditioner you are considering will be able to provide first-hand information regarding its durability and performance.
3. The Installation Process
Another factor to consider when searching for the quietest window air conditioner is the ease of installation. Easy installation goes a long way in ensuring a good user experience and helps avoid spending more on a professional service. The opposite is also true, and if installation is complicated, it can ruin the experience, even if you have the best window air conditioner.
Most window air conditioners are compatible with double-hung windows, while a few can even be installed in single-hung ones. Then, there are some that come with special mounting hardware for wall installations, depending on the brand and type of unit.
When choosing between various quiet window air conditioners, try to find out about the installation process. In many cases, window air conditioners can be installed easily without the help of professional installation services, but this may not always be the case.
Window AC units with mounting hardware allow you to install the air conditioner even if its dimensions are incompatible with the window. But it is a good idea to take the measurement of your window first, especially its width.
Then, check the specs of the window air conditioner to find out the maximum and minimum width required for installation. The unit doesn't have to be an exact fit since window AC units generally come with a window installation kit. These include side curtains that can seal off any gaps on the sides of the window air conditioner.
If you plan to install the window AC unit through the wall, first, make sure it supports such an installation and comes with a proper kit for the purpose. Check the owner's manual to see whether clear installation instructions have been provided.
4. Power Requirements
Since window AC units are the most powerful when it comes to air conditioners, they require more power. That is why they do not run on standard electrical circuits present in most homes and require special circuits with higher capacities.
What type of circuit you need for installing a quiet window air conditioner will depend on its cooling capacity. Usually, window air conditioners require 115V, 125V, or 125V electrical circuits. A window AC unit with a cooling capacity of less than 15,000 BTU can be installed on a 115 to 125V circuit, which is found in most residential structures.
However, when installing quiet window air conditioners with a capacity of over 15,000 BTUs, you will need a circuit with 220V or higher. Such units will also require special wiring, and you may need to hire an electrician to get them installed.
You can find the power requirements by reviewing the specifications on the product page. This will also provide information regarding the correct plug type required for the window AC unit, another important aspect of the installation process.
5. Energy Efficiency
Window air conditioners are great for reducing power consumption and saving energy. But how much energy you can save will depend on various factors. These include the size of the window AC unit, the Energy Star rating, the Seasonal Energy Efficiency Ratio or SEER, and the Energy Efficiency Ratio or EER.
Going with an Energy Star-rated option will provide a better experience when searching for quiet window air conditioners. Most of the window AC units that I've mentioned above come with this rating, and these usually consume around ten percent less energy than those without an Energy Star rating.
Then there is the EER, which lets you know the number of BTUs used by the quiet air conditioner for one watt of power. Window AC units that have a higher EER are more energy efficient. The US Department Of Energy recommends using a window air conditioner with an EER of at least 10.0 for optimal performance and maximum energy savings.
6. Additional Features
Most modern window air conditioners have several features and can do more than just cool your room. They often perform functions such as heating the room and getting rid of humidity, eliminating the need to use separate appliances for such purposes. Such functions are usually available in the case of reversible window air conditioners.
If you're living somewhere that experiences extreme summers and winters, a reversible quiet window air conditioner can be a good choice. You can use it for cooling during the summer and as a central heating unit in winter.
Reversible window AC units operate by reversing the refrigerant flow so that it works as an evaporator and condenser simultaneously. For that purpose, they have a heat pump with a reversing four-way heat valve. So, they can help maintain an optimal temperature without requiring separate appliances for heating and cooling.
And besides saving on a separate heater, you will have greater savings since heat pumps do not require as much power as a regular heater. There is also less impact of such window air conditioners on the environment, and the noise levels are lower.
7. Maintenance
While window air conditioners have a longer lifespan than portable ones, they require proper maintenance to keep them in good condition. Since the larger portion of a window air conditioner remains outside the window, it is always exposed to the elements. Dust and dirt can easily find their way into the chassis of the unit.
When dust particles accumulate on the air filter of the window air conditioner, they can restrict airflow and reduce the operating efficiency of your AC. To prevent that from happening, it is important to clean the chassis at least once a year.
I recommend searching for the quietest window air conditioner with a slide-out chassis, which can make maintenance very easy. Additionally, look for options with washable air filters since you just need soap and water to clean them.
You may also consider looking for window air conditioners that have features like mosquito nets that can prevent insects from entering your home.
8. Noise Levels
It should be obvious that the operational noise levels of a window air conditioner are among the most important factors to consider when looking for the quietest window air conditioner. If you get disturbed even by the slightest noise, selecting the wrong air conditioner can make for an unpleasant experience.
While it is possible to reduce the noise produced by most window air conditioners, opting for an option that makes less noise is better. To do so, compare various options and check the specs sheet to determine the operational noise levels. High-end options generally offer multiple cooling and fan speeds, which can determine the noise produced.
Running your window air conditioner at lower speeds can reduce the noise produced significantly. Additionally, features like digital thermostats and timers can be very helpful in ensuring that the unit only turns on when the temperature is uncomfortably high.
Proper installation can help reduce the noise and improve the performance of your window air conditioner. Loose components and parts like side panels and gaskets can make even the quietest window air conditioners noisy. So, check that the gaps are filled with foam, and mounting parts are tightly secured.
Adding soundproofing curtains and or thermal curtains around the window AC unit can marginally reduce noise and improve performance, as they prevent excessive heat from entering the room. However, it's crucial to ensure that the curtains do not restrict airflow through or out of the unit, as this is vital for proper functioning.
Finally, regular maintenance will help prevent the airways and fan blades from getting clogged with dirt. Dirt can damage the bearings and lead to noise.
9. Budget
In most cases, the budget will determine which option to choose when looking for the quietest window air conditioner. You may find that a particular option is too costly, but before making a decision, compare the pricing with other similar options and the features they offer.
Alternatively, if you find a good option, consider looking at different companies, as some may be offering the same unit at a lower cost. Going with an established brand might help find a reliable option quickly, but it may be costlier than one from a relatively newer one.
Also, you might get better support and overall experience when dealing with a well-known brand. But some newer brands may offer a similar product and good service at a lower cost.
Silent Window AC FAQs
How does a window AC work?
Window air conditioners are the simplest of all AC systems and use two air cycles to function – the room air cycle and the hot air cycle. There is an insulated partition within the chassis of a window air conditioner that separates the room air and hot air compartments.
In addition, a window AC has condenser and evaporator coils, a compressor, a thermostat, a filter, a blower, and fans. A fan within the unit cools the room by blowing hot air over the evaporator, while another fan outside keeps the condenser cool.
A. Room Air Cycle
The air inside the room where your window air conditioner is located is called room air. When the unit is turned on, the blower starts up, followed by the compressor, which starts cooling the evaporator or cooling coil. The blower, which is present behind the evaporator coil, starts pulling in hot room air along with dust and dirt particles.
This air passes through the filter, which separates the dust particles and prevents them from passing through. After going through the air filter, the air passes over the cooling or evaporator coil. The temperature of this coil is considerably lower than that of the room air, which allows the refrigerant inside the coil to absorb heat from the air.
As the temperature drops, moisture condenses on the surfaces of the cooling coil to form dew, as the dew point of the air is higher than the coil temperature. Dew formation reduces the moisture from the air, eliminating humidity from the room.
This air, which has low temperature and low humidity values, is pulled in by the blower and pushed out at high velocity into the room through a metal duct. It comes out from the front panel of the window air conditioner and helps keep the room cold and humidity-free.
However, the air within the room has a higher temperature and contains moisture, which is absorbed by the cool air that comes out from the AC. This makes the air hotter, so it gets pulled back into the window air conditioner, and the cycle continues.
B. Hot Air Cycle
The hot air cycle uses atmospheric air to cool the condenser, which is that component of window air conditioners that remains outside the room. It has a propeller fan that pulls in the outside air, which has a high temperature and passes it over the condenser.
When this air passes over the condenser, it absorbs heat from the refrigerant, which is present inside the condenser and has a high temperature. This further increases the atmospheric air temperature, which can be felt at the back of the unit.
The refrigerant becomes cooler once the atmospheric air absorbs heat from it, allowing it to enter the expansion valve. Once there, it passes to the evaporator coil while the hot external air enters the atmosphere. Again, fresh air is pulled by the propeller fan and passes over the condenser, allowing the cycle to continue.
What factors can cause a window air conditioner to make noise?
There can be several reasons why your window air conditioner is making noise, such as:
Defective Or Broken Fans
Loose, broken, or bent fans or fans with dirty blades are among the most common causes of noise in a window air conditioner. If your window AC is making banging or rattling noises, defective fans are the most likely cause.
Improperly Lubricated Fan Motor
If the fan motor of your window air conditioner is not lubricated properly, it can make screeching noises when the AC is turned on. You can get a heating, ventilation, and air conditioning technician to take a look at the problem in that case.
Compressor Operating At An Extremely High Temperature
Sometimes, when the compressor of your window air conditioner is operating at an extremely high temperature, it can lead to a pressure buildup. In such cases, you may hear a screaming or hissing sound coming from the air conditioner.
Damaged Or Broken Coil Fins
Another reason for a noisy window air conditioner may be dirty or bent coil fins. They may need to be cleaned and straightened if that is the problem.
Buildup of Dust
The chances of dirt and debris buildup in window units are quite high since the larger portion of such units remains outside the window. If too much dust accumulates within the chassis, you may hear a humming sound when the AC is turned on.
Refrigerant Leak
Refrigerant leaks can result in a gurgling or hissing sound, and it is crucial to resolve the issue as soon as possible as it can cause health issues like poisoning.
Loose Screws
When window air conditioner units are operational, their vibration can cause the screws of internal components to become loose. This can lead to a rattling noise when the appliance is switched on.
Incorrect Amperage Or Faulty Power Cord
If the power cord of your silent window air conditioner is damaged or worn out, you may hear a buzzing sound. This sound can also be heard if the unit is plugged into the wrong power outlet.
How can you make window units quieter?
If you’re having difficulty looking for the quietest window air conditioner, try out these steps to make your noisy window air conditioner quieter.
Make Sure The Unit Is Installed Correctly
Check that the window air conditioner sits properly on the window sill and there are no gaps. In case there are, use putty or caulk and fasteners to seal them up and prevent the passage of air. This can help make the unit more effective and help reduce noise.
Place A Rug Below The Window AC
A rug can be very effective in absorbing the reverberating noise produced by the motor of the air conditioner while it is running.
Cover The Air Conditioner With A Blanket
Covering the AC unit with a blanket can also help absorb vibrations from the AC motor. But when doing so, make sure not to cover the outlets and vents from where the air blows out.
Ensure Proper Insulation
If the building insulation is damaged or worn out, it can allow sound waves to pass through easily. So, make sure to replace any torn insulation and use moisture-resistant material for the purpose.
Check The Internal Components Of The AC
Taking a look at the internal components of the window air conditioner can help identify the cause of the noise, making it easier to come up with a solution. For instance, the fan blades may be bent and cause noise by hitting the front grille. Or nuts, bolts, and screws may have become loose and may need to be tightened.
Avoid Running The Unit At Maximum Power
Even if you run the quietest window air conditioner at maximum power all the time, it may start to make some noise. So, avoid doing that and, instead, search for ways by which the unit can function more effectively at lower power levels. You can create a temporary awning above it or place it in a more shaded area.
Can you install a quiet window air conditioner yourself, or is professional installation required?
As I mentioned before, when it comes to installing air conditioners, window units are the best choice. They do not require any special skill or expertise and can be installed without the help of professionals. You just need to remember a few things when installing quiet window air conditioners.
Firstly, make sure to select an option that fits your window properly, as window AC units are available in various sizes. Most window air conditioners are compatible with double-hung windows, though some may also be compatible with single-hung ones. You can find out the dimensions of the air conditioner on the specs page.
Selecting the right option will make installation easier since it will ensure that the unit fits properly into the window without leaving any gaps for air to pass through. This also means that you won’t have to put in additional effort to seal the gaps using insulation and other materials.
Another thing to keep in mind is the weight. Window air conditioners are quite heavy, and picking them up and placing them in the window can be a bit difficult. I recommend asking friends or family members to help when doing that to avoid accidents and injuries.
Finally, make sure to install the unit on a circuit that can support it, as window air conditioners with a larger cooling capacity require more powerful circuits.
How to clean your window air conditioner to ensure it stays quiet?
Regular cleaning can help your quiet window air conditioner last longer and operate more efficiently and noiselessly. To get started, you will require a few things, most of which may be present at home or can be bought from the nearby home supply store.
Items Needed
Vacuum with hand attachment
Warm water
Detergent or soap
Toothbrush
Bristle brush
Cloth or rag
Hydrogen peroxide
Can of compressed air
A. Cleaning The Air Filter
Make sure to disconnect the window air conditioner from the power source before you start cleaning. Usually, this will require removing the front panel first, though some units have filters that can be simply pulled out. Check the owner’s manual to find out how to remove the air filter from the unit.
Once the filter is removed, use a vacuum with a hand attachment to remove the dust accumulated on it. Then, use soapy water to wash the filter and scrub it using the bristle brush. Let the filter dry completely before you reinstall it.
B. Cleaning The Coils
After removing the front panel, locate the evaporator coils and gently wipe them clean with a toothbrush. Do the same with the fins present on the coils but make sure to be very careful as these can easily get damaged. Once done, blow compressed air onto the coils and fins to remove any remaining dust.
C. Cleaning The Exterior
Use a damp rag or cleaning cloth to wipe the exterior panel of the air conditioner. If it has become extremely dirty, remove it and submerge it in water containing soap and use a rag or a brush to clean it. Let the panel dry properly before reinstalling.
After you finish cleaning the grille, use the cloth to wipe the sides and the top of the window air conditioner. Also, empty the plastic or metal drip tray, if present, and wipe it clean.
D. Preventing Mold Growth
To prevent mold growth, you can put some hydrogen peroxide in a spray bottle and spray it on the exterior of the window AC. Allow ample time for all the parts to dry before placing them back and plugging in the air conditioner.
Verdict
The right window air conditioner can provide relief from the sweltering heat in the summer, eliminate humidity, ensure better air circulation, and do it all without making any noise.
However, choosing between them can be a bit challenging, so here are my top recommendations. The Midea window air conditioner is a great pick that comes with a U-shaped design that helps with overall windows noise reduction, is Energy Star certified, and even has an anti-theft mechanism.
Then, there is the hOmeLabs air conditioner with 5 different cooling modes and a 24-hour timer, while having multiple certifications.


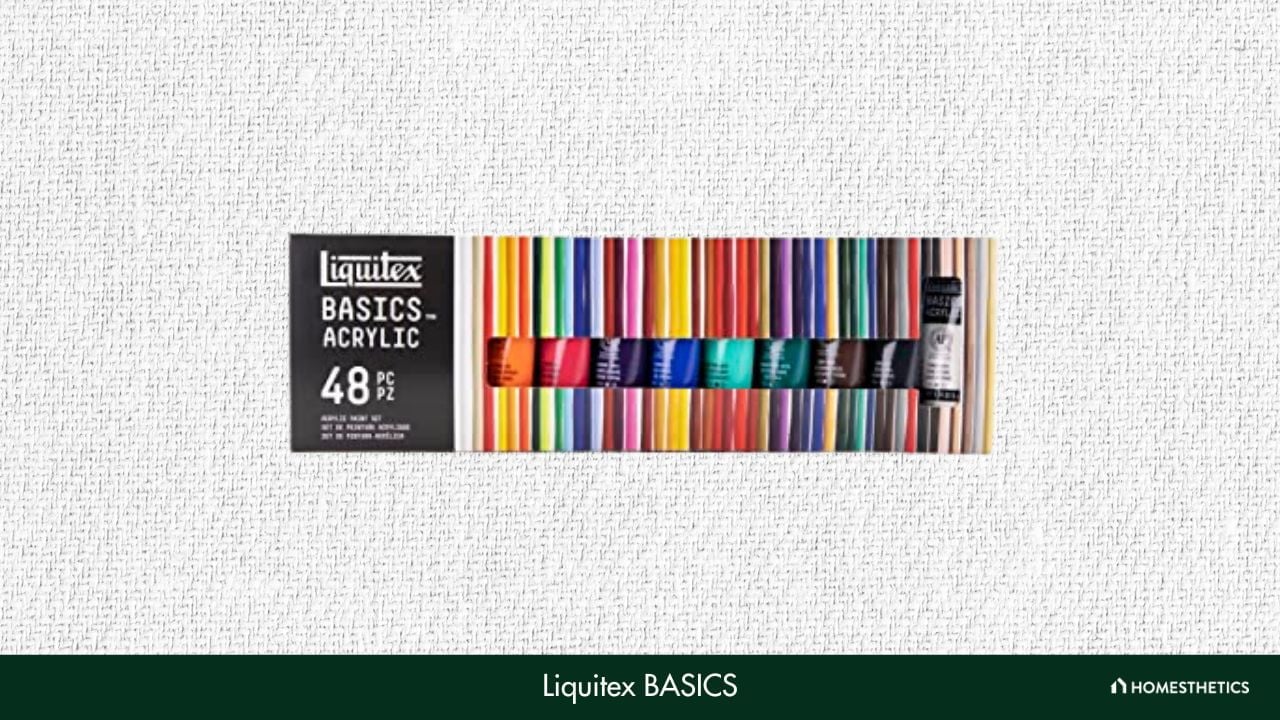
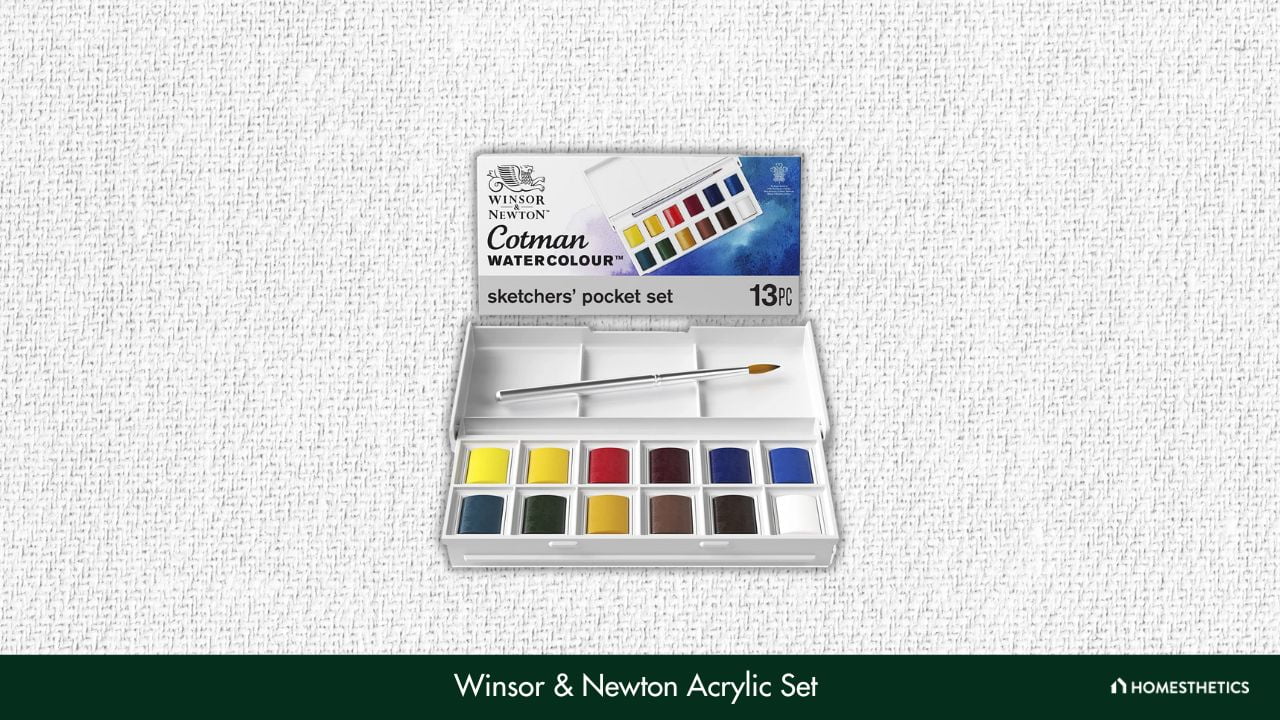
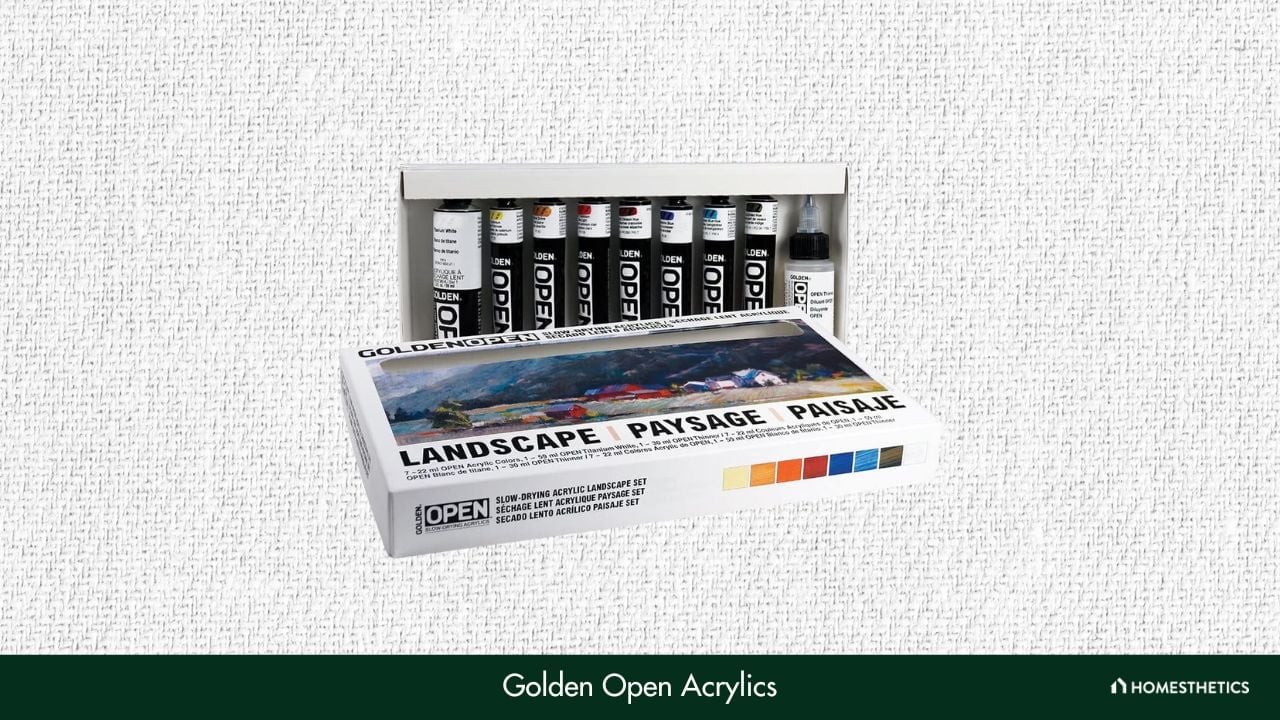
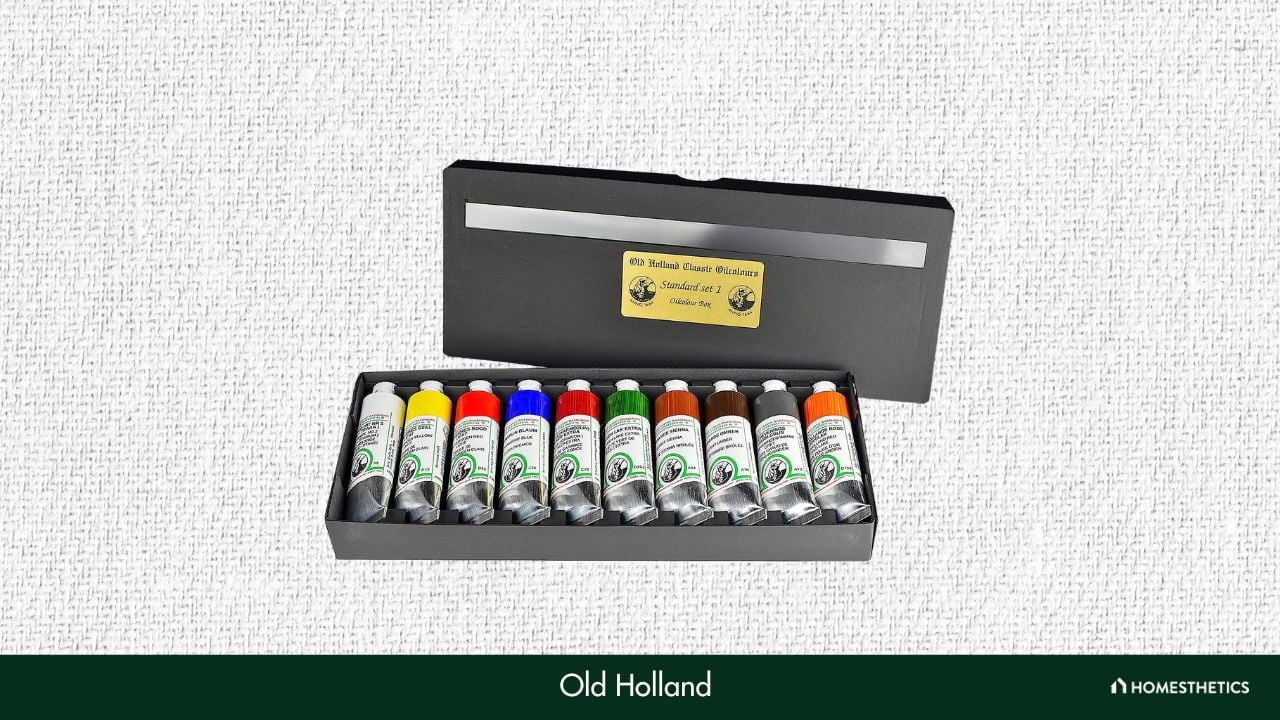
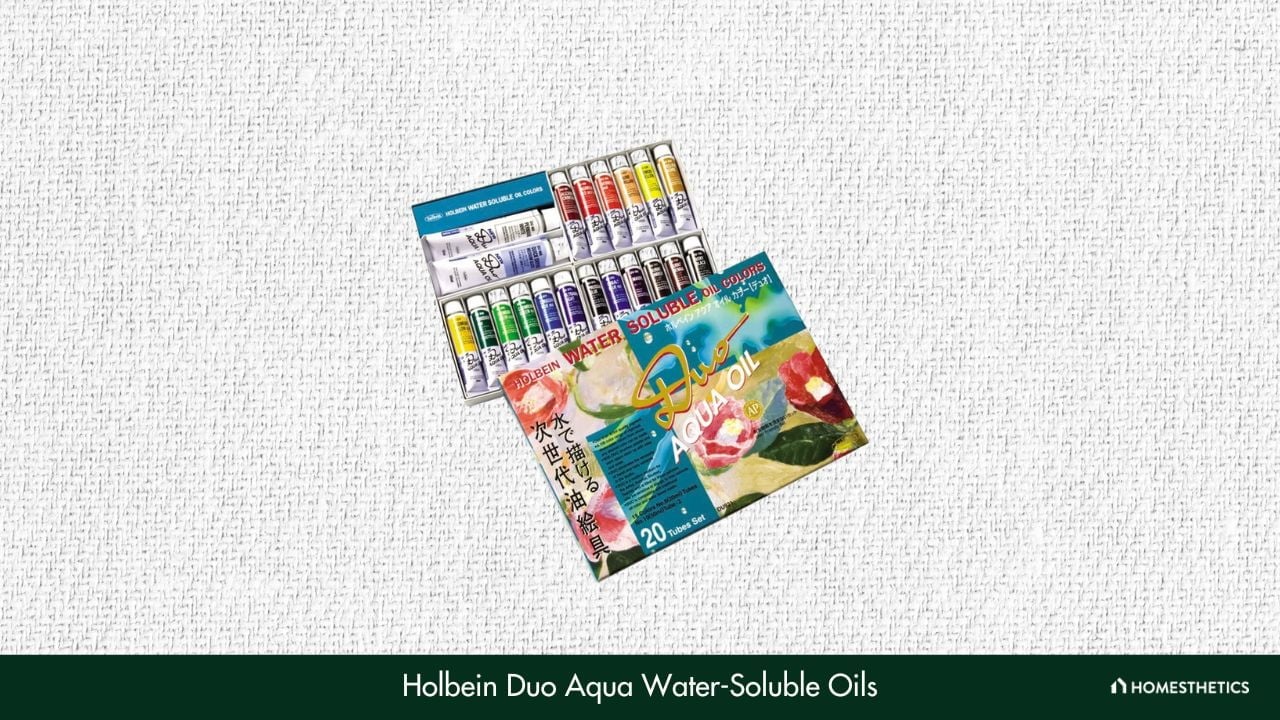

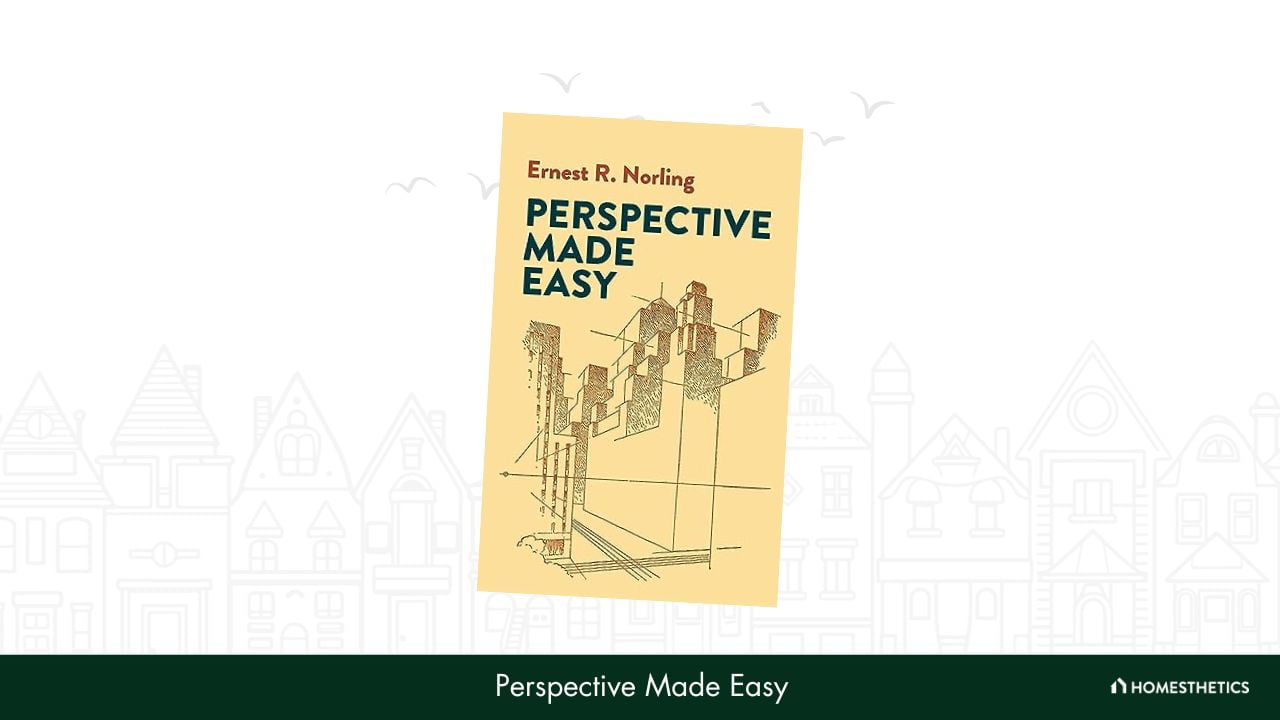
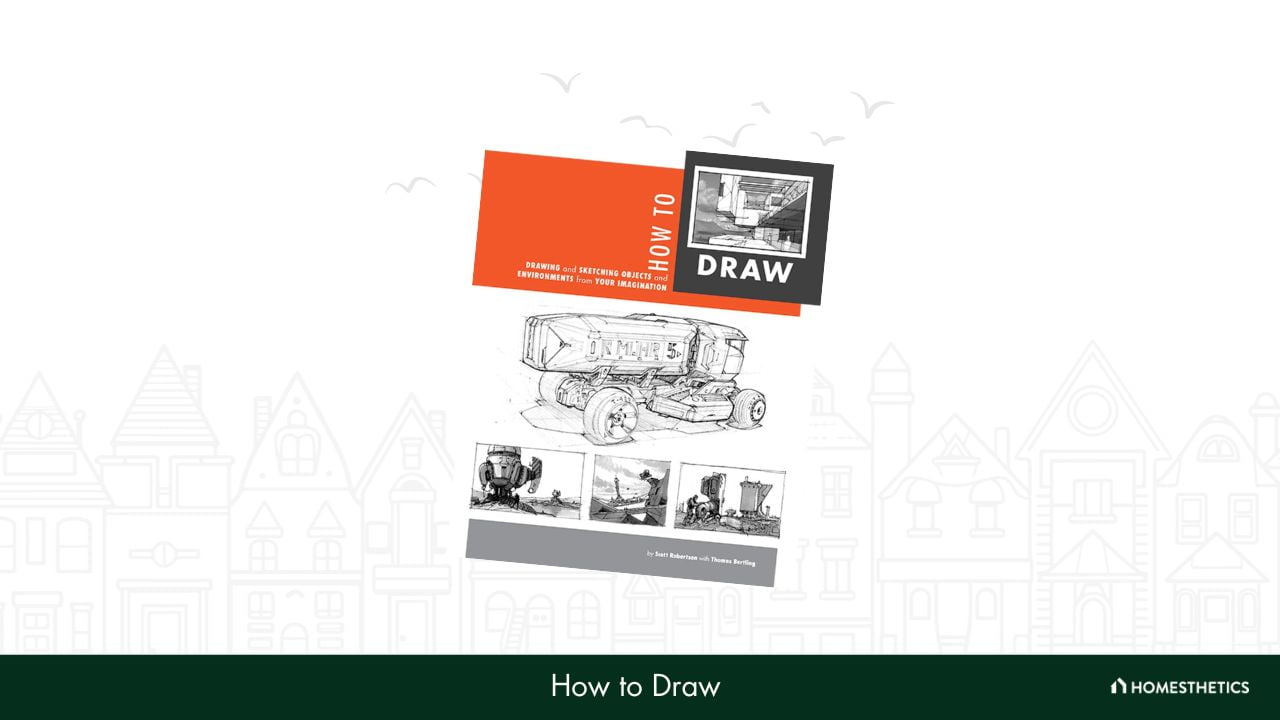
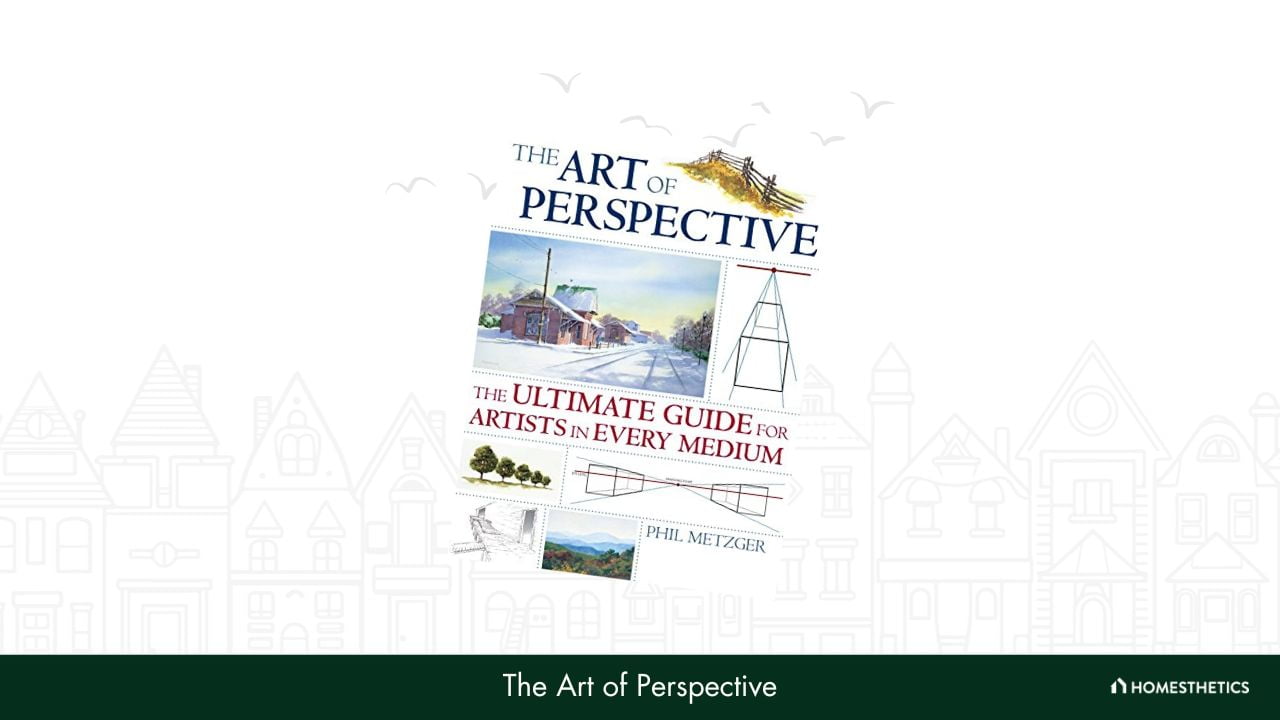
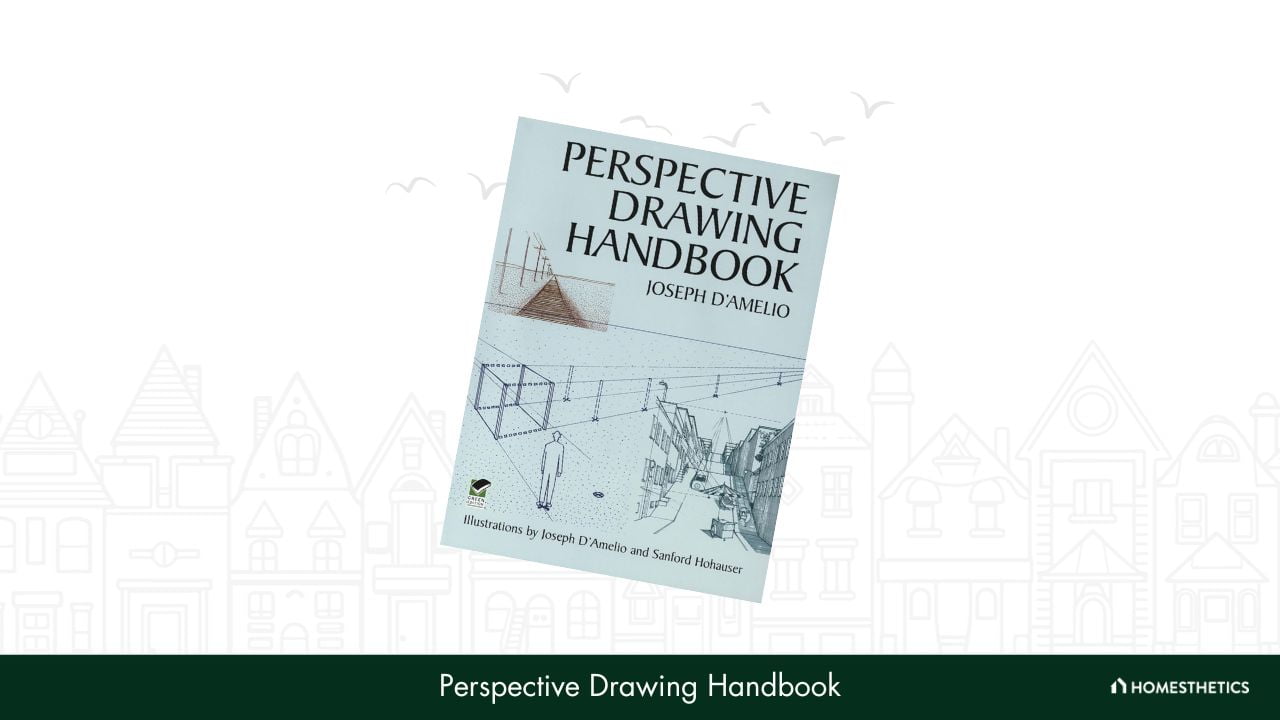
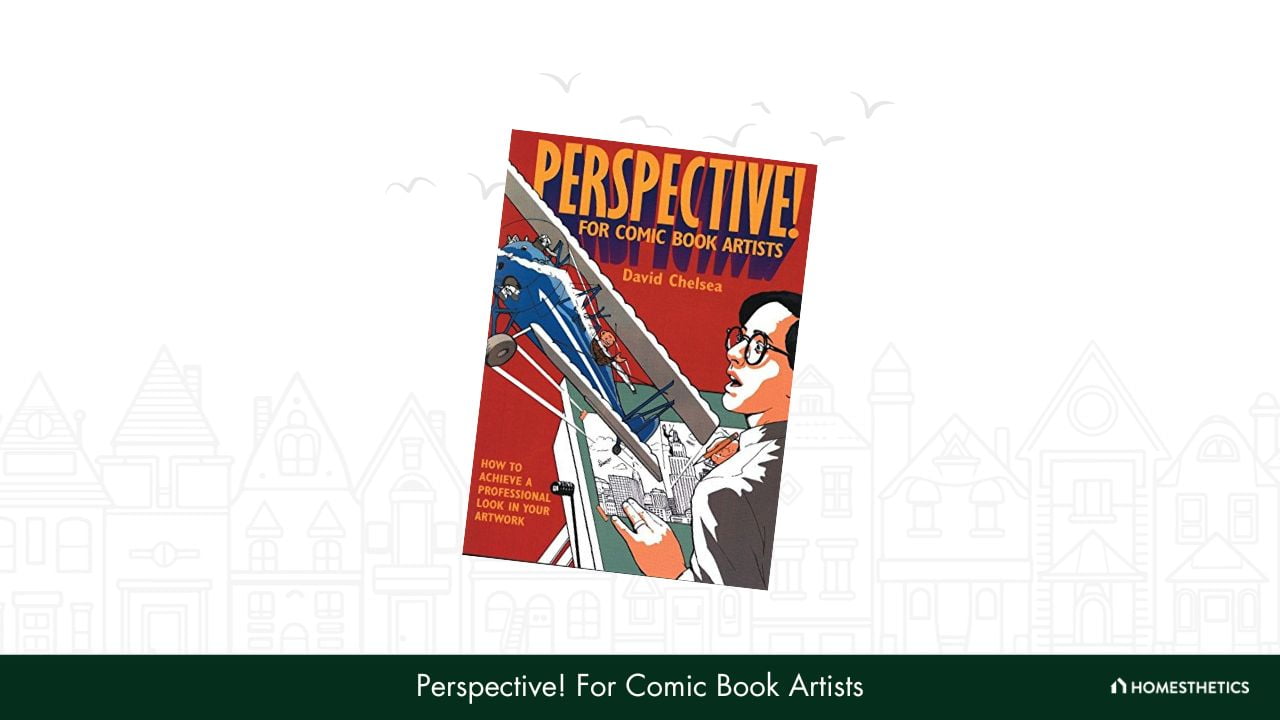
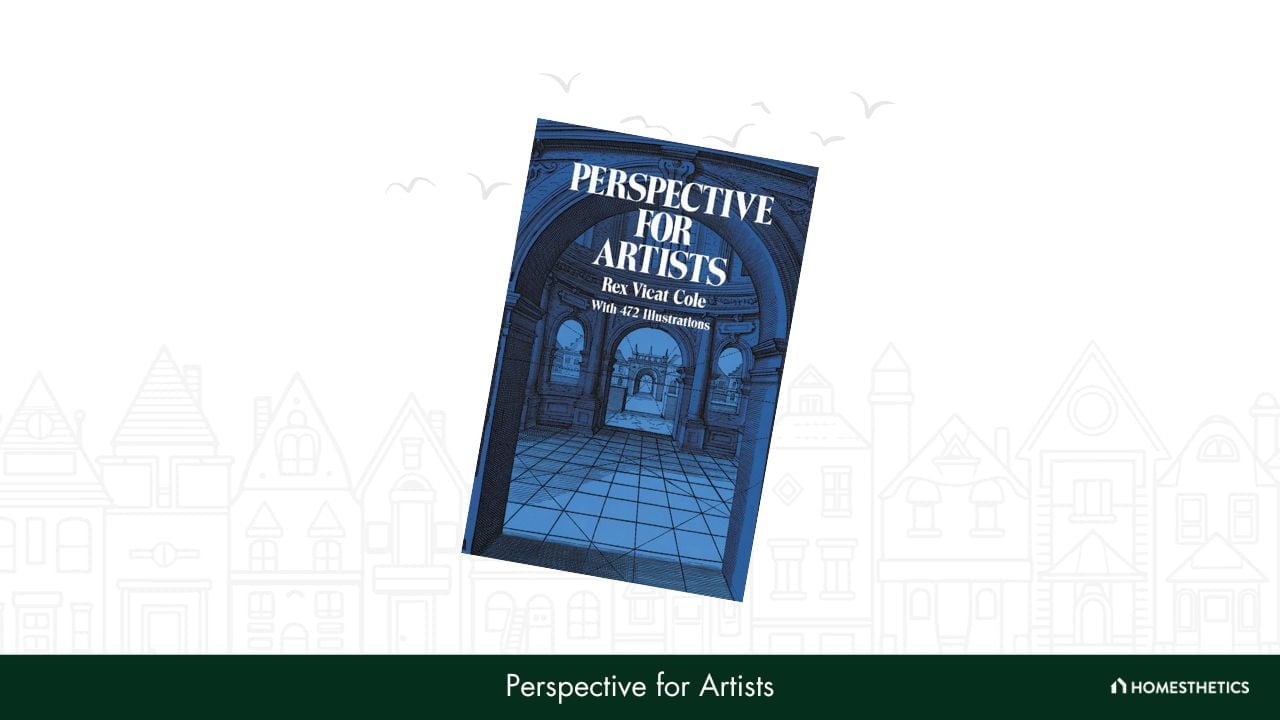
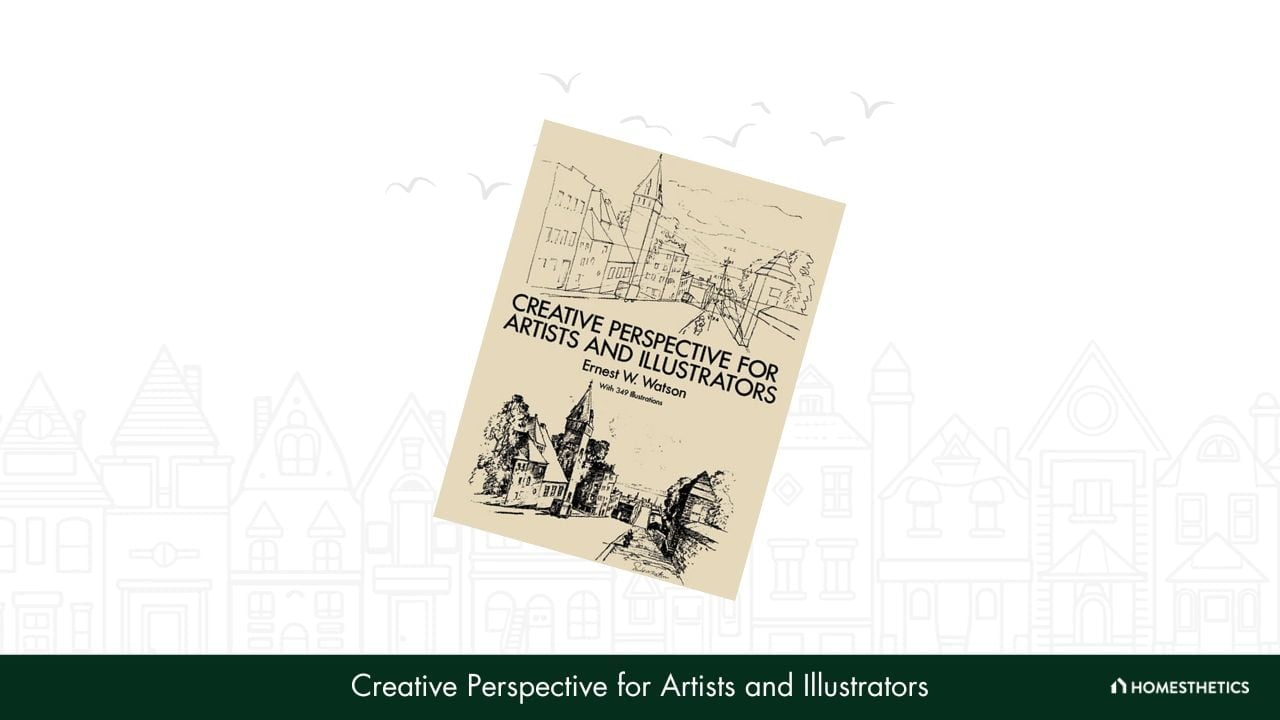
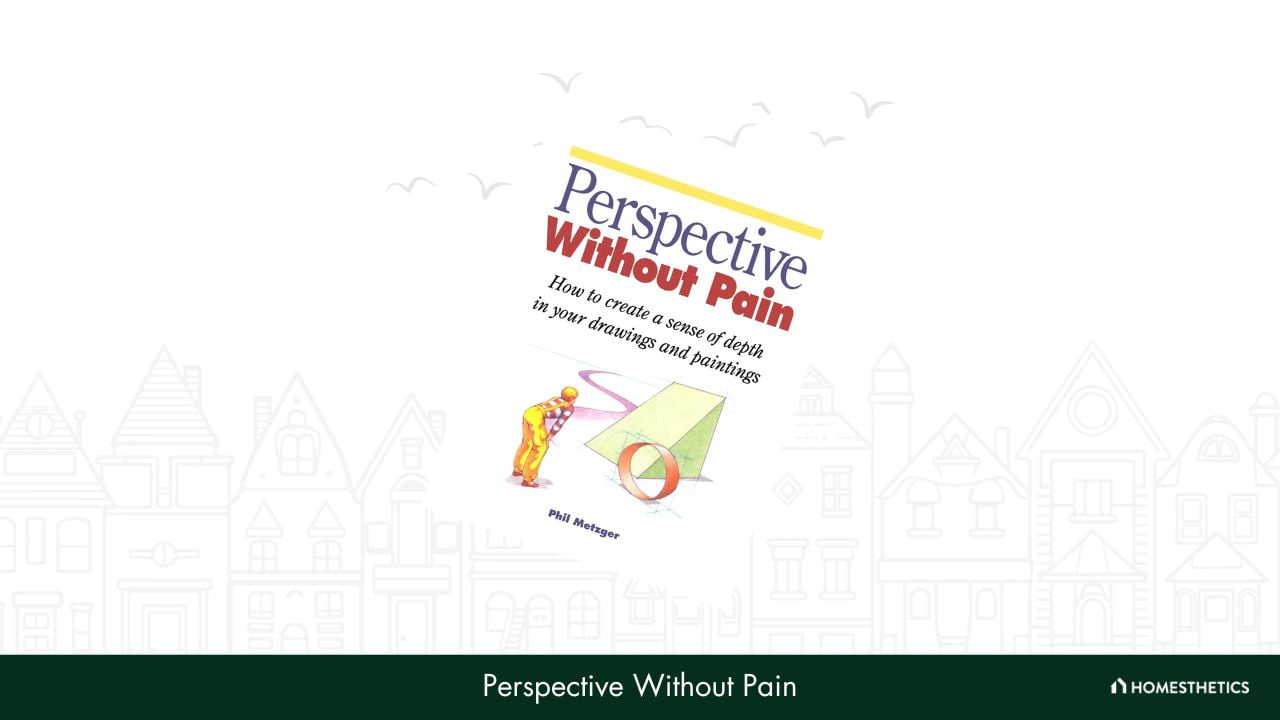
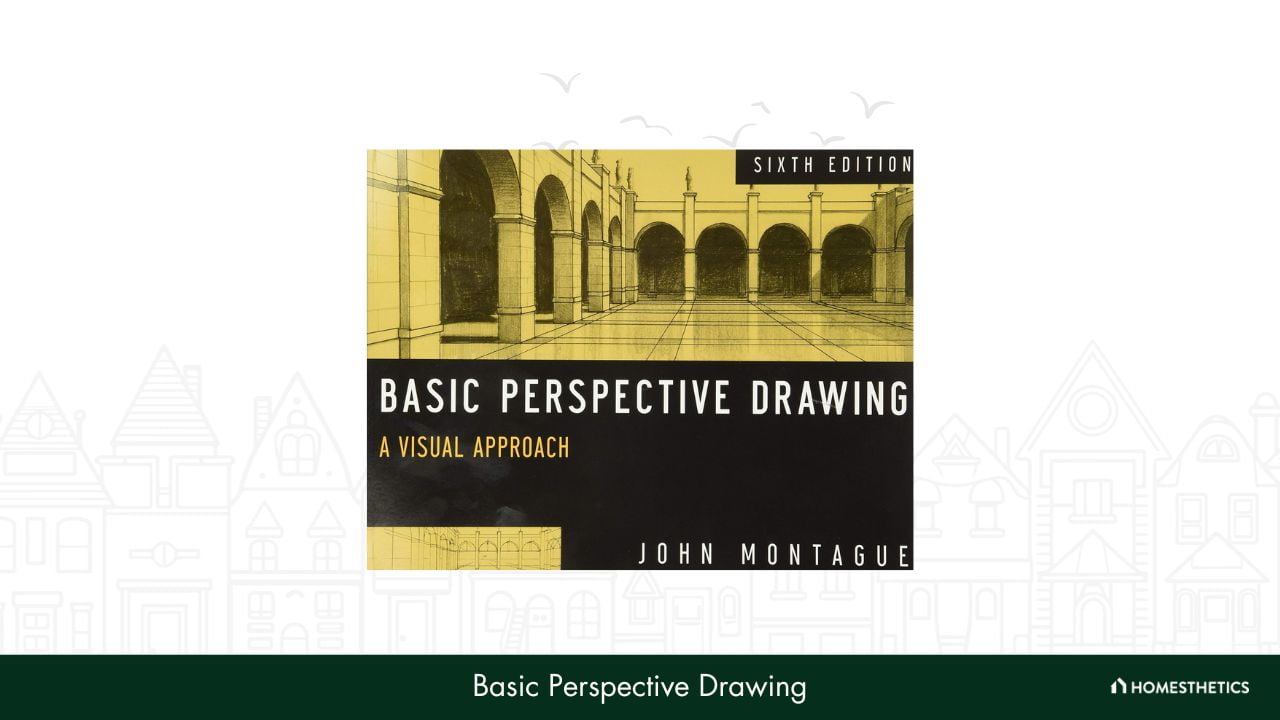
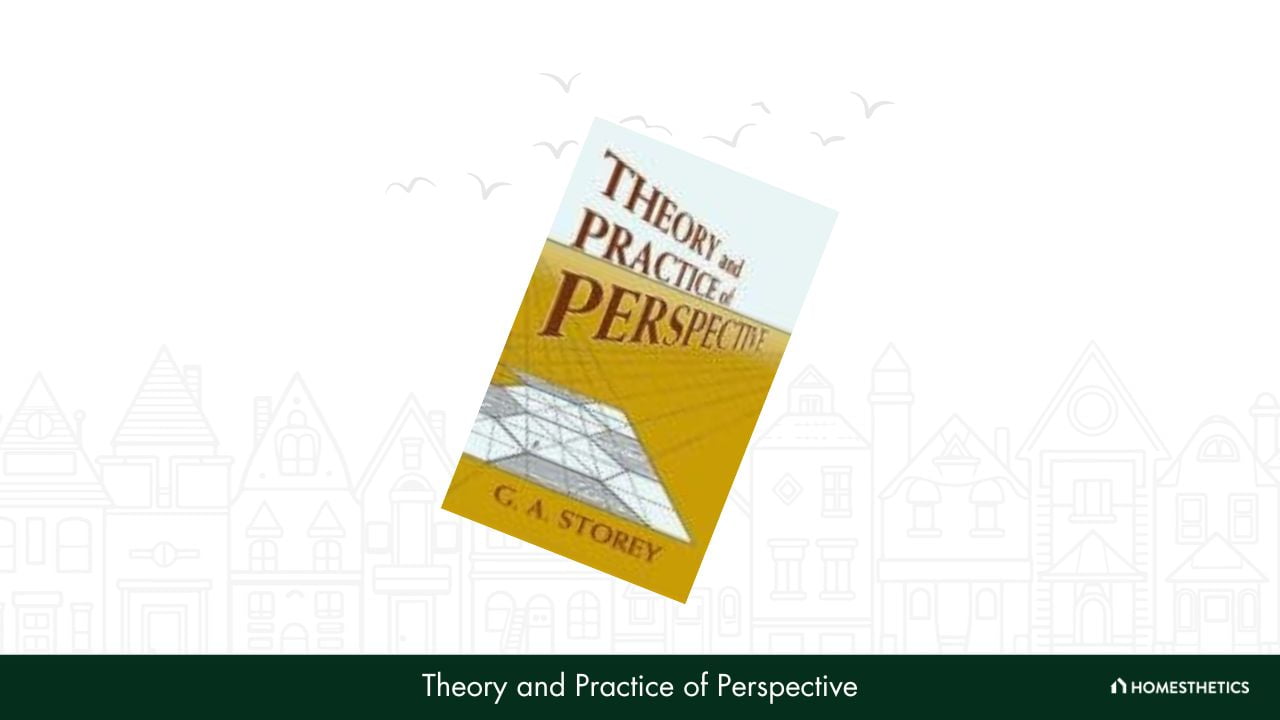

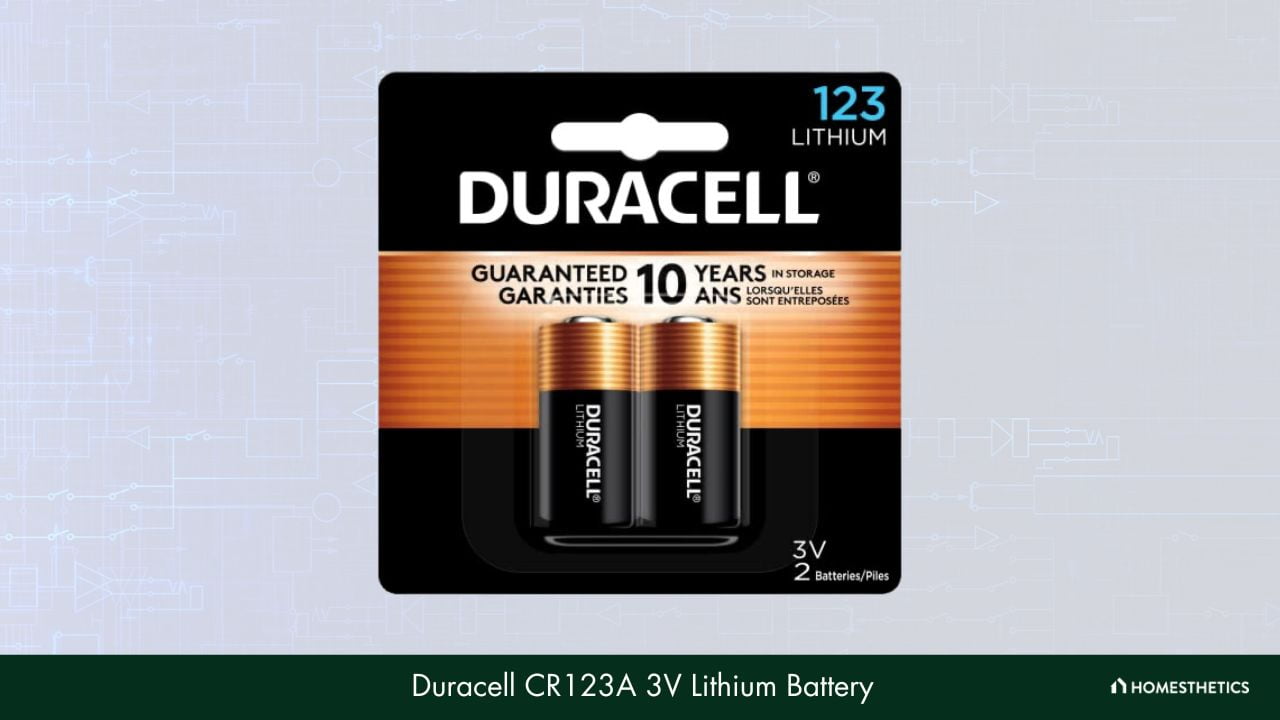
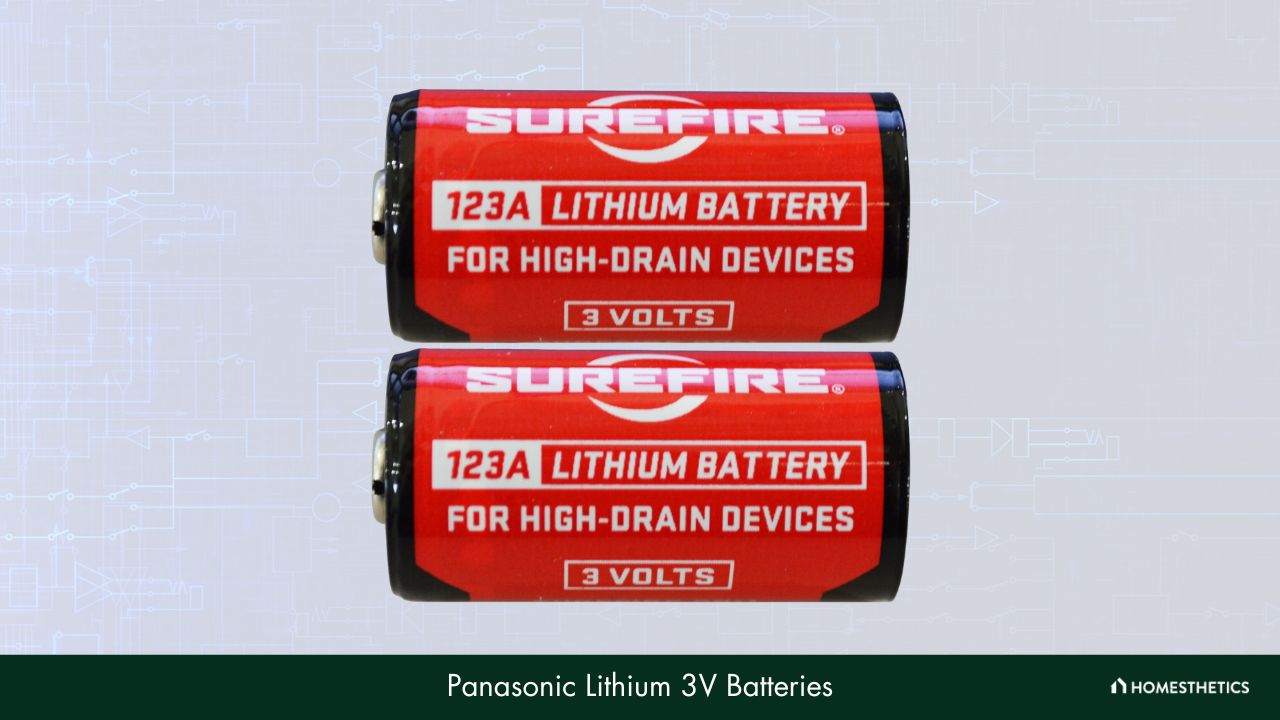

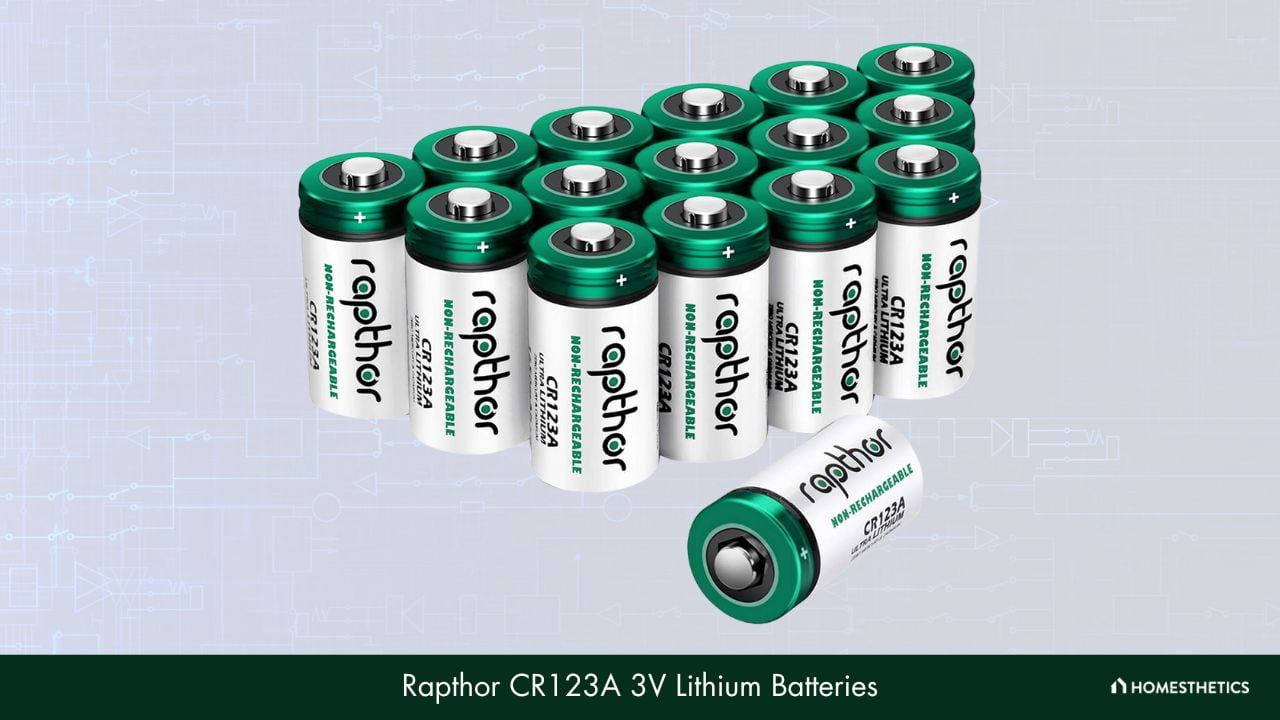
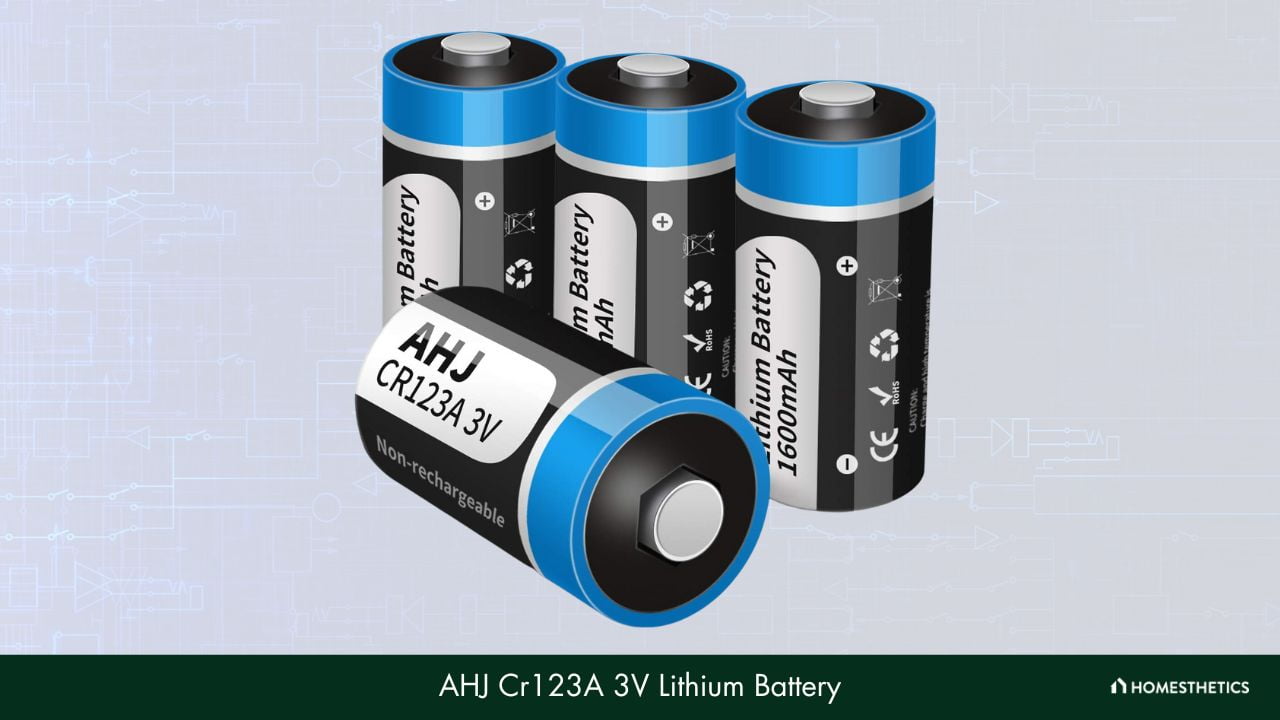
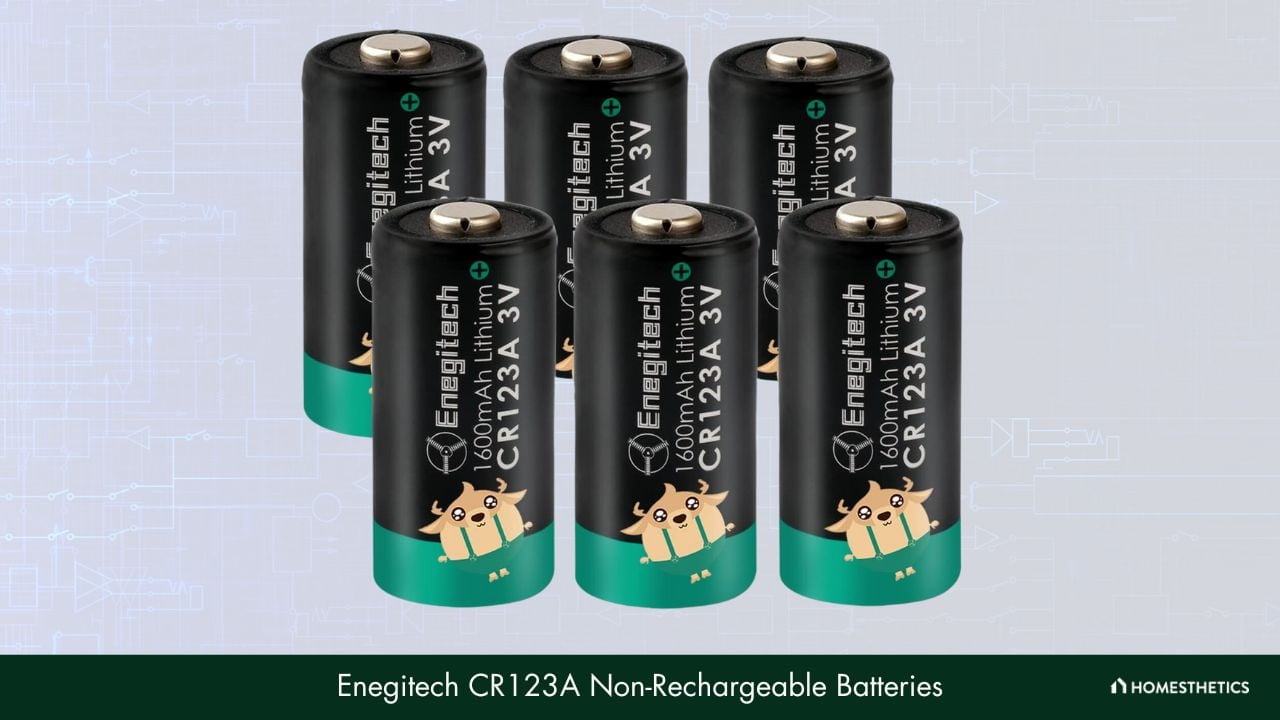
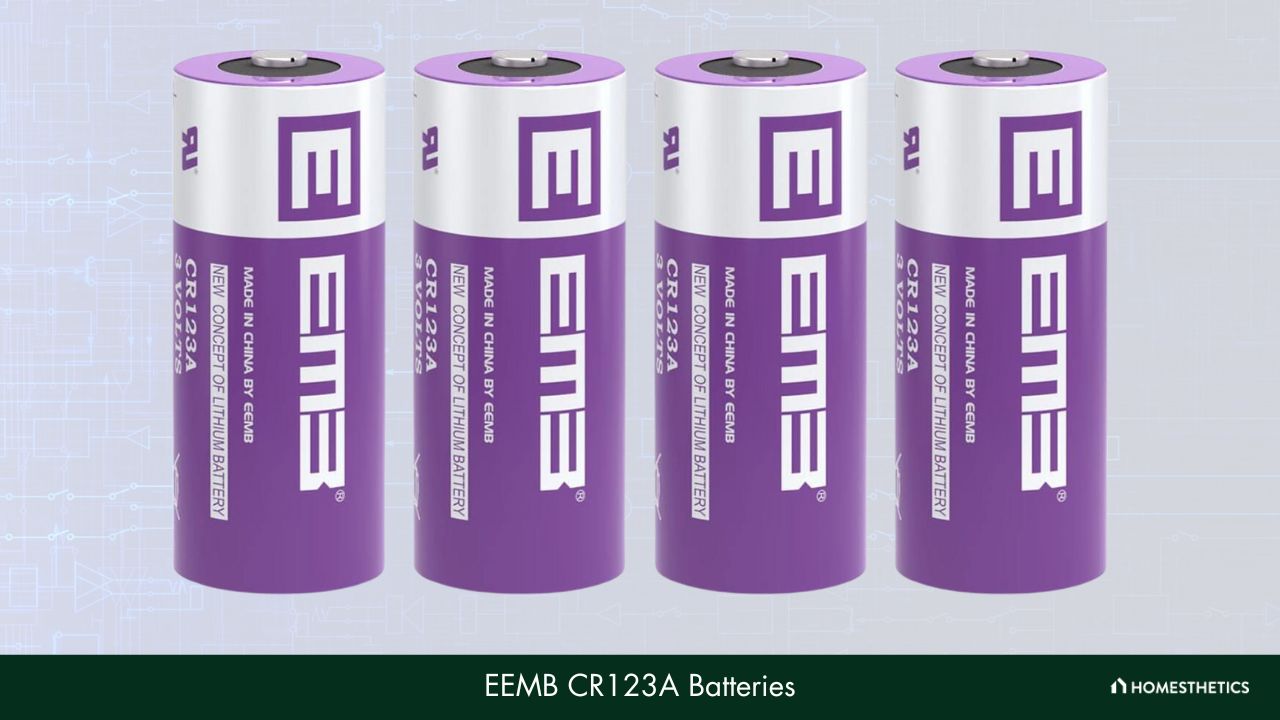
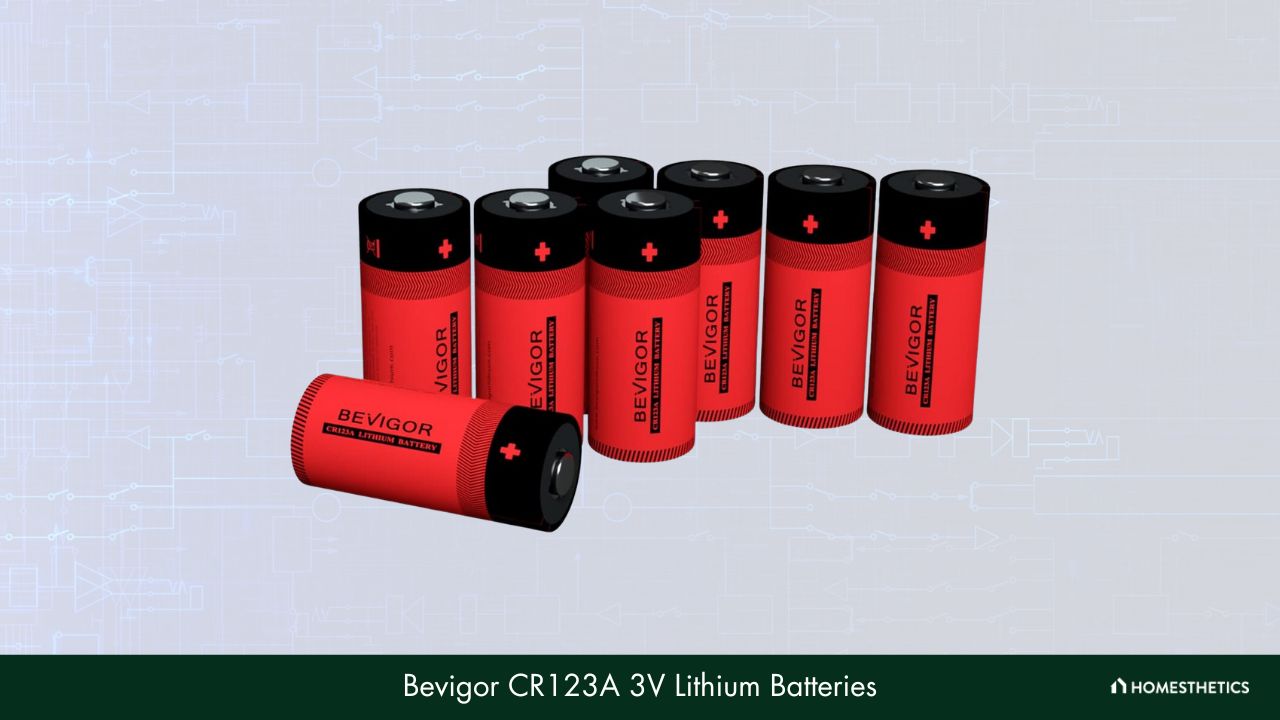


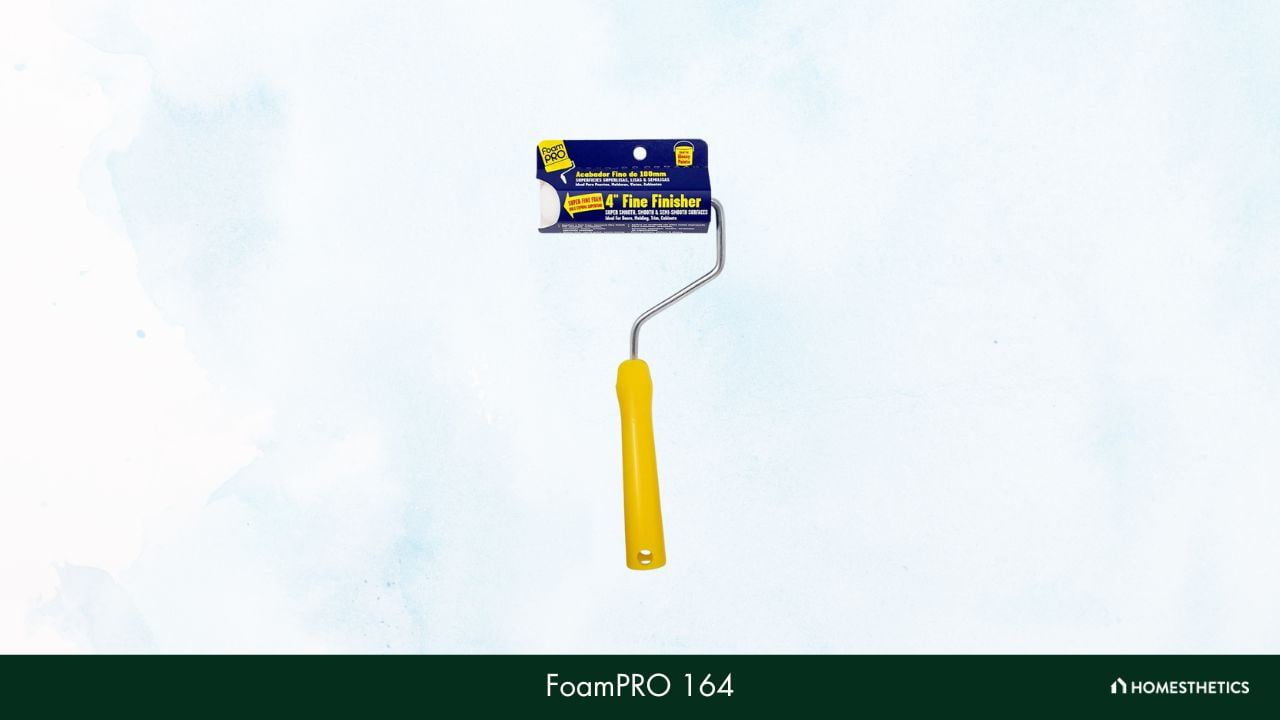
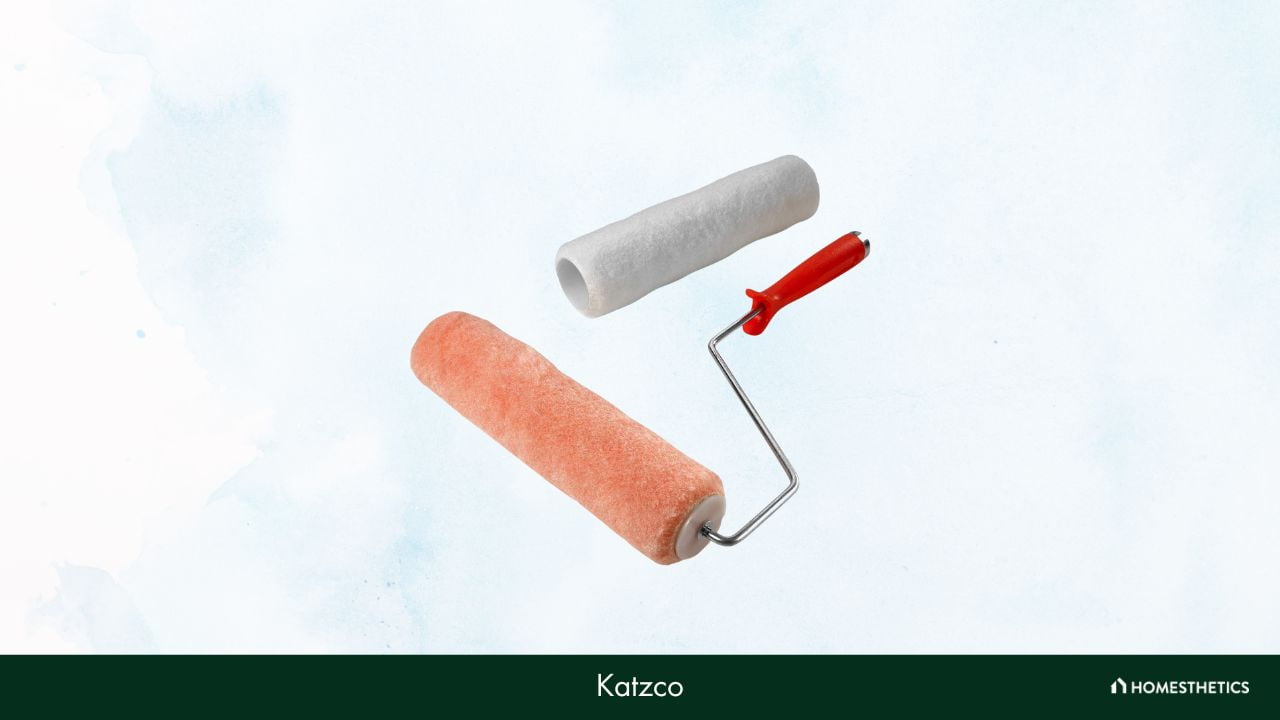
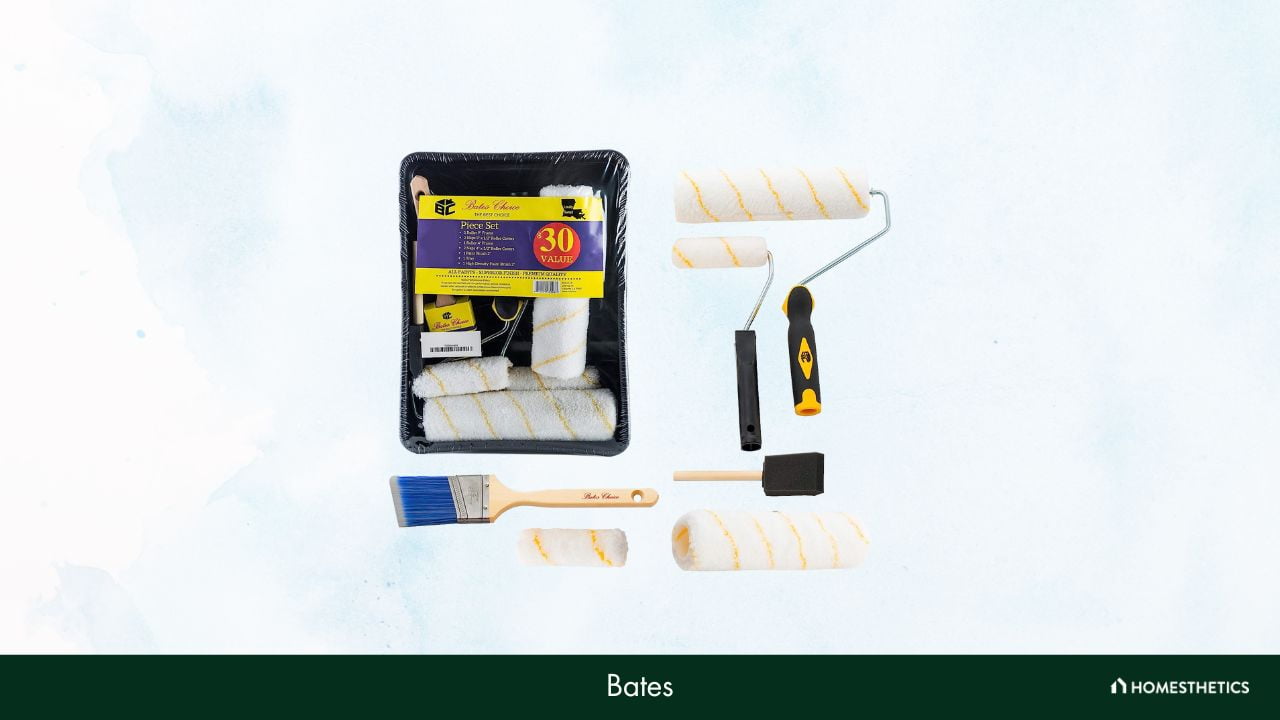
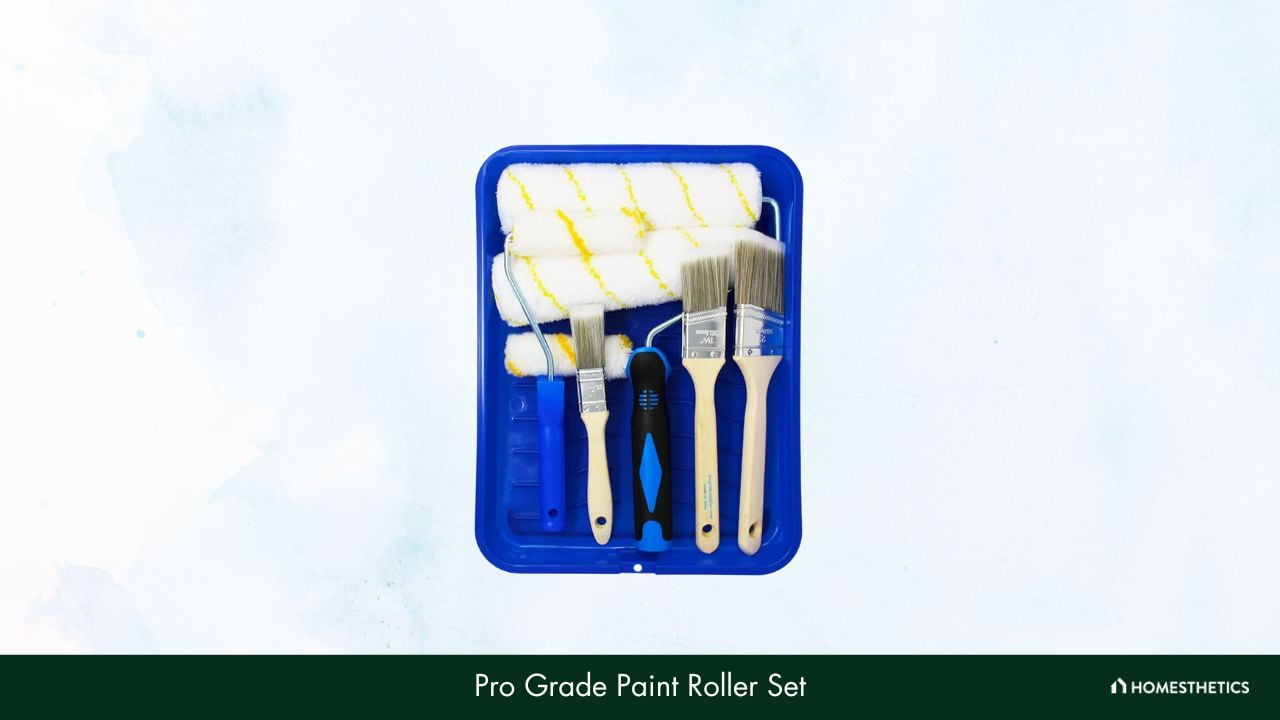
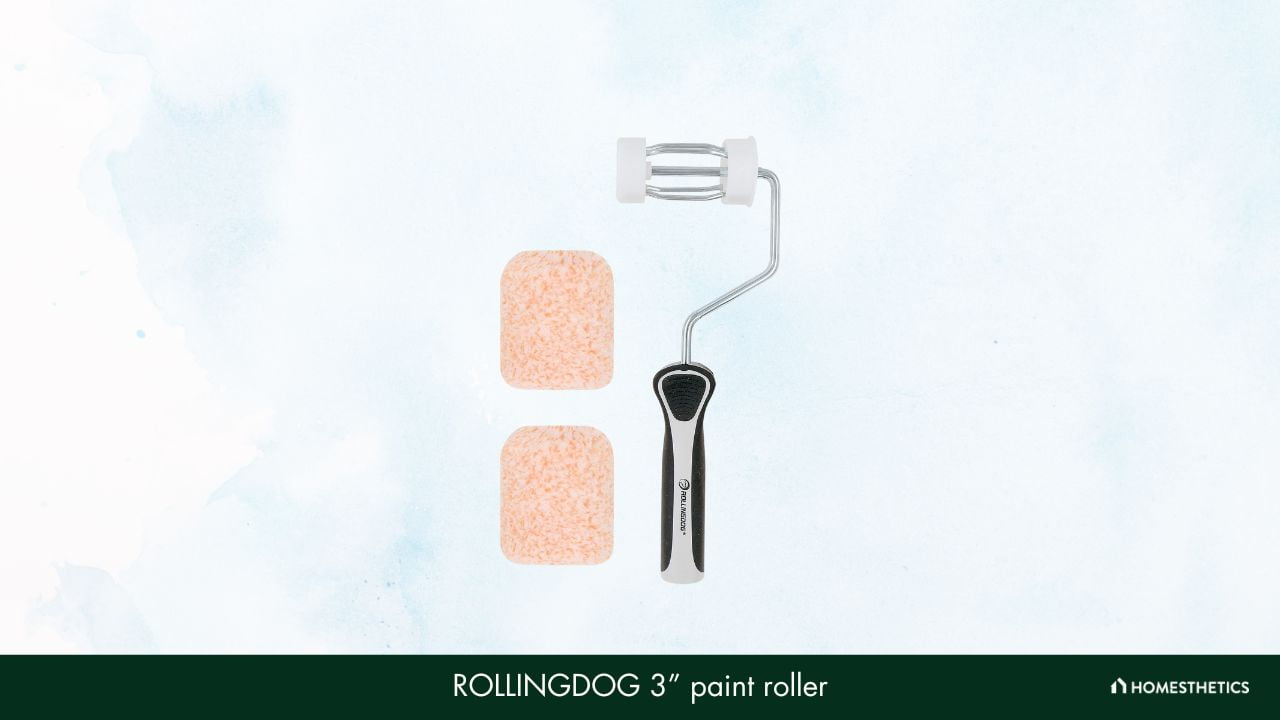
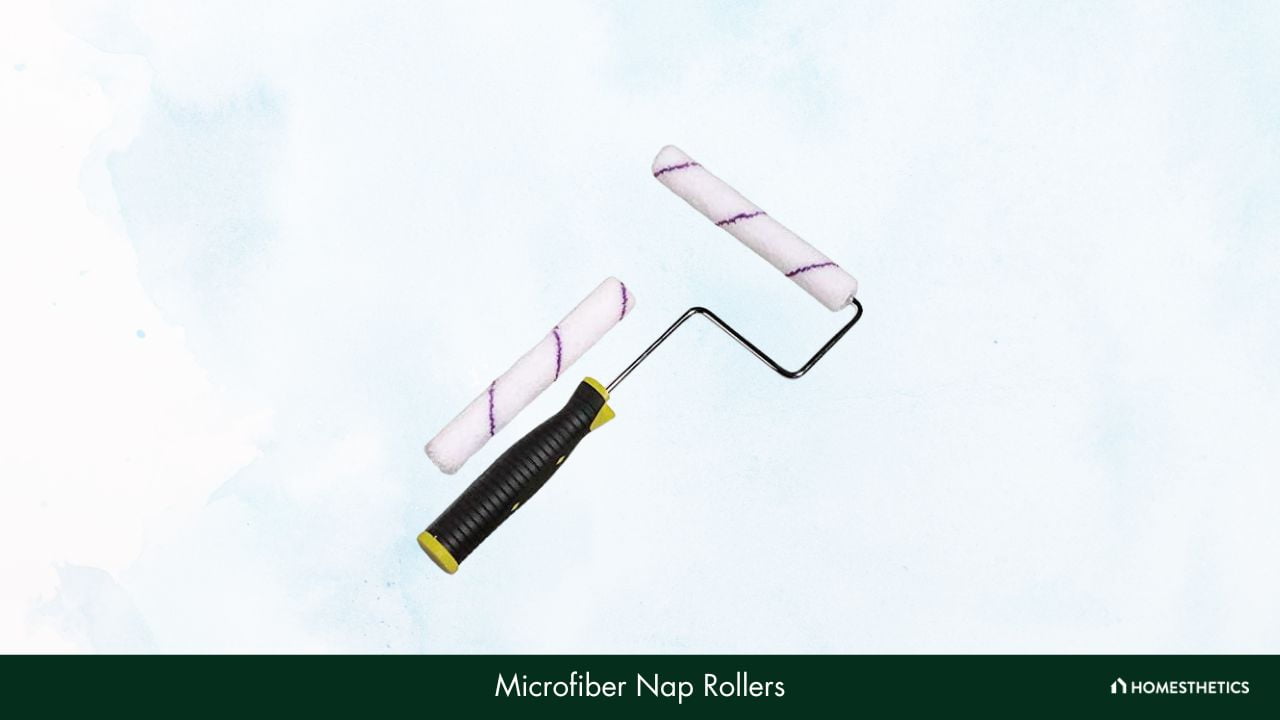

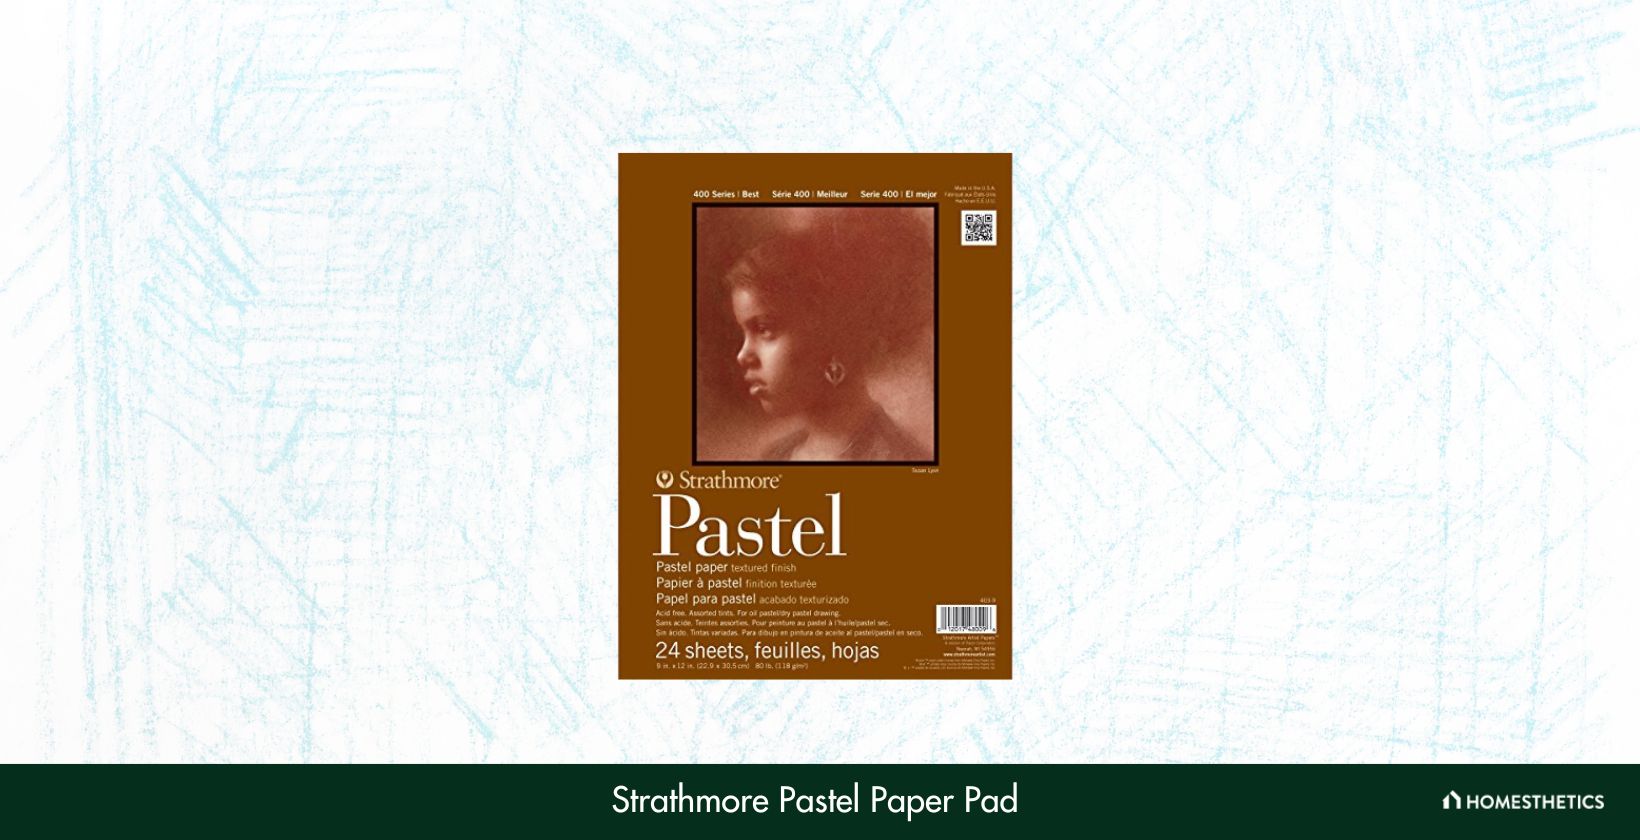
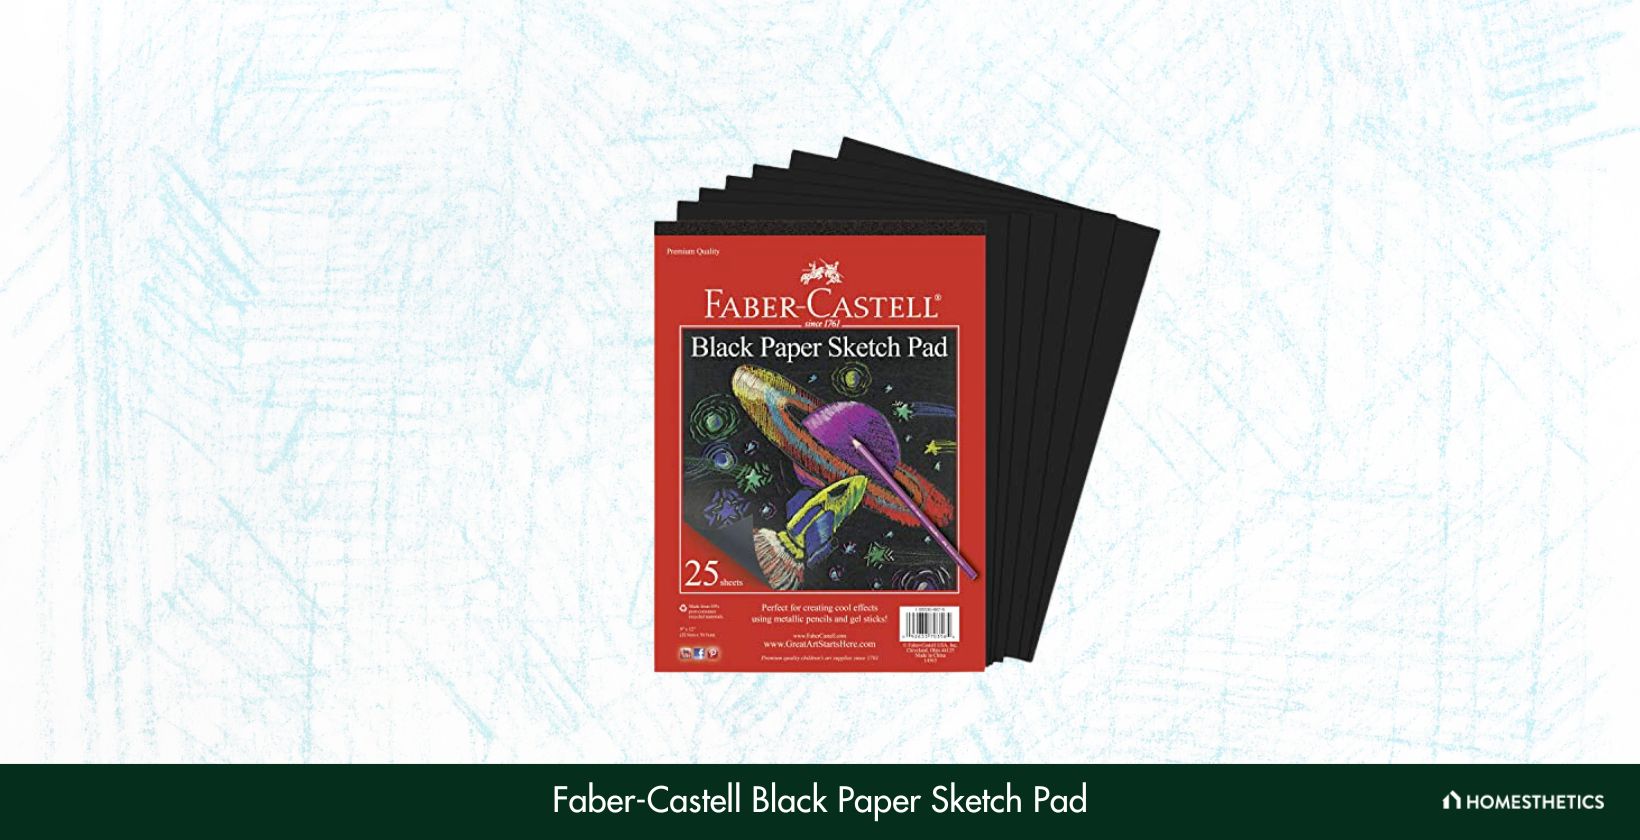
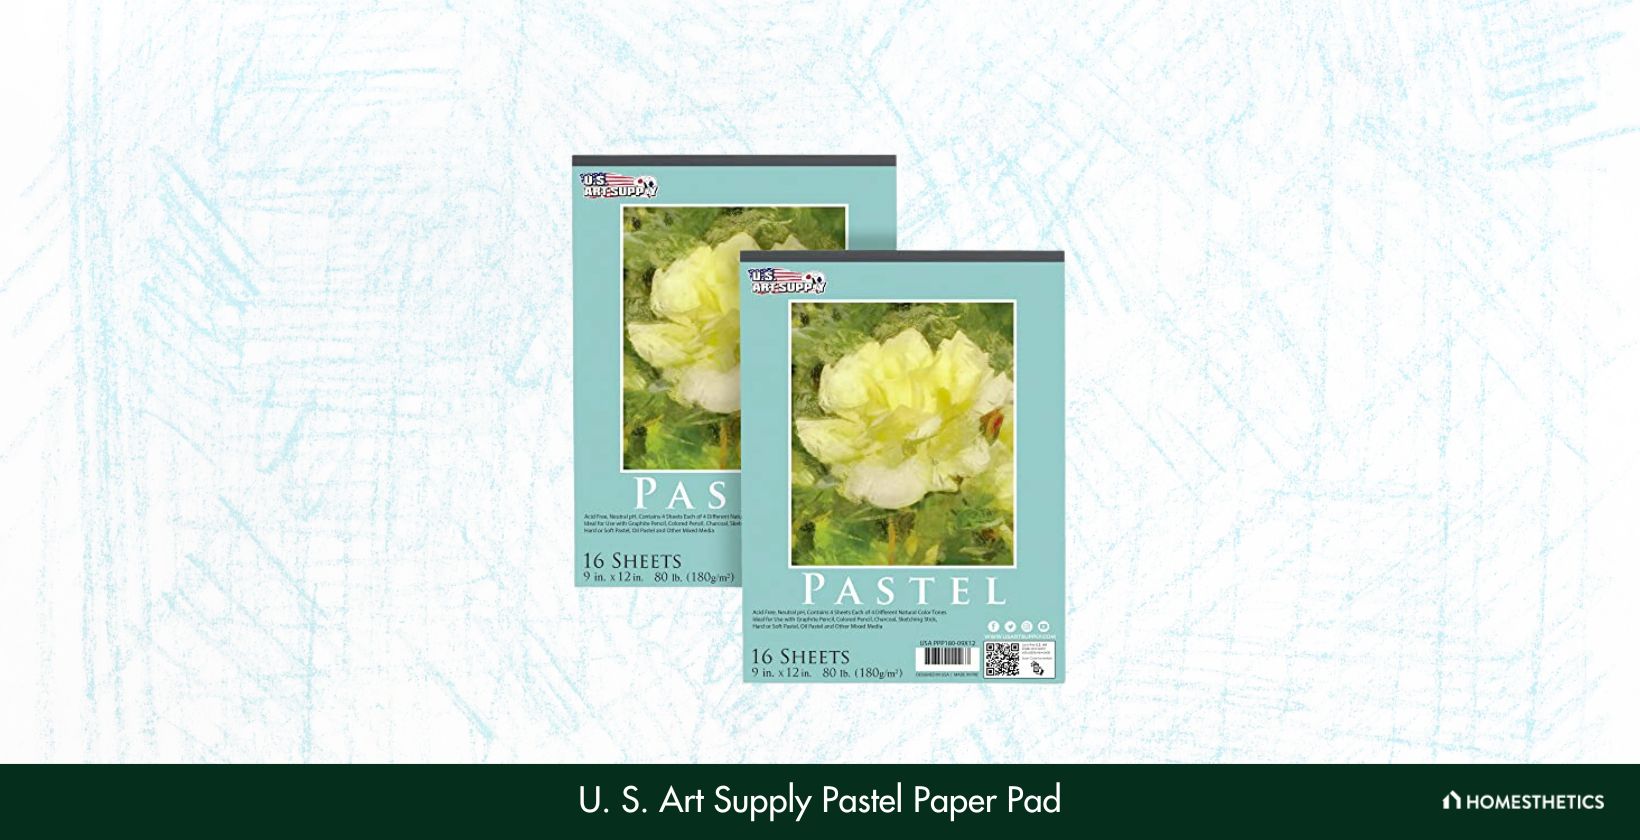
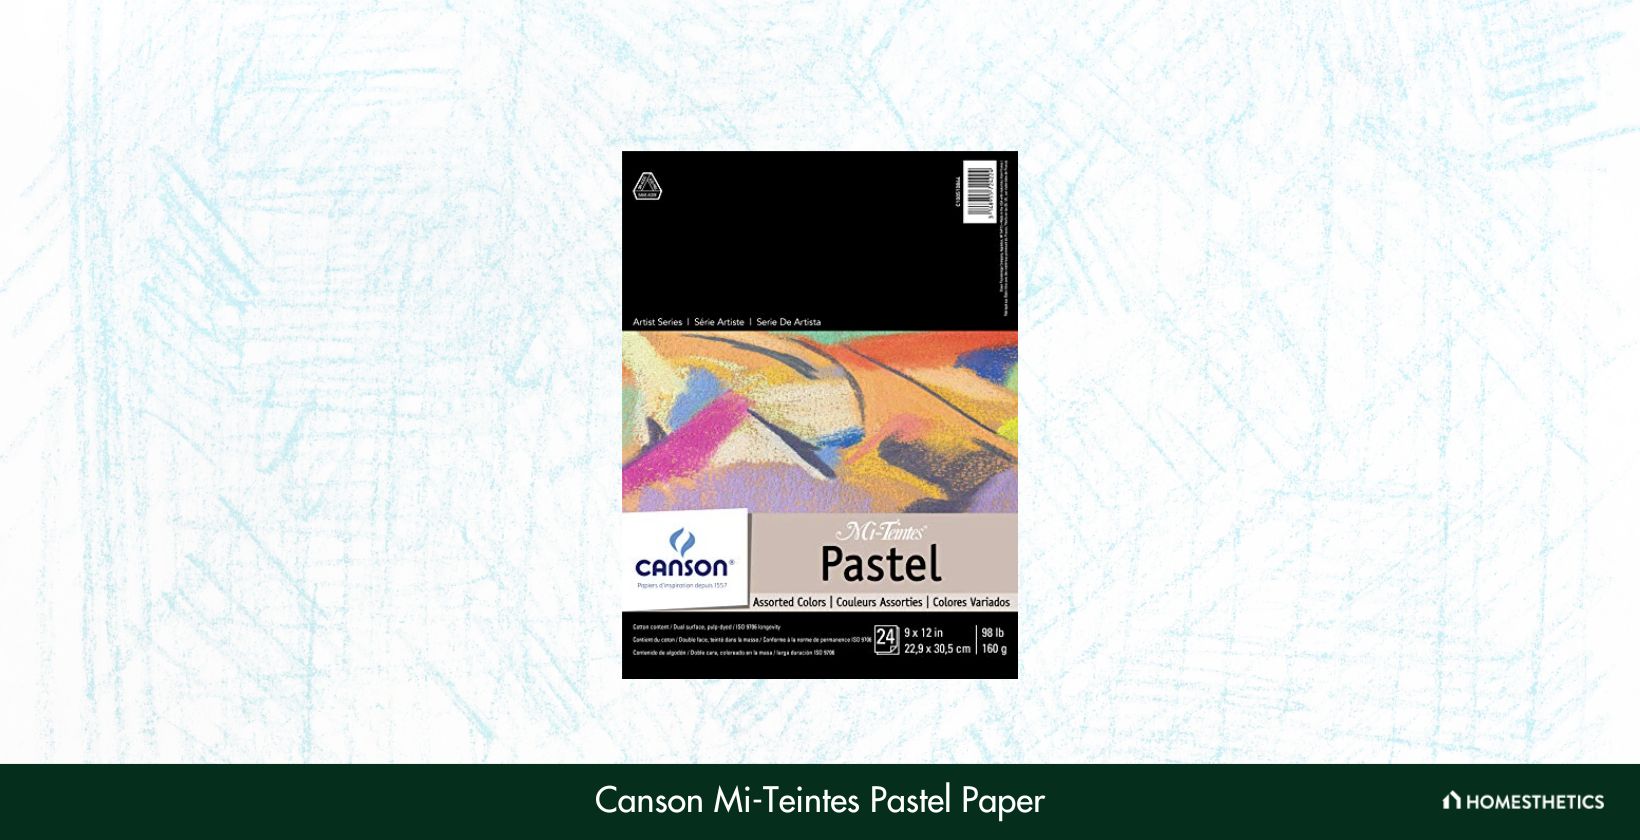
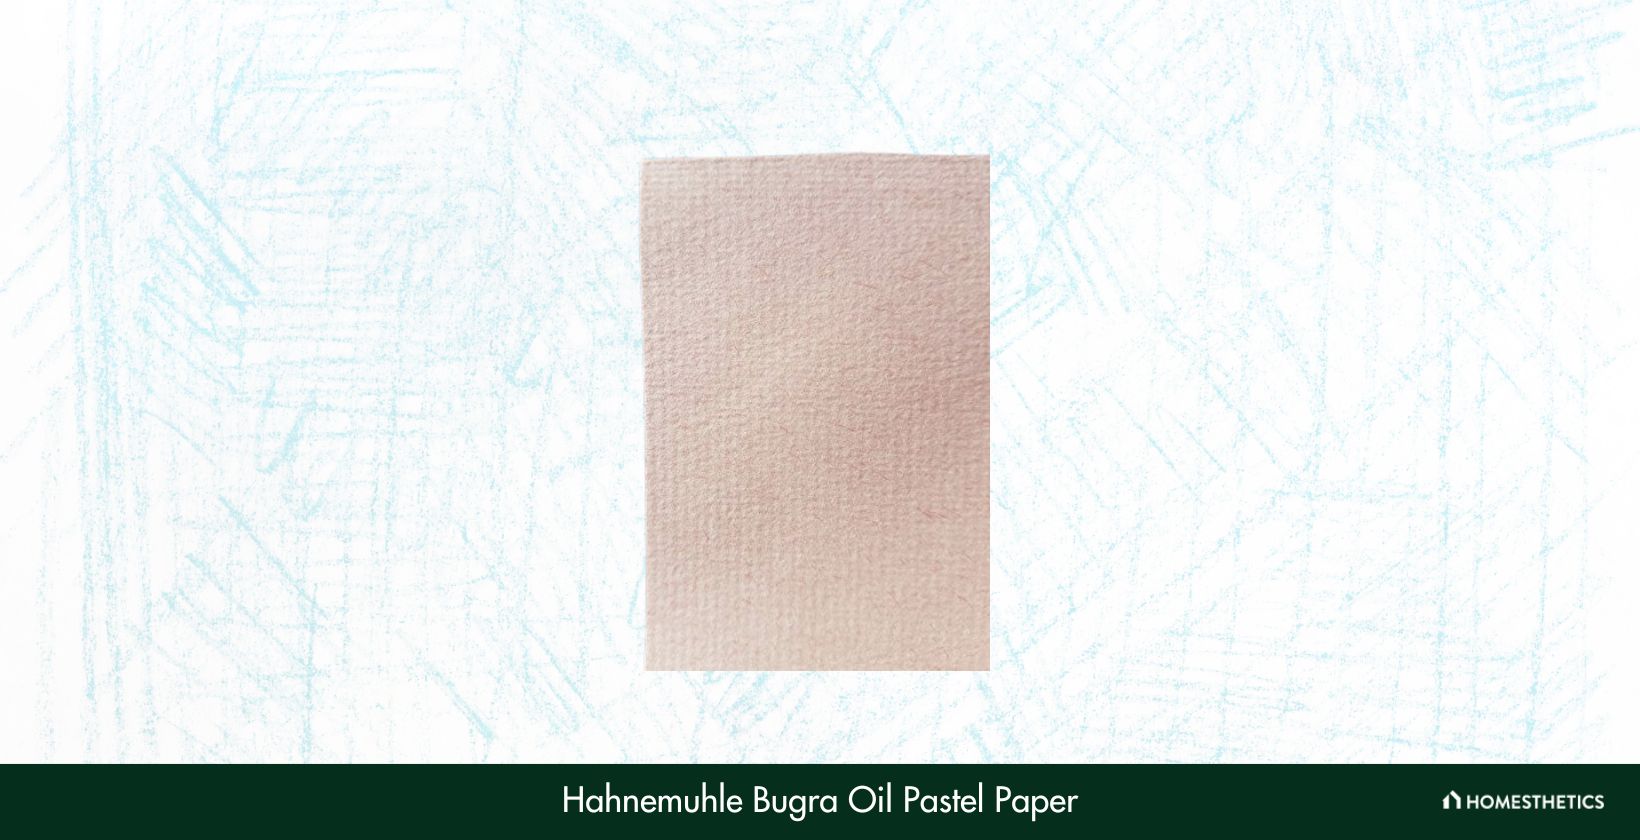
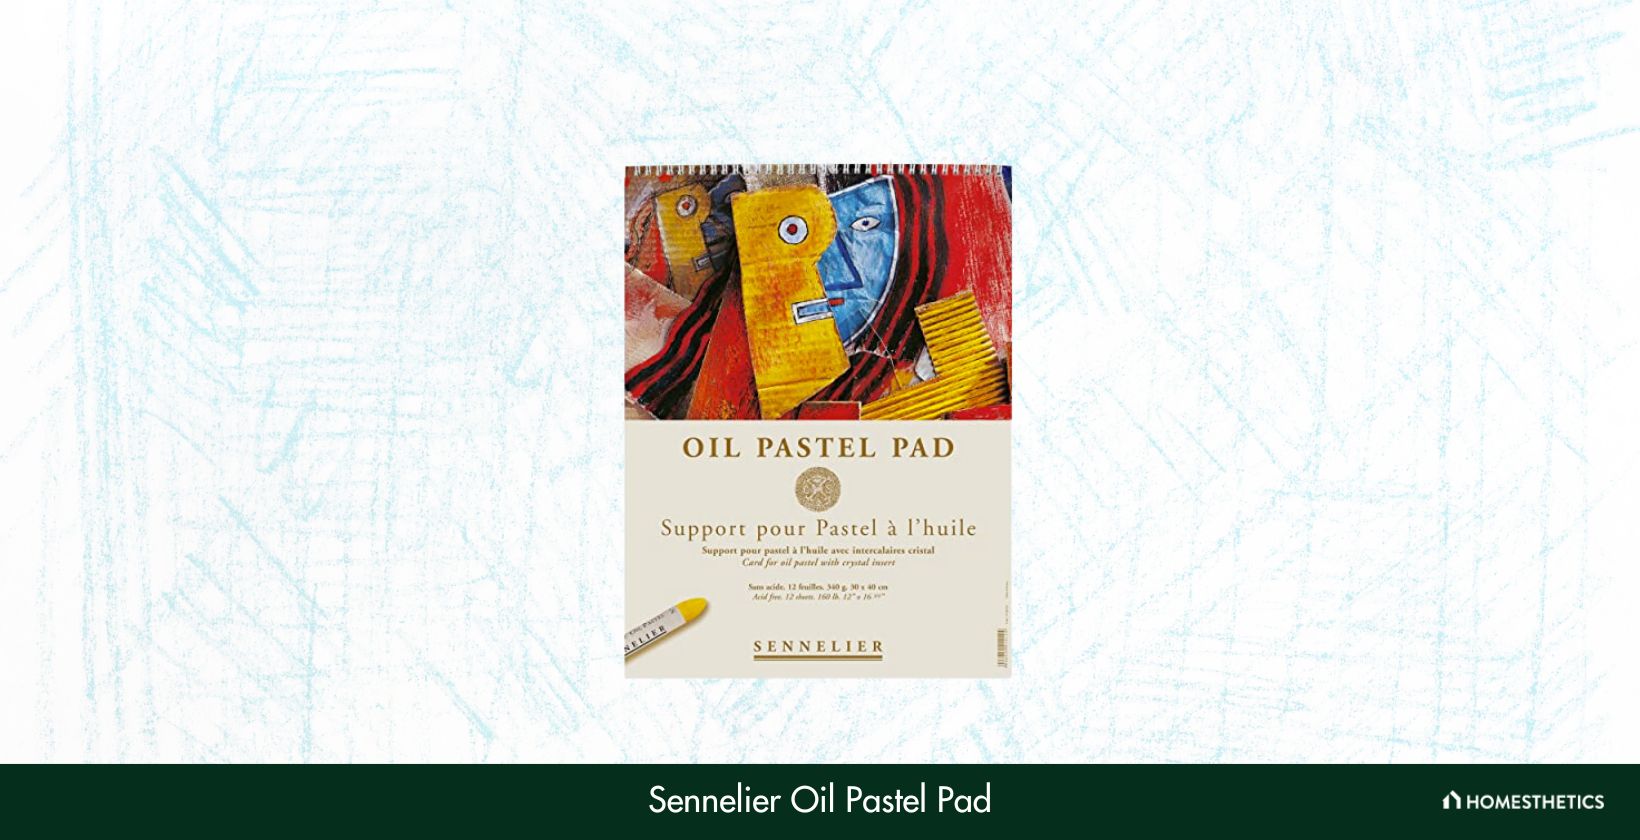
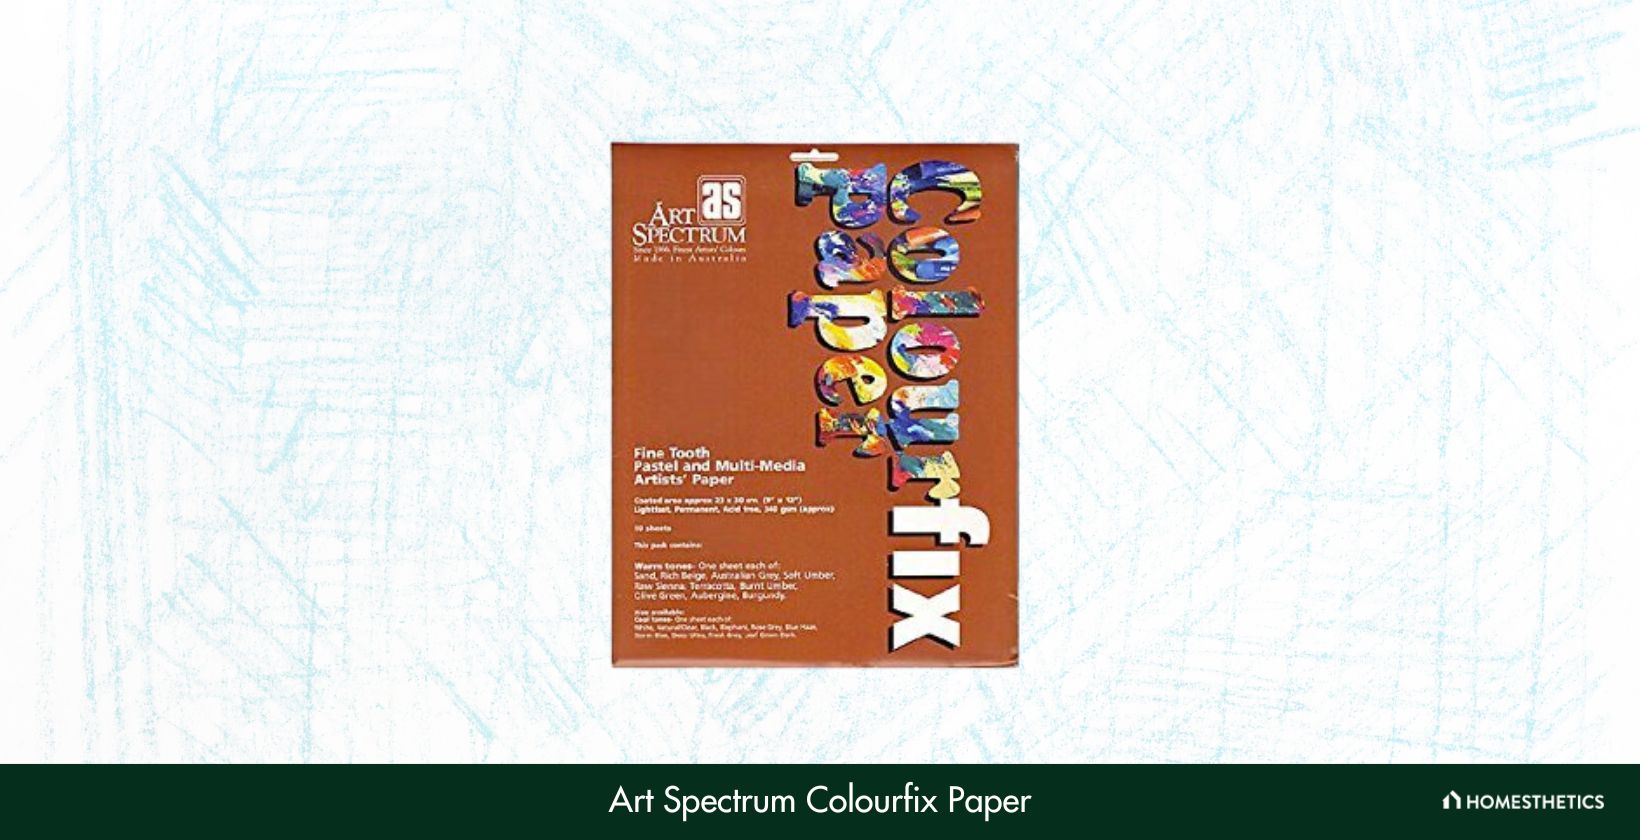
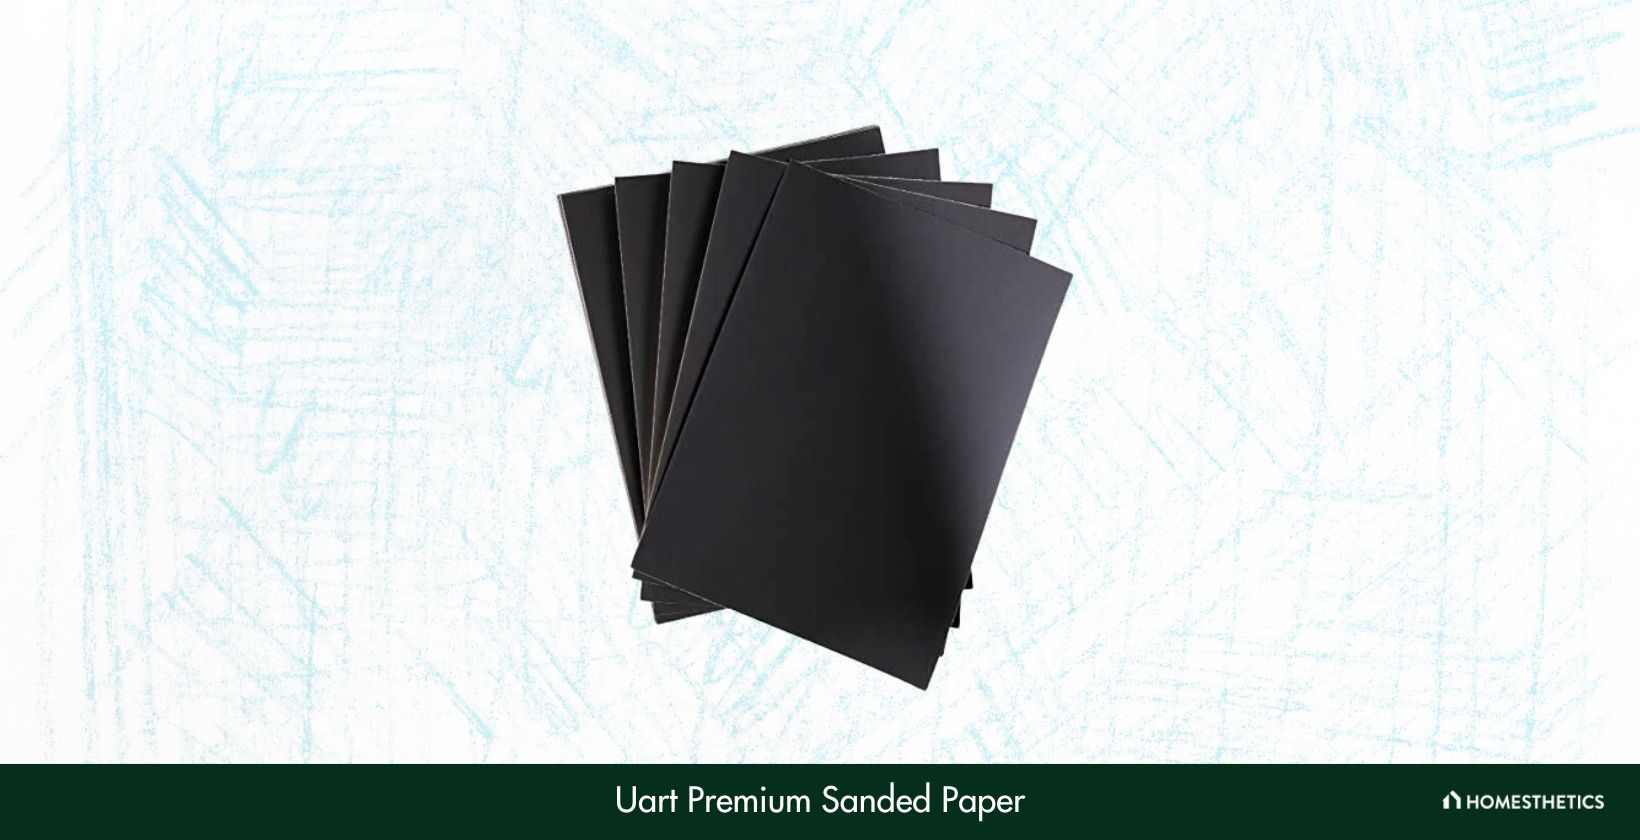


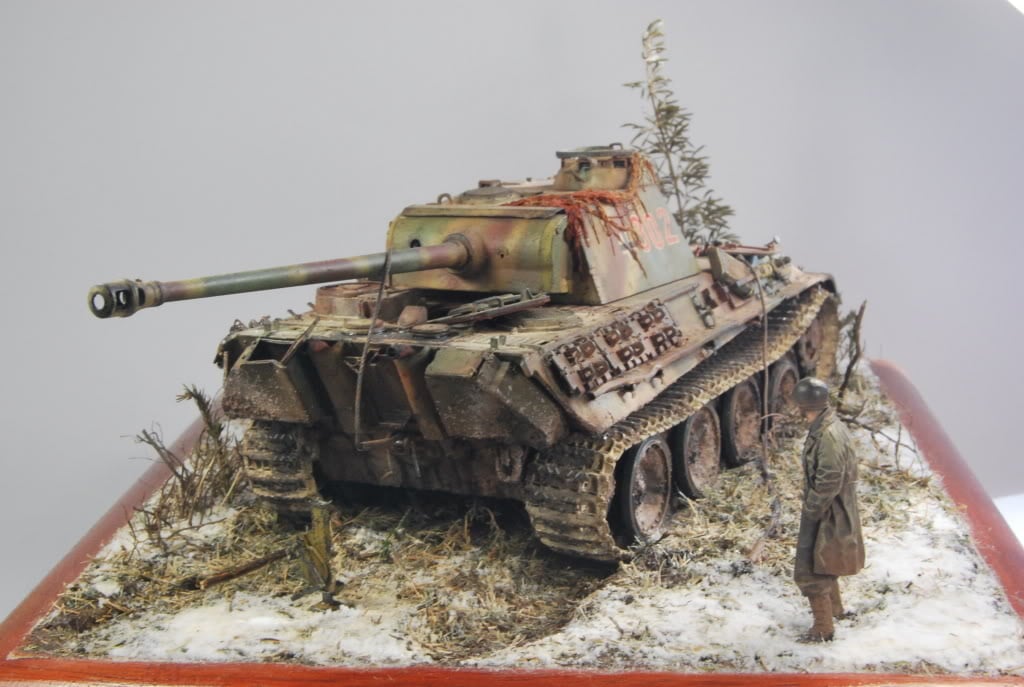
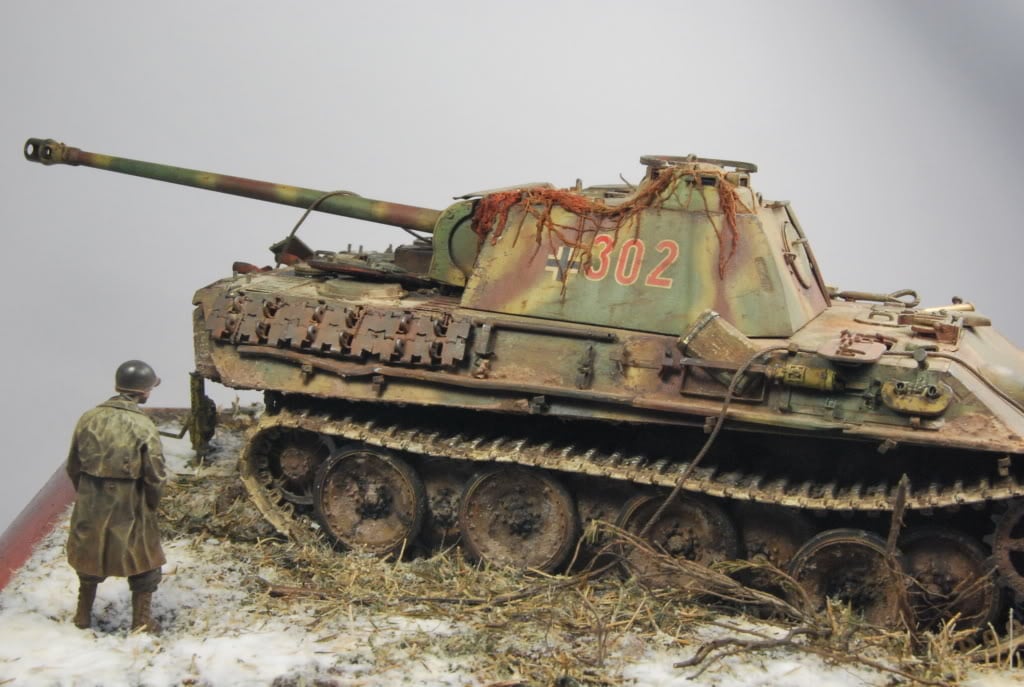
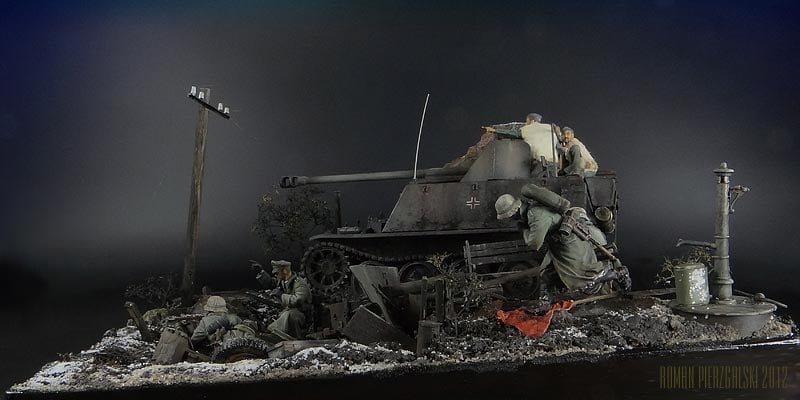
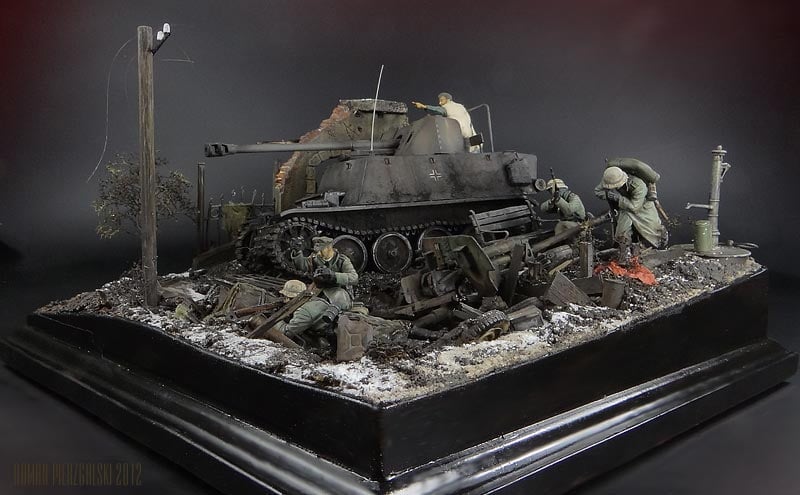
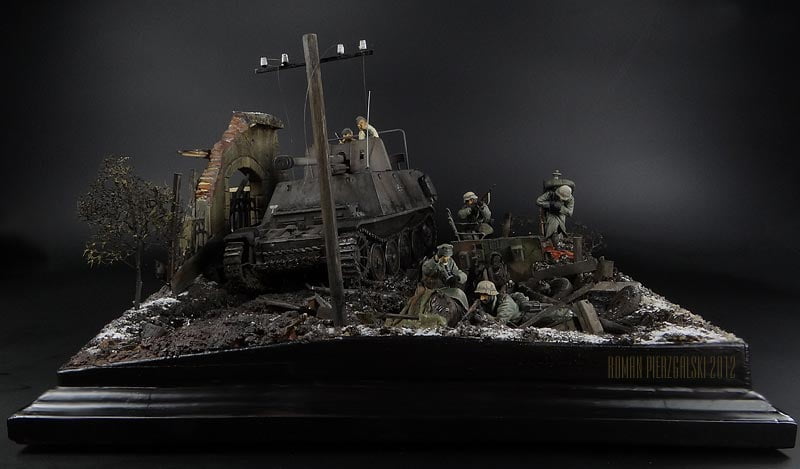


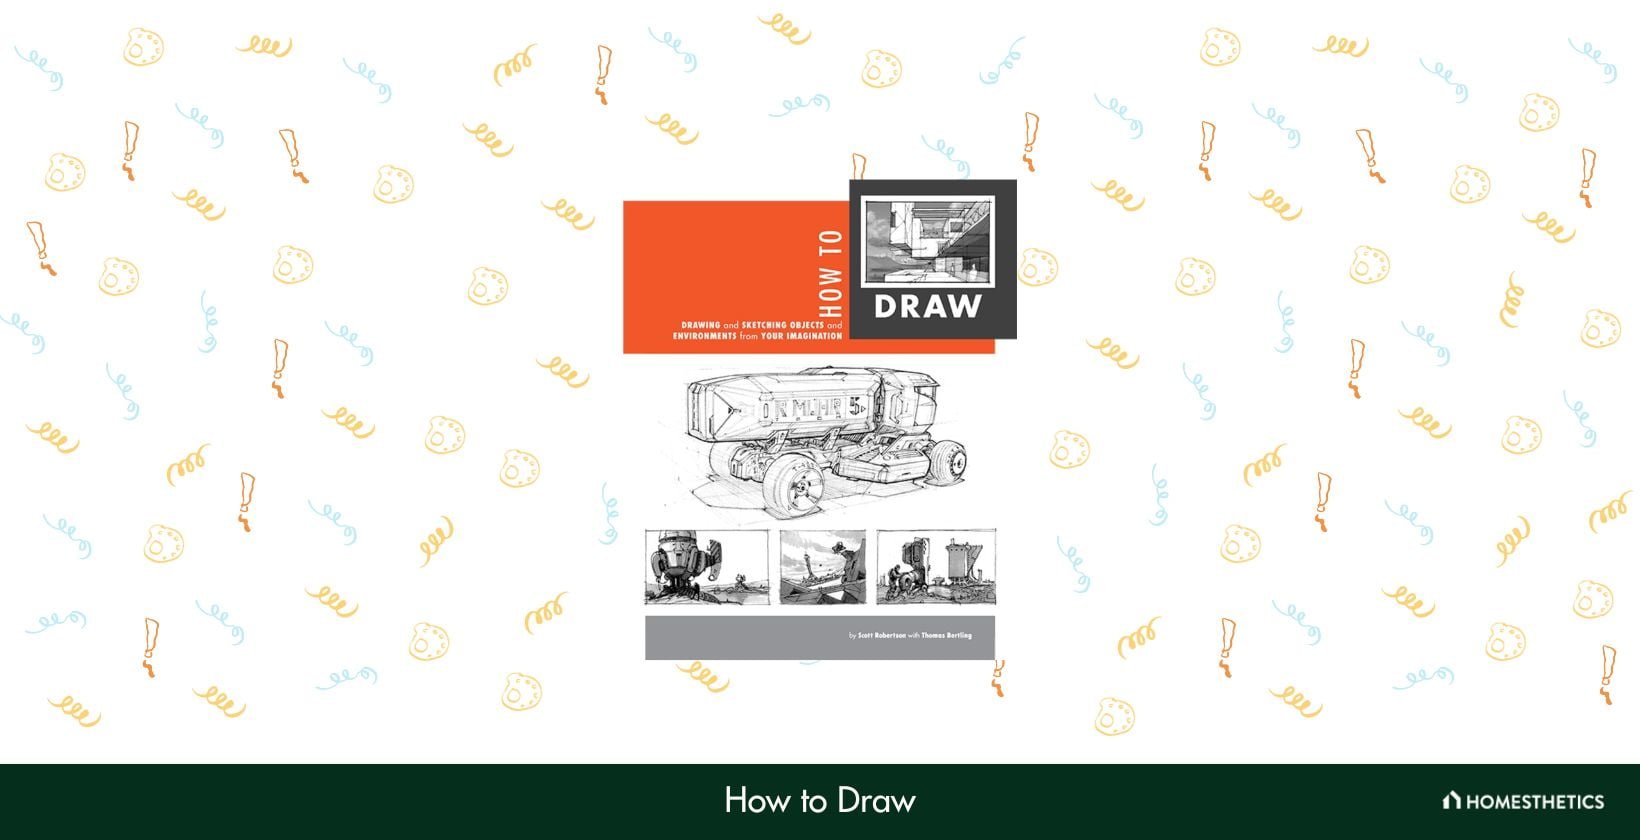
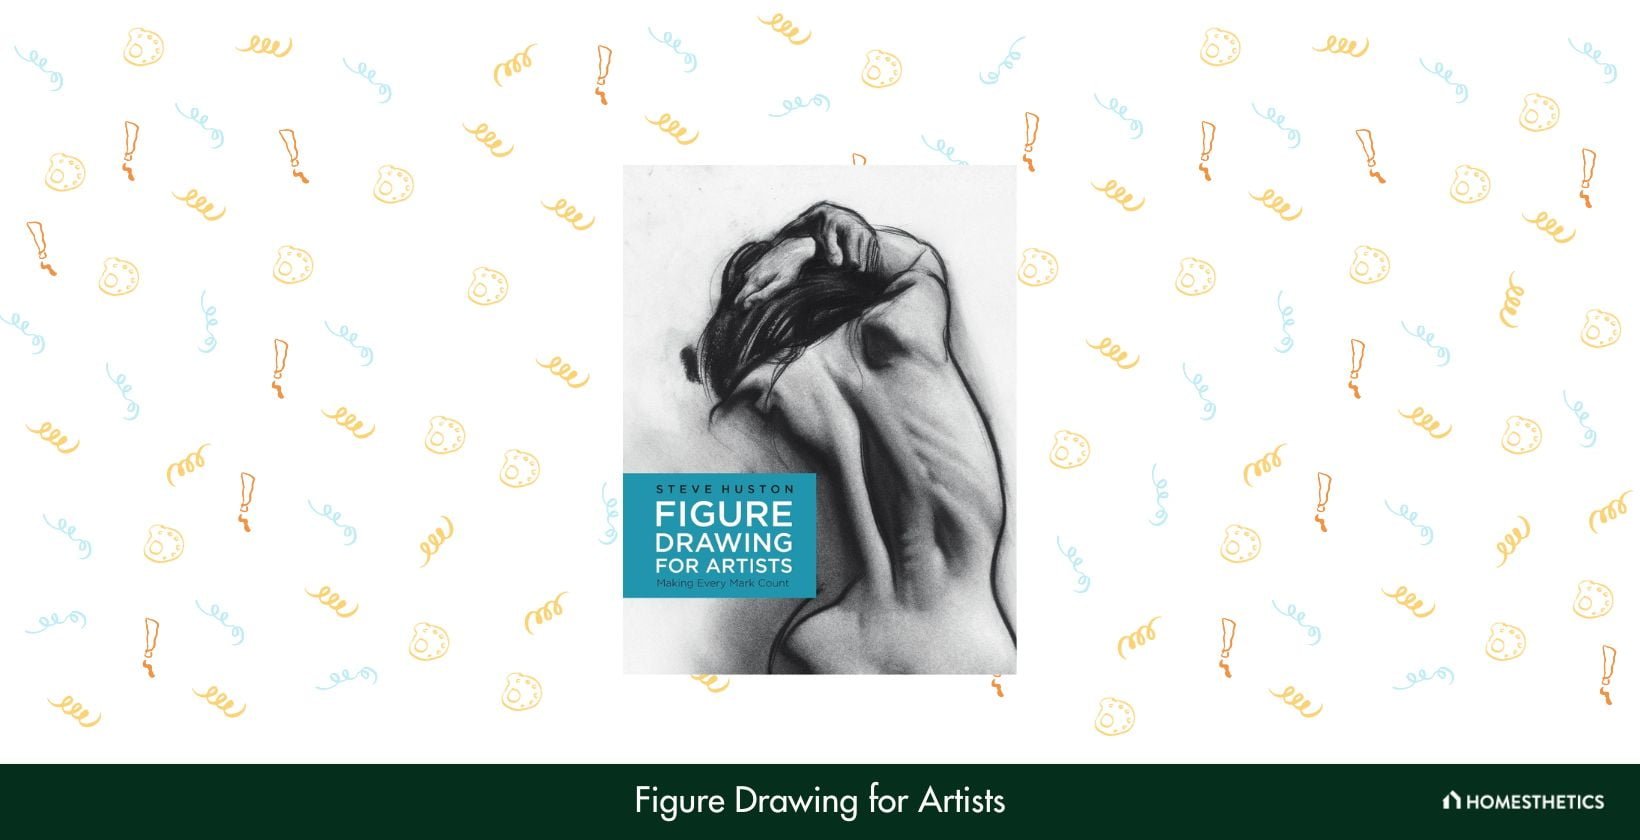

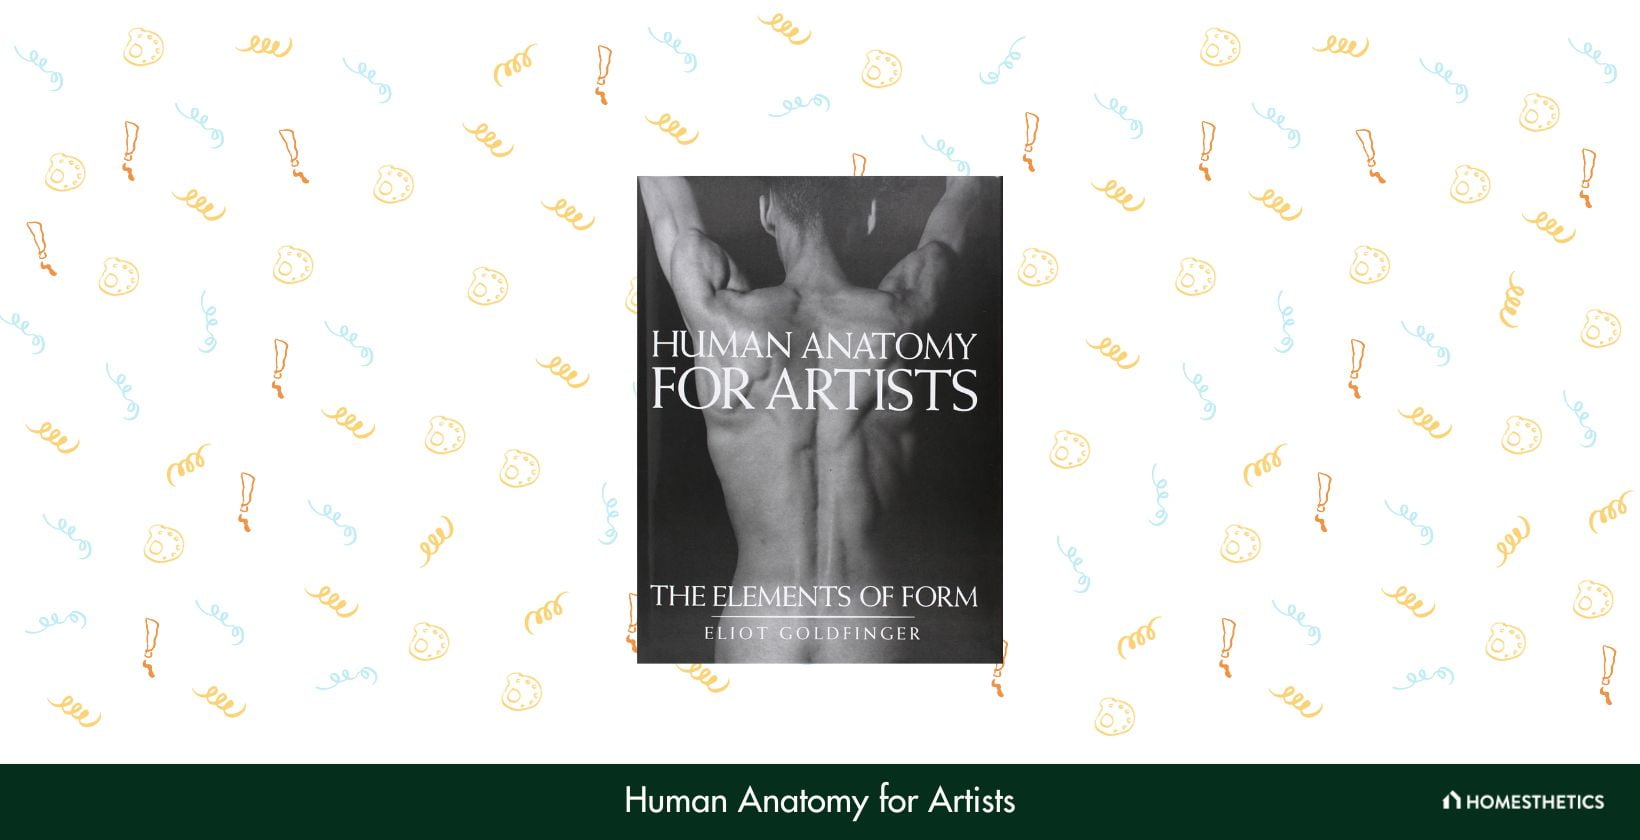
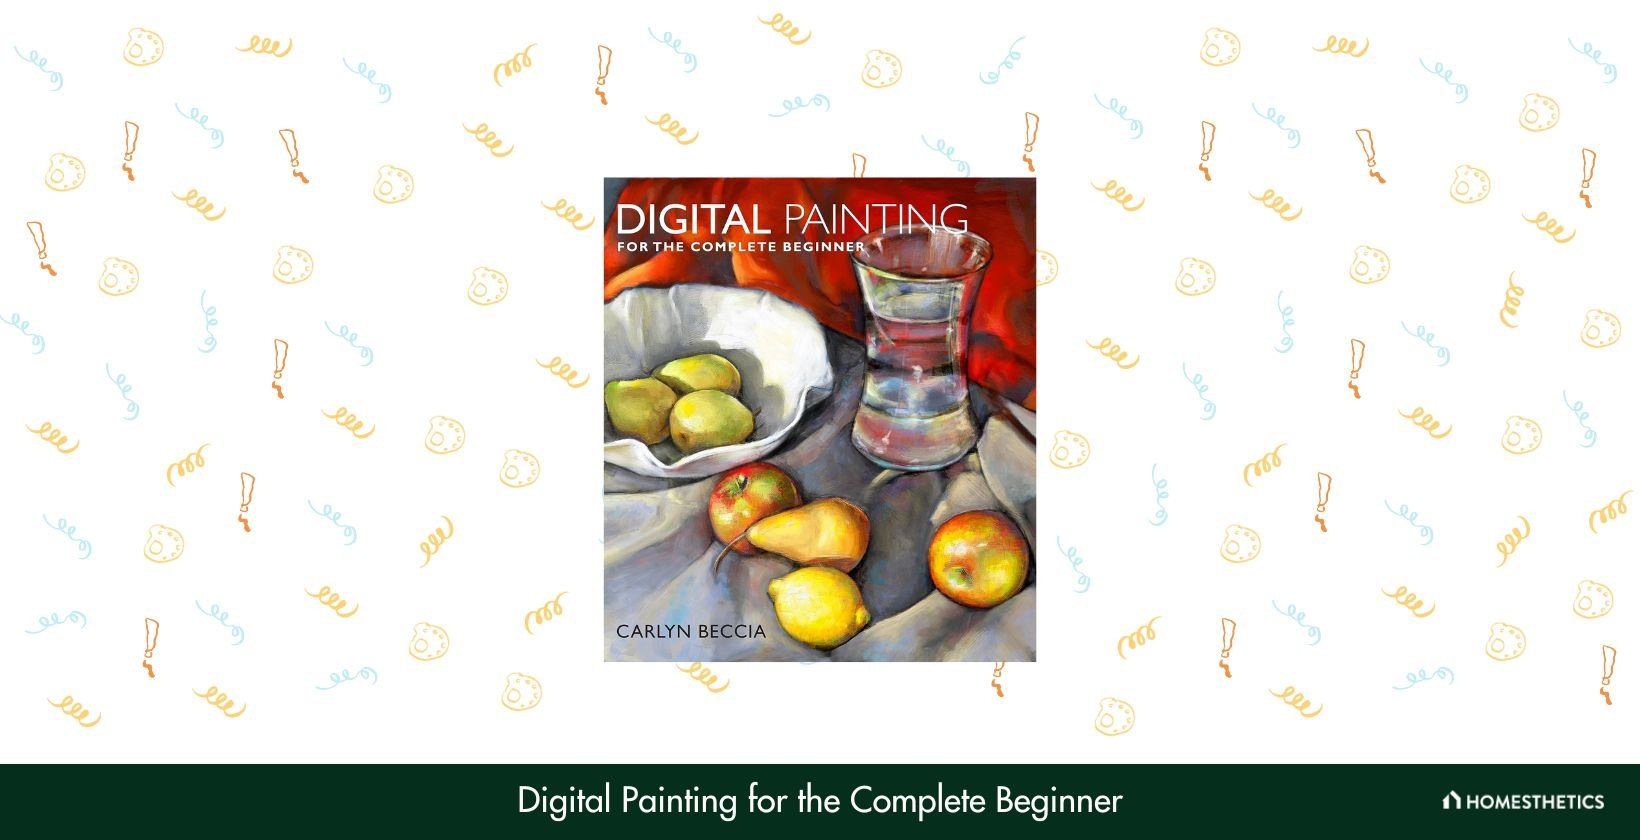
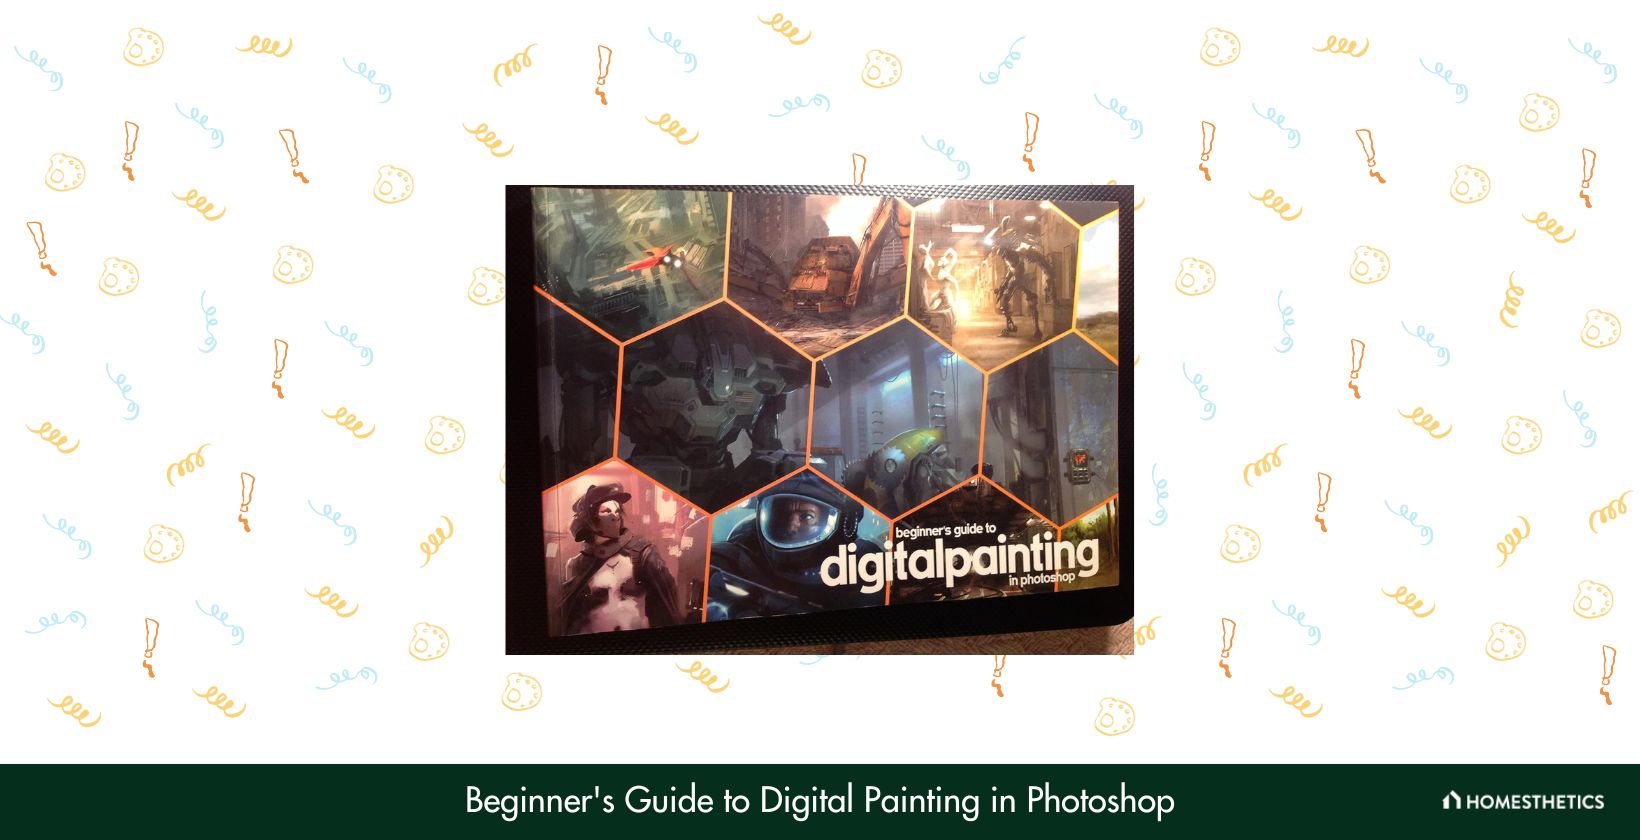


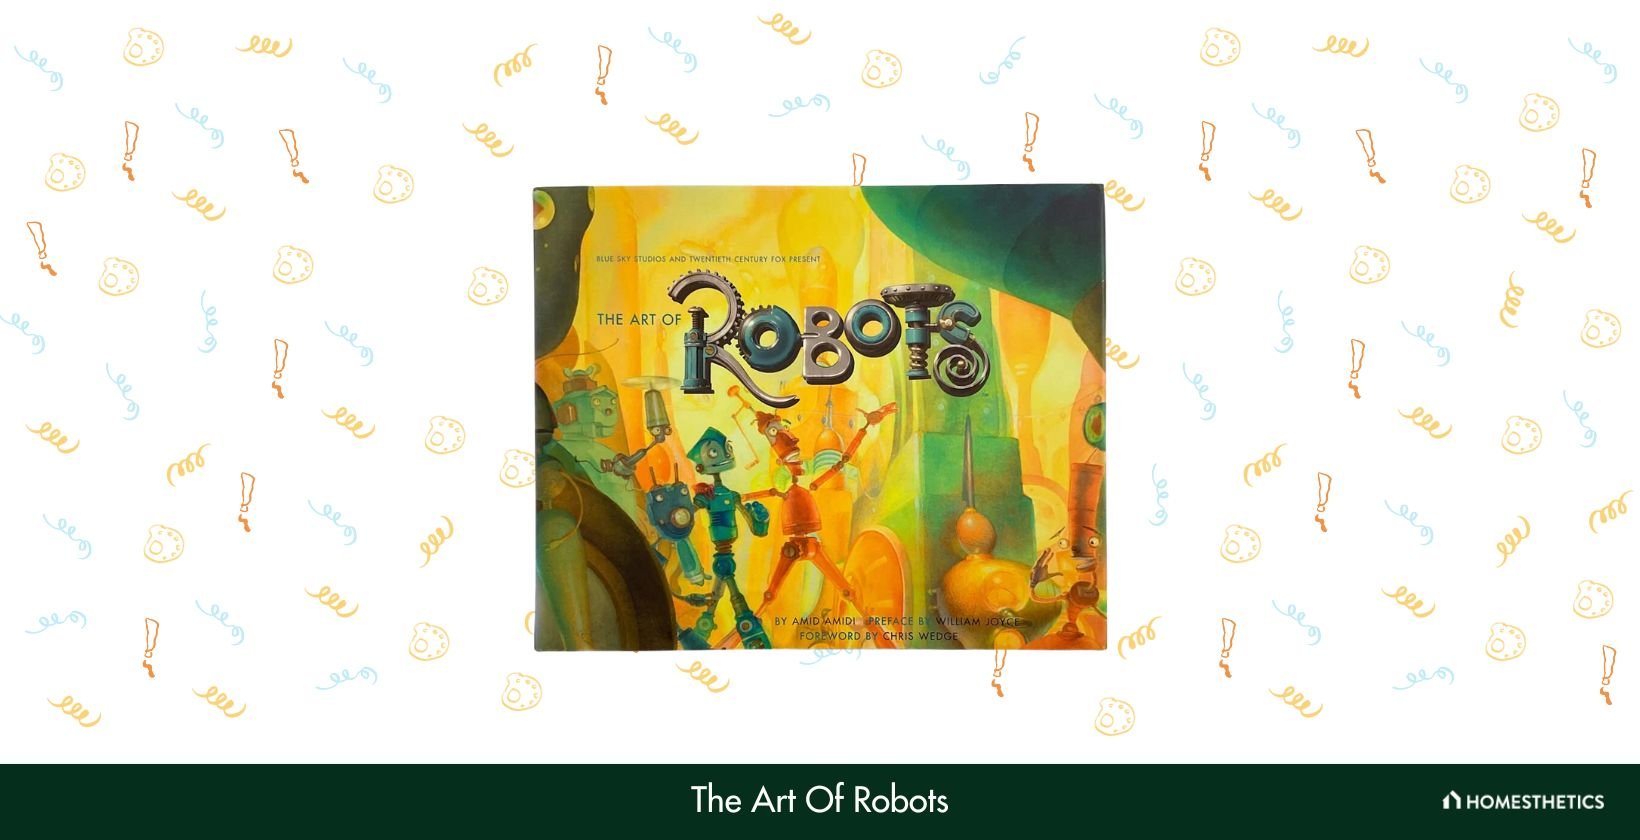


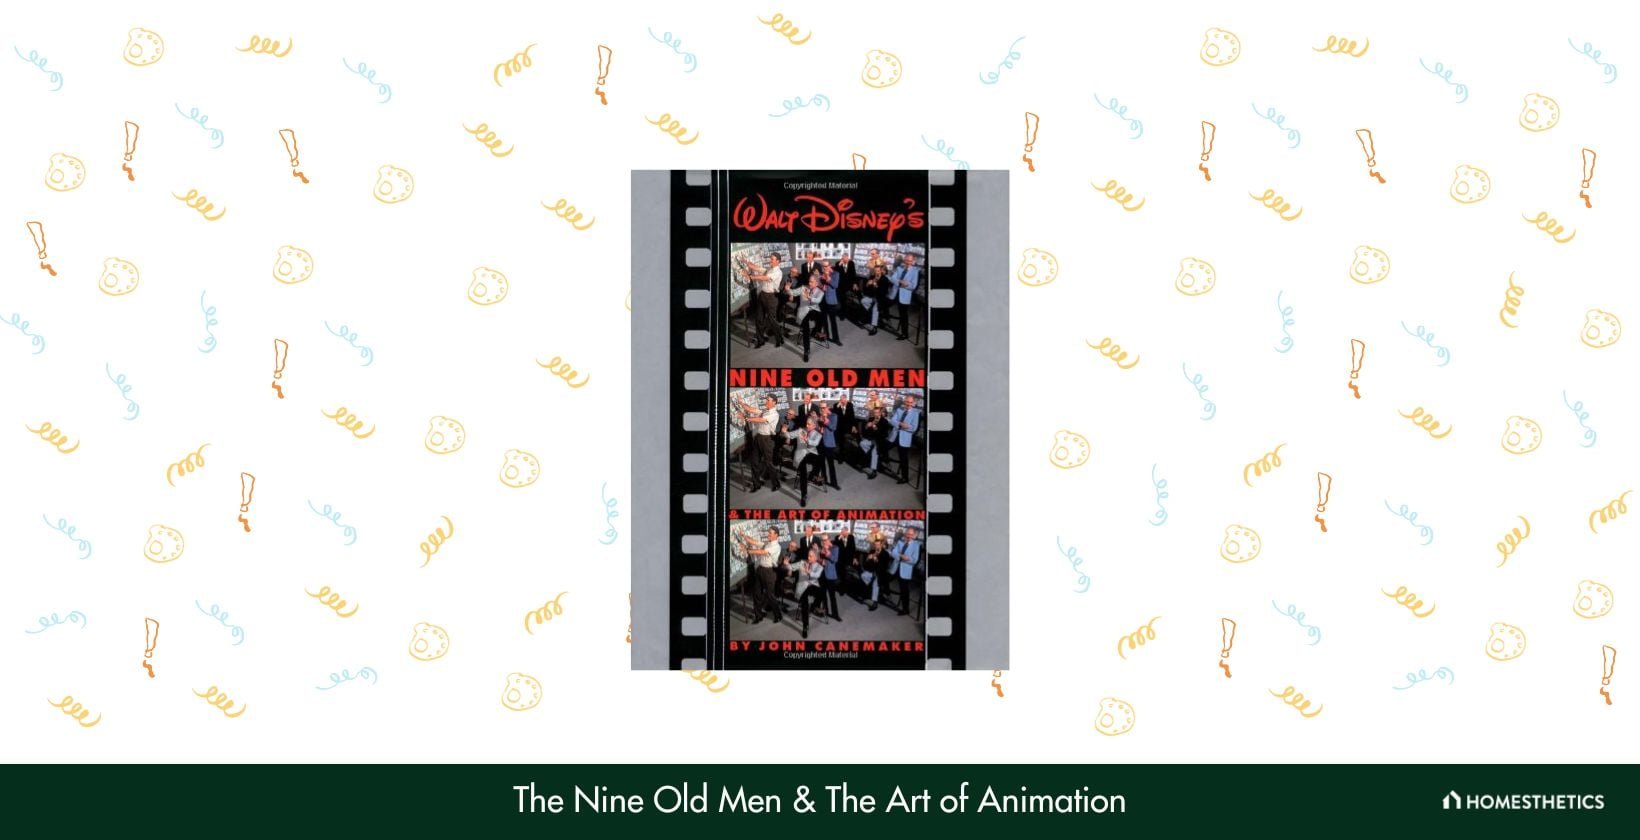


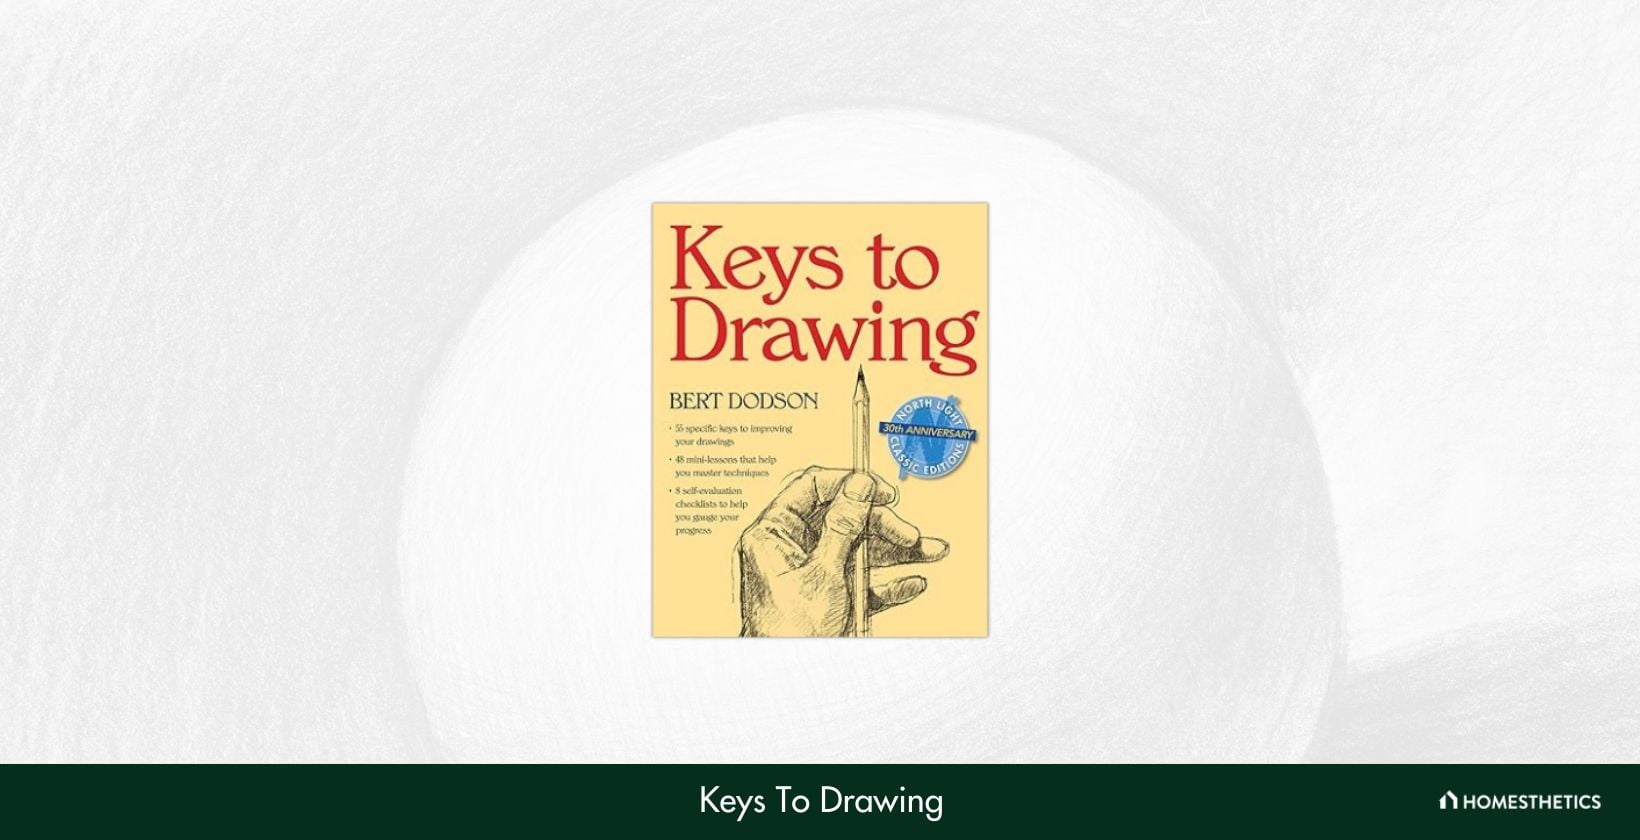

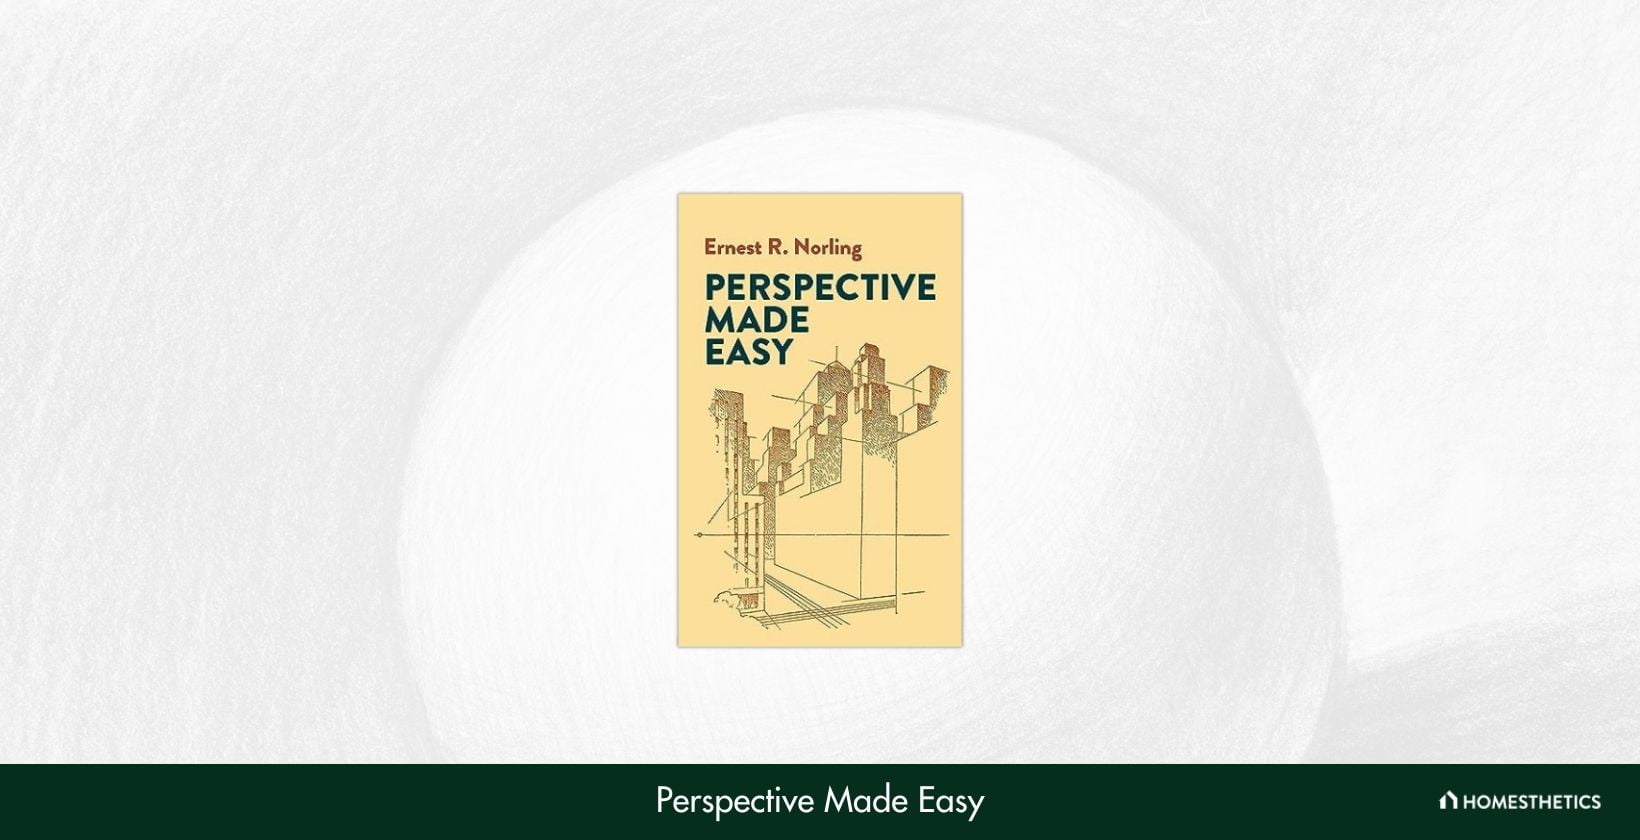
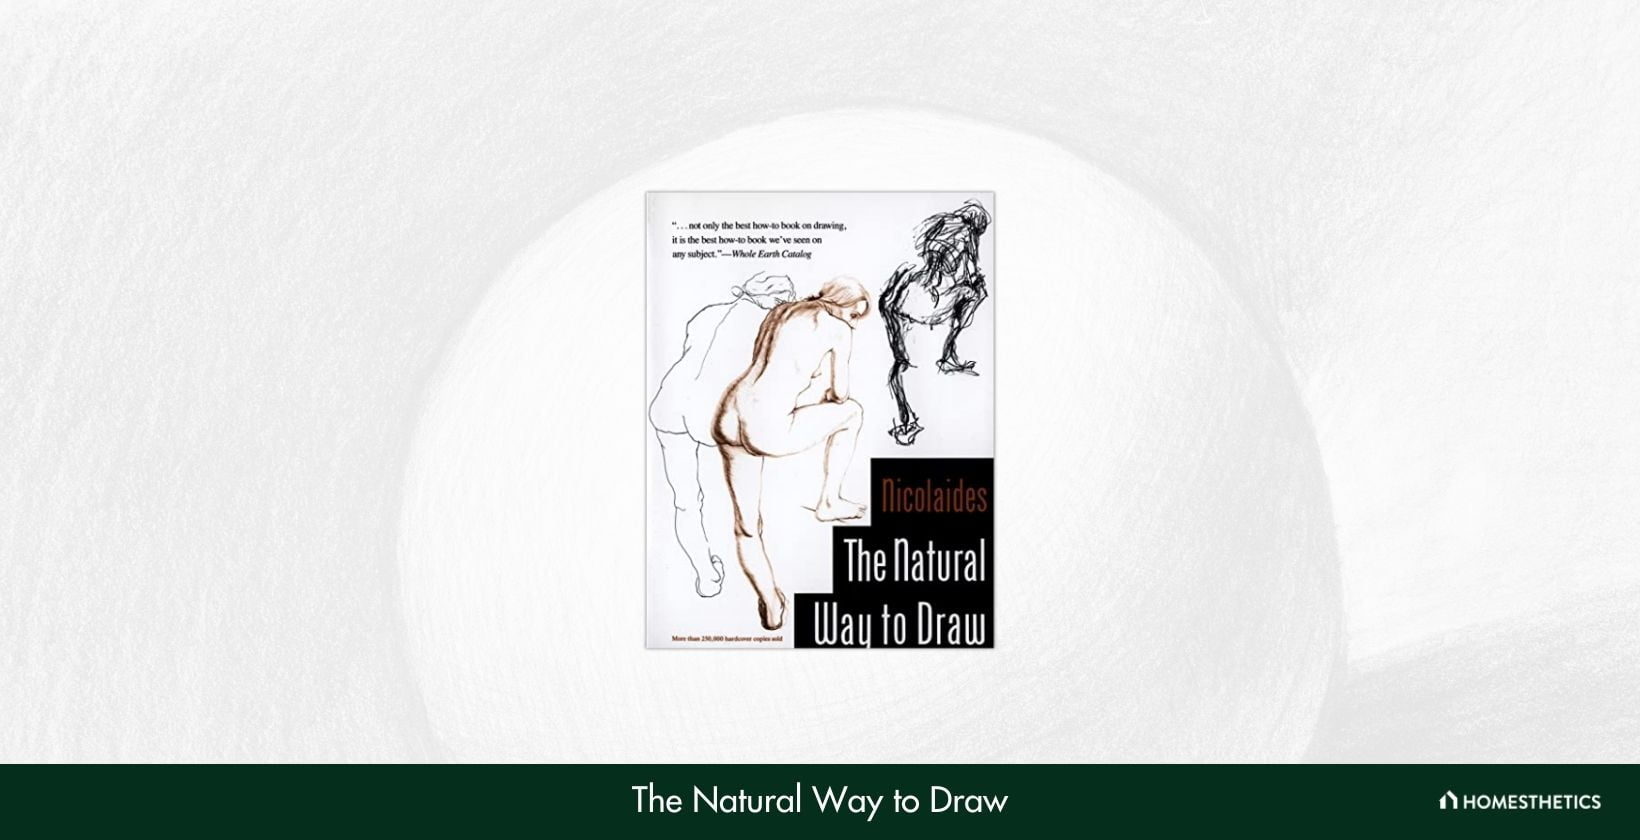

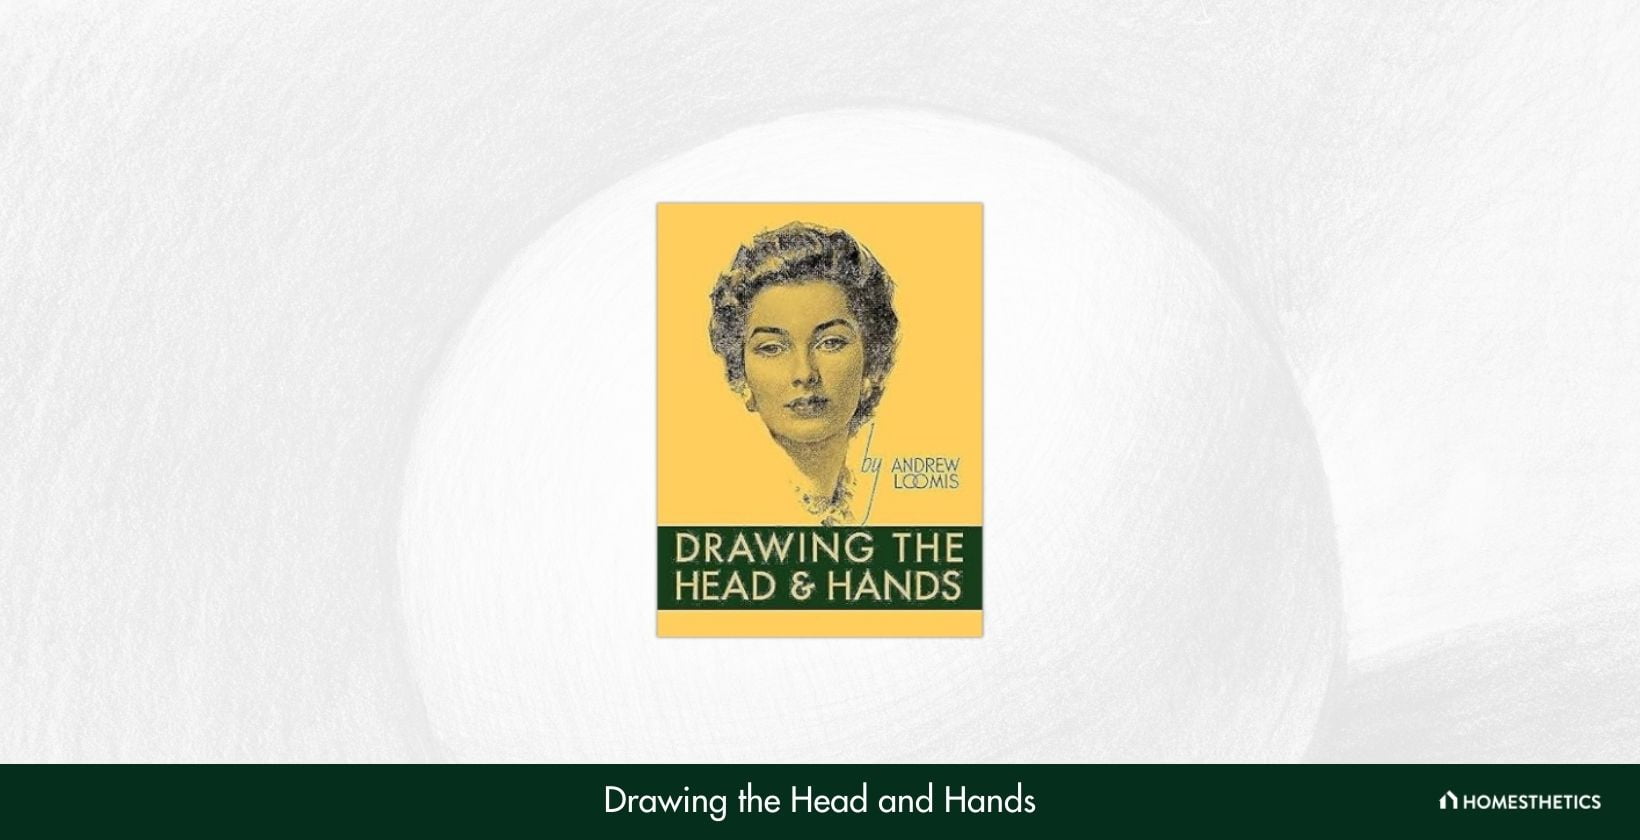
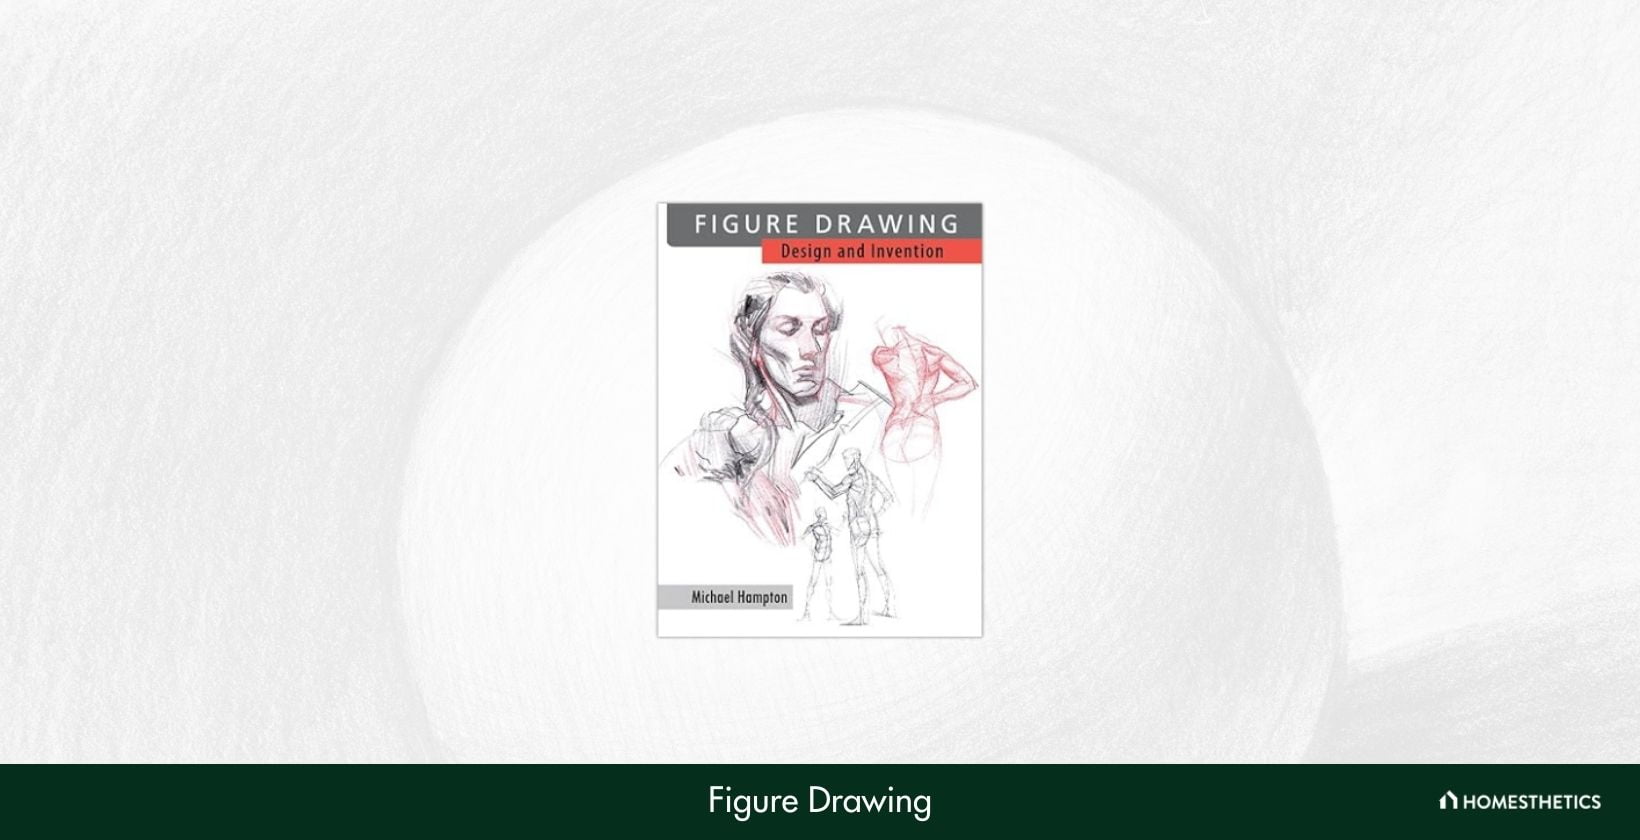

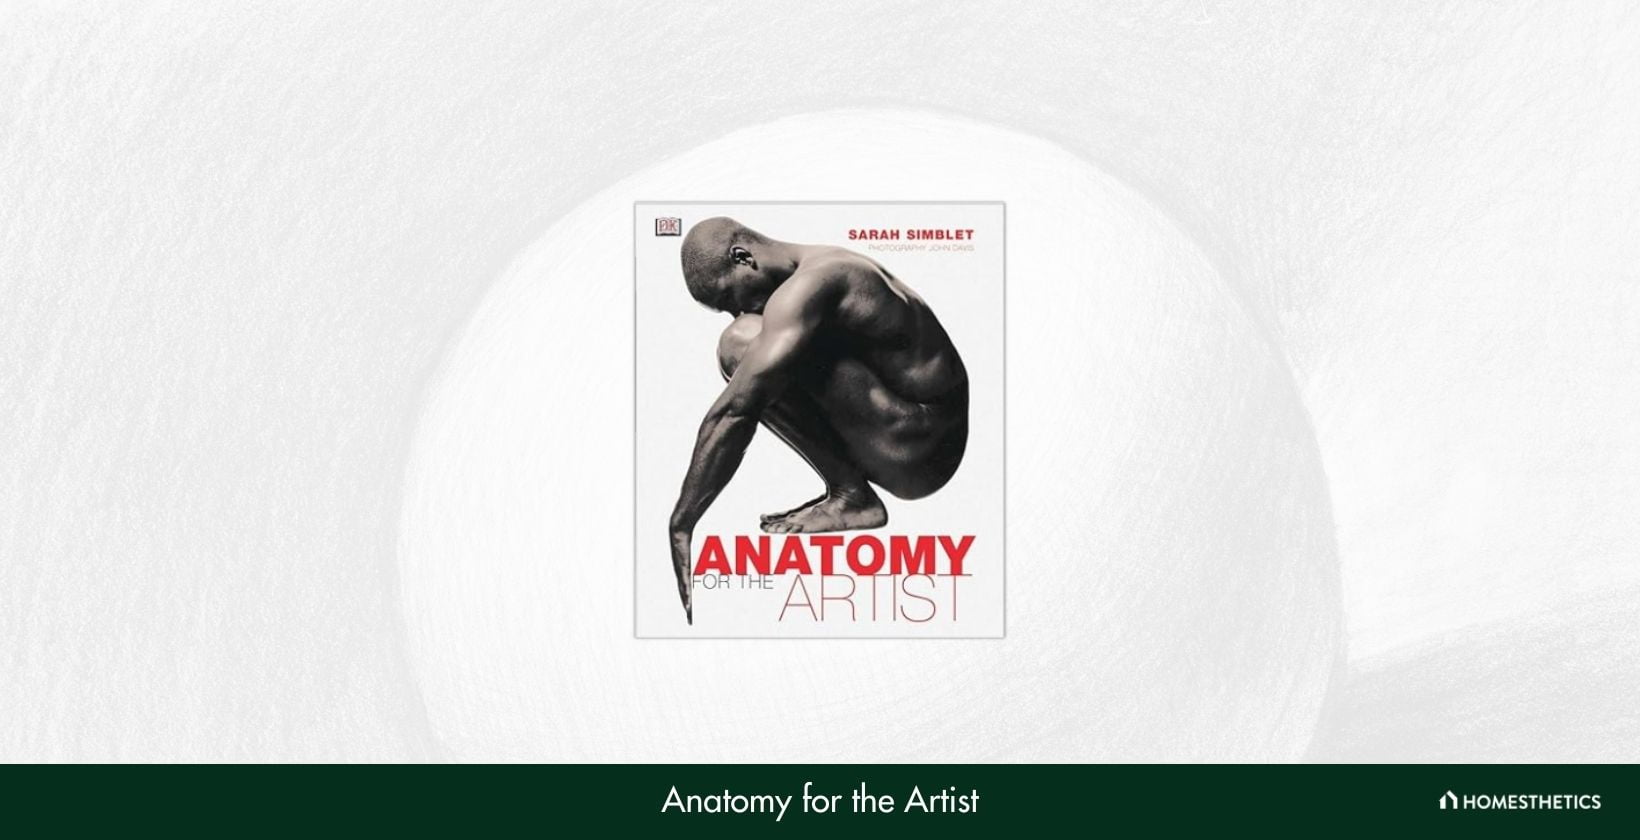
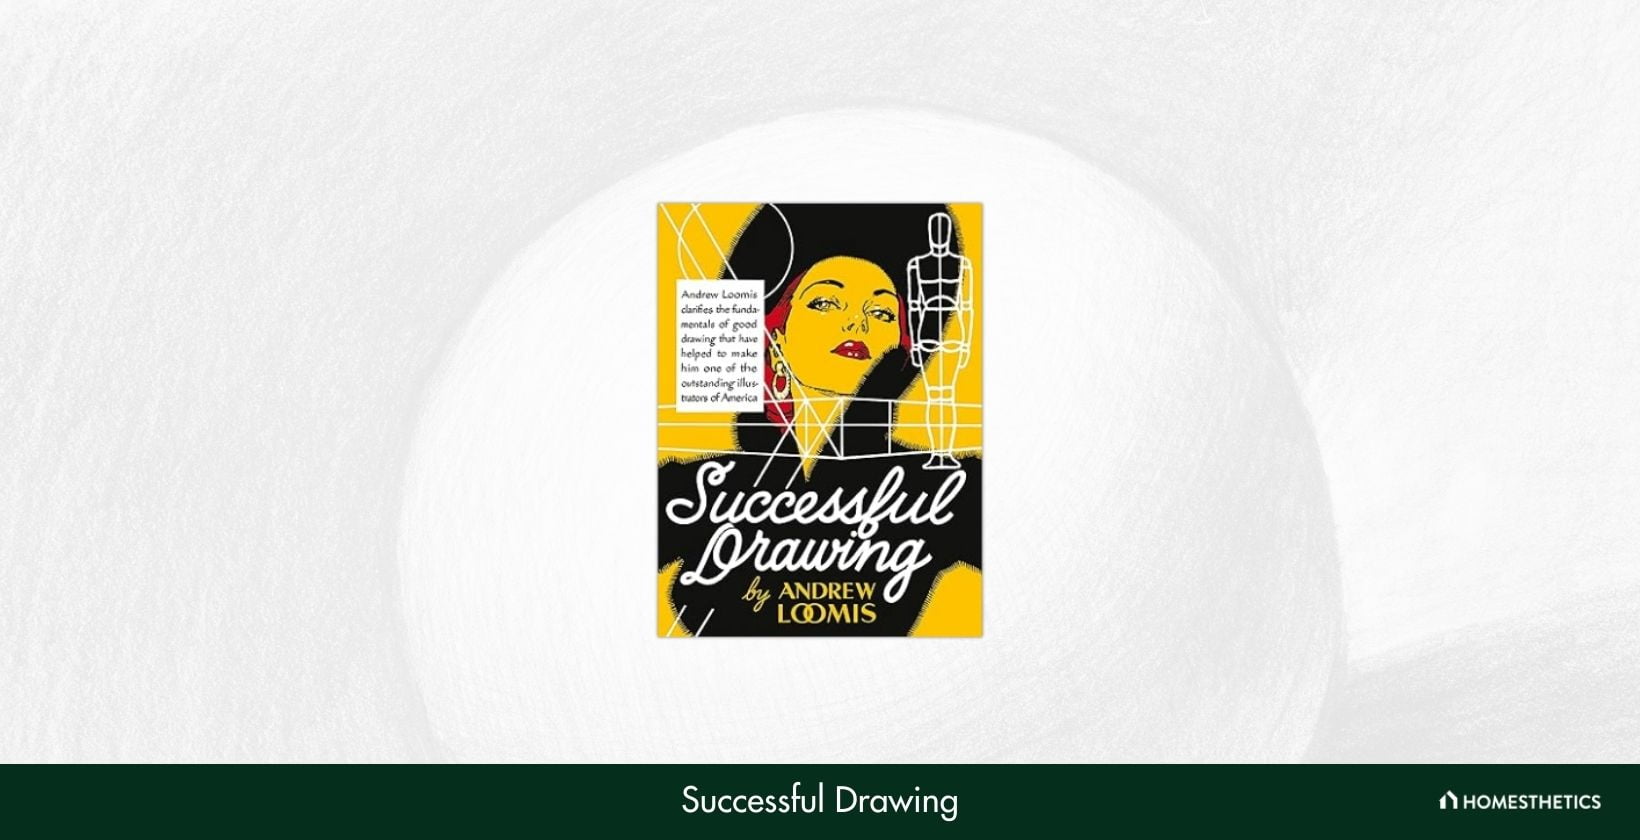
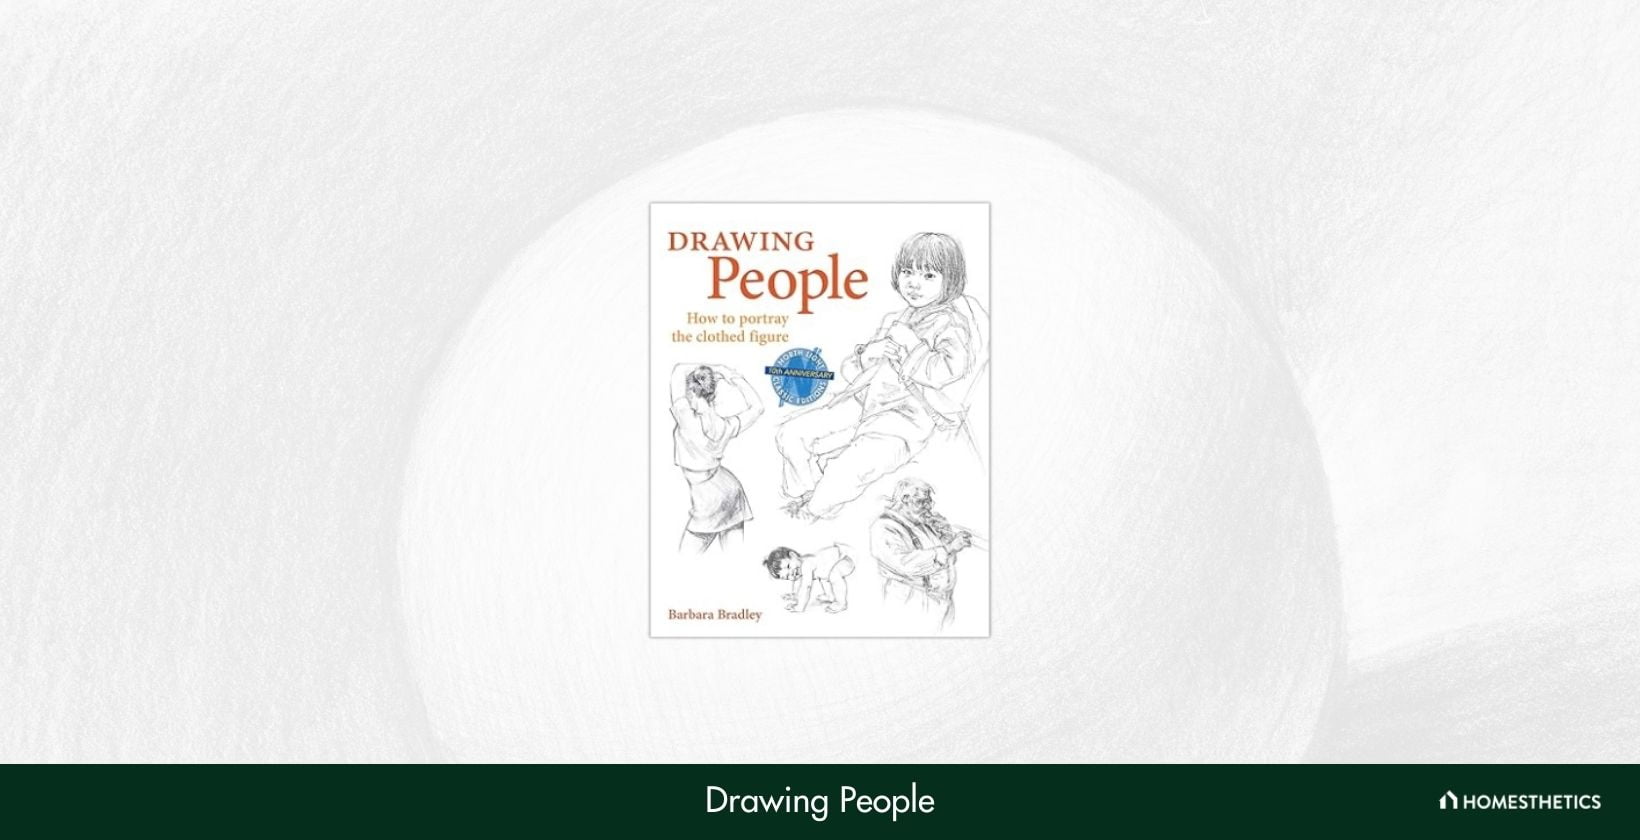

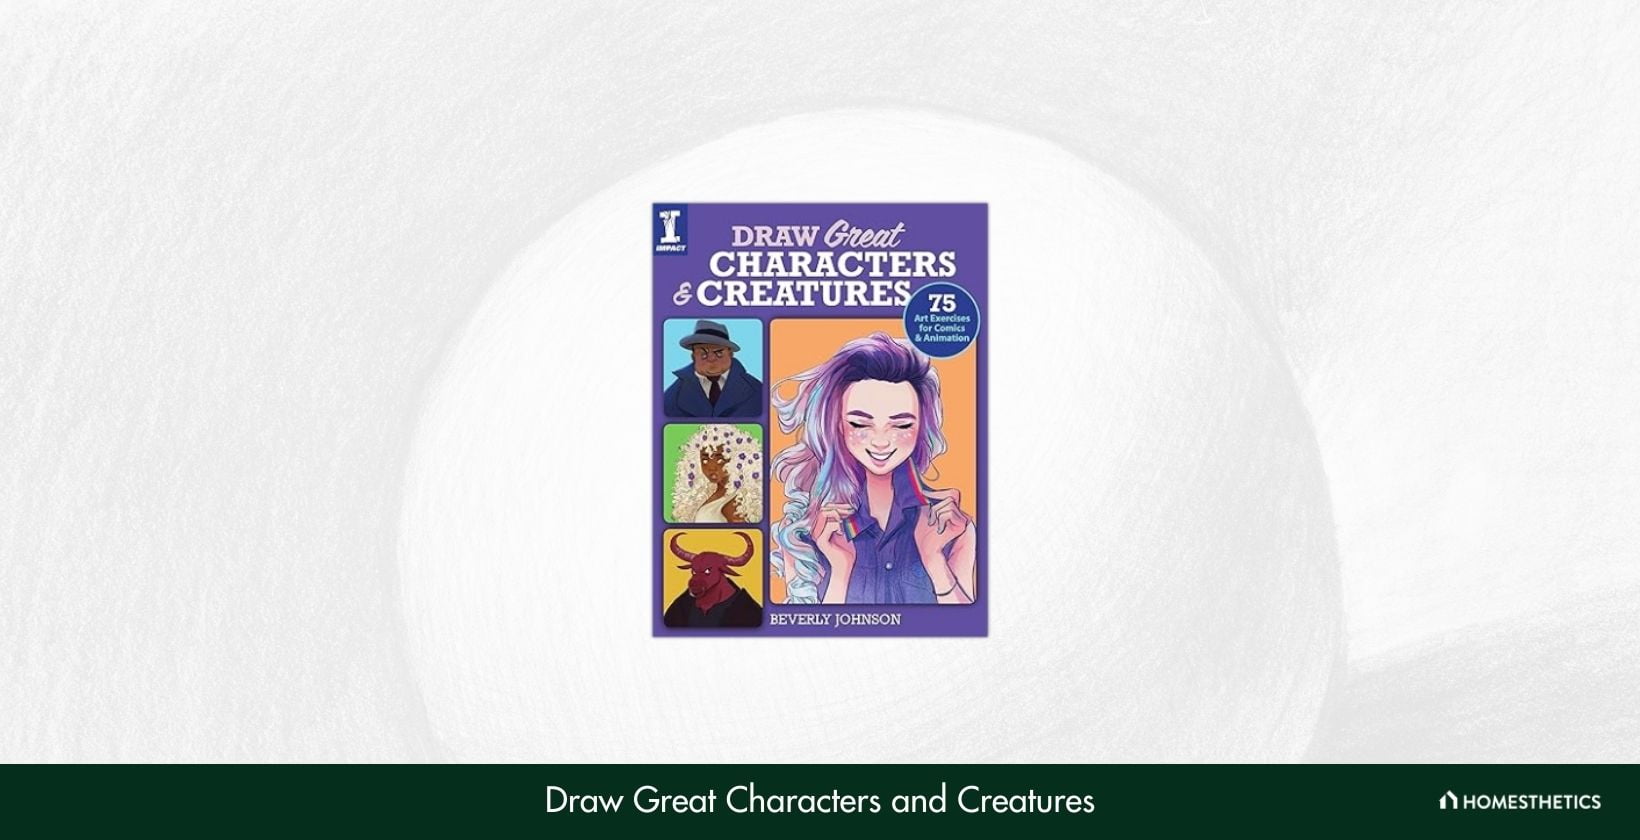
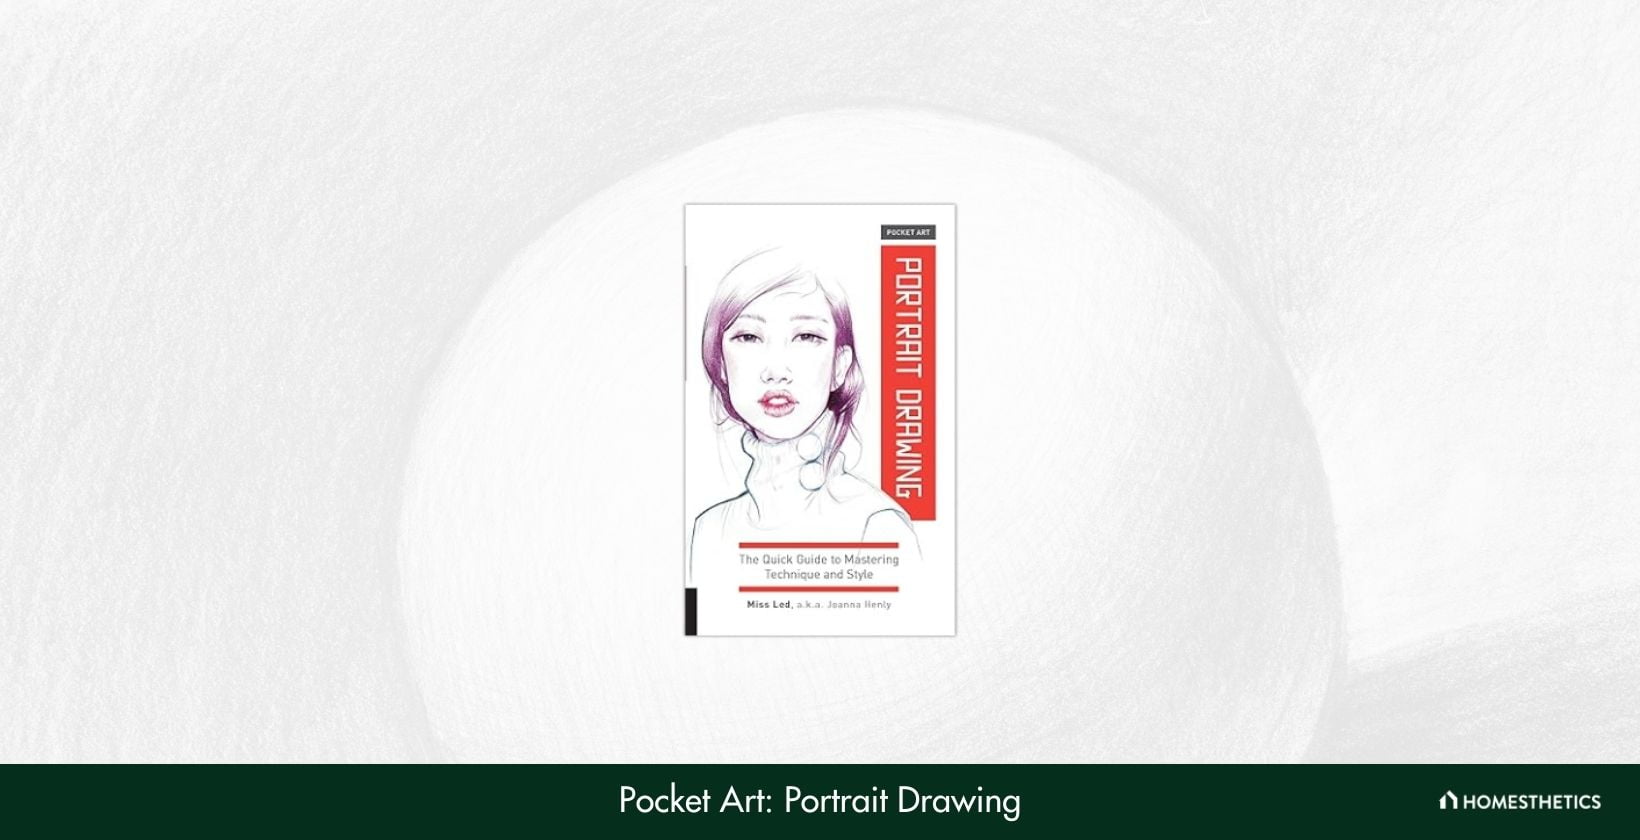
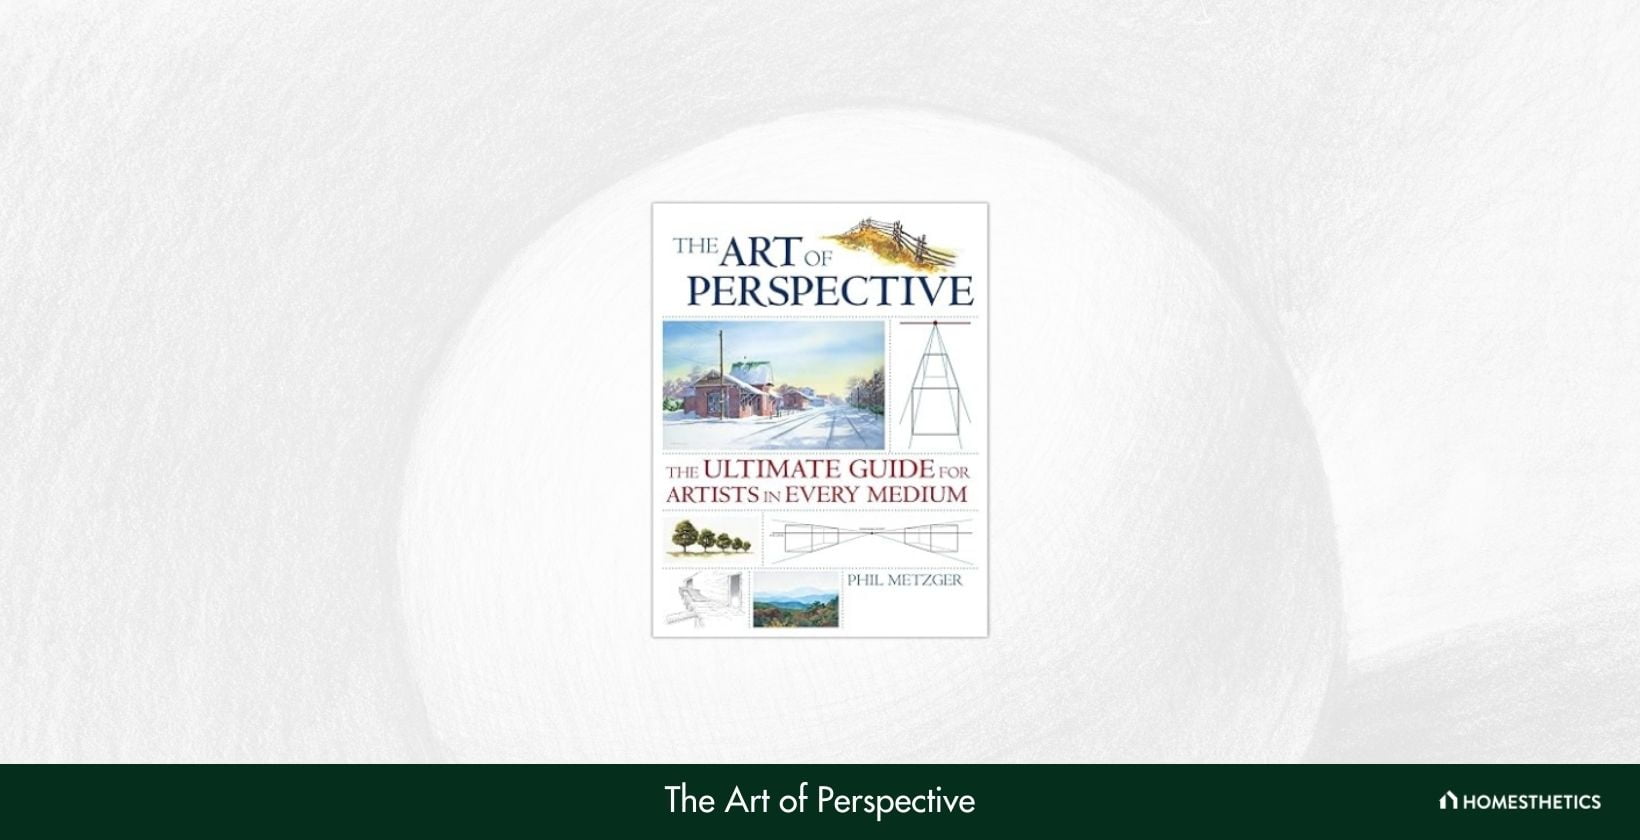

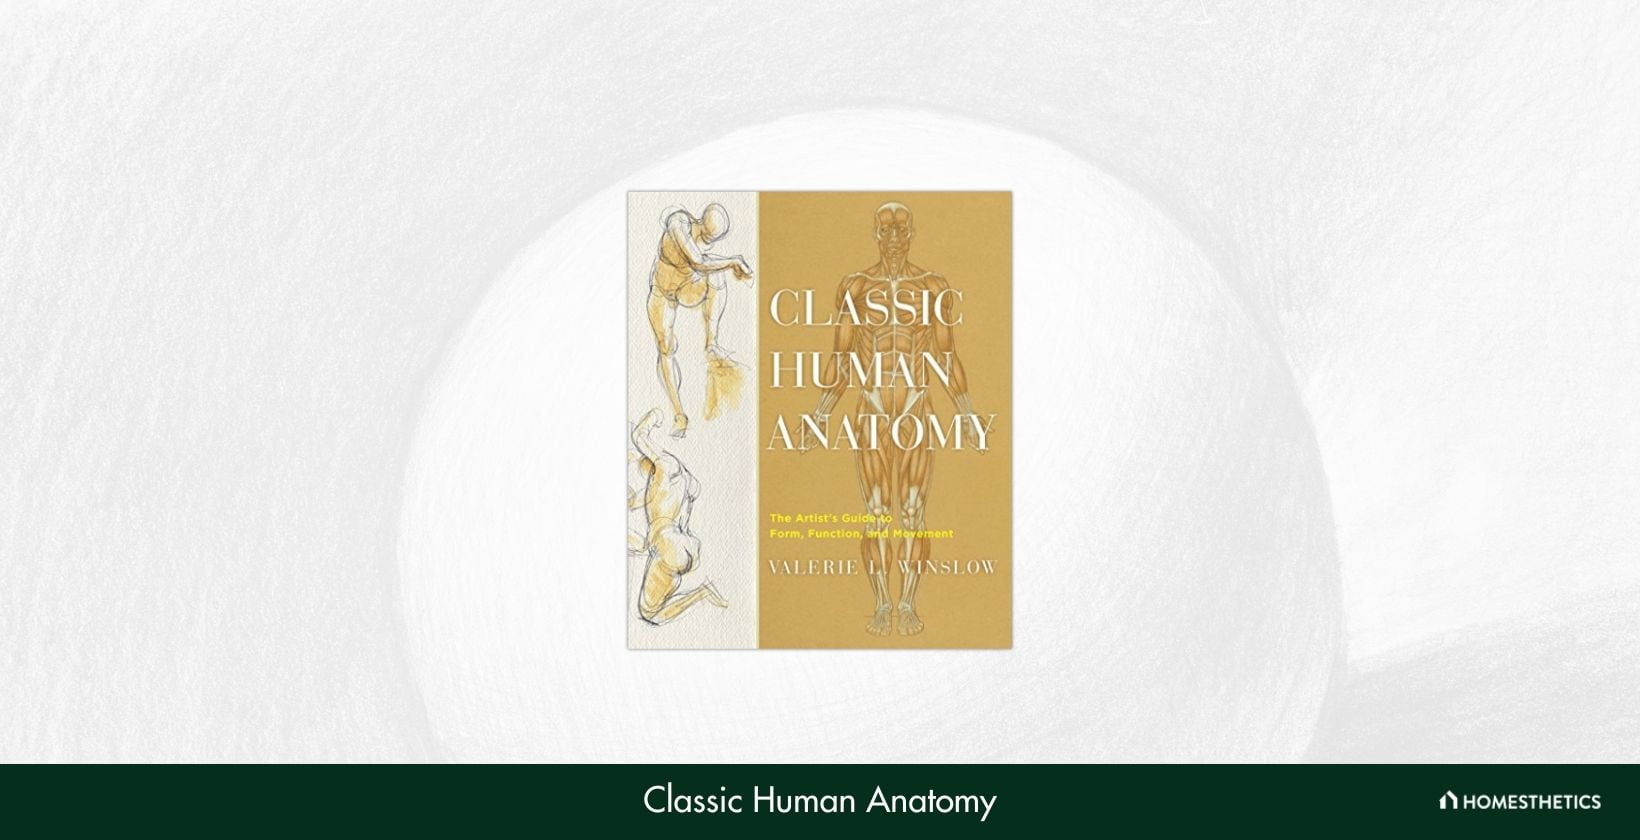

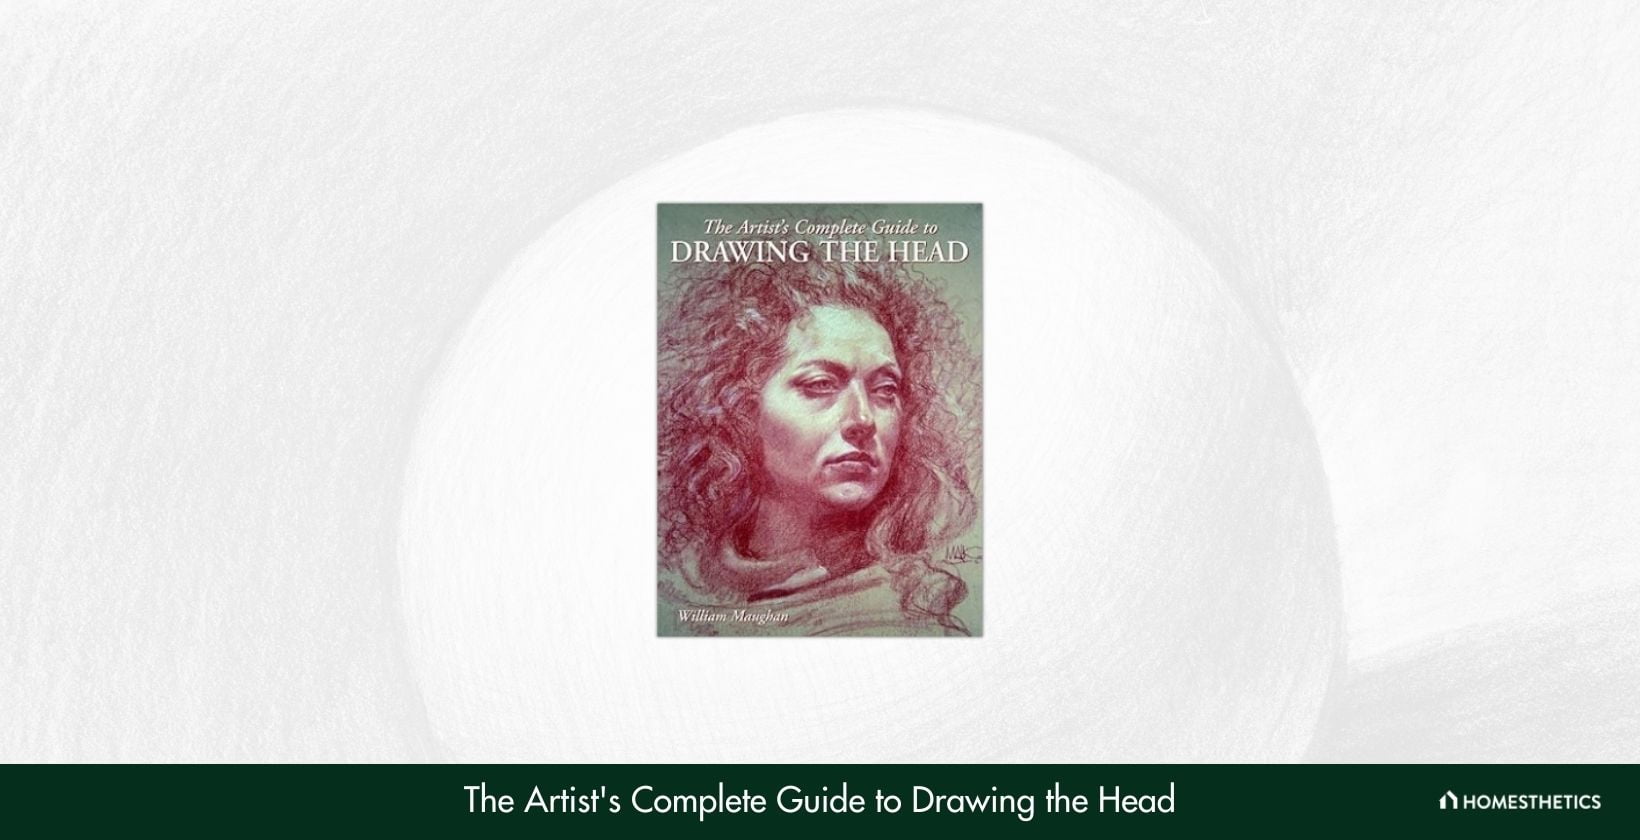


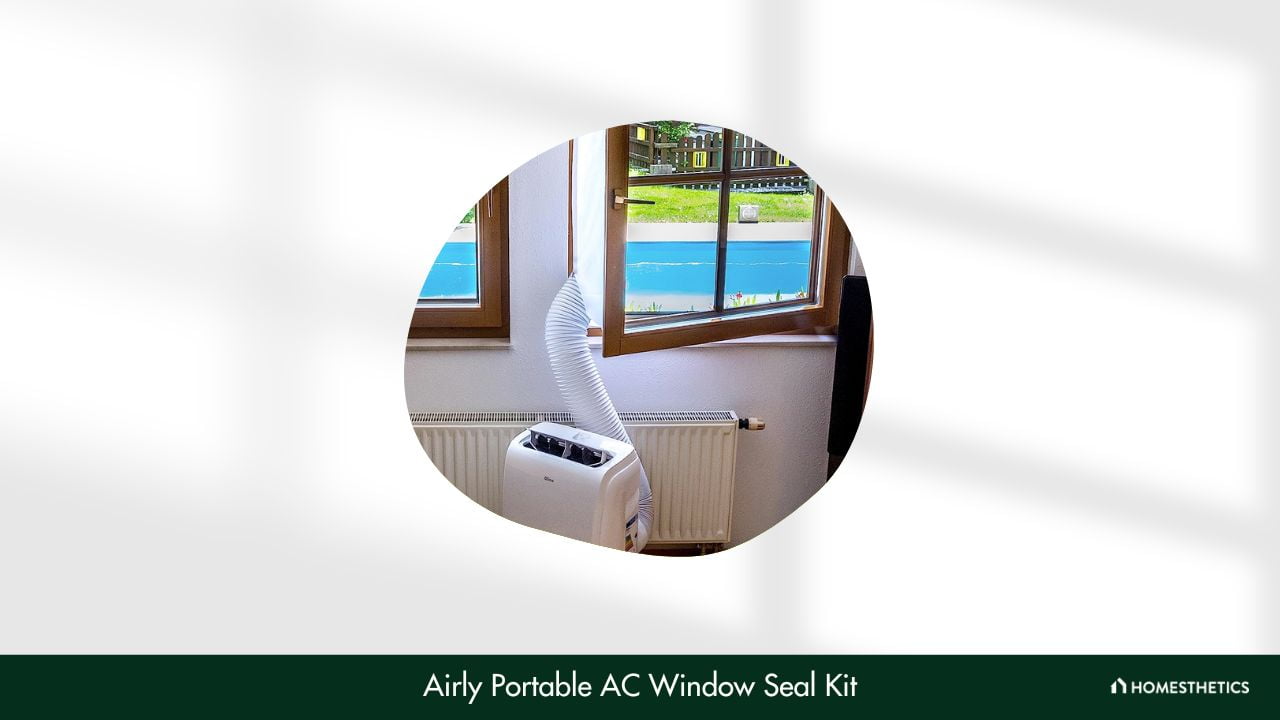
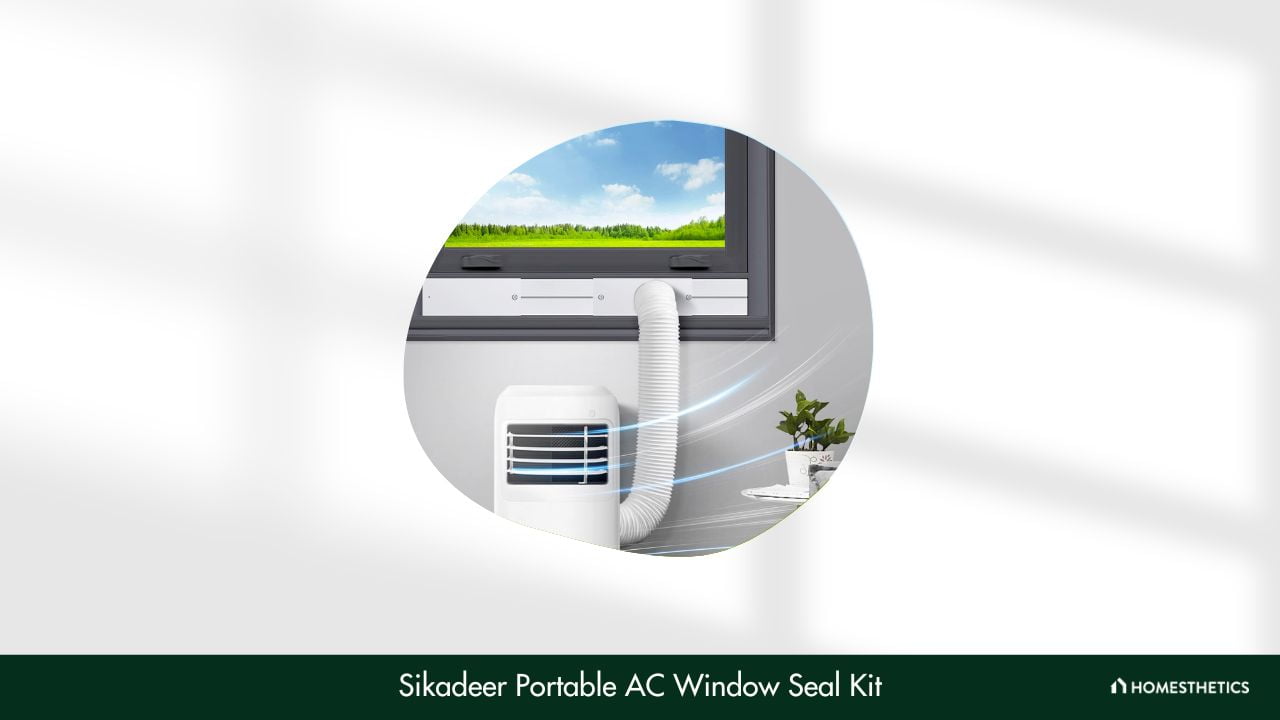

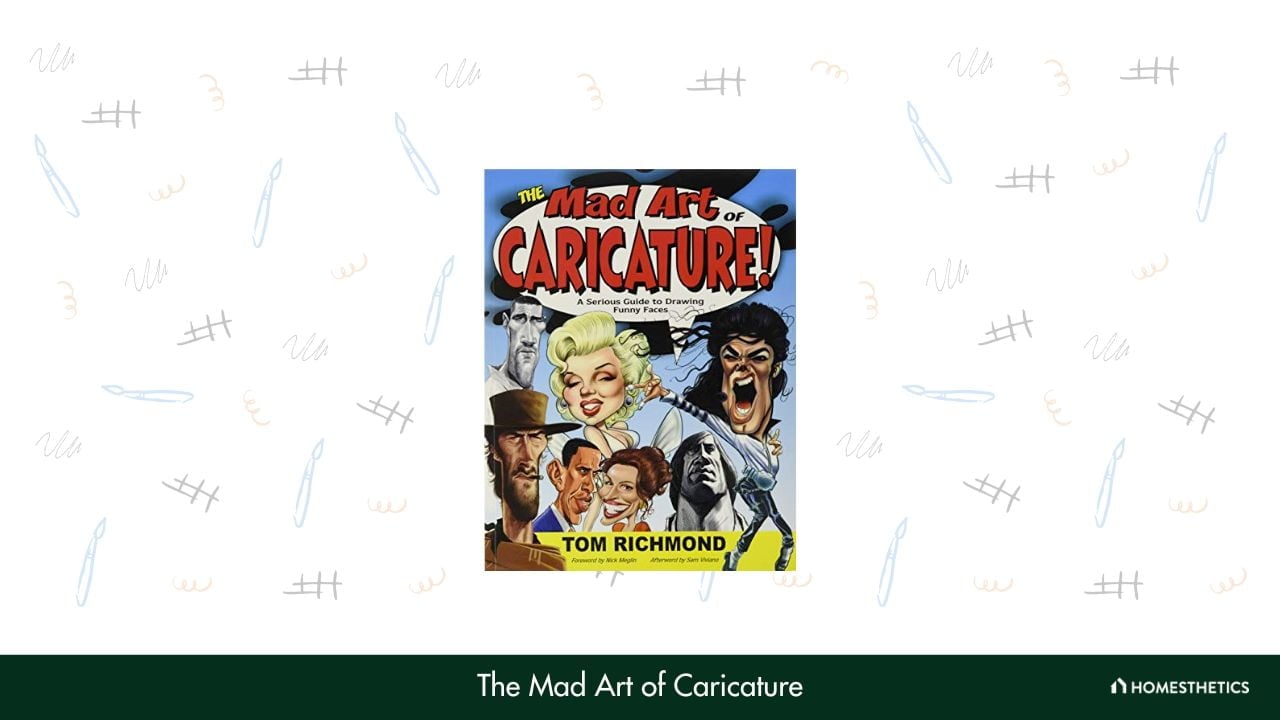

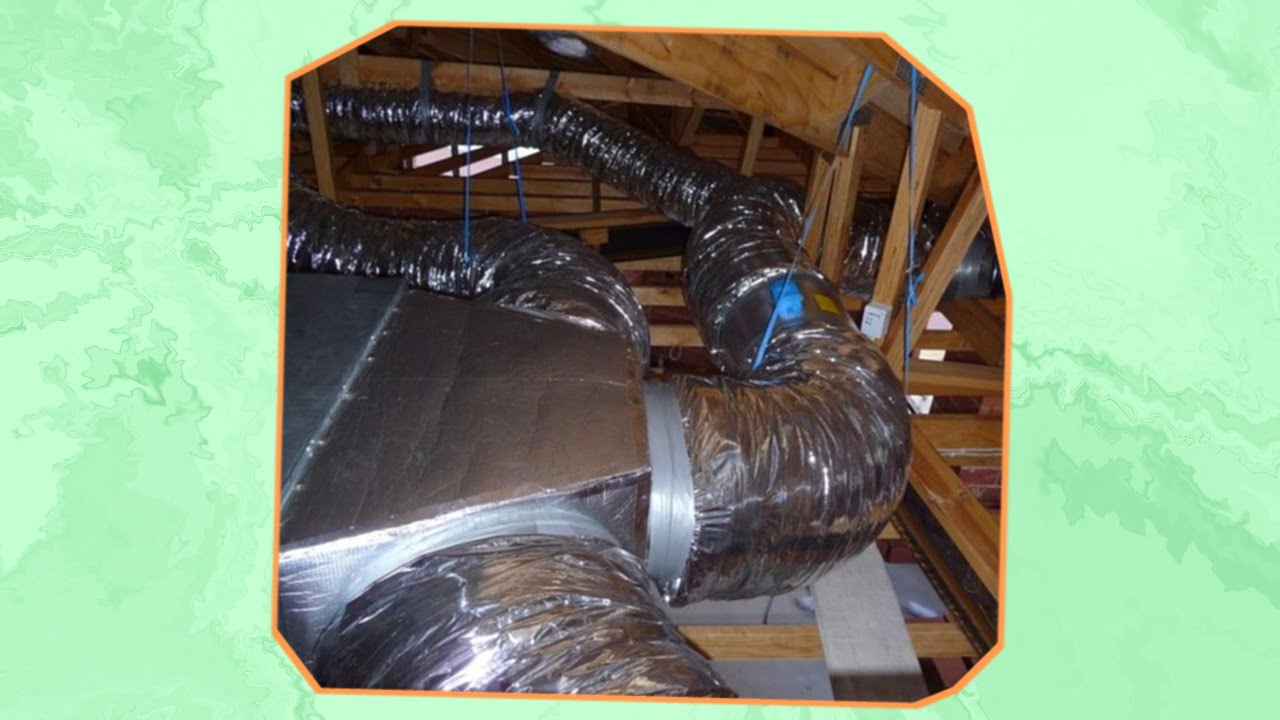


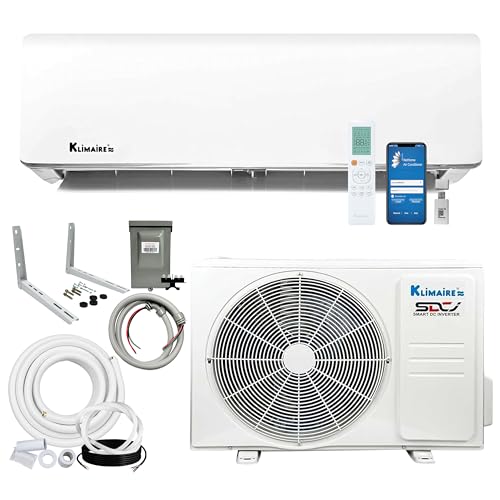
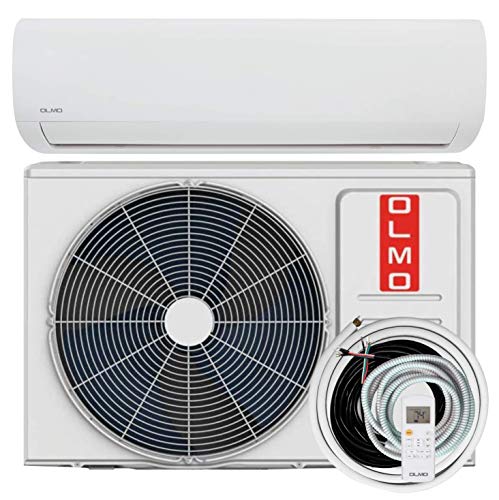

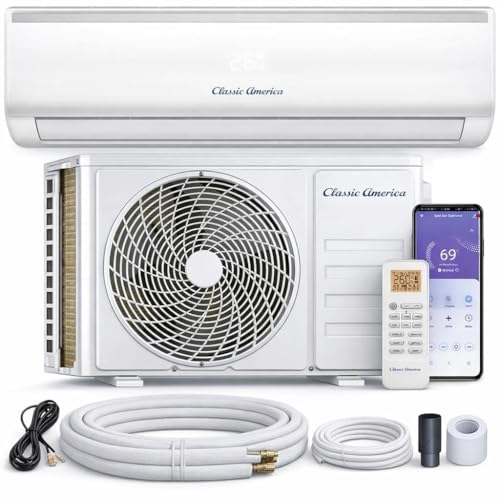


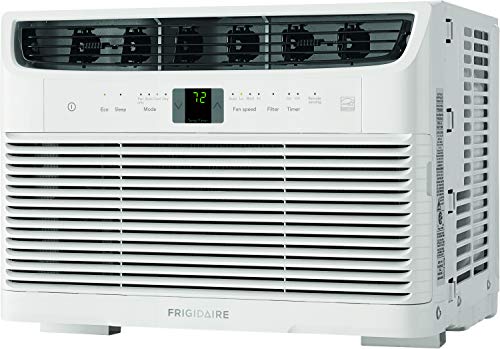
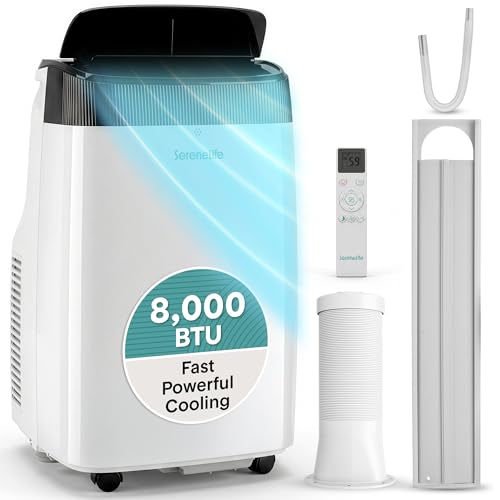


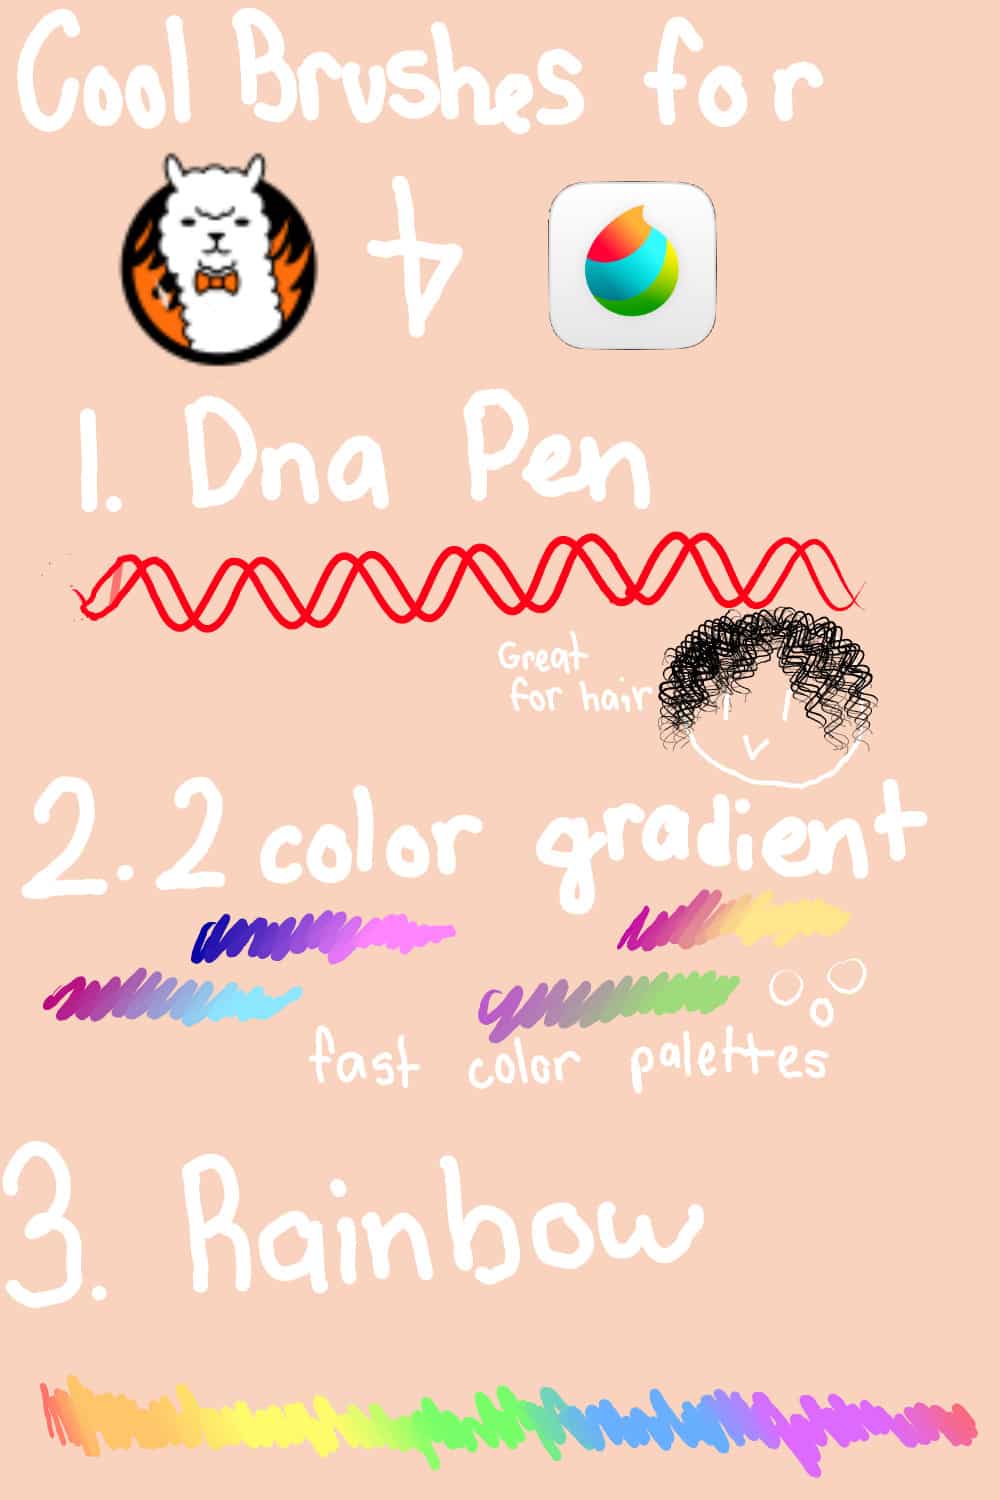


 This is perfect for artists who are looking for software that focuses on details more than anything else. Game developers for smartphones and other handheld gaming devices are known to go for Pro Motion in order to get amazing graphics.
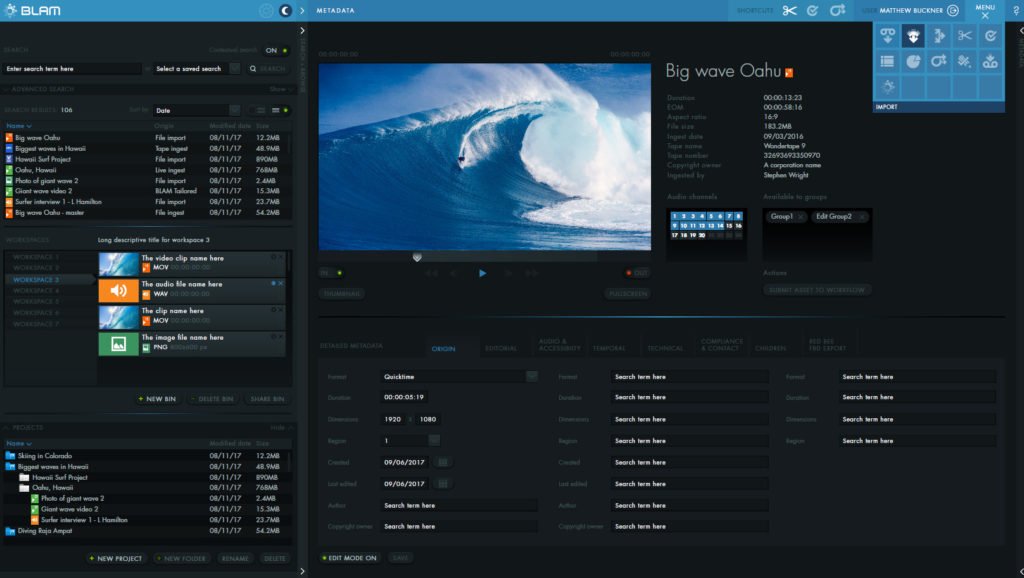

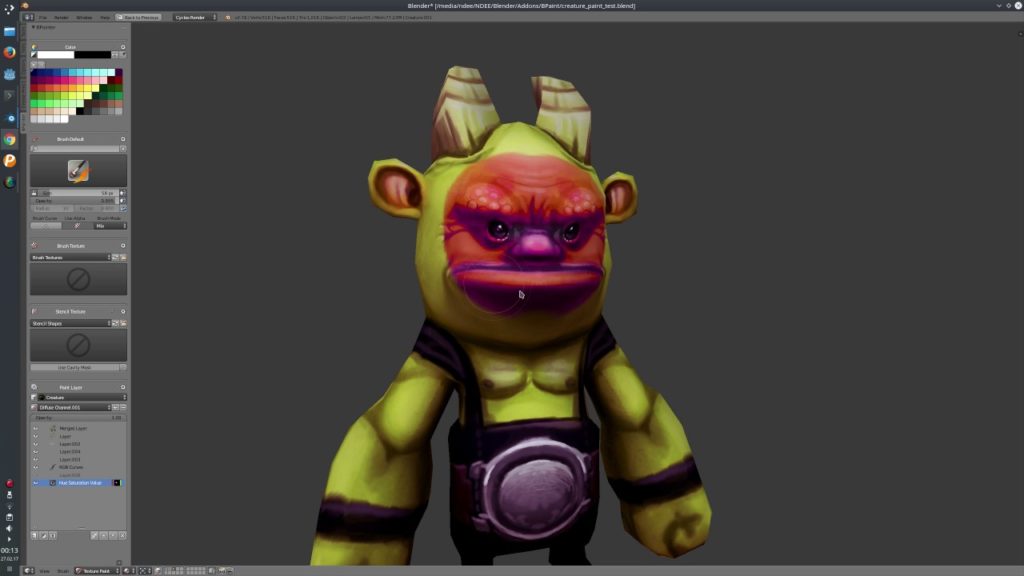


![10 Best Paper For Colored Pencils in 2023 [Reviewed]](https://homesthetics.net/wp-content/uploads/2019/07/Best-Paper-For-Colored-Pencils-2.jpg "10 Best Paper For Colored Pencils in 2023 [Reviewed]")

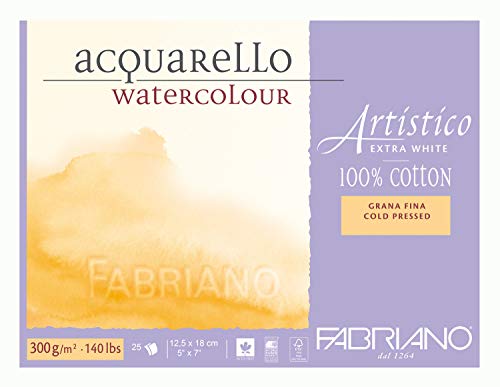


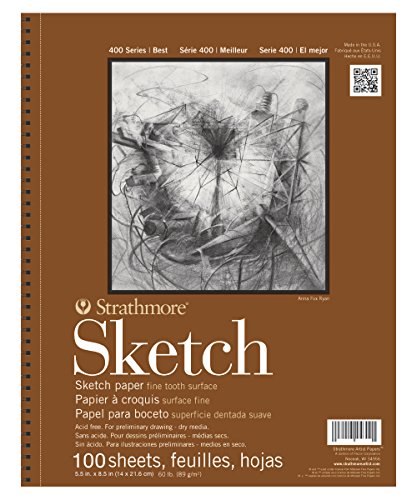


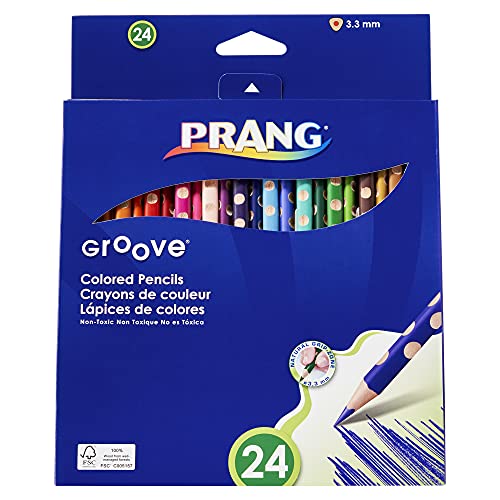
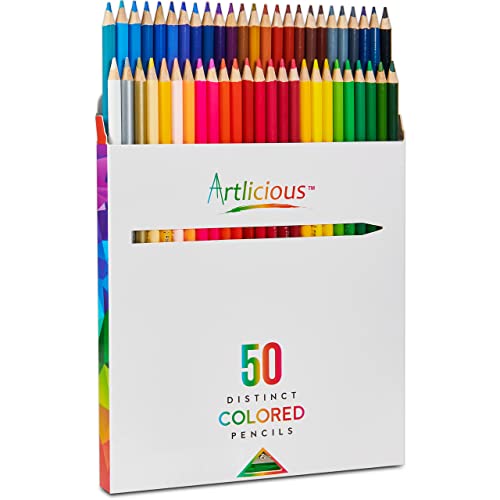
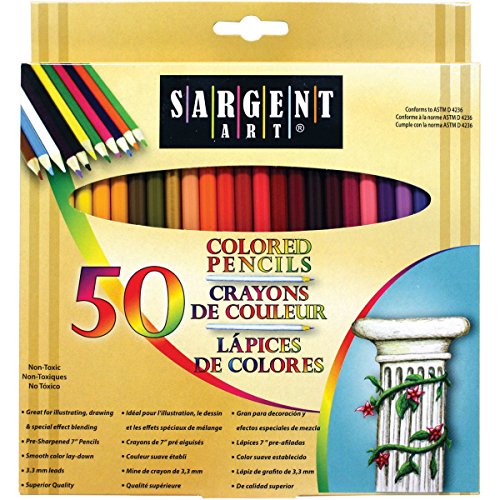
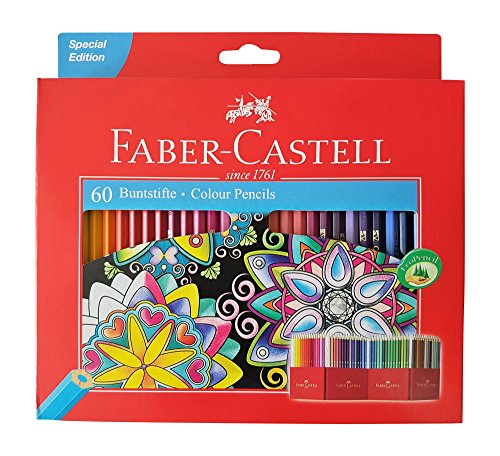


![80 Best Procreate Brushes for the Realm [Free & Premium Brush Sets]](https://homesthetics.net/wp-content/uploads/2019/09/gsb-pro-7-.jpg "80 Best Procreate Brushes for the Realm [Free & Premium Brush Sets]")
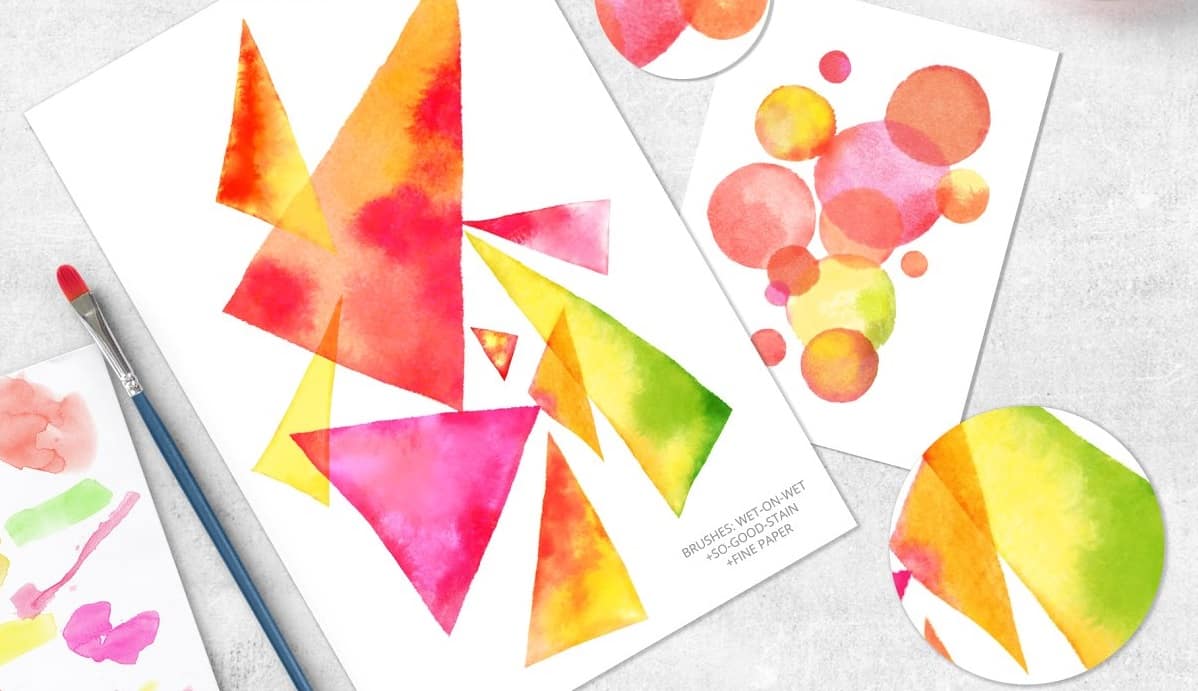


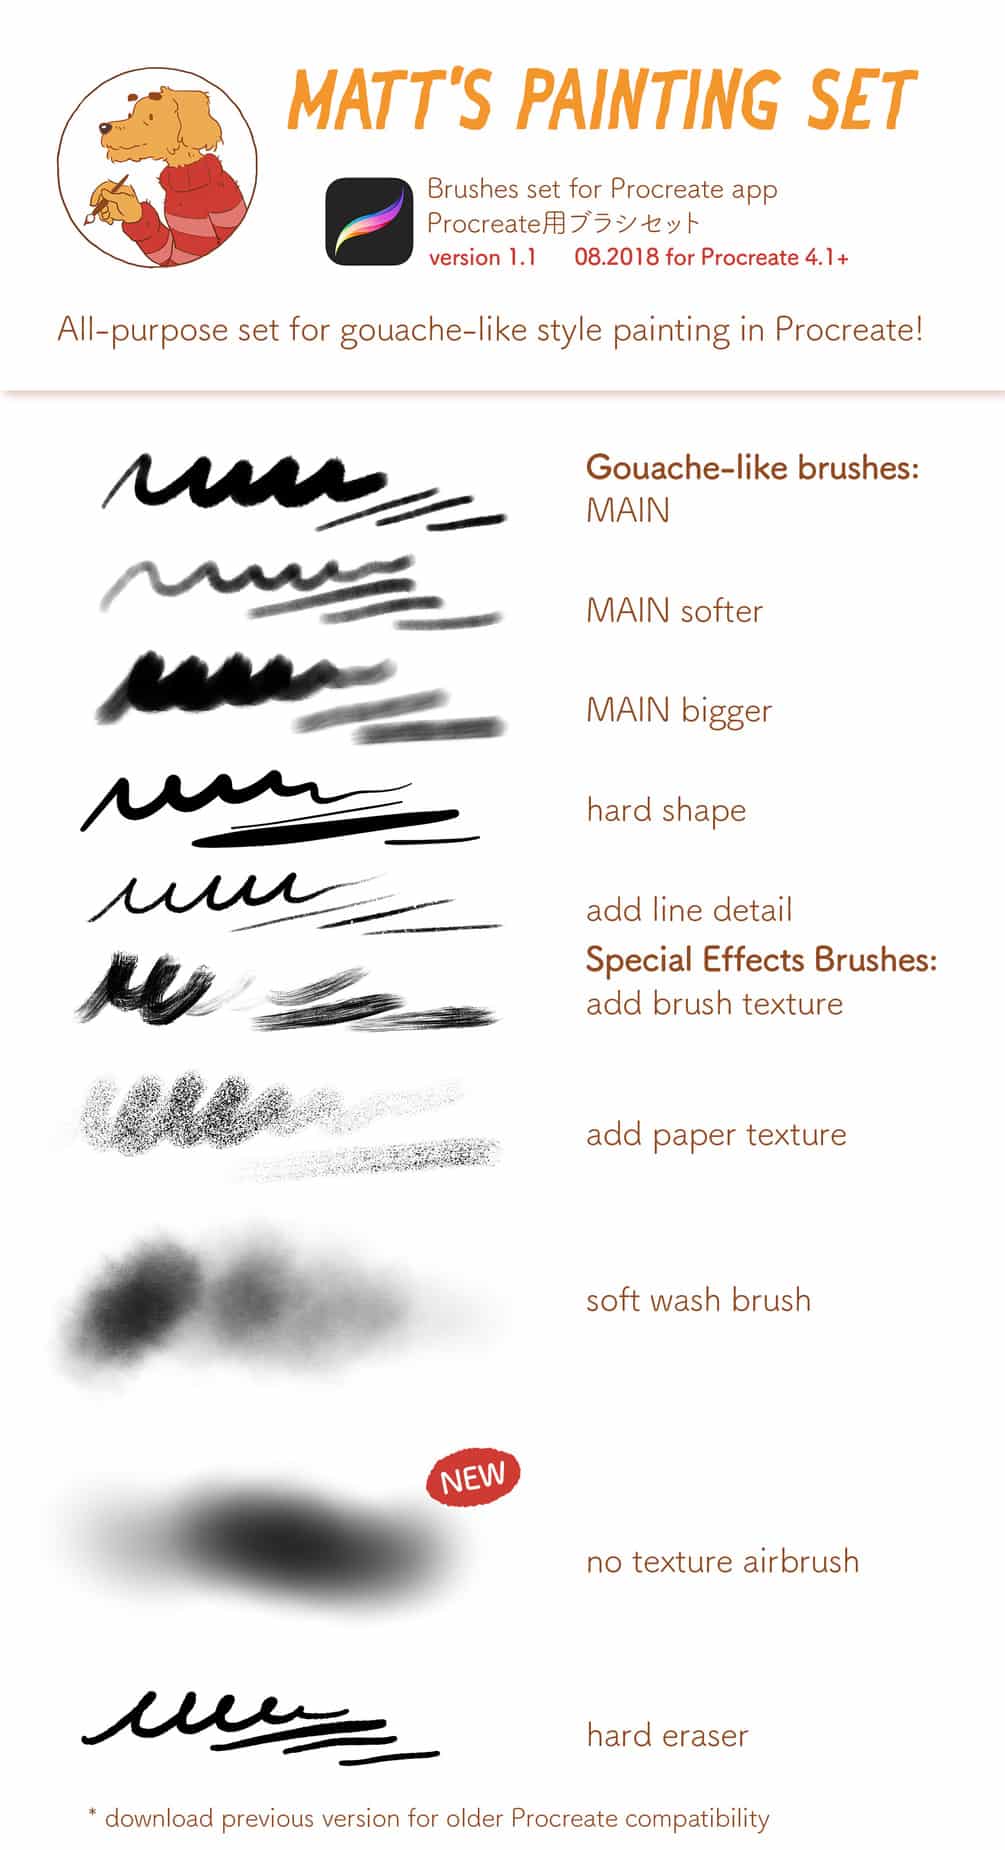


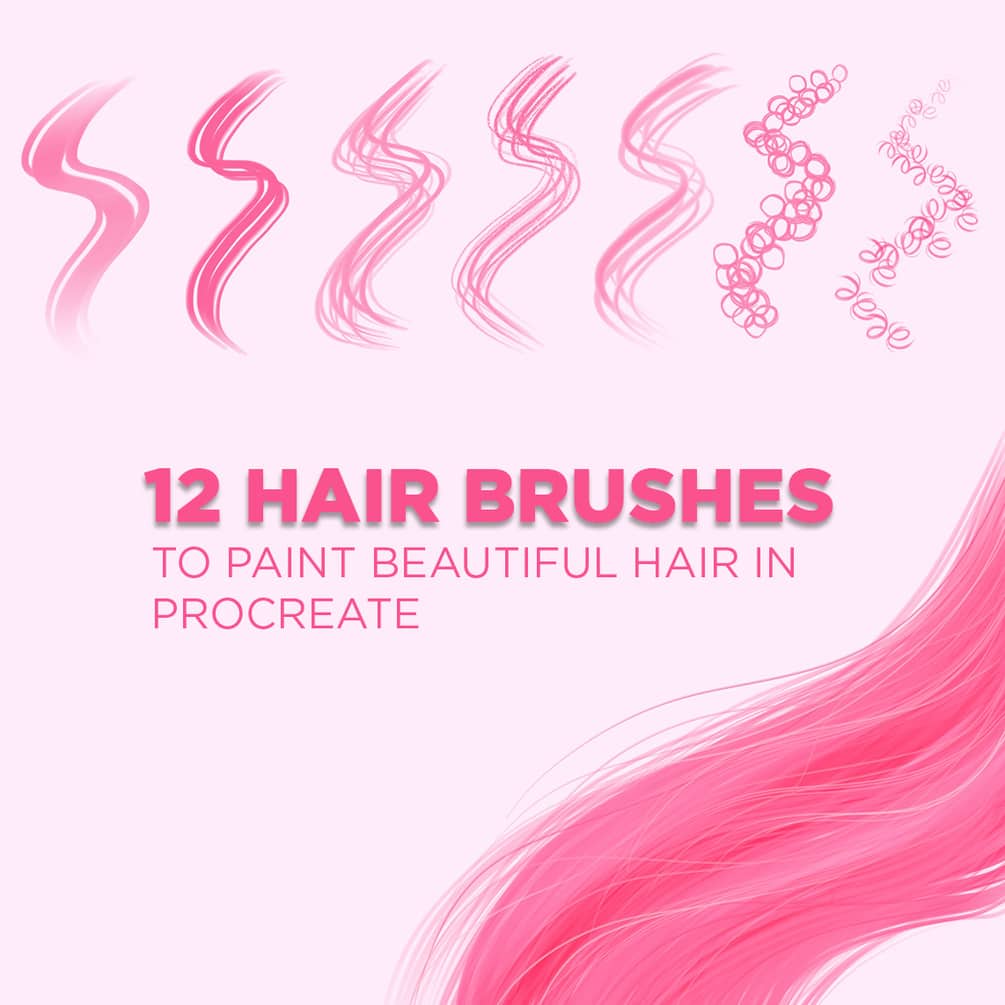

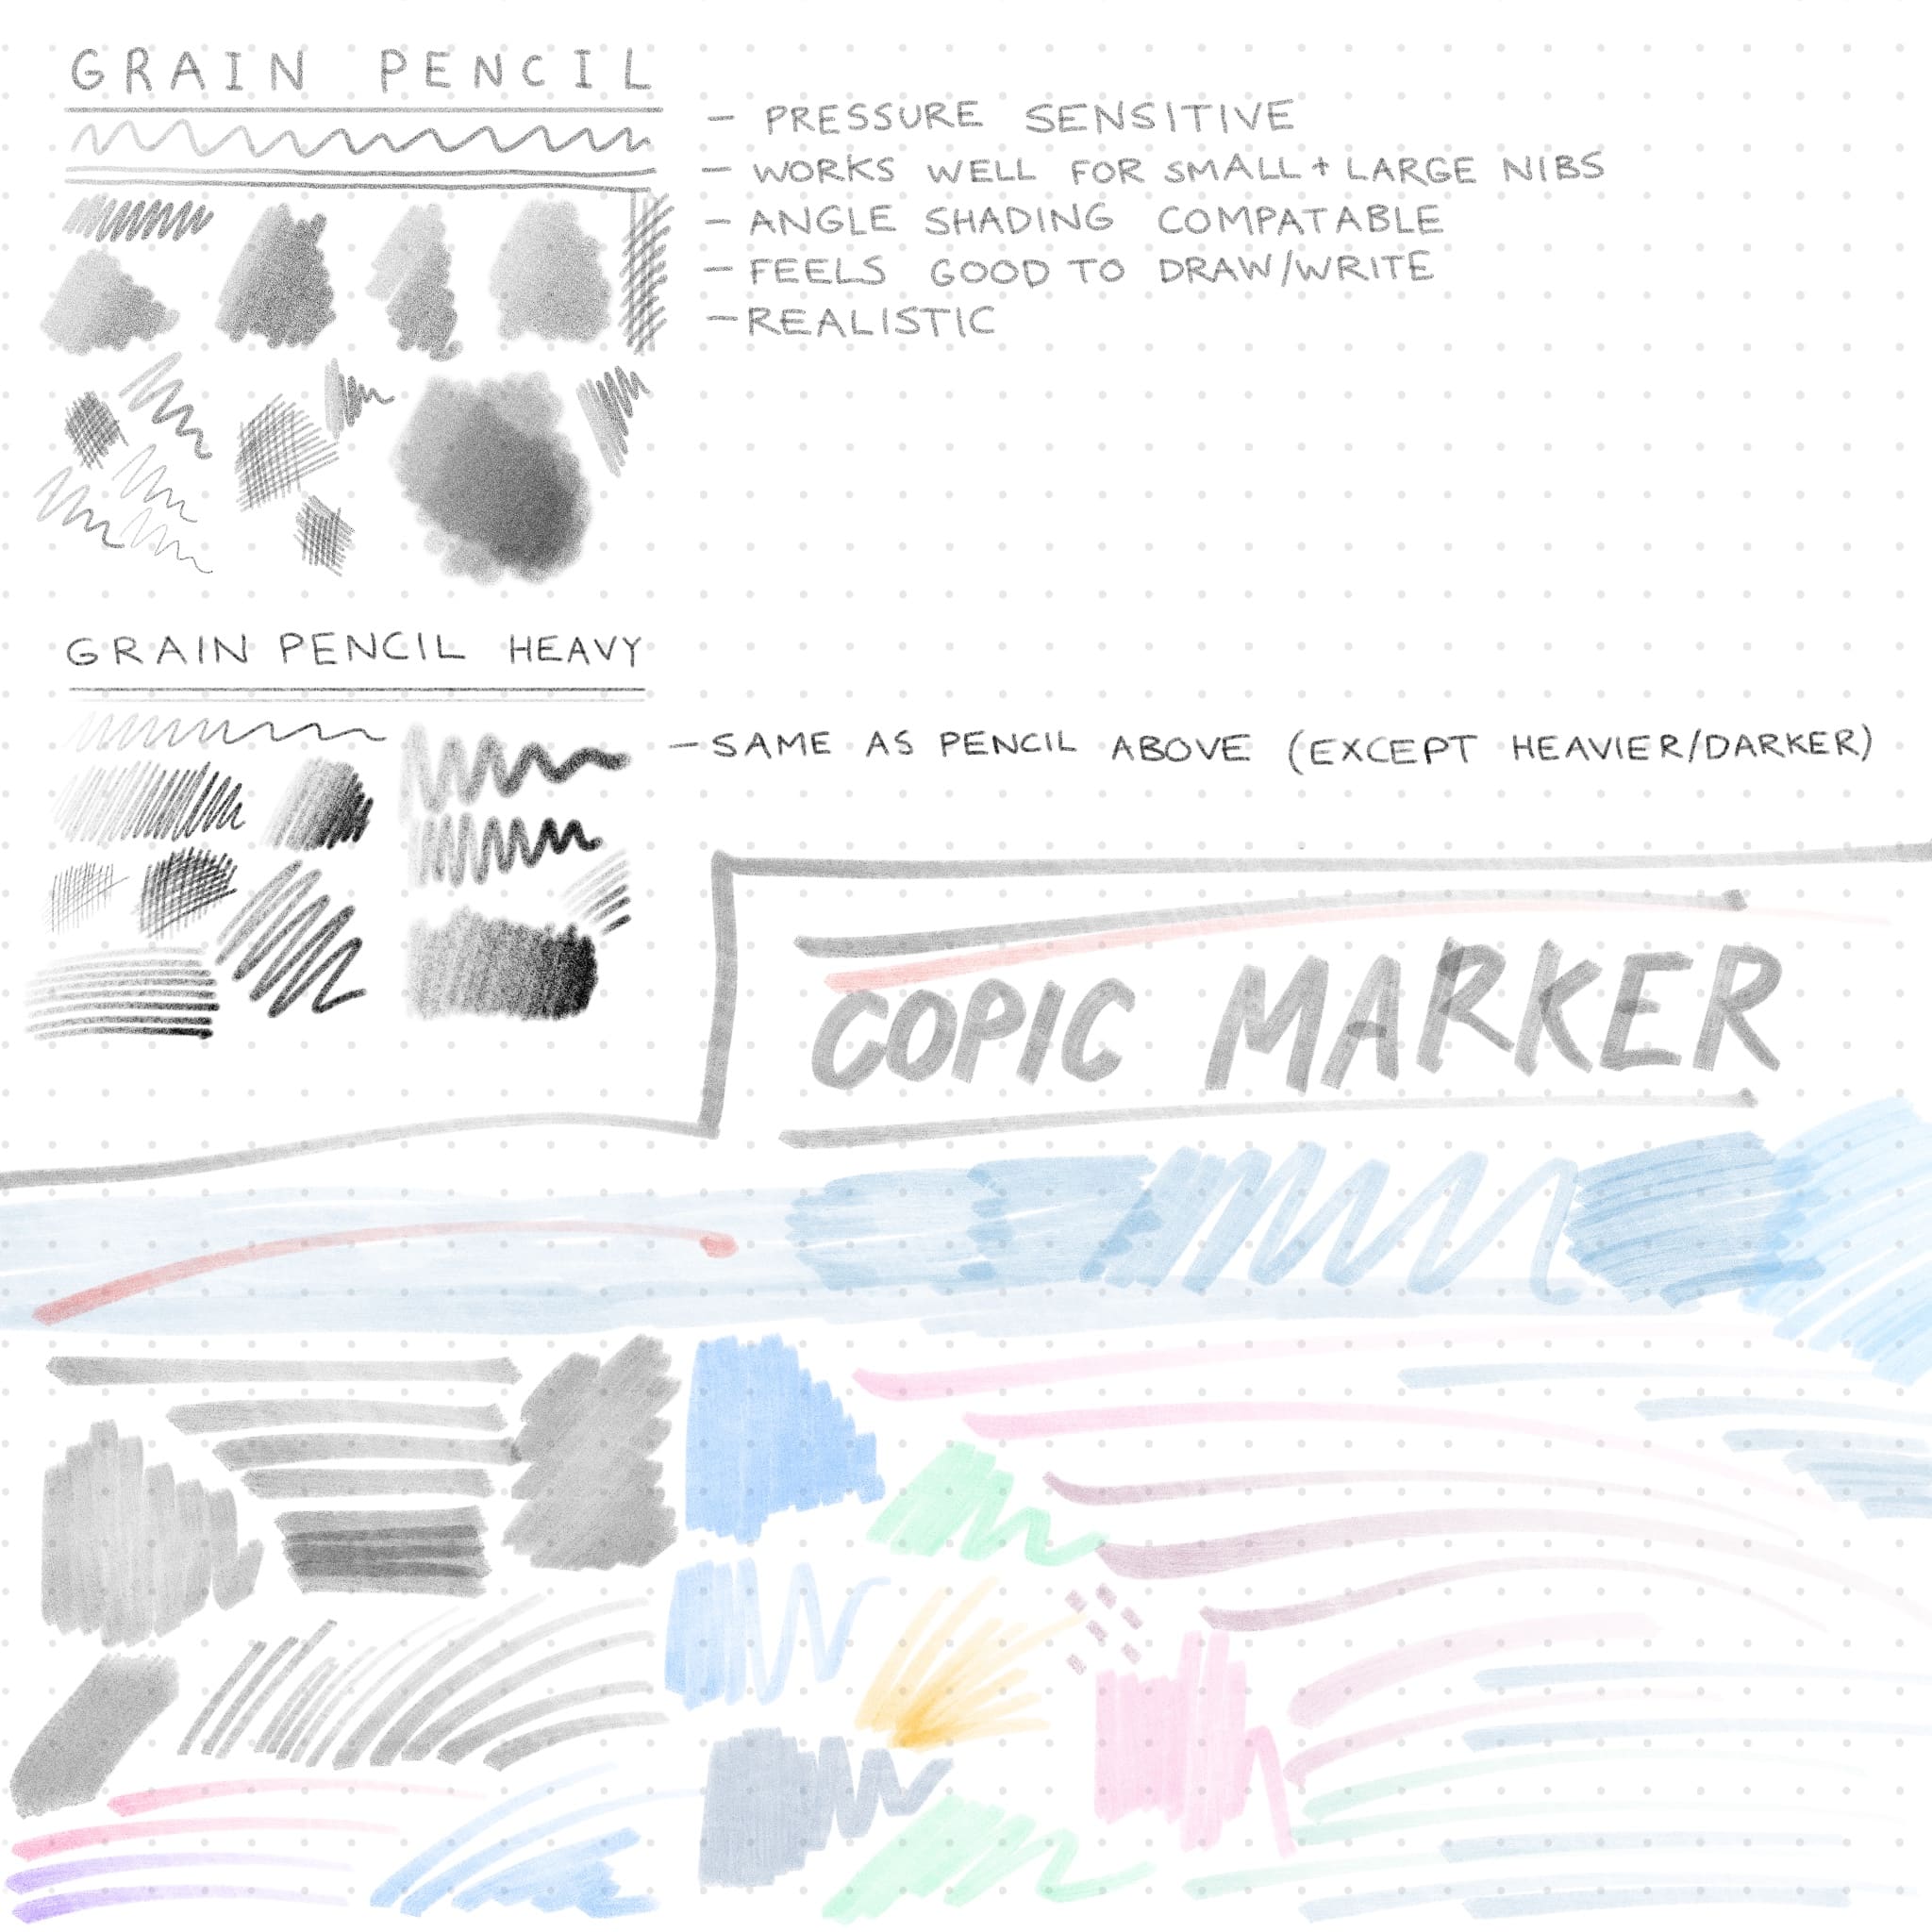


![21 Best Manga Studio & Clip Studio Paint Brushes [Free Download]](https://homesthetics.net/wp-content/uploads/2019/09/Best-Manga-Studio-Clip-Studio-Paint-Brushes-1.jpg)

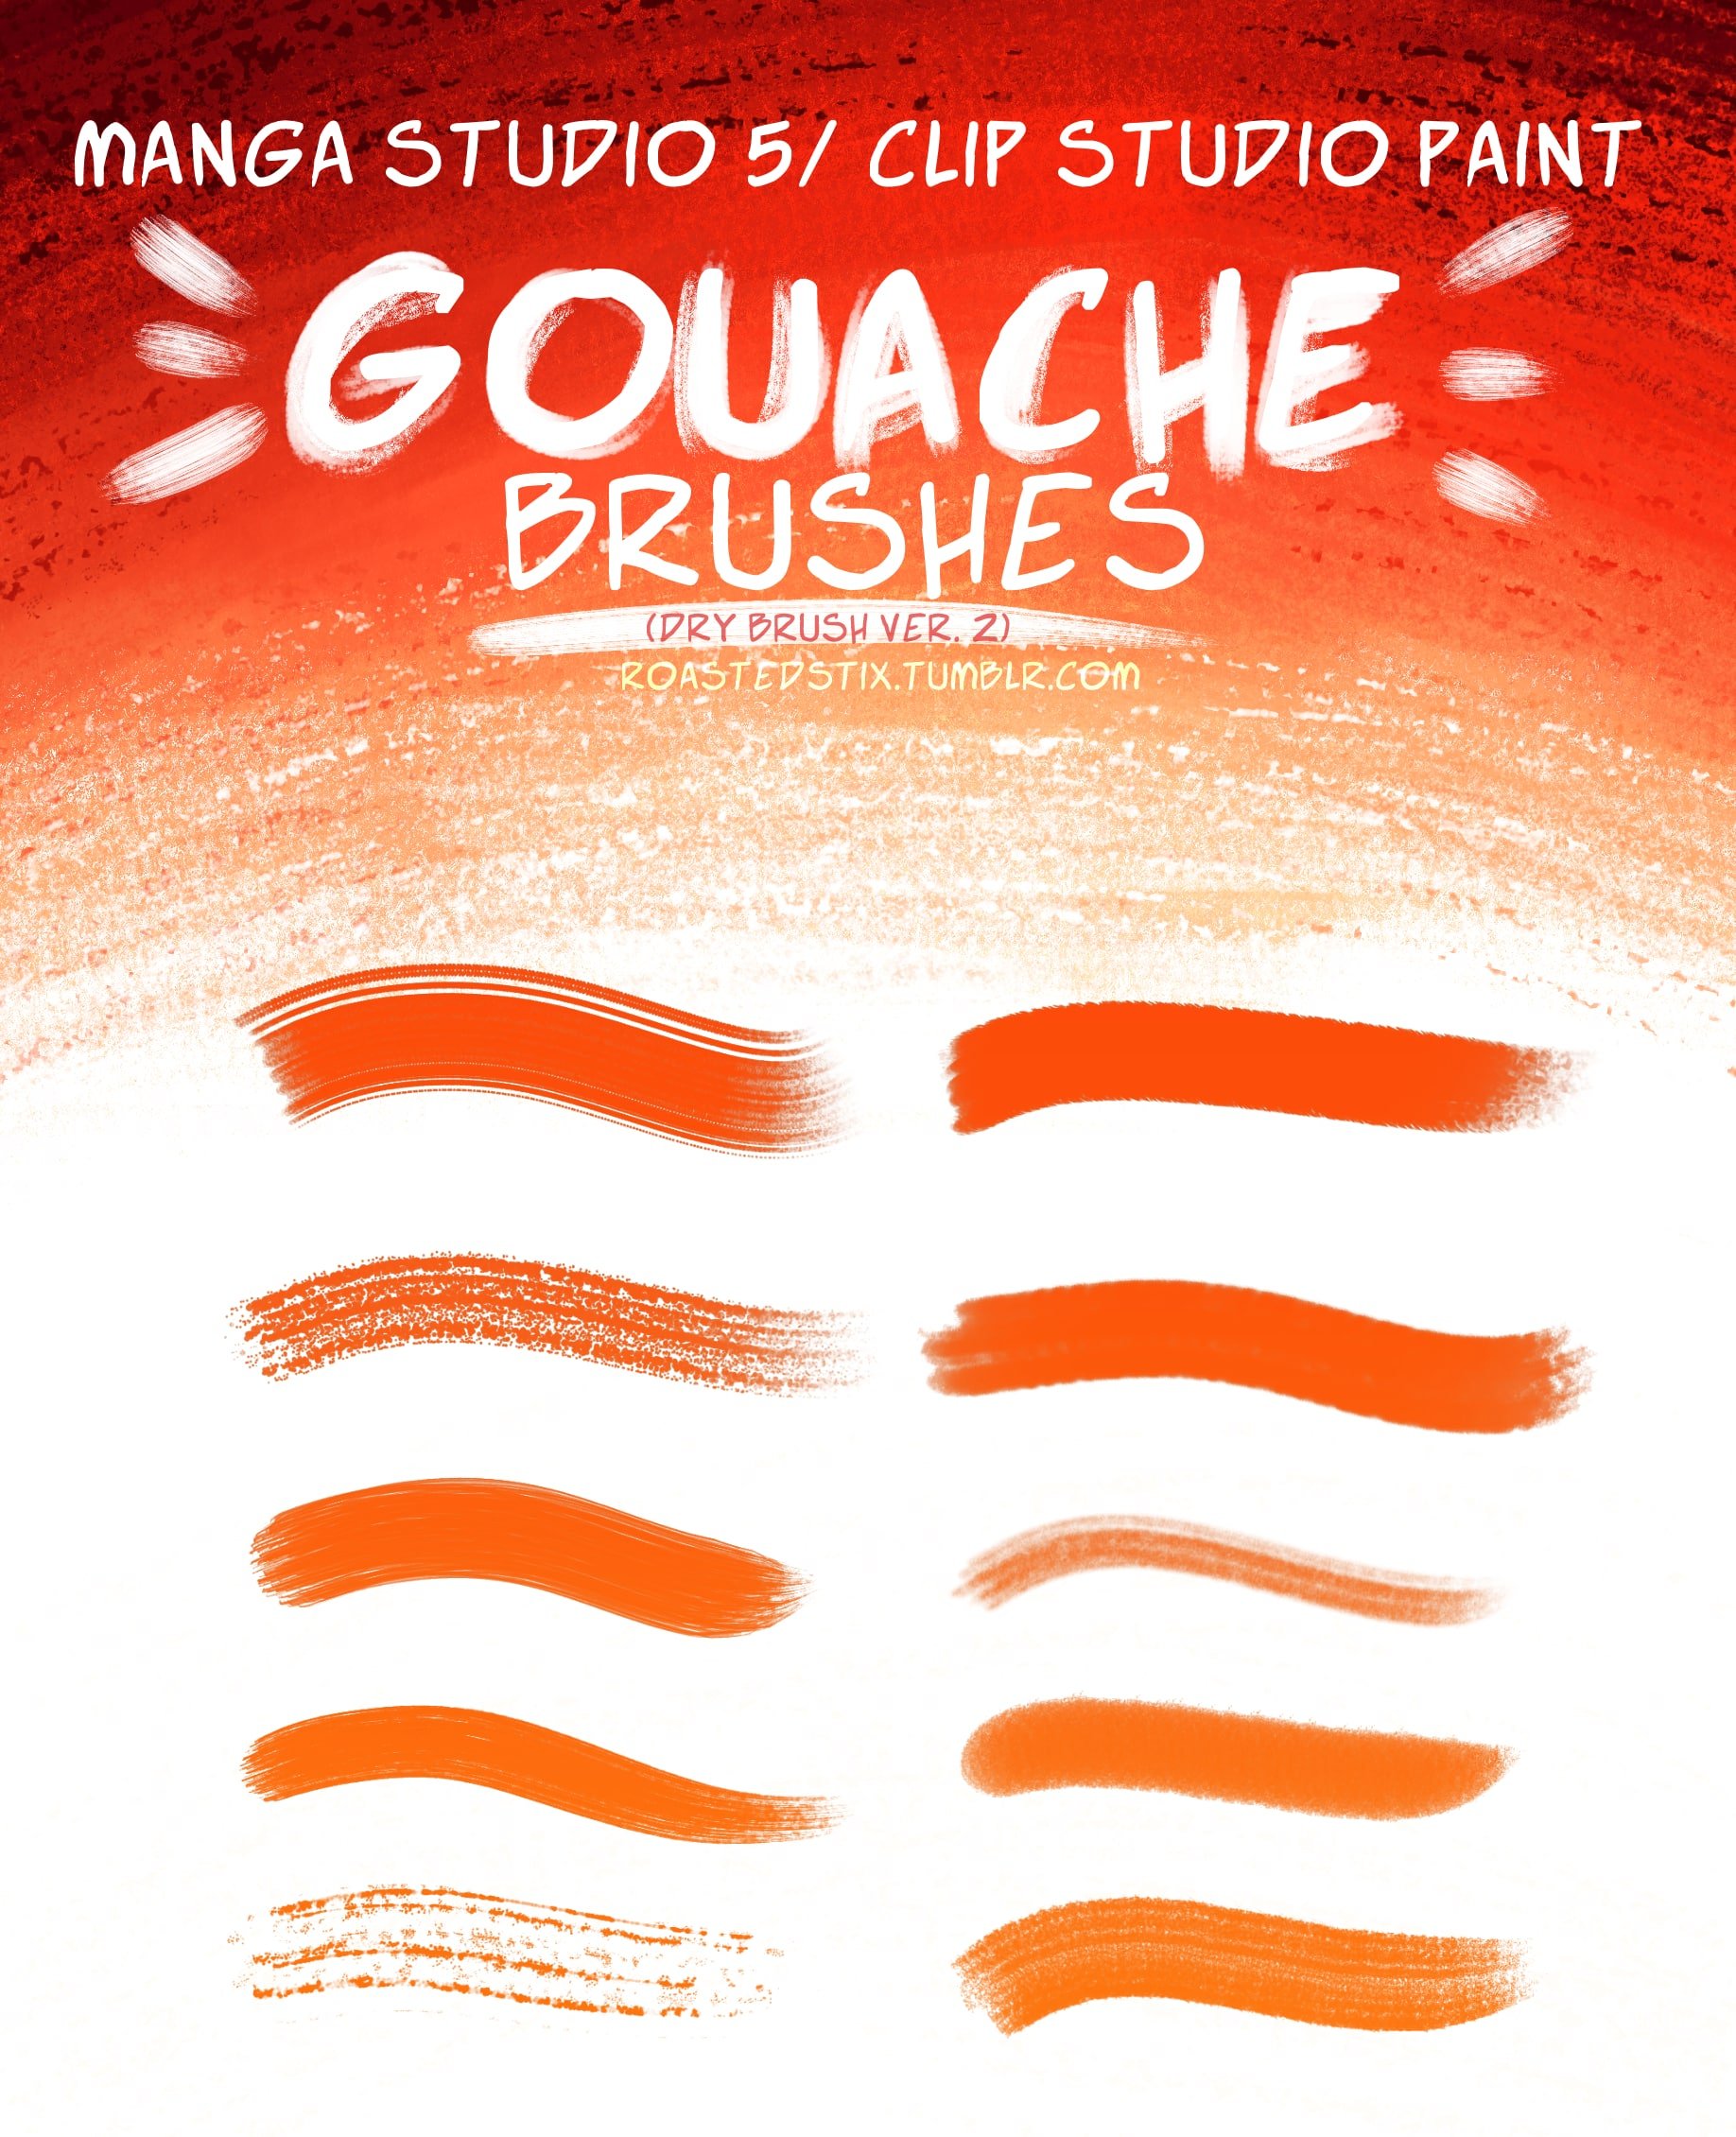
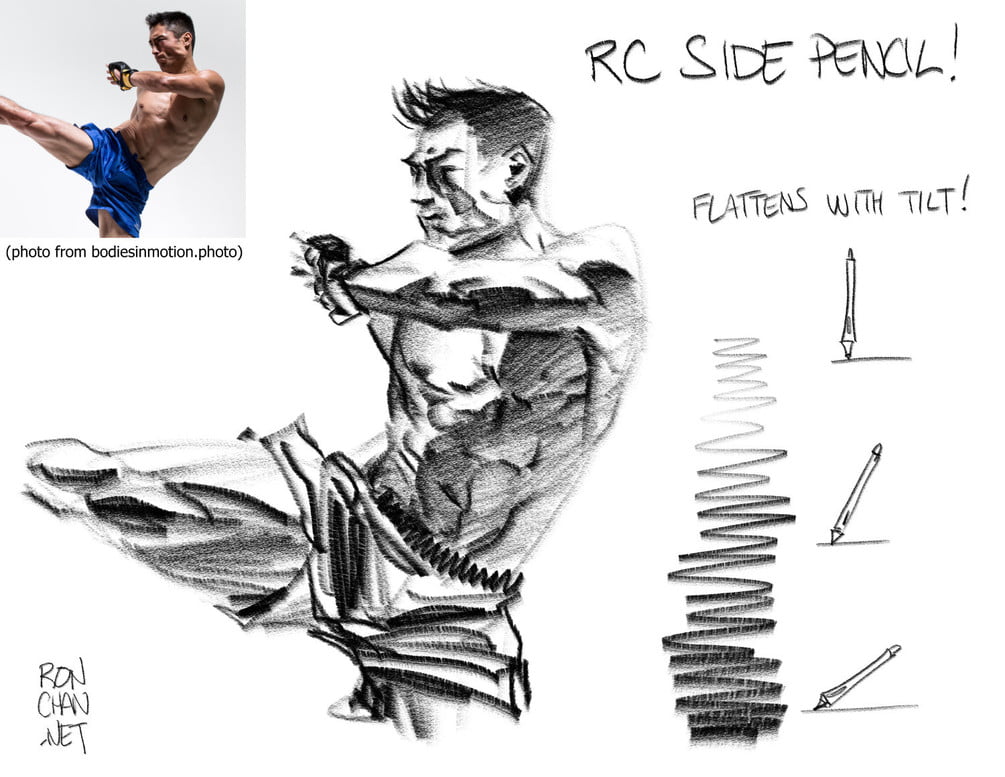

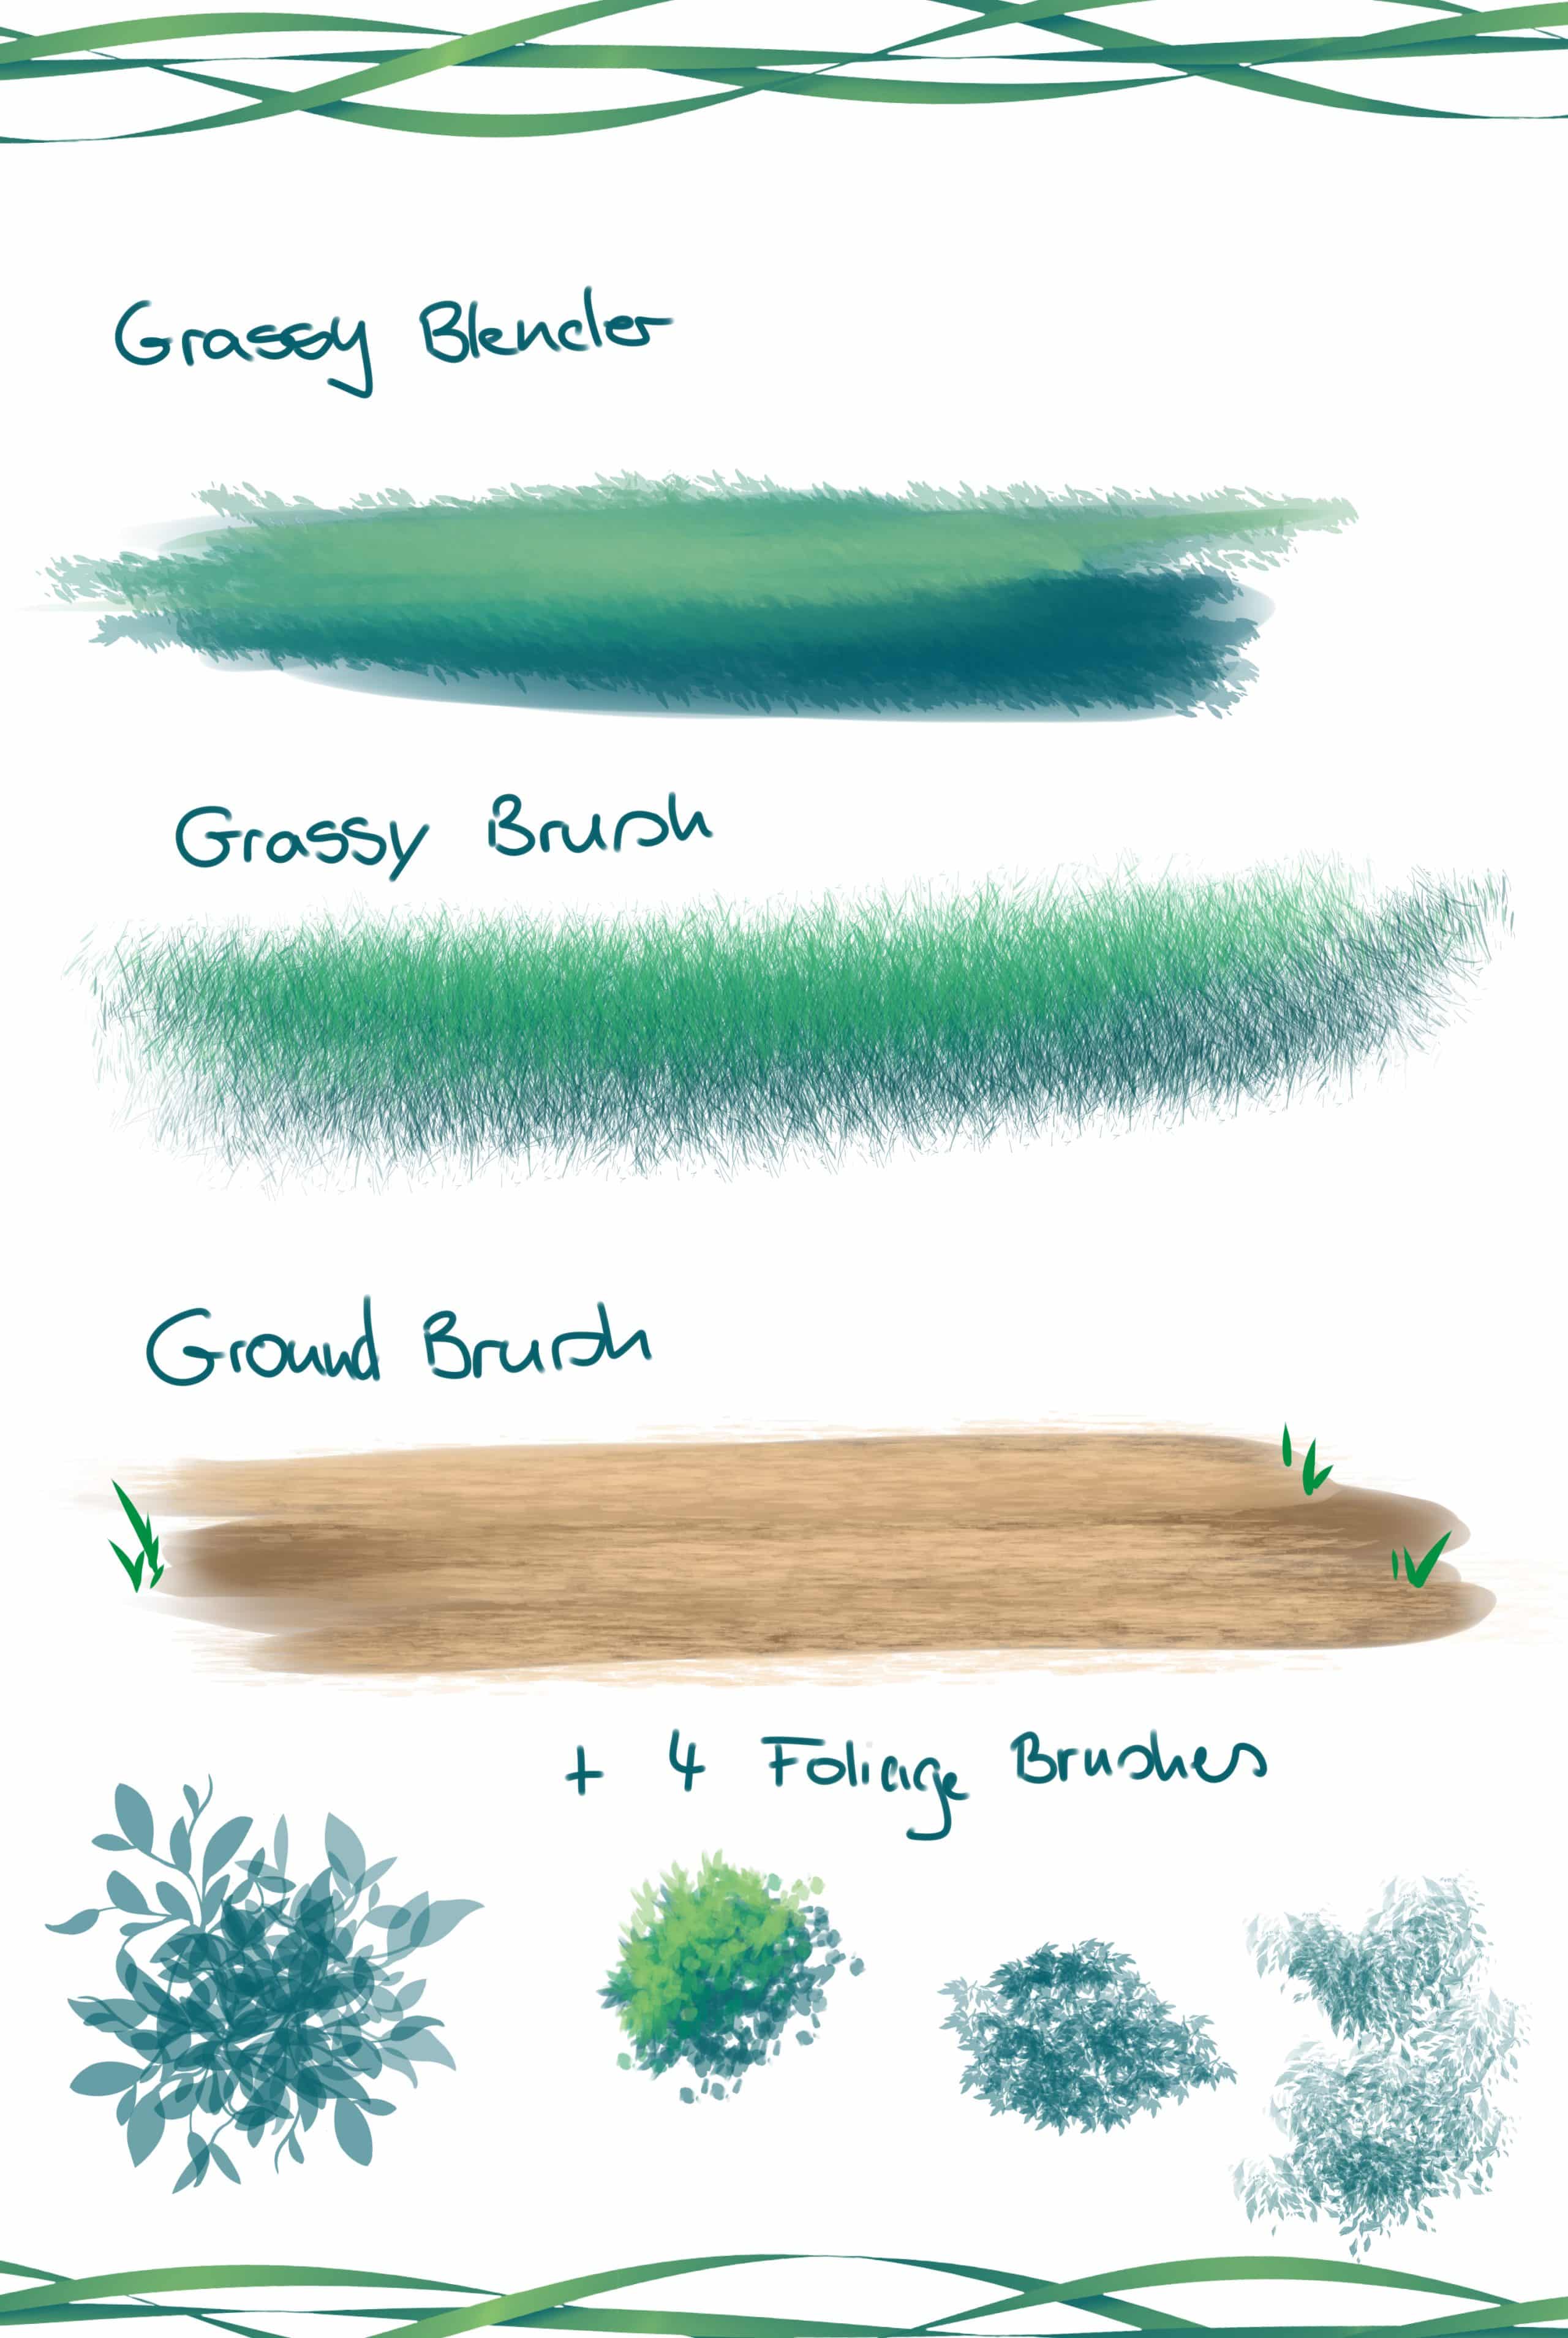

 1.
1. 


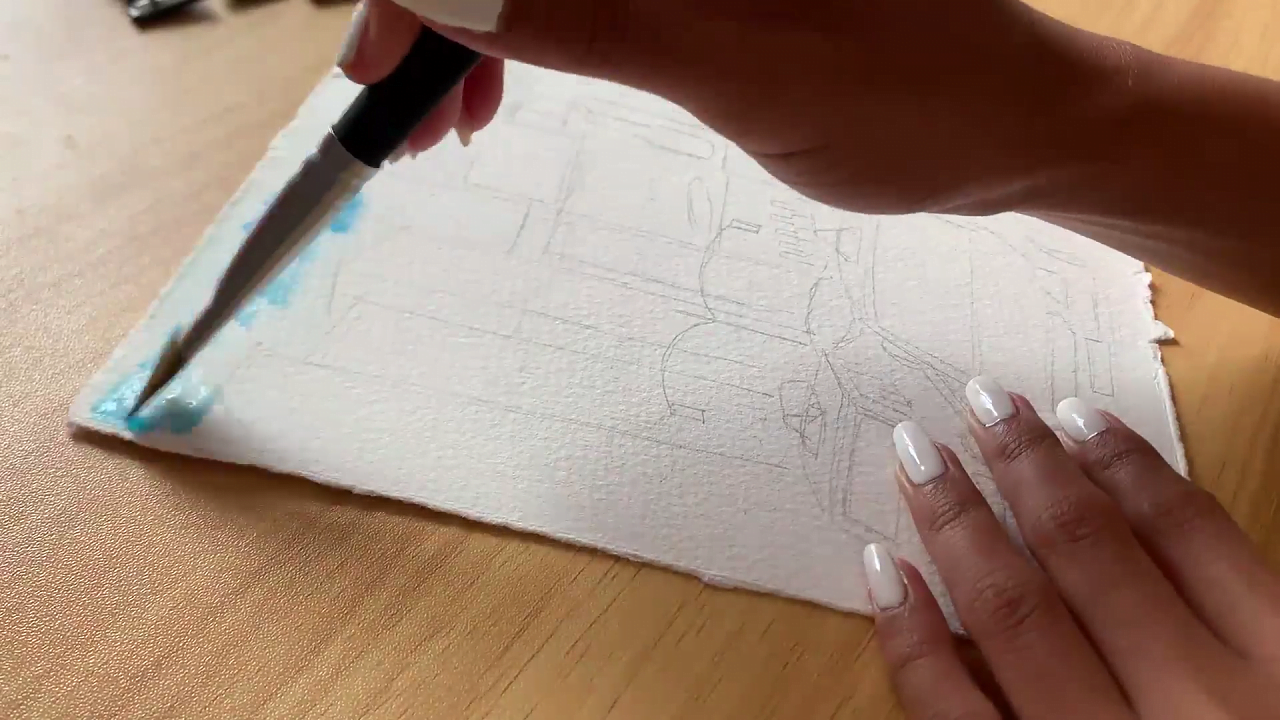
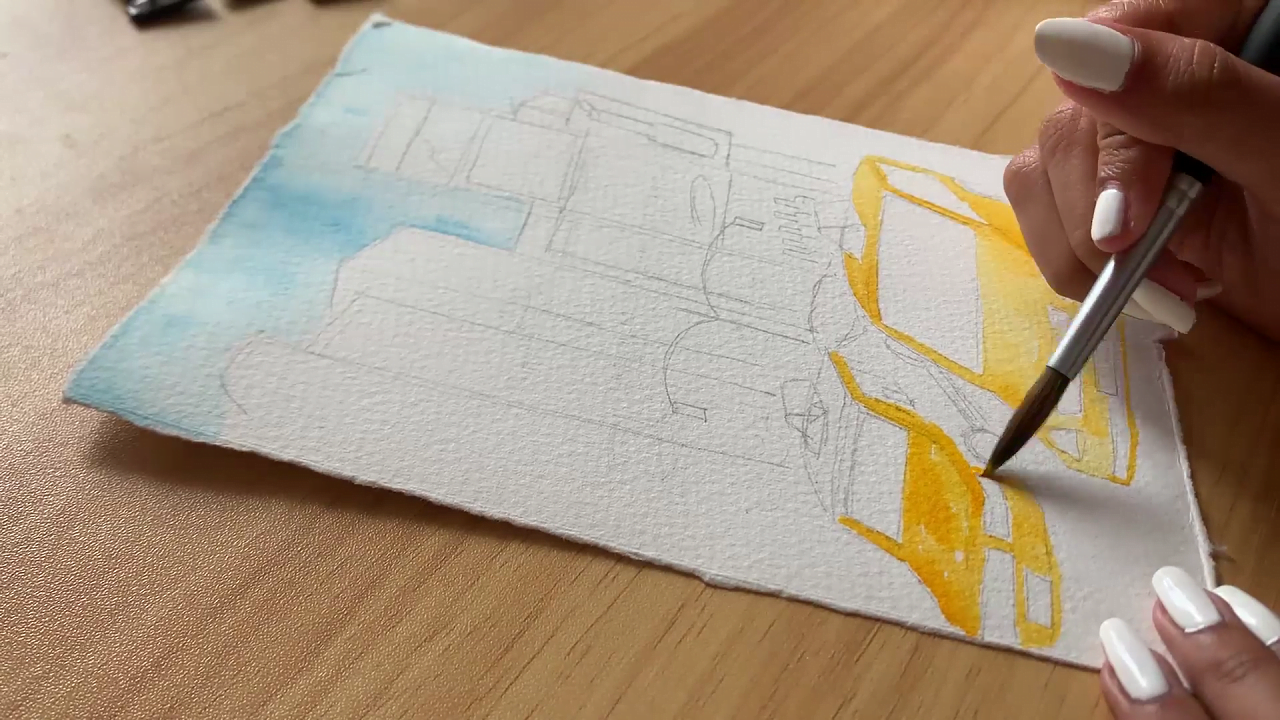
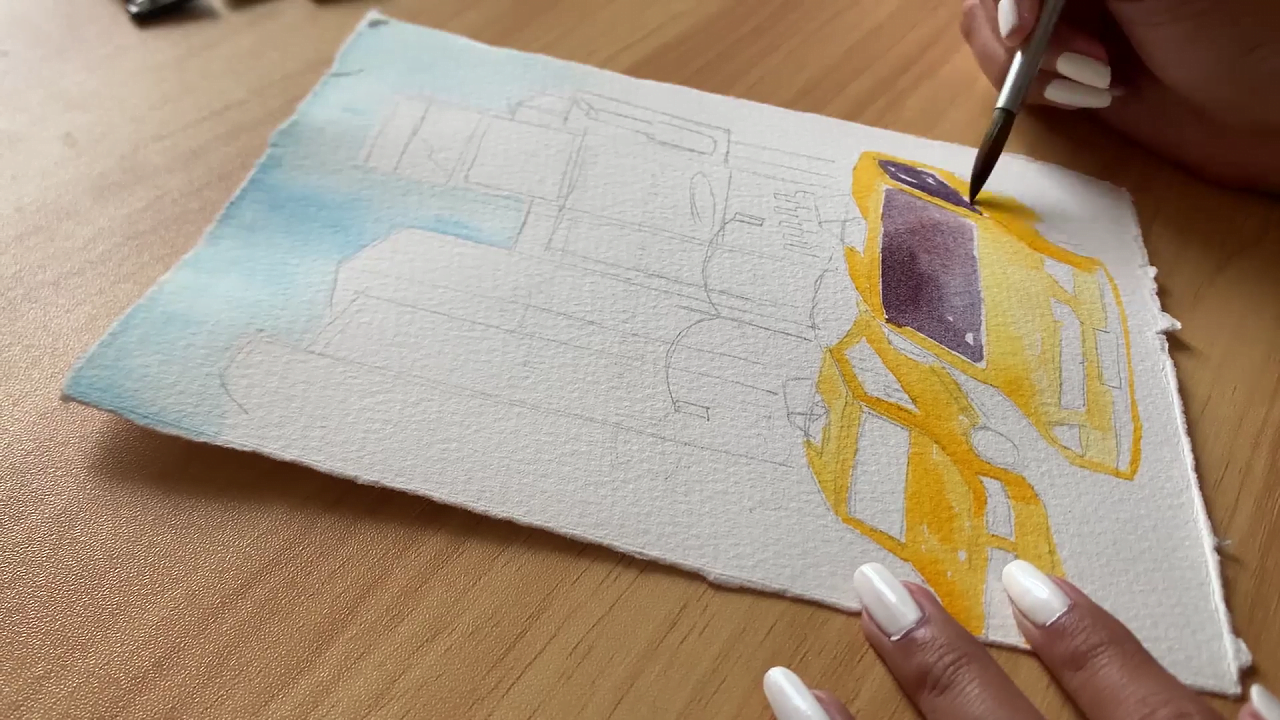
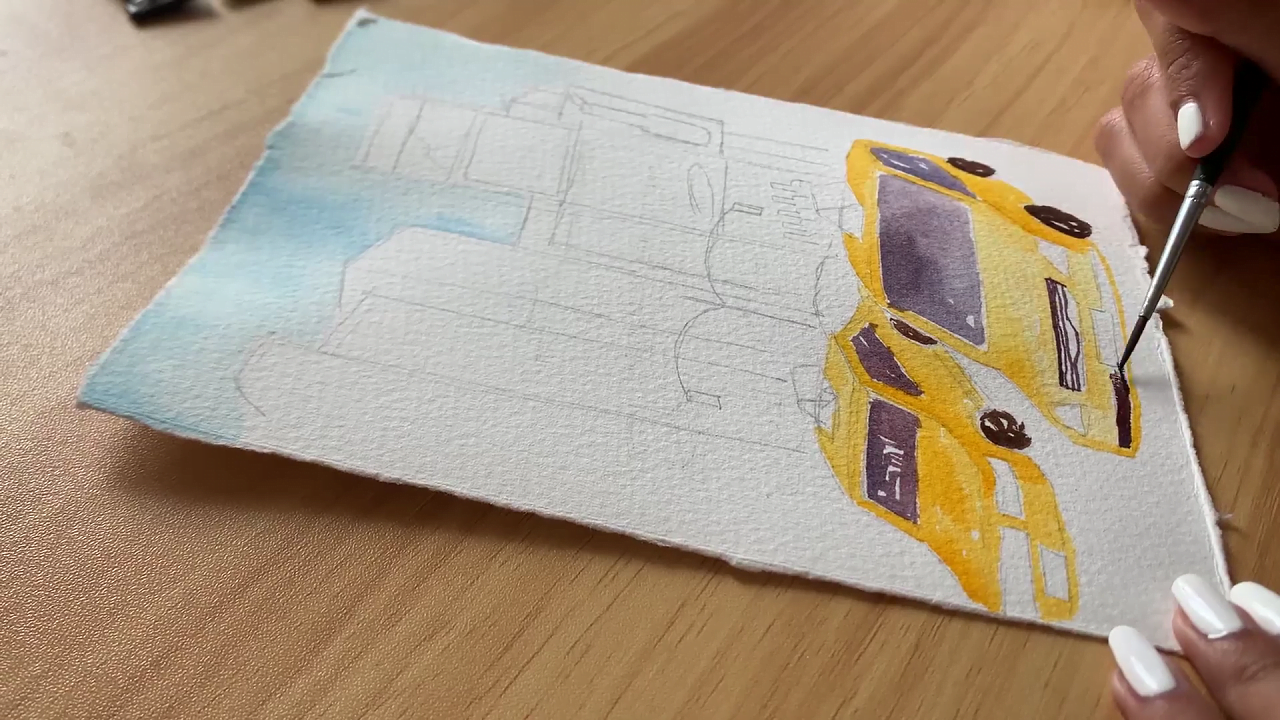
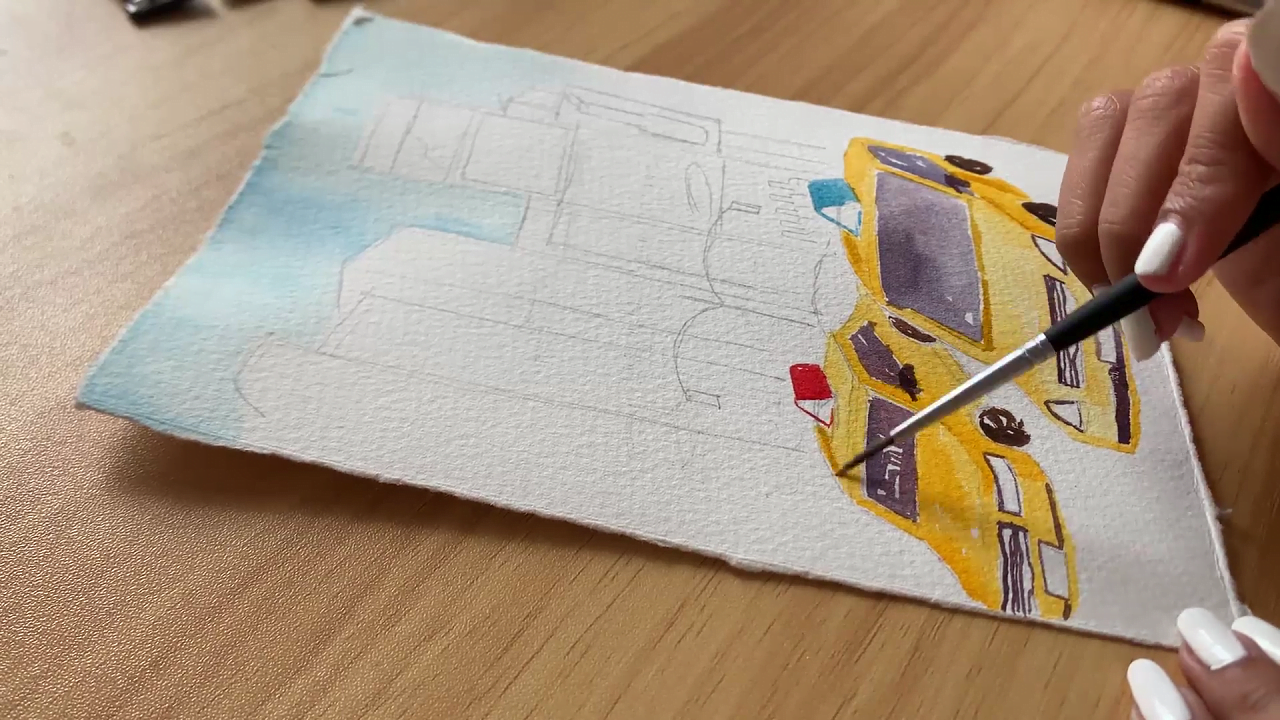
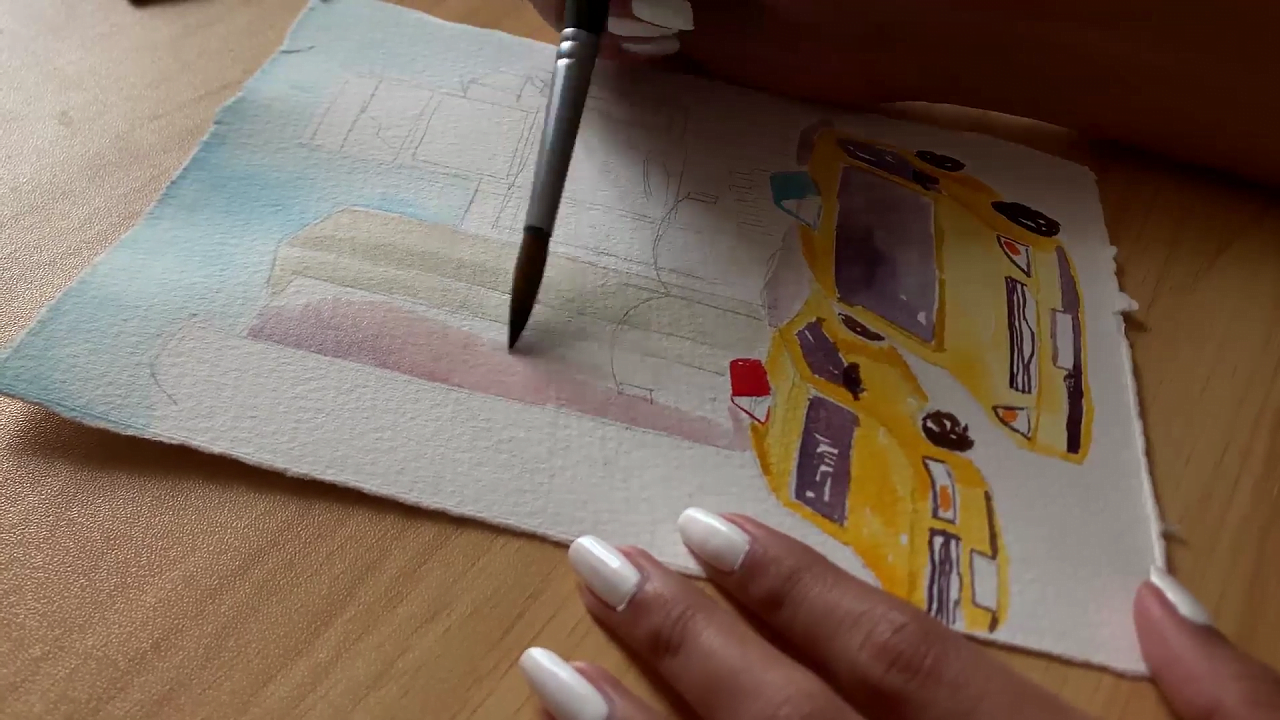
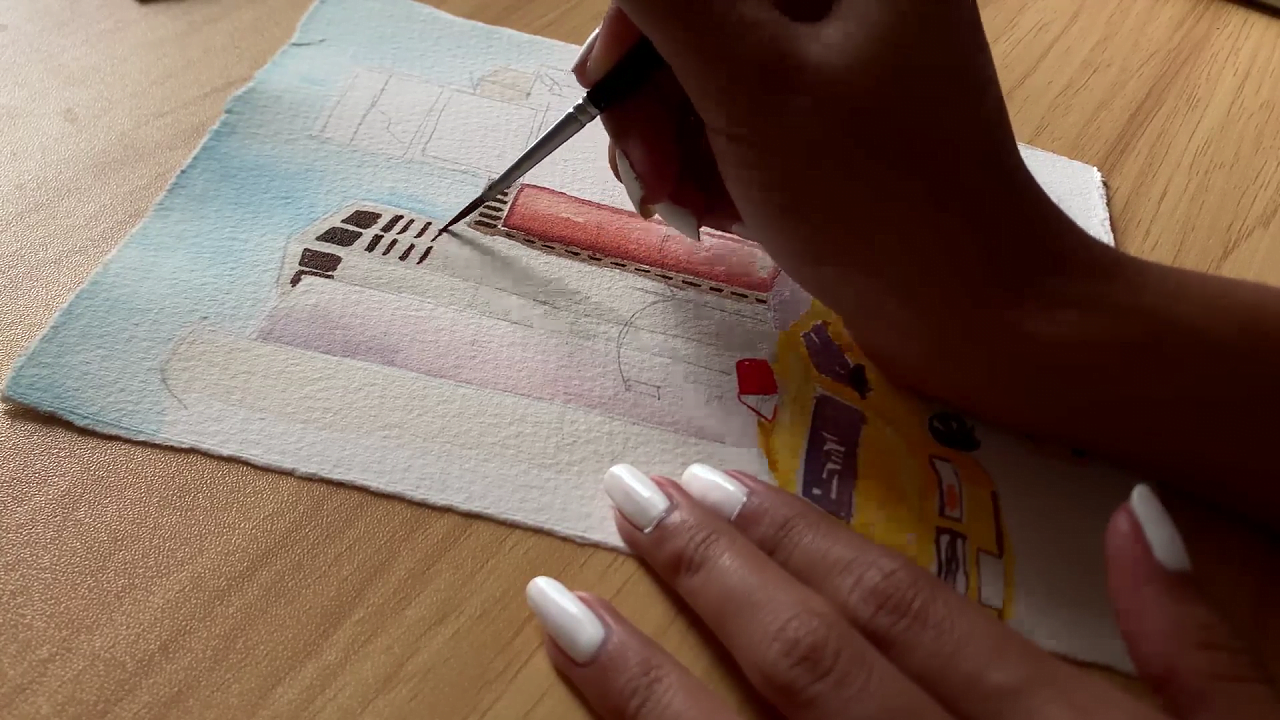
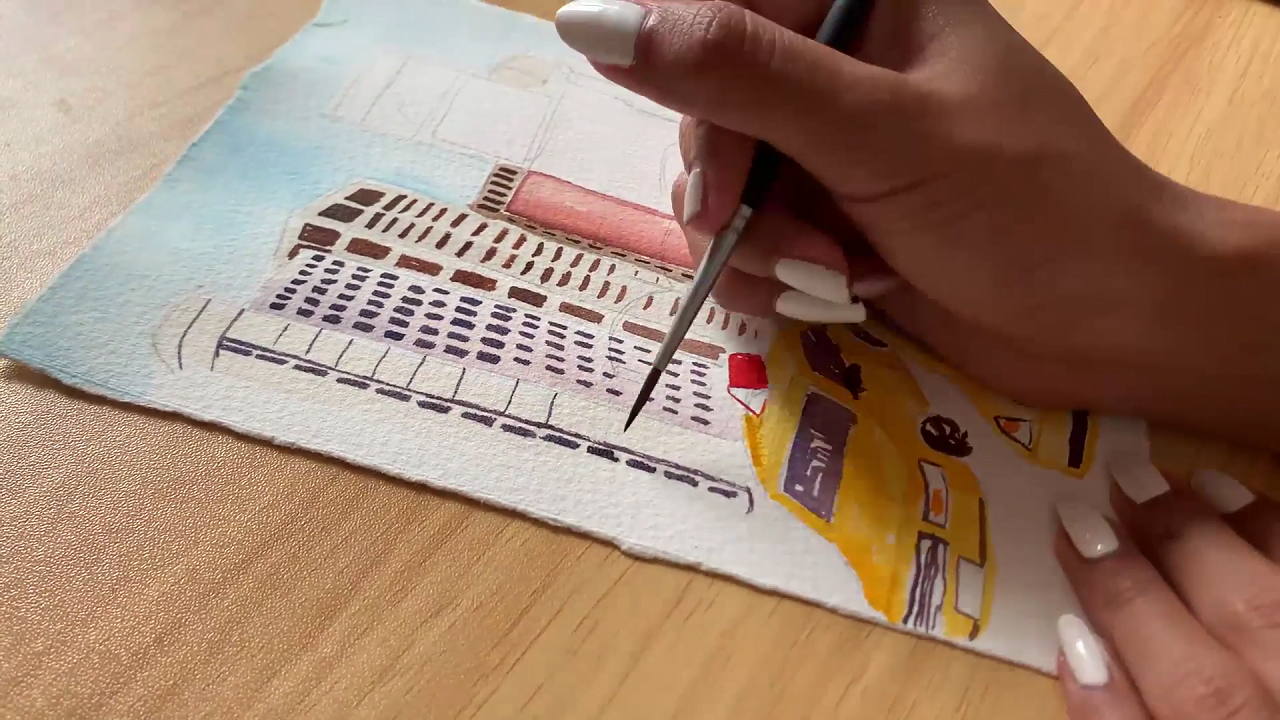
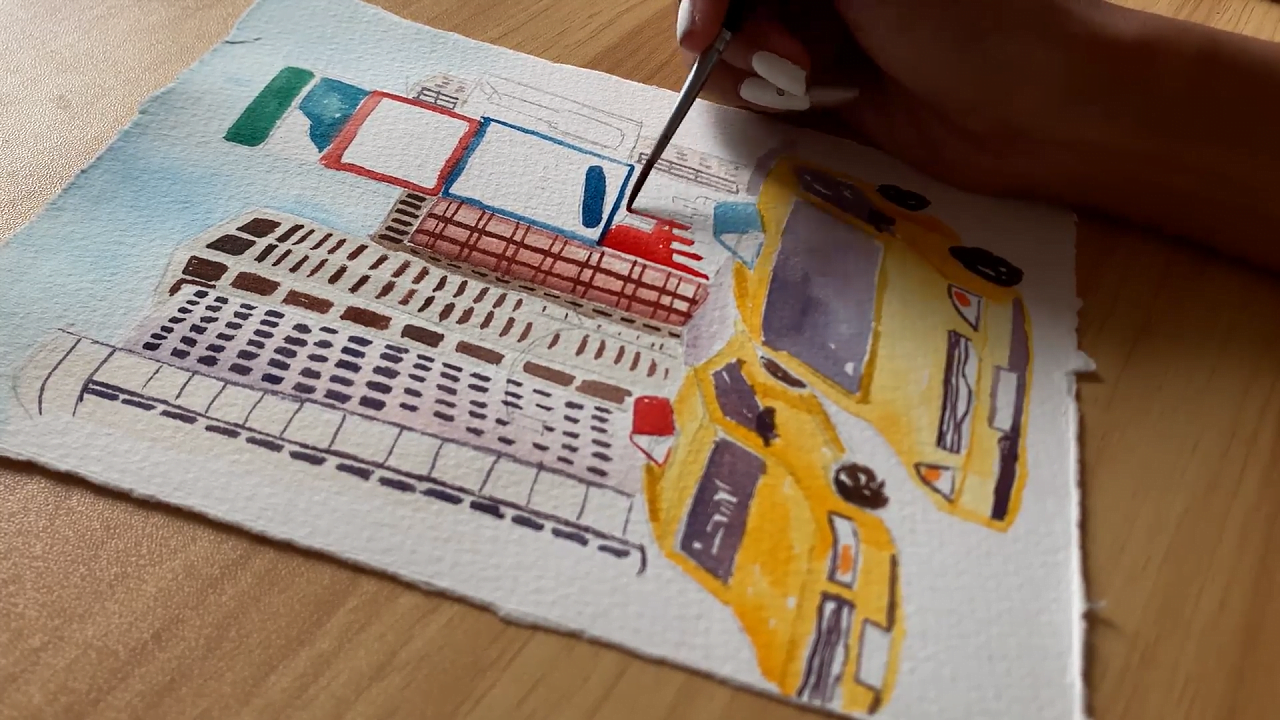
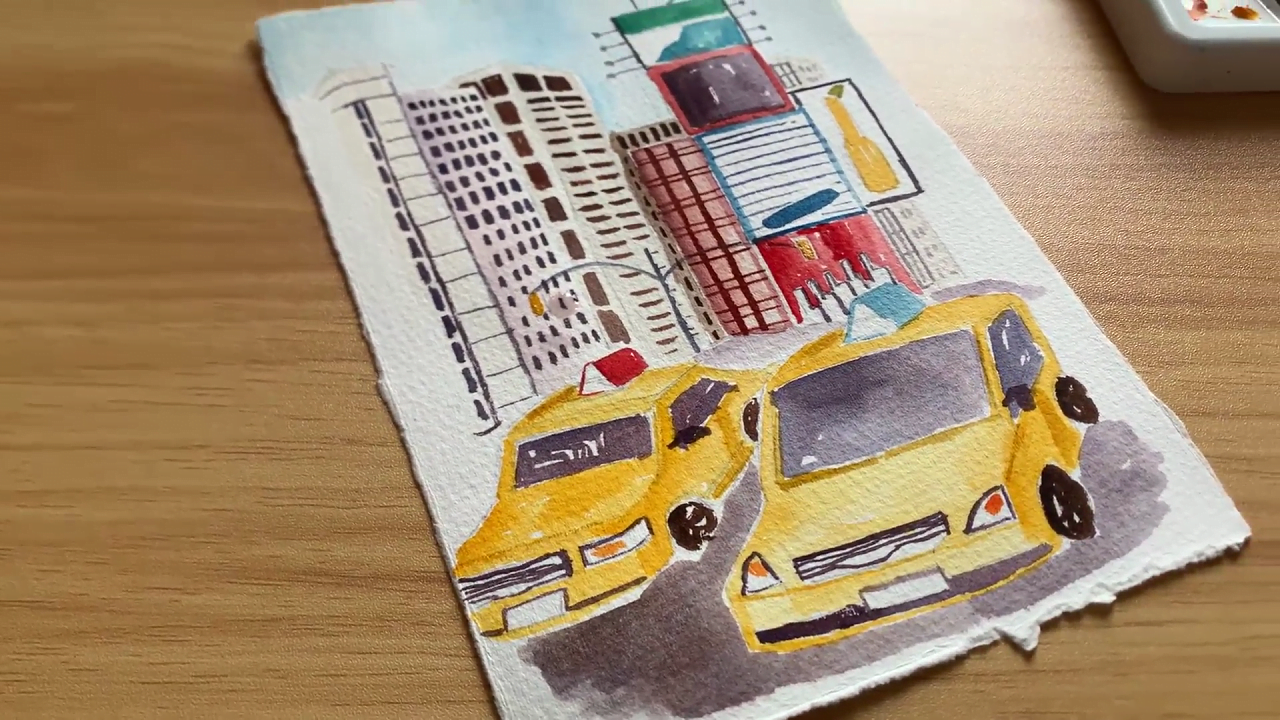
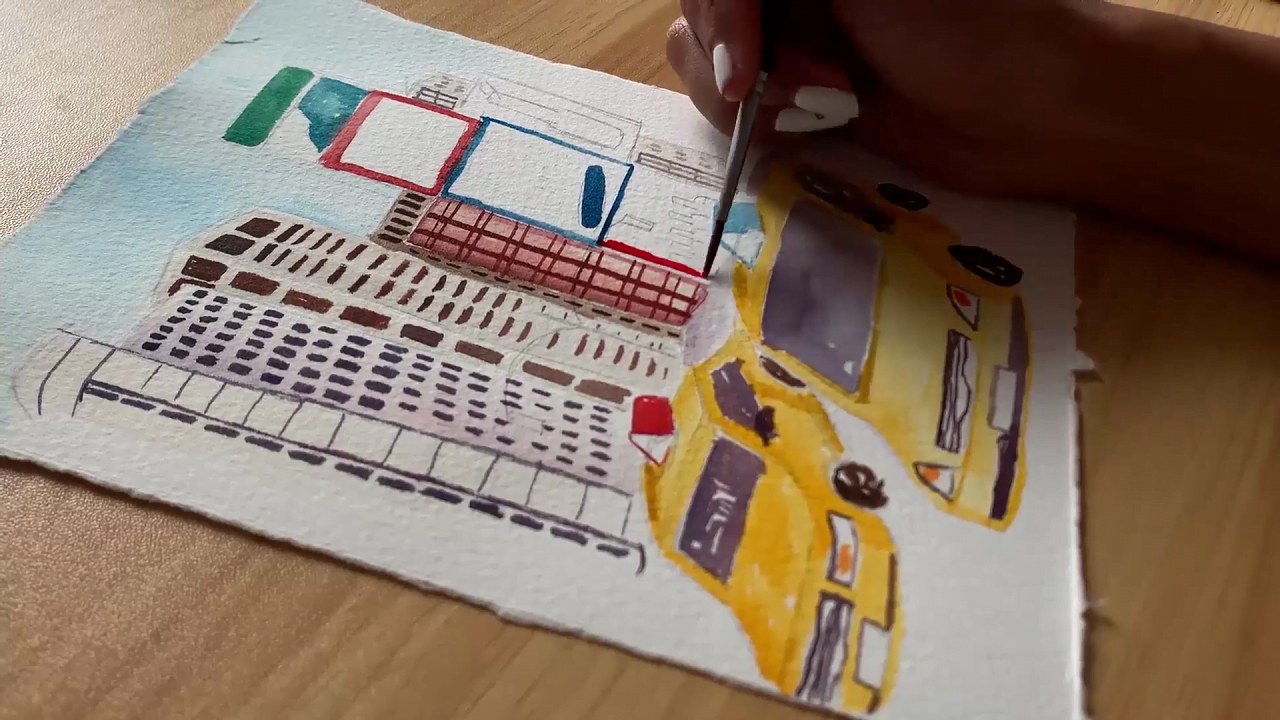


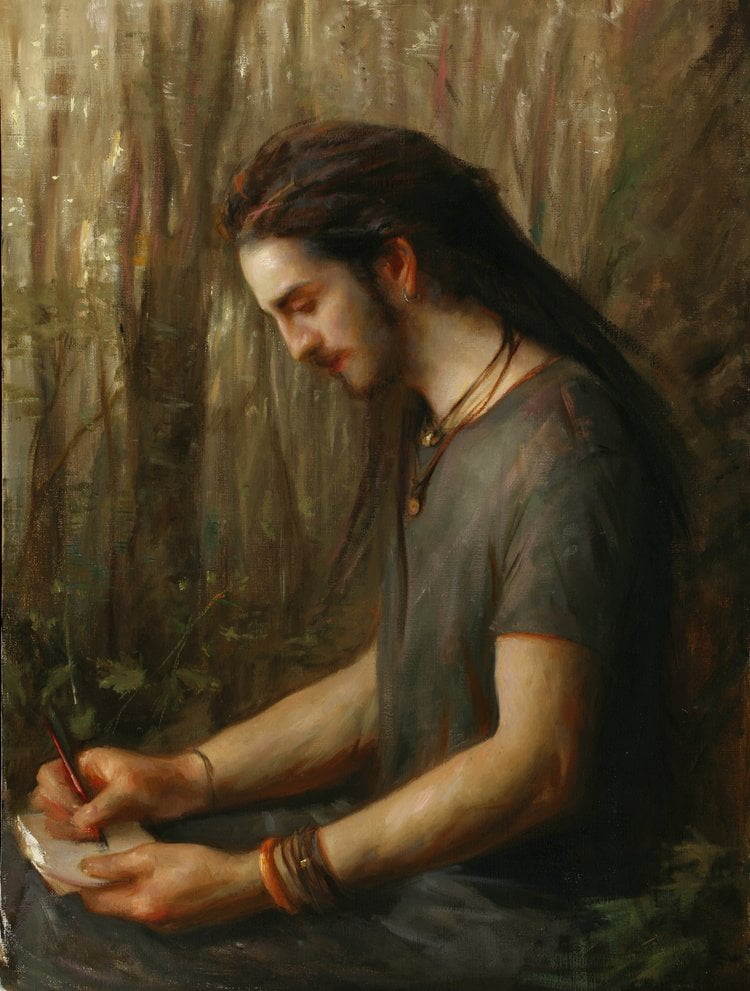


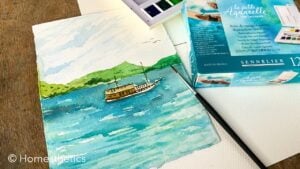
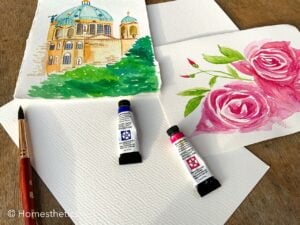
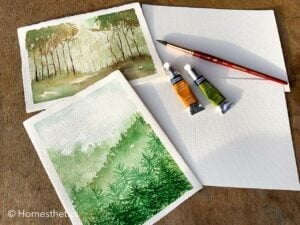


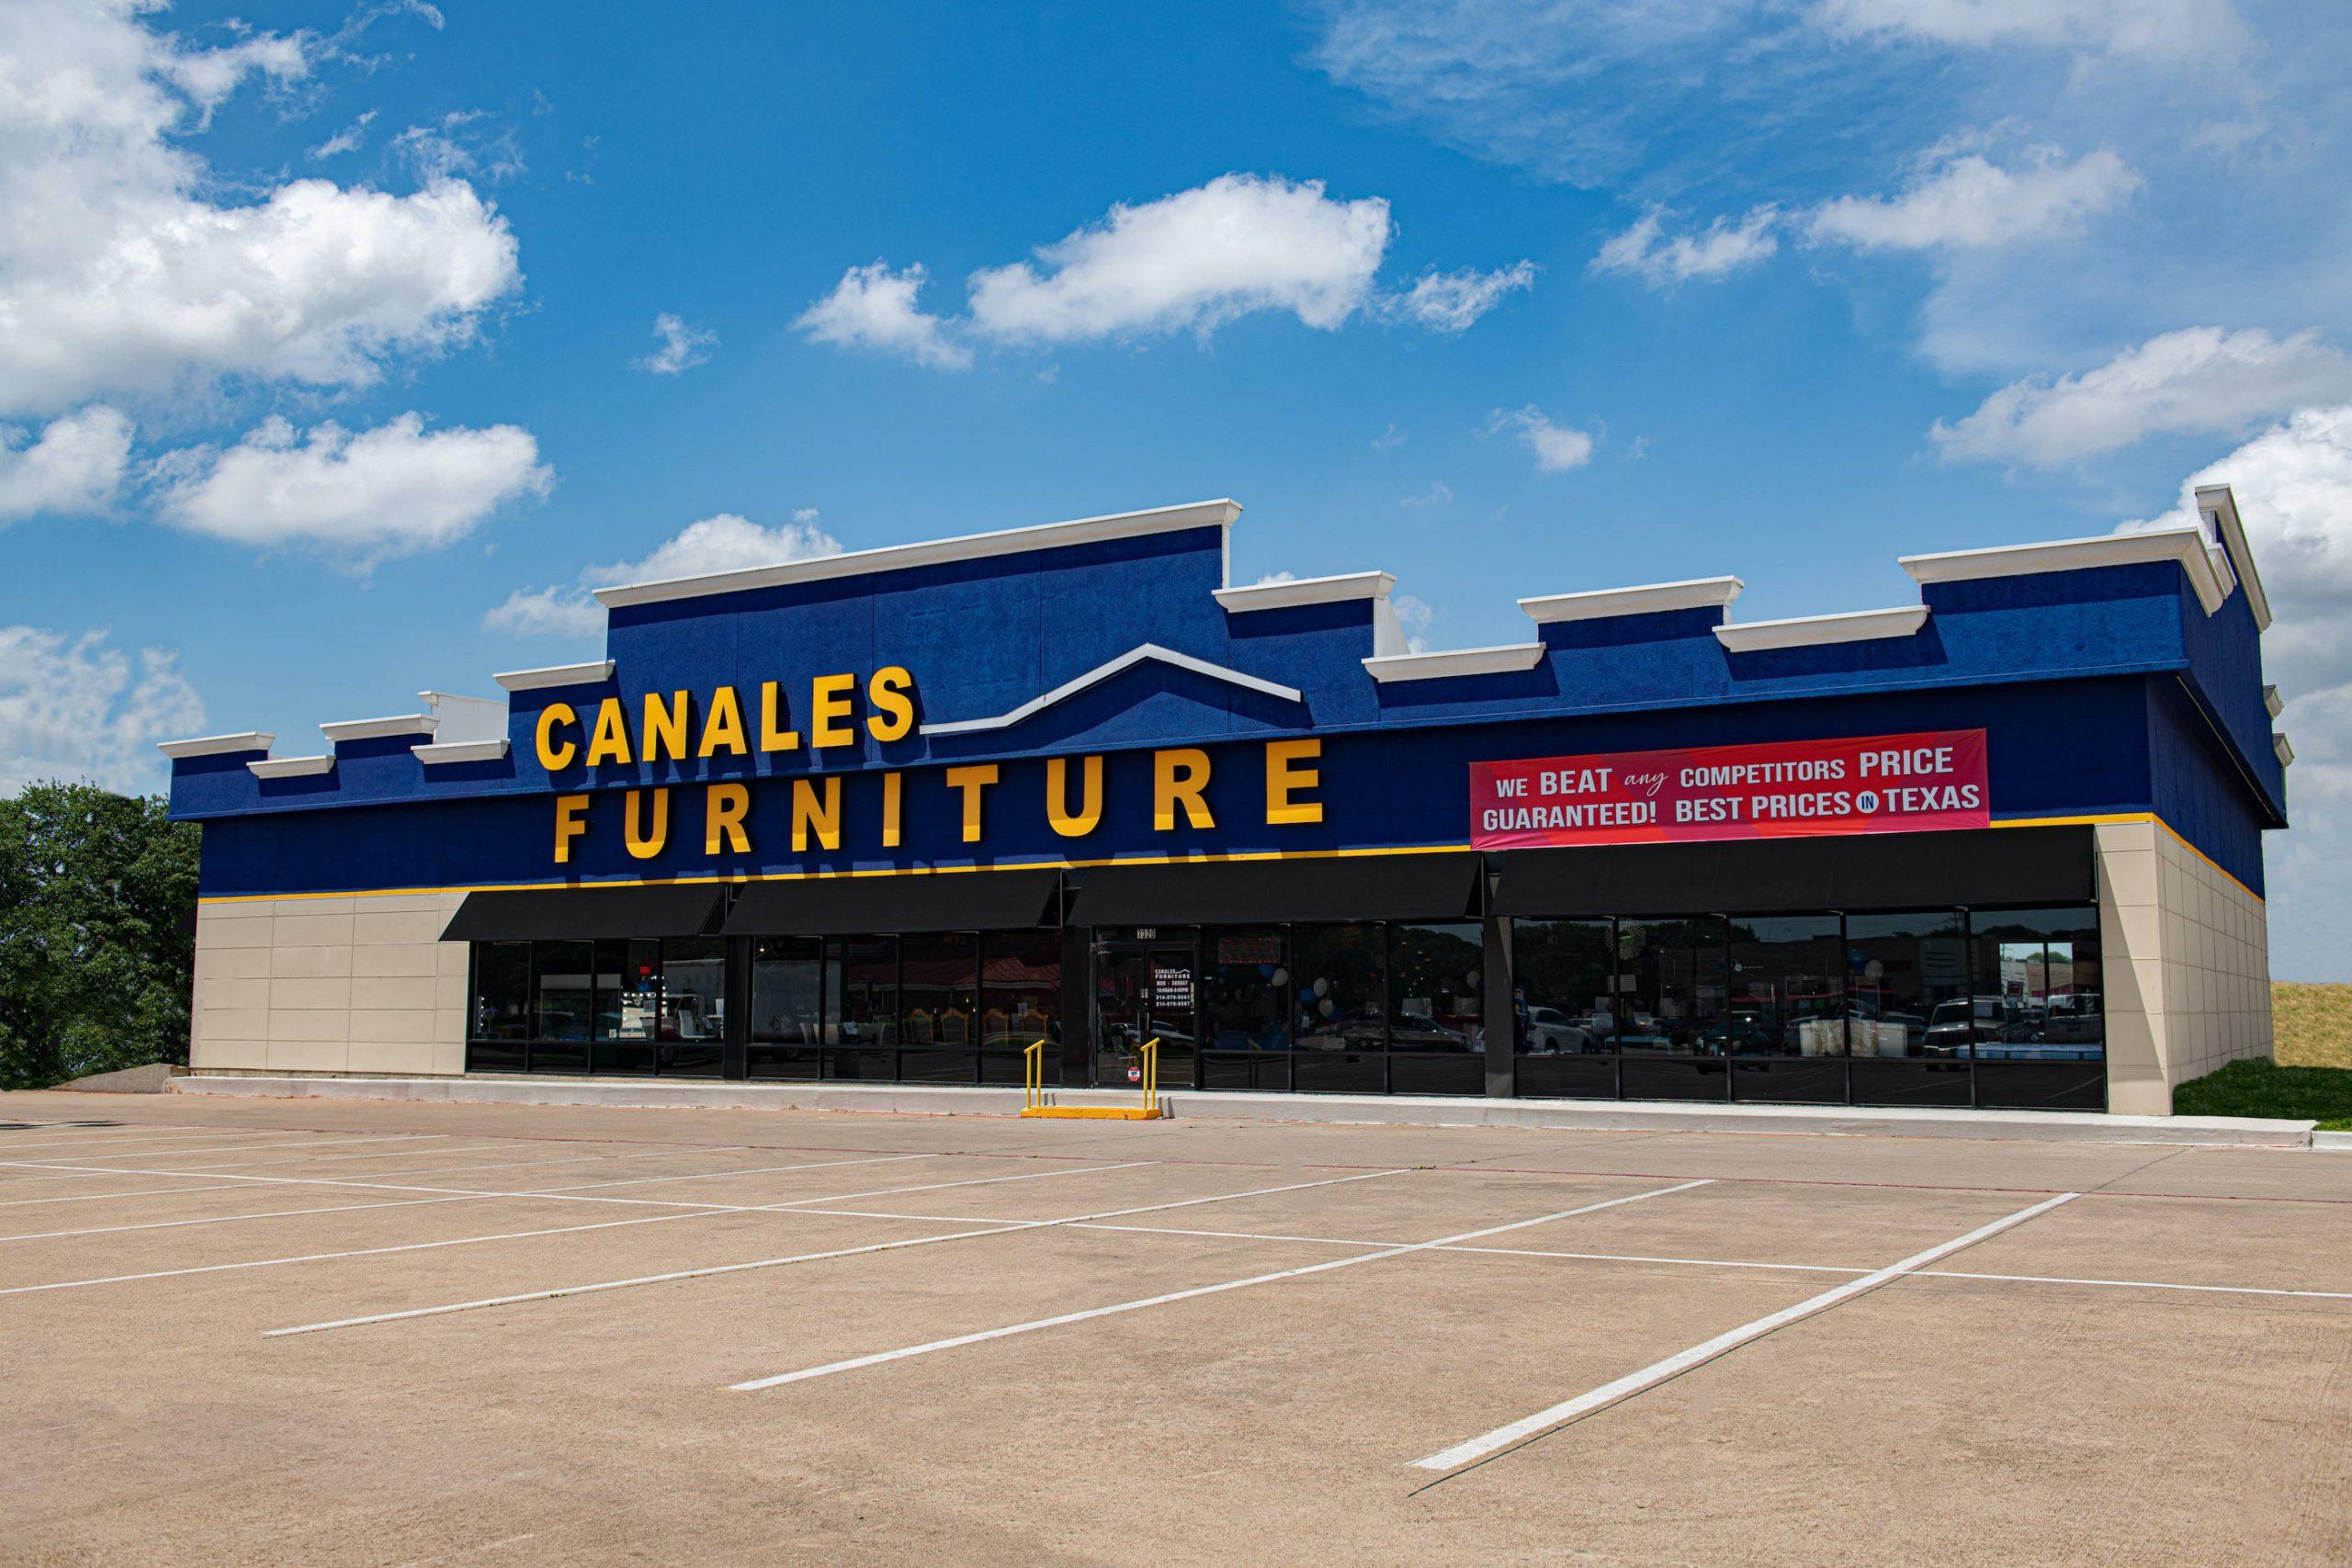


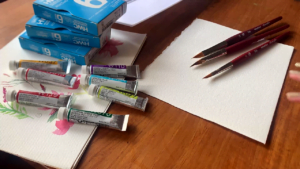

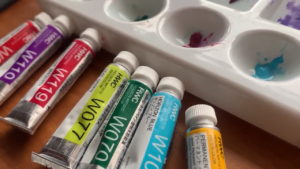
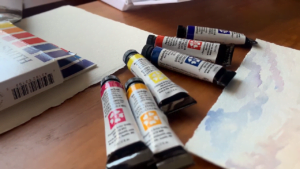

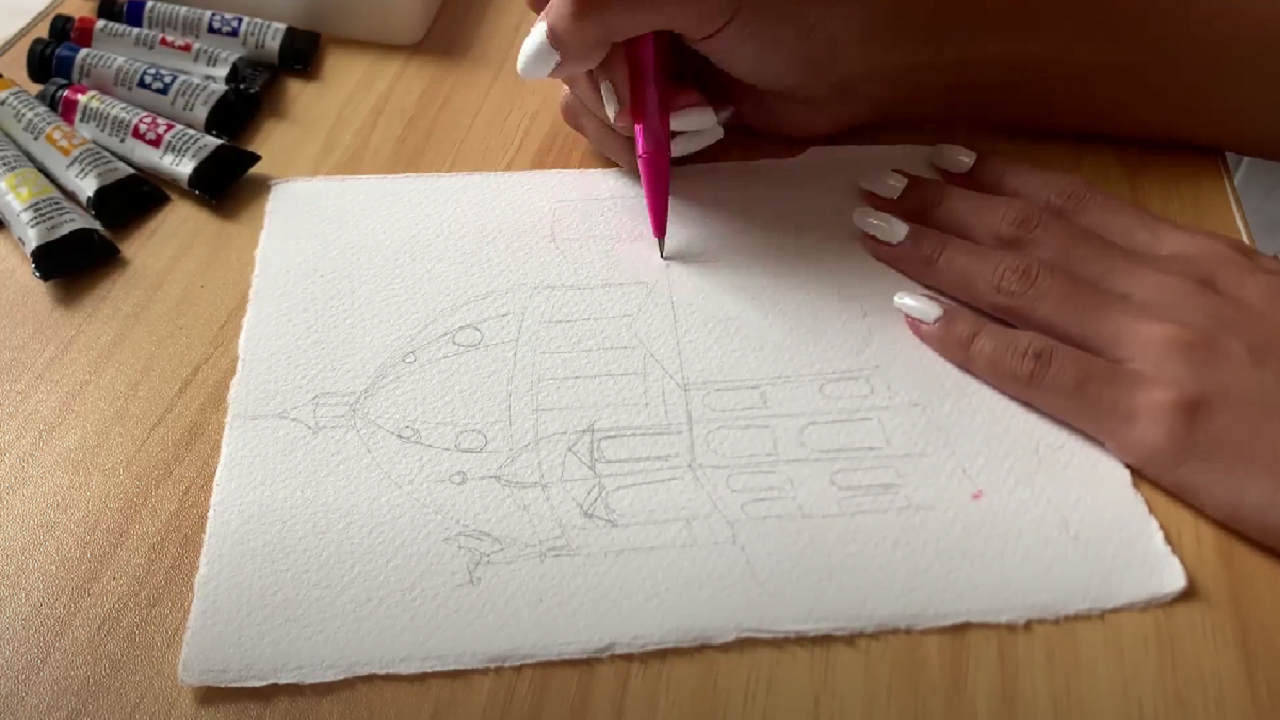
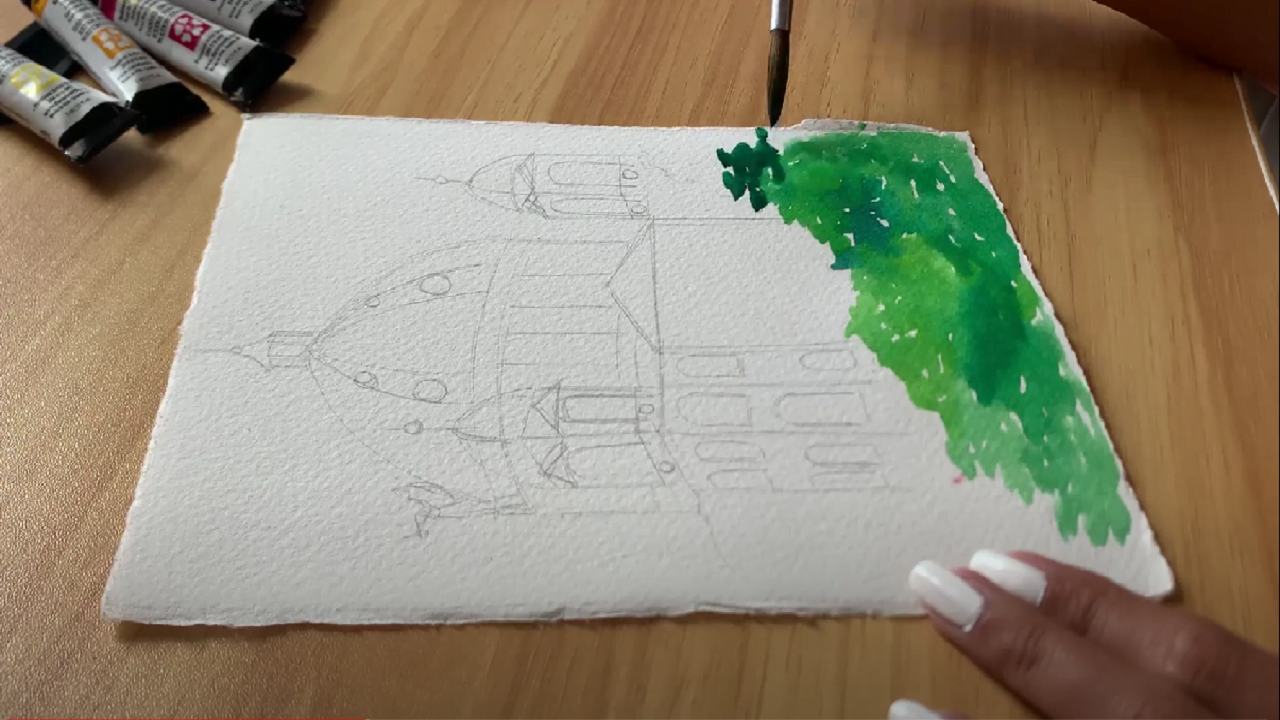
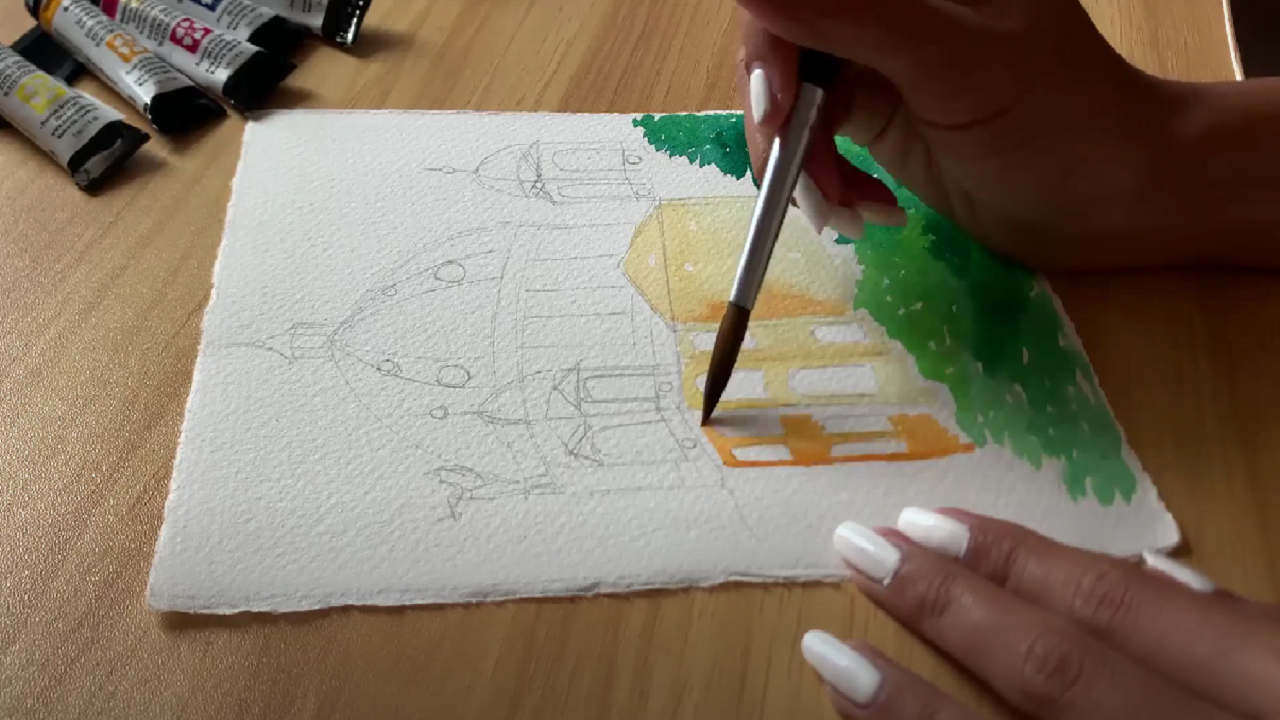
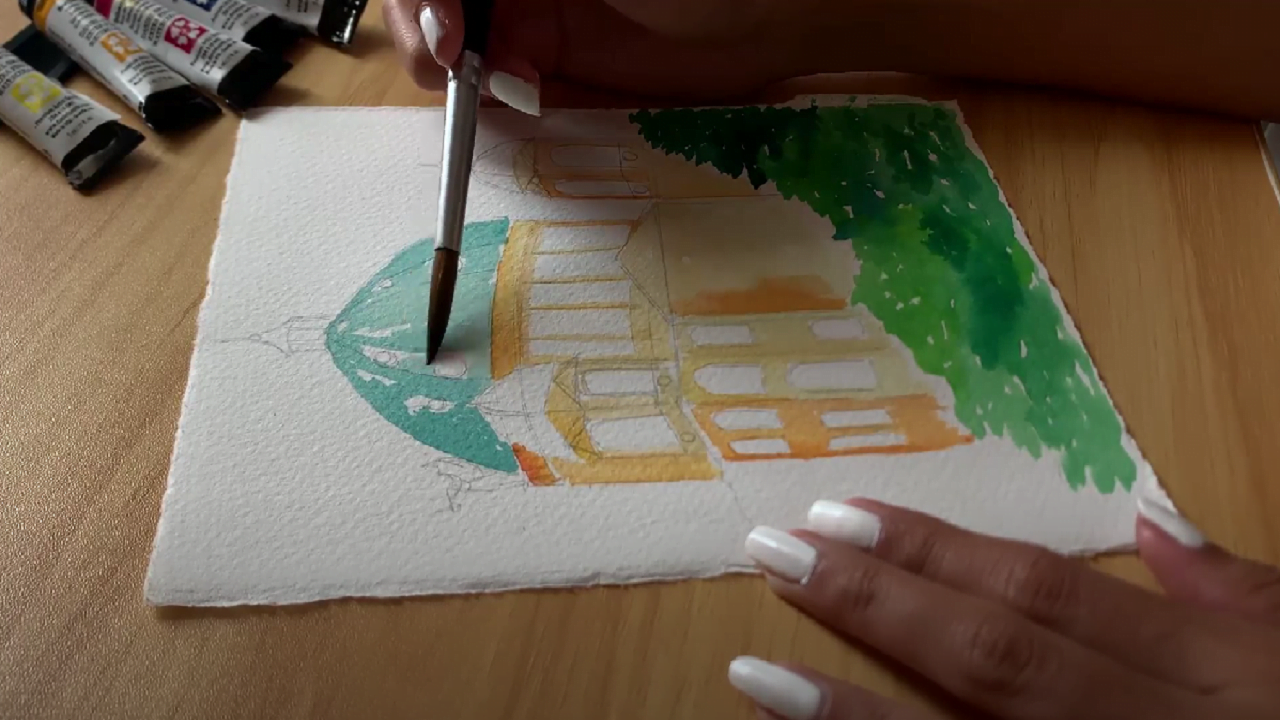
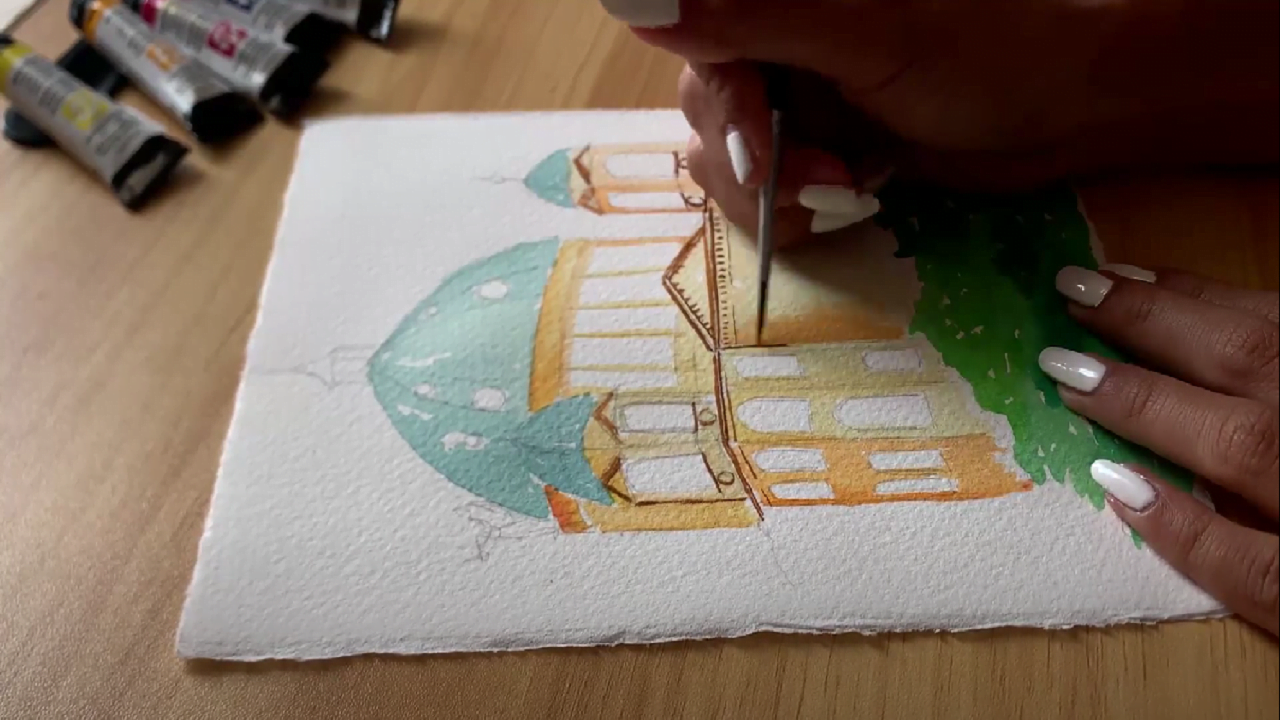
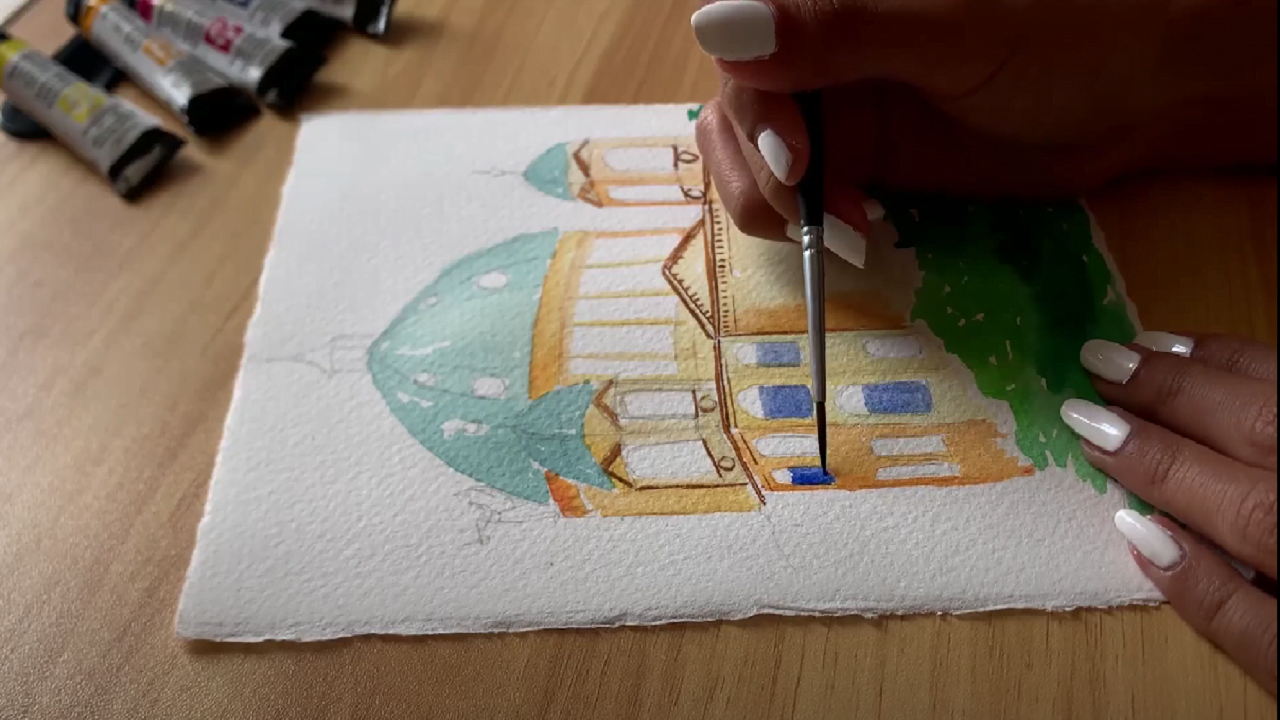
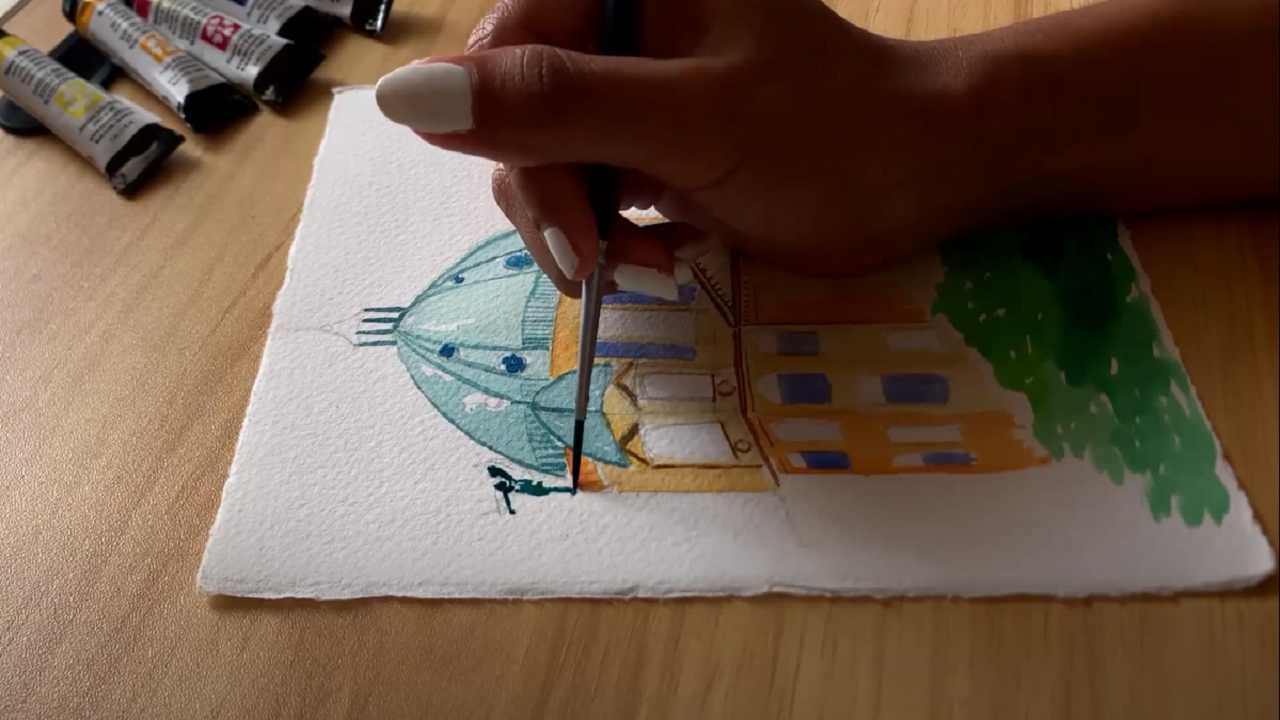
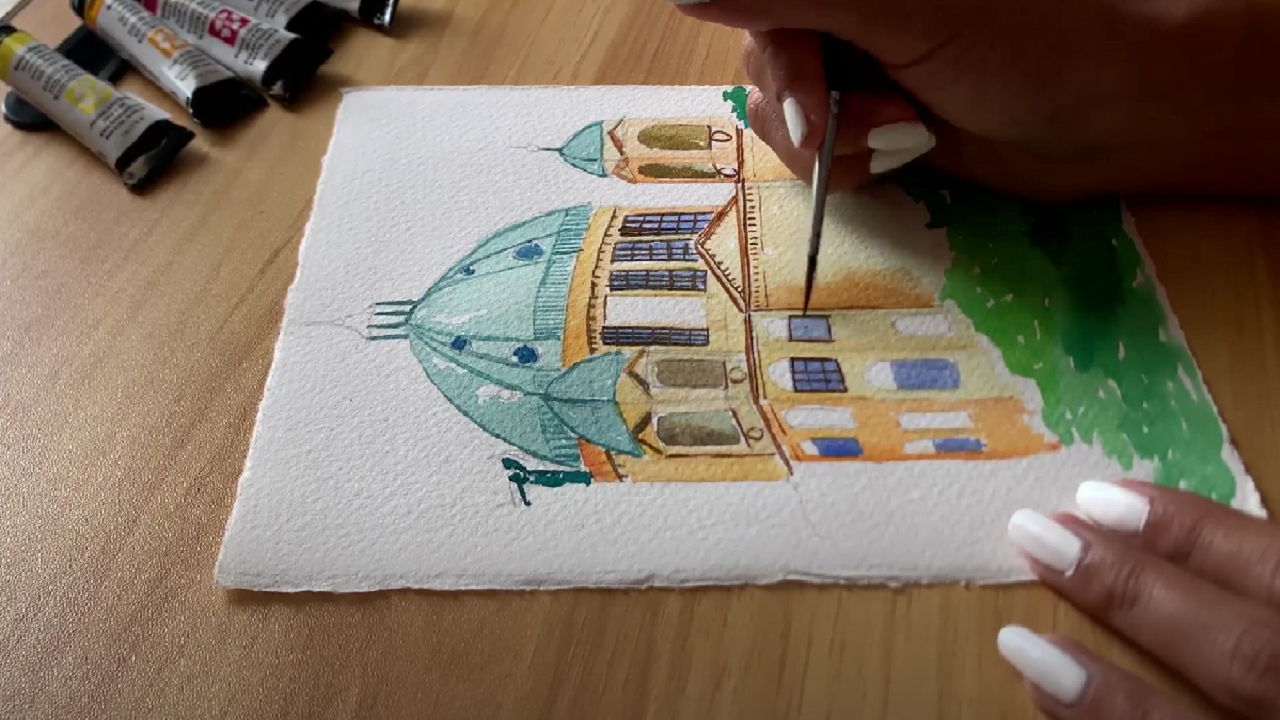
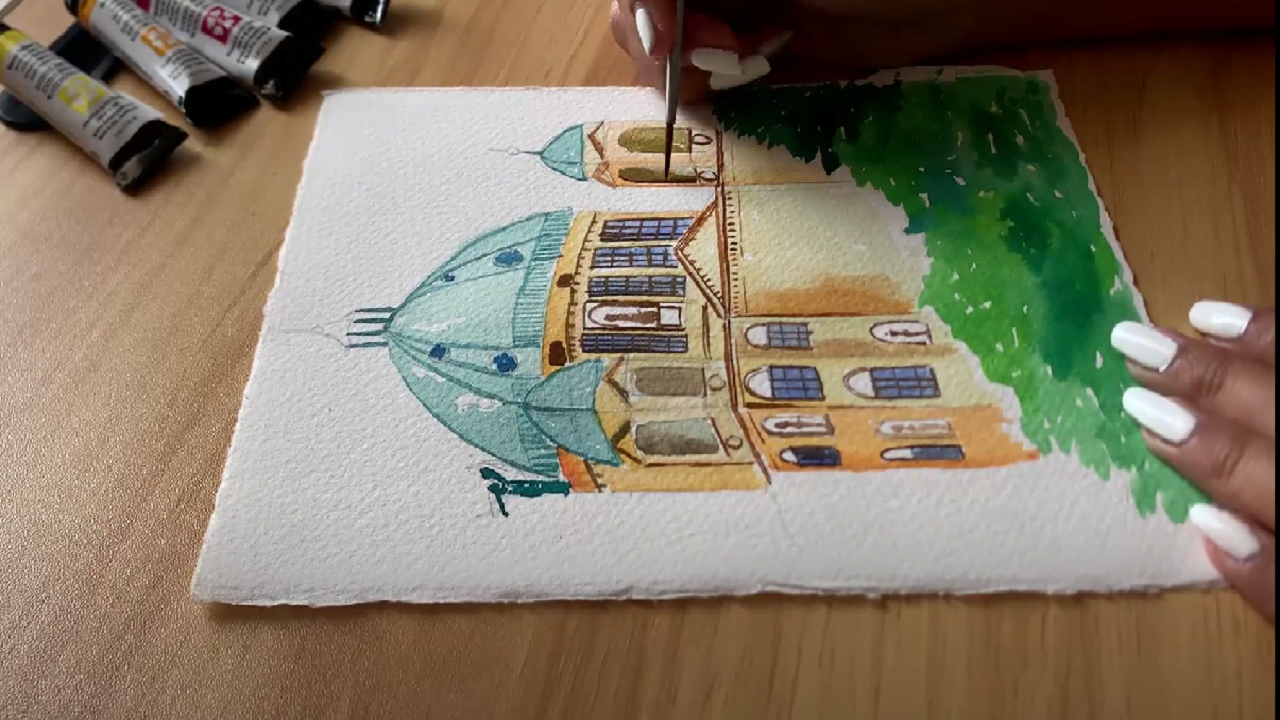
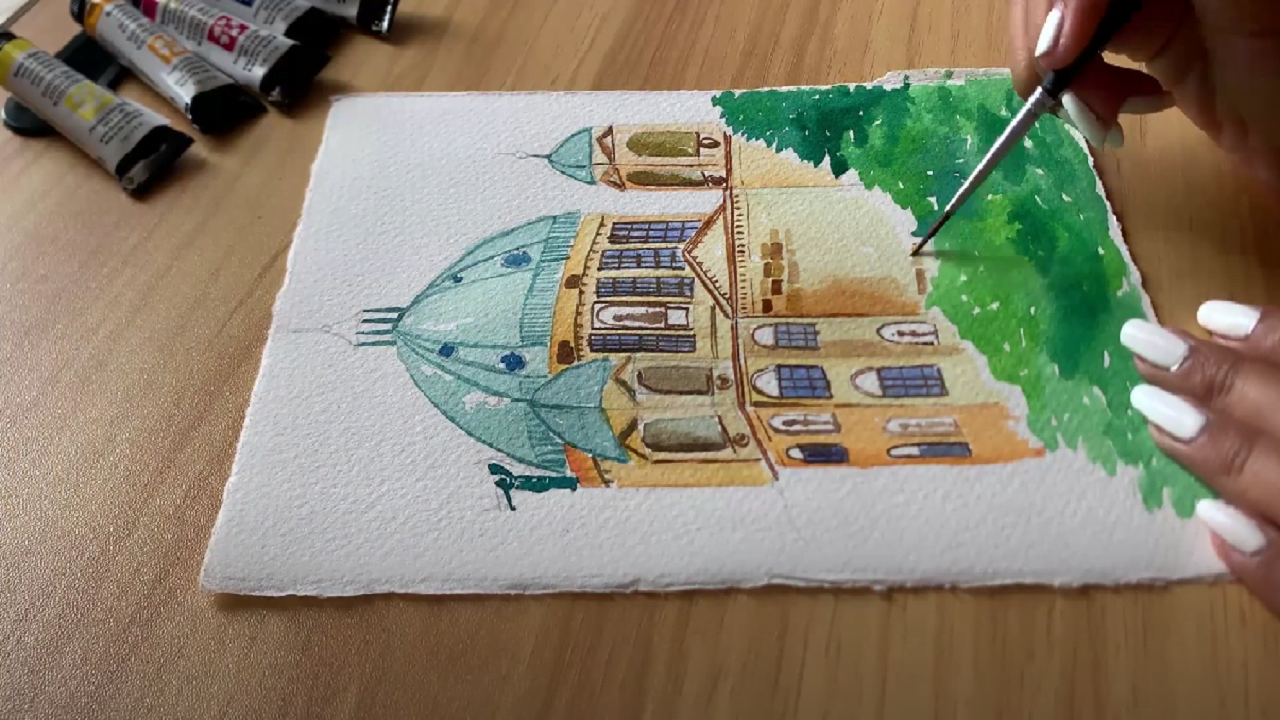

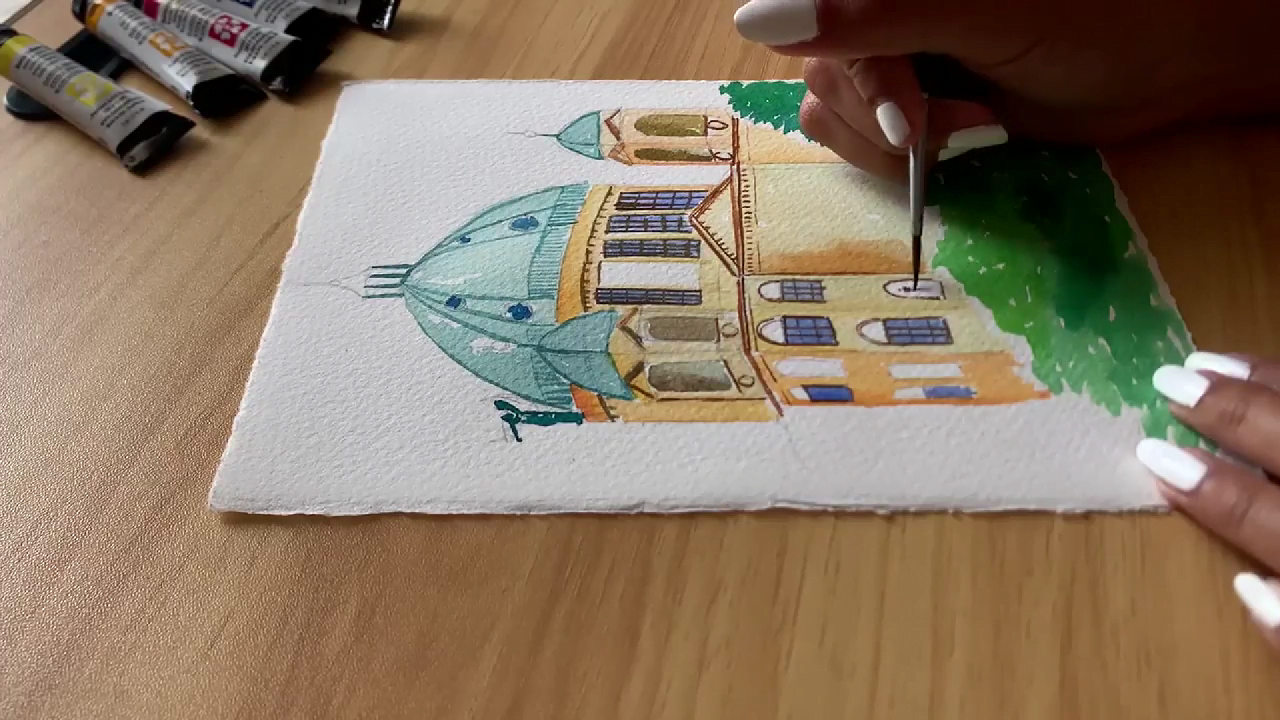

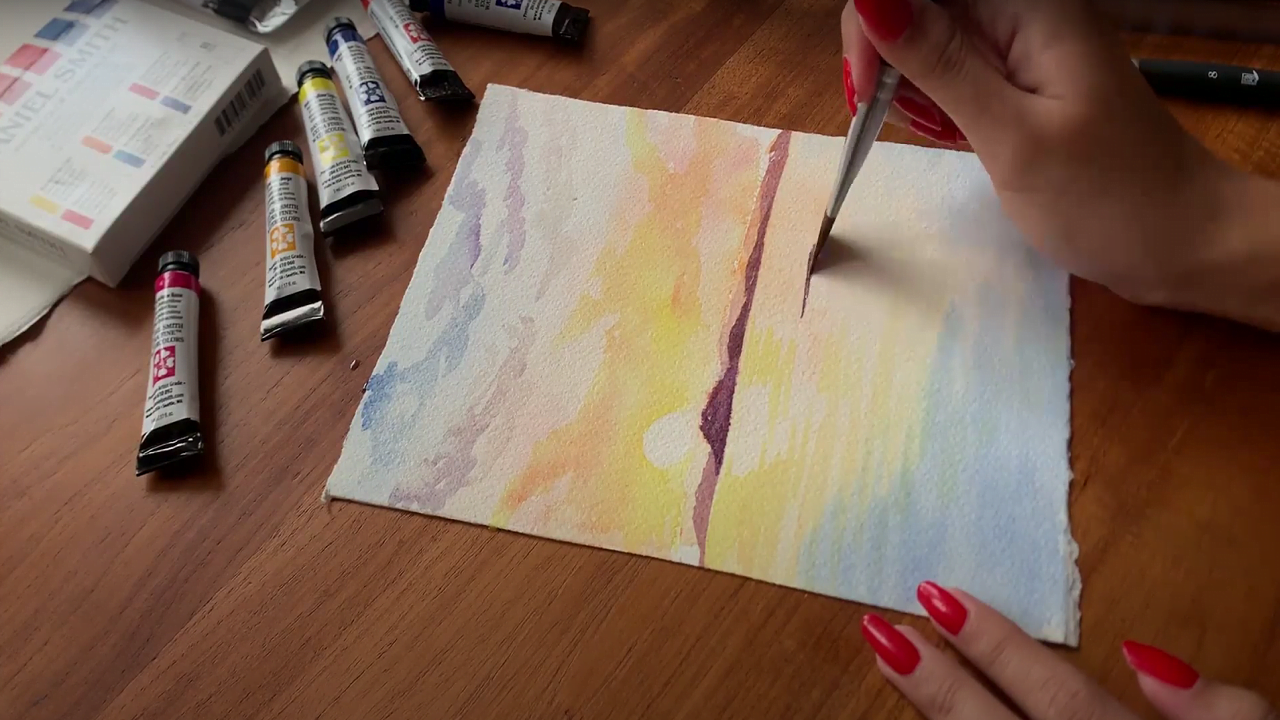
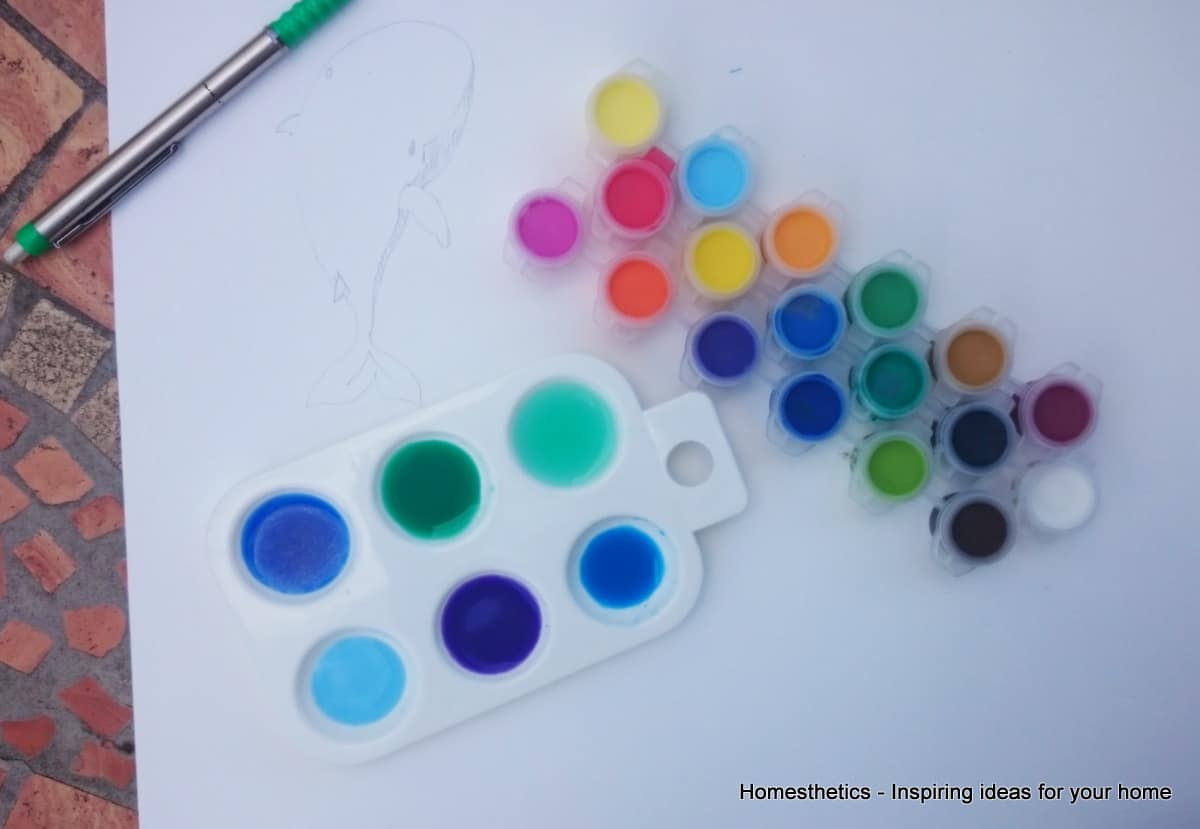
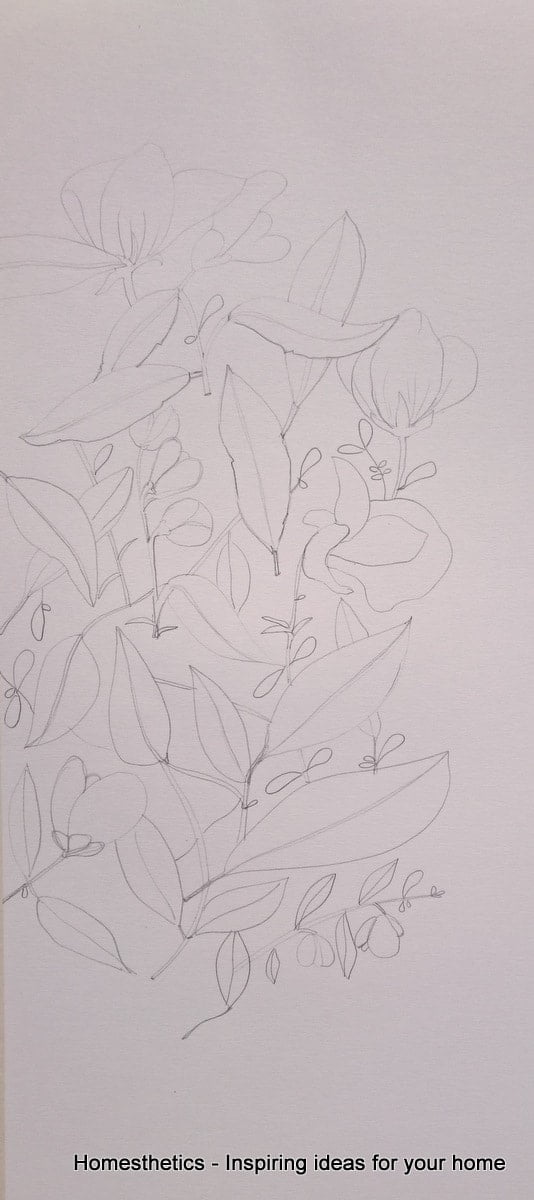

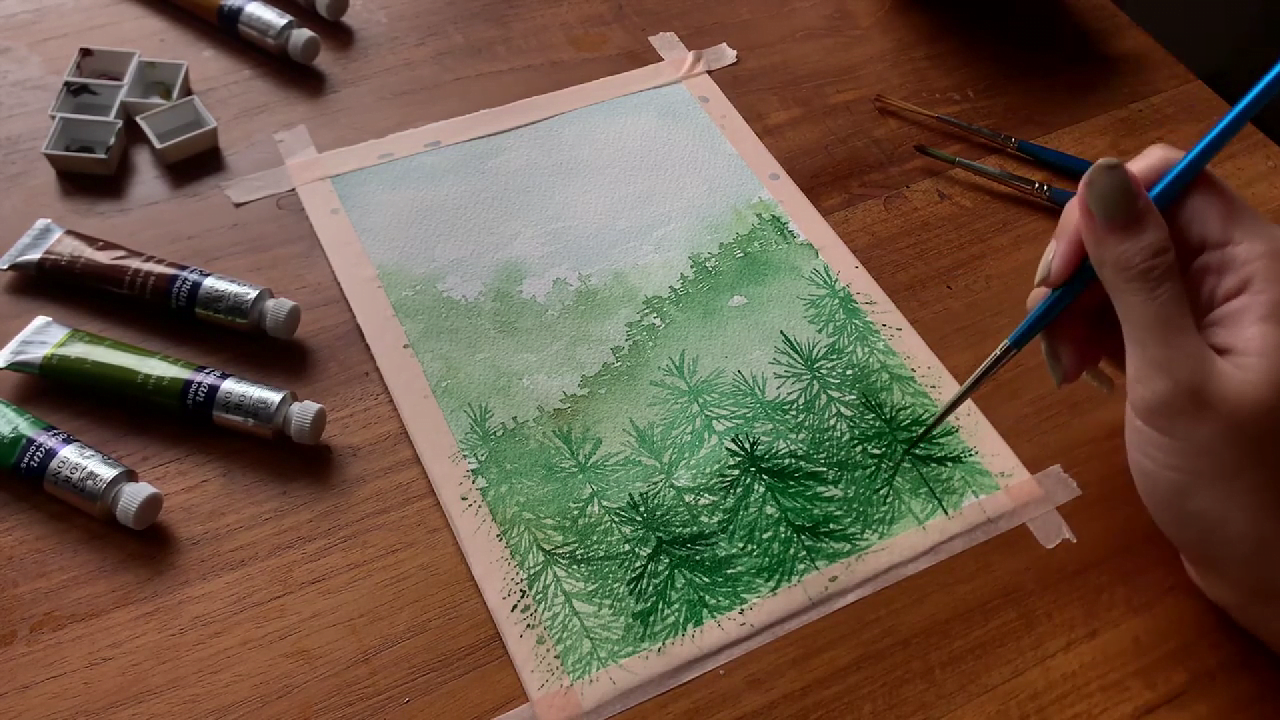
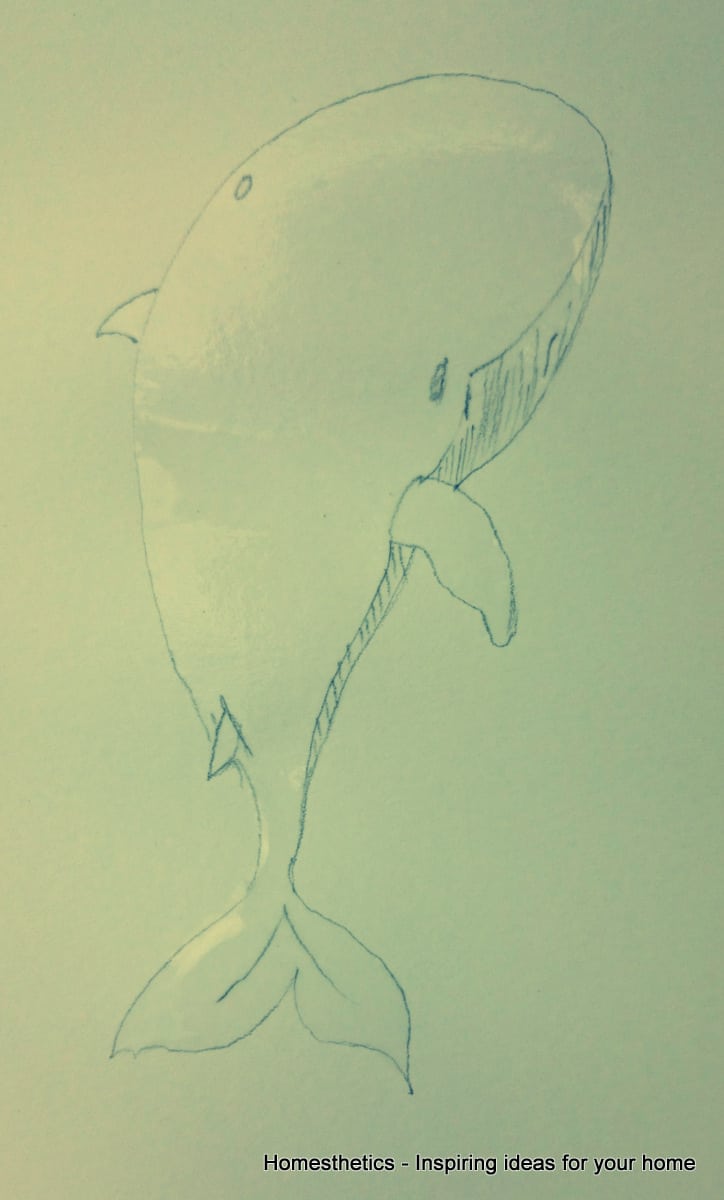
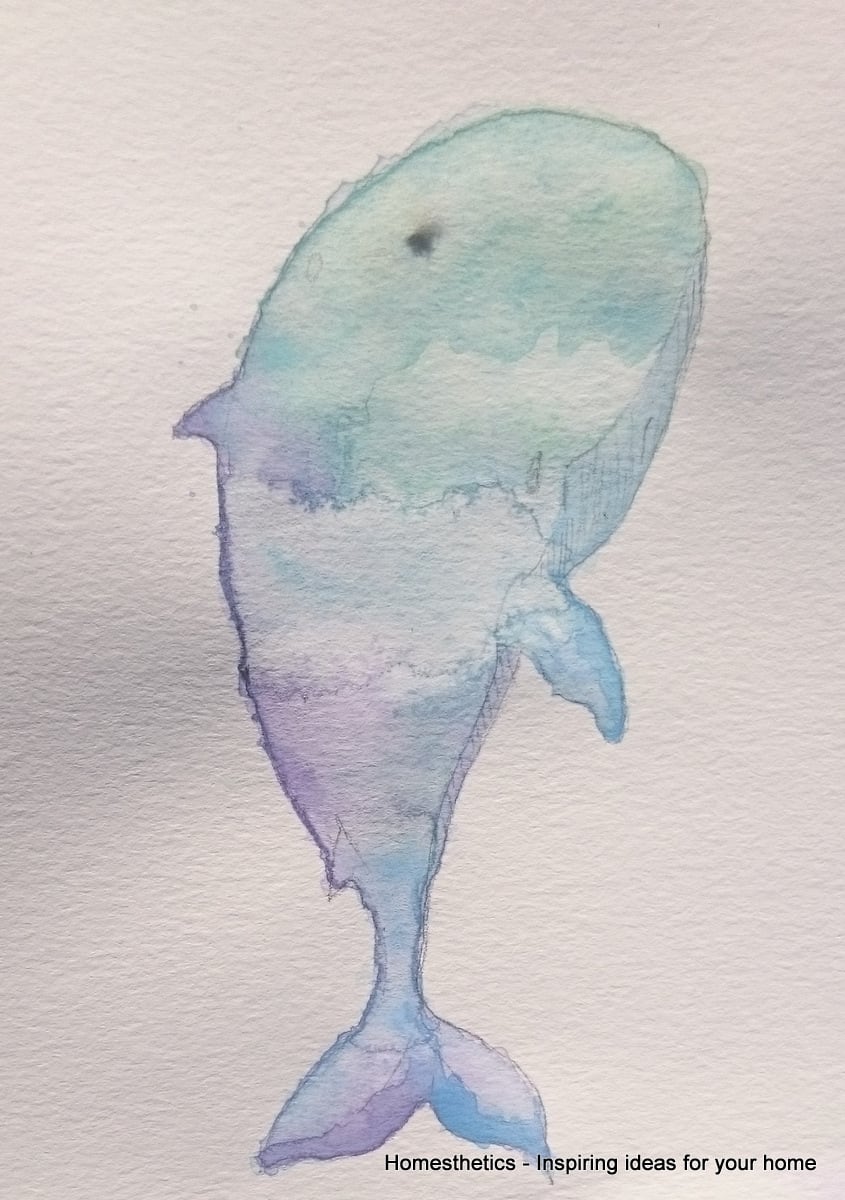
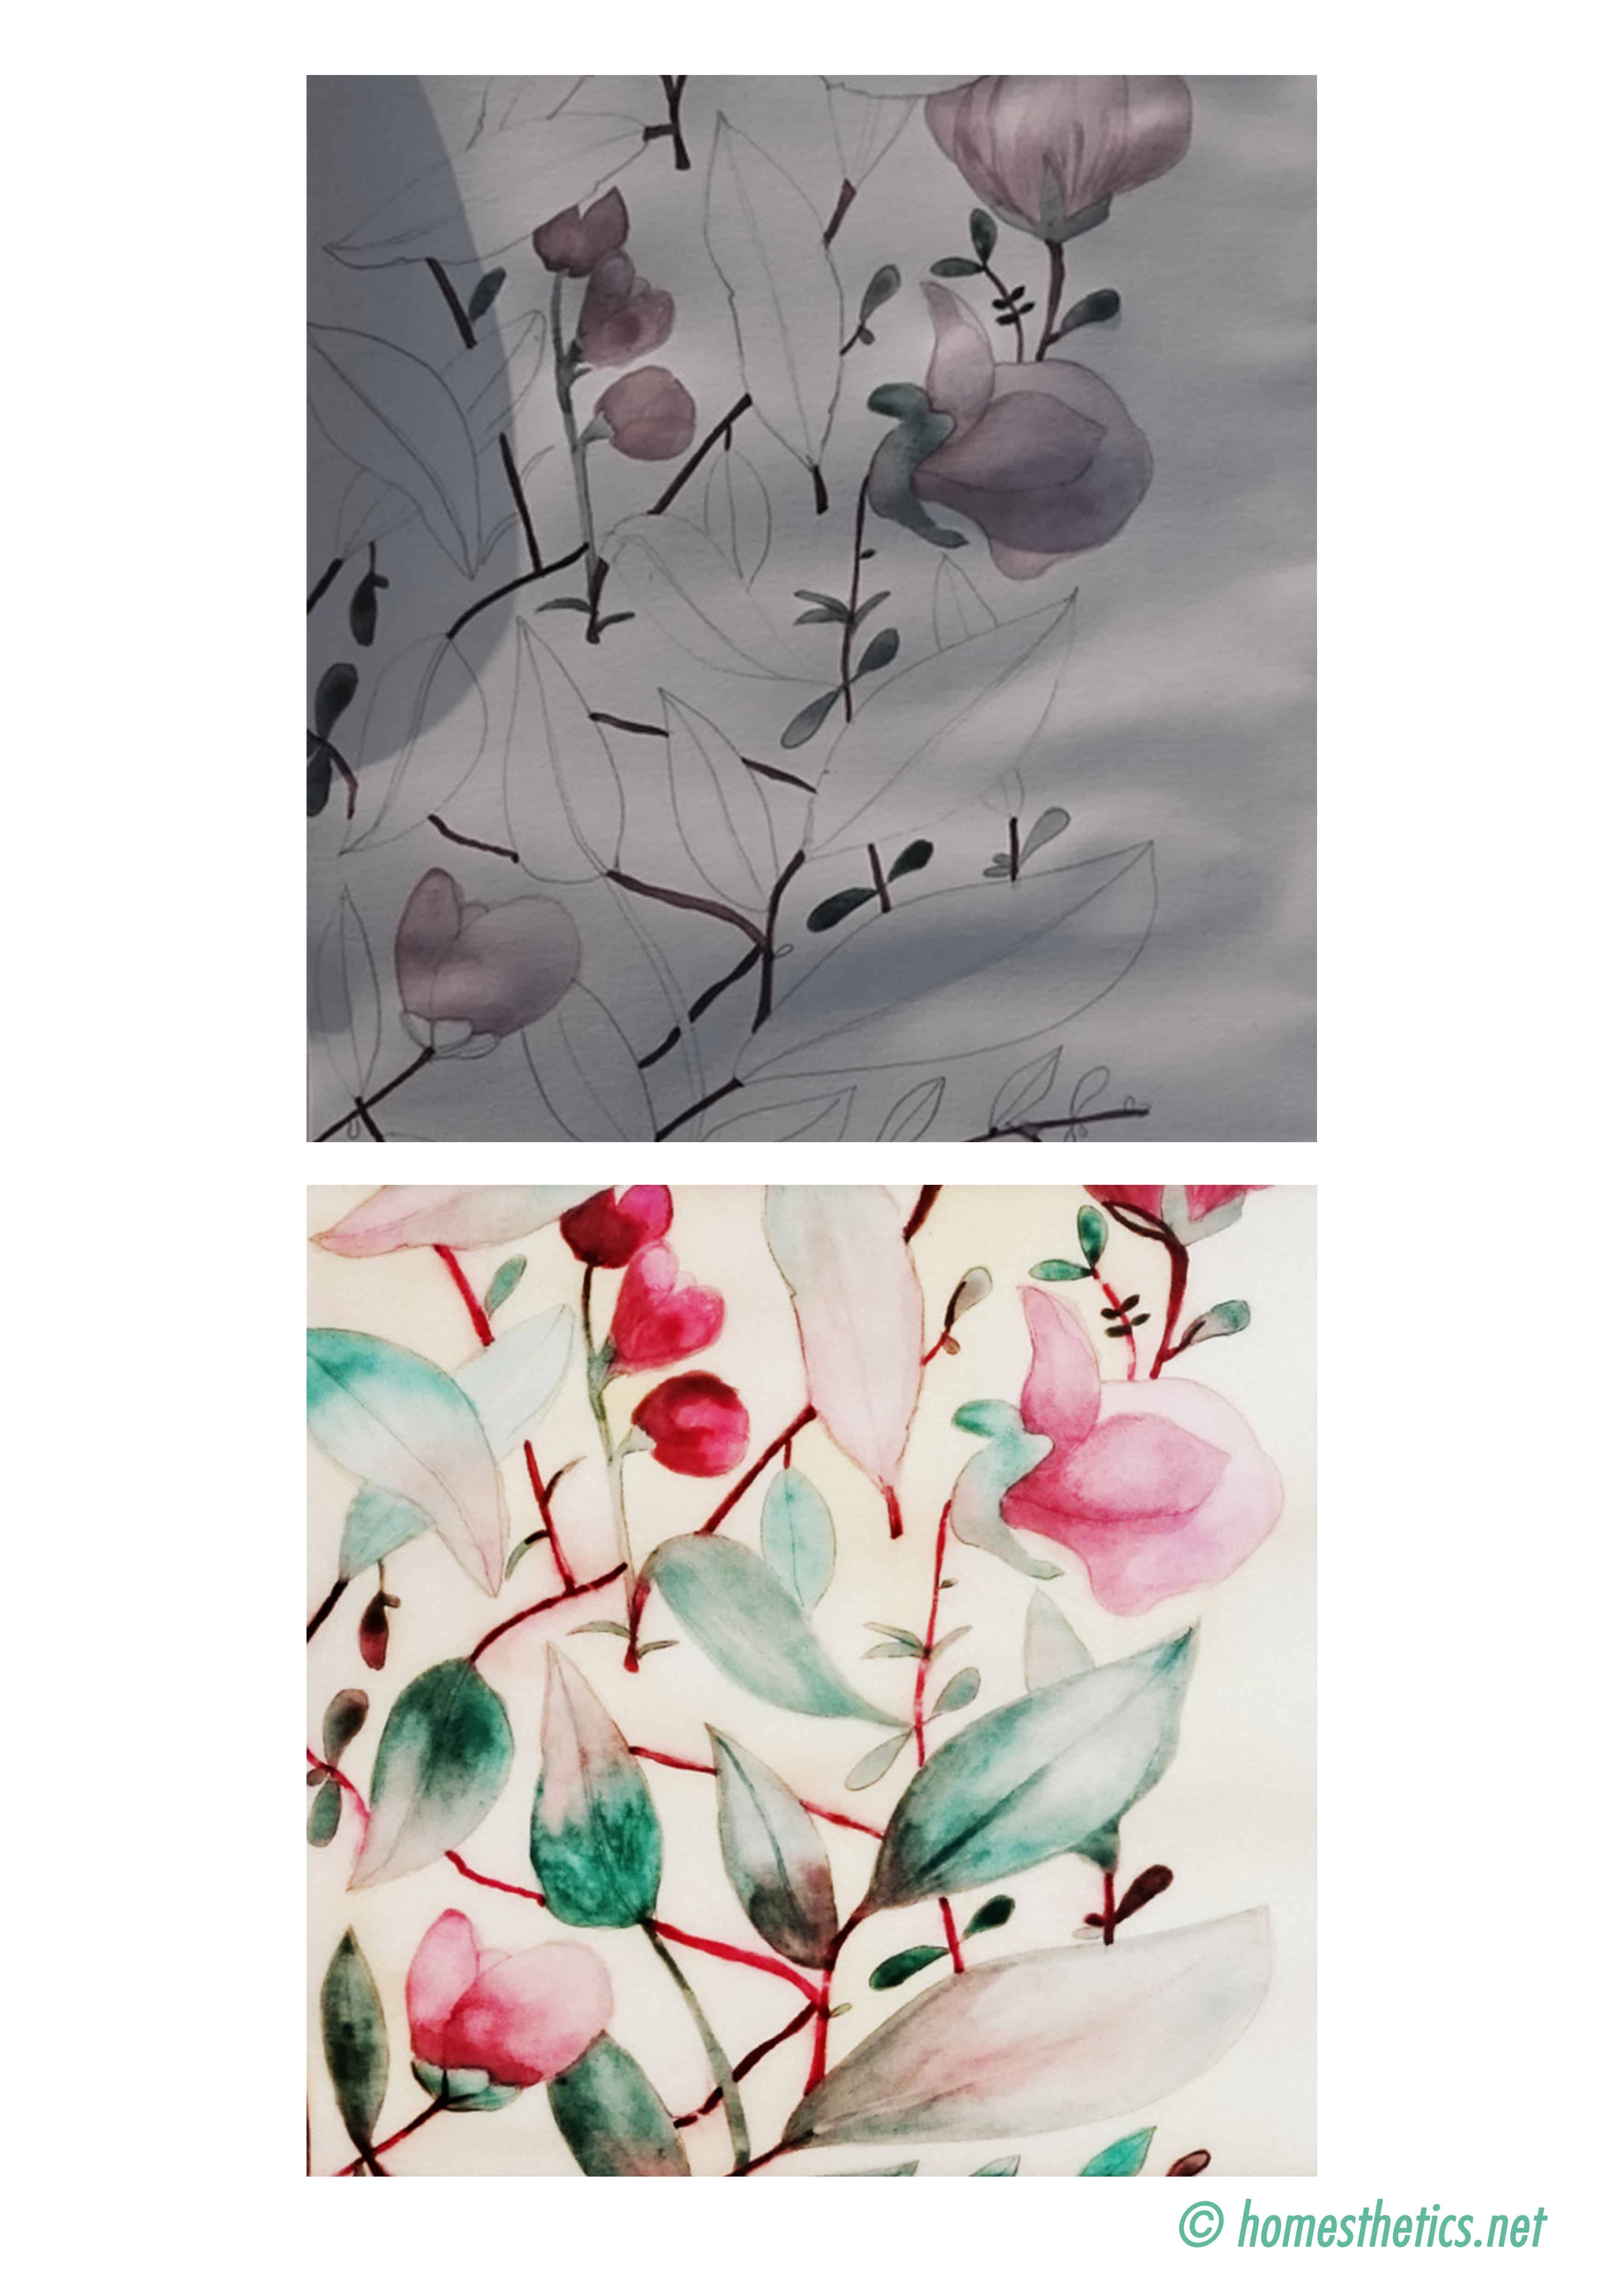
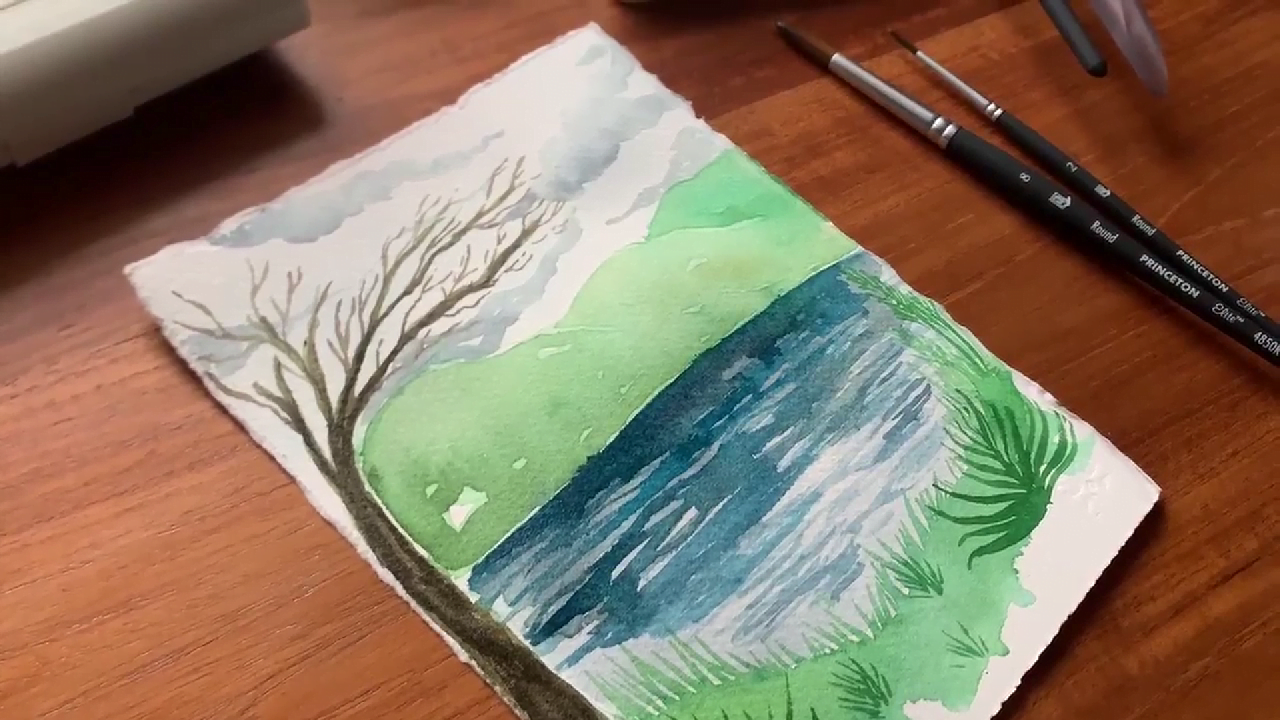


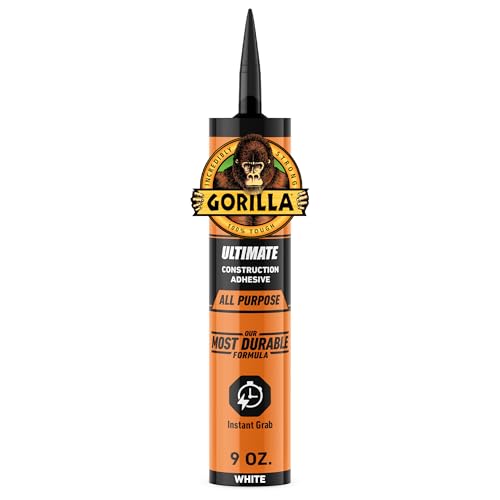
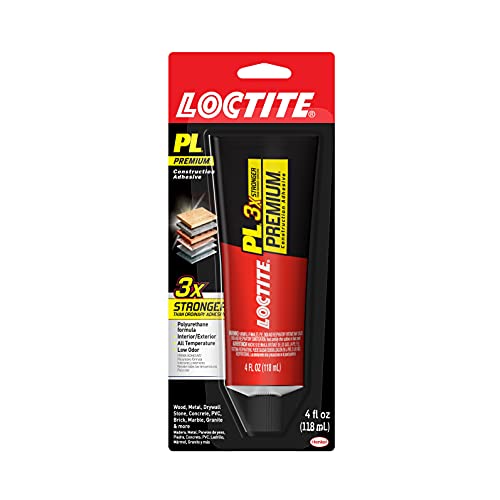


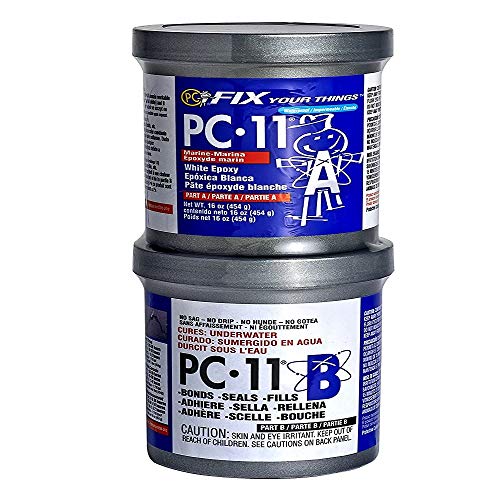
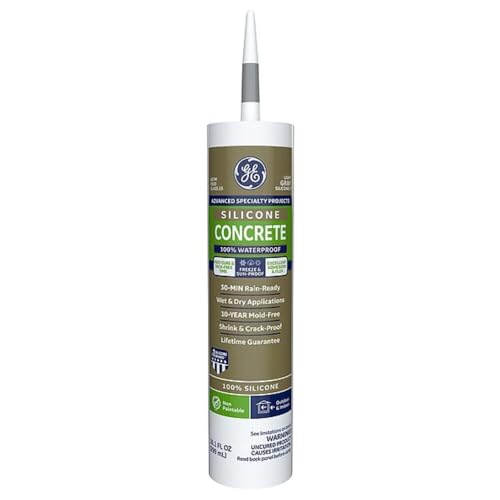


