

Doing so ensures that they are protected from mold, discoloration, or insect infestation. Also called grain moisture meters, they are available in two types: handheld and tabletop. Both have their unique perks and come with preset calibrations; nevertheless, it’s best done manually.
As an essential piece of equipment for landowners, a corn moisture tester also comes in handy for use in processing facilities and restaurants. Whether it’s a handheld unit or a bench tester, it offers a variety of features that greatly aid in the farming process. This is why it’s important to choose the right one.
When the market is teeming with a plethora of options, the task of selection can be a difficult one. In order to help you out, we’ve compiled a list of the 11 best products available right now.
So, without further ado, let’s dive right in.
Listed below are the 5 best corn moisture meters from our list:
- Farmex MT-16 Grain Moisture Tester. Farmex MT-16 Grain Moisture Tester offers a direct readout for 16-grain varieties, it's ideal for gauging moisture levels of fields essential for drying before selling grains; its adjustable scales match local elevators enhancing accuracy and speed of results further with its high-frequency capacitive circuit.
- AMTAST Grain Moisture Meter. AMTAST Grain Moisture Meter is designed with 16 grain codes for a wide range of grains giving accurate temperature and moisture readings; its multi-point calibration prevents errors and ensures the streamlined functioning of this energy-efficient and durable device.
- General Tools MMD7NP. General Tools MMD7NP checks for areas damaged by seepage in softwood, hardwood or any other construction material, ensuring work surface safety; its audio-visual alerts for leak location, auto-calibrating features, and in-mold prevention mechanism further enhance its utility.
- Huanyu Multifunctional Fibre Moisture Meter. Huanyu Multifunctional Fibre Moisture Meter works on various materials like wood fiber, grains, straw, bran, and husk with its deep probe sensors; it offers stable performance due to its automatic temperature and humidity compensation technology, making it an optimal choice for on-spot detection.
- Agratronix Coffee Moisture Tester Model 08150. Agratronix Coffee Moisture Tester Model 08150 is suitable for various types of coffee beans due to its unique multilingual, backlit display and multiple modes of calibration; offering an excellent working moisture range between 7%-40% for green coffee, 8%-40% for parchment coffee, and 4%-20% in cocoa.
Here's the list of the 11 best corn moisture meters that will help you accurately measure the moisture content of your corn crop.
1. Farmex MT-16 Grain Moisture Tester - Best for Operational Efficiency
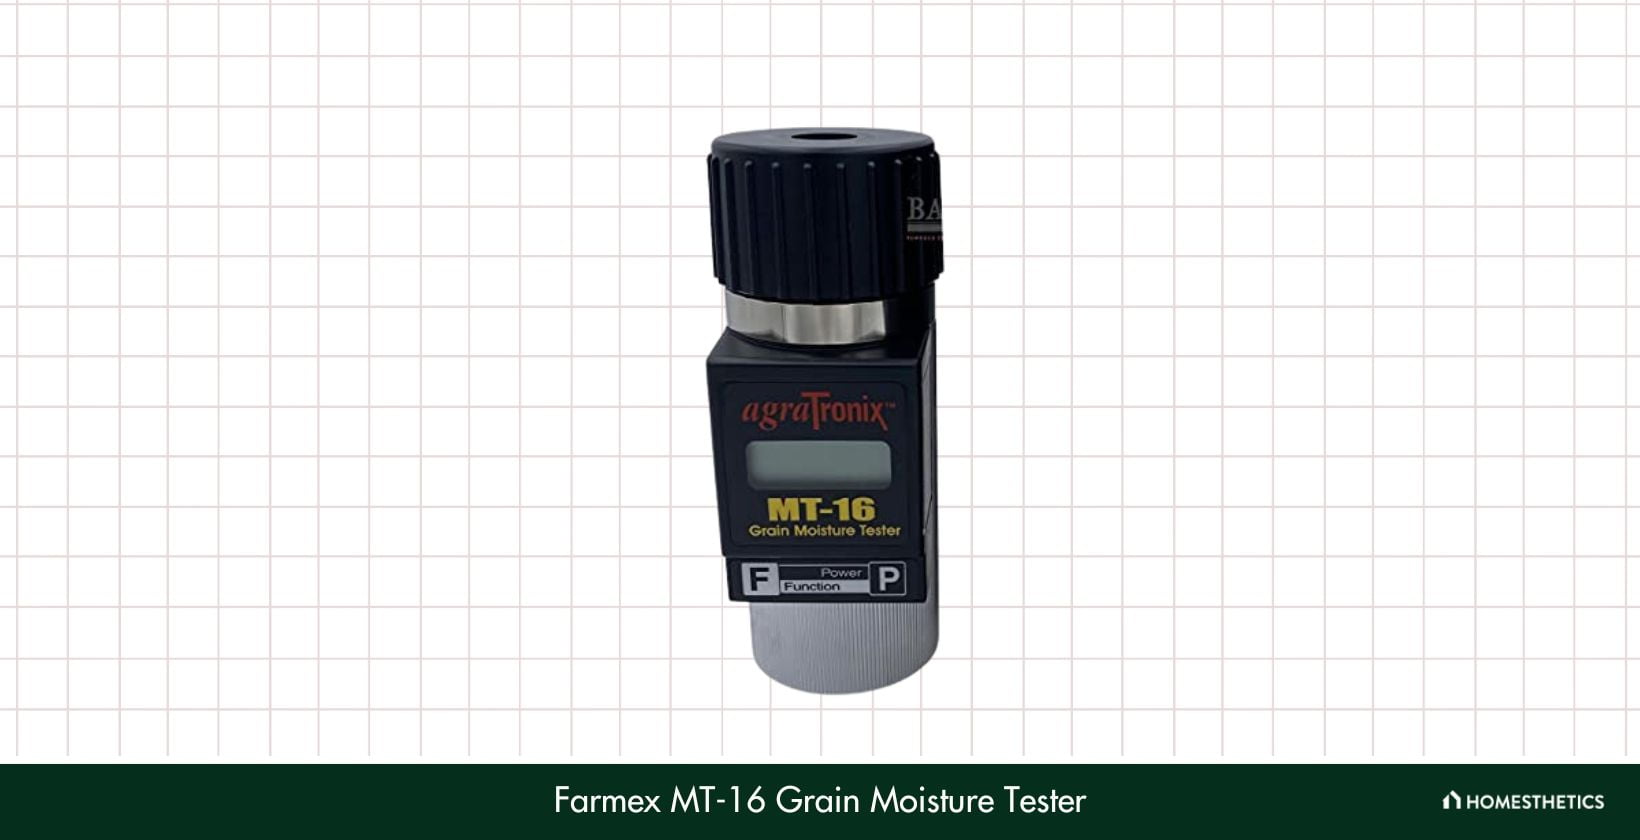
First on the list is an excellent moisture tester from Farmex. As one of the leading brands in the market, Farmex has been a manufacturer of reliable agricultural machinery since its inception. Fitted with a number of high-functioning features, the MT-16 lives up to the users’ expectations and promises to deliver.
There are a number of reasons why this product is among the best ones available out there. High in accuracy, versatility, and operational efficiency, it makes for a worthy companion to any landowner. The tester offers direct readout for 16 varieties of grains including barley, rye, sunflower, rice, and wheat, in addition to corn. Useful, right?
Moreover, it is ideal for gauging the moisture levels of a field which allows for ease of drying before selling the grain. With each scale easily adjustable to match the elevator used locally, the results are accurate and timely, which significantly simplifies the operation. This is further augmented by the high-frequency capacitive circuit.
Last but not least, Farmex’s moisture tester has an ergonomic design and is the size of an ice cream cup. Also, at 2.8 pounds, it is one of the lightest units on the list and comes with a sturdy shoulder strap and a 2-year warranty. Overall, it is a long-lasting device that leaves little space for complaints.
The only issue with the moisture tester is that it is difficult to calibrate, which may not suit users who are new to such devices. However, Farmex has a capable and hands-on customer support team that is bound to help you in case of such issues.
What We Like
- Lightweight and long-lasting
- High operational efficiency
- Precise readings
What We Don't Like
- Difficult to calibrate
2. AMTAST Grain Moisture Meter - Best for Accuracy & Versatility
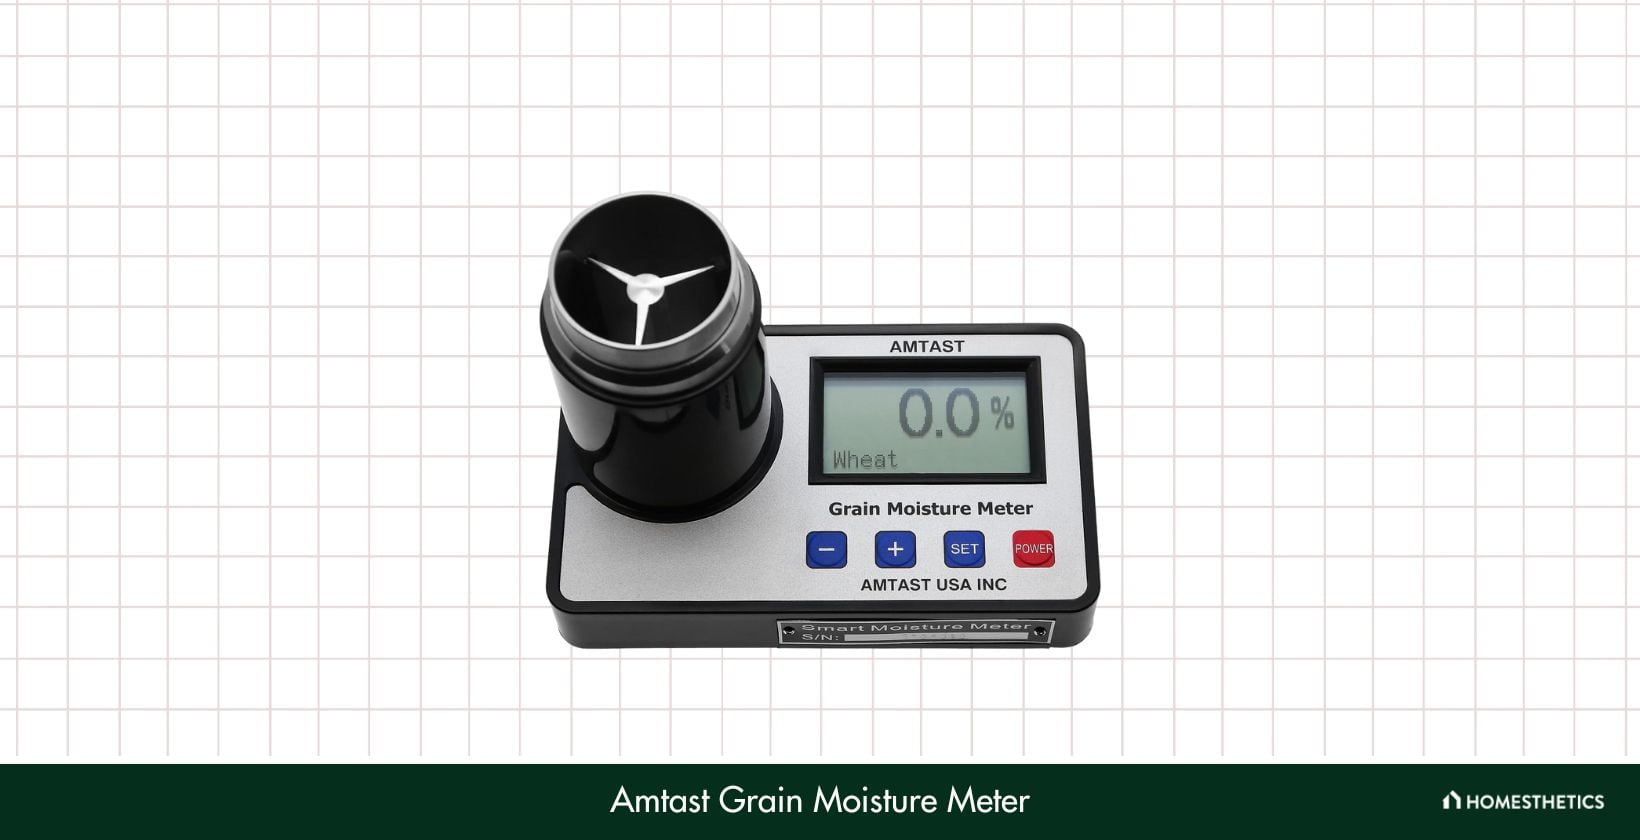
Next up, is an equally capable moisture tester from AMTAST. This particular model boasts a state-of-the-art design that allows for greater efficiency in performance and also makes it easy to use. Lightning-fast and convenient, the unit makes for a smart option for the most discerning buyer.
First and foremost, it is the design of the moisture tester that impressed us the most. It comes with 16-grain codes, each for a different variety. So, it can be used for wheat, maize, Indica rice, Japonica rice, rice, soybean, black bean, coffee, rapeseed, sorghum, sesame, mung bean, black rice, millet, fragrant rice, and red bean.
In terms of operational efficiency, it is quick and convenient and also features a direct display of precise temperature and moisture levels. The data is available in two units - Fahrenheit and Celsius, so it may be easily followed. Such measures enable the user to simplify the process and make it a cakewalk even for beginners.
Lastly, thanks to the multi-point calibration, the unit functions in a more streamlined manner and leaves little room for errors. In case they occur, the tester offers an impressive range of error corrections to tackle that. Energy-efficient and durable, it makes use of automatic shutdown to conserve power. In our books, AMTAST’s product is a winner.
To a large extent, the moisture tester is devoid of shortcomings. However, the only slight drawback is that it’s unable to take measurements on parchment. On the other hand, it must be noted that for its price, the device does an excellent job of providing accurate results and so, it hardly remains a disadvantage.
What We Like
- Wide coverage of grain varieties
- High accuracy of readings
- Energy-efficient and durable
What We Don't Like
- Unable to take measurements on parchment
3. General Tools MMD7NP - Best for Grain Variety Coverage

Our next recommendation is a moisture tester from General Tools, another trustworthy brand that has established quite a name in the market. The MMD7NP is a high-functioning device that is built to offer a wide range of features and specifications. Efficient and timely, it is a tool that is as high on utility as it is on durability.
Right off the bat, General Tools’ product impressed us with its moisture-detecting capabilities. Be it softwood, hardwood, or any other construction material such as masonry and drywall, it does an excellent job of checking for areas damaged by seepage. As a result, work surfaces are protected especially well given the lack of pins on the unit.
Additionally, the tool comes with audio-visual alerts for easy detection of sources of leaks. The high-pitched tones offer an accurate reading of the exact location, while the tri-colored LED bar indicator enhances the process further. Also, it has an impressive reach into the surface and can detect moisture levels deep inside.
High on operational efficiency and auto-calibrating, this moisture tester also comes equipped with a number of useful features. Among them, the auto-power-off function, HOLD button, and low battery indicator stand out. Last, but not the least, the in-mold prevention mechanism examines suspicious water stains as well, just as easily.
The deep reach of the tester is prone to occasional malfunction. However, this is a rare occurrence and in case of such an issue, we recommend getting in touch with the company’s customer support team as they are ever ready with practical and timely solutions.
What We Like
- Works on a variety of surfaces
- High-functioning and precise
- Impressive depth reach
What We Don't Like
- In-depth reading capacity prone to malfunction
4. Huanyu Multifunctional Fibre Moisture Meter - Best for Surface Moisture Detection
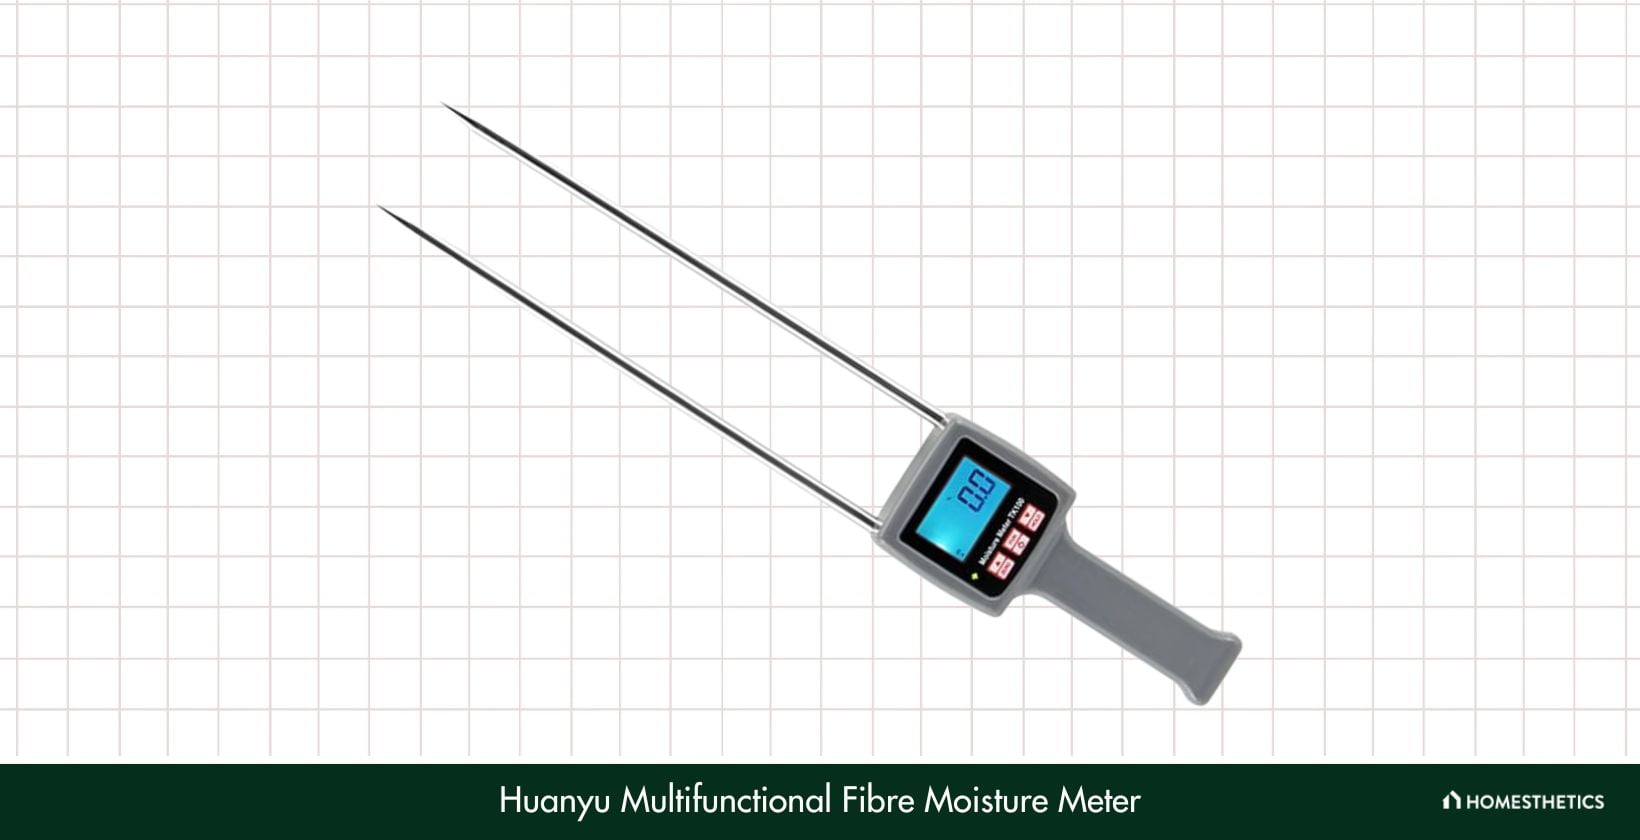
Huanyu is a leading brand in the agricultural machinery industry, so there’s no doubt that its product is a prominent feature on our list. This multifunctional moisture tester from the company makes for an impressive addition to your toolkit with its efficient and accurate functioning. Optimized to offer the best results, this is a product worth checking out.
There is no dearth of reasons why one would be impressed by the moisture tester right away. First up, its versatility deserves a mention. Equipped with extensive probe suits, it works on a variety of materials such as wood fiber, grains, straw, bran, and straw. While at it, the device reaches deep into the material thanks to its probe-like sensor.
In addition to this, the tool comes with automatic temperature and humidity compensation technology which results in stable performance. Further, it offers timely measurements with a high degree of accuracy. And when we say time-efficient, we mean that the entire operation takes less than a minute!
Lastly, the product is light in weight and a breeze to use. Compact in size and with strong anti-interference capacity, it’s especially useful for on-spot detection. This is further augmented by the backlit LED display, energy efficiency, and customizable qualities of the tester. All in all, Huanyu’s device certainly makes a good case for itself.
The moisture meter is nearly flawless, in fact, there are no functional errors at all. Our only grievance is that it is quite highly-priced and may not suit all budgets. However, it’d do well to mention that given all that’s on offer, it is among the best ones in its range and makes for a worthwhile purchase.
What We Like
- Versatile compatibility
- Energy and time-efficient functioning
- Lightweight, compact, durable
- Easy operation
What We Don't Like
- Slightly expensive
5. Agratronix Coffee Moisture Tester Model 08150 - Best for Versatile Material Compatibility
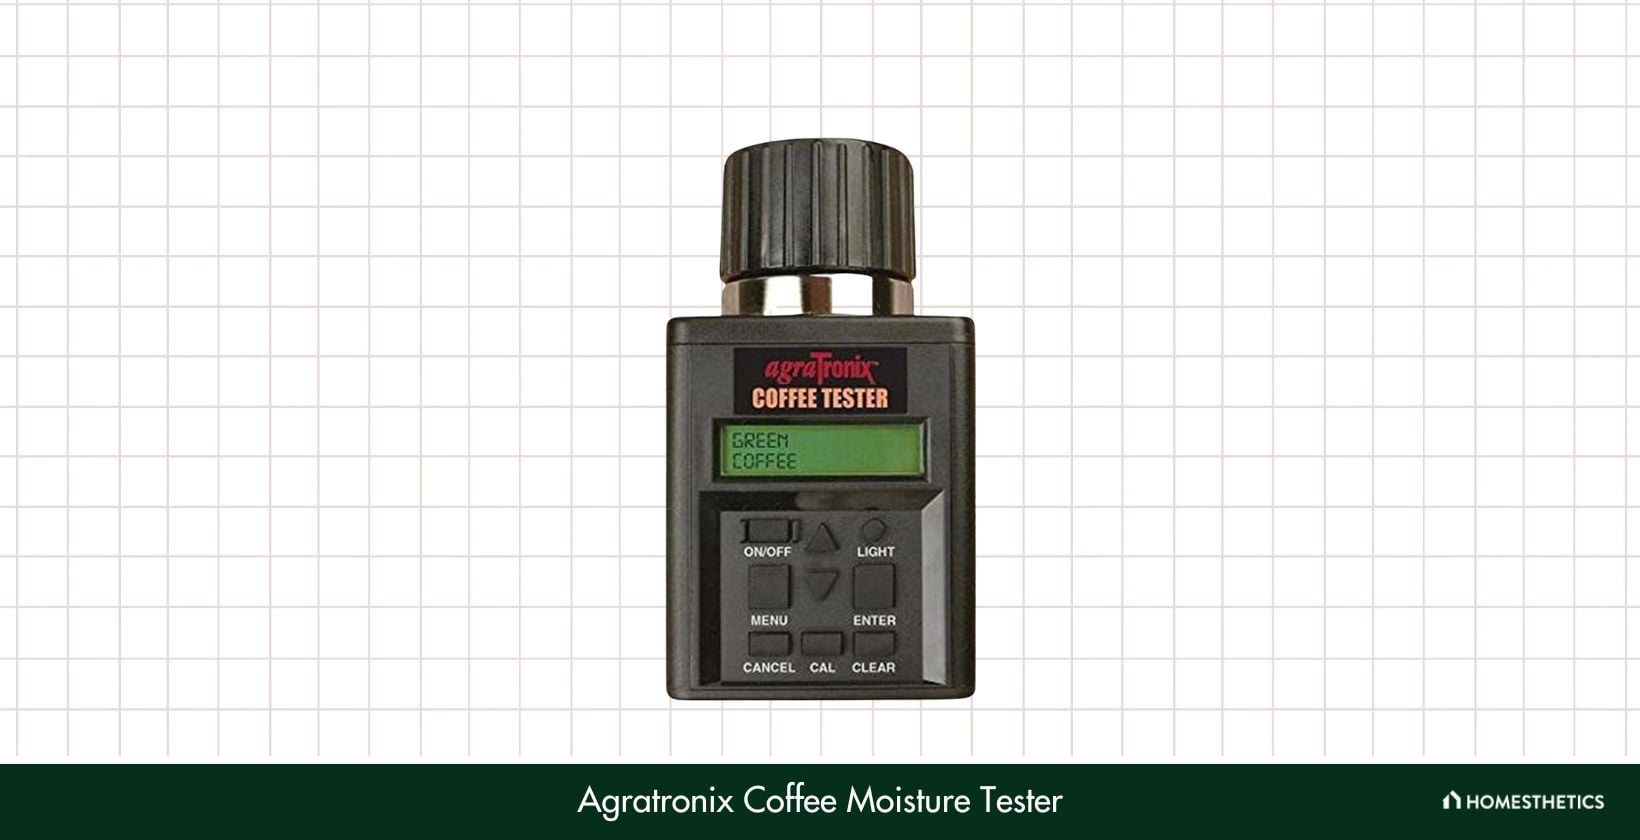
We’re almost halfway through our list of recommendations, and it’s high time Agratronix makes an appearance on it. The coffee moisture tester from the brand is an excellent device that offers a number of features and it also does a good job of providing precise results. Read our review of it to learn more.
The moisture tester from Agratronix is fitted with attractive features that make the process exceptionally efficient, timely, and accurate. Suitable for a wide variety of beans, it is also easy to operate, portable, and features a unique design including a multilingual, backlit display and multiple modes of calibration such as basic and advanced.
Moreover, the unit is also suitable for users at any level of expertise as it’s convenient and easy to operate. As a handheld tester, it can be used for various types of coffee beans and offers precise results, significantly more than scoop testers.
Speaking of which, the specifications in this regard are certainly impressive. In terms of moisture ranges, it works between 7% to 40% for green coffee, 8% to 40% for parchment coffee, and 4% to 20% in cocoa. Lastly, the device features a high-resolution display and requires two 9V batteries for operation. Simple and nimble, Agratronix is one of our best bets.
Although there are no major red flags in this moisture tester from Agratronix, it does take a while to be delivered which may not sit well with buyers. However, we’d suggest getting in touch with the company and/or the delivery service in order to resolve such issues.
What We Like
- Functional and streamlined design
- Easy operation
- Adaptable to a wide range of beans and humidity conditions
What We Don't Like
- Delivery may take time
6. AMTAST Water Activity Meter

Midway through the list, we have another product from AMTAST, the water activity meter. This device is adept at taking readings under diverse conditions and indicates the amount of free water in the state of food balance, the possibility of microbial activity, and the level of chemical enzymes. As you can tell, it looks at some of the most vital aspects of grains.
It’s not often that we come across a device with such a sophisticated level of functioning and one that is also easy to operate. However, this moisture tester from AMTAST is capable of measuring the dryness enduring capacity of microorganisms by gauging the water activity of foodstuff. But it also does more!
By doing so, the use of preservatives in packaged products can be greatly reduced, thus increasing their freshness and nutrition. In addition to such functions, the unit is also portable and lightweight. All water activity and temperature readings are displayed together for increased user convenience and it also connects to computers.
Last, but not the least, time efficiency is one of the main advantages of using the device. Not only does it take a mere 5 minutes to measure water activity, but it also offers highly accurate readings of the same. Furthermore, the sensors and readings are fully integrated which allows for streamlined operation.
Although it’s an extremely cost-efficient option, there is one issue that could be cause for concern to users. At times, the data collected is not stable and may need to be verified multiple times. In case such issues persist, however, we’d recommend contacting the customer care team.
What We Like
- Versatile and accurate
- Ensures nutritional quality of grains
- Time and cost-efficient
What We Don't Like
- Readings need to be verified
7. AMTAST Integrated Grain Moisture Meter
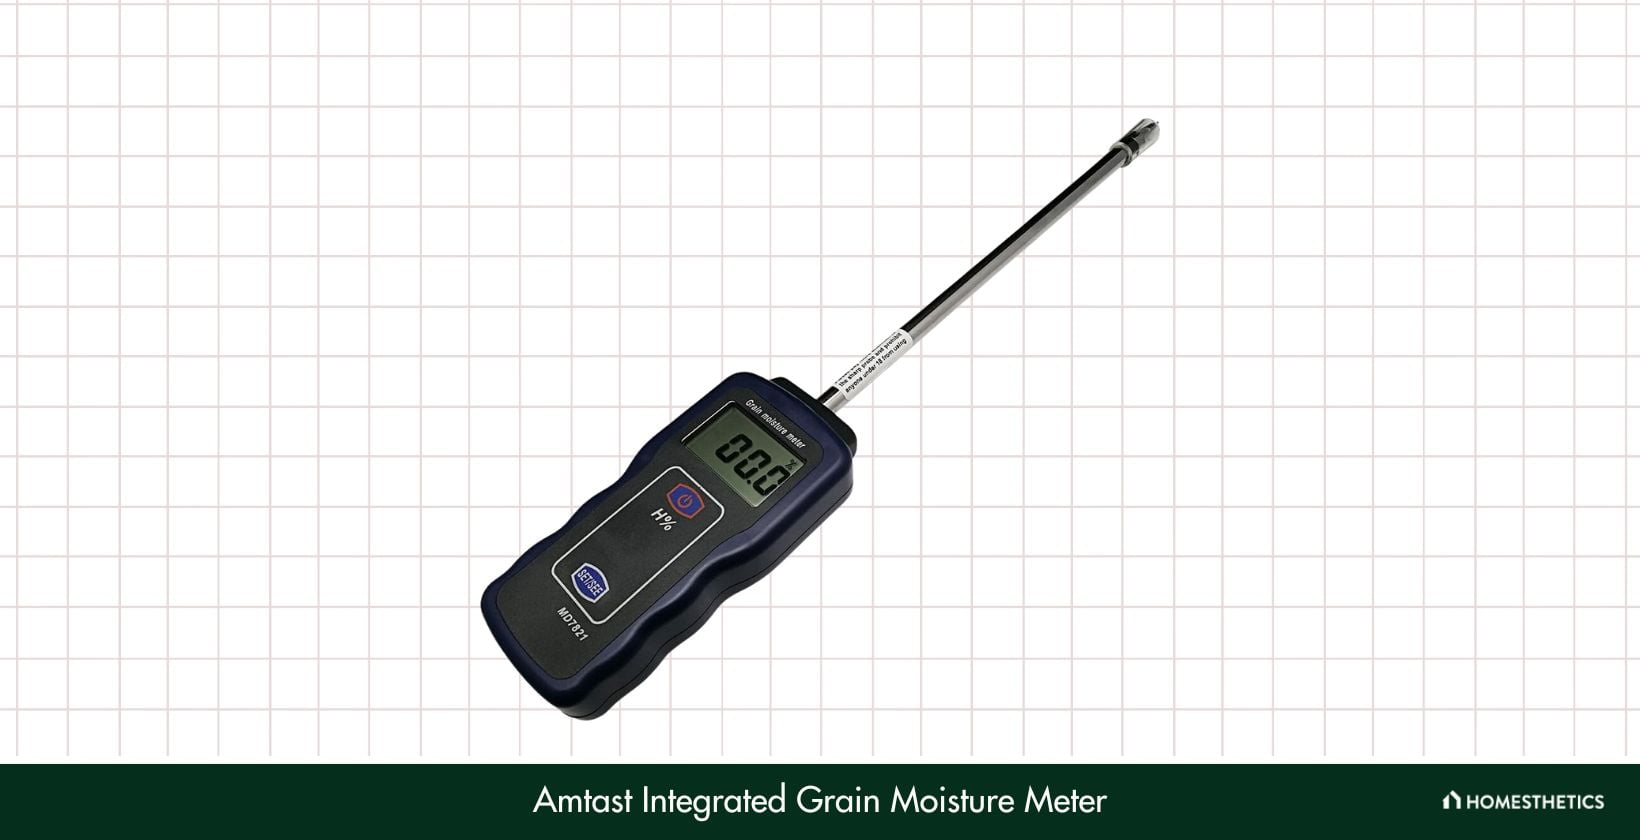
By now, AMTAST’s prowess in sophisticated agriculture machinery must be well-established. The next product that we loved from the brand is the integrated moisture tester that employs the latest technology to deliver results that are precise and timely. Below, we’ve discussed how and what it exactly does. Take a look!
AMTAST never fails to give us a number of reasons to love its products and this unit is no exception to the rule. First up, it uses cutting-edge microcomputer technology (CPU) which results in a high degree of accuracy in the readings. Further, the integrated single probe allows for one-hand operation, thus enhancing user comfort.
Also, the unit comes with the capacity for automatic environment temperature compensation. In addition to this, it is power-efficient and runs on a laminated 9V battery fitted with an alarm to warn of a voltage lower than the specified value. Needless to say, with the integrated moisture meter, the operation is incredibly streamlined.
In terms of build, the tester is constructed out of hard and lightweight plastic that withstands prolonged use without suffering wear and tear. Durable and dependable, it is easily portable, compact in design, and offers good value for money. Lastly, the device is compatible with a wide variety of grains which further adds to its appeal.
Although the unit is devoid of functional and technical errors, we wish it was as compatible with varieties of hemp as it is with other grains. However, this is simply a matter of preference, and by no means does it hamper operation.
What We Like
- Fast and accurate results
- Power-efficient operation
- Lightweight, portable, easy to use
What We Don't Like
- Not compatible with hemp
8. Gain Express Landtek Instruments Moisture Tester
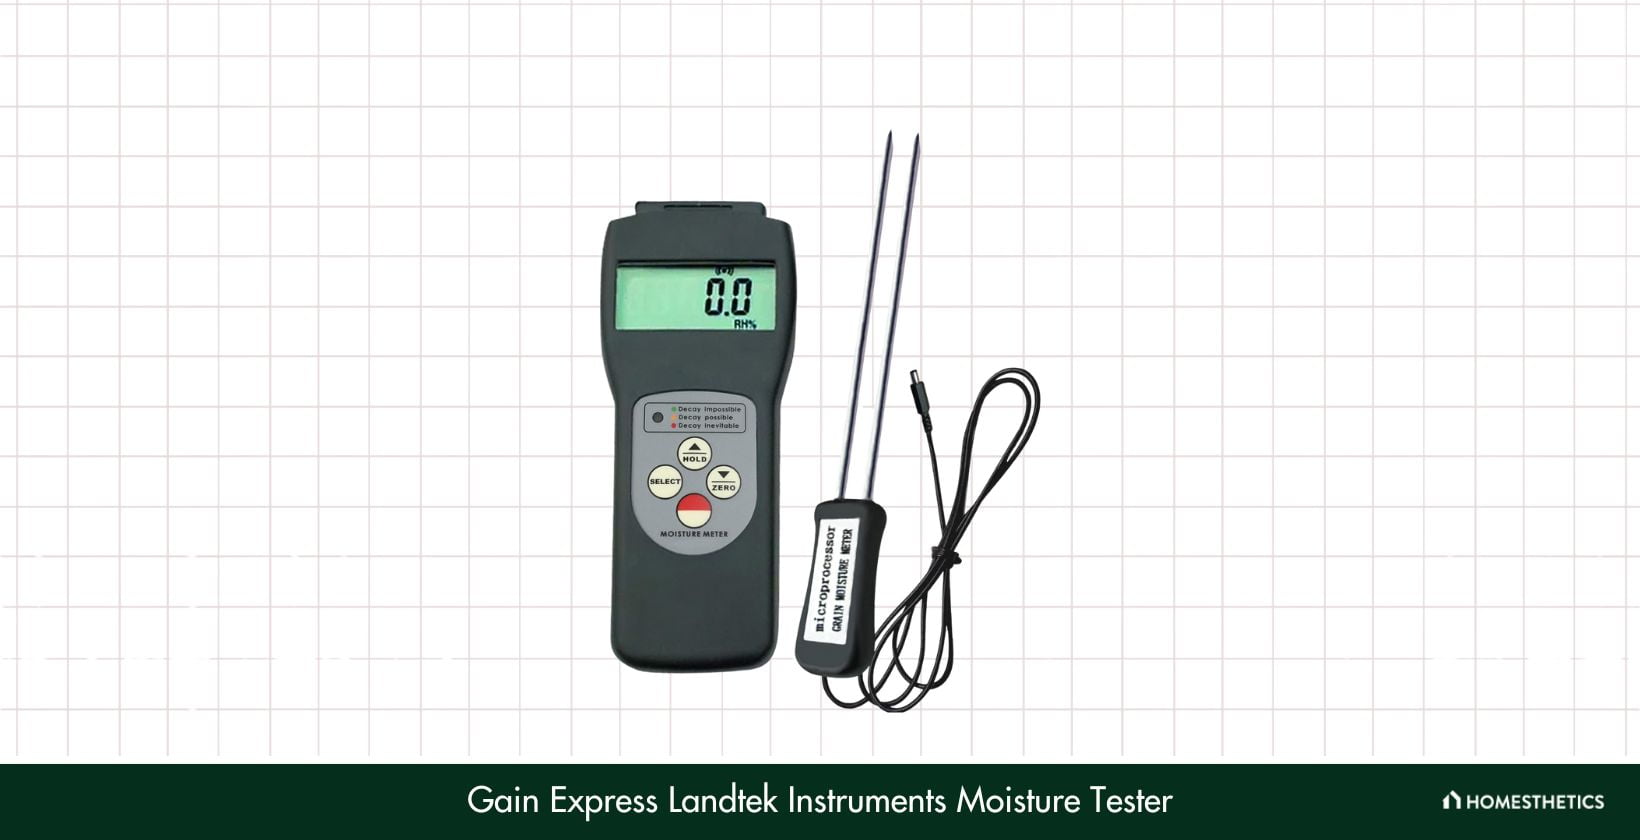
Next up, we have an excellent moisture tester from Gain Express, one that scores points, especially, for operational efficiency. Equipped with cutting-edge technology, it makes use of the latest features to deliver a stellar performance that leaves little room for complaint. Read on to learn all about it.
First and foremost, we must mention that the device excels in its primary function of testing the moisture content of a variety of grains, no less than 36. With a range of 6% to 30% moisture, it is easily rendered as a versatile and high-functioning tool that is capable of producing accurate results.
In addition to that, Gain Express's device also scores extra points for operational efficiency which ensures immense convenience for the user. Fitted with three LED indicators, it allows for accurate and easy reading of the measurements and also signifies the degree of dampness found. Green implies safe and dry, yellow is for borderline, and red points to proper dampness.
Lastly, the Gain Express tester employs LSI circuits aided by microcomputers and crystal time-base for greater accuracy and a faster response time for readings. Built to last and dependable, this is a device that is impressive in terms of utility and makes for a worthy addition to the toolkit.
The only issue with the device, which is technically not a functional drawback, is that it’s not pinless. Had it been so, the walls would have remained free of perforations. However, this is only a desirable characteristic and by no means a red flag.
What We Like
- Wide range of suitability with grains
- High operational efficiency and ease of use
- Fast response time
What We Don't Like
- Could’ve been pinless
9. Agratronix 05100 MT-PRO+
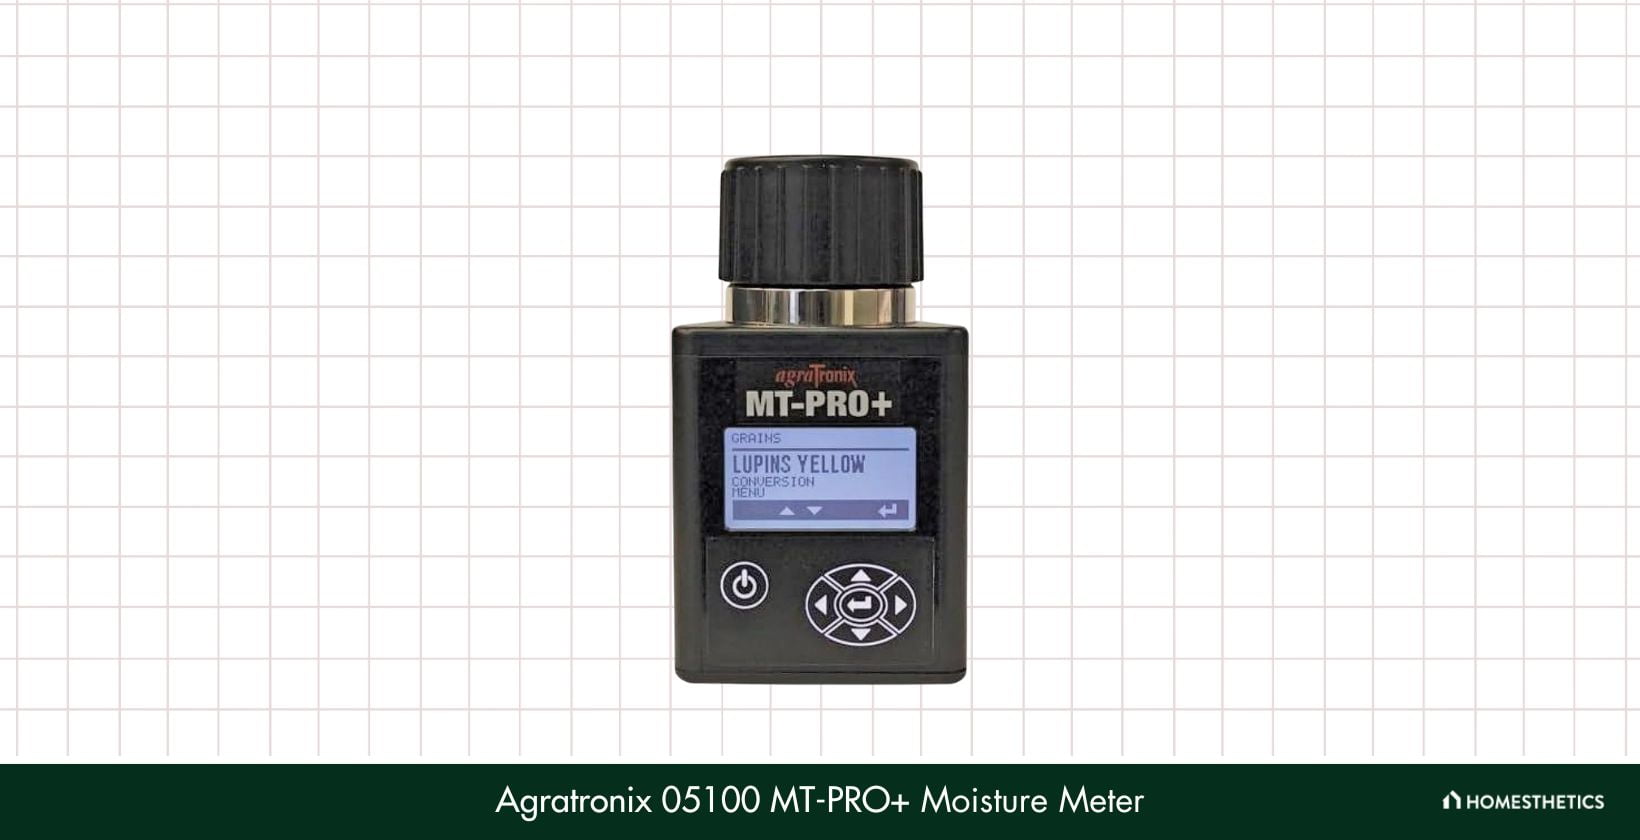
As we near the end of the list, Agratronix makes a second appearance, this time with the MT-PRO+ with enhanced features and a more durable build. Suitable for a wide variety of grains, it is a dependable device that is useful to keep handy. If utility is your first priority, then this is certainly a moisture tester to keep an eye on.
Along with its suitability with 40 varieties of grains, the MT-PRO+ also exhibits certain features that set it apart from its market counterparts. Fitted with a 2.5-inch LCD display with customizable fonts, it offers clarity of readings which is further augmented by the high levels of accuracy.
Additionally, the unit is capable of automatically averaging the number of tests that may be selected and stores the required calibration for the tested grains. Alongside this, it has a prompt response time, higher than most handheld testers, which speeds up the process as a whole.
To end with, the tester is also fitted with a USB port that makes way for personalizations such as adding one’s own username, grain scale, diagnostic updates, and firmware. Powered by two 9V batteries, this is a dependable option that can be relied upon to provide fast and precise results.
There are no technical faults with Agratronix’s moisture tester, however, its excellence comes at a cost. Priced considerably higher up the scale, it makes for a premium choice and may not suit all budgets. Although we're of the opinion that the unit is definitely among the few items that are worth shelling out some extra dollars for.
What We Like
- Ease of use
- Prompt response time
- Scope for personalizations
What We Don't Like
- Expensive
10. Pinless Wood Moisture Meter
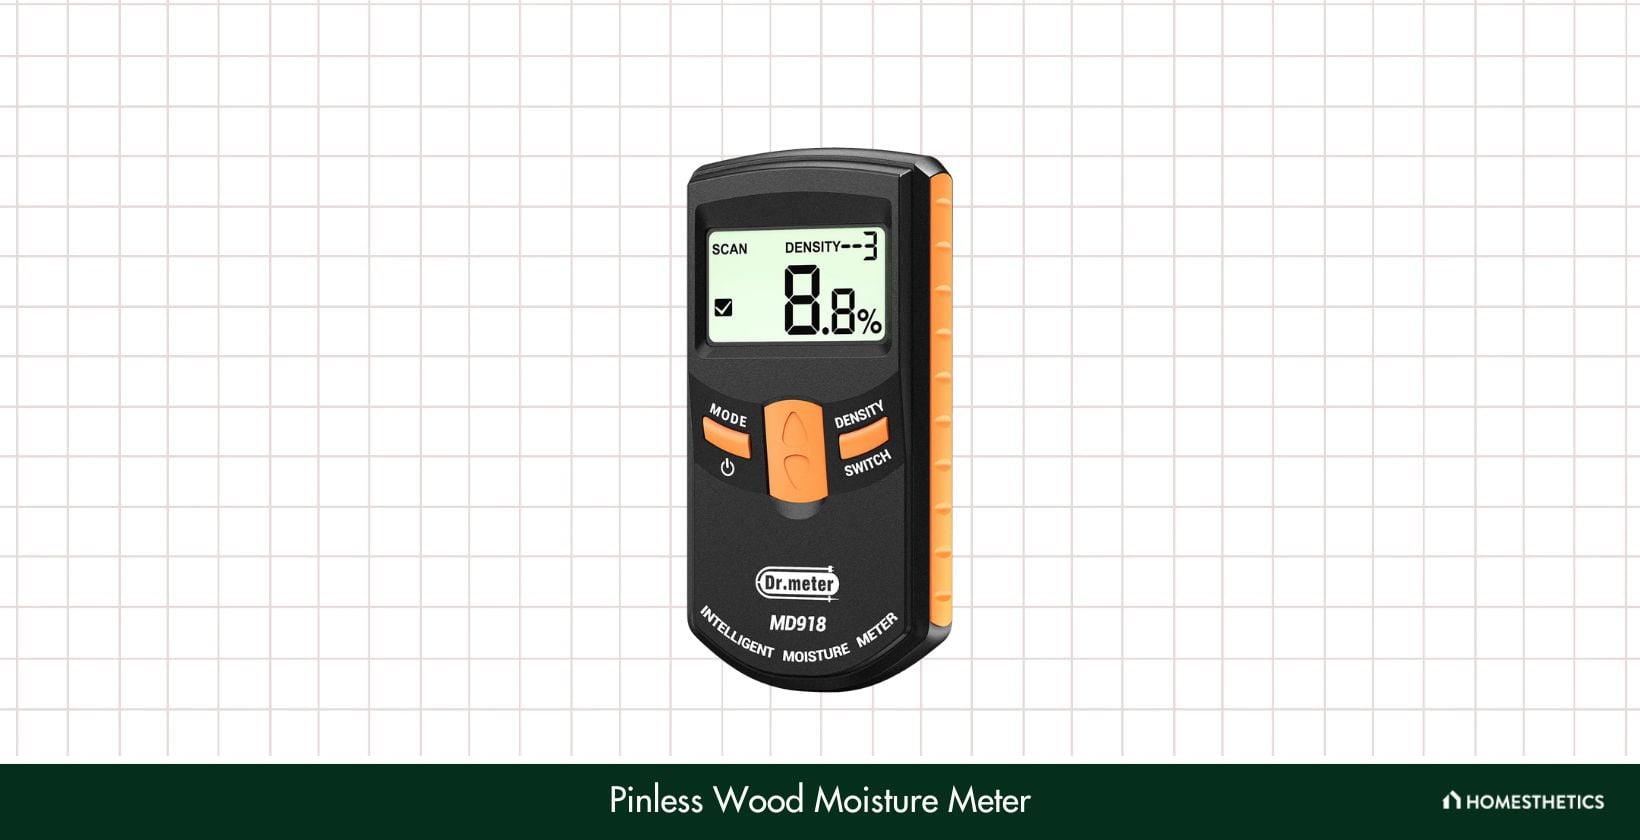
Our second last recommendation is a pinless moisture meter from Dr. Meter, one that is highly accurate and does no damage to the walls or furniture. Equipped to perform a wide range of functions, it is adept at taking readings and is an energy-efficient option as well. Reliable and featuring a sturdy design, the unit is a strong contender for one of the top choices.
What impressed us the most about this nifty little device is its non-invasive properties. As a pinless device, it makes use of electromagnetic waves to initiate and carry out the process of testing. Thanks to such a feature, the user is spared the cleanup operation after the operation.
Moreover, the compatibility of the device is rather excellent as it is suitable for 10 grades of timber density, with 4% to 80% Maximum Error. Also, it comes with a temperature compensation function that stabilizes the temperature of the object to be tested for at least 5 minutes in order to ensure accuracy.
Furthermore, the automatic power-off function renders the tester energy-efficient while the large LCD screen enhances operational efficiency and ease of use. Lastly, a unique feature is the calibration alert system which makes sure that the user is always aware of any calibration that needs to be made. On the whole, Dr. Meter’s functional and versatile tester makes moisture testing as easy as ABC and is a handy tool to own.
Although there are no functional flaws in the device, we feel that using buttons for recalibration in place of a manual method would save time and streamline the process considerably. If the user so wishes, they can always take up the issue with customer support who are always ready and willing to help.
What We Like
- Sophisticated, state-of-the-art technology
- Stabilizes temperature to ensure precision
- Easy to use and functional
What We Don't Like
- Recalibration button could be provided
11. TK100 Multifunctional Moisture Meter
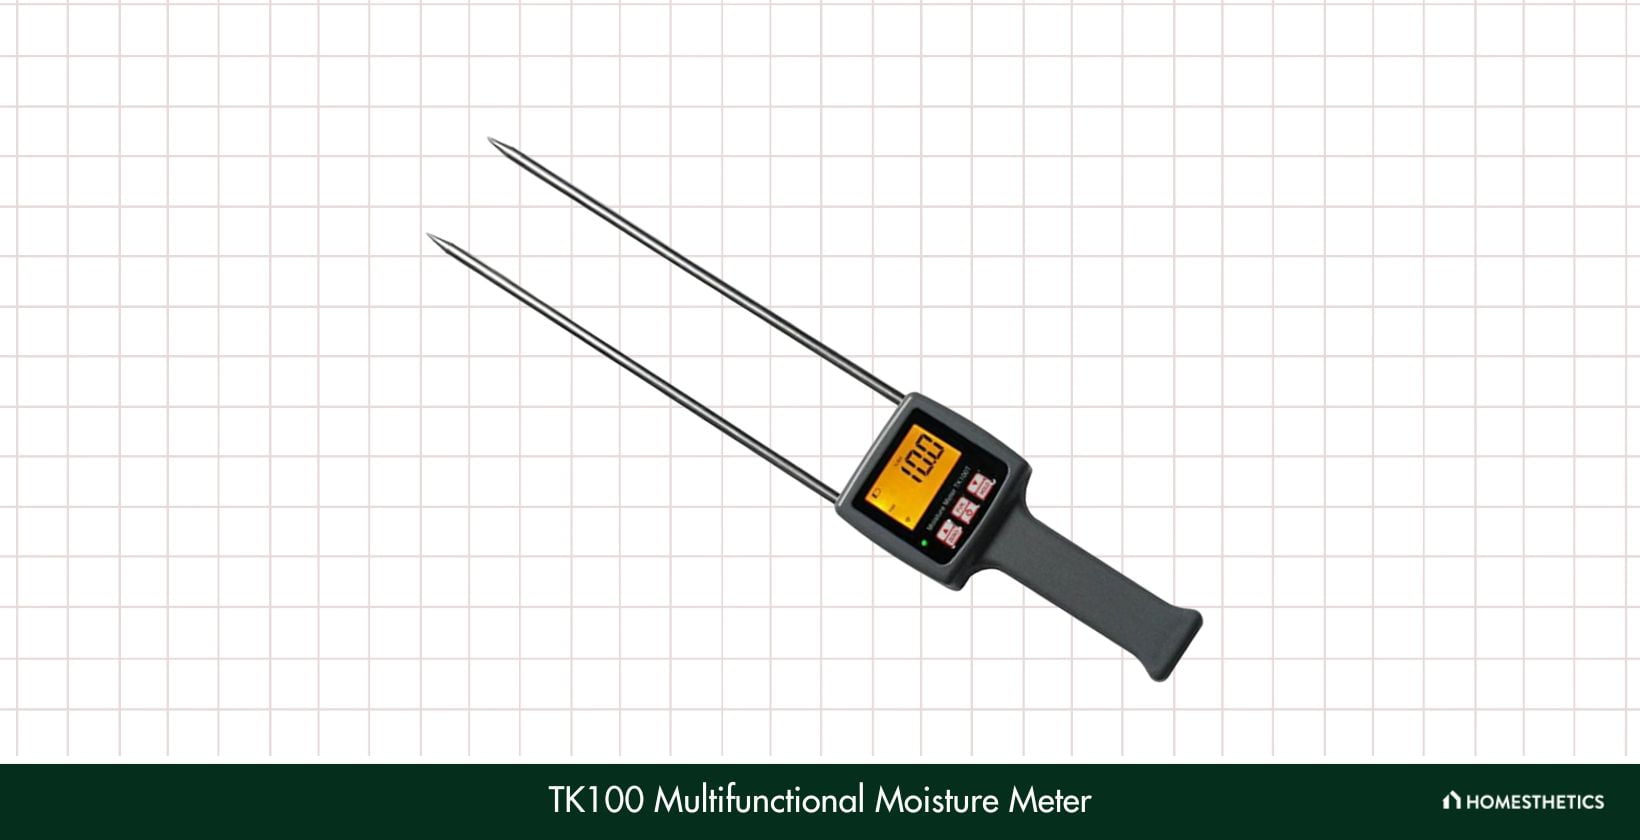
Our last recommendation is by no means lesser in any aspect than its precursors. Adequately functional, efficient, and easy to operate, this multipurpose moisture tester comes fitted with a host of features that are bound to appeal to the most discerning buyer. Check out all that it has to offer.
As one of the most high-tech devices on the list, this upgraded moisture tester features extensive probes that are suitable for an impressive range of grain varieties. It also works perfectly well on chemical raw materials, soap powder, plastic granules, traditional Chinese medicine, and other fibrous materials.
As a compact, portable, and operationally efficient unit, it comprises a highly sensitive sensor that has a response time of 1 second, and the readings are then displayed on the screen. To ensure the user’s convenience, the 4-inch digital LCD screen comes with a backlit display. Alongside this, the measurements taken are accurate and precise up to one decimal point.
Moreover, with impressive ranges of temperature and humidity, the product is hard to beat. It runs on 4 AAA batteries and comes with a warranty of one year. Lastly, both modes of power-off, automatic and manual, are available to enhance the ease of operation, and if you ask us, this one leaves no stone unturned.
The only drawback of this otherwise excellent product is that it does not come with sufficient instructions for use, which may pose a problem to new users of moisture testers. However, our suggestion would be to contact customer care as they are sure to resolve the issue and help out as required.
What We Like
- Wide-ranging compatibility
- Easy to operate and read measurements
- Hassle-free functioning
What We Don't Like
- Does not contain instructions
What is the Best Corn Moisture Tester?
Presented below is a detailed comparison chart showcasing the foremost corn moisture testers on the market. This comparison is centered on essential corn moisture tester specifications, including measured grain type, measuring range, accuracy, display type, probe type, calibration, and other features.
| Product | Measured Grain Type | Measuring Range | Accuracy | Display Type | Probe Type | Calibration | Other Features |
|---|---|---|---|---|---|---|---|
| Farmex MT-16 Grain Moisture Tester | Corn, Wheat, Soybeans | 5% to 40% | ± 0.5% | Digital | Penetration Probe | Automatic | Temperature Compensation, Backlit LCD Display |
| AMTAST Grain Moisture Meter | Corn, Rice, Wheat, Sorghum, Barley | 7% to 30% | ± 0.5% | Digital | Penetration Probe | Automatic | Temperature Compensation, Backlit LCD Display, USB Output |
| General Tools MMD7NP | Corn, Wheat, Soybeans, Oats, Barley | 5% to 40% | ± 1.5% | Analog | Penetration Probe | Manual | None |
| Huanyu Multifunctional Fibre Moisture Meter | Corn, Rice, Wheat, Soybeans, Cotton, Flax, Peanut, etc. | 0% to 80% | ± 0.5% | Digital | Penetration and Surface Probes | Automatic | Temperature Compensation, Backlit LCD Display, USB Output |
| Agratronix Coffee Moisture Tester Model 08150 | Coffee | 7% to 35% | ± 0.5% | Digital | Penetration Probe | Automatic | Temperature Compensation, Backlit LCD Display, Built-in Scale |
| AMTAST Water Activity Meter | Food, Grain, Chemicals, Pharmaceuticals | 0.000 to 1.000aw | ± 0.015aw | Digital | Puncture Probe | Automatic | Temperature Compensation, Backlit LCD Display, USB Output |
| AMTAST Integrated Grain Moisture Meter | Corn, Rice, Wheat, Soybeans, Sorghum, Barley | 6% to 30% | ± 0.2% | Digital | Penetration Probe | Automatic | Temperature Compensation, Backlit LCD Display, USB Output |
| Gain Express Landtek Instruments Moisture Tester | Corn, Wheat, Rice, Bean, Soybean, etc. | 5% to 30% | ± 0.5% | Digital | Penetration Probe | Automatic | Temperature Compensation, Backlit LCD Display, USB Output |
| Agratronix 05100 MT-PRO+ | Corn, Soybeans, Wheat, Barley, Sunflowers, Oats | 5% to 40% | ± 0.5% | Digital | Penetration Probe | Automatic | Temperature Compensation, Backlit LCD Display, USB Output, Built-in Scale |
| Pinless Wood Moisture Meter | Wood | 0% to 99.9% | ± 0.5% | Digital | Pinless | Manual | Backlit LCD Display, Automatic Power Off |
| TK100 Multifunctional Moisture Meter | Corn, Wheat, Rice, Bean, Soybean, etc. | 0% to 50% | ± 0.5% | Digital | Penetration and Surface Probes | Automatic | Temperature Compensation, Backlit LCD Display, USB Output |
Buying Guide For The Best Corn Moisture Tester
By now, you probably have a shortlist ready. However, given how specific they are in their functions, it is by no means easy to select a moisture tester that is just right for your needs. To help you make the final selection, we have a nifty buyers’ guide here, outlining all the important points to keep in mind before you purchase a product.
-
Type of Tester
Moisture testers are primarily of two types: handheld and bench testers. While the former is definitely more portable, bench models are more efficient in their working and evaluate the grain with greater precision. It is more powerful and easier to work with.
-
Battery Health
Battery health comes a close second and it is especially relevant for portable testers which are quite popular with buyers. The battery must be fully charged at all points in order to avoid inaccurate results; users may also face lagging. When not in use for long periods of time, such as months altogether, it’s wise to remove the battery and store it separately in order to avoid leakage.
-
Accuracy
The sole aim of buying a moisture tester is to get accurate readings of the water content. Therefore, the best unit will never fail in this respect. Ensure that in terms of precision, the model of your choice is foolproof as this has a direct impact on the health of the grains consumed. If stored in a condition of high moisture content, grains are bound to deteriorate in quality.
-
Probes and Pans
Most handheld moisture testers are available in two forms; they either use pans or probes. Pans resemble containers that act as receivers that are filled with grain to be tested for moisture. Tabletop testers consist of larger pans than portable models.
On the other hand, probes are bard devices fitted with the tester that is brought in contact with the grains. They are far easier to use than pans, however, the former delivers results with a high degree of accuracy.
Why is it important to measure corn moisture?
Measuring corn moisture is essential for determining the optimal time for harvesting, storing, and drying the corn. Moisture content affects the quality and market value of corn, and improper moisture levels can lead to spoilage and mold growth.
What is the optimal moisture content for storing corn?
The optimal moisture content for storing corn depends on the type of corn and the storage conditions. Generally, the ideal moisture content for corn storage is around 14-15%, but this can vary depending on the climate, humidity, and other environmental factors.
What factors can affect the accuracy of corn moisture meter readings?
Factors that can affect the accuracy of corn moisture meter readings include temperature, grain density, and sample size. It’s essential to calibrate the device properly and take multiple readings to ensure accuracy.
Can corn moisture meters be used for other grains besides corn?
Yes, corn moisture meters can be used for other grains, including wheat, rice, and soybeans. However, it’s important to calibrate the device for each specific grain to ensure accurate readings.
How often should a corn moisture meter be calibrated?
Corn moisture meters should be calibrated regularly to ensure accurate readings. The frequency of calibration will depend on the model and manufacturer’s recommendations, but it is generally recommended to calibrate the meter at least once a year.
In the agricultural world, reliable and accurate corn moisture meters are essential for ensuring optimal harvest conditions and maximizing profitability. With the plethora of options available in the market today, it can be challenging to discern which device will best suit an individual's needs. After careful analysis and reviewing 11 top contenders, we present our expert recommendations to help guide your search for the perfect corn moisture meter.
From the above 11 best corn moisture meters, here are the top three expert recommendations:
Backed by a reliable brand and equipped with numerous high-functioning features, the Farmex MT-16 is an ideal option for those in search of accuracy, versatility, and efficiency in a moisture meter. With its lightweight design, a wide range of compatible grains, and remarkable precision, this model is a worthwhile investment for anyone involved in agriculture.
With its state-of-the-art design, multi-point calibration system, and remarkably wide grain compatibility, the AMTAST Grain Moisture Meter is a good option for those requiring precision and versatility. Though it may not be suitable for parchments, this device still offers impressive attributes at an affordable price, making it an attractive choice for those in need of accuracy and adaptability.
For a moisture meter that delivers exceptional performance on various surfaces and offers an extensive range, the General Tools MMD7NP is the right choice. Featuring audio-visual alerts and an impressive reach into surface materials, this model ensures both convenience and reliability on the job.
In conclusion, whether you are seeking operational efficiency, accuracy, versatility, or exceptional grain variety coverage, there is a corn moisture meter designed to cater to your specific needs and preferences. As you venture into the world of moisture detection, keep these top-rated devices in mind, and trust that their impressive features, reliability, and accuracy will help you make the best-informed decisions for your agricultural endeavors.


![5 Best Charcoal Air Purifying Bags [Review & Buying Guide]](https://homesthetics.net/wp-content/uploads/2023/09/Best-Charcoal-Bags-1.jpg "5 Best Charcoal Air Purifying Bags [Review & Buying Guide]")


![12 Best Central Vacuum Systems [Reviewed & Buyer’s Guide]](https://homesthetics.net/wp-content/uploads/2021/07/Best-Central-Vacuum-Systems-to-Consider-Today-001.jpg "12 Best Central Vacuum Systems [Reviewed & Buyer's Guide]")


![6 Best Button Maker Machine [Reviews & Buyer’s Guide]](https://homesthetics.net/wp-content/uploads/2023/09/Best-Button-Maker-Machine-1.jpg "6 Best Button Maker Machine [Reviews & Buyer's Guide]")


![6 Best Budget Miter Saws of 2024 [Reviewed & Buyer’s Guide]](https://homesthetics.net/wp-content/uploads/2021/03/Best-Budget-Miter-Saw-of-2021-01.jpg "6 Best Budget Miter Saws of 2024 [Reviewed & Buyer's Guide]")


![5 Best Airbrush for Miniatures & Model [Buyer’s Guide]](https://homesthetics.net/wp-content/uploads/2023/07/Best-Airbrush-for-Miniatures-Model.jpg "5 Best Airbrush for Miniatures & Model [Buyer’s Guide]")

![3 Best Adhesive for Carbon Fiber of 2024 [Reviews & Buyer’s Guide]](https://homesthetics.net/wp-content/uploads/2022/01/Best-Adhesive-for-Carbon-Fiber-1.jpg "3 Best Adhesive for Carbon Fiber of 2024 [Reviews & Buyer’s Guide]")


![5 Best Bookshelf Speakers [Under $100] of 2022 Reviewed](https://homesthetics.net/wp-content/uploads/2018/11/5-Best-Bookshelf-Speakers-Under-100-of-2018-Reviewed-1024x768.jpg)


