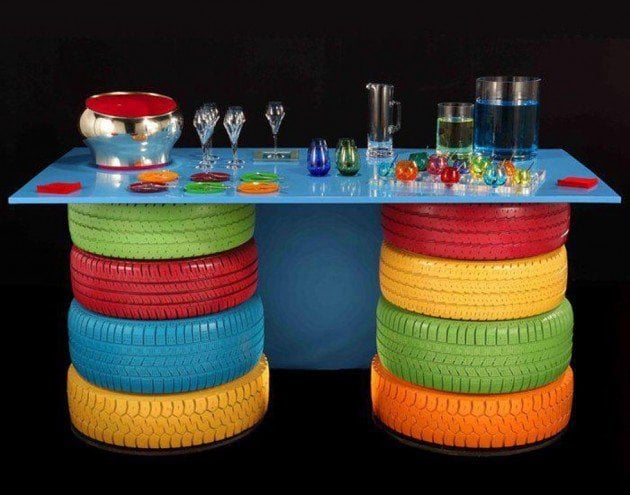
A smart inexpensive craft is often called brilliant. A selection of such items follows, creative Do It Yourself Cinder Block Projects for your home, crafts that will help you solve problems in a beautiful manner. Simple, rectangular shape that can beautifully complement wooden textures, the cinder block can be introduced in multiple, stable compositions.
Water features, sitting and storage options alike have been showcased below, we invite you to cast a glance and start using cinder blocks in your DIY projects as soon as possible. We would to hear from you in the comment section below.
#1 Enhance your Garden with a simple water feature
What do you think about these creative Do It Yourself Cinder Block Projects? We would love to hear your opinion on the subject in the comment section below.
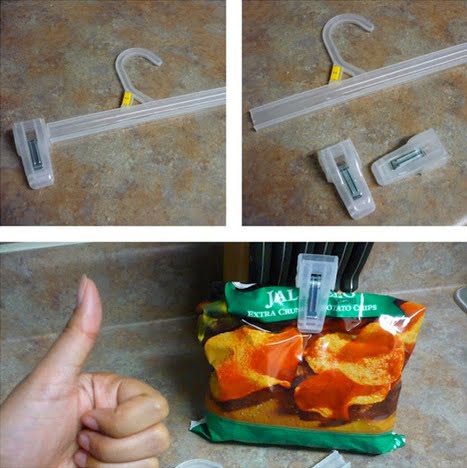
Finding mundane items that can be used in creative DIY projects has become a challenge for us at Homesthetics, one we are happy and excited to take on everyday. Creativity plays a vital role in this quest, a quest the infinite DIY community offers the resources to respond to.Today we have chosen coat hangers as central pieces in re-purposing projects. Some are creative, others unique in approach and style, others very effective and efficient. The key that bonds them all together is simplicity and a clear purpose they all succeed in achieving. Cast a glance at the selection below and feel free to complete the collection with your own personal interpretations of the mundane plain coat hanger.
coat hangers will serve as newspapers and magazine holders
Rather than staking old newspapers and magazines in a corner for the dust to settle why not take the unconventional approach and place them on a coat hanger within your reach? Maybe this way you will be more encouraged to finish a reading before stepping to the next glossy cover.
display your sunglasses collection in an unconventional style
We all tend to overbuy items and staking them in a corner of a drawer only manages to encourage this direction. Display your collection in plain sight in a simple elegant manner as a reminder of all your great pieces you already own.
Keeping the crafting corner clean and organized is a difficult task. Use a coat hanger to finally stack those ribbons you usually misplace around the house.
Photo via: happilyevercrafter.org
pose your JEWELRY collection from a coat hanger
Take the option of using a coat hanger to store all your bracelets and necklaces without constantly tangling them.
use a different approach to a coat hanger
If you are feeling creative, adapt plain coat hangers and a driftwood piece into an elegant one of a kind piece for your hallway.
Photo via: alittleglassbox.com
mixing wooden coat hangers to form a dishwasher
Wood and water don't always get along but you must admit the creation above is very beuatiful in its simplicity.
Photo via: instructables.com
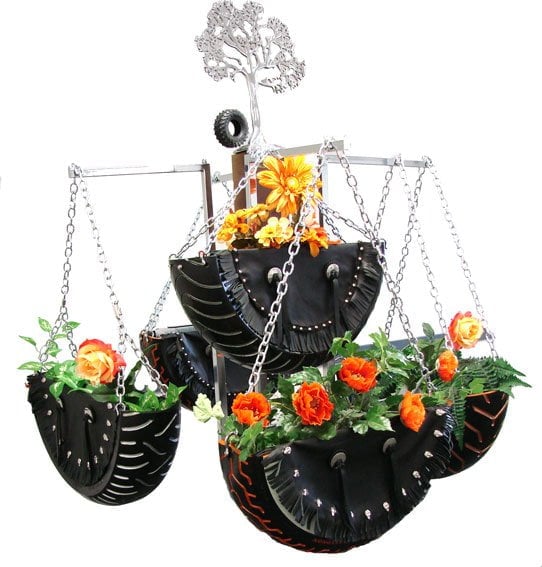
for the innovative mind coat hangers can form chandeliers
For the out of the box thinker, hangers can become chandeliers in mesmerizing compositions.
Have you ever considered re-purposing something as plain as a coat hanger? Feel free to express your ideas in the comment section below.
Today we have chosen to get lost in the wonderful realm of books, more specific the creative methods of recycling book paper and the many delicate book project ideas you can adorn your home with.Our society runs at a very fast pace and books in their archaic form have gone on a descending slope whereas the constant evolution and development of technology has brought us E-books, Kindles and several other alternatives to the classical simple book.Yet, here we are to encourage you to search and rediscover the magic that lies between the pages of a book and we are not talking about the story itself but the complex and creative process reading is. You will never get the full experience, true and powerful in the shape of a leather bound old book with its characteristic smell and delicate pages affected by the mark of time by holding on to an electronic gadget. And when the passage of time has finally taken its toll on a book, throwing it away feels like a true crime when you can find thousands of creative methods of recycling, reusing old delicate books in fun, beuatiful crafts.With this idea in mind, we invite you to delight your senses with the following 40 beautiful book project ideas featured below.
1. gorgeous volumetric lettering made from book pages
2. decorate your home for the holidays with paper garlands
Have we succeeded to convince you to take up book project ideas on your next free day? What is your take on the idea of recycling old books instead of throwing them away? We would love to hear your ideas so feel free to share your thoughts in the comment section below.
A few ideas come to mind when we try to imagine inexpensive beautiful ways to enhance our household and they all include natural materials such as wood river rocks and natural stones. All beautiful, all natural and all composing unique compositions throughout the design line. Today we will present you 36 examples on how to use river rocks in your decor through diy projects, these ideas are here to feed your imagination and inspire you through creativity to start your own diy project.
River rocks are usually used in the backyard landscape or in the customization of particular interior items like bars, fireplaces and even indoor swimming pool ensembles. River rocks in small quantities can also add a spa-like atmosphere in a regular bathroom, helping you relax and infusing serendipity. It is worth mentioning that river rocks are also highly durable and they require little to no maintenance if assembled right from the very beginning; cast a glance at the selection below and choose the design to materialize in your next diy project !
The selection above has showcased creativity at its best; river stones in all shapes and sizes have been complemented and have complemented various interior design lines through simplicity and density at the same time. River rocks diy projects can be used in multiple projects in your household with little to no costs, how would you use them? We would love to hear your opinion in the comment section below on the subject. Craft away !
Never throw away recipients that might be useful to you or your loved ones in any manner. Clay pots, wooden boxes and metallic buckets can become new objects in no time. By using metallic or clay recipients you can even create exotic crafts like Koi fish water ponds or water features for your swimming pool, immense possibilities are born from creativity.
We have curated 33 Insanely Smart Ways to Repurpose Galvanized Buckets and Tubs, all extremely graphic and creative. Cast a glance and get creative !
Ways to Repurpose Galvanized Buckets and Tubs
#1 Create industrial lighting fixtures with galvanized buckets
#2 use different recipients to create customizable gardens
#33 vertical planters can feature a great design line as well
#34 nestle your favorite plants in galvanized recipients
Galvanized recipients can contain flowers in a timeless manner. Use them to create contrast between your normal clay or wooden recipients and immerse yourself in beautiful greenery.
What do you think about these crafts? We would love to hear how would you repurpose galvanized buckets and tubs in the comment section below.
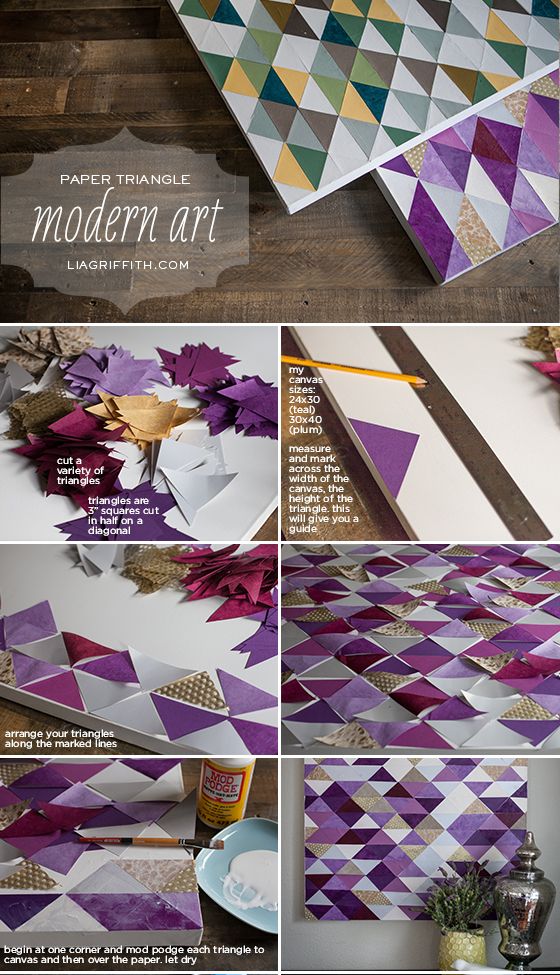
Simplicity is the ultimate sophistication. It is known. From time to time though the need to brake free and bring a touch of color in your decor is extremely important as it refreshes the interior atmosphere and rebuilds or relocates the focal points in your room. It is only natural to feel the constant need of change and embrace as often as possible to refresh the design scheme. Any decor can hold a drop of glamour, through some sparkling DIY decoration ideas realized properly you can disturb positively the balance in the home decor. Needless to say that all them can be used easily as New Year's decorations as well.
Driftwood carries its own history in our home, its own path through the world. We invite you to cast a quick glance at the DIY driftwood decor ideas and simple glaze at the immense beauty showcased by the piece of wood, glaze at the tremendous amounts of details organically developed along a few centimeters and wonder how world`s most extraordinary architect, nature, could have realized it better.
Naturally beautiful textures can be brought into the picture to wise use of driftwood pieces, pieces that can be combined with inexpensive textiles, rope segments or various wires in extraordinary pieces. Cast a glance at the gallery below and surge inspiration for your next DIY project.
#1 Driftwood Sail Boats Bringing Vintage Textures Into the Scenery
What driftwood DIY project do you think it would suit your design line better? We would love to hear your opinion in the comment section below.
In the kitchen everything should be bent to out desires and lifestyle. Here we should relax at the end of the day, disconnect entirely from the busy workday that you`ve just finished. Moreover here we have our own battleground, here we prepare our favorite weird or not so weird recipes so decluttering your home in your own way is quite a huge deal, make sure everything gravitates around you. From recycled wooden pallets you can do everything now-a-days and if you need a quick kitchen remodeling project the beautiful kitchen diy pallet projects below might work in an extraordinary manner.
Surge inspiration from the feed below and pick your favorite, all you have to do next is to get some pallets from your local hardware store or a specialized re-seller. If you want you can treat the wood with a sealant only to obtain that desirable rustic look or with any other solid color if you want to camouflage the wooden texture which we don`t recommend. The texture of wood will add coziness and warmth to your interior whilst looking extraordinary and having a huge life span. Get ready, get inspired, get crafty !
Old bottles tend to stack up in any home and loose their purpose quickly if not recycled properly.Today we have decided to focus on this topic and discover several appealing creative crafts revolving around Super Ingenious Methods to Reuse Old Bottles. We highly encourage you to take some time and discover the wonderful art of recycling and up-cycling everyday items as the tendency nowadays is to find creative useful methods of preserving the natural habitat and avoiding to pollute though any means necessary.
Recycling and reusing old bottles is a prime essential step in this endeavor. We invite you to choose your favorite craft or crafts and to start getting inspired today.
Enjoy!
Ways to Reuse Old Bottles
1. turn plastic bottles into artsy decorative apples
This summer everything can change in your backyard. You can take advantage of your vacation directly at home by sculpting a beach-style outdoor living design that will invite calm and piece in your home directly. You can redesign your porch, yard and backyard to match the airy breezy vibes exuded by the seaside in your own home.
Buoys, rope, burlap, driftwood and nautical inspired colors can be inserted into your new design line along with sand and seashells to obtain the desired result. Enjoy your outdoors to the fullest and be sure that you feel comfortable in your own home this summer !
1. Mark a Junction With Colorful Driftwood Signs With an Airy Vibe
With just a little bit of time invested and creativity you can change the air in your household this summer. Pick your favorite project from the gallery above and tell us why do you like it in the comment section below.
Probably the most extraordinary way to beautify your garden is through the creative use of water features in greenery; through these we can obtain peace, calm, tranquility and relaxation in the purest form. Water features can be used both indoor and outdoors being able to refresh the design line without affecting the comfort in your home or backyard, moreover, outdoor diy water features can be realized at home from old sculptural items that can now be animated by light.
Regardless of the shape and size of your installations we are sure that these will add comfort and calm in your backyard or home. We invite you to cast a glance at the tutorials and ideas showcased underneath and pick your favorite craft. We would love to hear your opinion in the comment section below on the subject.
Outdoor DIY Water Features Tutorials and Ideas
1. Various Bubble Water Fountains Can Do The Trick Regardless of Their Shape
We would love to hear your opinion in the comment section below on these DIY Water Features Tutorials and Ideas. We have found them extremely creative and versatile, able to bend and blend into any decor.
Quite epic wooden pallet projects are in the world of DIY as everyday these ingenious crafts are emerging to the online surface. Thanks to the their accessibility and their own high quality material, wooden pallets are used worldwide today to craft beds, swings, fences, terraces, decks and thousands of complementary household items. All successfully realized, all beautiful and cozy.
No less than 26 Highly Ingenious Cost Efficient Pallet DIY Projects for Kids have been showcased underneath. These items have been curated as a statement in educative practical experiments at home, by realizing a Do It Yourself with your family you can present in the future to your own child.
Cost Efficient Pallet DIY Projects For Kids
#1 use old wooden pallet boards to make a beautiful fairy tale fence
DIY Room Dividers are simply an extraordinary craft for your household, these simple elements of design are able to reshape your space in a perishable manner that can be undone at any given time. By realizing them in DIY projects they will cost you little to no money and offer you the chance to tailor them to your needs specifically; you will be able to control the finish, the texture and the transparency of the divider .
Just imagine how easier it would be if your desk had a filter, a small neat room divider that will help you concentrate and work far more efficiently. There are multiple living areas that require a small space divided through discrete elements and in the following rows you will find the answer to your questions.
Cast a glance and feed your imagination !
#1 use upright branches as a beautiful organic living space divider
#24 you can suspend artist's canvases from the ceiling
What do you think about the gallery showcased above? We would love to hear your opinion in the comment section below.
Unique items and crafts are required for each event, you need that level of customization, that refresh in your decor that fits the season, the holiday. The right decor for the right time can be obtained through simple inexpensive diy projects dripped around the home, slowly constructing the right ambiance, the right feel and vibe for a happy, joyful home.
23 Neat Inexpensive DIY Thanksgiving Decorations have been curated and showcased in the gallery below, all of them creative, easy to realize inexpensive DIY projects able to change your decor. We invite you to cast a glance at the gallery below and pick your favorite craft; feed your imagination and start the do it yourself project right away!
What do you think about these Inexpensive DIY Thanksgiving Decorations? We would love to hear your opinion in the comment section below.
Leather belts might be an item often overlooked into regular DIY Projects yet from time to time, enthusiasts do find a way to use old leather belts creatively. The simple nature of the leather belt allows it to blend into pretty much any craft where support or even decoration are required. Ingenious ways to use old leather belts in DIY projects have been presented underneath, cast a glance and pick the project to materialize in your next weekend.
In the gallery below leather belts have been used to wrap vases and bags, they`re used to support bookshelves or to emphasize items through their decorations. Creativity has no limits, don`t throw away a good piece of leather but reuse it or donate it instead.
Simple items can make a change. Use leather belts in your household creatively or donate them. Take a moment and think about the provenience of the leather belt you are using, is such an item worth throwing away?
When the first signs of spring arrive, the first rays of sun falling to cast away snow, we immediately start spending more time outdoors, preparing the garden, the flower beds, cleaning up the mess left by the winter season. Our garden or backyard is our retreat, our oasis away from the hustle and fuss of the busy urban lives. It is here were we spend time as a family, we teach our little ones how to play childhood games, we entertain friends and form memorable moments we will cherish forever.
In small corners or small yards the issue of sitting space appears and most of the time garden furniture with a pleasant aesthetic appeal costs a fortune. Luckily, the idea of tree seats has appeared, a form of preserving your greenery and building around it, creating functional sitting areas. Let's take a glance at a few tree seats ideas and choose your next diy project today.
via gdiva.com
The first thing that comes to mind when thinking about a garden project is the usage of natural materials. The tree seat above has been created using river rocks and stone.
Pallet wood is another creative cheap option. Simply form a structure around your favorite tree add a few pillows and your relaxation seat is ready.
Make sure to create such a platform in a corner if possible.
What do you think about the idea of a tree seat?Feel free to share your own tree seats projects in the comment section below.
Lace is a controversial object, texture, item, able to easily transform DIY Crafts, fashion items and interior designs alike. Doilies as well are items in which a tremendous amount of energy has been invested, items able to shape and construct space, design lines and DIY projects alike. We have curated 22 charmingly beautiful lace DIY projects to realize at home, items ready to beautify through elegance and details.
These items can emphasize items, can become graphical motif in certain themes or stand-alone items in their space. Cast a glance at the gallery below and notice how so little can change so much.
#1 Vintage Wood frame decorated with doilies and frames
What do you think about DIY Lace Projects? We would love to hear your opinion in the comment section below .
Immense beauty.
Warmth.
Coziness.
Candles have been emphasizing our existence for more than 2000 years already, helping us survive, rebuild ourselves, focus and relax. An object that can take many shapes and sizes, candles are simply brilliant presences filled with coziness and warmth that bring the light into your lives. Candles combined with natural wooden textures are defining the perfect package, the supreme item of relaxation today, complementing each other in a great manner.
The first candles used on Earth, initially used to survive, originated in China somewhere around 200 BC and they`re know to be made out of whale fat. In Europe`s anitiquity candles were made from natural fat, wax and tallow. Ancient Rome candles were realized out of tallow due to the excessively high cost of beeswax. In Ancient Greece candles may have exisisted yet the unknown, imprecise terminology obstructs our view into the past.
In Europe, in the Middle Ages, the most common candles where the tallow ones. In the 13th century candles appeared in England and France as guild crafts; the "chandlers" tittle owned by candle makers were know to wonder about from house to house, realizing candles on site from the kitchen fats especially saved for that purpose, candles made previously in candle shops were also sold on demand. Beeswax candles were known to burn cleanly compared to other animal based candles like tallow, these having a smoky flame; they also smelled fresh where tallow had a terrible odor. As a result, Beeswax candles were really expensive and few people were able to burn them in their homes in Medieval Europe, churches on an other hand used often in church ceremonies.
18th century came with news in the candle making process, spermaceti, an oil produced by sperm whale, gave birth to superior candles. In the late 18th century the colza oil and rapeseed oil gain ground as they were much cheaper substitutes.
19th century brought immense changes as the candles manufacturing become an industrialized mass process towards the middle of the century. The machine that revolutionized candle making emerged in Manchester, England where a pewterer entitled Joseph Morgan patented the game changing piece of machinery. A continuous production of molded candles started, it used a cylinder with a movable piston to eject them as they took shape, 1500 candles per hour were made and as a result, candles became an item affordable to the masses. In this era Candle-makers began to fashion wicks as well, tightly braided out of stands of cotton, previously these only being simply twisted. This simple change on the wicks regulated the height of the wick and directly the flame, self trimming wircks being entitled, removing excess wick constantly as they were incinerated.
In the mid 1850s another remarkable change occurred as James Young managed to distill paraffin wax from oil shales and coal at Bathgate in West Lothian, thus developing a commercially viable option for commercial use and production; this brought paraffin candles of high quality to affordable price ranges. The new bluish white wax now burnt clearly and left no unpleasant odor unlike the old tallow candles, in the late 19th century everything changed, most manufactured candles being realized out of paraffin wax and stearic acid.
In the mid-1850s, James Young succeeded in distilling paraffin wax from coal and oil shales at Bathgate in West Lothian and developed a commercially viable method of production. Paraffin could be used to make inexpensive candles of high quality. It was a bluish-white wax, burnt cleanly, and left no unpleasant odor, unlike tallow candles. By the end of the 19th century, most candles being manufactured consisted of paraffin wax and stearic acid. New pioneered techniques opened new roads as Price`s Candles based in London, the largest candle manufacturer at that time, managed to implement a new technique of steam distillation that was able to forge candles out of multiple sources like bone fat, fish oil, industrial greases and various other raw materials.
The huge uprising of the candle industry declined rapidly as the introduction of superior lightning using kerosene and lamps changed the game entirely. In 1879 the incandescent light bulb managed to extinct the candles functionality, from this point, the candle being advertised as a decorative item.
Today we have infinite possibilities in candle making, we can obtained candles with any scent, any shape, any size. Happily we can use them to complete our ambiance and warm up the mood in any combination, any decor.
In the following rows we will showcase a small home made candle holder centerpiece that can be crafted in 10 minutes with a few power tools that you might already have. Cast a glance and leave your valuable feedback in the comment section below.
DIY Wooden Candle Holder Centerpiece Guide
ITEMS REQUIRED
jigsaw - manual or electric
electric drill
1 1/2 inch spade bit
rustic wooden piece
tape emasure
one square
pencil
Find a Graphic Wooden Piece for Your Votive Candle Holder
A diy enthusiast keeps everything that can become a craft in its household. The piece of wood showcased below presented great potential from the first glance but it remained in our small wood pile thanks to the time`s footprints imprinted on the piece. As you can see, sculptural waves have been shaped by time, emphasizing its graphic aesthetic values a great deal.
You can see the wooden piece by the pitch fork, waiting to become something spectacular.
The right part showcases great potential and we`ve decided to work with the rustic look for more warmth.
Measure and Trim the piece
Think about the position of your feature centerpiece, try to scale the item according to the table on which it will reside. Our wooden candle holder was supposedly envisioned for a small dinner table and as a result we`ve made it short, 43, approximately 17 inches. We`ve chosen to design it kind of short because we`ve also had only a small portion of piece affected beautifully by time, if you are lucky enough to have a more spectacular piece of wood you can go with a bigger length.
mark the position of the candle sockets
A very important step as the proper spacing of the candles can define your outcome. Make sure that you have a clear clean layout before you start drilling. We`ve chosen to position three sockets stacked with a constant space between them followed by a more distant candle in one of the end. In theory, that separate candle was to be colored or scented where the others might have been white, simple or differently colored.
Get drilling
Caution and care is advised. You should use adequate protection equipment and make a trial run on a less important piece of wood. It would be a shame to ruin the sculptural work of time in a matter of minutes. If this is your first craft with a spade bit, practice a little, it is very easy to get it out of hand and the depth is hard to control. It is worth mentioning that every piece of wood is different and you have to adapt to your own; if you could have a practice run in an excess wooden piece from the same element you will gain a more complete feedback.
Enjoy your fresh rustic candle holder centerpiece
5 minutes have passed and four sockets have been drilled. You can now see the layout we`ve envisioned, that 3 to 1 emphasized by the beautiful sculptural node that influenced our decision. In the background you can also see our own trial runs with the spade drill bit.
The beautiful part of about this wooden piece is that every facade is different, every angle showcases a marvelous perspective filled with naturalness and warmth.
We`ve showcased the item below along various other Homesthetics crafts, we would love to hear your take on the collection.
Wooden textures beautifully tailored with candles are a combination hard to define, simply filled with naturalness, organic, coziness. A smart design can go a long way and as you`ve read above, candles have worked very hard to be in our lives, to beautify our soothing long baths and bring light in the most magical moments of our lives. The candle will remain a splendid occasion regardless of their shape, size, color, scent and even occasion, it is really hard to go wrong with candles.
We would love to hear your valuable feedback on the subject in the comment section below, we would love to hear how you`re using candles in your decor today.
Children are creative entities awaiting to release their imagination and transpose it into fun crafts that will keep them entertained and connected with the environment. Anything that arouses their senses, stimulates their interest and creative juices can trigger their wonderful enthusiasm which we all adore to see more often and surround ourselves with. There are multiple methods of connecting with a child's creativity but painting has been proven to be a very effective one. Consider teaching your little one how to mix various hues with a sponge or empty tissue paper rolls to exercise their imagination. This way, the idea that one has to stick to a paintbrush in order to create a masterpiece, will be transpired to to them as a narrow minded way of thinking. Finger painting will enable youngsters to express their true feelings on canvas while teaching them to transfer what they see in nature on paper, developing their focal ability and enhancing their sense of environmental awareness.
Imagine your little kindergartners creating their own array of colors and using bubble wrap or other miscellaneous household items to discover the artist in them, while having fun. Realize that even bouncing objects that has been dipped in some form of colorant, onto a blank sketch, can be a great craft idea. It is possible to invent and create fun and easy painting ideas for kids of any age. Colors carry their own meaning, significance, so when working with preschoolers especially, use bright, vivid hues like yellow, orange, blue and green to awaken their mind and instill a willingness to participate.Consider these 19 fun and easy painting ideas for kids and yourself as well as a fun relaxing activity for a free weekend.
It is possible for kids to have fun using many different forms of coloring to create their own unique images of their understanding of the world around them.Get your imagination going and have fun along them in a colorful painting journey. We would love to hear your take on this creative topic in the comment section below.
Are you looking for some new DIY projects for your home soon? If yes, you should choose reclaimed wood to make them because it has a rich history, a nice charm, it has memory and experience, it adds character and beauty in its surrounding. Reclaimed wood is known to be extremely durable and strong, so this is another good reason why you should make it a part from your home. If you don't have a clue what to do with this type of wood, I'm going to give you some stunning ideas that you can't get out of your mind once you see them.
Scroll through the photos below and see the Charming DIY Reclaimed Wood Projects That Will Add Warmth To Your Home and make your picks. Wood will connect you to the outside world with ease and will beautify the space instantly with its interesting unique textures that coziness and warmth.
Let's take a look at some fun designs that you can recreate at home!
The reclaimed wood seems to fit in almost any style with ease and lots of modern home owners decide to add it in their living spaces whether it is just as an accent or in a big way.
Would you love to see larger doses of wood in your home or just small details that will enliven the ambiance?
Reclaimed wood is not expensive, so all of these projects won't cost you much money. You can make some useful furniture out of it or other decorative pieces that will give character to the area. It's a hot trend nowadays and it seems that everyone is looking forward to embracing the warmth of wood.
Do you think it's impossible to add reclaimed wood in your home? Have you though about a barn door? This is an interesting project for your home and change your surroundings with a small effort.
Your sleeping area is another place where you can incorporate wood and make the atmosphere more warm, comfy and inviting, so what do you say about using reclaimed wood to make your own headboard quickly and easily?
You have the opportunity to realize something beautiful, something great, something cost efficient cozy and warm. You just need time, patience and love to invest in a small craft that will remain as a living memory in your household. It is wood; it is the supreme material that surrounds us and transforms the world as we know it through its beautiful cozy and warm textures.
We have curated a list of 19 Smart and Beautiful DIY Reclaimed Wood Projects To Feed Your Imagination and we invite you to cast a glance at the galley below. You will find crafts of various difficulties and different types, choose your favorite and start crafting!
#6 build a reclaimed wood bookcase in just a few minutes
You can use these as modules and play with them in different settings or simply scale the project up into one piece if needed.
#7 craft a rustic wooden tray for your coffee table
#8 enhance a reclaimed wood desk and use it
#9 build a rustic wall mounted magazine rack and mail organizer
#10 beautify old benches or tables with wooden surfaces
#11 super neat reclaimed wood shelving unit
#12 tailor hallway shelf to hold your keys and mail
#13 neat reclaimed wood tv stand or coffee table
#14 build your own bed out of reclaimed wood
#15 tiny Salvaged wood tray with rope handles
#16 Enhance your party kith with a rustic 4 pack beer tote
#17 reclaimed wood wall art doubling as a green wall
#18 Coat rack aided by reclaimed wood
#19 industrial pipe arms combined with a wood shelf
Simple yet beautiful and efficient. Wood is simply stunning. What do you think? We would love to hear your opinion on these DIY reclaimed wood projects in the comment section below.
Are you excited to see some new and inspiring DIY crafts that you can make on your own and improve your living space for less money than usual? If yes, you are at the right place. For today I have decided to share with you 19 Charming DIY Chandeliers That Will Lighten Up Your Space. There are so many different designs that you can choose from and it won't be hard to find a matching design for your home. Most of the designs are made by re-purposing old things, so you would be able to give old items new life and give them another useful purpose. Chandeliers are perfect for those who want to add drama to their homes. They are big and they are in the center of attention. The designs are really eye-catching, so it's worth giving them a look!
Has is ever occurred to you that you can make a chandelier by reusing tea cups? If you are a fan of beautiful cups than this is the design that will get the most of your attention for sure.
Isn't this romantic chandelier really lovely and adorable? It's a girly design that will work great for a girl's pad. You will have to use a hula hop or another square wooden construction to get a perfect shape.
Have you been collecting wine corks and have been looking for the right design to put them to a good use? What do you say about this stunning chandelier? All wine lovers will be fascinated by it!
Does your rustic interior seem some kind boring and you need something to lift the spirits and bring some excitement into the room? Find a branch with unique shapes and see how it becomes your new chandelier in no time.
Glass bottles are very durable which is a feature that makes them amazing for DIY projects that will stay in the home for the long run. Making a chandelier out of bottles can be really fun and your room will be brightened with an awesome design that will grab everyone's attention.
Do you have old bike wheels collecting dust in the basement and you haven't got a clue what to do with them? Well, it turns out that they can be used to create some remarkable chandeliers for your home. What do you think about this idea?
We all love the hula hoops from our childhoods because they bring us nice memories of fun and careless times. Lately, I have been seeing them everywhere and the hula hoop craze have entered our homes, yards and parties. People use them to add a lovely touch to their home decor and their special events. Here you are going to see some Fun DIY Hula Hoop Projects That Will Impress You and will make you give a second life to the old hula hoop that you have at home.
Has it ever occurred to you that you can reuse the hula hoops in your garden? If you have just started gardening, and you have a small garden, this is a wonderful idea that you could give a try.
The wedding decorations featuring hula hoops are more than amazing when combined with red and orange roses and green leaves. They create a perfect backdrop, so if you are having your wedding soon, have this idea in mind.
Are you a fan of dream catchers? If yes, then you will definitely love to make this huge dream catcher and use it as a decoration for the empty wall in your bedroom.
This playful chandelier has a hula hoop at the top to hold differently colored and sized paper spheres. The craft may take a while thus putting your patience to a test but the result is surely rewardful.
Are you wondering how to make your kids' room more playful and fun? They will definitely fall in love with this hula hoop project that will give them privacy in their room. They will love to hide here, read their books or just play around.
Incorporate the hula hoop in the decor of the first birthday party to your kid. It's not difficult at all to attach balloons to it and just hang it on the wall. The room will get a completely different look in no time.
The hanging hula hoop decorated with some green leaves and your favorite word in the middle makes a gorgeous decoration for the modern and contemporary home.
Turn the hula hoop into a memory bank by displaying all of your favorite photos into it. This is such an amazing alternative frame that will become a focal point in a minute.
How do you see the funny DIY Hula Hoop Projects above? We would love to hear from you in the comment section below !
Quilting is the art of combining three layers of fabric together like a sandwich, and stitching them either by hand or a quilting machine to achieve a desired style for a specific purpose such as to beautify one's home decor. To do this, first choose out the design you would like to work with, keeping in mind that a quilted material can be the same on both sides as well as have different patterns on either side. Place the cotton material in the center of the two layers of designed fabric being aware of which one you desire to have as the top layer and back or underneath sheet; then stitch as desired. This craft is usually taken up as a hobby, or someone looking to make a living. In some countries, quilting is usually carried out by a group of people around a huge sheet of material, all collaborating using hand stitching to complete a project.
Table runners on the other hand have been deemed to be useless by some while there are many who disagree for good reasons. These centerpiece fabrics, as I would call them add so much elegance and luster to your dining decor, in other words they basically compliment your dining room the same way a bouquet of flowers or a chandelier would. Many people are passionate about keeping traditions, well this is one that will always be a classic because it brings so much character to the relevant setting.
Before laying down the fabric, ensure the table is measured to determine what will be the length of your pad; note this can be used to bring attention to a beautiful centerpiece or in accompaniment to an actual full length cloth that covers the entire dining surface.
#1 Choose to quilt a winter heart box pattern as a valentine's day table runner idea
Despite what many say, using fabric will various designs to enhance a dining room'a decor is very much in style and considered vogue. What is your take on this DIY topic? Feel free to speak your mind in the comment section below.
Nature and greenery is all you need to recharge, relax and calm down at the end of a stressful day. If you are lucky enough to enjoy a small yard of your own these are the elements that should be enjoyed to the fullest at the end of your work day. Greenery can sculpt a high quality background with low costs and happily maintenance is low, especially on xeriscaped backyards. In the gallery showcased below you will find no less than 16 backyard landscaping ideas that have beautified household through simplicity.
In your backyard as in your home decluttering your décor is insanely important, a smooth design line being obtained through clarity and naturalness. Enjoy your landscape with your friends and family and try to think of it as a refugee, a small drop of heaven nestled in greenery in your own yard.
Backyard Landscaping Ideas
#1 Natural Scenery Beautified by Greenery
#2 Brick Edge in Beautiful Greenery With Tropical Plants
#3 Xeriscaping and Mineral Elements in Drought Backyard
#4 Stunning Realized With Colorful Flowers Embraced by Tall Greenery
#5 Greenery Emphasizing a Simple Backyard
#6 Wooden Fence Protecting Flowers With Organic Edging
#7 Big Rocks Used to Organize a Breathtaking Landscape
#8 Terraced Rocky Backyard Sheltering Flowers at Multiple Levels
#9 An Ocean of Greenery and Flowers on a Sloped Backyard
#10 Tropical Setting With Lush Vegetation and Rocky Flooring
#11 Exemplary Floral Display Decorating a Brick Wall
#12 Wooden Deck Nestled in Greenery Taking Advantage of Fresh Air
#13 Two Benches in Greenery Might Be All You Need
#14 Organic Landscape Sculpted by Mineral Elements Throughout The Greenery
#15 Wood and Rock Combined With Greenery in a Calm Peaceful Background
#16 Wooden Pallets Used as a Fence in Simple Rock and Grass Backyard
We would love to hear your opinion on these backyard landscaping ideas in the comment section below. What elements would you like to introduce in your backyard this summer?
Designed by E. Fay Jones, second of six “most admired” architects recognized by Architecture magazine, an apprentice of Frank Lloyd Wright, Jones’s Thorncrown Chapel displays characteristic organic architectural elements.
Demonstrating respect for the natural setting and landscape and integrating a sophisticated orchestration of space and light along with the use of simple, handcrafted, natural materials, Thorncrown Chapel received the American Institute of Architects (AIA) Honor Award and Jones was awarded the Gold Medal for his great contribution. The Architectural Record proclaimed that Thorncrown was“a brilliant testimony to the power of architecture to intensify experience and inspire contemplation.”
It is constructed mostly of wood and other natural materials indigenous to northwestern Arkansas. So the proposed design minimized material transportation costs. Though it looks like an open-air structure, the chapel is a glass-enclosed, conditioned space that still allows you to fell in the middle of a forest.
This chapel was listed on the National Register of Historic Places in 2000 .(Buildings less than fifty years old can only be listed on the Register if they are of exceptional significance).
Zaha Hadid Architects have completed all sorts of public architectural programs through which they have proved their majesty and one of a kind style. This museum bears the mark of their ingenuity through which they have developed a design that was inspired by the landscape and its profound meanings.
The exhibition is nothing short of extraordinary. Spreading over a surface measuring 7,000 sqm, it houses over 3,000 exhibits previously stored in the former building of the Glasgow Museum of Transport, a vast collection of relics from a prosperous past. Among them visitors can glance at items like the L. S. Lowry: Cranes and Ships, Glasgow Docks or the SAR Class 15F 4-8-2 steam locomotive, No.3007 - built by the Glasgow-based North British Locomotive Company.
The concept at the base of the project could not have been explained better than the architects themselves:
“The historical development of the Clyde and the city is a unique legacy; with the site situated where the Kelvin flows into the Clyde the building can flow from the city to the river. In doing so it can symbolize a dynamic relationship where the museum is the voice of both, linking the two sides and allowing the museum to be the transition from one to the other. By doing so the museum places itself in the very context of its origin and encourages connectivity between its exhibits and their wider context.
The building would be a tunnel-like shed, which is open at opposite ends to the city and the Clyde. In doing so it becomes porous to its context on either side. However, the connection from one to the other is where the building diverts to create a journey away from the external context into the world of the exhibits. Here the interior path becomes a mediator between the city and the river which can either be hermetic or porous depending on the exhibition layout. Thus the museum positions itself symbolically and functionally as open and fluid with its engagement of context and content to ensure it is profoundly interlinked with not only Glasgow's history, but also its future. Visitors build up a gradual sense of the external context as they move through the museum from exhibit to exhibit.”
The design is basically a giant tube, opened at both ends, which the architects have shaped in two ways. First of all there is the very intriguing roof which resembles a scenery from the Alps and, just like the mountains, it takes the shape of peaks and troughs, creating a very dynamic facade and a very interesting interior. Their second intervention consists of bending the shed twice, resembling the form of the letter “Z”. The visitors cannot see the other end of the building from the entry point, fact which turns the tour through the museum into a labyrinth-like route, creating some sort of mysterious and magical place and enhancing the will to go through the entire exhibition and to get a sense of the place. The interior does not benefit from any natural light, mainly because in an exhibition there should be no direct sunlight because it affects the perception of the exhibits. Instead, artificial light is used which can be manipulated to enlighten the internal space as the architects desire and to provide visitors with a proper perception of the exhibition. It also allows them to focus on the observation of the items.
Homesthetics conclusion:
The amazing thing about this project is the attention to detail given by the architects. Every aspect of the project has been properly designed and optimized to meet its purpose. I mean they have taken into consideration everything from the relationship between the architectural object and the landscape to providing the visitors with a most interesting route and not just with a storage space for the automotive relics. They sorted it all out. And above all of course its the exterior shape of the building which impresses and gives the museum a sense of personality and character.
Client: Glasgow City Council
Opening: June 20th, 2011
Cost: 74,000,000
Project Director: Jim Heverin
Project Architect: Johannes Hoffmann
Project Team: Achim Gergen, Agnes Koltay, Alasdair Graham, Andreas Helgesson, Andy Summers, Aris Giorgiadis, Brandon Buck, Christina Beaumont, Chun Chiu, Claudia Wulf, Daniel Baerlaecken, Des Fagan, Electra Mikelides, Elke Presser, Gemma Douglas, Hinki Kwon, Jieun Lee, Johannes Hoffmann, Laymon Thaung, Liat Muller, Lole Mate, Malca Mizrahi, Markus Planteu, Matthias Frei, Michael Mader, Mikel Bennett, Ming Cheong, Naomi Fritz, Rebecca Haines-Gadd, Thomas Hale, Tyen Masten
Competition: Team Malca Mizrahi, Michele Pasca di Magliano, Viviana R. Muscettola, Mariana Ibanez, Larissa Henke
Services: Buro Happold [Glasgow, UK]
Acoustics: Buro Happold [Bath, UK]
Fire Safety: FEDRA, Glasgow
Cost Consultants: Capita Symonds
Project Management: Capita Symonds
Size/Area: Gross floor area 11,300 m2 (excluding basement)
Exhibition Area 6600 m2 (including public areas and café)
Site Area 22,400 m2
Footprint Area 7,800 m2
Materials: Steel Frame, Corrugated Metal Decking, Zinc Cladding, Glass-reinforced gypsum interior surfaces
Modernity has come with new exciting ideas meant to transform your living space and make it exciting and unique. But although a black and white color scheme can be considered a true "classic", the usage of black in interior designing is quite limited. And the main reason is that black is very difficult to adapt to any interior and can cause irreparable damage if not handled carefully. It can transform a small room in a even smaller one and create discomfort and a claustrophobic atmosphere. At the same time, in the right amount black can confer your home a certain degree of richness and elegance that can set the rithm for the entire interior design.
Its sophistication comes from the strong contrast it can create between certain pieces of furniture but at the same time, it can be utilized as a neutral background for exclusive pieces of art and plays the role of a display window, becoming the focus of the entire decor. But for the effect to truly be at its best, we recommend you to limit the usage of black paint to one wall; It does not have to be the biggest wall in the room, the color itself will draw attention to it and thus to the objects displayed in that specific room corner.With the right illumination and decoration, black walls can be used in any home from modern interior design to classic mansions. The following gallery is meant to inspire you and give you some interesting ideas on how you can use the black wall as a statement in you interior design.
The Absolute Towers are also known as the Marylin Monroe towers, the nickname given by the local residents. The gentle twisting of the two structures was meant to resemble and express the fluidity that defines the natural world.
Also known as the Taipei World Financial Center, it is the former highest building in the world, surpassed in 2010 by Burj Khalifa but still a brilliant piece of architecture and engineering.
The Taipei World Financial Center is revolutionary from many points of view and a very intriguing project for both architects and engineers. The designers met many drawbacks and problems which nobody ever confronted before so they had to invent new ways of dealing with the opposing forces. Building the highest structure in the world means going over new boundaries set by enormous height and huge mass. The amazing size of the Taipei World Financial Center meant that the efforts produced by wind, weight and earthquakes were in a whole other dimension than for normal buildings such as a small home. But the materials that the designers had to work with were the same and had the same abilities to resist to various forces.
Structure
The first challenge was to design and build the foundation, the element that anchors everything to the ground and keeps it from falling steady, probably the most important part of the construction process. The main problem was that the site was only 600 feet away from a fault line and, moreover, in this area of the Asia-Pacific earthquakes are quite common and serious. These factors lead to the decision of making one of the most stable buildings ever constructed that will withstand gale winds of 134 mph and the most powerful earthquakes that could occur. The Taipei World Financial Center has five underground stories of which the foundation is composed. There are 380 piles that go 262 feet into the ground so that the base of the building would take a hold in the bedrock, the hardest layer that was to be found underground-each pile is 5 feet thick goes about 98 feet into the bedrock to ensure maximum stability. The engineers worries about the safety of the structure was put to a test on March 31, 2002 when a 6.8 magnitude earthquake shook Taipei and its buildings; many collapsed but the skyscraper which had reached 56 floors showed no structural damage, whatsoever. This fact gave the engineers confidence and work was soon resumed, considering that five people lost their lives during the catastrophe.
During the construction process, the number of earthquakes in the area increased. A scientist launched the hypothesis that the huge mass of the newly built skyscraper was so large that it had the power of severely influencing the stability and movement of the two faults, near which it was being built. Even if it was never demonstrated to be true, it is still very intriguing and gives a clear view upon the enormous, 700,000 tonnes mass of the Taipei World Financial Center.
After the foundations were completed, an even harder and more complicated part of the construction followed. To make the tower resist to wind forces but also inertia given by an earthquake, the engineers had to develop a mega structure, never built or designed before. The result is a not so complicated to comprehend but was very difficult to build and presented unforeseen challenges. There are eight main, mega columns that provide vertical support and conduct the efforts from each floor to the foundations and 28 smaller ones. They are all connected and reinforced, on each level, by a complex steel grid. Every eight floors, massive steel outrigger trusses further enhance the stability and compactness of the structure. In order to achieve a flexible but also strong structure to make the Taipei World Financial Center resist, the engineers had to combine concrete which is only good at being compressed but cannot resist to any stretching with steel ( about four different types of steel) which can do both. The eight main columns are made from a steel square frame into which the builders poured concrete. Sounds quite simple but welding steel parts that add up to nearly 1500 feet and transporting them to such a height was never done before and was only possible by using cranes that rise with the building. The huge demand of precise parts of steel was supplied by an industrial factory near Taipei.
The crown jewel of the structure is the world’s largest passive tuned mass wind damper, set at the top of the Taipei World Financial Center. The principle on which this element works is quite simple: it is a shock absorber that holds the building from moving swinging too much and it was placed as high as possible because that is the part of the building that will move the most, especially due to wind power. This unusual of keeping the building steady reduces in fact 40% of the movements that would normally occur; without this key structural element, the tower would probably incline beyond its capacity and break. The tuned mass damper weighs 660 tonnes and cost 4 million US$; the steel sphere measures 18 feet in diameter and consists of 41 circular steel plates, suspended from the 92nd to the 87th floor.
Design
The overall appearance was meant to evoke strong Chines beliefs and traditions, a building that would be an icon for the city of Taipei by illustrating its community's attributes. The number 101 symbolizes perfection by being a step further than 100. Dividing the tower into eight floor segments was also inspired by the Chinese culture, in which this number represents abundance, prosperity and good fortune. Both the interior and the exterior of the Taipei World Financial Center were diverted from the shape of a Chinese pagoda and the form of bamboo flowers. The concepts of financial richness and everlasting youth in Chinese culture are represented by a blossoming flower, which inspired the designers to make the building open upwards. Naturally there are many other small design elements that were inspired by the same beliefs, all pointing out to the idea that the designers were very fond of the Chinese culture and chose to include as many traditional elements as possible in the design of the Taipei World Financial Center.
Awards
Seven Wonders of Engineering by Discovery Channel in 2005
7 New Wonders of the World by Newsweek Magazine in April 2006
Best of What’s New Award 2004- Engineering, Popular Science Magazine
Guinness World Records of the World’s Fastest Passenger Elevators (Observatory Elevators 1,010 m/min)
Tallest Building in the World by the Council on Tall Buildings and Urban Habitat (CTBUH)
Homesthetics conclusion:
What is truly remarkable is the designers wish and force to confront issues that nobody has faced before and the intelligence that they’ve proved by pre-designing this huge structure which acts just as they've foreseen and imagined. If there is something that would even further prove their boldness and determination is Taipei’s World Financial Center’s singularity. It is the only skyscraper around, the first built in the area and the highest point for many miles. I also appreciated the way that the designers approached the concept, not forgetting their culture and beliefs, creating a symbol for the Chinese and Taiwan tradition.
Photo and image courtesy to C.Y. Lee & Partners and
Type :Commercial offices
Location :Xinyi District, Taipei, Taiwan
Construction started :1999
Completed :2004
Opening: December 31, 2004
Cost :US$1.8 billion
Architectural height :509 m (1,669.9 ft)
Roof height :449.2 m (1,473.8 ft)
Top floor height :439 m (1,440.3 ft)
Observatory height :391.8 m (1,285.4 ft)
Floor count: 101, 5 below ground
Floor area :193,400 m2 (2,081,700 sq ft)
Lifts/elevators :61 Toshiba/KONE elevators, including double-deck shuttles and 2 high speed observatory elevators
Owner: Taipei Financial Center Corporation
Management :Urban Retail Properties
Architect :C.Y. Lee & Partners
Structural engineer: Thornton Tomasetti
Main contractor: Samsung Engineering and Construction Company
Nature has various ways of expressing herself. Its beauty lies in its wildness and incredible force which has modeled shape and created surreal landscapes and sights. Today we are presenting you the simplest of houses lying down between a surreal landscape powerful through its rough terrain slopes and lonely surroundings. Located in the harsh Norway on a solitary island, the small home seems to camouflage wonderfully in the stony land. Its simplicity stands out, rising from the ground and overcoming its difficult site conditions.
“We have aimed to build a contemporary Naust with an unpretentious presence and a distinctive character, developing themes from the vernacular architecture. Seemingly growing from the landscape, the house sits on a rock beneath a granite shoulder negotiating the uneven terrain“, explained the architects.
Simple Scandinavian interior designs have been chosen to go with the overall theme where glass dominates the structure, allowing the incredible landscape in. Neutral tones create a cozy uniform atmosphere where you can relax and let go.
Would you choose to live in such harsh conditions? We believe that for a solitary soul such a landscape and home would be the ideal place. It can also serve as the most incredibly simple vacation home where you could actually disconnect and reestablish that necessary earth connect we all seem to have lost in our concrete cities. Fell free to share your thoughts in the comment section below.
As we all know, times are changing and so do people's needs, but when we change something that doesn’t fulfill our needs to the best , ( our home for example ) ,we want to leave there a piece of intact history behind, and architecture nowadays extends towards a merge between old and new buildings , with reinvigorating new functions that better suit our contemporary society.
In that manner, BKK Architects finished their latest project , the Enclave House. “Deep reveals to the upper floor windows shield the gaze from the surrounding neighbors. This also gives the residence a profound sense of containment, like a protective cocoon. The private courtyard garden links the studio space with the main residence. The landscape has been manipulated to frame the views between the two“.
Although the courtyard is small , the garden and the swimming pool look welcoming and generous .Large openings connect the inside to the outside spaces , providing an airy feeling and a light passage. The spaces are generous , the design is simple and minimalist , with few details and accents and no bold colors . Although the dining table is a little bit to majestic and large , placed in an open place filled with white,it brings a feeling of harmony and stability .
Homesthetics conclusion
We really enjoyed this project because we are generally interested in the merge of old with contemporary architecture styles. Although we weren‘t particularly impressed by the contemporary interior design, the successful style merge that invigorated the functions and the purpose of this home proved it as a true architectural mark.
All photos and images are courtesy of BKK Architects .
Sitting in the middle of this gorgeous Icelandic plane, the Reykjavik House integrates perfectly in the landscape and proves that minimalist, simple architecture can fit in any terrain. ‘The main idea of the project is a terrace wall, pulled from the house and bended in a way that it looks like it came out from the landscape,’ says architect Lukasz Pastuszka of Lodz-based Moomoo Architects. Because of its location, almost any type of building standing alone on the sit would prove to be a brutal, definite gesture that marks the entire landscape. That’s why making it fit in, making it look like it belongs there was so important. The monochromatic composition that formes the house is adequate to the surroundings and instead of destroying the plane it creates a point of interest, a marker for it. The interior is a simple and appropriate as the exterior. The house has openings on east and west facades to take advantage of the views around; the other two are covered because of intimacy and climate reasons, the north side is alway
s the coldest. The construction doesn’t accommodate only the landscape but the family too; it’s not just a house but a home too, the interior organisation proving it. Description from architects: „The project of the house should fit within the border lines of the local master plan which was established for the chosen plot. Consequently the exterior building dimensions including terraces and roofing are 15,5m x 17m which is the maximum area that can be achieved in the plot. The house answers to the needs of future inhabitants, both in the visual and space organizational ways. The form is minimalistic, plain white, with wide glazing. The house respects surrounding landscape – sides directed to the stunning views that are fully glazed and other 2 walls are almost fully covered, which allows the inhabitants to hide from neighbors and have privacy. The main idea of the project is terrace wall which was pulled from the house and bended in a way that it looks like it came out from the landscape. The glazing on both sides of the house is sliding, so during the warmer season they can be folded, so the terrace makes the continuation of the area of the house. This manipulation of the shape of the house blurs the border between the house and the surrounding area. While the exterior is plain white, the interior has an accent of birch wood. The plan divides the house into 4 main zones – garage area, master bedroom area, children area and living area.” Homesthetics conclusion What I really appreciate is how the architects have integrated the house in the given site. On a barren field with nothing but white plains to glaze at for miles, the structure fits in perfectly taking advantage of the landscape and turning its disadvantages into something that enhances the buildings features.
Photo courtesy to MOOMOO Architects Architect: MOOMOO Architects, Lodz, Poland Location: Reykjavik, Iceland Description: Residential - Single family residence Status:completed Area: 193.49 sqm
A career isn't just about scoring a job that helps pay the bills. In order to feel fulfilled and satisfied with your career choice, you need to find a role that you love.
This requires some amount of vision right upfront. Where do you see yourself in 10 years? I know most of us absolutely hate that question, and a lot of it is because we either don't know what we want or it might be that we just don't know how to get there.
That's because we're only looking at the big picture - however, everything in life requires design, including your career. The imagination and meticulous planning you put forth into your design project should be applied to your career paths as well.
No goal is unattainable as long as you manage to break it down into a set of small, achievable steps.
If you want to be a CAD expert, you need to develop software skills and start with internships in architecture planning jobs. If you want to focus on management, or construction or research, you need to get your foot in the door as fast as possible.
Here are a few tips to fast-track that journey.
How to Make and Accomplish Goals as an Architect
Learn from those before you
Life is a lot easier with a mentor - whether that's your college professor, or someone in the industry or even your dad. They will be able to provide you emotional support and help you with your decisions.
However, unless they're in the industry itself, they won't be able to tell you exactly who to approach, which companies to apply to and which door to knock on.
Thus, your best bet is to look online. Make a profile on LinkedIn and jump in. Chances are your friends already have profiles there with a lot of connections. Use their connections to check out other people who are doing the same thing as you are.
Take a look at how their career paths progressed, the companies they worked at, the projects they worked on, the people they worked with. The more people you look at, the more you'll get to learn about all the options that you have.
You can even look up alumni from your school itself and then reach out to them for guidance or advice. LinkedIn is a great place to do your research as you have so many different career paths laid out in front of you. If you want to follow someone's footsteps, this is how you do it.
Make smart goals
SMART stands for specific, measurable, attainable, realistic, and time-bound. This is exactly what we were talking about at the beginning. Having big goals is bound to seem overwhelming unless you have a plan.
With your long term goal in mind, it's time to reverse engineer how you try to get there. Break your career path into small chunks and then focus on going up the ladder one step at a time.
Set small goals for yourself, setting yourself up for small victories and celebrations, instead of large disappointments. Keep your goals specific - for example, getting a license by passing the ARE (Architect Registration Examination). This goal is realistic, achievable, and you'll be able to complete it in a certain time period.
Even with smart goals, it helps to have a timetable. For example, if you are presenting a paper, you'll have a deadline. Choose a subject which is doable for you, thereby keeping your goals realistic. Then start working on your presentation one day at a time, so you have measurable progress every day.
Goals which aren't smart include: I want to buy a big house and a car, or I want to make more money. Instead, aim for a 30% pay hike after a year. If it's not realistic, you're setting yourself up for disappointment and cynicism.
It's also worth noting that every one of your smart goals can be broken down into even more fundamental smart goals. This is where the timetable and the schedule come in. Rome was not built in a day, and as an architect, you know that you can't build a house without building a foundation. So go step-by-step.
Ask for help
You must have heard the saying, "If you want to go fast, go alone, but if you want to go far, go together." This is absolutely true, you can't make it on your own. You need to learn to ask for assistance, not just when you're in a tough spot, but also to make your day-to-day life a little easier.
Now when we say assistance, we don't just mean someone who will stick with you for the rest of your life or a mentor. You just need someone to help you get past the next big obstacle, the most immediate problem.
For example, you can try out your local AIA [American Institute of Architects] chapter.
It helps to have friends, and it helps to know your way around the industry. Industry professionals will always trust someone who comes well recommended and is well-known in the network.
Give it your all
I'm sure you're tired of hearing this by now, but there is no such thing as a shortcut to success. If you want to get to the top, you have to work harder than everybody else. And by that, we mean work smarter, not harder.
Abraham Lincoln said if he's given 10 hours to chop down a tree, he'll spend the first 9 sharpening his ax. You don't have to spend 60-hour workweeks, just make sure you cut down on duplication of efforts and focus on getting things right the first time. Also, make sure your work gets noticed. Credit is due where credit is due. Keep a log of your daily work so you can present it to your boss if anyone ever raises any questions about your work ethic.
But more importantly, you need to keep your eyes and ears open. Opportunity always comes knocking, but you need to get up and answer the door. It doesn't do you much to slave away at a meaningless job and then just go home and watch Netflix when there's a better one probably just around the corner. Your luck can change for the better, but you have to take the first step yourself. Fortune always favors the brave.
Go easy on yourself
Life isn't a competition, and often we are so hard on ourselves on issues which really don't matter much in the large scale of things. So your friend and classmate got himself a big fancy house, and he's only 25? It won't matter in a few years. The only person you should be competing with is who you were yesterday. Aim for better than yesterday, and that's all. It all adds up.
Also remember, it's unreasonable to assume your first job will be the field you'll stay in forever. You might like the idea of research work, but pretty soon you might get bored and want to switch over to something more hands-on like construction. That's completely okay, and it doesn't mean you're taking a step back.
Keep in mind that success isn't always a constant upward trajectory. You'll make mistakes, but you will learn from them, and that is the only way forward. Don't get stuck on something you don't like doing simply because you invested a lot of time in it, sometimes, you just have to cut your losses and continue your journey on another path.
Teamwork
Final Words
If you got nothing else from this article, then this is the short version. Visualize where you want to be a few years from now, and if you want ideas, look online, preferably Linkedin. Once you've sort of mapped a career path, start working at it one step at a time. Break down all your goals into small parts and keep moving forward.
If you keep doing this, it's not guaranteed that you end up where you had initially planned to be, but you'll definitely be in a better place than where you are today.
The name of this modern dream home made by Mayer Sattler-Smith Architects comes from the client’s occupation. He is a professional dog musher, a four time champion of the 1,161 mile sled race from Anchorage to Nome.
Designed for the Glaskoch Corporation by 3Deluxe, the Leonardo Glass Cube pavilion covers 1200 square meters on two floors and is used for product presentations, conference rooms, seminars and recreation.The glass facades suggest a hyper-naturalistic and esthetic style, the organic-like structure being borrowed from the surrounding landscape. The structure of the building is made of two parts: its glass rectangular shell and the undulating interior. The softly curved interior wall encloses an intimate exhibition area, the other side of the building being handled in the exact opposite way: a flood of natural light filtered by the glass wall. The surroundings of the building are treated in the same genetic style by designing a pavement similar with the structure of the facade, achieving a beautiful connection between the pavilion and the immediate encircling space.
The floors are connected by two intersecting bridges. From the entrance, the interior space reveals itself to the visitor on both horizontal and vertical plane. The artificial lighting is constantly and dynamically changed so that the inner atmosphere is in a permanent shift. I believe though that what makes this building stand out is the way its curved structure bonds with the rectangular glass facades, creating a wonderfully balanced architectural composition.
Homesthetics conclusion
Organic designs have always been a bit tricky and hard to materialize because they do not define what we see everyday. These architects have achieved an object that is both a proper architectural object and takes after the organic world.
Photo courtesy to 3Deluxe
Place:Bad Driburg
Architect:3deluxe,Wiesbaden
Lighting designer:Atelier Schiefer
Start of construction: April 2004
Opening: 24 May 2007
Cost: 8 million euros
Inside area: 2,800sqm
Outside area: 5,600sqm
Total height of building: 11m – above-ground: 7m
Height of glass panes: 6m, width: 2m
Materialized in a serene landscape, embedded in vegetation, in nature; PLACE materialized one of the most beautiful green modern classic houses in the world, deeply hidden in the forest.
PLACE is a rather special architecture studio, an award winning Vancouver architecture firm oriented towards the environment that tries to celebrate, nurture and enhance the methods of social cohesion in extraordinary manners. In their projects they work side by side with the client the entire time developing ideas and dreams into new establishments or simply into other dreams.
One of their soul creation it`s entitled The Harbinger, an extraordinary name for a spectacular home. The shelter is built entirely with sustainable materials whilst making no compromises on living quality and comfort; an eco-sensitive house using natural elements in an extremely beautiful and delicate environment.
The modern comfort and extraordinary spaciality has been envisioned for both entertainment and hosting, being situated on a sunny shy acre in the forest, surrounded by mature unique landscaping, a small sport court and a hot tub. The home features a humongous total surface of 5542 square foot from which the architects extracted five bedrooms, four bathrooms; each room being different entirely, comfortable and unique in a distinct manner.
We find the position of the establishment spectacular, it massively improves the whole project. Beside the forest it self the home has its own gardens which are lovely, extraordinary established and very intimate. We would love to hear your opinion regarding this green modern house subdued to wilderness.
Cozy, comfortable, intimate and unique. These are the keywords for this amazing project which presents a very different and unique type of architecture.
Northern London nestles an interesting complex building, six apartments in a simple, sculpted silhouette defined by brick. In this shape distinct balconies are brought forward, wrapped in a natural material, wicker. The volume has been envisioned by Amin Taha Architectsand it now features a cross-laminated timber structure, also known as a CLT structure in which layers of laminated wood are used as a skeleton thus replacing concrete or steel.
The brick play with which was surrounded is perforated to match its surroundings, on the sides two brick buildings neighboring it. Large bronze framed windows pierce the street facade to invite natural light and expand the floor with balconies thus creating a connection between interior and exterior spaces; the wicker balconies provide seated privacy for each apartment with the secondary purpose of shading the window below slightly, as a result each balcony receives the maximum amount of light and privacy.
The interior space is extraordinary special and particular thanks to its timber structure, there is simply no need for plaster walls or suspended ceilings. The cross laminated timber structure remains exposed in the interior beautifully tailored with parts of the brick facade into a balance of coziness and warmth; the architects further relate:
“Timber also has inherently more robust and is perhaps a better and warmer domestic aesthetic”
How do you see the home above? What do you think of its Cross-Laminated Timber Structure ?
The four-storey building centers on the steel staircase that connects all levels and creates an internal dynamism, just like a contemporary luxurious design should be and feel like.
Mindbogglingly beautiful balcony decorating ideas are standing just a few scrolls away, more than 50 extraordinary mesmerizing and yet simple ideas to be exact. In most areas balconies are not used for their design purpose; rather then being opened to fresh air they`re closed with windows in most cases and worst, a big part of them are being used as storage or as an unnatural extension of the apartment or home. The article stands here to change all that. Just cast a glance at the items showcased below analyze the imagination feed, these ideas will serve as a starting point in your balcony decorating diy projects.
Notice how nothing but greenery and a wooden trunk can change the entire decor. These are the first things we are noticing in this transparent design that breaths and exudes freedom.
You can tell if a family loves greenery just by looking at their balcony. The light string emphasizes the beautiful setting through a romantic vibe.
A balcony decorated with care stands above us. Every detail contributes to Mediterranean design scheme beautifully.
Very sensible and beautiful balcony opening up with wooden texture, vintage accents and greenery being animated by romantic candles at night.
Japanese inspired balcony design featuring river rocks, a swing and bamboo wall decor along beautiful bonsai.
Simple and inexpensive decor that can be realized in a matter of hours.
Romantic dinner setting in a narrow balcony beautifying the life of its owners.
A breathtaking decor that can be realized with little to no costs.
Colorful textiles on white stark Ikea furniture nestled in greenery in a mesmerizing result.
Peaceful reading nook with river rocks on the floor.
Yellow infuses happiness and joy at a first glance. Embrace a healthy attitude and make a change in your balcony .
Greenery is all you need at the end of the day.
Superb composition between the rattan texture, the brick wall and the wooden floor.
Wooden bench bringing coziness and warmth in a balcony dominated by greenery.
One twig holding wind chimes to animate the sounds that you require at the end of the day to relieve stress, the song sang by wind.
Wood can make absolutely any balcony better when combined with greenery. Breathtaking decor combination.
Scandinavian vibe in simple stark white decor with wooden flooring.
Small cooking area and sink for that feeling that you get when you cook outdoors.
Industrial color scheme sustained by textures and furnishings beautifully.
Dark stained wood can give your balcony a noble status emphasized through elegance and the visual comfort of stability, it almost brings it a down to an earthy feeling.
A small balcony is no excuse to pass on a great small oasis.
Wooden crates can be transformed in flower pots storage. Greenery related items only.
The bigger the balcony the bigger the garden .
Sculptural items can be sheltered in you reading nook beautifully.
A hammock is probably the ultimate piece that you can shelter in your small relaxation area. Fresh air, greenery and a hammock, absolutely amazing idea worth following.
A full wood/rattan/bamboo decor along with some succulents, a cactus, a bonsai and ficuses can give the place a very very strong cultural vibe. Powerful commited designs are describing the personality of the owner in a beautiful manner.
Sleeping as close as possible to a window is a dream for many, it`s the closest experience to sleeping outside in your own home.
Suspended flower pots on a huge terrace can make a big difference.
Two chairs and a small table nestled in greenery.
Small balcony bar with expansive views.
Huge outdoor rattan armchair in romantic setting.
Without a doubt the most beautiful balcony decor in our small album. Here as well plants in ceramic and concrete flower pots are creating the sculpting and resembling a full size garden in an extraordinary mesmerizing setting emphasized by pebbles and multiple wooden textures.
Get your dinning on the balcony and enjoy the sun in the morning.
In the last balcony setting the space is extended outdoors where greenery stops you to admire it along with the expansive views.
What do you think about these beautiful balcony decorating ideas? We have found them breathtaking, jaw-dropping and extraordinary inspiring. Make a change, declutter your balcony and start enjoying it as a relaxation area today.
Usually, the prettiest DIY crafts are made from things we see everyday, like, for example, tree branches. This is the reason that made us to show you some unique ideas to decorate your home using nothing but simple branches from you garden or backyard. These projects are simple, very cheap and the will cost you only a little bit of your free time. If you have some free time it’s perfect, if not, you should take a break and relax, because we all know how important is to relax now and then, just to clear out our minds. Crafting is a really great way to light your imagination up, to take a break and to decorate your home or garden with whatever you want! So get creative and start these 18 Creative Craft Ideas- How To Use Tree Branches now.
Having a dedicated wine cellar in which you would store all of your wine bottle collections is a luxury that a lot of people can't afford. Some don't want to commit the resources and effort that the construction of a wine cellar will require while others simply do not have space in their home to allocate for a cellar that will do nothing else but store wine.
The next best thing is to use wine racks to store your wine collections around your home. Wine racks are most commonly placed in the kitchen or in the dining room where they will be easy to access, but you can use this to also display your favorite wine bottles. You don't just have to store them away in a dark cabinet where no one can see them. Use them as part of your home décor when you are not using them for their intended purpose. But hang on, simple wine racks cost as much as a television set if you'd go to buy them from a store.
That's why you won't buy one. Instead, we'll show you how to make one by yourself with these DIY wine rack ideas that we've managed to scrape up around the web. They all come with complete tutorials that will instruct you along the way with step by step instructions. All you need to do is find the one that you want to make and then just roll up your sleeves and get down to business.
Super simple materials, inexpensive materials and processes that highly appear to amateurs and enthusiast crafters alike don`t you think? What would you like to materialize from the list above ?
We would love to hear your thoughts in the comment section below !
Discarding old items is no easy nor a pleasant job especially if the item has been with us for a white, especially if it has been used frequently happily. This is the case with old wooden wine barrels. These recipients have given our storage an extraordinary great vintage classic vibe and an extraordinary scent that we will never forget. At the same time, these recipients have stored a really noble drink that made us happy while we`ve entertained friends and family. These brilliant items are therefore deserving a place of their own in your little shelter and below we have featured creative diy projects reusing old wine barrels.
You can use glass and flowers to transform the coziness and warmth as a support for an elegant piece of glass in a coffee table, you can transform then planters, in chars and ottomans or even in dog houses. The planks can be used in multiple manners if you choose to disassemble it but keeping it alone will preserve its prestigious image intact, even when split in half.
25 Brilliantly Creative DIY Projects Reusing Old Wine Barrels
1. Split the Wine Barrels In Two Coffee Tables
2. Extraordinarly Beautiful Wine Barrel Ice Chest
3. Cut a Small Slice and Use It as a Mirror in The Bathroom
4. Old Whisky Barrel Transformed Into a Coffee Table- A Grand Design
5. Slices Can be Used as Bathroom Storage Efficiently
6. Fairy Tale Succulent Mini Garden Realized Out of a Sculptural Barrel
7. Highly Stylish Sculptural Wine Rack Barrel
8.Donkey Kong Barrel Table Custom Built in a Barrel
9. Wooden Barrel Doubling as a Sink in a Bathroom Design
10. Wine Barrel Sliced and Transformed Into a Dog Feeder
The ideas are simply stunning, all original, all authentic and highly highly functional yet graphic. We would love to hear your opinion on the subject and we would to love see your own barrel crafts ! Leave your valuable comment in the comment section below along with your craft and we will try to add it to our list. Craft away !
We will continue the sustainable recycle ideas with another wine bottle design idea. Wine bottles are sculptural objects with amazing resonating properties, making them terrific candidates for a wind chime. Further on we will present you the materials needed for a green pendant wind chime along with the instruction needed . After those you`ll find more suggestions meant to inspire you, you can use the instructions bellow to realize the others, the explained example being the most difficult in execution. In the pictures, most of the wind chimes are colored, we will describe how to paint them in another tutorial, till then you can use naturally colored glass or simple green orange or white bottles.
You will need the following materials (you can of course improvise and alternate with similar products) :
Green Generation(G2) Bottle Cutter
3 Glass bottles in varying sizes from large to medium and small
8 Large glass beads with different sizes, all being a bit larger then the opening of the bottles
36 inch cotton cord
Instructions
Prepare the working area by covering it with craft paper or newspaper, this will help you clean faster afterwards and protect the surface of the glass as well as the working surface .
Prepare the three bottles in different sizes, small medium and large, these ones will nest inside each other.
Measure six inches down from the top of the large bottle, five on the medium bottle and four on the small bottle, mark these distances with a permanent marker afterwards. You can modify these distances to better fit your aesthetic requirements.
Use the bottle cutter to slowly score and separate each bottle where you have previously marked them.
As instructed in the bottle cutter manual, smooth the rough edges as much as you can to prevent unfortunate accidents.
Measure and cut 34" length of the cord, make a know on one end of the cord, large enough to properly hold a 3/4 inch bead. Be careful, not securing the knot here or not making it big enough may cause problems later.
Thread one bead onto the cord till it rests against the know previously created, tie another three inch know from the first and thread another bead onto the cord till it stops at second knot.
Now thread the cord up, from the bottom of the smallest bottle trough the neck until the bead is comfortable against the opening in the neck of the bottle. Tie another knot and glide on a third bead now.
Measure 1 and half inch above the third bead and make yet another knot, add the fourth bead, make another knot, now pull the cord up trough the medium bottle and further up trough the neck.
Add a fifth bead next and one more knot, slide the sixth bead onto the cord make one more knot.
You are almost done, thread the cord trough the bottom of the large bottle and trough her neck, now knot the cord above the lip of the last bottle and add a one inch bead to the cord and yes, knot again.
Measure no less ten 9 inches and make a knot in the cord, now create a loop by inserting a 3/4" bead onto the cord, inserting the end back into the bead opening to create a loop, now secure the loop with a DOUBLE KNOT to properly hold the bead in place.
Last and most important step, hang your personalized retro wind chime where a breeze can slowly animate the object and enjoy the relaxing peaceful melody of your wine bottle art piece.
All distances may be modified to make a slightly longer or shorter chime, the beads can be of course replaced by something more personal or more relevant for you, we invite you to share with us your own personalized design and to help us by sharing the green sustainable attitude that we are trying to promote.
Is concrete on your DIY project list? It might seem like a material more fit for a constructor but it is actually pretty easy to use and highly graphic in the right context. But you must be willing to roll up your sleeves and get your hands dirty. It might require a few tryings before real success, but in the end we guarantee you will be satisfied. Concrete and cement projects have started to reappear in the last couple of years after along absence. Their beauty lies in the raw, textured touch and modern appeal suitable for edgy interior designs and more. The variety of cement projects is vast and covers ideas from flowers pots to door knobs, candle holders and even furniture design. And if you desire that perfect kitchen concrete counter-top, why pay a ridiculous amount on money on buying it when you can easily do it yourself? We admit, it might be difficult to obtain that perfect plane level but you can get there, no worries!
So lets start our 30 DIY Concrete And Cement Projects collection.
1. Cement door knobs in any shape you might desire
2.Decorative cement house using a milk carton
3.Hold your patio tablecloth down with these beautiful cement roses
4. Decorate your garden in unusual ways
5. Be creative and make your own cement planters
6.Put to good use those wooden legs lying around and make yourself a cement stool
7.Cement coasters are as safe as they can be for your table
8.You must build a concrete fire pit this summer
9.Arrange your backyard with concrete stepping stones
10. Your succulents need fancy holders
11. You can stencil even cement
12. Lead the way to your house in neat style
13. Use yogurt cups to make cement candle holders
14. Even old toys can be of help sometimes
15. Make a statement with cement heart pendants
16. Cement lamps are very in right now
17. Pattern your cement candle holders with lace
18. Cement globes as candle holders
19. A cement phone case?
20. Store your jewelery right
21.Make a beautiful terrarium
22. Hold your books in place
23. Shine bright like a star
24. Step on lace
25. Nothing as sturdy as a cement coffee table
26. Use a more watery mixture for a finer texture
27. Even a concrete coffee table can be delicate
28. Find multiple uses for anything
29. Dip a star sponge in cement for decorative purposes
30. Mix wood and concrete for an industrial touch
31.Organize your plants neatly
32. DIY simple concrete bricks and wood bench
Simplicity is beautiful, the ultimate sophistication one might argue. The candle light, a simple shiver of simplicity encapsulating sensibility, coziness warmth and the feel of intimacy in it can beautify our world with ease. Often used to melt down our problems and calm us down, candles are becoming more and more popular each day as their simple light animates our interiors at the end of the day next to the glass of wine.
In the following rows you will find a simple to create DIY concrete holder, realized at home in less 15 minutes or less. Its simplicity and concrete texture has already beautified a few late nights with friends and a few relaxing bath sessions.
MATERIALS REQUIRED
surgical gloves - safety first
glass recipients for small candles
plastic ice scream recipient to use as mold
cutter
concrete mixture
STEP 1
Once you have your plastic recipient ready insert the glass, plastic candle holders into it. Place them on the bottom, facing the floor; in this manner the end item will use the smooth face of the recipient properly. Keep in mind that the recipient dictates the shape so try to find something that would fit your needs, not small nor big enough. In an ice scream container we`ve inserted the magical number of glass candle holders. It is worth mentioning here that the surface must make perfect contact and be heavy enough to support the pressure between the concrete and the air captured within.
STEP 2
Add water to you concrete mixture and with care pour spoon by spoon in the recipient. Make sure that you place the first spoons over the candle holders to apply pressure on them. Take a few seconds glancing on them, if you see any movement, pour the concrete back, clean the recipients, put them back into position and use some kind of glue or discrete tape to stick them to the sop surface.
STEP 3
After filling the mold you need to vibrate the concrete and get air bubbles out, ensuring that concrete has filled everything evenly. Do this with caution, we don`t want to get the air out of the candle holders or the concrete will replace it and ruin the little project.
STEP 4
If everything ran smoothly patience is now required. Let the concrete rest for at least 24 hours before peeling off the mold.
STEP 5
It is time. At least 24 hours have past and you can now peel of the magical object. In our case everything ran decently this time, this being the second attempt; some concrete milk managed to get past the candle holders but nothing that our cutter can`t manage.
STEP 6
Finish off the your concrete holder by removing excess and clean it with water to remove all the dust.
STEP 7
Enjoy ! Use your DIY concrete holder in your bathroom proudly, its shiver of light will beautify many magical moments from now on.
What do you think about this DIY concrete candle holder? We would love to hear your opinion on the project in the comment section below.
I think we can all agree that today's' society is oriented towards the future and modernity. But who says that you can't express modernity and elegance through classical design elements? As the black will ever get old in matters of design, so does the neutral color scheme with classical accents, creating a rich, cozy atmosphere where one could really feel at home. The following example is a great example of a modern mansion that exudes elegance and a conceptual design unity. Located in Canada, this dream home makes use of a dark color pallet to emphasize its classical shape with the all-known arcs and facade details. Natural elements like stone, wood and leather create a composed scheme that offers its inhabitant the perfect ambient one would dream. The white walls have been used as a canvas for the entire display of furniture and decor, but not by overcrowding the space like the old interiors used to. The usage of large windows has created a perfectly illuminated space that can really put into value the created interior design, arranged around the central masterpiece: the classical stone fireplace.Overall, the entire house reflects a beautiful taste in details and design in general, a truly dream mansion.
This remarkable white modern mansion was designed by German practice Hornung and Jacobi Architecture is located in an open site in the countryside next to a forest in Southern Germany, benefiting from wonderful views of the natural surroundings.
Household items can cause lots of problems and their proper solving and right organization can save you a lot of time and nerves. Household hacks are here to save the day and make things a hole lot easier for your daily routine.We have found and gathered 58 New Smart And Creative Hacks For Household Items which will save you time and make your life easier. Enjoy!
Smart And Creative Hacks For Household Items
1. Using Clear Nail Polish To Fix Screws
Nail polish can be used as glue for fixing loose screws from glasses for example.
2. Clear Nail Polish To Fix Loose Buttons
I always have the problem of button thread unraveling at the worst possible moment. Use a bit of clear nil polish o keep things together.
3. Use Your Makeup Brush To Clean Your PC's Keys
It's inevitable to keep things away from your keyboard. use your makeup brush to clean the dust and crumbs away.
4. Rubber Band To Smooth Your Way Through The Door
The rubber band keeps a door latch from opening. Easier access.
5. Painting In a Controlled Manner
Wipe excess paint off of your brushes with the use of a rubber band placed around the paint bucket.
6. Keeping Small Things Organized
Use buttons to keep your small earrings organized and to never lose them again.
7. Keep your boots in good shape
Use pool noodles which are very cheap to keep your boots in a straight position and prevent damage.
8. Prevent slippery hangers
Wrapping pipe cleaners around the ends prevents your dresses and shirts from falling of your hangers.
9. Stack important things together
Use a binder clip to hold your paper money, then attach your keys to make it double as a key ring.
10. Send perfect paper and photos with cardboard
Protect photos and documents from bending in the mail with light bulb packaging placed inside the envelope.
11. Using Bag Closures As Cord Labels
Label your power cords with bag closures to make your life so much easier!
12. Save yourself the mess of cleaning melted Popsicle
Use a muffin liner to prevent those dripping Popsicles your kids love so much from damaging your couch.
13. Decorating mason jars
Even small things should be pretty. Label your jars and add ribbons for a prettier appeal.
14. Packing shoes
Use a shower cap to prevent the dirt from your shoes destroy the rest of your luggage.
15. Always use the right measure
Place masking tape across the top of baking containers to get a perfect level scoop, with the right measure for your cooking.
16. Shower hooks for your clothes and accessories
Shower hooks come in handy when you need to hang different things in your closet without the classical hangers.
17. Repel dust with fabric softener
Fabric softener works as a dust repellent, leaving your house smelling amazing.
18. Dryer sheets to remove soap scum
This hacks seems to actually work and the smell afterwards is far better than any of the other cleaning product's.
19.Use a Tissue Box As Plastic Bag Storage
Store plastic bags in a controlled way.
20. Using a Hair Straightener As A Fabric Iron
This hack is dedicated to those small spaces between buttons where a hair straightener fits perfectly.
21. Coffee Filter As A Flowerpot Liner
Line flowerpots with coffee filters to prevent the flower soil to fall down through the drainage of the pot.
22. Concealing your valuable items
This solution is perfect on the beach when you are alone and want to keep your money and keys safe.
23. Use a colander as an ice bucket for your parties
Great method of always having the perfect ice, without the running water.
24.Funnel made out of a plastic bottle
Perfect use for plastic bottle. Fill those bird feeders easy.
25. Protect yourself from coffee buns with wristbands
Insert delicate flowers into straws to keep them from bending.
28. Use cooking spray on your shovel
Cooking spray prevents snow from building up on your shovel.
29. Pool noodle used as a bed rail
Keep your kids in bed during the night with the use of a pool noodle.
30. Hair clips to keep cords organized
31. Organize your trays and cutting boards with a file organizer
32. Wine glasses candle holders
Perfect for any centerpiece.
33. Family game nights with twister table cloth
34. Let toothpaste guide your perfect picture nailing
Use a dab of toothpaste on the back of a frame and press it up against the wall where you want it to hang. The toothpaste will transfer onto the wall right where you will want to place your nails.
35. Keep jewelry from getting tangled with plastic straws
36. Baby powder as a jewelry untangler
37. Use paint chips as napkin holders
So many colors to choose from!
38. Keep scarfs from wrinkling with paper tubes
39. Cooking spray for squeaky door hinges
40. Organize your toothbrushes
Multiple kids sharing a single bathroom? Use a jewelry tray to organize the brushes.
41. Fun colorful drink stirrers from lollipops
42. Display your cake pops on a colander
43. Design your manicure set in a sunglasses case
Organize every small item in your life.
>
44. Keep your camera safe in a soap box
45. Organize your earrings in a pill box
Perfect for traveling.
46. Cork needle cushion
47. Organize your small office supplies in ice trays
48. Sticky Pot-it cleaning
Use the sticky party of a Post-It note to get in between the tiny cracks of your keyboard.
49. Binder clips as cords organizer
50. Cool down wine with frozen grapes
This is such a perfect treat on a hot summer day.
51. Cut corn off the cob right
When cutting the corn off of the cob, place it in the center of an angel food cake or bundt pan for a secure hold.
52. Part ice cream scoops served perfectly in muffin pans filled with liners
53. Use hanger clasps to keep your chips fresh
54. Keep pasta in Pringles containers
.
55. Hanging pictures with soda tabs
Perfect for those pictures which have not been intended to be placed on the walls and don't come with nails and screws.
56. Organize power cords with toilet paper rolls
57. Lego key holders
For the kid inside you.
58. Skewers As A Knife Block
Bunch skewers together in a box to hold your knives safely.
So, are these tricks and hacks useful? We would love to hear your thoughts in the comment section below and on our social platforms.
Wall art pieces are really hard if not impossible to define as an entire category in just a few words. Sublime copper penny compositions or paper medallions can be embedded in the same category whilst being radically different yet infinitely beautiful, special and particular. Individuality is the most important thing in this big world, it connects voids with contrast and unites different elements discreetly beautifying them without tearing them apart. We invite you to cast a glance at the simply brilliant diy paper wall art projects showcased below, a glimpse of uniqueness in a basic state.
Simple Folded Yellow Paper Medallions Welcoming Spring
Origami Cutouts in a Thick Piece of Paper
Stupidly Beautiful Kirigami Butterflies in Heart Composition
Textile and Paper Installation Tickling Our Imagination
Creativity Breaking Boundaries With a Simple Plastic Bottle
Complex Origami Sculptures Beautifying the World
Paper Triangle Modern Wall Art Showcase
Scrape Paper in Breathtaking Collage
Old Magazines Recycled Creatively
We have found this ideas simply yet inspiring and worth pursuing. Most of them will take a while to realize, creating the perfect opportunity to invite your loved ones into the project and spend some quality time while you`re building out memories. We would love to hear your opinion in the comment section below ! Craft away!
Many of us have old tires lying around somewhere in our garage and you are probably wondering what exactly to do with them or if to throw them away. Happily there are tons of ideas and diy projects revolving around different methods of reusing, recycling and transforming old tires.There are some discussions regarding the toxicity of using old tires in your home as furniture pieces and we highly recommend you to not bring them inside and keep them as flower pots, bike racks, ottomans and other suitable outdoor garden backyard projects. Adding vibrant color to them will make the process of integrating them into the landscape easier. The gallery below showcases a series of these creative projects which are fun colorful and quite easy to make. Browse through them and feel free to share your input in the comment section at the end of the article. Enjoy!
1. CREATIVE CHEAP BIKE RACK
2. FUN COLORFUL STACKED TIRES GARDEN TABLE
3. HOW TO ARRANGE YOUR GARDEN PLANTS
4. A BEACON OF COLOR IN A MINERAL DECOR
5. ARRANGING AN ALLEY
6. VARIATIONS OF COLORS
7. OR PATTERNS
8.LOVELY SITING AREAS
9. ARRANGING A PLAYGROUND
10.LANDSCAPING IDEAS
11. GARDEN FENCE FLOWER POTS
12.FUNNY DESIGNS
13. CREATIVE PATIO COFFEE TABLE
14. STACKING UP TIRES IN COLORFUL WAYS
15. RED TONES LOOK LOVELY
16. FUN TIRE BASKET
17. CREATIVE YET STRANGE FLOWER POTS DISPLAY
18. COZY WHITE OTTOMAN
19. HERBS TAKING OVER
20. DISPLAYING FLOWERS
21. THE CHILDHOOD SWING
22. UNIQUE FLOWER POTS ARRANGEMENT MADE FORM OLD TIRES

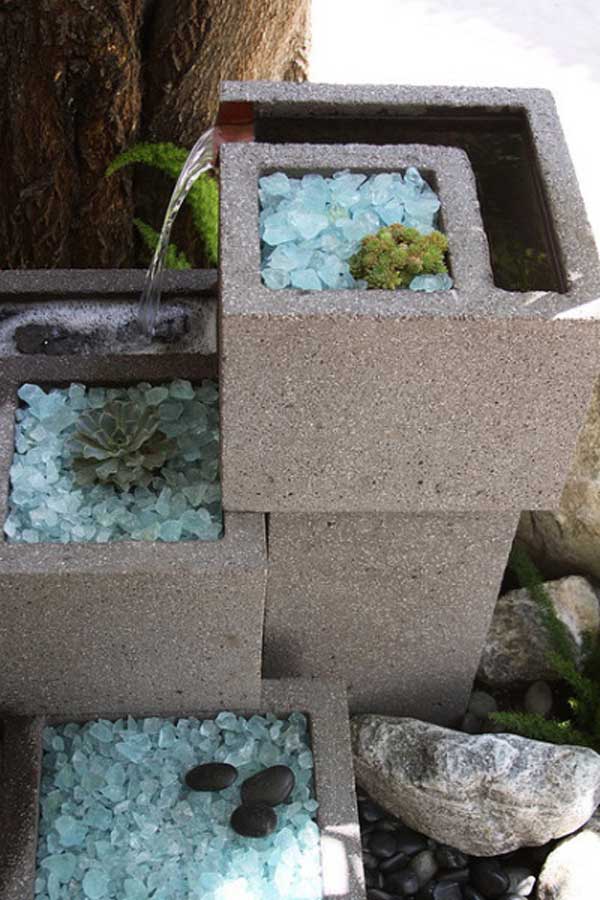
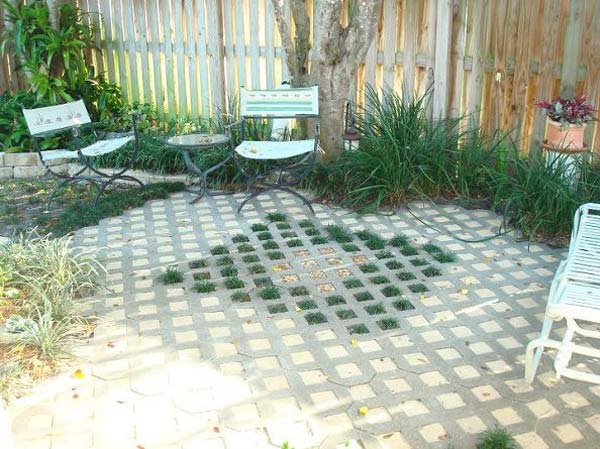
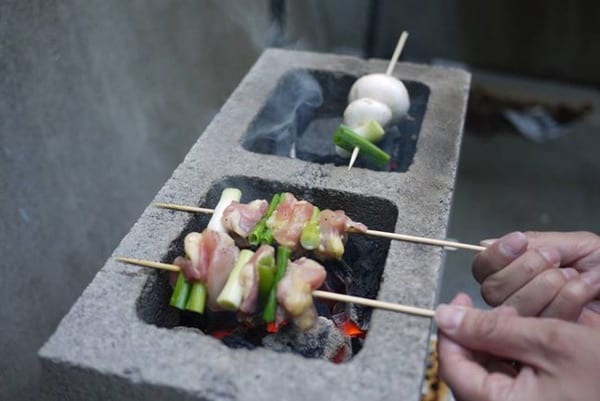
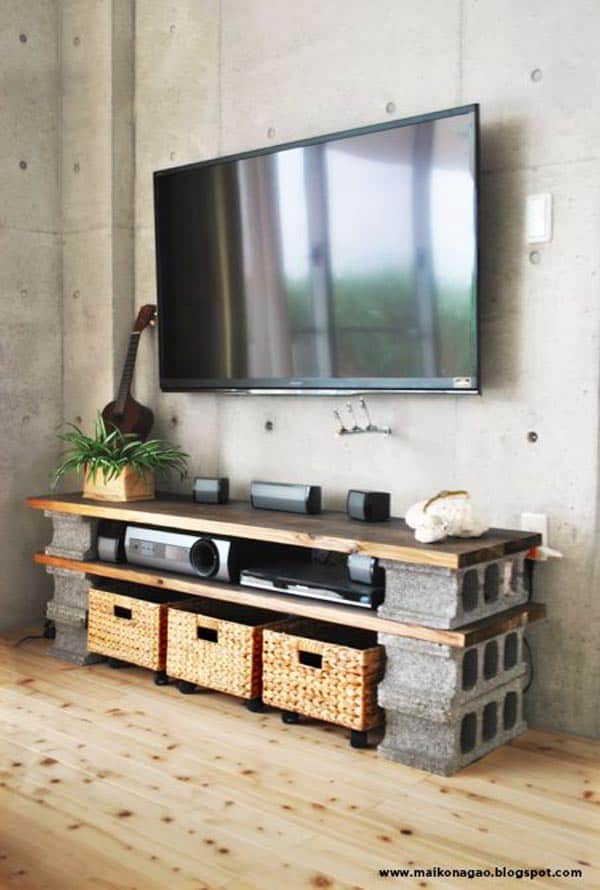
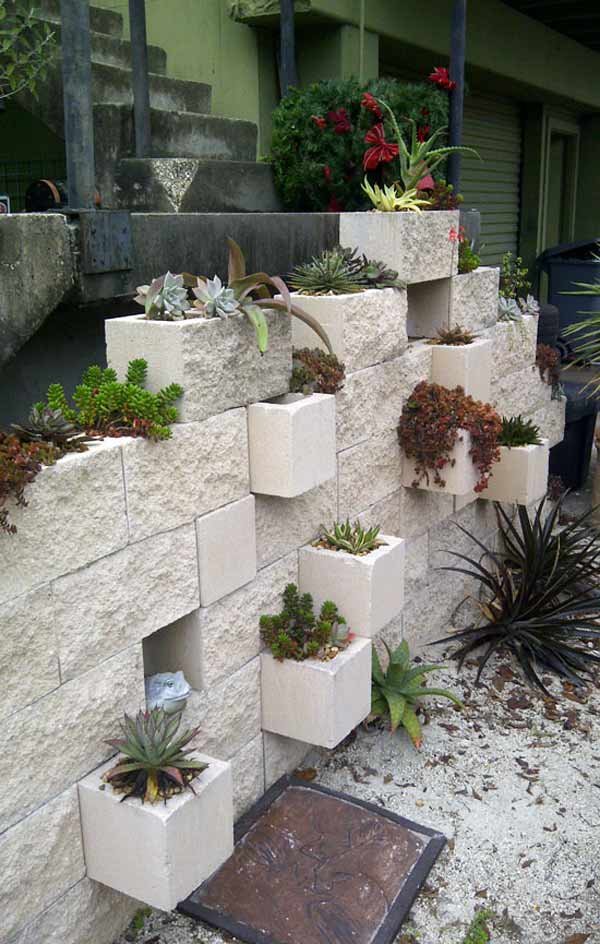

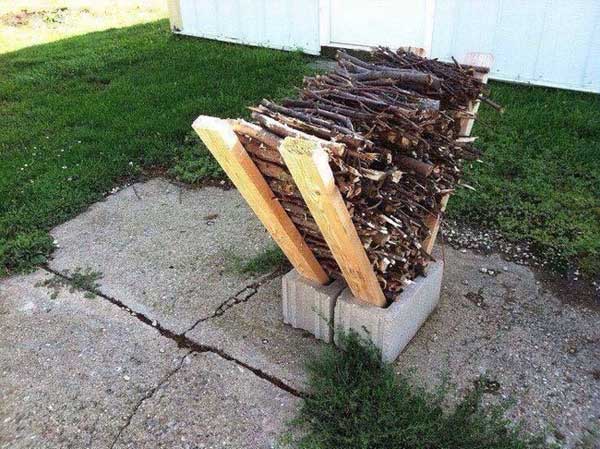
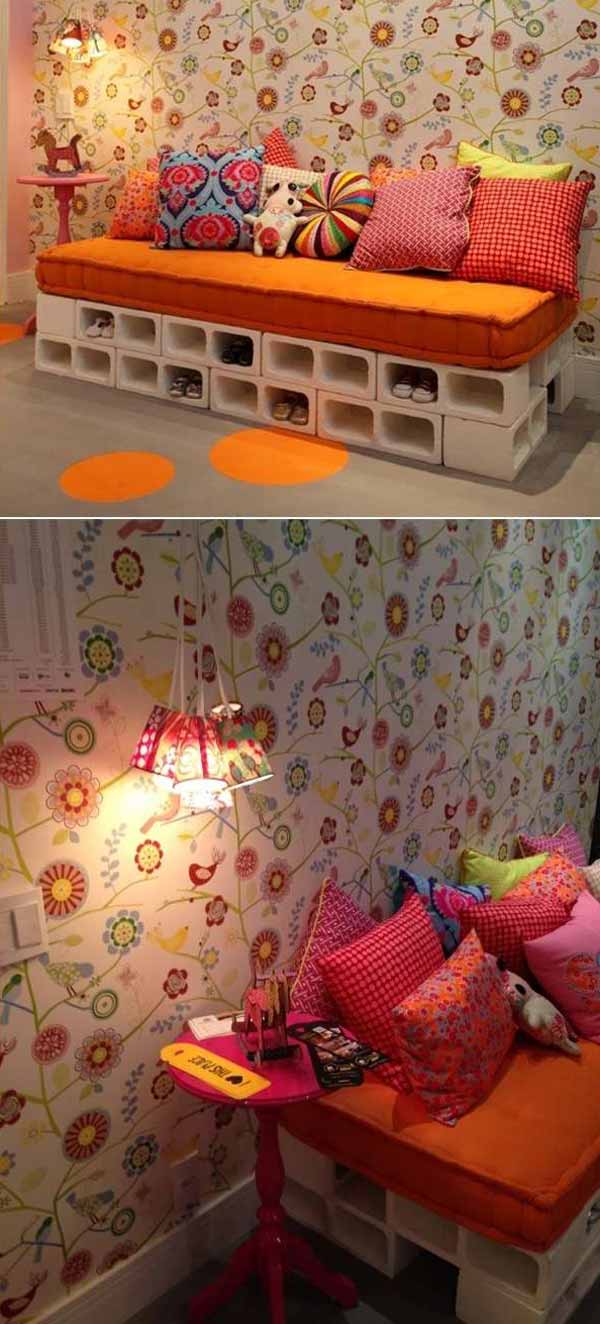
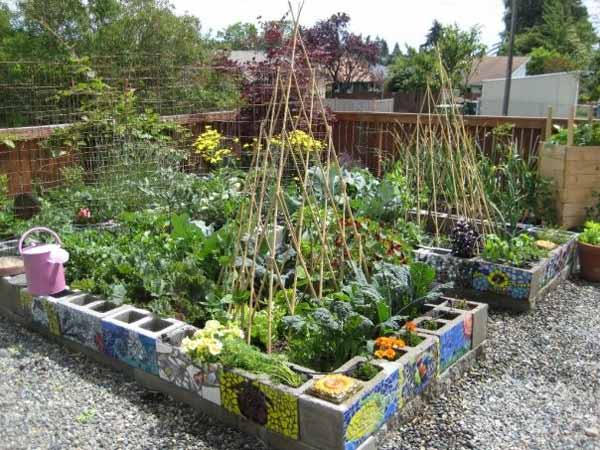
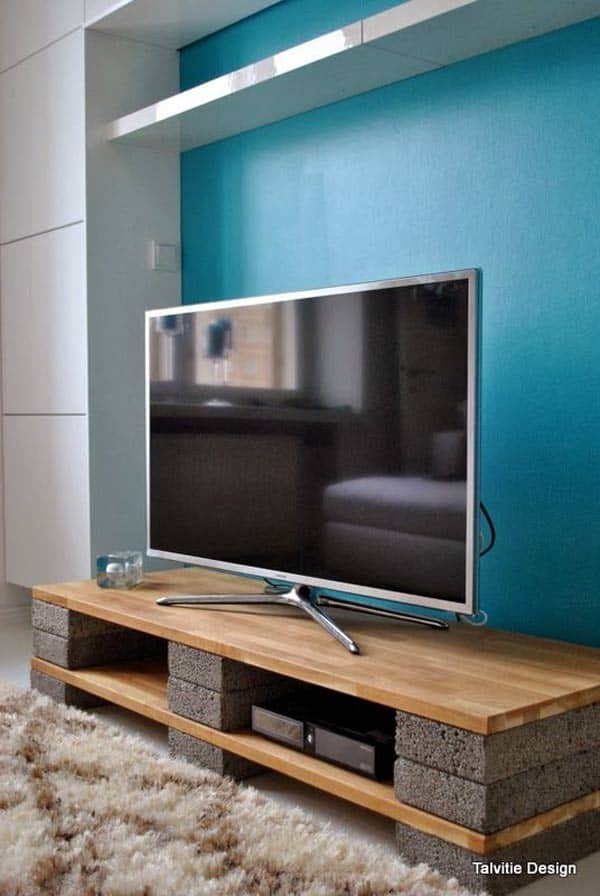
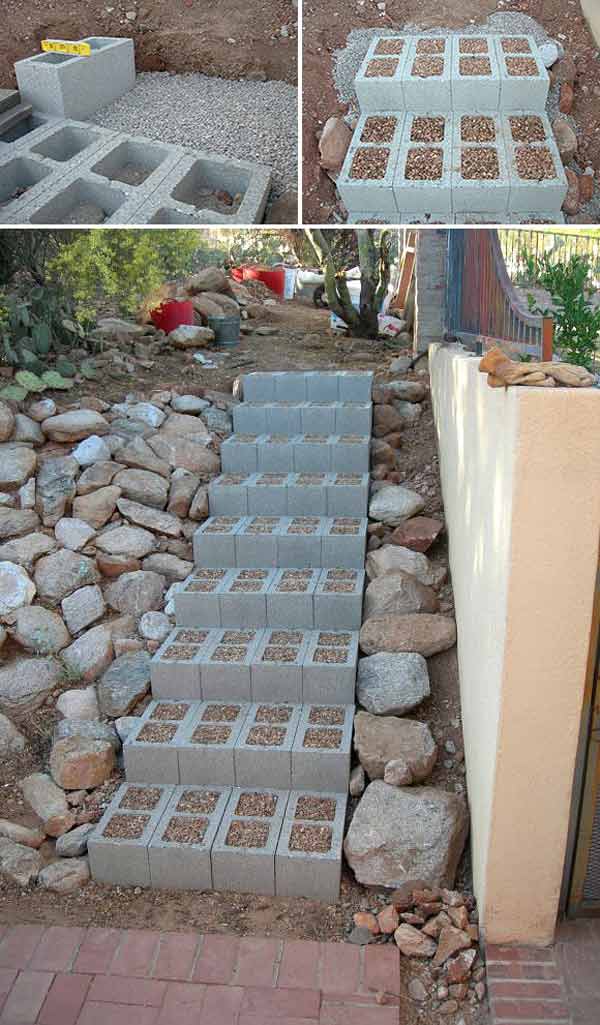


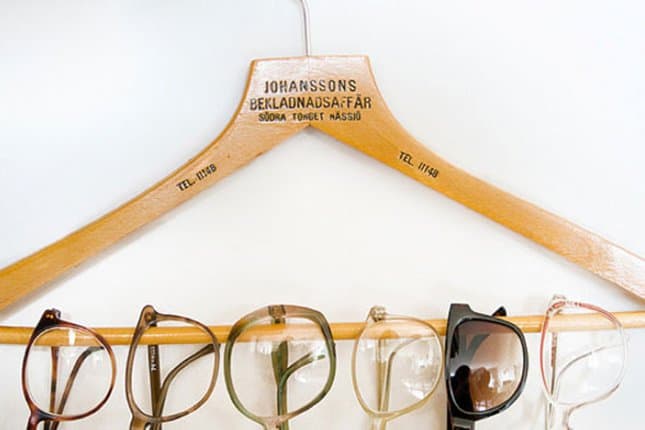
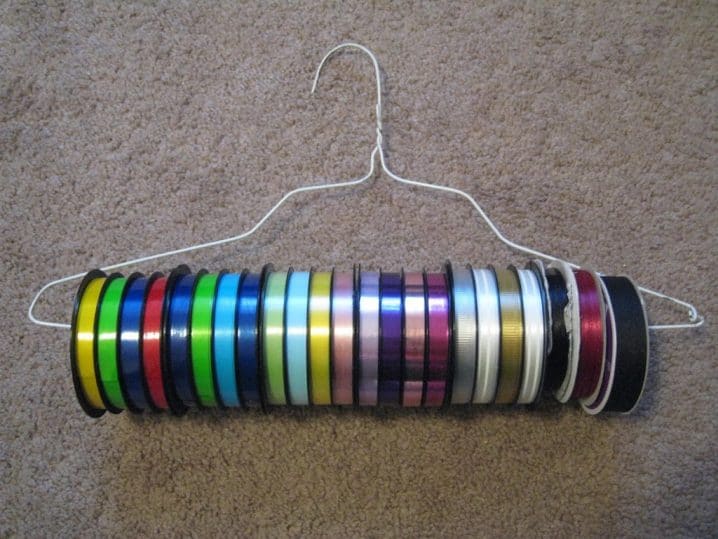

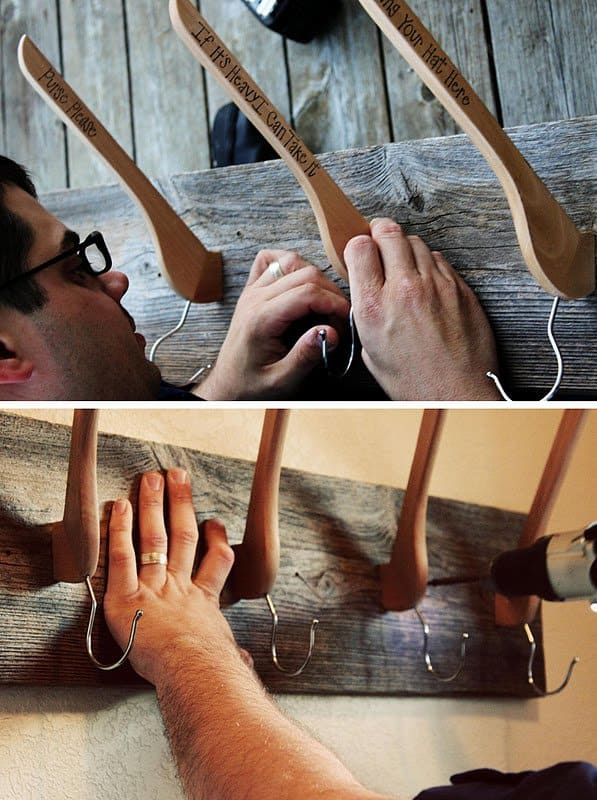
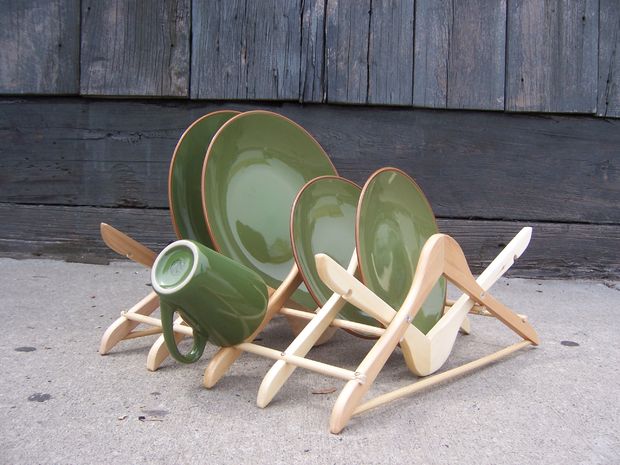
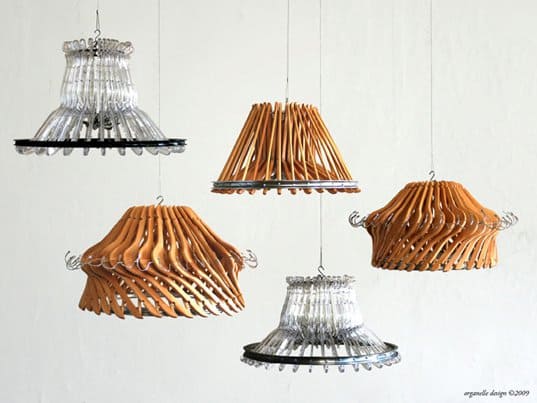
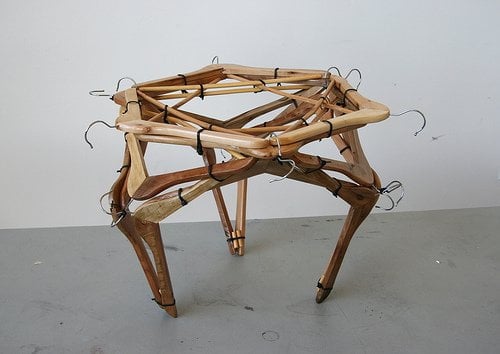
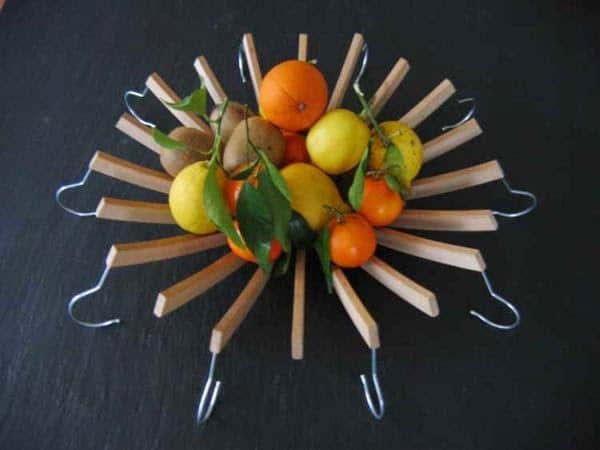

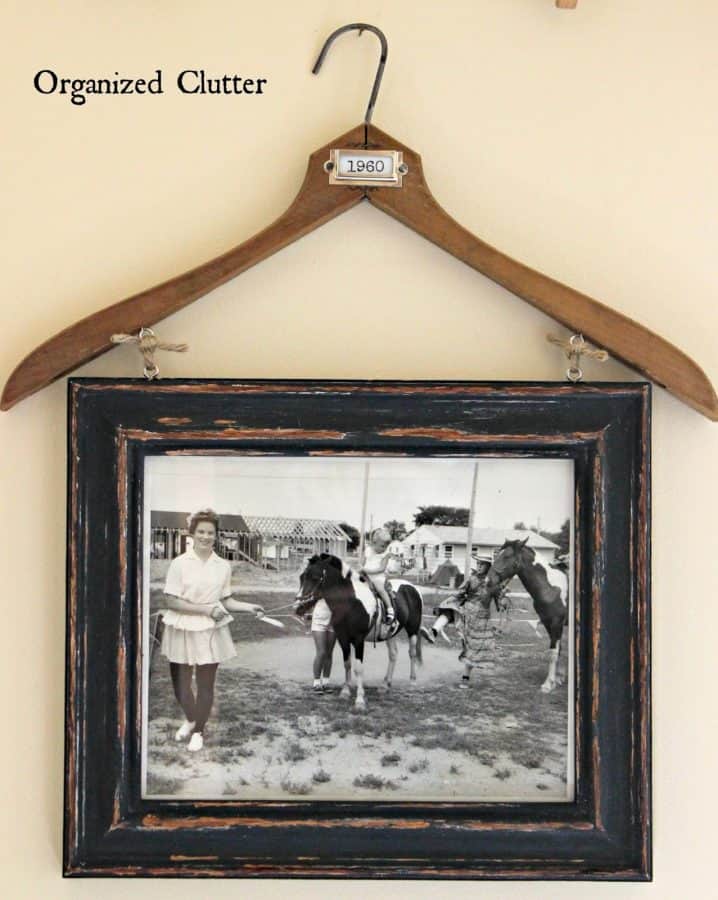
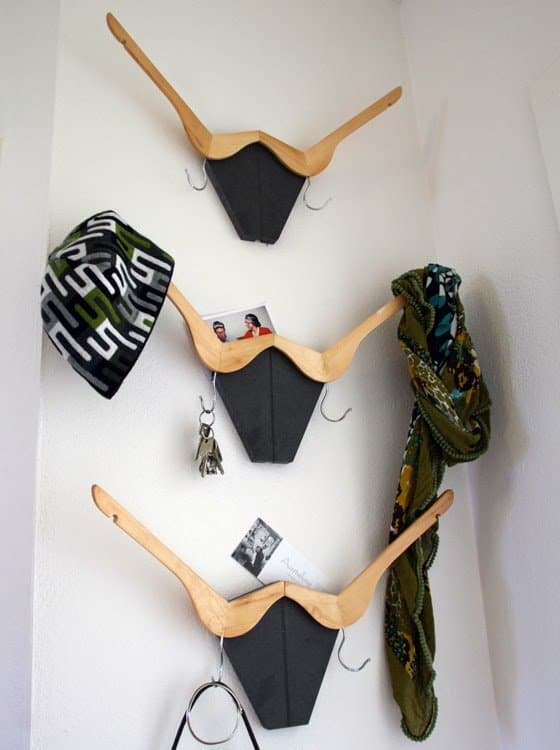
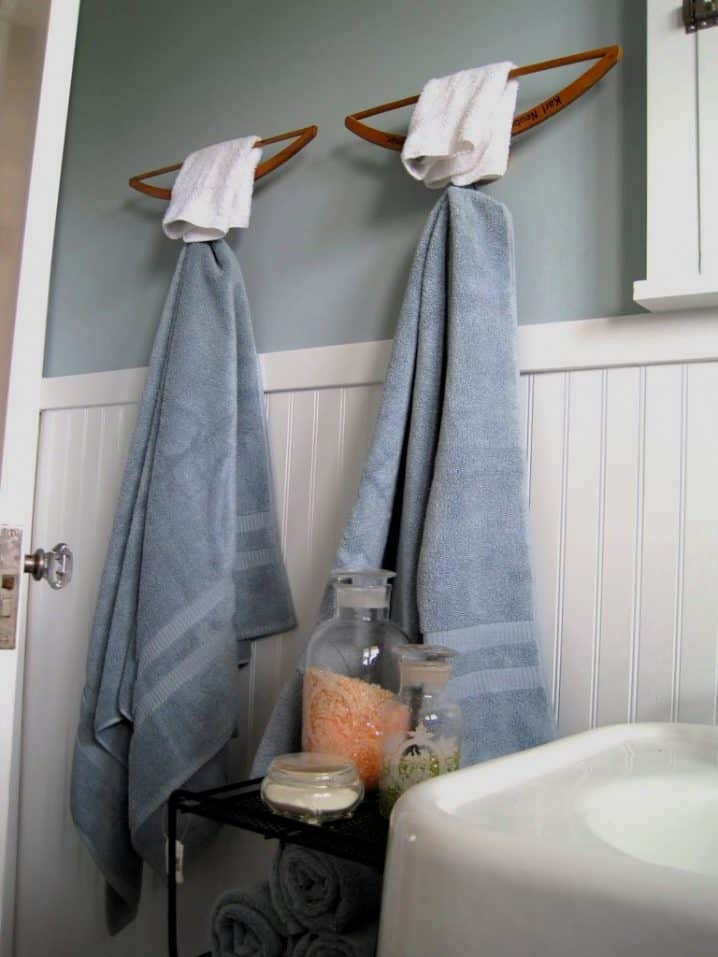

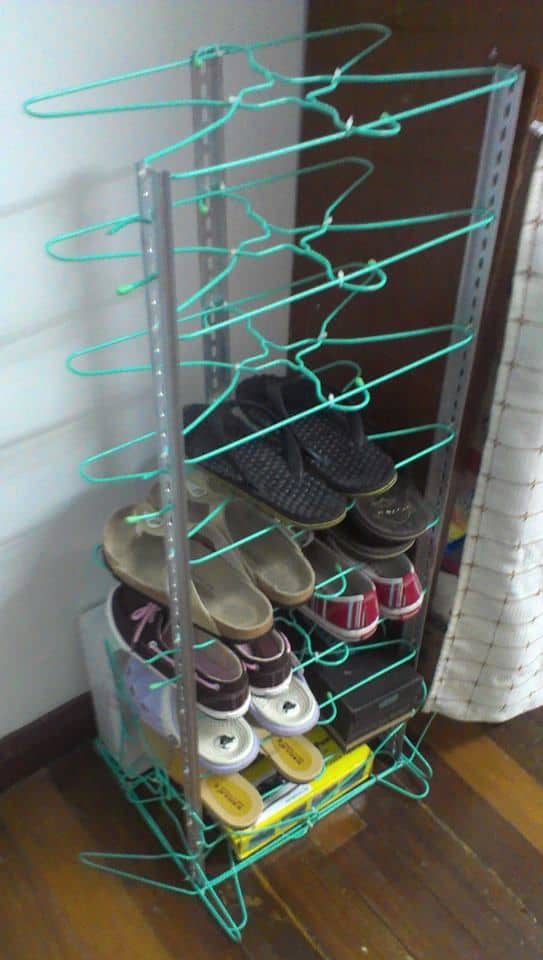


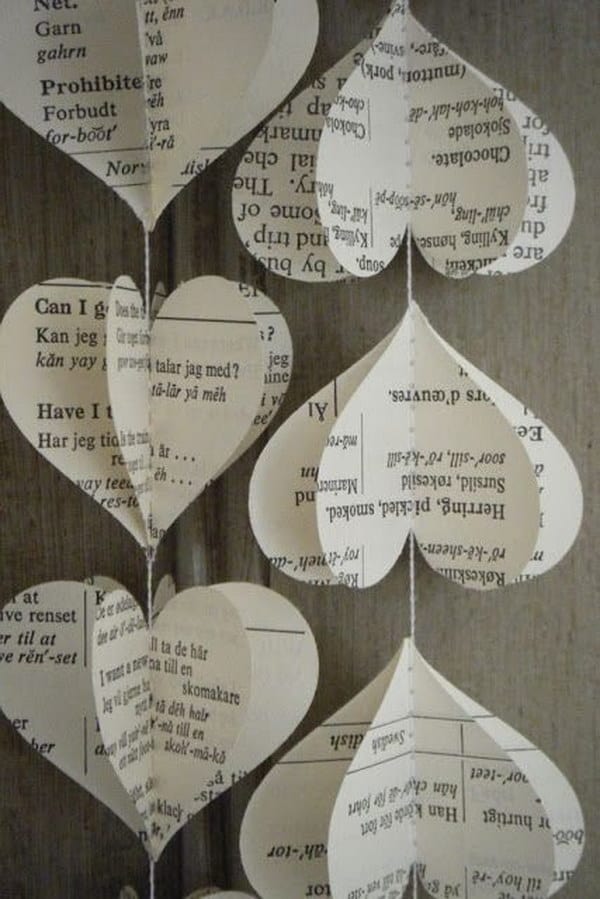
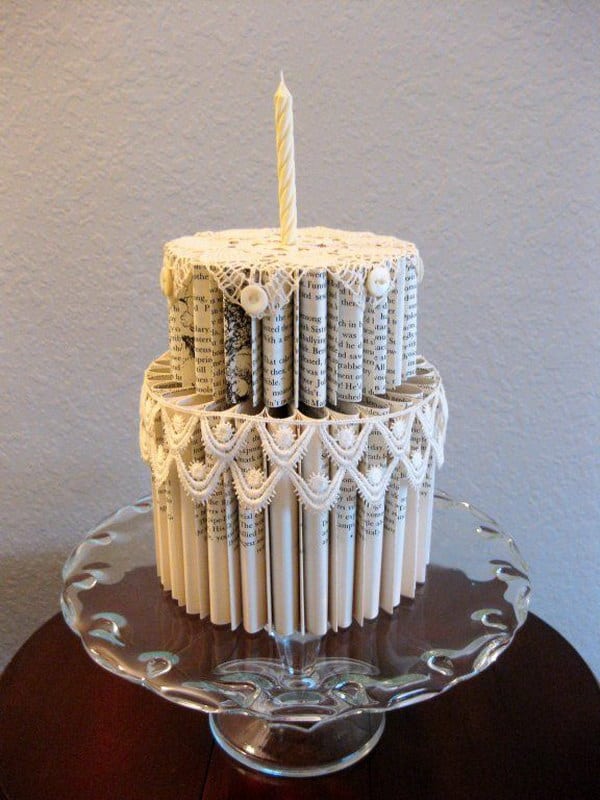
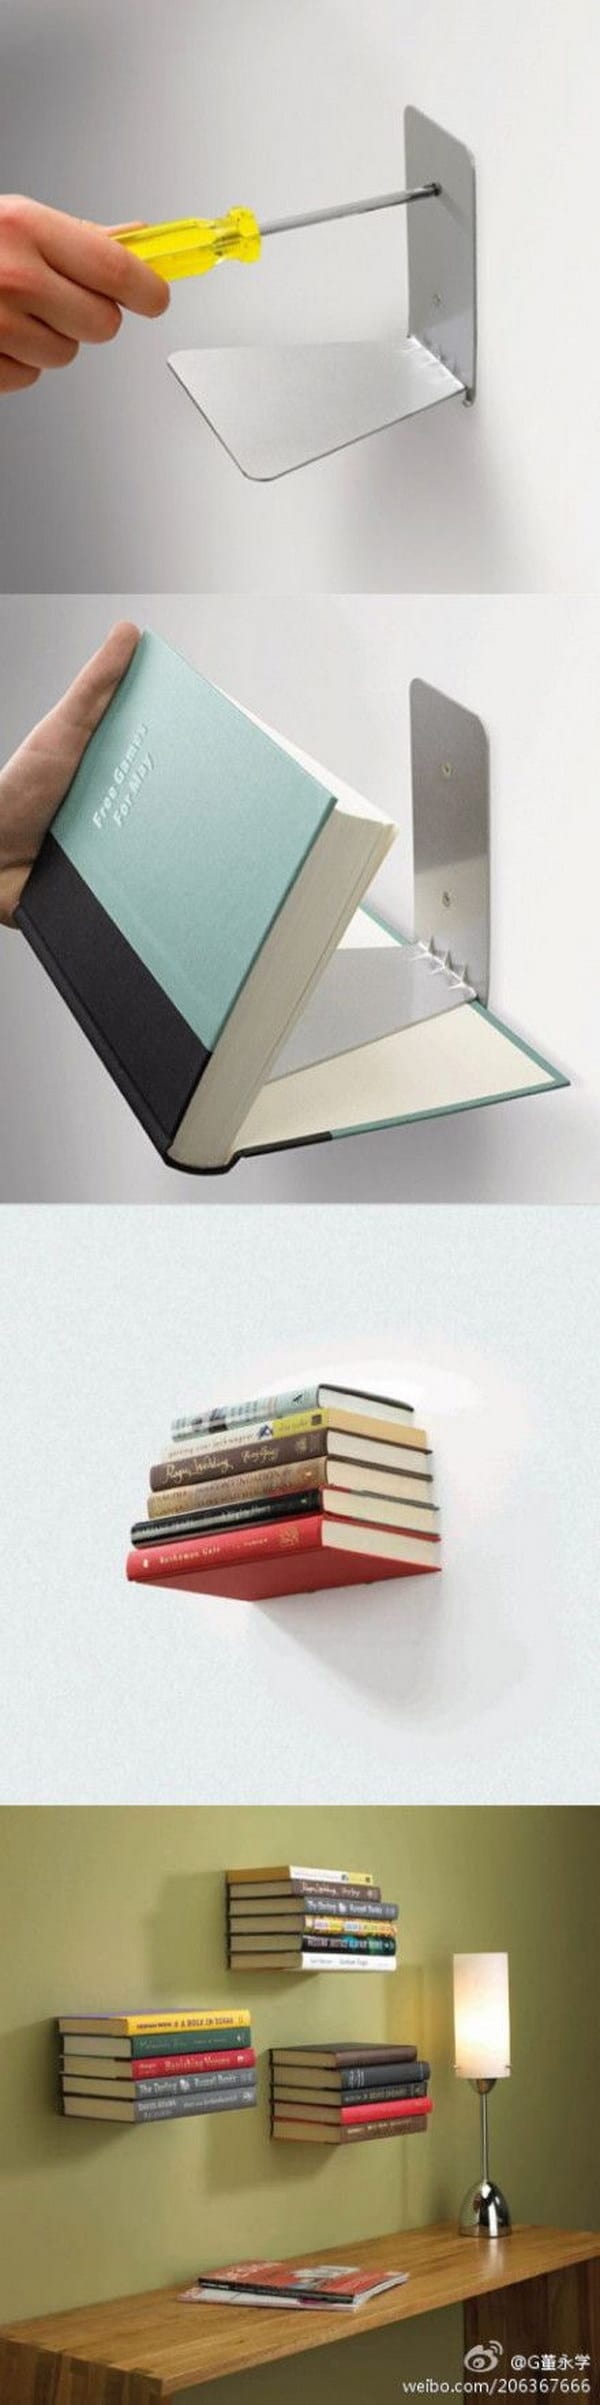
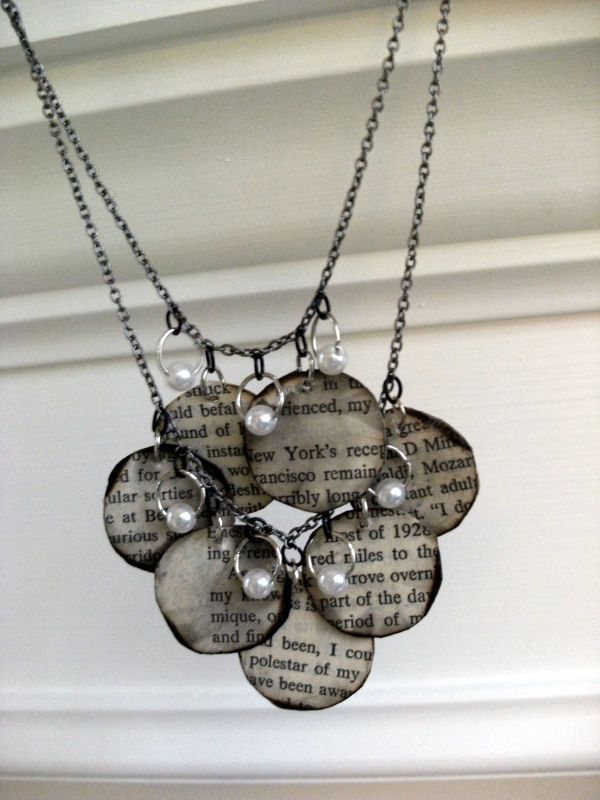
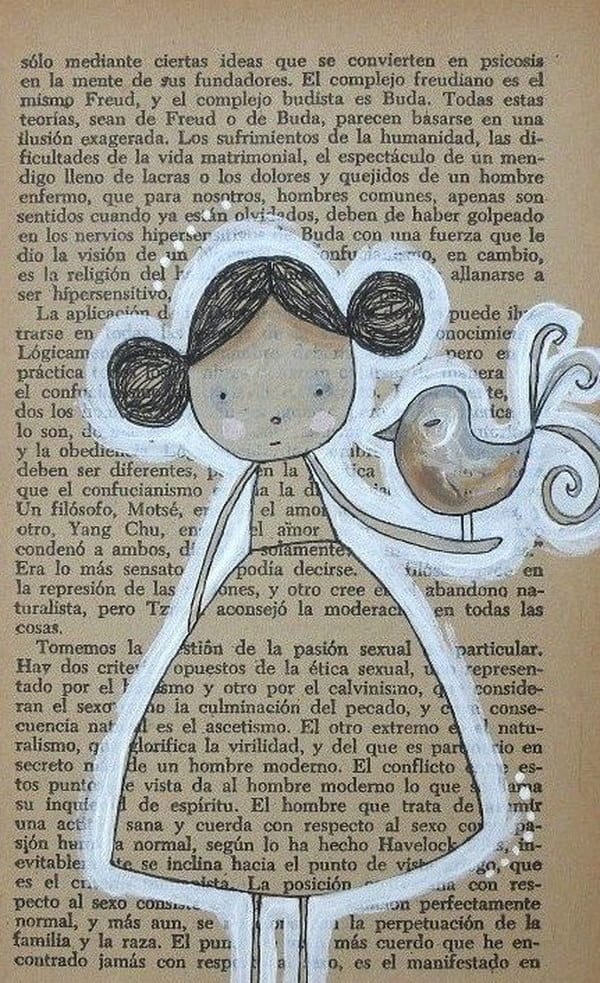
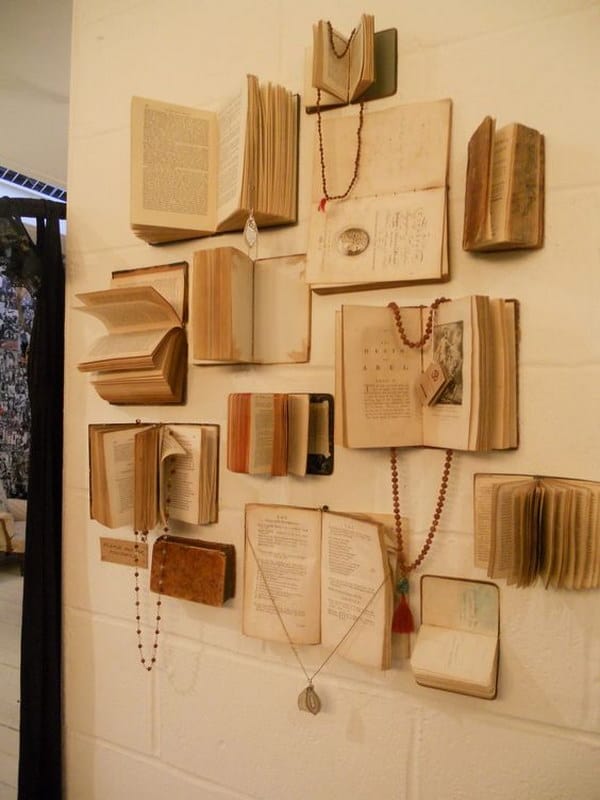

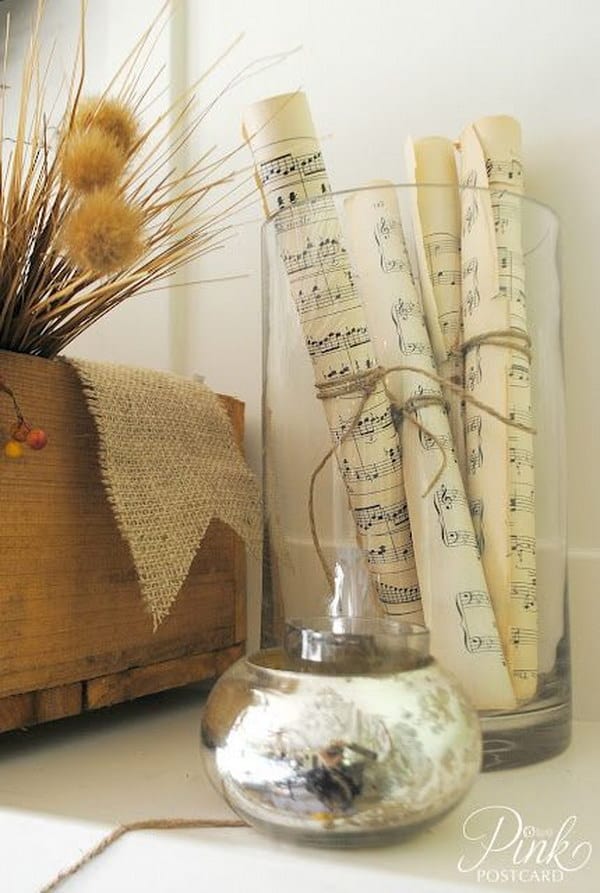
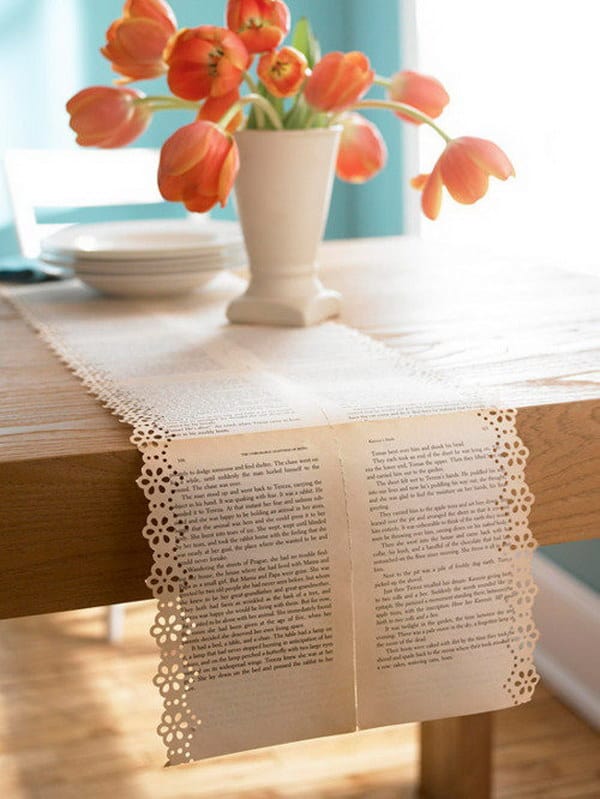
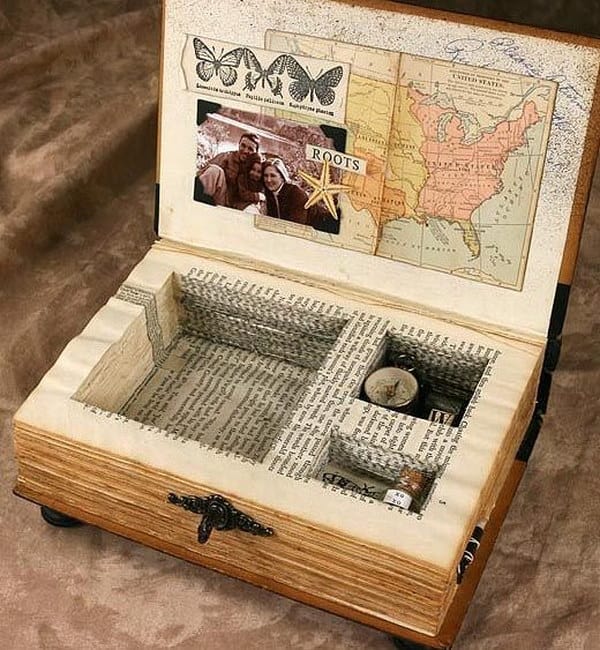

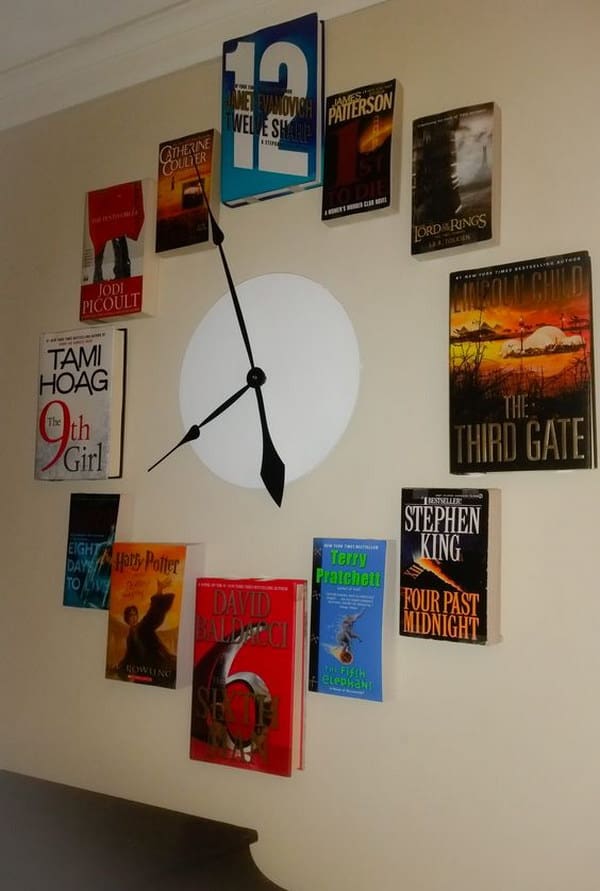
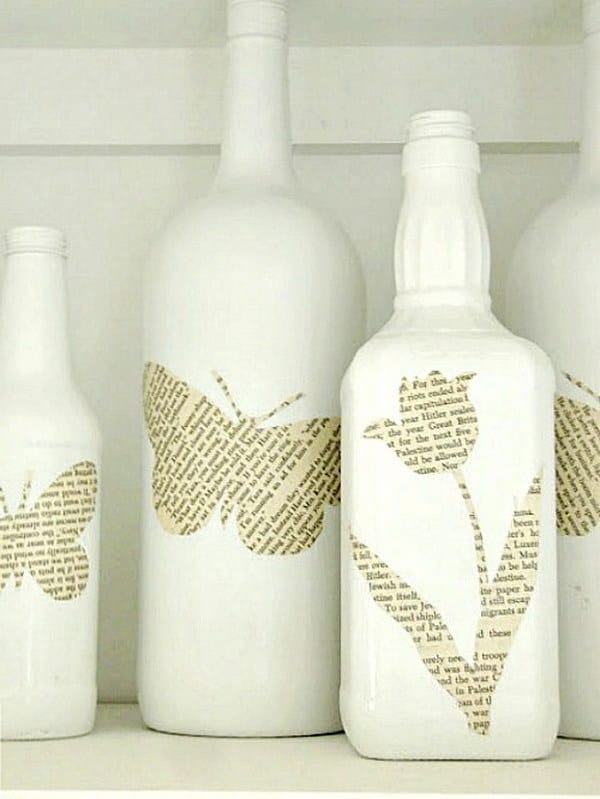
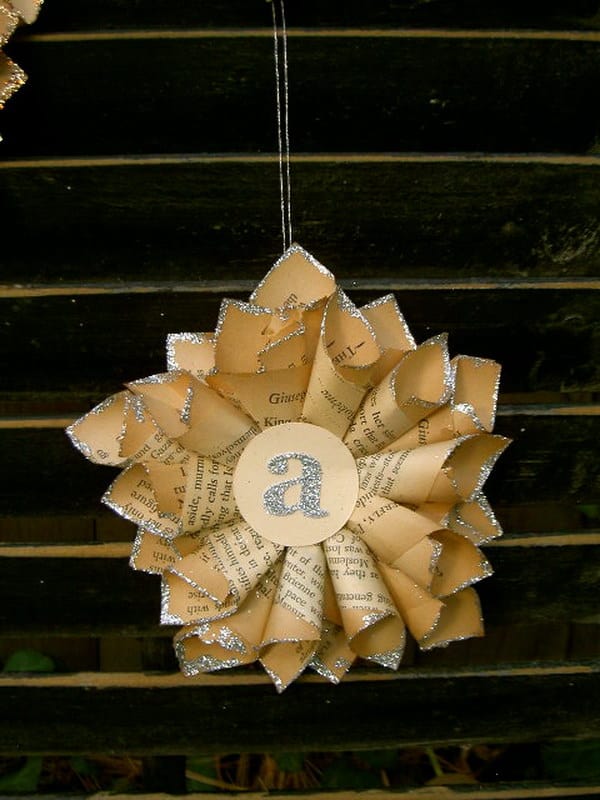
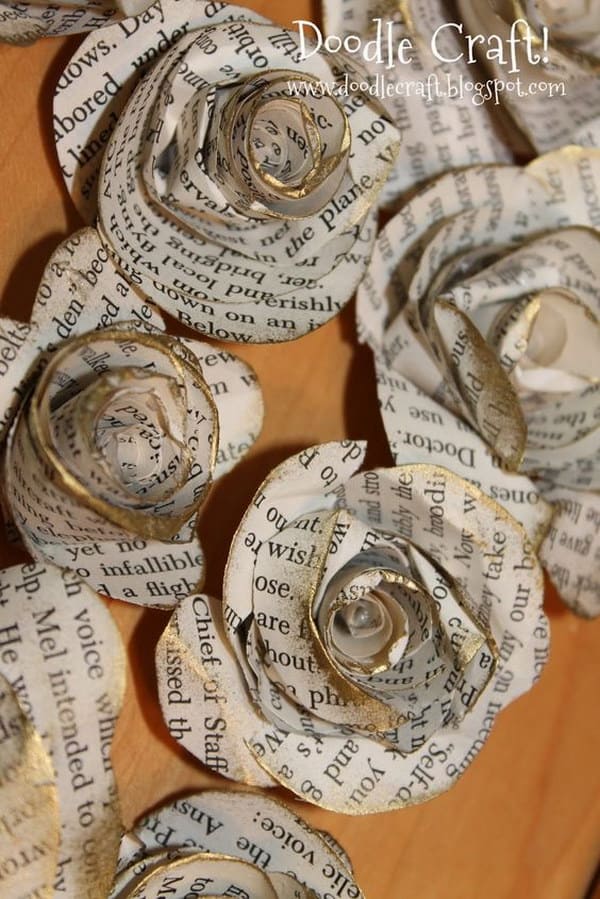
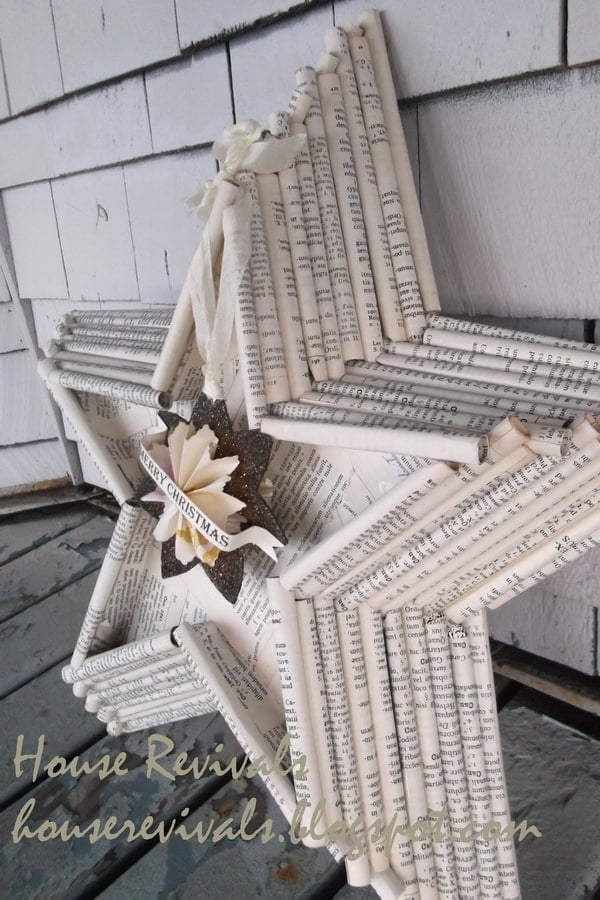
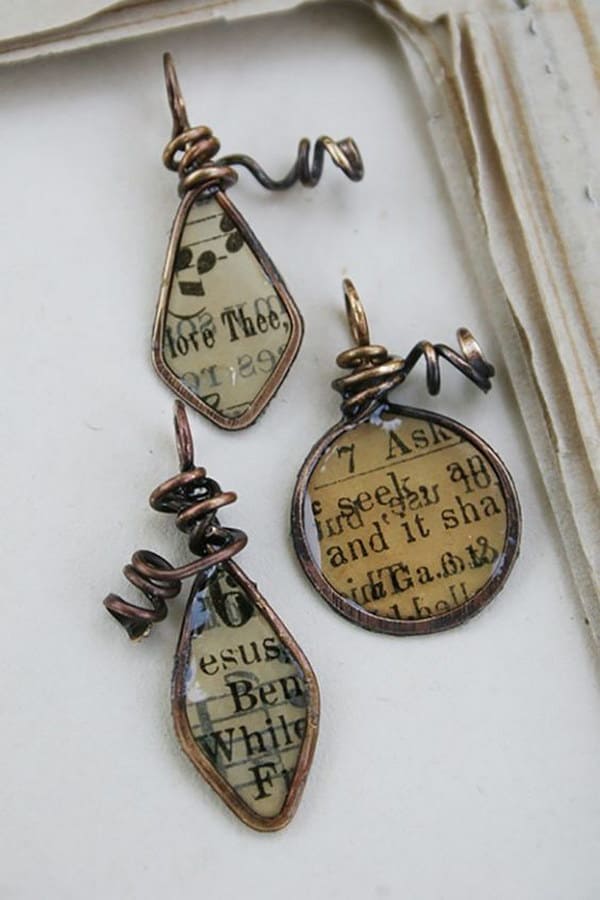
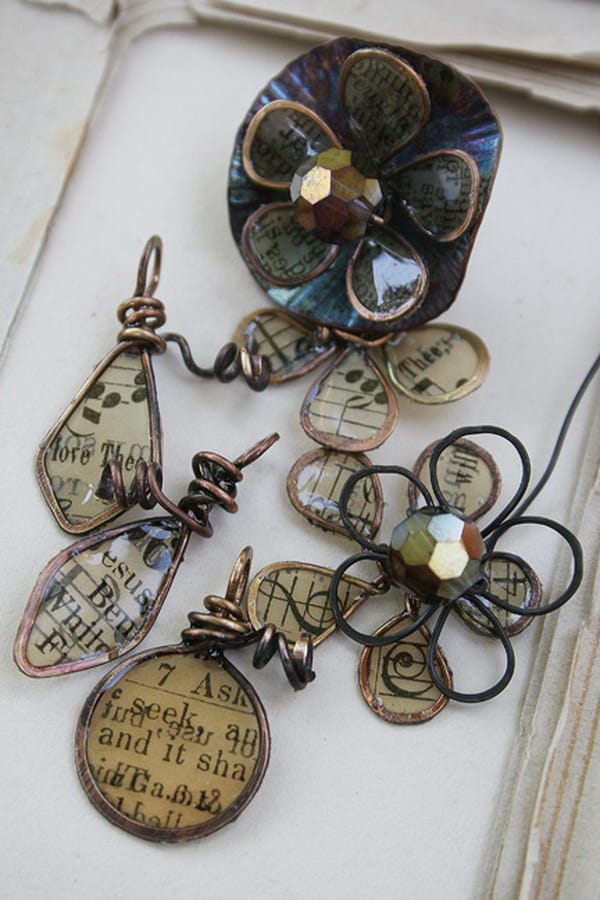
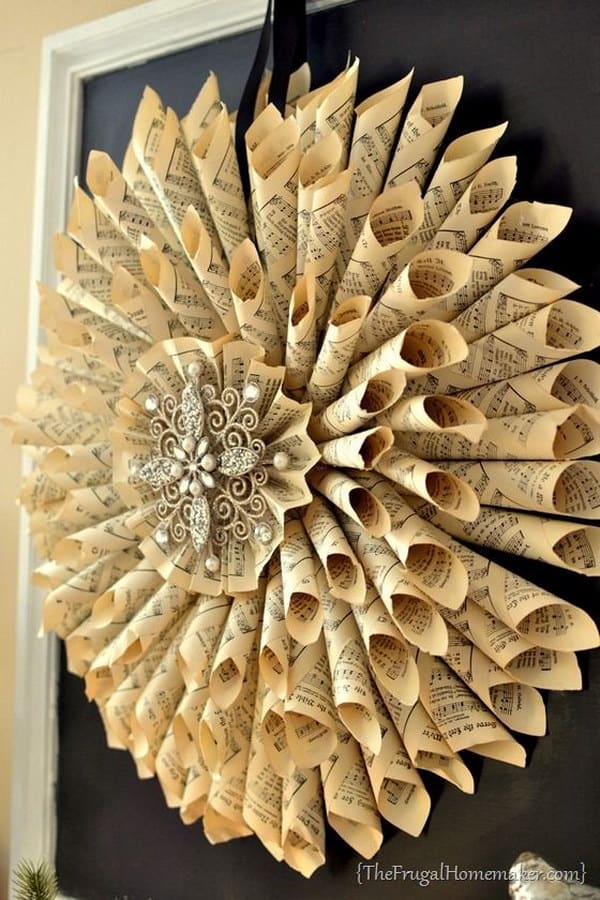
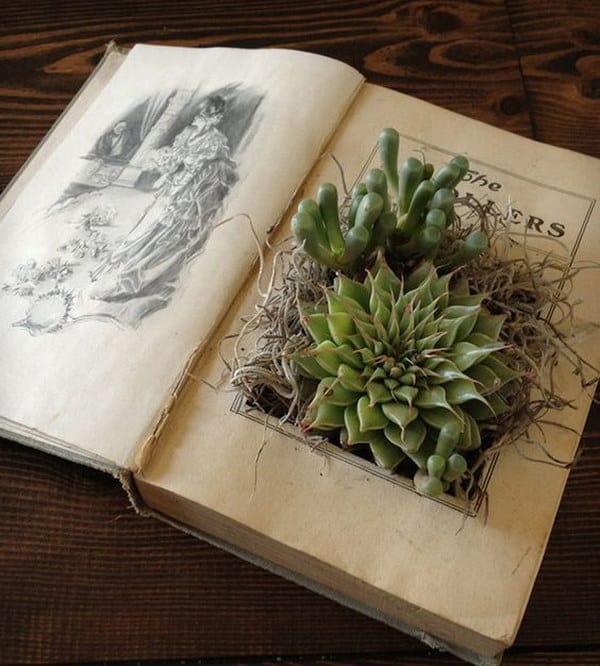
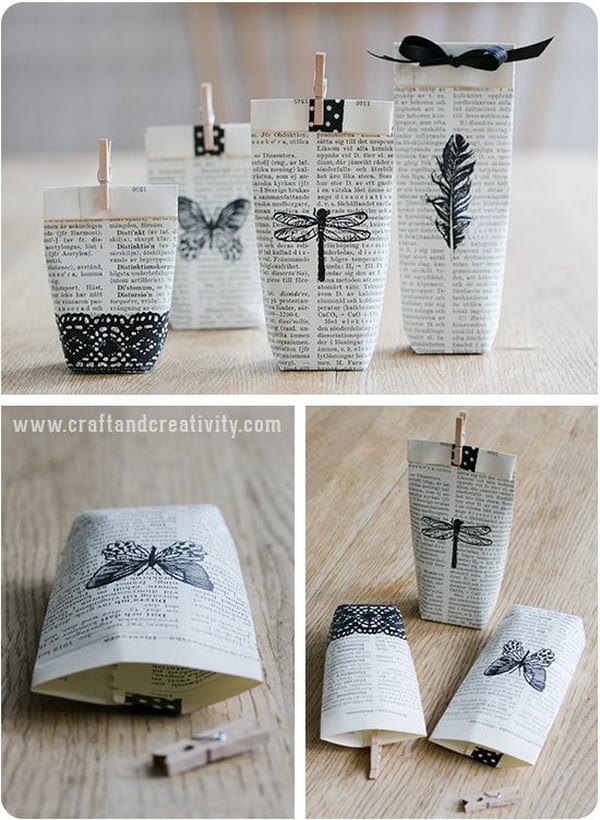


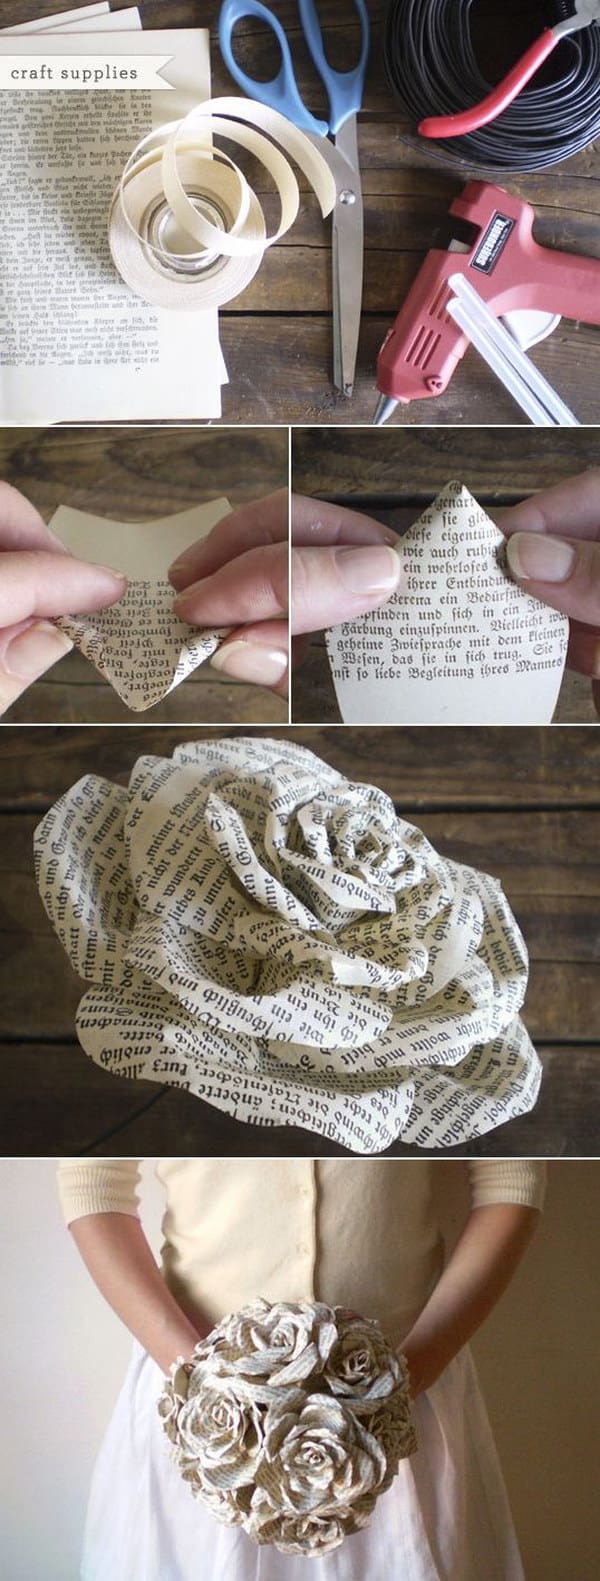
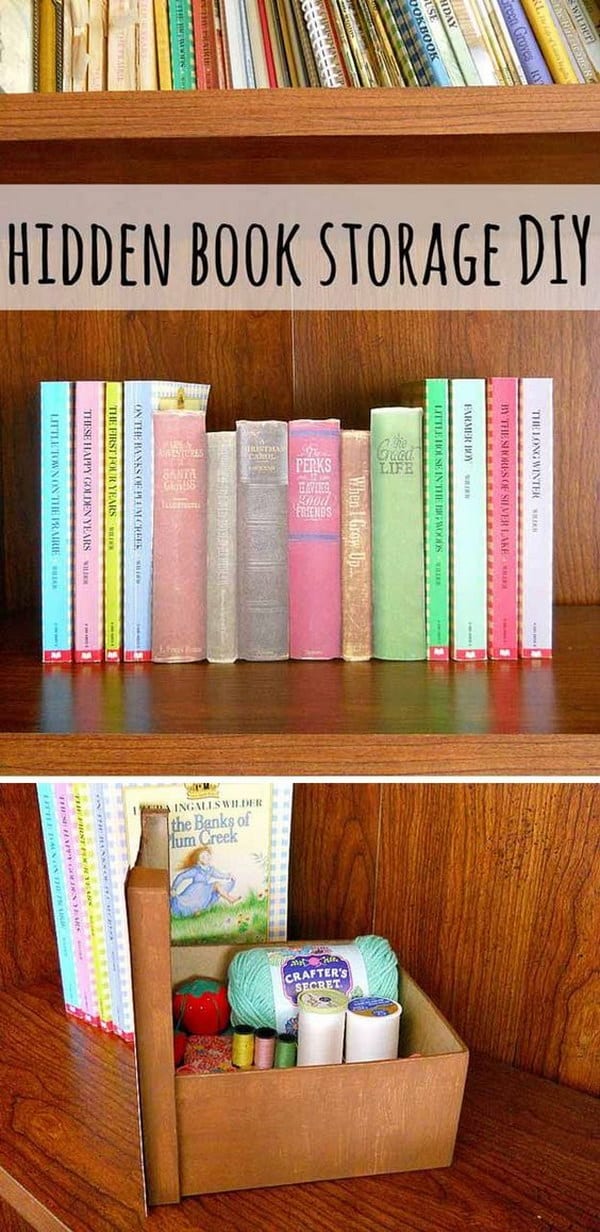
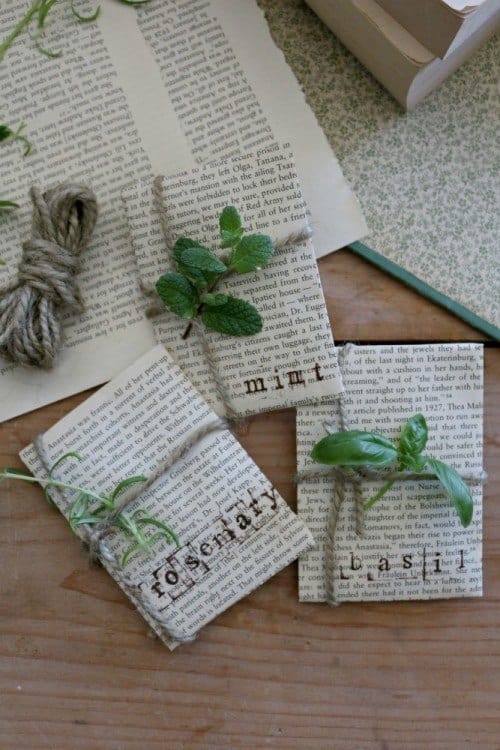
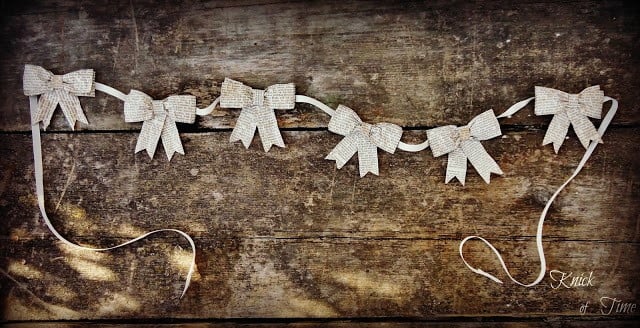
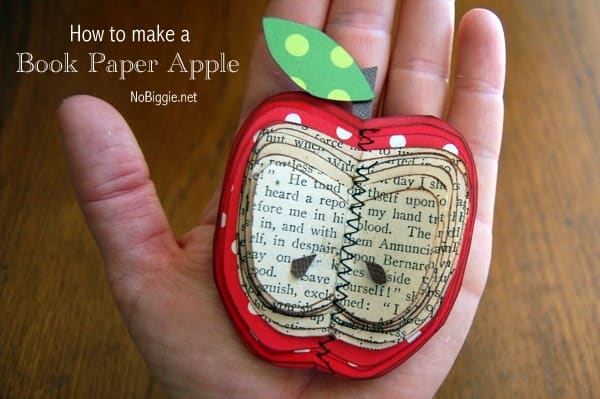
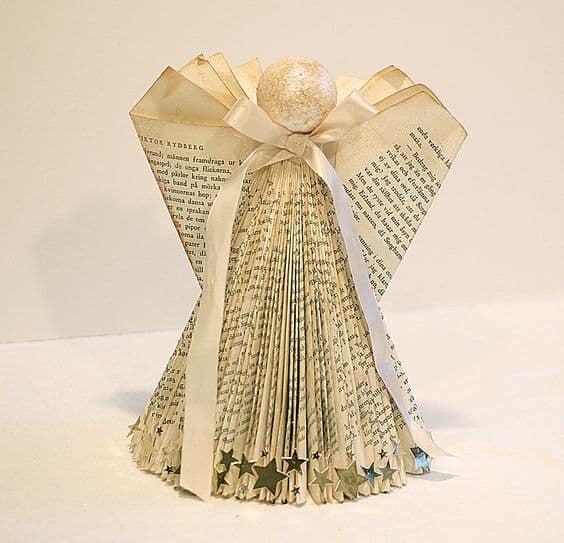
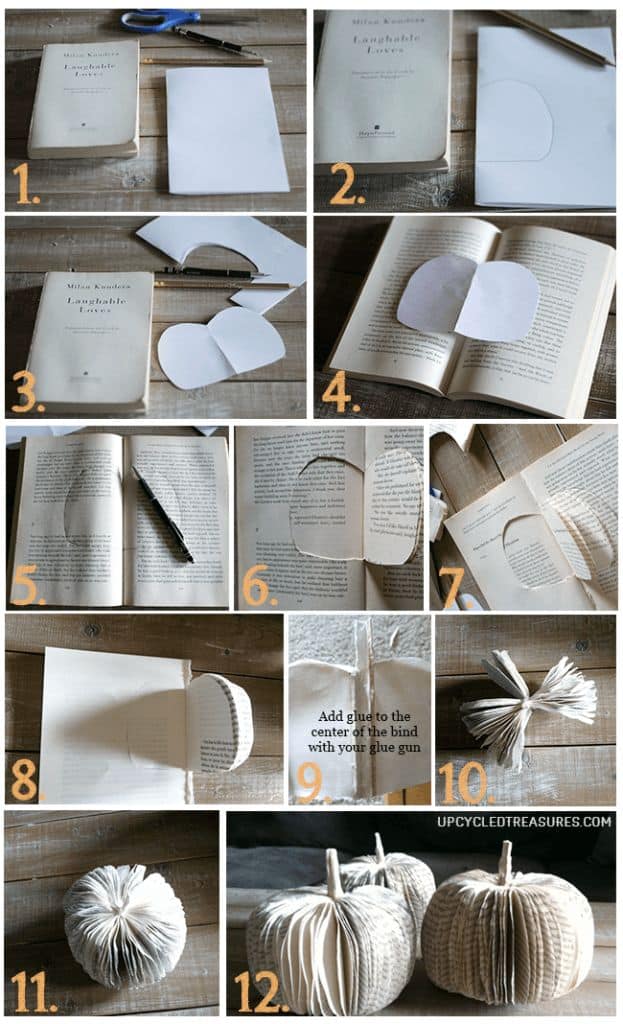
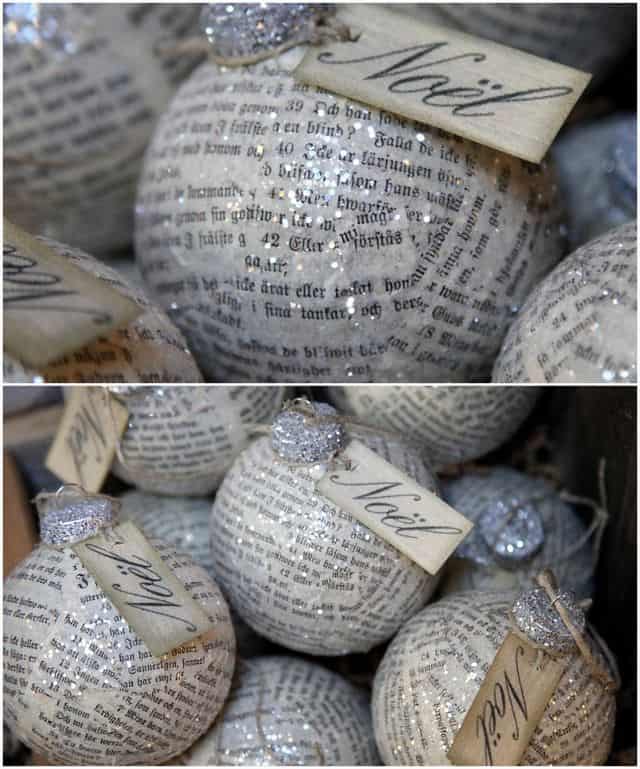
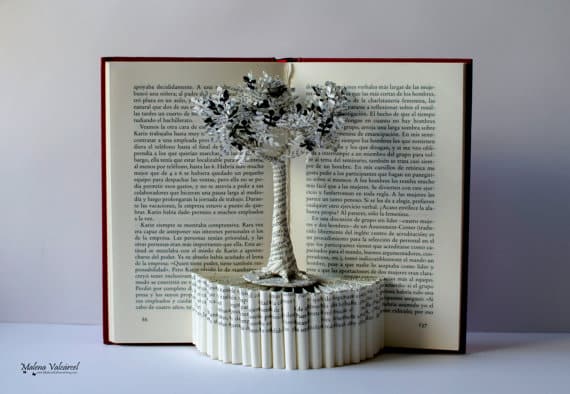
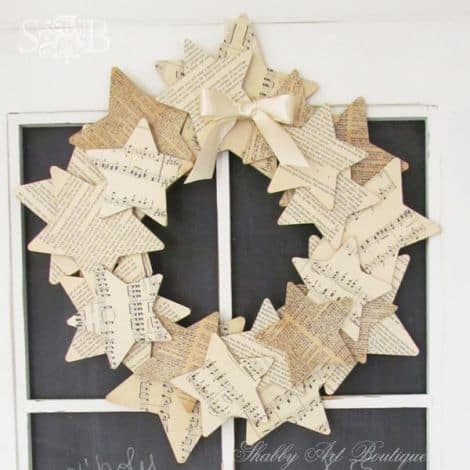

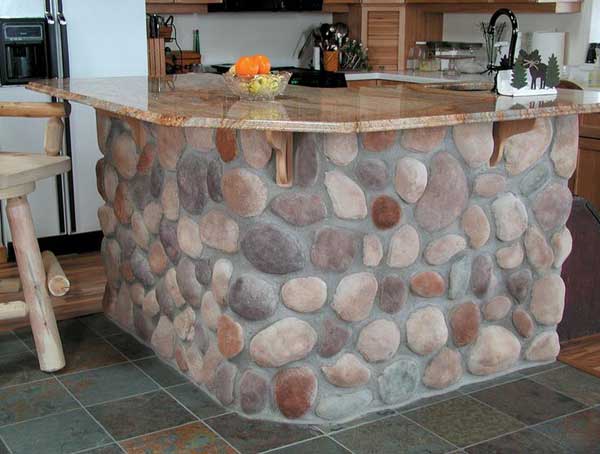
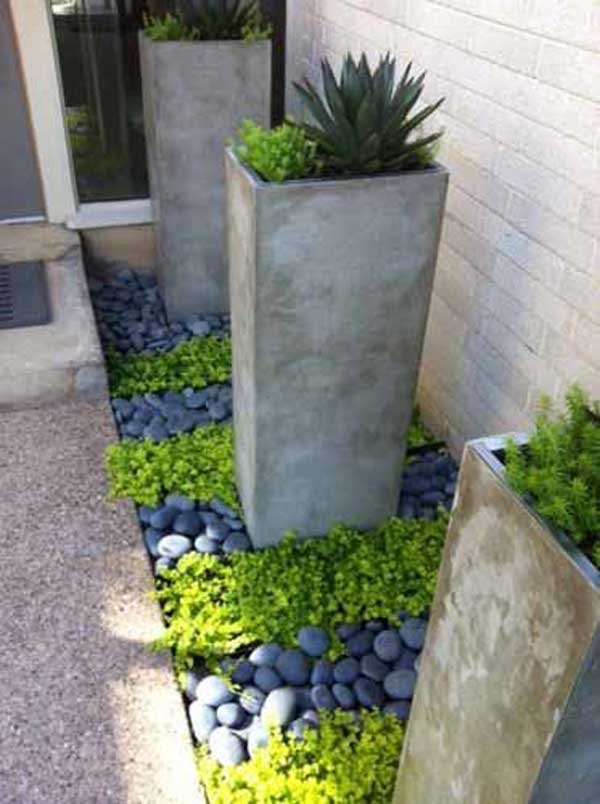
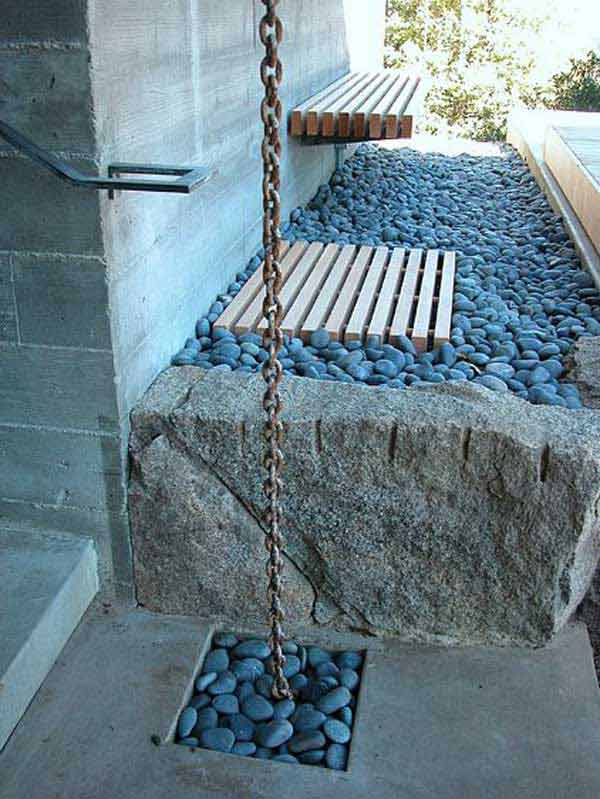
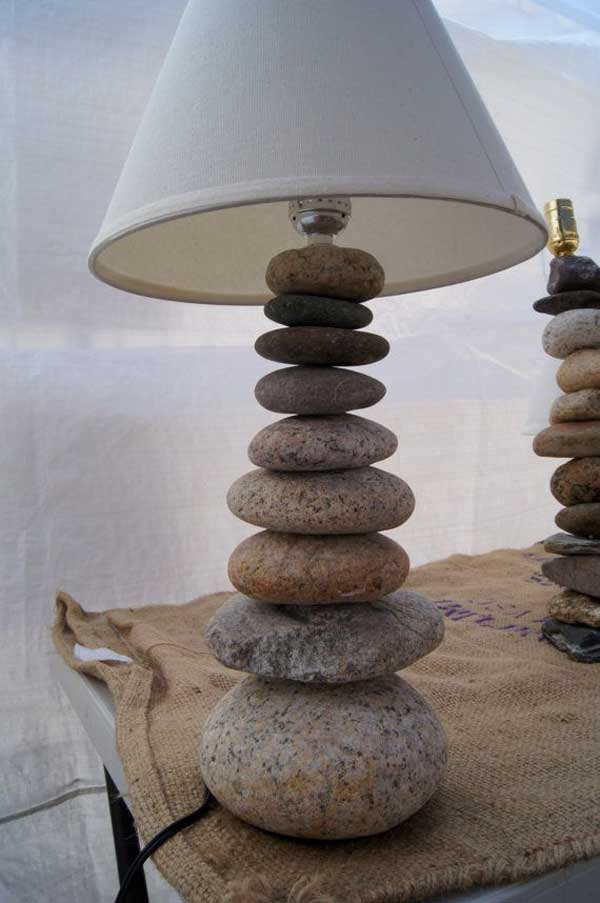
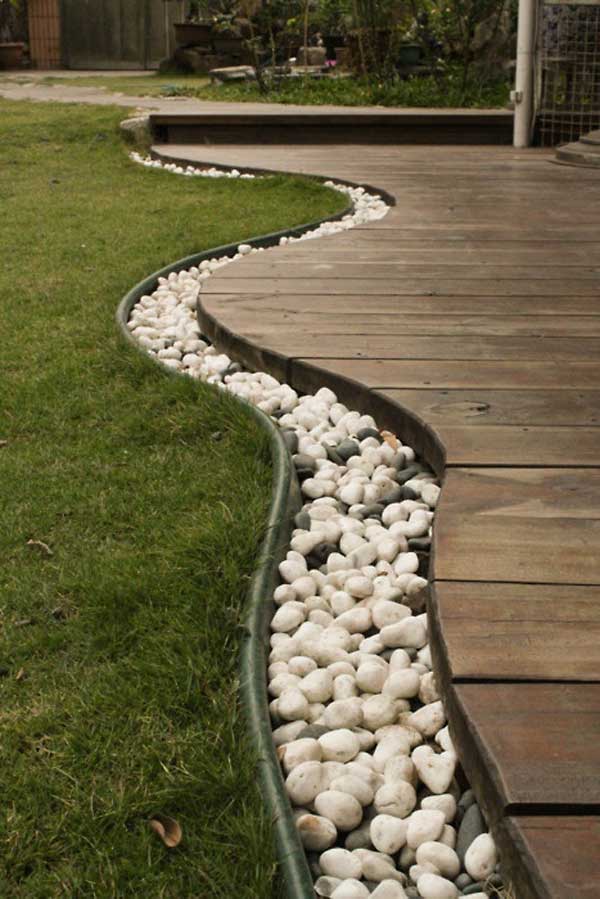
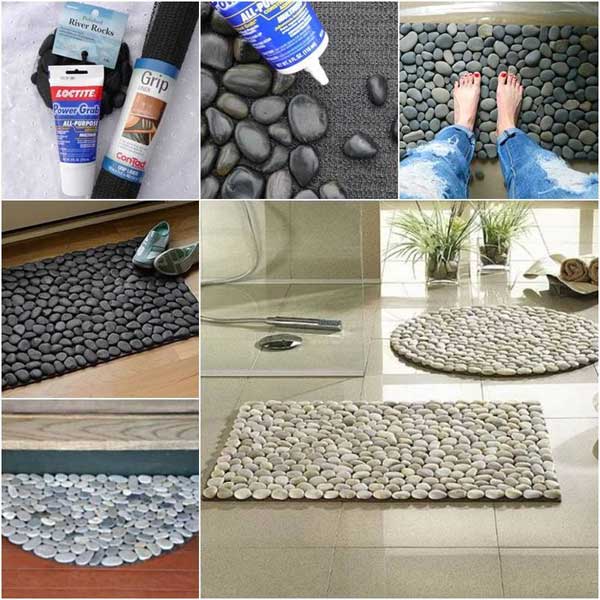
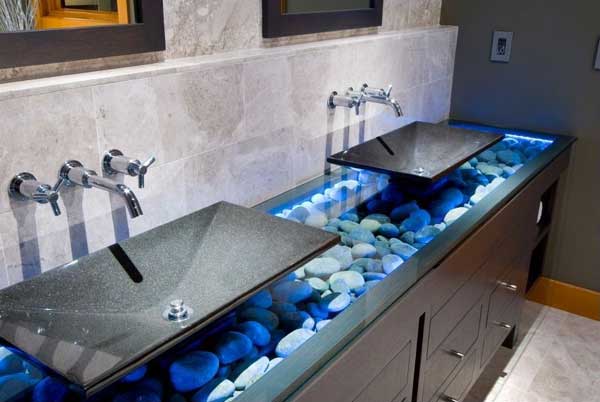
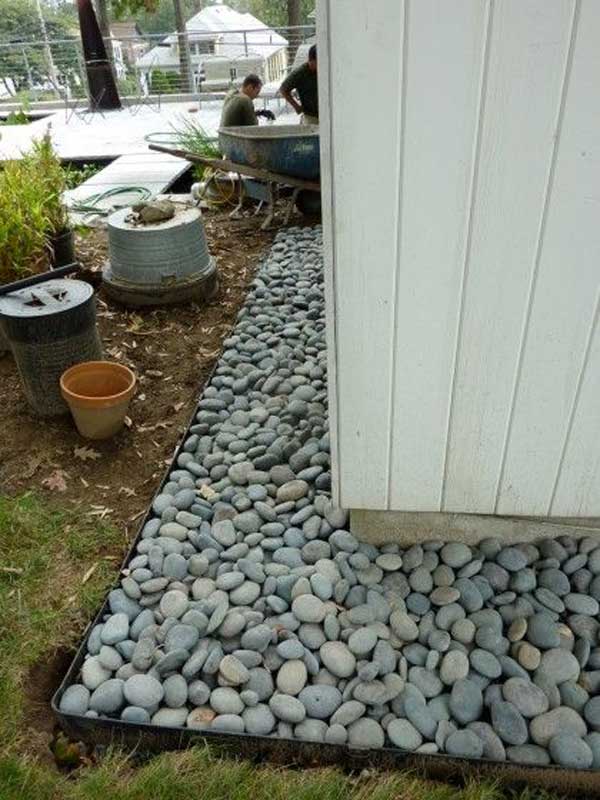
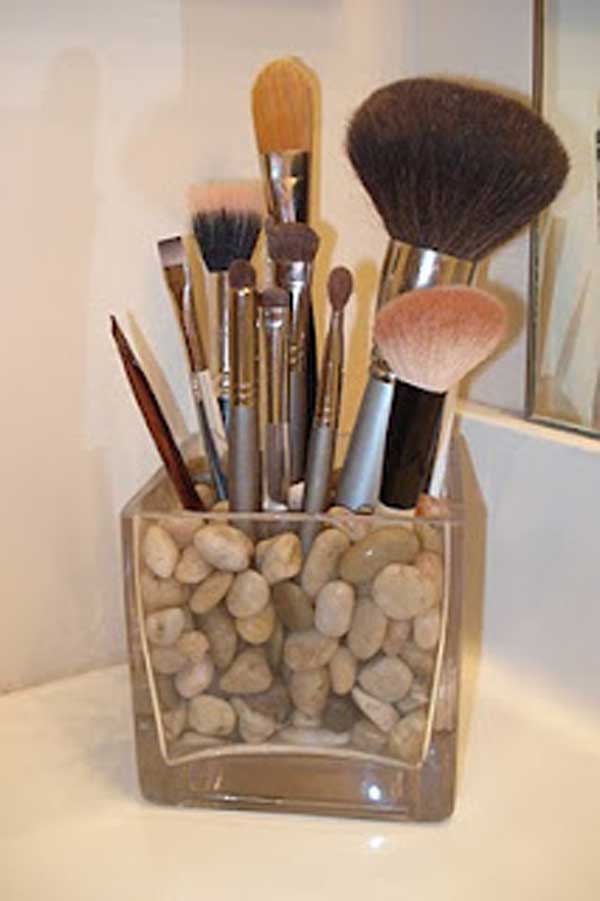
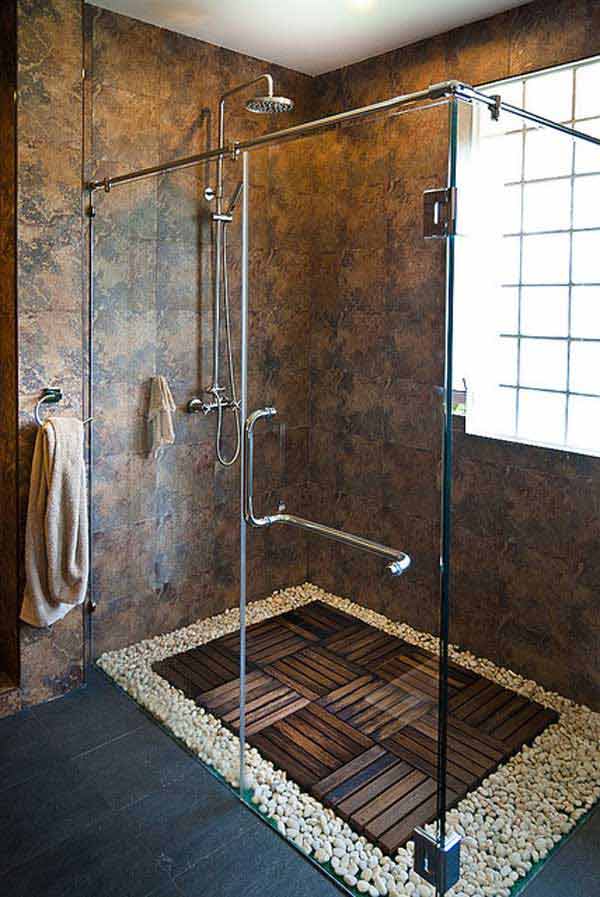
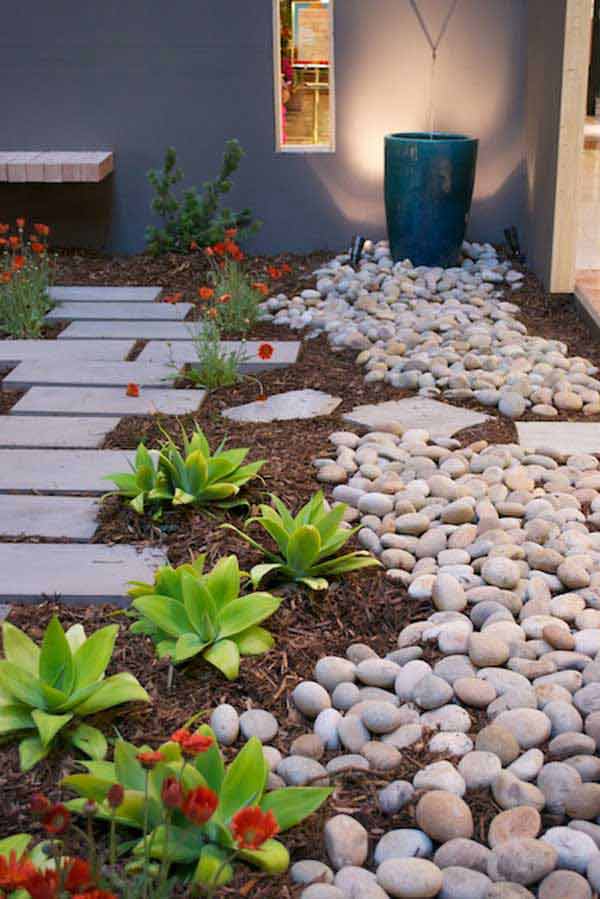
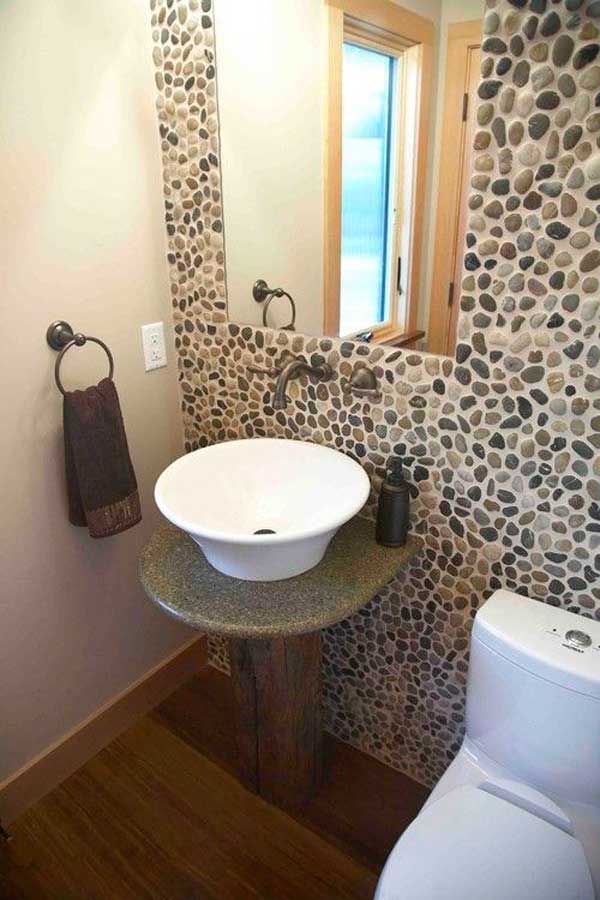

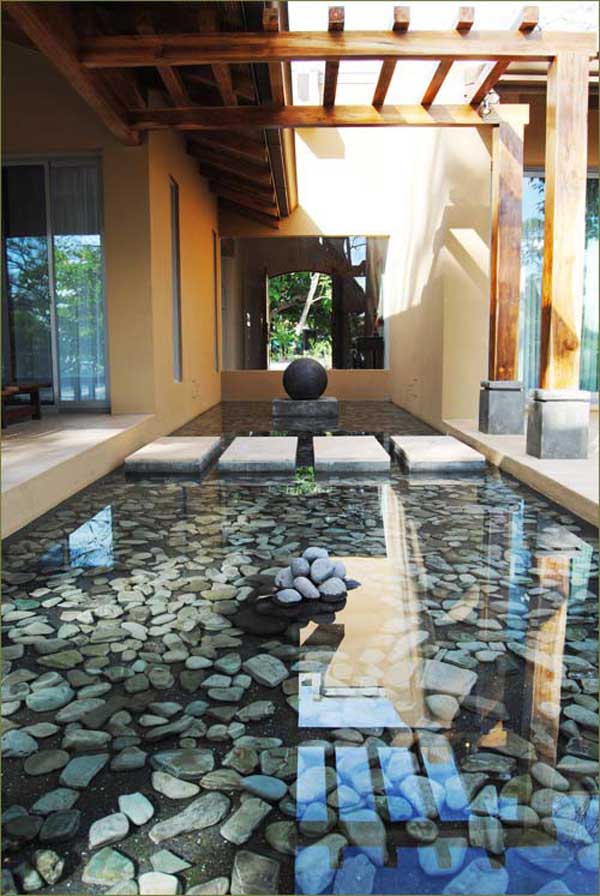
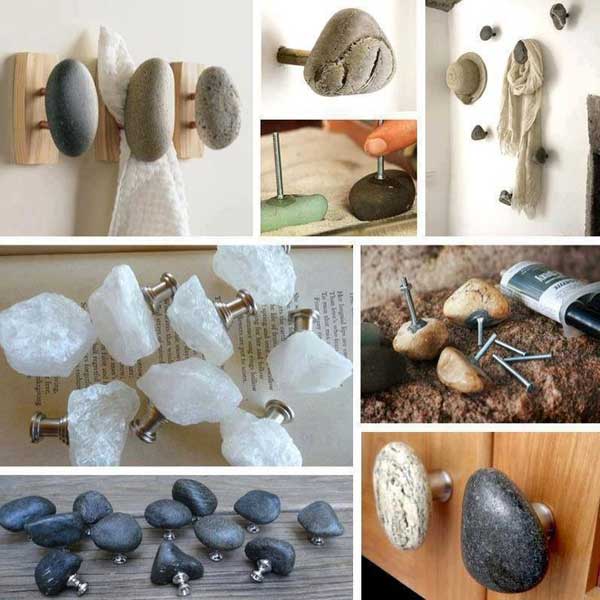
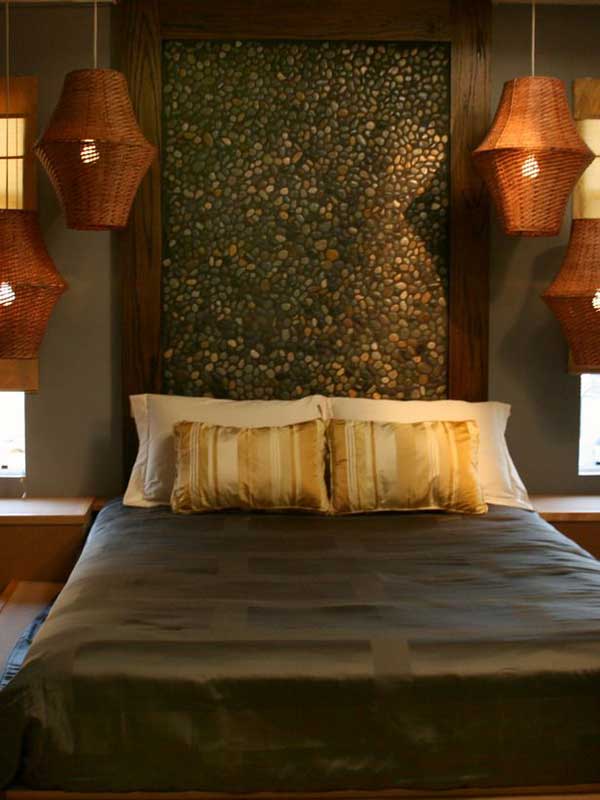
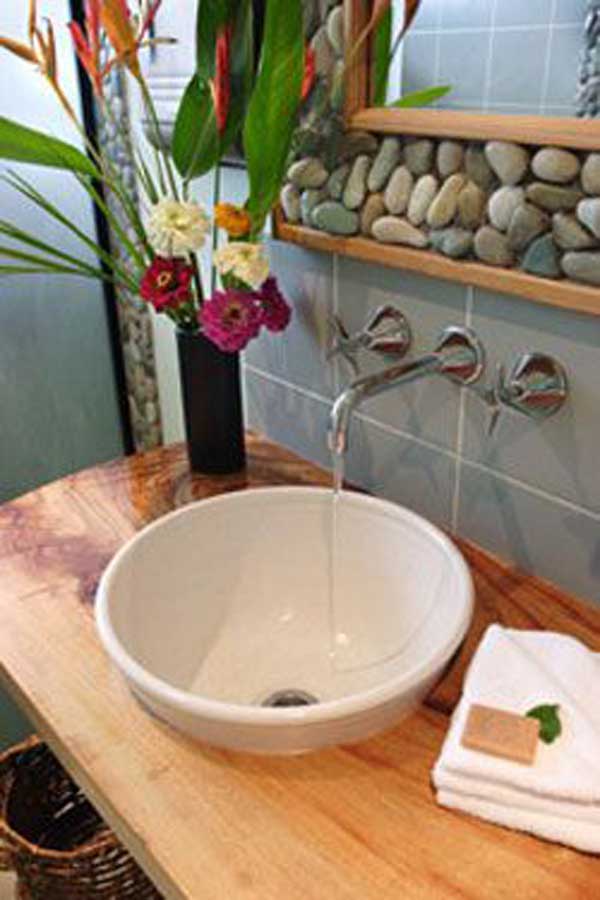
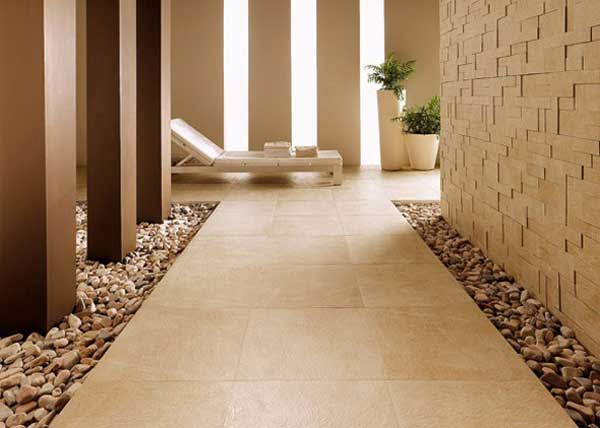
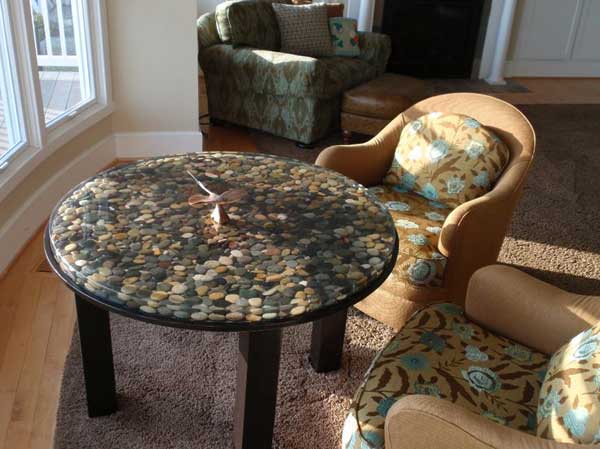
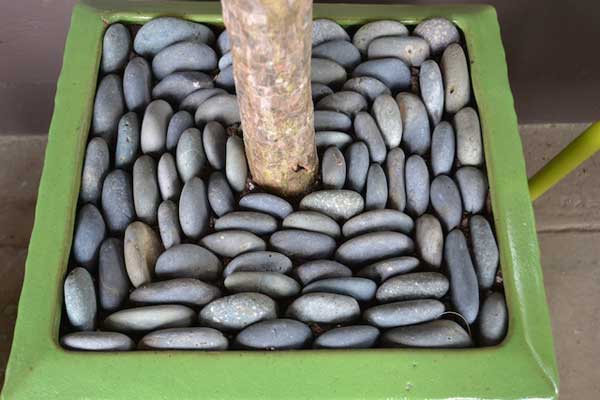
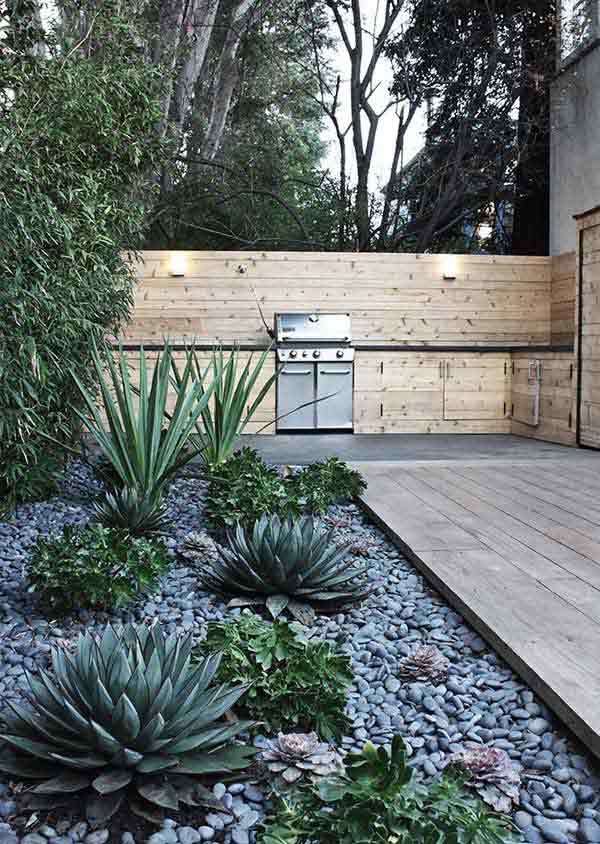
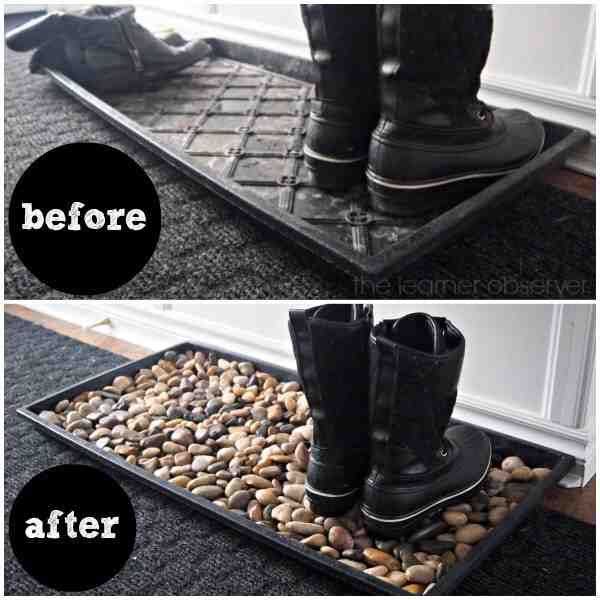
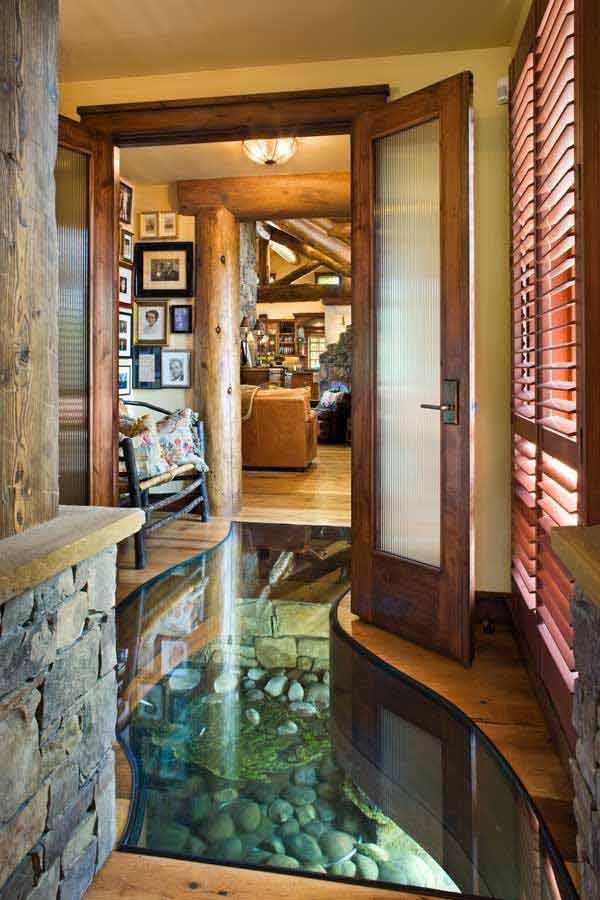
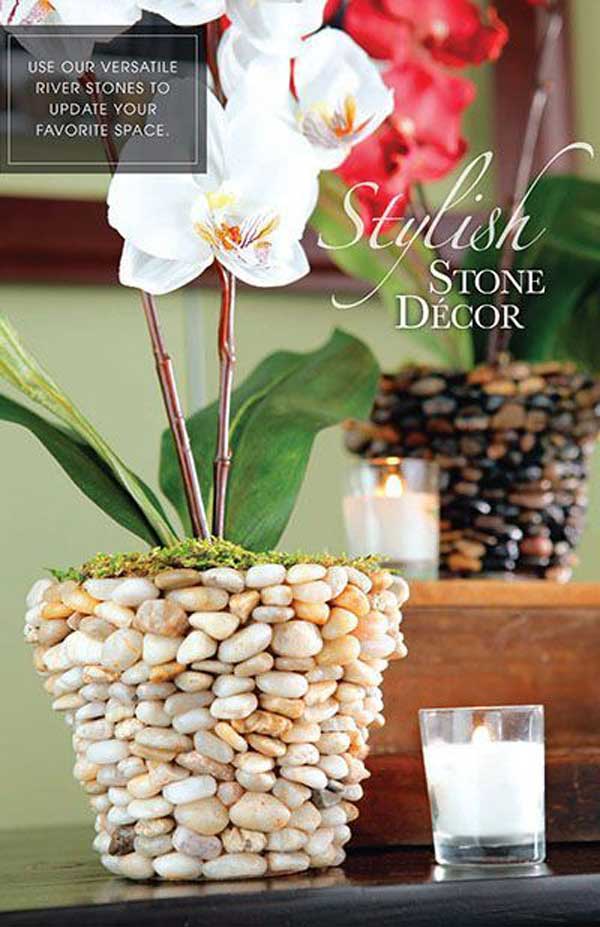
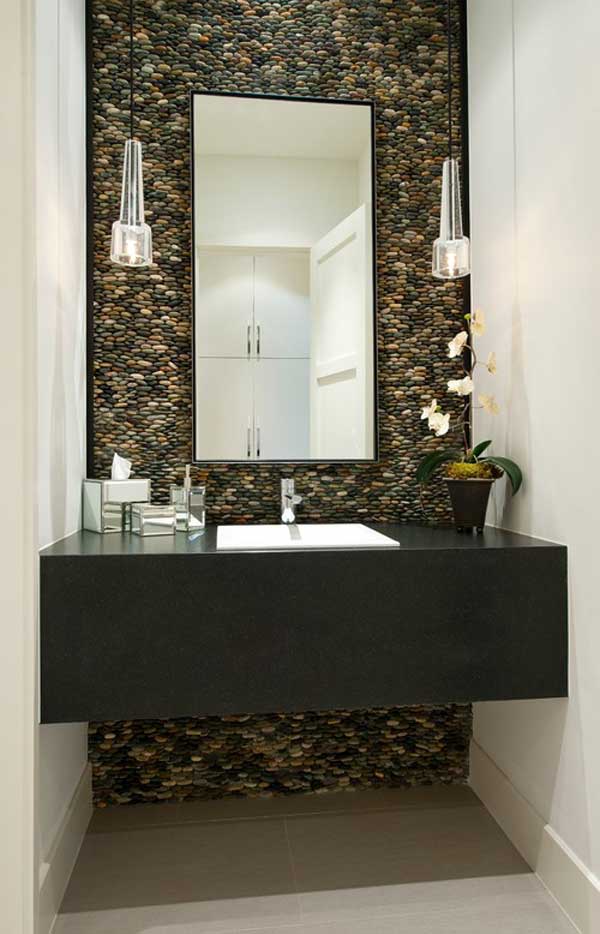
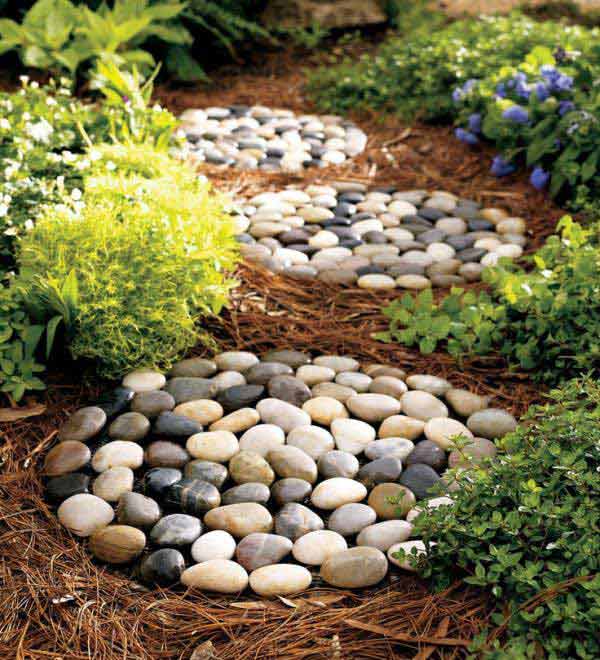
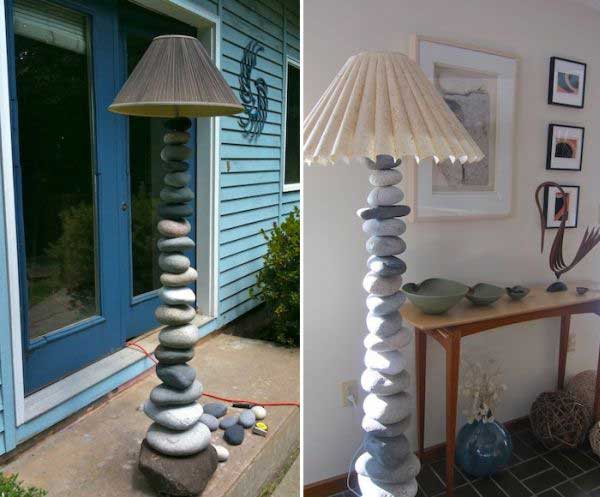
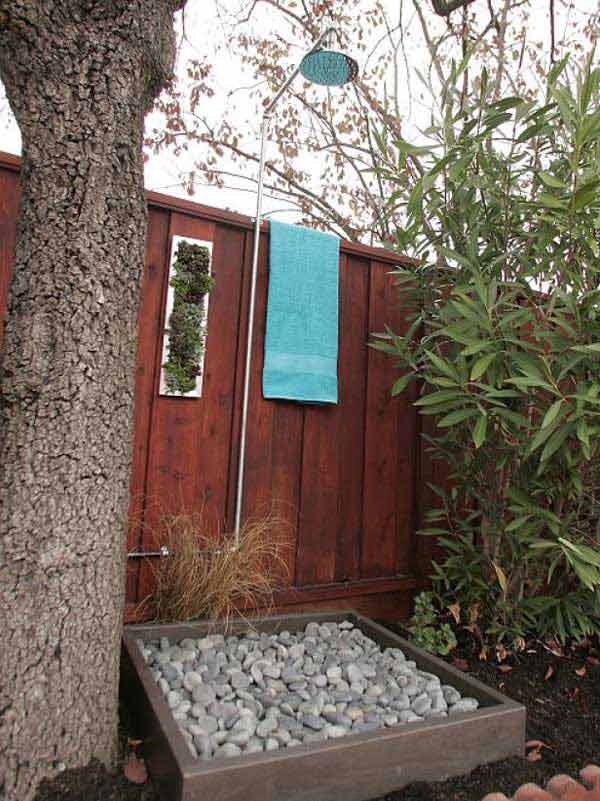
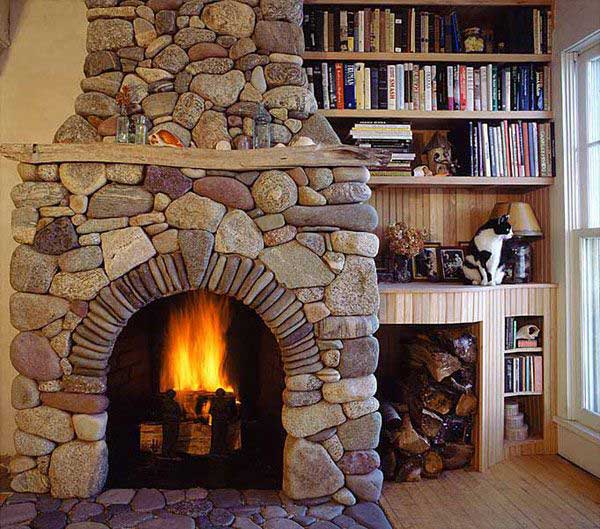
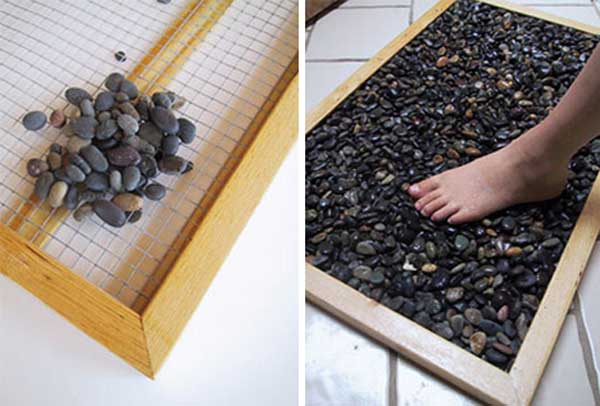
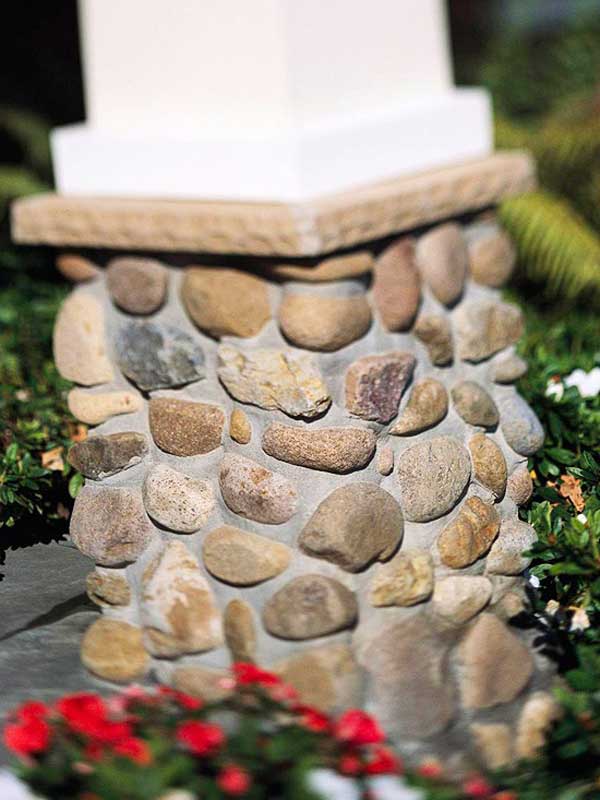
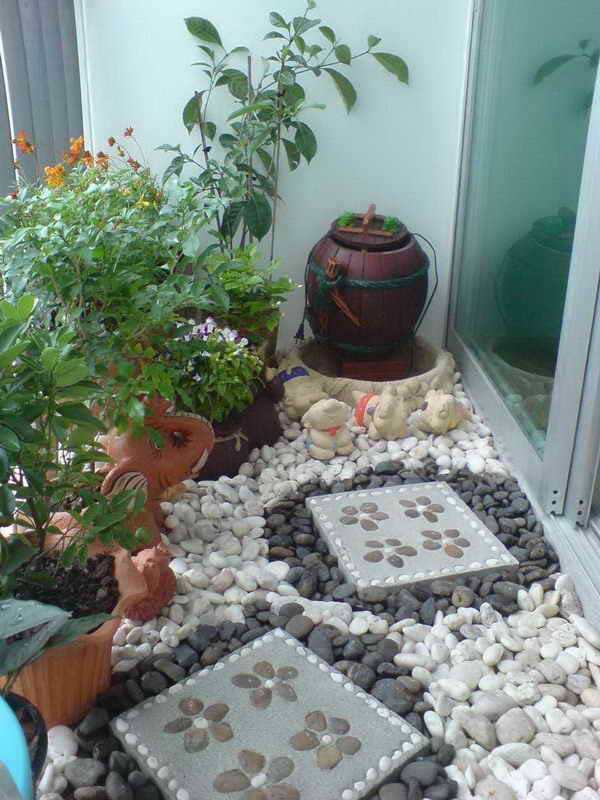
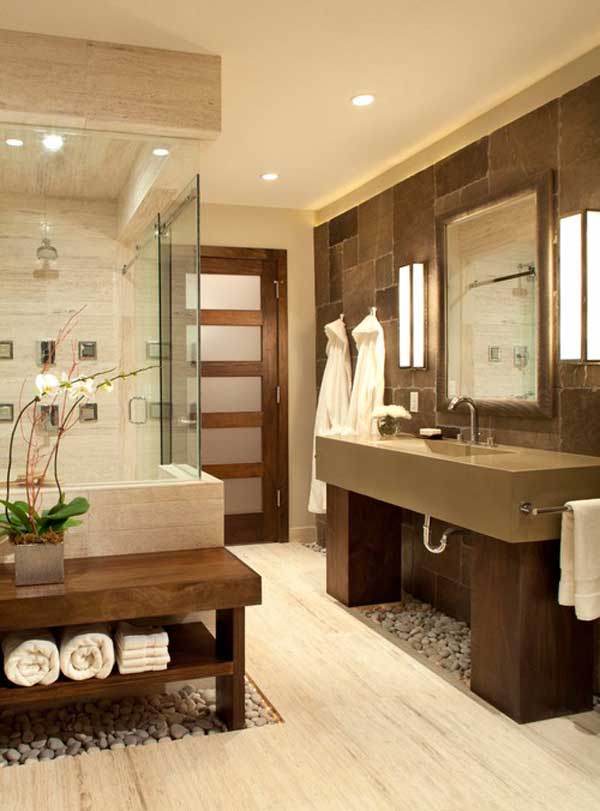
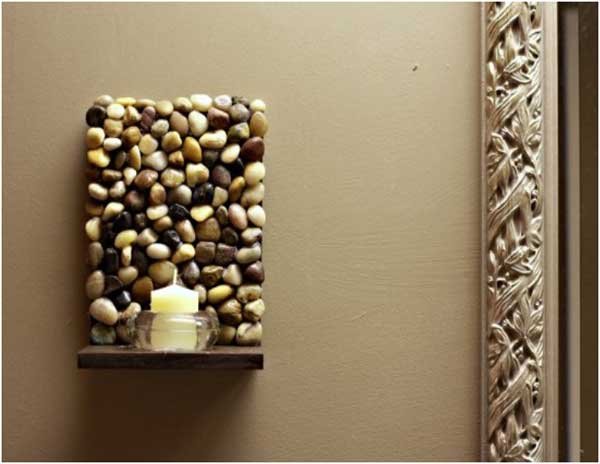
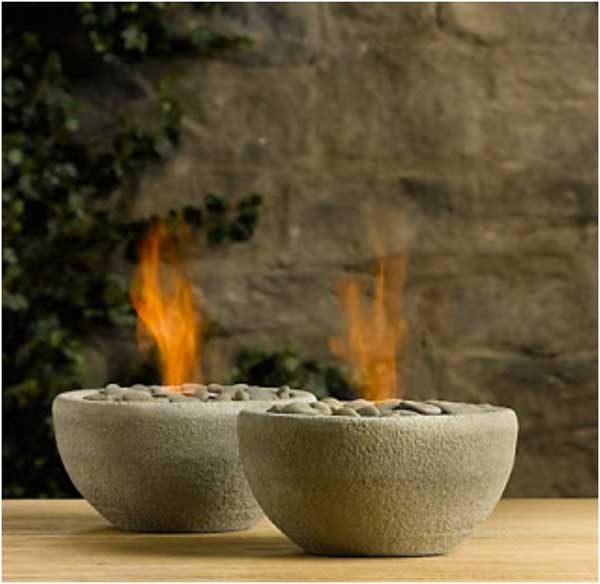

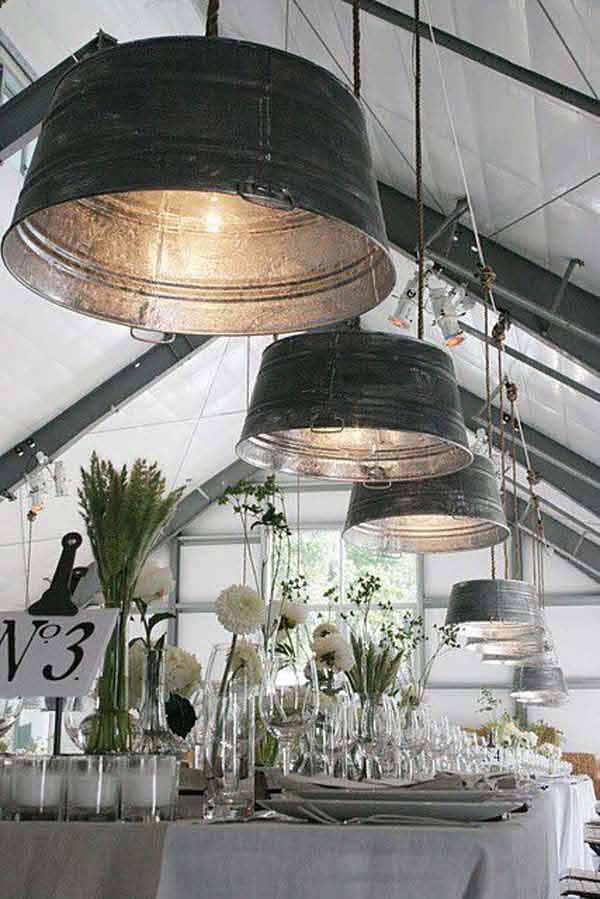

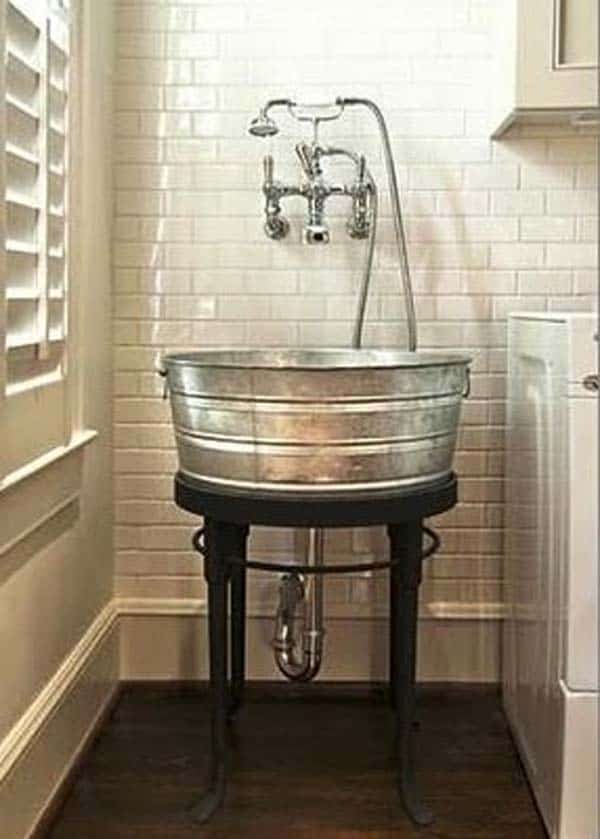
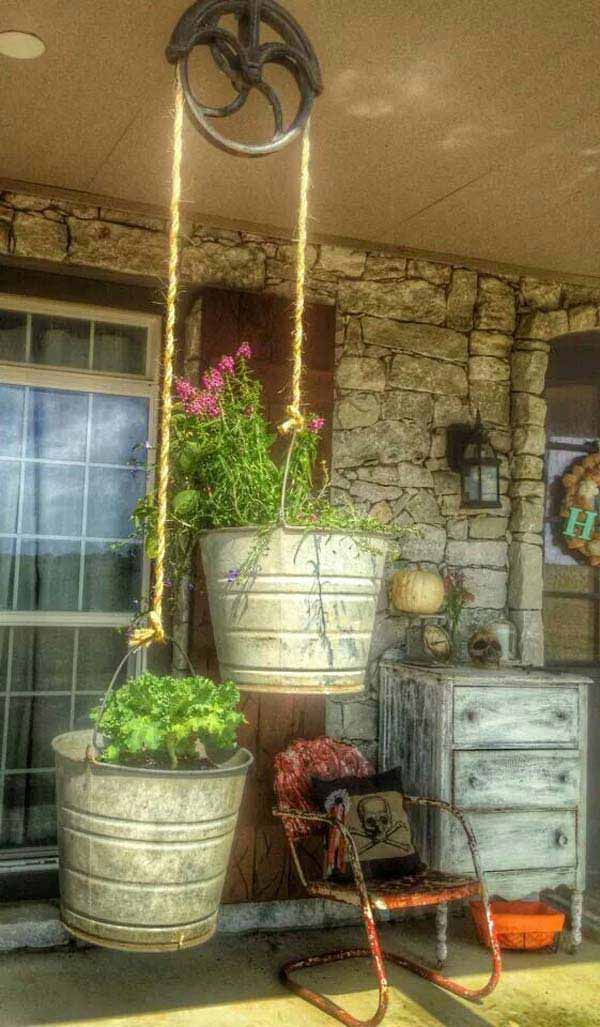
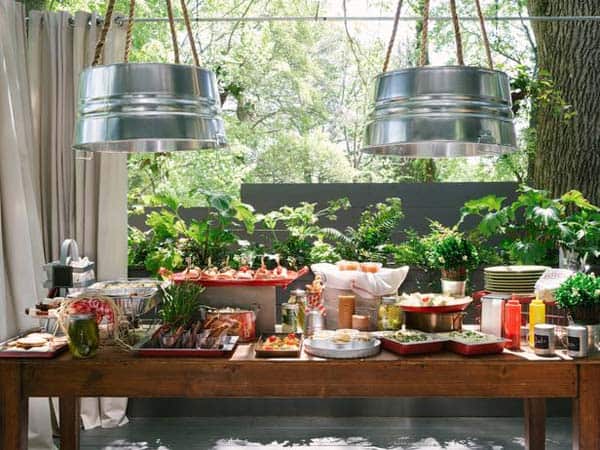
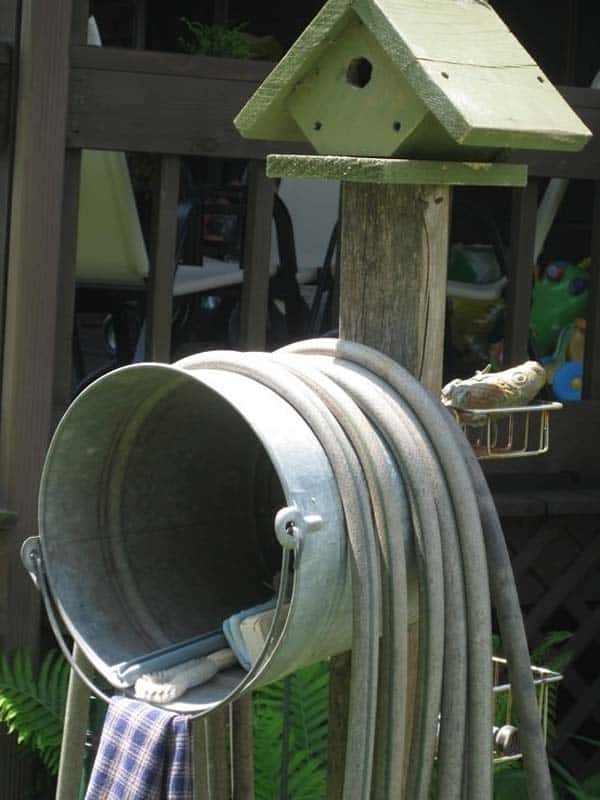
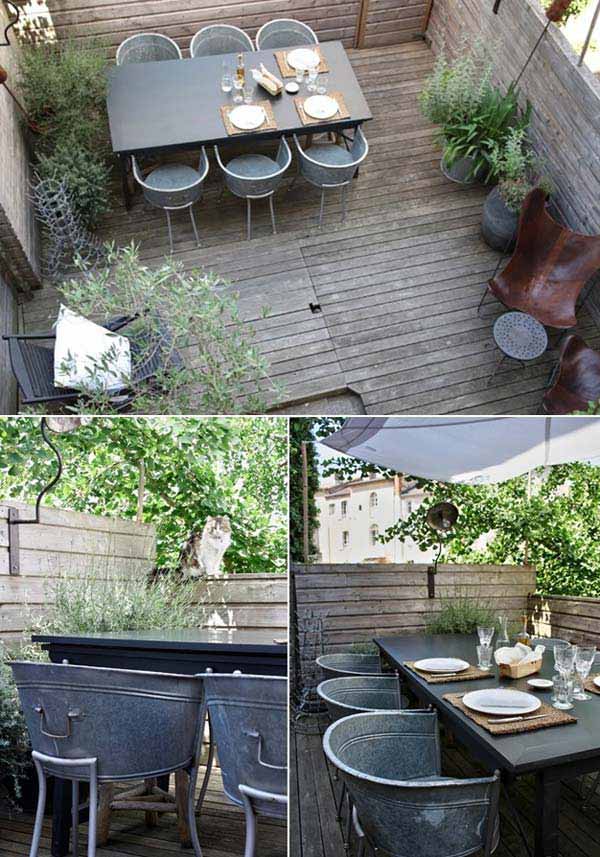
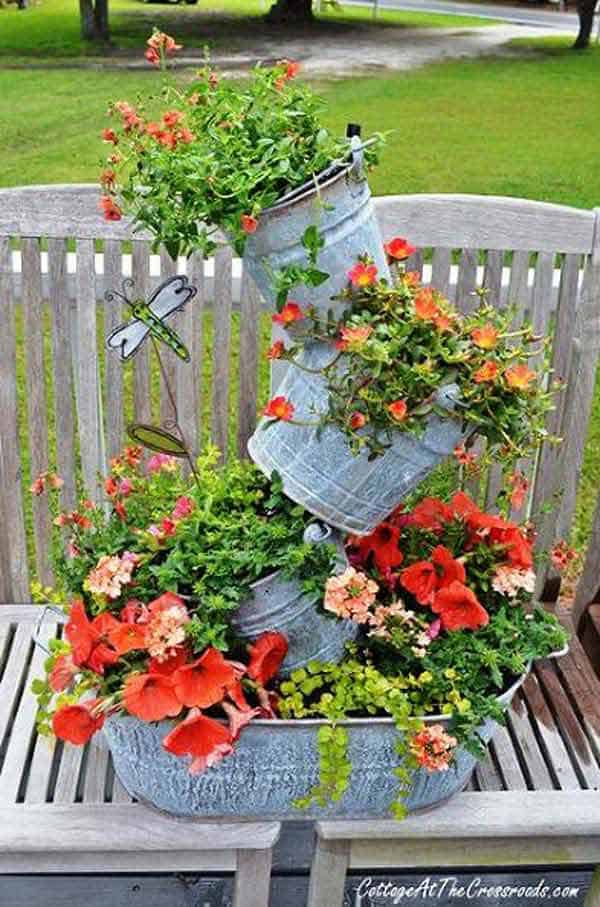
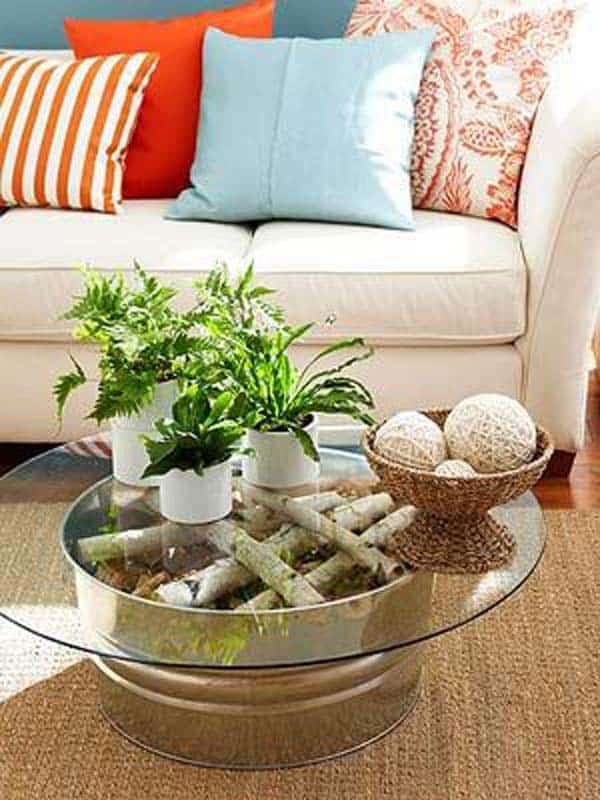
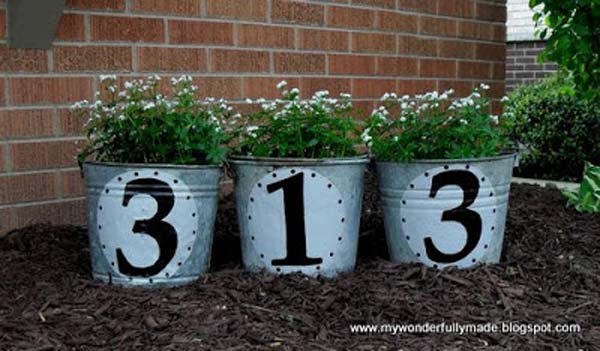
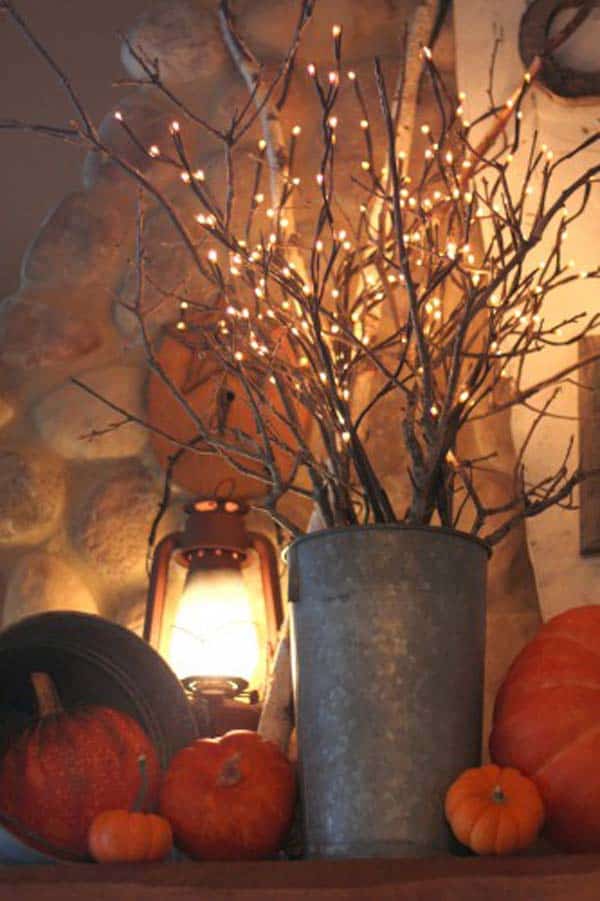

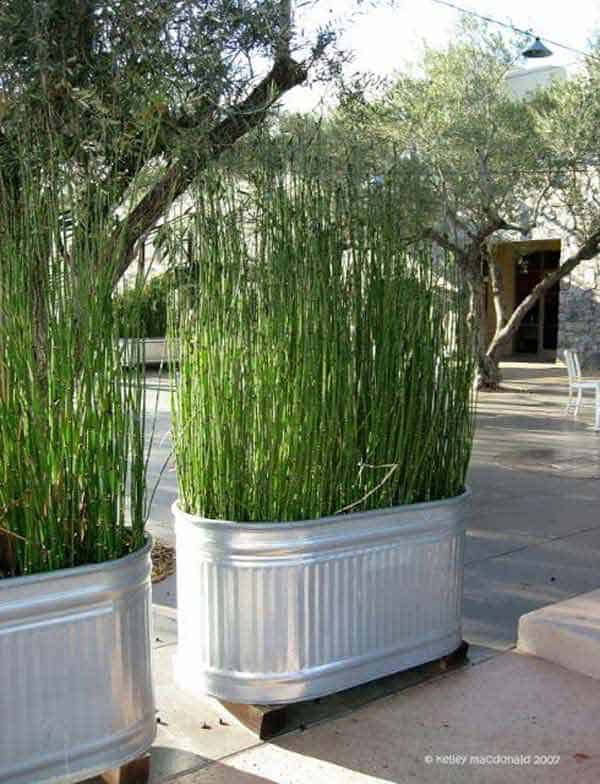
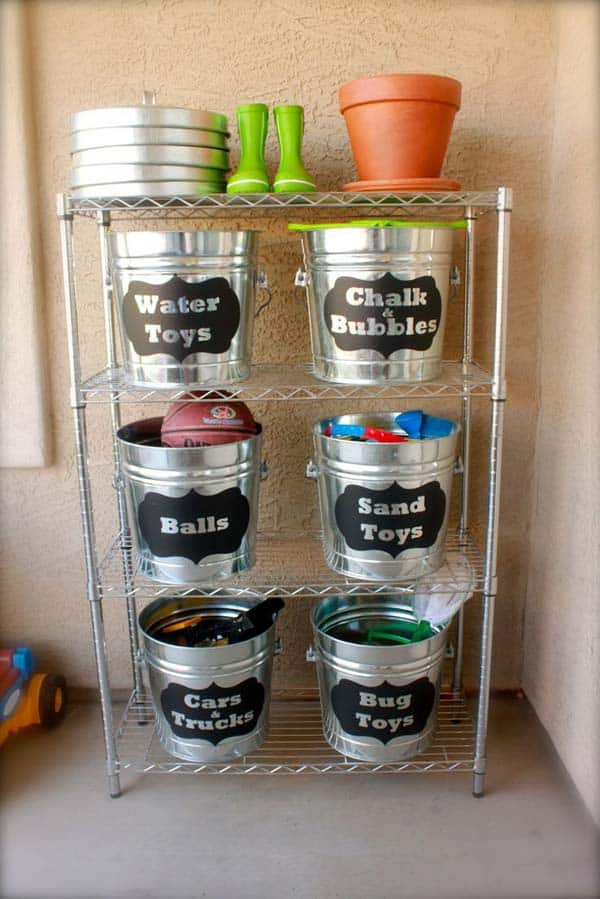
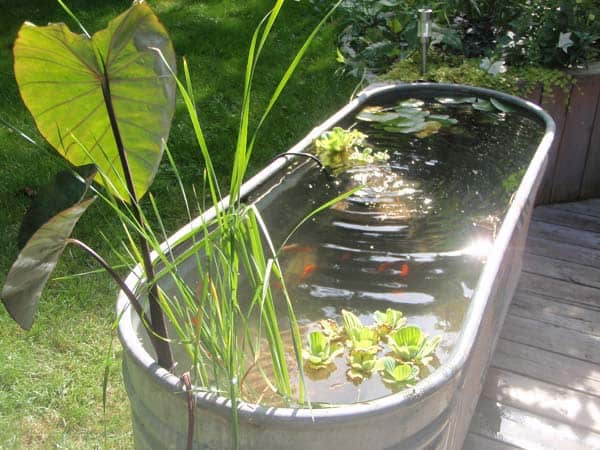

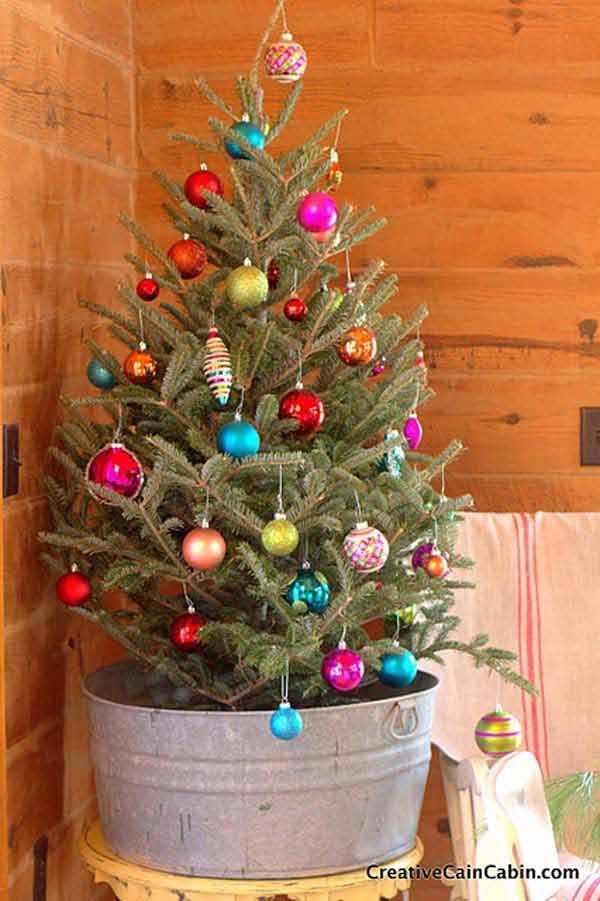
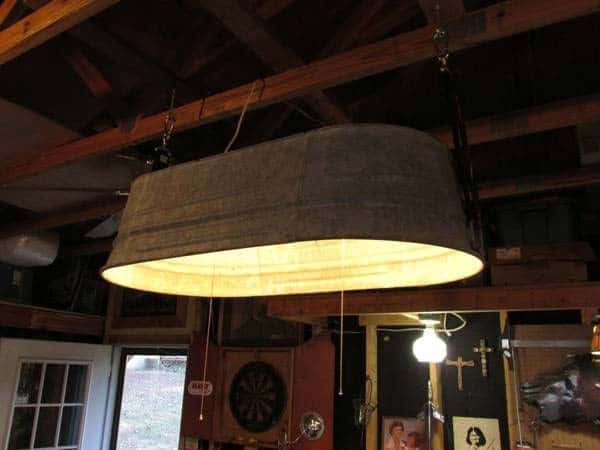

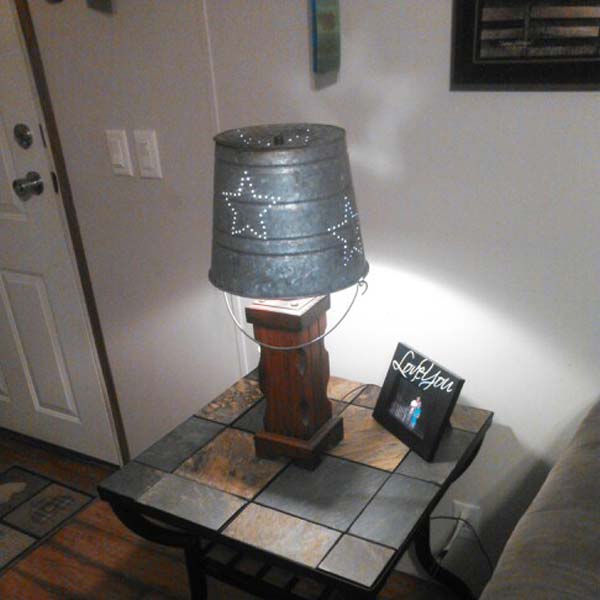
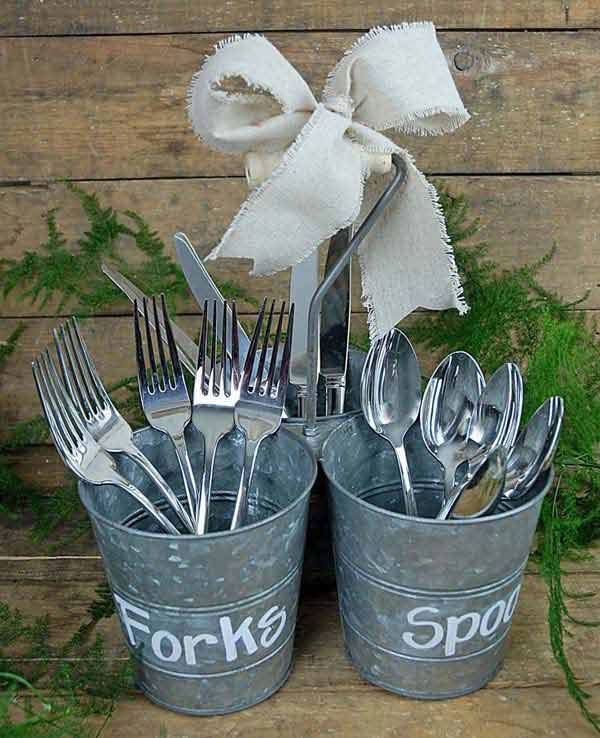
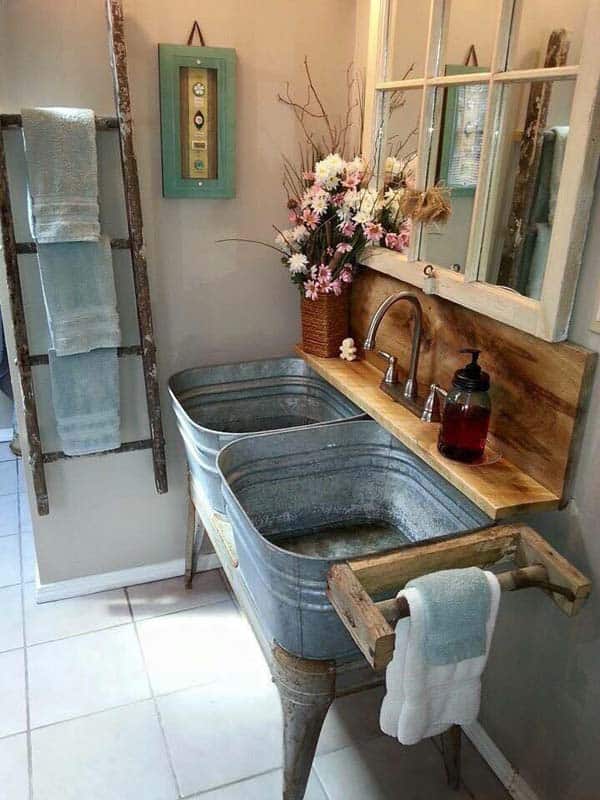
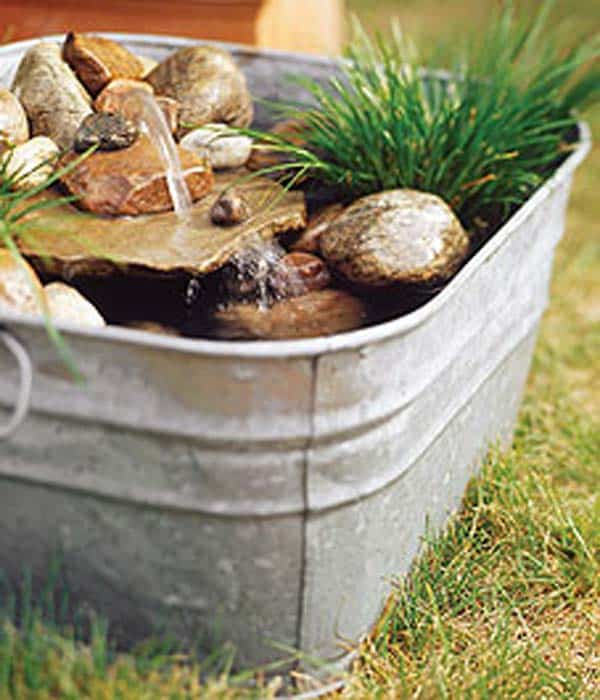

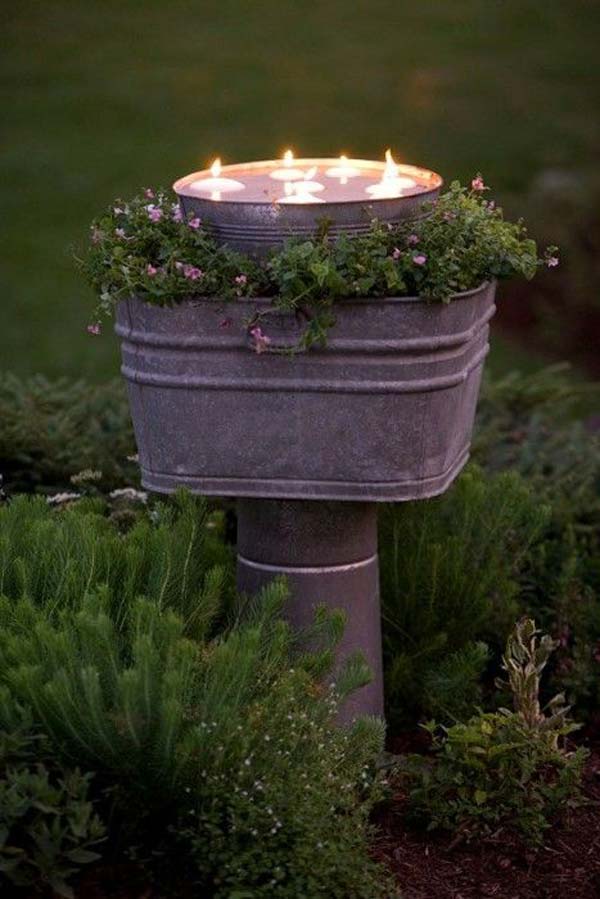

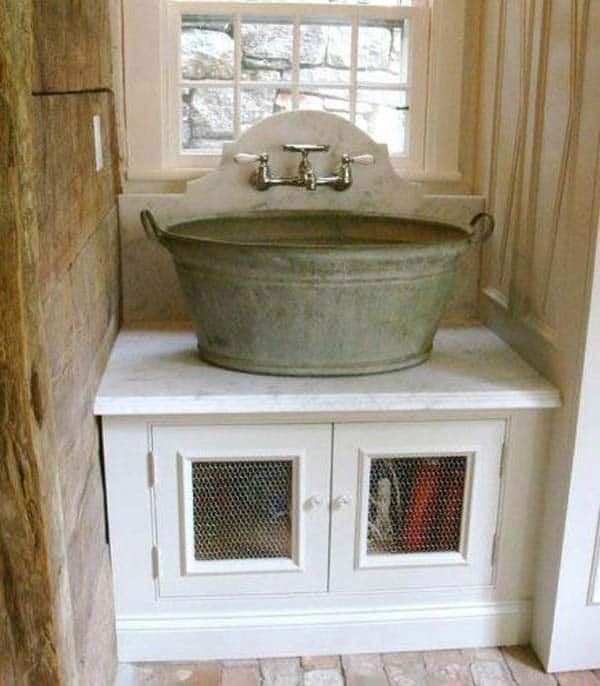
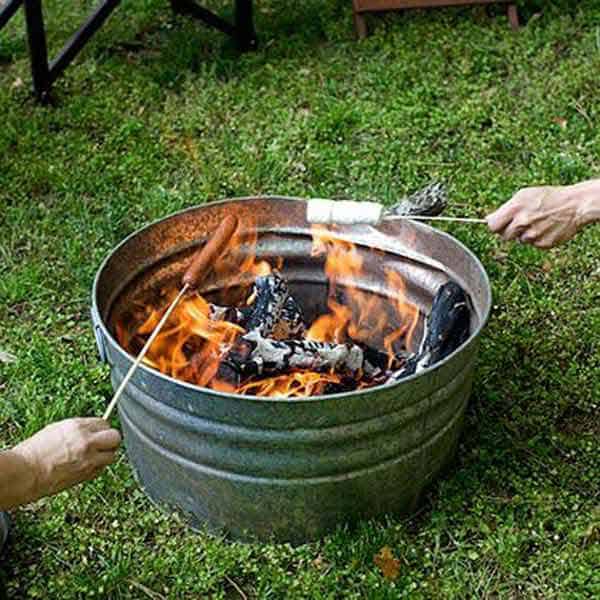
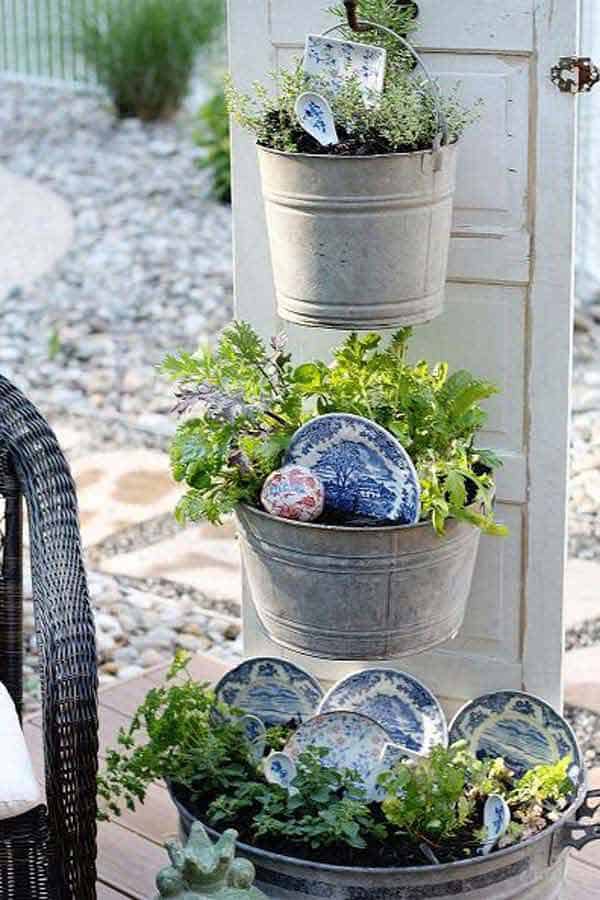
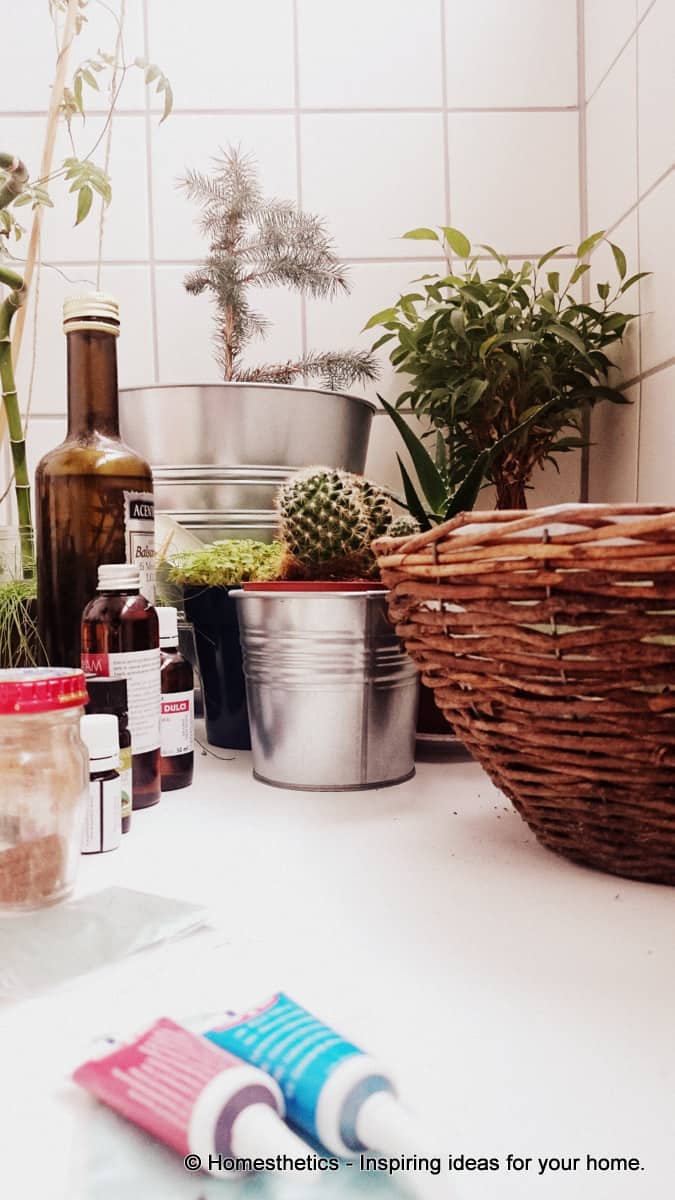

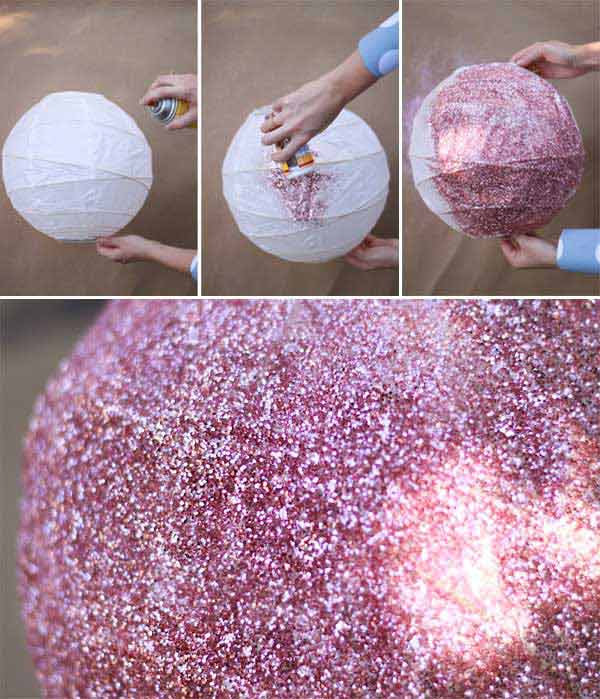
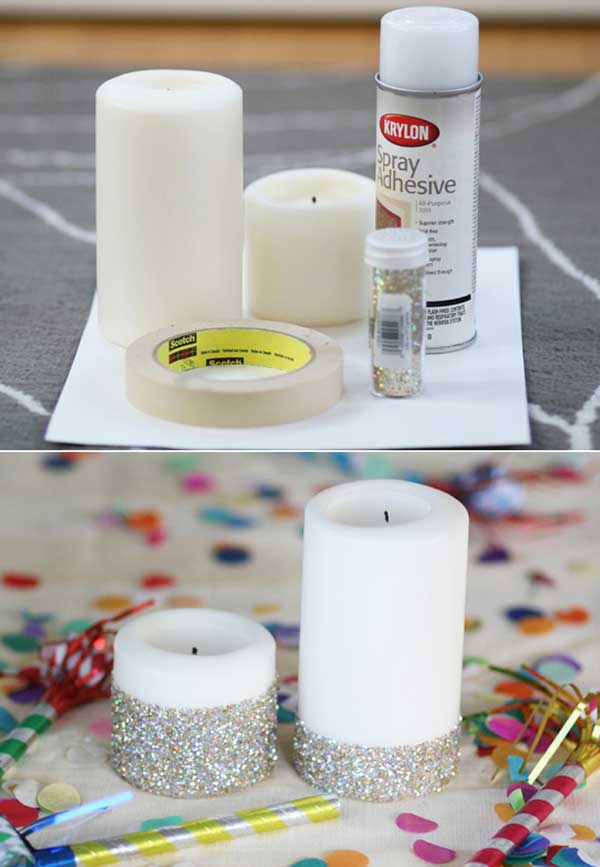

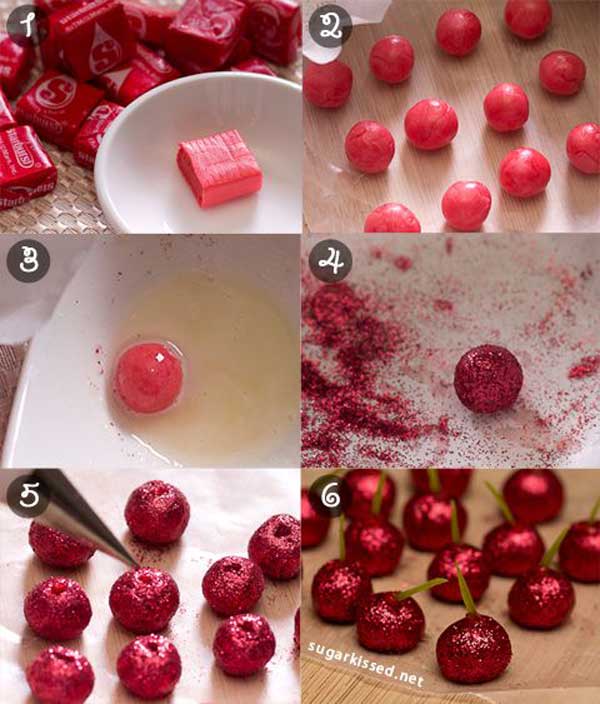
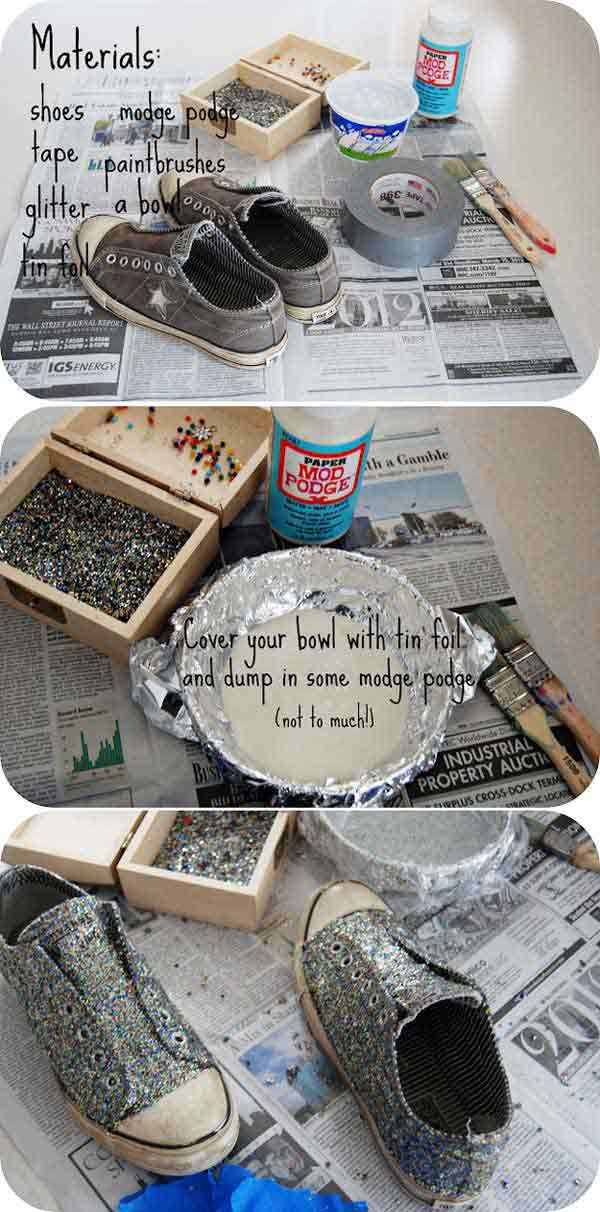
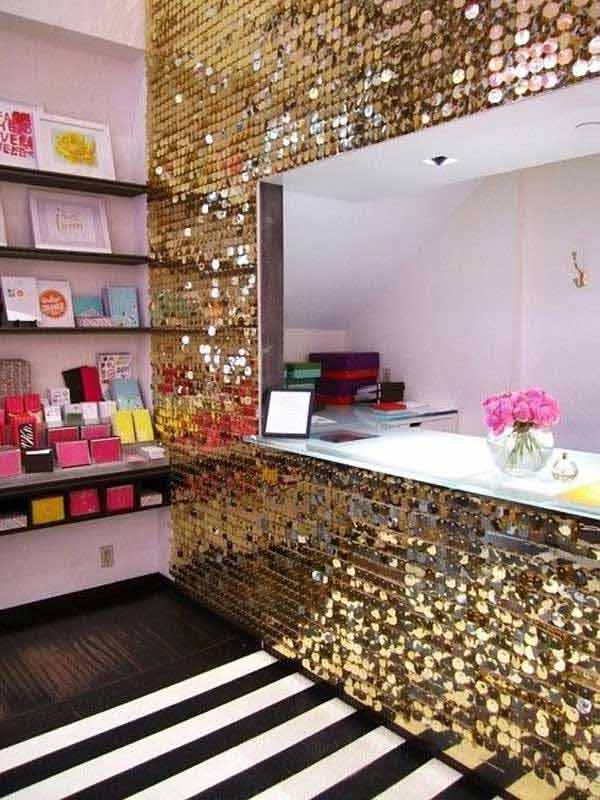


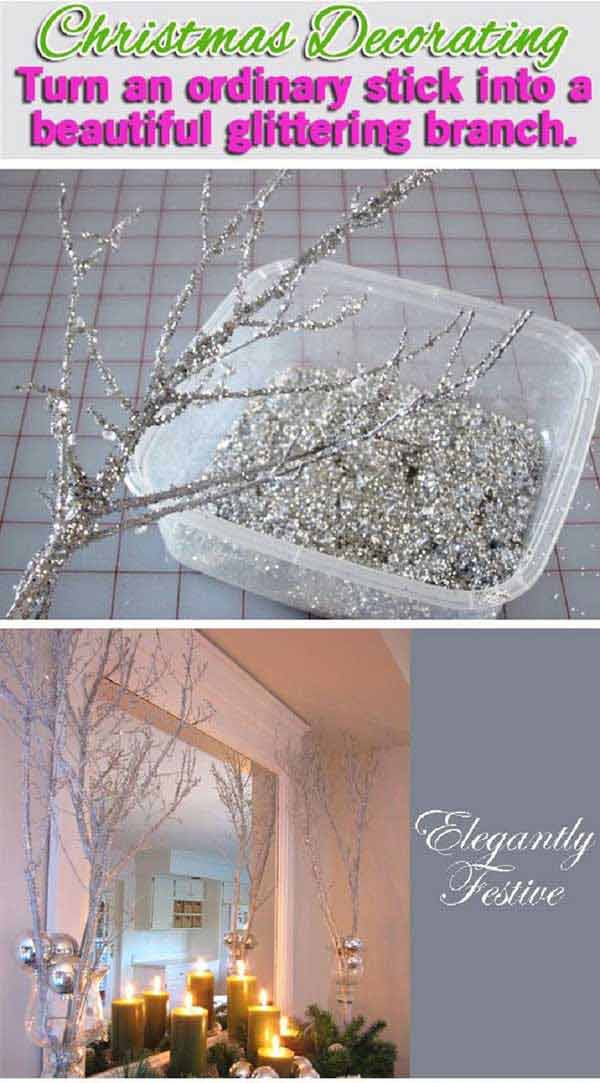
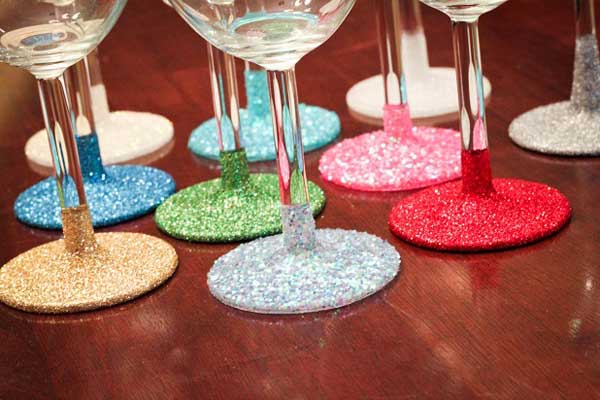

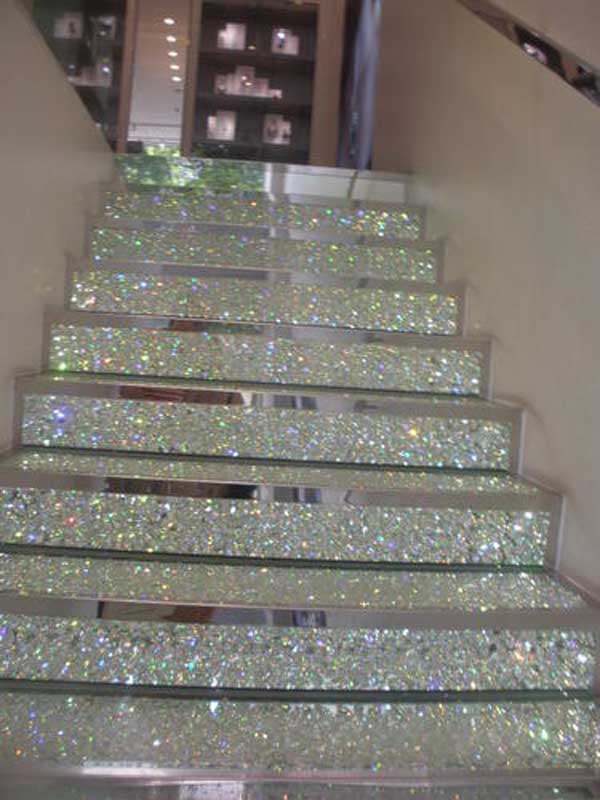


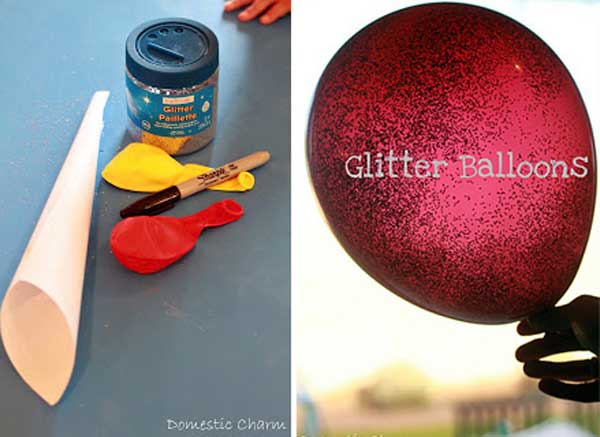
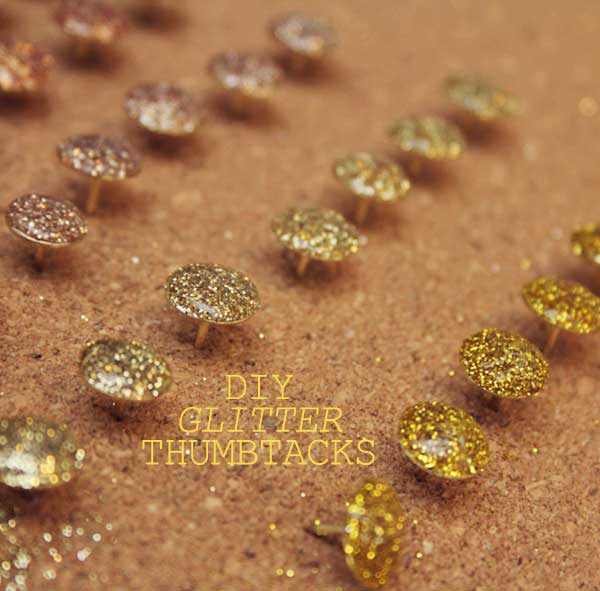

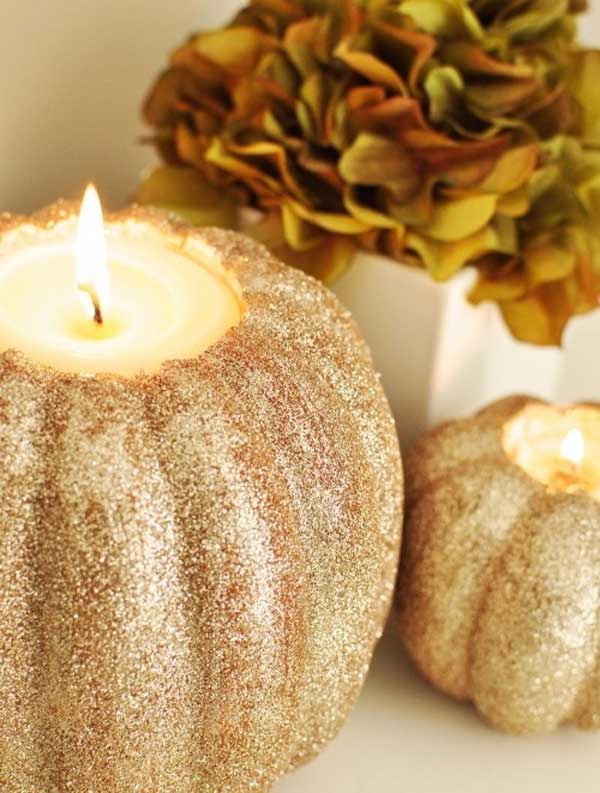
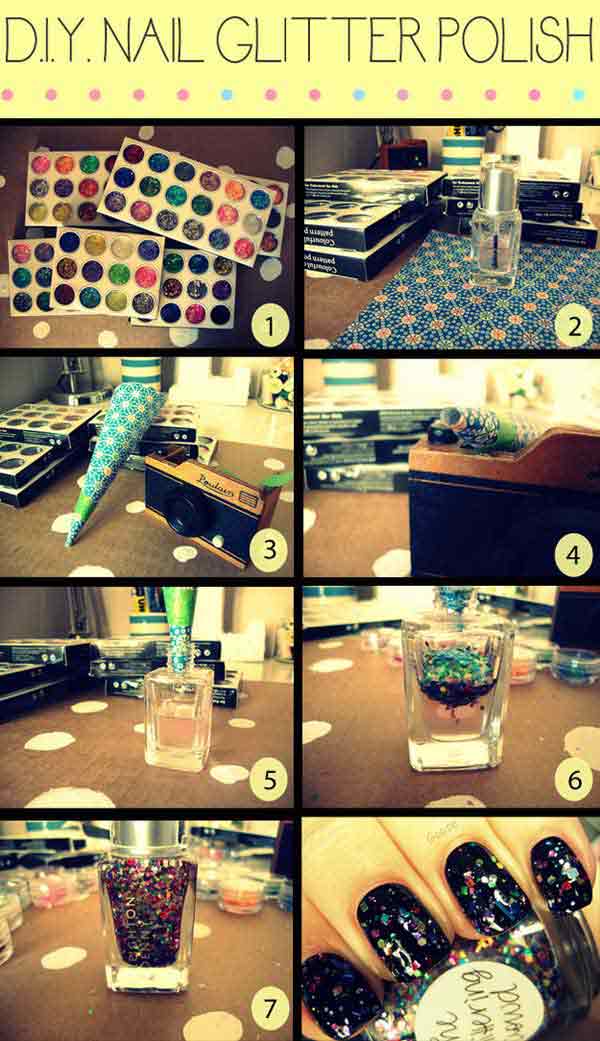
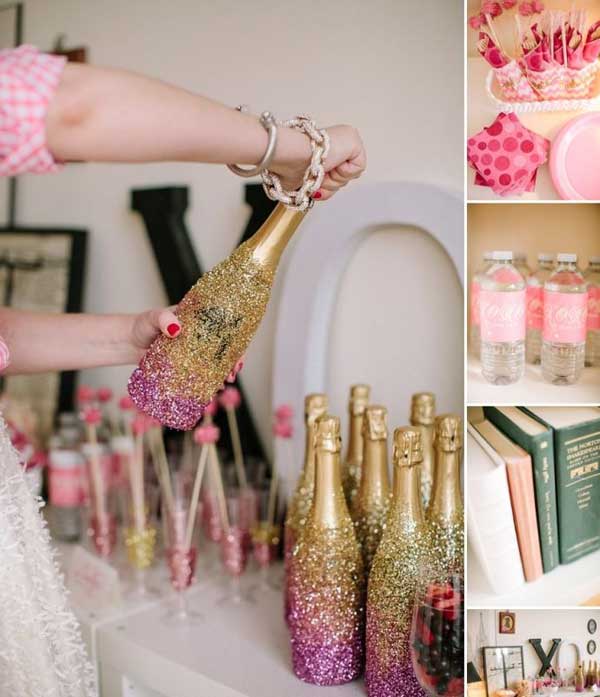
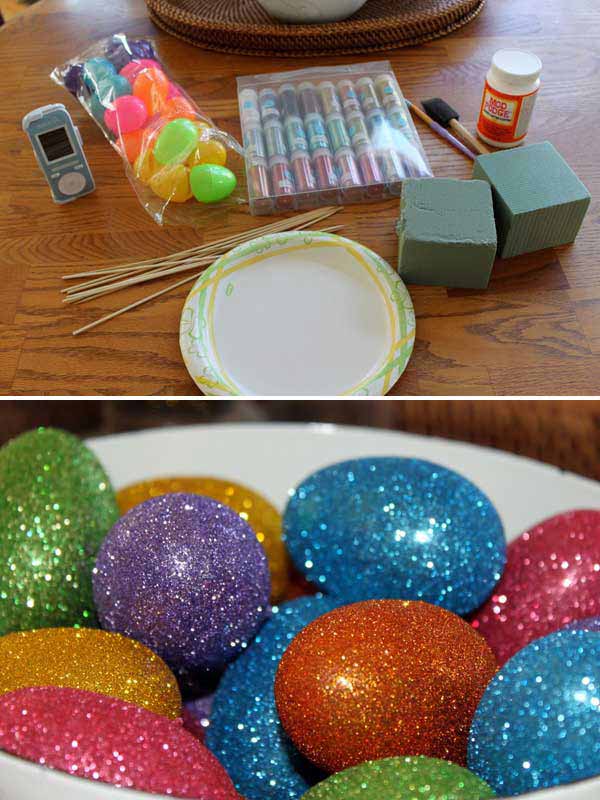
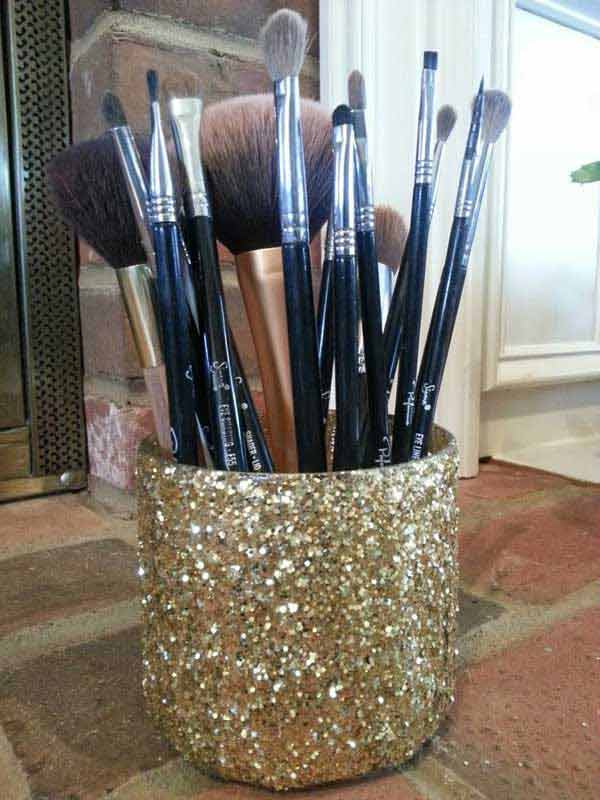

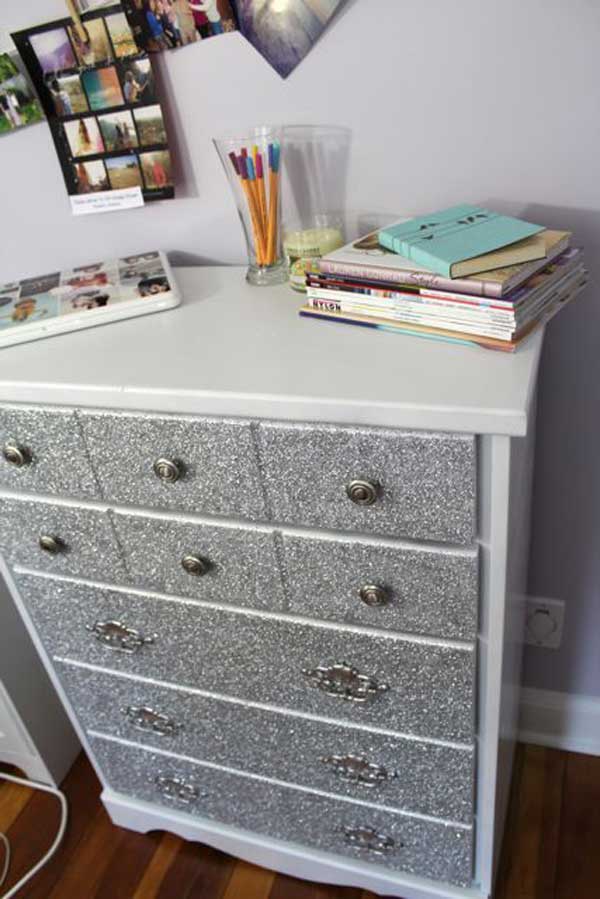
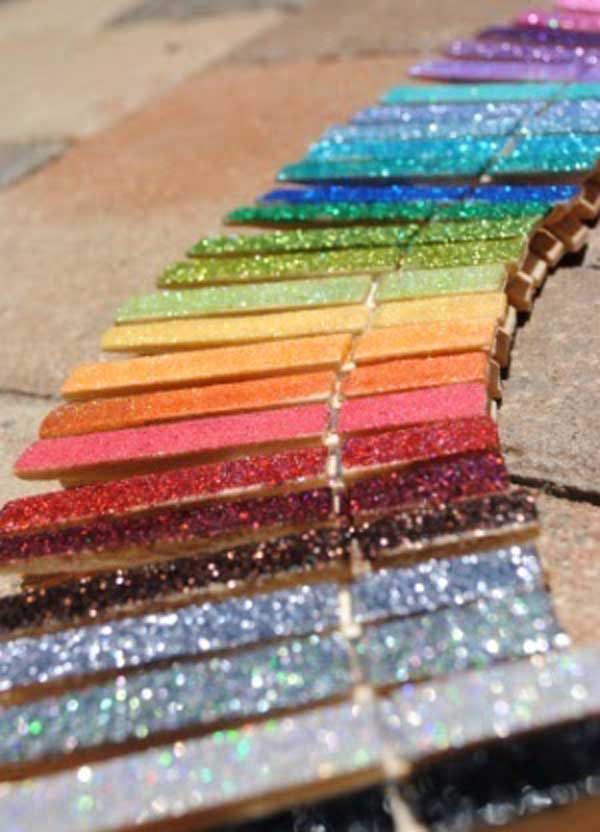

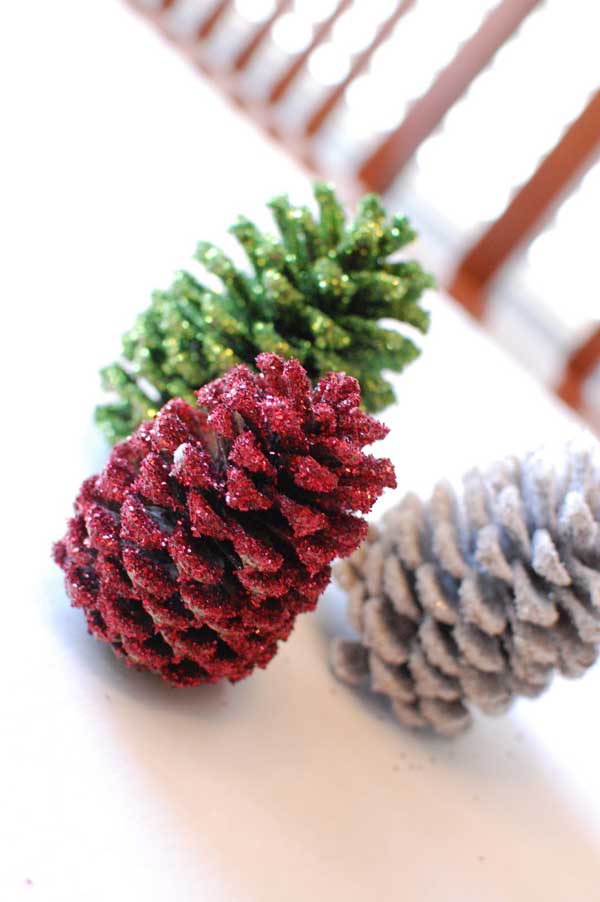
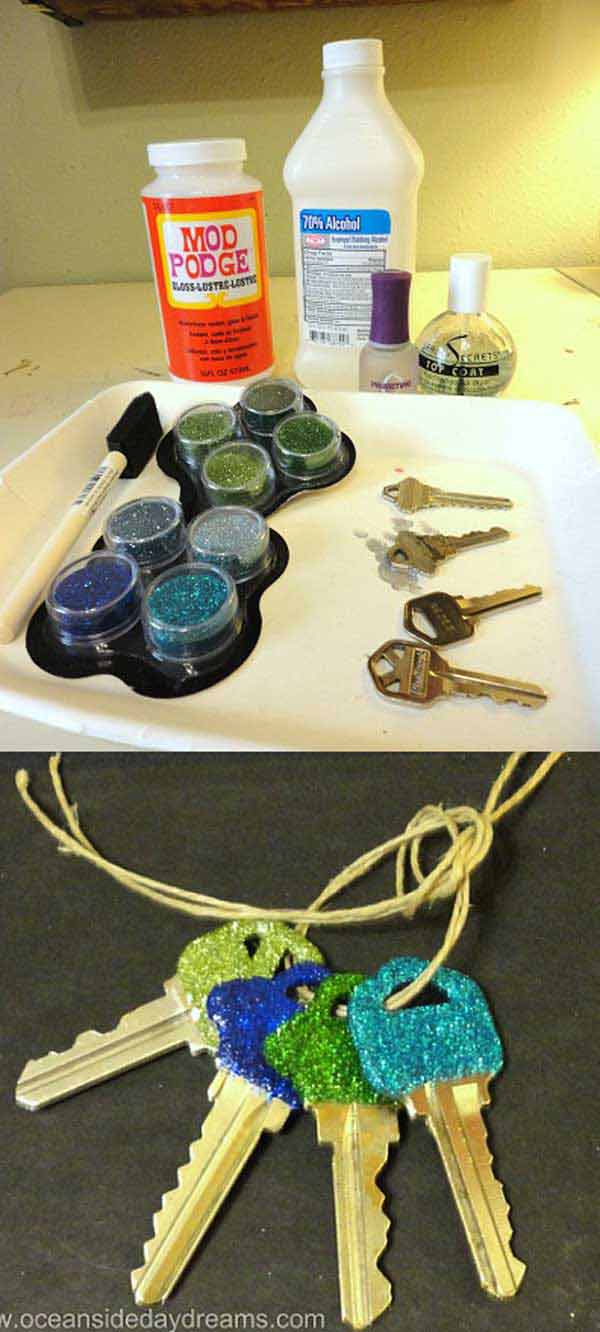

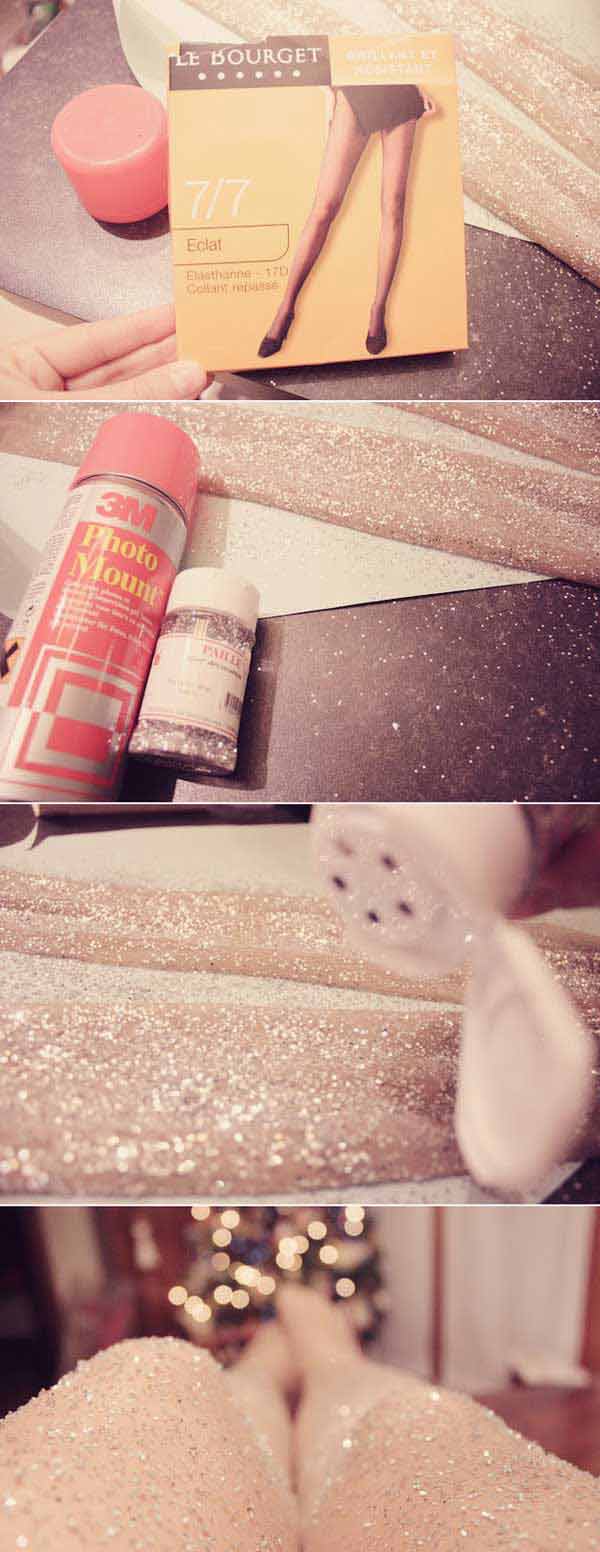

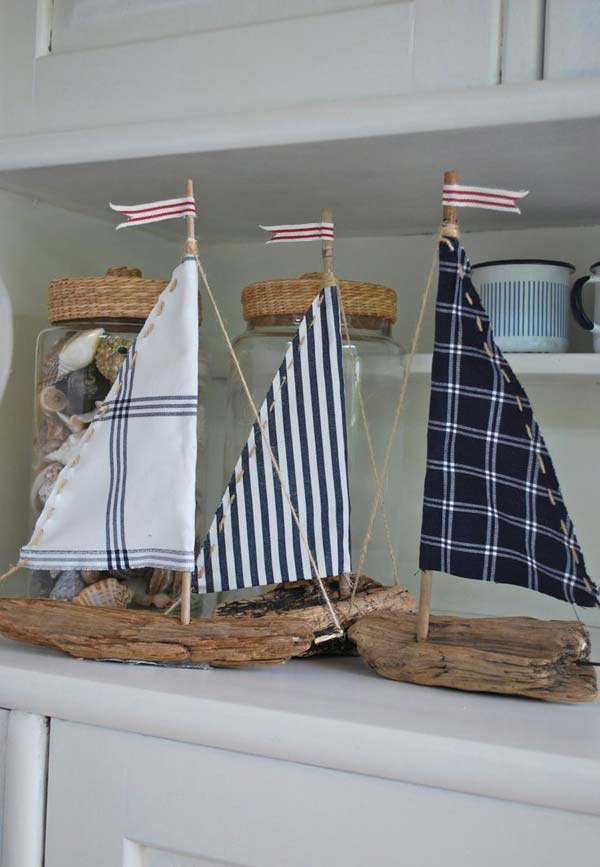
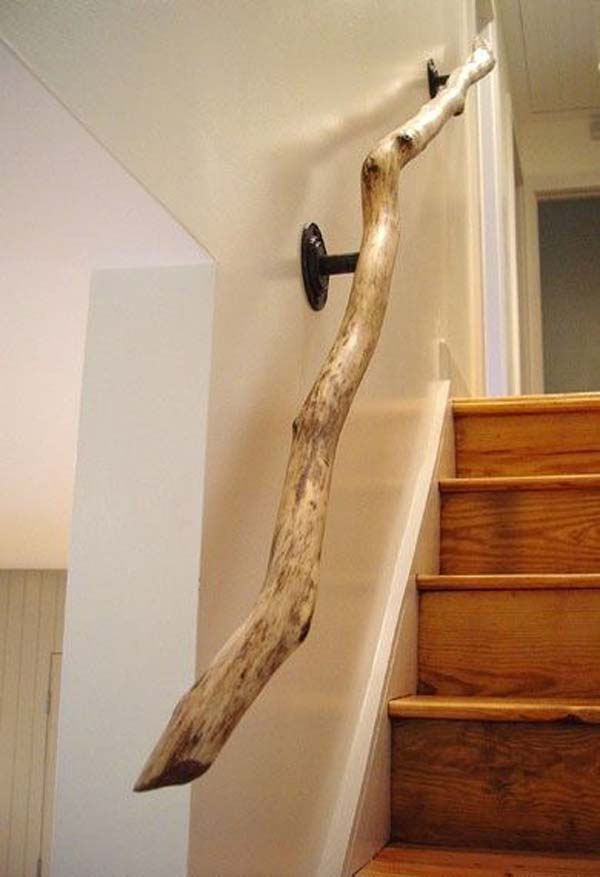
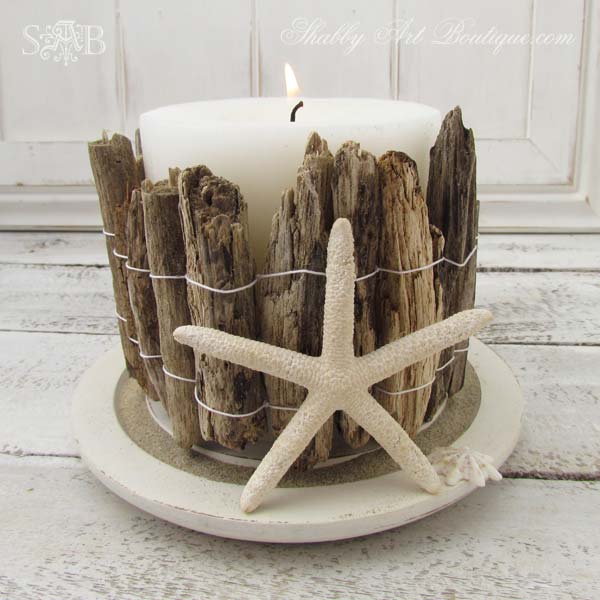
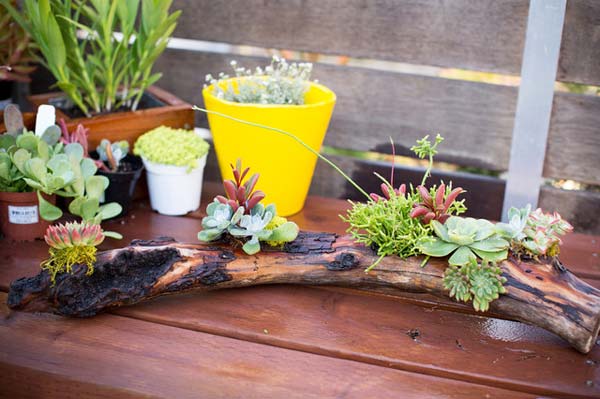
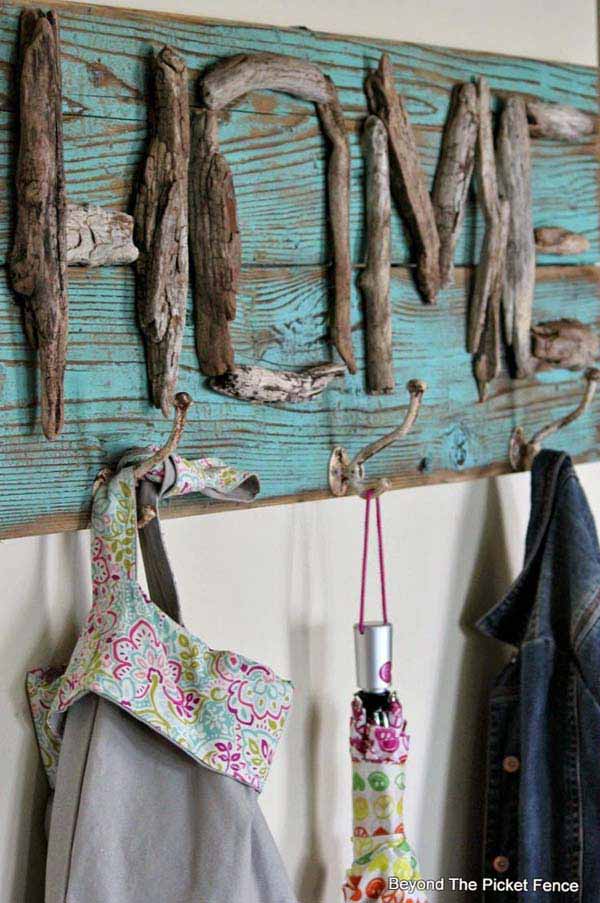
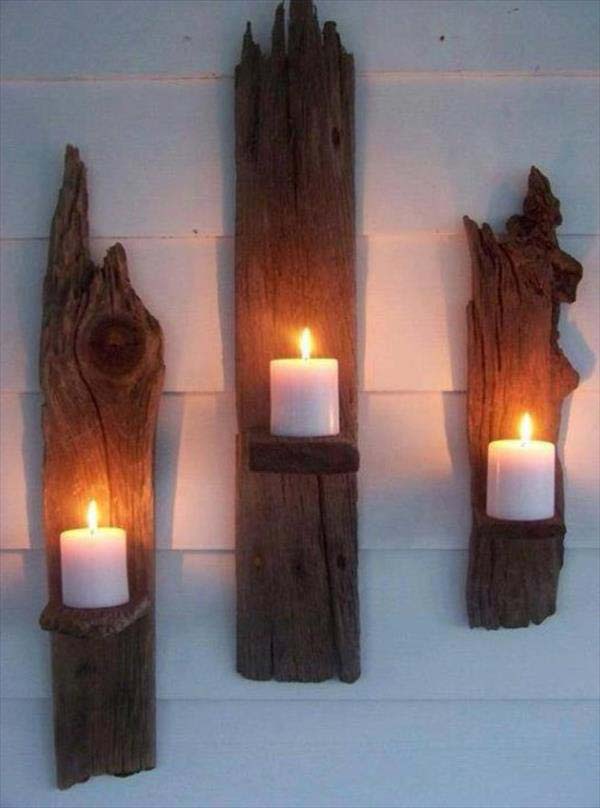
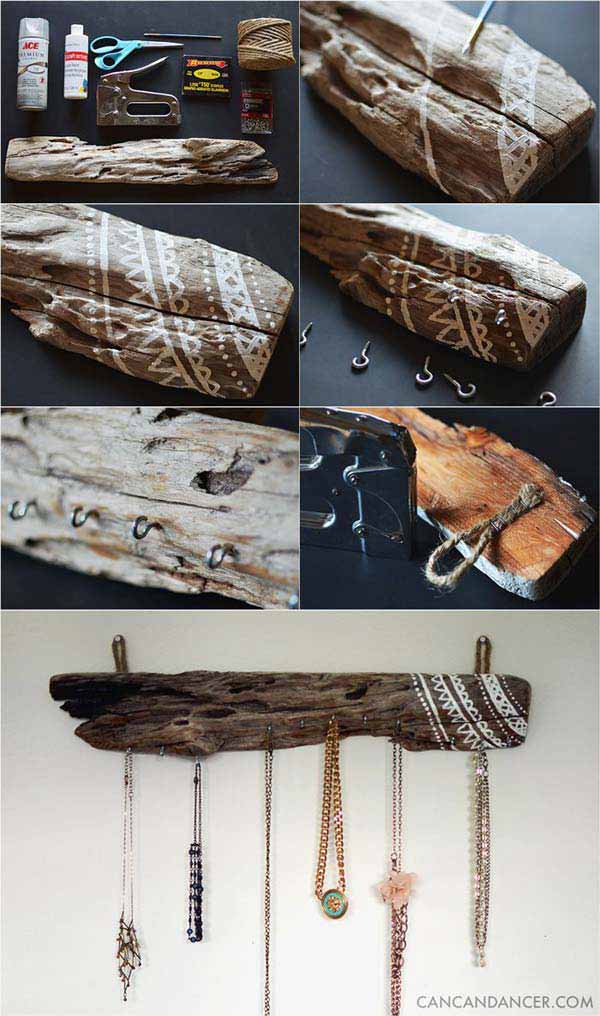
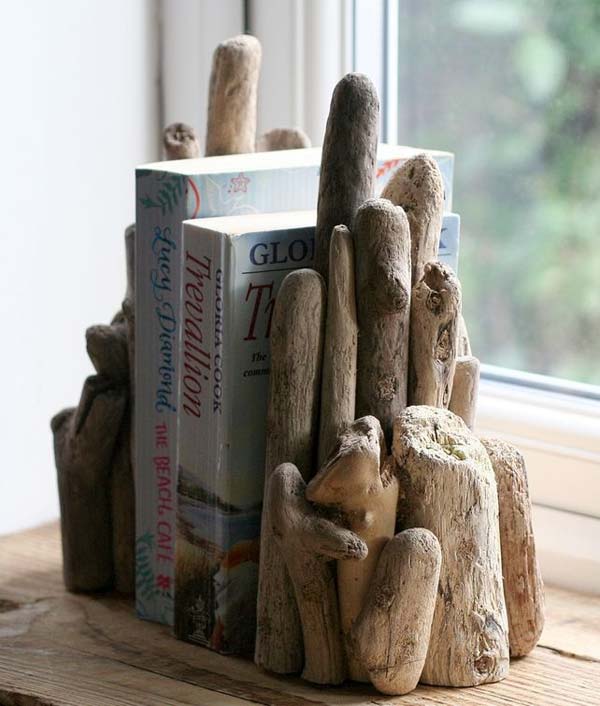
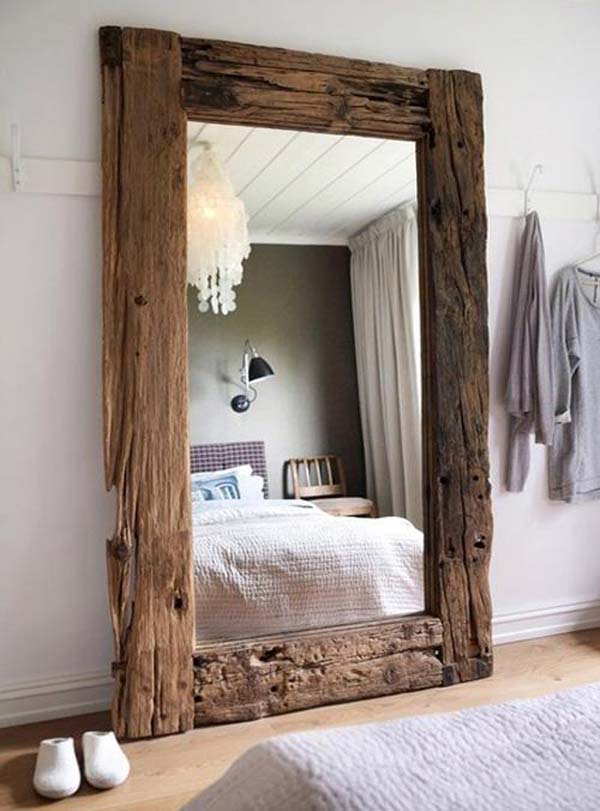
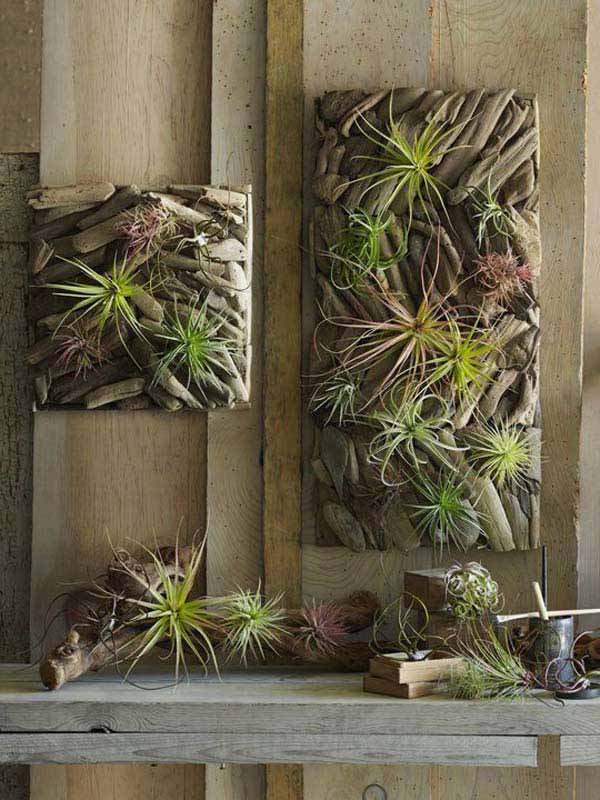
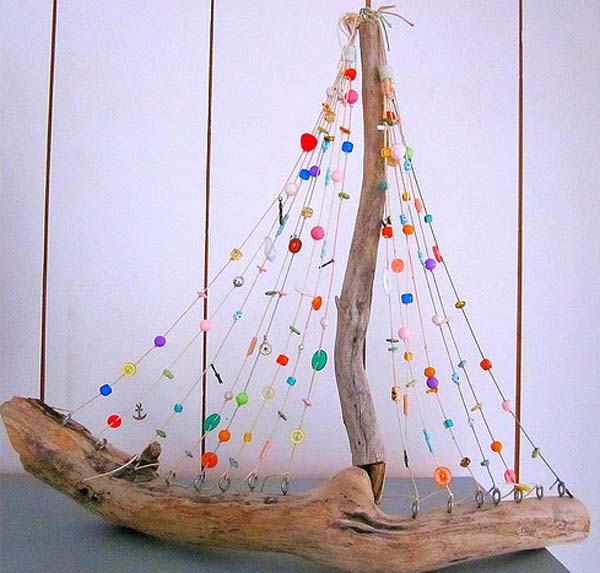
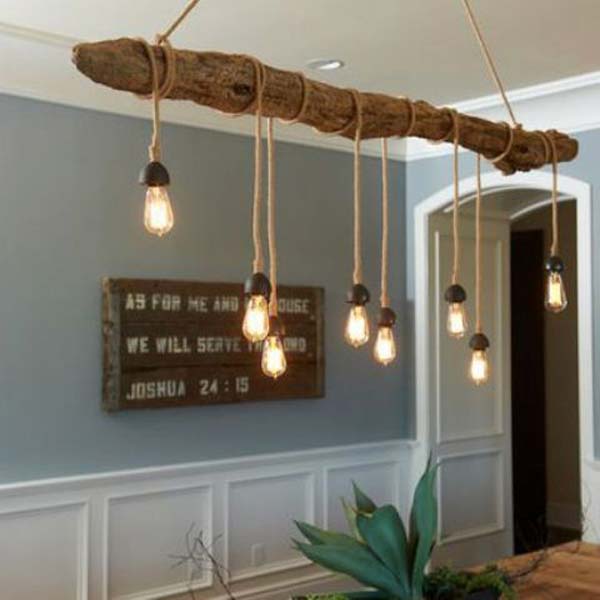

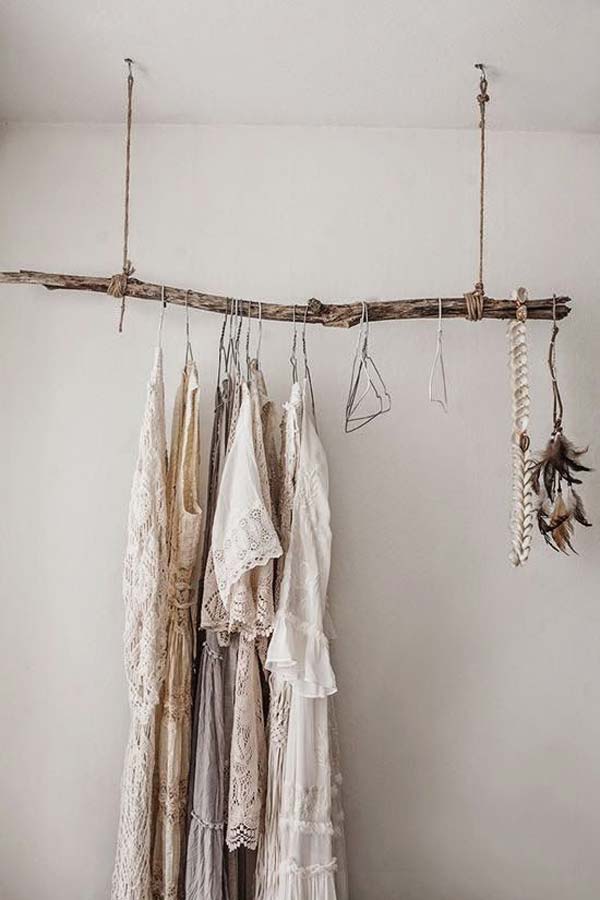

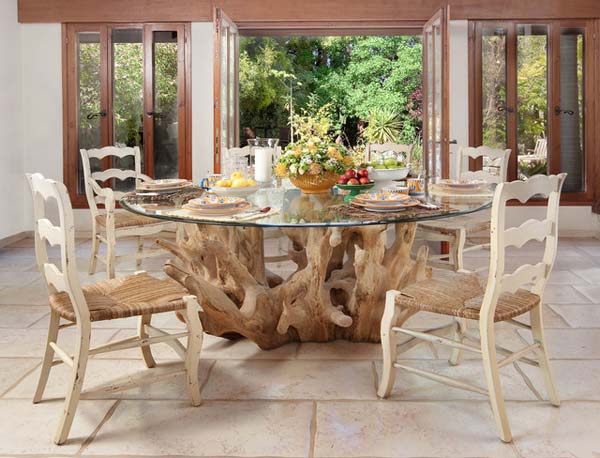
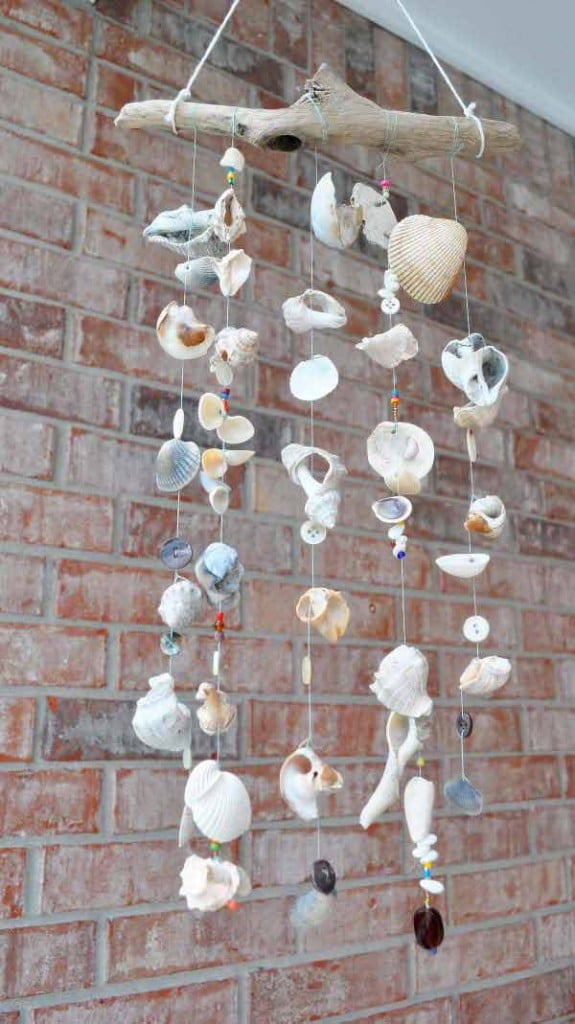
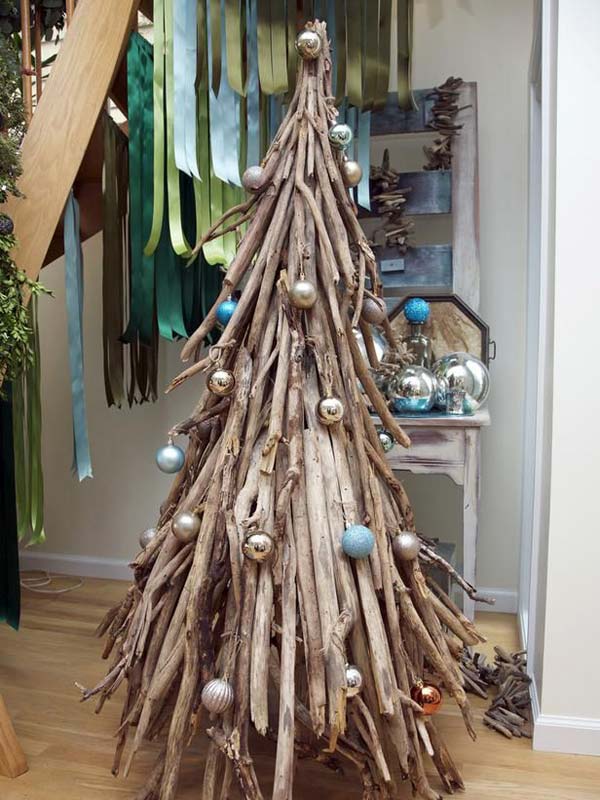
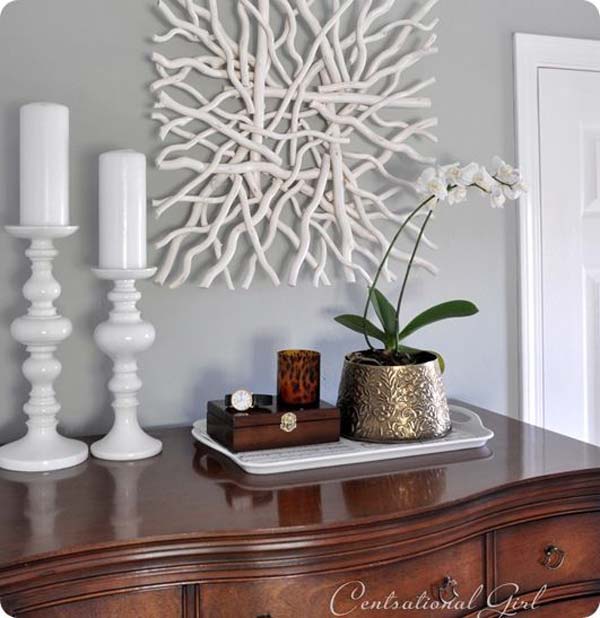
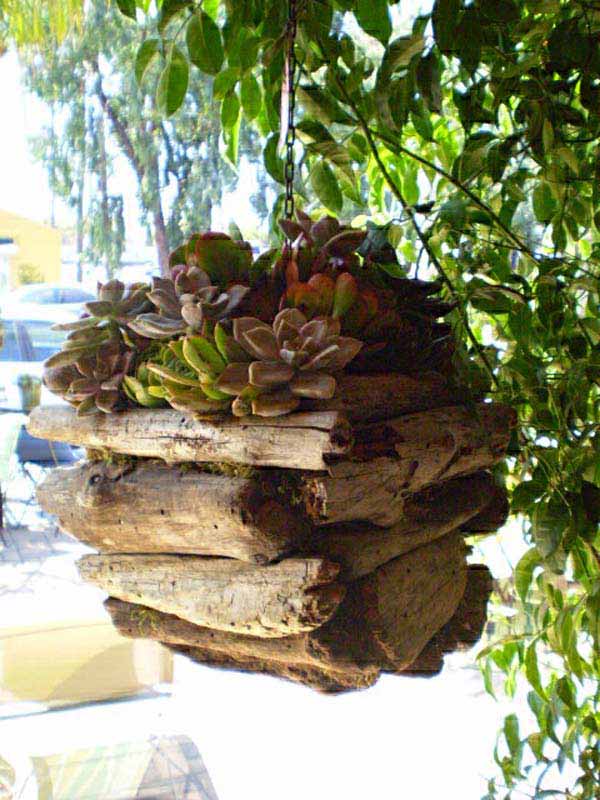
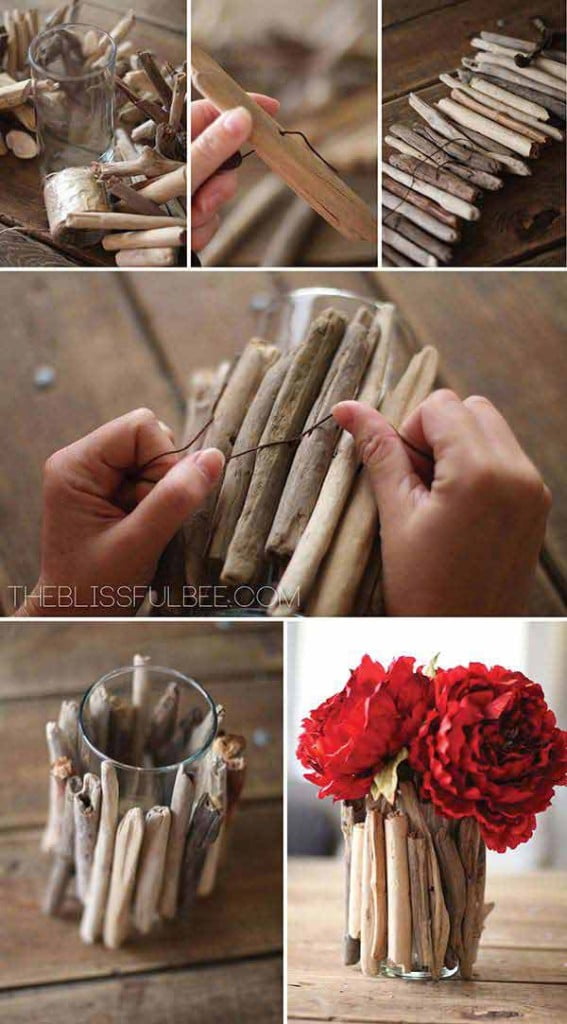
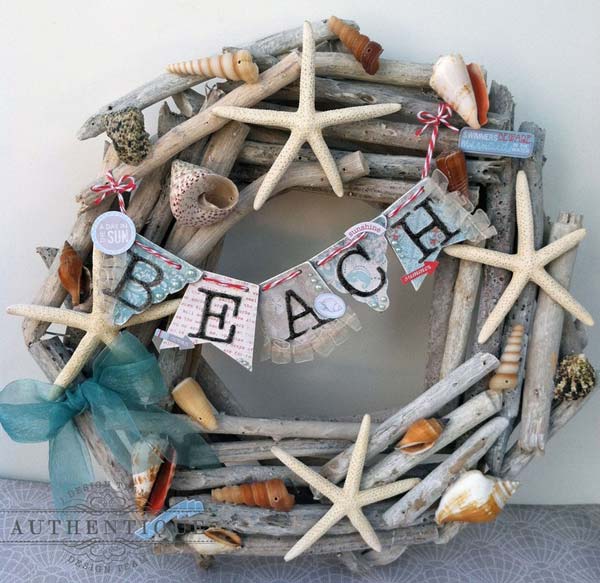
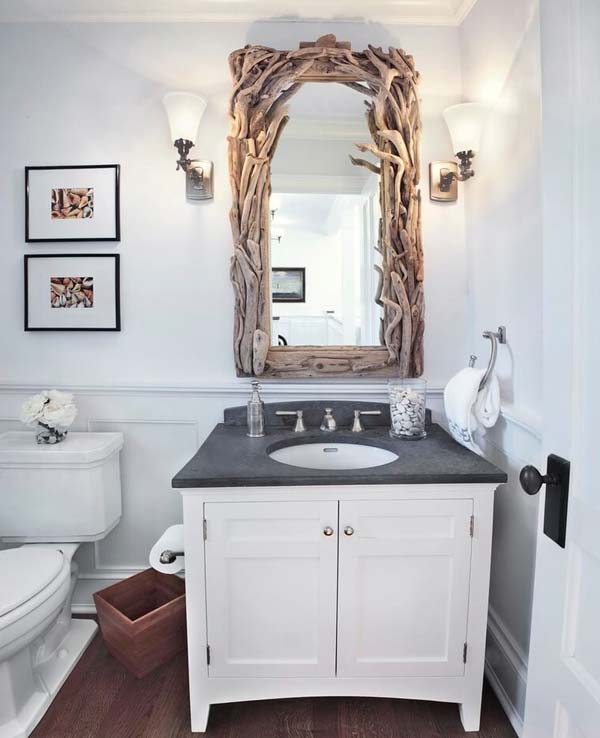
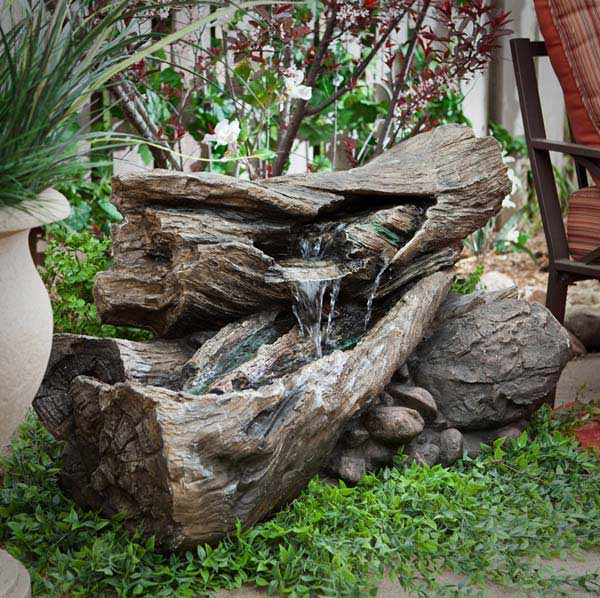
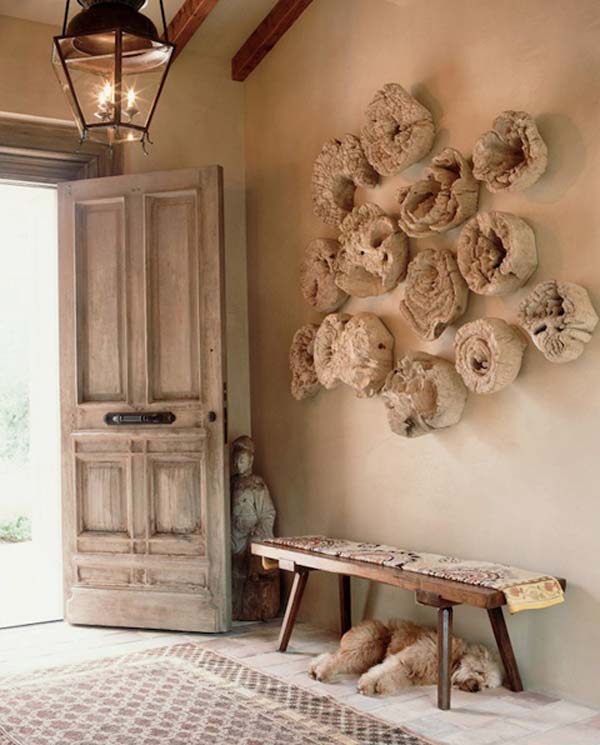
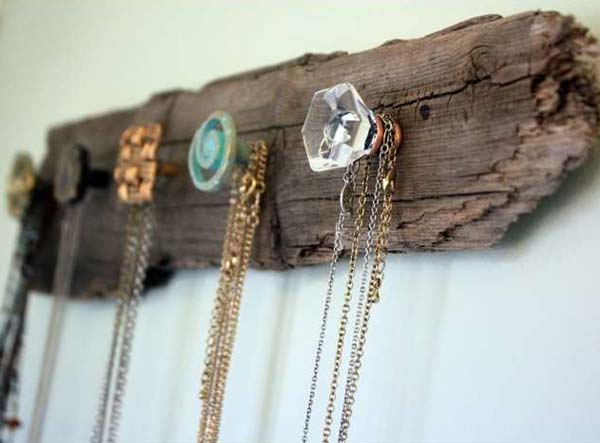
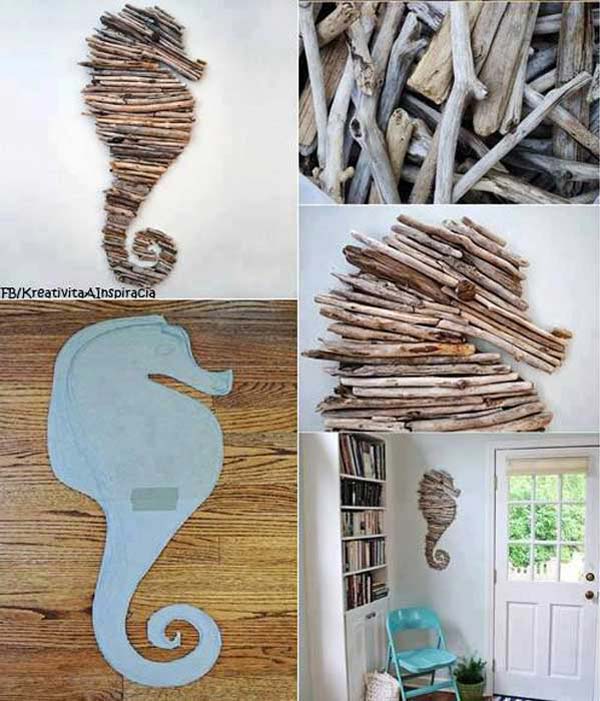
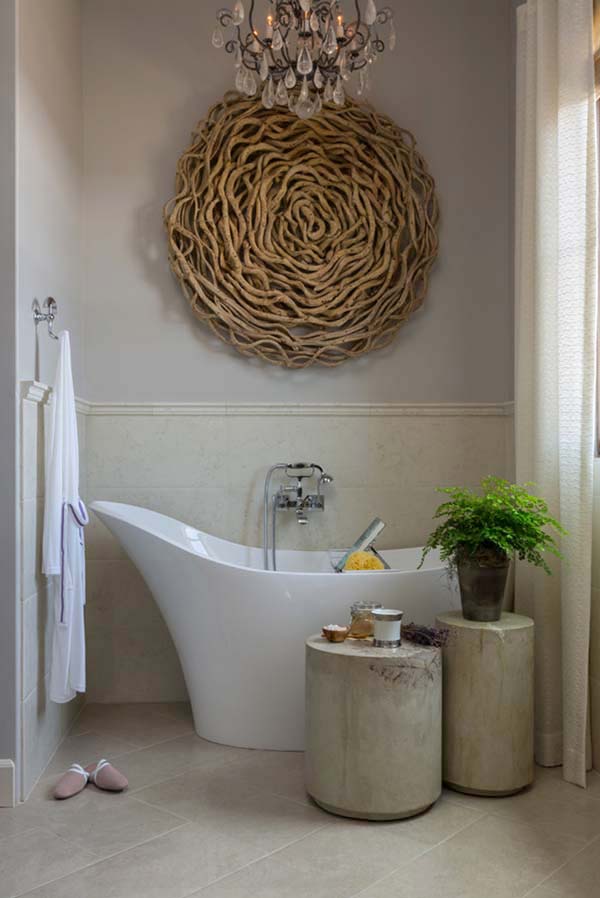
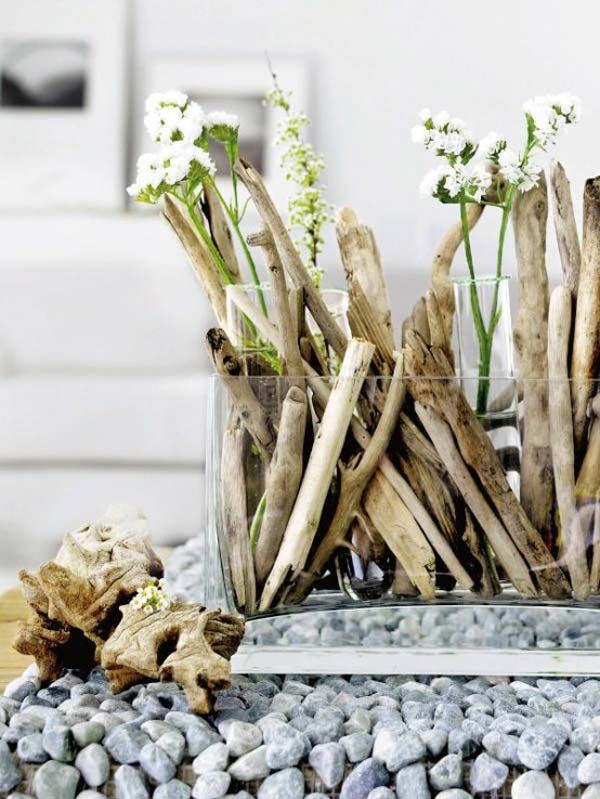
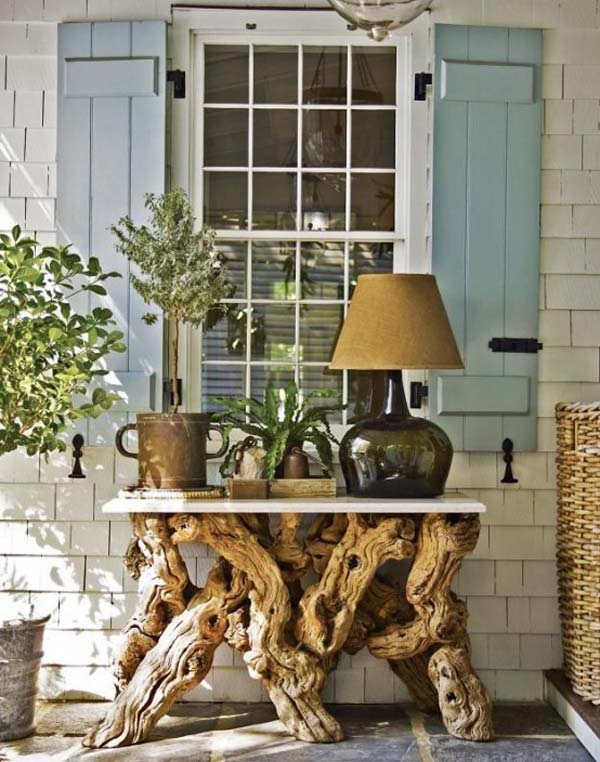

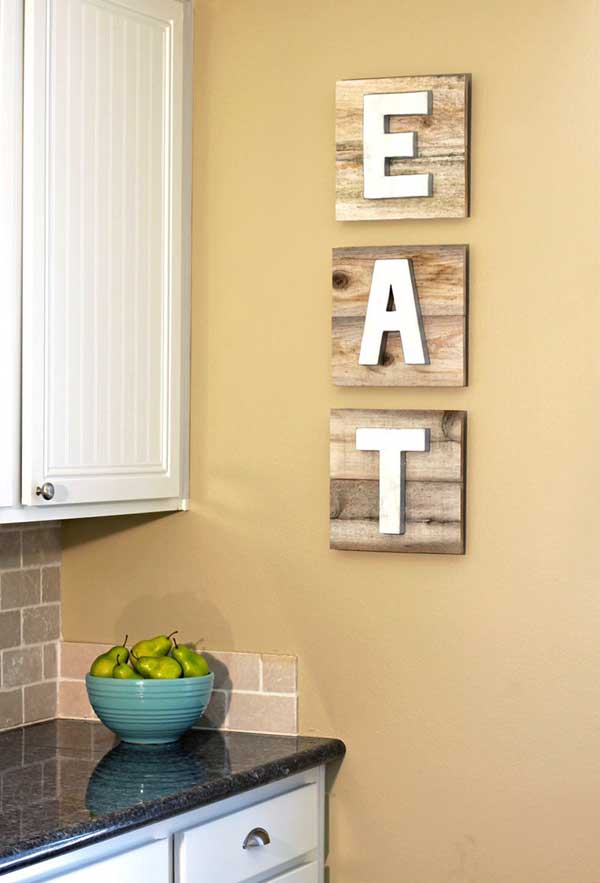
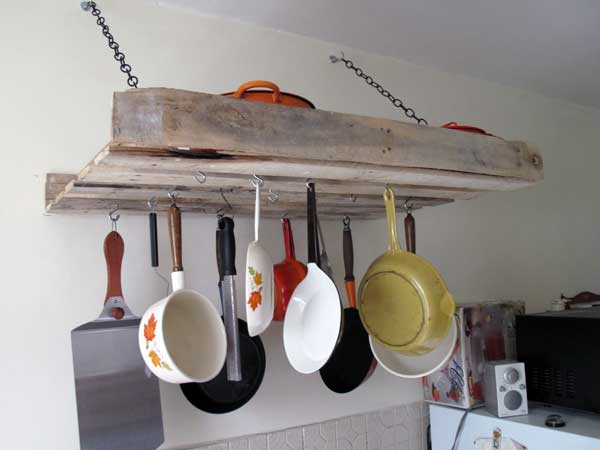
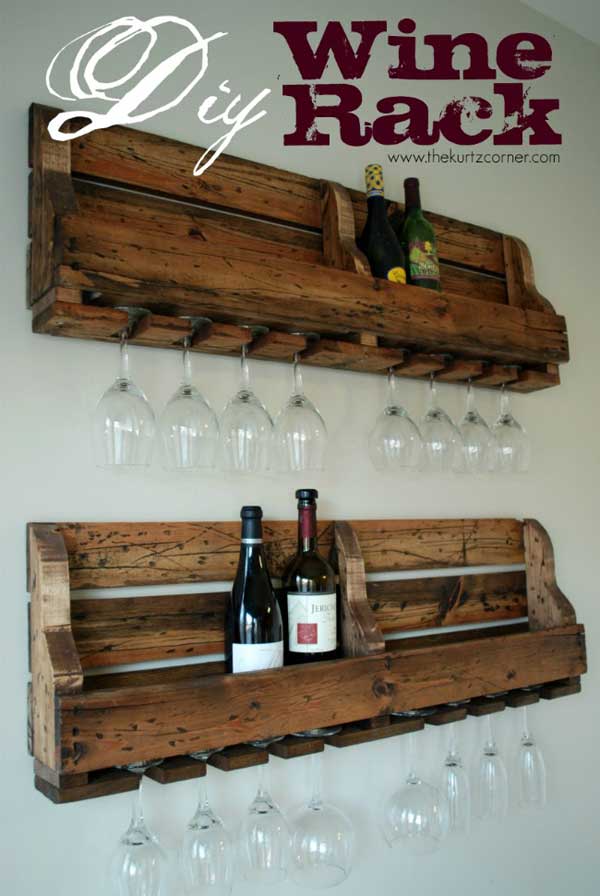
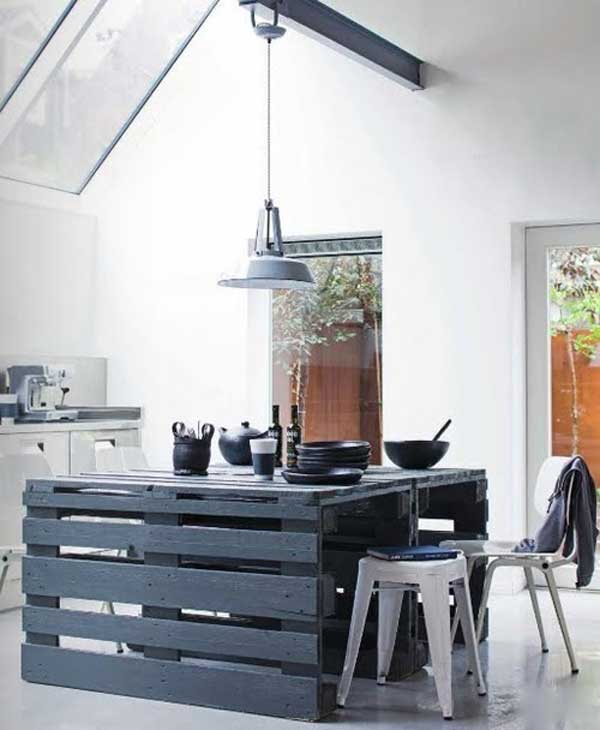
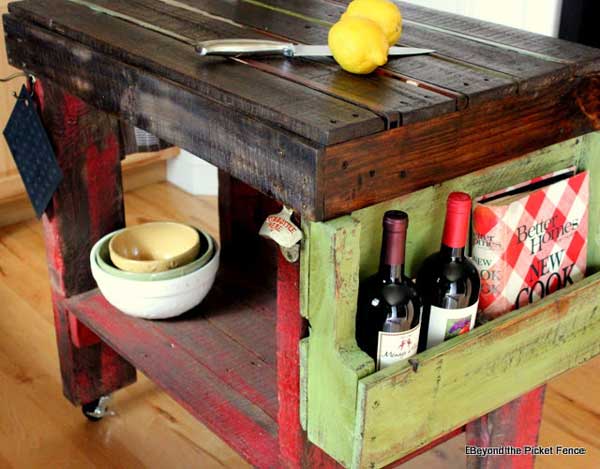
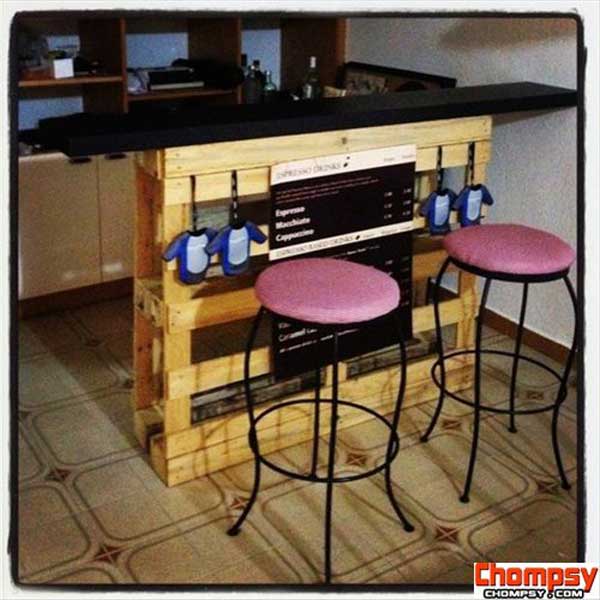
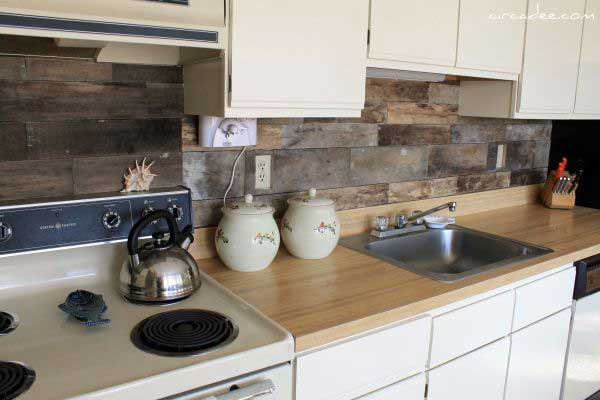
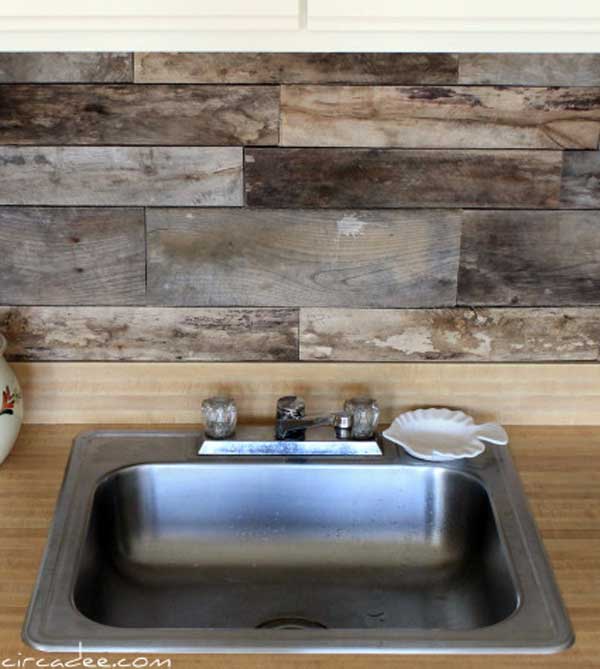
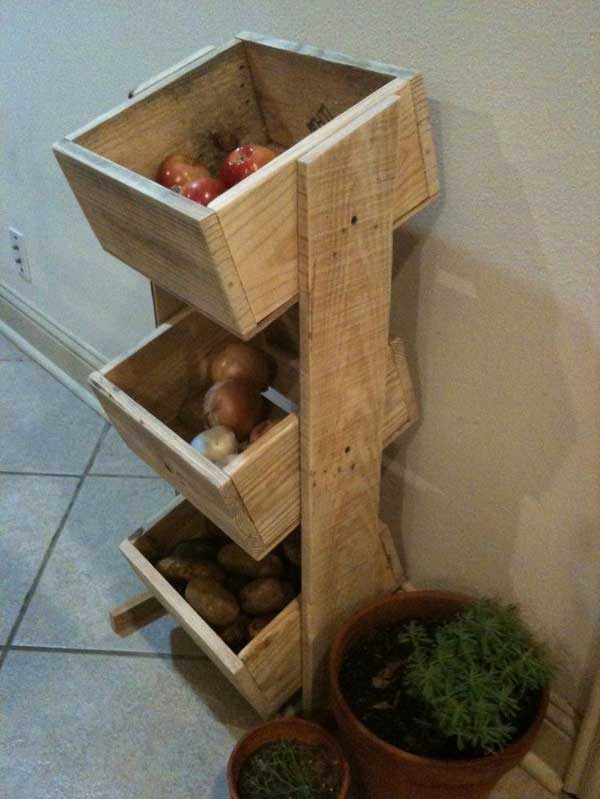
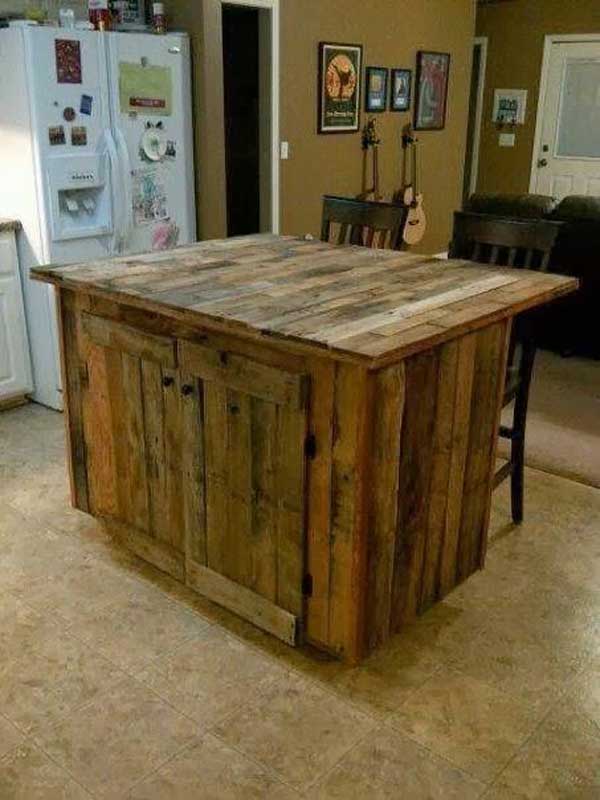

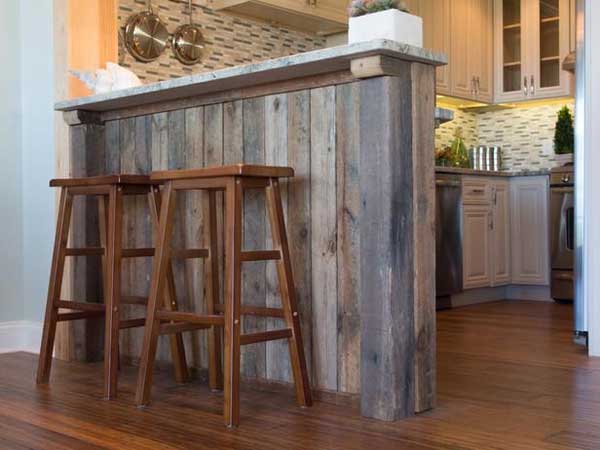
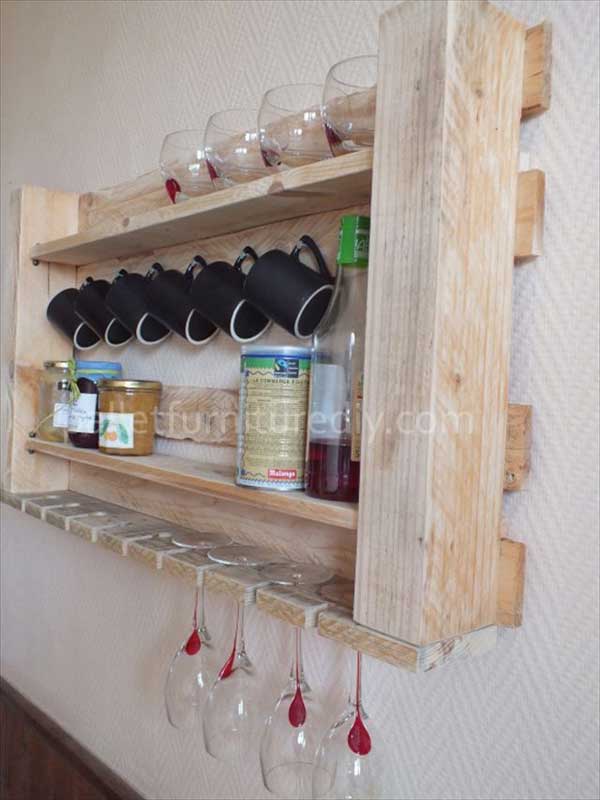
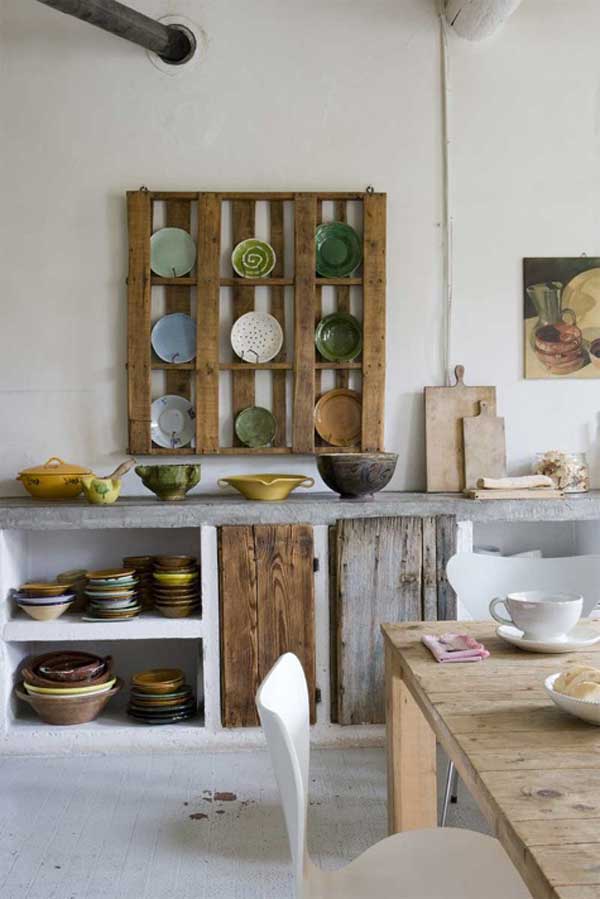
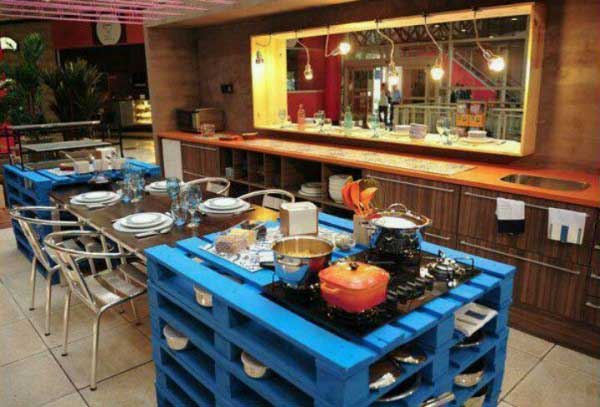
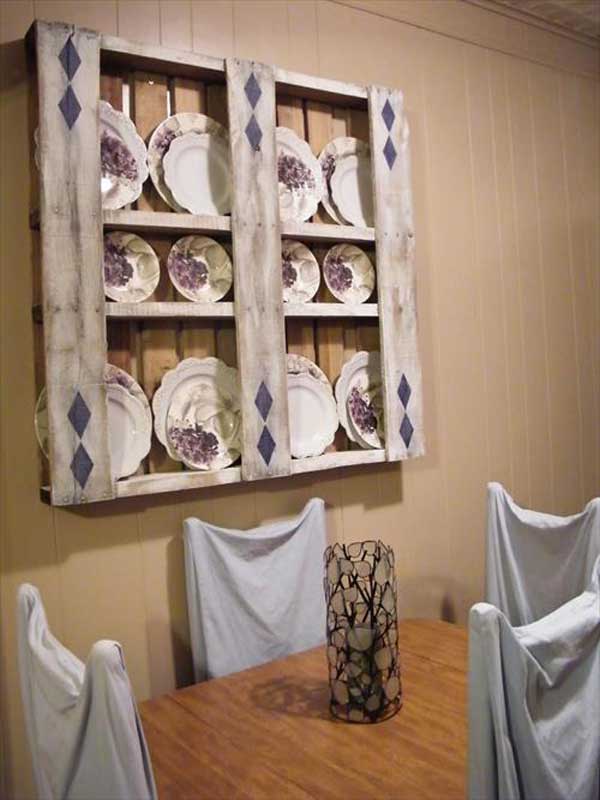

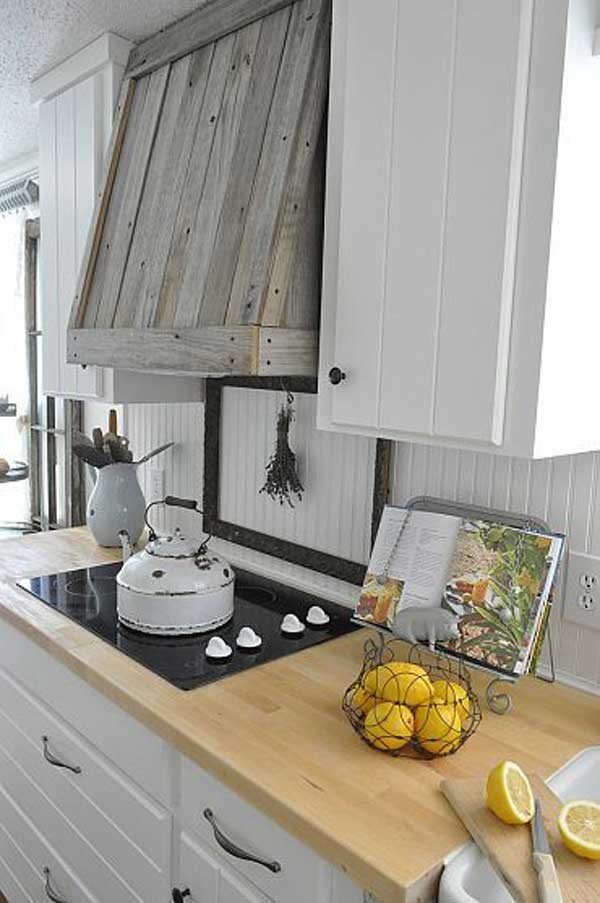
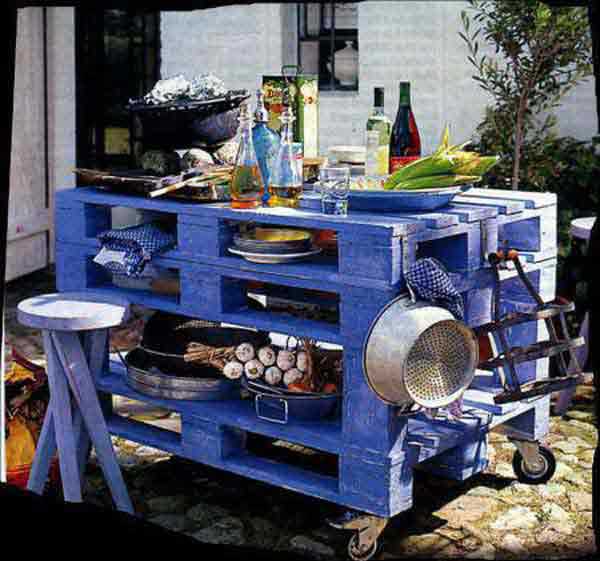
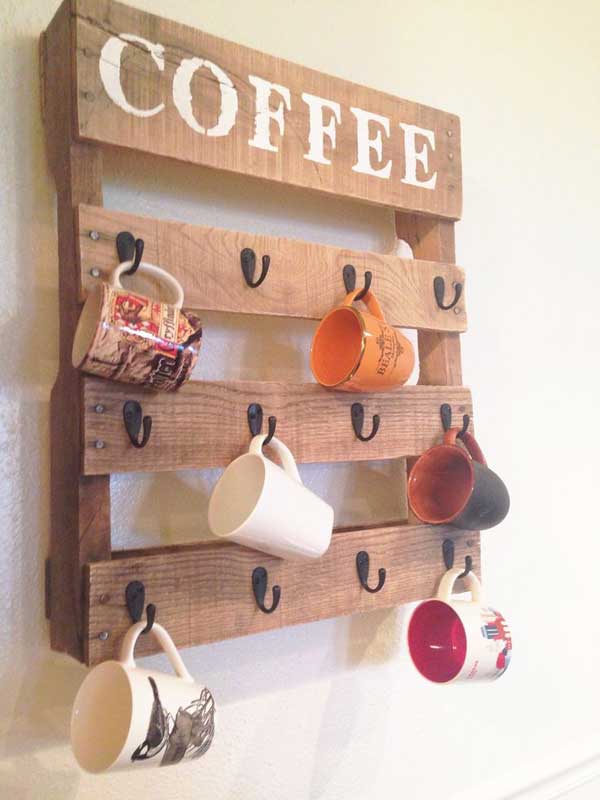
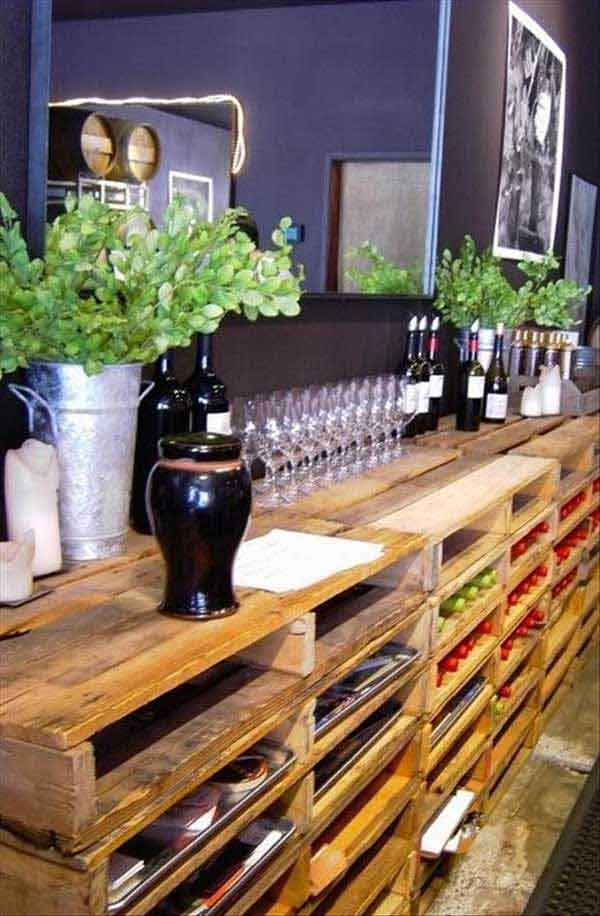

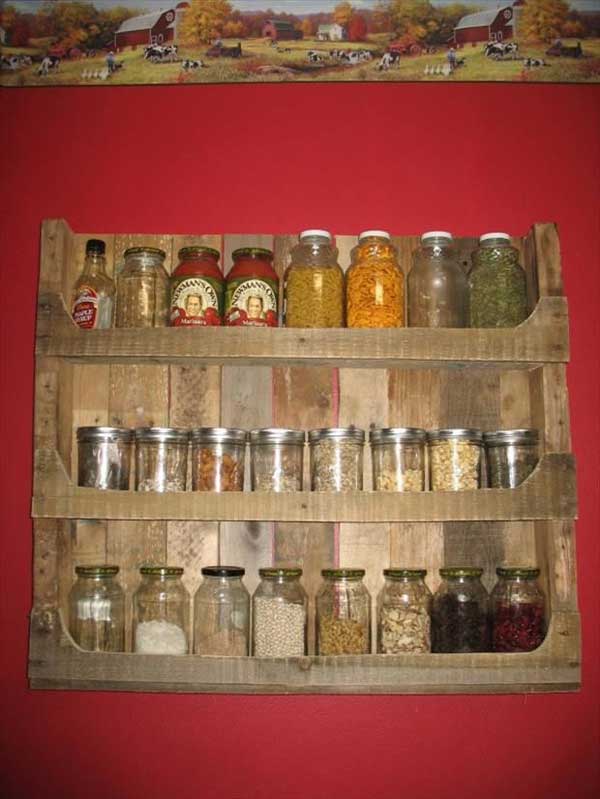
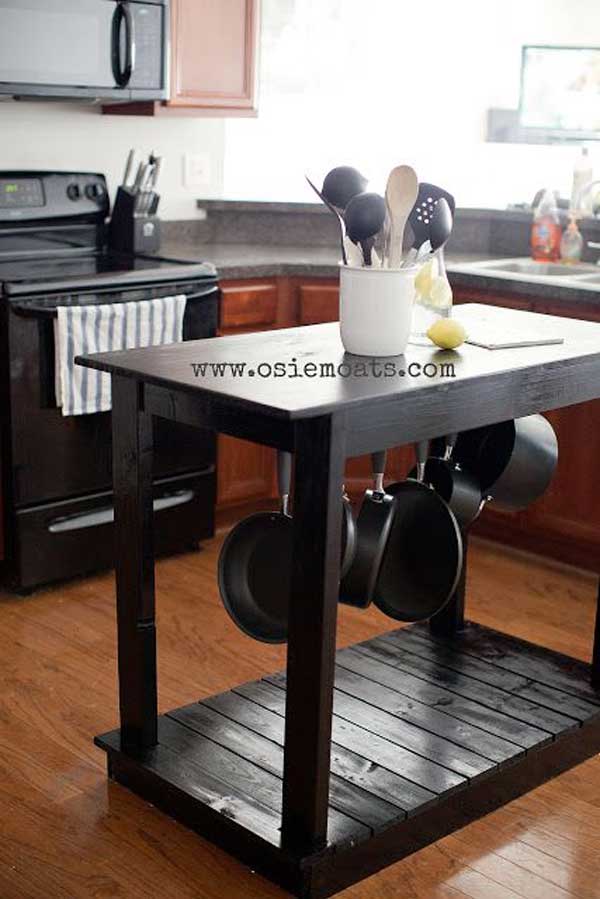
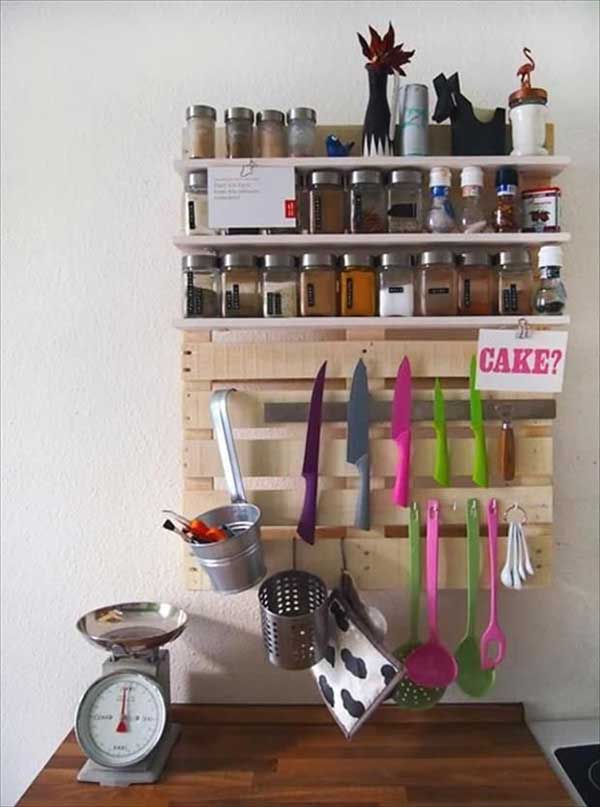

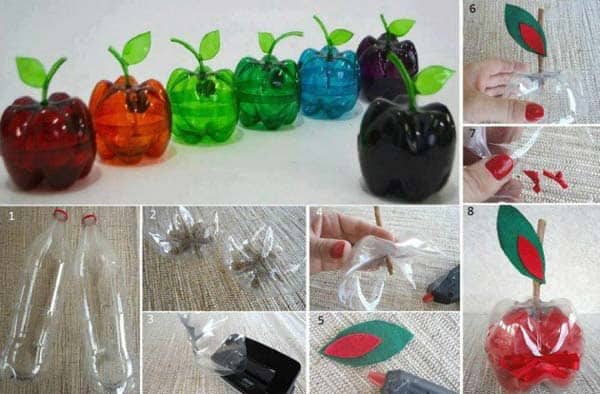
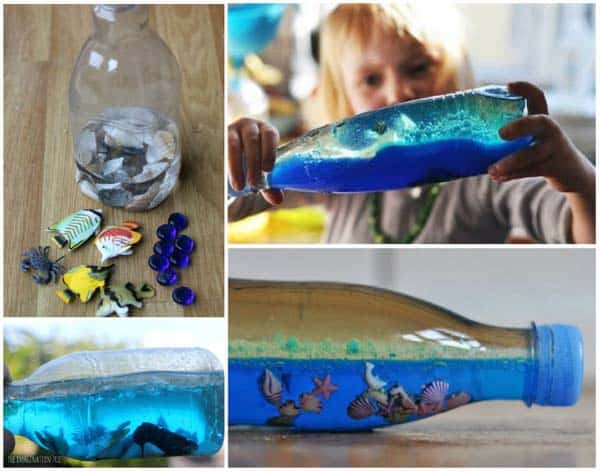
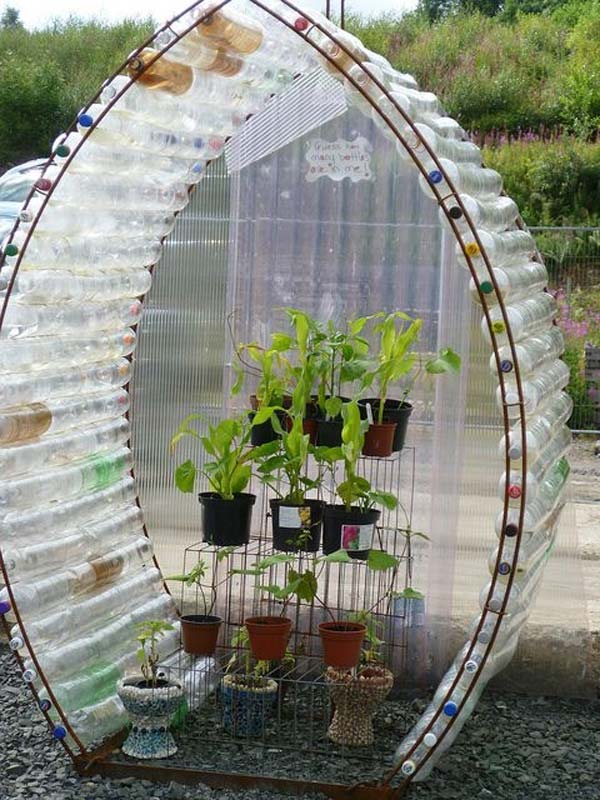
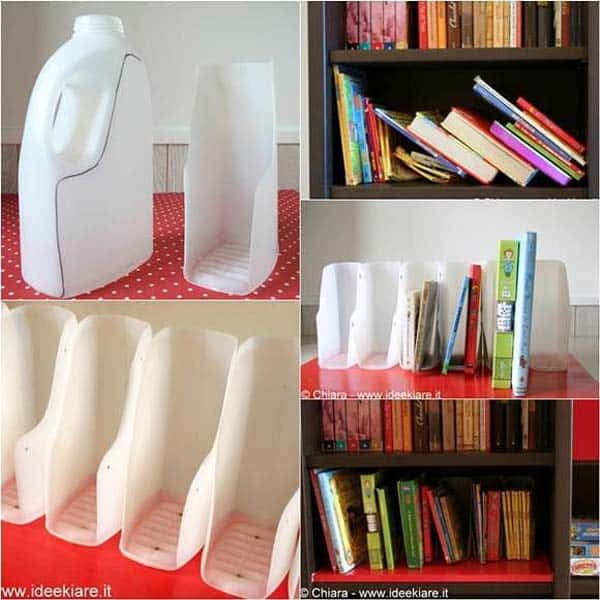
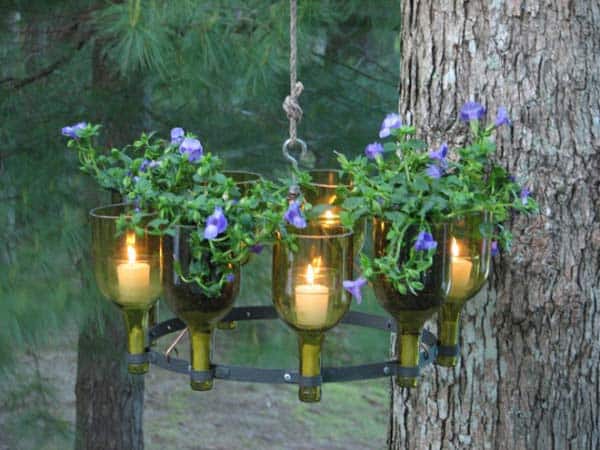
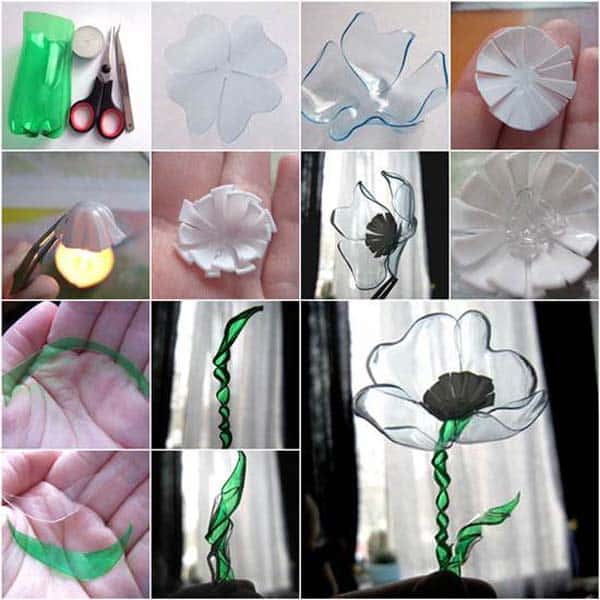
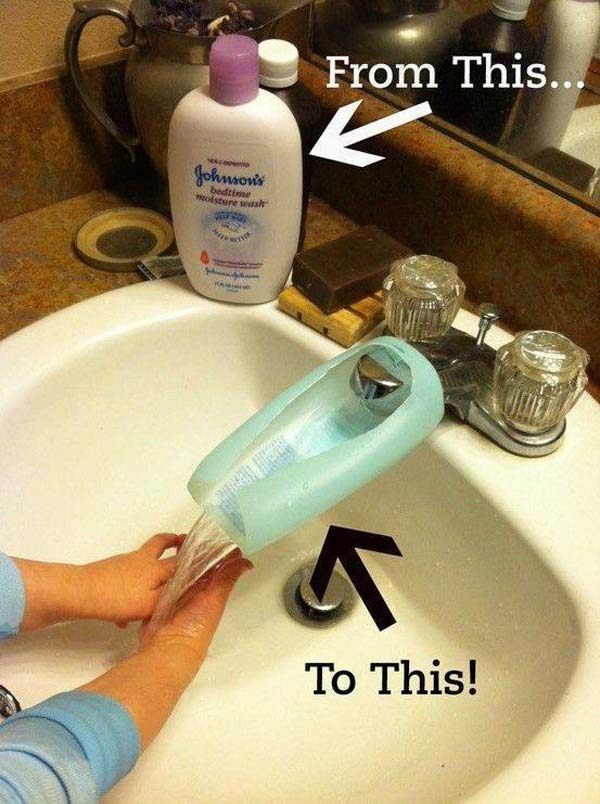
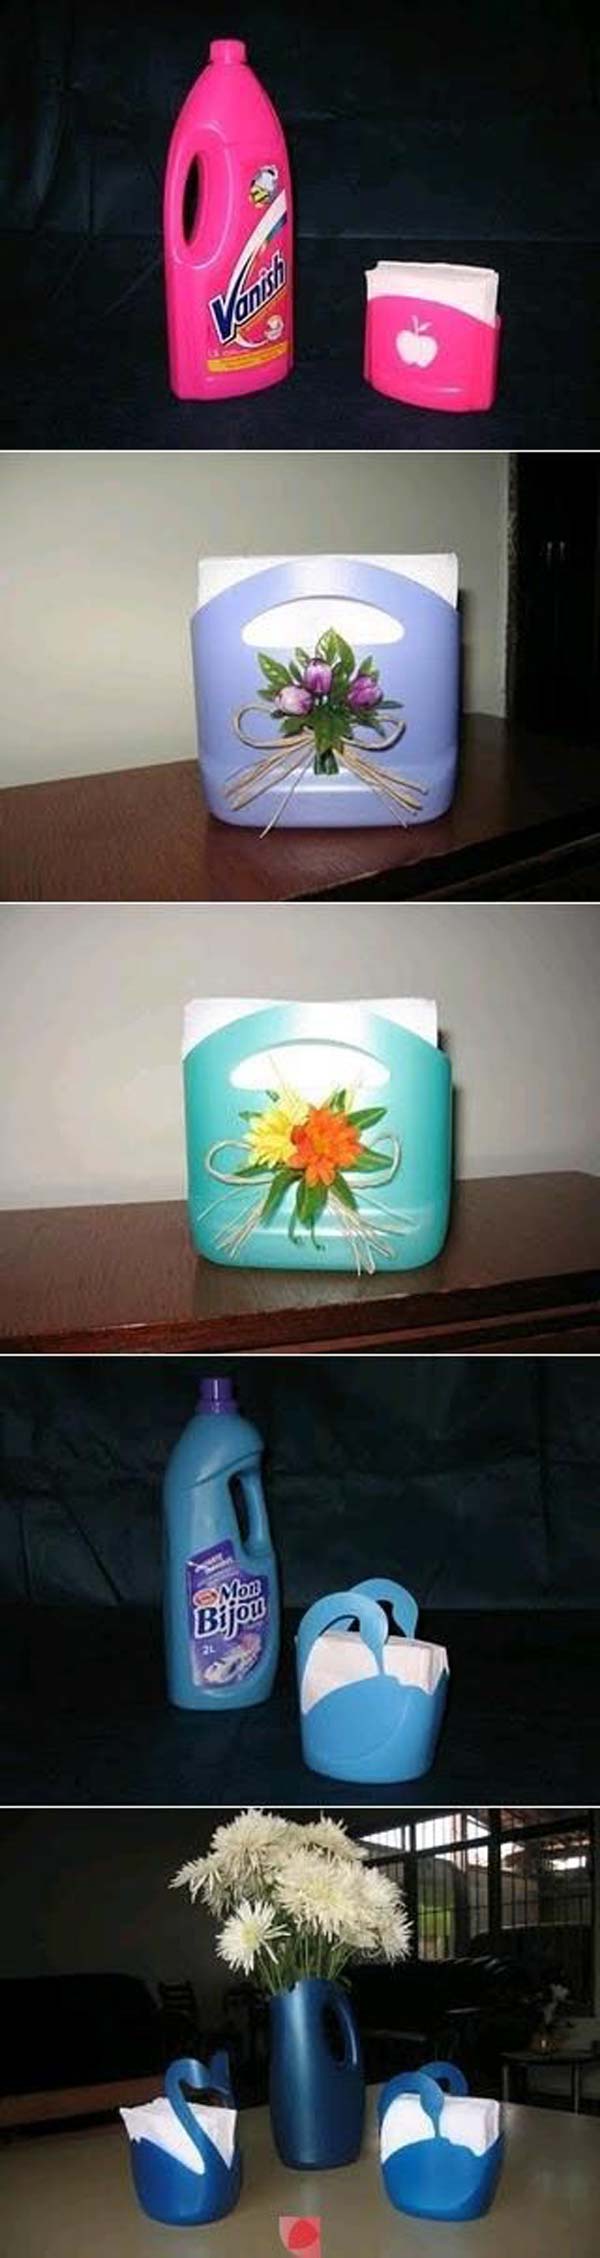
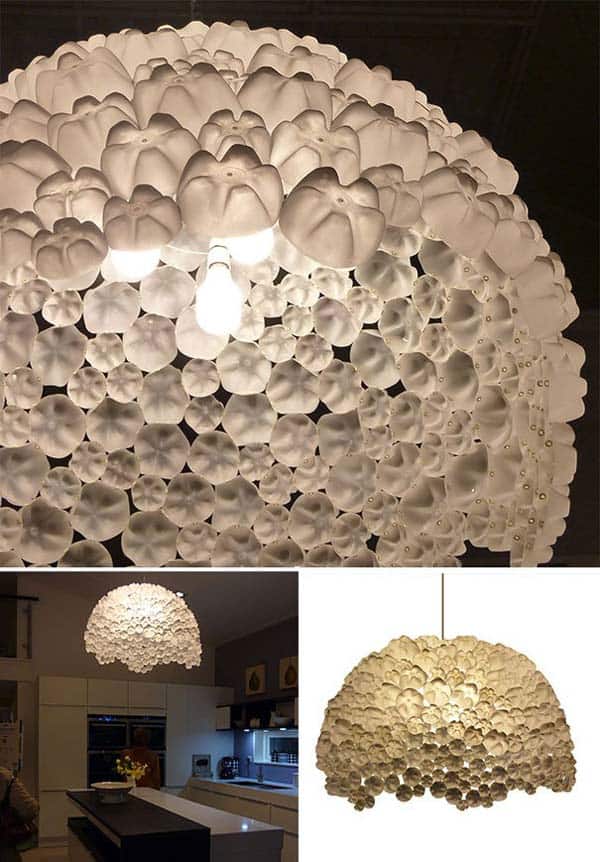
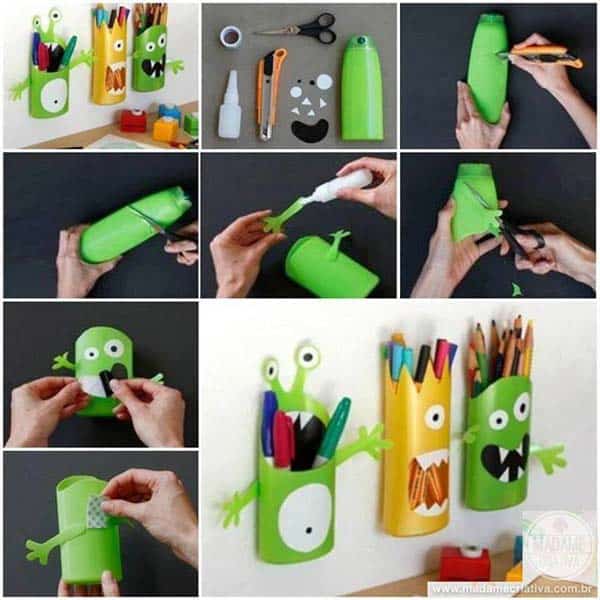
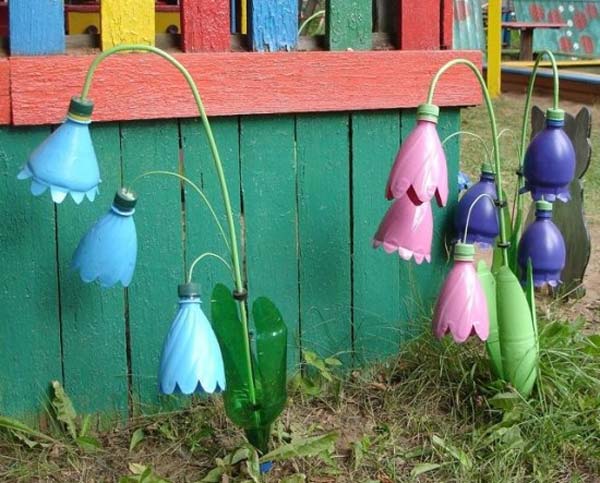

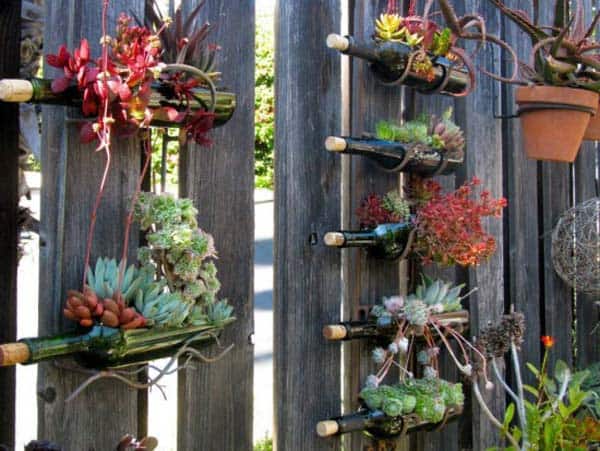
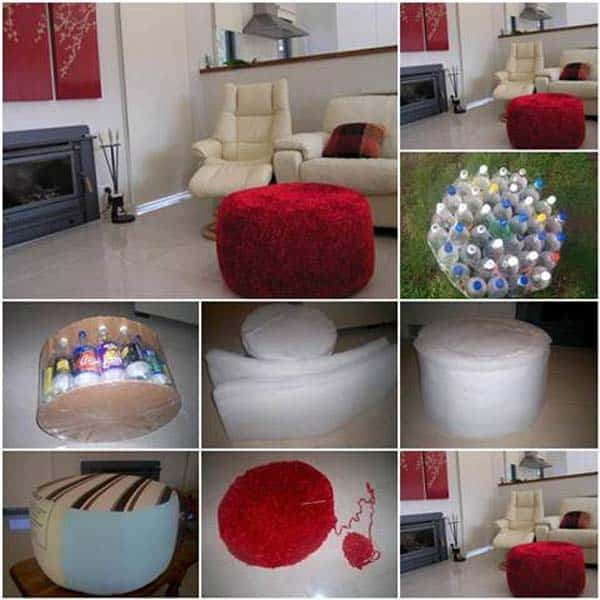
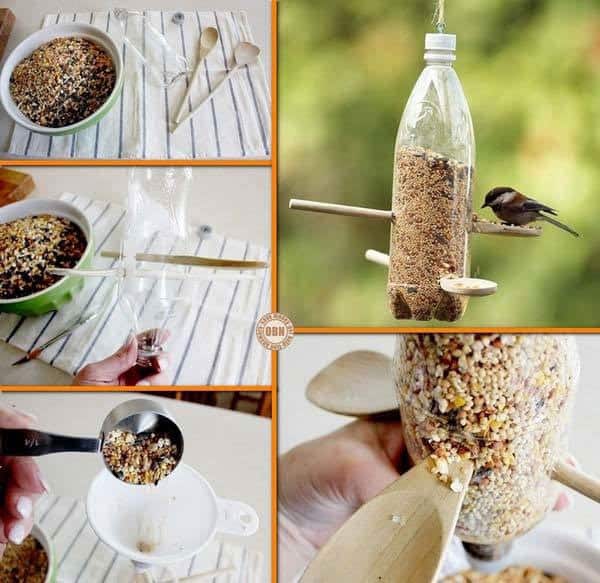
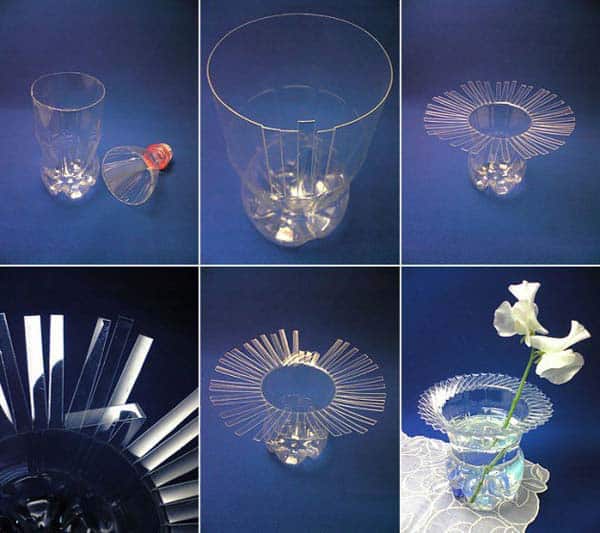
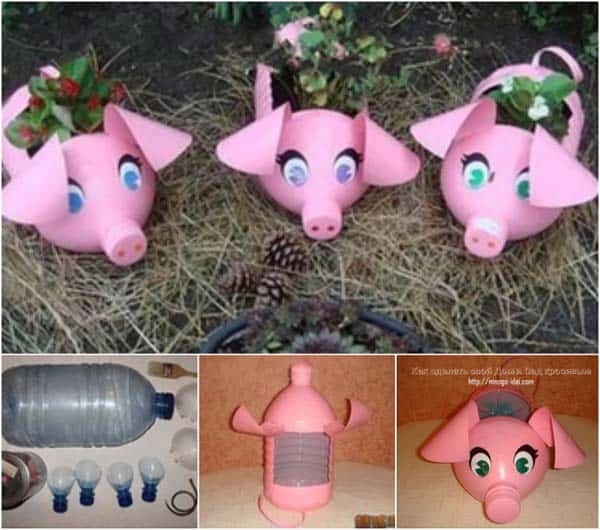
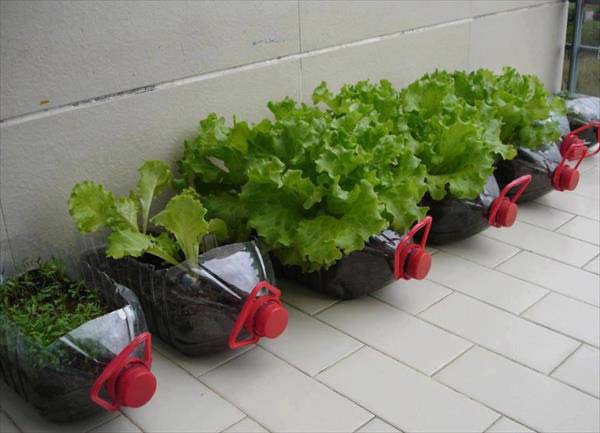
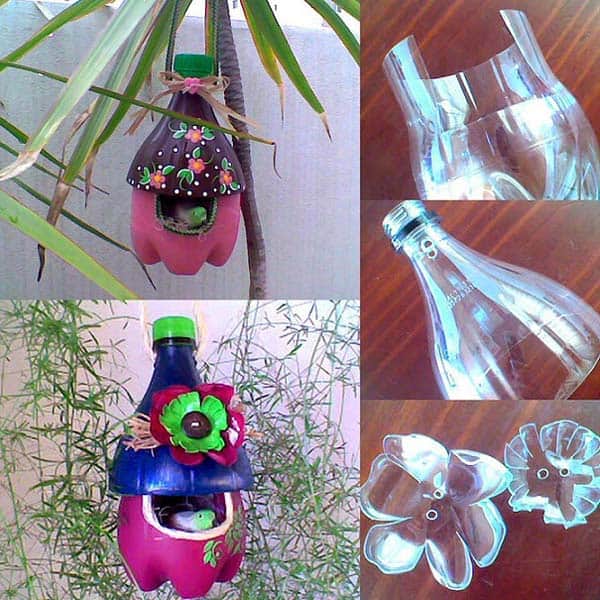
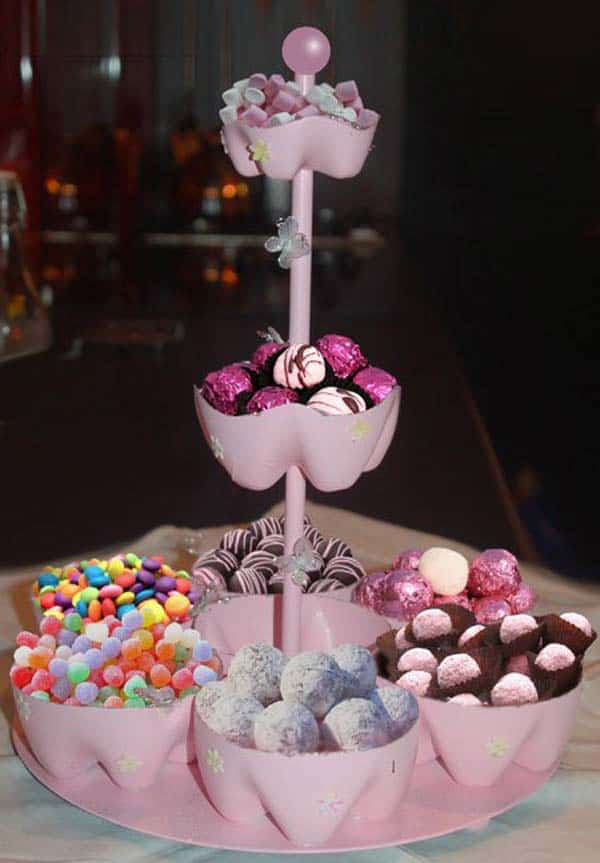
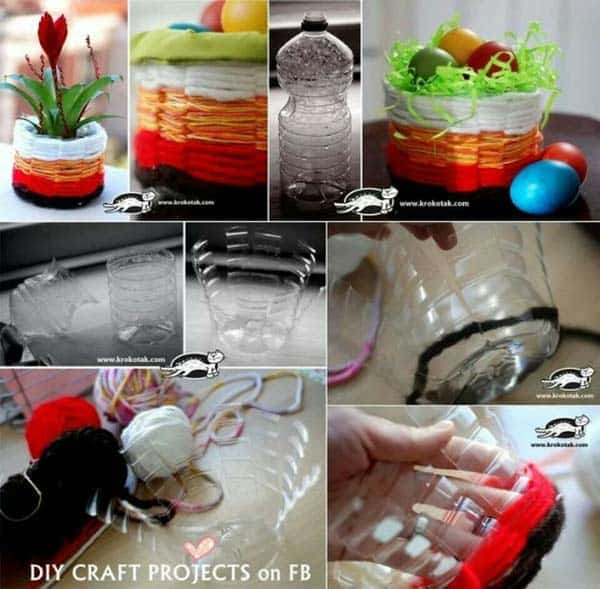


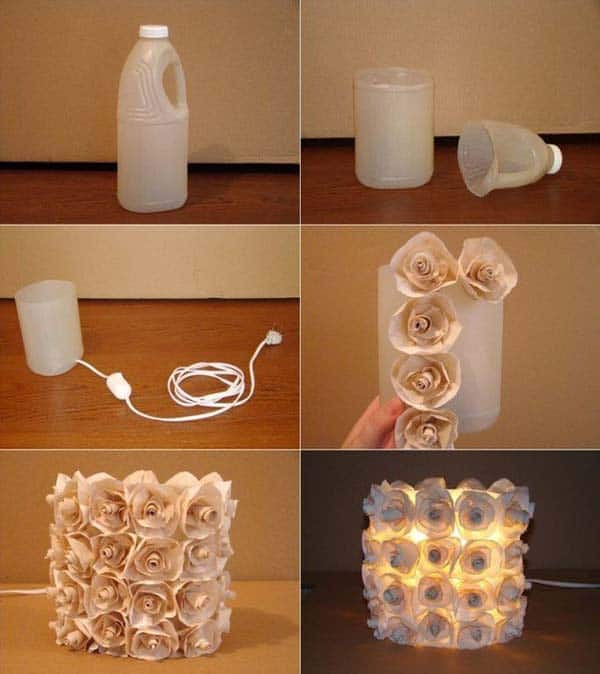
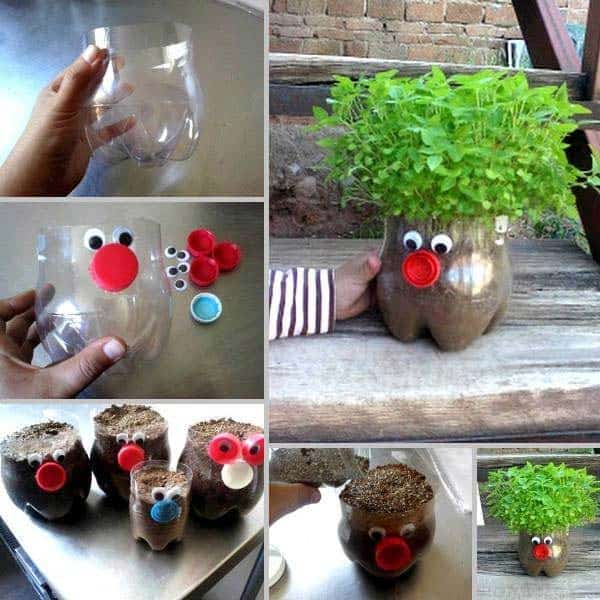
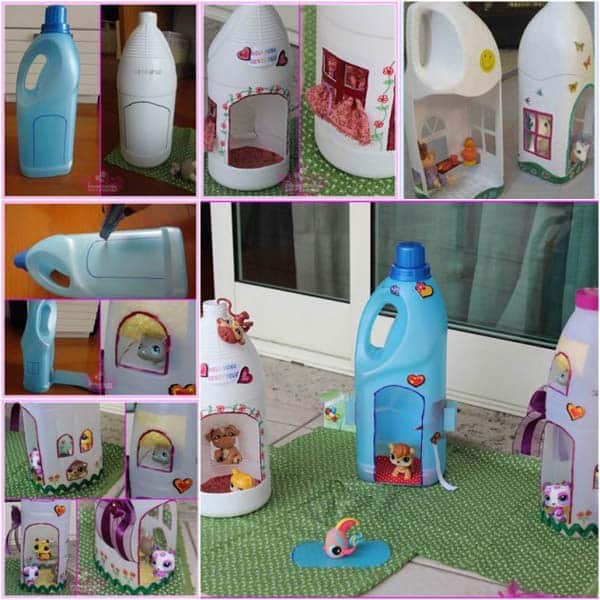

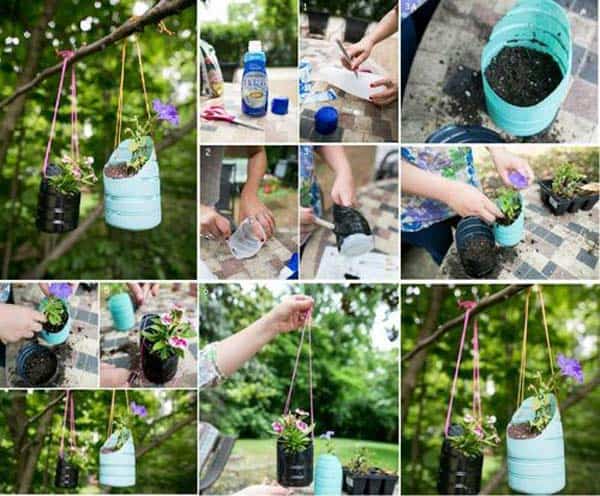

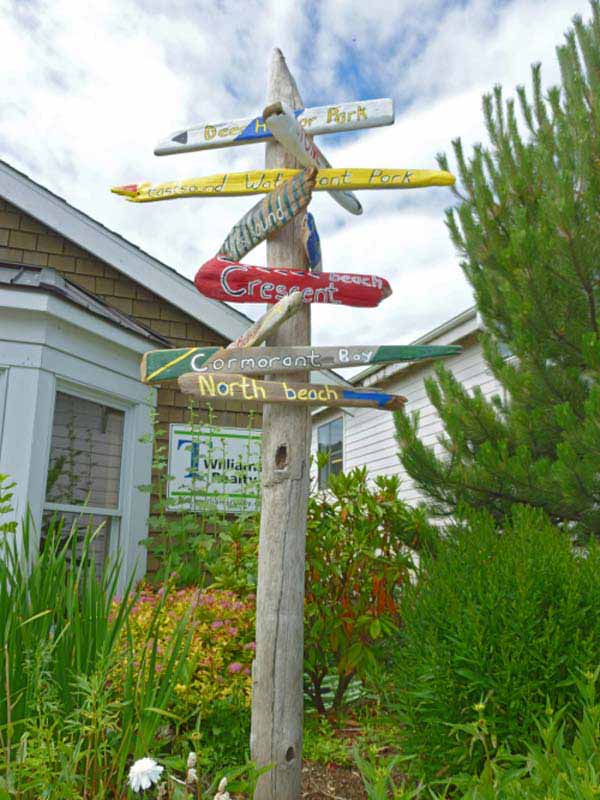
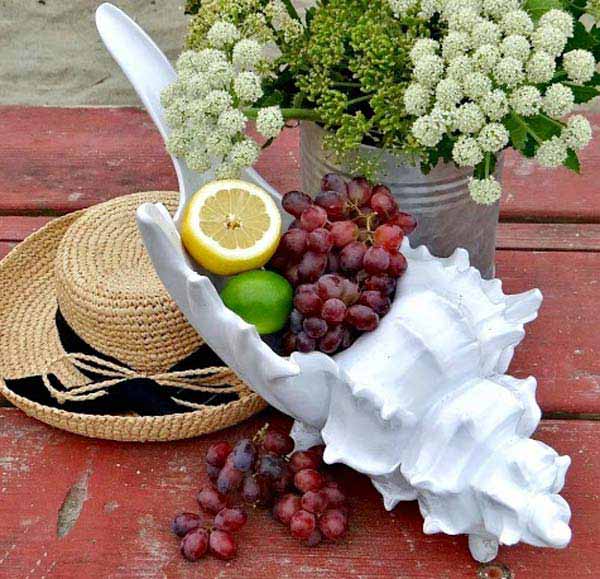
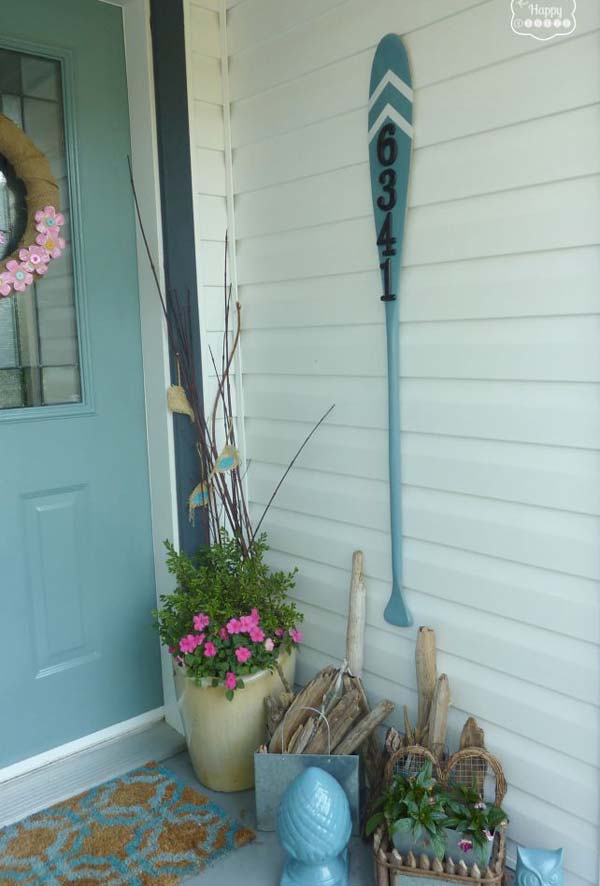

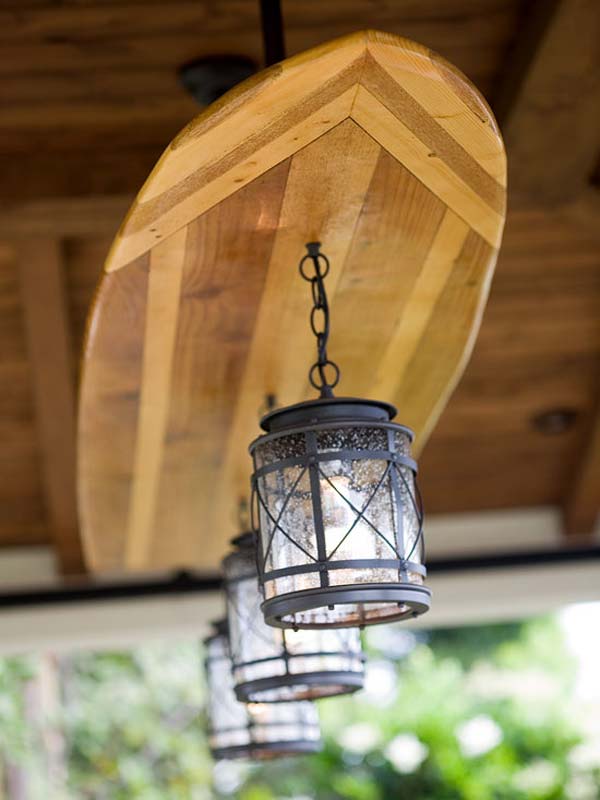
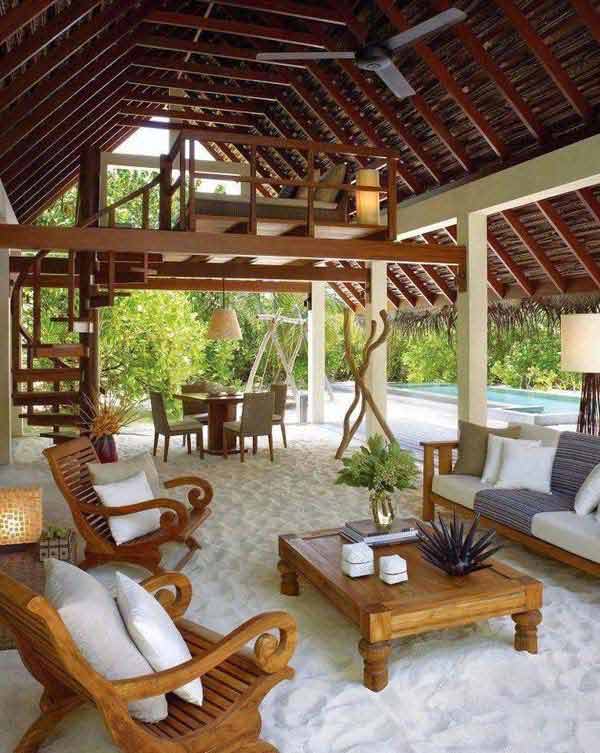
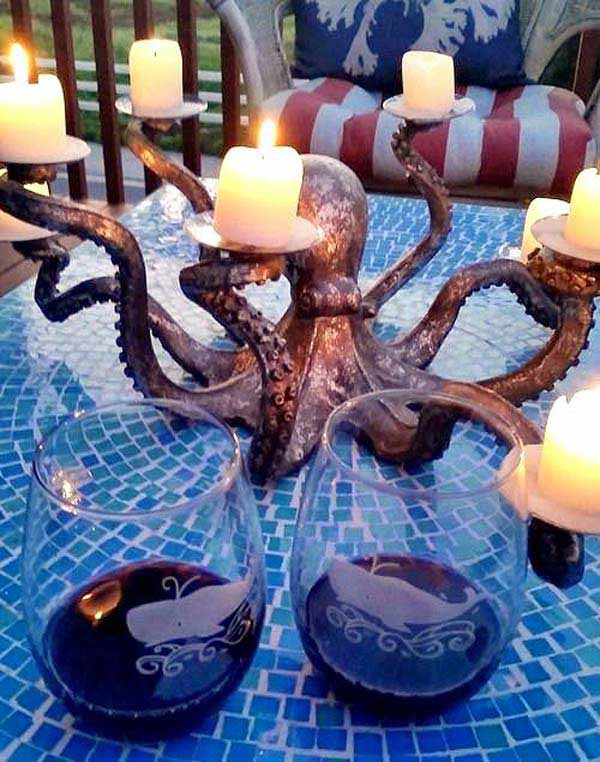
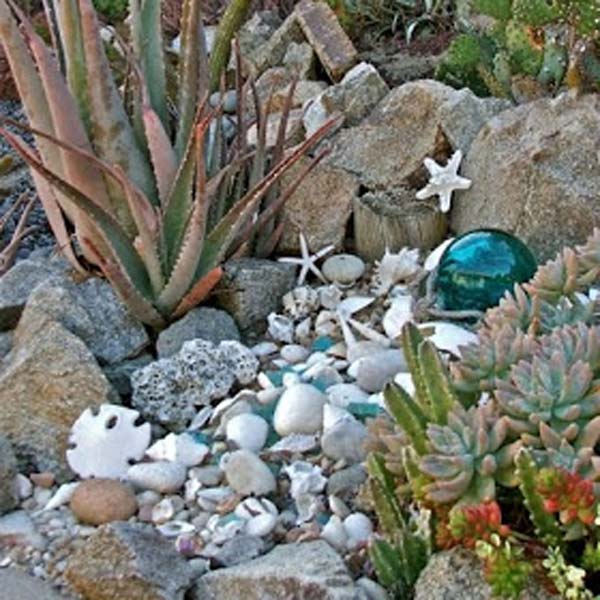
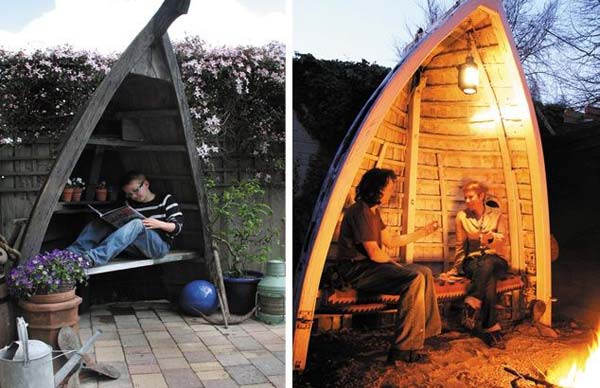
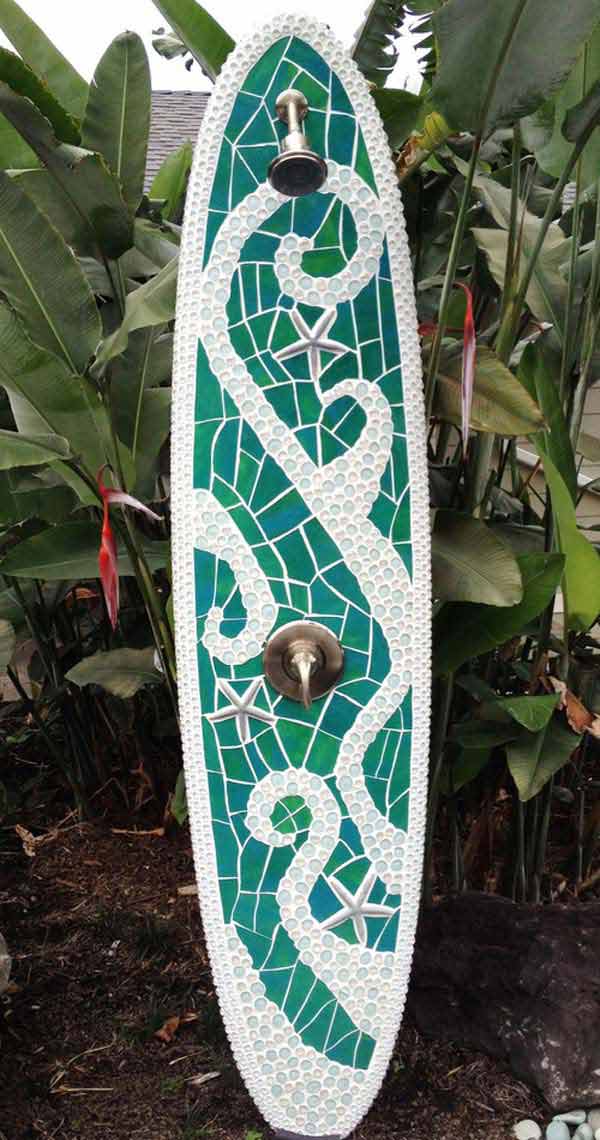
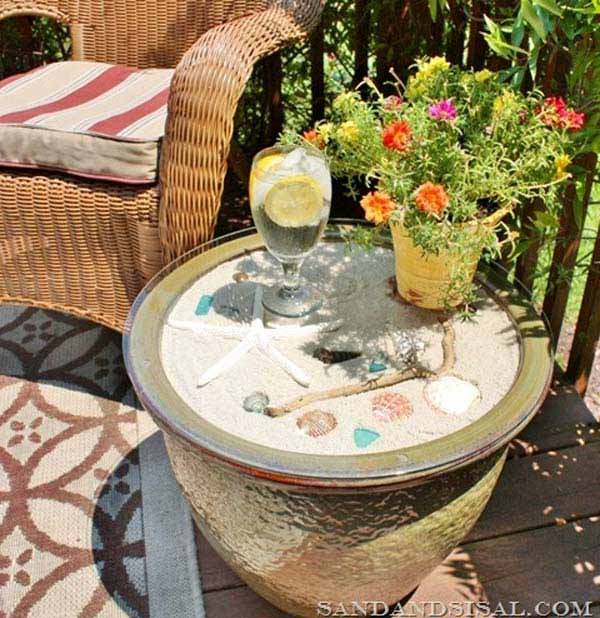
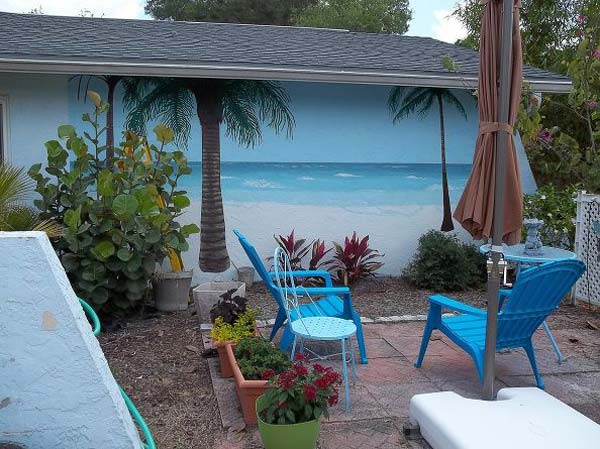
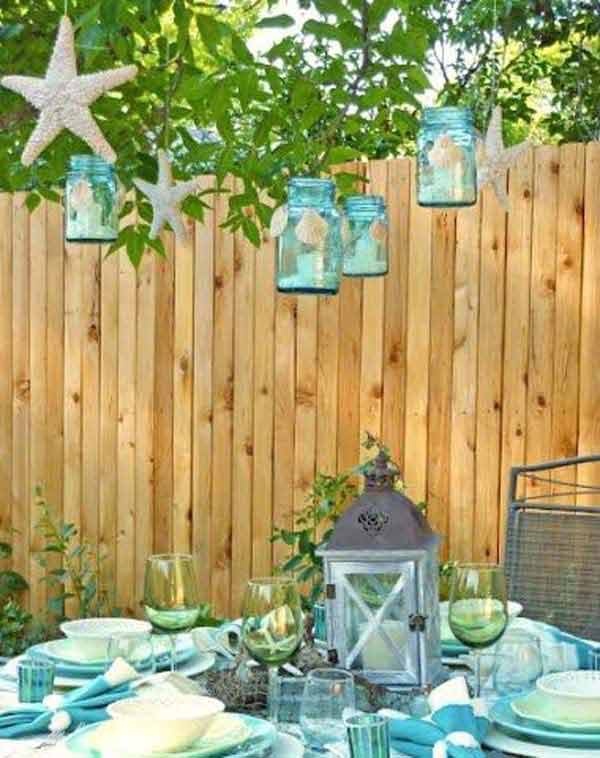
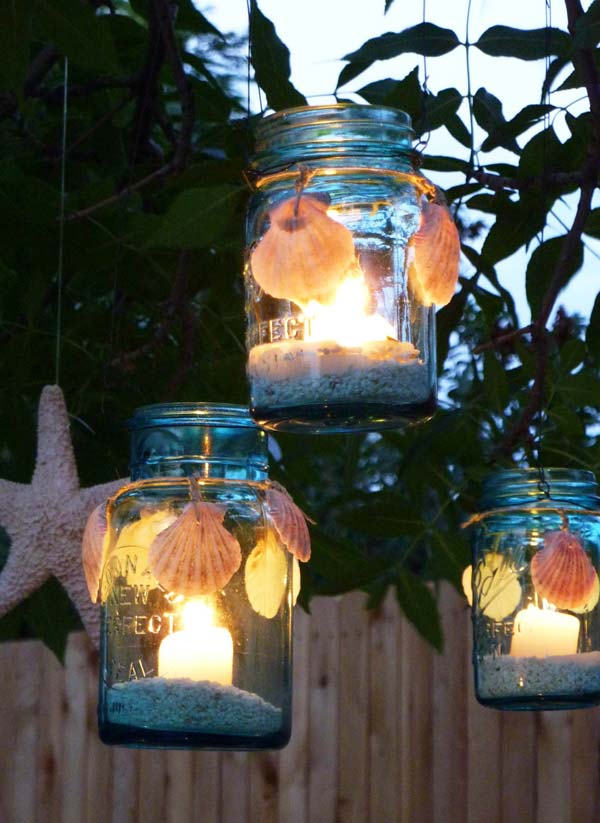
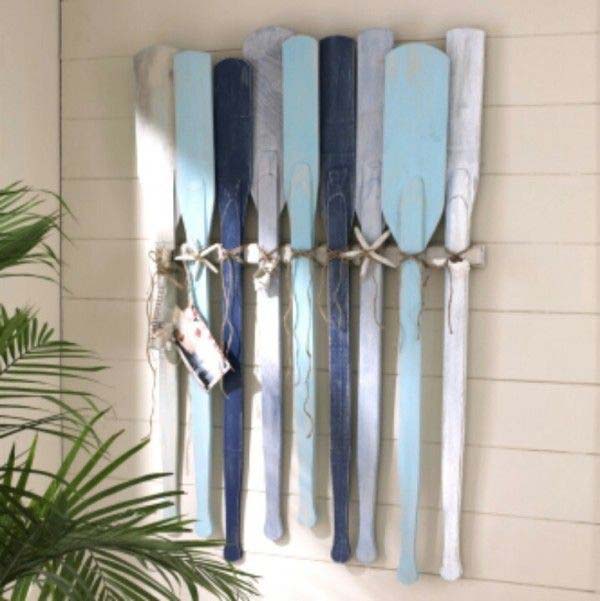
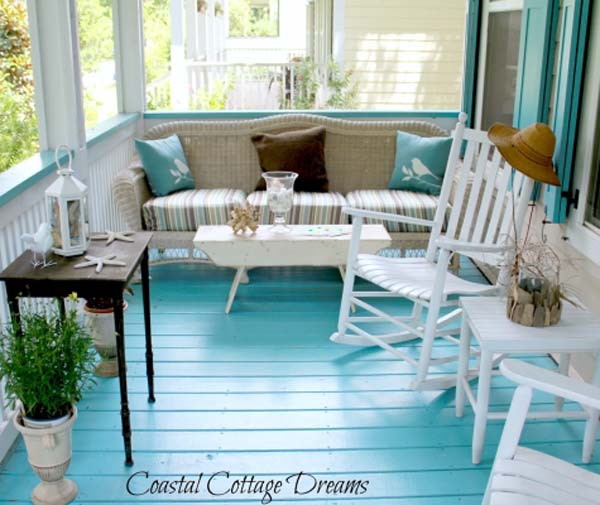
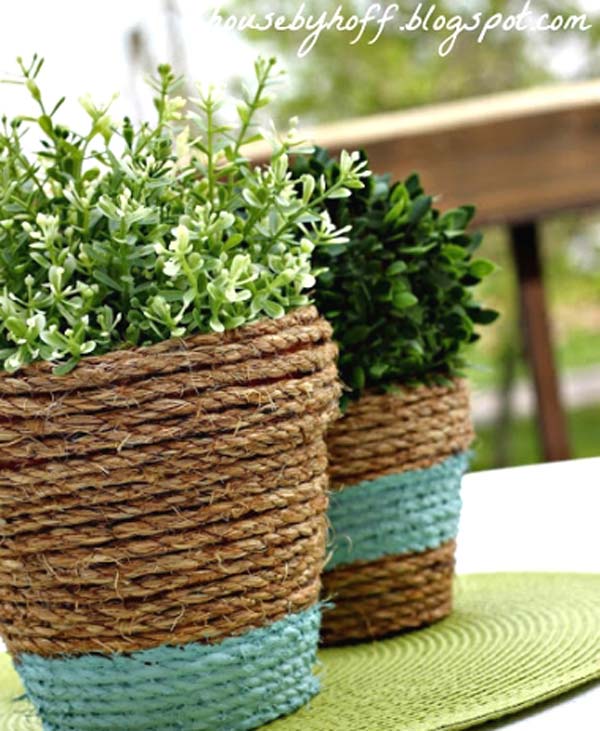
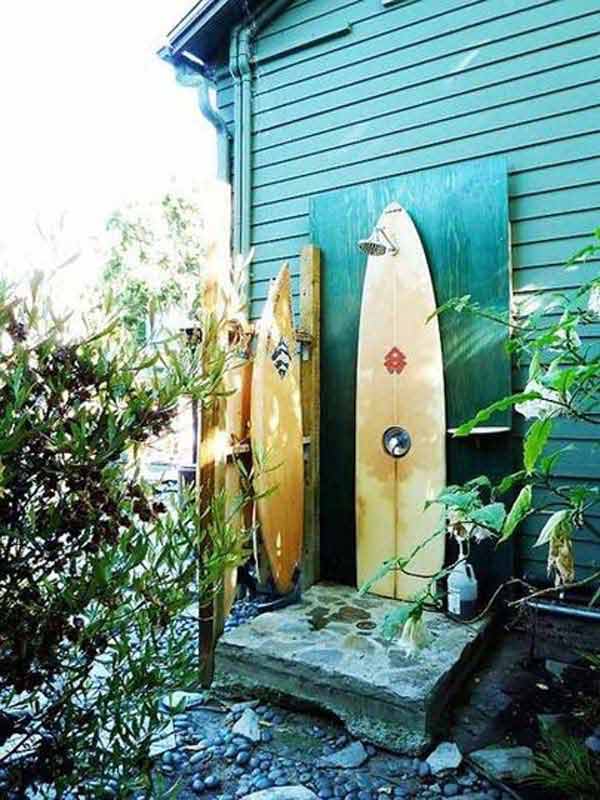
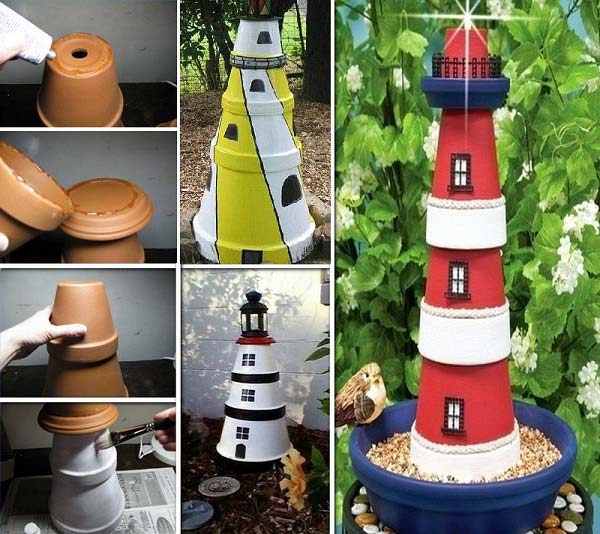
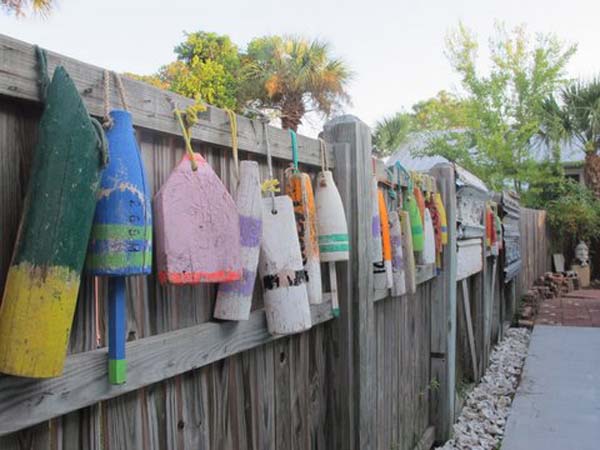
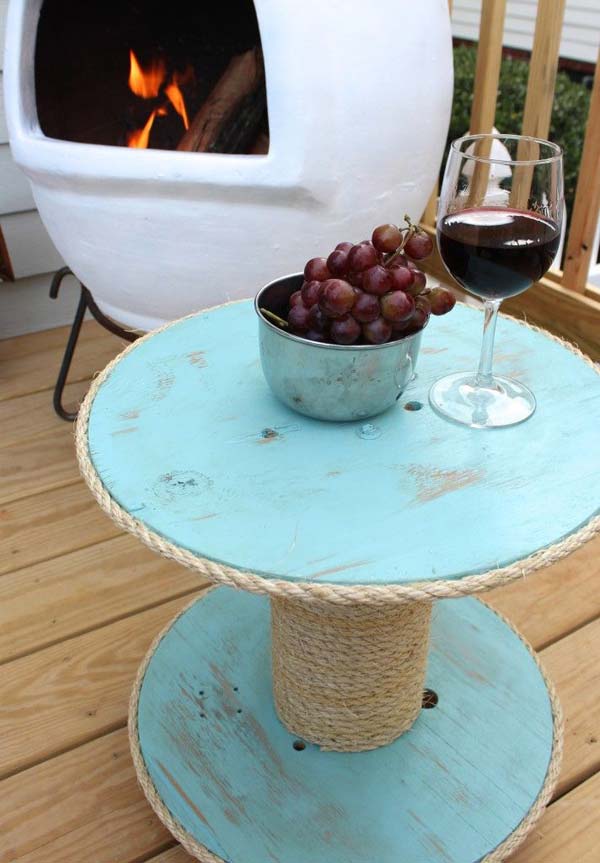
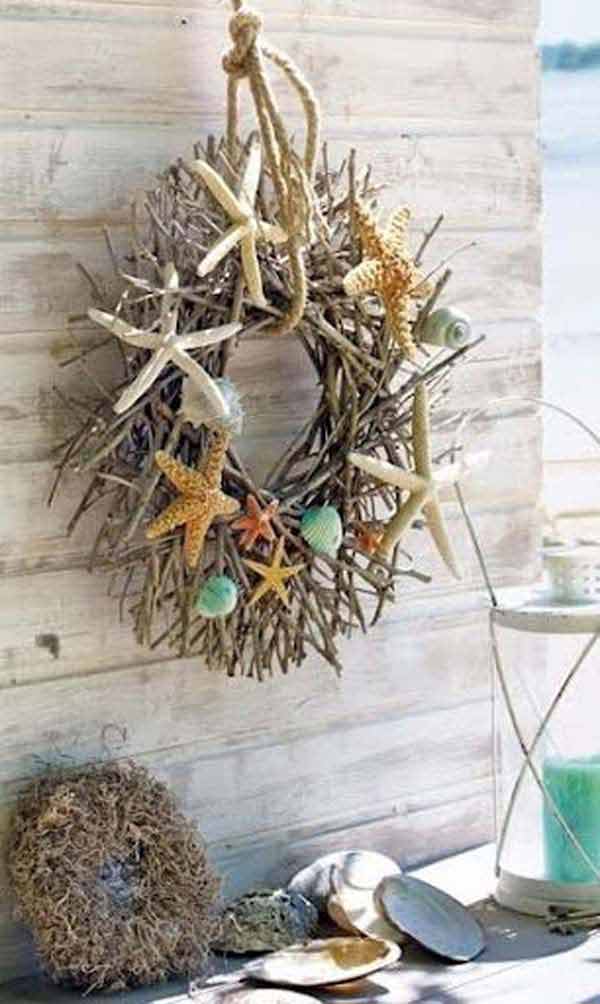
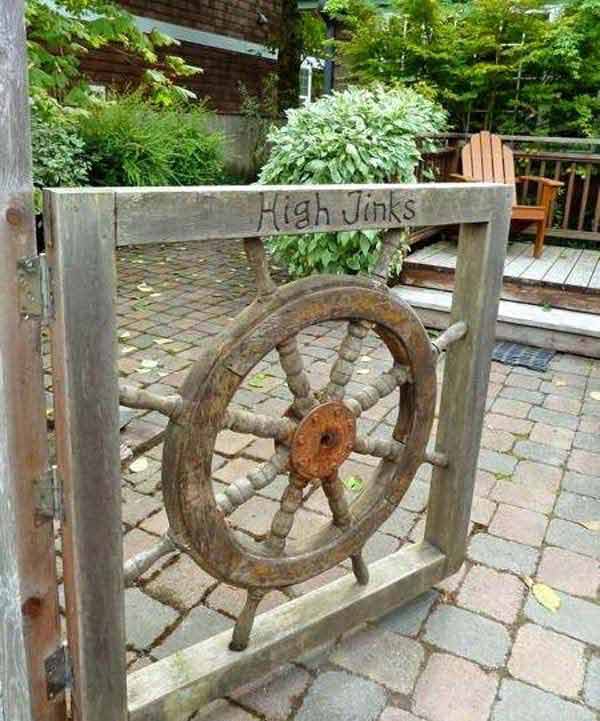

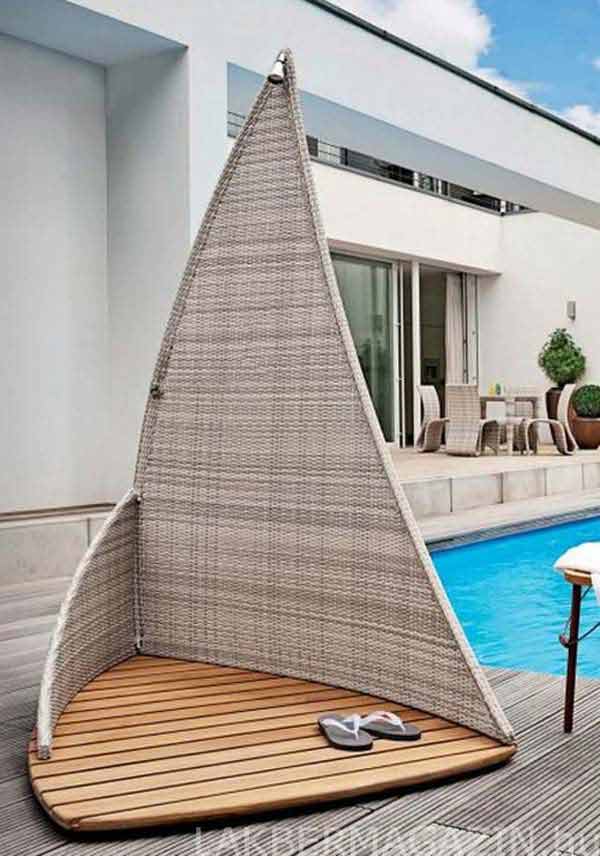
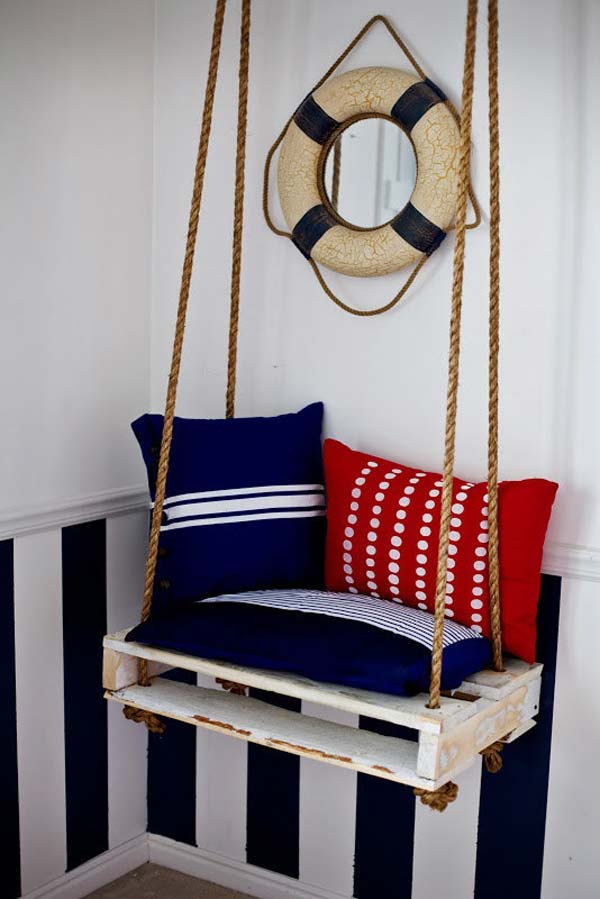
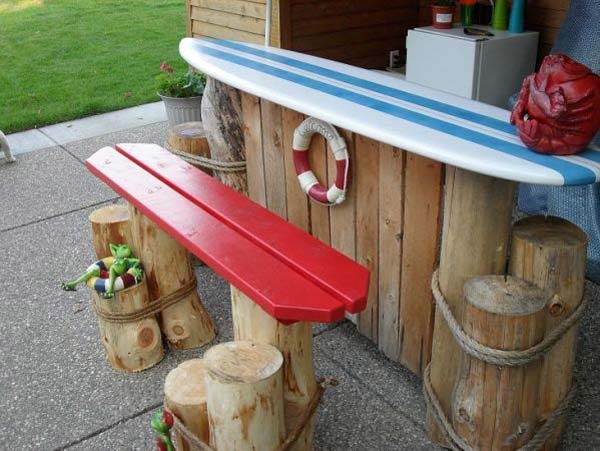
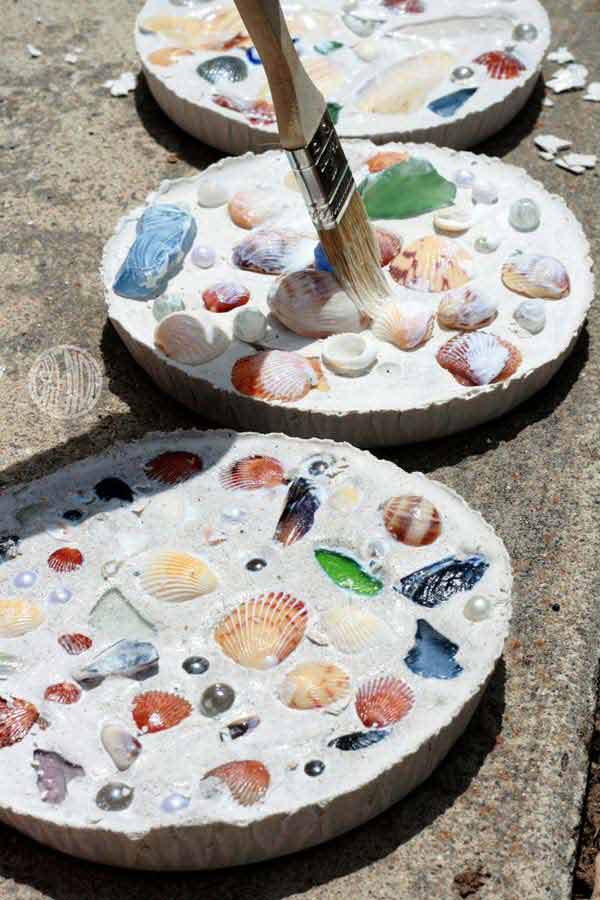

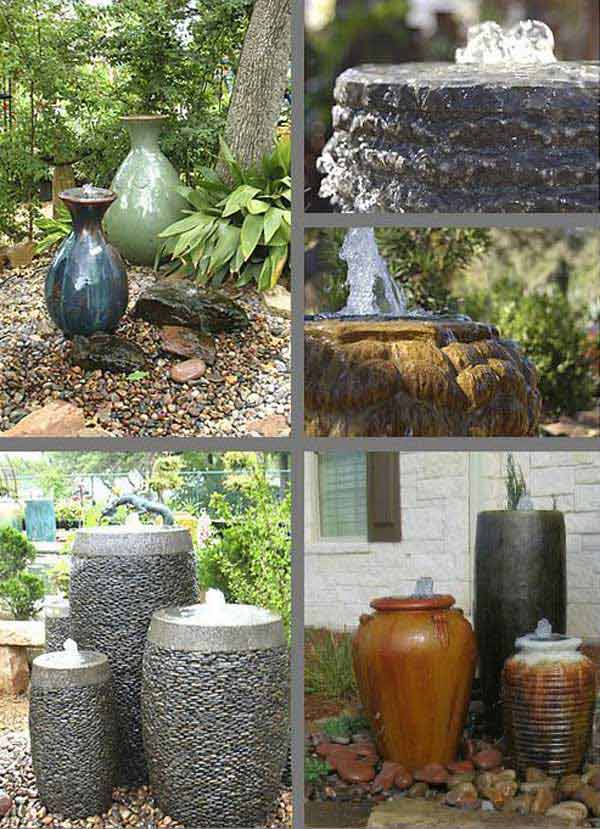
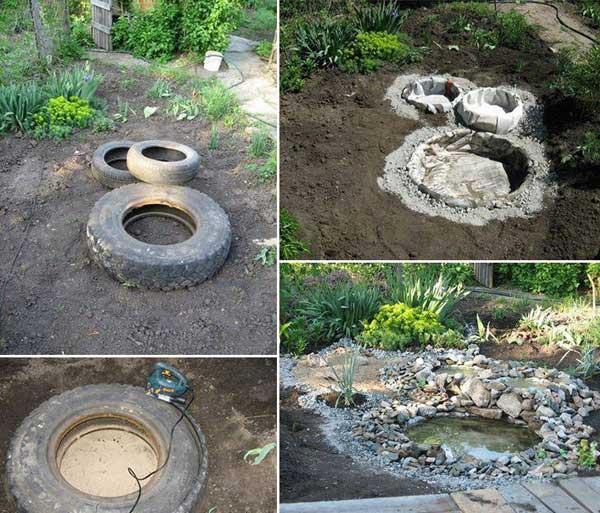
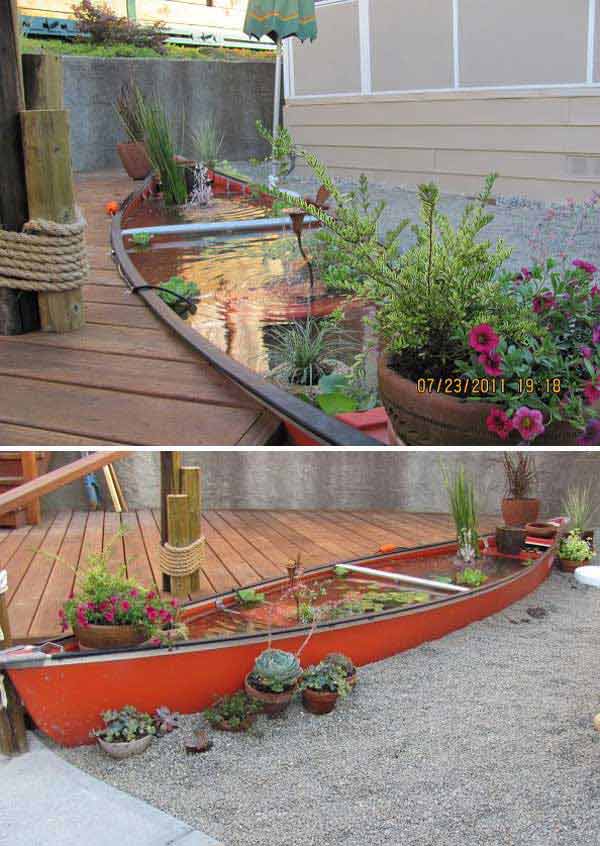
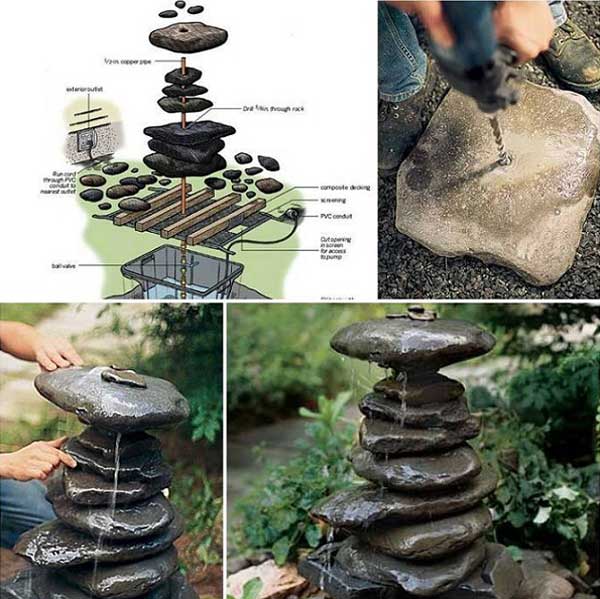
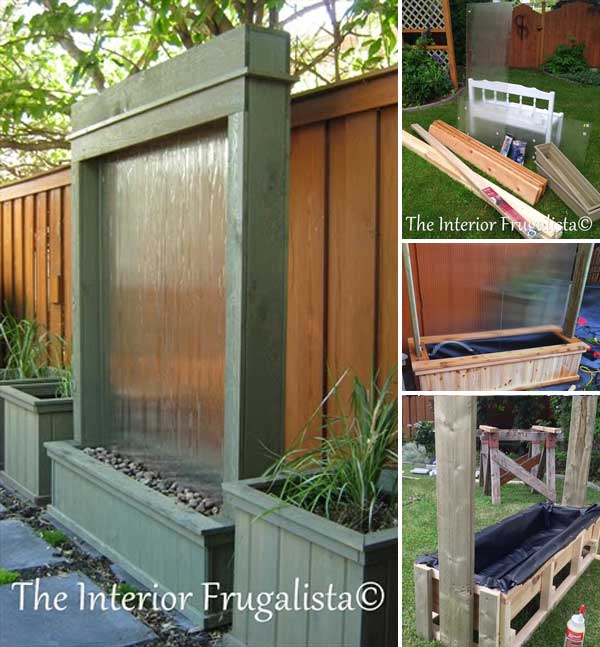
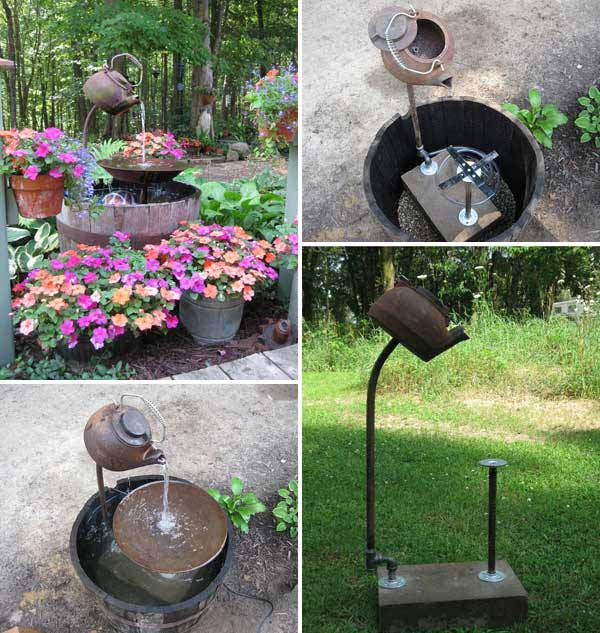
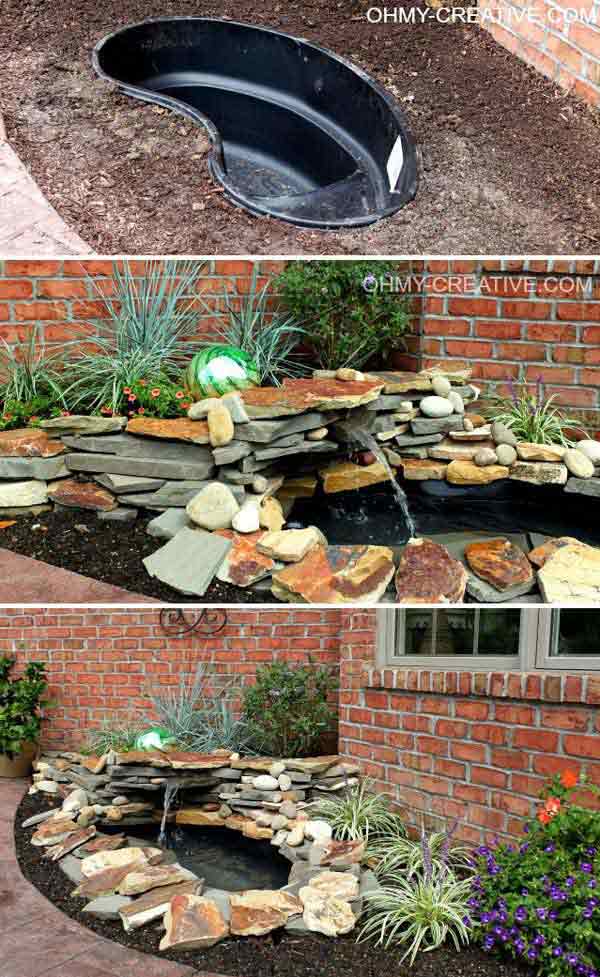
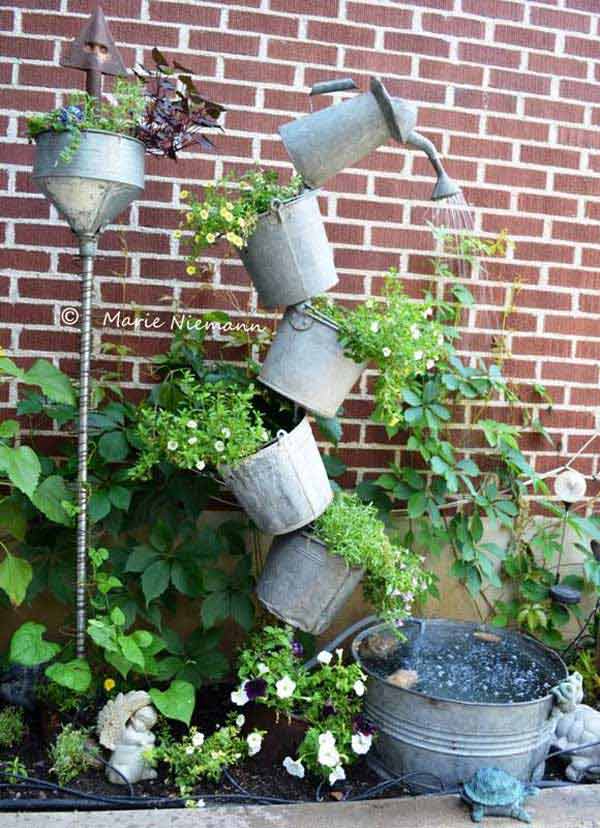
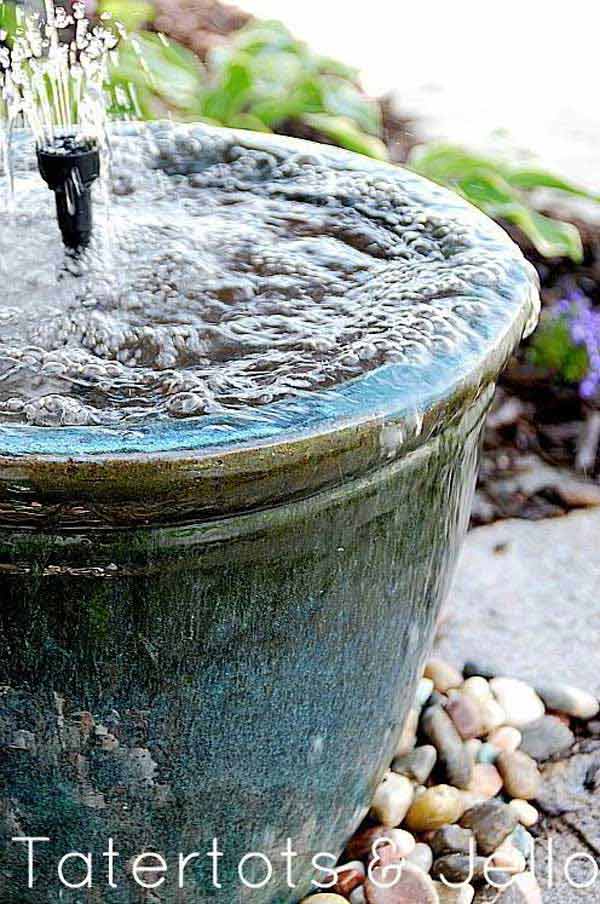

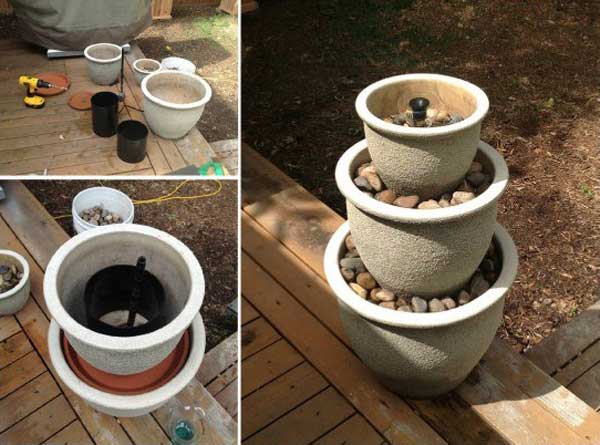
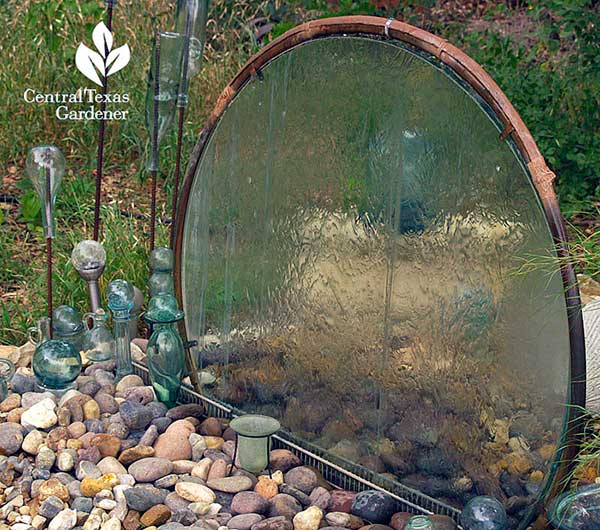

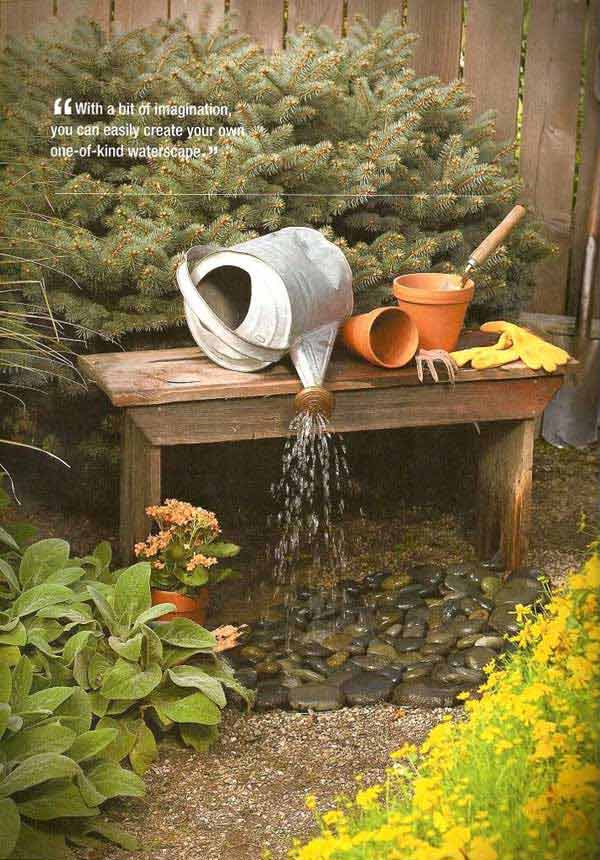
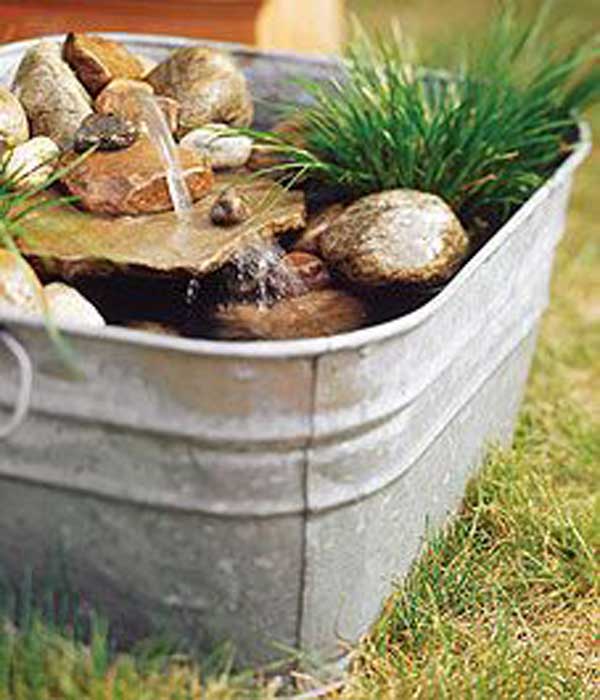
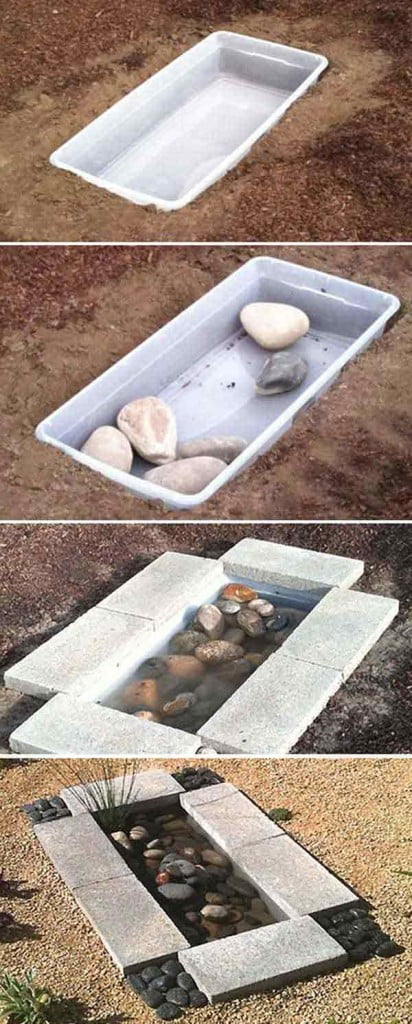
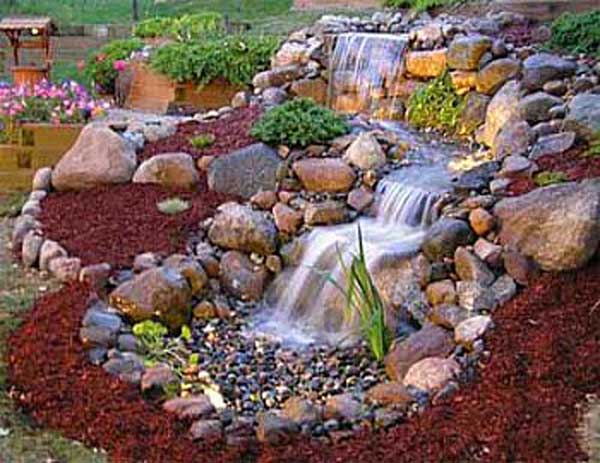
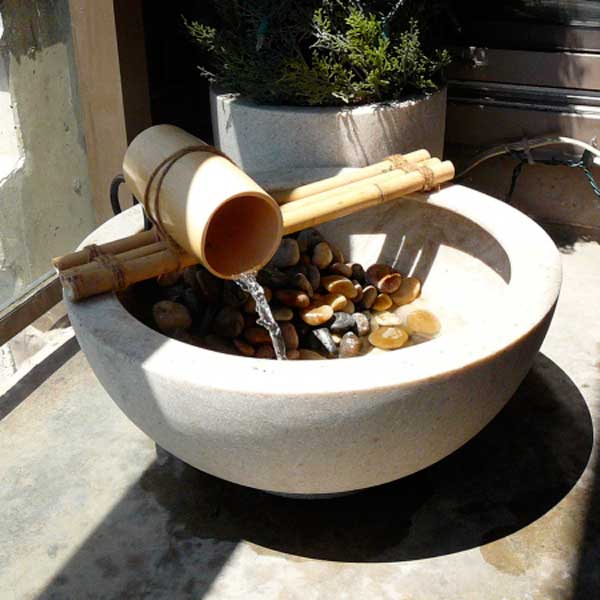
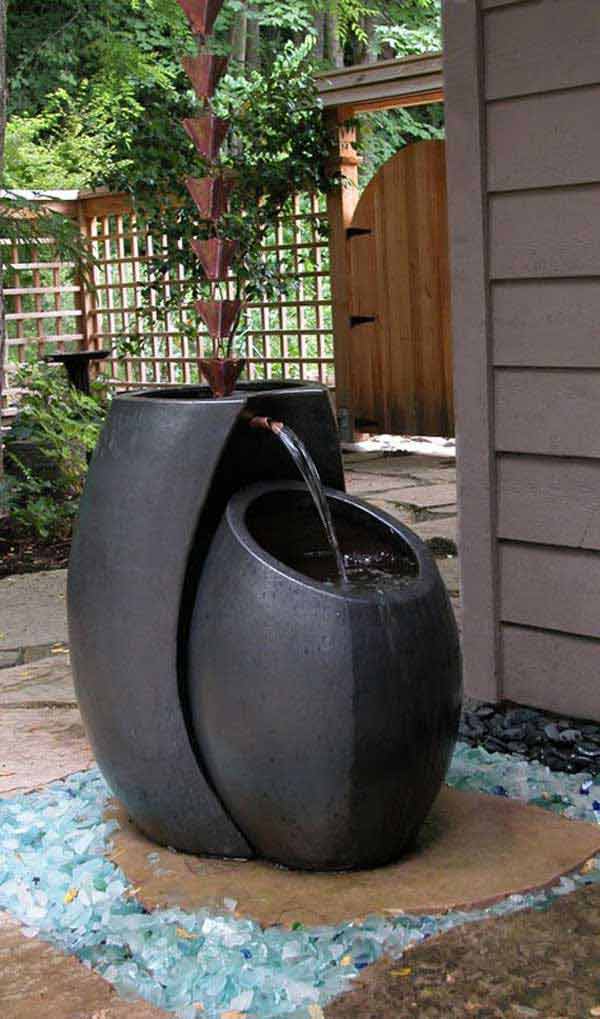
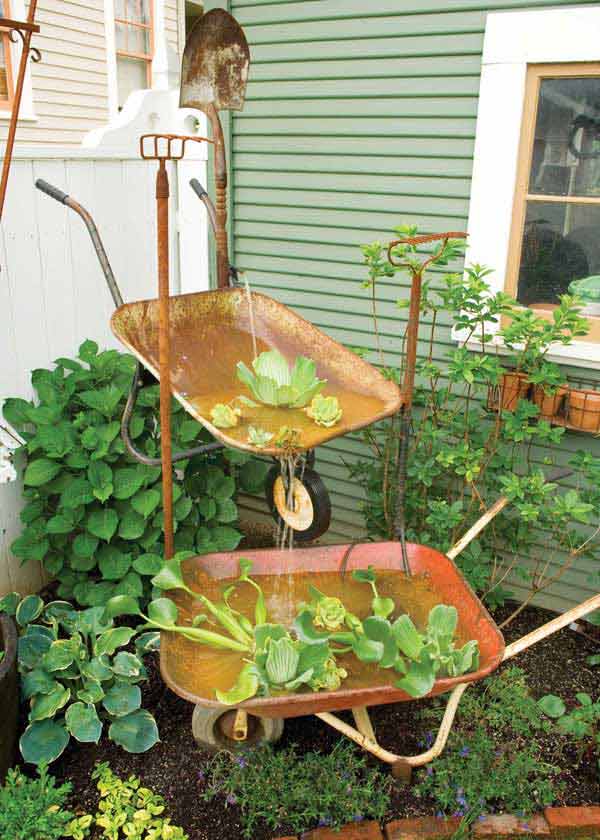
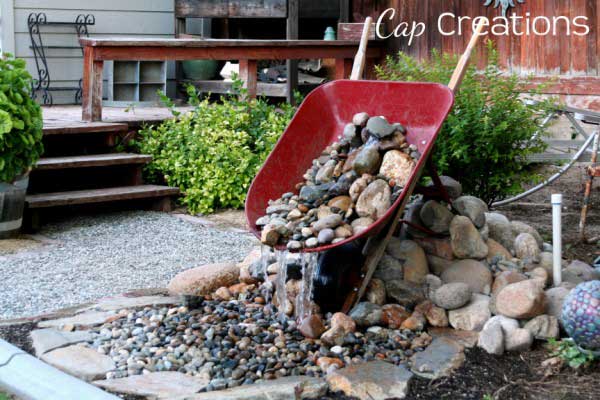
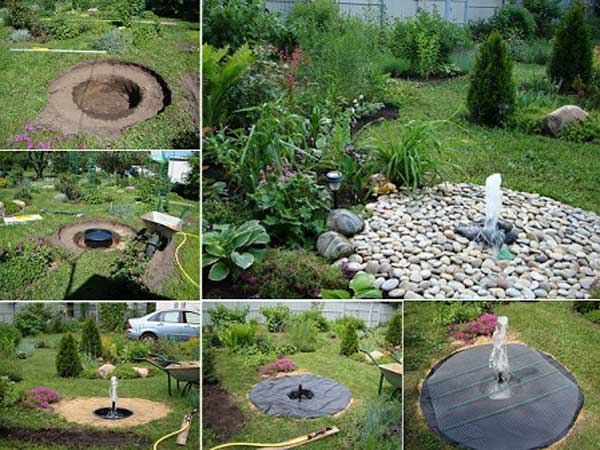
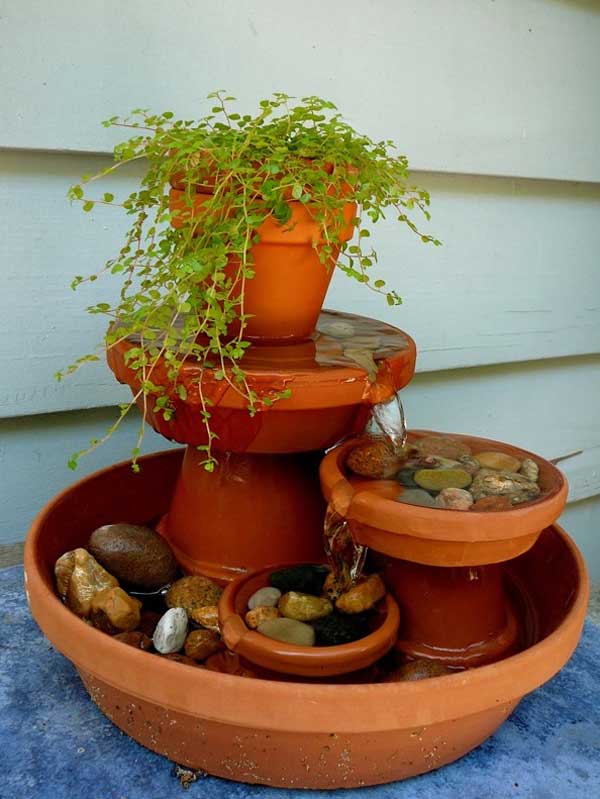

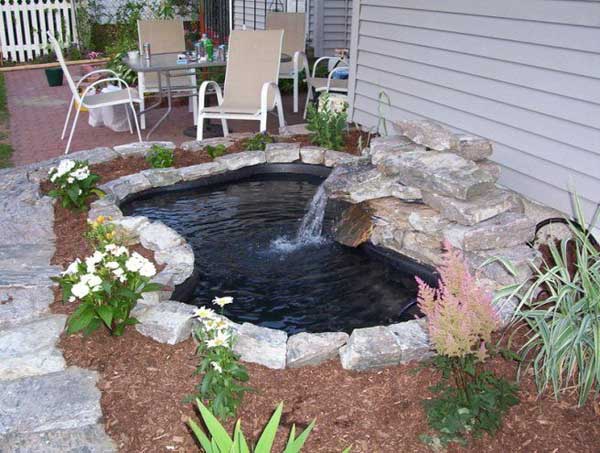


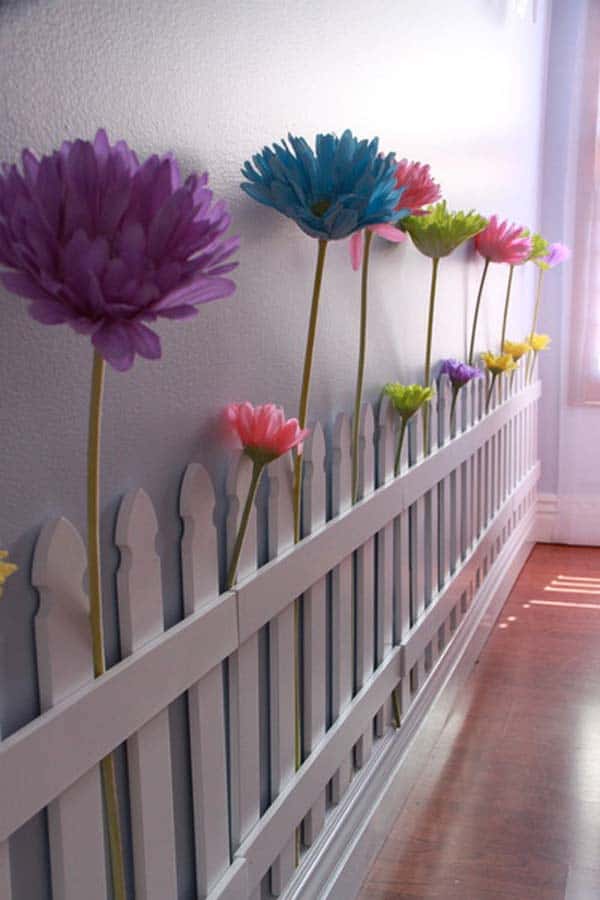
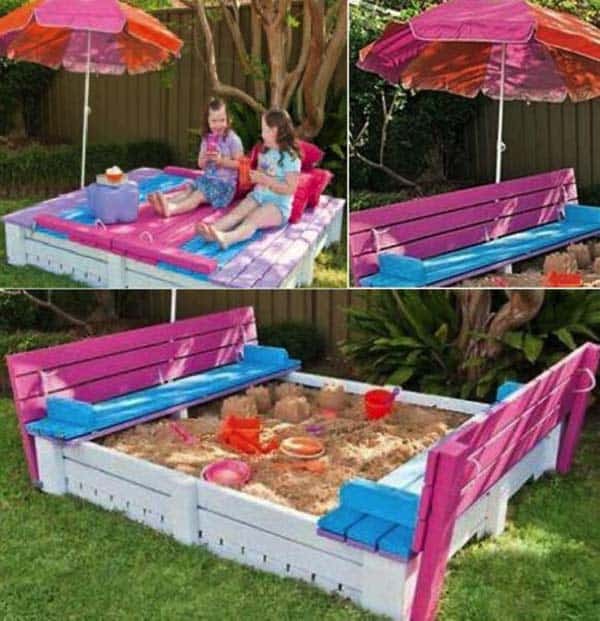
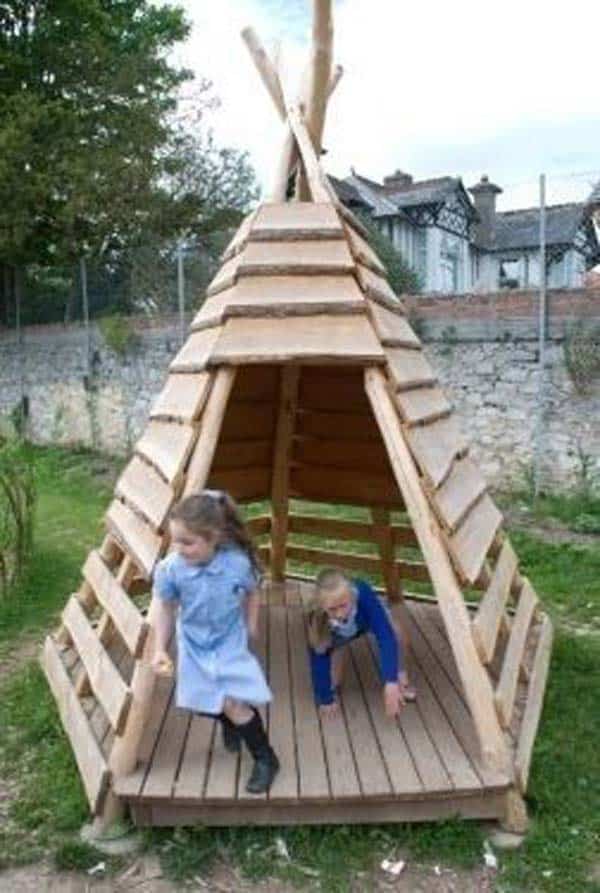
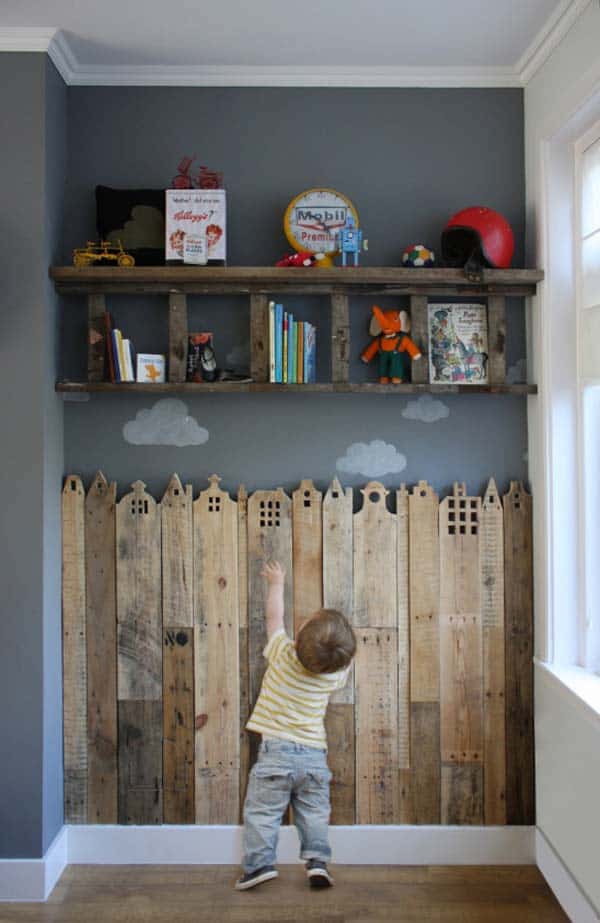
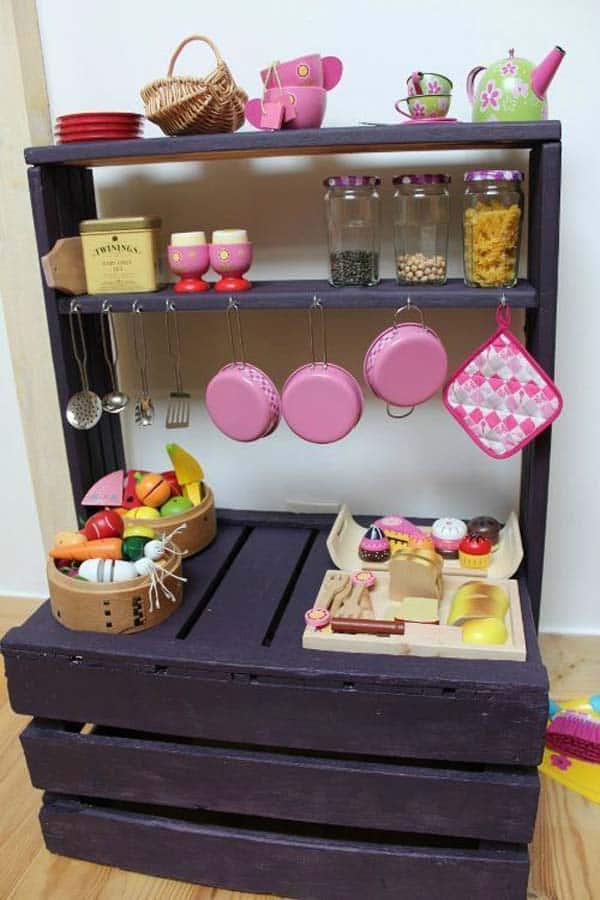
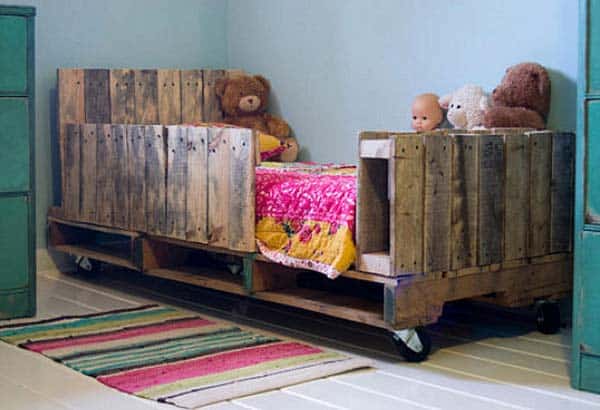
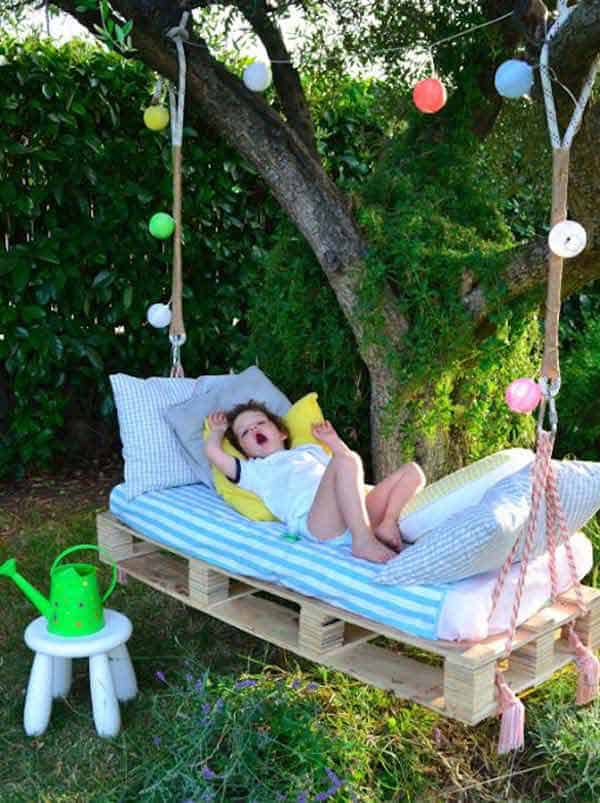
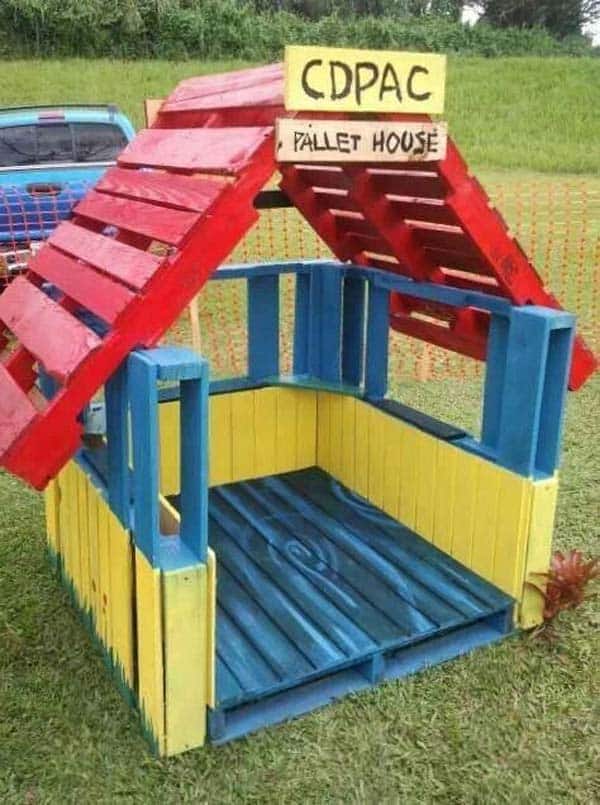
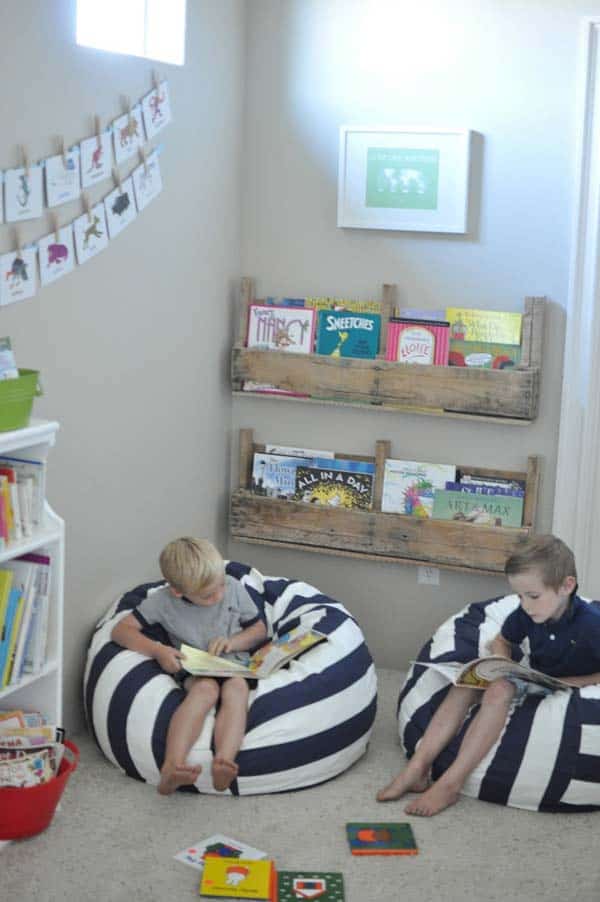
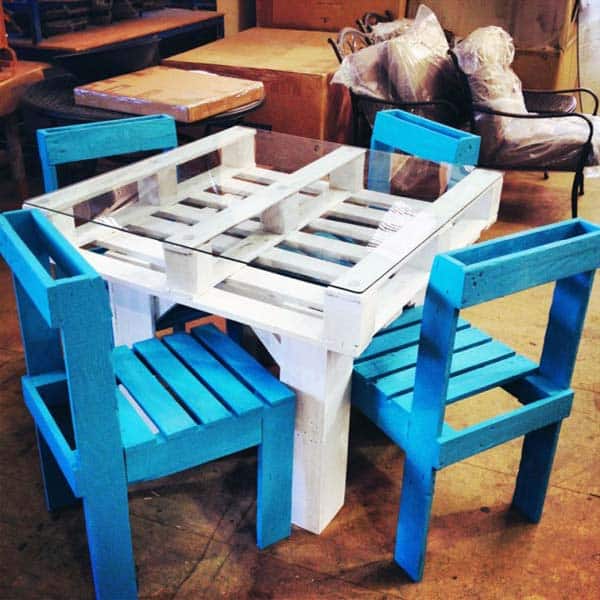

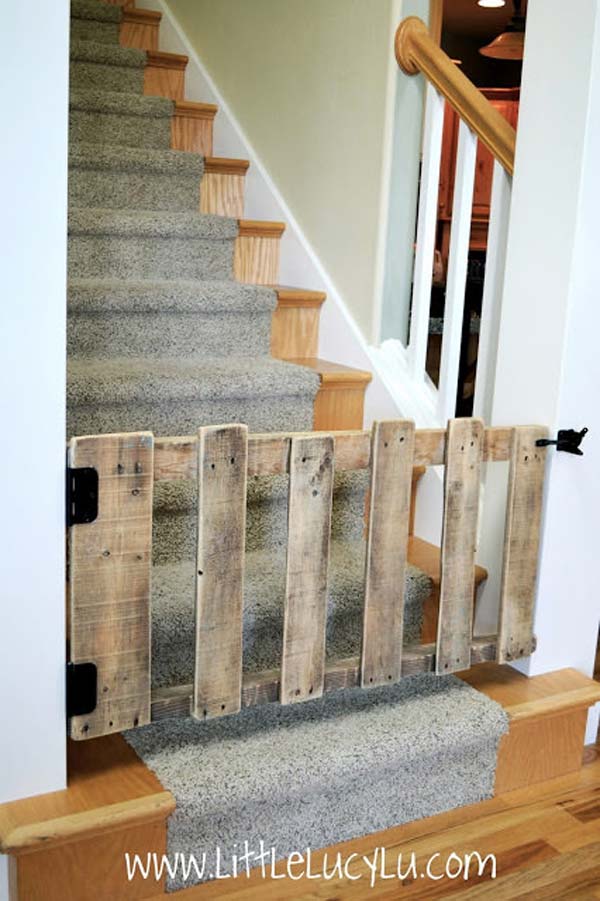
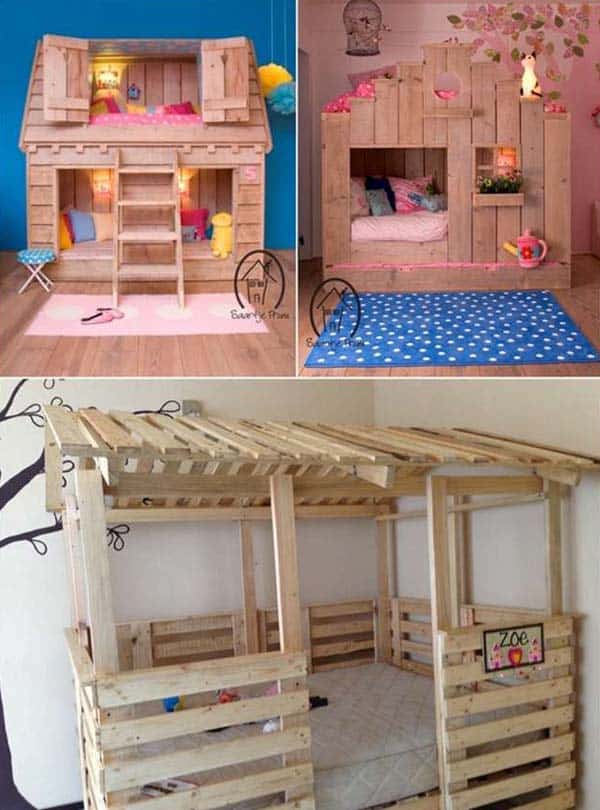
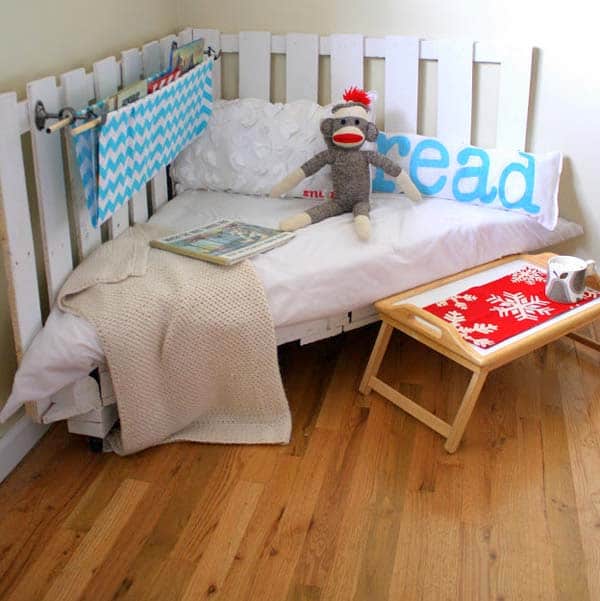
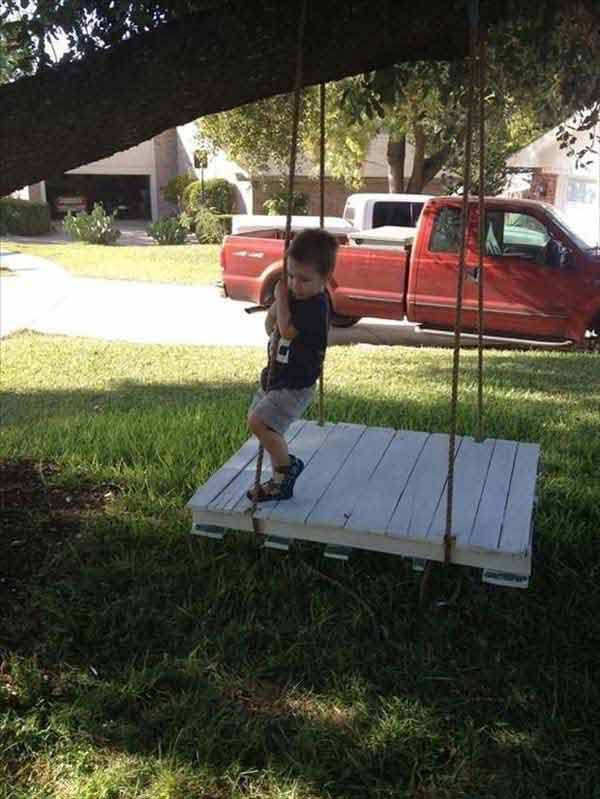
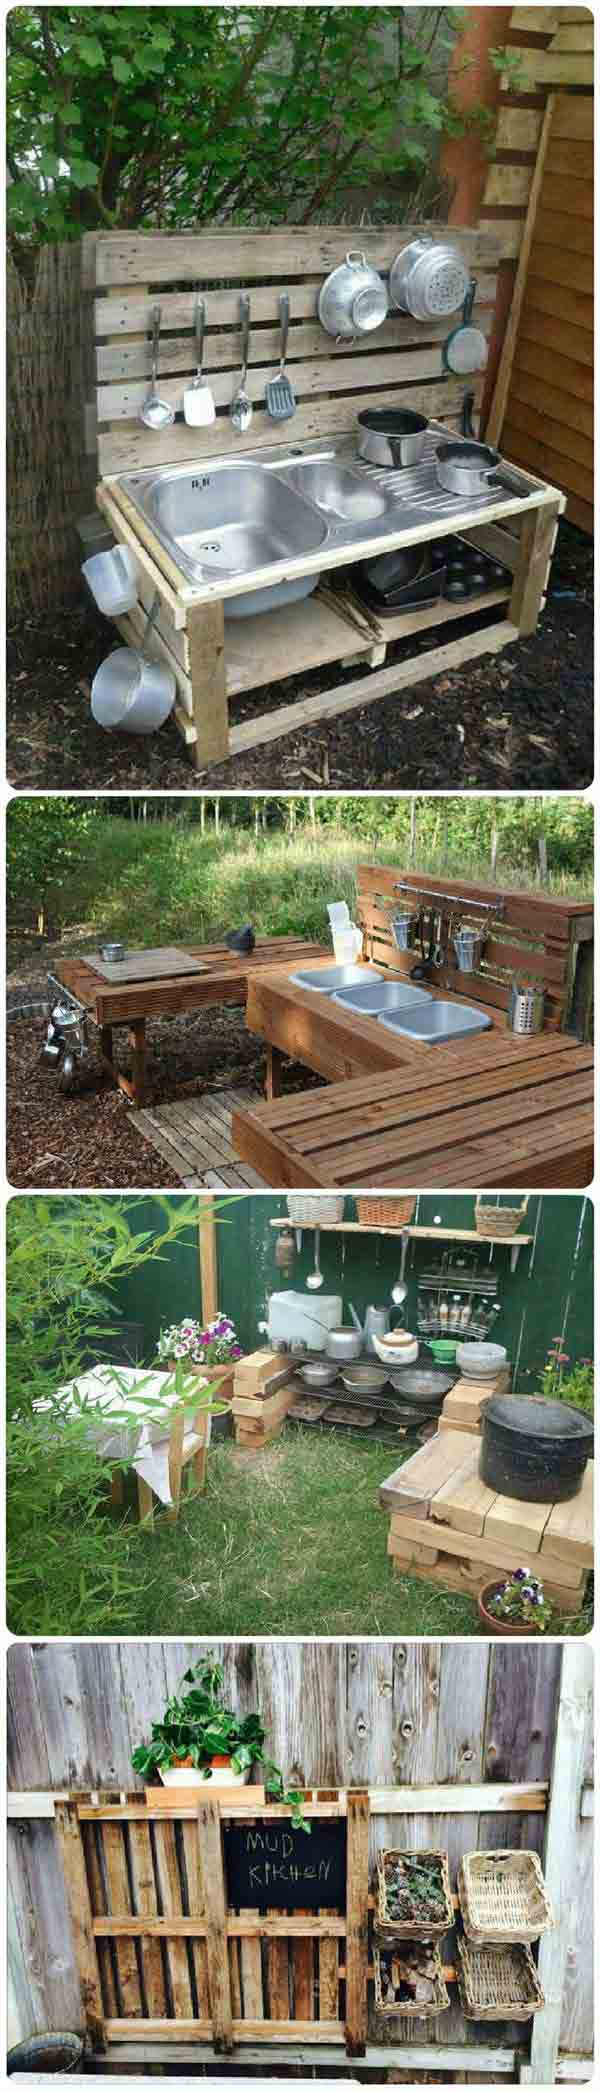
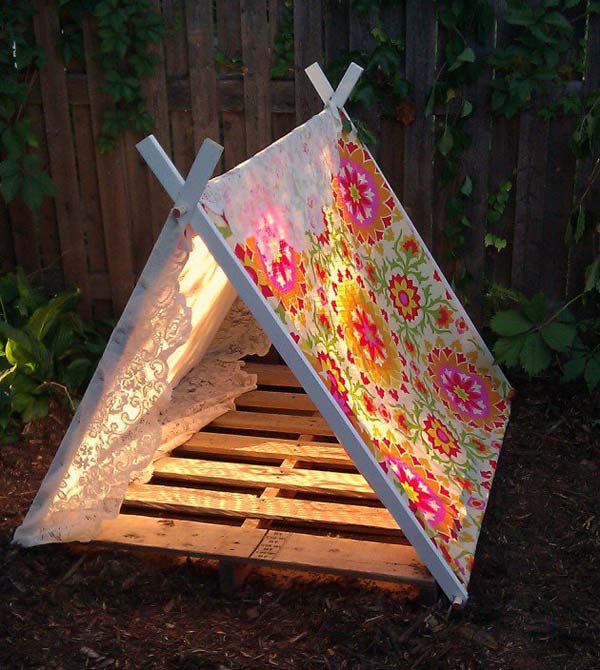
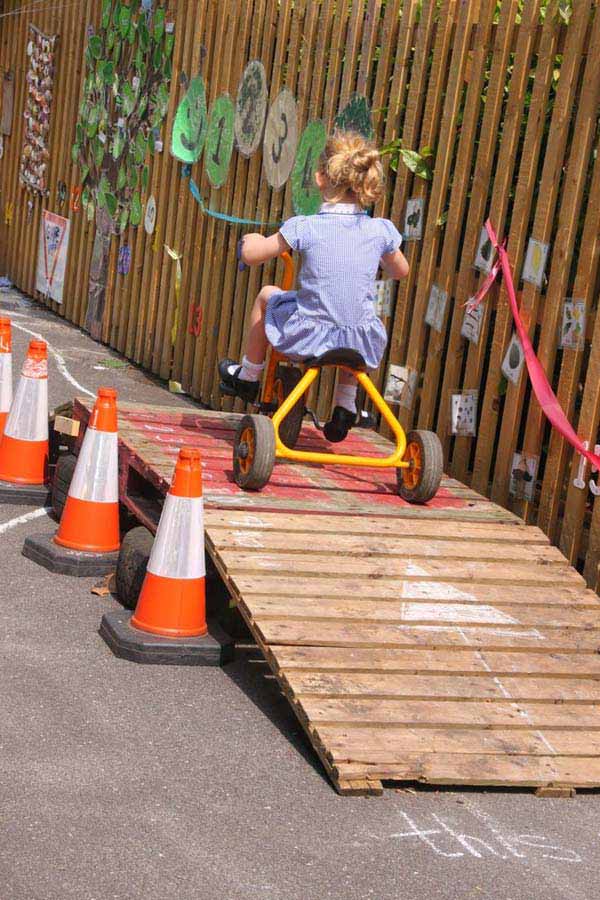
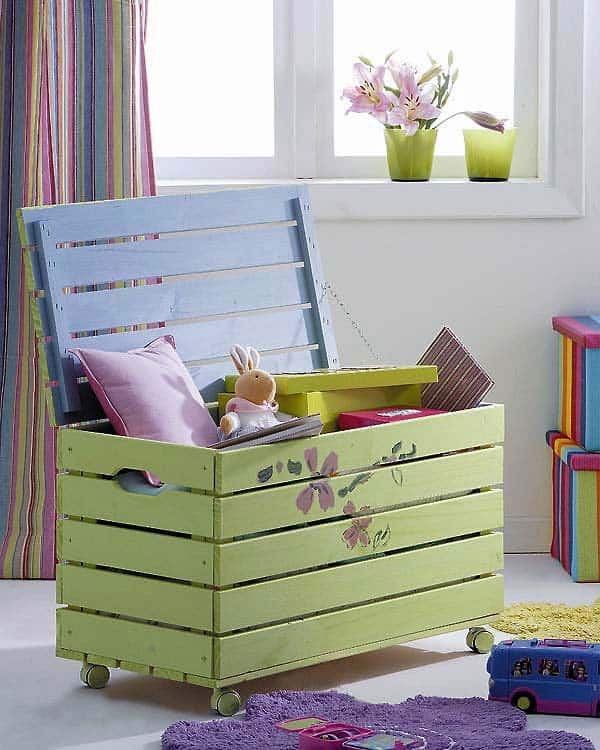
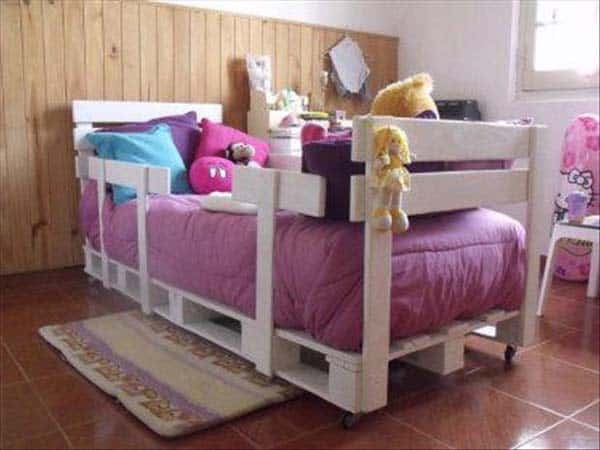
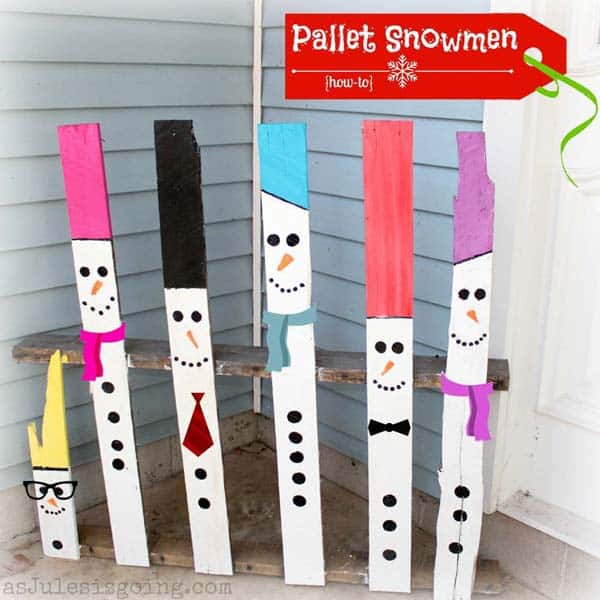
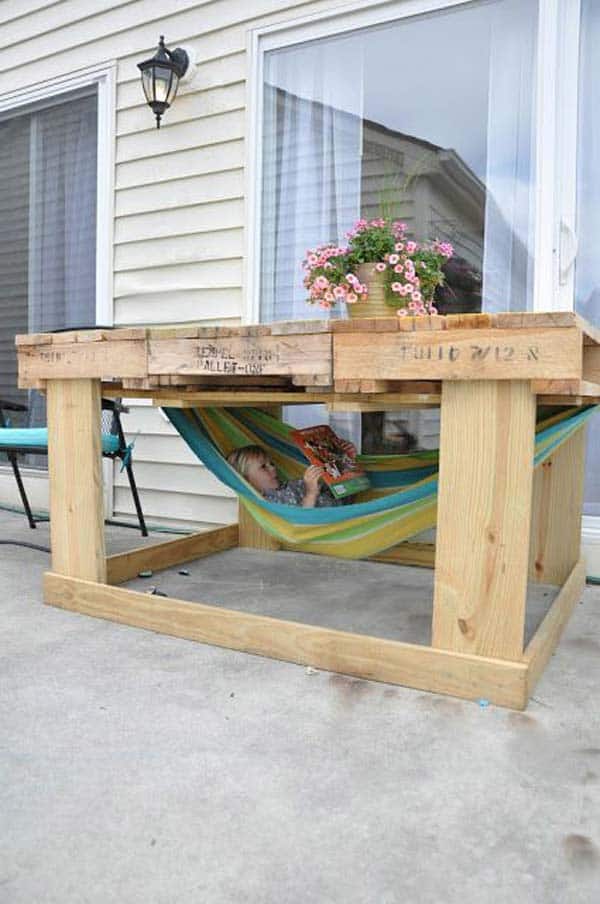
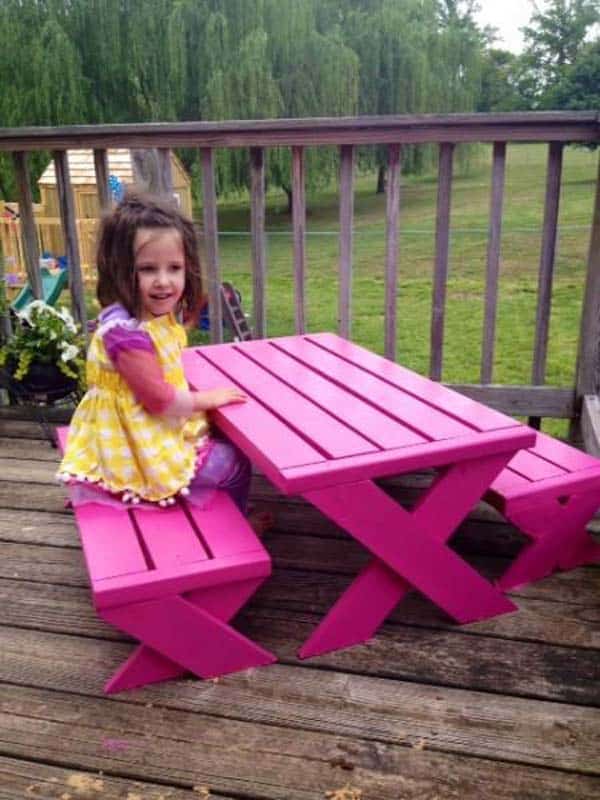
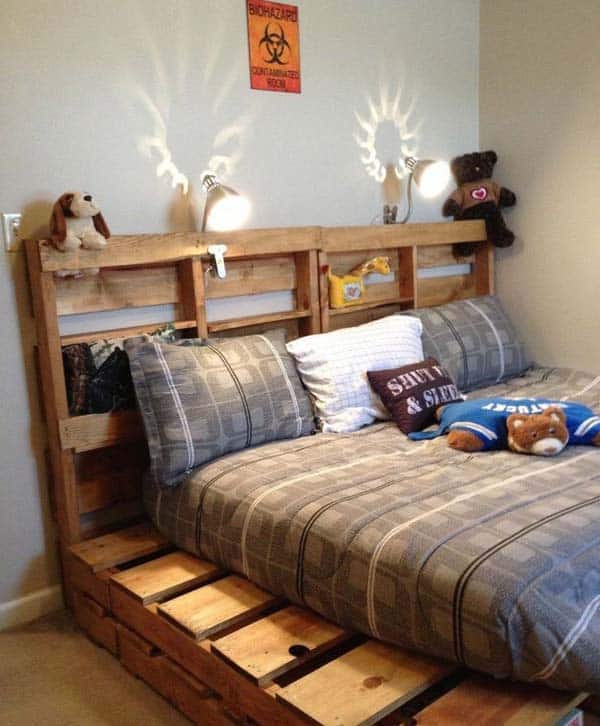
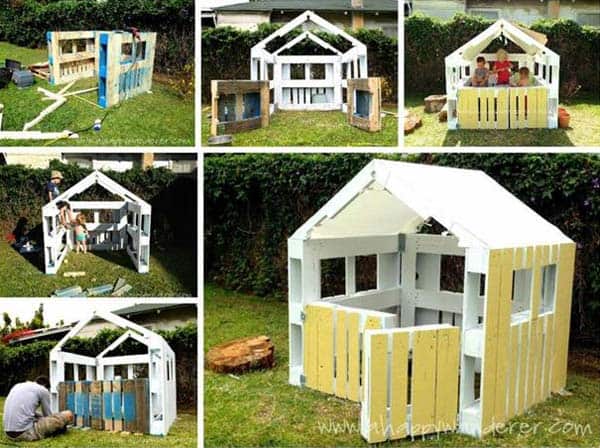

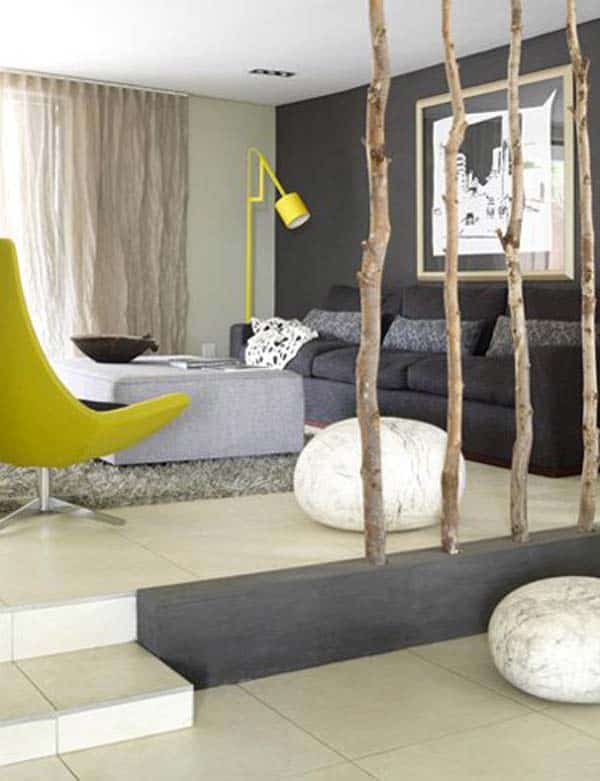
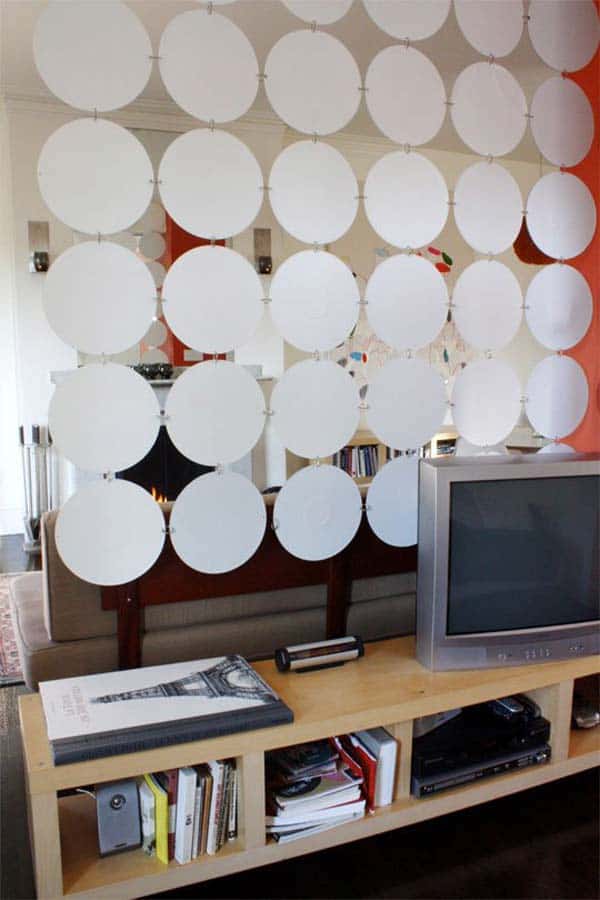
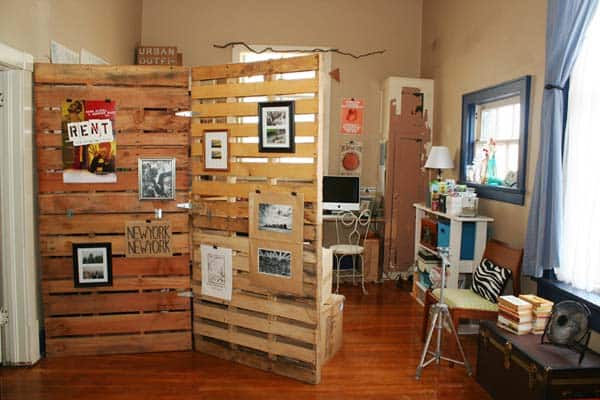
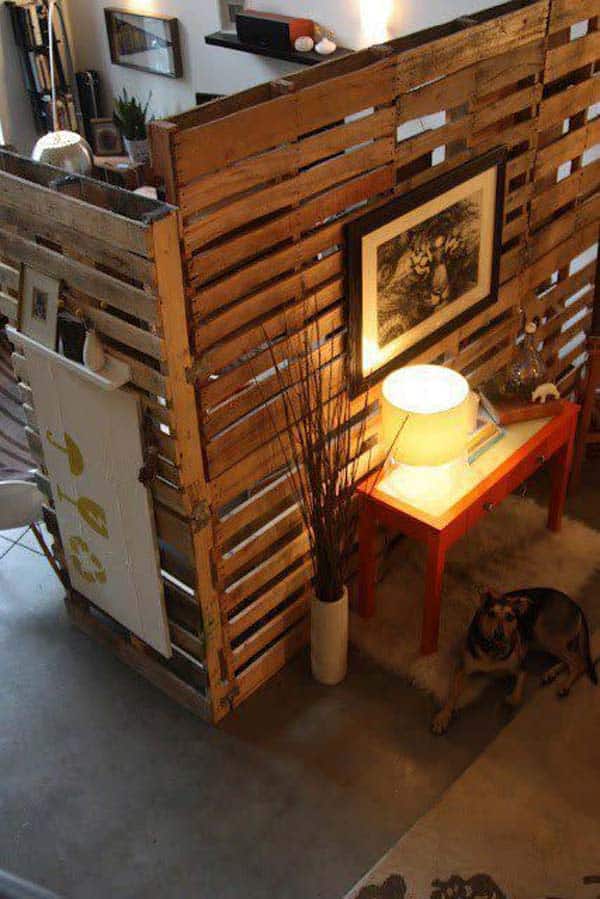
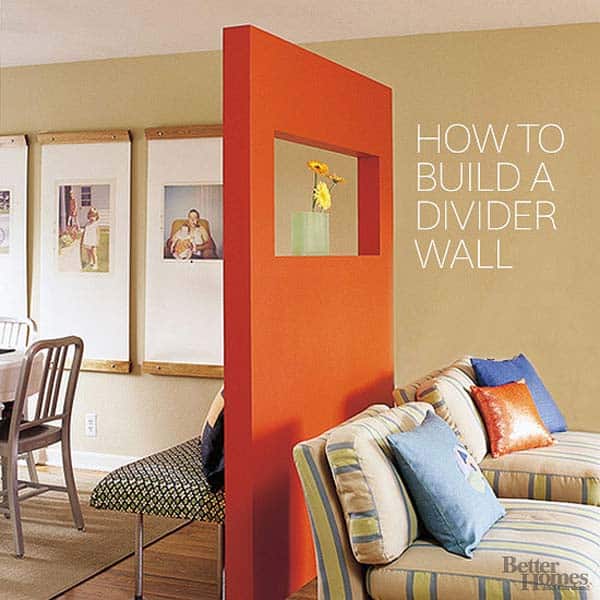
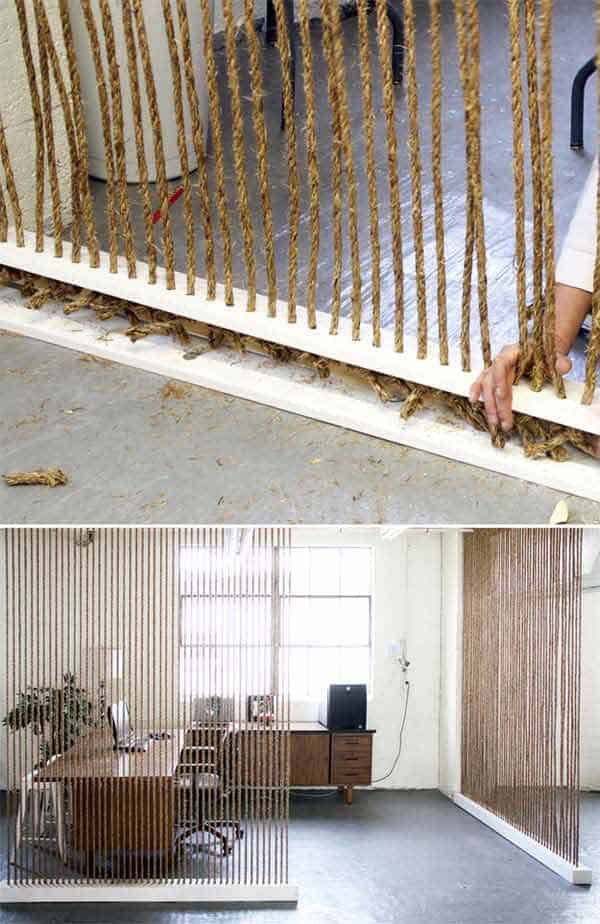
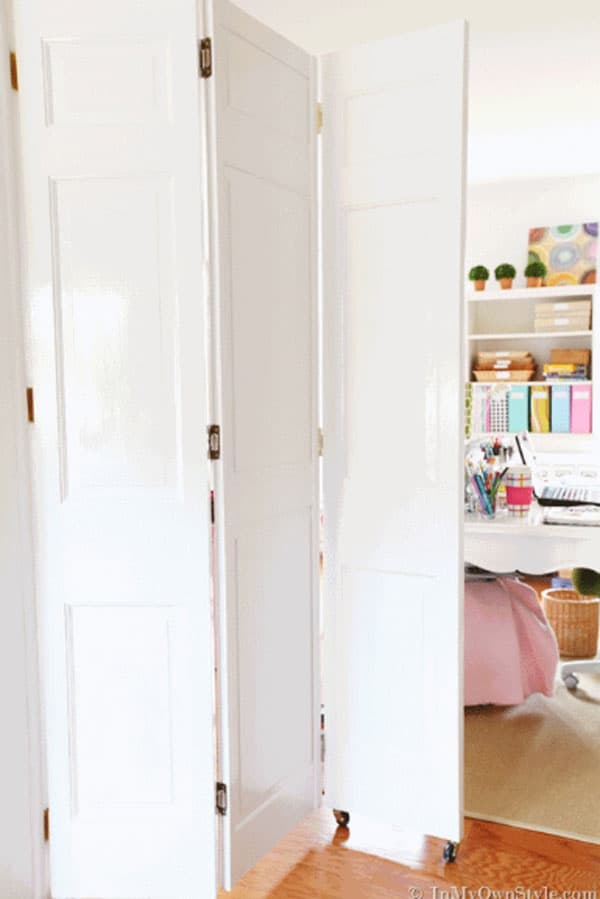
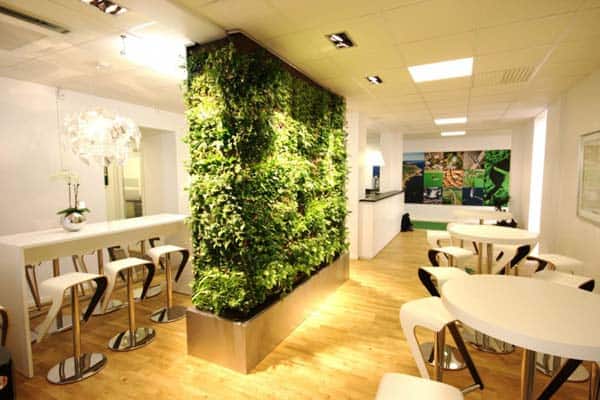
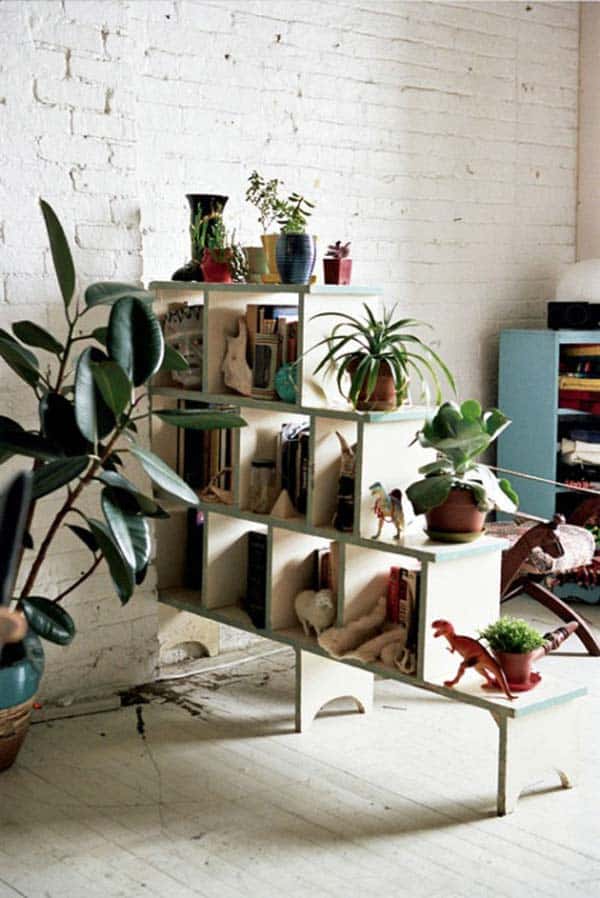
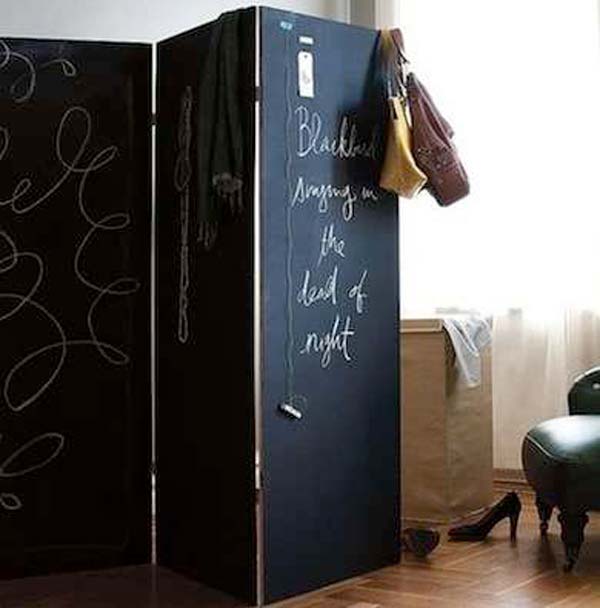
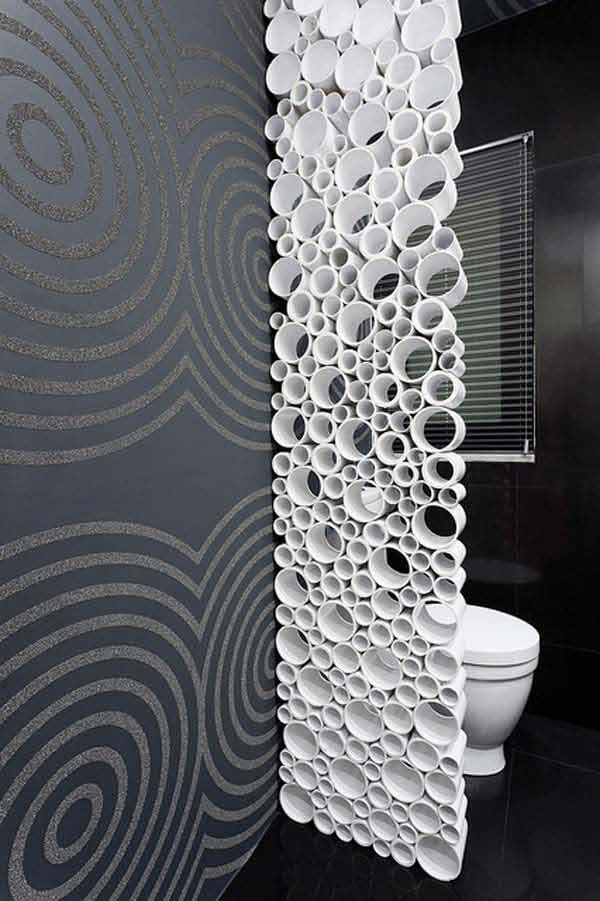
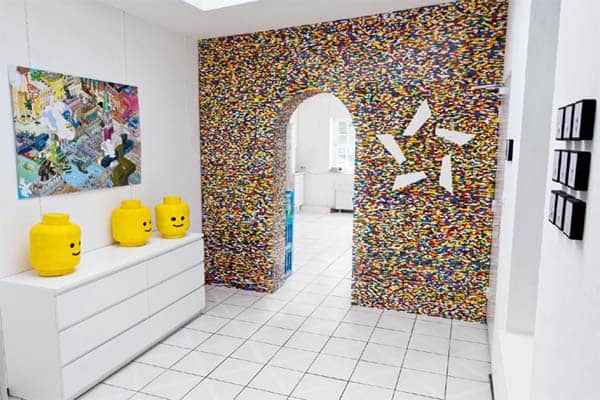
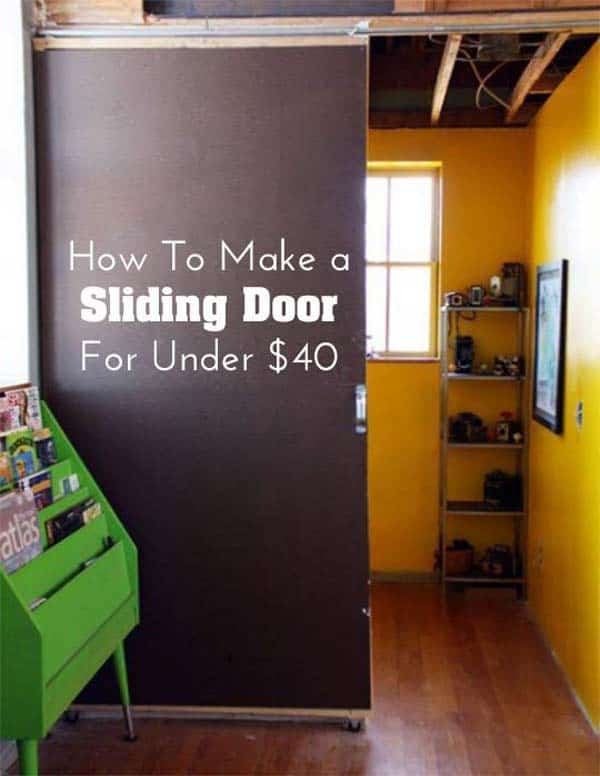
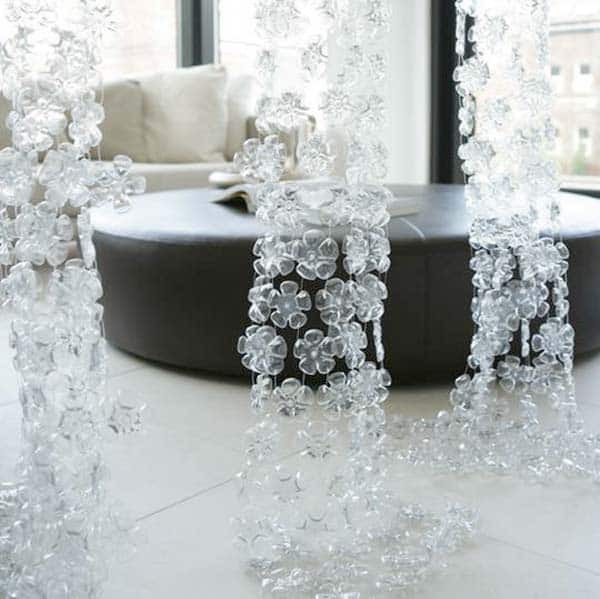
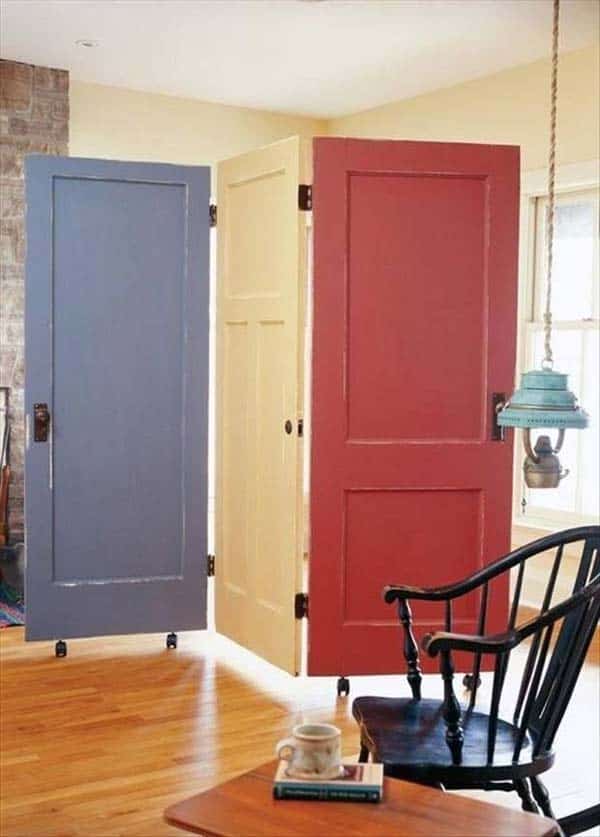
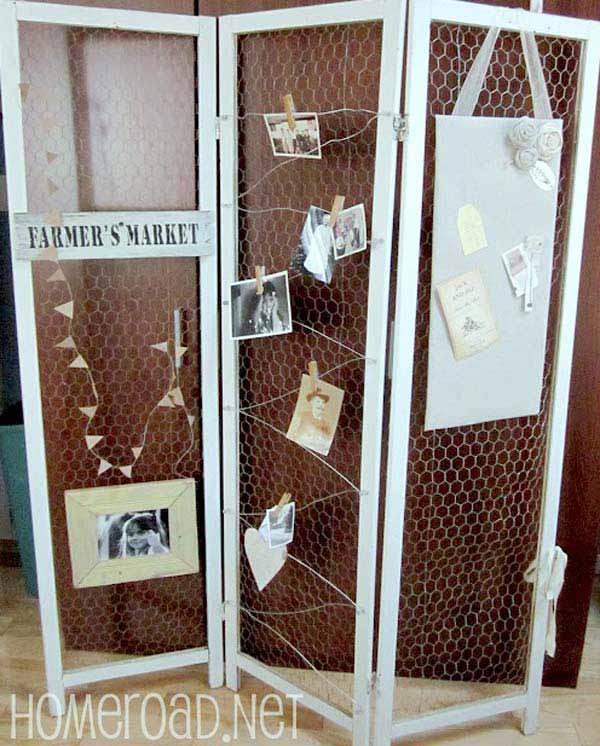
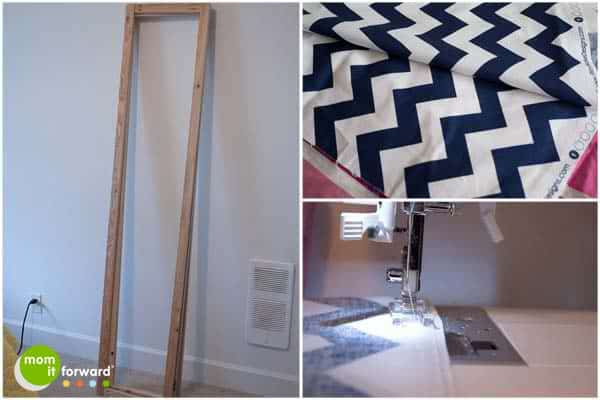
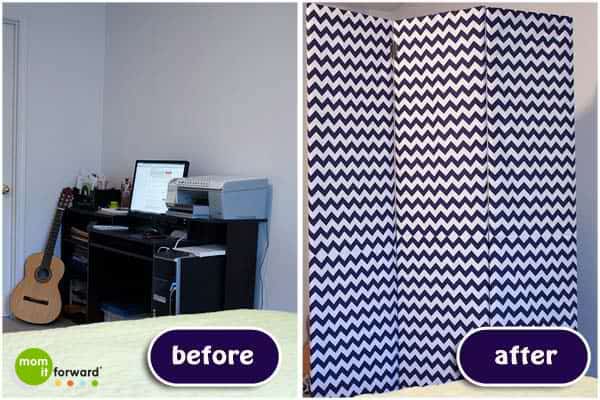 x
x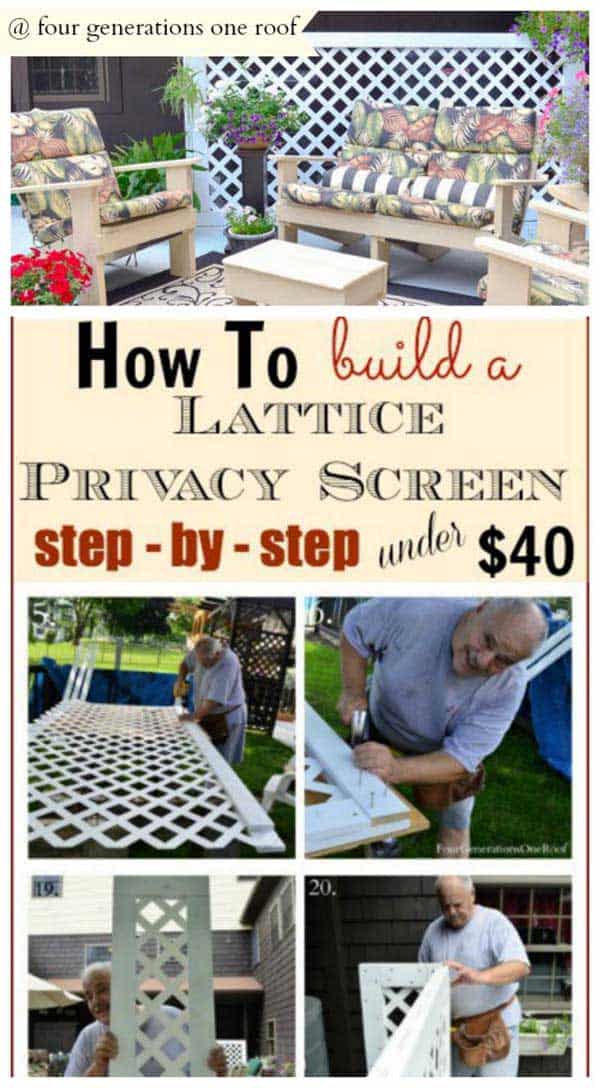
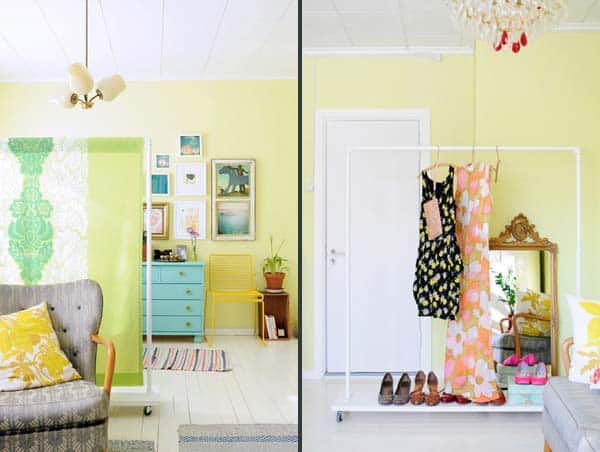
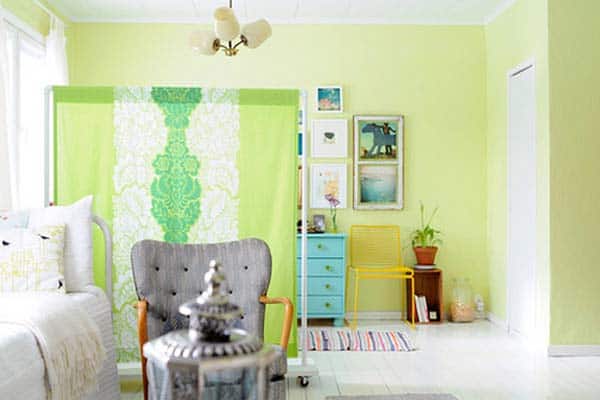
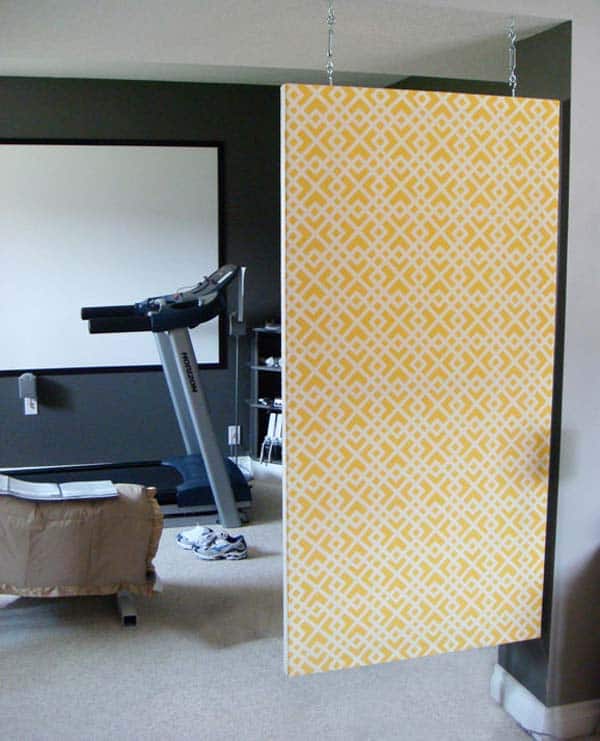


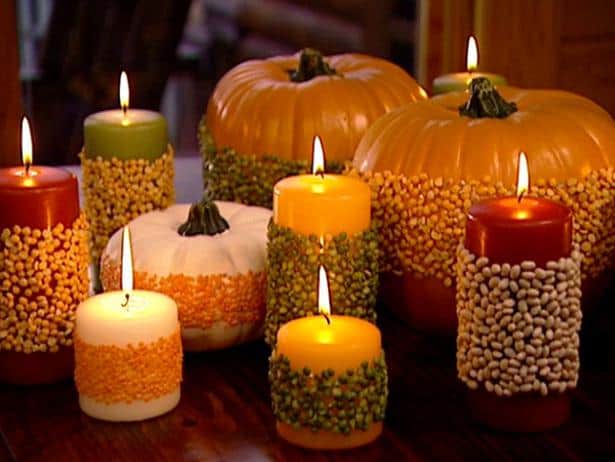


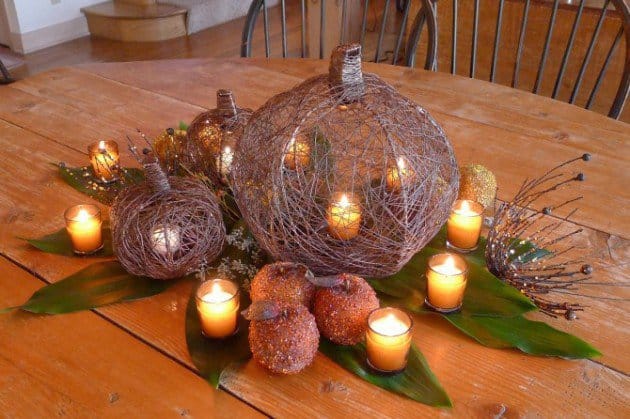


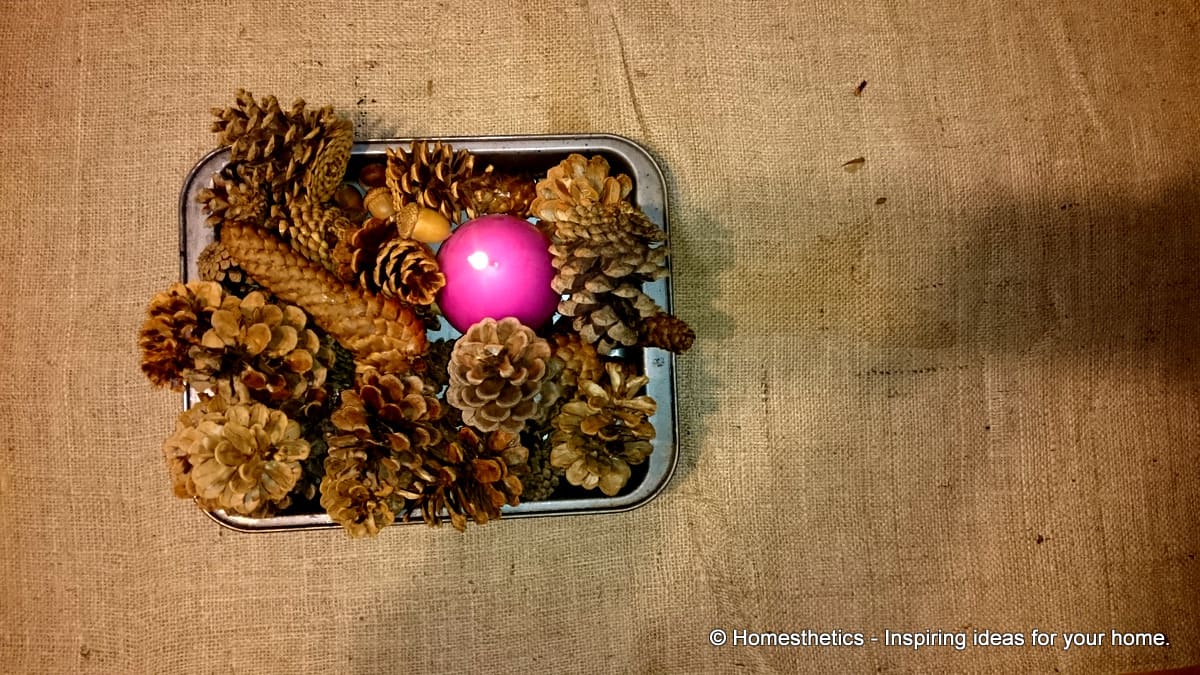

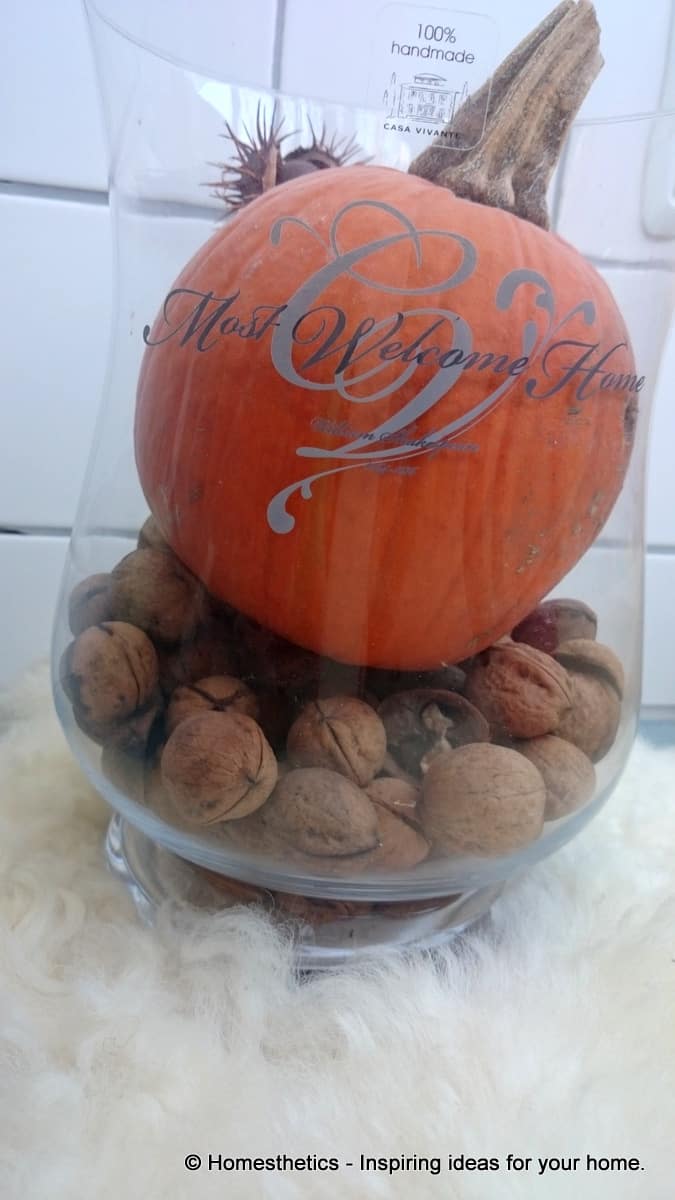
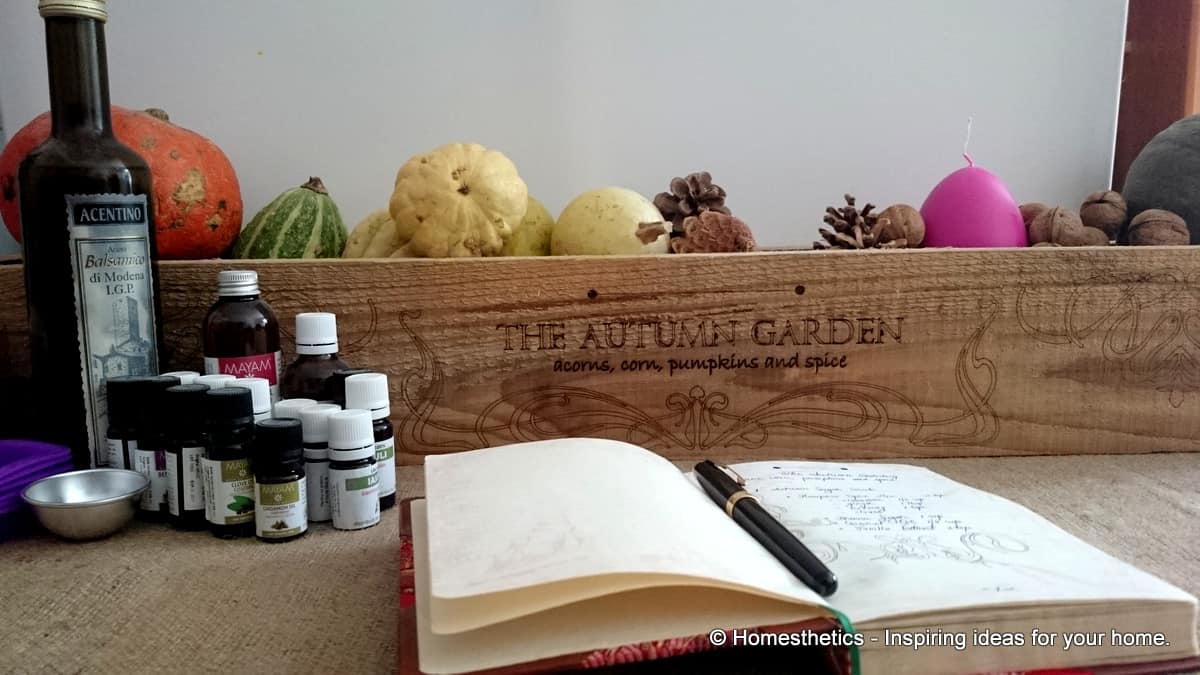

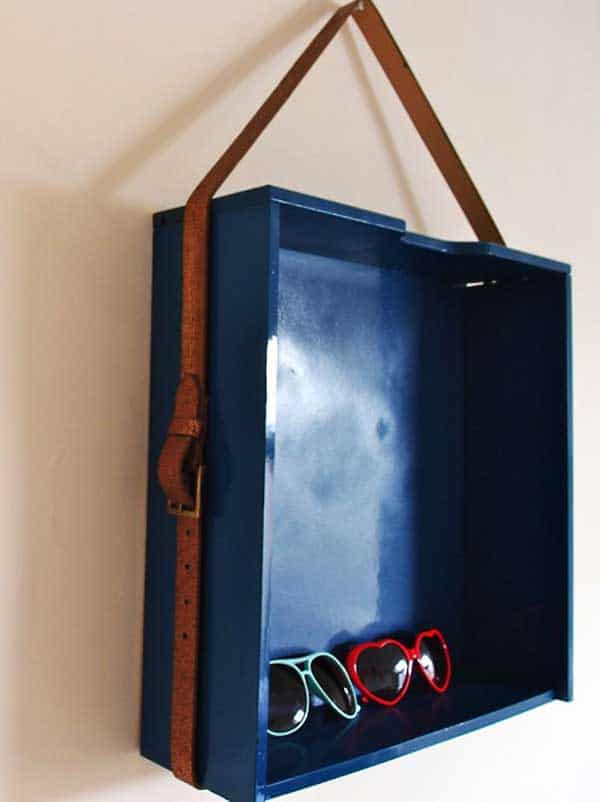

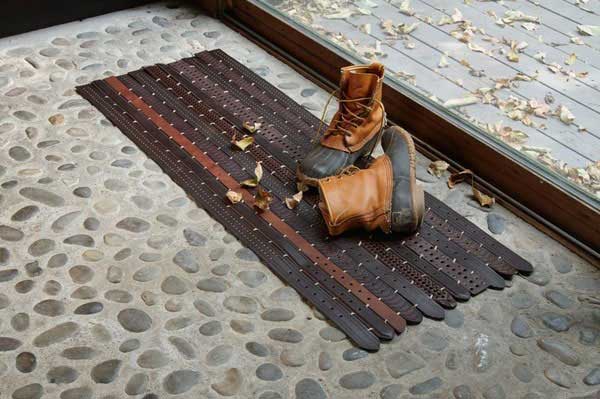
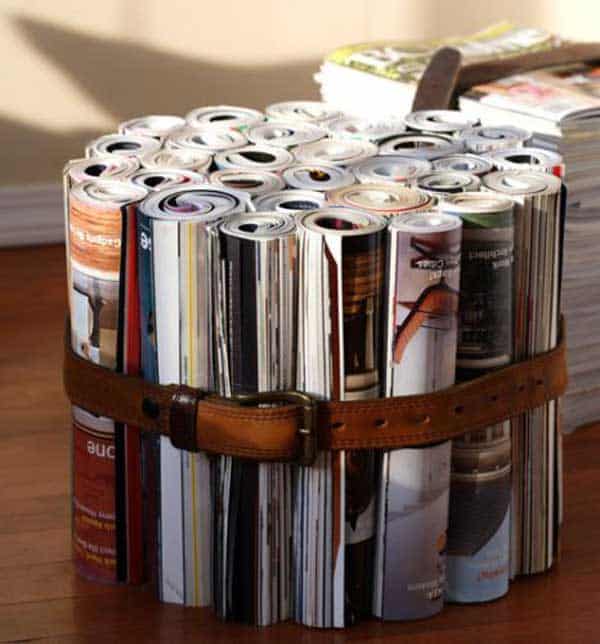
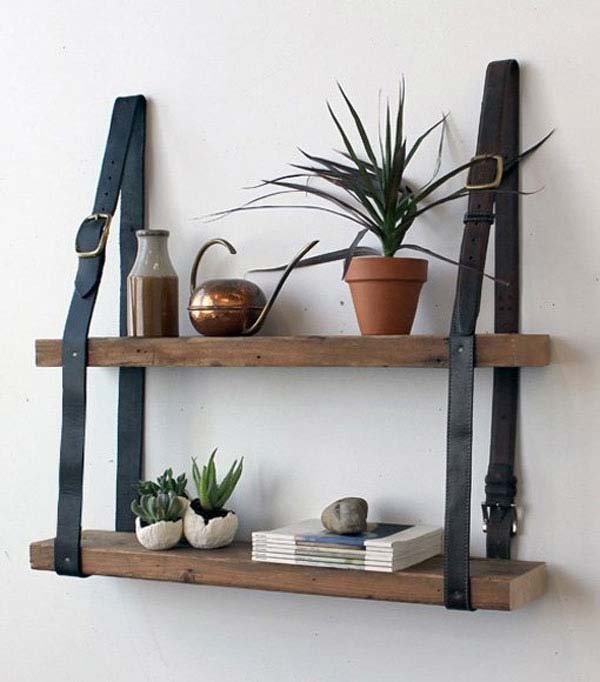
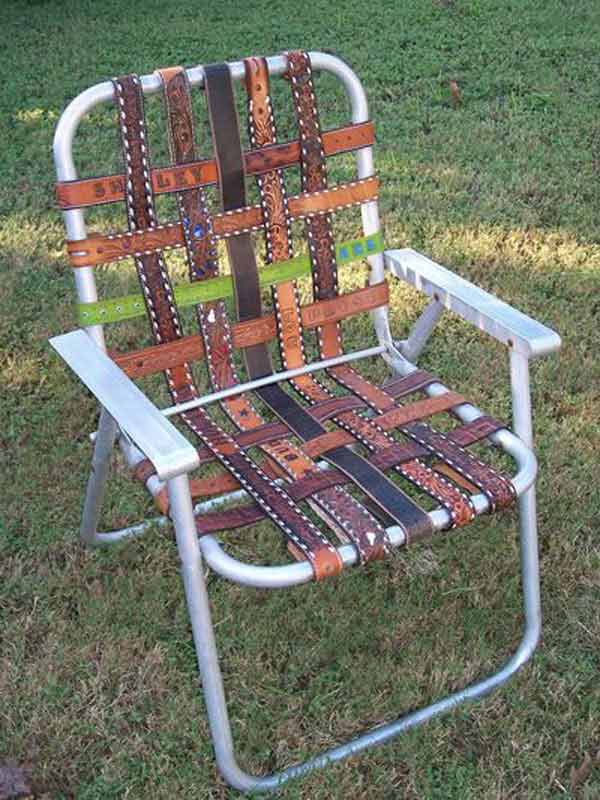
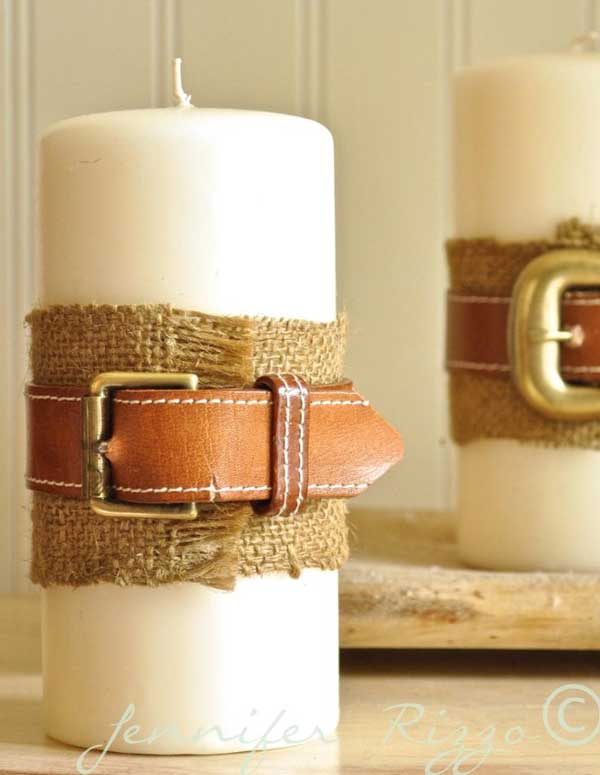
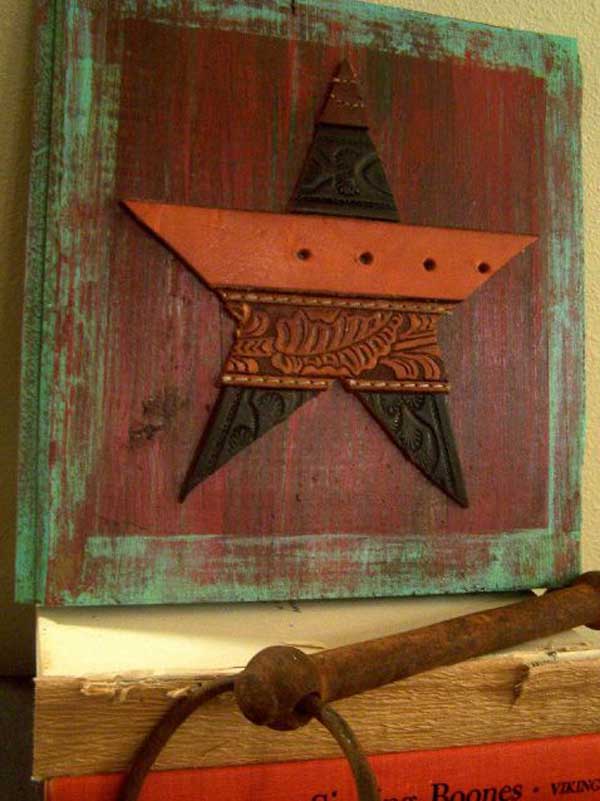
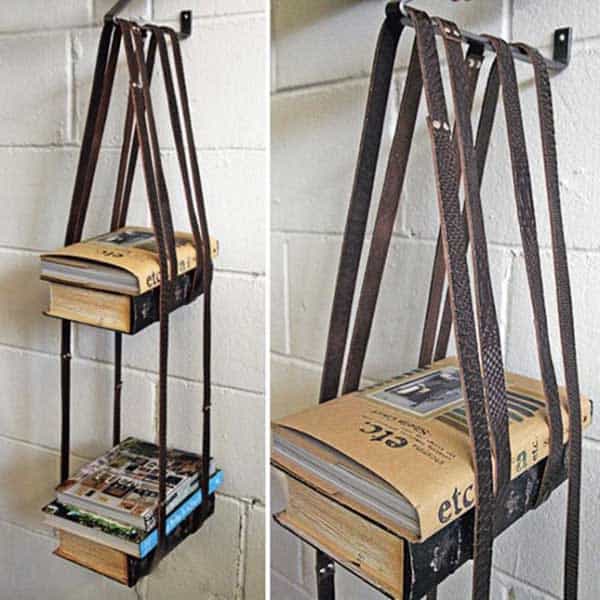

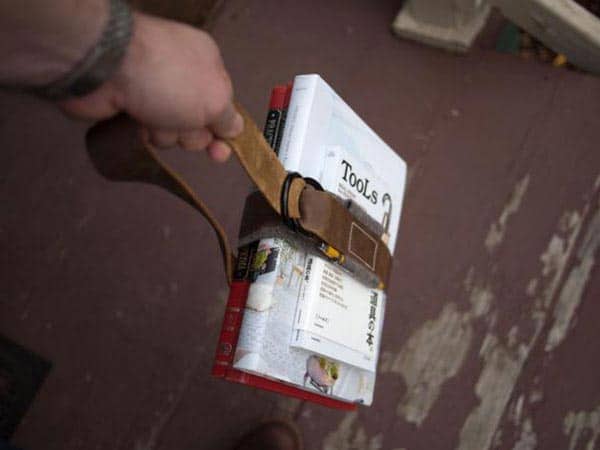
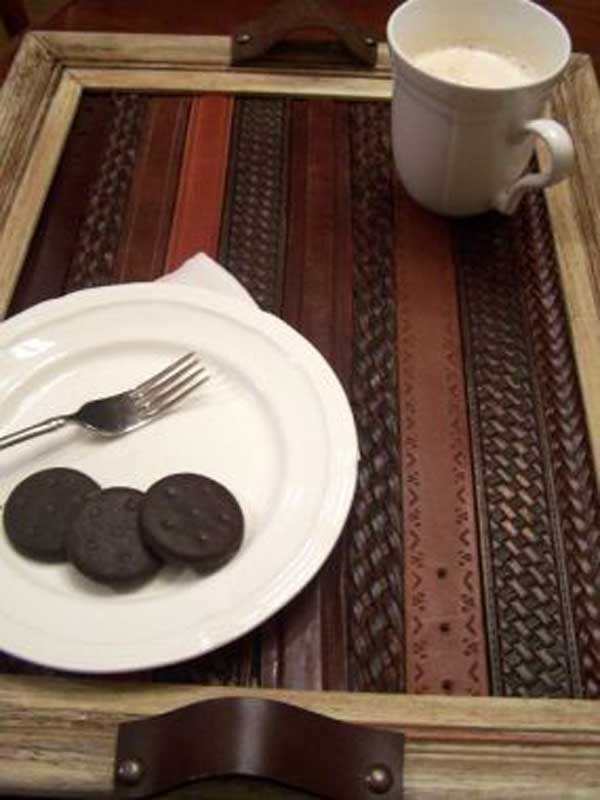
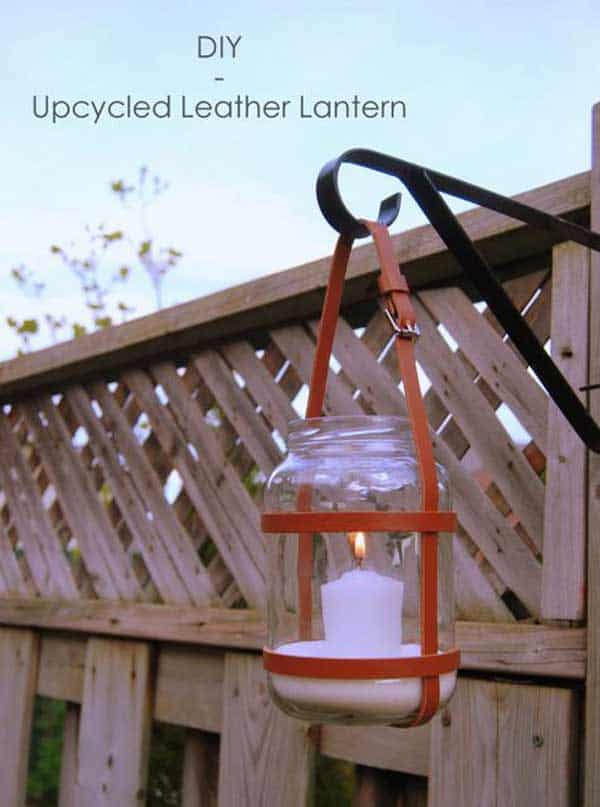
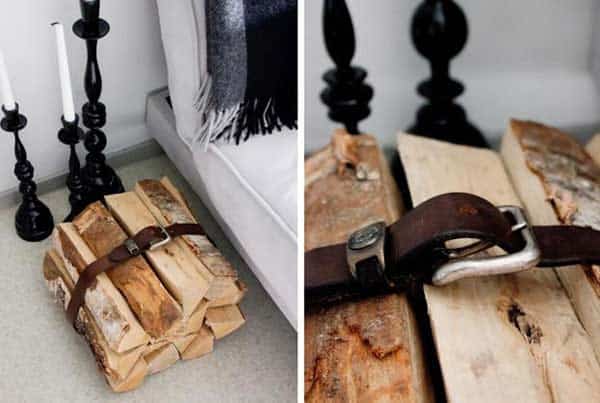
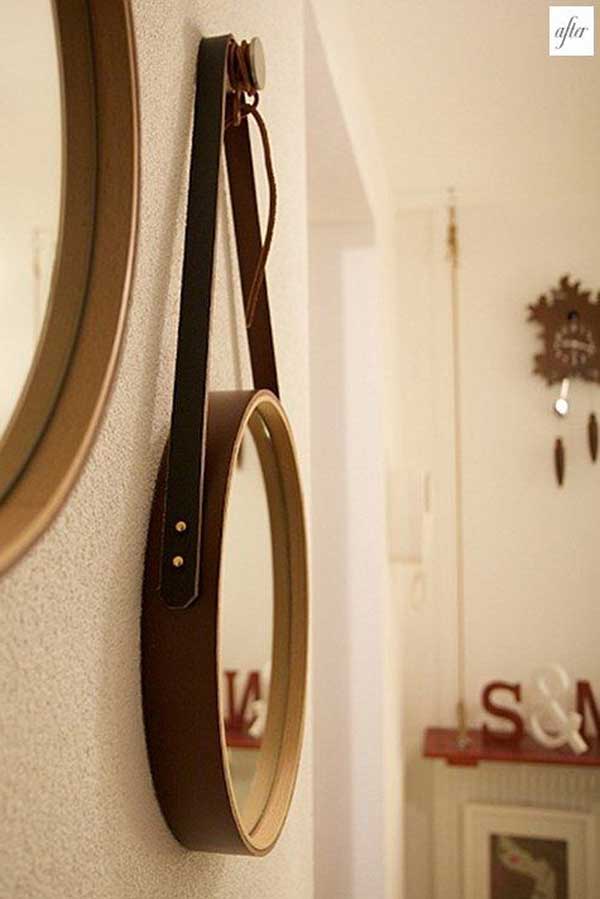
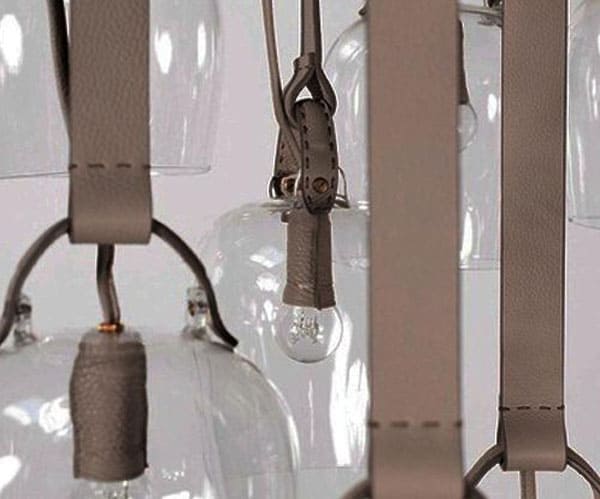
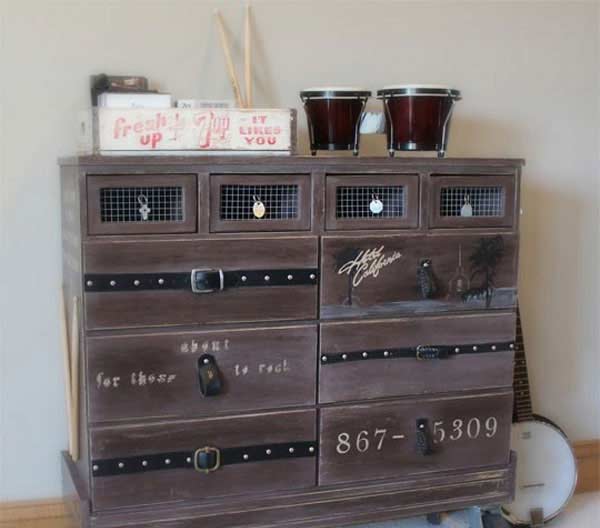

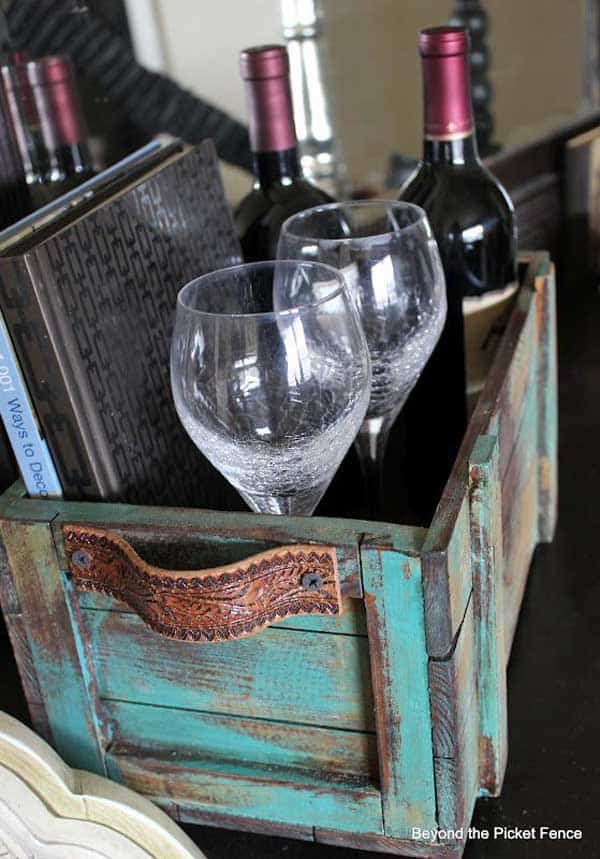

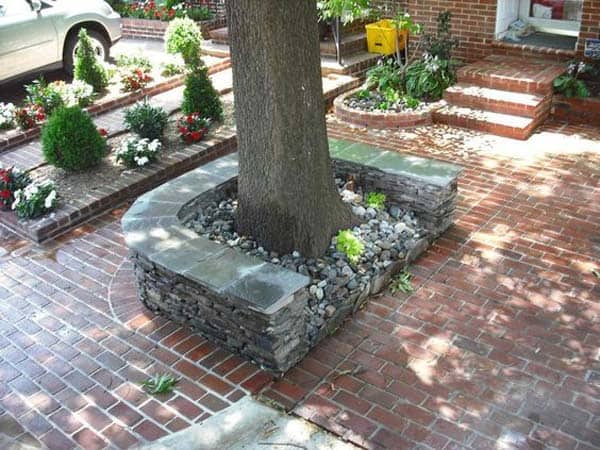

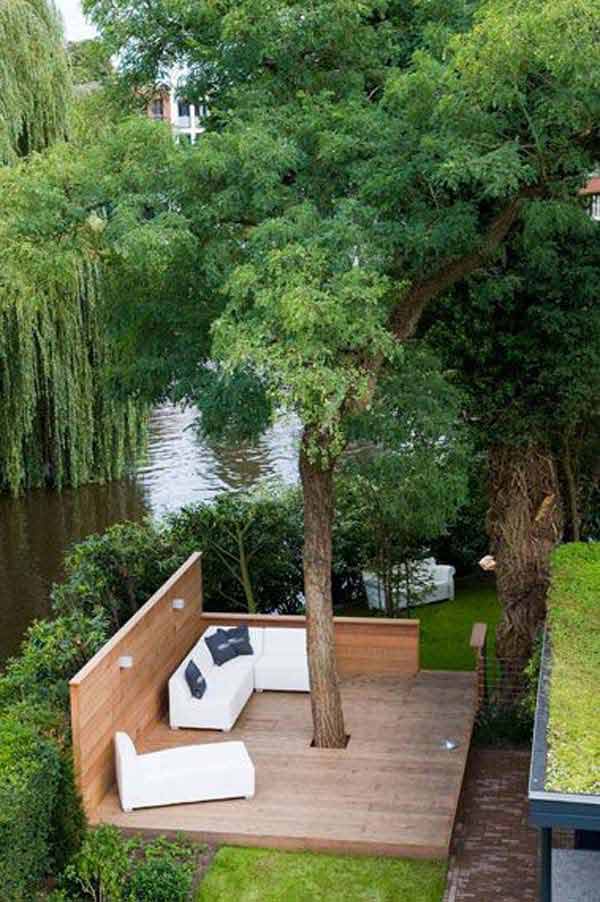
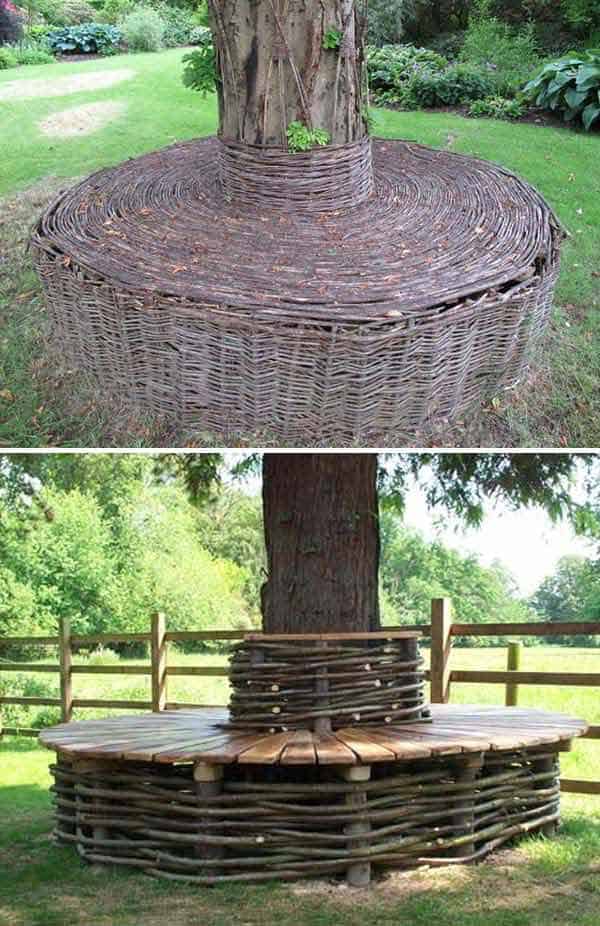

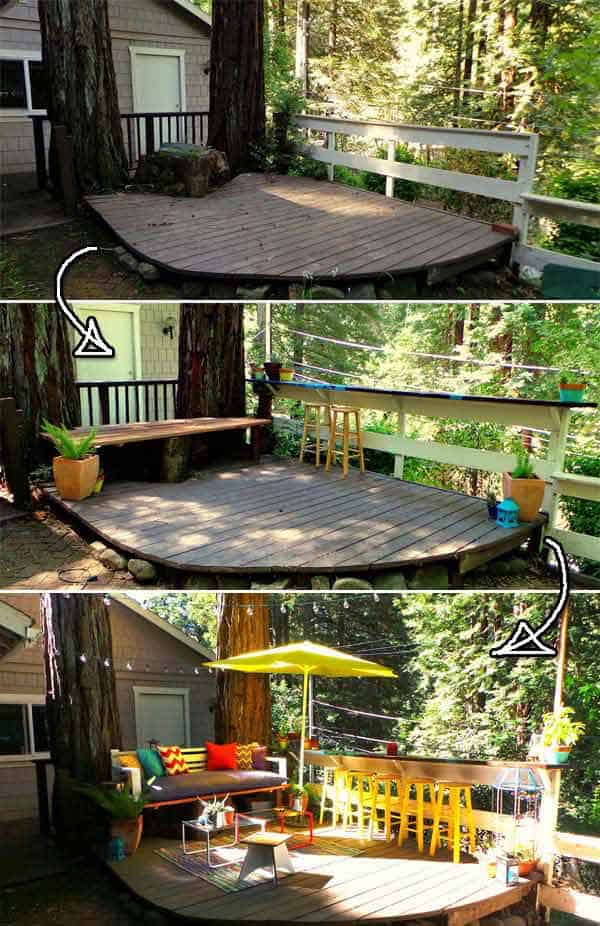
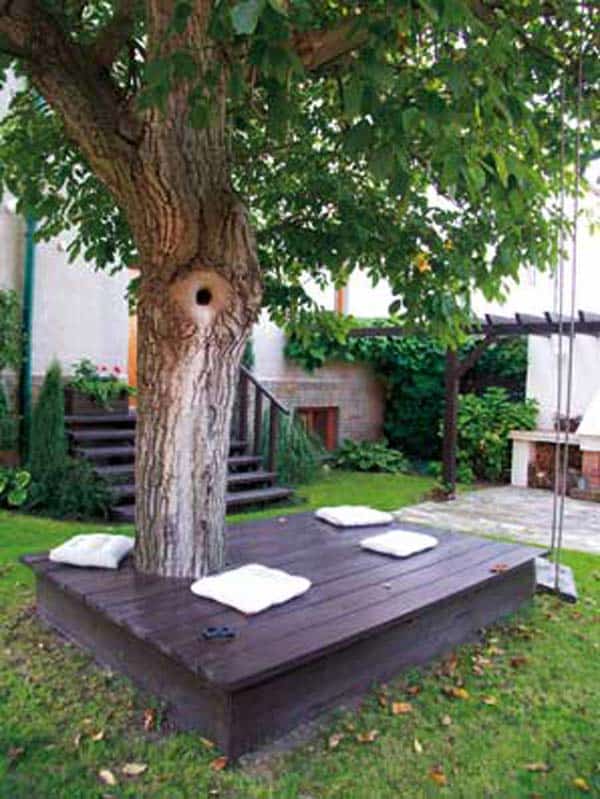
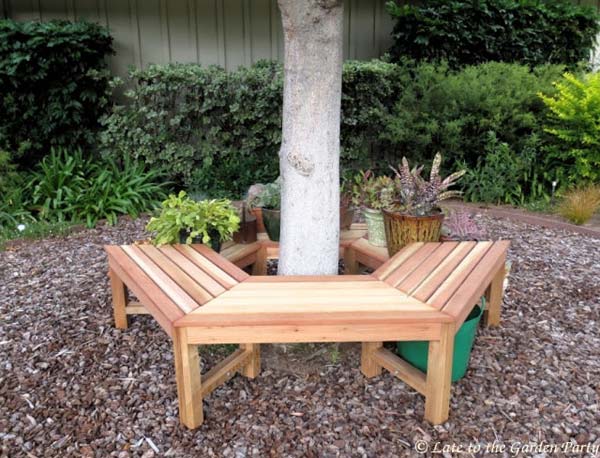
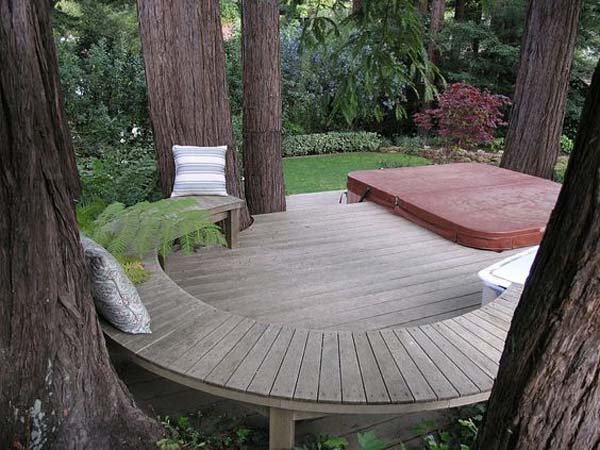
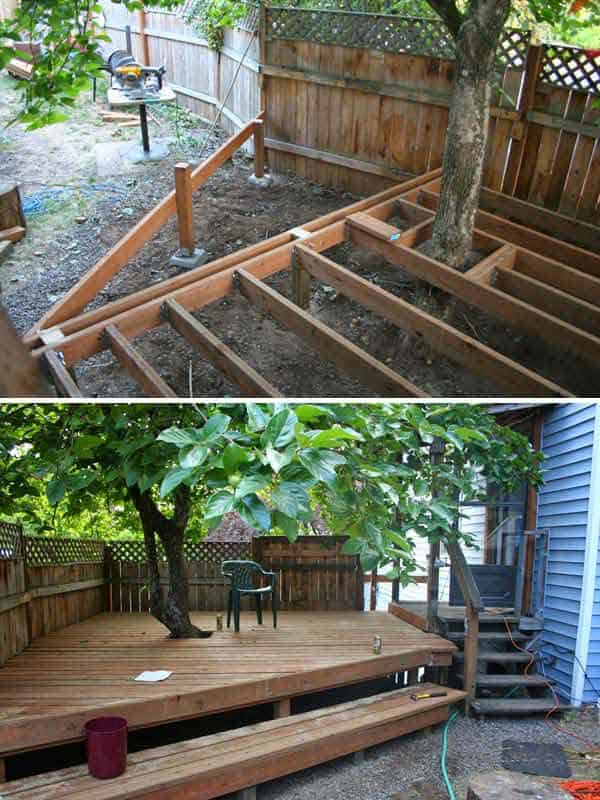
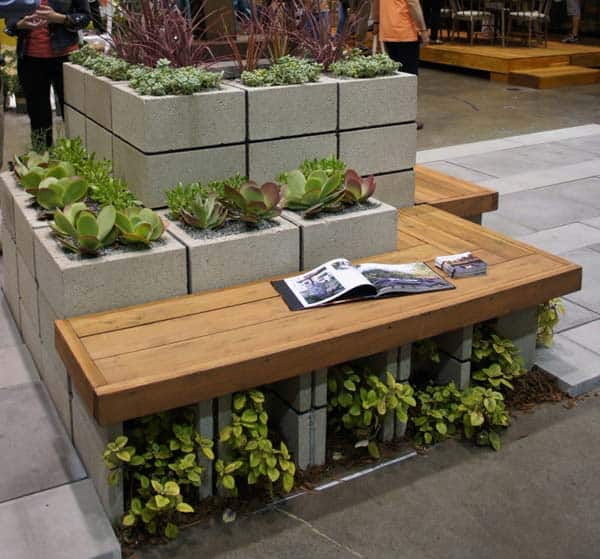
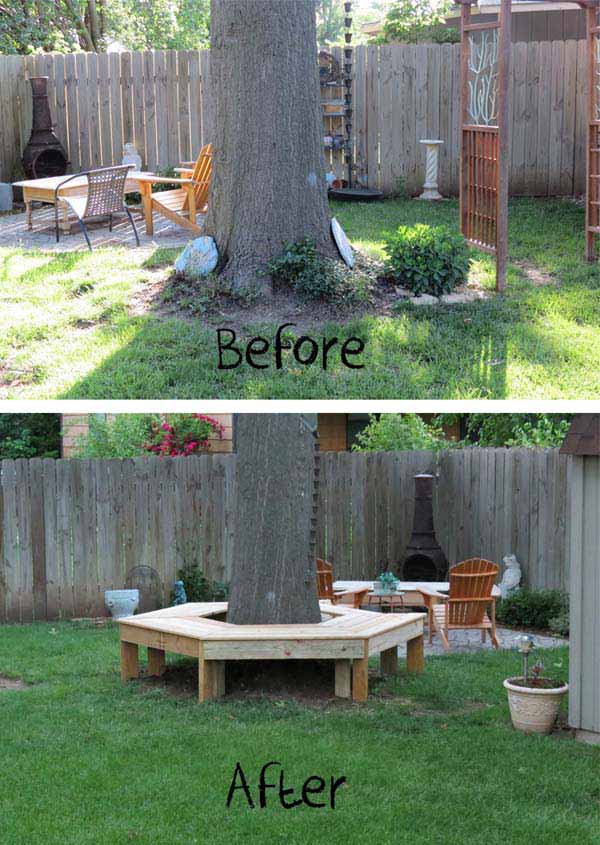
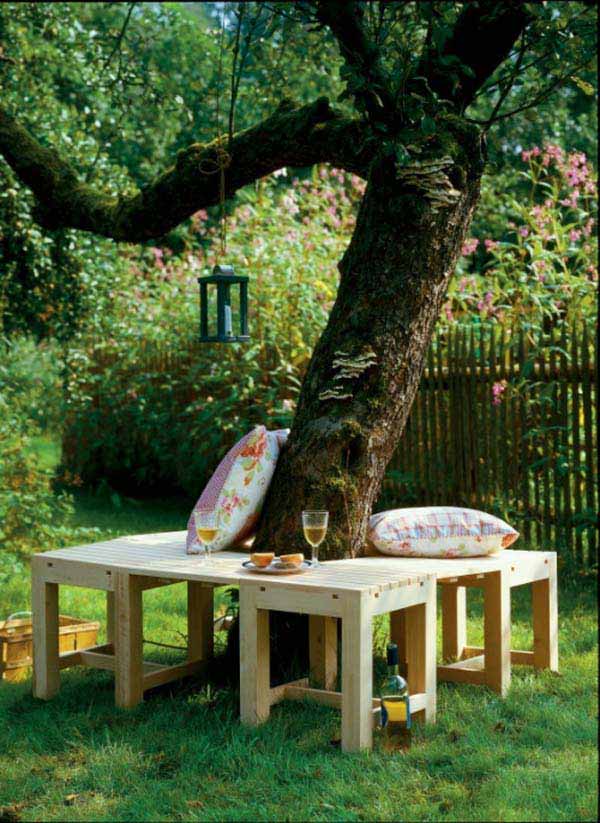
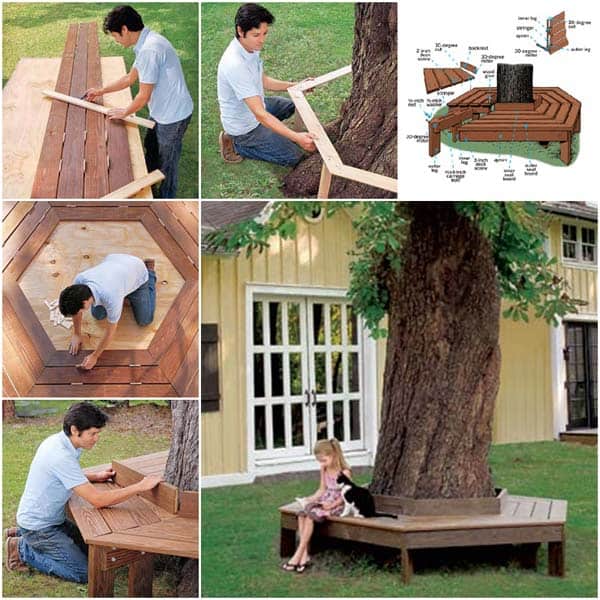

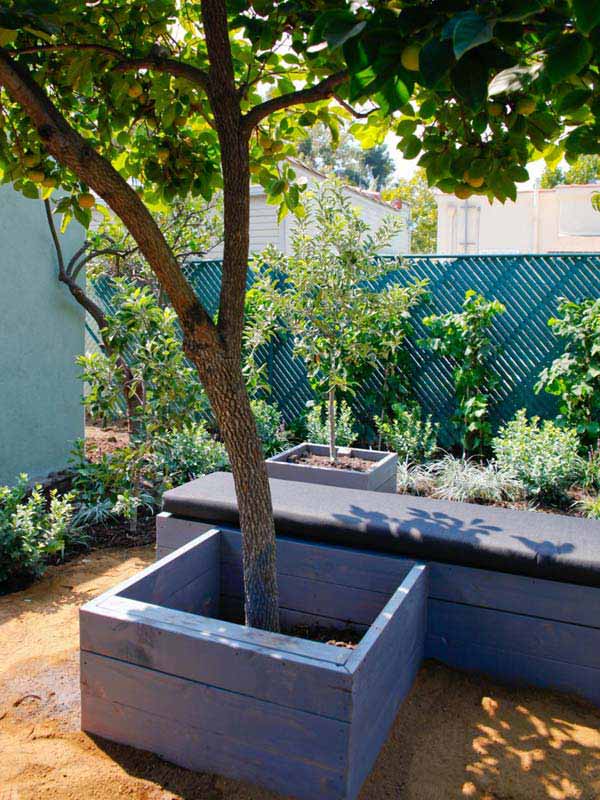
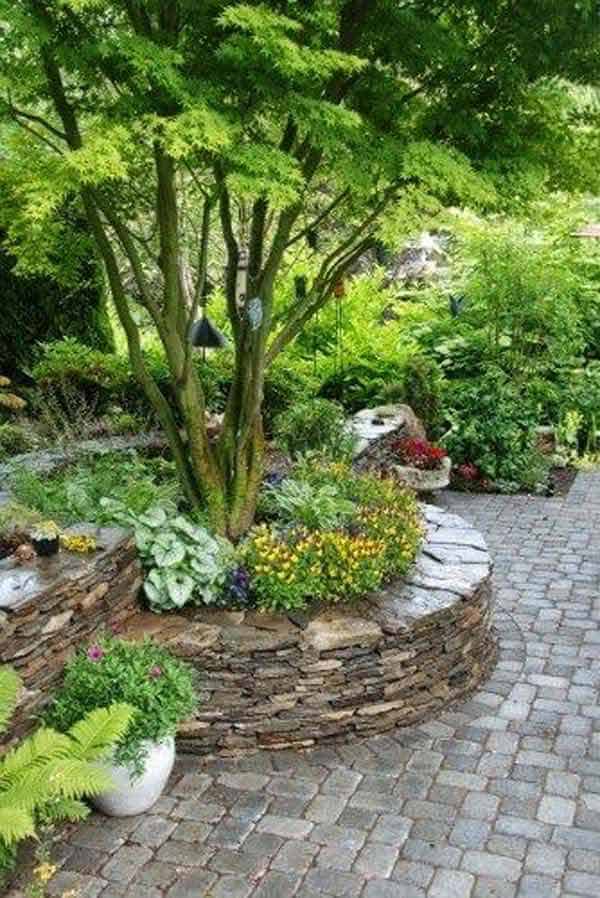
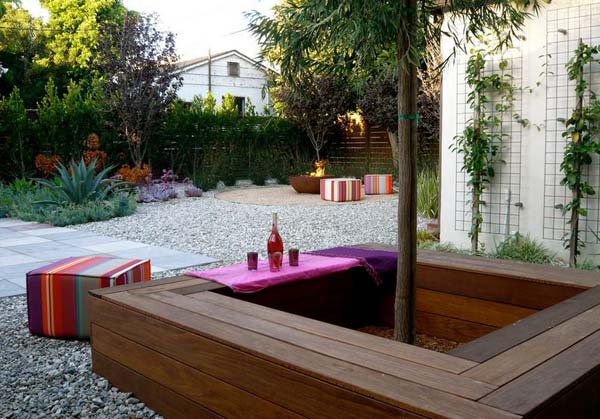
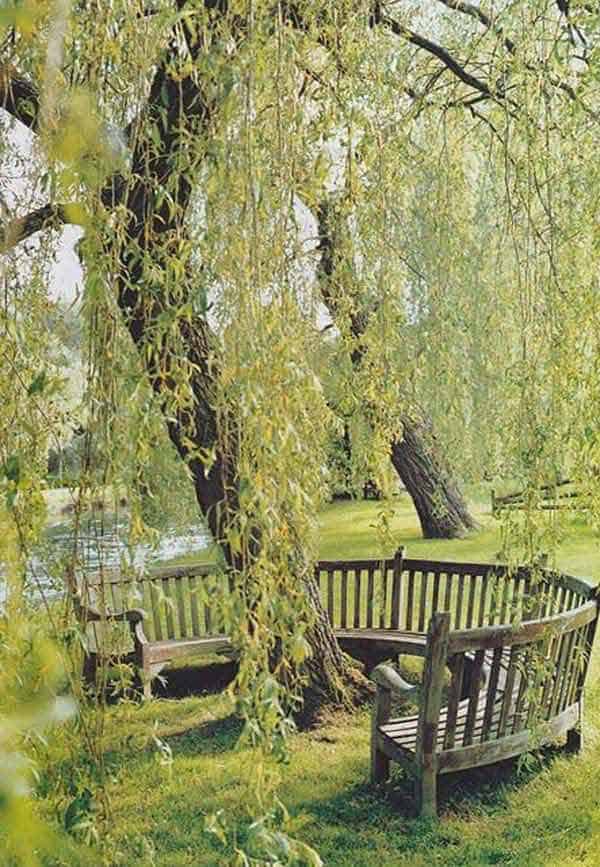
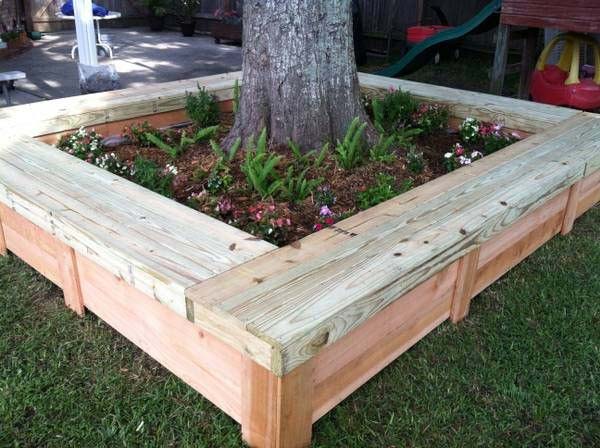

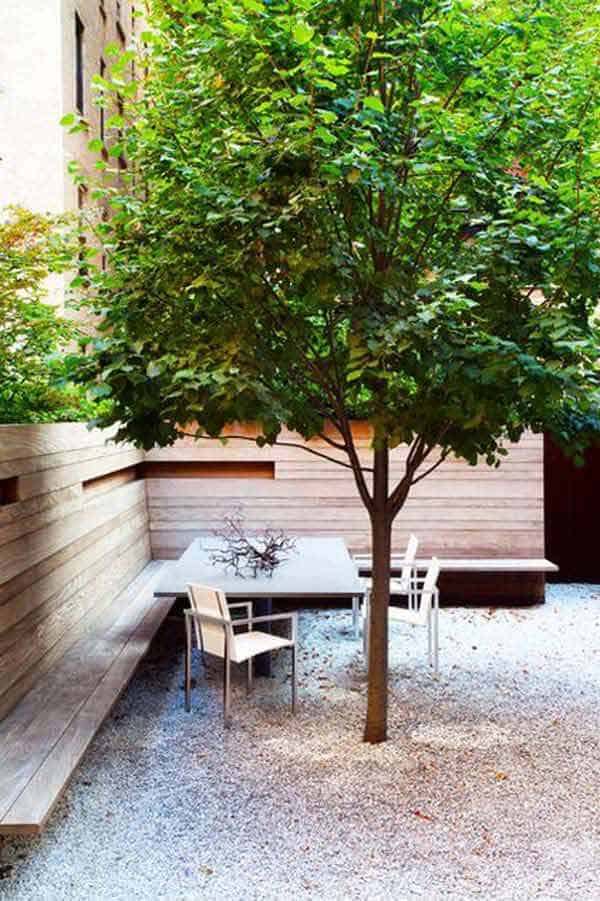

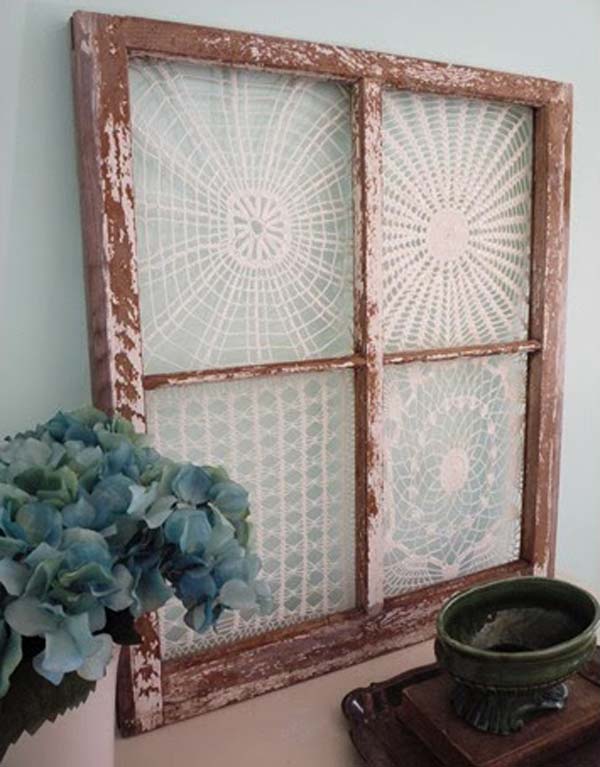
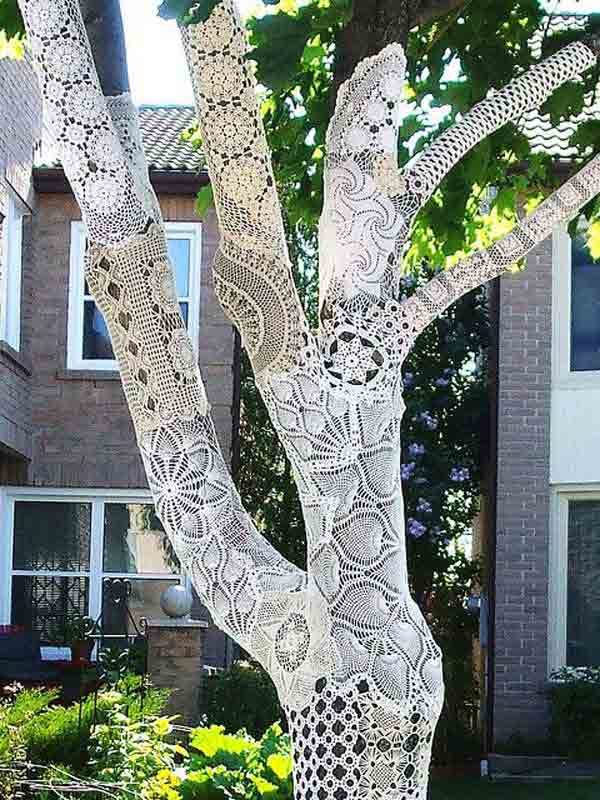
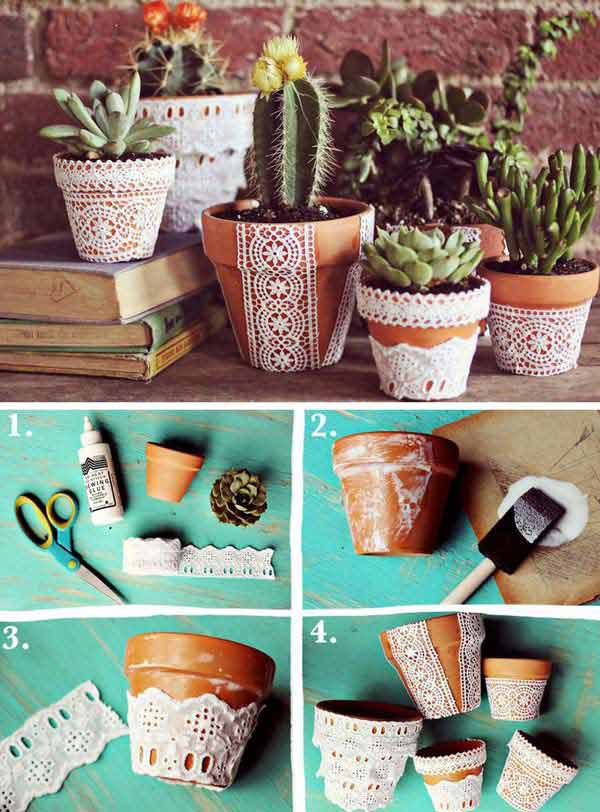
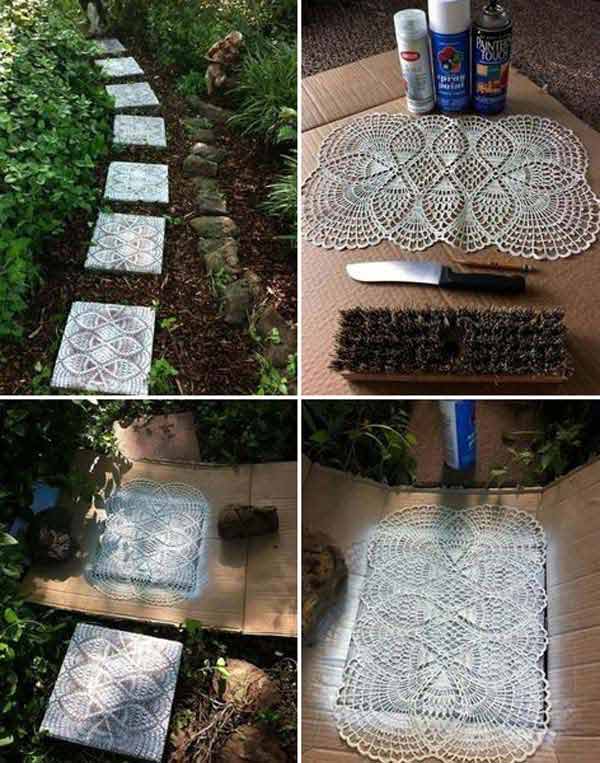
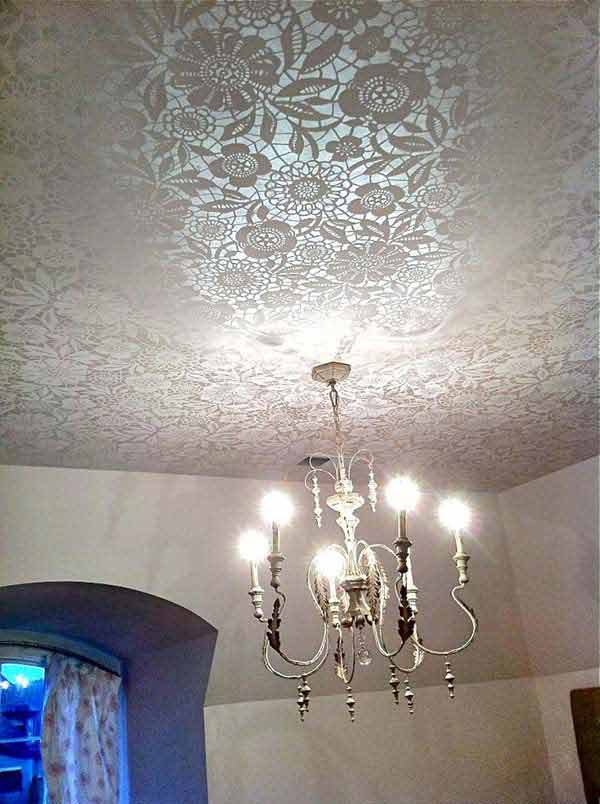
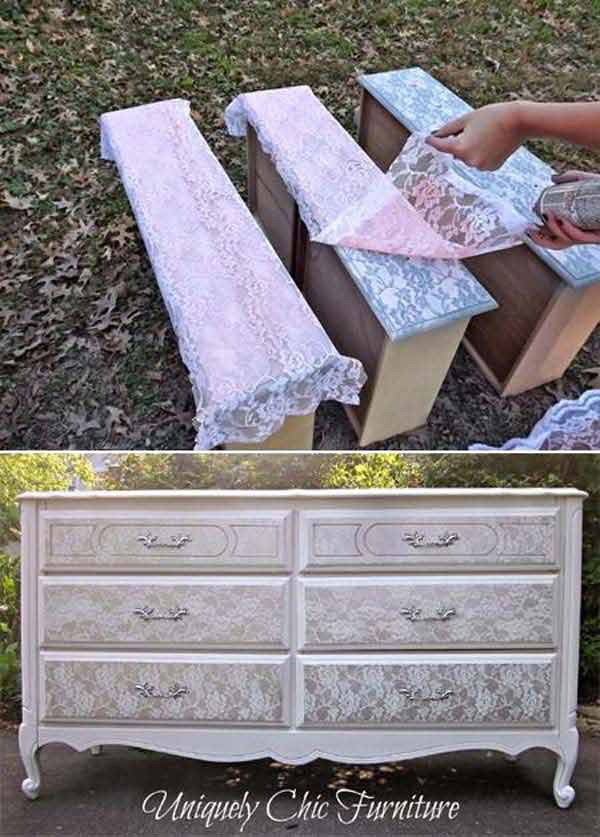
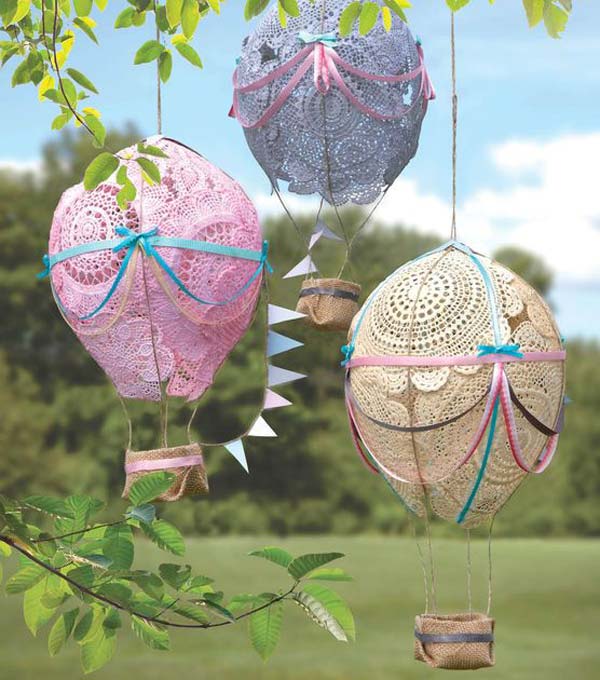
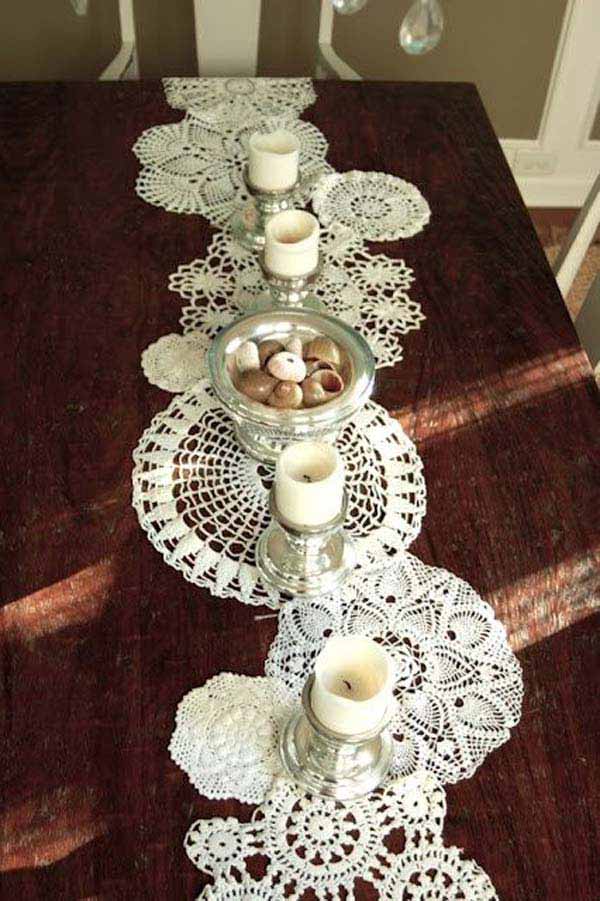
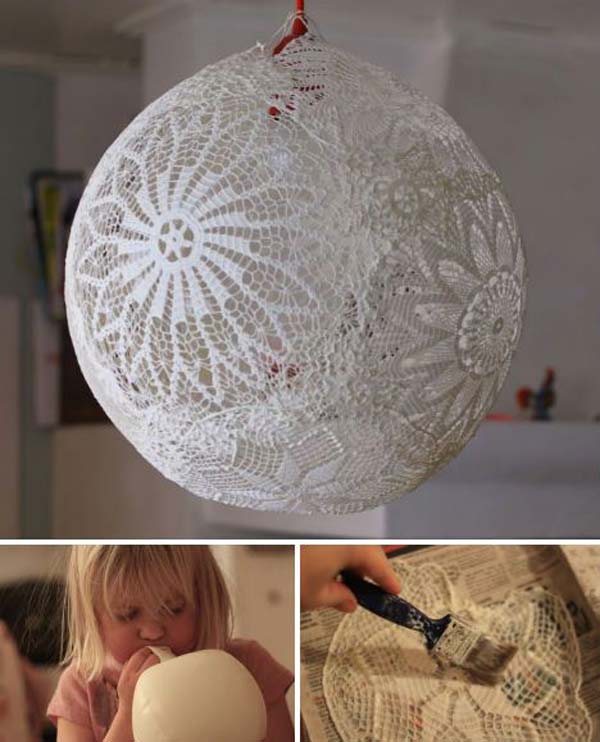

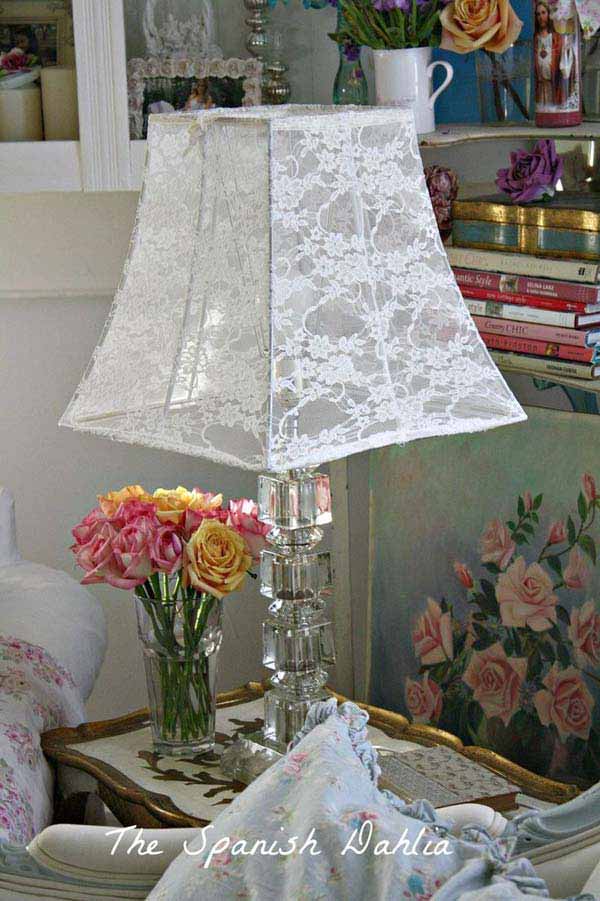
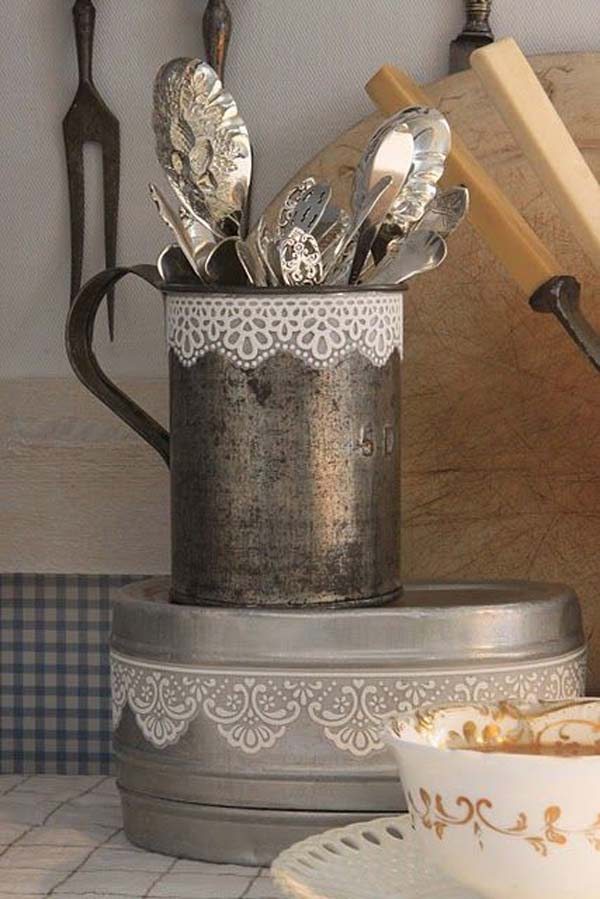
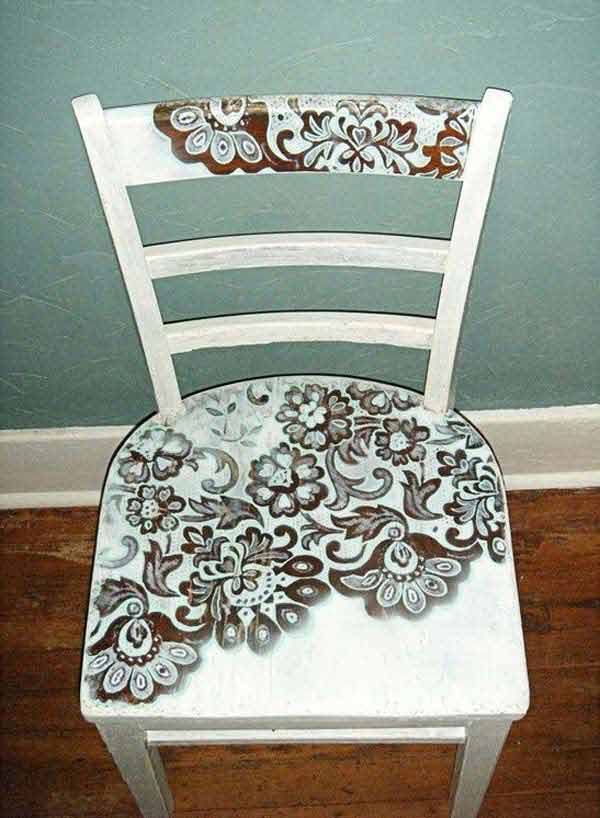
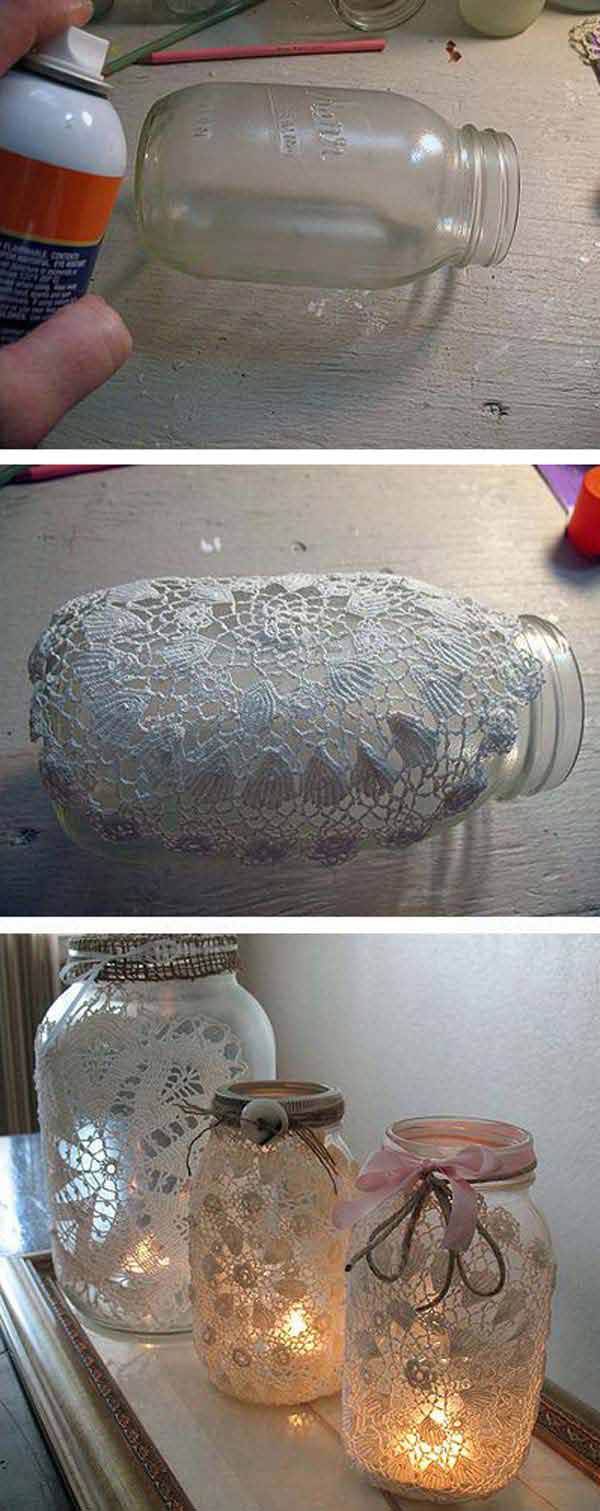
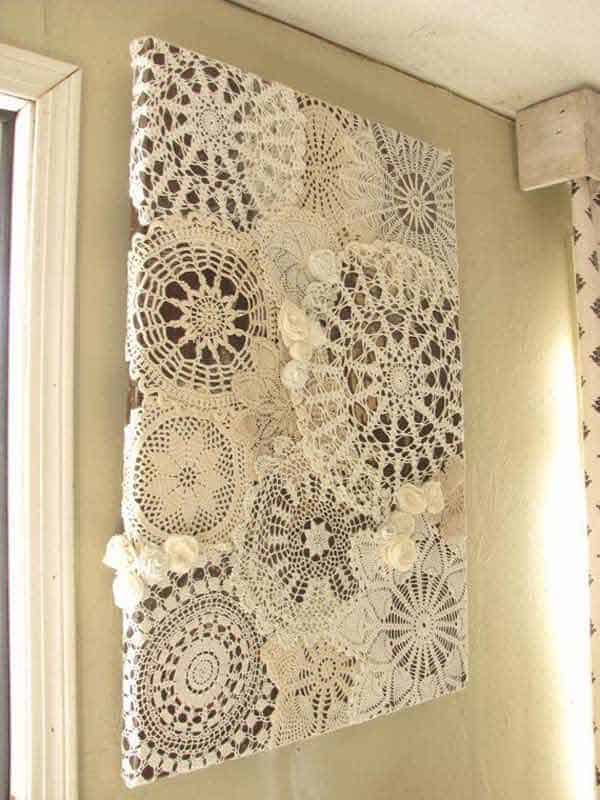

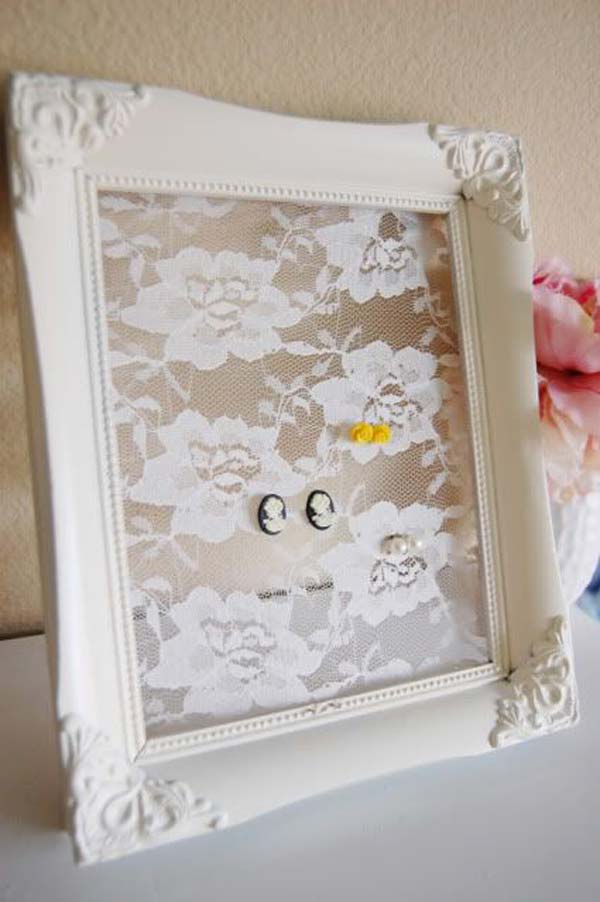
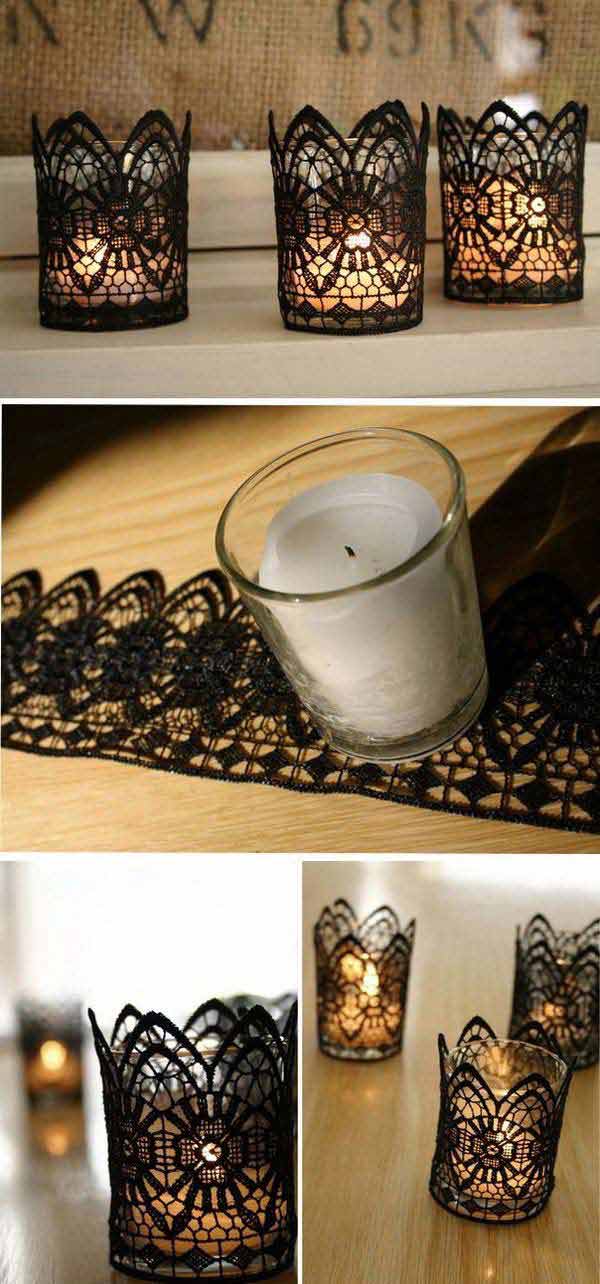
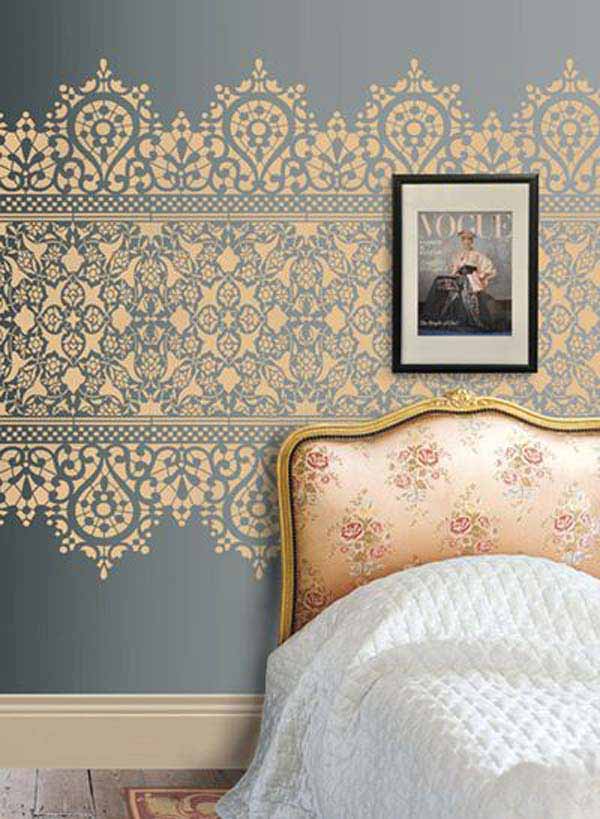
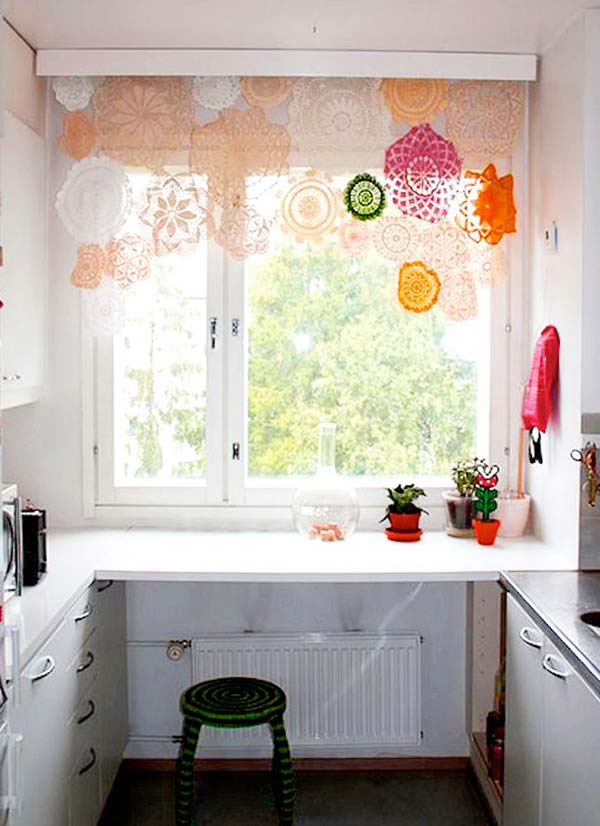

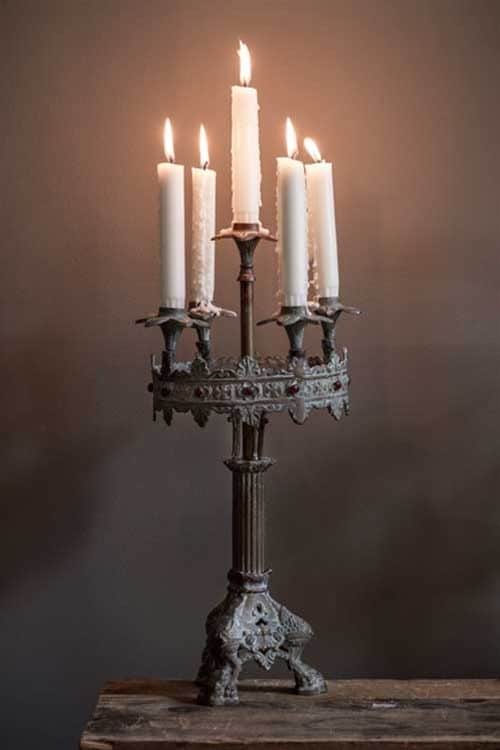

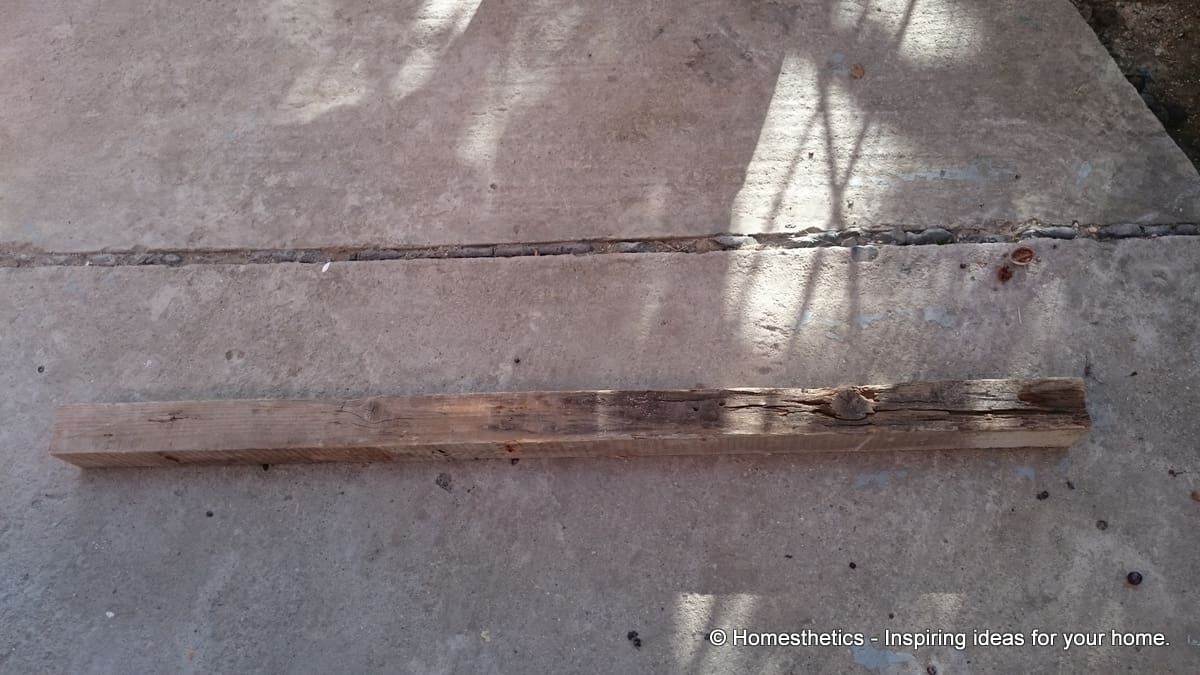
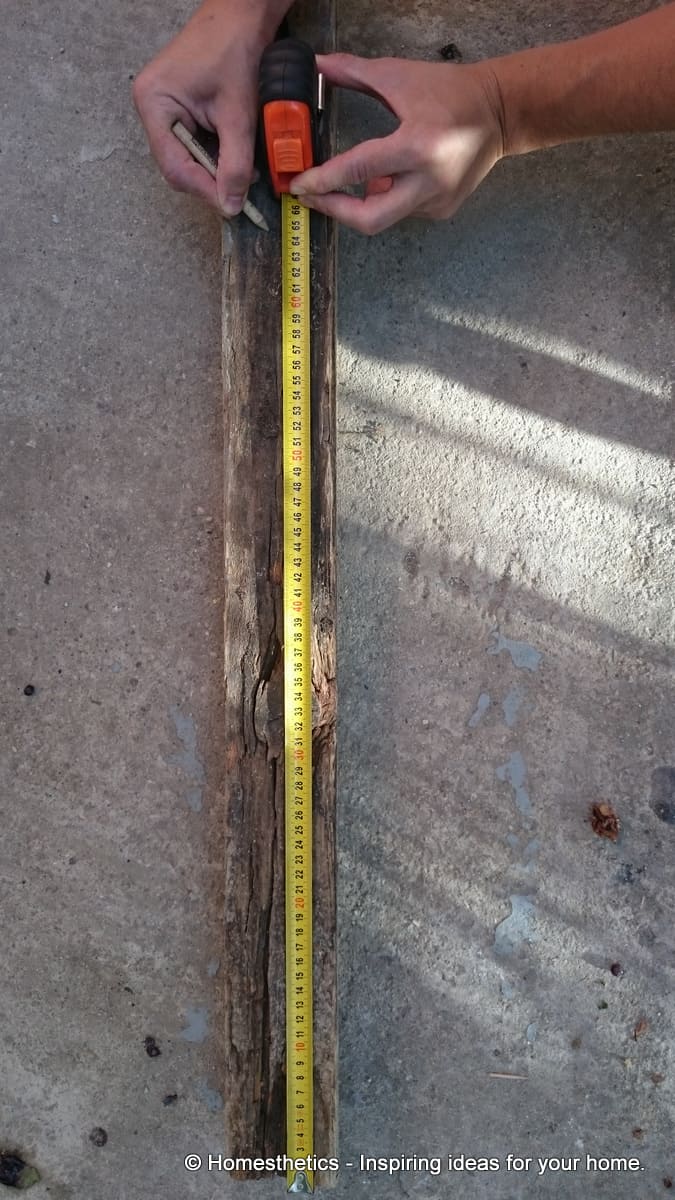

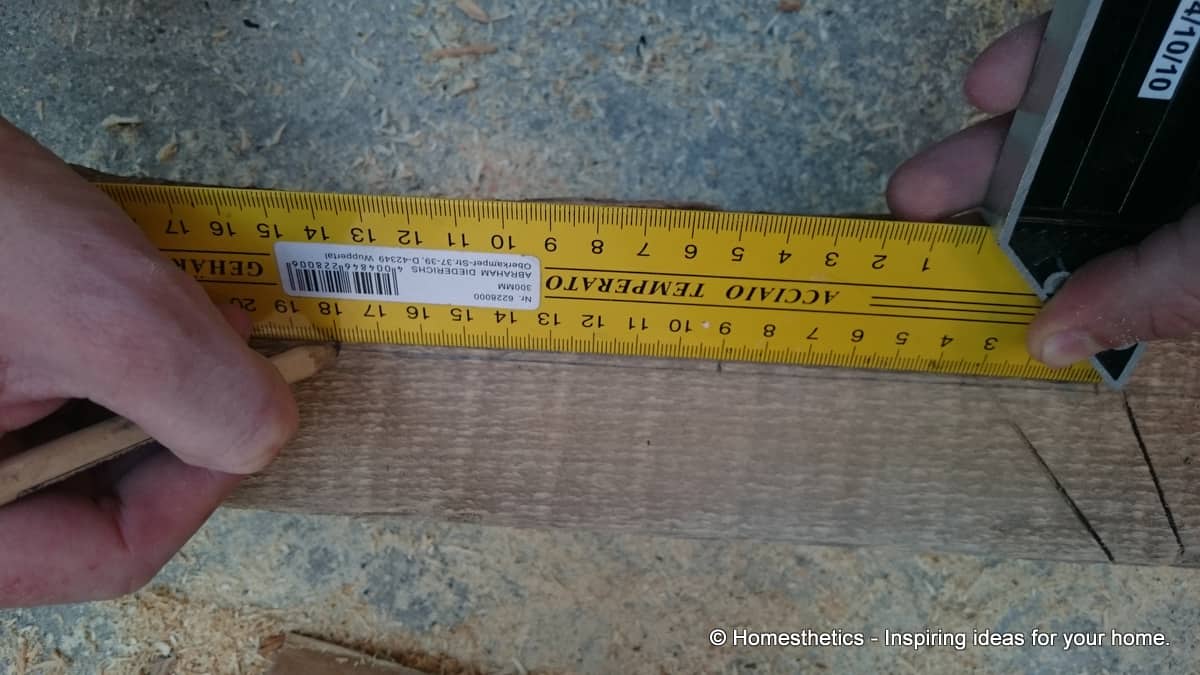
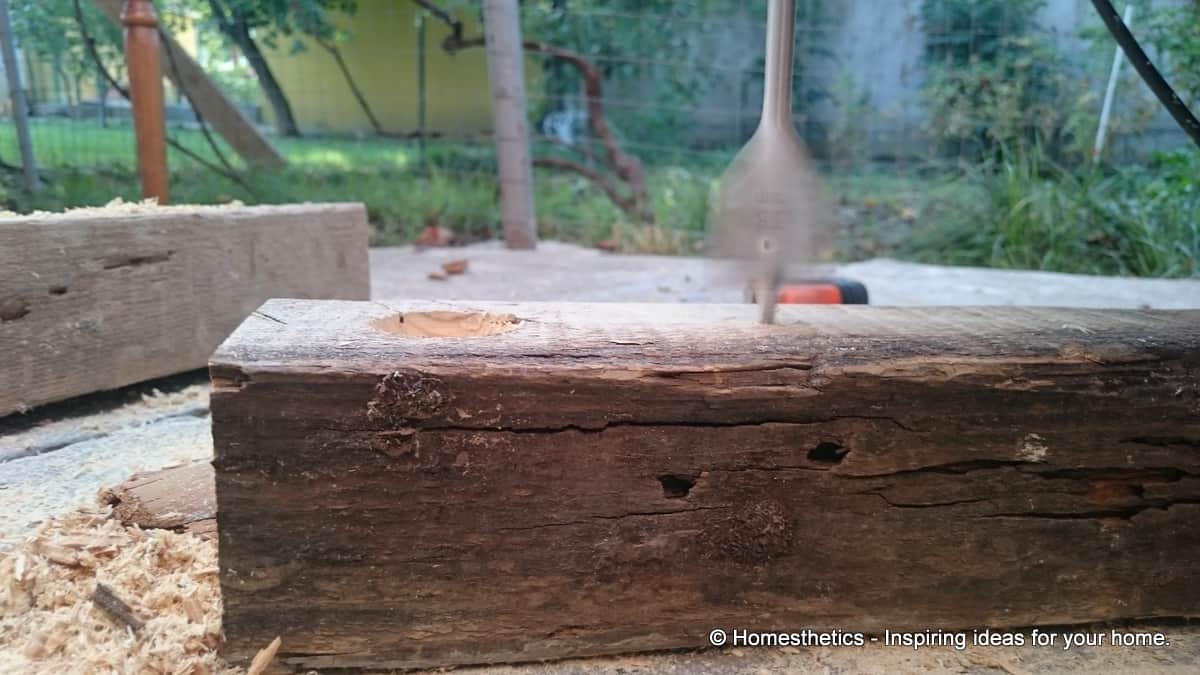
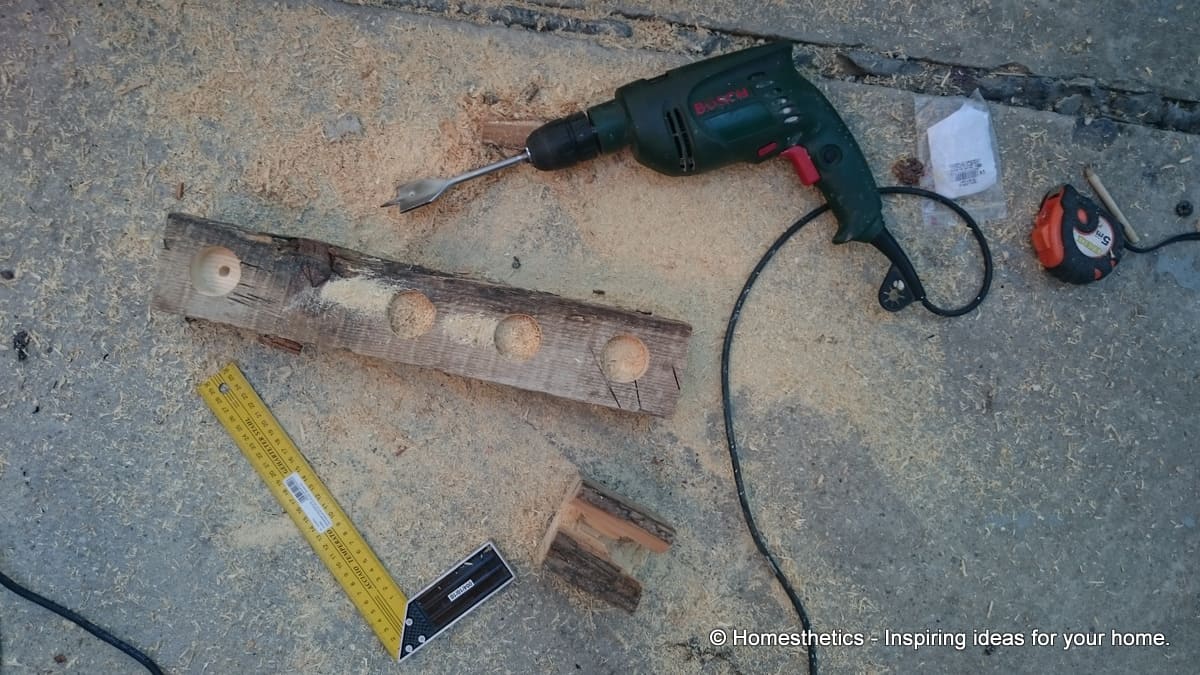
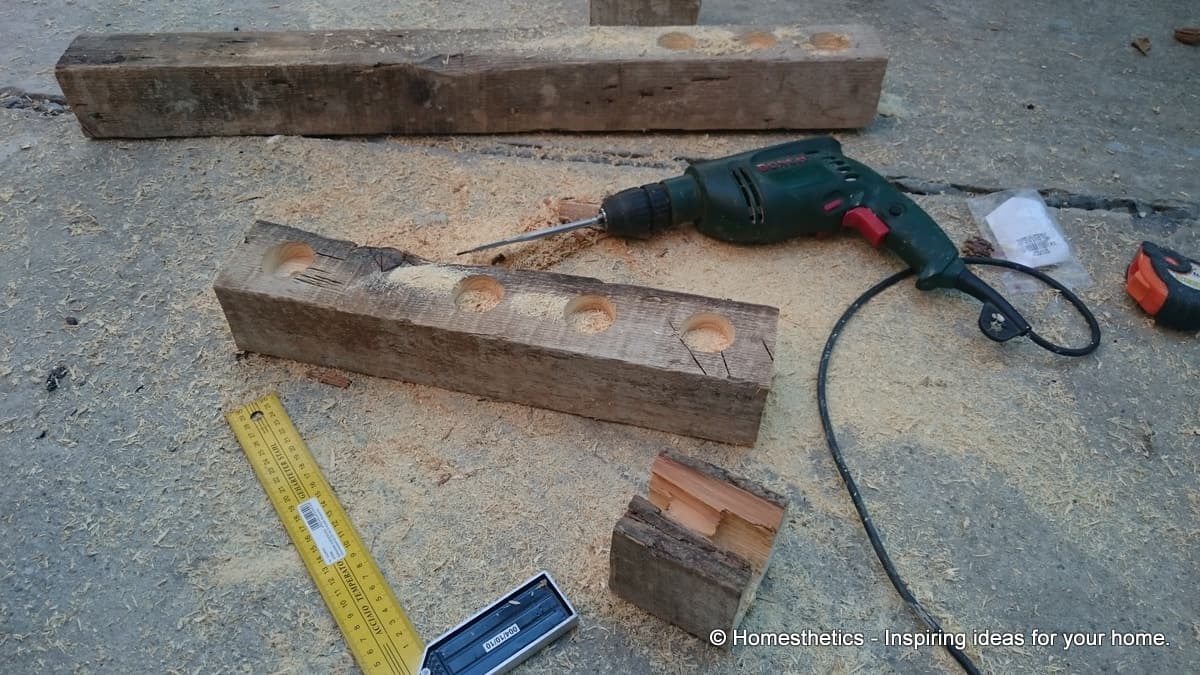

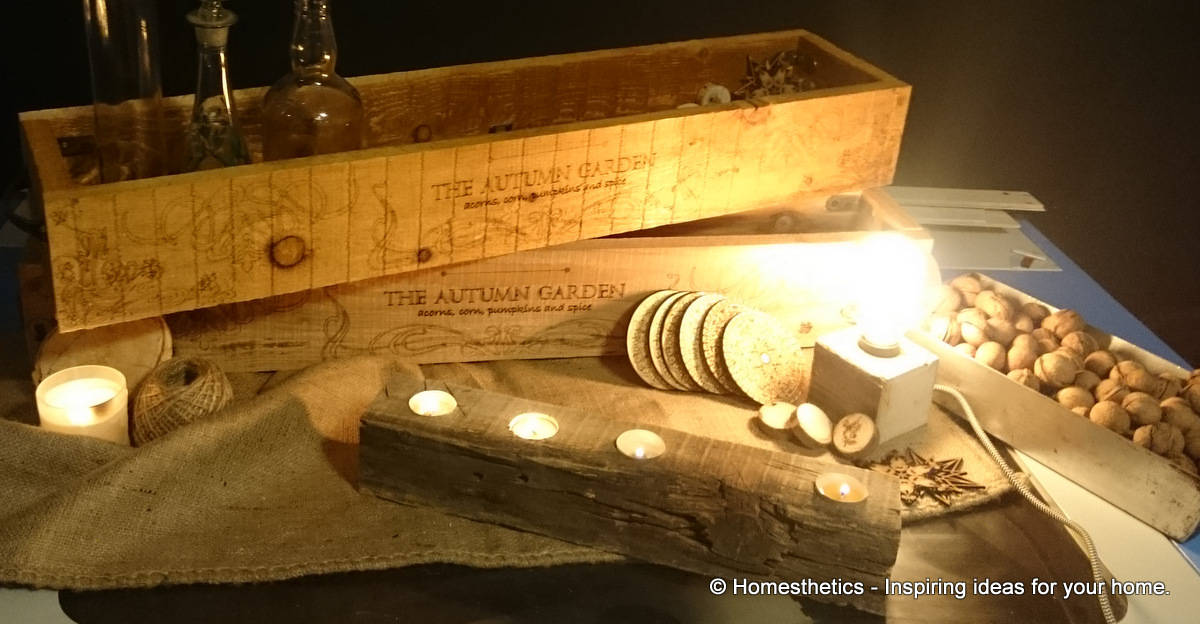
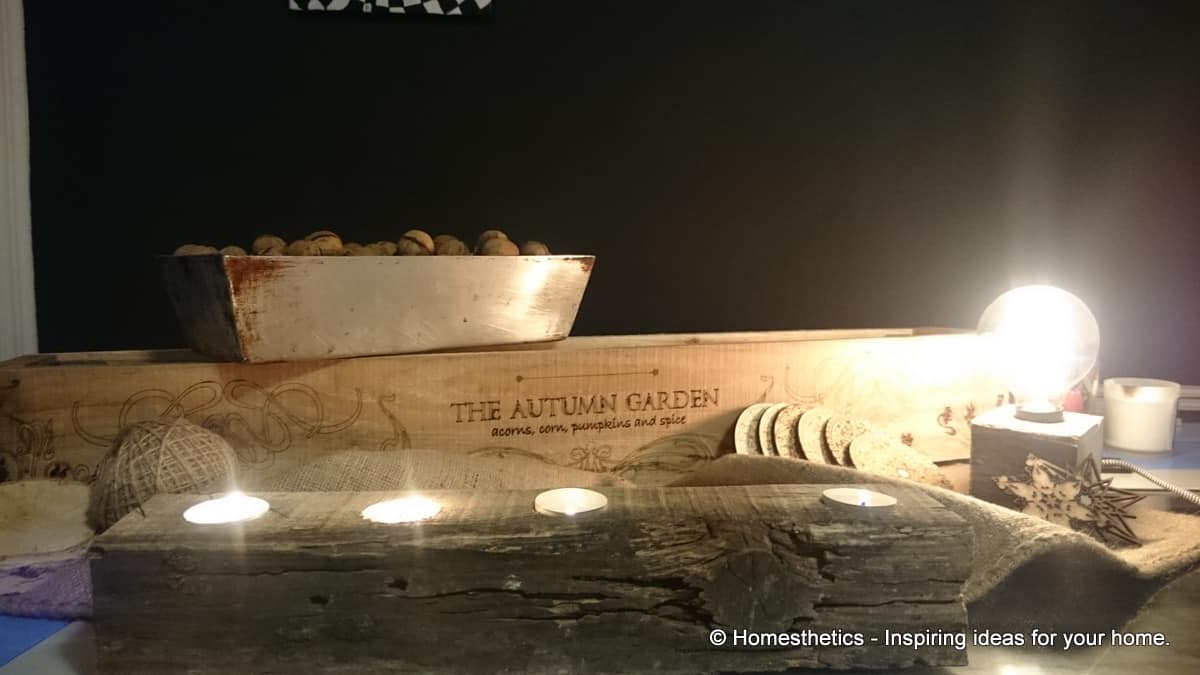
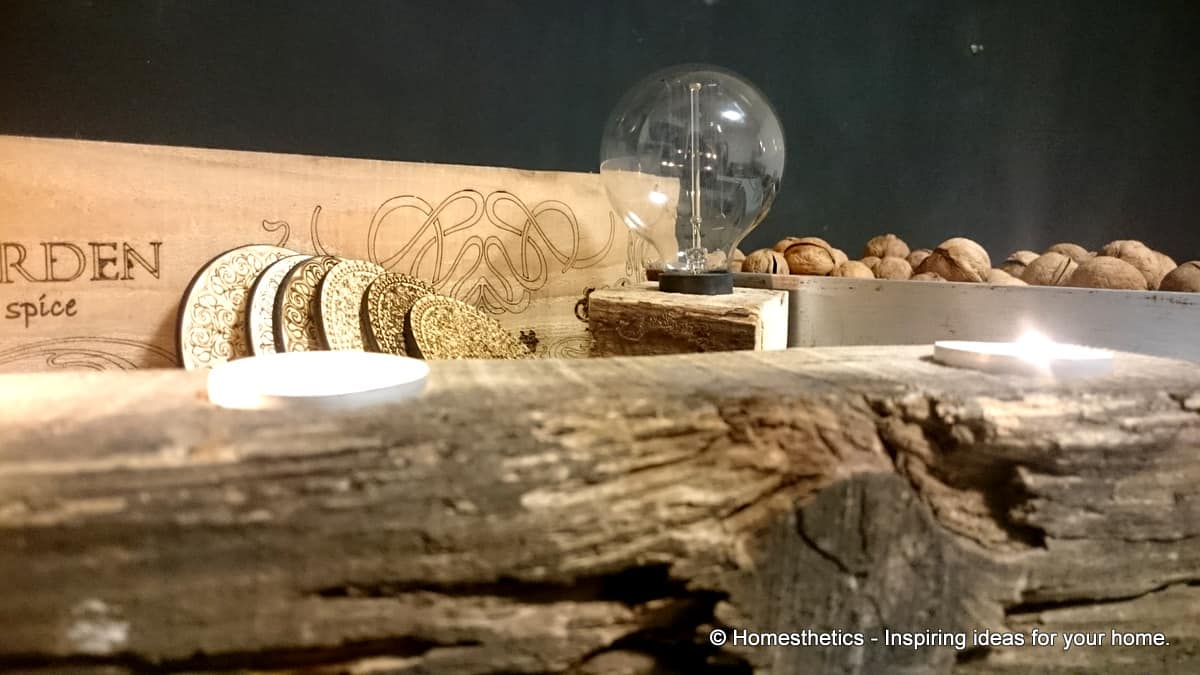
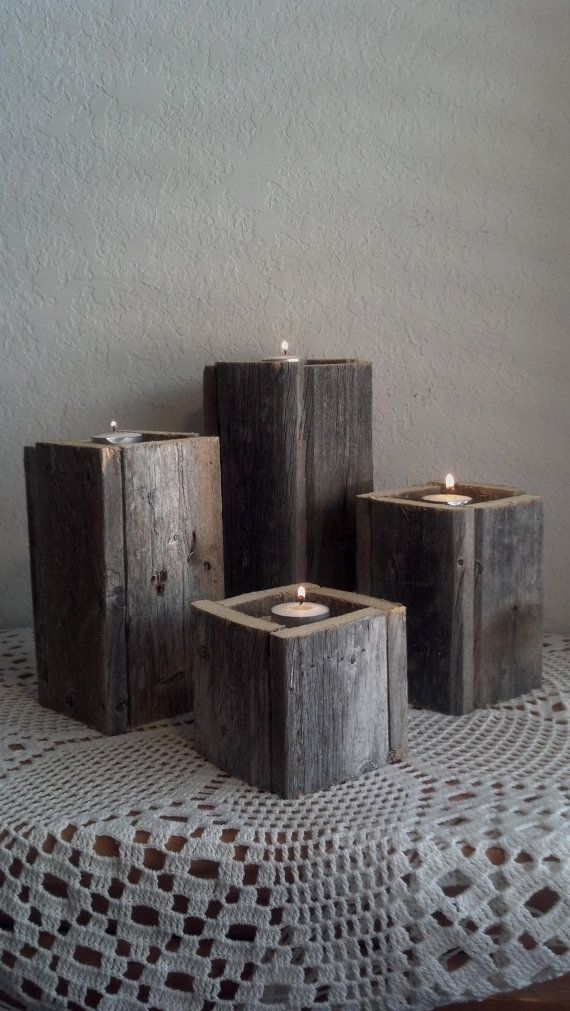
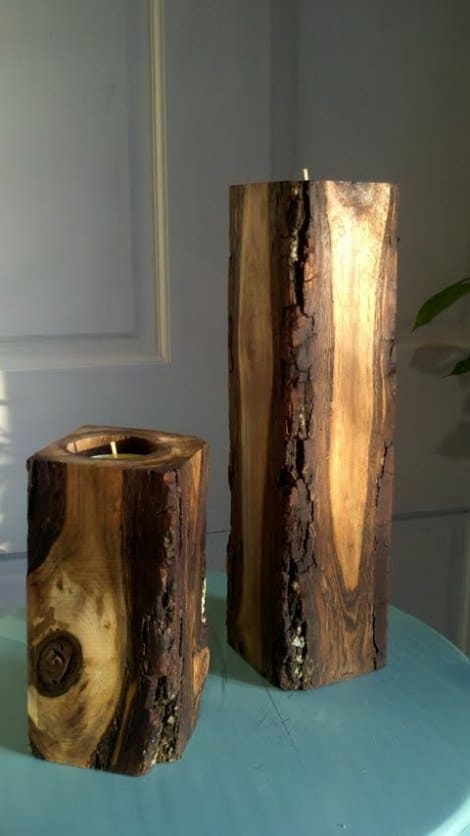
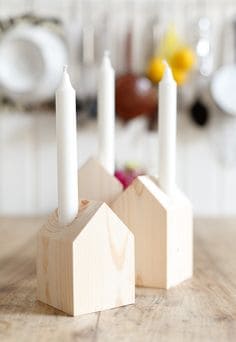
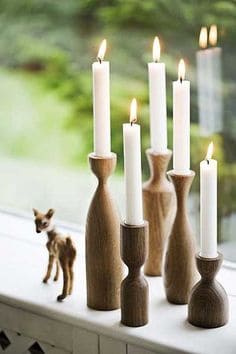

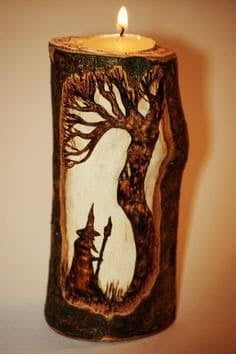
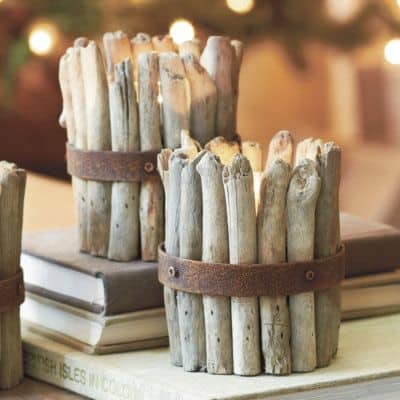
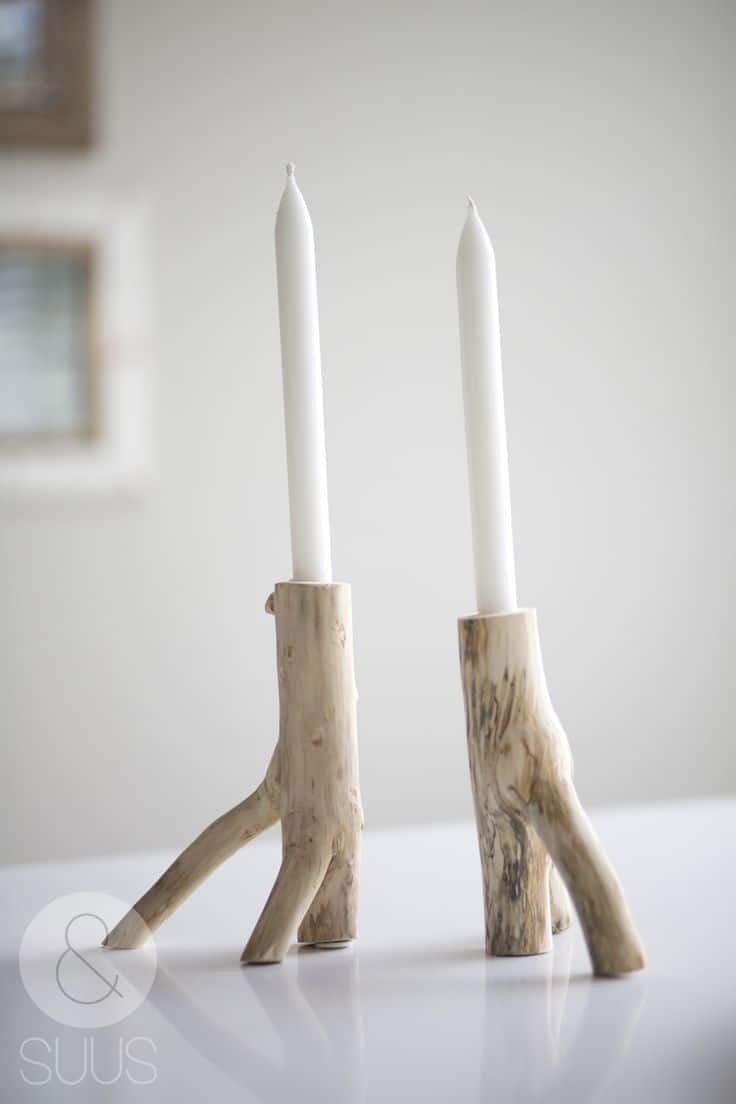
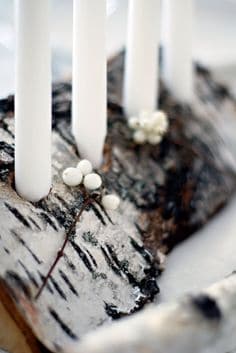
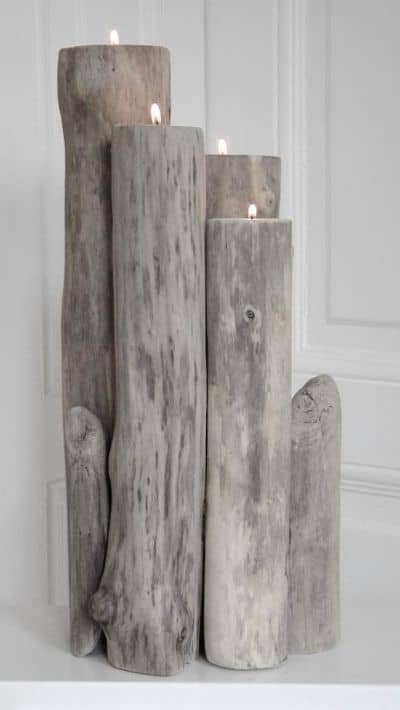
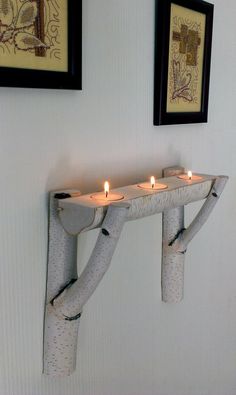
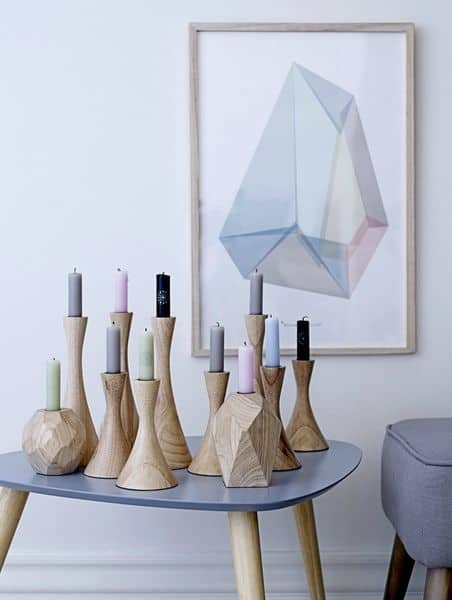
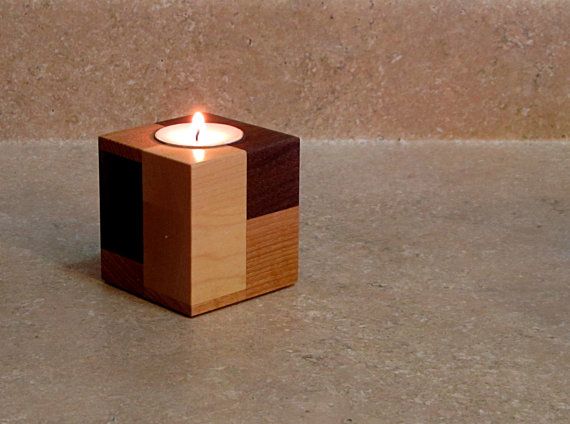
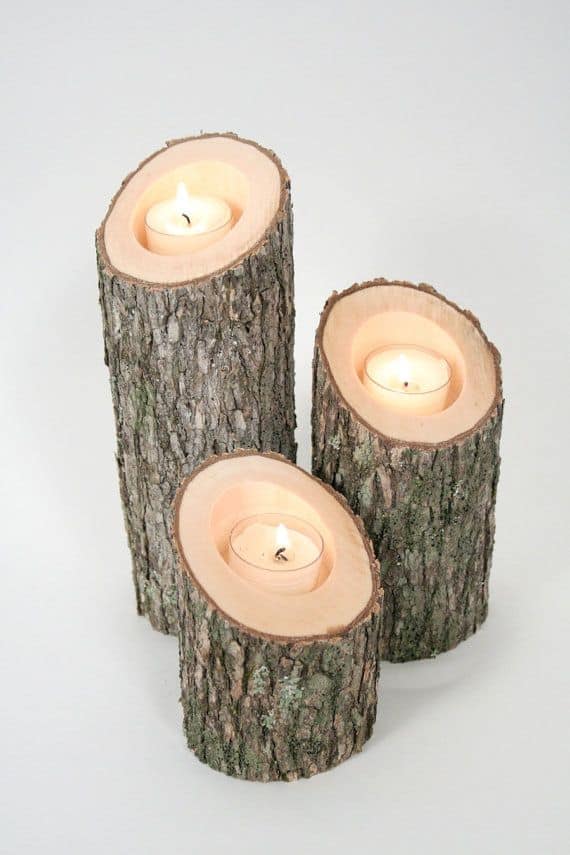
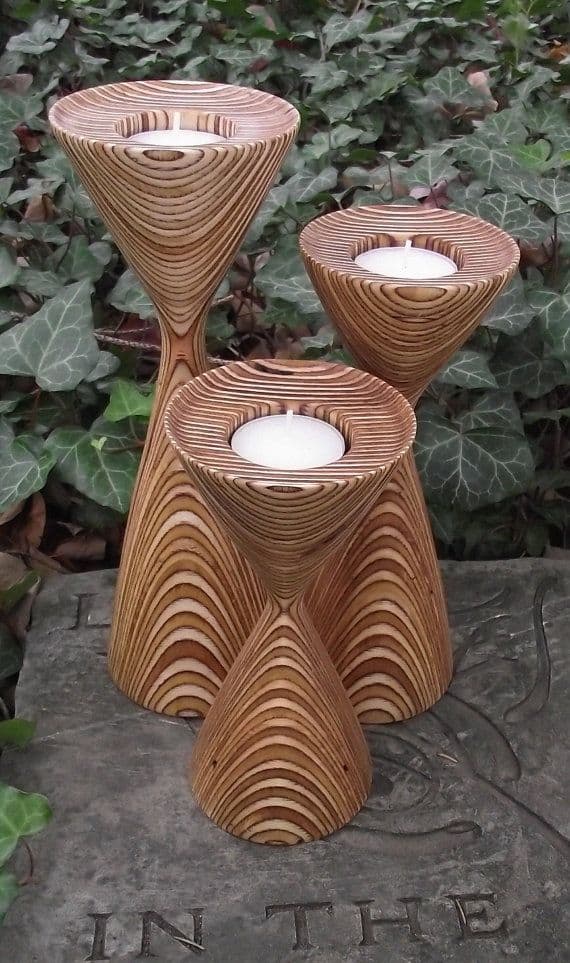
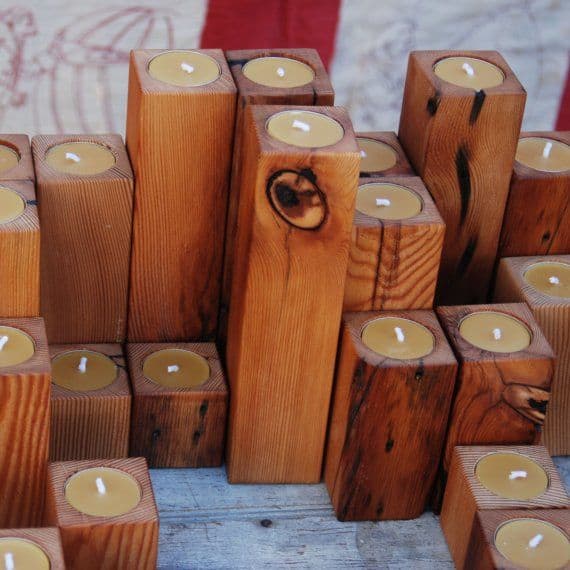
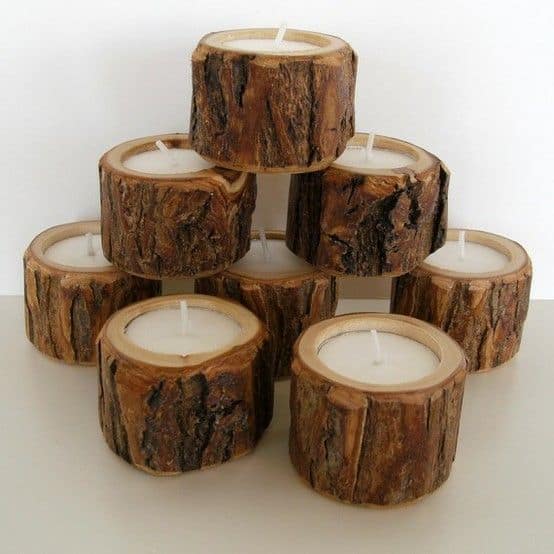
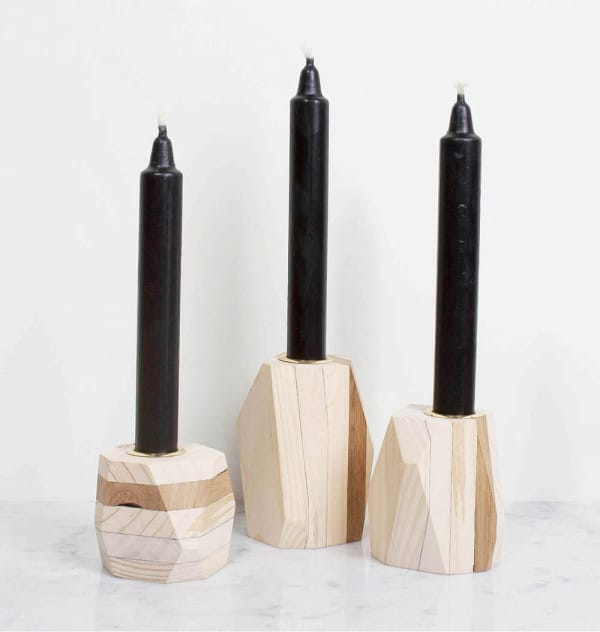
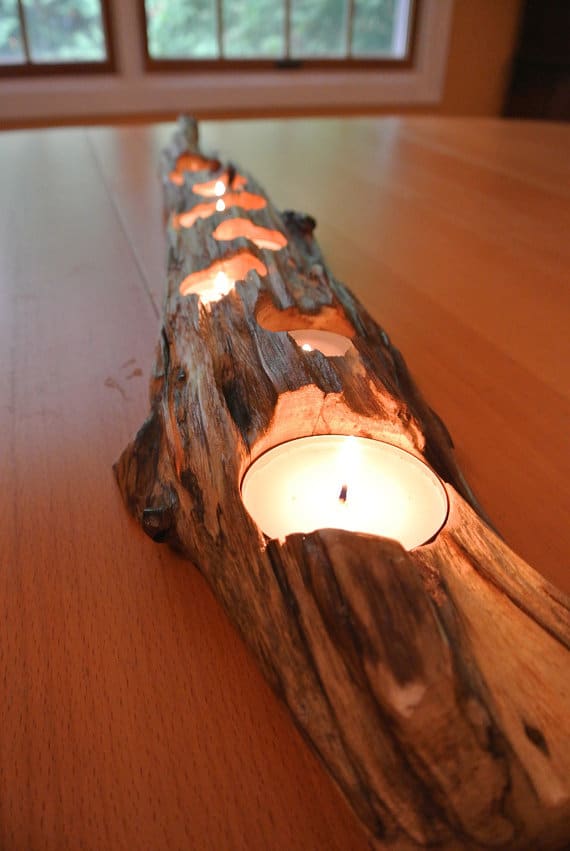
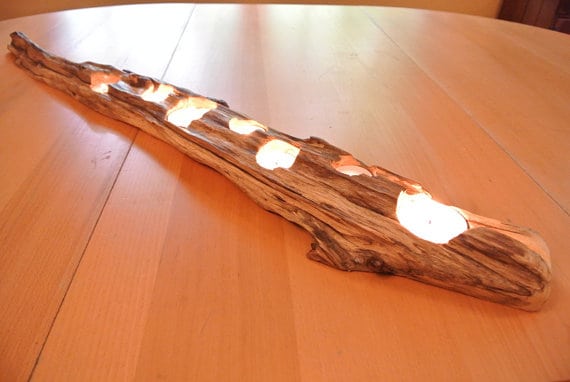
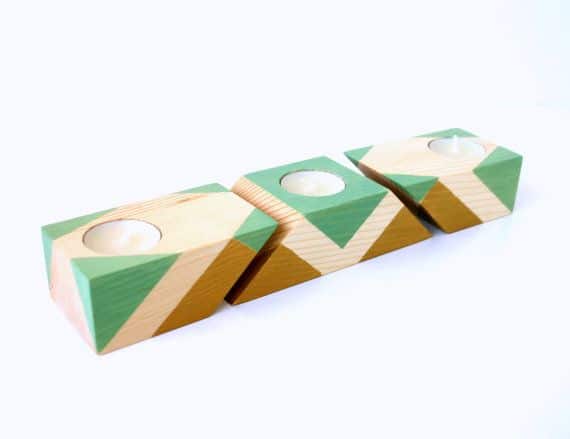
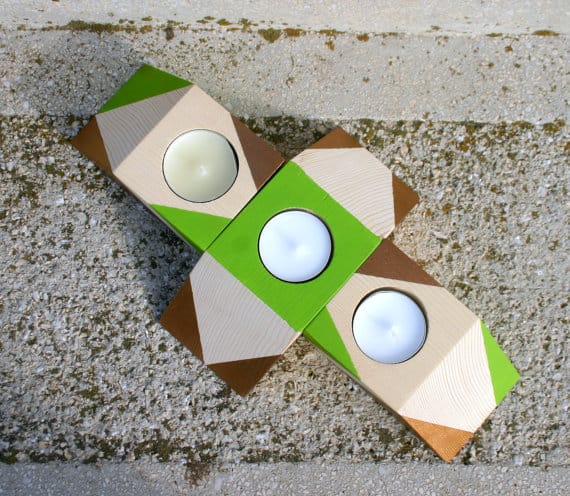
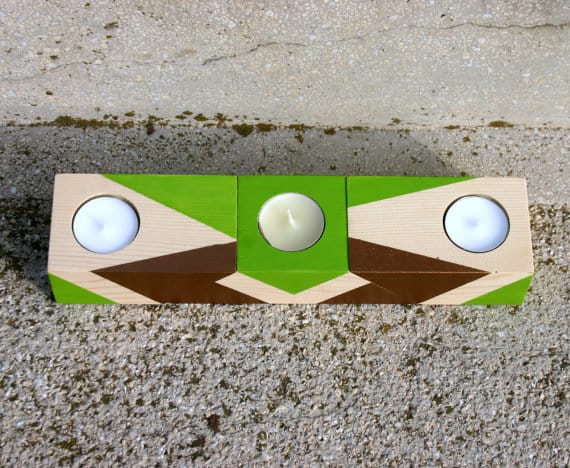


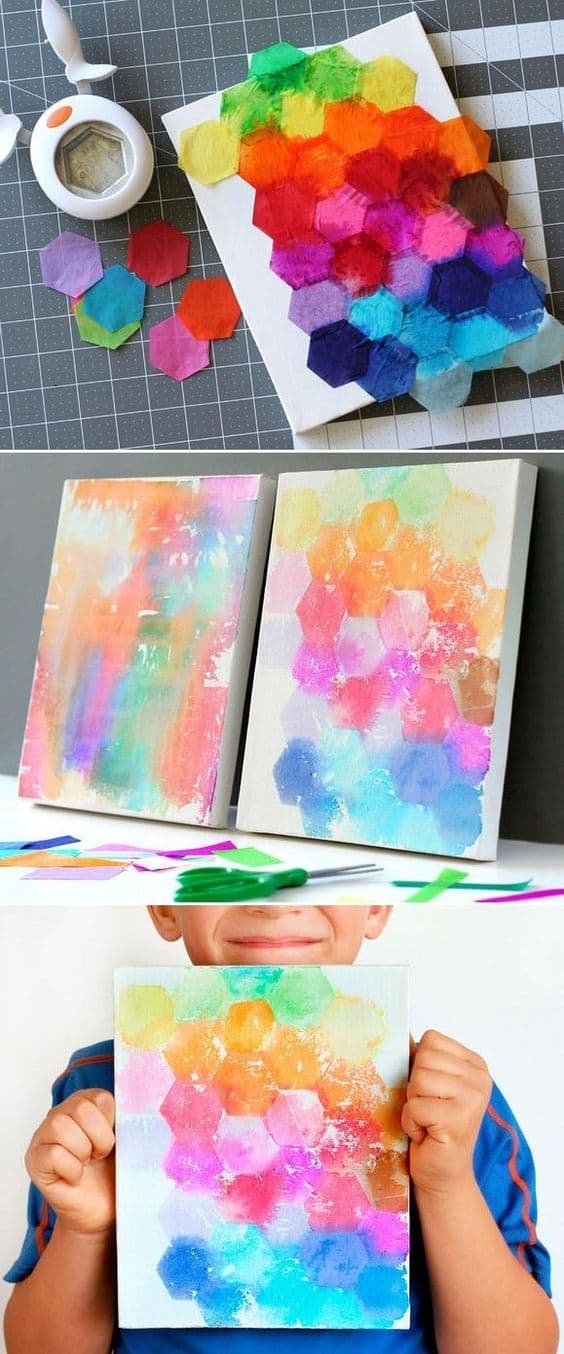
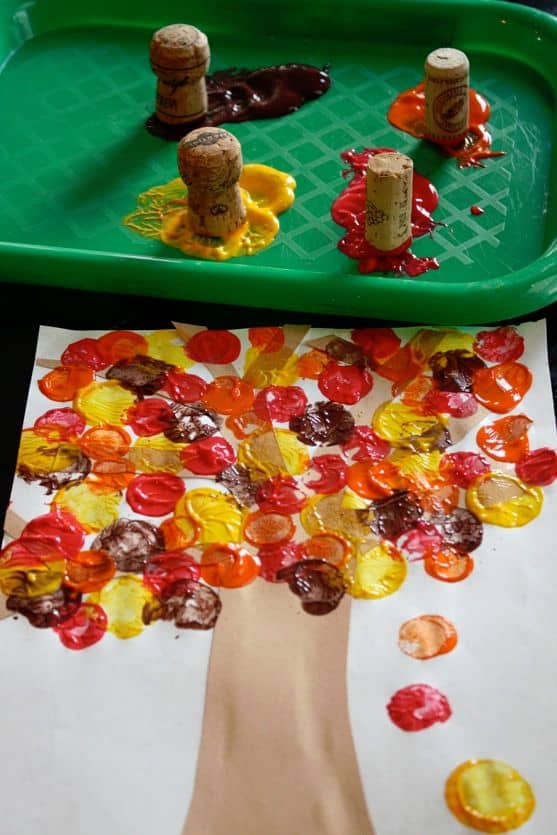

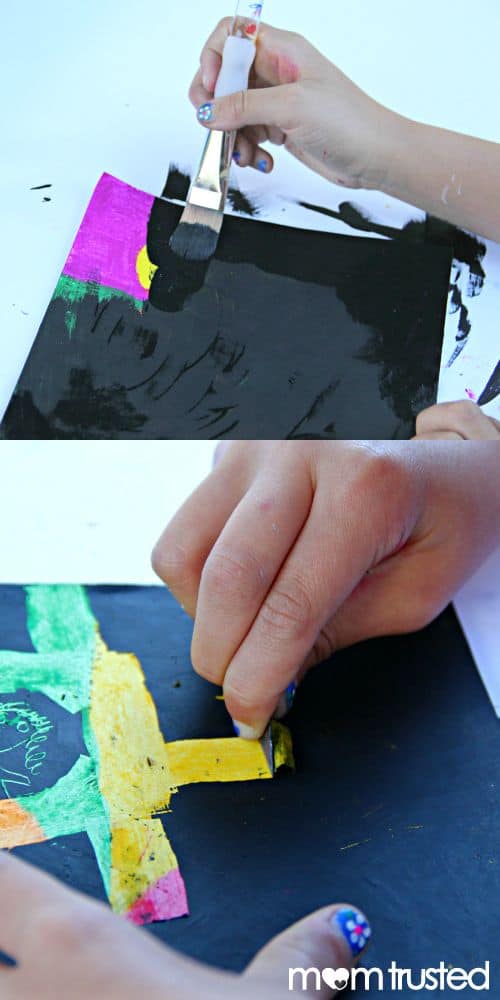

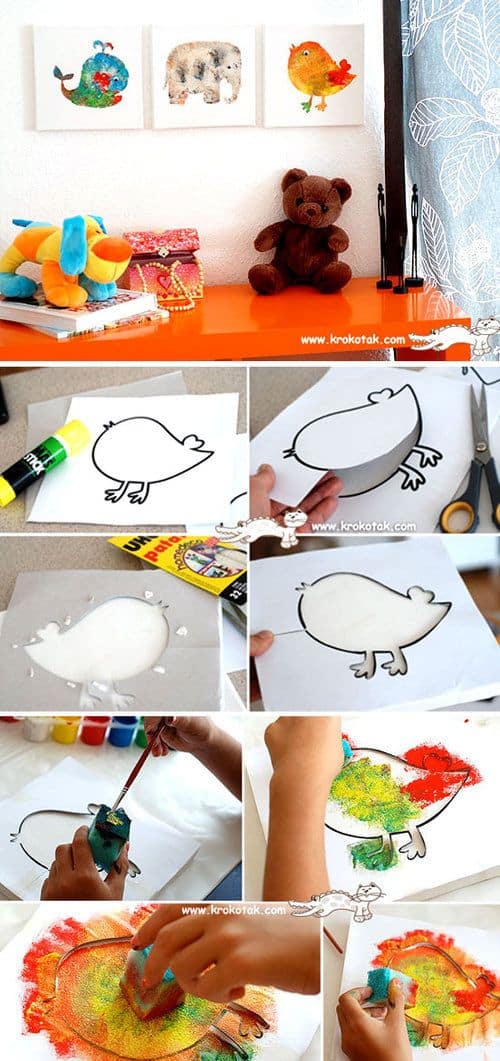

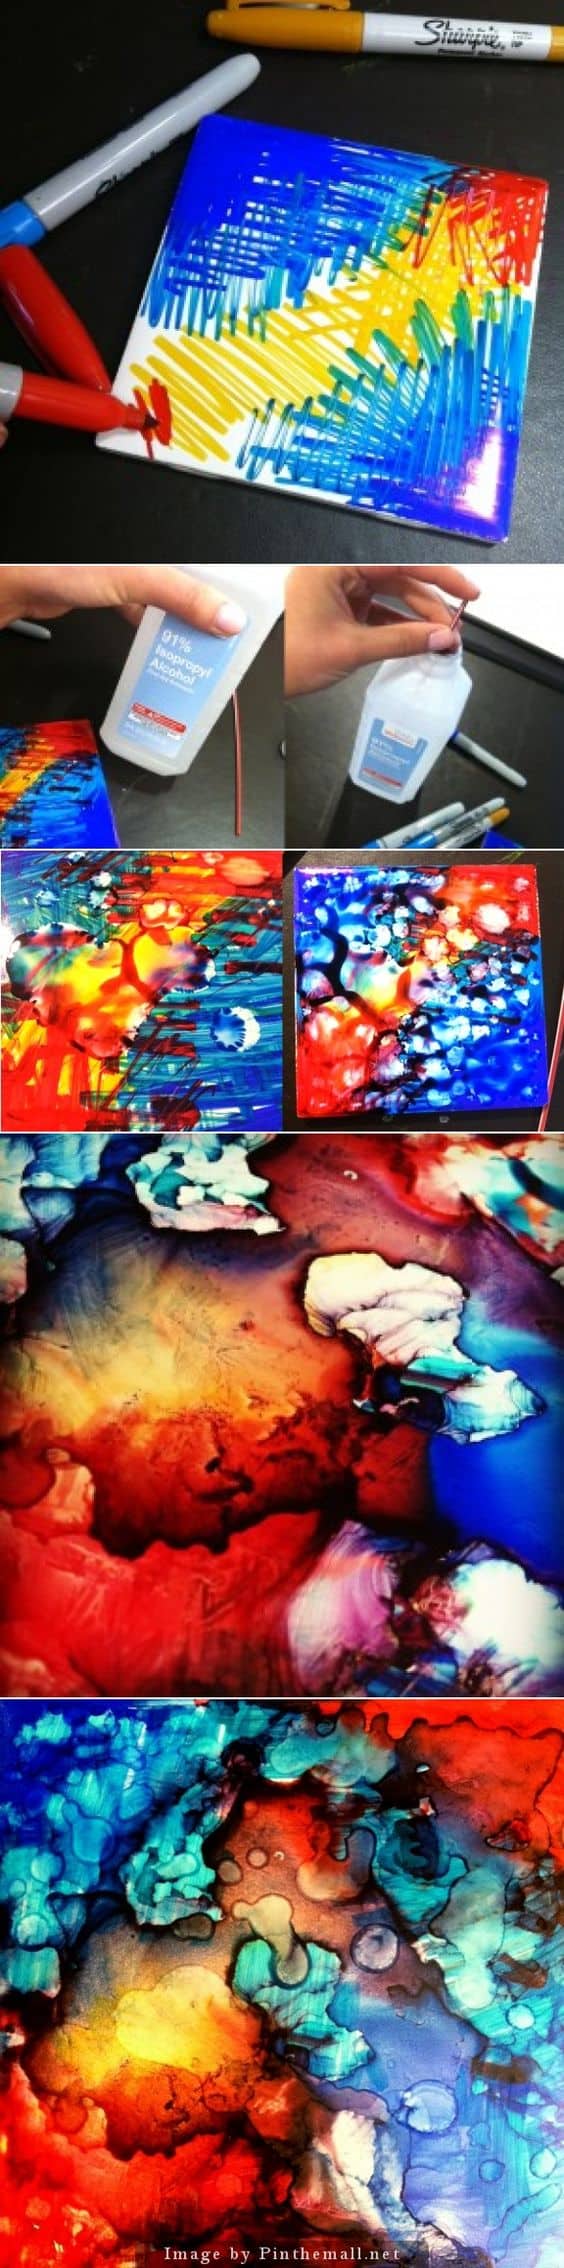

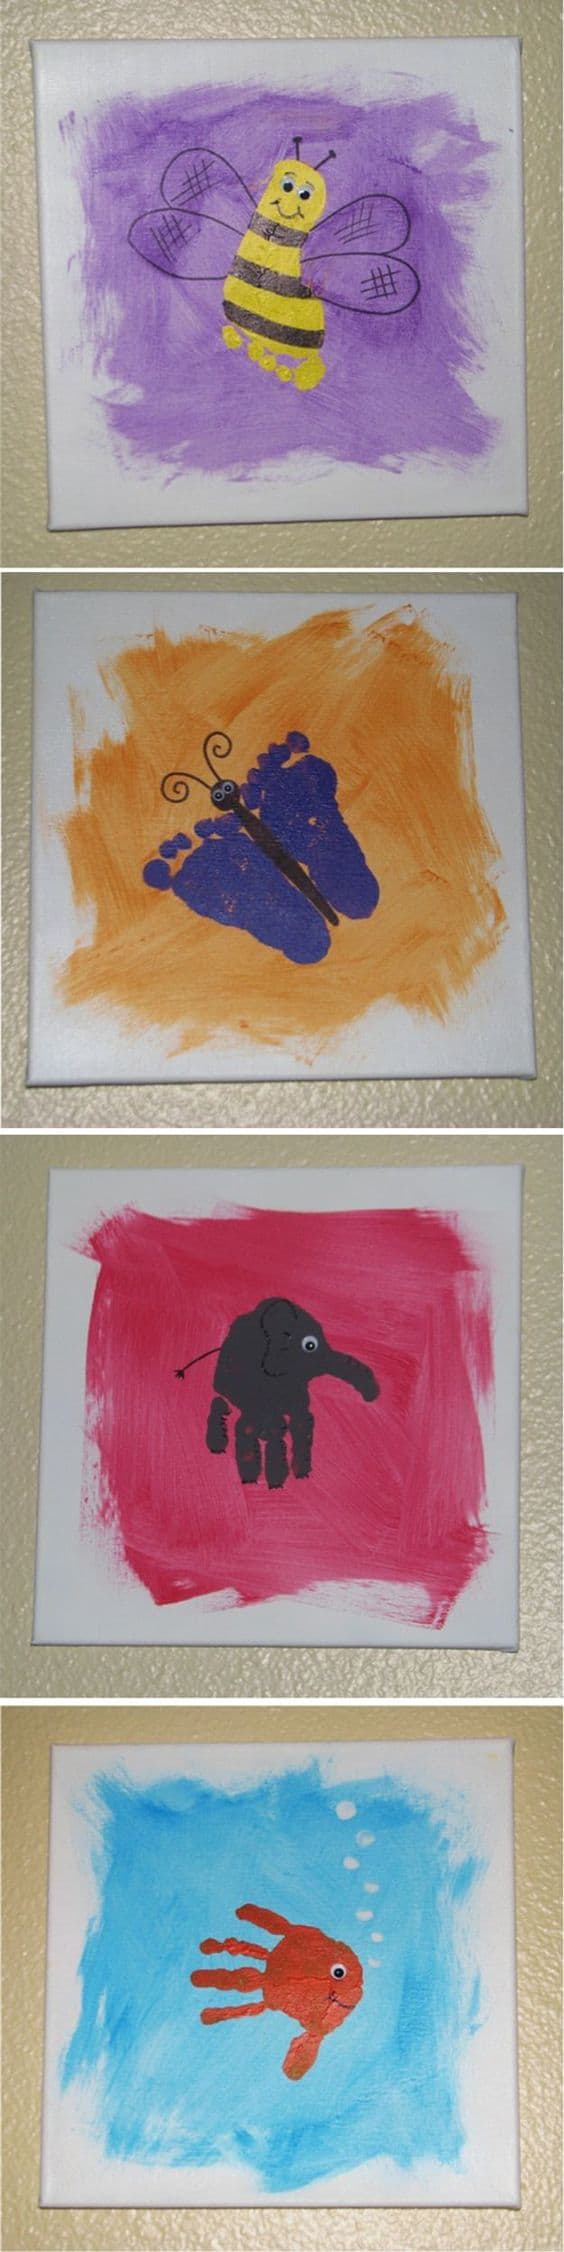
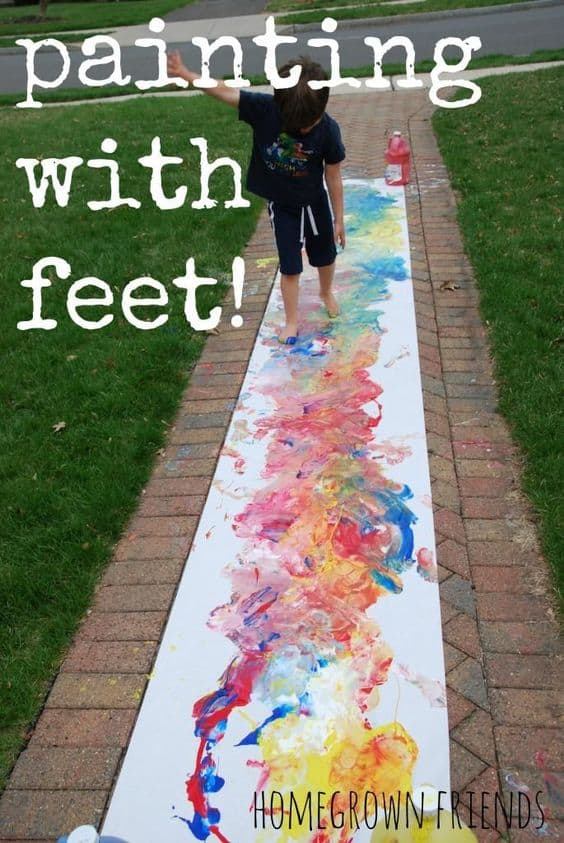
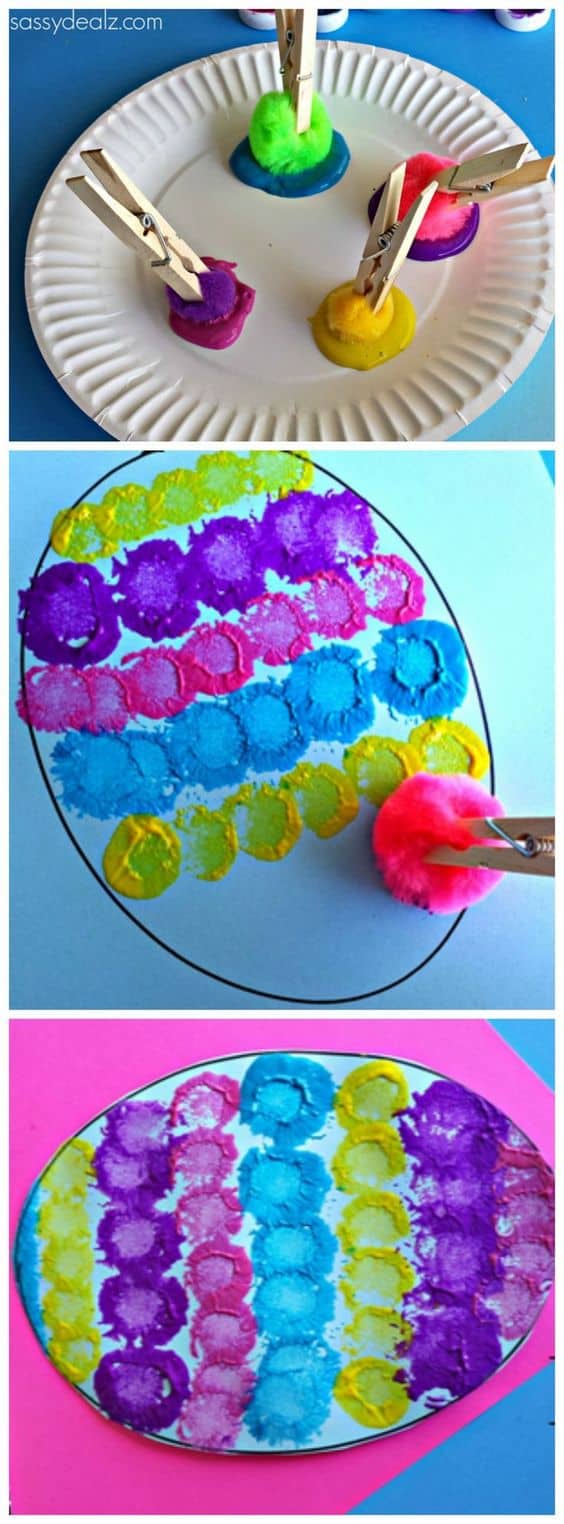
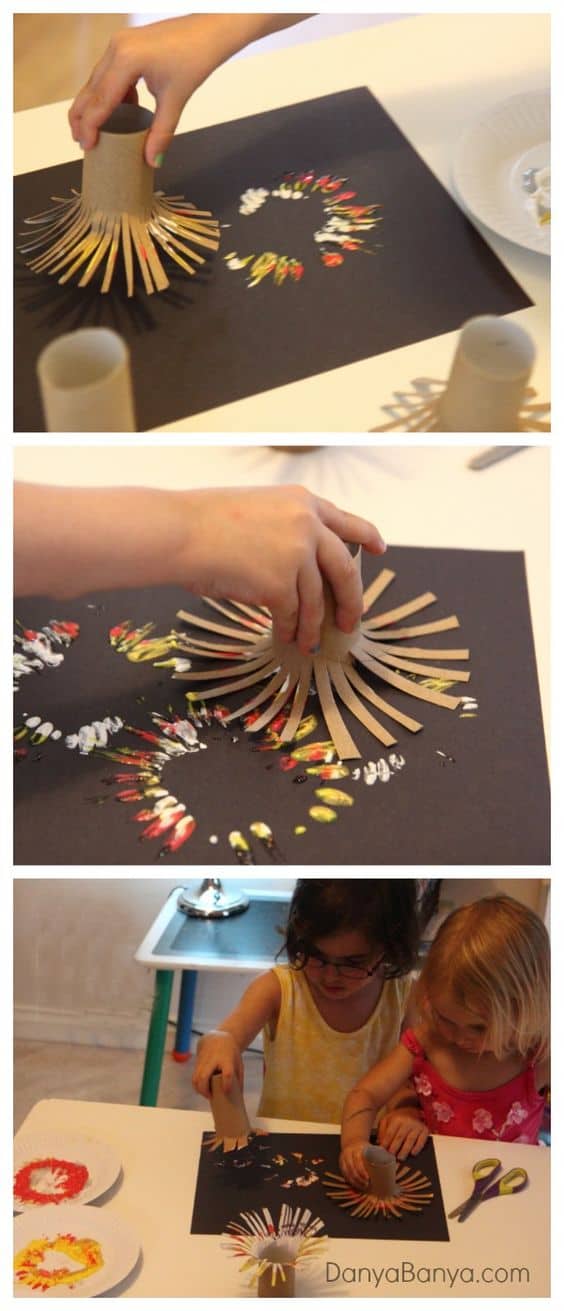
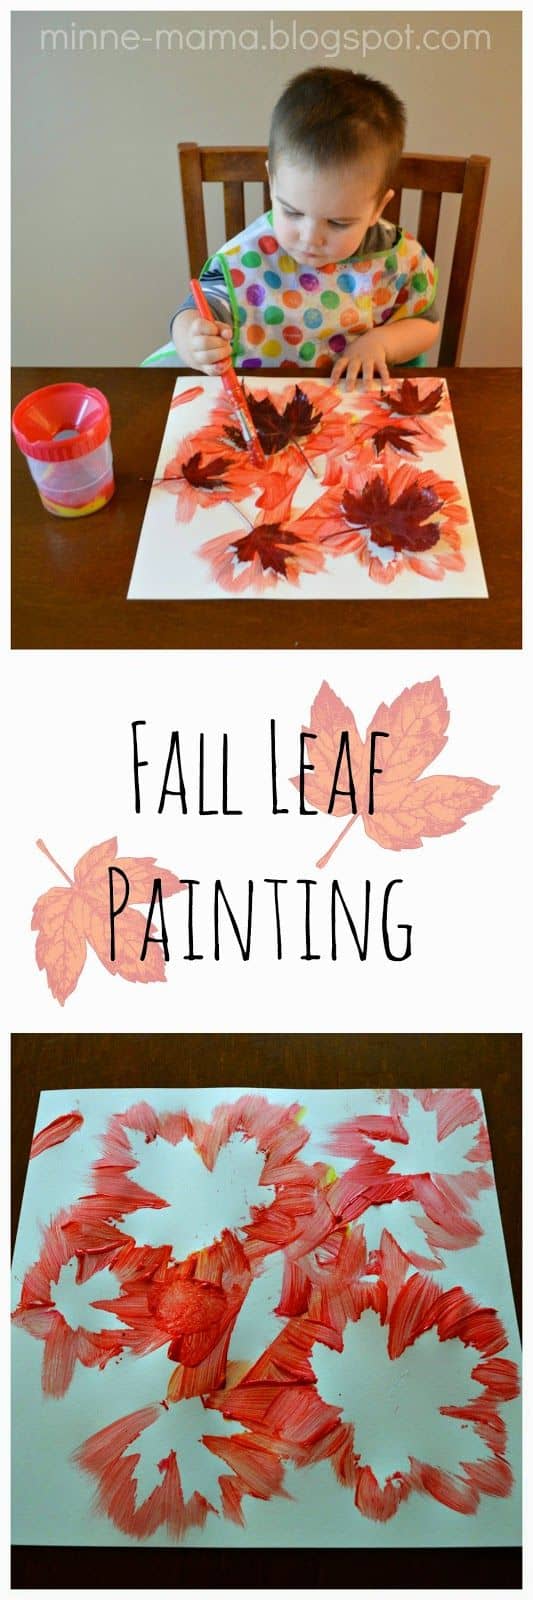


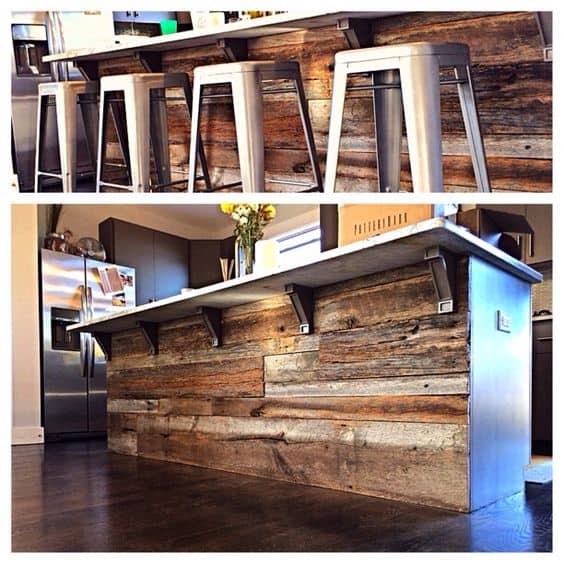
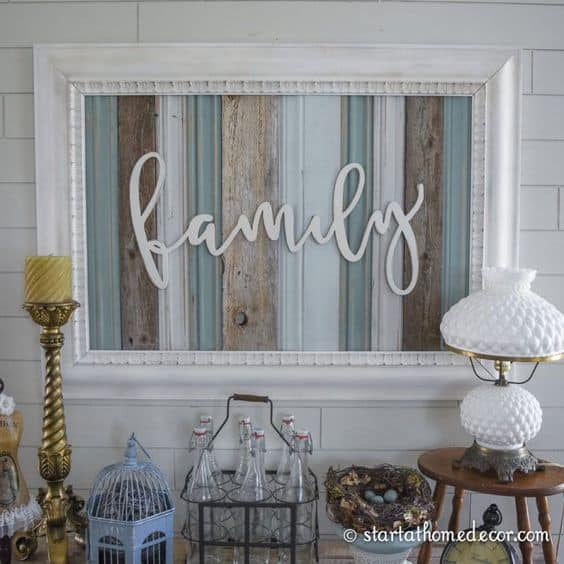
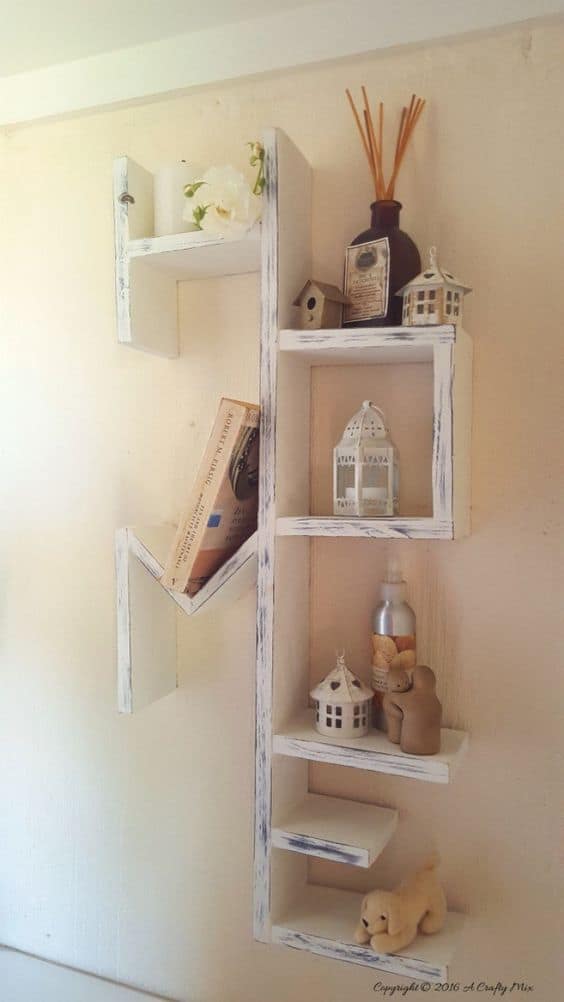
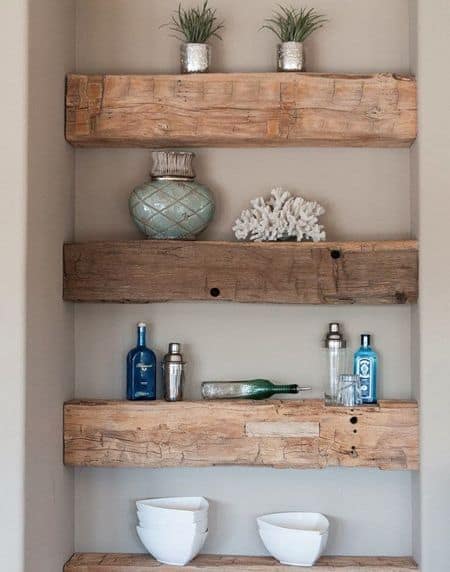
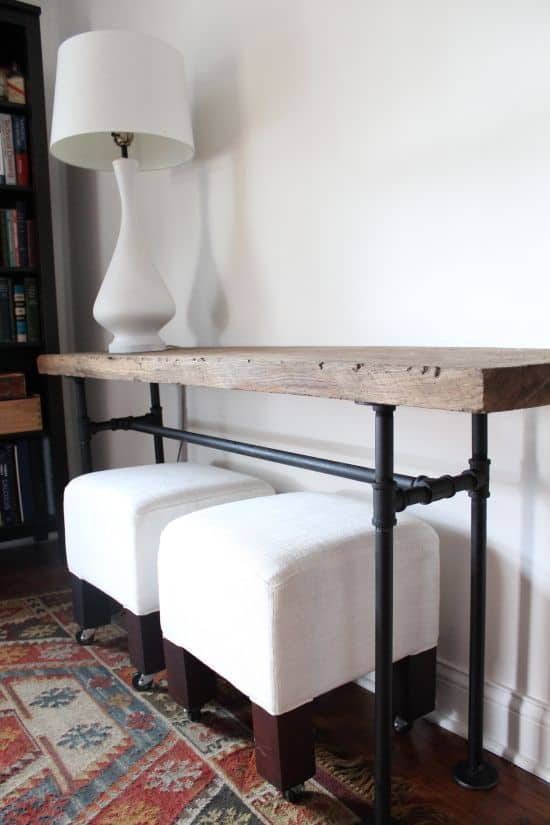
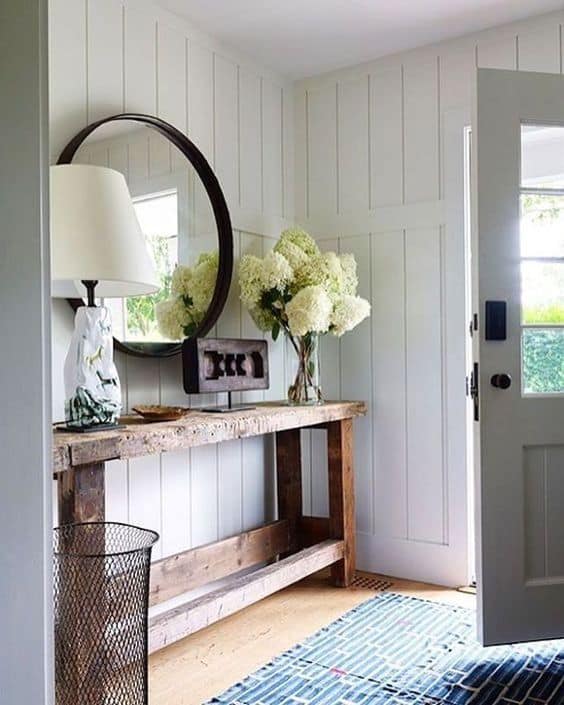
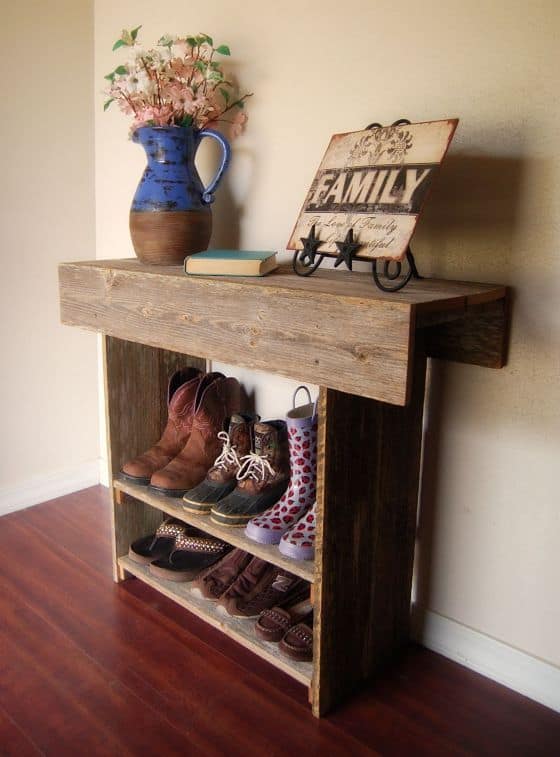

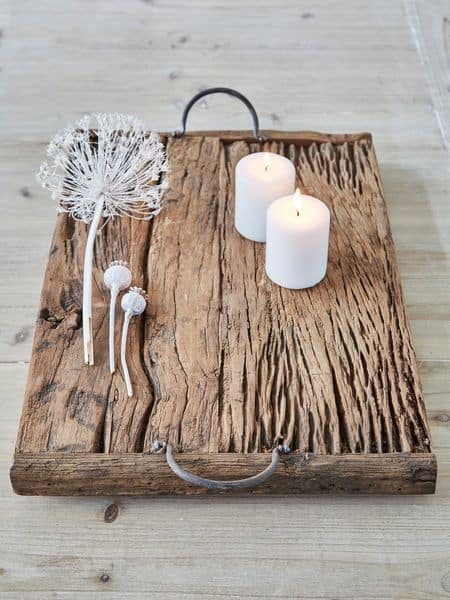
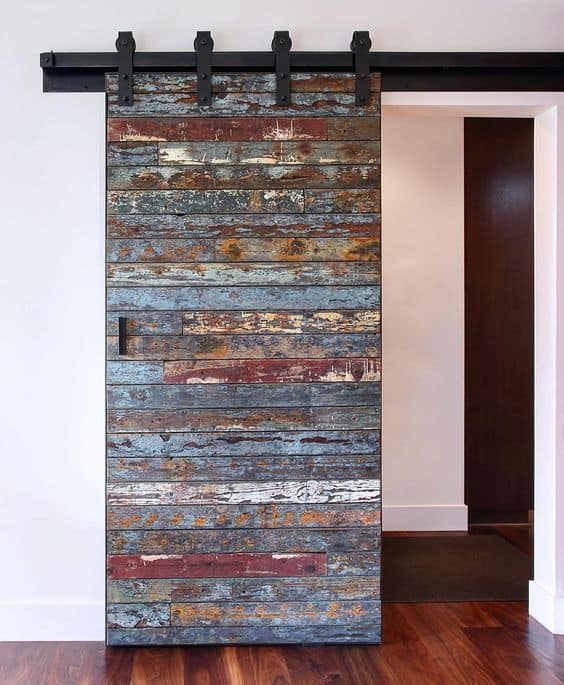
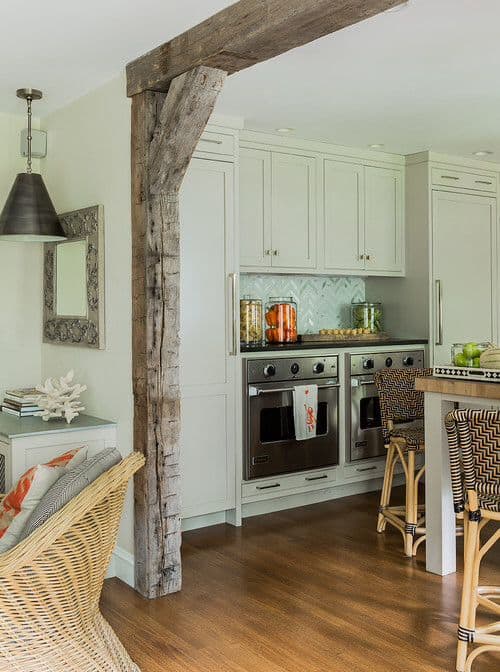
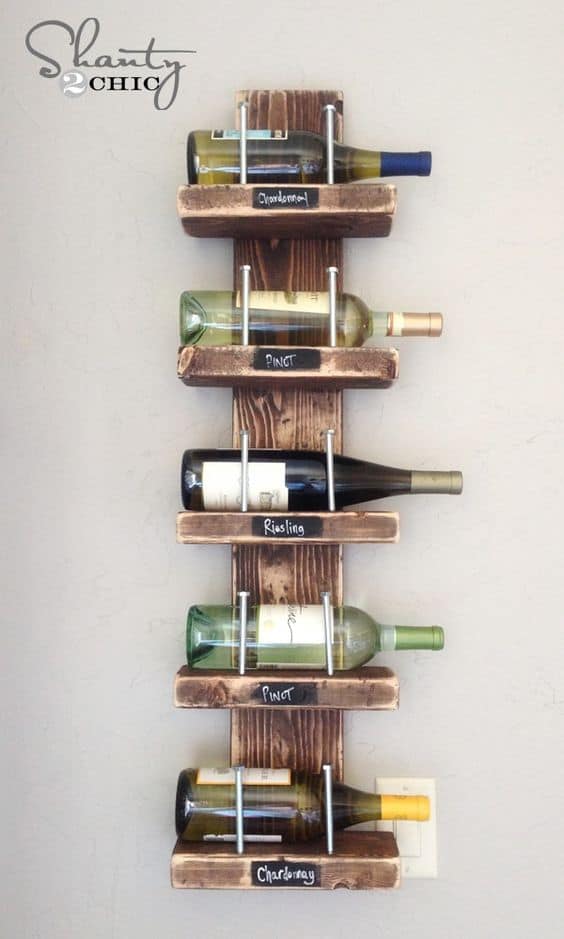
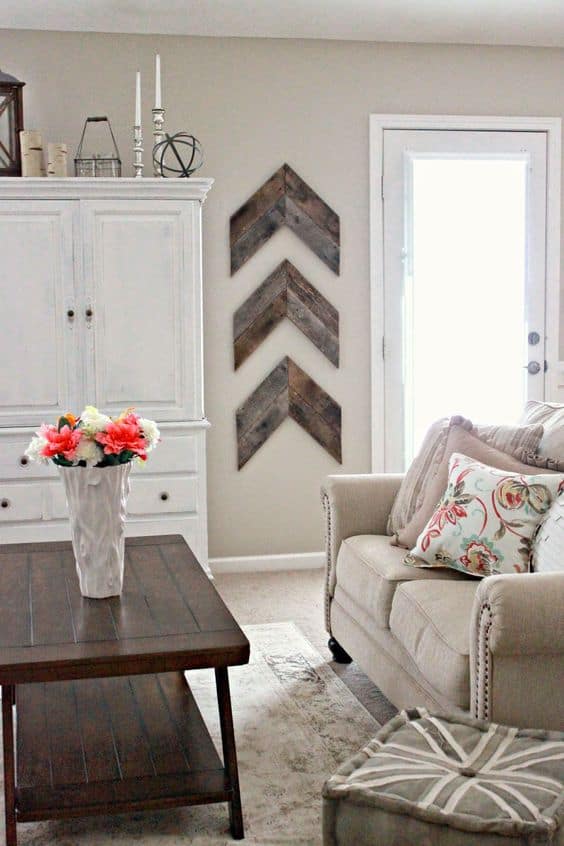
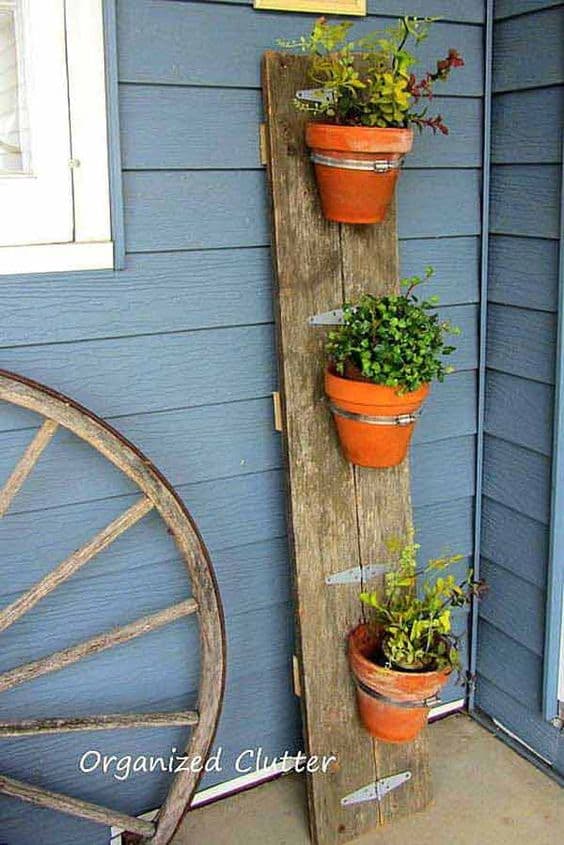
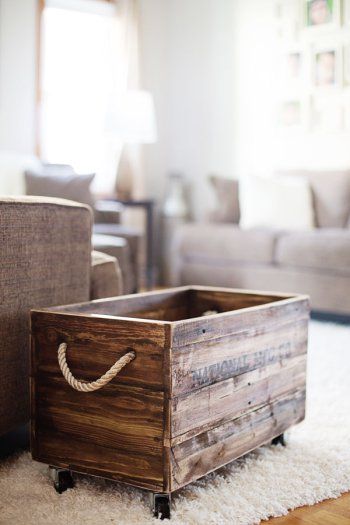
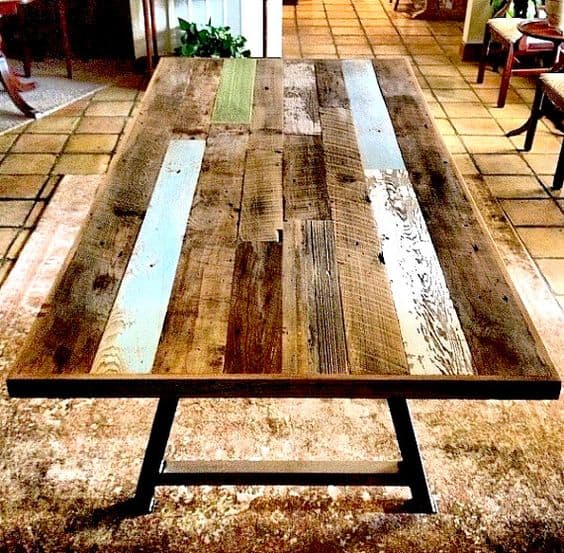
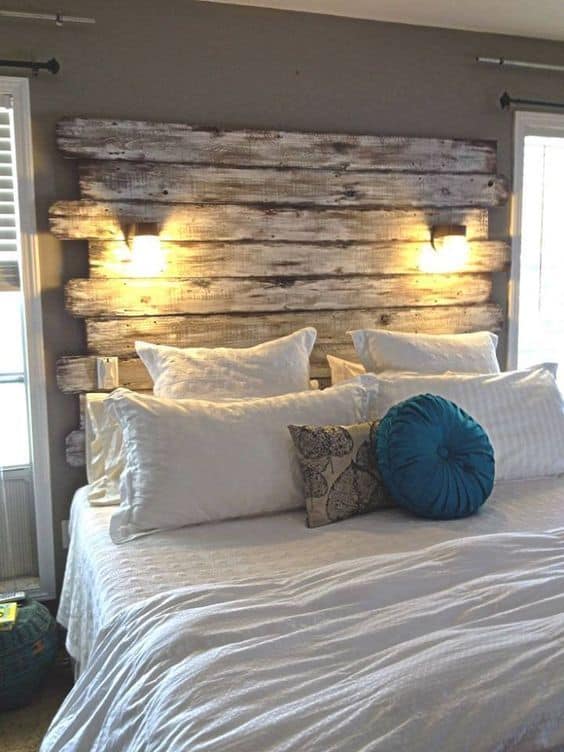
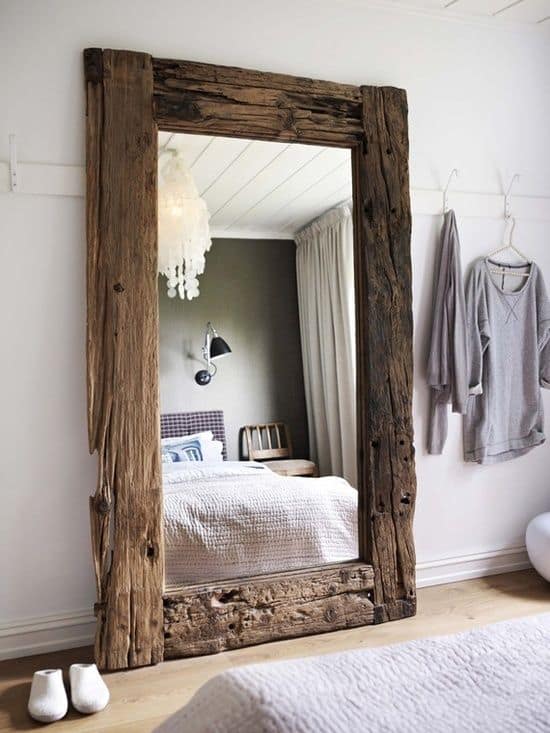
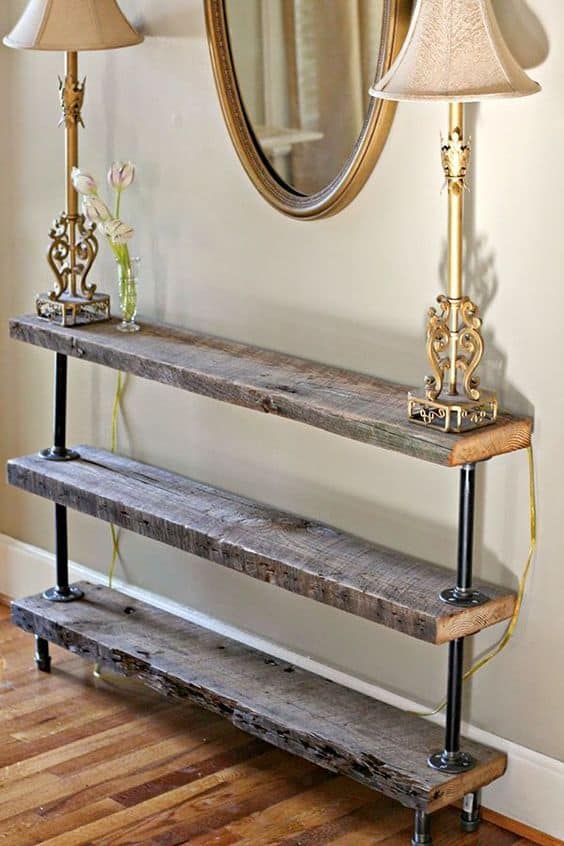

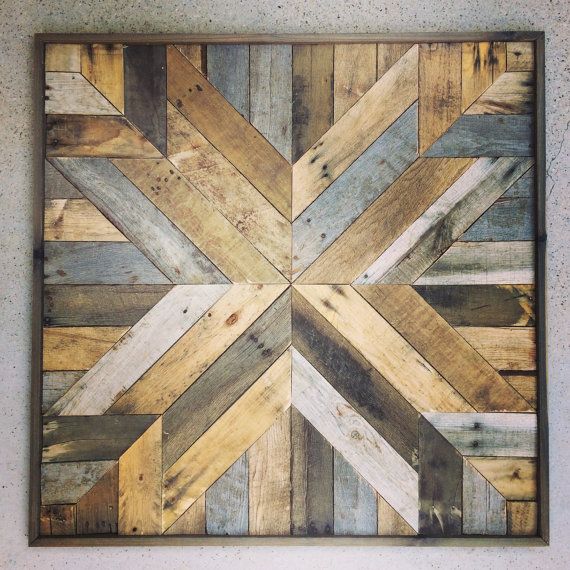
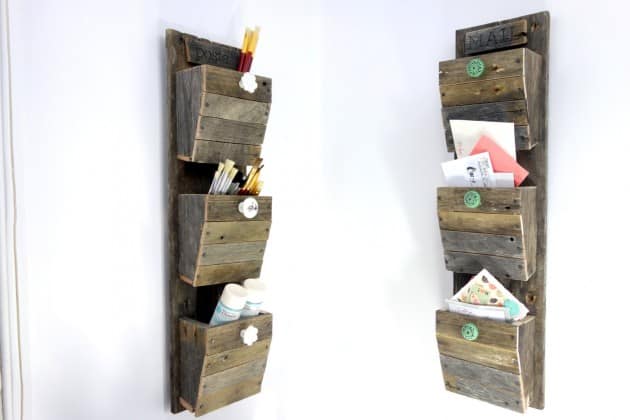
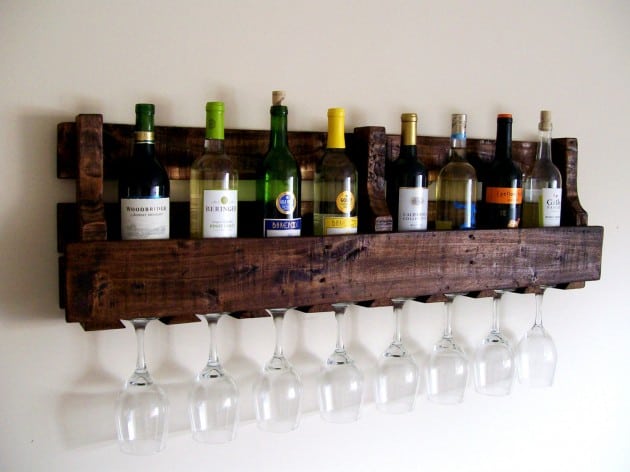
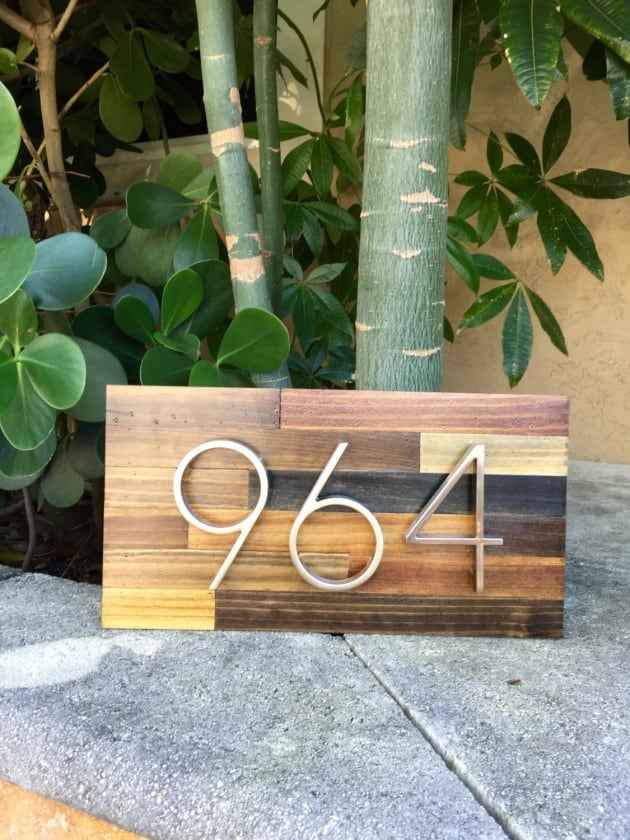
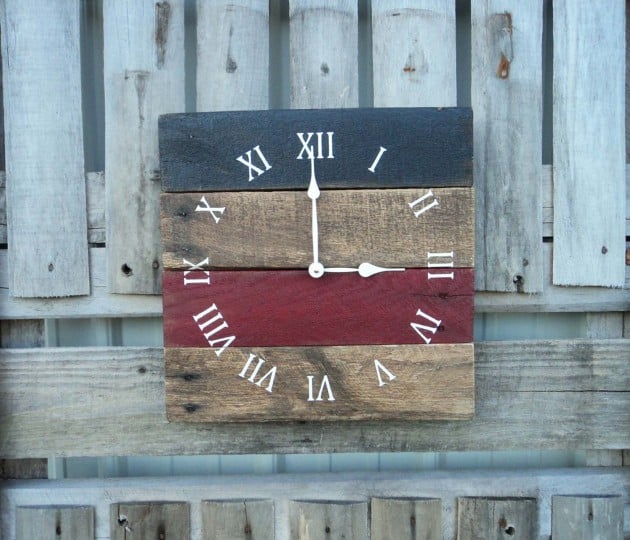
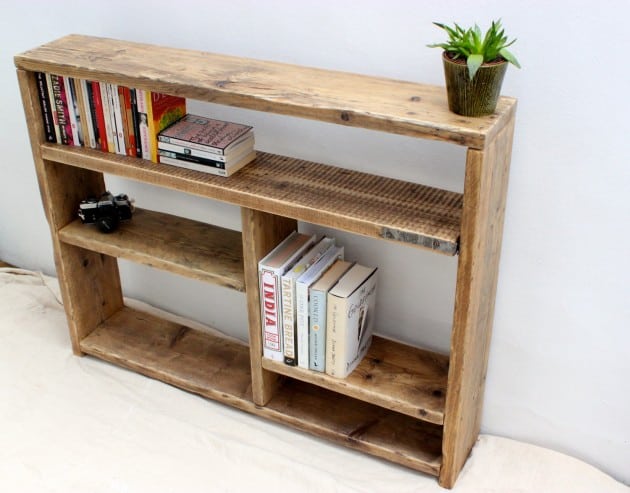

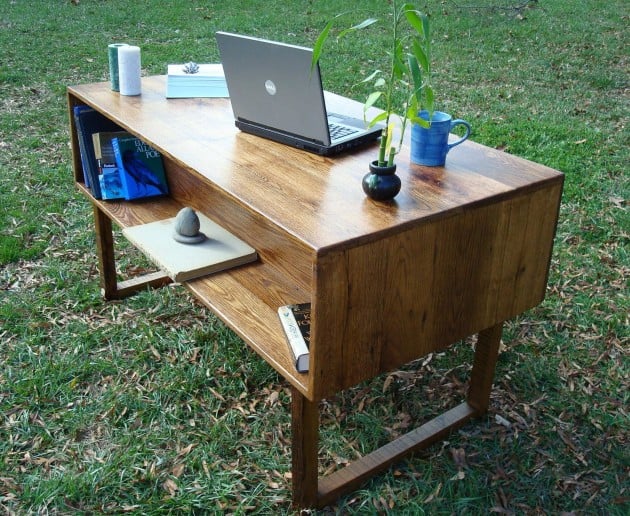
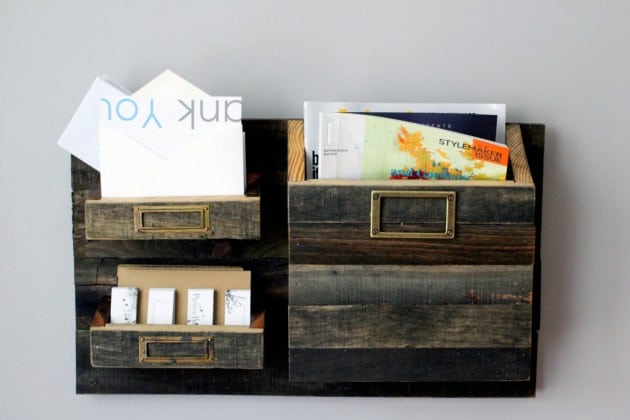
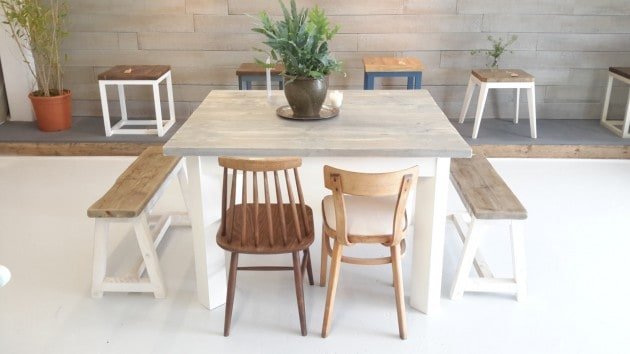
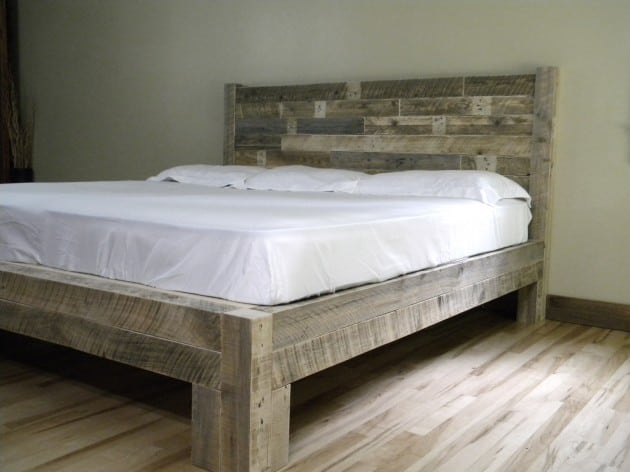
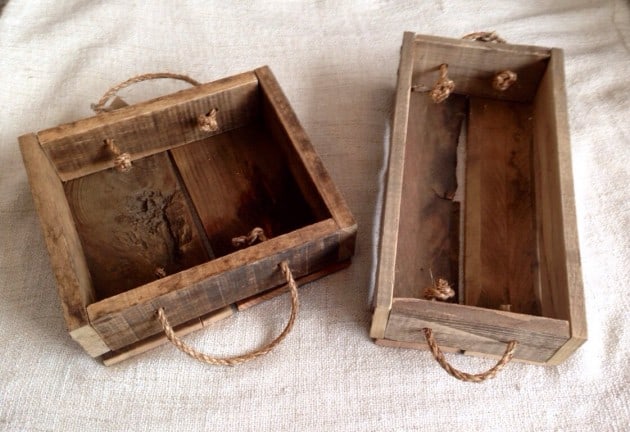

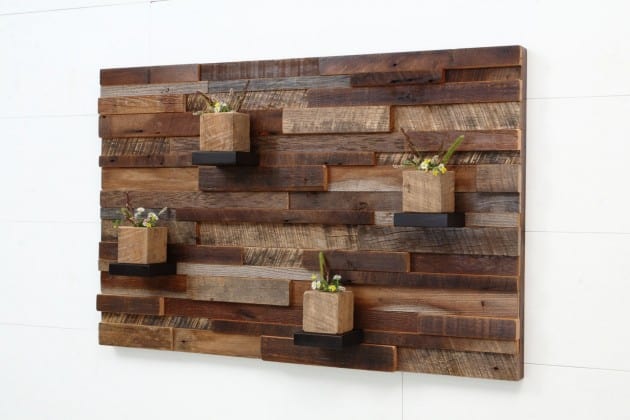

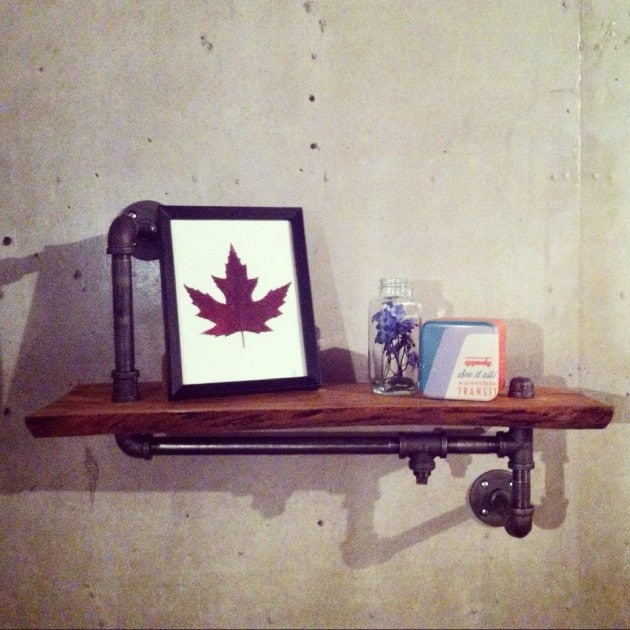


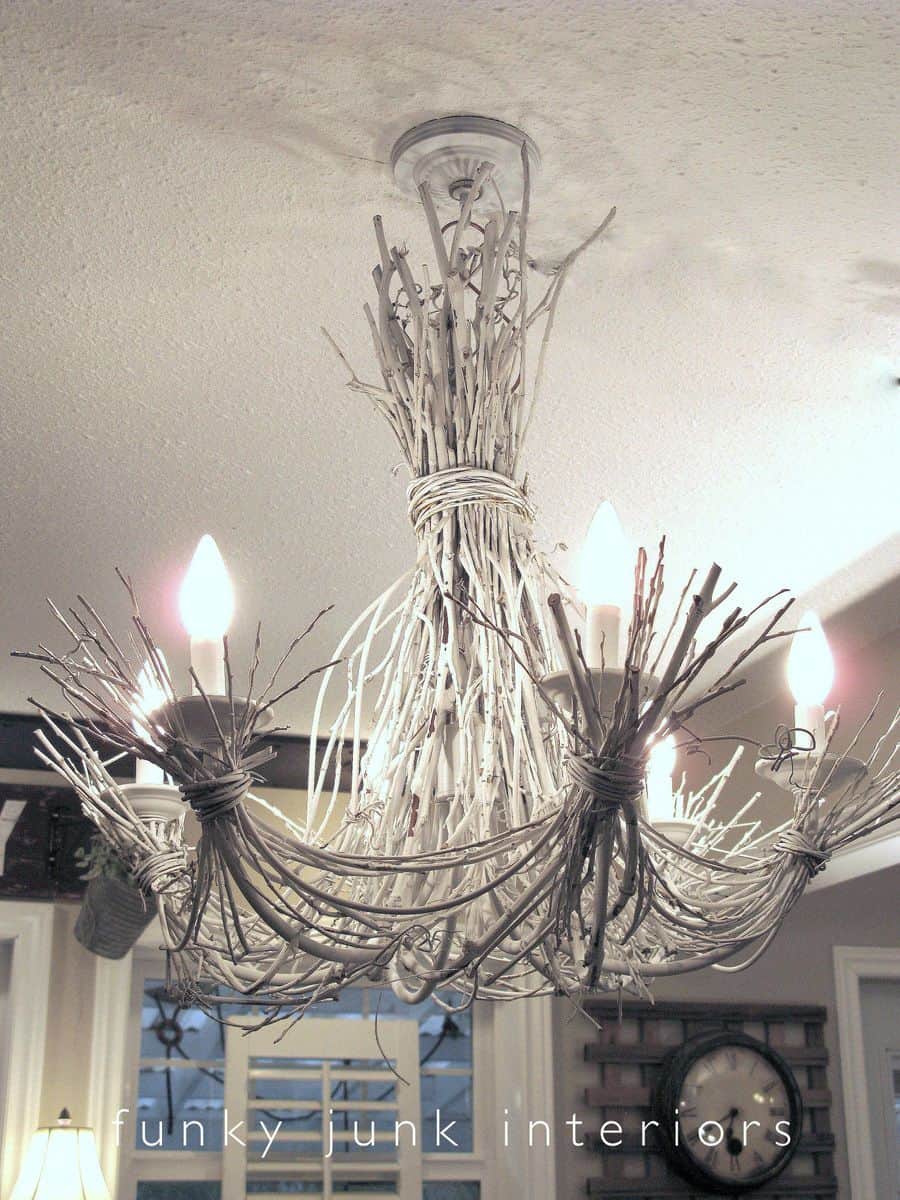
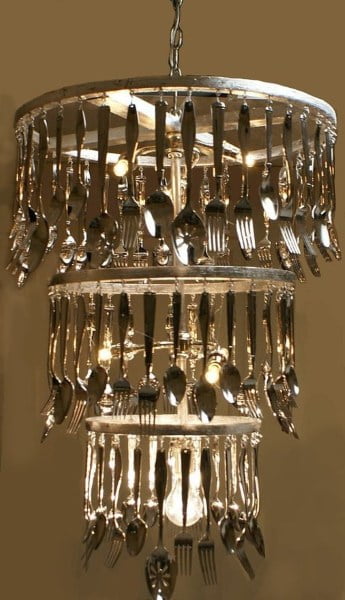
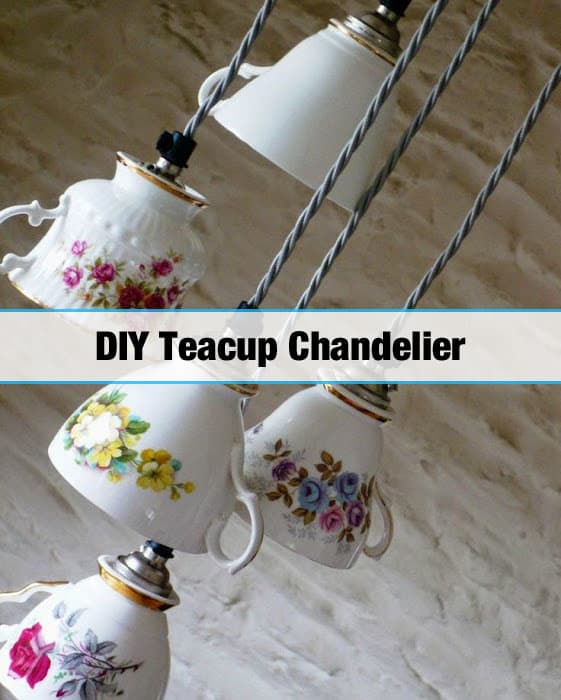
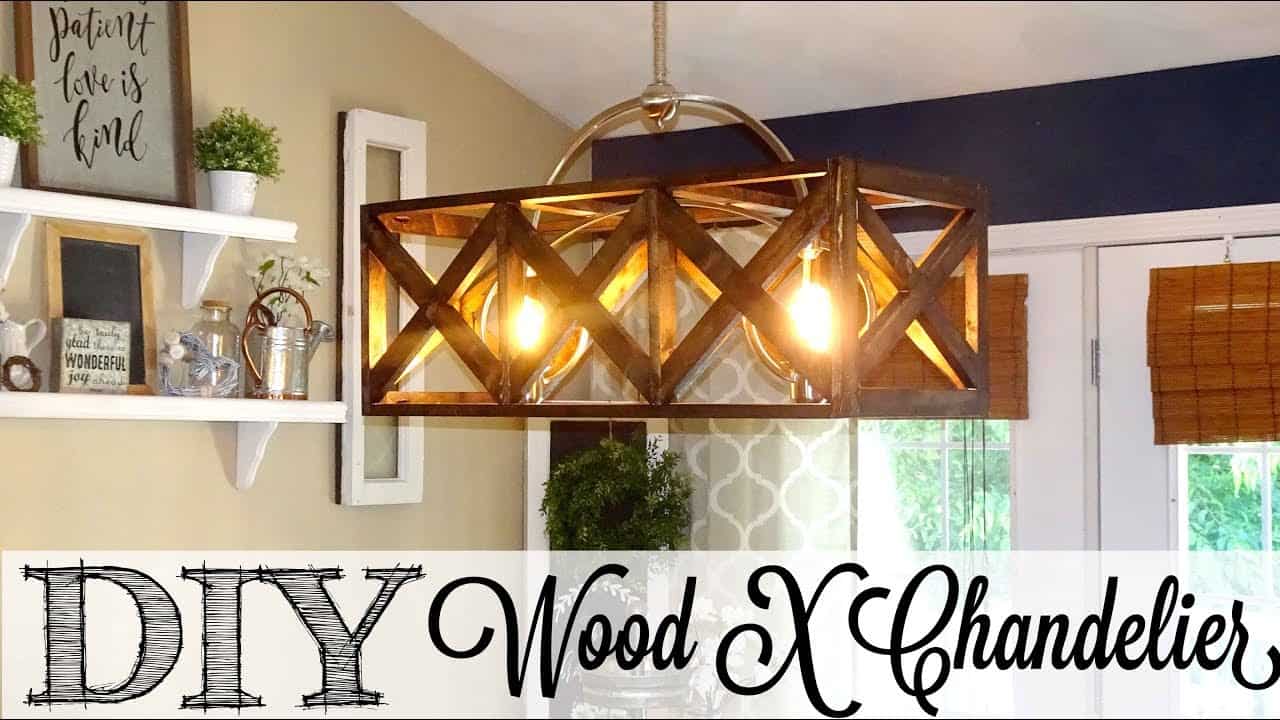
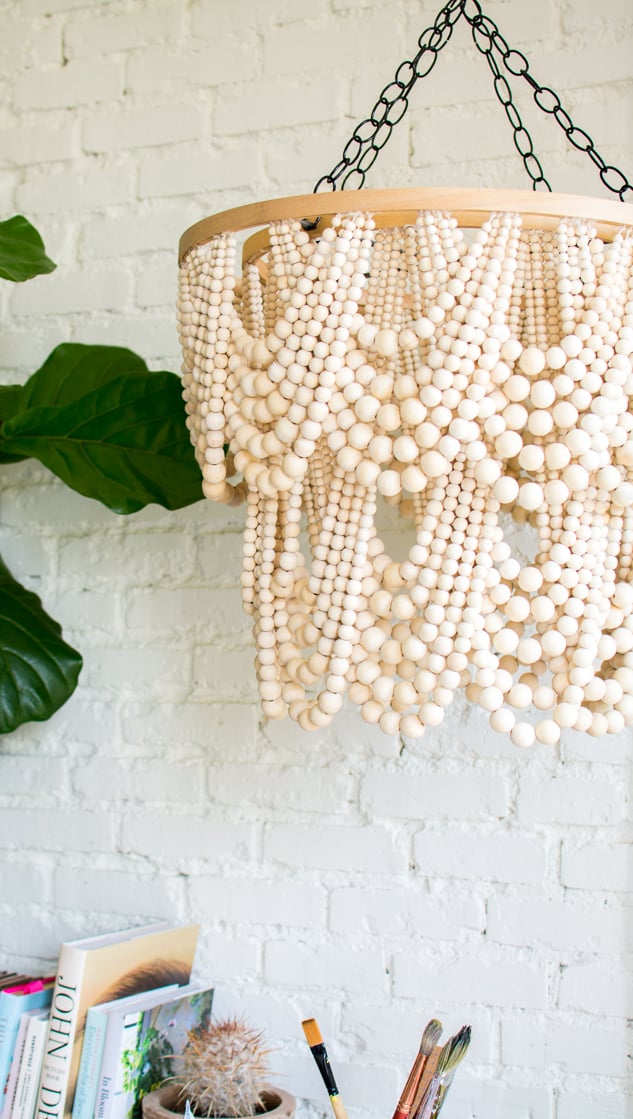
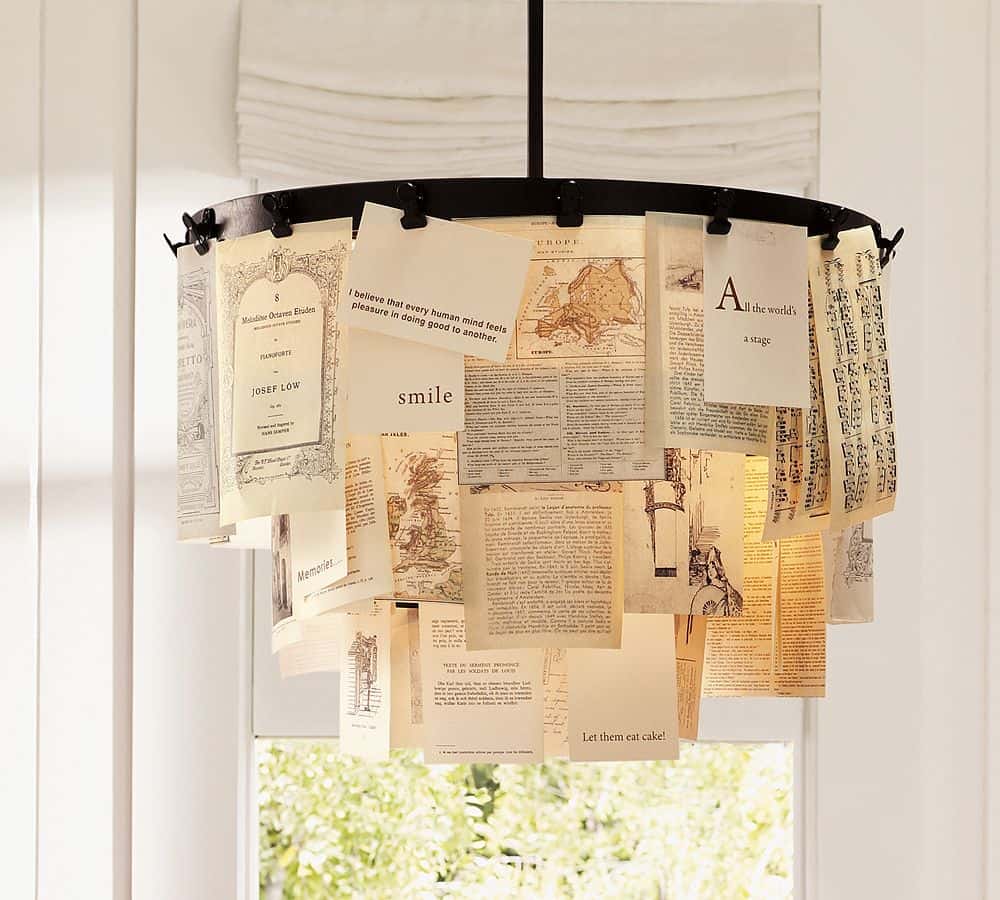
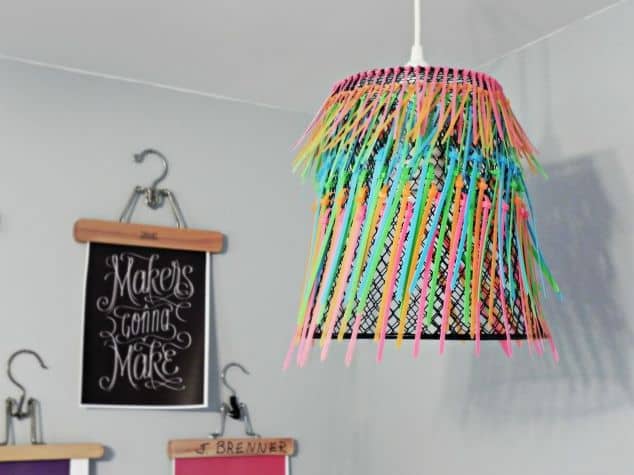

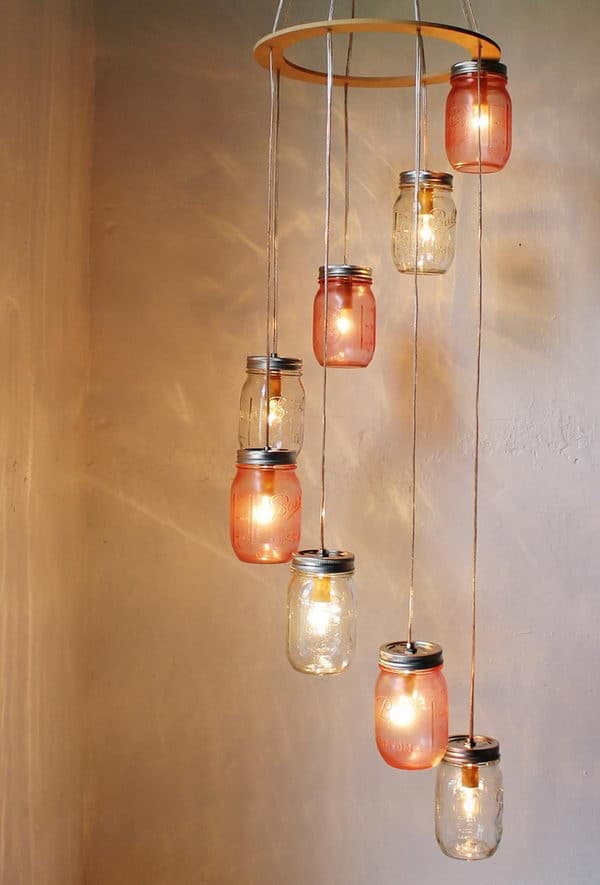
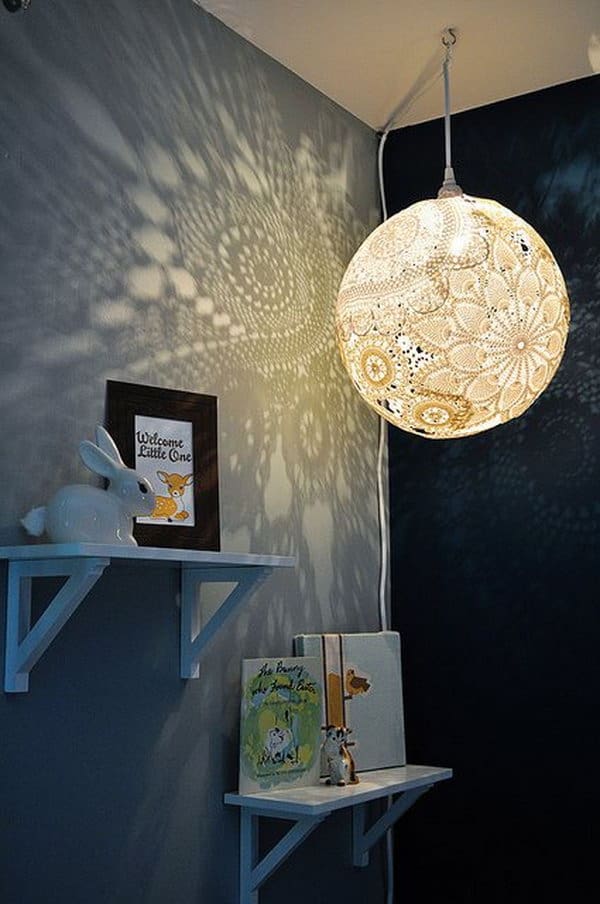
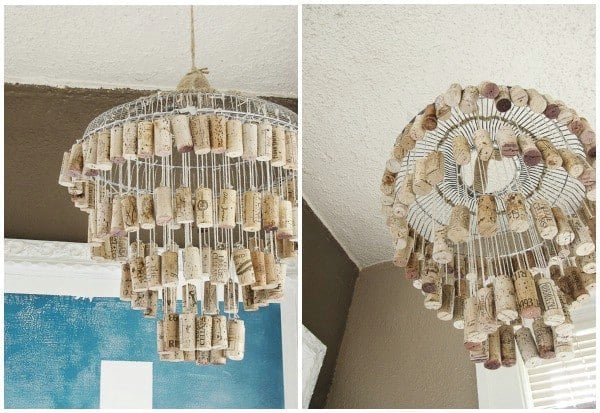
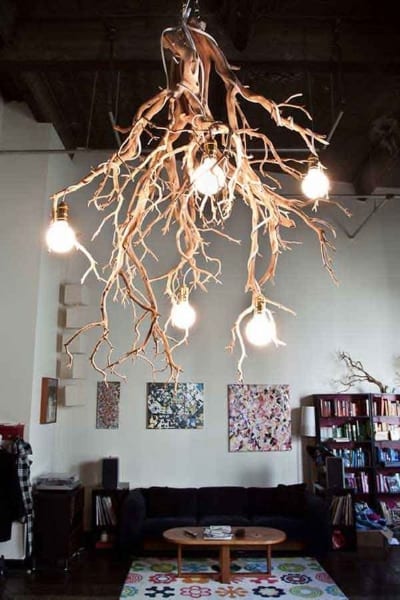

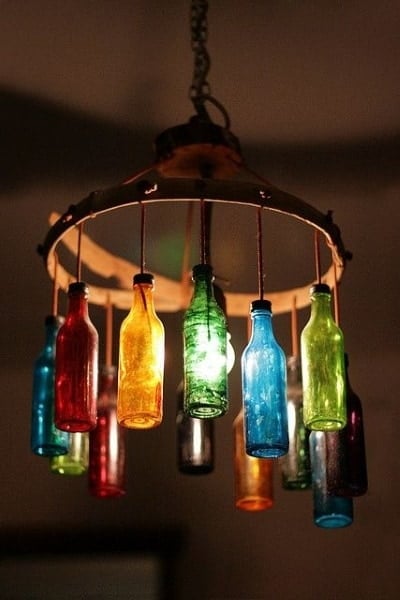
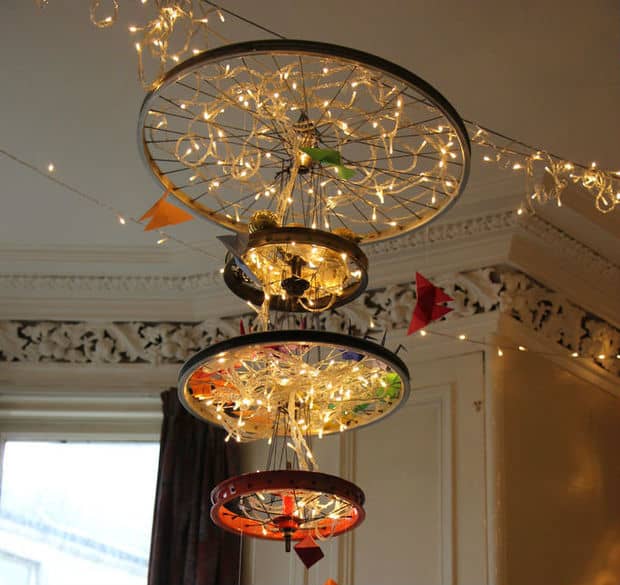
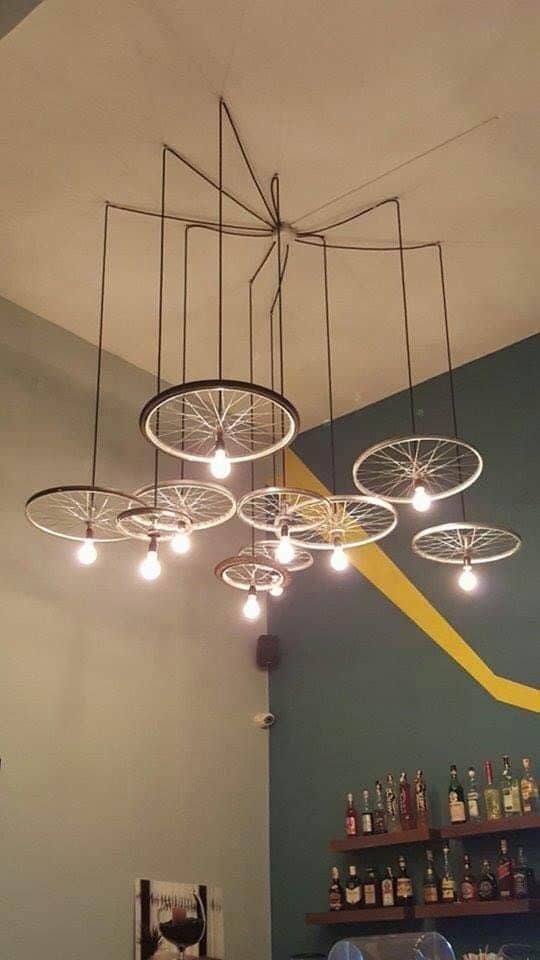
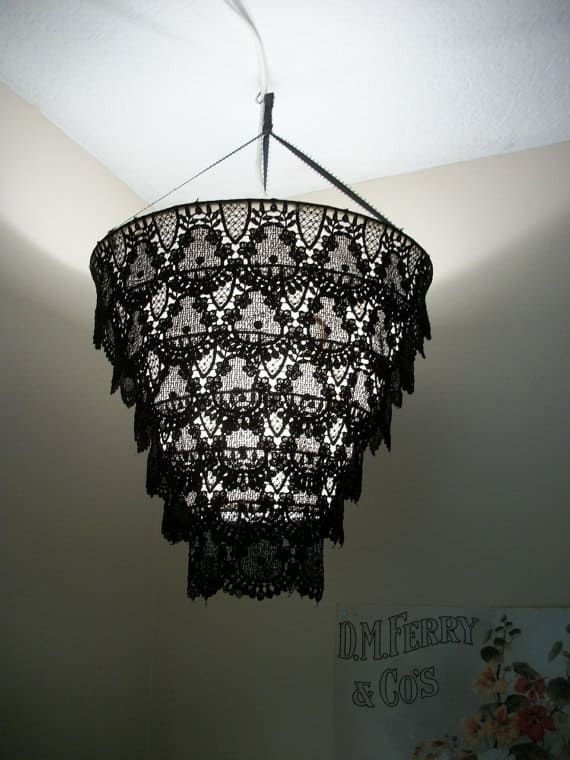

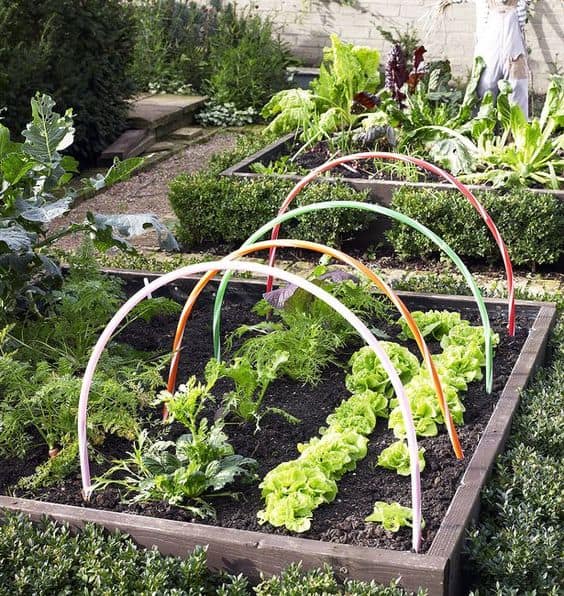
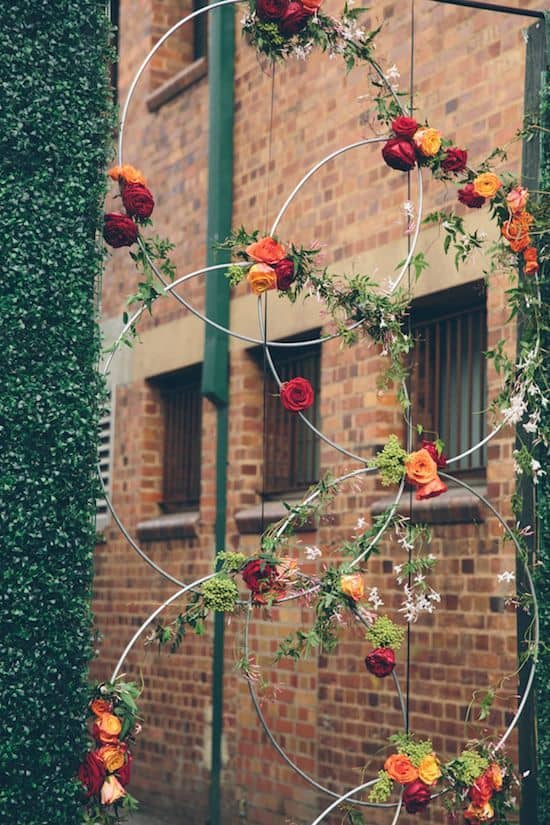
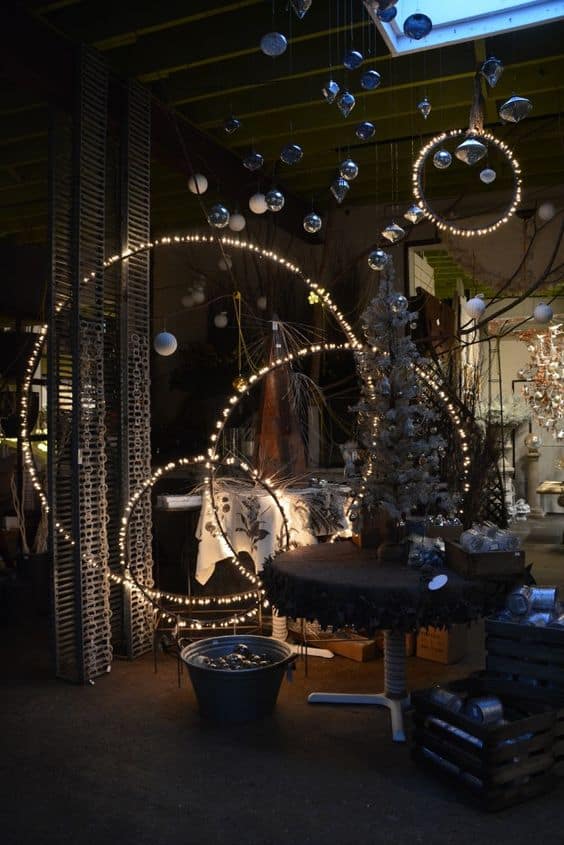
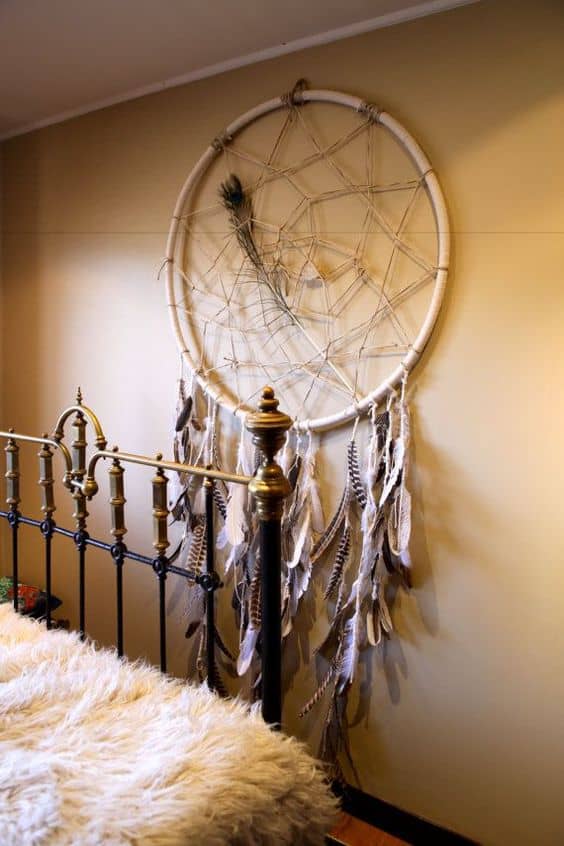
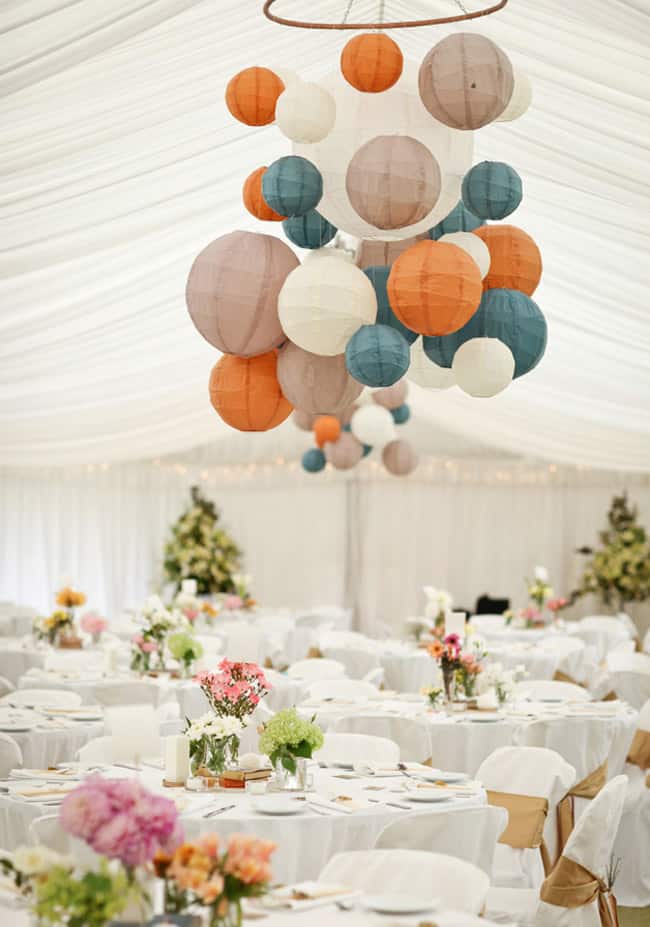
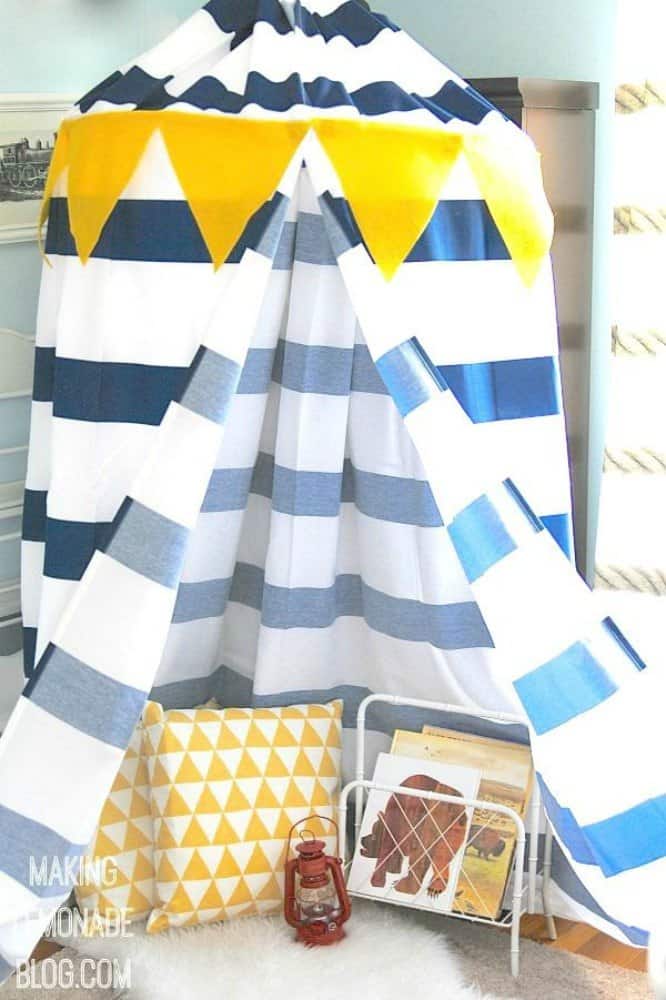


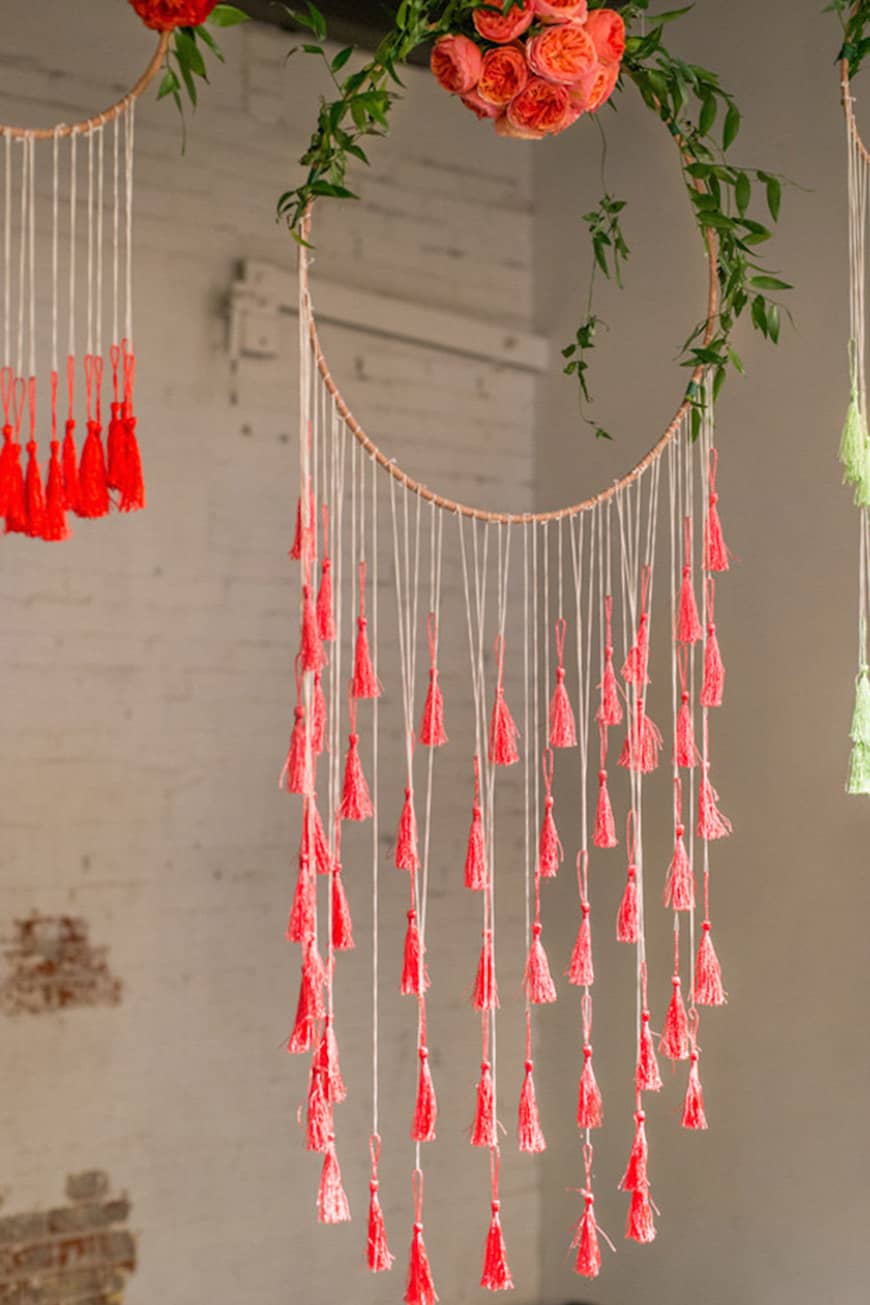
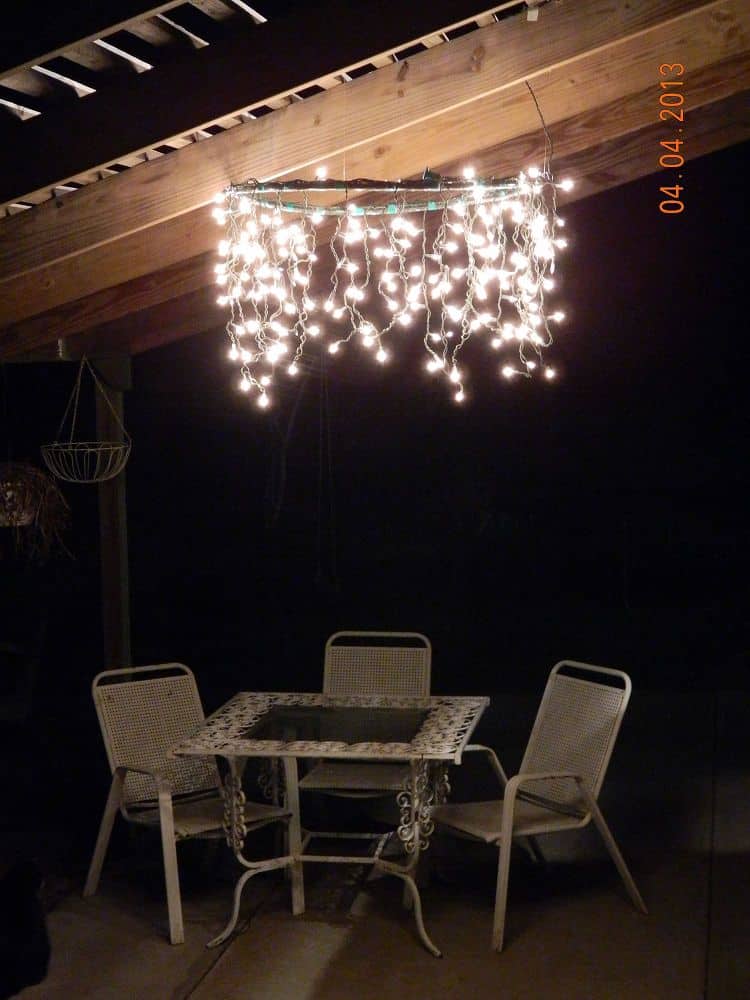


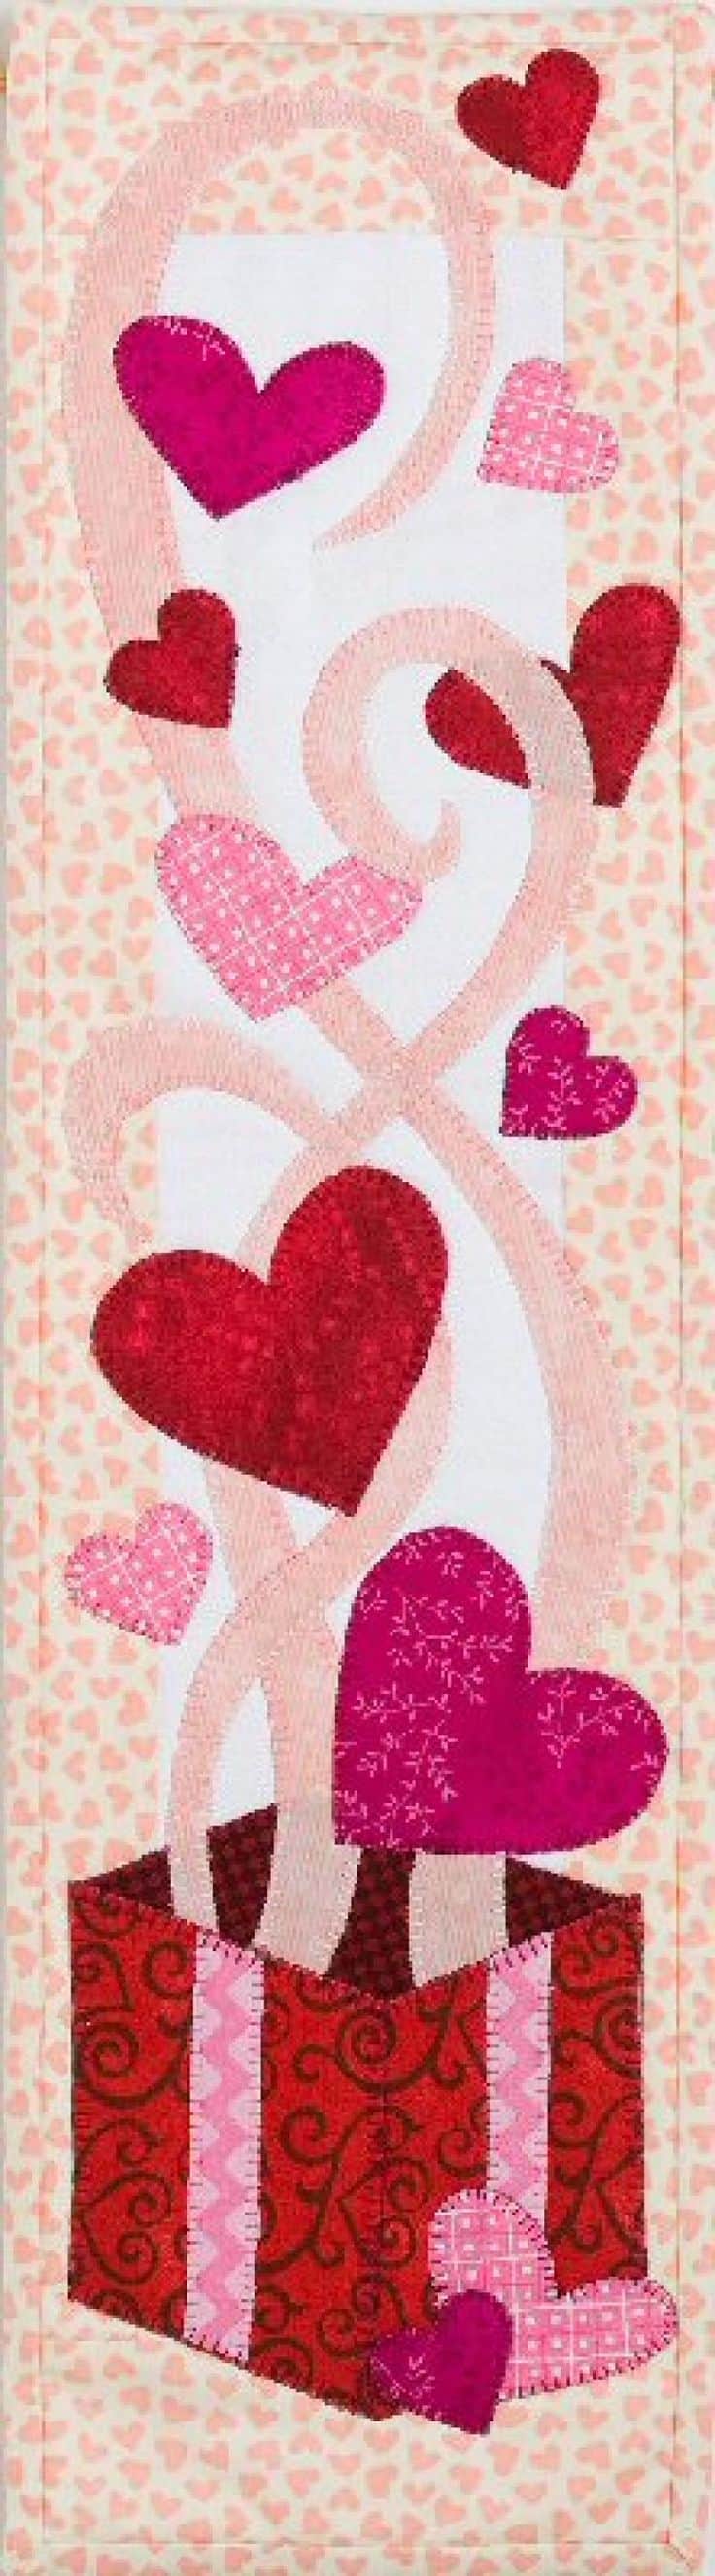
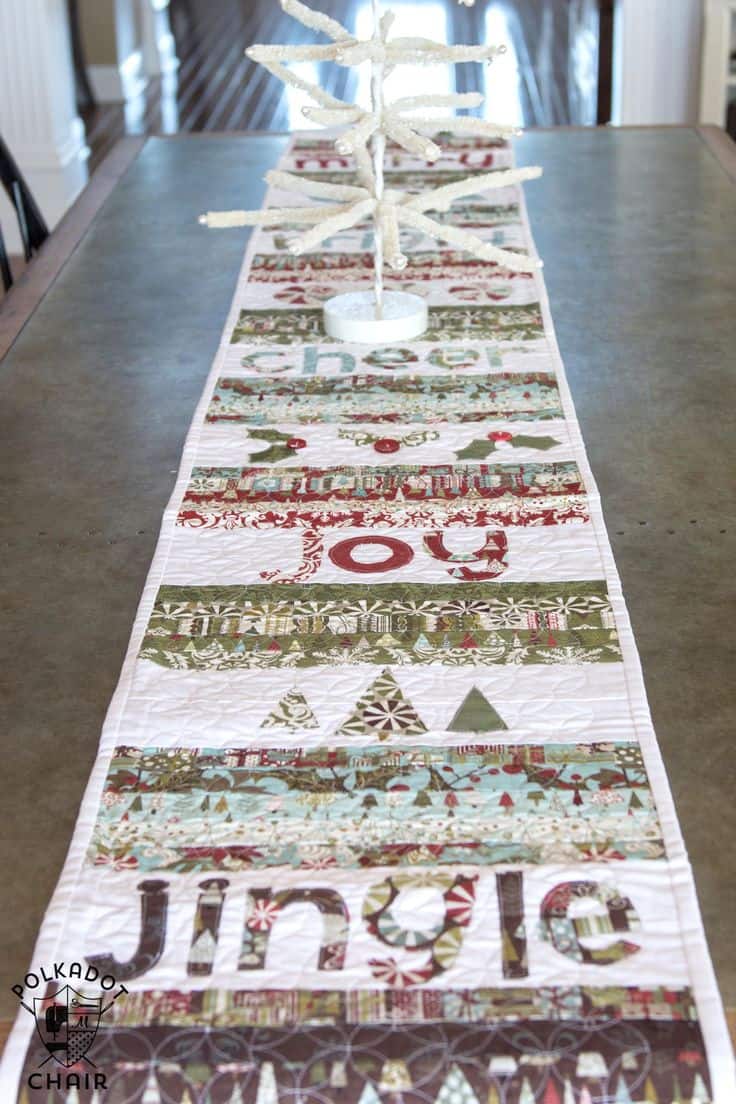

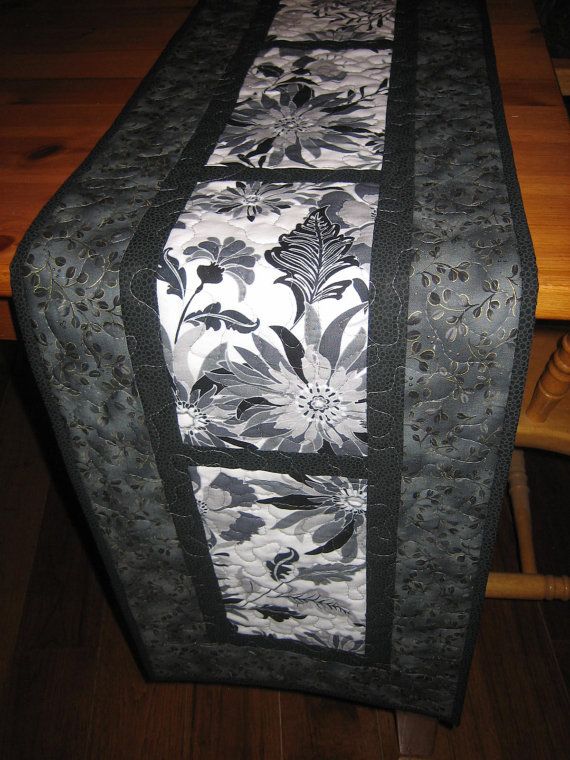
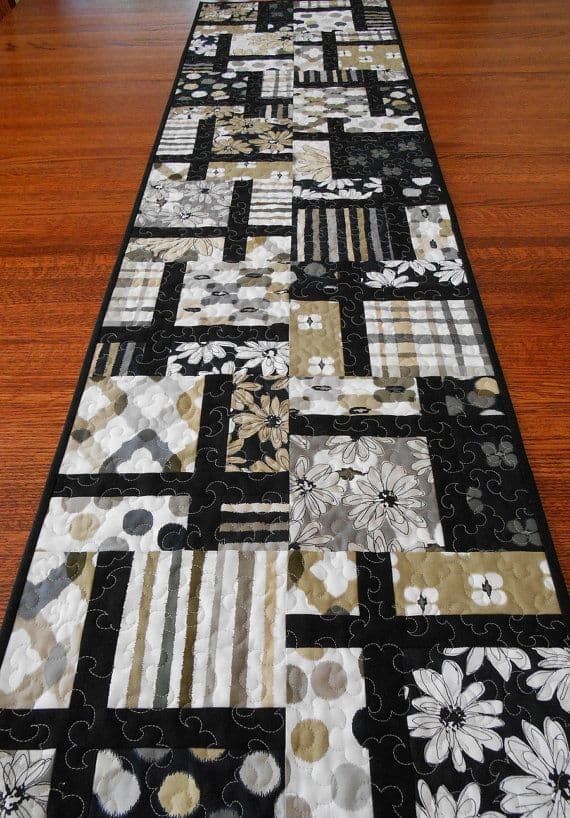
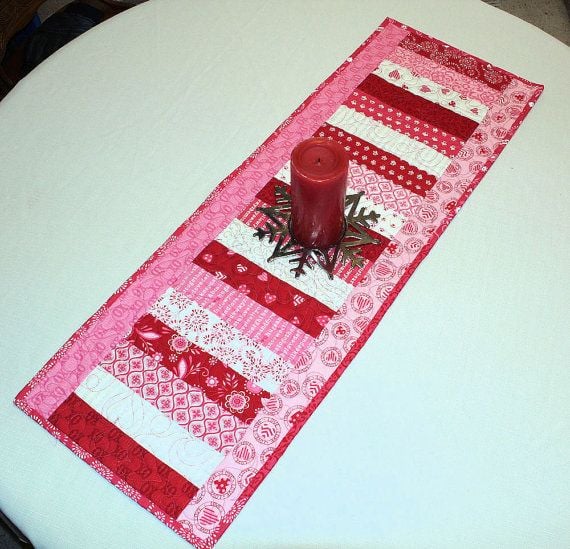
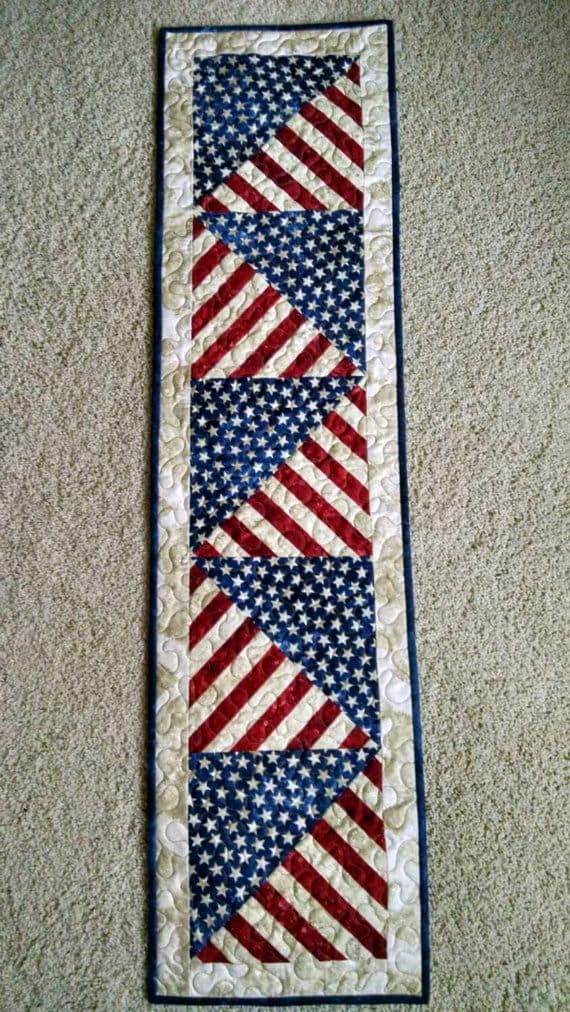
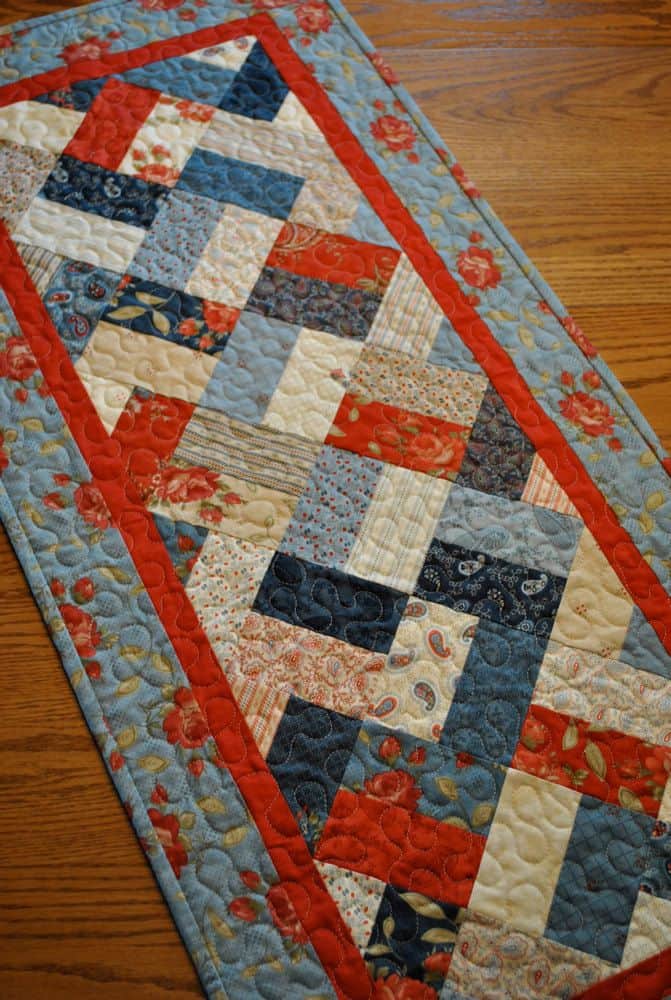
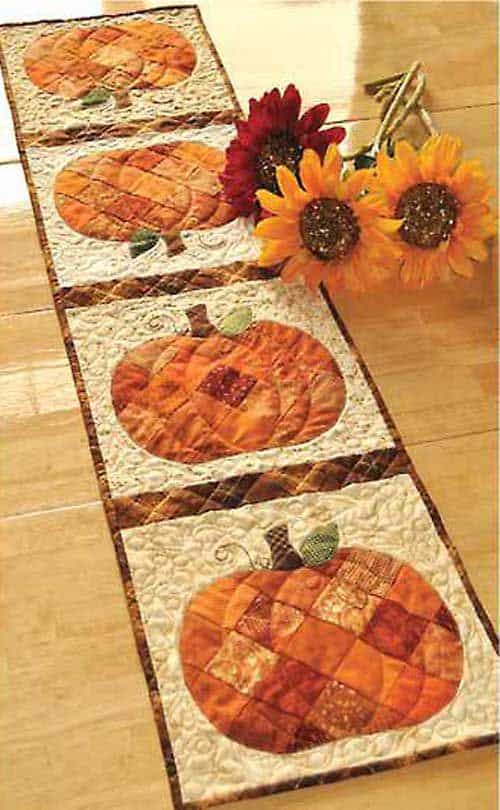
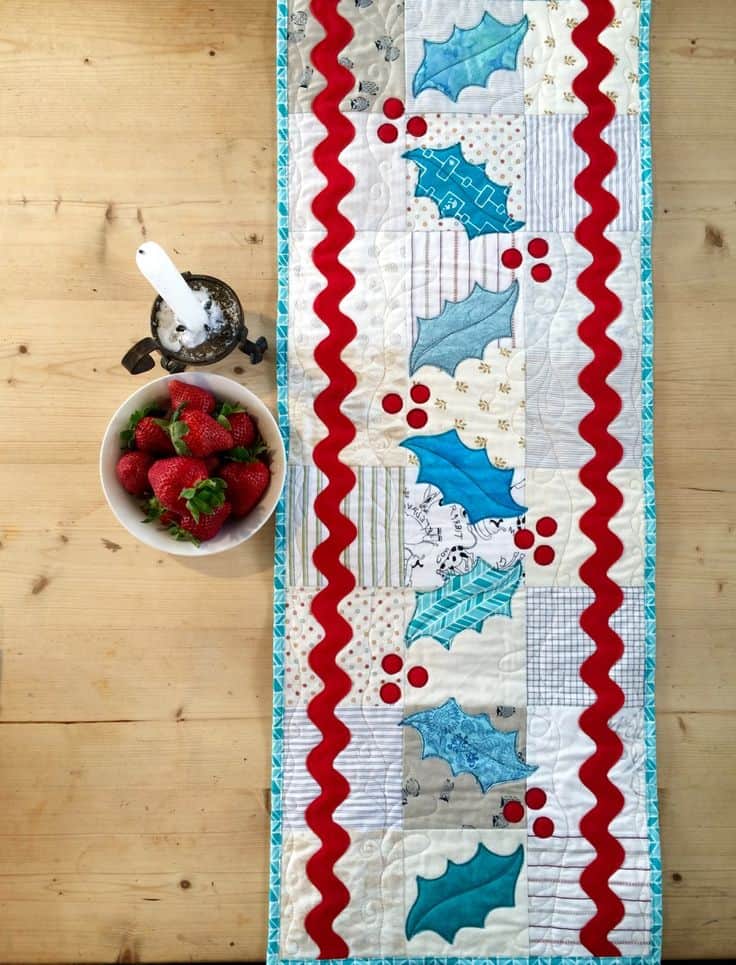
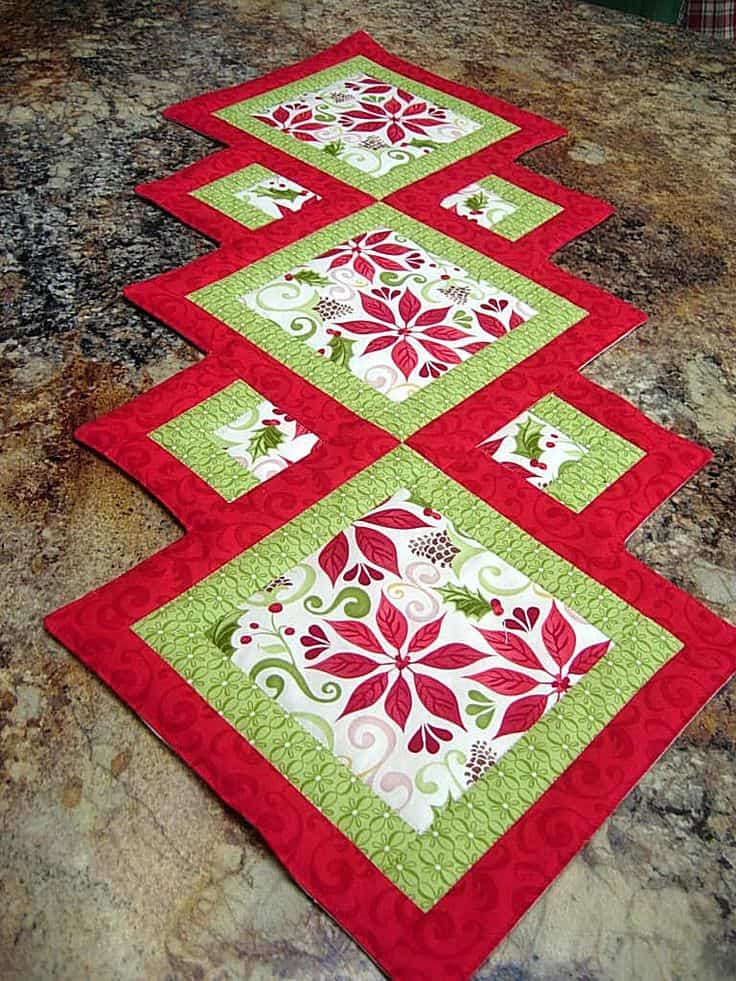
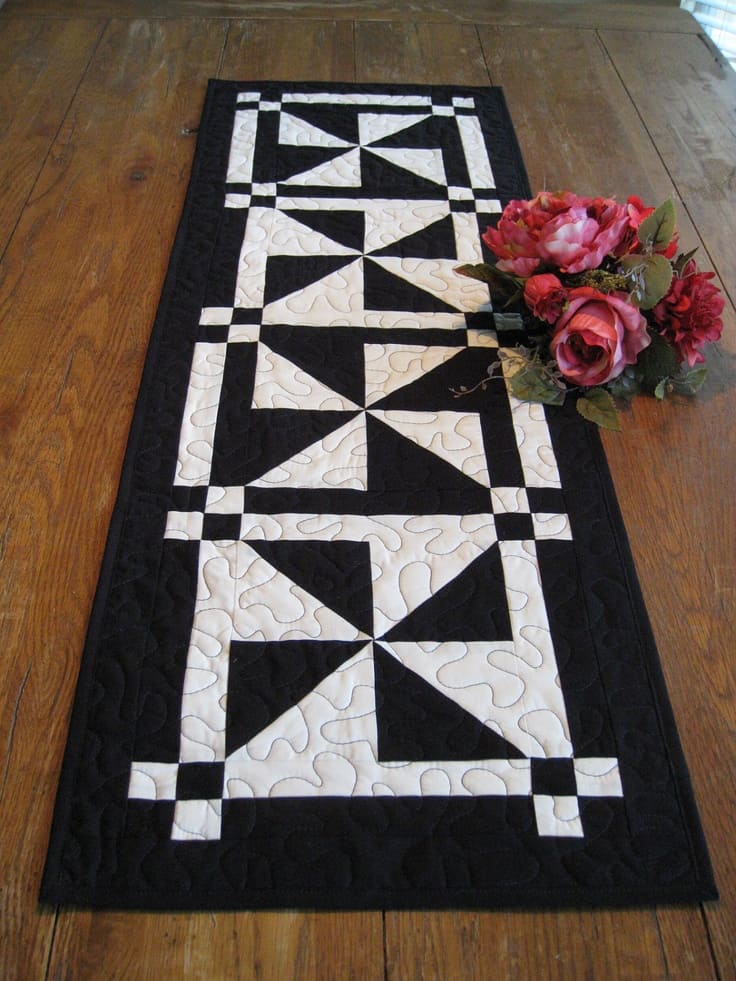
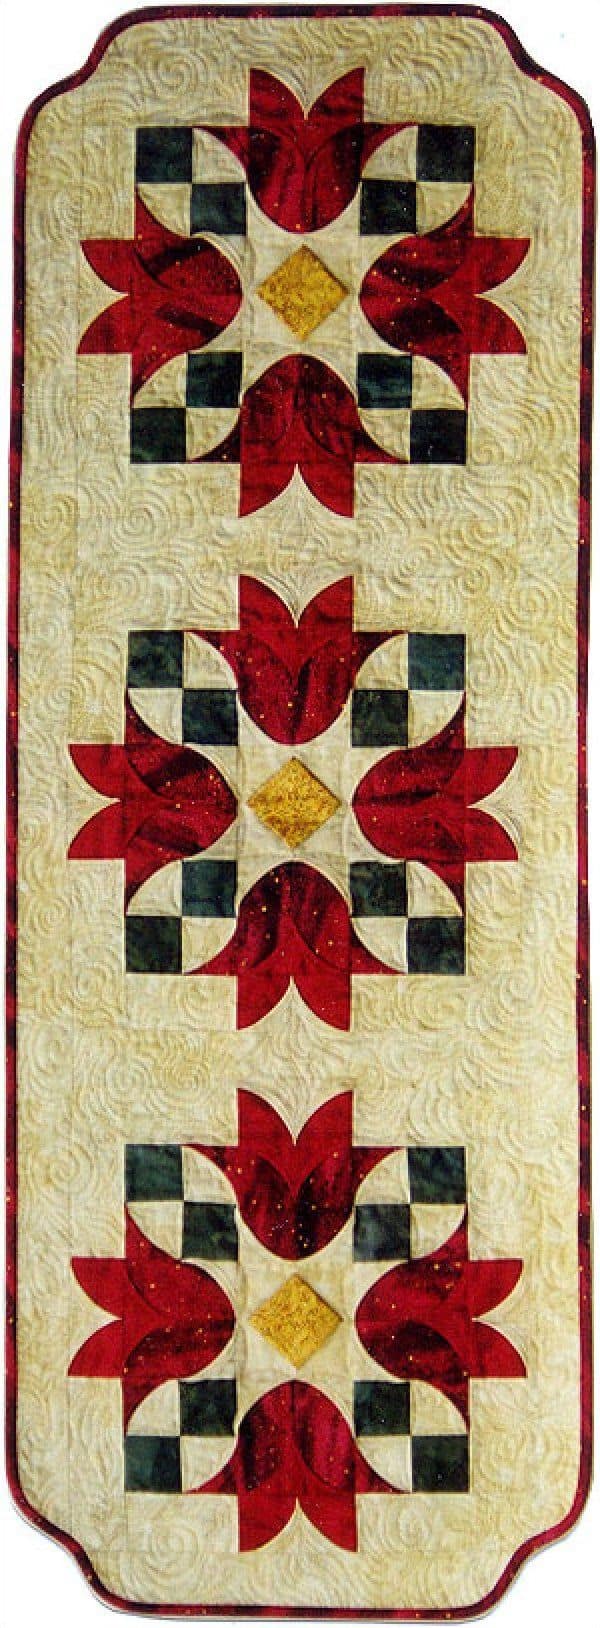
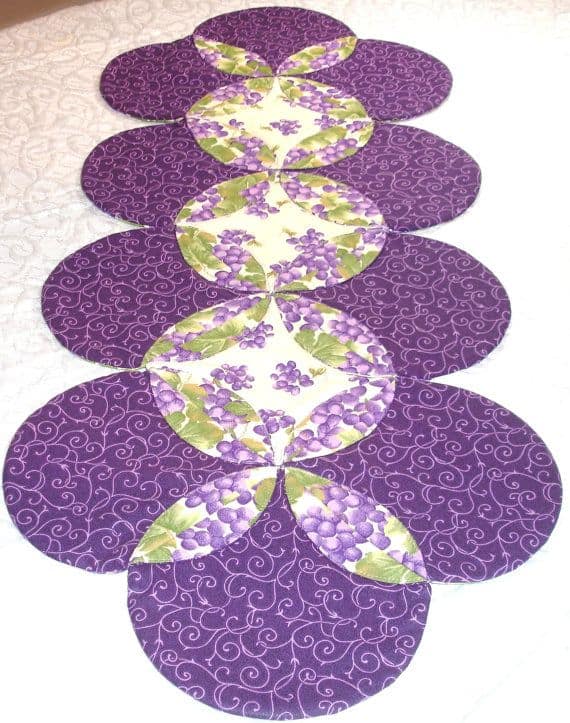
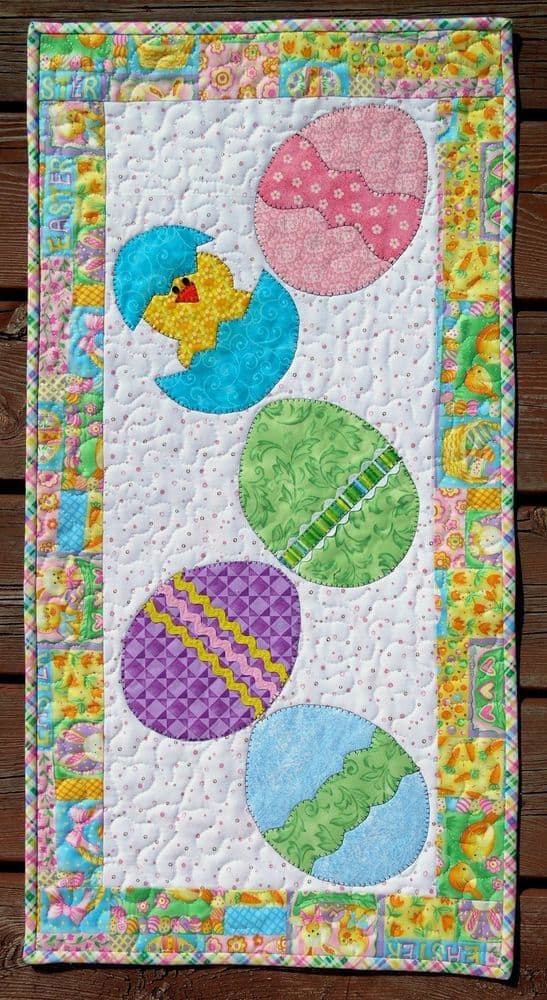
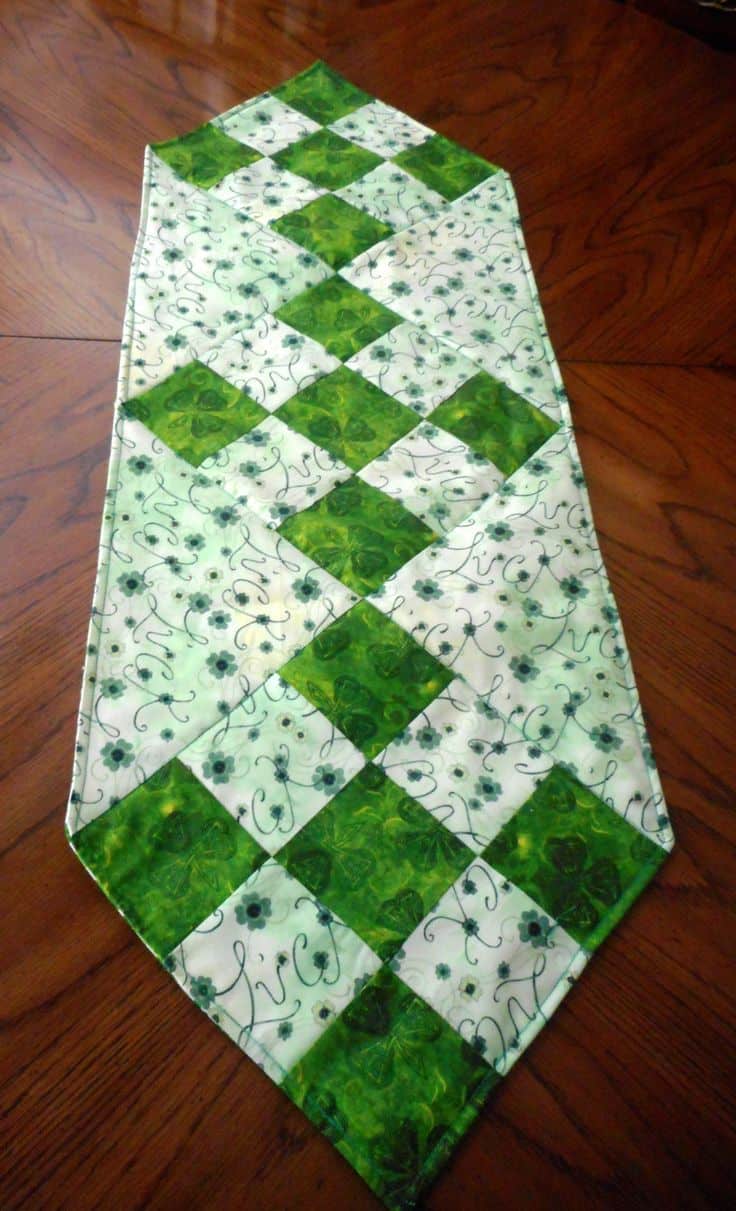
 Despite what many say, using fabric will various designs to enhance a dining room'a decor is very much in style and considered vogue. What is your take on this DIY topic? Feel free to speak your mind in the comment section below.
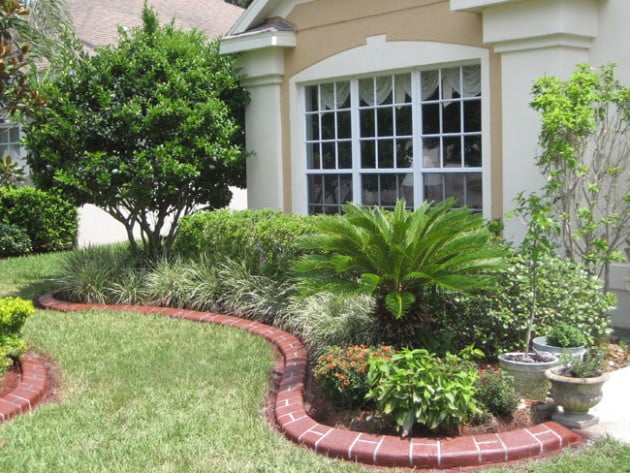
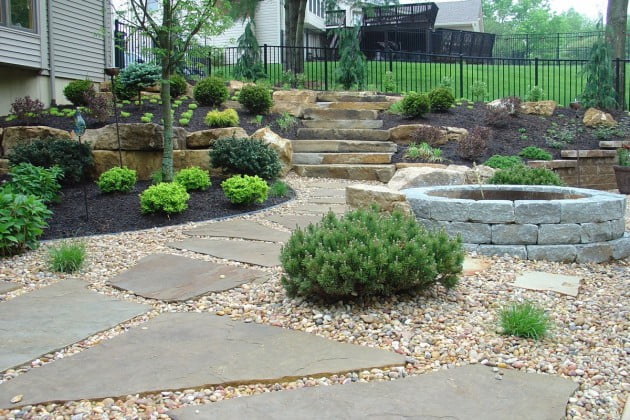
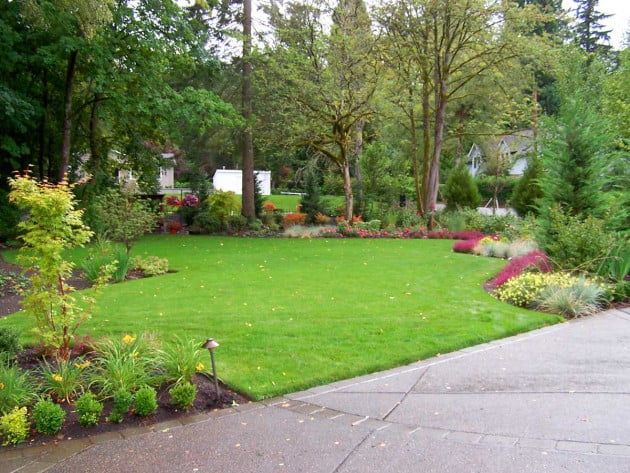
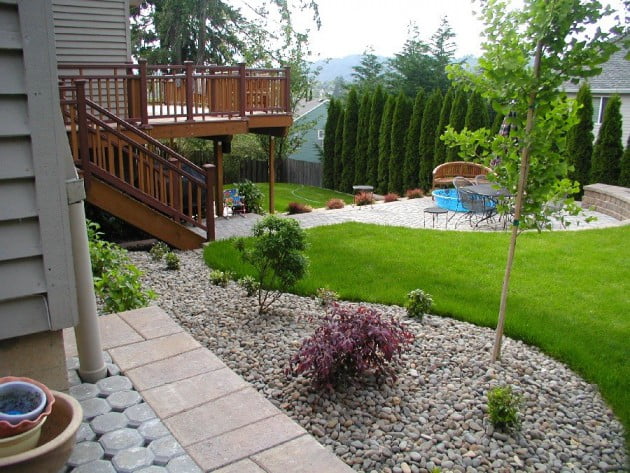
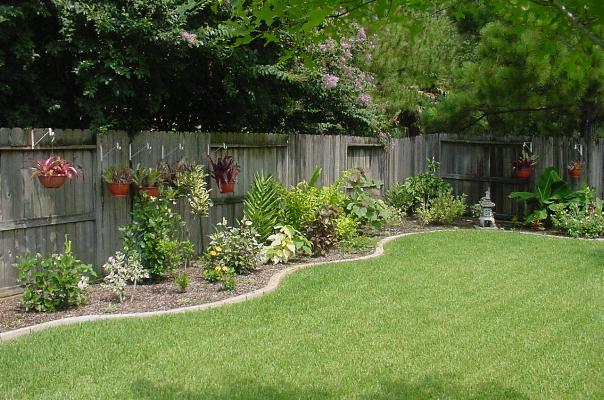
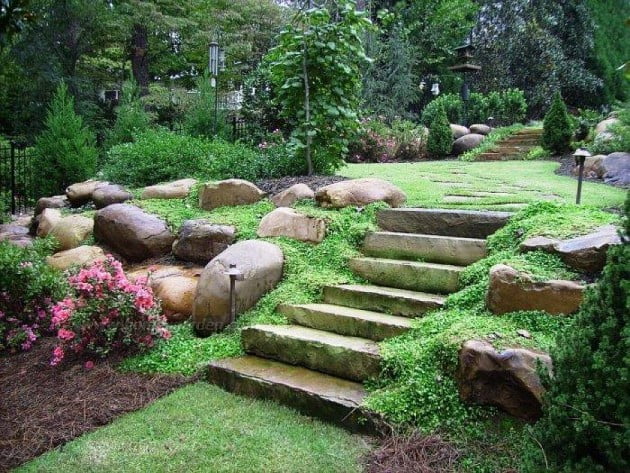
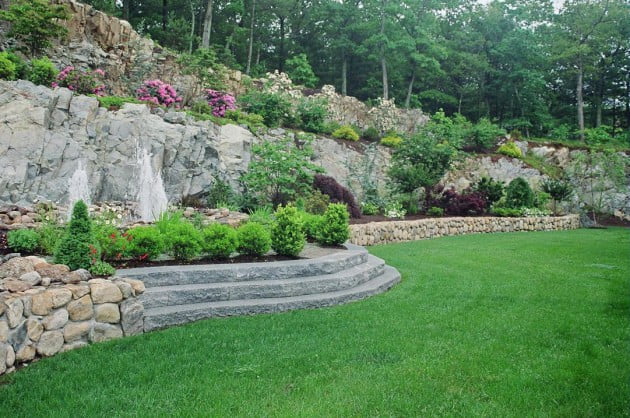
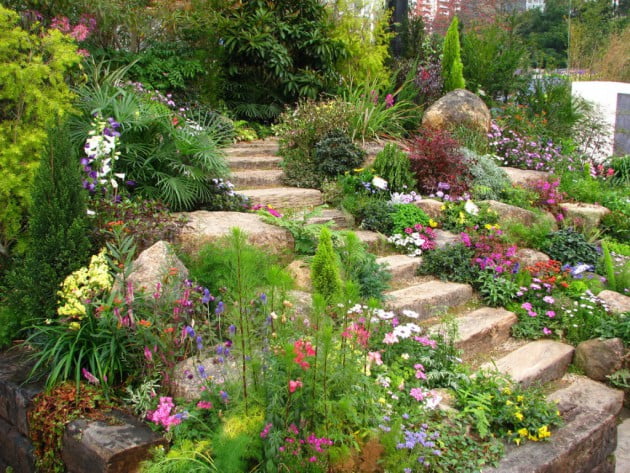
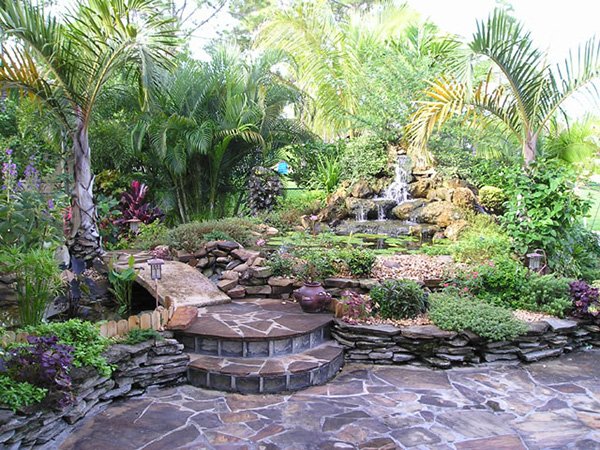
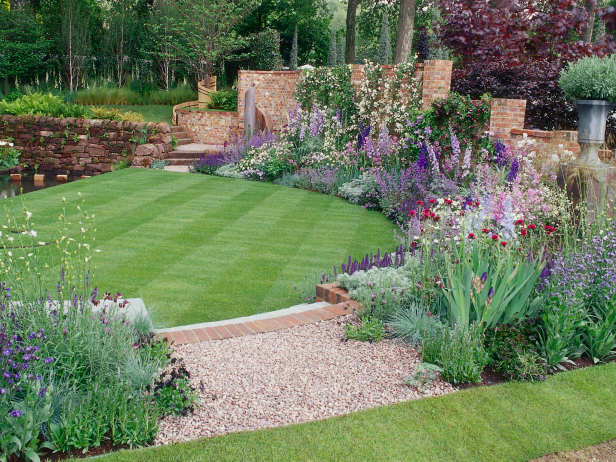
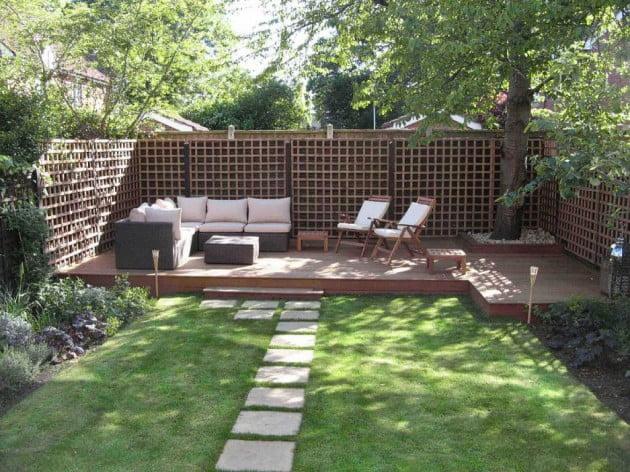
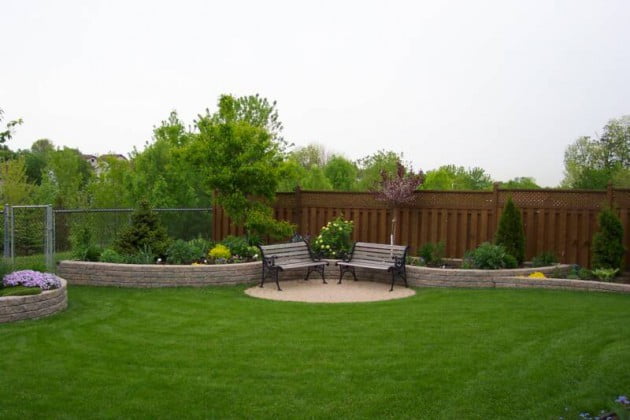
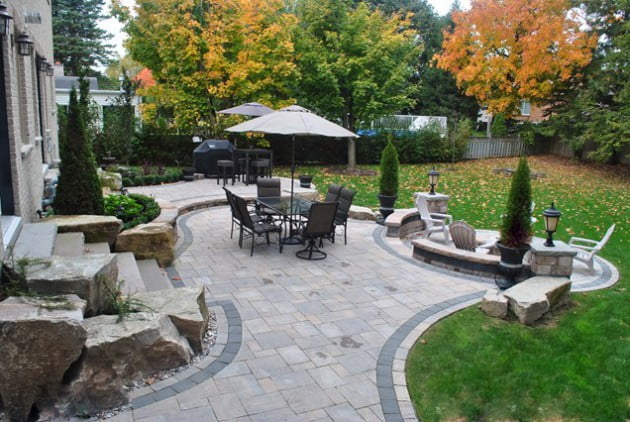
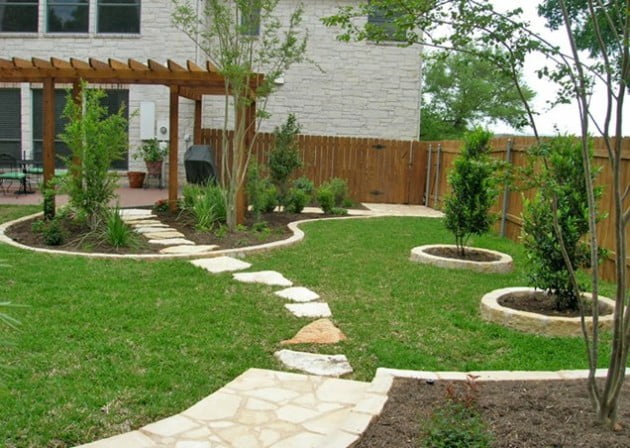
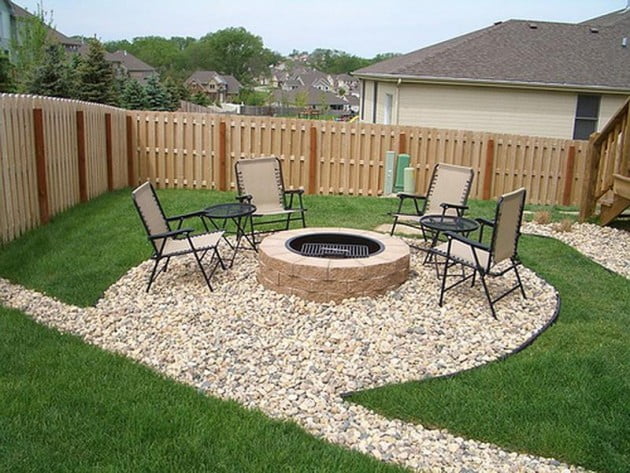

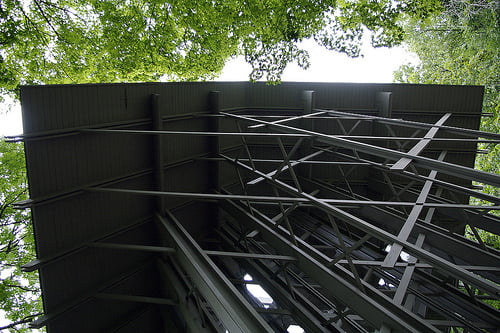
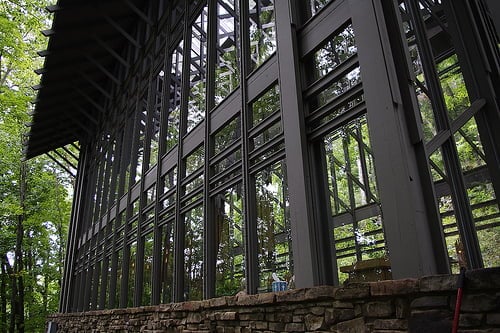
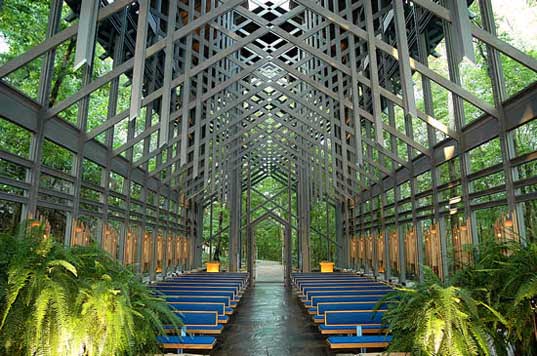
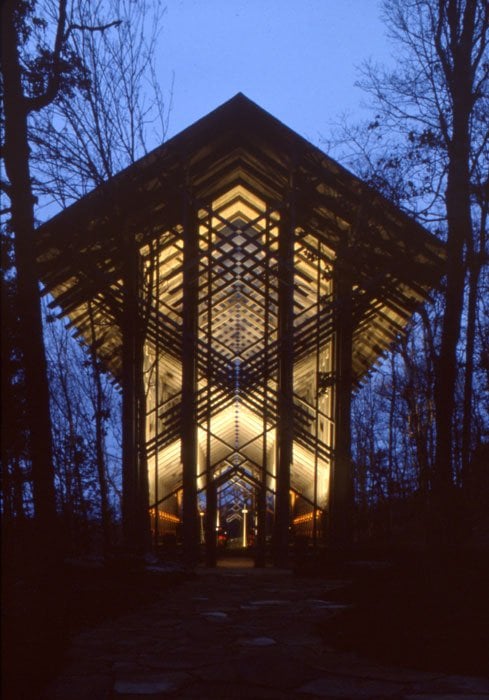

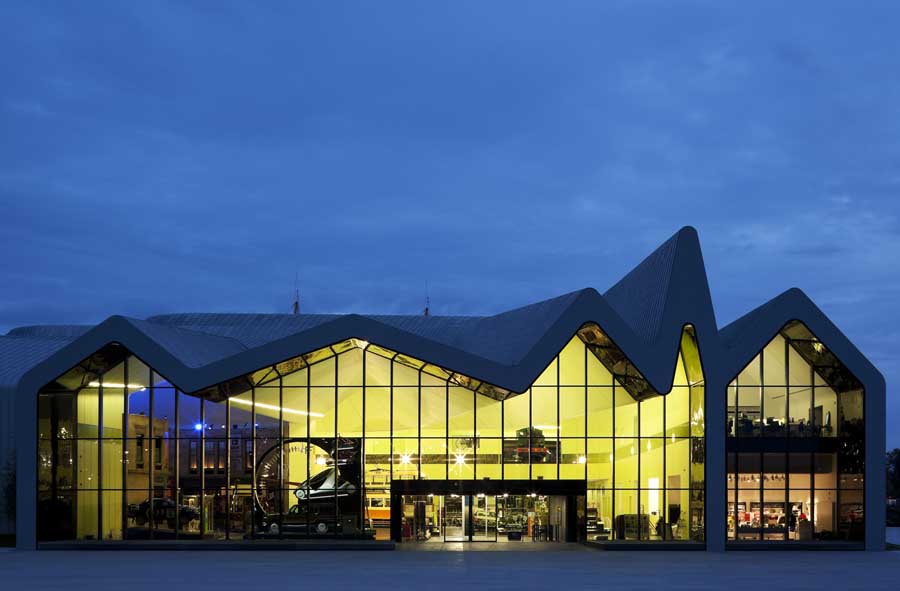
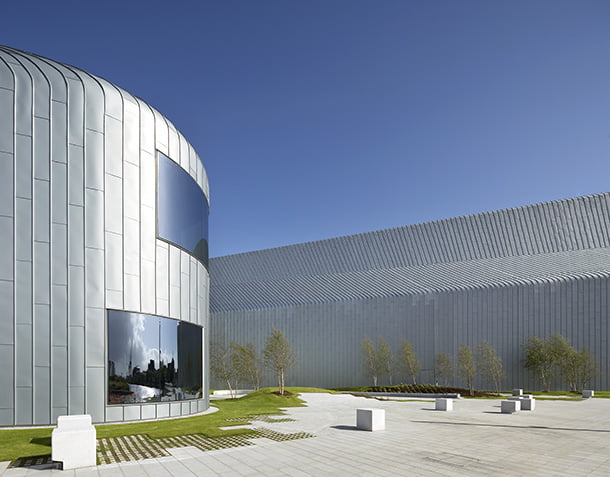
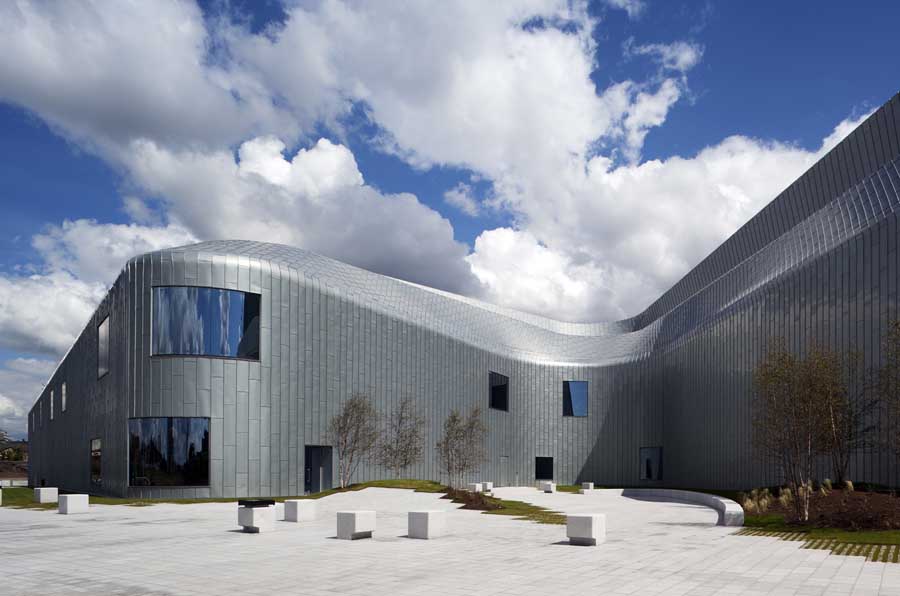
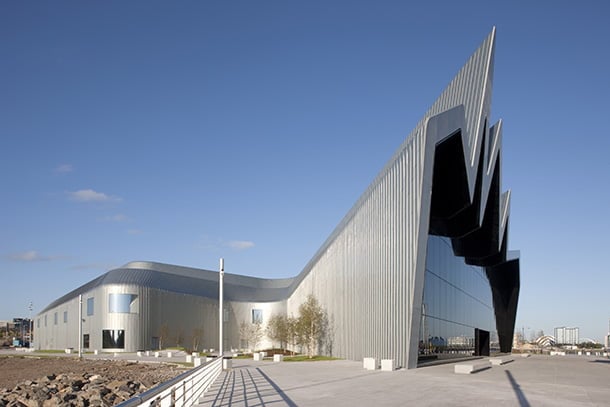


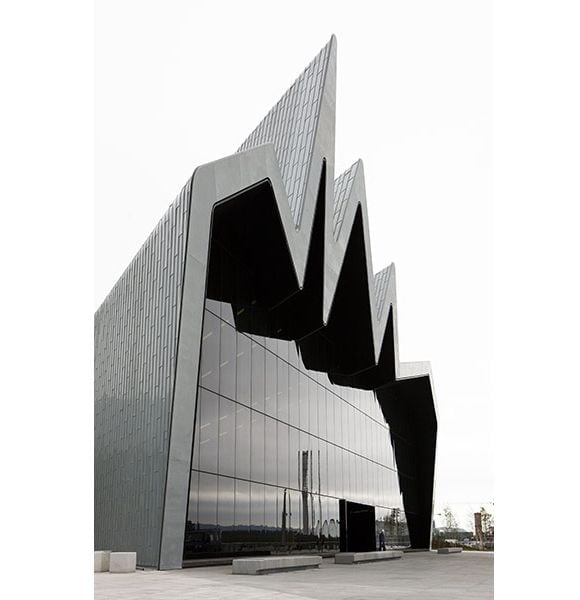
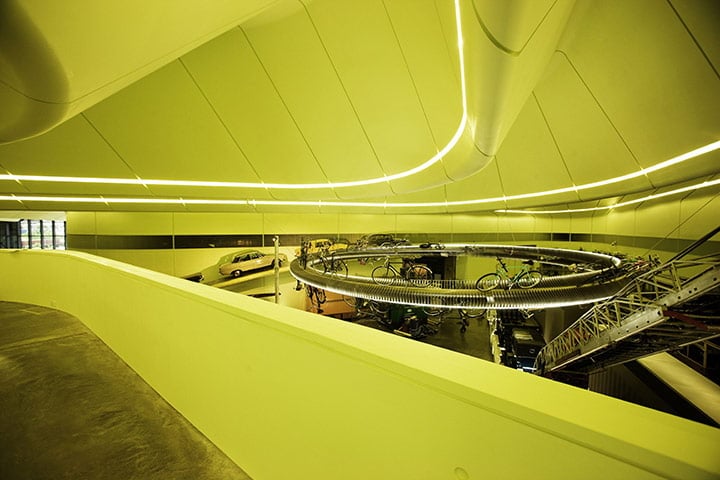
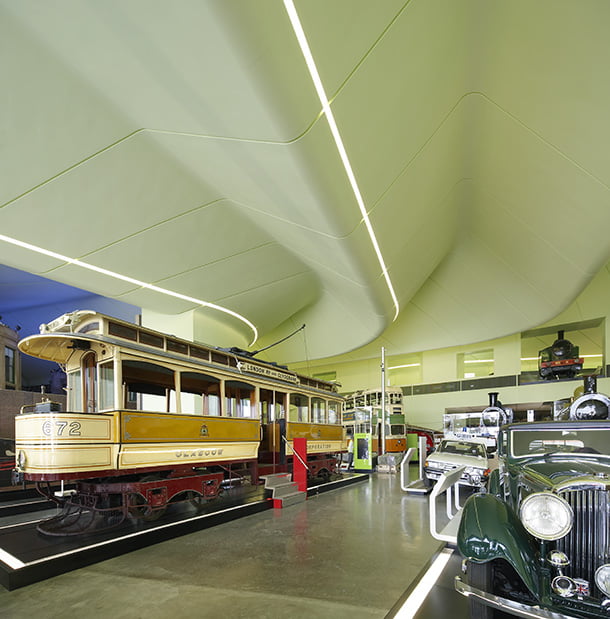
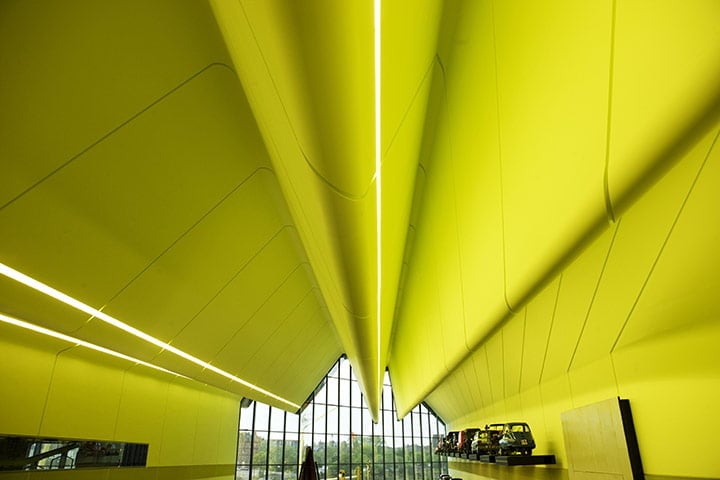
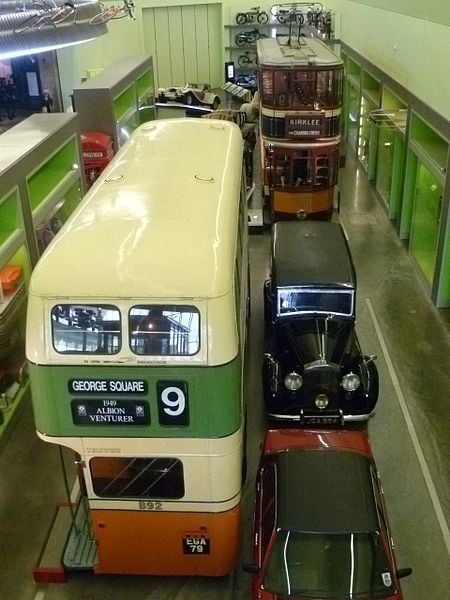


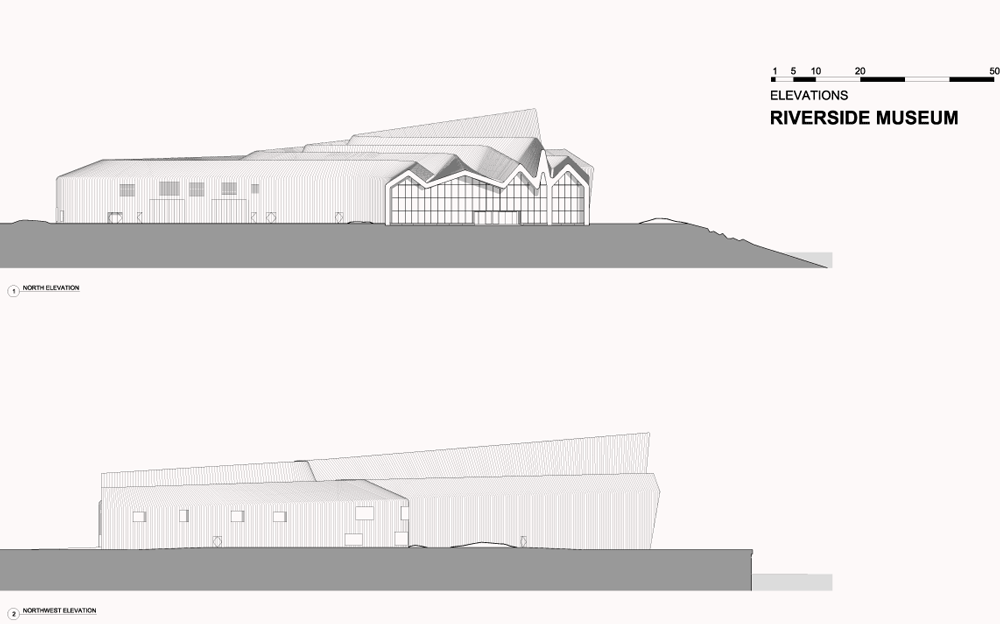
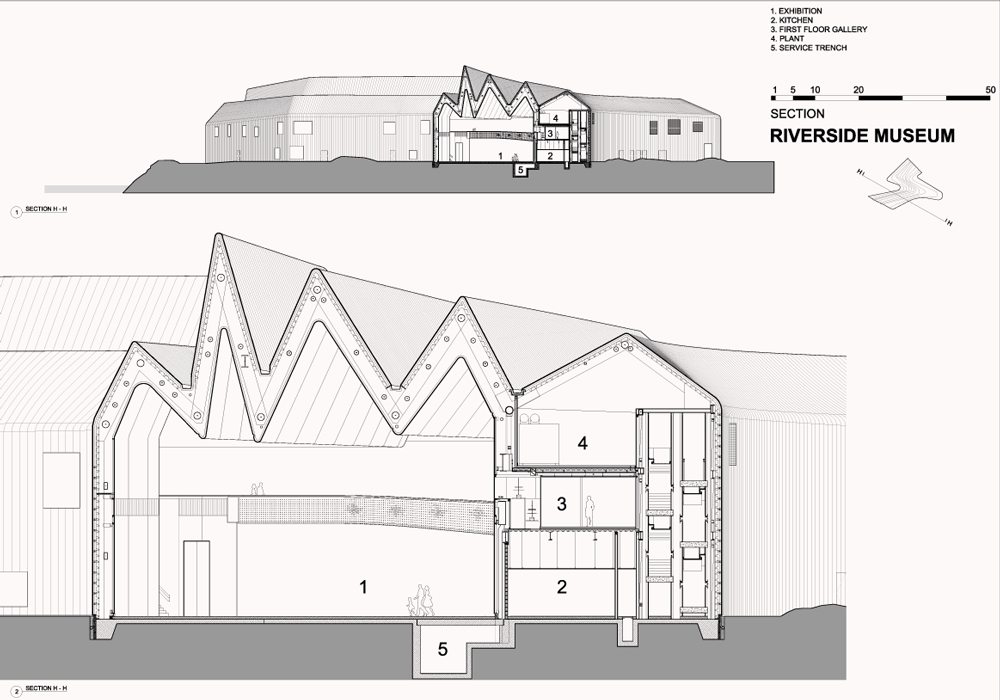
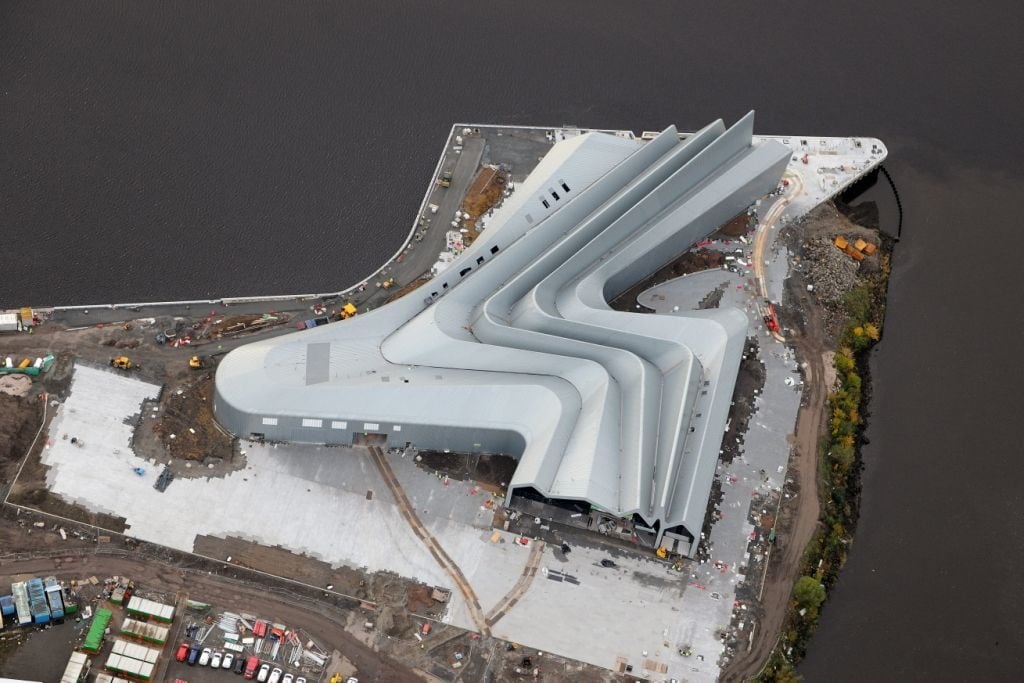
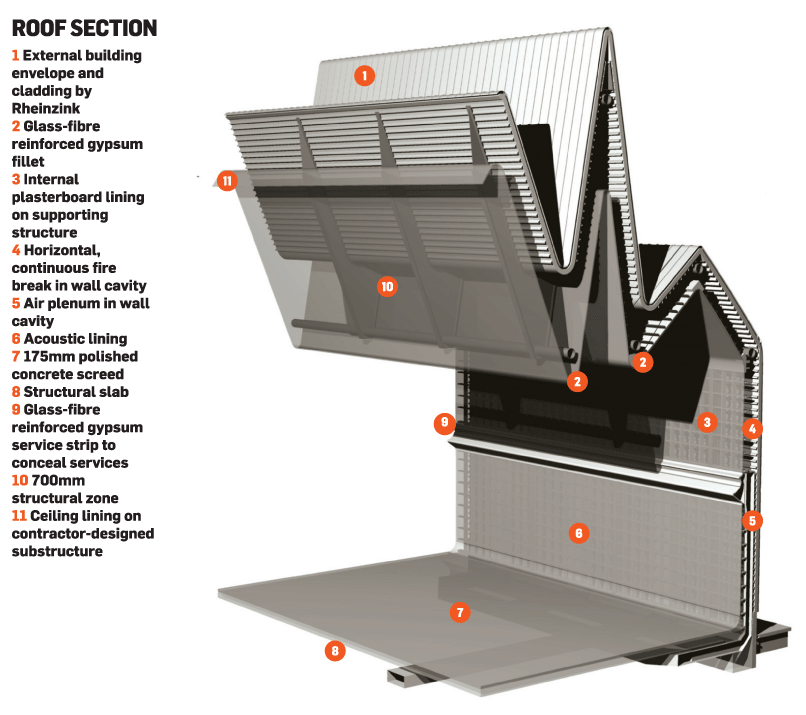

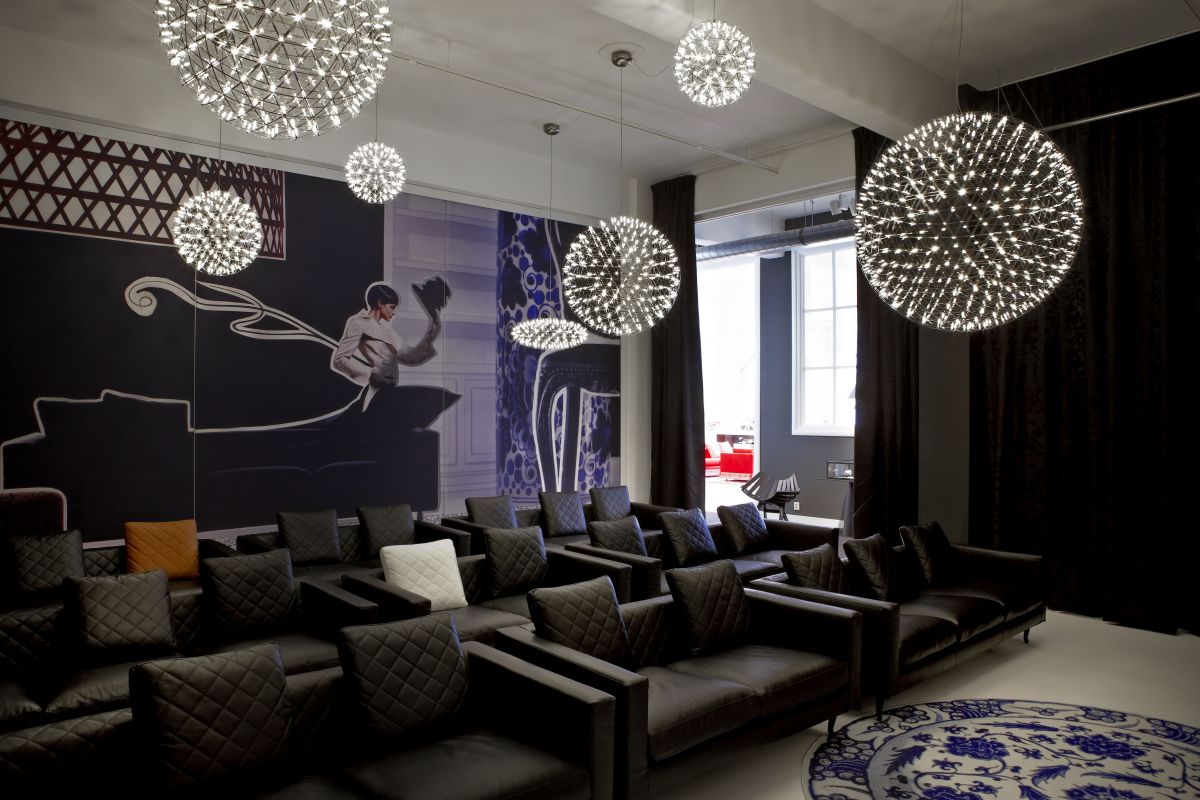
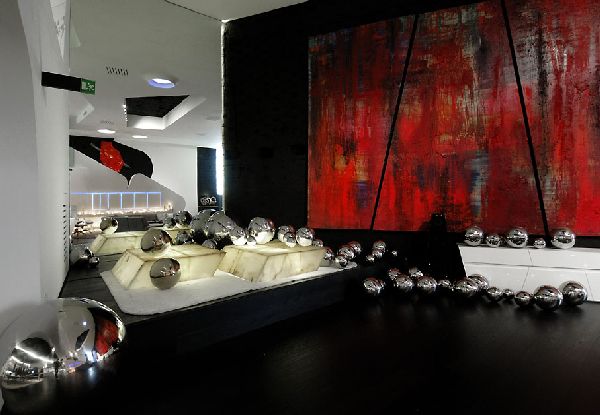
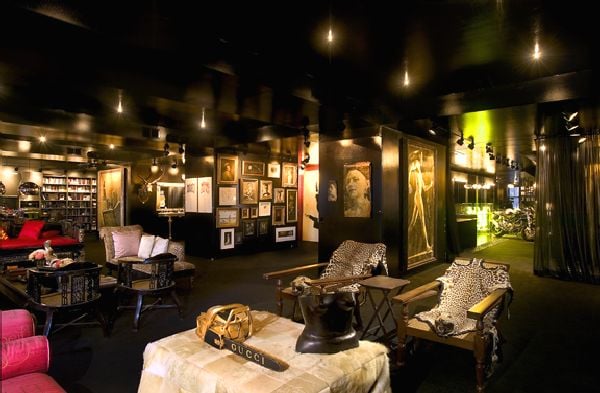
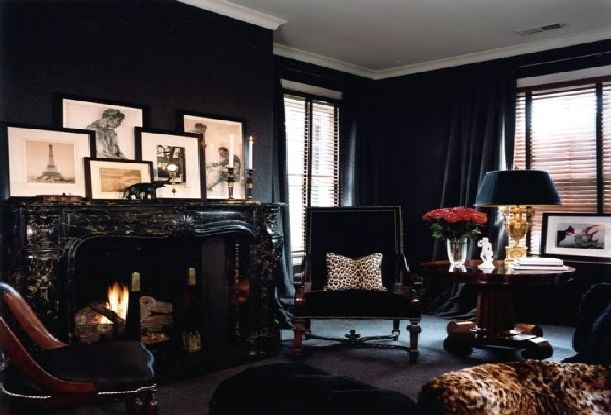
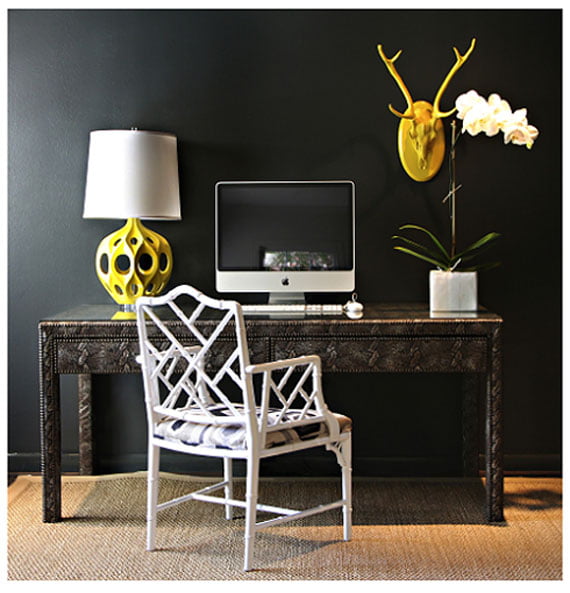
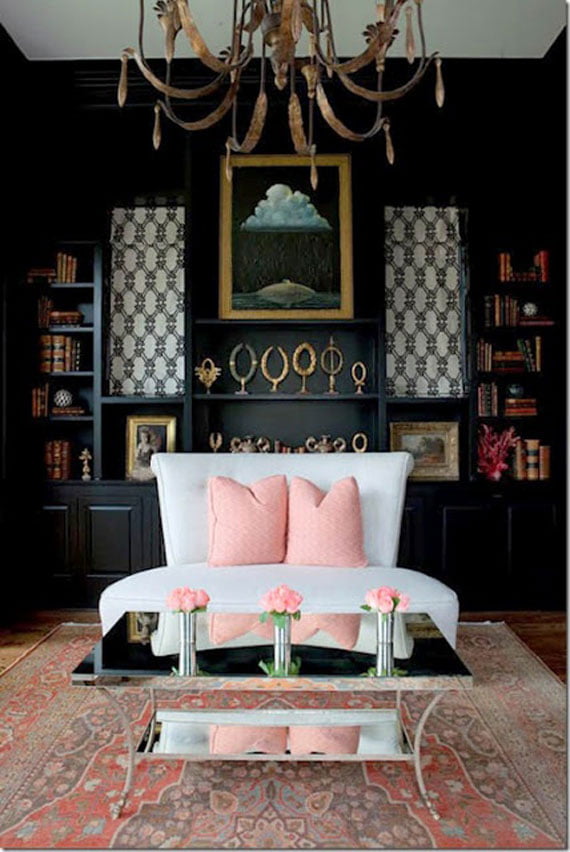
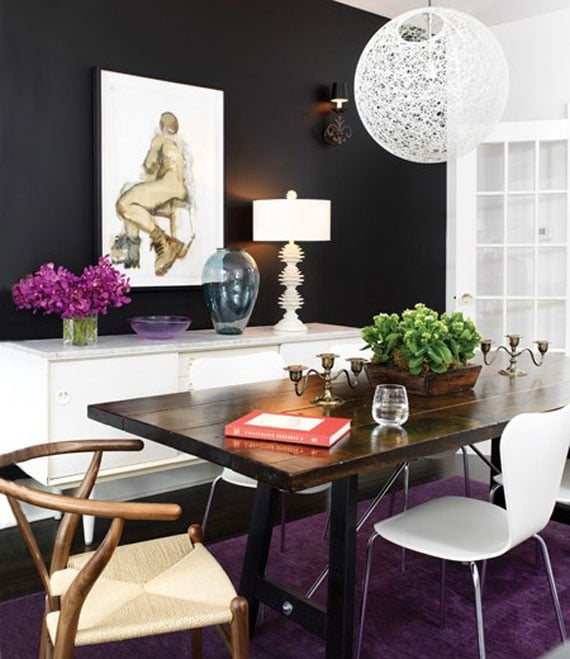
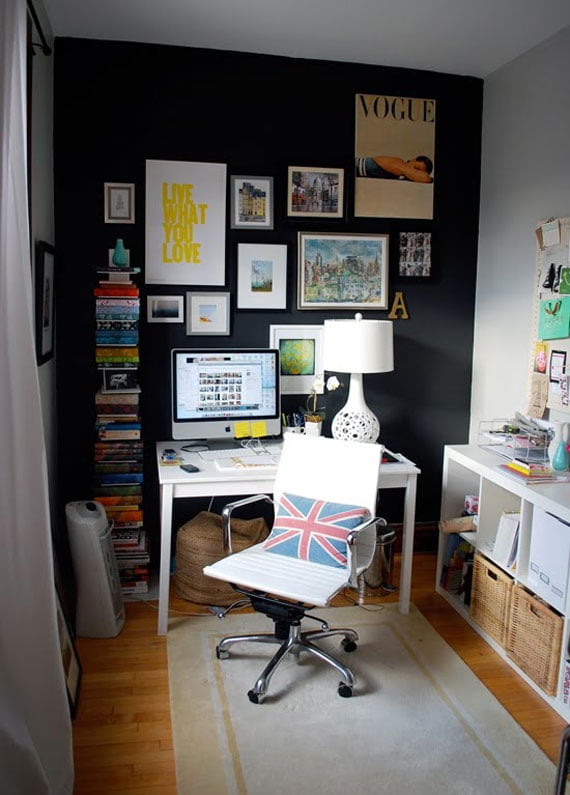
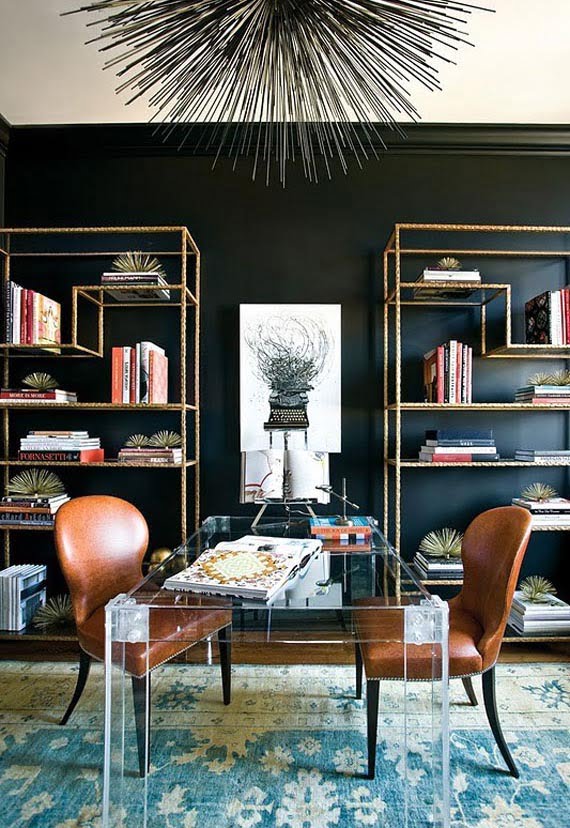

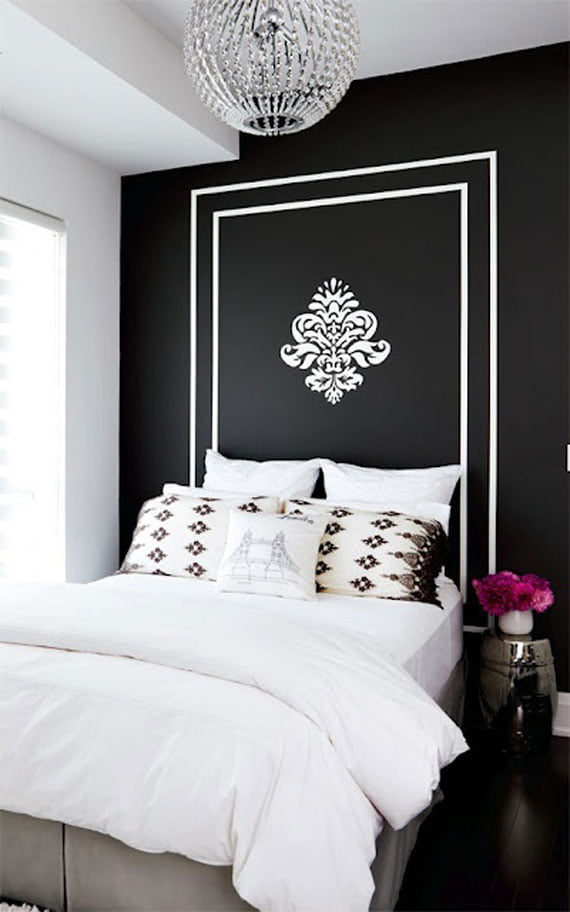
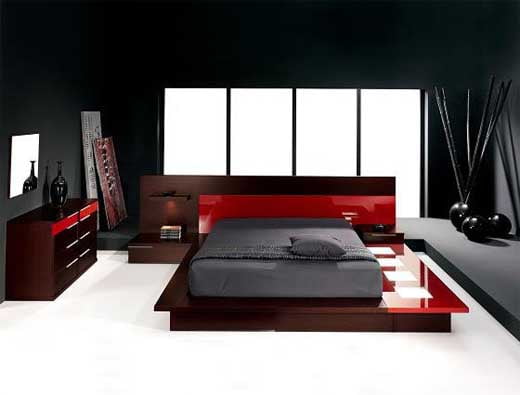


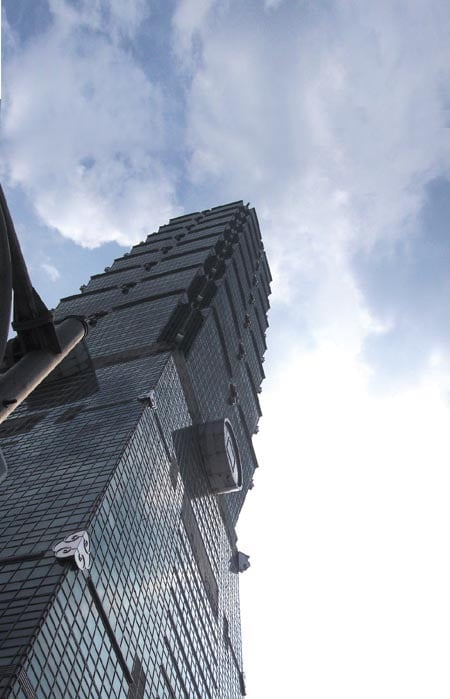
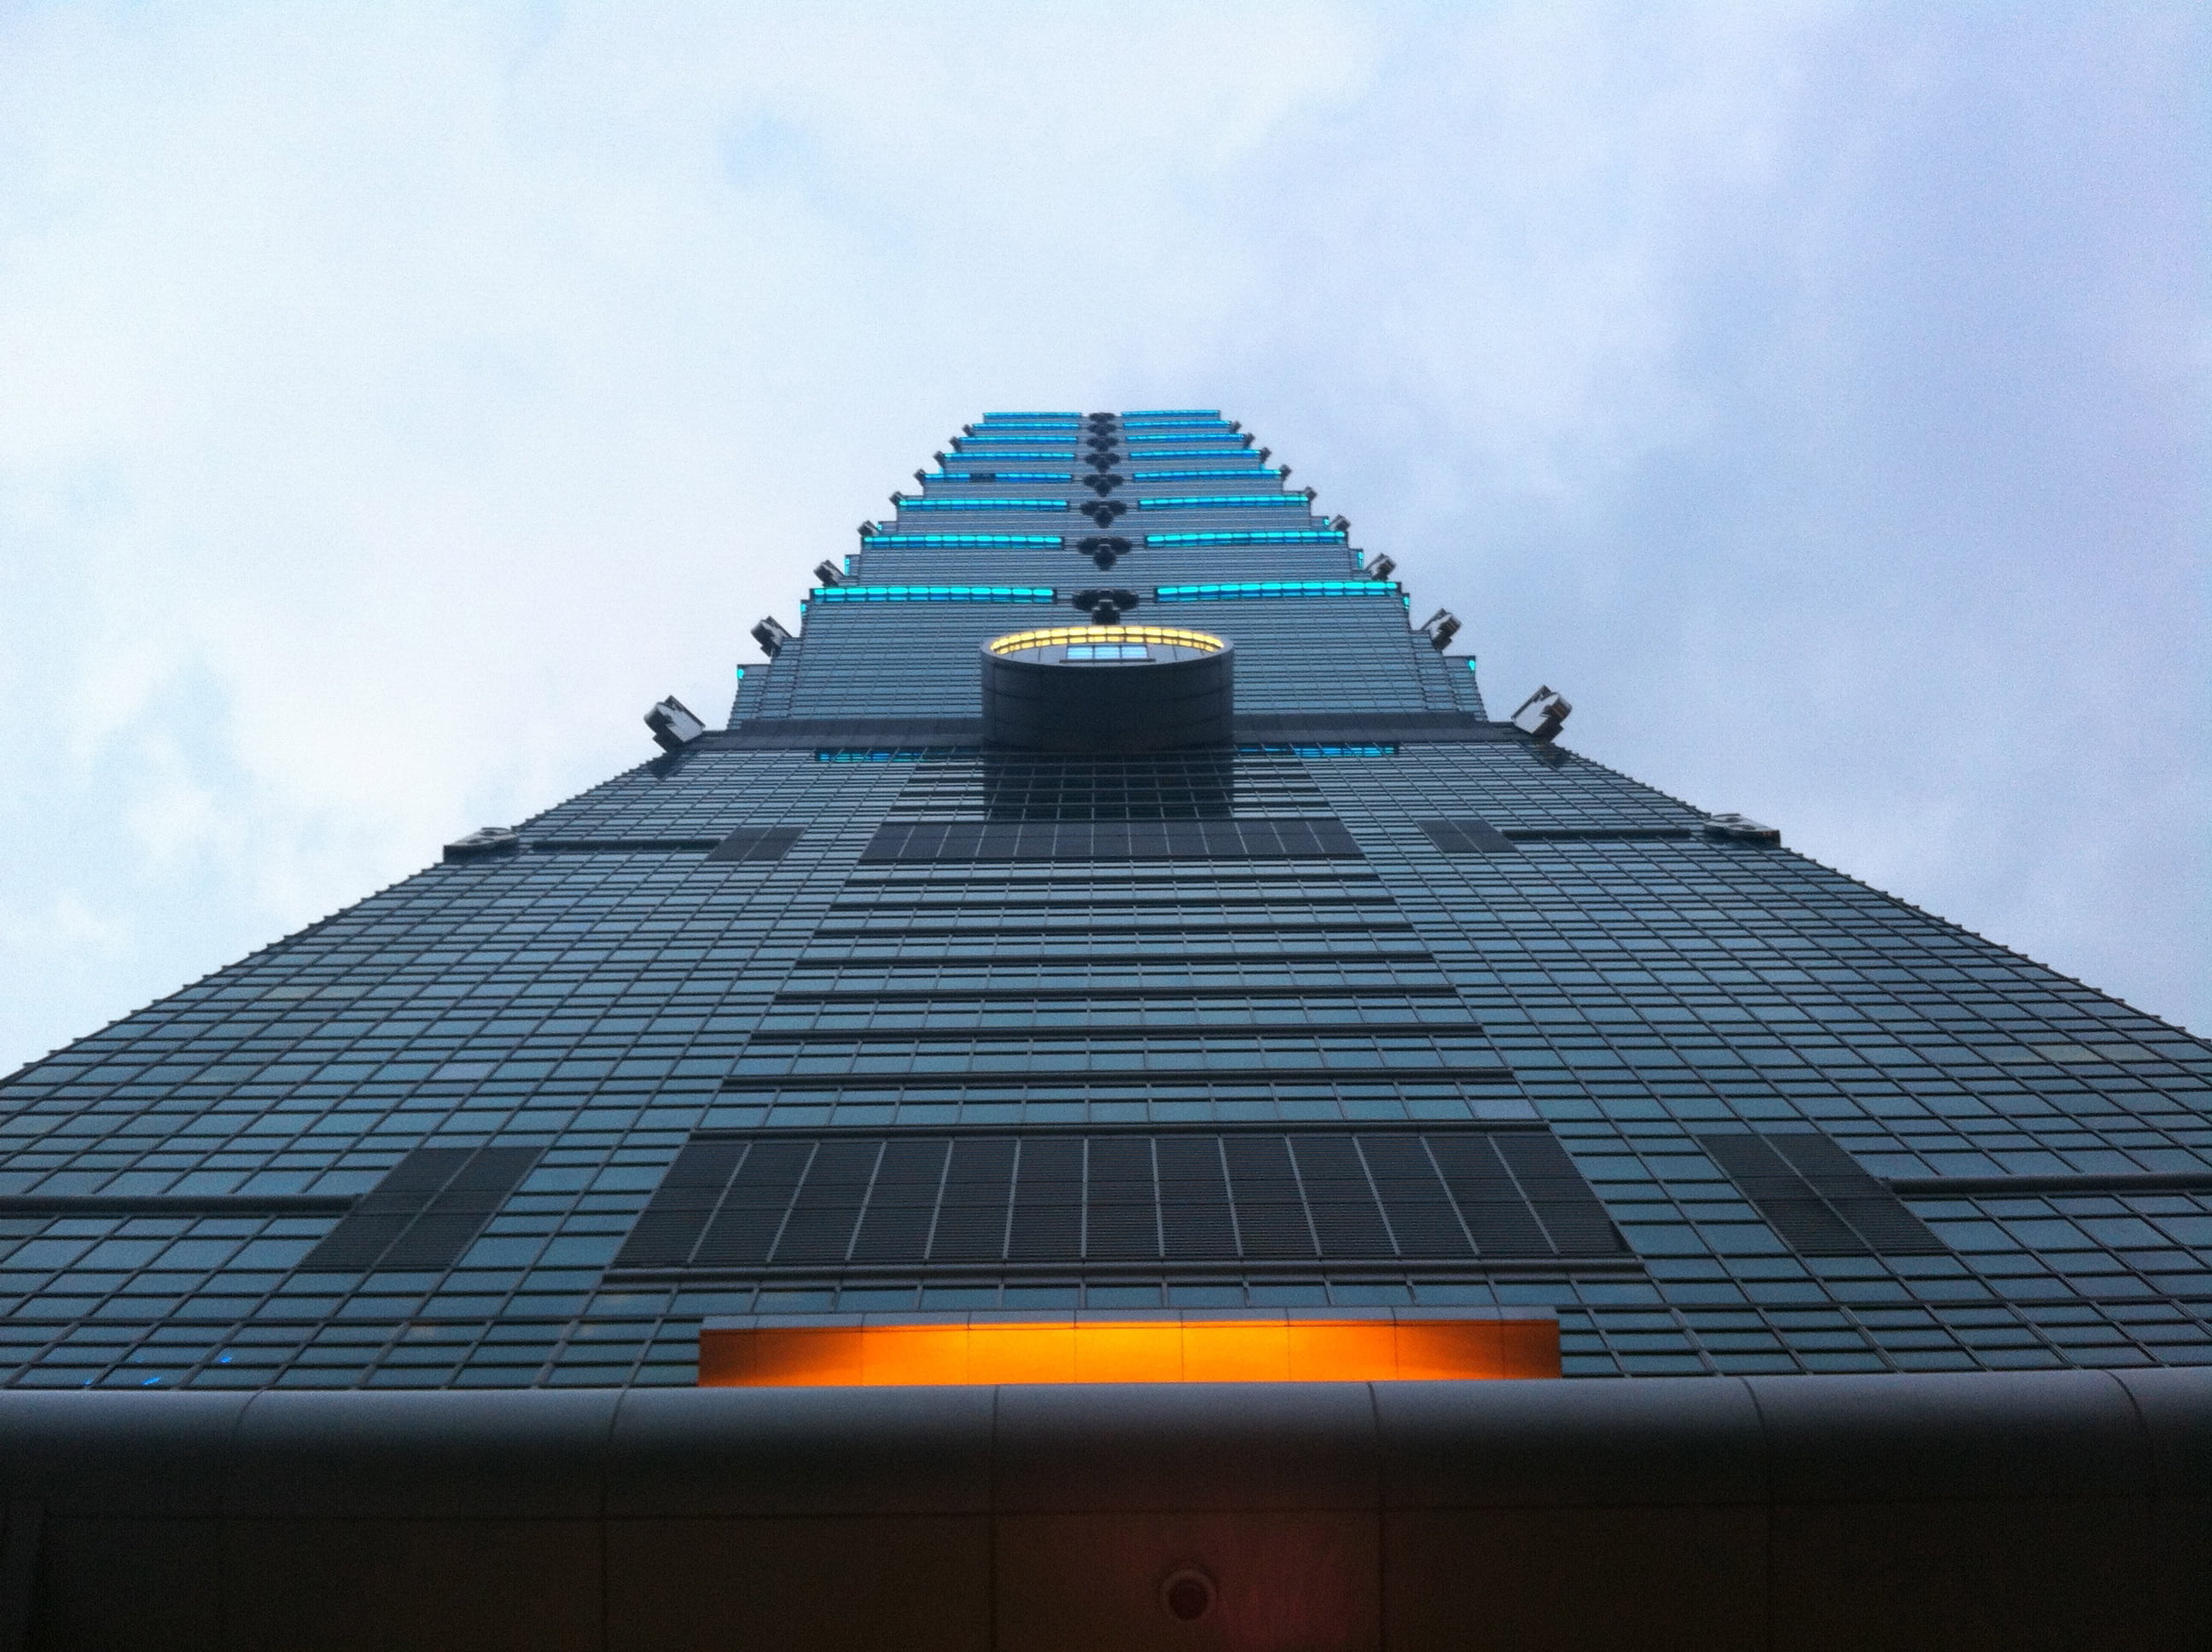

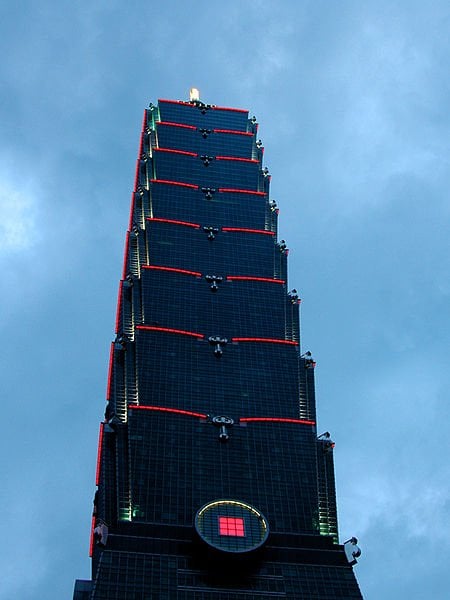


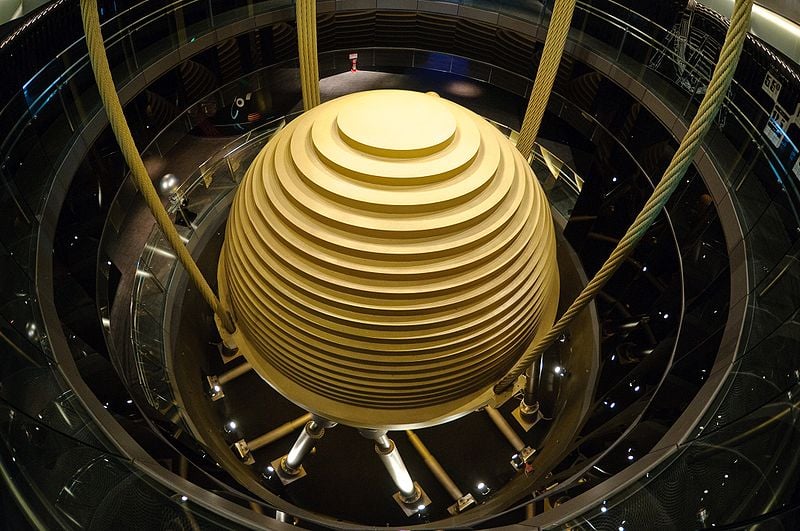
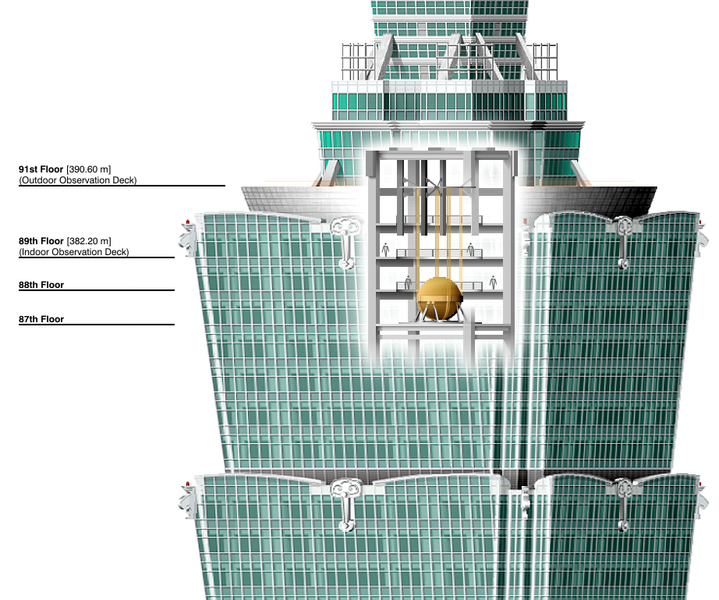
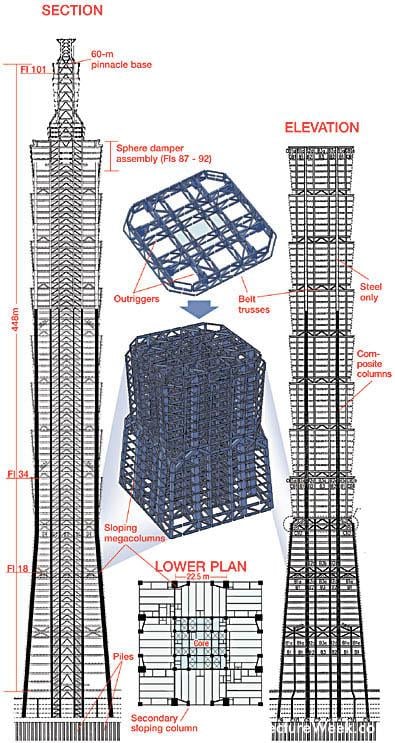

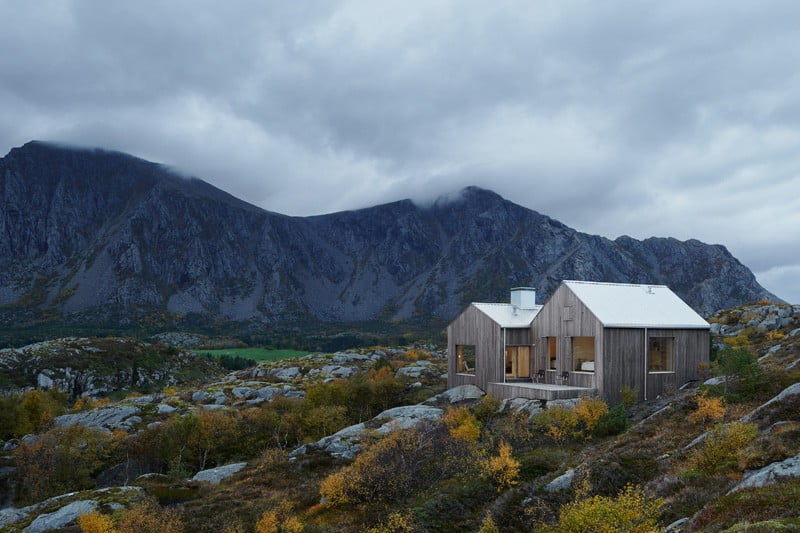

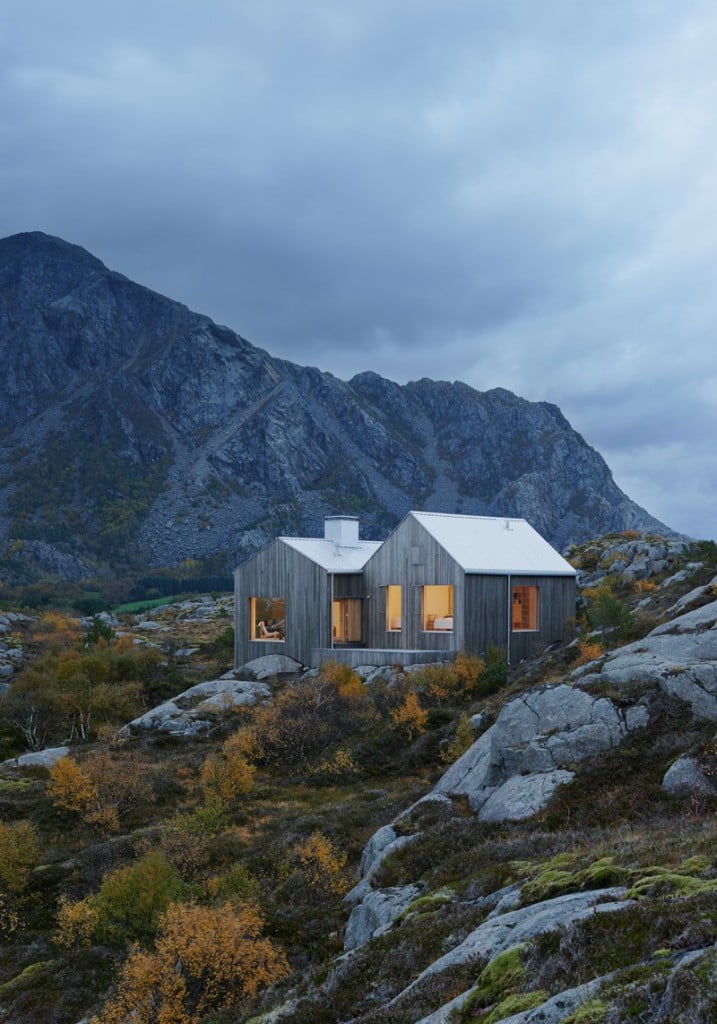

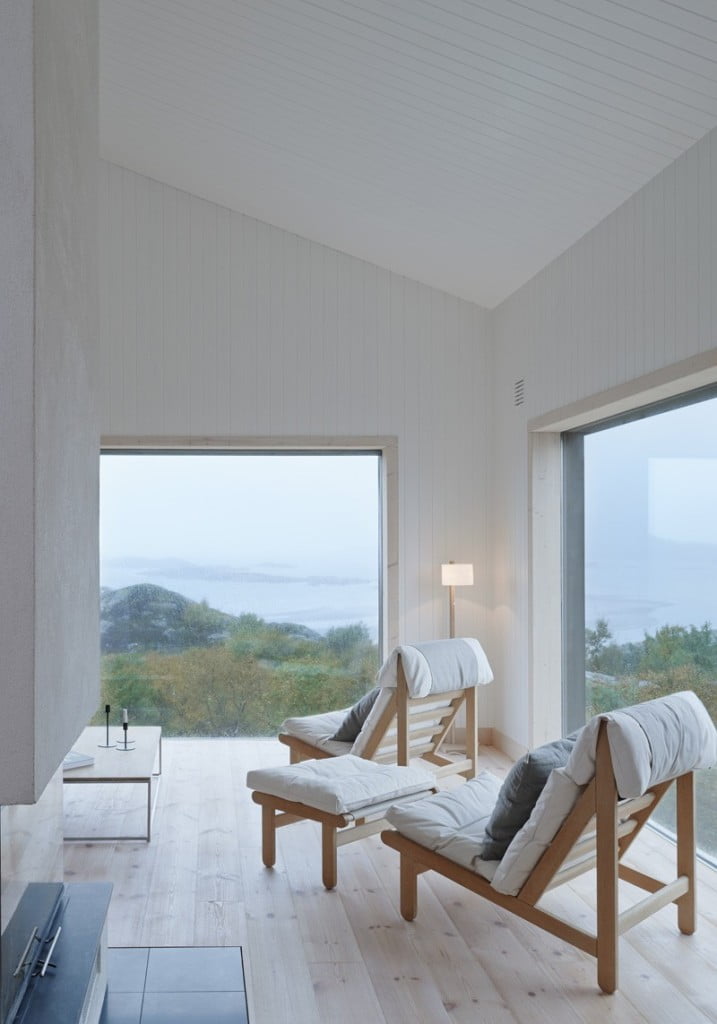
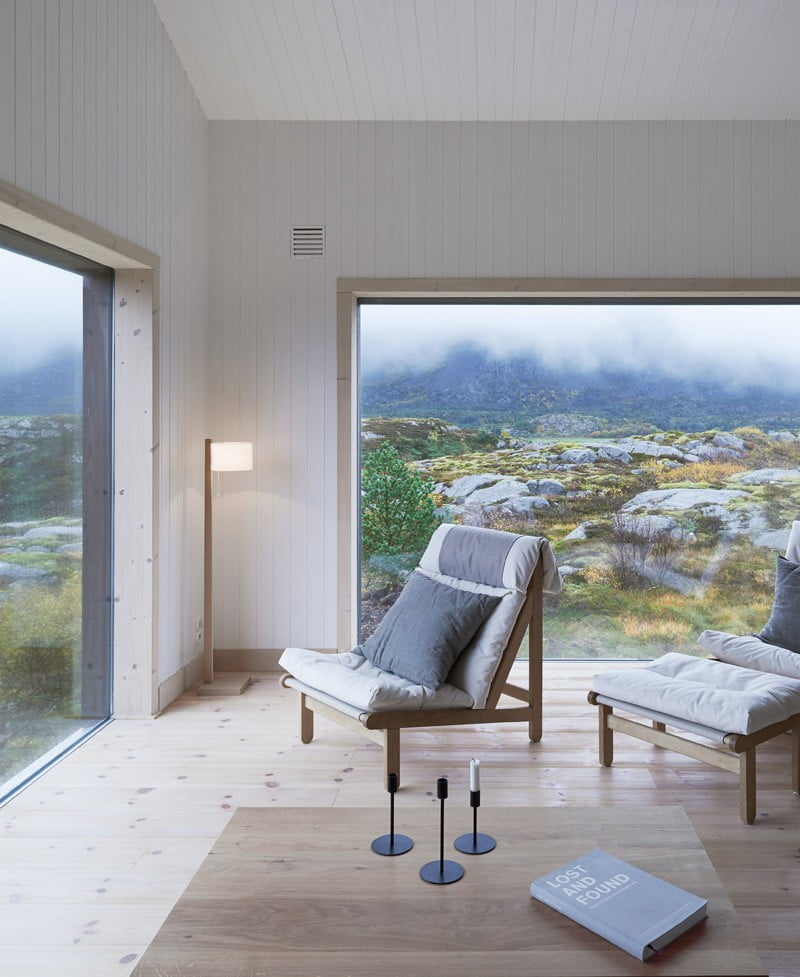
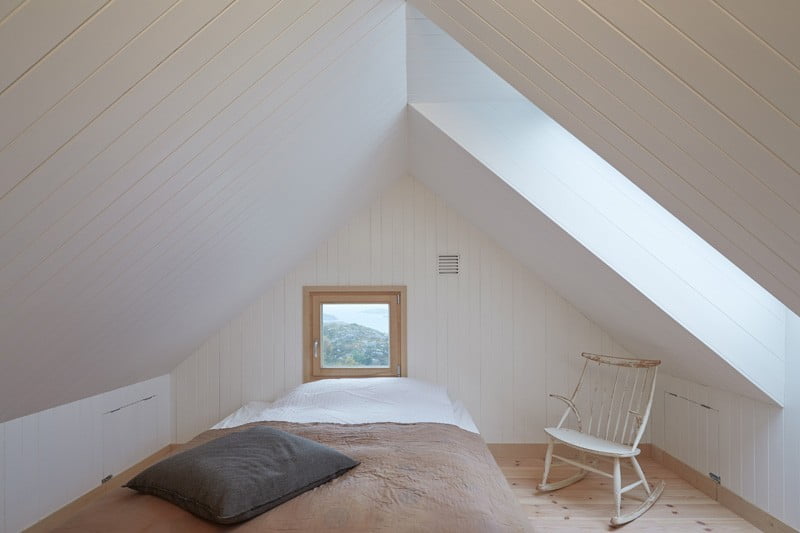
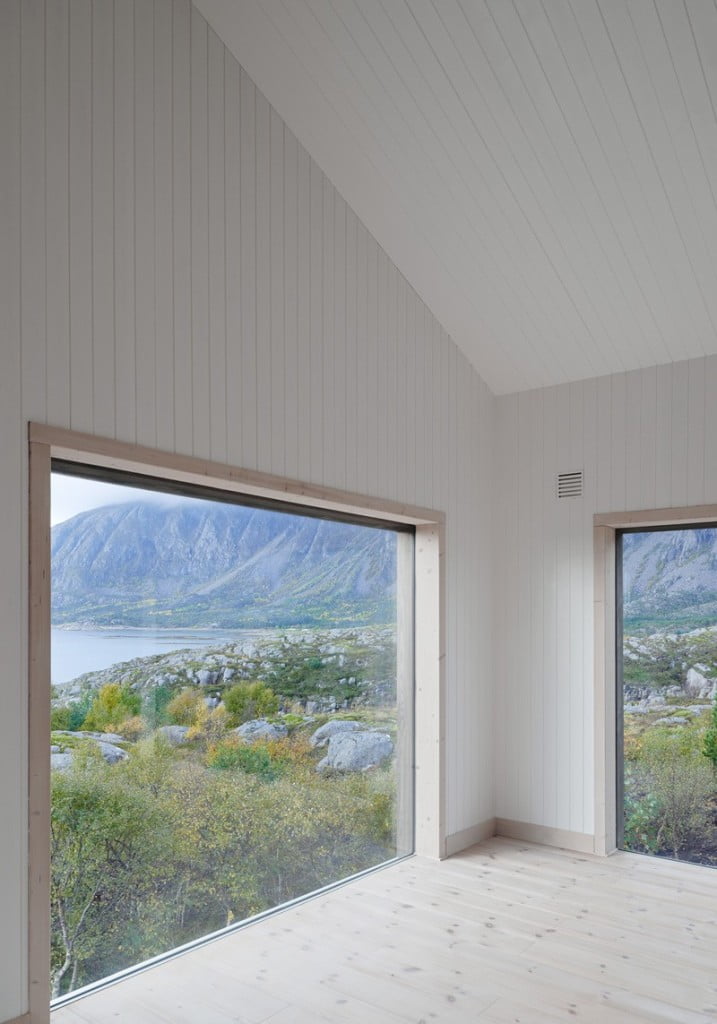

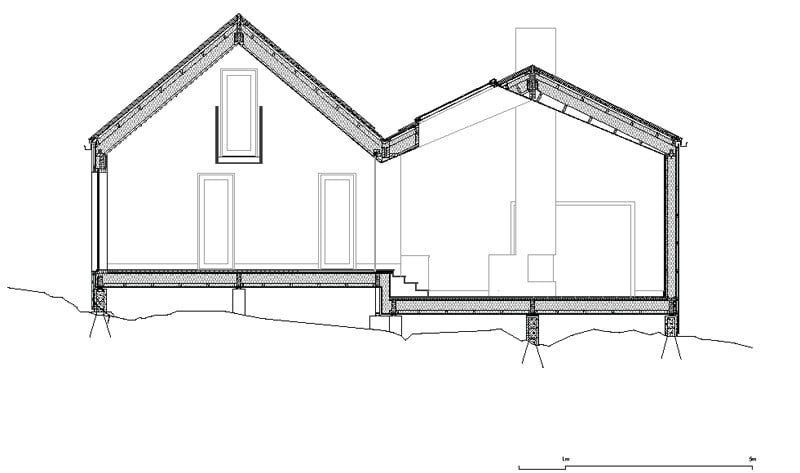
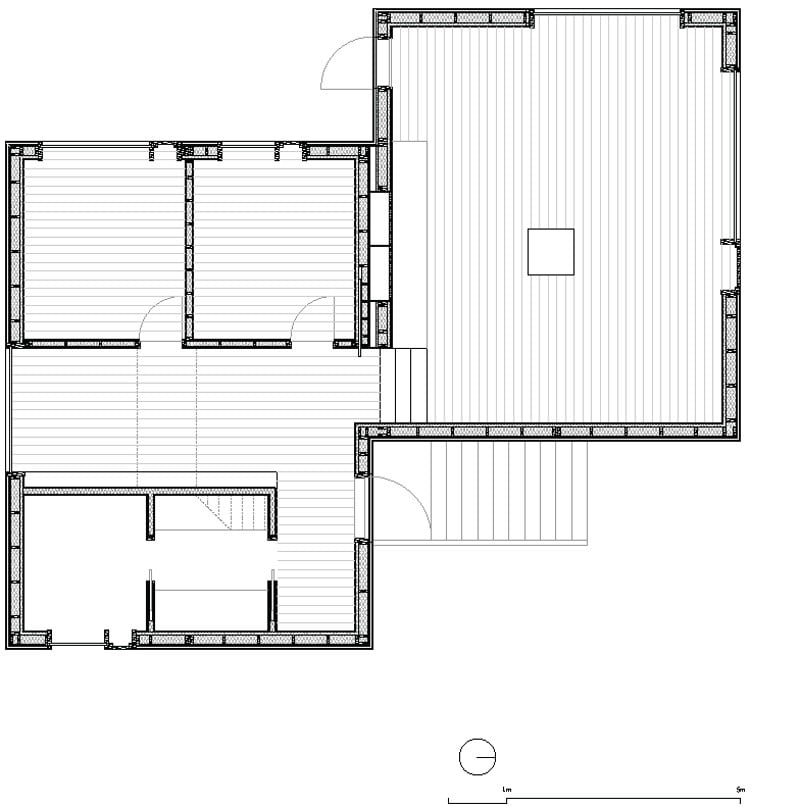

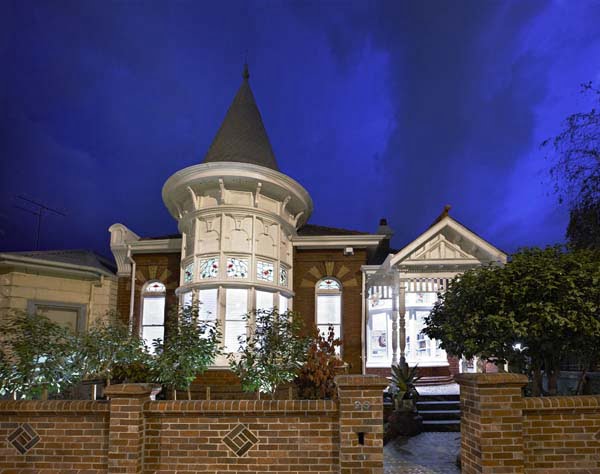
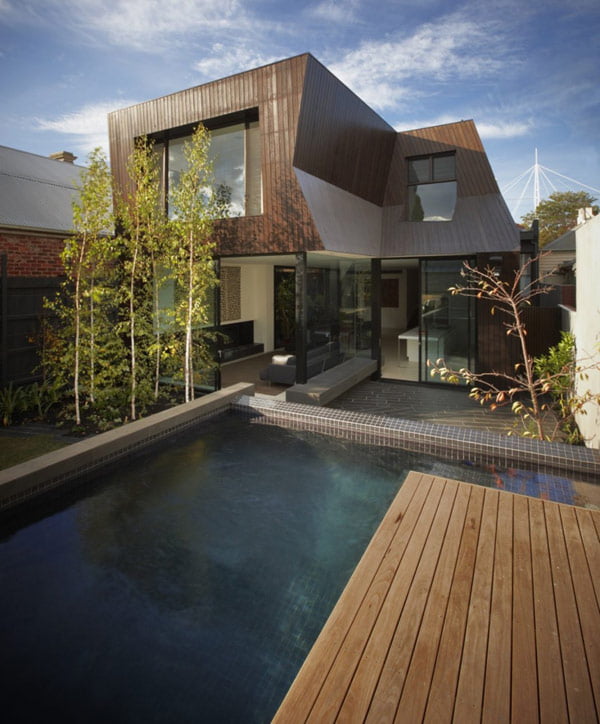
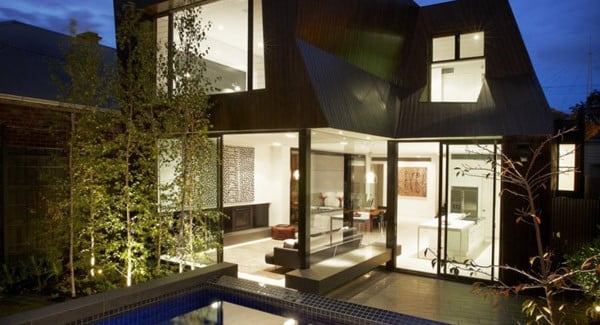
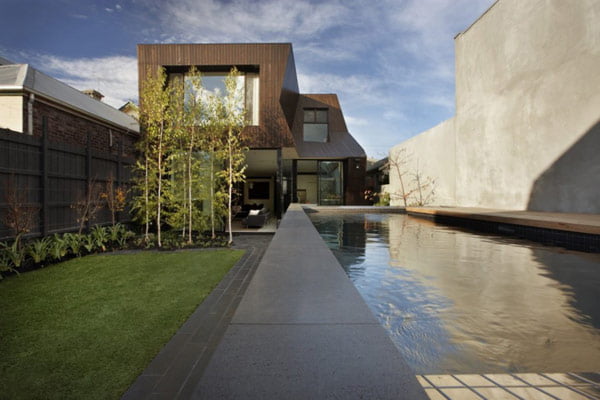
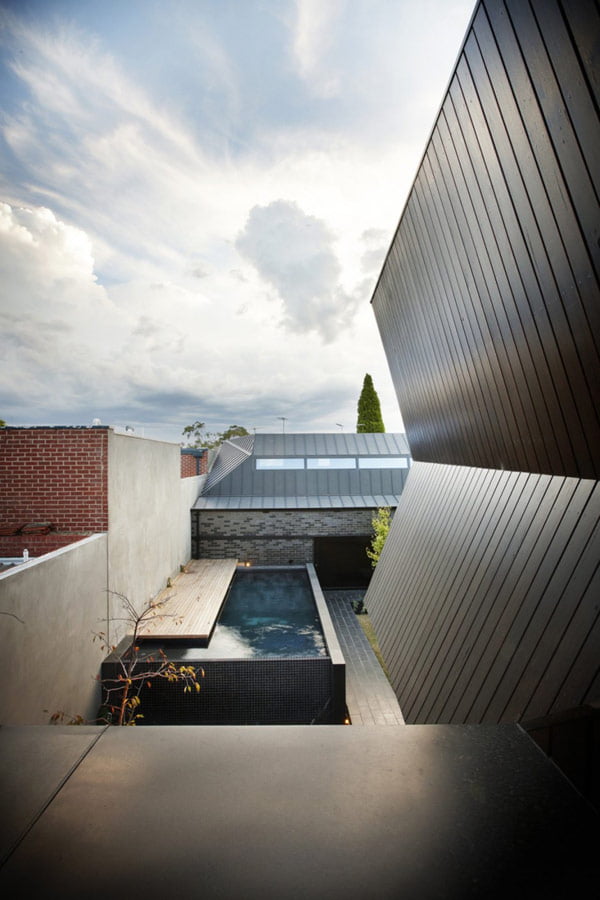
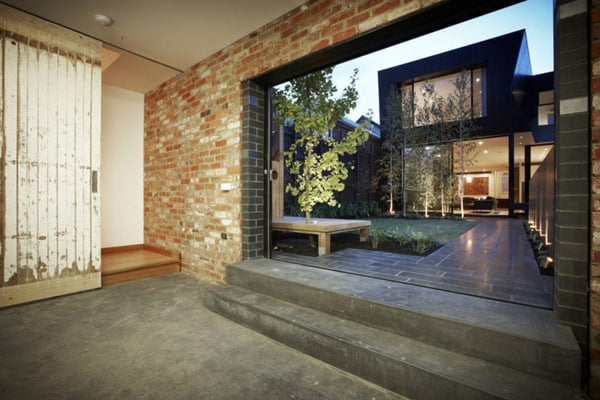
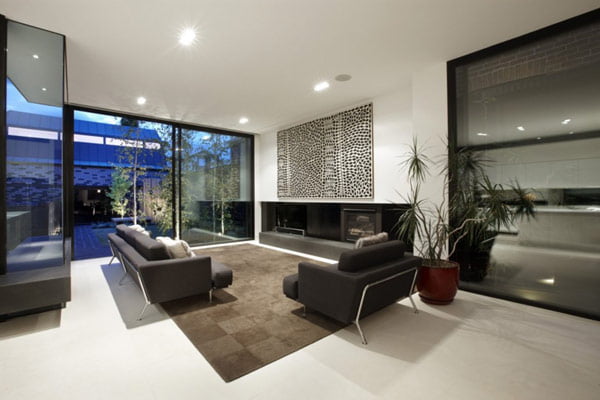

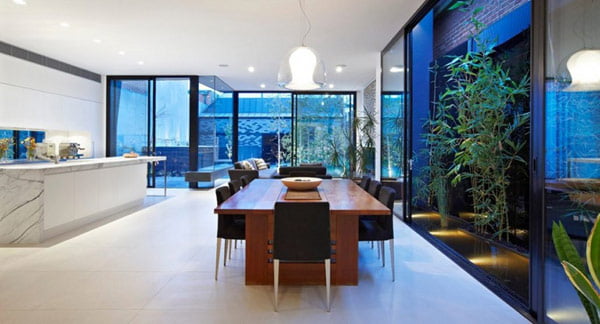
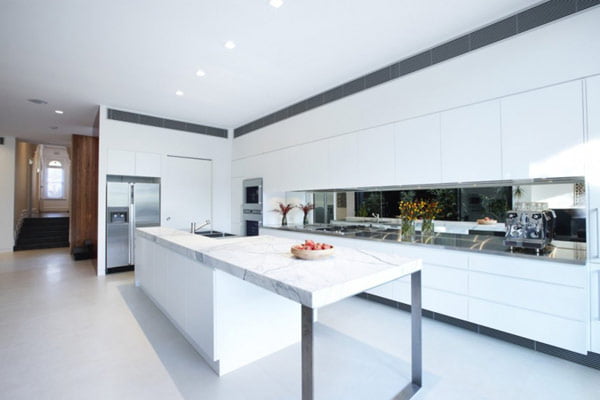
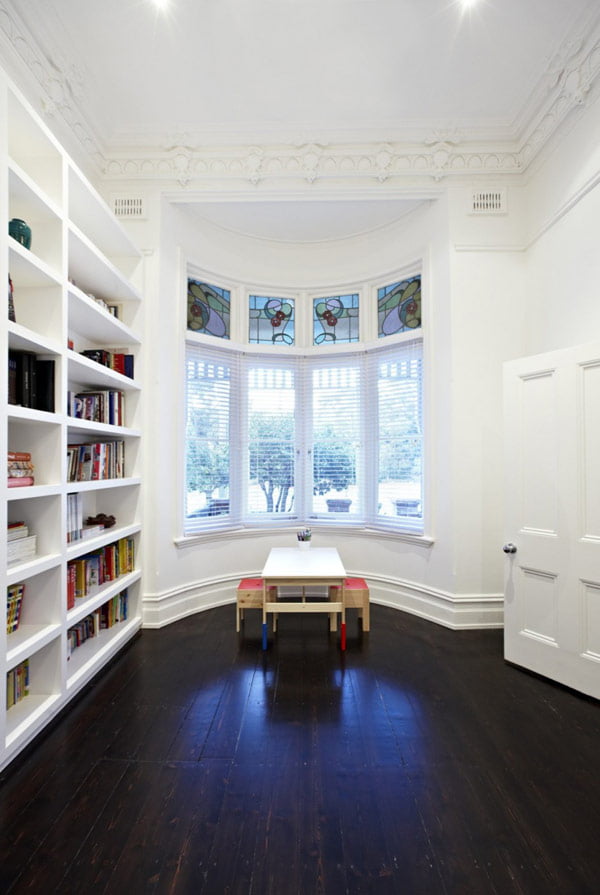
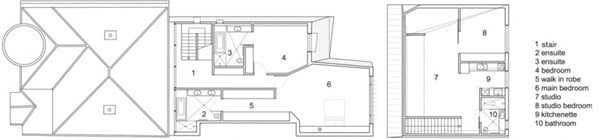
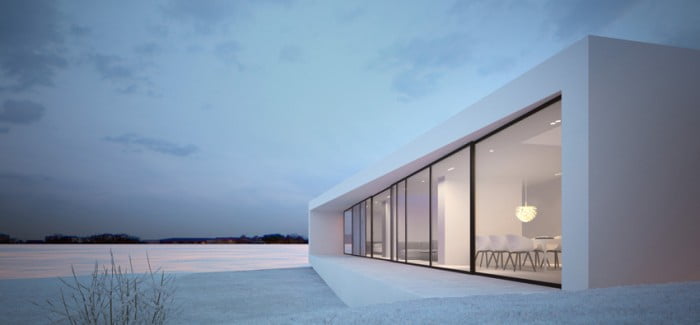 The interior is a simple and appropriate as the exterior. The house has openings on east and west facades to take advantage of the views around; the other two are covered because of intimacy and climate reasons, the north side is alway

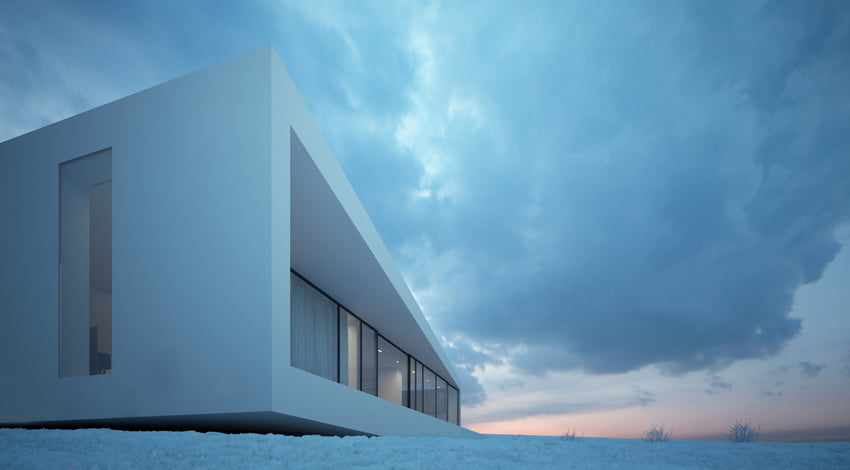 Description from architects: „The project of the house should fit within the border lines of the local master plan which was established for the chosen plot. Consequently the exterior building dimensions including terraces and roofing are 15,5m x 17m which is the maximum area that can be achieved in the plot. The house answers to the needs of future inhabitants, both in the visual and space organizational ways. The form is minimalistic, plain white, with wide glazing. The house respects surrounding landscape – sides directed to the stunning views that are fully glazed and other 2 walls are almost fully covered, which allows the inhabitants to hide from neighbors and have privacy. The main idea of the project is terrace wall which was pulled from the house and bended in a way that it looks like it came out from the landscape. The glazing on both sides of the house is sliding, so during the warmer season they can be folded, so the terrace makes the continuation of the area of the house. This manipulation of the shape of the house blurs the border between the house and the surrounding area. While the exterior is plain white, the interior has an accent of birch wood. The plan divides the house into 4 main zones – garage area, master bedroom area, children area and living area.” Homesthetics conclusion What I really appreciate is how the architects have integrated the house in the given site. On a barren field with nothing but white plains to glaze at for miles, the structure fits in perfectly taking advantage of the landscape and turning its disadvantages into something that enhances the buildings features.
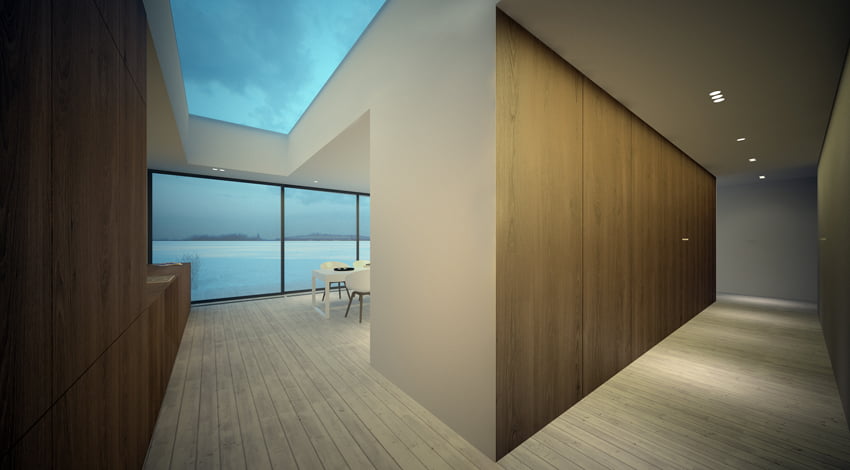
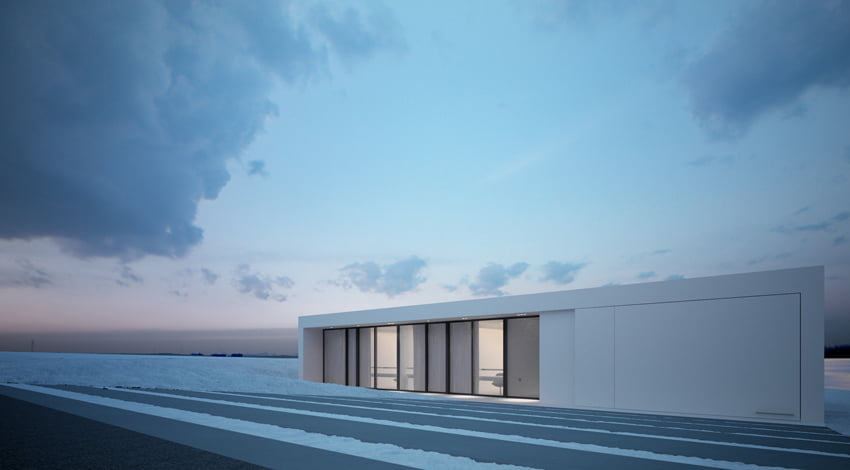
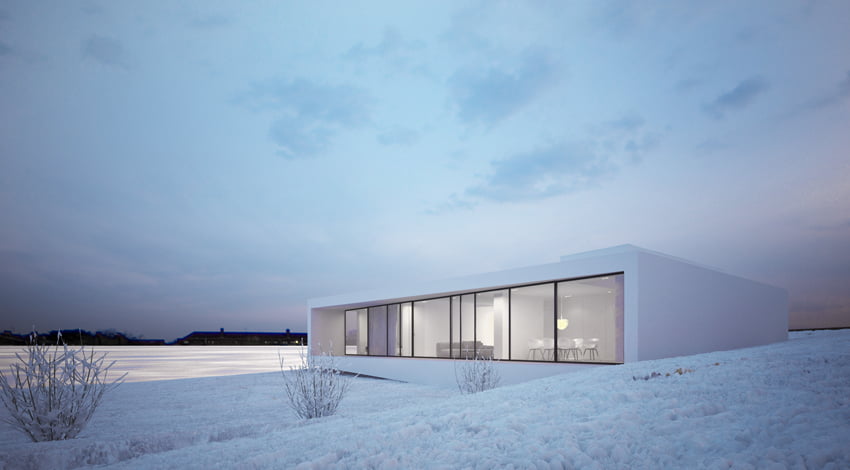
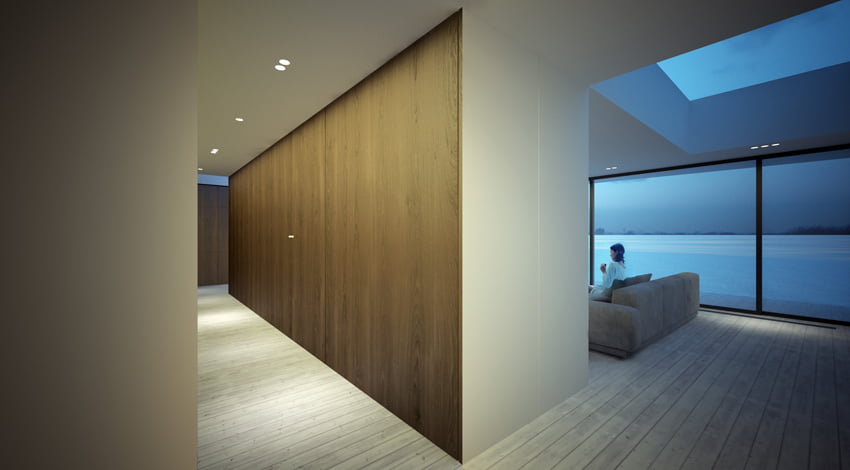
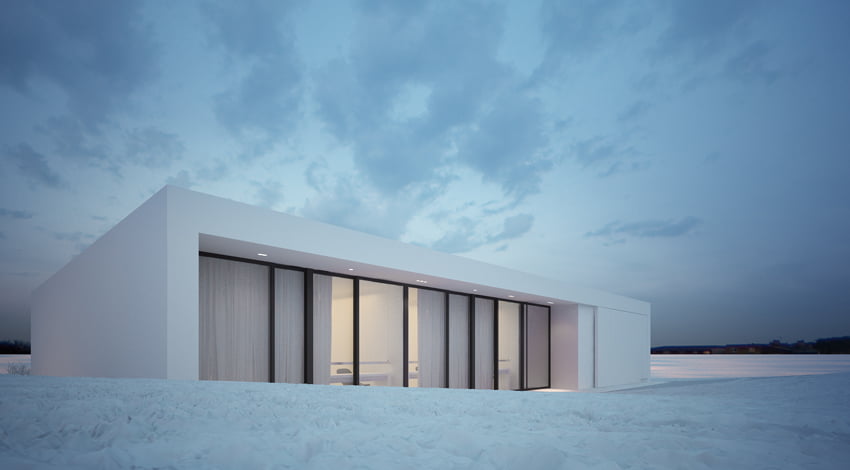

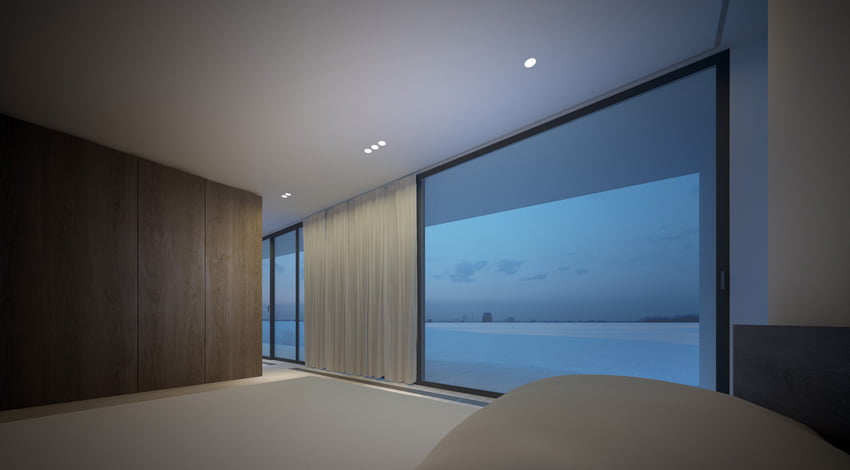
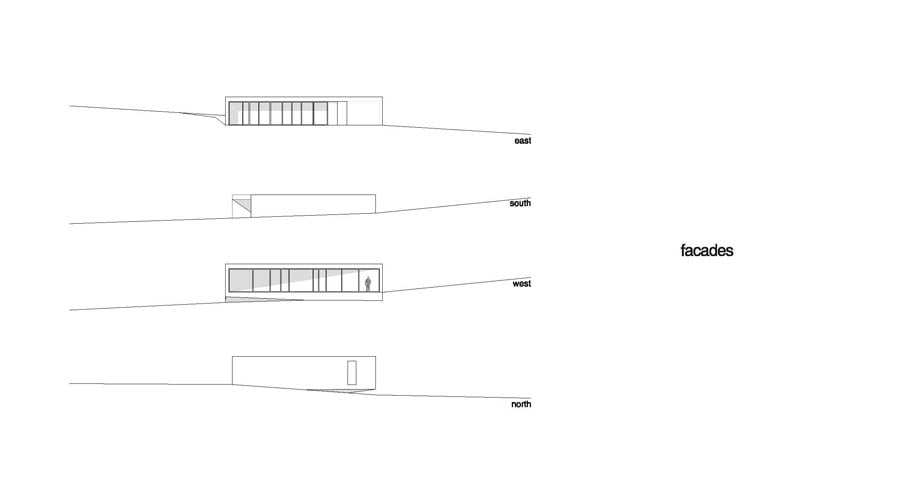
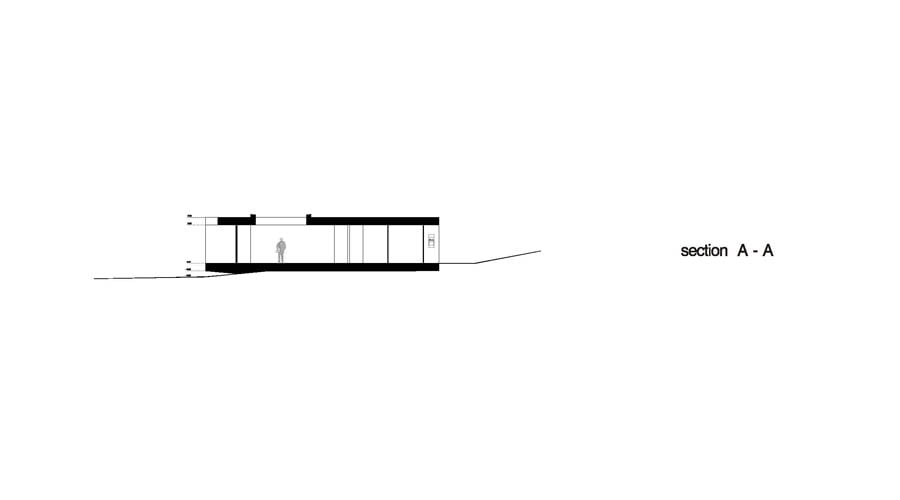
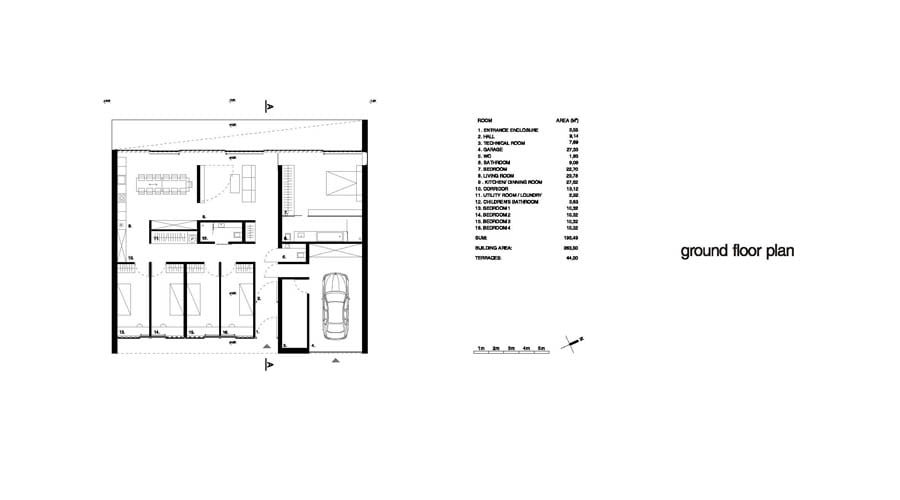 Photo courtesy to MOOMOO Architects Architect:
 ![How to Make and Accomplish [Short Term] Goals for the Architect in You](https://homesthetics.net/wp-content/uploads/2019/06/How-to-Make-and-Accomplish-Short-Term-Goals-for-the-Architect-in-You.jpg "How to Make and Accomplish [Short Term] Goals for the Architect in You")


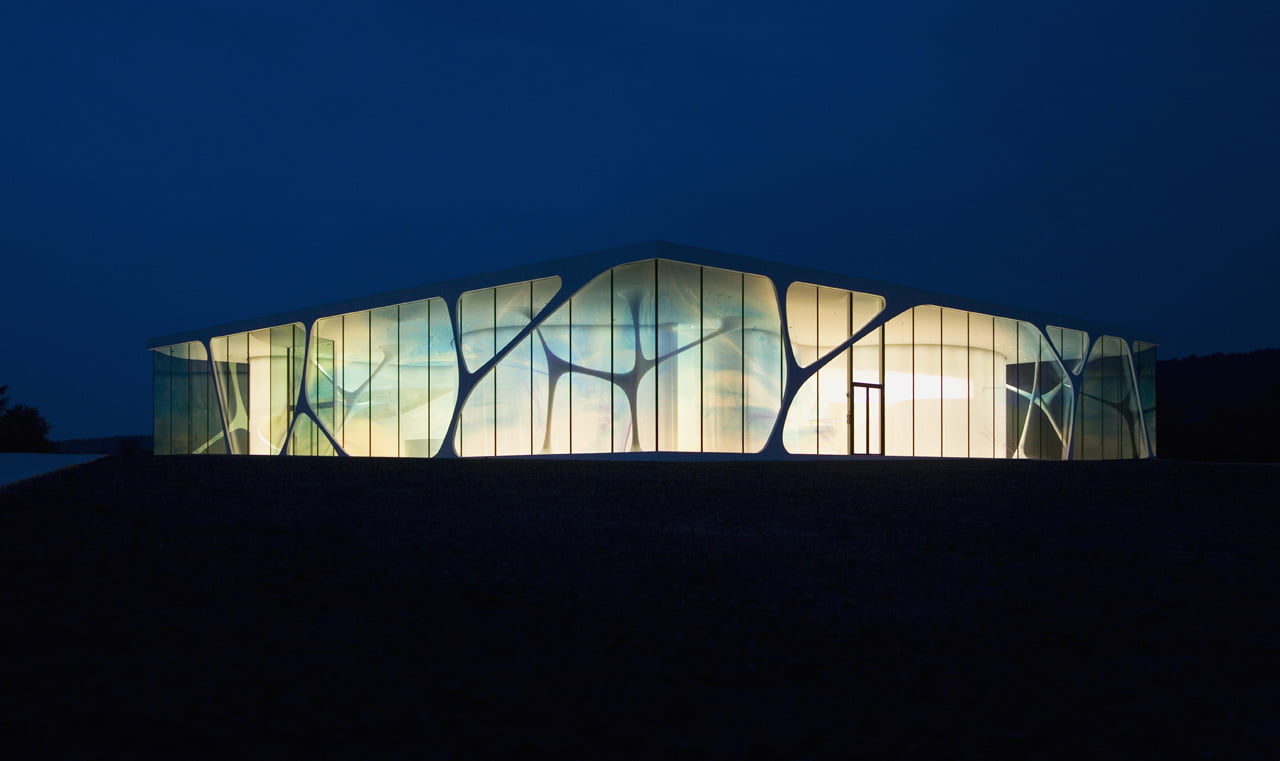
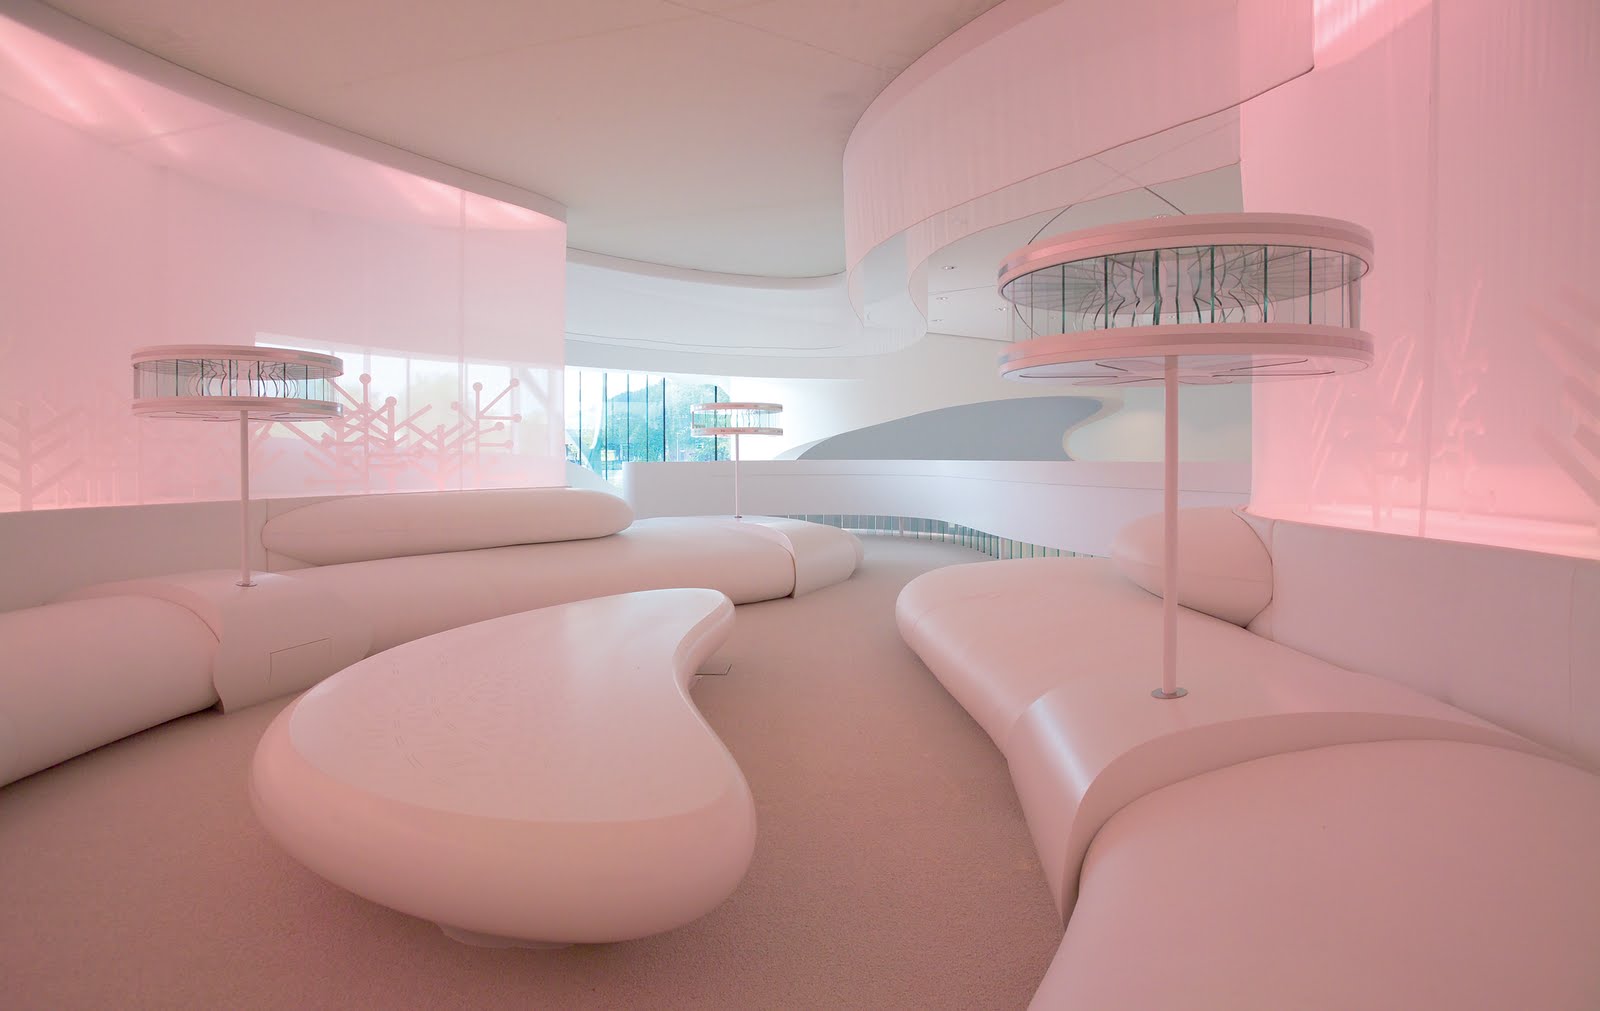
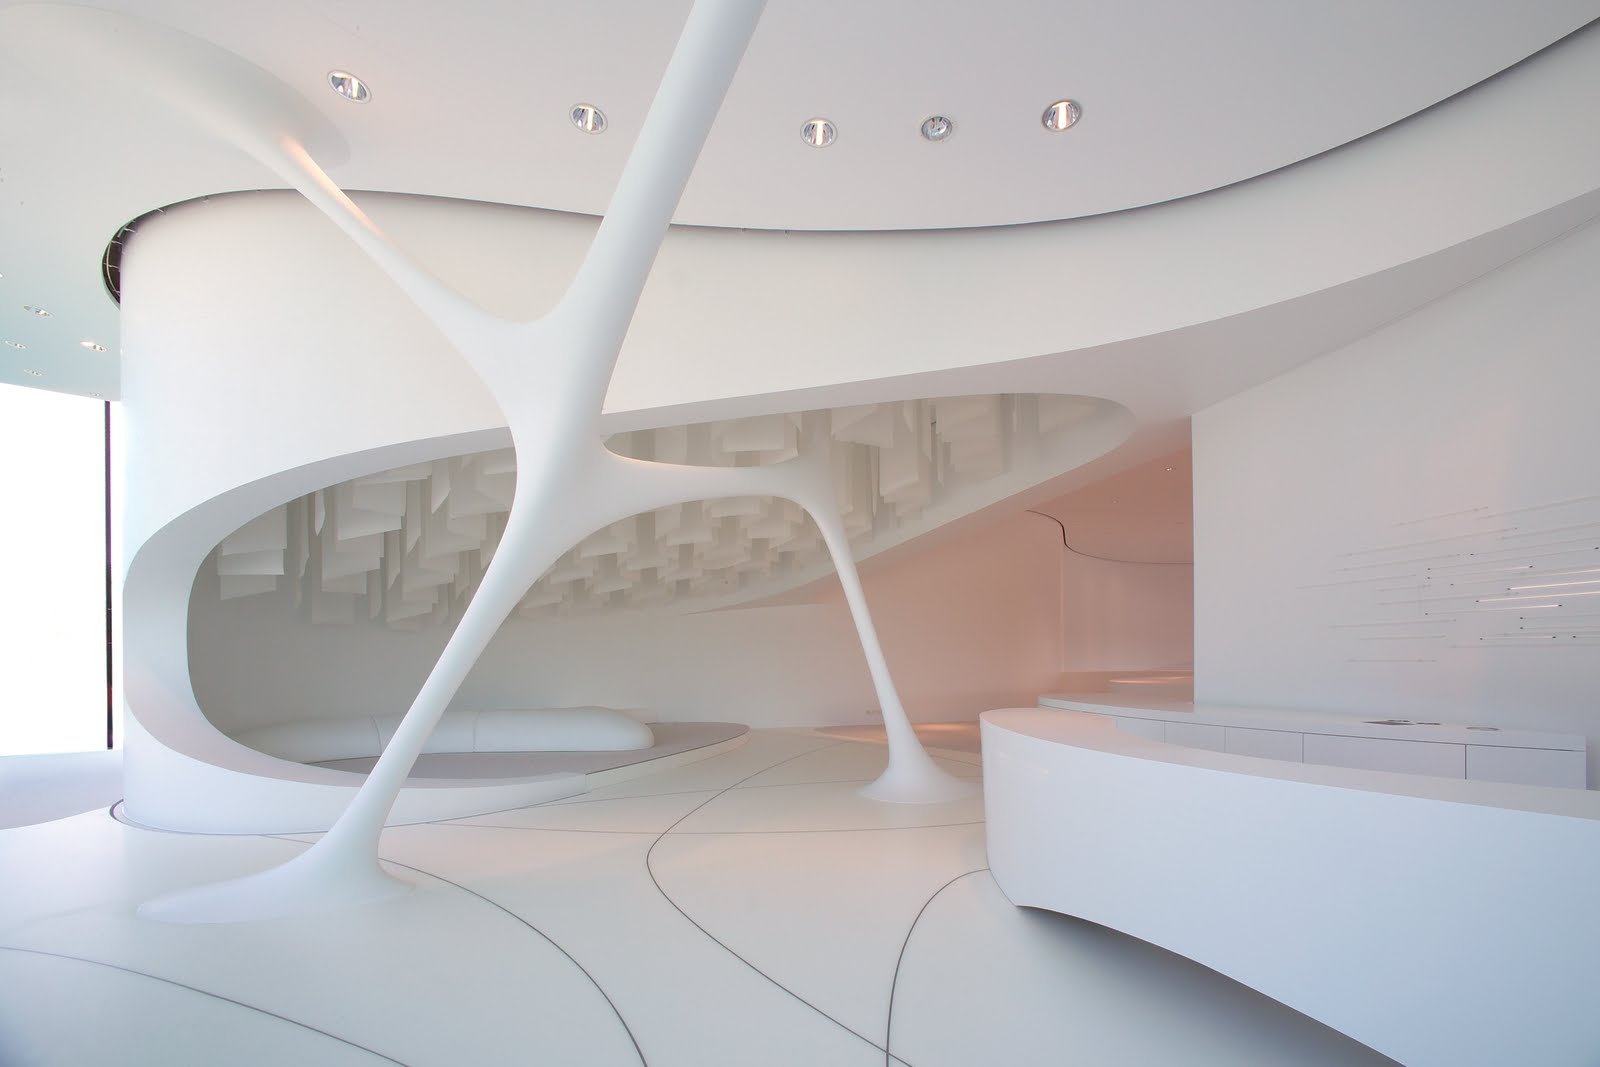

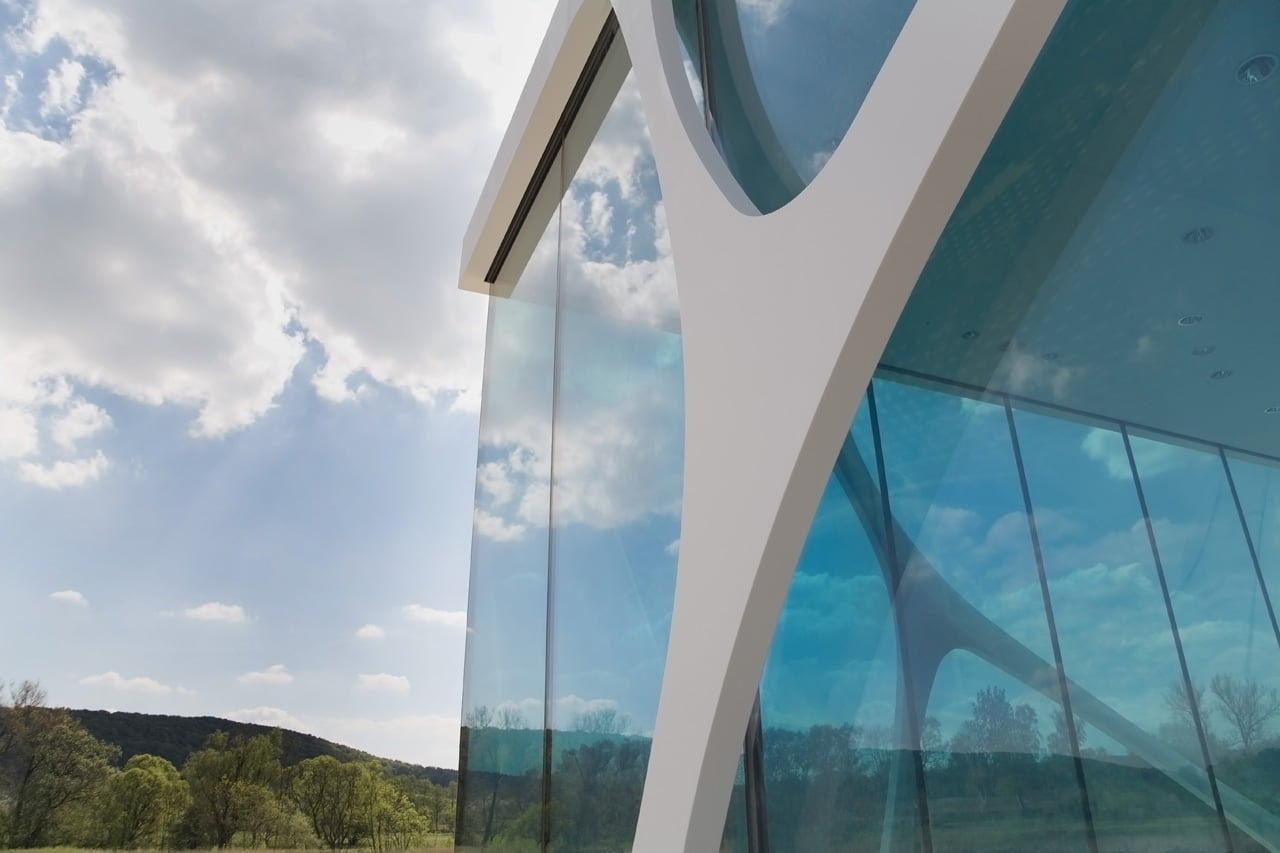
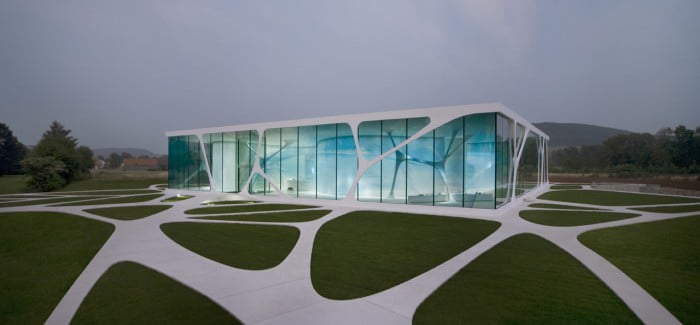
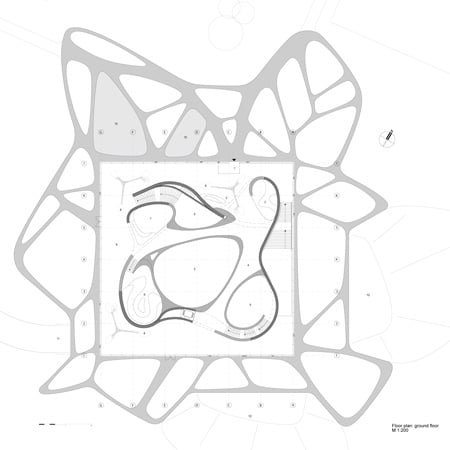
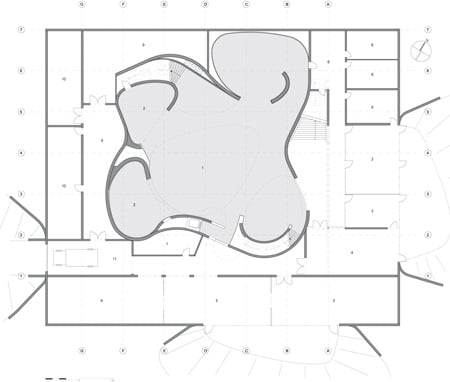
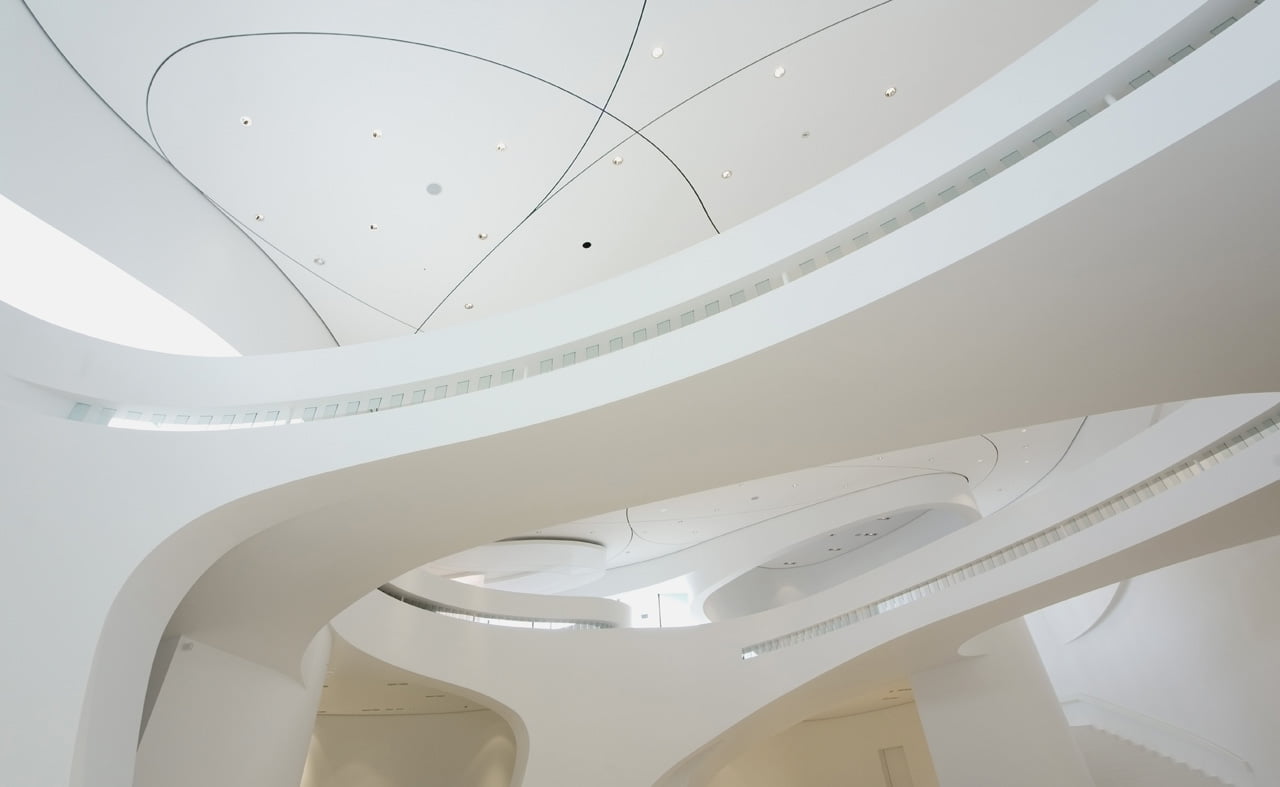
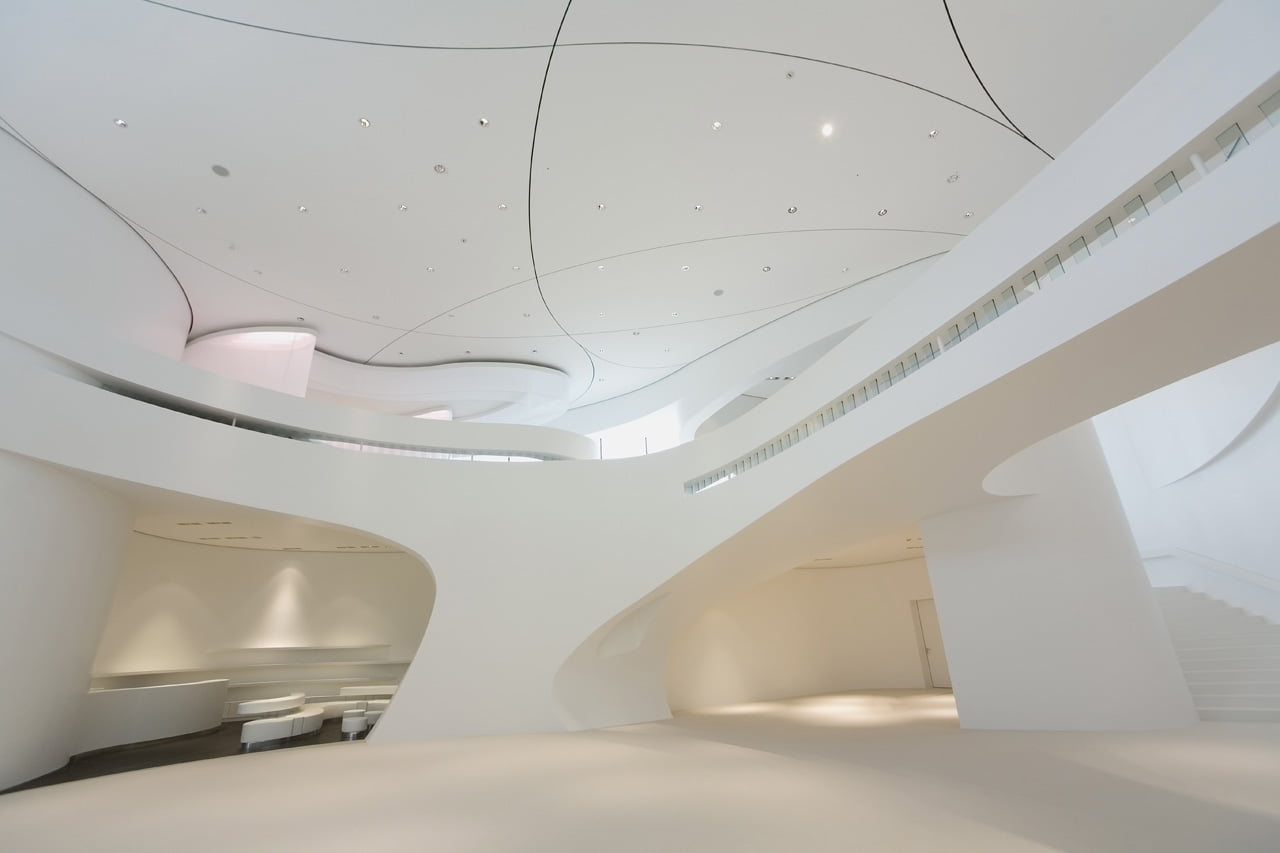

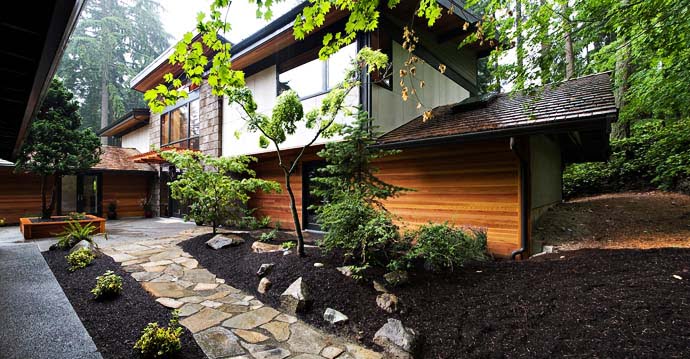
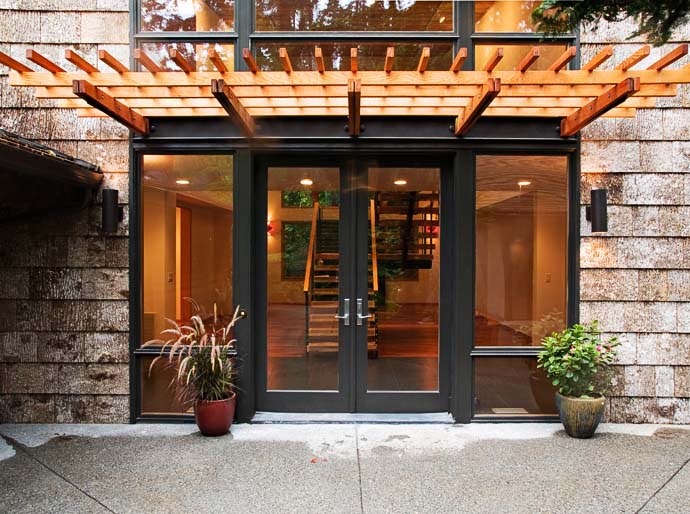
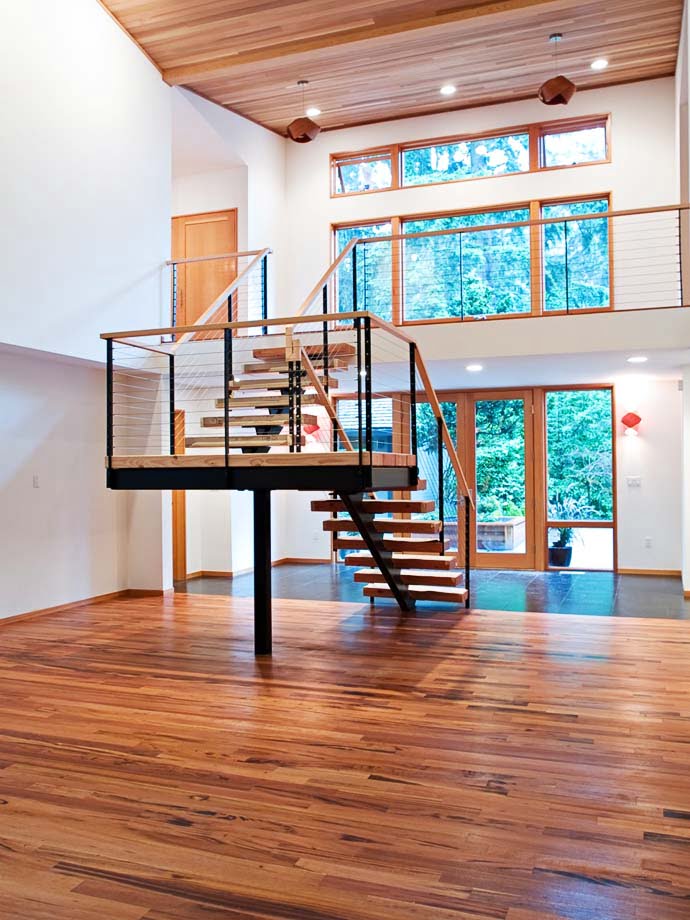
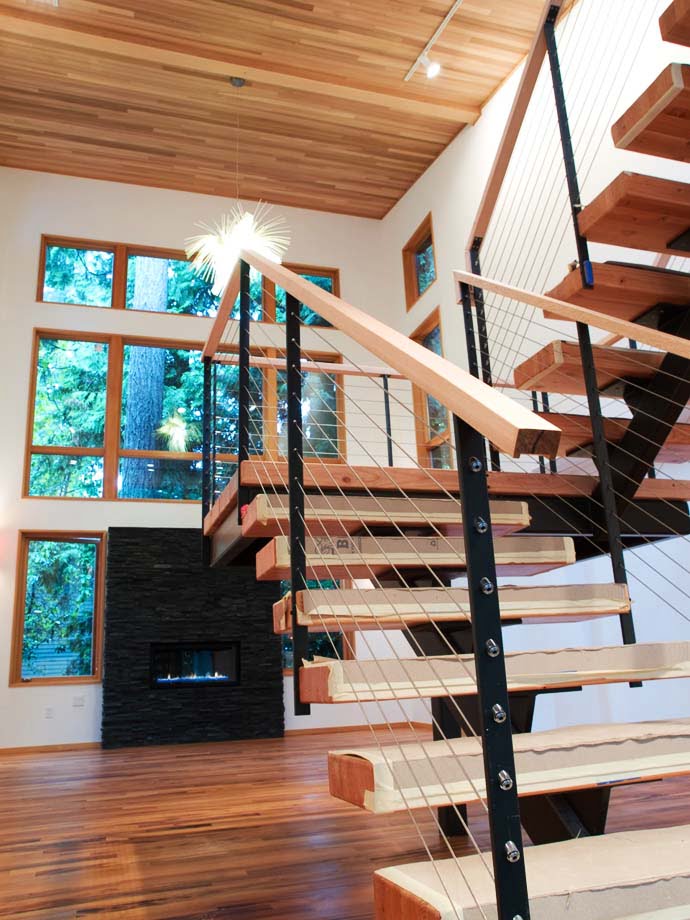
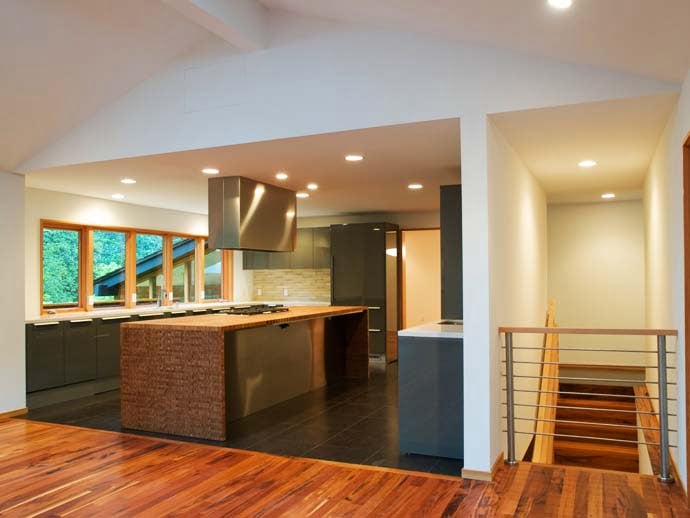
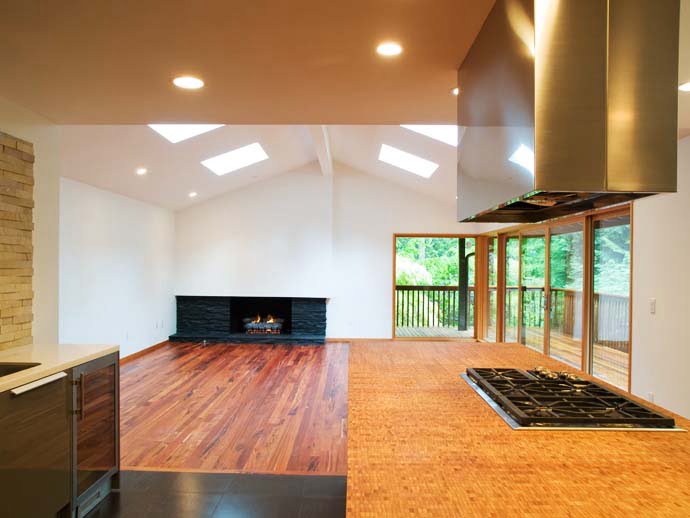
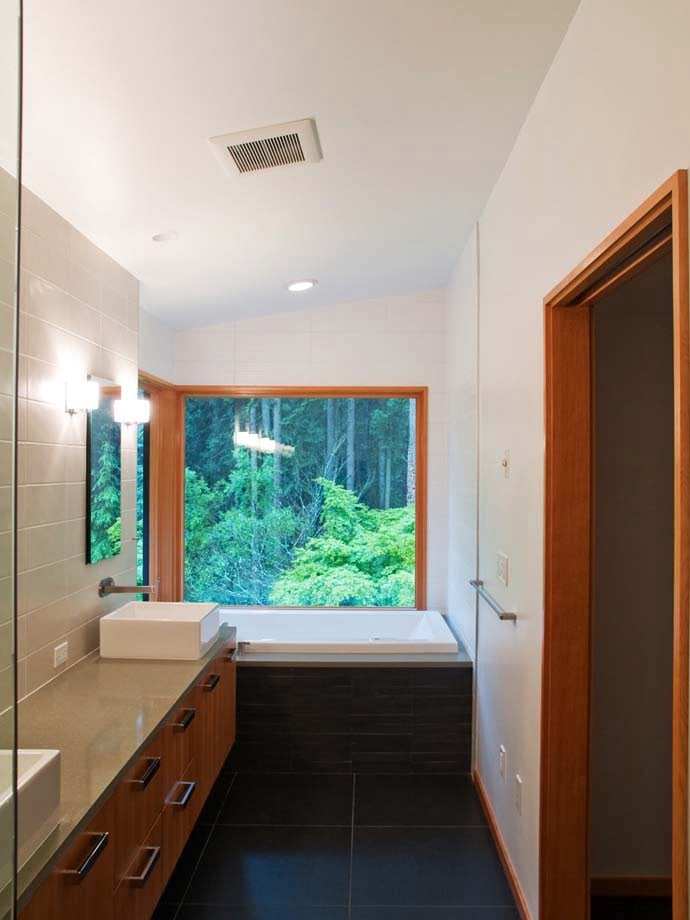
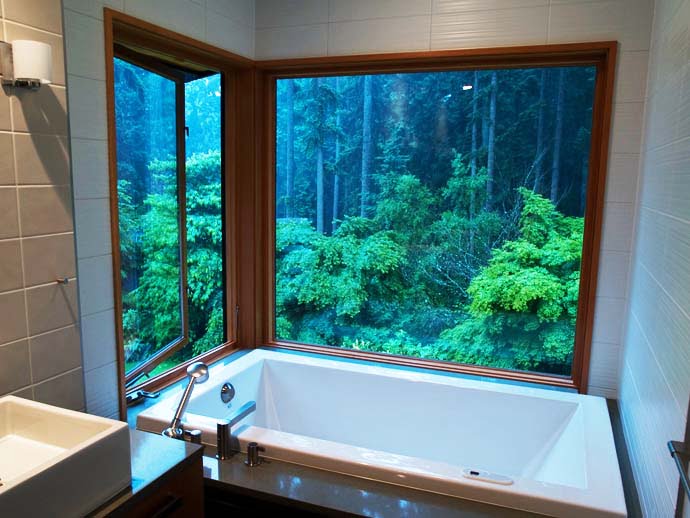
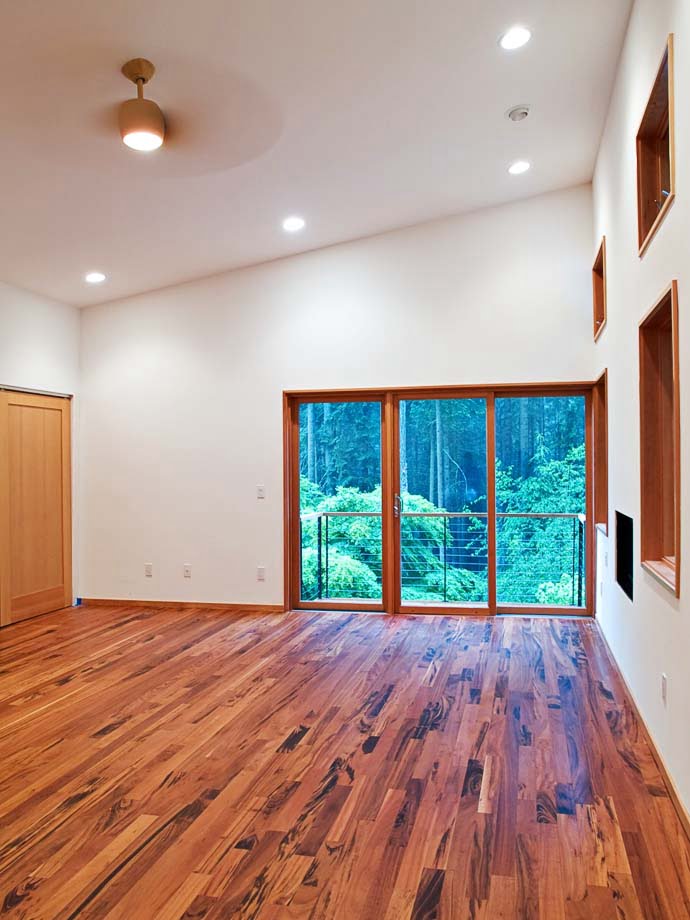
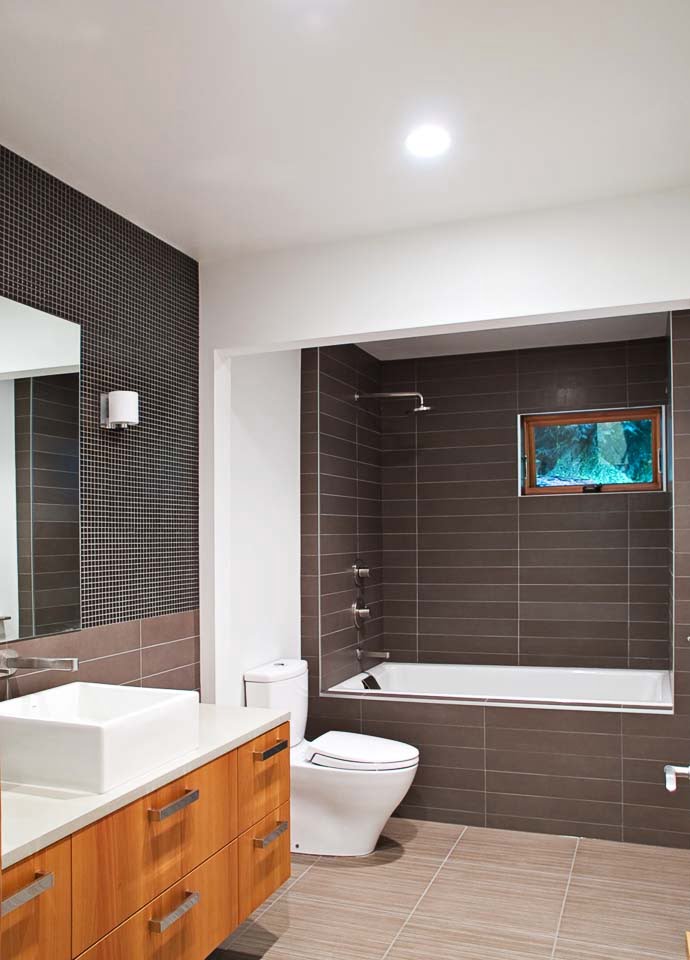
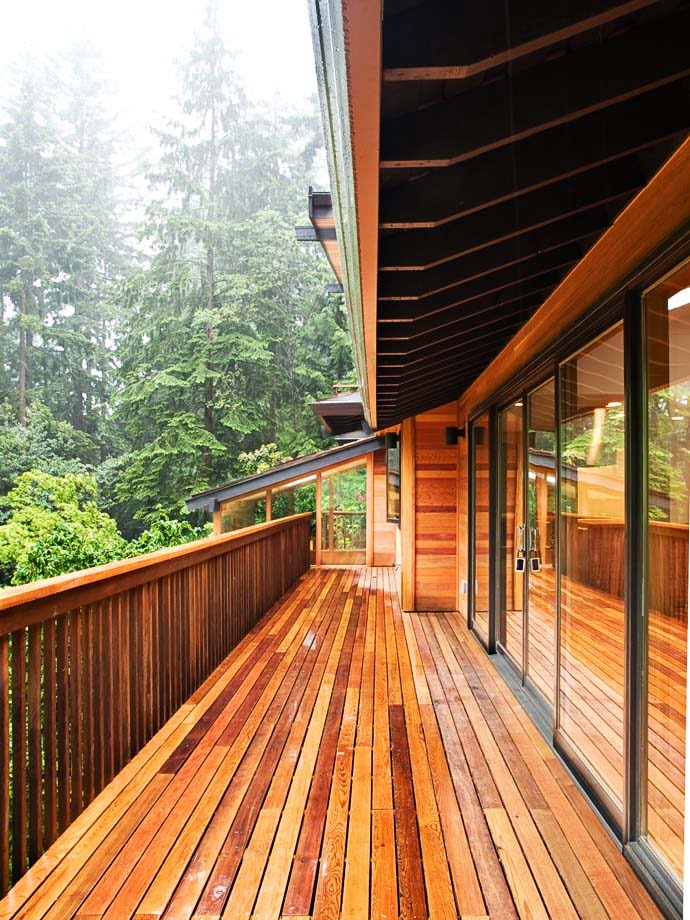
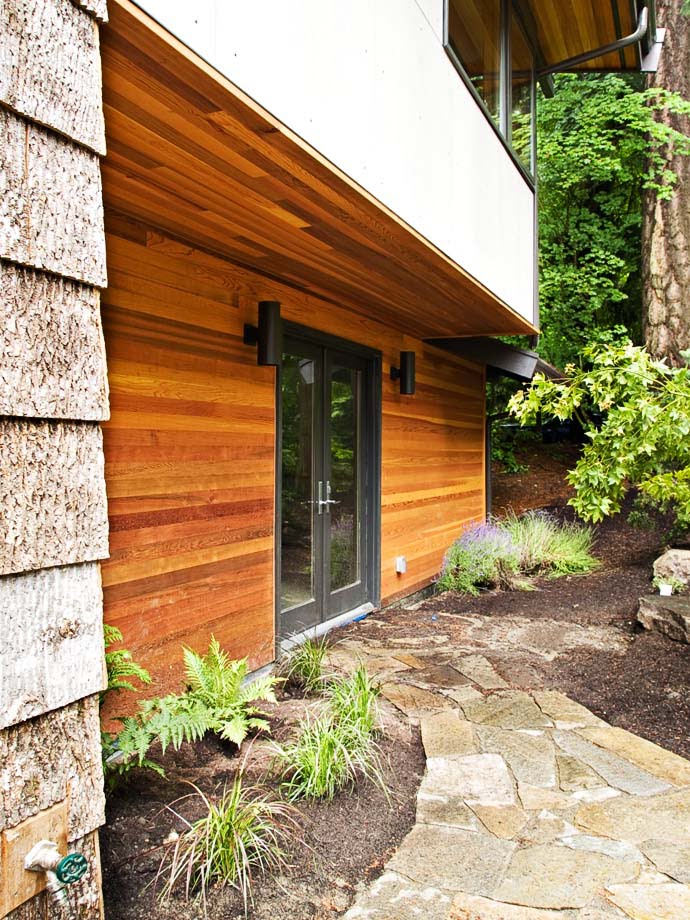
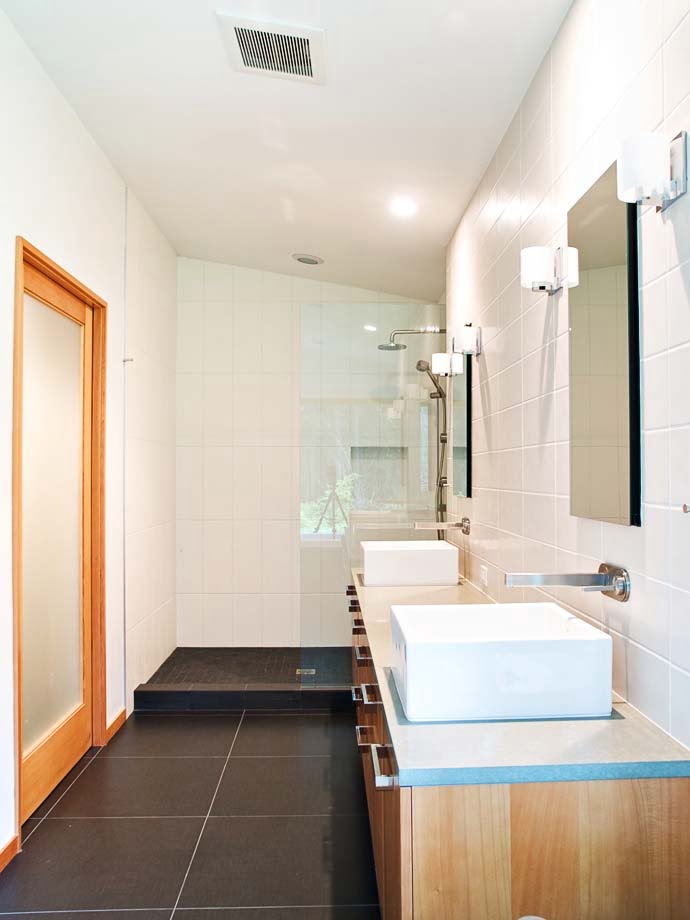
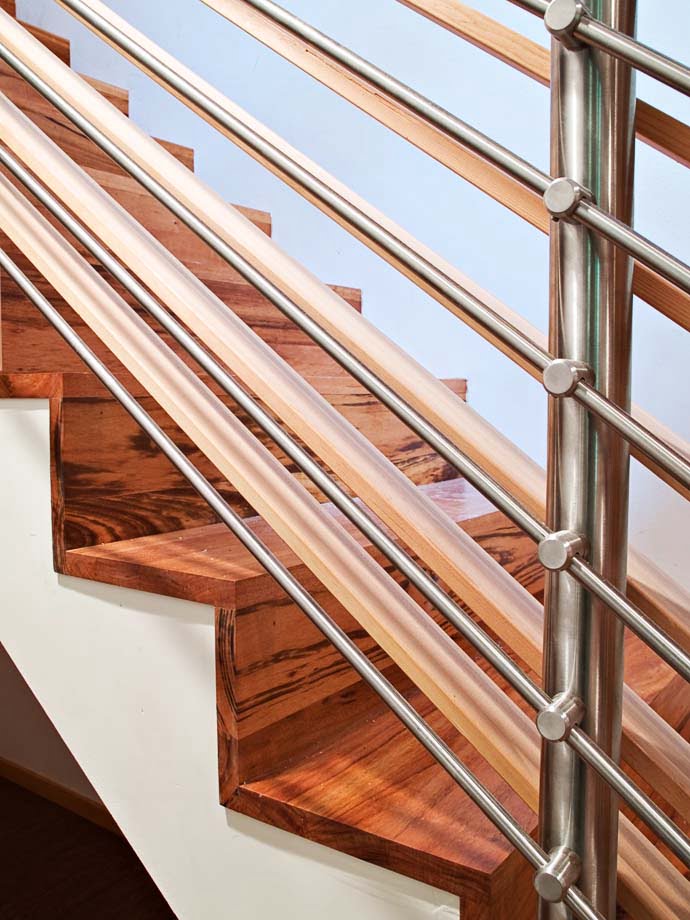


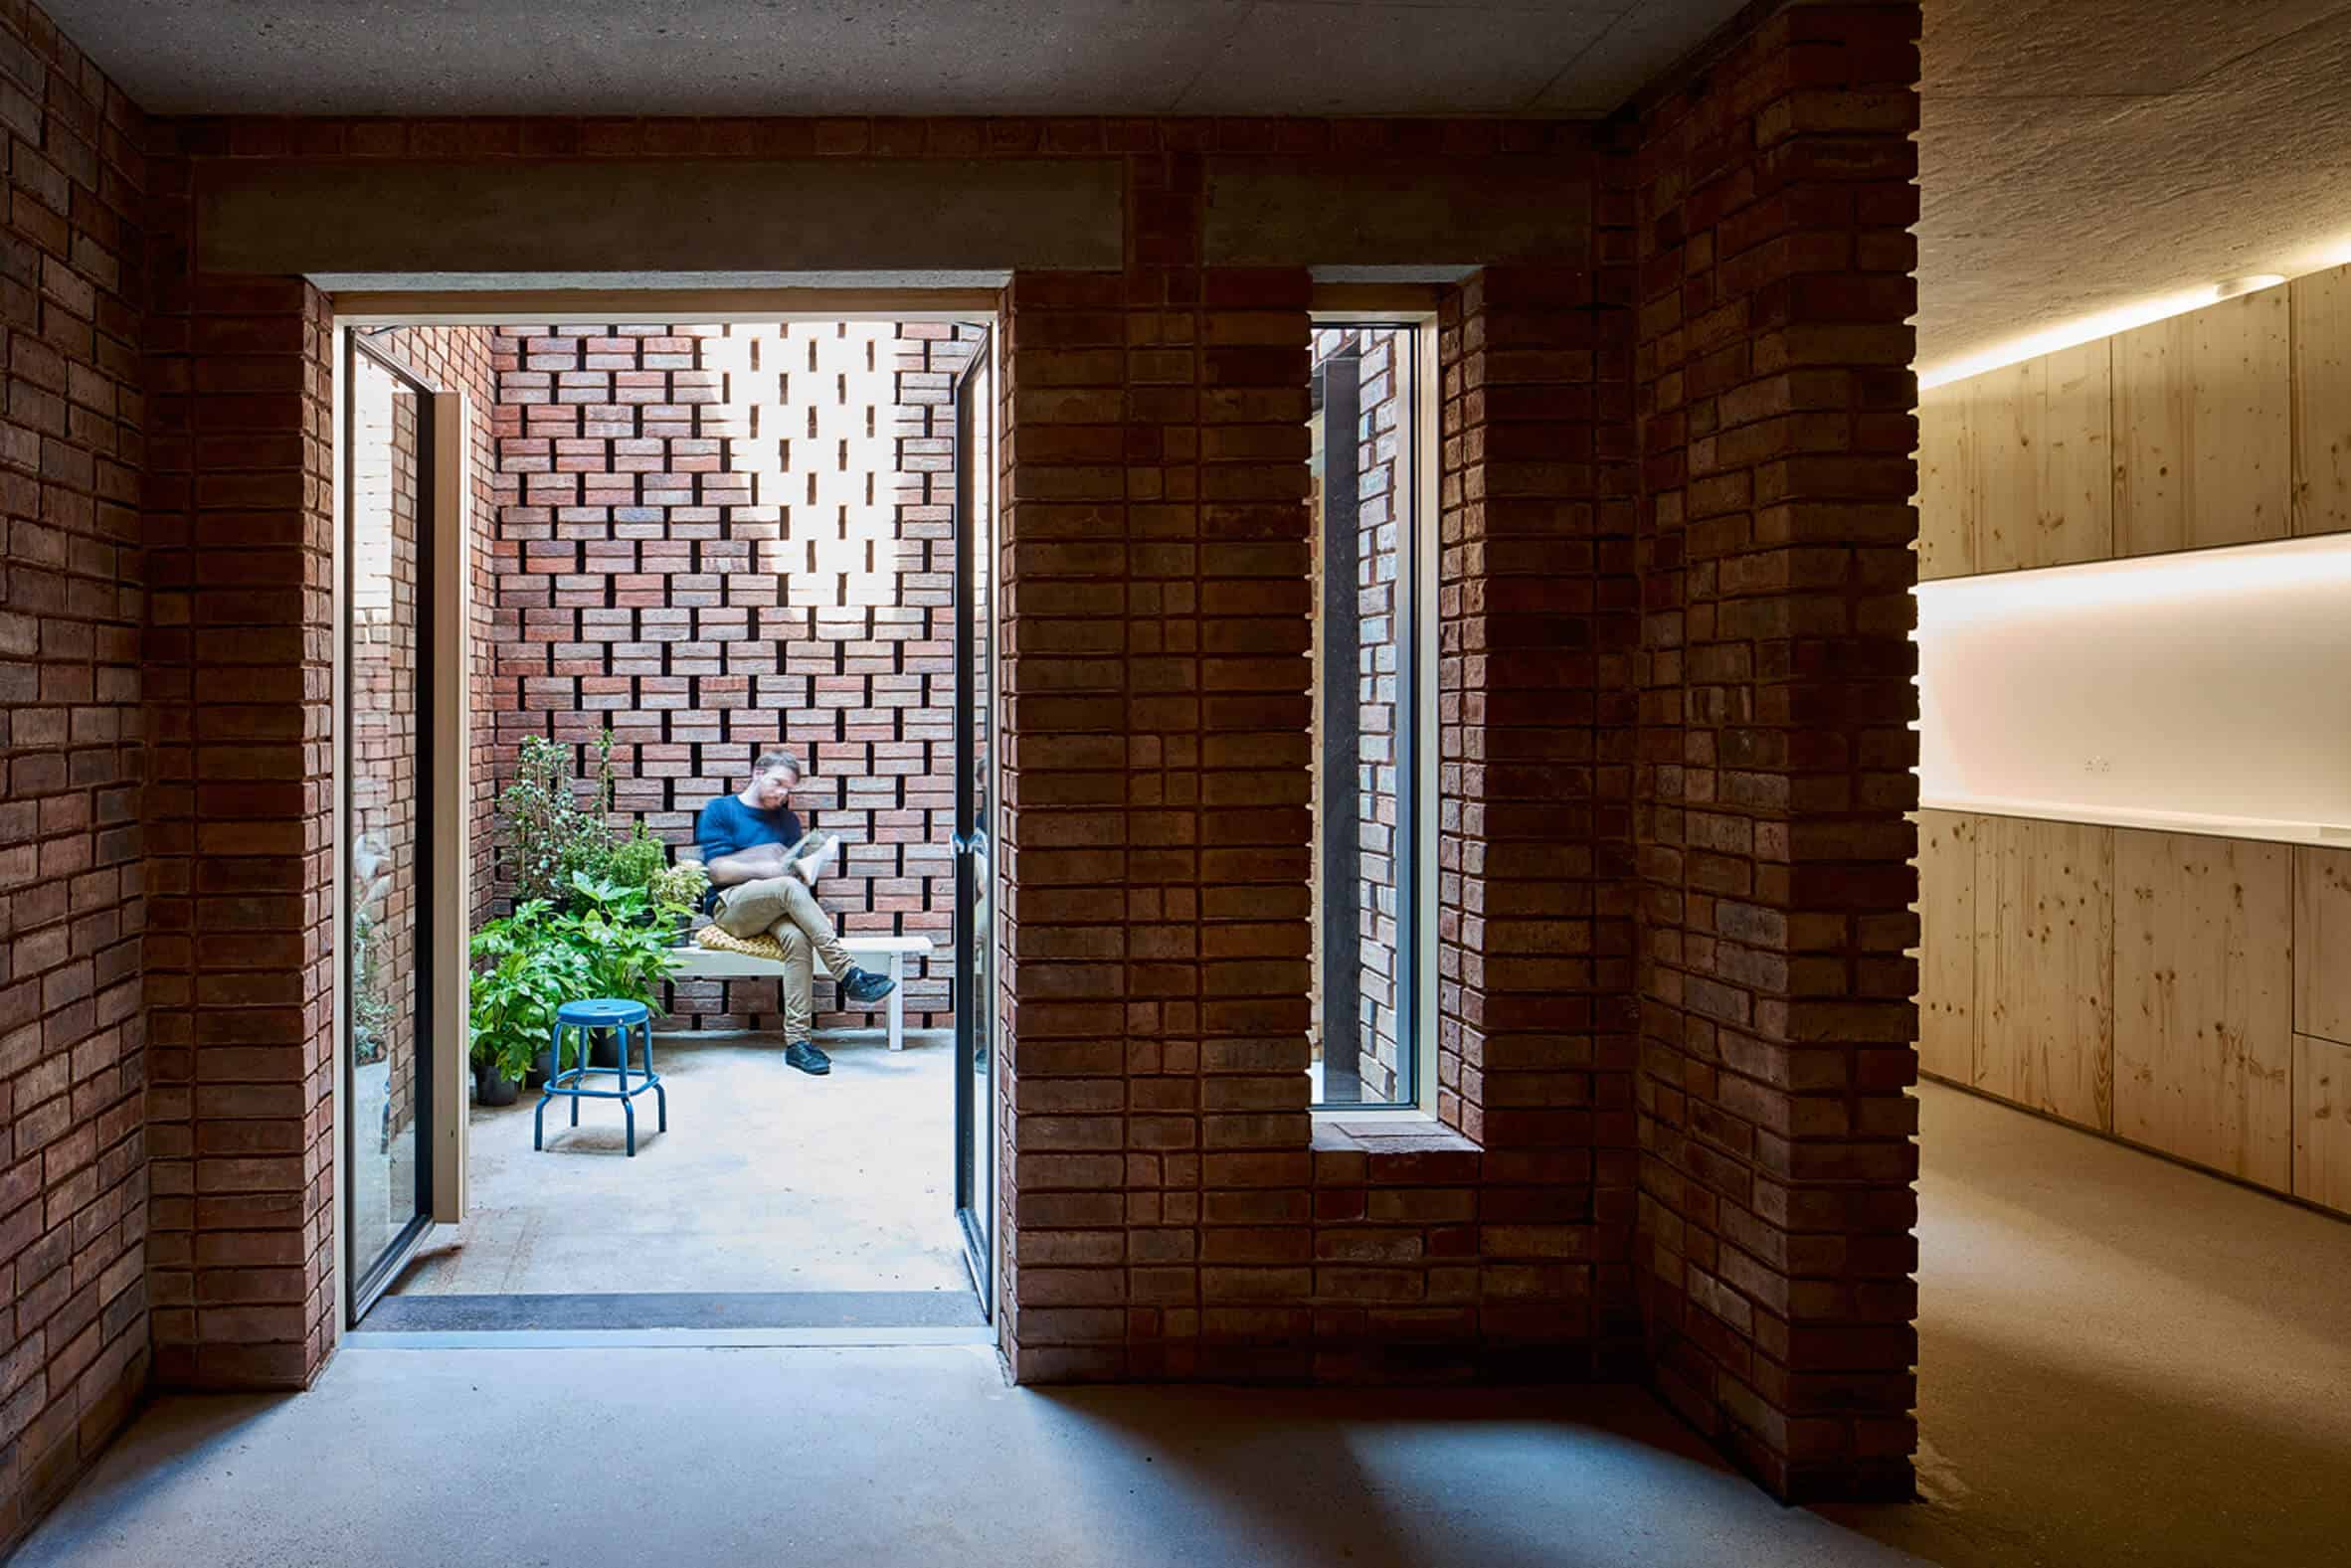
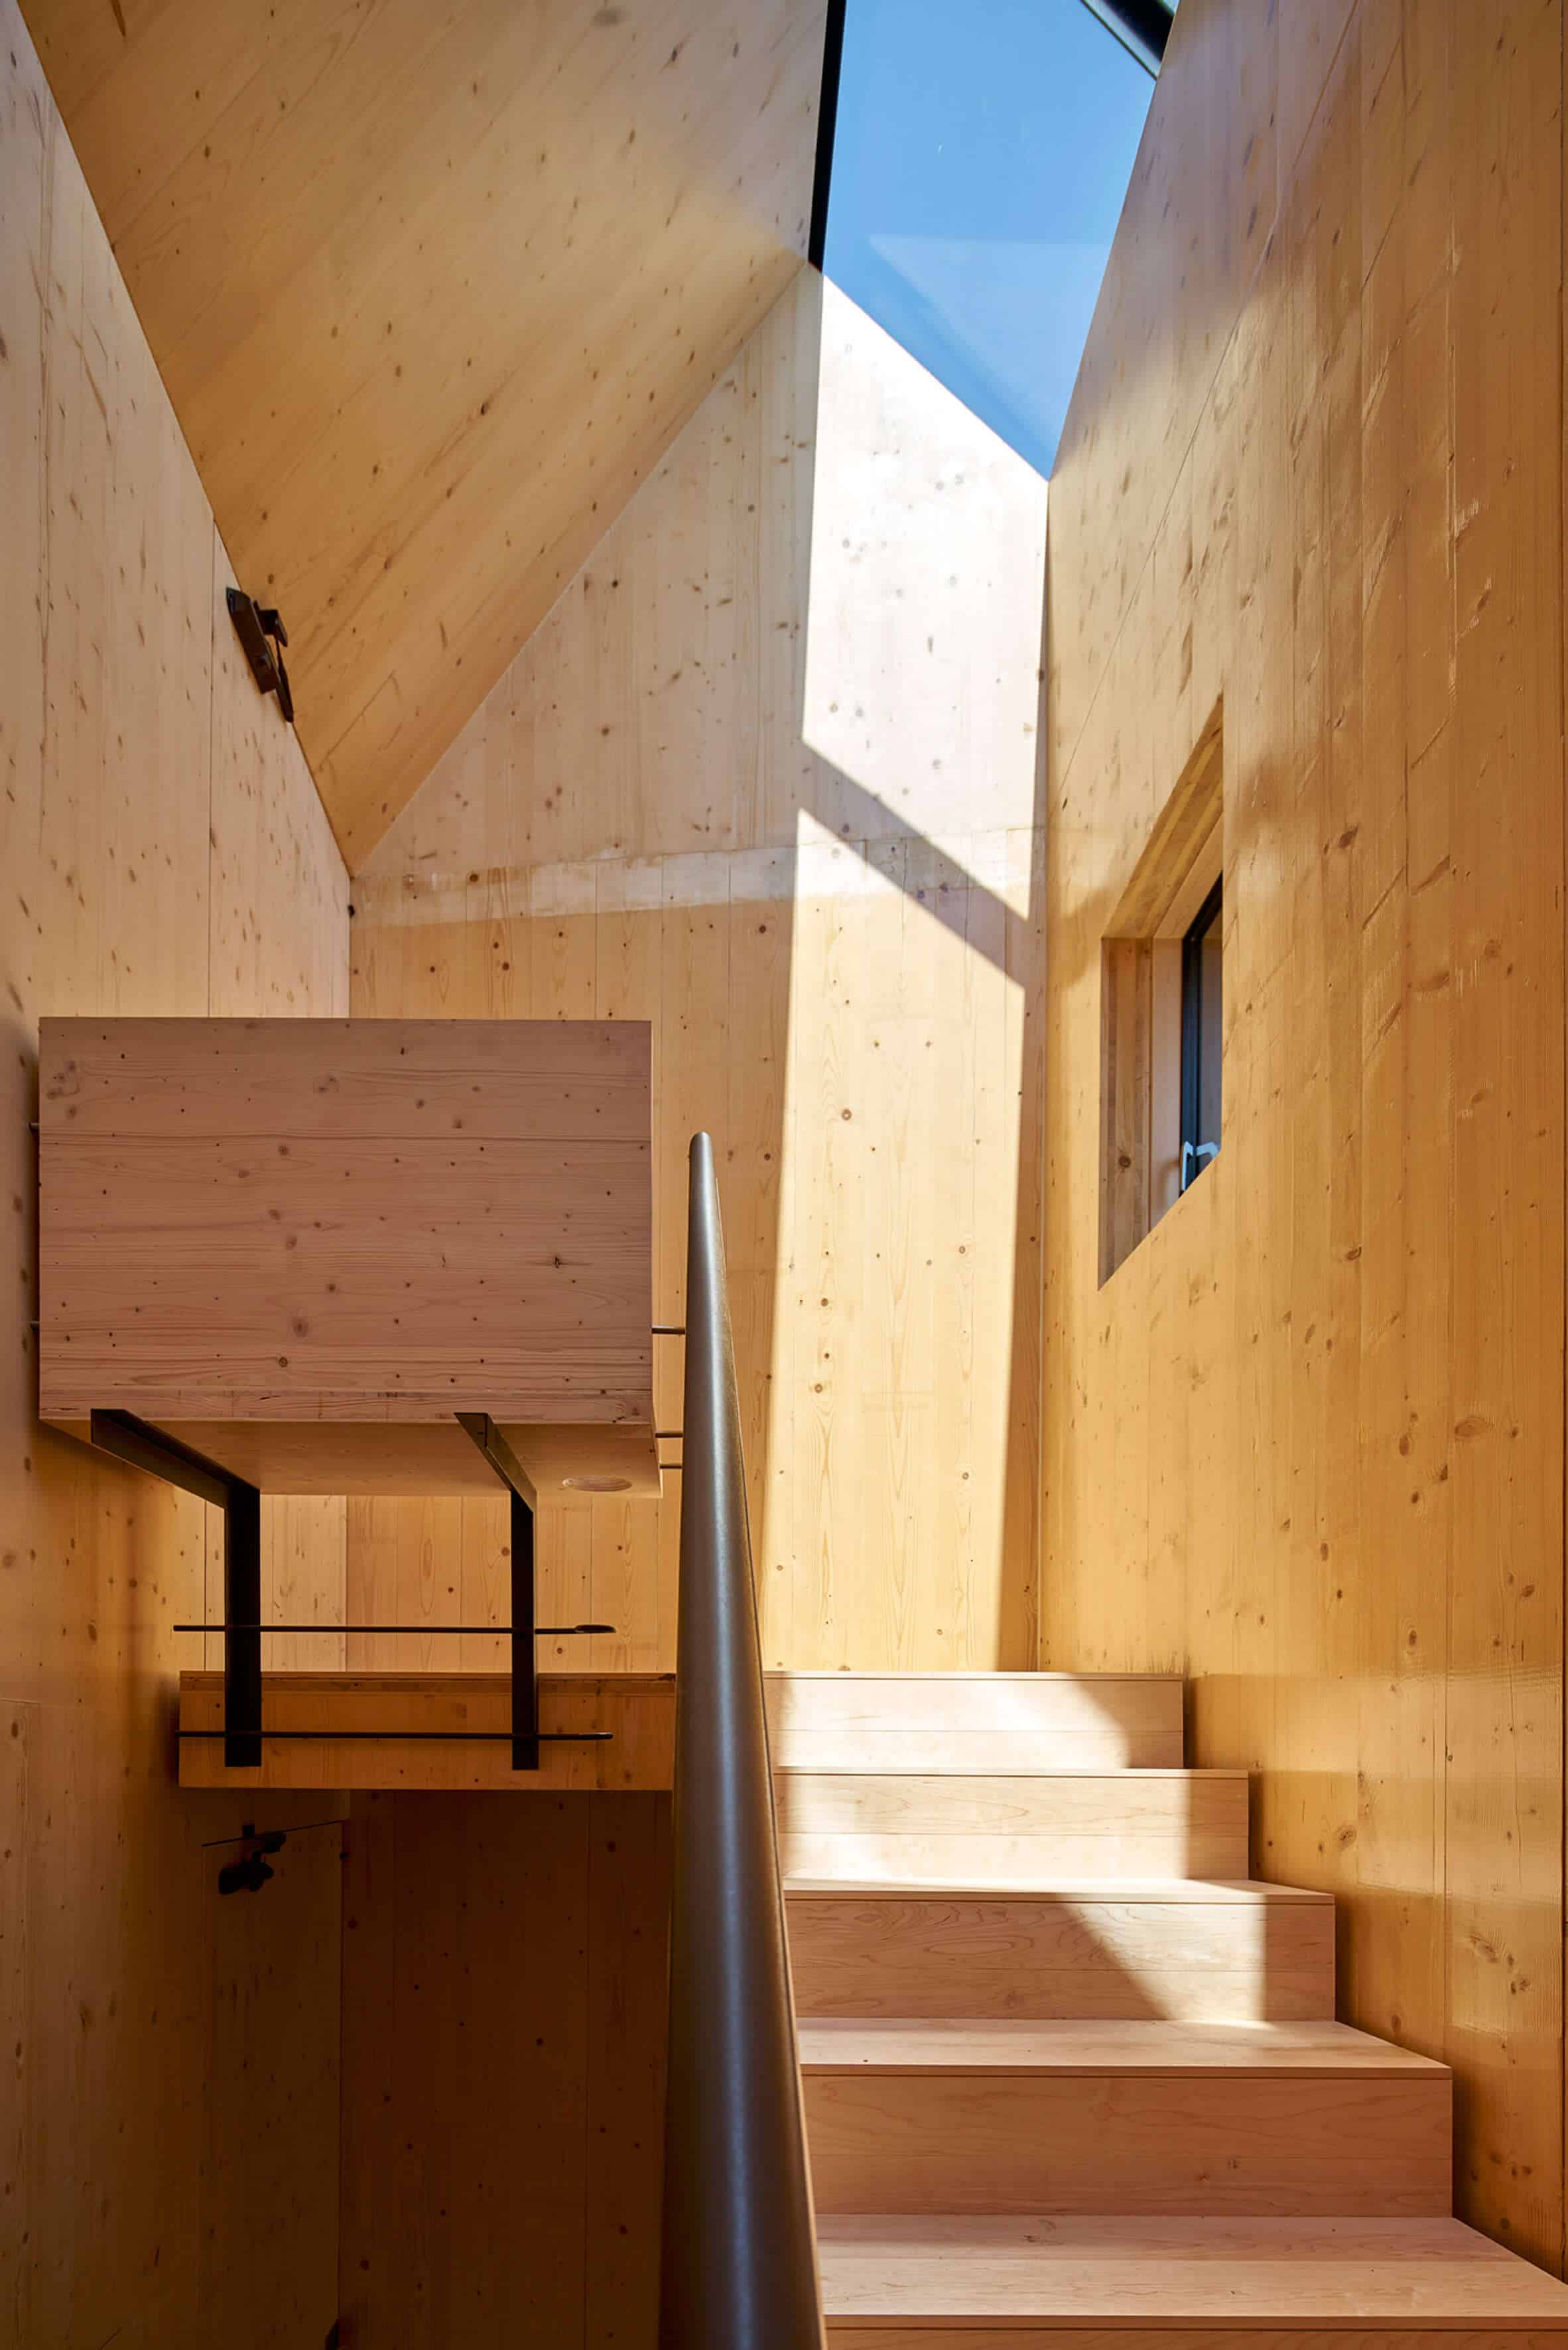
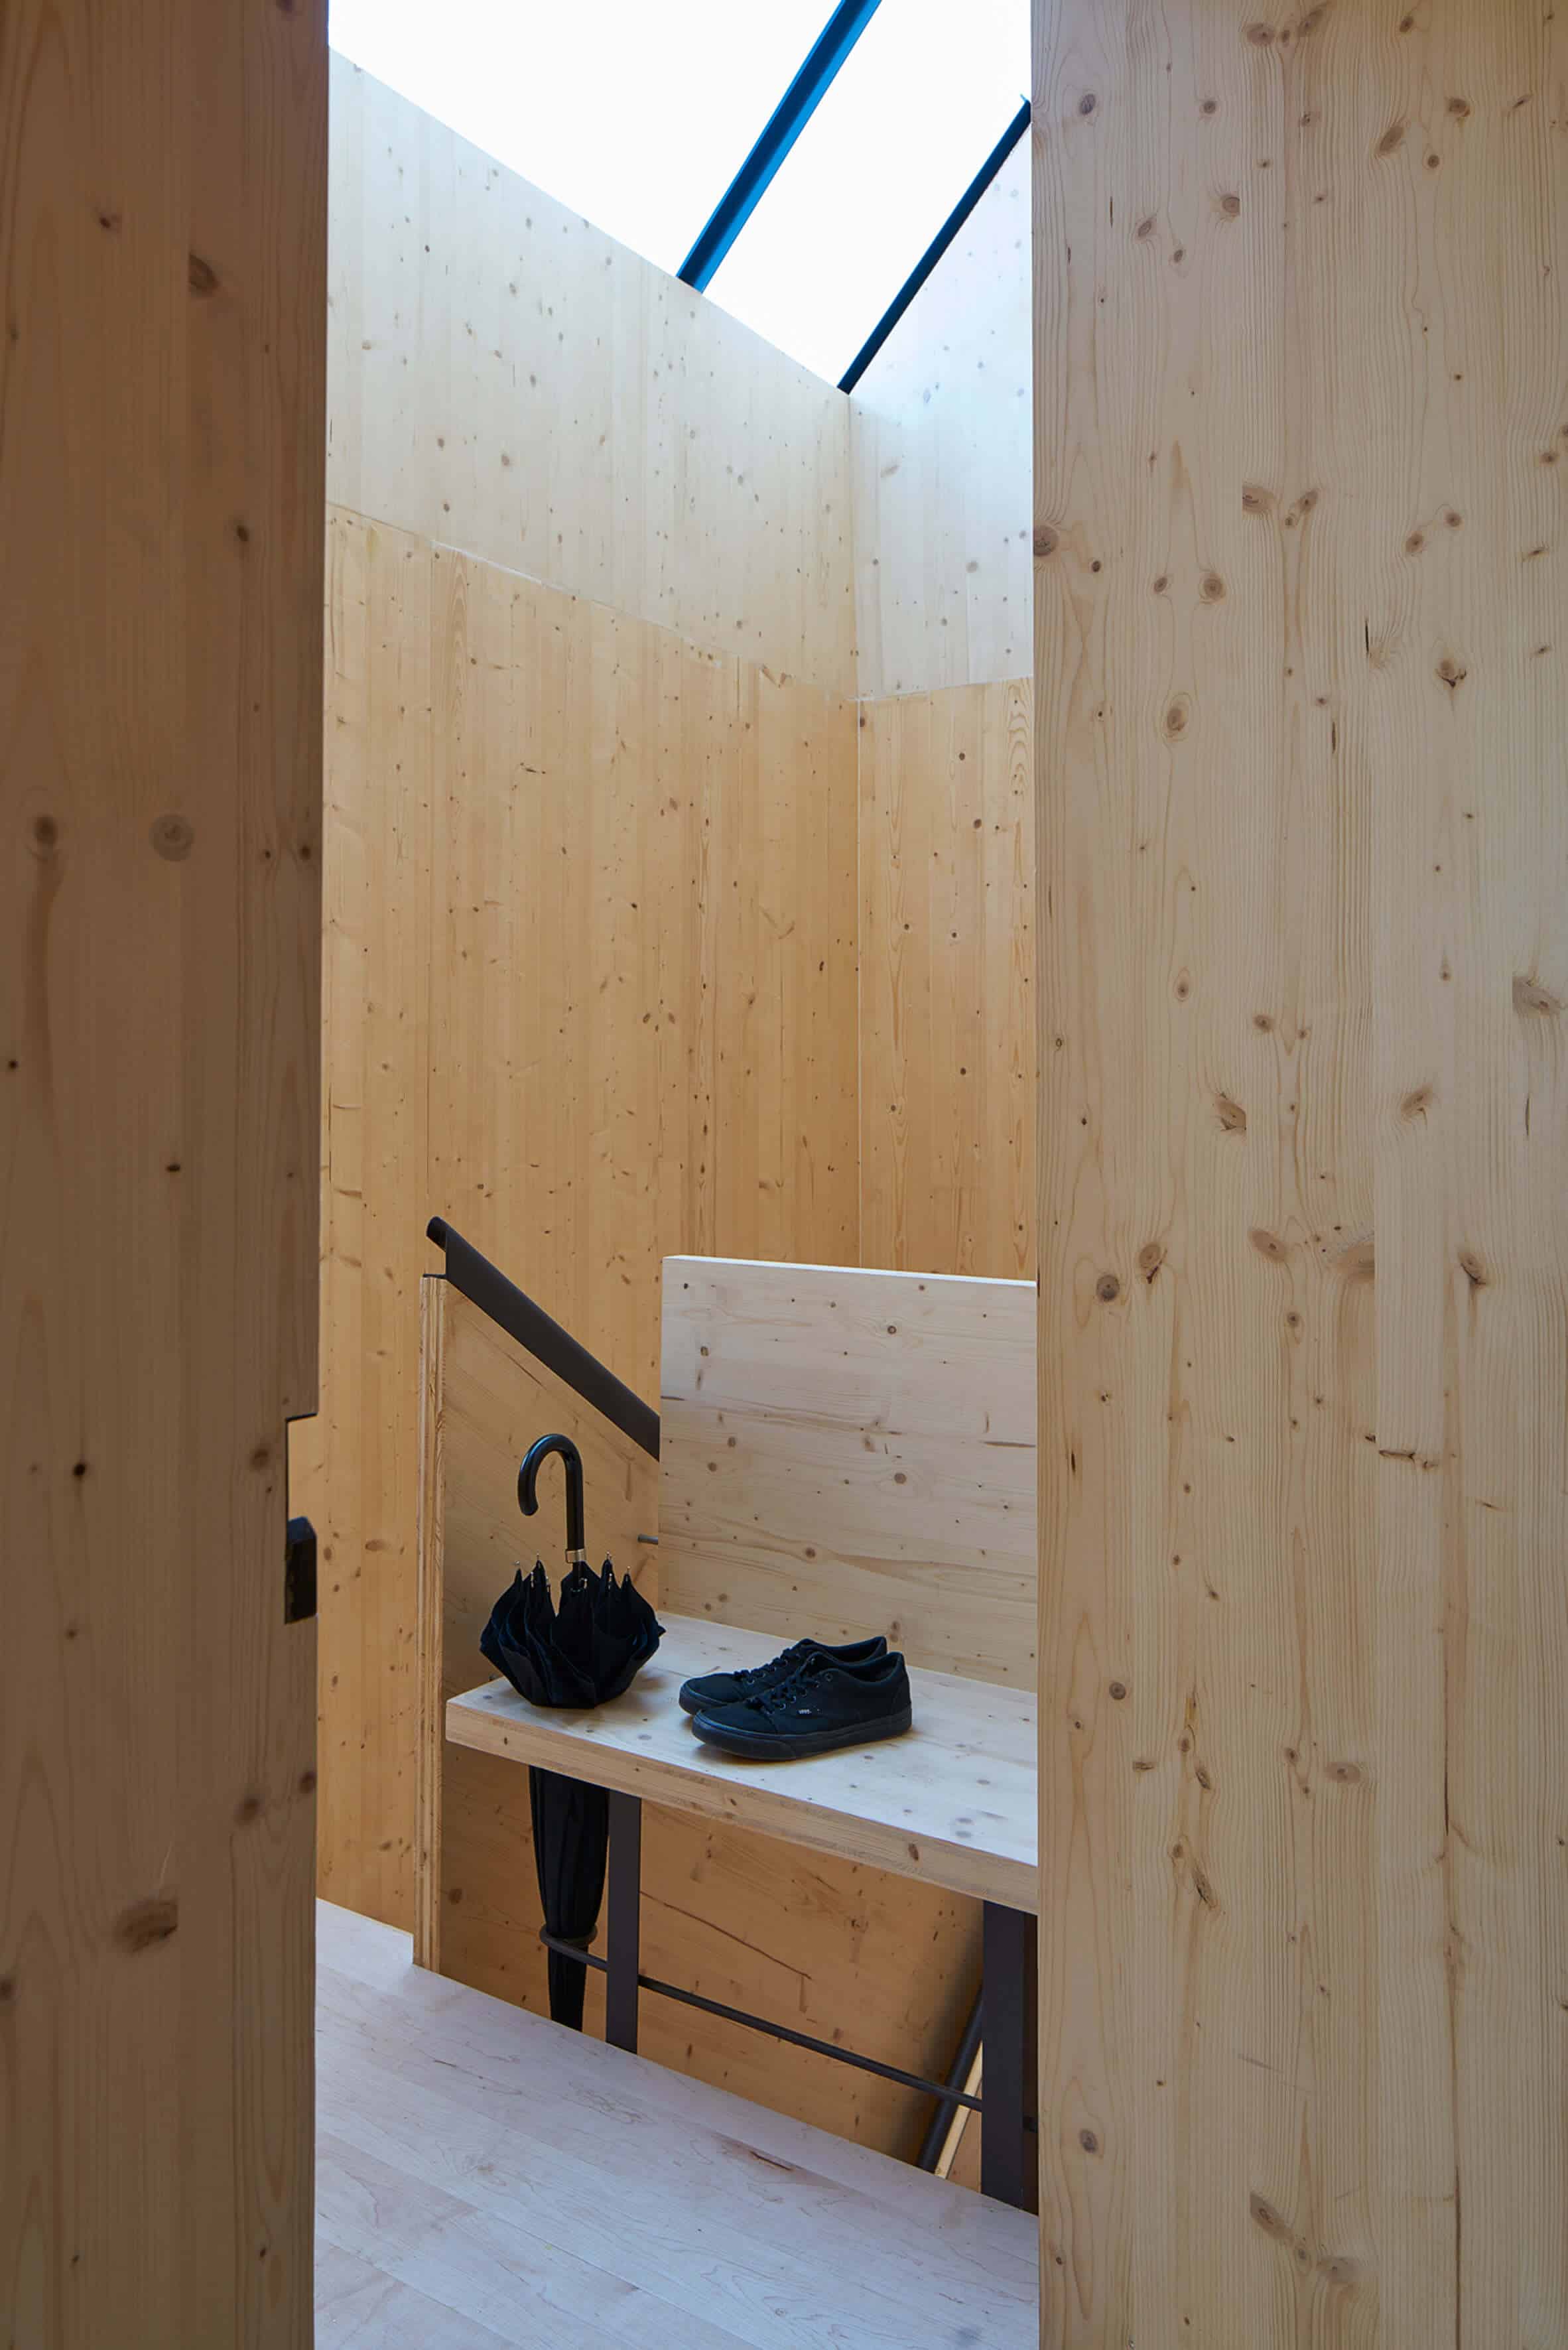
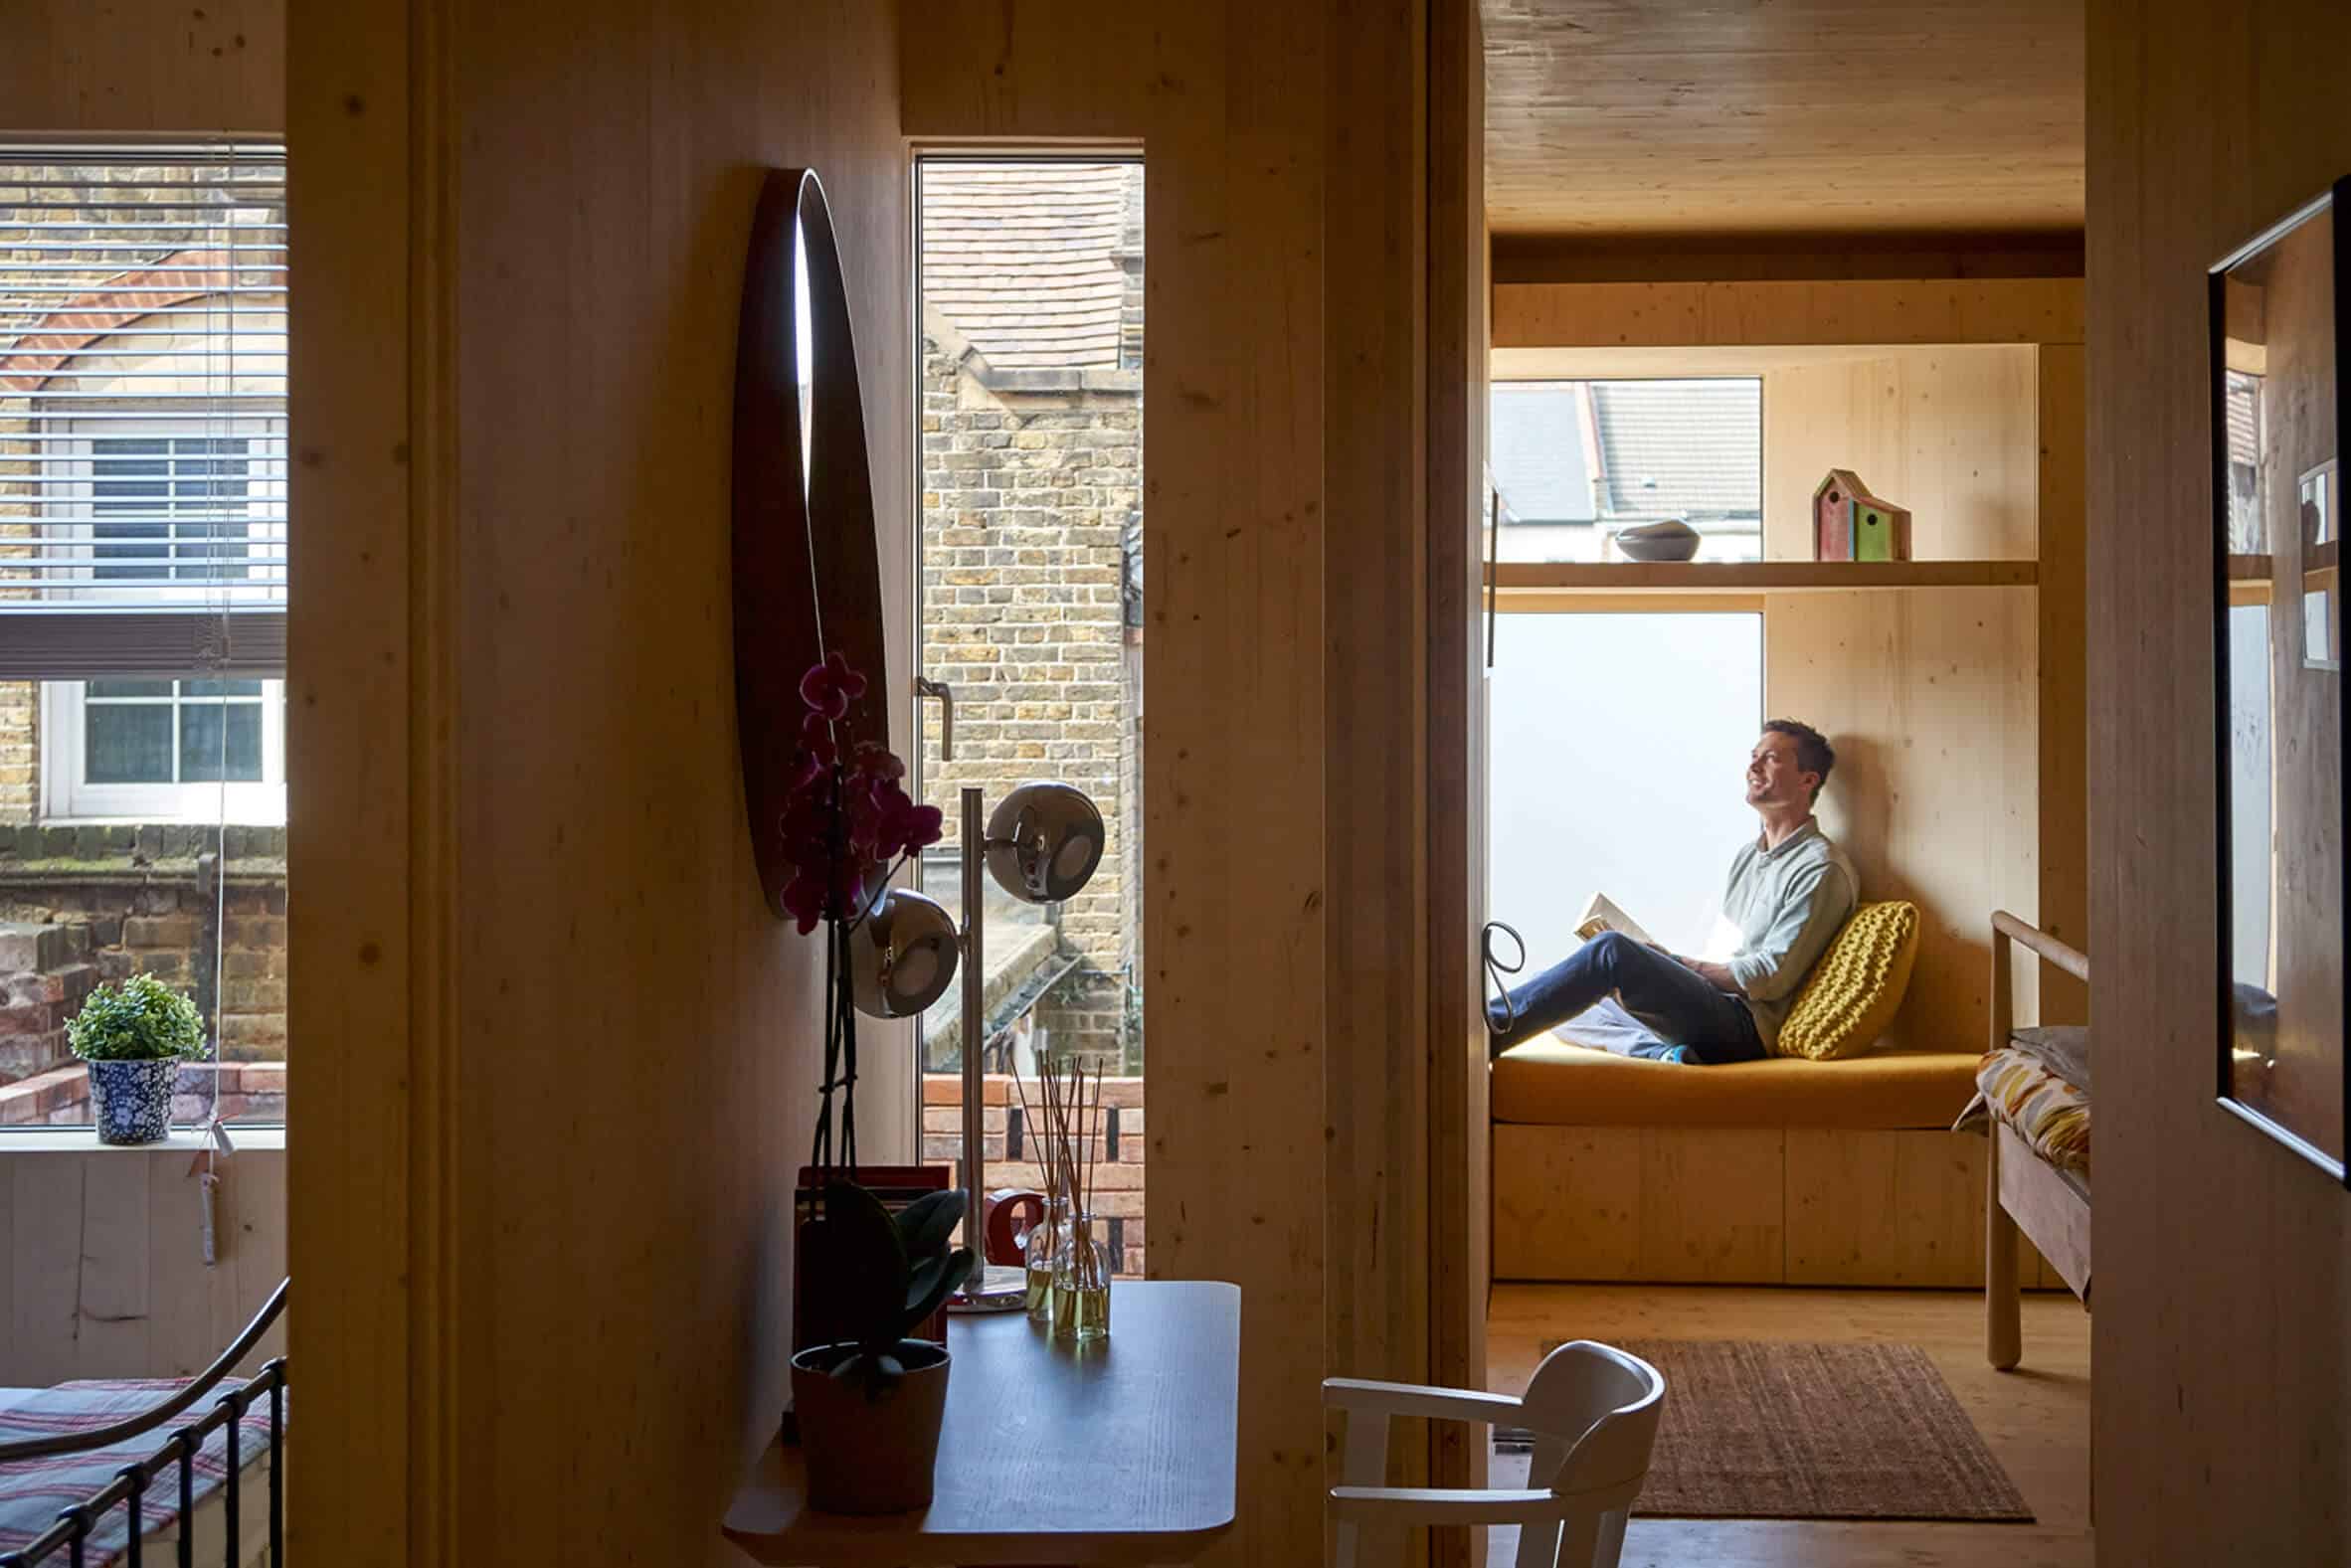
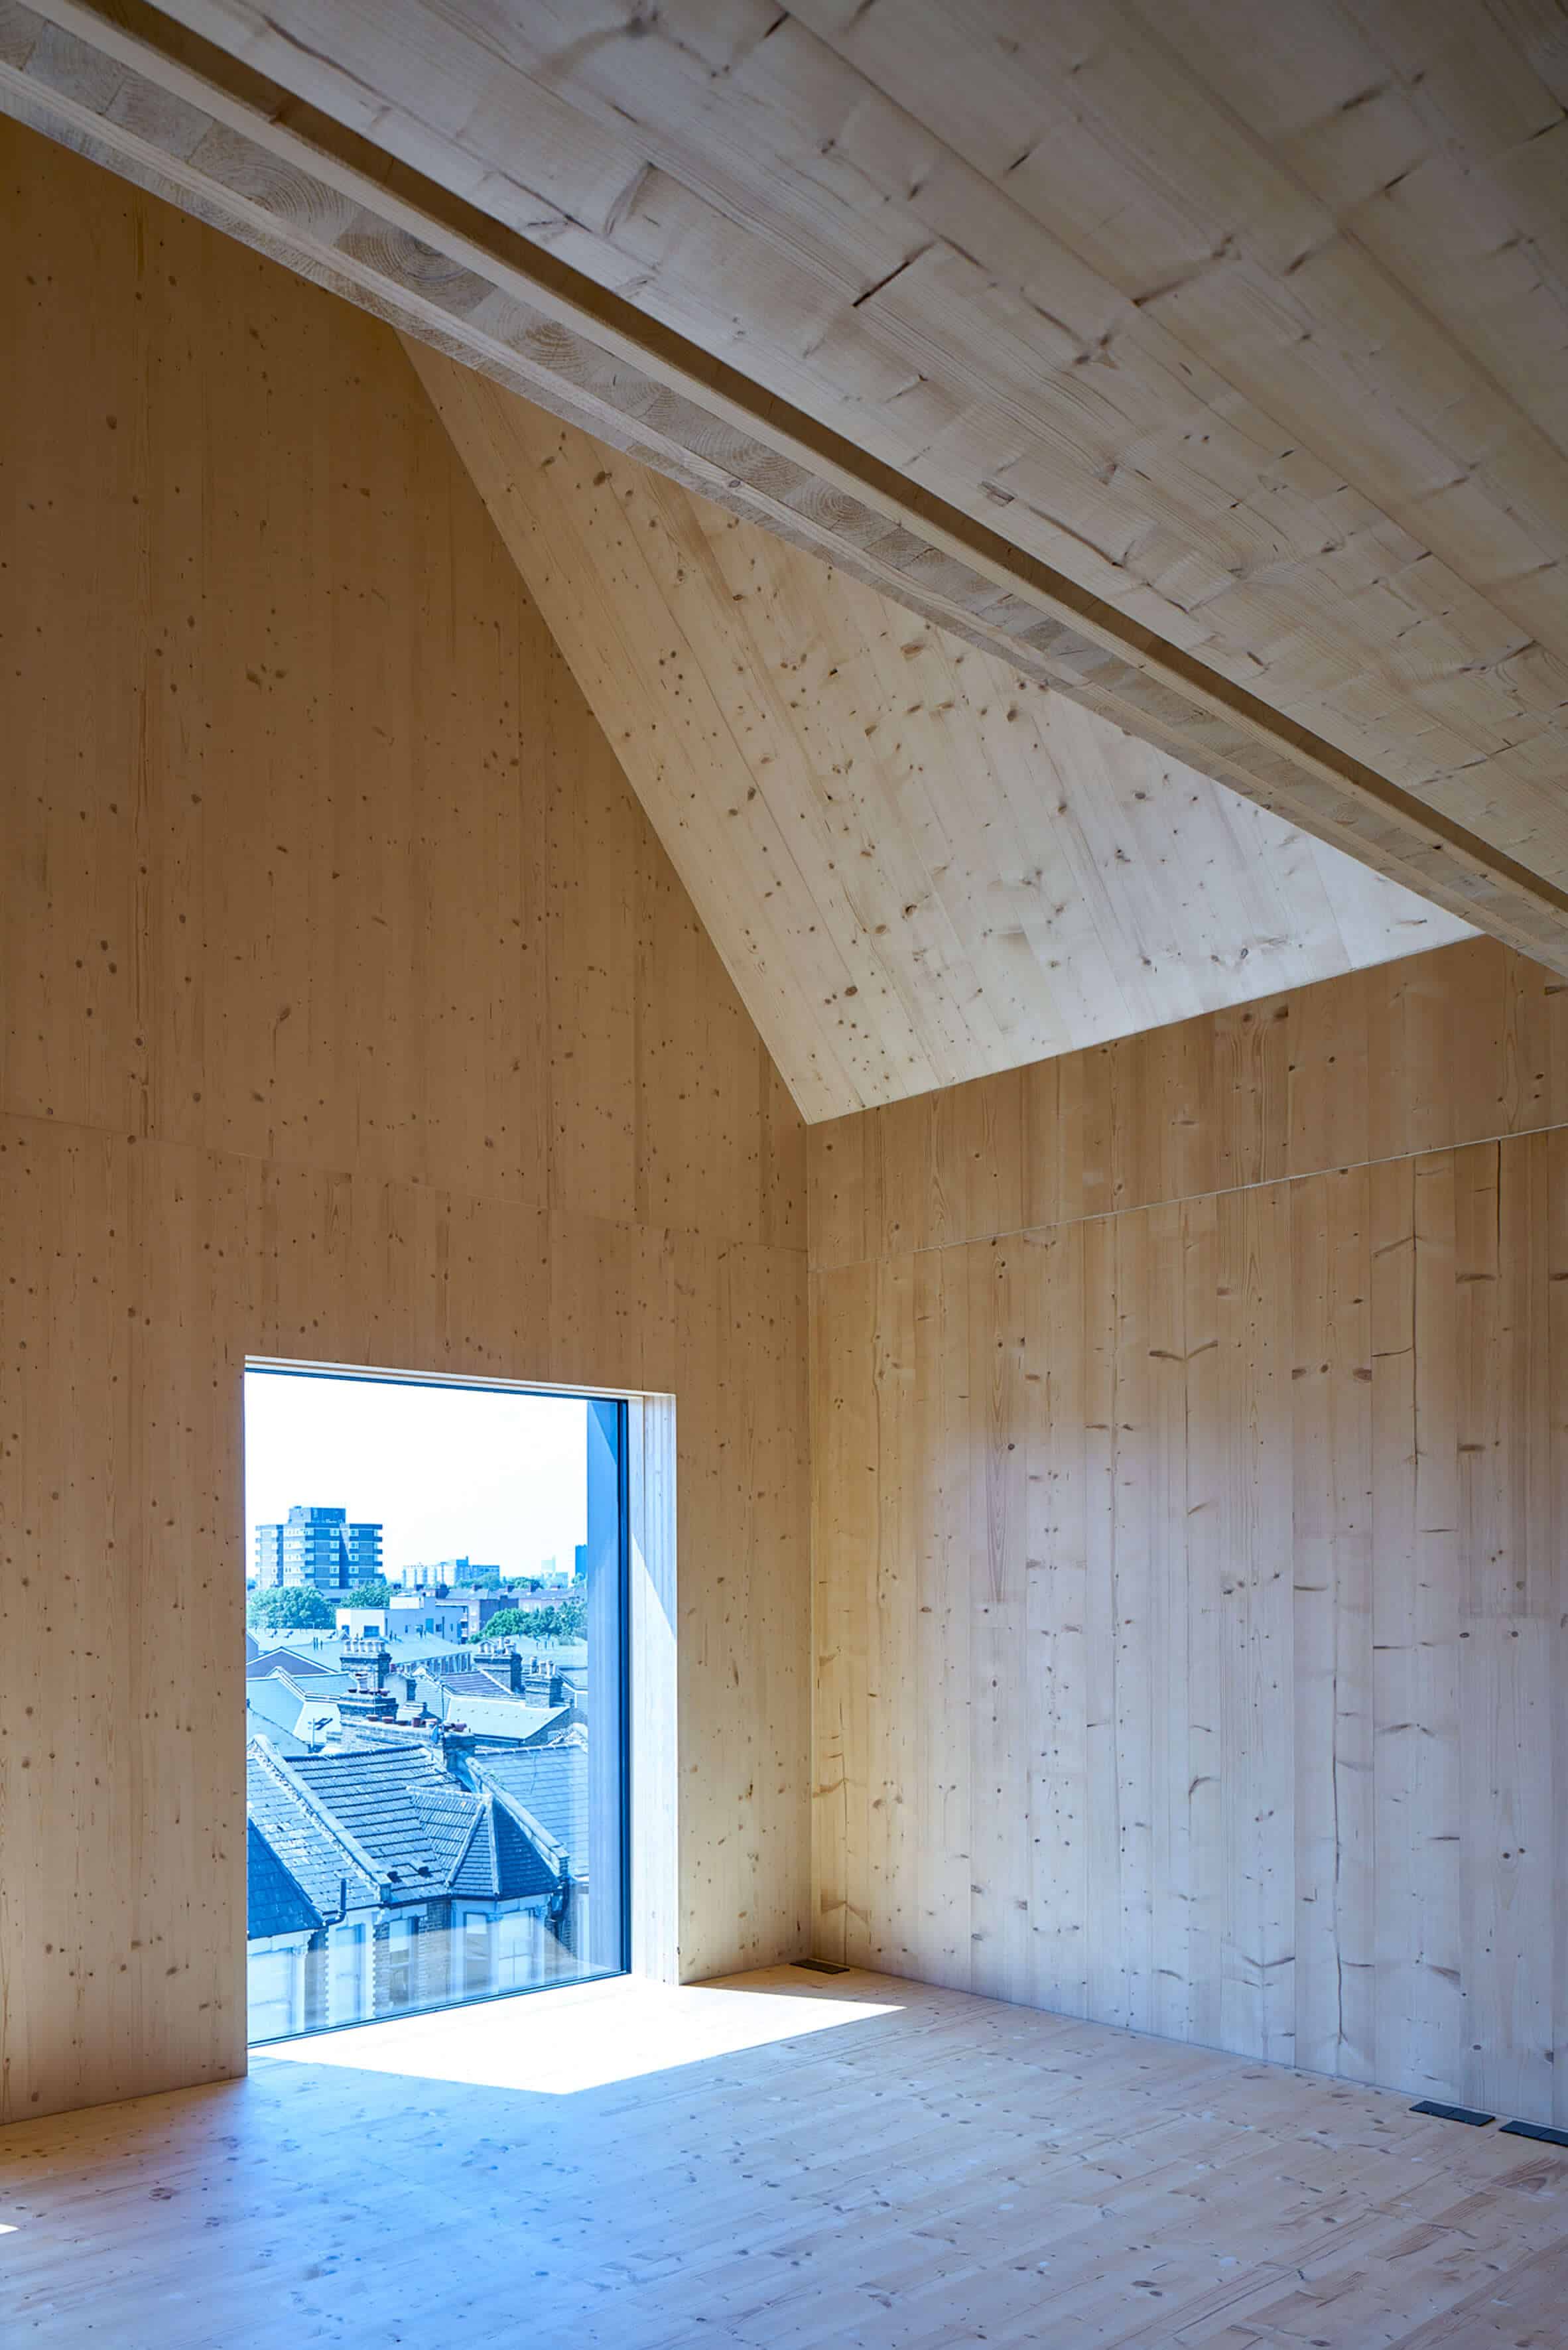
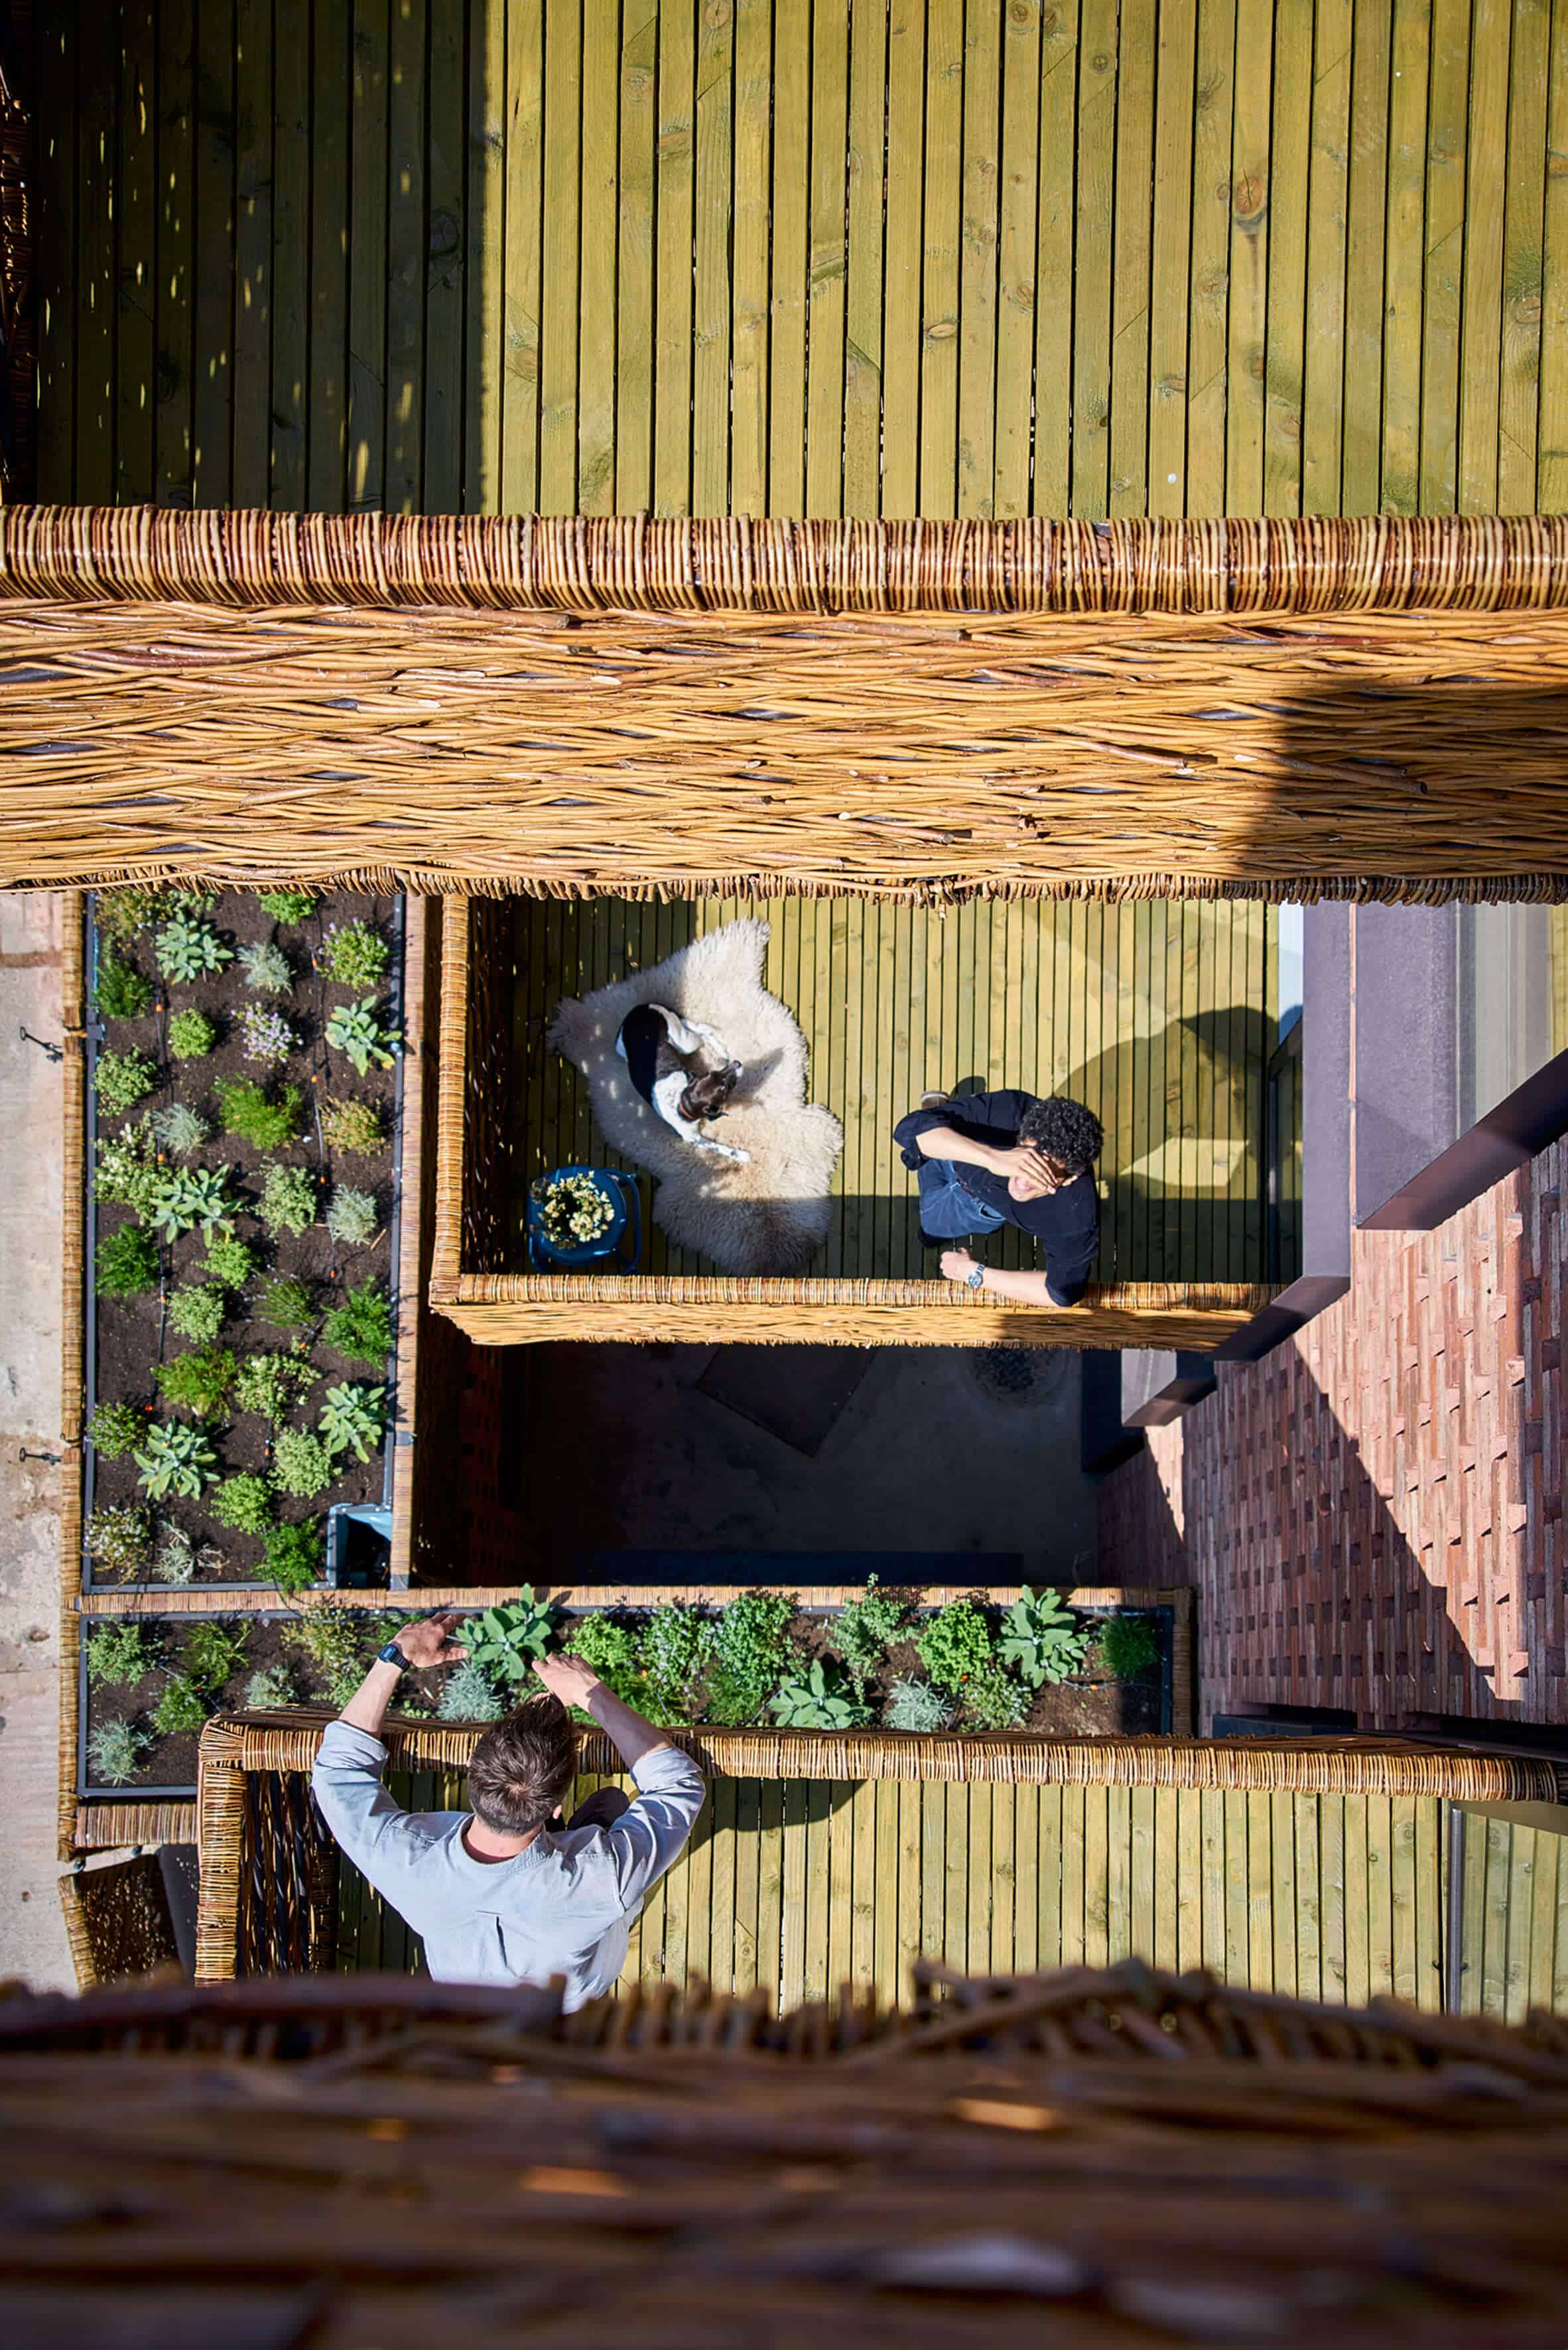
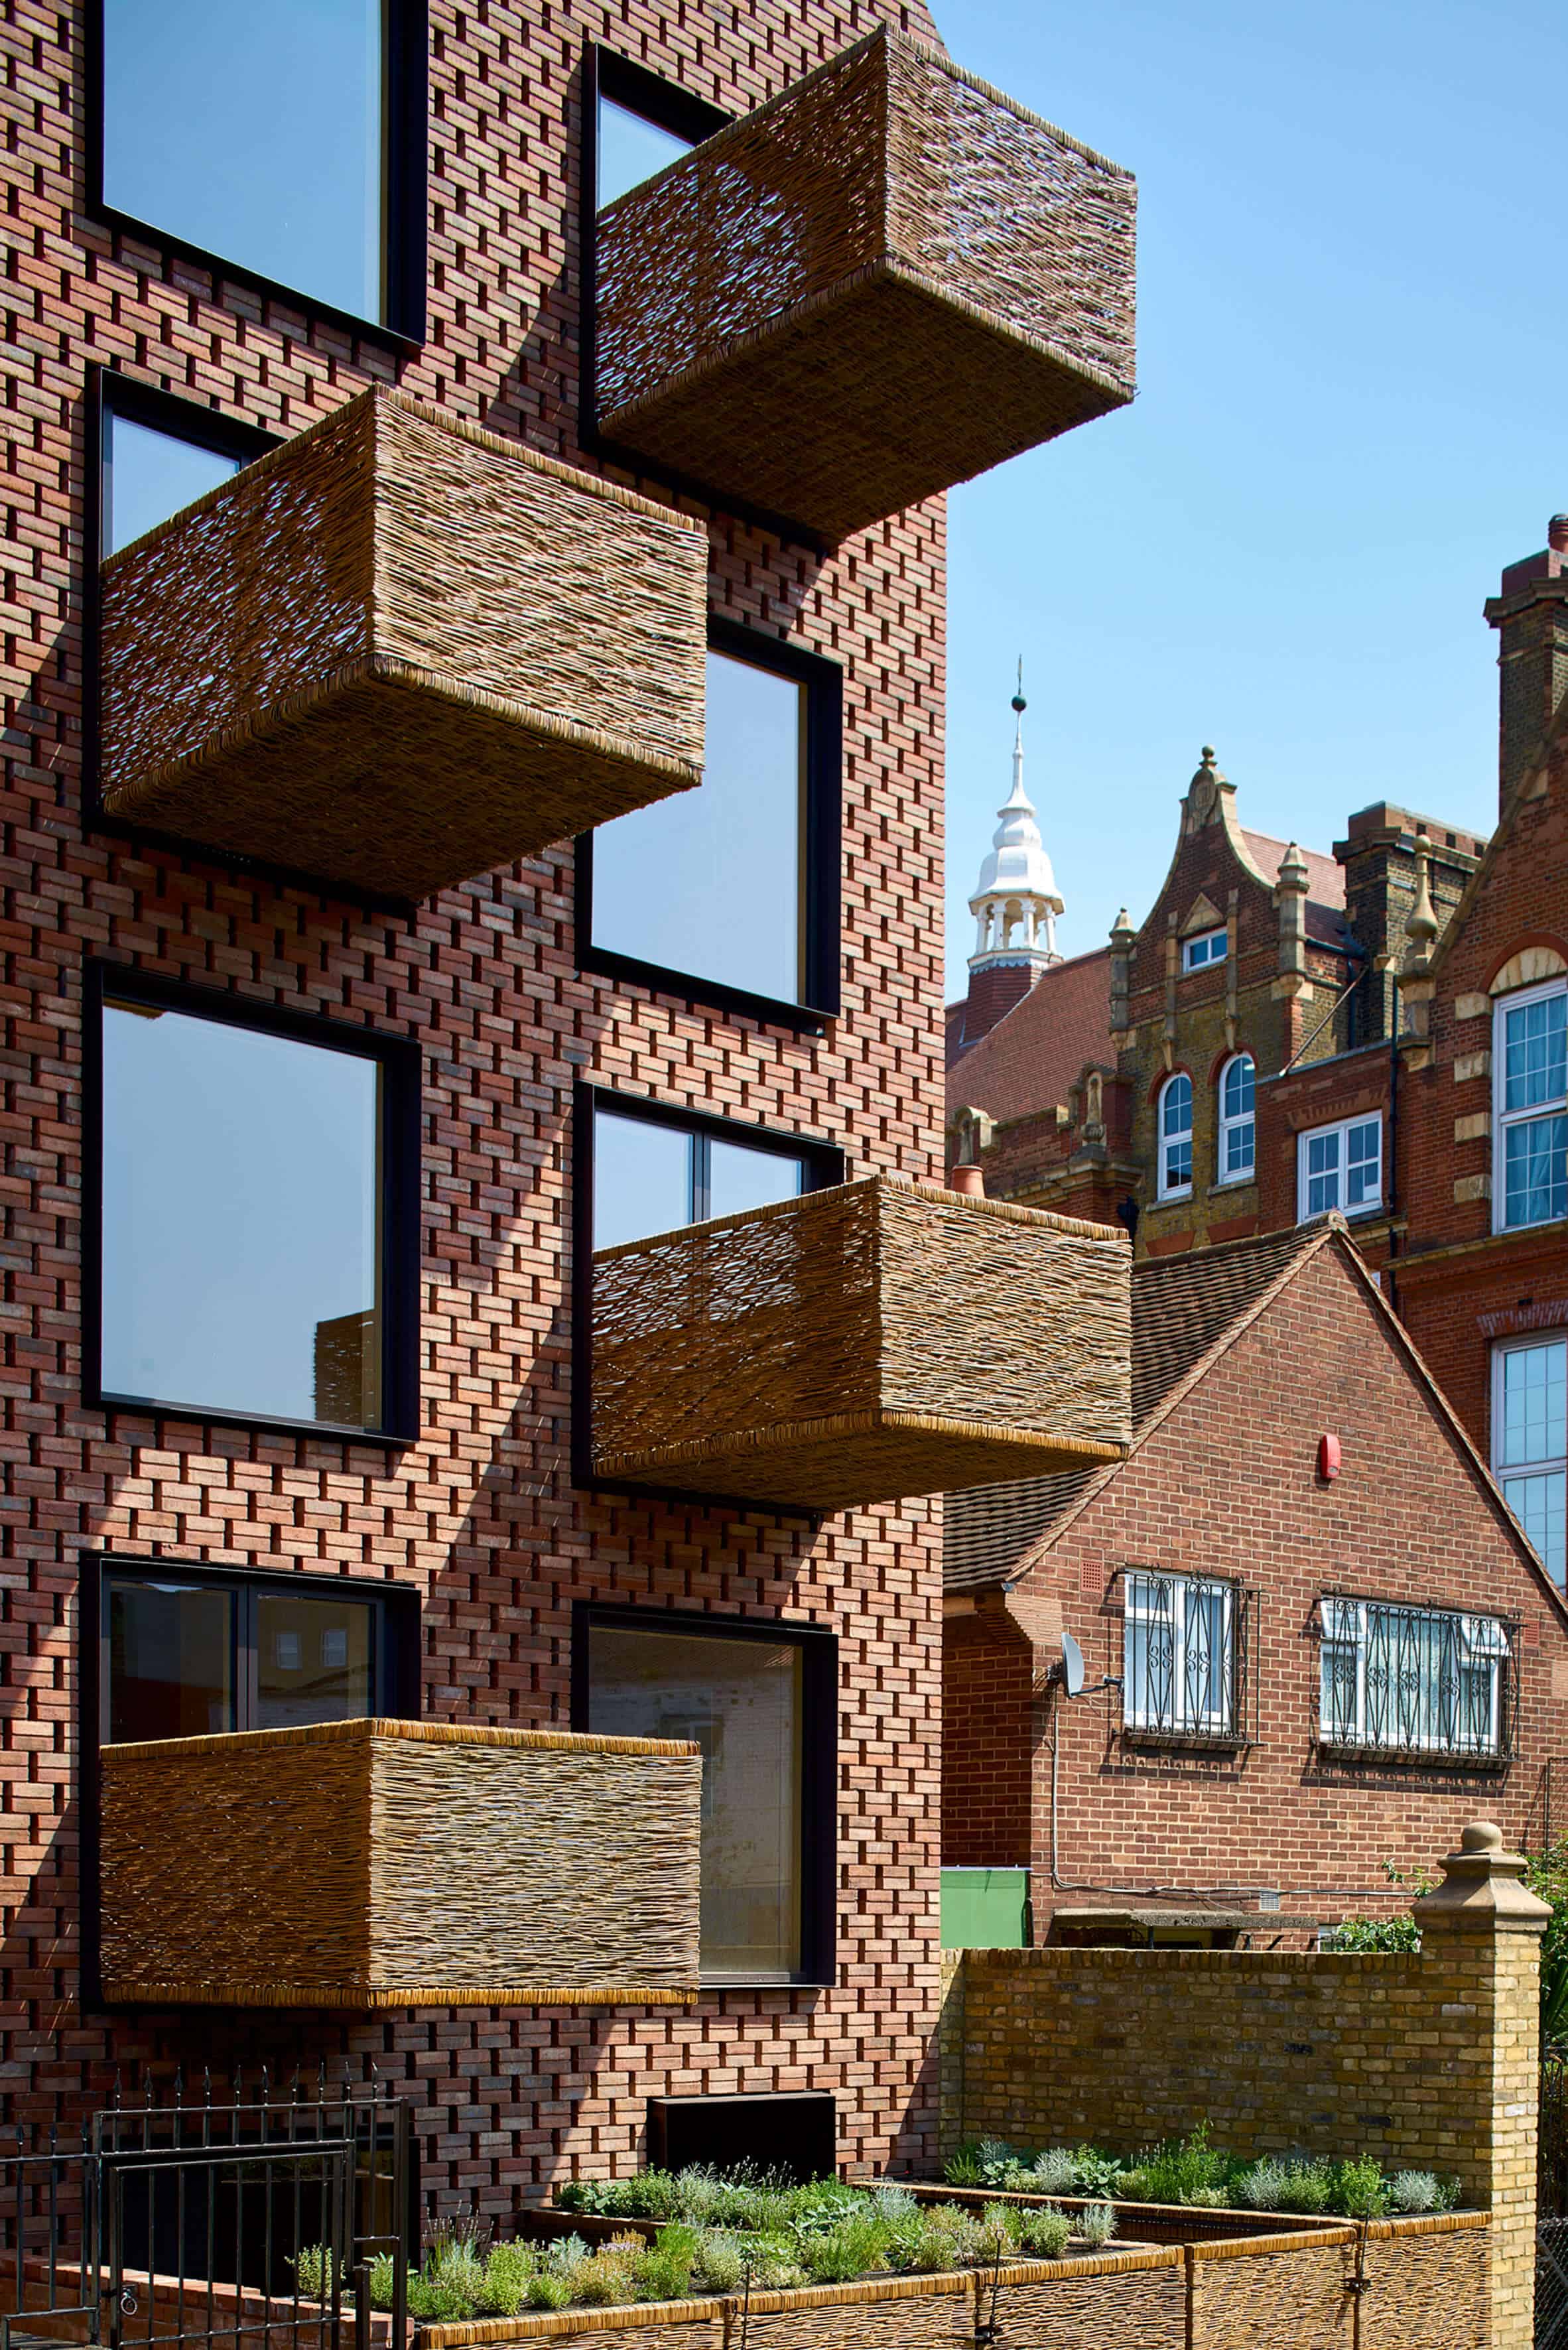

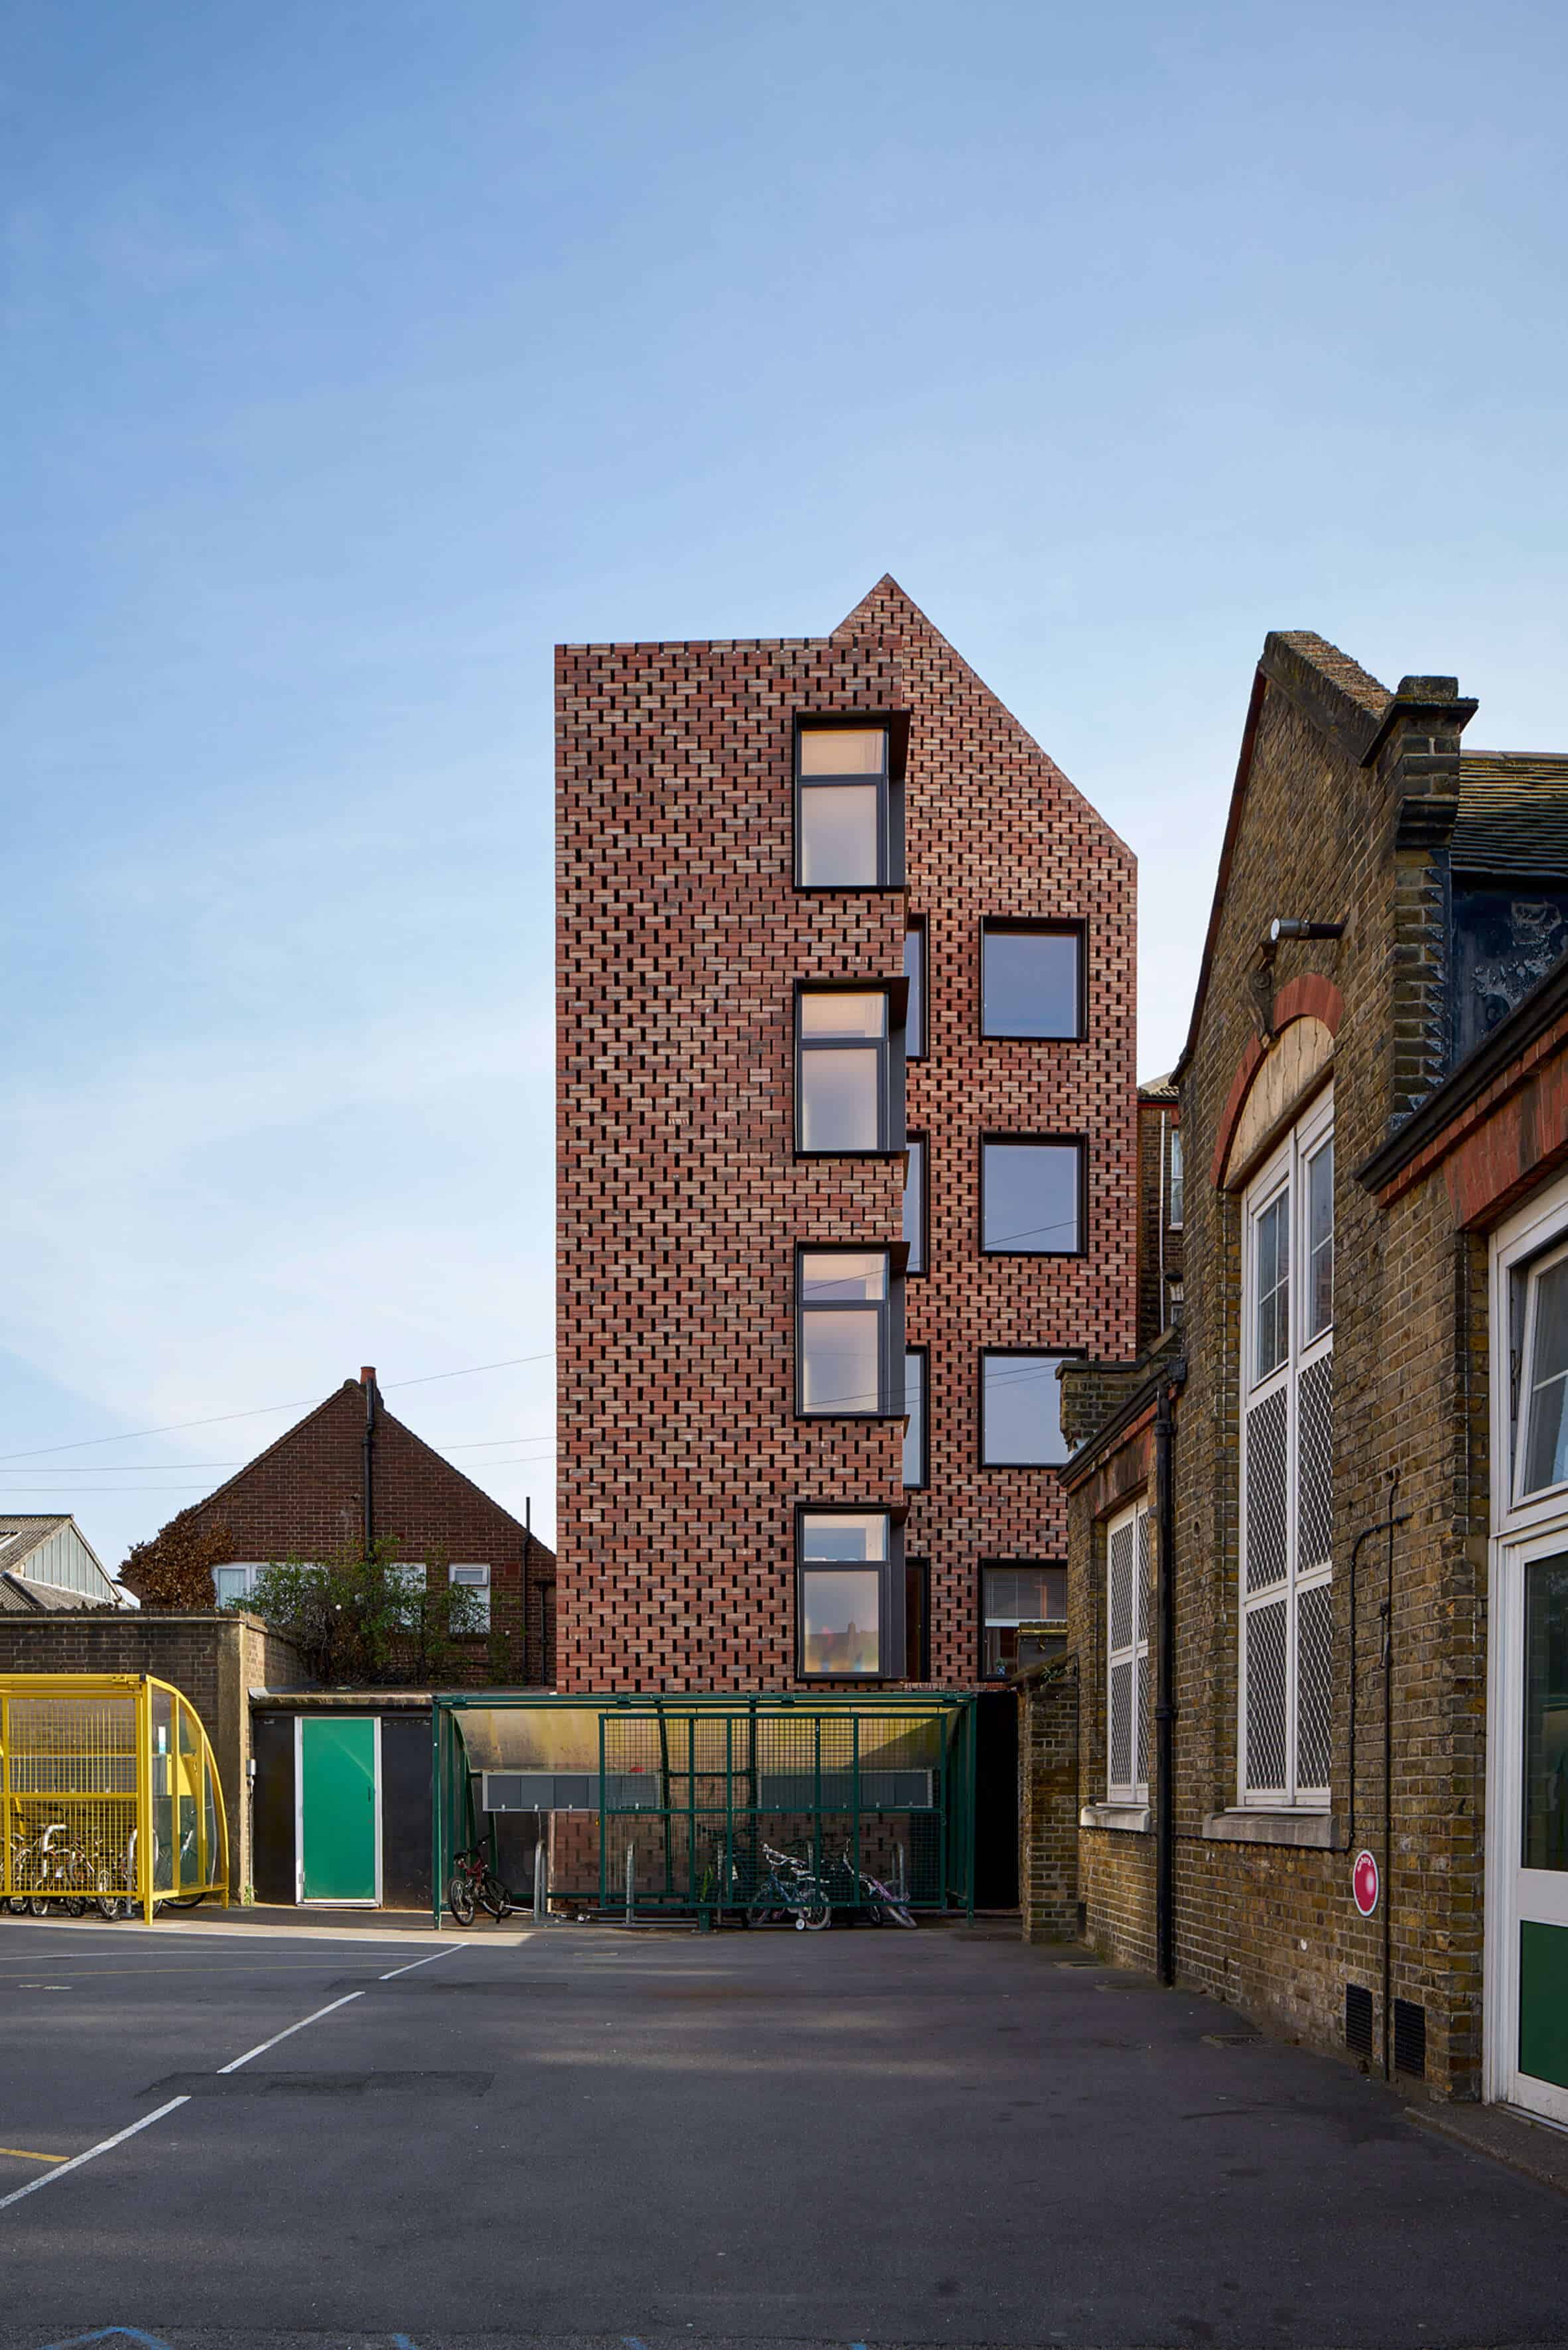
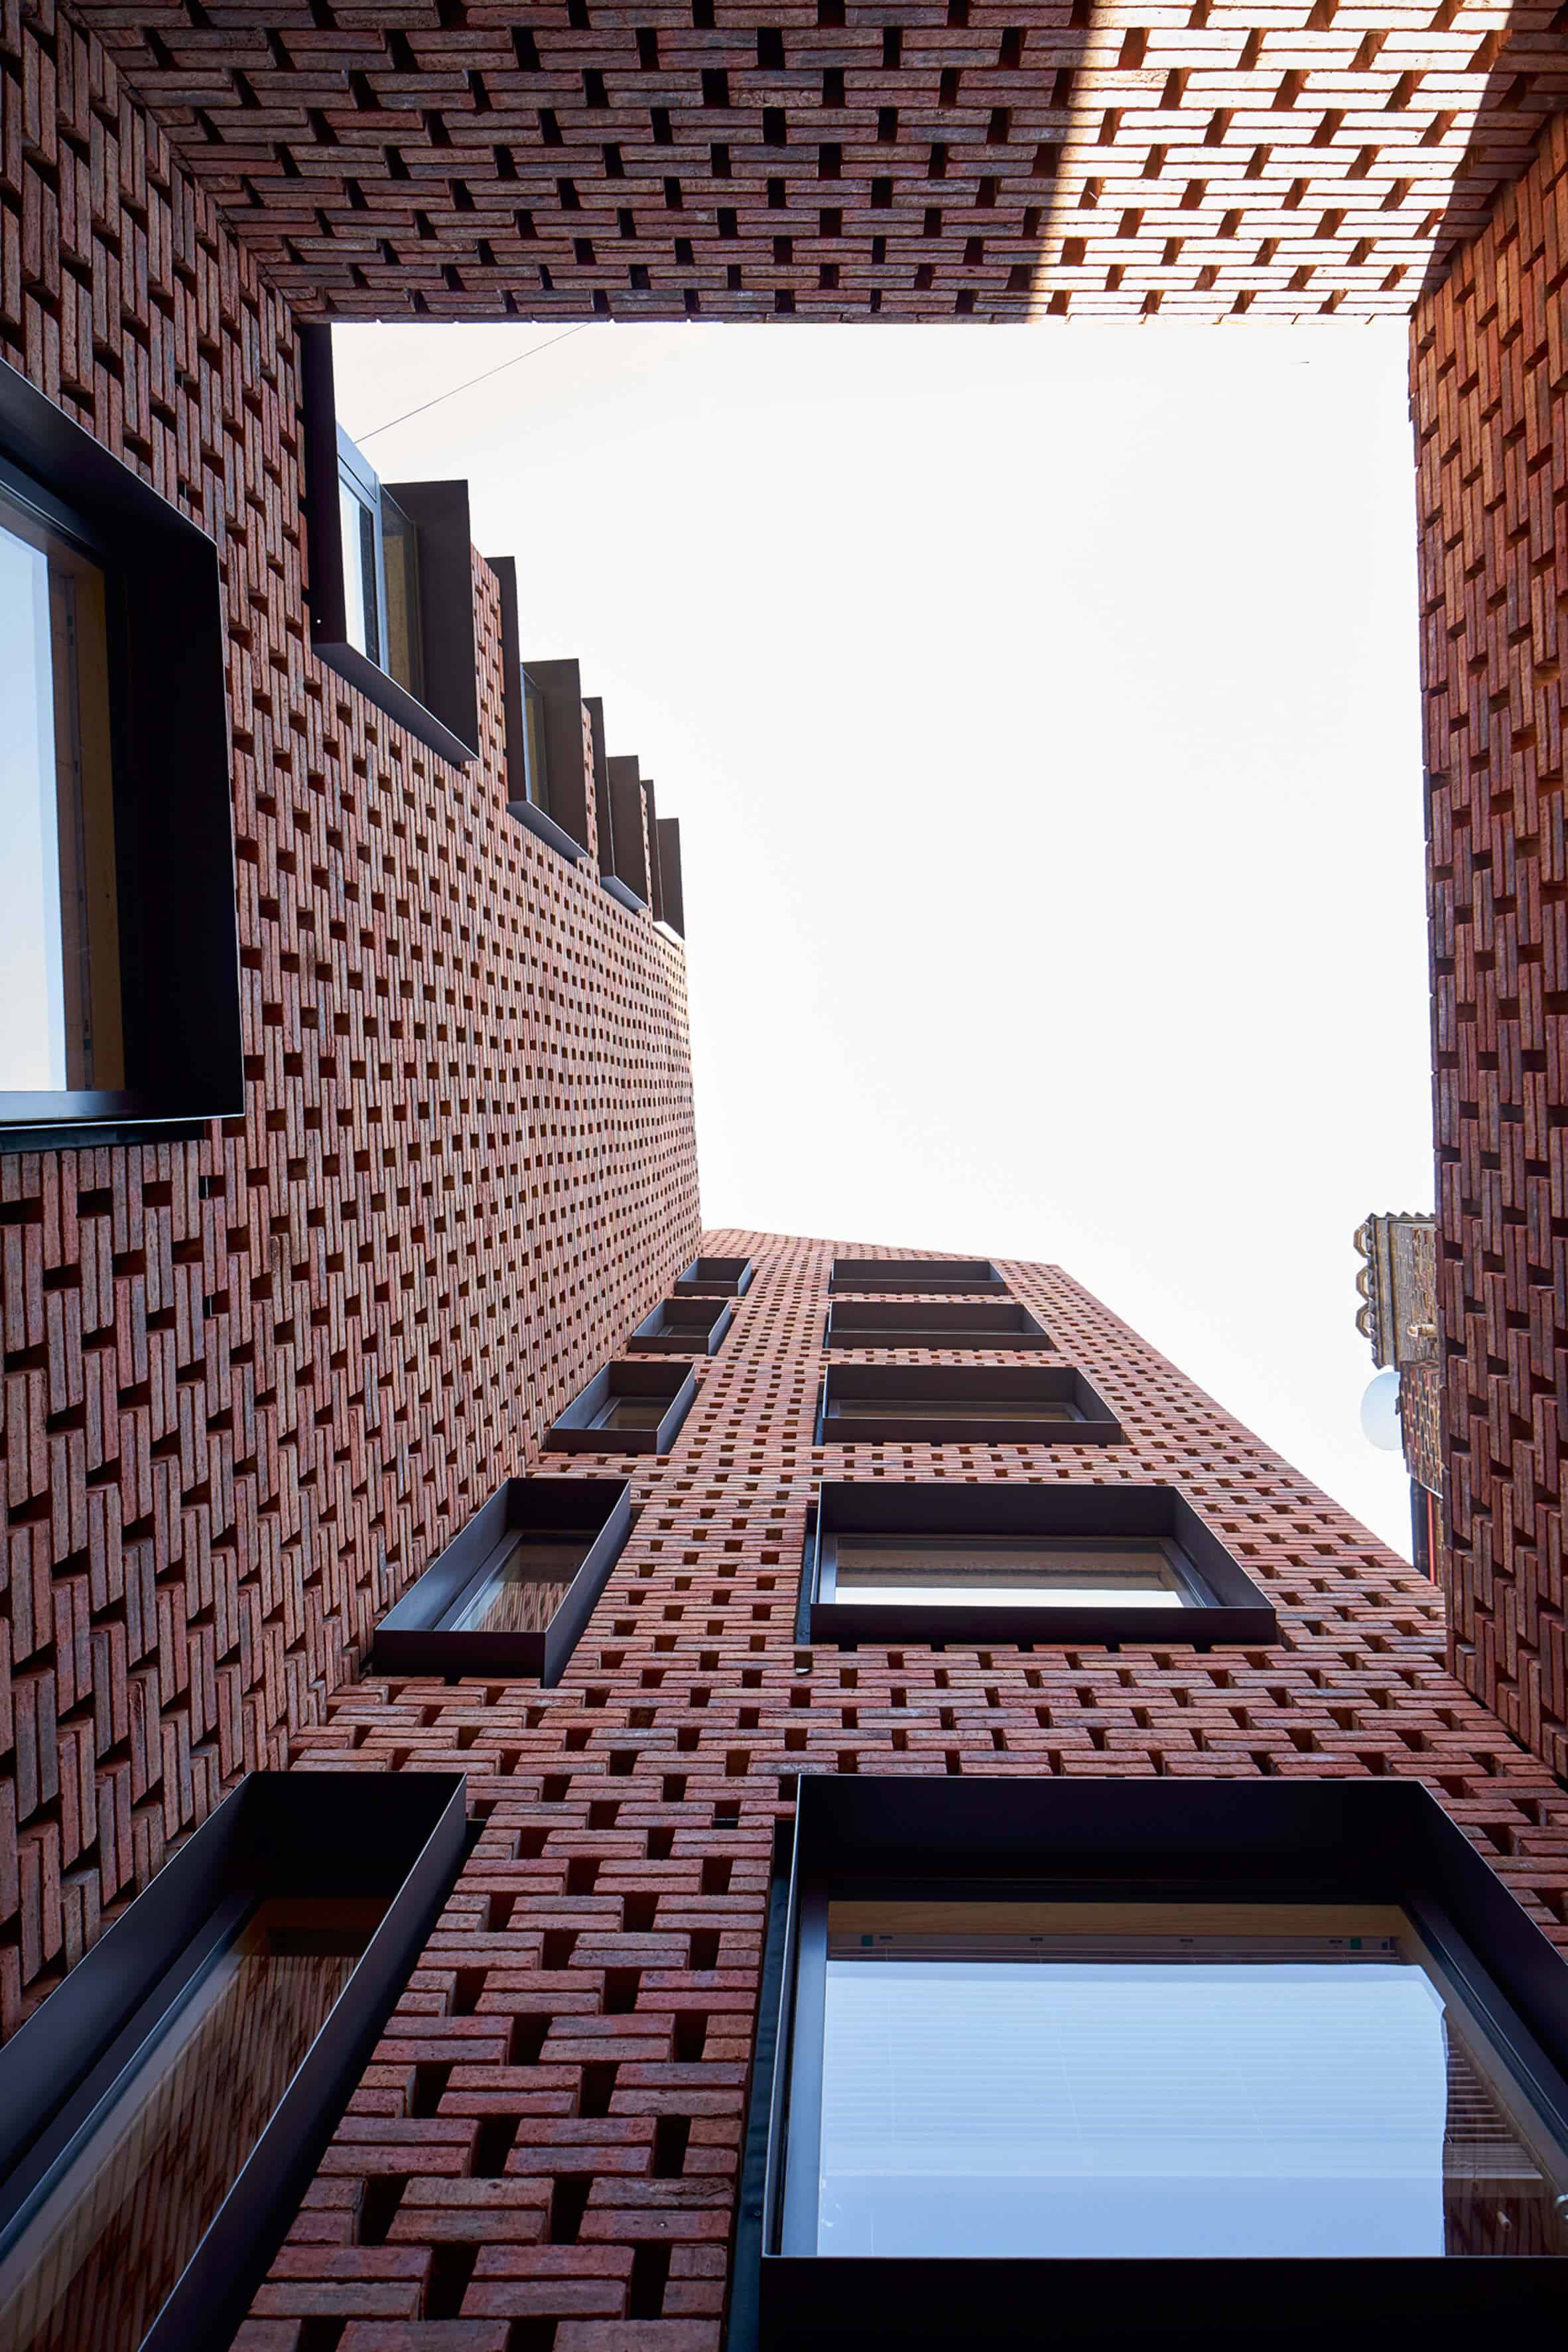


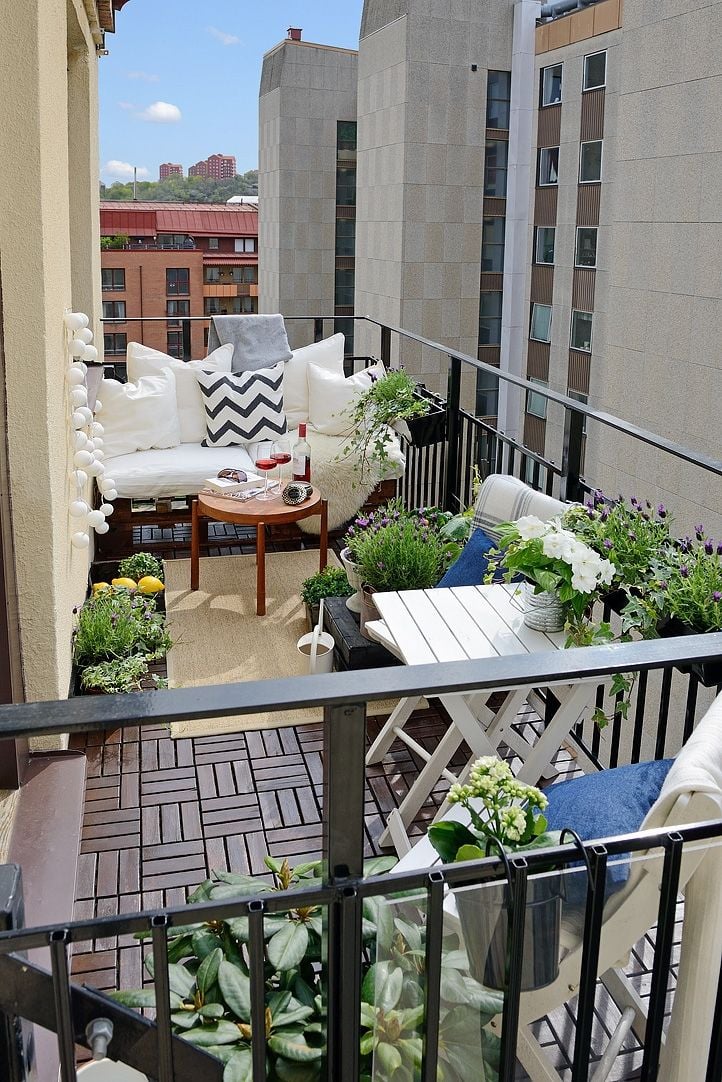
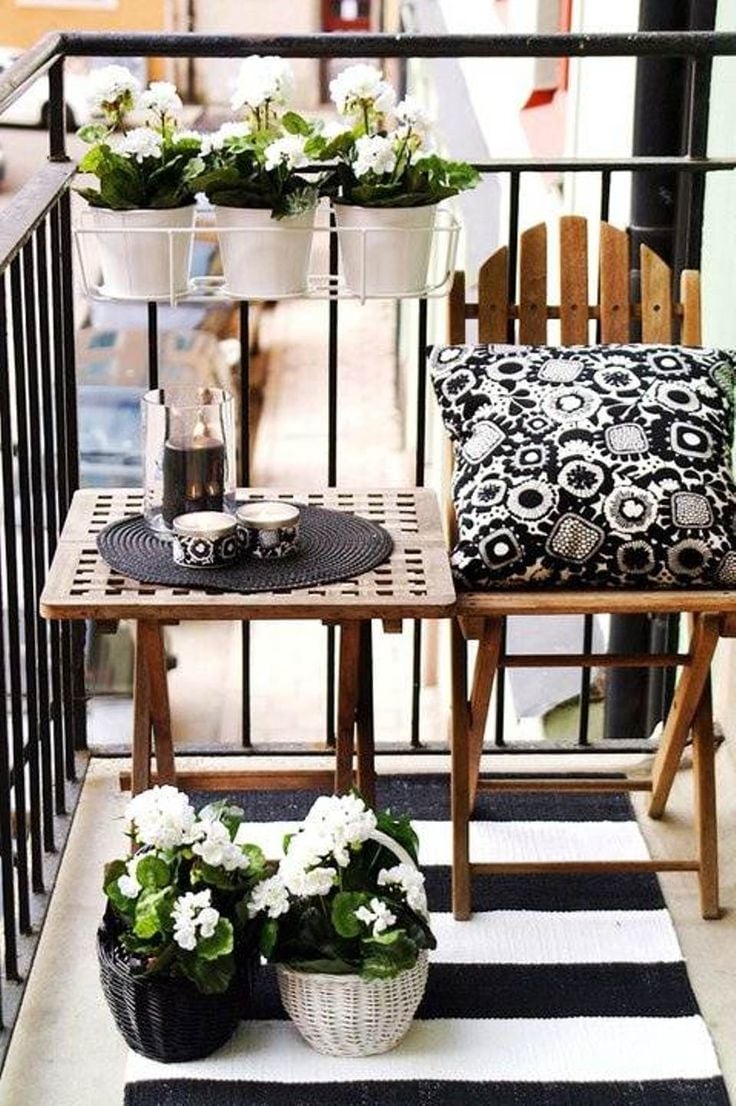
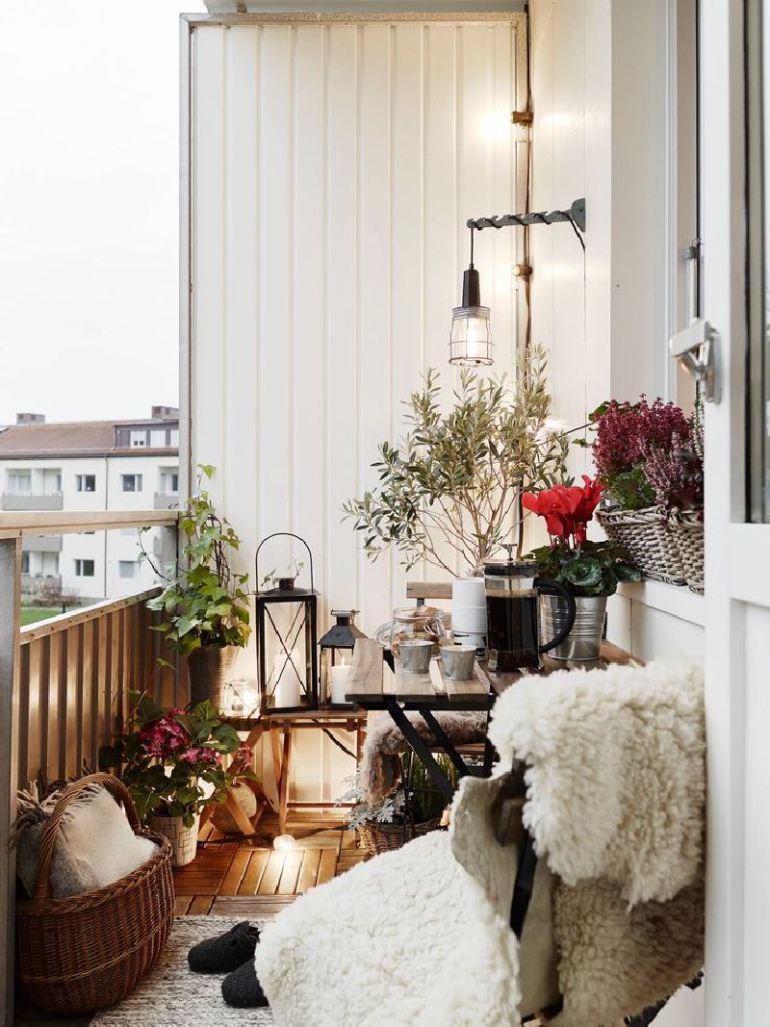
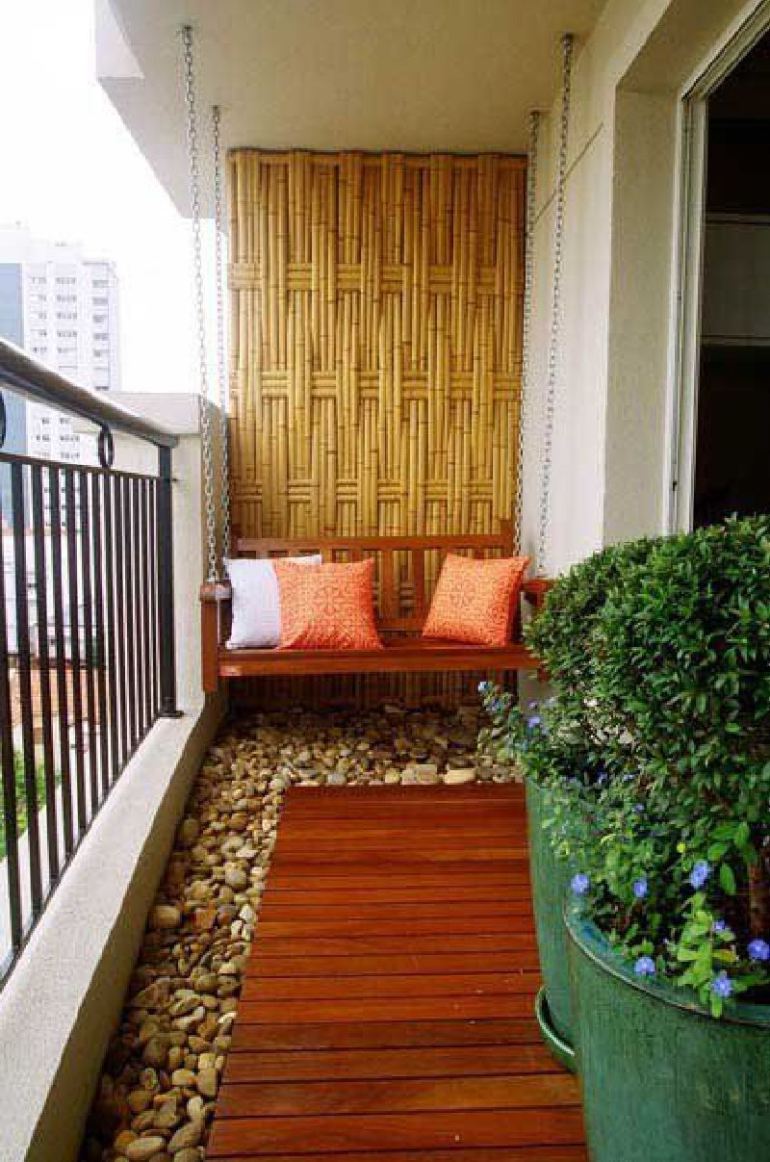

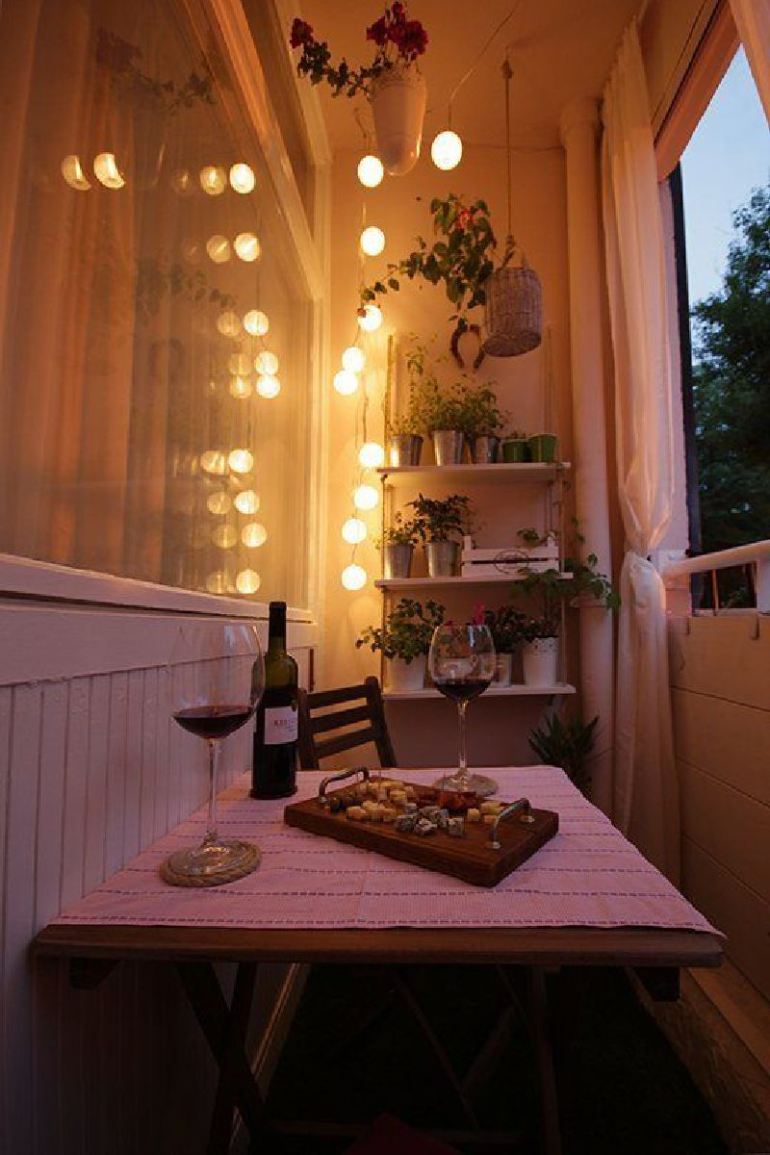
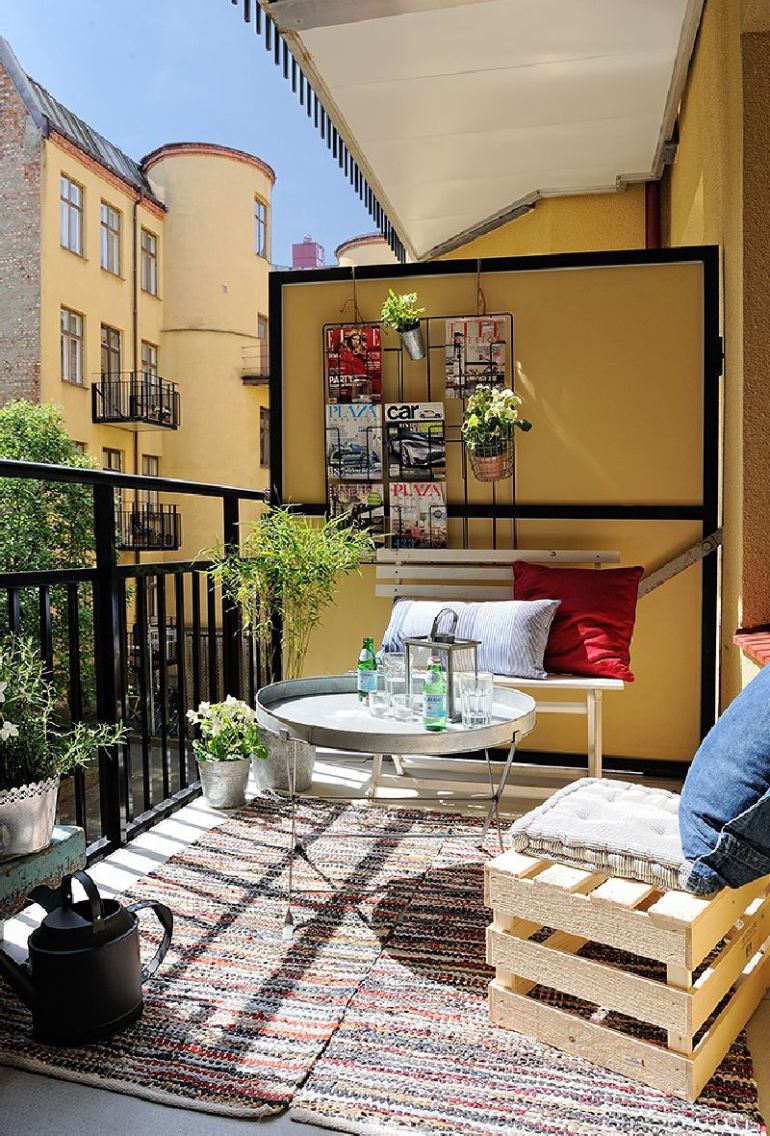
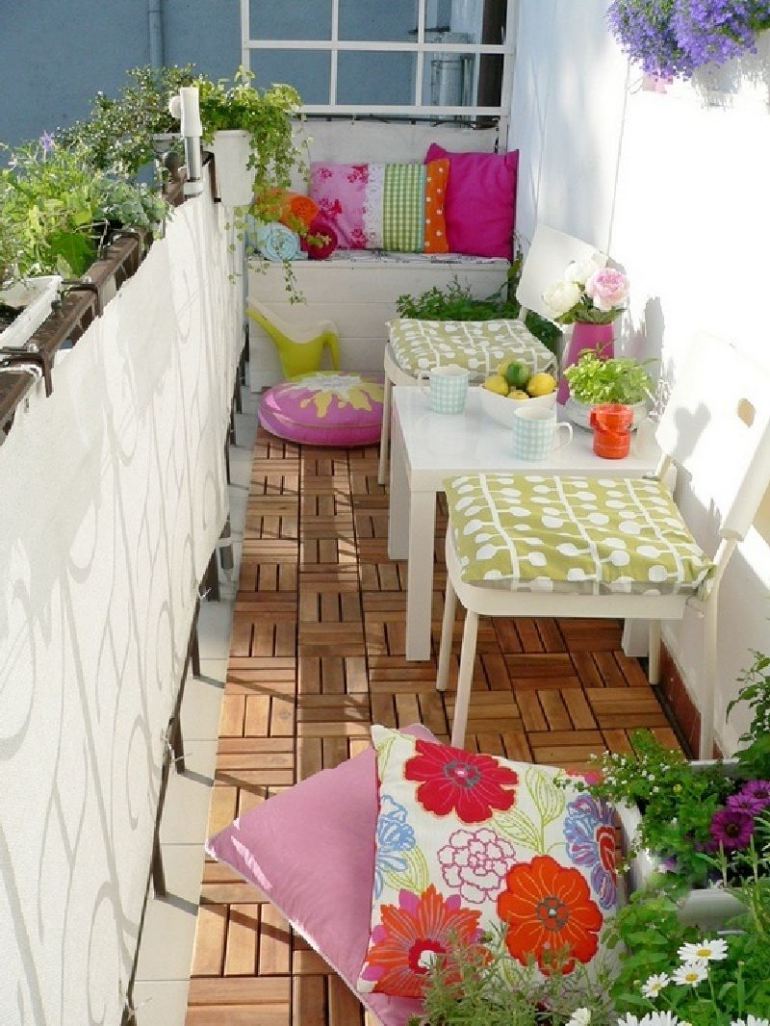
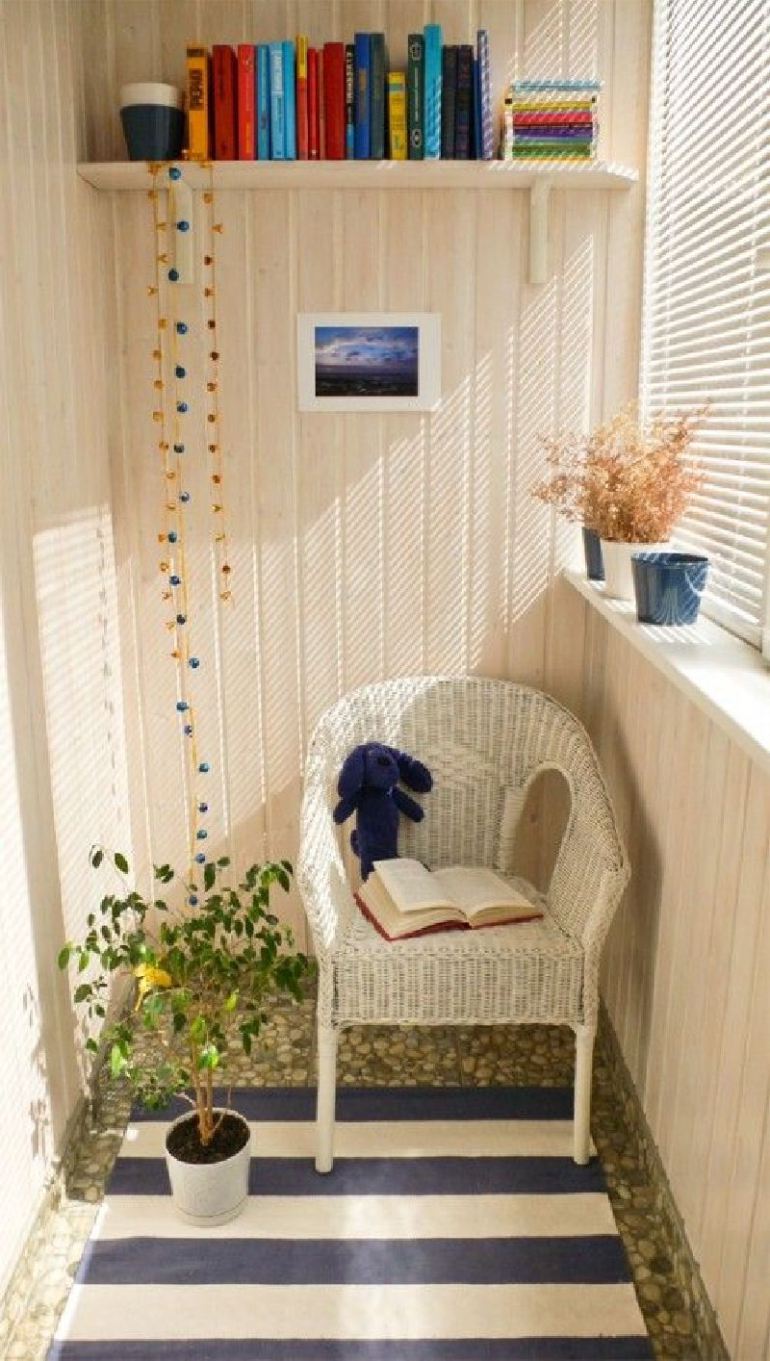
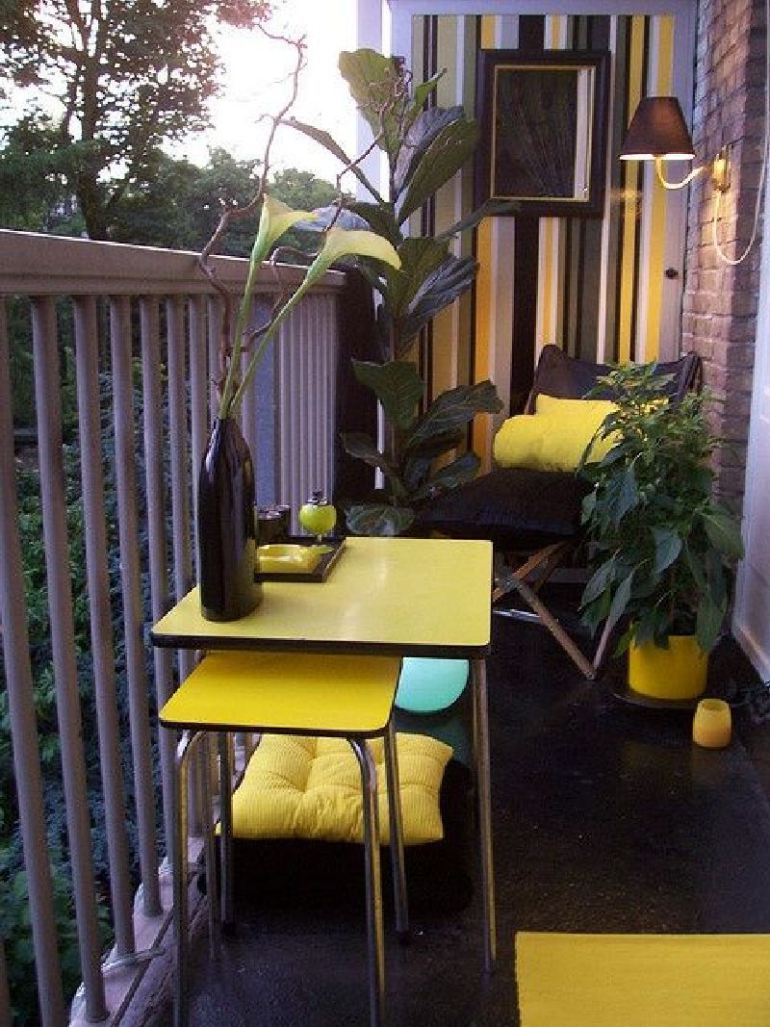
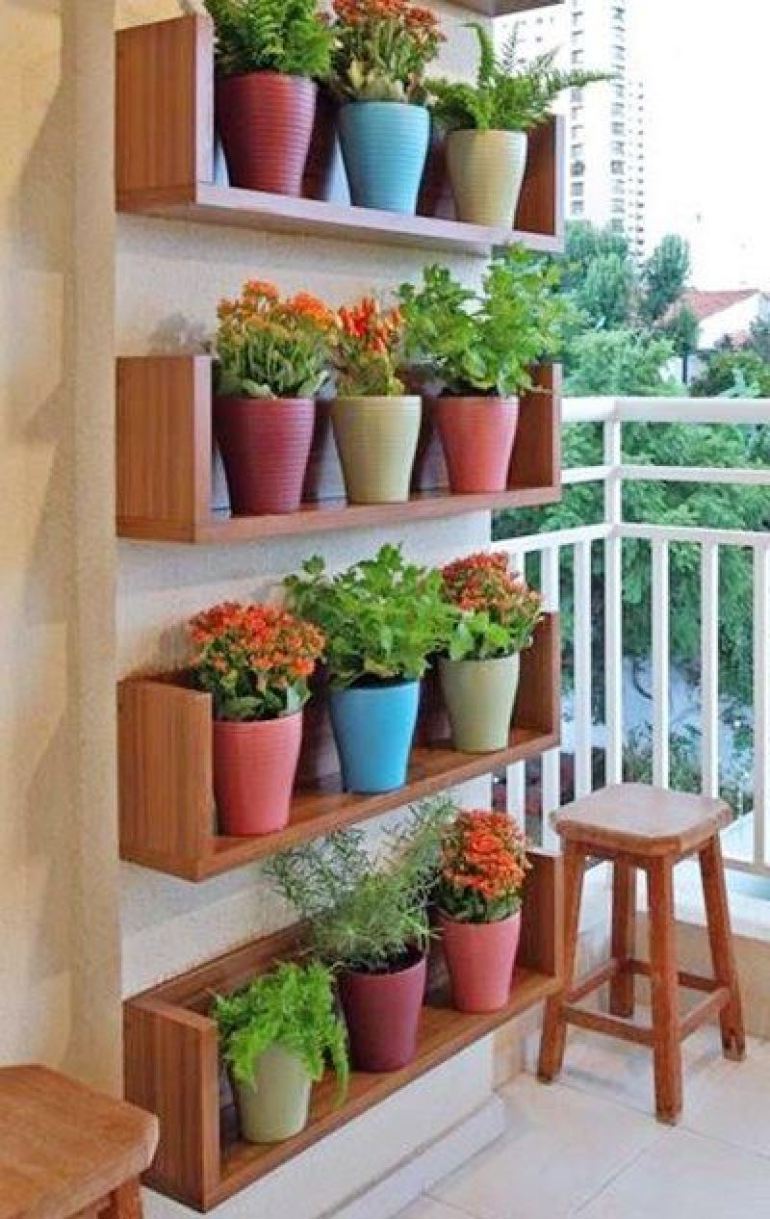
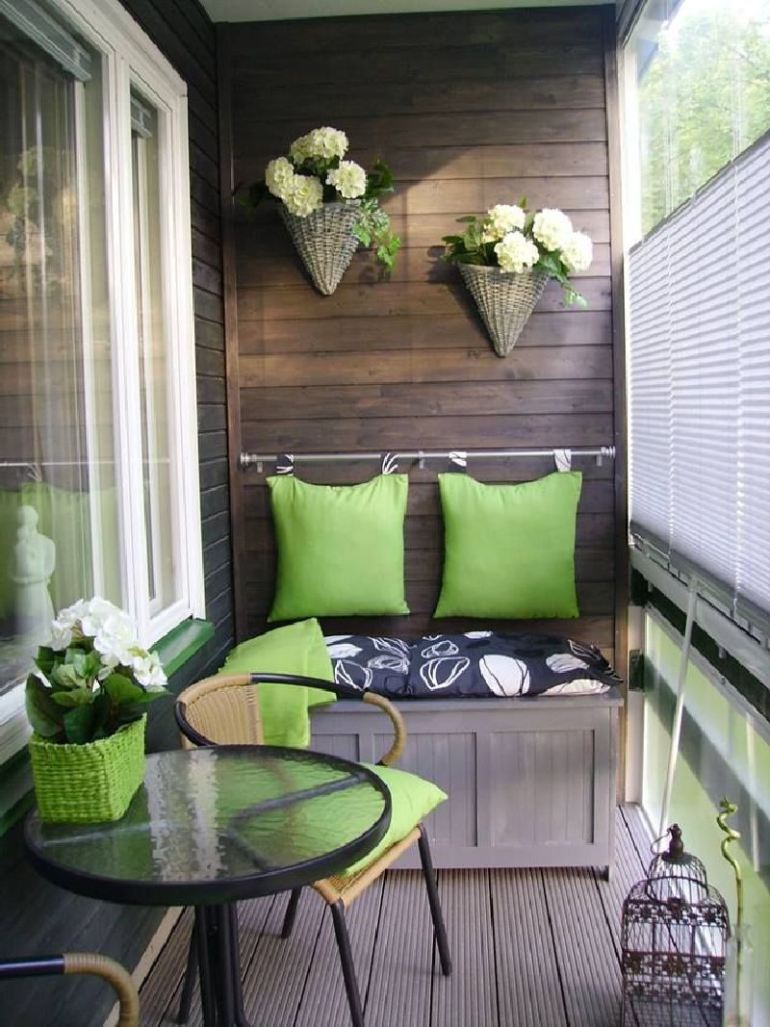
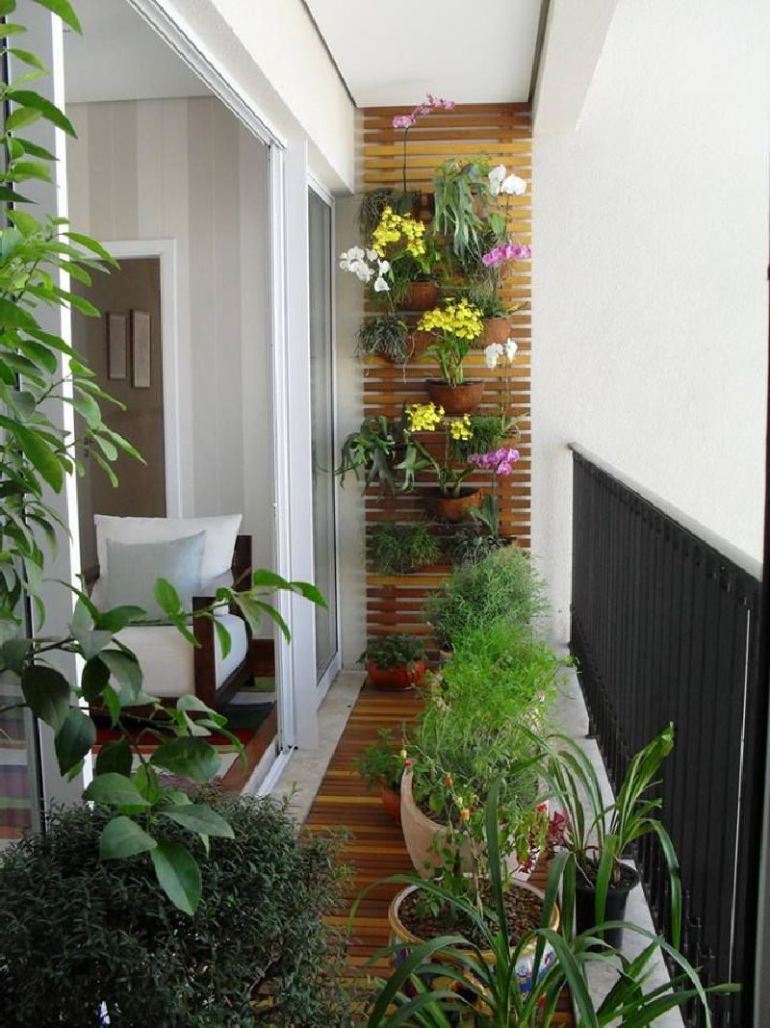
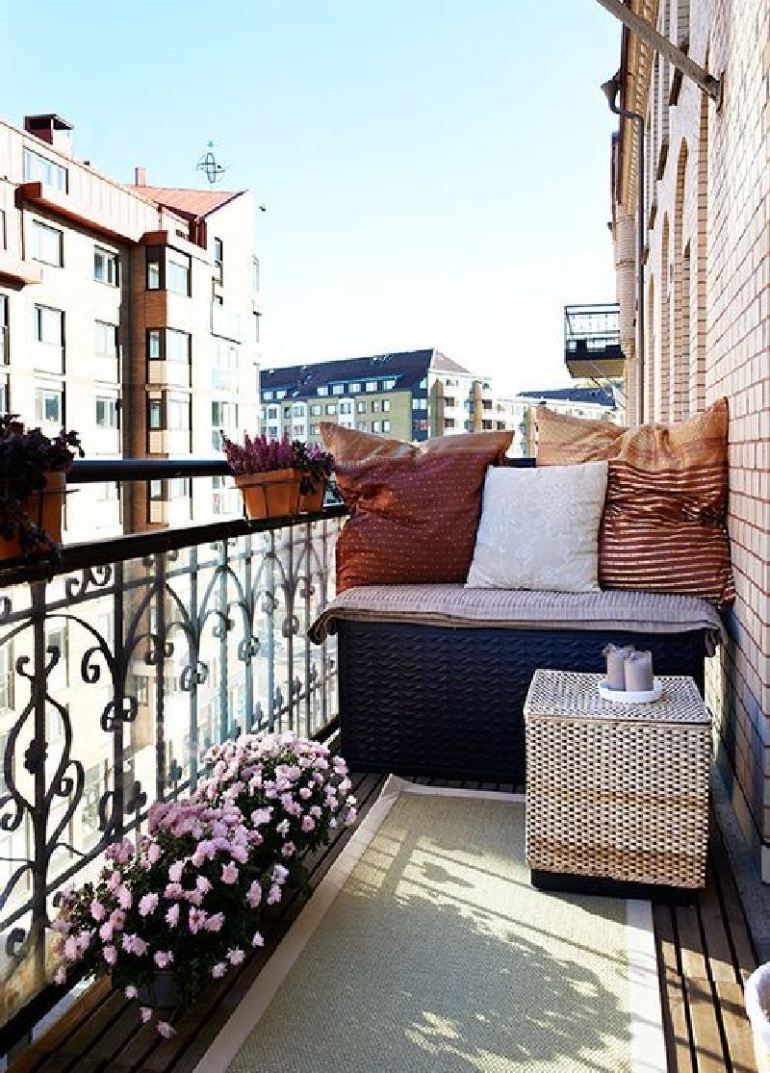
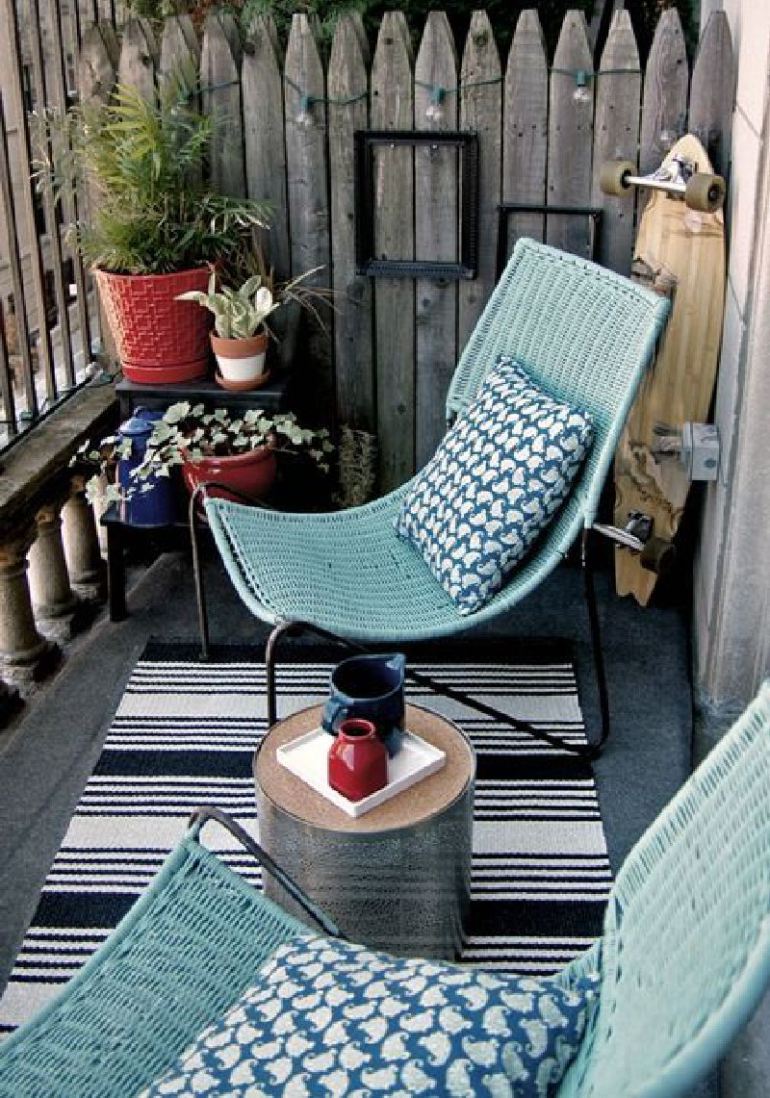
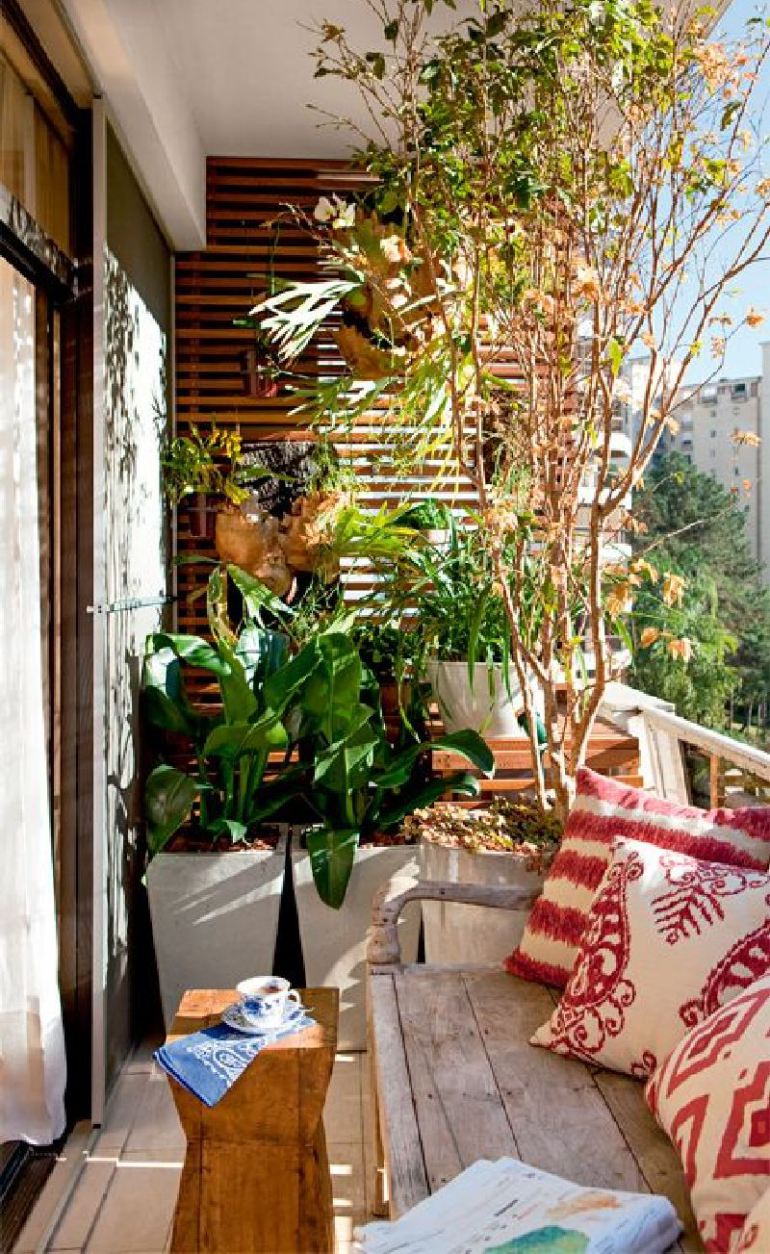
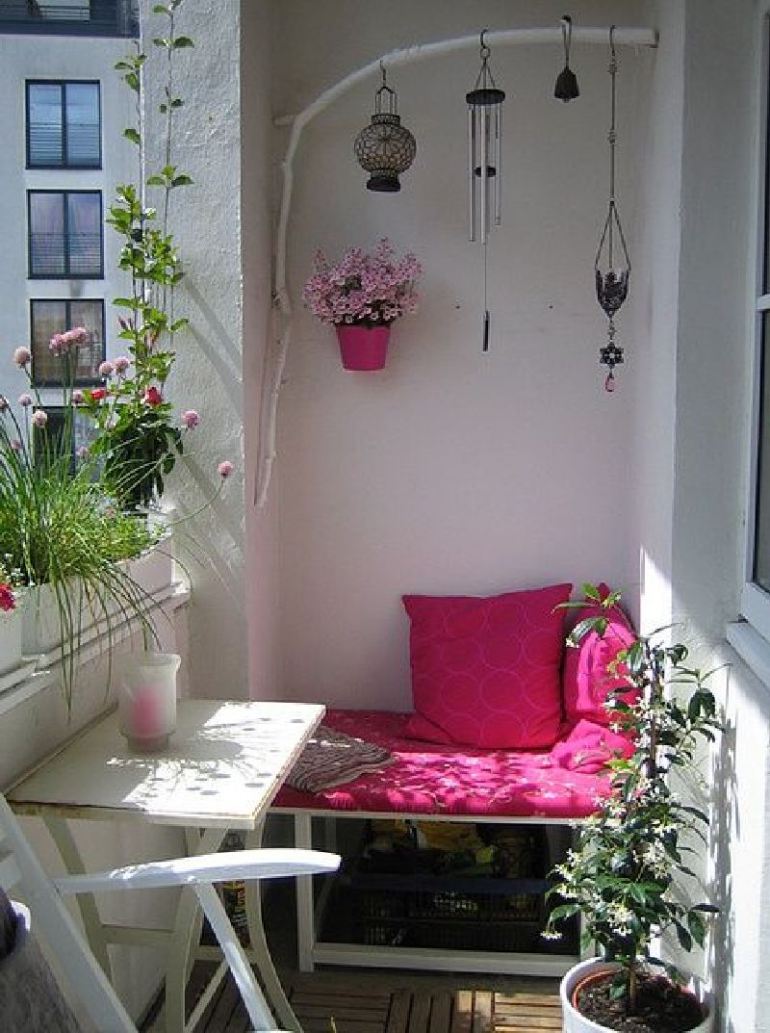
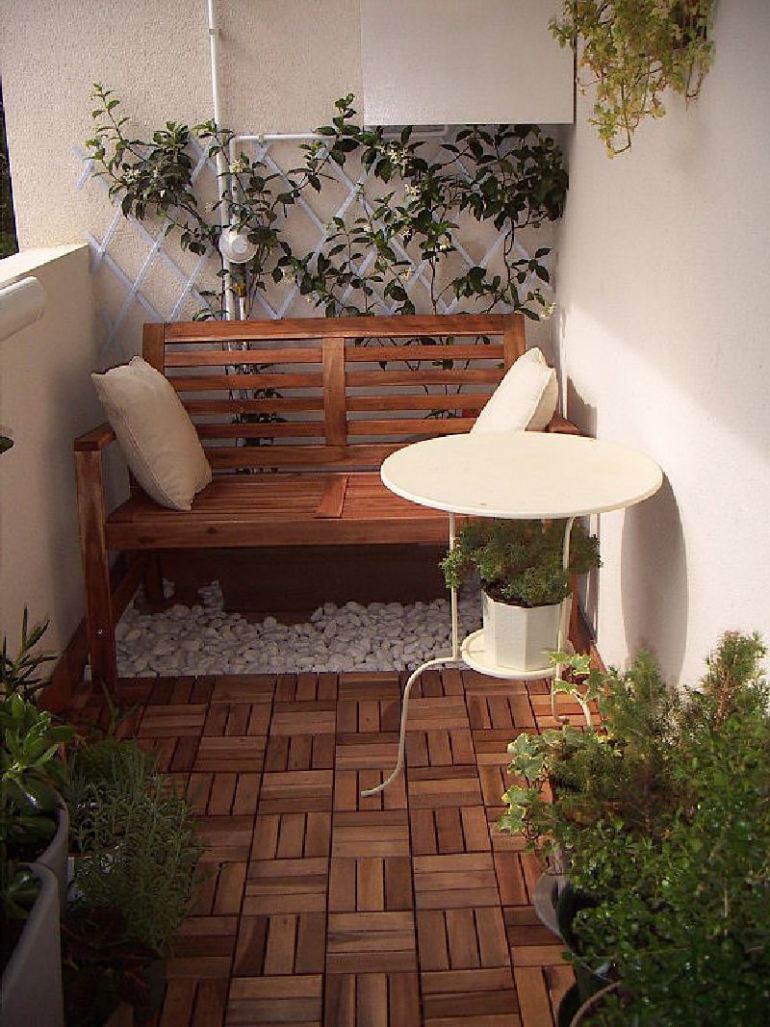
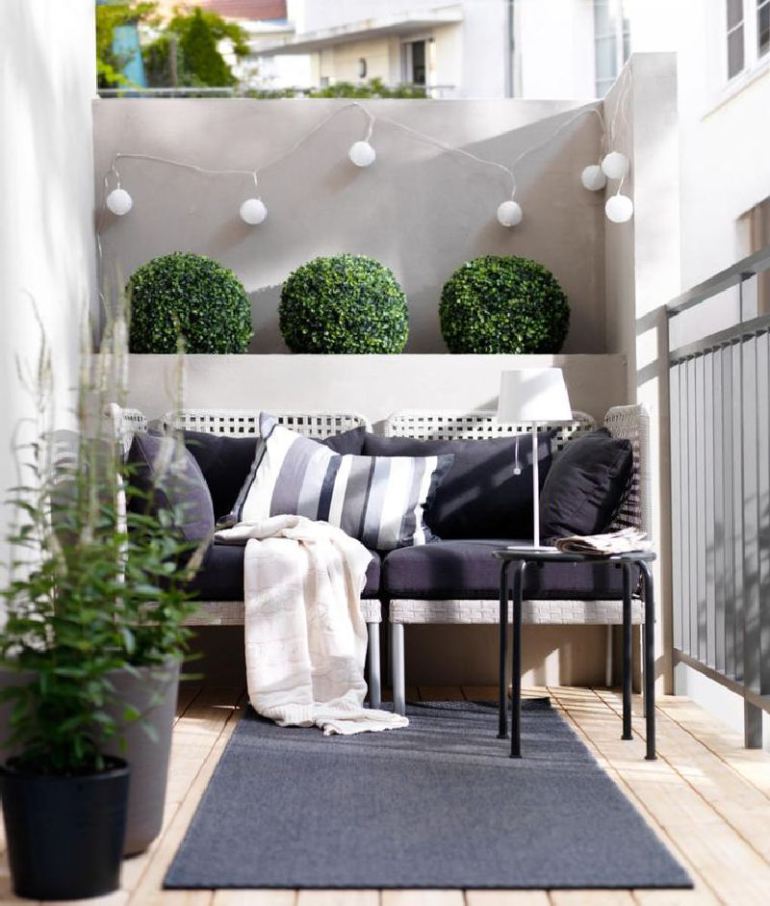
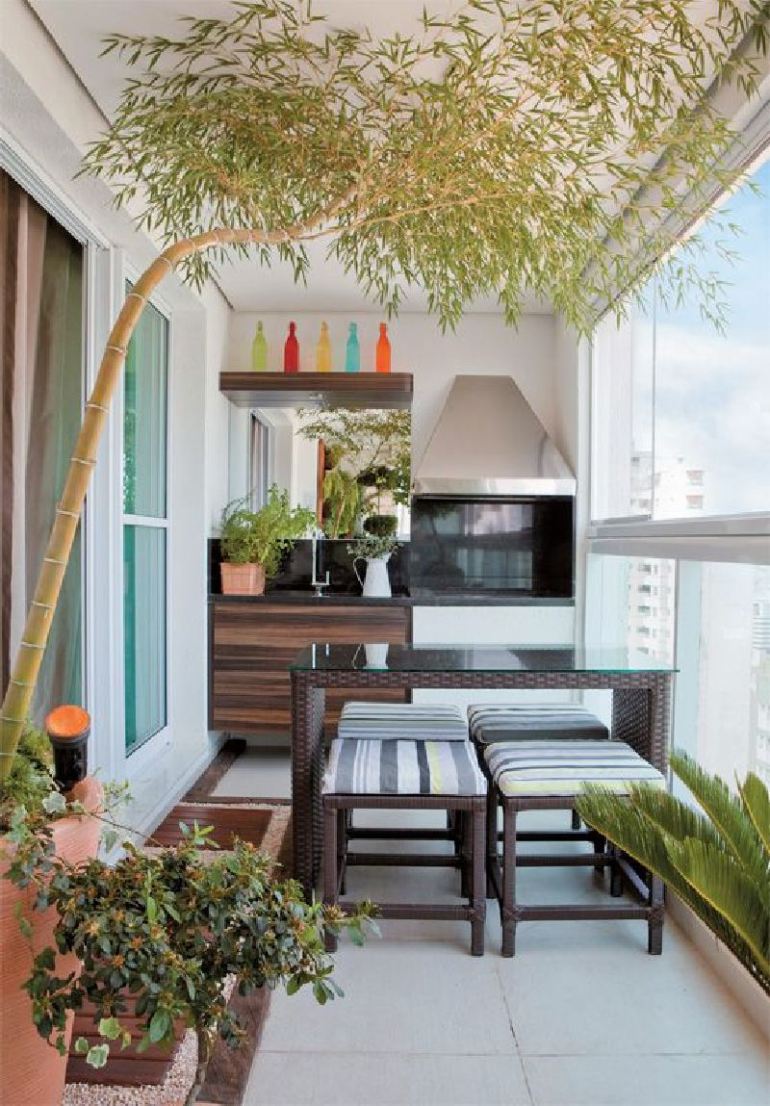
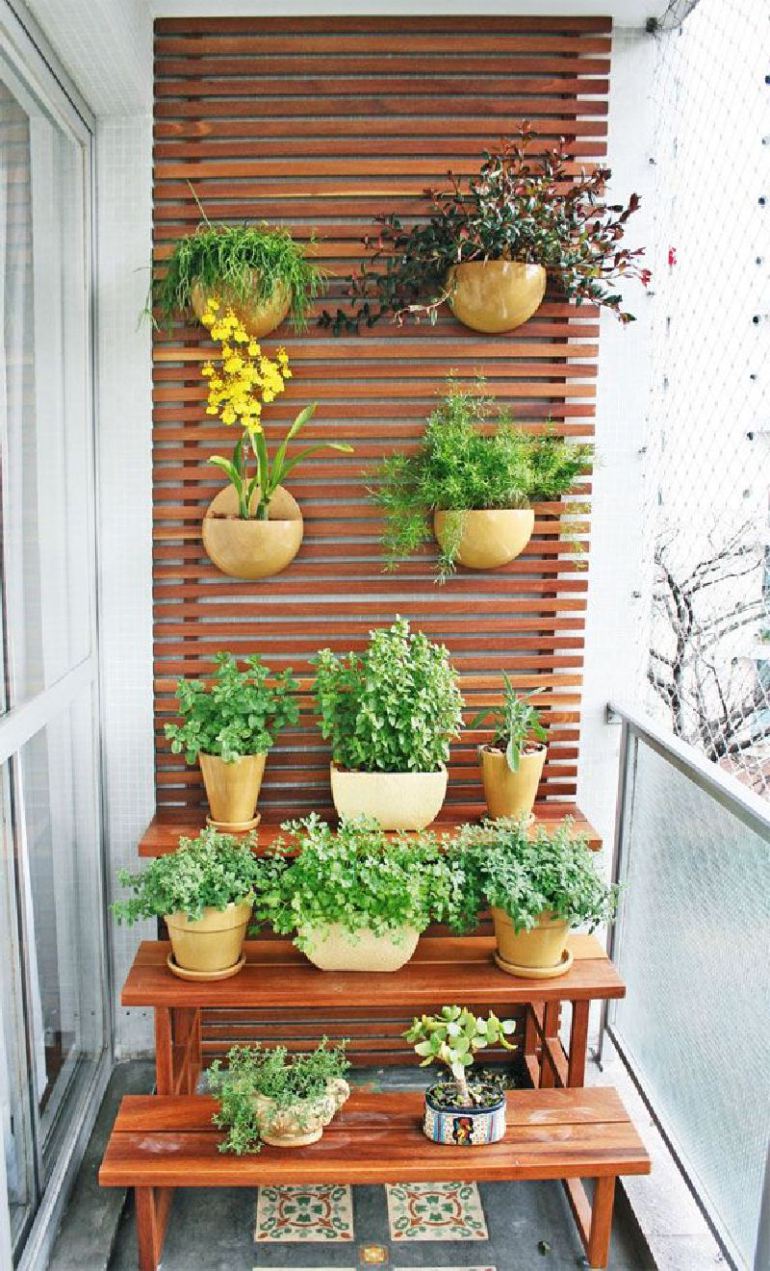
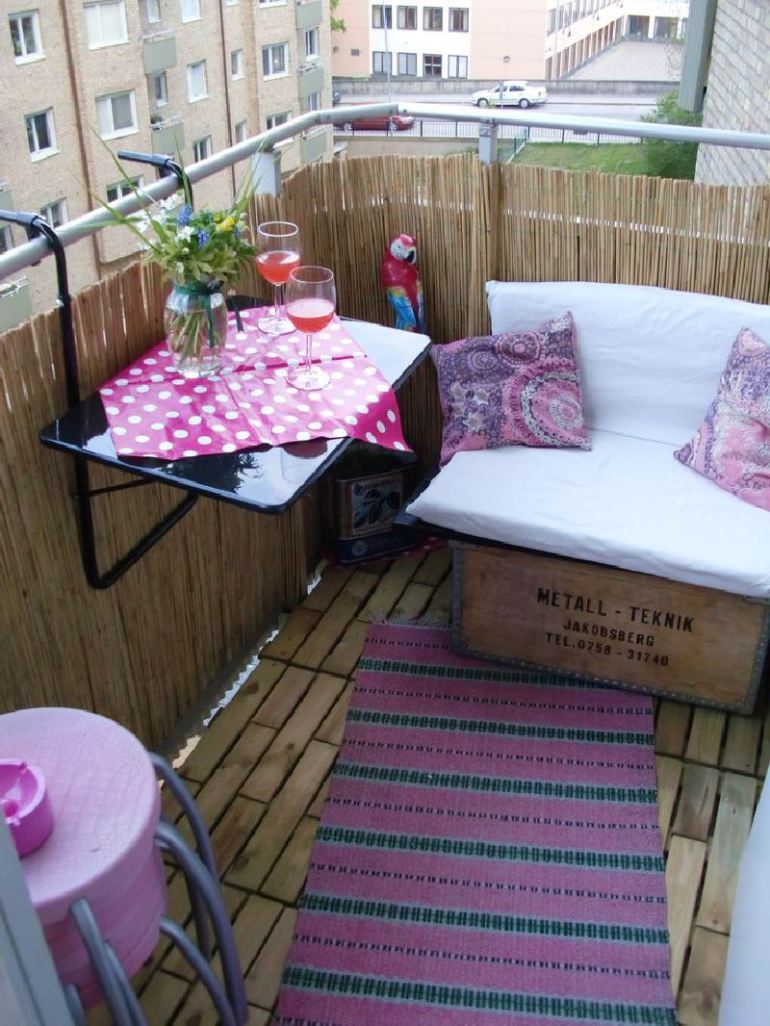
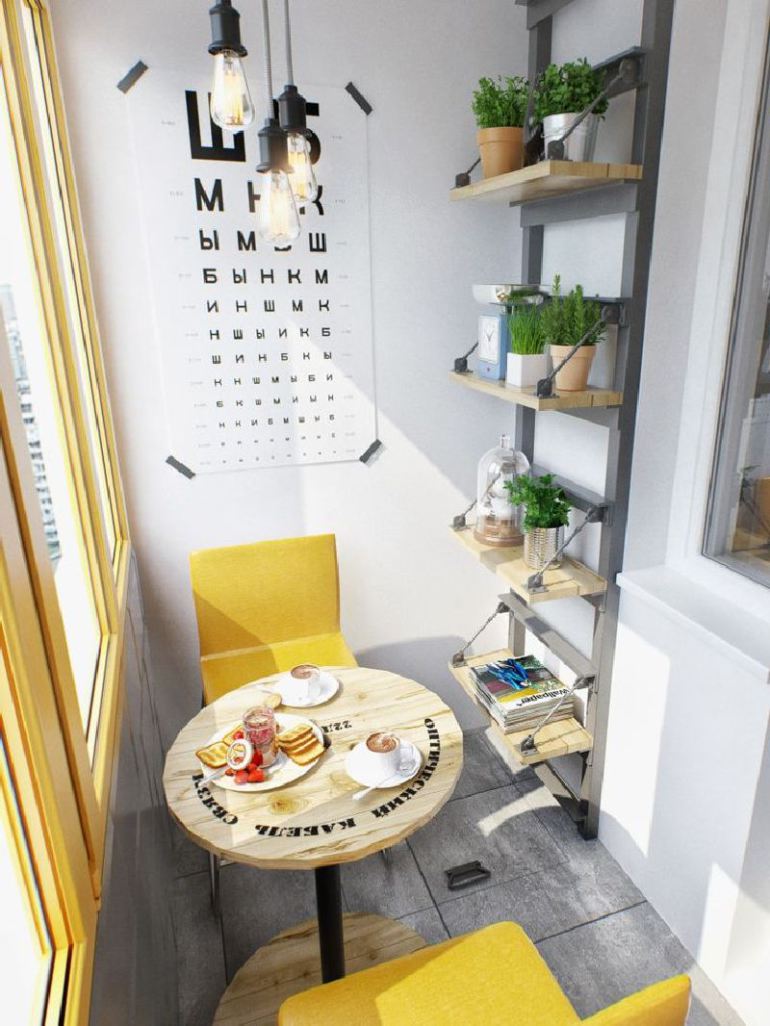
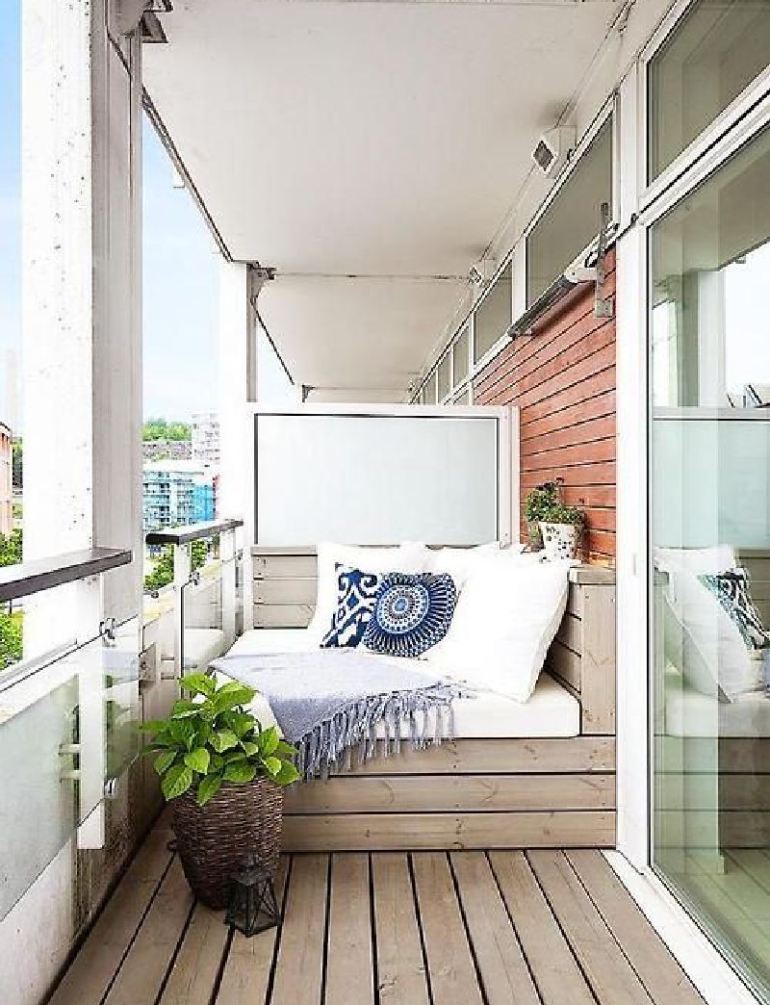
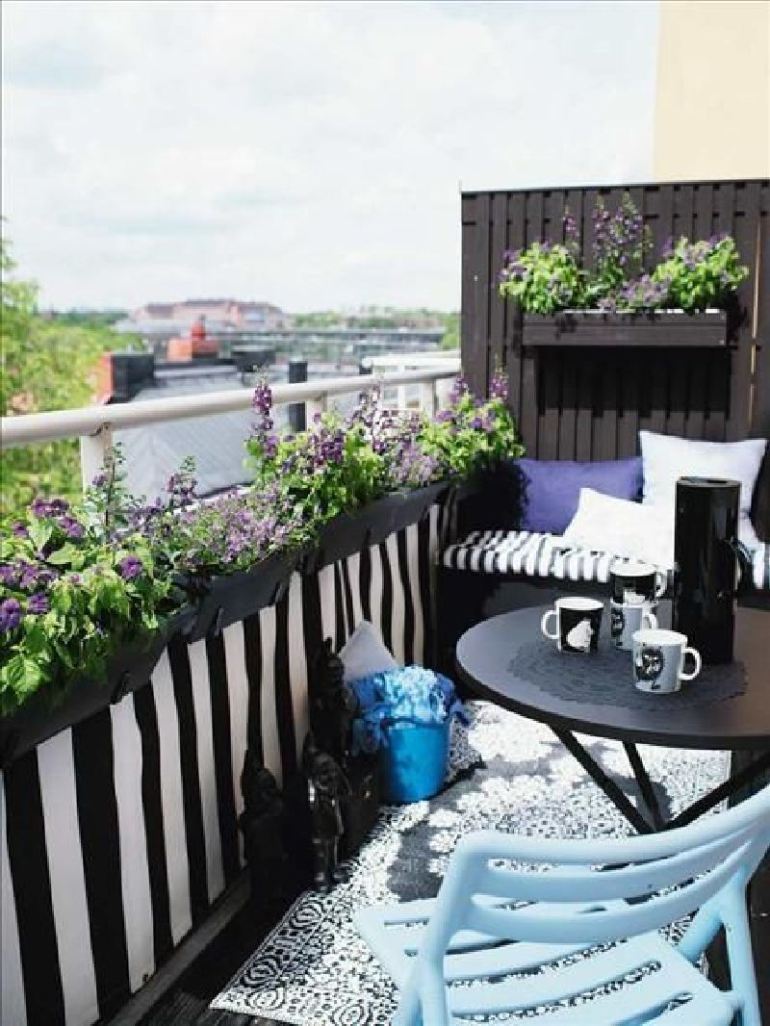
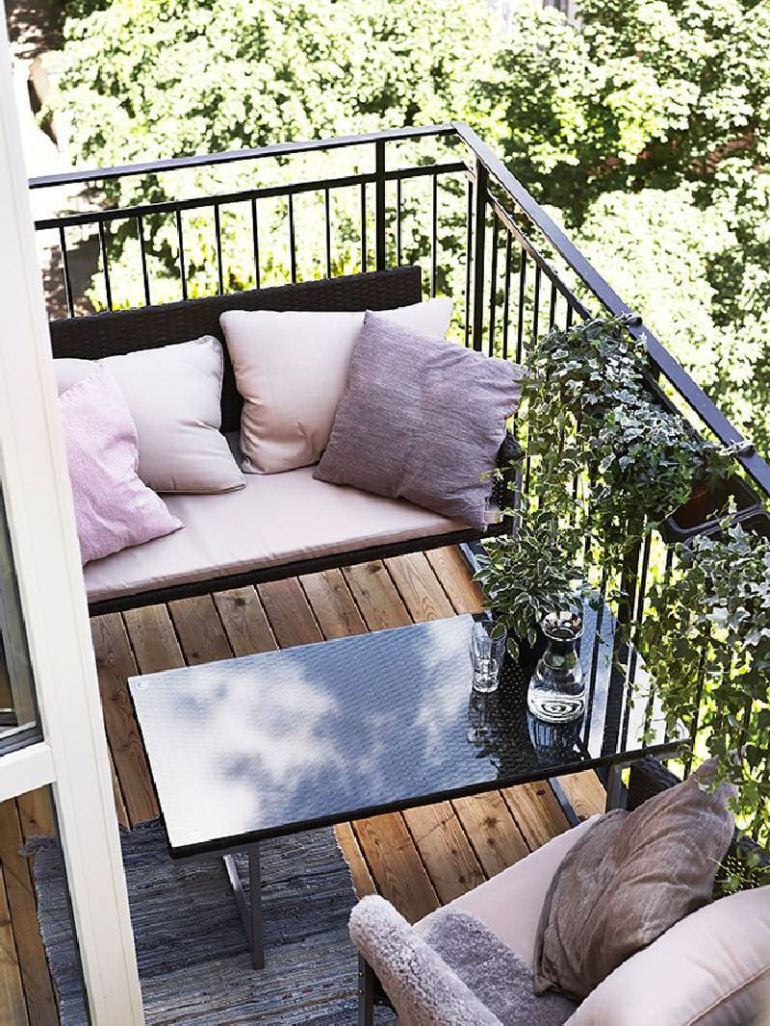
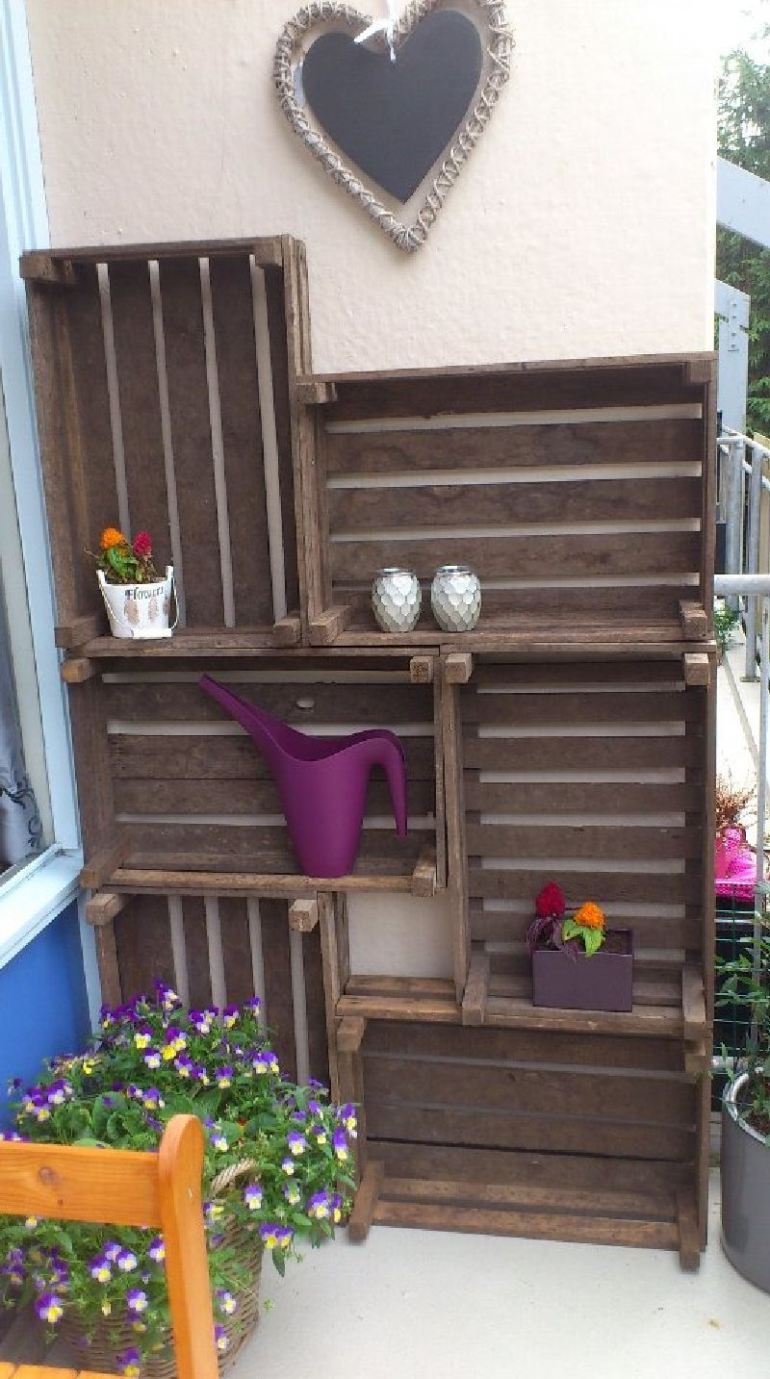
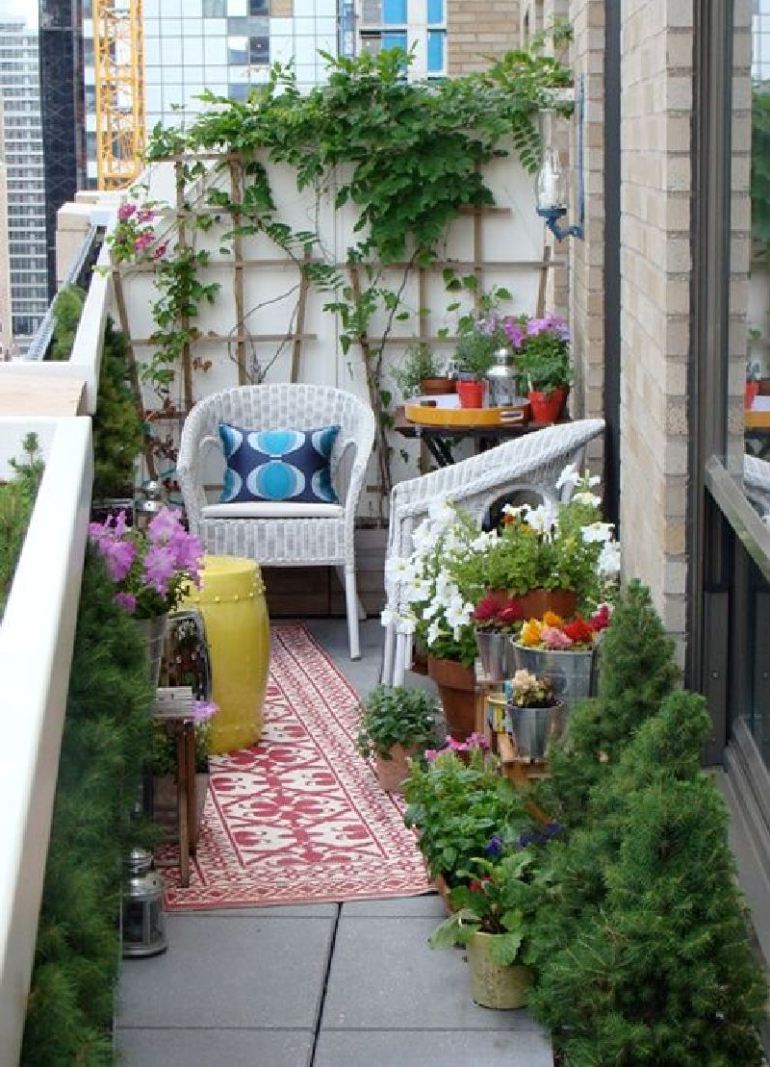
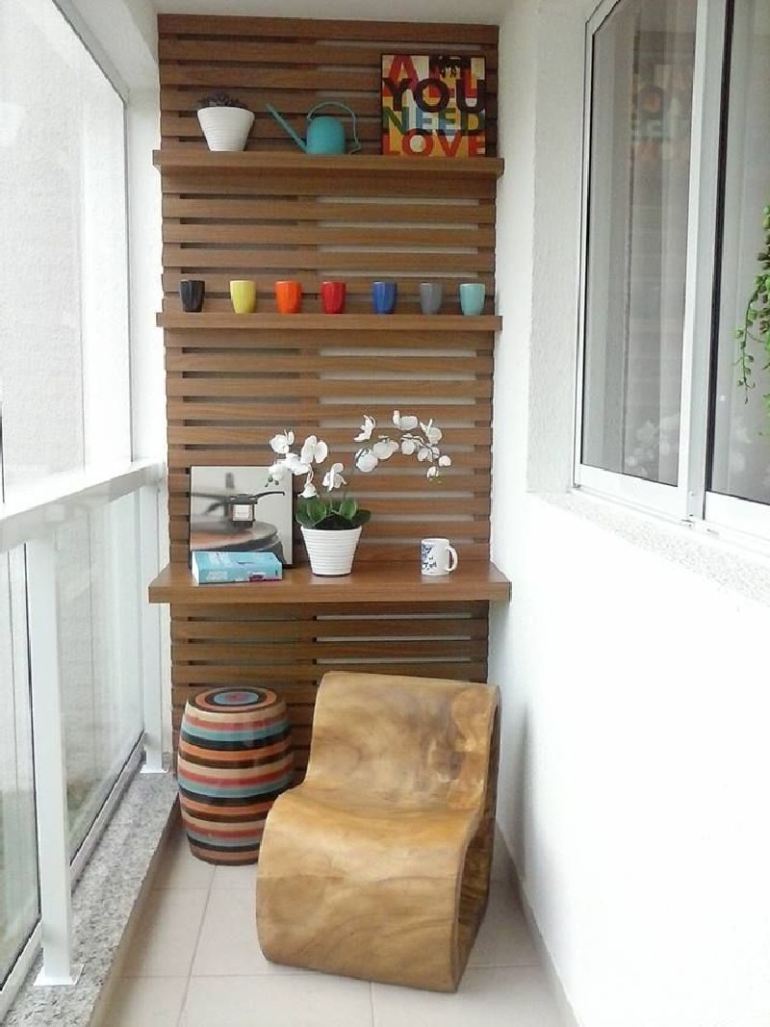
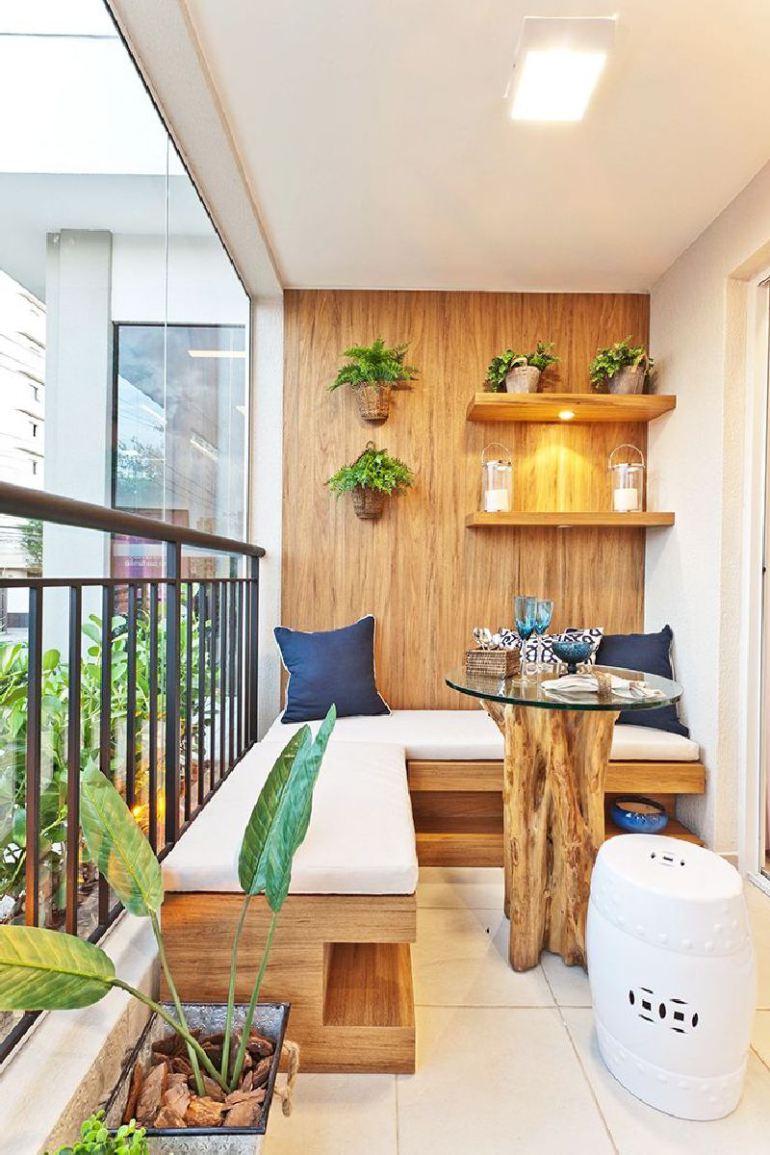
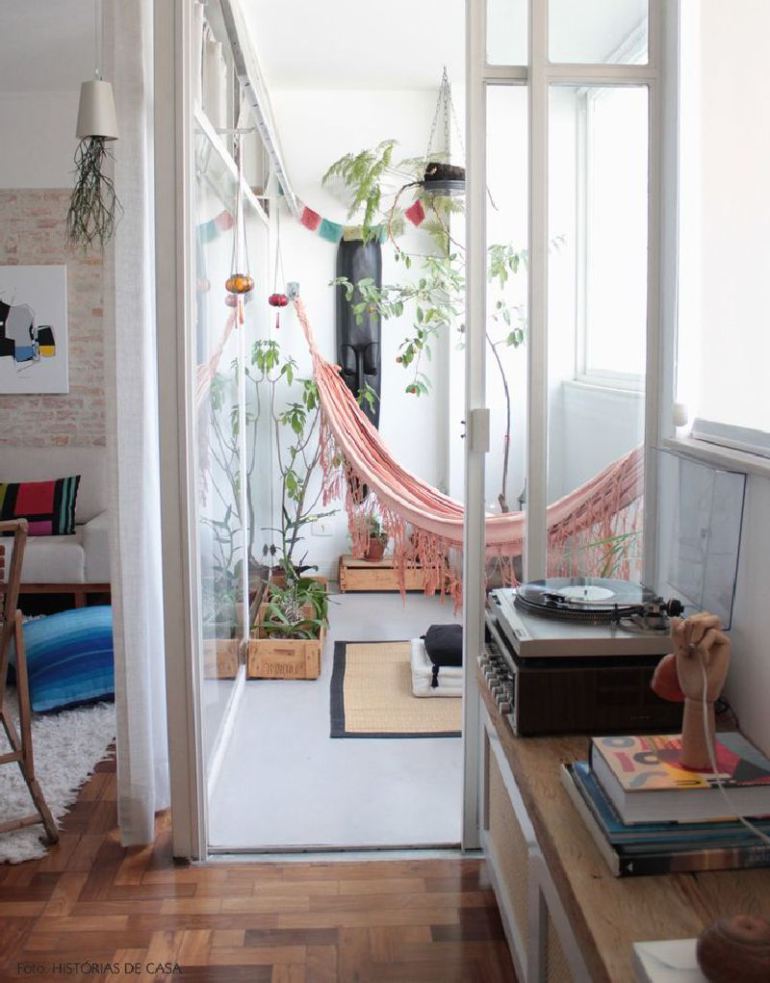
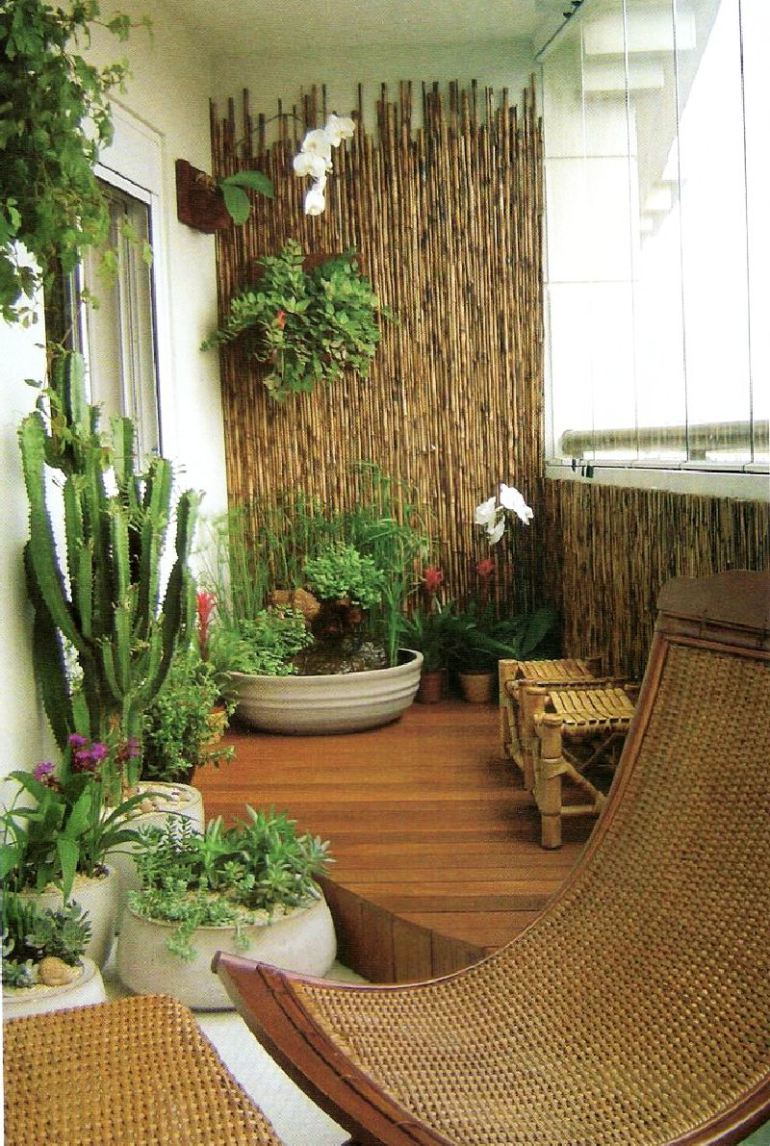
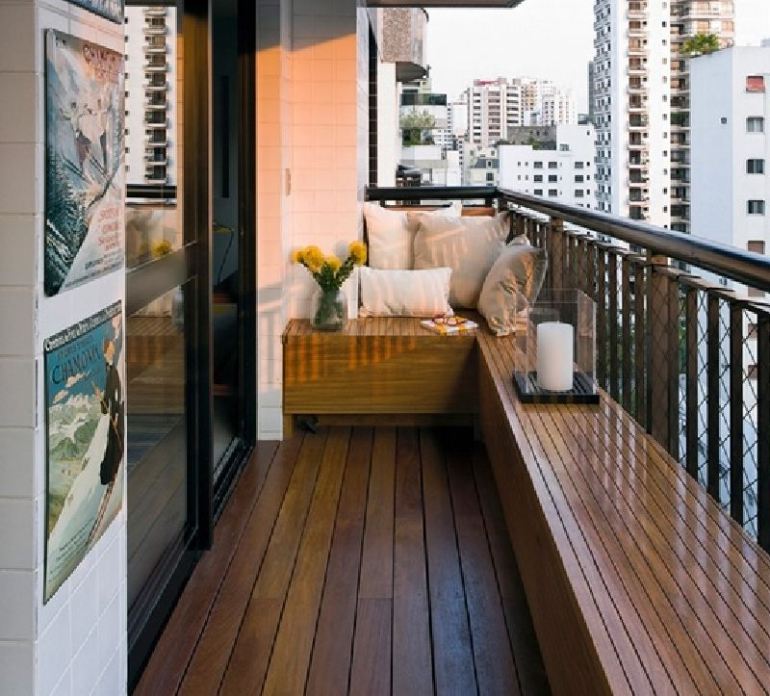
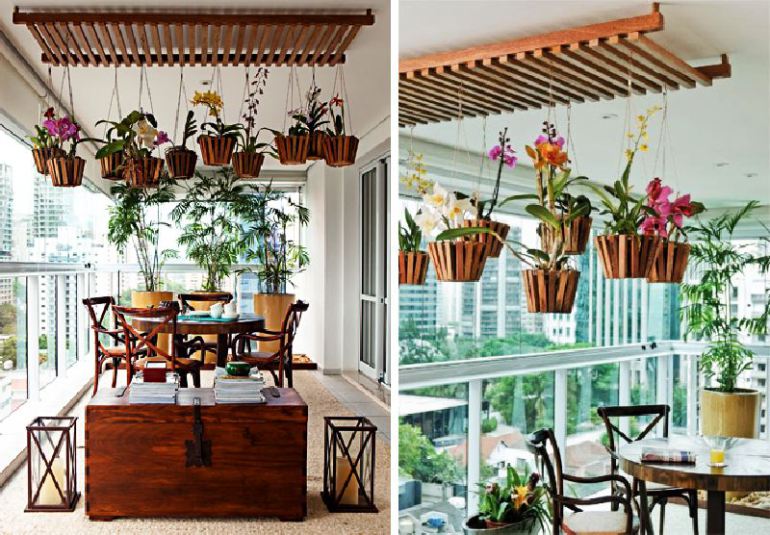
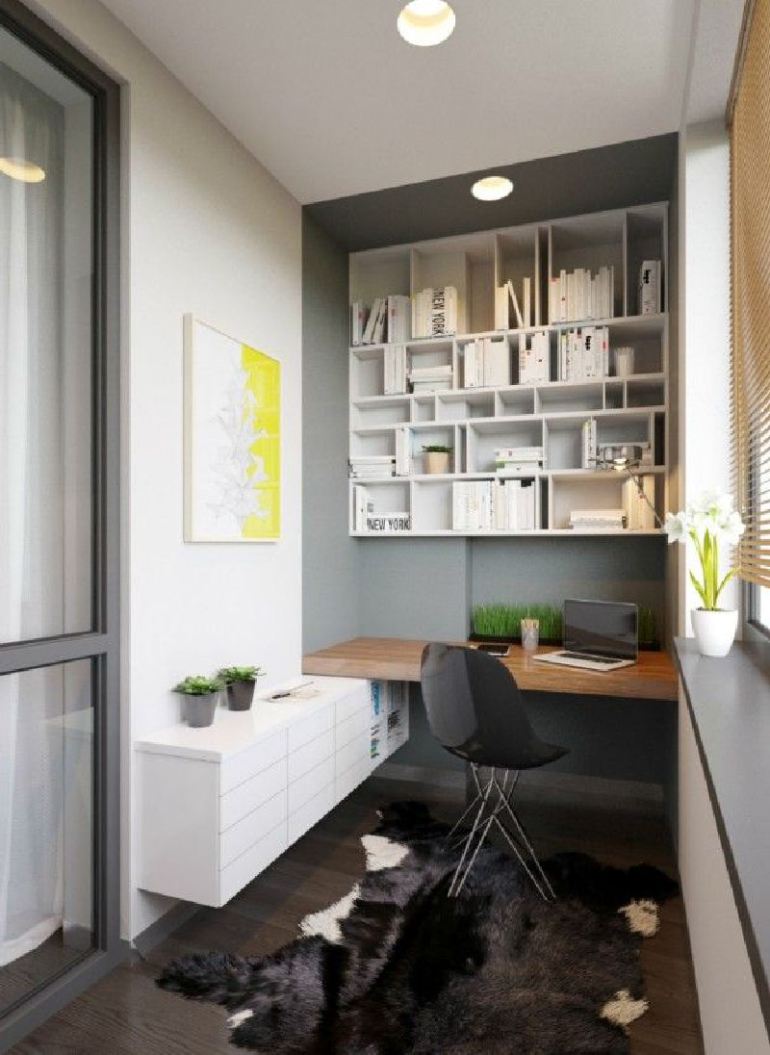
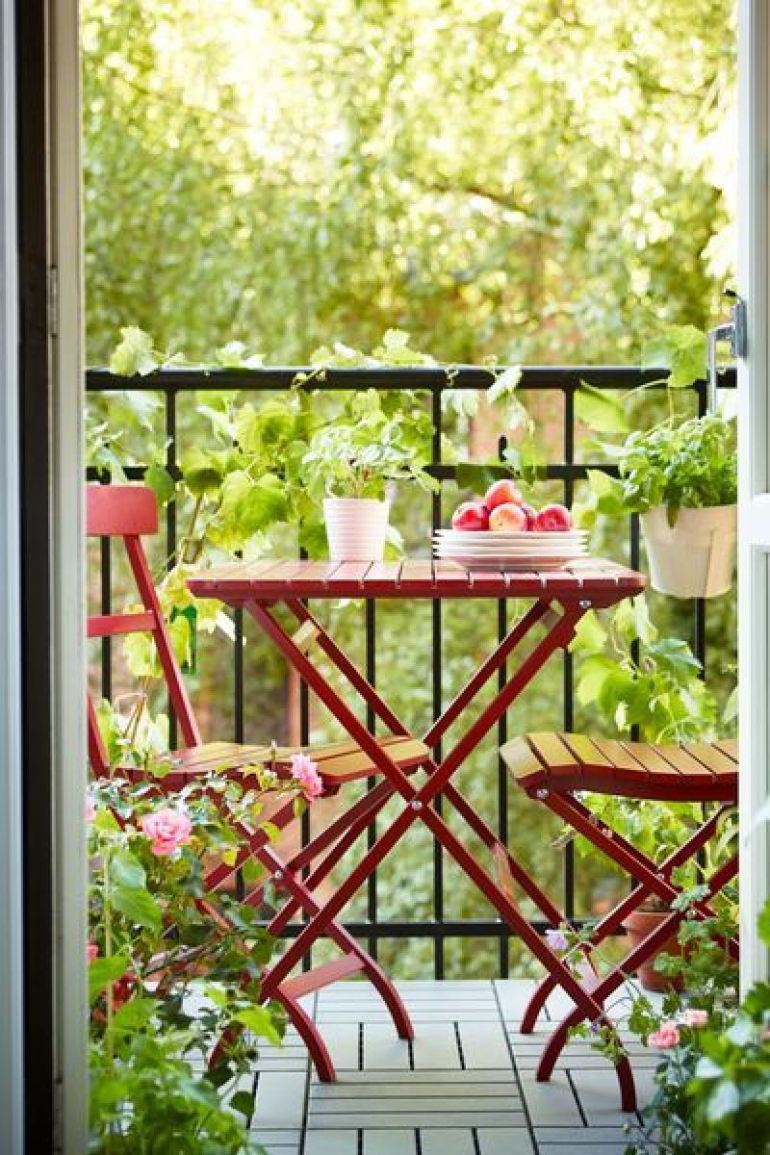
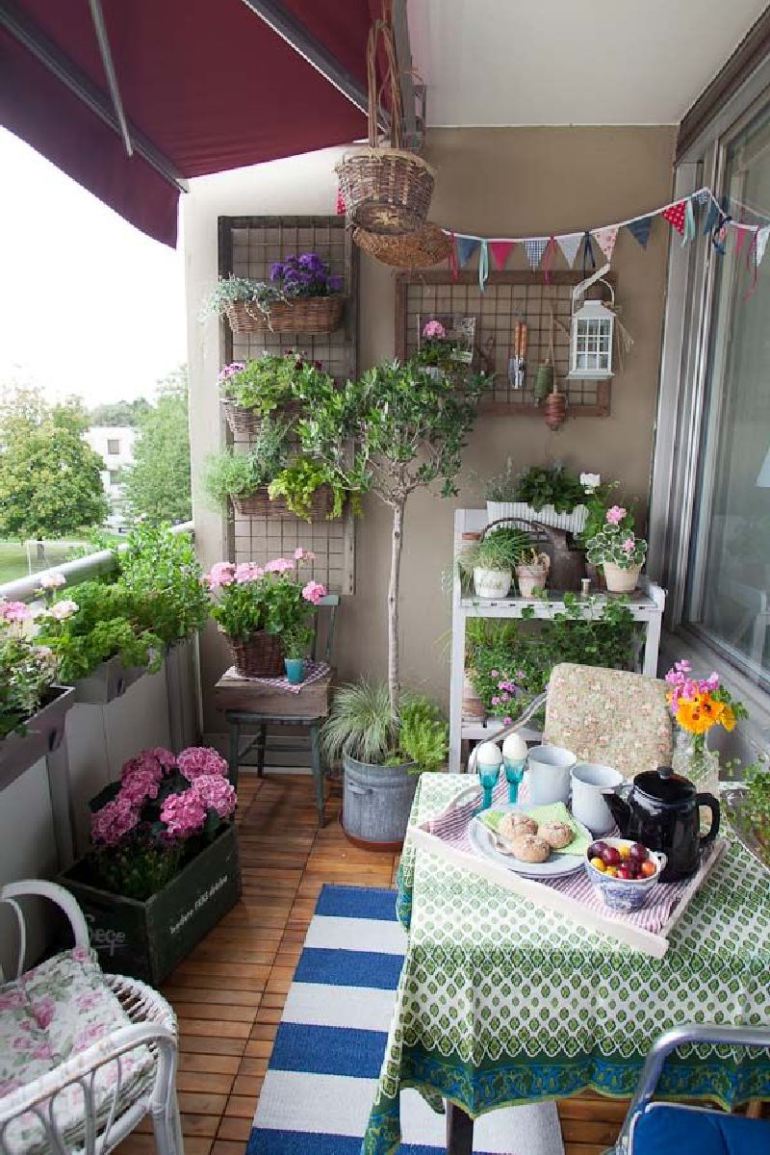
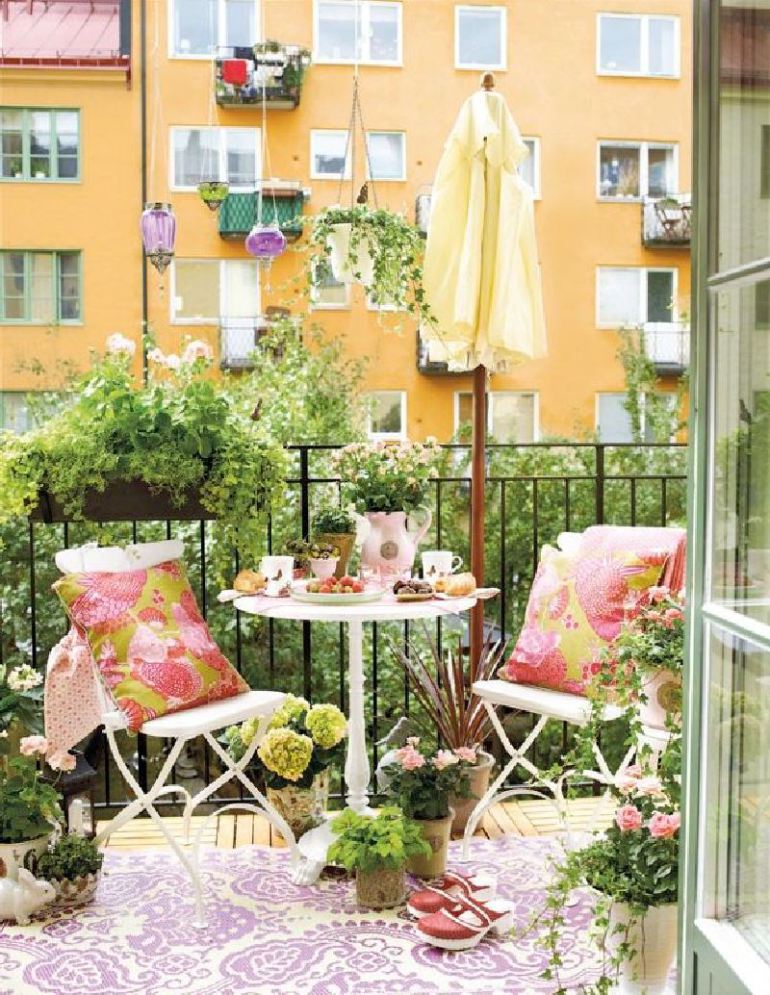
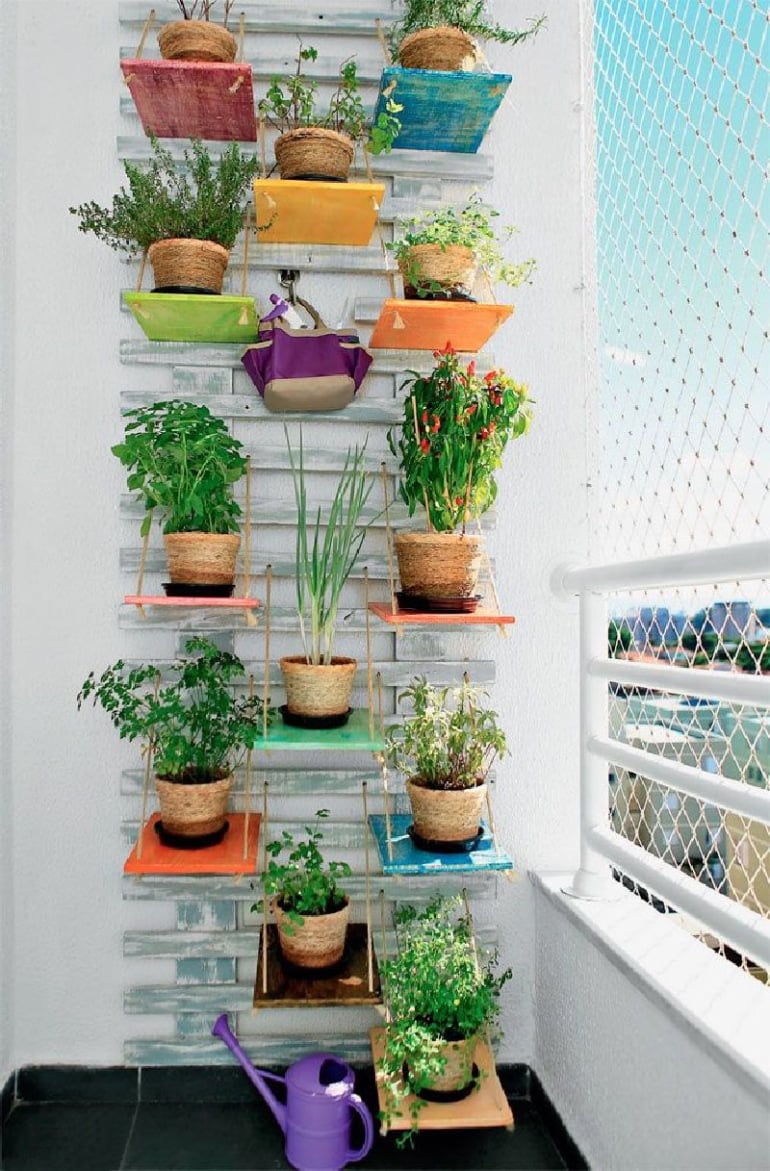
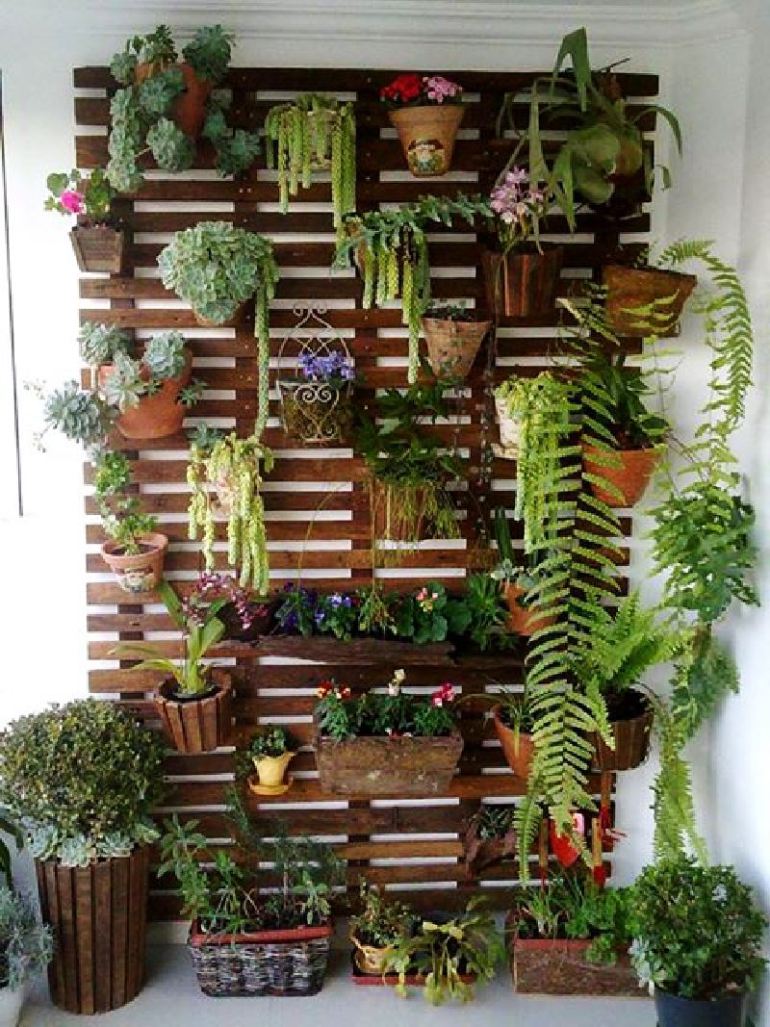
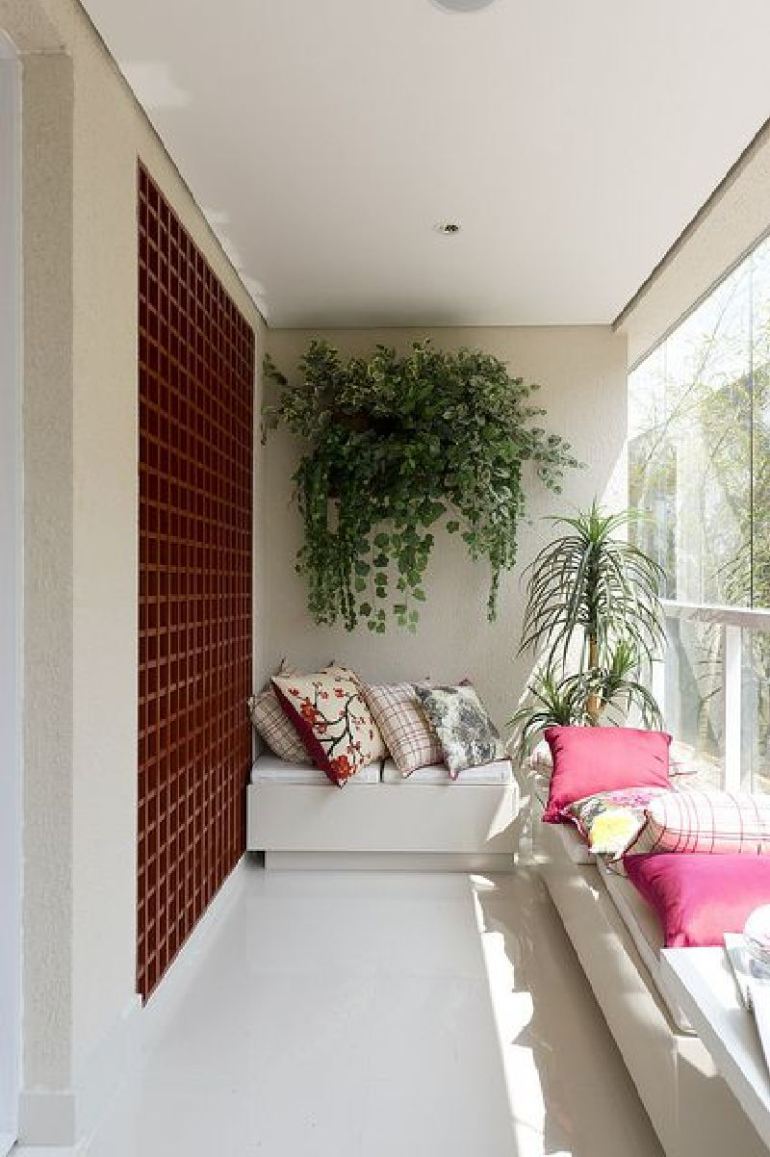

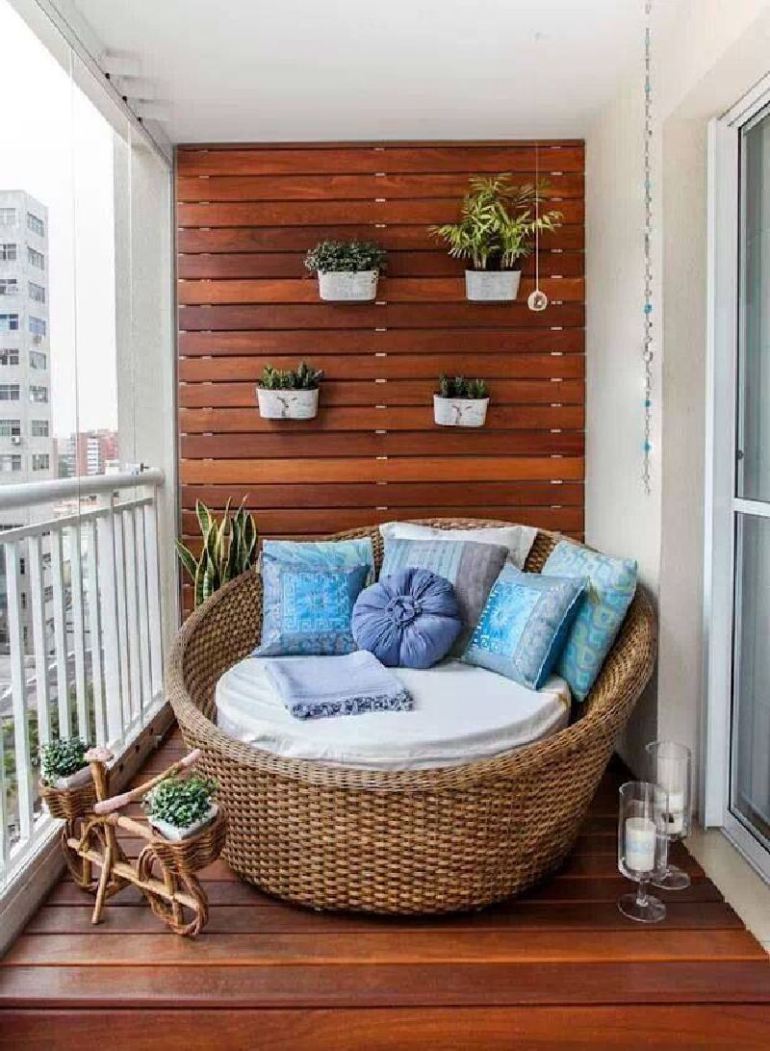

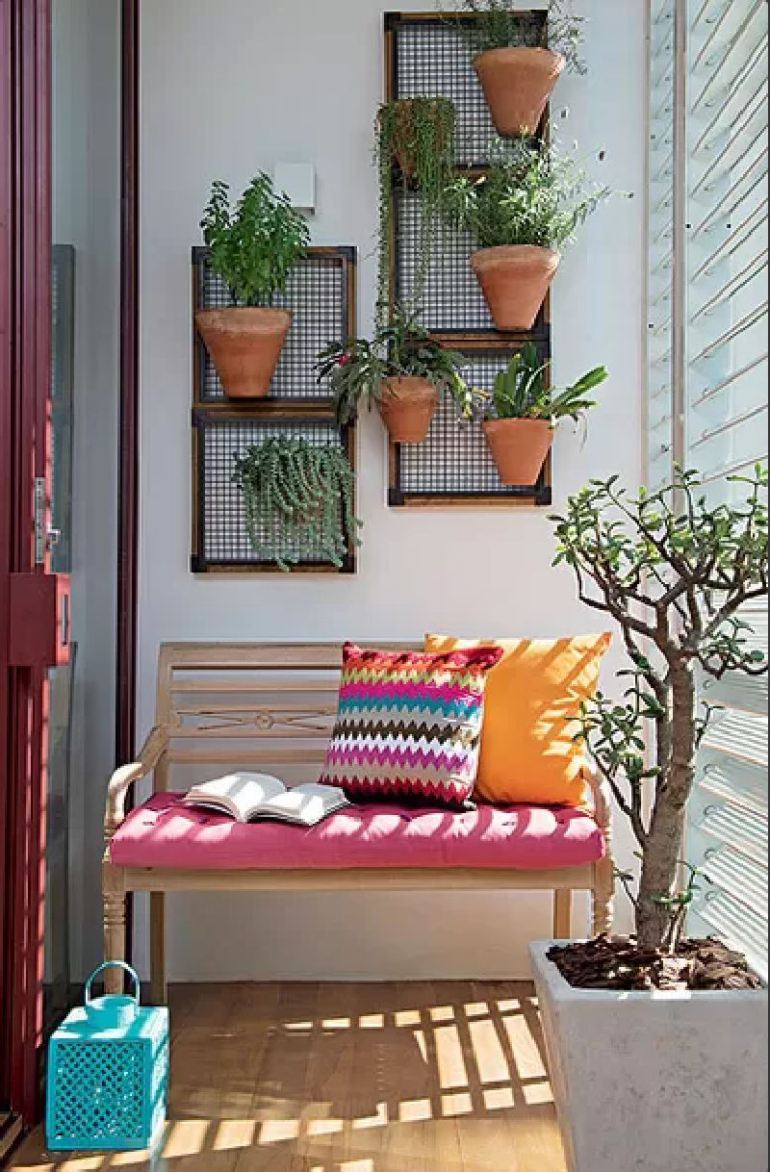
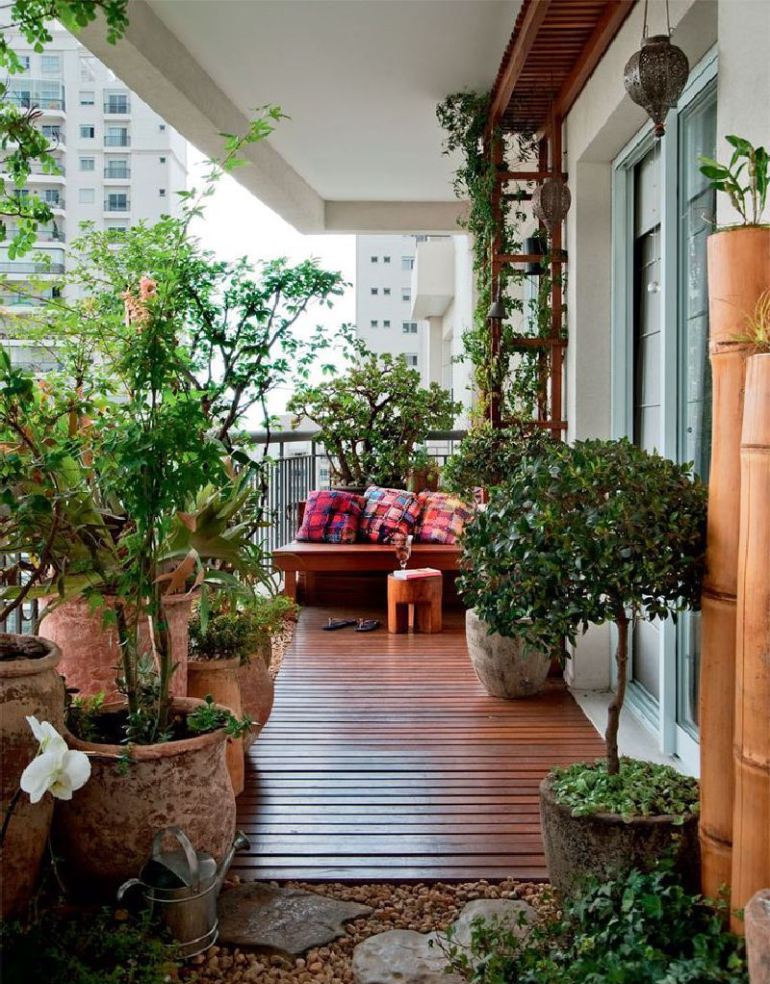

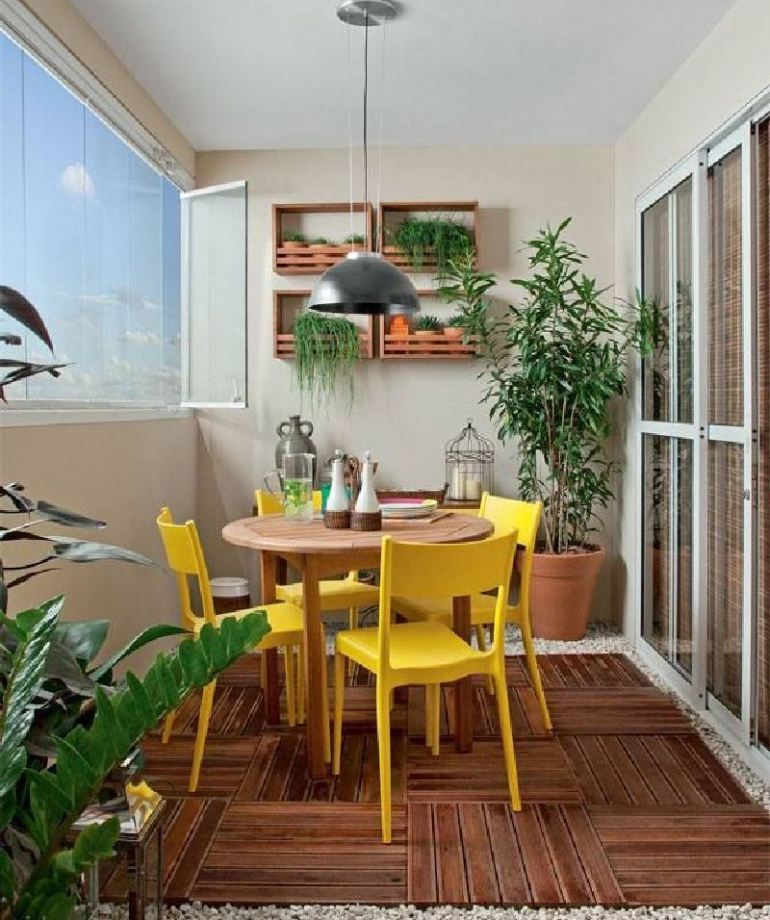
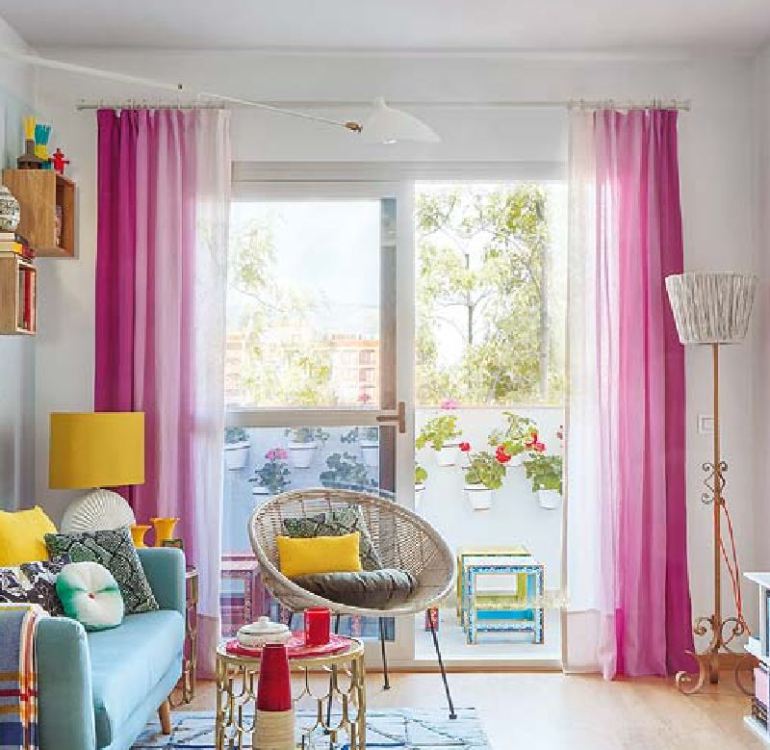

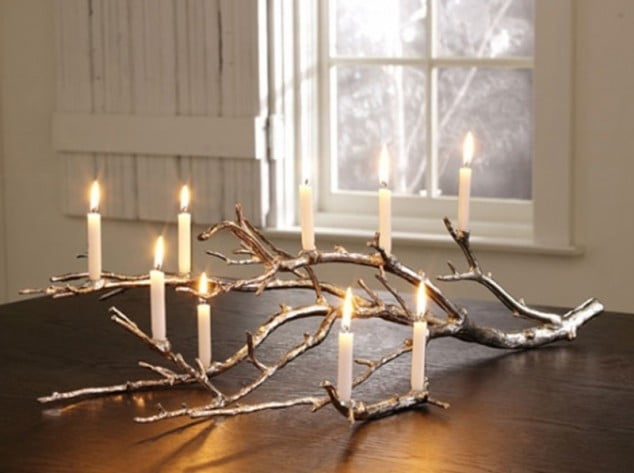
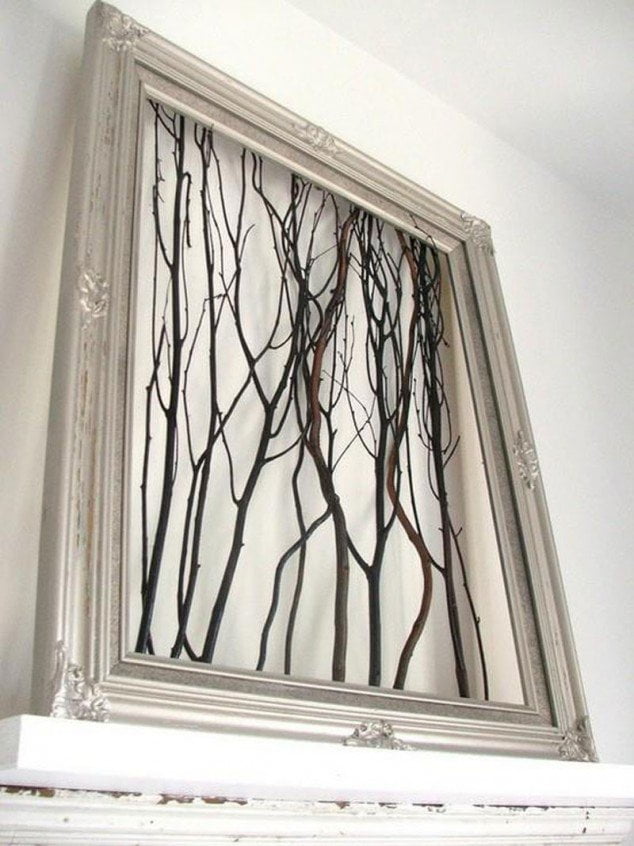
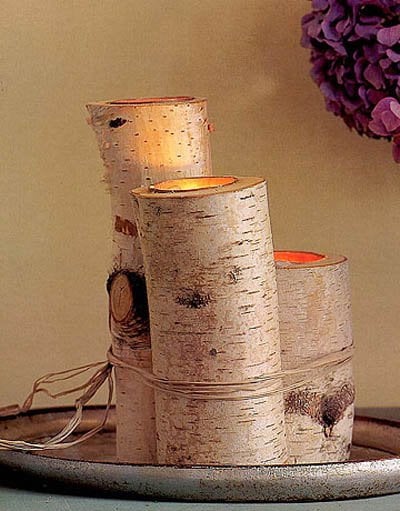
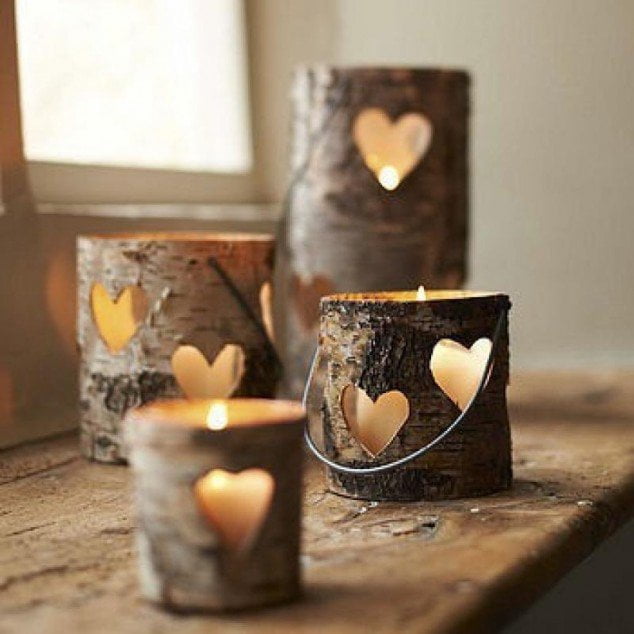
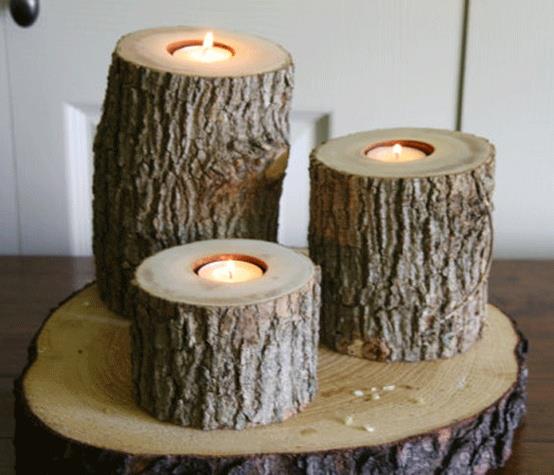

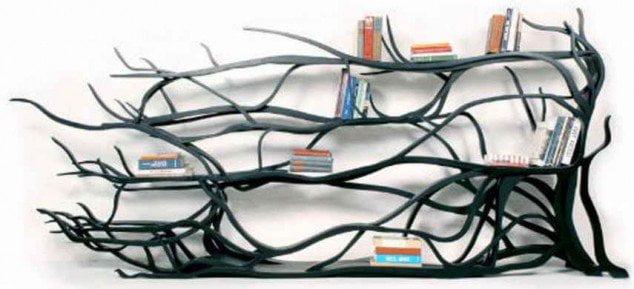
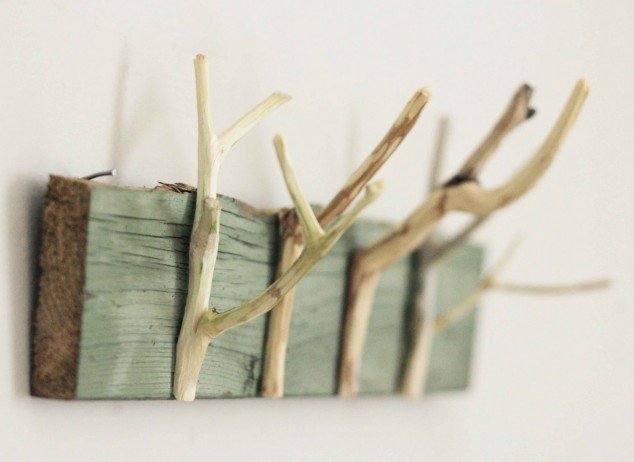
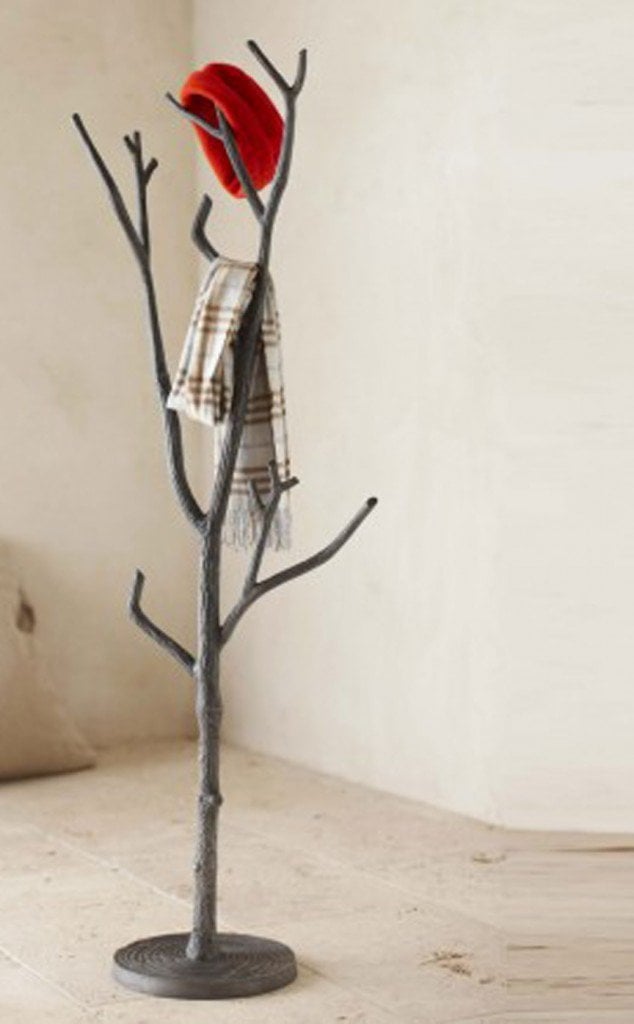
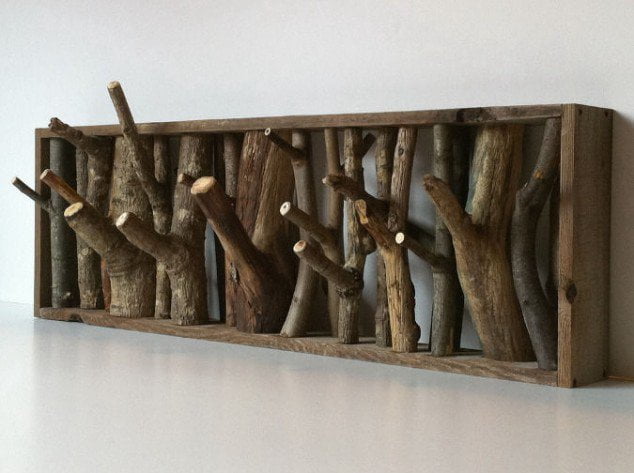

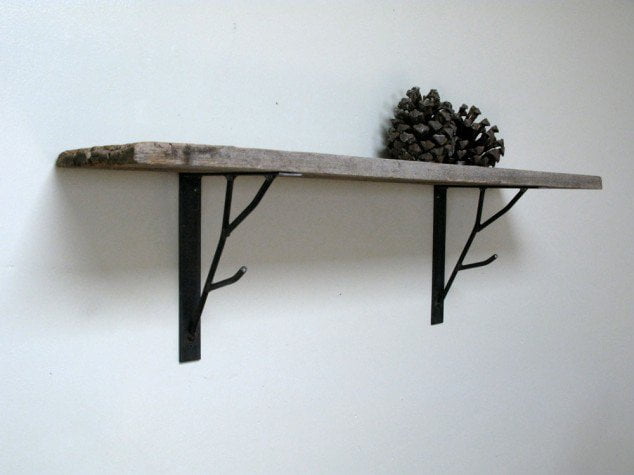

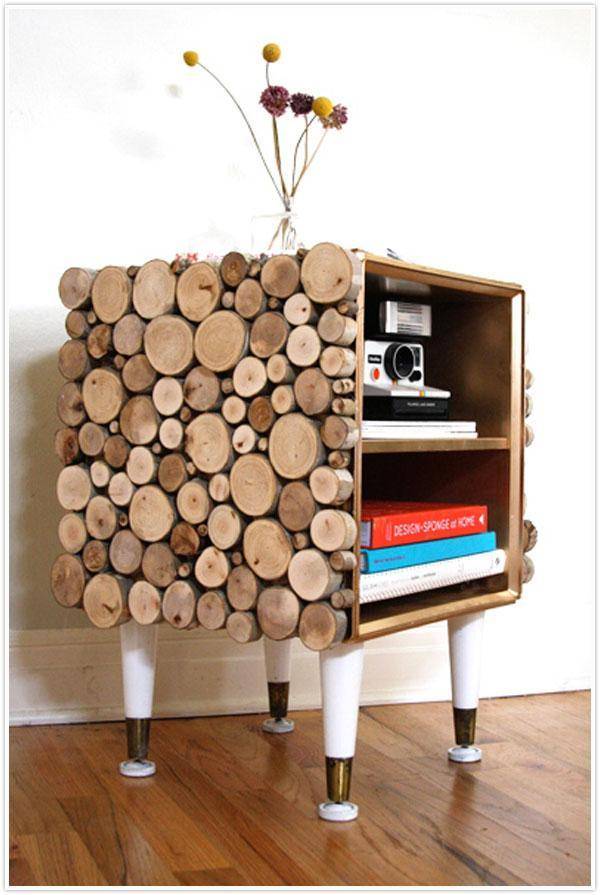
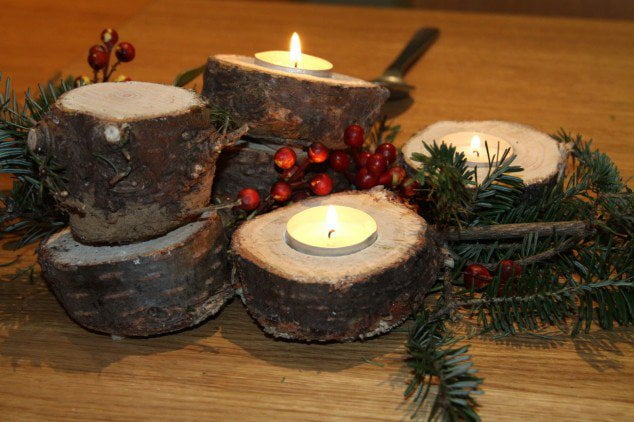
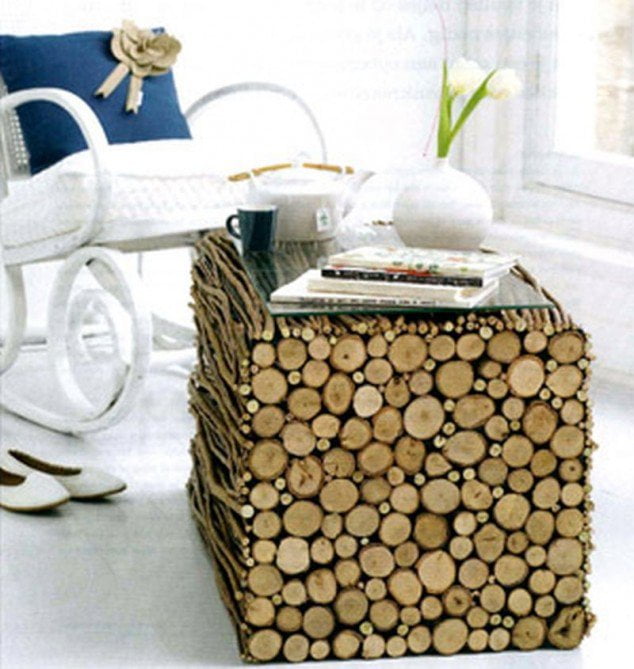
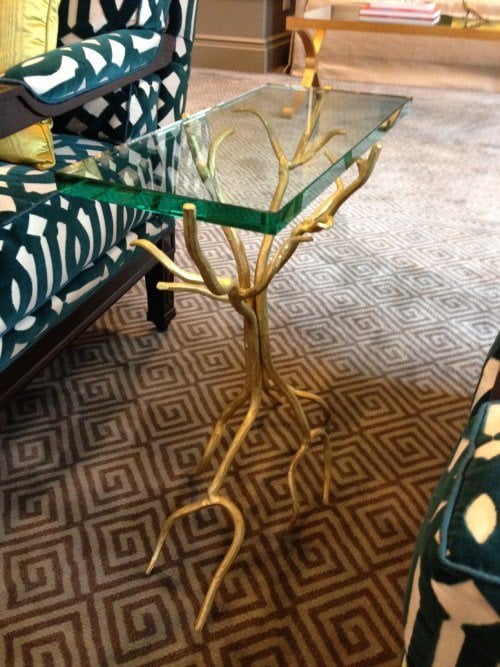
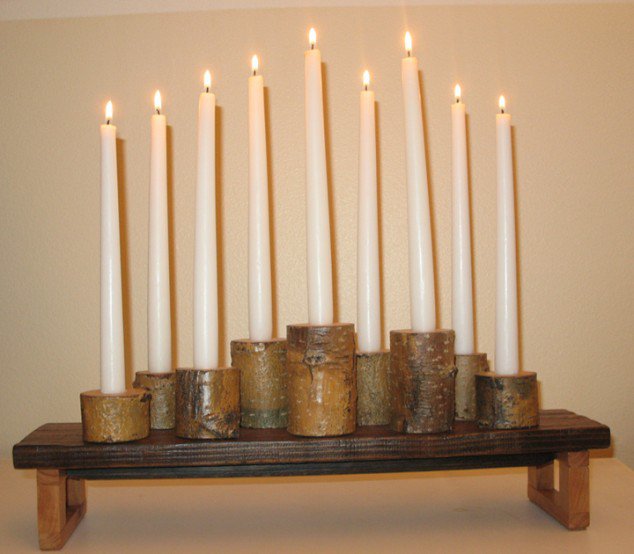
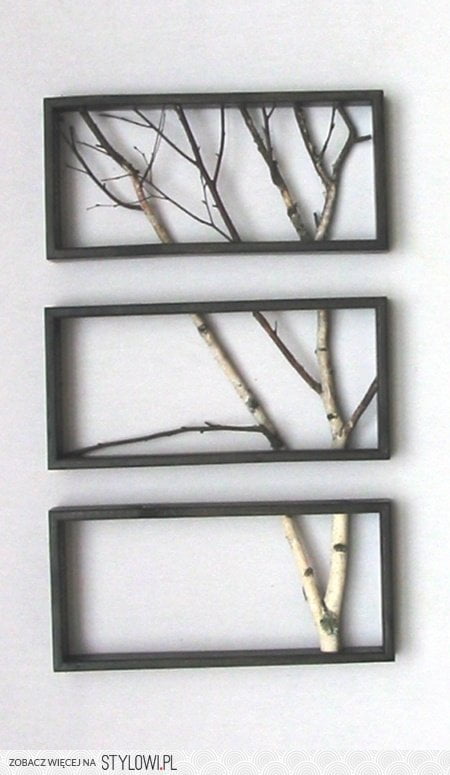

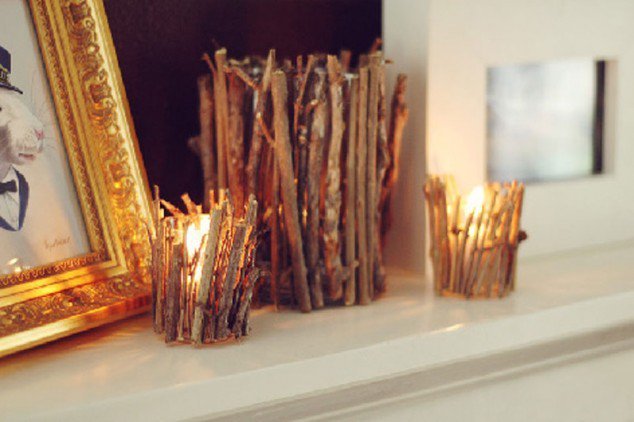

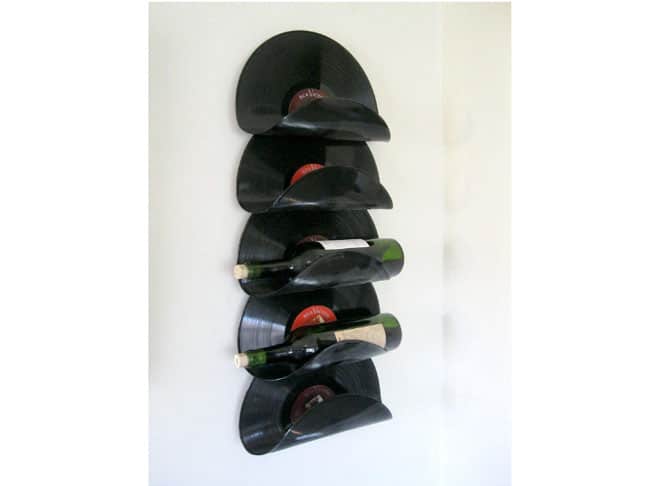
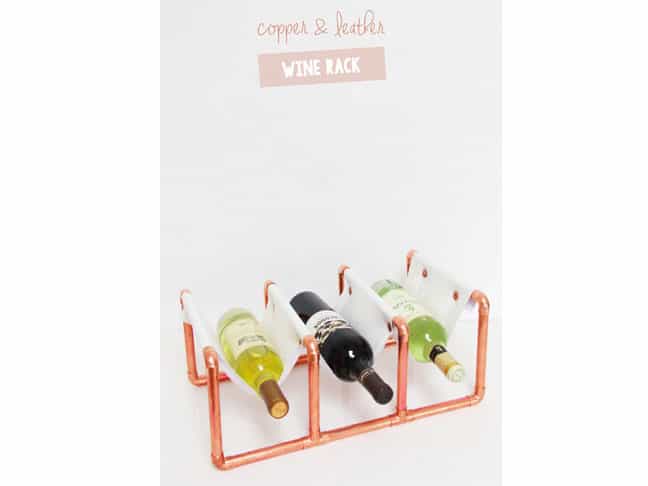
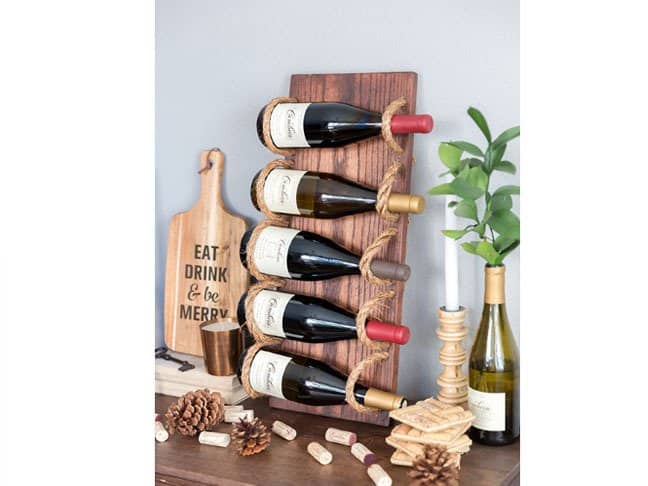
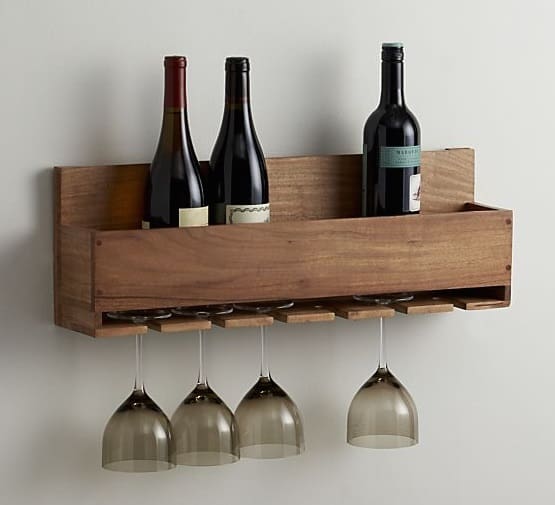

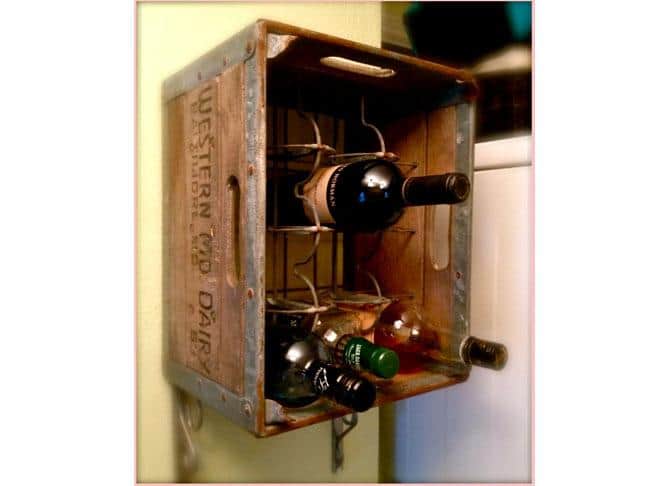
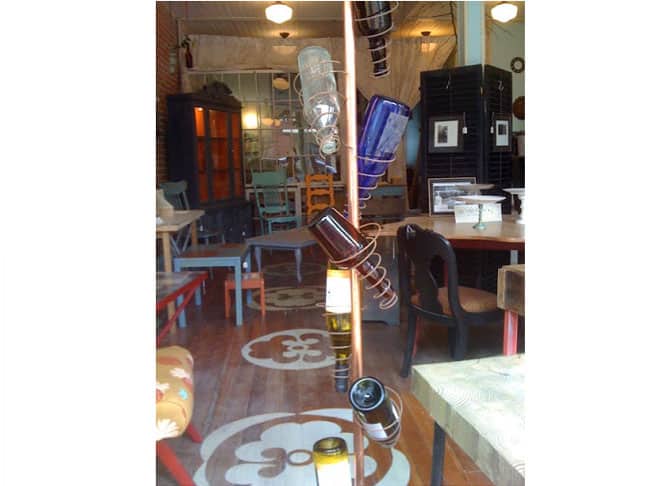
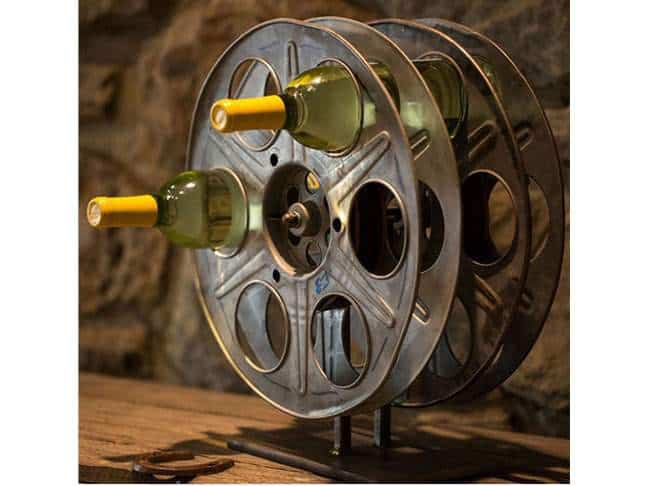
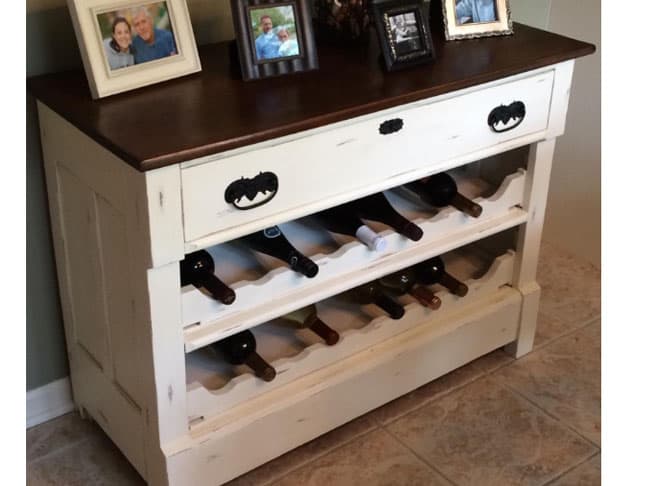
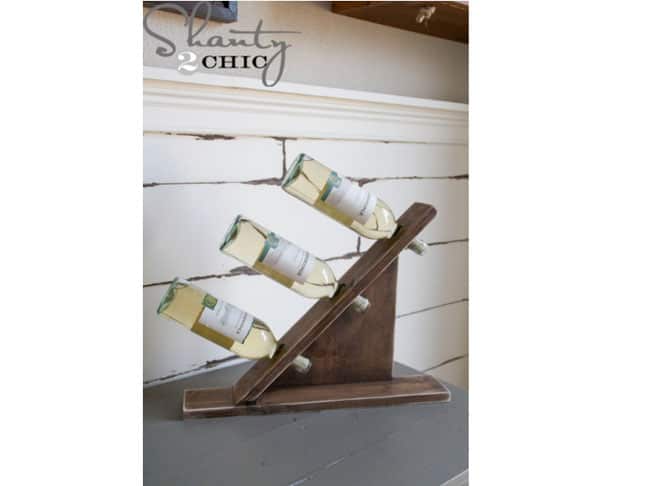
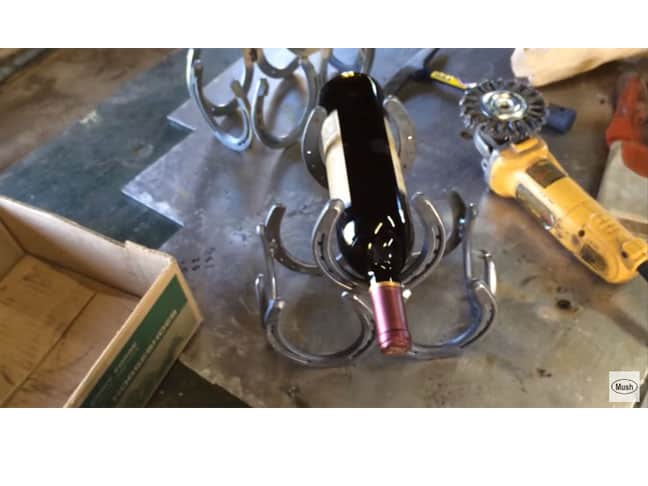
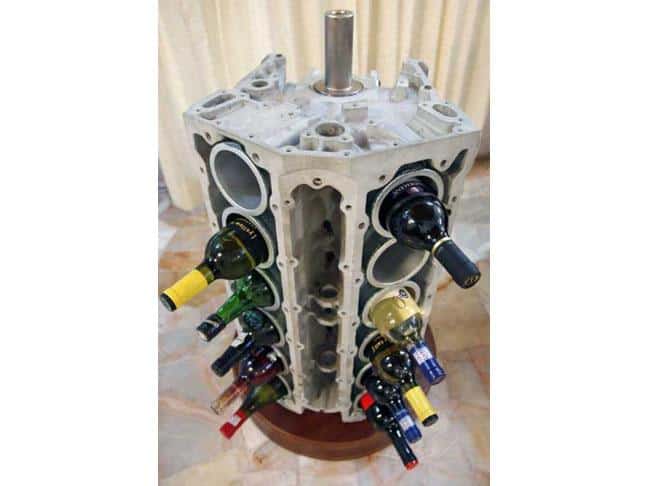
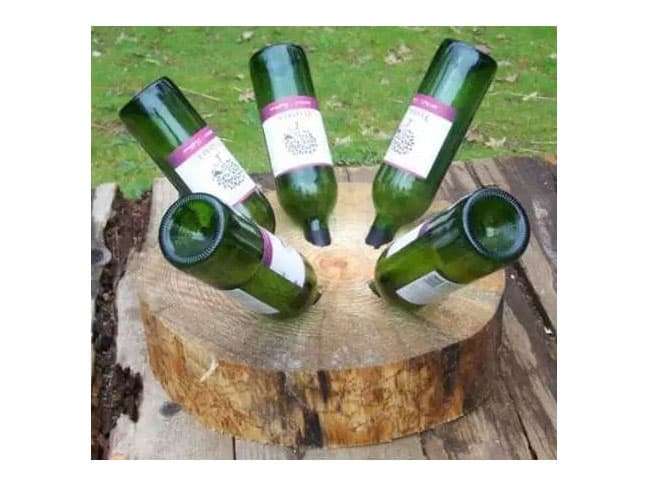
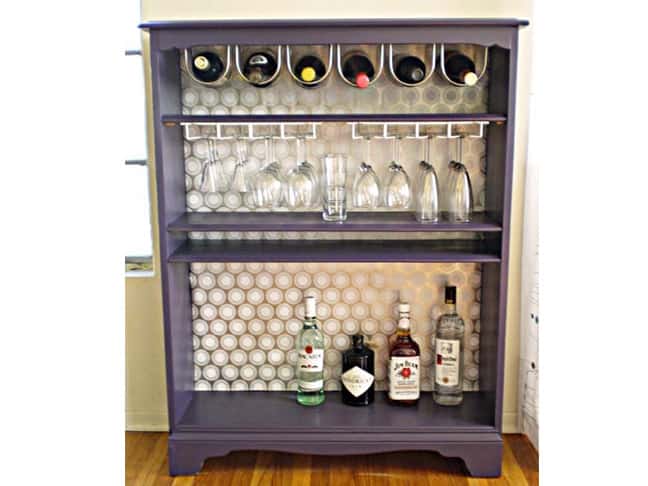
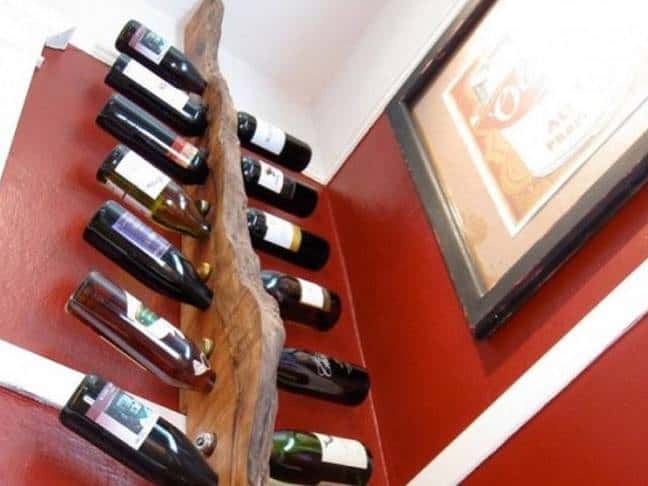
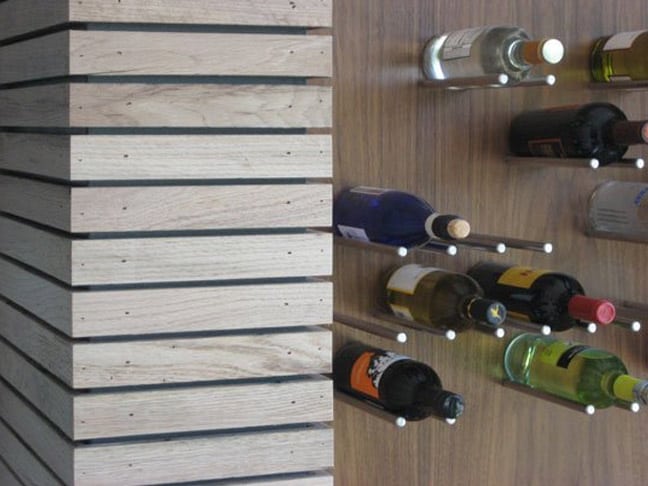

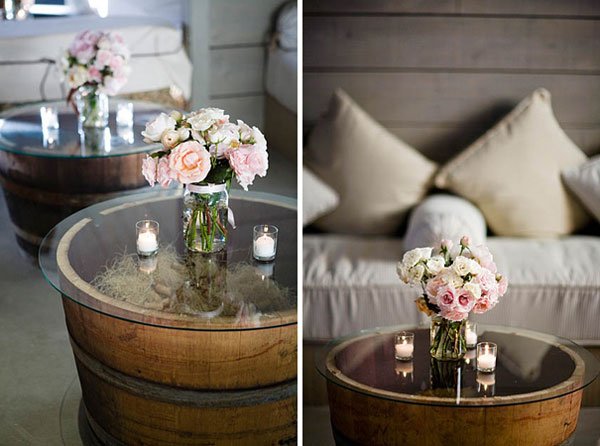
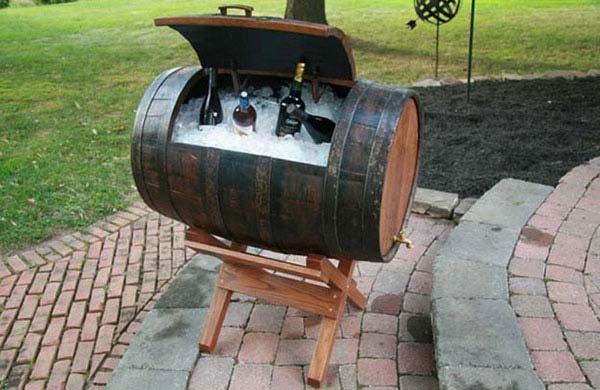
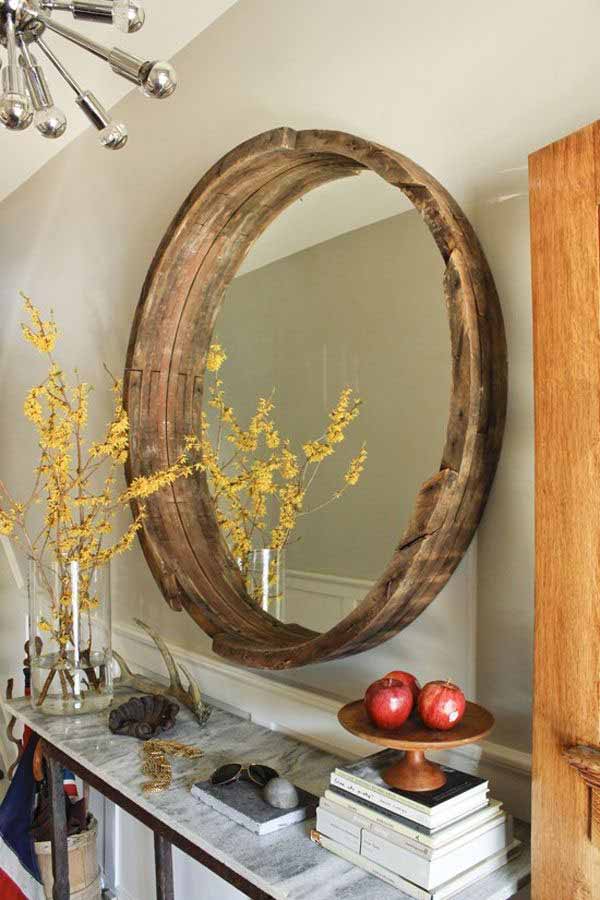
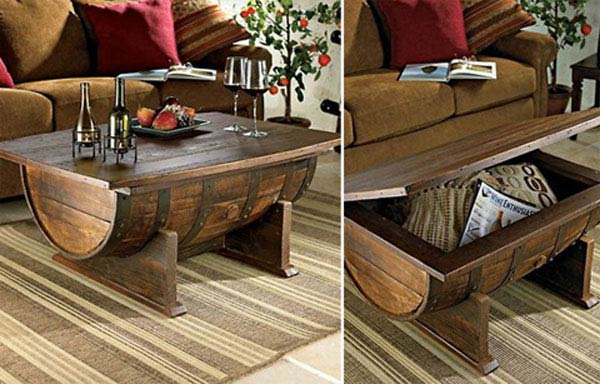
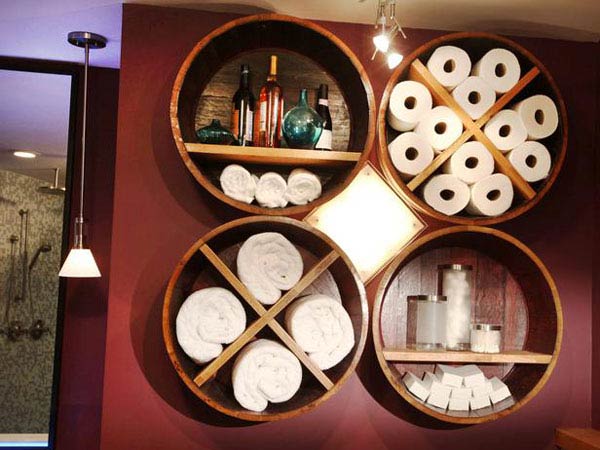
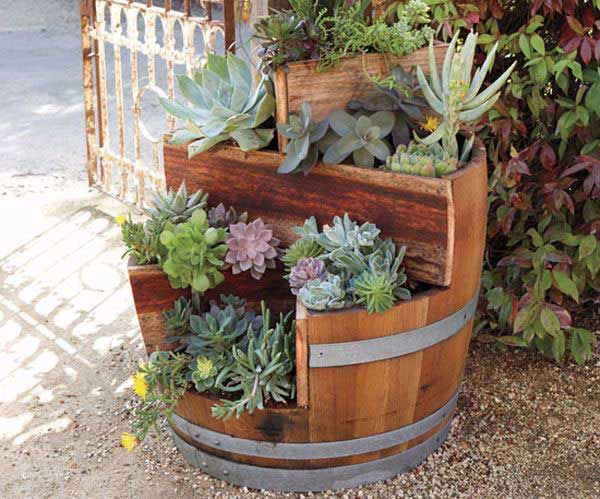
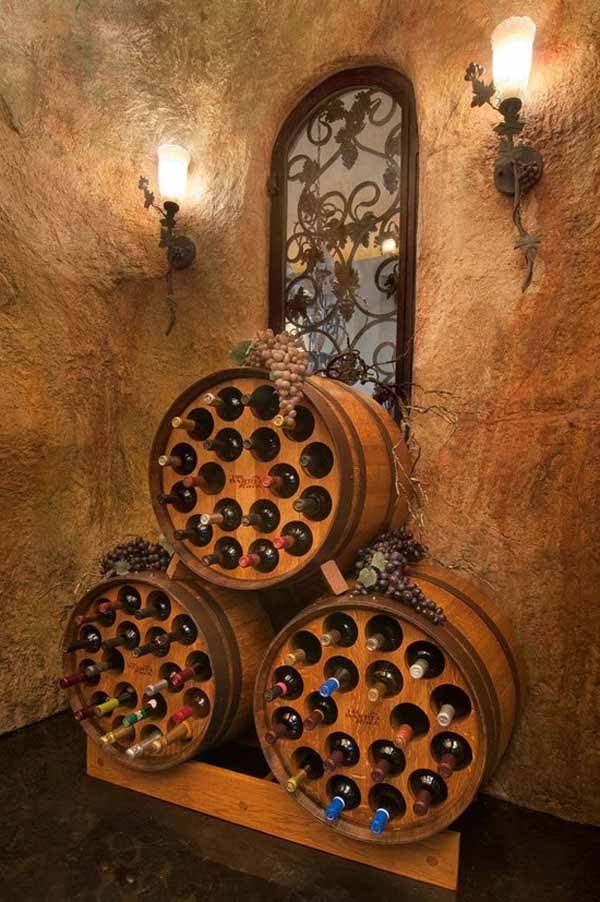
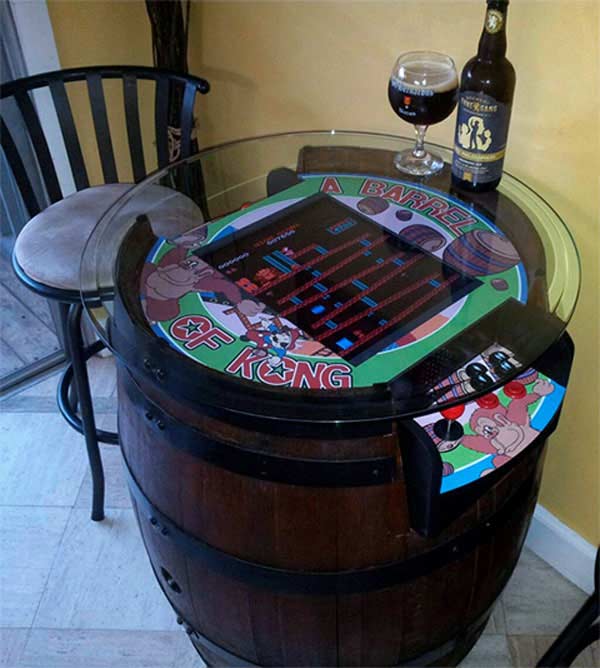
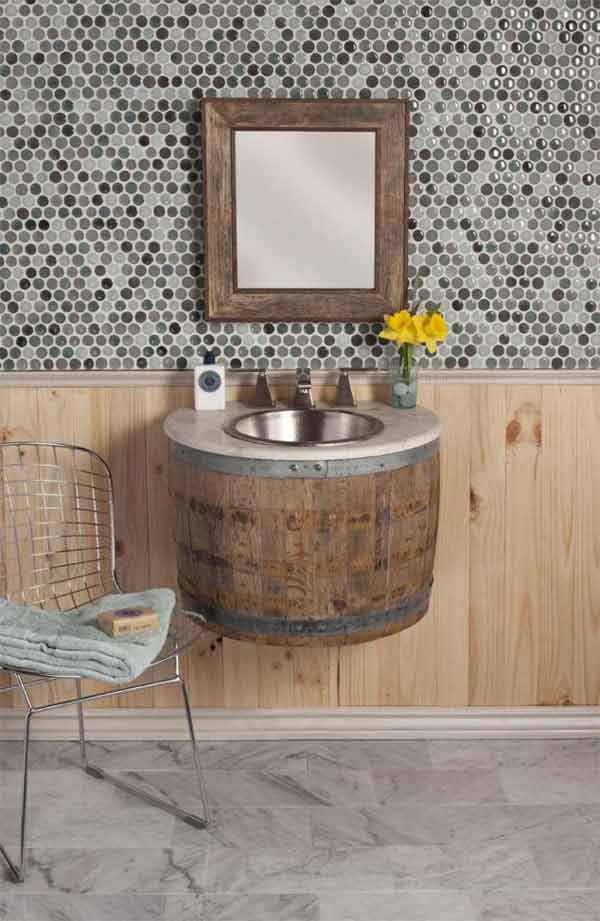
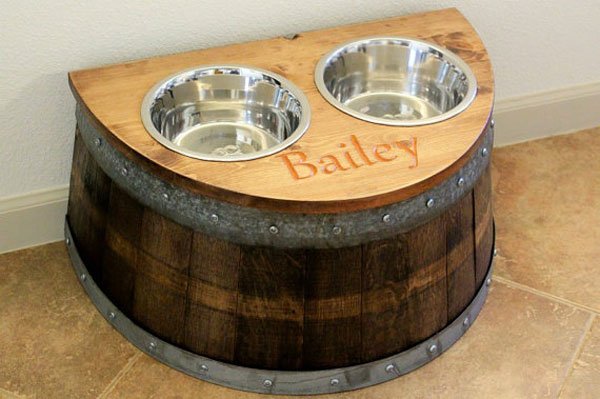
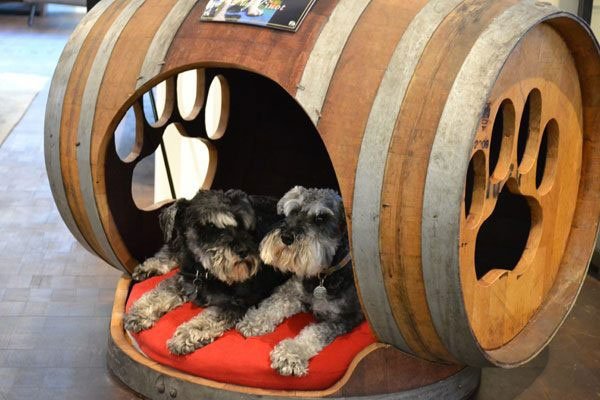
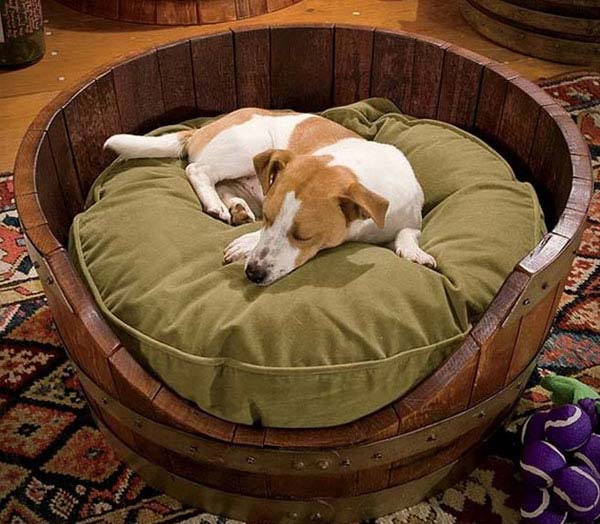
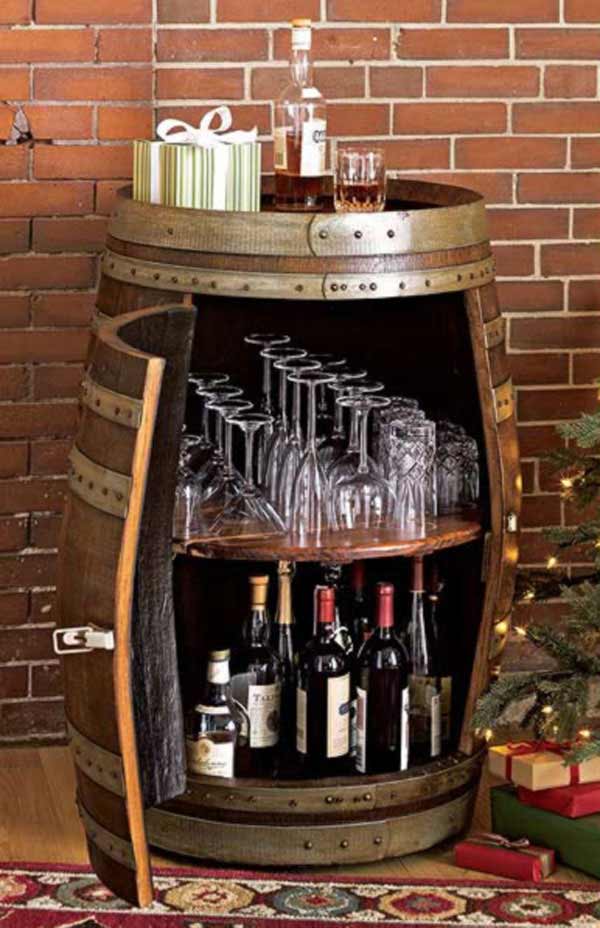

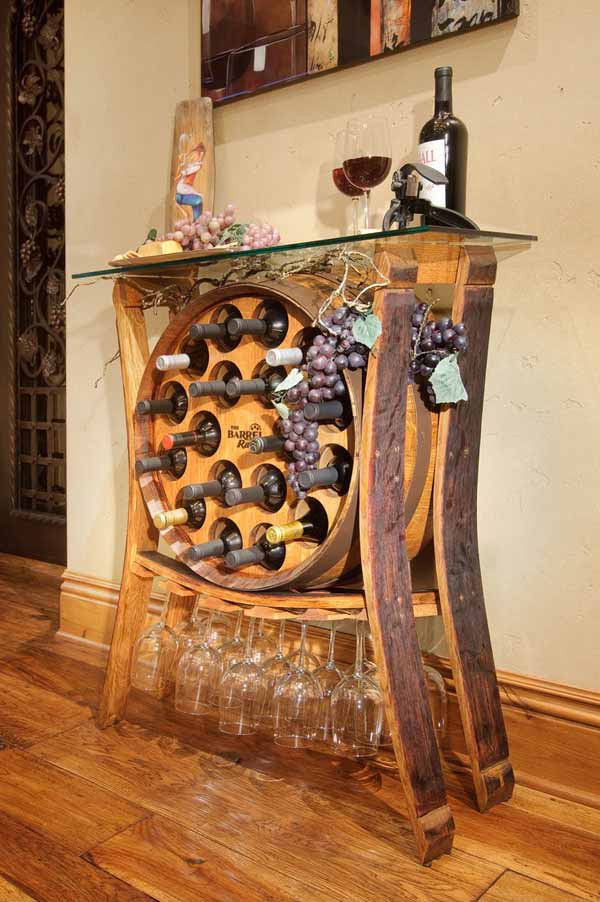
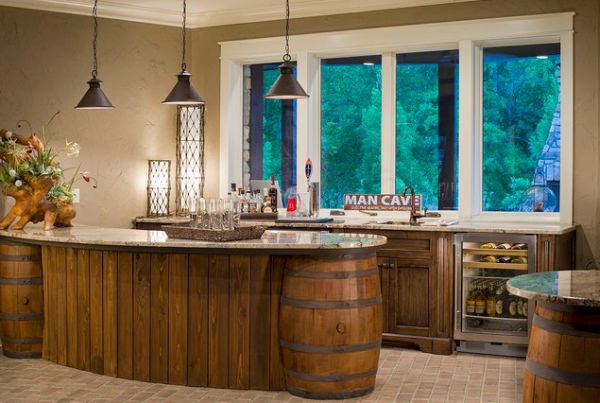
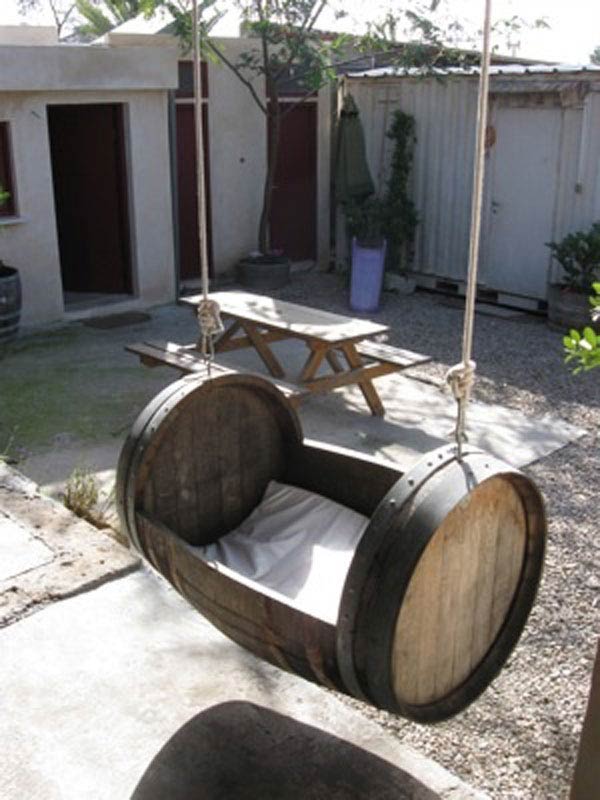
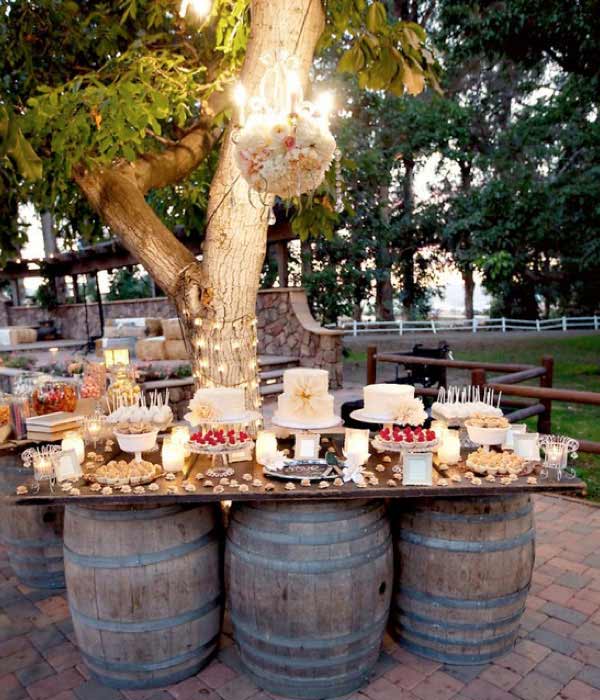
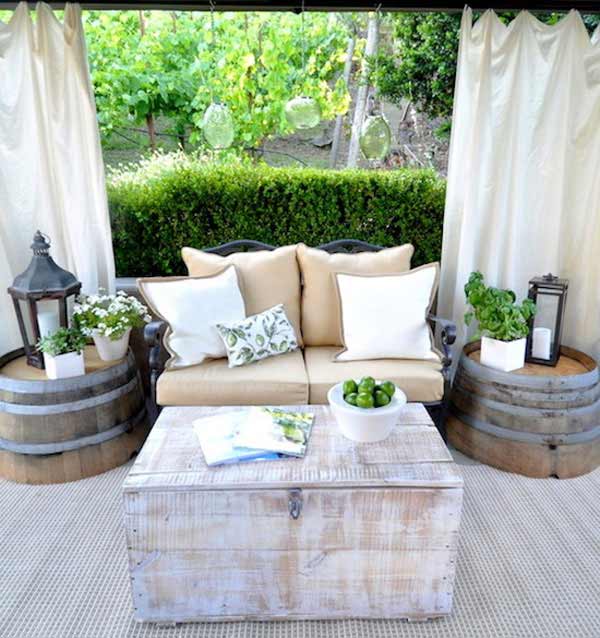
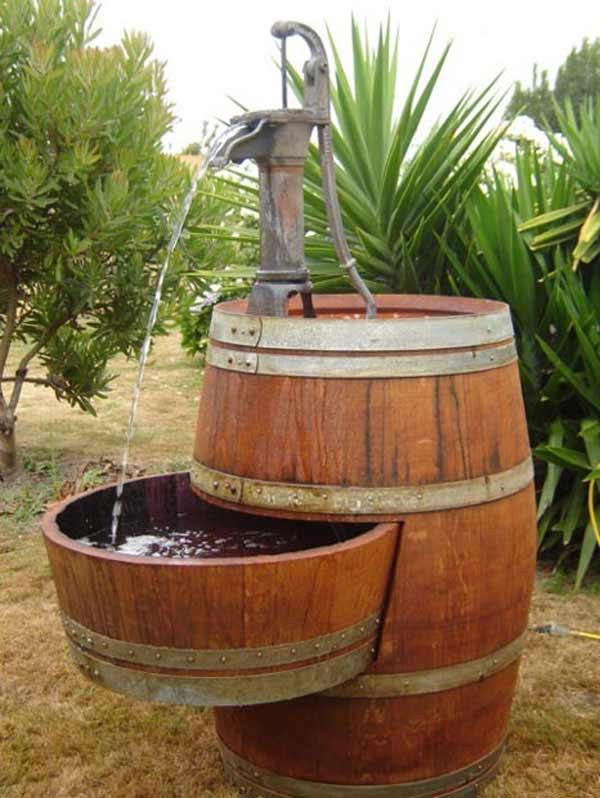
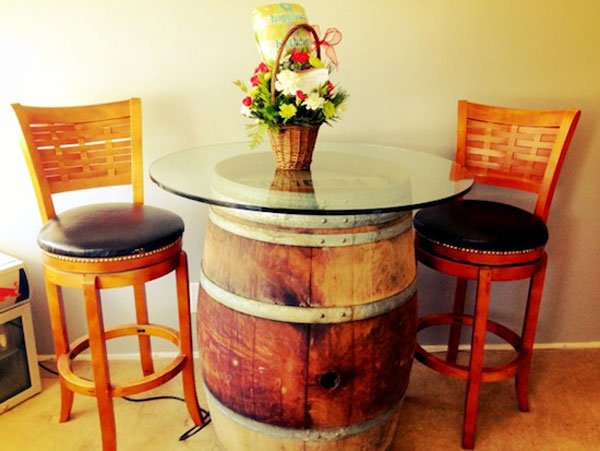

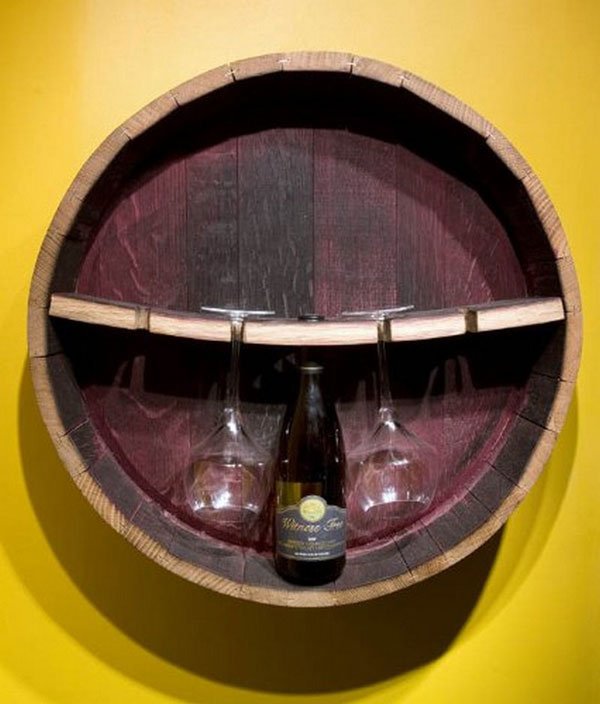
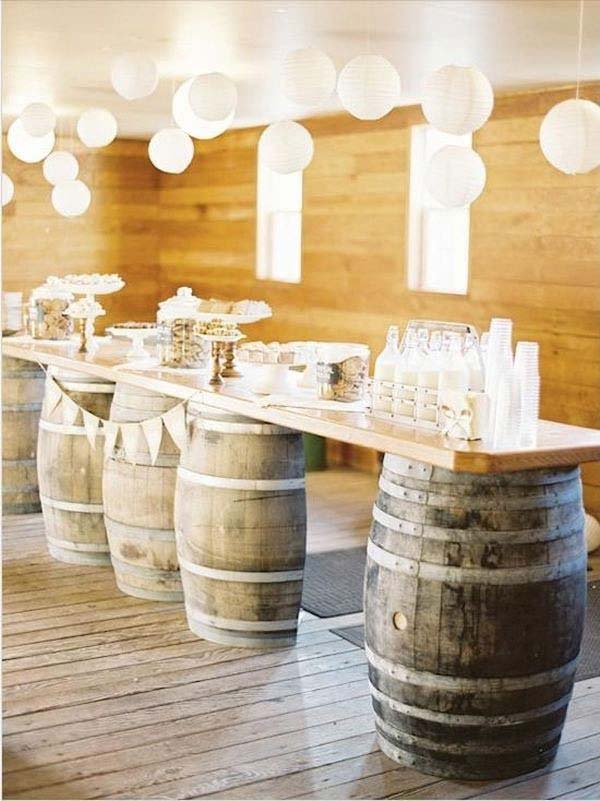
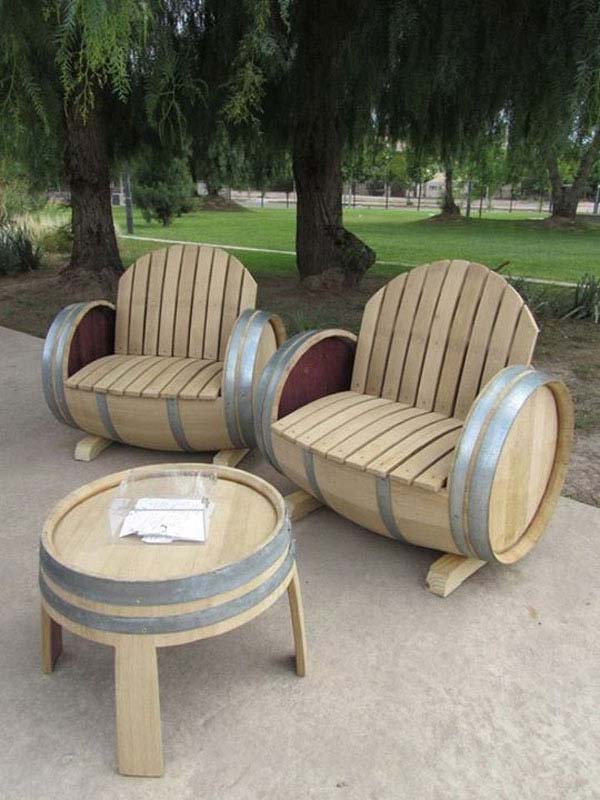
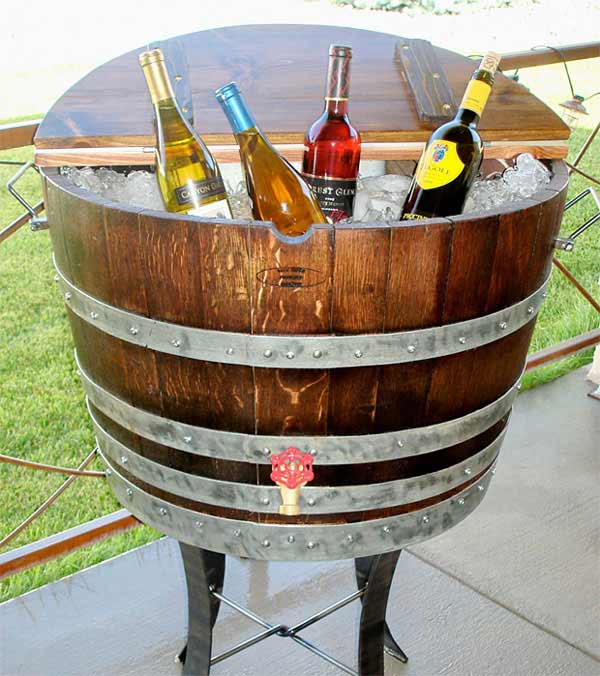
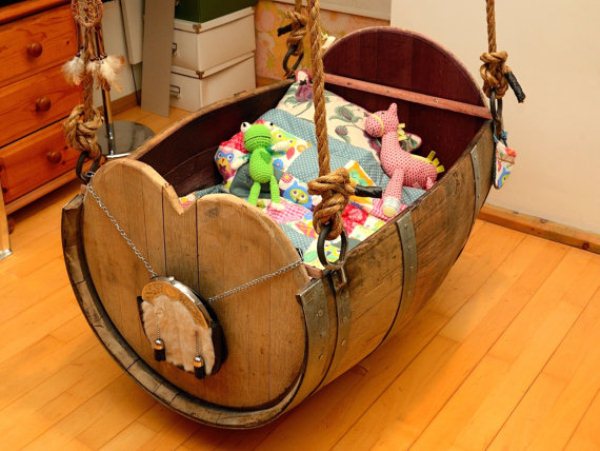

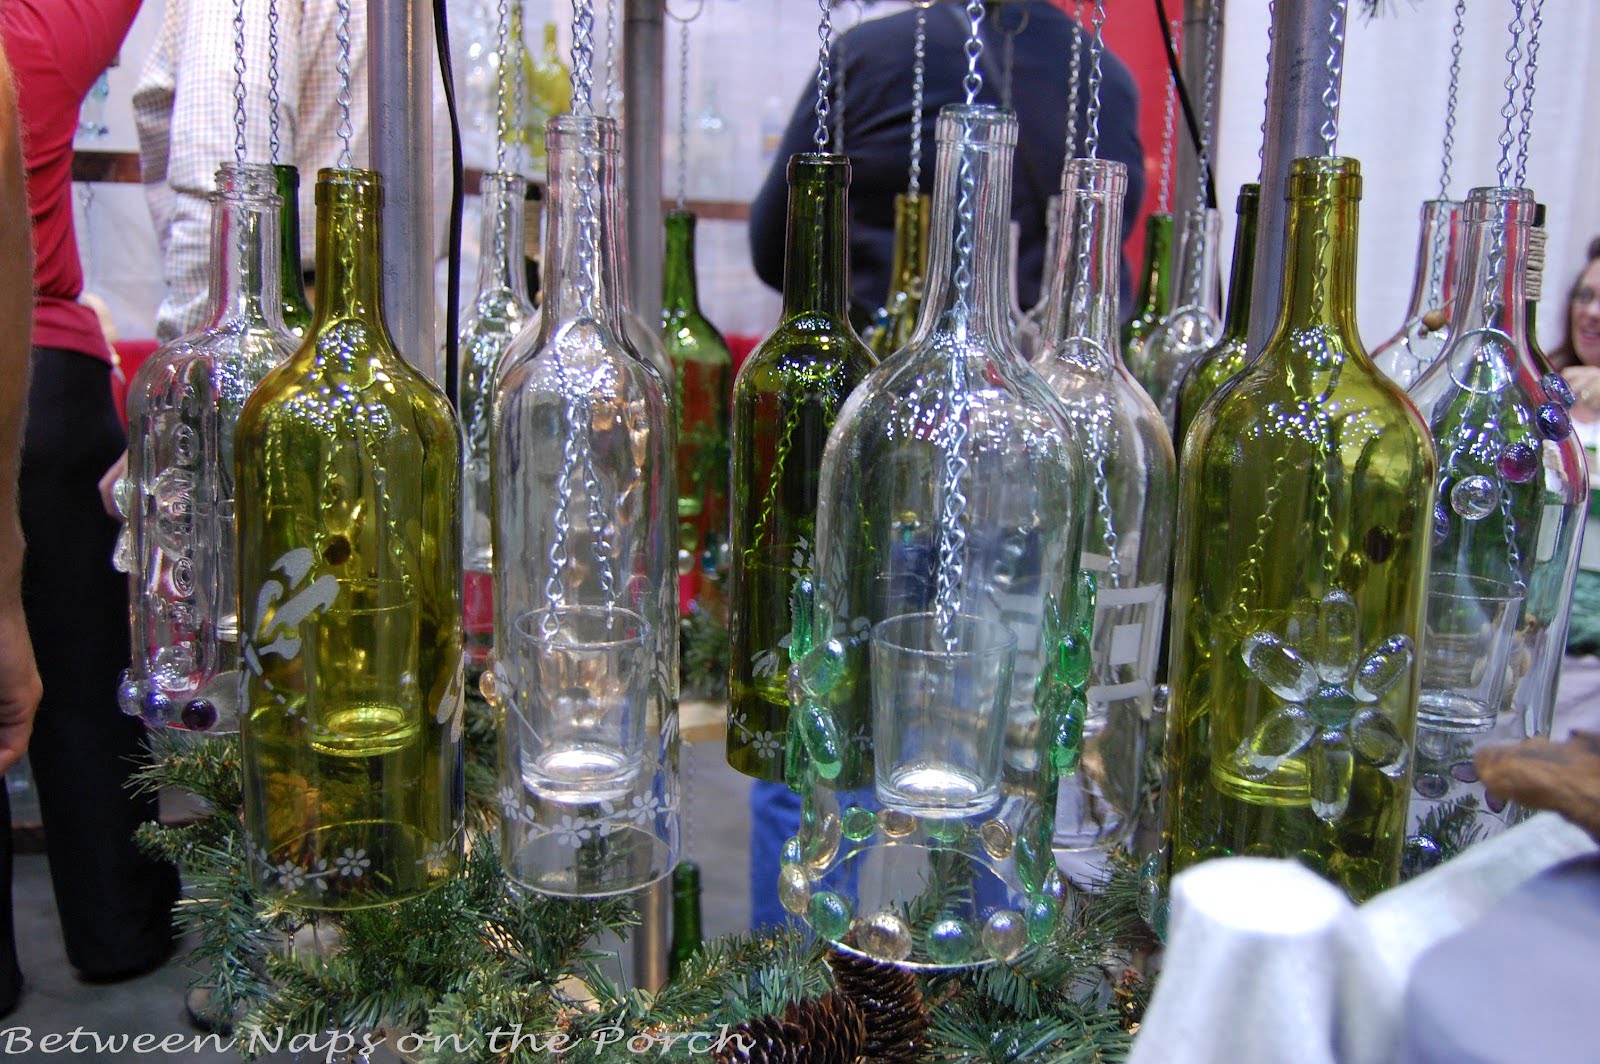

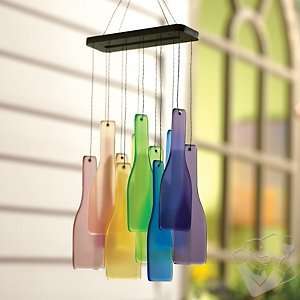

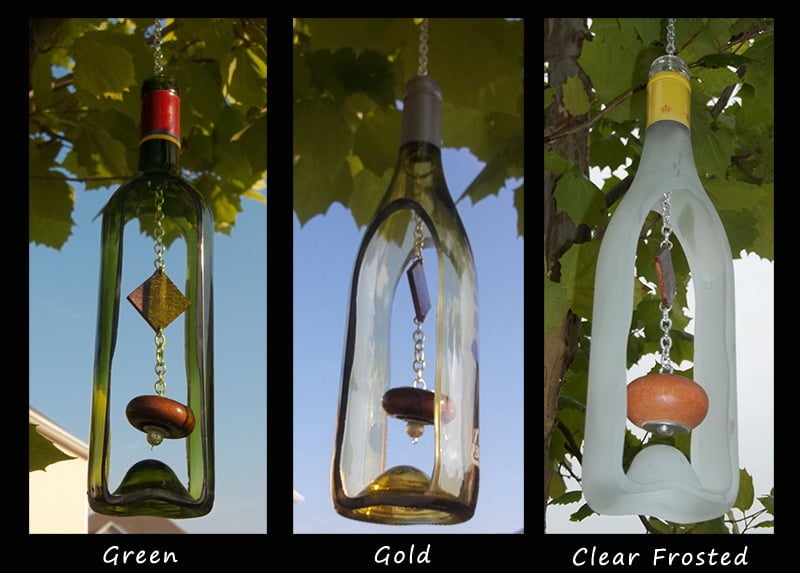

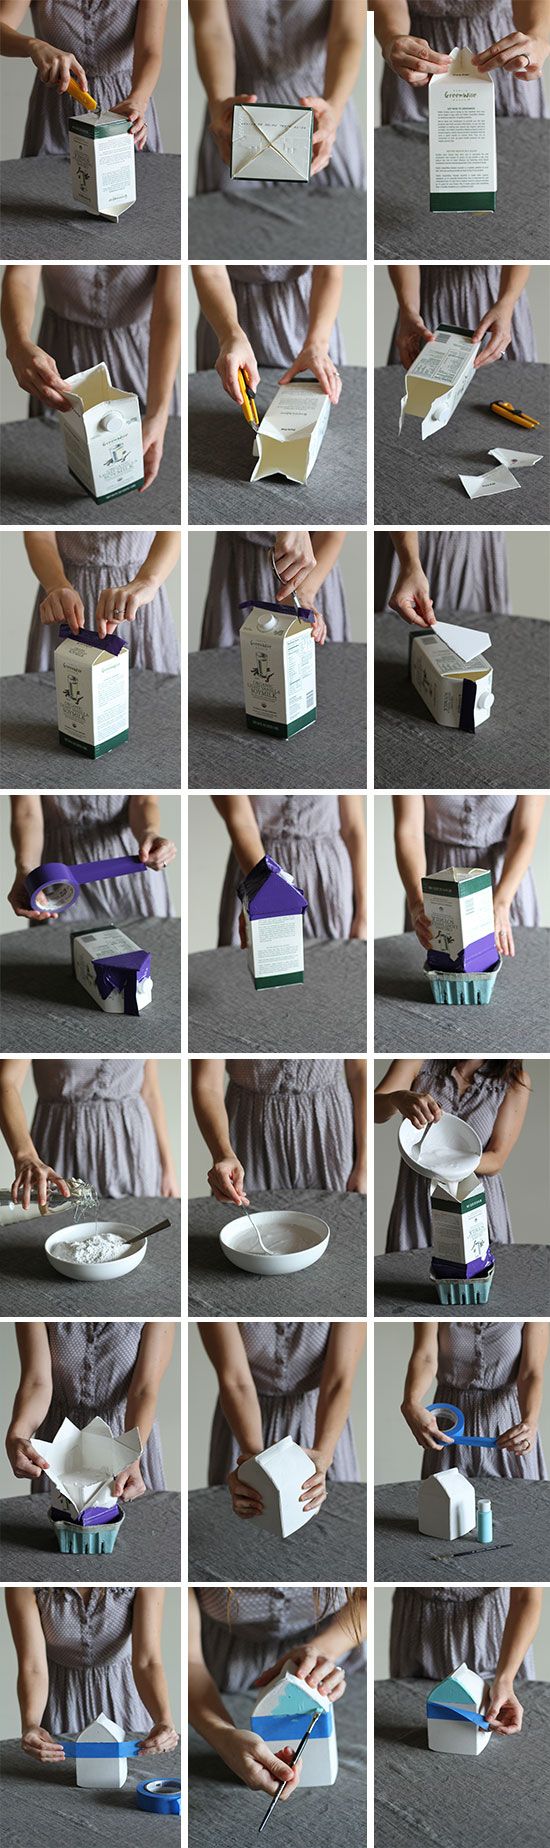
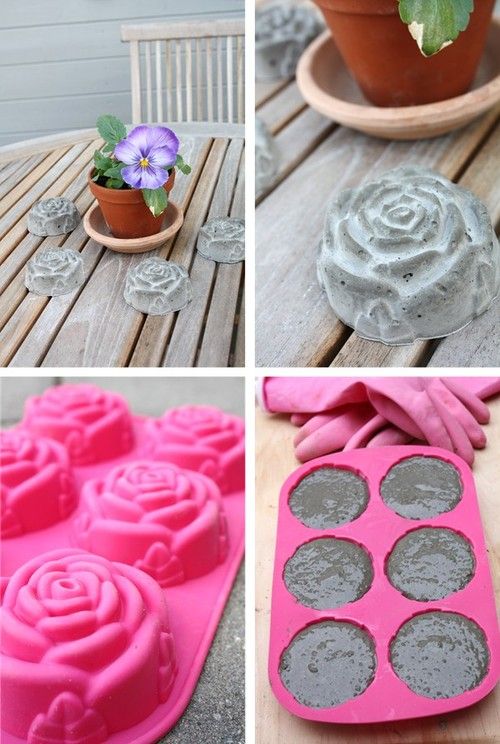

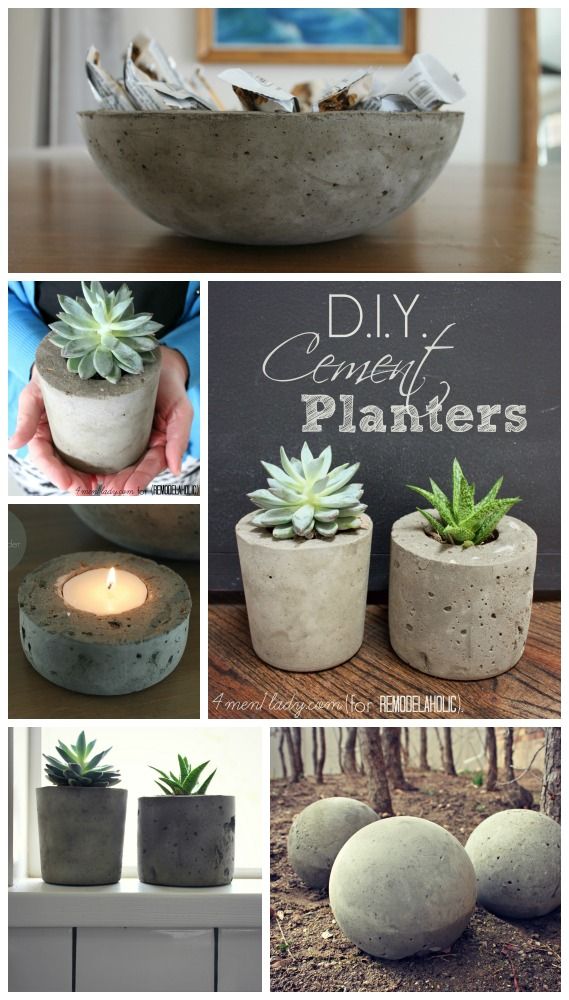
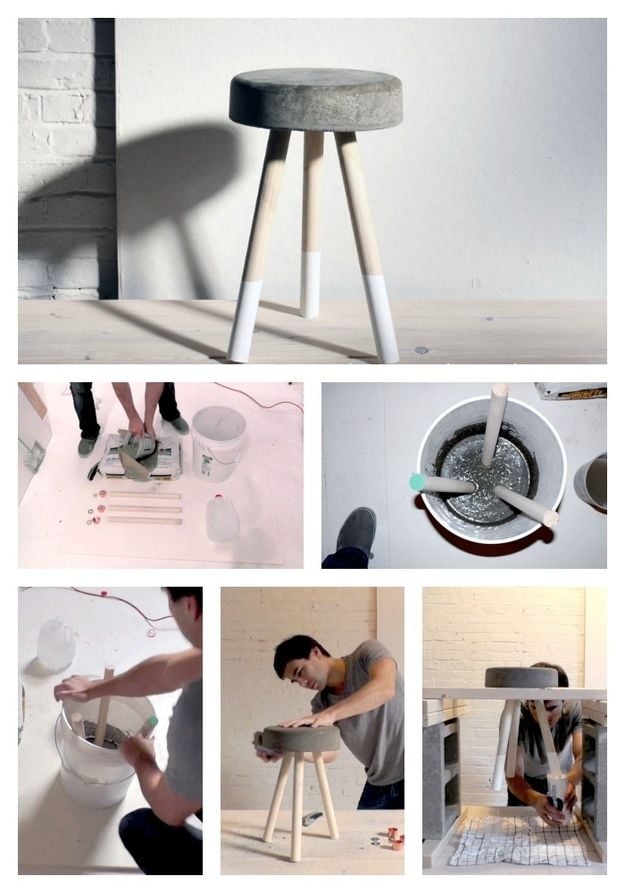
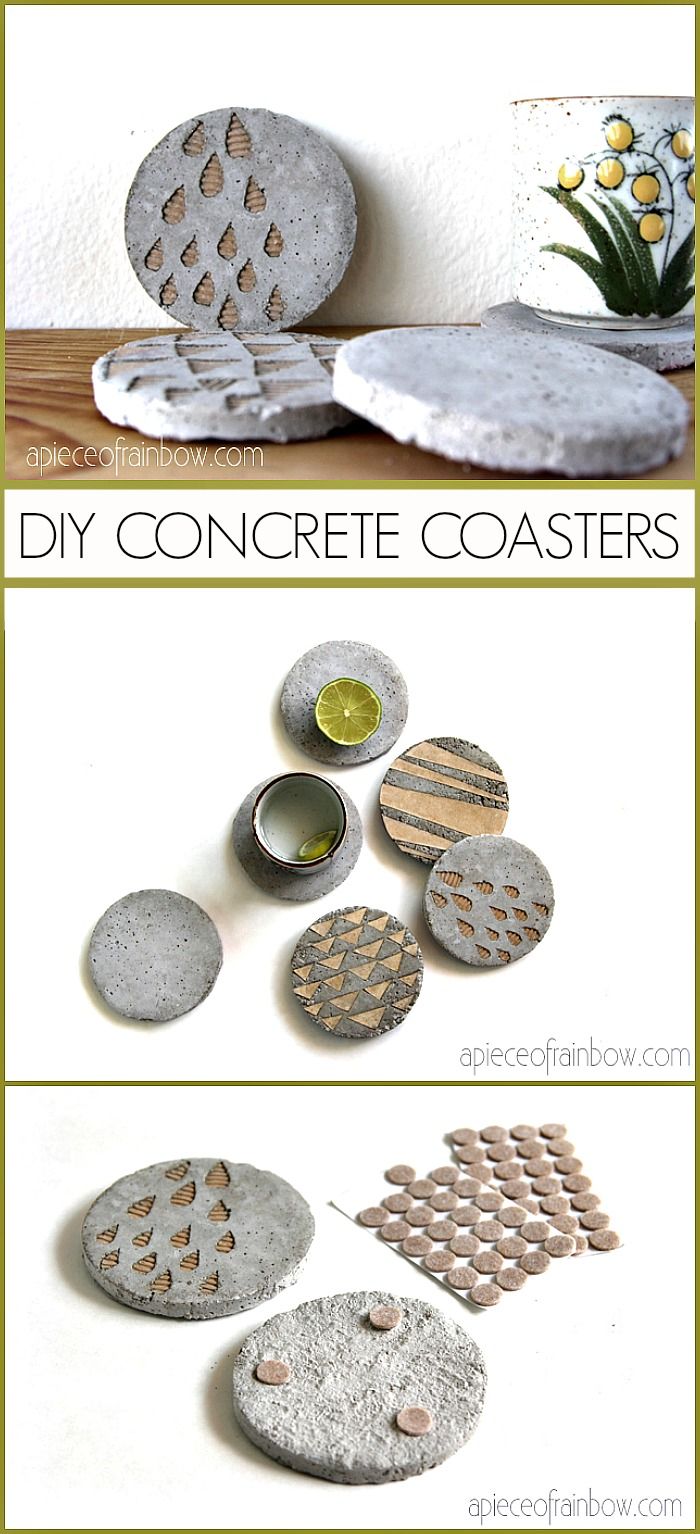

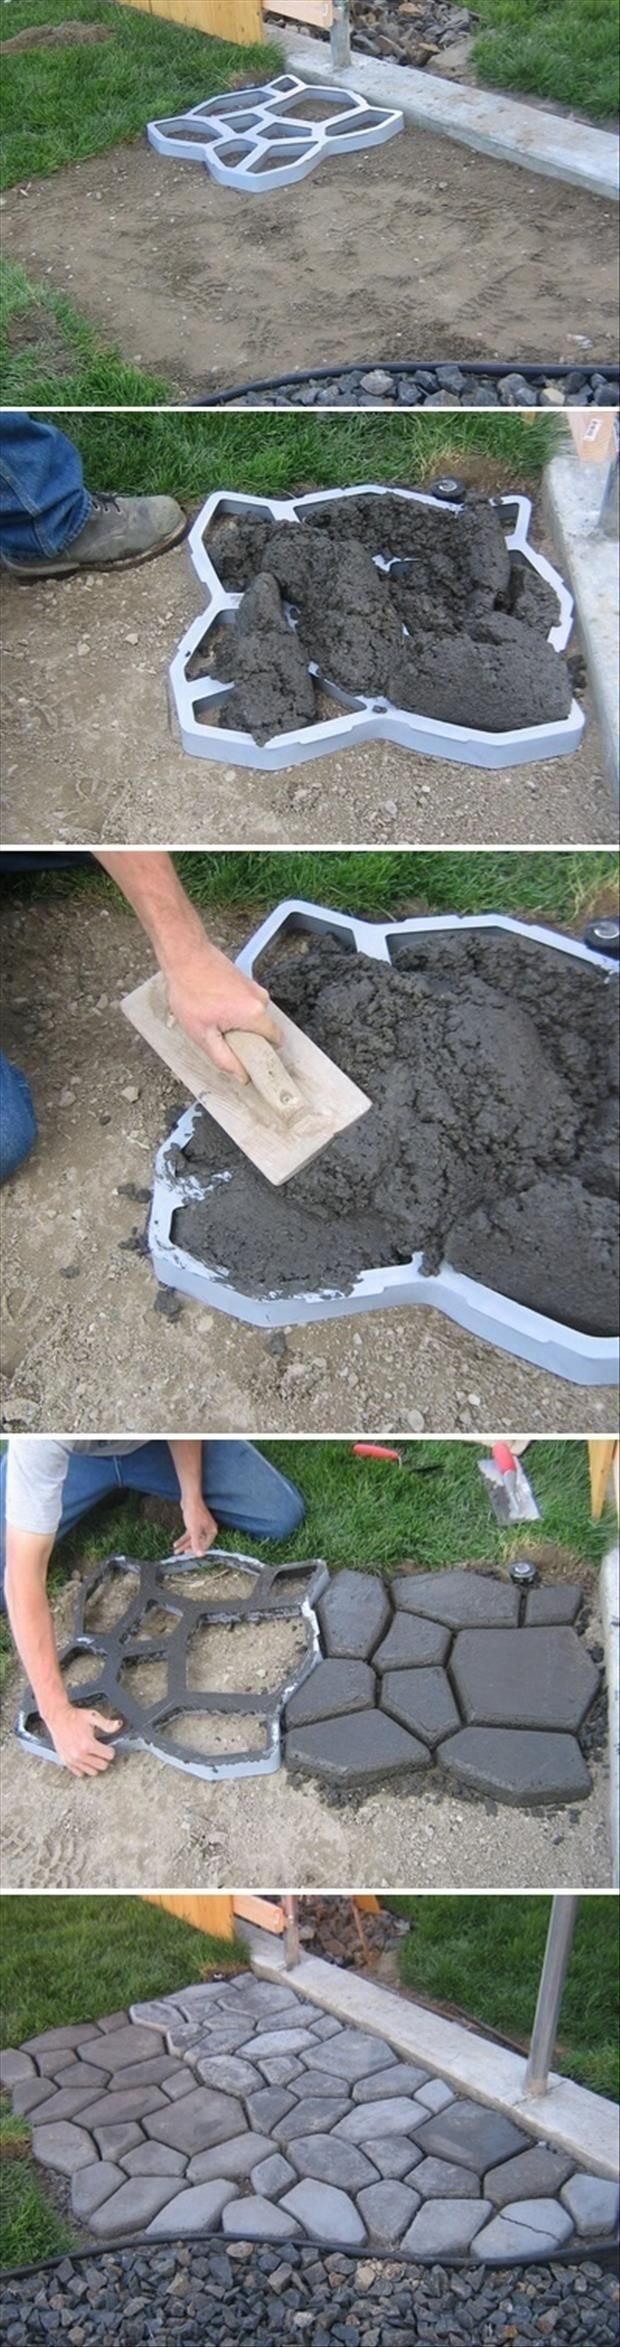
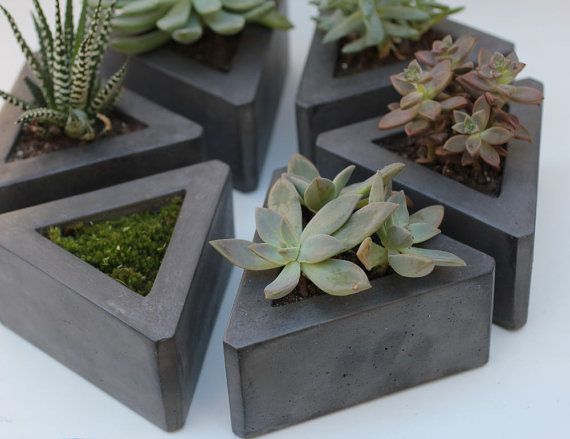

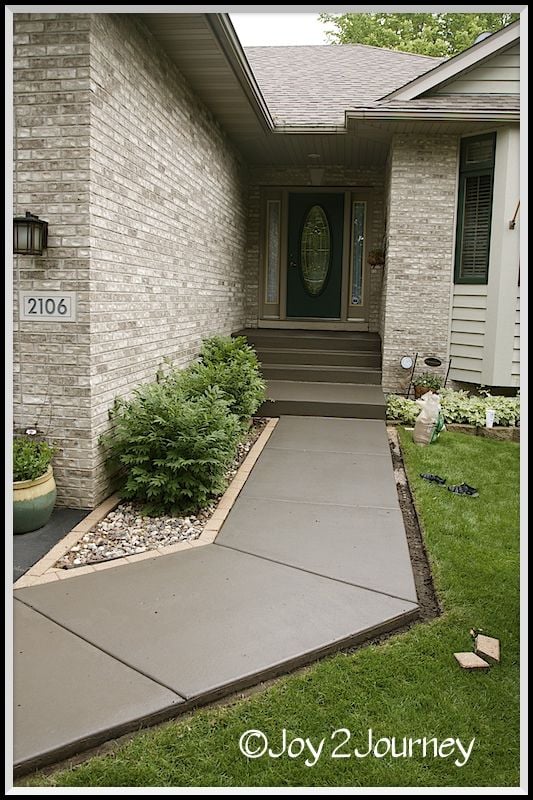
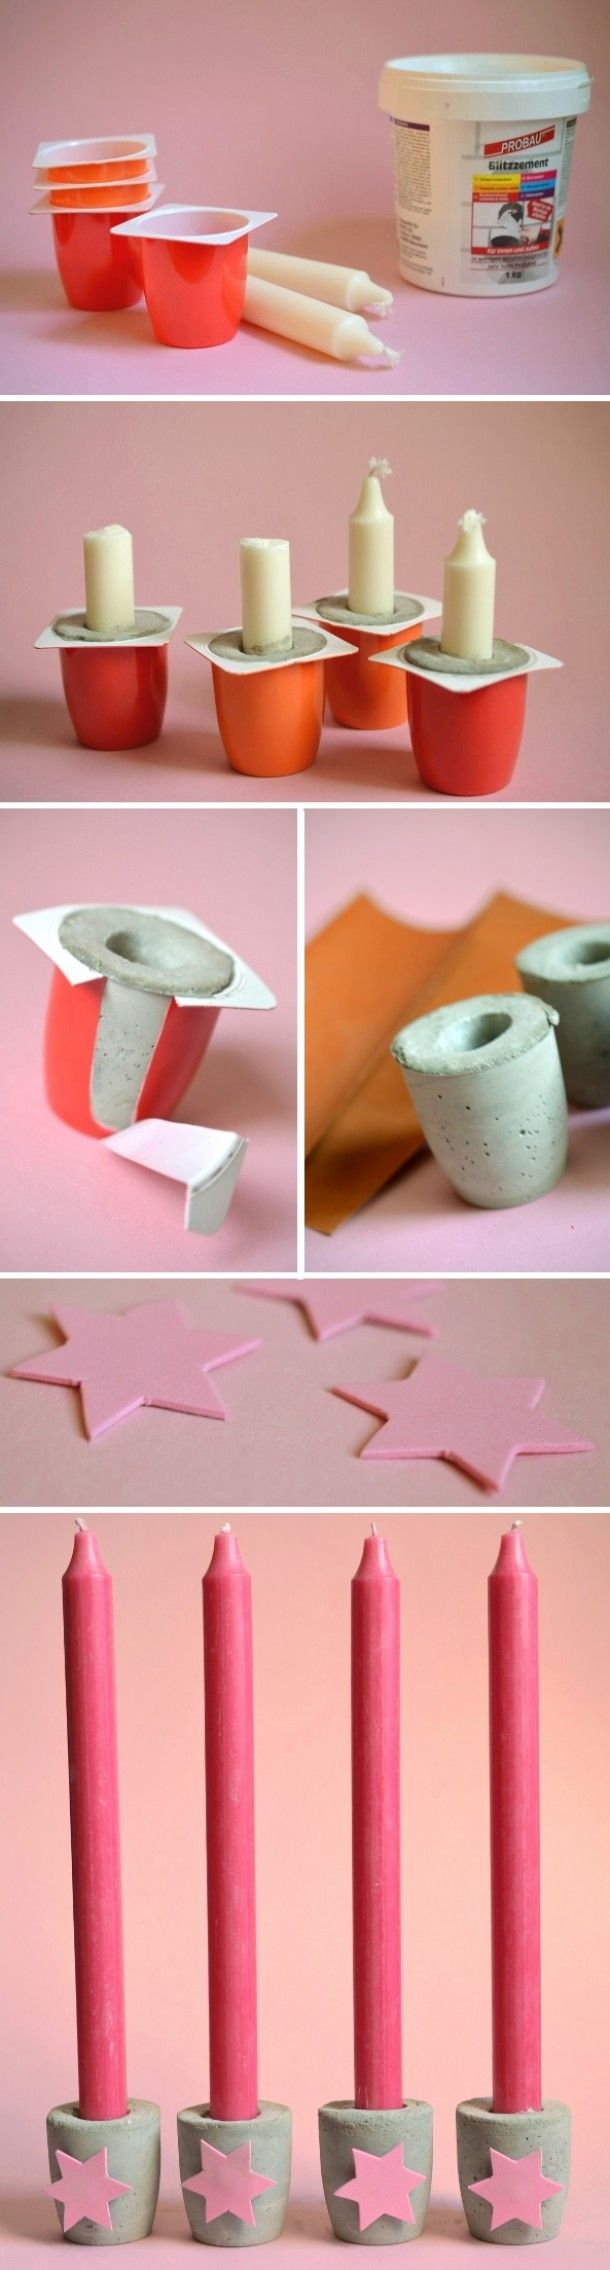

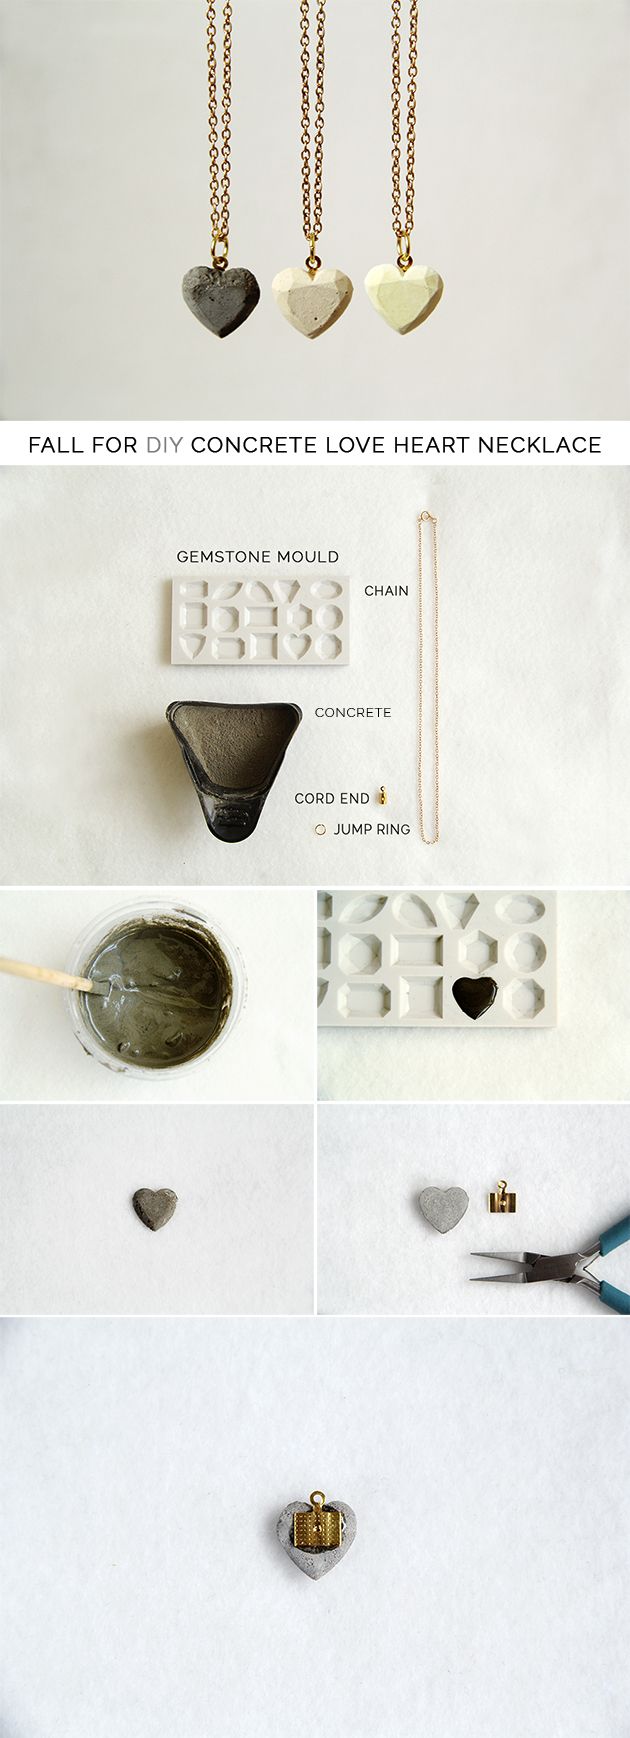
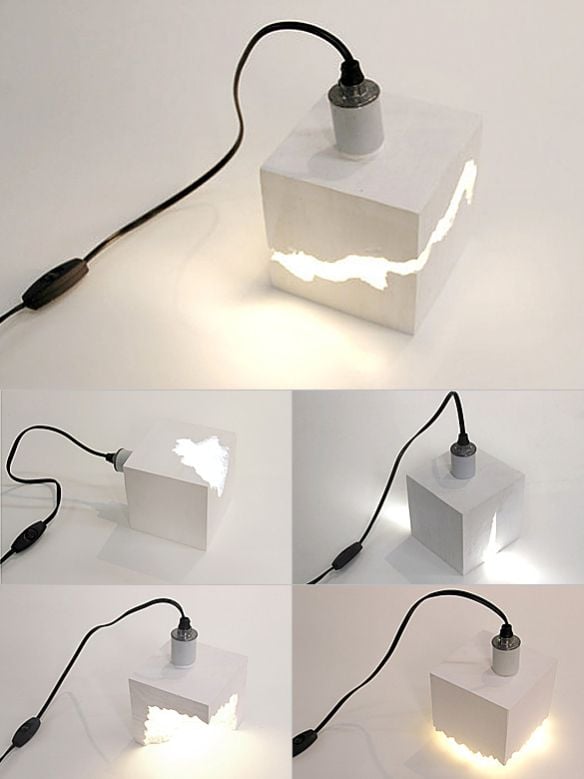
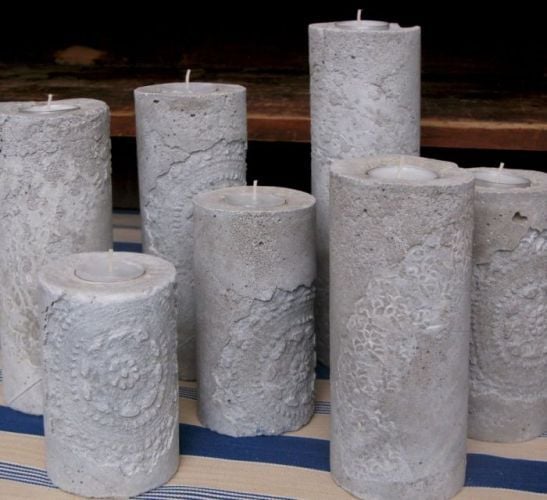
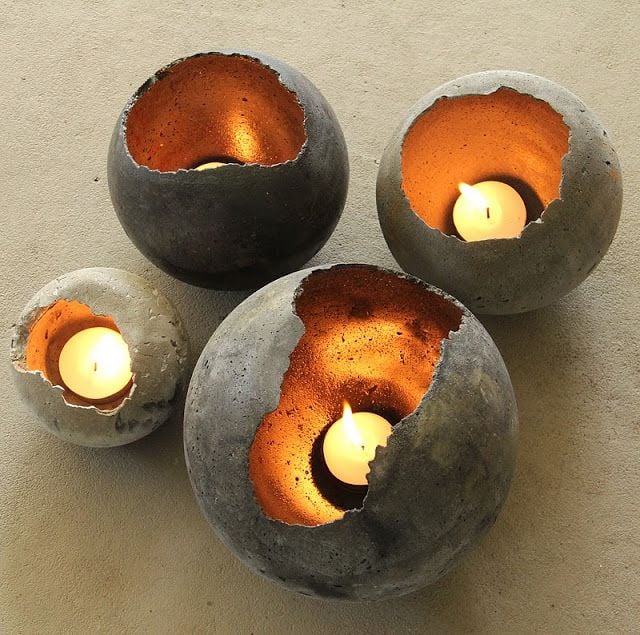

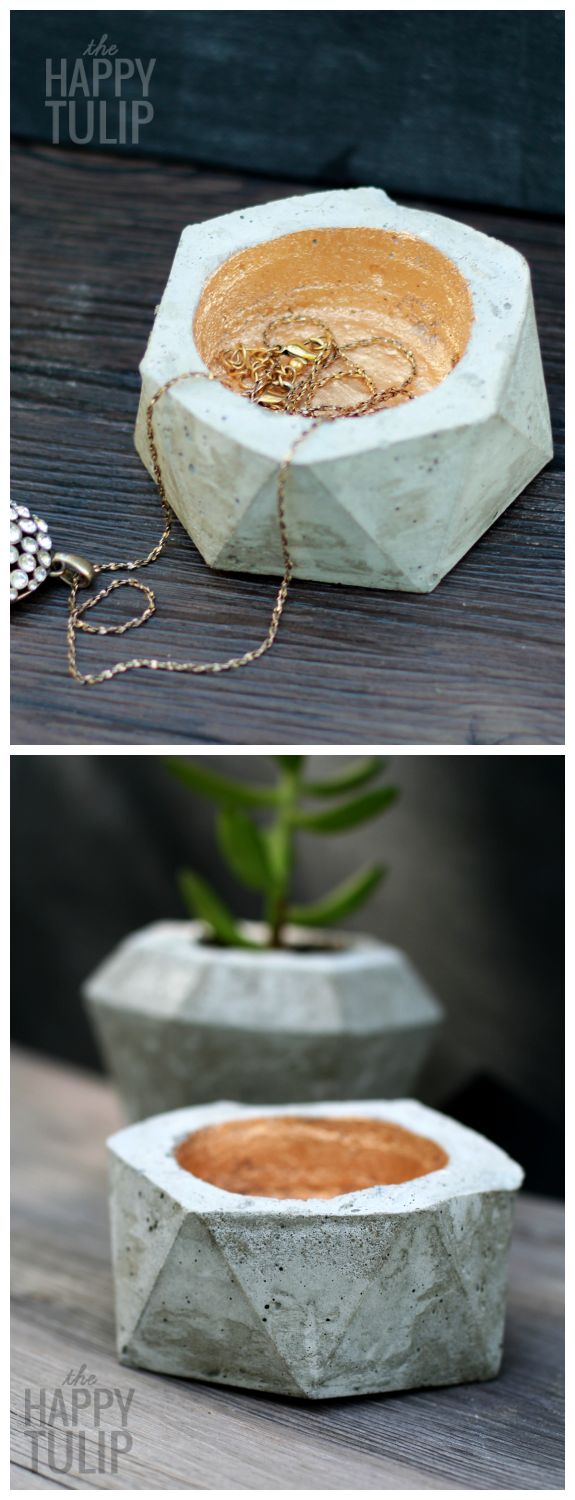
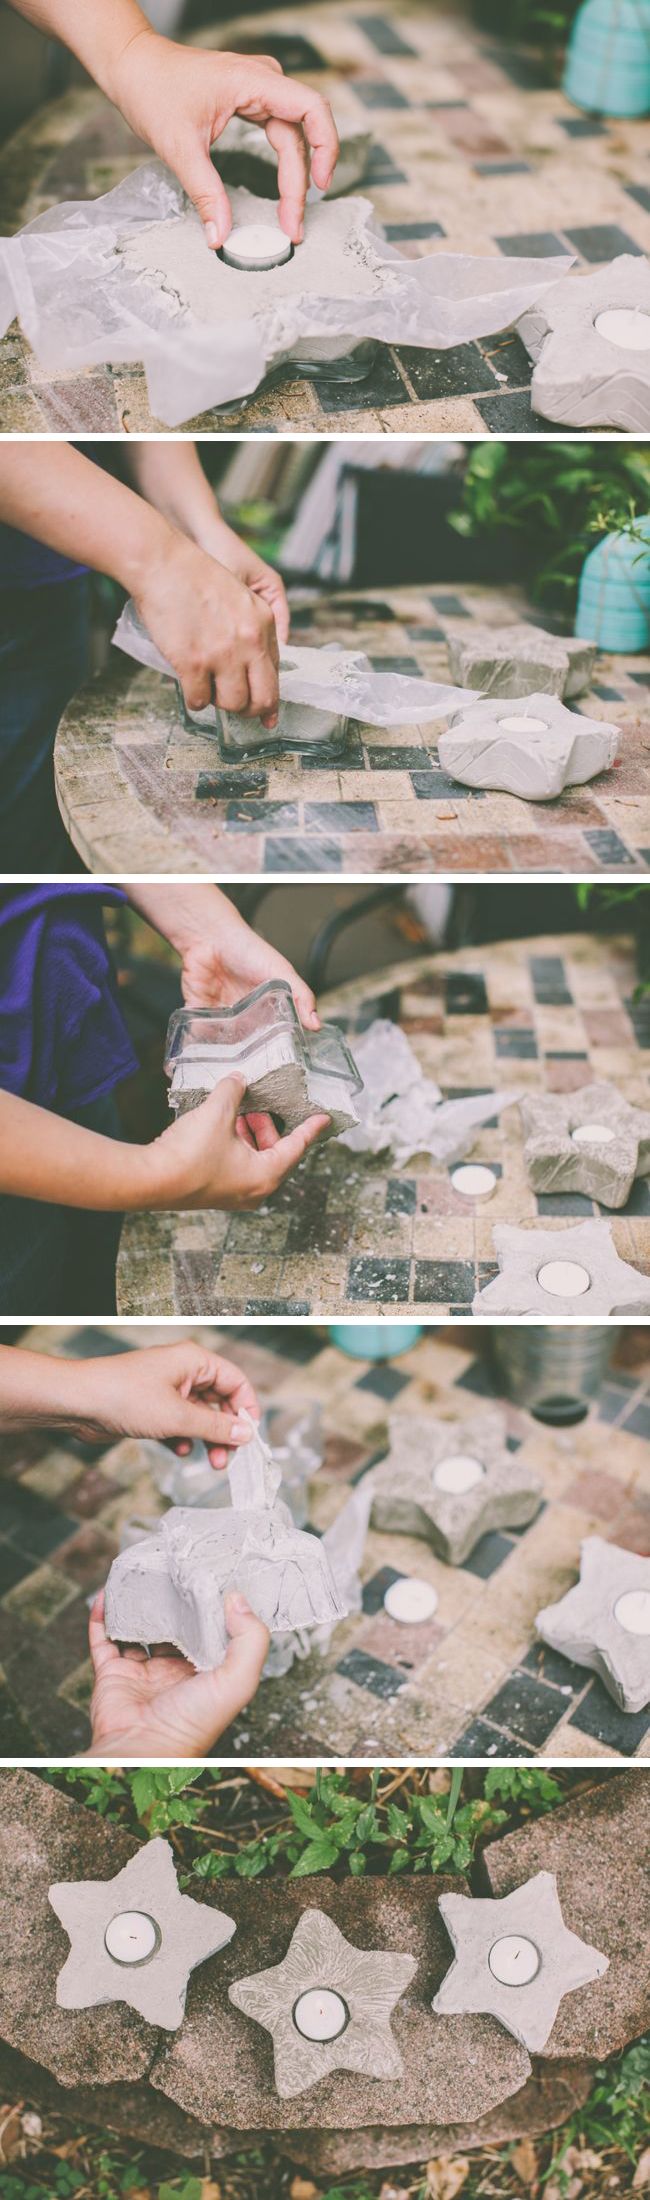
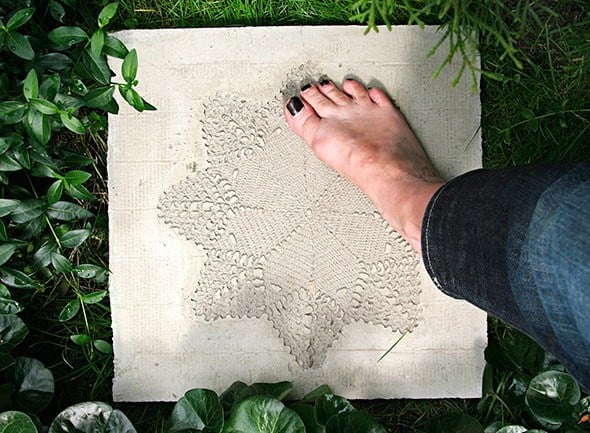
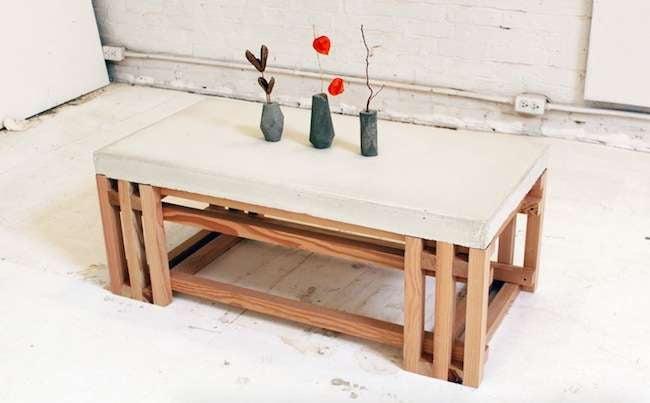
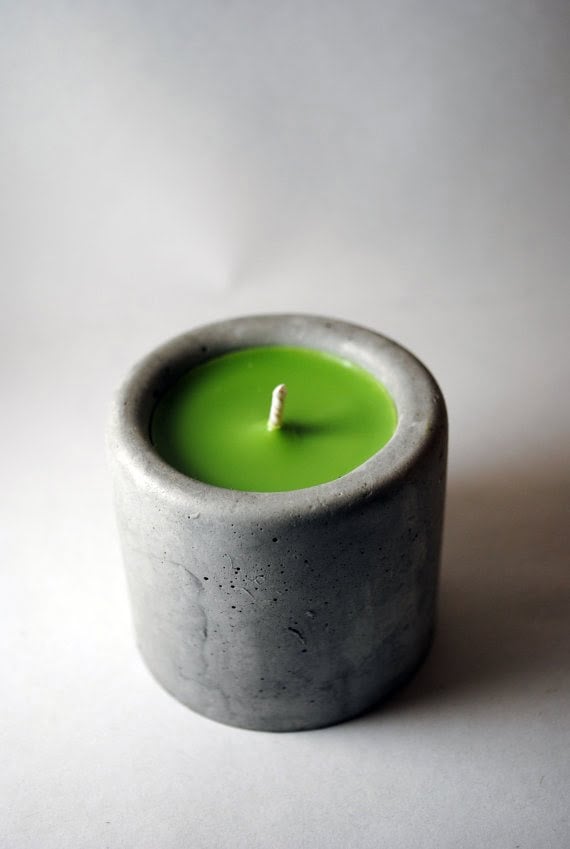

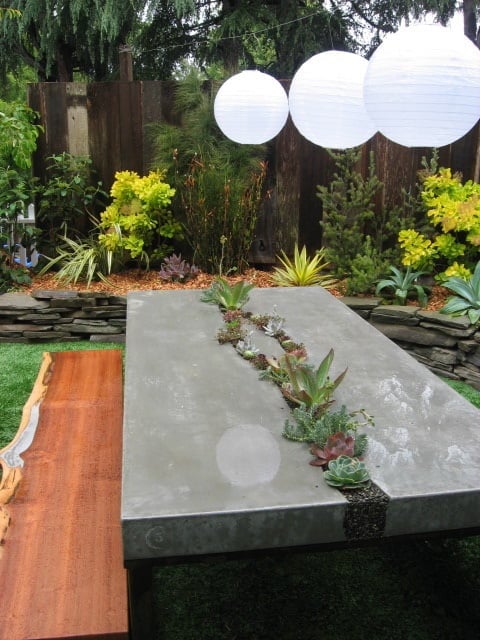
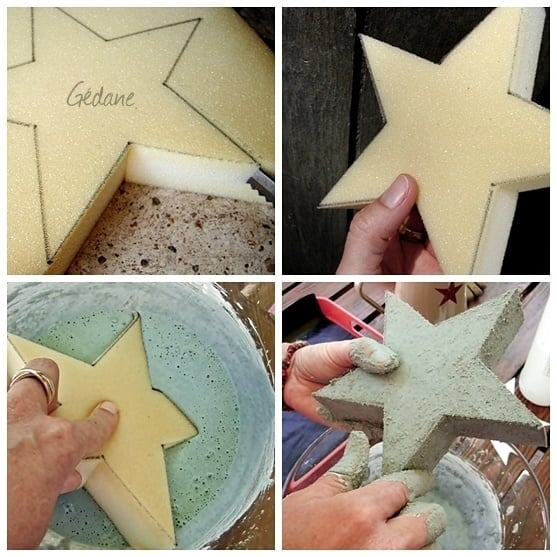
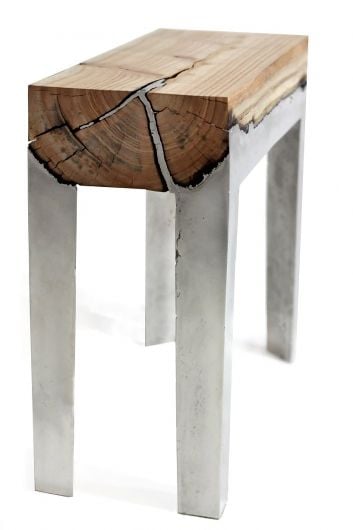
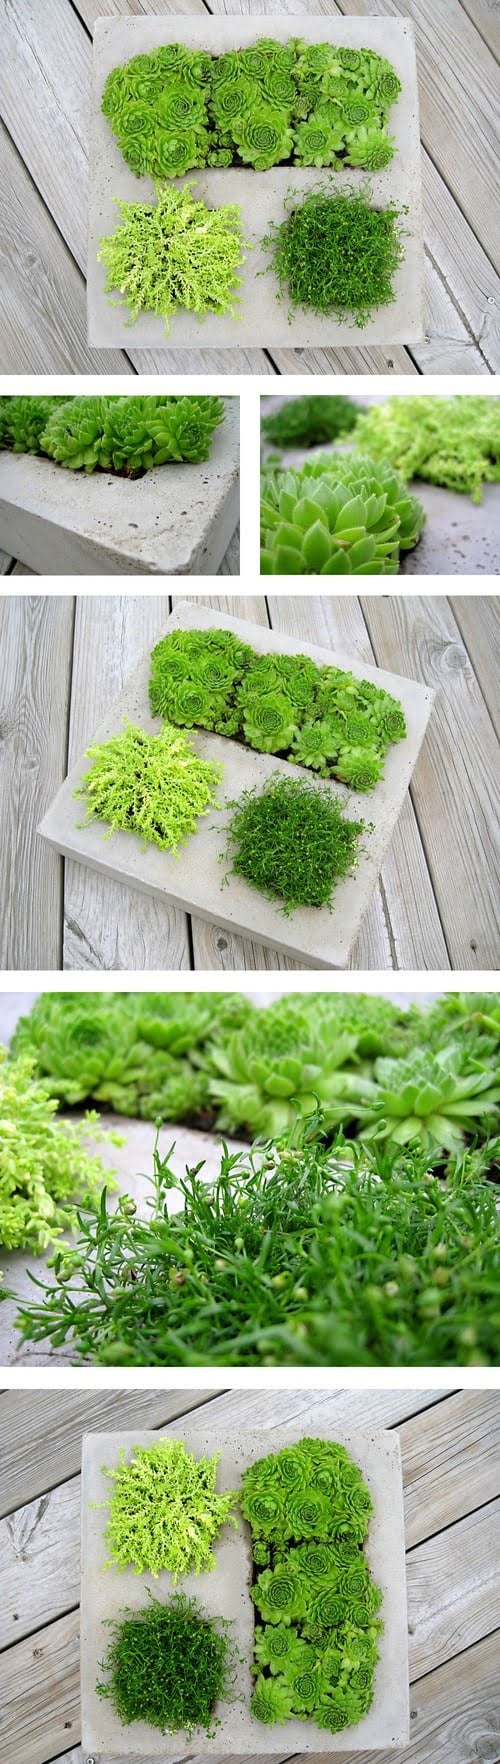
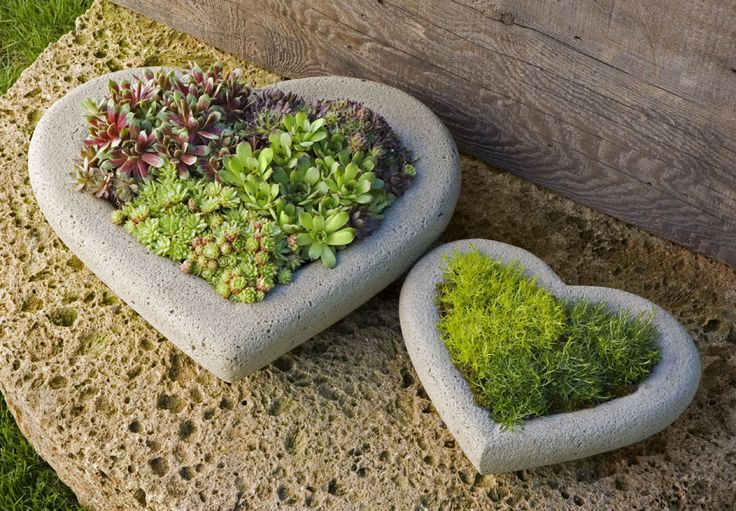
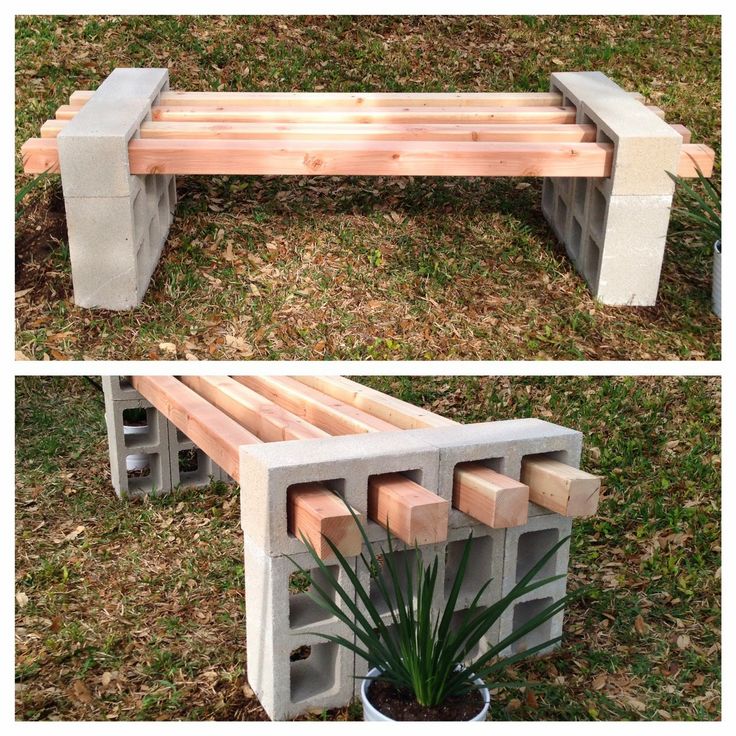


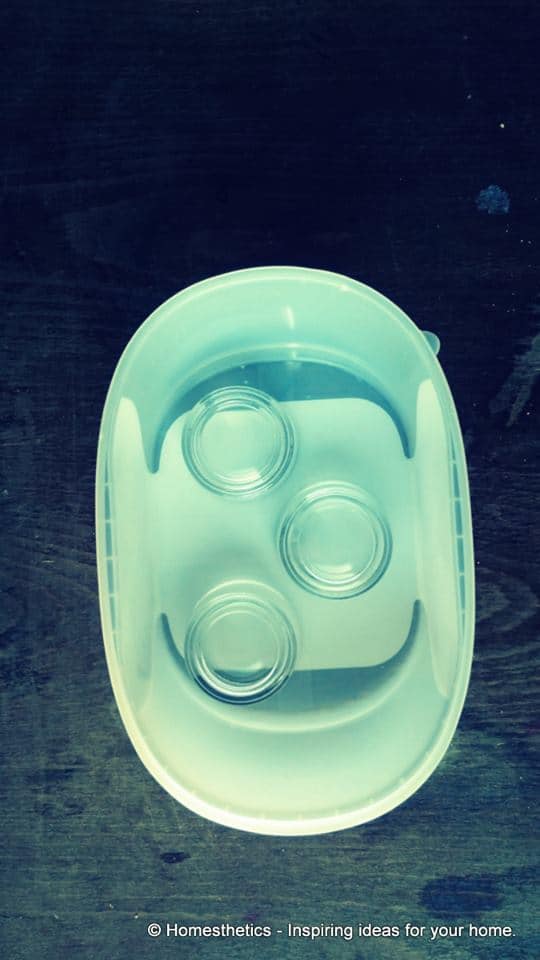
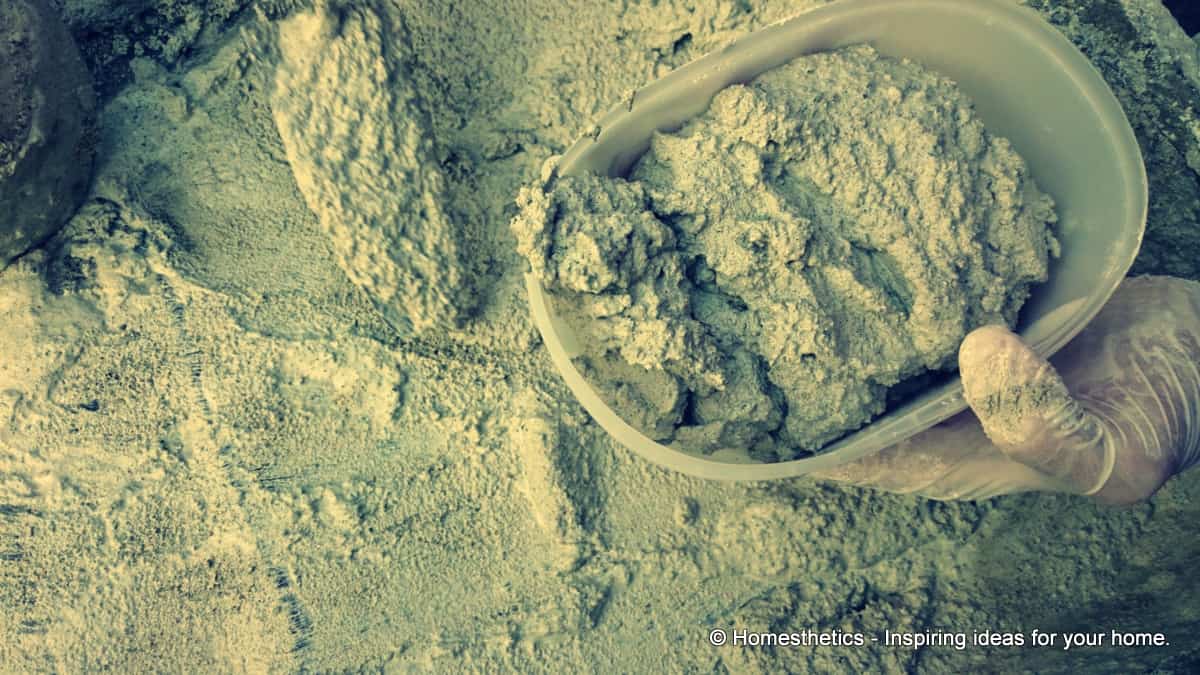
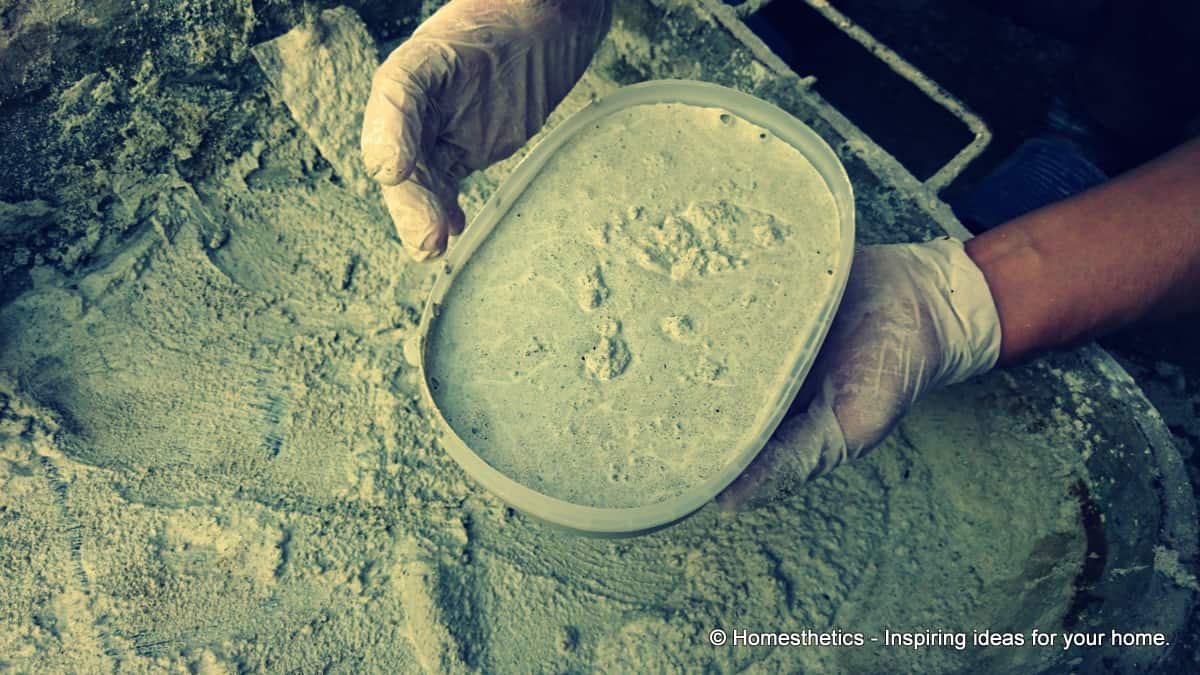
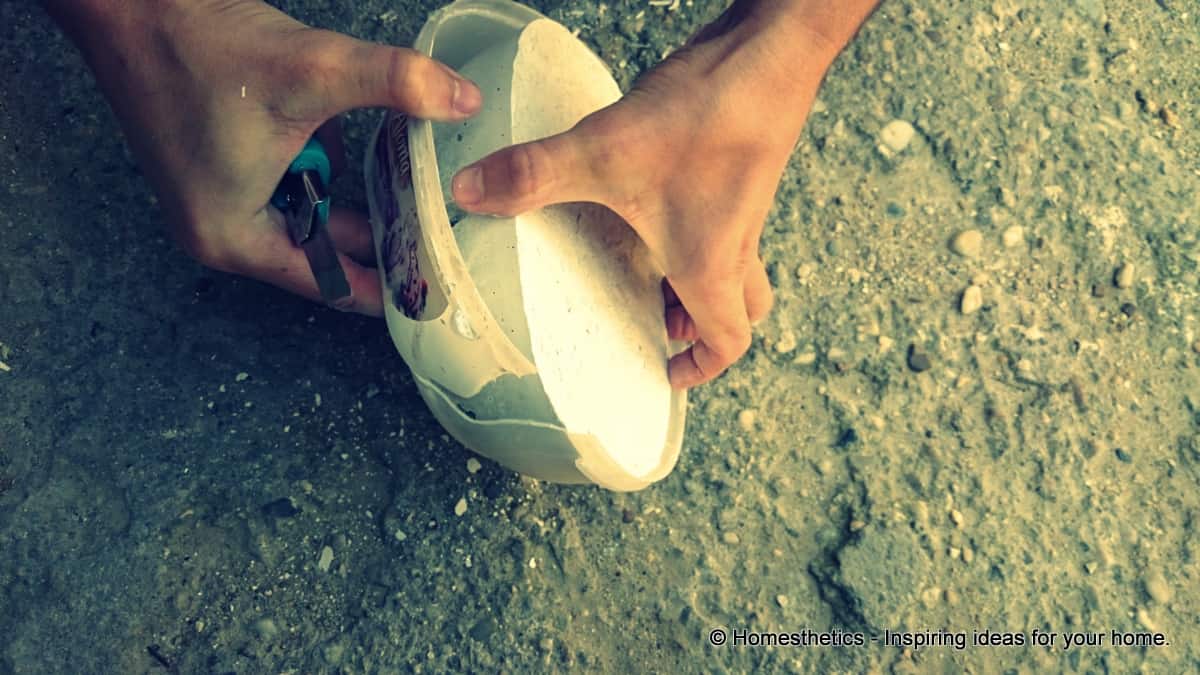
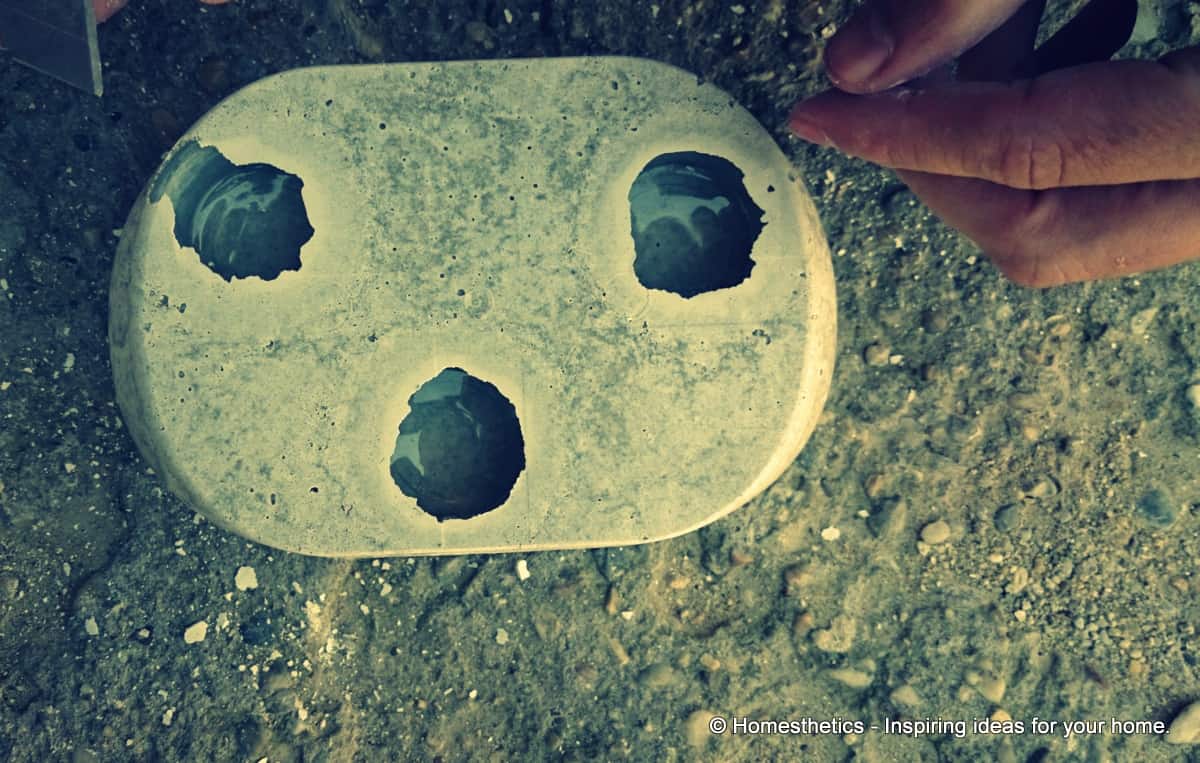
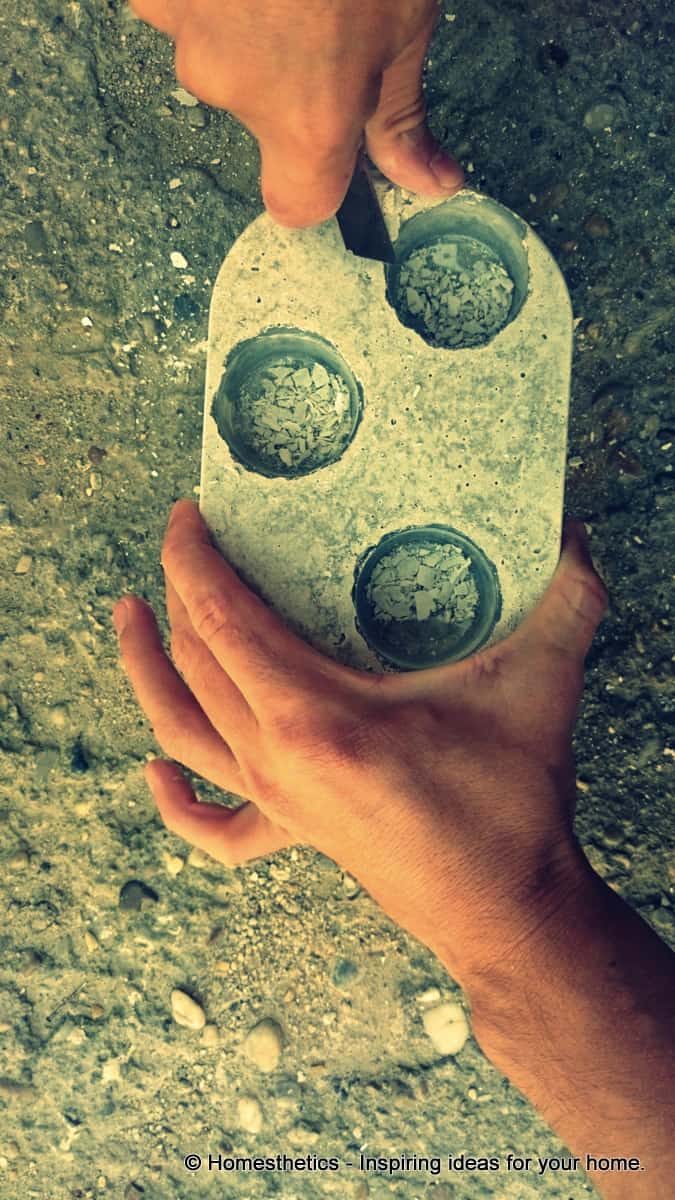
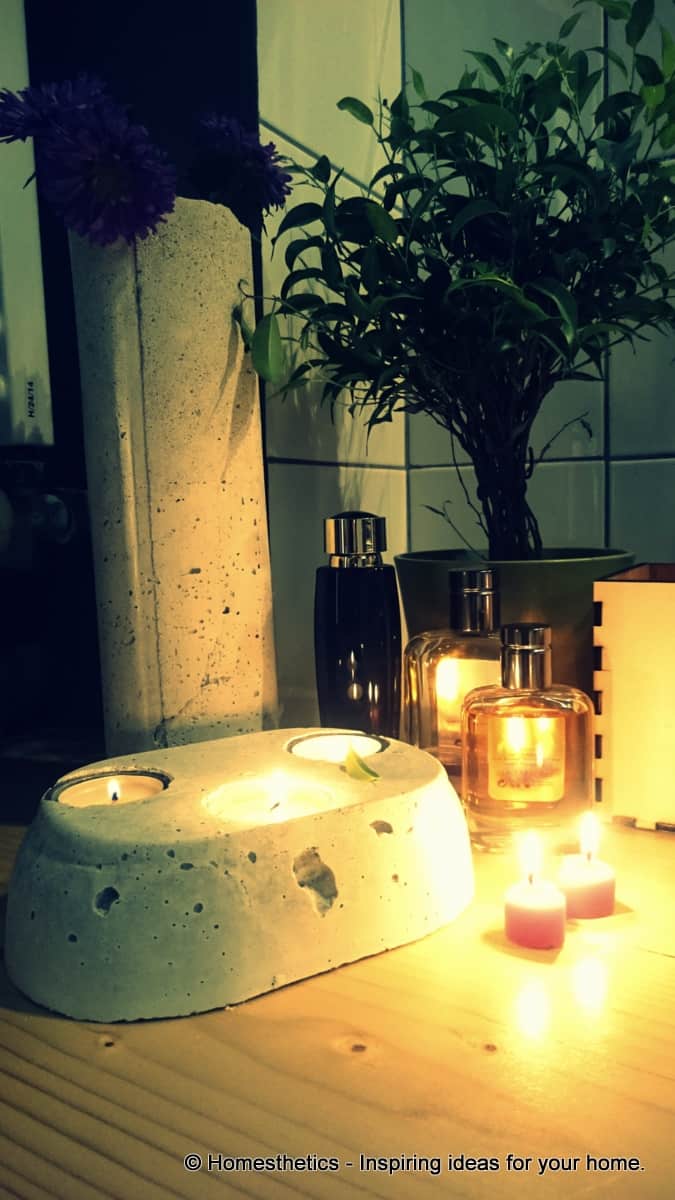
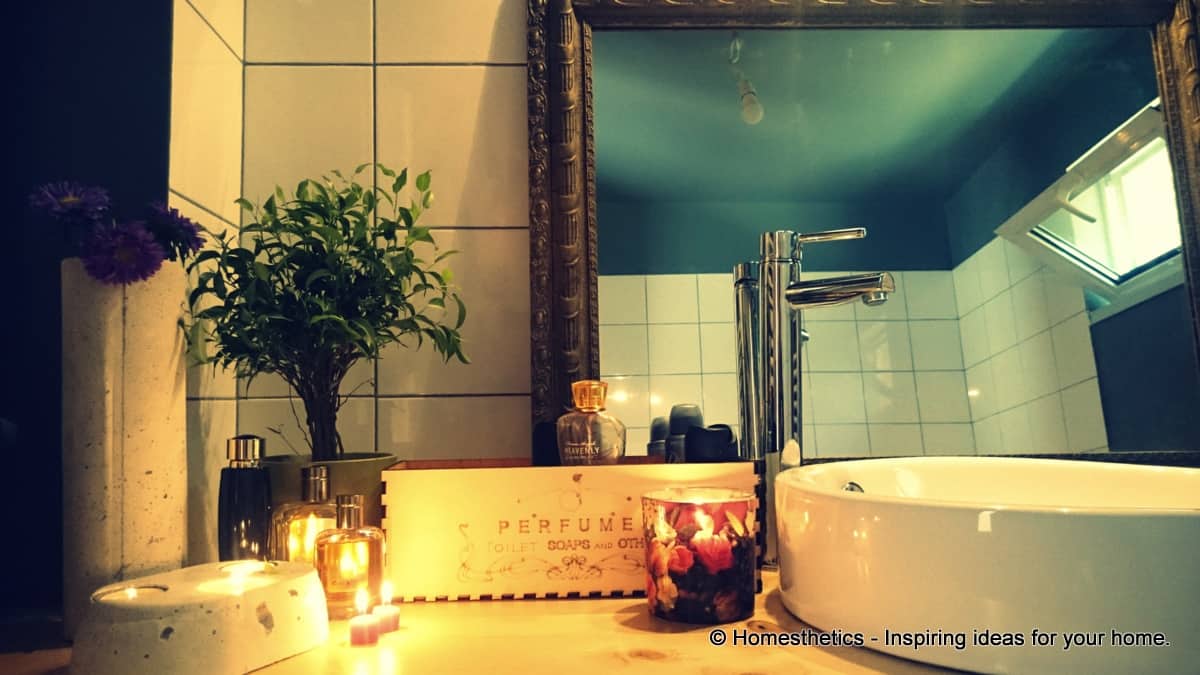


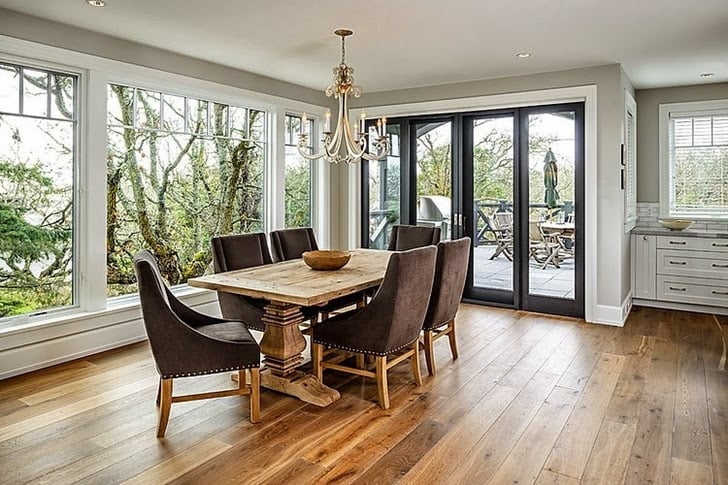
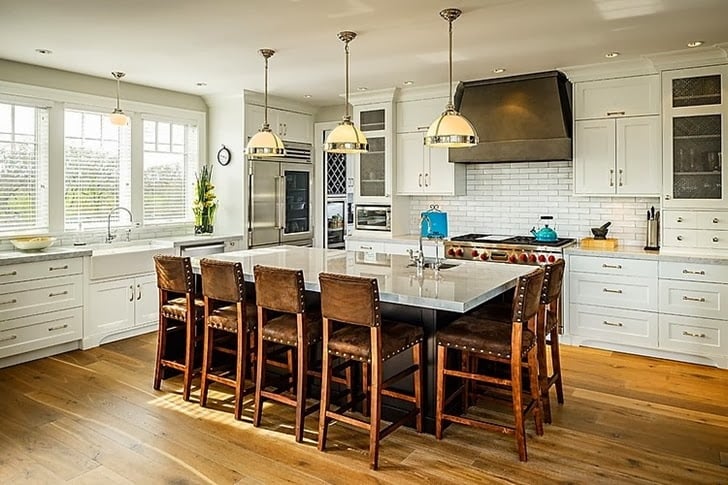
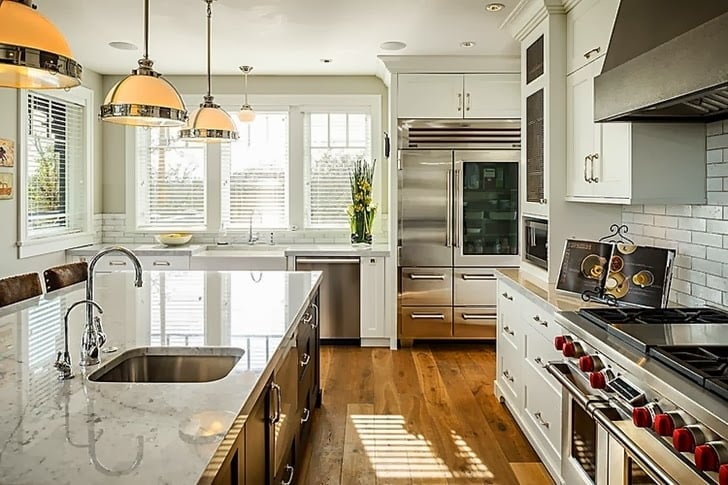
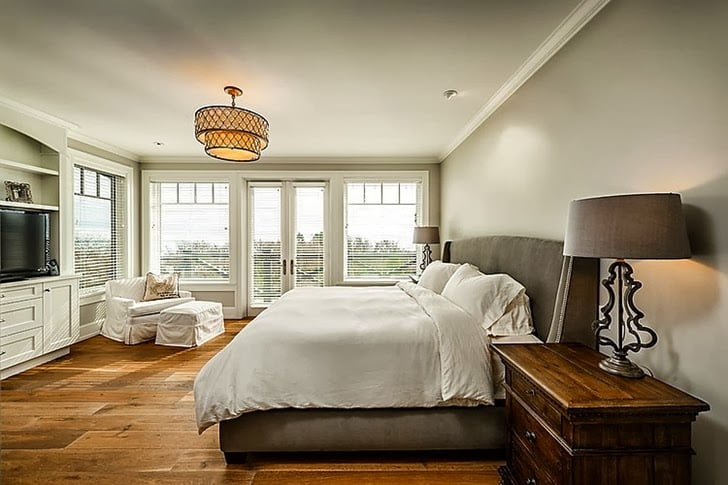
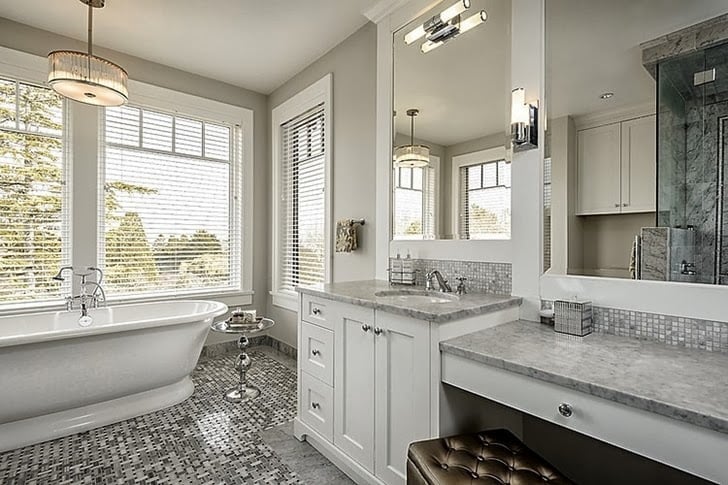
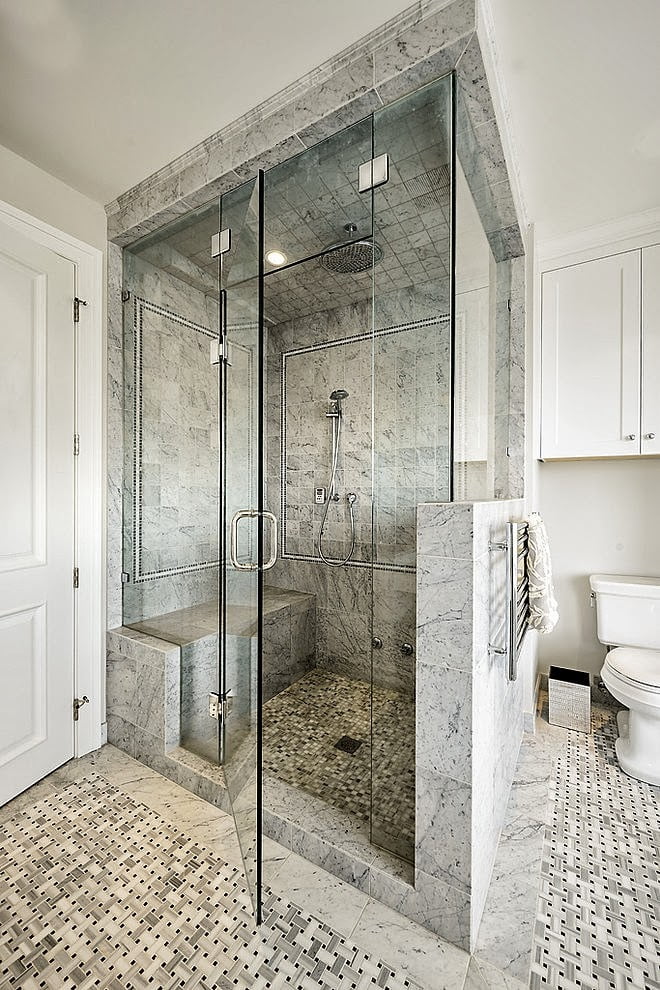
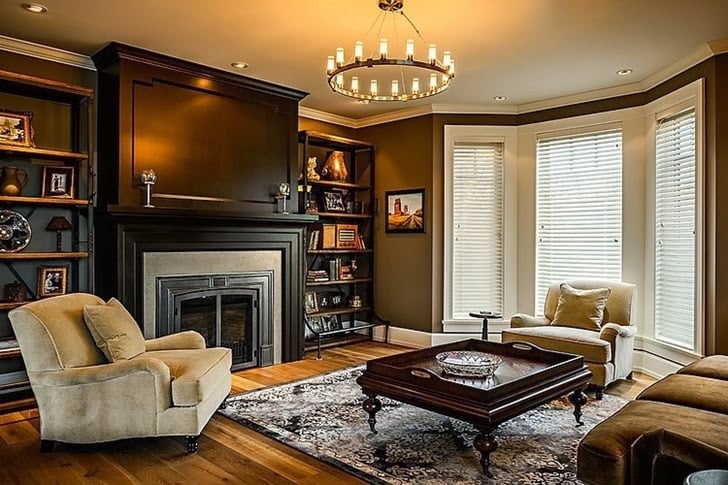
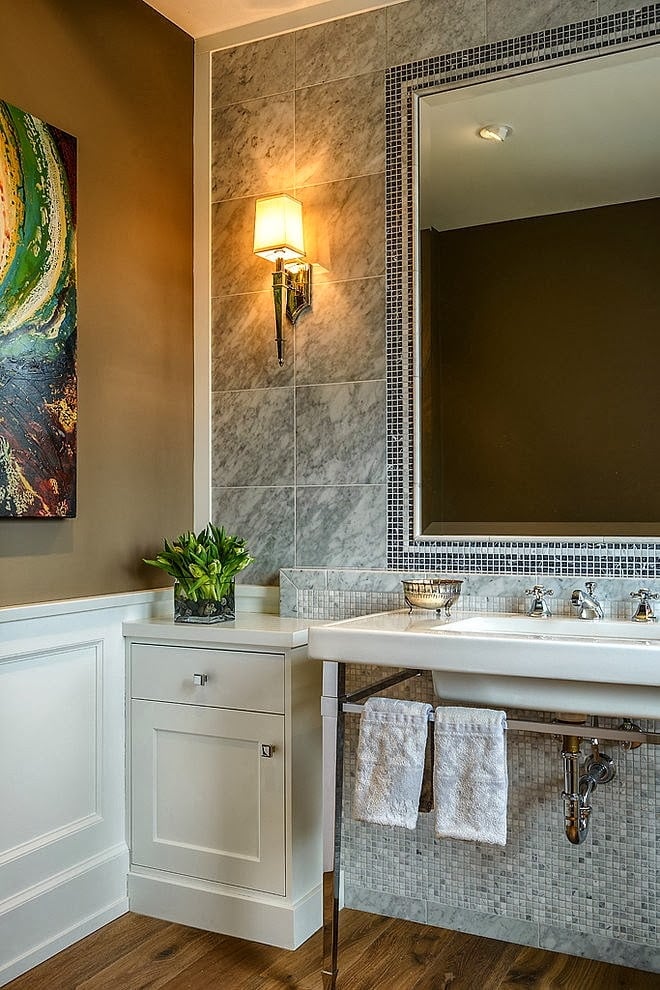
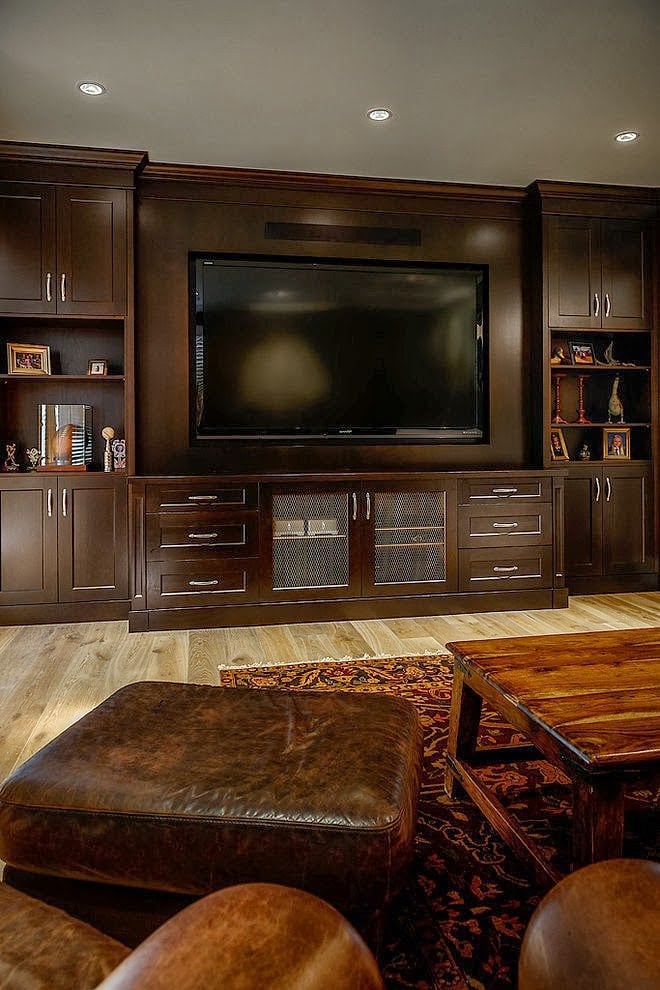 All photos © courtesy of


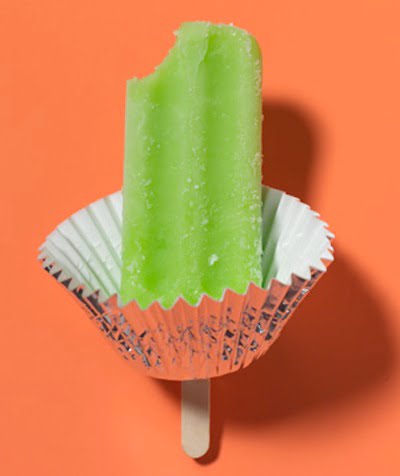
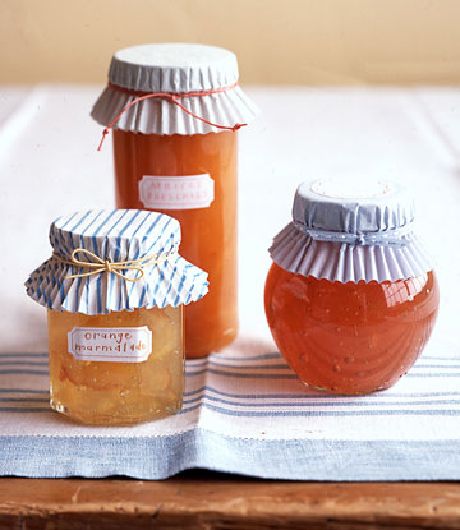


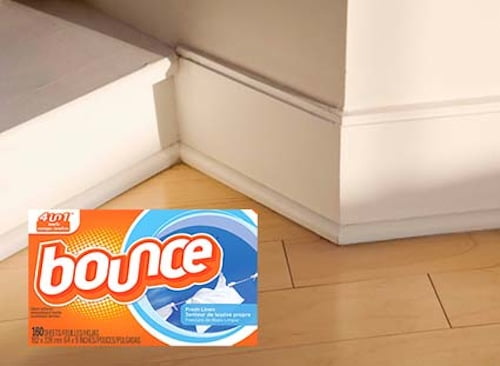
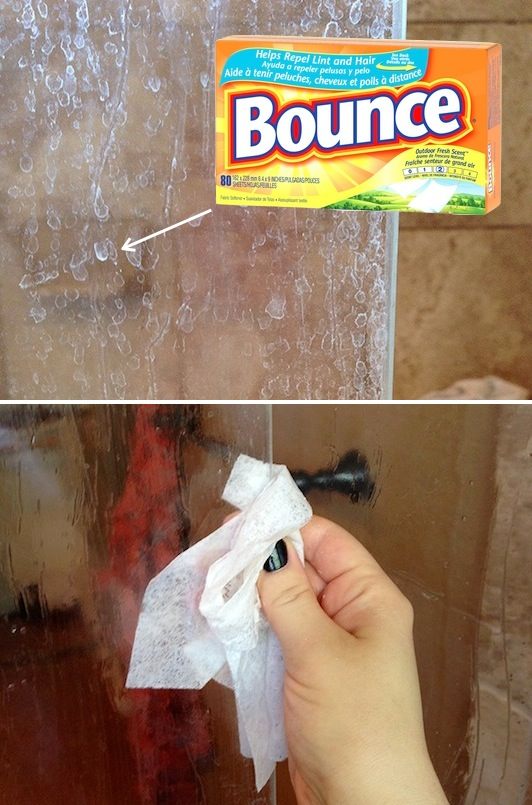
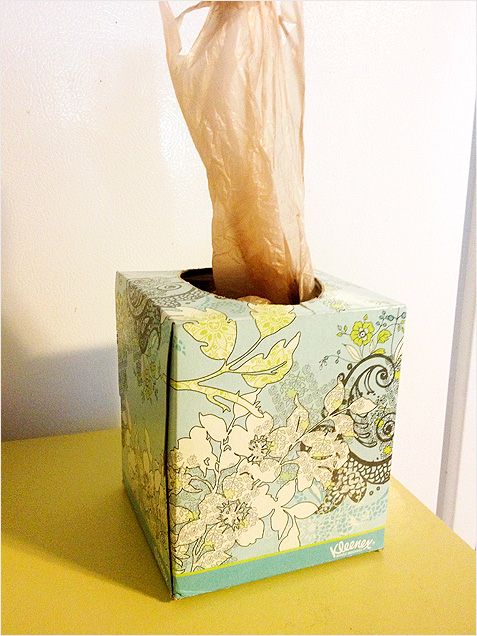


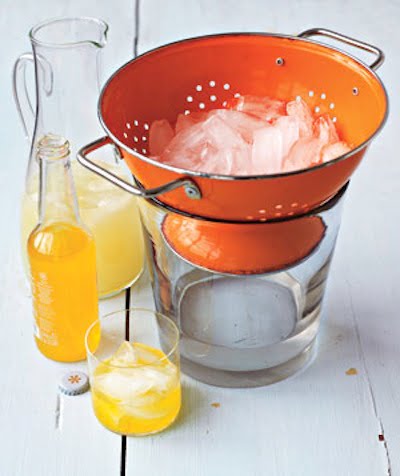


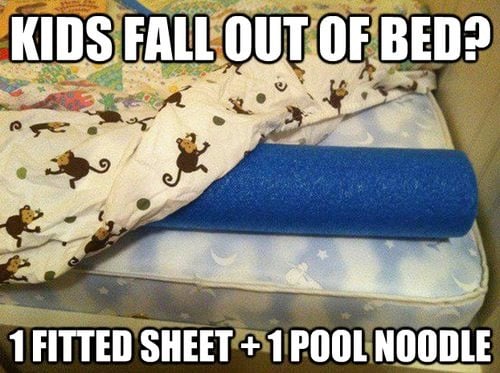

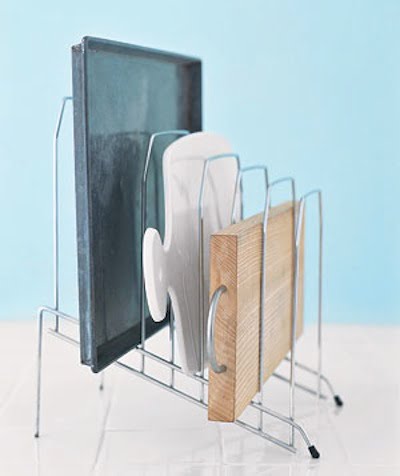
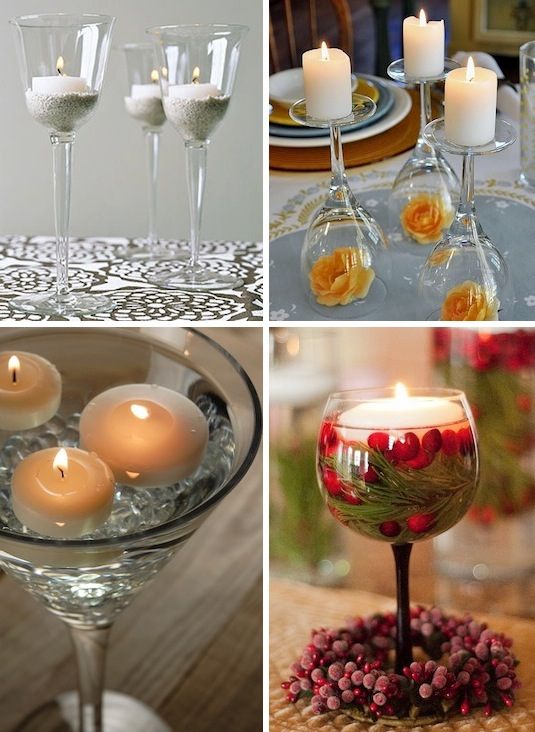


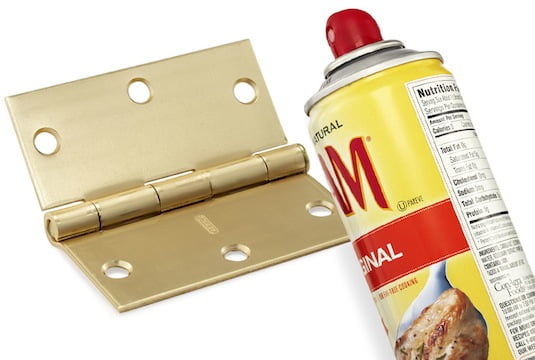

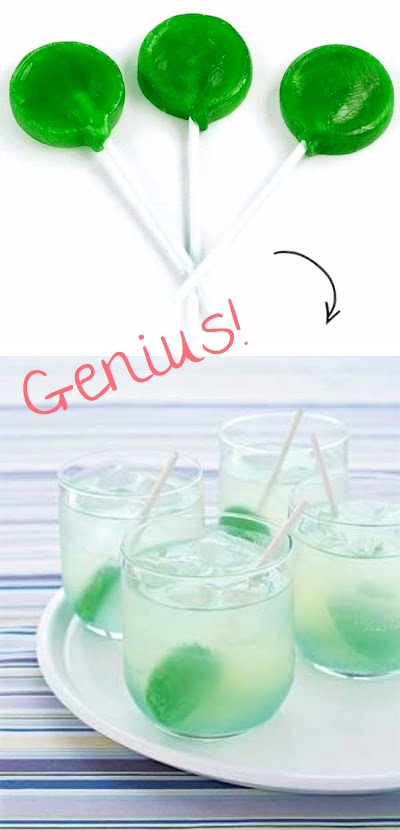
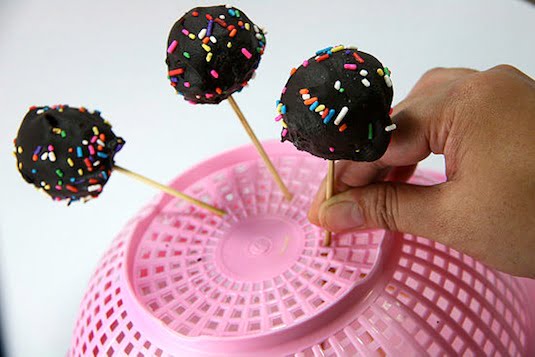
 >
>