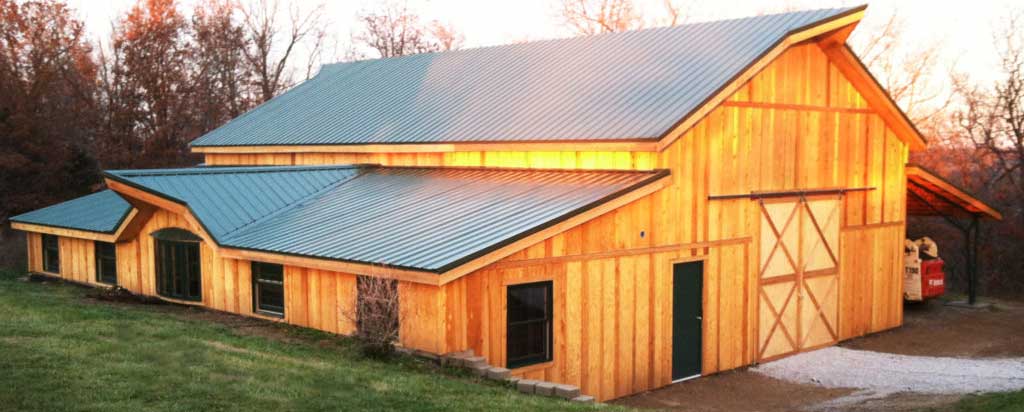
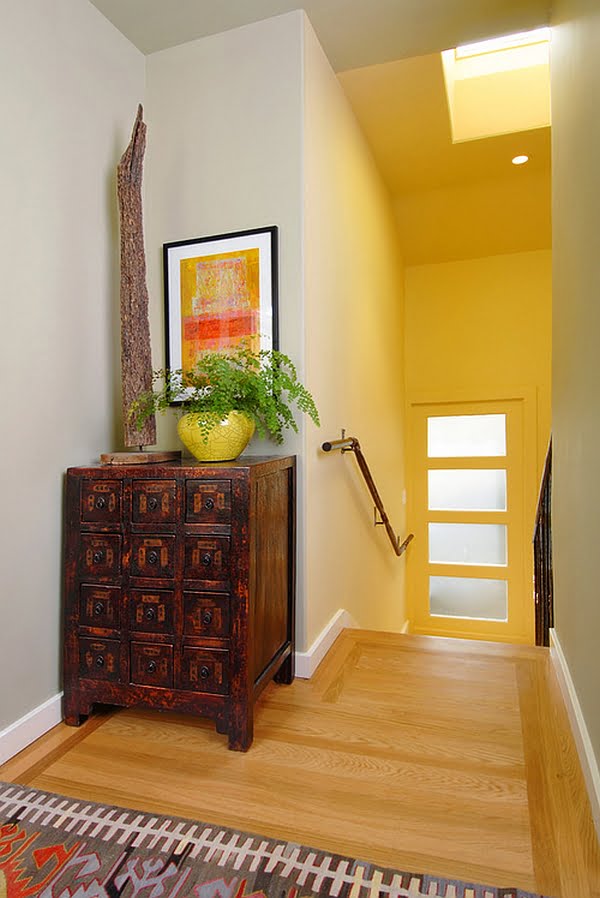
It is known that wood is usually associated with warmth, coziness, versatility thanks to its beautiful, unique texture for each piece, versatile role it can play in our lives and homes.It is the go to material for furniture building, elegant flooring and delicate crafty decorations. It can be shaped and molded to take any form and serve any function depending on requirement, including today's chosen topic of DIY Wood Wall Decor That Will Cozy Up Your Home In An Instant. You can create wedding signs for a rustic, vintage wedding, gorgeous driftwood for mirror frames, logs slices arranged in a gorgeous wreath and useful creative wooden clocks.Choose your favorite wooden wall decor from the list we have gathered below and start crafting today.
1. DIY Wood Wall Decor- heart wedding sign cut from a wooden pallet
What do you think about our DIY wood wall decor selection? Which on do you prefer? Choose your favorite and express your thoughts on this topic in the comment section below.
An old, dirty tire doesn't always have to end up in a landfill.
There are actually many ways to reuse them in and around your home. However, you might not be sure of what to do with your recycled tire or how it can be used to improve your home.
Fortunately, we have a few ideas for turning your used tires into outdoor décor or functional furniture inside your house. All you'll need are a few simple tools and a spark of creativity to make that happen.
We've gathered the best DIY tire projects to give you some ideas on how to reuse an old tire and make it functional again.
48 DIY Tire Projects to Reuse Old Tires
There are many ways to reuse an old tire. Depending on the procedures involved, it can be a personal tire craft or a fun family project.
We've collected a few colorful and easy DIY ideas to inspire you to recycle those old tires. Finding DIY instructions online for these crafts should be easy.
Here are 48 DIY tire crafts you can try out for your home.
One of the common ways to reuse old tires is to turn them into something the kids can play with. Try turning it into a tire totter for your backyard, and your kids will have fun for hours on end.
All you'll need is half a tire, a few pieces of wood, and bolts to create this DIY project. Paint it with bright colors to make it more eye-catching and vibrant.
If you have a few plants, you may want to try turning your tires into a recycled tire planter. Using your tire as the base is the easiest way to do this.
This design is best used for vines that need a good base to creep up on a structure.
It's amazing what an old tire can be to our furry friends. If you have a pet puppy, you can try making a dog bed for them, especially since its shape is similar to traditional style dog beds.
This alternative can be cheaper than the most affordable dog bed, giving your dog a comfortable place to stay.
Depending on the design you have in mind, you can add a comfy fabric cushion to make it feel more like an actual bed.
The most traditional way to reuse old tires is to turn them into a tire swing. They're usually built to hang on a tree branch to ensure it's sturdy and can handle people's weights.
This project is great for the kids and those at heart.
Another one of the most common DIY tire ideas is furniture, especially ottomans. Creating a rope ottoman will give a more rustic vibe to your home.
You would need a wooden platform for the base of a tire ottoman. Then, you'll have to wrap the rope around the tire. It may take a few hours to work on the wrapping part, but it would be worth it.
Some of the best schoolyard games tend to happen in a sandbox. If you have multiple tires to work with, you can try turning them into a DIY tire sandbox for your kids and their friends.
A tire sandbox is rounded, making it less hazardous for the kids when playing. It's also a unique way of reusing your old tires.
If you have two tires, you can try turning them into a funky upcycled tire table. It's sure to make your living room more attractive. It can also match your other tire furniture pieces.
A tire table can give off many aesthetics, from rustic to retro, depending on how you design it.
You can top it with a craft made from wine bottles for the centerpiece, creating a cohesive, eco-friendly space in your living room.
If you're looking for outdoor furniture, you can use your old tires to make just that.
The principle for indoor furniture is similar. However, if you're looking for a more rugged and outdoor vibe, we recommend exposing most of your tires' original design.
However, you can spray paint it to a color that would best fit your space.
Backyard décor tends to be expensive, especially if you want a wishing well.
Fortunately, you can also make it with used tires, making the project much cheaper. It's also a rustic way of recycling your old tires. You can also add flowers and other elements to make it more unique.
If you want your well to have actual plumbing, you might need to hire a professional to help you with that.
If you're a cyclist or your family has a lot of bikes, having a place to park your bicycles would be ideal.
You'll have to cut the tires in half and attach wood as your bike tires' stopper. You can do this by drilling holes into each tire to secure the wooden planks.
A tire bike stand is one way of reusing your old tires to keep your wheels in place.
Another tire craft that can be great for kids is a tetherball set. You can set it up in your backyard. The outdoor space will be perfect for this activity.
It should take about an hour to complete this tire craft. You'll only need one tire to act as the base of your tetherball, which you can spray paint with bright colors.
One way to show off your bright flowers is to pair them with a flower pot. For large arrangements, you can use tires to display these flowers outdoors.
You can also spray-paint and design them with similar hues to match your flowers.
Using an old tire as a flower pot is a great way to add color and life to your home.
A unique way of hiding your curtain fixtures is to turn an old tire into a valance. It makes for a memorable and eco-friendly addition to your house's interior.
Whether you're a car lover or are going for a more rustic vibe, reusing your old tire for your windows is a great way to keep them out of landfills.
A tractor tire is excellent for recycling because of its size. There are many possibilities when it comes to this item.
One of the more aesthetic tire ideas for this one is a tire pond in your backyard. It can create a relaxing outdoor space for your family and friends to sit around.
That said, the plumbing may require additional help, especially if you have to tap into your water supply.
If you're looking for a different style of tire ottoman, you can try the pastels and patterned style. It's a great way of turning a recycled tire into something adorable.
These tire crafts are fun to work with, especially with their whimsical outcomes.
They're also less time-consuming than the rope ottoman since the tire would only need to be painted instead of having to wrap some rope around it.
If you're looking for an alternative to the classic tire swing, try turning it into a horse. It's a great way to reuse old tires, especially if you have kids.
Like the other swings, ensure that this one is safely tied onto a strong tree branch or stable structure.
If you're sick of the elevated tire seats, why not try a tube seat? It's set on the floor, making them great for staying cozy and curled up on the ground while hanging out with your family.
All you have to do is wrap your recycled tire with colorful yarn. You can add a pillow to make it more comfortable.
Any recycled tire can be turned into a garden pond, adding a lucky water element to your outdoor décor. It can also match your crafts with bamboo or other woodworking projects.
You would have to drill holes in your background to achieve this project. You might also need professional help when it comes to its plumbing.
Another type of chair you can turn your old tire into is a stool. You can paint it in unique colors and add an upholstered cushion to make it more comfortable.
It's great for those who might use this chair while they paint on a canvas or work on other crafts.
A trug or garden basket is a helpful tool to have around when you're working on your background.
Part of a recycled tire can be used to create this tool to help you carry your things around. Drill a hole in each corner and add rope to help you take it everywhere.
Massive tires are best for décor, especially when you're into video games. Turn them into giant mushroom toadstools to make it look like it came straight out of a Super Mario game.
It's a quirky and whimsical way of turning your recycled tires into exterior décor.
As mentioned previously, tire crafts can be a great way of organizing other things in your house. A great example is turning your tires into toy storage for the kids.
They can put all their toys into it. Not only are you keeping the environment clean, but you'll also be teaching kids how to clean up with ease.
You can easily bend some tires and turn them into something new. One way of creating a small storage space using an old tire is by turning it into a pouch.
You can give this pouch as a gift or use it to keep small items safe and secure.
Why use a boring frame for your mirror when you can use the unique textures and designs of one tire? It's best if you use a bike tire for this crafting project.
Replacing your frame with a recycled tire is an excellent way to personalize this furniture piece.
If you love to play volleyball or badminton, you might want to make space for it in your backyard. Using old tires to create concrete tier piers can keep your net in place.
These are a great way to set up your court and get playing in your background.
What can you do with a large used tire, wood screws, a hot glue gun, and a few pieces of plywood?
You can turn it into a wonderful tire shelf to display small items, from toys to little knick-knacks. Choose the exterior paint that will fit your aesthetic.
Taking inspiration from the rope ottoman, wrapping your tire planter with yarn can be a great way to upcycle it and make it more aesthetically pleasing.
It will surely add a cozy, cottage-core feeling to your classic tire planter.
The rubber used for wheels can also be used to tread stairs. You can cut up an old tire and flatten them against the steps instead of buying new ones, which could be expensive.
Make your stairs safer by trying out this crafting work.
Tire Projects FAQs
You may have more questions about DIY projects for recycled tires.
We’ve gathered the most common questions to help with your tire crafts.
Is It Safe to Reuse an Old Tire?
The common concern for recycling an old tire is the chemicals in the plastics and rubber. People think that they are harmful. However, that’s typically not the case.
The simple answer is yes, old tires are safe to use since volatile organic compounds (VOCs) found in tires are usually gassed out by this time.
Can I Clean My Tires for Recycling?
Yes, you can clean your old tires by washing them with water and scrubbing them with soap.
However, if you’re unsure if your tires are safe for recycling, you can take them to a recycling plant instead.
Conclusion
Many tires end up in landfills, which can be extremely dangerous for the environment. Luckily, there are ways for us to keep them out of there.
If you have a few old tires lying around your garage, why not try out one of these DIY ideas?
Ask any person who loves to read how they would feel if someone returns a book they borrowed with folds like dog ears in page corners. Horrible! That's the answer you'll get, and normally so because no one likes to get their favorite book defiled.
Recently, this friend of mine gave me a great suggestion. She told me why don't I lend the bookmarks along with the books? At least that ought to discourage the people borrowing them from ruining the pages with corner folds.
Wow! Why didn't I think of that before? But what do you do if there are no cute bookmarks left? Don't worry; today I will teach you how to make these amazing DIY bookmarks, not just for yourself, but as gifts for people to whom you lend books.
Cool Homemade DIY Bookmark Design Ideas Follow
This mustache bookmark that helps you stay classy
This cute little mustache bookmark is both handy as well as chic. It is simple, only requires a square paper that needs to be folded into a triangular shape, big enough to place it into the corner of the pages of your book, and a mustache template that should be stuck onto the upper part of the triangular bookmark. And voila, you're done.
This ice-cream bookmark that's perfect for summer reading
So, you're off on summer vacation and carrying a load of books with you to just bask in the glory of reading? Why not make it better by making this pretty ice-cream shaped bookmark? All you would need is a cardstock paper, a pair of scissors, some glue, sharpies, a perfect quote and not to forget, a popsicle stick.
Cut the cardstock paper into the shape of a popsicle, and color it in the way you want to. Pick a nice quote to write on it, and stick it to an ice-cream stick. You can even print design if you think you're not too great with drawing.
These cute little-faced men with long hands could be a great bookmark for your kiddo. And it doesn't require a lot of time and effort for making it. All you would be needing is a cardstock paper, some color sketch pens or colored paper, and scissors. You can draw these little men in different expressions, color them up, and cut the hands accordingly so that they can be placed over the paper while the rest of the torso of these little men stay behind, while the face shows up.
Who doesn't love pompoms? These little furry balls of yarn or wool make for great decorations and that entire cheerleading thing. But did you know they can make for great bookmarks, in fact, I have one myself? They are really cute, can be made easily and in many colors.
This tutorial shows you a step to step process to make a beautiful pompom bookmark, from wool, yarn, or a leather sole, whatever floats your boat!
This one is a simple multi-colored woolen pompom DIY bookmark, and it looks gorgeous amidst your books. All you have to do is take multi-colored wool and spin it around a fork as per the size you want. Once, you are done, tie the knot in the center of the fork, pull out the wool, which should now look like a bundled bow tie, and simply cut them off at both the ends. You could use a longer thread to tie the pompom, which can come all the way to the bottom of the book when you place it in the middle of pages.
What better than a bookmark that reminds you of coffee?
For all the people who love snuggling up to a book in a couch, with a blanket and a warm cup of coffee on a cold winter day, this coffee bookmark might just be a cherry on top of the cake called reading.
For this elaborate yet straightforward DIY bookmark project, you will need a handmade cardstock paper, in two colors preferably, a template of a coffee cup (which you can also draw on a paper if you want), and few wires to replicate the hot fumes of the beverage. Follow this tutorial for more elaborate steps to complete the project.
Show your books some love with these heart-shaped paper clip bookmarks
There's no denying that paperclips are quite handy, you can just use them as a makeshift bookmark in case you don't have access to anything else. But if you got a little bit more time on your hands, and a couple of paperclips, you could make this adorable little heart-shaped bookmark. All you have to do is reshape the wire of the paperclip into a tiny little heart which could be clipped onto the pages of the book.
What could a paper clip and some fabric or ribbon do together? Create a little magical bookmark. This could be an easy project that you can make when you don't have a lot of time on your hand but want a great outcome.
Just cut some fabric, make them into a bow tie, and stick it to a large sized paper clip. That's all! You can now mark your pages happily. What's more, make a few more of these; wrap it in a little box and who knows? It could be a perfect gift for your book-loving friend.
Making corner bookmarks can be so much fun. They are easy to make and are highly customizable. For people who are fans of corner bookmarks, you might want to try out this cute little monster bookmarks.
You would need cardstock paper in different patterns, and a plain white paper to draw teeth and eyes. First, you need to make a normal triangular corner bookmark as mentioned in the mustache bookmark above, but only in patterned paper, and then stick the eyes and teeth onto it. You can simply cut out the corner of an envelope and use it as a basic corner DIY bookmark, but this tutorial also gives you detailed steps on how to do everything from scratch.
This one is like the little Mr. Long Hand bookmark shown above, but only more elaborate with the details of the body and torso.
Take a cardstock paper and draw a little figure of a human on it, be it a boy or a girl. Color it up and separate the hands from the torso and the rest of the body, so that you can clip on the bookmark with the hands, as shown in the picture.
Now, this is another way to make an easy yet aesthetically pleasing bookmark. That too, with just two materials - ribbons and colorful paper clips. Just take a small piece of ribbon and tie it around one end of the paperclip and you are good to go.
Yup, I can just go on and on about the kind of bookmarks you can make with paper clips as the central material. After ribbons, which I mentioned in the previous bookmark, this one could be made with one simple replacement - buttons!
So, you can just collect as many cute buttons as you wish, and just pick the right ones you think would be perfect for cute diy bookmarks and stick it to the paper clip with the help of a tape.
In case you have the habit of hoarding old toys and keeping them for a very long time like me, this is perhaps a great way of upcycling. Just cut your old toys in half, especially if they are tiny, like animal figures or Barbie dolls, and just stick a paperclip on one end to use it as a creative DIY bookmark. Now, you don't have to let your childhood toys go to waste, just like that.
If you have some color palettes lying around in your house after that huge refurbishing and repainting task, why don't you just convert them into some classy bookmarks?
Pick a color palette of your choice, and cut small shapes like hearts and stars in between the color shades (you could even use the shape punching machine). Then just punch a small hole on the top and tie a thread to give it a finishing touch as a holder.
Now this one is simple and cute. All it needs is a felt sheet and thread. Just take some red felt sheet, and cut two hearts out of it. Now, stitch them both together, but only at two sides, leaving one side open to use it as a corner bookmark.
Be it an earring whose pair is long lost, a broken bracelet or an old pendant, and you can now turn it into a blingy bookmark. I mean, who could resist something this creative? All you have to do is take some sheer or fancy ribbons and attach these pieces of old jewelry to them. Now they can give your half-read books a shiny and classy look.
Not everyone loves sipping a coffee while reading. Some of them are into having a nice cup of tea, too. Well, these cute diy bookmarks are for all those tea lovers who are also reading enthusiasts.
It is really simple to make, and you would need craft papers, a piece of thread and a tube of glue. Take some craft papers and cut them into the shape of teacups. Now take a thread, and a small piece of paper and wrap it around one corner of a thread like a tea bag. Glue the other end of the thread to the teacup and you are done.
Want a bookmark that calls out to you? Then you must try making this elegant butterfly shaped bookmarks. For this, you would need a patterned cardstock paper or just a paper ripped out of a magazine, a white paper, and thin ribbons.
Take the patterned paper and cut it into the shape of a butterfly. Glue a white paper onto it, which is also cut into the same shape, but smaller. Now punch a hole on the top and tie a ribbon that is long enough to be placed in the book.
If you are a fan of all the haute couture and ongoing clothing trends, then this might just be the bookmark for you. Take a piece of fabric, outline a dress onto it and cut it out. Now, take a thread and sew it along the edges to give it a proper finishing. And to turn this into a pretty little bookmark, stick this dress with a piece of an elastic band, which you can place around your book.
This is another kind of heart-shaped bookmark which is completely made with paper. And of course, you would need glue to keep it all together.
First, take some white paper and cut the heart shape to the desired size. Draw a smaller heart on the patterned paper and cut it out. Now, attach these both together with the help of glue, but only on two sides so that you can use it as a corner bookmark.
Now, this is a bookmark that is very simple to make and can be created in any design you want. All you have to do is take cardboard and cut it in a basic rectangular bookmark shape. Use a black marker to draw any sketch you want on it. Last but not the least, take a white paper and cut different shapes on it - be it animal, bird, flowers or anything abstract - and glue it onto your cardboard.
The sticky note is a savior for those who forget things. Wouldn't be great if you can make bookmarks out of it? Just take a solid colored cardstock paper and place your sticky notes on it. Add some washi tape or ribbon as a handle on the top to give it a finishing touch. What's so great about this bookmark is that you can now take notes while actually reading the book, and not forget about it. Awesome, right?
You've already seen how to make a heart shaped bookmark with felt. Now, you can experiment with it a little more by making monster shaped bookmark in a different color.
For this, you'd be needing two different colored felt sheets, which must be cut according to the shape you need, and stitched together. And here too, you must make sure that the felt sheets are attached only on two sides. For more detailed instructions, you can follow the tutorial mentioned in the link below.
Wouldn't it be a great gifting idea to give someone bookmarks made out of their own pictures? For this, you need to choose some old pictures from your albums, preferably in crazy poses, that you wouldn’t mind using in a craft.
Now, these pictures need to be cut out in the shape of the outline of your bodyand must be attached to a tassel on the top with the help of a thread.
Source Unknown
Owl bookmarks made with cardboard
If you are in love with all those owls shaped jewelry and printed bags, then this cute owl-shaped bookmark is the one for you. All you have to do is take a template of an owl sitting on a branch and cut various color papers into the shape. Finally, you must glue them all together, but leave the upper most layers half open so that you can place them in the half-read books accordingly. These detailed instructions will help you make one perfectly.
If you are a cat person, then this bookmark is a must-have for you. All you need is colored paper, some sharpies and a pair of scissors. Cut the colored paper into a rectangle on the three sides, and two triangles on the top resembling cat ears. Now sketch cat with two paws on it. Cut out these paws leaving one side still attached to the bookmark, enabling it to be placed inside the book perfectly. And you are done!
Give your book a formal look with this bookmark shaped like a tie. To make this one, you need four thin strips of paper, preferably of two colors, which you need to pleat one over the other, as shown in the picture and the tutorial. Once you are done, glue it to keep everything intact, and add a thread on the top to give it a complete look of the tie.
Photo Courtesy of krokotak.com
Easy tassel bookmark that you can make at home
Give the usual rectangular patterned bookmark a peppy look by just adding a tassel to it. Just take a piece of paper and cut it out into a basic rectangular bookmark. You can even use patterned cardstock or magazine cut outs for the same. Now punch a hole on one side of this book mark, and attach it to a tassel which is made with thin wool or yarn. The tutorial attached will give you an idea of how to make a tassel if you don't have an idea of making one.
What can a colored paper, googly eyes and scissors do together? An ultra-cool funny faced bookmark. All you need to do here is to cut the colored paper into rectangular shapes, and long nose a la Pinocchio style. Now for the finishing touch, add some googly eyes to it and you are done! If you want to decorate it further, you could even add horns to these funny little bookmark creatures.
This is another way to make corner bookmarks more fun. Fold colored papers into corner bookmarks and just jazz it up with a funny little command or a simple quote. This tutorial can sure help you make one.
Free printable bookmarks that you can color by yourself
Now, this one is extremely easy. All you have to do is get printouts of these bookmarks with sketches or doodles and color them in whatever way you like. For those who are interested in coloring, this might be a perfect activity - it doesn't just give you satisfaction, but also a vibrant and gorgeous bookmark for your book collection.
Tutorial @ bydawnnicole.com
Heart-shaped bookmark in origami fold
Now, this is another heart-shaped corner bookmark but only made with origami folds. All you have to do is pick up a colored pattern paper and fold it into the shape of a heart. This tutorial details every step to get that perfect little bookmark. If you're too lazy to read, the picture is also pretty self-explanatory.
Another fun DIY origami project is this funny little kitten bookmark. Though it looks difficult and time-consuming if you follow the right steps mentioned in the tutorial. It is not so hard to achieve. And guess what; all it needs is a simple solid color paper and a knack for folding them.
This article is definitely a treat for all those people who love cats. Here's another simple kitty bookmark you can make. Just print the template of the cat and cut it around the dotted line. Now, take a craft knife and cut the lower half inner grey line of the kitty leaving the outline. You can now clip on this kitty into the pages of your book and use it as a bookmark.
Ribbon and hair tie bookmarks
Want to make a simple yet pretty bookmark? Then just go to a craft store and pick up some nice polka dotted ribbons, colored hair ties, and buttons.
Now, take a long piece of ribbon and attach a hair tie to it, probably by sticking or sewing it into the corners. To give it an extra touch, you can glue a button to one or both the sides of the area where you attached the ribbons and elastic together. You can follow this tutorial with detailed steps below.
Woot woot! Or should I say meow! Here's another simple cat bookmark which is entirely made out of wire. Take a long wire and coil it in three to four circles. Now take the outer end, bend it into the shape of a kitten's face and voila, you have your bookmark in your hand.
These DIY bookmarks open up like greetings and are very easy to make. The supplies you need for this are patterned paper or fabric, plain card stock paper, craft knife, colorful ribbons and a glue stick.
Take the card stock paper and fold it into two halves like a greeting card. But make sure, it is in the shape of a basic bookmark. Now take a small piece of patterned paper or fabric and stick it on the inside, as shown in the dotted line of the picture. On the other side of the card, draw any shape you wish and cut it out with a craft knife. As a part of the last step, fold back the bookmark, punch a hole on the top and tie a ribbon around it. You can even write a small message on the bookmark if you want.
Why do we always have to use cardstock, paper or felt for the bookmarks? Here's a completely different, washable alternative - a floral bookmark completely made with fabric. To make this, you must first create a fabric rosette and attach it to a strip of fabric that's sewn into a basic bookmark. This project needs a sewing machine, but can also be done with hand if you have a lot of time to spare.
This tutorial by little birdie secrets will help you with a step by step procedure on how to make this beautiful bookmark.
This is a bookmark made of ruffled ribbon, which can also be doubled as a journal wrap. To make this bookmark, you would need a strip of elastic and a ribbon.
First, you must make ruffles with the ribbon by making small folds and stitching them together in a compact manner. Now, attach this ruffled ribbon to strip elastic to make the bookmark.
This project would also need a sewing machine to get that perfect finished look. Also, a colorful ribbon would be the best pick for this particular DIY project.
Hug-a-book puppy bookmark
Since we have had quite a few cat bookmarks already, I think it's high time there's one bookmark for dog lovers as well. This is a hug-a-book dog bookmark that's quite easy to make. All you need is a white card, brown paper, glue stick, markers and a pair of scissors.
Cut the white card into a rectangular piece and glue a drawing of a dog face, ears and paws on it. The best part of this cute little bookmark is that pops of the page and you could make these bookmarks with other animal faces too.
This is a DIY bookmark which is made the same way as the puppy bookmark, but with a little more design and detail. Instead of a regular rectangular shape, you need to cut the back part of the bookmark into a mermaid's tail. While you can use different colored papers and sketches to make the mermaid's face, hair, and other accessories. What's more, you can even embellish the whole bookmark with sequins and other glittery decorations.
Isn't Toothless on How to Train Your Dragon adorable? How about making a bookmark of this cute little dragon? You can make your own Toothless bookmark from scratch, only with paper, scissors, and glue.
This tutorial from redtedart also gives you a printable template if you need one, and all you have to do it is assemble and glue it according to the tutorial.
Another fabulous way to have an amazing bookmark if you are into origami is this less-spooky ghost. These little fellas can be made with one square sheet of paper and will be perfect for bookmarking your horror reads.
If you are a beginner, then you can follow the detailed steps in the link below, to fold a piece of paper into these cute little ghosts and use them to mark your books.
This project is something unique, but definitely an eye-catching way of making bookmarks. If you are into painting and other kinds of art, then this black glue and watercolor bookmark is just perfect for you. All you have to do is take a white paper or a cardstock, draw the template of a shark, seahorse or any other creature you like and cut it out. Now, outline it with black glue and paint the insides with watercolors to give a final touch to it.
Another excellent way to make use of paper, black glue and watercolors apart from sea creatures is to paint nature with it and make bookmarks. These gorgeous leaf bookmarks are made in the same way like the shark bookmarks above. Just draw a template on the right watercolor sketchbook, outline it with black glue and paint it in colors of your choice.
What you could do differently with this is that you can also make a tiny little matching acorn and tie or glue it to the leaf with the help of a thread or a yarn and you are good to go.
These could be made as perfect matching bookmarks along with the cover art for your mindfulness journal. All you need to do is cut a cardstock paper and doodle your favorite set of inspiring words and color them with sketch pens or sharpies. Now just punch a hole, attach a ribbon or a woolen strand to the bookmark, and you're done.
What better way to celebrate the love of books than making bookmarks on the theme of your favorite books? When you buy books at bookstores, they sometimes give you promotional bookmarks, but making one on your own is definitely a much better idea.
You can select a favorite page, quote or cover of the book, scan it, print it and stuck it on a colored cardstock sheet to achieve the desired outcome. It's that simple. Oh and also, you could just attach a ribbon to it as usual to give the final touch. This could be a fantastic project to work with the children and keep them occupied while you have errands to run.
We all love Harry Potter and can never get enough of craft ideas and DIYs based on the theme of these books. So, I looked around to find these Harry Potter themed chevron bookmarks. The basic pleating is like the same as the tie bookmark mentioned above, but the difference here is you print out a house badge and glue it onto the bookmark.
Also, you must make sure that you use the right house colors while pleating these bookmarks. These are the colors you could use:
Bookmark design with recycled cardboard and artwork
What can recycle pieces of cardboard, an old artwork, some PVA glue, and some ribbon could possibly give you? An amazing bookmark. For this, you must take recycled cardboard pieces, preferably thin ones, and cut them into hearts of different sizes. You can then stick these heart shapes onto the old art sheets and attach it to the ribbon with the PVA glue.
These are so easy to make that you could perhaps even involve your young ones in this project. They will surely enjoy doing the craft stick bookmarks all by themselves. All you have to do is color the craft/popsicle sticks into whatever design and shape you like. You could even use some ribbons, sequins or other embellishments to decorate it.
If you are into crochet, then this daisy flower bookmark might be the perfect one for you. All you need is some colored worsted weight yarn, a G hook and this step by step tutorial which will help you make the right crochet bookmark for you.
Bunnies are cute, especially when used as a bookmark. To make this adorable little bunny bookmark, all you need is a paperclip, a bunny and an Easter egg sketch drawn onto the paper and a thread. All you have to do is glue the bunny sketch onto the paperclip and attached it to the Easter egg with a thread.
Traveling is one of the most happening passions of people these days. Everyone has a place they went and loved, they wanted to go, or the one place on their bucket list. So why not make a bookmark out of it? All you have to do is make a basic bookmark with a cardstock paper and ribbon. But to make it beautiful, you have to just choose the map of one place you love or want to be and stick it onto the bookmark.
Washi tapes, otherwise known as paper tapes can make for wonderful bookmarks. To make these, you need to have a basic cardstock bookmark onto which you can stick washi tapes of different colors in different patterns and designs. And of course, don't forget the ribbon or the thread that you usually attach to a bookmark. You can even use a different pattern on the other side to use your bookmark both the ways.
Show some love towards your state and country with these patriotic bookmarks
This is for those who want to show the pride of their state and country, even with something as little as a bookmark. To make this, you can choose a small map of the state you belong, and cut the template onto a glitter paper. This must be stuck onto a basic cardstock bookmark, which you can outline with more glitter paper to give it a nicer look. If not a state, you can even use the map of the town, city or the country - whatever you wish!
This is a perfect bookmark for the students or readers who have the habit of marking not just pages, but also paragraphs. It also helps you take small notes whenever possible. All you have to do is glue on rows of bunches of small sticky notes in neon colors onto a basic cardstock paper bookmark. You can use sticky notes of one color or multiple colors to give the bookmark a different look on the hole
If you are too lazy to make everything from the scratch, but still want a rustic bookmark, then you should perhaps try this one out. To make this bookmark, you need a gift tag, a stamp and a piece of string. You must choose a design of your choice and stamp it onto the gift tag, and tie a string to the end of it. This is a perfect bookmark for those who don't want to spend too much time but want something simple and classy.
More than a traditional bookmark with a string or a corner bookmark, this is more like a piece that you would put inside the book and close it. For this, you have to take a patterned cardstock paper, print out a template of an animal, a tree, a flower or any other figure that you like, and outline it onto the card stock. Now, using a craft knife and cut it out and use the front half as a bookmark.
Who knew that washi tapes and paper clips are a perfect match when it comes to craft? They are fire; they could quickly whip up a fantastic bookmark in practically seconds. All you have to do is to pick a nice colorful washi tape and stick it onto the paper clip by folding them. You can make many of these, put them in a box and give them away as presents, too.
Photo credit Laura Silva, laurascraftylife.com
Bookmark with your favorite team's felt tassel
If you are a hardcore sports fan, you can make a bookmark with the theme colors of your favorite team too. I mean who said sports and reading could not go together? Just take a felt sheet, cut out two long strips with a rectangle at the bottom. Now, cut fringes at the lower part of the rectangles, lay the felt strips one atop another and roll them up beginning from the side of the long strip. For the final strip, glue the felt pieces together as a tassel and you are good to go!
Photo credit Alison Sherwood
Confetti filled bookmark
I have the habit of keeping business envelopes because I never knew what I would need. And this seems like a great idea to use one of those cards. For making a confetti-filled bookmark, you need one of those business envelopes with a clear address window. You can cut around the window, keep it on a piece of colored paper, and stick it to the paper, but only from three sides. Now, fill in as much confetti as you want to make a shiny, glittery bookmark.
Photo credit Alison Sherwood
Bookmarks with RE-PURPOSED calendars
Since it's the New Year, we have the habit of discarding the calendars of the previous years. But I have one suggestion, don't do it, because the material on the calendars can be extensively used for DIY. These bookmarks are one such example.
To make these bookmarks, all you have to do is choose the right artwork, cut it into the shape of a bookmark and tie a string around it. It's that simple. You can make as many for yourself, or just make a bunch of them and give them away as New Year presents to your friends and family.
Photo credit Brenton Gospodarek
Quoted bookmarks
This is one of the effective and beautiful ways to speak out about your love for books. These quoted bookmarks are easy to make and can really reflect on the lines from the works of literature that inspired you. You can just pick the quotes you liked, take a print of them and glue it onto the basic bookmark template made out of cardstock template. You can even make a small design on one corner to give it that edgy look and they are perfect bookmarks to carry around when you are back to school or are on a reading spree during summer vacation!
Duct tape can account for some really chic bookmarks, based on how classy your imagination can run. Make a basic cardstock bookmark template and go all the way, using your creativity to create shapes, letters, sizes or abstract designs for your bookmarks.
I once made this arrow bookmark, and I couldn't get enough of it. All it needs is a large hair tie or an elastic band tied at both ends like a journal wrap, and a small craft stick or thick cardboard cut into the shape of an arrow.
All you have to do is fix the arrow onto the elastic with the help of hot glue. What I really love about this bookmark is that it not only shows you which page you are on but can precisely tell you about the particular paragraph and line you stopped reading. Amazing, isn't it?
Well, we can never get it over with one Harry Potter bookmark, can we? Only this time, these are house ties and scarves wholly made out of felt sheets and glue.
Like the previous one, you must choose the color combinations of various Harry Potter houses and glue the felt strips accordingly. This tutorial will help you with the step by step process of making these bookmarks easily.
Here's another style of bookmarks made with fabric. For this too, you must take in a piece of fabric and sew it together with the help of a machine. But what's cute and unique about it is the shimmery lace bows and beads that are placed as embellishments. These additional decorations give the cute bookmarks a really elegant yet cute look.
Use elastic and patterned paper to make bookmarks
Paper in varied designs, patterns and art and some cardboard, along with a piece of fancy elastic can make up for a perfect bookmark. Just cut in the design papers, stick them up on the cardboard and attach the elastic to it. And there you go, a simple and really cool bookmark is ready.
Use spines of the books as bookmarks
When I first read about this idea, I absolutely fell in love with it. This fantastic idea involves magical bookmarks made out of the spine of the books. So be really careful when you are deciding to work on this project. You must opt for this only if you are willing to let go of some of the books from your cherished collection.
But in case if you have old books lying around, just cut them up, pick the spine and attach it to a piece of string to make a truly appreciated literary bookmark.
Starry bookmarks
Geometrical shapes as decorations are here to stay and never go out of style. These simple and cute bookmarks are embellished with star-shaped color paper cut-outs stuck on the basic template of the bookmark. You can also attach a bigger star at the end of the string to give a complete look.
It's simple, pretty and easily doable, even for the little ones. So, why don't you give it a try?
Hand drawn bookmarks
There is no better inspiration than something that is entirely created from the scratch with one's own hands. Especially, if it involves drawing. So, try something different when you are making cute bookmarks this time. Instead of sticking some printed things or embellishments, just draw whatever you feel like on a cardstock sheet or thick paper. Now, you are good to go and use this as your very own personalized bookmark.
You can make this cute little bookmark by taking a popsicle or craft stick and painting it in a solid color of your choice. Then, you can simply addgoogly eyes and some colorful feathers to it to make it beautiful. It's very easy to make and can be done in a variety of color combinations. Also, you'd never get bored of how adorable they look.
Also, this is a wonderful project for the kids to work on as it doesn’t take too much effort.
Linen can be a great fabric to make cute bookmarks. To make something like the one shown in the image, you must cut two strips of linen fabric, which would later be stitched together.
Choose your favorite quote and print it on one of the strips. Now, embroider the quote following the pattern on the sketch, and attach the both of these together with a sewing machine or by using a hand. You can even embroider an image onto it. And as a final touch, just add a colorful ribbon or an extremely thin fabric strip on the top.
These are some of the ideas I could get together to give you the ideas to make creative bookmarks on your own. You could always look for more inspirations and try making something that's close to your heart.
So, do remember not to fold dog ears into the pages of your books, because that's an unforgivable sin. Instead go for a great bookmark in a diy project, because they help you keep your book absolutely new!
I remember as a child growing up in my country, I never saw anyone showing much value to this material called Jute. We always discarded it as something that had no good use. Now this incredibly strong material made, basically, from a plant, is being used to add décor to some of the finest homes. Now I see, not only is Jute used in the making of bags for gardening purposes, but for drapery and wine bottle dressings as well.
Check out these simple DIY Jute Designs. So simple yet so impressive.
4 DIY Jute Designs
1. DIY JUTE WINE BOTTLES
A great DIY Jute Design idea for decorating your living or dining room.
Choose to have them sit in an undisturbed corner of any room in your home. With the available option to hang your DIY Jute Design Lamps as chandelier in your kitchen or desired room.
4. AN EASY DIY JUTE DESIGN ANYONE CAN DO
Simple yet effective way to change the look of your home or in the case internal or external doors. Another rustic looking DIY Jute Design.
These DIY Jute Design flowers would make a great bouquet on your dining room cabinet.
10. LOVE THIS DIY JUTE DESIGN LAMP SHADE!
A great idea would be to adhere or stitch a colored piece of cloth around it. Preferably one that would compliment this DIY Jute Design Lamp Shade in your room. Although, any rustic look will stand on its own.
Clearly, judging from these pictures one must have a passion for DIY Jute Design crafts and a lot of free time on their hands. They say a picture is worth a thousand words. These say a whole lot more than that to me. I realize a lot of people are not familiar with the term 'Jute'. They tend to more recognize twine, burlap or rope. Secondly, if we are honest with ourselves, we would admit that this is a material that is not appreciated enough. Little use is made of this versatile vegetable fiber material. Nevertheless, consider the various ingenious use of it. You will agree that certainly, there is no accounting for taste.
The right interior decor for little ones is very easy to find, but usually the design items are quite pricey so why not try to create some yourself. The following topic requires a great deal of patience and time but the end result is fun, colorful and highly appreciated and loved by little ones.
Pom-poms have always been associated with childhood and the pom-pom craft revives old memories of my grandmother making me crouched hats with colorful pom poms. And although I'm not a child anymore, pom-pom rugs and chairs and blankets make me smile and seem so cozy and warm that I want to start making one for myself right away. All you need is colorful thread, lots and lots of thread, a scissors, a fork or a cardboard circle and tons of patience.
It may take a while before you have enough pom-poms to make a rug or blanket but you can make them while watching your TV series or you have a little bit of time off from all the daily chores. You can even teach your kids how to make them and create something together. We hope you will try this DIY project and share your ideas with us. Enjoy our Cute colorful DIY Pom-Pom Crafts and Ideas Collection.
How to make a pom-pom
Use different colors thread in the same pom-pom
Create an artificial pom-pom tree
Pom-pom a butterfly rug for your kid's room
Make cute pom-pom toys
DIY fluffy soft baby pom-pom blanket
Or be eccentric and accesorize your shoes
Make a Valentine's Day heart decor
Or a heart pillow
Revive old pillows by adding colorful pom-poms on the margins
Make pom- poms by using cardboard circles
DIY pom-pom monogrames
Decorate your chairs
Make a pom-pom ball
Or simply an elegant white pom-pom rug
Crates have been used form ancient times to keep and transport fruits, vegetables, wine and even milk. Recently designers have rediscovered the aesthetic qualities of an old vintage crate and have started re-purposing them into truly elegant design pieces. New or old, a wooden crate can be revived and reused in many different ways from storage ideas to coffee tables, side tables, cutlery storage, wedding table decorations, flower planters, balcony wooden benches and so on. If you are not in possession of a vintage crate you can make it seem older yourself by stenciling a brand new crate. It will look spectacular in a shabby chic decor and very contrasting in a sleek shiny new interior design. The trick is to restore the crate just wright, and not overdue it or paint a vintage crate and destroy it aesthetic value. Like wooden pallets, Re-purpose Old Wooden Crates and get some very interesting and creative design items suitable for every interior design and taste.
1. Take a new crate and stencil it to seem vintage
Many of us have old tires lying around somewhere in our garage and you are probably wondering what exactly to do with them or if to throw them away. Happily there are tons of ideas and diy projects revolving around different methods of reusing, recycling and transforming old tires.There are some discussions regarding the toxicity of using old tires in your home as furniture pieces and we highly recommend you to not bring them inside and keep them as flower pots, bike racks, ottomans and other suitable outdoor garden backyard projects. Adding vibrant color to them will make the process of integrating them into the landscape easier. The gallery below showcases a series of these creative projects which are fun colorful and quite easy to make. Browse through them and feel free to share your input in the comment section at the end of the article. Enjoy!
1. CREATIVE CHEAP BIKE RACK
2. FUN COLORFUL STACKED TIRES GARDEN TABLE
3. HOW TO ARRANGE YOUR GARDEN PLANTS
4. A BEACON OF COLOR IN A MINERAL DECOR
5. ARRANGING AN ALLEY
6. VARIATIONS OF COLORS
7. OR PATTERNS
8.LOVELY SITING AREAS
9. ARRANGING A PLAYGROUND
10.LANDSCAPING IDEAS
11. GARDEN FENCE FLOWER POTS
12.FUNNY DESIGNS
13. CREATIVE PATIO COFFEE TABLE
14. STACKING UP TIRES IN COLORFUL WAYS
15. RED TONES LOOK LOVELY
16. FUN TIRE BASKET
17. CREATIVE YET STRANGE FLOWER POTS DISPLAY
18. COZY WHITE OTTOMAN
19. HERBS TAKING OVER
20. DISPLAYING FLOWERS
21. THE CHILDHOOD SWING
22. UNIQUE FLOWER POTS ARRANGEMENT MADE FORM OLD TIRES
23. A COZY NEST FOR YOUR PET
We will continue the sustainable recycle ideas with another wine bottle design idea. Wine bottles are sculptural objects with amazing resonating properties, making them terrific candidates for a wind chime. Further on we will present you the materials needed for a green pendant wind chime along with the instruction needed . After those you`ll find more suggestions meant to inspire you, you can use the instructions bellow to realize the others, the explained example being the most difficult in execution. In the pictures, most of the wind chimes are colored, we will describe how to paint them in another tutorial, till then you can use naturally colored glass or simple green orange or white bottles.
You will need the following materials (you can of course improvise and alternate with similar products) :
Green Generation(G2) Bottle Cutter
3 Glass bottles in varying sizes from large to medium and small
8 Large glass beads with different sizes, all being a bit larger then the opening of the bottles
36 inch cotton cord
Instructions
Prepare the working area by covering it with craft paper or newspaper, this will help you clean faster afterwards and protect the surface of the glass as well as the working surface .
Prepare the three bottles in different sizes, small medium and large, these ones will nest inside each other.
Measure six inches down from the top of the large bottle, five on the medium bottle and four on the small bottle, mark these distances with a permanent marker afterwards. You can modify these distances to better fit your aesthetic requirements.
Use the bottle cutter to slowly score and separate each bottle where you have previously marked them.
As instructed in the bottle cutter manual, smooth the rough edges as much as you can to prevent unfortunate accidents.
Measure and cut 34" length of the cord, make a know on one end of the cord, large enough to properly hold a 3/4 inch bead. Be careful, not securing the knot here or not making it big enough may cause problems later.
Thread one bead onto the cord till it rests against the know previously created, tie another three inch know from the first and thread another bead onto the cord till it stops at second knot.
Now thread the cord up, from the bottom of the smallest bottle trough the neck until the bead is comfortable against the opening in the neck of the bottle. Tie another knot and glide on a third bead now.
Measure 1 and half inch above the third bead and make yet another knot, add the fourth bead, make another knot, now pull the cord up trough the medium bottle and further up trough the neck.
Add a fifth bead next and one more knot, slide the sixth bead onto the cord make one more knot.
You are almost done, thread the cord trough the bottom of the large bottle and trough her neck, now knot the cord above the lip of the last bottle and add a one inch bead to the cord and yes, knot again.
Measure no less ten 9 inches and make a knot in the cord, now create a loop by inserting a 3/4" bead onto the cord, inserting the end back into the bead opening to create a loop, now secure the loop with a DOUBLE KNOT to properly hold the bead in place.
Last and most important step, hang your personalized retro wind chime where a breeze can slowly animate the object and enjoy the relaxing peaceful melody of your wine bottle art piece.
All distances may be modified to make a slightly longer or shorter chime, the beads can be of course replaced by something more personal or more relevant for you, we invite you to share with us your own personalized design and to help us by sharing the green sustainable attitude that we are trying to promote.
Even if most of the time our main goal is to blend in and be a part of the ever changing world and busy mass, one should not forget to express himself and not loose his personality.Your home and the choices you make in matters of design can say a lot about yourself. But if all you have to work with is a tern house, you can always choose to go with the usual colourful accents that can lighten your atmosphere and change the hole décor in general. Never underestimate the power of vibrant accents.They can always do wonders in all black contemporary interior design.
“To be yourself in a world that is constantly trying to make you something else is the greatest accomplishment."(Ralph Waldo Emerson) Those accents are the ones that separate us from the crowd and speak for our personality and taste. Golden accessories can transform a gloomy, morbid black interior into one that exudes elegance and luxury. A colourful chair placed in the right setting can attract more attention and change the focus of the entire room. Also try placing bits of colour on your walls and generate thus a brighter atmosphere. Pillows, table settings, decorations, flowers, every little accent counts and can really make a difference. Just try and experiment with your interiors.
Creativity knows no boundaries. Nothing should stop us from enhancing our everyday life with something new, fresh, meant to reinvent us and refresh our desire to improve constantly. Here at Homesthetics we have featured dozens of DIY projects worth considering but this DIY Pond project that uses an old car or tractor tire is absolutely extraordinary. Mainly because it is a project that changes the landscape dramatically with little to no effort, nothing that you see in this short guide is hard, the entire job should not take more than 20 hours split into two days.
Moreover this project will enhance the environment, it will bring more birds into your backyard, you can welcome their visit with even more amenities like small or large tree homes. Your pond can be as elaborate as you want it to be. You can use only one tractor tire, two, three combined with other old car tires or you can displace the tires with another recipient able to satisfy your needs in matter of size. An old jacuzzi tub or bathtub carefully camouflaged for example can replace the tires easily. You can use more of these to create a bigger swimming pond, possibilities are endless.
Upcycle An Old Tire Into a Jaw-Dropping DIY Pond!
Moreover upcycled items that are hard to recycle naturally, such as old tires, are extremely rewardful for both your project and the environment alike. Basically the tire will last forever and you reuse an item that would have burnt a lot of energy to be recycled properly . Tyres can also be found in many many sizes so you can mix and match as much as you need, there is a size that can fit any garden. We invite you to start this project today and enhance your backyard landscaping massively with a mirror of water that will completely transform your small green heaven.
Materials required for this DIY Pond Project
Old Tractor or Car Tires or Similar Recipients
Rocks of Different Sizes
Tarpaulin Like Material To Cover the Ensemble
A Few Buckets of Sand
Gravel
Tools Required
Simple Regular Shovel
A Jig Saw
Slab of Wood Or Any Item With Which You Can Level the Sand
The Craftsman House, also known as the American Craftsman, is an architectural style that originated from the American Arts and Crafts Movement towards the end of the 19th century.
This has been an integral part of the very beginnings of practical skills that include interior designing, landscape designing, and decorative and applied arts in the American domestic architectural scene at that time.
These Craftsman homes gained some serious popularity almost as soon as they started appearing, owing to their clean layouts and a spectacular blend of antique England houses of the Victorian era and modern designs. This brought in the beauty of the ornate Victorian forms with a spring-like freshness of modern designs.
Craftsman House Style & Why It's Popular
What happened was because of this style, more and more people came forward to invest and put mass production in creating these beautiful structures. Not only these had a very contemporary look and feel about them but they were also exceedingly durable and profound in character.
So, as the world took its very first steps in moving away from the Victorian influence, the American Craftsman homes provided them with a much cleaner, modern look that was a welcome spell and substitute for the expected Victorian frills.
Image via Creative Architects
History of the Craftsman Home
The most interesting thing about the origins of the Craftsman homes is that the style was born out of the late 19th-century British social movement. During this time, Britain was going through all of the direct impacts of the Industrial Revolution more severely than any part had to sustain at that point of time in history.
The contrarian Arts and Crafts Movement at this time marked one of the most critical moments in the history of architecture. The movement was focused on rejecting any trace of the new and mass-produced construction style in favor of handcrafted products made by artisans.
The movement eventually pervaded America, at the turn of the century, under the deft leadership of Gustav Stickley, the founder, and editor of The Craftsman magazine. His publication sold blueprints for homes that were designed in the Arts and Crafts style. His motive was to make “serious architecture” accessible to the broader mass.
The term “Craftsman” was originally reserved for homes that were built using one of Stickley’s plans. However, it has evolved and grown to define a certain architectural style today.
As of today, Craftsman homes are identified by certain common characteristics. Yet, each of these features includes a solely individual detail unlike any other that makes all layouts absolutely unique and exceedingly functional for their owners. And this is precisely what Stickley had envisioned it to be.
The Craftsman movement exalted, emphasized, and celebrated hard-worked goods and buildings. This was favored way more over mass-produced items. So, in a way, it could be said that the movement was actually formed as a direct retort and counter-response to the idealized, late 19th-century Victorian homes that exuded a strict air of orthodox manners and conventions.
The Increasing Popularity of Craftsman Homes
The popularity of the Craftsman houses could be accredited to Stickley himself. It is thought that he was inspired by the designs of the bungalows that he saw on his trips to Bengal in India. He also published an article on them when he returned, and several American architects decided to follow his lead on it.
What had inspired and struck a chord in him primarily was the utter simplicity of these bungalows. These were unlike anything the Victorian architecture had imposed previously on the masses and the architects of that time.
An essential aspect about all of these homes was that, unlike the elitist air that hung over the Victorian houses, the Craftsman houses were actually considered to be as functional as they could get for the masses; these were residences made for the working class.
Image via Coombs Design
While Victorian architecture emphasized and inclined heavily on aesthetics, ornamentation, and the overall grandeur of the structure, the architectural layout of the Craftsman homes, as was planned by Stickley, focused mainly on the functionality of the structure.
These homes were, to put it this way: small, sweet, and uncomplicated. These were very easy to maintain, which made for the most part of its appeal and attractiveness.
The Craftsman houses thus attracted hardworking individuals. The main reason behind the popularity of these homes amongst the working class was the sustainable angle which was taken into thorough consideration.
Unlike the elaborate Victorian style which took the overall cost of construction to a tremendously exorbitant level, Craftsman houses were considered affordable to build or even upgrade.
And this is why Craftsman houses are even more desired in the present day, given the economic situation of the majority of the population. However, the most attractive part about it is that in no way does it decrease the aesthetic appeal of these homes. It brings in a beautifully neat and clean design that presents a fresh new approach to modern architecture.
This very modern “break” from the severe vintage designs has enabled a beautiful and smooth transition to a contemporary and self-referential architectural layout.
Some of the Key Features of the Craftsman Homes
There are mainly four different types of Craftsman style homes, namely, Mission, Four-Square, Bungalow, and Prairie. Although every Craftsman house is unique in its own way, there are some defining aspects that tell them apart from other architectural styles.
These aesthetic details are what give these homes their cohesive foundation upon which the structure is constructed and accentuated.
These include the following:
Low-pitched Rooflines
The most apparent feature of Craftsman houses is the low-pitched rooflines that are generally designed in a triangular gable or hip pattern. These look and feel very comfortable, accentuating a cozy, compact overall residential structure without being too imposing and challenging to get to.
Wide Eaves
The overhanging, wide eaves of the Craftsman houses compliment the low-pitched tops of the structures. This balances out the overall dimensions of the upper part of the house without losing the proportion between the roof and the main structure. This also makes the house manageable during inclement weather.
Exposed Rafters Below the Eaves
This is a unique aspect, specific to Craftsman houses. The exposed rafters below the eaves look very “meta” in a cozy atmosphere where you would expect to find a few vintage elements or expressions still.
Covered Front-porch
The covered front porches of Craftsman homes not only look marvelous and serve as beautifully serene places to unwind, but they also protect the home from the direct heat of the sun as well as a torrential downpour. These are some of the most attractive features of Craftsman houses, which give you the dual benefit of beauty and functionality.
Symmetrical Pillar Alignment at the Entrance
The pillar-lined entrance to the Craftsman houses gives them a very neat and clean-edged approach. These are some of the distinctly modern and minimalist aspects of the houses. Functionality-wise, such a layout provides a well-balanced and proportionate overall structure that amply protects the house from any sort of violent climatic onslaught.
Double-hanging Windows
Breaking away from the high and ornate Victorian windows, Craftsman Homes bring forth a very straightforward design for their window designs. The double-hanging windows of the house give a straight-edged look, especially due to the separate panes that go on the upper and lower portions of these windows. These are easier to repair and open and close, unlike the heavier, vintage ones.
Singular, Jutting Dormers
The single, protruding dormers are a beautiful and very homely feature of these houses. What’s interesting is, these are also something that honors the traditional vintage layouts, in a way. These dormered roofs of the houses not only look aesthetically pleasing, but they also serve as a welcome addition for a viewing space up in the attic.
Conspicuous Fireplaces
The Craftsman homes come with prominent, integral fireplaces that take up a substantial space in the main living area. This gives off an immensely cozy and snug feeling, keeping you amply warm in harsh winters. These fireplaces with their beautiful mantles, also add a touch of the classic decorative element to a place that is but essentially modern in almost all aspects.
Window Seats and Nooks
These are rather pleasant little features of the Craftsman homes that make them all the more warm and inviting in spirit and structure. The nooks and window seats serve as special little personal spaces where you could have some time to yourselves.
It is fascinating how a very straightforward, compact design can still provide you with the benefit of a calm and quiet spot where you can enjoy some peaceful time away from the central portions of the house.
Integrated Storage Unit
The built-in storage units in Craftsman homes provide a spacious area for all of your wares and other objects. Although it’s not as big as a separate room or garages away from the main house, it still serves as a decent storeroom within the house.
Image via The Works
Ample Woodwork from the Floor to the Ceiling
There is absolutely no lack of natural elements such as wood or stone that go into the making of Craftsman homes. While you would find solid stone construction in some authentic and older Craftsman models, you could get all the woodwork you want in every kind of Craftsman home. Be it the lavish rafters or the polished wood trimmings for the interiors, some of the most beautiful designs found in these layouts are essentially natural, cost-effective, and easy to work with.
Sprawling Exterior with Beautiful, Manicured Lawns and Gardens
This is the single-most delightful aspect of the Craftsman style homes. Almost all of the houses come with stunning outdoor spaces that could be used for gardening or maintaining a simple lawn along with a small sparkling fountain.
The recent house models of this style come with provisions for you to maintain beautiful, raised flower beds, contemporary garden-pathway designs, or for planting medium-height trees and bushes.
Are Craftsman Homes and Bungalows the Same Thing?
Craftsman homes are often associated with the traditional bungalows, an architectural style for residential buildings that is specific to the Bengal region of India. Bungalows, similar to Craftsman-style houses, are simple and quite compact in layout.
These usually have a single story or one and a half stories at the most and a wide front porch. While Craftsman houses are often taken to be a similar structure to these bungalows owing to a few identical features, the two are not really the same in overall structure and design.
For instance, the Spanish Colonial Revival bungalows were quite famous during the 1920s and 30s, and so was the Craftsman architecture which was a separate line altogether.
The esteemed and globally-renowned architect brothers Henry and Charles Greene of Pasadena have contributed significantly to the success of Craftsman-style homes. According to Grant Marani, a partner at New York’s Robert A.M Stern Architects, the buildings designed by the Greene brothers reflect a brilliant influence of both local construction traditions and Japanese architecture, standing as some spectacular specimens of the Craftsman style.
A celebrated example of this is the Gamble House which flaunts a magnificent blend of traditional Craftsman style and some serious Japanese influence, designed captivatingly by the Greene brothers.
Grant remarks that although the Craftsman homes emerged and proliferated the most in California, the Craftsman influence spread rather quickly throughout the United States thanks to the popular press and pattern books around the beginning of the 20th century.
So, now we know that these homes were quite famous, even 100 years back, and remain to influence the most modern and present-day models that are mainly based on the traditional layouts of that time.
These are primarily witnessed in mountainous or forest regions that demand a greater degree of antiquated simplicity which the traditional Craftsman designs essentially stand for.
Conclusion
Thus, it could be inferred that the Craftsman House Style had been one of the earliest and most celebrated inventions of the modern period which heralded a new age in the architectural field. It was also a time period that had begun to form after a reign of utter unrest between the social classes.
So, the emergence of such a style that brings the most beautiful and marvelous aspects of both vintage and modern worlds together in a stunning balance is definitely one thing the world could never have had enough of.
And, on the same note, we could say that this game-changer of a style is yet to open up astonishing new designs as of yet for future generations to marvel at!
Nothing is more important in the world then having a place to call home. Most of us have already imagined how our dream homes would look like, on the exterior at least, we thought about the big lawns, the huge swimming pools yet we`re all leaving aside the most important thing, the interior design.
Absolutely every dream home should start from the inner home, from the interior, the real home in the home. We need shelter everyday both psychological and physical and the most important contact with it it`s trough the feelings evoked in the interior.
As a result our article today points out an interesting approach that we consider appropriate for a modern dream mansion, it encapsulates coziness and warmth in a serene atmosphere using high end materials. The home is located in one of the most expensive pieces of land in the world, Australia. It`s of course, an escape, a retreat, a shelter, entitled Brighton Escape and designed by Georgia Ezra, the head of G. A.B. B. E. studio. The home manages to gain her aesthetic values trough the simple and very clean combination of materials used in airy spaces with amazing natural lightning, here and there you will definitely notice beautiful accents from the sculptural white staircase to the slowly textured materials that would create a totally different effect if they were flat.
The interior further on expands trough the huge windows to the exterior creating a bridge between the tranquility of the amazing natural environment found on the site and the interior, therefore expanding the comfort zone of the inhabitants. The whole backyard landscape has the corners designed with zen pebbles and extraordinary green emerald grass that protects the home.
“The space was treated from its genesis, with the same respect for design as a museum. Carving of ceiling, walls and floor not only creates sculptural partitions throughout the residence, but with the spirit of a rock pool, provides channels to flow through and delineates ample space in which to dwell together.”
When was the last time you thought of buying a clock, or you even admired one for its designs?
A clock is something that every person owns, but we usually never consider them to be a décor item. It can be stylish, fun, and super functional. When you have a beautiful clock, it’s a great way to complement your décor, to add some color, and to bring a sense of quaint touch to any room.
Most of the wall clocks these days have varied aspects like color, design, or purpose. Wall clocks have been part of our homes since many decades altogether, and they’re the silent contributors to the personality of your space. It doesn’t just help us to tell the time, but they also act as a reminder to value time.
They tend to merge effortlessly with every style of décor. You can choose a wall clock with a formal style to add a sense of elegance and charm to your living room, while an exciting, brightly colored clock for the kitchen or kids room. And a contemporary design will compliment any space in your office or home.
Best Copper/Rose Gold Wall Clocks
Without further ado, let’s read through the best rose/copper wall clocks!
MODERN WALL CLOCK DESIGN: This contemporary wall clock was...
SILENT SWEEPING QUARTZ CLOCK MOVEMENT: Each Ribbon wall...
This modern wall clock is made of high-quality metal and comes in a unique multi-ribbon shape. The eye-catching design given by Michelle Ivankovic helps to add a sense of charm, functionality, and class to your living space.
Also, the feature of a no ticking, noiseless, and sweeping Quartz movement helps ensure a maintenance-free and accurate performance. You need to power this clock with a single AA battery, which is not included in this set.
Experience
The design of this clock will blend in with the theme of your office and home perfectly. Even though it has a sturdy steel frame and bent edges, but you have to be careful while holding this clock because the edges are sharp.
We have used small finishing nails to hang this lightweight clock. But you can also use a wall anchor and a screw for the same. The ticking sound of the watch can be quite distinctly heard mainly at night, so you might prefer to place it in your hall room or kitchen.
We love the sleekness of the stainless steel frame, but if the same material were used around the mechanics that is placed inside, then it would have given the clock an expensive look. The product is pretty solidly built, and it lasts you for years to come. We admired the copper color as it's not found easily on wall clocks, which gives this piece a mid-century modern style.
Pros
Unique and stylish design
Easy, lightweight, and easy to hang
Easy to understand the difference between the hour and minute hands as the size has a bright contrast
Maintenance-free and does not require winding
Cons
The edges of the ribbon can be sharp
You need to buy the battery separately to operate this product
This is a vintage and antique wall clock, and if you prefer retro styles, then this product will be a great pick. The design blends in perfectly with the decor of your office, farmhouse, kitchen, bedroom, and living room.
The clock has a double ring round metal frame, with straight bars which indicate 3, 6, 9, and 12 o’ clock. It is an oversized clock with a stark look yet fascinating.
Experience
We placed this clock in our living room. It's a classy piece that gives a very edgy look to the entire space. You will appreciate the unique design, especially when you observe how stunning your walls start to appear. We couldn’t use the mounting hardware, which is a slot placed behind the clock, so we opted for a simple nail instead.
There is no ticking sound heard even during the quiet nights, so you can also keep it in your study or bedroom. You will need to buy a single AA battery to operate this clock. Therefore, you don’t have to worry about excess energy consumption.
Pros
Silent wall clock
Perfect for the living space due to its oversized shape
You have the option to select between the 16 inches and 20-inch design
It has a metal and vintage look
Cons
The mounting hardware might not be perfect to use for hanging your clock
This analog clock is known for its elegant and sleek design, that has a white dial with 3D rose-colored numbers. It is a non-ticking clock with a silent quartz sweep movement that helps to guarantee you with a quiet environment and accurate time.
You can place this beautiful and decorative piece in your office, kitchen, study room, living room, or bathroom. The front glass cover helps to guarantee a perfect view and enhances readability.
Experience
We selected this wall clock, for the rose gold color, which is electroplated on the frame and the 3D numbers of the same color. The color combination makes this clock stand out as a simple yet elegant piece of wall decor. You can’t even guess the real price of this product by looking at it; our friends always gave a higher estimate.
We found the customer service given by Jomparis to be remarkable. It is a very crisp, simple, lightweight, and attractive clock. We have used a nail to hang this clock rather than the given attachment as it seemed sturdier. Even though the case is made of plastic but it can’t be made out quickly, and because of the color, it appears to be high-priced instead.
You can operate this clock by just inserting a single AA battery. You can get this modern style wall clock in four different color combinations so that you can select them accordingly to your color preference.
Pros
Large 3D numbers with a front glass view that makes it easier for you to read the time
Has one piece of hook included, which makes it easy to hang the clock
Quartz sweep movement ensures a quiet environment that is free of any ticking sound
The high-quality movement in this clock will guarantee you with accurate time. This wall clock is of 12- inch diameter circumference. For eliminating any distractions or sound, this product has been made with a silent non-ticking technology. It also comes with a back nail slot that makes it easy to hang on the walls.
Experience
The luxury design theme used in this product will complement the decor of your home, both traditional or modern. We have not faced any disturbance while using this clock. And we never even had to worry about the constant ticking sounds that are heard in the regular clocks.
However, we have used this product for a long time, and there are no problems that we have noticed. The frame is made of metal, and it has a rose gold finish that gives this cock an elegant look.
We have used a nail to hang this clock, and since it’s lightweight, installing it was simple. You’ll also get a few color options, so you can select the one that will complement your walls.
Pros
Glass front gives you a proper view of the time
Sturdy built
Doesn’t make any ticking sound
Cons
The numbers are pretty small, so it can get challenging to read the time from a distance
WALL MOUNTED OR TABLE TOP: Infinity can be quickly...
MODERN & VERSATILE CLOCK: Stay on time with Infinity's...
This is a portable and battery operated wall clock, with a non-ticking mechanism. The product has been well built, which ensures longevity. It comes with a correct number display, easy-to-hang hole, glass cover, and an elegant colored rim.
This is a 12- inch timeless design which will tell you the time soundlessly and stylishly. It is powered by a single AAA battery, which doesn’t come with this clock.
Experience
The clock is battery operated, so we never had to worry about carrying around any extension cords. You can hang this clock anywhere you want, and the versatile design will blend well with any decor.
You won’t face any disturbance as there are no ticking sounds; it just has a sweeping mechanism which glides around the circle smoothly.
Also, the clock is lightweight, so the installation process is not going to be difficult. There is a keyhole at the back of the watch, so it makes it easier for you to hang the clock. You don’t even have to fear about the construction, as it’s built with quality materials and there is no fear of easy breakage.
This clock by Timelike has a simple and open design, with just an hour and minute hand. It is a statement piece that will jazz up your home decor in an effortless manner.
The quartz analog clock is made of aluminum, and the dial is around 10.4 cm with the hour's hand being 16.5 cm and the minute hand is 24.3 cm. It’s a lightweight (200 gm) piece, and a single AA battery powers it.
Wall Mountable: The clock hands are designed to mount on a...
3D Design: The clock hands have a unique 3D design that adds...
Experience
It is a simple and elegant piece that merged perfectly with the contemporary design of our living room. The clock is made of metal, and there is equal importance given to the functionality as well as the design of this product. We found the watch pretty lightweight, but it can travel with vibrations.
Overall, the clock is fragile, but with caution, it can work perfectly well. We loved the understated stylish appeal of this piece, and it’s a significant change from the boring wall clocks that we were using for years. We have received a ton of compliments for this clock, as it showcases your taste for a unique design.
Pros
Funky and minimalistic look
Maintenance-free
Priced reasonably
Lightweight
Cons
Not everyone’s taste
Not the most durable
Rose Gold/Copper Wall Clocks Buyer’s Guide
When you’re hanging the watch, you should pay attention to the small details in its design, that will make the wall space look attractive.
Buy a clock, that will last you for years to come and will be a prized possession to your home décor.
The quality of the watch is paramount as it helps to ensure reliability and accuracy of time.
The amount of light required by the clock should also be considered. And whether you can read the time just when you glance at the clock face.
Pick a different color tone for the wall clock that will contrast with the vibe of your wall space.
If you’re buying a clock for the study or bedroom, then get the ones with a quartz sweeping mechanism. There will be no ticking sound while you have a quiet environment.
There are different types of wall clock designs, but we can roughly divide it into two categories: decorative and functional. As the name implies, with a functional design, it will not just provide an excellent display or tell time, but it will serve as an instructional or highly specialized clock. Moreover, the decorative wall clocks help to add a fun element with its images and prints.
Rose Gold/Copper Wall Clocks Conclusion
There is a range of wall clock designs to choose from, while you're selecting the right one to compliment your home/office space. To find a clock that is unique and has been made with high-quality innovations is an excellent move for a refreshing change; be it classic or modern.
When we pick a clock for its exceptional design, whether ornate and vintage or sleek and modern, it transforms this functional item into a piece of artwork. Take your time to go through the designs to find the clock that fits in perfectly with the vibe and tone of your wall space.
In addition to coloring books, chalk, and construction paper, you can use clay for sculpting projects to unleash your child’s creativity.
Clay is a go-to crafting material because it is versatile, easy to work with, and comes in various vibrant colors. Kids can enjoy working with clay and applying their creative ideas to create beautiful and unique sculptures. It’s beneficial in developing their motor and coordination skills, imagination, self-esteem, and concentration.
Let alone children; clay modeling helps adults to unwind from their stressful days and take their creative skills up a notch. So, get some clay and start making some cool and funky sculptures today by following some of the ideas in this guide.
For DIYers, fixing cracks in walls and other places feels as soothing as clay sculpting, and this will enhance the strength of your house as well. So checkout our previous article on fixing foundation wall cracks to know more.
Without further ado, let’s get in!
Fun Clay Sculpting Ideas
1. Spoons
Handmade ceramic spoons are a fun and unique addition to any kitchen, and they don't require many materials or much effort to create, making them perfect for beginners. You just need a handful of modeling clay and a kiln to heat those spoons.
Roll your clay in a cylindrical shape and pinch a shallow bowl shape in the front to make a spoon. You can take references from the silverware in your kitchen to make these. Then, you can design and color the spoons in any way you want.
2. Pinch Pots
If you have never worked with clay before, pinch pots are a great way to start with. These are easy to make, and you don’t need a potter wheel.
To start with, insert your thumb into the center of the clay and keep pushing it until you’ve reached the middle. Don’t push it in any other direction, or you might end up with a donut rather than a pinch pot.
Continue pinching with your thumb and rotating the clay, and as you do so, the clay will take on the shape of a pot. Then, place the pot in a fire kiln for a few minutes to solidify. Take it out and let it cool for a while before using it to store something.
3. Wheel-Thrown Mugs
A wheel-thrown mug is another simple yet beautiful piece you can make with clay. It's a satisfying piece to craft because you'll be using it every day and appreciate the time and effort you put into it.
Compared to our previous two hand-made pieces, this one needs a potters’ wheel. It might not seem easy initially, but practice makes a man perfect. So, continue to learn through any pottery course to learn using the potters’ wheel and keep on practicing. You might end up creating some interesting and unique art pieces with the wheel.
4. Hand-Coiled Mugs
It is an interesting and fun project for those who don’t have access to the potters’ wheel. The process is similar to what you learned in making pinch pots but uses polymer clay.
Although this clay is easier to work with, it dries up if stored longer. So, you must be wondering, “how to make modeling clay soft again?” Well, you can easily revive your dried-up clay by kneading it for a few minutes. Your moist hands are enough to make the clay smooth. And if that doesn’t work, spray some water on it and keep it in a sealable bag for 5-10 minutes.
5. Teapots
Are you well-versed with using the potters’ wheel and looking to make different things for the kitchen? Then a teapot made out of clay is something you can try.
Although the process is more challenging than the others we've discussed so far, the outcome is well worth the effort. Serving tea in a handmade teapot provides great satisfaction while also grabbing the eye of your guests.
6. Plates
Plates are another piece that you can make using a potter’s wheel. Although it might take some time and practice to create a perfectly round plate, imperfections add to the individuality and character of the handmade items.
7. Cartoon Snakes
A cartoon snake is an excellent option for those looking for easy yet creative clay crafts to work with. Thanks to its basic design, it’s a suitable starting project for kids that they can show off to their friends and family.
8. Leaf-Print Pendants
You can make your leaf-print pendants by imprinting some leaves on air-dry clay. Make sure to poke holes in the pendant before it dries. Once it has completely dried, paint with any colors of your choice.
9. Earrings
Jewelry enthusiasts are in luck as now you can use clay to make unique and beautiful accessories, like some funky earrings. These are affordable and easy to make and don’t require many tools or accessories - just some colors and clay!
Begin by taking a small lump of clay and slowly pinching it into the shape of an earring. Heat the clay to harden, and once it cools down, use your creativity to make unique designs.
10. Beads
Aside from earrings, you can create clay necklaces by making beads that can be interlaced together. Poke a hole at the center of these clay beads to insert a string inside them, and voila - you’ve got a unique and beautiful necklace of your own! After they've been hardened, you can design or color them however you want.
11. Stamped Bowls
The stamped bowl is quite an easy project to make, even for beginners. Take a ball of sculpting clay and roll it out on a smooth surface. To give it a shape, take a bowl, place it upside-down, and gently put the clay on it.
Unlike other types, modeling clay tends to stay a bit dry, so you need to soften it before you start sculpting. But to store modeling clay? Note that you can sprinkle water, but adding excess water can produce cracks.
Next, decide on a design that will look good, stamp it, and let it dry overnight. The following day, you will have a lovely bowl to eat your food in.
12. Clay Pots
Clay pots are the most basic yet widely used items in our homes for keeping flowers. Although many stylish pots are purchasable from the market, making them yourself is an experience like no other!
Start by kneading the clay, and make it as smooth as possible. The smoother your dough is, the better the finishing of your pot will be.
Roll the dough to prepare the bottom of the pot and shape it the way you want. Then, heat it properly from each side to harden it and paint it in unique designs and vibrant colors to have a beautiful home for your plants.
13. Alphabets
Making cool and fun things with clay doesn’t end at just jewelry or kitchen items. You can now personalize your name initials with simple, fun arts and crafts clay projects. To shape your clay, you might need a knife or a stencil and bake it in an oven or a kiln. Once hardened and cooled down, paint them with any colors of your choice.
14. Fridge Stamps
Funky and vividly colored fridge stamps add a nice touch to your otherwise dull fridge door. Although these are available on the market in various sizes, shapes, and colors, what’s better than making them on your own.
You just need clay, a cookie-cutter, different colors, and a kiln. Use a cookie-cutter to make different stamp shapes. Once heated, hardened, and cooled, color and design them any way you like. You can even sprinkle some glitter when the clay is wet.
15. Clay Coasters
Now you can design a unique and stylish coaster for your coffee mug using clay. Knead the clay lump you’ve got, roll it out and flatten it with a thickness of more than 1 cm. Take a mug to cut a round shape, and keep it dry for some time. Once done, unleash your inner artist to create creative patterns and designs.
16. Elephant Ring Holder
For a change, use tempera paints and self-hardening clay to create a uniquely-designed ring holder. While many animals can be made using clay, this elephant shape is suitable as you can keep your rings on its trunk! This project is ideal for artists of every level, professionals or beginners, and you can adjust the detail level based on your ability.
17. Clay Structures
Polymer clay has grown in popularity in recent years due to several features. Compared to different clay types, they are easier to work with and come in a wide array of colors. You can make unique and impressive sculptures like fish, unicorns, and animals.
18. Ceramic Love Birds
Making love birds should be simple if you're proficient enough to make the aforementioned clay sculptures. Refer to any bird image you get on the internet and mold your clay in a particular shape. Paint it with your favorite color, and keep it on your reading desk or computer table.
19. Air Dry Clay Bird
You can use air-dry clay for making this clay sculpture if a kiln is not available. Compared to love birds, it is a bit tricky to make, provided the details required, but looks stunning when completed. Another feature of air-dry clay that makes it superior to different types of sculpting clay available is it can be painted with acrylic paints and doesn’t require any special glazes.
20. Elf
Now that you have practiced enough with polymer clay, it’s time to start working on some complex sculptures, one of which is an elf. These are the creatures we usually see in folk tales and are represented as delicate, little humans with magical powers, pointed ears, and a capricious nature.
Most children adore these creatures, so having one made for them would be a dream come true!
21. Butterflies And Moths
Butterflies and moths are beautiful creatures you can make using polymer clay and paint them with acrylic paint. As mentioned above, polymer clay is a bit difficult to work with compared to other materials, but they soften once you knead them properly.
Use acrylic colors and glitters to draw unique patterns on the clay butterflies, and hang them on your walls to give them an aesthetic look.
22. Mushroom Earrings
Channel your inner creativity to make these clay mushroom earrings and paint them in your favorite colors. These aren’t the most difficult things to make, but the more proficient you are in working with polymer clay, you can give the mushrooms a more realistic and detailed look.
23. Bamboo Forest
You don’t always need to make practical things using clay, like utensils and fashion accessories. So, why not make a mini bamboo forest that is beautiful, sculptural, and artistic in its own way?
Plus, you can keep these natural-looking bamboo forests on a reading table or in your room as a decorative piece.
Clay Sculpting Ideas Final Words
That’s all for this guide!
We hope this guide serves as inspiration whenever you face a creative block and can’t get any new ideas for clay sculptures. Apart from that, you can search for more options for clay sculpting on the internet.
However, there are a few things you need to keep in mind when working with clay. First, keep your kids at a safe distance when heating clay sculptures in a kiln.
Besides that, keep your kids under supervision whenever they are clay sculpting. Make sure they don’t put their hands in their mouth while working. It can potentially affect their overall health.
Just keep these safety tips in mind, and you’re good to go. Happy crafting!
Clay modeling can be quite fun as a pastime activity. In fact, using clay for sculpting different objects is one of the most enjoyable things we did as kids.
This activity helps in developing the fine motor skills in children and nurtures their creativity. In that context, even adults can enjoy sculpting and clay modeling as a hobby. It is a great stress buster that can help you relax as well as unwind after a long and hectic day.
If you are creative enough, you can make a few stand-out clay models. After all, modeling clay is relatively flexible, and you can shape it in any way you want.
However, if you are running short on ideas for clay modeling, then you’ve come to the right place. In this guide, we have brought to you some of the best clay crafting ideas that you can try.
So, let’s get started!
Best Clay Modeling Ideas
1. Clay Bowls And Pots
This is probably the most versatile idea for clay crafts that you can try. It is simple and even children can master it pretty quickly. And, because of its versatility, you can add intriguing patterns and shapes to the clay to make it more interesting.
Most natural air-dry clays can be used for this sculpting idea. You can sculpt the clay into different shapes to make mugs and planters in addition to pots and bowls. Just make sure that the hollow central cavity has been modeled accordingly.
You can also add attractive patterns to the body of the clay model. For instance, you can use a sculpting knife to create intricate designs on the bowl or pot. You can then color these patterns using acrylic paint. Also, you can craft the cups or bowls using the pinching method to make the shapes interesting.
2. Cutlery
Are you tired of using conventional plastic and steel cutlery? Then you can try this clay modeling idea to create innovative cutlery. You can make spoons and forks using natural clay. However, you might need a kiln to fire the clay cutlery items before they can be used.
They are very easy to create, and you can give them a coat of acrylic paint to make them even more appealing. For more individuality, alter the shapes and sizes of the spoons and forks to make them distinct from each other.
3. Cookie Cutter Clay Shapes
You can make a wide variety of clay shapes using cookie cutters, which can be used as decorations throughout your home.
For this idea, you can use polymer clay or natural air-dry clay. First off, flatten the clay and place it on a hard surface. Then press the cookie cutter on the flat clay to cut out the designs.
Subsequently, you can use a sculpting knife to create patterns on the clay shapes. You can also paint the patterns to make them vibrant and colorful.
4. Animal Clay Craft
This is the perfect idea to keep your little ones engaged for a long time. Using polymer clay dough, you can help your kids craft cute little animals. What’s better, you can keep these clay animals as decorations in your house.
The clay can be shaped into different insects, such as snails, caterpillars, butterflies, and so on. And to make these clay insects even cuter, you can have your child color them with acrylic paints.
Besides, you can create small birds and animals, such as dogs, cats, and bunnies. Then, use a a sculpting knife to make them look realistic or funky like a cartoon, whichever you prefer. You can also use color on the whole model or on some parts to complete the look.
5. Plants And Flowers
Similar to the animal clay craft ideas above, making plant clay models can also be fairly engaging. You can make adorable miniatures of different plants, or craft individual leaves and branches. In fact, you can make potted plant designs as well.
In our opinion, the simplest plant that can be crafted is the cactus. You can try making other plants, but they will require a lot of precision and patience. Craft the pot first and then attach the plant and pot together with glue with a few final touches.
Alternatively, you could just craft the plant and pot as a whole. You can also model separate flowers such as roses, daisies, lilies, and so on. And don’t forget to give them a splash of color!
5. Clay Models
Have you ever made sandcastles on the beach when you were a child? Well, this sculpting idea is the same, but with clay instead of sand. You and your child can enjoy creating majestic castles and beautiful houses using polymer clay.
Just make sure to use it in abundance so that the model can be sufficiently detailed. With enough effort, you can make detailed dioramas to show off to your friends and neighbors.
Making detailed models requires a lot of time, patience, precision, and imagination. So, it can be a perfect method to enhance the focus, concentration, and creativity of your child.
6. Clay Mosaic
If you’ve got any old modeling clay lying around, then this is the perfect idea to safely and creatively recycle them. Not only that, but you can also use the finished clay mosaics as a house decoration.
To begin, get your child to draw scenery, portraits, or create any other artwork on a clean white sheet of paper. Then, apply glue to the outlines of the picture. Once that’s done, simply stick the old and dried clay to the glued paper to create a mosaic.
The clay acts as the color for the image your child has drawn, which gives it a unique appearance. Furthermore, you can mix and match the different colored clay to give it an even more distinctive appeal. You can then frame the mosaic art piece and hang it on the wall as a display.
7. Clay Impressions
This is another exciting idea for sculpting clay, as it can help your kids make impressions of objects, such as seashells, corals, and so on. You can also create impressions of your hands and feet on the clay. These can be used as the perfect souvenirs for parents, siblings, spouses, or the children themselves.
First, the clay needs to be flattened using a press or rolling pin. You may wonder—how to store modeling clay in this case? Well, you can add water to make the clay softer for a better impression. But, that is not absolutely necessary, especially if you use natural air-dry clay.
After it has been flattened, you can get your child to press the seashells, corals, or any other object into the clay. They can even press their toys against the clay to create footprint designs. Once done, frame the impression and put it on display.
8. Clay Lantern
This is a clay modeling idea that is not only beautiful but also quite practical. Essentially, you will be creating a portable lantern using modeling clay. You have a lot of liberty when it comes to its design, such as how many candles you want to fit in, what the shape and pattern will be, and so on.
First, you have to make a hollow clay mold, preferably with both sides open. Using a sculpting knife or a pointed tool, create interesting patterns on the outer surface of the clay, through which the light will pass. To add a rustic vibe, you can even try baking it in a kiln or oven. Or, you could simply paint its surface with acrylic colors.
9. Jewelry And Fashion Accessories
Instead of using conventional jewelry made from gold or silver, how about you give clay jewelry a spin? These fashion accessories made from clay will allow you to look stylish in a unique way.
You can use polymer clay to craft beads for necklaces and bracelets. Additionally, you can create rings and earrings with this clay. Making these items with clay is super easy and quick. Besides, you can mix polymer clays of different colors to create a marbled look.
10. Fridge Magnets
Using this idea, you can create attractive and colorful fridge magnets. Not only will they act as fridge decorations, but they can also be used to put up notes and images on the fridge door.
You can use air-dry or polymer clay to make these magnets. All you need are a few sculpting tools and knives to mold a blob of clay into the desired shape.
After that, simply attach a small magnet to the back of the clay model, color it with acrylic paint, and then allow it to dry. You could also simply use colored clay if you are using polymer dough.
Clay Modeling Ideas Frequently Asked Questions ?
Which clay is the best for crafting?
Typically, crafting clay is of two types—natural and artificial. Natural clay uses conventional modeling clay and is usually air-dried. Once it dries, it is not easy to remold it. On the other hand, artificial clay is made from synthetic polymers and can be remolded easily.
So, if you want to create permanent designs, natural clay is better. But, for temporary models, artificial clay offers more flexibility.
Can you bake artificial polymer clay?
We would not recommend baking them, as the chemical composition of such clay is not safe, especially if you use them as bowls and containers to store food. However, if you use it for any other modeling craft, it can be baked safely in conventional ovens.
Clay Modeling Ideas Final Words
Those were some of the best clay sculpting ideas that you can try with your children. Believe us, your kids will find these ideas to be exciting and engaging. You also get to spend some time with your children.
Some of these ideas have a lot of practical utility, so that is a bonus. And, considering how inexpensive modeling clay is, you won’t regret buying it at all.
Now, it is time for us to wrap up this brief guide. We hope you enjoyed reading it as much as we did curating it for you.
See you around!
Finding mundane items that can be used in creative DIY projects has become a challenge for us at Homesthetics, one we are happy and excited to take on everyday. Creativity plays a vital role in this quest, a quest the infinite DIY community offers the resources to respond to.Today we have chosen coat hangers as central pieces in re-purposing projects. Some are creative, others unique in approach and style, others very effective and efficient. The key that bonds them all together is simplicity and a clear purpose they all succeed in achieving. Cast a glance at the selection below and feel free to complete the collection with your own personal interpretations of the mundane plain coat hanger.
coat hangers will serve as newspapers and magazine holders
Rather than staking old newspapers and magazines in a corner for the dust to settle why not take the unconventional approach and place them on a coat hanger within your reach? Maybe this way you will be more encouraged to finish a reading before stepping to the next glossy cover.
display your sunglasses collection in an unconventional style
We all tend to overbuy items and staking them in a corner of a drawer only manages to encourage this direction. Display your collection in plain sight in a simple elegant manner as a reminder of all your great pieces you already own.
Keeping the crafting corner clean and organized is a difficult task. Use a coat hanger to finally stack those ribbons you usually misplace around the house.
Photo via: happilyevercrafter.org
pose your JEWELRY collection from a coat hanger
Take the option of using a coat hanger to store all your bracelets and necklaces without constantly tangling them.
use a different approach to a coat hanger
If you are feeling creative, adapt plain coat hangers and a driftwood piece into an elegant one of a kind piece for your hallway.
Photo via: alittleglassbox.com
mixing wooden coat hangers to form a dishwasher
Wood and water don't always get along but you must admit the creation above is very beuatiful in its simplicity.
Photo via: instructables.com
for the innovative mind coat hangers can form chandeliers
For the out of the box thinker, hangers can become chandeliers in mesmerizing compositions.
Have you ever considered re-purposing something as plain as a coat hanger? Feel free to express your ideas in the comment section below.
A black and white interior design is sure screaming out the strong and powerful attitude of the owner trough a classic apparel, a very bold contrast and huge color scheme that works with this amazing collection. You can use it anywhere from the living room to the the terrace and in backyard landscaping, a highly versatile combo that can mix and match everything just by adjusting the contrast and the ratio of black and white. You need a simple bright room? All you need to do is use stark white on the walls and most of the furniture and keep the gadgets as black accents.You need a Vintage Gothic Apparel? Go hardcore by using very strongly black in combination with Art Deco and Gothic motifs, you can use more iron, less glass expressing what you need trough textures and keep things as black as it`s needed.
There are hundreds of world architects and designers which just love to use black and white for contrast, mostly because such a contrast does not keep your attention fixed in, it`s a neutral way of controlling the surroundings. Take Colunata House as an example, if you look on the interior design, you will notice that even though the contrasts exists, the interior design is top notch, your attention will still go to the wonderful rocky shores, allowing you to enjoy the amazing landscape.
From another point of view, you can use such colors to make your room seem larger wider or taller depending on where you`re using the white or black; you can make a small bedroom seem huge using stark white paint or even smaller with black; in the same manner you can control the lightning and brightness of the room just b using the black and white color scheme.
There are hundreds of methods of using the black and white color scheme and hundreds of methods of transforming a home or an interior design using it, this bold and strong combination is considered a very powerful asset by any architect or designer that knows how to use it and we are obviously highlighting such setups for your dream home.
Pictures below are speaking for themselves of how far you can play with your interior design but we are really curious how are you using the black and water color scheme in your design.
For more inspiration we have posted bellow few of our articles which rely mostly on black and white :
17 Inspiring Wonderful Black and White Contemporary Interior Designs
Pyrography, derived from the Greek words pur (fire) and graphos (writing), is the centuries-old art of burning designs into wood or leather to create lasting decorative impressions. What began with metal pokers heated over flames has evolved into a modern craft with precision-controlled pyrography pens and complete wood-burning tool kits—ideal for both hobbyists and serious artisans. These tools resemble soldering pens and often feature adjustable temperature settings, interchangeable tips, and ergonomic grips for maximum control and creative flexibility. If you're new to the medium, choosing the right pyrography tool can feel overwhelming given the range of features and price points available. To help, we’ve reviewed the 5 best wood-burning kits and pyrography pens available today, based on ease of use, performance, safety, and value. Whether you’re just starting or upgrading your current setup, this guide will help you select a toolset tailored to your needs.
This is a great tool for the beginner. In my review, I found that it had a comfortable design, which was easy for me to hold and work with.
I started out my adventure with this tool, and I found that on multiple occasions, its safety guard protected my hand from burning. Such a welcome feature, especially for the newbies. It also comes with variable temperature control, which makes the pen very versatile to work with. I’d generally start etching with a lower temperature in the beginning, then gradually move to a higher temperature for darker shades.
Wood burning tool with variable temperature control and 11...
Tool features a comfort grip for extended use and a stand to...
In my experience, the temperature control was really convenient to let me get into more complex designs. I soon found myself trying out flowers and pattern designs instead of making blobs on a piece of wood. Also, the multiple heads helped with getting creative with my artwork.
It’s also inexpensive, adding to the feature list that is meant for beginners. Get your hands dirty and get crafty with this pen right away.
Power Source: Corded | Temperature Range: 750-950°F | Tips Included: 11 interchangeable tips | Warranty: 4 years
The tool comes with 14 pieces, loaded for perfectly executing any type of project you may want to. Wood burning, shrinking, or maybe even area heating; everything can be done with this tool.
It even does soldering as it comes with a butane torch that is easy to use. It has its ignition trigger and a feature called “flame lock”. This feature is especially helpful when soldering, and it made it so easy for my wrists.
Cordless butane soldering torch ideal for wood burning,...
Integrated ignition trigger with safety lock for easy start...
The temperature control was more tactile and responsive, in my opinion. And the quality of the product is a bit better, in my opinion,n than the previous entry. It also comes with a storage case, which is very handy in my opinion.
I found it extremely versatile for working on different projects, and also this one seems less flimsy and more long-lasting.
Power Source: Butane | Temperature Range: 1022°F - 2192° F | Tips Included: 7 interchangeable tips | Warranty: 2 years
The “10-in-1” Wall Lenk Woodworker pyrography pen comes with seven tips for wood burning, two for fusing and cutting, and one for soldering. Of course, this pen doesn’t mess around and is great for any form of pyrography. Not just wood. Although I have only used it for wood-based pyrography, other users have mentioned that it’s great for leather pyrography as well.
What I loved the most about this simple tool is that it’s loved by both beginners like me and more experienced pyrography peers I have. It's practical and functional every time you need it to be.
1-30 watt Professional tool, 7-burning tips, 2-cutting and...
It also comes with a storage case like the last entry, which I find convenient. It's maybe a budget-friendly tool, which is great for beginners, but it doesn’t mess around as it has 30 watts of power that reaches over 1000 degrees Fahrenheit.
I’d recommend it to beginners to start with something simple, and for experts as well, to add it to their arsenal.
Power Source: Corded | Temperature Range: 350-900°F | Tips Included: 10 interchangeable tips | Warranty: 5 years
This is a tool meant for the experts. The amount of control of the craft I got with this tool is immeasurable compared to any of the tools I have yet mentioned in this list.
It has a refined temperature control that has a marking range from 1 to 10, which is incredibly helpful when doing more complex, multi-layered artwork.
Not only that, but it also comes with more than 800 pens and tip combinations, which is extremely versatile for pyrography. There’s no match for its universal nature. At least not in any of the products I got to use, including the ones I didn’t bring up on this list.
Compact and easy to use; The SSd-10 is built to last, solid...
If that is not impressive enough for you, then consider its 10-amp output, which results in one of the fastest temperature recovery times of the tip, aided as well by its wire-style design.
This is a serious tool for artwork, which is meant for serious business. But that doesn’t mean that it’s not meant for beginners as well. As a beginner myself, I found this tool a great investment in enhancing my artwork capabilities.
The fact that it also works with tips from other brands made it so easy for me to get used to it as I’d use the tips of my previous pens to mimic the designs I’ve got handy. This pen is all about modularity, ease of use, and functionality.
Since all the pyrography pens are relatively inexpensive products, it doesn’t hurt the wallet to go for a more expensive entry like this. It’s also really durable and long-lasting by design. Even long-time users of this pen are satisfied with its durability.
It was impossible to find a negative review of it, online or offline. Instead of shipping issues, which very few people had, it seems to have no downsides. Excellent temperature control, safe design, and pen-tip modularity make this the best product to go for on this list.
Power Source: Corded | Temperature Range: 600-800°F | Tips Included: 2 interchangeable pens | Warranty: 1 year
I may have been chanting too much praise for Razertip’s pen, but this one takes the top spot in every regard. This one is meant only for professional use. And getting this pen means that you are ready for some serious pyrography as well.
It has a 60-watt wood burner, which results in an incredibly quick tip recovery time. I feel as if I am using the Ferrari of pyrography pens.
CONSTANT HEAT - Super powerful 60W wood burner features...
ERGONOMIC - Small and lightweight hand piece design...
Its lightweight design made it comfortable and made it possible to work on finer designs as if you were holding just a ball-point pen. There are 20 tips included in the box as well. It made it so flexible to use me that I don’t think any professional would have a problem with the inadequacy of any sort.
This pen can do incredibly detailed artwork on any medium, such as wood, gourds, leather, and even paper. And I didn’t have any problem with its reliability or safety. Especially because of its lightweight and straightforward design.
The temperature control is precise well with no room for any complaints.
But in all seriousness, as a new pyrographer, I felt as if I didn’t deserve to use this for my small projects. Using the same car analogy, it felt as if a Prius driver is driving a Ferrari on a street instead of a racetrack.
Power Source: Corded | Temperature Range: 392-842°F | Tips Included: 40 interchangeable tips and 2 pens included | Warranty: 2 years
The primary categorization of pens is done based on the type of tips, namely, solid tip burners and variable temperature wood burners.
Solid tip burners, also known as craft-style wood burners, are great for beginners. It’s excellent for filling up big chunks of designs which you can use to make signs or simple designs. Corollary, on the other hand, fails at creating complex or highly detailed designs.
Copper tips are usually thicker.
Heating and cooling take a lot more time, about 5-10 minutes.
The handle is much larger.
Most come equipped with a hand shield to prevent the user’s hands from burning.
For executing complex designs, artists use variable-temperature wood burners instead. These have finer tips and come in different shapes and sizes, much like brushes, for burning different strokes of design.
These come with finer pen tips for much more detailed work.
The handles are smaller for writing and drawing on wood.
The heating and cooling time is much lower.
These also have electrical temperature control, which is great for detailed work.
Working and Performance Parameters
There are several parameters that can judge the performance of the pen. Here I have listed some of the key factors that you should be taking a look at before making the purchase.
Of course, you should know what your use case is before making up your mind about any pen. But that may be even harder to do if you have no idea what specifications you need for the use case. So let’s get started.
Power
Manufacturers will make advertising that the higher the power, the better. But professionals know that isn’t true at all. And as a beginner myself, I can also say that it’s about the right balance. If the pen has more power, of course, it’ll get hot faster,r and it’ll be easier to etch faster. But if you don’t know what you are doing or are not used to doing the design fast, you may end up burning the material being used to the point that it has black spots.
Hence, it’s a no-brainer that lower-power pens are great for doing more detailed work than the more powerful ones. Keeping an arsenal of differently-abled pens is also a great idea, especially if the pens you buy don’t have temperature control.
Comfort
One of the deciding features during my purchase of the pens was comfort. Sometimes, I work on longer projects for hours. Even when I don’t have elaborate ideas and designs, I often like to practice for a long time on scrap pieces.
For that, I always consider if the pen is easy to hold and if it’s lightweight. Higher-end pens pay more attention to comfort, so I generally have a bias toward that. After shelling out a few extra dollars from my wallet, I can definitely say that comfort is a worthwhile investment for serious beginners and professionals alike.
Kinds of Tips for Pyrography Pens
To execute the artwork without any error, the artist must know the types of tips available and which ones to use for the particular design.
Fixed tips
These tips are designed to heat up faster and are incredibly helpful for more consistent artwork.
Polished tips
These are smooth tips, which run more easily over the material than their non-polished counterparts. These are extremely helpful for working on more detailed parts of the project. Variable-temperature wood burner tools usually come with polished tips.
Non-polished tips
Rougher tips are great for blacking out bigger parts of the design, and it is great for etching and making rougher textures on the surface. But keep in mind that it looks less refined and has more imperfections than its polished counterparts. Solid tips are usually equipped with non-polished tips.
Interchangeable tips
If it were me, I’d only recommend interchangeable tips. Versatility is great for detailed artistry. Using different types of tips on the fly is incredibly necessary for more detailed projects. Especially if they are more elaborate.
Cost
Pyrography pens are generally inexpensive, but they can range from $20 to $200. In my opinion, it only depends on what you have for the pen.
I don’t think the cost matters much if you know what the use case is, as all the tools' prices are defined by what they can do. Hence, the value proposition is consistent across the board.
I’d rather recommend finding your use case before investing too much time into the cost of the product.
Conclusion
Thank you for taking the time to read this article on the best wood-burning tool kits. It's exciting to journey into the world of pyrography, and I hope you found this information essential and helpful in selecting the perfect tool kit for your needs. As someone who has had the chance to experience and test each of these wonderful tools, I want to ensure that you make the right choice.
Out of these 5 best wood-burning tool kits, here are the top three expert recommendations:
Walnut Hollow Creative Versa is an ideal option for beginners looking to jump into pyrography. The safety guard and multiple heads offer versatility, making it perfect for those embarking on their first artistic adventure.
Dremel 2000 Versa Tip Butane Torch is a good option for those who desire more extensive functionalities and higher quality. With precise temperature control and a butane torch for soldering, this tool kit can handle a wide range of projects.
Wall Lenk Woodworker 10-in-1is the right choice for both beginners and seasoned pyrography experts, offering a simple yet powerful design. With 30 watts of power and a combination of tips suited for different crafts, this is a versatile and reliable choice for any level of talent.
In conclusion, selecting the right pyrography tool kit is crucial, as it is the gateway to a new world of creativity and expression. Each of the top three recommended kits caters to a particular set of needs, ensuring that you find the perfect match for your goals and artistic preferences. Happy burning, and may your journey through the world of pyrography be fruitful and enjoyable!
We all need a wall clock in our homes, be it as a statement piece or for knowing the time.
In this digitized era, we rely on digital technology for very much everything. Be it calling someone, performing daily chores, and even knowing what time it is. However, we all want a traditional wall clock not only for keeping accurate time but also to add a focal point to the room.
Besides, some wall clocks display helpful information like the day of the week or temperature, while others add stylish and classy design elements to your home.
And you’ve thought of purchasing a wall clock, you have some decisions to make. Do you need a digital or an analog clock face? And do you need additional features or will a simple and classy-looking watch be adequate?
In this review-based guide, we’ll review the 10 best wall clocks out there and provide a detailed buyer’s guide to help you make a viable decision.
Bernhard Products is a well-known analog clock manufacturer and is committed to delivering quality pieces for its consumers. Likewise, this black wall clock is great for any work office, home, or classroom. Its classic frame is sure to align with any room decor, and with 1-year protection, you can get one with complete confidence.
10 Inch clock. Large black bold numbers against white face...
Silent non-ticking mechanism with sweeping movement. enjoy a...
Why Did We Like It?
This classy-looking Bernhard wall clock is sure to grab everyone’s attention. As mentioned, you can keep it anywhere in your room, and it will merge in with the rest of the decor. The black-colored minute and hour hands, the red-colored seconds hand, and the large numbers on the white dial make it easier for anyone to read the clock from a distance.
With a dimension of 10.25 x 10.25 x 1.75 inches and weighing 8 pounds, it's very lightweight, portable, and easy to hang. It’s made of sturdy plastic and a glass lens, which keeps dust away from the dial and is easier to clean.
Interestingly, thanks to its sweeping movement, this battery-operated clock doesn’t make a disturbing ticking sound. So, you can sleep and relax in silence. Plus, their precise Quartz movements always tell you the right time.
What Could've Been Better?
The only setback with the product is that it doesn’t come with AA batteries to operate and show accurate time. But these batteries can be purchased from any local retail store, so that wouldn’t be a significant problem per se..
The 12-inch non-ticking wall clock by Jomparis is considered one of the best wall clocks on the market. Its simple and modern design is suitable for any space, be it a kitchen, bedroom, office, or any other room. And it guarantees to display time accurately and maintain a quiet environment.
【Silent Operation】Quartz movement produces non-ticking...
【Easy-to-Read Large Numbers】 Bold 3D white numerals on a...
Why Did We Like It?
Firstly, this modern clock can be a quality addition to your space, thanks to its looks as well as the features it presents. Similar to the Bernhard wall clock, the precise quartz movement ensures no-ticking sound and accurate time. So, you can concentrate on your tasks without getting irritated.
Design and quality are considered absolutely important for a wall clock, and this unit doesn’t disappoint whatsoever. It boasts a stylish modern cement gray dial and 3D white numbers, making for an easy time-viewing experience. Plus, the frame is made of lightweight and sturdy ABS plastic, for optimum durability and longevity.
Moreover, its back slot design includes a hook, so you can hang it anywhere without dropping a sweat. Other than that, these analog clocks are available in several colors for you to select from. And you only need only one AA battery to run this piece for a whole year.
What Could've Been Better?
The white-colored numbers might blend with the dial of the silver clock, making it a bit difficult to read time in poor lighting. It would’ve been better to maintain a contrasting color for the numbers. But aside from this minor inconvenience, we didn’t find any other substantial limitation.
Pros
Completely silent
Sturdy and lightweight
Easy to hang
Looks great
Cons
Time-viewing might be difficult in poor lighting for silver ones
Design: Modern | Material: Plastic | Dimensions: 12"W x 1.77"H | Weight: 1.32 Pounds | Featured: Silent Clock
The Foxtop FT-12JMSRG1 is an elegant-looking analog, battery-powered wall clock that aligns perfectly with your space, irrespective of its decor. It’s easy to install and use with an easily readable face. And it runs smoothly in both dry and wet conditions, so you can get your hands on a high-quality clock.
Upgraded Movement: Compatible with alkaline battery, with a...
Elegant Design: Rose gold color frame makes it the perfect...
Why Did We Like It?
If you wish to add a glamorous accent to your interior decor, this metallic analog clock by Foxtop is an ideal choice. Like our previous models, this wall clock also comes with a precise quartz sweep movement, guaranteeing accurate time display.
In terms of design, the sleek clock, with its silver, gold, and rose gold shades with large numbers, makes it easy to read. The frame is made of durable plastic, making the clock lightweight and long-lasting. Also, the clock background is made of solid plastic, keeping it dry in humid conditions.
Apart from that, it features a front glass cover that makes for convenient viewing while keeping dust away from the dial. And its easy-to-see hands and large numbers ensure easy readability. Lastly, the unit comes with a hook and a back slot for easy installation.
What Could've Been Better?
This unit makes a ticking sound which can be a bit disturbing if the room is extremely quiet, although you might not hear anything in a busy or noisy space. So, it can be a minor setback for some customers who prefer a silent room environment.
Yoobure, with a “high precision” principle for their product design, has developed this precise analog wall clock. With an easy-to-read and traditional clock face, silent dial movement, and sturdy frame, it becomes the perfect choice for users looking for a high-quality unit for their homes. Apart from that, its elegant design adds an aesthetic look to your interior decor.
Concise Style: Special and elegant design with classic black...
Why Did We Like It?
This unit features everything one wishes for in a wall clock. To start with, its built-in sweep movement ensures it doesn’t create a ticking sound, thereby establishing a totally silent working or sleeping environment. It’s a standard feature you’ll witness with most products on our list.
Besides telling accurate time, it boasts a classic style, which suits most interior decor. Also, its black-colored numerals are huge and align perfectly with its background design, making it easier to read the time. So, you can install it anywhere you need it most.
The 10-inch clock weighs 11.6 ounces, making it a lightweight option. Furthermore, the back slot and hook allow you to hang it quickly and complete your daily tasks on time.
What Could've Been Better?
The primary issue that we faced after using the unit for some time was that it started lagging after a few months and required a reset. This is primarily because of the faulty battery holder design, twitch doesn’t allow the battery to last long.
Halfway through the list, we have a vintage-looking wall clock by Hylanda. Its elegant and classy design adds up beauty to your interior decor. What’s more, its sturdy build, superior silent hand movement, easy readability, and other user-friendly features make it a worthy option for almost any space.
🕗【SOLID & LIGHTED & STAIN-RESISTANT】 - The Sturdy...
Why Did We Like It?
There are several things that we love about this product- it’s a 12-inch round-shaped clock with a pale yellow dial face and a brown frame. Anyone who’s a fan of mid-century design and loves adding vintage-themed items in their living room will love the look on offer.
Similar to previous models, this unit also has a superior sweeping movement that ensures true silence, leaving you undisturbed. At the same time, its precise movements ensure accurate time display. Furthermore, its large numbers and HD glass lens make it easy to read and repel the dust falling on it.
Moving on, this unit is powered by one AA battery, which means operating it won’t make you scratch your head. And lastly, it comes with a 1-year warranty, where the company will replace any physically damaged parts resulting from manufacturing defects.
What Could've Been Better?
The issue we encountered with this product was its small back hole which made the overall installation process somewhat problematic. It took us an hour to set it up, as the hole wasn’t visible from the side.
Up next, we bring you a classic timepiece by Hippih that has a silent mechanism and an easy-to-read dial. With this clock, not only will you be able to add aesthetics to the living room, but you can also ensure to always stay on time. And being lightweight, you can easily hang it anywhere.
Easy to Read: The large black numbers of this 10-inch wall...
Easy to Use: 1 AA ordinary Carbon Zinc battery(not...
Why Did We Like It?
To begin with, this Hippih wall clock boasts a classy and elegant look with its round shape and black border frame. Hence, it makes for a perfect gifting option for your loved ones on any special occasion.
Its hands are made of aluminum, which further adds to its classy look. Aside from that, the bold black numbers on the white dial face make it easy to read.
As with most clocks on our list, it features a silent quartz movement. Hence, it doesn’t make any ticking sound and shows precise time so that you won’t get late anywhere.
Furthermore, the frame weighs a mere 1.5 pounds, meaning portability won’t be an issue. And last but not least, the package comes with a simple mounting kit that aids the installation process.
What Could've Been Better?
Our primary disappointment with the unit is its construction. The clock body is made of very lightweight plastic, which might appear flimsy to your hands. So, we didn’t find the price justified according to the construction and material being used.
Stonebriar has this gorgeous vintage wall clock that brings an aesthetic look to your living room, and anyone can hang this clock without breaking a sweat. It’s battery-operated and can even be a perfect gift for elderly people on their special occasions.
This unique clock measures 14" in diameter and is the...
Rustic clock features a vintage worn blue and white clock...
Why Did We Like It?
This Stonebriar wall clock measures 13.98 x 13.98 x 1.1 inches and weighs 1.92 pounds, making it a lightweight model and perfect for any room. And it comes with a keyhole hanger making it easy to hang on any wall.
Its design makes it a standout amongst other products on our list. Featuring a vintage worn blue color, a white clock face print, and lightly distressed black numbers, it gives out an antique farmhouse feel. Its unique look makes it a perfect gift for your loved ones on any special occasion, be it Christmas, birthdays, weddings, or others.
The unit is made from medium-density fibreboard, making it durable and long-lasting. Apart from that, you can just use a damp cloth to clean it, and it needs a single AA battery to run.
What Could've Been Better?
Unlike other models on our list, this wall clock produces a ticking sound, which might irritate many. Apart from that, distressed black numbers on a blue dial make reading difficult in some situations. You might have to get closer to it to read the time.
Bringing you another round-shaped wall clock by Hippih that features a concise style and large black numbers, making it easily readable, even from a distance. Its simple design makes it a suitable fit for any room, and its sturdy frame makes it last longer.
Similar to its sibling product, it features a round face design with large black numbers, making it easy to read. Its elegant and unique design fits beautifully with any of your interior decors. Plus, its sturdy frame and high-quality aluminum pointer make it durable and long-lasting.
Its second-hand doesn’t make a ticking noise, ensuring a quiet and non-disturbing working environment. Apart from that, it comes with a 12-month manufacturer’s warranty so that you can purchase the unit with complete confidence. In case you are somewhat bothered by the clock, you can directly contact the company for their assistance.
The unit also includes a hook that ensures an easy installation. Plus, it needs an AA carbon battery to run, which is readily available.
What Could've Been Better?
The clock by Hippih is not as quiet as advertised by the manufacturer. It makes a murmurous sound, which some might find inappropriate. Apart from that, it started to lag after a few months, which was a critical issue with the unit.
Now that we’ve almost reached the end of our list, we present you with a classic wall clock by Bekith. It has an antique, wooden look with hands that move without ticking noise. Also, it features a practical design that allows easy installation.
Classic style suitable for classroom, office, living room,...
Why Did We Like It?
To start with, this wall clock is made of plastic and has a bronze frame with an off-white clock face contributing to its vintage, antique, and classic look. The unique designed clock aligns with any interior decor and any room that demands a peaceful environment. Thanks to its non-ticking mechanism, you won’t have to worry about it making any ticking sound.
It weighs only 1.05 pounds and becomes one of the most lightweight options to have it hung. Its 12-inch round dial and large black visible numbers make it easy to read.
Apart from that, coming with a wide back slot ensures that you can hang it anywhere easily. Plus, you’ll need 1 AA battery to run the clock. Make sure to change it on a periodical basis to avoid any time lag and risks of you getting late to work.
What Could've Been Better?
We found the battery slot to be a bit tight with this wall clock. So, getting the batteries in and out of it can sometimes be challenging. Apart from that, the battery holder seems to be faulty and a new battery seems to stop working after a few days of its use.
This gorgeous-looking wall clock by Epy Huts is a beautiful piece to keep as a centerpiece of your living room. Made of crystal-clear glass lens, solid plastic case, and metal hands deliver the most value for money. Also, its precise quartz movement doesn’t make any ticking sound.
Clear View-The large numbers are clear to read and the front...
Why Did We Like It?
This classic-looking clock has some handy features that make it suitable for our list. For one, it ensures a silent non-ticking sound owing to its accurate quartz clock movement. And, it shows the accurate time at all times of the day, so you miss nothing.
In terms of design and looks, it features a graphic dial with baton hands and a minimalist straight-cut case, making it suitable for any room. And it comes with a range of dial colors to choose from.
It showcases white Arabic numerals on a black dial, making it easier to read. Apart from that, it’s operated by a single AA battery and is much easier to clean. All these features make it a perfect gift to loved ones on any occasion.
What Could've Been Better?
The major setback of this product is the material it is made of. Because it’s made of plastic, it is not considered a durable clock and can be damaged if it falls to the ground. Apart from that, the battery holder is also much smaller, and you have to struggle to fit in a battery.
For wall clocks, it is challenging to select one from a range of options. We bring you this detailed buyer’s guide, which will help you navigate the market. This section will guide you through features you should look out for when going clock shopping. So, let’s start.
1. Analog Or Digital
First of all, it’s essential to decide which kind of clock you want, an analog or a digital one. Both need to be set up properly before you’re manually using them.
Analog clocks are traditional and typically have three hands, an hour hand, a minute hand, and a second hand. To tell the time, you need to read and interpret the clock face, divided into 12 (for 12 hours) divided into 5 (12 × 5 = 60 minutes).
On the other hand, a digital clock usually comes with a screen that displays the exact time, eliminating the need for interpretation and making it easy to read. Also, you can have an atomic clock to yourself to get an accurate time interpretation every time.
2. Ticking Or Silent
The ticking sound in clocks is mainly due to their second-hand movement. It typically applies to analog clocks. Some people might feel unbothered by the ticking sound, while others find it soothing. However, it can be irritating for some, worse when it's placed in places like a library or bedroom.
Luckily, most wall clocks on the market (many we have discussed on our list) come with silent quartz movement and eliminate the ticking sound.
3. Size
Another factor worth considering is the clock size. A wall clock is helpful only when visible from every corner of the room, and size plays an essential role in this respect.
4. Readability
Apart from its size, other factors come into play where readability and visibility are concerned. This includes:
Contrast between numbers and clock face
Numbering style of the clock (numbers or Roman numerals)
Contrast between face and hands of the clock
Material of the face cover, such that it doesn’t reflect light
Visible in dark
5. Power Source
The way a wall clock is powered is another factor to consider. Most wall clocks use AA batteries, which are easily available in local retail stores. However, some models use power chords to run. We’d suggest avoiding the latter one, as having a cord means the clock needs to be installed near a power source, which might not be accessible easily.
It’s best that clock batteries are changed frequently as weak batteries can stop the clock altogether.
6. Additional Features
Apart from traditional timekeeping, many clocks come with additional functions, especially digital clocks. These functionalities include date keeping, alarm, humidity, and temperature measurement.
7. Style
We’ve already mentioned that a clock is more than just a timepiece, they are a decorative item, and you should treat them as such. And so, when putting on your shopping glasses, pay attention to what it looks like. You have many styles to choose from, like the classical style, modern style, or vintage style.
It’s essential to consider factors like its color, design, and build material.
8. Durability
As for any products you’re purchasing, you might want them to last long. So, it's essential to pay attention to the material of the clock, the manufacturer’s warranty and online reviews posted by customers.
Do you need a wall clock?
It’s not an absolute necessity but is an excellent addition to any space.
Should you purchase an analog or digital clock?
It entirely depends on what you need in your space. They both work equally well, as long as you’re purchasing a reliable and high-quality brand.
How high should a wall clock be hung?
An optimum height for a wall clock is 57-60 inches above the ground. But, you can hang it anywhere you find comfortable and visible from other rooms.
How do you fix a wall clock?
Based on what’s broken, it might be helpful to call for a professional horologist, a specialist in diagnosing and fixing a broken clock.
Conclusion
Whether you’re looking to stay on time or want to add a new item to enhance the look of your room, a wall clock is always an option. So, whatever your reason for purchasing a wall clock, we hope to have helped get your hands to an ideal one.
Before leaving, we’d like to help you further by mentioning our favorites from the list. Bernhard wall clock will be the best wall clock you can get. Apart from its straightforward design with easy-to-read numbers, it doesn’t have any potential issues you have to worry about.
Our next favorite is the Foxtop modern wall clock which comes in a beautiful rose-gold frame that adds up to your wall decor. And, it doesn’t make any sound, and the installation is very straightforward.
With this, we’d say goodbye. See you later and take care!
Are you still searching for the best UV light glue to use in your projects?
Settle down and let's discuss the options that would be best for your purpose. Both professionals and hobbyists try to look for a glue that will provide the best adhesion.
Even though super glues and some other options are available on the market, nothing can beat the benefits of UV light glue. Besides providing enough time to work with the substance, it also proves to be quite resilient after curing. Moreover, the glue works well with various surfaces and can be used for commercial and hobby purposes. Hence, its rising popularity has led numerous companies to come up with their own version of the glue.
To ease the confusion of choosing from a vast pool of products, we have come up with a recommendation of seven excellent UV glues. So, let's begin to know a bit about each of them!
Listed below are the best UV light glues:
Loctite 34931 Light Cure Adhesive: The Loctite adhesive is famous for its exceptional optically clear finish, perfect for glass and precious stones. The cure time outshines others, which takes only seconds. It requires a special UV light strength of 365 nm for the most effective bond.
Bondic SK8024 UV Liquid Plastic Welder: A plastic welder lauded for its strong adhesion across numerous materials, boasting a waterproof quality. Its unique pen-like design makes precision work much easier compared to traditional squeeze tubes. The higher price and cost of refill cartridges pose a downside.
Limino SKU0009a UV Resin: The Limino UV resin is ideal for artistic DIY projects, setting itself apart with its high-gloss finish after curing. It comes in a generous 200-gram bottle. It can remain sticky after curing if not exposed to a high-power UV light.
RapidFix 6121805 UV Liquid Plastic Adhesive: The RapidFix UV adhesive can bond various materials, fill cracks, and is drillable after drying. It also includes a UV light, unlike Loctite 34931, increasing the overall value. A few users found faults with the included flashlight, a potential setback.
Riverruns Bonding and Welding Glue: Riverruns glue kit comes with three specialized bonding solutions and a UV penlight. It can resist severe conditions, including vibration and extreme temperatures. Ambiguous label information can be confusing.
1. Loctite 34931 Light Cure Adhesive - Best for Glass and Metal
If you ask around about companies that make excellent UV glues, Loctite is sure to come up. The company calls this a light cure adhesive that works best with glass and metal. Moreover, as an optically clear glue, this is highly sought-after, so let's check it out.
Loctite 349 is regarded as a pioneer when it comes to the best UV glues. Its bright yellow packaging is easily visible, and even professionals swear by using it for heavy-duty projects.
As it dries clear, it is one of the best adhesives to be used with glass and precious stones. Also, because of its heat-resistant properties, you don't need to worry about discoloration.
Moreover, the handy bottle packaging makes the application hassle-free. Its narrow neck lets you apply the slightest of drops, and it doesn't get messy. Also, we think this is an excellent option for those looking to work on projects with crystals.
Furthermore, since the product is water-resistant, you can use it in places that can get wet once in a while. Hence, it's a great glue to have around the house.
This isn't technically a drawback of the product, but you will need to buy a UV light with a strength of 365 nm to cure this glue. Having the proper light ensures that the bond is strong and long-lasting. So, this glue might cost you a bit more than the usual options.
What We Like
High-quality UV glue
Good for small and big projects
Low curing time
Adequate quantity
What We Don’t Like
Needs a special UV light strength
Quantity: 1 Bottle | Volume: 1.69 fl oz | UV Light Included: No | Cure Time: Within Seconds | Dry Color: Clear | Resistance: Resists Water, Heat
2. Bondic SK8024 UV Liquid Plastic Welder - Best for Professionals
Bondic presents you with unique bonding products that are especially helpful for professionals. You may have felt frustrated while working with the usual glues, but this fresh product will put an end to your worries. So, if you find this interesting, check out what more it has to offer.
Are you tired of using adhesives that just don't seem to work? Rest assured about this product as it amused us with its excellent quality. The first feature that we noticed about it was the container. It snugly fits into the box and remains safe even when you carry it around.
Another great feature has to be the design of this product. It's shaped like a pen, so using it is much easier than those squeeze tubes. Moreover, the thin applicator at its mouth is beneficial to work with small items.
However, the feature that pleased us the most is the 100% waterproof capability of this UV glue. Because of this, you can easily use it to bond items that come in close contact with water. Also, it can work with various materials, so you don't need to purchase different glues.
Overall this plastic welder or UV glue is perfect for gluing parts together. However, the only drawback is its high price. Also, it comes with only 4 grams of glue. Hence, you will need to purchase refill cartridges that don't come at a cheap price once it runs out.
3. Limino SKU0009a UV Resin - Best for DIY Arts and Crafts
Are you someone who needs to have a big bottle of glue all the time? This epoxy UV resin from Limino will amaze you with its bonding properties. Moreover, this resin is also excellent for DIY arts and crafts, so you are actually getting a versatile art material rather than just glue.
To begin with, we love that this epoxy resin isn't marketed as just glue. The company realizes that someone who works with the product may want to try out its versatility. However, unlike other epoxies, this is a single-part product, so you can use it directly from the bottle.
We appreciate that Limino went ahead with a much bigger 200-gram bottle compared to a tiny one. So, you can do many projects with this glue without continuously needing to buy more. And, its affordable price point makes this one of the best UV glues currently available on the market.
Don't own a UV light? No problem! Just leave your project under direct sun for 10-15 minutes on a bright day, and it will cure. Also, there is no chance of yellowing with this crystal-clear epoxy.
The only drawback of this UV resin was that it might remain sticky when a low-power UV light is used for curing. You can either get a high-power light or increase the curing time to prevent stickiness. Moreover, some people have even recommended using thin layers as a solution.
What We Like
Easy to use
High gloss results
Low odor
Cures fast even under sunlight
What We Don’t Like
Might remain tacky after curing
Quantity: 1 Bottle | Volume: Around 6.75 fl oz | UV Light Included: No | Cure Time: 1 to 2 Minutes (UV Torch), 10 to 15 Minutes (Sunny Day), 30 to 60 Minutes (Cloudy Day) | Dry Color: Clear | Resistance: Withstands Up to 248°F
4. RapidFix 6121805 UV Liquid Plastic Adhesive
If you are tired of using glues that make tall claims about bonding various materials, give a shot at this RapidFix UV glue. With its simple approach, this product can do everything from gluing things to fixing cracks. Moreover, its small size is perfect for carrying it around.
The RapidFix UV adhesive is one of the strongest glues out there, and it doesn't dry out in the package. Moreover, it allows you enough time to manipulate the adhesive before curing it in place.
When it comes to versatility, it dries clear, so you won't be able to see it on a substance like glass. Also, you can sand it down or paint it to make a project smoother. It is also one of the only glues that can stand drilling, which is excellent for DIY projects.
Generally, you may need to buy a UV light for curing, but RapidFix has got you covered by including it in the package. We recommend you purchase multiple packs to always have access to it for quick fixes.
Also, at the back of its packaging, you will find interesting info on the ways to use it for different projects.
While reviewing previous customers' reviews, we found that a few of them received faulty flashlights. Even though the probability of facing the problem is low, you still need to be wary of it. Moreover, if you face any problem don't forget to contact customer care to get a replacement.
Are you a professional who has to work with various types of materials? Riverruns has brought a glue kit that you can't miss. It includes three different UV glue bottles along with a 395nm penlight for curing. So, without further ado, let's check out this impressive product.
The unique quality of this kit lies in the three different types of glue present in it. Each glue comes in a 10 ml bottle, and only a few drops are enough to create a strong bond.
We like that Riverruns have included a plastic and PET-safe UV glue that’s seldom seen in other kits. Moreover, even though these are specialized glue, each of them can also work with other materials.
Additionally, the UV penlight is also included in the kit. The light has zooming capabilities which are perfect for projects of different sizes. Moreover, its power of 395nm will also help you to cure some of the strongest UV glues available on the market.
Also, everything comes packaged in a beautiful metal case to keep the contents safe. Even the dark foam present that lines its insides prevents the bottles of glue from drying out.
We don't have any complaints about the glue as it works pretty well. However, we did notice that all the bottles have similar information on the labels. Hence, this can be confusing for a beginner who is using UV glue for the first time. It would have been nice if more information were added to the labels.
Damn Good brings us a fuss-free UV glue that works with different types of materials. Moreover, the cute little bottle has enough glue to fill up three 4-gram pens. So, let's know a bit more about this helpful adhesive.
If you are new to UV glue, this Damn Good product will be a great place to start. This simple yet effective glue comes in handy for fixing or gluing things together. Moreover, it also can fill up cracks or gaps. As it dries clear, the object wouldn't have an odd look.
The beautiful black bottle holds 10 ml of product that can quickly fill up a glue pen. However, its narrow mouth lets you apply the glue on large and small surfaces.
Additionally, this is a workshop-grade glue, so professionals can also use it for their projects for plastic welding. Also, on using a powerful light, the glue takes only a few seconds to dry. So, you wouldn't need to spend a lot of time on one spot.
The only aspect of this glue that we didn't like was that it requires a pretty strong UV light. So, even though this is an affordable option, beginners will initially need to spend on a light. Other than that, we didn't find any drawbacks with this adhesive.
Last but not least, we have this Solarez glue kit that's dedicated to our fish-enthusiast friends. If you have struggled with building fly ties, this kit will finally let you have some peace. Moreover, the cute packaging also provides enough information needed to work on the ties.
We have saved one of the best products for the last bit of this guide. Solarez, a well-known UV glue company, has made this special glue for making fly ties. But, that's not all! You can also use this resin to bind other things because of its adhesive quality.
Moreover, the three resins present have different consistencies for a versatile look. This kit also contains a flexible resin that has 300% elongation. So, if you are one of those who like to create lots of strings, it will surely give you satisfaction.
However, the best feature of this product has to be the formula. It's non-toxic so you can make fly ties with children, and it doesn't even have an odor. Also, the resilient quality ensures that you can use the fly ties for a long time.
We love this product because of its unique outlook on making fly ties. However, people interested in buying this should remember that they will have to learn to make the fly ties. We thought of mentioning this point even though it isn't really a drawback.
What We Like
Versatile usage
Works well as a glue
UV light is powerful
Packaging provides enough info
What We Don’t Like
Requires learning fly tie-making process
Quantity: 3 Bottles | Volume: 0.5 oz Each | UV Light Included: Yes | Cure Time: Around 30 Seconds | Dry Color: Clear | Resistance: Resists Yellowing
What is the Best UV Light Glue?
If you're in search of the best UV light glue, below is a table providing a comparison of quantity per package in units, volume in fluid ounces, whether a UV light is included for curing, cure time in minutes and seconds, dry color, and resistance properties.
Before choosing a UV glue, you will need to take into account some features that set each apart. Moreover, it will help you understand the aspects of glue that make it suitable for your project. So, here are some essential points that you need to keep in mind.
Types of UV Glue
While picking a UV glue, the first thing to notice is its type. Most UV adhesives either have an epoxy or acrylic base. Though both have similar textures, the result might be slightly different. Moreover, depending on the type, the glue might not work for specific materials.
We suggest you choose an epoxy-based adhesive to cover a larger area or fix cracks and gaps. In contrast, acrylic-based glue works well for bonding materials like glass and metal. However, it has a slightly longer drying time compared to epoxy-based adhesive.
So, choose the glue based on your project to get the best results. Also, don't forget to get the UV light suggested by the manufacturers.
Ease of Application
No one wants to mess things up while applying glue. This is especially crucial while working on smaller projects. Hence, while buying the glue, make sure that it comes with easy application.
Manufacturers mainly achieve it by including a narrow applicator. This helps in getting to the smallest of surfaces without excess spillage. We especially like the pen applicators because it's easy to hold and apply the product.
Also, a product should mention any required safety precautions. While working with epoxy-based glues, you may need to spend some time preparing for the work. Moreover, we also appreciate clear instructions as it makes using the product easier.
Quantity
If you plan to work on a big project, the tiny 10 ml bottles won't work for you. Hence, before purchasing the adhesive, you should do some calculations to know the required quantity. We will always suggest you get a little extra for good measures.
Moreover, this point also leads you to the total cost of purchasing the glue. So, be very careful while selecting the product, and make sure to check the quantity.
Additionally, people who are buying glue pens should also check for the availability of refills. We always like companies that have affordable and accessible refills, as you can never have enough glue.
Is it safe to use UV light glues?
Yes, it is generally safe to use UV light glues provided safety precautions are observed. Direct contact with skin and eyes should be avoided, and protective clothing, gloves, and eyewear should be worn during its usage. Moreover, direct exposure to UV light can be harmful, so appropriate shielding is necessary when using UV light for curing. Always use these products in well-ventilated areas and follow the manufacturer's safety instructions.
Can I use a UV light glue on non-transparent or opaque materials?
You can use UV light glue on non-transparent or opaque materials, but effectiveness may vary. UV curing adhesives harden, or cure, upon exposure to UV light. Transparent materials allow the UV light to penetrate and cure the glue thoroughly. With opaque or non-transparent materials, the UV light might not penetrate fully, potentially resulting in inadequate curing. It's essential to follow the manufacturer's specifications for best results.
Can I sand or file a cured UV light glue bond?
Yes, you can sand or file a cured UV light glue bond. After the UV adhesive has been properly cured under UV light, it hardens and forms a strong, solid bond. This solidified bond can be sanded or filed, much like many other hardened materials. It's important to use appropriate safety precautions when doing so, such as wearing protective eyewear to protect against any potential residue or dust.
Can I paint over a cured UV light glue bond?
Yes, you can paint over a cured UV light glue bond. Prior to painting, lightly sand the glue for better paint adhesion, then clean the surface. Paint adherence may vary, so refer to your paint manufacturer's guidelines.
How should I store UV light glues?
You should store UV light glues in a cool, dark place as exposure to ultraviolet light or sunlight can cause premature curing. It's also good practice to keep the container tightly sealed to prevent air exposure, which can also activate curing. Some products may have additional storage requirements, so always check and follow the manufacturer's instructions.
Having explored the performance, ease of use, and quality of various UV light glues on the market, we have narrowed down the top three expert recommendations.
The Loctite 34931 Light Cure Adhesive is an ideal option for those looking to bond glass and metal, with its heat-resistant and water-resistant properties making it particularly versatile.
On the other hand, the Bondic SK8024 UV Liquid Plastic Welder is a good option for professionals who need a strong adhesive and appreciate the pen-like design for precision application.
Lastly, the Limino SKU0009a UV Resin is the right choice for DIY enthusiasts or artists who want a large quantity of crystal clear epoxy that can cure even under sunlight.
With that, we come to the end of this guide. Do let us know if you have any queries regarding the suggestions.
Till then, take care and have a nice day!
No one is born with the ability to sew, and some of us, no matter how hard we try, find it impossible to learn.
That’s why fabric glues are the next best thing. The lack of sewing expertise shouldn’t stop anyone from making fun costumes or modifying old clothing. Fabric glues are ideal for adding eye-catching stones and gems to add some frills to worn-out clothes and make them look new again. Plus, DIY Halloween costumes with no sewing? Sounds like a dream!
But, since this fabric glue and leather glue craze is catching on, there are many brands to pick from. If you’re looking for reliable fabric glue, you’re in the right place. To make it easier, we have put together this review of the 11 best permanent fabric glues available in the market.
Since time is of the essence, let’s get right to it!
Best Permanent Fabric Glues
Here is the list of the 11 best permanent fabric glues that you can use to craft, mend, and repair your favorite fabrics.
One of the best things about fabric glue is that it can help add embellishments to make the fabric stand out. And a very popular fabric glue for that purpose is this one by Aleene’s. It has many features that make it a hit, and it doesn’t spoil the fabric.
75 YEARS of QUALITY: Voted America’s Favorite Crafting...
STRONG AND FLEXIBLE BOND - Our super strong adhesive forms a...
Why Did We Like It?
People avoid fabric glues because once the glue is washed, it makes the fabric stiff. However, that problem has been solved by Aleene’s. This product has been formulated in a way that keeps the glue flexible even after washing. So it won’t feel uncomfortable or unnatural against your skin.
Another great thing about this glue is that it stays permanent on a variety of fabrics. So whether you want to embellish a jacket or add some patches to a jersey, Aleene’s fabric glue can help you do it all. Plus, it is a non-toxic glue that will not cause any harm in case it touches the skin.
Aleene’s Fabric Fusion is also odorless and does not create strings when applied. This makes it easy to use and reduces the chances of making a mess. It is also machine washable, so there is minimal after-care required.
What Could’ve Been Better?
This glue is quite popular since the adhesion is top-notch, and it stays even after multiple washes. However, the only issue with it is that it is not quick-drying like most of its competitors. Even when used in small amounts, it takes a while to dry.
Pros
Strong adhesion
Can be applied to a variety of fabrics
Mess-free
Non-toxic and machine washable
Cons
Takes time to dry
Quantity: 1 Bottle | Volume: 8fl oz | Set Time/Dry Time: N/A | Dry Color: Clear | Resistance: Waterproof
When it comes to fabric glues, timing is everything. The glue must stick firmly and dry fast. If you don’t like to wait around for the glue to dry, take a look at Tear Mender’s instant adhesive. It is made for people looking for fast-drying, strong fabric glue.
INSTANT DURABLE BOND: Adhesive dries and forms and instant...
DURABLE HOUSEHOLD REPAIRS: Forms a long lasting and...
Why Did We Like It?
Straight off the bat, we were impressed with how “instant” this glue is. The adhesive is quite strong and bonds with the fabric very quickly. After application, the material remains flexible and is wearable within three minutes. Since it is water-proof, machine-washing the fabric will not weaken the bond.
It’s also impressive that the glue can be used on both indoor and outdoor fabrics. Since it is made for leather too, not only can it be used on clothes but also on upholstery, décor, and sports gear. Moreover, it requires no additional solvents or heat to create a firm and permanent bond.
You may think that any glue this strong will be toxic, but that is not the case. Tear Mender’s instant glue is made with natural latex and is acid-free, making it non-toxic. Plus, it is effortless to clean since it does not stick to hard surfaces.
What Could’ve Been Better?
While this is a very popular brand of fabric glue and has a ton of positive reviews, one consistent complaint is that it runs a little thin. So when applying it on larger surfaces, you will have to use it more generously. Plus, it is not odor-free, and the smell can be overpowering for some.
Fabric glue is not just great for decorating jackets and fixing sofas. It can be helpful for outdoor gear as well. If you are looking for something to fix seams in tents, awnings, and the like, take a look at the Gear Aid seam grip. Fixing camp gear will never be a hassle again.
Permanent Repairs – Seal seams and fix holes in tents,...
Covers 12 Feet of Seams – One 1 oz tube treats up to 12...
Why Did We Like It?
Fixing tents and other outdoor gear can be quite a hassle, especially if it faces a lot of rain. Sewing may not be as effective every time and can be pretty time-consuming. This is where the Gear Aid seam grip sealant comes in handy. It has a coverage of 12 ft and dries clear.
It comes with an applicator, which makes it easy to apply on the seams. It takes about 8 hours to cure but can also be kept overnight. After curing, it forms a strong layer on the fabric. The best part is that it is waterproof and can be used on a rainfly and camping gear.
Additionally, it can be used to fix tears on nylon, polyester, canvas, leather, and vinyl. Since it dries clear, it will not be visible, leaving the fabric looking smooth.
What Could’ve Been Better?
One of the most important things to be careful about is the application. The glue is a bit thick, so while applying, make sure you apply a thin layer. The thinner the coating, the less time it will take to cure and it won’t look bulky.
Pros
Waterproof sealant
Ideal for outdoor and camping gear
Can also fix tears and rips
Ample coverage with one tube
Cons
Glue consistency is too thick
Quantity: 2 Tubes | Volume: 1fl oz Each | Set Time/Dry Time: N/A | Dry Color: Clear | Resistance: Waterproof
Next on the list is the Beacon Fabri-Tac adhesive. If you are one of those DIY costume makers or are always looking to update your wardrobe, this glue is a blessing. Other than for creating elaborate designs, it’s great to have around for basic repairs too. Let’s have a look at some features.
It remains our goal to earn your trust through the...
Manufactured in united states
Why Did We Like It?
One of the biggest issues DIY costume makers have is finding fabric glue to work on various fabrics. While most work on the basic ones like leather, nylon, and polyester, finding something that works on delicate fabric is tough. But that’s a thing of the past with the Beacon Fabri-Tac adhesive.
Fabri-Tac is not just ideal for day-to-day crafts but works really well on soft fabric because it does not soak or stain it. And, since it does not become stiff, the softness of the fabric can be retained. Another great thing is that it is incredibly fast-drying, and the fabric is wearable almost immediately after application.
Much like the other glues on the list, it is acid-free and non-toxic. Interestingly, this glue can also be used on hard surfaces like wood. Since it is water-proof, washing will not affect the adhesion.
What Could’ve Been Better?
This is one of the highly-rated glues due to its quick-drying qualities. However, one recurrent issue users have faced was that it caused a mess. The glue is relatively thin, so you will have to be careful while applying it.
Pros
Ideal for soft and delicate fabric
Does not soak or stain
Can be used on wood
Water-proof and non-toxic
Cons
Thin consistency
Quantity: 1 Bottle | Volume: 4fl oz | Set Time/Dry Time: Dries in Minutes | Dry Color: Clear | Resistance: Waterproof
This is yet another fantastic option if you love adding embellishments to any fabric. The Gorilla fabric glue has a quick-drying formula that can bond all sorts of gems and stones quickly. Plus, the adhesion is strong and will keep the gems in place. Now, moving on to some deets.
100% WATERPROOF: Formulated to provide a fast setting,...
CRYSTAL CLEAR: This high strength adhesive dries crystal...
Why Did We Like It?
A fabric glue that dries in seconds? What’s not to like? Not only does it have a quick-drying formula, but it can also be used on a variety of fabrics like corduroy, denim, fleece, flannel, and more. With this at home, your old corduroy jacket can finally be brought back in style.
But that’s not all; this glue is 100% waterproof that remains flexible even after washing. You don’t need to worry about water weakening the adhesion anymore. Plus, it dries crystal clear and will not leave unappealing stains on your favorite fabric.
Whether you are looking to add buttons, ribbons, or even rhinestones, this glue can hold onto it all. It is available single but can also be bought in a three-pack; the choice is yours.
What Could’ve Been Better?
First off, this fabric glue is not recommended for softer fabric like velvet or satin as there is a possibility it will bleed through. Plus, it may be quick-drying, but it takes a long time to cure. So wearing the fabric immediately will not be possible.
Pros
Strong adhesion ideal for gems and rhinestones
100% water-proof
Dries within seconds
Glue remains flexible
Cons
Takes time to cure
Quantity: 1 Tube | Volume: 2.5fl oz | Set Time/Dry Time: Holds & Dries in Seconds | Dry Color: Clear | Resistance: Waterproof
Now, we know this is not a permanent glue but hear us out. What if you put some extra rhinestones, and now the permanent fabric glue won’t let go of it? Enter temporary fabric glue. This one by Odif is a great product to have if there is a chance for errors.
Temporary, repositionable, fabric adhesive used to...
Odorless, colorless, no mist, does not gum sewing needles
Why Did We Like It?
As much as someone may like to believe it, it is impossible to do something without making a few mistakes. If you want to try a few embellishment patterns before permanently fixing them or wish to baste fabric, try Odif. This temporary fabric glue is ideal when there needs to be room for adjustment and repositioning of fabric.
Hemming a dress or quilting has never been easier, thanks to Odif’s temporary glue. Most people avoid using temporary glue because it sticks to the needle but not this one. You will have a smooth and effortless stitch despite using glue.
Additionally, this is a mist-free and odor-free spray. It is also non-toxic and acid-free, so you won’t have to worry about any harmful fumes. Moreover, since it is a spray instead of a pour spout bottle, it is also straightforward to use.
What Could’ve Been Better?
Like with most spray bottles, nozzles tend to be an issue, and this one is no different. One of the most common issues faced with this temporary spray is that the nozzle tends to clog after a few uses. This can make spraying a bit difficult but can be fixed by shaking the bottle vigorously.
Pros
No odor
Mist-free spray
Ideal for when fabric needs to be repositioned
Can be used for quilt basting
Cons
Nozzle tends to clog
Quantity: 1 Can | Volume: 12.4oz | Set Time/Dry Time: N/A | Dry Color: Colorless | Resistance: N/A
Liquid fabric glues are not the only tool that can be used for DIY projects and costumes. If you are the type that prefers patches to gems on fabric, then this iron-on adhesive is perfect for you. The ThermOweb Heat N Bond works on any inkjet printer and is excellent for patterns or texts.
HeatnBond Lite is a roll of iron-on, sewable, double-sided...
Use it in place of pinning or basting and just stitch right...
Why Did We Like It?
Patch jackets are always in style; the only problem is, they can be pretty expensive to buy. But worry not, you can be up to date with the latest fashion trends by making a DIY patch jacket using the ThermOweb Heat N Bond. This is a handy tool to have for people who like to display their creativity through their clothes.
It is pretty easy to use and does not take a lot of time. One pack comes with ten sheets that can be used with a standard inkjet printer. On printing the design or text, it only takes 5-10 seconds to dry on the paper. Since it is heat-activated, it has to be ironed on (no steam).
On the fabric, it takes about 6-10 seconds to fully bond, after which you can sew along the edges. Plus, the adhesive is machine washable and will eliminate the need for pinning.
What Could’ve Been Better?
Although this is easy to use, it does need some stitching work. For this reason, it is not ideal for people that have no sewing experience at all. In those cases, regular fabric glues are a better option. However, this does have strong adhesion and is highly recommended.
Pros
Ideal for applique quilting
Non-toxic and acid-free
Quick bonding time
Does not gum the needle
Cons
Not ideal for people with no sewing experience
Quantity: 1 Pack | Volume: 6.4oz | Set Time/Dry Time: 5 to 10 Seconds to Dry | Dry Color: N/A | Resistance: N/A
If you are just entering the world of fabric glue, picking different glues for different fabrics can be expensive. Plus, the additional accessories and tools come separately at an extra cost. But not with this kit. The secure stitch kit has everything you need at an affordable price.
Fabric Glue That Quickly Mends, Alters, Hems & Embellishes...
Includes: 4oz.Fabric Solution & 2oz All Fabric Solution
Why Did We Like It?
Buying kits and packs are the best way to get the most for your money. Not only are you saving money, but it also makes the project easier since everything is provided in one kit. The Secure Stitch liquid sewing kit has seven items that can make any repair or DIY project easier.
This kit covers a variety of fabrics. One solution works well on natural materials like cotton and denim, while the other is ideal for artificial materials like acrylic and nylon. It also comes with two applicator bottles, so it’s easy to separate the solutions and a separate silicon applicator.
The hem clips make it easier to measure fabric before hemming. Additionally, these glues are flexible and machine washable. It does not string on the fabric and won’t bond to the skin, making it perfectly safe to use.
What Could’ve Been Better?
While this is an excellent kit for people on a budget, the glue is a bit thin. This leads to making a bit of a mess when using it on bigger projects as it’s runny. Plus, it does not dry clear and is a bit milky in color.
Pros
Ideal for people on a budget
Works on a variety of fabric
Strong adhesion
Flexible after drying
Cons
Glue consistency is thin
Quantity: 2 Bottles | Volume: 4fl oz (All Fabric Solution), 2fl oz (Synthetic Fabric Solution) | Set Time/Dry Time: Quick-Drying | Dry Color: Clear | Resistance: N/A
Let’s come back to the topic of temporary glues to talk about this fantastic product. The Roxanne glue baste-it is perfect as an applique glue. If you are into quilting or just want a temporary glue to make it easier to reposition fabric until you’re sure of the design, this is one to consider.
This Incredible Applique Glue Is 100% Water-Soluble, Dries...
These Are A Great Way To Add Extra Design To Whatever...
Why Did We Like It?
We know how tedious quilting can be. It is crucial to put the right pieces together and if there is an error, pulling them apart can be difficult once sewn in. This is where Roxanne’s glue baste-it comes in handy. Since quilting often requires repositioning fabric, it is helpful to have a temporary and easy solution to pull apart.
To make this process even easier, the bottle comes with a syringe applicator. This allows for more precise glue placements, and since it’s a syringe, you will not be using a lot of it in one go. This way, you cannot only control the droplets but use just the amount needed.
Additionally, the solution is 100% water-soluble. So once the sewing is done, the glue easily washes off without hampering the fabric. Plus, it does not gum up the needle, which is very convenient.
What Could’ve Been Better?
People who like quilting highly recommend this product. But, it is a bit expensive considering it is a temporary glue, and there are cheaper alternatives. However, the quality makes up for the price. Also, the plastic cleaner for the needle is a bit flimsy.
Pros
Great for applique quilting
Easy to pull apart
Washable
Precise drops using the syringe
Cons
A bit expensive
Quantity: 1 Bottle | Volume: 2fl oz | Set Time/Dry Time: Dries in Minutes | Dry Color: Clear | Resistance: N/A
When it comes to quick and easy fabric glues, this one by iCraft is a strong contender. The fabric fuse liquid adhesive comes in a handy 2.1 oz bottle and is the solution if sewing is your biggest problem. Let’s have a look at some of the features that make it so popular.
Fabric Fuse is a no-sew adhesive for all your fabric...
Quick strong, permanent bond
Why Did We Like It?
To begin with, we were very impressed by the strength of the adhesion this glue has to offer. Not only does it work well on fabrics and gem/rhinestones but also plastic, wood, and metal. Fabric fuse is the best no-alternative as it works on several surfaces and forms a strong bond.
Now, a significant concern with fabric glues this strong is how it reacts with fabric. But with fabric fuse, you can let those worries go. Not only is it a strong adhesive, it dries clear, ensuring the fabric remains unharmed and clean. Moreover, the glue is flexible, so the fabric feels natural and comfortable to hold or wear.
Another great thing is that this glue is non-toxic and will not harm your skin either. Users find this extremely convenient to use when fixing hems and home décor.
What Could’ve Been Better?
One consistent issue with this glue was that it takes a long time to dry. When used on larger surfaces, it might even take a day or two. Plus, the glue tends to stick to the skin. And although it is non-toxic and won’t harm you, we advise wearing gloves.
Pros
Firm adhesion
Flexible drying
Colorless when dried
Works on outdoor furniture
Can be used on a variety of surfaces, including wood and metal
Cons
Long drying time
Sticks to the hand
Quantity: 1 Bottle | Volume: 2.1fl oz | Set Time/Dry Time: Long Drying Time | Dry Color: Clear | Resistance: N/A
Finally, we have yet another popular permanent fabric glue which is also Amazon’s choice. This fabric glue by Dritz is an excellent buy for all arts, crafts, and DIY enthusiasts. As a brand, it aims to bring every creative idea to life. What was once a family business has now become a household name.
When it comes to using permanent fabric glue, this is as easy as it gets, and we appreciate that. The Dritz unique stitch comes in a small tube which is very simple to use and beginner-friendly. All you need to do is squeeze out the glue and spread it with your finger on the fabric. Since it is non-toxic, it will not harm the skin.
This is quite popular not just because it forms a permanent bond with the fabric but also because of its versatility. It can also be used on typical embellishments like gems, rhinestones, ribbons, etc. Additionally, it can be used on zipper tapes and hook-and-look tapes too! This glue can cater to most DIY costume needs and décor repair work.
Additionally, it is water-resistant after drying. So once it is fully dry, it can be machine washed, and you do not need to worry about damage to the glue.
What Could’ve Been Better?
As we mentioned, once the glue has dried, the fabric can be machine or hand washed. However, it is advised to avoid dry cleaning any fabric that is treated with this. Also, if using this for home décor, it is only ideal for lightweight items.
Pros
Beginner-friendly tube
100% water-soluble after drying
Can be used on a variety of surfaces
Non-toxic
Cons
Cannot dry clean treated fabric
Quantity: 1 Tube | Volume: 1.25fl oz | Set Time/Dry Time: Fast-Drying | Dry Color: Clear | Resistance: Water-Resistant
Now that we are done with the reviews, you may have noticed that most of these glues have similar features. But which ones are more important than the others? Well, to tell you precisely that we have put together this buying guide.
If you are searching for the ideal fabric glue and are unsure of the 11 we have suggested, take a look at the features below. Since there are endless brands to choose from, knowing which attributes will aid your project is beneficial.
Now, enough chit-chat, let’s dive into this.
Strength
This is perhaps one of the most critical factors. The main reason for buying a fabric glue is to stick things to the fabric, and if it doesn’t hold, then what’s the point? The strength of the adhesion is of top priority.
If you are looking to stick heavy-duty things to the fabric, we suggest going for superglues or industrial fabric glues. On the other hand, if you need basic glue to stick stones onto fabric occasionally, the fabric glues available in the market are good enough.
Quality
Another important aspect is the quality of the glue. No matter how strong the adhesive may be, if it tends to absorb into the fabric or harms it in any way, the project will go to waste. Good quality fabric glue will dry clear and not leave any marks on the fabric.
This is why it is crucial to test the glue on a small piece of fabric before applying it to the whole thing. Top-quality glue will be transparent when it dries and, in some cases, seamlessly blend into the fabric.
Texture
Next, we have the texture of the glue. It is vital to find the perfect balance between thick and thin so that the fabric is not harmed. If the adhesive is too thick, it will become stiff as it dries and cause the material to stiffen. It will look unnatural and feel even worse.
On the other hand, having glue too thin will lower the chances of a strong and permanent bond. In such cases, the glue will weaken as soon as it’s washed.
Temporary vs. Permanent
Since this review has both temporary and permanent glue, we thought why not include this point too? If you are confused between the two, it all boils down to your choice. If the aim is to stick patches, stones, or decorative designs on the fabric, then go for permanent glue.
However, if you aim to try your hand at quilting or want to iron on patches, then temporary glues are better. They eliminate the need to pin the patches in place.
Additional Features
Lastly, take a look at the bottle to see if it’s an eco-friendly product. Since you will be using it with your hands and inhaling its smell, it needs to be safe for the body and the environment. The best way to tell is if the glue says it’s non-toxic or acid-free or both.
Permanent Fabric Glues FAQs
Is using permanent fabric glue better for the environment compared to sewing?
Both sewing and fabric glue have environmental impacts, with energy and resource consumption associated with producing thread, needles, and glue. The environmental impact largely depends on factors such as production processes and waste management. It is essential to consider the sustainability of each option based on your specific project and circumstances.
Can I use fabric glue for outdoor projects?
Some permanent fabric glues are weather-resistant, making them suitable for outdoor projects. Check the manufacturer’s guidelines to see if the specific fabric glue you have in mind is weather-resistant and appropriate for outdoor use.
Can permanent fabric glues be used on stretchy fabrics?
Yes, some permanent fabric glues are designed to be flexible and can work well on stretchy fabrics without affecting their elasticity.
Are permanent fabric glues safe for skin?
While many fabric glues are non-toxic and won’t harm the skin if incidental contact occurs, it is always best to avoid skin contact. Always follow the manufacturer’s instructions for use and safety precautions.
How do I apply permanent fabric glue?
Apply a thin, even layer of glue to the fabric following the manufacturer’s instructions. Press the fabrics together, ensuring proper alignment. Allow the bond to dry and cure according to the recommended time.
How do I remove excess fabric glue?
To remove excess fabric glue, gently scrape off the bulk of the adhesive with a blunt edge, such as a spoon or plastic scraper. Then, follow the manufacturer’s instructions for removing any remaining residue.
Can I remove permanent fabric glue once it's dry?
Permanent fabric glues are designed to create lasting bonds and may be difficult to remove once fully cured. However, some brands of fabric glue can be softened or dissolved using specific solvents or methods outlined in their instructions.
Can I sew through glued fabric seams?
Yes, you can sew through glued fabric seams, but exercise caution as the adhesive might stick to the needle and interfere with the sewing process. Always let the glue fully dry before sewing.
What is the shelf life of permanent fabric glue?
The shelf life varies by product, but most fabric glues have a shelf life of 1-2 years when stored in a cool, dry place with the cap tightly sealed.
Conclusion
And there you have it, a comprehensive guide on the 11 best permanent fabric types of glue. The world of fabric glues is vast with too many products, and we hope this review has helped shortlist a few.
We would love to make the decision-making process easier, so allow us to name some of our favorites. If you want something to help in creative projects, especially with adding solid embellishments to fabric, Aleene’s Fabric Fusion is ideal.
However, if you want something that works on indoor and outdoor fabrics, then the Tear Mender Fabric and Leather Adhesive is the best option. We shall now take your leave and be back soon with more reviews and guides.
You might be wondering why it is so difficult to use regular glue on leather items. The reason for this is very simple. Being an organic material, leather tends to flex and bend a lot, and ordinary glue cannot maintain its bond in such conditions. In fact, using regular glue on leather can even damage it.
That’s why leather requires a special type of adhesive that not only creates a strong bond but is flexible enough to maintain that bond even after flexing.
However, finding such an adhesive can be quite challenging as there are several options to choose from, and going through their reviews usually takes a lot of time and effort. Luckily, our informative review-based guide of the top 6 products, comprising a buying guide and some FAQs, can help you out. Then, you'll be able to repair your leather couch, chair, shoes, clothes, handbags, and every other repairable leather product with potent adhesives.
Listed below are the 5 best leather glue adhesives from our list:
Gorilla Super Glue. Gorilla Super Glue boasts an advanced formula that allows for easy application on any surface, alongside its impressive non-drying feature. It's recognized for its ability to withstand impacts and create a strong bond that retains flexibility, ideal for fabrics and leather.
Aleene’s Leather And Suede Glue. Aleene's Leather and Suede Glue is perfect for diverse leather repair needs, offering a strong bond that dries quickly and an adjustable multi-size applicator for precision. It's known for its no-soak, no-stain formula, ensuring a clean repair process.
Fiebing’s High Strength Adhesive. Fiebing's Leather Glue is designed specifically for leather projects, but it excels on other materials too, creating a robust and flexible bond. It comes with the extra advantage of being non-toxic and flammable, making it perfect for crafts with kids.
Tear Mender Fabric And Leather Adhesive. Tear Mender's Leather Adhesive is favored for its fast, three-minute bonding time and easy, heat-free application process. This highly versatile adhesive allows for applications on various material types, ranging from clothing to sports gear.
Barge All-Purpose Glue. Barge's All-Purpose Glue is a multipurpose adhesive suitable for leather, fabric, metal, and wood. Known for its potent bonding ability and quick curing time, it offers resistance to moisture and impact, offering an affordable and high-quality solution across various repair needs.
Here’s the list of the 6 best leather glue adhesives in 2024, essential for repairing your leather products with potent adhesives, ensuring a strong and flexible bond even after flexing.
1. Gorilla Super Glue - Best for Impact Resistance
Whether you’re looking for quick-drying adhesives, super glue, or craft adhesives, Gorilla Glue has it all. Both DIYers and professionals swear by this brand, which is why the Gorilla super glue gel for bonding leather is the next item we’ve included on this list.
Coming with a host of innovative features, the gorilla glue is a compelling choice if you are looking for the perfect leather adhesive. Firstly, its formula does not run, which makes it easier to use on all types of surfaces. This can come in really handy if you intend to use the glue to make repairs on wall hangings and décor.
Moreover, the anti-clog cap prevents this leather glue from drying out once opened. You should know that due to their nature, adhesives start drying very quickly once the cap has been opened since they get exposed to air. However, that is not the case with this product.
Additionally, the Gorilla Glue brand is known for making high-quality products that can easily resist impacts, which is another fascinating property of this adhesive. The high-strength bond is durable while also offering the flexibility required for bonding fabrics and leather.
Due to its comparatively thicker consistency than other leather glues, the Gorilla glue can take some time to enter into smaller crevices where it is applied. Although this problem does not occur with thinner adhesives, it’s only a minor issue, and overall we were quite impressed with the results.
2. Aleene’s Leather And Suede Glue - Best for Precise Application
Aleene’s is another well-known brand in the adhesive industry, offering a wide range of glue products ranging from crafting glues to DIY adhesives. This leather and suede glue is an outstanding product from the manufacturer, perfect for all types of suede and leather repairs.
Those looking for leather glue from a reputable brand cannot go wrong with Aleene’s leather fabric and suede glue. This glue works well on all types of fabric and leather items by creating a strong and permanent bond quickly.
Plus, the manufacturer has designed this glue to make it incredibly easy to use. It comes with a multi-size applicator tip that can be adjusted according to the needs of the project, ensuring precise and mess-free application.
Another one of the features that we really liked is that this leather cement does not soak through the material, unlike most other fabric adhesives. It prevents the material from getting stained and also makes the application process easier.
Moreover, being a highly versatile leather glue, this adhesive can be used for all types of bonding projects. It includes repairing leather goods like belts and bags while working well with other materials as well.
While testing this glue, we discovered that the bond was adversely affected by water. This means that it is not completely waterproof and should not be used on surfaces exposed to water. Make sure you keep this factor in mind when using this glue.
What We Liked
Versatile
Easy application
No soaking and non-staining
Strong, durable bond
What We Don't Like
Not waterproof
Bonding Material: Polyurethane | Drying Time: 2-4 hours | Waterproof: No | Heat-Resistant: No | Volume: 4fl oz | Dry Color: Clear
3. Fiebing’s High Strength Adhesive - Best for Leather Projects
Moving on to the next item on the list, we bring you Fiebing’s high-strength adhesive. This brand specializes in the development of leather care items, including dyes, glues, and patinating products. You can use this adhesive for gluing leather with minimal effort while still getting superb results.
While the other items on our list have been developed to work with several types of materials, Fiebing’s leather glue has been designed especially for leather projects. Yet, it provides equally amazing results when working with materials like fabric since it creates a very strong, permanent bond that is flexible enough for all types of surfaces.
Besides creating a strong bond, Fiebing’s leather cement has a non-flammable and nontoxic formula which makes it an ideal choice for children’s crafts projects. Plus, it dries completely clear, so you do not need to worry about visible signs of repair on your leather shoes.
Also worth mentioning is the fact that this glue allows you to perform modifications after application due to its considerable curing time. This property makes it the best glue for leather if you need to make adjustments, and we only wish more manufacturers incorporated this property in their products.
The only thing we noticed while testing Fiebing’s leathercraft cement is that it does require a longer period to cure compared to other leather glues on the market. While this does not affect its overall performance, it does make this glueunsuitable for emergencies or projects that need to be completed urgently.
What We Liked
Wide application
Allows modifications
Completely safe to use
Clear drying
What We Don't Like
Takes some time to cure
Bonding Material: Rubber, Resin, Acetone, Alcohol | Drying Time: 15-30 seconds | Waterproof: No | Heat-Resistant: No | Volume: 4fl oz | Dry Color: Clear
4. Tear Mender Fabric And Leather Adhesive
We’ll start this list with a powerful leather glue from Tear Mender, a leading manufacturer of fabric adhesives, supplying quality products since 1932. This glue is nontoxic and offers instant results so that you can complete your repairs in no time.
The best adhesives are those that combine ease of use with fast results. And that is the primary reason which makes this product from Tear Mender a great choice. It can create a powerful bond with any leather or fabric material within three minutes, so you don’t have to wait long to get your favorite leather jacket repaired.
Another thing that we liked about this leather glue is that it does not require any heating, ironing, or solvents for the curing process. That makes it very easy to use and also ensures that the process is a lot less cumbersome. Plus, the durability of the glue guarantees that the results are permanent.
Apart from that, you’ll love how versatile this leather adhesive is. It can be used for making repairs on clothing, upholstery, leather, sports gear, and more. You can even use it for DIY or arts and crafts projects with excellent results.
We did not come across any significant downsides to this impressive product from Tear Mender. However, it tends to leave a yellowish mark on certain fabrics, so it may not be the best choice for situations that require invisible repairs. However, this does not affect the overall performance of the glue.
What We Liked
Provides results quickly
Waterproof
Easy to use
Versatile application
What We Don't Like
Leaves a visible mark
Bonding Material: Natural latex, Water | Drying Time: 3 minutes | Waterproof: Yes | Heat-Resistant: Yes (up to 150F) | Volume: 2fl oz | Dry Color: Tea
5. Barge All-Purpose Glue
Up next is the Barge all-purpose glue, developed not only for use on leather and fabric but also for bonding surfaces like metal and wood. This makes it the most versatile leather crafting glue currently available on the market, ideal for all kinds of repair or DIY projects.
The Barge glue is an incredibly powerful adhesive that cobblers have used for several decades due to its strong bonding capabilities. We tested it out on a leather bag that had a broken strap and was delighted by the results. It was easy to apply and cured quickly, making the bag look as good as new.
Also, since it is an all-purpose adhesive, you can use it on rubber, wood, glass, and metal objects. Naturally, it is suitable for home DIY repairs as well as professional jobs that require only the best quality adhesive.
Adding to these features is the fact that this leather repair glue is both moisture and impact-resistant. You can easily use it outside without worrying about the adhesive getting damaged. And finally, to top it all off, it is available at a surprisingly affordable price, making it a fantastic value-for-money option.
When buying this leather glue, keep in mind that it emits strong fumes which could make you uncomfortable. That’s why it is highly recommended to use this glue in a well-ventilated space or outside. Other than that, there are no issues with the Barge all-purpose cement.
As we near the end of our list, it is time to introduce the Krazy Glue superglue to you. This multipurpose adhesive is among the fastest-acting ones on the market and is perfect if you need to bond leather, make household repairs, or complete DIY projects.
Similar to Gorilla Glue, Krazy Glue is a well-known brand famous for its high-quality adhesives, which have been in use for several years. This super glue from the brand has been developed for use on leather, wood, metal, rubber, and plastic materials, offering a wide range of uses.
What makes it such a great option is that it can create a very strong and durable bond within minutes of application. Plus, using it is a simple process as it comes with a clog-resistant applicator and an easy-to-hold bottle.
Apart from that, the leather glue itself has been designed in such a manner that it does not run across the surface. It helps prevent any mess during application while also ensuring that it’s suitable for vertical surfaces.
Lastly, this super glue has a temperature-resistant formula, so you can use it outside or on surfaces exposed to temperature changes without any worries.
Krazy Glue does a marvelous job of making sure its products provide effective results, and this super glue is no different. However, like many others in this segment, this adhesive is toxic and should be kept out of reach of children and pets.
Presented below is a precise comparison of the finest Leather Glue Adhesives, evaluating critical aspects including bonding material, drying time, waterproofing, heat resistance, volume, and dry color.
So, these are the top six leather adhesives available on the market right now. However, knowing about these options is not enough to ensure you find the right product. That’s why we’ve created this in-depth buyer’s guide, which lists some of the essential factors that should be considered when buying leather adhesive.
Bond Strength and Durability
The most important factor when selecting an adhesive, not only for gluing leather but other materials as well, is its bonding strength. Adhesives that contain rubber cement, polyurethane, and cyanoacrylate work best with leather, while products with more bonding strength will offer greater durability.
Long story short, purchasing the best glue will ensure that any repairs or projects undertaken with it will last for a very long period.
Drying Time
For urgent projects or emergency repairs, it is necessary to have glue that dries quickly. This is especially true for mending small rips or tears on clothing or accessories.
On the other hand, for projects that require alterations and adjustments, you will need an adhesive that takes some time to dry. So, make sure to select the glue that offers the required drying time for your project to stand out.
Element Resistance
Having waterproof and heat-resistant glue is always an advantage since it ensures that the finished project will not be damaged by exposure to heat and water. It also makes it possible to use such adhesive outside, adding to the versatility of the product.
Similarly, cold-resistant glues will guarantee that any tears and rips repaired using that glue do not crack in extremely low temperatures.
Ease Of Application
Irrespective of whether you are a professional needing an adhesive for work, or a homeowner who needs to get some repairs done, ease of use is an important consideration.
Any adhesive that is designed to be applied easily can help save a lot of time and effort while performing repairs or completing projects. Hence, when buying leather glue, read the customer reviews, which can help you find out how convenient it is to use it.
Compatibility With Materials
Leather glues can be used on all types of objects, such as belts, bags, pouches, gloves, and more. Most adhesives designed for leather are suitable for use on other materials, such as rubber, fabric, metal, PVC, etc. However, how effective they are when used with various materials varies from manufacturer to manufacturer.
We suggest selecting the glue, depending on how compatible it is with the materials you need to use it for.
Budget
When deciding which glue to select, make sure to take into account the cost of the adhesive. You do not require professional-grade glue for general household repairs and DIY projects, which can be quite costly. On the other hand, it is inadvisable to go for the cheapest option that might not provide effective results.
Just make sure to gauge both the performance and the price of the product you select before making a final decision.
Does fabric glue work for leather?
Fabric glue generally performs well in bonding with leather due to the similar nature of these materials. It's also advisable to consult the product's manufacturer's website or product label for the types of materials the adhesive is compatible with for confirmation.
Does hot glue work on leather?
Using hot glue on leather is often not recommended as it contains thermoplastic adhesive which doesn't bond effectively with leather. It can also damage leather products and once cooled, can be easily dislodged from the surface even under slight pressure.
Can an adhesive be used to glue leather to leather?
When it comes to gluing leather to leather, a special type of glue specifically designed for this purpose is required. Ordinary wood glues or DIY adhesives generally lack the necessary bonding strength to efficiently adhere leather surfaces together.
One of the most frustrating things to encounter is a broken home appliance right when you are in the middle of housework.
On that note, a refrigerator is a regularly used appliance found in most homes, and it's safe to say that we aren't always too careful about using it. So, there can be incidents when parts of the fridge break and come off loose.
This leads to the problem of finding a fresh component to replace the broken part, but that can be expensive. Therefore, your next best option is to glue the broken plastic pieces together for the time being.
But, which is the right kind of glue to use for fixing fridge plastic parts? That's where this handy guide can help you — we have gathered some excellent suggestions so that you can choose the best glue to fix the plastic parts of your fridge.
The following are the four best glues to fix fridge plastic from our list:
J-B Weld. J-B Weld stands out with its multipurpose urethane-based adhesive that provides a strong bond and a fast drying time, making it ideal for joining a wide range of materials, including plastic, glass, and fiberglass.
Gorilla. The Gorilla super glue's gel formula offers functionality and ease of use, making it suitable for accurately attaching broken plastic pieces, and it dries quickly, making it ideal for rapid fixes.
Silco. Silico Sil-Bond RTV adhesive offers food safety certification and is environmentally friendly and VOC-compliant, making it suitable for repairing internal fridge components. Furthermore, it dries fast and is waterproof, able to withstand a wide range of temperatures.
Bondic. Bondic offers a unique non-toxic plastic welder that comes in a tube and cures under LED UV light, proving to be a reliable and lasting solution. Despite being more expensive, it works as a superior bonding solution and does not dry out inside the tube.
One of the most common issues that arise with fridges is the plastic parts breaking or becoming loose, which can affect their functionality. Fortunately, there are various types of glue available in the market that can help you fix these issues. But with so many options out there, choosing the right one can be overwhelming. To help you out, here’s the list of the 4 best glues to fix fridge plastic.
1. J-B Weld - Best for Plastic Parts
J-B Weld is a well-known brand available on the market when it comes to quality adhesives. This product from the company is no different as it comes with an extra-strong bond and versatility, allowing you to use it with different materials. On that note, let's see how this can be useful for your fridge.
First, let's start by talking about the strength of this adhesive. This two-part glue has a tensile strength of 3770 psi, which guarantees a strong bond that ensures joined plastic parts won’t budge under normal pressure.
On top of that, the glue comes in unique syringe packaging with a resealable no-waste cap. So, you can get multiple uses from the product or take a break while working on a big project.
Anyhow, this multipurpose urethane-based adhesive is a handy household tool as it can be used to join materials like glass, plastic, and fiberglass. That said, this product can be utilized for different needs, like fixing automotive parts or DIY crafting.
For us, the best feature of this high-strength glue is the fast drying time, as it sets within 15 minutes of application.
Overall, this is one of the best glues for plastic that you can use to fix any broken refrigerator part. Having said that, you will need to experiment with the glue a couple of times to get better with the application as it isn't a premixed product.
When it comes to quick fixes, you can't do better than the superglue from Gorilla. This product comes in an enhanced gel formula to give you more control during the application process. Anyhow, the super glue from this household name can make any repair job a piece of cake, even for someone who isn't used to DIYing jobs.
Right off the bat, what makes us appreciate the Gorilla super glue has to be the convenience. There's no need for learning how to apply the glue, as it comes in a tube with a tip meant for precise application.
Furthermore, compared to other super glue options available on the market, the product is a bit different because of its gel consistency. So, you can use it for attaching broken plastic pieces with ease. Also, as it's a gel formula, there's no need to worry about the glue getting everywhere.
Coming to the strength of this super glue, it can stand quite a bit of impact due to its reinforced formula. Therefore, it can be easily used to fix a broken handle of a fridge or a freezer.
Even though this is a great glue to fix broken fridge parts, we wouldn't recommend it for use on internal plastic items. That said, refrain from using it on elements where food items are stored. Other than that, it's a durable adhesive for a quick fix.
What We Like
Easy to use
Fast drying
Great for vertical surfaces
Impact-resistant
What We Don't Like
May be toxic if ingested
Type: Super Glue | Size: 0.71 oz | Color: Clear | Material: Cyanoacrylate | Waterproof: Yes | Heat Resistance: No | Sandable: No | Paintable: No | Dry Time: < 10 sec | Cure Time: 24 hours | Strength: Very strong
3. Silco - Best for Food Safe Repairs
Do you have a broken refrigerator shelf? If so, then the Silco Sil-Bond RTV adhesive is an excellent product to glue the plastic parts together. You can apply it yourself, and the glue is certified safe for use on areas where food items might be kept. Read on to know more.
When it comes to the quality of this silicone sealant, it definitely ranks over several other adhesives we have seen on the market. On that note, this glue stands out because of its food safety, making it suitable for fixing fridge shelves and other internal components. Moreover, this is a 100% eco-friendly product and VOC-compliant.
One of the common complaints about silicone-based glues is that they take a long time to dry. But, that isn't the case with this silicone sealant, as it dries relatively fast and cures fully within 24 hours. And since this glue is self-curing, there's no need to clamp it down.
Furthermore, this silicone sealant has a high tolerance level and can withstand temperatures between -62°F to 350°F while maintaining a strong bond. And that’s not all; this adhesive is waterproof, so you won't need to worry about the plastic part coming loose due to moisture.
The only drawback we found was that it doesn't dry clear and leaves a slightly unsightly finish. So, it might not be an ideal product if you want to fill a crack or repair a shelf while preserving a clean look.
What We Like
Precise application
Can stand all weather conditions
Works for creating gaskets
Cures fast
What We Don't Like
Doesn’t dry clear
Type: Silicone | Size: 2.8 fl oz | Color: Clear | Material: Silicone | Waterproof: Yes | Heat Resistance: Yes (350°F) | Sandable: No | Paintable: No | Dry Time: 30 min | Cure Time: 24 hours | Strength: Strong
4. Bondic
To be honest, this isn't glue but a plastic welder as described by the brand, Bondic. You get to have more time while applying the liquid on any surface and cure it within seconds using the UV light provided in the kit. So, let's check out the features of this plastic bonder.
There are several reasons for liking this Bondic plastic welder, the first being that it has a non-toxic formula. As it's free from harmful solvents or any other chemicals, you can use this plastic bonder to fill cracks or repair broken fridge plastic pieces.
What's more, it's pretty easy to use this product as it comes in a handy tube. And, you only need to shine the LED UV light for five seconds on the liquid to cure it for a strong bond. This plastic bonder can be applied in layers if you feel that the initial application isn't enough.
Furthermore, you do get the benefits of other plastic glues in this product as it's waterproof and heat-resistant. However, as this product isn't a true glue, you don't need to worry about the liquid drying out inside the tube.
Compared to the other glues we have mentioned on this list, this is definitely more expensive. The reason is that it has superior quality, and the bond that's created can last for a longer time. However, the product does come as a whole kit, making it a worthy purchase.
Mapped out underneath is a comprehensive table that deciphers essential features of the top-rated glues suitable for fixing a plastic fridge. The table offers a breakdown of the glue's type, size, color, base material, and whether it's waterproof, heat resistant, sandable, paintable, and its dry and cure times and it estimates the adhesive strength.
Buying Guide for the Best Glue to Fix Fridge Plastic
Are you still confused about which would be the best glue to fix fridge plastic parts? There's no need to worry, as we have gathered some essential points to make your decision easy. So, let's have a look at them.
1. Food Safety
One of the first things to remember while picking any adhesive is that it might have chemicals that are not suited to be near food. Hence, if you look forward to fixing plastic parts like fridge shelves, it's crucial to pick a food-safe glue. It might be a bit hard to find them, but using the wrong glue can pose a health hazard.
2. Strong Bond
If you want to fix fridge plastic parts, it's a must to look for an impact-resistant glue. This is necessary as common parts like the handle or fridge shelves would go through regular wear and tear. On top of that, if you're looking for glue to fix internal plastic parts, make sure it's cold-resistant and waterproof. Without these features, the bond may end up coming loose within a few days.
3. Formula
Another feature to check in the glue to fix fridge plastic parts is its formula. We like glues that come in a thicker consistency as they don't tend to drip during the application process. Moreover, if you are searching for precise application on plastic, it's best to choose a gel formula as it works well to fix cracks.
Can I use regular glue to fix the plastic parts of a fridge?
No, regular glue may not be suitable for fixing plastic parts of a fridge as it may not have the strength to withstand the temperature changes and moisture in the fridge. It’s important to use glue specifically designed for plastic and one that can withstand the specific conditions of the fridge.
How long does it take for glue to dry when fixing plastic parts of a fridge?
The drying time for glue may vary depending on the type of glue and the size of the plastic part being repaired. Generally, it’s best to allow the glue to dry for at least 24 hours before using the fridge. Follow the manufacturer’s instructions for the specific glue being used.
Will glue hold up in the cold temperature of a fridge?
Yes, certain glues such as silicone sealants or J-B Weld Plastic Bonder Structural Adhesive can withstand the cold temperature of a fridge. It’s important to choose a glue specifically designed for plastic that can withstand temperature changes.
Is it safe to use glue in areas where food is kept in a fridge?
Yes, it’s safe to use glue in areas where food is kept in a fridge as long as the glue is safe for use on surfaces in contact with food. Check the label of the glue for any limitations or recommendations. Silco Silicone RTV 4500 Food Contact Safe High Strength Silicone Sealant is a glue specifically designed for food-safe repairs.
That's everything we had to tell you about finding the best glue to fix fridge plastic parts. We hope you will get your product of choice from our suggestions. However, do remember to pick a glue based on the component you're looking forward to fixing.
On the other hand, the Gorilla super glue gel is perfect for those who are looking for convenience to fix a broken fridge part. But, you have to work swiftly as the glue dries fast.
With that, we come to an end. Do remember to refer back to our suggestions and the buying guide when in doubt about picking a suitable glue for fridge plastic parts.
The best glues for vinyl are specially formulated to bond with this durable yet flexible material, offering strong adhesion without compromising flexibility, critical for surfaces that expand, bend, or endure frequent use. Whether you're patching vinyl flooring, repairing upholstery, or fixing outdoor gear, the right adhesive ensures that vinyl surfaces maintain their integrity over time. Vinyl is widely used in both residential and industrial applications, but like all materials, it deteriorates with age, moisture, and friction. Instead of opting for costly replacements, using a specialized glue offers an affordable, effective solution for restoring vinyl to its original strength and appearance. In this guide, we’ve selected the 7 best vinyl adhesives, each tested for flexibility, drying time, water resistance, and ease of use, so you can confidently take on any vinyl repair project with long-lasting results.
Listed below are the best glues for vinyl:
RH Adhesives HH-66: The RH Adhesives vinyl cement stands out due to its resistance to weather extremes, oil, fuel, and grease. It sets in just 2 to 5 minutes, although for larger projects this might be too quick, compared to others like Gorilla adhesive.
Gorilla Construction Adhesive: Gorilla adhesive is ideal for indoor and outdoor projects. Its strength lies in its quick set time (20 to 30 seconds) and flexibility, making it the most versatile adhesive compared to RH Adhesives HH-66. The necessary cutting of the nozzle may hinder storage.
Henry 356-030: A vinyl adhesive ideal for floor coverings, Henry 356-030 touts an easy application and solid grip. It surpasses others like Gorilla in grip strength but requires the adhesive to dry out before use, unlike Rhino glue.
Rhino Glue: Rhino glue is a sturdy adhesive with a versatile 1.4 fl oz volume formula. Its durability and strength surpass others like Henry 356-030. It might discolor vinyl, a downside absent in J-B Weld 8237.
J-B Weld 8237 PlasticWeld: J-B Weld PlasticWeld is a unique two-part epoxy putty stick rated for plastics. It stands out from Rhino glue due to its malleable shape before setting,g but it doesn't handle moisture as well as RH Adhesives HH-66.
1. RH Adhesives HH-66 - Best for Vinyl Repair
The HH-66 adhesive is an incredibly strong adhesive designed to handle vinyl material as well as vinyl-laminated fabrics. It forms a barrier against extreme temperatures and has the ideal size for general maintenance use. This adhesive is highly resistant to any oil, fuel, grease, and other chemicals.
RH Adhesive’s HH-66 adhesive is the perfect choice for any vinyl material in different conditions. A great convenience is the option to apply it using a wet or dry application method - the sealant will hold steadily either way.
With the wet application possibility, the glue has a weatherproof nature. Applying it under harsh weather conditions yields the same outcome as an application in average weather. This makes it ideal for even submerged repair work; it can hold its own despite being exposed to water.
Additionally, the application process itself is relatively easy and quick. The drying time was extremely fast; within minutes, the bond had been made.
An already easy application process is made easier by the clear color of the glue. Seeing where it is being applied is a great help in having a clean application.
Drying times on the HH-66 vary depending on the temperature and climatic conditions. Under high temperatures, the glue will stick quickly, sometimes within seconds. But for those working with a large surface area, it may be a nuisance to have to reapply every few inches repeatedly.
What We Like
Wet and dry application
Waterproof
Ideal for patching and sealing jobs
Resistant to temperature and extreme weather
What We Don’t Like
Fast drying time is unsuitable for large areas
Quantity: 1 Can | Volume: 8 fl oz | Set Time: N/A | Cure Time: 2 to 5 Minutes | Dry Color: Clear | Resistance: Waterproof, Withstands Weather Extremes, Oil, Fuel, Grease, & More
2. Gorilla Construction Adhesive - Best for Indoor/Outdoor Projects
From a respected brand in the adhesive market, Gorilla offers a fantastic construction adhesive product. It has a strong bond with weather resistance and is ideal for both indoor and outdoor projects. It is versatile in the different surfaces it can be applied.
Not to be confused with Gorilla’s iconic super glue, this construction glue is a durable, heavy-duty product. It is straightforward to apply and use with its versatility. What’s more, the fast dry time brings even more usability for easy application.
It flexes and is fully waterproof when dried off, so using it on outdoor projects brings no risks from natural elements of water or impact. Additionally, it can be sanded down and painted to give a flush look with the material when dried.
The flexible nature of this adhesive makes it a suitable choice when filling up gaps or for surfaces that have spaces between them or are porous. Uneven surfaces were no problem in the application or filling in the recesses.
One caveat about using this heavy-duty adhesive is the design of the bottle. To have the adhesive be applied, the tip of the nozzle must be cut. However, there is no indication of where to cut, and if cut wrong, the cap can be impossible to replace and store away.
What We Like
Low odor and VOC-compliant
Secures quickly
Easy application
Versatile application
What We Don’t Like
The nozzle must be cut and can compromise storage
Quantity: 1 Cartridge | Volume: 9 fl oz | Set Time: 20 to 30 Seconds | Cure Time: 24 Hours | Dry Color: Clear | Resistance: Weather-resistant, Waterproof
3. Henry 356-030 - Best for Floor Coverings
A highly recommended and used adhesive for floor covering adhesives is this multi-purpose adhesive from Henry. Whether it is a professional or a small home project, this can serve its purpose well in easy application and versatility. It has an incredible grip, so once applied, there is no chance for it to be removed easily.
Overall, the design of the container makes the adhesive easily accessible with a top-open lid. Scooping the adhesive out and applying it at your discretion is excellent for any sized project or task you have.
When it comes to the bonding power that the Henry adhesive has, it remains solid in performance. Following the instructions during application is vital to have the best results; that means letting it dry a bit to a sticky consistency.
Once the glue has been laid down, it is easy to clean up so long as it is before it has set. This makes for a clean and controlled application overall with the best quality results. A damp towel is enough to tidy up the edges of the application or clean up any excess glue.
One advantage to this adhesive is the easy cleanup with a damp towel. It remains wet until it comes into contact with air. This can be a nuisance, but should be considered nonetheless. It can also be considered a drawback as the glue will be ineffective if it is dampened even a bit.
What We Like
No petrochemical solvents or ammonia
Simple application method
Low VOC and odor
Sticky grab to maintain adhesive grip
What We Don’t Like
Glue must dry out before use
Quantity: 1 Container | Volume: 31.98 fl oz | Set Time: N/A | Cure Time: More than 24 Hours | Dry Color: Yellow | Resistance: N/A
4. Rhino Glue Heavy Duty
The Heavy Duty glue variant from Rhino Glue has a rugged and extremely versatile formula. It can work on a range of materials with different densities and textures. It is a solid and capable adhesive with a fast-drying time and durability that can withstand many obstacles.
When working with adhesives, the application is the most crucial part. Applying Rhino heavy-duty adhesive to the material and allowing it to bond is an easy experience. With the short bond time, there was no fumbling with clamps or repositioning necessary.
Additionally, the actual strength of the glue is incredible. Only a small amount of adhesive is required to create a lasting bond between the two surfaces. While this is an incredible feat with such a small amount of glue, it also means a regular container lasts a long time.
What’s more impressive is the durability alongside the strength of the adhesive. Rated to withstand heat and moisture as well as impacts, the Rhino adhesive can secure any surfaces together for a lasting bond.
Making mistakes is bound to happen at times while making repairs or working on a project. With the Rhino glue, there is a strong grip formed almost instantly. As such, if used on vinyl, there is a possibility that the adhesive will bond and discolor the material, leaving little room for error.
Truly a unique option from J-B Weld is this two-part epoxy putty stick. Once mixed together, it creates a polymer that can be manipulated to adhere and fill up gaps in the material's surface. It has been rated to work with plastics and similar materials.
One of the most remarkable features of this adhesive is the NSF certification. This guarantee opens up the range of possibilities and use-case scenarios for repairs and projects involving potable water.
Drying out the glue is an easy 20-25 minutes, with a complete cure setting in within two to three hours. Once cured, the glue has an off-white color to it. Additionally, the modifications that can be done after curing to have a cleaner result are great features to have.
As for the strength of the adhesive, it has a strength of 600 PSI, which is by no means a light performance. When being kneaded to fit into a gap or recess, the glue may be weak, but it won’t be going anywhere once it has been allowed to settle.
Waterproofing does not seem to be a strong suit for the J-B Weld adhesive. It has been noticed that when using this glue in projects exposed to moisture, the epoxy takes a hit. When used on pipes or outdoor projects, the adhesive would not be able to maintain the bond.
What We Like
Easy mixing of epoxy
Malleable shape before setting
Instant bonding
Can be sanded, painted, and cut when dry
What We Don’t Like
Not ideal for projects involving moisture
Quantity: 1 Stick | Volume: 2 fl oz | Set Time: 20 to 25 Minutes | Cure Time: 3 Hours | Dry Color: Off-white | Resistance: Withstands 250°F to 300°F
6. Loctite Vinyl, Fabric, & Plastic Adhesive
Coming out of Canada, this adhesive by Loctite is a great tool for vinyl repairs as well as plastics and fabric. It has a long-lasting repair that remains clean in its finish even after extended periods of time. With waterproofing and a flexible consistency even when dry, it is capable of indoor and outdoor use.
Having an adhesive that is flexible enough to maintain its bond even after drying is extremely useful when working with plastics. The Loctite adhesive performed well in keeping its adhesion and also had a clean finish to it.
As it dries clearly, there is no need to compromise a repair for a messy appearance. The clear finish will make it seem as if no glue is necessary in the first place. This clear finish is maintained over time with no yellowing or becoming brittle, which gives the repair that much more longevity.
Of course, when it comes to vinyl and plastic adhesives, waterproofing is an important feature to have. The waterproofing in the Loctite glue is up to par and effectively keeps moisture out well. Indoor and outdoor repair jobs are no issue for this adhesive.
Loctite has specifically designed this adhesive to work with plastics and similar materials like vinyl. Joining these materials to different material types and densities can cause the glue to underperform. Special care must be taken to ensure the material falls under the use cases of this adhesive.
A straightforward adhesive, this vinyl tile repair adhesive from Henry does what it says and does it well. Applying this glue to vinyl tiles will have them set securely with little evidence of a repair ever being done. Indeed, a valuable tool to have, be it for a complete renovation or a touch-up of your vinyl tiles.
If working on vinyl tiles, it is a no-brainer to have a bottle of Henry Vinyl Tile Repair adhesive handy. It is quite literally designed to adhere to vinyl tiles specifically, so it has all the qualities you might need in a vinyl adhesive.
Having flexibility in the glue’s consistency before hardening was great for filling in uneven surfaces before placing the tile. Additionally, working with flexible plastics becomes more manageable when using adhesives of similar viscosity.
Once the glue has been set and hardened, it forms an almost permanent bond between the base flooring and the vinyl tile. Only a small quantity is necessary to create this strong adhesion.
Once the glue hardens a bit to a tacky consistency, it can be easily applied to the surface and worked with for a clean result. The finished product blends in with the rest of the tiling and is almost imperceptible.
While the Henry vinyl tile adhesive may be designed for repairing and placing tiles, it is not the one-stop solution to every vinyl tile-related problem. When dealing with repairs where only a portion of the tile has become loose, it is lacking. It performs best when the full tile is replaced.
If you are looking to identify the best glue for vinyl, a table is provided below for a comparison of details such as quantity per package in units, volume measured in fluid ounces, set time in minutes and seconds, cure time in hours and minutes, dry color, and resistance characteristics.
Investing in an adhesive to touch up vinyl is a smart choice, not just for the durability of the vinyl but also for environmental care. Vinyl does not break down naturally, so to keep it out of the dumps, you should repair your vinyl as much as possible.
Maintaining vinyl requires specific qualities in the adhesive; otherwise, there is a chance of it not working. Here are things you should keep in mind when looking for a suitable glue for you.
Types of Vinyl Glues
Vinyl glue has four types that differ in their strengths and use cases. They are cyanoacrylates, epoxies, polyurethane, and silicone glues. Each one is suited to a specific kind of vinyl and performs differently.
Cyanoacrylates are also known as superglue and have a fast setting time. They use air to harden and create a solid mesh-like bond to the surface of the material.
Epoxies are traditionally a mixture of two formulas to create a strong adhesive. These glue types are great with rigid types of vinyl as they can hold shape as well as fill any recesses.
Polyurethane glue is versatile in the materials it can adhere to. Thin and flexible vinyl falls under these material types. It requires the preparation of the surface to create abrasions for the glue to grip.
Silicone is suitable for vinyl and has a definite shape. The strength of the bond is determined by the amount of contamination on the material's surface. Therefore, keeping it dust and debris-free is of utmost importance when gluing.
Unique Features
With variations in formula across manufacturers and brands, there are certain features in the glue that set it apart from the others. Whether it is in compatibility with vinyl or other areas, every adhesive is unique.
Taking note of what sizes the glue bottles are available in is important. Not having enough adhesive to complete a repair can mess up the entire process; leaving areas incomplete just means another necessary repair shortly.
There are a variety of sizes for glue bottles, some even coming in multiple packs. Determine how much glue is suitable for your project and buy accordingly.
On the package of the bottle or product description is a list of compatible surfaces the glue was designed for. Match the material you are working with to an adhesive that is able to form a bond on it. Using the wrong glue with the wrong material can result in a weak or nonexistent bond.
The application of the adhesive is one of the most critical steps in the repair process. A proper application can ensure the repair lasts longer and also has a more clean result; the repair will be flush with the material.
Additionally, there are situations where the surface to be glued is in a small, hard-to-reach area. To help increase accessibility and ensure a clean application, the nozzle and tube shape of the bottle should be taken into account.
Depending on the extraction method of the glue, it can determine how steady the glue is removed. For example, a squeeze bottle allows you to control how quickly the glue is removed for slow, precise work or faster and larger applications. Furthermore, the nozzle design can affect how finely the glue can be applied.
Surface Preparation
Vinyl is a smooth surface that picks up dirt and oils easily. To ensure the bond made is durable, the surface should be prepped before applying the adhesive.
Cleaning the surface to remove any contaminants is the first step to preparing the surface. Next, sand or rough up the surface to create a texture that the adhesive can grip and create the bond. These small measures will go a long way in keeping the strength of the adhesion at its most efficient and stand the test of time.
What types of glues are suitable for bonding vinyl materials?
Several types of glue are suitable for bonding vinyl materials. Contact cement and cyanoacrylate can be effective, as can specific vinyl adhesives, which have been formulated for optimal bonding with vinyl. When choosing a glue, it's crucial to ensure it is suitable for vinyl to avoid potential damage or weak bonds.
Is it necessary to prepare the vinyl surface before applying glue?
Yes, it is generally necessary to prepare the vinyl surface before applying glue to ensure a strong bond. This usually involves cleaning the area to remove any dust, dirt, or oils that could interfere with the adhesive. The method of preparation can depend on the specific type of glue, and the manufacturer's instructions should always be followed for the best results.
Can I use glue for vinyl on other materials?
While it's technically possible to use glues for vinyl on other materials, their effectiveness can vary depending on the specific material. Vinyl adhesives are formulated specifically to bond with the plasticizers in vinyl and may not adhere as effectively to other materials. For the best results, it's recommended to use an adhesive that is specifically designed for the material in question.
How to remove glue residue from vinyl surfaces?
To remove glue residue from vinyl surfaces, a gentle yet effective method is often to apply a small amount of rubbing alcohol or adhesive remover to a soft, lint-free cloth and then rub the residue gently until it comes off. It's crucial to avoid abrasive tools or harsh cleansers that could damage the vinyl's finish. Always perform a spot test in an inconspicuous area first to ensure the cleaning agent won't harm the material.
Can I paint over glued vinyl surfaces?
Yes, you can paint over glued vinyl surfaces, but proper preparation is crucial for good results. This preparation might include cleaning the surface thoroughly, sanding it lightly to help the paint adhere better, and applying a suitable primer. It's important to note that vinyl-specific paint or a paint that is suitable for plastics should be used for best adhesion and durability.
After a comprehensive analysis of the best glues for vinyl, it's essential to highlight the top three expert recommendations. These exceptional selections were determined based on their performance, durability, versatility, and user reviews. Each stands out for a particular purpose, ready to fulfill your specific vinyl adhesive needs.
Amongst the seven best glues discussed, RH Adhesives HH-66 proves to be the best for vinyl repair. It offers an incredibly strong bond, designed to handle vinyl material as well as vinyl-laminated fabrics. Additionally, this adhesive demonstrates exceptional resistance to extreme temperatures and various chemicals, making it an ideal option.
For indoor and outdoor projects, the Gorilla Construction Adhesive is a good option. Not only does it ensure versatility in the surfaces it adheres to, but it also provides a strong bond that is both weather-resistant and waterproof. Equally important, it can be sanded down and painted to give a seamless look with the material when dried.
When it comes to floor coverings, the Henry 356-030 is the right choice. This multi-purpose adhesive is favored for its easy application, versatility, and exceptional gripping power. Its accessible containers make it suitable for projects of any size, and the cleanup process is straightforward with a damp towel.
In conclusion, our top three recommendations serve as a dependable guide for choosing the perfect glue for your vinyl project. Regardless of the situation at hand, be it repair work, indoor and outdoor projects, or floor coverings, these expert recommendations will make your decision process smoother and deliver outstanding results. So, gear up for your next vinyl project, knowing you have the ideal adhesive for the job.
Styrofoam is a go-to material for DIYers, crafters, and builders due to its lightweight structure, shock absorption, and versatility, but bonding it correctly requires the right adhesive. Not all glues work on polystyrene foam, and using the wrong one can melt, deform, or weaken your project. Whether you're assembling intricate craft pieces, mounting foamboard for displays, or insulating with rigid foam panels, selecting a glue designed specifically for Styrofoam ensures clean application, strong adhesion, and lasting durability. In this guide, we review 11 of the best glues for Styrofoam—ranging from Aleene’s Tacky Glue and Gorilla Clear Glue to high-performance adhesives like Loctite PL 300—along with a detailed buyer’s guide to help you choose the right fit for your needs.
Listed below are the 5 best glues for styrofoam from our list:
Aleene’s All-Purpose Tacky Glue: Beloved by crafters for its versatile and easy-clean qualities, the quick-set, non-toxic tacky formula makes precise applications possible across different materials; It doesn't suit washable items.
Gorilla Clear Glue: Renowned for its profound adhesive strength even on challenging surfaces and boasting a water-resistant formula, it excels at both interior and exterior bonding, though it's not entirely kid-or pet-friendly.
Loctite 1390595 Premium Construction Adhesive: This high-performing adhesive stands out with triple adhesive strength ideal for construction materials and the ability to cure under cold temperatures, despite being slightly challenging to apply and clean.
Mod Podge Waterbase Glue: An all-in-one gluing, sealing, and finishing solution, it offers an affordable, quick-drying, and clear-drying product for crafters but might face some packaging issues during delivery.
Weldbond Multi-Purpose Adhesive Glue: Weldbond is recognized for its non-flammable, non-toxic formula, the ability to bond varied materials, and to seal porous surfaces, albeit with a longer curing time.
Here is the list of the 11 best glues for styrofoam that you can use to create a strong and secure bond on any styrofoam surface.
1. Aleene’s All-Purpose Tacky Glue - Best for DIY Crafts
For over 50 years, Aleene’s 15599 All-Purpose Tacky Glue has been the favorite of crafters, hobbyists, and enthusiasts alike. Its quick and easy clean-up formula makes it sit atop our list. Moreover, this premium all-purpose adhesive can be used on a variety of surfaces. As such, it is perfect for all your DIY crafts and projects.
Coming from a brand that has been catering to crafters’ needs for over 50 years, it works exceptionally well in bonding surfaces. Moreover, this premium-quality adhesive is high in versatility as it can be used on a variety of surfaces. From foam, metal, and felt to paper products, ceramics, and non-washable fabrics, this glue will bond almost anything you want.
Furthermore, what’s appealing is the design of the tip, which makes it perfect for all kinds of applications. The cap features three ridges, which you can cut according to the size of your project.
Whether you have to bond small objects, medium pieces of wood, or large metals, you can easily trim off the ridges. Such customizations allow you to work with utmost precision without any difficulty. Plus, this all-purpose adhesive is relatively easy to clean.
What’s more, its ultra-tacky formula is entirely safe to use around kids and pets, thanks to its non-toxic solution.
Although it is a highly versatile product, it isn’t compatible with washable items. And so, we recommend that you not use them on these items or surfaces. Also, we suggest working carefully while using this glue as it sets pretty quickly. Apart from this, this product is a bang for your buck!
What We Like
Adheres to a variety of surfaces
Customizable tips
Easy to clean
Safe to use around pets and kids
Offers excellent adhesion
What We Don't Like
Unsuitable for washable items
Fast setting time
Quantity: 1 Bottle | Volume: 8fl oz | Set Time/Dry Time: N/A | Dry Color: Clear | Resistance: Water-Resistant
2. Gorilla Clear Glue - Best for Strong Bonding
If you are looking for an adhesive that stands up to almost anything, look no further - the Gorilla Clear Glue is perfect for all your needs. This is by far one of the best glues for bonding both interior and exterior surfaces. Thanks to its water-resistant and incredibly strong formula, it is super easy to use.
To be honest, one of the striking aspects of the Gorilla Clear Glue is its incredible adhesive strength, even on off-the-wall surfaces. As such, you can use this to create incredibly strong bonds on challenging surfaces, pores, or even fissures.
Furthermore, this glue stands to its claim of non-foaming. It stayed clear throughout the application process, which makes it ideal for fixing anything you want. Plus, it binds well to almost every surface. Be it metal, wood, or ceramics, this glue will mend everything you want, so you can rest assured of its versatility.
On top of that, because of its water-resistant formula, you can use this outdoors to bond the trims, fences, or iron gates. Plus, you don’t have to be an expert in using this as it is easy to use, thanks to its user-friendly design. On the whole, this is an excellent glue because of its incredible bonding strength.
This Gorilla Clear Glue is one of the best glues that we came across, so there isn’t much to complain about. However, unlike Aleene’s Tacky Glue, this one isn’t safe to use around kids or pets as the packaging states to store it away from pets and children.
Also, to maintain its crystal clear formula, it is advised to store in areas with sufficient lighting. Other than that, this works exceptionally well for bonding surfaces.
What We Like
Incredibly tough adhesion
Versatile
Easy application
Resistant to water after curing
User-friendly glue
What We Don't Like
Unsafe for kids and pets
Not suitable for storing in dark areas
Quantity: 1 Bottle | Volume: 1.75fl oz | Set Time/Dry Time: N/A | Dry Color: Clear | Resistance: Water-Resistant
3. Loctite 1390595 Premium Construction Adhesive - Best for Construction Materials
Our next pick is a premium-quality adhesive by a well-known brand - Loctite. From treated wood to ceramics, the Loctite 1390595 Premium Construction Adhesive is perfect for all your bonding needs. Moreover, it is also usable on most construction materials, thanks to its 3 times stronger adhesive strength.
More than anything, the Loctite Adhesive impressed us with its incredible adhesive strength. Because of its 3 times stronger adhesion, it is used to bond common construction materials, which is pretty impressive.
Furthermore, it is sheerly versatile as it is usable on both interior and exterior surfaces. As such, you can throw anything into it, and it will fix it with all its might. Be it wood, concrete, stone, masonry, insulation, foam, cement-based products, metal, lead ceramics, drywall, and fiberglass, you can bond anything you want.
Not only that, but this high-performance adhesive features a waterproof formula to ensure it can withstand heavy rains. Plus, you can coat it with any paint you want as it is paintable.
That’s not all, it cures even in cold temperatures, and so, this works amazingly on frozen or wet lumber. So, whether you are a professional or a DIYer looking for an incredibly strong adhesive, this Loctite one is perfect for all your needs.
Although this product works incredibly well to bond surfaces, there’s a minor shortcoming you must want to know. Unlike the two glues mentioned previously, this Loctite Premium Construction Adhesive is messy to apply.
Plus, cleaning it is a bit of a challenge. Hence, we strongly recommend you keep some mineral spirits around you to clean it after use.
What We Like
Bonds surface strongly
Suitable for a wide variety of surfaces
Waterproof and stainable
Cures within 24 hours
Works on frozen and wet timber
What We Don't Like
Messy application
Cleaning requires slight efforts
Quantity: 1 Cartridge | Volume: 10fl oz | Set Time/Dry Time: 15 to 20 Minutes | Dry Color: Light Brown | Resistance: Waterproof, Resists Shrink, Cold Temperatures
4. Mod Podge Waterbase Glue - Best for Craft Finishing
Next up, we have an excellent product for all novices, DIYers, and enthusiasts. This all-in-one glue, sealer, and finish from Mod Podge will make art and crafts an easy-breezy task for you, thanks to its super-strong formula.
Mod Podge has been catering to the crafter’s needs for over 50 years with its high-quality products. Thus, if you’re an affordable and all-in-one product for all your personal and professional use, then this Mod Podge is a better bet any day.
Furthermore, because of its highly versatile applications and flexibility, it has been the crafter’s go-to brand. It dries in almost no time and dries crystal clear, which makes it perfect for all applications.
What’s more, its variety of finishes allows you to choose the perfect one for your needs. From matte, and gloss to antique and satin, you can use a variety of sheens to preserve the beauty of your pieces.
Additionally, this super-strong formula is sandable, and cleaning is a breeze with just soap and a wet rag. Plus, it is a beginner-friendly product, which is a bonus.
We did not come across any significant drawbacks while testing this glue. However, the only gripe we have against this product is its packaging. When it was delivered, the bottles were unscrewed, and they had leaked all over the package. Other than that, this product works exceptionally well.
What We Like
Affordable
Highly versatile
Quick-drying formula
Beginner-friendly
What We Don't Like
Comes in poor packaging
Quantity: 1 Bottle | Volume: 32fl oz | Set Time/Dry Time: N/A | Dry Color: Clear | Resistance: N/A
5. Weldbond Multi-Purpose Adhesive Glue - Best for Versatile Applications
Next up, we have another quality product for you from a well-known brand, Weldbond. Whether you have to fix up the window trims or the fences of the backyard, this Weldbond Multi-Purpose Adhesive is excellent as it can bond almost anything you want. Plus, it can be applied in the blink of an eye.
There are many things we love about this glue; however, the thing that hooked us right from the start is its versatility and flexibility. Whether you have to mend the broken edges of your cabinet or quick-fix the stained glass on the ceiling, this glue is perfect as it bonds anything and everything.
Furthermore, we love the fact that this glue is non-flammable and non-toxic. As such, you can use this indoors around kids and pets without worrying about a thing. Also, it has a subtle odor, which we love. Plus, it is low in VOCs, which is a bonus.
What’s more, we love the fact that this is a highly versatile glue. Not only does it work well for bonding surfaces, but it also seals porous surfaces. As such, you can use this to fix the wood in your garage.
Additionally, adding a little Weldbond glue to your concrete will enhance its strength and durability.
This glue is highly popular among professionals and DIYers, mainly because of its versatile application and non-toxic formula. However, our only gripe is its long curing time of almost 48 hours. Understandably, this might be an issue for those looking for a quick fix.
Looking for a strong adhesive to bond styrofoam to other materials? Take a look at the Uhu Pour Styrofoam Adhesive, which is specifically designed for bonding styrofoams. Its waterproof and gentle formula makes it an excellent option for porous surfaces. Rest assured, you will not be disappointed.
If you’ve been searching for glues for bonding styrofoams for DIY projects, then your search ends here. This premium-quality glue from Uhu will perfectly bond styrofoams to whatever surface you want. Be it metal, wood paper, ceramics, fabric, plaster, or plastics, Uhu Por’s excellent adhesion will bond anything.
Another appealing aspect of this product is its flexibility which means it can withstand breakage no matter how you bend it. As such, this makes it perfect for all your DIY projects and craft items.
Plus, unlike other glues, this high-quality bond neither melts nor does it wear over time, which is particularly impressive. Additionally, it features a waterproof formula which makes it ideal for multiple surfaces and objects.
What’s more, the design of the application tip allows you to fill challenging gaps and fractures seamlessly. Lastly, you can work on all your DIY projects without costing a pretty penny.
To be honest, this glue is an excellent choice for all your styrofoam projects. However, our only complaint is that the tube is smaller than we expected. So, if you’re working on large-scale projects, we recommend you buy them in large quantities to complete the projects quickly.
What We Like
Excellent for bonding styrofoams
Can easily bend without breaking
Does not wear out over time
Ideal for all kinds of surfaces
What We Don't Like
Large quantities are required for large projects
Quantity: 1 Tube | Volume: 1.69fl oz | Set Time/Dry Time: 10 to 20 Minutes | Dry Color: Transparent | Resistance: Waterproof, Resists Impacts
7. Elmer’s E461 Craftbond Tacky Glue
Our next pick is perfect for all DIY, crafters, and enthusiasts alike. From bonding home decor projects to fixing ornaments, this Elmer’s E461 Craftbond Tacky Glue is an excellent option for all your bonding needs. Plus, this is an easy-to-use glue, thanks to its unique no-run formula.
One of the striking things about this glue is its unique no-run formula, which makes it ideal for various surfaces. As such, you can bond your surfaces quickly and conveniently without creating a drippy mess.
Want to seal porous and semi-porous surfaces? Well, Elmer’s E461 Craftbond Tacky Glue has got you covered, thanks to its strong, wet tack.
Furthermore, what we love the most about this glue is its application ti,p which ensures hassle-free application. As such, the glue wicks into the challenging spaces effortlessly. Not only that, but it dries clear, which means you can use this to bond anything you want without worrying about the bonds being visible.
Additionally, cleaning this glue isn’t challenging. With just a wet rag, you can easily wipe off the excess glue. Plus, it has a long shelf life and will last for years to come.
In our opinion, Elmer’s E461 Craftbond Tacky Glue is an outstanding option, mainly because of its unique formula and versatility. However, while testing, we found that the glue is slightly thicker than we expected.
Plus, it also takes slightly longer to dry than other glues but works well once dried. Other than that, it is a bang for your buck!
What We Like
Doesn’t create a drippy mess
Ideal for porous and semi-porous surfaces
Bonds aren’t visible
Cleaning is a breeze
Extended shelf life
What We Don't Like
Thick viscosity
Takes longer to cure
Quantity: 1 Bottle | Volume: 8fl oz | Set Time/Dry Time: N/A | Dry Color: Clear | Resistance: N/A
8. Loctite 1421941 PL 300 Foamboard Adhesive
For all your styrofoam bonding needs, Loctite 1421941 PL 300 Foamboard Adhesive is an excellent option. From a well-known brand with over 50 years of history in the industry, this foamboard construction adhesive provides strong and durable bonds to a wide variety of surfaces. Plus, its waterproof feature makes it perfect for outdoor applications.
This premium styrofoam glue is perfect for the next styrofoam project you’re working on because of its versatility and functionality. It has been formulated to bond Styrofoam to a variety of surfaces. Whether you want to cover up the popcorn ceiling with Styrofoam tiles or bond blue insulation foam to wooden surfaces, you can easily use this glue for all DIY repairs.
Furthermore, not all glues can withstand the elements, but Loctite stands true to its claims as it can withstand weathering. Plus, its low VOC formula makes it a perfect option if you have kids and pets around without worrying about their safety.
What’s more, the extended working time of up to 30 minutes is particularly impressive. As such, it allows the crafter in you to work at your own pace. Lastly, because of its excellent adhesive strength, you can even bond uneven styrofoam surfaces in a breeze.
Although the Loctite 1421941 PL 300 Foamboard Adhesive is highly popular among professionals and DIYers, there is only one tiny drawback. It takes more than 7 days to cure fully. Even though this might not be an ideal option for your quick-fix tasks, it will be the best one for your heavy-duty tasks.
What We Like
Can bond styrofoam to a variety of surfaces
Ideal for outdoor applications
30-minute extended working time
Bonds uneven surfaces excellently
What We Don't Like
Long curing time
Quantity: 1 Cartridge | Volume: 10fl oz | Set Time/Dry Time: 15 to 20 Minutes | Dry Color: Light Brown | Resistance: Weatherproof, Resists Water
9. Surebonder DT-2010 All-Purpose Glue Sticks
If you are looking for hot glues that won’t screw up styrofoams, then let us introduce you to Surebonder DT-2010 All-Purpose Glue Sticks. From delicate objects to tough metals and wood, these glue sticks are versatile enough to fix almost anything. With these Surebonder DT-2010 All-Purpose Glue Sticks, your DIY projects will be fun.
There are a lot of things that we love about these glue sticks; however, the one that appeals to us the most is their versatility. Whether you have to complete a craft project or fix the broken edges of the coffee table, these hot glue sticks excellently adhere to any surface you want.
Not only that, but you can also use these glue sticks to mount objects on the wall because of their adhesive power. Plus, it offers excellent adhesion, thanks to its thick formula. Moreover, with a drying time of 60 - 65 seconds, this is by far the fastest-drying glue we’ve come across.
What’s more, it works both at high temperatures and low temperatures. That’s not all, these glue sticks are free of VOCs, which means they are odorless. As such, you can work for long hours without giving yourself a headache. That being said, this glue is perfect for all your DIY repairs and projects.
Despite being an excellent choice for DIY crafts and projects, we wouldn’t recommend this to novices. As such, it doesn’t dry crystal clear, so you have to be very cautious while using this, for even the slightest overspill can mess up the look of your project.
What We Like
Excellent adhesive strength
Dries pretty quickly
Odorless
Excellent value for money
What We Don't Like
Doesn’t dry crystal clear
Quantity: 20 Glue Sticks | Volume: N/A | Set Time/Dry Time: 60 to 65 seconds | Dry Color: Clear | Resistance: Resists Water, 230ºF to 380ºF
10. Great Stuff Insulating Foam Sealant
Want to create a water-resistant seal quickly? Then this premium quality sealant is perfect for you to consider. This Great Stuff Insulating Foam Sealant fills, seals, and insulates gaps smoothly and effortlessly. Plus, it can be used to seal both interior and exterior surfaces, thanks to its excellent adhesive strength.
When looking for a sealant to bond surfaces, adhesive strength plays a crucial role. And when it comes to this foam sealant, you’d be satisfied with its excellent adhesive strength. Once it dries, it cures as hard as a stone.
Furthermore, this sealant offers excellent adhesion as it expands to mimic the shape of cracks and crevices. As such, you can use this to fill gaps in trees, wooden windows, or even buildings.
You can use this stuff for sealing a variety of surfaces. Whether it is the gaping joists in the attic or cracked blocks, this sealant seals anything and everything.
What we absolutely loved about this sealant is its straw tube applicator, which ensures that the seal perfectly wicks into challenging cracks and crevices without any hassle. Moreover, once dried, you can trim, sand, and even paint it if you wish to.
Plus, if left unattended for two hours, the seal shuts off on its own. Rest assured, you won’t be disappointed.
We were pretty satisfied with the performance of this seal for most parts; however, our only gripe is its pungent odor. That being said, we suggest you use it for outdoor projects. However, if you intend to use it indoors, make sure to use it in a well-ventilated space. Also, don’t forget to put on a gas mask.
What We Like
Offers excellent adhesion to your surfaces
Seals almost anything and everything
Perfectly wicks into challenging cracks
Cures tough
What We Don't Like
Strong odor
Quantity: 1 Can | Volume: 20oz | Set Time/Dry Time: N/A | Dry Color: Natural | Resistance: Water-Resistant, Weather-Resistant
11. 3M Spray Trim Adhesive
Last but not least, the 3M 08074 Spray Trim Adhesive is a handy glue for all your DIY projects and crafts. The lightweight aerosol adhesive is an excellent choice for bonding styrofoams. Moreover, its easy application allows you to use this for a variety of purposes. Plus, it sets super quickly.
To be honest, this spray-on adhesive does an excellent job of bonding styrofoams to metals and other surfaces. Not only that, but you can also use this for fixing lightweight trim materials. As such, it is compatible with a variety of surfaces which makes it highly versatile.
Whether you want to fix the headliner to the roof or install interior carpets in the van, this aerosol adhesive will perfectly fulfill all your bonding needs. Furthermore, it is formulated to create a tough adhesion that will last for years to come.
What we love about this spray-on adhesive is its low mist formation, because of which there’s minimal overspray in the surrounding surfaces. Moreover, you don’t have to keep materials in place for lengthy periods, thanks to its quick setting time.
All in all, this no-fuss aerosol spray is excellent for all professionals, DIYers, and enthusiasts alike.
Although the spray-on adhesive is excellent for all your household and automotive needs, several customers have complained that spraying is slightly challenging because of the hard tip. Other than that, this is an excellent product for all your household and automotive bonding needs.
What We Like
Compatible with a variety of materials
Offers excellent adhesion
Sets pretty quickly
Excellent for bonding styrofoams
What We Don't Like
Spraying is a tad difficult
Quantity: 1 Can | Volume: 16.8oz | Set Time/Dry Time: Allow 5 Minutes | Dry Color: Clear | Resistance: N/A
What is the Best Glue For Styrofoam?
In this section, we present a comprehensive comparison of the finest glues suitable for Styrofoam. The table below outlines crucial attributes including quantity, volume, set time, dry time, dry color, and resistance.
With thousands of glues available on the market, choosing one for bonding Styrofoam is pretty challenging. There are a lot of factors that you must keep in mind while buying Styrofoam glue. And so, to make things easy-peasy for you, we’ll be discussing important factors here in detail. Our goal is to help you make an informed decision.
Viscosity
Styrofoam glues are available in different viscosities. Some are of thick viscosity, while others are significantly thinner. For this, you need to keep in mind the nature of your task. If you have multiple craftworks at hand, then thick viscosity glue will be perfect for you.
Meanwhile, if you’re dealing with large projects, a thin viscosity glue is an excellent option for all your projects. We strongly recommend that beginners go for glue with thick viscosity as they are easy to use.
Drying Time
The drying time of the glue is another crucial factor that you mustn’t ignore while buying one for styrofoam. Whether you want a quick-drying glue or one that takes slightly longer to dry depends entirely upon the nature of your task.
So, we recommend you go for a quick-drying one for all your small projects, while slow-drying glues would be ideal for all large-scale construction projects.
Shelf Life
Not to forget, the shelf life of the glue is of utmost importance. For dedicated crafters, shelf life isn’t a problem. But it certainly will matter if you use adhesives once or twice a year. And so, we strongly recommend you consider the shelf life of glues before buying one.
What safety precautions should I take when using Styrofoam glues?
Work in well-ventilated areas, wear gloves to prevent skin contact, and avoid inhaling any fumes. Keep the glue away from your eyes, and follow the product’s safety instructions.
How can I ensure maximum bonding with Styrofoam adhesive?
For a strong bond, ensure both surfaces are clean and dry. Apply glue evenly and press the pieces together, using clamps or weights to hold them in place until the glue dries.
Can I paint over Styrofoam with glue applied to it?
Absolutely, painting over Styrofoam with glue applied to it is certainly possible, provided water-based or acrylic paints are used so as not to dissolve the Styrofoam, and the glue is given ample time to dry before paint application.
Can I use Styrofoam glue for other materials?
Indeed, Styrofoam glue is quite versatile in some cases, with the capability to bond other soft materials such as foam rubber, felt, or even wood, yet, consulting the manufacturer’s guidelines is always advisable for maximal benefit.
Can I use Styrofoam adhesive for outdoor projects?
Certain Styrofoam adhesives exhibit waterproof characteristics, making them suitable for outdoor projects, though it is recommended to verify the product's water resistance from the label before outdoor utilization.
How do I remove Styrofoam glue residue from surfaces?
To effectively remove Styrofoam glue residue from surfaces, start by leveraging a plastic scraper or your fingernail to scrape off as much residue as practicably possible, then employ a cloth soaked in rubbing alcohol to gently rub away the remaining residue.
At what temperature should I store Styrofoam glue?
For optimal adhesive performance, it is best to store Styrofoam glue at room temperature, as exposure to temperature extremes might compromise the product's effectiveness over time.
Bonding stainless steel and other metals with glue is becoming increasingly popular as it brings numerous benefits. These include fewer risks, improved appearance, superior chemical and heat resistance, etc. Also, most stainless steel adhesives available on the market come with resealable caps so you don’t have to buy a new one after opening it.
However, landing on the right adhesive that can bond stainless steel can be tricky with so many brands available on the market. Check out our exclusive article on top glues for metal to wood, to get an idea of how stainless steel can be glued to wood.
Super glue can be used on any surface. Although, in the case of metals, super glue does the work, but not for long. To know more, check out our article on super glue on metal surfaces.
Now, let’s get started with the best adhesives for stainless steel surfaces.
Listed below are the 5 best glues for stainless steel from our list:
J-B Weld KwikWeld. J-B Weld KwikWeld is a fast-setting adhesive ideal for stainless steel and other metal surfaces, providing a high-strength bond. It comes in a resealable syringe for multiple uses and offers a tensile strength of 3127 PSI, making it durable and suitable for various materials.
Loctite PL PREMIUM. Loctite PL PREMIUM is an adhesive designed for superior adherence to materials like PVC, wood, and metal. It's waterproof, capable of curing even in cold temperatures, and suitable for indoor and outdoor use. Its durable formula adds an extra shine to the material and is non-flammable and non-toxic.
Blue Magic QuickSteel Adhesive. Blue Magic QuickSteel Adhesive is a high-temperature-resistant epoxy putty paste suitable for bonding a variety of materials. It sets within five minutes and cures within an hour, hardening like steel. It can be used underwater and withstand temperatures up to 500ºF.
Guoelephant Instant Adhesive. Guoelephant Instant Adhesive is a non-toxic, transparent, and colorless adhesive that works well for metal-to-metal bonding. It adheres to a variety of materials, including plastic, rubber, and wood. Fast bonding and simple application make this glue a convenient choice for various tasks.
J-B Weld 8265S Steel Reinforced Epoxy Glue. J-B Weld 8265S is a two-part epoxy system offering extreme strength, making it a suitable alternative for torch-welding steel. With a tensile strength of 5020 PSI and a heat resistance of up to 550 degrees Fahrenheit, this adhesive is ideal for strong and long-lasting repairs on a variety of surfaces.
Here is the list of the 12 best glues for stainless steel that you can use to securely and permanently bond stainless steel surfaces.
1. J-B Weld KwikWeld - Best for Quick Repairs
The first product on our list is the KwikWeld stainless steel adhesive. Besides stainless steel, it also repairs other metal surfaces with a high-strength bond. It’s a fast-setting version of the Original Cold Weld two-part epoxy system and is ideal for sticking DIY household decorative items.
This two-part J-B Weld stainless steel adhesive comes in a syringe with a resealable cap that prevents the glue from drying or leaking. This ensures you can use it multiple times without worrying about the glue becoming hard and unusable.
Not only that, it comes with a mixing tray and a stir stick, which makes the entire mixing and coating process easy and quick. On top of that, this KwikWeld adhesive takes only six minutes to set and four to six hours to cure.
Also, this epoxy adhesive comes with a tensile strength of 3127 PSI, making it a super-strong glue that can be used to bond automotive parts, bricks, ceramic, and concrete. This glue can also withstand temperatures up to 300ºF, making it highly durable.
The one drawback we noticed about this adhesive for stainless steel is its strong smell, which can irritate people who are sensitive to strong odors. We suggest working in a well-ventilated room or area to avoid the glue's foul smell.
What We Like
Strong and lasting bond
Easy to use
Quick setting
Unique dispensing system
What We Don't Like
Strong odor
Volume: 0.84fl oz | Set Time: 6 Minutes | Cure Time: 4 to 6 Hours | Dry Color: Dark Gray | Resistance: Resists Up to 300ºF
2. Loctite PL PREMIUM- Best for Outdoor Projects
Next up, we have the Loctite 1390595 stainless steel adhesive, which provides superior adherence. Its tan finish works well for most materials such as PVC, wood, and metal. This makes it suitable for both interior as well as exterior use.
This adhesive from Loctite is waterproof and cures even in cold temperatures, making it ideal for sub-floor installations. It can also be used for joining materials like polystyrene foam, wood, metal, fiberglass, ceramic tiles, and more.
Another feature that should be mentioned is its ability to add an extra shine to the material. Its durable formula makes it an ideal glue to fix items that are exposed to harsh environments.
We like how this glue doesn’t leave any stains on the surface where it’s applied and is entirely non-flammable and non-toxic. What’s more, it doesn’t have any VOCs, and hence is harmless for the human body.
When we tried the product, we found out that it doesn’t come with a resealable cap. This means that when you cut open the nozzle, you need to use strong tape to seal it back for the glue to last a long time. The tape also ensures that the product doesn’t spill.
What We Like
Excellent bonding strength
Waterproof
Heat-resistant formula
Can be painted upon
What We Don't Like
No resealable cap
Volume: 10fl oz | Set Time: 30 Minutes | Cure Time: 24 Hours | Dry Color: Light Brown | Resistance: Resists Cold Temperatures, Waterproof
3. Blue Magic QuickSteel Adhesive - Best for High-Temperature Resistance
If you are looking for an epoxy putty paste to fix your broken stainless steel items, the QuickSteel epoxy putty from Blue Magic can be an ideal choice. This putty bonds with most materials, and once it dries, it becomes as hard as metal.
This adhesive from Blue Magic mixes well like putty and bonds like epoxy glue when applied to fix broken metals. This glue can adhere to metals like fiberglass, plastics, glass, wood, ceramics, bricks, and more.
This product sets in just five minutes and cures in an hour. Once cured, this adhesive hardens like steel and can be drilled, filed, machined, sanded, and painted. Such flexibility is the reason we like it for our personal projects.
This putty can also withstand temperatures up to 500ºF, making it ideal for outdoor repair work.
The only gripe we have about this product is that it has a strong odor. Many customers have complained about it, and this factor can be an irritant for people who are sensitive to strong smells. However, the smell goes away after curing.
What We Like
Cures within an hour
Can be set even underwater
High PSI
Works with most materials
What We Don't Like
Strong odor
Volume: 2oz | Set Time: 5 Minutes | Cure Time: 1 Hour | Dry Color: Gray | Resistance: Resists Up to 500ºF
4. Guoelephant Instant Adhesive - Best for Metal-to-Metal Bonding
If you’re looking for glue that’s non-toxic, environment-friendly, and bonds strong, then the LB10 Instant Adhesive from Guoelephant is suitable for you. This glue is transparent and colorless and provides a clean and invisible bond that can be worked upon as you need.
If metal-to-metal bonding is what you’re looking for, then this is the glue for you. Whether you’re looking to fix spectacles or trying to glue metals in a professional setting, you can rely on this product.
Not only that, this glue is suitable for bonding metals with other materials like plastic, rubber, and wood. This adhesive can even be applied on rough surfaces, making it suitable for sticking uneven materials that have unconventional shapes.
Since this glue provides fast bonding, you won’t need to wait for hours to complete your tasks. And it comes in a 20 g container with an applicator, so using it is simple and straightforward.
The one aspect we found disappointing about this glue is that its viscosity decreases when it is stored for long. This means you’ll need to use it up after opening the pack. Long-term storage might reduce the efficacy of the product.
5. J-B Weld 8265S Steel Reinforced Epoxy Glue - Best for Extreme Strength
The J-B Weld original is a two-part epoxy system designed as an alternative to torch-welding steel. So, you can imagine the strength this glue possesses. This glue is perfect for strong and long-lasting repair work and also for household DIY projects.
To begin with, we were impressed by the strength of this epoxy glue. With a tensile strength of 5020 PSI, it is ideal for bonding pieces of steel. Not only does it bond with incredible strength, but it withstands temperatures of 550 degrees Fahrenheit, making it one of the most heat-resistant glues.
Furthermore, setting and curing time is not something to worry about. To start the epoxy process, you need to mix the resin and hardener in an equal ratio of 1:1. Mix it thoroughly to blend the solution and apply it to the surface that needs repair. After application, it takes 4 to 6 hours to set, after which the surface is safe to move if handled gently.
Complete curing takes anywhere from 15 to 24 hours which is the average curing time for any epoxy glue. Apart from stainless steel, you can also use this glue to bond together metal, wood, plastic, PVC, concrete, ceramic, tile, and fiberglass.
Honestly, it doesn't get any better than this product when it comes to bonding stainless steel. The glue also dries a dark grey color which blends well with the steel surface. The only point worth noting is that beginners may find the epoxy a bit complicated to work with.
What We Like
Versatile and dependable
Compatible with various surfaces
Ability to handle extreme temperatures
Perfect for DIY projects
What We Don't Like
Challenging for beginners
Volume: 1oz Each | Set Time: 4 to 6 Hours | Cure Time: 15 to 24 Hours | Dry Color: Dark Gray | Resistance: Resists Up to 550°F
6. Gorilla Clear Glue 4572502
Coming up next on our list is one of the most popular brands out there - Gorilla. The 4572502 model by Gorilla is a clear superglue that claims to "bond virtually everything." It comes in various types of packaging options, the most common one being a squeeze bottle with 5.75 fluid ounces of product.
Right off the bat, we knew we had to include this product by Gorilla because of its high ratings on most websites. Not only that, Gorilla has been a well-known brand that we heard about growing up. After all, it has been around for 2 decades.
However, all the praise we heard was well-earned because most of its features are exactly what you need from super glue. Firstly, it is a powerful glue that can bond together all materials like wood, stone, glass, ceramic, and stainless steel. Also, the solution is water-resistant, making it easy to use for repair projects outdoors.
Apart from that, the application process is pretty simple. All you need to do is dampen the surface, which needs to be glued, then apply a thin layer of glue on one surface. If you need to wipe, adjust within 15 minutes of applying and then clamp the surfaces shut for two hours. Usually, 24 hours are enough for a complete cure.
There were plenty of aspects we liked about this product. However, we did notice that the glue tends to work better on some surfaces and takes longer to bond with others. Wood, steel, metal, and glass bonded quickly, while plastics took more time to bond together.
What We Like
Non-foaming
Water-resistant
Budget-friendly
Can be used indoors and outdoors
What We Don't Like
Plastics take more time to bond
Volume: 5.75fl oz | Set Time: 2 Hours | Cure Time: 24 Hours | Dry Color: Clear | Resistance: Water-Resistant
7. Aleene's Jewelry & Metal Instant Adhesive Transparent
Up next, we have the 21709 glue model by the brand Aleene's. This transparent glue comes in various packaging options, with the most common being a tube of 45 milliliters of the product. If you are looking for an industrial-strength formula, then take a closer look at this option.
One of the best things about this glue is that it is all-purpose and easy to use. Aleene's glue is the go-to option whenever you need minor fixes and repairs in your project. It is a quick and permanent solution that bonds metal, stainless steel, and especially pieces of jewelry.
Along with that, even though this glue is specialized to work on metal jewelry and toys, it also works on beads, mirrors, plastics, gems, and ceramic. It also bonds porous and semi-porous stones. Another feature we liked was its no-drip formula which ensures the glue doesn't run whenever you open the cap.
Furthermore, once the solution is applied and dried, it is waterproof and transparent. This is useful for several reasons; you can make small fixes to wooden or metal windows where moisture might be present. Since the glue dries quickly, you can use it for creative art and craft projects and leave the glued portion visible since it is transparent.
We tried this product to repair and bond a bunch of items around the house and found that it worked best on steel and metal. However, we didn't see the efficiency with other materials like plastics and beads, which took far too long to dry.
What We Like
Bonds various tough materials
Easy squeeze tube
Forms permanent bonds
No-drip formula
What We Don't Like
Some materials longer to dry
Volume: 0.7fl oz | Set Time: N/A | Cure Time: N/A | Dry Color: Clear | Resistance: Resists Impact, Waterproof
8. Gorilla Micro Precise Super Glue 102812
Next, on our list, we have the 102812 models by the brand Gorilla. This super glue comes in the standard packaging of 5.5 grams in a precise microtube. Apart from having a tough impact on so many materials, it also dries quickly and clearly.
First of all, this is one of the three types of glue by the brand Gorilla, which we decided to include in our list. And, there are two reasons for including this particular model, the first being the incredible super-strong formula. This glue can bond wood, ceramic, rubber, leather, paper, and stainless steel.
Secondly, we want to discuss the nozzle design. This feature is what sets this model apart from the other Gorilla products. It consists of a precise dispensing tool designed that fit in your hand comfortably. To use, you need to turn the nozzle firmly to the right to break the seal.
When the white part of the base of the cap is not visible, you won't be able to turn it further. Afterward, once the nozzle is firmly in place, you'll need to turn the blue cap to the left to open the tube and dispense. What's more, the tube comes with an anti-clog cap and a metal pin so that the product does not dry up.
This super glue has many advantages because of its pin-point precision, making it possible to control the amount you release. However, you can't do much if the glue comes to you dry. While we received the perfect packaging, some online reviewers got a perforated tube that caused the glue to dry.
9. 3M Marine Adhesive Permanent Bonding and Sealing Glue
Coming in next, we have this fast-cure sealant by 3M, which turned out to be a pretty strong adhesive. It comes in cartridge packaging in a tube with a pointed nozzle carrying 10 fluid ounces of product. Read on to find more details about this high-quality glue.
One of the best features of this product is its high-strength, moisture-resistant formula. This adhesive can also fill gaps and bond materials like wood, gel-coat, fiberglass, and aluminum, among others. It also cures quickly, taking not more than 48 hours to cure fully.
Since this sealant is designed for marine applications, it's no surprise it is water-resistant, weather-resistant, and extremely tough. This glue is traditionally used to seal deck fittings, fiberglass hulls, motors, and hull seams above and below the waterline. You can use it to glue materials that are in constant contact with water, like kitchen sinks and bathrooms.
Moreover, the long-lasting formula does not crack or peel over time, allowing you to use the sealant outdoors and on rooftops. This is due to the polyurethane polymer in the slue, which makes it resistant to weathering and saltwater. Also, it stays flexible and has the ability to retain strong bonds even during vibration, structural movement, or shock.
Overall, we found the product simple and easy to use and found many uses in and outside the house. However, we wish the product came with a slightly improved cap. The current one did not deal efficiently, causing the adhesive to dry out before the subsequent use.
What We Like
Extremely durable product
Does not crack or peel
Cures fast
Long-lasting formula
What We Don't Like
Cap design could be better
Volume: 10fl oz | Set Time: N/A | Cure Time: 24 Hours | Dry Color: White | Resistance: Resists Moisture, (Salt) Water, Harsh Weather
10. PC-Clear Liquid Epoxy High Strength Clear Adhesive
Yet another glue we reviewed was the 70147 model by PC Products, which is a clear epoxy adhesive liquid. This product comes in multiple packaging in syringe format and bonds a variety of surfaces and materials together. Read on to find more details on this tough glue.
Let's start with the features of the epoxy formula. Epoxy is a transparent adhesive liquid that can bond wood, metal, glass, ceramic, concrete, and fabric. The first time you mix the resin and hardener solutions, be sure to stir them correctly and use one batch at a time. This is to prevent the solution from drying up and ensure it lasts a long time.
Furthermore, once you finish the mixing part, the solution will look opaque at first. But don't worry; after application and drying, it turns transparent when fully cured. Another feature we liked was its ability to withstand extreme temperatures. Since it can tolerate a range of -20 to 200 degrees Fahrenheit, you can use the glue to fix ovens, microwaves, fridges, or freezers.
Also, outdoor repairs are possible with this adhesive. One thing you need to note is to mix only as much as you need; otherwise, it will dry quickly. The glue gives you a working time of 4 minutes in which you can manipulate, wipe, and clean. And, curing takes about 24 - 48 hours to complete.
This product comes in syringe-type packaging, which allows you to control the flow of both the solutions - resin and hardener. However, the trouble with this is that the nozzle might be too thin for some jobs. We felt the nozzle and dispenser design needed improvement.
11. J-B Weld HighHeat 550 Degree Epoxy Putty Stick
We decided to test out another glue by the brand J-B Weld. This time it is the glue model 8297, which specializes in working with scorching temperatures. If you are looking for an easy-to-use yet heavy-duty adhesive, you must consider this glue option.
Firstly, we were impressed with the sheer strength of this product. The J-B Weld HighHeat has a lap shear strength of 800 PSI at room temperature and 600 PSI at 400 degrees Fahrenheit. This adhesive has the ability to withstand continuous heat of up to 450 degrees Fahrenheit and intermittent heat of 500 degrees Fahrenheit.
Essentially, this product comes in toe parts and can be mixed manually. After mixing the two solutions into a slurry, you need to instantly apply it to the surface that needs bonding. After application, drying will take merely 1 hour, and the surface will be completely cured within 8 hours which is faster than other glue brands.
Apart from that, its multipurpose formula is one of the best for DIY projects in the house. This heavy-duty epoxy can repair and restore various materials in a short time. Since it can withstand high temperatures, people often use it to glue tailpipes, mufflers, engine blocks, ducts, and machinery.
Although we liked most aspects of this product, there were a few things which were lacking. As advertised, it does work well to glue objects that will be exposed to high temperatures. Objects like ovens or heaters accepted the glue just fine. However, it didn't work well on exhaust pipes.
Next, we decided to check out the 454657 models by the brand Rhino. This glue is also called Rhino Ultra Glue Pro Series, and it works as an all-purpose glue for household projects and repairs. It usually comes in a squeezy bottle with 40 milliliters of the product.
The first thing we liked about this product was how easy it was to use. The method is pretty straightforward, and anyone can follow it. First of all, you need to make sure the surface or area that needs to be bonded is free from spills. Next, we recommend you wear protective gloves and keep the room well-ventilated.
After this, twist off the black cap and spread the adhesive in a thin layer. The thinner, the better, in this case, and porous materials will need glue on both surfaces. Now, press and hold the surfaces for 60 seconds and allow for a curing time of 20 minutes. For rigid materials, clamp and keep them overnight.
Moving on, it can bond surfaces like plastic, vinyl, wood, metal, canvas, ceramic, glass, and concrete. The good thing about this glue is that the formula is tough enough to withstand impacts, shocks, moisture, heat, and vibrations. Finally, it also comes with a glue brush for easy application.
Even though we liked many features of this glue, there were a few drawbacks we'd like to mention. The adhesive worked well on wood, glass, and ceramic but took too long to bond with stainless steel. This was disappointing because that was the main reason behind purchasing this glue.
In this section, you'll find a detailed table comparing the top adhesive options for stainless steel. This table evaluates critical attributes, including Volume, Set Time, Cure Time, Dry Color, and Resistance.
Now that you have seen all the best glue options for bonding stainless steel let us see the criteria that make it ideal for you. Here are a few aspects that you must consider before purchasing
Types Of Glue
A. Polymer Adhesives
These glues are creed using polyurethane and come in one or two-component options. One-component adhesive can cure moisture from the atmosphere while the two-component one forms a chemical reaction. This is a flexible and robust adhesive ideal for gluing metals and plastics.
B. Silicone Adhesives
Essentially, this adhesive is based on a silicone compound and is often used to seal glass and ceramics. This type of glue is available in one or two-component variants. The one-component glue does not need mixing, while the two-component one will need the mixing of both resin and hardener solutions.
Drying And Curing Time
Metal glues usually take 4 to 6 hours to dry. However, this heavily depends on the type of glue. As far as curing is concerned, the number of hours will increase with the thickness of the layers. But usually, 15 - 24 hours are enough for them to cure.
If you need a quick job, maybe epoxy will be too time-consuming for you. In that case, superglue would be a better option.
Element And Chemical Resistance
Another thing you need to consider is exposure to chemicals and extreme temperatures if any. Are you going to need glue to withstand high temperatures since you are gluing an oven? Moreover, consider if you will need waterproof glue. If yes, shortlist the options accordingly.
Next, check if the glue can handle certain harsh chemicals and make a selection accordingly. Ultimately, this will matter only if you are going to expose the glue to a severe environment.
Temperature & Water Resistance
This is another important factor to keep in mind, and you need to check whether the glue can withstand extreme heat and continue to provide a solid bond underwater. This might not be required in every situation, but still, it’s a good quality to have.
Application
You must make this check to determine the kind of dispenser that suits you best. Are you comfortable with pin-point thin nozzles that release fluid slowly? Or do you prefer to manually mix the epoxy and apply it with a brush?
What kind of adhesive can be used on stainless steel?
Stainless steel can be bonded with other materials using epoxy adhesives, polyurethane adhesives, and acrylic adhesives. The application of the appropriate adhesive will depend on several factors such as materials being bonded, their surface texture, weight-bearing capacity, etc.
Will the epoxy glue stick to stainless steel?
Yes, stainless steel can be bonded with epoxy glue. An epoxy adhesive comes in two parts – epoxy resin and hardener. When you mix the two well, you will create a solid and durable bond.
Tired of throwing away your rubber products even though there isn't any serious damage?
It's high time that you had a look at glues that work for rubber. By getting the right glue, you can mend any rubber product and prolong its life. Moreover, spending on good adhesive costs you much less than getting new products.
Even though rubber is a frequently used material in our everyday lives, we seldom know the right ways of mending it. And as various options are available on the market, it can be a little confusing if it's your first time buying glue for rubber.
Hence, we decided to help you out by coming up with this guide about the 11 best glue for rubber available right now. And, there's also a buyer's guide to help you make a well-informed decision.
So, without further ado, let's get started!
Best Glues For Rubber Reviews
Here is the list of the 11 best glues for rubber that can be used to repair, seal, and bond rubber materials quickly and easily.
Want to get glue that sets quickly yet maintains a strong bond? If yes, then you might have already heard about the Gorilla super glue. This unit comes in small packaging that makes working with it easier. So, let's have a look at this great product.
Gel glue formula: Our thick, no-run Gorilla glue gel formula...
All purpose glue: Gorilla Super Glue is formulated for...
Why Did We Like It?
When it comes to working with superglue, most of us remember how hard it can get to control the watery liquid. But, you won't be having that problem with this glue as it comes with a gel formula. Make sure to shake the bottle prior to use, and you won't even need to apply much to get a strong bond.
Coming to the application of this product comes in a handy squeezy bottle to directly apply the glue on any surface. Moreover, its precision mouth lets you put a drop of this adhesive on even the tiniest of surfaces. Also, there's no need to clamp down the rubber after using this material as it sets in only 10-45 seconds.
Furthermore, this glue isn't just for rubber as you can use it for materials like leather, wood, plastic, ceramic, and even paper. So, it won't limit your creativity or the need for mending things.
What Could’ve Been Better?
This Gorilla super glue gel is one of the best glues for rubber present on the market. However, some previous customers did complain that the glue dries out inside the bottle. So, make sure to close the cap as soon as possible after your work is done to prevent it from drying.
Pros
Fast drying
Easy to control
Strong bond
Works with various materials
Cons
May dry in its packaging if the cap is left open
Quantity: 1 Bottle | Volume: 0.71fl oz | Set Time/Dry Time: 10 to 45 Seconds | Cure Time: 24 Hours | Dry Color: Clear | Resistance: Impact-Resistant
Gorilla is a leading manufacturer of various adhesives, and we can always expect something innovative from it. And, this two-part epoxy glue has to be an example of how the company makes things simpler, and that too by putting it in a syringe. So, let's check it out.
5 minute epoxy: This epoxy resin kit in just one applicator...
Why Did We Like It?
First of all, let's talk about its packaging. Putting the two-part epoxy adhesive in a syringe is ingenious as you wouldn't need to squeeze it out of individual tubes. Also, as Gorilla provides pretty clear instructions, measuring the right amount of adhesive needed is easy.
However, the best feature of this glue is that it dries clear. So, if you are working on a rubber project with an exposed exterior, then this adhesive won't look bad on the surface. You can also use this glue to fill gaps or cracks found in your rubber or leather products.
Besides, this glue is also water-resistant. So, bad weather won't affect its bond if you apply it to your tires or shoes. Just make sure to give it enough time to dry, and the glue will prove its durability.
What Could’ve Been Better?
Even though we like this glue for rubber, we have to say that applying it can get messy. The packaging does make mixing the epoxy easy, but you still need to apply the glue with something. Hence, be careful about handling this adhesive and check out some tutorials before using it.
When it comes to producing excellent adhesives, Loctite is up ahead in the game. This super glue from the company has been a favorite of many because of its strong bonding capabilities and convenience of use. But, there's more to this product, so let's check it out.
Rubber Toughened: Loctite’s most durable cyanoacrylate...
No Drip Or Run: No-mess formula is ideal for vertical...
Why Did We Like It?
Are you tired of using glues that have a weak bonding capacity? Don't worry, as this adhesive from Loctite comes with a rubber-toughened formula. Because of its composition, the glue can withstand all kinds of impact, making it ideal for use on items like shoes or tires.
Moreover, the best part of this glue has to be its patented applicator from Loctite. The tube comes with easy-squeeze sides, so you wouldn't need to put a lot of pressure on it to get the glue out. Similarly, with its precise nozzle, you can even place a single drop of the adhesive on the working surface.
This adhesive also stands out to us because of its versatile usage, as with it, you can bond materials like metal, wood, glass, fabric, paper, and even hard plastics. So, you can use the glue for other purposes rather than just working with rubber.
What Could’ve Been Better?
Overall this Loctite super glue gel is excellent for bonding rubber products. However, our only gripe with it is the quantity that you get. We expected a little more than 0.14 fl oz at its price, and you would need to buy multiple units for bigger projects.
Pros
Resilient bond
Helpful packaging
Quick drying
Good for vertical application
Cons
Low quantity
Quantity: 1 Bottle | Volume: 0.14fl oz | Set Time/Dry Time: 15 to 30 Seconds | Cure Time: 12 to 24 Hours | Dry Color: Clear | Resistance: Resists Water, Impact, Shock, Vibration
Do you often go on long drives? If yes, then you're likely to face punctures in the middle of a highway. However, having rubber cement and a patch kit can help solve the problem for a smooth ride. So, let's take a peek at this adhesive.
Be prepared for the inevitable puncture and patch tires...
Partner with a Slime plug or patch kit for a complete repair
Why Did We Like It?
Slime has created this adhesive specifically to be used with flat tires. And, it works well with patch kits produced by Slime or by other manufacturers. We really liked the packaging, as there's an easy applicator included in the cap. So, you wouldn't need to carry an extra brush just for applying the glue to the patches.
Don't worry if you are new to repairing automotive parts, as Slime provides all the needed instructions. And, it's pretty convenient to use this glue without making a complete mess.
Moreover, this cement dries clearly so that the patch wouldn't look odd on your car's tire. Make sure to find a patch closer to the color of the tire, and you will get the best results.
Besides, even though this glue is meant for tires, you can definitely use it for other projects where there's a need for bonding rubber.
What Could’ve Been Better?
While going through previous customers' reviews, we found that most people thought this glue had a long drying time. Even though it can dry pretty quickly for patching small holes, it does take a while to dry for larger projects. Also, make sure to follow the instructions to get better results.
Tired of spending on expensive gasket repairs? Get help from this 3M adhesive that's meant to set gaskets with a waterproof and airtight seal so that it stays put for a long time. Hence, if you have been searching for such a product, let's check it out.
BONDS weatherstripping, headliners, gaskets and more
FORMS FLEXIBLE, waterproof bond that resists vibration
Why Did We Like It?
3M is one of the most renowned brands for adhesive-based products, and this glue strengthens the claims made by the company. We liked that it prevents water from seeping through your car's window or any other surface by creating an airtight seal. Moreover, it can also stand vibrations, solvents, and temperature changes, so the gasket won't need any repairs for a long time.
Using the product is also quite simple as no preparation is required. The tube has a narrow mouth, and you can even apply the glue on the thinnest of surfaces. It's also quite easy to spread the glue by using a brush or a spatula.
Furthermore, there's no need to bother buying glues for different materials, as this glue is able to bond rubber with metal, vinyl, and fabric.
What Could’ve Been Better?
One of the drawbacks that we came across in this product was its runny consistency. This does help you spread the glue more evenly, but someone who is using it for the first time will need a little while to get used to controlling it.
Pros
Easy-to-use packaging
Good quantity
Flexible bonding
Black color looks seamless with the rubber
Cons
Runny consistency
Quantity: 1 Tube | Volume: 5fl oz | Set Time/Dry Time: Allow 4 Hours | Cure Time: 24 Hours | Dry Color: Black | Resistance: Waterproof, Resists Vibration, Solvents, Temperature Changes, & More
Barge has been consistently providing adhesives that have a strong bond, just like the bear on the company's logo. This is one of the all-purpose glues that work with various materials, including rubber. Also, it comes in large quantities, so you can manage to do several projects.
Barge All Purpose Cement is a professional strength glue...
Ideal for patching rubber boots, resole leather shoes,...
Why Did We Like It?
While doing professional work with rubber, you need to use an adhesive specifically made for the job. This all-purpose glue from Barge is one of the best glue for rubber recommended by professionals. It's perfect for those who work with rubber shoe soles, as apart from providing a strong bond, the glue also dries quickly.
However, the best feature of this adhesive has to be its flexible bond. This makes it suitable for products like shoes or toys, as the glue wouldn't budge even when the object is used daily. Additionally, while using this glue, you can keep the top open for up to four hours. So, you wouldn't need to worry about the adhesive drying out while working on large projects.
Even though we suggest this glue specifically for rubber, it also works with wood, metal, gumlite, fiber, cotton, and many other materials.
What Could’ve Been Better?
We can't complain about this product as it has been a favorite of professionals for a long time. However, the applicator present in this can isn't of the best quality, and it doesn't work for bigger projects. So, get yourself a brush or a spatula to spread the glue evenly.
Pros
Great for professional projects
Prolonged open time
Dries fast
Versatile usage
Cons
Poor applicator
Quantity: 1 Can | Volume: 32fl oz | Set Time/Dry Time: N/A | Cure Time: N/A | Dry Color: Yellow | Resistance: Waterproof
Do you struggle with shoe heels or soles that seem to come off? Put an end to your troubles with this shoe goo adhesive as it brings shoe repair to your home. Also, it comes in a black color to make your dress shoes look new.
If you are one of those people who always seem to have trouble with the soles of their shoes, then you will surely benefit from this adhesive. This product has been specially made for bonding shoe soles and to make it last even with daily usage. Moreover, this glue works with shoes of all materials, and you can even use it to stick on a loose high heel.
Rather than just sticking two pieces of rubber, this glue mends your shoe by filling in the gaps. If you notice a hole in your trusty boots, just apply this adhesive in that area to fill it up. You can also try using it at the end of your shoelaces to stop fraying.
Additionally, this adhesive is also waterproof, so it will also help fix any work shoes or rubber boots that you may have.
What Could’ve Been Better?
This isn't really a drawback, but we would like to note that this glue comes in black color. Hence, as it dries black, the adhesive wouldn't work well for the exteriors of light-colored shoes. You may try the clear version of the same product for better results.
Pros
Great for most shoe brands
Easy to use
Clear instructions
Good for patching holes
Cons
Not suitable for light-colored shoes
Quantity: 1 Tube | Volume: 3.7fl oz | Set Time/Dry Time: 3 to 4 Hours | Cure Time: 48 to 72 Hours | Dry Color: Black | Resistance: Waterproof, Resists -40°F to 180°F, Abrasion
Barge brings you another excellent adhesive in a new formula that's toluene-free. So, this adhesive has a less toxic formula than the original one introduced by the company. Don't worry, as this still has the usual strength of the all-purpose cement that would help mend rubber and numerous other materials.
Once you try this cement, you'll see why it's considered one...
Industrial use, all purpose cement provides a strong bond...
Why Did We Like It?
Most of us have a terrible experience when it comes to using glue straight from the can. To make the application process much more manageable, Barge offers a tube packaging for this glue. However, if you require a larger quantity, quart-size cans are also offered by Barge.
Compared to other cement adhesives available in the market, this one has a low drying time of 10-15 minutes. So, you can mend a shoe one day and wear it the next day without worrying about loosening the bond.
Moreover, this adhesive comes with a superior flexible bond, making this product great for use in shoes that you will use every day. Also, the quantity provided is enough to fix the sole of a pair of shoes or even more.
What Could’ve Been Better?
We really like this all-purpose cement from Barge because of its great quality and strong bond. However, we would have even liked it better if a precision applicator or cap was provided with it. It's still an easy-to-use glue that's great for beginners and professionals.
Pros
Quick drying time
Manageable tube packaging
Works well in professional use
Versatile usage
Cons
No precision applicator is provided
Quantity: 1 Tube | Volume: 2fl oz | Set Time/Dry Time: 10 to 15 Minutes | Cure Time: N/A | Dry Color: Translucent Yellow | Resistance: Waterproof
Are you looking for a multipurpose adhesive to have around the house? If yes, then check out this one from Quickhold, as it's one of the best craft glues out there. Also, we really like the bright purple packaging, so let's check it out.
One of the foremost problems seen with adhesives is that they don't dry clear. And, when working on a project, you wouldn't really want the glue to dry gloopy. But, this product from Quickhold has a transparent formula, so it dries clearly. Also, you can wipe away the excess to have a more seamless finish as it’s thin.
Another great feature of this glue has to be its thoughtful packaging. We especially like the precise nozzle that allows you to apply even a tiny drop of glue. So, if you are thinking about working with rubber gaskets, then this adhesive would be suitable for the job.
Furthermore, as it's a multipurpose product, you are never limited by the materials on which this glue can be used. As this adhesive can also withstand extreme temperatures, it's great for working with glass and metals.
What Could’ve Been Better?
This glue for rubber is an excellent product that's also similarly useful for bonding other materials. However, if you're a beginner, it may take you some time to get used to its runny consistency. Also, never apply too much pressure on the tube as it may release too much product.
Pros
Fast drying
Great for crafting
Strong bond and hold
Easy to clean the excess
Cons
Runny consistency
Quantity: 1 Tube | Volume: 2fl oz | Set Time/Dry Time: 2 to 3 Minutes | Cure Time: 2 to 6 Hours | Dry Color: Clear | Resistance: Waterproof, Resists -40°F to 150°F
If you thought that Elmer's only produced glue for school, then this rubber cement would come as a surprise. It's a lesser-known adhesive from the brand, but that doesn't limit its quality as this is a useful product. So, let's see how you can use this glue for everyday purposes.
This isn't just a glue meant for rubber, but it's actually made from rubber which adds flexibility to a bond. So, when you apply it on the sides of your shoe or the sole, the glue would be able to take the pressure, and it wouldn't get wrinkled. This makes this product excellent for those who want to work with delicate rubber pieces as the glue wouldn't cause any creases.
Moreover, even though this adhesive has an opaque formula, it does dry clear. Hence, it's useful for projects where the glue might be visible. As it comes with an acid-free formula, the glue wouldn't go yellow with time. And, wiping off the excess is also simple, so you wouldn't need to toil with it.
Besides, the applicator attached to the cap of its bottle makes spreading the glue easier, even when there's a large piece of rubber.
What Could’ve Been Better?
We didn't come across any negative aspects of this adhesive. However, some customers did comment about how the applicator brush got stiff after a while. This mainly happens when you let the glue sit on the brush for too long. Hence, if you see any gloopy glue on the brush, do clean it.
Pros
Good for DIY projects
Easy to use
Great quantity
Also works for scrapbooking
Cons
Applicator may get stiff with use
Quantity: 1 Bottle | Volume: 4fl oz | Set Time/Dry Time: Only Takes A Few Minutes | Cure Time: N/A | Dry Color: Clear | Resistance: N/A
Last but not least, we have another adhesive from Gorilla that's renowned for drying fast. It comes in a pack of three, so you will have enough glue to work on multiple projects. This product also has one of the fastest-grabbing capacities we have seen on the market.
We have saved one of the best products for the last leg of this guide. Gorilla provides us with a clear drying glue that's also paintable. So, if you want to make some designs on a piece of leather with this glue, go ahead with it. Also, painting on the adhesive works out really well when using it on a shoe.
Are you fond of leather patches? If yes, then you can use this glue to attach the patches to your favorite jacket or jeans and even on shoes. This glue is also waterproof, along with being washer and dryer safe, so you wouldn't need to worry about it coming off.
Moreover, the best thing about this glue is that it can also be used for outdoor things. So, if you have been searching for glue that will help to fix your tires, this product will do the work just fine.
What Could’ve Been Better?
We don't have any complaints about the glue as it works pretty well. However, some people have noted that this glue may dry out in its packaging. It's mainly due to improper handling, so make sure to wipe down the nozzle and close the cap tight to prevent it from drying out.
Pros
Doesn’t have a strong smell
Easy application
Strong permanent bond
Versatile usage
Cons
Glue may dry out
Quantity: 3 Tubes | Volume: 3fl oz Each | Set Time/Dry Time: In Just Seconds | Cure Time: 24 Hours | Dry Color: Clear | Resistance: Waterproof
While choosing the best glue for rubber, you need to know some essential points that'll help to make the right decision. As mending or bonding materials are often based on specific projects, skipping any points may leave you with completely unusable glue, which may also end up ruining the rubber. So, let's check out these key points.
Type Of Glue
While going through the product recommendations, you'll notice that we have tried to recommend various types of glue for rubber. The reason behind it is that you may want to bond the rubber with a different material like wood or metal. Hence, when choosing glue, it's crucial to check the composition of the adhesive.
Most people will recommend you use a cyanoacrylate-based adhesive that makes up the standard super glue. But, you might also want to look into epoxy-based glues, which have become quite a popular choice.
However, we did observe that cement or latex glues are also preferred by many, especially when it comes to mending shoe soles. So, make sure to do a bit more research about the type of glue that would be best suited for your particular project.
Ease Of Application
A lot of folks don't pay attention to the application process of glue, but you should. Won't it be a hassle to use two-part glue for fixing the sole of your shoe? To avoid the difficulty posed by the application of adhesive, it's best to go for a product that suits your needs.
Moreover, some projects require a special applicator that helps get the glue to reach even a minute corner. You can't manage to apply the adhesive with a brush or a spatula for such a task. So, make sure to check the process of usage before picking glue for your rubber-based projects.
Drying Time
Most of us are pretty impatient regarding the cure time of an adhesive. Moreover, the abundance of super glues has made us believe that every glue can be set within five minutes. However, when it comes to cement or epoxy-based adhesives, it can take hours or days for them to cure properly. And, if you aren't careful, there might be a need to redo the whole thing.
To avoid such situations, always check the curing time of a particular glue. Super glues usually are the quickest to dry, whereas two-part or latex-based adhesives may take a while. But, you should also make sure that the type of glue you have chosen will work with the material, as patience is the key to getting a durable bond.
Quantity
Have you ever faced a situation where you have run out of glue in the middle of a project? If yes, then don't worry as you aren't the only one to have made this mistake. Most people underestimate the amount of glue needed for a project. So, to be on the safer side, take care of your calculations as early as possible.
When choosing an adhesive, check the amount present in each tube. As there's going to be some wastage, always try to buy more than what you require. Moreover, if you're into professional work, think about buying larger cans or tubes as they are usually cheaper.
Having said that, we will suggest avoiding buying superglue in bulk as it tends to dry in the packaging. Also, a handy tip is to check the expiry date of a product and get the adhesive from the latest batch to get a longer working time.
Glues For Rubber FAQs
Is it necessary to wear protective gear while applying rubber glues?
Yes, it is advisable to wear safety goggles, gloves, and long sleeves while working with rubber glues. Always work in a well-ventilated area and avoid direct skin or eye contact with the adhesive.
Does the type of rubber being used affect the choice of glue?
Yes, the choice of glue is influenced by the type of rubber being used as well as the intended application of the bonded material. Different types of rubber may require different adhesives for effective bonding.
Can I use rubber glues for auto parts?
While some rubber glues can be effective in automotive applications, always consult product datasheets or the manufacturer to confirm suitability, as the bond may need to withstand demanding conditions like extreme temperatures and chemicals.
How should I store my rubber glue after use?
Store rubber glue in a cool, dry place, away from direct sunlight and heat. Ensure that the cap or lid is tightly sealed to prevent the adhesive from drying out or losing potency.
Conclusion
So, that's everything we had to tell you about the best glues for rubber. We hope that this guide will help you in finding an adhesive that works best for your project. Also, do remember to go through the buying guide if you face any difficulties while making a choice.
Among our recommendations, we will suggest the Gorilla 7700104 super glue gel to anyone looking for a quick-drying adhesive for rubber.
In comparison, the Gorilla 4200101 2-part epoxy is better suited for those who want to mend holes and cracks along with high bond strength. But, working with this glue needs patience as it can get a bit messy.
With that, we come to the end of this informative guide about glue for rubber. Do let us know if you have any queries regarding the suggestions.
Rhinestones are one of the most popular objects in fashion design.
They can be used on clothes, shoes, accessories, and even crafts in various ways. However, these tiny objects can be tricky to use despite their popularity, as they tend to fall off surfaces when not glued properly.
When using rhinestones for designing clothing or accessories, selecting the right glue is crucial. A good adhesive, fabric, or leather glue will ensure that these decorative items do not fall off so that your fashion accessory or clothing looks good.
But selecting a suitable rhinestone glue can be quite challenging, with so many options to choose from. It also requires a decent amount of time and effort to go through numerous reviews about the various options.
That is why we’ve compiled this guide to help you out and even included a buyer’s guide to making things easier. So, without further ado, let’s begin!
Best Glue For Rhinestones
Whether you're working with fabric, metal, or plastic surfaces, we've got you covered. So, without further ado, here's the list of the 7 best glues for rhinestones.
Let us start with a product from Aleene’s, one of the leading manufacturers of a wide variety of crafting glues, ranging from quick-dry adhesives to multipurpose ones. And the 21709 is one of the best for designing clothing, accessories, and more, so read the following section to know all about it.
Aleene’s 21709 is one of the best adhesives for fashion designing, and as such, can be used with excellent results to glue rhinestones. The effectiveness of this glue lies in the fact that it comes with a non-runny formula that is great for use on soft surfaces like fabrics.
Additionally, the 21709 bonds quickly, making it ideal for situations that require quick solutions. It is also incredibly strong, preventing decorative objects like tiny rhinestones from falling off your clothing item or accessory.
Another thing we liked about this rhinestone glue from Aleene’s is that it dries clear, so there won’t be any visible signs of the adhesive left on the surface. You can easily use the glue with objects such as beads, metals, stones, or gems and for household repairs with excellent results.
What Could’ve Been Better?
While testing this product, we got impressive results and did not find any significant downsides. However, the opening of the adhesive tube is too wide and can lead to a messy situation. The manufacturer should look into fixing the design of the tube to improve the experience.
Pros
Versatile
Strong and long-lasting
Ideal for invisible repairs
Affordable
Cons
Tube design can create a mess
Adhesive Type: PVA | Bond Strength: 350 PSI | Drying Time: 45 mins | Waterproof: Yes | Heat Resistant: Yes | Multipurpose: Yes | Shelf Life: 2 years
The next item on our list is the ToolsGS JA-GSHYPO, another excellent option for attaching rhinestones onto various surfaces. ToolsGS is an American brand with a reputation for manufacturing quality products at reasonable prices. Unsurprisingly, this multipurpose glue from the brand can be used for arts, crafts, and jewelry making.
Great for highly detailed work, perfect for small jewelry...
Why Did We Like It?
There are several things to like about this product, so let us start with the tube itself. The JA-GSHYPO comes with a precision applicator that makes it ideal for detailed work, such as gluing rhinestones, making crafts, or repairing work. Thus, you can apply the glue neatly without any mess.
Another noteworthy feature of the JA-GSHYPO is that it dries completely clear, which makes it suitable for use on clothes and accessories. It is an excellent option for purposes that require clean application without leaving any visible signs of the adhesive.
Moreover, it is one of the best rhinestone glues on the market since it does not discolor or yellow over time. This means your fabric or other material will retain its appearance even after considerable use.
Also, despite creating an incredibly strong bond, this rhinestone glue still retains some amount of flexibility after drying, preventing easy breakage.
What Could’ve Been Better?
Once again, we have nothing to say about the product that needs improving except that putting the cap back on the tube can be quite tricky. The cap is small and can easily be lost, without which the glue can dry up pretty quickly.
Pros
Wide application
Does not create any mess
Remains flexible after drying
Provides a decent amount of working time
Cons
Replacing the cap can be difficult
Adhesive Type: Cyanoacrylate | Bond Strength: 3200 PSI | Drying Time: 15-20 mins | Waterproof: Yes | Heat Resistant: Yes | Multipurpose: Yes | Shelf Life: 1 year
If you’re looking for an adhesive specially designed for jewelry making, then the SG_B00KO6V0N6_US is the perfect option as it is one of the highest-rated products on the market. It can be easily used by both professionals and hobbyists due to its ease of use and impressive performance.
If you are someone who frequently undertakes DIY projects or is engaged in jewelry making, then the SG_B00KO6V0N6_US is perfect for your needs. This rhinestone glue comes with metal precision tips that allow a high degree of control during the application process.
You can also use it for other purposes besides jewelry makings, such as repair work, clothing, and accessory design. It makes attaching embellishments such as rhinestones or even natural gems or pearls very easy, creating a strong bond that prevents breakage.
Furthermore, the screw-on applicator tip allows the glue to come out slowly and evenly, making the application process mess-free. You can save a lot of time on cleaning up any excess glue afterward by using this excellent rhinestone glue.
The E6000 is also one of the quickest-drying glue sticks on the market, and this attribute makes it ideal for projects that have an element of urgency.
What Could’ve Been Better?
The E6000 is undoubtedly an excellent product when it comes to performance due to its quick-drying property. However, it starts drying as soon as you open the tube, and you’ll either need to use it all in one go or figure out a way to prevent drying.
Many of you must have heard of the Beacon Adhesives brand, one of the biggest names in the adhesive industry. This brand offers a wide range of glues for industrial as well as home use, and the GT2OZBBC12 is the perfect example of the effectiveness of its products.
Secure gems and rhinestones with Gem-Tac, a premium quality...
Suitable for mirror-backed stones and dries clear, making it...
Why Did We Like It?
Coming from the Beacon Adhesives brand, we expected the GT2OZBBC12 to offer promising results and are delighted to say that it did not disappoint. It is one of the most versatile adhesives and is highly compatible with various materials, including wood, plastic, fabric, leather, etc.
The GT2OZBBC12 is a must-have permanent adhesive for those working in jewelry-making, creating clothing products or accessories, and more. It is not only the best glue for rhinestones but can be used to bond several other objects, including crystals, sequins, and more.
What sets the Beacon Adhesives GT2OZBBC12 apart from the rest is that its formula gets stronger when exposed to heat. You can easily use a hot glue gun to apply this glue.
Additionally, it is incredibly easy to use and dries clear without leaving behind any noticeable signs. You can easily use it for bonding real or imitation gems, laces, fabrics, and more to other materials.
What Could’ve Been Better?
It is one of the best glues specially developed for bonding gemstones, pearls, and overall jewelry-making purposes. However, the shelf life of this product is extremely short, and you will need to store it properly to prevent it from drying up completely and becoming unusable.
Pros
Does not create a mess
Very easy-to-use
No foul odor
Dries quickly
Cons
Very short shelf life
Adhesive Type: PVA | Bond Strength: N/A | Drying Time: 24 hours | Waterproof: Yes | Heat Resistant: No | Multipurpose: Yes | Shelf Life: 2 years
Moving on to the next item on our list, we bring you the B-7000 from Cat Palm. It is a highly versatile and multipurpose adhesive that can be used for jewelry design, repairs, and more. If you’re looking for the best rhinestone glue, the B-7000 can make a highly compelling choice.
★Using a needle design, can be opened after use, won't get...
★Multi Purpose,Able to permanently bond various...
Why Did We Like It?
We came across the Cat Palm B-7000 super glue when looking for the best glue for rhinestones and decided to include it in our list after witnessing its performance. When gluing rhinestones onto fabric, this superglue delivered excellent results and did the job quickly and cleanly.
Being one of the most powerful options in this segment, this super glue can easily be used for jewelry making, household repairs, and more. It is waterproof as well, which further adds to the versatility of the product.
Also worth mentioning is that this glue does not whiten over time, unlike most competing products. Due to this, the B-7000 can easily be used on all projects without worrying about affecting the appearance or creating a mess.
Moreover, the Cat Palm super glue is completely non-toxic and emits a very low odor. It can even be used by kids easily for arts and crafts projects.
What Could’ve Been Better?
The only thing that we would like to mention is that this product is not available in a single tube. You can only purchase two at a time, even though that quantity may not be required. If the other tube is never used, that amount of money will go to waste.
As we near the end of our list, we bring you another product from Aleene’s. The 32136 is a waterproof polyurethane glue that offers exceptional performance without compromising safety and ease of use. Liquid fusion technology helps create a powerful bond with a wide range of materials and delivers fantastic results.
Voted America’s Favorite Crafting Glue by generations of...
Waterproof - great for both indoor and outdoor projects
Why Did We Like It?
One of the foremost reasons why we liked Aleene’s 32135 rhinestone glue is its immensely strong bond. We used it on fabric and other materials such as wood, glass, and even metal and found that it bonds to these surfaces extremely well. Furthermore, being waterproof, the strong glue is not affected by exposure to moisture.
This polyurethane glue is also completely non-toxic, does not foam, and emits a low odor, making it one of the safest options on the market. What is more, you can even paint on the surface once the glue is dry, which makes it the best glue for jewelry-making and repair work.
The 32135 glue dries clear without acquiring a yellow tint, unlike many other competing products. Whether you use it for repairs or for attaching gemstones and pearls to fabrics, it won’t leave any visible sign.
Finally, this adhesive provides a mess-free experience as well.
What Could’ve Been Better?
Aleene’s 32135 is one of the most effective rhinestone glues we’ve encountered while compiling this list. The only drawback to this industrial-strength adhesive is that it is a bit on the costlier side. It may not be suitable for those on a tight budget.
Pros
Very strong bond
Non-toxic glue
Does not create a mess
Wide application
Cons
Costly option
Adhesive Type: PVA | Bond Strength: 300 PSI | Drying Time: 60 mins | Waterproof: Yes | Heat Resistant: Yes | Multipurpose: Yes | Shelf Life: 2 years
We conclude our list with the Gem-Tac permanent adhesive from the house of FindingKing. The brand deals in a wide variety of tools and supplies as well as a range of jewelry items and watches. Rest assured, this product is one of the best for jewelry, accessory-making, and repair purposes.
This is a new bottle of Gem-tac permanent adhesive
Perfect for bonding gemstones and rhinestones to fabrics, ,...
Why Did We Like It?
The FindingKing Gem-Tac is an excellent product for purposes like bonding gemstones and tiny rhinestones to materials such as fabric, leather, metal, and glass. Besides these uses, you can use it for arts and crafts or other purposes like fixing household items.
The glue creates a permanent bond with non-porous surfaces that is heat resistant and lasts for an incredibly long time. Applying it to any surface is also incredibly easy, and you can either use the tube or a hot glue gun for the purpose. The best part is that since it is non-toxic and non-flammable, you do not need to worry about accidents.
Plus, the manufacturer has included all the instructions on the bottle regarding the correct way of using the adhesive to make things easy. What’s more impressive is that the FindingKing Gem-Tac is one of the quickest-drying adhesives on the market right now.
What Could’ve Been Better?
Though this glue dries clear, it does acquire a yellow tint over time, so it might not be the best option for projects that require invisible glue. That said, its long-lasting bond and non-toxic nature make it one of the highly recommended options for other projects.
Pros
A strong, long-lasting bond
Versatile application
Easy to use
Dries quickly
Cons
Tends to yellow over time
Adhesive Type: PVA | Bond Strength: N/A | Drying Time: 24 hours | Waterproof: Yes | Heat Resistant: No | Multipurpose: Yes | Shelf Life: 2 years
We’ve now completed our list of reviews about the best adhesives for gluing rhinestones. However, we understand that knowing about the available options isn’t enough for making the right decision. Multiple factors need to be considered when selecting glue for rhinestones.
In this buyer’s guide, we’ve listed some of the most common factors you should consider when selecting a rhinestone glue.
Keeping these factors in mind can make your job of selecting the right product easier and more effortless.
1. Bond Strength And Resistance
When purchasing any type of glue, this is one of the primary factors to consider. You should look at how well the adhesive bonds with other materials, such as fabric, glass, metal, etc. The glue that you select should be able to create a permanent bond with such surfaces.
Besides having good bond strength, the rhinestone glue should also have a certain amount of flexibility. Having flexibility is crucial because the fabric that the main glue will be applied to needs to remain flexible.
Besides that, the rhinestone glue needs to be waterproof to ensure it does not wear off when the fabric is washed. Being heat and impact-resistant can be of added advantage.
2. Drying Time
Like adhesives used for Swarovski crystals, the best rhinestone glues work reasonably quickly while also allowing a decent amount of time to make adjustments when gluing rhinestones to fabric. Usually, you need to attach several rhinestones to a piece of fabric or another surface. Any adhesive that takes too long to dry out will adversely affect your working efficiency.
Using temporary glue offers the advantage of allowing you to reposition or readjust the rhinestones, while permanent adhesives create a stronger bond. The ideal solution is to use a product that sets in place in a few minutes while requiring more time to cure permanently.
3. Clear Drying
The color of the glue, after it dries, should also be considered before making a decision. Generally, when selecting an adhesive for gluing rhinestones to fabric or other materials, it is recommended to select one that dries clear.
This property of the glue will ensure that any mistakes during the gluing process are not easily visible, and the appearance of the material is also not affected. It also makes the glue suitable for projects that need adhesive to remain invisible.
4. Precise Application
Selecting an adhesive that can be applied with high precision can make things much easier and help speed up your workflow. Being extremely small, the process of putting rhinestones requires a minimal quantity of glue. Select an adhesive that comes with a precise applicator tip or applicator tool for greater efficiency.
5. Substance Type
Various types of adhesives are formulated to work with different types of materials. For instance, super glue may not be the best option for foil back rhinestones since it reacts with the foil and also does not allow adjustments. Similarly, other types of adhesive may contain epoxy resin and are quite runny, which makes them unsuitable for use on delicate fabrics.
Heat-tolerant adhesives can easily be applied to surfaces such as larger rhinestones using a hot glue gun. Such adhesives also get stronger when exposed to heat.
6. Toxicity
Different types of rhinestone glues have varying chemical compositions. Some glues may have a chemical composition that makes them toxic to pets and children. Keep that in mind when selecting an adhesive. Several non-toxic alternatives are easily available on the market.
Also, certain types of adhesives like epoxy epoxies have a strong odor or may emit fumes and should only be used in a well-ventilated area. In this case, also, you can easily get products that are odor-free and do not emit foul fumes.
7. Viscosity
Viscosity refers to how thick or thin a glue can be. An adhesive with a runny consistency makes it unsuitable for use on materials such as fabrics, as it can damage the material. On the other hand, glue that is too thick will take a long time to dry.
The right glue will neither be too thick so as to prevent any mess nor too thin so as to run off. Using such a product will make the application process easier and faster, helping save a lot of time and effort.
Glues For Rhinestones FAQs
What type of glue is best for rhinestones?
The best type of glue for rhinestones depends on the surface you are adhering them. For fabric surfaces, fabric glue is the best option. For non-porous surfaces such as metal or plastic, cyanoacrylate (super glue) or E6000 adhesive are good options.
Can you use hot glue for rhinestones?
Hot glue can be used for rhinestones on fabric surfaces, but it may not be the best option for long-term use. Hot glue tends to become brittle over time and can crack, causing the rhinestones to come loose.
How do you remove rhinestones from clothing?
To remove rhinestones from clothing, use a heat source such as a hairdryer or heat gun to soften the glue. Then, use a dull knife or plastic scraper to gently pry off the rhinestones. Any remaining glue can be removed with a solvent such as rubbing alcohol or nail polish remover.
Can you wash clothes with rhinestones?
Yes, you can wash clothes with rhinestones, but it’s important to follow the care instructions on the garment carefully. Use a gentle cycle and avoid using harsh detergents or bleach that could damage the rhinestones or the adhesive holding them in place.
How long does rhinestone glue last?
The lifespan of rhinestone glue depends on various factors such as the type of glue used, the surface it’s adhered to, and the environment in which it’s stored. Generally, high-quality rhinestone glue can last for several years if stored properly and used as directed.
Conclusion
There are plenty of options available when it comes to rhinestone glues, which makes the process of selecting one quite difficult. However, selecting the right type of adhesive can provide great results and increase efficiency.
With that, we’ve reached the end of our review-based guide for the best rhinestone glues that can be purchased from the market right now. We hope that you found it informative and enjoyable, and it has made selecting the right product easier.
Before signing off, we’d like to share our favorites from the list. Our top pick is Aleene’s 21709, a strong, versatile, and affordable rhinestone glue that guarantees excellent results. But for those who want a multipurpose adhesive that is waterproof, the ToolsGS JA-GSHYPO is a better option.
Finally, the E6000 is easy to use and delivers quick results. With that, it’s a wrap, until next time!
Venturing into the world of glues for plastic eyeglass frames may seem challenging. The J-B Weld Plastic Bonder excels in bonding strength, while the versatile and quick-drying Gorilla Super Glue is another standout. Skim through our precise reviews for a well-informed selection.
The best possible solution during this time is to either fix them yourself or get hold of someone who can do the job for you. And in case you are planning to do it all by yourself, it is best to select a glue that can fix the eyeglass in no time. Sometimes fixing them is the only option as completely replacing the glass might not be a choice.
But when you go to the market, you will surely get perplexed by the number of options out there. So, to bail you out of the situation, we have designed this guide with the top 5 products worth trying. You will also find a buyer’s guide towards the end so that you don’t miss out on any important details.
Listed below are the best glues for plastic eyeglass frames:
J-B Weld Plastic Bonder: J-B Weld Plastic Bonder is a glue that stands out for its exceptional bond strength of 3770 PSI. It sometimes struggles with inconsistent adhesive distribution.
Gorilla: Gorilla super glue offers 10 to 45 seconds of drying time which is one of the fastest among the options, making it superior in cases that demand quick fixes, with a maximum cure time of 24 hours. The quantity is smaller than the J-B Weld.
Aleene's: Aileene's glue has wide surface compatibility, from porous to semi-porous materials. The super-strong nature can result in unwanted adhesion if not carefully applied.
E6000: The E600 adhesive has a unique resistance to high temperatures and the ability to alter its color post-drying, it stands out for its versatility. The lack of an applicator can make the application process challenging.
Starbond EM-150: The Starbond EM-150 is a lab-tested glue that is accompanied by additional micro applicators, ensuring precision in small crack repairs, a feature not commonly available in the list. Its weak packaging can potentially lead to damage during delivery.
1. J-B Weld Plastic Bonder - Best for Quick-setting Repairs
One of the first recommendations that we have for you is the J-B Weld 50139 Plastic Bonder which is best known for its quick-setting formula. You can rest assured that once you repair the eyeglass frames with this solution, they will last for a long time. Within no time, it will get cured to form a robust and permanent bond.
What we liked the best about this product is that not only does it fix your glasses, but it also fills the gap. Hence, you can have your glasses fixed in no time. If you do not want to go to the shop to fix your glass and engage in DIY plastic repairs, this is one of the best options. And the best part is that it comes with a sealable cap, which prevents the glue from drying out when not in use.
On top of that, the strength of this plastic bonder is noteworthy. With a strength of 3770 PSI, you can rest assured that this glue works as an excellent adhesive. Once you fix your eyeglasses with this glue, they will stay that way for a long time.
Moreover, it is pretty simple to work with this item. Once you apply it, all you have to do is wait for about 15 minutes for the glue to set in. Long story short, it reduces your work time considerably.
Some users find the application process of J-B Weld 50139 Plastic Bonder challenging due to the dispenser's unequal adhesive distribution, despite its straightforward working process and quick setting time.
The Gorilla 7805001 super Glue is one of the best adhesives that you can get your hands on for fixing plastic eyeglass frames. Because it includes a variety of tips in its package, you can use it for a range of applications, and that too completely mess-free. It does not matter how small the surface is; you can apply it anywhere you need to with utmost precision.
Once this glue dries up, you won’t even understand that it had been applied in the first place. It offers a seamless application and a discreet appearance. So, be it plastic sunglasses or eyeglasses, you can fix all kinds of eyewear with it.
Even better, the glue hardly takes any time to dry up. You can expect it to dry up within a span of 10 to 45 seconds and get cured entirely within 24 hours. So, you will be ready to wear your fixed eyeglass in under a day’s time.
Other than that, we were really impressed with how this glue can be used to fix a range of materials and not only plastic. We could not help but appreciate how versatile this item is, as we could use it on rubber, leather, ceramics, or wood. Irrespective of where you apply it, the bond will be quite strong.
Despite showing brilliant performance, we were not really happy with the quantity delivered. The tube is pretty small and is good to fix eyeglasses only. But in case you are planning to use it on bigger surfaces, you might need more than one bottle. Otherwise, you may run out of glue sooner than later.
Next up on the list, we have Aleene's 94830 29131 jewelry & metal glue. This super glue is best if you are looking for an adhesive that provides a good hold and a strong bond. This is best for DIY jewelry makers and is an excellent option for fixing your eyewear too. With this, you can fix your broken eyeglass in a matter of a few minutes.
What is really noteworthy about this item is that it can work on a range of surfaces. Be it semi-porous or porous materials; this item can perform its wonders anywhere. So, you do not have to restrict yourself to using it just on eyeglasses. If you are feeling experimental, feel free to try it on glass beads, rubber, stones, and even beads.
Moving on to the appearance, we would score it a perfect 10. Once the glue dries up, the finish is excellent and is undetectable. As it becomes completely clear when it dries up, it does not look blotchy and won’t feel like the eyeglass has been repaired. And even if you apply it on any other surface other than plastic, the finish will be the same.
Also, the quantity provided in the package is pretty good. You can use it for all your DIY projects with much ease. And you do not need to buy multiple packs to wrap up the project as you get not 1 but 3 tubes in the pack.
There’s only one downside to this item. It is super sticky, and you should be a little careful with the application process. We had applied it on Swarovski and because the glue was so strong that some parts of the crystal came off. We suggest that you check the strength of the glue before applying it.
What We Like
Can be used on a range of surfaces
High durability
Excellent finish
Good quantity
What We Don’t Like
Can be too strong
Quantity: 3 Tubes | Volume: 0.10 fl oz Each | Cure Time: N/A | Dry Color: Clear | Resistance: Waterproof
4. E6000
If you are on the lookout for an adhesive that is popular for its toughness and durability, the E6000 230010 craft adhesive is the best bet. Irrespective of the kind of substrate that you apply it on, this item will indeed work its magic. This provides a perfect bond, and you will be able to fix everything with it.
While the tubes might look tiny, the adhesive is pretty powerful. This unique formula is well-suited to deliver top-notch performance and is preferred by users for both industrial-level and craft projects. So, you can understand how efficiently it can fix your plastic eyewear.
Moreover, you can turn it into any color that you want once the glue dries up. So, it gets easy to make it match the color of the substance that you put it on. This makes it convenient for you to put it on any surface of your choice, as you can make it in any color.
Furthermore, this item is entirely non-inflammable when it gets cured. Once it gets cured, you can rest assured that it can handle a wide range of temperatures. To be honest, it is entirely temperature-resistant. So, if you use it for any DIY project that involves using high heat, it will handle it well.
There's no doubt that the product scores perfectly when it comes to performance. However, keep in mind that the application might seem a little difficult. The tube does not come with an applicator, and unless you apply it carefully, it might get blotchy.
What We Like
Strong bond
Versatile
Durable finish
Resistant to high temperatures
What We Don’t Like
Application is not easy
Quantity: 1 Tube | Volume: 3.7 fl oz | Cure Time: At Least 24 Hours | Dry Color: Clear | Resistance: Waterproof, Temperature-resistant
5. Starbond EM-150
For a high gloss finish that provides a clear and hard coat, you should give the Starbond EM-150 CECOMINOD040312 a try. This is a great opinion for fixing your plastic eyewear and also for filling wood cracks and the like. You can rest assured that this premium glue will provide nothing but outstanding output.
The best part about this item is that the manufacturer did not compromise on the quality at all. In fact, special attention has been paid to ensuring that the quality of this adhesive is top-notch. This industrial-grade adhesive undergoes proper tests in the lab before it gets packaged. So, there's no doubt that you can handle challenging projects with this item.
On top of that, the application process of this product makes it very impressive. You will find additional applicators, stoppers, and a collection of tips for precise application, all included in the package. As a result, you do not have to visit the local supermarket for additional supplies. You can easily fix the tiniest of the cracks with micro-applicators.
Moreover, this glue comes with a good shelf life. So, even if you do not end up using the entire file in one go, you can keep it saved for future use. It won't disappoint you as it will remain in the exact same condition for years if you store it well.
Despite scoring well on performance, we were not really impressed with the way this item was packaged. The box in which it arrived was a little torn, and we were worried that it got damaged. In case you face a similar problem, you can contact their customer support team to ask for a replacement.
What is the Best Glue for Plastic Eyeglass Frames?
If you're looking for the best glue for plastic eyeglass frames, the table below provides a comparison of the quantity per package in units, volume measured in fluid ounces, cure time in hours and minutes, dry color, and resistance properties.
Buying Guide for the Best Glue for Plastic Eyeglass Frames
Before you can decide which item to go for, we would like to let you know about a few other important considerations. This will help you pick the best adhesive for your plastic eyeglasses. Let's take a look!
Curing Time
Most of the glues that we have mentioned on our list are super quick to dry. So, when you fix the eyeglasses with them, you can go back to wearing them in a few minutes.
However, be cautious about selecting a glue that does not dry up too fast. In case you have shaky fingers, this will become a problem as you will hardly get any time to adjust the pieces. If that's the case with you, consider going with UV light glues.
Simplicity of Use
Unless you are a pro, handling difficult-to-use glues means only one thing- mess. And we are sure that you would not like that.
In order to avoid messy situations, it is best that you find an adhesive that involves an easy application process. Unless it is easy to apply, the results can turn out blotchy too. In case there is no micro-applicator included in the package and if you are planning to fix the eyeglasses with it, we suggest that you get some from the market.
Durability
What good is a product if it does not last long? And adhesives are no different. So, it is always best to look for glues whose bond will not deteriorate soon. There are a few adhesives whose bonds start to weaken within a few months.
We strongly advise that you remain cautious and not buy a product that comes with a similar problem. It is essential to fix your eyewear correctly so that it does not keep troubling you time and often. So, glue that lasts for a long time should be your ideal choice.
Can I use regular household glue to repair my plastic eyeglass frames?
No, regular household glue is not recommended for repairing plastic eyeglass frames because it may not provide the necessary strength or longevity. Instead, use adhesives specifically designed for plastic materials.
Are glues for plastic eyeglass frames safe to use around the lenses?
Yes, glues for plastic eyeglass frames are generally safe to use around lenses, as long as the lenses do not come into direct contact with the adhesive. It's recommended to remove the lenses before a repair, if possible, to avoid potential damage.
Will gluing my plastic eyeglass frames together be as strong as a professional repair?
Gluing plastic eyeglass frames together will not be as strong as a professional repair. Professional services use specific techniques and materials optimized for durability in eyewear repairs.
How can I ensure a clean and precise repair job?
To ensure a clean and precise job, carefully clean the surfaces to be glued using rubbing alcohol or a mild detergent. Apply a minimal amount of adhesive using a toothpick, needle, or fine applicator to ensure accuracy and prevent messes.
Particle boards are widely used for their affordable and versatile nature in furniture and other household projects.
Whether it is binding two pieces together or fastening things to a particle board, there are many ways this unique wood material can be used. However, to ensure they stay attached, a strong and long-lasting glue should be used.
To ensure your DIY project has the best quality result, we have gathered the best options on the market today. We have also included a guide on how to choose a suitable glue so you can make the most informed decision.
Without further ado, let's get into it!
Particle board is a great material for do-it-yourself projects, but it requires a strong and durable glue that is easy to use as well.
Listed below are the Best Glue For Particle Board:
Franklin International Titebond III: Titebond III leads the market in water resistance for indoor and outdoor use. It stands out with its non-toxic nature, allowing indirect food storage. A drawback is the bottle cap - it could freeze due to leakage.
Weldbond: Weldbond offers dual functionality, both bonding and sealing porous materials, with a non-toxic formula that minimizes fumes. A challenge it presents is delivering precision owing to its thin consistency.
Gorilla Glue: Gorilla Glue 6202010 impresses by drying rapidly and being water-resistant. The downside is its thick viscosity can potentially lead to nozzle clogging.
Elmer’s: Elmer's shines with its durable bond, especially on porous wood surfaces, and additional mold protection. Peeling back the layers reveals the necessity of careful storage to prevent formula hardening.
J-B Weld: J-B Weld's lightning-fast setting and curing outmuscle the competition, cutting down waiting time dramatically. One unavoidable hurdle is its limited working time due to fast drying, a potential challenge for larger projects.
To help you find the best glue for particle board, here is the list of the 7 best glues for particle board:
1. Franklin International Titebond III - Best for Water Resistance
The Titebond III from Franklin International is an ideal glue for particle board use whether it is exposed or indoors. Not only is it water-resistant, but it can also be used for indirectly storing food. It has an extended working time so getting a clean application is more accessible.
What makes this one of the ultimate wood glues to use for particle board is the fact that it can be used for food storage. Although it is limited to indirect contact, the fact that it is approved is enough to give it an upper hand over the competition.
Additionally, it has to be waterproof so it is ready for outdoor applications as well as indoors. Finishes also do not have an effect on the end result; it is not called the ultimate wood glue for nothing!
Another feature that sets this apart as the ultimate wood glue is the easy clean-up. Using just a damp rag, any excess applications can be wiped off within seconds. Attaining the clean result you are after is not possible with the Titebond III.
One slight flaw in the bottle design that we noticed was the cap had occasionally frozen up due to the dried glue. After every use, there was a bit of extra formula that would leak out and dry up, locking the cap. This made opening up the bottle for the next use particularly difficult.
This adhesive from Weldbond is a universally working option that can be applied to a variety of surfaces. Not only does it bond surfaces but it can also seal porous materials which makes it one of the best glue for particle board applications.
When buying glue, a great feature to have is versatility; something that this Weldbond adhesive successfully accomplishes. It can be used on normal surfaces as a bonding agent, but it also works as a glue for particle boards and other porous materials. By sealing and penetrating the surface of the particle board there is a strong bond formed that will be sure to last.
Furthermore, there are more than a few safety features that make it ideal for use on indoor and outdoor projects. It is non-toxic in nature so you don't have to worry about making a mess. What's more, it doesn't give off much fumes or odors, so using it indoors is a viable option if you choose to do so.
After the adhesive has been allowed to set and cure for 24 hours it will become water-resistant. Although it is not completely waterproof, the seal will be able to withstand moisture to a certain extent.
A slight inconvenience that makes this glue for particle board applications challenging is its thin viscosity. This makes precise applications difficult to accomplish. Although it does have a clear finish so this can be avoided to a certain extent depending on the surface it is being applied on.
Gorilla Glue is a brand known for some of the best glue options for different surfaces. In particular, this Gorilla wood glue is a handy glue for particle boards as it uses a water-based formula. With a water-resistance and invisible drying color, it is a great option for any woodworking projects you have.
One of the highlighted features we appreciated was the rapid speed at which this Gorilla wood glue dries. This glue requires only half an hour to have a secure bond between two materials. While it requires clamping, it is not a long wait just to get them to stick together.
Additionally, once the drying and curing time has been fulfilled, the seal can be worked on to become seamless. Unlike most glues, this Gorilla wood glue has a clear drying color that can also be sanded and painted.
Another feature that comes in handy once the glue has been dried and cured is its water-resistant nature. This feature helps make it an appropriate glue to use for indoor and outdoor purposes. A strong bond can be maintained even if one of the applied surface areas is exposed to moisture.
While there is no doubt that this Gorilla wood glue is a great glue for particle board use, there is one slight inconvenience. It is a thick viscosity glue, making precise application challenging. As a result, there is a higher chance of clogging in the nozzle as well.
Elmer's adhesive glue offers a long-lasting bond for DIY projects involving porous wood surfaces. Thanks to a clean, non-toxic formula that is easy to clean up, it is an easy-to-work-with option among different particle board glues. Added protection against mold growth and water resistance makes this a strong contender as the best glue for particle boards.
Seeing as this Elmer's construction adhesive is a thicker glue variant, it made working with it much easier. The formula was able to penetrate deep into the wood and strong rubber particles to create a tight seal. As a result, it has fantastic water resistance that is handy for outdoor projects.
Despite having such strong and permeating binding properties, the formula is also non-toxic and does not give off strong odors while applying or curing. Even young children can safely work with the adhesive without worrying about their safety.
Furthermore, it is much easier to clean as compared to most glue for wood. Simple warm water is enough to remove all traces and ensure it doesn't leave marks where it shouldn't. After the wood glue has been dried and cured for 24 hours it can then be sanded, painted, and even stained for an even cleaner application.
We highly recommend that this wood glue be stored properly to keep the formula from drying out. It comes in a plastic bottle that does not offer much in terms of protection from exposure. As such, there were quite a few users who found the wood glue hardening in the container itself.
What We Like
Indoor and outdoor use
Strong bond on porous wood boards
Non-toxic formula
No strong fumes
What We Don't Like
Plastic bottle dries out fast
Type: PVA | Color: Tan | Material: Synthetic Polymer | Waterproof: No | Heat Resistance: No | Sandable: Yes | Paintable: Yes | Dry Time: 10-20 min | Cure Time: 24 hours | Strength: Strong
5. J-B Weld
When buying glue, J-B Weld is one of the top brands to consider as the best glue for particle board applications. In particular, this epoxy putty stick has a quick setting drying and curing time to make it incredibly efficient in joining wood and other surfaces.
What sets the J-B Weld epoxy putty apart from most adhesives is the fast setting and curing time involved. Not only does it set in 15-25 minutes, but the curing period has an astonishing one-hour time frame. Gluing boards and other materials can be done with little to no waiting time involved.
Even though this wood glue is an epoxy variant, it only uses one component to mix and use. This makes it accessible and easy to apply without lots of effort involved. After the application has been dried and cured, it will take on a light tan shade.
Once the epoxy mixture has been mixed and activated, there are a number of possible measures that can be taken to make the seal imperceptible. Drilling, staining, sanding, and shaping are all possible to allow the glue to take on the natural color and form that matches that of the other materials.
While fast-drying wood glue may help create a more efficient workflow; however, it also limits the amount of time that you have to work with it. Considering how the putty needs to be worked with before it can be used, the working time is brought even lower, so large particle boards may be challenging to work on.
Glue Masters offers a high-quality, professional-grade super glue that sets and holds fast on a variety of material types including particle boards. As far as particle board glue goes, it is incredibly versatile and easy to work with, ranking it among the best glues for a DIY project.
If there is one thing that Glue Masters has successfully pulled off with this super glue, it is the drying period involved. With an incredibly low setting time, it forms a strong bond on other surfaces almost instantly.
Additionally, the super glue has a thick consistency that allows for increased control over the quantity and flows during application. This limits the amount of mess created and cuts down on cleanup time afterward. Only a small amount is needed to create a lasting bond, so there shouldn't be any issues with over-application.
Another feature that we appreciated was the extended shelf life that is possible due to the effective bottle design. A tight cap keeps the formula free from exposure and drying out. Although there is a lack of an anti-clog cap, it does a good job of keeping out foreign elements from the bottle.
Seeing as this is a professional-grade super glue, it comes as no surprise that removing it is incredibly challenging once dried. If you attempt to do so, you may find that it leaves streaks and residue on the applied surfaces, which may not be the desired result.
What We Like
Versatile use of wood and other materials
Even flow and control of the formula
Extended shelf life
Rapid curing agent
What We Don't Like
Difficult to clean
Type: Cyanoacrylate | Color: Clear | Material: Cyanoacrylate | Waterproof: No | Heat Resistance: No | Sandable: No | Paintable: No | Dry Time: < 1 min | Cure Time: 24 hours | Strength: Strong
7. Gorilla Glue 7700104
Another Gorilla wood glue option is this super glue gel variant that offers an improved drying speed compared to other wood glues. If speed is the crucial element to finding the best glue for particle board surfaces then this super glue gel is definitely worth looking into.
One of the highlighted features that Gorilla Glue emphasized on this adhesive gel variant is the possibility of vertical application. The solution has been formulated to hold its shape, so using it on hanging particle boards and other similar surfaces will not see a runoff formed. Once applied, it will stick and hold without drooping, unlike other, thinner viscous wood glue options.
Furthermore, increasing the accessibility of the superglue gel further, there is no need to clamp the two surfaces while drying. Thanks to a minimal drying time, clamping is unnecessary, making it easy to use in a tight pinch or for fast repairs. After the glue for the particle board has dried, it develops a tough resistance to impacts and outside elements.
Another handy feature is an anti-clog nozzle design that keeps the glue from becoming dried out when not in use. This maintains the quality of the glue for longer over multiple uses.
Although the anti-clog design is appealing to the eye, it does not help with the dispensing of glue. As it is quite thick, it can be quite difficult to get the glue out in a steady stream. For precise applications or smaller surfaces, you may have difficulty in getting it down cleanly.
What We Like
Increased impact resistance
Versatile application possibilities
Dries in 10-45 seconds
Only one drop per sq. inch
What We Don't Like
Hard to dispense
Type: Super Glue | Color: Clear | Material: Cyanoacrylate | Waterproof: No | Heat Resistance: No | Sandable: No | Paintable: No | Dry Time: < 10 sec | Cure Time: 24 hours | Strength: Very strong
What Is the Best Glue for Particle Board?
When bonding particle board, it's essential to use a suitable adhesive for the best possible outcome. Below is a comparative analysis of seven different glues often deemed the best for particle board usage. Variables compared include glue type, color, material composition, whether they're waterproof, their heat resistance (measured in °F), sandability, paintability, dry time (in minutes or seconds), cure time (normally 24 hours), and the strength of the adhesive bond formed.
Finding the right glue can be a challenge if you are not aware of the various features and options available to you. To give you a better idea of what useful features are available, here are the top factors to keep in mind when making your decision.
1. Drying And Working Time
One of the most important considerations when working with glue for particle board surfaces is the amount of time needed to fully dry and cure it. Depending on these conditions will determine how much time you have to get it in place before it is fixed.
Setting time refers to how long the glue takes to fasten itself to the particle board. Furthermore, the curing time is the period in which the glue fully hardens and full protection and durability are achieved.
2. Resistance And Durability
With various types of glue from different manufacturers available to you, there is also a range of additional protective features that you can choose from. Adapting the bond to accommodate for these external factors will see an improvement in the lifespan of the seal for a higher quality adhesion.
Water-resistant glue is one of the most valuable features to have when working with particle boards as it allows the material to be placed both indoors and outdoors. When working with an outdoor glue, water resistance is given to protect it from rain and other climate conditions.
Impact resistance can also boost the durability of the glue by creating a stronger bond that holds even when exposed to pressure. For projects that see a high amount of contact and exposure, this feature will come in handy to keep it together without breaking it down prematurely.
3. Safety Features
When working with glues there are quite a few toxic gasses and odors produced in some formulas. Using a non-toxic option can give you a safer experience while applying the adhesive. When working in a confined space, a non-toxic solution will come in handy to make up for the lack of ventilation in the closed space.
Additionally, a glue formula that does not contain harmful substances and is easy to clean up can help you have a seamless experience with the glue. Safety should always be the first priority, so keep an eye out for the toxicity levels and similar health and safety benefits to expand the range of applications possible.
What is the best adhesive for adhering melamine to particle board?
The best adhesive for adhering melamine to particle board is a contact adhesive specifically designed for this purpose such as Titebond Melamine Glue, which is formulated to bond wood, particleboard, MDF, and other porous materials to synthetic materials like melamine, vinyl, HPL, and metals.
Can particle board adhesive be used on other surfaces?
Yes, particle board adhesive can be used on other surfaces, including plastics, stone, metal, ceramic, foam, glass, and concrete.
How long does it take for particle board glue to dry?
The drying time for particle board glue will depend on the specific adhesive and environmental conditions, but typically it takes from a few minutes to 24 hours for the glue to fully dry.
How should particle board glue be stored?
Particle board glue should be stored in a cool, dry place away from direct sunlight.
How long does particle board glue last?
The shelf life of particle board glue will depend on the specific adhesive, but in general, it should last up to two years when stored properly.
With that, we will conclude our review and guide on the best glue for particle board projects. You should now be more
Our top choice goes to the Titebond III Ultimate Wood Glue for its versatile application and minimal clamp time. A close second is the Weldbond which has fantastic durability against moisture and other related elements that can weaken the seal. However, if you prefer to work with epoxy putty, then the J-B Weld is a fantastic heavy-duty option to consider.
Our final words of advice to get the best possible result for your particle board projects would be to pay attention to the extra features included in the different options available to you. After all, the bond formed is only as strong as the work that you put in.
What if you suddenly have to deal with a detached heel from one of your favorite stilettos? Or a cracked bottle of medicine?
These are situations in which the standard bottle of glue that you have at home won’t be practical. You will need a more specialized glue for such purposes since these materials are mostly constructed from polypropylene, a particular variety of plastic.
Such a glue will provide the required strength to the bond and will protect it from weather damage and any sudden impact. But there is an overwhelming number of options available on the market, and not all of them are equally effective.
So, making the right choice might seem a bit difficult to you initially. Considering this, we’ve put together this guide to the top 11 options out there. We’ve also included a buyer’s guide to help you make a well-informed decision.
Let’s get started, then!
Listed below are the 5 best glues for polypropylene from our list:
Gorilla Super Glue: Ideal for polypropylene DIY projects, this glue provides two methods of dispensation and boasts commendable bond durability and impact resistance, setting it apart from others. Its fast-drying feature, however, is marred by packaging quality concerns.
Loctite 2436365: Tailored for heavy-duty applications, this epoxy-formulated glue promises ultimate bonding strength in 15-30 seconds, setting it ahead of its competitors. It comes with a precision applicator for hard-to-reach surfaces and is temperature resistant, but the glue quantity in each tube is less.
J-B Weld: Boasting high-temperature resistance, this glue comes with a two-part epoxy formula enabling strong, long-lasting repairs. It has an impressive 3960 PSI tensile strength, but it requires a longer curing time compared to others.
Starbond: As an all-in-one set, it features a powerful glue with cyanoacrylate and has a long shelf life with added tools for versatile usage. Even though it’s exceptional for penetrating deep into polypropylene surfaces to create strong bonds, meticulous care is required during application due to challenging cleanup issues.
Gorilla Clear Glue: Specially designed for indoor and outdoor use, this glue is water-resistant and creates long-lasting bonds, making it a standout. Its non-foaming formula and pointed tip facilitate easy application, but it has a longer drying time compared to other products on the list.
Here is the list of the 11 best glues for polypropylene that you can use to create strong and lasting bonds between plastic components.
1. Gorilla Super Glue - Best for DIY Polypropylene Projects
Creating a perfectly unbreakable bond in any polypropylene object will be effortless and quick with this product from Gorilla. Hence, for DIYers who often work with polypropylene for their projects, this glue is indispensable. Coming in a 0.42-fl oz tube, it’s among the finest adhesives for polypropylene out there.
The most noteworthy feature is that it lets users dispense the glue in two methods to enable greater accuracy and control in their projects. After all, you may not need the same amount of glue for all the parts; hence, it must be dispensed as per your requirements.
While the nozzle with a precision tip is provided for quick and easy dispensing, the brush enables controlled coverage. Using the glue is also effortless as you just need to unscrew the entire cap and then wipe the brush on the inner portion of the tube to remove the excess glue. On the other hand, you must unscrew the upper cap to use the precision tip.
The durability of the bond is also praiseworthy as it resists wear and tear perfectly. In fact, it is further reinforced with rubber to offer greater impact resistance. This glue even dries really fast, and the object can be used after just 10-30 seconds of application.
This glue tube may sometimes arrive damaged or half-full due to the use of poor packaging by the brand. Hence, we felt it needs to be improved considerably to protect it from damage or leaks during delivery.
2. Loctite 2436365 - Best for Heavy-Duty Applications
Another highly effective choice to go for is this professional-grade glue from Loctite. It offers absolute user convenience in addition to great performance and can render all your bonds very strong and long-lasting. To know more about all the features on offer, move on to the next few sections.
The highlight of this glue is its epoxy formula that’s perfect for heavy-duty repairs and projects. As such, you can achieve ultimate bonding strength for your polypropylene objects within just 15-30 seconds.
Another significant advantage is the availability of an extra-long tip that makes it easy to apply on surfaces that are hard to reach. You can also apply precise amounts of glue as per your needs using the pin-point nozzle that prevents oozing or dripping.
The glue even comes with a patented opening and locking system with a screw-on cap to enable easy usage. This prevents glue buildup or clogging when you’re not using it and also keeps it air-tight so that it stays fresh.
What’s more, it is able to withstand extreme temperatures such as heat waves and freezing cold weather. This ensures the bond is intact despite rough weather conditions.
A drawback of this glue is that each tube contains less glue than other products. Hence, it’s best to buy more quantities to ensure you can use them for more projects. You can either buy the four-pack version or multiple two-pack versions for this purpose. And that won’t be expensive as well since it comes at a very budget-friendly rate.
What We Like
Perfect for heavy-duty projects
Ultimate bonding strength
Quick action
Easy to use
What We Don't Like
Each tube has less glue
Quantity: 2 Bottles | Volume: 0.7fl oz Each | Set Time/Dry Time: 15 to 30 Seconds | Cure Time: 12 to 24 Hours | Dry Color: Clear | Resistance: Resists Hot & Cold Weather, Water/Moisture, Shock, Most Chemicals
3. J-B Weld - Best for High-Temperature Resistance
J-B Weld is known worldwide for its range of extremely strong adhesives, and this glue from the brand lives up to its reputation. Coming in a rare and convenient design, it offers a combination of high quality and ultimate durability that every DIYer desires. All in all, it’s definitely among our top recommendations from the list.
To begin with, this glue has a two-part epoxy formulation that facilitates truly long-lasting and strong repairs in any polypropylene object. It comes in a convenient syringe that allows for a simple 1:1 mix using the mixing tray and the stick provided in the package.
In addition, you can subject the bond to different treatments as per your needs, such as sanding, drilling, tapping, and shaping. There’s even a resealable cap on the syringe that ensures it never dries out or leaks, so you can easily use it multiple times for different projects.
Another striking feature we found was its incredible tensile strength of 3960 PSI, which ensures it creates a tough bond every time. On top of that, the glue can withstand temperatures of up to 550°F when it’s fully cured. This ensures the bond stays intact even if the object is heated at high temperatures.
The curing time for this glue is much longer than other products, so you’ll have to wait for a long time to use the object after the application. In fact, it will take at least 15 hours to cure completely. But apart from that, this glue does its job very well.
What We Like
Long-lasting and strong repairs
No drying or leaking
Extremely hard bonds
Can withstand high temperatures
What We Don't Like
Longer curing time
Quantity: 1 Double Syringe | Volume: 0.85fl oz | Set Time/Dry Time: 4 to 6 Hours | Cure Time: 15 Hours | Dry Color: Dark Gray | Resistance: Resists Heat Up To 550°F
4. Starbond - Best All-in-One Set
If you’re on the lookout for an all-in-one set that will help you create the strongest of bonds smoothly, look no further than this product from Starbond. Designed to offer ultimate efficiency and convenience to users, it consists of a 2-fl oz bottle of glue along with various other essentials.
The ultra-powerful glue in the set contains ethyl cyanoacrylate that penetrates deep into the polypropylene surface to seal, stabilize, and strengthen the bond. Notably, it’s much thinner than other glues and has a viscosity similar to water, thereby facilitating quicker action each time.
Another beneficial feature is its long shelf life of several years, even in extremely cold temperatures. In addition, the brand offers a 30-month warranty for its shelf life, so you are sure to get a replacement or refund in case it doesn’t last.
Speaking of the tools included with the glue bottle, there’s an efficient stopper with a tiny pin to prevent clogging of the glue, two applicator caps, and multiple micro-tips.
While the caps facilitate versatile use, the micro-tips help you apply the glue in tighter spots and tiny cracks. Long story short, you can use this set to create bonds in a variety of materials for lots of projects effortlessly.
The one problem that you might face is with cleaning up the excess glue which might ooze out of the bond, as rinsing the spot with water might not be sufficient. This is why you should be very careful in applying just the amount that’s required for the bond. However, quality-wise, we have no complaints regarding this glue.
5. Gorilla Clear Glue - Best for Indoor/Outdoor Use
Halfway through our list, we’ve chosen another reliable glue from the well-known brand Gorilla. Equipped with a strong formulation and effective features, it is capable of creating durable and long-lasting bonds in several materials comfortably. Also, you can get this glue in a two-pack variant.
We loved the crystal clear color of this glue as it ensures the surface is never stained and facilitates ease of use. Speaking of the quality of the bonds, each of them will be everlasting and extremely resistant to harsh weather conditions.
Another big advantage is the incredible water resistance offered, as it makes sure the bonds are safe during rainy and humid weather. Together, these properties render it perfect for both outdoor and indoor applications.
Furthermore, its non-foaming formula makes it easier to handle for all your projects, ensuring a hassle-free application each time. It also has a convenient pointed tip for easy and accurate dispensation, which is protected by a durable outcap to prevent drying when not in use.
Like one of our other recommendations, this glue has a longer drying time compared to other products. It will take at least a day to dry up completely, so you won’t be able to use the object so soon. As such, for those who need fast-drying glue to complete their projects at greater speed, this won’t be the ideal choice.
The industrial-grade adhesives produced by Glue Masters have been praised all over the country for their highly effective formulations. And this premium-quality glue is no different, as it offers you the ideal performance and durability for your money. As such, your projects will never go wrong with this glue at your disposal.
The best thing about this glue is its cyanoacrylate resin formulation which renders each bond incredibly strong and weather-resistant. So, be it fixing a shoe heel or repairing broken parts of disposable cups and other useful objects for the home, this product will do the job flawlessly.
We also liked how it settled in within just 60 seconds to establish the bond firmly. As such, it would be perfect for people who need a quick fix for their polypropylene objects.
Even the viscosity of the glue is quite well-balanced, thereby offering greater control while maintaining an even flow. That’s why you can get through the job without any hassle or mess, unlike other products.
What’s more, its 2 oz capacity offers enough mending power for small and large projects alike, while the long and pointed tip enables easy and precise application.
This glue lags behind some other products in terms of safety of use, as it releases fumes that might cause discomfort to users. Hence, it’s a must to wear a mask while using this product, especially for people who are already suffering from respiratory issues.
This small glue comes with a power-packed formula to help you sail smoothly through all your DIY projects or repair jobs, no matter how big they are. It can provide the perfect toughness to all the bonds, making them last for years to come. Based on our experience, we can say it’s a pretty good option to go for.
We were impressed with the surface coverage that this glue provides, thanks to the convenient brush-on applicator attached to its cap. It facilitates controlled application on larger surfaces and even hard-to-reach spots. As such, all bonds are perfectly secured, and your projects can be completed just the way you desire.
The brush also remains fresh in the glue bottle, with its bristles never sticking together. Plus, the bottle is designed so as to prevent clogs, while the durable cap closes tightly after use to keep the glue from drying out.
We even found it to be quite versatile, as it’s suitable for repairing any object at home or in the workplace. Thus, including this small tube in your DIY kit will keep you prepared for any sudden mending job.
What disappointed us a bit was that this glue looked cloudy when it dried, which sometimes showed through the repaired part. So, this won’t be a suitable choice if you’re looking for crystal-clear glue. But overall, it does a wonderful job of fixing cracks and breakages in polypropylene objects.
Some polypropylene objects might be tough to bond for glues out there, but this product from Loctite will surely do the trick. After all, it’s specially formulated for mending such items securely to enhance their durability and strength. It comes with a couple of advanced properties that provide the ideal finesse for getting the job done.
This glue works using a two-part system, whereby an activator primes the surface before it’s glued together. While the longer tube contains the applicator that prepares the surface for a permanent bond, the shorter one has the glue; and both these tubes are very easy to use.
Note that the activator has a slanting felt tip that enables accurate application and prevents any accidental spills.
Speaking of the glue, one drop provides enough strength for the bond to remain intact over the years. And here’s the best part: the glue can form the bond in just 30 seconds, unlike ordinary ones, which take hours to consolidate the bond.
Furthermore, it’s perfectly resistant to harsh chemicals, freezing temperatures, and water. This ensures the bond remains unaffected due to changing weather conditions and on coming in contact with water.
You must watch out for the packaging of this glue as well, since it may arrive torn in several places owing to the weak packaging material used. But when it came to performance, this product perfectly met our expectations.
Armed with a commercial-grade formulation, the Rhine Ultra glue can give tough competition to most other products on the market in terms of performance. Having this glue by your side is enough to create perfectly strong and durable bonds in various materials, including polypropylene.
Its patented formula refined through triple distillation is the greatest strength of this glue as it lets you create superior bonds in virtually any material. Plus, it penetrates the material almost instantly to make the bond permanent, unlike others which may need some time to strengthen.
The glue is also least likely to dry out or get clogged when not in use, thanks to the efficient design of the glue bottle and its sturdy cap.
In addition, it offers great weather resistance so that the bond stays strong during extreme temperatures. It even remains unaffected by sudden vibrations or shocks.
Its crystal clear color is another significant feature as it prevents any stains on the object and makes it easy to handle. Lastly, the bottle has a larger capacity than many other glue products on the market, so you can use it to complete many projects over a long time.
Perhaps the only downside to this glue is that it can cause allergies if it accidentally comes into contact with the skin. Hence, we’d suggest wearing a pair of gloves while using it. But you are sure to get a pretty smooth and effective performance out of it.
It’s not often that you’ll find hide glues in a liquid form that’s convenient to use, but this Titebond glue is among those rare products out there. And it offers an appreciable performance when it comes to securing bonds in polypropylene objects. Read on to find out more about its features.
From our experience with this glue, we can vouch that it provides exceptional strength for fixtures created in a range of materials. This is owing to its potent formulation, which is definitely among the finest you will find in hide glues. As such, many professionals use it as an adhesive for heavy-duty projects of different types.
Another major benefit is that it comes ready for use and hence needs no mixing or heating, unlike most hide glues on the market.
In addition, the moisture sensitivity of this glue sets it apart from other options, making it suitable for beginners who are prone to making mistakes initially. Just rinse the bond lightly with water, and the glue can be removed to create a fresh bond at the right spot.
It is even useful as a crackle medium for achieving an appealing weathered look on any object, be it furniture, picture frames, or cabinets.
Since this glue is slightly darker than the crystal clear varieties, it might leave a few stains on the object if applied in excessive amounts. So, be careful not to use too much of the product on a single spot, and keep a moist towel handy so that you can clean the extra glue oozing out of the bond.
What We Like
Exception bond strength
Suitable for heavy-duty use
Mistakes can be corrected
Can create a weathered look
What We Don't Like
Darker color
Quantity: 1 Bottle | Volume: 8fl oz | Set Time/Dry Time: N/A | Cure Time: N/A | Dry Color: Translucent Light Brown | Resistance: Creep-Resistant
11. HENKEL CORPORATION
Towards the end, we’ve picked this glue from Henkel Corporation that performs considerably well in fixing cracks and other damages in polypropylene objects. It can render your bonds just as tough and long-lasting as you want them to be and comes in a much larger cartridge of 9 fl oz.
First things first, this tube is powered by a highly effective instant-grab formula that penetrates most materials within seconds to create an unbreakable bond. This lets you fill gaps and repair cracks or other damages in all polypropylene objects comfortably.
In addition, this glue is perfectly weather-resistant like the other high-performing products we’ve included in our list. That’s why you can easily use it for all indoor as well as outdoor projects to create super-strong bonds with utmost perfection. Even the water resistance offered is commendable, so you can be assured that water or moisture will never loosen the bond.
What’s more, this glue has a low odor which ensures it never makes users uncomfortable, while the cleanup is also effortless as it needs just water and soap.
This glue will take at least half a day to dry up completely, so you won’t be able to use the object till then. This aspect will be an inconvenience for people who need to get over with their projects faster, so they should rather go for a different product.
What We Like
Quick penetration
Weather-resistant
Water-resistant
Low odor formula
What We Don't Like
Longer drying time
Quantity: 1 Cartridge | Volume: 9fl oz | Set Time/Dry Time: 10 Minutes | Cure Time: 12 to 24 Hours | Dry Color: White | Resistance: Weather-Resistant, Water/Moisture-Resistant
What is the Best Glue for Polypropylene?
This section presents a straightforward comparison of top-rated glues designed for polypropylene bonding. The accompanying table outlines key product specifications, including quantity, volume, set time/dry time, cure time, dry color, and resistance.
To ensure that a glue product can create the ideal bond in polypropylene objects, you must consider some key features that will determine its performance. Thus, making the right choice is not just about looking at the specifications of some high-performing products. That’s why we’ve listed some essential points you must keep in mind before purchasing a suitable glue.
Formulation
This is undoubtedly the most crucial factor you need to consider while choosing the ideal glue for polypropylene. Hence, you must remember to check the product details for the nature or constituents of the formulation.
Note that quite a few glues contain a compound called cyanoacrylate, which lends great bond strength and durability. As such, any glue that primarily contains this compound is sure to provide a commendable performance in fixing polypropylene objects.
You must also make sure that the formulation doesn’t produce any foam and acts quickly enough to create a permanent bond. In case you don’t find these details in the product information, going through the customer reviews will be the best way out.
Weather Resistance
A bond created in any polypropylene object is completely secure only if the glue is resistant to changing weather conditions, including extreme temperatures. That’s why weather resistance is such an important factor in selecting a suitable glue. So, you should always check the product details to make sure it fits the bill in this regard.
Ease Of Use
Some customers tend to overlook this factor, considering that all glues generally come in a small and compact size. But small glue tubes are equally likely to make the job messy and full of hassles if they don’t come with the ideal application system and design.
Hence, remember to check whether the design of the glue you’ve chosen is convenient enough for all your projects.
You must also ensure that the applicator is equally suitable for tight spots and larger surfaces. The availability of multiple applicators will be an added advantage, while a long and pointed tip will help in covering tiny cracks in any object quite easily.
Capacity
The glue that you choose must, of course, come with a capacity sufficient for completing the task you have at hand. Plus, if you want a product for long-term use, the capacity you would need is even greater.
Note that a capacity of 7-9 fl oz is ideal for long-term use, while 2-3 fl oz can help you get through a couple of projects at a certain point of time. So, consider your needs and verify whether the capacity of the product is in line with the same.
What are some safety precautions when using glue on polypropylene?
It's imperative when using glue on polypropylene to don suitable eye and skin protection. Adhering strictly to manufacturer instructions regarding application, ventilation, and required curing durations should be part of safety measures.
Are there special techniques for applying glue to polypropylene?
Preparing the surface appropriately is crucial when it comes to polypropylene. Utilizing methods such as light abrasion, plasma treatment, or flame treatment could significantly enhance the adhesion process.
Can I mix different types of glue to bond polypropylene?
It's not advisable to mix varying adhesive types, as this could deter the bond strength and potentially lead to complications. It's best to stick to a single type of adhesive purposely designed for use with polypropylene.
How do I remove glue from polypropylene?
Some adhesives will dissolve under the influence of solvents, while others can be eliminated by utilizing a scraper or equivalent tools. It’s crucial to follow the specific adhesive manufacturer’s instructions and take preventative measures to steer clear of causing any harm to the polypropylene.
Is it that difficult to fix a broken mirror? Well, not if you get your hands on good-quality glue for mirrors, of course.
But then again, we all know that choosing the right mirror glue is easier said than done. With the market being flooded with various options, selecting the right one can get complicated and time-consuming. That’s why, to help you out, we have curated this review-based guide on the five best glues for mirrors on the market. Don’t worry, as it was only after hours of extensive research and testing that we provided detailed reviews for each of our recommendations.
Furthermore, we have included a buyer’s guide towards the end of the article to make things a bit more interesting. So, without any further delay, let’s jump straight to the good stuff!
Listed below are the best glues for mirrors:
3M: The 3M mirror adhesive stands out for its high durability and impressive curing time of just 15 minutes. Its nozzle is prone to getting clogged.
Permatex: The Permatex adhesive offers multiple types of surface sealing across materials like glass, plastic, and vinyl tops. The long curing time of one day makes it less time-efficient compared to the 3M adhesive.
Loctite 37438: Loctite 37438 mirror adhesive excels with its strong bond strength and 0.02 fl oz activator, engineered for mirrors and windshields. It sets rather quickly which limits the adjustment window compared to the Permatex adhesive.
Versachem: A mirror adhesive with a tensile strength of 2,500 PSI. The curing time of 30 minutes allows enough time for last-minute adjustments. Its price is high considering the 0.01 fl oz volume of each activator & adhesive.
Loctite 1693636: The Loctite 1693636 is a mirror adhesive that scores high for its superior bonding in wet areas. The glue gun makes application easy, making it a user-friendly option. Weakness: Long drying time of up to seven days.
1. 3M - Best Overall
3M is a brand dedicated to manufacturing a range of products that work to improve people’s lives. And the 08752 Rearview Mirror Adhesive is an ideal example of what the brand can bring to the table. Let’s move on to the next few sections to learn about this high-quality product in detail.
During our usage, what we liked the most about this product was its durability, which ensures it can conveniently resist challenging conditions. Hence, you can use it on various surfaces, including freshly painted walls, cabinets, drywall, wallpapers, and wood floors.
On top of that, it is vibration-resistant, so you can rest assured that it can withstand the bumps that occur as cars move over rough roads. Additionally, it cures within 15 minutes, unlike many other adhesives that take hours, leaving the users worried and frustrated.
Now users who are skeptical about using it in the bathroom mirror can relax, as it creates a strong bond that holds up in humid environments. This makes the product applicable in bathrooms and other places that often experience temperature fluctuations. Lastly, it sports a budget-friendly price tag, ensuring great value for money.
While this two-part mirror adhesive seemed like a dream at first, we soon noticed that the tip of the nozzle tends to get clogged with glue. But having said that, we believe most users won’t mind this minor inconvenience, given it is available at such an economical price.
What We Like
Forms a durable bond
Vibration-resistant
Has a low drying time
Available at an affordable price
What We Don’t Like
Tends to get clogged
Volume: 0.02 fl oz activator & adhesive | Color: White | Material: Plastic | Application: Bonding | Viscosity: N/A
2. Permatex - Best for Versatile Sealant
Next up, we have the 80855 Clear RTV Silicone Adhesive from Permatex, a great option for those searching for a versatile sealant. From metal to wood to plastic to glass to tiles, this sealant can mend just about every other surface that you can think of. Sounds intriguing? Then keep reading.
Like our previous pick, this adhesive also impressed us thoroughly with its range of applications. It can seal different surfaces such as vinyl tops, fabric, plastics, glass, and lots more. Thus, it’s safe to say you can use this incredibly strong adhesive for pretty much all repair work.
With a temperature range between -75°F and 450°F, this super glue can withstand grease, vibration, water, and oil without breaking a sweat, which is great. But especially satisfying is the fact that it is easy to apply. All you need to do is spread it with a plastic knife or other similar material on the surface.
Beyond that, it is available in three different quantities, allowing you to choose the right one as per your requirements. Overall, from our experience with this product, we can assure you that you won’t be dissatisfied with what it has to offer.
While testing this product, we noticed that it takes about a day to fully cure. While this may not be an issue to some, it is a major concern for professionals who need to complete many projects within a limited time frame. Other than that, we couldn’t find any considerable downsides to this product.
What We Like
Can be applied on a range of different surfaces
Withstands vibration & temperature fluctuations
Easy to apply
Incredibly strong adhesive
What We Don’t Like
Takes a day to fully cure
Volume: 11 fl oz | Color: Gray | Material: Silicone | Application: Sealing | Viscosity: High
3. Loctite 37438 - Best for Rearview Mirrors
Loctite is one of the leading manufacturers of top-grade sealants and adhesives globally. And the 37438 Rearview Mirror Adhesive Kit is yet another notable addition to its mirror glue repertoire. If you are looking for glue specifically designed to stick mirrors, then this special type of glue might just be your best bet.
Manufactured to the highest grade available, this product can create an incredibly strong bond that can last for a long time. Thus, it makes the adhesive suitable for remounting mirrors to windshields.
Another significant feature that we loved about this glue is that It has been approved and used by major car companies such as Chrysler, Ford, and GM. Hence, we think it’s safe to say that it delivers on its promises and is thus reliable.
This rearview mirror sealant can withstand heat and moisture with ease. So, no matter the weather conditions, rest assured it will hold just fine. And the best part? It’s easy to use; just follow the detailed instructions, and you are good to go.
Lastly, it comes at an affordable price, which naturally makes it an instant hit among people on a modest budget.
The drying time of this product is much quicker than we would like, which makes it almost impossible to realign things. So, that’s something you need to keep in mind if you decide to go with this one. Apart from that, it works perfectly.
What We Like
Ideal for rearview mirrors
Sports an economical price tag
Made following the OEM standards
Easy to use
What We Don’t Like
Sets too quickly
Volume: 0.02 fl oz activator, 0.01 fl oz adhesive | Color: Clear | Material: Acrylic | Application: Bonding | Viscosity: Medium
4. Versachem
The next item on our list is another great product from the House of Versachem, a brand that has been manufacturing adhesives for more than 35 years. Meet its 11109 Rear View Mirror Adhesive that promises to permanently fix rearview mirror brackets in a jiffy. Obviously, there’s a lot more to it, so keep reading.
To begin with, this mirror adhesive has a tensile strength of 2,500 PSI, which means it is incredibly durable and can hold on to surfaces even under extreme conditions. Naturally, that helps it make mirror repairs super smooth and hassle-free. Speaking of which, unlike other adhesives, it doesn’t require mixing. Just follow the instructions, and you shall have no issues with it sticking.
Beyond that, it can be used to bond a wide range of materials, including jewelry, ceramics, metal, glass, and a lot more. And unlike other brands, you don’t need to use too much; just one drop would do the job perfectly.
This two-part adhesive offers a cure time of 30 minutes, allowing you to make last-minute changes if required, which is truly remarkable if you ask us. However, we were even more impressed to find out that it is vibration and shock-resistant. Thus, you don’t have to worry about the occasional vehicle bumps ruining the adhesion of the glue.
Without a doubt, this mirror adhesive is one of the best on the market, mainly because of its perfect curing time and durable bond. However, we must admit it’s a tad bit on the expensive side, considering the quantity you get. So, if you are on a modest budget, this product might not be for you.
What We Like
Forms a strong bond
Ideal curing time
Can be used on various surfaces
Easy to use
What We Don’t Like
A little expensive
Volume: 0.01 fl oz accelerator, 0.01 fl oz adhesive | Color: Red | Material: Acrylic | Application: Threadlocking | Viscosity: Medium
5. Loctite 1693636
We don’t need to say much about Loctite as we have already added a great product from the same brand earlier. As far as this mirror glue is concerned, it is just as good as the other options on our list, be it in terms of bond strength and ease of use.
What caught our attention right from the get-go was its superior bonding capabilities in humid and wet areas, which ensures that it doesn’t damage or stain the mirrors. Additionally, this product adheres to other surfaces found in bath and kitchen areas, such as backsplashes, drywall, metals, fiberglass, ceramic, tile, glass, concrete, granite, and brick, which is a bonus.
Moving on, we are pleased to let you know that it meets the stringent state and federal VOC regulations, which means it’s eco-friendly and absolutely safe to use. Not to mention, the product can be applied through a glue gun, making the application all the more precise and easier.
So, if you are a first-timer wanting to set a mirror vertically on a bathroom wall, then you might want to keep this product under consideration.
Lastly, this mirror adhesive is available at a budget-friendly price, which makes it ideal for first-timers and people on a low budget. Naturally, it is one of the most sought-after mirror adhesives currently available on the market.
While this product glues the mirror to the wall with ease, it takes about seven days to fully dry. Now that’s too long in our opinion, especially when compared to the other options available in a similar price range. Other than that, we don’t have any other gripes with it.
What We Like
Sports an affordable price tag
Can be applied with a caulk gun
Has a superior bonding capacity
Can be used on a range of materials
What We Don’t Like
Takes too long to fully dry
Volume: 10 fl oz | Color: Gray | Material: Acrylic | Application: Retaining | Viscosity: Medium
What is the Best Glue for Mirrors?
If you're on the lookout for the best glue for mirrors, the table below compares volume in fluid ounces, color, material, application, and viscosity.
When buying the best glue for mirrors, knowing just the brands and the product specifications is not enough. To select the right product, you need to keep a few essential factors in mind, which will help you make an informed purchase. Fret not, as we have explained all those factors here in detail.
So, let’s take a look, shall we?
1. Temperature Proof and Waterproof
First and foremost, you have to ensure that the glue you are going to purchase can resist damage from temperature and water. This is because if you are using it on a bathroom mirror, chances are that the glue will come in contact with water and temperature fluctuations.
Therefore, it’s best to go with a product that forms a bond that’s durable and waterproof to ensure it stays intact
2. Materials
Another crucial factor to keep in mind when buying a mirror adhesive is the type of material you will use it on. While some are designed for porous materials, others are not. So, make sure you know the surface to which you will be sticking the mirror in order to choose the right product.
On a side note, be sure to wear safety goggles as a preventive measure whenever you fix or attach a mirror. And once done, remember to wipe any excess glue from the mirror surface to avoid staining it.
3. Color
The color of the glue doesn’t matter if you’re buying it to stick a mirror to the wall. However, If you’re going to fix a mirror, you’ll need glue that dries clear; otherwise, the glue might damage the mirror's surface.
4. Drying Time
Drying time is a factor that most people often tend to overlook, but it is perhaps one of the most important ones. This is because a faster drying time allows you to focus on other work once you are done fixing the mirror.
On the other hand, if the drying time is high, you might have to keep supporting the mirror until the glue dries.
5. Quality
While fixing a rearview mirror, you would want the final result to be as close as possible to the original. And that’s why it’s best to go with mirror glue that meets the OEM standards. This ensures that your mirror is fixed how professionals would have done it.
The Loctite 37438 is an example of an OEM-approved glue, and it has been used and approved by major car companies such as GM and Ford.
Can all types of glue be used for mirrors?
No, not all types of glue can be used for mirrors. Specialized mirror adhesive is recommended as some common adhesives can damage the mirror's reflective backing. Always check the adhesive's compatibility with mirror materials to ensure proper application and long-lasting results.
How do I apply glue to a mirror for mounting?
To mount a mirror using adhesive, first clean the back of the mirror and the intended mounting surface to ensure they're free of dust and dirt. Then, apply a thin, even layer of mirror adhesive to the back of the mirror, ensuring to follow the instructions detailed on the adhesive's package.
Once the adhesive is applied, press the mirror onto the mounting surface, holding it steady for a few moments to allow for initial bonding. Always use mirror adhesive, as regular adhesives may damage the mirror's coating.
How long does it take for glue to dry when mounting a mirror?
How long it takes for glue to dry when mounting a mirror depends on the type of adhesive used and the environmental conditions. Mirror adhesives typically take 24 hours to fully cure, but some may dry in as few as 1-2 hours for initial hold. It's recommended to refer to the manufacturer's instructions for specific drying times. Properly bonded mirrors should be left undisturbed during this curing period to ensure a strong hold.
Can I remove a mounted mirror if I use adhesive glue?
Yes, you can remove a mounted mirror that has been affixed with adhesive glue. Keep in mind that doing so requires care to avoid damaging the wall or mirror. Usually, a heat gun or hairdryer is used to soften the adhesive. Then, a thin blade or wire is slipped behind the mirror to cut through the softened adhesive. For safety, it's advisable to get professional help. Always refer to the adhesive manufacturer's instructions for removal guidance.
Can glue for mirrors be used in wet or humid areas?
Yes, certain types of glue for mirrors can be used in wet or humid areas, as they are formulated to be water-resistant. It's important to check the product description to ensure the adhesive can withstand such conditions.
Can glue for mirrors be used on all types of surfaces?
Not all types of glue for mirrors can be used on all surfaces. Some may not bond well with certain materials like plastic or metal. Check the product label or consult with the manufacturer to determine if the adhesive is suitable for the intended surface.
Is it safe to use glue for mirrors on an antique mirror?
Whether it's safe to use glue for mirrors on an antique mirror depends on the mirror itself and the adhesive product being used. Some adhesives can have a negative effect on the mirror backing, especially if it's older or in a fragile state. It's recommended to consult with a professional or conduct a small patch test in an inconspicuous area before fully applying the adhesive.
Now that you are equipped with all the necessary information about the best glue for mirrors, we hope you will be able to make an informed purchase. But if you are still not confident, then stick around for a few more seconds as we let you in on our favorite picks from the list. This will surely make things crystal clear for you.
The 3M is the best overall, in our opinion, simply because it forms a durable bond and has a low drying time. Additionally, the Permatex is an outstanding choice since it can be applied on various surfaces and can easily withstand temperature fluctuations.
However, if you are looking for mirror glue specifically made for rearview mirrors, we strongly suggest going with the Loctite 37438. Also, it sports an economical price tag, ensuring it is worth the money you spend.
And with that, it’s time to wrap up. Until next time, take care!
Finding it difficult to put back the pieces of your broken action figure together? It’s about time you got yourself the best glue for miniatures.
That being said, since the market is flooded with several kinds of glues, choosing a reliable one for gluing metal miniatures can seem like a daunting task. That’s why, to simplify your search, we have compiled a list of the 11 best types of glue for miniatures after hours of research and testing.
Plus, we have included a buyer’s guide towards the end of this review-based article to make things a bit more interesting. So, make sure you read it till the end.
Now, without any further delay, let’s jump right in!
With so many options available in the market, it can be overwhelming to select the best one for your project. To help you with this task, we have put together a list of the 11 best glues for miniatures.
1. Gorilla - Best Overall
Gorilla is a glue brand that needs no introduction, and the 7700104 Super Glue Gel is yet another quality addition to its repertoire. This product has been designed to provide long-lasting repairs in a jiffy, hence an ideal choice for DIYers looking for reliable glue for miniatures. Keep reading to know more.
To begin with, the Gorilla Super Glue Gel features a thicker and more controlled formula, which ensures it is easy to use on a variety of surfaces. Thus, no matter what your miniatures are made of, they can provide a strong bond that will last for a long time.
Additionally, it sports an innovative cap with a metal pin inside that ensures that the glue doesn’t dry out inside the bottle, which is great. But especially pleasing is the fact that once it is applied, it dries within 10-45 seconds, unlike other glues that take up to a few hours to completely dry. Thus, it could be your best bet if you are a professional modeler.
Finally, this product has a reasonable price tag, ensuring it is the top choice for many customers.
We didn’t come across any significant downsides to this exceptional super glue during our usage. However, if we had to nit-pick, we’d say that it requires a bit of pushing after a few uses as the liquid tends to get a little sticky with time. Other than that, it does a commendable job.
Next up, we have the 1363589-6 Ultra Gel Control from the house of Loctite, which is a great option to repair breaks around the office or home. This cyanoacrylate glue features a rubber-toughened formulation, which ensures that it can withstand vibration, shock, and impact without breaking a sweat.
Without a doubt, we were thoroughly impressed with every aspect of this product. However, what caught our attention right from the start was its unique rubber-toughened formula, which makes the bond flexible and resistant to water and impact.
And since this glue is on the thicker side, just like our previous pick, it is ideal for porous and vertical surfaces and filling gaps between parts. Thus, whether you want to reattach a broken limb of an action figure, set up a brand new Warhammer, or are looking for the best adhesive for gluing metal figures to a wood surface you can rest assured this product will provide satisfactory results.
Speaking of the control applicator, it sports easy-squeeze sides for pinpoint accuracy and precise dispensing, giving it the edge over other superglues in a similar price bracket. Not just that, the screw-on, self-piercing cap ensures that the glue is kept fresh and the nozzle clog-free. Therefore, you can expect repeated uses if you store the product in a dry place.
This craft glue is undoubtedly one of the best on the market, which is why it is a bit on the expensive side. Therefore, it may not be the right choice for average DIYers and hobbyists. However, given the result it delivers, we would recommend it nonetheless.
If you are in search of a slightly unconventional option for gluing together plastic models, then we strongly recommend trying out the Tamiya SG_B000BMYWYC_VR3. We call it unconventional because it is a liquid cement, unlike most other options on this list. Let’s move on to the following few sections to see what else it offers.
Perhaps, the most advantageous feature of this plastic cement is its pointed applicator tip, which allows the users to glue together plastic pieces that need pinpoint accuracy. So, you don’t have to worry about applying too much glue and ruining the project with this plastic cement.
On top of that, it features an extra-thin formula, which further enhances its accuracy and finesse to glue together small pieces. The thin and runny liquid easily flows into small gaps to rigidly attach separate joints, naturally making it the go-to choice to glue together plastic resin models.
As far as the volume is concerned, it contains 40 ml of plastic model cement, which is well worth the money if you ask us. Considering how little you have to apply to create rigid joints, it’s safe to say that it can be used across several projects without any issues.
Plus, a thin formula means it won’t dry up quickly, allowing the cement to last longer even when not used.
Unfortunately, this liquid cement from Tamiya works only on plastic and not metal models, which is a shame, especially considering its top-notch gluing capacity and affordable price tag. Apart from that, it has a strong odor, so we highly recommend using it in a well-ventilated area.
What We Like
Offers pinpoint accuracy
Ideal for plastic surfaces
Not likely to dry up quickly
Sports a budget-friendly price tag
What We Don't Like
Has a strong odor
Adhesive Type: Cyanoacrylate | Bond Strength: Not specified | Drying Time: 10-20 seconds | Waterproof: Yes | Heat Resistant: No | Multipurpose: Yes
4. Glue Masters Super Glue
Glue Masters is one of the leading manufacturers of extra-large and quality cyanoacrylate adhesives in the US. And naturally, this super glue from the brand is no different. Besides offering a relatively stronger bond than most other modeling glues, this product has an extended shelf life, making it one of the best model glue options on the market.
As a cyanoacrylate glue from such a renowned brand, we are pleased to inform you that this product lives up to our expectations for most parts. Formulated with industrial-grade cyanoacrylate resin, the super glue offers a sustainable and strong bond that can last for years without any issues whatsoever.
From building models to fixing wood and shoe soles, you can use this product for a variety of general household repairs. Thus, it makes this special glue a must-have item in anyone’s toolbox.
Beyond that, the product sports an innovative cap design, which ensures that the glue doesn’t get clogged. Thus, it not only extends the shelf life of the product but also keeps it fresh and ready for the next time. Additionally, the applicator tip deserves mention as it provides you with better control over the modeling glue to ensure minimal wastage.
Long story short, the Glue Masters Super Glue is for those looking for a premium-quality model glue at a budget-friendly price to repair miniatures and models.
While the product description of this glue says that it can be used on fabric, upon testing, we found out that it’s not the case, which was quite disappointing. Also, this product is not as thick as it claims to be; in fact, its consistency is almost like water, so it might take quite a while to cure.
For over 40 years, J-B Weld has been manufacturing top-quality repair products for different professionals and DIYers alike. So, it should come as no surprise that the 8265S Two-Part Epoxy from this brand is one of the top recommendations on our list. Designed as a substitute for torch welding, the JB-Weld glue can provide long-lasting repairs at an affordable price.
First things first, these two parts can be applied on a wide range of surfaces, including fiberglass, ceramic, concrete, wood, metal, and a lot more. So, rest assured, no matter how big or small your project is, you can apply this two-part epoxy and restore it to the way it used to be.
Additionally, it boasts a tensile strength of 5,020 PSI and therefore can resist temperatures up to 550°, petroleum, and acids once it is fully cured. Speaking of the drying time, it takes 6 hours to set in and a day to cure, which is pretty decent, we would say, especially considering the results it offers.
Oh, and did we forget to mention that it can be further drilled, molded, sanded, and tapped once it’s cured? Naturally, it is ideal for reattaching loosened joints and metal parts for automotive, marine, and craft repairs.
Since it’s a two-part epoxy, first you’ll have to mix it, and only then will you be able to apply it on various surfaces, which can be a little time-consuming. Also, for this, you’ll need a mixing tray and a plastic knife, so be prepared to shell out some extra dough to make the additional purchases.
If you are a hobbyist fond of collecting and building plastic model kits and action figures, then the Zap PT-02 could work out well for you. With its potent adhesion, you can seal pretty much every surface that you can think of. So, let’s dig a little deeper.
For us, the main highlight of this product is its easy-flowing liquid that seeps deep into the cracks without a hassle. Plus, it dries relatively quicker than most options on the market in a similar range, which is excellent as it allows you to get the job done in a jiffy.
Upon drying, it forms a clear and reliable seal that helps keep the appeal of your metal, wooden, and plastic miniatures intact. Moving on, the thin nozzle applicator does a fantastic job in ensuring that the product doesn’t clog and lasts till the last drop, which is truly commendable, in our opinion.
We must also mention that this glue is available in multiple sizes, allowing you to choose the right one per your requirements. Overall, one of the top-rated super glues that any hobbyist can hope to get their hands on.
The only thing that we didn’t like about this product was the packaging material used. When it arrived, the box was warped, and the glue was slightly leaking, which left us annoyed. Even though it is an exceptional product, the brand should have paid more attention to the packaging as bad packaging makes products susceptible to damage while being delivered.
For over a century, Beacon has been committed to manufacturing quality adhesives that engineers, designers, and crafters alike can count on. On that note, we thought of introducing you to the 314OZ advanced craft glue from the brand that can be your ideal companion for all repair work that demands precision.
Naturally, being a veteran on our list, this product had set our expectations a little high. And we are glad to say that it didn’t disappoint in most aspects.
Its multi-purpose formula enables it to deliver super-strong bonds that can be applied on various surfaces such as fabric, plastic, metal, paper, and wood. Thus, it means that you will be able to use it for almost all kinds of projects without facing any problems. Interesting right? Well, it doesn’t just stop there!
Since the product features an acid-free formula, it is safe to use. Therefore, it could be an ideal choice for children looking for a reliable school glue for assignments and homework. And while it dries in a matter of minutes, it still allows room for correction; just make sure you rub the excess glue away.
Needless to say, all these factors make this product an investment you will not regret making.
Some customers have complained that once the product is less than half full, it becomes a bit difficult to shake the glue to the nozzle tip. While it’s nothing derailing, we felt it’s something that needed to be noted. Other than that, we could not find any considerable drawbacks to this glue.
We are halfway through the list, and it’s time to talk about the Citadel Plastic Glue from the company called Games Workshop. This super glue has been designed specifically for putting together plastic miniatures; hence it is an option hobbyists and DIYers wouldn’t want to miss out on.
We were thoroughly pleased to find out that besides filling in the gaps and cracks with ease, the product slightly melts the plastic in order to deliver a strong bond. Now don’t be scared of the melting part, as the glue ensures it leaves a neat and even finish afterward, making the project look brand new.
Apart from that, the drying time deserves mention. The low viscosity of the glue enables it to melt and cure in five minutes. Even though it is quick, it allows you to make any last-minute changes if required, which is no less than a bonus in beginners’ books. Also, low viscosity means less clogging and drying in the bottle.
Thanks to the narrow applicator nozzle, it truly makes it easy to dispense the glue from the bottle. Finally, it comes at a reasonable price, which ensures it delivers good value for money.
Overall, the best glue for plastic materials, if there ever was one.
The only issue with this plastic glue is that it has an incredibly strong odor, which can easily give you headaches if you keep working for prolonged hours. As such, we strongly recommend working in a well-ventilated area if you decide to go with this product.
What We Like
Available at a reasonable price tag
Delivers a strong bond
Leaves a smooth finish
Easy to apply
What We Don't Like
Has an incredibly strong odor
Adhesive Type: Plastic Cement | Bond Strength: Not specified | Drying Time: 5-10 minutes | Waterproof: No | Heat Resistant: No | Multipurpose: No
9. Testors
Founded in 1929 in the US, Testors is among the largest producers of high-quality paints, airbrushes, and glues. And this product is a true testament to the quality the brand promises to bring to the table. Compatible with all plastic surfaces, the Testors 3509C Plastic Cement can be the perfect choice for crafters and DIYers.
Perhaps, the most advantageous feature that this plastic cement has to offer is precision, as it comes with four precision tips to ensure a simple yet accurate delivery. Additionally, it forms an extremely durable bond, so no matter what you’re building, you can rest assured that it will stay intact for life.
Talking about the quantity, it comes in two tubes containing 25.8 ml each, which is more than enough in our opinion for assembling regular plastic kits. Moving on, we were happy to find that it didn’t dry too fast. This gives you the time required to move the little parts around to get the best fit before it delivers a permanent bond.
Lastly, we have to commend the manufacturer for keeping its price affordable, making it a top choice for those looking for quality plastic cement at an economical price.
While testing it, we noticed that it tends to leave strings, which some people might find annoying. But given the affordable price and the other practical features on offer, we don’t think most users would mind this minor drawback. Thus, you can most certainly keep this product under consideration.
What We Like
Sports a budget-friendly price tag
Ideal for plastic kits
Has an ideal drying time
Comes in a decent quantity
What We Don't Like
Tends to leave strings
Adhesive Type: Plastic Cement | Bond Strength: Not specified | Drying Time: 5-10 minutes | Waterproof: No | Heat Resistant: No | Multipurpose: No
10. Bob Smith Industries
Now that we are towards the end of the list, here’s another product that you should consider. Meet the BSI-133H Insta-Cure+ from Bob Smith Industries, which can be a great option if you are looking for reliable glue that will form a long-lasting bond. Obviously, there’s a lot more to it, so keep reading.
Without a doubt, the wood glue is great; however, the main USP has got to be the screw-on cap with the attached needle.
While the needle ensures that the glue comes out of the tip smoothly whenever you want it to, the cap prevents it from drying out. As such, unlike other glues, you can use it quite a few times without having to find a paperclip or a needle to remove the dried glue from the tip.
Apart from that, it has a moderate drying time, making it the top choice for projects where you don’t want the material you’re gluing to dry in an instant. And despite having a moderate drying time, if you can call it so, the glue doesn’t leave you holding the parts for prolonged periods, which is an added advantage.
Moving on, it can be used to bond a variety of surfaces such as glass, leather, rubber, and ceramics, which is great. But more importantly, it doesn’t have a strong odor, unlike other superglues.
A few customers have mentioned that the holding power is average, which is strange because we didn’t counter any such issues during our usage. But if it is, we strongly recommend combining it with any other super glue and then applying it to get the desired results.
Since Zap products are so affordable and effective, we thought adding another product from this renowned brand to our list would make sense. With that said, allow us to present the ZAP PT35, which is just as good as the other options on our coveted list.
For starters, the glue has a cure time of just 15 minutes, meaning you can expect faster repairs with this product. Plus, once it’s cured, it can be further sanded to achieve a smooth finish; however, given that it cures clear, you probably wouldn’t need to sand it after all.
Now, as far as the consistency is concerned, we’d say it’s that of warm honey, which is great as it allows the epoxy to fill gaps with ease. Apart from that, it offers a tough, shock-resistant bond that can last for decades without any issues. So, if you are looking for a permanent fix, you can’t go wrong by choosing this product.
Lastly, this 15-minute epoxy has a modest price tag, which makes it one of the most sought-after epoxy resins on the market.
While testing this product, we found out that it does not bond that well to glass, which is quite disappointing. However, given the other features on offer, we would certainly recommend that you go for it, especially if you are on a humble budget.
This table provides information on various types of glue suitable for miniature crafting. It includes details on the product name, adhesive type, bond strength (measured in PSI), drying time, waterproof properties, heat resistance, and whether the glue is multipurpose.
Now that you have gone through our top 11 recommendations for the best glue for miniatures, will you be able to make a choice? If you are still having a hard time zoning in on the right glue, there is absolutely nothing to worry about.
We understand that selecting the right option from a list of the best ones can get a bit confusing. That is why we have written this buyer’s guide explaining a few important factors that you need to keep in mind in order to make an informed purchase. So, make sure you read it carefully.
1. Strength
The adhesive strength of the glue is one of the most important factors that you need to consider while making a purchase. You wouldn’t want the feet or arms of the miniatures to loosen while gaming, would you? So, make sure you go with glue that offers a strong and permanent bond.
Also, we strongly recommend reading the customer reviews of the particular product before buying it, as it will give you an idea of how strong it can hold the pieces.
2. Drying Time
This is yet another crucial factor that you cannot afford to ignore. The drying time is the period that the glue takes to solidify and become strong enough to hold two or more materials joined together. While some glues can take hours or even a day to fully dry, others dry in a matter of minutes.
So, depending on the kind of model you are crafting, you should consider the drying time.
3. Material
We bet there’s nothing more frustrating than reaching the assembling and gluing step only to realize that you don’t have the right kind of glue. So, make sure that you know the material compatibility of the glue that you are purchasing to avoid such a nuisance. You can find this type of information on the product label.
4. Painting
If you are looking to paint the model once you are done building or repairing it, be sure to choose a glue that’s paintable. More often than not, plastic glues are not paintable, so make sure you keep an eye out for those that are and then purchase accordingly.
Can I use regular glue for miniatures?
It is not recommended to use regular glue for miniatures, as it may not provide a strong enough bond or may damage the miniature. It is better to use a specialized glue designed for miniatures.
What is the difference between super glue and plastic cement?
Super glue is a type of cyanoacrylate adhesive that bonds quickly and strongly to a variety of materials, including plastic. Plastic cement is specifically designed for bonding plastic materials and uses a solvent to melt and fuse the plastic together.
Can I use PVA glue for miniatures?
PVA glue is not recommended for miniatures, as it is not strong enough to hold small and delicate parts together. It may also cause warping or damage to the miniature.
How do I apply glue to miniature parts without making a mess?
One technique is to use a toothpick or a small brush to apply the glue precisely where it is needed. Another technique is to apply a small amount of glue to one surface and then press the two surfaces together, which can help prevent excess glue from spreading.
What should I do if I accidentally use too much glue on my miniature?
If you accidentally use too much glue, you can use a cotton swab or a toothpick to carefully remove the excess glue. Be careful not to damage the miniature in the process.
Can I paint over glued miniature parts?
Yes, you can paint over glued miniature parts once the glue has fully cured. However, it is recommended to prime the miniature before painting to ensure the paint adheres well to the surface.
Conclusion
It’s been a long ride, but hopefully, you are ready to get yourself the best glue for miniatures by now. But hold up, before you make any decision, stick around for a couple of minutes more to know our top picks from the list.
The Gorilla is the best overall, in our opinion, as it sports a reasonable price tag and can be used to bond a wide range of surfaces. Additionally, the Loctite is a great choice since it comes with an innovative control applicator and can be reused multiple times.
However, if you want a liquid cement that is specifically designed to bond plastic surfaces, then the Tamiya could just be what you’ve been looking for. Not to mention, it offers pinpoint accuracy, which makes it an ideal option for gluing small pieces.
The best glues for metal offer a powerful alternative to traditional welding, providing a reliable way to bond metal to metal in both DIY and industrial settings. Unlike regular adhesives, these specialized formulas are engineered for strength, durability, and heat resistance—making them the go-to solution for furniture repair, home improvement, auto work, and more. Whether you're patching steel joints, fusing aluminum, or attaching metal fixtures, choosing the strongest glue for metal can make or break your project. In this guide, we’ve reviewed 9 of the top-rated options available to help you pick the right one for your needs.
Listed below are the 5 best glues for metal from our list:
Gorilla 5002801. Gorilla 5002801 stands out with its industrial holding power and versatility, easily bonding a variety of materials from metals and wood to delicate paper and plastic.
Loctite 1365882. Loctite 1365882 impresses with its super-strength formula, exceptional fast setting and drying times, and strong bonding on a wide array of materials, all at a reasonable price.
Gorilla 7700104. Gorilla 7700104, known for its unique gel formula, boasts quick-drying properties, increased impact resistance, and high-quality packaging with an anti-clog cap.
Permatex 84109. Permatex 84109, designed for bonding metals, not only stands out with its compact packaging but also its capacity to withstand extreme temperatures, making it suitable for both minus degrees and high heat applications.
Krazy Glue KG94548R. Krazy Glue KG94548R, equipped with an attached brush for excellent surface coverage, effectively bonds metal, wood, and ceramic, ideally suited for office projects, school work, and crafting applications.
Here is the list of the 9 best glues for metal that you can use to quickly and effectively bond metal surfaces together.
1. Gorilla 5002801- Best for Versatile Applications
Let's talk about one of the most famous brands on the market: Gorilla glue. The 5002801 of Gorilla glue is known for its industrial holding power and versatility. Apart from having the best reputation, it also delivers the best for anything related to glue.
The first thing we liked about this product was how perfect it was for any kind of project. Be it the toughest of metals and wood or flimsy paper and plastic, this glue can bond two different surfaces effortlessly.
It is compatible with many materials, including wood, foam, glass, ceramic, concrete, metal, and stone. This makes it perfect for repair jobs around the house or on the roof.
Apart from that, this glue is simple to apply. All you have to do is slightly dampen the surface with some water. Next, apply a thin layer of Gorilla glue on one side, only making sure it isn't in excess. Remove the extra glue with a dry cloth if required before it hardens. Once done, this glue takes about 15 minutes to harden up.
After the glue is completely hardened, you need to chip off the extra dried-up glue that might be surrounding it. Finally, make sure to clamp the two surfaces together for at least two hours.
We think this product is one of the strongest glues out there, so we couldn't find anything significant to critique. However, you need to be cautious about using this glue around kids and pets. Under no circumstances should children be allowed near this glue. Also, people with respiratory issues like asthma should avoid it.
Another brand that brings high-quality and strong glue is Loctite. This glue is excellent for heavy-duty projects and repairs due to its super-strength formula and works equally well on more minor fixes. Compared to other brands on the market, this one is reasonably priced.
Straight off the bat, this glue impressed us with its list of never-ending features. What we liked the most was how fast it set and dried and held any two surfaces firmly. Along with paper, rubber, and plastic, this glue also manages to hold together metal, leather, wood, and ceramic.
All the credit goes to the fast-setting formula, which is resistant to moisture, chemicals, and cold temperatures. Along with that, its pinpoint nozzle allows for precise application without dripping all over the place, preventing unnecessary spilling.
After the glue dries, it appears clear, and one can barely see that the surface has any kind of adhesive. This makes it a good option for joining tabletops, leather shoes, or any surface visible from the outside. However, you must take precautions while using this glue and screw on the cap well to prevent clogging of the cap.
There are some incidences where even the slightest exposure to air completely blocks the nozzle. Now, we understand that it's a quick dry glue, and the nozzle is super small. However, it was slightly annoying to buy a new adhesive and not be able to use it more than once.
What We Like
Many package types to choose from
Waterproof and solvent-resistant
Withstands extreme temperatures
What We Don't Like
Nozzle blocks easily
Quantity: 1 Bottle | Volume: 0.71fl oz | Set Time: 15 to 30 Seconds | Cure Time: N/A | Color: Clear | Resistance: Waterproof, Resists Extreme Temperatures, Solvent, Shock
3. Gorilla 7700104 - Best for Quick Drying
Another product from the reputed brand Gorilla is the 7700104 model, which comes in a thick gel formula. It comes in small packaging of 0.71 ounces per bottle for various uses around the house. If you are looking for quick-drying glue, this option would be a perfect choice.
The first thing we liked about this product was its unique gel formula. The benefit of this formula is that it does not run out from the nozzle even when applied to vertical surfaces. Also, since the formula is quite dense and much thicker than other glues, it dries incredibly quickly. On average, you can expect the glue to dry in 10 to 45 minutes.
Moreover, the glue is specially formulated for increased impact resistance and strength. This will definitely help if you have objects like glass or metal, which are usually challenging to bond.
Another feature is the anti-clog cap, which is proof of its high-quality packaging. It can be used multiple times because of the air-tight cap. All you have to do is immediately place the cap after use and screw it tightly. Finally, this product quickly bonds wood, metal, ceramic, glass, and leather.
Despite not having any significant flaws, we did notice one thing worth mentioning. While reading the description, we found that this glue doesn't work on polyethylene polypropylene plastic or similar materials. While this isn't a big deal, we thought it was worth noting.
What We Like
Impact resistance
Unaffected by extreme temperatures
Compact packaging
Budget-friendly
What We Don't Like
Doesn't work on certain plastics
Quantity: 1 Bottle | Volume: 0.71fl oz | Set Time: 10 to 45 Seconds | Cure Time: 24 Hours | Color: Clear | Resistance: Resists Impact, Extreme Temperatures
4. Permatex 84109 - Best for Metal Bonding
Up next, we have the 84109 model by the brand Permatex. This glue is formulated specially to bond two metal surfaces together. It comes in a packaging of 0.84 ounces per pack and is reasonably priced. Read on if you need glue for bonding household metal objects.
First of all, we liked the compact packaging that this glue comes in. The bottle is the perfect size for minor and frequent fixes around the house. Any larger, and it would probably dry out before we could get to the end of the bottle.
One thing that massively impressed us was the extreme temperatures the glue was able to withstand. Even if you use the glue to fix a plastic ice tray and place it in the freezer, the adhesive remains unaffected. The same applies to higher temperatures too- the glue can be used for fixing metal saucepans and baking trays.
And you can check for yourself; the cookware can be heated on stove tops or in ovens without any damage to the bond. This is because it can withstand a wide range of temperatures from - 60 degrees Fahrenheit to 300 degrees Fahrenheit.
Now, this product is a multi-metal epoxy adhesive that can bond aluminum, brass, copper, steel, iron, stainless steel, and many other metals. However, sometimes it so happens that the bond won't form well if there is excess moisture around these metals.
What We Like
Eliminates the need for welding
Doesn't require clamping
Sets in 4 minutes
Compact packaging
What We Don't Like
Excess water may prevent bonding
Quantity: 1 Double Syringe | Volume: 0.84fl oz | Set Time: 4 to 5 Minutes | Cure Time: 10 Minutes | Color: Gray | Resistance: Resists Water, Impact, Solvent, -60°F to 300°F
5. Krazy Glue KG94548R - Best for Precision and Crafts
Another glue for metal, wood, and ceramic is KG94548R by Krazy Glue. It has excellent surface coverage because it comes with an attached brush. It also comes in a small bottle that contains 0.18 ounces of glue which is perfect for one-time projects.
Let's start with the functionality of this product. Unlike other products mentioned in our list, this glue isn't meant specifically for metal objects. It is a daily use glue best suited to office projects, school work, and creating crafts. Now that this piece of information is out of the way let's talk about its brush.
Once you open the bottle, you will see it has an attached applicator brush which resembles a nail paint applicator. Using the attached brush, you can simply spread the glue all over the surface to get an even application before bonding metals.
In case you are worried about brush clogging, the bristles stay clean and moist most of the time. This is if you ensure to close the bottle firmly whenever it is not in use. Lastly, despite its small size, this glue manages to form strong bonds even with minimal application, making it perfect for woodwork fixes.
This glue has a strong formula and can work on various surfaces like wood, ceramic, and plastic. We also liked the way its brush applicator was easy to control and covered tight spaces. However, some reviewers received bottles that didn't open easily, causing spills as they opened them.
Another model from Lactite is the 1363589, a clear gel superglue that is the most durable model from this brand. One bottle contains 4 milliliters or 0.13 ounces of product. What's different about this product is its easy-to-use squeeze bottle.
To begin with, the formulation is truly super strong. It has an Ultra gel control which does not allow any drips when applied to vertical surfaces. Apart from that, its formula is durable and flexible, resistant to impacts, shocks, and vibrations. It's the best glue for metal, wood, paper, and a variety of different materials.
Also, it has a patented control applicator that can be squeezed from both sides with your fingers to dispense the glue with pinpoint accuracy. This applicator is self-piercing, and the screw-on cap keeps the fluid gel from drying up.
Another benefit of this applicator is its advanced grip which is comfortable to hold and press. Light pressure is enough to apply a layer of glue.
Moreover, we like how quickly it dries and sets after seamlessly repairing household items, office projects, or crafts. If we speak about its strength and durability, it has proven to produce long-lasting bonds repeatedly.
To get a solid bond, you need to clean the two surfaces first. Then apply a bit of glue and press it for a minute or two. Usually, this much is enough for the adhesive to hold two objects together. However, it was observed that some surfaces take a longer time to stick.
What We Like
Ultra gel control
Seamless repairs
Precise application
Good for household repairs
What We Don't Like
Long drying time
Quantity: 1 Bottle | Volume: 0.14fl oz | Set Time: 15 to 30 Seconds | Cure Time: 12 to 24 Hours | Color: Clear | Resistance: Resists Water, Impact, Most Chemicals, Freezing Temperatures, and more
7. Gorilla Glue 8040001
Yet another glue we decided to check was the 8040001 one by Gorilla. This clear adhesive is entirely waterproof and can be used for repairs in the house, garage, or even rooftop. If you are looking for an all-purpose glue, read on to find out more about this product.
We ended up checking out many types of glue from Gorilla. And, since this one claims to be the best glue for the most demanding jobs, we decided to try out this model too. This glue is easy to apply, and the narrow tube is thin enough to squeeze out the adhesive without creating any mess.
Using it is relatively uncomplicated, just apply the crystal clear liquid on both sides/surfaces and leave it exposed to air for a few minutes. This ensures that the glue isn't too liquid, which may hinder the bonding process. After a few minutes, press the two materials together, and after you release the pressure, they hold for seconds.
Furthermore, it creates permanent and irreversible bonds, which is an excellent feature for fixing leather shoes and ceramic cups. It can even fix decorative items made of glass or wood and toys made of plastic.
Despite being a flexible, fast-setting, crystal-clear glue, it does not work on styrofoam, polypropylene, and polyethylene products. Also, it may not be enjoyable for some people to press and hold the material to allow setting, and it also doesn't tolerate extreme temperatures.
What We Like
Useful for outdoor projects
Versatile use
Creates permanent bonds
Fragrance-free
What We Don't Like
Doesn't tolerate high temperatures
Quantity: 1 Tube | Volume: 3fl oz | Set Time: In Just Seconds | Cure Time: 24 Hours | Color: Clear | Resistance: Waterproof
8. J-B Weld 50132
Here we have another quick setting epoxy, the 50132 glue by J-B Weld, which is also called “Plastic Weld.” This glue is an excellent example of a product with varied purposes that has a stronghold. Read on to get more details about this glue.
We liked that this glue has a wide range of materials it can work on. It can efficiently work on glass, vinyl, rigid plastics, fiberglass, and PVCs, among other materials. The unique thing about this glue is its syringe which allows you to create a 1:1 mix of two solutions evenly.
Using glue is simple; you need to start by prepping the surface. Clean the repair area of dust, first grease, oil paint, and rust. Then, remove the snap-on tip of the glue bottle and press down on the plunger to squeeze equal amounts of both fluids into a mixing bowl and mix it well.
After that, use a brush or spatula to apply an even coat on the surface. You could also apply different shapes like a bead if required. Next, you'll need to wait for a while as it takes about 5 minutes to dry off. Finally, after use, you can seal it with its reusable cap.
We liked this glue for multiple reasons, including its versatile use and the fact that it even provides a mixing tray for stirring the two solutions. However, if the temperature in your surroundings is low, it seriously hampers the setting time and may take hours to set and cure.
This epoxy glue comes in handy for fixing woodwork, fencing, glass decorations, and various other materials in and around the house. The 1365736 glue by Loctite is a two-part epoxy consisting of a resin and hardener, making for the strongest hold for any kind of repair.
Firstly, this epoxy material is unbelievably strong and apt for woodworking, carpentry, for professionals, or even for DIYers at home. Furthermore, you can find great uses for this glue in your furniture projects. It's possible to assemble chairs, stair work, decks, and arbors and make new fencing, stonework, and laminate with this one glue.
Apart from that, it comes in 8 ounces in one packaging, consisting of two bottles; one is the resin, and the other, is the hardener. For application, both of these chemicals must be thoroughly mixed to produce an even-looking fluid. Once the mixing is done, you cannot leave it exposed to air for long because it hardens quickly,
So, without taking much time, apply to the surface that needs fixing and allow at least 5 minutes before you move or touch it again. Also, we noticed that the bottle sizes were pretty big compared to the others we reviewed, so it will be enough for larger projects.
We didn't have anything to complain about when it came to this product. It was a good 8 ounces in both bottles, and the price was reasonable too. However, we came across some online reviewers who received two of the same bottles instead of one resin and one hardener.
What We Like
Ideal for many furniture projects
Combined with fiberglass makes a patch
Won't shrink
Sandable and drillable
What We Don't Like
Inconsistent in packaging
Quantity: 2 Bottles | Volume: 4fl oz Each | Set Time: 5 Minutes | Cure Time: 24 Hours | Color: Yellow | Resistance: Resists Water, Shrinkage, Humidity, Solvent, Impact
What is the Best Glue For Metal?
Contained below is a meticulously assembled comparison table that outlines the primary qualities of leading glues suitable for metal. The table puts under scrutiny elements like quantity, volume, set time, cure time, color, and resistance factors.
Now that you’ve seen the variety of glues available on the market, here are a few things to consider before buying metal glue.
Type Of Glue
There are 3 kinds of metal glues widely available - epoxy metal glue, polyurethane metal glue, and Super Glue for metals. In essence, all of these options perform the same task of bonding metals together. However, there is a stark difference in their composition.
When using epoxy glue, you must use it immediately after mixing the resin and hardener. Care must be taken to not spill on the skin because it may cause irritation. This is a strong adhesive that requires clamping to set the two metals in place. Along with that, it is waterproof and resistant to extreme temperatures.
Polyurethane metal glue often requires external heat to set in place. It is not as strong as epoxy, but the advantage is it comes premixed, and you won't need to worry about the mixing ratios. Also, it dries slower than epoxy, so you don't have to rush to finish the job.
As far as super glues are concerned, they are the most DIY-friendly and mess-free option. It's excellent for giving instant results, but it isn't as strong as the other types of glues.
Drying Time
Different types of glues will dry differently. Usually, polyurethane dries faster than epoxy but slower than superglue. Finalizing the right kind of glue will depend on your project at hand. If you need a long wait time to arrange pieces of wood in place, slow-drying glues like epoxy would be a better choice.
Ease Of Application
Glues come in different types of packaging and bottles. Some of them are meant to be directly applied from the bottle, while others need to be removed onto mixing trays in specific ratios. Check beforehand what kind of dispenser the glue comes in.
It could be a pinpoint thin nozzle or an applicator brush. Which one you select should correlate with the kind of work it is required to do. For tiny repairs and quick fixes, a nozzle would be suitable, whereas, for longer projects, a brush would be better.
Strength It Can Withstand
Supposing you need glue for metal furniture, something like a bed frame for sitting and sleeping. Thus with such furniture, the glue used needs to be strong enough to hold bonds firmly. The more pressure the object needs to maintain, the higher the pressure resistance from the selected glue should be.
Exposure To Elements
As we mentioned earlier, some glues are resistant to extreme temperatures and water. Depending on your use, it may or may not matter to you. If you are fixing a roof, it makes sense to use waterproof glue, and working with metal pans needs heat-resistant glue. However, this won't be an essential point if something needs to be built indoors or at room temperature.
Type Of Metal Or Material To Bond
Another point to keep in mind is the material and type of substance you need to bond together. If they are metal or wooden pieces that do not align naturally, a malleable glue-like epoxy may be required to fill in the gaps. However, if the metal pieces are larger, then Superglue may not be able to withstand it, and an alternative may be required.
Should I prepare the metal surface before applying glue?
Yes. For optimal bonding results, clean the surface by removing dust, dirt, and grease. Lightly sanding the surface can create stronger adhesion.
Should I wear gloves when working with metal glues?
Yes. It is recommended to wear gloves when handling metal glues to prevent skin irritation and unwanted bonding of materials to skin.
Can I use metal glue to bond metal to other materials like plastic or wood?
Yes. Certain adhesives such as epoxy, polyurethane, or hybrid adhesives can bond metal to other materials effectively. Be sure to choose a glue suited to both materials.
How do I remove cured metal glue from a metal surface?
Depending on the type of glue, you can use adhesive removers, heat, or mechanical methods such as sanding, scraping, or wire brushing to remove cured metal glue.
That's all you need to know about metal glues.
Selecting the right glue doesn't have to be difficult for you after all! We hope this guide helps you navigate through the different types of adhesives and the variety of brands available on the market.
Before we take your leave, we'd like to mention two of our favorite glues. We liked 7700104 by Gorilla for its fast-drying ability and anti-spill formula. The next option we recommend is 5002801 by Gorilla, which was indeed the most versatile and robust bonding glue we came across.
For those in the crafting arts, be it at the novice or professional level, gluing wood to metal becomes necessary in a project. The Loctite Ultra Gel Control Super Glue is our top pick for precise application across materials. If you're working on vertical surfaces, the Gorilla Super Glue Gel with its quick-setting formula is an excellent choice. For a strong and fast-bonding solution, the J-B Weld Kwikweld Pro-Size, a potent two-part epoxy, is recommended. Dive into our in-depth reviews to find the perfect match for your specific project needs and ensure seamless metal-to-wood bonds every time.
These two materials are so different in density and texture that gluing them to each other can be a daunting task. This is why making sure the glue you use is effective enough to keep the two surfaces permanently attached is crucial.
Listed below are the top 5 recommendations for the best glues to bond metal to wood:
Loctite Ultra Gel Control Super Glue: Known for its controlled application and high bonding strength, it adapts well to environmental changes and is both waterproof and heat-resistant. Keep in mind, the initial volume may not match the bottle size.
Gorilla Super Glue Gel: This fast-setting glue is perfect for vertical surfaces and offers excellent impact resistance. For extended use, multiple packs may be required.
J-B Weld Kwikweld Pro-Size: With incredible tensile strength and fast-drying properties, it's also chemical-resistant when fully cured. It may have a shorter lifespan compared to the original formula.
Original Gorilla Glue: Renowned for its strength and versatility for indoor and outdoor repairs, it offers a large volume of adhesive. Over time, it may eventually dry out.
Starbond Medium Premium CA: This glue excels in permeability and strong adhesion, and comes with useful attachments for tight spaces. Just remember, it's not suitable for vertical applications due to its thin viscosity.
So, whether you're looking for a fast-drying option, a waterproof adhesive, or something that can handle high-impact stress, here's the list of the 9 best glues for metal to wood to help you find the perfect one for your project.
1. Loctite Ultra Gel Control Super Glue - Best for Controlled Application
For a heavy-duty performance, the Loctite Ultra Gel Control Super Glue is an excellent option. From a respected brand with 50 years in the game, this rubber-toughened adhesive can withstand many formidable obstacles in an easy-to-use bottle. Not only is this super glue tough and efficient, but it can also work on a variety of materials.
When a product can be handled by a professional and a novice with the same ease, it is a testament to a great design. Using the Loctite Super Glue was easy with its easy-squeeze sides.
Additionally, it can be used repeatedly by sealing it in with the screw-on cap. The super glue is tough and withstands impacts, moisture, and temperature changes. All these strengths are thanks to the rubber mixed into the glue.
Once applied onto the surfaces, no clamps were necessary to seal them together. Simply keeping them on top of each other was enough to achieve the desired results.
The Loctite super glue can be used on not just indoor pieces but on outside projects as well. It can maintain its hold on both wood and metal simultaneously by adjusting its elasticity. Furthermore, being able to use it without worrying about its eventual durability is indeed a good feeling.
During initial use, it was clear that the actual volume of the glue left more to be desired. Despite the large body and innovative design, the contents of the bottle did not seem to proportionately match the size of the bottle.
What We Like
Controlled application
Fast and easy drying
Transparent even after drying
Adapts to changes in the environment
Able to dry without pressure or clamps
What We Don't Like
A little volume of superglue
Prone to clogged nozzle
Bonding Strength: High | Drying Time: 10-20 seconds | Waterproof: Yes | Heat Resistant: Yes up to 212°F/100°C | Application: Precise control, no mess
2. Gorilla Super Glue Gel - Best for Vertical Surfaces
A standout company in the world of glue and adhesives, Gorilla Glue’s Super Glue Gel is a fast-setting and tough formula. With the unique gel consistency, a whole new level of application is possible. This gel is truly a “super” glue in a small cartridge.
One of the most remarkable features of the Gorilla Super Glue Gel is the gel consistency that can stick to a vertical surface. These angles can be challenging to get to with gravity pulling the glue out of position and not curing correctly.
Additionally, the super glue gel dries exceptionally fast. The packaging claimed a drying period of 10-45 seconds, which held up in testing. In fact, the light cartridge makes it even more ideal for carrying around for quick fixes.
When it comes to the design of the cartridge, it is able to dispense the gel smoothly in a controlled manner. What’s more, the cap design makes sure the glue won’t be able to clog the nozzle when not in use. Always a welcomed touch for reusability.
The Gorilla Super Glue Gel is sold in different sets with either one, two, or ten packs. However, the single pack is not a feasible option to use as the amount of gel in one pack is insufficient for continued use.
What We Like
Fast-drying
Capable of vertical applications
Impact resistance
Easy application
What We Don't Like
Multiple pack purchase required for reusability
Bonding Strength: High | Drying Time: 10-20 seconds | Waterproof: Yes | Heat Resistant: Yes up to 200°F/93°C | Application: No run control gel formula
3. J-B Weld Kwikweld Pro-Size - Best for Permeability
If two-part epoxies are the method you choose to take, the offering from J-B Weld, the Kwikweld, is a strong option. The strength and fast-curing period are ideal for use by hobbyists and professionals alike. Additionally, a steel reinforcement in the mixture adds incredible tensile strength to this epoxy blend.
With such a bold claim on the packaging of being the “World’s Strongest Bond,” there is an expectation of how durable the epoxy would be. Thankfully, these expectations were held up well.
Regardless of what materials the epoxy was rated to be effective on, the results across the board were unanimous. It is able to hold its own when used and mixed correctly.
A surprise was the fast dry and cured time. Within six minutes, the epoxy dries, and in four to six hours, the entire application has been cured. After being fully cured, the epoxy is supposed to be not only waterproof but chemical, petroleum, and acid-resistant.
Using a clear solution can be challenging to differentiate between where the adhesive is applied or not. A feature of this epoxy that was useful in this context is the dark grey color it takes on when cured fully to remove any excess glue.
The Kwikweld Pro is a successor to another original formula from J-B Weld. The original does seem to have a longer lifespan despite the extra resistance in the newer Kwikweld Pro once cured.
Perhaps if some aspects of the original epoxy could have been maintained to preserve the lifespan of the epoxy, it would have performed better.
What We Like
Large 10 oz container
Fast drying and curing time
Dark grey color when cured
Strong tensile strength
What We Don't Like
Shorter lifespan compared to older epoxy formula
Bonding Strength: Very high | Drying Time: 6 minutes | Waterproof: Yes | Heat Resistant: Yes up to 300°F/149°C | Application: Two-part epoxy, professional grade
4. Original Gorilla Glue
Another super glue option from Gorilla, the original Gorilla Glue, is widely used for its versatility and strength. It is able to handle indoor and outdoor repairs while maintaining its integrity. With a 100% waterproof claim to fame, there is little that can break down Gorilla Glue.
Using the original Gorilla Glue is extremely useful for any minor repairs that may pop up. The versatile adhesion possibilities are almost endless.
What makes this super glue great is its easy application. Just dampen the surface and secure the two pieces with even pressure. The rest manifests after a couple of hours as a single complete piece. Any excess glue peeping out can be sanded away to make the repair imperceptible.
While this resin may be activated by water, it becomes fully waterproof once it is fully cured. Having the peace of mind that outdoor repairs will last through anything nature throws at it is a welcome feeling.
The amount of superglue in a container is a significant step up from other superglue options. A whole eight oz. will keep you going for years, at least.
Once the container of Gorilla Glue has been opened and exposed to the air, it begins the slow process of drying out. Atmospheric moisture dries out the glue and will eventually solidify the whole container. Despite using preventive measures, it is inevitable; however, the process is slow and will take years to complete.
What We Like
Extremely strong
Fully waterproof
Simple and easy application
The large volume of superglue in the container
What We Don't Like
Eventually dries out after some years
Bonding Strength: Very high | Drying Time: 2 hours | Waterproof: Yes | Heat Resistant: Yes up to 200°F/93°C | Application: Expands as it dries, waterproof
5. Starbond Medium Premium CA
A cyanoacrylate glue, Starbond’s Premium CA glue is a valuable adhesive to have around. Due to having attachments to reach tight spaces, this handy setup will be a great tool to have. Besides the useful attachments, the CA glue itself is strong and versatile.
The inclusion of attachments along with the CA glue is a thoughtful touch by Starbond. If not for the unclogging of the nozzle, then the special applicator tips will help precisely apply the glue on small surfaces.
Additionally, the shelf life of the Premium CA glue is exceptional. Starbond CA glues have a shelf life of several years. They are confident in their claims enough to back it up, offering a 30-year warranty on their product.
Due to the viscosity of the Medium Premium CA, it can permeate into thin gaps like a thin viscosity. It can also be coated like a thin viscosity glue, which is useful for using it as a finish. Additionally, the strength of the adhesive is similar to the thick viscosity variant and holds well.
One drawback to using this medium viscosity CA glue is the weak structure it holds. The thin viscosity qualities dominate the overall rigidity of the glue before it sets. As a result, the glue has a tendency to drip from the nozzle and run down the side of the surface on vertical applications.
What We Like
Useful attachments
Long shelf-life
Excellent permeability like a thin viscosity glue
Strong adhesion similar to thick viscosity glue
What We Don't Like
Not suitable for vertical uses
Bonding Strength: High | Drying Time: 10-20 seconds | Waterproof: Yes | Heat Resistant: Yes up to 200°F/93°C | Application: Thin viscosity, fast curing
6. Rhino Glue Gel Heavy Duty
Rhino Glue Gel is a clear commercial grade heavy duty gel that can adhere to many material types. This glue gel is strong and resists shocks and impacts as well as resists water. It is a safe choice for any adhesive task with a fast bonding time and a powerful formula.
Using a medium viscosity gel can be a tricky ordeal; however, the Rhino Glue Gel performed with little to no hiccups. The strength it holds even after using only a thin layer of it is remarkable.
One of the most convenient features of this gel is the fast dry time. While it bonds in seconds, the overnight curing option will ensure an all-around secure adhesion. This comes in handy for materials that can not be easily clamped together for drying.
The gel itself is clear in color, so being aware of where it is being applied and how much gel is being used is easier. Due to its viscosity, it is even able to bind porous materials as well with no issues. Once cured, it can withstand a large amount of exposure to impacts and moisture as well as heat. Perfect for even outdoor touch-ups!
When working with a super glue gel, the glue may seep out onto the surrounding area of the gap to be filled. The excess glue oozing out can become messy with a fast bonding time, potentially damaging the surrounding material. This could have been made easier with an application tool or precise nozzle.
What We Like
Fast drying time
A minimal volume is required for the application
Can withstand natural elements
Clog-resistant nozzle design
What We Don't Like
Struggles with precise application
Bonding Strength: High | Drying Time: 5-10 minutes | Waterproof: Yes | Heat Resistant: Yes up to 200°F/93°C | Application: Gel formula, gap-filling
7. Gorilla Glue Clear Gel
Another offering from the Gorilla brand is a clear glue gel formula. This versatile glue gel is able to grip many different surface types with ease. Using a unique non-foaming formula that is clear gives a clean application after every use.
Gorilla is a well-known brand in the adhesive market for a good reason. Their clear glue gel product works like a charm no matter what it is that needs binding.
Their claims to a non-foaming solution were no joke; the gel remained clear throughout the application process. This came especially in handy when trying to see where the nozzle is pointing for precise application.
Additionally, the glue can be used for outdoor purposes too. Once the gel has been properly cured, it becomes water-resistant.
What’s more, the gel can work with many materials, not only indoors but outdoors. Be it wood, stone, metal, or ceramic, even delicate foam material can be used with the clear gel.
The package has a disclaimer in regards to the storage of the gel that can potentially become a nuisance. In order to maintain the transparent nature of the gel, it must be stored in a location with adequate lighting and heat, or it becomes yellowed. For those who keep tools in dark drawers or sheds, this can be an inconvenience.
What We Like
Compatible with a variety of surfaces
Easy application due to the clear color of the gel
Simple to use with a no-foaming formula
Water-resistant when cured
What We Don't Like
Dries over two hours with a 24-hour curing time
Bonding Strength: Very high | Drying Time: 10-45 seconds | Waterproof: Yes | Heat Resistant: Yes up to 200°F/93°C | Application: Crystal clear, no foam
8. Mitreapel Super CA Glue
The Super CA Glue from Mitreapel is a powerful adhesive with a two-part application process. Drying and curing time is expedited tremendously, with the activator speeding up the adhesive. With a simple application, a clean adhesion is possible for many different material types.
Probably the best feature of the Super CA glue from Mitreapel is the easy application process. Joining narrow and tight surfaces together would be difficult to maneuver with other adhesives. However, the adhesive and activator spray allowed for precise coverage no matter the area to be covered.
Additionally, the fast drying time is handy for quick fixes. Within a few seconds, the surfaces were joined with adequate strength. Once it has been dried thoroughly, the glue can be worked on with sanding, finishing, and even painting.
When the glue dries, it remains clear to give a clean, finished look to the repair. Combining this with the other features of the CA glue, it is possible to have a seamless repair with little to no effort involved in the clean-up afterward.
The design of the adhesive bottle is cumbersome to use. There are many instances where the glue will struggle to come out and get stuck in the nozzle. Additionally, squeezing the bottle is difficult due to the lack of an ergonomic design.
What We Like
Precise application
Easy to use
Fast drying and curing time
Versatile for use with different materials
What We Don't Like
Glue occasionally becomes stuck in the nozzle
Bonding Strength: High | Drying Time: 5-10 seconds | Waterproof: Yes | Heat Resistant: Yes up to 248°F/120°C | Application: Thin viscosity, high strength
9. Bazic Contact Cement Adhesive Glue
A strong adhesive that is latex-free, the Contact Cement Adhesive from Bazic is a handy tool to have around the house. The flexibility to adhere to porous and non-porous surfaces allows for versatility with many material types. Once the separate surfaces make contact, the adhesion remains strong.
Contact cement is handy for quick fixes around the house. The flexibility of the glue allows it to work well with different types of materials with no compromise in strength.
Securing two surfaces together without a clamp allows for the two pieces to remain the way you want them to be positioned. Air drying them is enough to begin curing the glue, and when they are put into contact with each other, it becomes affixed in no time. Only for heavy-duty materials was it necessary to use a clamp to secure the two pieces together.
The tube’s design helps the glue to come out smoothly and easily. The nozzle keeps the latex-free solution easy to apply. Additionally, it is easy to store away and carry around with the lightweight tube design.
When the contact cement is dried, there is a possibility of some oozing out between the seam. If exposed to air, the glue will become yellowish in color. This can be a nuisance if trying to have a clean and seamless attachment.
What We Like
Easy and simple application
Applicable to a number of material types
No clamp is needed for quick fixes
Tubed design
What We Don't Like
Yellowish tinge when dried
Bonding Strength: High | Drying Time: 10-20 minutes | Waterproof: Yes | Heat Resistant: Yes up to 140°F/60°C | Application: Good for larger surfaces, brush included
What Is the Best Glue for Metal-To-Wood Bonding?
This table compares glues for metal-to-wood bonding based on attributes like bonding strength, drying time, waterproof capability, heat resistance (up to degrees Fahrenheit or Celsius), and specific application features for each product.
With all these options, what should you be looking for in an adhesive to keep the metal and wood surfaces together? Metal and wood are very different materials with certain qualities that make any adhesion tricky.
Wood, for example, is a porous material which means it shifts its size, contracting and expanding, with changes in temperature. On the other hand, metal is a non-porous material. This means it has no air gaps or changes in size. It is a smooth surface which makes it difficult for any glue to grip onto it and adhere.
Types of Metal and Wood Adhesive
In order to join wood and metal, two types of glues can be used. These are polyurethane glue and epoxy adhesive.
A go-to option for joining materials, polyurethane glue is ideal for general projects and many minor repairs that need to be done. It is able to set quickly and maintain a strong bond between different density materials.
On the other hand, an epoxy adhesive is a two-step process. The first application is the glue to one surface and then a spray-on hardening agent to the other. After joining and curing the two surfaces, the adhesion is complete.
While an epoxy adhesive is durable against temperature and impact, polyurethane glue is still preferable for its flexibility in handling different materials.
Preparation for Adhesion
Before applying any adhesive to the surface of the wood or metal, there are some steps to be taken to make sure the bond is strong. Making sure these precautions are taken is important to keep both sides securely fastened to each other permanently.
Cleaning and drying the surfaces is a must to make sure the glue can grip the material’s surface itself and not any dust or dirt on it. Additionally, the adhesive should be placed on only one surface as too much glue can cause a weaker bond between the two.
Depending on the type of adhesive being used, the curing and clamping period of the materials together can vary. While some span seconds, others may require an overnight curing period. Always refer to the packaging or product information to ensure enough time is given to set it.
Avoid any sunlight or moisture when working with wood and metal. Being exposed to UV light and dampness can affect the strength of some glues, resulting in a weaker bond.
Method of Application
There are a number of application types, from spray-on to two-step epoxy. Considering what area needs to be covered can affect the choice between different application methods.
A spray-on method may not be suitable for areas that are smaller and require precision. Additionally, the spray-on method may not have as strong of a bond as other methods.
Alternatively, a two-part epoxy may need to be mixed before application; otherwise, there are variants that are simply one-part epoxies. These one-part epoxies can be applied directly without any mixing. Epoxies tend to have a stronger bond as compared to the spray-on method.
How do you glue metal to wood?
To effectively glue metal to wood, start by ensuring both surfaces are clean and free of dirt. Apply the glue according to the instructions, covering the dry surfaces of both the metal and wood. Allow it to set, and the bond will form between the metal and wood.
Can you use regular glue for bonding metal to wood?
Using regular glue is not recommended for bonding metal to wood. Everyday glue isn't designed for this purpose and is more effective on porous surfaces like wood. Metal, being non-porous, won't form a strong bond with regular glue, making it unsuitable for this application.
How strongly does metal bind to wood?
The strength of the bond depends on factors like the type and quantity of glue used. Using more glue will result in a stronger bond, but avoid excessive amounts to prevent wastage. Epoxy glue provides a relatively strong bond between metal and wood, although it lacks flexibility. On the other hand, superglue or polyurethane glue allows for more flexibility.
What to do if the glue does not bond?
If the glue doesn't bond, ensure the metal surface is clean and dry. If it's not, use solvents like acetone to thoroughly clean and dry it before applying the glue. Additionally, wood may contain oily substances that hinder bonding. To address this, use an activator to remove such substances from the surface before applying the glue.
How do you remove excess glue?
To remove excess glue that has not yet cured, use acetone. This will effectively dissolve the excess without affecting the curing process. Once the glue has hardened, acetone will no longer be effective. In such cases, physically removing the excess glue through cutting, scraping, or sanding with sandpaper is recommended.
Medium-density fiberboards, or MDFs, are common construction materials used in DIY as they are affordable and easy to work with.
However, when joining two pieces of this type of wood together, it can be difficult as this wood is more porous than the other of its types. As such, nails and adhesives can damage the wood if used incorrectly.
If you need pointers of quality wood glues that are suitable for an MDF project, look no further. In this guide, we will give you a few options to choose from and help you understand what features a glue should have to be MDF compatible.
Without further ado, let us start with the best glue options available today!
Best Glues For MDF
Here is the list of the 7 best glues for MDF that you can use to create strong, secure bonds for your woodworking projects.
A household name in terms of adhesives, Gorilla’s wood glue is a strong adhesive that can help join any two wood surfaces with ease. The simple bottle design makes for a straightforward application of their strong glue formula. Once applied, the drying time is minimal, making it an easy option to work with.
Complete projects fast: Our wood glue only requires 20-30...
Use indoors or outdoors: Give your indoor or outdoor project...
Why Did We Like It?
Using a Gorilla Glue adhesive will almost always guarantee that a solid adhesive bond is formed. In terms of their wood glue product, it was able to hold well when used on two wooden surfaces.
Regardless of the type of wood or how dense it was, the glue adhered to the surfaces and kept them strongly bonded.
The viscosity was not too thick; spreading and working with the adhesive to have a clean application was easy. Additionally, Gorilla states that this glue is able to dry within 30 minutes with a clamp.
Where most other products require more time to set and dry, a shorter drying time is welcome. This can let you move on with your work quickly, without having to wait and see if the glue has held or not.
What Could've Been Better?
While it is not a drawback of the actual glue itself, it should be noted regardless that this particular glue does come in a four-ounce bottle. This amount is more suitable for minor repairs and adhesions. For more extensive or heavy-duty repairs, it is advised to pick up a larger volume to get the job done.
Pros
20-30 minutes clamp time
Versatile with different density woods
Easy to use
It can be used indoors or outdoors
Cons
Volume required may be less for larger projects
Quantity: 1 Bottle | Volume: 4fl oz | Set Time/Dry Time: N/A | Cure Time: 24 Hours | Dry Color: Off White | Resistance: ANSI/HPVA Type II Water Resistance
An iconic orange cap on this bottle declares it as Elmer’s glue. This carpenter wood glue forms an incredibly strong adhesion on wood surfaces, penetrating into them for a secure bond. Widely used for its non-toxic formula with no fumes, it is a comfortable option to work with.
Non-toxic, no harmful fumes and easy to clean up with water
Why Did We Like It?
For projects which are placed outside or in areas where exposure to moisture is a possibility, the E7310 is a great glue to use. This adhesive is able to hold the bond between surfaces while making sure no moisture passes into the wood.
By creating a penetrating bond with the surface, it prevents mold and mildew formation; the glue acts as a sealant in a sense. Not having to worry about any possible growth taking place in the bond itself is a great feature to have.
Additionally, the glue is able to be sanded and painted once it has dried. This makes the repair job even more imperceptible, blending into the material itself. Combining this with the bottle’s easy application design and simple clean-up makes this Elmer’s glue a breeze to work with.
What Could've Been Better?
It may not always be possible for the surface you are working with to be thoroughly cleaned before applying an adhesive. As such, it should be noted that this particular Elmer’s glue requires the surface to be clean for the most durable result possible.
Pros
Non-toxic
Little to no odors or fumes
Strong bond
Thick consistency for easy application
Cons
The surface must be completely cleaned beforehand
Quantity: 1 Bottle | Volume: 16fl oz | Set Time/Dry Time: N/A | Cure Time: 24 Hours | Dry Color: Tan | Resistance: Waterproof, Resists Heat, Mold, Mildew
A two-part application process, this cyanoacrylate formula from FastCap is designed for an easy application that is also fast. Within seconds, a bond is formed regardless of what density surfaces you are sticking together. Once dry, the glue is able to withstand up to 4,000 PSI, excellent for filling up those small gaps permanently.
What is probably the standout feature of the 2P-10 adhesive is the incredible set and curing time. After spraying the activator on the glue, the surfaces are bonded within ten seconds and cured in 30.
There are not many types of glue that can boast of such fast curing times, let alone the time needed for a bond to form. What’s more, this adhesive does not require intense pressure on the material while it is curing. Simply pushing the two surfaces together for 30 seconds was sufficient enough.
Another helpful feature is the design of the activator’s cap. One of FastCap’s own designs, this nozzle applied the spray evenly and smoothly. There were no inconsistencies or bubbles once the spray was applied to the surface.
Additionally, the no-clog design of the cap came in handy when using the activator multiple times --truly giving you the full value for money experience.
What Could've Been Better?
As this adhesive bonds within seconds, the materials should be ready to be positioned before any application. There is not much room for error once the glue has been applied, so getting it right the first time is recommended. You wouldn’t want your two surfaces to be placed incorrectly after the glue has already bonded.
This waterproof adhesive formula from Titebond is excellent for those areas which are exposed to water. Not only does this adhesive protect against moisture, but it can be applied on surfaces in contact with food. Overall, this waterproof adhesive is an ideal choice for both indoor and outdoor projects.
Right off the bat, the most helpful feature of using this adhesive is the waterproof quality that the formula has. Any moisture is repelled and keeps the bond dry and secure. As such, using it on an outdoor project is within the realm of possibilities.
Unlike other wood glue formulas, Titebond has not prioritized the drying time to be as minimal as possible. While it does dry in less than an hour, they have allowed a window of time to work with the material. This can help you have the best adhesion and get the pieces positioned just right before the bond is set.
Furthermore, any excess glue that is left over or seeping from between the seam can be cleaned easily. A damp rag is sufficient to get the glue wiped off quickly. Additionally, the adhesive can be sanded down for a cleaner, seamless look once it is dried.
What Could've Been Better?
It should be noted that once this glue has dried, it takes on a dark shade. For those who are working with light-colored wood, the bond can stand out. This can be worked around by using a stain to blend the repair job but is not always applicable depending on the project.
Pros
Waterproof formula
Interior/Exterior application
Cleans up easily
Extended “open time” to work with material
Cons
It has a dark shade once dried
Quantity: 1 Bottle | Volume: 32fl oz | Set Time/Dry Time: Less Than An Hour | Cure Time: N/A | Dry Color: Dark Shade | Resistance: Waterproof
Another wood glue from the Gorilla brand, this variant has some waterproof features that increase its versatility. This glue maintains the strong bond formed between wood while making sure the permeating seal holds up against any moisture. This glue has an even application with a thick consistency no matter the density of the wood being bonded.
Use indoors or outdoors: Give your indoor or outdoor...
Extended working time: This Gorilla glue has an extended...
Why Did We Like It?
There are not many differences between this waterproof Gorilla wood glue and normal Gorilla wood glue. Where this glue shines is, of course, the waterproofing features. It held up well in keeping the seal between the wood dry.
What’s more, the bond itself is not inferior in any way. Once it has been set and cured, the wood feels solid; the adhesion feels more substantial than the wood itself.
A particularly useful quality of this glue is the thick consistency it has. By being so dense, it is able to hold its shape even when applied vertically. Using thinner glue will result in a runny mess, but this Gorilla glue was able to stick until it dried.
Additionally, the working time of this glue allows for the best positioning of the pieces to be glued. Once they have been placed correctly and the adhesive is applied, a curing time of 20-30 minutes with clamping will thoroughly dry the glue.
What Could've Been Better?
While a thick consistency can be a benefit, there are also some drawbacks to using such a thick viscous glue. For one, getting it out of the bottle can be a hassle, especially when being used multiple times. When the glue hardens in the bottle, it can be even more challenging to get it out.
Pros
Can be applied indoor/outdoor
Minimal clamping time
Cleaned up with water
Thick viscosity for vertical application
Cons
It can be difficult to remove from the bottle
Quantity: 1 Bottle | Volume: 8fl oz | Set Time/Dry Time: N/A | Cure Time: 24 Hours | Dry Color: Off White | Resistance: ANSI/HPVA Type I Water Resistance, Withstands Exposure To Sun, Extreme Temperatures
Titebond offers a premium wood glue option in their 5003 II that has a strong tensile strength of up to 3750 PSI. What’s more, the 5003 II was designed to be used on exterior surfaces, so water and UV resistance, as well as the ability to sand it down, are key features.
This item is a Franklin International 5003 Titebond-2...
Purpose of use for Hardware, wood-glues
Why Did We Like It?
Using a waterproof formula in this wood glue makes for an ideal outdoor adhesive. While it can be used indoors as well, this glue can be taken full advantage of on surfaces exposed to the elements.
To put it in context, other wood glues that are not rated for outdoor use can yellow and crack if exposed to UV rays and moisture. For wooden surfaces outdoors, this glue did not have any such yellowing; the bond formed was maintained regardless of what it was exposed to.
When applying the 5003 II, it forms a bond within five minutes on the surface; enough time to work with the material and get it into place. Thanks to the applicator top, the glue comes out in thin strips for a controlled flow.
What Could've Been Better?
Titebond has decided to use an applicator nozzle rather than a closed-off nozzle on the tip of the bottle. This can leave the glue exposed or even clogged within the nozzle. When using the glue on multiple occasions, it can be challenging to have an even application or unclog the nozzle.
Pros
Water-resistant
Ideal for exterior application
Water clean-up
Easy application
Cons
Nozzle tends to clog and leak air
Quantity: 1 Bottle | Volume: 8fl oz | Set Time/Dry Time: Within 5 Minutes | Cure Time: N/A | Dry Color: Yellow | Resistance: ANSI/HPVA Type II Water Resistance, UV-Resistant
The 80070 Jel is a thicker, more viscous formula than the other adhesives in the 2P-10 line from FastCap. Due to this difference in consistency, this glue is able to hold its shape when applied on vertical surfaces. If thicker glue is what you need, this FastCap option can be what you’re looking for.
Excellent For Filling - With its superior filling...
Clear Results - It provides crystal-clear finish. Once...
Why Did We Like It?
Working with viscous glue is always easy in terms of having an even application. In particular, the Jel wood adhesive is easy to spread across the surface and stick without running. This comes in handy when the surfaces are at an angle.
Additionally, the glue does not drip or run when applied. Even when used on a vertical piece of wood, it stuck wherever it was applied. This helps to have a cleaner application overall.
There is an option to use this adhesive with the activator included in the 2P-10 combo pack. However, the Jel wood adhesive by itself will cure and set within minutes without the activator. Regardless, having the option of a bond within seconds is always handy.
What Could've Been Better?
Due to the design of the bottle’s cap, the glue can potentially dry out or become stuck. The screw-on lid must be kept securely fastened between uses to maintain the quality of the glue. Even leaving the slightest bit exposed to air can begin the curing process and solidify the entire bottle.
Working with MDF glues can be tricky, figuring out how each type of specialized glue differs from the other. To understand the main types and make the most informed purchase, keep in mind the following points.
Types Of MDF Glue
Polyvinyl Acetate (PVA)
Made of a combination of polyvinyl acetate and water glues, this type of glue is a versatile option. It is able to work both indoors and outdoors with a minimum drying time to boot. However, it is most suited for indoor usage as it does not perform well in humid locations.
What’s more, these glues are usually affordable and readily available in woodworking shops. Overall, it is a basic glue that can be used in most DIY projects with ease.
Plastic Resin Glue
A contrasting glue from PVA, this type of glue is suitable for heavy-duty uses and large projects. The bond created is more robust; however, the application process can be more complex and dangerous.
Although it has a longer drying time, the glue is next to impossible to remove once set. As such, ensure the adhesive is applied carefully.
Additionally, there are a number of powders that are mixed into the resin that can match the resulting resin to different wood stains.
Epoxies
Using epoxy with an MDF is the most flexible option available in terms of working time, as resin glues can be set fast or slow. So whether you need a long or short working time, you can choose an adhesive that matches your needs.
One drawback to the epoxy type is the higher price tag that comes along with it. If the price tag is justifiable, then epoxy glue can be incredibly useful to give you full value for your money.
Conclusion
With a number of options listed having various beneficial features, it should be easy to pick the most compatible glue for your medium-density fiberboards.
If the bond must be set quickly, the FastCap 2P-10 adhesive and activator combo pack is a value buy that is also easy to apply. In the event your MDF must be joined with another wood having a different density, the Gorilla Wood Glue is a versatile option.
Waterproofing features are essential for exterior projects. For this, we recommend the E7310from Elmer’s or the Titebond III, which is not only waterproof but food-safe as well.
So long as you keep our pointers in mind, any of these glues will be sure to get the job done. With a little bit of glue and effort, your MDF will be looking pristine and whole in no time at all!
The best glue for marble is a specially formulated adhesive designed to bond dense, non-porous stone surfaces with precision and long-term durability. Whether you're repairing chipped countertops, reattaching tiles, or fixing decorative pieces, marble requires a glue that can withstand structural stress while blending cleanly with its natural finish. However, with so many different types of glue available—epoxy, cyanoacrylate, polyurethane, and more—choosing the right one can be overwhelming. Some adhesives excel in strength but lack aesthetic finish, while others are easier to apply but don't hold up to moisture or heavy weight. That’s why we’ve tested and reviewed the 6 best glues for marble, assessing each for bonding strength, setting time, compatibility with polished stone, and resistance to yellowing or cracking. Whether you're a DIY homeowner or a restoration specialist, this guide will help you find the ideal marble adhesive for repairs that last.
Listed below are the 5 best glues for marble from our list:
Epox-Sci. The Epox-Sci 112920k Instant Install is celebrated for its excellent value, versatility and capability to glue marbles effectively in a short span of 29 minutes. Perfect for minor repairs like cracks and fractures, it is composed of non-toxic ingredients and can even be used around children. It does not dry clear, leaving an opaque finish that may require coloring for better aesthetics.
HIMG Surface Repair. Known for its fast curing and delivering a powerful bond, the HIMG Surface Repair is a top choice to fix marble countertops, rocks or granite. It delivers a transparent finish, is completely non-toxic and does not turn yellow over time. It's slightly pricier compared to other standard epoxy glues but worth the investment.
Loctite 1451588. The Loctite 1451588 stands out for its durability and versatility. It delivers a strong bond, eight times stronger than regular construction adhesives, and can be used on several surfaces from marble to other building materials. Nonetheless, the drying result tends to be translucent which can be addressed with a coat of paint.
Loctite PL 530 Mirror, Marble, and Granite Adhesive. Uniquely suited for moist environments like kitchens and bathrooms, the Loctite PL 530 Mirror offers a lasting bond for glued marble countertops. It's resistant to water, mold, and mildew, ensuring the bond's longevity. It's also stain-resistant and user-friendly. The only potential downside is its longer drying time.
Akfix Stone and Marble Fast Adhesive. The Akfix Stone and Marble Adhesive offers versatility and a solution for projects requiring quick drying and strong bonds. Its high viscosity is especially effective for vertical applications and it can be used with different materials. It's waterproof and heat-proof, making it suitable for various applications. However, it's not suitable for high-impact applications due to its low resistance to shock and impact.
Here is the list of the 6 best glues for marble for your projects.
1. Epox-Sci - Best Overall
For starters, we have the Epox-Sci 112920k Instant Install. Users love this epoxy glue as it provides excellent value for money. This product offers a number of solutions and is highly effective when it comes to gluing marble.
Gluing stone becomes much simpler when you have the right repair tools at your disposal. Some people might feel that fixing marble is difficult, but this marble epoxy glue will take all your worries away.
The first thing that caught our eye was the claim that it can repair cracks on marbles within a short span of 29 minutes. Hence, you will be able to bond marble surfaces without waiting for hours. This stone glue takes 15 minutes to work and another 14 minutes to dry.
Moreover, it is made of completely non-toxic ingredients and, therefore, can be used in the kitchen too. You can consider using it in areas that children access, as this epoxy resin won't cause any harm to them.
Apart from that, this is one of those epoxy glues that can be used on a range of materials, including quartz and granite. And most people prefer using it for more minor repairs like cracks and fractures.
When we used this item to glue marble, the only problem we faced was that it did not dry clearly. We noticed that the finishing was opaque, and that made it evident that the marble tiles had been glued. To deal with this problem, you can consider adding color to the glue.
What We Like
Dries fast
Delivers a strong bond
Versatile use
Durable results
What We Don't Like
Does not deliver a clear finish
Adhesive Type: Epoxy | Application: General | Color: Clear | Heat Resistance: High | Curing Time: 24 hours | Strength: High | Shelf Life: 2 years
2. HIMG Surface Repair - Best Non-Toxic
We would recommend that you try the HIMG Surface Repair to fix marble countertops, rocks, or granite. It can fix broken marble in a jiffy and is also great for repairing minor cracks and fractures. And once it dries, you can rest assured that it will deliver a powerful bond.
If you are on the lookout for a solution that can effectively help in gluing marble, then this product may fit the bill. It delivers a completely transparent finish and is excellent for fixing cracks and broken marble tiles. When it comes to repairing chipped surfaces, this one works like magic.
We would suggest that you opt for this glue for marble if you hate dried-up glue surfaces turning yellow over time. This option is entirely non-toxic, and you can use it anywhere in your house without having to worry about safety. Plus, you do not need to wear any safety gear when using this item.
Moreover, it is essential to note that, unlike other light-cure acrylics, this self-cure option dries up very fast within a matter of a few minutes. This glue marble cures on its own and heals in a short time span.
The only complaint that we have with this product is the fact that it is a little pricey when compared to other standard epoxy glues. This marble glue comes in a small pack, and it is best that you use it judiciously to prevent any wastage.
What We Like
Perfect for fixing cracks
Heals fast
Safe for use
Does not get yellow
What We Don't Like
A bit expensive
Adhesive Type: Polymer composite | Application: Surface repair | Color: White | Heat Resistance: Medium | Curing Time: 2 hours | Strength: Medium | Shelf Life: 1 year
3. Loctite 1451588 - Best Durability
The Loctite 1451588 can be your best bet to provide glued marble surfaces with optimum durability. It has a low viscosity, which makes it effective for bonding, and is an excellent option when you have to repair marble. What’s more, this adhesive can handle both light and heavy objects.
What makes this product stand apart from the glues manufactured by other brands is the fact that it delivers an extremely strong bond. From the tests that we conducted, we gathered that it is eight times stronger than regular construction adhesives.
In fact, this polyurethane adhesive is at par with any high-quality gorilla glue and is a perfect choice to glue marble together.
Other than that, the versatility that it puts on the table is nothing short of incredible, as you do not have to restrict yourself to using it just on marble. Instead, you can apply it on other surfaces such as stone, hardwood, treated wood, slate, brick, and other building materials. So, you do not have to buy separate glue for different materials, and that would save you a lot of money.
And the versatility extends to other aspects of use as well. For example, you can use it in cold climates too, and it would dry without any problem. Once it gets cured, you can even paint on it if you wish to.
Despite delivering a solid bond, the problem with this glue is that it does not dry clear. So, there's a chance that the final output might not look that great once it dries up. To prevent that, it is best that you follow it up with a coat of paint.
What We Like
Delivers excellent bond
Durable
Resistant to water
Can be used on a range of surfaces
What We Don't Like
Tends to be translucent when dried
Adhesive Type: Super Glue | Application: Multi-purpose | Color: Clear | Heat Resistance: Medium | Curing Time: 10 seconds | Strength: Low | Shelf Life: 2 years
4. Loctite PL 530 Mirror, Marble, and Granite Adhesive
The Loctite 1693636 PL 530 Mirror, is an excellent choice if you are working with marble in the kitchen or bathroom. Once you glue the marble countertop with this item, the bond will last for years to come.
What makes this item stand out among its contemporaries is the fact that it can be used in moist environments. It is true that for most glues, drying up in humid areas is a problem - but not with this one. This is the best glue for marble if you are working in moist areas like in your bathroom or kitchen.
Moreover, you can rest assured that it won't stain the surfaces that you are working on. That makes it a great addition to your DIY kit and reduces your cleaning work to the minimum. Besides, it doesn’t leave any nasty stains and you can wipe the finished surface to get rid of any dirt.
Other than that, what enhances the durability of the glue is that it is resistant to water, mold, and mildew. That is what makes the bond last for a long time. And, coming to the ease of application, the simple applicator tube gets a perfect ten from us.
There is no doubt that the bond this glue delivers is super-resistant. However, you need to keep in mind that it takes some time to dry up. So, if you have a short deadline, this might be a problem. Keep this factor in mind before purchasing.
What We Like
Highly durable
Does not stain surfaces
Can handle water-based damage
Easy to apply
What We Don't Like
Long drying time
Adhesive Type: Polyurethane | Application: Stone and marble | Color: Gray | Heat Resistance: High | Curing Time: 24 hours | Strength: High | Shelf Life: 1 year
5. Akfix Stone and Marble Fast Adhesive
Akfix Stone and Marble Fast Adhesive is a versatile adhesive designed specifically for bonding marble, stone, and other materials. This product is particularly useful for basic repairs and small applications where fast drying and strong bonds are required.
One of the primary reasons we took a liking to this adhesive was its high viscosity, which proved to be incredibly effective for vertical applications. This quality allowed it to be utilized with an assortment of materials, such as marble and stone. Due to its adaptability across different projects, we found it to be an incredibly versatile and practical choice for many users.
Another factor that greatly impressed us was the adhesive's quick drying time and the strong bonds it could form. This feature ensured that projects were not only completed efficiently but also resulted in reliable and durable outcomes. The adhesive's performance exceeded our expectations, which furthered our admiration for the product.
Lastly, we appreciated the adhesive's resilience upon curing. It demonstrated exceptional water resistance, making it 100% waterproof, and remained unfazed by heat. This capacity to endure various environmental conditions without compromising the integrity of bonds made it an excellent option for numerous applications. Overall, the adhesive's comprehensive range of features, performance, and durability helped solidify our favorable impression of the product.
While its performance is excellent in terms of being waterproof and heat resistant, it lacks resistance to shock and impact, making it less suitable for high-impact applications.
What We Like
Perfect choice for gluing marble
Versatile stone adhesive
Works with cultured marble
Waterproof
What We Don't Like
Low impact resistance
Adhesive Type: Cyanoacrylate | Application: Stone and marble | Color: Clear | Heat Resistance: Low | Curing Time: 5 minutes | Strength: Low | Shelf Life: 1 year
6. PC Products Two-Part Heavy Duty Epoxy Adhesive Paste
The PC Products Two-Part Heavy Duty Epoxy Adhesive Paste is perfect for heavy-duty applications that involve complex bonding, including large marble projects. With its extreme resistance to various damaging factors and its ability to bond with multiple materials, this adhesive is ideal for various scenarios.
One aspect of the adhesive that we found particularly noteworthy was its exceptional strength, boasting a remarkable 2150 PSI tension resistance. This incredible level of strength ensured that bonds created with this product were reliable and secure, making it a suitable choice for various projects needing a robust adhesive solution.
Another reason why this product impressed us was its resistance to multiple damaging factors. As a result, it could withstand various external elements without affecting the adhesive's performance. Additionally, this adhesive proved great for sealing and filling gaps or cracks, which further expanded its range of applications, making it a highly versatile choice.
Finally, the slow drying feature of the adhesive allowed users to engage in careful, accurate work. In scenarios where precision was paramount, this attribute proved invaluable, giving users the opportunity to make adjustments and corrections before the product was fully set. Overall, the combination of exceptional strength, superior resistance to damaging factors, and a slow drying time for precision work made this adhesive stand out as an impressive and reliable choice.
This amazing adhesive has one drawback: it dries with a grey color, which makes it less ideal for visible surfaces where aesthetics matter.
What We Like
Works with glass and wood as well
Works with any marble surface
Waterproof
Simple to work with
What We Don't Like
Takes a long time to cure
Does not dry clear
Adhesive Type: Epoxy | Application: General | Color: Gray | Heat Resistance: High | Curing Time: 4 hours | Strength: High | Shelf Life: 2 years
What is the Best Glue for Marble?
The following table presents a comprehensive comparison of the finest adhesives specifically designed for marble. It evaluates crucial attributes including Adhesive Type, Application, Color, Heat Resistance, Curing Time, Strength, and Shelf Life.
Even after going through the top products in detail, some of you might still be a bit confused about which one to pick. There are a few other factors that you need to look into in order to make the right decision.
Let’s look at some of them!
1. Glue Type: Epoxy Adhesive And Epoxy Cement
The most common type of adhesive that people use to glue marble is epoxy cement or marble epoxy glue.
It is true that epoxy glue offers great hold, but it can be a bit challenging to work with as it shrinks and dries pretty fast. Some people do not prefer to go for them because they do not offer much color variation.
On the other hand, epoxy cement contains a bit of cement or rubber in the mix. You can use this for both repair purposes and directly as an adhesive to glue marble countertops. We suggest that you go for epoxy cement only when you are working on large projects and require a stronger hold.
2. Drying Time
Another very important consideration when buying adhesive to glue marble is to check its drying time. Drying and curing time depends on factors like the weather as well. In most cases, it takes around 12-24 hours for glues to cure completely.
However, drying time is generally less, and the bond should be dry to touch within a few minutes of application.
Some of the adhesive options come with an activator spray that can help to effectively speed up the drying process. Depending on the type of project, you have to determine how much drying time you can afford.
Bear in mind that quick-dry options might be a little difficult to work with as they do not give much time to work. In case you go for them, you need to be super deft and manage time effectively.
3. Material Compatibility
Most of the glues that are used on marble can be used on granite and stones too. It is always best to invest in a product that is versatile and can be used on a range of materials, like glass, wood, etc. There are some options that work fast and can help glue metal to marble as well.
Before you make a purchase, always ensure that you read the label well to know what materials the product is compatible with.
How do I prepare the surfaces of the marble before gluing?
You can prepare marble for glue in 4 easy steps:
1. Dampen a soft cloth with denatured alcohol and use it to wipe the marble surface.
2. Rinse the marble with clean water.
3. Apply acetone to the marble and remove any coating.
4. Wipe away any excess acetone and allow the marble to dry.
How do I apply the glue to the marble?
To apply glue to a marble, use a small brush or toothpick to spread an even layer of glue on the top and bottom of the marble to ensure proper adhesion.
How do I clean up the excess glue from the marble?
To clean up excess glue from marble, use a damp cloth and a mild detergent or all-purpose cleaner. For very stubborn glue, use a razor blade to scrape it off. Be sure to move the blade in the same direction as the grain of the marble.
If this doesn’t work, acetone can be used to dissolve the glue. However, test the acetone on an unseen part of the marble first, to make sure it won’t discolor the area.
Is there any special technique for gluing marble?
Gluing marble requires evenly spreading the glue and applying pressure to the glued area for a few minutes. Use high-quality glue that is designed to bond with marble for the best results.
Are you fond of finishing Lego projects but hate when the blocks come apart? Don't worry, we have a solution for you.
Most of us have played with Lego blocks as kids and have good memories attached to them. There must have been times when we really liked a project but couldn't keep it together as the blocks got loose over time.
Luckily, the adhesives industry has advanced since then, and now we have a number of glue options that can bond Lego bricks easily. Having said that, the numerous options can make it challenging to pick the perfect product, especially for newbies.
Therefore, we thought of creating a list with some of the best glue for Legos available on the market to help you out. We have even included a handy buying guide so that you can narrow down your options with ease.
So, without further ado, let's get started.
Listed below are the 5 best glues for Legos from our list:
Gorilla® Super Glue: This glue stands out for its no-mess application due to its thick gel consistency and anti-clog cap, which prolongs its usability. It's fast-drying and the compact bottle design is comfortable to handle, however, using too much can result in visible gaps between Lego blocks.
Loctite® Super Glue: This brand is known for its versatile and durable formula that includes features such as precise application and fast drying. A standout feature is its rubber-toughened glue that remains flexible yet resistant to heavy impact and vibration, though the applicator needs frequent cleaning to prevent clogging.
GLUEMASTERS® Professional-Grade Adhesive: Noted for its industrial-grade formula that works well for various projects including Lego construction. The precise applicator and different viscosity levels make it versatile and highly effective. Use in well-ventilated spaces is recommended due to its strong formulation.
Rhino Glue®: Its fast drying time and clear result make it a great choice for Lego constructions. The extra-strong formulation creates a shock-resistant bond that ensures longevity, yet its strong smell might be off-putting to some users.
Krazy Glue® All-purpose glue: This glue offers a strong bond that remains effective over a long period. The precision applicator allows for a smooth application process, and the stay-fresh container ensures multiple uses. Product quantity in individual packs might be less for bigger projects.
To help keep your Lego masterpieces intact, there are various types of glue available in the market that are specifically designed for use with Legos. But with so many options out there, it can be tough to determine which one to use. That's why we've put together a list of the 7 best glues for Legos, to help you choose the right one for your needs.
1. Gorilla - Best for Precision
Let's start with a brand that most people know — Gorilla, a manufacturer that has consistently produced the best quality adhesives. And if you want glue for permanent Lego constructions, then this product is bound to be a good choice.
There are several things to like about this Gorilla super glue. But, first, we would like to divert your attention toward its consistency. Unlike any other liquid glue, this formula comes in a thick gel, making it easy to apply on vertical and horizontal Lego pieces. That said, the no-mess Gorilla glue makes the application process easy as the glue won't get everywhere.
Another key feature of this glue is its packaging. You can now hold the cleverly designed compact plastic bottle in your hand for long hours while working on an intricate project.
However, what probably stands out the most is the anti-clog cap, which keeps the Gorilla glue from drying out, thus allowing multiple uses with each bottle.
Furthermore, the Gorilla super glue gel takes between ten to forty-five seconds to set, based on the amount of glue used. And, as it gets fully cured in 24 hours, you wouldn't need to wait for days before handling the Lego construction.
Overall, this is one of the best permanent glues for Lego blocks. But, our only concern is that laying down a thick layer of Gorilla glue may leave a visible gap between the blocks. So, you need to be a bit more careful while using the glue and only apply a few drops.
What We Like
Easy to use
Dries transparent
Ideal for intricate projects
Versatile adhesive
What We Don't Like
Thick layer may increase the space between pieces
Adhesive Type: Cyanoacrylate | Cure Time: 10-30 sec. | Bond Strength: High | Heat Resistance: No | Gap Filling: No | Viscosity: Gel | Waterproof: No
2. Loctite - Best for Flexibility
For the last 50 years, Loctite has remained a leading brand of permanent glues available on the market. The best thing about this product is its innovative formula that promises versatility and durability. And, as it's widely available from different retailers, you won't have a hard time searching for this super glue.
To begin with, what pulled us towards this product was the packaging. We really liked the bottle design, which is equipped with squeezable sides to make the application process easier. What's more, the sides have grooves to help you maintain a better grip on the bottle. Not to mention how the precise nozzle lets you apply drops of glue even on the tiniest of Lego bricks.
However, the property that truly makes this permanent adhesive a worthy product is its unique formulation. That said, it is a rubber-toughened glue that allows bonds to be flexible while also giving it the ability to resist heavy impact and vibration.
Moreover, this glue dries clear, so you wouldn't need to worry about any traces showing through the Legos, especially between darker-colored pieces. On that note, the transparency provides a seamless look to the blocks when the right amount of glue is applied.
One of our only concerns with this glue is that the product may build up on the applicator if it isn't cleaned after every use. So, you should always remember to wipe off the applicator with a paper towel to prevent it from clogging. Also, refrain from keeping the bottle uncapped for long periods.
What We Like
Easy to dispense
No clamping required
Suitable for vertical Lego surfaces
Fast drying
What We Don't Like
Applicator needs to be cleaned after every use
Adhesive Type: Epoxy | Cure Time: 5 Minutes | Bond Strength: High | Heat Resistance: Yes (up to 300°F) | Gap Filling: Yes | Viscosity: Thick | Waterproof: Yes
3. GLUEMASTERS - Best for Industrial Use
Are you in search of a permanent glue that won't lose its bond even after years? If yes, you can try this adhesive from GLUEMASTERS, which boasts an industrial-grade formula. This makes the glue excellent for all kinds of projects, from Lego construction to fixing heavy-duty machines. So, let's check out its features.
If you are a hobbyist who likes to indulge in different projects, it's a must to have this GLUEMASTERS professional-grade adhesive. It comes in various viscosity levels to choose from, but we recommend the thick variant for Legos as it works well for vertical surfaces. Nevertheless, this glue is available in different quantities, including an 80 oz bottle.
However, the best feature of this glue has to be its precise applicator. The nozzle allows you to place the smallest drop of adhesive on the Lego blocks before attaching the plastic pieces. Additionally, the bottles are only filled to two-thirds of the total capacity to give you more control while applying the glue.
Besides its function as a glue for Legos, this professional-grade glue is quite versatile. You can use it to bond materials like rubber, ceramic, wood, metal, and other plastic objects. Needless to say, it's a helpful glue to have in your toolbox.
Although not a dealbreaker, its industrial formulation is only suitable for use in a well-ventilated space. The manufacturer also suggests using protective gear, like gloves and goggles, to keep yourself safe from coming in contact with the glue. Apart from this, we don't have any complaints about this permanent glue.
What We Like
Durable bond
Applicator doesn’t clog
Available in larger sizes
Versatile adhesive for different materials
What We Don't Like
Needs to be used in a well-ventilated area
Adhesive Type: Cyanoacrylate | Cure Time: 5-15 sec. | Bond Strength: High | Heat Resistance: No | Gap Filling: No | Viscosity: Thin | Waterproof: No
4. Rhino Glue
Have you been looking for cyanoacrylate-based hobby glues for permanently bonding your Lego construction? If so, this heavy-duty Rhino glue can be an excellent choice to finish the task as fast as possible without the Lego set falling apart. This glue is also part of the Pro series by Rhino, guaranteeing top-notch quality.
Right off the bat, what we liked about this glue was its fast drying time. Notably, the drying time is exceedingly swift compared to other permanent glues. Rhino categorizes this product as a tough-instant glue, and it does live up to the claims. So, while using this product, you won't need to wait for hours as the glue cures within 20 minutes.
Moreover, the Rhino glue dries completely clear. Hence, there's no need to worry about needing to paint over the adhesive to match the color of the Legos. And, as applying a few drops does the job, your Lego bricks won't have a thick layer of glue between them.
Furthermore, one of the critical features of this glue has to be the unique formula that makes it stronger than other glues. Because it's a maximum-strength adhesive, your Lego bricks will remain glued together permanently. Plus, the glue has been toughened to make it shock-resistant and maintain a strong bond under pressure.
When it comes to this glue, the only drawback we found was its strong smell. It can be a bit overwhelming for people who may be averse to the smell of adhesives. So, we recommend wearing a proper mask while using this glue to keep yourself from inhaling it.
What We Like
Strong bond
Easy application method
Dries rapidly
Shock-resistant
What We Don't Like
Strong smell
Adhesive Type: Cyanoacrylate | Cure Time: 10-30 sec. | Bond Strength: High | Heat Resistance: No | Gap Filling: Yes | Viscosity: Thin | Waterproof: Yes
5. Krazy Glue
If you didn't know already, Krazy Glue comes from the house of Elmer's, so we were really thrilled about trying this product. And, this super glue didn't fail our expectations when it came to gluing together Lego bricks, as it does the job quite smoothly. So, let's learn a bit about its features.
Are you tired of using superglues that seem to lose their bond over time? Don't worry, as Krazy Glue has got you covered. The strong all-purpose bond of this glue helps to keep the blocks attached even after a long time has passed. So, your Lego piece won't suddenly crumble apart after a few weeks after you accomplish the whole building process.
Having said that, for us, the best feature of the Krazy Glue was the applicator which is perfect for attaching Legos, particularly the tiny pieces. The precision tip places a small dab that's enough to give a strong bond. And, as the tube is compact, the application process is pretty smooth.
On top of that, the glue comes in a stay-fresh container, so it remains viable for multiple uses. However, do make sure to cap it properly after every use.
To be honest, this is one of the best glues for Legos that we have tried out. However, our only complaint is that the individual packs have very little product. So, you'll certainly need to buy more than one tube of the Krazy Glue for a bigger Lego art piece.
What We Like
Straightforward application
Strong adhesive
Compact-sized tube
Doesn’t dry out after single use
What We Don't Like
Less quantity
Adhesive Type: Cyanoacrylate | Cure Time: 10-30 sec. | Bond Strength: High | Heat Resistance: No | Gap Filling: No | Viscosity: Thin | Waterproof: No
6. Le-Glue Temporary Glue
Did you know that a kid made the Le-Glue non-permanent glue? Yes, this product was designed by Tripp Phillips when he was in the third grade. Unlike the other Lego glues mentioned by us, this one can be safely used by kids to create their own fun Lego projects. So, let's check it out.
First of all, let's focus on the use of the Le-Glue temporary glue. As you can understand, this glue is meant to bond the Legos temporarily. But, that doesn't mean your blocks will fall apart, as this glue from Le-Glue has a hold that's twelve times stronger than other temporary glues.
Moreover, it works for all kinds of building blocks, including Lego, Nano Blocks, and Mega Blocks. You just need to apply a small dab of this temporary glue on one block and press the other block on it for some time to get a reliable bond.
Furthermore, Le-Glue temporary glue comes in a non-toxic and solvent-free formula. And, it's made from all-natural ingredients. So, your kids can safely play with it for as long as they want without facing any health issues.
Plus, it's pretty easy to break the bond of the Le-Glue temporary glue as all you need to do is soak the blocks or project in warm water.
One of the only problems with this product is that the application can quickly get messy, especially for kids. As this glue comes in plastic packaging, you need to pour it into a container before starting your project. However, the good thing is that it's easy to get rid of this glue from your clothes or skin, and it doesn't leave any residue.
What We Like
Easy to use
Cures within 24 hours
Safe for use by kids
Dissolving glue is hassle-free
What We Don't Like
Application can get messy
Adhesive Type: Temporary | Cure Time: N/A | Bond Strength: Low | Heat Resistance: No | Gap Filling: No | Viscosity: Thick | Waterproof: No
7. BrickShield
Have you been looking for a semi-permanent glue that's easy to apply? If so, then check out this non-toxic and kid's safe glue from BrickShield that has been designed specifically for Legos. It comes in a handy spray bottle that lets you apply the glue directly on the bricks without needing any applicator.
Straight away, what we liked about this product was the packaging which makes applying the glue pretty easy. Do follow the directions specified by the brand, and you'll be able to glue Legos with precision. A nice thing about the bottle is that the kids face no problems in spraying, and it doesn't hurt their hands.
Moreover, this glue has been specially designed for plastic blocks of all kinds, including Lego. And, it drastically reduces the time needed to glue Legos for elaborate projects because of its fast application.
Another one of the key features of this temporary brick glue is its non-toxic and kid-safe formula. This is rarely seen in aerosol products made for kids, so we were pretty impressed with this adhesive.
Plus, the brand provides a 100% satisfaction guarantee with this spray glue. So, if, for some reason, you're not happy with this product, there's an option to contact customer care to receive a refund.
We would like you to know that this isn't really a drawback that's exclusive to this glue as it's common in all spray glue products. When you spray to apply the glue from a distance, there's bound to be some wastage. This means that it's always better to keep a backup of this glue to avoid running out of it.
What We Like
Ease of application
Dries and cures quickly
Glue washes off easily with soap and water
Dissolves in warm water
What We Don't Like
Does have wastage
Adhesive Type: Silicone | Cure Time: 24 Hours | Bond Strength: Medium | Heat Resistance: Yes (up to 500°F) | Gap Filling: Yes | Viscosity: Thick | Waterproof: Yes
What is the Best Glue For Legos?
This section provides a straightforward comparison of leading glues for Legos. The table below outlines key Lego adhesive specifications, including type, cure time, bond strength, heat resistance, gap-filling capability, viscosity, and waterproofing.
When choosing the best glue for Legos, you need to know some essential points that'll help to make the right decision. As gluing the Legos is often based on specific projects, skipping any points may leave you with completely unusable glue. So, let's check out these key points.
1. Viscosity
One of the most important features to look for in glue is its viscosity. A thin consistency may prove to be challenging while gluing Legos as it may cause the blocks to slide around. Hence, it's better to opt for glue with thick viscosity or a gel texture for attaching the Legos easily.
Moreover, thicker glues are easier to apply on vertical surfaces. As Lego projects can have a mix of vertical and horizontal planes, opting for glues with thick viscosity proves to be an excellent choice. And it makes the process less messy.
2. Permanence
Would you like the Lego set to have a permanent bond? If so, it's best to choose a glue that comes with the capacity to bond the surfaces permanently. While choosing a permanent glue, make sure to handle your Lego construction properly before it cures properly.
However, while researching the glue for Legos, we found out that some people prefer semi-permanent or non-permanent glue. These options are better to display the completed project for a certain period. It also leaves you with the choice to dismantle the Lego structure whenever needed.
On that note, while choosing a non-permanent or temporary adhesive, don't forget to check the process of breaking the bonds. Typically, the glues are water-soluble and dissolve in warm water, but some may require the application of certain chemicals to come off the Legos entirely.
3. Curing Time
Another point to check while looking for the best glue for Legos is the curing time. As you may know, there's a wait time for most glues when it comes to handling the pieces after attaching them. In the case of Legos, we want it to be as fast as possible to avoid detaching the pieces.
Now, the cure time or the total time taken for the glue to dry is usually between 24-48 hours, depending on the brand and consistency of the adhesives. Superglues take the least time, while white glue takes the longest. So, make sure not to forget about the curing time while ordering your Lego glue.
4. Ease Of Application
On searching for how to glue Legos, a common suggestion you'll notice tells you to look for a suitable glue. And, that's why it's important to choose a Lego glue that comes with ease of application.
You don't want it to be too messy, as it can make working with small blocks frustrating. At the same time, try to find a product with a precise applicator to avoid using too much glue.
Having said that, the application technique does vary depending on the project, so try to find a product that fits your demands from the adhesive.
Can glue be used on all types of Legos?
Most Lego types, such as regular and Duplo Legos, can be bonded with glue. Nevertheless, ascertain that the glue implemented is compatible with the plastic material constituting your Legos for seamless application.
How do I remove glue from Legos?
The process of glue removal from Legos can prove problematic, with the potential for damage to the plastic. Usage of a solvent like acetone or nail polish remover is a common approach, but caution is advised as these substances could render the plastic brittle.
Can I take apart Legos after using glue?
Taking apart glued Legos is typically not feasible, as the glue tends to create a permanent bond. Thus, you’re advised to think carefully before deciding whether to permanently adhere your Legos together using glue.
Is glue safe to use on Legos?
Applying glue to Legos is perfectly safe, however, it’s crucial to use glue explicitly designed for Lego use. This ensures the adhesive won't inflict damage to the plastic, maintaining its structural integrity.
Glass is a unique material with a non-exhaustive list of uses—everything ranging from packaging, tableware, furniture, housing, etc.
Despite being such a versatile product, glass is one of the materials that require utmost care while handling. It tends to develop cracks and breaks easily and quickly, often even after careful handling.
Now, damaged glass is not very easy to repair and requires special types of adhesives available on the market from several different manufacturers. However, as the market is flooded with so many products, it becomes difficult to select the right one.
That is why we have compiled this list of the best adhesives for glass. Additionally, we have included a buyer’s guide that explains what factors to consider while selecting the right glue.
Without further ado, let’s dive into it.
Best Glues For Glass Reviews
Here is the list of the 10 best glues for glass that can help you to create strong, durable bonds between glass surfaces.
We begin with the E6000 230010 Craft Adhesive, which has a unique formula that offers impressive results. This product is placed so high on our list as it is compatible with a wide range of materials that not only includes glass, but also wood, fiberglass, metal, and more.
Bonds to glass, wood, plastics, tin, metal, ceramic, cement,...
Dries clear, paintable
Why Did We Like It?
We found the E6000 230010 to be very effective in sealing all sizes of cracks in glass and work excellently to repair delicate ornaments or damaged glass objects. Also, it does not leave behind any visible signs that show it has been fixed.
As mentioned above, this glue is highly compatible with several different types of materials and you can use it successfully to repair or join wood, porcelain, glass, cement, rubber, etc. Additionally, the industrial-grade material performs excellently in all weather conditions.
This craft adhesive also possesses the property of being highly paintable, allowing you to easily paint over the repaired section. This property makes it an excellent product for various types of crafts where visibility might be an issue.
What Could’ve Been Better?
This craft adhesive is one of the finest products for use on glass and other types of material. The only drawback that it has is that the product emits fumes you should try to avoid. That is why using it in enclosed spaces is not recommended without ensuring proper ventilation beforehand.
Pros
Allows versatile application
Compatible with several different types of materials
Durable and long-lasting
Temperature resistant and non-flammable
Cons
Might emit fumes
Quantity: 1 Tube | Volume: 3.7fl oz | Cure Time: 48 to 72 Hours | Dry Color: Clear | Resistance: Waterproof, Resists -40ºF to 180ºF
Loctite is one of the brands in the industry that has been offering premium-quality adhesives for over 50 years. The Loctite Glass Glue is one of the products on this list specifically suitable for bonding glass. It has a unique butyl formula that is effective for all glass varieties such as clear glass, tinted glass, etc.
Strong bond to all types of glass to itself and to certain...
Dries clear and colorless for smooth repairs on glass and...
Why Did We Like It?
You will be very impressed with this patented super glue that bonds to glass perfectly. Besides such strong bonding, another impressive feature is that it sets clear without turning yellow like most other adhesives for glass. Due to this property, you can use it on any type of glass without worrying about aesthetics.
This glue for glass also works very quickly, bonding almost instantly to the glass. For projects that require faster completion, this quick-acting feature is an additional benefit.
One of the most critical factors that make a glue ideal is its resistance to temperature changes. The Loctite Glass Glue is reasonably resistant to such changes and does not melt down in extreme heat, making it suitable for use in areas or objects with heat exposure.
What Could’ve Been Better?
While the Loctite Glass Glue is one of the most impressive products for working with glass, there is one limitation that you need to consider. It can only work with glass and does not provide excellent results on other materials. This drawback limits the number of use cases for the product.
Pros
Bonds very quickly
Does not turn yellow over time
Suitable for all types of glass
Value for money product
Cons
Not suitable for use on materials other than glass
Next on this list is the Gorilla 5002801 Original Waterproof Polyurethane Glue, one of the strongest adhesives for working with glass. This product is excellent for application on dissimilar surfaces and works well for several different applications.
Our original bottle of glue: A heavy duty glue with a water...
100% waterproof: When cured, this waterproof glue doesn't...
Why Did We Like It?
There are several reasons why we liked this product. The Gorilla 5002801 is one of the adhesives that work on almost all surfaces, making it handy for repairing glass objects as well as wood, plastic, fiber, metal, etc. Also, the industrial-strength formula ensures that the glue lasts for a very long time.
We also found the glue to be unaffected by the elements, making it perfect for both interior and exterior use. As it is waterproof, you can use it on surfaces that are frequently exposed to moisture. Overall, this adhesive has the broadest range of applications you could imagine.
Another point to note is that the glue expands up to 3 times its original size as it dries up. This property ensures that it securely holds the pieces or parts together without leaving any gaps in between, creating the strongest bond between materials.
What Could’ve Been Better?
The efficiency of this industrial-strength glue is unparalleled. However, this also leads us to one drawback: since the glue works so well, removing it from unwanted sections is a complicated process and requires a lot of effort.
Another excellent product that we would like to mention is the Gorilla 4200101 2-Part Epoxy. Coming from the same brand as the previous product, this is an adhesive that offers a long setting time. It is ideal for challenging repairs and provides a permanent solution for glass, wood, ceramic, and metal repairs.
5 minute epoxy: This epoxy resin kit in just one applicator...
Why Did We Like It?
As we know, the Gorilla brand is well-known for offering quality products that provide a great user experience, and this product is no different. It comes with an easy-to-use syringe that makes the application process very simple and you also get separate barrels of resin and hardener, which prevent the epoxy from hardening.
This glue provides a decent setting time which allows you to reposition it as required. Many other glass adhesives do not offer this feature. The durable bond formula expands to fill any spaces in the glass or other material, making the glue suitable for even minor repairs and damages.
Besides, this is one of the most cost-effective products on the market right now. This is because the convenient cap that comes in the package allows you to store the glue properly and use it again later as needed. Also, the adhesive itself also does not dry up so quickly as to render it unusable later.
What Could’ve Been Better?
We cannot recommend this product enough due to the excellent results it offers, though you should keep in mind that the glue dries with a slight yellowish tint. So, this product would not be a perfect choice for repairs that are meant to remain invisible.
We suggest the Rhino Glue if you are looking for a glass adhesive that offers commercial-grade results. This adhesive is an instant glue that bonds with almost any material and works flawlessly for all repairs, making it suitable for home, business, as well as industrial use.
Rhino Glue is a more Durable adhesive that is 2X faster than...
Bonds in seconds plastics, vinyl, wood, rubber, metals,...
Why Did We Like It?
When looking for instant glues, the curing time is the main factor to take into consideration. As such, this is one of the best instant adhesives that exceeds expectations and requires very little time to cure, making it ideal for projects that require urgent repairs.
One of the unique features of the Rhino Glue is its clear stress formula that is resistant to shock, impacts, vibrations, etc. It will not face damage even after repeated exposure to such factors, making the product perfect for use on machine surfaces.
Rhino Glue offers excellent results using glass, vinyl, wood, rubber, metals, etc., and is ideal for various types of applications using different materials. This is a significant reason why it is an excellent choice for business or industrial applications.
What Could’ve Been Better?
This glue is one of the best adhesives that are resistant to shock and impacts of various types. Unfortunately, this property does not extend to heat and moisture, and frequent exposure to extreme heat or water tends to affect the glue’s holding capacity.
Pros
Fast acting formula
Stress and impact resistant
Ideal for home, business, or industrial applications
The next item on this list comes from J-B Weld, a Texas-based world-famous company known for its epoxy products. The J-B Weld 50112 Clearweld is a multipurpose two-part epoxy perfect for repairing glass, ceramics, wood, etc. It is one of the most potent adhesives that we came across while researching.
J-B Weld Clearweld: A Clear, Quick Setting And Multipurpose...
Cure And Set Time: After Mixing The Two Part Formula With...
Why Did We Like It?
Coming from one of the most innovative brands in the industry, the J-B Weld 50112 Clearweld offers excellent results for glass repairs. It creates a robust and lasting bond and works fine with glass, ceramics, metal, concrete, and plastic, making it suitable for repairing all manner of objects without putting in a lot of effort.
The glue comes in a syringe that allows easy application as well as storage due to the resealable cap that prevents the adhesive from drying out. This two-part epoxy has very high durability, which makes it perfect for larger repairs.
The J-B Weld 50112 Clearweld can also withstand extreme temperatures ranging from blistering heat to freezing cold. Where other adhesives are likely to melt or freeze and crack, this product holds its own against harsh temperatures very effectively, making it ideal for use on exposed surfaces.
What Could’ve Been Better?
We have nothing negative to say about this product, other than the fact that it emits a foul odor during use. This limitation is only to be expected, considering it is an industrial-grade adhesive. The smell fades away as the glue dries, and you can cover your face using a mask during application.
The Devcon 31345 2 Ton Clear Epoxy offers an excellent combination of outstanding performance, versatility, and affordability. It helps repair cracks in glass, metal, and wood very effectively and is a perfect example of how effective Devcon’s products generally are. The Devcon 31345 is one of the best value-for-money products on the market.
No products found.
Why Did We Like It?
People who want durable, high-strength glue to repair glass or ceramics cannot go wrong with this product. Besides being one of the more affordable items on this list, the Devcon 31345 2-Ton Clear Epoxy offers excellent results when working with glass, ceramics, metal, or wood.
This glue creates a very strong and long-lasting bond with the surface it is applied to, ensuring perfect repairs effortlessly. It also possesses good impact strength, helping prevent further damage to the object by absorbing shocks, impacts, and vibrations. Surfaces that are subject to frequent shocks and vibrations can be repaired using this product with great results.
Not only is the Devcon 2-Ton Clear Epoxy resistant to water, but it is also completely unaffected by oils, solvents, gasoline, salts, and mineral spirits. You won’t have to worry about the glue getting dissolved after exposure to any of these compounds.
What Could’ve Been Better?
While testing out this product, we discovered that it performs exceptionally well indoors. The problem occurs when you use it outside, exposing it to the weather and particulate matter. In such conditions, the adhesive tends to lose its effectiveness, and we recommend using it only for indoor repairs.
Pros
Creates a very strong bond
Resistant to oils, solvents, spirits, salts, etc.
Offers versatile applications
No chemical smell
Cons
Not suitable for outdoor use
Quantity: 1 Double Syringe | Volume: 0.84fl oz | Cure Time: 8 to 12 Hours | Dry Color: Clear | Resistance: Waterproof, Resists -60°F to 180°F, Shocks, Impacts, Vibrations, Oils, Solvents, & More
The 2708910 Silicone adhesive from GE Sealants and Adhesives is one of the most innovative products you will find on this list. It is a 100% silicone-based glue that works like a charm to repair cracks and breaks in different materials like glass, porcelain, wood, steel, etc. This product combines durability with flexibility, offering great results for all types of repairs.
It is easy to find adhesives that work well indoors, while fewer products work as well outdoors. Thankfully, this product seems specially designed for outdoor use. It provides unmatched results and offers long-lasting durability.
It is a silicone-based glue suitable for prominent surfaces such as glass and ceramics as well as steel and aluminum. The product’s formula allows it to be highly flexible, which helps in the absorption of various types of shocks and impacts. This property is highly beneficial for making repairs on outdoor surfaces.
If you are looking for an inexpensive adhesive but do not want to compromise on quality, the 2708910 is for you. It is highly reliable and ideal for use on objects exposed to moisture, such as outdoor furniture, as it is entirely waterproof.
What Could’ve Been Better?
The drawback that this product suffers from is a fairly common one. Once you open the tube for the first time, the glue starts hardening up very quickly, making it difficult to get it out of the tube for later use. So, it’s best to purchase it as and when required.
Further down the list, we bring you one of the strongest adhesives perfect for glass, plastic, jewelry, and more. The Beacon GM2OZ Glass Metal & More is a fantastic product that provides a rock-solid bond while ensuring that your glass repairs remain completely invisible. It has been proven to provide unmatched results even in situations where super glue does not work.
Glass, Metal & More is a versatile premium permanent glue...
Reinforcing its strength, Glass, Metal & More permanently...
Why Did We Like It?
The Beacon Glass Metal & More uses a unique formula that promises unmatched durability for several years. We found it impressive as it becomes utterly transparent once dry, leaving behind no visible signs of repair. In the case of projects where the signs of the repair require to be hidden from view, this is a perfect choice.
Adhesives that are waterproof expand the scope of usage, making them a highly versatile product. To our satisfaction, the Beacon Glass Metal & More is not only waterproof but can also effectively survive snow, hail, sleet, etc. For repairing surfaces such as outdoor ornaments and furniture that are exposed to such elements, this is the ideal option.
The glue works flawlessly not only with glass but also metal, creating a super-strong bond that is nearly impossible to break. Additionally, it works reasonably well to seal up cracks on certain plastic surfaces as well.
What Could’ve Been Better?
Compared to many other items on this list, the Beacon Glass Metal & More requires considerable time to set. During the setting period, which is around 24 hours, you won’t be able to use that surface. This factor might be an issue in the case of regular use.
As we near the end of the list, we would like to mention another exceptional product for making repairs on glass. The Eclectic E6800 262011 UV Resistant Pro-Grade Adhesive is an industrial-strength, non-flammable product that is highly versatile and offers excellent results for glass repairs.
UV resistant – resists yellowing and cracking when used...
Tough – 2x stronger and 60x more flex than polyurethane
Why Did We Like It?
Despite ranking lower on our list, it is no less effective than the others. You can use it easily to fix glass since it is firmer and more flexible than polyurethane. Additionally, its resistance to chemicals makes it ideal for surfaces exposed to dilute acids and caustics, such as vials, lab equipment, marble, etc.
The product works flawlessly even in fresh and saltwater conditions. This feature distinguishes it from most other waterproof adhesives that do not allow submerging in water. Being highly resistant to moisture allows it to be used to repair surfaces like swimming pools.
The manufacturer has used UV stabilizers in the formula, which provides resistance against UV rays, making the glue suitable for outdoor use. It is also reasonably resistant to extreme temperatures and does excellent under hot as well as cold conditions. Using it for repairing your outdoor furniture or ornaments is sure to provide excellent results.
What Could’ve Been Better?
The only defect we found while using this product is that it does not perform very well for vertical applications. You can use it successfully for horizontal work without any worries, but it tends to run down the surface during vertical use.
By now, you must have got an idea of what to look for while purchasing an adhesive for glass. Before making a final decision, however, there are some other factors you should take into consideration.
Even after reading through this list of best adhesives, it is possible to end up with a product that does not meet your needs. To prevent this from happening, you should take into account various factors when purchasing glue for repair purposes.
This buyer’s guide lists the essential factors that will help you make an informed decision.
Strength and Durability
How strong an adhesive is determines how effectively it can hold pieces together for repair. The stronger the glue, the better it tends to perform. This property also relates to durability, as stronger adhesives last longer.
When shopping for the ideal glue for repairing glass surfaces, you will find several products that offer industrial strength. In most cases, such products perform their function well and are suitable for heavy-duty use.
Flexibility
Flexibility is another essential factor to consider while selecting the suitable glue for your purpose. Flexibility allows the adhesive to expand and contract depending on external conditions such as moisture, temperature, and pressure.
The more flexible the glue is, the more resistant against breakage due to such external stimuli. Non-flexible adhesives tend to crack and break if they are exposed to sufficient pressure or extreme temperatures.
Resistance to External Stimuli
Most adhesives you will find on the market claim to be resistant to several factors such as heat, cold, water, shock, etc. Products that meet such claims are generally great options. Surfaces often tend to get exposed to various stimuli, especially exterior ones.
Adhesives that offer such resistance can be used in numerous ways, such as repairing ceramic pools or glass panes. On the other hand, glues that are less resistant limit their use to mainly indoor repairs.
Versatility
The versatility of an adhesive determines which type of use it is suitable for. Versatile glues are ideal for glass and metal, wood, porcelain, and even plastic.
You should select the product that works well with the surfaces you intend to use it on. A versatile adhesive would be more suitable for multiple surfaces and objects than one that works only on a single surface.
Storage and Multiple Uses
A significant issue with adhesives is that most of them tend to dry up quickly once you open them. This tendency prevents multiple uses and forces you to purchase again for later use. Some products come with a cap that prevents them from drying up.
If you are looking for a product you would like to store and use again, go for products that allow multiple uses. Products that dry up quickly are fine for a single-time use case.
Glues For Glass FAQs
Can I use regular white glue or wood glue for bonding glass?
No, regular white glue or wood glue is not recommended for bonding glass as they don’t have the required strength and durability. Instead, use specialized adhesives designed for bonding glass.
What types of glues are best for bonding glass?
The best types of glues for bonding glass include super glue (cyanoacrylate), UV-curing adhesive, two-part epoxy, and silicone-based adhesive. Each of these options has its own unique properties, making them suitable for specific applications.
Are there any safety precautions I should take when using glues for glass?
Always read and follow the manufacturer’s safety instructions. Some glass adhesives may emit strong fumes, so ensure you work in a well-ventilated area. Wear gloves to protect your skin and safety glasses to shield your eyes.
Do I need to prepare the glass surfaces before applying glue?
Yes, it’s crucial to clean the glass surfaces with rubbing alcohol or another suitable cleaning solution. This removes any dirt, oils, or residues that may impede the adhesive’s ability to bond the glass properly.
Do I need to apply pressure or a clamp during the bonding process?
It depends on the type of adhesive being used. Some glues require pressure or clamping during the curing process, while others do not. Always follow the manufacturer’s instructions for best results.
Can glass adhesives be used for load-bearing applications?
Some glass adhesives are specifically formulated to support heavy loads, but each product’s strength can vary. It’s essential to consult the manufacturer’s guidelines to determine if the adhesive is suitable for your specific load-bearing application.
What should I do if I accidentally break the glass bond?
If you accidentally break the glass bond, clean the surfaces once more and reapply the adhesive. Ensure that you follow the manufacturer’s guidelines carefully to achieve the best bond possible.
Can I bond glass to other materials, like metal, wood, or plastic?
Yes, many glass adhesives are also suitable for bonding glass to other materials. Consult the manufacturer’s guidelines to ensure you’re using the appropriate adhesive for your specific project.
Conclusion
Finally, we have come to the end of this comprehensive review and buyer’s guide, and hope you found it informative and helpful in selecting the right product.
Before taking our leave, we would like to mention our favorites from the list. The best overall product for us that offers excellent results would be the E6000 Craft Adhesive.
For those looking for a value-for-money product, we recommend the Loctite Glass Glue. Finally, if you are looking for completely waterproof and multipurpose glue, then nothing beats the Gorilla 5002801.
Fixing glass to wood can be a daunting challenge due to their vast differences in texture and inherent makeup.
However, this does not have to be as difficult as people make it out to be. Using suitable glue can get the job done in no time at all but a standard glue can see the bond becoming weak over time
So, specialized glues meant to handle a variety of materials are the way to affix these two different surfaces together. How then is one to select an appropriate glue for their wood and glass adhesion needs?
Worry not! We have compiled the best adhesives that can join glass and wood with a robust and lasting bond. We will review each glue in detail and provide a guide on the different glue types to help you make the most informed decision.
With that being said, let’s get into it!
Listed below are the Best Glue for Glass to Wood:
Gorilla Glue: The Gorilla Glue is esteemed for versatility with a clear consistency. Requires longer drying time.
Devcon: The Devcon features rapid hardening and waterproof formula. Rapid drying may limit large-scale usage.
J-B Weld: The J-B Weld is known for steel-reinforced durability. Tube design might complicate the application.
PC Products: The PC products offers further manipulability upon drying, but requires 3-7 days to fully cure.
Loctite: The Loctite is a user-friendly self-mixing syringe serves a dual function as an adhesive and filler. Cures to a visible translucent yellow.
1. Gorilla Glue - Best in Versatility
Gorilla Glue is a known and trusted brand in the adhesive market and their trademark clear glue is able to stick a variety of materials with no problem. This glue is straightforward to use, only having three steps in the application process. No matter what you need to be stuck together, it is sure to get the job done.
Gorilla Glue is able to work with a variety of materials, so not having to worry about its effect on different surfaces was a relief. We could get right into the adhesion process as minimal prep work is involved, but nothing too complex even for beginners.
One feature that was especially helpful when working with the Gorilla Glue was the clear consistency of the formula. By being transparent, it was easy to see where the glue was being applied without any obstructions. This helped us have a cleaner application overall.
While it offered an efficient and clean application, we did make a few mistakes here and there. All that we had to do to remedy these mistakes was wait for the glue to harden. Once dried, it can be sanded or chipped to clean up the adhesion for a seamless bond.
If there is one downside to the Gorilla Glue, it would have to be the drying time. After the glue is applied to the material, both sides need to be clamped together and left to dry. The drying process can take anywhere from a few hours to a whole day for a complete cure.
What We Like
Easy to use
Strong bond
Versatile and works on many material types
Water-resistant for indoor/outdoor use
What We Don't Like
Long dry and cure time
Type: PVA Glue | Volume/Size: 5.5 oz | Drying/Curing Time: 10-45 seconds | Bond Strength: Low | Waterproof: Yes | Heat Resistance: No | Chemical Resistance: No
2. Devcon - Best in Waterproof
This epoxy mix kit from Devcon is sure to be a favorite when looking to secure two materials. It has versatility and an easy mixing procedure so that you can work the resin into the seam easily. What’s more, it has an incredibly minimal drying time, delivering noticeable results within minutes.
For us, the standout feature of the Devcon epoxy kit is the ultra-fast drying time it has. Working with adhesives that join two different materials usually results in a long wait for the glue to dry. But, thanks to the hardener component of the resin, we were able to have a bond within minutes of applying it.
Another helpful feature is its waterproof formula. Being resistant to water opens up a whole new realm of possibilities for a project. For instance, it becomes possible to work on outdoor tasks or pieces that are exposed to different climatic conditions.
Once dried, the epoxy resin has a solid and secure hold between the two materials that are joined. Moreover, the bond remains clear to maintain the illusion of a seamless transition between the surfaces.
Fast-drying times may be an advantage, but they can also work against you. If the area is too large, you may find some parts of the epoxy hardening before the pieces are even brought together. This can make for an uneven application, resulting in a less-than-adequate bond.
What We Like
Waterproof formula
Fast drying time
Clear finish when dried
All-purpose epoxy kit
What We Don't Like
May not be ideal for large areas
Type: Epoxy | Volume/Size: 25 ml | Drying/Curing Time: 30 minutes | Bond Strength: High | Waterproof: Yes | Heat Resistance: Yes | Chemical Resistance: Yes
3. J-B Weld - Best in Durability
J-B Weld’s KwikWeld epoxy kit has a unique steel-reinforced formula, making it an extremely durable bonding agent. Additionally, there is a short drying and curing time, so you won’t be left waiting for the resin to dry. This resin kit is easy to use even for novices with its one-to-one mix ratio.
Of course, this resin kit has many valuable strengths and benefits in creating a bond. One such benefit is the resistance it has against many factors. It can be safe to use it on outdoor surfaces no matter what type of material or exposure it goes through.
This versatility is a handy feature to have as the strength of the resin is quite heavy-duty. Being able to create a lasting bond regardless of material type is a handy feature to have. Whether it is a restoration project, DIY, or a quick repair job, this resin will be able to secure any surfaces together.
Furthermore, this resin has an easy mix ratio which is a convenient touch for any resin kit. By eliminating the need to measure out the correct ratio of resin and hardener, the application process is made that much simpler.
J-B Weld has chosen to package the resin and hardener in a tube design for their kit. While it is efficient in saving space, the tube can make extracting either formula a challenge. In some cases, we had to cut away at the tube to access the formula itself.
What We Like
Easy mix ratio
Resistant to water, petrol, chemicals, and acid
Tensile strength of 3127 PSI
Heat resistant up to 230 degrees Fahrenheit
What We Don't Like
Tube design can be difficult to work with
Type: Epoxy | Volume/Size: 2 oz | Drying/Curing Time: 4-6 hours | Bond Strength: High | Waterproof: Yes | Heat Resistance: Yes | Chemical Resistance: Yes
4. PC Products
An epoxy adhesive from PC Products, this glue is easy to work with no matter your experience levels. It has a great working and curing time, so you can get the bond precisely the way you want. What’s more, it can be manipulated and painted after drying for a clean, professional-level adhesion.
As this epoxy is a two-part adhesive, the ratio is a factor to be considered. In the case of PC Products glue, the ratio is already measured out for you with a unique one-tube design. Simply placing the handle into one end of the pipe and pushing will eject the appropriate ratio.
After applying the epoxy adhesive, we had the option of working on it further with a sander or drill to cut away and smooth out the dried glue. This gave a much better quality bond that was not immediately noticeable. Of course, the translucent finish of the glue helped as well.
Additionally, the working time of 15 minutes is more than enough to position any delicate pieces together. This is especially handy if working with large areas or components that are heavy and can not be clamped right away.
Although this epoxy adhesive glue is able to dry and cure in little time, the full curing period is much longer. Depending on the materials being bonded and other extraneous factors, it can take up to a whole week to cure—a stark comparison to the initial cure time of three-four hours.
What We Like
No drip or sag of glue
2650 PSI bond strength
Multi-purpose: fill, bond, and seal
Easy mix ratio
What We Don't Like
Full cure only in three-seven days
Type: Epoxy | Volume/Size: 50 ml | Drying/Curing Time: 24 hours | Bond Strength: High | Waterproof: Yes | Heat Resistance: Yes | Chemical Resistance: Yes
5. Loctite
Loctite has developed a uniquely designed application method in this two-part resin kit. An included nozzle will mix both parts resin and hardener for you in equal parts and dispense it precisely. It is safe to say this has an easy application process for solid adhesion between uneven surfaces.
Right off the bat, the difference in user experience is evident when applying this resin from Loctite. The syringe design is intuitive and works well in applying the resin accurately, even in tight spots. There were no inconsistencies in the formula with a spiral design inside the nozzle; the resin and hardener were thoroughly mixed.
Additionally, the multi-functionality of the resin formula only increases the efficiency of this adhesive. Not only is it able to bond different material types together, but it can permeate the surfaces to act as a filler.
Using this Loctite resin syringe for minor repairs is quick and easy. It is set within five minutes, and with minimal prep required, you can finish the job in no time. Simply grab the syringe, push the necessary amount out with the nozzle, and it’s good to go.
Loctite clearly states this resin as having a translucent yellow color when it is fully cured. This color may make certain applications more obvious. If you are looking for a discreet bonding agent, this resin may not be the option for you.
What We Like
Self-mixing epoxy
Sets within five minutes
High impact resistance
Sand and paint-ready once fully cured
What We Don't Like
Cures to a translucent yellow color
Type: Epoxy | Volume/Size: 0.85 oz | Drying/Curing Time: 5 minutes | Bond Strength: High | Waterproof: Yes | Heat Resistance: Yes | Chemical Resistance: Yes
6. Krazy Glue
Krazy Glue is a household name for quick repairs around the house or just everyday adhesion purposes. Thanks to its versatility, you can simply pick up and use this glue without giving much thought to it. The resulting bond holds strong against water and day-to-day impacts, making it a favorite glue to use.
Where this glue stands out is its uniquely designed bottle, in particular the cap and nozzle. Applying the adhesive is made infinitely easier with the extended nozzle that gets into the tightest of spaces. The nozzle keeps the glue coming out consistently, so having a clean application is a breeze.
As for the cap of the bottle itself, it is specially designed to have a complete seal to lock off the glue. The cap does not allow any air to pass through and hardens the glue when not in use. It is truly an underrated feature that helps, especially for multiple uses.
Furthermore, the glue comes out clear and dries clear as well. This clear bond is sure to last and is almost imperceptible. Having a high resistance to temperature, impact, and moisture, it is an invisible bonding agent that protects the seal.
Before the two surfaces are joined together, the glue must sit for a few seconds to harden and reach a thicker viscosity. When applied straight out of the bottle, it has a thin consistency and is runny. This thin viscous glue may not be the best choice for vertical applications.
What We Like
Clear finish when dried
Easy to apply
Waterproof bond when cured
Complete seal cap design
What We Don't Like
Thin viscosity formula
Type: Cyanoacrylate | Volume/Size: 0.07 oz | Drying/Curing Time: 10-30 seconds | Bond Strength: Low | Waterproof: No | Heat Resistance: No | Chemical Resistance: No
What Is the Best Glue for Glass to Wood?
The adhesion of dissimilar materials like glass and wood can be challenging due to their varying structural properties. Thus, the choice of an appropriate adhesive plays a crucial role in ensuring an effective bond. Below is a comparative analysis of various adhesives suitable for bonding glass to wood. The evaluation factors include the type of glue, the volume or size it is available in, the duration it takes for the adhesive to dry or cure, its bond strength, as well as its resistance to water, heat, and chemicals.
Before selecting a glue, it is a good idea to be aware of the different options available to find the most suitable option for you.
There are a number of glue types when it comes to joining glass and wood together. Each type has unique benefits and weaknesses that can make or break its effectiveness. Compare the features of each type of adhesive to find which one you think is best for your project.
Super Glue
One of the most commonly used types of glue, super glue is known for its versatility of incompatible materials. This versatility is what makes it a household product; no matter what the materials to be joined are, it is highly likely that superglue can get the job done.
Additionally, superglue is able to form a bond within seconds of application. The resulting bond holds strong but is not as complex of an adhesive as other types of glue. In terms of wood and glass, they are both quite heavy, so a large amount of super glue may be required for a solid adhesion.
Ultimately, this glue is best suited for small repair jobs and not heavy-duty applications. Larger projects call for a larger area to be covered, a luxury that superglue does not have. By the time one area is covered, another area may already be hardening, all before the two surfaces are joined.
Silicone Glue
As is evident from the name, silicone glue incorporates some amount of silicone into its formula. This added ingredient brings certain benefits in durability to the adhesion formed. Silicone is waterproof and weather-resistant, so it is a popular choice for outdoor or exposed surfaces.
Furthermore, silicone is able to form a seal in the treated material. Large-scale or heavy-duty projects usually use silicone glue to create waterproof seals to protect the structural integrity of the material. This feature is handy when working with wood, which is highly susceptible to warping and water damage.
Silicone glue is available in many different sizes to handle various projects. For example, a caulking gun will help apply it evenly on larger projects compared to a smaller-sized bottle with a narrow tip for precise applications.
Epoxy Adhesive
Working with epoxy adhesives entails the mixing of two parts-a resin and a hardener component. These parts must be thoroughly mixed to form the glue and begin the setting process.
Usually, epoxy adhesives take five minutes to set, but to have the full extent of durability, you will have to let it fully cure. This curing process can take up to 24 hours, so there is a fair bit of waiting involved with this adhesive. However, the resulting bond is well worth it; it holds up well regardless of the conditions the piece is exposed to.
Once the epoxy is allowed to harden and set, the resulting bond is incredibly strong and durable. It is able to join a wide variety of materials thanks to its unique viscosity and application method.
Polyurethane Glue
A unique adhesive, polyurethane glue shares some similarities with epoxy in terms of durability. What makes this glue stand out is its multi-functionality in acting as a filler as well as an adhesive. It permeates cracks and pores and expands to form a complete seal across the material’s surface.
Additionally, polyurethane glue is able to adhere to surfaces with minimal grip or texture. This makes it a perfect fit for working with glass and wood. Wood is already textured, giving the glue something to grip, while the smooth glass is already a compatible surface.
Can you use hot glue to attach glass to wood?
Hot glue is not recommended for attaching glass to wood. Hot glue may not provide a strong enough bond and may cause the glass to break. It is recommended to use a two-part epoxy or clear silicone adhesive for best results.
Can you use super glue to attach glass to wood?
Super glue is not recommended for attaching glass to wood. Super glue may not provide a strong enough bond and may cause the glass to break. It is recommended to use a two-part epoxy or clear silicone adhesive for best results.
Can you use wood glue to attach glass to wood?
Wood glue is not recommended for attaching glass to wood. Wood glue is designed to bond wood to wood and may not provide a strong enough bond for glass. It is recommended to use a two-part epoxy or clear silicone adhesive for best results.
Can you use epoxy glue to attach glass to wood?
Yes, epoxy glue can be used to attach glass to wood. Epoxy glue is a two-part adhesive that provides a strong and durable bond between glass and wood.
Can you use silicone glue to attach glass to wood?
Yes, silicone glue can be used to attach glass to wood. Clear silicone adhesive provides a strong and durable bond between glass and wood and is a good choice for applications where a flexible bond is needed.
How do you remove glue from glass and wood?
To remove glue from glass and wood, use a solvent such as an isopropyl alcohol or acetone. Apply the solvent to the glue and let it sit for a few minutes. Then, gently scrape off the glue with a plastic scraper or brush. Be careful not to scratch or damage the glass or wood surface.
Hopefully, now you are more aware of what glue options are available and what to keep an eye out for in selecting a suitable product.
Our choice for the best overall glue is the Gorilla Glue for its easy application and versatility outdoors as well as inside the house. But if waterproofing is a feature that you specifically need, the Devconis a waterproof epoxy that holds strong.
However, in terms of a durable bond, we would go with the J-B Weld as the formula has steel reinforcement. With so many great options to choose from, it is just a matter of picking which features suit you best.
Don’t be afraid to get messy and make mistakes; after all, with such strong glues backing your projects, there is little holding you back.
Foam is one of the most common items for DIY purposes as it is a very lightweight, versatile, and low-cost material, with multi-purpose use.
Utilizing foam often requires working with glue, though foam does not perform equally well with all types of glues. As a result, selecting the correct type of adhesive is vital for getting the desired outcome.
The good news is that several adhesives have been specially manufactured for working with foam. Each of these adhesives has different properties and meets specific types of requirements.
Selecting the glue that serves your purpose best from among these many products can be a daunting task. To help you out, we bring you some of the best adhesives for foam available on the market.
We have provided detailed reviews as well as a buyer's guide for your convenience. So, let us begin!
Best Adhesives for Foam
Whether you're working on a foam-based art project or repairing foam furniture, these glues will help you get the job done right. Without further ado, here's the list of the 9 best glue for foam.
Loctite is a leading American brand that manufactures adhesives, sealants, and industrial chemicals. The PL 300 Foamboard Adhesive is another of the brand's excellent products, simplifying working with foam. It works exceptionally well for use with foam and different types of construction materials.
Designed For Foamboard: Specially designed for permanently...
Versatile: Strong, durable bond to all foamboard insulation...
Why Did We Like It?
There are quite a few reasons why the PL 300 is placed so high on our list. First and foremost is that it is compatible with all other foam board insulation products, which makes it suitable for a wide range of DIY applications.
The glue bonds well with polystyrene foam and creates a strong bond between the foam and other materials such as concrete, wood, brick, etc. Not only this, but the adhesive has a low VOC formula that meets all the State and Federal VOC Regulations.
We also found out that the glue performs equally well in both outdoor and indoor conditions. You will not have to worry about your foam projects left outside in the sun. Additionally, using the product will help you reduce your dependency on fasteners.
The PL 300 is also water-resistant, and you can easily use it on surfaces exposed to moisture.
What Could've Been Better?
Overall we did not find any significant drawbacks to this product from Loctite. Though it tends to dry a bit slowly, that does not affect its performance for DIY projects. However, you may need to provide support to the surface while the glue dries.
Pros
Doesn’t burn through foamboards
Bonds well with most manufacturing materials
Perfect for interior and exterior use
Water-resistant
Cons
Dries slowly
Bond Type: Polyurethane | Drying Time: 24 hours | Waterproof: Yes | Heat Resistance: Yes, up to 170°F | Size/Volume: 10 fl. oz.
The following product we have on the list comes from the Gorilla Glue Company. Just like its flagship product, the Gorilla Spray Adhesive also provides awe-inspiring results. It is a multipurpose glue ideal for heavy-duty applications and works well with several types of surfaces.
All purpose glue: Gorilla spray glue is heavy duty and...
Easy to use: This glue spray has a comfort nozzle for a...
Why Did We Like It?
We were expecting great results from the Gorilla Spray AdhesiveSpray Adhesive, seeing as it came from such a famous brand, and it did not disappoint. The glue works fast, creating a permanent bond with the material it is applied to, yet allows repositioning and adjusting the surface as needed.
Another feature we liked was that it dries without acquiring a yellow tint, which is a problem with many of the adhesives for foam. This property makes the glue perfect for use in cases where you do not want it to be visible, such as for crafts and decor items.
As far as safety standards go, the 6301502 Spray Adhesive adheres to the latest VOC standard and is completely safe for household applications. Additionally, the comfort nozzle releases a controlled spray mist that prevents you from getting it on yourself or unwanted surfaces.
What Could've Been Better?
One of the features that set the 6301502 Spray Adhesive apart from many other competing products is its quick-drying property. Unfortunately, this also results in the glue drying up in the bottle once it is opened. It only allows for a single-use case and needs to be repurchased for later use.
Pros
Versatile application
Clear drying adhesive
Allows reposition
Meets the latest VOC standard
Cons
Single-use application
Bond Type: Aerosol spray | Drying Time: 10-30 seconds | Waterproof: Yes | Heat Resistance: Yes, up to 170°F | Size/Volume: 14 oz.
Proceeding onward, we bring you another excellent product from Loctite. The Loctite General Performance Spray Adhesive is a glue that is specially manufactured for arts and crafts. It offers unmatched results with foam and glass, leather, paper, fabric, etc.
General Performance: Spray adhesive glue provides superior...
Repositionable: Permanent or repositionable bonds with no...
Why Did We Like It?
The Loctite General Spray met our expectations during the testing process and far exceeded them. It has a premium formulation that bonds effectively with surfaces such as foam, fabric, wood, metal, and more.
This glue also has a quick-drying property, making it suitable for projects with time constraints and needing to be finished quickly. Other than that, it sets with a transparent finish making repairs invisible. You can easily use it for all types of repair work as well as DIY projects and crafts.
It even comes as an aerosol spray in an easy-to-use can, making the application process quick and straightforward. Furthermore, you can apply multiple coats of adhesive to the surface without worrying about damage.
Additionally, the glue does not yellow with age and allows you to create impressive projects.
What Could've Been Better?
The Loctite 2235316 makes completing DIY projects and repairs an easy job. Unfortunately, the nozzle tends to spray the glue in a sticky mess, making the cleaning-up process a chore. However, it provides excellent results, which makes the mess worth it.
Pros
Allows multiple coats
It does not yellow with age
Resistant to curling or wrinkling
Suitable for a variety of applications
Cons
Messy to use
Bond Type: Super glue | Drying Time: 30 seconds | Waterproof: No | Heat Resistance: Yes, up to 212°F | Size/Volume: 4 g
It is a well-known fact that Aleene Jackson is the creator of the original tacky glue that has become popular among DIY enthusiasts. Her brand's Felt and Foam Tacky Glue is one of the most heavily demanded products in the crafts industry for a broad spectrum of applications.
First of all, we liked that this glue is available in a 4oz bottle, making it easy and convenient to use and store. Apart from that, Aleene's Felt and Foam Tacky Glue works exceptionally well with Styrofoam products while also providing great results with other materials like felt, feathers, glitter, etc.
Unlike adhesives from other brands, this one has a very thick consistency which prevents it from running across the working surface. This feature also makes the glue easy to work with. Additionally, it has an instant hold formula that creates a durable bond as soon as you apply it.
The Tacky Glue is the perfect product for children's arts and crafts projects, especially those involving foam or fabric. Also, it dries clear and solid, making repairs invisible while preventing the surfaces from coming apart.
What Could've Been Better?
This tacky glue is a highly recommended product if you want to undertake any craft or DIY project that incorporates foam. However, one thing to note is that this glue is not washable and will lose its hold if exposed to water. For dry surfaces, it will not leave you disappointed.
Pros
Easy to use
Transparent after drying
Works on different surfaces
Instant results
Cons
Lacks water resistance
Bond Type: PVA glue | Drying Time: 2-4 hours | Waterproof: No | Heat Resistance: No | Size/Volume: 4 oz.
Many of you must have heard of the Beacon Adhesives brand, a world-famous manufacturer and supplier of a vast selection of adhesives for industrial and home applications.The brand's Hold The Foam Glue is their offering for working with materials like foam and fabrics.
Why Did We Like It?
Our list would be incomplete without including this product from Beacon Adhesives, especially since it offers impressive results. The glue is suitable for working with all types of foam and works equally well with other materials like plastic, fabric, wood, etc.
We liked that it grabs the surface quickly to create a strong bond while also allowing time to reposition the surface as required. For projects that require making frequent adjustments, this glue works like a charm.
The Beacon Hold The Foam Glue is a washable adhesive and is not affected by water, enabling you to clean the surfaces easily once the job is done. This feature allows it to be used on outdoor surfaces like wooden furniture as well.
Perhaps the most crucial aspect of this product is that it is completely non-toxic, an uncommon characteristic in products of this nature. Children can easily use it for arts and crafts projects.
What Could've Been Better?
We were most impressed by the glue's thick consistency which made it easy to work with. However, it does take a long time to get completely dry before the surface becomes usable again. Keep this in mind when working on projects that need to be completed quickly.
Pros
Suitable for all types of foam
Allows repositioning
Safe for use for all projects
Washable
Cons
It takes too long to dry
Bond Type: Foam glue | Drying Time: 2-3 hours | Waterproof: No | Heat Resistance: No | Size/Volume: 2 oz.
Bob Smith Industries (BSI) manufactures premium-grade epoxy and cyanoacrylate (CA) adhesives for industrial and hobby purposes. The BSI-142 Clear Foam Cure Craft Glue is one of the brand's best products for working on craft projects.
Why Did We Like It?
The BSI-124 Clear Foam Cure Craft Glue is one of the highest-rated products available online. Its popularity is due to several reasons, such as being very easy to use due to the long thin nozzle of the container. The nozzle also helps in reducing the amount of mess while undertaking any project.
Another factor contributing to its popularity is that it becomes crystal clear after drying, making it suitable for several different applications. It provides excellent results while working on crafts and for projects such as repairing household articles and furniture.
The craft glue can also be used with wooden or plastic surfaces besides foam and creates a powerful bond after curing for a specified amount of time. One of the significant advantages it offers is that you do not require to mix and prepare the glue before application. This feature helps in saving time as well as effort.
What Could've Been Better?
The BSI-124 Clear Foam Cure Craft Glue offers awe-inspiring results for a variety of applications. The only drawback is that it requires around 10-12 hours to cure fully. The surface is not usable during this period. However, once the glue dries, the results are worth the wait.
Pros
Very easy to use
It becomes clear after drying
Suitable for all types of foam
No prior preparation required
Cons
It takes a considerable amount of time to set
Bond Type: Polyurethane foam glue | Drying Time: 30 minutes | Waterproof: Yes | Heat Resistance: Yes, up to 200°F | Size/Volume: 4.5 oz.
The Professional Quality General Multipurpose Spray Adhesive from AK Trading Co. is a fantastic product. It is a glue for use specially crafted with craft fabrics, upholstery, and acoustic panels.
Wide Compatibility for Versatile Mounting Solutions:...
Highest Performance Aerosol Adhesives for Reliable Bonding:...
Why Did We Like It?
While researching different types of adhesives for foam, we came across this excellent product from AK Trading Co. It is available in an adhesive spray that you can use with great results on surfaces such as foam, wood, paper, glass, and others.
This glue creates both permanent and temporary bonding, expanding the scope of applications it is suitable for. Some of the most popular projects for which this adhesive is used include DIY projects, furniture upholstery repairs, automobile accessories, etc.
The General Multipurpose Spray is different from other products because it does not contain Ozone depletes and Chlorinated solvents. In layman's terms, it means that it does not adversely affect the Ozone layer and is entirely environmentally friendly.
Also, the hypoallergenic adhesive is unlikely to cause any reactions and is completely safe for home use.
What Could've Been Better?
You cannot go wrong with this product, as it delivers the results it promises. The only thing to remember is that this one has a tough texture compared to most other adhesives. Even after drying completely, there is still stiffness to contend with, but the results are worth it.
Pros
Simple application process
It does not harm the planet
Hypoallergenic
Highly durable and long-lasting
Cons
Extremely hard
Bond Type: PVA glue | Drying Time: 30 minutes | Waterproof: No | Heat Resistance: No | Size/Volume: 1 gallon
Up next on the list is an adhesive from the house of 3M, a leading manufacturer of industrial-grade chemicals and adhesives. The Fastbond Contact Adhesive comes in a can and can be applied using a brush, roller, or spray.
Bonds most foamed plastics, plastic laminate, wood, plywood...
Creates a very high strength, high temperature resistant...
Why Did We Like It?
The 3M Fastbond Contact Adhesive, an industrial-grade glue, is a solvent-based product that bonds foam, wood, and even materials like plastic. It allows the adhesive to be used in more ways than most regular foam adhesives.
It also can be applied using various techniques, depending on your preferences. It works equally great whether you use a roller, brush, or spray it on the surface.
One of the best characteristics of this product is that it creates a temperature-resistant bond, which makes it suitable for broader applications. You can even leave it out in the sun, and the glue will not melt down or freeze up.
On top of that, the Fastbond Contact Adhesive is completely non-flammable in its wet state, eliminating any worries when used near any flammable substances. It is, however, recommended not to use it in such environments.
What Could've Been Better?
The Fastbond Contact Adhesive lives up to its name and provides incredible results for DIY and craft applications. The only thing we noticed is that following the manufacturer's instructions is a must if you want the desired results. Deviating from the instructions tends to result in unwanted outcomes.
Pros
Creates a long-lasting bond
Offers up to 4 hours of bonding time
Suitable for both hot and cold environments
Allows multiple applications
Cons
Necessary to follow instructions
Bond Type: Synthetic rubber adhesive | Drying Time: 1 hour | Waterproof: Yes | Heat Resistance: Yes, up to 170°F | Size/Volume: 1 quart (32 fl. oz.)
As we near the end of this list, we would like to mention another superb product for gluing foam surfaces. The FloraCraft Non-Toxic Foam Glue is a special-purpose glue meant explicitly for objects like Styrofoam.
This Foam Glue from FloraCraft is one of the best products for arts and crafts. It creates a strong bond with the material it is applied to that is durable and long-lasting. We discovered that the glue works exceptionally well with foam and does well with cardboard, wood, etc.
The FloraCraft Foam Glue is also one of the safest foam adhesives on the market, with a completely non-toxic formula. You will not have to worry about using it on your kids' projects. Additionally, it is easy to use, making it suitable for children to use.
A common quirk most other adhesives have is that you need to support the material while the glue dries up. This requirement is not an issue with this product, which does take some time to dry, allowing you to adjust the surface accordingly. However, your material does not require support and will hold on easily.
What Could've Been Better?
It was hard to find any flaw with this product, which provides excellent gluing materials like Styrofoam. However, it may not be the best choice for those with a smaller budget, as it is a pricier product. Additionally, the shipping charges push the price up even further.
Pros
Highly durable
Clear drying
Works well with different materials
Allows repositioning and adjustment
Cons
Not very cost-effective
Bond Type: PVA glue | Drying Time: 24 hours | Waterproof: No | Heat Resistance: No | Size/Volume: 4 oz.
The above list of the top adhesives for use with foam is intended to help you select the product that best matches your requirements.
However, we understand that even selecting a product from this list is not an easy task. There are several factors to be considered when purchasing suitable glue for foam.
To make things easier, we have compiled this buyer's guide that covers all the essential aspects. It will make the entire process much more straightforward. Read on to know more.
Versatility
The versatility of any adhesive determines how well it works with different types of materials. The more versatile the glue is, the wider the scale of opportunities it offers. More versatile glues can be used with wood, paper, glass, metal, foam, plastic, etc.
Getting a more versatile product also helps save money that would otherwise go into purchasing different adhesives.
Drying time
Different adhesives require different amounts of time for grabbing hold of a surface, creating a bond, and drying up. The critical point is that a fast-drying glue doesn't necessarily mean a better product.
Glues that dry quickly are more suitable for projects with a time constraint and need to be completed promptly. On the other hand, glues that take longer to dry provide more time for adjusting and repositioning the surface as required.
Clear Drying vs. Opaque
There are two types of adhesives based on how they dry up. The first type of glue dries and becomes completely transparent. It makes them nearly invisible to the naked eye, making them ideal for projects such as furniture repair.
The other type of glue becomes opaque once it dries up and is visible. It is not suitable for projects which require the glue to be invisible. It can be used for arts and crafts as well as similar projects.
Cleaning Up
Working with adhesives generally tends to be a very messy process. The stuff not only attaches to almost any surface but is also challenging to clean. Certain brands are now focusing on this aspect and making their products easy to clean.
Some glues can be easily cleaned up using water and soap, while others require more potent chemicals. For a fast and straightforward cleanup process, select the glue that allows a more superficial cleaning-up experience after completing the project.
Resistance
Several types of adhesives for foam are available on the market for many different purposes. Certain types of glue are highly resistant to factors such as heat, cold, water, etc. Such adhesives are suitable for use on projects exposed to such elements, such as outdoor ornaments.
In many cases, such adhesives are also more durable and long-lasting. Highly resistant adhesives are suitable for a more significant number of applications as well.
Glue For Foam FAQs
Can you use super glue on foam?
Super glue is not recommended for use on foam. Super glue can melt or dissolve the foam, resulting in a weak bond. Using a low-temperature hot glue gun or foam-safe contact cement is recommended for best results.
Can you use spray adhesive on foam?
Yes, spray adhesive can be used on foam. However, it is important to use a spray adhesive that is specifically designed for use on foam, as some adhesives may melt or dissolve the foam. Follow the manufacturer’s instructions for the best results.
How do you remove glue from foam?
To remove glue from foam, use a solvent such as rubbing alcohol or acetone. Apply the solvent to the glue and let it sit for a few minutes. Then, gently scrape off the glue with a plastic scraper or brush. Be careful not to damage the foam surface.
How long does it take for hot glue to dry on foam?
The drying time for hot glue on foam depends on the glue’s temperature and the foam’s thickness. Typically, it takes between 30 seconds to 2 minutes for the glue to dry and set. Follow the manufacturer’s instructions for the best results.
How do you glue foam to wood?
To glue foam to wood, first, make sure the surfaces are clean and dry. Apply a small amount of low-temperature hot glue or foam-safe contact cement to the wood surface. Press the foam into place and hold it in place until the adhesive dries and sets.
Conclusion
Foam is one of the most commonly used materials in arts and crafts projects and different daily use objects such as furniture, décor, etc.
Working with foam requires a suitable adhesive, and there are several to choose from on the market. Selecting the right kind of glue for your project will go a long way in ensuring the desired results.
On that note, we conclude our review and our comprehensive buyer's guide. Before taking our leave, we would like to mention our favorites.
Recreating spectacular crafts made of felt is fun, considering all the parts stick together.
We've often seen it - a felt flower or box that barely hangs together as the poor quality glue struggles to keep things in place. But the good thing about fabric is that you could always sew things in place.
If not, one must resort to using glues to fix the project that needs to be completed immediately. So, here we have a list of options for the best glue for felt, a guide that you can hopefully use to find the perfect product for your household.
Take a look at detailed reviews for the best options on the market below…
Best Glue For Felt
From impeccable bonding strength to user-friendly application, these glues have proven their worth in the world of felt crafts. Without further ado, here's the list of the 8 best Glue For Felt. Let's dive in and unleash your creativity!
The number one glue option we found for you is the all-purpose Always Ready tacky glue by Aleene's. Its incredibly versatile formula holds all sorts of items together and permanently sticks the adjacent surfaces. Dubbed "America's Favorite Craft Glue," this product is the only adhesive you need in your project kit.
Aleene's Always Ready Original Tacky Glue 4 fl. oz. – 4...
Trusted All-Purpose Craft Glue: Aleene’s Original Tacky...
Why Did We Like It?
Aleene's original tacky glue has been a household name in the world of glues and adhesives for over 50 years. Millions of Americans trust this brand for craft projects, hobbies, or household repair purposes. Its distinctive gold bottle is a visual representation of the gold standard of quality that one expects for this brand of glue!
As we mentioned earlier, this glue is versatile enough to hold together two pieces of felt, foam, wood, paper products, ceramics, and non-washable fabrics. Whether you are adding small jewelry or designs to the material or working with a felt project, this glue will help you along the way. Also, you could use this glue for making DIY slime recipes for the kids.
Moreover, one unmistakable benefit of using this permanent glue bottle is the choice of nozzle openings. You can customize the opening of the nozzle by cutting it with a pair of scissors to a comfortable size.
What Could've Been Better?
Purchasing glue is not as easy when there are tonnes of worthy options on the market. But, we can all safely agree that Aleene's is one brand that you can trust without giving a second thought. However, we think this fabric glue is the best glue for felt; and it would be better if the formula dried a tad bit quicker.
Another glue typeby Aleene's would make for a perfect bonding agent for felt and several other materials. As the name mentions, however, this glue is specifically designed to stick together pieces of felt and foam. Available in 118 milliliter or 4 oz bottles, you can use this tacky wet glue for any of your craft projects for the best results.
We have a really good reason to bring back Aleene's brand for our second glue recommendation. When we talk about glues for felt and foam, you must remember that not any glue will do the trick. It should be either super glue that holds just about anything or specially designed to form bonds with felt fabric.
Moreover, this permanent adhesive dries almost instantly and forms a strong bond between both the felt materials. This will come in handy for adding decorative pieces, embellishments, or even sparkles to foam for a children's project. As such, a playroom prop will adhere much quicker with foam glue like this one to enhance the craft project.
In any case, this tacky glue might be the best glue in the thick, non-runny variety, thus making it towards the top of this list.
What Could've Been Better?
While we know that foam and felt glue has a slightly different formula to regular adhesives, this also makes the product less versatile. So, buy this bottle only if you need to work with felt and foam because it may have limited uses elsewhere.
Coming up next on the list is another well-known brand, Elmer's, and we've decided to review the CraftBond Tacky Glue by this company. Now, Elmer's markets this product as perfect for household fixes and arts and crafts projects alike. The formula is smooth and wet on application and dries pretty quickly too.
They are ideal for home decor projects, holiday ornaments...
Good item for making many types of arts and crafts projects
Why Did We Like It?
Firstly, Elmer's glue falls into the category of clear-drying tacky glue that helps adhere flat surfaces together. This craft glue is ideal for bonding felt to wood or any other material because it is pretty versatile. The wet tack can also work as fabric glue to hold the felt material of fine fabric together.
Moreover, Elmer's tacky glue remains flexible even after application, thus giving you some time to work with it. It might be quick-drying, but it does not dry instantly either. As far as the glue felt formula is concerned, it is thick and smooth and will not ruin your projects by leaking from the sides and spilling everywhere.
As with other glue for felt, this option does the job pretty well while remaining open to multipurpose use. Permanent adhesives like this are perfect for home décor projects, holiday décor, and creating handmade gifts for friends and family.
What Could've Been Better?
Gluing felt together is not possible with any glue, and you will find that there are many hits and misses in bonding this material. But the best adhesive is one that manages to apply without spilling and dry to form a strong bond within a short time. On the downside, this formula might be too thick for bonding paper.
Next, we have shortlisted a felt glue formula by the brand Beacon Adhesives. If we are to look at glues designed to form bonds between felt materials, it doesn't get better than this option. You can use it for all sorts of gluing projects around the house and expect it to form permanent bonds that clean up by water.
Non-Toxic, Dries Clear & Cleans Up Easily With Water
Why Did We Like It?
During our search for the best glue for felt, we found this fabric glue option that was formulated especially for felt projects. If you have an arts or crafts setup that requires gluing felt to wood, this craft glue can help you out. Using a thin layer of this product, attaching felt becomes seamless, and this results in a smooth finish for felt projects.
Besides, this glue dries quickly after application and leaves no residue behind. Sticking felt requires a particular type of formula, and this non-toxic glue is perfect for that. Since it is non-toxic, you can use it to repair children's objects and create craft projects. What's more, you can even allow the kids to use this glue for their schoolwork.
Apart from that, this glue dries completely clear and does not leave a yellowish tinge behind. In case you make a mistake, simply clean it with some water because the glue dissolves upon contact with water.
What Could've Been Better?
We discovered that you could use this glue for a number of purposes in and around the house. However, we felt that glue should dry moderately quickly for it to be effective and whole fabrics of felt together. Since that was not the case with this product was slightly disappointed.
Now that we have seen a few wet or tacky glue options, it's time to check some spray adhesives. One popular option is the 3M Super 77 multipurpose sprayer adhesive, which is the best spray glue for bonding wooden projects. Apart from the industrial strength of the glue, it also dries instantly.
EFFECTIVE spray glue provides a secure bond in 15 seconds to...
ALLOWS FOR QUICK REPOSITIONING for perfect placement
Why Did We Like It?
While searching for the best glue for felt, we found a suitable alternative to the traditional tacky wet glues in the form of spray glue. Whether you are sticking felt to a wooden surface or any other material, this all-purpose tacky adhesive spray will come in handy.
A spray adhesive is especially helpful when you need to cover a large area quickly, especially on vertical surfaces. In such scenarios, sticking felt to wood panels becomes easier, and you do not need to reapply the glue all over again due to drying. A thick layer of tacky spray is all you need to cover a large space, and gluing felt will seem like the easiest thing to do.
Anyway, once you apply the spray, it gives you around 15 minutes to reposition the materials. A complete bond is formed within 30 minutes or so if the glue felt is left alone. Additionally, the adhesive is photo-safe, meaning you can use it to create photo albums without fear of damaging the images.
What Could've Been Better?
While this spray glue has several purposes that make it ideal for felt, wood, and other substances, a few details were left overlooked. The spray format is suitable for quick fixes with thin materials, but the same cannot be said for larger objects. Reviewers felt that this spray could not handle heavier projects.
Pros
Provides coverage on larger surfaces
Allows time for repositioning
Ideal for light materials
Does not seep into materials
Cons
Not ideal for heavier objects
Bonding Material: Fabric, Felt, Foam | Volume: 7.3 Fl Oz | Drying Time: 1-5 mins | Application: Spray Can | Washable: No | Toxicity: Low | Odor: Low
The Precision Craft Glue by Bearly Art is a premium clear-drying adhesive, which some might argue is the best glue for professionals. While that might be true, it can also be an ideal pick for home projects, crafts, and, not to forget, glitter applications. So, your search ends here as this wrinkle-resistant glue is what you need!
Clear-Drying Premium Arts & Craft Glue - Create a...
Tip Kit with Multiple-Sized Tips - Provides more choices in...
Why Did We Like It?
To begin with, we know that attaching paper and felt material needs a strong bond, which is precisely what this glue manages to nail. Whether you are attaching felt to wood pieces or the wooden floor, a thin layer of this fabric glue goes a long way.
What's unique about the glue bottle is the four options of application tips it comes with. The tip kit contains all the tools you will need to make crafts of your choice. The fine tip is made of stainless steel end and a plastic base, ideal for the most precise applications. The fine tip is made of plastic and allows a slightly larger amount of glue to pass through.
Apart from that, the bottle also comes with a tip cap to prevent the glue from drying and a cleaning pin to clear any blockages. One added benefit of this glue formula is its wrinkle and clump resistance, no matter the amount of glue you add.
What Could've Been Better?
We loved the fact that this glue formula was resistant to freezing and thawing. But one downfall prevents this adhesive from being a truly great glue. Most reviewers liked the product and its application but thought the odor was overpowering for the most part. This might put off some people from using this adhesive.
Pros
Varied application choices
Stable to freezing and thawing
Quick-drying formula
Made in the USA
Cons
Strong odor
Bonding Material: Fabric, Felt, Foam | Volume: 2 Fl Oz | Drying Time: 1-2 hrs | Application: Fine Tip Applicator | Washable: Yes | Toxicity: Low | Odor: Low
Another option we have selected for this list is the Sew Glue Liquid by Plextone. In essence, Felt is a fabric, and a dedicated fabric glue like this one would get two felt pieces stuck in no time. This particular glue is also capable of adhering pieces of leather together and does not wash off even after cleaning.
High quality - Once repaired, it can easily resist washing...
Application - Designed to repair all damaged fabrics such as...
Why Did We Like It?
If you are on the lookout for glue that bonds any type of fabric, this is the one you should go for. Apart from attaching felt, it also bonds solid materials like leather in an unbreakable bond with each other, even bonding felt to wood.
Once this liquid fabric glue is used for repairing materials like felt, it will not come apart even if you toss the cloth in a washing machine. Simply put, it is resistant to water once it dries up, and the same is applicable to high temperatures. Thus, fabrics created or repaired using this glue are safe for ironing or putting in the dryer after washing.
Additionally, the glue comes with a repair kit that includes two tools for easy fabric adhesion. Whether you are starting a project from scratch or making minor changes and repairs to old, torn clothes, this is the right glue to go for. Another reason for sticking felt with this glue is that it dries completely clear and is made of a non-toxic formula.
What Could've Been Better?
All in all, gluing felt with this fabric adhesive could make your life easier, and you could even ask the customer service team for help. However, applying this glue to white fabric might be a mistake because it leaves a yellowish tinge after application.
Pros
Works on all fabrics
Comes with tools and instructions
Convenient nozzle
Non-toxic
Cons
Leaves yellowish tinge
Bonding Material: Fabric, Felt | Volume: 2 Fl Oz | Drying Time: 10 min | Application: Nozzle or Brush | Washable: Yes | Toxicity: Low | Odor: Mild
At last, we arrive at the final recommendation for the day - the Instant Fabric And Leather Adhesive by Tear Mender. This is an eco-friendly, non-toxic glue that dries in mere minutes of application and exposure to air. In the pure sense of the word, this glue is genuinely all-purpose since you can use it to repair almost anything.
Instant durable bond: Adhesive dries and forms and instant...
Durable household repairs: Forms a long lasting and...
Why Did We Like It?
Now, adhesives are the most valuable when they bond all sorts of material together, but with felt projects, they only need to stick fabric pieces. This adhesive will, however, also stick your leather products together apart from gluing felt. Plus, if you need to stick fabric or leather to a wooden surface, this is the option you might want to select.
Unlike hot glue, this adhesive does not require heat, ironing, solvents, or reactions to form bonds to attach felt to wood. The formula has a naturally thicker consistency that leaves the surface flexible for three minutes after application. Once dried, the glue is waterproof, UV resistant, and flexible, making it ideal for an outdoor repair project.
Tear Mender glue comes in a standard bottle size of 2 oz. per packaging; however, there are several bundles offered on third-party sites. So, if you have a large project lined up, be sure to grab the offer.
What Could've Been Better?
Reviewers appreciated that the glue formula is intrinsically acid-free and safe for contact with human skin. Something customers were rather displeased with was that the bottles that came in the mail all dried up and were quite impossible to use. To add to their frustration, the customer service team took a long time to reply.
Pros
Non-toxic formula
Dries quickly
Forms long-lasting bonds
Various bottle options are available
Cons
Inconsistent packaging
Bonding Material: Fabric, Felt, Leather | Volume: 2 Fl Oz | Drying Time: 3 mins | Application: Nozzle | Washable: No | Toxicity: Low | Odor: Mild
In this section, we leave the reviews behind for a deeper look into what makes a glue worth selecting over all of the others. Whether you select a glue for felt from the list or from any other source, there are a few unchanging factors that need consideration.
1. Type Of Glue
Essentially, you will find four types of glues for felt - super glue, hot glue, fabric glue, and tacky glue. Your purpose will determine the type you should ultimately select. For instance, working mostly with fabrics or non-porous materials requires fabric glue. On the other hand, kids will do well with using tacky glue since it is safe and ideal for crafts.
Similarly, you wouldn't want children to go anywhere near superglue because it has a strong odor and forms bonds too quickly.
2. Drying Time
Another basic check is the drying time, which may be crucial to some fast-paced projects. Some crafts and wood projects cannot wait for long, due to which you must check the glue drying time before purchase. Hot glue and super glue always dry and cure much faster than the other types.
3. Ease Of Application And Use
Working on a large project with a pinpoint nozzle that extracts glue excruciatingly slowly is simply a waste of time. You'll find yourself needing a larger bottle or a nozzle with adjustable points or even spray paint for getting the job done quickly.
Along the same lines, ensure you get a precise, pointed nozzle if small decorative pieces need to be added to the fabric. Apart from that, go for glue kits that offer cleaning kits to unclog the nozzle if necessary.
4. Type Of Finish
You would have come across the term "dries clear" quite often by now. This is important if your work involves attention to the tiniest details and the fabric is light in color. Some glues leave behind a slight yellowish tinge that would stand out too much on white fabrics.
So, avoid this issue by checking the packaging of the glue to see if the adhesive indeed remains transparent after drying.
5. Viscosity
Similar to our list here, not all glues on the market have the same consistency. Some are liquidy and runny, while others, like tacky glue or hot glue, are much thicker. With porous felt material, you can't go for something too runny since that will get messy quickly. In this case, fabric glue and super glue happen to be thin and liquidy, so select the type carefully before finalizing your purchase.
Conclusion
Essentially, you are surrounded by numerous adhesives that are pretty good in their own right. However, after going through the buying guide, you may find that the kind of glue you need is heavily based on the project at hand.
In any case, there are still a couple of glues that won't miss the mark, no matter the project. The first one, and our top choice, is Aleene's Always Ready Tacky Glue. Not only is it the most reliable for felt, foam, or fabrics, but it is also light on the wallet.
The other product that would go well with felt and similar materials is Aleene's Felt And Foam Tacky Glue. Since this adhesive was explicitly designed for felt fabric, it is no surprise that it finds its way into our top two types of glue for 2024.
When it comes to bonding faux leather, it isn’t easy because, unlike natural leather, this material is not porous.
That’s why to glue faux leather, you need the correct type of adhesive to get into the material and form a solid and durable bond. The best leather glue either for faux or natural should be a solid and flexible solvent-based adhesive that’s strong enough to hold the material together.
But, a trip down the adhesive aisle at a craft store to pick the best glue for faux leather may confuse you. That’s why we are here with a few references to help you choose the best glue for faux leather products based on your needs.
Listed below are the best glues for faux leathers:
E6000 Craft Adhesive: The E6000 is an industrial-grade adhesive known for its exceptional strength and compatibility with various materials. The flat-shaped nozzle may complicate application and the 24-hour drying time is longer than that of Aleene's and Tear Mender's adhesives.
Aleene’s Leather and Suede Glue: A leather and suede glue that doesn't require oxygen to evaporate or create a bond. It dries in just 2-4 hours. Not washable or dry-cleanable compared to E6000 and Fiebing's adhesives.
Fiebing’s Leathercraft Cement: Fiebing’s cement glue is known for its versatility in fixing leather and other types of materials. While it is water-resistant, it has a longer drying time of 24 hours compared to Aleene’s and Tear Mender's glues.
Tear Mender Instant Fabric and Leather Adhesive: The Tear Mender leather adhesive is prized for its fast 3-minute drying time and UV-resistant feature, making it ideal for outdoor fixes. People with a latex allergy may find it irritating.
RH Adhesives Duall-88 Leather Adhesive: This leather adhesive sets industry standards in terms of strength and durability. With its 10-30 minute setting time, it dries clear and has a shelf life of 18 months. Not as effective with wood and rubber compared to the other adhesives listed.
1. E6000 Craft Adhesive - Best for Industrial Use
Let’s start our list with the E6000 Craft Adhesive, which is known for its exceptional strength and toughness. This adhesive is uniquely formulated to meet high-performance industrial requirements, thus making it ideal for bonding wood, fabric, natural and faux leather, ceramic, glass, metal, and more. E6000 will handle just about any fixing project with ease.
To begin with, the E6000 bonds almost everything, thus making it an excellent and durable fixative for crafts. With its super-strong adhesive formula, this glue can bond materials like tin, metal, cement, rubber, vinyl, fabric, and all kinds of plastics with which other glues struggle. Can you imagine leather contact cement bonds? Well with this leather weld adhesive, you can start imagining it.
Manufactured in the United States, this glue is non-flammable once cured and easily resists extreme temperatures. What’s more? This glue is perfect for fixing torn clothes, backpacks, shoes, and other craftwork made of faux leather.
Furthermore, it’s waterproof, so your item won’t be damaged by accidental spills. Not to mention, unlike other superglues, this glue doesn’t adhere to your skin and can be easily rubbed off.
The only drawback many customers pointed out is its nozzle, which is flat and not cone-shaped. The flat nozzle makes the glue application messy on surfaces, which is quite annoying. But apart from that this industrial-strength glue dries clear, and is hardly noticeable.
2. Aleene’s Leather and Suede Glue - Best for Leather and Suede
As the name suggests, this glue is your go-to solution for repairing leather and suede products. But, this adhesive is not just limited to the abovementioned materials. You can use this permanent glue for creating home décor items and for other decorative purposes like sprucing up your bags, shoes, and belts without the help of a sewing machine.
Aleene’s leather and suede glue is capable of what other fabric glues can’t achieve. Unlike comparable fabric glues, this one doesn’t need oxygen to evaporate and create a bond. Thus, this glue can come in handy in repairing shoes, belts, and purses, among other things.
Instead of sewing, you can use this glue to stick beads, fringes, patches, and trims on your leather items. But, if you prefer sewing on real leather, you can use this glue to hold leather pieces in place, and then stitch them for further reinforcement.
We also appreciate that this glue keeps your fabrics safe. This means that the fast-tacking glue won’t stain or soak through your fabrics. Also, the multi-size applicator tip is customized to ensure proper and wastage-free application.
Without a doubt, Aleene’s leather and suede glue is the perfect choice for your premium fabric repairs because it offers a flexible and permanent bond. However, this glue is not washable, and can’t be dry-cleaned.
What We Like
Water-resistant
Permanent bond
Non-toxic
Fast-tacking
What We Don’t Like
Not washable and dry cleanable
Volume: 4 fl oz | Type: Leather glue | Bonding Material: Leather, suede, and imitation | Waterproof: No | Heat Resistant: No | Drying Time: 2-4 hours
3. Fiebing’s Leathercraft Cement - Best for Leather and Multi-Materials
Moving on with our list, we have Fiebing’s Leathercraft Cement which can be used for fixing or DIYing leather items like shoes, wallets, jackets, and more. This powerful polymeric glue can also be used on other materials besides leather, making it a flexible adhesive.
If you are looking for high-quality leather glue that also fixes fabrics and other materials, Fiebing’s Cement is a good choice. This leather cement has a quick-drying formula that is best for real leather and other materials. It comes in a convenient four-oz. the bottle that makes application super easy.
The glue has low viscosity, allowing easy gum flow from the squeeze tip. The low viscosity also allows the smooth application of the glue on surfaces. Besides that, the non-toxic formula of this glue makes it safe to work in enclosed spaces.
Furthermore, this product has a water-based contact adhesive formula, which allows you to work with various crafts and leather items. Plus, the bonding result of this contact cement is strong and flexible, thus making your items last longer even after getting damaged.
We didn’t come across any significant downside to this cement from Fiebing. However, it takes a lot of time to dry compared to other products available on the market, which can irritate some people. But we have no other complaints regarding its performance.
What We Like
Non-toxic formula
Super-strong bond
Water-resistant
Easy to use
What We Don’t Like
The glue takes time to dry
Volume: 4 fl oz | Type: Leather glue | Bonding Material: Leather, rubber, wood, paper | Waterproof: Yes | Heat Resistant: No | Drying Time: 24 hours
4. Tear Mender Instant Fabric and Leather Adhesive
The Tear Mender Instant Fabric and Leather Adhesive is an impressive product, thanks to its 15-minute fast-drying formula. The faster drying time allows you to start using the materials within a short while.
This glue from Tear Mender is compatible with clothes and leather and can also be used for small repairs on home décor items, sportswear, tents, boat covers, and tarps. The glue maintains a flexible yet strong bond after drying up.
Also, this adhesive is UV-resistant, which means it won't become brittle when glued to surfaces that stay exposed to sunlight for a long time. The UV-resistant feature makes it the best glue for outdoor fixes. Besides that, it won’t harm your skin if it comes in contact with it, due to the water-based formula.
Moreover, the glue is formulated with natural latex, making it non-toxic. So, you can use this adhesive anywhere you want without worrying about accidental spillage.
There’s no doubt that the Tear Mender Instant Fabric and Leather Adhesive is a safe product to use. However, a latex allergy can cause irritants and rashes on your skin if you come in contact with the adhesive. So, always make sure to wear gloves while using the glue.
What We Like
A flexible yet strong bond
Completely waterproof
Non-toxic formula
Suitable for indoor and outdoor use
What We Don’t Like
Not suitable for use by those with a latex allergy
Volume: 16 fl oz | Type: Fabric and leather adhesive | Bonding Material: Fabric and leather | Waterproof: Yes | Heat Resistant: Yes | Drying Time: 3 minutes
5. RH Adhesives Duall-88 Leather Adhesive
Our list would remain incomplete without the inclusion of this specialized leather glue from RH Adhesives. It is one of the strongest adhesives available on the market when it comes to bonding leather, and creates a bond that’s flexible and waterproof.
RH Adhesives is a trusted brand in the United States when it comes to bonding materials. The brand has been setting industry standards for adhesives since 1949. And this Duall-88 leather adhesive has been a leading choice for repairing shoes, bags, and other leather goods for generations.
In addition to leather, this glue is widely used to bond different types of fabric, foam, metal, and plastic. This leather glue dries clearly after application on goods, giving you a long-lasting and durable repair without being visible.
On top of this, this adhesive is long-lasting and has a shelf life of around 18 months. Plus, the bond with Duall-88 sets within 10 to 30 minutes, no matter your surroundings.
Many customers have complained that even though the leather adhesive was advertised to work with wood and rubber, it failed to create a strong bond with these materials. This is somewhat of a letdown if you’re looking to work with these two materials.
If you're scouting for the best glue for faux leather, the table below compares volume measured in fluid ounces, type, compatible bonding materials, waterproof and heat resistant properties, and drying time in hours and minutes.
The above reviews might have enticed you to already select a product, but we recommend waiting a bit as there’s more to consider. We have prepared this detailed buyers’ guide to help you buy the most suitable glue that meets all your standards.
A. Types of Glues
Before buying glue for attaching faux leather, you need to understand the types of leather glues available on the market. There are leather glues, cement, and super glues, each with different functionalities.
A leather glue is created with formulas explicitly designed to bond leather goods. These glues create flexible bonds and are low in Volatile Organic Compounds (VOC), which cause headaches.
Leather cement is suitable for various other materials, unlike real leather glues. And these glues create flexible bonds that are hard to pull apart. They are also high on VOCs, which can be a problem for sensitive users.
Super glue works on leather, but the bonds are not flexible. You can use them for quick repairs, but they will not give you the desired result compared to the other glues.
B. Water-resistance
There are certain types of leather that suit only wet conditions. So while working with such leather pieces, you should ensure that the leather glue creates a strong bond and is water-resistant.
B. Drying Speed
When you work with leather adhesives, drying speed is essential. This is because if the glue takes a lot of time to dry, you can’t use it for quick repairs. Nowadays, leather glues on the market promise quick drying speed, so always make sure to know about the drying speed before buying the glue.
C. Bond Strength
One of the important things to check before buying leather glue is its bonding strength. For this, you need to check for adhesives that contain polyurethane, rubber cement, and cyanoacrylate, as they work best in bonding leather.
D. Compatibility With Other Materials
Always select the glue based on its compatibility with other materials because you might not be working with leather alone. Most leather adhesives are suitable for other materials like rubber, fabric, metal, PVC, etc. However, you need to check their effectiveness when used with these materials.
E. Budget
Before buying glue for faux leather, always take into account the cost of the adhesive. You don’t require expensive professional-grade glue for repairing household items or DIY projects.
Let's say you followed our buying guide and acquired the best glue for your faux leather. Now, do you know how to fix tears such as those found in leather car seats? If not, then we have the exact article for you, where you can fix many types of damaged leather.
Can you use regular glue on faux leather?
While you can technically use regular glue on faux leather, it is not recommended due to the potential for the glue to warp or discolor the material. Opt for adhesive products specifically designed for use with faux leather or other flexible materials, as these typically create a stronger, cleaner bond that withstands wear and tear.
Does fabric glue work on faux leather?
Yes, fabric glue can work on faux leather, especially types designed for use with a variety of materials. It's essential to ensure the adhesive is suitable for both flexible materials and the specific type of faux leather to ensure a strong bond that won't damage the material.
How long does faux leather glue take to dry?
Typically, it takes 15 minutes to 24 hours for faux leather glue to dry and set completely, although this can vary based on the specific product and the conditions in which it's applied. It's always advisable to follow the manufacturer's instructions for the best results and to allow the maximum drying time for the strongest bond.
If you've accidentally spilled glue on your leather, we have an exclusive article on removing glue from leather, where you can learn simple methods to get rid of unwanted glue.
So, that’s all we have to tell you about the best glues for faux leather available on the market. We hope our suggestions helped you pick the best option suitable for you and your needs. We also hope that you will retire the hot glue gun from its leather craft glue duty as it is simply subpar. The only thing left now is to share our favorites from the list.
Among the recommendations, our favorite is the E6000 Craft Adhesive, which offers superior adhesion to stick materials like rubber, leather, vinyl, and different kinds of plastics. Alternatively, the Tear Mender Instant Fabric And Leather Adhesive has a water-based formula, which doesn’t harm your skin on contact. Plus, it provides a robust and flexible bond.
With that, we are signing off. Until next time, happy crafting!
We often use cork in home decor art projects. Now, cork may need to be glued to different surfaces or another corkboard. For this reason, there are multiple varieties of glue available, which can range from hot glue, glue sticks, super glue, and contact cement, to construction adhesive, to name a few. But, most adhesives can be toxic and have to be used very carefully.
Also, we needed an adhesive that could hold many materials together as you might be attaching cork to other surfaces like metal or ceramic.
Hence, we decided to test out the top 7 glue for cork and cork boards, and after a testing period of 2 weeks, filled with trial and error, we discovered 7 of the top adhesive choices on the market so that you can find the best glue for cork, cork boards, and wine corks. Most of the options below are not toxic, making them safe to use. We have also spoken about the highlighted features to make it easier for you to choose.
Let's get started!
Are you looking for the best glue for cork, cork boards, or wine corks? You've come to the right place!
Listed below are the 5 best glues for cork from our list:
Elmer's Products, Inc E7000. Elmer's E7000 is a non-toxic solution that ensures effective carpentry work. It dries quickly, leaving a solid bond within 24 hours, and a brush is recommended for less messy use.
Loctite HC1060027. Loctite HC1060027 is applauded for its ease of application and wide surface versatility. It dries as a waterproof bond but is likely unsuited for smaller projects due to the one-time-use applicator.
Gorilla 5201204-2. Gorilla 5201204-2 offers high strength and powerful bonding ability, working perfectly with cork surfaces. It requires glove usage to avoid hard-to-remove residue.
Loctite PL 1451588. Loctite PL 1451588 is a robust construction adhesive that offers heightened strength and durable bonding, perfect for both indoor and outdoor projects. Be sure to wipe excess glue before it dries.
Elmer's E1321. Elmer's E1321 is a fast-drying multipurpose adhesive ideal for various home and school projects. Buy in small quantities to avoid mold growth over time.
Here is the list of the 7 best glues for cork that you can use to adhere cork surfaces together:
1. Elmer's Products, Inc E7000 - Best Non-Toxic
If you are looking for a non-toxic option that will help you with carpentry projects, then Elmer's Products, Inc. E7000 is going to be a great choice. We were trying to build a few pieces of furniture on our own, and this turned out to be very helpful.
This is a non-toxic wood glue that comes with no harmful fumes. You can safely use it indoors without having to keep the windows open. You can also easily clean up the extra glue with water, making the work much easier.
Next, we have to tell you about how fast it can dry. We have found from using this product that you will need to give it around 20 to 30 minutes for it to dry to the touch. And it will take around 24 hours to dry completely. We were able to sand and paint the cork surface the next day, making it a convenient option. Also, you can expect a permanent bond, thanks to the strong wood glue.
Unsurprisingly, professionals, including carpenters, tend to use this glue because of its effective nature. It comes in a 4-ounce bottle, which can store enough glue for small projects. You can purchase more bottles if needed.
The only issue that you might face while using this glue is that it can be messy, and you might get it all over the place. To prevent this from happening, we recommend using a brush for proper application. That should take care of the job without making a mess.
What We Like
Takes 24 hours to bond fully
Easy to clean up with water
Perfect for carpentry DIY projects
Forms a strong bond
What We Don't Like
Messy application
Adhesive Type: PVA | Bond Strength: 350 PSI | Drying Time: 45 mins | Heat Resistant: Yes | Shelf Life: 2 years | Color: White
2. Loctite HC - Best in Ease of Application
If you are searching for a good glue that can be applied easily, then the Loctite HC1060027 will fit the bill. It will not shrink after application, which makes it perfect for bonding. When we trialed this product we had to work with cork boards as well as ceramic, and the adhesive helped us with the entire process.
This wood glue comes with a high-strength formula in a precision applicator pack. You will get a syringe applicator that can be used to precisely apply the glue to smaller parts. It can be used on wood cork, plastic, glass, metal, ceramic, and tiles, to name a few. We were very impressed with the versatile usage that is offered.
Next, the glue is waterproof once it has dried up completely. You can use pigments and different kinds of cement to add color or texture to the glue. This can be done so that the adhesive matches the color of the surface on which it is applied.
What’s more, you can use this strong formula as a filler for surfaces and binding gaps. It can help with repairing surfaces and for lamination purposes.
If you need a minute amount of epoxy glue for a DIY project, then this may not be the right product. That is because you will be getting two nozzles with the pack. The instructions say that you will have to throw them off after a single use. Hence, the bottle can only be used twice.
What We Like
Self-mixing and easy-to-use bottle
Can be tinted with various substances
Waterproof formula
Recommended for fiberglass and wood
What We Don't Like
Not for smaller projects
Adhesive Type: Cyanoacrylate | Bond Strength: 3200 PSI | Drying Time: 15-20 mins | Heat Resistant: Yes | Shelf Life: 1 year | Color: Clear
3. Gorilla - Best in Bonding
One of our top choices is the Gorilla 5201204-2, which is known for its high strength as well as bonding power. You can use it for indoor and outdoor projects as it is not only water-resistant but is 100% waterproof as our investigation demonstrated. Read on to learn more about its bells and whistles.
Gorilla glue has been around for a long time, and it is well known for the strength and adhesive qualities that it offers. It is indeed one of the popular glues on the market, which can be used with foam, wood, glass, metal, ceramic, concrete, as well as stone. Yes, it pretty much works on everything around the house.
All you need to do is dampen the surface and apply the Gorilla glue in a thin layer. Then, clamp it for the next two hours. After that, you will need to leave it for 24 hours for it to cure fully. Once it dries, you will be able to see a white layer, and it should be able to form a permanent bond.
Moving on, you will receive two bottles of this wood glue, which should meet all your needs. We bought it for our corkboard projects, and it has worked perfectly while gluing cork surfaces.
Gorilla glue is extremely difficult to remove from fingers in case you have got it all over your hand. You might have to struggle a bit, which can be totally avoided if you wear gloves. We will recommend safety gloves during the application so that you face no further problems.
Loctite PL 1451588 is also known as a construction adhesive and is a very popular choice. While researching the best glue for cork, we came upon this 100% polyurethane adhesive, which will work for all kinds of professional purposes, we have found from using this product that it works with cork too.
This is a tan-colored glue that works very well with both wood and cork surfaces. You can use it for making objects inside and outside the house. Since it is made of polyurethane, the wood glue is guaranteed to last for a long time.
What is even more remarkable is that it is known to be 8x stronger than the general construction adhesive that you get on the market. The product can be used with wood, hardwood, treated wood, cork, concrete, marble, stone, masonry, flooring of all kinds, as well as bricks. In a nutshell, it is known to be a construction adhesive for a reason.
Moving on, you will be happy to know that the wood glue is completely waterproof. Once it dries completely, you can paint on top of it, when we trialed this product we painted over the glue with acrylics with excellent results.
And in case you live in an area with a cold temperature, do not worry, as the glue will dry up well even in cold weather.
If you are purchasing this adhesive, remember that you need to clean any excess adhesive immediately before it dries up. This is very important; otherwise, you might have tan-colored spots permanently on the surface. Keep a cloth nearby so that the job can be done at once.
What We Like
Waterproof and safe to use
Can be painted
Works with a variety of surfaces
Can be used in cold temperatures
What We Don't Like
Excess glue needs to be cleaned immediately
Adhesive Type: PVA | Bond Strength: N/A | Drying Time: 24 hours | Heat Resistant: No | Shelf Life: 2 years | Color: Clear
5. Elmer's E1321
If you are looking for a fast-drying formula for quick DIY cork projects, then Elmer's E1321 will work very well. It can be used around the house for different craft projects. We used it with cork boards, and it has been working fine. Moreover, it can be kept as an emergency adhesive in your tool kit, based on our firsthand experience, it will not disappoint.
While looking for the best glue for cork, you must be wondering how quickly you can get done with the projects at hand. This option will provide you with the exact solution. It dries very quickly, and you can finish the project at hand in a day.
On the other hand, this adhesive is known for its multi-purpose capacity. It can be used for repairing parts, engaging in craft projects as well as bonding wine cork, corkboards, and wood to other surfaces. The adhesive works with paper, leather, and fabric, to name a few kinds of fabric.
Moving on, this can be used to make homemade slime. If your kids are asking to play with slime, make them some using baking soda, food coloring, contact lens solution, and this adhesive. It can be used for school and craft projects too, but with adult supervision.
If you are purchasing this glue, we will recommend buying it in smaller quantities. You should be able to work with it within a few months, as otherwise, mold can grow. We were unable to save half a tube because of this issue. But now that you know about it, there should not be any further problems.
One of our final suggestions is the Krazy Glue KG94548R, which will solve the problem of bonding surfaces that are hard to reach. You will be able to complete all kinds of jobs easily, thanks to the convenience offered.
A great advantage of this adhesive is that it comes with a brush-on applicator, we have found from using the Krazy glue that the applicator will help you cover large as well as small surfaces with utmost ease and precision. You can also put glue on difficult areas with the brush, which would otherwise not be reachable.
Adding on, the glue comes in a no-clog bottle, which will enable you to use the product for a long time. You will be surprised to know that the bristles of the brush do not stick together at any point, ensuring that you can keep using the brush multiple times. Just close the cap properly after every use, and it should work incredibly well.
Because of its efficiency and great bonding capacity, you can use it for repairs at the office and at home. It can help you attach the cork to plastic, vinyl, metal, and ceramic to name a few.
While you should have a great experience with the glue, the only drawback is that it takes a lot of time to dry. Now, if you need to rearrange the surfaces, this will be beneficial. But if you wish to finish the project quickly, it might hinder the process slightly.
What We Like
Perfect for home and office use
Can be used in hard-to-reach areas
Bristles do not stick together
Will last for a long time
What We Don't Like
Takes time to dry
Adhesive Type: PVA | Bond Strength: 300 PSI | Drying Time: 60 mins | Heat Resistant: Yes | Shelf Life: 2 years | Color: Clear
7. Barge
The Barge DA081 is for those who need to purchase a lot of glue for large-scale projects. You will love the bonding power, and you can order in gallons or place a bulk order by calling the brand. We got a pack of 2 fluid ounces, and we were not disappointed.
We were looking for the best glue for cork surfaces in the house when we came across this. The adhesive is so powerful that you can work with a lot more surfaces. Some customers say that they have been able to fix their leather boots with this glue, it has been the cobbler's choice for a long time, making it perfect for emergency repairs around the house based on our observations.
That is not all; you can attach wine corks to metal or rubber surfaces for different kinds of DIY projects. Many professionals also use it to make leather items. The glue will stay in place for a long as it has incredible bonding powers.
What’s more, you can bond surfaces within 24 hours. We will recommend holding and clamping the surfaces for a few minutes after application before leaving them to dry for the next 24 hours.
When you are applying this to white or clear surfaces, be careful about any excess glue as it will dry to form a yellow layer. This layer does not look good, and it can be difficult to remove after it has dried. Hence, be careful during application, and you should have no further issues.
What We Like
Comes in a 2-ounce pack
Only a thin layer is required
Works with wine corks and corkboards
Quickly dries within 24 hours
What We Don't Like
Dries to form a yellow layer
Adhesive Type: PVA | Bond Strength: N/A | Drying Time: 24 hours | Heat Resistant: No | Shelf Life: 1 year | Color: Clear
What is The Best Glue for Cork and Cork Boards?
This section provides a comprehensive comparison of the most effective adhesives tailored specifically for cork and cork boards. The table below meticulously evaluates key attributes including Adhesive Type, Bond Strength, Drying Time, Heat Resistance, Shelf Life, and Color.
After countless hours of playing with cork, glue, and sticky fingers, we have determined through our tests that there are multiple kinds of glues, and it can be difficult to pick the best adhesive. To make the job easier for you, we have a buyer’s guide for the best glue for cork in place, read on to find out what our trial and error testing has taught us to be important when choosing a glue for cork:
1. Purpose
What kind of surfaces are you going to deal with? There are cork flooring, cork tiles, and many other materials that you may need to work on at the same time. Also, you might need to attach the cork to other non-porous materials and porous materials.
Please make a note of the kind of surfaces that you might be working with. While glue might work with metal, it may not be a great option for foam. Then you need to consider paper, plastic, cardboard, ceramic, rubber, glass, and all kinds of possible surfaces that might need to bond with cork.
Once you are confident about your needs, read the product description carefully. See if the glue works with the kind of surfaces you have in mind before you actually go on to purchase.
2. Amount
Keep in mind how much glue can be needed for a specific project before purchasing. If you need to use glue in large quantities, then purchase bigger packs. Otherwise, settle for smaller ones.
Glue can dry up easily if not used within a short period of time. This is especially true if you have already opened the pack. Hence, please be aware of this.
3. Curing Time
When you are trying to bond two materials, it is going to take more than a few seconds, regardless of glue, as per our expertise. It is essential to know the curing time when you are working on outdoor projects or craft projects in general. Apply glue, and then you will have to wait for an hour or two for it to dry to the touch. Then depending on the substance, it can take 24 hours or more to dry clear.
Now while working with lightweight substances, you might not need a very strong glue; hence, it may dry faster. We recommend checking the curing time before purchasing. If you are in urgent need of gluing cork, you will need the best glue that can work the quickest.
4. Safety
While working with the best glue for cork, you could easily apply adhesive all over your hand, red gl. That could be difficult to remove, and you may have to look for rubbing alcohol to help remove it. Super glue can be removed from glass, tiles, along other ceramic surfaces with it too. In both cases, you can pour a lot of this substance and then wait for the glue to loosen.
To be on the safer side, after countless hours of gluing cork our team discovered that gloves make all the difference, we would advise you to wear gloves while working. That will keep your hands protected throughout the process, and you do not need to use strong synthetic substances on the hand.
Moving on, if you are working on large-scale heavy-duty projects, inhaling toxic fumes throughout the day is not a good idea. Read the factory instructions mentioned on the back of the pack carefully and wear a mask if you are sure about toxic fumes.
Can you use hot glue on cork and corkboards?
Yes, you can use hot glue on cork and corkboards, but it may not provide a very strong or durable bond. Hot glue is better suited for lightweight or temporary applications.
What is the difference between contact adhesive and PVA glue?
Contact adhesive is a type of glue that creates a strong, permanent bond between two surfaces. PVA glue, also known as white glue or school glue, is a water-based adhesive that is easy to clean up and dries clear.
How do you apply contact adhesive to cork and corkboards?
To apply contact adhesive to cork and corkboards, first, clean and dry the surfaces to be bonded. Then, apply a thin layer of adhesive to both surfaces and allow it to dry for a few minutes. Once the adhesive is tacky, press the surfaces together firmly and hold them in place for a few minutes.
Can you use glue to repair a corkboard that has come apart?
You can use glue to repair a corkboard that has come apart. Apply a small amount of contact adhesive or PVA glue to the edges of the cork and press them back together. Hold the edges in place until the glue dries.
Is waterproof glue suitable for cork and corkboards?
Waterproof glue is suitable for cork and corkboards, especially if the cork or corkboard will be exposed to moisture. However, it’s important to check the label or manufacturer’s instructions to ensure that the glue is suitable for use with cork.
Can you remove glue from the cork and corkboards?
You can remove glue from cork and corkboards using a scraper or a sharp blade. However, be careful not to damage the cork surface. You can also use solvents such as acetone or rubbing alcohol to dissolve the glue.
Do you think gluing plexiglass is difficult? Well, it isn't if you have the correct glue and know the right method.
Plexiglass is often used as an alternative to glass in various projects because it is transparent and, unlike glass, it can tolerate high pressure easily. Needless to say, this flexible and durable material might find multiple uses in and around the home.
Unfortunately, many people are still not sure how to glue it.
Actually, Plexiglass does not glue in the regular sense at all. It requires a chemical weld that allows two surfaces to melt and can fuse into each other. This creates an irreversible bond that you cannot separate, no matter how hard you try. So, today we've created a list of the best glues for acrylic Plexiglass to help you find the perfect choice for your project.
Listed below are the best glues for acrylic plexiglass:
J-B Weld: J-B Weld sealant and adhesive is renowned for its robust adhesion and forms a tough, weather-resistant seal. It takes 4-6 hours to dry, longer than other options like Loctite and Gorilla and has delicate packaging which may cause some glue to squirt out.
Loctite: Loctite is a cyanoacrylate superglue that is recognized for its high-temperature resistance. It has a fast-setting, moisture and chemical-resistant formula. The smaller packaging limits its use in larger projects.
Gorilla: The Gorilla super glue gel sets within 1 minute and requires no clamping. Its high viscosity makes it easy to apply without making a mess, compared to thinner solutions like Starbond. Not entirely transparent when dry.
Starbond: The Starbond glue offers low-viscosity instant adhesive properties. It has a quick drying time and a clog-free stopper for smooth application. Due to its thin consistency, it's more prone to spills and messes, unlike Gorilla.
Super Glue: Super Glue is an economical epoxy adhesive that sets in about 10 minutes and cures fully in 24 hours, allowing for a longer working time. It appears slightly yellowish upon drying.
1. J-B Weld - Best Overall
Who could skip out on the world's strongest bond available in a conveniently sized tube? This 100% silicone sealant by J-B Weld is as strong as commercial glues get. They come in compact packaging weighing 90 ml and in several colors.
J-B Weld is one of the more popular brands we included on our review list. With over 40 years of experience and hundreds of great reviews of this product online, we decided to test it on Plexiglass to see what we get.
One of the first things we noted was that this glue is an RTV (Room Temperature Vulcanized) silicone sealant, which sets at room temperature.
Apart from that, it is almost effortless to use. Also, we found that the silicone forms a tough, waterproof, weather-resistant seal on almost all surfaces, especially Plexiglass. After a few days of using it, we saw no sign of shrinkage or cracks, and the glue was strong enough to hold larger pieces.
Moreover, we found that it worked well on automotive products, ceramic, cloth, carpet, rubber, windows, door frames, and so on. That said, this product is versatile enough for diverse projects around the house and beyond.
And finally, this product sets clear within an hour and is resistant to mold and mildew.
We decided to include this product on our list after testing its versatile uses, beyond its adhesive properties on Plexiglass. And it certainly did not disappoint. However, we wish the seams were sealed more tightly.
That said, some amount of glue squirted out when we squeezed it. So, buyers should ensure that they handle the product delicately.
What We Like
Weather-resistant
Perfect for household DIY projects
Sets in one hour
Precise nozzle
What We Don’t Like
Delicate packaging
Bond Type: Epoxy | Drying Time: 4-6 hours | Viscosity: Thick/high viscosity | Volume: 3 fl oz | Temperature Resistance: -40°C to 200°C | Water Resistance: Yes | Chemical Resistance: Resistant to fuels, oils, and other chemicals
2. Loctite - Best for High Temperatures
This adhesive might sound familiar to those who often work with home improvement products. That said, the 1365882 model is a professional-grade liquid superglue by the well-known brand Loctite. As the name suggests, this superglue is incredibly strong and quick, making it one of the most reliable options we found.
Many people have superglue lying around the house, but can it be used to glue Plexiglass? Yes, absolutely. Therefore, we couldn't skip this versatile superglue by Loctite as we set out to find the best glues for Plexiglass.
Although you can use this glue for DIY projects at home, the ingredients are professional-grade and ideal for heavy-duty repairs.
Often an issue DIYers face while using glue is the drying up of the adhesive at the nozzle. To prevent such problems, this glue comes in compact packaging with a pinpoint nozzle for precise and drip-free application.
Another positive aspect of the bottle design is that the screw-on cap sits perfectly in place and seals the nozzle to prevent clogging.
Moreover, it has a fast-setting formula that is resistant to moisture and chemicals, so you can use this adhesive on Plexiglass projects using water. Speaking of which, an essential aspect of Plexiglass is the clarity after drying. And, this product offers just that- transparency after drying, without any clamping required.
Overall, this product checked all the boxes of a high-quality adhesive. However, we wanted a little bit more of it.
So, if there were one thing that needed improvement, it would be the lack of size options. That said, we wish the product were available in a larger bottle for bigger projects.
What We Like
Sets without clamping
It comes with a screw-on cap
Compatible with multiple surfaces
Quick-drying
What We Don’t Like
Small packaging
Bond Type: Cyanoacrylate | Drying Time: < 30 seconds | Viscosity: Thin/low viscosity | Volume: 0.7 fl oz | Temperature Resistance: -55°C to 120°C | Water Resistance: Yes | Chemical Resistance: Resistant to mild acids and alkalis
3. Gorilla - Best Dry Time
Next, we have another popular favorite - the 7700104 glue by Gorilla.This glue comes in a tiny bottle containing 0.71 ounces of the product. But the quantity may be sufficient for most jobs because one drop is enough for about one square inch of most surfaces. So, if you are looking for a quick-drying glue that requires no clamping, consider this option.
First off, the glue began solidifying within 30 seconds of application and did not need any clamps to hold it in place. While this feature comes in handy for DIY projects, you need to be quick while working with it because it dries in under a minute.
Also, the superior Gorilla formula does not run if the tube is held vertically, giving you ultimate control over the amount to apply.
Furthermore, a lesser-known fact about this product is that it contains tiny rubber particles, which improve its bond with materials. So, after using it for your Plexiglass project, you can use the same adhesive for various other purposes.
That said, this versatile formula works equally well on plastic, metal, rubber, ceramic, fabric, and paper.
For best results, use this product after shaking the bottle first and then tapping the bottom to bring the contents near the nozzle. Next, apply one drop of glue for one sq. inch of material and lightly press the object for 30 seconds. Rest assured, this is enough to form strong and long-lasting bonds.
While we had no major qualms with this product, there was a slight difference that we noticed over the course of testing it.
Although the glue sets pretty fast, the dried and finished result is not clear like other adhesives. Still, this is not a big deal and can be overlooked.
What We Like
Sets within one minute
Bond various surfaces
Resistant to impact
Mess-free application
What We Don’t Like
It is not entirely transparent
Bond Type: Cyanoacrylate | Drying Time: < 10 seconds | Viscosity: Thick/high viscosity | Volume: 0.7 fl oz | Temperature Resistance: -45°C to 90°C | Water Resistance: Yes | Chemical Resistance: Resistant to water and most chemicals
4. Starbond
Are you wondering which glue type is superior - superglue or CA glue? In fact, the two are more or less the same substance, but with different names.
That said, this CA glue has instant adhesive properties with medium viscosity, just like super glue. At the same time, this glue flows like oil from the tube, allowing for a smooth application on various materials.
Right off the bat, what's different about this product is its viscosity. While other glues are thicker with a consistency similar to honey or even more viscous, this one is much thinner. In fact, it has a viscosity measurement of 150 cPs, similar to the consistency of motor oil. However, the fluidity of this option has its pros and cons.
So, while it flows easily and is better to apply, it is also more prone to spills and messes. But the positive aspect is that it dries in a short amount of time, relieving you of the work required to clamp it. And since the product is made of cyanoacrylate, it has the brilliant ability to form bonds quickly.
Moreover, one of its additional features involves the inclusion of two cap applicators of different types. You can also switch to the other in case one gets clogged up. Not to mention how it also comes with a clog-free stopper and a bunch of micro tips for precise application.
As we mentioned earlier, the motor oil-like consistency is a double-edged sword. On the one hand, it allows the product to flow through a very fine micro tip for smooth application. On the other hand, it has a higher chance of clogging up.
What We Like
100% refund guarantee
Convenient application
Perfect for arts and repairs
Waterproof finish
What We Don’t Like
Prone to clogging
Bond Type: Cyanoacrylate | Drying Time: < 10 seconds | Viscosity: Thin/low viscosity | Volume: 2 fl oz | Temperature Resistance: -51°C to 80°C | Water Resistance: Yes | Chemical Resistance: Resistant to water and most chemicals
5. Super Glue
Next, we have a fast-setting plastic fusion glue that sets in a mere ten minutes. As the name suggests, the Super Glue Plastic Fusion Epoxy Adhesive works well on plastics. At the same time, it works equally well on Plexiglass. However, the USP of this product is the unique syringe feature that helps it release glue in a controlled manner.
First of all, it is easy to be fooled by the low cost of this product. But the results of this adhesive are far from average, and we say this from our first-hand experience.
If you know a thing or two about glues, you might've heard about epoxy adhesives too. Epoxies are one of the strongest and most reliable glues, and this product is no different.
That said, the 15277-12 model has 4000 PSI strength holding power, which is more than enough for bonding materials. Once you apply the glue, it starts bonding within the first eight minutes of application, and the curing process takes about 24 hours to complete.
Another feature we wanted to highlight is the unique bottle the contents come in. Upon a closer look, the dispenser is designed like a syringe with two different compartments carrying different materials. Once you press the syringe, one part releases the resin while the other removes the hardener. Both of them combine to form a super solid glue for Plexiglass and other materials.
One of the things we liked about this glue is the long working time it provides. But if you are in a hurry to fix repairs within a time limit, this option might not be the best one. So, choose wisely if you have such a project in mind. Also, the glue isn't completely clear; instead, it appears slightly yellowish upon drying.
What We Like
Allows a longer working time
Reasonably priced
Cures completely within 24 hours
Works on various surfaces
What We Don’t Like
It takes longer to dry
Bond Type: Epoxy | Drying Time: 30 minutes | Viscosity: Thick/high viscosity | Volume: 1 fl oz | Temperature Resistance: -40°C to 100°C | Water Resistance: Yes | Chemical Resistance: Resistant to most chemicals
6. WELD-ON
What do you look for when you need glue exclusively for Plexiglass? You need glue that fuses the materials together as if they have been welded. This is precisely what you get with this model by Weld-on. Simply put, it is a clear formula that bonds materials with a cement-like strength.
One of the things we wondered about while reviewing these glues for acrylics was how specific these adhesives could get. It's one thing to say that glue is multipurpose and can be used on various surfaces. And, it's another to claim that the adhesive is specifically designed to form irreversibly strong bonds with Plexiglass.
This got us intrigued enough to give Weld-on a shot. For starters, consider how multipurpose glues are excellent at holding two pieces together, but they do not actually fuse the surfaces.
On the other hand, Weld-on changes the molecular structure of the acrylic and softens its surface when applied. After joining two pieces of Plexiglass, these two parts harden again as if they have been welded into each other.
The product itself is thin, like a liquid, with a consistency similar to water, so you may even pour it into the dispenser. But it dries up pretty quickly, giving you only one minute of working time and three minutes before it sets.
Upon testing, we found that this glue dries and sets pretty fast, along with being an excellent choice for Plexiglass. Yet, there was one issue that we could not overlook. That said, the glue is so thin that it is prone to spillage, and thus it's possible to mess up the work area if you're not careful.
What We Like
Easy application
It doesn’t leave white marks
Made especially for acrylics and Plexiglass
Two-year shelf life
What We Don’t Like
Prone to spillage
Bond Type: Solvent-based | Drying Time: 10-20 minutes | Viscosity: Medium viscosity | Volume: 4 fl oz | Temperature Resistance: -30°C to 80°C | Water Resistance: No | Chemical Resistance: Resistant to most chemicals
7. SCIGRIP
Now that you have seen a few types of glue, it's time to check out a slightly different bonding agent - acrylic cement. This is one of the easiest solutions to work with because it is pretty thick and easy to apply. Not to mention how this is one of the best options for beginners.
One of the first aspects we noticed was the thickness of the product, which is medium-bodied compared to others that are much thinner. Due to this consistency, it becomes easy for newbies to use this glue on Plexiglass.
Also, this product is a high-strength solvent that does not need much time to set. Merely five minutes after the application, you have a dry surface that is transparent without a yellowish tinge. The good thing about this product is that it achieves 80% of its strength within 24 hours of application. But, the drying begins within minutes, eliminating the need to use clamps.
Furthermore, the adhesive is a low-VOC product which indicates a significantly lower release of harmful chemicals in the air. And while we liked this aspect, what impressed us even more, was its ability to securely bond objects apart from Plexiglass. Indeed, this adhesive works well on PVC, butyrate, polycarbonate, ABS, and styrene.
Overall, this product did not have any flaws worth pointing out, so it is safe to say that we were pretty pleased with its results. However, we can think of something that might be bothersome for some people. Despite its thickness, it is pretty messy to work with because of its container.
What We Like
Low-VOC content
Bonds rigid materials easily
Leaves no residue
Beginner-friendly
What We Don’t Like
Messy application
Bond Type: Solvent-based | Drying Time: 10-20 minutes | Viscosity: Medium viscosity | Volume: 1.5 fl oz | Temperature Resistance: -30°C to 80°C | Water Resistance: No | Chemical Resistance: Resistant to most chemicals
8. Aron Alpha
We decided to include another quality adhesive on our list. This glue is the AA490 model by the brand Aron Alpha. The product comes in simple packaging, which users need to squeeze for careful application. Also, the glue dries clear so that you can apply it in visible areas for decoration.
If you are someone who is engaged in frequent art projects or uses glues regularly, then this option might be worth considering. When we received this glue, the first thing we wanted to do was test it directly on Plexiglass. The results were pretty good, and we found that the glue set quite fast.
After that, we tried testing it on various other materials to find if it was compatible with different types of surfaces. When it came to paper and plastics, this glue could bond those surfaces reasonably quickly.
But when it came to metal, the story was slightly different. After applying the glue, the metal pieces didn't show any sign of bonding, and it was only after an hour or so that the glue dried out. Apart from this, the glue bottle was easy to use and glide over surfaces.
Although this option performs decently across the board, it isn't as durable as others on this list. While other glues are resistant to heat and impact, this one does not provide any such benefit. In fact, the glue bottle clearly states that it must be stored away from heat.
What We Like
Compatible with plastic and metal
Mess-free
Affordable
Convenient applicator
What We Don’t Like
Sensitive to heat
Bond Type: Cyanoacrylate | Drying Time: < 10 seconds | Viscosity: Thin/low viscosity | Volume: 0.7 fl oz | Temperature Resistance: -50°C to 80°C | Water Resistance: Yes | Chemical Resistance: Resistant to most chemicals
What is the Best Glue for Acrylic Plexiglass
If you're in the market for the best glue for acrylic plexiglass, the table below provides a side-by-side comparison of bond type, drying time (in hours, minutes, and seconds), viscosity, volume measured in fluid ounces, temperature resistance range in Celsius, water resistance, and chemical resistance.
Buying Guide for the Best Glue for Acrylic Plexiglass
Here are a few things to consider before buying glue for bonding Plexiglass:
Glue Type
The most crucial step is to read and check the label to find out the glue type before purchasing. While some glues can bond to almost any object, some are only specific to one or two materials.
You'll need to figure out if the glue you pick can indeed bond something as tricky as Plexiglass. Sometimes, people pick up a glue type that is the strongest at joining two surfaces, but it would still not be enough to hold Plexiglass.
As we mentioned before, two acrylic surfaces need to fuse together instead of simply joining. So, which type of glue would be the best for Plexiglass?
Here are a few options:
Cyanoacrylates or Superglue
The most common types are called CAs or cyanoacrylates and are also known as superglue. These glues are compatible with Plexiglass and are very quick to dry. They do not require any curing or setting time. But they might be difficult for beginners to use because they do not allow much time to work with the surface.
Epoxy Glues
Another type of glue that is often used is epoxy glue, which comes in two parts. There are epoxies that come as one component, but they are not adequate for gluing Plexiglass, so you must avoid those.
On the other hand, two-component epoxies consisting of resin and hardener are very effective when it comes to bonding acrylics.
Drying and Curing Time
Drying time can vary vastly depending on the type of glue. Super Glue bonds are pretty much instant, and only a few minutes should be enough to fuse Plexiglass together. On the other hand, epoxy glues take hours to dry and a minimum of 24 hours to cure completely.
If you need a stronger bond, a longer cure time will definitely help. Generally, epoxy bonds are much stronger than superglues, so make your selection wisely.
Also, some glues may require additional pressure to encourage bond formation. This additional time is known as clamp time. It is essentially the time needed to hold the two surfaces together.
Details about the drying, curing, and clamping time should be mentioned on the back of the glue bottle. If you are purchasing it online, make sure to read the description before finalizing your decision.
Surface Residue
If you need to glue decorative pieces, the color of the glue should not ruin the look of the item. Thus, it is best to go for an adhesive that turns transparent after drying. Since Plexiglass is clear anyway, a yellow or grey residue film from the glue would not be aesthetically pleasing.
Can I use superglue on acrylic Plexiglass?
Yes, you can use superglue on acrylic Plexiglass. It's important to note that superglue can sometimes cause a noticeable fogging effect around the joint, which might not be desirable in some uses. For cleaner bonds, consider using acrylic cement, which is specially designed for bonding acrylic materials.
Can I use epoxy on acrylic Plexiglass?
Yes, you can use epoxy on acrylic Plexiglass and can create a strong bond. Keep in mind that since epoxy is not as clear as some other adhesives, it can be visible when cured. For applications requiring a clear, nearly invisible bond, a specialized acrylic adhesive may be a better choice.
Can I use silicone on acrylic Plexiglass?
Yes, you can use silicone on acrylic Plexiglass, particularly for sealing purposes. For bonding or gluing acrylic plexiglass, silicone is not usually the adhesive of choice due to its flexibility and lower bonding strength. In such cases, a solvent-based adhesive designed for acrylics, such as acrylic cement, would be recommended.
How do I remove glue from acrylic Plexiglass?
To remove glue from acrylic Plexiglass, use specialized adhesive removers or a mild solution of soap and water. It's important to avoid using abrasive tools or harsh chemicals that can scratch or damage the acrylic surface. Always test the cleaning method on a small inconspicuous area first to ensure it does not harm the Plexiglass.
Is it possible to glue acrylic to wood?
Yes, it is possible to glue acrylic to wood. Epoxy or a specialized plastic-to-wood adhesive is commonly used for this purpose because of its strength and versatility. Ensure both surfaces are properly prepared and clean for the best adhesive performance.
So that was our list of the best glues for Plexiglass available on the market. We hope this review-based guide helps you find the correct adhesive for your next project.
And while all the products we listed performed well - both in quality and functionality, we had a couple of favorites that we'd like to mention.
Our first pick has to be the 31310 glue by J-B Weld. This option was the overall best and also worked on most surfaces. What’s more, it is incredibly strong, long-lasting, and versatile enough to replace all your other glues.
Another one of our top favorites would be the 1365882 model by Loctite. The highlight of this fantastic product was its pinpoint nozzle for delicate applications and its resistance to high temperatures.
Wall clocks are handy devices, made of different materials, found in almost every household. On that note, concrete wall clocks are becoming increasingly popular nowadays since they combine style with utility.
That is why we have reviewed some of the best wall clocks that you can consider for adorning the walls of your home.
Listed below are the best concrete wall clocks:
Stephanie Imports: The Stephanie Imports Modern Minimalist Wall Clock is a numberless, eco-friendly timepiece with noise-free operation and a contemporary design. Its primary drawback is its tendency to accumulate dirt quickly.
Driini: The Driini Staircase Modern Wall Clock sports a unique staircase design with a sleek black finish. The model's elegance might be lost on dark or textured walls.
Leafre Minimalist: The Leafre Minimalist LED Digital Wall Clock allows for easy readability and quiet operation, courtesy of its LED display and night mode. Calibration complexity due to its USB power source stands as a potential inconvenience.
Nextime Mohawk: The Nextime Mohawk Wall Clock impresses with its detailed copper hands and minimalistic appearance. It comes only in one design and color variant, limiting customization options.
Sol Pixie: The Sol Pixie Dust Modern Wall Clock is a handmade clock that offers a unique shape and a blend of concrete and wood, alongside numerous customization options. Its relatively small size may limit readability.
1. Stephanie imports modern minimalist wall clock - Best wall clock made with forescolor eco-boards
What We Like
Numberless, minimalist clock face
Different color options
Noise-free operation
Durable build quality
What We Don't Like
Tends to get dirty quickly
The Modern Minimalist concrete wall clock is one of the most popular products of this brand, thanks to its design and quality.
This clock is a part of the brand’s Concrete Collection, and it features a minimalistic but elegant form that can easily fit on any wall. It is available in two different shades of concrete gray, and the dials and clock hands come in a wide range of colors. This aspect provides a good degree of variety to this option.
The dials on the clock face are numberless, which further enhances the minimalist vibes of this clock. What’s more, it features a special Silent Quartz mechanism that gives you a noiseless operation, while for the power source, it uses one AA battery.
This clock face is made of a 0.35” thick FORESCOLOR eco-board that is quite durable. However, it tends to get a bit dirty at times, which is a drawback.
Shape: Round | Type: Analog | Power source: Single AA battery | Material: Engineered wood, acrylic
2. Driini staircase modern wall clock - Best numberless patterned wall clock
What We Like
Simple but elegant design
Unique staircase pattern on the clock face
Sleek black finish
Easy to read pinewood hands
What We Don't Like
Not that suitable for dark or textured walls
The clock has a simple design that feels unique, which makes it stand out from other concrete wall clocks. To be more precise, it features a numberless, staircase-like pattern on the clock face, where each “step” acts as a number.
Its body is made from a premium-quality, stone-based polyresin material that looks and feels just like concrete. What’s more, it has a sleek matte black finish, which enhances the elegance of the wall clock even more.
The hands are made from genuine pinewood material, and it greatly complements the black clock face. Likewise, the arms have a sweeping operation that feels smooth and is noiseless.
But we found the clock looks a bit awkward on textured or dark-colored walls, which is a limitation.
Shape: Round | Type: Analog | Power source: Single AA battery | Material: Stone-based polyresin, pinewood
3. Leafre minimalist led digital wall clock - Best digital wall clock with night mode
What We Like
Digital clock with an LED display
Night mode feature for uninterrupted sleep
Minimalistic but contemporary design
No batteries required
What We Don't Like
Slightly complex setup
The minimalist LED digital wall clock is one of the best digital wall clocks you can get today.
This wall clock features a stylish digital display that is silent and easy to read, even in the darkness. The clock has a convenient “night mode” feature that adjusts the light intensity of the LED display so that your sleep doesn’t get interrupted. Also, you can switch between 12 and 24-hour formats.
It has a highly minimalistic, contemporary design and concrete gray body that makes it a stylish addition to your walls. There are no numbers, markings, or hands on the clock face, which makes it pretty appealing as decor for living rooms, bedrooms, and offices.
The clock does not require any batteries, which sets it apart from conventional digital clocks. Instead, it is powered via a USB cable that remains connected to the clock. However, this can make the setup a bit complicated, which can be an issue for some people.
Shape: Round | Type: Digital | Power source: USB cable | Material: Concrete
4. Nextime mohawk wall clock - Best clock hands with copper detailing
What We Like
Durable build quality
Beautifully detailed copper hands
Minimalistic, numberless dials
Textured concrete material
What We Don't Like
Available in a single color and design
This particular product has a beautiful design that complements the walls of dining rooms and other living spaces.
The round wall clock is made up of a gray concrete material that has a textured finish. It is designed to be durable, which means that you don’t have to worry about any scratches or damages.
Subsequently, the hands of this clock are made of premium quality copper that is scratch-proof and dust-resistant. The copper material goes well with the concrete face of the clock. On top of that, each of these hands has special cut-out detailing that makes them even more beautiful. Similarly, there are only four dials along the edge of the clock, which gives it a minimalistic vibe.
It is powered by a single AA battery and has a silent operation. However, it lacks variety since it is available in a single design and color combination.
Shape: Round | Type: Analog | Power source: Single AA battery | Material: Concrete, copper
5. Sol pixie dust modern wall clock - Best wood and concrete handmade wall clock
What We Like
Has a uniquely shaped clock face
Handmade design
Hybrid build made from concrete and wood
Good customization
What We Don't Like
Relatively small size
The Modern Wall Clock by Sol Pixie Dust is possibly one of the best handmade wall clocks that you can get for your home. Unlike many other concrete wall clocks, this one does not have a round shape. Instead, it has a square shape with rounded edges, making it a unique interior design décor.
We noticed that it is a hybrid concrete wall clock that also contains wood. To be more precise, it is made from 0.16” ply oak wood that is combined with a 0.23” concrete sheet. The wooden layer is varnished with dark oak satin that gives it a beautiful finish.
Its hands are metallic, and they come in a number of colors. In that context, you can customize the color of the clock face too. Moreover, it has a lightweight design and has a silent EZ Quartz Sweep operation. However, the size of the clock is a bit small, which can make it difficult to read.
Shape: Rounded square | Type: Analog | Power source: Single AA battery | Material: Concrete, wood
6. Sol pixie dust three quarters wall clock - Best asymmetric clock face design
What We Like
Unique and asymmetrical three-quarter design
Made from wood and concrete
Features a durable varnish coating
Highly customizable
What We Don't Like
Comes with a high price tag
The Three Quarters Wall cock by Sol Pixie Dust is one of the best-designed concrete wall clocks that we have tried. As the name suggests, the clock has a quirky three-quarter design on the clock face, which gives it a truly unique and asymmetrical look.
Such an unconventional design can greatly complement your living area or office space. Additionally, it is a handmade option that is made from concrete and wood materials. Its wooden layer has a dark oak satin varnish coating that not only gives it an elegant finish but also protects it from scratches and damage.
The color of the varnish coating and the clock hands can be easily customized. As such, you can create a wall clock that enhances the overall look and feel of your wall perfectly. That said, its customizability comes at a higher price, which means that you need sufficient money to buy it.
Shape: Round | Type: Analog | Power source: Single AA battery | Material: Concrete, wood
7. Sol pixie dust type 1 wall clock - Best numbered clock face
What We Like
Numbered clock face that is easy to read
Durable concrete build
Customizable clock hands
Lightweight and easy to hang
What We Don't Like
Not very budget friendly
Here, we have reviewed another product by Sol Pixie Dust, which is the Type 1 Wall Clock. It is a fully numbered concrete wall clock that is made from a durable concrete sheet. The concrete layer is 0.23” thick and has a light gray color. Furthermore, the numbers are made from acrylic materials, and they are firmly glued onto the concrete layer.
You can easily customize the color of the clock hands, which adds a fair bit of variety to this option. The hands can be read easily from a distance, which makes it convenient for the user. Besides, it has an easy hanging mechanism and is pretty lightweight, which further enhances the user’s convenience.
The clock is powered by one AA battery, and it has an EZ Quartz Sweep mechanism that eliminates ticking noise. With that being said, it is slightly more expensive than other concrete wall clocks, which can be a drawback for people on a tight budget.
Shape: Round | Type: Analog | Power source: Single AA battery | Material: Concrete, wood, acrylic
What are the best concrete wall clocks?
The table below provides comparative insights into various top-tier concrete wall clocks. It focuses on essential characteristics such as the clock's shape, type (analog or digital), its power source, and the material it's crafted from. Each product's particular features are given distinct consideration, therefore enabling a thorough comparison.
In this section, we have discussed some important factors that you need to keep in mind while purchasing a concrete wall clock. Keep reading to know what they are.
1. Type
The type is the most essential aspect to consider when buying a concrete wall clock. All wall clocks can be categorized into two different types, which are analog and digital. The traditional analog clocks use “hands” to tell the time, which gives them an old-school vibe. On the other hand, digital clocks feel a lot more modern since they use LED displays to show the time.
2. Power Source
Most conventional wall clocks use batteries as a power source. The number of batteries used depends on the available features and functionalities. In other words, if a concrete wall clock comes with extra features like alarms and lights, the number of batteries required will be higher. However, a basic option will often use a single battery.
On that note, many manufacturers today offer USB-powered wall clocks, which need to be plugged into a compatible power outlet. They might be a bit difficult to set up, but you don’t have to worry about battery replacements with such options.
3. Shape And Design
The shape and design determine how well the wall clock fits on your wall. If the design of the clock does not match the aesthetics of the wall, then it will look odd and out of place.
That is why you need to check which shape fits your wall best. Most clocks come in a round shape, but there are many other options that have a square, rectangular, or another face shape. Also, you have to check whether the color and finish compliments your wall or not. Concrete wall clocks usually come in gray, black, or other similar shades, but you can find other colors too.
How long do the batteries of a concrete wall clock last?
The battery life of a concrete wall clock depends on several factors, such as the available features, clock type, number of batteries used, and the capacity of the battery.
A basic wall clock that uses single or multiple batteries can work for several months without needing a replacement. However, if it is a digital clock or it comes with extra features like lights and alarms, then the battery will drain faster, and you’ll need to replace it more often.
Can you use a concrete wall clock outdoors?
Most concrete wall clocks are designed to be used indoors, where it remains protected from the rain, sun, or snow. These weather elements can damage the clock components, rendering them useless.
But there are clocks available today that can withstand these outdoor weather elements with ease. So, you will need to check the product specifications to make sure of this aspect.
How do you set the time on a concrete wall clock?
The time adjustments on a concrete wall clock depend on the type and the model. In conventional analog clocks, you can set the time with the help of a mechanical dial that is located behind the clock face.
Conversely, in the case of digital clocks, you can set the time using the buttons on the side or the back. If there are other functionalities, then there will be multiple buttons present. In that situation, we would suggest consulting the clock’s user manual.
How to clean a concrete wall clock?
You can clean a concrete wall clock by using a soft and clean cloth. Gently wipe the surface of the clock to get rid of any loose dust. Try not to use water as that may damage the electronic circuits inside. You can use a cleaning solution, but you have to check if it is suitable first.
We hope that you have been able to make up your mind by now using the information we have provided.
Before we wrap it up, we’d like to mention our personal favorites from the list above. The Stephanie Imports Modern Minimalist Wall Clockis our top pick overall, thanks to its color variety and durable build made from FORESCOLOR eco-boards.
The best Bauhaus wall clock with abstract geometric patterns is the Hapuxt ZHIMI, bringing an aesthetic similar to an oil painting. Other options to consider include the Braun Classic and the Driini Bauhaus clocks, which balance functionality with aesthetics quite effectively.
A wall clock plays an invaluable role in determining the overall aesthetics of a room, which is why they come in several unique styles.
One such style is the Bauhaus wall clock, inspired by the German architectural movement that emphasizes functionality with a modern and sophisticated look. And since there are plenty to choose from, picking a wall clock out can be quite challenging.
So, let’s take a look at our top recommendations for the best Bauhaus wall clocks to spruce up the look of your living space.
Listed below are the top 5 options for wooden shed kits:
Hapuxt ZHIMI Quartz: The Hapuxt ZHIMI is distinguished by its abstract geometric design, this clock seamlessly integrates art and function. A downside is the additional purchase of batteries.
Braun Classic Analogue: The Braun Classic Analogue Wall Clock is ideal for minimalist decor enthusiasts, with the silent operation being its major strength. Readability might be compromised due to the second-hand blending into the dial.
Driini Modern Mid-Century Analog: The Driini Modern Mid-Century Analog is a Scandinavian-inspired design that features an easy-to-read contrasting display. The absence of tempered glass raises durability concerns.
Society6 Bauhaus Style: The Society6 Bauhaus Style offers extensive customization options and serves as a distinguishing feature of their clocks, complementing different room themes. Note that batteries are not included in the purchase.
La Crosse UltrAtomic: The La Crosse UltrAtomic Wall Clock is proficient in atomic-level accuracy, and dual antennas boost signal reception. Its dependence on uncommon C-size alkaline batteries could be considered a downside.
1. Best overall: Hapuxt zhimi quartz wall clock
What We Like
Abstract geometric patterns
Silent operation
Can fit in various room styles
Lightweight and thin form
What We Don't Like
No included batteries
Made from high-quality eco-friendly PVC, the Hapuxt ZHIMI is a wall clock that comes with abstract geometric patterns.
This is a frameless clock that resembles an oil painting and is large enough to view from all corners of a living room. Featuring a classic round shape, the clock has a rather light and thin form, making it easy to hang on a wall.
The Hapuxt clock is a battery-operated clock that uses a quartz crystal oscillator to tell the time. Additionally, the inner mechanisms of this item are completely silent, which keeps it from disturbing quiet reading sessions, conversations during a date, or sleep.
This retro wall clock is in the affordable price range as well, making it an option worth considering if you’re on a budget.
If needed, the ZHIMI can be propped up on a desk as an ornament or placed in any living space of your house. Its varied color schemes and patterns may suit various aesthetics, making its design versatile.
It’s worth noting that the wall clock doesn’t come with included batteries, which have to be bought separately.
The Braun Classic is an analog wall clock designed to suit a minimalist aesthetic. It is a large wall clock that can be hung in a suitably large room, allowing the visitor to view it from any direction.
This 12-inch diameter wall clock features an easy-to-read dial layout and contrasting hour and minute hands for added legibility. Its size may make it suited for rooms like the living room, bedroom, school classroom, office, etc.
Additionally, the wall clock operates silently, with the second hand making no discernable noise. The hand also moves in a sweep motion that creates a non-tick ‘floating’ effect, enabled by precision quartz movement. That said, the second hand somewhat blends into the dial, which may affect its readability to a degree.
During our time with the item, we found that the semi-tempered glass lens used for the Braun wall clock is rather sturdy. As such, the glass lens does not shatter easily when dropped from a moderate height.
Moreover, the wall clock is made using wood, which may add to its durability. Its inner workings may still remain operational in case the wall ornament falls out of its place.
3. Bauhaus wall clock with the best readability: Driini modern mid-century analog wall clock
What We Like
Large and easy to read
Aluminum frame
Silent sweep mechanism
Simplistic design
What We Don't Like
No tempered glass
Featuring a Scandinavian-inspired industrial design, the Driini wall clock is a product that aims to suit several visual styles at once.
The Driini wall clock has a 12-inch diameter with large, easy-to-read numbers printed on it, which suits larger rooms like bedrooms, offices, classrooms, and more. It is about two inches thick.
This wall clock is made using an aluminum frame that has been painted black, which contrasts with the white dial. The minimalist color scheme adds to the readability of this clock, featuring no distracting elements to detract from its simplicity.
Additionally, the wall clock has a front glass cover that keeps dust and debris away from its white dial. Note that the glass is not tempered, which can make it susceptible to shattering when dropped.
As far as operation goes, the Driini clock uses a quartz analog mechanism to tell time accurately. The quartz mechanism also enables the silent sweep feature, which enables the bright red second hand to move without making any noises.
And lastly, the company offers a 100% money-back guarantee if you end up dissatisfied with the item.
For those with a taste for artfully crafted timepieces, the Society6 Bauhaus Style Wall Clock may be an option to consider.
This mid-range wall clock depicts a pastel artwork on its dial that may fit in a room with brightly-colored walls and other artistic elements. It was designed to be a twist on the traditional timepiece that retains function while adding a visually appealing flair to it.
Featuring a shatter-resistant dial and wooden frame, the Society6 wall clock is a highly customizable item. With multiple frame color options, hand options, and design styles, the clock may attract a visitor’s attention as they enter your home.
And for those with a themed room, you may choose between rectangular, triangular, round, and square clock shapes as well. This can be beneficial if your home has a consistent visual theme, making the clock fit right in.
Lastly, the plexiglass crystal glass dial has a 10-inch diameter that suits medium to large-size rooms, and the clock itself is 1.75 inches thick. The clock does not come with batteries, which need to be bought separately.
5. Best atomic bauhaus wall clock: La crosse ultratomic wall clock
What We Like
Highly accurate atomic clock
Dual antenna for clear signal reception
Sturdy frame
Dual battery compartments
What We Don't Like
Requires C-size alkaline batteries
If you’re looking for an accurate atomic wall clock on a budget, you may consider the La Crosse UltrAtomic.
The UltrAtomic is an atomic wall clock that tells the time accurately. This clock features dual antennas that enable it to receive clear reception in areas with plenty of walls. And while testing it, we found that it was able to tell time accurately in an office building as well.
Additionally, the clock has options to choose from various US and worldwide time zones. It also adjusts for Daylight Savings Time with an on/off button that resets twice a year.
As for its design, the clock features a solid stainless steel construction with a two-inch profile, along with a 12.7-inch glass lens. The frame is quite sturdy, but the same may not be true for the lens.
For longevity, it comes with dual battery compartments that run on two or four ‘C’ size alkaline batteries. We did find that the lack of AA battery support can be a little inconvenient, as C-size batteries are not as common.
The UltrAtomic works around this as well through an eco-mode, which pauses the second hand during the night to extend the battery life. This ensures that you will not have to replace the batteries for a long while.
The Society6 Bauhaus-Style Wall Clock is a model that predominantly features apricot and birch colors in its dial contrasted by white hands.
Much like the model mentioned before, this wall clock is a customizable option for those with a specific aesthetic vision in mind for their home. The wall clock suits a geometric theme the best, which may make it fit the accent wall of the room the most.
This Society6 wall clock is made using a natural wood frame and a high-impact plexiglass crystal lens. You may choose from different frame finishes that include natural wood, black, and white color options, which can be paired with black or white hands. We found that white hands suit this clock more than black ones.
The clock is an inch wide and lightweight as well, which makes it easy to hang and store. It is powered by a battery-powered quartz mechanism, but the clock doesn’t come with batteries included in the packaging.
7. Best minimalist wall clock: Ticktockclocks studio wall clock
What We Like
Minimalist design
Uses Bauhaus design principles
Tells time accurately
High legibility
What We Don't Like
Delicate hands
This minimalist wall clock from TickTockClocks Studio utilizes primary colors to draw the viewer’s attention. It is a clock that is directly inspired by the Bauhaus movement, using its principles to create a balanced look.
The TickTockClocks wall clock makes use of several materials in its construction, including laminate, plywood, timber, CNC, and acrylic. And with an 11-inch diameter dial, the clock is highly readable in medium to large-size rooms.
Its dial is colored a bright yellow, featuring no printed numbers. The vertical and horizontal extremes feature blue acrylic as the timelines, which recess into the face of the clock. And the base comes with a chamfer around the back, creating a shadow line.
As for the hands, the minute and hour hands are made using bright red acrylic, while the second hand is colored black. We did find the clock hands to be rather delicate, which can pose an issue while handling the clock.
For operation, the clock has a silent sweep mechanism that is powered by one AA battery. This quartz mechanism also has a built-in hanging mount, which simplifies the hanging process quite a bit. Additionally, the clock is quite accurate once the battery is inserted and the clock is mounted.
8. Best premium wall clock: Cloudnola bauhaus metal wall clock
What We Like
18-inch dial
High readability
Classic design with primary colors
1-Year warranty
What We Don't Like
No tempered glass
A classic wall clock featuring multiple colors, the Cloudnola model is designed with the Bauhaus movement principles in mind.
Its face features geometric shapes with all the primary colors being displayed prominently. The red, blue, yellow, and white shapes are separated by thick black lines for simple-yet-effective color synergy. During our time with the product, we found that the colors tend to pop even in low-light settings.
The Cloudnola wall clock has a solid steel frame with a glass lens that may prove to be quite sturdy. We did think that the clock should have included a semi-tempered glass lens at its price point.
Featuring a non-ticking silent quartz mechanism, the clock can be placed in any environment that requires silence. Such a quality is typically suited for offices, living rooms, and bedrooms.
Additionally, since it features a large 18-inch diameter, it can also be read easily from a distance. Its color schemes play into this as well since the contrasting colors further enhance its readability. As such, it can be hung freely in large rooms as well.
And lastly, the Cloudnola product is also backed by a 1-year manufacturer’s warranty. Should anything happen to the clock, Cloudnola will offer repairs or replacements for it.
9. Best decorative brauhaus wall clock: Designq ‘fluid shapes in bauhaus’ wall clock
What We Like
Visually striking
Large roman numerals
Includes hanging kit
Print uses high-quality ink
What We Don't Like
Can be heavy
In the premium price range, you may consider the DesignQ Brauhaus Wall Clock. This clock prominently features an abstract design on an off-white dial for a unique visual design.
The contemporary design of the wall clock is something that suits modern and artistic themes for a room. And to ensure that the design does not fade away for a long while, DesignQ uses high-quality inks on the dial.
Printed on the dial are large Roman numerals that can be read quite easily from any corner of a large room. With its three different dial sizes, namely small, medium, and large, the wall clock can find a place in a room of any size.
As for its make, the DesignQ wall clock is made using natural pine wood, leaning into the artistic aspect of its design. The natural wood grain enhances the texture of the print, further enhancing the visually striking nature of the clock.
You can hang the DesignQ wall clock using the included hanging kit to simplify the process significantly. That said, it's worth noting that at 10 pounds, the clock can be quite heavy to hang high on the wall.
With the inclusion of batteries, you can hang the clock immediately after unpacking it.
Clock Style: Modern | Clock Shape: Round | Material: Natural Pine Wood | Operating Mechanism: Quartz
What are the best bauhaus wall clocks?
Bauhaus wall clocks epitomize modern design, blending elegance, functionality, and the fusion of art, craft, and technology. To help you find the right clock, we have a comparative table of top Bauhaus wall clocks on the market. It covers aspects like 'Clock Style' (design aesthetic), 'Clock Shape' (physical form), 'Material' (construction components), and 'Operating Mechanism' (timekeeping technology).
A wall clock can be a crucial part of the overall aesthetics of your living space, particularly if it has a specific artistic flair.
The style, goals, and placement, in particular, play a major role in determining whether a wall clock is the right fit for you or not. This is particularly true for the Bauhaus movement, introduced by the famous architect Walter Gropius.
In his view, the Bauhaus movement is meant for an architect to use items and elements to showcase the unity of all arts. As such, it’s important to keep a few factors in mind while picking your favorite Bauhaus wall clock.
A good place to start is to consider the overall aesthetics of the room and narrow your choice of Bauhaus clocks down accordingly. That way, you will not have to venture into clock styles that simply don’t fit into your vision of a perfect living space.
With that in mind, let’s look at what you must seek in a Bauhaus wall clock.
1. Size
Further narrowing down your choice of a Bauhaus wall clock is the size of both the room and the clock.
A wall clock that is too large or too small for a room can not only hamper its visual presence but also affect its readability. Large Bauhaus clocks in smaller rooms tend to be an eyesore, whereas small Bauhaus clocks in larger rooms contribute little in terms of both aesthetics and function.
The size of a wall clock should be relative to the size of the room it will be placed in. So, a large room will benefit from a larger wall clock to maximize visibility and the aesthetic contribution of the clock. And the reverse is also true, with smaller Bauhaus clocks befitting a smaller room.
So, before you venture into the market for a Bauhaus wall clock, consider measuring your room.
2. Positioning
The best place to hang a Bauhaus wall clock is where you naturally tend to turn your head while in the room. A wall clock may suit a particular wall to a tee, but it shouldn’t be the sole deciding factor. After all, practicality is an important facet of a wall clock.
Consider positioning it in a way that it remains clearly visible while seated while ensuring that it isn’t exposed to direct sunlight. This eliminates lower parts of the walls, as well as the wall behind the most-used furniture.
Additionally, try sitting in various parts of the room to find out which wall is the easiest to view and make your decision accordingly. Ideally, the clock should be at eye level to avoid straining your neck.
3. Theme Of The Room
Bauhaus clocks come in several shapes, sizes, and color schemes, and each of these elements should suit the theme of your room.
Subdued colors go well with a minimalist style, and vibrant colors and unique shapes make for an interesting addition to a similarly vibrant room. Paired with the right size, a wall clock can become the highlight of your room, drawing attention the moment a visitor enters the living space.
For instance, a room with décor inspired by architecture in France can benefit from a rustic Bauhaus clock. Depending on your choices, the clock can be rimless and feature a print inspired by French art for a visually striking look.
The ambiance of a room should also be carried by the clock. This is particularly true for large rooms that demand more from the decorum to lift their aesthetics to a new level.
4. Make Of The Clock
What the clock is made of has bearings on its price. Materials like plastic are often more affordable than wood or metal, but each material has its own flaws.
Plastic can be quite brittle and doesn’t remain in pristine condition for as long as other materials. While its longevity depends on the thickness and quality, this property remains true for most kinds of material.
If you’re going for a rustic look, a wooden wall clock can be a great option for your wall. Pine, mahogany, and eucalyptus are some of the common species of wood used in Bauhaus clocks. Owing to their sturdiness, wooden Bauhaus clocks can be put up on your wall for a long time.
And lastly, metallic Bauhaus clocks offer an industrial and modern look to your walls. The polished look that they offer will give your wall a refined look, which is perfect if you’re going for a sophisticated aesthetic.
Incidentally, most Bauhaus Bauhaus clocks are made using metal as their primary construction material. This makes them rather long-lasting while fitting the German design sensibility perfectly.
5. Clock Type
There are three main kinds of Bauhaus clocks that you can find on the market based on how they operate: mechanical, atomic, and quartz.
Mechanical Bauhaus clocks work using a winding mechanism that must be turned periodically. The frequency of winding may vary from seven to 14 days, which can lead to them being slightly inaccurate at times.
But for the design elements brought by Bauhaus clocks, a mechanical clock fits the role perfectly. The extra care is a relatively small hassle compared to its elegant design.
Next, you may consider atomic Bauhaus clocks if precision matters for you more than any other element of the clock. These are self-adjusting Bauhaus clocks that don’t need much care to operate after the initial setup. Simply set the time, hang it up on the wall, and forget about it.
Note that atomic Bauhaus clocks can be rather expensive, especially if you’re looking to create a specific aesthetic.
And lastly, you may consider the most common type of wall clock: the quartz clock. These are more accurate versions of mechanical Bauhaus clocks that work using a crystal oscillator to tell the time precisely. If you’re looking for low-maintenance Bauhaus clocks, these can be an option to consider.
What is the best wall clock size range?
The best wall clock size depends largely on the room you wish to hang it on. Typically, you can choose a wall clock that ranges between 10-30 inches in diameter for the best balance between readability and aesthetics.
What is the lifespan of a wall clock?
You can expect a Bauhaus wall clock to last anywhere between 10-15 years. Of course, this can depend on the build quality, number of faults encountered, and inner items replaced throughout its lifespan.
What causes wall clocks to stop working?
One of the most common causes of Bauhaus clocks malfunctioning is a buildup in the battery compartment. This buildup keeps the battery from properly connecting with the clock mechanism, which causes it to stop functioning.
You may be able to fix this by removing the battery and clearing out any buildup that may be present in the battery compartment.
What is the most accurate type of wall clock?
The most accurate type of wall clock is the atomic clock which has an error margin of a second in 109 days. Once synchronized, these Bauhaus clocks don’t need to be reset for several generations, which is why these are typically used as standards for international time.
A wall clock is an essential component of interior design, ensuring that a room retains its visual themes in each of its elements. This especially holds true for clocks designed with the Bauhaus movement in mind, which introduce you to unique visual styles to decorate your home with.
Despite the stiff competition, we found the Hapuxt ZHIMI to be the best Bauhaus-themed wall clock on the market. Its lightweight and thin form, along with eye-catching colors, may make it a versatile clock that fits various visual styles.
That said, those who prefer a more classic or contemporary design may choose options such as the Braun Classic or the Driini Bauhaus clocks. These are equally as accurate and functional while providing you with a unique design flair, making them options worth considering.
At the end of the day, the best choice for a wall clock depends on the design elements you have in mind for your room.
Soft and malleable - there are not many options better than clay for sculpting unique figurines, structures, and more!
Whether beginners or professionals, modeling clays are something everyone can try to bring shape to their imagination. It’s probably the best therapeutic hobby one can take up.
And making clay sculptures with your children also aids in their early development. It nurtures their creativity and imbibes self-confidence. Clay modeling also helps develop visual-spatial skills among children, especially toddlers.
However, for that, you must give them the best entry-level clay to start with. Now the problem is that finding one isn’t as easy as it seems, and the availability of many options makes the task even more challenging.
That’s where we come in! We've compiled a list of the top 11 beginner clays on the market so you can pick the best one for your kids.
Stress-Free Crafting - DAS airdry clay boasts a smooth, even...
Artistic Versatility - This modeling clay can be used to...
Kicking off our list with an air-dry clay by an iconic Italian brand, DAS, which has been providing superior modeling clay since 1963. The brand and its clay are well-known amongst artists, professionals, enthusiasts, and children.
DAS clay is available for people of all ages, like DAS Junior for kids and DAS for professionals or more experienced artists.
This clay is an air-dry type, so you won’t need a kiln or oven. Apart from that, it sticks to and supports any material so that you can use the clay to make things like jewelry and large sculptures with ornaments. Or, if you’re running short of the DAS clay in the middle of the project, you can mix it with other clay types to complete it.
Although it’s available in only two colors: white and terracotta, you can use any paint you want. Acrylic paint also works fine with it.
The next product we have is an air-dry clay by Jovi. Based in Barcelona, Spain, this brand has been offering premium modeling paste to customers of all ages. Its clay is gluten-free, non-toxic, and CPSIA-certified, which makes it a safe item to work with.
Children often make a mess when working with modeling clay and stain or damage their clothes. But with less sticky and stain-proof Jovi clay, there are fewer chances of that.
Besides that, what makes the clay ideal for beginners is that there’s no need for any specialized tools for clay sculpting. You just need to channel your inner creativity into making something unique. And similar to DAS clay, you don’t need to heat or bake it; keeping it in the open will give a fully-dried clay.
Available in several colors, Sargent Art Plastilina Modeling clay is a popular product amongst people who are into clay art, be it beginners or more advanced sculptors. Its mineral-based formulation won’t harden anytime soon, unlike our previous two options.
The modeling clay is non-toxic and conforms to ASTM D 4236 standards. So, rest assured you can hand over the clay to your kids and let them explore their creativity to make new things every day. The product is also small enough to fit into kids' tiniest hands. Further, you can use its 5lb size variant for crafts projects, flower arrangements, and many more.
NATURAL CLAY – This 10lb block of white clay will help you...
NO KILN NEEDED – Slowly and evenly air-dry clay creations...
If you are looking for natural air-dry or water-based clays, then take a look at our following product. This 10lb block of white clay is a versatile piece that you can use for hand-modeling, sculpting, or throwing on a pottery wheel.
Being an air-dry clay, it’s easy to mold into different shapes and designs, making it a suitable choice for beginners. And once you complete sculpting, keep it outside for a few minutes to harden well.
However, the only issue with this unit, as it is with every air-dry clay, is that it might dry up while you’re sculpting. In such cases, sprinkle some water on it to smoothen it again. But, ensure not to pour too much water, as cracks might develop.
Easy to Use: Sargent Art polymer baking clays are great for...
Multipurpose: Perfect for home projects, school projects,...
Sargent Art is a one-stop destination for art essentials, supplies, classroom supplies, and accessories. The brand uses decades of experience to offer the finest products to its customers. So, rest assured, you get high-quality clay for molding clay figures and models.
Unlike the air-dry clay of Craftsmart, the versatile polymer clay remains soft and pliable for a long time and hardens only after it’s baked. Nevertheless, the hardened clay can be sanded, painted, and drilled without breaking the structure. It makes the item perfect for multiple applications, including school, home, or science projects, jewelry making, crafts, etc.
However, this clay is a blend of several polymers, so make sure to supervise children when they use it to mold. Children have the habit of putting things in their mouth, and although the brand claims it to be non-toxic, consuming it can have serious consequences for their health.
SCULPEY III is a great introduction to oven-bake clay...
1 OUNCE BARS: The ideal size for sampling multiple colors....
Sculpey III Polymer oven-bake clay comes in a set of 30 vibrant colors that are easy and soft to sculpt, making it an ideal gift for beginners of any age. It’s perfect for any type of modeling project or sculpting, and you can showcase your creativity by blending a bunch of different colors to mold something. Kids can have great fun using this!
Being available in different colors means you don’t have to paint them separately after molding. Also, with polymer clays, you can take your time to sculpt things without worrying about the clay drying out.
Next on our list, we have yet another polymer clay kit that is suitable as a gifting set for kids and adults. This kit includes five wooden sculpting tools, nine different accessories, one rolling pin, and 50 vividly colored polymer clay.
Its modeling clay blocks are well-tested to be non-toxic and eco-friendly, making it a perfect molding paste option for kids to show their creativity. But make sure the kids are working under parental guidance.
In terms of hardening the uncured clay, you have three options - air drying, blow drying, and oven baking. Usually, air drying doesn’t work with polymer clay, and it might take 7-8 days for a final clay sculpture to dry, but it’s better than letting your kids go near a fire.
Heating with a hair blower works for smaller projects (1-2 inch size), where you put your artwork in an enclosed paper box and blow it for 3-5 minutes to harden. And the oven bake method is suitable for professionals only. Put your clay art wrapped in a foil sheet and heat it at 135℃ for at least half an hour.
Perfect clay for all craft projects including jewelry
Includes 3.75-pound clay
If you are looking for a budget-friendly clay for your kid to start their artistry journey with, then look no more. The Sculpy polymer clay is a perfect option for new sculptors looking to practice pottery before switching to more professional clay.
It comes in three basic colors - terra cotta, white, and granite, which look like ceramic clay and add additional texture to your finished sculpture. And engaging your kid in clay art allows them to take time off the mobile screen and use their imagination to make unique sculptures.
Moving on, we have another air-drying clay by Remarkable U, which, like any other traditional clay, is simple to work with and a good starter item for children. This 10lbs clay block is perfect for kids as they can just use their little hands to mold it into an exceptional piece of art.
The most fun aspect about using this item is you can use markers, paints, and other mixed media to color your dull white piece of clay. And, being made of 100% natural and non-toxic ingredients, it’s safe to use for kids.
PREMIUM QUALITY - Bring life to your creative ideas with Old...
GREAT FOR CLAY CREATIONS - Formulated with a smooth...
Explore your imagination with this premium-quality Old Potters sculpting clay. The smooth consistency and exceptional plasticity of the clay allow you to mold it into any shape you want.
You can cut this block of clay into small chunks for sculpting on a wheel or hand-building. This Terra cotta clay is available in two sizes - 5lbs and 10lbs, so you can purchase any according to your needs. A 10lbs block is sufficient to sculpt 15-20 small-sized art pieces.
Aside from that, this clay is suitable for people of all skill levels, where beginner to proficient potters can use it for projects of all shapes and sizes.
Main material: The raw material of this natural air-dry clay...
Non-toxic and odorless: The natural air-dry clay uses raw...
Ending our list, we have this natural clay by Biggun, made of kaolin, which boasts good light transmittance and plasticity. What makes this product a bit different from other air-dry modeling clays is that you can repeatedly fire it in a kiln to harden and deliver a glaze to it.
Before you start making sculptures with this clay, you first need to knead it properly and spray a bit of water on it to make it smoother. It makes the clay smooth enough to be molded into various shapes and forms.
Beginner Sculpting Clay Buying Guide
Now that we’ve mentioned some of the best clay for beginners in the market, it’s time to tell you about aspects or features you need to look into before purchasing.
1. Clay Types
People generally use two types of clay for sculpting - synthetic and natural clay, also known as polymer and air-dry clay. Other types of clay are dough clay, ball clay, and paper clay. But it’s recommended for beginners to stick with the conventional clay types.
Natural or air-dry clay is water-based, and exposure to a bit of air can make them dry, so you don’t need to bake them separately. So, it is the right clay if you don’t have access to a kiln or an oven. And, if you want to practice sculpting techniques, then soft water-based clay is an excellent option.
Furthermore, this clay is reusable, provided you keep it in an airtight container. But, even if it hardens, don’t worry. Sprinkle a few drops of water on it, knead it properly to remove any air bubbles, and smoothen it, and you are good to go.
But remember that, too much water can destabilize the structure and cause cracks to form.
On the other hand, synthetic clay is an oil-based clay that doesn’t dry naturally. Instead, you need to put it in an oven for a few minutes to finish your masterpiece. These clays are generally made from oil, clay flour, and wax.
2. Flexibility
The flexibility of clay is different for different types; some are pliable, while others are firm. The soft or pliable clays are easy to work with and, therefore, suitable for kids and beginners. At the same time, the firm type requires modeling tools to mold.
It’s entirely up to you which type of clay you choose. Some beginners having specialized tools prefer working with firm clay, while many professionals like to use their hands to manipulate the soft clay. So, there’s no hard and fast rule to choosing a clay type.
3. Texture
The texture of clay depends on the brand you are opting for. Air-dry clays of some brands have coarse particles, while some come with smooth ones. The latter type is preferred for beginners who lack the required tools and prefer using their hands to mold their clay.
On the contrary, professionals with experience in wheel sculpting use coarse clay as they don’t have to use their hands, thereby lowering the risk of hand abrasion.
4. Strength
You can only determine the strength of clay once it dries. Some types of clay (air-dry clay) crack more than their counterparts (polymer clay) while drying, while some maintain their smooth surface even after drying. So, it’s evident that polymer clay is more durable than air-dry clay. Nevertheless, if you stay cautious and carefully handle them while molding, both types of clay can stay intact.
A word of advice here - apply a shellac coat on your finished air-dry sculpture to enhance its strength.
5. Toxicity
Another critical aspect to consider is the inclusion of toxic substances in clay. Whether you’re molding by hand or using a potter’s wheel, the clay comes in contact with your skin in one way or another. And the presence of any toxic substances can result in skin and respiratory problems.
So, ensure the clay you choose is made of 100% natural ingredients and is approved by safety standards like ASTM D-4236. Go through the product description thoroughly before purchasing a clay.
6. Quantities
As you’ve observed in most of the products mentioned above, each comes with a varying quantity. So, before you look to purchase clay, estimate how much clay you’re going to need for sculpting. If this is your first time trying to make a clay sculpture, five pounds or less would be ideal.
On the other hand, if you’re a professional working on a project where the requirement is more, you might need 10 pounds or more clay.
Beginner Sculpting Clay
Is clay toxic?
Most clays on the market are non-toxic, but you must check the label to confirm if they’re marked safe. Some clays contain toxic sulfur, but there are sulfur-free options as well.
What should you do if the clay you were working with dried out in the middle?
You can warm up the air-dry clay and knead it to smoothen them, or you can spray some water onto it and knead it more. On the other hand, oil-based clays don’t harden in the air but become less flexible in cooler temperatures. You can place it in your household oven for a few seconds to make it more pliable to work with.
Can you fill the cracks in your sculptures?
To avoid this issue altogether, take the best quality clay to start with. Oil-based clays are less likely to crack, but brush some water over the clay while working. Or, in case some cracks are formed on the surface, use clay slips to cover them.
Can you use a kiln for drying an air-dry clay?
No, you can’t. Exposing an air-dry or natural clay to high temperatures results in the formation of cracks and eventually breaking down. As already mentioned, these clays dry up if kept in the open air; therefore, no kiln or oven is needed to dry them up.
How long does it take for air-drying clays to dry?
To completely dry the clay, you must keep it in the open air for at least two to three days. Nevertheless, the time varies according to your sculpture size, and bigger ones might take even a week.
How to paint clay?
If you want to paint the clay on your own, it would be best to take a white base clay. And once the project is complete and hardened, use tempera or acrylic paints to color it. The presence of white background makes each color look more beautiful compared to brown or gray backgrounds, as with most clays.
How can you give a glossy look to your clay sculpture?
To make your modeling clay glossy, apply two layers of varnish to it, where the first layer would be thin. And once it’s dried completely, which takes around six hours, add another layer to it. Although two layers of quality varnish do the trick, you can apply as many layers as needed until you have the desired look.
Beginner Sculpting Clay Final Words
That’s all we have to tell you about beginner sculpting clay!
Now it’s up to you to visit the market and get the best beginner clay to sculpt with. Along with clay, we have shared some starter kit options, which will be helpful for first-timers. So, you can opt for them as well.
These beginner clays are easy to work with. However, you should be careful with kids, as some tools are pointed, and they might hurt themselves while working with them. Or rather, just buy them clay and make them use their hands to sculpt. Make sure to supervise them throughout the process and encourage them to experiment all they want.
That said, we’ll wrap up this guide now. Adios folks!
Are you thinking of efficient ways to build a home? It’s time you went beyond the concept of modular houses, and thought out of the box.
Focus your creative mind on a specific metal building, reflecting barn-style living spaces. What are we talking about? A barndominium, barn home, or whatever you may call it.
Well, the term can be alien for those who are new to the housing markets, but you can rest assured that this building-type is a trend that’s here to stay. That’s why we’ve decided to help you get familiar with the concept of a barndominium.
Through this guide, we’ll be providing relevant information on all there is to know regarding this type of building. Furthermore, we’ll elaborate on what you can expect in terms of its floor plans and pricing. You’ll also gain valuable insight on its benefits in the long-run.
So, without further ado, let’s begin.
What Is A Barndominium?
and that the term “barndominium” itself can be quite confusing, especially if you’re not familiar with building types. So, let’s make it simpler for you, and for this, we’ll start by breaking up the word.
A barndominium is composed of two words, namely - “barn” and “condominium.” Earlier, the name was given to barns that were converted into living spaces. In other words, it is basically a metal or steel building with living quarters.
However, nowadays, designers and planners are incorporating several features into these houses to ensure sustainable living. Some of these features include:
Energy-efficient windows to help block the sun’s rays, keeping the heat trapped inside during the cold winter months and outside during the summers.
Stained concrete flooring to meet your style preference and budget requirements.
Spray foam insulation to enhance the thermal insulation value of the house without air filtration.
Plumbing fixtures, tanks, pipes, and other apparatuses for easy access to water.
Barndominium Floor Plan
Now that we’re fully acquainted with the term “barndominium,” it’s time we elaborated on its floor plans to create a better understanding. On that note, barndominium house plans feature country home designs, strongly influenced by barn styling.
The best barndominium floor plan differs from the popular “farmhouse” trend! Instead, the designs usually feature an open concept floor plan, a gambrel roof, and of course, the rustic aesthetic appeal of repurposed pole barns.
Earlier, the floor plans of a barndominium were limited, but people saw its potential as a living space with time. As such, today, there are a variety of barn homes for you to choose from, ranging from year-round homes to carriage houses.
But then again, is it worth the investment? Let’s answer this question in the following section of our guide.
Should You Buy A Barndominium?
Well, owing to its open concept floor plan, the answer to this question is pretty straightforward for those tired of the daily hustle in big cities. If you’re one of those people, a barndominium can be a great place for a weekend getaway.
That’s not all; there are plenty of factors, which make barndominiums a reliable investment option. In this section, we’ll be highlighting some of their benefits to help you come to a decision. Let’s take a look.
Versatile Design
The best quality of a barndominium is undoubtedly its open and customizable floor plan, which makes it suitable for a wide range of purposes. You may use your living space as a restaurant, garage, shop, community center, entertainment area, or even a church.
Easy To Build
You need not wait for months or years to move into your new home as barndominiums are easy to build with or without the help of a contractor. So, if spending money isn’t a feasible option, we’d definitely recommend you to do it yourself.
Moreover, material kits for the construction purpose are already available in the markets, making your task simpler and less time-consuming.
Additional Space
Thanks to its versatile design, you can easily increase the available space of a barndominium when required. In other words, it allows you to add walls to the living space or leave it open, depending on your requirements.
Barndominiums are, in fact, known for their spacious design and high ceilings, which ensure the uninterrupted flow of air and light. So, you can easily arrange and customize their interiors as per your preference without having to worry about them being too crowded or stifled.
Durability
We all seek durability when it comes to finding houses, and the same goes for barndominiums. Luckily, you don’t have to worry much about the building’s maintenance as it’s sturdy and offers protection against troublesome elements, such as pests. So, rest assured it won’t wear out over time, giving you complete peace of mind both during and after purchase.
You must be thinking about what makes a barndominium more durable than other buildings. The answer’s simple - they're steel buildings and thus have a steel or metal construction.
Protection From Elements: Metal, being sturdier than wood, is capable of withstanding storms and earthquakes better.
Insurance Costs: Steel or metal barndominiums come with better rates from insurance providers.
Keeps Pests Away: Pests can never damage a metal structure; as such, your barndominium will last you through the years to come.
No Combustion: There’s no need to worry about fire hazards since metal barndominiums may deform due to high temperatures and fire but will never catch on fire.
Won’t Rot: Moisture and mold are the two primary concerns when it comes to a wooden structure. You’ll have to protect your home from damage by taking the right preventive measures. Fortunately, steel or metal structures don’t face these issues; they’re easier to maintain and have a longer lifespan.
Strength To Weight Ratio: Despite being robust, metal is quite light, so you won’t have to spend a fortune on material transportation costs. That’s not all; the basic assembly of a barndominium is not as labor-intensive as traditional houses.
Cost-Effective
One of the primary reasons why people don’t mind investing in a barndominium is because it’s quite cost-effective. Rest assured, you won’t be burning a hole in your pocket for it.
Conventional homes are more expensive than these buildings, costing something around $290,600, i.e., $145 per square foot for a 2,000 square feet building. However, when buying a barndominium, you can expect unlimited exterior doors, premium windows, an engineered foundation, metal shells, and so much more for only $38,000 approx.
You’ll only have to pay $75 or $90 at most for a 5000 square feet barndominium. Now, to help you invest in a suitable barndominium at a price under your budget, we’ve come forth with a pricing guide.
Barndominium Pricing Guide
Here we’ll be addressing a few crucial concerns related to the average price and customizable home kit of a barndominium. Other than this, we’ll be helping you learn how to calculate its final price.
What Is The Average Cost Of Barndominiums?
As mentioned earlier, barndominium costs for large high-end buildings are quite expensive, costing around $25,000 or more. The price is inclusive of the building materials, slabs, and high-grade finish but exclusive of appliances or any other essential that you may need.
However, if you’re in search of a basic shell with living quarters, just a shell, you’ll easily find a barndominium that’s completely built and ready for finishing at a price less than $26 per square foot, the barndominium cost is in direct correlation with its quality as you would expect but considering the resilient nature of the establishment one could consider the average barndominium cost to be inexpensive.
All the hard work in putting the building together will already be done, so you’ll just have to put your finishing touches on its interiors. For instance, putting up the windows and doors, painting the walls, and more. But for these barndominiums, you’ll require a cheap and custom barn home kit, which brings us to our next point.
Why Do We Need A Custom Barn Home Kit?
If you plan on building your barn home from scratch, we’d suggest purchasing a prefabricated barndominium kit. It can save up to 50% of the total costs of building a barndominium without the help of a builder.
What are these kits? They are predesigned plans and materials available at reduced prices to help you build a barn home. That’s not all; these kits come with everything you’ll need to build your barndominium within no time.
You can choose from the different plans and square foot sizes to find a suitable match for your home. If not, you may also customize the size and floor plans according to your specific requirements. But keep in mind that these changes will be reflected in the overall construction price.
Several companies specializing in barn homes offer plans or fabrications, depending on where you live. This is because some of them only serve regional areas within a specific mile range when working with a client.
Ideally, they prefer having clients within a 100-mile range to deliver barndominium kits without much of a hassle. However, with the demand for barn homes on a continuous high, larger builders in Texas are extending their service into New Mexico and Oklahoma.
They no longer just deliver the shell of a building but also offer exterior doors, stained concrete floors, engineered concrete slabs, energy-efficient windows, spray foam insulation, and a continuous roof.
To sum up, investing in a custom barn home kit reduces the cost of building a barndominium. It is the most cost-effective way of building a home and highly beneficial for first-time homebuyers who can’t afford homes in today’s market.
How To Calculate The Final Barndominium Cost?
As you already know, there is a wide range of barn home floor plans and sizes to choose from. And depending on what you specifically want in your living space, the barndominium cost can vary by a huge margin.
So, if you want to calculate the total average cost of completing the project, you have to take three variables into consideration, i.e., the price of the barndominium kit, labor costs, and the price of the finishing materials (drywall, cabinets, insulation, and paint).
Needless to say, the total cost of building the barndominium will be the sum of the three variables: the kit price + material costs + labor costs.
For example, suppose the final cost of building the barn home is around $45,000, and it’s built on a 1000 square feet area. In that case, the cost per square foot of the area would be around $45.
Final Words
As more people have started seeing the true potential of a barndominium, its popularity has significantly increased over the years. That said, the best part about investing in a barn home is that it offers long-term returns without burning a hole in your pocket.
What’s more, you’re able to design it however you want while preserving its spacious feel. And you don’t even have to use it for the purpose of living. There are multi-functional uses of a barndominium; it’s up to you to choose what you wish to do with this safe, durable, and affordable home.
On that note, we have reached the end of this guide. And we hope you were able to find all the information needed to build your very own barndominium.
Any person dedicated to its backyard landscape must poses a small space in which s/he can shelter the tools needed and another space in which plants and flowers in pots would be deposited during the winter.
Agneta Enzell chose a beautiful black and white design for a shed dedicated to an orangery situated just a couple of meters away from the house. She advised us to look for the simple, neutral background for our shed in order to highlight the colorful landscape around it. A simple black and white shed with classical Scandinavian influences became her second home; she united the utility with pleasure and created a simple small shed in which she finds peace calm and for herself, she is listening to the rain, taking breakfast and dinner surrounded by nature, enjoying the sunset in a serene atmosphere, a warm and cozy environment of herself to sustain her passion.
One famous quote renown worldwide in Shakespeare`s famous plays is given by King Lear :“Give me an ounce of civet, good apothecary, to sweeten my imagination”. Today`s meaning of the word ‘apothecary’ is far more diverse and complex, it means so much more then a mere medical practitioner in the times that passed by us . Today, both the apothecary style and culture, have embraced an extraordinary unique decor inspired by the spices,wine and herbs merchants in the Medieval Europe and in the Far East.
The fast growing special demand for these furnishings and accessories accelerated the development of contemporary realized pieces with an antique apparel across the globe, emphasizing both minimalist interior design as well as vintage design lines and industrial ones.
Apothecary Chest in the Dinning Area Serving as the Perfect Side Table
Whether we are talking about some simple clear glass apothecary jars which are emphasizing the design or hundreds years old antiques, the possibilities raised by these amazing apothecary cabinets, chests and jars are mind blowing, being a very iconic presence in any interior design and working aside with hundreds of accessories, therefore the capabilities being endless.
Despite the popularity of the apothecary cabinets, not all individuals are looking for the authentic apothecary look; a contemporary touch of color on these kind of cabinets is working like a charm, a touch of vintage colors may emphasize their originality and elegance in a modern design as well, yet another reason for being so popular.
Apothecary Chest on a Stand Realized from White Pine Wearing a Contemporary Touch of Color
by Plow & Hearth
A Rather Special Manner to Organize Your Bedroom in a Vintage Style
by Buckingham Interiors + Design
Superb Apothecary Style Dresser in Bold Red
SO
Enhance the Apothecary Jars with Colors that Will Highlight the Accent Hues
Intimate and Fabulous Use of Apothecary Style Cabinets in the Electric Kitchen
by Summer Thornton Design
Double Apothecary Chests in a Contemporary Living Room Design
Impeccable Apothecary Jars Decorating Idea
by IMBUE Merchandising & Design
Enhancing Your Storage Options with Style & Elegance -Apothecary Cabinets and Chests
Thanks to high -end prices and rarity, apothecary chests are not quite that often animating contemporary homes compared to gorgeous sparkling jars, but they sure offer a whole lot more then pure aesthetics.
For less organized individuals these cabinets would definitely not be their first choice, with a series of small drawers these can be a burden if you are not organized. For the rest of us though, these are the perfect organizer, an effortless way to store your belongings in a magnificent manner. Most homeowners are using apothecary cabinets in the main hallway or access area to create a dramatic entry while others are finding it very useful in the dinning room, bedroom, bath or even kitchen!
Black Apothecary Chest Observing the Dinning Room
Apothecary Cabinet Welcoming Inhabitants in a Long Corridor
by Patricia Benson
Simple Apothecary Chest Giving the Bathroom an Unique Vibe
by Julie Ranee Photography
Depending on where you live you may be able to find these cabinets in a big variety of sizes and styles; you can paint them on your own to match your interior design properly. In the local flee market you have the biggest chances of finding an unique original vintage apothecary chest. There are a few modern recreations that are offering a similar apparel which in many cases may come with lower price tags then the original ones. You can decorate your chest with vintage photo frames vases, watches and other vintage accessories to enhance its design.
Take Note of How the Apothecary Chest Blends in the Contemporary Kitchen Style
by Northwick Design
Small Transitional Living Area With a Wonderful Vintage Decor
by Holly Marder
The Balanced Silhouette of an Apothecary Chest May Fit Perfectly by a Narrow Entry
by Adeeni Design Group
Multi-Purpose Space- Unique Home Office and Dinning Area in an Eclectic Design
A Touch of Oriental Charm for an Exotic Contemporary Entry
by Wellbuilt Company
Discharging a Timeless Design
If you are not looking for a vintage-looking apothecary chest for your contemporary interior design there are plenty of options to choose from. Contemporary furnishings inspired by the original pieces can be found in a variety of shapes or can be made through a custom order; several modern kitchen cabinets are resembling the drawers of the original apothecary chests. All these are of course custom made or highly exclusive, enhancing the notoriety of the apothecary style despite the design line in which it will fit; from rustic, transitional, vintage, industrial or farmhouse- like themes to minimalist ones. No matter what color you choose for your apothecary chest they will look timeless, they`re exhaling elegance and style through shapes and proportions, becoming extraordinary centerpieces for your special kitchenware for example or china.
Custom Designed Apothecary Chest Built in Black and White
by Kristin Drohan Collection and Interior Design
A Bold Presence and A Huge Focal Point Materialized Trough an Apothecary Cabinet Design
Customized Stenciling on a Vintage Apothecary Cabinet for a Modern Bedroom
In several contemporary bedside stand designs we can often find resemblances with an original apothecary chest design whilst keeping the modern twist shaped with high- end technology in extraordinary materials. Several producers are accepting custom painted orders to better fit the customer`s interior design. An unique industrial vintage design can be obtained through metallic apothecary pieces. Bellow floating apothecary styled storage's are appearing to occupy less space whilst giving the bath a highly sophisticated look along with the double sink and extraordinary water taps. Note the jars in which the items are placed and the mirrors, highlighting the entire design line through appurtenance.
Floating Apothecary Cabinets Highlighting The Design Line
by Kimberley Bryan
Modern Mirrored Reinterpretation of the Apothecary Style
by Amy Lambert Lee
Apothecary Style Cabinets in a White Modern Kitchen with Vintage Chairs
by Pennville Custom Cabinetry
Blend of Contemporary and Classic Materialized in a Bathroom
Filling Up the Apothecary Jars with Right Kind of Drugs
Apothecary Chest and Cabinets are coming indeed with a huge price tag but there is a less expensive option to bring this design line into your home: apothecary jars! Through these gorgeous pieces you may be able to convince yourself to make your own cabinets or move towards another design line that you would like better. Whether they`re transitional items, new additions to you apothecary style design or simply jars that you love, these have an extraordinary method of presenting Christmas and New Year decorations. This is their superpower and you must know it and make use of it properly. The extraordinary silhouette lives up to its name the entire year so it will bear with you through sweets, candy delights or even a terrarium at any giving time in great style.
Apothecary Jars Sheltering Candy Goodness
High End Apothecary Chest and Jars Properly Welcoming Guests
Apothecary Jars Completed with a Starfish for the Complete Beach Style
by jill Shevlin – Intrinsic Designs
As you would expect, apothecary jars are breaking the aesthetic boundaries in the kitchen where they`re becoming really functional, for example: you can use them to store spices, coffee, sugar, etc. A fresh seasonal fruit in the apothecary jars is also recommended, being far healthier then sweets. A colorful fruit can become a fresh accent in the overall look of the room.
"Perfect for every room in the house, decorating with apothecary jars is all about tapping into your creativity!"
Lidded Glass Apothecary Jars of Swabs and Cotton Balls
by Neiman Taber Architects
Using the Apothecary Jars as Neutral Transparent Decoration in an Already Extraordinary and Iconic Setup
The Presence of the Apothecary Jars in the Kitchen is Bringing Far More Then Aesthetics
Glass Apothecary Jars Adding Elegance and Style to the Bathroom
Here we are in the end of an article that we find highly graphic and inspiring, asking you for your valuable feedback. What do you think about the apothecary cabinets and apothecary jars? We would love to hear your opinion in the comment section bellow, on Facebook or Twitter.
When it comes to the best clay for sculpting, there are different options you can use to get the job done, but polymer and air dry clay are the most preferred ones.
While both may look similar, they have unique properties when it comes to the sculpting process. In general, polymer clay requires intense heat to dry up, while air dry clay only requires proper air ventilation.
Moreover, the former is suitable for complex clay art projects since it is extremely durable. On the other hand, air dry modeling clay will come in handy for first-timers to explore their creativity.
Both these options have a wide range of applications and advantages. So, keep reading if you want to learn more about the difference between polymer clay and air-dry clay.
Overview Of Air Dry Clay
Air dry clay needs the least introduction since it is widely used by kids and adults for various projects and creative sculpting. It doesn’t matter if you lack experience since the clay can easily be manipulated.
The air dry clay mixture is made from natural materials, such as glue and paper fibers. As such, the clay is ideal for kids since it doesn’t have any harmful chemicals that can cause severe reactions on their skin.
Moreover, it doesn’t require any firing since it can easily dry in a well-ventilated room on its own. However, the main reason why air dry clay has risen in popularity is because it is extremely affordable and doesn’t require a conventional oven for curing.
Nevertheless, air dry clay does have a few major drawbacks. Firstly, it takes around 24 to 72 hours for the crafting projects to dry completely. Secondly, it is not very suitable for delicate projects such as making jewelry as it is vulnerable to cracks.
How To Use Air Dry Clay
Here are a few steps you will need to follow to get the best results from air dry clay.
Step 1:
Firstly, you should clean the surface of your workstation to make sure there’s no dirt, debris or moisture. After this, remove the clay from the packaging and place it on the surface.
Step 2:
Start kneading the clay till it achieves a soft texture.
Step 3:
Once the clay is soft, start to mold the clay and give it the desired shape.
Step 4:
Let it dry in a well-ventilated room for around 24 to 72 hours.
Overview Of Polymer Clays
Polymer Clay is the most versatile clay on the market since you can use it for different purposes, such as making home decor items, pottery, jewelry etc. It can be used for making intricate and complex designs without any difficulty.
Generally, polymer clay is made from polymer polyvinyl chloride, and it is manufactured on a commercial level since the material is used for making high-end home decor accessories. Apart from this, it is available in a wide range of color options; hence, you can choose the right one to suit your project's needs.
When it comes to drying, the polymer clay craft usually takes around 10 to 30 minutes to completely dry. However, you will require a large kiln or a kitchen oven since the drying process requires intense heat.
As soon as the clay dries up, it becomes extremely durable and resistant to water.
Another advantage of using polymer clay is that you don’t need to worry about the clay drying quickly when exposed to air. This makes it extremely convenient for sculptors and crafters since they can take breaks without having to worry about wasting any clay.
How To Use Polymer Clay
The process of using polymer clay usually requires some strict techniques and skills. With that in mind, we have listed the following guidelines for you to follow while using polymer clay.
Step 1:
Clean the workstation to remove any dirt or debris from the surface before placing the clay on it.
Step 2:
For the next step, you should condition the clay by kneading it with your hands and pressing it on the work surface. You can use a pasta machine for softening the clay till it reaches the required smoothness.
Step 3:
Once you condition the clay properly, give it the required shape and structure by molding it with your hands.
Step 4:
Lastly, let it cure in a preheated oven or furnace at a temperature of 275-degree Fahrenheit for around 15 minutes. After it gets baked completely, remove it from the oven and let it dry for another 15 minutes.
What Are The Main Differences Between Polymer Clay And Air Dry Clay?
Despite being similar in nature, air dry clay and polymer clay have their own unique properties and serve different purposes. Hence, we have listed a few key factors that can help you to decide which clay will be the ideal choice for a sculpting project.
1. Application And Ease Of Use
Air dry clay is well known for being one of the easiest clays to work with. Even kids and beginners can enjoy working with it since it doesn’t require any specialized technique. Moreover, you can easily shape the clay to make different sculptures.
On the other hand, polymer clay requires strict conditions and techniques so that you can mold it easily. In fact, you can’t mold the clay until you have kneaded it to a smooth and soft consistency. Therefore, polymer clay is mostly used by experienced crafters.
2. Dependency On Heat
Can you bake modeling clay without heat? Your answer would probably be ‘no’ since most clays require heat to mature completely. However, this isn’t the case with air dry clay. Air dry clay is made from a special material that allows it to dry and harden as soon as it gets in contact with air. A well-ventilated room will get the job done perfectly.
In contrast, a polymer clay craft will require a kiln to harden since it requires intense heat to dry completely. If you don’t own a kiln, then you can use the kitchen oven instated for baking the clay craft.
3. Drying Time
Despite being an easy-to-use clay, the air dry clay has one major drawback- it requires a minimum of 24 hours to 3 days to dry completely. If the moisture content in the room is dry, then the clay craft will take a longer time to dry. In addition, you will need to use an acrylic sealer for adding an extra layer of durability to the clay surface.
Although polymer clay requires a kiln to harden, it takes less time to dry up. For instance, it usually takes around only 15 minutes for one-fourth of the thickness to dry. At the same time, you will be required to give it an additional 15 minutes to cool down before you can touch the clay sculpture.
4. Durability
When it comes to durability, air dry clay sculptures are usually fragile and prone to getting cracked especially if moisture is trapped within the clay. Additionally, if you plan to make clay jewelry, such as air-drying clay earrings, you will need to be very careful.
On the contrary, polymer clay sculptures are usually very durable and rigid after they are baked and dried completely. Moreover, the finished projects become water-resistant immediately after drying, making it a suitable option for designing a range of items.
5. Storage
Air dry clay requires a dedicated airtight container to avoid cracking since it can easily dry when it comes in contact with air. If air gets trapped within the container or the storage unit, then the clay will start to crack, and you wouldn’t be able to use it again.
However, you don’t need any strict storage requirements for polymer clay. After you are done with the project, you can store the leftover clay in the original packaging till you need to use it again. Just make sure that the room doesn’t get too hot since heat can dry up the clay over time.
6. Affordability
Apart from the application, you should always choose the clay that suits your budgetary needs. Air dry clay is usually extremely affordable; hence, you can buy the clay in bulk and use it for different projects.
In contrast, polymer clay is usually costly, making it less accessible to hobby crafters.
7. Versatility
Air dry clay is extremely versatile since people can use it irrespective of their experience. Also, it can easily dry up without any heat application. Air-dry modeling clay is usually available in three colors: terracotta, white and gray.
Polymer clay is well-known for being available in a wide range of color options, and some clays come with a unique texture option that gives the final sculpture a different finish altogether.
Air Drying Clay Vs Polymer Clay Frequently Asked Questions ?
What Causes Air Dry Clay To Crack?
One of the major problems with air-dry clay is that it can crack easily when it shrinks due to dry weather conditions. However, you can prevent the sculpture from cracking by placing it in a room that isn’t too dry or using a humidifier.
But keep in mind that too much water will also damage the clay. Hence, you should avoid using too much water on the clay since it can cause the surface to develop cracks once the water starts evaporating.
How To Determine If The Polymer Clay Has Baked Properly?
The quickest way to check if your polymer clay craft project has baked properly is by removing it from heat, letting it cool down and touching it gently. If you observe finger impressions on it, then the clay needs more time to bake.
When Should You Use Acrylic Paint On Air Dry Clay?
Generally, it is recommended to wait for at least three days so that the air dry clay project can dry up completely. If you don’t let your air dry crafts to dry completely, it can cause moisture to enter the clay craft.
Whenever excess moisture gets trapped within the clay craft, it forms cracks on the surface due to water evaporation. Therefore, you should let the project dry completely before using any acrylic paint.
Is It Possible To Dry Air Drying Clay Faster?
Technically, you can speed up the drying process of air dry clay by using a dehydrator. However, you will need to take the right precautions while using this device. For instance, you should choose the lowest setting and try not to use it for too long since it can cause discoloration of the clay craft.
Moreover, excessive use of dehydrators can cause your air-dry clay projects to develop cracks since the clay will shrink faster than it should.
Air Drying Clay Vs Polymer Clay Final Words
As mentioned earlier, there is a wide range of applications for both polymer and air-drying clay. However, it ultimately boils down to the user to decide which clay is suitable for his or her needs.
Before leaving, here are a few tips you can use to determine which clay will suit your current needs. For starters, beginners are recommended to use air-dry clay since it is easy to shape and use.
On the other hand, polymer clay may be more suitable for experienced sculptors and creators. Moreover, if you’re on a tight budget, then you should use air-dry clay since it is cheaper than polymer clay.
With that, we are signing off for today, but watch this space for more such reads. See you next time!


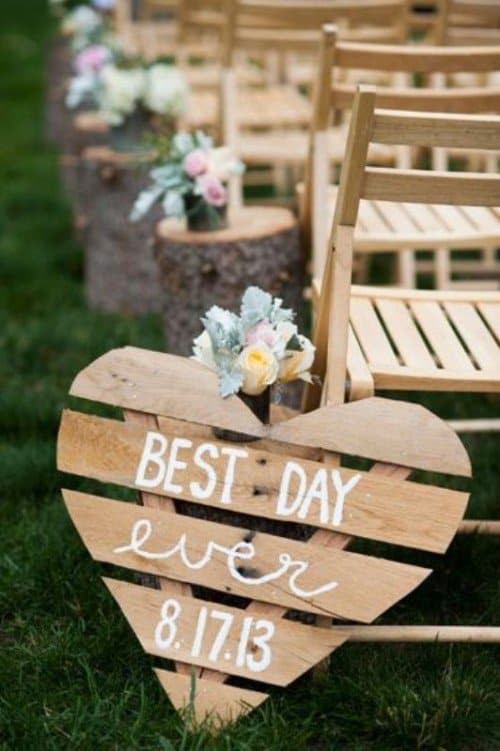
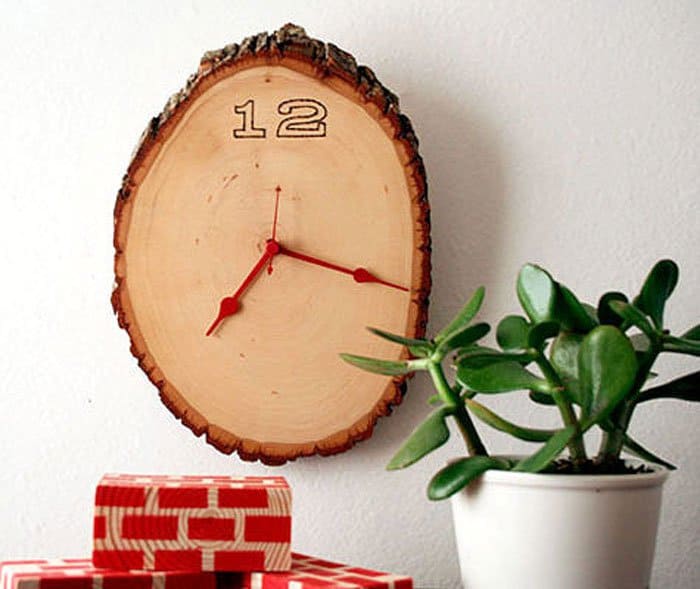
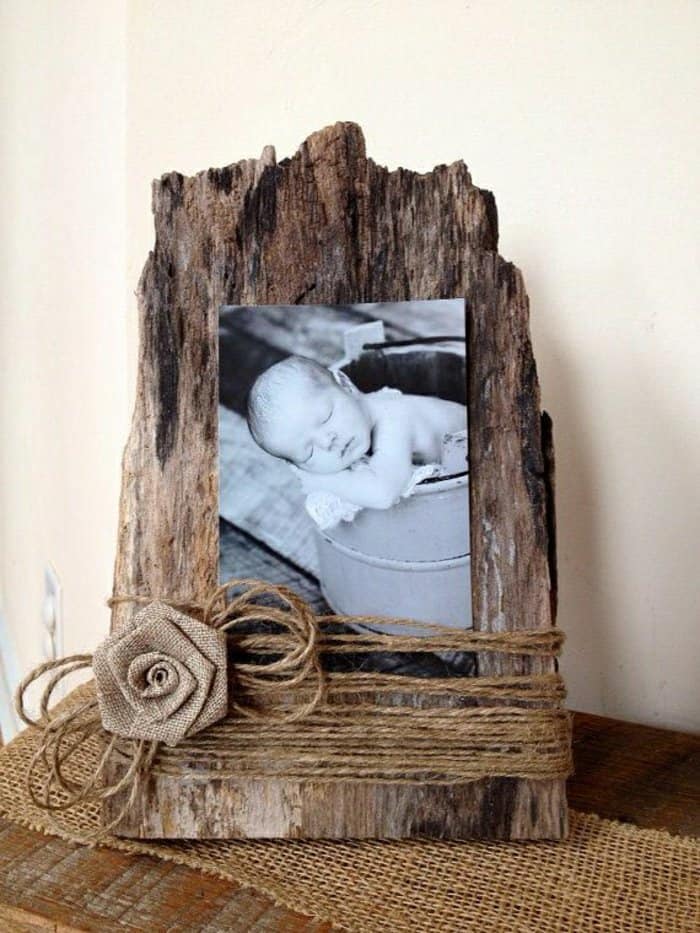
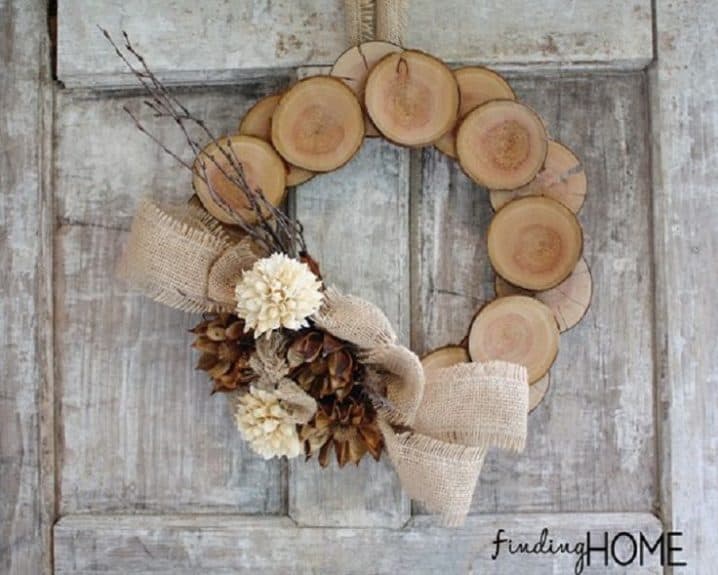

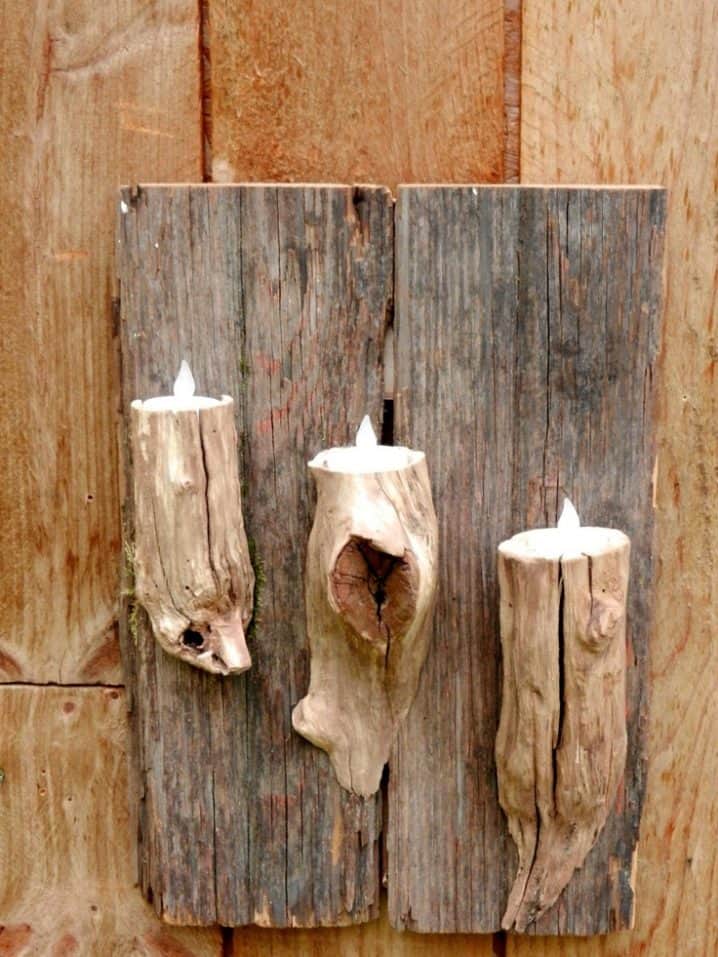
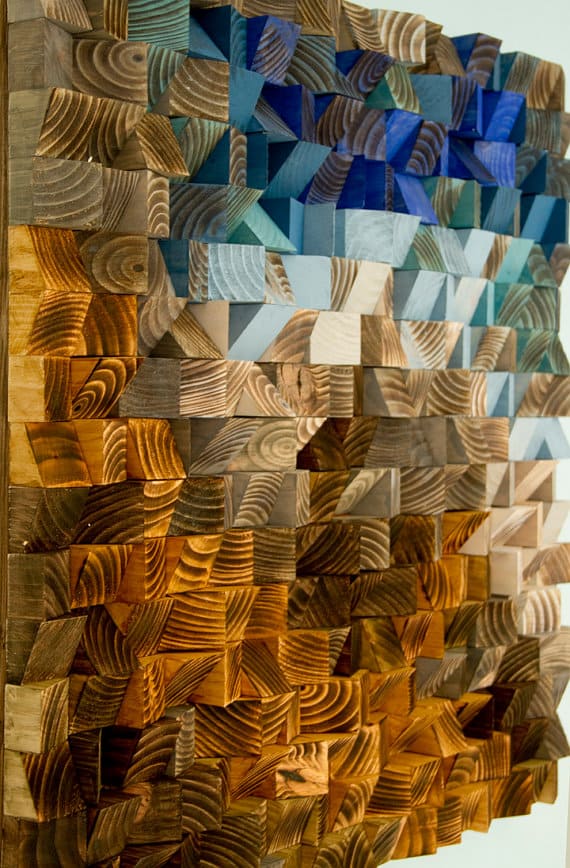
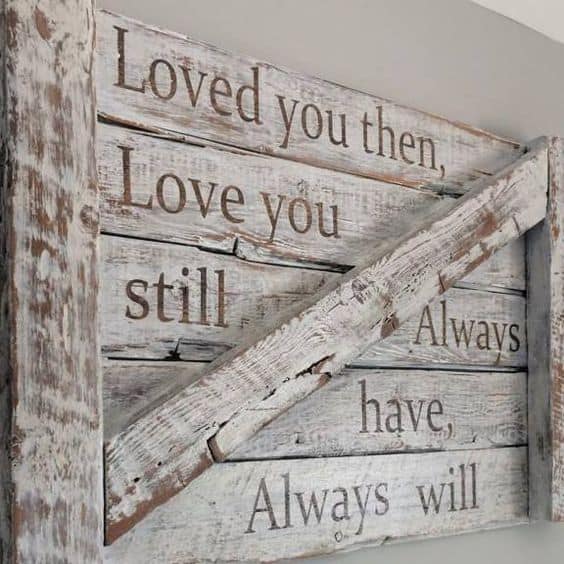

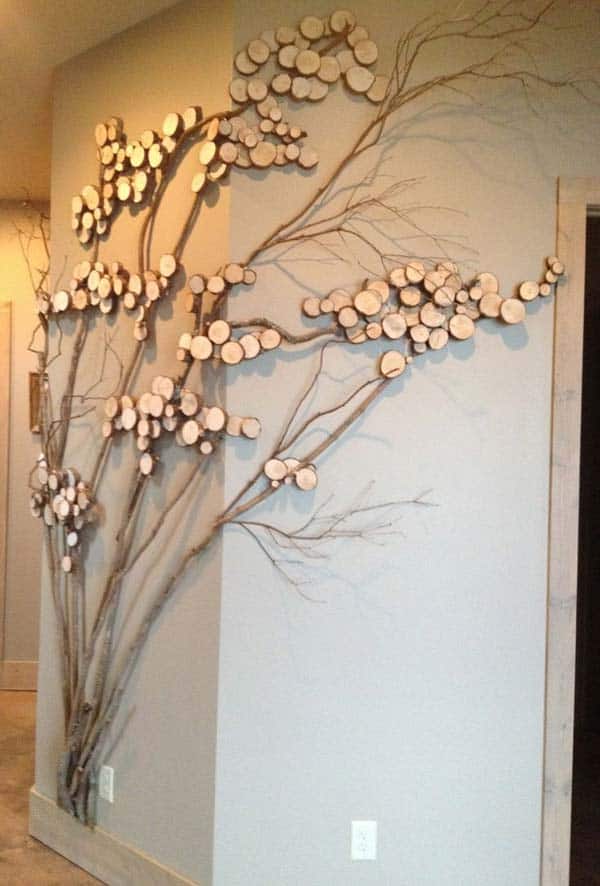
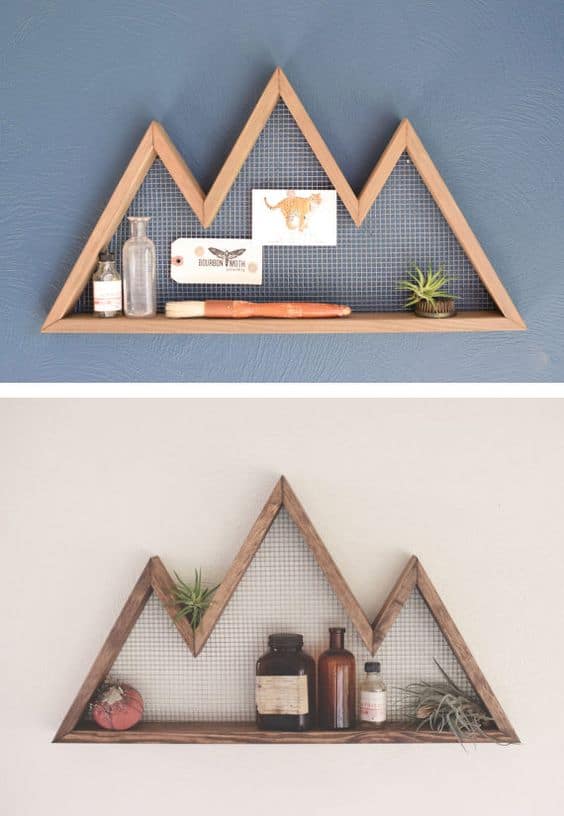
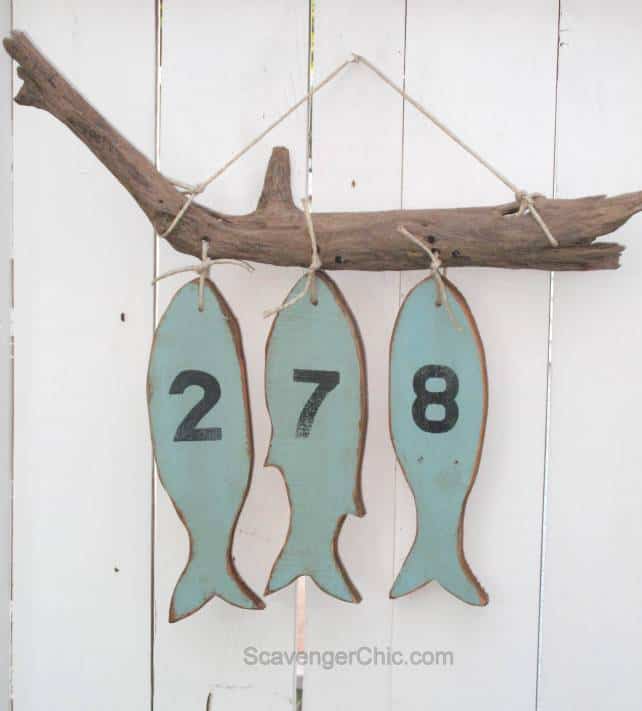
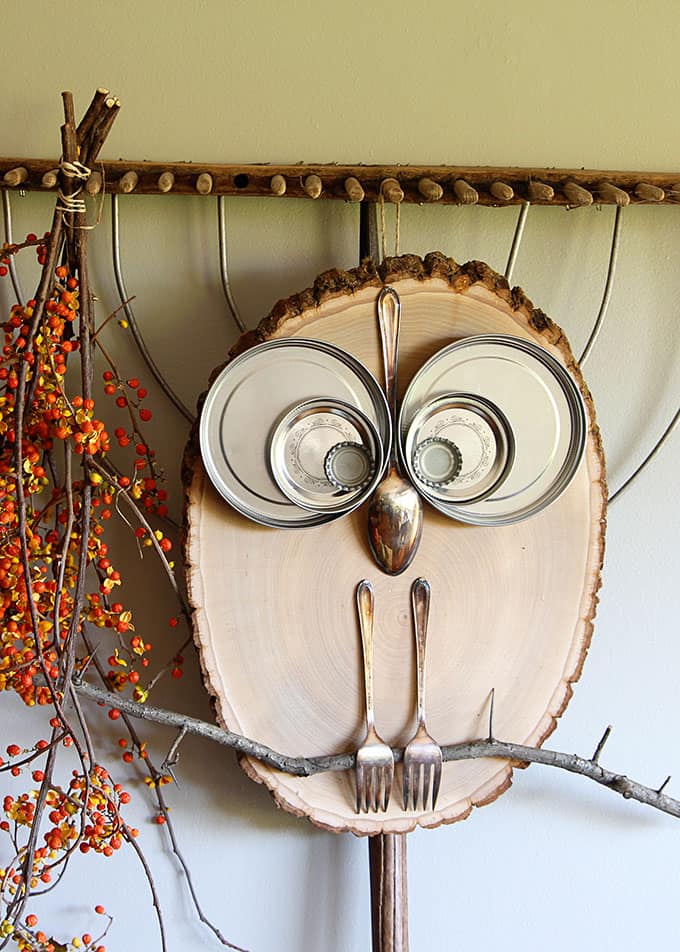
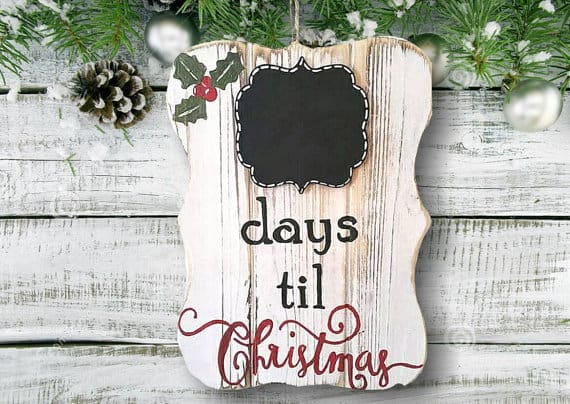

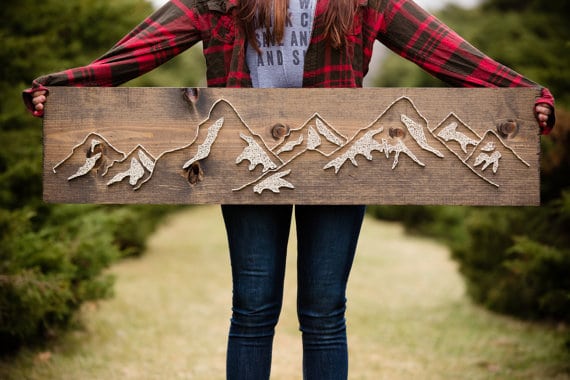


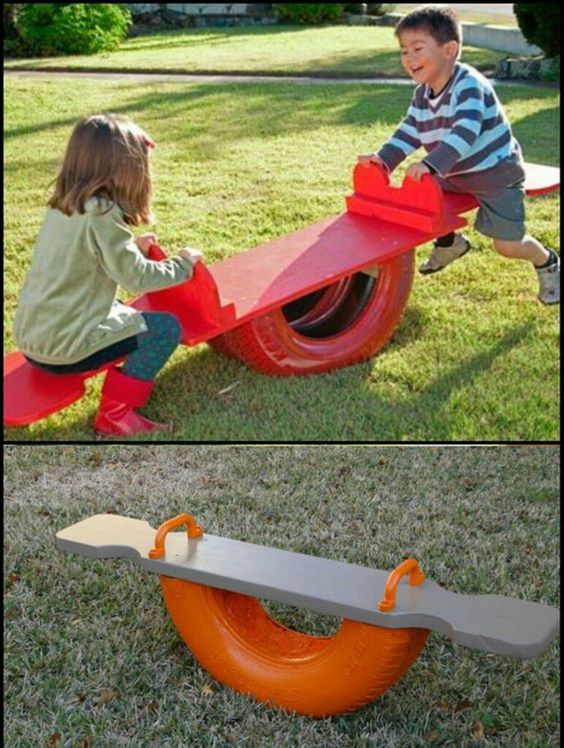
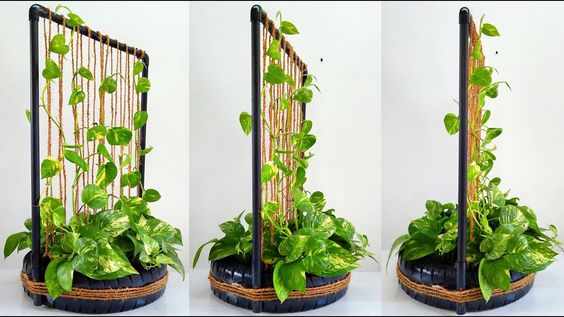
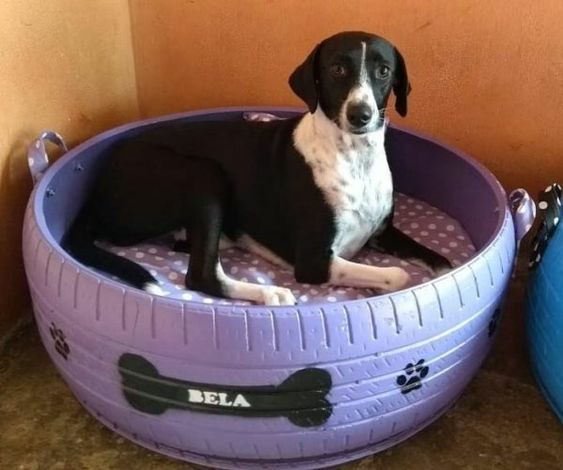
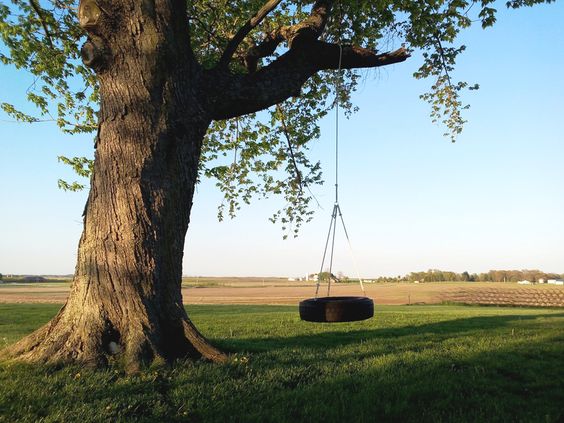

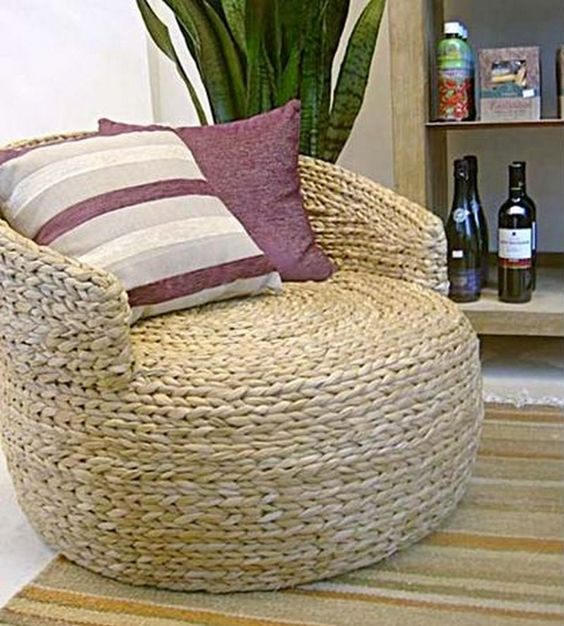
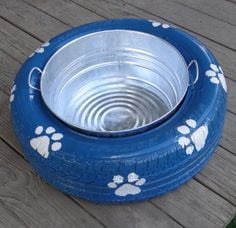
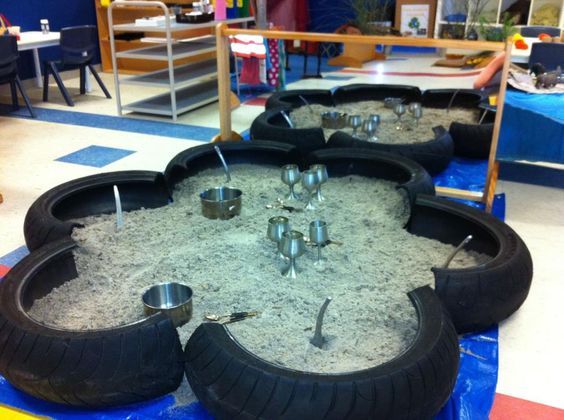
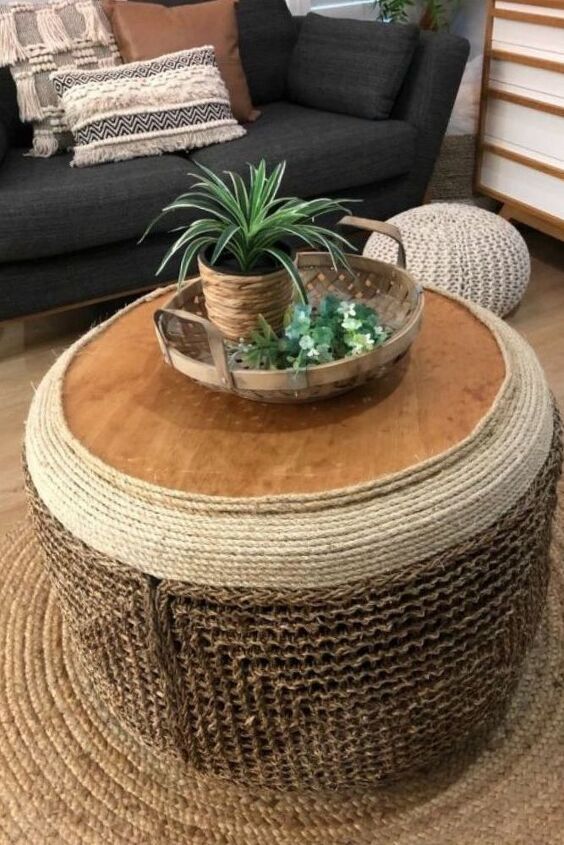
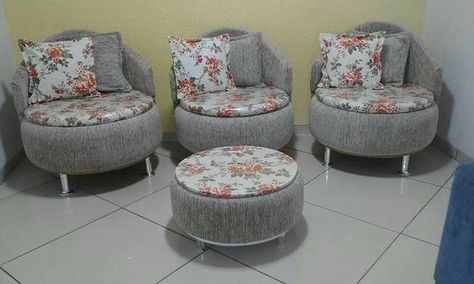
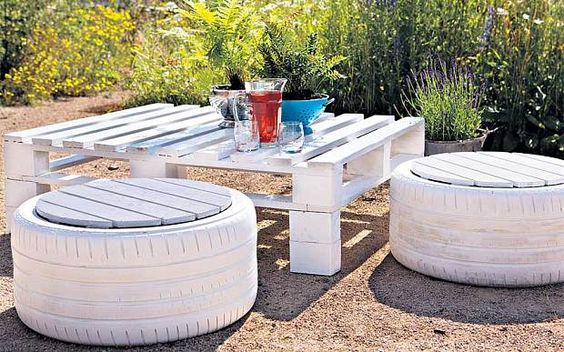

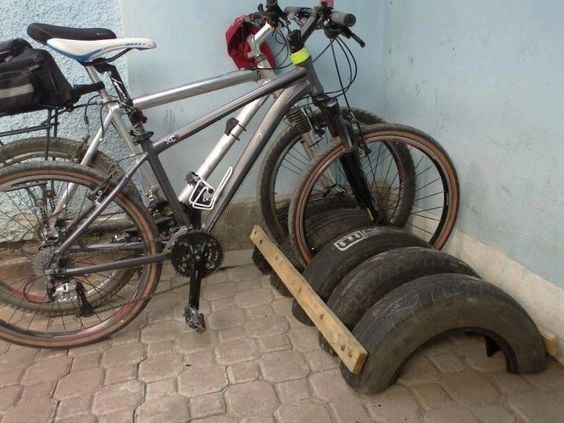
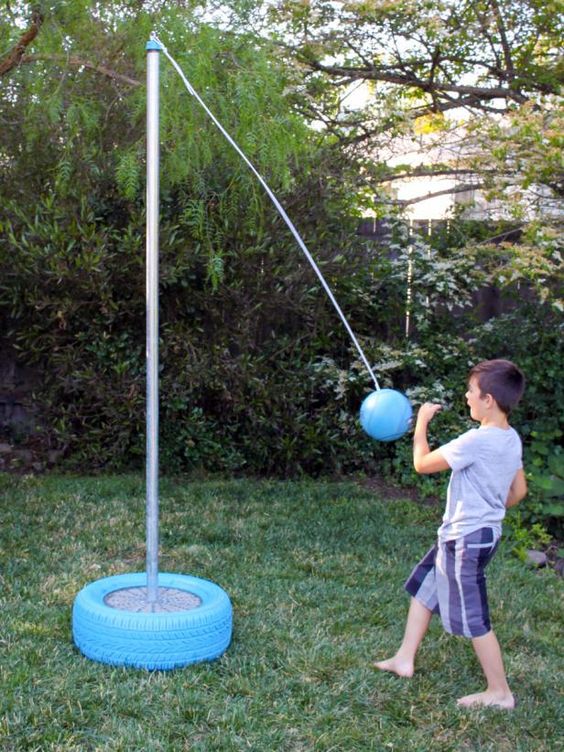
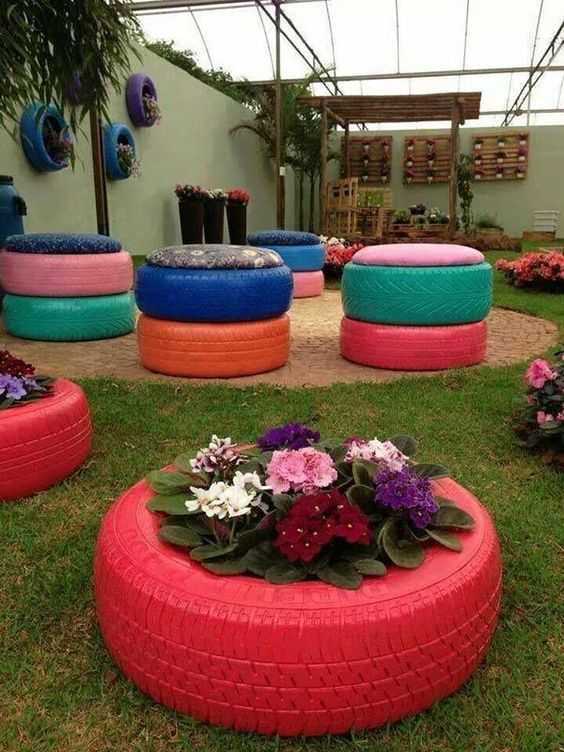
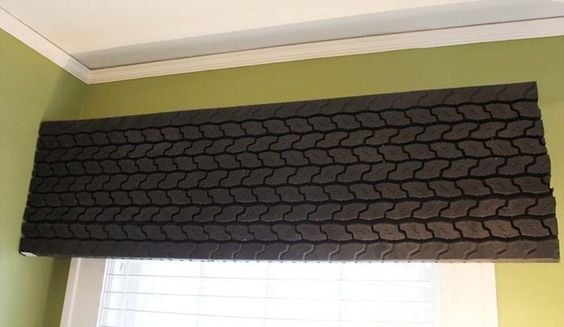
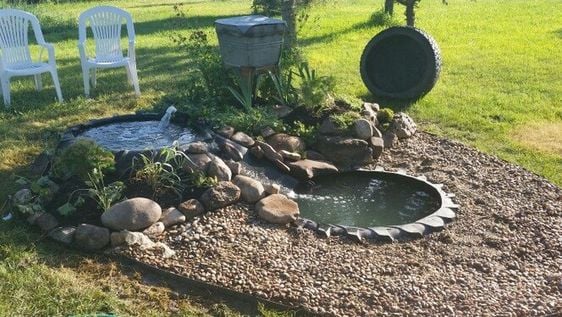
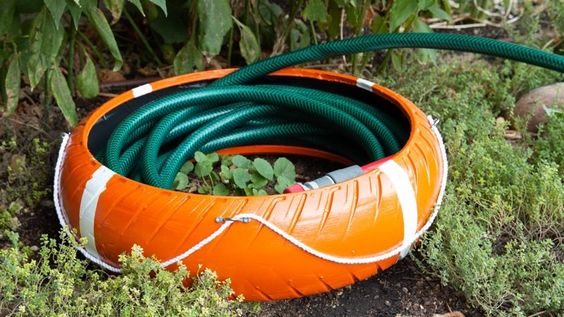
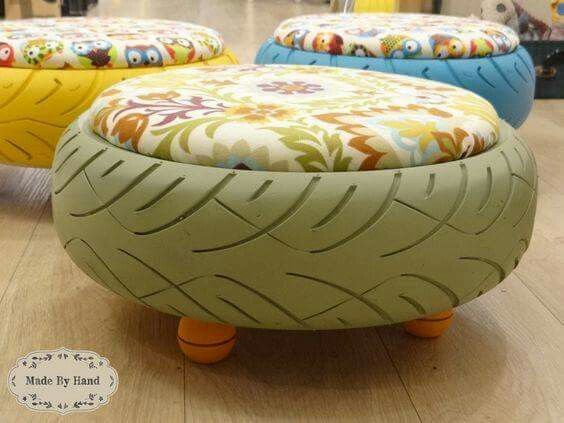
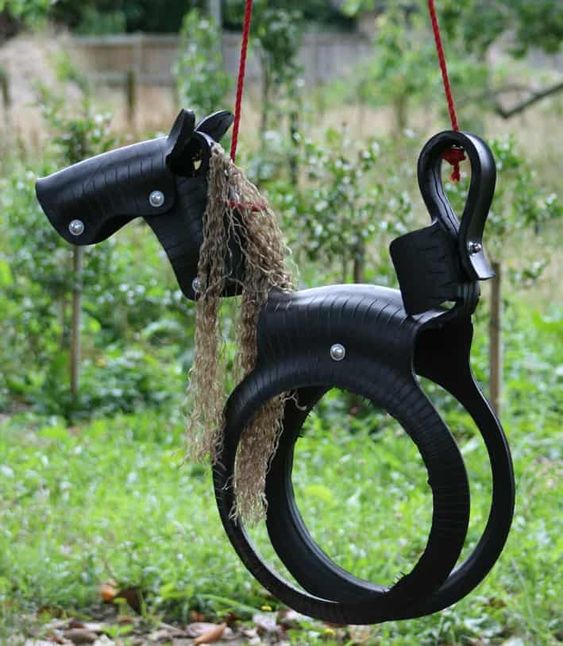
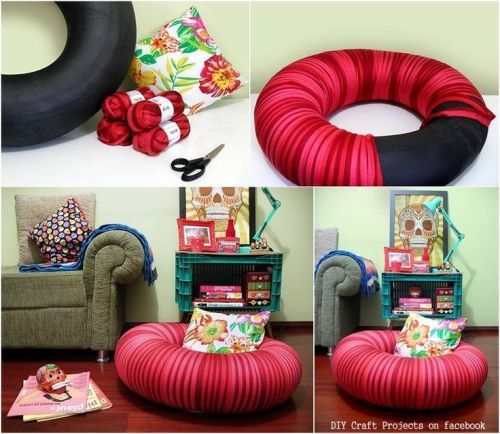
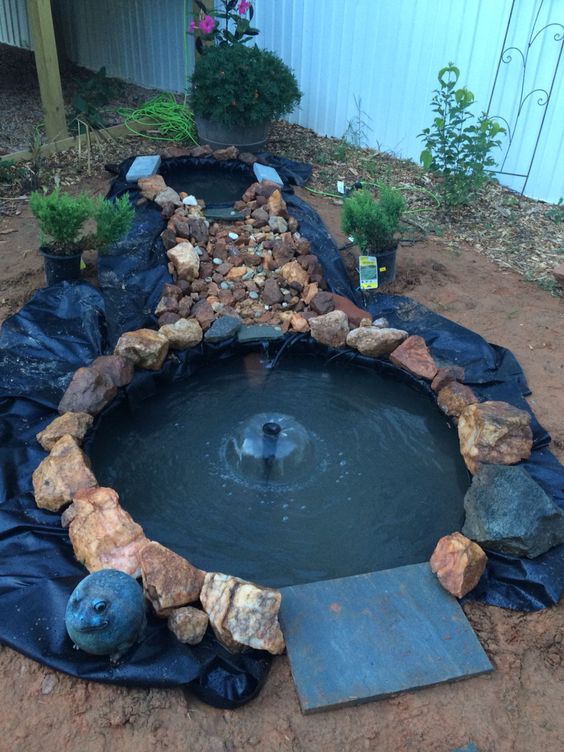
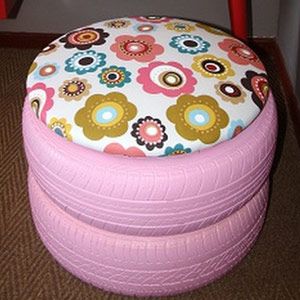
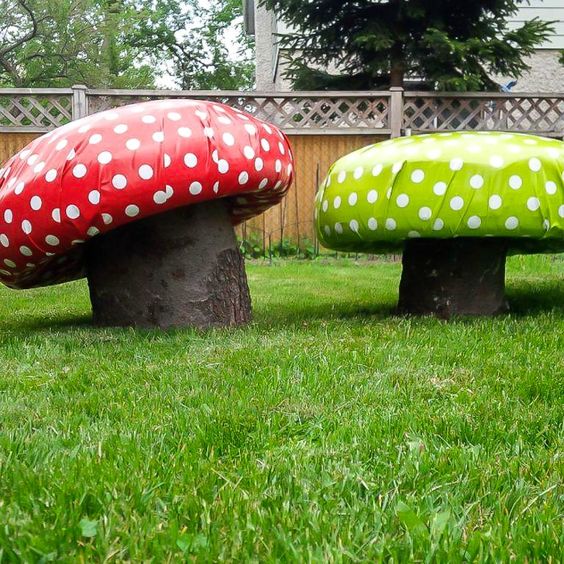
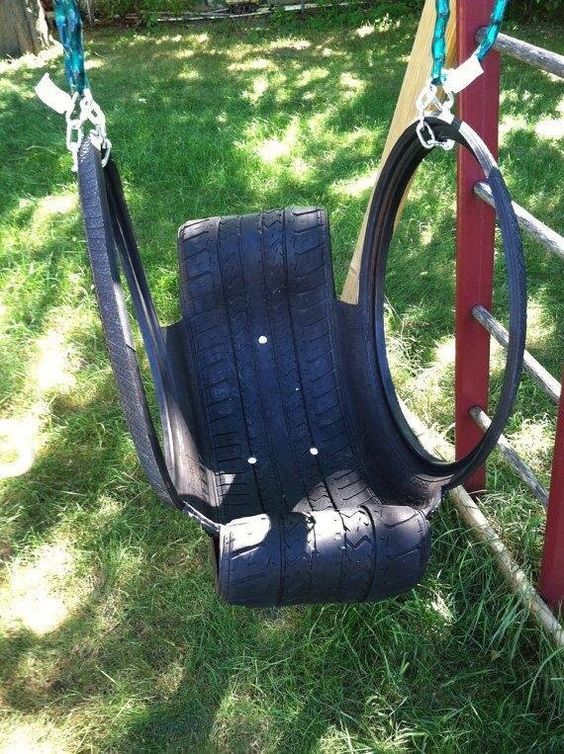
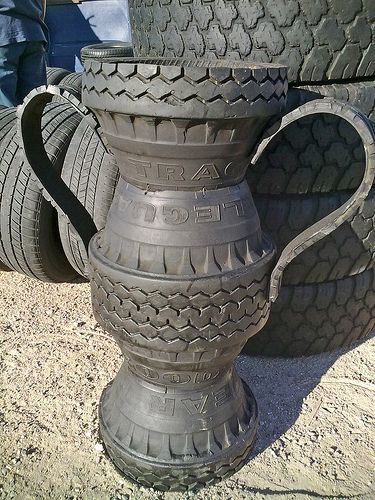
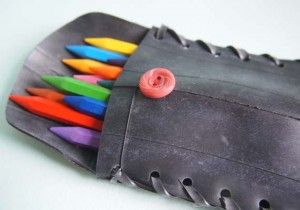
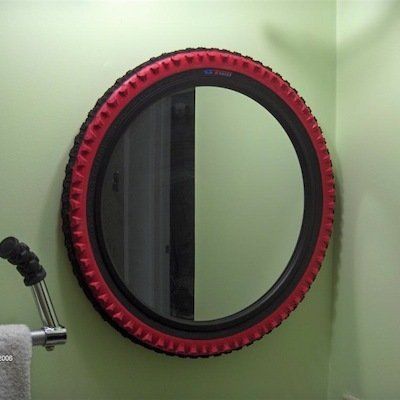
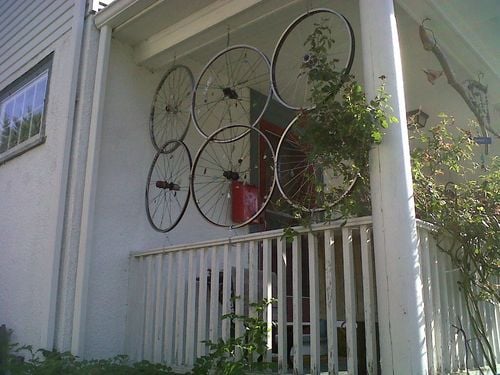
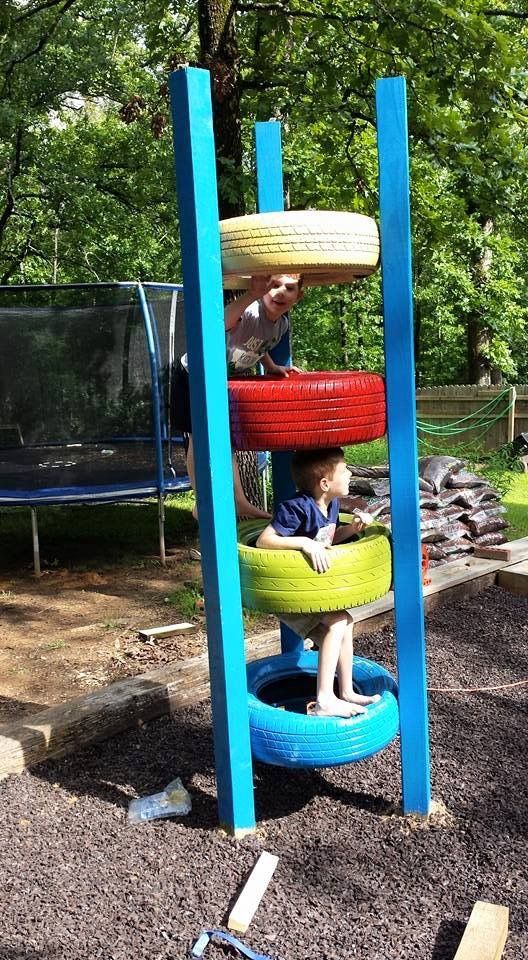
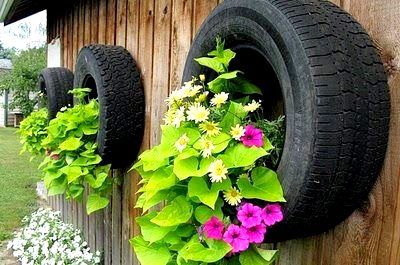

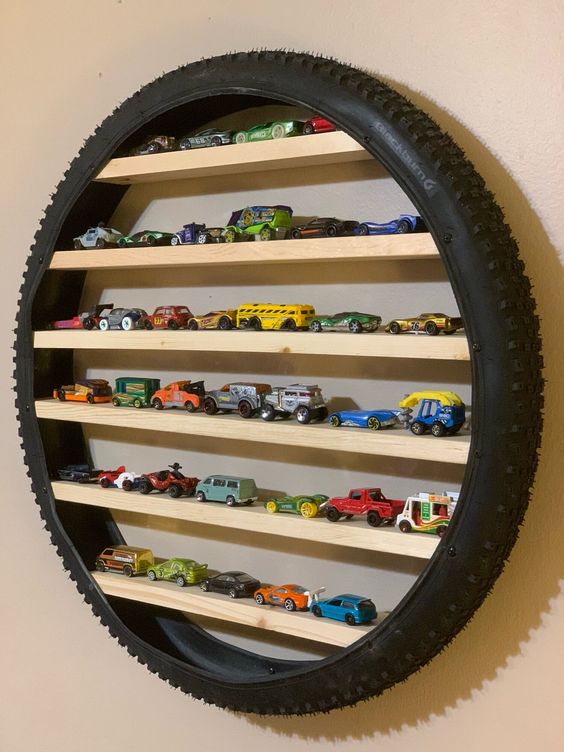
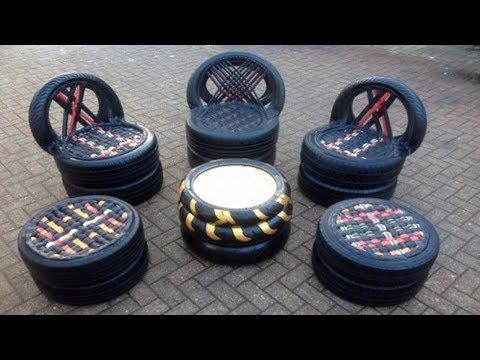
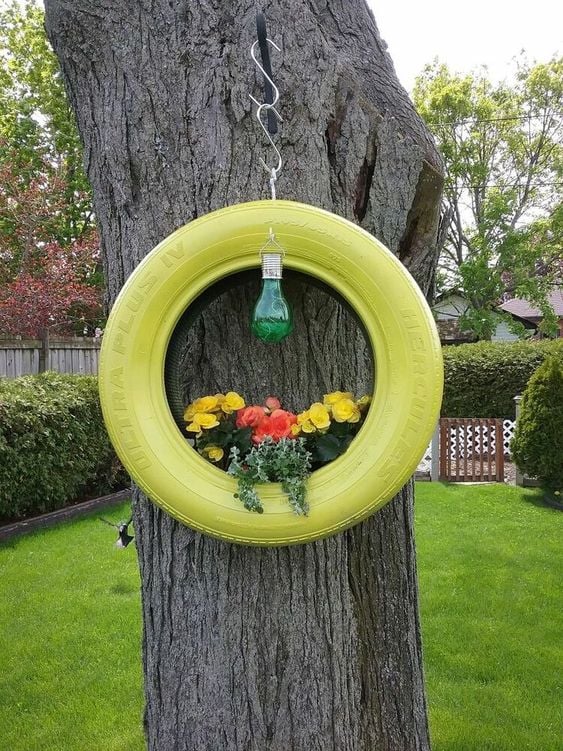


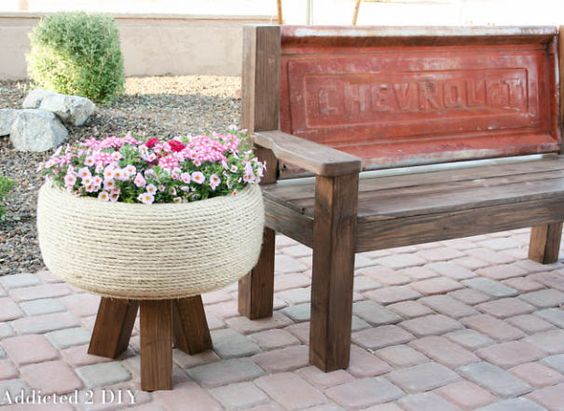
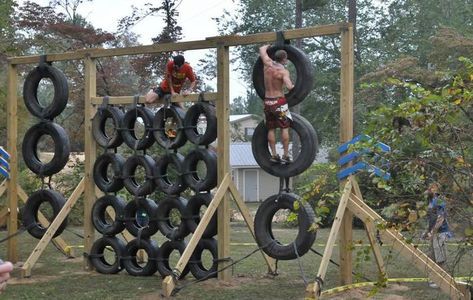
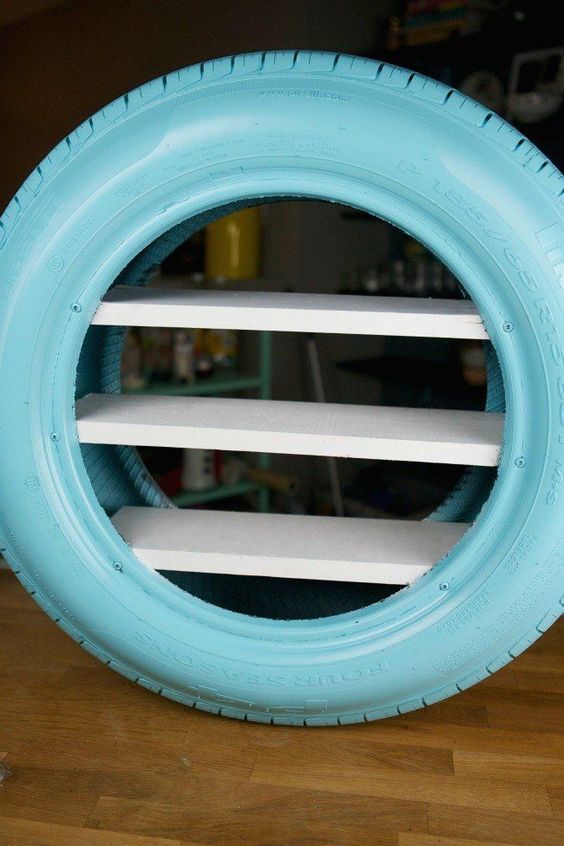
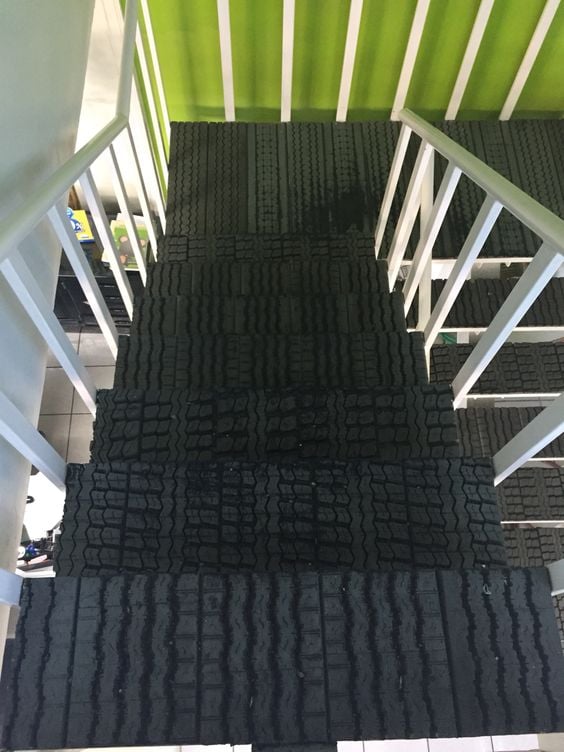
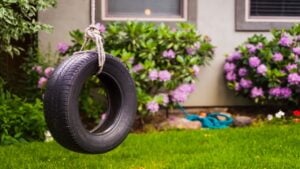

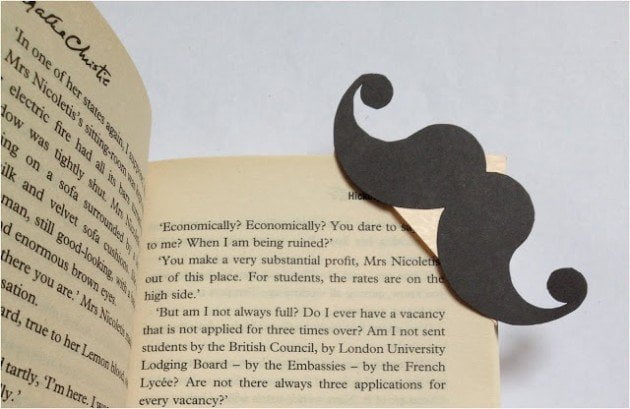
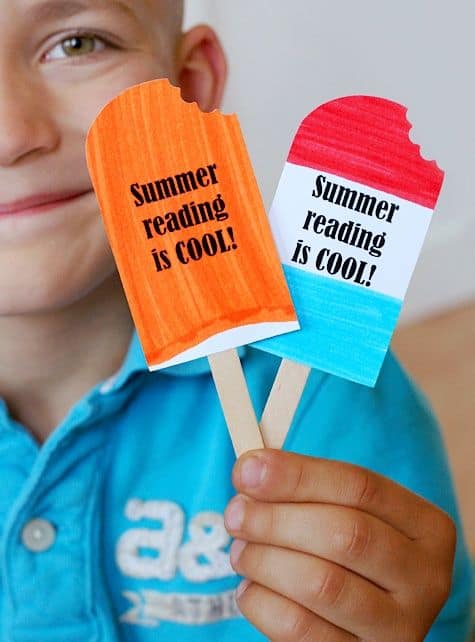
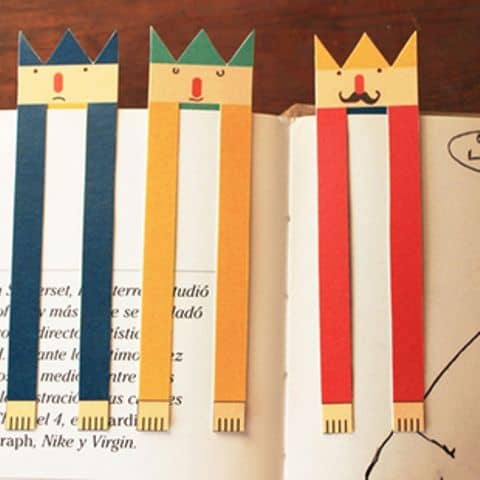
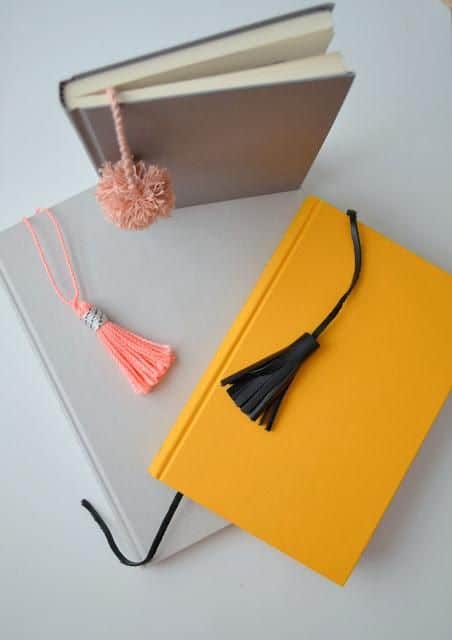
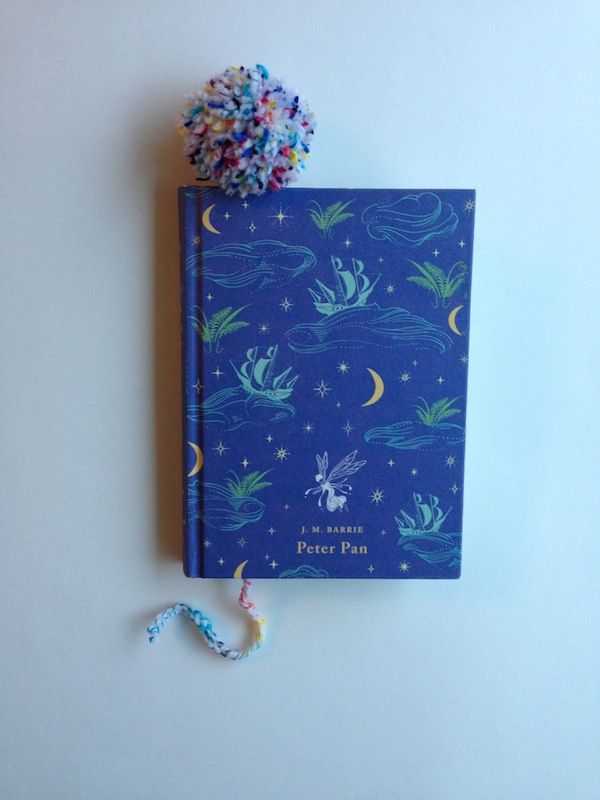
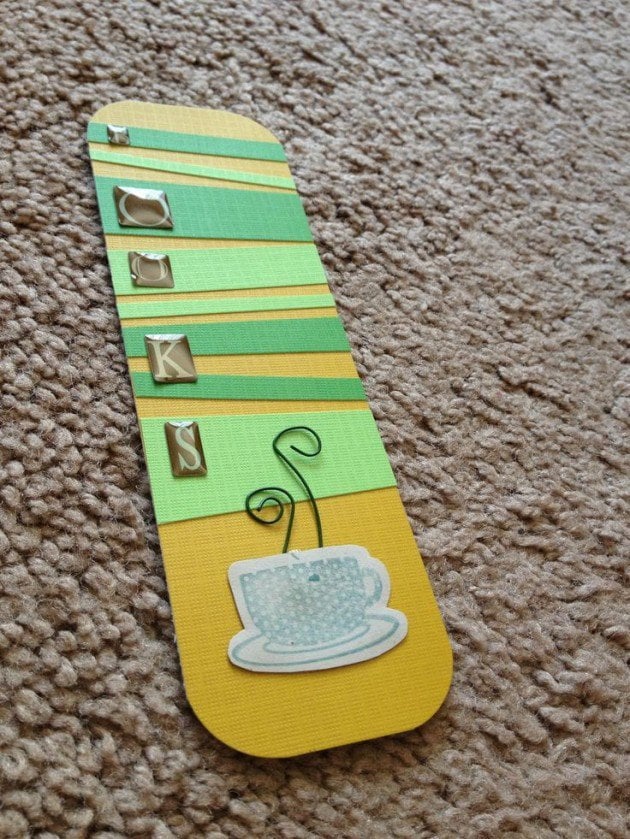
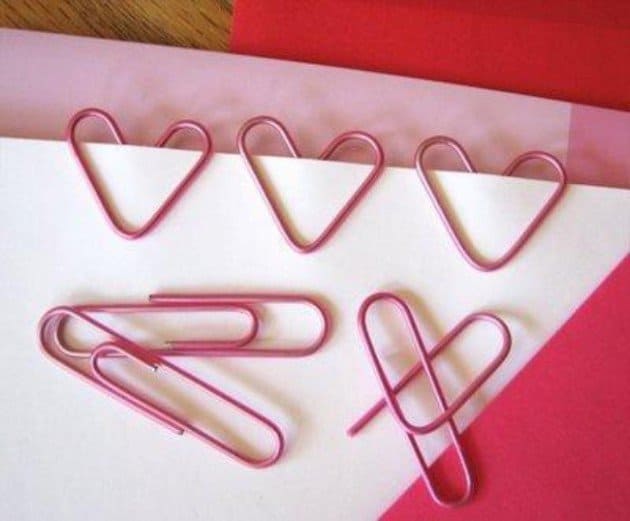
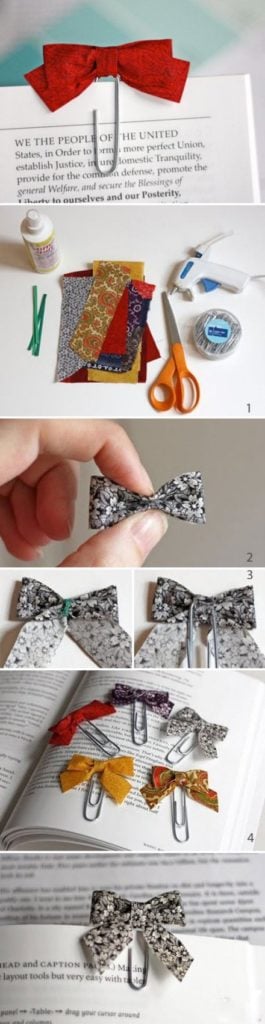
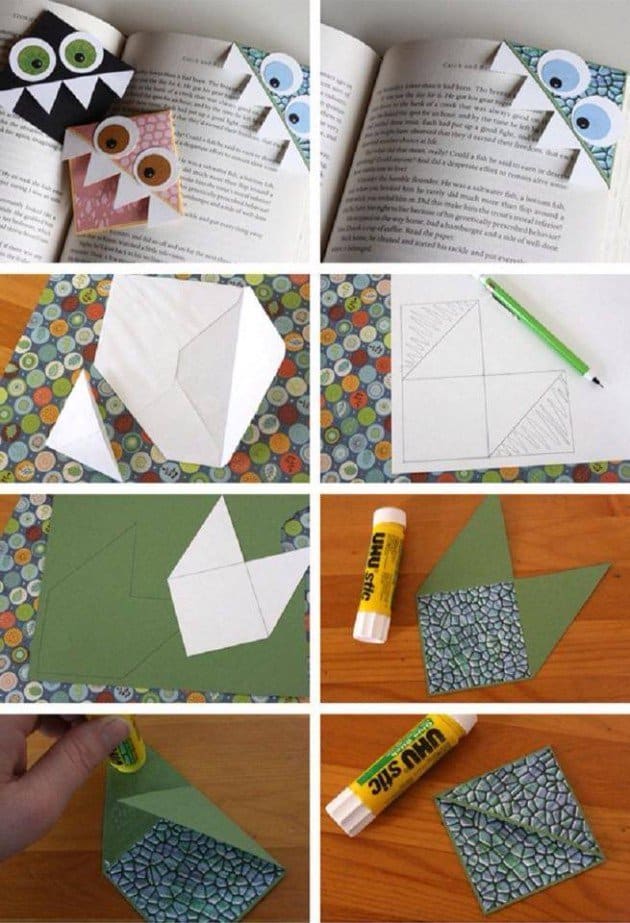
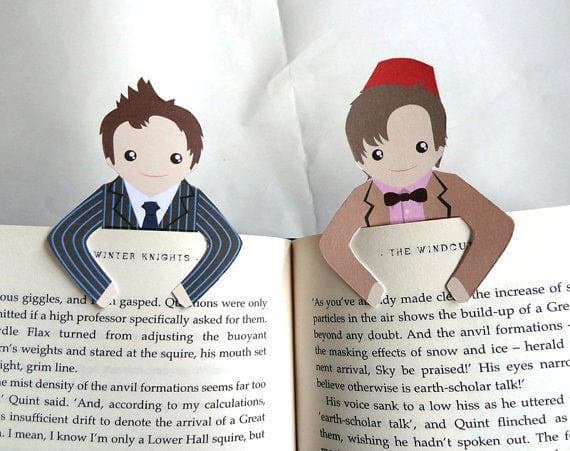
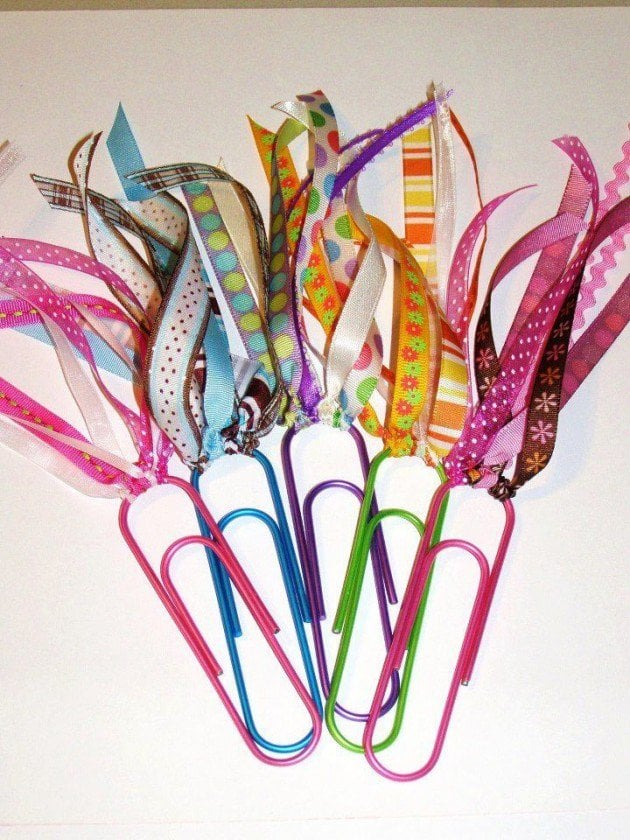
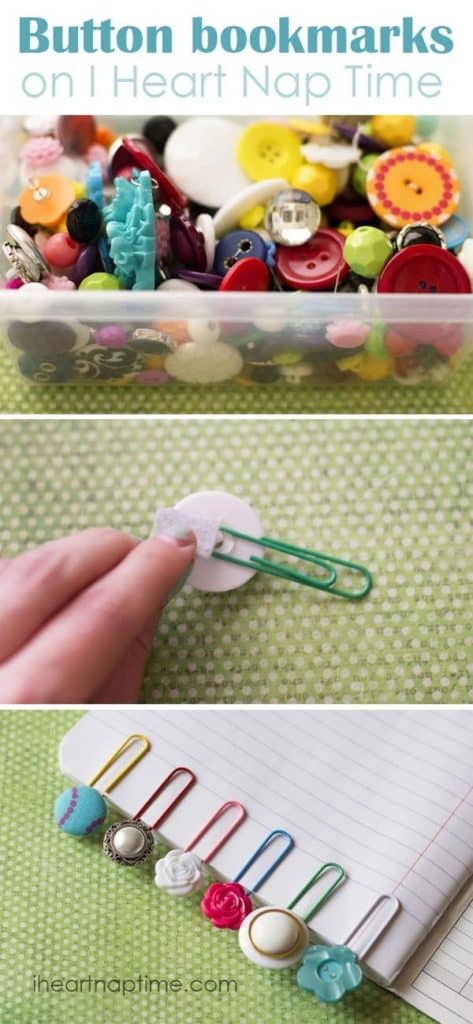
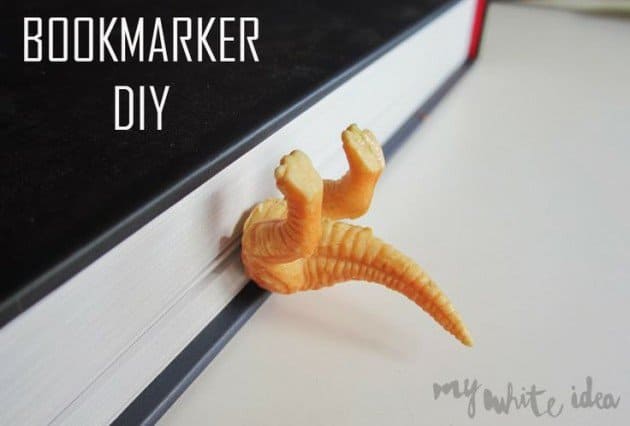
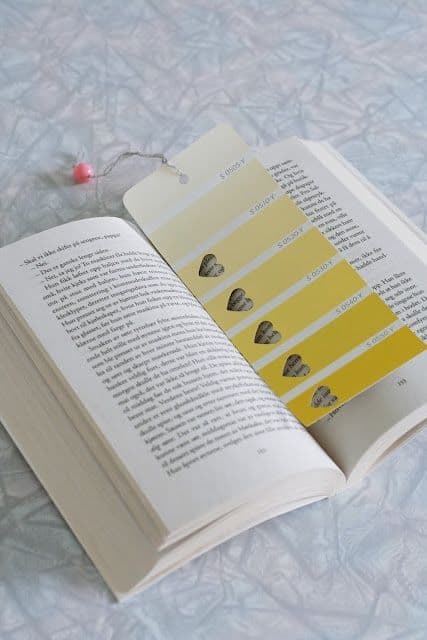
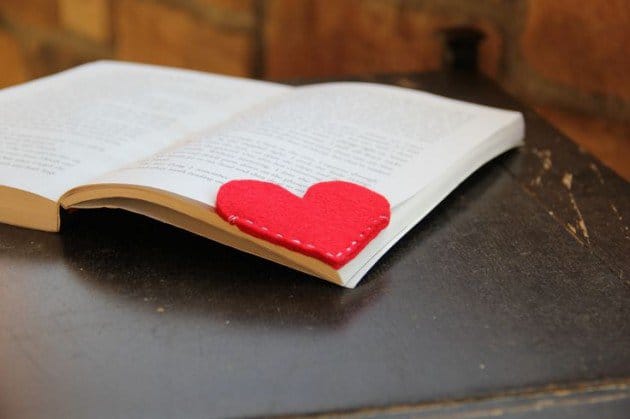
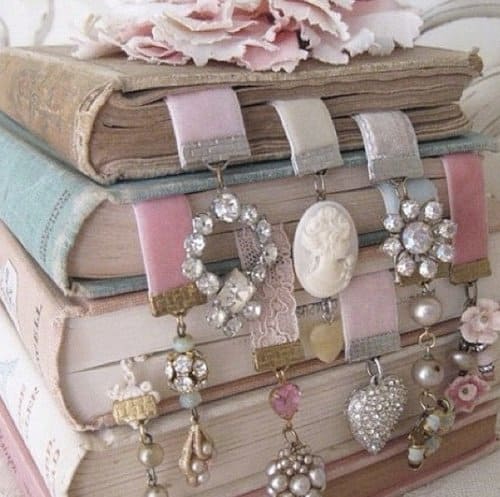
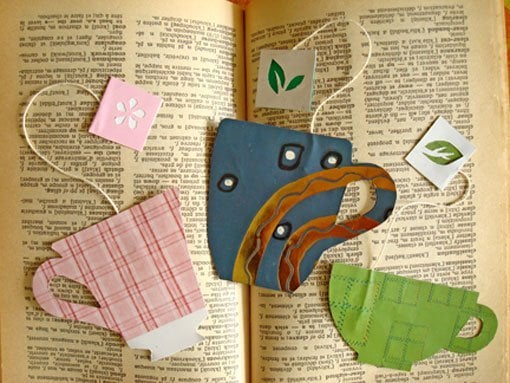
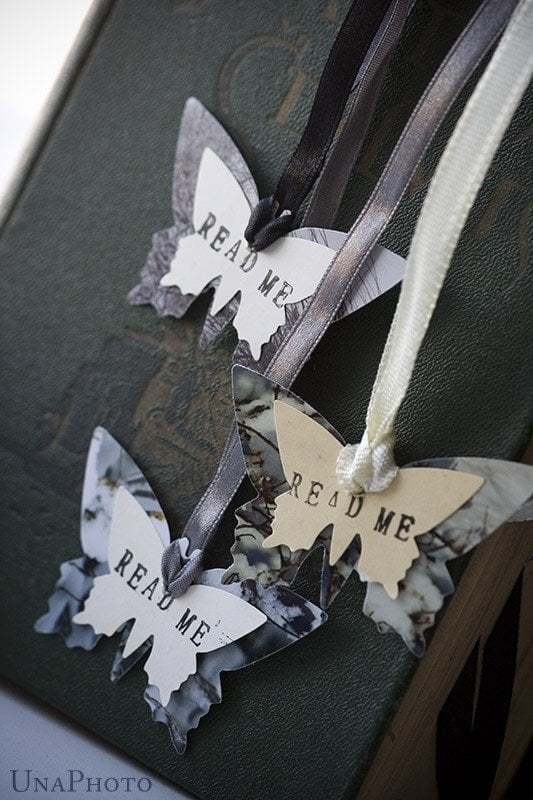
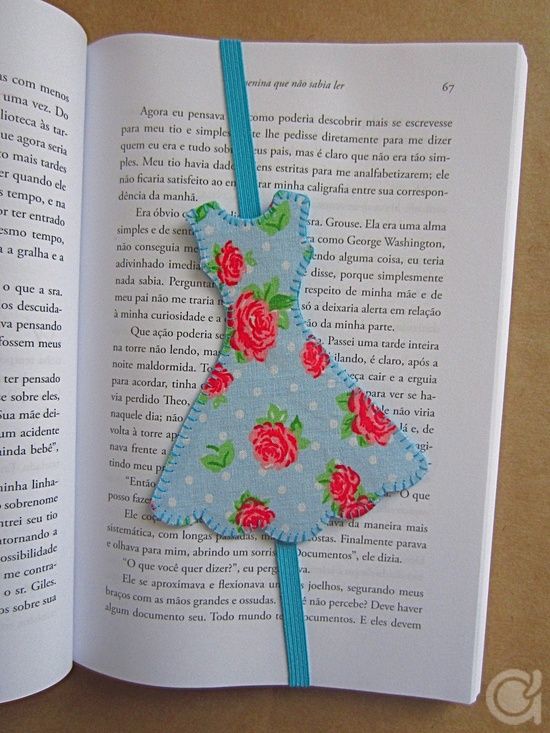
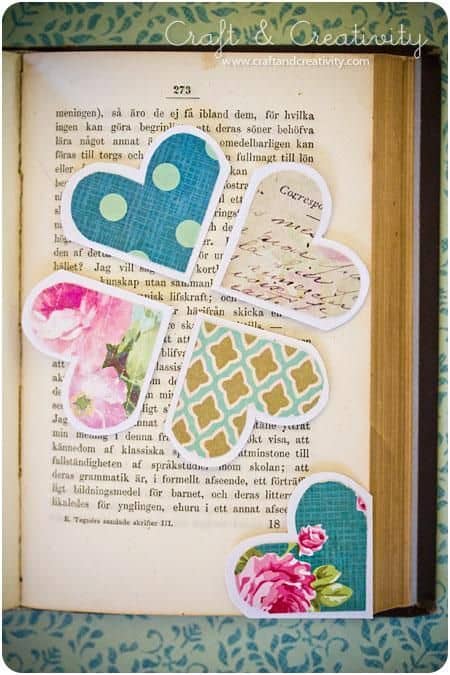
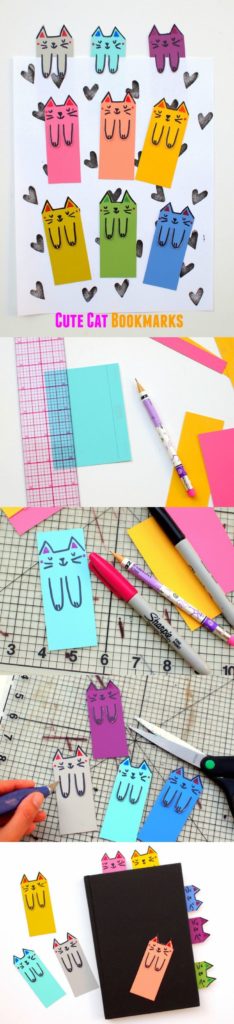
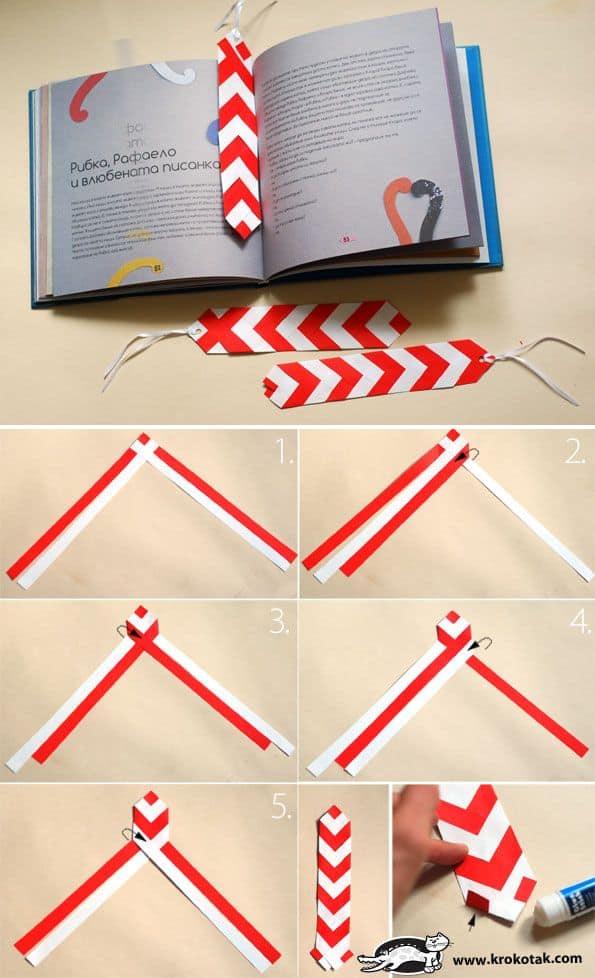
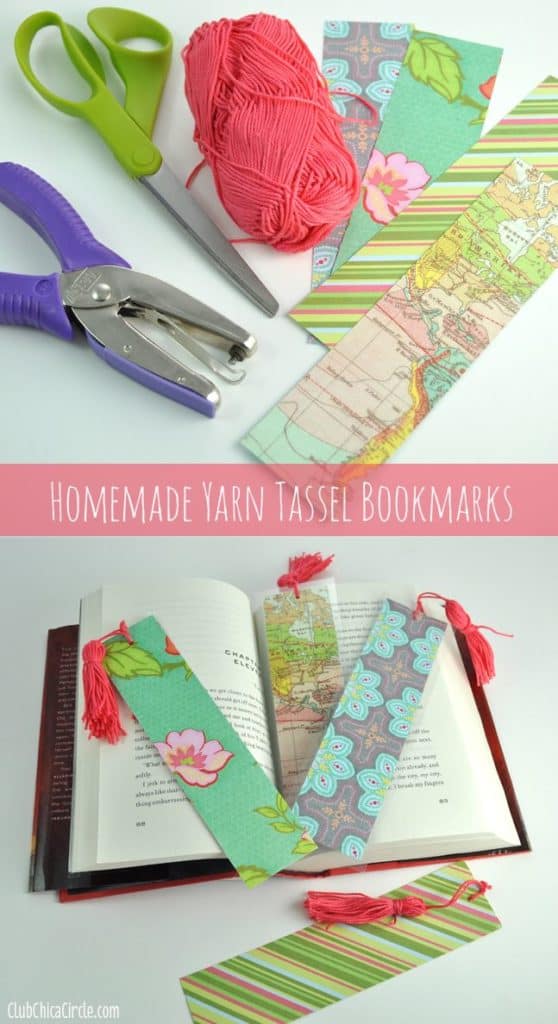
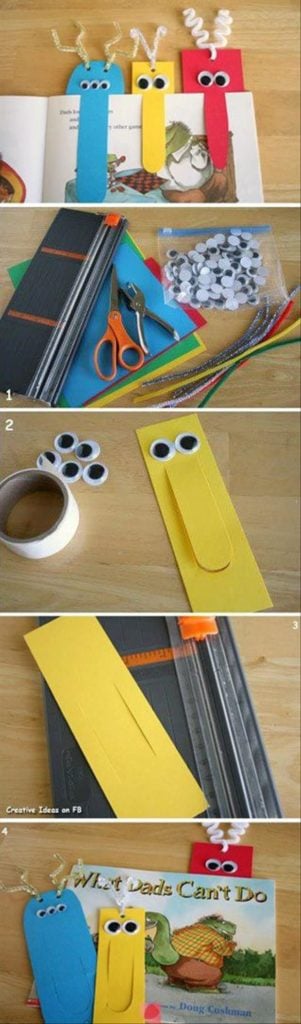
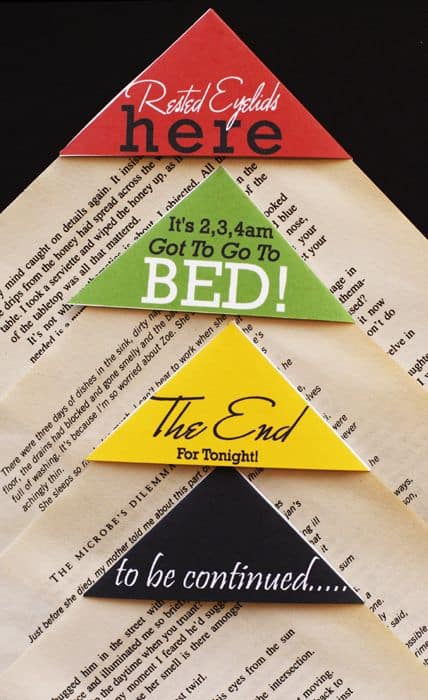
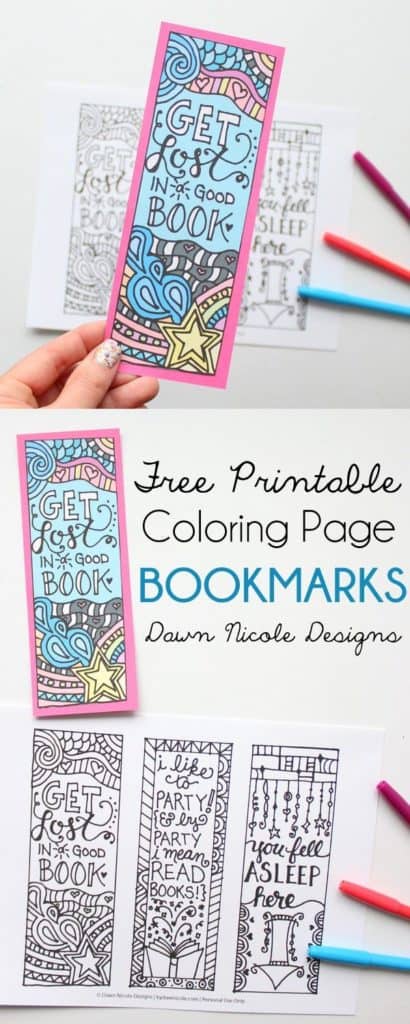


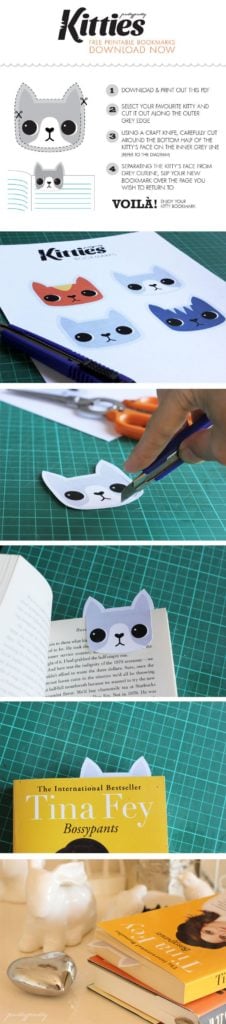
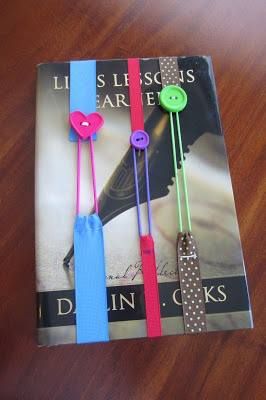
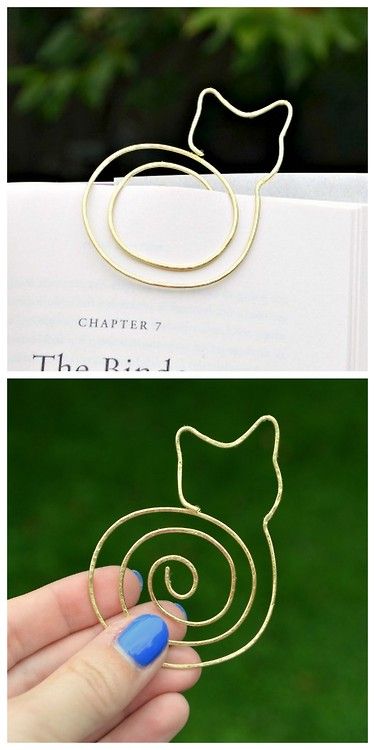

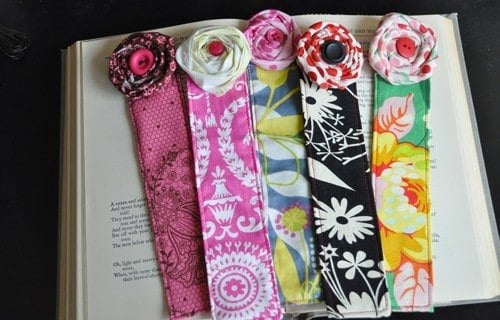
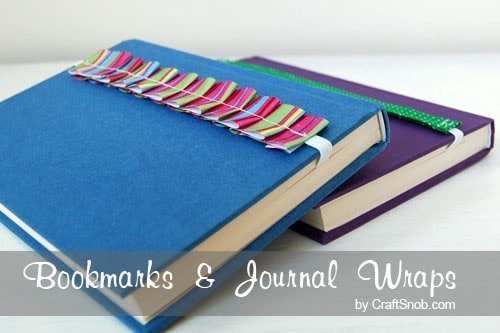
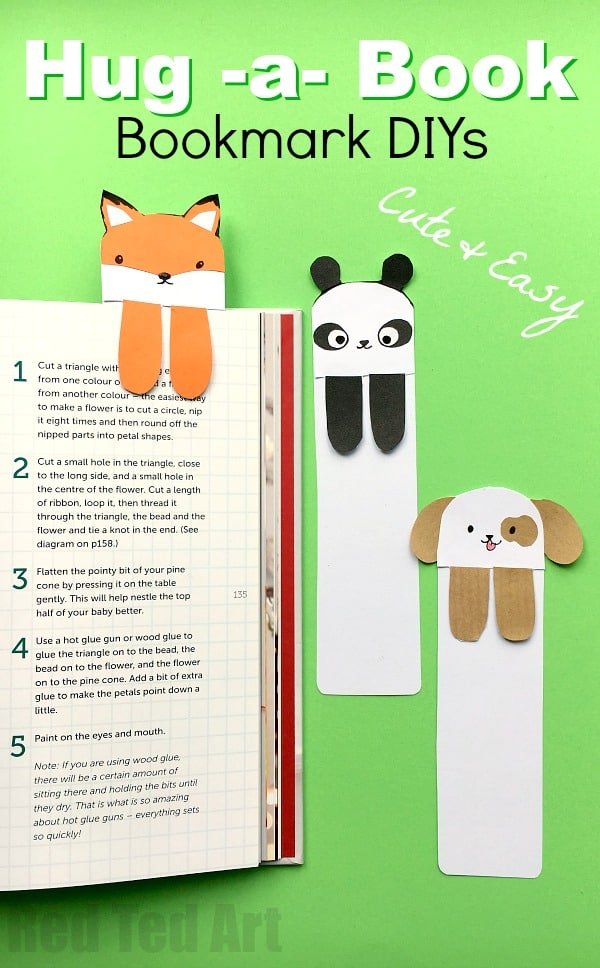
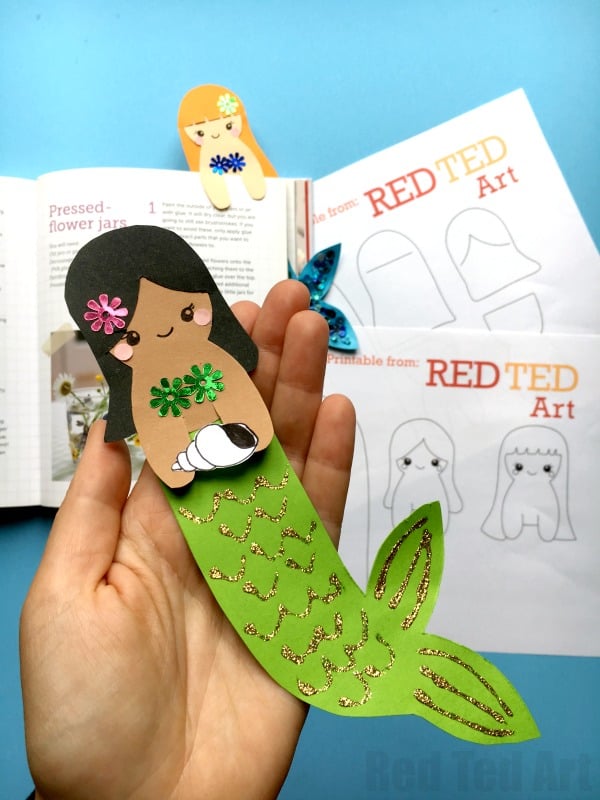
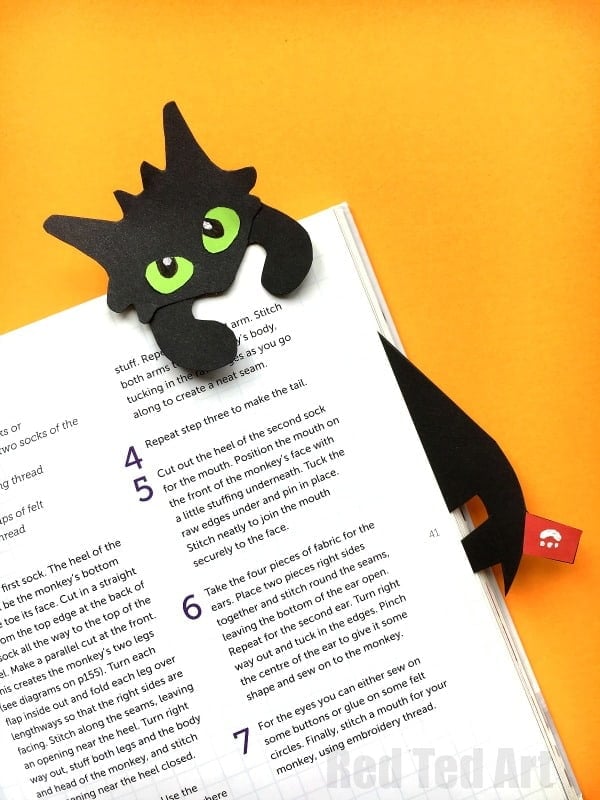

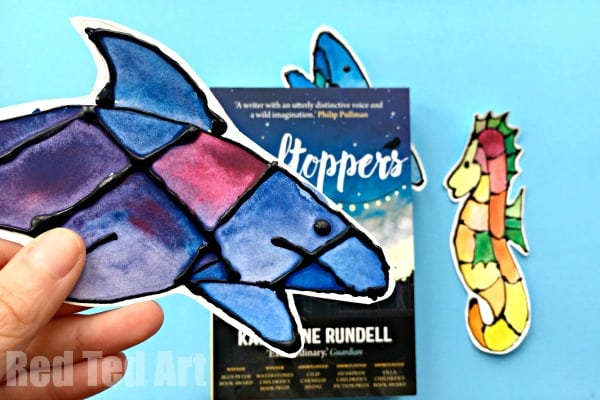
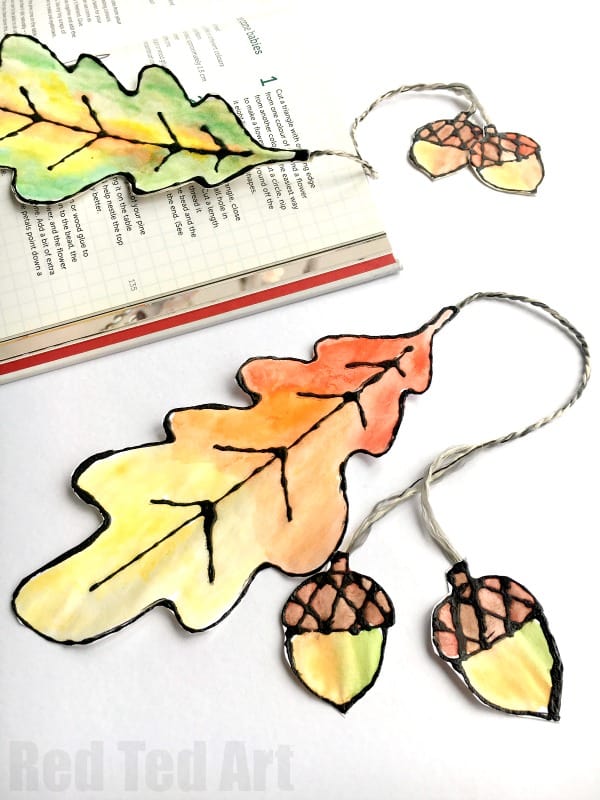
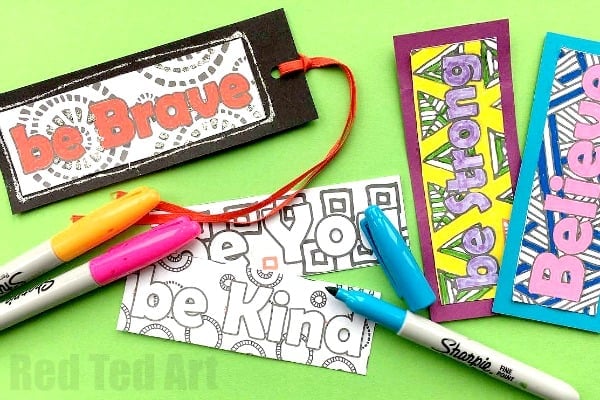
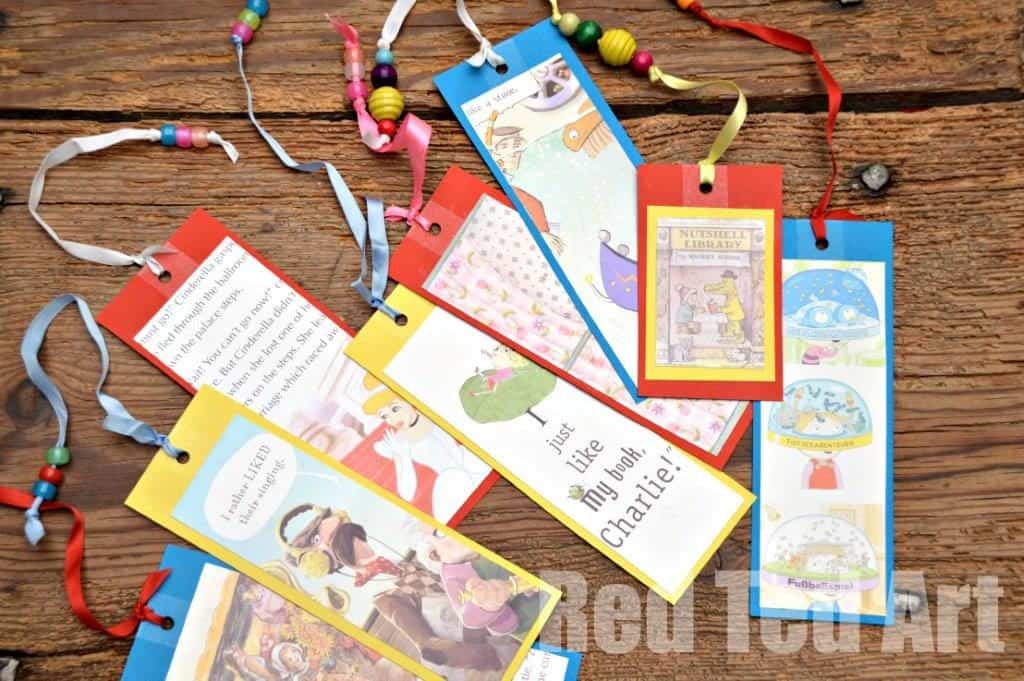

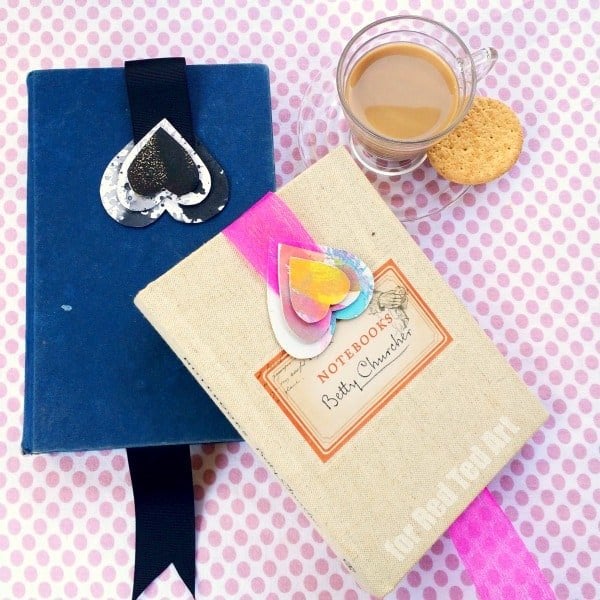
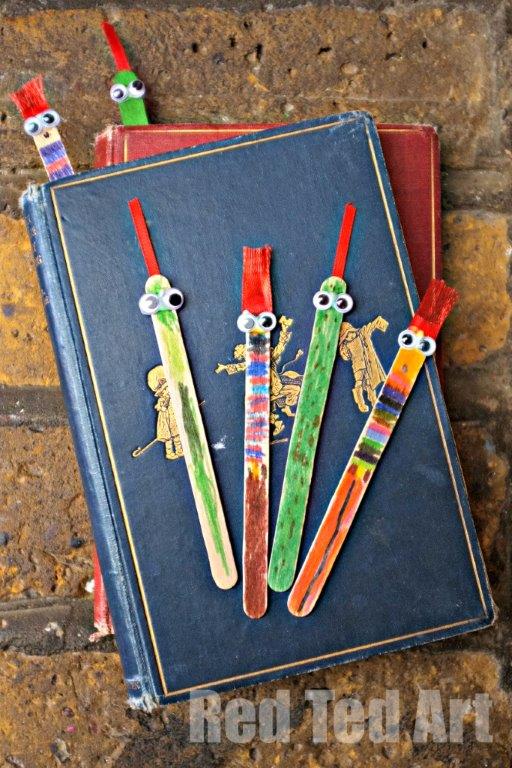
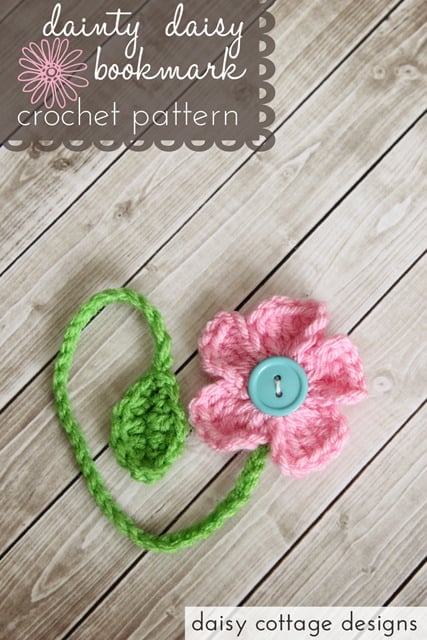
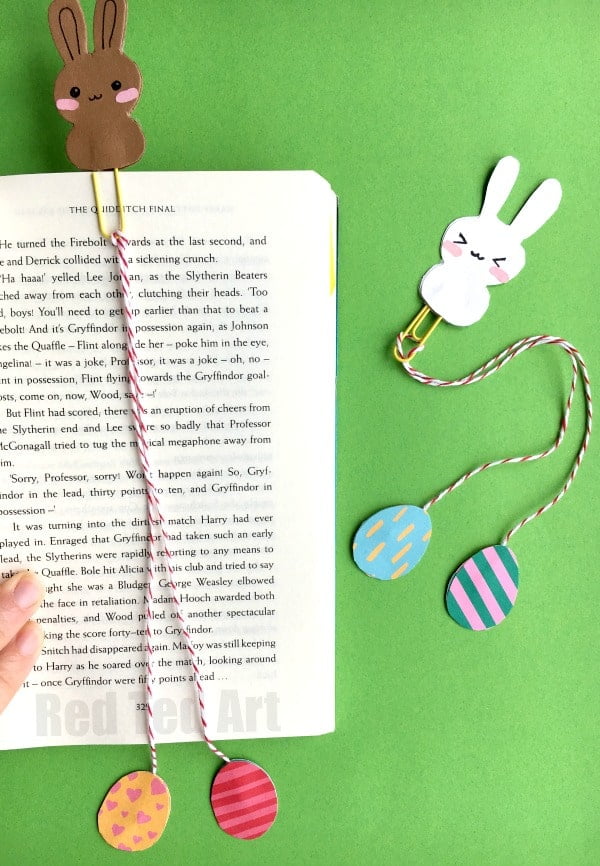
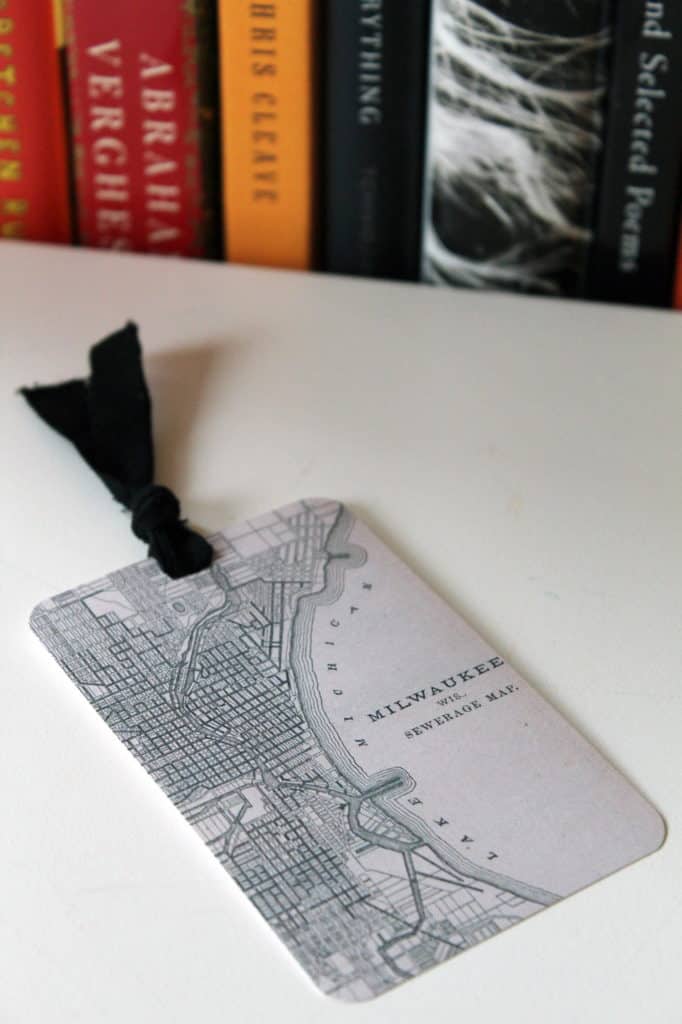
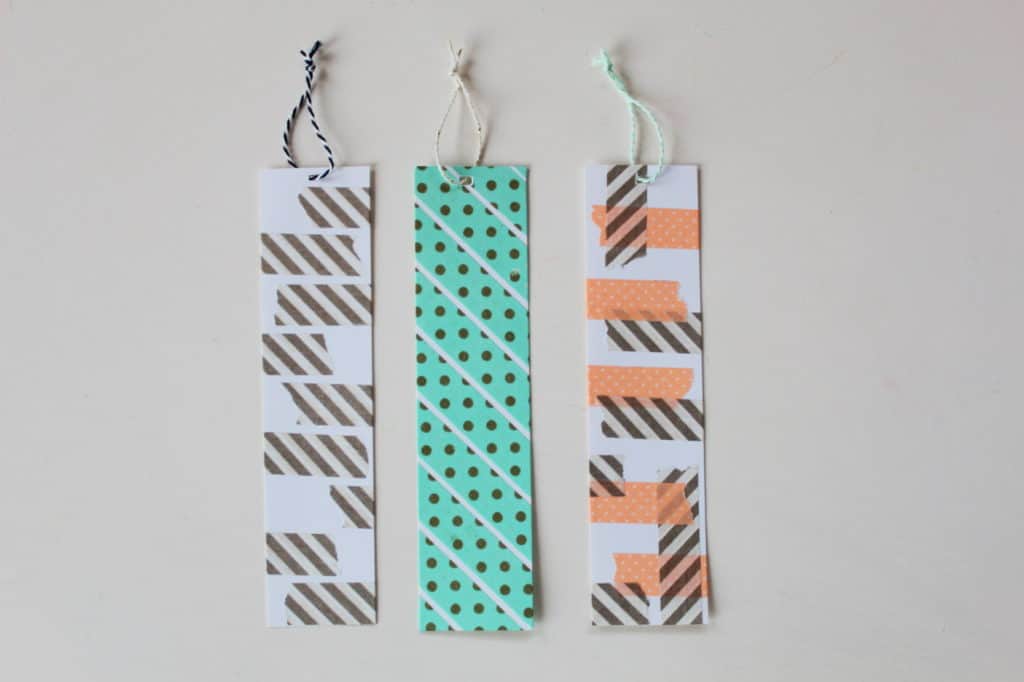
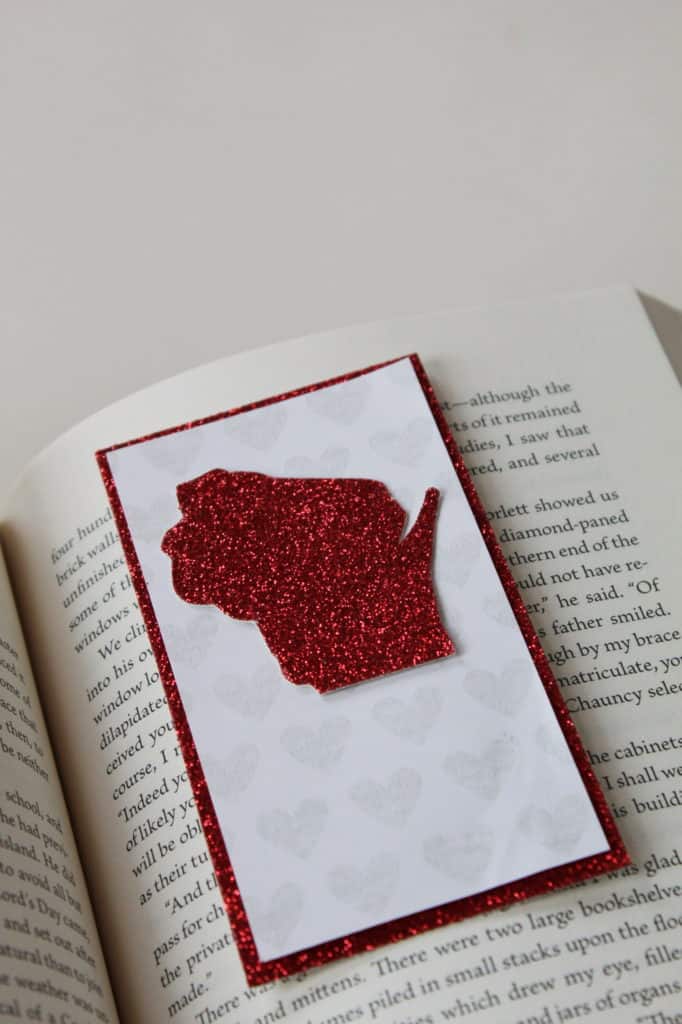
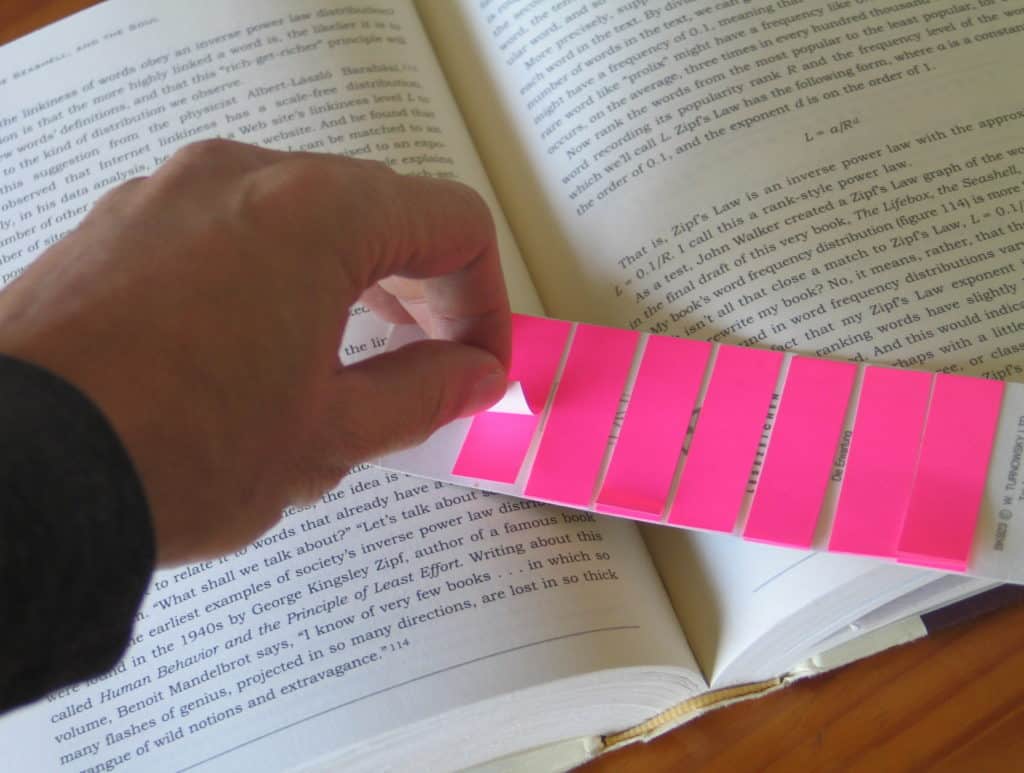
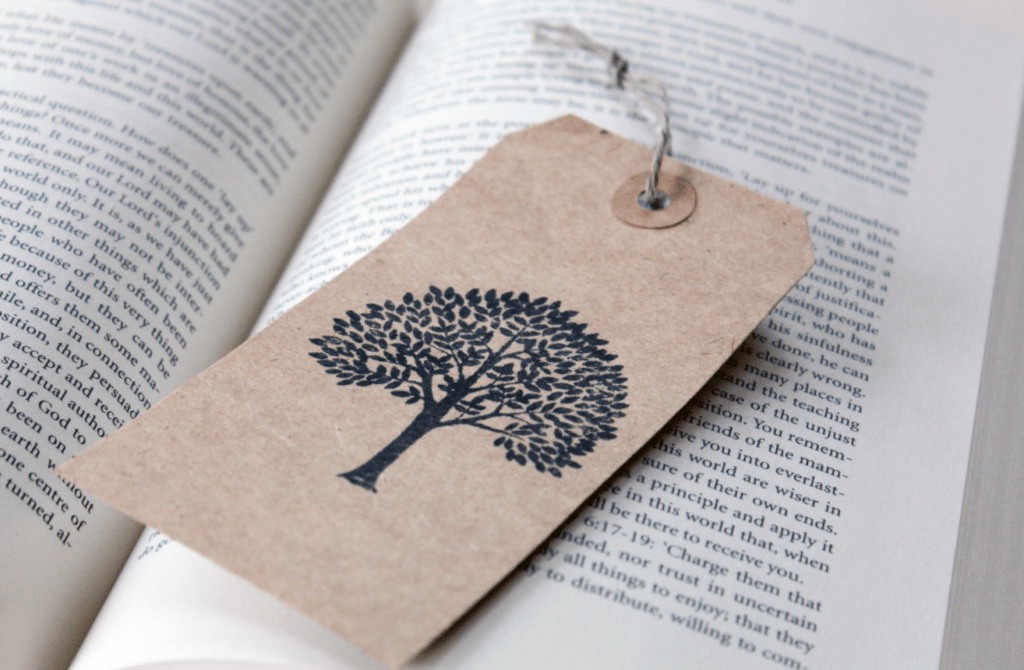
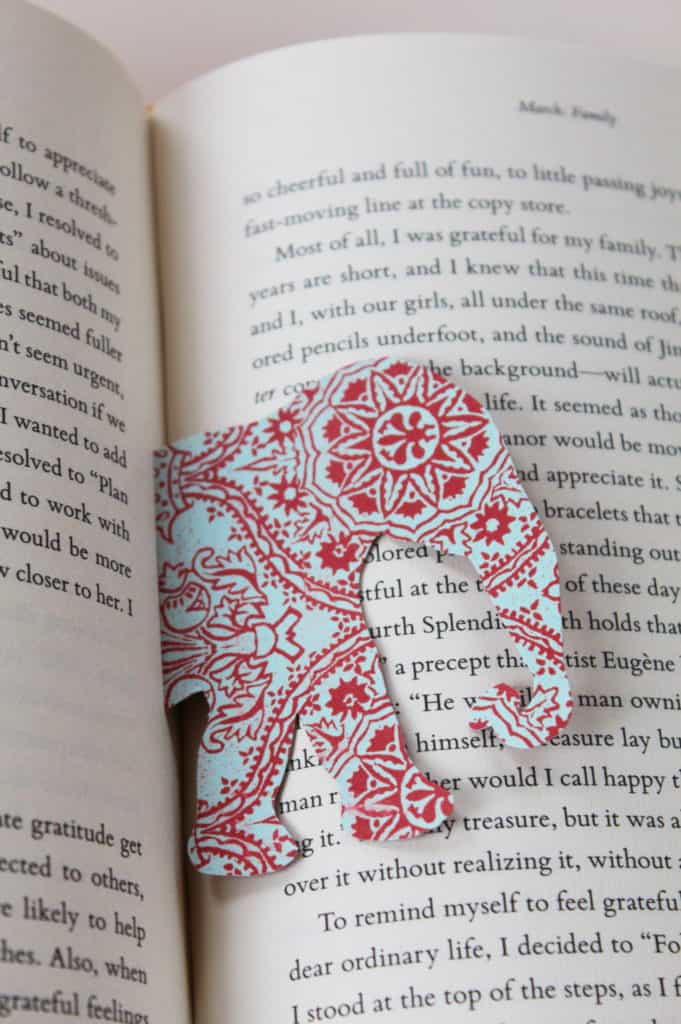
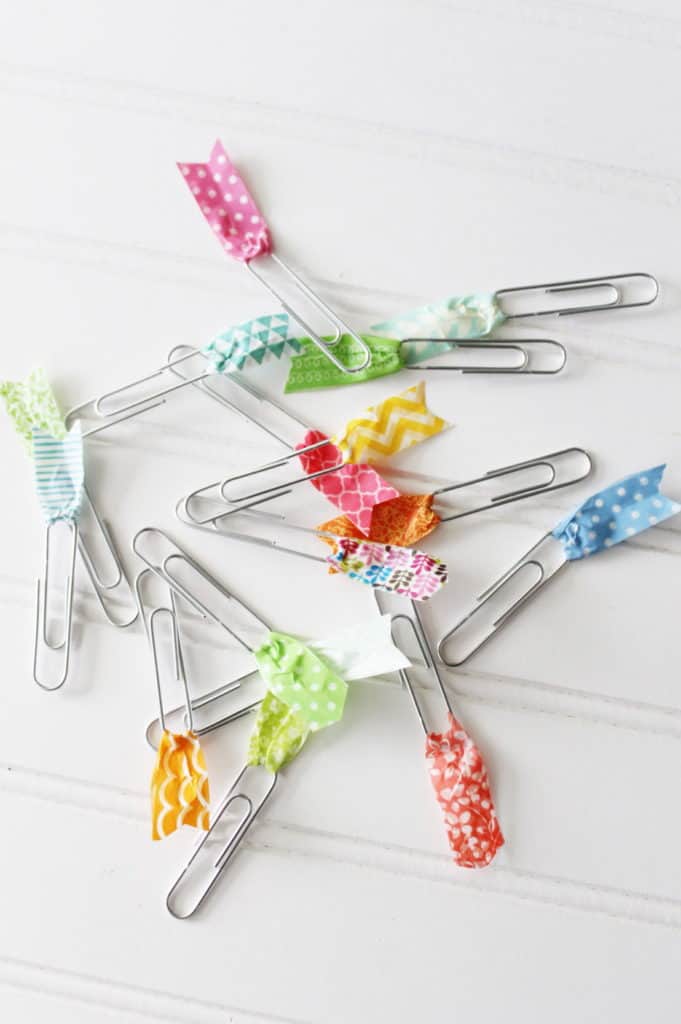
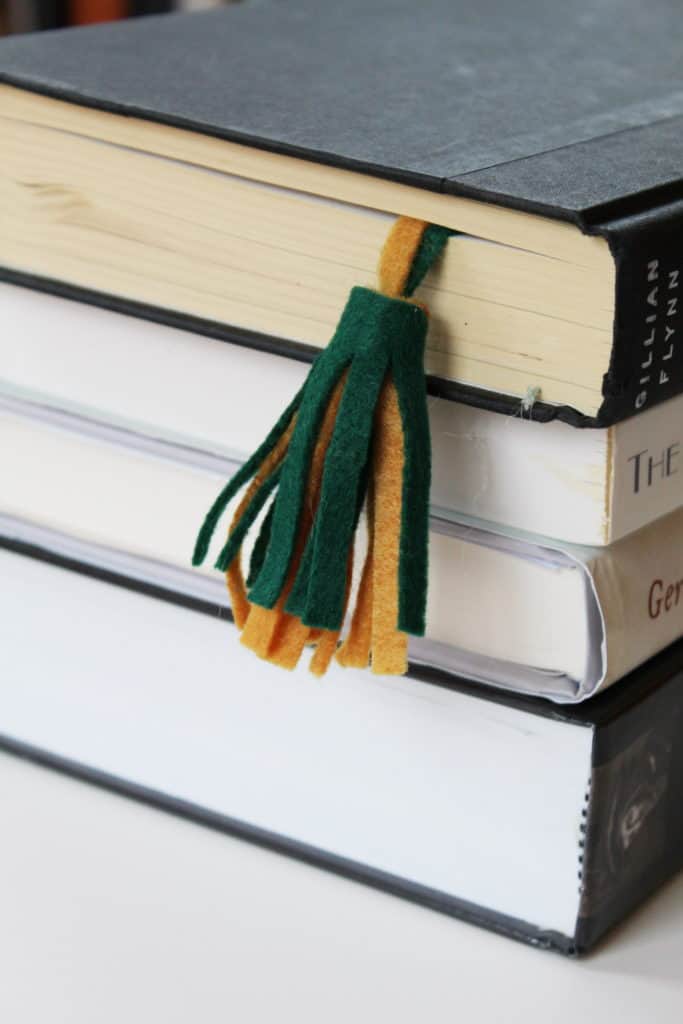
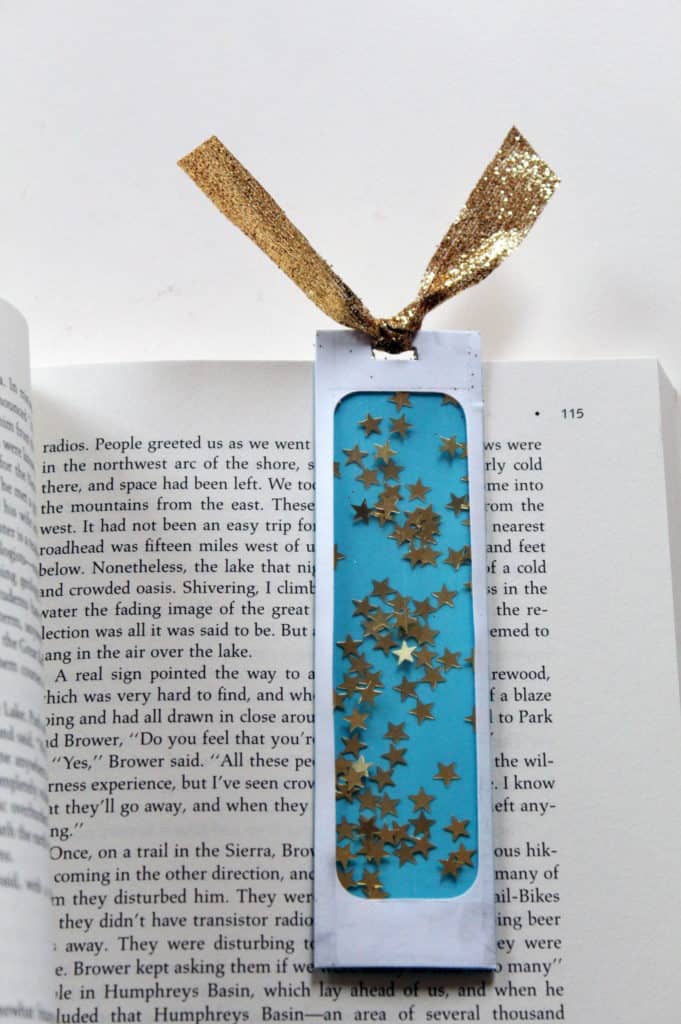
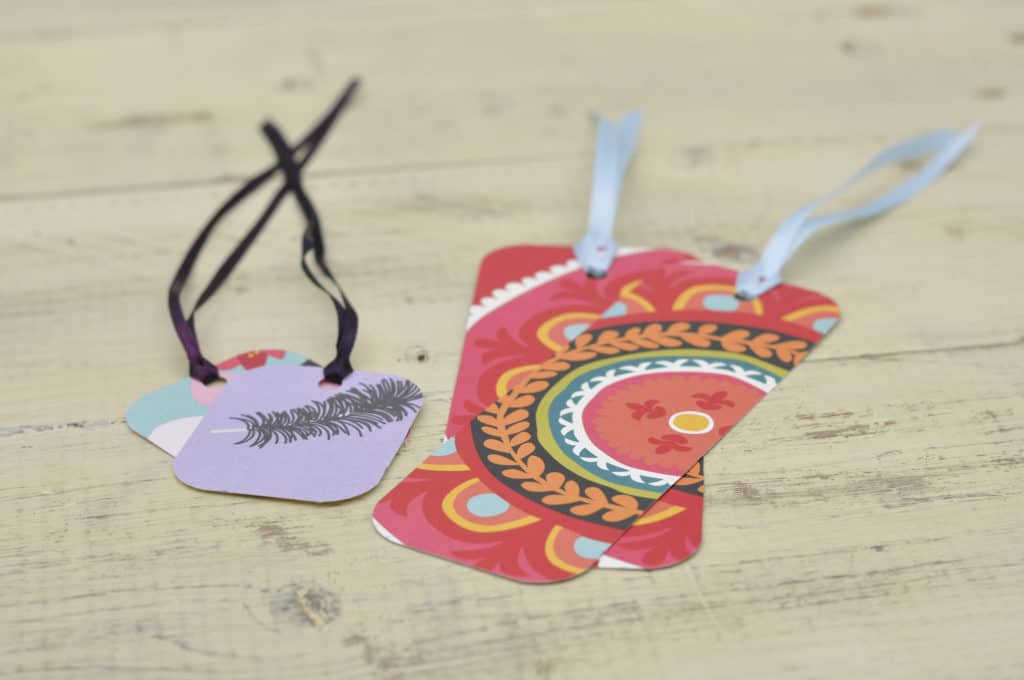
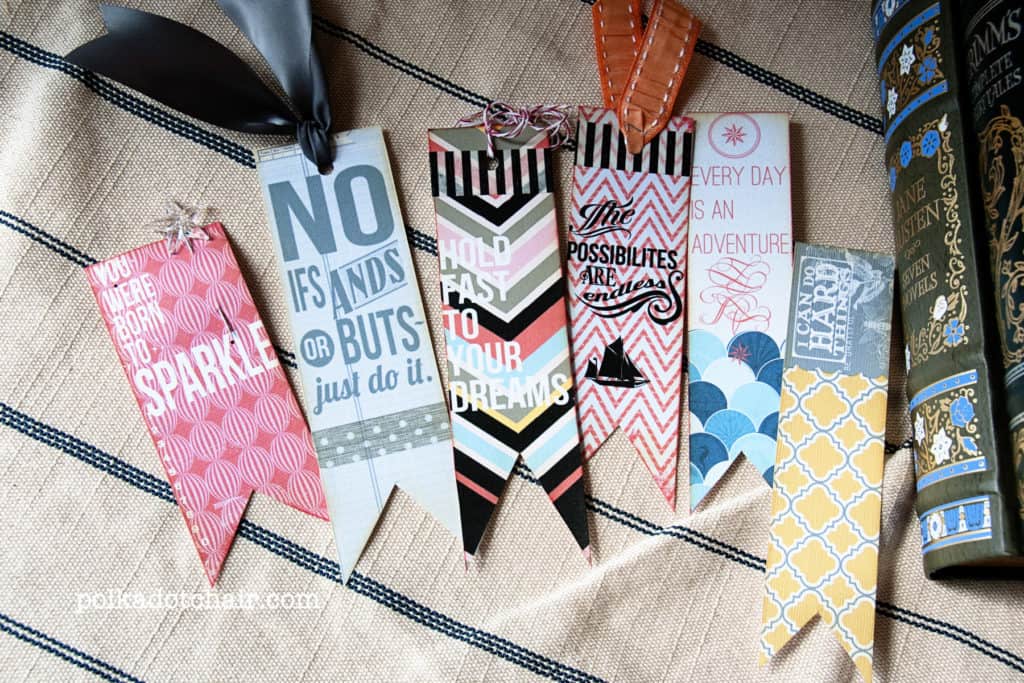
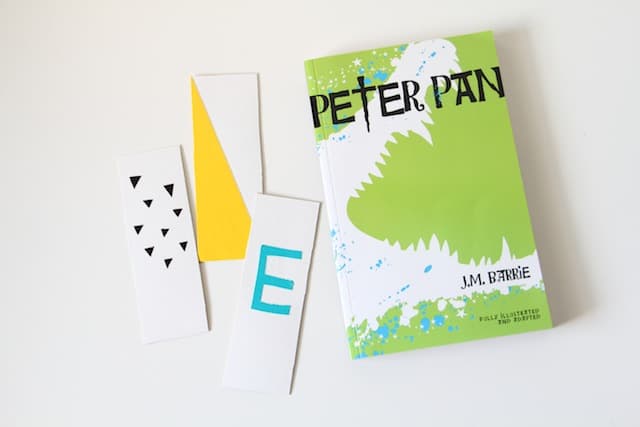
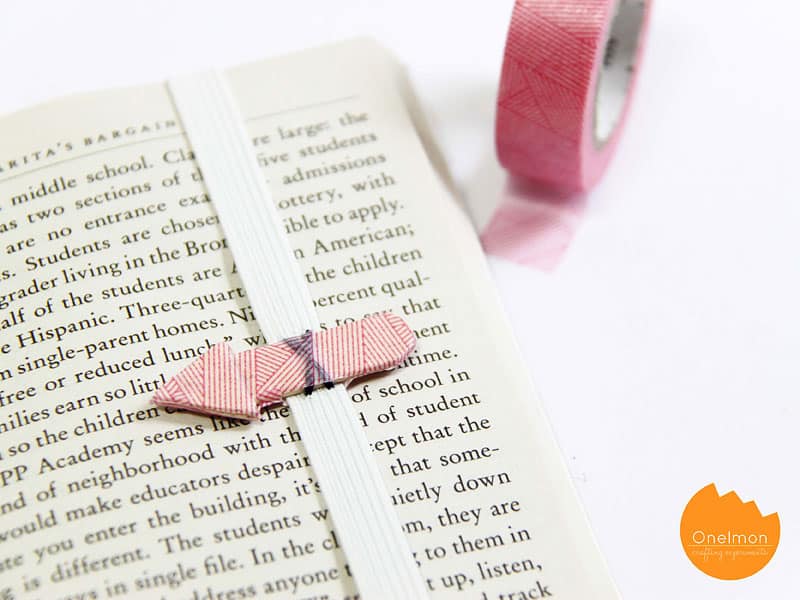
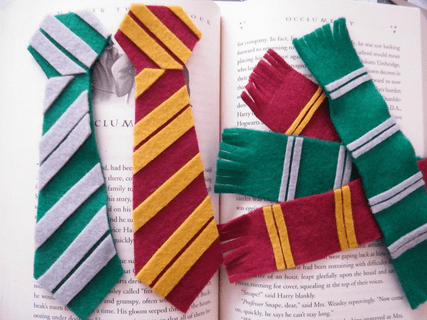
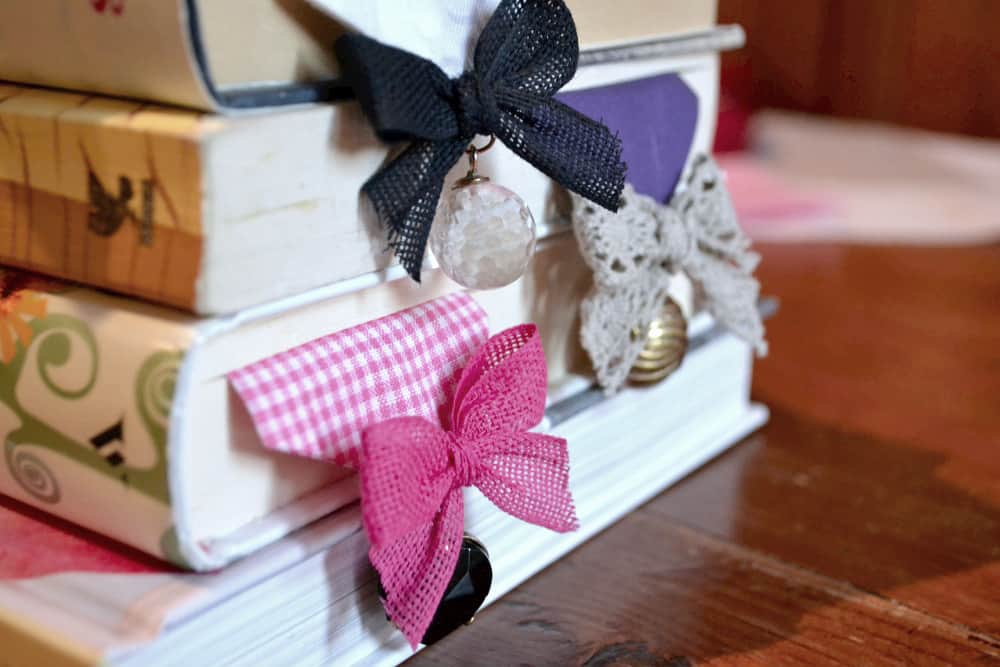
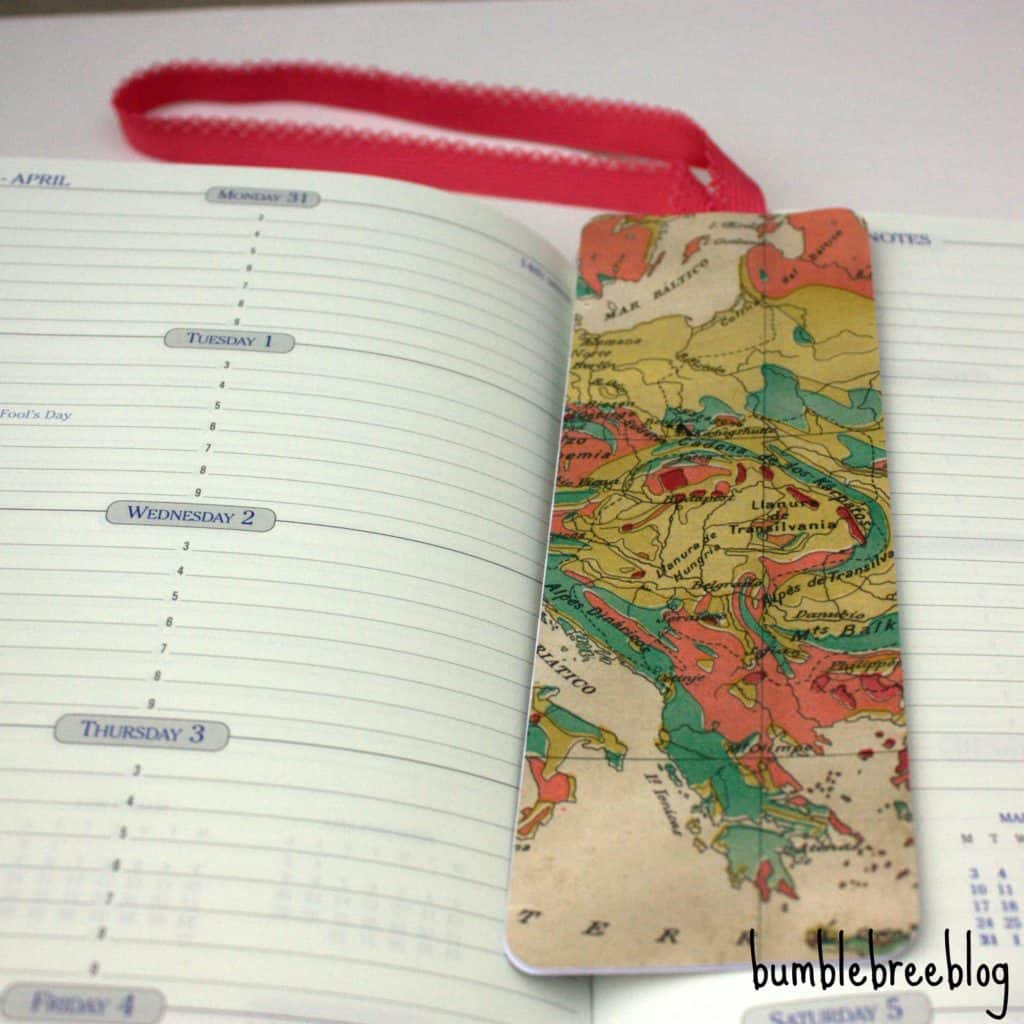
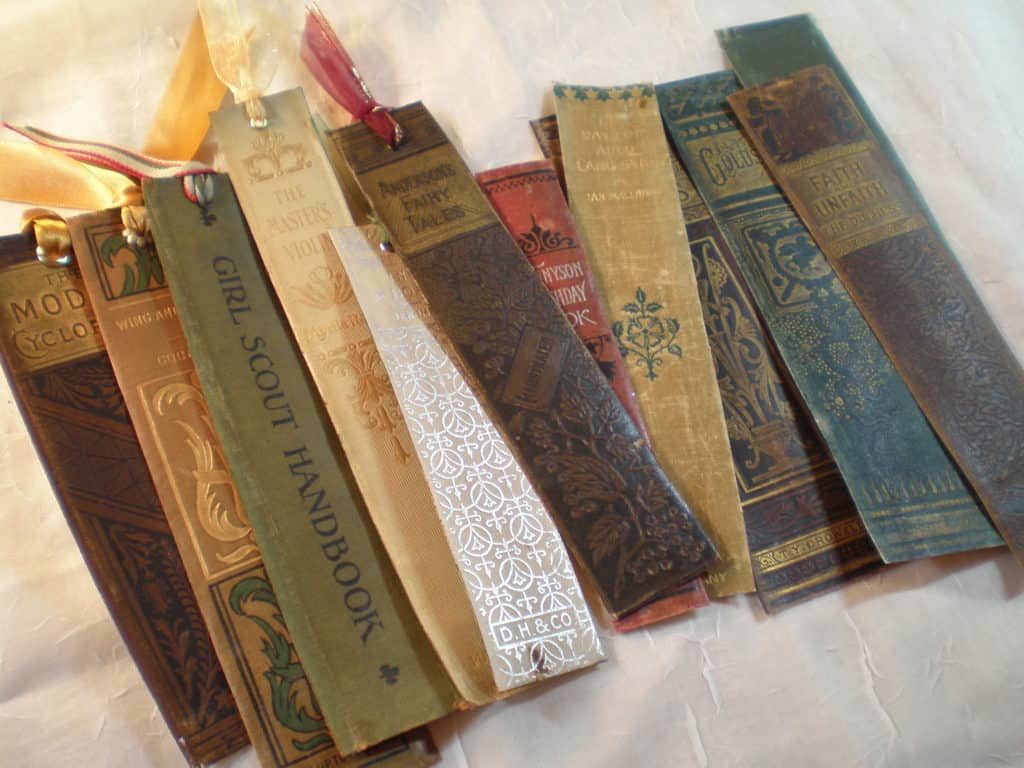
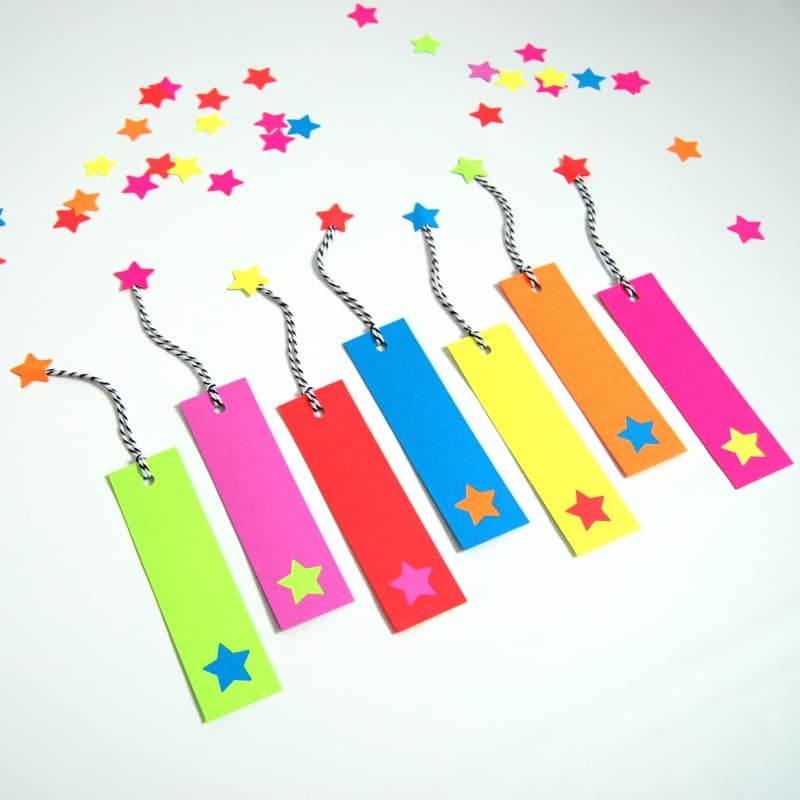
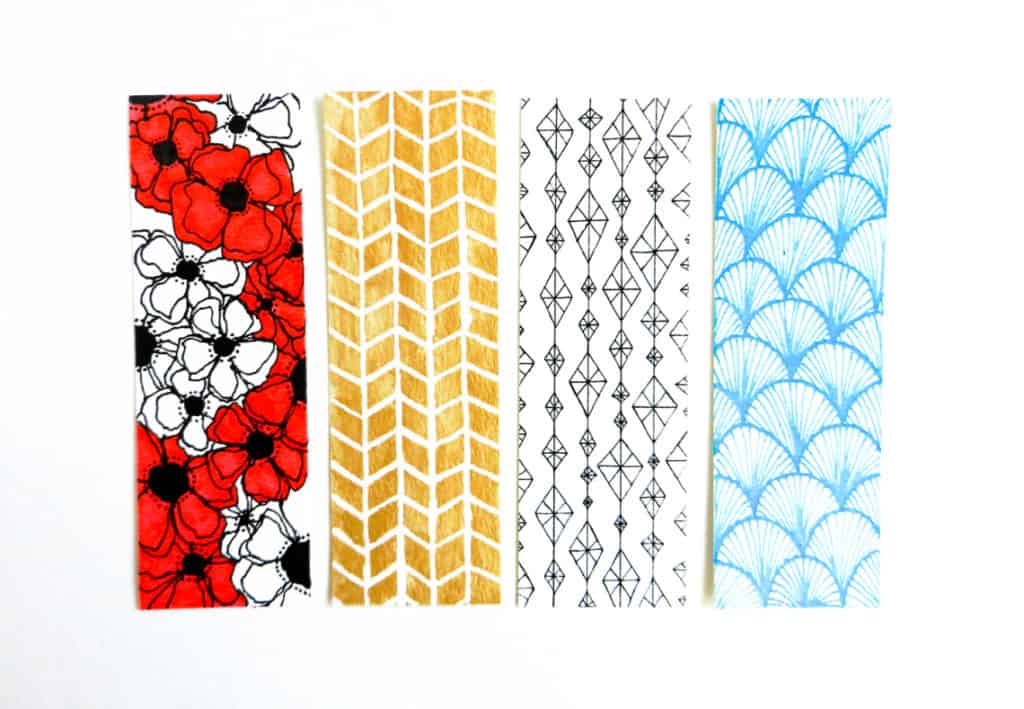

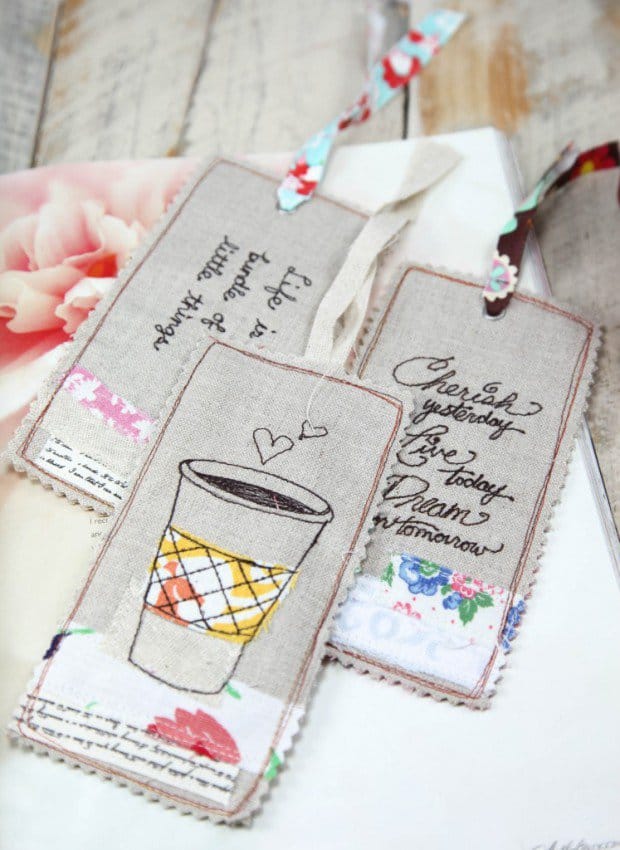

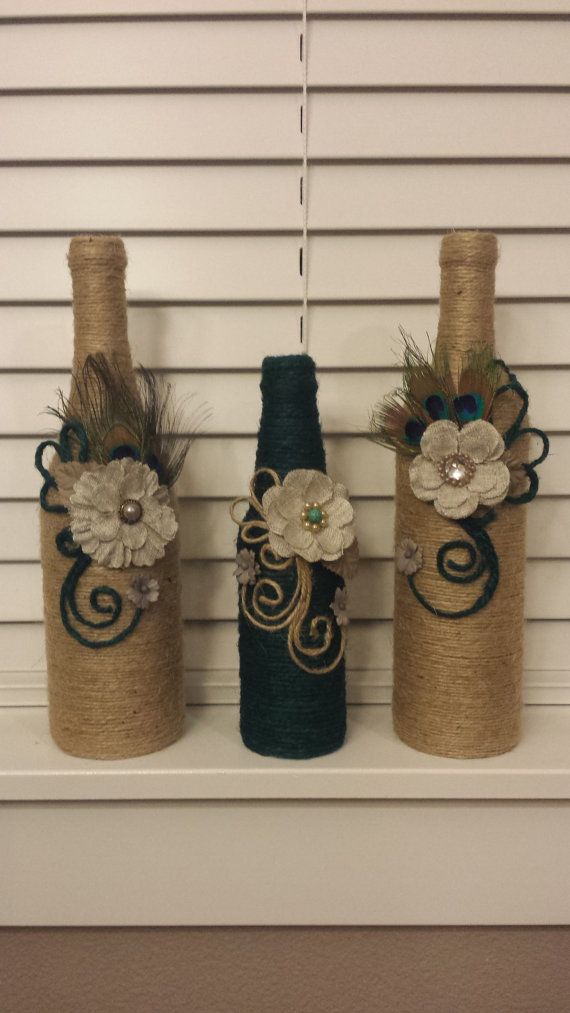
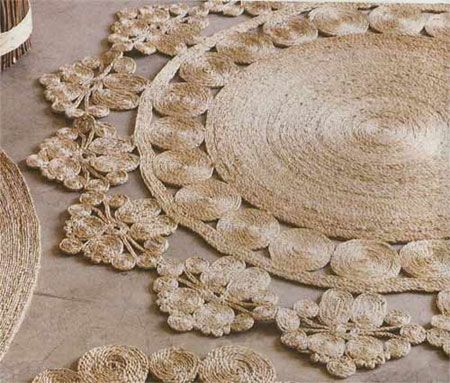
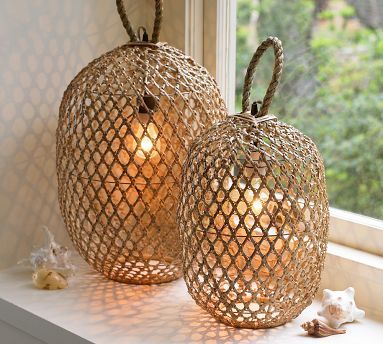
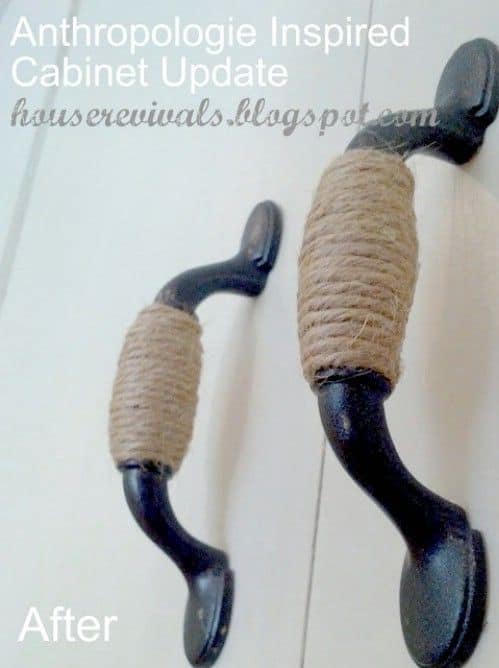
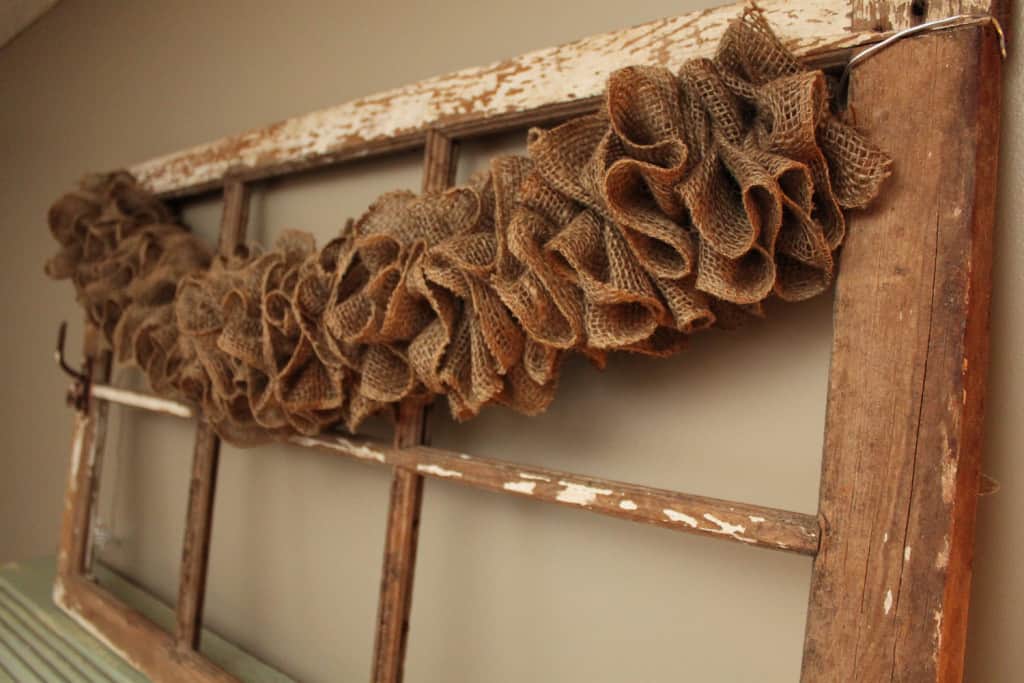
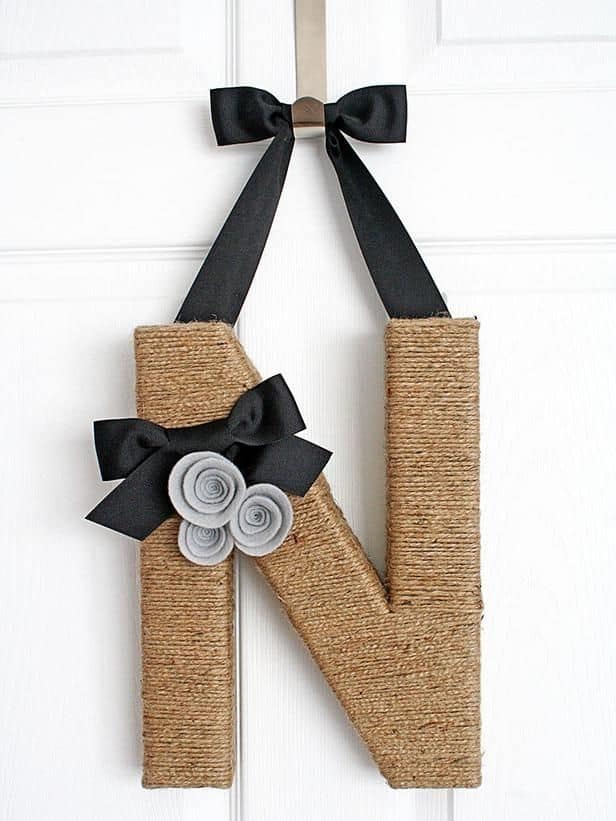
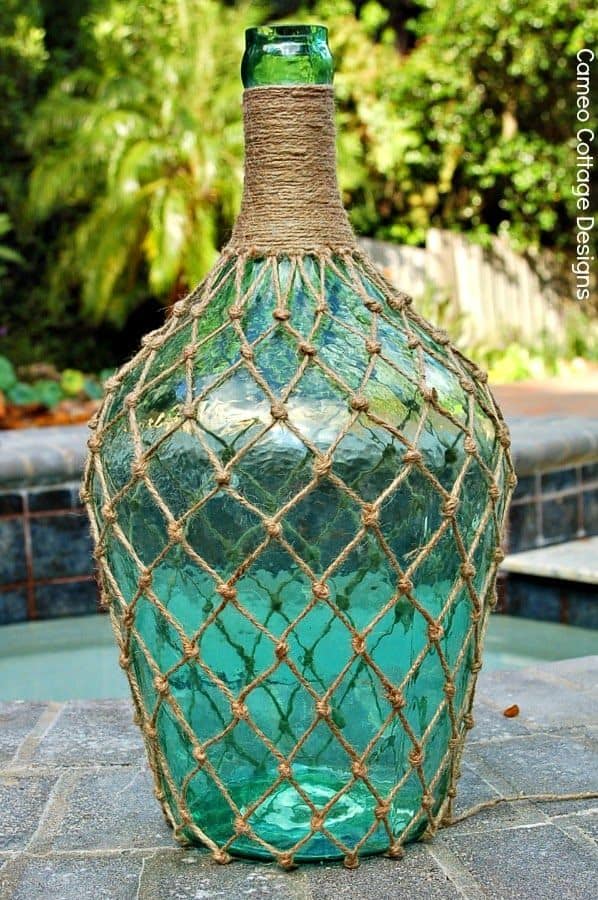
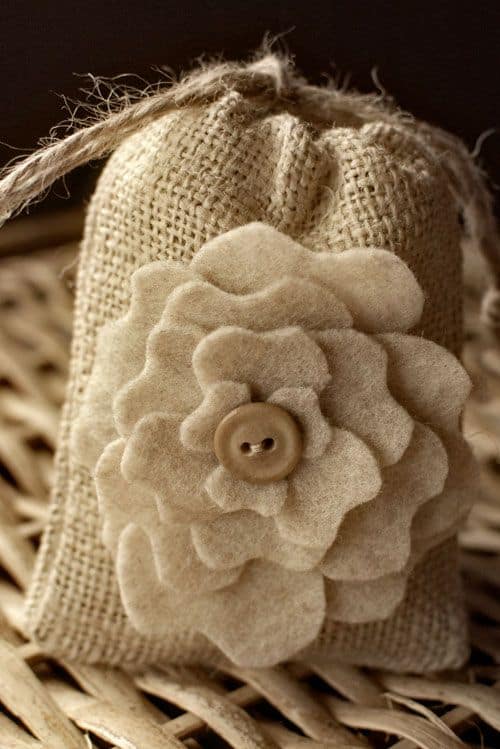
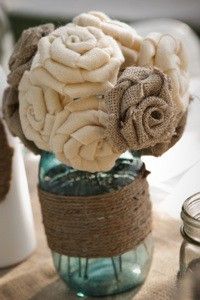
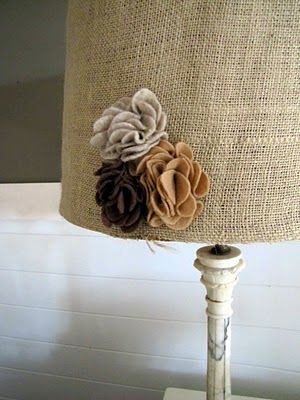
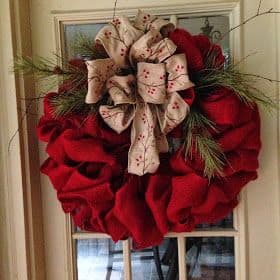
![Cute Colorful DIY Pom-Pom Crafts and Ideas [Video Included]](https://homesthetics.net/wp-content/uploads/2014/10/New-folder.jpg "Cute Colorful DIY Pom-Pom Crafts and Ideas [Video Included]")
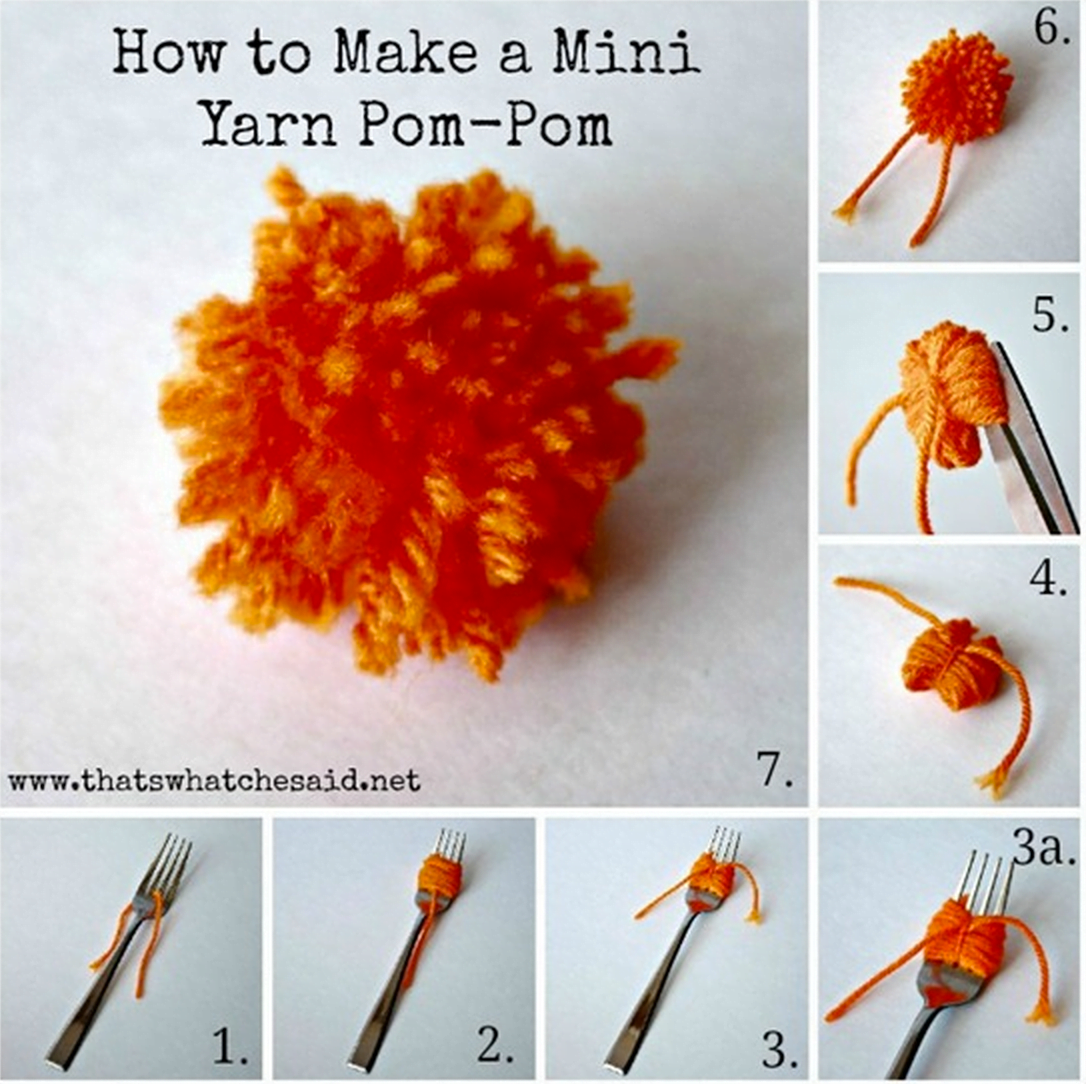
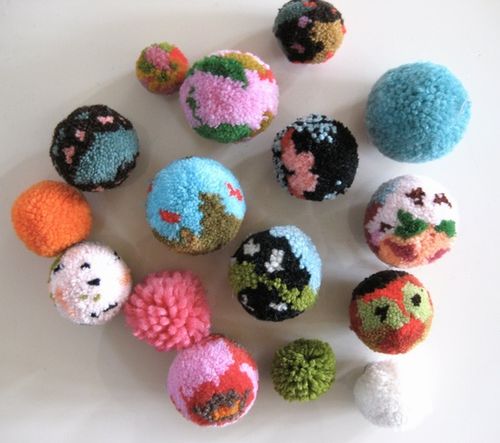
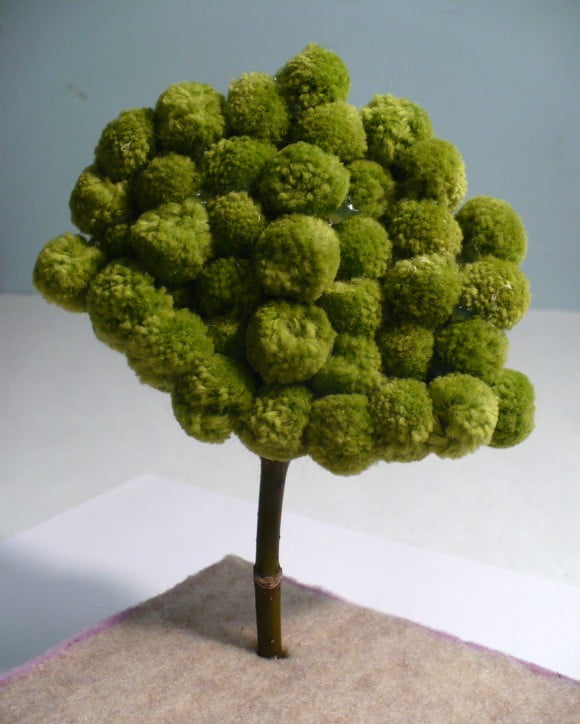
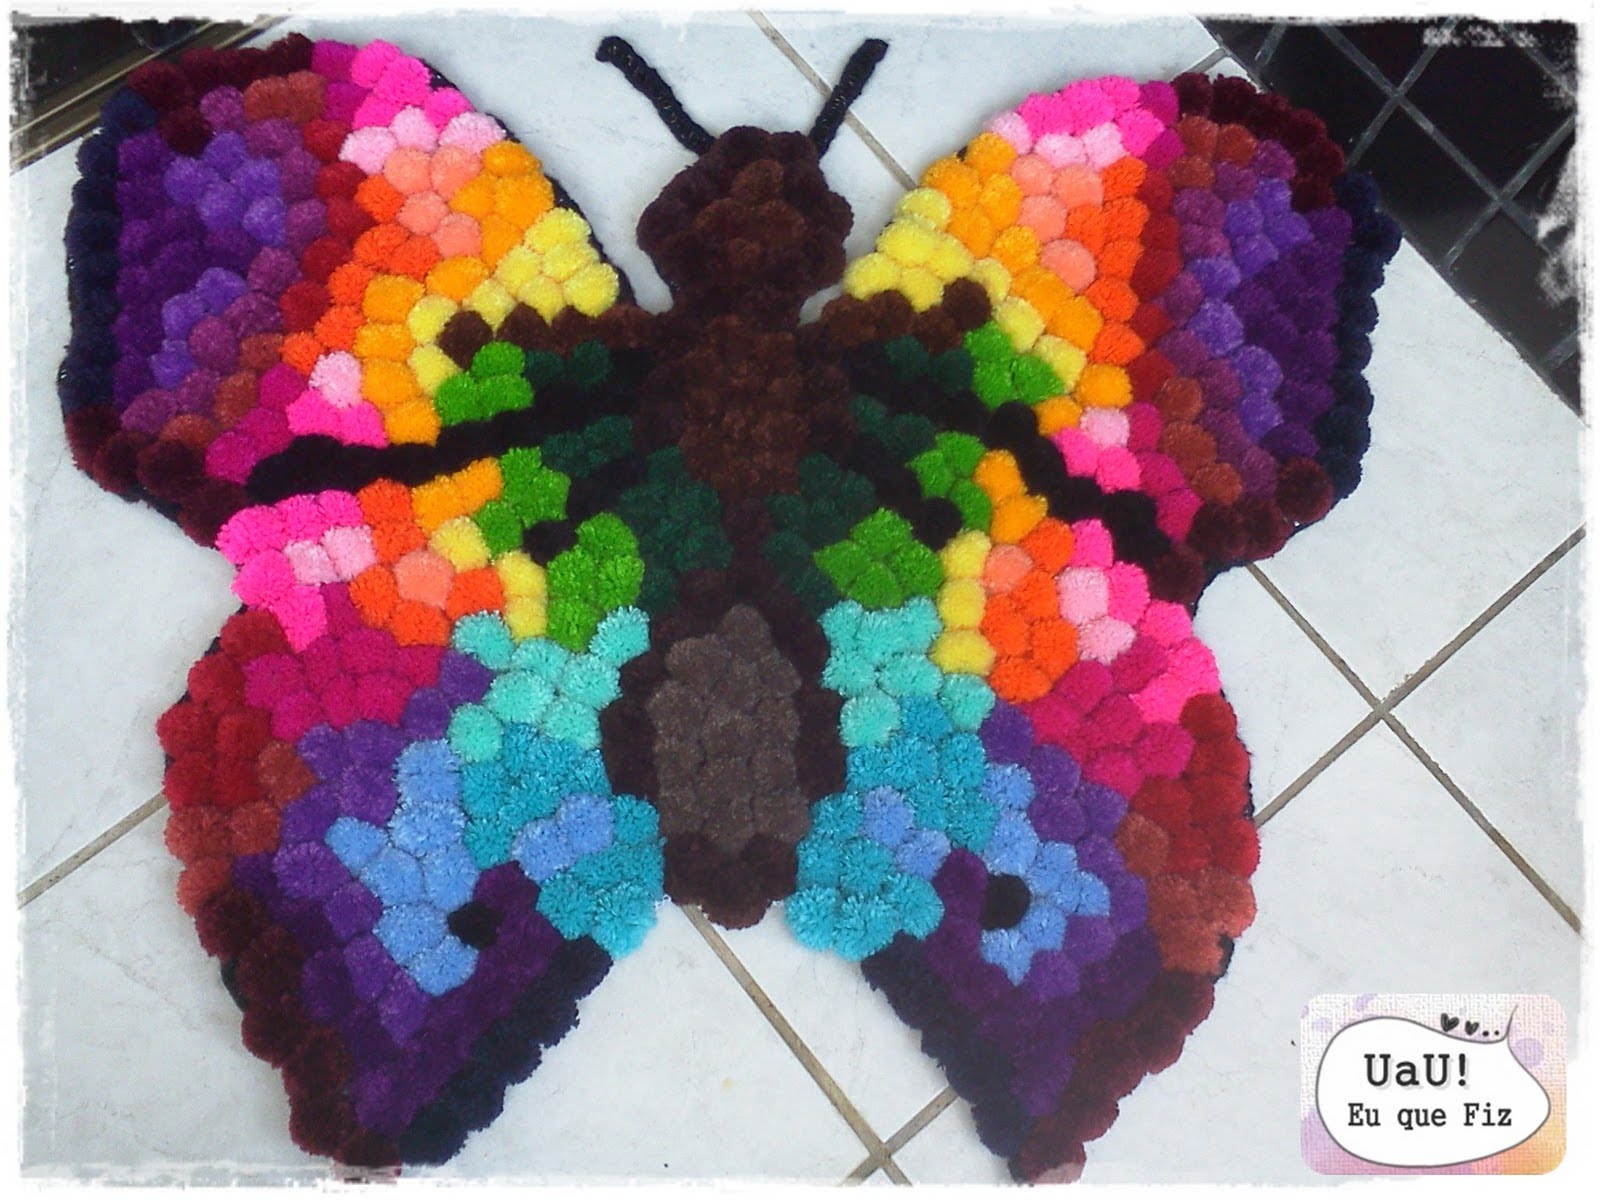
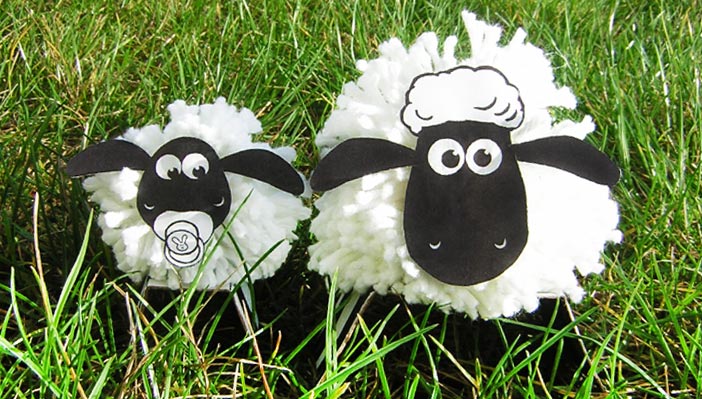

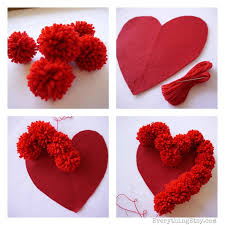
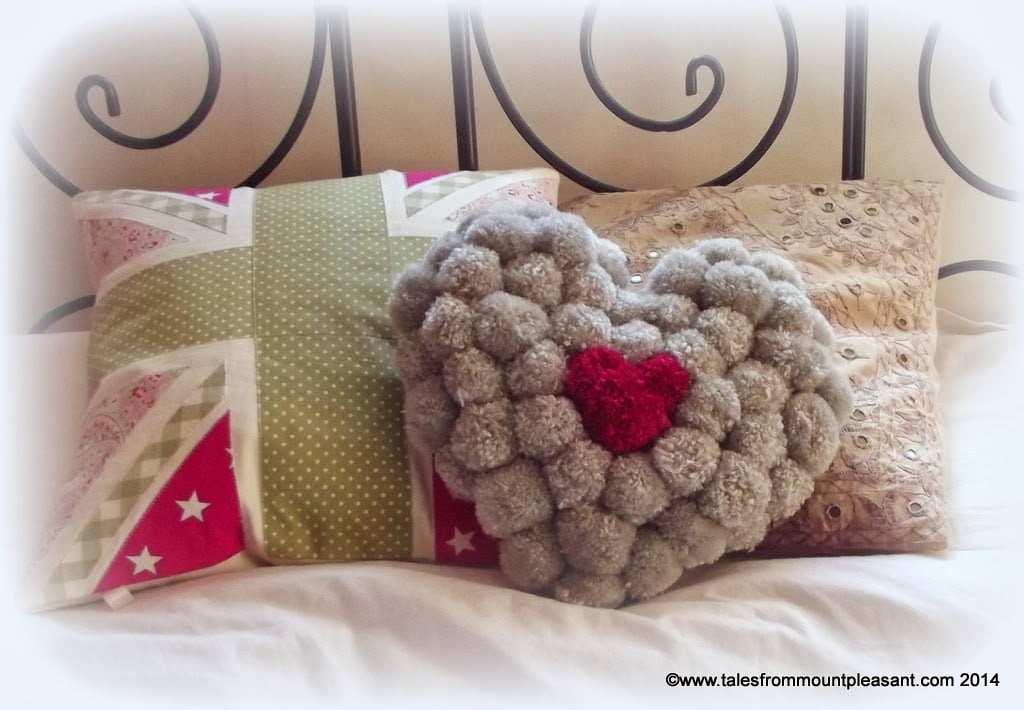
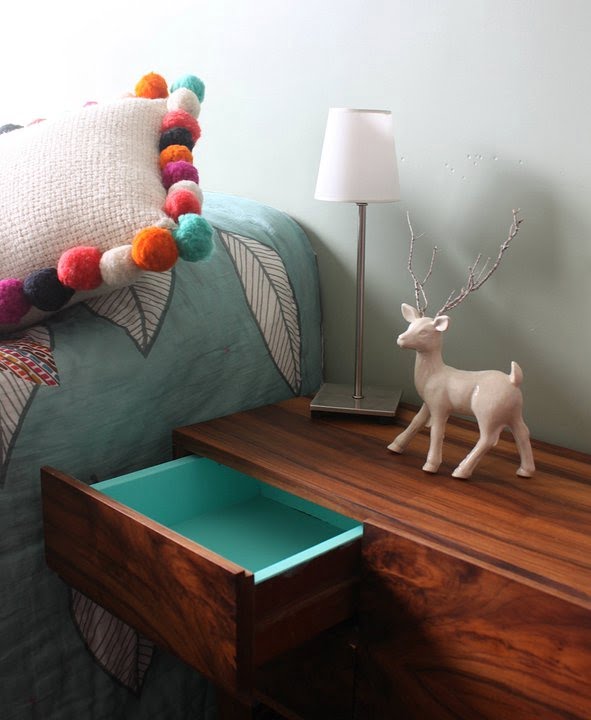
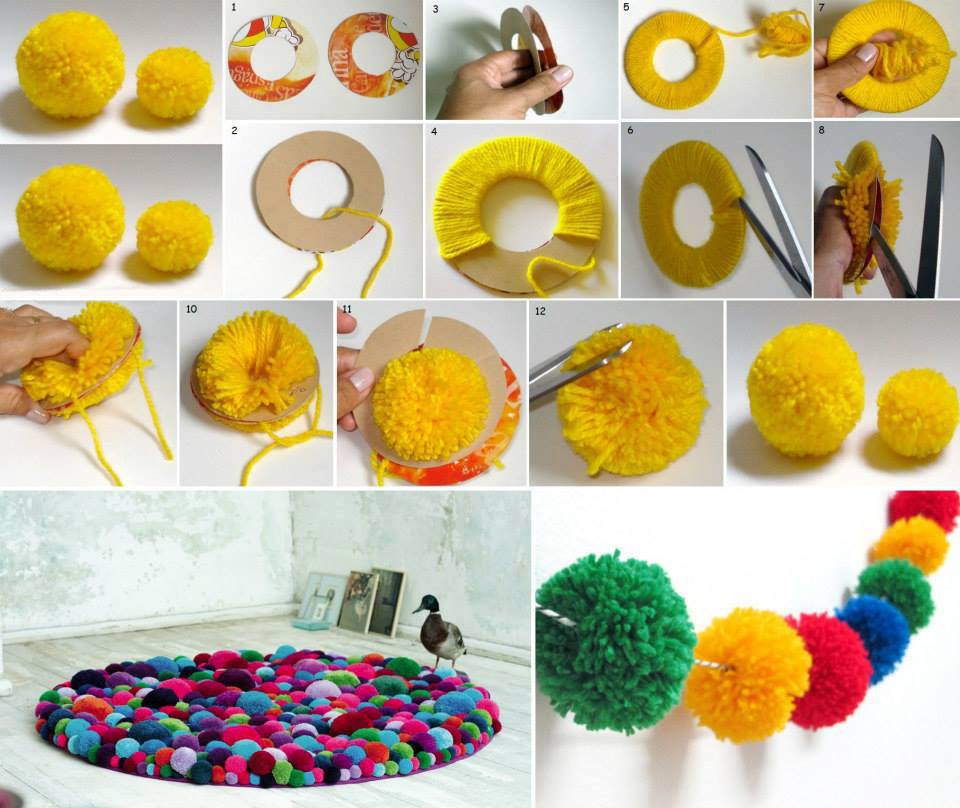
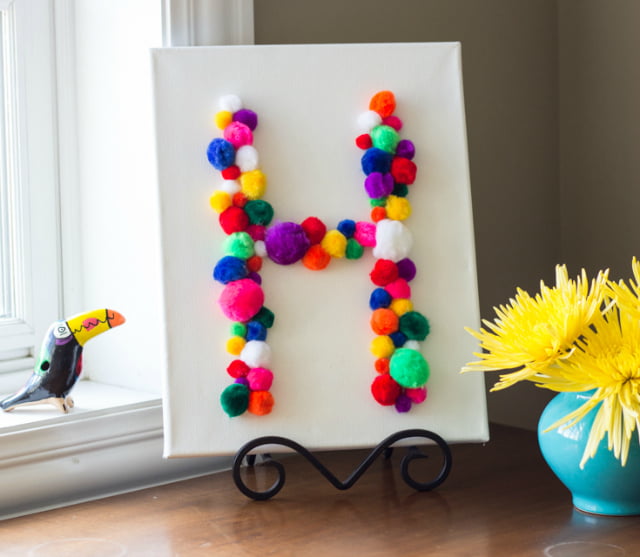
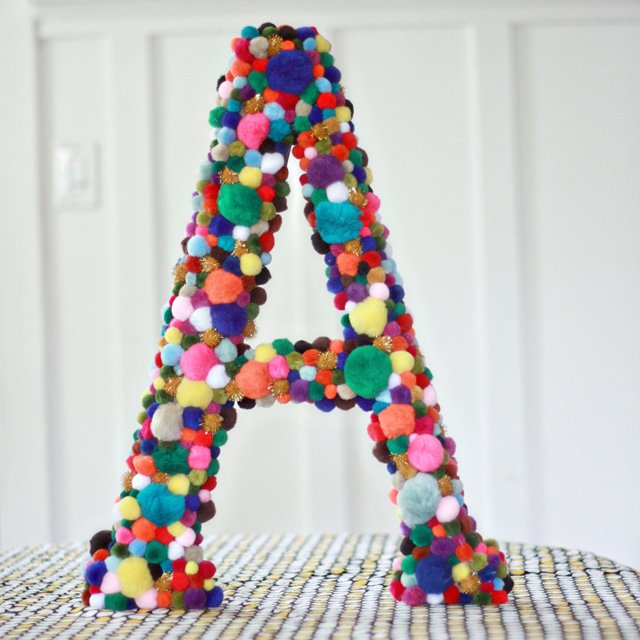
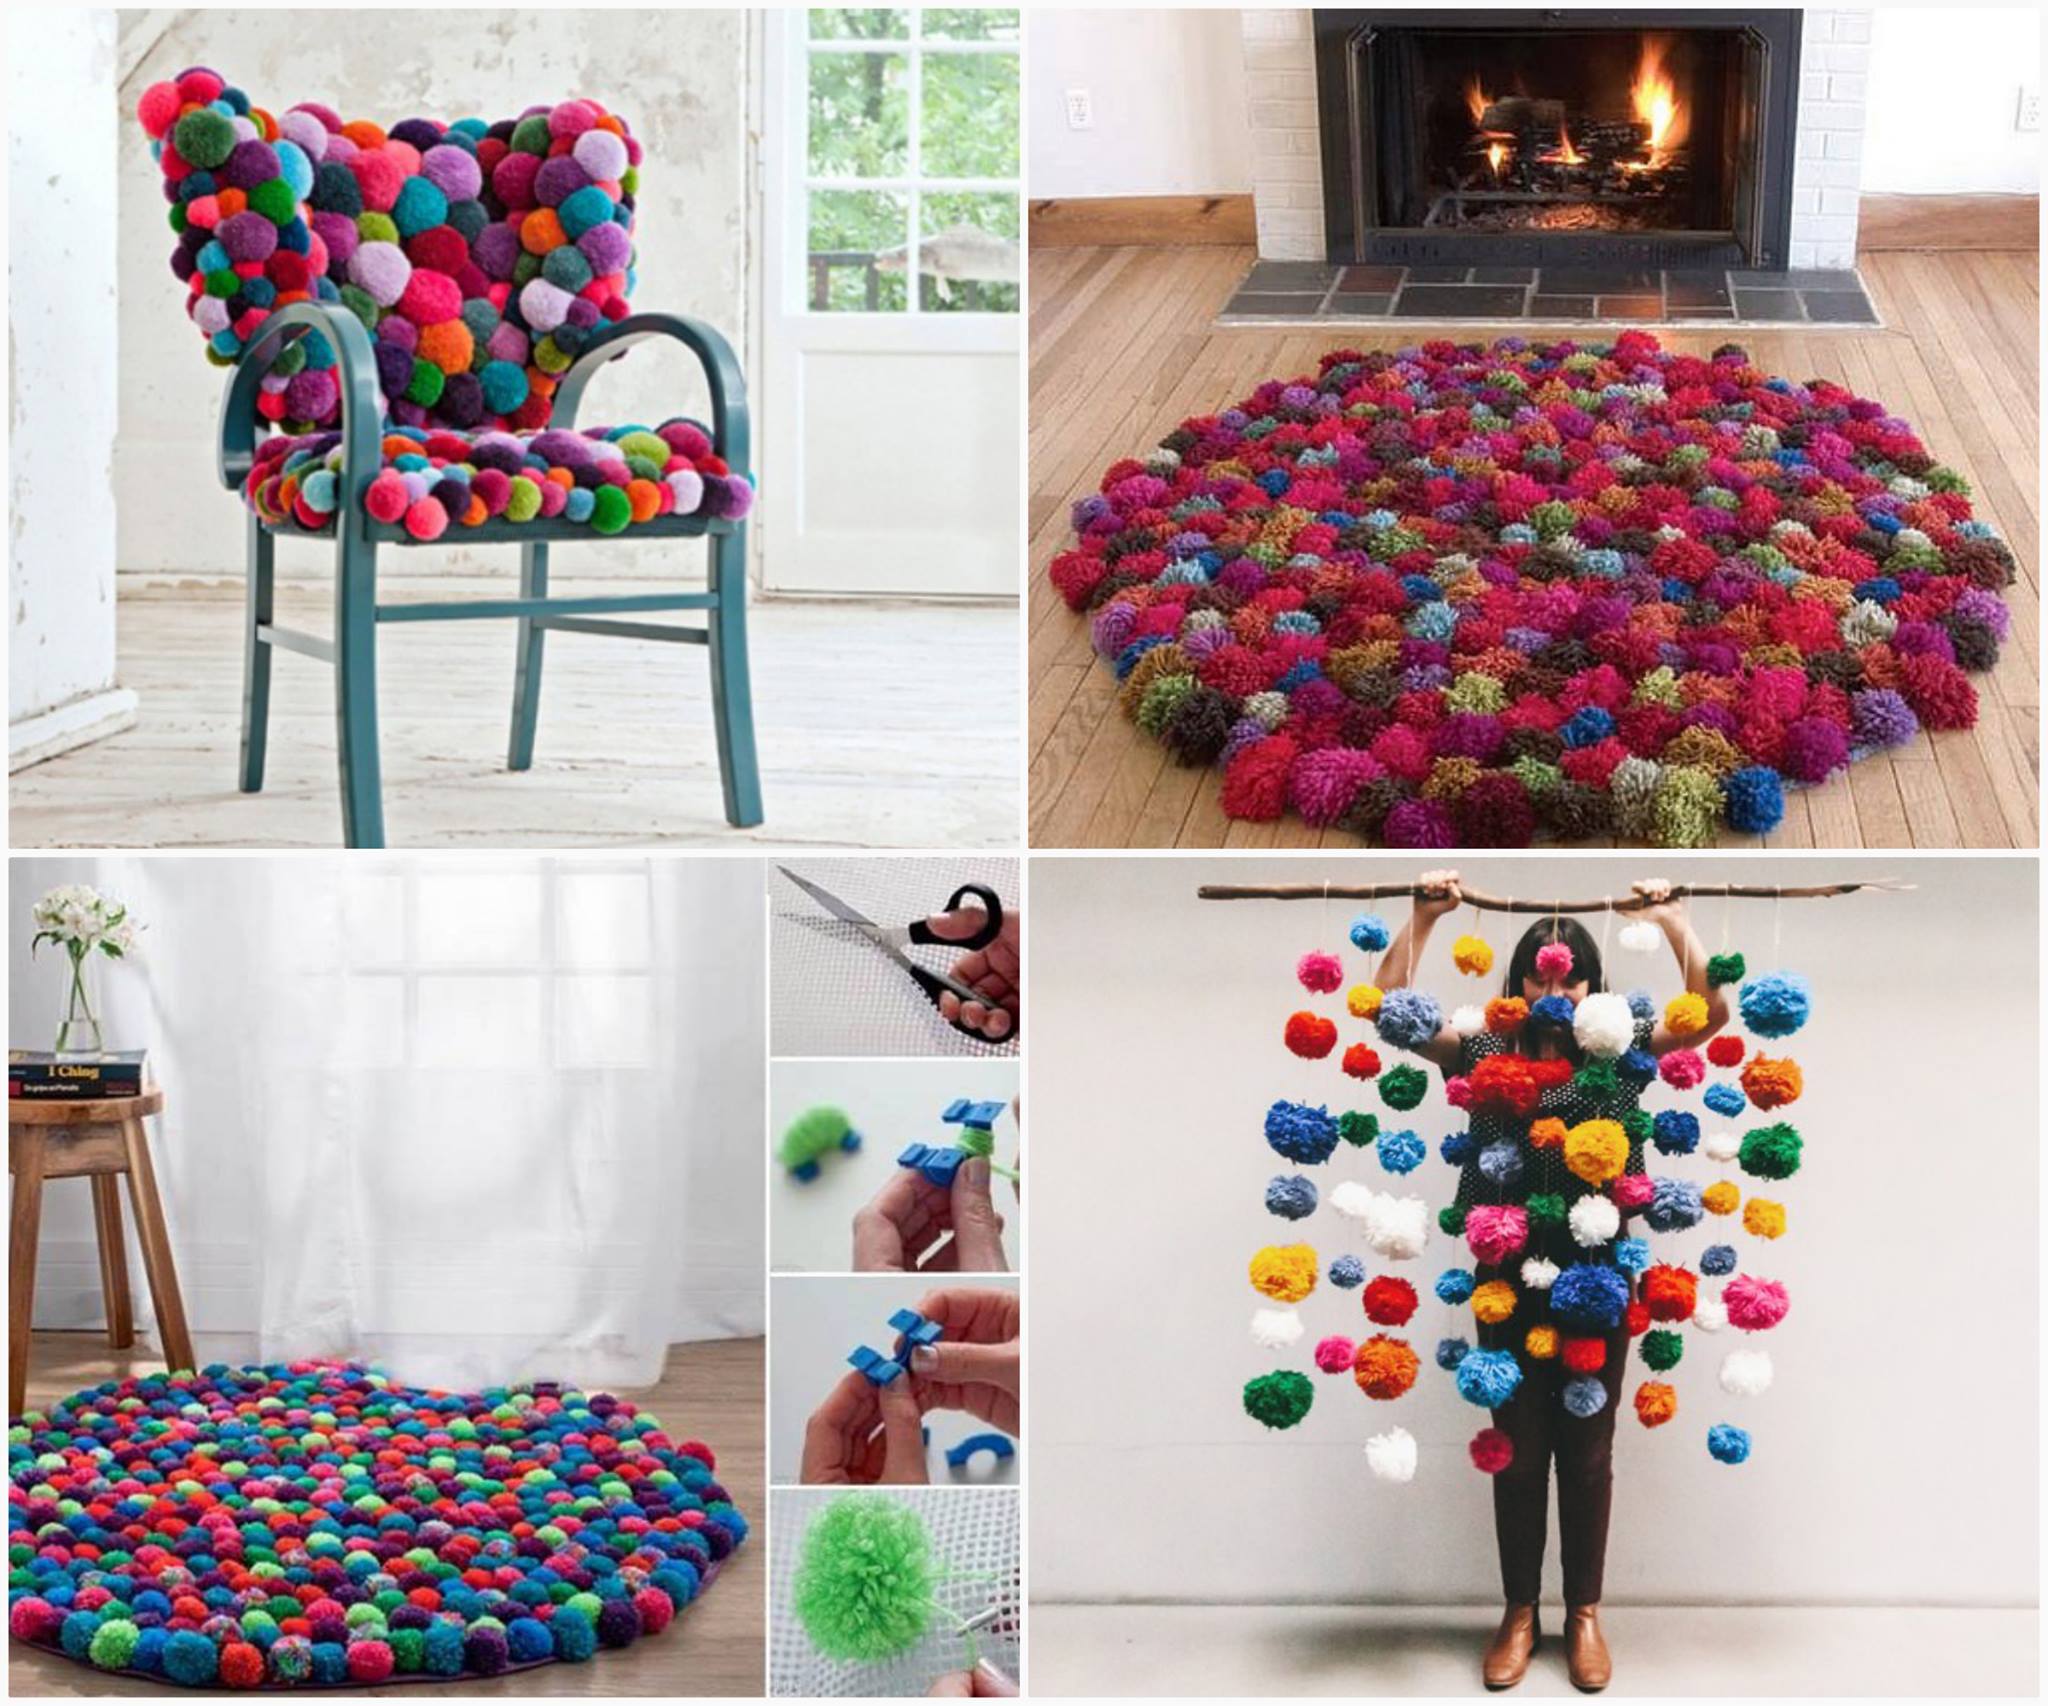
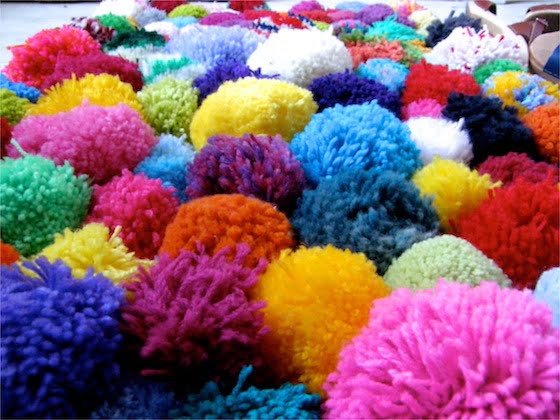
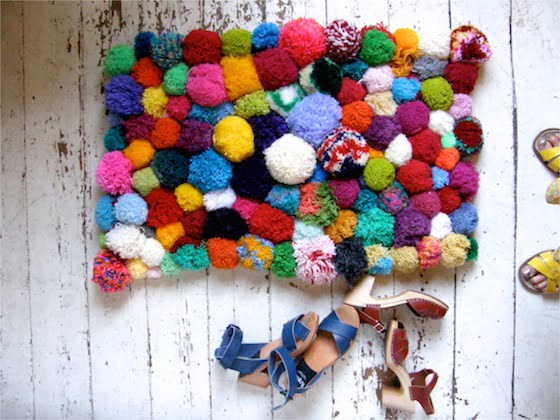

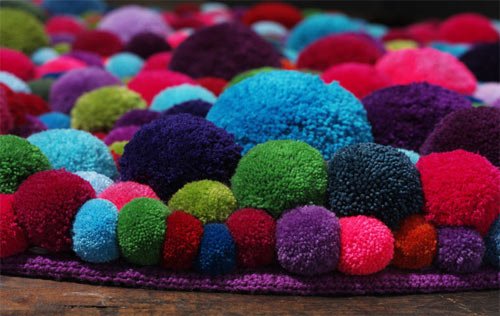
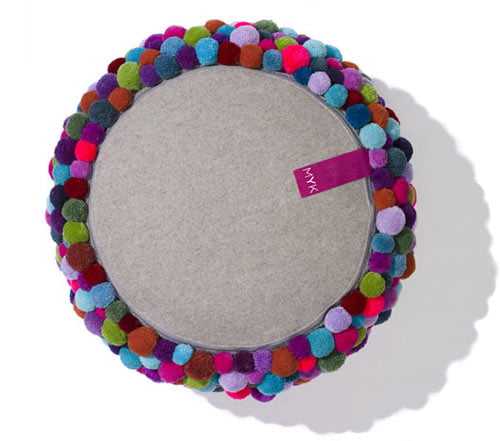

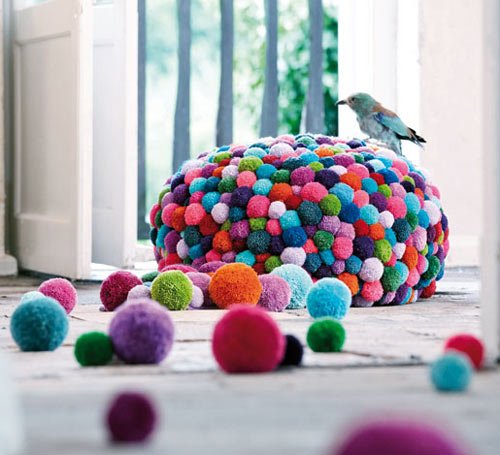
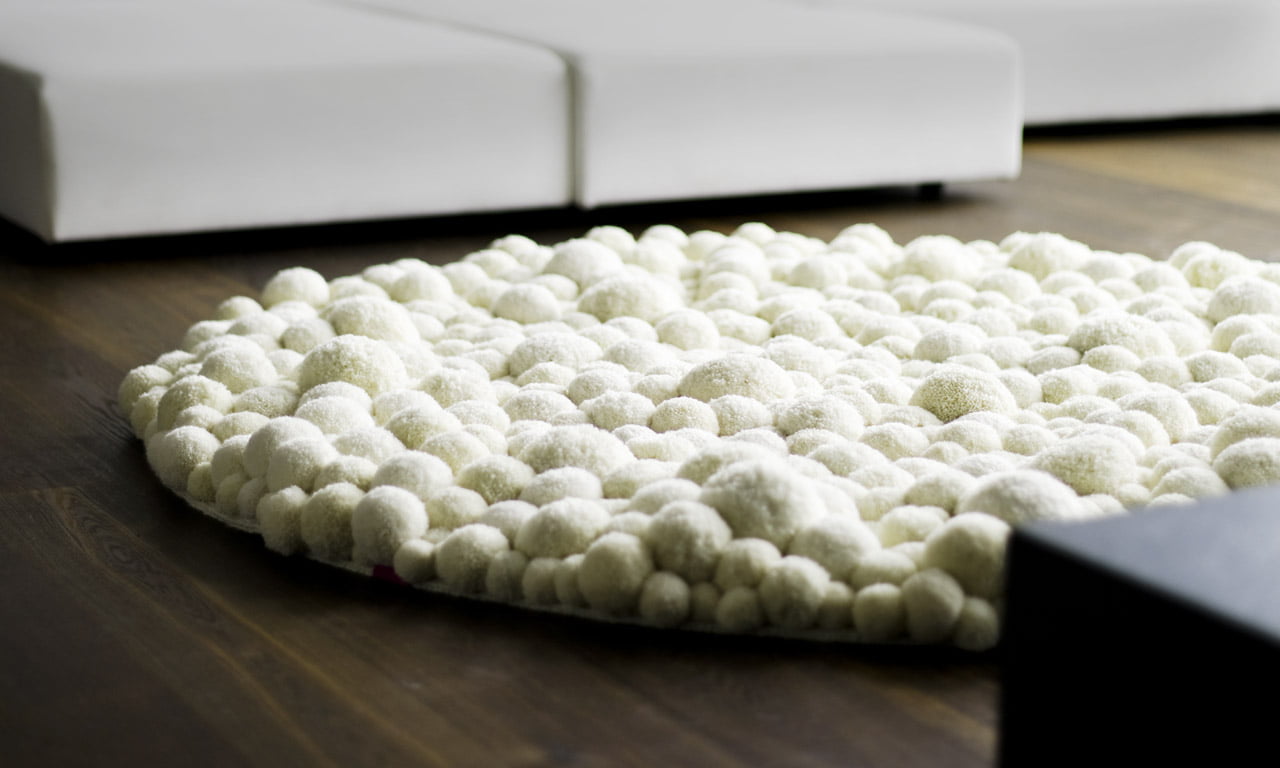

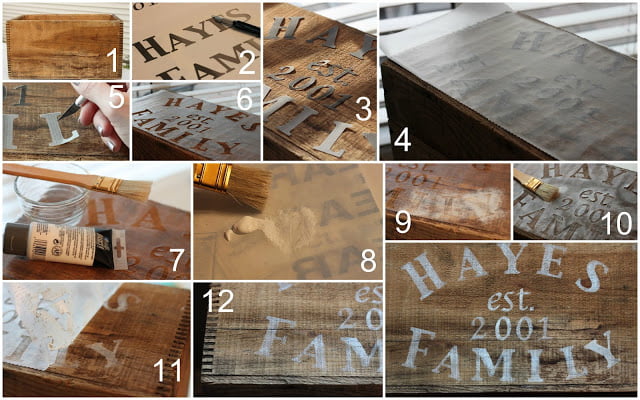
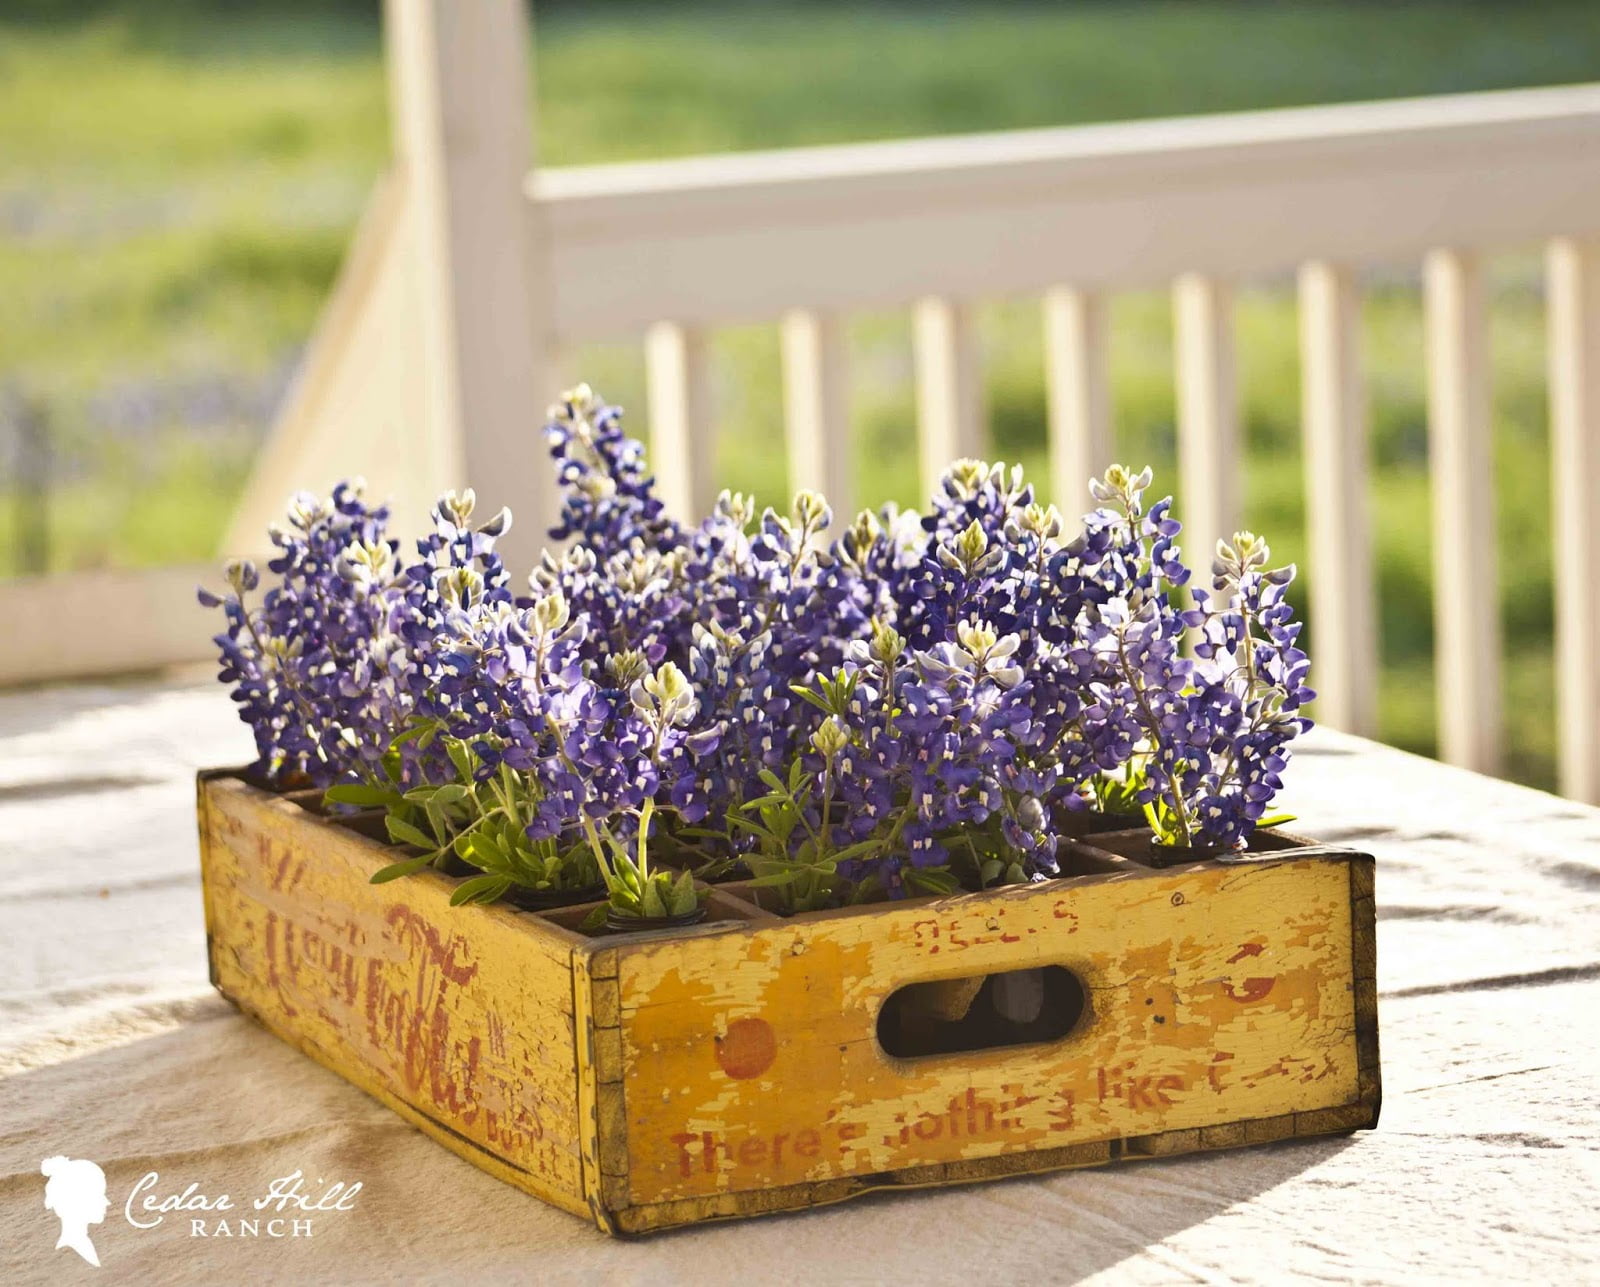
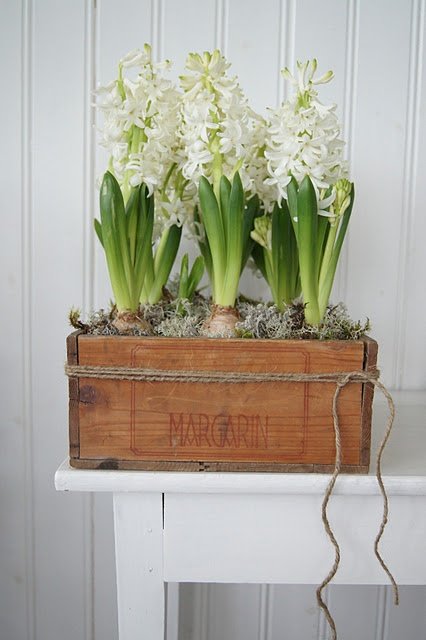
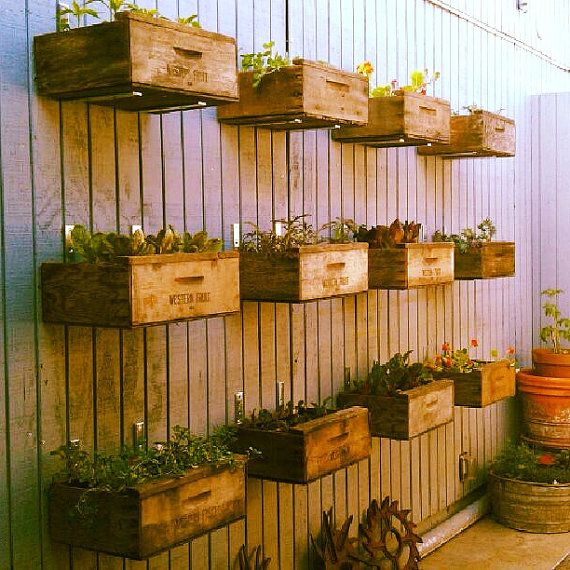
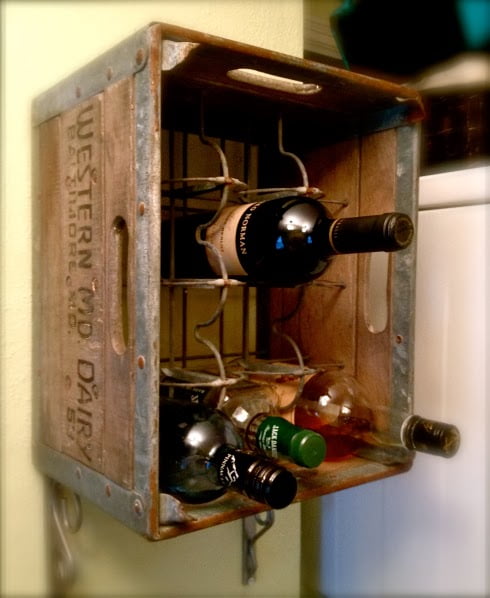
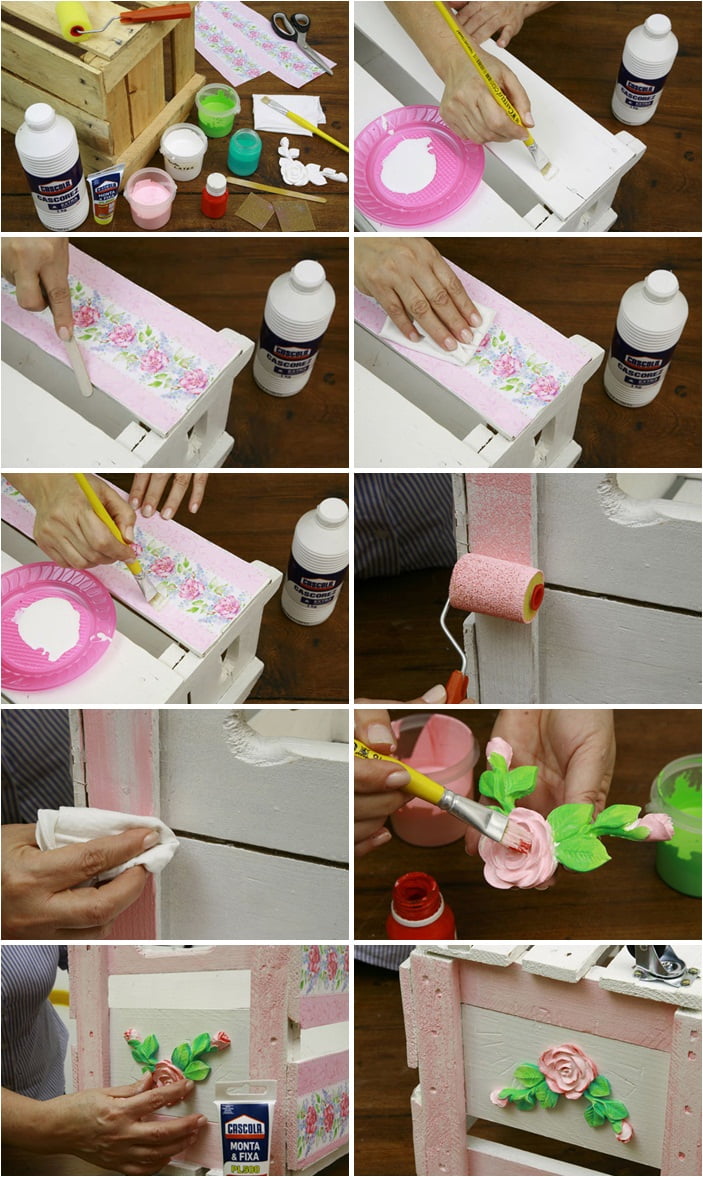
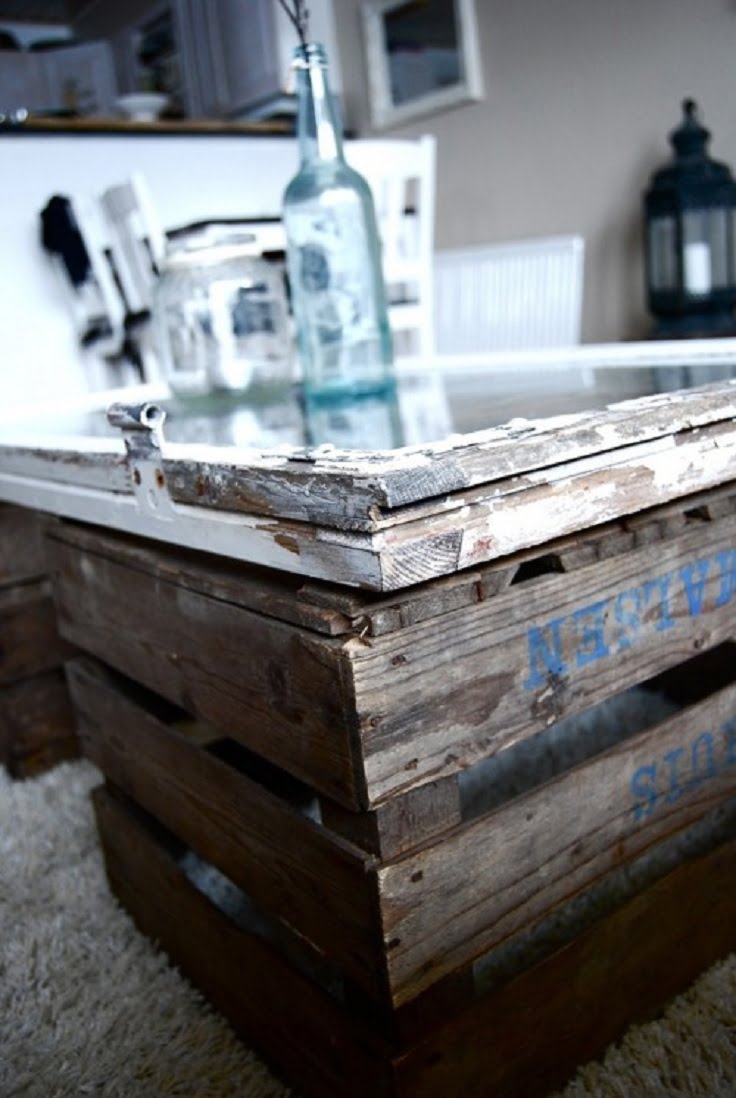
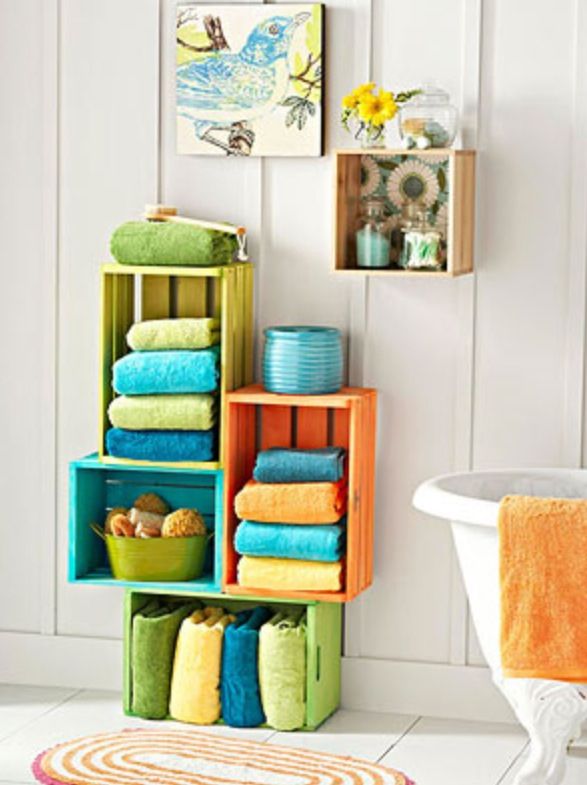
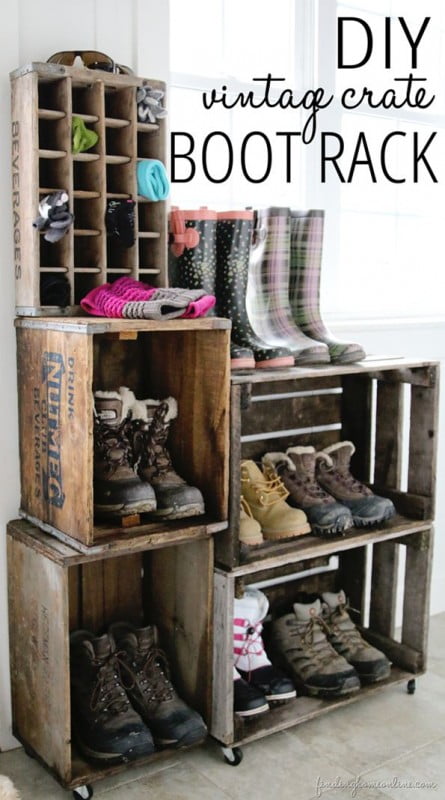
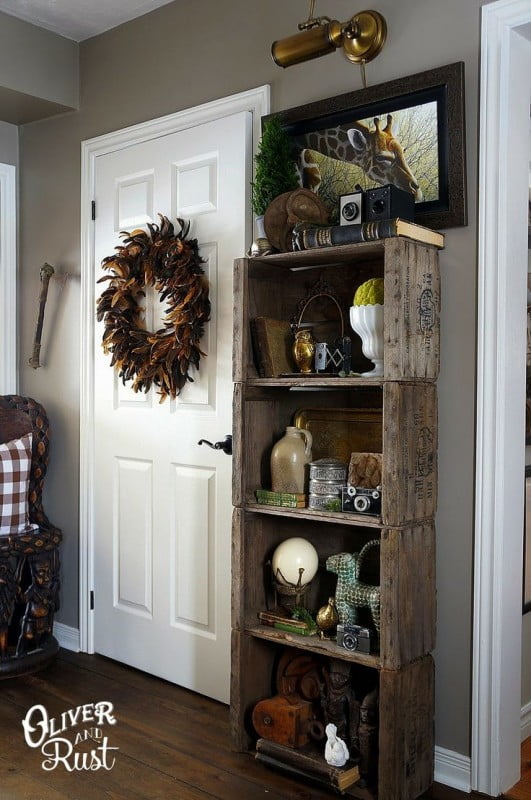
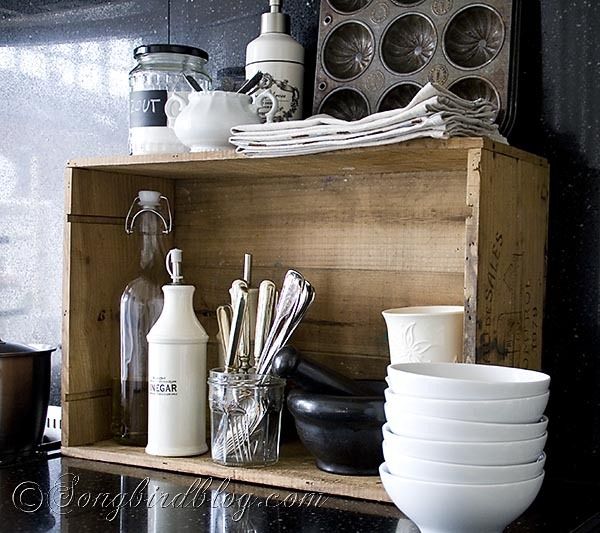
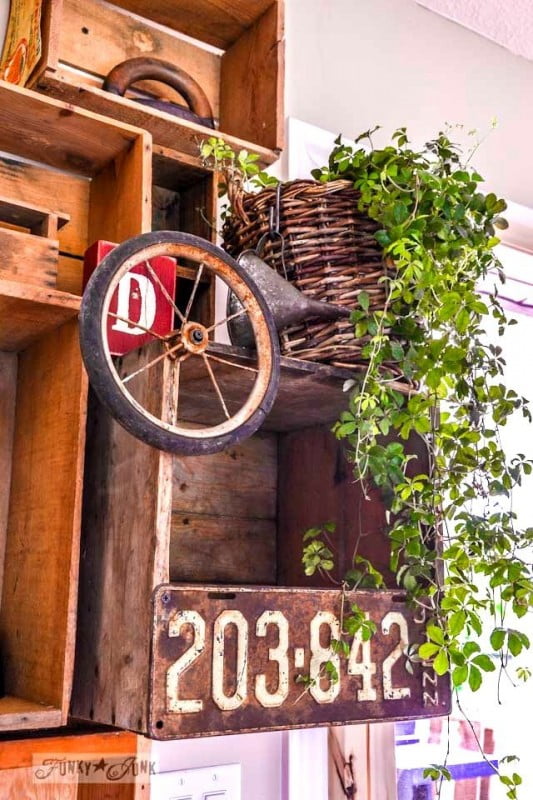
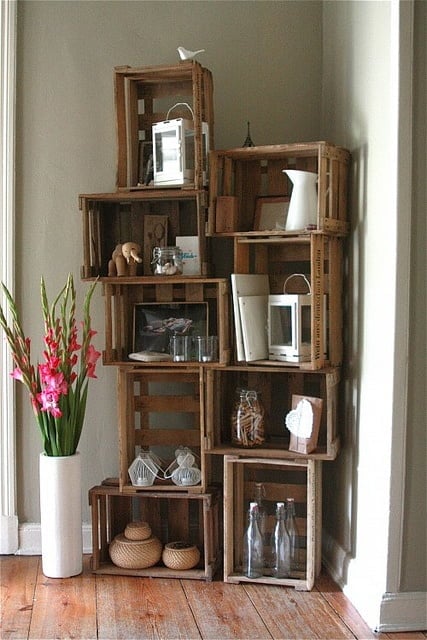
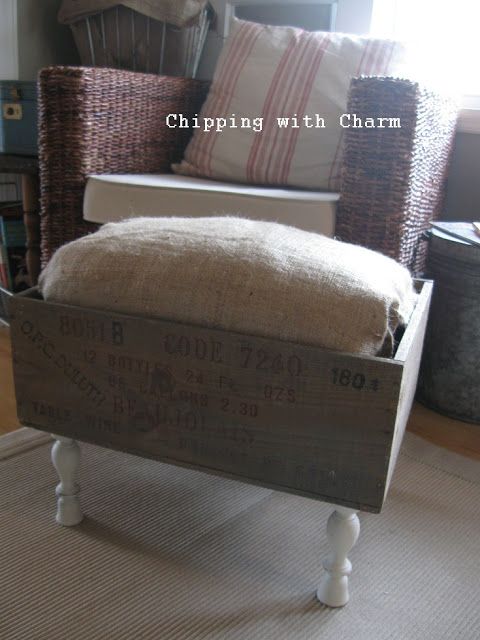
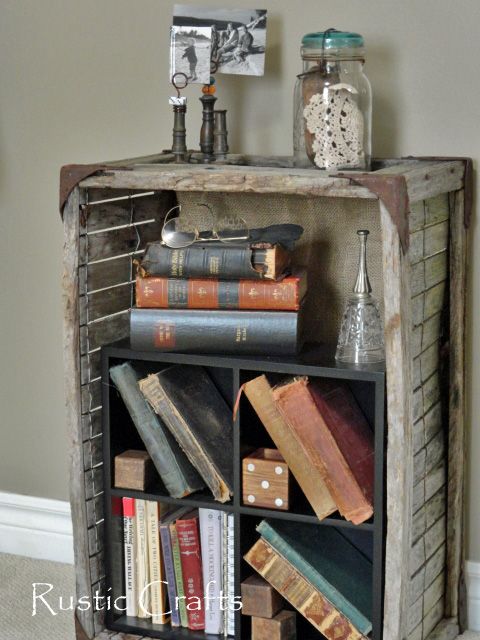
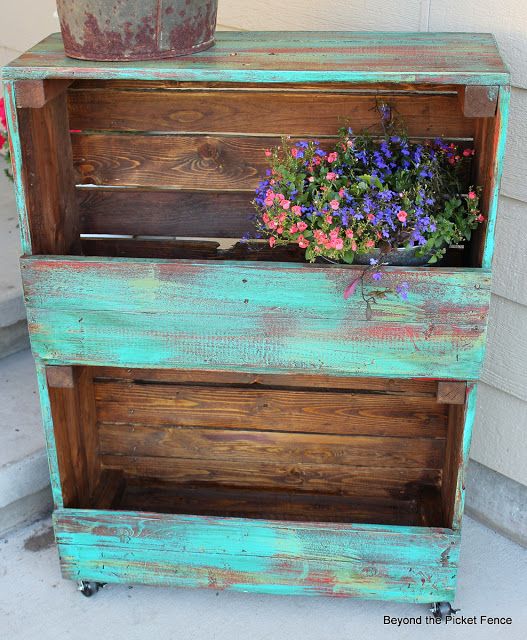
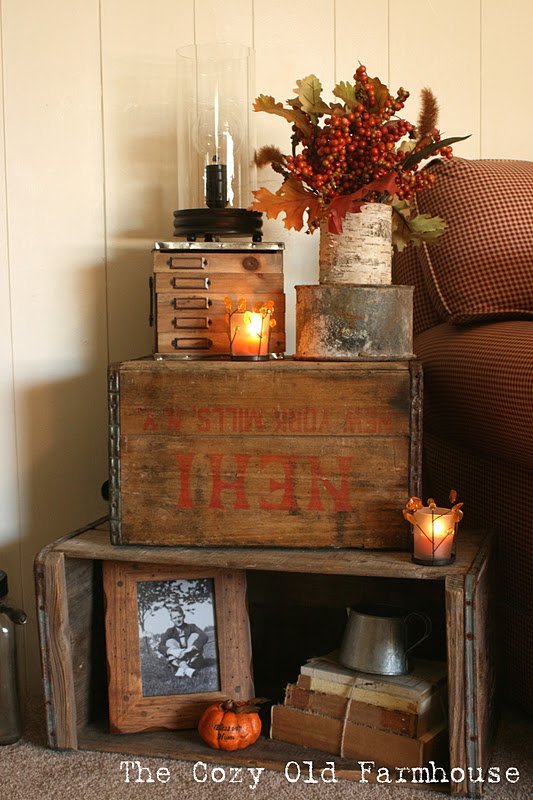
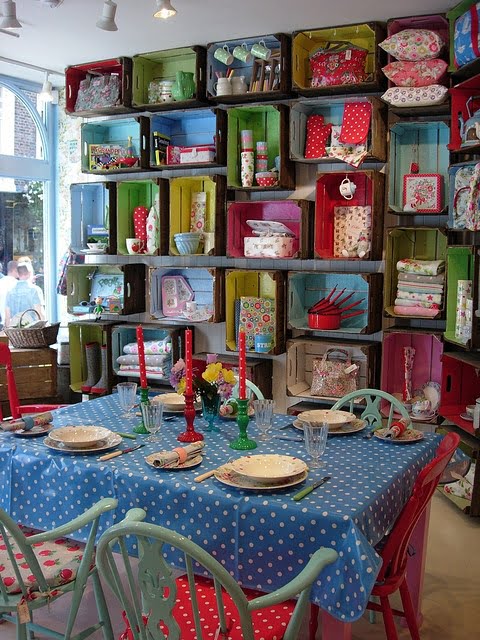
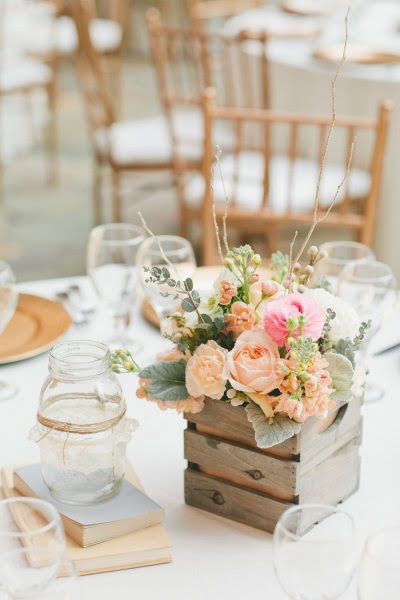
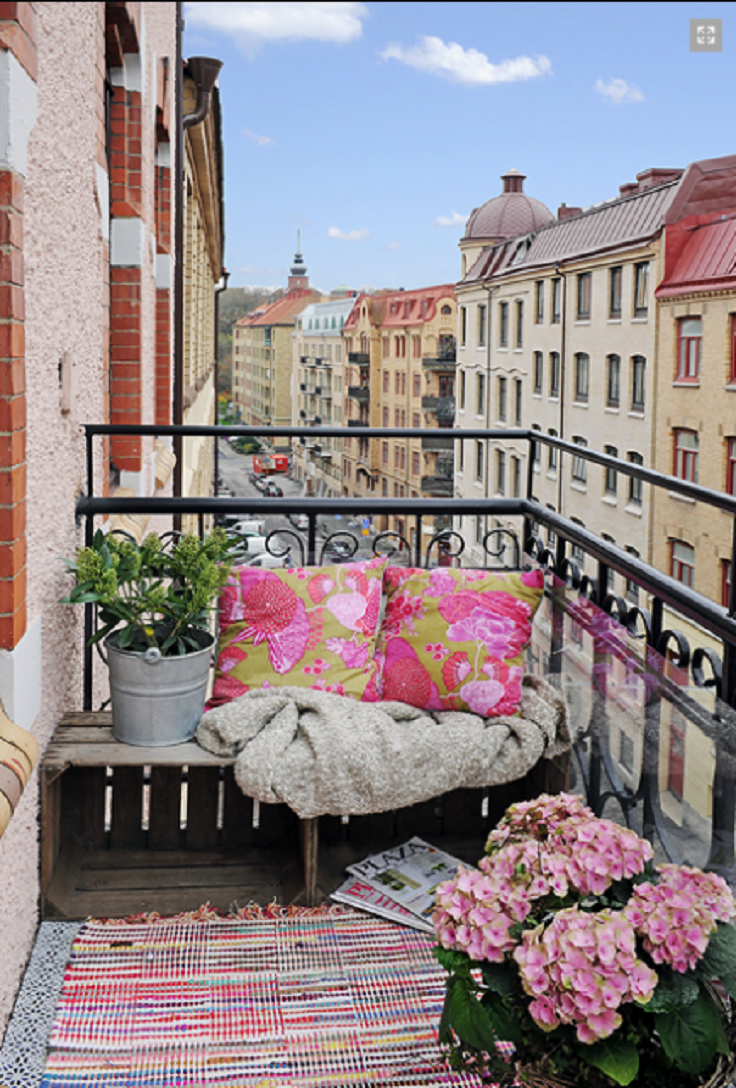
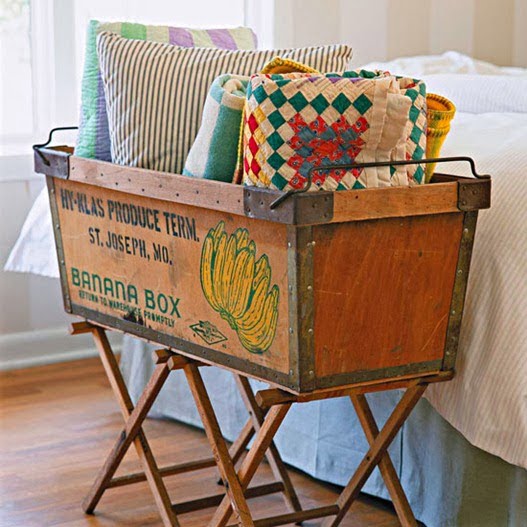
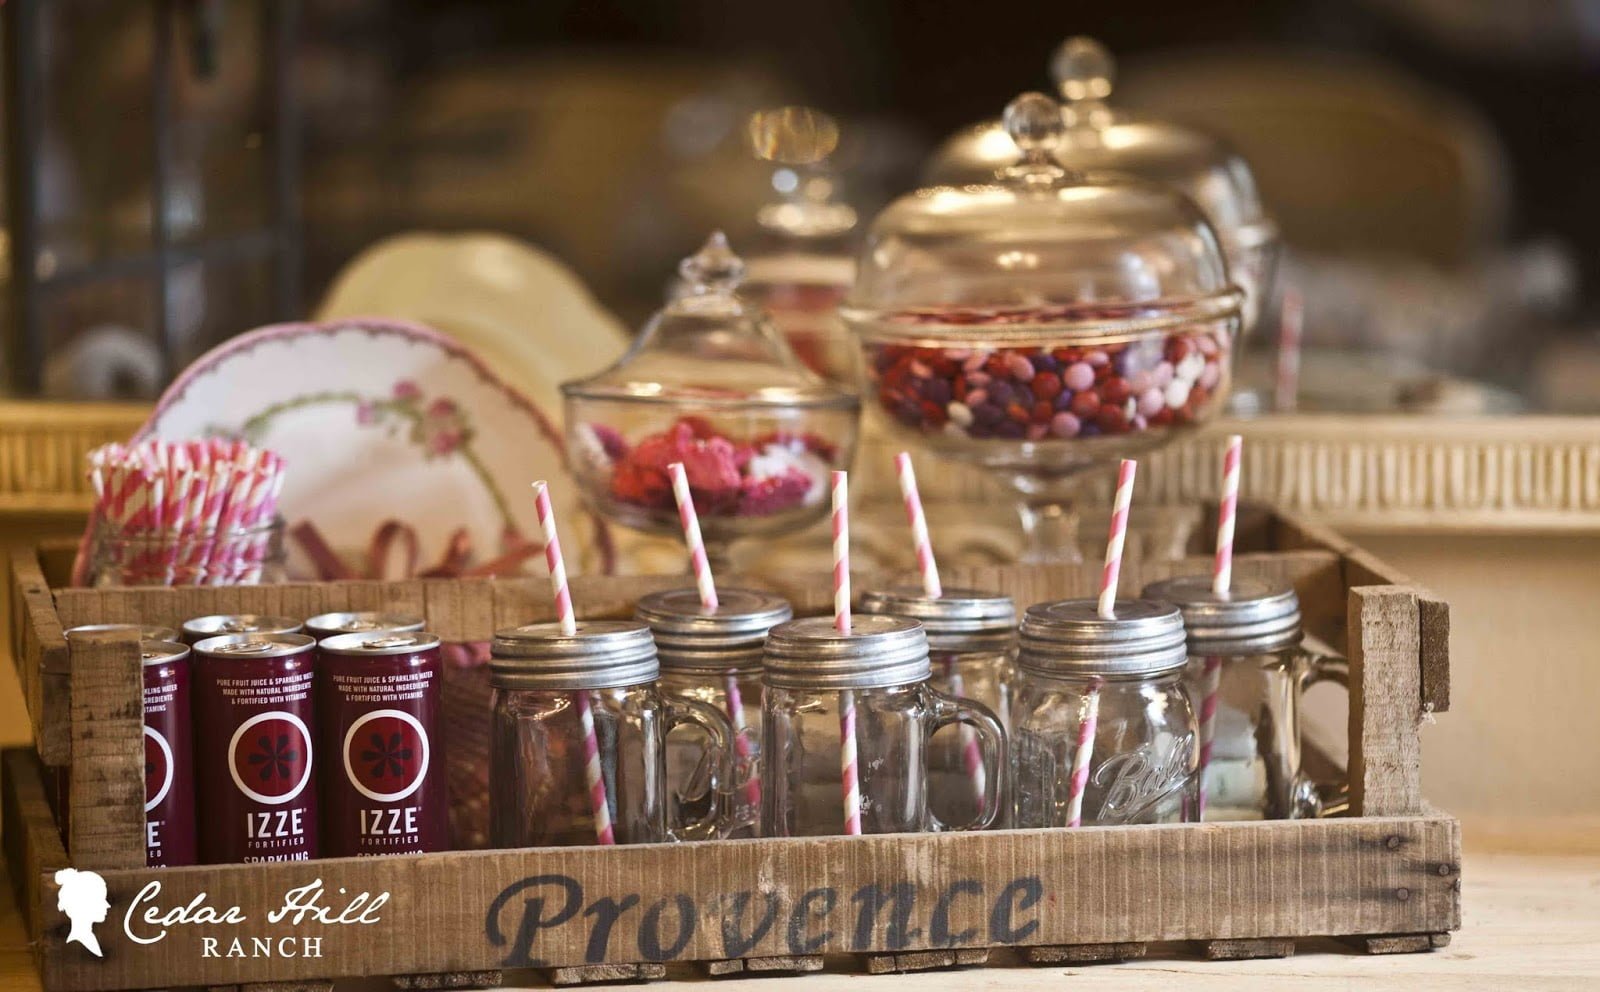

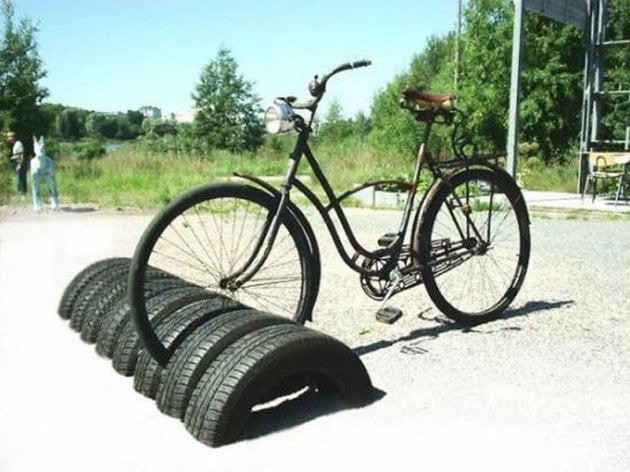
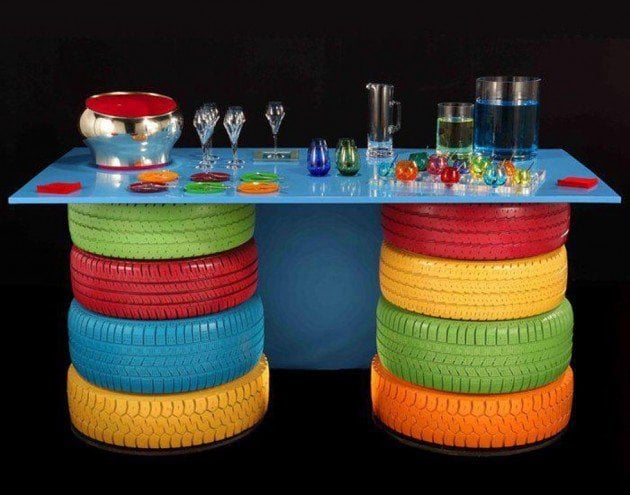
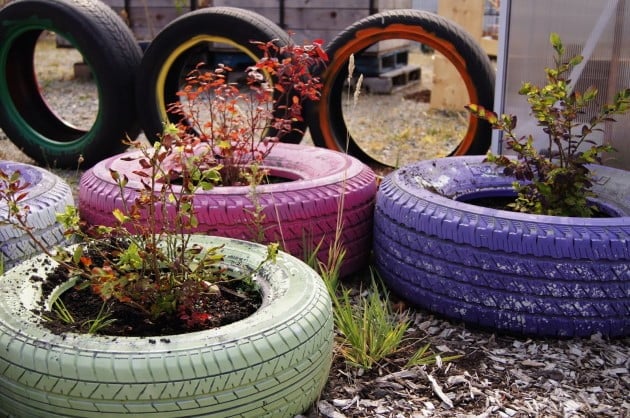
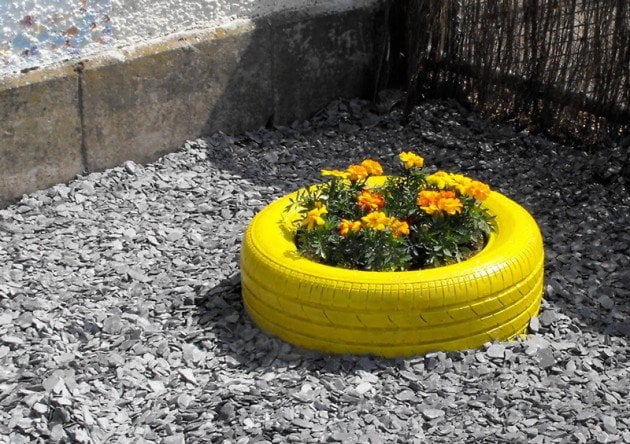

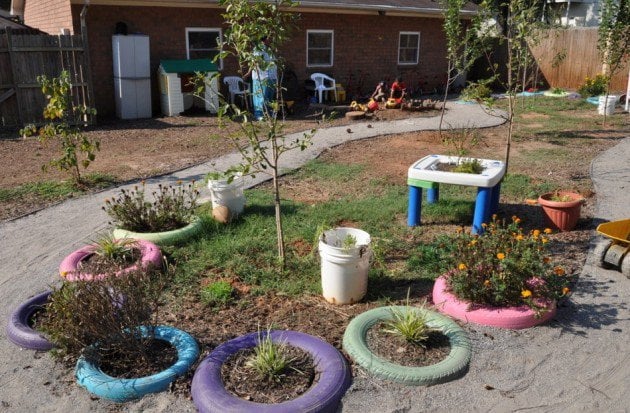
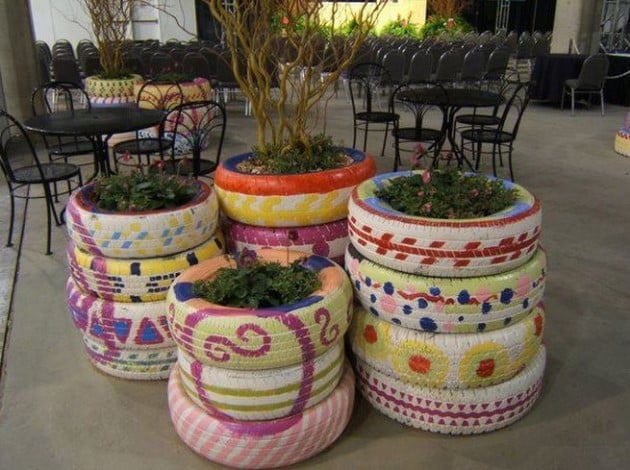
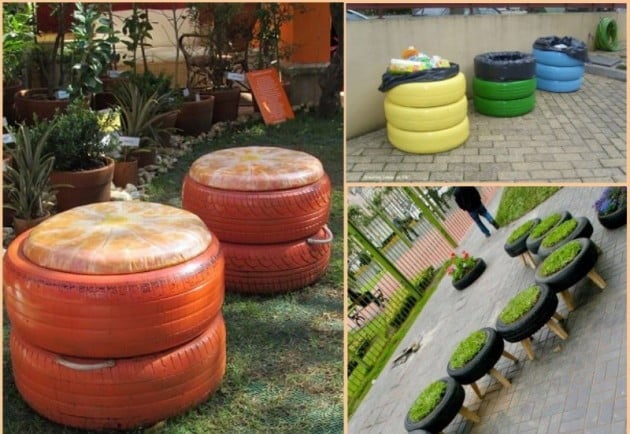
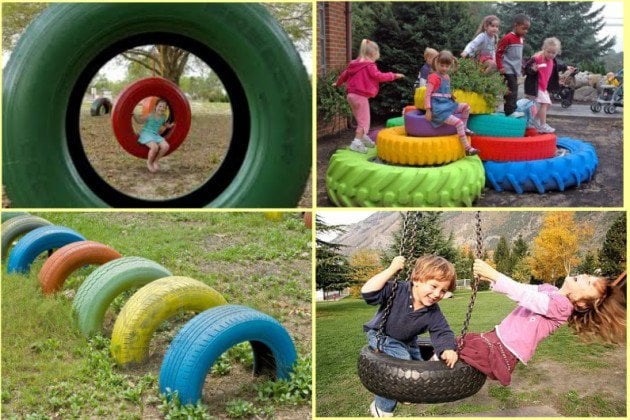
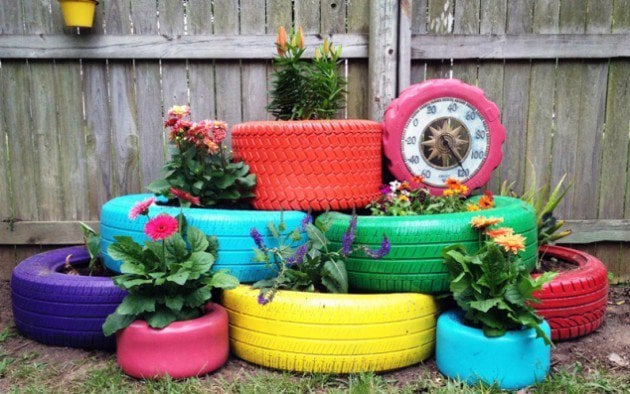
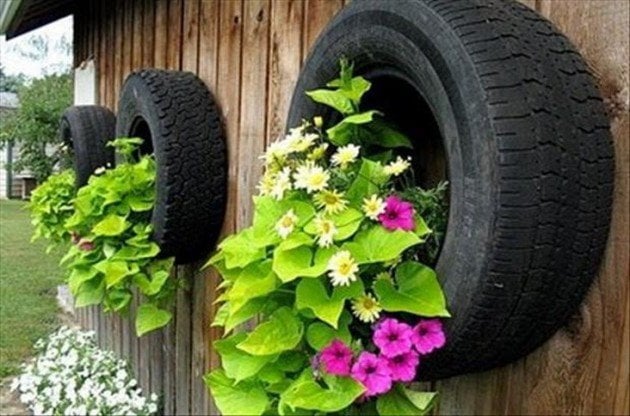
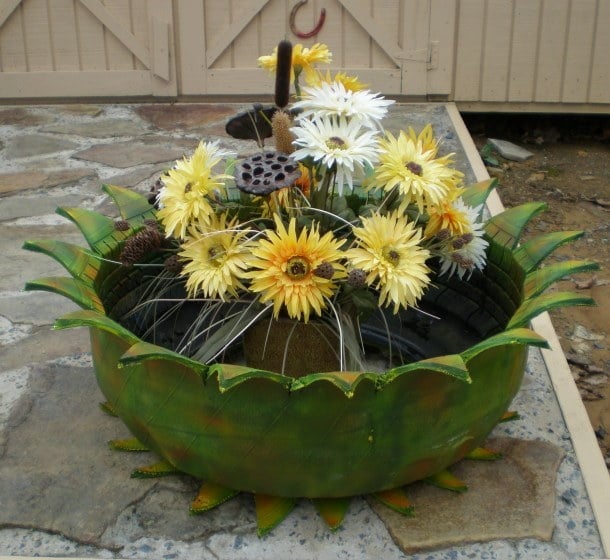
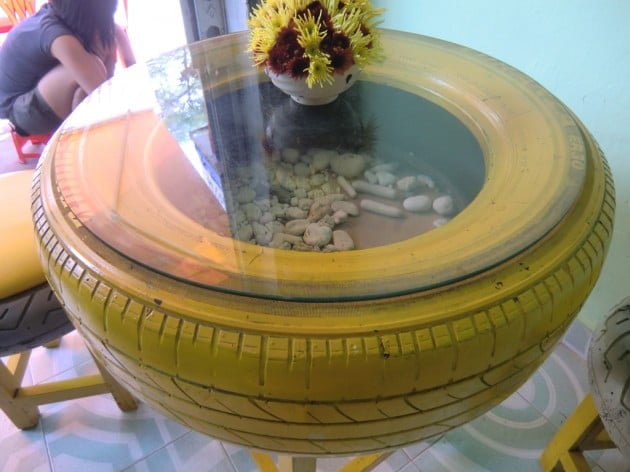
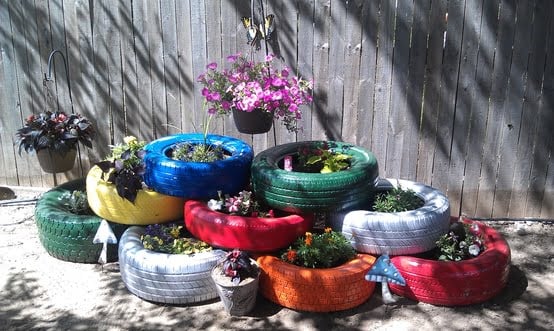
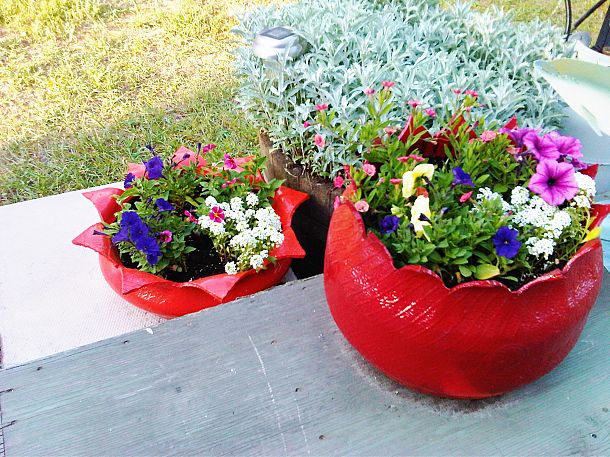
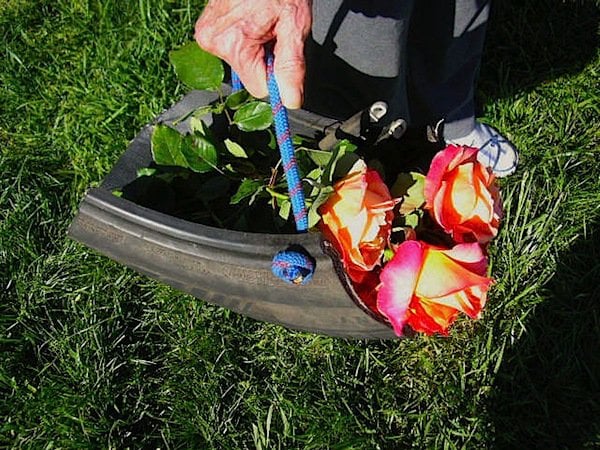
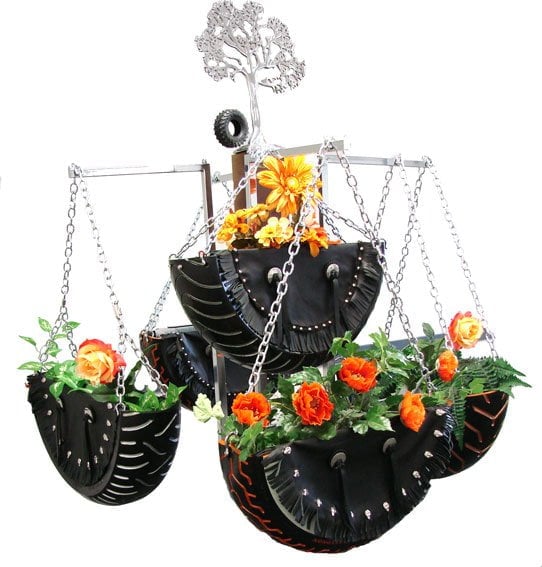

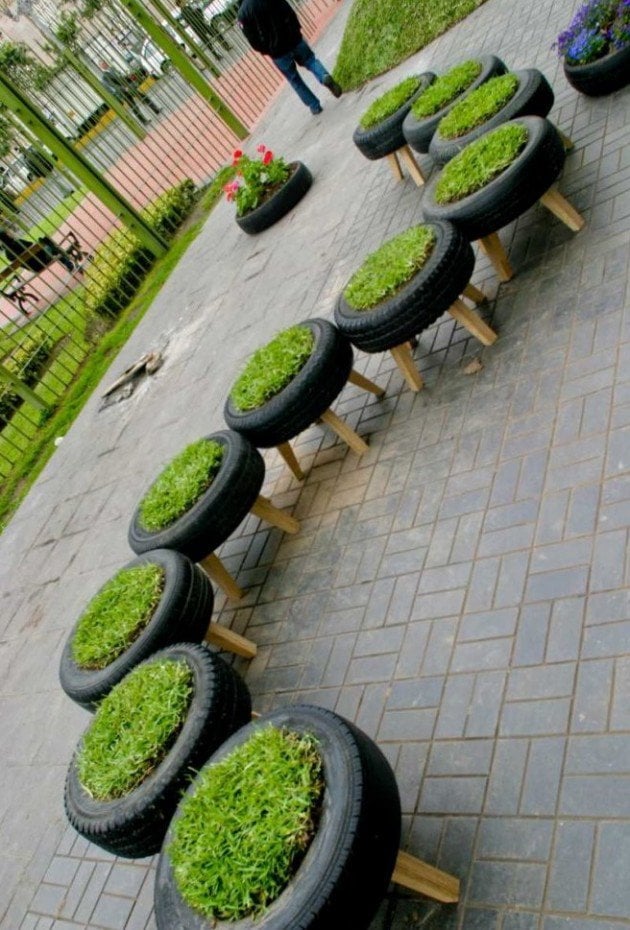
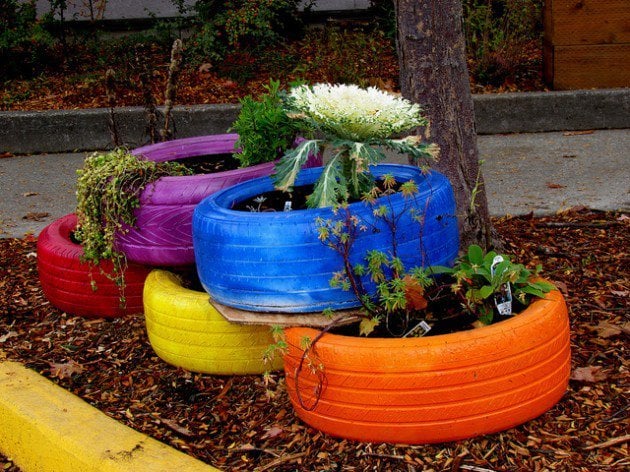
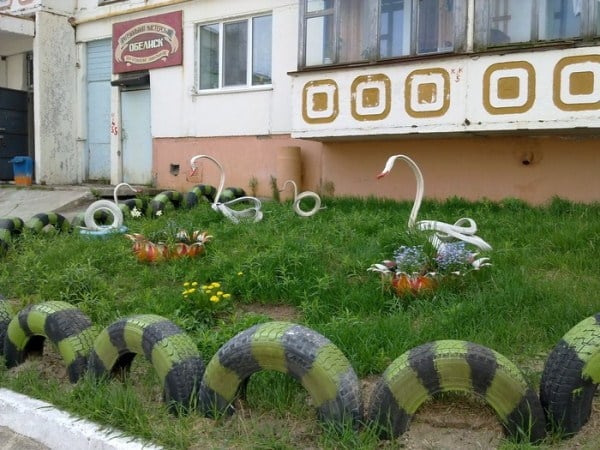

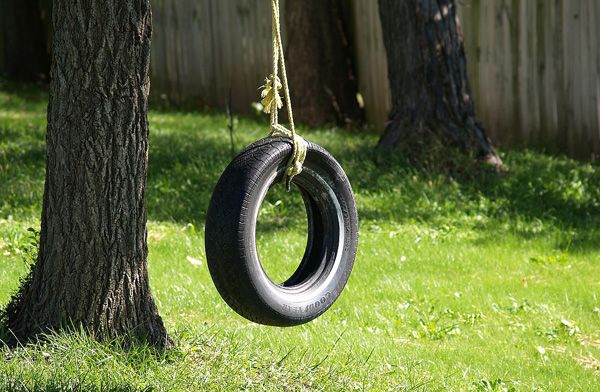
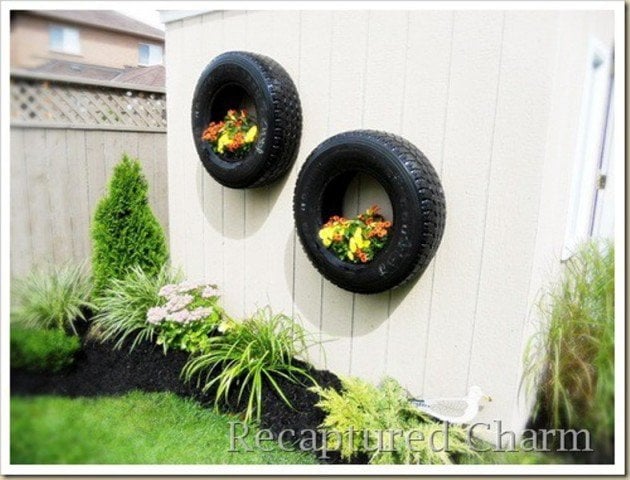
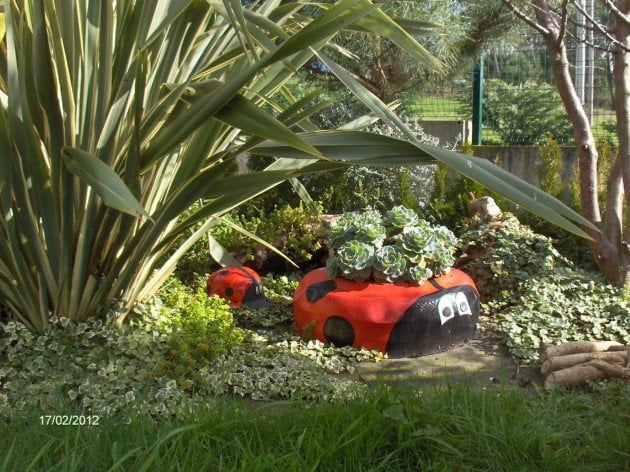
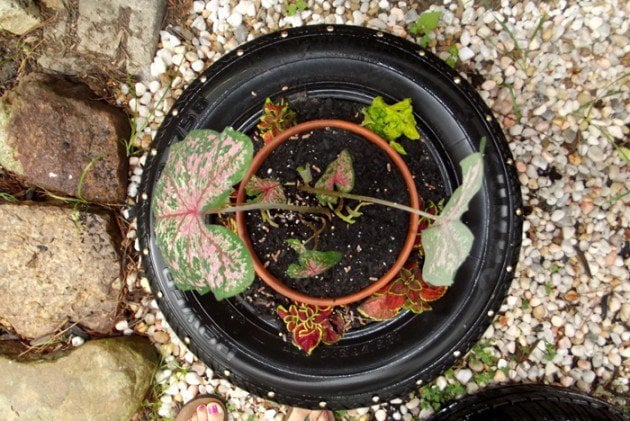
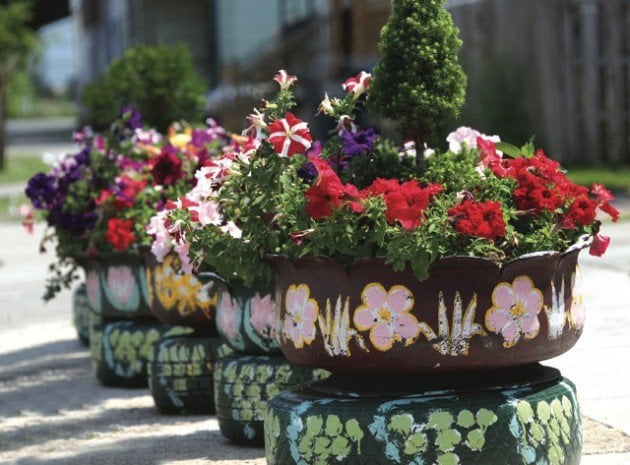
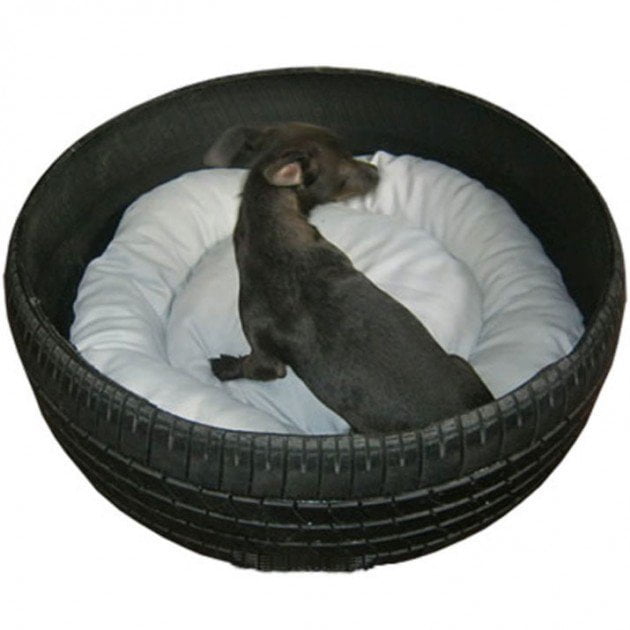

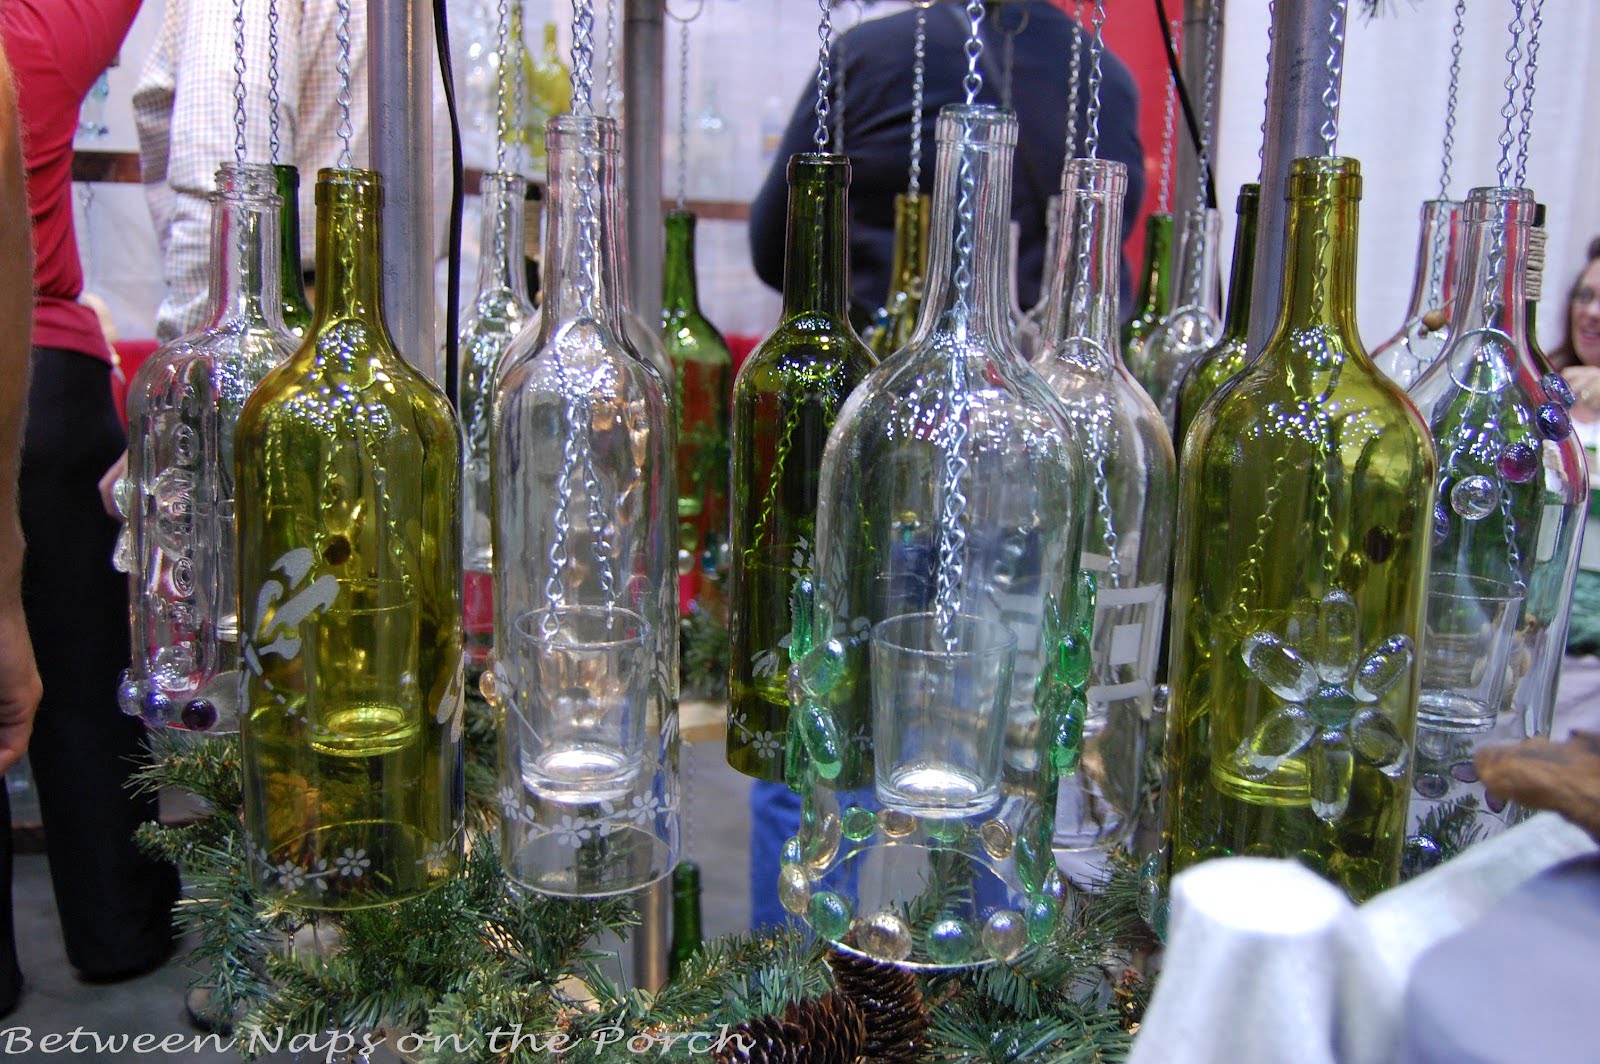

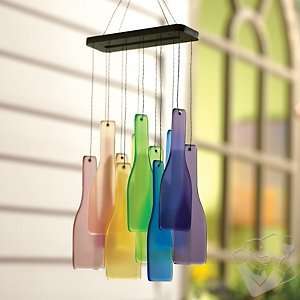

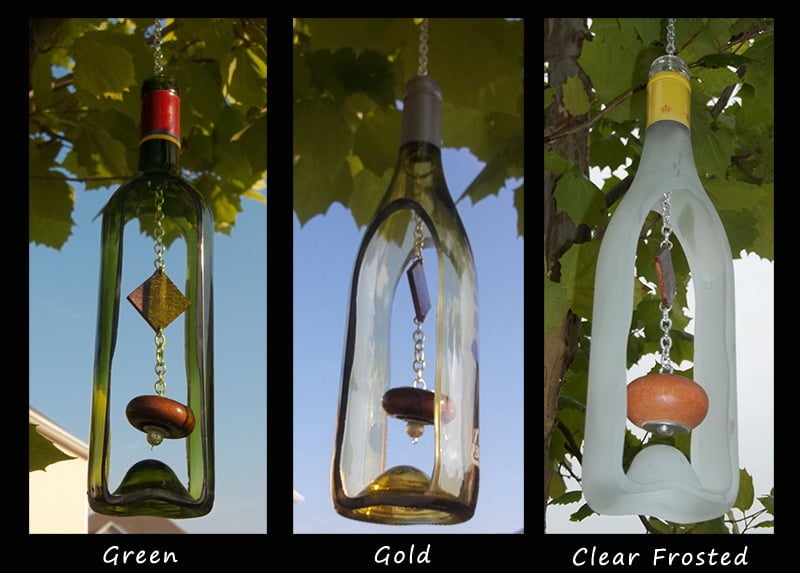

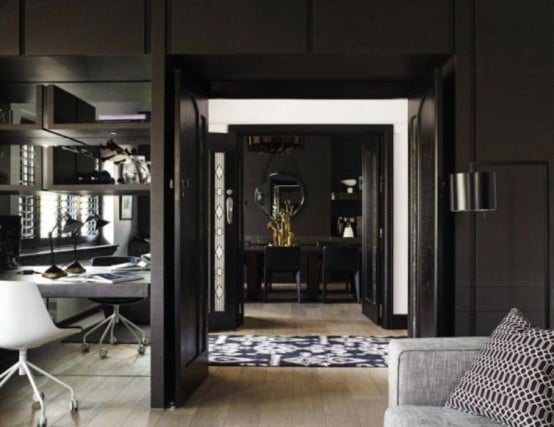
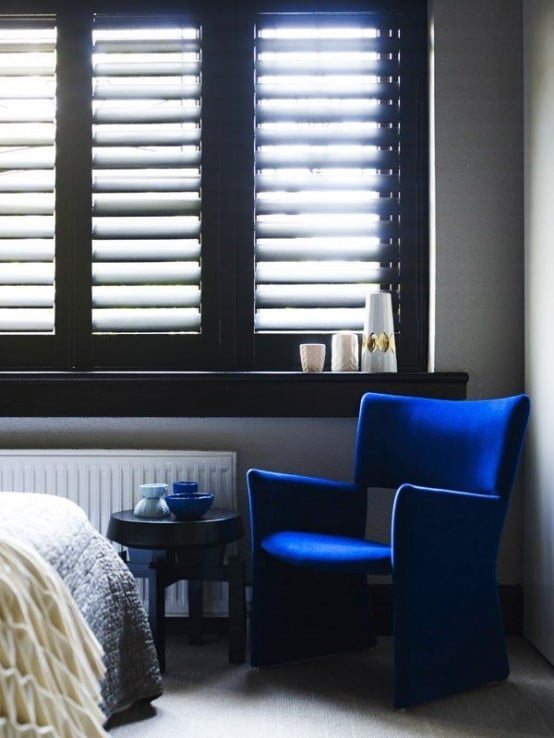
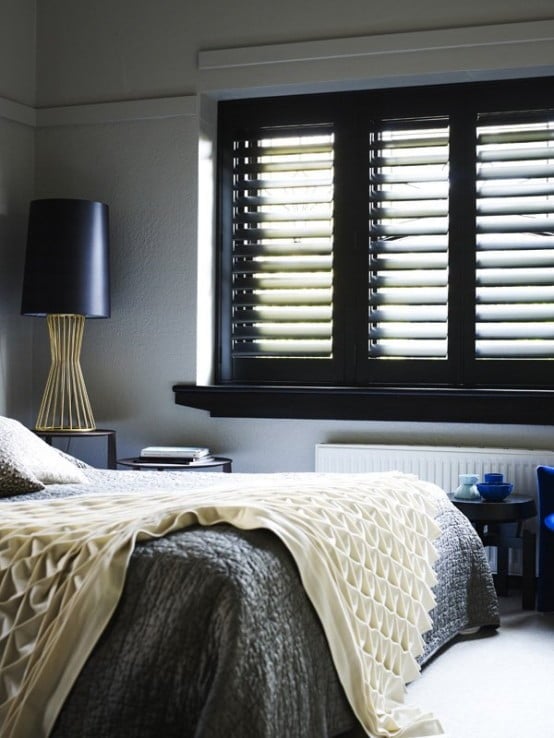
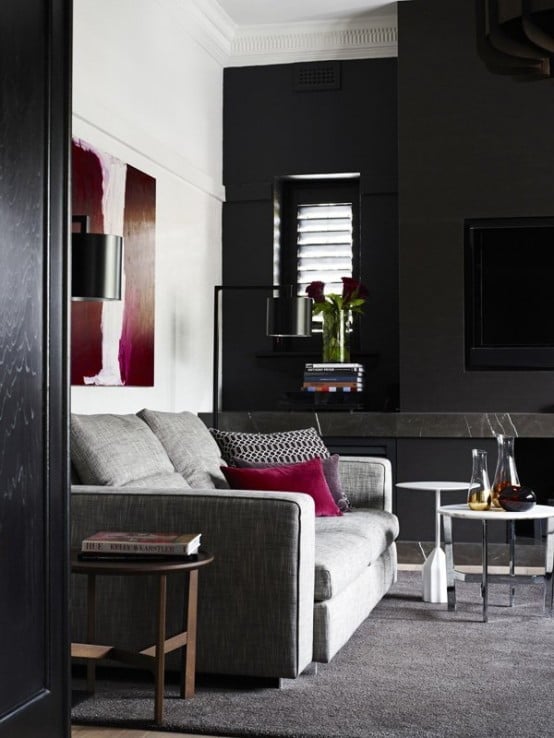
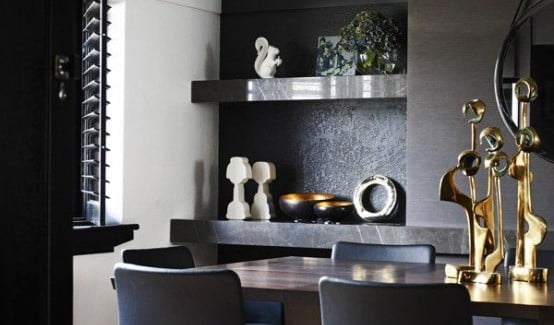

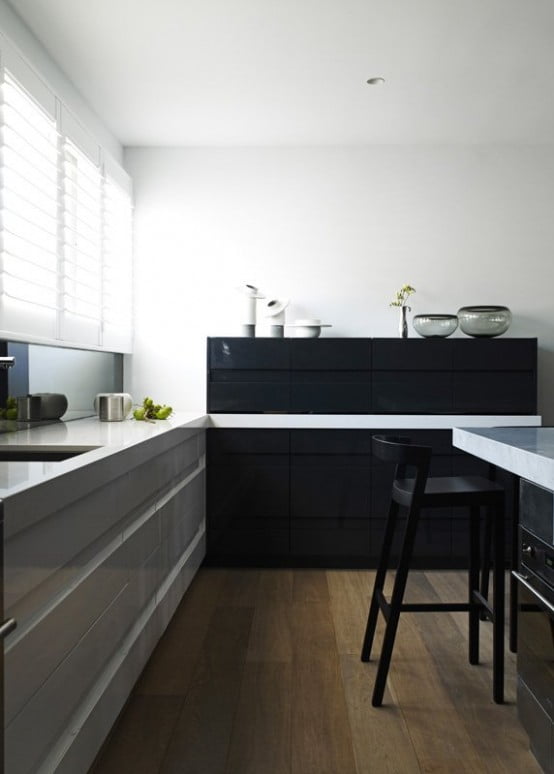


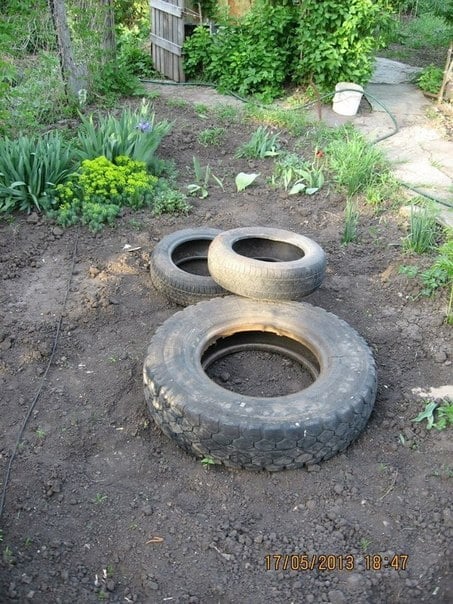

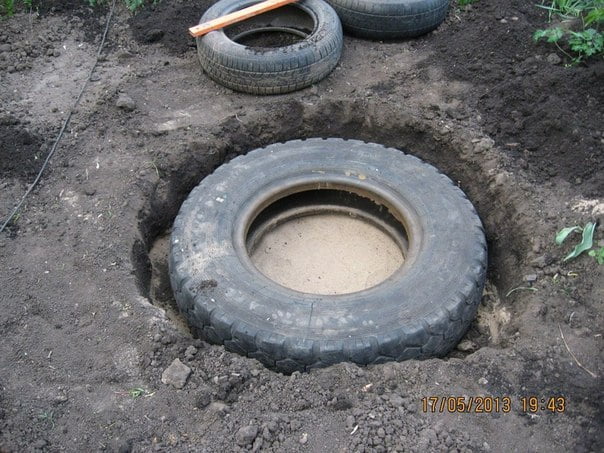
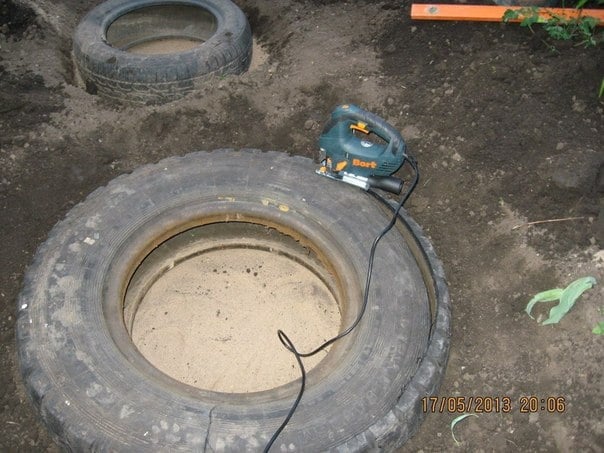
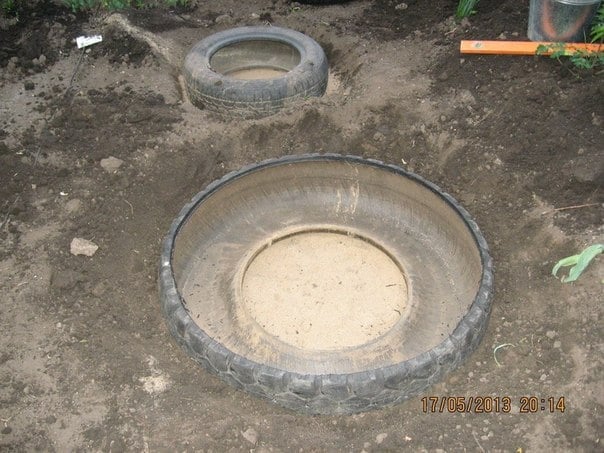


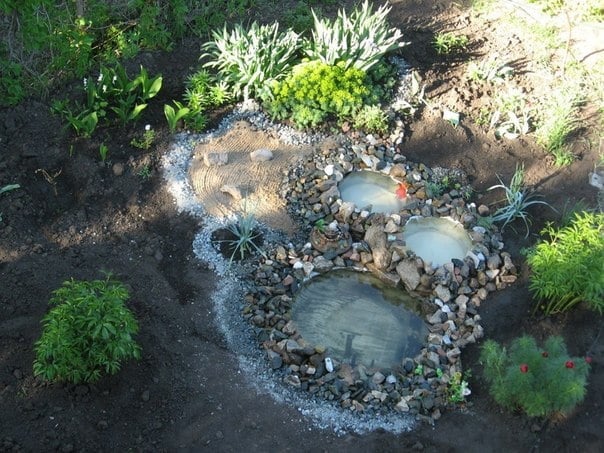


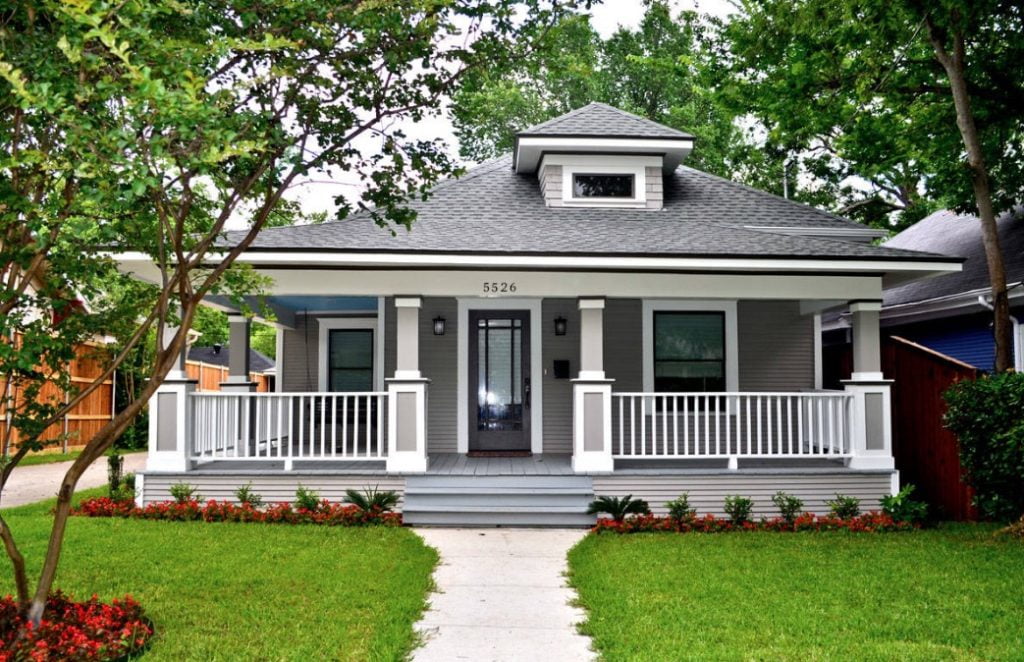

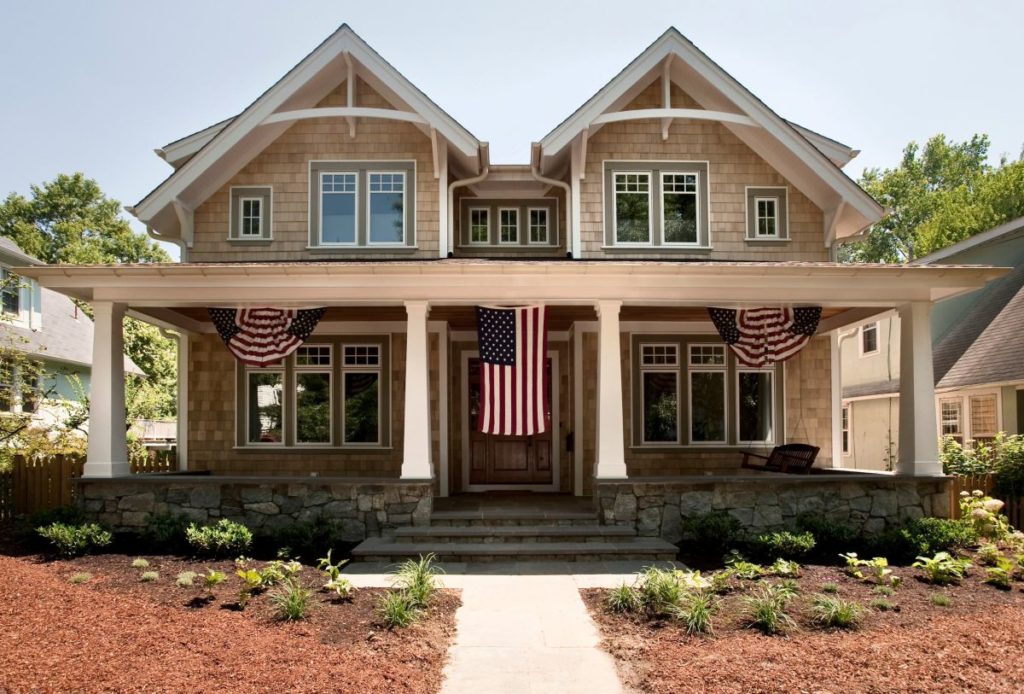
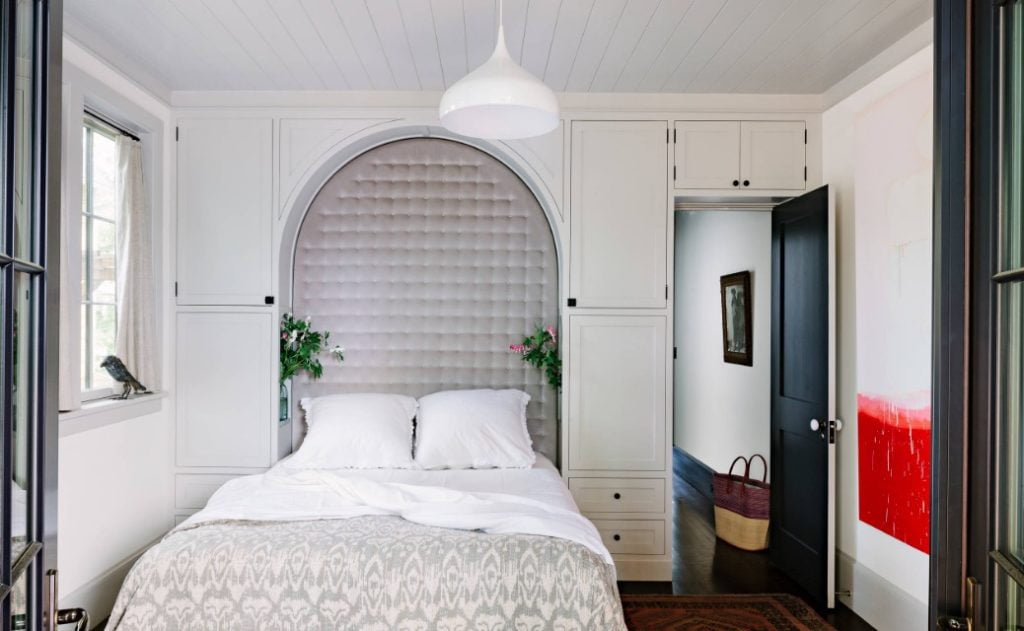

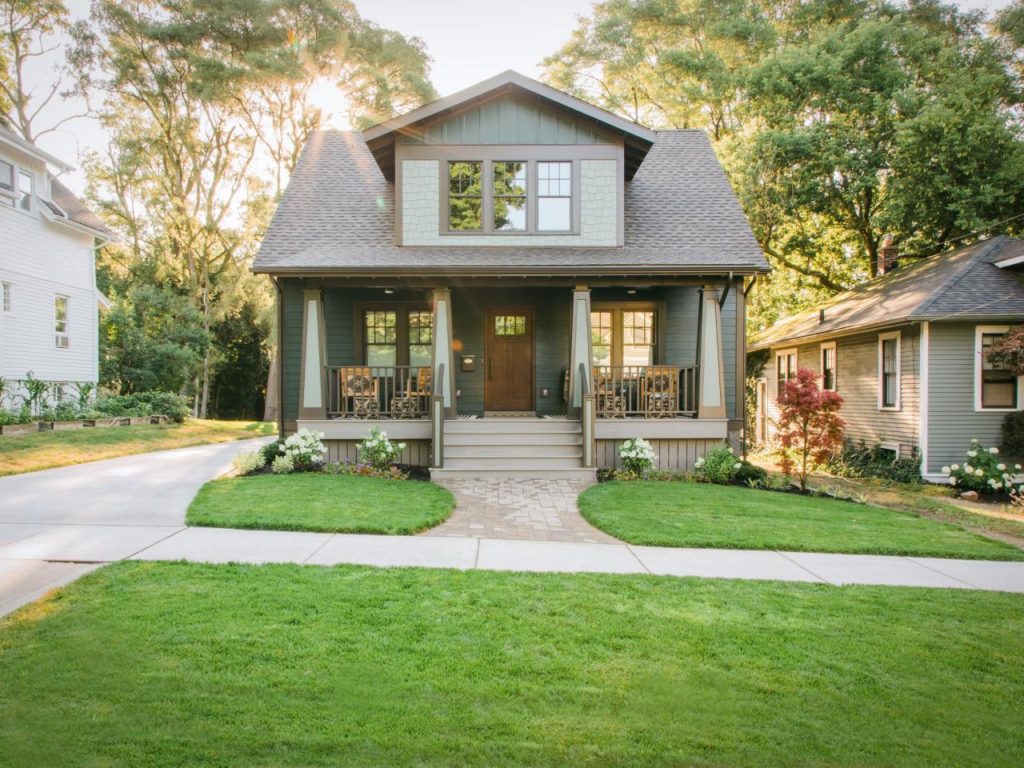

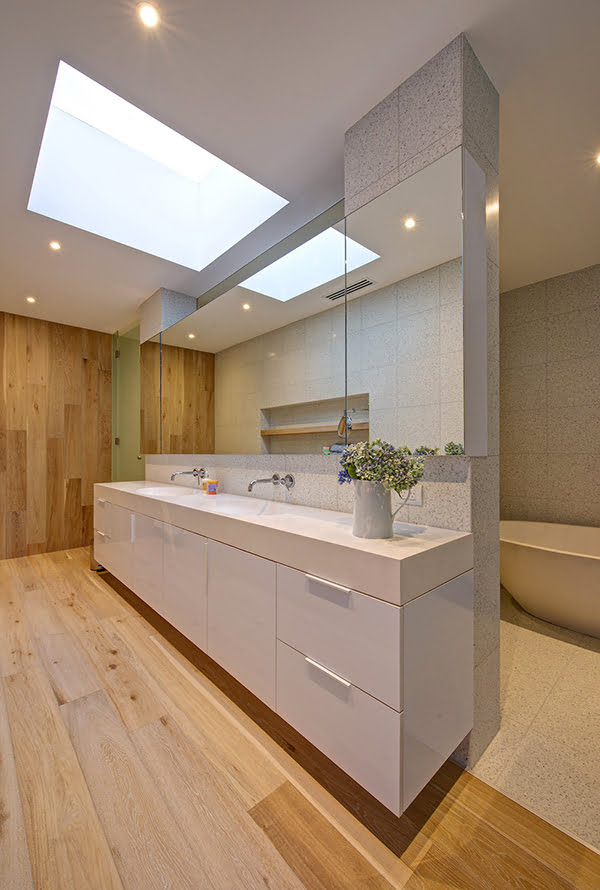
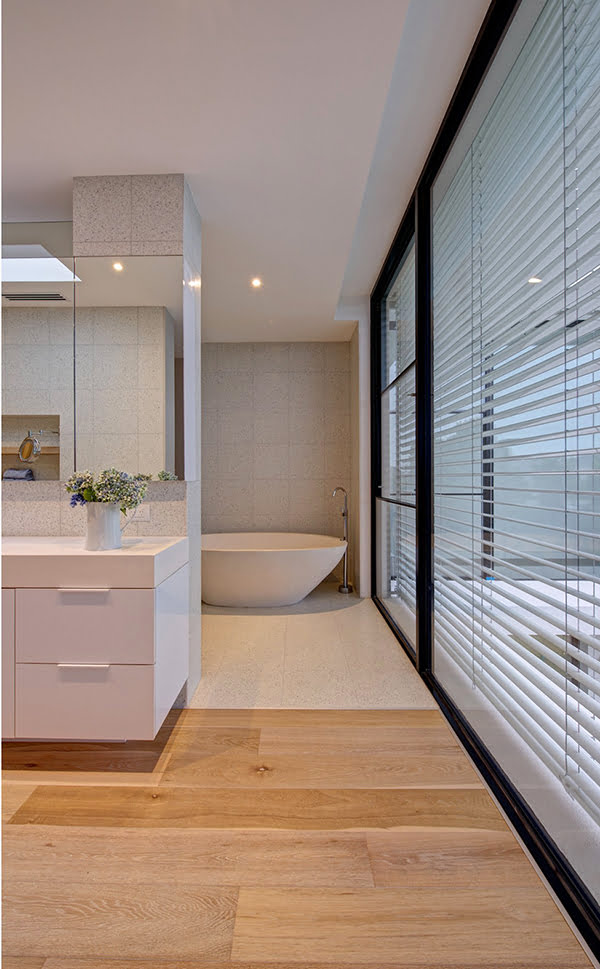

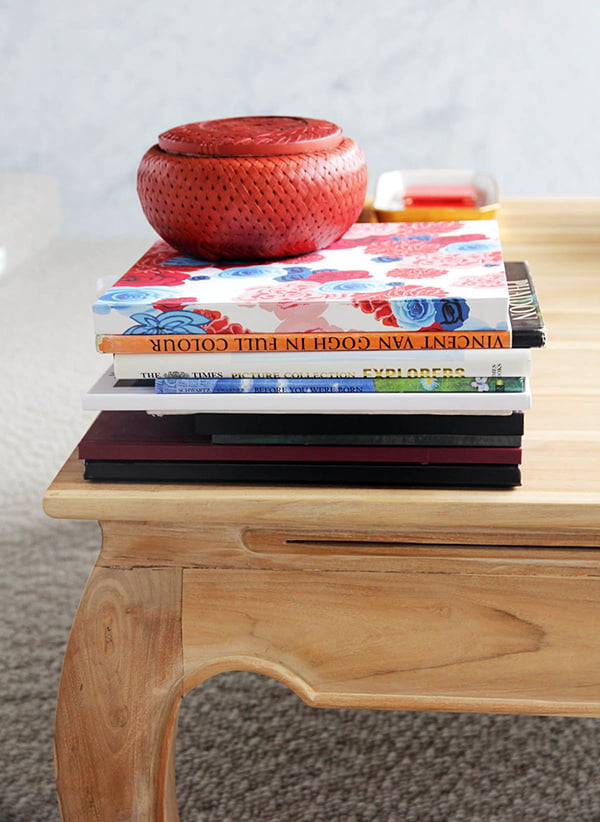

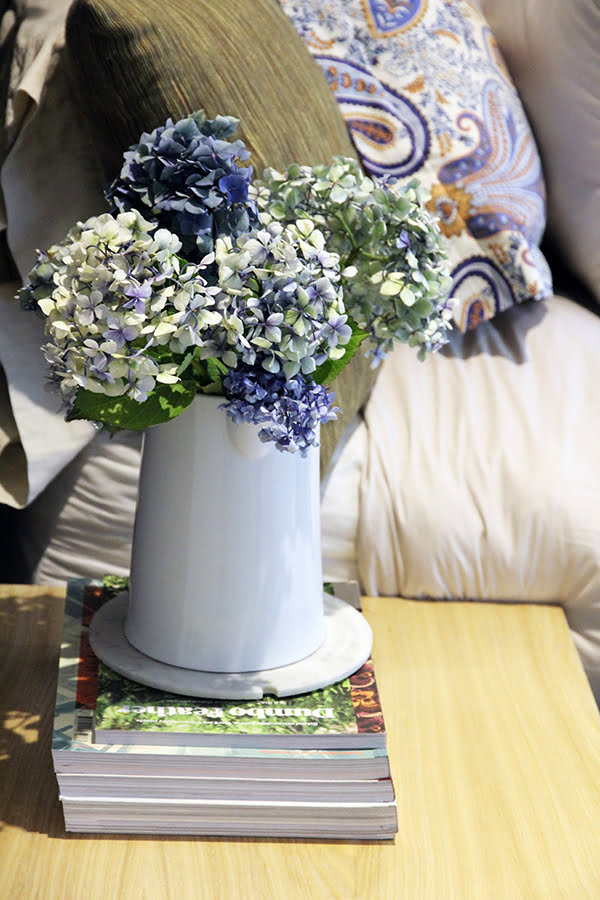

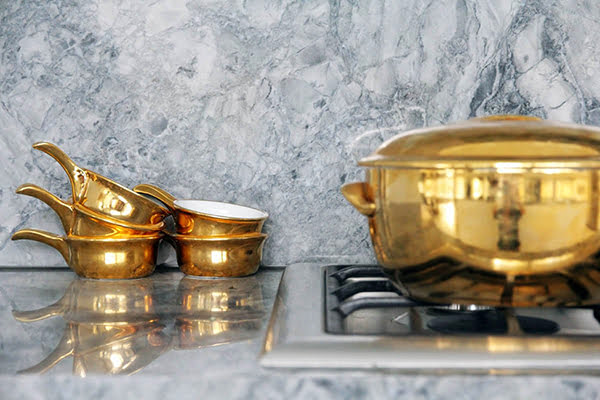
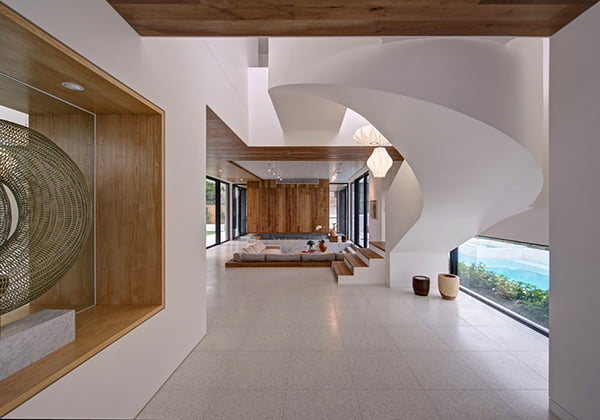
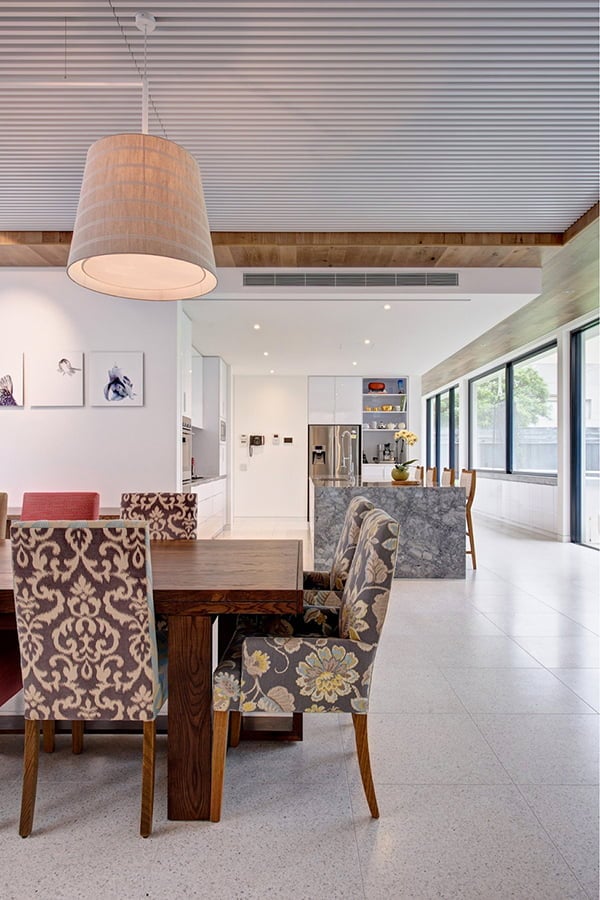
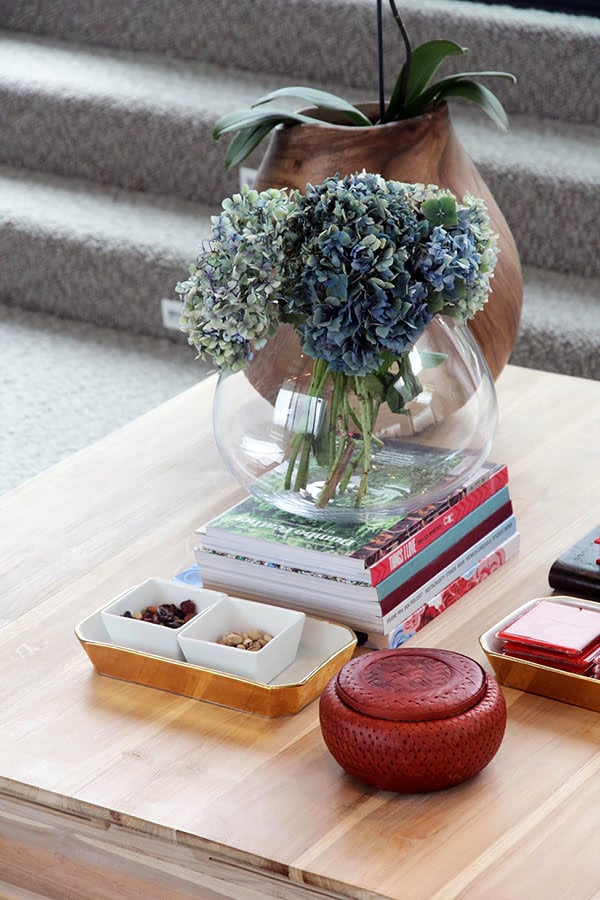
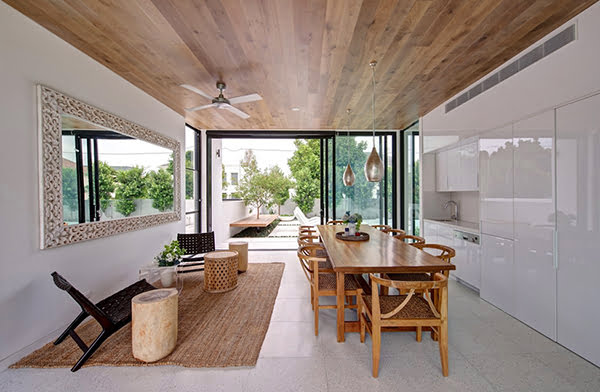
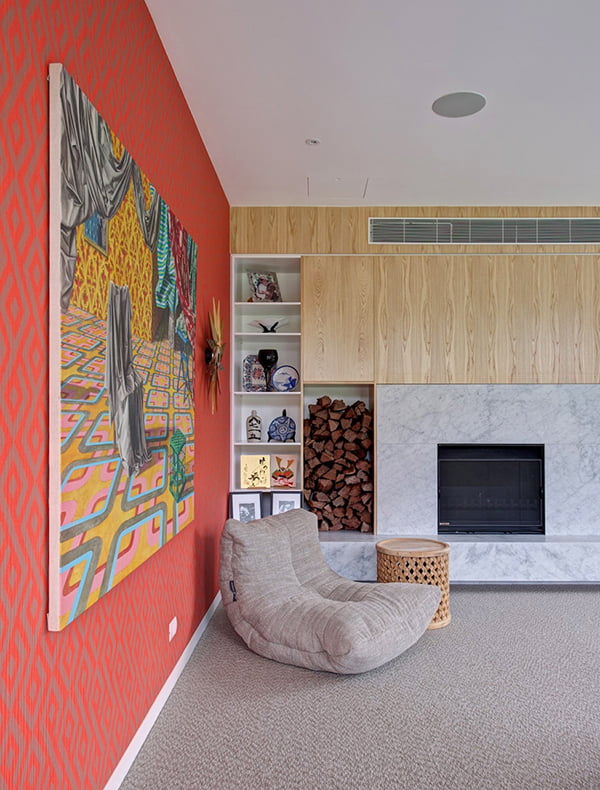
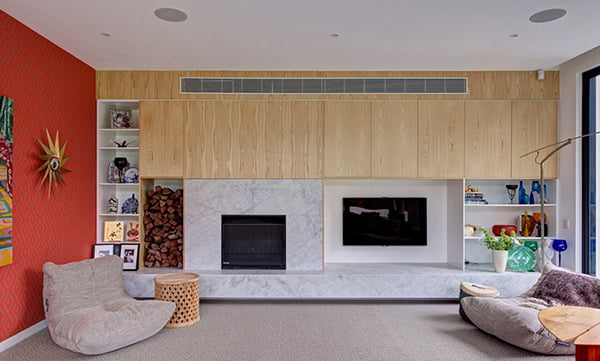

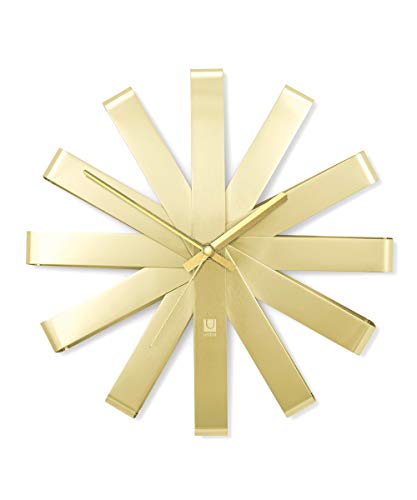

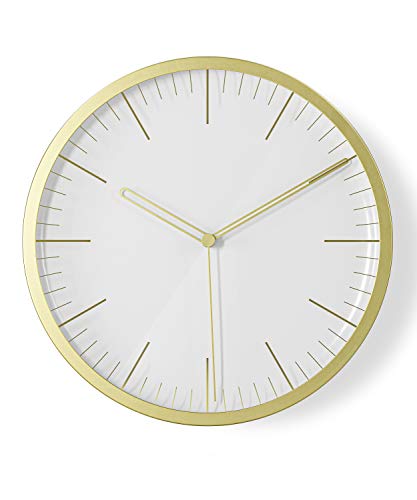
![Clay Sculpting Ideas [All You Need To Know]](https://homesthetics.net/wp-content/uploads/2022/08/Clay-Sculpting-Ideas-1.jpg "Clay Sculpting Ideas [All You Need To Know]")

![Clay Modeling Ideas [All You Need To Know]](https://homesthetics.net/wp-content/uploads/2022/08/Clay-Modeling-Ideas-1.jpg "Clay Modeling Ideas [All You Need To Know]")


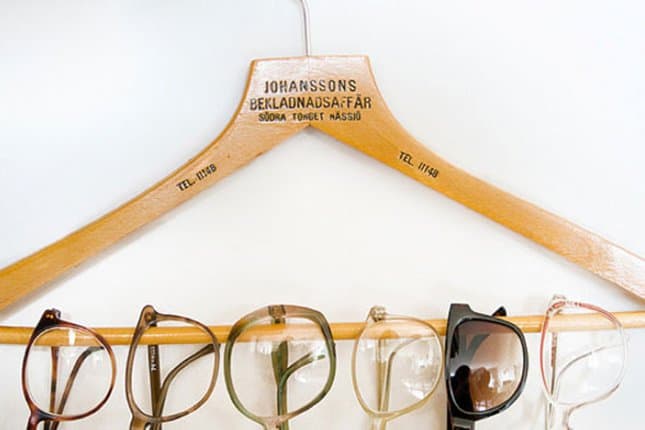
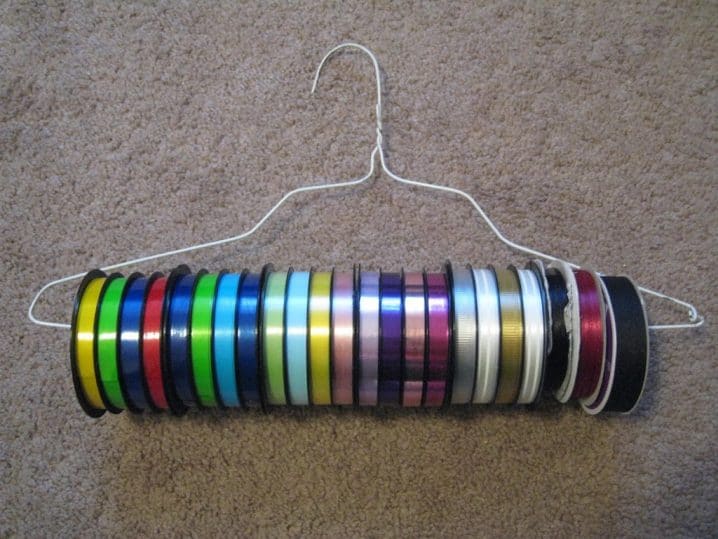

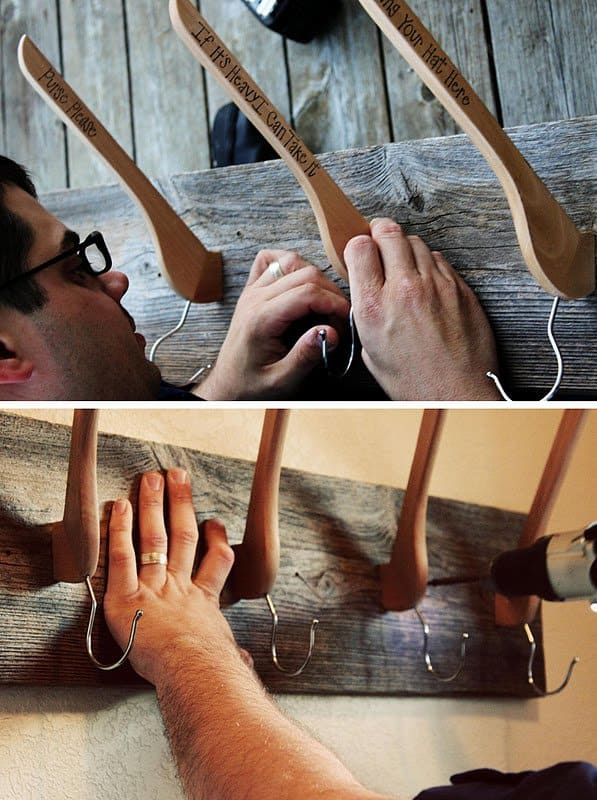
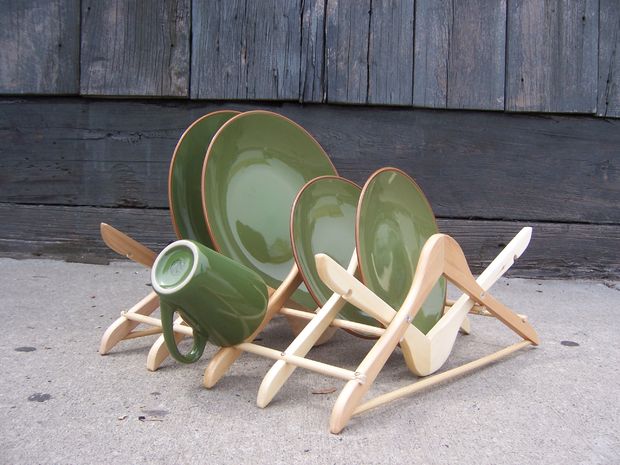
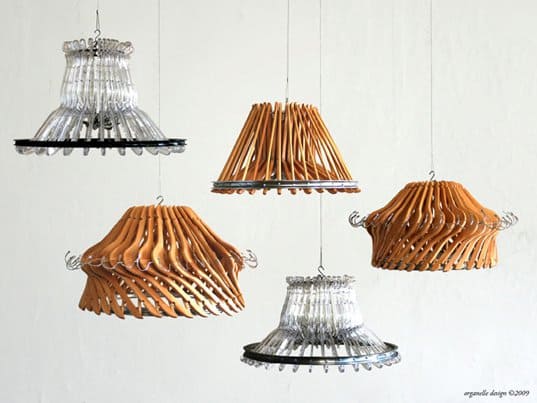
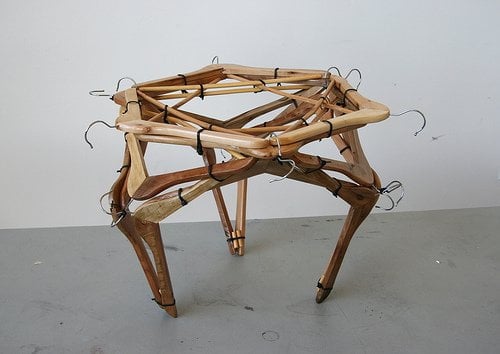
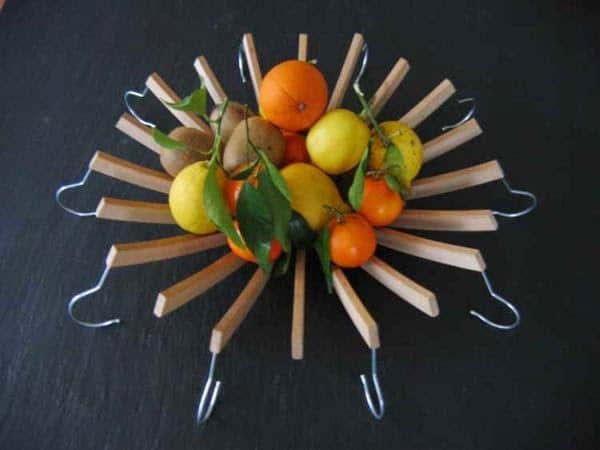
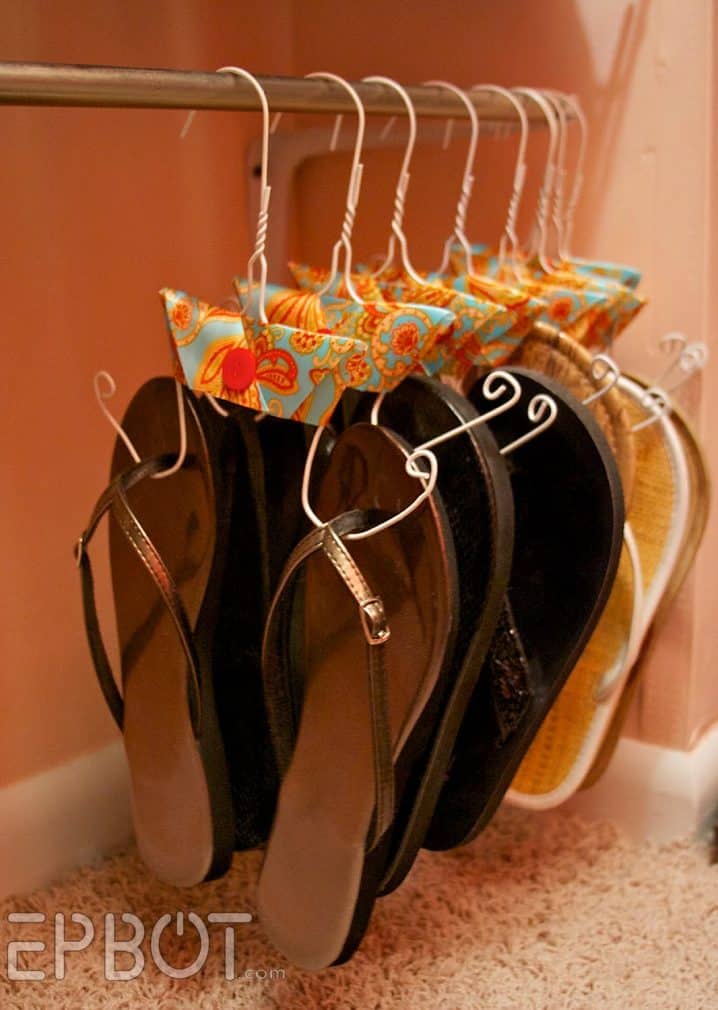
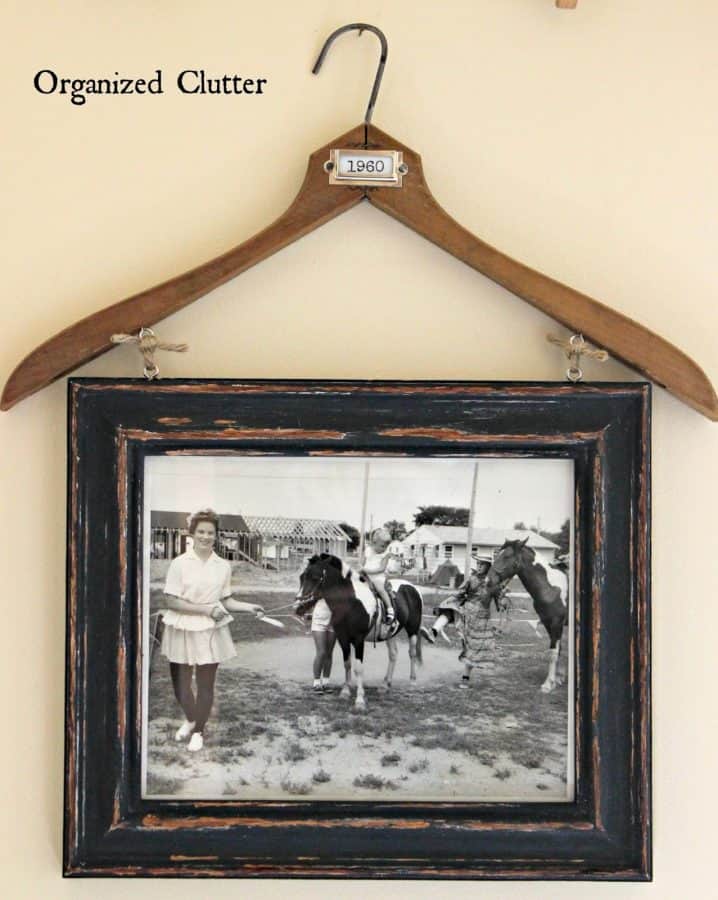
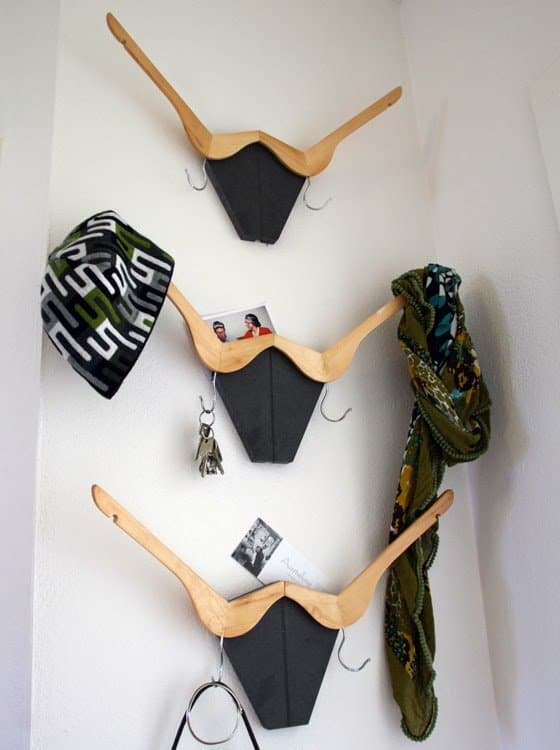
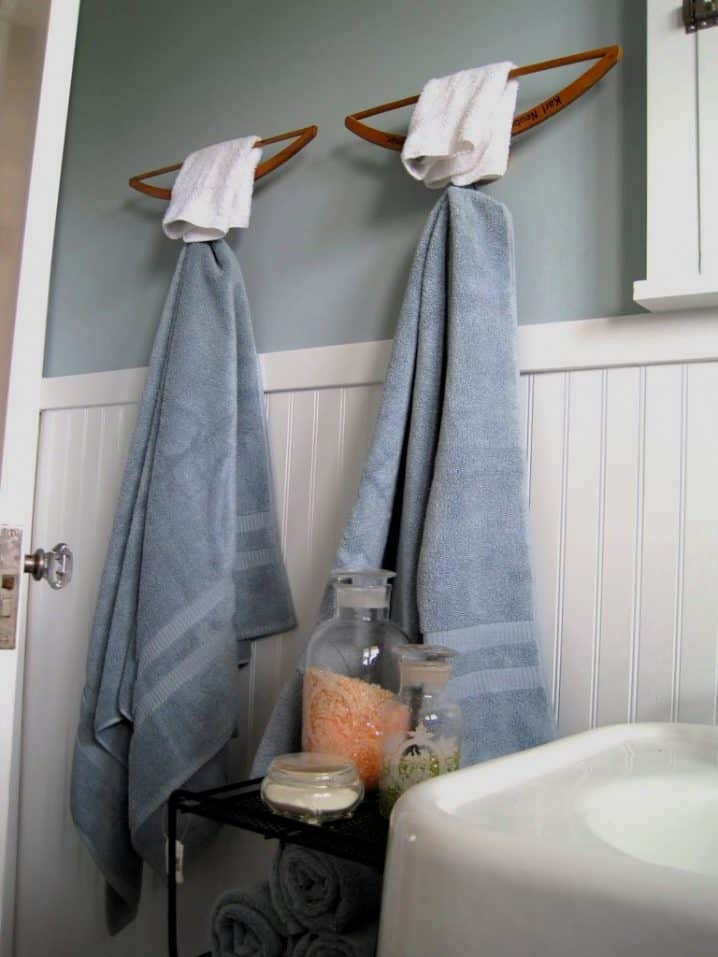


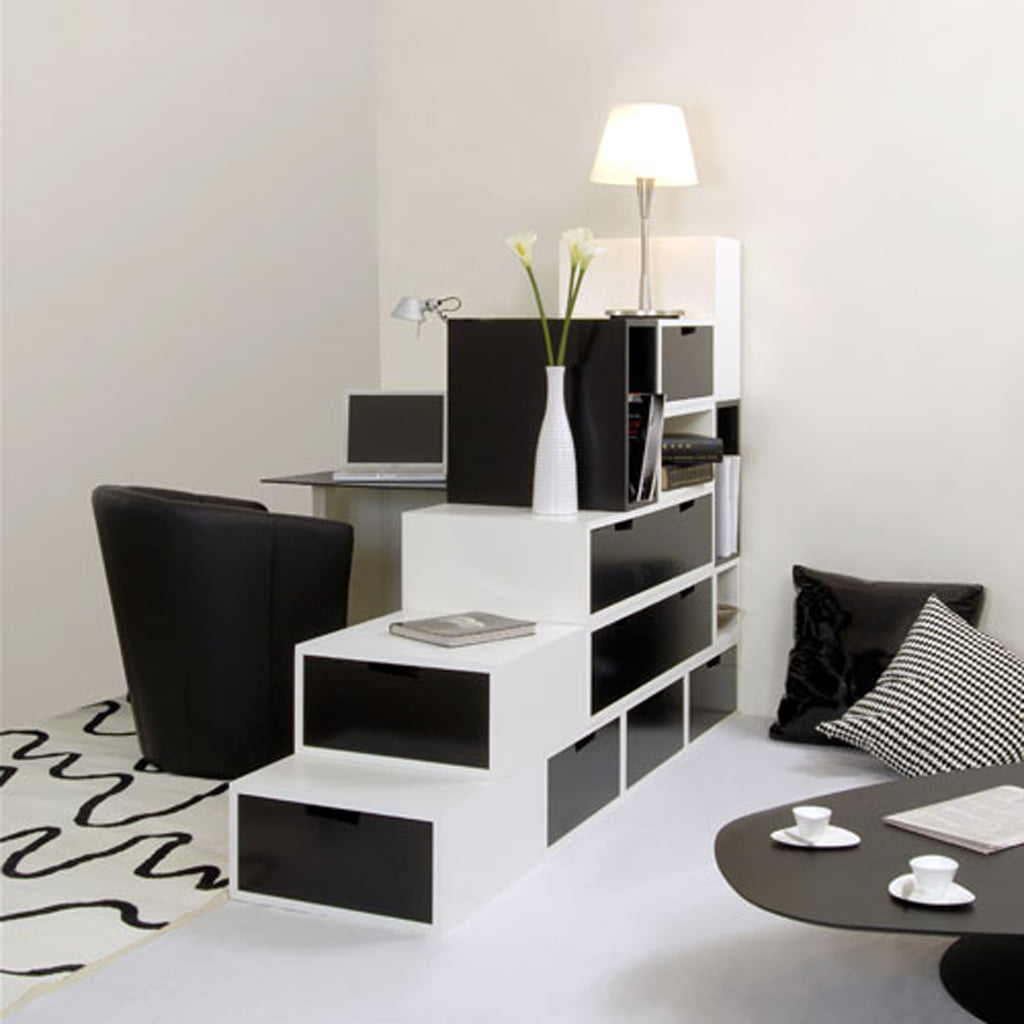
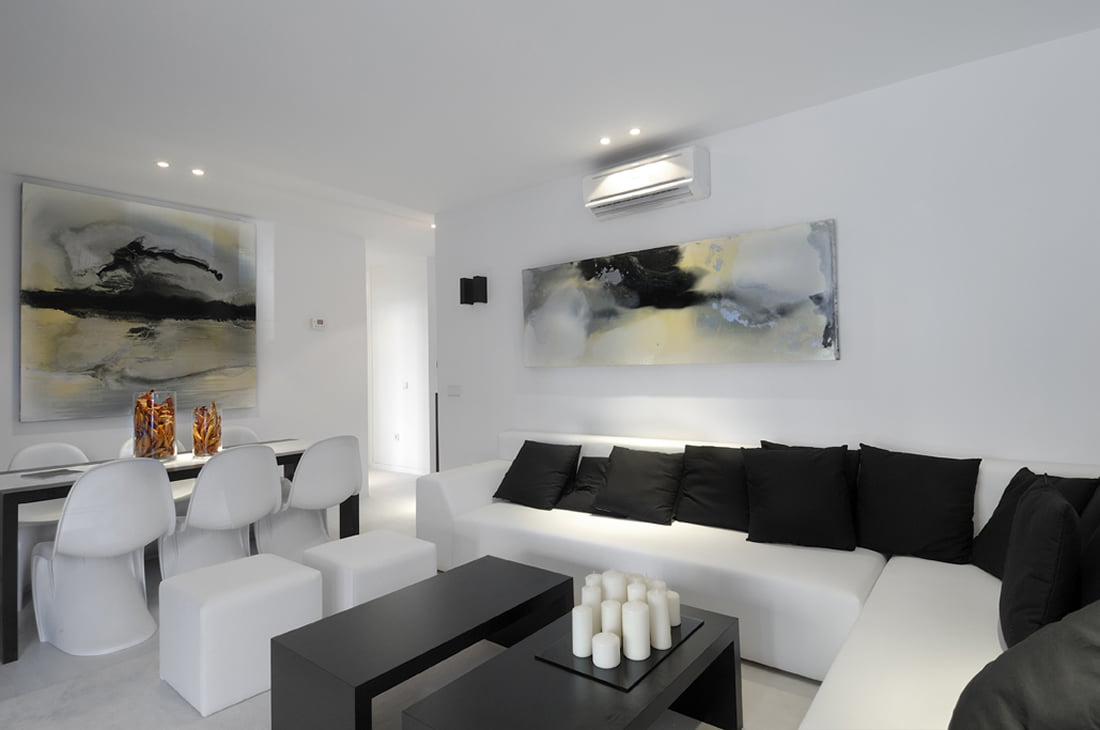

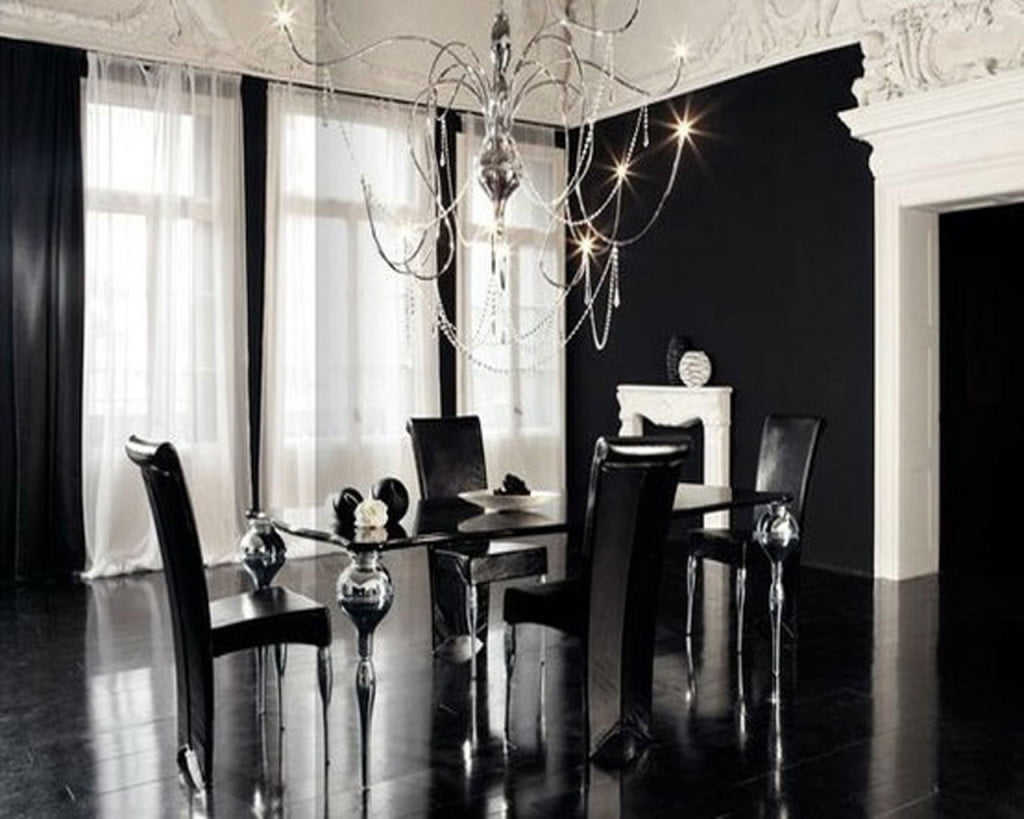

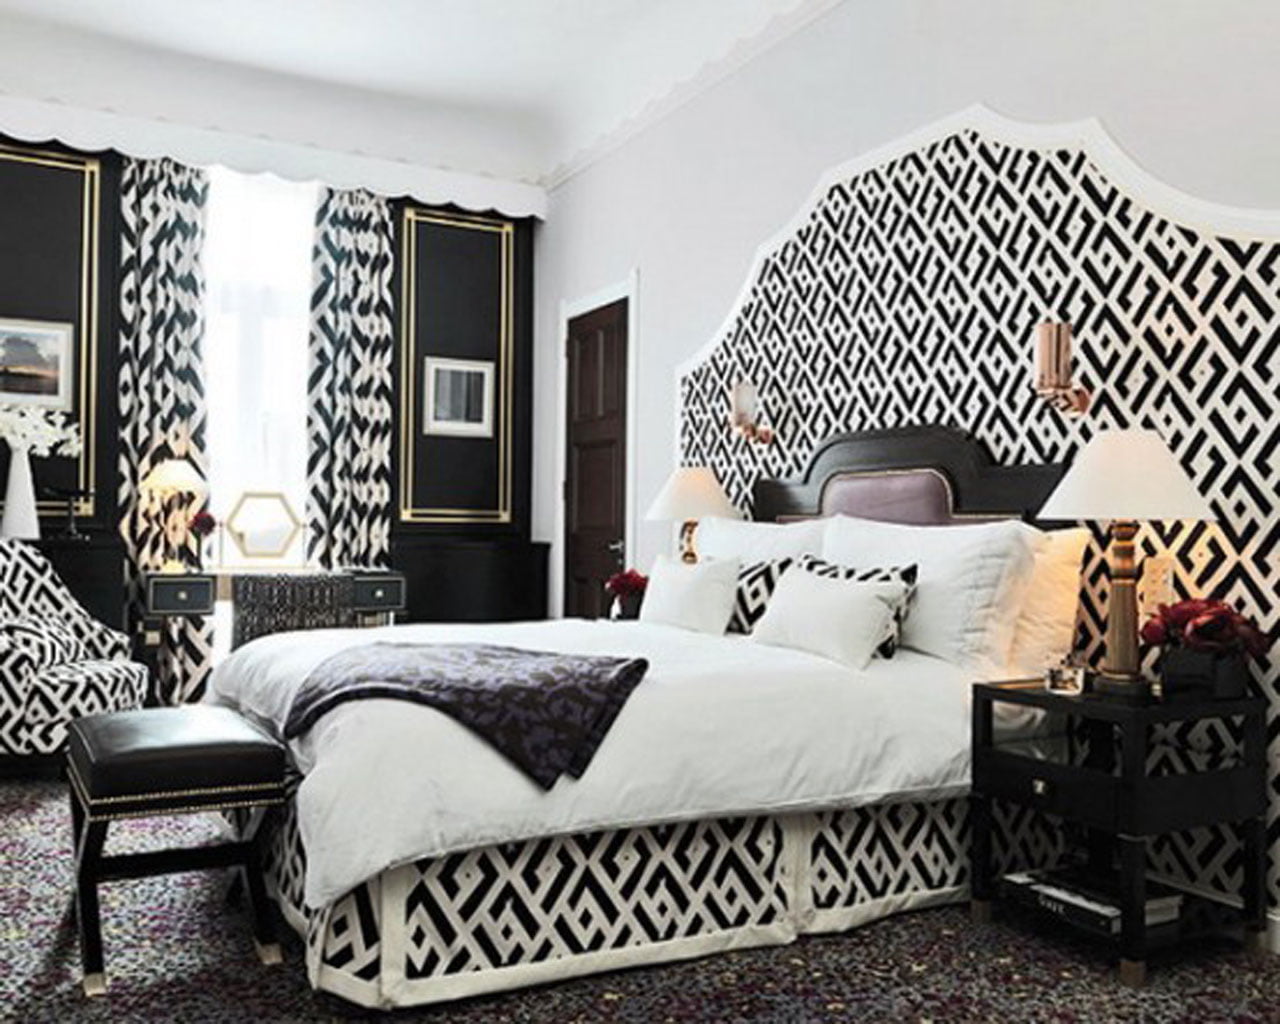
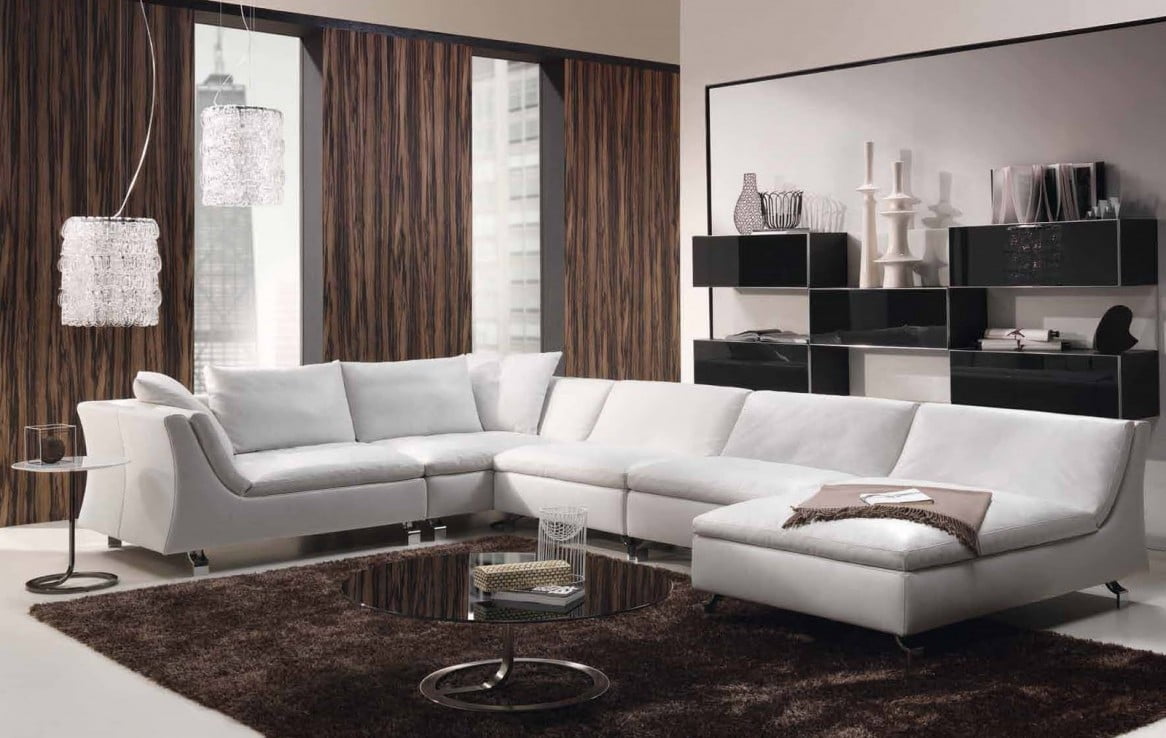
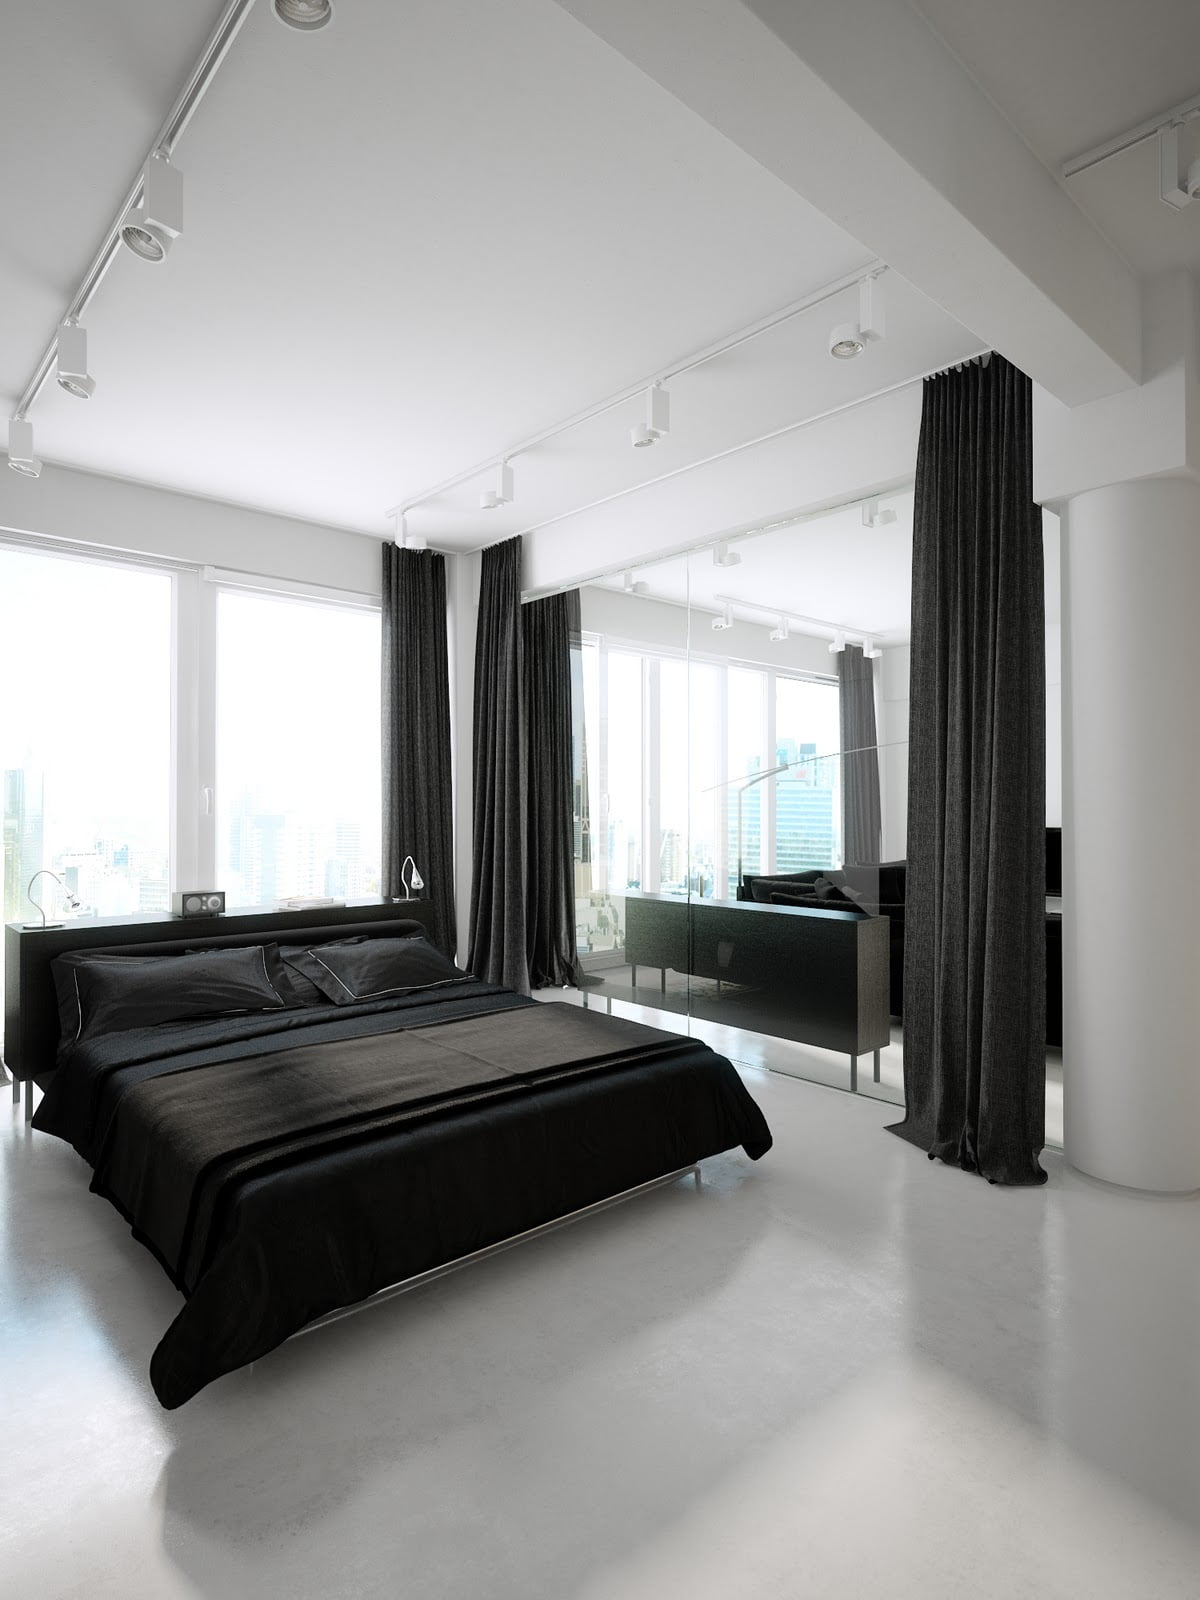
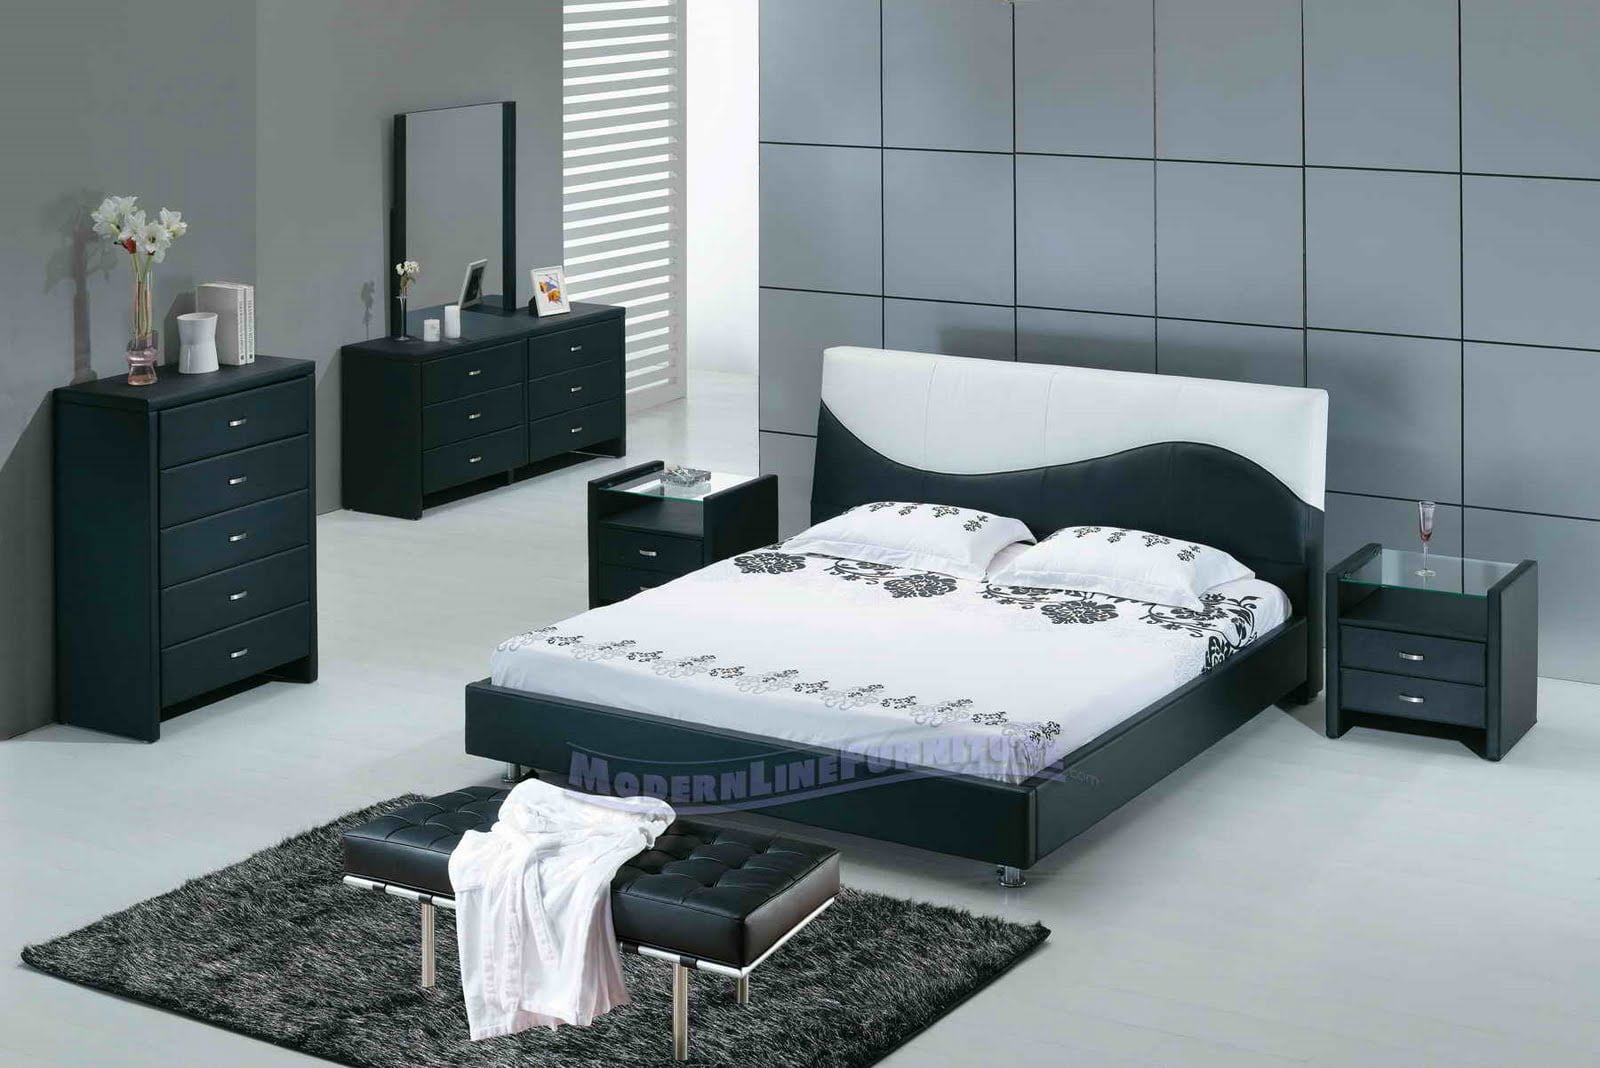
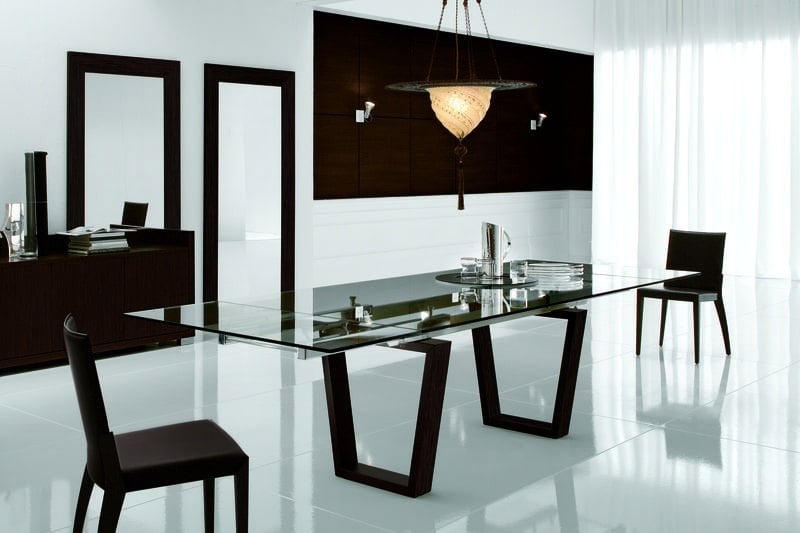

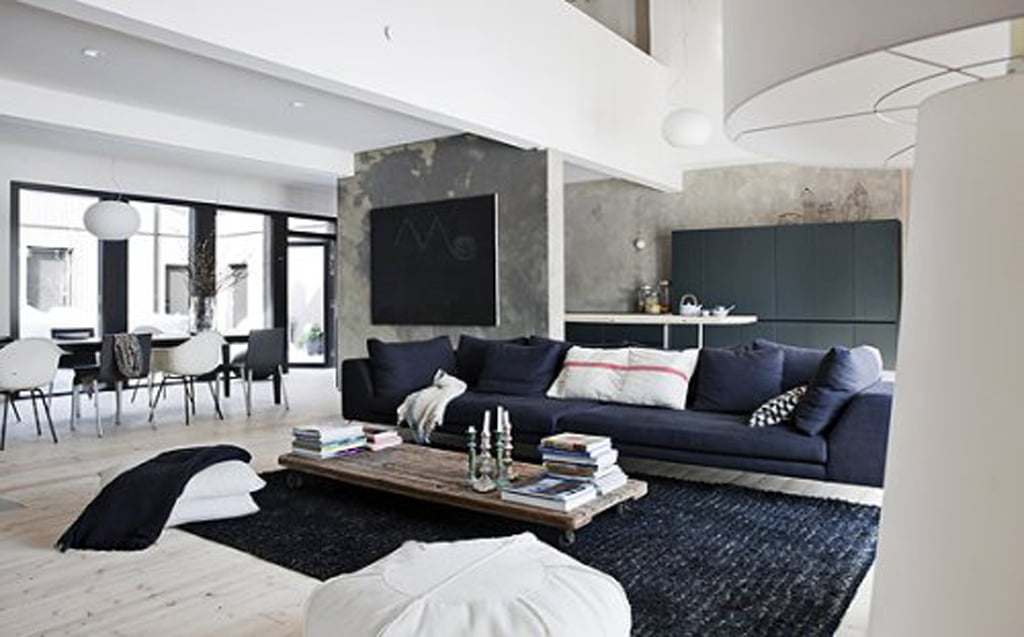

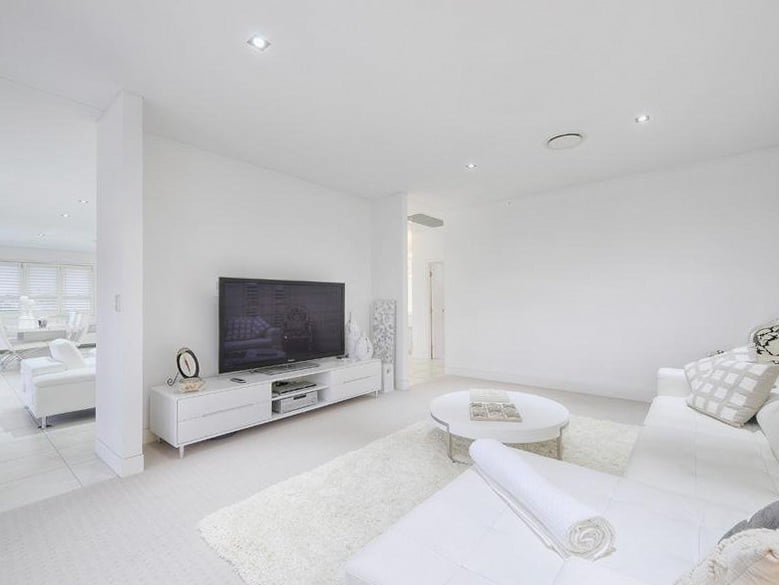
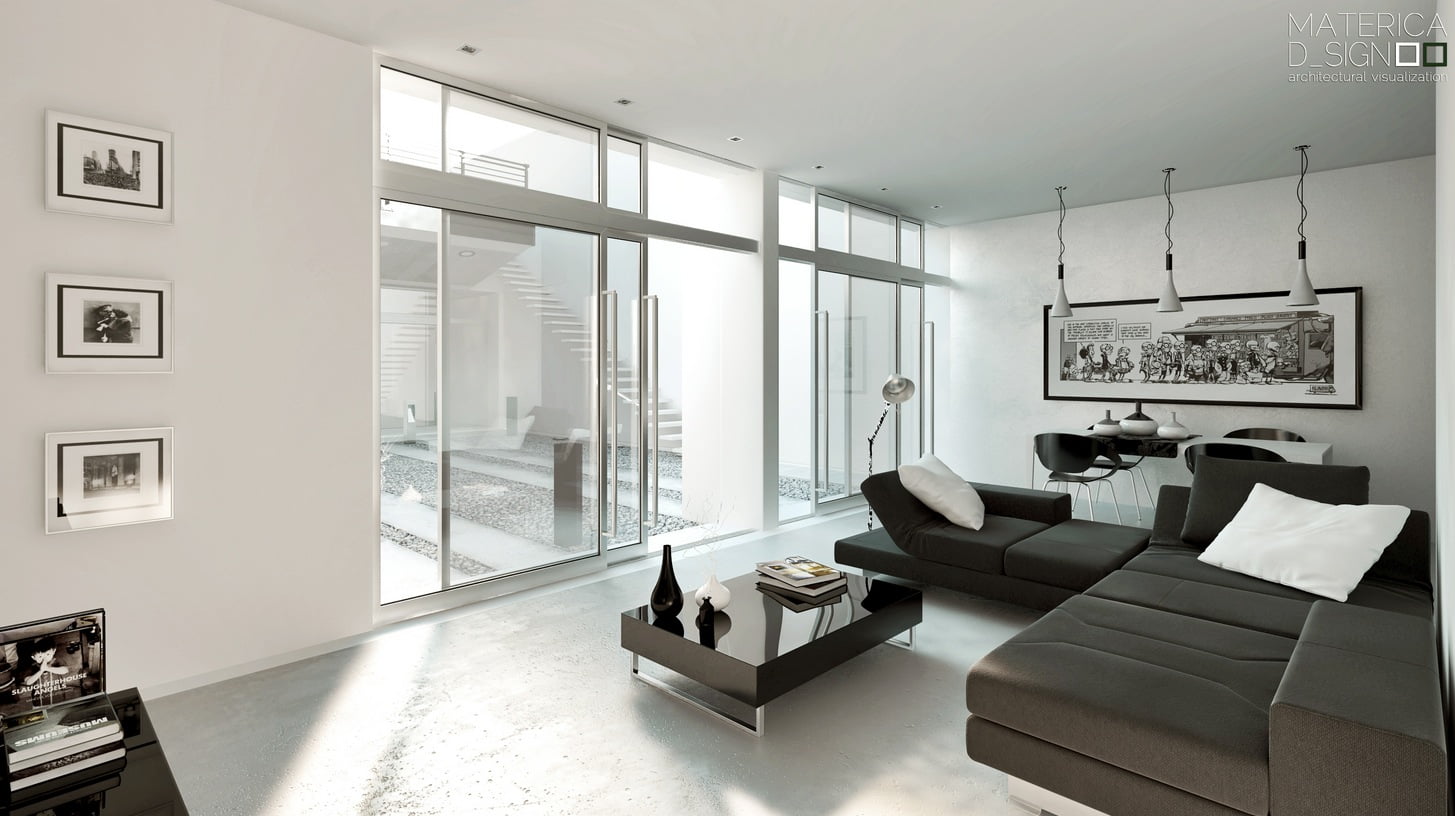
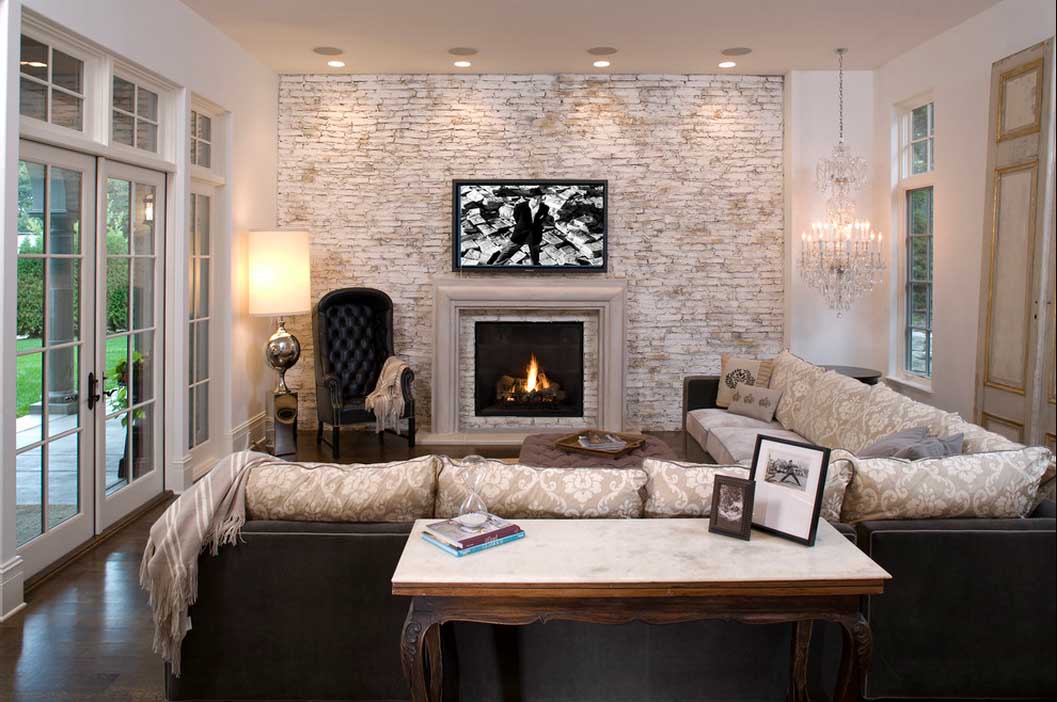
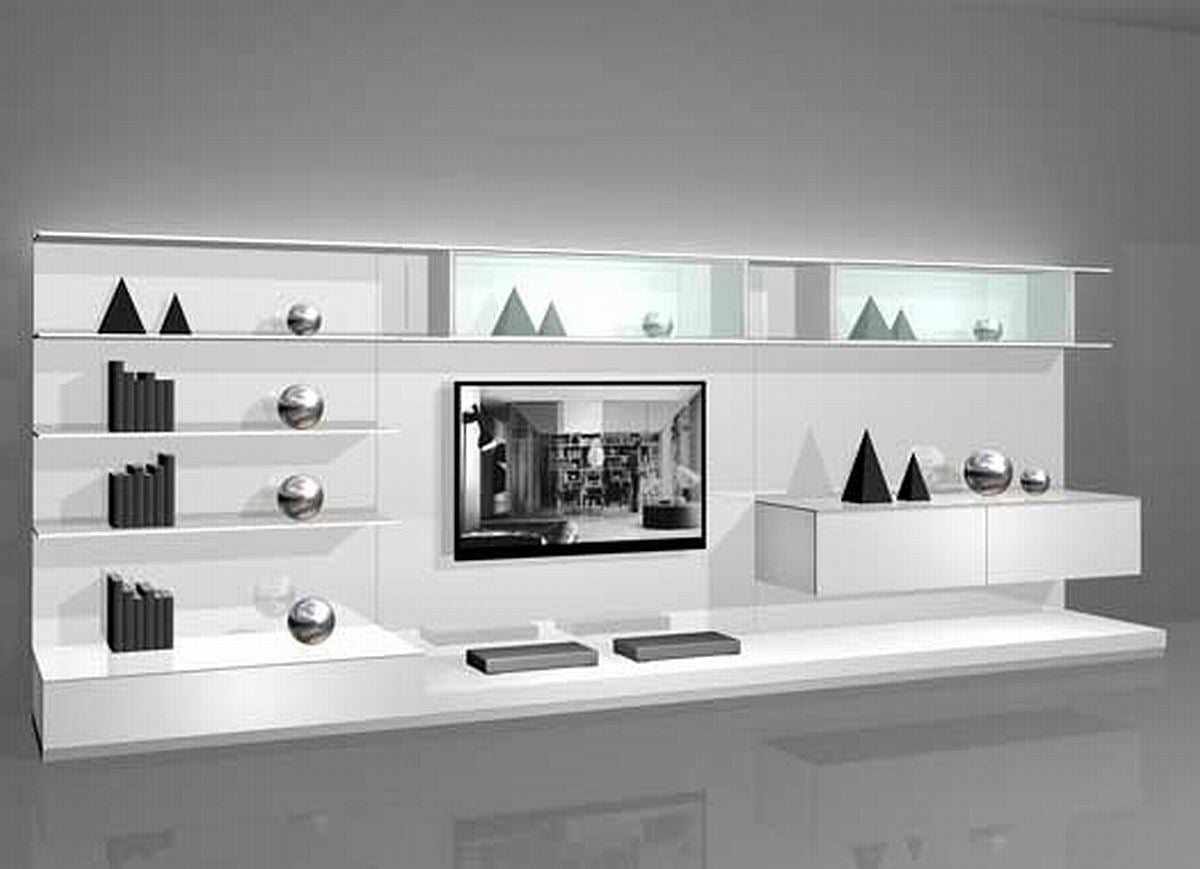
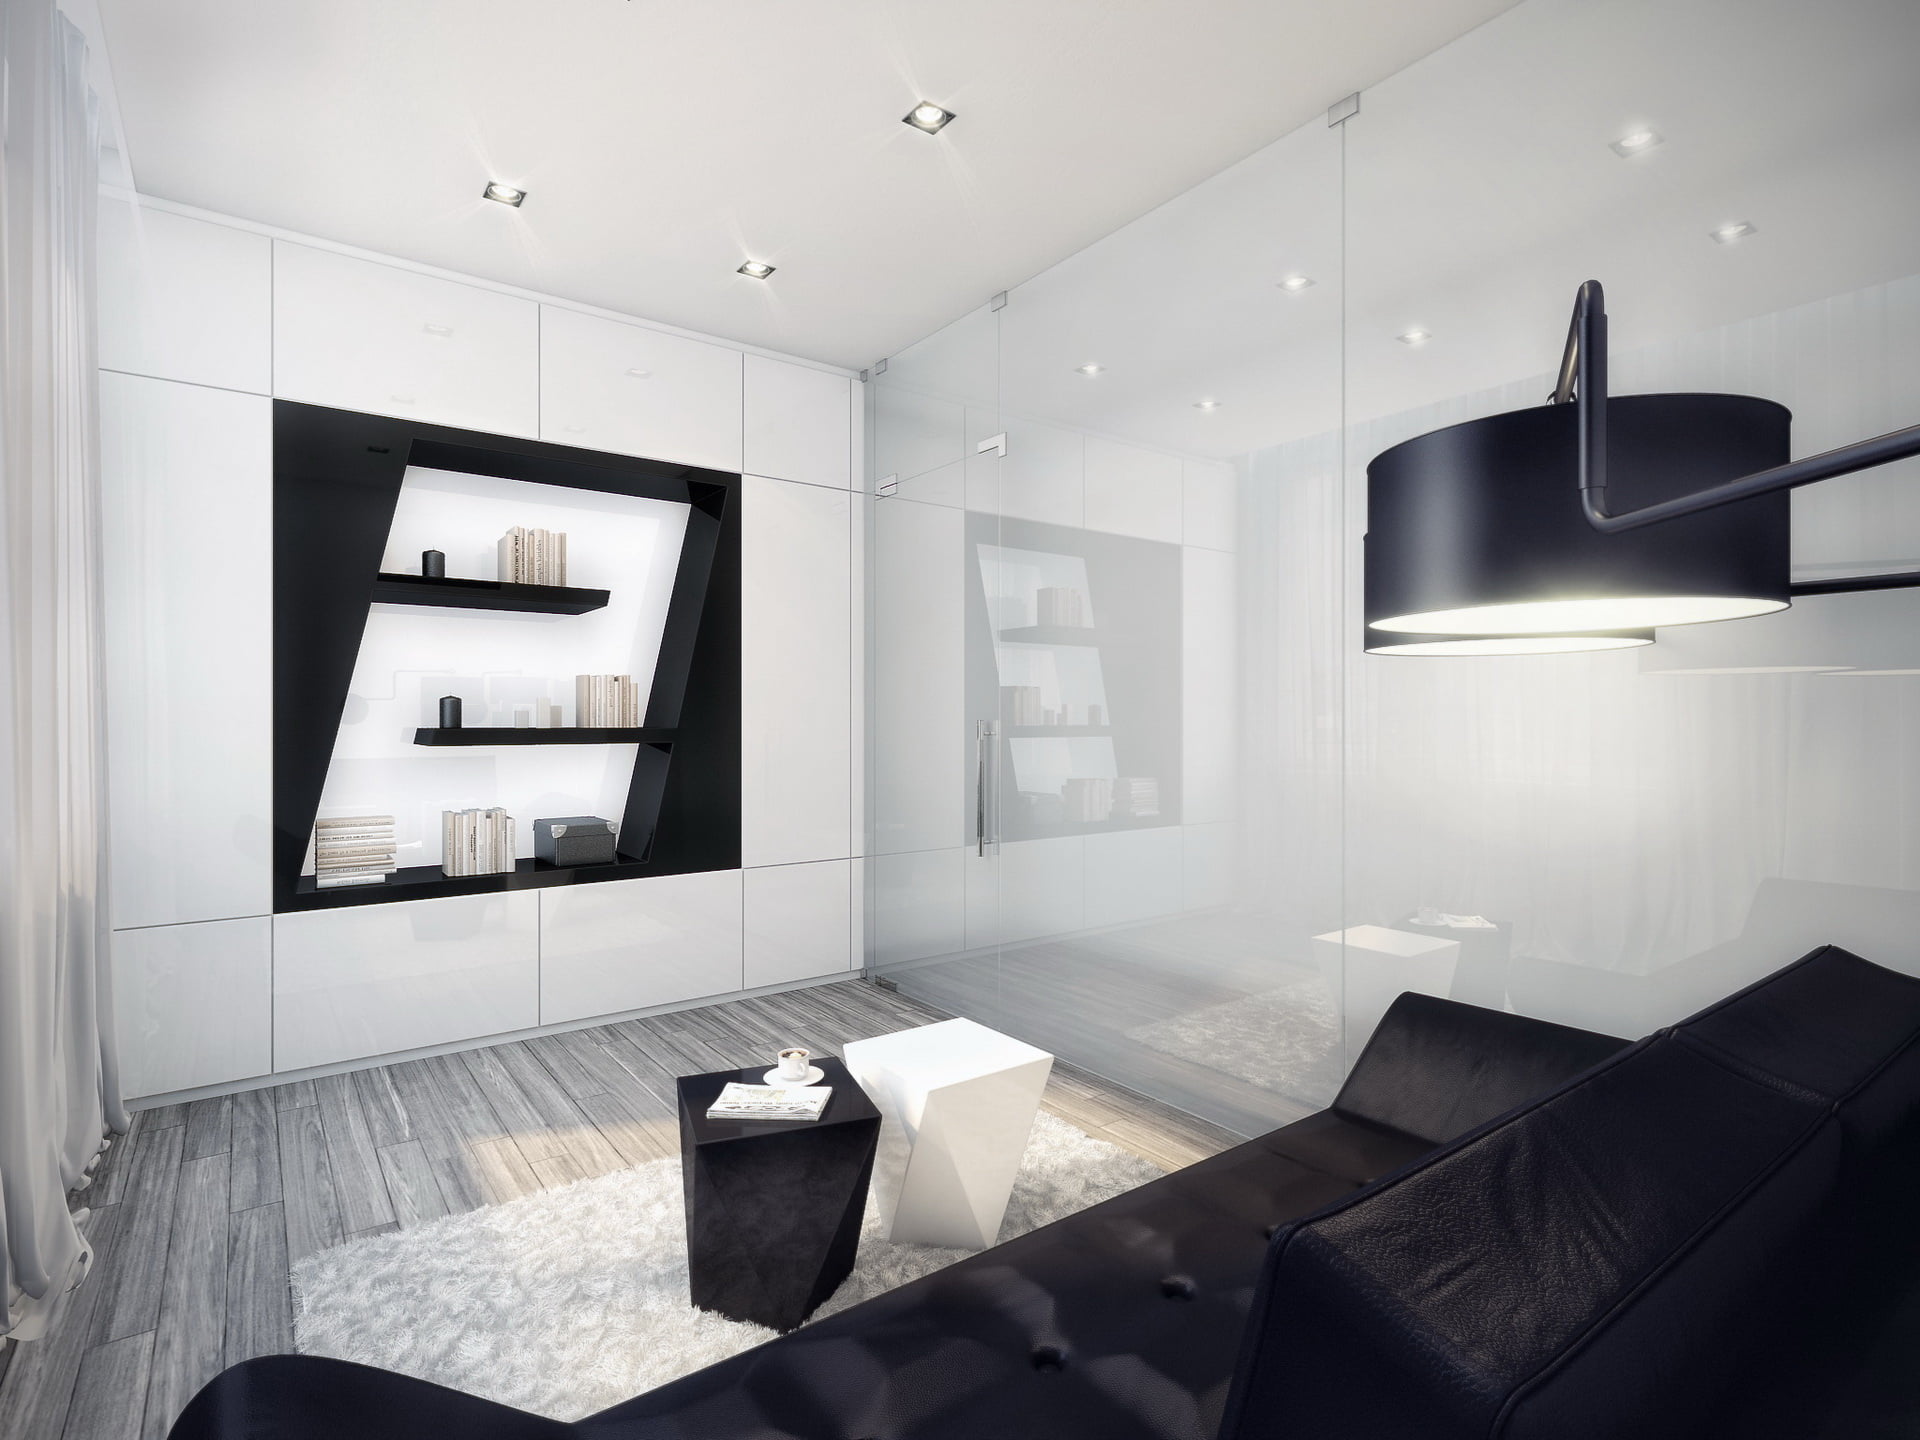


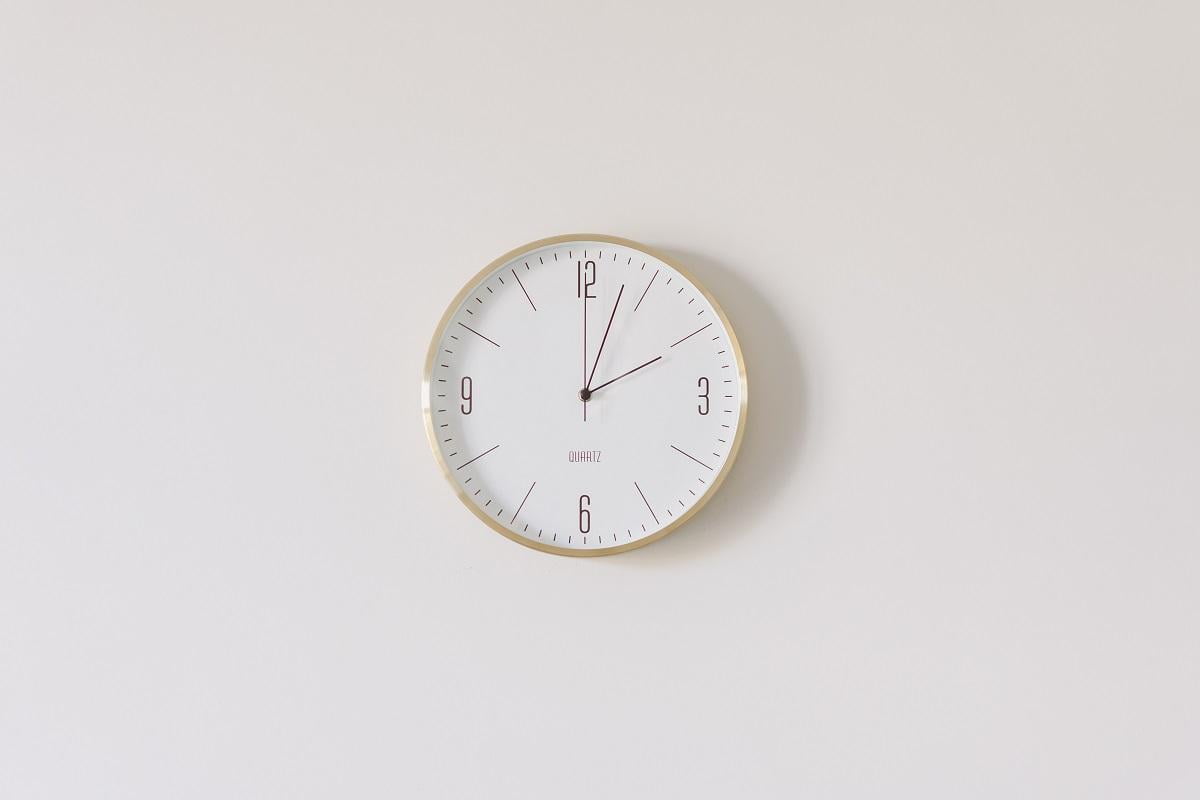
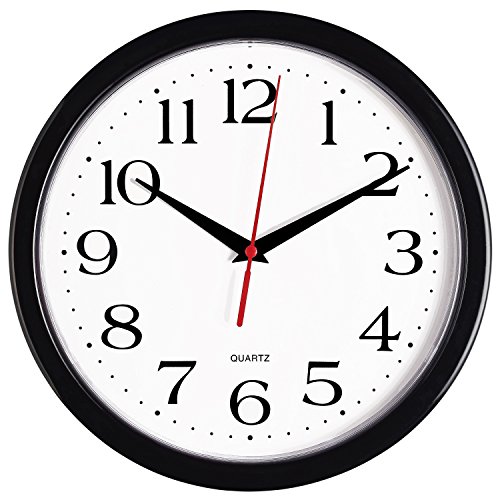
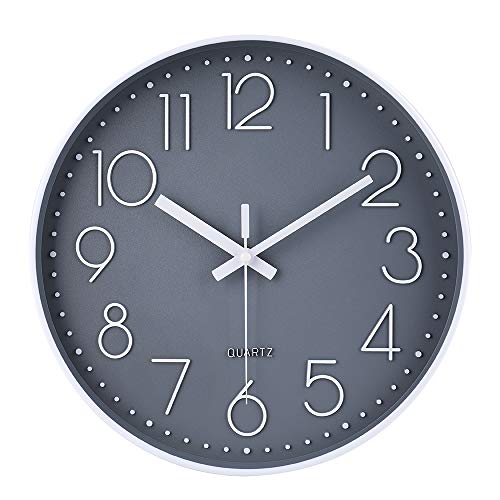


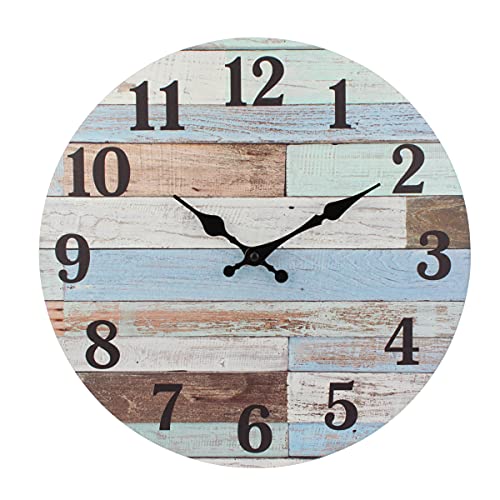
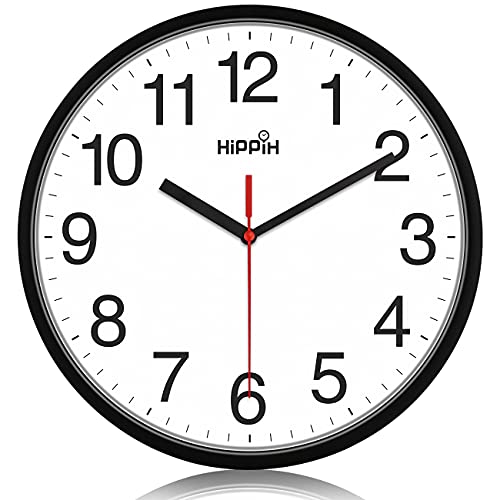

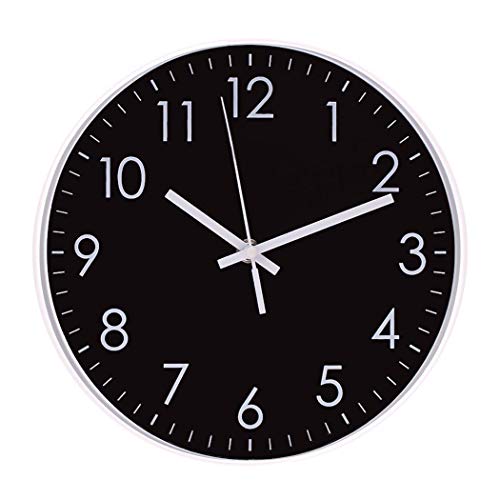
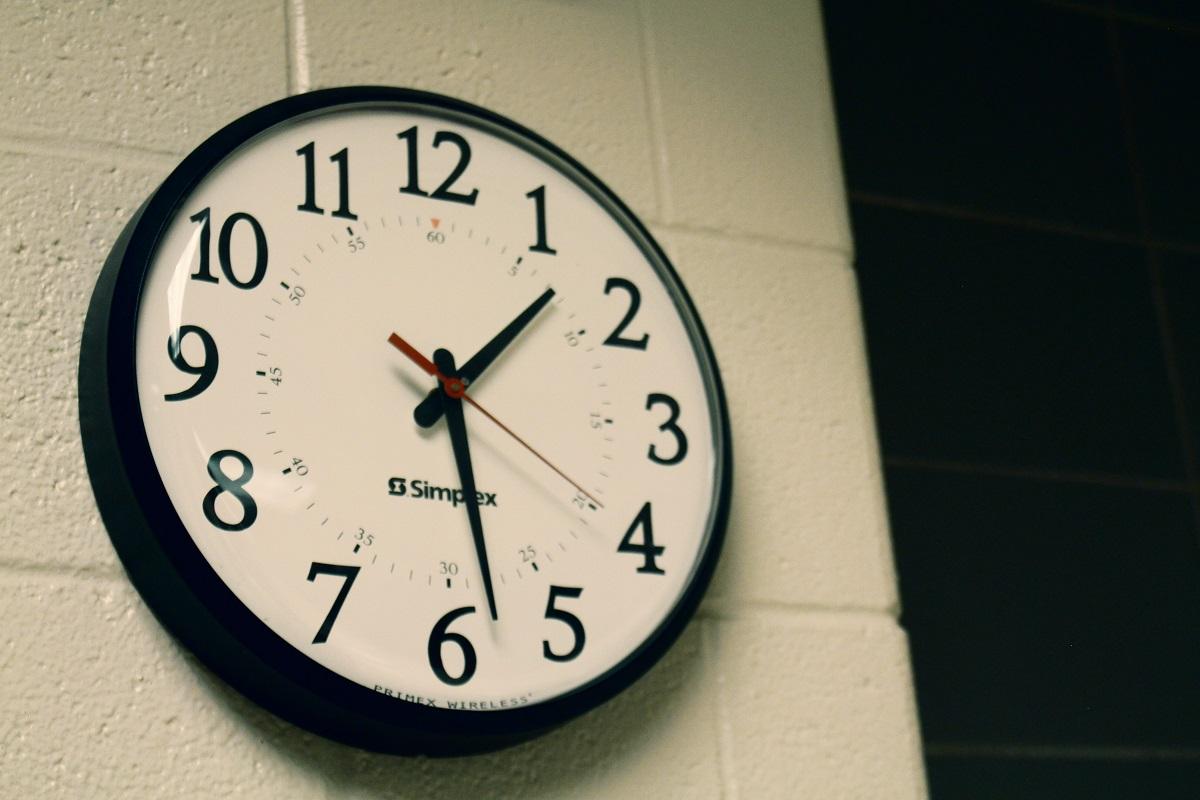


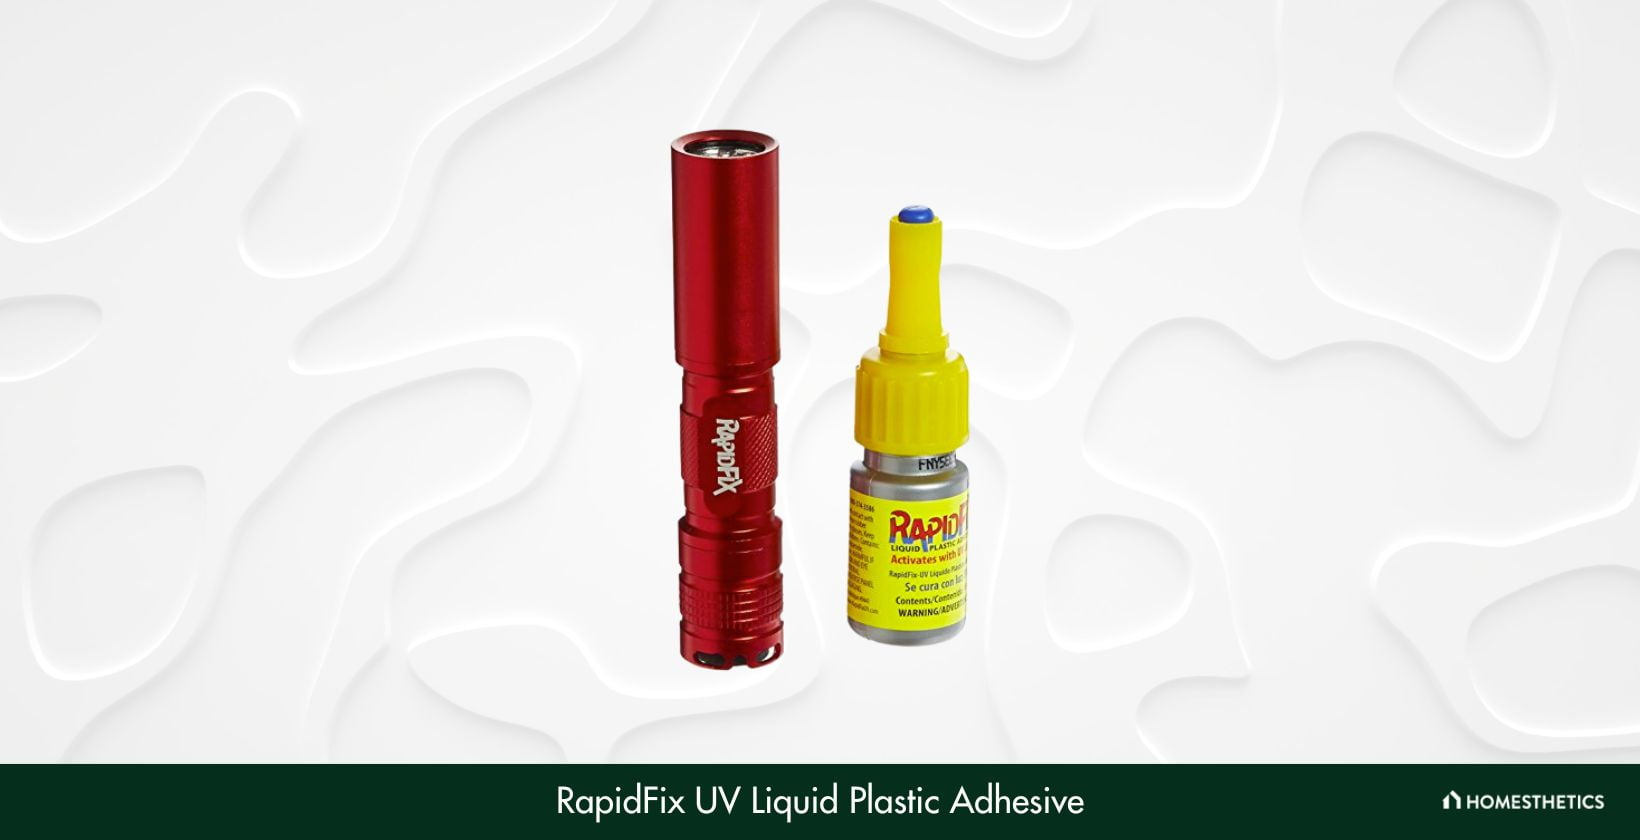
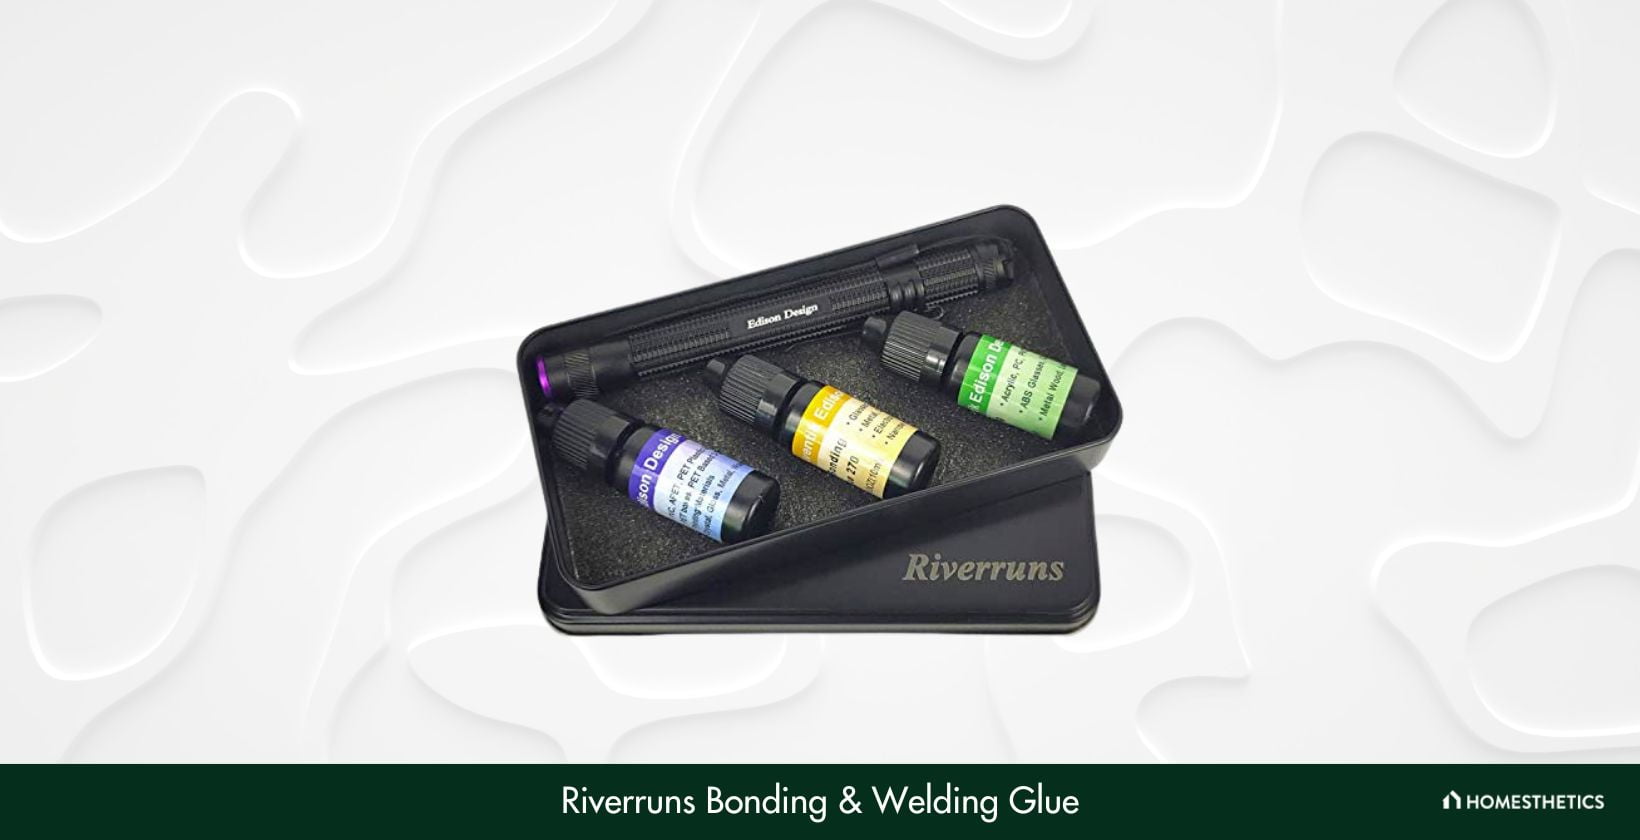
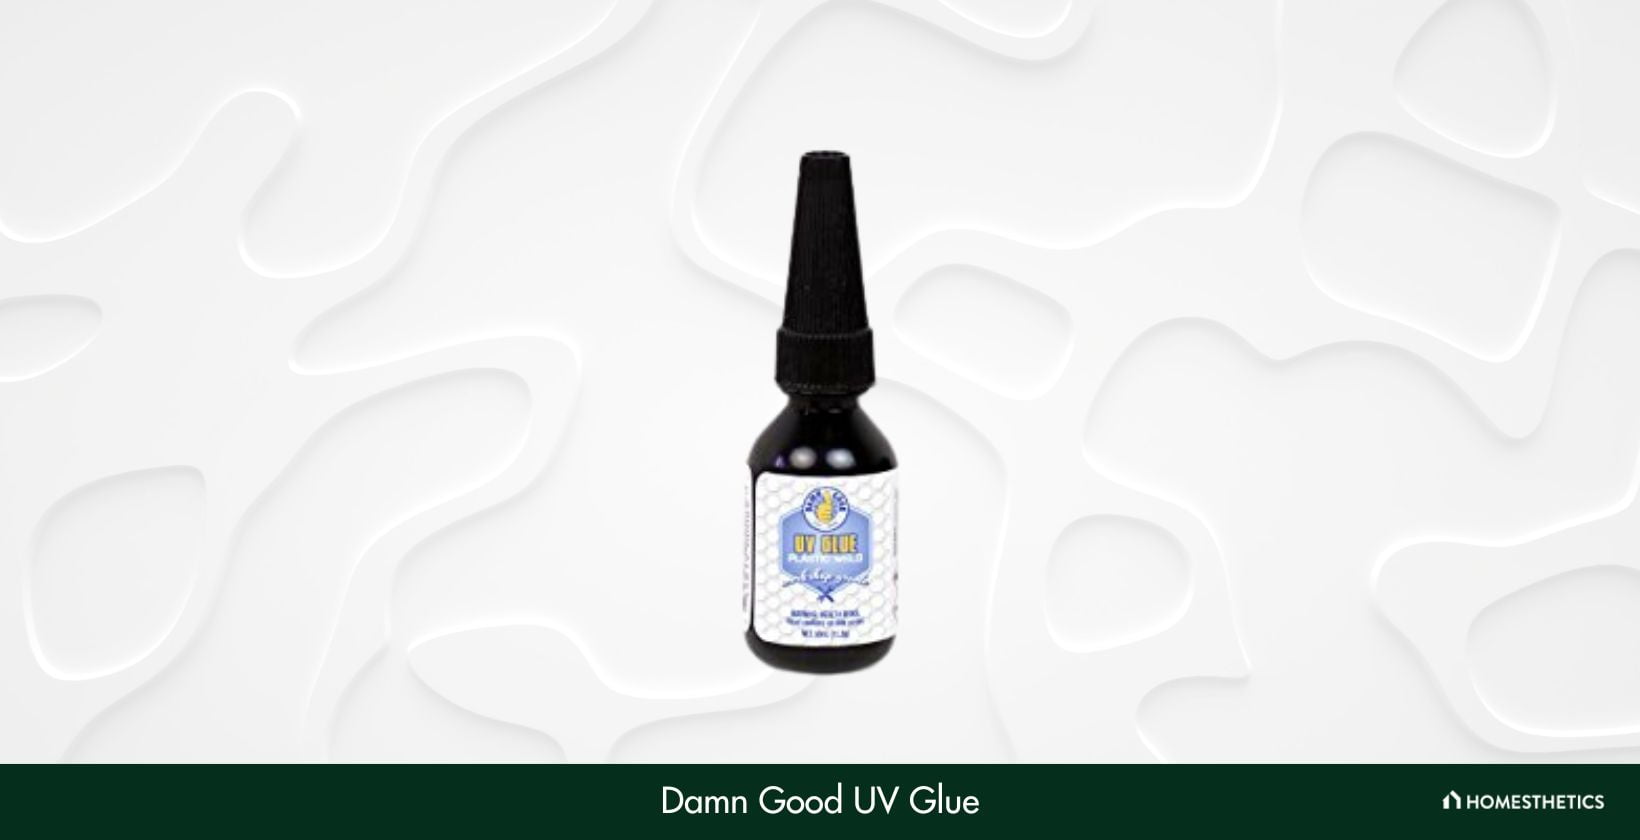
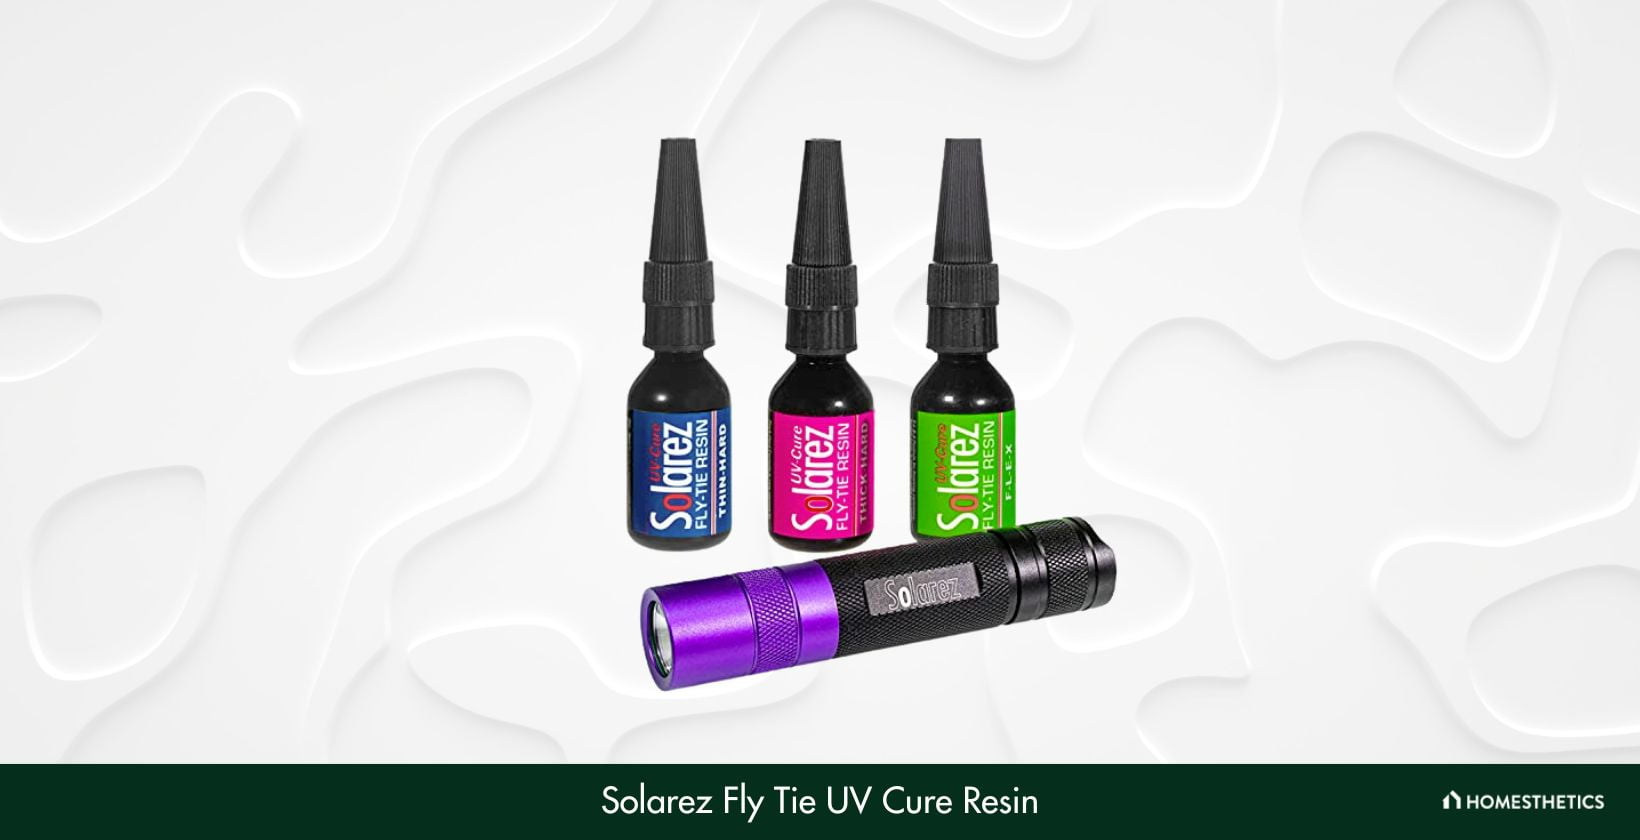
![11 Best Permanent Fabric Glues [Reviews & Buyer’s Guide]](https://homesthetics.net/wp-content/uploads/2021/06/Best-Permanent-Fabric-Glues-01.jpg "11 Best Permanent Fabric Glues [Reviews & Buyer’s Guide]")


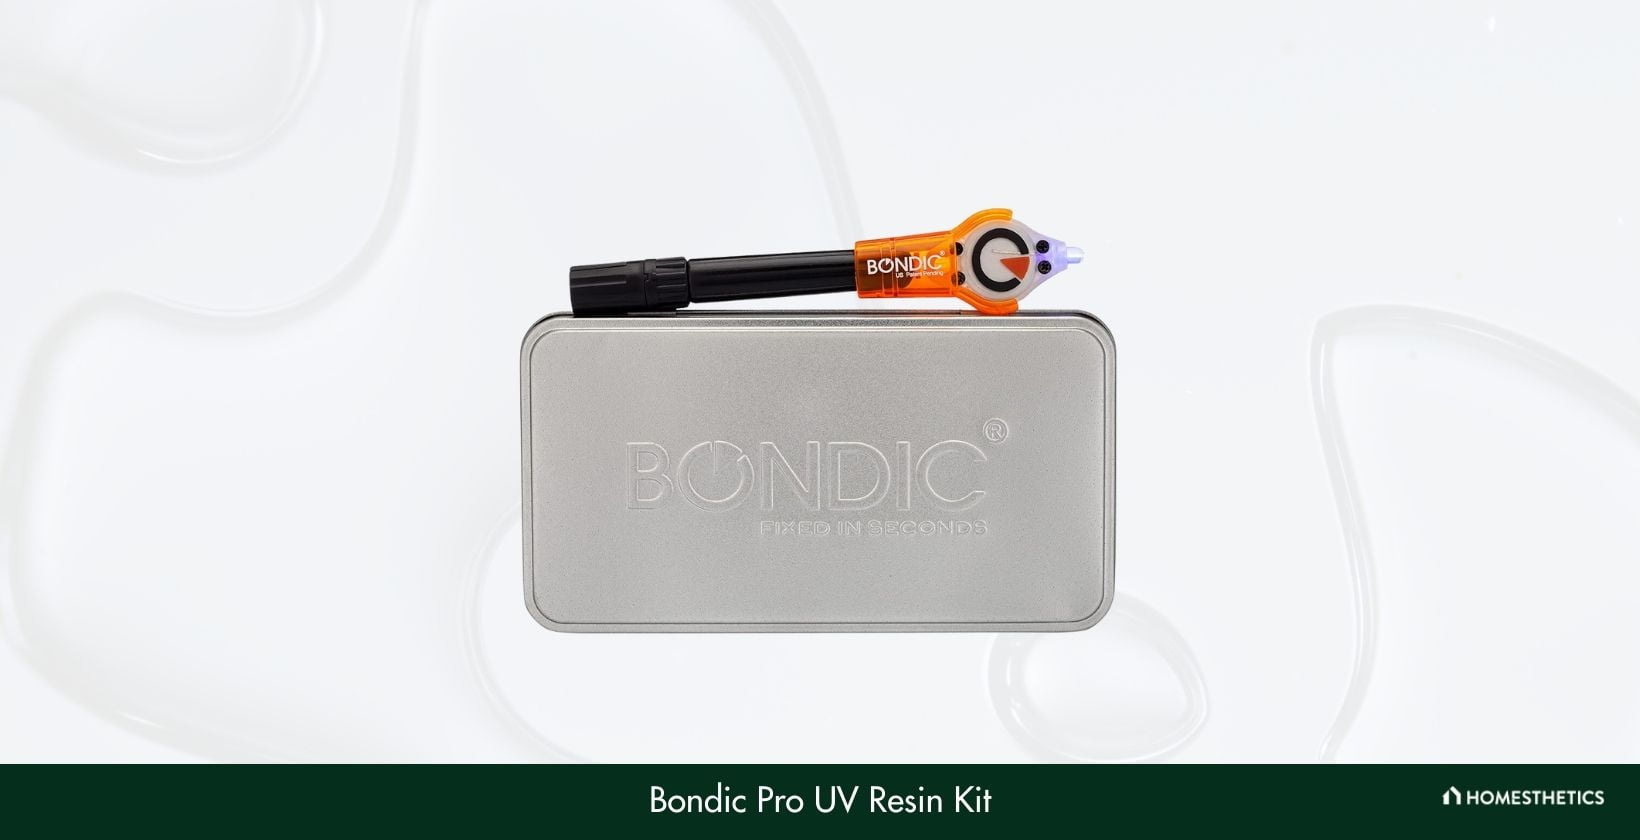

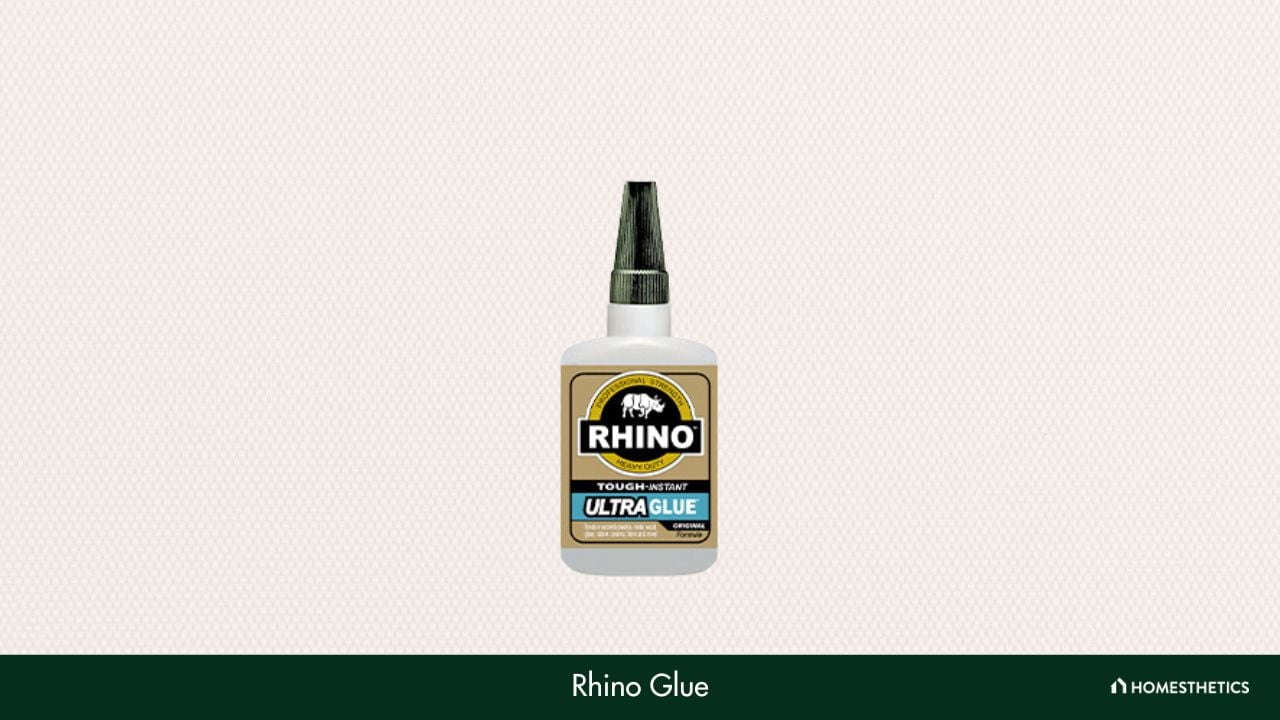

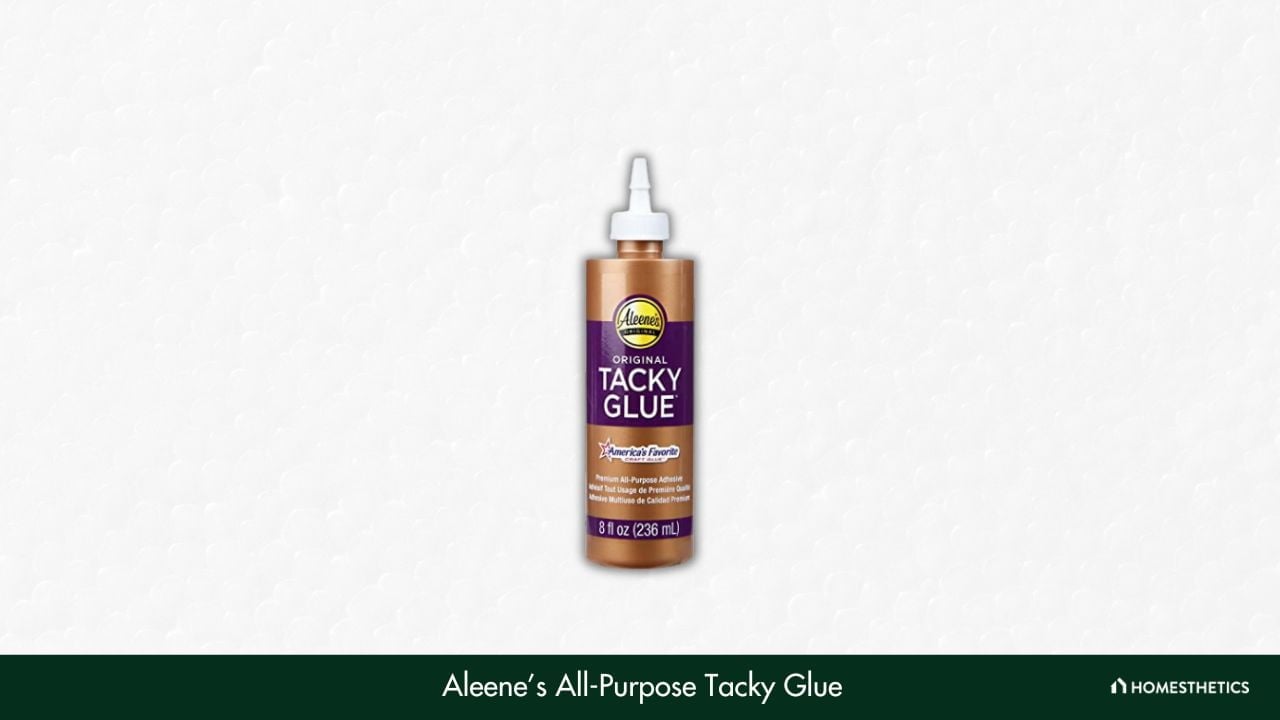

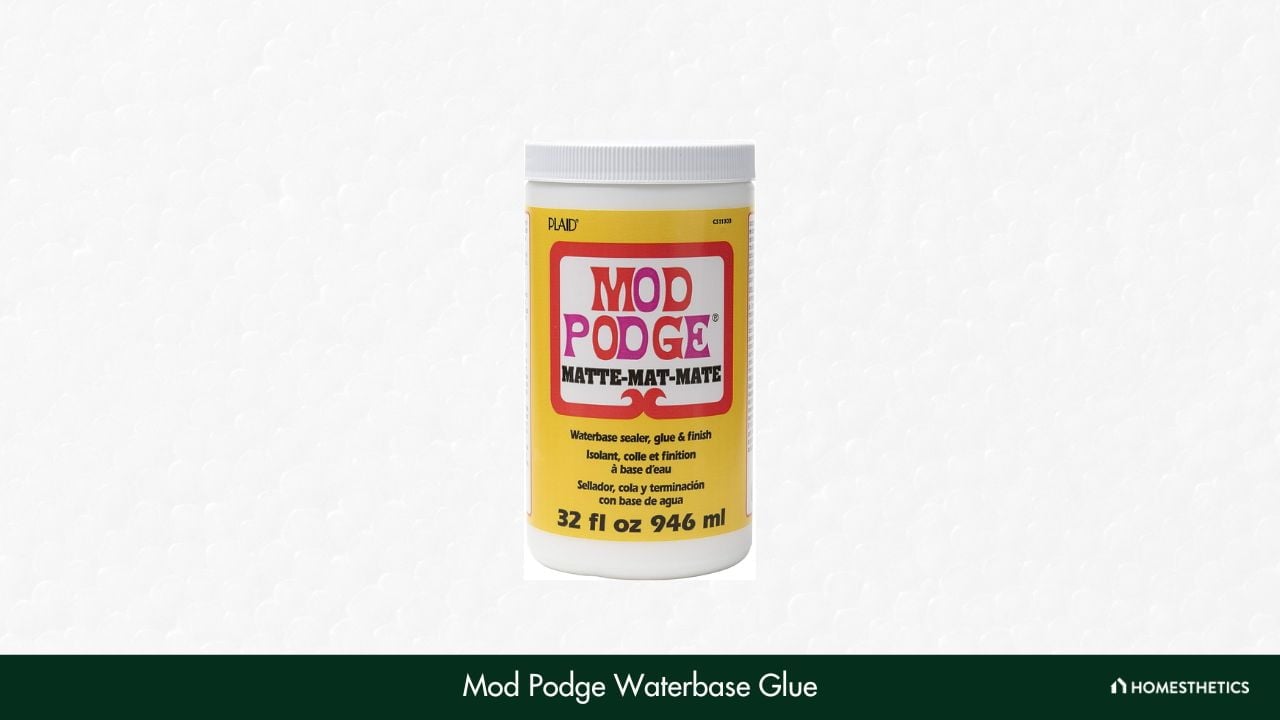

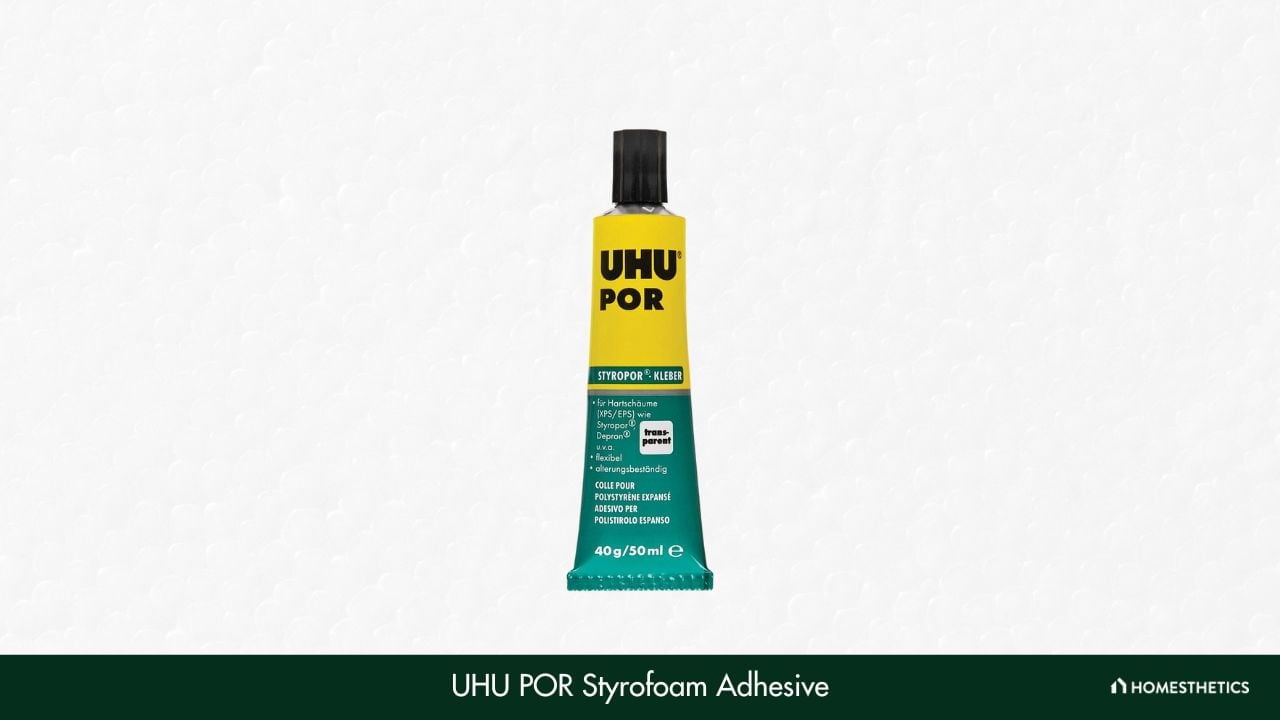
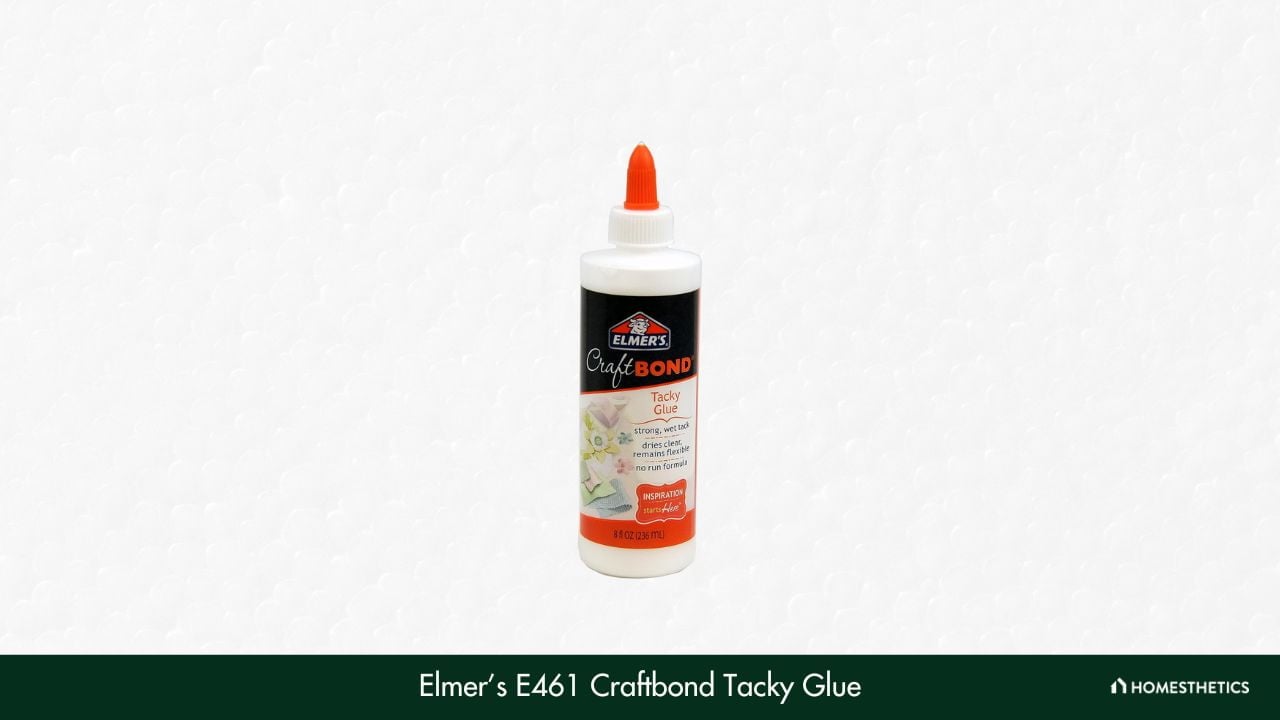
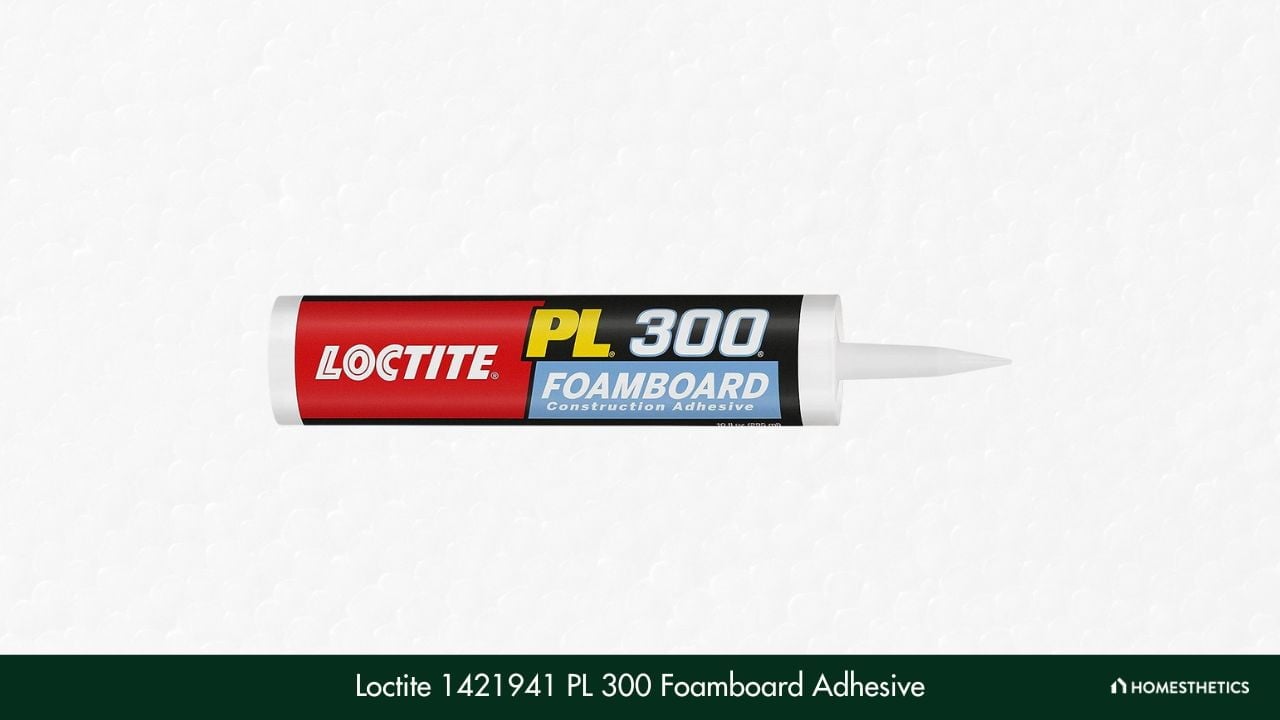
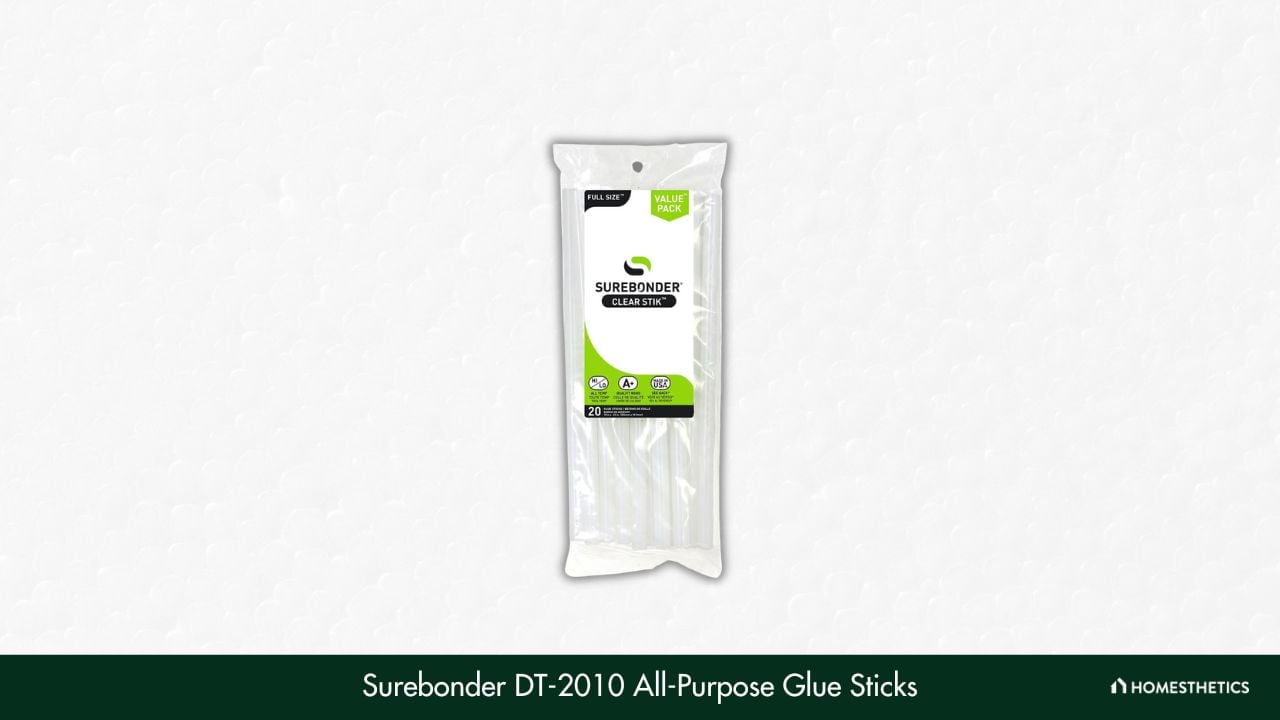
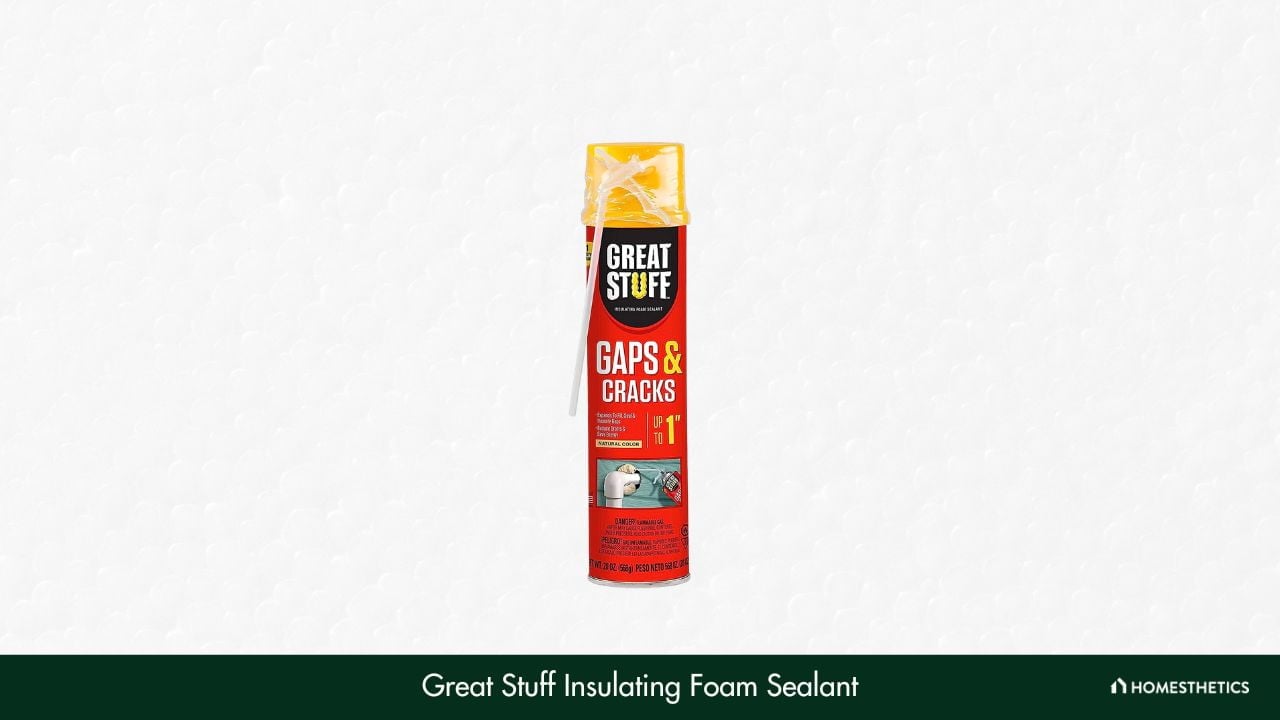


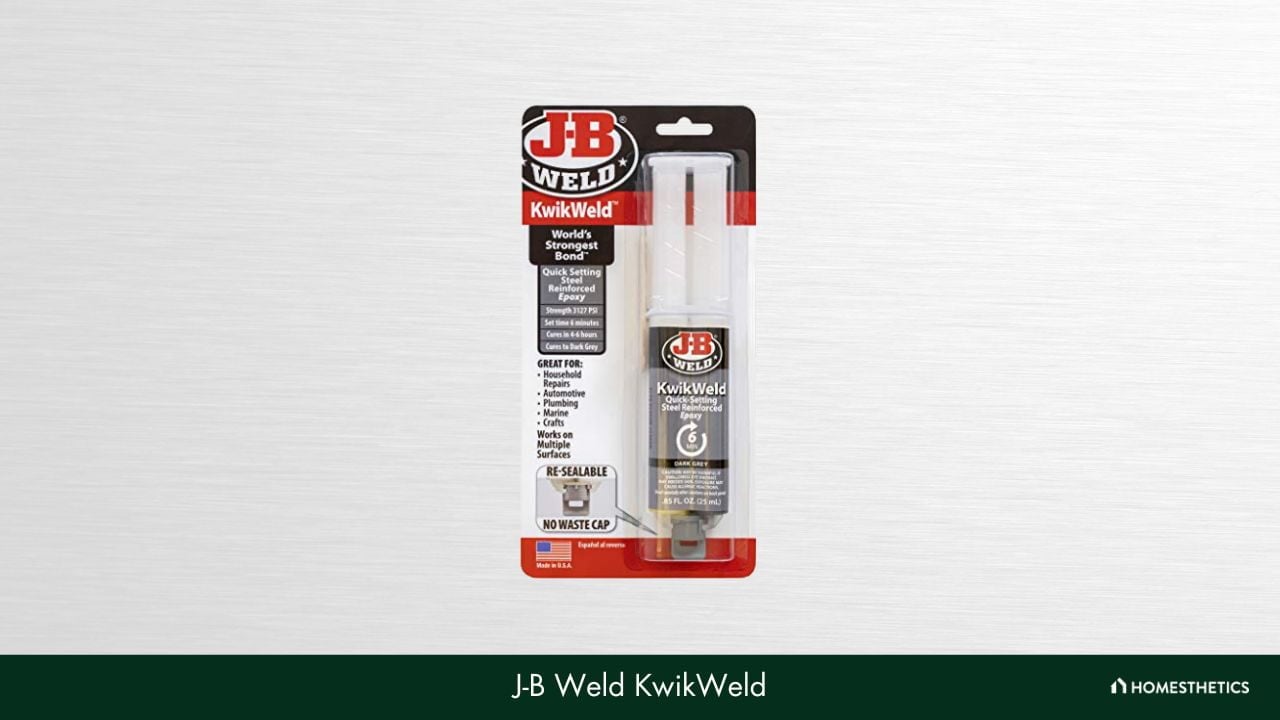
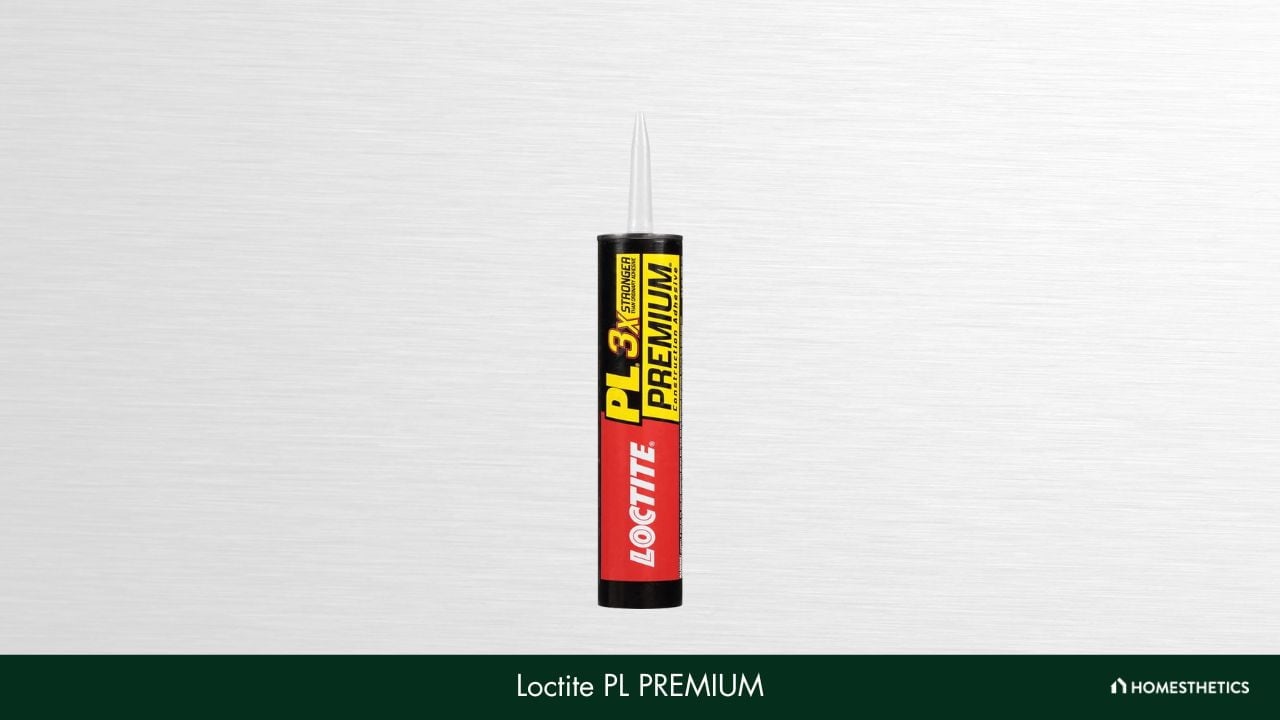
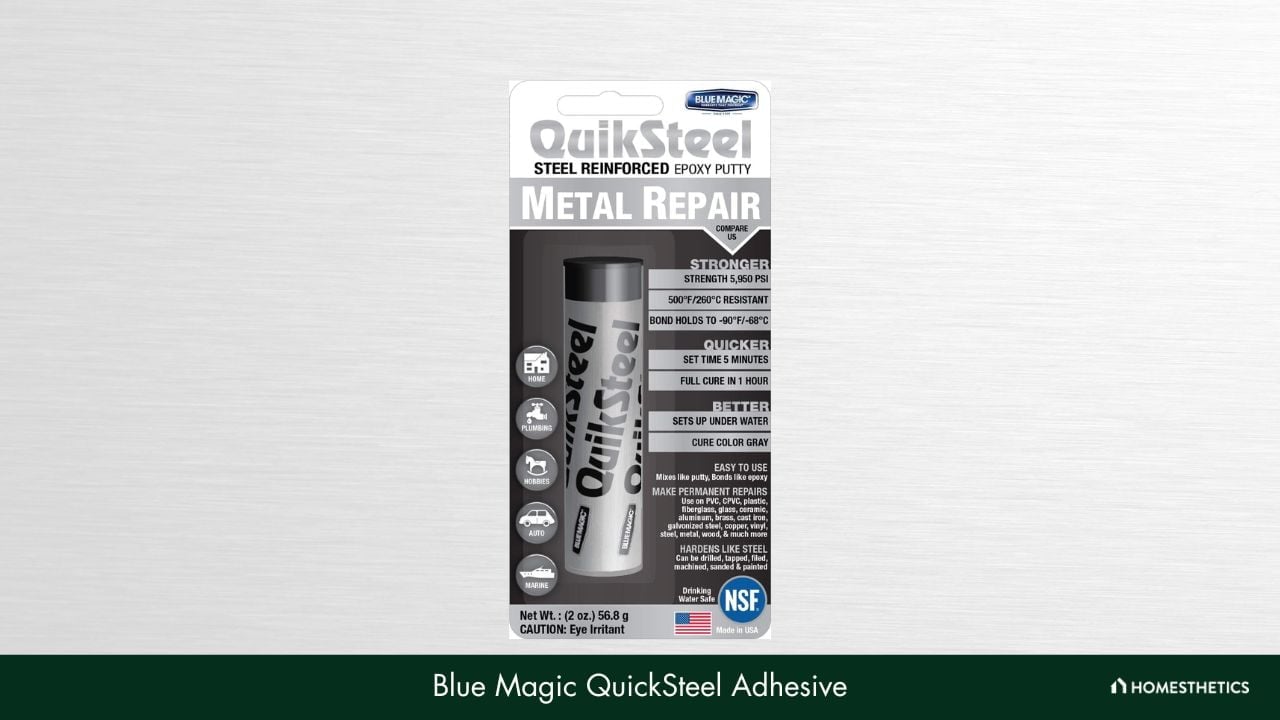
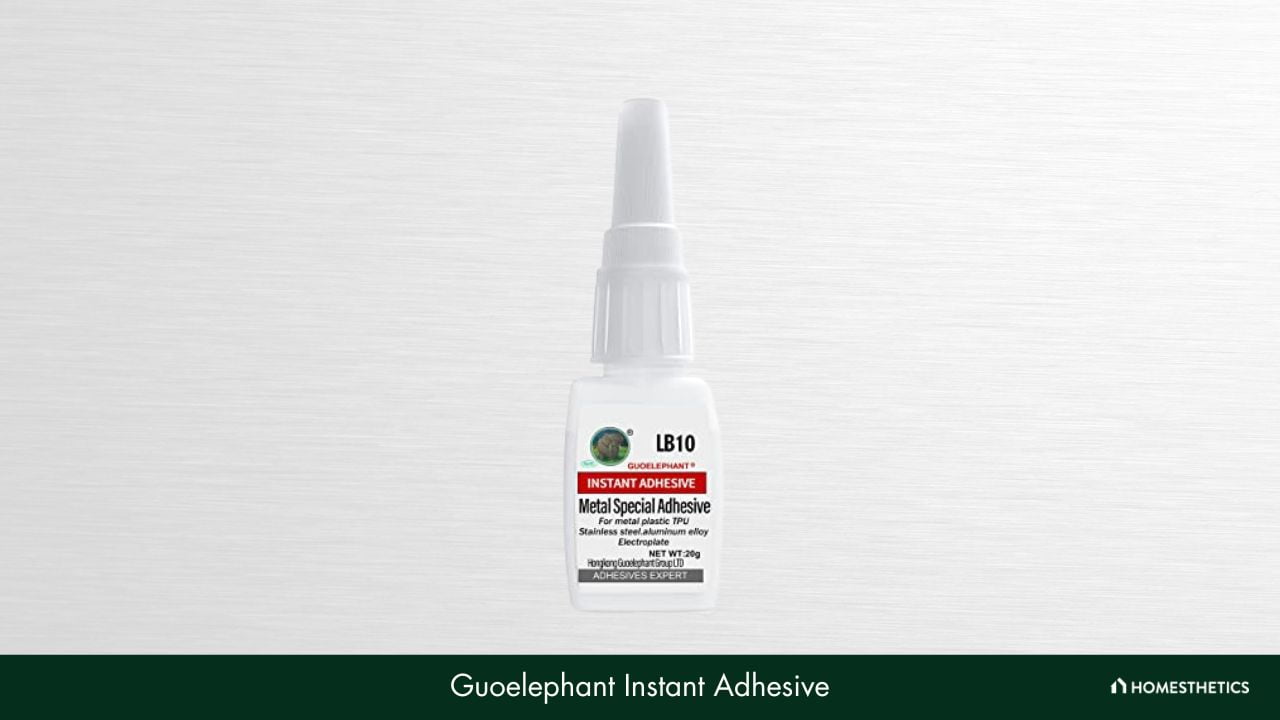
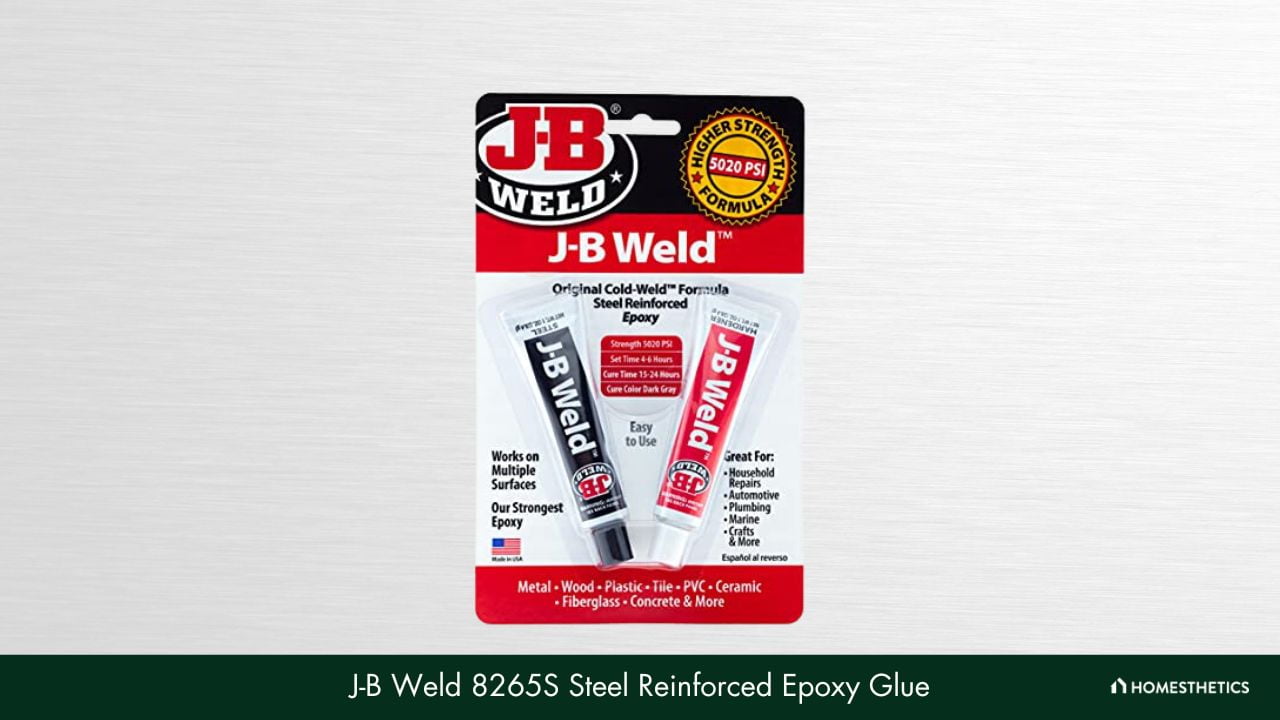
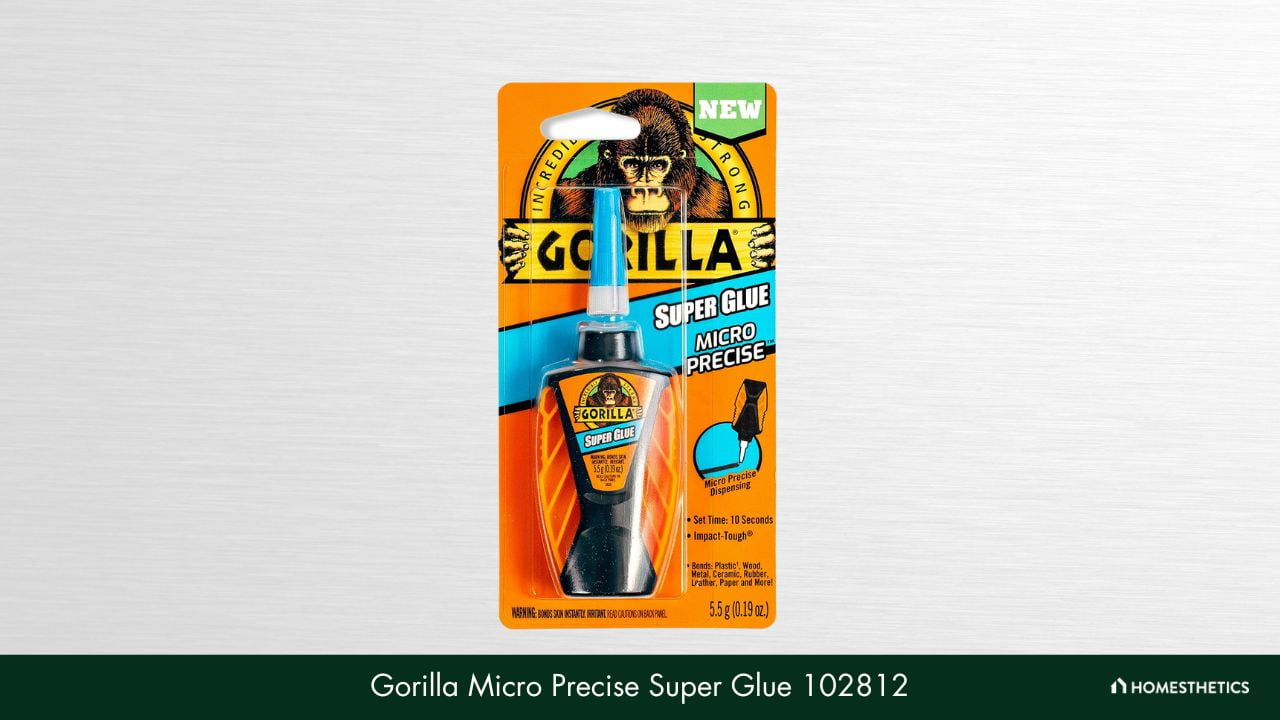
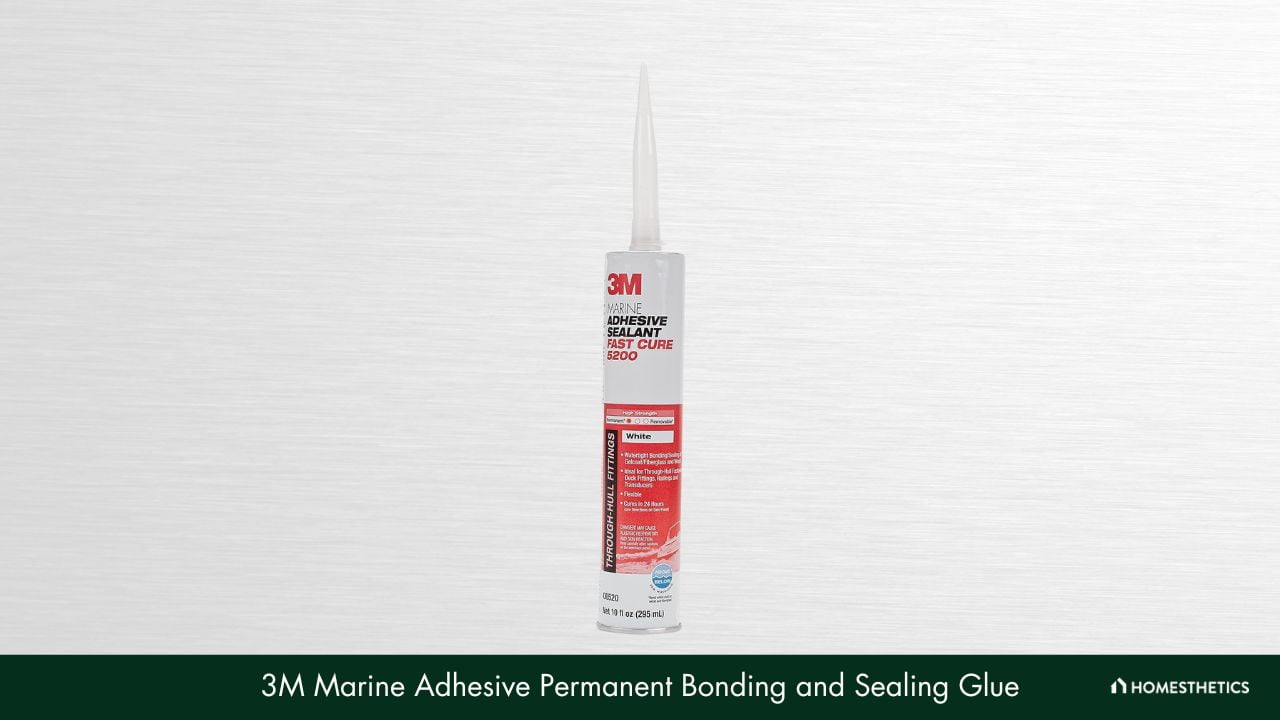
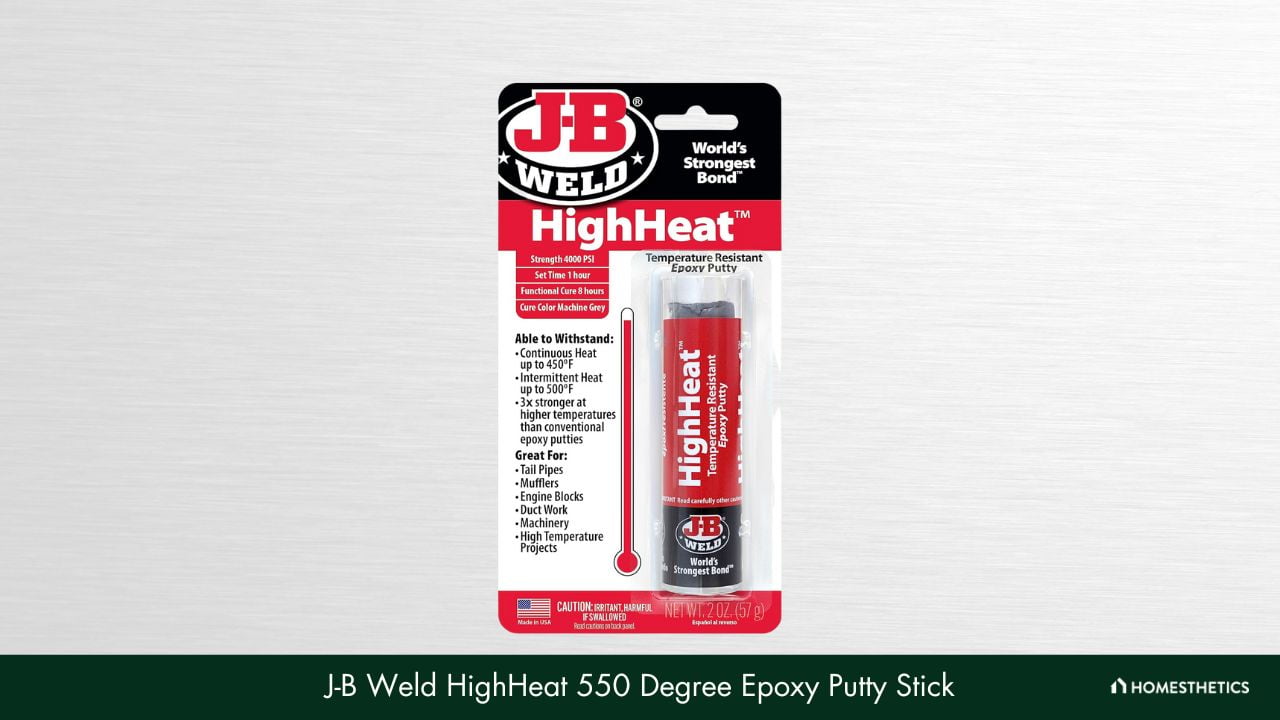

![11 Best Glues for Rubber of 2024 [Reviews & Buyer’s Guide]](https://homesthetics.net/wp-content/uploads/2021/12/best-glue-for-rubber-01.jpg "11 Best Glues for Rubber of 2024 [Reviews & Buyer's Guide]")


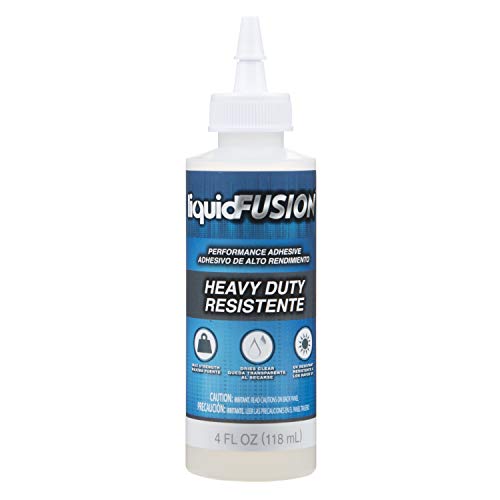
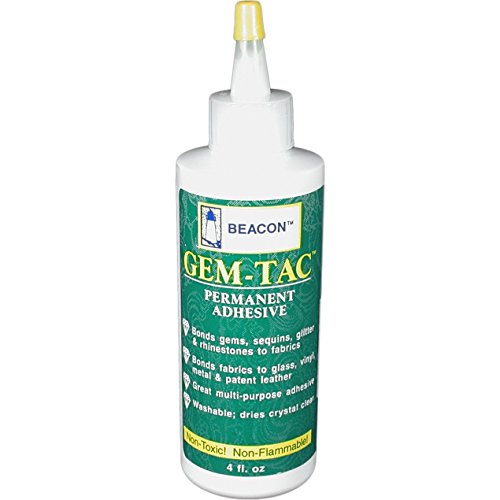
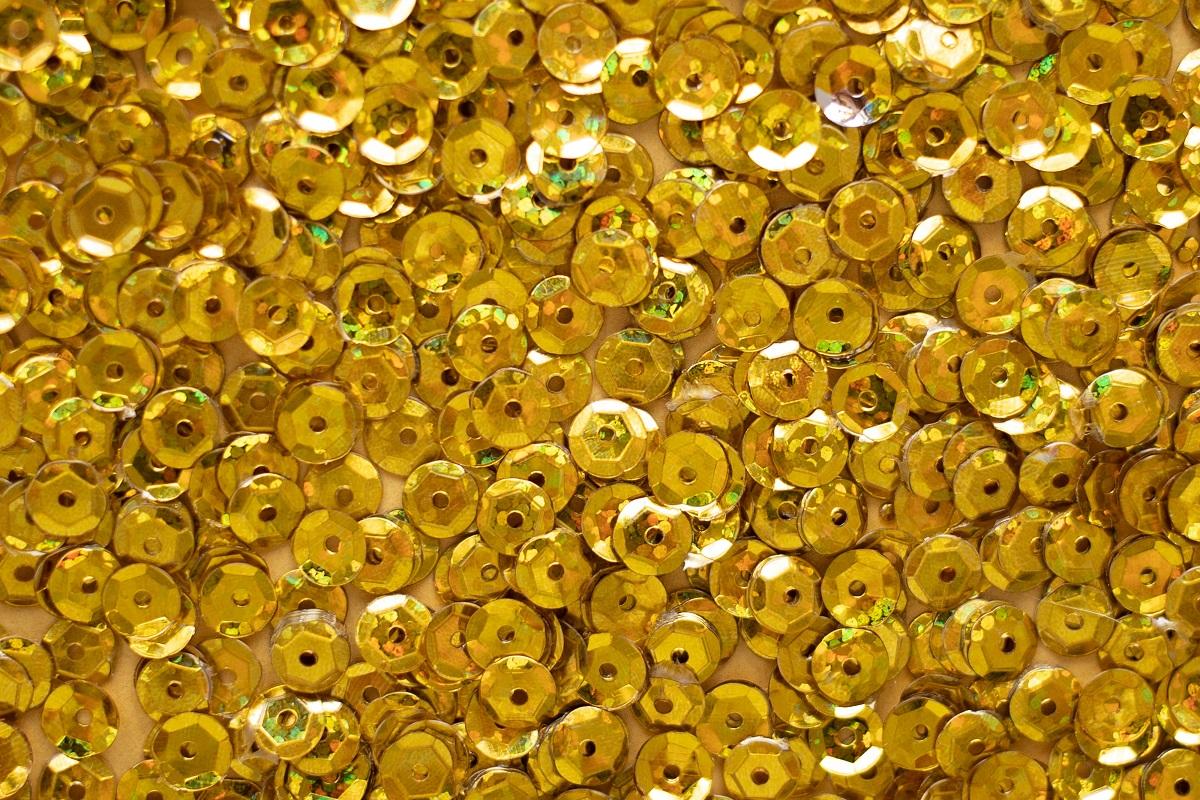


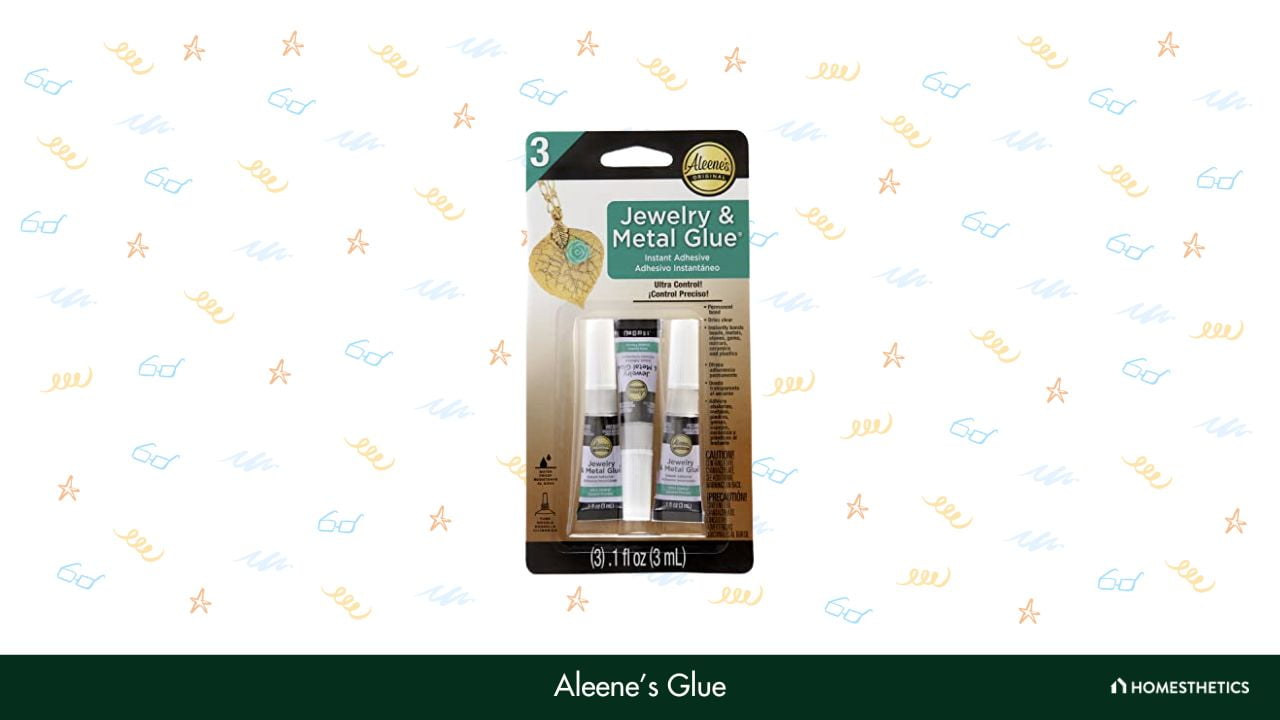
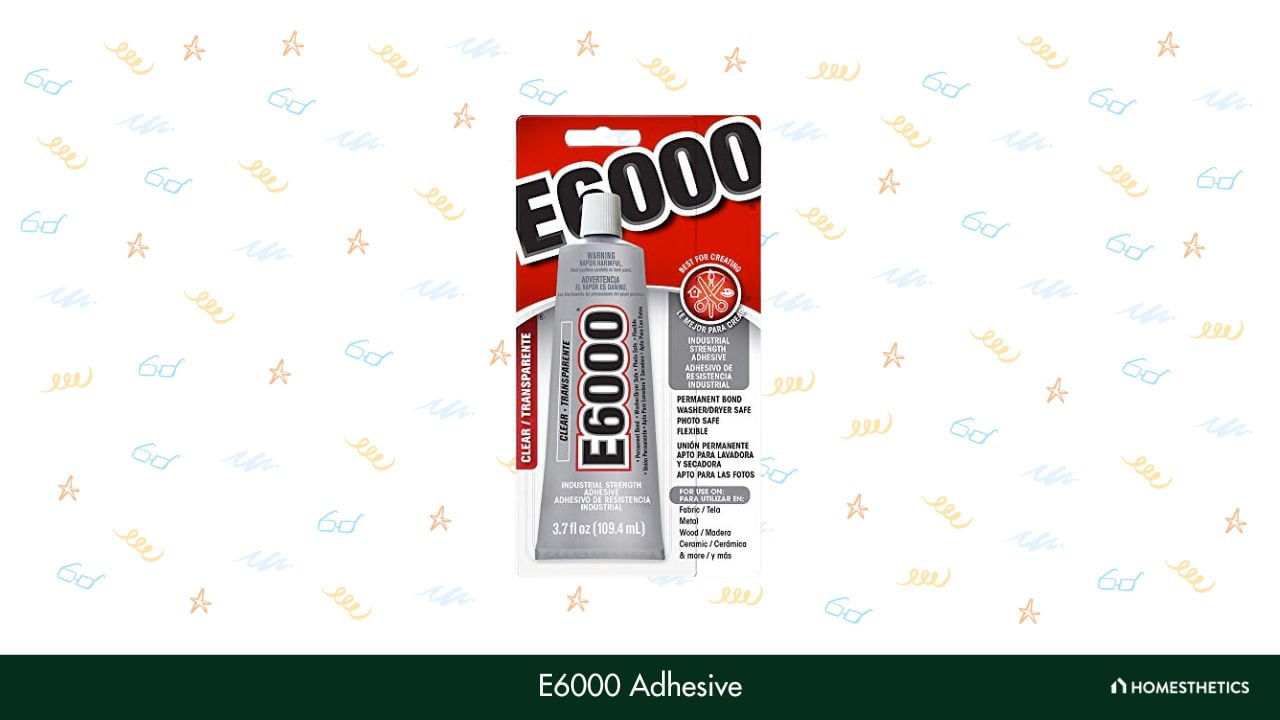
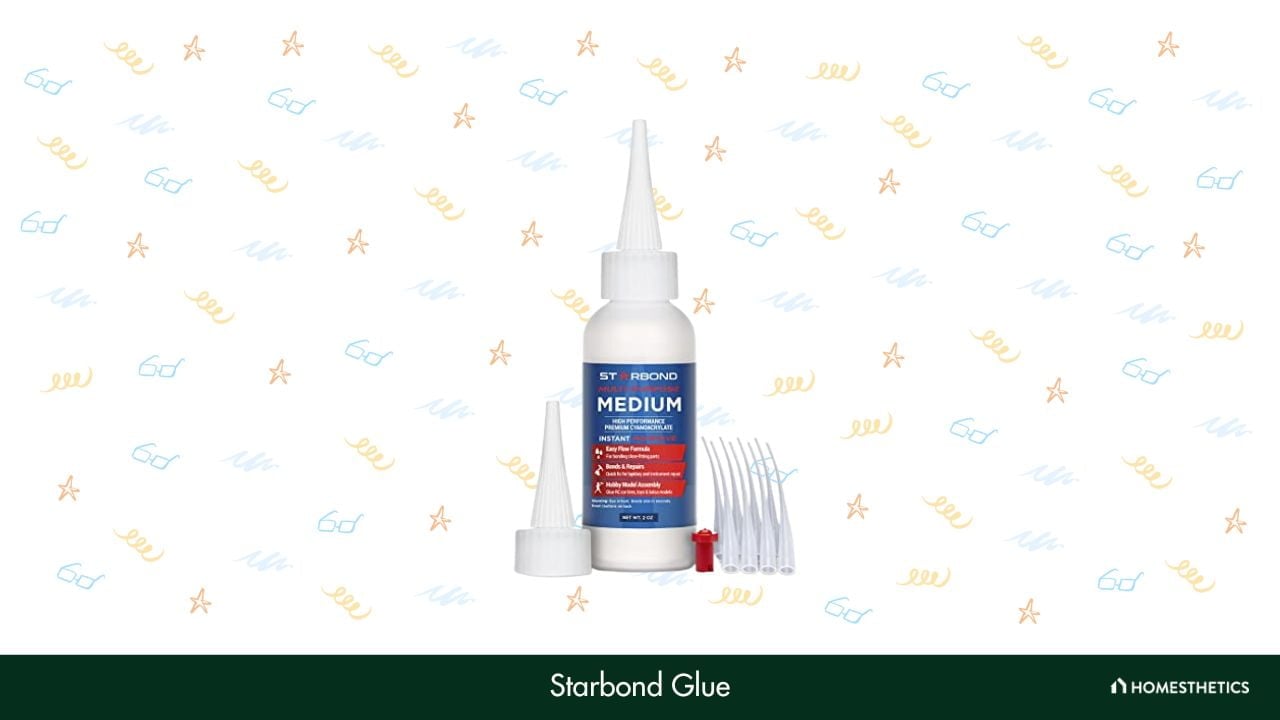

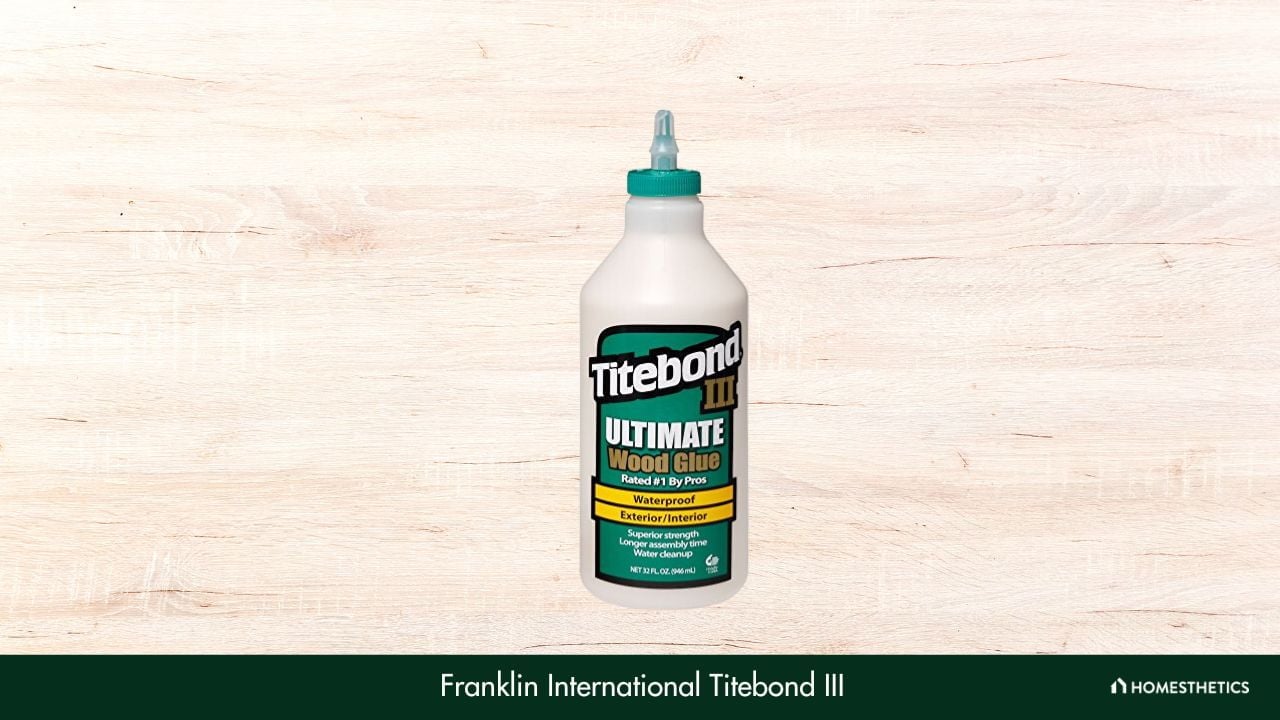
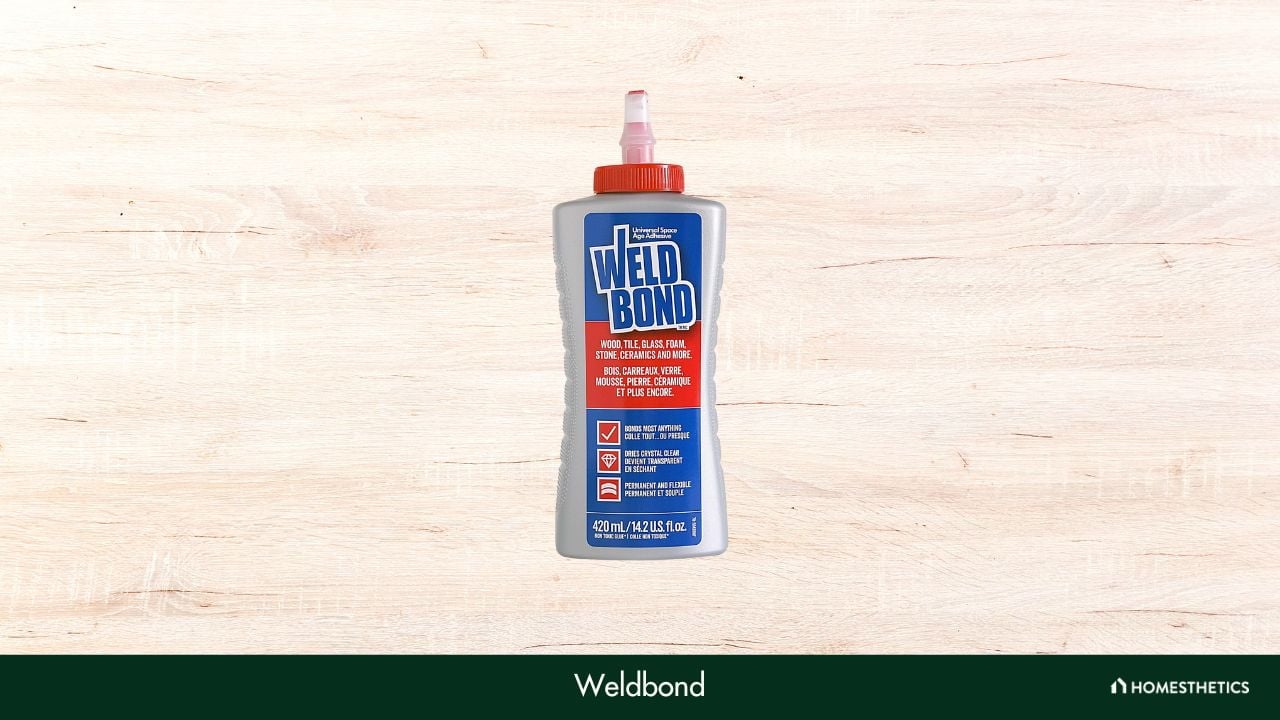
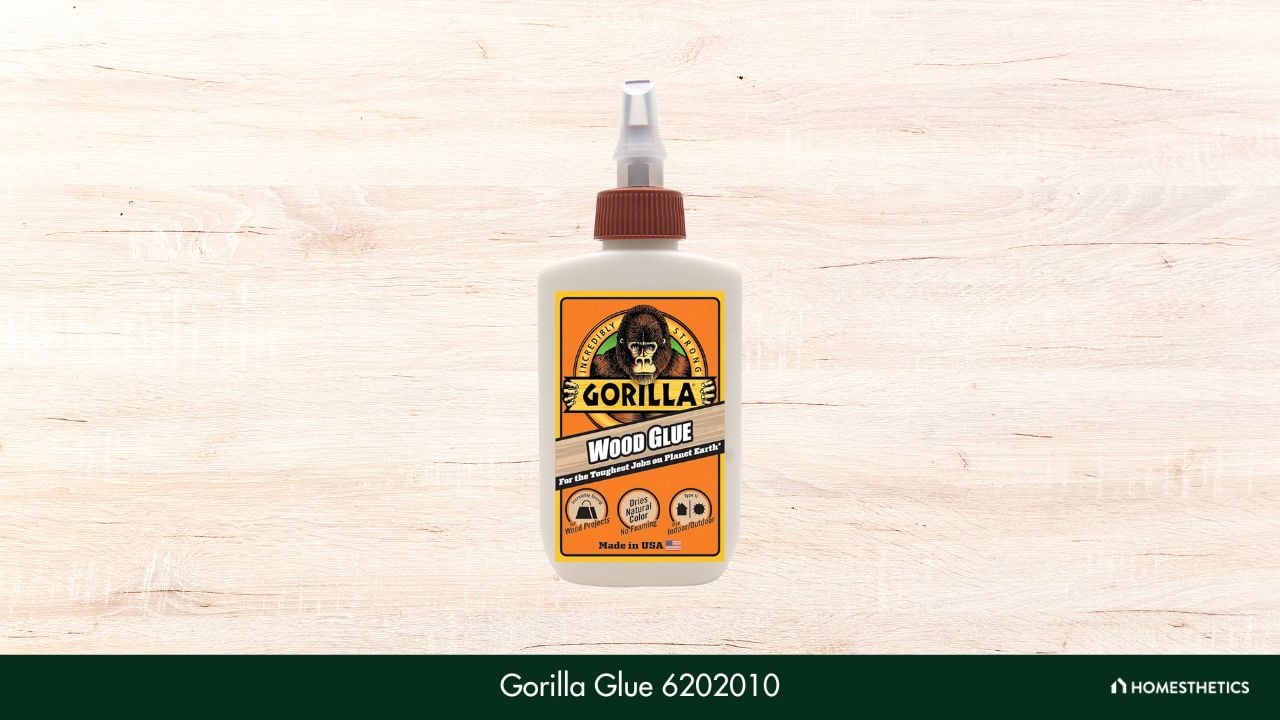

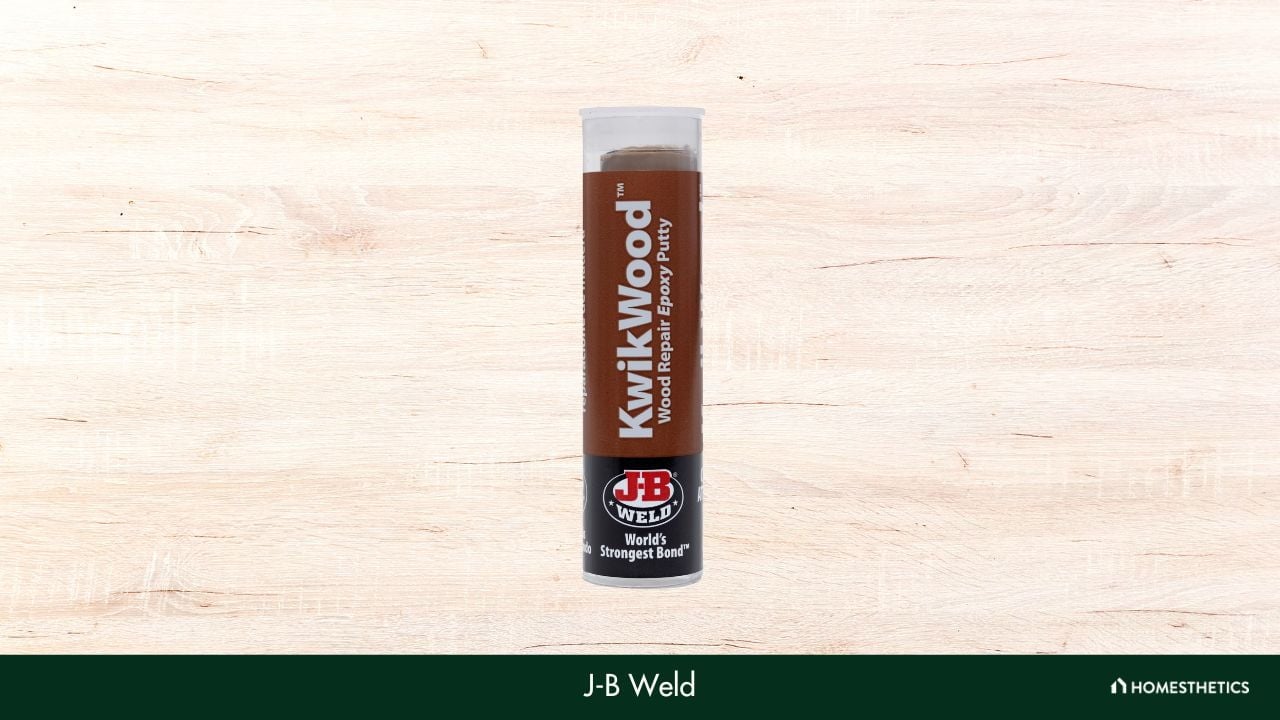
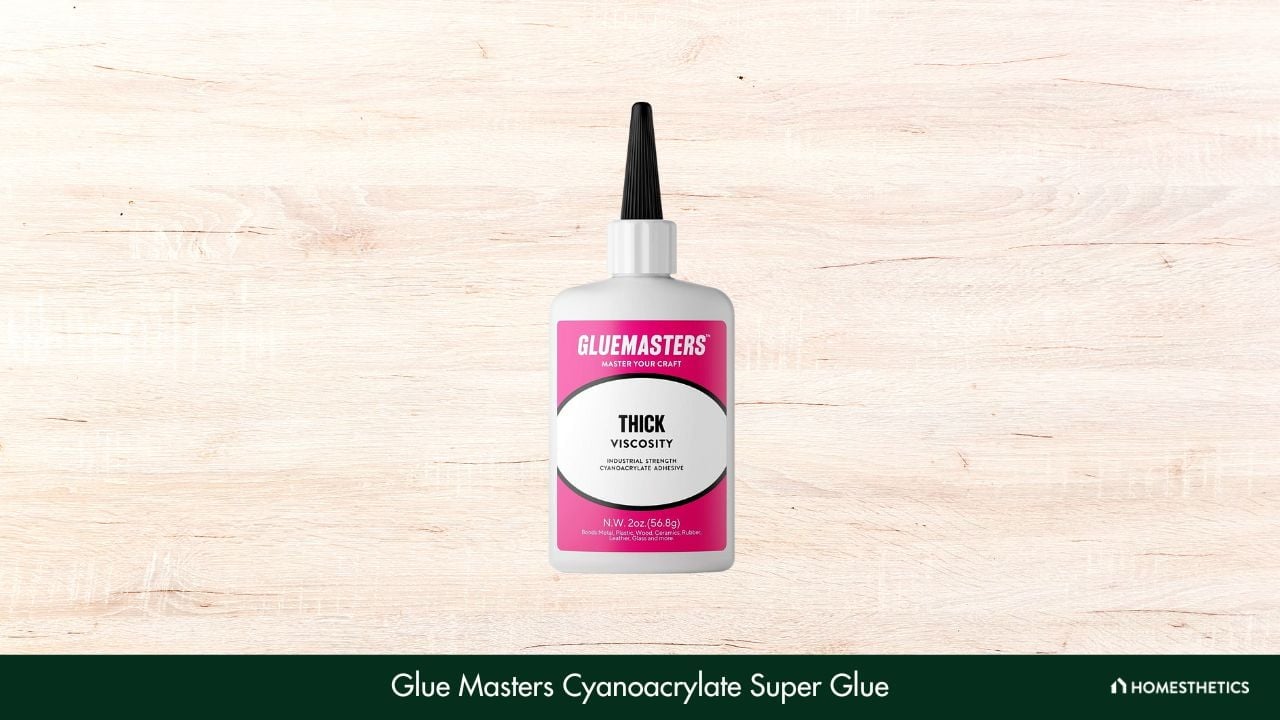
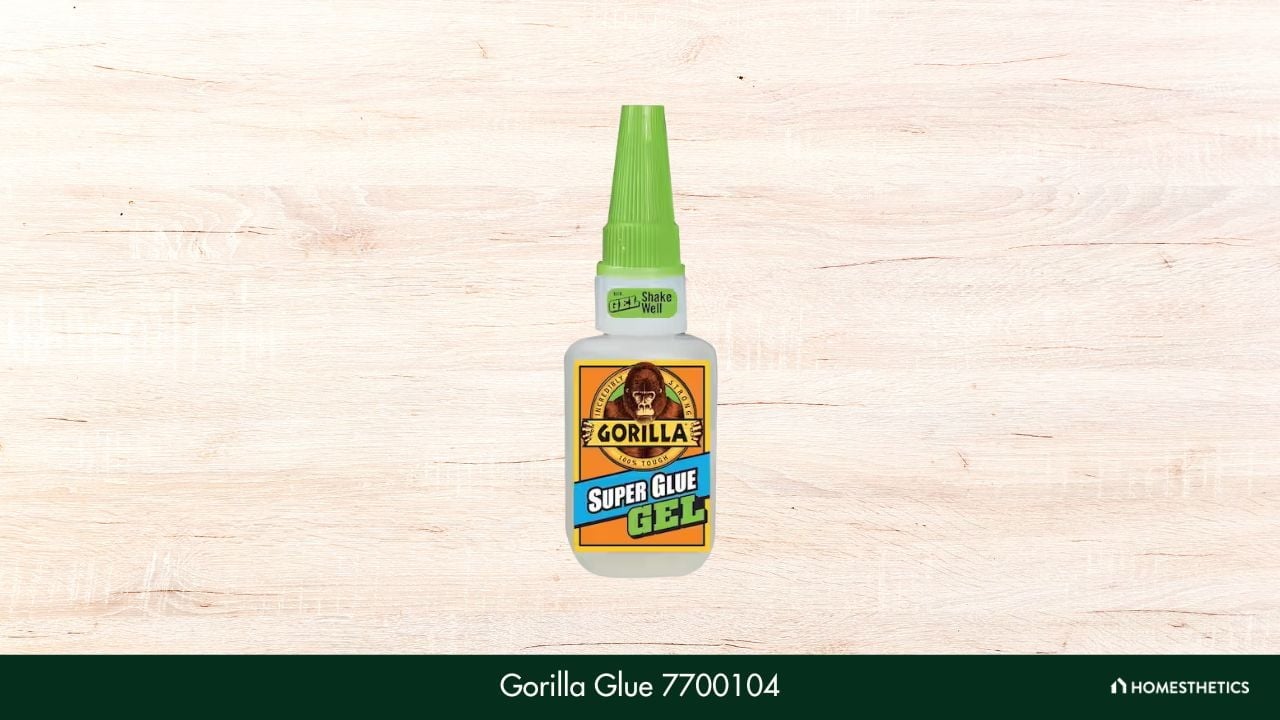
![11 Best Glues for Polypropylene [Reviews & Buyer’s Guide]](https://homesthetics.net/wp-content/uploads/2023/06/Best-Glues-For-Polypropylene.jpg "11 Best Glues for Polypropylene [Reviews & Buyer's Guide]")
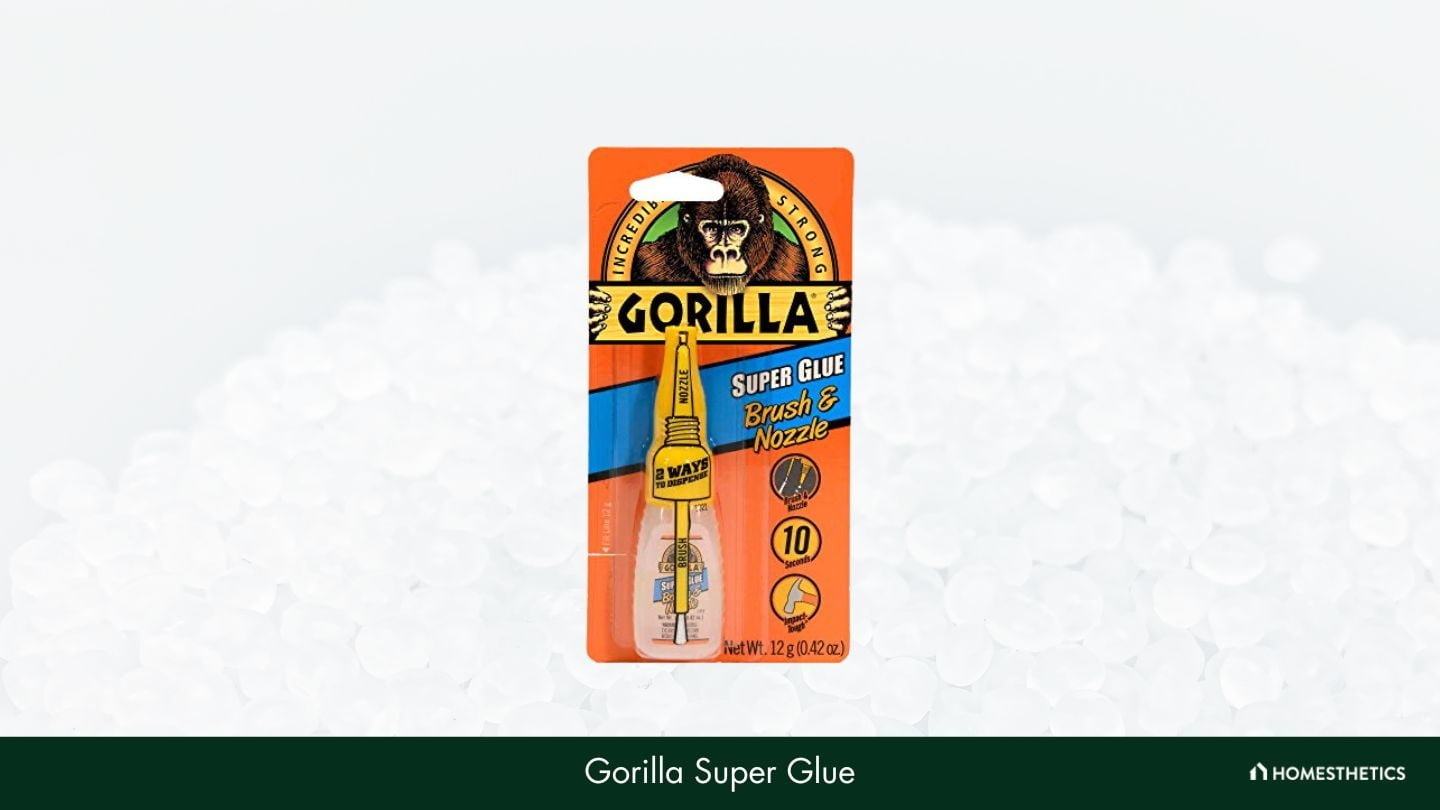
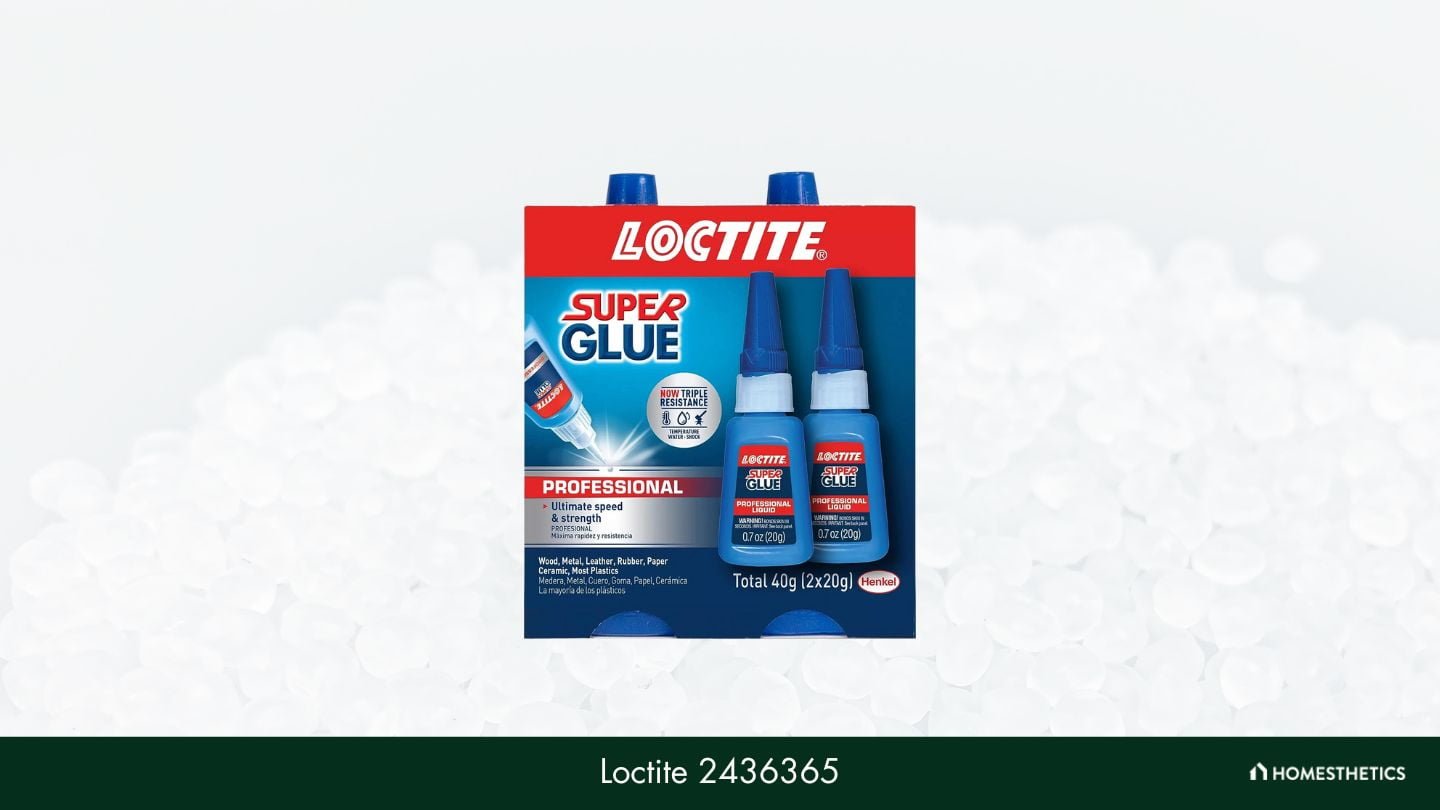
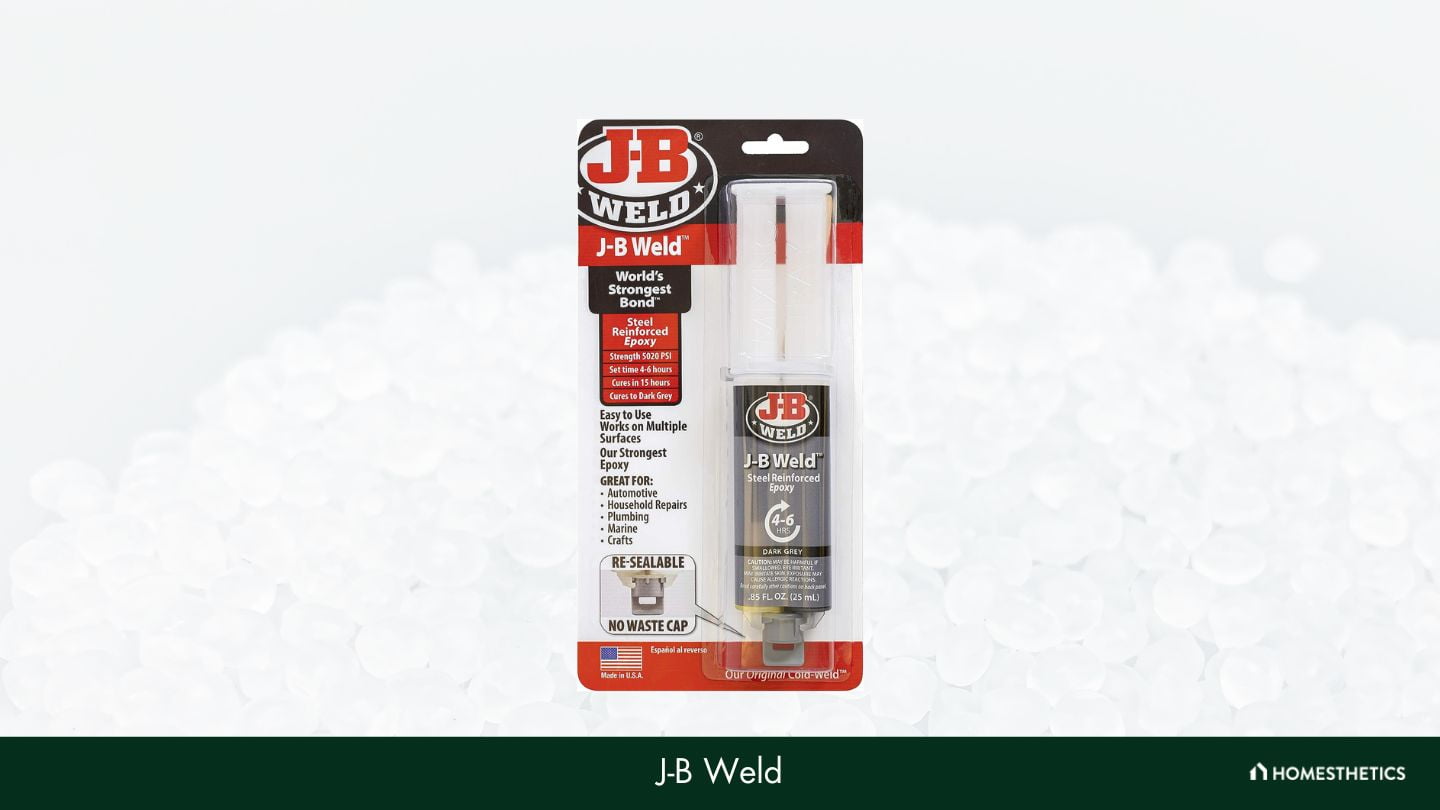
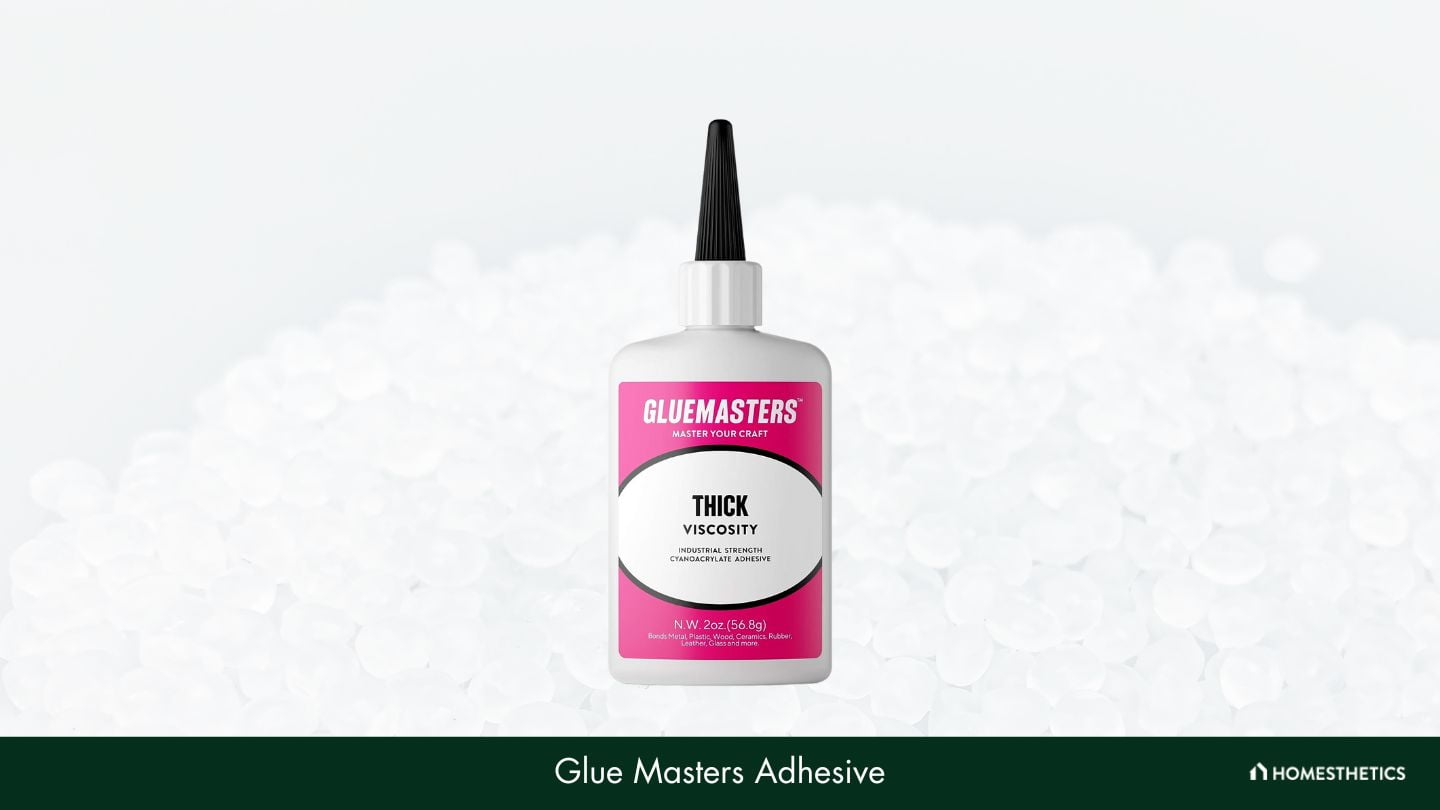
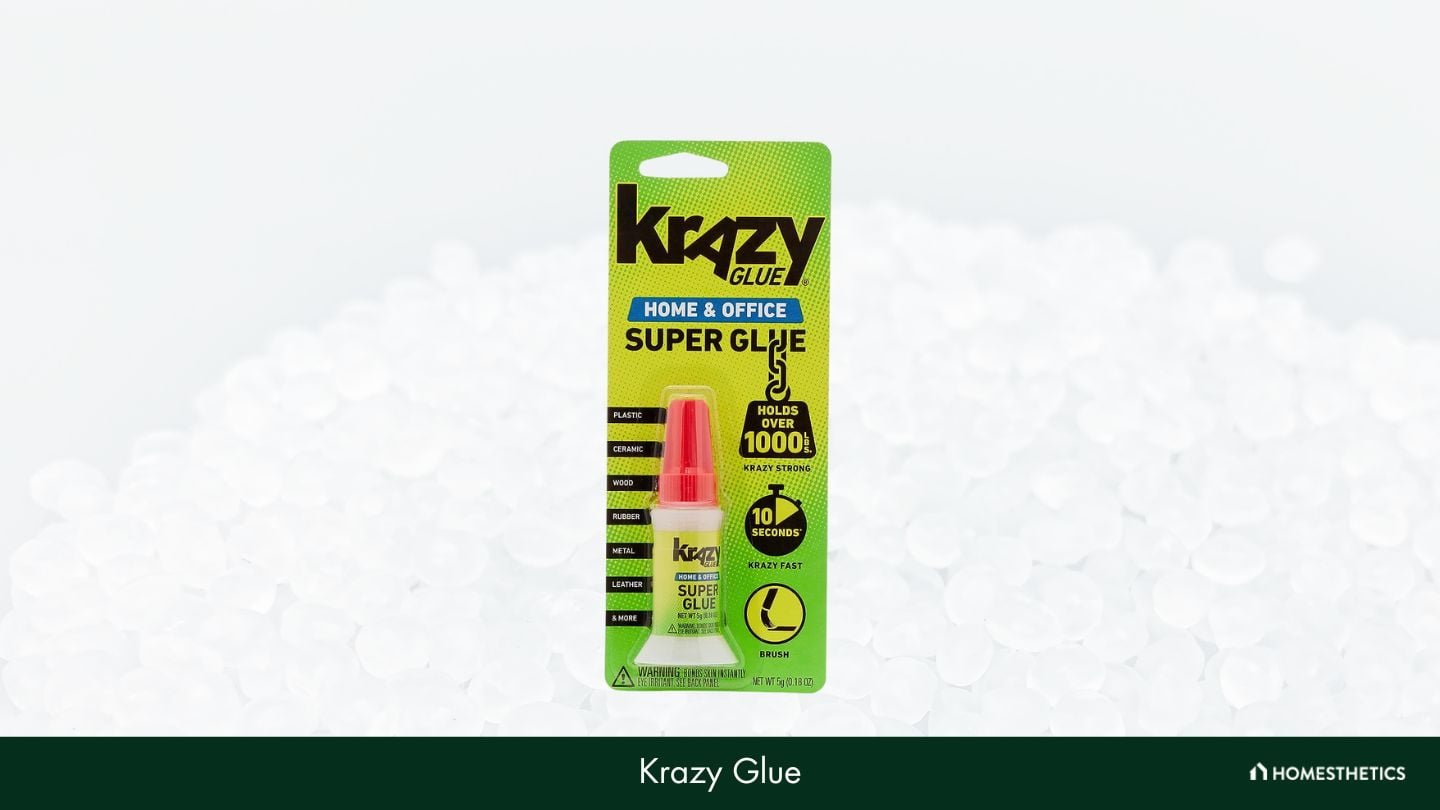
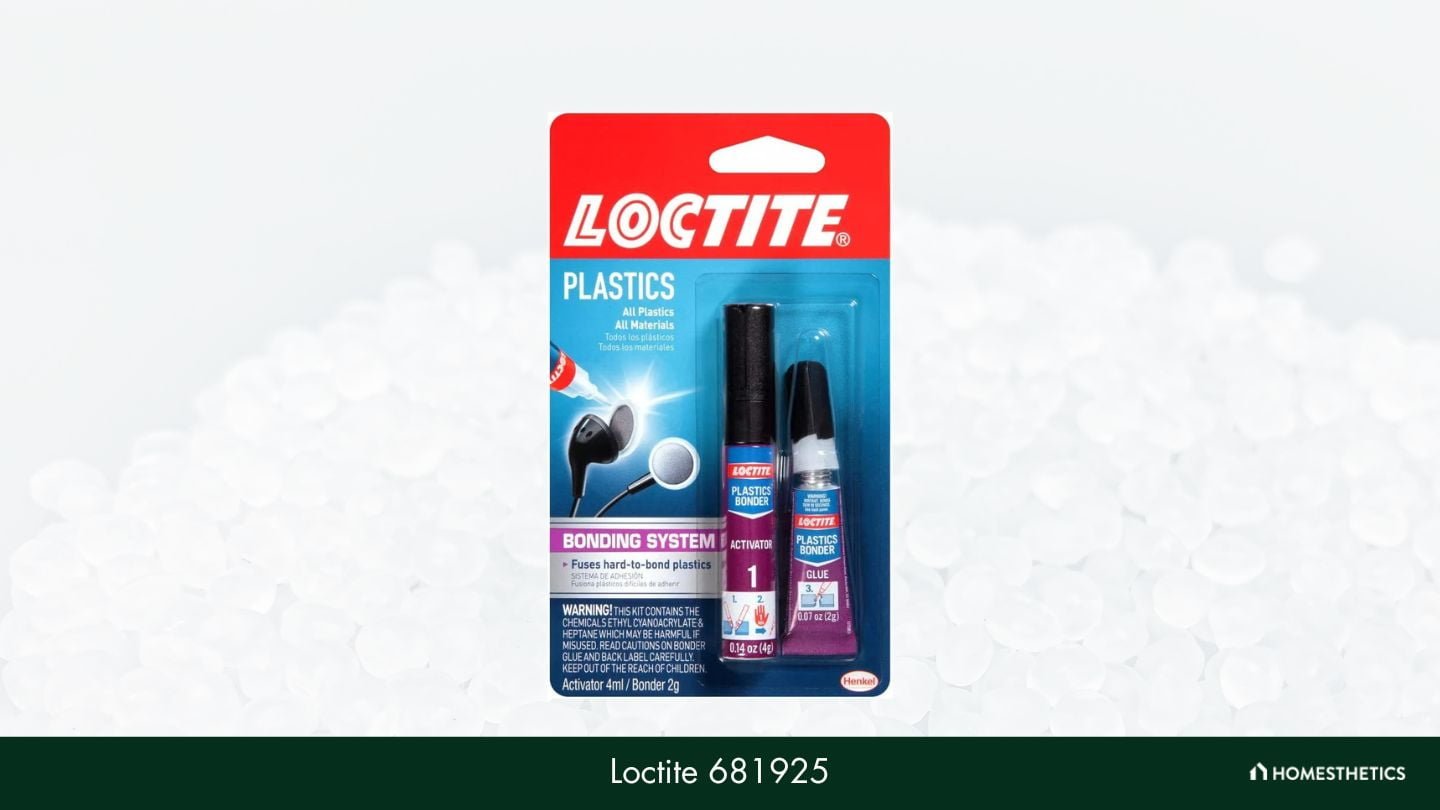
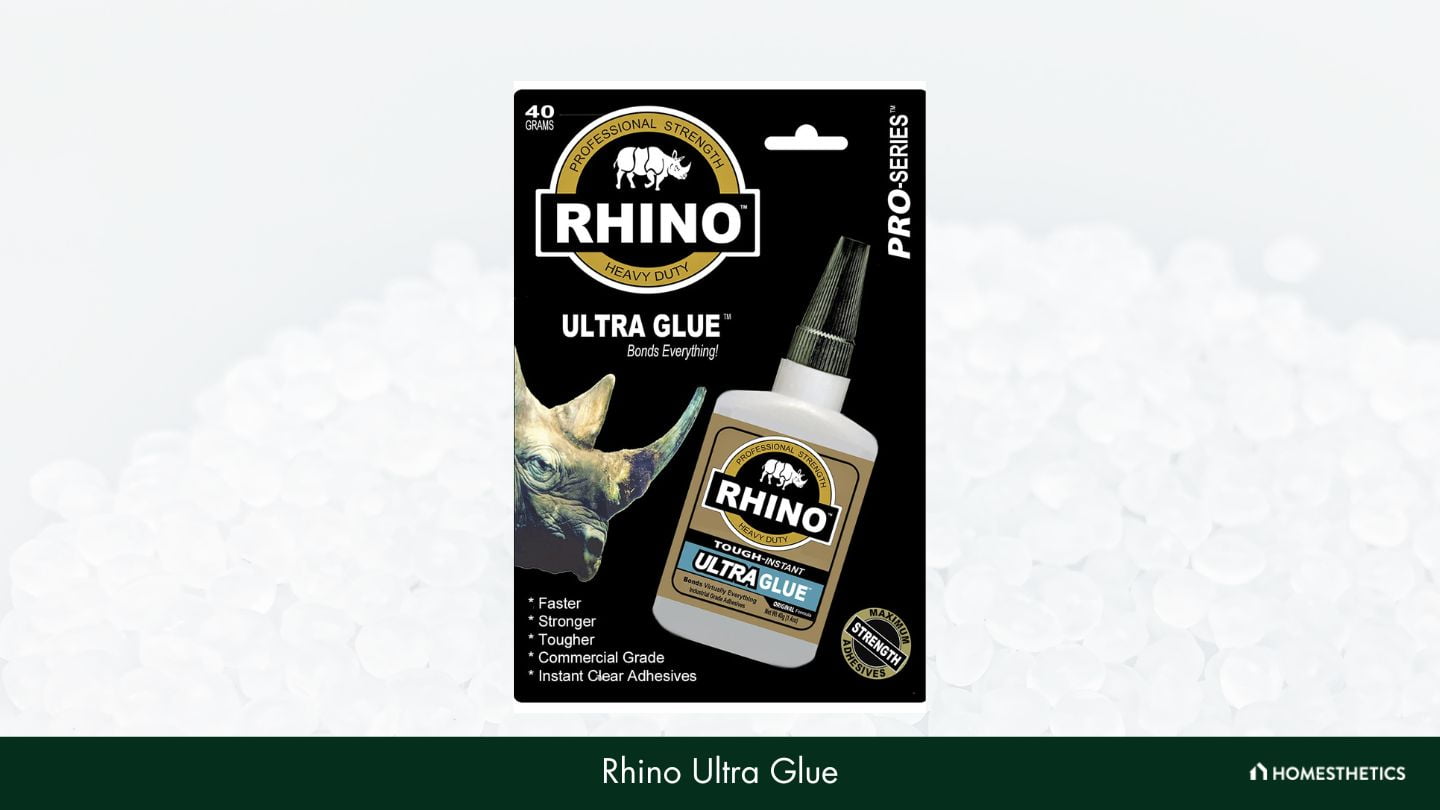
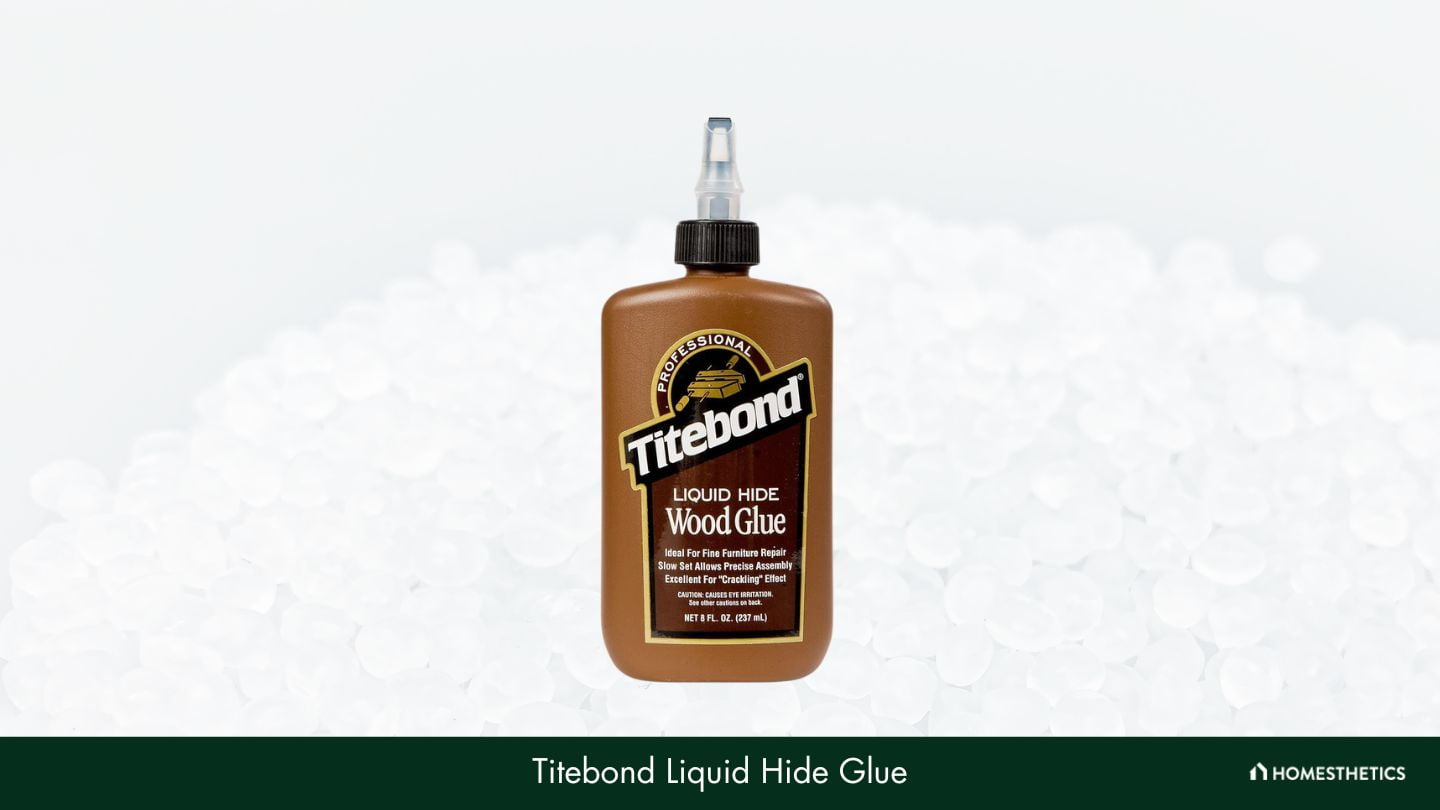


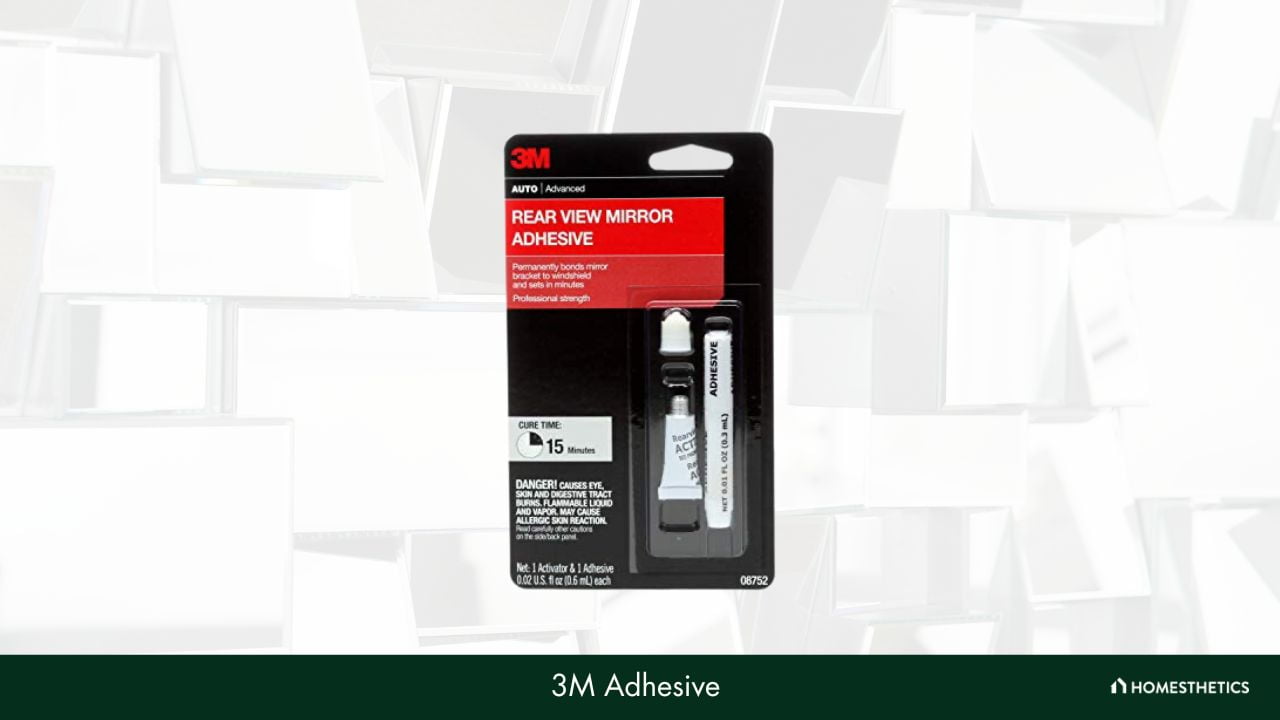
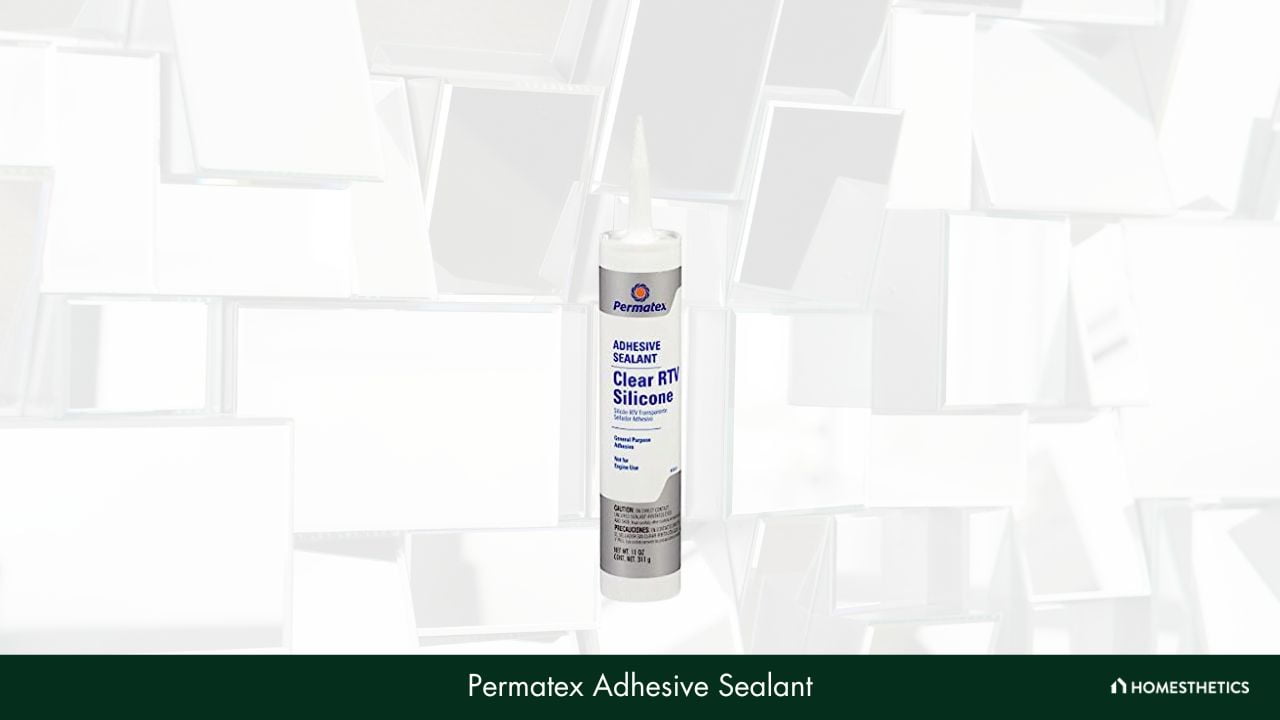
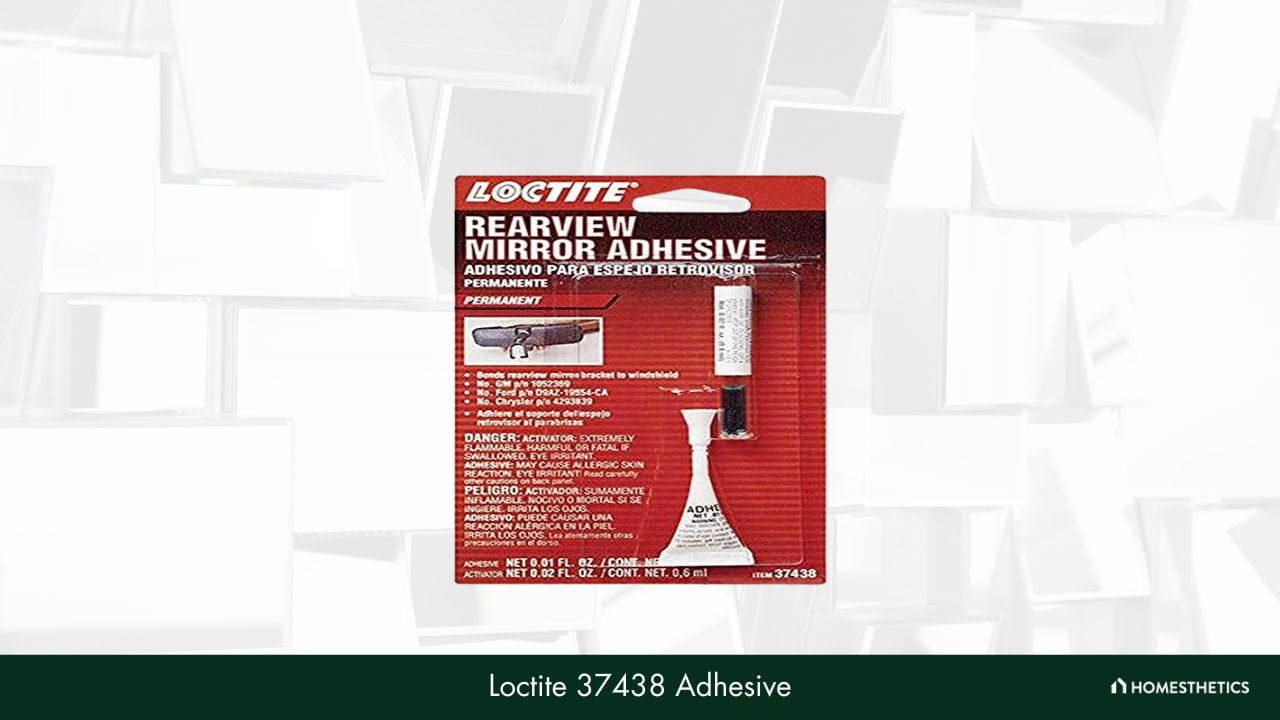
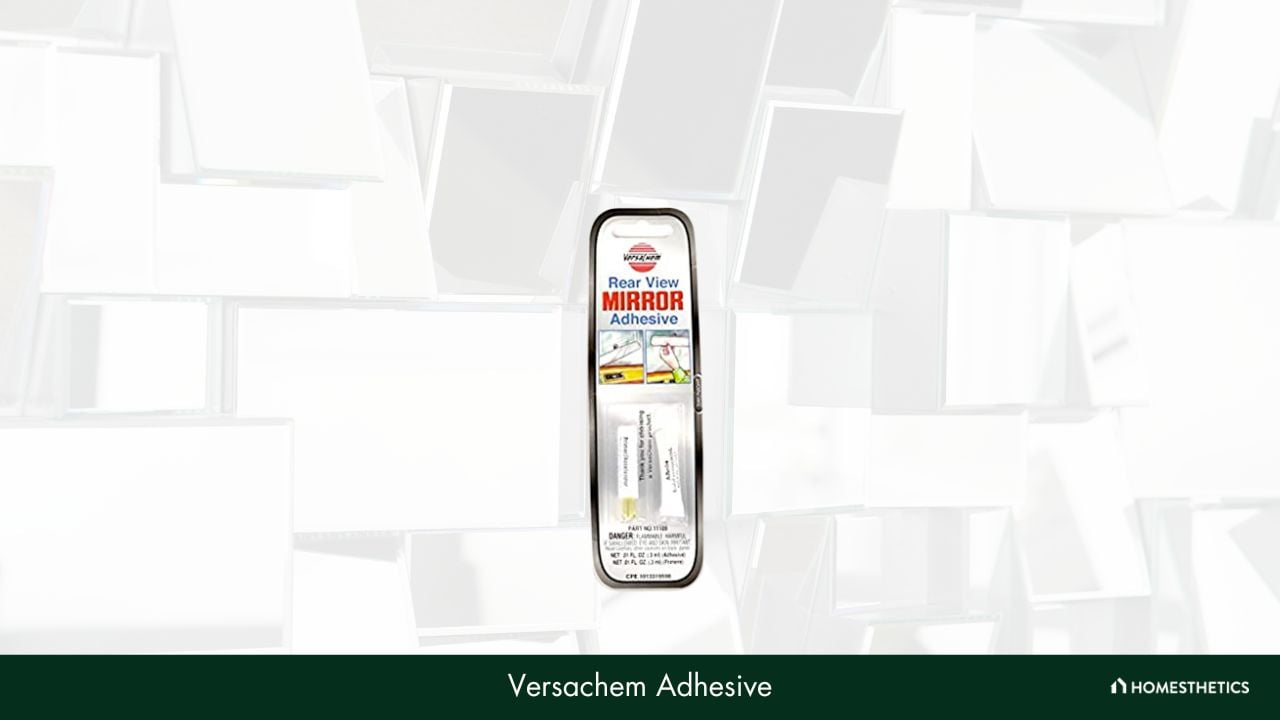
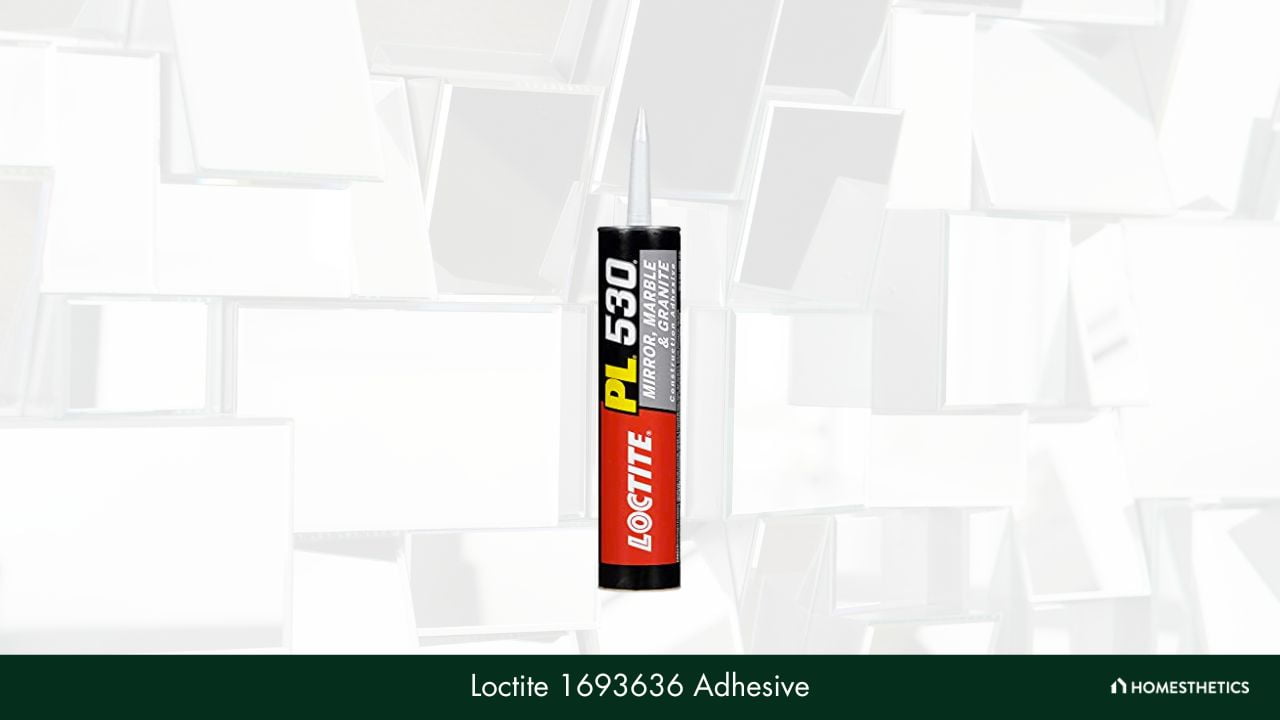


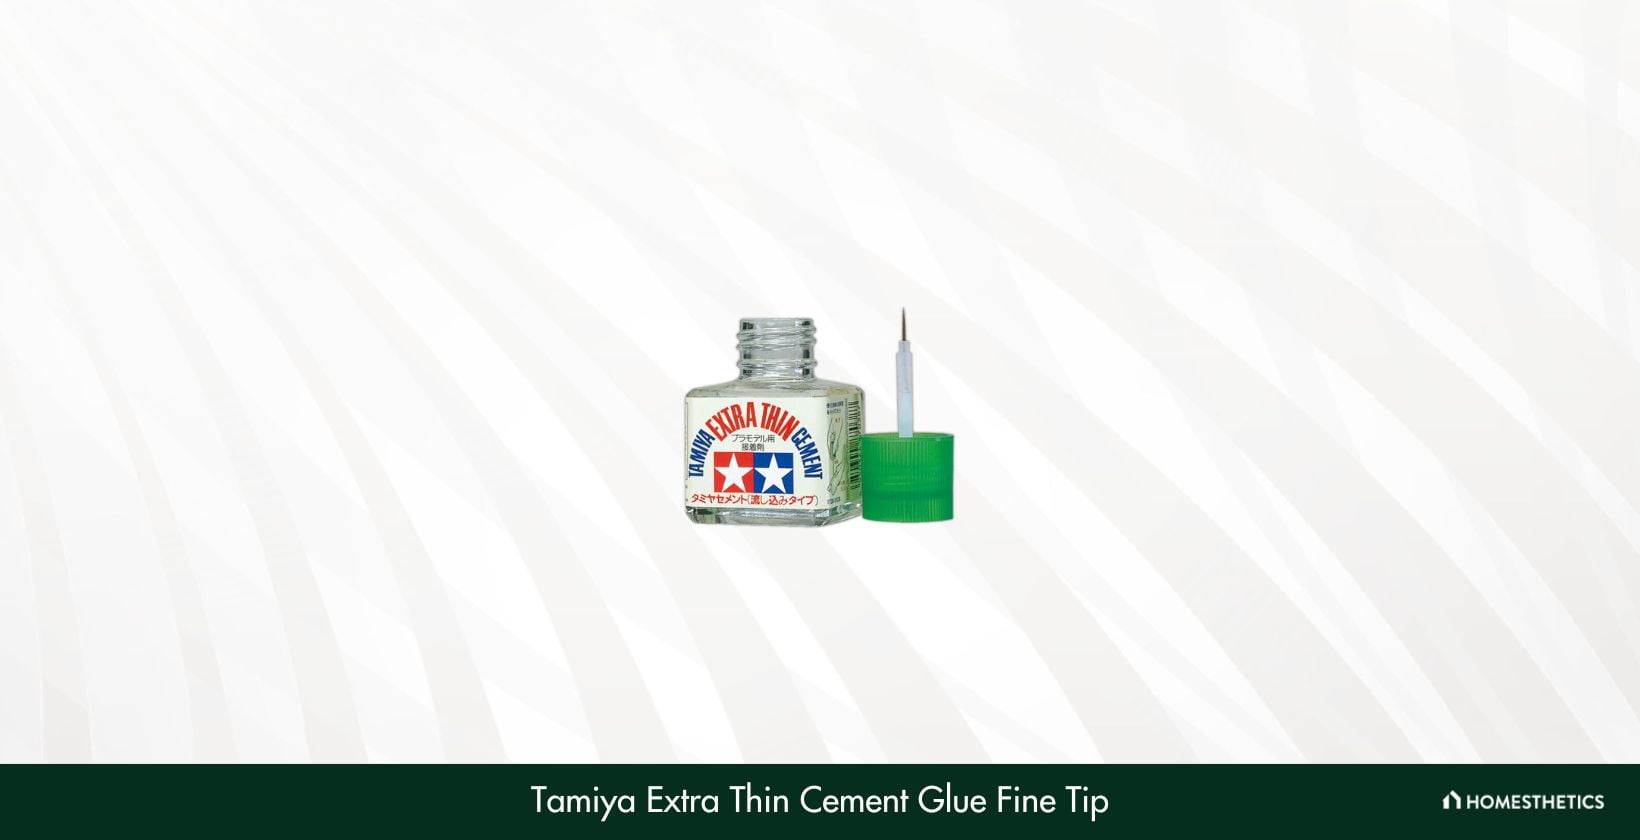
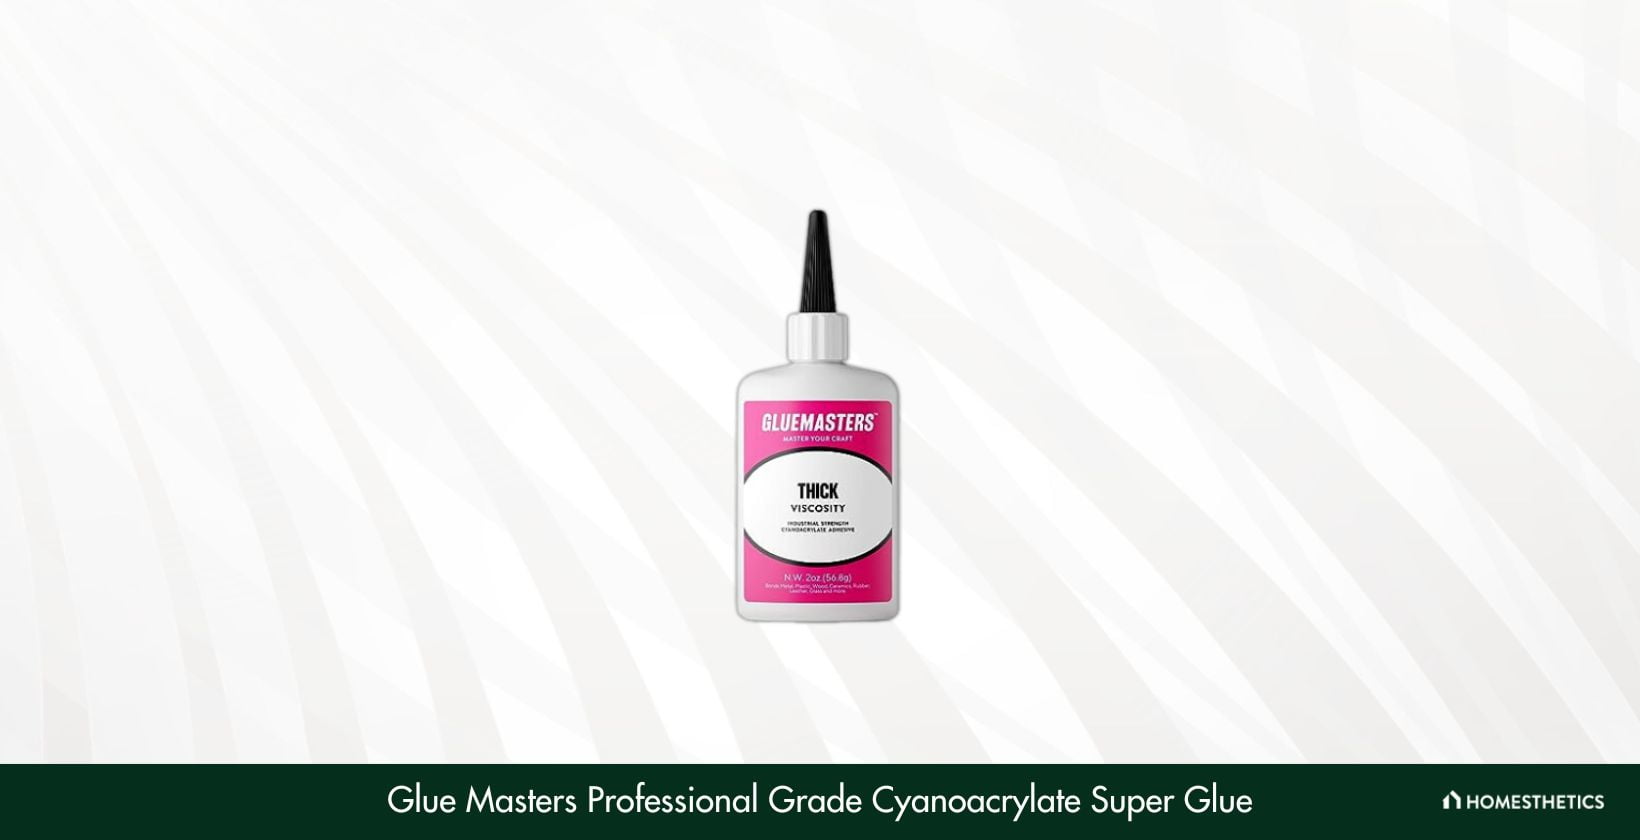
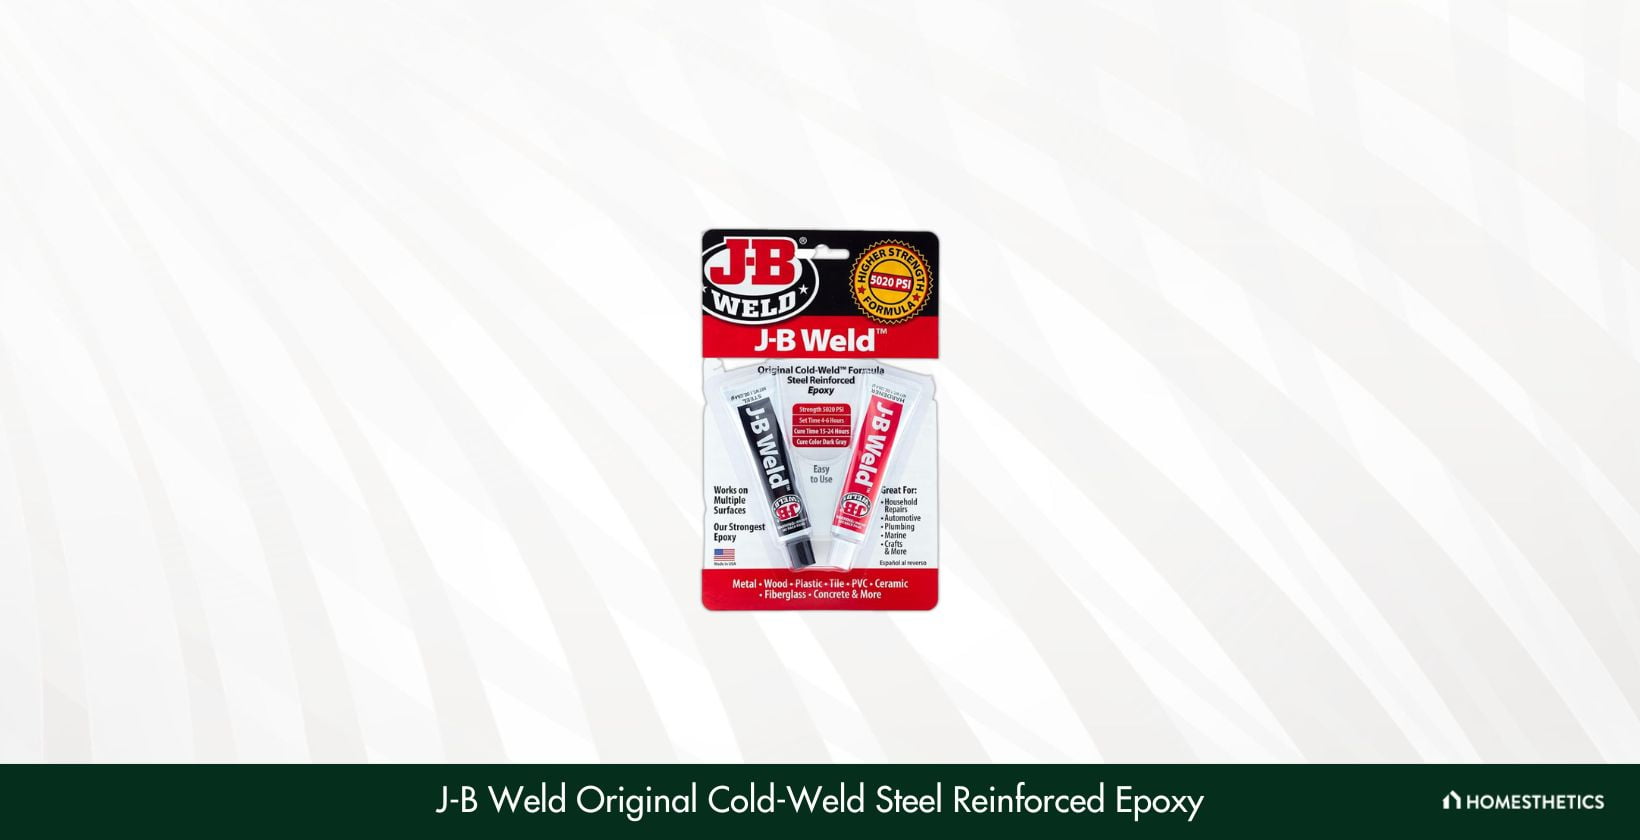
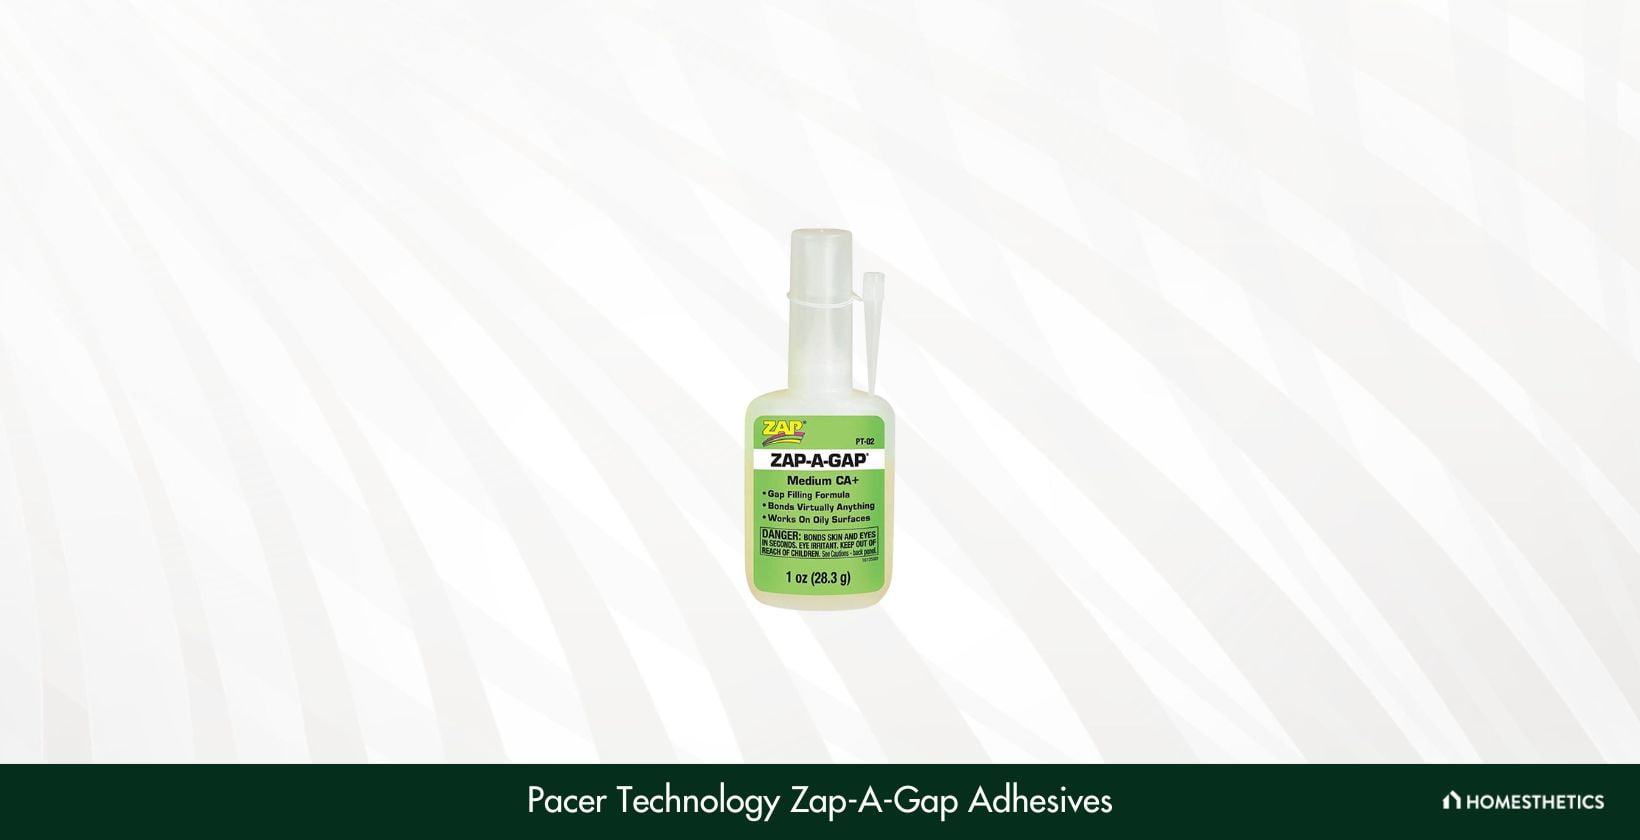
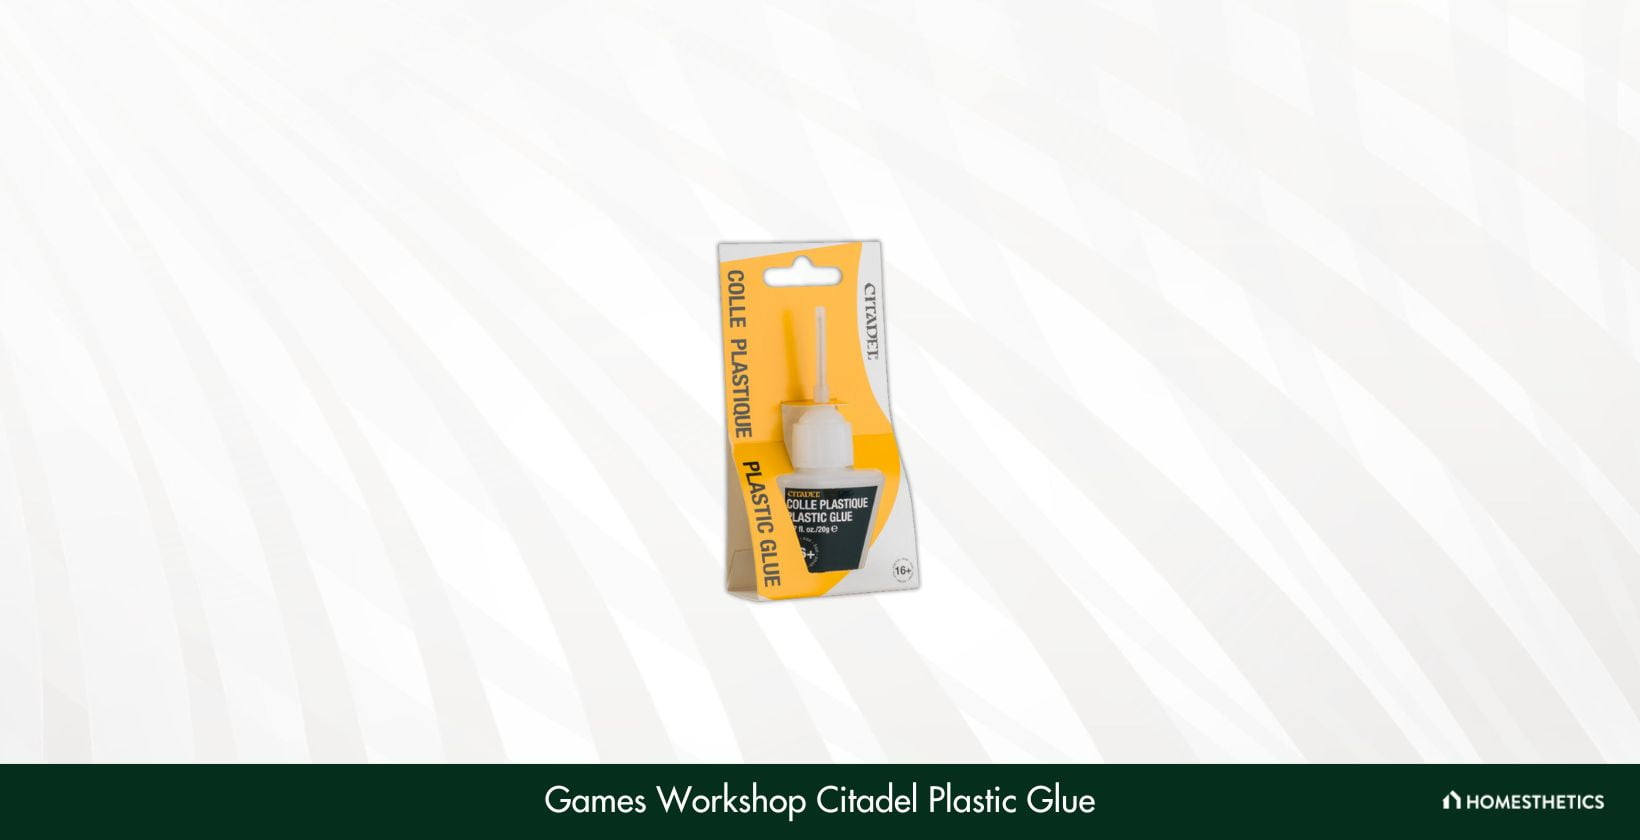
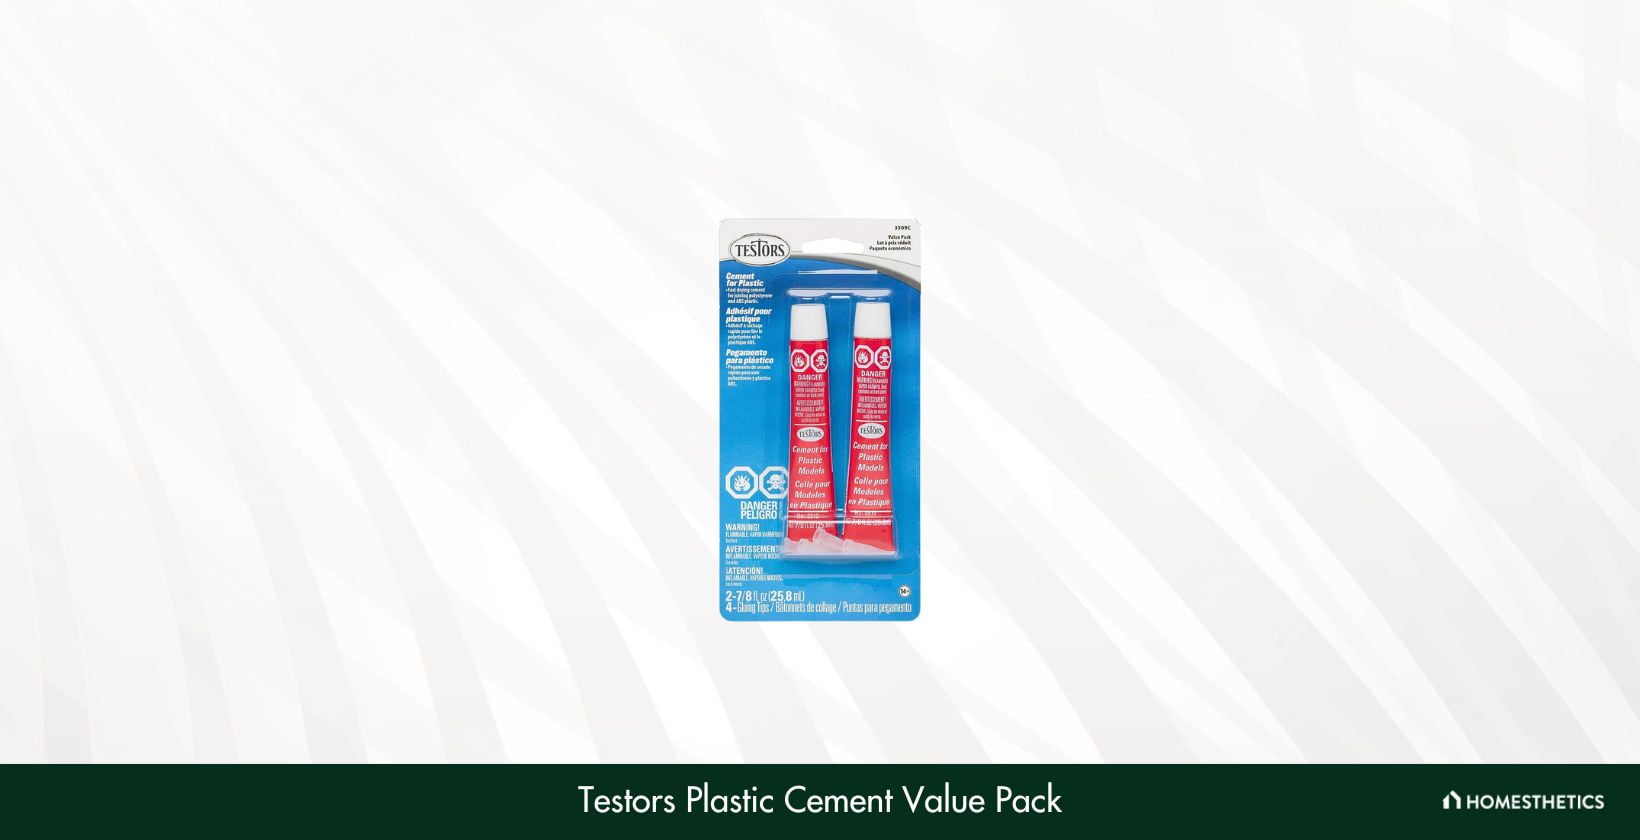
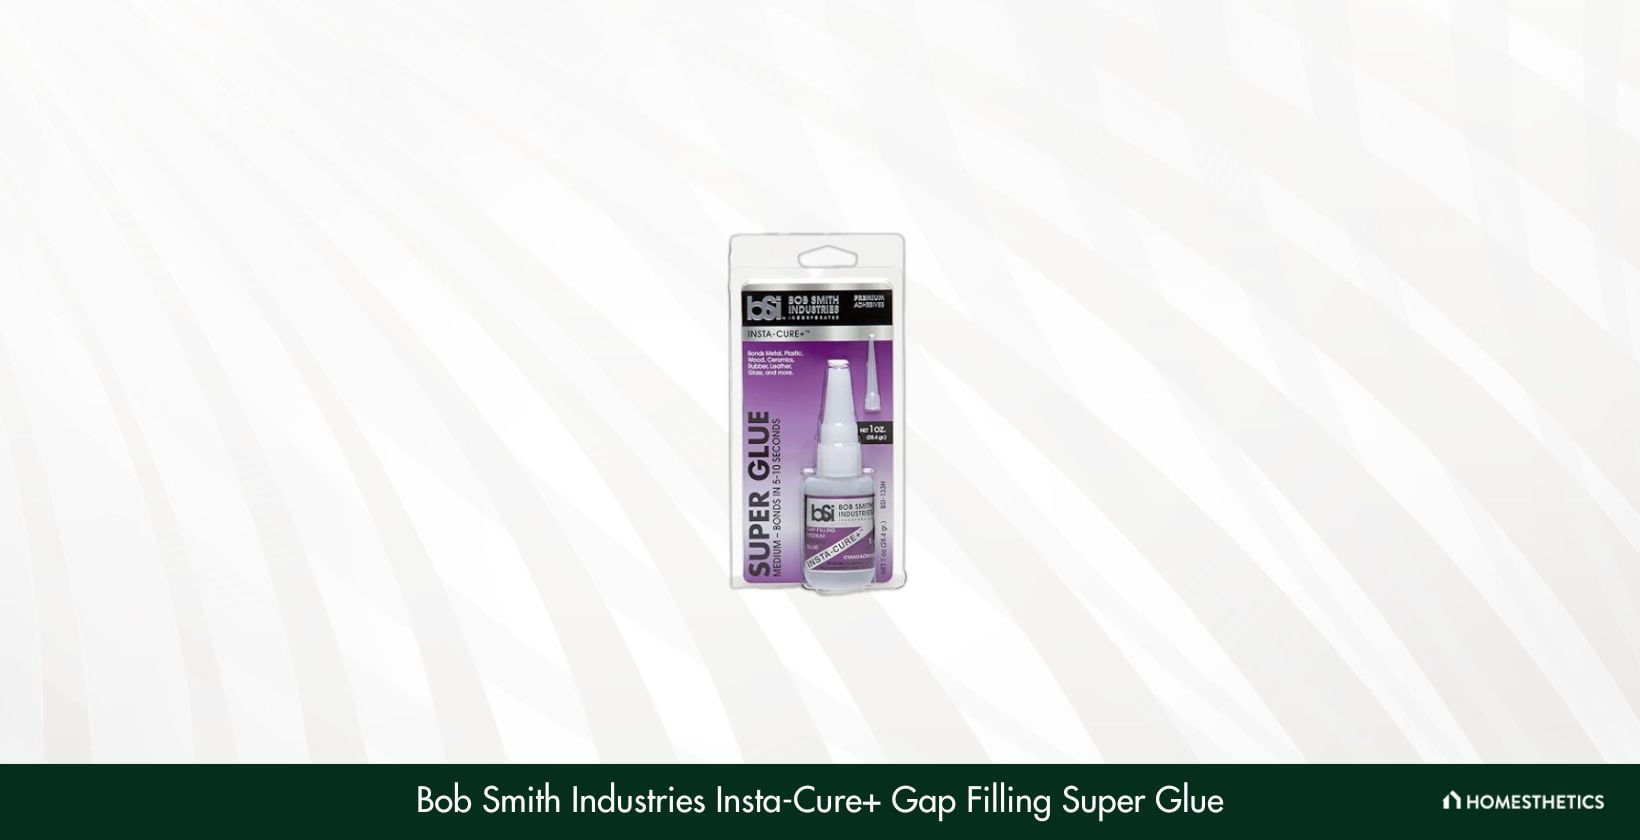
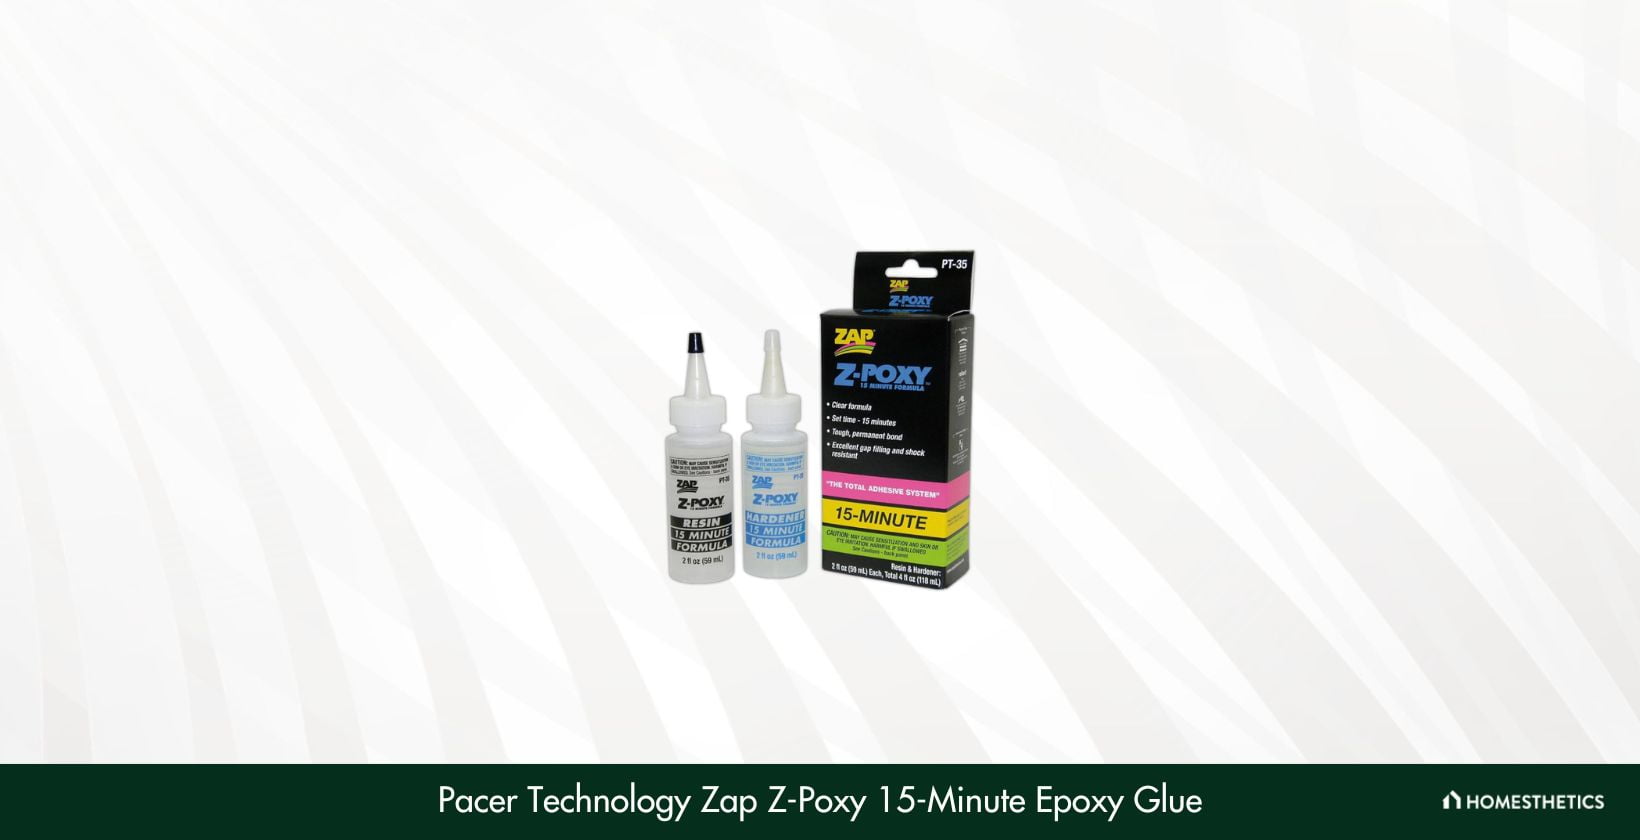

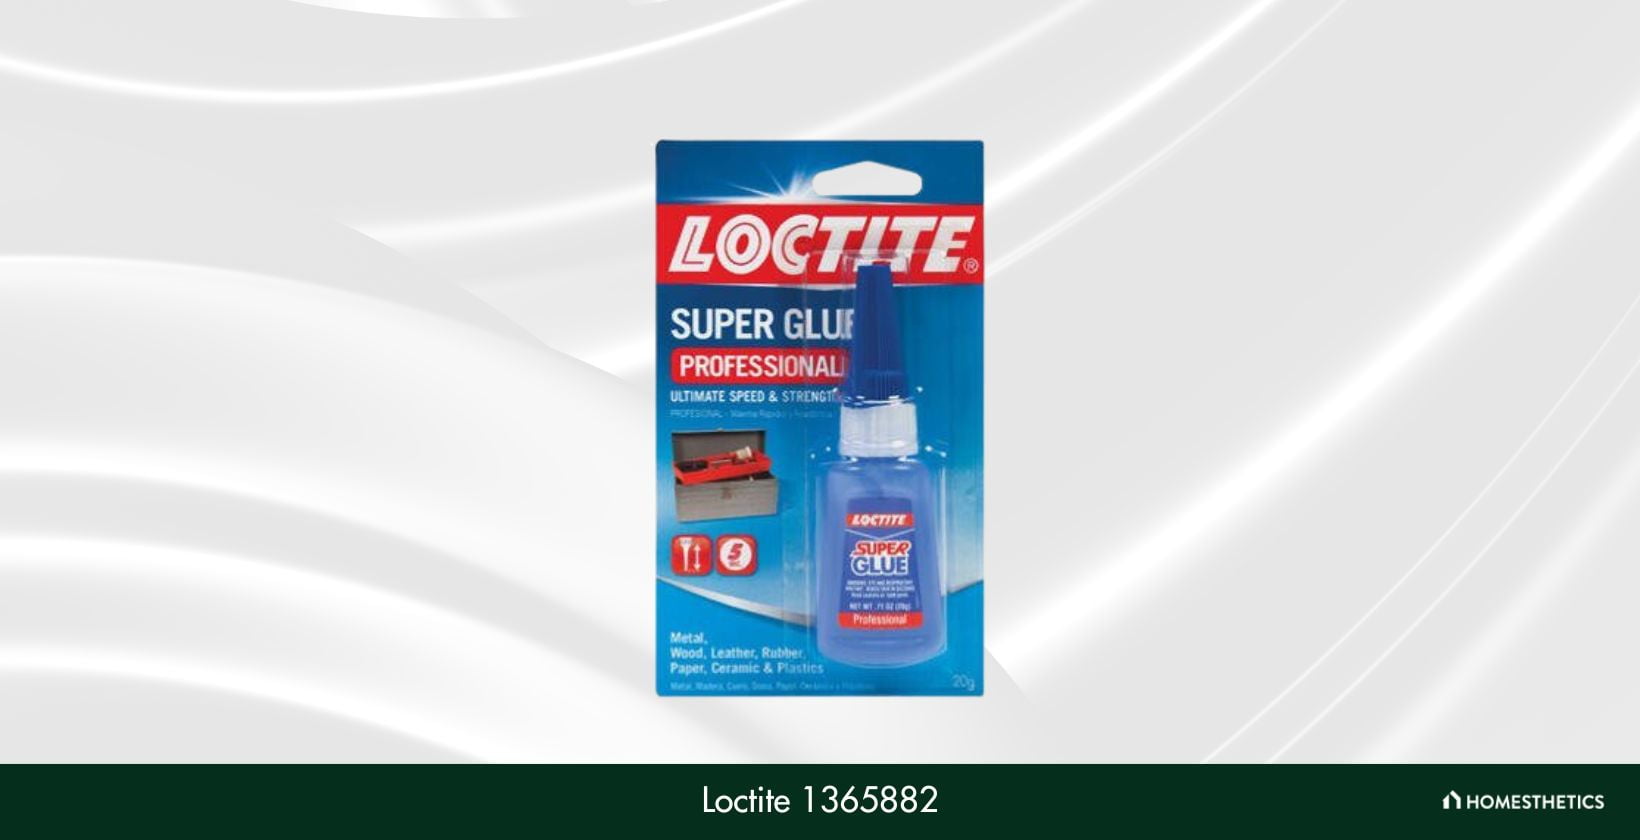
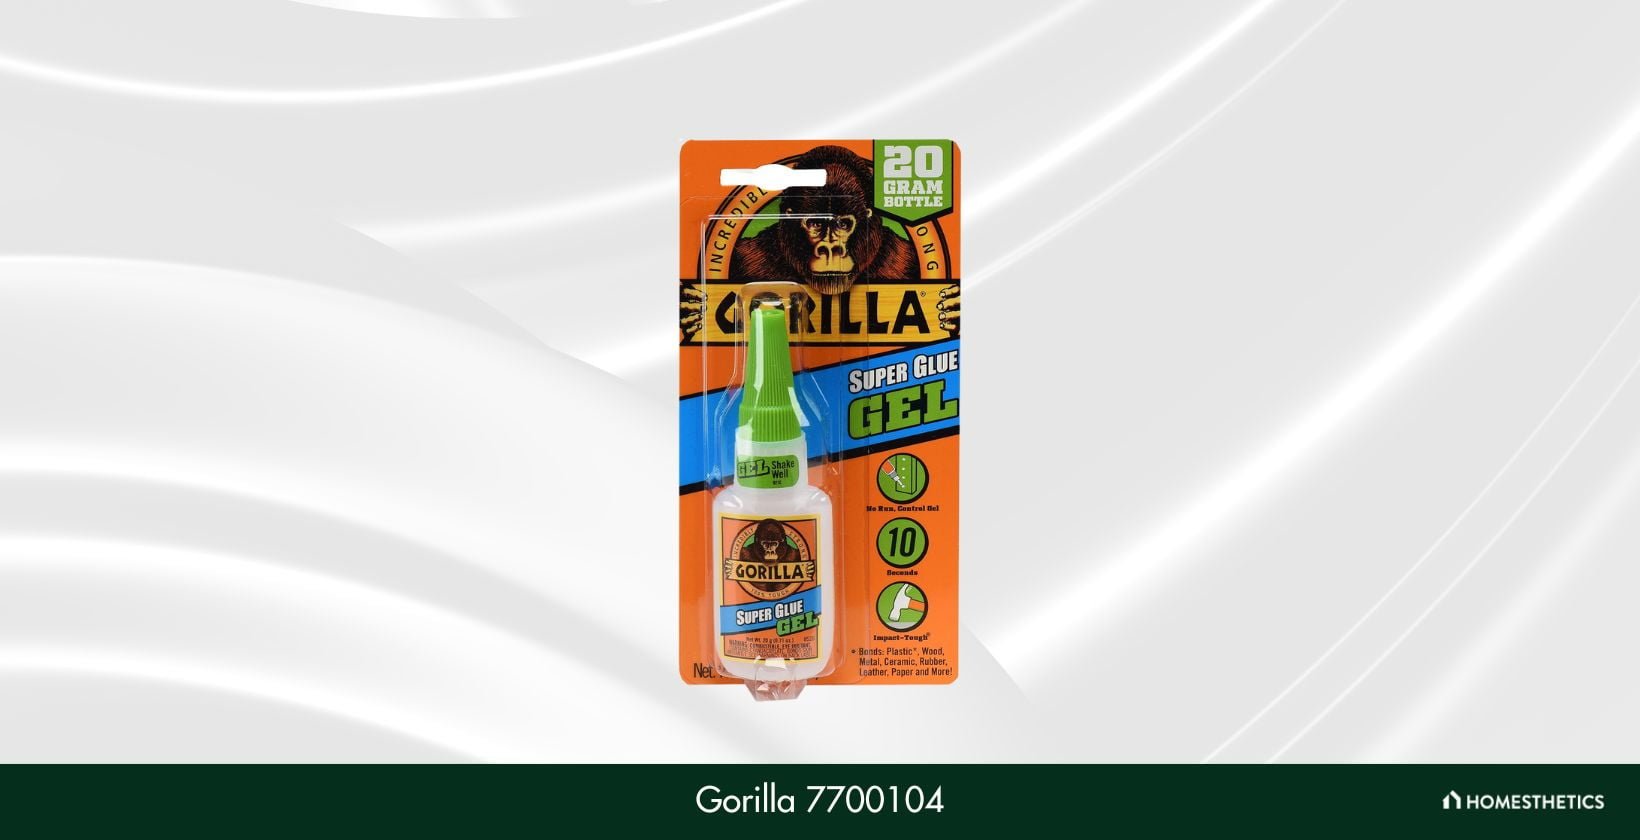
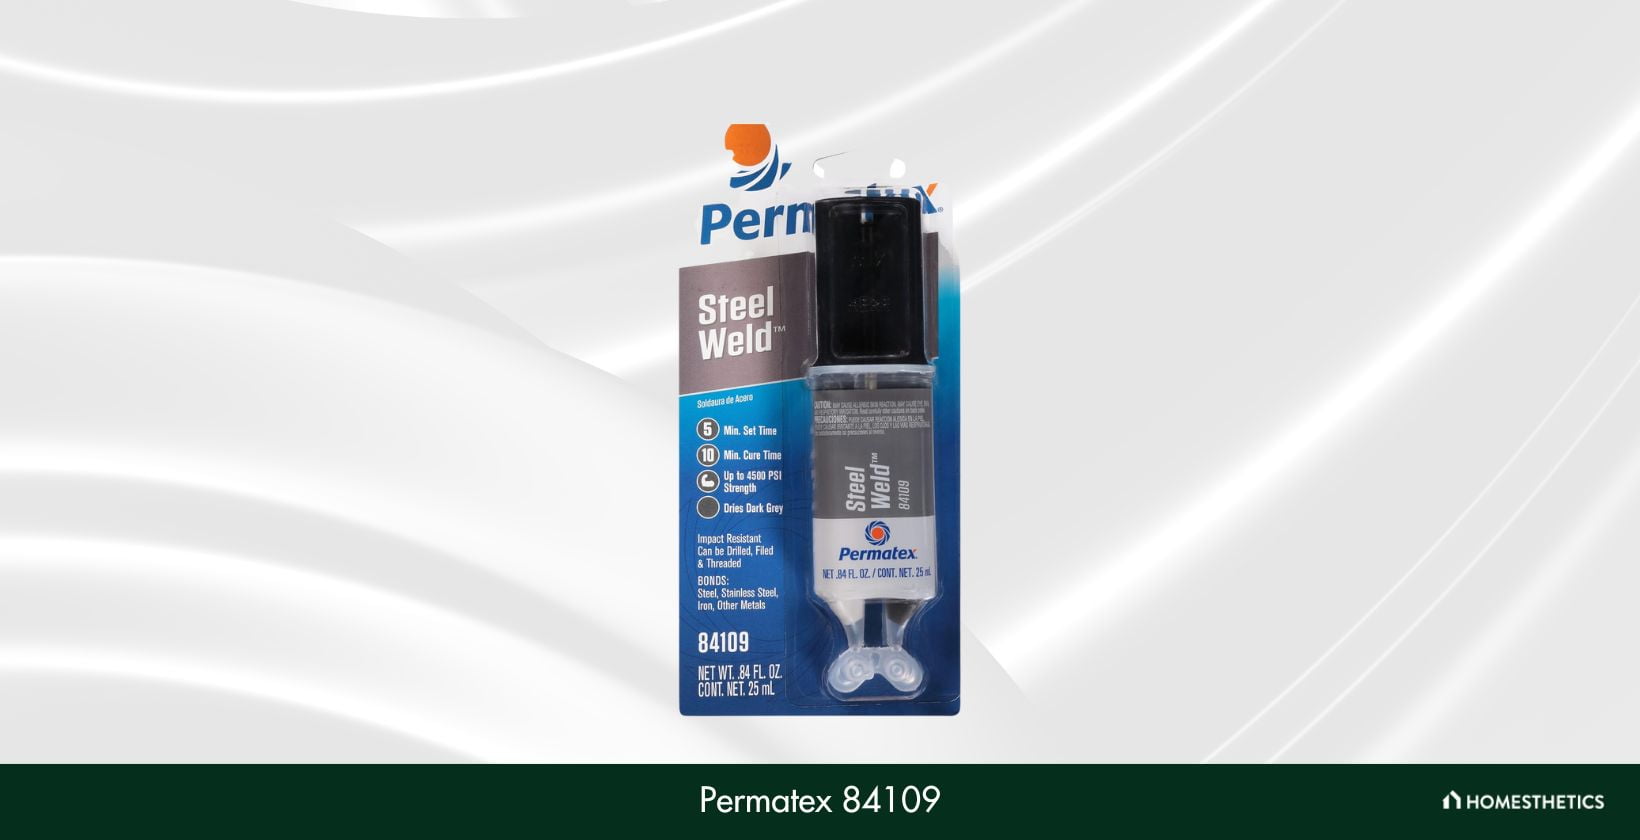
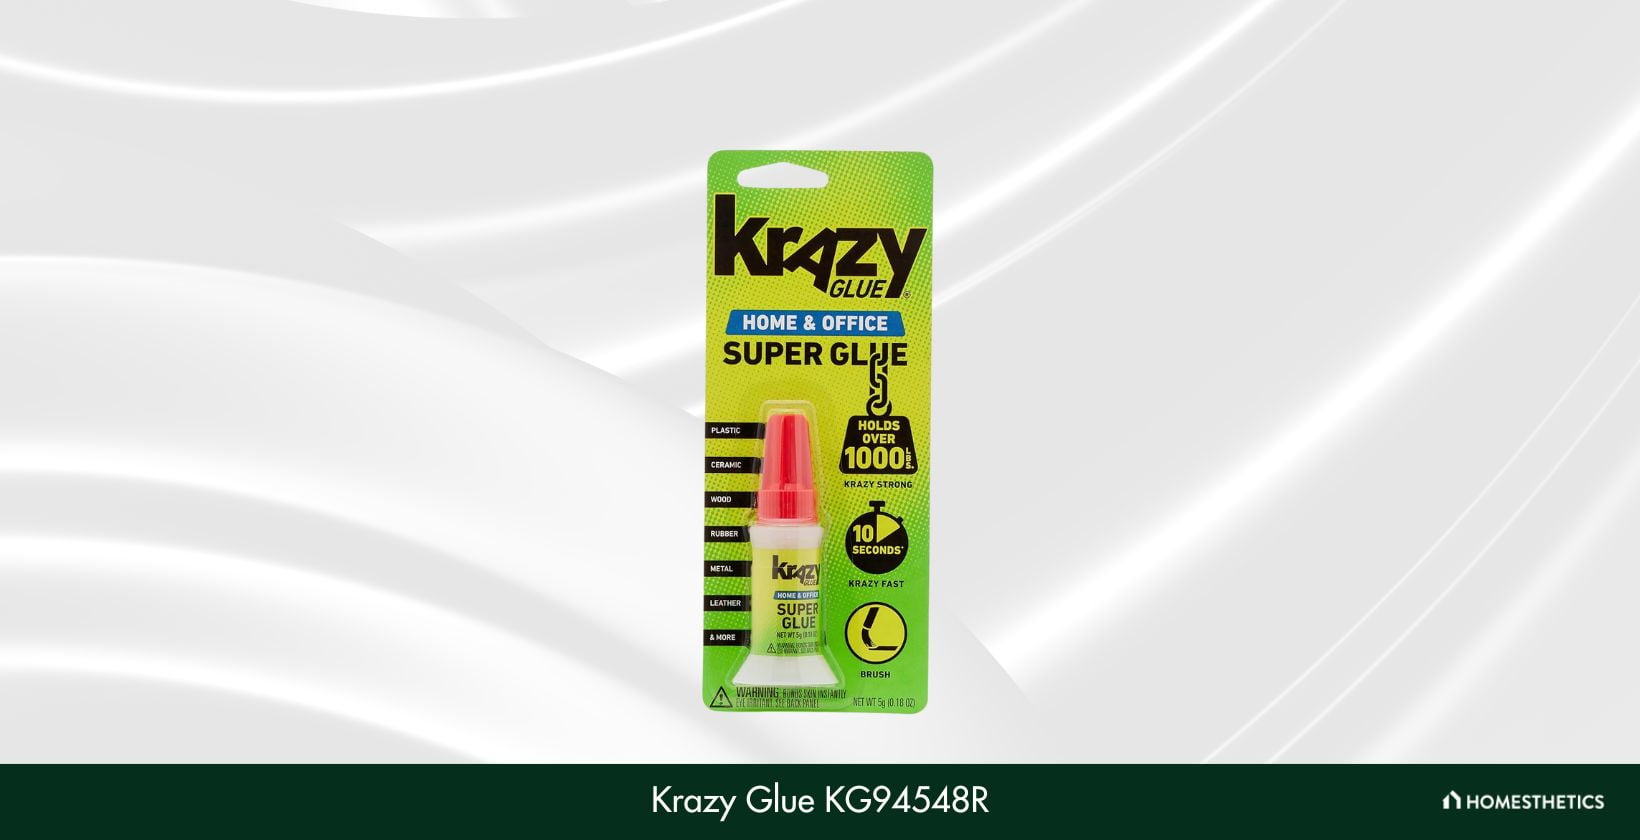
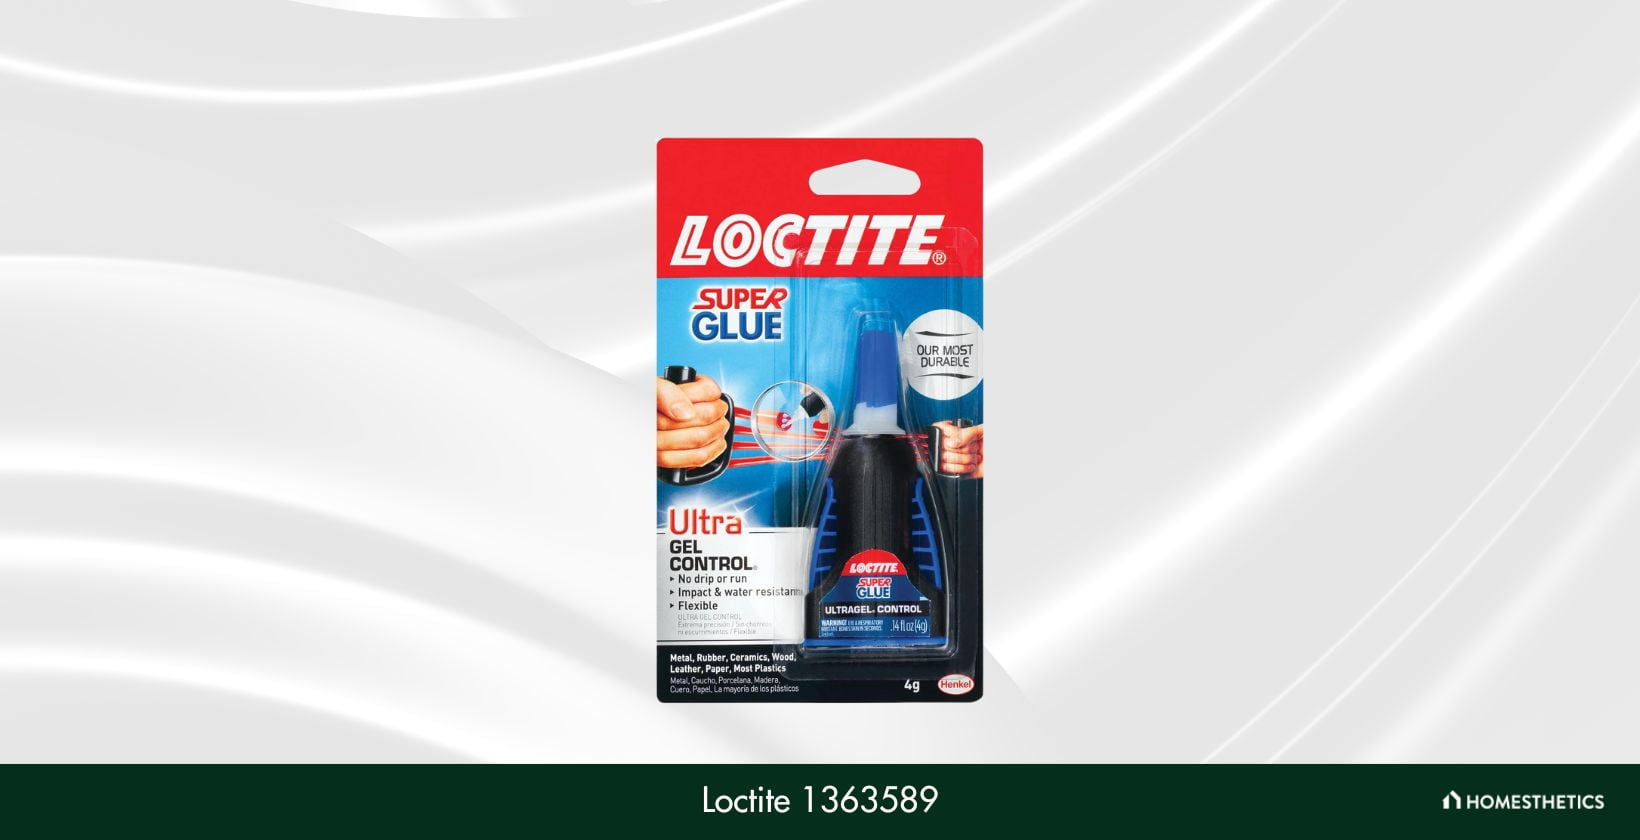
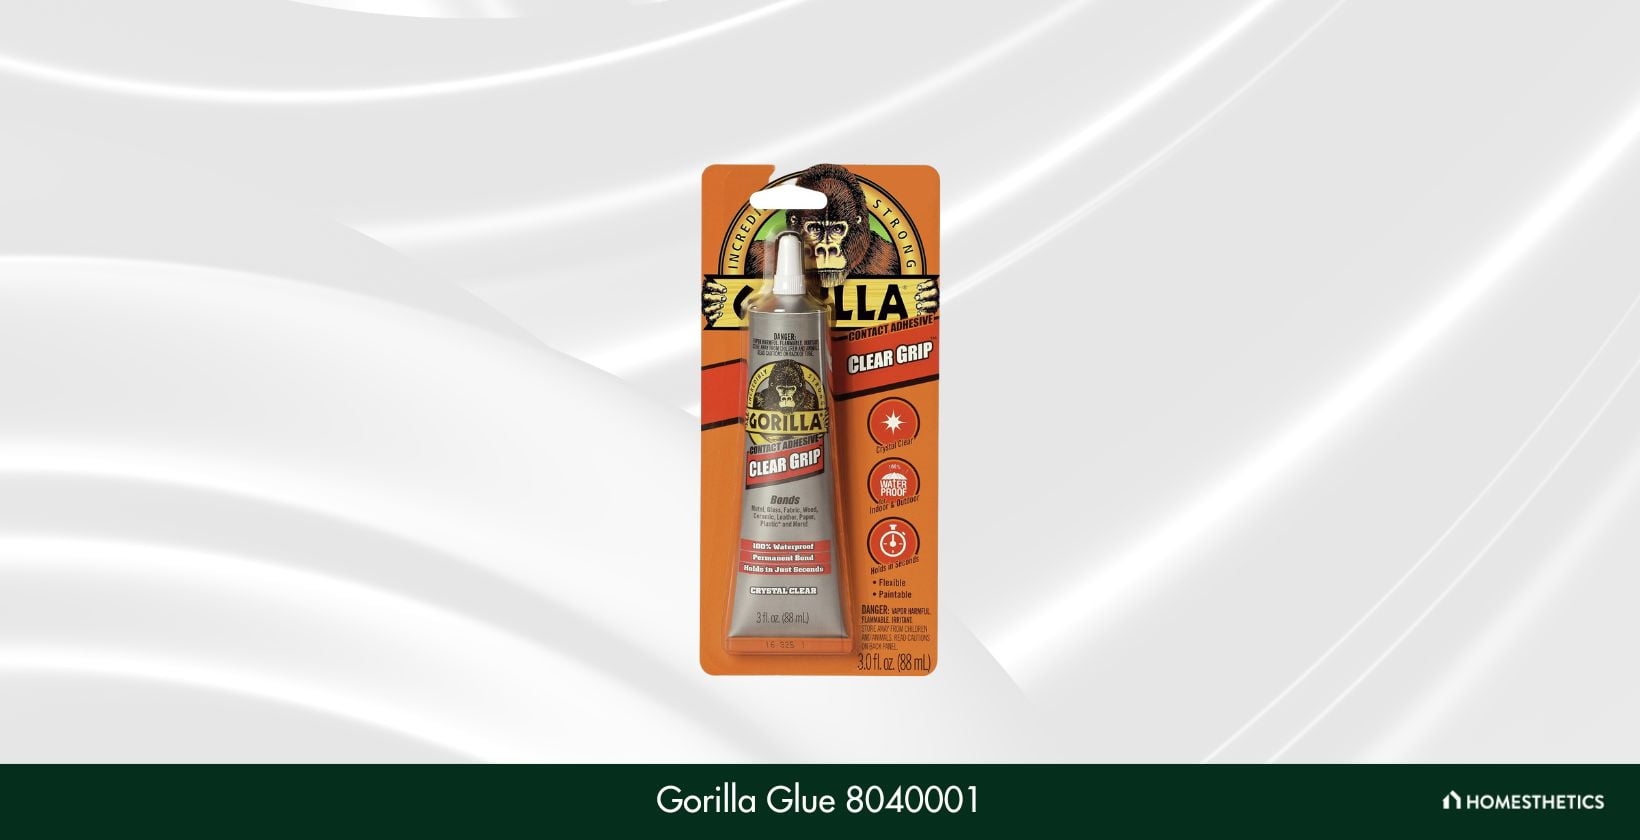
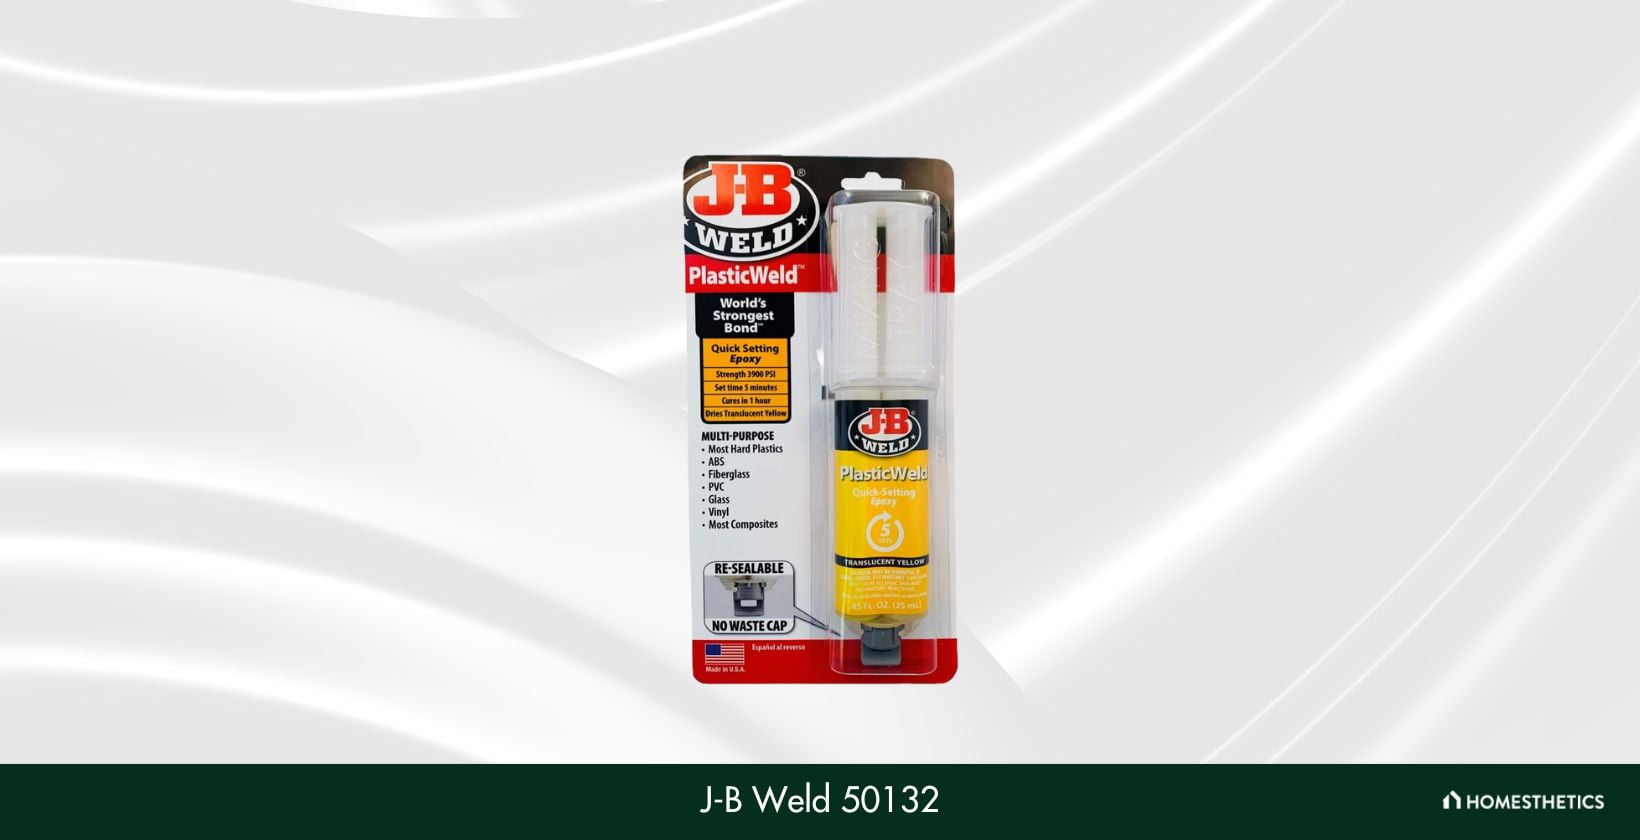
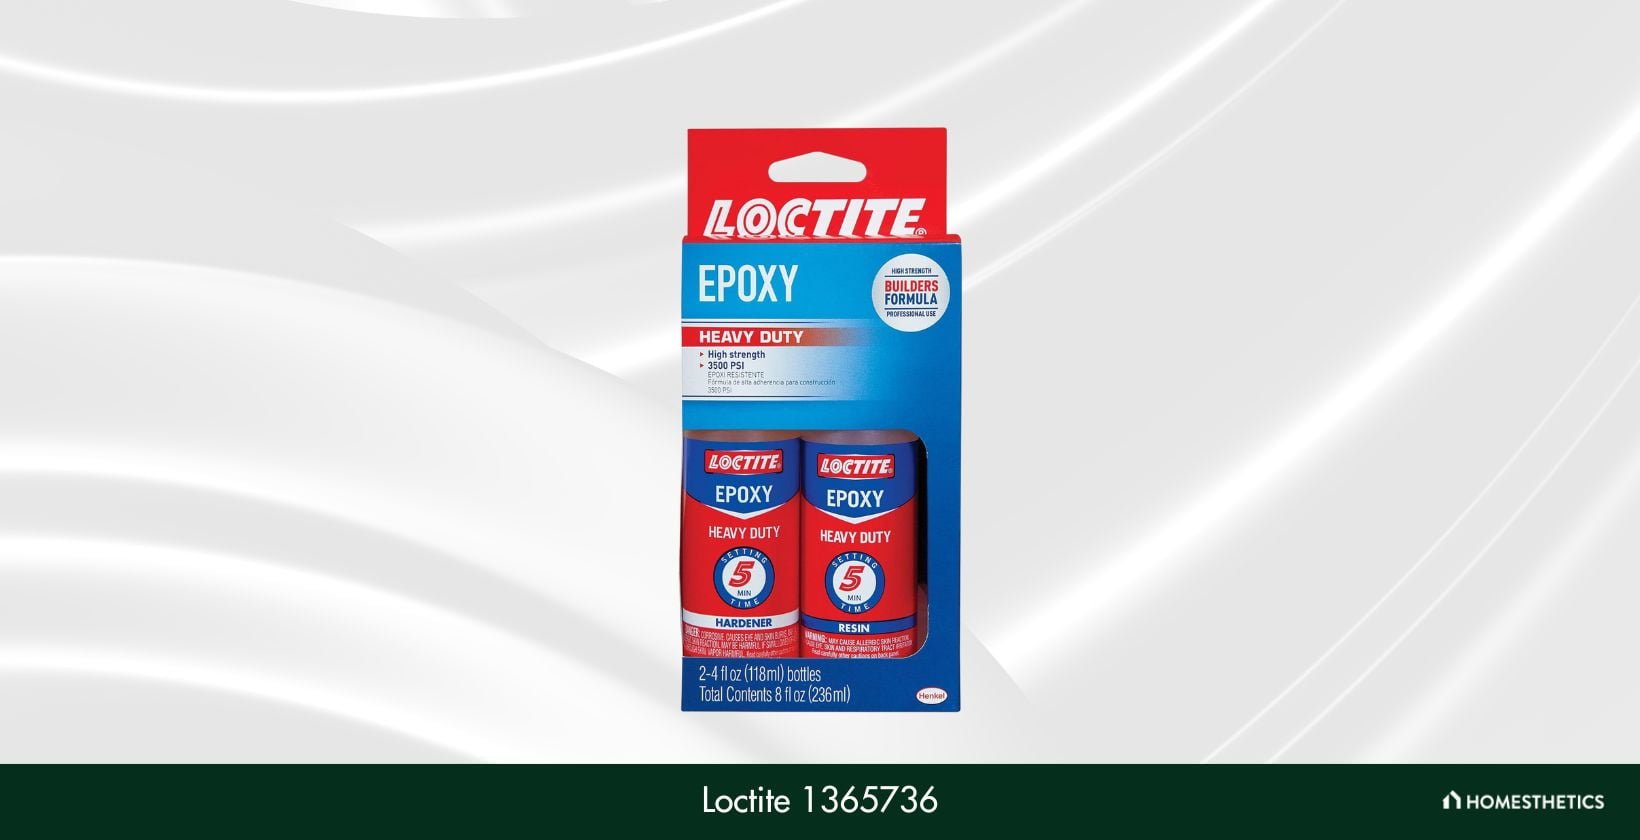

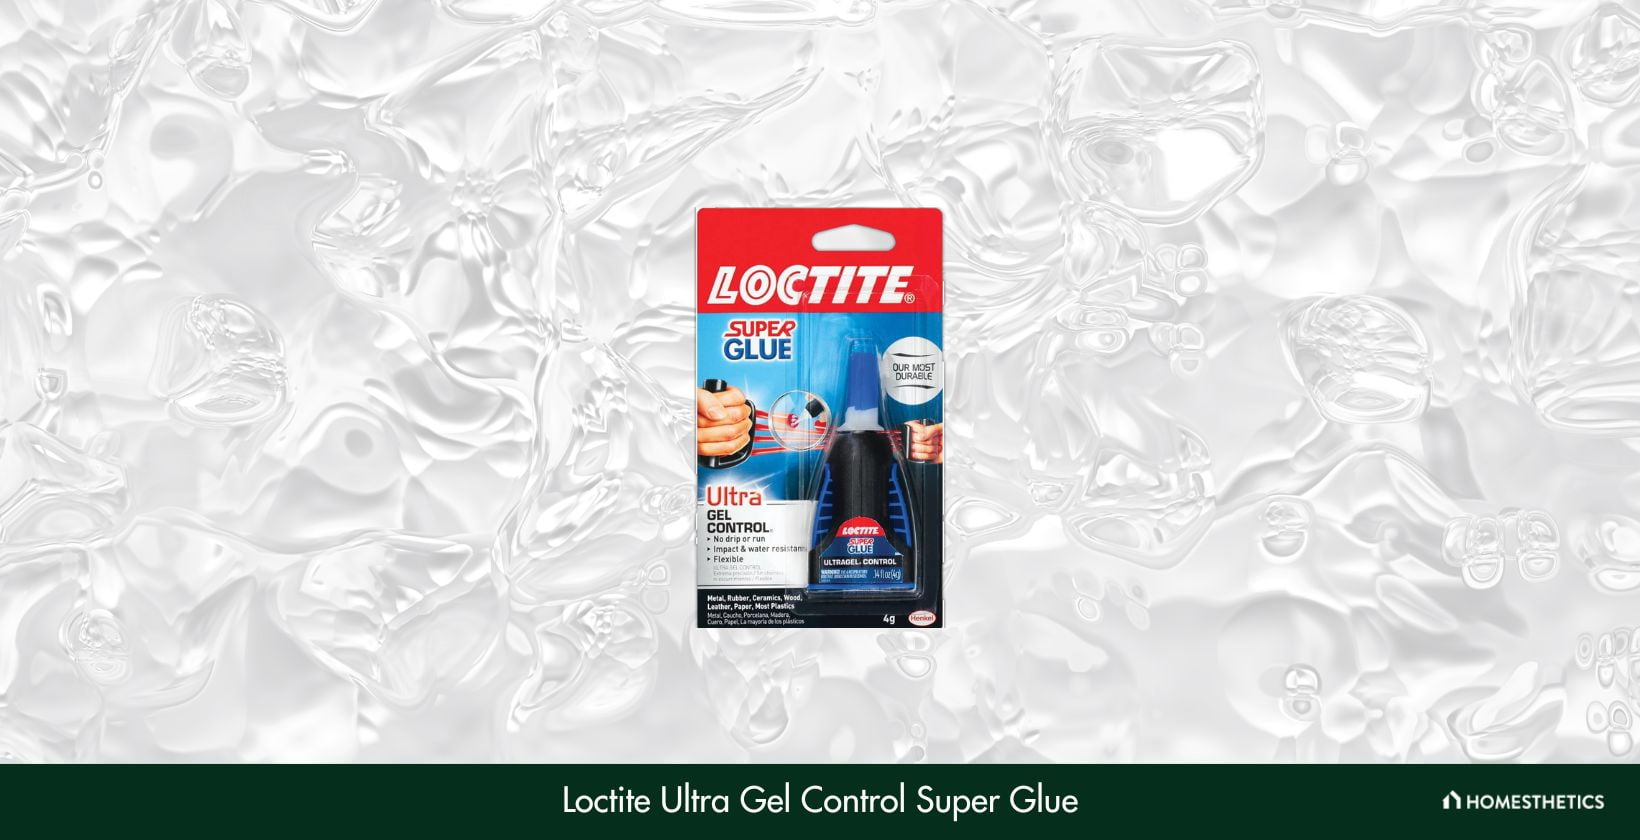
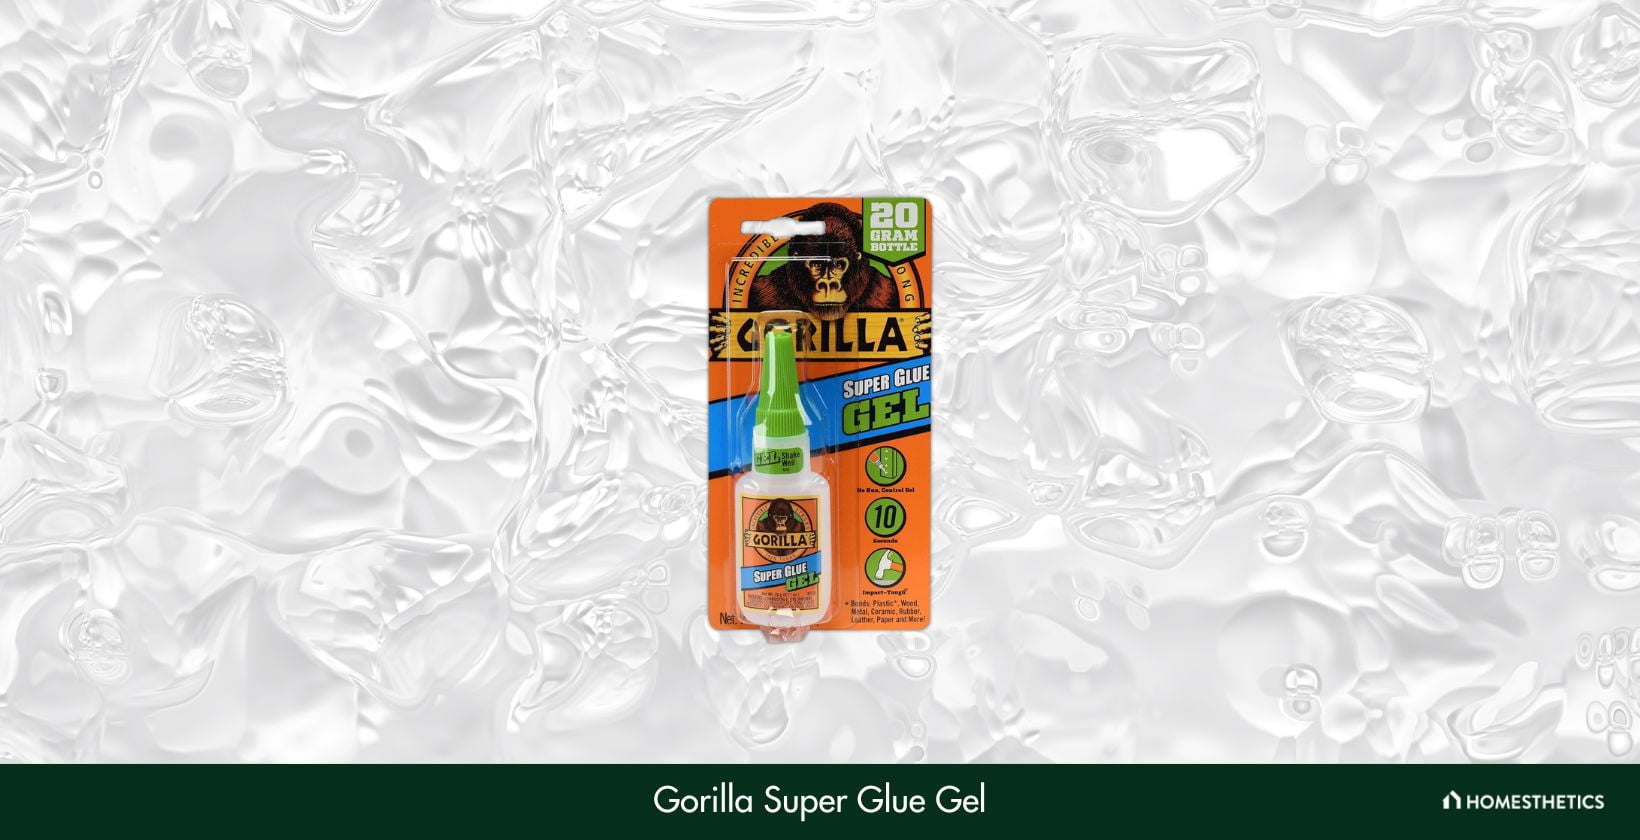
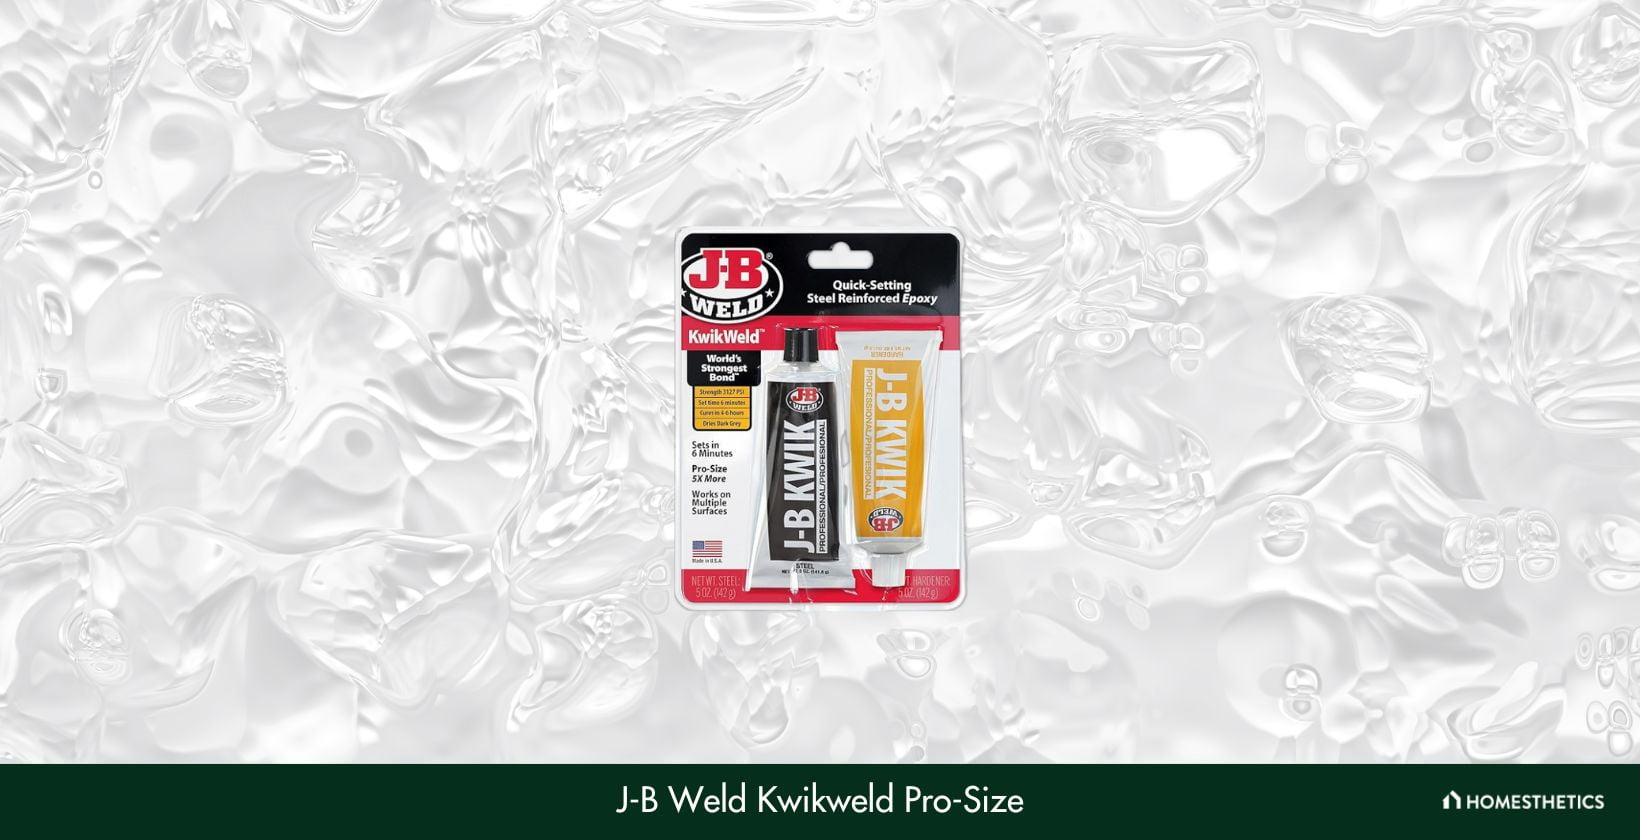
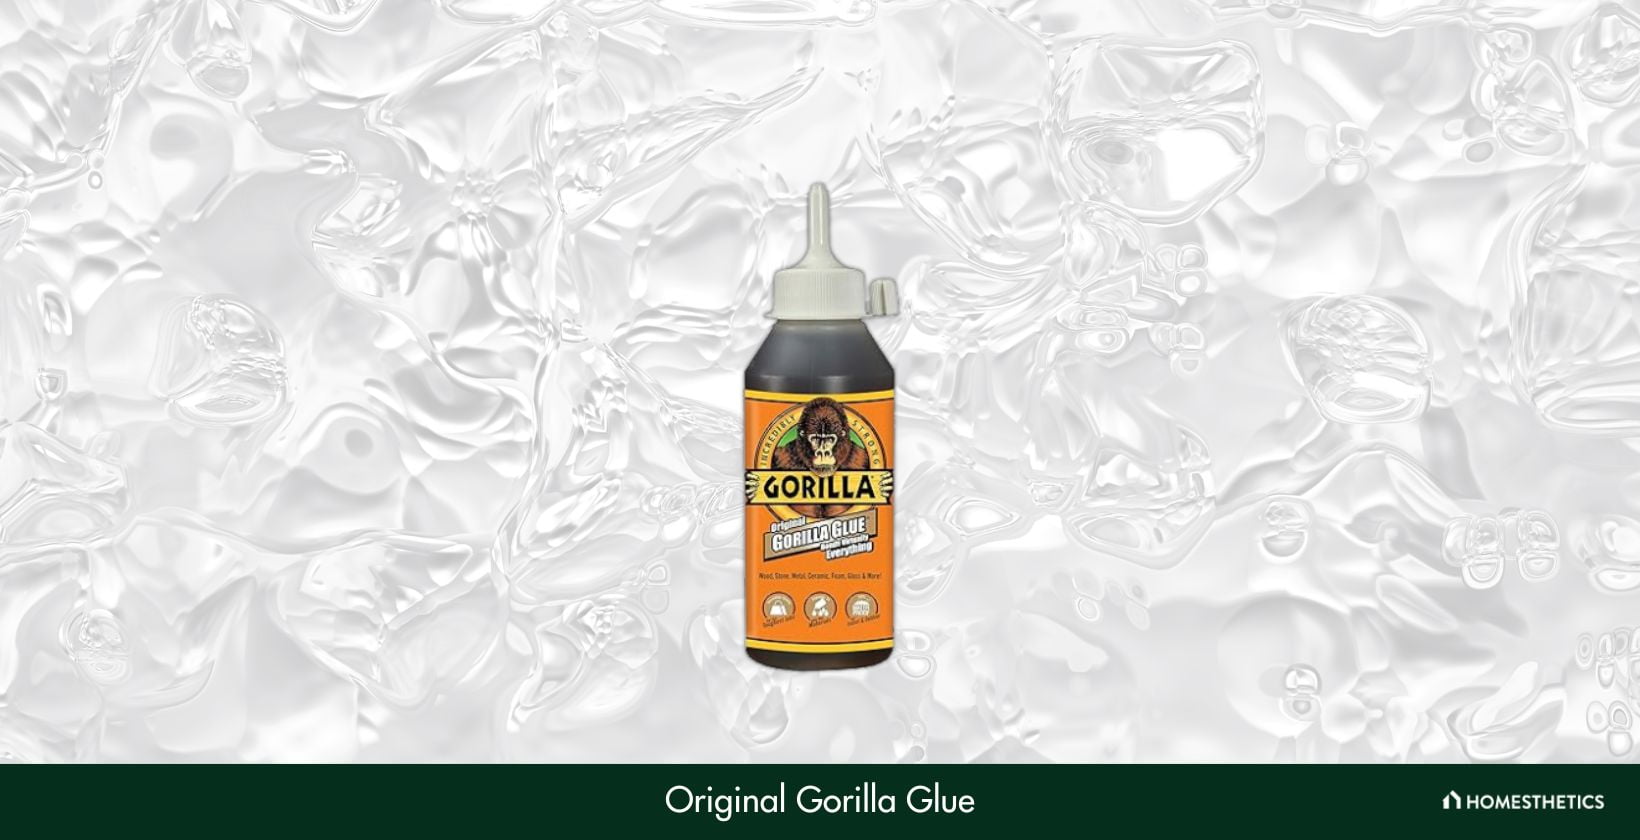

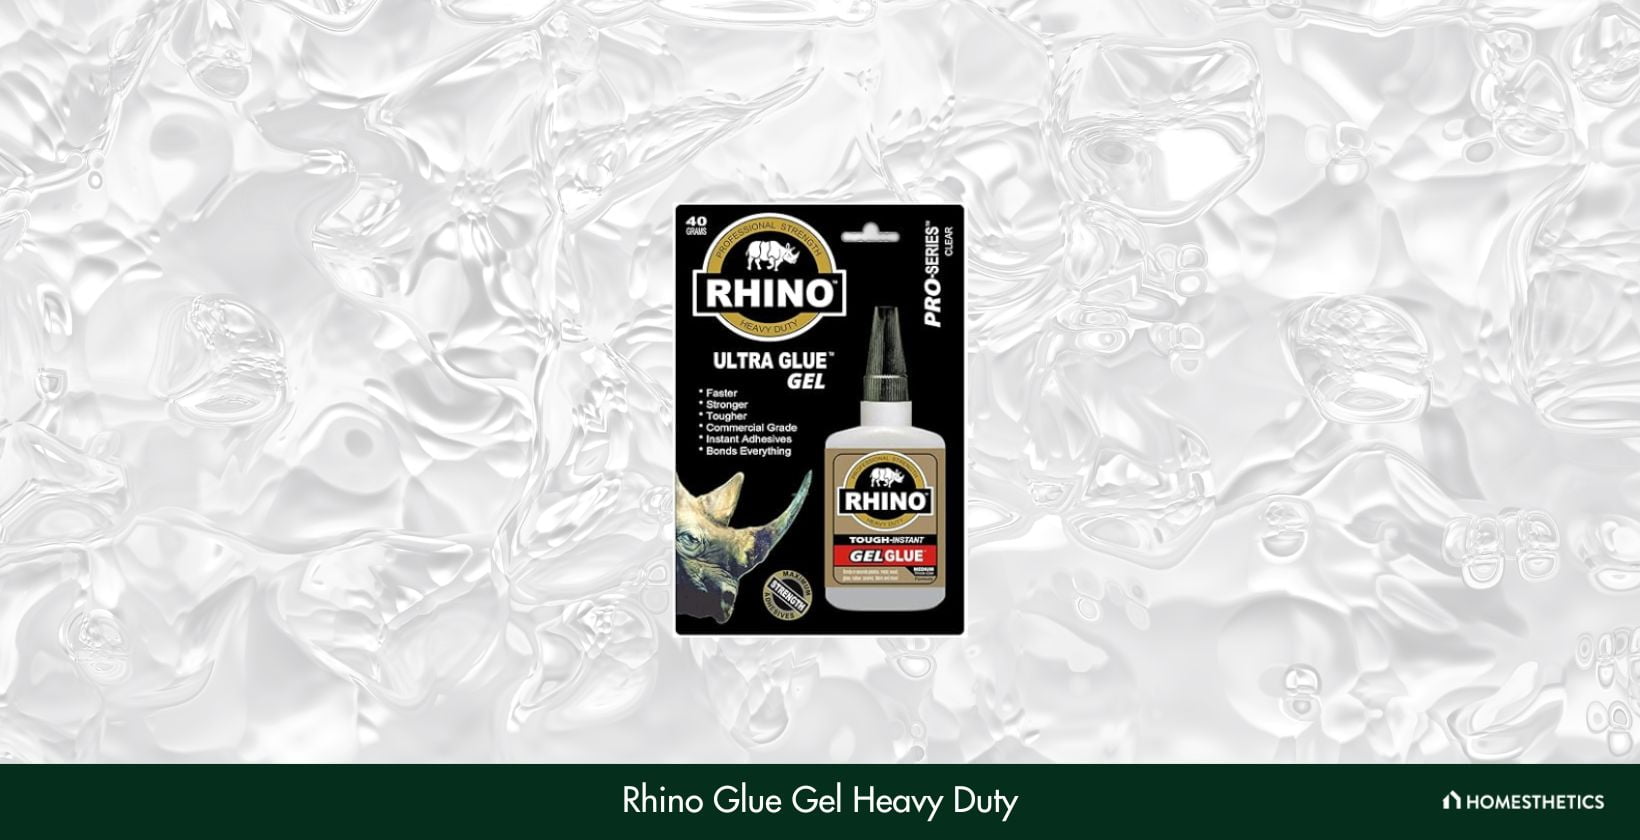
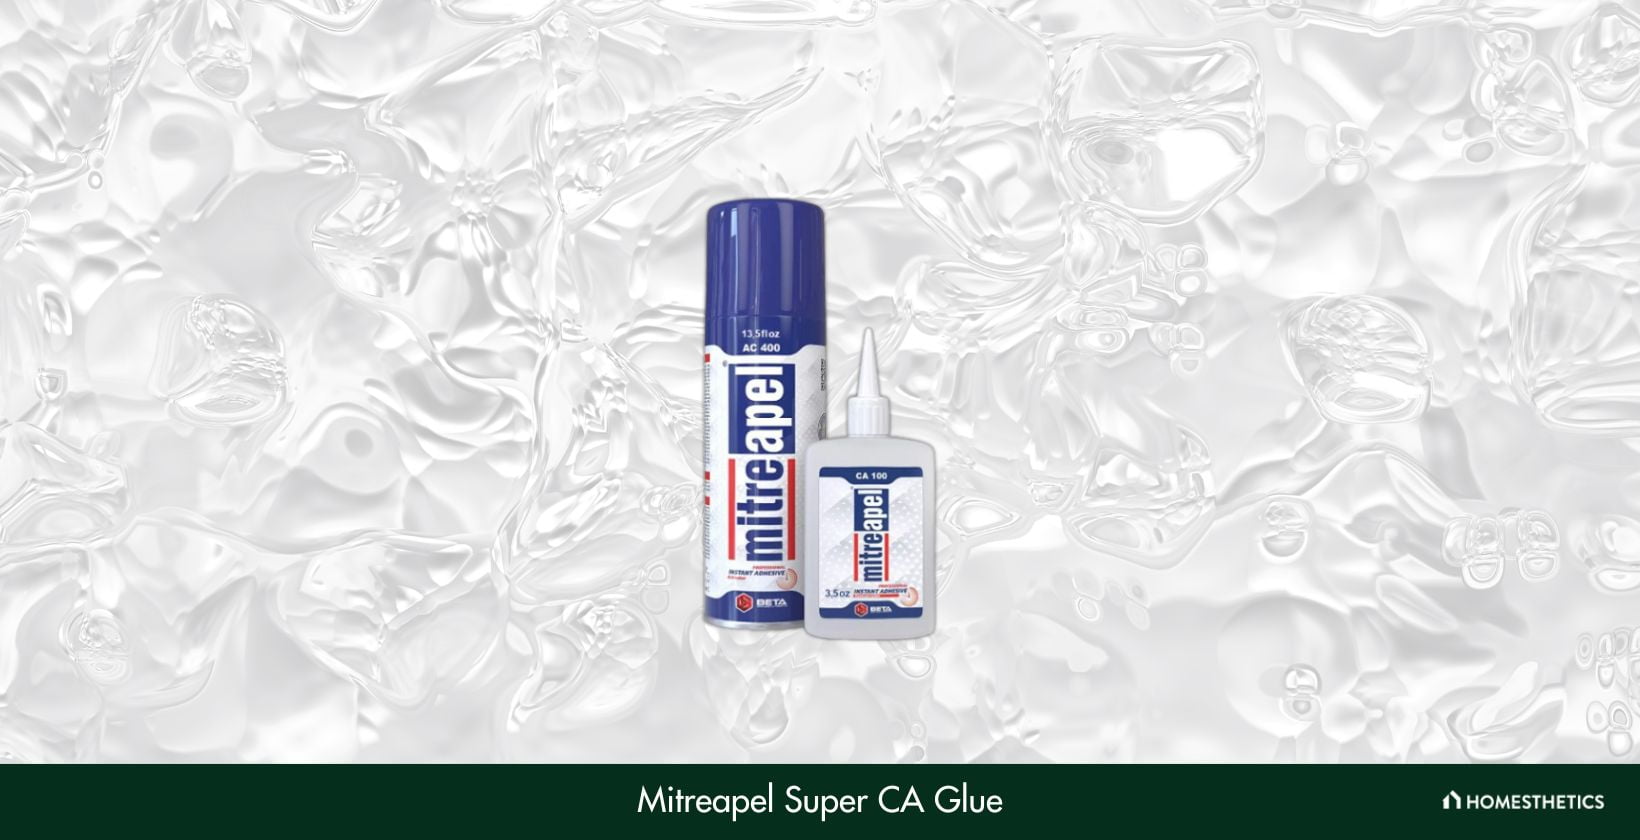
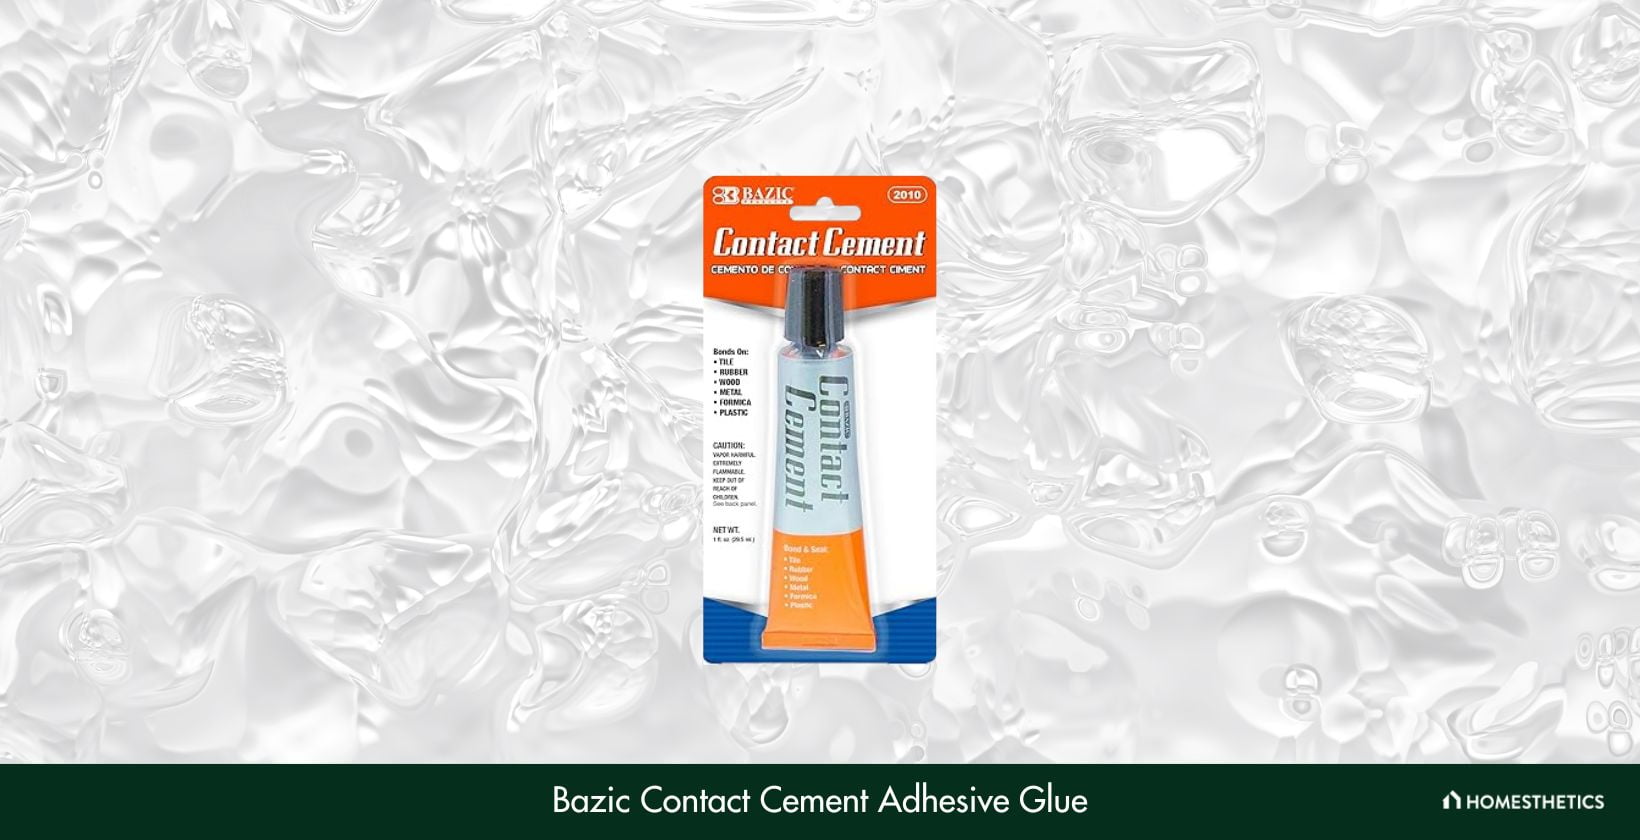
![7 Best Glues for MDF of 2024 [Reviews & Buyer’s Guide]](https://homesthetics.net/wp-content/uploads/2021/12/Best-Glue-for-MDF-1.jpg "7 Best Glues for MDF of 2024 [Reviews & Buyer's Guide]")
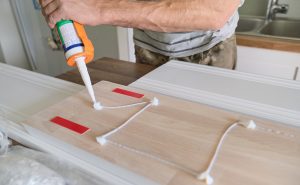


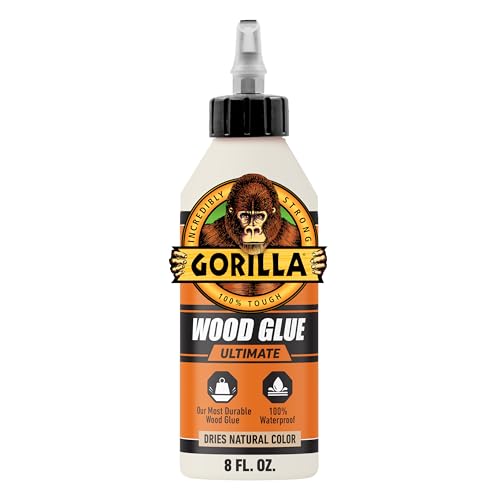


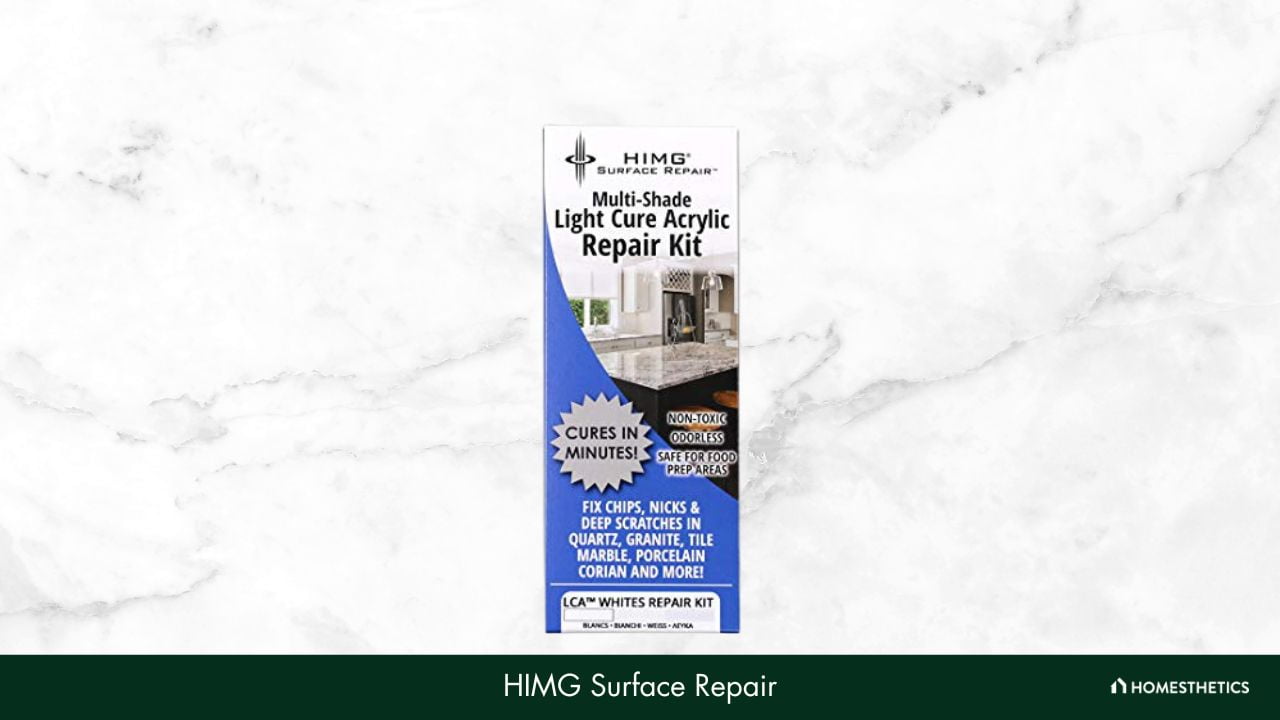
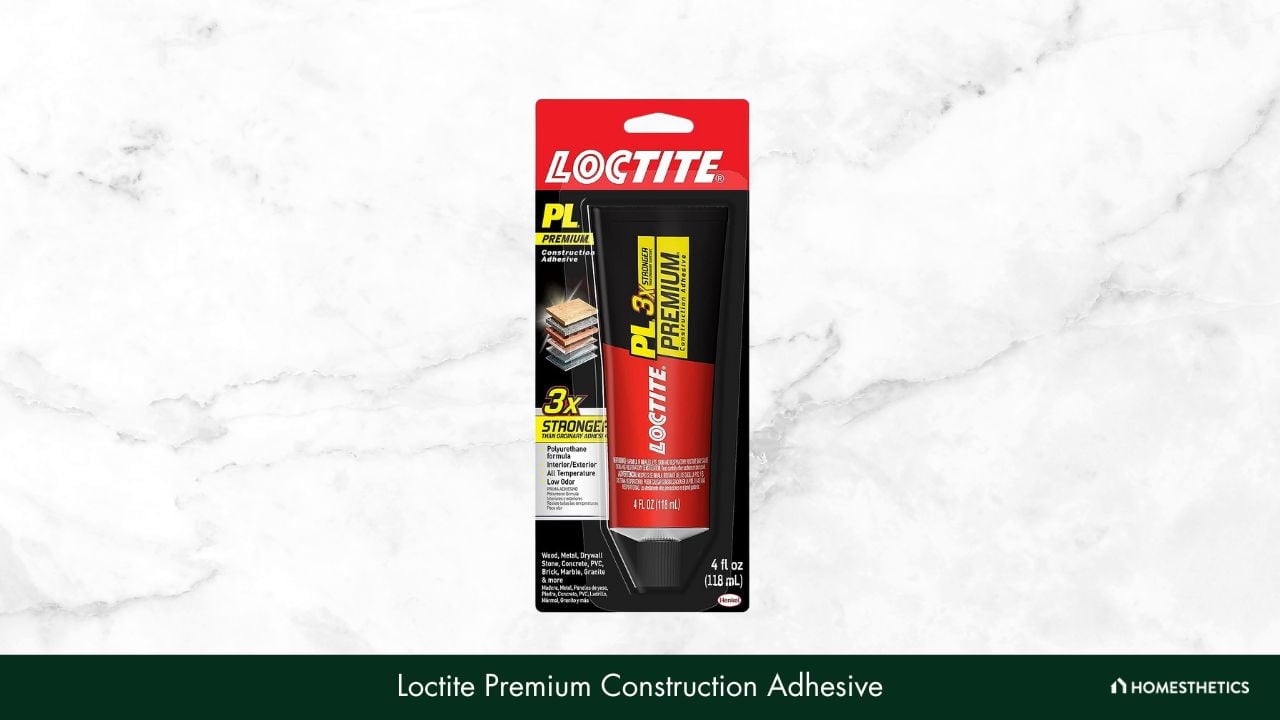
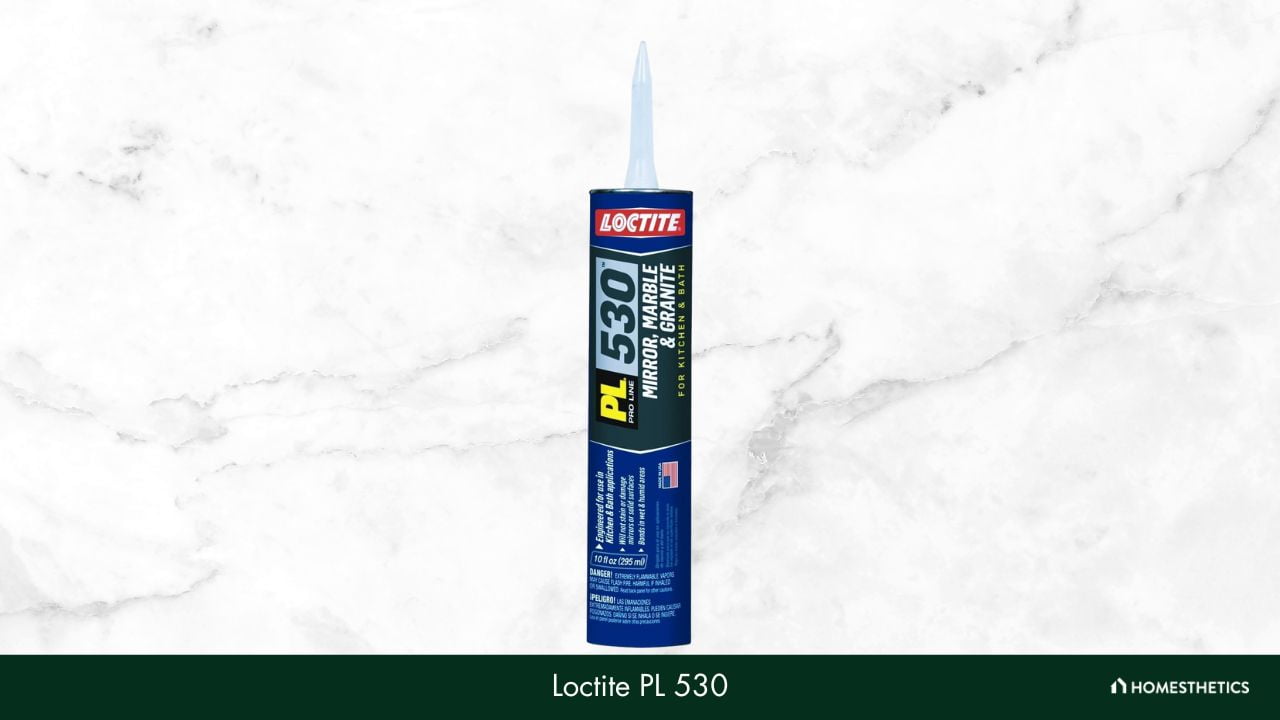
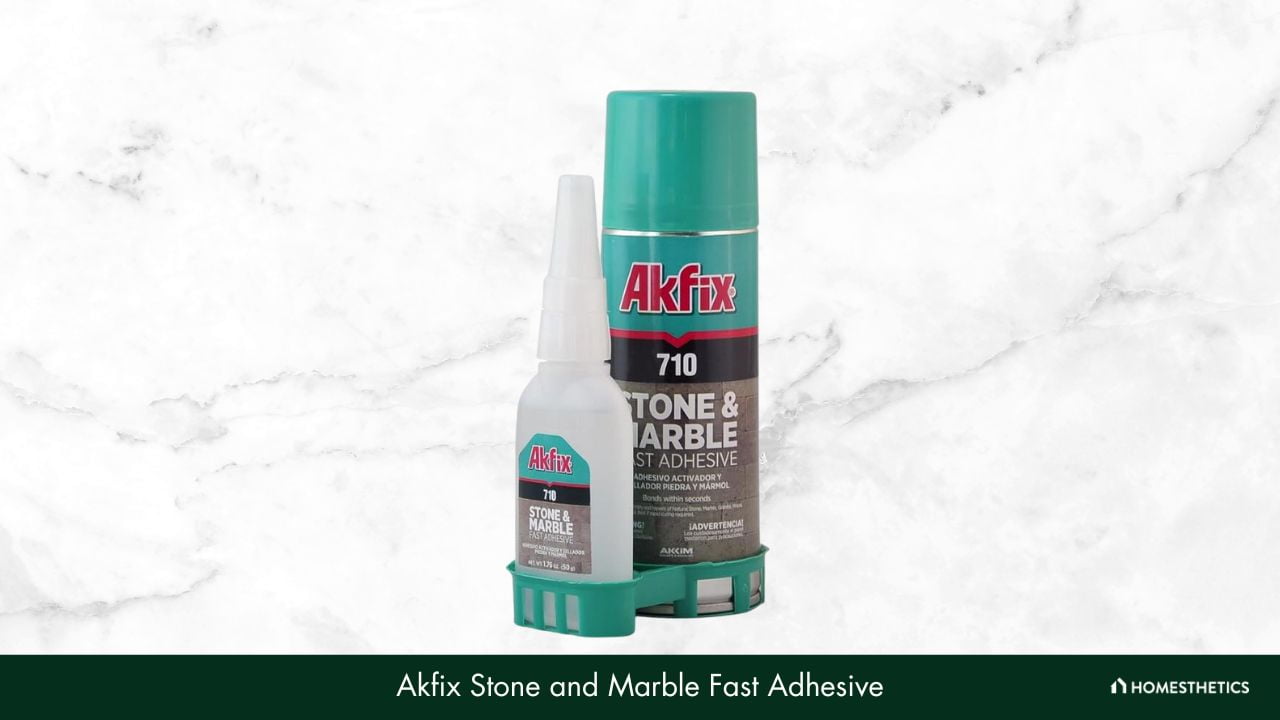
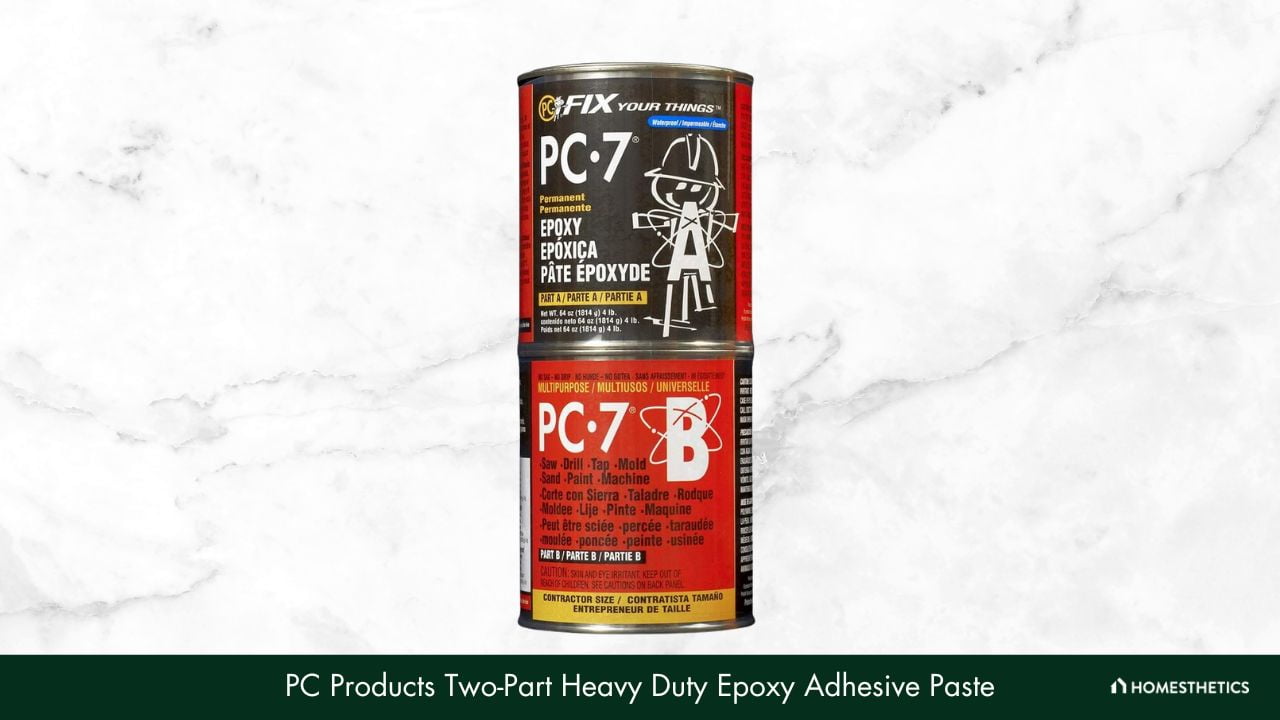


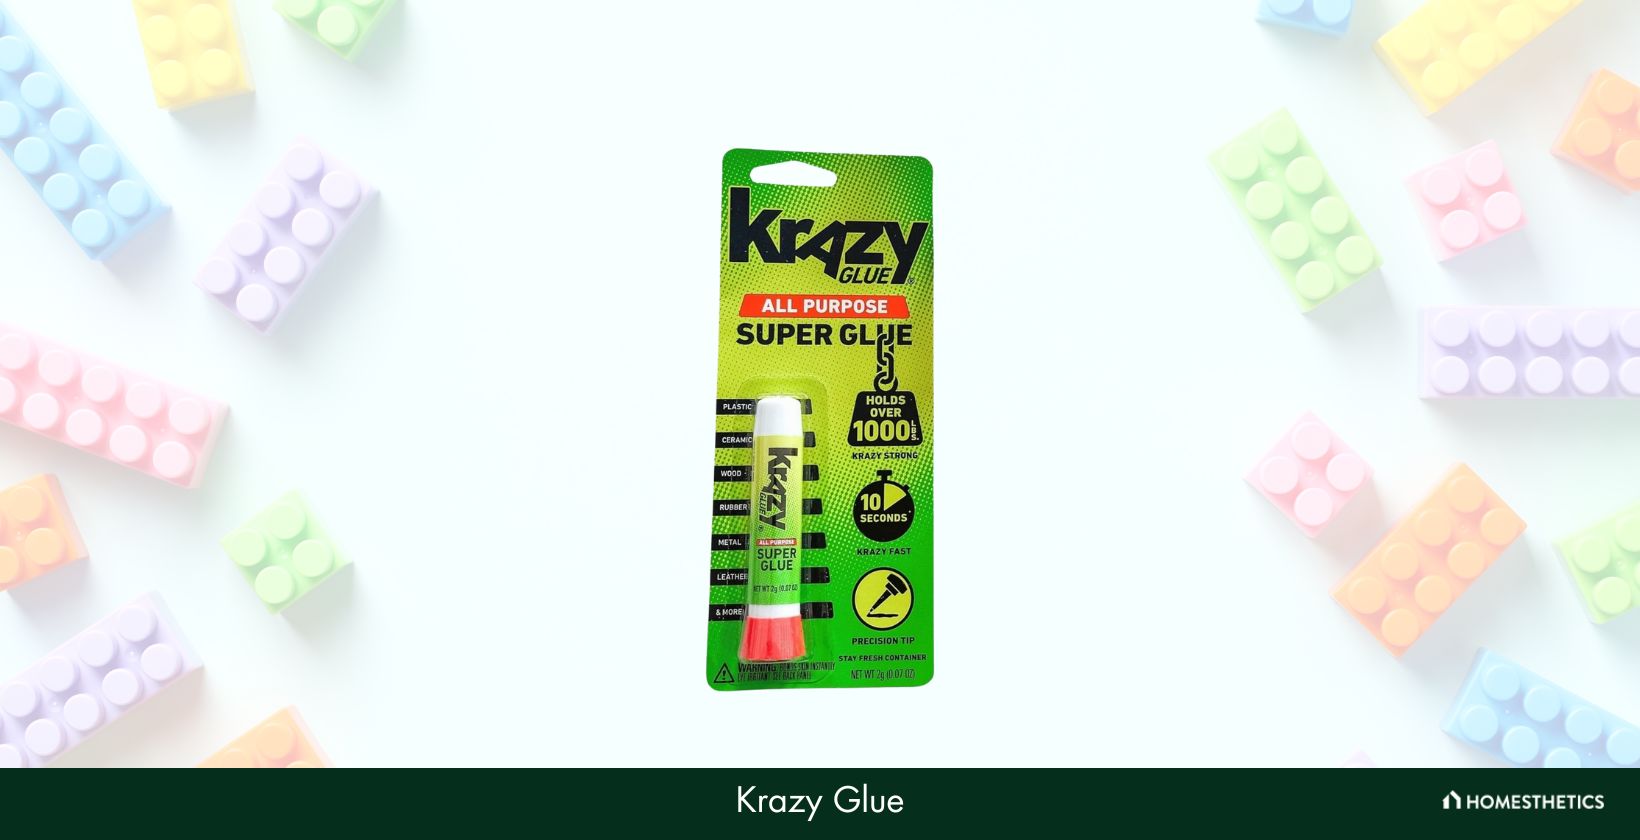
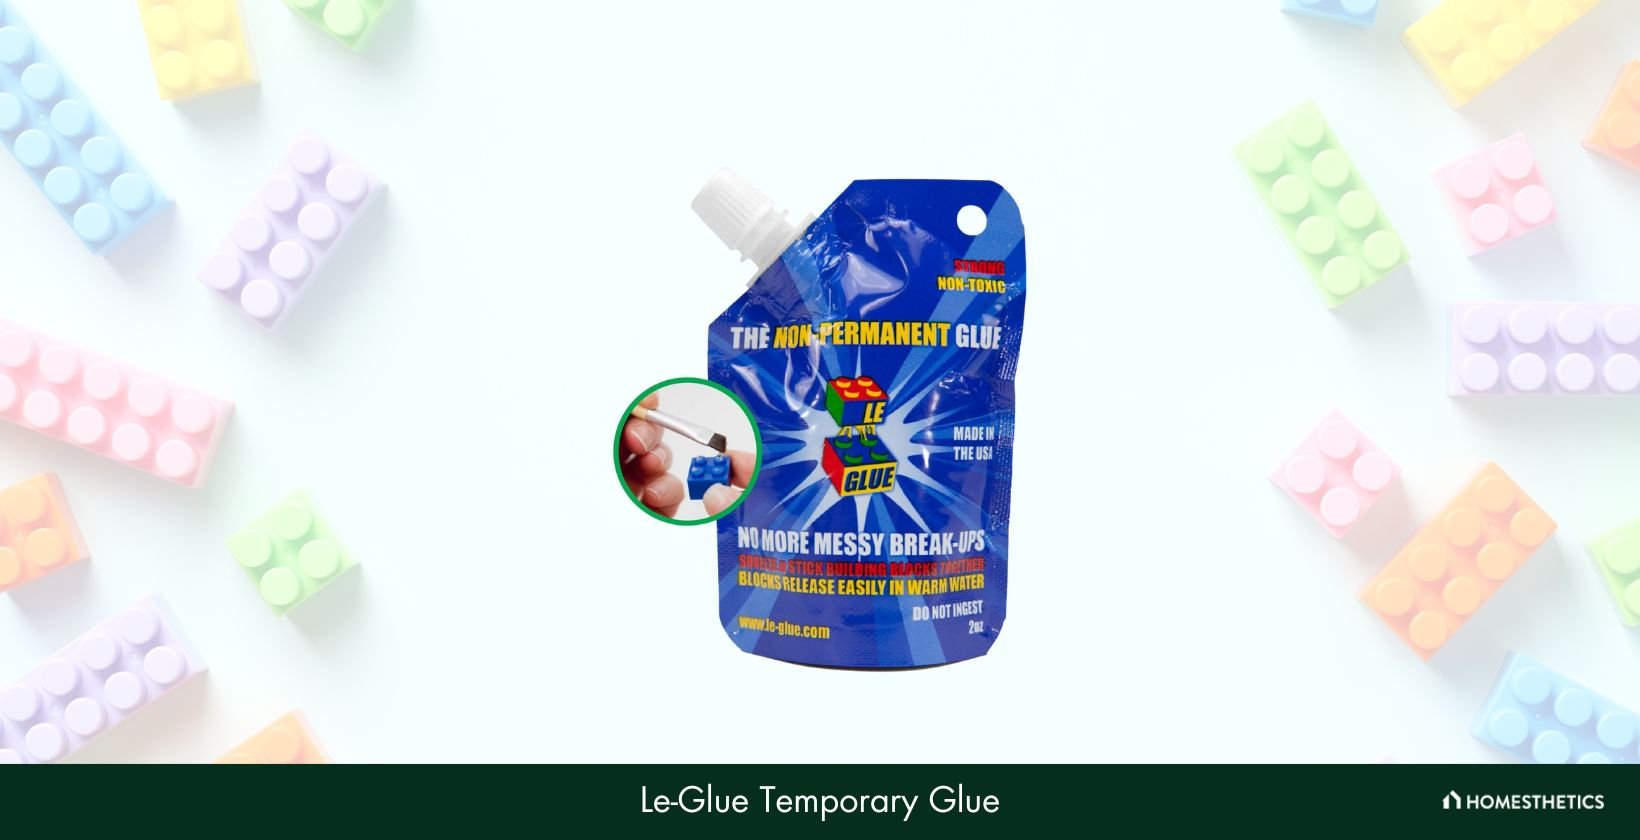
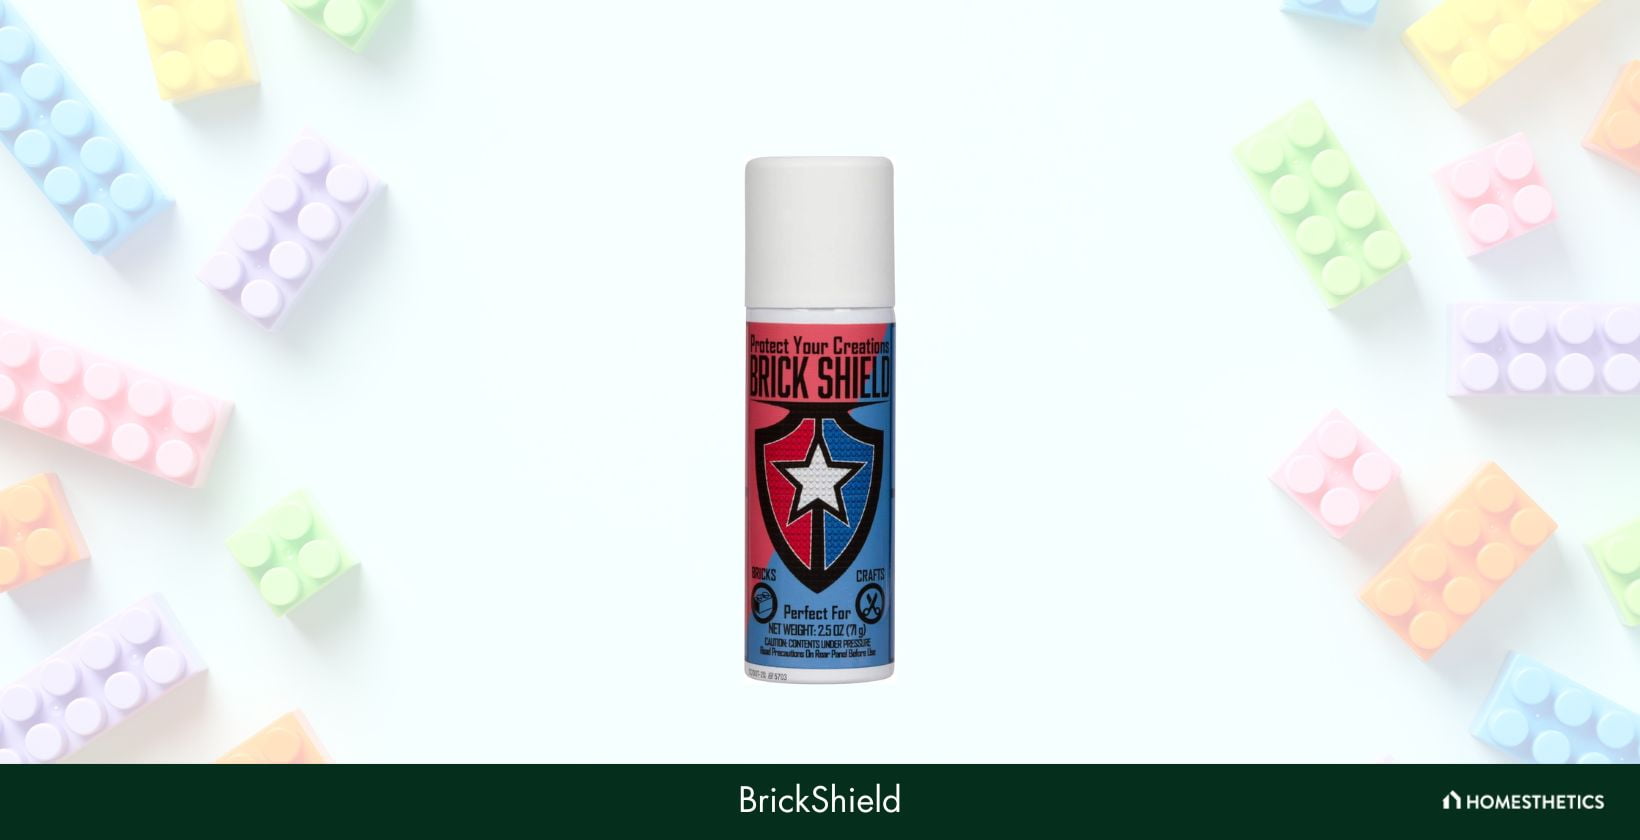
![10 Best Glues for Glass of 2024 [Reviews & Buyer’s Guide]](https://homesthetics.net/wp-content/uploads/2021/12/Best-Glue-For-Glass-1.jpg "10 Best Glues for Glass of 2024 [Reviews & Buyer’s Guide]")

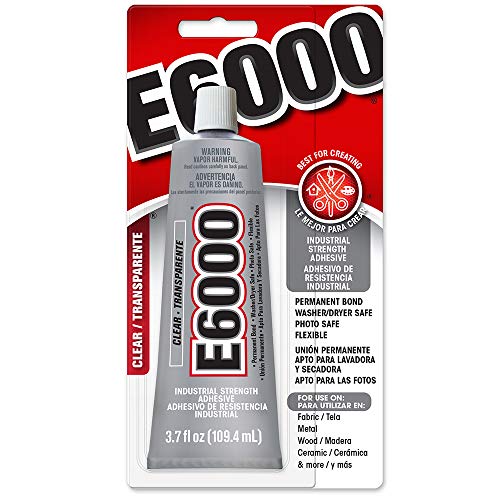
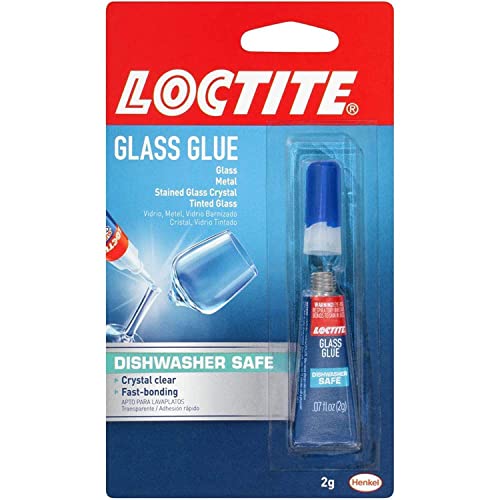

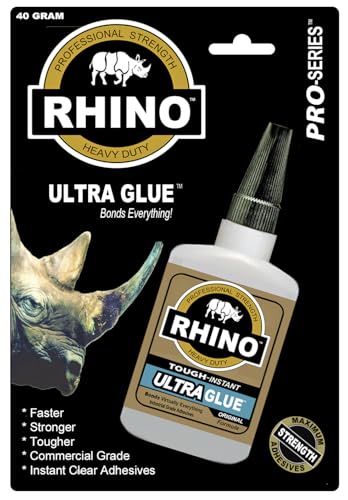

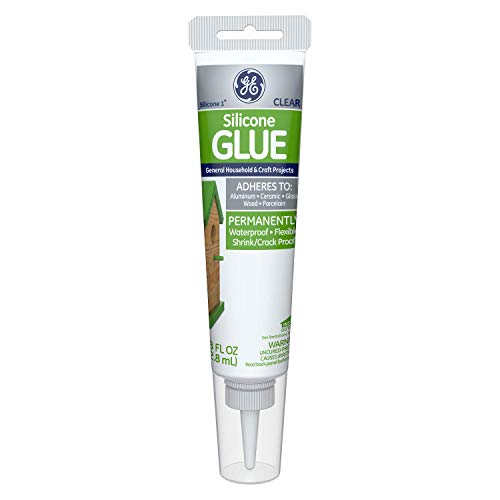

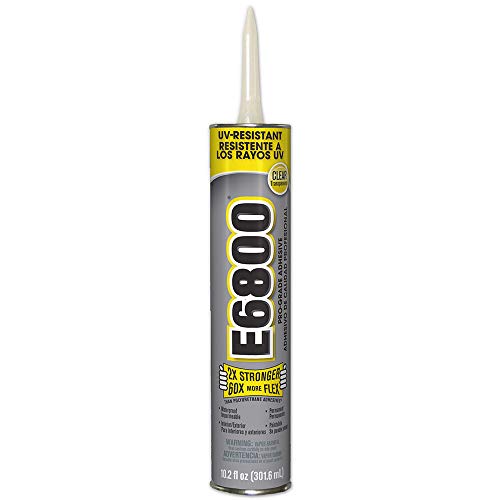

![6 Best Glue for Glass to Wood of 2024 [Reviews & Buyer’s Guide]](https://homesthetics.net/wp-content/uploads/2023/09/Best-Glue-For-Glass-To-Wood.jpg "6 Best Glue for Glass to Wood of 2024 [Reviews & Buyer's Guide]")
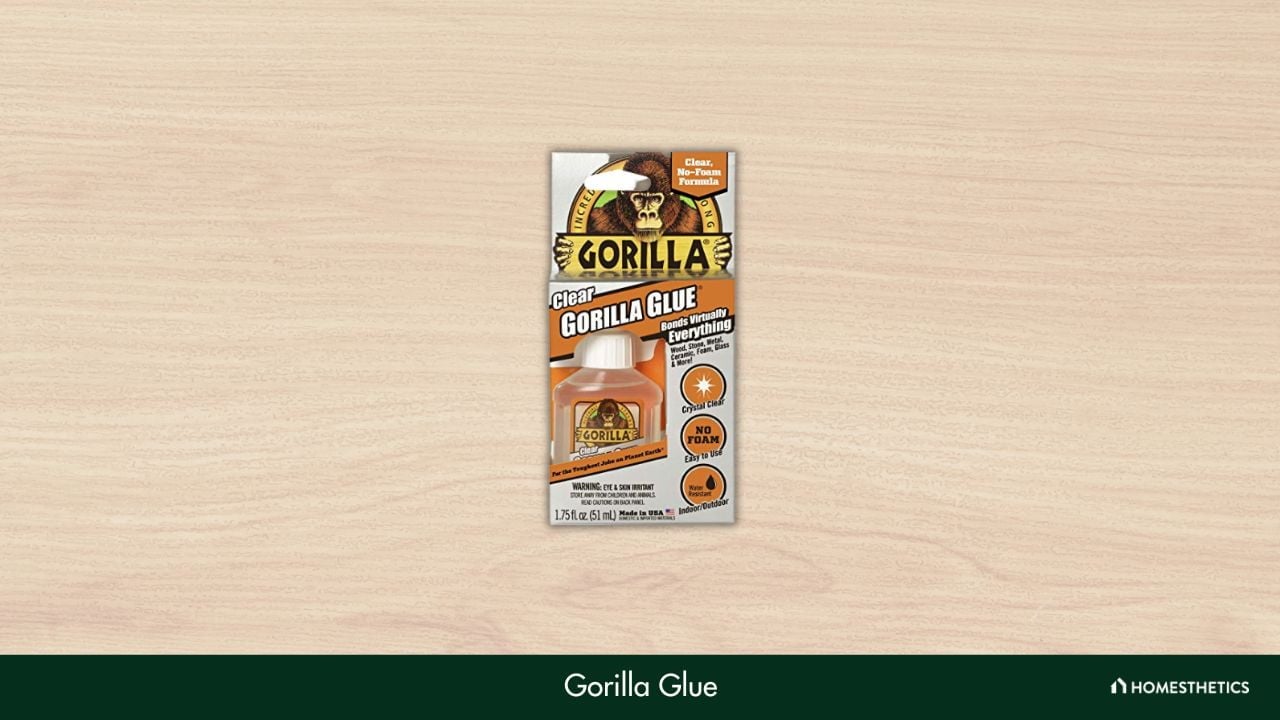

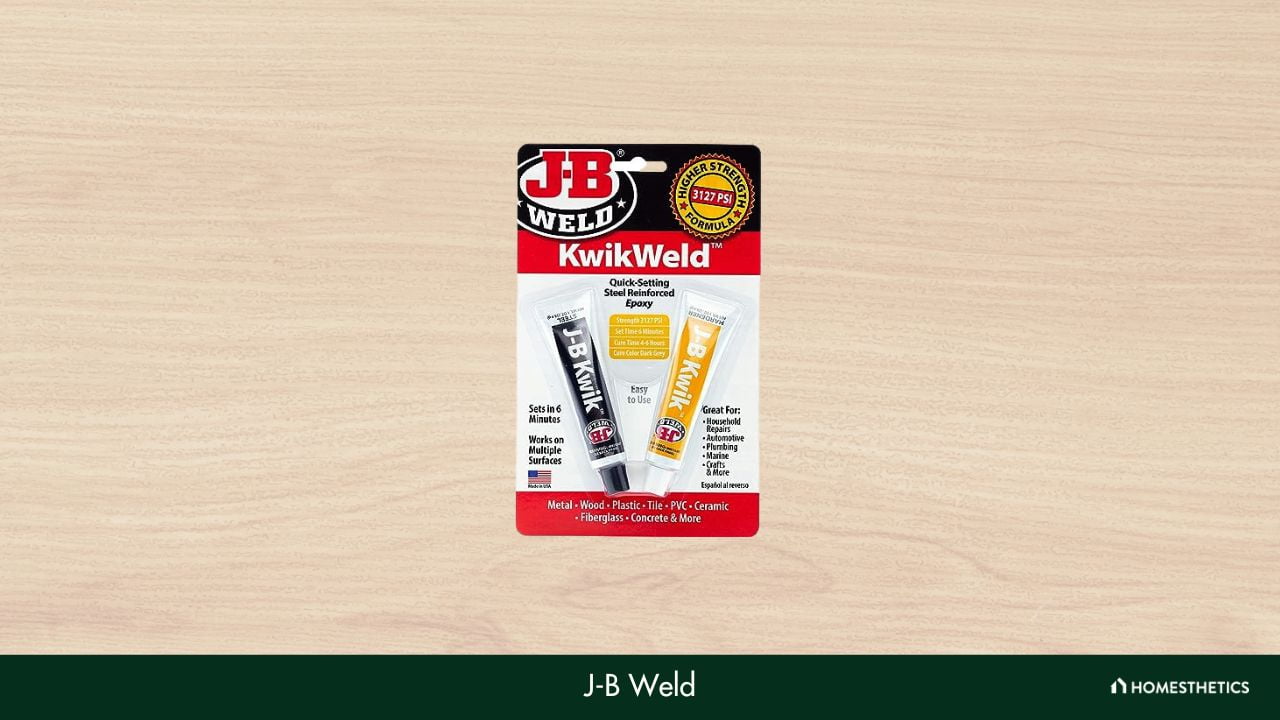
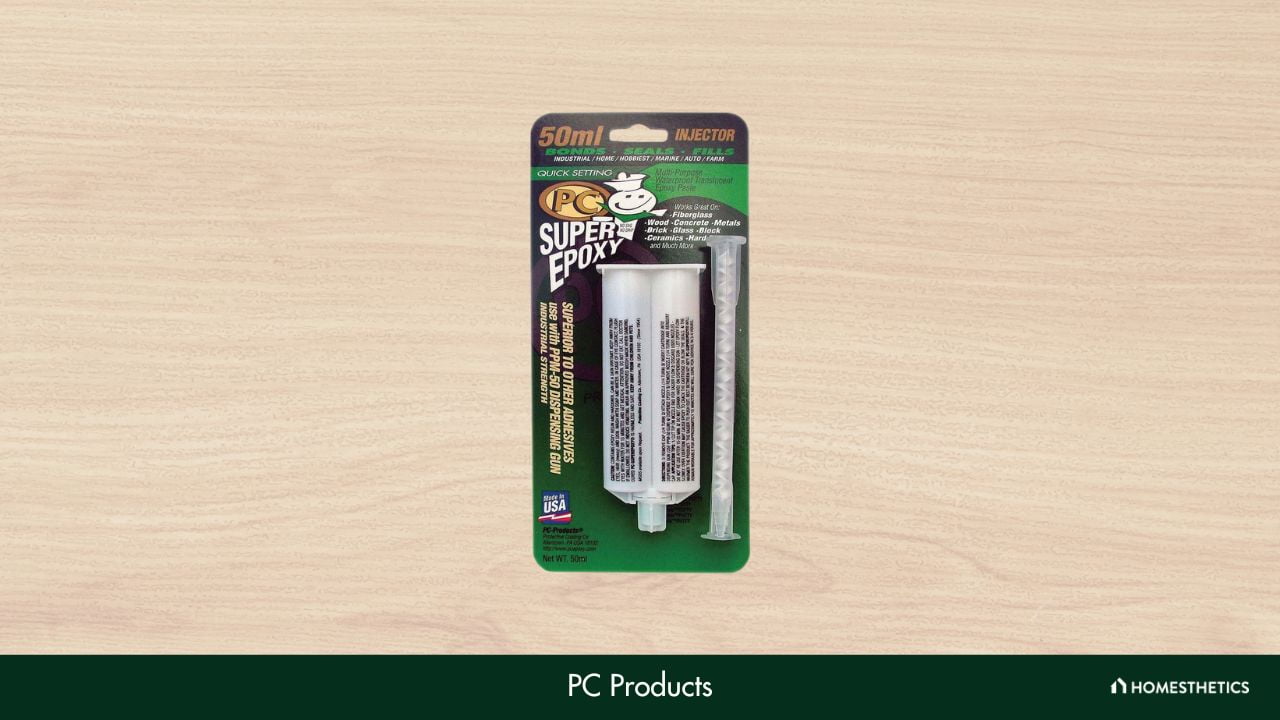
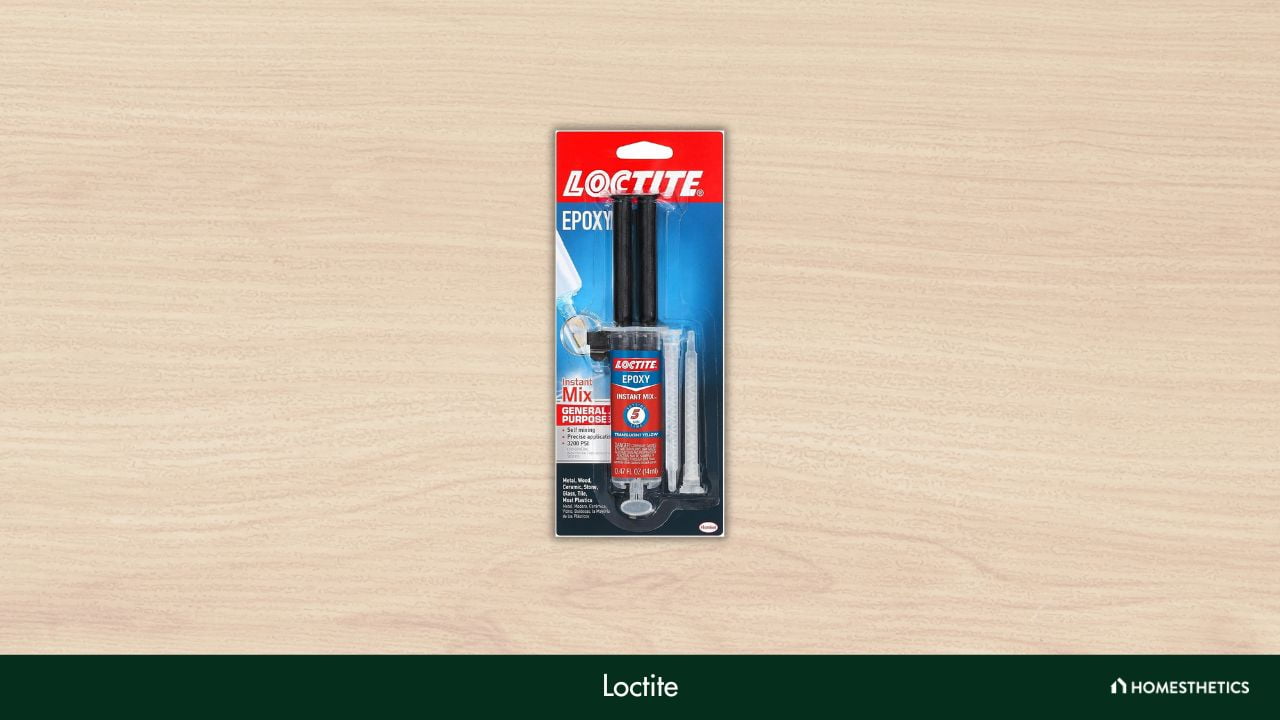
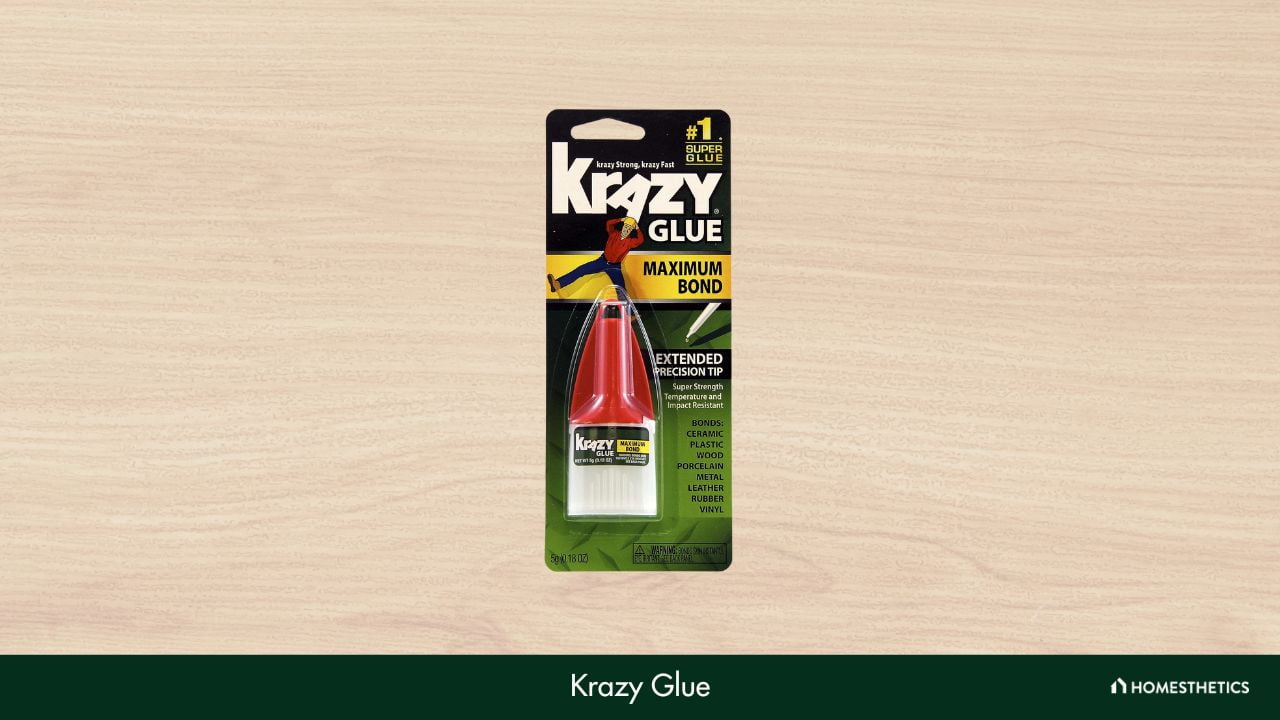
![9 Best Glue For Foam Of 2024 [Reviews & Buyer’s Guide]](https://homesthetics.net/wp-content/uploads/2022/01/Best-Glue-For-Foam-011.jpg "9 Best Glue For Foam Of 2024 [Reviews & Buyer's Guide]")


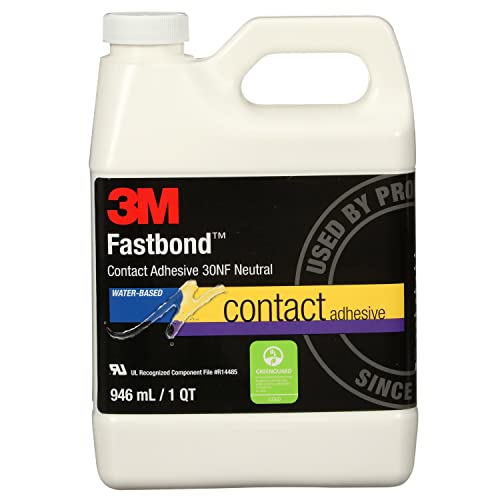


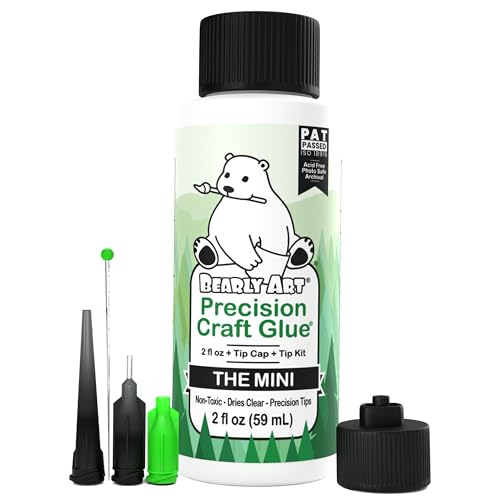
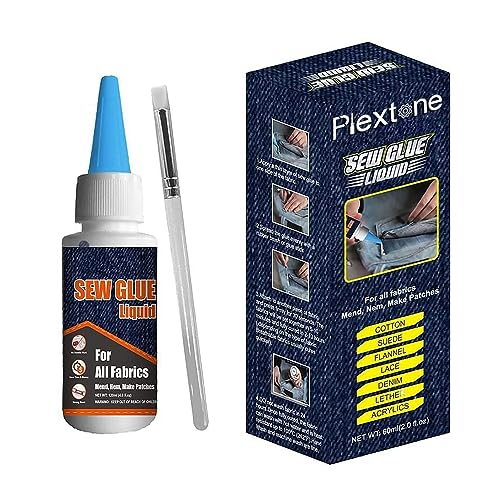

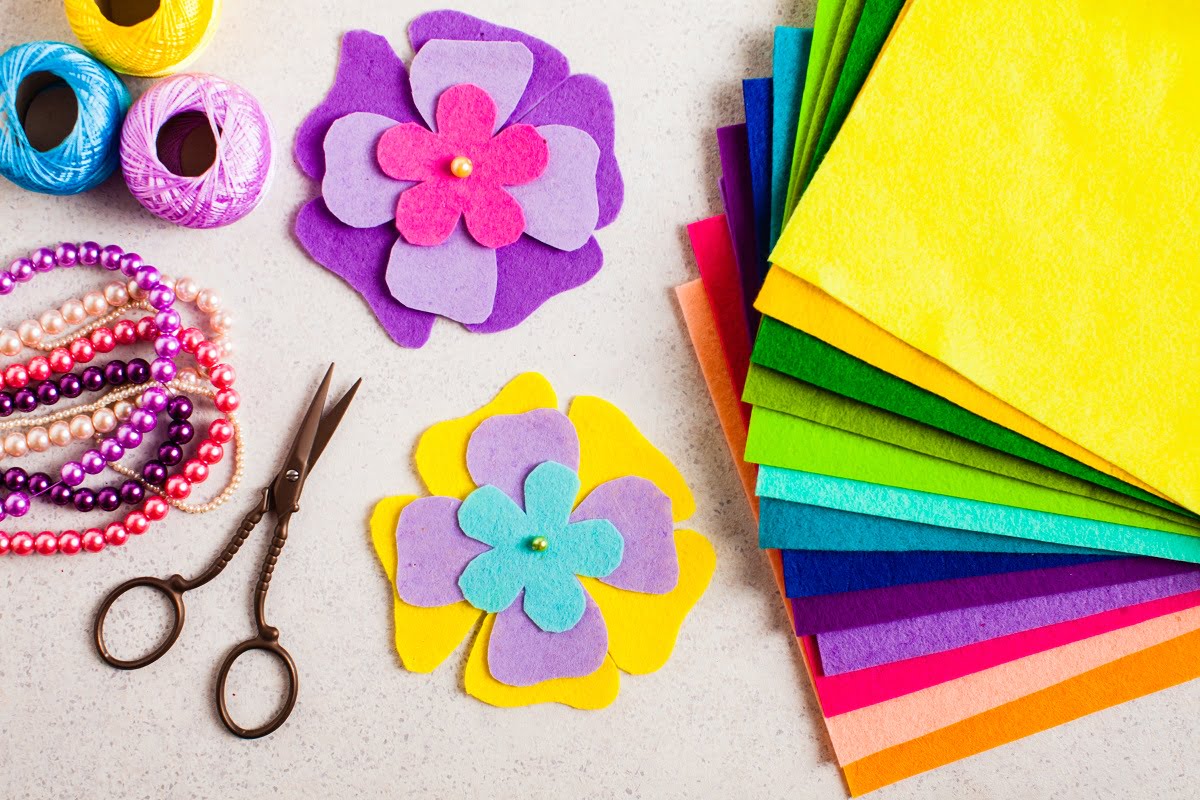

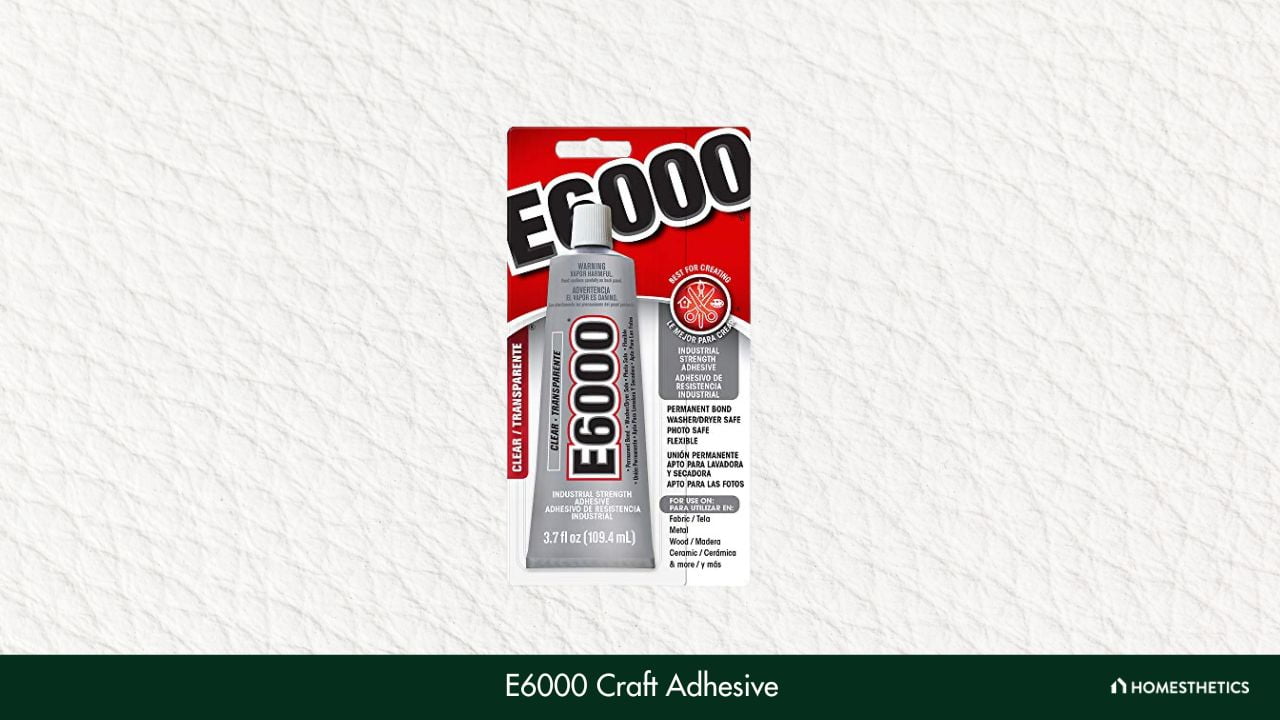
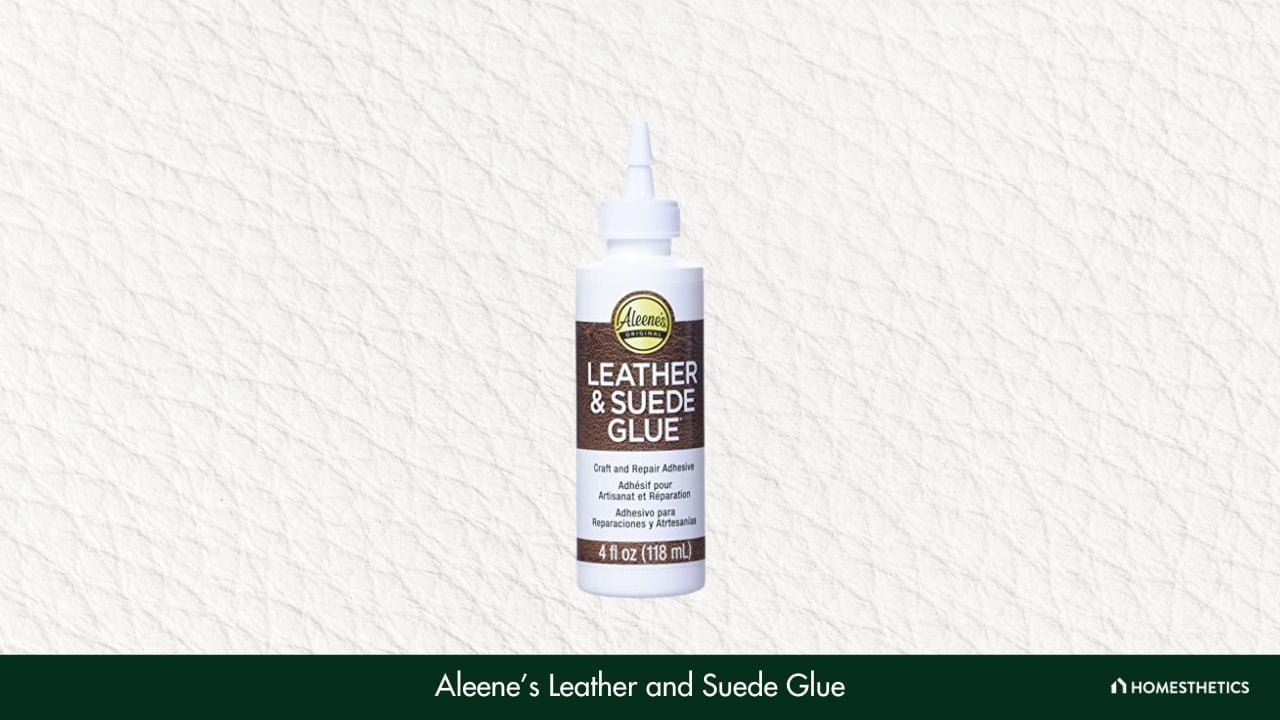
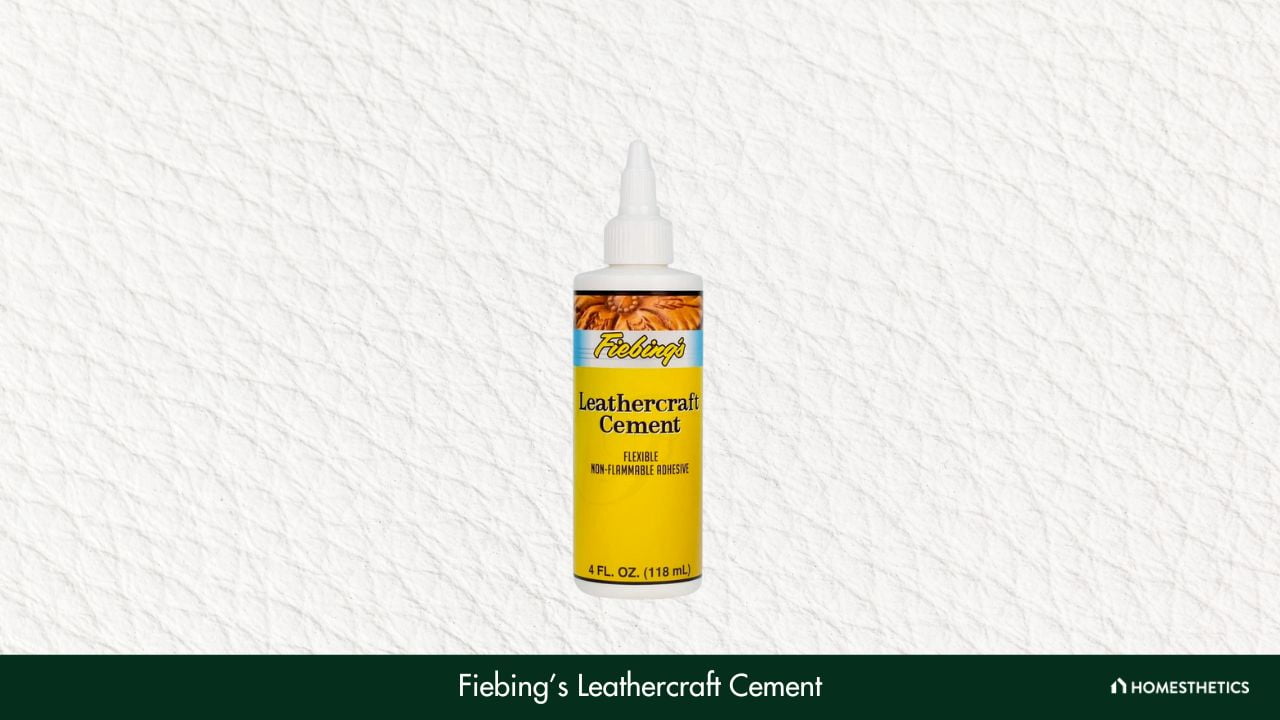
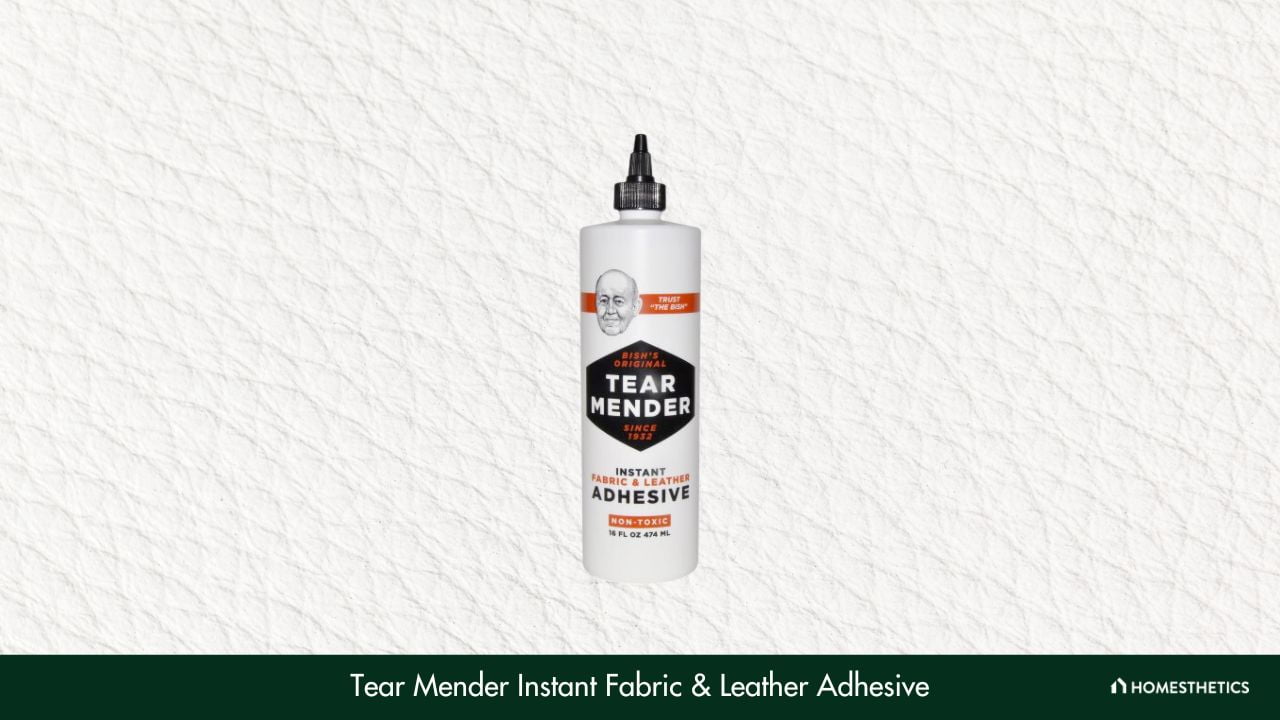
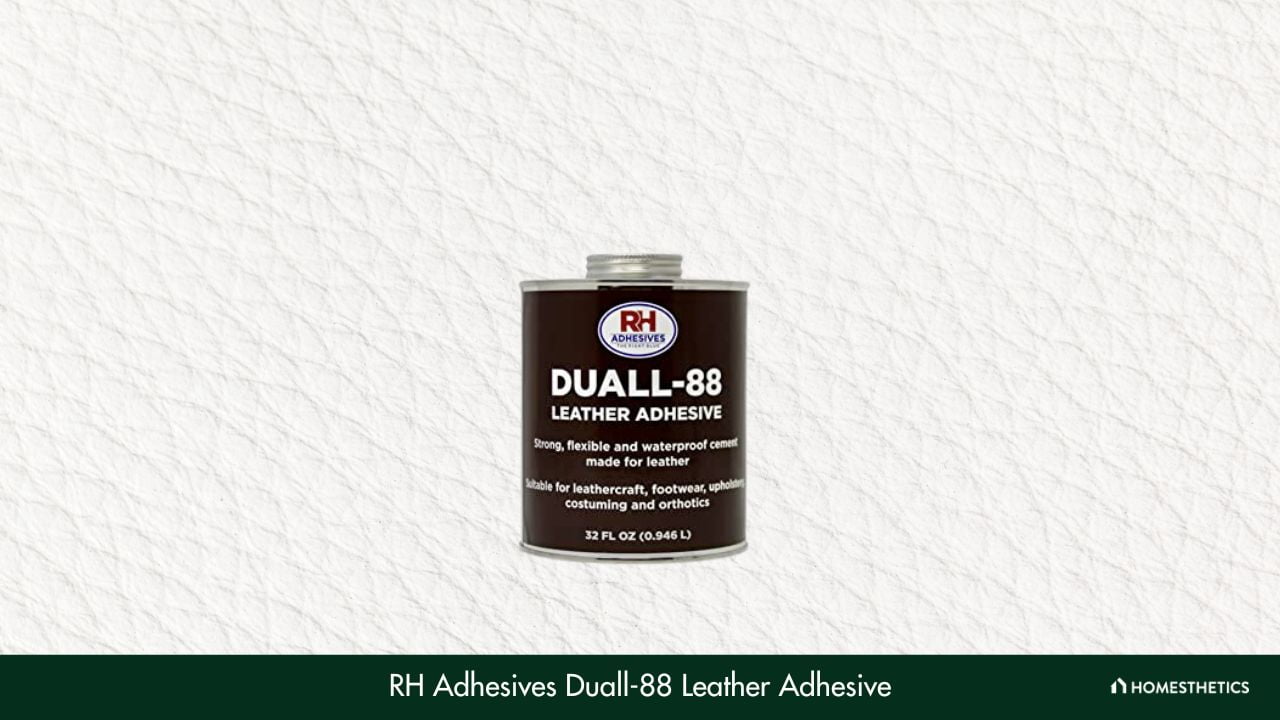

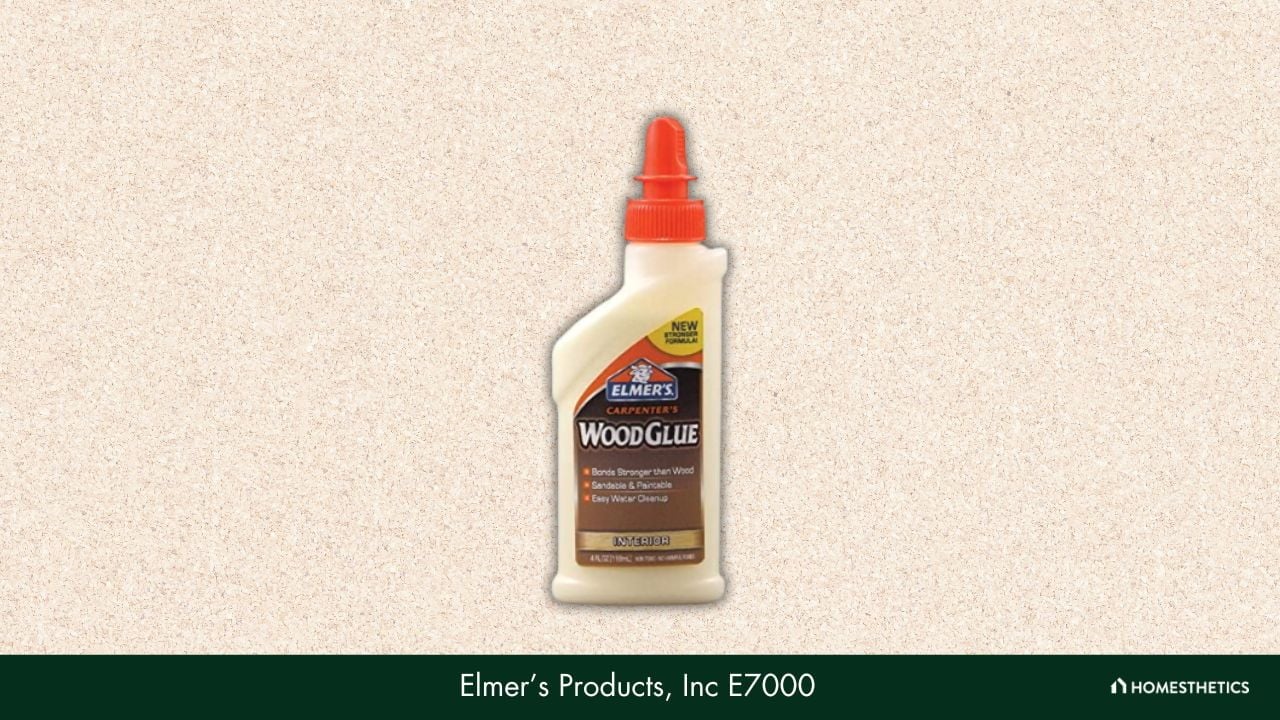

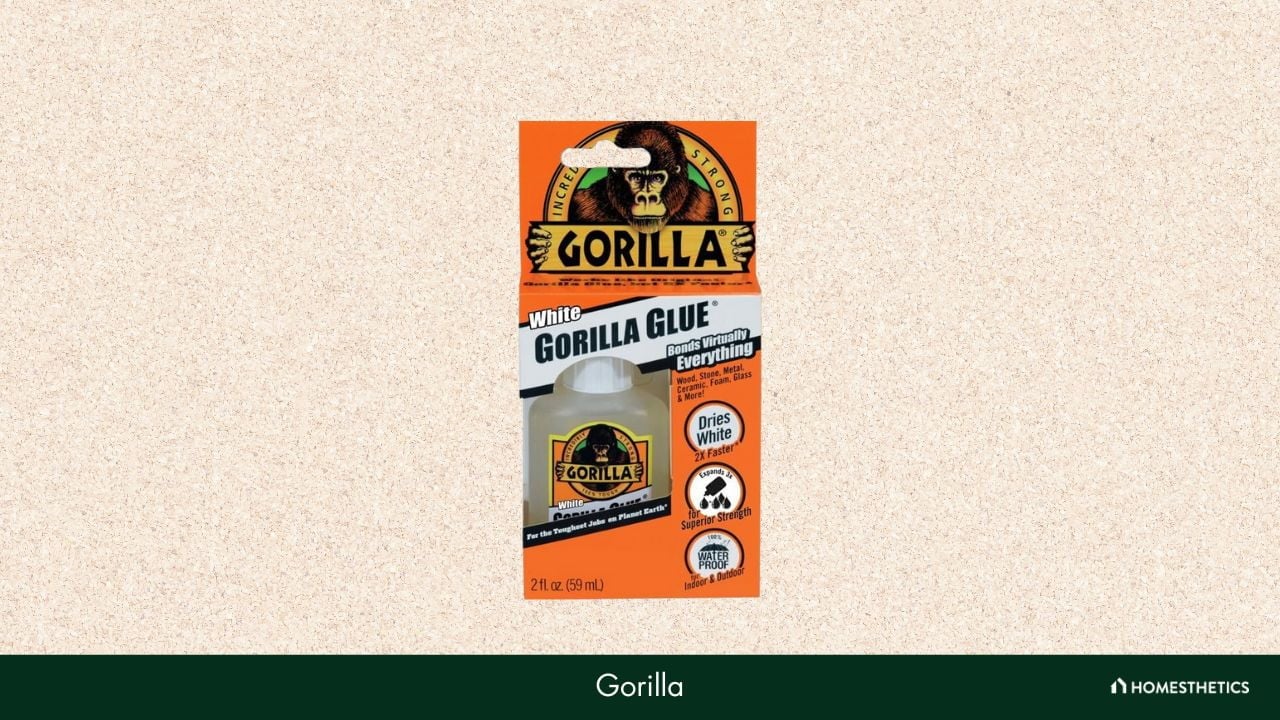
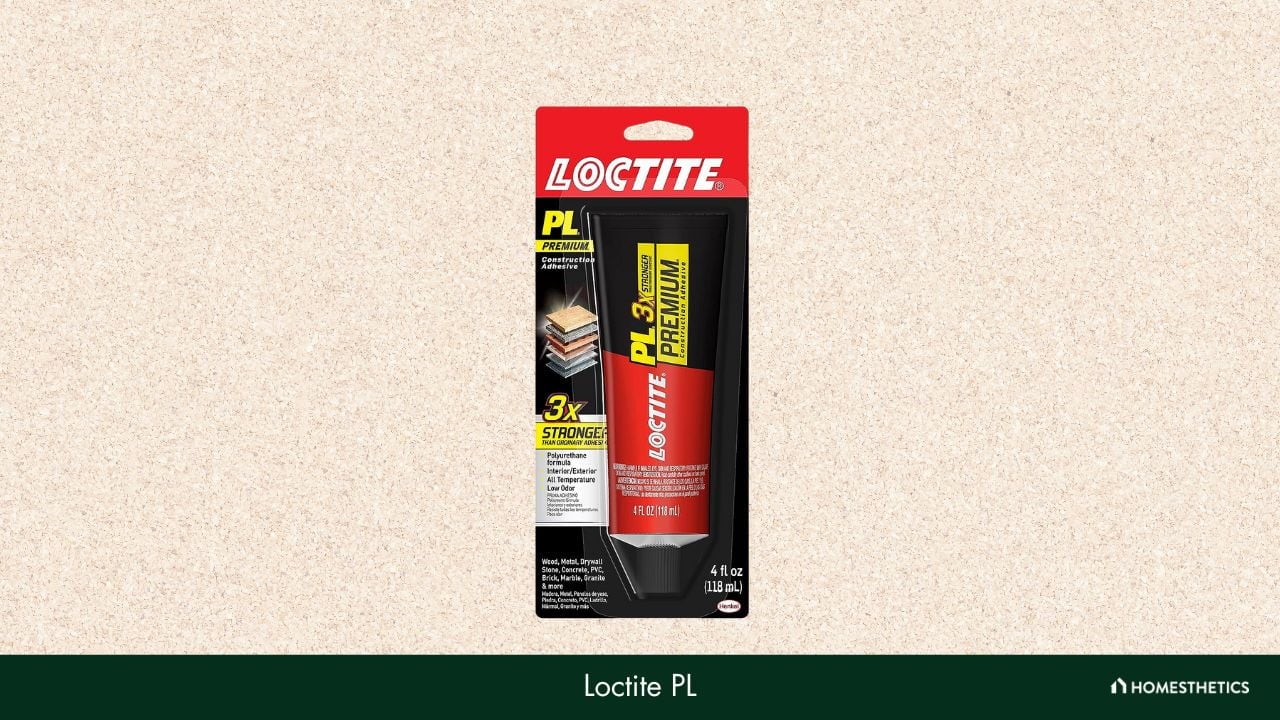
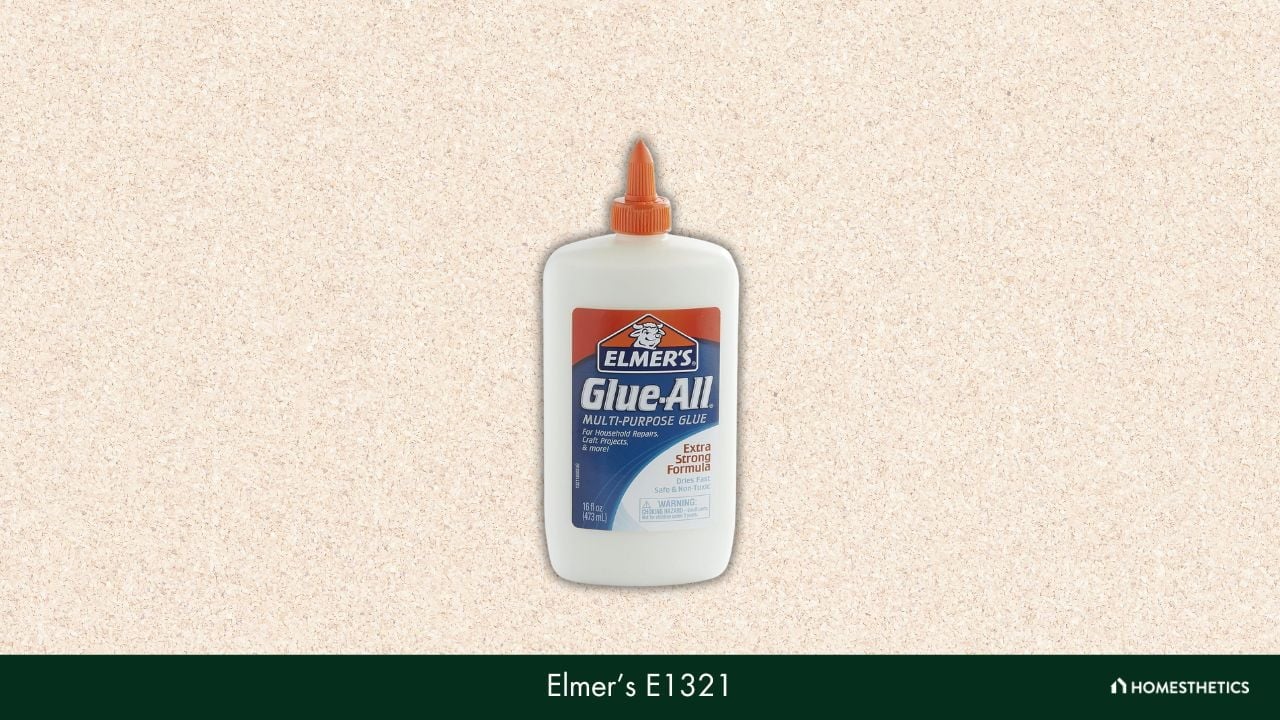
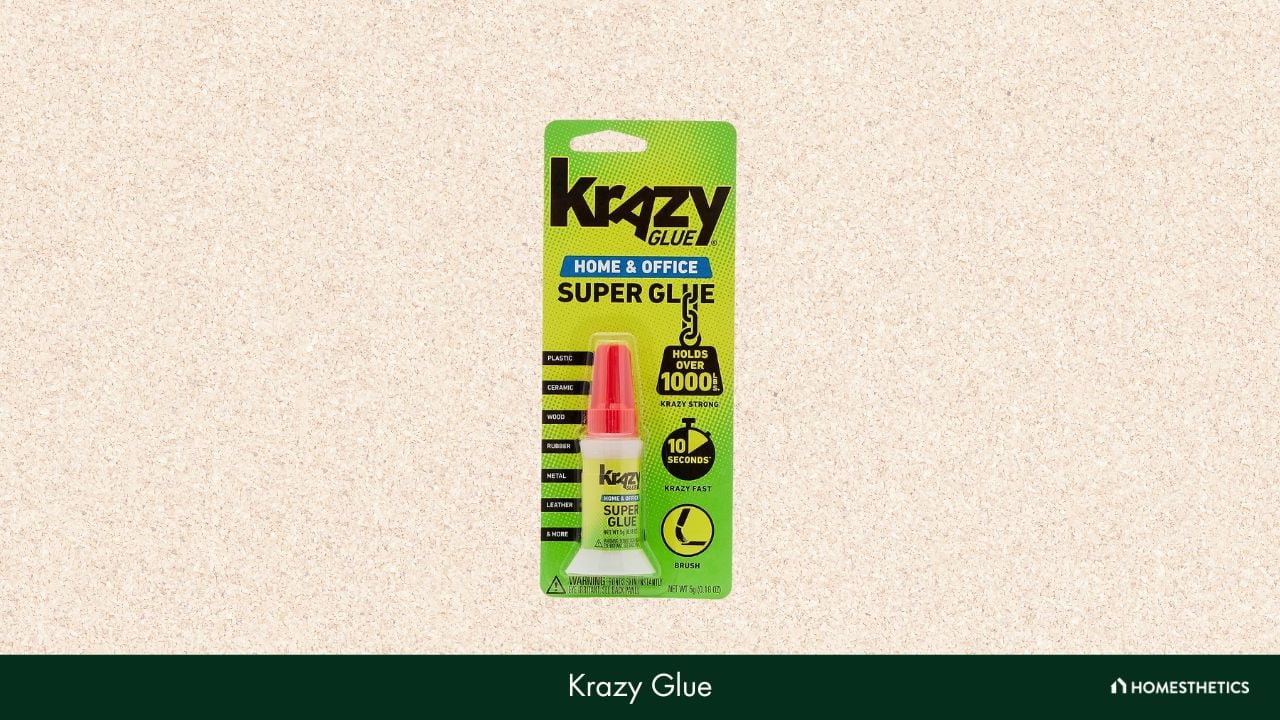
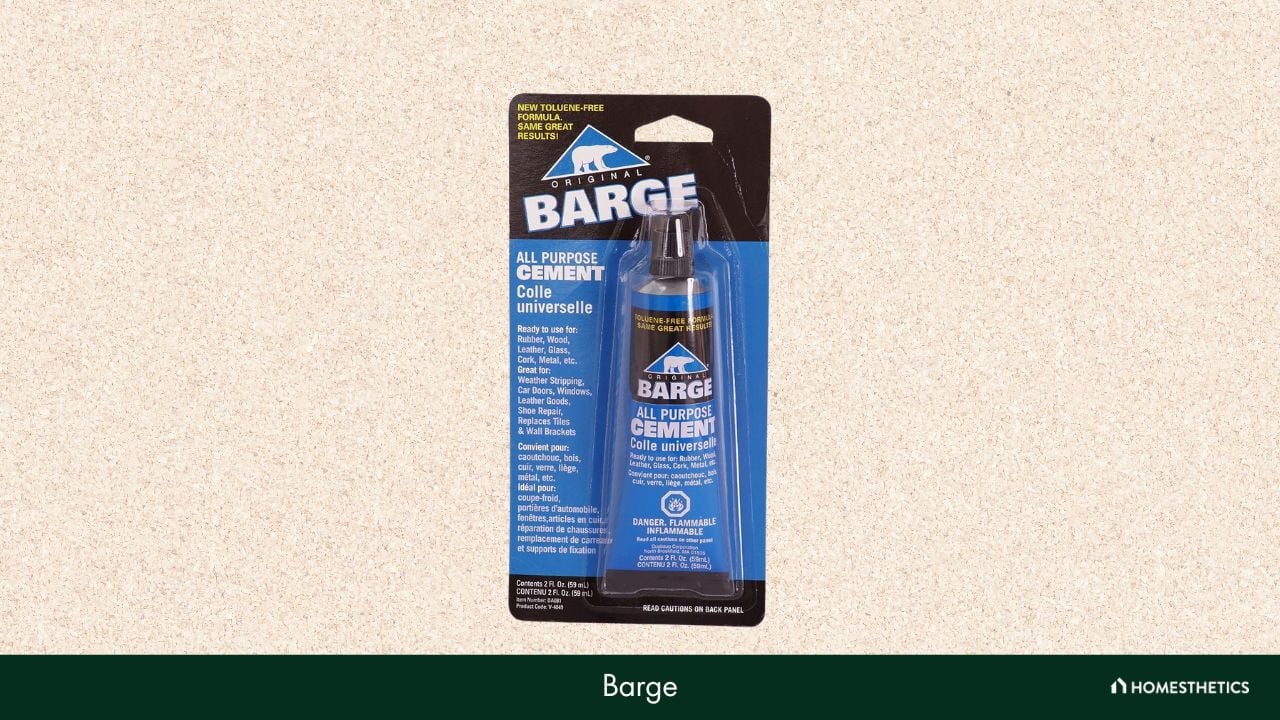
![8 Best Glues for Acrylic Plexiglass [Reviews & Buyer’s Guide]](https://homesthetics.net/wp-content/uploads/2023/09/Best-Glues-for-Acyrilic-Plexiglass-.jpeg "8 Best Glues for Acrylic Plexiglass [Reviews & Buyer's Guide]")
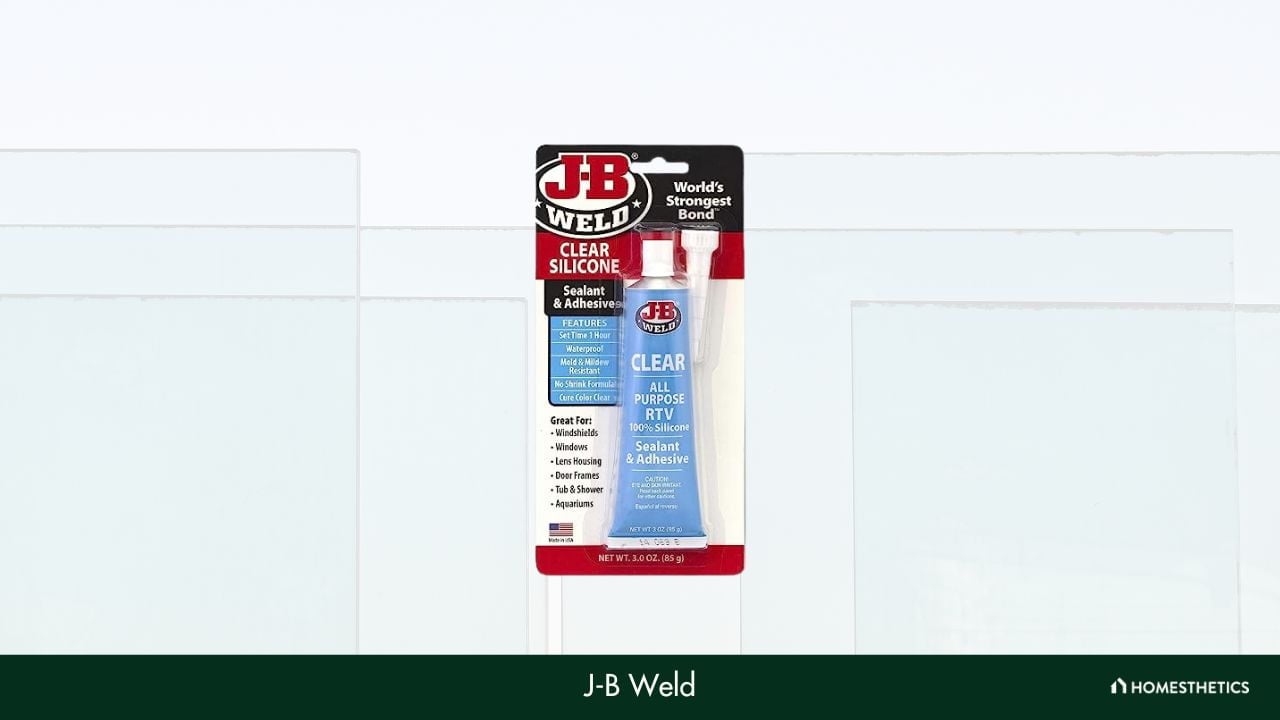
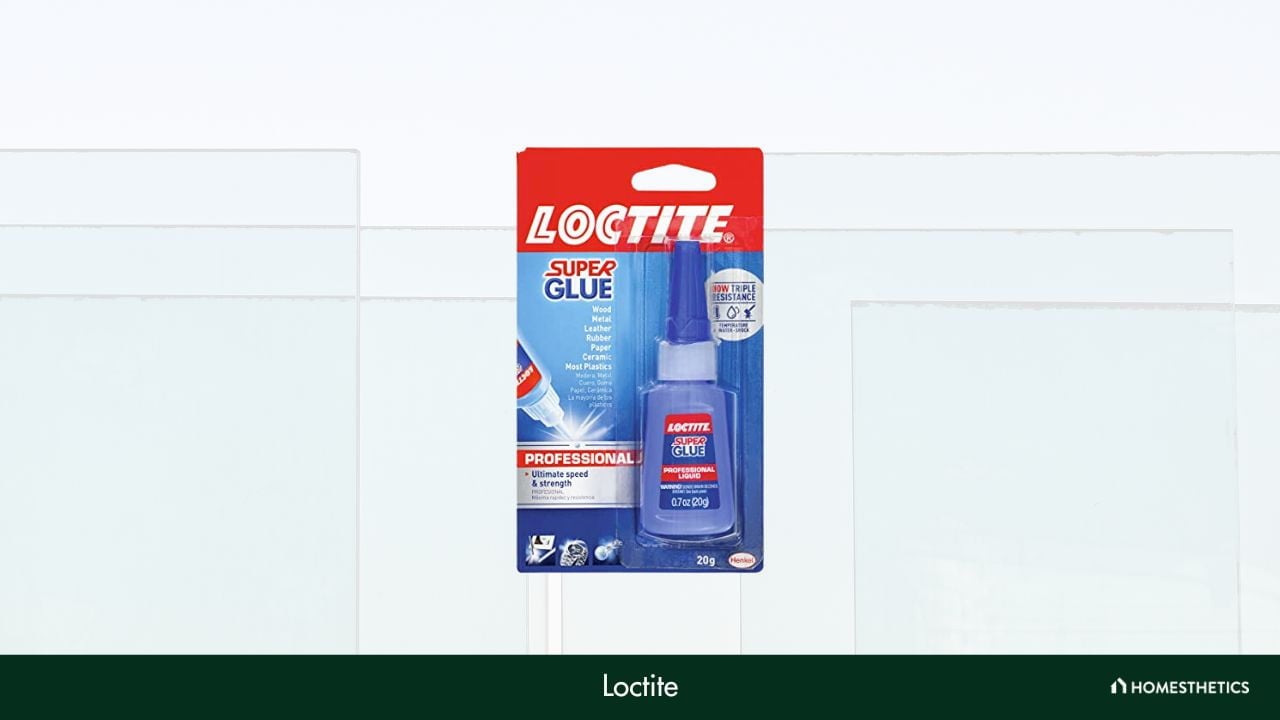
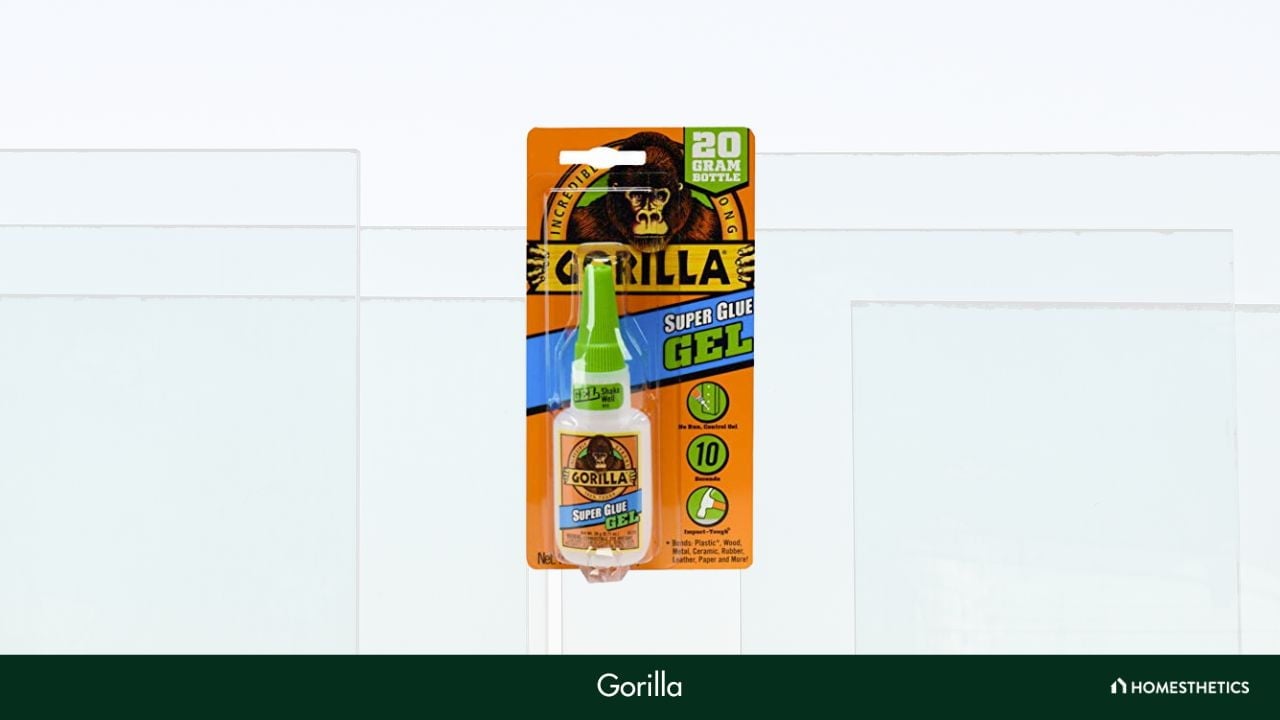
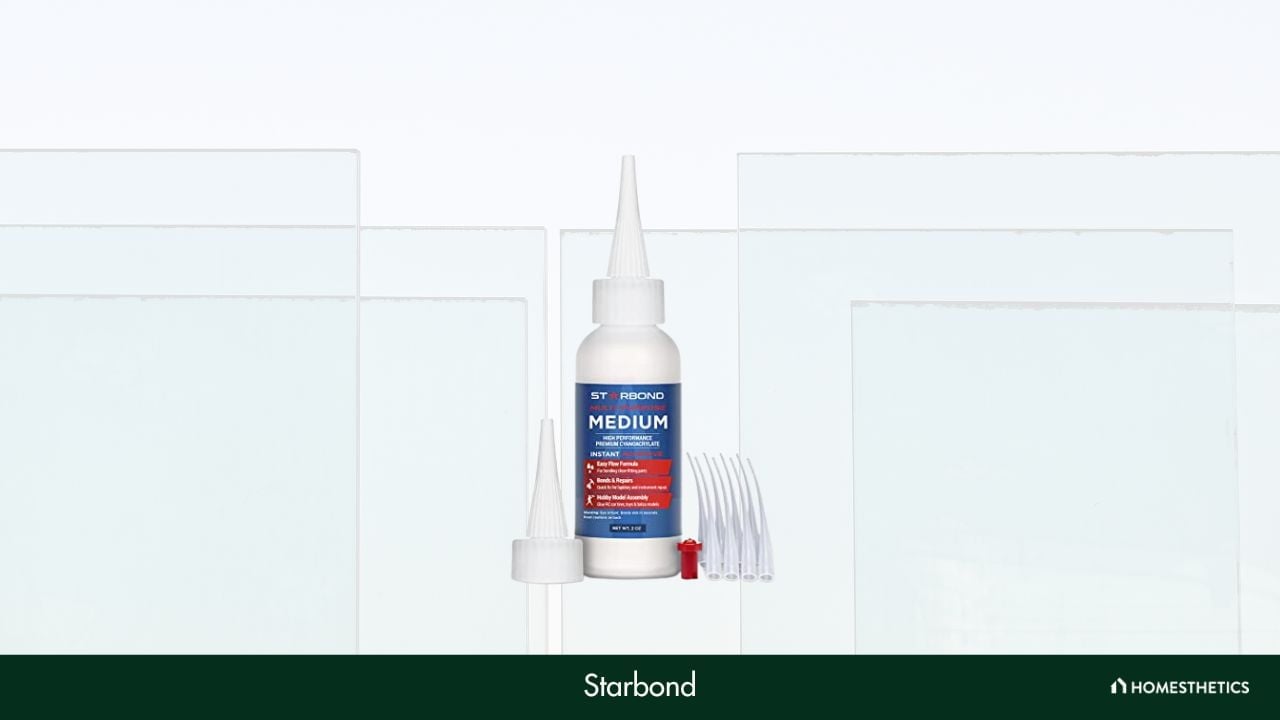
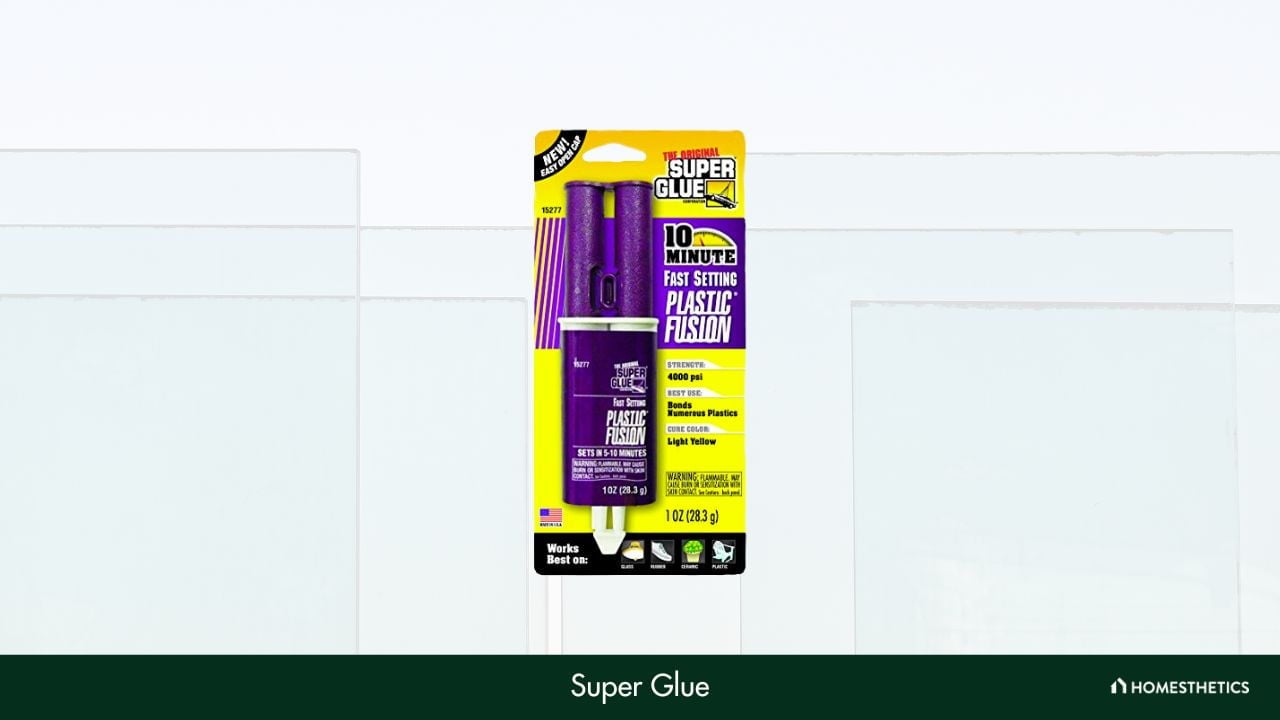
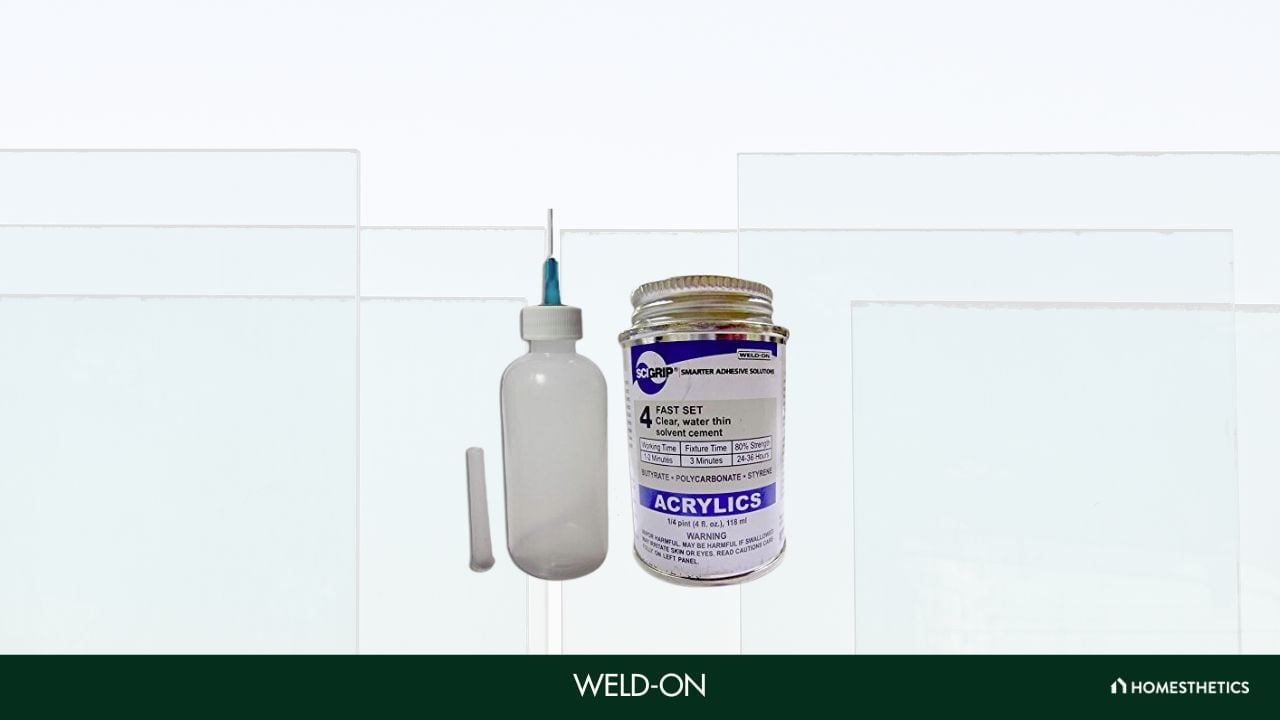

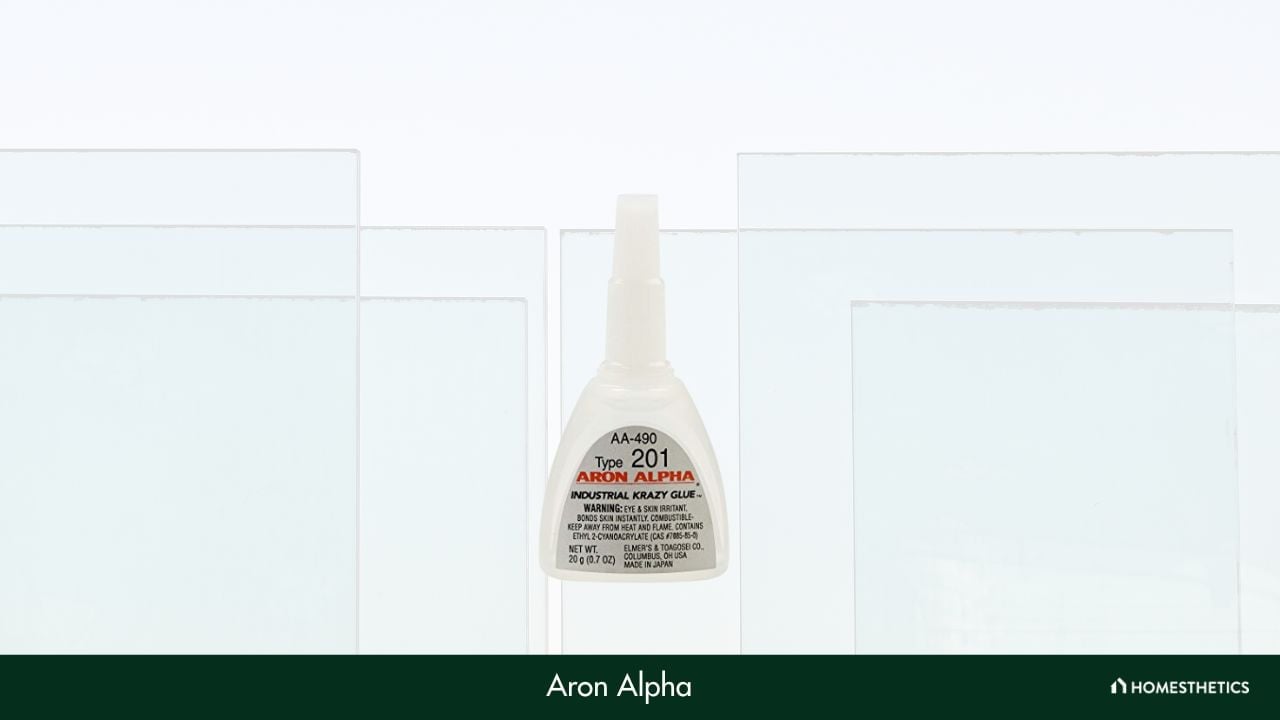

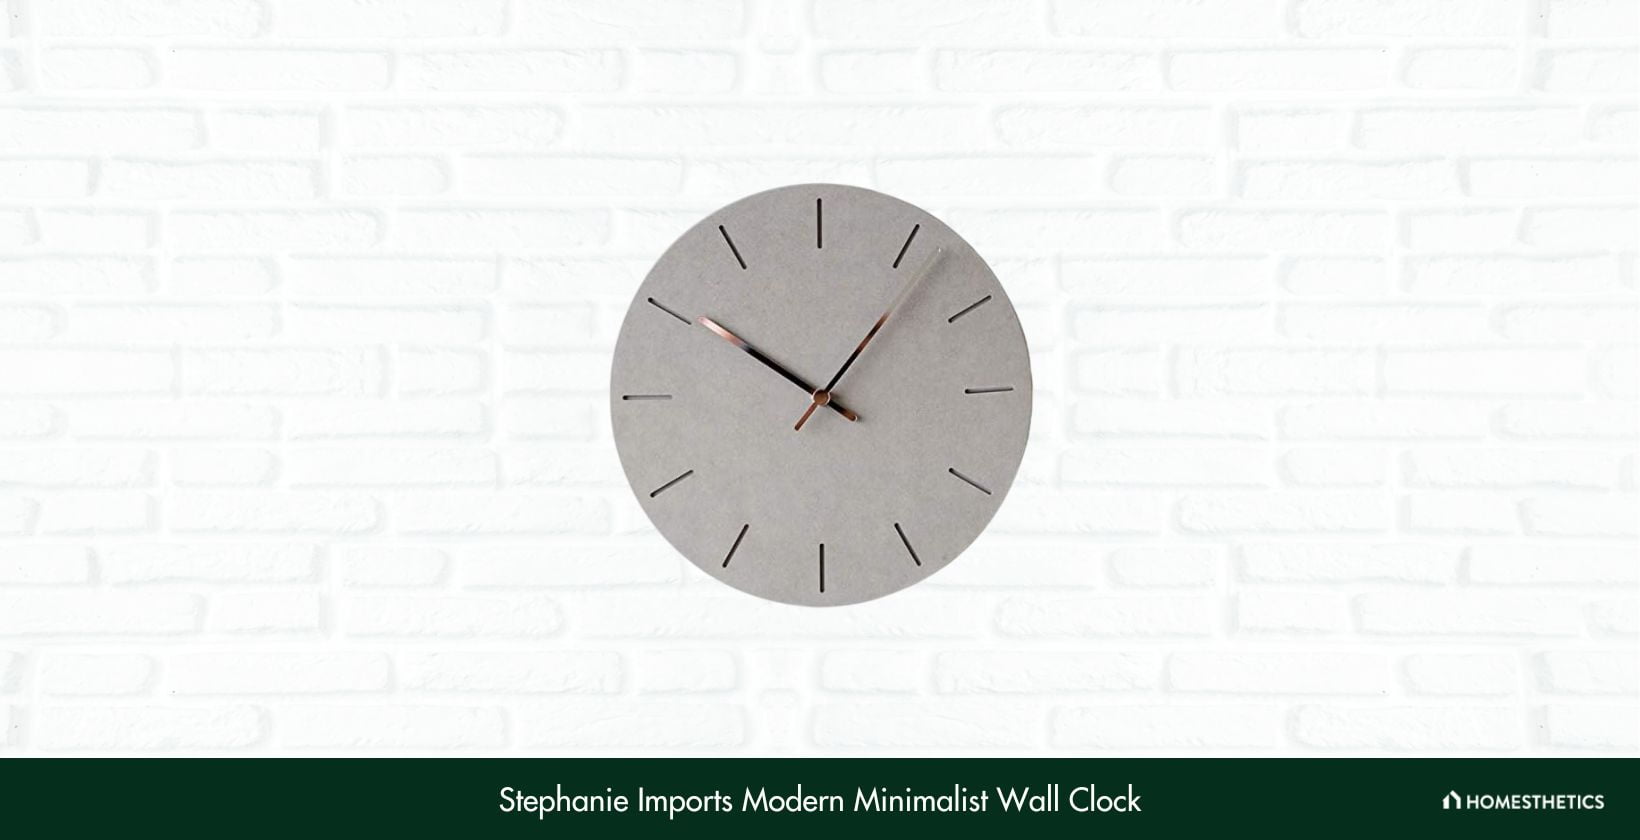
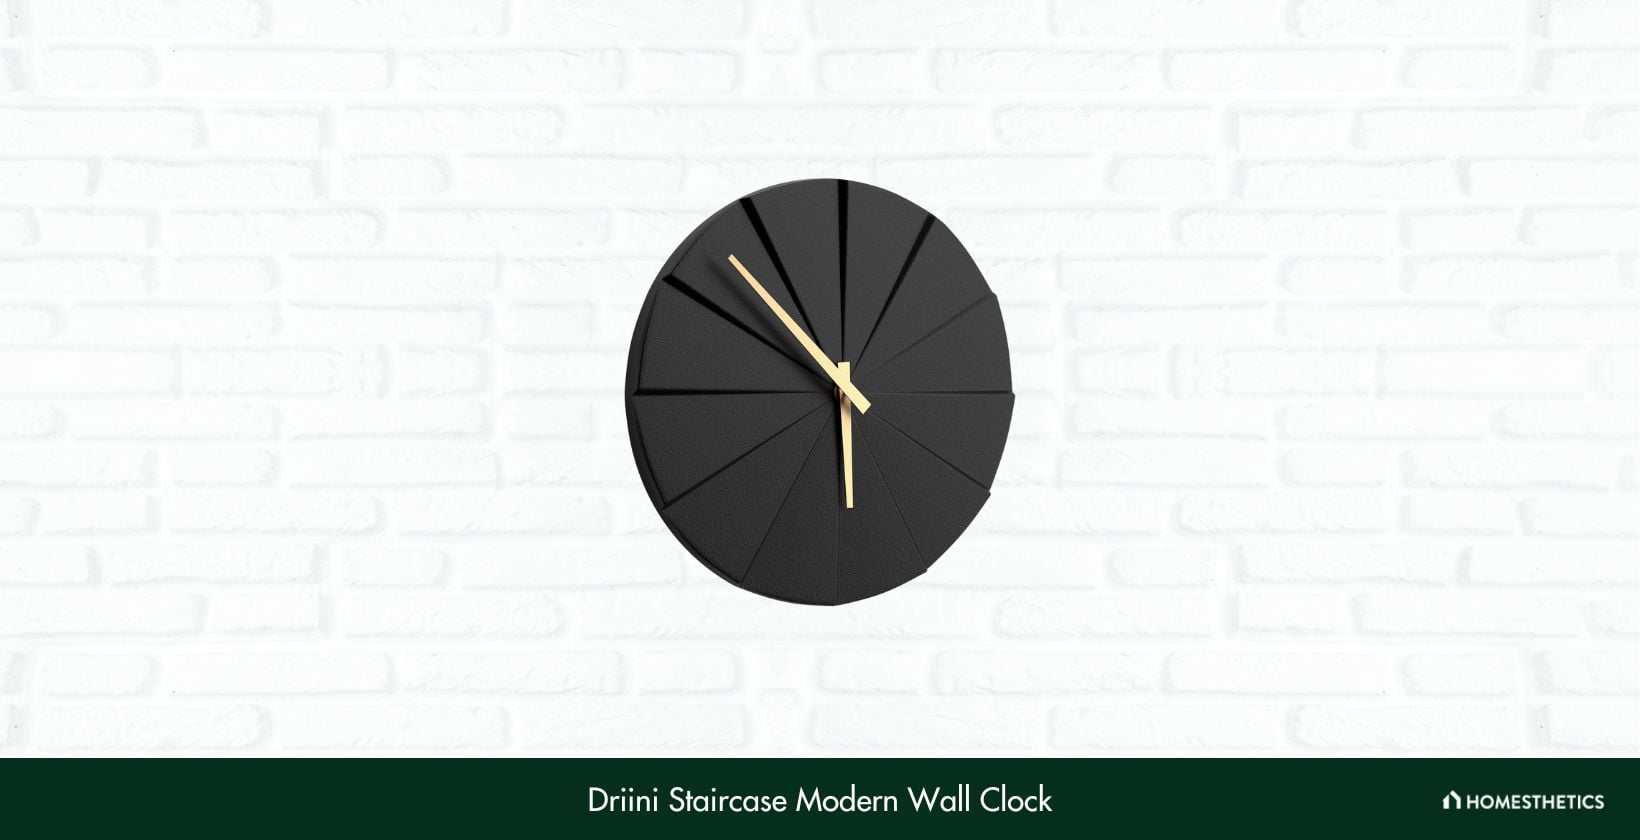

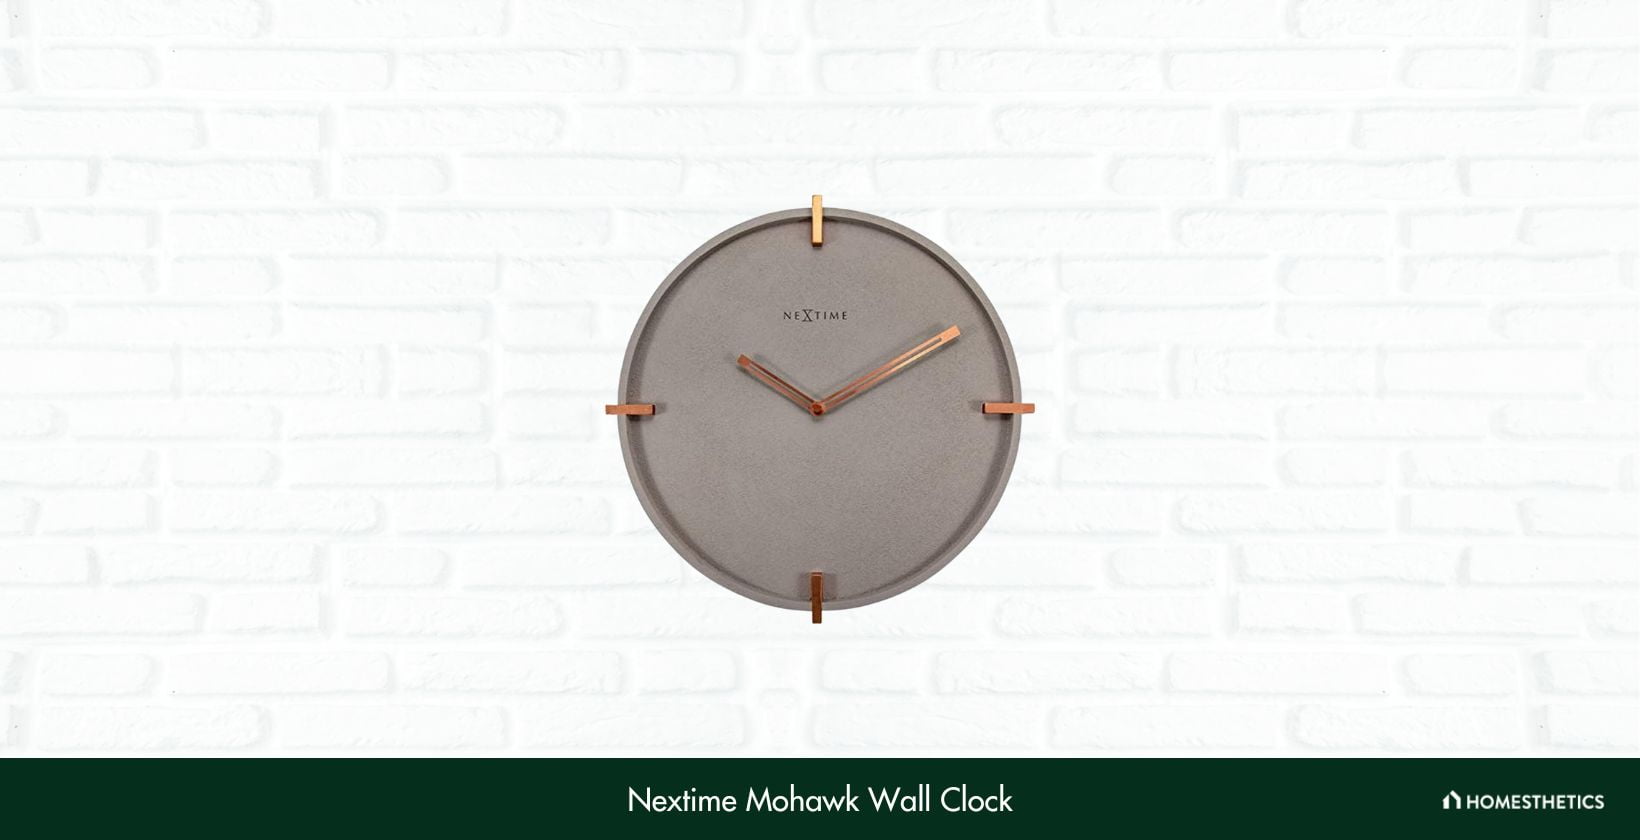
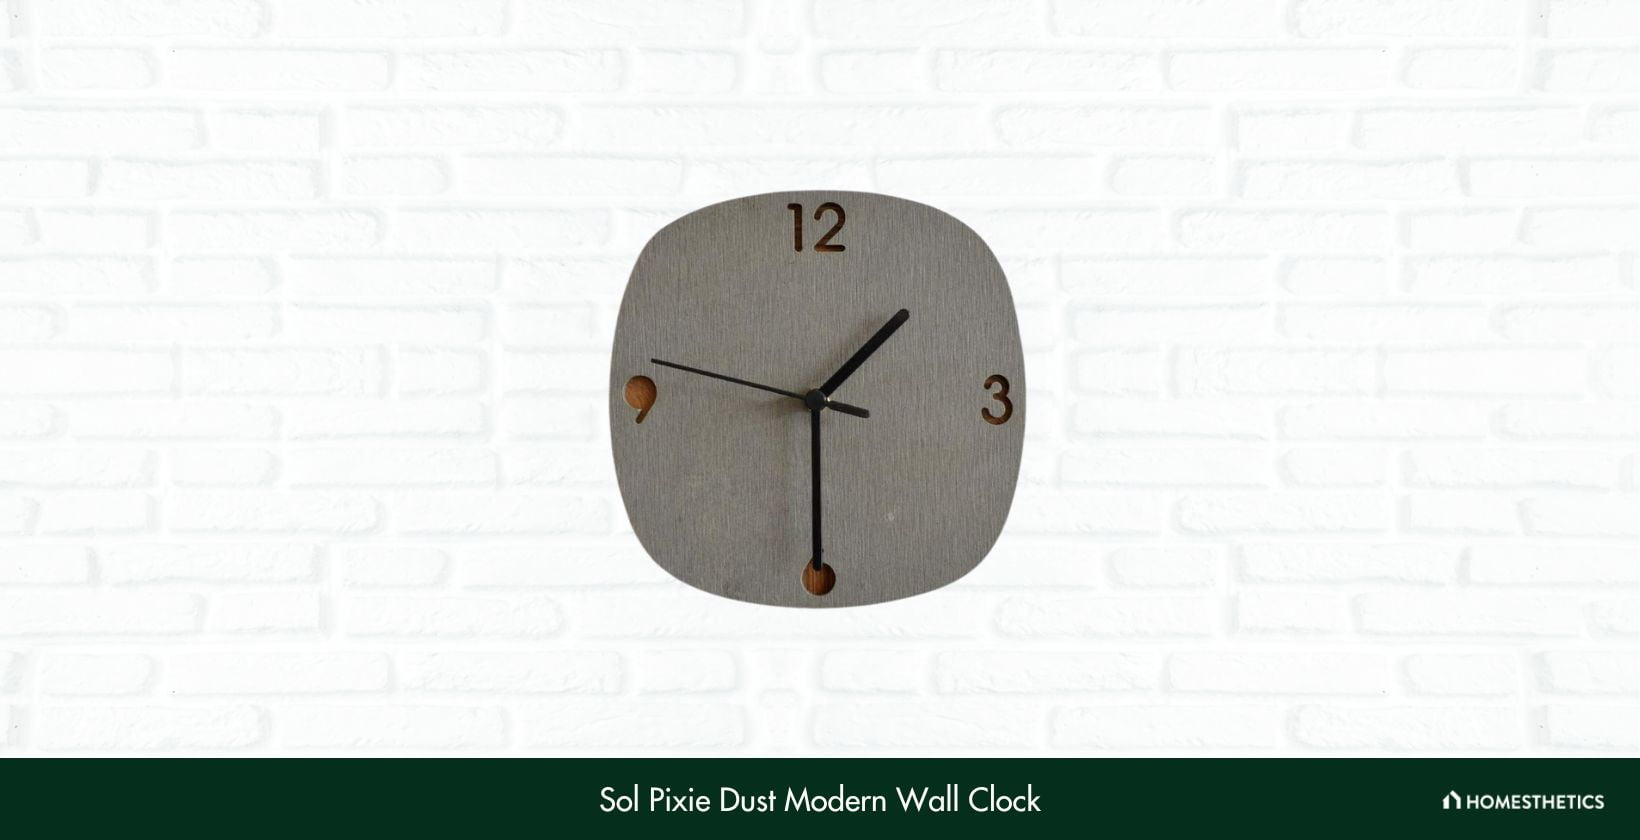
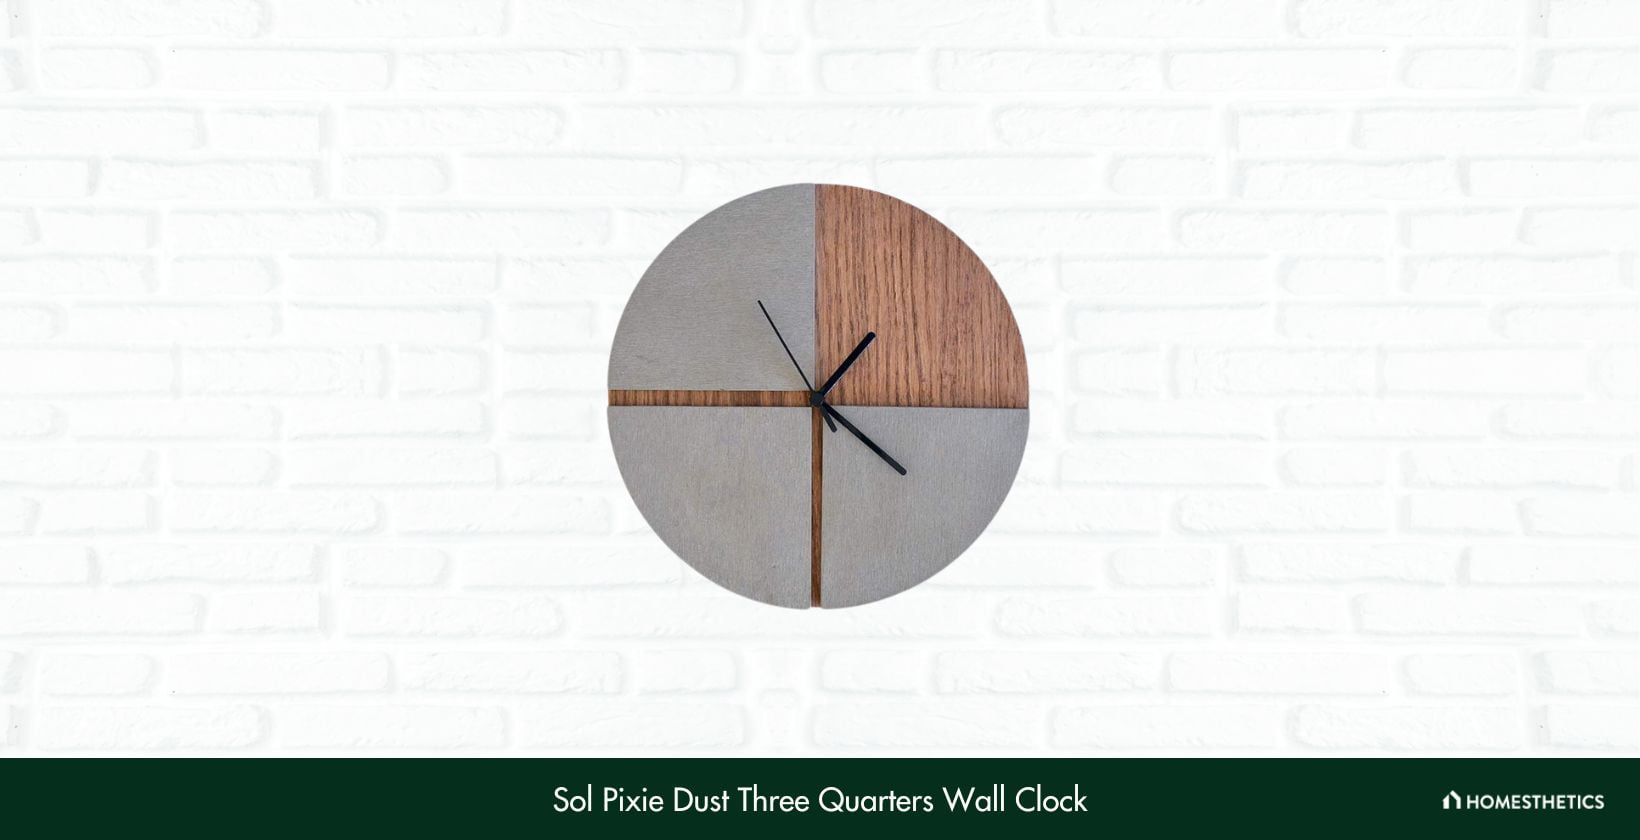
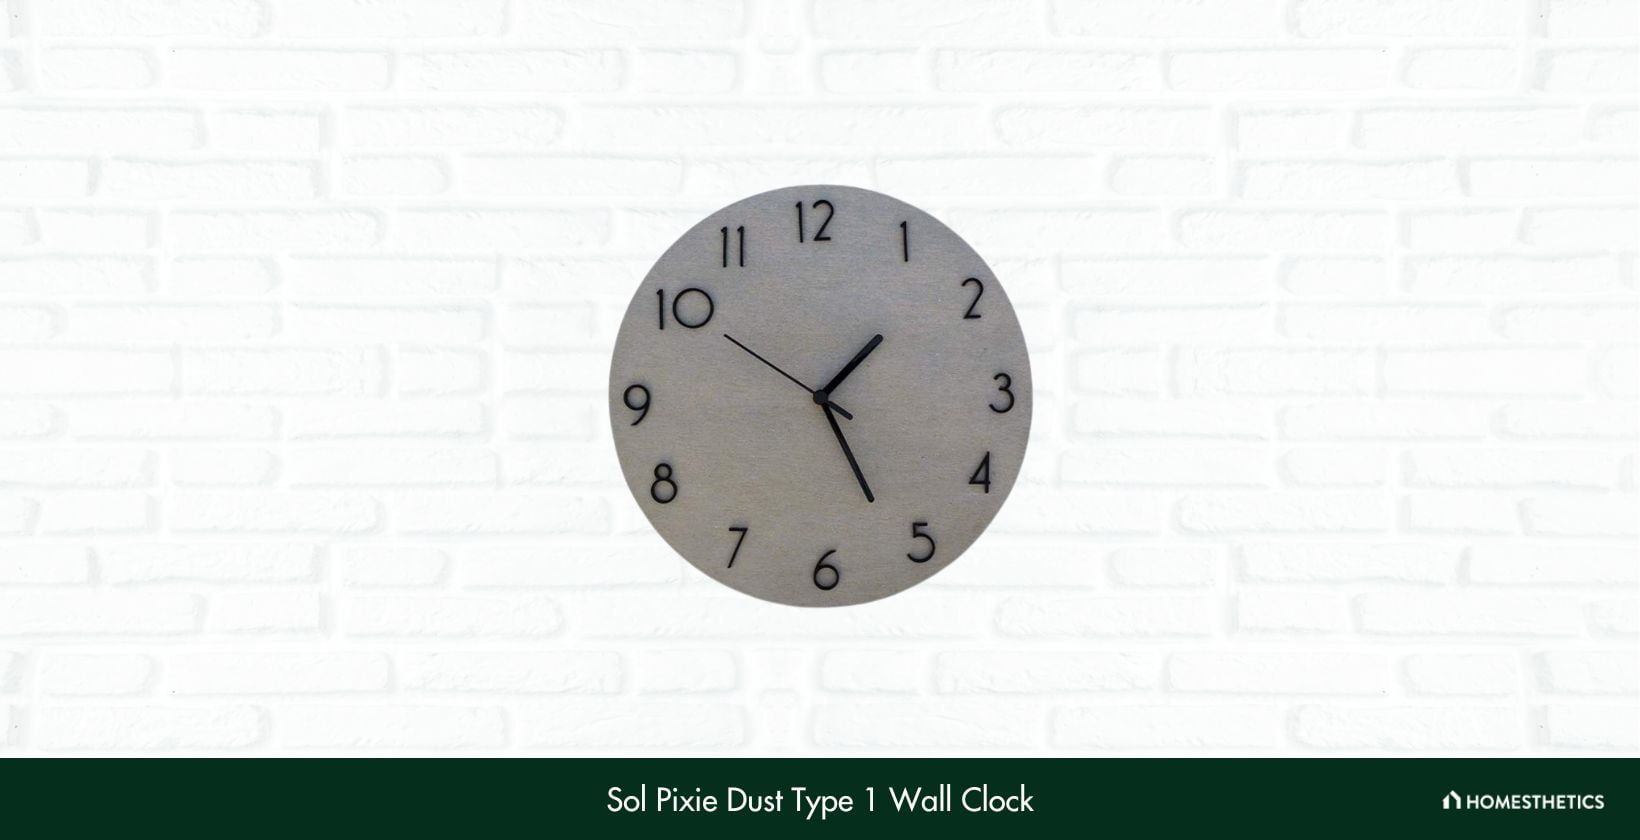

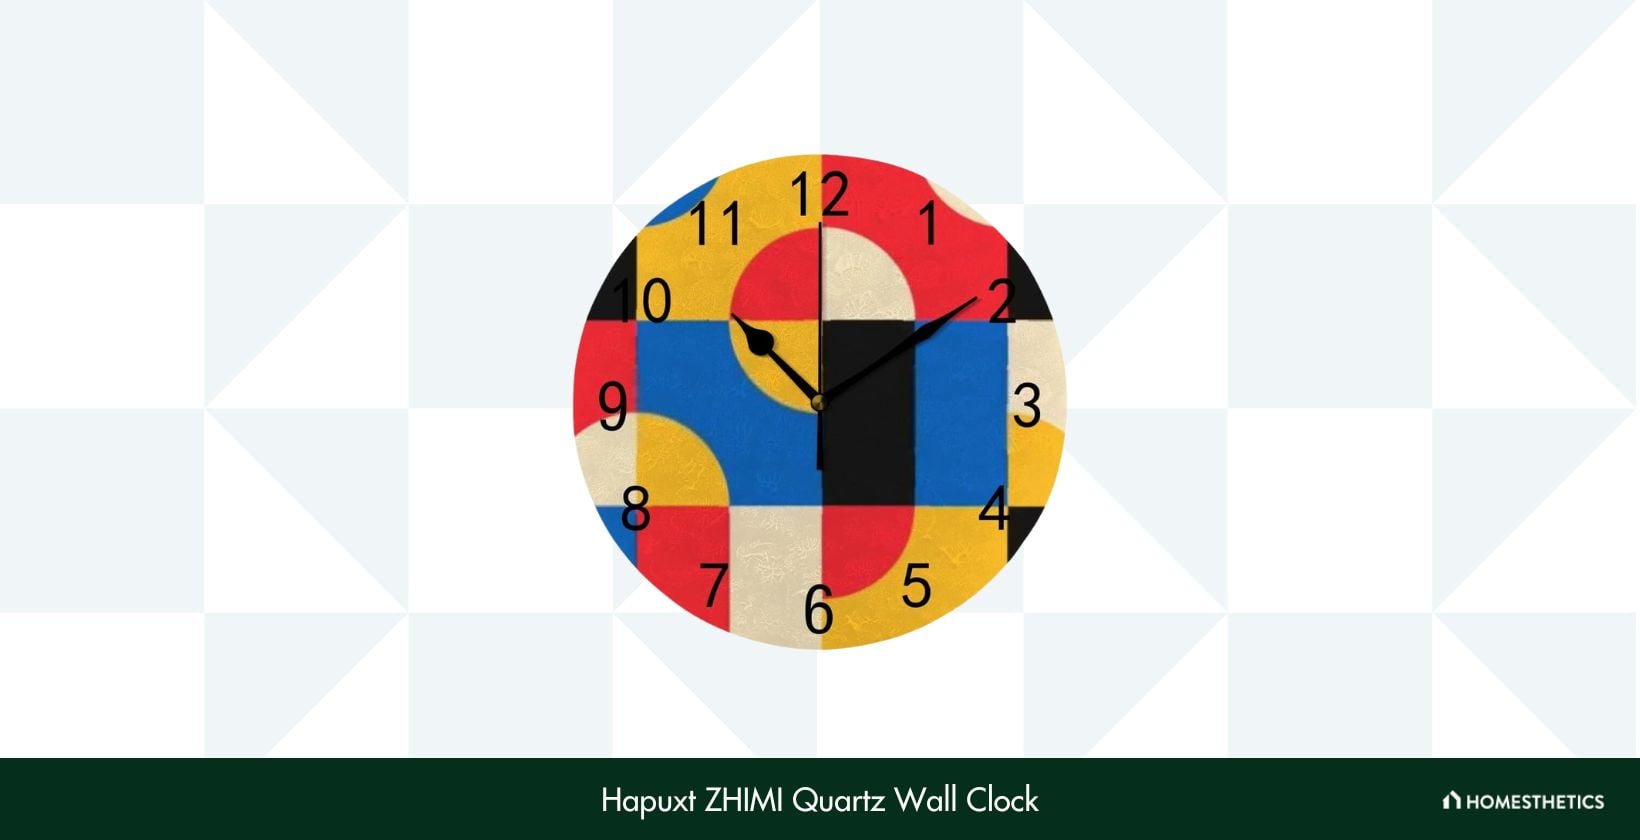
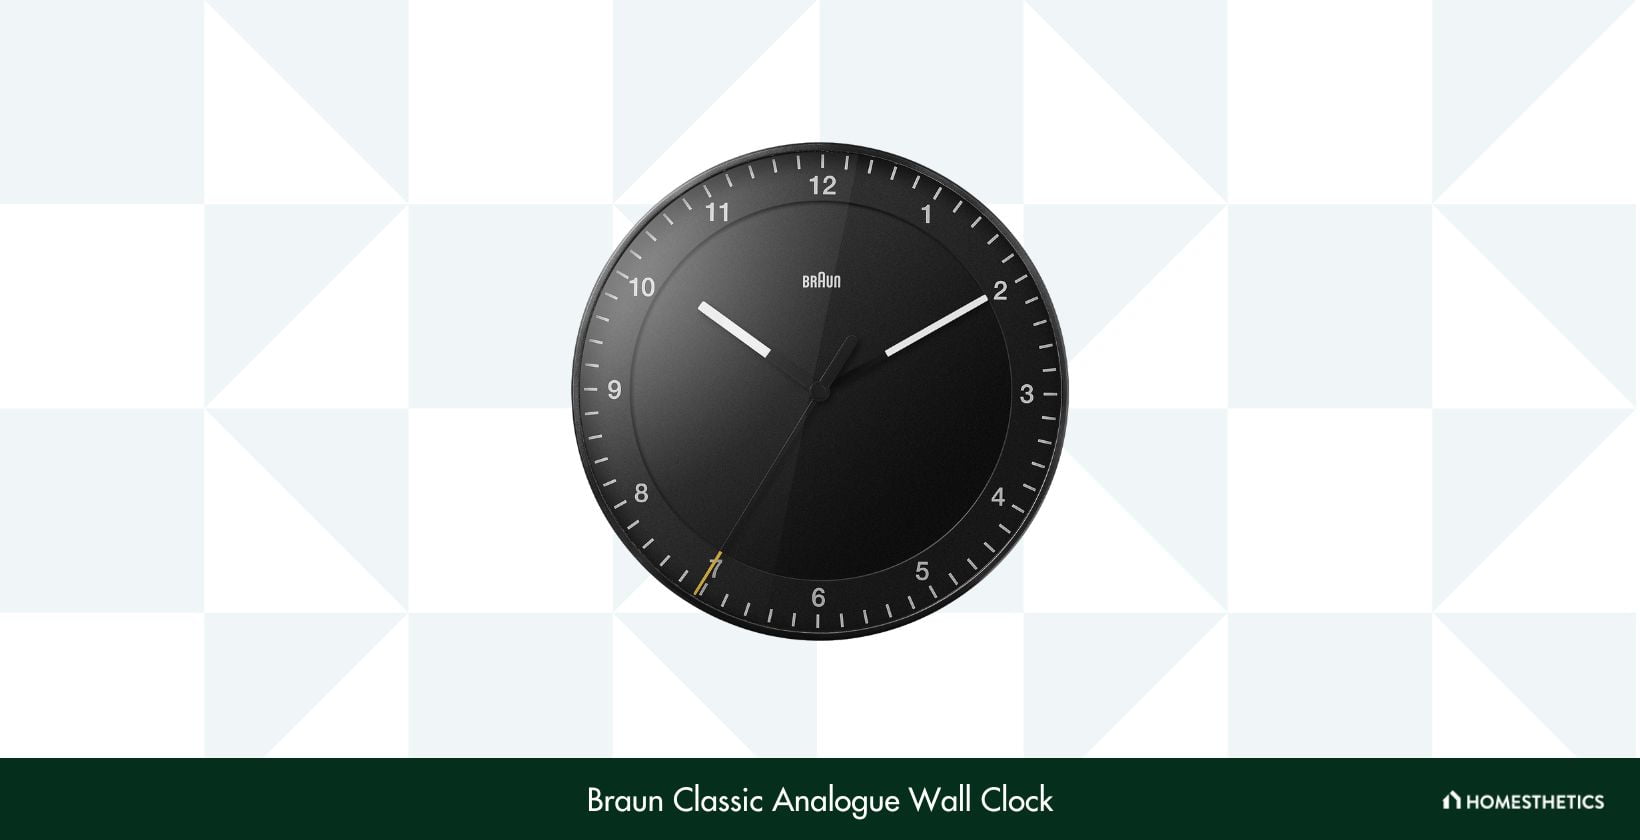
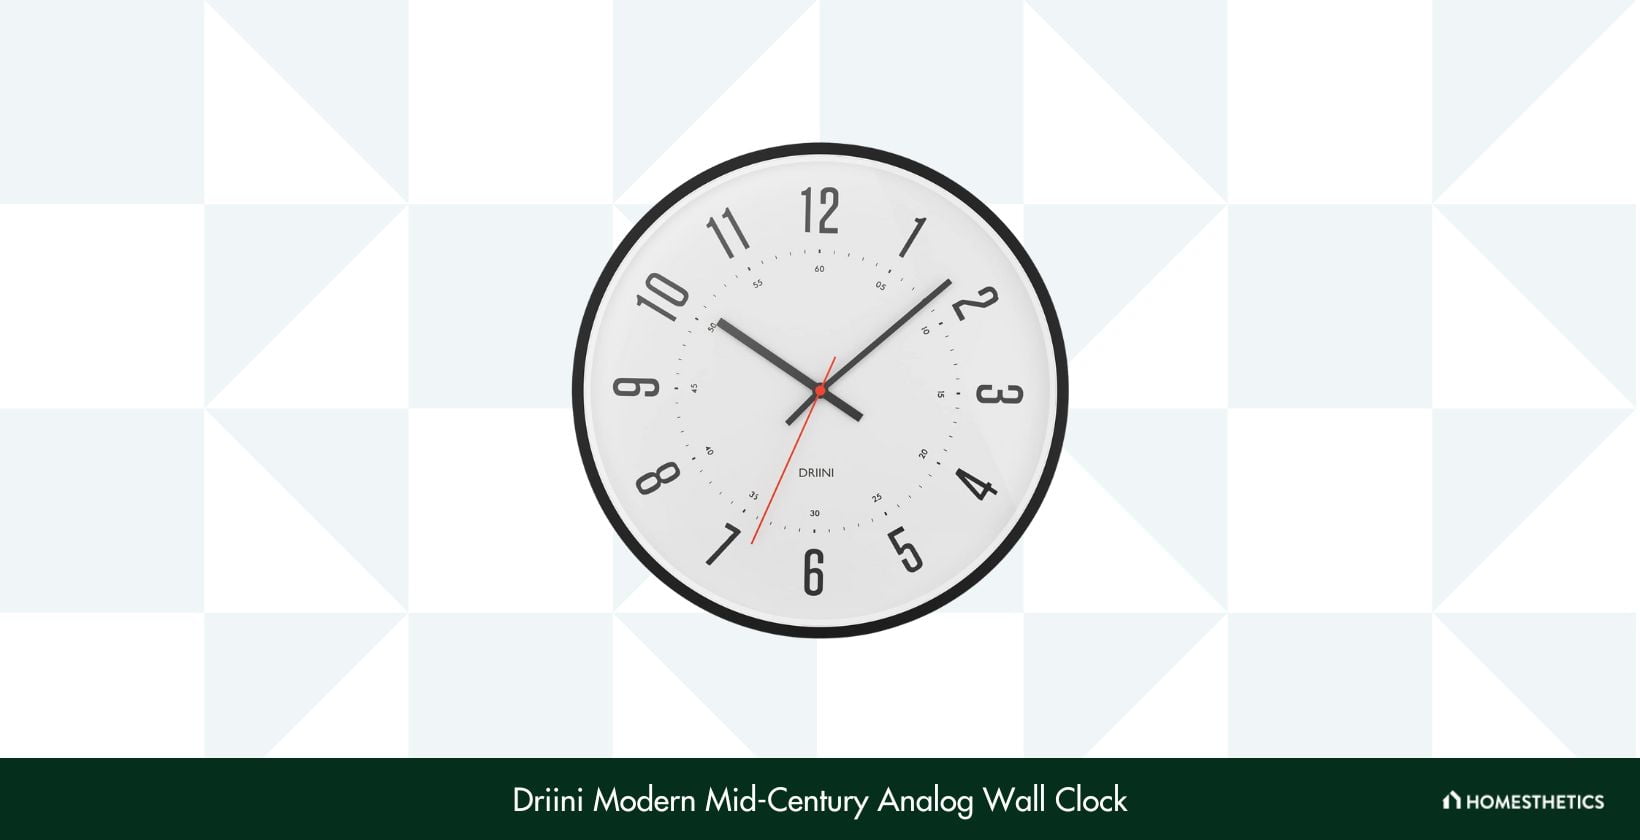
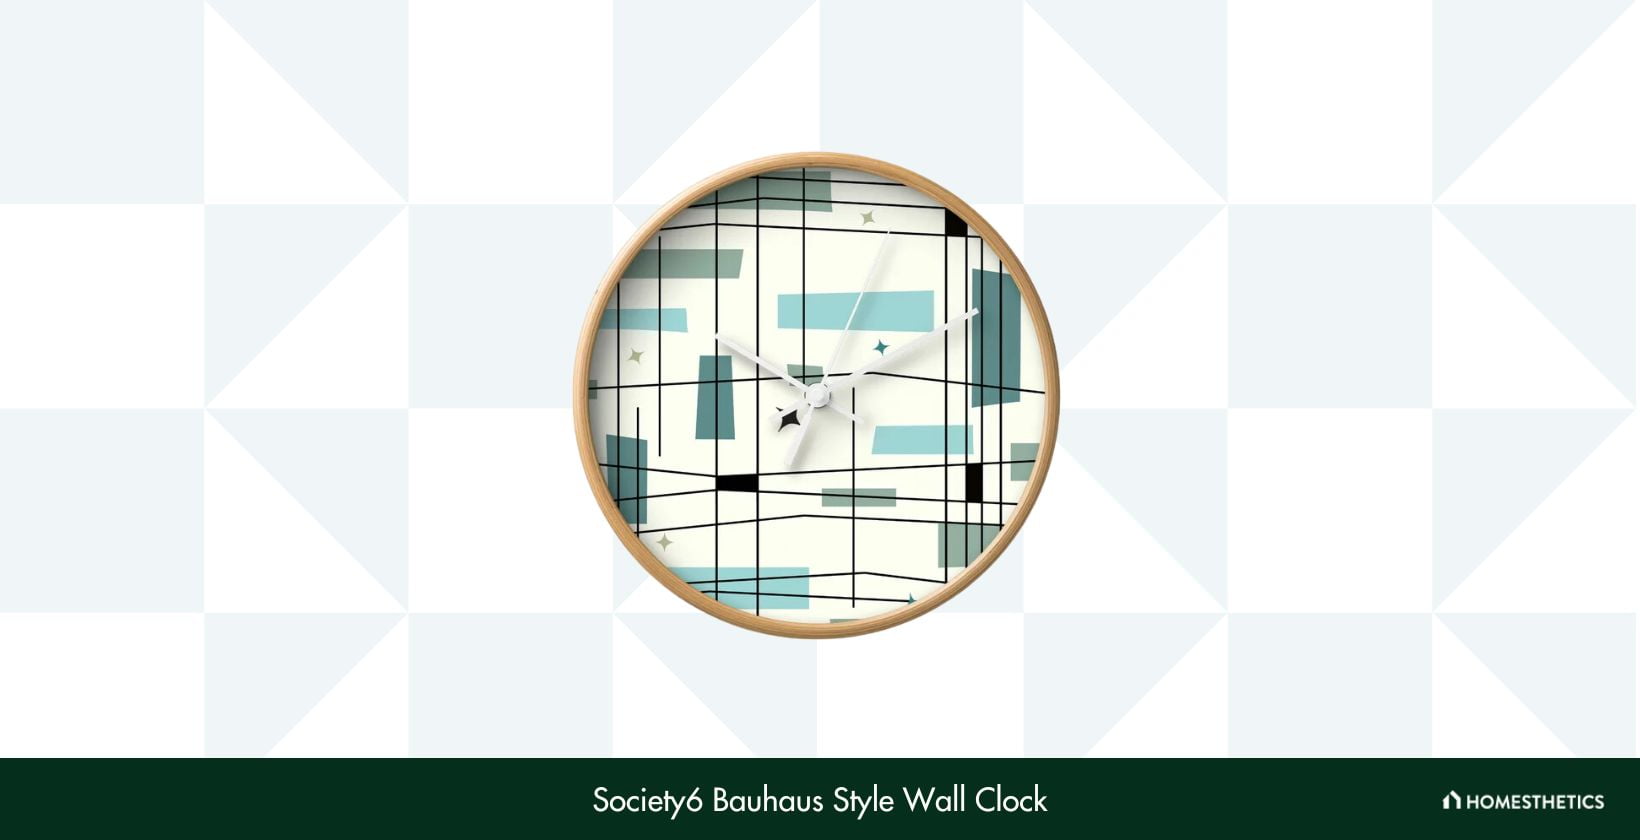
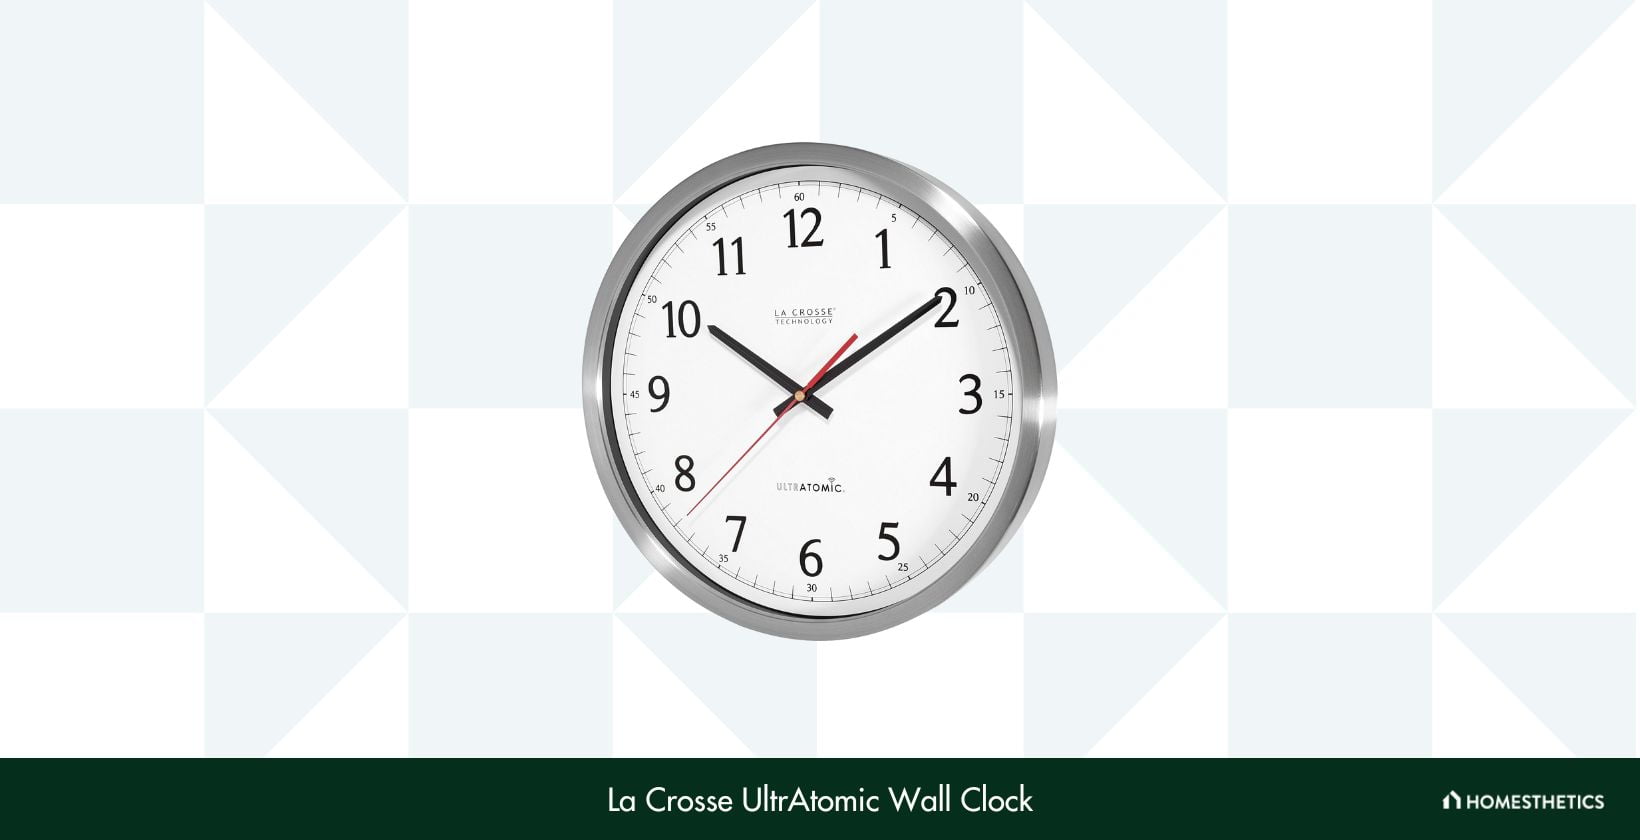
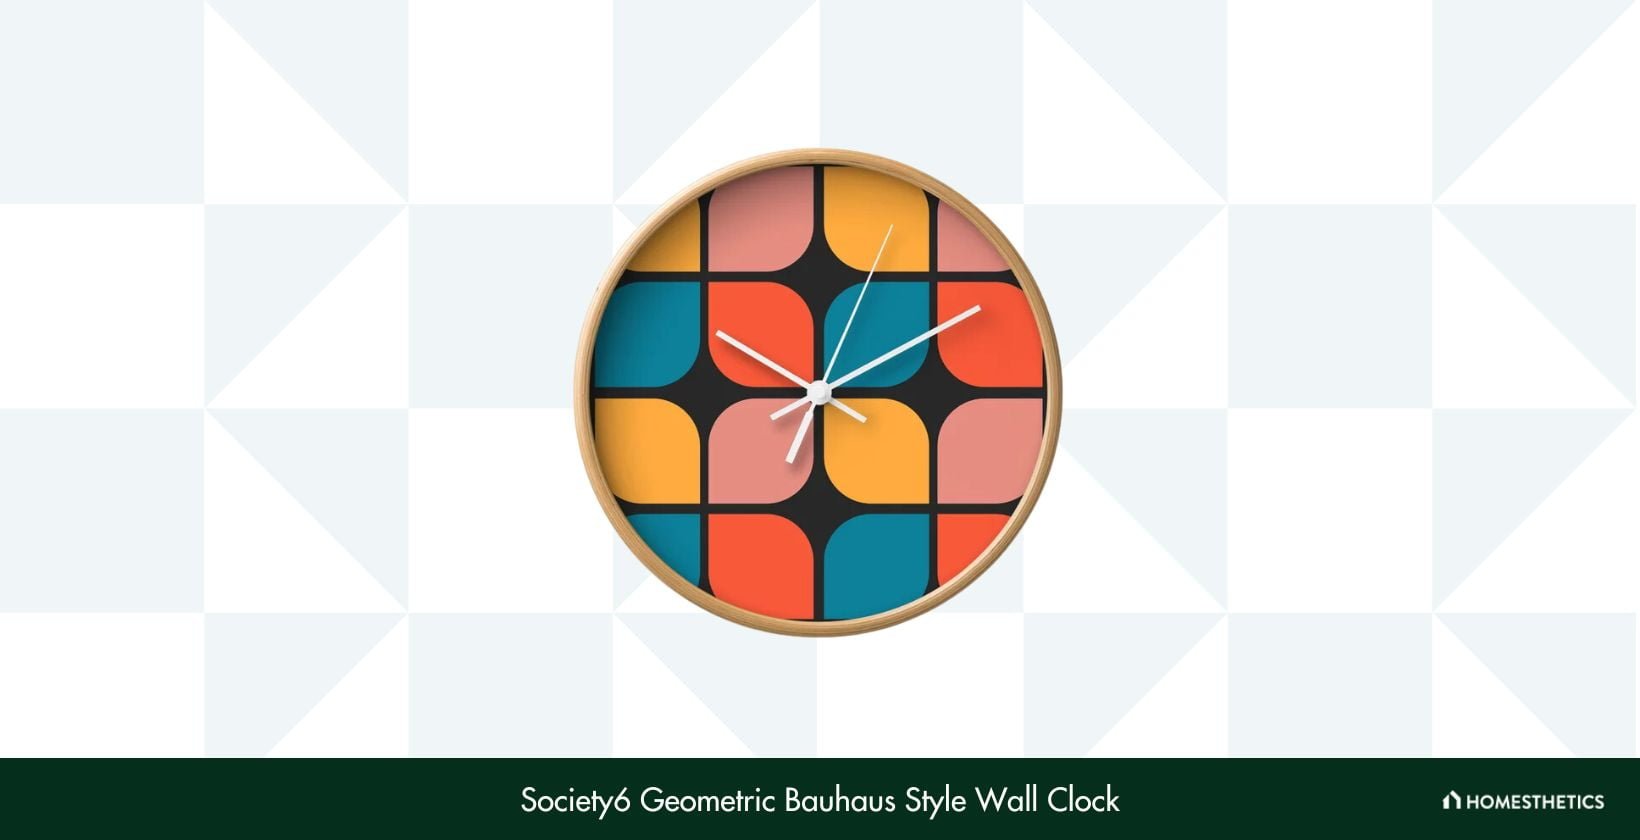


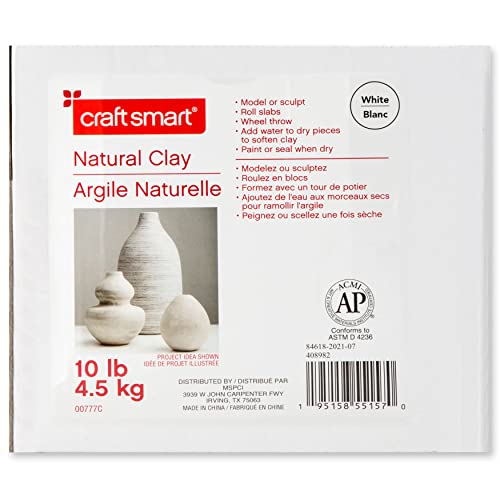


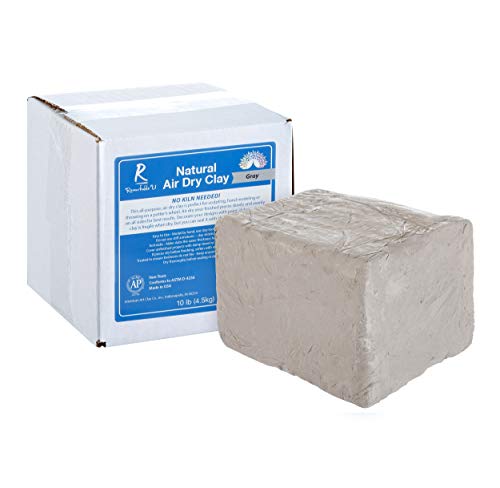


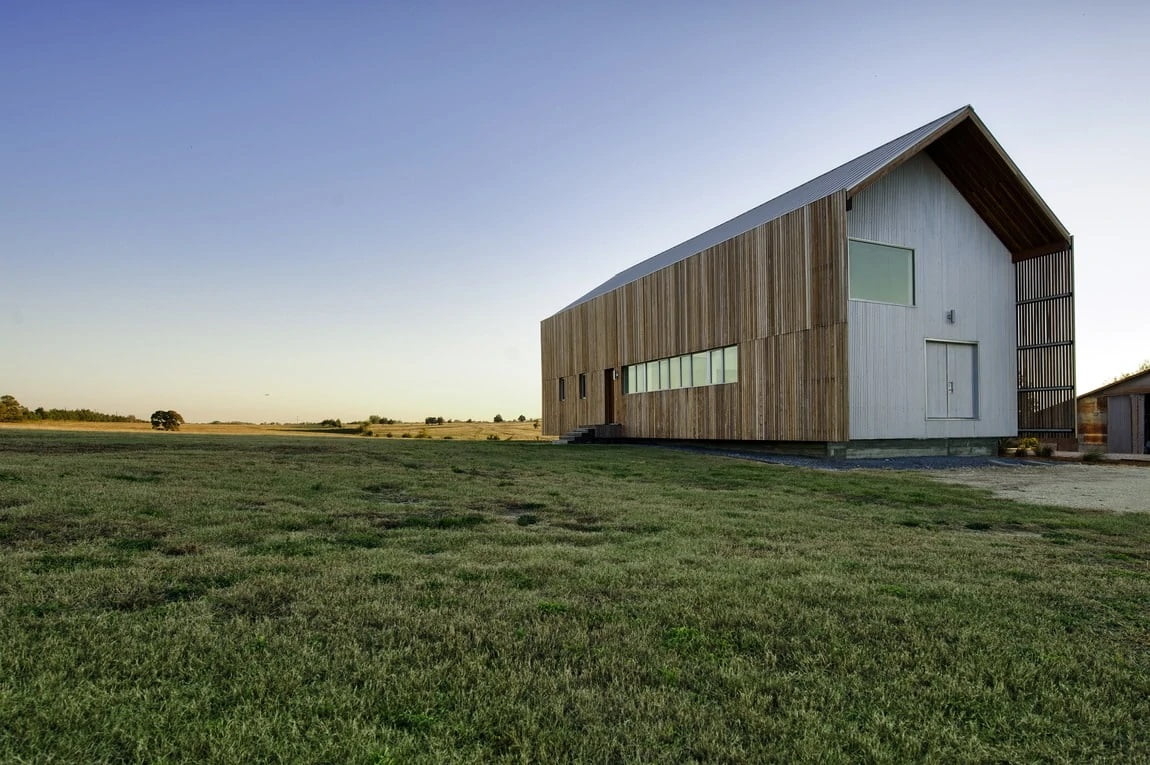
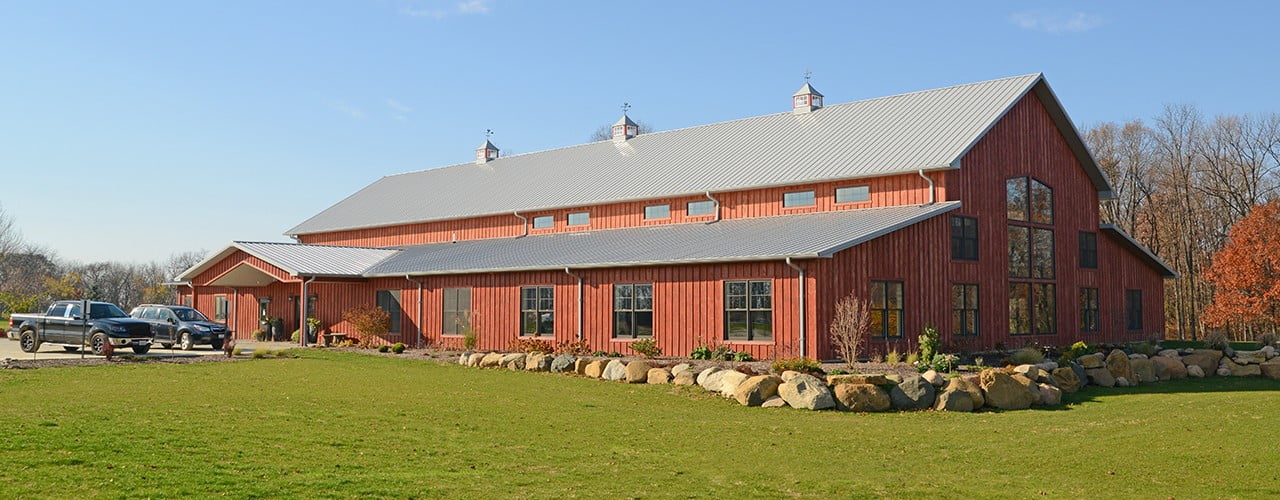 and that the term “barndominium” itself can be quite confusing, especially if you’re not familiar with building types. So, let’s make it simpler for you, and for this, we’ll start by breaking up the word.