Wood carving involves the chiseling away of wood to create the desired figure by the carver and is one of the world oldest crafts. Before carving a piece of wood, the craftsman has to determine where the grain is in order to learn the weak and strong areas of apparatus. Some of the best wood for carving is walnut with its superb dark color, basswood which is a lighter shade of brown, maple, pine and mahogany. Some of the best tools come in sets with a variety of chisels and knives each having their own purpose, whether its shaving, cutting or rounding edges. Carving can be done using an electrical equipment, like a chainsaw, drill and shaver. All contribute to creating the work of art you will notice in this article along with passion and skill to bring about the most finely sculpted wood art.
A key to creating a great carve out work or art is to work with contrast, by going cutting and chiseling against the grain; which means that a wood carver has to be someone with a certain built and some measure of strength to place force when and where it is needed. Tutorials for wood carving are available online and books can be found with in depth knowledge of this interesting skill at length.
If you are considering learning this craft, understand that there are four ways to go about it, because then you will know what are the appropriate tools you will need and where it would be best for a beginner to start. You will have to learn about chip carving: a special knife used to remove unwanted pieces of wood. Then there is a technique called carving in the round which basically speaks for itself. This is mainly used to give curvature to the wood such as the breast of a bird. Relief carvings are usually done on a flat sheet of wood but is made with three angles or dimensions. Lastly, there is whittling, which is the most common form of carving that stems even further back in history than the other three techniques. This type of carving may seem a bit amateurish because when it is completed, the viewer can see the work the knife left in the wood.
Surely, this is one craft idea that must be undertaken by someone who has an innate ability to work with wood and in the carpentry arena. Consider these 20 wood carving ideas for a rustic home décor.
Wood Carving Ideas for a Rustic Home Décor
#1 Create your own carved out rose ornament to décor your home
Not all DIY project materials are easy to find despite popular belief. The sole purpose of DIY projects is to use what you have at hand and upcycle creative items into objects filled with memory and substance. These crafts are not easy yet every one will surprise and reward you in the right context. After publishing a DIY tree stump inspiration pack today we are presenting you twenty hand-picked DIY Branches Crafts that will surely amaze you.
Tree stumps are extraordinary: they`re heavy, short, and wide, and they offer your interior a very bold direction, a proper tree stump coffee table enroots your design into our realm, it moves the entire center of gravity of your decor through a beautiful massivity. Tree branches on another hand are quite different: they`re fluid, organic, slim, and long, they tend to reach the sky on a path filled with dynamicity, texture, and flowing beauty. As a result their uses are quite different, you can use them as a handrail, as an extremely graphic hanger, or as a body for a floor lamp. Needless to stay you can stack them up and realize everything that you would realize with tree stumps in a more sensible design but the amount of work invested increases and so do the resources required.
Keep in mind that no trees should be cut for your next hanger. You can surely find some fallen trees to use and you can always talk to the local forester. Craft away!
Use Tree Branches to Shelter Memories Beautifully
What can be simpler than this photo rack? Here it has been used to complement the corner but you can easily hang it or move it around the house whenever you want wherever you want. It is that simple!
Mesmerizing Sculptural Branch Lamp Enhancing a Decor
It is clear that the sculptural branch beautifully enhances the decor here but take a moment and notice the floor, the extremely spectacular wooden ergonomic chair, and the light bulbs at the end of the branch. All of these are spectacularly complementing the decor.
Floor to Ceiling Sculptural Branches Serve as Hangers
Insanely simple to realize and insanely graphic. Here the branches have been fixed into place but if you are insecure about your current environment or you tend to design versatile multipurpose spaces you can find below a free-standing coat hanger.
Twigs used here are using an old coffee table as the structure. In this manner, you would use far fewer materials but the result will look a little more artificial. If you have enough branches you can always stack them up neatly.
Sculptural Branches Composition Dinner Table
The sculptural dinner table surely ain't easy to realize. The composition and structural demand in perfect static and graphic equilibrium is hard to realize but always rewardful.
White Branches Side Table Empowered by Living Nature
In Shabby Chic Interiors and Scandinavian Interiors alike, a top of white will never do any harm. The natural texture can contrast white in isolated focal points.
Organic Twigs Used in a DIY Wall Art Project
Wall art requires no introduction in DIY projects but above us, we have an example that shows how repetition can work very well with fluid and organic lines.
One Branch Nestling Infinite Memories
This might look odd for some but if you take a moment to envision it in a shabby chic or Scandinavian interior design you will change your mind for sure. Moreover, the branch pierces the wall in just two points to sustain its weight and carry the frames. Imagine how many pierced would your wall be without it. The branch will also allow you to change the composition with ease every time you like in every direction.
Via keeppy.com
One Ensemble Sliced Into Three Frames
Simple and graphic.
Mesmerizing Center Shabby Chic Centerpiece
There are no words to describe this extraordinary centerpiece. Imagine its evolution through seasons, every time the branches wear a different decor for Easter, Halloween, Christmas, and so on. Very creative and versatile, your efforts will be rewarded.
Simple Branch Handrail
High-end handrails are quite pricey and the customization possibilities on affordable ones are really dull. You can always use this graphic handrail as a temporary solution until you move toward your dream handrail.
Small Twigs Beautifying Simple Candles
Simple twigs, simple candles, beautiful results.
One Branch Chandelier to Rule Them All
While the candles above your head might look quite inappropriate you can always replace these with LED lights that produce no heat. Be creative and find sculptural solutions for your interior decor. You can also use fewer twigs and more branches to obtain a more solid result but these are here to warm us.
Decorate an Old Window With Sliced Wooden Branches and Twigs
Old mirrors can be easily upcycled and the possibilities are endless but if they're in a good state why not use them for their original purpose? Ask a friend who owns the right power tools to slice them beautifully, sand them, and stick them on the contour in a neat composition.
Via paigespartyideas.com
Upcycle a Broken Lamp in a Natural Organic Manner
Whether you are looking for a new lamp and you've decided to purchase a lamp kit or simply upcycle an old one, using branches as a structure is a safe and viable option. Make sure that the bulb is at a safe distance from the wooden part though.
Probably the most creative solution in our guide and the least expensive bar hanger ever produced. Craft away!
Movable Organic Branches Coat Hanger
The free-standing coat hanger alternative was mentioned earlier in the article. Notice how two different parts of the root are changing the graphic result.
If you are a fan of rustic design you can embrace this solution with ease. The small branches have been sliced here but you can create a bigger ensemble of twigs and branches in your hallway; the branches will serve as a coat hanger while the small twigs can work as key hangers. Make use of the organic, warmth, and coziness of wood in your design, and imagine the bigger picture. The result will be impeccably beautiful and it will be YOUR design!
Via roobyroost.com
What do you think about our hand-picked selection? We would love to hear your opinion in the comment section below and we would be more than delighted to see your crafts on the subjects.
Cardboard crafts and cardboard DIY projects harness the unexpected potential of a material often tucked away in corners for storing items deemed unnecessary. For those passionate about DIY, cardboard offers a canvas for creativity, inviting you to engage in a variety of hands-on projects. Whether it’s constructing innovative bookshelves, designing unique phone holders, crafting decorative chandeliers, or building cozy pet homes, these cardboard crafts embody the spirit of resourcefulness. Dive into the world of cardboard DIY projects and discover how you can transform this humble material into something extraordinary. Embrace the opportunity to think outside the box—literally and creatively!
store books and magazines in a cardboard bookshelf
create DIY cardboard gift cards for the next holidays
What do you think about using cardboard in DIY projects? Feel free to share your ideas in the comment section below.
Not one single day passes without encountering a bottle cap. Not one day. Simple and insignificant for some yet extraordinary resources for others. Ingenious bottle cap crafts are following these words, ready to surprise you with a smile that you cannot imagine.
All of them are simple.
Equally brilliant they are all.
Feed your imagination!
We invite you take a moment and cast a glance at what may soon become your next diy project as creativity unravels in front of you. Keep in mind that thousands of people are gathering these magnificent items in collections, travelling the world for such trinkets.
Cool Bottle Cap Crafts
#1 Personalize an Ikea Coffee Table Into The Perfect Playground
We would love to hear your opinion in the comment section below on these bottle cap crafts! Craft away!
Finding unique and fun flower pots can be really hard and even when you find them they may cost you a fortune. So, why don't you get down to work to give the boring terracotta pots an interesting look on your own according to your preferences and style? There are so many different designs that you can make with ease, you just have to grab some paint and some brushes. This is the easiest and the cheapest way to decorate your home with matching pots. Scroll down through the photos below and see How To Give The Dull Terracotta Pots Super Interesting Looks. It will be hard for you to choose a favorite design because all of them are more than amazing. Check them out and see what I'm talking about!
Is Batman your favorite superhero? Well, it seems that is about time to make yourselves your brand-new Batman terracotta pot that everyone is going to love!
Even if you are not feeling very artistic there are some designs that you can rock as well. This dotted pot doesn't require much proficiency. Just paint the pot in the color you want and make some dots here and there in the size you like the best.
By using lace you can give your terracotta pots a new and fresh look in no time. All you have to do is to stick the lace on the pots with glue. As easy as a pie.
Is the decoupage technique your thing? You can try it out on your terracotta pots too! Get some designed tissues and give the pots a new, colorful life.
If you have your small garden planted in amazing terracotta pots, then this is the design that you should try next. Writing the name of each plant on the pot is really fun and even those who don't know them will have the chance to learn them easily.
Color blocking is an interesting way to add color to these brown and dull pots, so use tape to do them perfectly. You can even paint the inside of the pot since a small part of it it's still visible.
Even your favorite quote can be written on the pot and get you through the day. The daily motivation will be on your favorite pot and flower in your home decor if you recreate this design. What do you think?
What do you think about these projects? Are you ready to reinvent your flower collection?
Mosaic art is one of the oldest type of crafts that is still very popular today, with seashells, eggshells and pebbles of all sizes being used to keep this skill alive. This form of handiwork can be fabricated using just about any kind of material even glass, with just the assembling of small pieces to fabricate a beautiful artifact. Whether it's glass or shells that are being used, each piece is usually painted, glued together and set to form the desired image. Some enthusiasts may choose to work with tiles.When getting into this pastime, draw out onto a sheet of paper or canvas the picture you would like to create. Ensure you have a tile cutter, gout, thin set, gloves and googles to protect your eyes. Another material that can be used for this type of montage is ceramics.w In ancient times mural artifacts were a popular scene in synagogues and other important structures in the eastern part of the world. Consider using wood that is easy to work with like ply to build an indoor patchwork picture as a first attempt to learn the relevant skill. Try to involve other members of the family to help or include friends until confidence is gained to create a collage on your own being mindful that there are two types of plaid, indoor and outdoor. Try to experiment with different types of apparatus to discover which material is easier to work with whether it's seashells or cardboard. It would be best to set aside a room or outside area specifically for this kind of hobby especially if you're working with broken glass or ceramics.
The easiest way to hone this art is to remember, once you can tile and draw you can do mosaic art. Consider these 20 eggshell mosaic art to inspire the artist in you.
Eggshell Mosaic Art
#1 Eggshell Mosaic Art- a montage of a valley in spring
#2 Consider depicting the beauty of a white flower in bloom
#12 consider creating an artifact of lilac flowers protruding from a white background
#13 display a painting of children dancing around a tree in the fall
HOW TO MAKE EGGSHELL MOSAIC ART
What do you think about this technique? We would love to hear from you in the comment section below !
Cement and concrete has been with us since Roman times and the Brutalist current really put the raw concrete wall on the spot. But only recently concrete objects like furniture design, lamps, flower pots, candle holders and other similar decorations have taken off and have secured a place in the contemporary interior design lines. Clean, sharp lines, bold shapes or just simple ones reflect the object itself, not covering it into an appealing wrap. Its textured, rough materiality is the one that empowers the product and gives it an attractive appeal. And while laying a concrete wall is a difficult job, suitable for professionals, small cute fun DIY cement projects are easy and approachable for every member of your family. The best part is that even if you ruin a piece or item or it does not come out quite the way you wanted, you can always make a new one quite easy and fast. And they may represent beautiful gifts as well, with some personal touches such as lace printing, fingerprinting or sculpting initials on the raw concrete. The possibilities are numerous and the results depend only on you and on the degree of roughness or finesse you want the texture to have. we hope the collection below will inspire you to try and take a chance at making these simple DIY cement projects.
1. DIY Cement Candle Holders
2. DIY Cement Projects- Cement Flower Pots
3. DIY Concrete Planter
4. DIY Concrete Coffee and Side Table
5. DIY Concrete Stool
6. Concrete Coffee Table
7. DIY Cement Clock
8. DIY Cement Cellphone Holder
9. Concrete Drink Cooler on Rolls
10. DIY Small Concrete Fire Pit
11. DIY Cement Bookends
12. DIY Cement Magnetic Letters
13. DIY Cement Deer Head Sculpture
14. DIY Cement Lamp
15. DIY Round Cement Candle Holders
16. DIY Cement Projects- Christmas Decorations
17. DIY Cement Pen and Pencil Holders
18. DIY Concrete Table Cloth Clippers
19. DIY Concrete Hanging Lamp
20. Cement Magnetic Eggs
Starting a new DIY project can be tricky, especially if you are e beginner in the DIY area. The type of project, difficulty, materials used and general end appeal will make a huge impact on your future crafts and will set the line of your future endeavors. You have to be aware of the fact that there are little chances of properly succeeding a DIY project from the first try. Perseverance is required, as well as patience and dedication in order to really achieve that dream item. We have started today's article with one thought in mind: searching a list of crafts and ideas that are easy enough for any DIY beginner that will inspire and convince you to give DIY a try. But most importantly in the DIY process is not the end result, but the process itself, so try to enjoy them and turn them into a family event you will cherish forever. We invite you to browse through our gallery of 20 Creative Simple DIY Crafts For Beginners and to express your opinions and share your own crafts in the comment section below. Enjoy!
Copper furnishings can bring a metallic look to your home decor whether you're snapping together pipes or spray painting glassware. Copper can carry an industrial appearance or if you prefer a more chic complementary accent to your furniture. The use of copper stems back to many centuries but it seems to be making lately a comeback in many various forms. Copper can be used in designing kitchen counter tops as well as a great back splash. Redesign your bathroom with a touch of copper or the hand rails on your staircase to trade a flat decor for a sheen look. A great place to add some trace of copper would be near the fireplace, as it would highlight the bright reddish-orange color of the metal, while also reflecting of the warmth of the fireplace.Use copper made items to brighten any dull area of your home or add a lift to a dull backdrop. Copper can be used in both modern and traditional spaces but works best when placed near wood or in a rustic decor. Depending on how you design your room, it can be made to stand out or it could be used quite subtly in a contemporary home or office setting.
On one hand copper can be displayed in bronze style in the form of a bracelet, baking pan or wall fireplace and on the other it can take on more polished tones in items such as copper stools in a white kitchen decor. By the looks of things it seems as though copper is soon the be the new silver, with such fast growing trends in home design and folks always wanting that extra special something to bring warmth and gleam to their home during the winter season.
#1 Gorgeous DIY Copper Projects- Manipulate a piece of copper to form an item of wearable jewelry
Consider getting someone a gift made out of copper this Christmas. Please leave your valuable feedback in the comment section below.
Recycle and up-cycle as much as possible, every day. Maintain a small carbon footprint and never throw away useful or recyclable materials. With multiple wine bottles or glass bottles in general you can run spectacular sustainable DIY wine bottle outdoor decorating ideas and projects in a heartbeat with your loved ones, creating an extraordinary experience that benefits the entire world. Prepare for the summer nights with a small wine bottle water fountain or an insanely beautiful bench decorated with wine bottles. Complete your pathway with a durable material, glass, and your path will shine every night under festive light. All the projects curated in the section below use materials that can be found in every home and all of them are budget-friendly whilst being incredibly beautiful. Feed your imagination and craft away!
1. Old Wine Bottles Used as a Decorative Element in a Wall and a Bench
What do you think? Are DIY Wine Bottle Outdoor Decorating Ideas for you? Would love to hear your thoughts in the comment section below!
If you've been looking for a fun, creative way to spruce up your home, look no further! I’ve got some amazing ideas that will not only keep you entertained but also enhance the look of your space. These DIY projects are perfect for keeping you busy and adding a polished touch to your home. Whether you’re a seasoned DIY enthusiast or just starting out, these 19 Quick And Simple DIY Rope Decorations That You Shouldn't Miss are perfect for everyone. Rope is incredibly versatile and easy to work with, ensuring great results every time. From stylish coasters to chic wall hangings, these DIY rope projects are both decorative and functional. They add a unique texture and character to any interior. Scroll down and get inspired by these must-try rope decorations that will transform your home into a cozy, stylish haven. Trust me, you’re going to love these DIY crafts and the beautiful touch they bring to your space!
These projects are very budget-friendly and won't break your wallet. Take a cardboard box and use rope to turn it into a fantastic storage box in no time.
Do you desperately want to add a room divider in your room but you don't have money to do it? This is a cheap and easy project that you can make on your own, so what are you waiting for?
Adding shelves in your home has never been easier! Just get the desired wood pieces, make wholes in them in hang them on your wall by using rope. It's a charming decoration that everybody is going to love!
When you are bored with your mirror, just update its look with rope in a few easy steps. It will immediately get a brand new look and will refresh the decor in the whole room.
Old lamps can really be an eye sore, so if you have one in your home and you are thinking about throwing it away, stop and think for a second. You can change its design quickly and easily by using rope, and you will get a completely different look of it for basically no money! Get some glue and rope and get down to work!
Which of these ideas would you like to try out first? There are more than one that caught my eye, and I will definitely recreate them and add them in my home decor!
Usually, the prettiest DIY crafts are made from things we see everyday, like, for example, tree branches. This is the reason that made us to show you some unique ideas to decorate your home using nothing but simple branches from you garden or backyard. These projects are simple, very cheap and the will cost you only a little bit of your free time. If you have some free time it’s perfect, if not, you should take a break and relax, because we all know how important is to relax now and then, just to clear out our minds. Crafting is a really great way to light your imagination up, to take a break and to decorate your home or garden with whatever you want! So get creative and start these 18 Creative Craft Ideas- How To Use Tree Branches now.
If you have replaced your old windows with new ones, then you are probably left with the old windows wondering what to do with them and where to put them. Here, I'm going to save you from that troubles, and will show you 17 Useful Ways To Repurpose Old Windows in your home.
They can be reused functionally and you will be glad that you saved them, they are all easy to do DIY projects that can emphasize your space through memory, age, nobility, a splendid presence that previously guarded your shelter. Scroll down through the photos below and check them all out!
If you want an enormous mirror in your home that is original in style, we suggest you to put together several window frames and will the places for glass with mirror. The result will be fantastic!
If you desperately need a cool pin board for your desk, here is how you can make it by recycling both old windows and wine corks. How do you like the idea?
What do you say about turning the old window into a clothes hanger? You don't need much skills to make this project. All you have to do is to add hooks to it.
Keep yourselves in track of all the events that you have to attend by creating the idea below!
Source
Which one of the ideas made the biggest impression on you? How are you going to reuse old windows? We would love to hear from you in the comment section below !
A highly important lesson that we should share with our little loved ones is responsibility and resource management. It may sound too much for some parents but making your child aware of what he is receiving and how valuable or non valuable are items in life is an extremely important thing from our point of view. Moral principles and education are the most important things that children remember and borrow from their parents to build their character. Make sure that you are a raw model for your child and do your best to make him aware of the world around him even if it is a little more grim. Through simple and creative piggy banks crafts you may start the education on one of the most delicate subjects in life : money.
Every simple step in this process can be educative, from recycling the bottle for the new piggy bank up to the monthly deposit that should be considered, a deposit that will be considered for his favorite toys probably. We invite you to cast a glance at the ideas showcased below and consider this short craft for your upcoming project.
We would love to hear your opinion in the comment section below on the subject. Creativity knows no boundaries and these 15 highly creative ideas are here just to feed your imagination and serve as starting point in your crafting endeavours. You can elaborate and craft your own piggy bank bent to the personality of the child to gain his interest and engage him in a memorable experience. Craft away!
Pottery is an art of using ceramic materials to mold into artifacts, tableware, stoneware and porcelain to name a few. Many people take up ceramic art as a hobby or master the skill as a way of making a living for themselves. The Chinese are one group of people who take ceramic or porcelain making and pottery painting more seriously and to a higher level. Through a few documentaries, many of us learned how to cover up a once broken ceramic tableware with pottery painting skills. Ceramic making involves the use of clay and other relevant materials. With ceramic materials, the modeling clay is molded by the hands while spinning in a circular motion into whatever object the potter desires to create. The bare hands are constantly exposed to mud, dirt, clay and in some cases animal or cow dung. So this art requires the artist to always have his hands immaculately clean when he is not at work. Finger nails must be always clipped and kept low to avoid as much as possible fungi and bacteria from taking up residence. Here are 16 examples of pottery art and ideas you can use for your own do it yourself pottery painting at home.
15 Do-It-Yourself Pottery Painting Ideas
#1 This pottery painter is simple creating a lot of dots to form a pattern
This just goes to show you don't need to be a professional to get started on your love for painting your ceramics. A simple idea of using a strong bright color on a -lain white ceramic ware will do.
#2 adding humor and fun to your pottery painting
Try including the kids into your pottery making ideas, a great starter skill for them to learn and with their appreciation for such art, you may have to bother with them disregarding or destroying it.
#3 unique ways make your pottery painting more versatile
Redesign that plain coffee cup into a two colored pattern. Just use crepe paper to cover the part you don't want painted in case the paint spills over.
Unless you have knowledge and experience in pottery painting, can you tell this is a plate at first or second glance? Me neither.
#9 multicolored pottery painted canister for home use
Can be used for decorative or functional purposes.
#10 pottery painted tea pot depicting a place by the sea
Using words to bring your tea pot to life is just as creative as using paintings. Better yet painting a memorabilia on your ceramic tableware to always remember an important event in your life.
#11 express your feelings on your flatware using pottery painting
Now here is a great gift to give to that special little person in your family or even at a kindergarten school event.
#12 heart shaped pottery painting plate purely for decorative purposes
A Valentine's day gift maybe? Very artistic skills demonstrated here which I am sure is not for beginners.
#13 A lady bug tea pot designed from pottery painting
This red and black pottery painted tea pot speaks for itself in terms of how brilliantly creative one can get when taking up the skill of pottery painting.
Here is a pottery painted piggy bank to teach your kids how to save their little pennies.
Just love those pottery painting do it yourself ideas. Go ahead and share yours in the comment section below if you are a pottery painter or lover of ceramics and porcelain.
Concrete is by far the most used composed material, from regular construction projects to decorative small items. Our topic for today is DIY Concrete Ideas For A Chic Minimal Design Line.Casting concrete or cement in different shapes and sizes is such an easy task nowadays more and more people choose to take on such creative DIY projects. From concrete coffee tables, elegant sculptural cast bathroom sinks and all sort of accessories and flower pots, there is a wide variety of ideas and crafts to draw inspiration from. We have gathered a selection of different wonderful DIY Concrete Ideas which we have found appealing. We invite you to cast a glance at the gallery showcased below and to choose your favorite concrete project to start this summer. We would also love to hear your ideas and see your own concrete projects so feel free to share them with us in the comment section placed at the end of the article. Enjoy!
1. Concrete lamp filtering light trough raw texture
2. Vegetables bowl exuding a natural vibe
3. curved fruit bowl perfect on any table as a decorative item as well
14. DIY Concrete Ideas-the simplest of table lamps
15. a sturdy chopping board made out of concrete
What is your take on DIY concrete projects? We would love to hear your opinion for don't hesitate to leave your feedback in the comment section below.
Rope and hem has always been an element that can generate around it a wonderful feeling of warmth and coziness.The natural fibers can complement any type of decoration and contrast the purity of bleach white Scandinavian wood. Associations between different elements such as rope, glass and candle light can lead to extraordinary projects that will infuse a timeless atmosphere into any interior decor scheme. The issue of diy rope crafts has been presented several times on Homesthetics in the past in articles such as:
Today we are focusing our attention to another set of 15 Beautiful Rope Crafts For Timeless Decor Ideas we have found profoundly delicate and beautiful in their simplicity. Enjoy the list and choose your favorite craft today.
1. a classical diy rope mirror frame
You can transform an old vintage mirror you are keen on keeping in the family by adding a thick rope frame. Use this wonderful natural material to create the hanger for the mirror as well and place your craft in an airy natural lit room for it to really shine.
2. elegant glass and rope diy candle holder
Candles warm up our souls and infuse wonderful fragrances into our abodes. Thus the actual support of the candles is important as well for the overall image expressed in your decor. Choose to associate glass and rope for a very complex yet subtle creation.
This particular craft is so beautiful it takes your breath away. But its complexity lies beyond the actual intricate pattern and is completed by the beuatiful nature of the material itself.Let the creation breath on an empty wall and do not associate it with heavy objects.
A single ring made out of thick rope can express so much beauty and elegance in one swift creation.Associate it with weathered wood and you've got yourself a winner.
A vintage decor deserves a proper lighting fixture, one expressed in the same manner and style. Rope, wood, metal and light all merged into a bold eclectic creation.
Source
6. delicately decorated candle holder
Another wonderful example of how to decorate a glass candle holder with natural rope. You can use a hot glue gun to create any type of decoration or pattern on the glass container.
The example below features a wonderful example of offering identity and flair to a public space. The same idea can be applied to an open plan home where you can use rope to separate different functional spaces. You could also use a rope wall as a support for climbing vines.
You can recycle an old chair and redo its bottom by using thick rope in a woven form. You might even like the effect so much you might want to change up every single chair in your home.
Recycle old wooden pallets, clean the wood up, and use a hot glue gun and rope to illustrate a beautiful message you can use to decorate your blank walls.
Although using old car tires indoors is considered to be unsafe and toxic, the same idea does not apply outdoors.Use a large quantity of rope to dress up the tires and create cozy ottomans suitable for your backyard.
Surround a wonderful family picture with a layer of rope and decorate it with shells for a nautical touch.
Source
13. a different type of DREAM-CATCHER
Invest time in creating a beautiful dream catcher diversify the model as you go along and improve your technique. Use beads, feathers, and other decorative pieces to embellish your craft.
We conclude our selection with another delicate craft suitable for your blank walls. This particular design embellishes the headboard wall and draws the entire focus of the room to it.
Choose your favorite from he rope crafts featured above and leave your valuable feedback in the comment section below.
Driftwood crafts are something extraordinary, driftwood diy projects have an allure torn from fairy tales. Simple, transparent and ephemeral these pieces of wood can be assembled into timeless decor pieces that will beautify your home. If you are lucky enough to live near a beach you will have all the resources at hand, just engage the healthy habit of walking along the coastline each day, relaxing completely whilst scavenging for driftwood treasures. Check the selection below and start your own diy driftwood project next weekend.
We would love to hear your opinion on the driftwood collection showcased above. We`ve found these crafts breathtaking beautiful and simply inspiring. Pick your favorite and start your scavenger driftwood hunt today !
A beautiful season to start crafting and gardening is upon us and slowly, step by step along with nature we start shaping garden projects and simple diy projects alike, infusing our creative mindset into our cozy household. A short collection of up-cycled furniture ideas for your home and garden has been curated for this marvelous spring season, the gallery includes simple crafts that mainly present re-purposing crafts, these now wear color and vegetation, greatly emphasizing their new position.
If in your spring cleaning process you decide to make a furniture change the article below is here to help, showcasing how a simple element can be re-purposed in your garden or home in a matter of minutes, conserving energy. A refreshing change indoors can become a refreshing change outdoors, old windows, doors and headboards can become swing sets, pergola ensembles or garden sheds, items that could enhance your household, provide additional storage or comfort.
Cast a glance at the ideas showcased below and surge inspiration, we would love to hear your feedback in the comment section below.
Upcycled Furniture Ideas for Your Garden and Home
#1 Up-cycle a headboard into a beautiful outdoor couch
In a matter of minutes with and old door or headboard and wood from a pallet you can create a new patio furniture piece of great beauty.
#2 use an old dresser on your porch to adorn greenery
Feature greenery, vegetation, the most beautiful decor piece on your patio from an old piece of furniture. You can display the address as well along a welcome message.
#3 Build a small shed out of old doors and store your tools
Three four old doors can become a new small shed to nestle your garden tools; an old phone cabinet can also do the job well but needless to say that they`re not easy to obtain. Get creative with simple elements.
#9 paint an old chair and transform it into a new flower garden ensemble
A chair treated like a raised flower bed can boost color and greenery a great deal; simple and fast to realize this craft will surely change the image of your garden or patio.
#10 Re-purpose an old kitchen cabinet into a potting station
Your potting station should be properly organized for the sake of your flowers. Repurpose an old furniture piece, paint it in vivid color and make the process easier and more interesting.
#11 two old doors can become a beautiful arbor-pergola ensemble
Two doors can sustain a few slabs; these will encourage vines to climb over the ensemble and beautify your garden.
#12 use your old sink to shape a small bird bath
The sound of the little animals can really animate your garden. A sink can be their new bath.
No one can complain of a dearth of DIY ideas, for the web is littered with all kinds of DIY project ideas. Instead of helping, the abundance of project ideas is causing confusion, so we have decided to pull DIY geeks out of the state of utter desperation by providing a list of 101 awesome DIY projects. It will excite a DIY aficionado so much that he/she will roll up her/his sleeves, plug in some music, get the DIY gear organized, and shut himself/herself in the crafts room to create the next masterpiece. Enjoy!
#1 Beautiful tetra box lamp
It is only when one starts looking around that the person sees how exciting the DIY world is. How many of us have ever imagined that something so mundane like a tetra pack can turn into such an awesome lamp? Making unexpected things from mundane, everyday objects is what makes DIY projects so exciting. The key to success in this project lies in the arrangement of triangular shapes made from a tetra box. To know how, follow the link below.
An artist uses blank canvases and crayons to make all kinds of artwork, but seldom does she use these two and turn them into a piece of artwork. To get this done, you need a canvas, boxes of crayons, glue, and a blow dryer. The first step in making this is to lay the canvas flat and then arrange the crayons in the shape you want. Afterward, fix the crayons on the canvas using glue. Let it dry for some time and when it is suitably dry, you should power up the blow dryer putting the setting to the maximum heat. Now move the dryer closer to the crayons making them melt and flow. The key to success in this craft is the flow of your dryer to get the desired shape, as shown below.
This is, perhaps, the most exciting wine bottle craft we have come across in years. The end result looks so classy and so chic that people will immediately lap up this project. It requires a set of wine bottles, a wooden board, and cutting, measuring, and drilling tools. The key to success in the project is the design of the wood board and how you balance it on a stand made of wine bottles.
#4. How to cut glass bottles
Knowing how to cut a glass bottle is an essential skill that all DIY aficionados should know, for you will not be able to complete any DIY project that needs bottle cutting without it. Thus, you will not be able to upcycle your empty wine and beer bottles. You may want to follow the project link and/or steps shown in the following infographic to learn the art of cutting bottles without breaking them or hurting yourself.
When converted into flowers and arranged in a flow, white crepe papers and orange thumbtacks can do magic on your wall. It is so simple to make, yet it adds glamour to an otherwise mundane-looking wall. The key to success in this project is how carefully one arranges various sizes of paper flowers to form a beautiful shape. You can give it the shape of a bird or whatever you want. You can choose the color of crepe papers and mix and match to get a different style, which will also depend on the layout.
People often discard used-up toilet paper rolls, but then they are not DIY geeks and they do not trust their imagination. Fortunately, not everyone is like that so toilet paper art has been born like the one shown below. To make this art at home, a DIY enthusiast will need 135 toilet rolls, each cut into five sections. One would need a lot of free space in the craft area to execute it. The first step in the process will be to make small sections of the craft and then join them using a glue gun, as the tutorial suggests.
Using a package of embroidery floss, a cork board, and some trim nails one can make an expensive-looking yet inexpensive string art to decorate a dull wall. The process is simple, but it takes some time. The first step is to make a template or layout on which you will fix the trim nails for colorful embroidery floss colors to move. The most crucial part of the project is to tie strings in such a way the colors give the illusion of flow. Check the project details on the link that follows.
If going organic is your dream then what could be a better way to do so than by making your own bioproducts. This project talks about one such product. The requirement list for this project is pretty simple. You will need 235gm soap base to make 6 small soaps, soap colorant, 6 soap molds, something for grinding and crushing the ingredients, and pumpkin spice mix which shall contain 1/4 cup cinnamon, 1tsp nutmeg, 1tsp ginger, and clove. Once you have all this ready, follow the tutorial on the link below.
Source: Homesthetics
#9. Mosaic Tile Garden Stepping Stones
Nothing excites a gardening aficionado more than handmade things she can put in her garden and she can be all jubilant if the craft is represented by colorful mosaic stepping stones for the garden. The project is simple to execute and needs very few items. A DIY garden enthusiast will need a plastic vessel, mosaic tiles, craft paper, pencil or sketch, plier, PVA glue, and grout. The steps are shown in the image below. It is important to note that the shape and size of the stepping stone will depend on the shape and size of the plastic vessel, so select one wisely.
Lying in the bathtub, sipping red wine, and listening to music sounds like a perfect relaxation technique and if you are getting excited about it then it is time for you to take your DIY gear out and a piece of wood, as you are in luck today. The DIY project dealt with below will help you create a perfect bath caddy using reclaimed wood. Just follow the instructions on the project page.
Source: Homesthetics
#11. Heena-style Wine bottle
When a flower, natural or artificial, is placed in the silver-colored wine bottle with a heena-style painting on it, it brings oriental charm to the household. This traditional design wine bottle will look classy in your living room.
#12. How to paint glass
Glass painting may sound easy to some, but it presents an unsurmountable challenge for others, particularly when it involves painting complex patterns. The following video can help you learn the art and constant practice will help you master it.
For someone who is into books, an iPhone dock hidden in a book will be exciting. The only cost one has to pay for it is the book which will be drilled and the pages which will be cut to make way for the cable. With the help of a drill, binder clip, scissors, knife, and ruler one can get an iPhone book dock like the one shown below. The key to success in this project lies in the accuracy with which you make the slot in the book for the charging cable.
This is another exciting DIY project for men and women of letters. To make coasters like the ones shown below, a DIY enthusiast will need cork sheets or MDF board and large-size printed characters and then these will be cut from the MDF board or cork sheet using a sharp hobby knife. You may need to sand the edges to make the coasters smooth. The key to success in the project lies in the accuracy of cutting the characters.
Love is spread by words, so it is always better to have meaningful words spread all around your home. This DIY craft does just that with the help of a piece of cloth, linen in this case, letter stencil, permanent marker, acrylic paint, and crafting tools. The first step is to measure your pillow and stitch a cover. Afterward, you can use the stencil and permanent marker to trace the message on the pillow, which will later be filled with acrylic color. The key to success in this project lies in the power of the message.
When it is Easter time, the first thing that comes to mind is beautifully designed Easter eggs. Each year people scan all kinds of sources to find awe-inspiring Easter egg ideas, but very few can beat pinata eggs. Making these eggs is easy. Apart from big chicken eggs, you will need some various colors of confetti, crepe paper of different colors, a roll of crochet thread to hang the pinata eggs with, glue, a paintbrush, and some toothpicks.
How many of us have thought that the corrugated cardboard box that we are throwing away can be used to make a beautiful lampshade? Making this BoxHat lampshade could be a challenging project, but then the end product is equally rewarding. The key to success in this project lies in the way you cut corrugated cardboard to make parts of the lamp. There is just one shortcoming in this, the lampshade looks raw. You may spray paint it to make it more attractive.
After the Easter Egg Pinata, it is time to make one more pinata, and this time with a photograph of your friend or family. To make this you will need a photo, crepe papers, white card stock or thick paper to make a box, masking tape, double-sided tape, confetti, candies to fill the box, a pencil, scissors, and a ruler. It must be noted that the photograph for the pinata should be as large as the front of the box. Once you have all that you need you can follow the step-by-step guide and create your own 3D photo pinata.
#19. Stained glass autumn tree made with nail polish
With a little bit of imagination, a thin metal wire, dark-colored paper tape, red and orange nail polish, and needle nose pliers you can create a stained glass autumn tree that will force people to ask how you made it. The process is quite simple and it only involves twisting the metal wire to make loops for leaves and branches, covering it all with paper tapes, and applying nail polish to make stained-glass autumn-tree leaves. The key to success in this project lies in how you apply the nail polish to the loop and make the tree stand firm on the table.
A well-made paper craft family tree will surely attract the visitors’ attention and will display your family pictures in a proper context. It will also decorate an otherwise mundane wall. Some toilet paper rolls, paints, glue, and some family photographs are all you need to turn the toilet paper roll stash into a work of art. The key to success in this DIY craft is the organization and layout of the tree. Cut toilet rolls in small sizes for branches and open them up to make branches and the stem.
To create this beautiful butterfly chandelier you will need enough color papers to cut 136 butterflies from it, a butterfly punch die-cut or silhouette digital craft cutter, fishing line, 15-20 yards of ribbon, 14" metal ring, scissors, and glue. The key to success in this project lies in how evenly you hang the 136 butterfly pieces with the fishing line. Everything else is comparatively easy.
With some pieces of toilet paper rolls, glue, colors and a design layout a home decor aficionado can make a work of art that will be worth displaying, as shown in the image below. One can add variety to the art by adding different colors to the inside of the resultant design. A meta-shape can also be made by using colors and a proper layout so that a shape becomes visible when seen from a distance.
This DIY concrete candle holder is perhaps the easiest candle holder project. It will not take much effort on your part. To see this project through, all you need is a couple of glass candle holders, plastic ones will also work just fine, mortar, and a container to fill the mortar. You should be careful in choosing the container as this will be the shape of the resultant tea-light candle holder. The key to success in this project lies in the selection of containers and the quality of the mortar.
Wood makes an excellent DIY material. It is sturdy, can carry weight, it lasts long and its aesthetic appeal is not something we need any convincing about. In this article, we have talked about using wood to make a candle centerpiece and now it is time to get to know how to create a wooden box centerpiece, which adds up to your decor while adding storage space to your dining table. It can be used to put fruits on the table. The project is simple to execute, but it will require cutting, drilling, and measurement tools.
Source: Homesthetics
#25. Cardboard Fish Scale Wall Art
First thing first: no real fish scale has been used to make this art possible. The gorgeous wall art has been made using cardboard paper, gum, an MDF board, golden-color spray paint, and decorative trim as the main ingredients. The following design took 687 pieces of circles which were cut from 19 cardboards. Those were then stapled on a large MDF board. Afterward, the trim was fixed on all four sides before gold spray paint was applied.
This string wall art may look complex, making it though is a simple affair. To do this, all one needs is a canvas, a roll of thread, some acid-free glue, gesso, acrylic paint, and a pair of gloves to perform the messy affair. After laying the canvas, mix some water in the gum to make it thin so that it will drip off the thread. The next step will involve dipping a yard or more of the thread, depending on the size of the canvas, and laying it on the canvas the way you want. After it dries out, apply a couple of coats of gesso followed by coloring the entire canvas using the color of your choice. You must allow some time between each step for the thing to dry.
There are all kinds of photo albums around, but none of those steal the show. The winner will always be the exploding box photo album. The design looks intricate, but actually it is easy to make. One just needs to follow a few basic steps. You will require a collection of photographs, 4 pieces of 4"x4" thick paper, a pencil, glue, scissors, and a ruler to get the most beautiful-looking photo album.
Roses can be made of egg cartons. If you do not believe it, you will believe it in a while when you see the steps involved in creating a decorative rose mirror made with egg cartoons. To make this mirror, you will need a mirror, a 3mm MDF sheet larger than the mirror, 12 egg cartons if you are going for a big mirror, but only 5 if you are going for the smaller one, glue, and some regular DIY tools. The key to success in this project lies in how you cut the carton boxes to make rose petals from it. You should keep in mind that the MDF board should be large enough to have at least 2-3" space around the mirror to attach roses.eg cartons
#29. Leather cable organizer
Cables are the unwanted byproduct of technology and managing it is a constant headache for modern society. There are a few solutions out there, but those are not as elegant as the one shown below. This is a pretty simple project. It requires only 1/4 yard of leather (or faux leather), snap buttons, and some regular DIY tools for cutting and measuring. The key to success in this project lies in the accuracy with which you cut the leather to make a loop for storing the charger and spaces between the loops.
8 tbsp of sea salt when combined with a mixture of 4 tbsp of Epsom bath salt, lavender flower buds, and red and blue colorant, and when 5 drops of lavender essential oil is added to it, magic is created. The bath salt will be so soothing and refreshing that your bathing time will become the time to anxiously wait for. Follow the link to the project page and read the step-by-step guide to making the lavender bath salt.
Source: Homesthetics
#31. Frosty sandblasted sea glass vases
Pottery Barn sells some beautiful sea glass vases but the price tag is discouraging, particularly to DIY geeks who can make one such vase using a flat-tipped paint brush, rubbing alcohol, frost-translucent glass paints, and a glass vase or bottle to make your set of sea glass vases like the ones shown below. Although the one shown below has been painted in sea lavender color, you can experiment with colors and embellishments like twains, shells, etc., to give it a personal touch.
Easter is not complete with Easter eggs alone. No celebration is complete without a proper meal and when it is the Easter meal why not decorate the dining table in the spirit of Easter like the one done below? It will take some work, but the end result will be impressive. To get an Easter brunch table like this, things like lace-trimmed napkins in aqua, flowers, wood, multiple decorated Easter eggs, a table runner, decorative bottles, pillar candles, and white china are needed. Like in every other design, certain things can always be played around with.
Lights create and uplift the mood. Proper lighting and light sources accentuate any environment. And despite all the developments in modern technology in lightening the romantic appearance of a candle is not lost to mankind, particularly those into DIY. And it is also true that a DIY geek will not like to throw away anything out of his or her home, for they have a hope to convert it into a work of art. The following project gives one such hope to a small piece of wood that you might have kept in your store. The idea is simple and so is its execution.
This exquisite-looking modern pom pom pillow is super easy to make. All it requires is a white pillow cover, a handful of pom-pom balls, glue to stick it on the pillow cover or needle and thread if you are a stitching kind, and a layout to fix the pom-poms on the pillow. You can give whatever shapes you want.
#35. Valentine’s Day branch tree
The Valentine’s Day version of this Scandinavian Christmas branch tree will help you woo your love’s object. The project looks complicated, but it is not that difficult to accomplish this. You just need some scrapbook paper in pink and red to cut hearts from, some glitter, pink and red baker’s twine, branches from your backyard, clip-on birds, a whiter pitcher, and white spray paint. The first step is sizing the branches, which will be followed by spraying them with white paint. Place it in the pitcher and clip the birds on it. Now in the final stage, you will need to cut some heart-shapes from the scrapbook papers and attach each heart to a piece of twine. Then hang each one of them to the branches. The key to success in this project lies in the uniformity with which you hang hearts and attach clip-on birds on the branches.
Talking of Easter, let's talk about cakes. Who does not like a delicious cake? Moreover, if it is a bunny-shaped cake the kids in your family will jump with excitement, making Easter even more fun. Making a cake like the one shown here is easy for a baking enthusiast. All one needs is an 8-inch cake round, some shredded coconut, sweetened, of course, jelly beans for eyes and nose, colored cardboard paper for ears, and colored tubs of frosting. Just follow some simple steps and the bunny cake will be ready for Easter.
The sunburst mirror is a craze among DIY enthusiasts and there are quite a few ways to make one, but there will not be many sunburst mirrors that will look as classy as the one made by Catie. The mirror shown below gulped 100 kabob skewers, silver-color spray paint, a circular mirror base, and glue. The crucial step in the project breaking the sticks into sets of various sizes and a layout to position them as per the design.
Ojibwe people believed that a beautifully nested dream catcher would trap the bad dreams, Bawedjigewin, in its intricate web while allowing the good ones, bawedjige, to come through. Like the Native American people of the past, many believe that a dream catcher can filter dreams to only good thoughts and dreams to enter the mind. This sounds exotic and so does its design, which has been beautifully detailed on the project page. Just follow the link and make your own beautiful dream catcher.
#39. DIY Copper Cutlery Quick Fix
This Super-easy DIY tip is for those DIY geeks who want expensive-looking cutlery without forking out lots of money for that. This is one of the easiest and least time-consuming DIY hacks that you can find anywhere on the web. The requirements are quite simple. Apart from a set of spoons, forks, and knives, a DIY aficionado will need a can of molten metallic color. To get this you will need to dip the cutlery into the can of molten metallic color and let it dip dry for some time.
This DIY project idea will not only help you decorate a boring corner in your room, but it will also help you preserve and share the memories. The project requires a set of 32 4x4 photos and glue to fix it on the wall. The beauty of this craft lies in the uniform spacing between the photos and the white borders around the photographs which have slightly rounded corners.
#41. Beautiful plastic spoon lamp
People do not think twice before throwing out use-and-throw plastic spoons. They do not see any practical use of it and as most of them are not DIY geeks they do not know terms like upcycle. Plastic spoons and a bottle when passed through a DIY gaze turn to become a beautiful lamp like the one shown below. The craft is simple to execute. The key to success in this craft lies in the way a DIY aficionado attaches spoons to the bottle to form a fish scale-like layer on the bottle.
#42. Plastic spoon rose pendant
It is not only a lamp that can be made from plastic spoons. They can also be used as a beautiful pendant. This may sound counter-intuitive, but it will cease to appear so when you follow the steps given on the project page. The steps are simple to take, and all you require are 17 spoons of different sizes, a candle, and a needle nose plier. The key to success in this project lies in how well you mold a spoon into a petal.
Although the penny has practically gone out of circulation and has ceased to be useful for financial purposes, it is not altogether useless. It can be upcycled to create a work of art that people cannot help but admire. This is a simple project but takes some time to complete and this one needs an MDF board, a lot of glues, and lots and lots of coins, the number will depend upon the size of the wall you will want to build. The first step in the project is arranging the pennies as a DIY geek will want to attach them to an MDF board using glue. One can even arrange it in a way to form a figure when seen from a distance. Then one should apply self-leveling epoxy to give it a cover. The key to success in this project lies in arranging pennies for the project. It took 19, 400 pennies to make the following penny wall, which measures 9x8 ft.
This is another project idea that uses pennies as a decorative item and unlike the previous one, this does not need so many. Yet the beauty of it is still mesmerizing. The idea is to create a penny mirror and again the number of coins one will need will depend on the size of your mirror. The project is pretty simple. All a DIY enthusiast needs is a large-sized mirror, a mirror mount, glue, and lots of pennies to form the frame of the mirror. One can also think of applying some kind of laminate once the penny is fixed in its place to give it a smooth feeling. Self-leveling epoxy will be a good option as well.
There will hardly be anyone who does not buy shoes, but unlike most folks, DIY aficionados will prefer to create a killer craft from the shoe box rather than throw it away. With a little bit of help from scissors, glue, and different shades of spray paints you can use your shoe boxes in crafts that will blow anyone’s mind. One will also need to use a screwdriver and screws to hang the boxes on the wall. The key to success in this craft is the color coordination among the boxes and their alignment.
There are so many ways to paint one’s wall, but none of them will excite a DIY geek as much as doing her own thing on the wall. The creation gives more satisfaction than the result. Well, in this case, the result is equally satisfying. To get a wall like the following, all a home-decor DIY enthusiast needs is a hardboard to print a Moroccan-style shape on, which will function as a stencil. The Key to success in this project is the alignment of the shapes one will draw on the wall. For this, one may want to use a level to make a perfectly straight shape every time.
#47. Clock Table from Dartboard and discarded table
Upscaling the use of otherwise discarded products is at the heart of a DIY initiative. The following clock table that was made using a dart board and table bottom bought from the flea market is a conspicuous example of that. This project will require some work as attaching the top with the bottom, printing the clock design, tracing it on the tabletop, sanding it, etc., but the key to success in this craft is how neatly you trace the design of the clock on the tabletop and paint it.
Generally, people throw away their old dinner plates and bowls, but DIY geeks turned those into bird feeders without much sweat. To get this, one would only require a plate, a bowl, a large carriage bolt, some washers, glue, and a nylon cord to hang it all. You may paint the plates to match your mood, but that is optional. The key to success in this craft is how you drill holes in the plate and bowl without breaking it.
This year's Easter decoration will look incomplete without this colorful wreath. To make it, you will need some patterned colored paper, glue decorative nest, Easter eggs, scissors, and a paper cutter. In this design, four strips were cut from 14 different types of papers, which were then glued in loops and afterward glued on the wreath form. 
#50. Messages on the Easter eggs
For the busy bee who lacks the time to make complex-designed Easter eggs, here comes a design that looks as exciting as it does complex, but requires a lot less time. All a person needs is to color eggs and let them dry and then write some pithy messages, which seeing the mood of the festivity, should be funny. The next step is to make stencils from the desired message and use it on eggs. One can also think of cutting out the letters of the alphabet and then writing the actual message with that.
Wine bottles can easily double as a bird feeder and when some wood is thrown in, the feeder looks even classier. You can opt for a complex design but give attention to how the bottle is fixed in the small birdhouse.
Without a water body, a backyard looks so dry. This is an easy-to-make mini pond that can be placed anywhere in the garden or patio. For the following kind of mini pond, one will require a water container, some water plants, garden soil, plastic pots, pea gravel, and mosquito dunks. The beauty of this project rests in selecting the water plants. The project recommends having emergent, submerged, and floater plants.
With the help of different shades of pink cardboard, a paper trimmer, glue, baker twine, and a 12" cardboard circle you can create a spring wreath that will make any decor come alive. A DIY enthusiast will need to make 80 cones for this project which will be fixed on the 12" cardboard using hot glue. The direction of gluing cones should be from the outer edge to the inside.
This is yet another exciting Easter egg project. This may look intricate, but it is relatively easy to make. For this project, a DIY geek will need one egg for the base, one hard-boiled egg for the top layer, colors, and glue. The first step is to color the hard-boiled egg and let it dry. Afterward, take the shell of that egg out by crushing it into multiple different sizes. Now the goal is to glue the bits on the other egg.
For something to be classy, it is not necessary to be complicated. The following bookmark is so easy to make that even a kid can make it. The only step involved in creating this bookmark is the folding of a small sheet of paper in the shapes shown below. One can always add variety to it by choosing different types of papers or doing some drawing on the resultant bookmarks.
Another quite easy project to undertake is the making of a stripped glass using opaque glass paint and twine or tape. Just wrap the twine on the drinking glass where you would not like to apply paint and then spray opaque glass paint on it. Leave it to dry and remove the twine. A beautiful striped drinking glass is ready.
Yet another simple DIY project to undertake is the making of a photo frame using PVC pipes. Take PVC pipes of varying diameters, cut them into small pieces, and glue them together using industry-strength adhesive. To make this, one would need to use a rectangular wooden frame to give the desired shape to the resultant photo frame, like the one shown below.
This set of hemp pendant lamps looks classy and to some, it may look like an outrageous DIY project, but then the project needs to be this exciting to make its way into the top 100 most beautiful DIY projects of all time. It must be noted that creating this project is not as difficult as it sounds. It will become suddenly easy when it is shared that the lines of the hemp string were wrapped around different sizes of bouncy balls, which were then inflated and taken out once their work was done.
With the help of a drilling machine, wood stains and screws, empty bottles and pine wood can create magic. The flower vase, as stated by the creator, takes less than one hour to make. The key to success in this project is the alignment of holes one will drill on the top of the flower vase for the neck of the glass bottle to go inside. The rest is just easy-breezy.
When the clay ribbon tool cuts the vertical lines on a glass vase wrapped in a sheet of 1CM-thick clay the result is as astounding as the textured glass vase the article is dealing with here. The craft is simple to execute but needs a therapeutic accuracy to produce a vase to flaunt. The supplies needed for this craft include a glass vase, air-dry clay, parchment paper, a rolling pin, a clay ribbon tool, and an X-ACTO knife. The key to success in this craft is how accurately the vertical lines are cut on the clay-wrapped vase.
When one sees beaded glass candle holders, one goes wow. The supplies needed for this craft have been explained in the image below. The key to success in this project is how a DIY enthusiast makes a pattern with the paint dots on the glass. As explained, the glasses should be left to dry for 24 hours before applying a mixture of glass paint and gloss paint medium.
Talking of easy-to-execute crafts, we should focus on a super-easy wine bottle craft that will transform any empty bottle into an etched bottle. There are just a couple of steps involved in the project, the most important being to uniformly apply the etching cream on the cleaned-up bottle after fixing the stencil in place. After it is left to dry for 15 minutes, the wine bottle should be rinsed under running water. Now remove the stencil to get an etched wine bottle like the ones shown below.
LED is environment-friendly, as it consumes less energy than the other light sources, so it is doubly efficient to make an LED desk lamp using an LED strip light cut into several pieces and wood blocks, maple wood in this case. It took 13 strips of six lights each to make the following LED desk lamp.
It is yet another simple yet attractive DIY project idea that any DIY enthusiast can execute. To make such a wall craft that doubles as a bracelet organizer, one needs pieces of wood or a wooden box, empty beer bottles, and something to hang it on the wall with.
The idea can also be extended to creating a wall craft that serves the purpose of hanging earrings, for which, one will need to attach a mesh to the back of the wooden frame.
#65. DIY concrete block planter
There is always a way to make mundane-looking planters into something exciting that will force people to stop and take notice. And this time all it takes is some outdoor colors and stencils to transform a boring planter into a work of art.
This is yet another exciting DIY project to upscale a corner table. The first step in the process is to strip the table of the paint using either chemical or 40-grit sandpaper. This is followed by sanding it with 80-grit and 120-grit sandpaper, respectively to get a smooth surface. The next step is to apply pre-wood conditioner and leave it to dry. In the meantime, one can color the rest of the table. This takes us to the next step of applying a vinyl silhouette sticker on the tabletop and painting it using white color. Take caution in getting the appropriate size of silhouette cameo for the tabletop.
A DIY craft does not need to be complicated for it to be exciting, and some of the project ideas that Homesthetics has shared in this series have proved it. The following wine bottle craft is very simple. All one needs is some empty wine bottles, white paint, and lace to decorate the outside of the centerpiece. The key to success in this craft is how the white paint is made to drip in the inside of the bottle.
When one sees a shoe box, one is confronted with two choices: either to throw it away or to upcycle it into a beautiful storage box or a gift box. This project urges you to go with the latter option and your DIY soul will agree with it. Creating beautiful boxes like the ones shown below is not difficult. All you need is fabric, glue and embellishments, and cardboard in case you need to make your own box to start with.
One of the classiest yet simplest to do DIY projects is creating a lace lamp. It just requires some old lace, an inflated balloon, wallpaper paste, and a tea-light candle. The first step is to soak the lace into wallpaper paste and then glue it on the inflated balloon. Once that is done, leave it aside for the gum to dry. Afterwards, prick the balloon and put the tea-light candle in the center and you have your lace lamp like the one shown below.
To create this personalized Instagram calendar one will need to get 12 pictures,card-stock paper, and a mini calendar, which, instead of buying, you can print on white cardboard. This way you will have full control of the entire process. You will also need glitter paper to decorate the cover of the calendar. To make it more meaningful, you may want to choose the pictures to resemble the mood of the month.
Another simple DIY project is making a thank you card or any card for that matter. You will only need a colorful card-stock paper for the front panel, white card-stock paper for the message, and a ribbon to decorate the card. You can either get a small stamp saying thank you made and use it with a stamp pad, or create one such text in an image editor and print it on the white sheet.
#72. Industrial pipe floor lamp
Industrial design lights or fixtures do not suit every taste bud, but if such things excite you then the following project is worth every penny you spend on it. To make this lamp you will need plumbing supplies like metal pipes of various sizes, splitters, couplers, connectors, flanges, elbows, and nuts as well as electrical supplies like power cords, light sockets, wire connectors, lamp wire, and vintage 60W bulb. Along with it, you will also need black spray paint, painter’s tape, 60-grit sandpaper, a screwdriver, a wire cutter, etc. This project could be time-consuming, but the end result is out of the ordinary. The key to success in this project is how you connect all the parts to make it stable and how you do the wiring for bulbs. You should be careful in taping all the wire joints to get protect against any accident, for the entire thing is made of metal.
Personalizing the cover of your phone is the most common desire among iPhone owners and this craft is set to meet that need. To make this kind of iPhone cover, the things that one needs are a white iPhone cover, a set of permanent markers, and a tribal design for reference. The accuracy with which one mimics the design on the phone cover will define it in the end.
#74. DIY Golden frame
Frames play a big role in the life of a person who is disposed to collect artworks, for she understands how big a role a good frame plays in adding to the beauty of the painting. To make the following golden frame, a DIY enthusiast will need an ordinary frame, gold leaf or imitation gold leaf, metal leaf sizing, 1" flat artist brush, and a fluffy brush to smoothen the gold leaf. You must not use any glue or ModPodge. Only sizing suitable for metal leaf should be used.
This is the sweetest use of your retired warhorse, read keyboard. You can take individual keys out from the keyboard and write a message with it for your valentine. Once the message is ready you can transfer it on a cardstock paper and then put a frame around it. There is a problem though, you cannot find two keys for one letter on one keyboard. To get that you may need to use some spray paint to quote the individual keys and then use a stencil to paint individual letters on each key.
#76. Paint swirl vases
Creating swirl vases is a piece of cake. One just needs glass vases and some acrylic paints to get the effect. The idea is to first put a few drops of one color and slowly swirl the vase for the paint to dance at its tune and then add a few drops of another color and keep it swirling. Drain the vase with leftover colors after the entire area of the vase is covered with the paint. The key to success in this project lies in how slowly you let the paint swirl around the inside of the glass vase.
#77. Button and string mini journal
This DIY craft can be a perfect gift for someone who loves taking notes with pen and paper. To make this journal, one will need a sturdy cover paper, you may go for a cardstock paper, inside pages, baker’s twine, and two eyelets. The project is simple to execute. The only tricky part is attaching the eyelets and string to the diary.
With the help of some scrapbook paper, gum, Mod Podge and your family photographs you can convert an ordinary-looking metal star into a photo collage, which you can hang in your home. The key to success in this project lies in carefully cutting the photographs and paper in proportion to the sides of the star. The rest of the steps are pretty straightforward.
You can easily upcycle the worn-out fabric to make a coil bowl following the steps mentioned in this tutorial. To do that, you will need a long strip of fabric, cord, yarn needle, and scissors. The process is not complicated but it is time-consuming. You should begin stitching from the bottom. The key to success in this craft lies in the combination of threat and fabric as well as in the loops that you make with the yarn and needle.
This is yet another simple DIY project that looks classy. This craft will transform your everyday umbrella into an umbrella that will attract attention and to do so all you need is waterproof colors and brushes of various sizes. You may want to use a toothbrush as well in the project. The key to success in this project lies in the interplay of splattered colors on the umbrella.
If you are into stitching then this DIY project will surely be a treat for your smartphone. The candy-like cover sewn from upcycled fabric will not only protect your phone and organize your keys and credit cards, but it will also add fun quotient to your phone.
Balloon works well as a DIY tool, as you have noticed in a couple of projects the article discussed above. This one also needs the help of a balloon to come into being. To make a button bowl, you will need lots of buttons of various colors, an inflated balloon, a paintbrush and glue, Elmer’s or Tacky to hold all buttons together. The process involves applying glue to the bottom half of the inflated balloon and setting it to dry. Afterward, a second coat of glue is applied and buttons are attached to it. When the glue dries up, prick the balloon and presto: you have your button bowl.
#83. DIY Instagram photo frame
Probably very few things will excite more the constantly-connected generation than a real-world artifact of something they encounter every day on the Internet -- Instagram. Creating this photo frame is very easy. All one requires is the colors used in the Instagram logo and a white cardboard to make a frame. The key to success in this project lies in the accuracy with which you reproduce the colors used in the Instagram logo.
This is yet another craft that uses balloons as a tool to make an awesome product. And like other projects, this also gives an output that leaves one astounded. To create a water balloon tea-light candle holder one will need some balloons, high-melt paraffin wax, a double boiler, and a cookie sheet.
Fill the balloon with water, put paraffin wax in the double boiler put it on the stove melt the wax until it reaches the temperature of 180 degrees Fahrenheit, and then dip the balloon till the water levels in the molten wax. Hold it there for a few seconds and then take it out. Dip the balloon again in and then take it out. Repeat the process for some time for the wax to stick on the outer layer to form a sufficiently thick surface. When the process is complete, keep it aside on a cookie paper to dry. Afterward, take it to the sink, prick the balloon, and remove the balloon. Now place a tea-light candle inside the candle holder, and you have your water balloon tea-light candle holder.
If you are short on time and really need some exciting bookmarks without spending much time then this is the perfect project for you. This project is so easy that even kids can do it without any adult supervision. All this DIY project requires are some colorful buttons, paper clips and glue. And the only step involved in the project is gluing a paper clip on the back of a button to get a button bookmark like the one shown below.
Some small pieces of paper, colors, and double-sided tape can bring life to your living room. You just need to cut lots of butterflies in various sizes and use double-sided tape to attach the butterflies to the wall to form a meaningful pattern, like the ones shown below.
A set of jars with the help of a set of bright colors and decals can be converted into something that you will want to display prominently in your home. The idea is quite simple: take a jar, attach a decal of whatever kind you want, apply craft paint or spray paint of your choice, let it dry, and peel the decal off the jar to get a jar that will resemble something like the ones shown below, provided you have used the similar decal.
It is not uncommon for a home to have a lot of empty cans and boxes which serve no practical purpose. For normal folks, this may pose a problem to deal with, for a DIY geek this means an opportunity. An opportunity to upcycle the cans and boxes and make something wonderful from it. With the help of wrapping papers and glue every empty can or box can be turned into a beautiful storage box like the following.
Creating a canopy bed that looks serene makes an easy-breezy DIY project. With the help of some everyday pieces of hardware that you can get from your neighborhood hardware store and some carpenter’s tools, you can easily create a dreamy canopy bed like the following.
#90. DIY PVC pipe mirror
This is a simple, straight-forward DIY project that requires only 1/2 inch pieces of PVC pipe, a circular mirror, adhesive to attach the pieces, and a piece of circular cardboard to use as a frame to attach pieces to make the inner circle, on top of which you will attach a mirror. The inner circle should be a little smaller than the mirror for the mirror to sit comfortably over the PVC pipe pieces. The key to success in this project lies in the pattern you make from the pieces of a PVC pipe and the inner circle.
This is a very simple DIY lampshade project. Just in a few simple steps, you will get the desired city-scape lamp. The steps include finding an outline of the city that you want to illuminate on your lamp, marking it on the lamp, and then using a needle to punch holes for the light to come out.
This DIY lampshade project may not be as simple as the above one, but it still is very simple to make. The steps in executing this project involve printing Instagram photographs, measuring the size of the lampshade to ascertain how many rows and columns of photographs will be needed, which will also tell you the number of Instagram photos you will need for the project, lamination film matching the size of the lampshade and hot glue to attach pictures to the lampshade. The key to success in the project lies in how accurately you smooth out the lamination film to discourage bubbles from forming inside of it.
When shopping for DIY stuff, very few people will think of heading to a neighborhood hardware store to get hex nuts, and an even lesser number of girls will think of wearing nuts as a fashion accessory. The DIY project in question is going to change this perception. With the help of 3 strands of cotton butcher’s twine, 18 small brass hex nuts will turn into a bracelet that you will never shy from flaunting. The key to success in this project lies in how you braid the twine and arrange the nuts in it.
With the help of a frame made of cardboard, the concrete mix can turn itself into modular planters that you can place wherever you want and in whatever shape. This is one of the simplest projects to undertake. Creating the basic structure of a unit of concrete planter is not difficult. The only thing that one should keep in mind is the strength of the concrete mixture.
Any discussion on decorative ideas cannot be considered complete unless there is a space dedicated to quilling paper arts. These small paper pieces with the use of simple tools can create items that one cannot even imagine. With small small pieces of bamboo cane and quilling paper, one can create boxes without much difficulty. This will be a real test of your DIY mettle, for the creator did not share a step-by-step guide for creating a box like this, but if you are into quilling paper crafts then you may not require any instructions whatsoever. Just the below images are enough inspiration for you to take the project further.
This incredible craft requires a floating shelf and some painting skills to come into being. In case you are not good at painting you can either go for a decal or a better idea would be to print a stencil on a cardboard and trace the legs of the table on a wall beneath the shelf and then paint it by covering the area where you do not apply paints using painters tape.
Modern city life means living in small spaces, but the shrinking space should not shrink your dream. It rather intensifies it and fulfilling that need is one of the goals behind taking a DIY craft. The following project will give you a wall-hanging vertical garden that will not only save space but will make your place look attractive and fresh.
This is a fun project for your girl and it just requires some toilet paper rolls, paper, gum, colors, and some accessories to make the face-changing dolls more attractive. You will need two sizes of rolls for this craft. One will function as the outer layer where all the designing will go and another will be the inner layer where one will make faces displaying various emotions. The top layer of a doll will rotate to bring different faces in front. You should be careful when cutting the window on the top layer. They should be uniformly cut to give it a polished look, unlike what is shown below. You may want to sandpaper the window edges as well.
It is always a good idea to store used-up toilet paper rolls. Those can be upscaled into many brilliant DIY crafts. One such craft is creating a circular photo-frame set to display any kind of photos in various sizes of rings, as shown below. The project is simple to execute and requires very few things. Depending upon one’s preference, the DIY enthusiast can either leave the outer ring of the resultant frame bare, as shown below, or color to add vibrancy to the rings.
More than you, your kid will be excited to know about this DIY project. After all, which kid does not like a car! Making colorful cars from toilet paper rolls is an easy thing to do. You just need to cut the rolls from the middle to mimic the inside of the car, color the rolls in attractive colors, add some graphics, make wheels using cardboard paper, and color them. Assemble all together using glue and pins. The set of cars is ready in no time. All you need is a driver for each car and a small toy will do a good job filling this role.
One of the most exciting things about any DIY project is that it gives you a beautiful-looking product at an unbelievably low price. Creating DIY chevron curtains is one such project. To make a curtain like the one shown below, a DIY enthusiast needs painter tapes, a color of choice, and obviously a curtain.
We hope you have found our curated selection of DIY projects of all time appealing and of interest to you and your household. We would love to complete this wonderful list with your very own creations so feel free to share your ideas and projects with us in the comment section below.
Even though the Scandinavian interior designs are tailored for the cold season and holidays we thought that in the early spring, melancholic after the most beautiful season we could all use some Scandinavian design lessons. Denmark has been recently declared the happiest state in the world according to a report conducted by UN on World Happiness, Norway followed in the second place and Sweden in fifth place. Why were all these three Scandinavian countries in the top?
One very important reason is the design definitely, living in a positive welcoming warm home environment influences your life and well being and conducts happiness. The Scandinavian design is a world renowned design theme known for its simplicity wrapped up in white, releasing coziness and warmth, the perfect setup and scenario to help you beat and enjoy the winter.
#1. Flood the interiors with light
Being far in the north and not having the light as much as they would want to is an important factor; a factor that determined the Scandinavians to cherish and appreciate the importance of natural daylight. It`s a really important component to our well being, we tend to be more positive when we are in a well illuminated environment, we see things differently. Because during the winter they have just a few daylight hours the Scandinavians are using large windows kept clean and unobstructed, letting as much natural light in as possible.
We can`t remodel the windows now probably but we can get rid of the heavy curtains in the winter and follow their example, we can throw away the silly ornaments blocking them and let the flood come in. If privacy is the reason your using such objects, you can use some wooden shutters or sheer floaty fabrics, these having a technical advantage as well, insulating against cold whilst retaining heat.
#2. Encourage the natural light to stay
Scandinavian designs are mostly white, pure color simple and clean. They use this color because it reflects light, it encourages it to bounce around and it just enlarges the spaces and brightens them. Every lighter colors helps but white is the way to go. Also using glossy and polished surfaces helps, these reflecting the light even more, throw the carpet away and replace it with a wooden floor and or tiles that would bounce the light effectively. Another important surface that reflects light an thereby increases the amount of light in the room are the mirrors, these are utterly important if used right.
#3. Coziness and Warmth
To add the coziness and warmth that you see in all Scandinavian designs you should more natural wood into your home. This would can be introduce in any shape: furniture, floor or even wall panels if you consider appropriate, this a very important principle found in most Scandinavian designs. Even though it has to be refurbished from time to time, wood is a natural insulated as well and it adds the perfect cozy welcoming feel.
#4.More coziness and warmth! - Candles
Candles are basically a small product that produces exactly what the Scandinavians adore, coziness warmth and light in the most natural way possible. Fire is the divine natural light source, it adds a different effective to every item, everything looks warmer and better under the candlelight, placing a simple candles along tea holders around the home will change things, when needed, light them up and create a fairy tale magical atmosphere.
#5. Well being and positive atmosphere surrounded by nature
In the Scandinavian lifestyle nature is utterly important, it is the heart of the design. Even in the cold winter outdoor activities are cherished and practiced, being positive, enjoying fresh air as much as possible living the life with a healthy attitude. Introducing greenery and plants into your home is very important for each and everyone of us, regardless of location. They bring the nature inside, plants animating every room and providing fresh air. You should try to go out as much as possible as well, this will make you feel much better; this offers you a new perspective on things and life.
#6. Use simple yet stylish furniture
Designers like Hans Wegner Verner Panton and Alvar Aalto, Arne Jacobsen and one of my favourite Charles and Ray Eames with Herman Miller do have world renowned pieces of furniture for a good reason. Clear smooth line and organic shapes are defying a simple and minimal design. Yet the furniture that we are trying to describe is not a cold and almost a clinical minimalist one. It is a minimalist design that enlightens the space and create the feeling of spaciousness, it allows energy to flow. You should invest bigger amounts of money in quality timeless furniture, a good design never gets old, never fades, some piece of furniture are actually objects of art trough simplicity, they influence the living quality whilst emphasize the feel of space that we need.
#7. Hidden organized streamlined storage
A good design thought process should include everything up to the smallest details. One very important aspect in design that is really often overlooked especially by individuals that are designing their home by their own is the storage. Storage is mandatory in absolutely any kind of home without a doubt, it`s crucial to create a positive and fluid space, and to do so, the storage has to be thought from the very begging. A huge casket on the wall is awful whilst a storage built in the wall or in the furniture is smooth, natural, subdued to the design theme, a pleasure to look at and to use. Everything unnecessary should be stored out of sight, there is no reason to keep worthless details on display and clutter your space.
#8. Cozy soft furnishings and textures
You should embrace the whole design and enhance it as much as possible, make your sofa and cushions to wear a warm and relaxing textile, something to rejuvenate the interior and mediate it up to heaven. In Scandinavian designs soothing looks are obtained trough shades of soft gray and small color accents like shades of purple or burgundy, you can even consider Scandinavian motifs to make it more authentic.
#9. Entertain the loved ones around a dinner table
Today, socializing is more then important then ever and harder to obtained on a deeper level then ever, everything can be described by the word chaos easily. We should take distance from such attitudes, it is normal to communicate and enjoy a good talk face to face instead of using Facebook or Twitter, a good company is utterly important. Consider a good sized dinner table and proper chair to encourage these meetings that are improving our quality of life and well being. Savor the time spent with family and good company along with great talks and delicious food, enlighten your soul.
#10.The "hygge"
Hygge in danish means cozy and it is probably without a doubt the secret ingredient to the Scandinavian design and lifestyle, the good vibe that animates everything in the end. It used to describe the wonderful things in life, the good things in life, a positive attitude that we should all embrace. Originally a Norwegian world, now highly used in Denmark, both countries using Scandinavian design, embracing positive lifestyle. The word describes simple gestures that nourish the soul and that are enhancing the quality of life, a long bracing walk, a time spent with a close friend or a beautiful design or landscape. Everything can bring more hygge into your life and you have to seek these simple gestures and appreciate them, make them happen, is up to you to improve your quality of life, these does not necessarily mean that you have to spend money but to learn and appreciate nature, light and simplicity.
We would love to hear your opinion in the comment section bellow and we invite you to throw a look on the pictures presented in the gallery bellow, they`re showcasing the Scandinavian design principles and lifestyle at its best.
We love flowers and the beauty they convey to the place they are put in. For the readers that share this passion, we have selected 11 DIY unique test tube flower vases. Yes, you read right, test tubes can be used to craft beautiful, elegant and stylish flower vases and other various home decorations. You can use your imagination, flair for design, a few simple glass test tubes and some bits and pieces anyone has lying around, like string, wire, pieces of wood in various conditions (depending on the desired effect or just on what you have at your disposal), and pretty much anything you think will look good in the arrangement you imagined.
We hope we can help with a little inspiration, by bringing these extraordinary examples right before your eyes. We think they are great ideas, very easy to produce, and would like nothing more than the knowledge that these ingenious examples will inspire countless other people and deliver many more beautiful designs.
1. A piece of driftwood with holes for the test tubes. Simple &Stylish
2. Crochet and glass go well together.
3. Timeless Design with wood and glass
4. A little white paint, some string and imagination.
5. Metal wire offers great versatility in your designs.
What's your take on this unusual yet beautiful idea? We would love to hear your feedback so feel free to share your thoughts in the comment section below.
Whether you are an artisan, a creative individual that loves DIY projects or you simply recycle and creatively repurpose some old objects from time to time, you ought always to seek inspiration. Creativity has deep roots in experiences and memory and with this thought in mind we are trying to serve and feed your imagination, fuel your creativity. Ahead are lying 10 creative examples of household items repurposed; we found them useful and hope you will too.
1. Door Repurposed Into a Temporary Coffee Table
Teal Door Transformed Into a Quite Large Temporary Coffee Table
image via phantasticphinds.org
2. Old Boxes Used as Shelves
Simple, Classic and Widely Used The Wooden Boxes are Evoking a Rustic Vibe
image via bomeng.org
3. Eclectic Shelve Ensemble Obtained Throughout Creativity
Eclectic Shelve Ensemble Obtained Through Creativity
Elegant Dining Table on a Farm Shaped Out of An Old Door
image via phantasticphinds.ro
10.Door Coat Hangers
White Door Transformed Into a Coat Rack With a Rustic Scandinavian Look
image via phantasticphinds.blogspot.ro
Cubicles are spaces often overlooked despite the immense amount of time that we spend in them. We earn our living in our cubicle, we experience emotions and we get attached to their tidiness, its organization or lack of without ever thinking how we could make it better, how we can shape a positive work-space through simple DIY cubicle organization projects. Simple means can make a big change and in the following gallery, you will find a suite of ideas that range from simple and fun purchases to crafts that can completely transform your workday in the long term.
Your amazing cubicle is about to surface, simply cast a glance at the gallery below and get inspired.
A simple backsplash can change the mundane look and set your cubicle apart and the Brick wall Cork-board below is one option that one could find on CB2. The backsplash creates an opportunity for an interesting gallery, important reminders, and dreams of travel destinations, it can turn around the whole cubicle if you use it as an oasis of inspiration to surge energy from.
Use a metal grid
The right organizer can boost a retro look, one that goes with the natural flow of one`s dreams especially when aided by inspiring memories. The graphic element below can be found on Urban Outfitters and it comes in copper, black and white, and immense opportunities.
String and clips
Display timeless memories in a photo display constructed with string and clips. The item is utterly simple and it can be purchased or crafted in a matter of minutes.
Craft a hand photo holder
A Beautiful Mess crafted a DIY photo display system that surely is creative, different, and spectacular as it contains petite cute hands holding your favorite photos, all in a fashionable golden finish.
Reshape the bulletin board
A memo board gone out of style can be reinvented with spray paint. The frame, the board, and even pushpins can be changed, details in full can be found on the Urban Girl Blog.
Use a golden desk organizer
A new vibe can be brought in with brightness and a feel of airiness and using easy-to-remove contact paper on your desk surface can bring in light while upscale glamorous-looking accessories can make your cubicle look extraordinary. The Knox Box above can be found on CB2.
Dhurrie rugs to fit your décor
A really graphic rug can change your cubicle. No big statement is needed but there are options for all budgets. A flat-weave rug is recommended as it will allow your office chair to move freely.
One color scheme can help one`s organizing a great deal as it connects the elements able to de-clutter through color and as a result, you can find and use them more easily, moreover, the ensemble is unified and it works better in terms of aesthetics. The Color Pop Office Accessories in Mint from West Elm are a great example.
Use pattern and color
A design motif has the same effect as a color scheme and it can invite into the theme additional organizers or decor pieces. Needless to say simple organizers can be color or pattern-coded through simple DIY crafts.
Super simple PVC projects can change a great deal and when it comes to desk organizers the pipe does wonders. The details in full can be found at Designs by Studio C.
Play with cork
Small stuff can go a long mile and nothing travels more on our desks than paper clips and rubber bands. They seem to have self-control but we cannot take control of items such as desk trays and organizers. A graphic option can be found on Urban Outfitters.
Use mason jars to contain candy
Mason jars can organize your entire desk in minutes yet candy should be a priority. Use a slightly modified mason jar to contain the energy you are about to devour with pure joy.
via iSaveA2Z.com
Use transparency to your advantage
A mason jar promotes what it contains through transparency and it brings forward an airy look. Use color and simplicity to highlight this feature visually and you will have a great organizing tool at your disposal.
iheartnaptime.com
Use a pegboard
Move the clutter off your desk in the vertical plane, pin important memories, your camera, and a book that you barely read onto the wall, and enjoy the graphic effects. The retro-modern look can be easily crafted or purchased from Urban Outfitters.
Everyday utensil on display
Having the most used item on the wall highlights its importance and makes it easy to find at the same time.
Use simple tacos to organize cords
In an office, few things are more annoying than the number of cords and cables all over. With simple leather "tacos" one could put this issue to rest in a graphic manner as the elements are made out of genuine leather. Find them on CB2.
Graphic geometrical choices
Marble and wood are a combination that one cannot miss. Tailored into a geometrical design object like the one below from West Elm the textures truly make a statement. The sculptural item is purely decorative yet on the desk it can double as a paperweight.
Geo object from West Elm
Potted plants
It can add balance and naturalness to a desk and it can refresh and purify your oxygen. Choose plants that work in little to no light or choose a faux plant.
Frame the meaningful
A classic frame can put a great timeless shine on something that means the world to you. Having the dearest and nearest at work makes tough decisions easier to take and handle. The option below from West Elm is highly elegant and discreet, acrylic and metal in clean lines.
Nothing great comes easy yet with simple small actions we can construct the future we dream of. These simple ideas on DIY cubicle organizations are here to help on our journeys and we would love to hear your opinion on the gallery below.
There are a lot of jobs that can be done from home nowadays. Usually, people working online, musicians, painters, but also accountants and lawyers could in theory work from home. It all depends on a lot of factors of course.
If you are lucky enough to have the chance to work from home, then you will need a place to work in. That is why we are going to show you designs of Scandinavian home offices that you can consider building in your home.
Don't get scared of the word "building" because building a home office, especially in the Scandi style, is usually placing a desk in the corner of an existing room in your home. Of course, this is a simple explanation. If you actually want to have a beautiful home office that will motivate you to work more, then you need to tailor it to your needs.
First off, we should make it clear that Scandinavian home offices are a very functional addition to your home even if you don't have the ability to work from home. It will prove useful to you anyway because you will have a space in which you can read, do some research, take care of the bills, or most importantly, practice your hobbies without anyone bothering you, or you bothering anyone.
So, now that we have that cleared up, what makes a home office a good home office? What's the most important thing to you when it comes to working and when it comes to home? Comfort. That is one of the biggest reasons a home office beats a regular office. You can do your job while enjoying the comfort of your home. No dress codes, and no generic furniture. Brew a fresh cup of your favorite coffee in your favorite mug and start working in your pajamas. Okay, maybe not in pajamas, but you get the idea.
Check out the designs of Scandinavian home offices that we have displayed in this collection and you will find plenty of awesome ideas!
1. Combine the study with the bedroom if space is limited
To work from home should be a treat and it surely needs to feel like it. Make sure you are comfortable, that you have everything that you need at your grasp, and that it defines you.
How do you like the stunning Scandinavian Home Offices above? How does yours look? We would love to hear from you in the comment section below! Also, if you want to learn about the four variables of professional task supervision, check out the AtTrack Blog website.
With work-from-home turning into a semi-permanent solution that’s here to stay, the search for a private workspace continues to soar high.
Employees of different companies are taking over bedrooms and basements to set up their home offices. But that’s not a feasible solution as the rest of your family members also need their personal space.
That’s why people are turning to their backyard sheds to work remotely while being free from the confinements of their bedrooms. These structures serve as the perfect dedicated workspaces once they’re equipped with the right furnishing and office essentials.
On that note, are you planning to use your garden shed as your home office? Well, we’re here to help you out. Through this guide, we’ve explained the steps involved in converting your cabin log or wooden shed into a perfect office.
So, without further ado, let’s begin!
Steps To Convert Your Shed Into A Perfect Office
The ongoing pandemic has allowed people all over the world to see the concept of working from home in a different light. Employees are expected to work remotely through the end of the year and into the beginning of next year, if not longer. That's why a dedicated workspace within the boundaries of your house is the need of the hour.
But that doesn’t mean confining yourself to your room. Whether you’re a freelancer, full-time worker, or running a business, you can prevent distractions while working by transforming the garden shed into your dream office.
That being said, we’ll now be taking you through a step-by-step guide on how to convert a shed into a perfect home office. So, let’s get right to it.
Step 1| Planning
Before you begin the conversion, it’s important to plan the kind of home office you want, based on the type of work you do. Think about how you’ll use this space and list out the items required for the purpose.
Suppose you need to constantly use a laptop or a computer for work. In that case, your shed will need a secure and constant supply of power. Similarly, take account of what needs to be done prior to using the shed as a dedicated home workspace.
Step 2| Getting The Required Equipment & Office Essentials
Now that you’ve decided on how you’ll be utilizing your shed, it’s time you thought about acquiring the necessary essentials. Consider crucial factors like the furniture, accessories, and storage you’ll need, depending on your job profile and work requirements.
For instance, if you’re a designer or artist, you’ll need a desk or table to draw, sketch, or sculpt. Along with this, you’ll require plenty of natural light and a comfortable chair to get you through the day.
What if you’re a writer? In that case, you may not require a large desk space; instead, you’ll need more wall space to install bookcases or whiteboards. You may also consider getting your garden office space equipped with a fridge and kettle for quick access to much-needed refreshments.
The possibilities are endless; just make sure you utilize the entire space while keeping your work requirements in mind. What’s more, ensure that the shed has access to water and a stable internet connection. It should feature the right type of light fixture, including spotlights, strip lighting, and lamps.
And don’t forget to ask yourself, “Will I need an open-plan design or a multi-room office?”
Step 3| The Design Selection
Do you plan on using your shed for work regularly throughout the year? In such cases, your priority should be to insulate the building and make sure it’s fully weather-proof.
Your shed can be at risk, especially if you’ll be storing electronics inside it during the cold winter months. That’s why it’s crucial to ensure that it’s structurally sound and fully weather-proof.
Having said that, let’s now take a look at the two most popular garden office shed designs for you to consider.
Log Cabin
A log cabin is the perfect example of a luxury shed office, offering a high-quality space for you to work from all year round. There is a wide range of design and style options to choose from based on your style preference and work requirements. You may consider opting for a log cabin with multi-room or open-plan designs.
Wooden Sheds
If you’re in search of a reliable home office, a wooden shed is probably your best bet. It comes in a wide range of designs to suit individual style preferences with ample space for alterations.
There’s no need to worry about factors like durability as windowed wooden sheds built using groove cladding and overlap are stronger and more weather-resistant than the others.
Step 4| Size & Layout Of The Shed
You’ve already listed out the furniture and office essentials you wish to have inside your garden shed. But how can you be sure that all these items will fit without looking too clumsy? This is why planning the layout and size of your new home office space is a must.
First things first, when purchasing or building a shed, consider the size of your garden to estimate the space it will take up. And if you already own one, ensure that you invest in the furnishing of the right size so that each item fits well.
Sheds are available in a variety of sizes so you can easily find a suitable garden office, depending on how big your garden is. That said, let’s take a look at the three primary shed sizes for you to consider.
Small Office Shed
You don’t really need a large shed to convert into a workspace. A small office shed is ideal for storing a desk and your office essentials, especially if you don’t really need a space to work remotely every day or have a small garden.
Wooden sheds ranging upwards in size from 4 x 6 square feet are primarily used as garden offices. You may also consider maximizing the space in your garden by installing a shed in the corner of your garden.
There’s no need to worry about the longevity of your office space. You can easily purchase a small log cabin featuring a more durable and better-quality construction.
Medium Office Shed
Suppose you need to keep a hefty amount of office essentials and equipment, including multiple bookcases and desks. In that case, a medium-sized garden office shed is ideal. It will provide ample space for you to work in peace, along with room to store items like printers and files.
A 10 x 8 square feet windowed wooden shed will provide sufficient space for placing a desk and storing office equipment. The windows will allow plenty of natural sunlight to enter the premises, creating a comfortable environment for you to work in. You may also consider opening the windows to ensure proper ventilation throughout the garden shed.
Large Office Shed
In case you need a large office space for starting your own business, you can save costs by investing in a log cabin. It serves as the perfect solution, providing you with a spacious area to work remotely at a fraction of the cost.
That said, you can choose a cabin from a wide range of designs and styles to suit your garden and individual preferences. The contemporary pent-style shed is ideal for modern gardens, while traditional and reverse apex designs perfectly complement traditional gardens.
You’ll find log cabins offering an open-plan multi-room design that’s perfect for separate offices and storing equipment and office essentials in different areas. These workspaces also provide you with the choice of multi-purpose bedding.
Now, suppose you desire a combined office space for work, relaxation, and entertainment. In such instances, the need for a shed with three separate pods should be highlighted.
All you have to do is ensure that these cabins come with dividing walls and two sets of double doors. The inclusion of these features will allow you to access separate areas for different purposes without being disturbed.
Step 5| Assessing Your Garden Shed’s Condition
This is another crucial step as it involves assessing the condition of your garden shed to check whether it’s fully watertight or if it requires any kind of alteration. Analyze the roof felt and look out for tears while ensuring that it’s securely attached.
You’ll also need to test the doors and windows of the space to make sure they’re in the right shape. That’s not all; we’d advise you to empty out the shed completely to look for signs of mold, leaks, wood rot, or dampness. And the assessment should be done before you begin converting the particular space into a home office.
In case you’re not sure about the stability of the shed, seek assistance from a professional builder. You may even consider purchasing or building a brand-new shed or cabin log for the purpose.
Step 6| All Set - Begin The Conversion
Once you’ve made all selections and assessments, you’re set to convert your garden shed into your dream workspace. Start by treating the exterior of the cabin to make it waterproof. This will safeguard it from the risk of dampness and damage, which, in turn, extends the overall lifespan of the shed.
Next up, the only thing left to do is transform it into a real office for you to work from remotely during the ongoing pandemic and even after that if needed. For this, you’ll need to think about the following factors and features.
Heating
Working remotely from your garden shed during the cold winters or any time of the year for that matter can be uncomfortable. To make it a pleasant experience, you’ll need an electric heater, which is portable and can be easily mounted on the wall.
You may even consider using tube heaters as they take up very little space and are cost-effective and safe ways to keep your shed warm. Heating your garden workspace will also prevent damps and keep your electronics and important documents from getting damaged.
Lighting
You’ll obviously require adequate lighting to work in, irrespective of the presence of sunlight. The various types of lighting will complement your office needs differently. For instance, halogen lights help in providing overhead lighting, but they can also be used for track lighting and as adjustable spotlights.
On the contrary, desk and floor lamps serve as cheap and portable lighting options for decorating your new garden shed workspace. At the same time, the versatile LED lights can be used as spotlights to make specific areas of your home office brighter.
Electricity
Like any real office, your dedicated home workspace will need electricity to run your laptop, charge phones, and power lighting. It’s better to contact a professional electrician to carry out all the electrical work of your shed; instead of trying to do them yourself.
Prior to them making the electrical connections, provide relevant information on how many sockets and light switches you need. Also, let the electrician know about all the equipment you plan on working off the electric mains.
However, if you don’t really use electronic gadgets and appliances, this step can be skipped.
Insulation
In order to protect your shed from dampness and other damage and keep them warm, have its ceiling, floor, and walls insulated. You should also soundproof the building, especially if you work in the music industry or enjoy working with loud music.
Step 7| Set Up A Well-Organized Storage Area
Image9
You’ll require a well-organized space to minimize clutter and maximize your overall work productivity. That’s why it’s important to assess how big your shed is and how much storage space is needed for the purpose.
The installation of open shelving units will help in the utilization of space in tall sheds, providing more room for you to walk and work. You can also use wall-mounted pegboards to optimize the wall storage of your shed, while clear storage containers stacked together are perfect cheap storage alternatives.
They are perfect for storing chargers, paperwork, ink cartridges, and other office essentials, keeping them close at hand. We also encourage the use of metal strips for holding metal objects such as scissors if you plan on utilizing your garden office as a practical space.
And those who have small sheds can use the space for storing items by repurposing old items. For instance, attach a spice or wine rack to the wall for organizing pens, paperclips, and document tubes. On the other hand, hanging a shoe rack behind the door can help keep small items in one place so that you do need not to worry about misplacing them.
Step 8| Decorate Your Garden Office Shed
Once you convert your shed into a workspace, it’s quite obvious that you’ll be spending the majority of your time working in it. That’s why it’s important to enhance the feeling and aesthetic appeal of the space by decorating every nook and corner according to your style preferences.
We’ve provided a few tips to help you out, so take a look.
Add A Pop Of Color
Now, whitewashed walls are indeed a popular trend when it comes to modern office sheds, but you may also stick to light and vibrant colors. You don’t have to bother much about the exterior; it can be painted in any of your favorite colors. Just ensure it complements the garden and the surrounding area.
The Personal Finishing Touches
You can create a homely feel to your garden office shed by adding photo frames or other personal items to its walls and your desk. In fact, framed posters are great inclusions to enhance the vibrancy of the space. They also help in covering up old cupboard doors.
Adding A Bit Of Greenery To The Place
Sheds can be brought to life by adding a touch of greenery. Plants not only make your workspace look good, but they also help detoxify the air, creating a better environment for you to work in.
However, if you are not someone who can take proper care of plants, we’d recommend getting artificial plants. You won’t have to work hard to keep them alive!
Make It Comfortable
Converting a garden shed into a proper office space will enable you to work in peace without any distractions. So, you’d definitely want it to be comfortable at all times.
Adding a rug and suitable furnishing with cushions can help in ensuring optimal comfort while you spend time in your home office.
Final Words
It’s a known fact that the year 2024 has drastically changed the way we live. With everyone working and learning from home, there’s been a shortage of personal space for the rest of the family members.
This has led to the popularity of garden shed offices, which have proven their worth as comfortable, dedicated workspaces for one or more members of a family. And seeing the current scenario, we’re sure that sheds will continue trending even in the coming years.
On that note, we have reached the end of our step-by-step guide to converting your shed into a perfect office. Here’s hoping we were able to provide all the required information to help you.
With this, we’ll take your leave. Till next time, stay safe!
Working in a home office is not as easy as it sounds, the distractions in your own home, or any home for that matter are endless therefore being very hard to focus on your work, ending up in a lot of breaks.
Besides the family members, television, game consoles, gardening, comfy beds, and sofas there are enough reasons for you to stop and yet hundreds of other reasons to work at home. A great method of escaping all these distractions and isolating yourself whilst keeping all the affinities and comfort of your home. Turning your basement into a home office is an extraordinary idea that will help you beat dozens of hassles, Tony Stark in Iron Man also has an extraordinary basement with his own workshop, office, garage, and hangar, what stops you?
Simple Contemporary Basement Home Office with a Brick Wall as Background
In basement home offices you can solve and accommodate huge advantages and most importantly you have the right amount of space to clearly define your office or workshop, sufficiently detached from the rest of the home. You can enhance your workplace by cutting down on noise levels and visual disturbance as well. Whether you are going to work for one or eight hours at home you should make sure that it`s comfy, ergonomic, and elegant it should fit your work routine as a glove.
Further on we will present a few smart tips that we find interesting and useful.
How To Transform an Old Basement
Start with a quick inspection
If you are serious about this project you should plan properly from the very beginning and not skip any steps. The first very important step is to check the stability of your basement. After this structure aspect, you should definitely waterproof the basement if it`s not already. Whether you are planning a basement bedroom, a wonderful game room, or a bawling alley these two steps are mandatory. The ceiling and floor should be checked for any possible chinks and leaks, you can also chalk your walls with the actual plan and imagine the spatiality of the future walls or furniture, maybe you`ll have more than one room in your little corner.
Elegant Stylish Basement Home Office with a Place to Rest and Relax
by Seattle Staged to Sell
The home office entrance and noise isolation
A basement entrance is typically connected to the access towards it, often through a flight of stairs. If you plan to welcome clients to your home office, it's crucial to consider the aesthetic value of the staircase. More and more people are moving their offices home to save time and money while being surrounded by elegance and comfort.
Creating separate entrances could offer an ideal solution - one serving clients and another for you and your family. A simple wooden ladder might not suffice for your professional clients.
Another crucial aspect that will significantly impact your work routine is your ability to stay focused and be away from household noise. There's no reason to move your work to a space where you can't be productive. Soundproofing your ceiling and implementing noise reduction measures, like adding acoustic panels or insulation, can greatly improve the acoustic environment in your workspace. Additionally, it's essential to avoid planning a home office in a basement that might be too noisy due to a cinema or game room. Always consider these factors, including soundproofing and noise reduction, before starting any home office project in your basement.
Transitional Basement Home Offices That is a Real Show-stopped
Using the space efficiently in your home office
Using your basement as a living and working space is an extraordinary reason to unclutter individual spaces that you can now decorate. You can move furniture around and use old rugs or some paper to see how much space you have saved and if is it worth moving down the stairs. This should be done before the construction begins, you should choose the decor and furnishings that you would like to use from the beginning, making sure that everything fits, and that the space will not be too crowded or unorganized. You can make the most out of small spaces with Murphy tables for example, desks that can be easily folded away onto the wall along with some efficient storage area. The spending limit can be influenced by thorough planning as well.
Small Basement Home Office with a Jaw-Dropping Built-in Desk and Smart Wall Shelves
by Wentworth
Warm and lovely ambiance doubled by functional lighting
The basement is one of the most unfavorable places to shelter any sort of living space or working space according to Feng Shui. You can however work around this aspect with proper lighting. Whether you consider Feng Shui when you design a home or not you should be well aware that lighting is a crucial component in the basement office, in any workplace for that matter. If you manage to combine smart functional lighting with adequate and right task lighting you will obtain a cozy and warm space that invites and enhances work and practicality. Try and make the maximum use of any upper windows in the basement and allow natural light to complement illumination, you can filter it in any way if it helps you.
Gorgeous Stylish Elegantly Decorated Home Office in a Basement
by KA Design
Some of the best options in a basement office can be sconces, pendants, or classic table lamps. In the basement, every inch of space is valuable so using a floor lamp would be rather inefficient. These combined with smart recessed lighting can work like a charm and define an exceptional home office.
Small Basement Home Office Decorating Idea
by Anthony Wilder Design/Build
The connection to the exterior
Unlike your bedroom or living room, a home office is far more demanding on connectivity and electrical management. You should be able to have a proper and permanent connection with the exterior through a telephone, a fax machine, a wireless or wired internet connection, and a couple of sockets, many sockets in which they will be plugged in. Besides these, a multitude of electronic gadgets are in need of electricity permanently. These as well have to be considered from the very beginning and be hidden from sight beautifully.
Lighting Your Home Office Properly
Use storage that will help you de-clutter
Besides the fact they can become highly aesthetics, the sturdy storage units can help you hide away the mess and keep your office organized and efficient. In small spaces storage units are gaining far bigger importance, mounting them on walls, under the stairs, or simply around your desk will save you a lot of space and offer you a highly aesthetic space. Bellow, the storage areas are hiding a humongous amount whilst maintaining an impeccable look.
Home Office That Disappears Into the Wall
Home Office Idea for the Basement in Which the Shelves and Desk Can be Tucked Away
by E/L Studio
Ample Storage Space Acts as a Room Divider as Well
by Mountainwood Homes
Let your imagination surpass the boundaries set by the office walls
If you really want a comfortable and relaxing home office we are sure that you are going to do everything properly, top-notch isolation may protect you from low temperatures during winter months easier. A dehumidifier is also a very important asset that will help you enjoy your home office as much as possible. A small kitchenette or a small cool bathroom right next to your office will make your life easier, especially if you are planning to spend a big amount of time there.
A proper color scheme is very important as well, it will help you accentuate the required working ambiance of the home office without shattering into pieces. Choose colors that will help you focus, stay calm and relaxed.
Simple and Elegant Home Office
Custom Made Floating Cabinets and Desks Aside Midcentury Modern Decor for Basement Home Office
by Studio Santalla
Are you ready to start working on your basement home office? What do you think about working at home in general? We would love to hear your opinion in the comment section below on Facebook or Twitter.
Working from home can be a bliss; you have the option to snooze the alarm, avoid morning commutes, work in pyjamas and enjoy all the comfort.
But there is always a flip side to it. And in this case, you have plenty of distractions going around such as pets, children, family members, and television, to name a few.
However, the good news is, the solution to this issue is a home office. It’s like the uber-productive section of your home that screams all things ‘business’. And, you also get to have the freedom to be creative while decorating this space, which gives you control over your budget.
Now, it can get overwhelming when you’re presented with a myriad of options that you can work with. So, to make it slightly easier for you, we have handpicked 13 of the best budget ideas for outfitting a home office.
So, without further ado, let’s get started!
Home Office Ideas on a Budget
Create a Plan
You might think that you just need to move the furniture around for the office space to work in your favor. But that may not be the case always, which is why it’s best to stick to a plan.
The most important thing here is that the office space should work for you. In other words, you need to put your business at the top of your list. You can start by taking measurements of your space; this will give you an idea about how to work on your floor plan.
And once the floor plan is ready, you should start measuring the furniture that will fit comfortably in your office space. This should help you understand whether a particular desk, chair or bookshelf will help you reach the goal or not.
Repurpose Existing Space Into an Office
There is no denying that one of the most efficient home office makeover ideas is to make use of the space that is already available in the house. This can be the space beneath the staircase landing, a kitchen nook, a vacant room or even a spare corner in your living room.
Irrespective of your work type and individual preferences, this tip will be helpful for anyone who is looking to revamp any room available on a budget. And if you do have space for a stay-at-home office, then this task won’t be very challenging.
Moreover, with a separate room for your home office, you’ll notice a significant difference in your productivity. In the end, you need to be comfortable in the space you’re selecting to set up a home office, so that your workflow is not hampered.
Repurpose Items for Furnishing the Home Office
You don’t need to go and splurge in Target or Ikea for purchasing any office decoration supplies right after finalizing a space. This means that you should aim to reuse the items that are lying around in the house. For instance, mason jar works perfectly for organizing your stationery, and cardboard boxes can be used for placing your files.
If you look around the house, you'll find a host of solutions which can be smartly used to keep you from busting the budget. And once you’re done re-purposing the items that you already own, check Craigslist or other thrift shops for office furniture. This is where you need to use your creativity to ensure that you get the best deal and make great use of it.
Shop Around for a Good Bargain
You’ll be surprised by what you can possibly find at thrift stores, flea markets, garage sales, and consignment shops. With high rates of product-consumption, people are always replacing older items with new ones. So, you can easily find book racks and office desks in excellent condition within an affordable price range.
On an interesting note, if any piece of furniture has caught your eye, focus on how you can give a finishing touch to it. This way, you can add a spark of life to even the dullest furniture that may come at a great discount. All in all, you’ll just need to sand them down and add a coat of paint or a few trimmings to repurpose any table or chair to save a few dollars.
But for those who don’t prefer hand-me-downs, you should look out for furniture sales both online and in brick-and-mortar stores.
Exchange with Friends
You can consider trading a few pieces of furniture with your friends. For instance, if you have a dining table that doesn’t fit your office space, how about swapping it with someone who has a smaller desk? Or if you have children’s furniture, you can exchange it for bookshelves which would be of great use in the home office.
Plus, you can also offer your decorating skills to a neighbor in exchange for a chair. The main factor that lies here is that you always have something valuable that you can offer whether it’s your skills or some product. Not only does it help you cut down your expenses but it also helps both the parties find just the required items, without having to fill the house with unrequited furniture.
Keep An Eye for Affordable Wall Decor
Most of us have some phrases or quotes that top our favorites list because we find them inspiring or motivating. And these are the same pieces that you can print out along with a few images to deck up your office area.
For super affordable frames, you can check out Ikea as well as dollar stores that usually have a good collection. We must say that when you print and frame your artwork; it cost way less in comparison to buying the ready-made prints in a retail store. And adding artwork can instantly revamp the entire decor; and it’s also one of the best ideas while working on a budget.
Moreover, if you’re a fan of planners, then don’t hesitate to include a calendar on the wall. They might not be an example of traditional ‘art’, but they do help in making the overall space and walls have an official look to them.
Also, if you prefer using an electronic calendar for scheduling your programs, a beautiful wall calendar works as a decorative piece. It is more than a useful planning tool. And you may also add new artwork to improve the existing decor of your space.
Add a Clock
If you’re on a budget, then the concept of “time is money” should always be at the forefront of your mind. With that said, something as simple as hanging a big clock on your wall can do wonders in keeping you focused and productive while at work.
It’s vital to ensure that whatever time you plan to keep for your work should be a productive one. Thus your office should be well-equipped with the things that you generally require without you having to take frequent breaks to get each item.
Many of you might be familiar with time-blocking, which is known to help many professionals. If you can figure out the time-blocking method correctly, then you’ll be amazed by the rate at which your productivity improves. This method is relatively simple; all you need to do is block out time for prioritizing the most important tasks.
And once they are completed, you can add in the less important tasks for the day. But don’t forget to set a timer for completing the tasks, this way you won’t have room for any interruption and you’ll be mindful with each passing second.
Add Greens
Adding some potted plants in your office space will allow you to breathe some life even in confined areas, and they are super affordable and easy to maintain. This way you’ll feel like working for longer durations because it cleans the air and keeps you feeling calm, and it looks pretty too. You can fill the vacant spots with plants from a local nursery or even a discount store.
And the best part is that plants help improve your health, while it also sharpens your focus. You can opt for any plant that is suitable for indoors and is low maintenance like a snake plant or even a bamboo palm.
Plus, getting a cute planter for keeping the plant works to your benefit as it takes your decorative game to the next level. Overall, you need to ensure that everything that you incorporate helps you get a balanced office space- practical, comfortable, ergonomic and most importantly, clean.
Ergonomics on the Cheap
The essential factors in your working environment are your health and safety, which should never be sacrificed regardless of your budget. So, when you’re picking a piece of furniture, do keep an eye for ergonomic designs as it makes things easier for you to use.
The task chair that you plan to use in your home office should balance your back and shoulder correctly. And this applies mainly to those who will be working on a laptop or desktop the entire day. In addition to that, you should also consider footrests, soft keyboard pads and ergonomic mouse instruments that fit your hand correctly.
Plus, even if you work for long hours the ergonomic office furniture and accessories will be less stressful to your body. Your main aim should be on purchasing or trading products that will help enhance the work experience. A decent ergonomic office chair these days for example could be had for less than $200.
Get an Exercise Ball
Sitting for long hours on the office chair can result in a lot of health issues later in life, which is why exercise is important. Replacing the office chair completely for the exercise ball is not a feasible option, but you can use the exercise ball during the day as part of your fitness regime.
In addition to that, using exercise balls has been the latest strategy for reducing discomfort, fatigue and back pain. That’s because when you sit on an exercise ball, the instability helps increase trunk muscle activation, which improves posture, increases core strength and decrease discomfort. This further keeps you feeling awake and motivated without any lethargy.
Another benefit that most users claim to have witnessed is increased calorie burning. You don’t even have to break the bank for other exercise equipment because this unit serves the purpose pretty well. So, keep an eye for a new stability ball, or you can even get one from a thrift store.
Keep your Office Space Clean
First and foremost, you need to clean the entire space and arrange the office supplies accordingly. We know this might sound like a pretty obvious statement that you’re told now and then, but cleaning your office space is essential. It is the key to making even the smallest of rooms appear spacious enough for working at ease
In short, if you keep piles of paperwork on the table, sticky notes and heaps of receipts, then you won’t be able to keep track of anything. Therefore, getting organized is an essential factor that needs to be focused on when you’re looking for affordable home office ideas. On the whole, being messy can cost you heavily in terms of lost ideas, lost productivity and lost time.
These days a messy desk usually means a messy computer desktop; and this is why you need to ensure that you organize the virtual files in the right order. And when you commit to saving the files in separate folders, you can work peacefully without having to waste time looking for items on the desktop. Overall, a clean office will help you stay more focused and productive during work.
Paint the Walls
Adding a coat of fresh paint can change the entire aura of your office and give it a new look for cheap. You have the freedom to select any colour of your choice, but ensure that it provides a sense of space. For instance, light-coloured walls have a brilliant way of making the room look more spacious, while dark colours make the room look smaller.
The quality of paint that you select can also determine the effect that the room will have. And the best part is that you can easily find a paint jar that suits your budget. You can DIY the entire painting process over the weekend, and we believe this is a fun project that you’ll be taking up soon.
Plus, if you want different coloured walls then you can also opt for that, it gives a unique finish to the entire space. It’s advisable to select a colour of paint that you think will match the photo frames and the other furniture that you plan to put up.
Take Advantage of Special Programs
Another effective way to shop on a budget is to look out for promotions and special offers on office supplies. This includes stationery, electronic items, inkjet refills, a stack of blank papers etc. During the once-a-year sale in most stores, you can strike a great deal with some of the essential office supply programs.
Moreover, you should watch for tax season promotions, Black Friday specials, August deals and September clearance, when there is an excellent discount on office supplies. In truth, you need to plan strategically to ensure that you’re picking only the required items without wasting a penny. You can stock up on everything that you’ll need, but don’t forget to keep an eye on your budget.
Since office supplies are fun to shop, you might end up overspending on pens, stickers and a host of other unnecessary items. It’s best to make a list of all the things that you want to purchase before you visit the store. This should help you avoid buying anything other than what you actually require.
Move around
You must have pinned down a lot of “office inspiration ideas” that you want to apply to your office space. The best fix is that you don’t need to go all-out while you’re giving your home office a beautiful makeover. And since most of our work is generally virtual these days, you can get it done from anywhere around the house.
You don’t have to wait until you’re done refurbishing the office space because you can use your laptop to work from anywhere. Whereas, waiting for the ‘perfect setting’ to get started with your work is more like procrastination in disguise.
So, even if the office isn’t huge, you can get comfortable on the couch to complete the tasks. For those who want a breath of fresh air during your work, you can even sit in the living room or the balcony. A change of scenery will always work to your benefit, as it keeps you alert, focused and more productive throughout the day.
Proper Lighting Makes a Huge Difference
Another essential factor that you need to pay attention to is the lighting. Ideally, you should focus on having a maximum amount of natural light in your office space. And if there is a large window, then it will easily enhance the lighting in the working area. Proper lighting is key to making a shabby office space look more spacious and inviting.
Daylight is undoubtedly the most reliable source of white light that is available with an equal proportion of colour on the spectrum. However, if you don’t have a window around your home office, then a combination of task and general lighting will be required.
You will need a high-quality task light for the cloudy days and late nights. And if the home office is located in a basement or a room without windows, then you should check-out the daylight-replicating light sources. This will provide you with energy-efficient, full-spectrum lighting that has a positive impact on your workflow.
To avoid glare, you shouldn’t place the overhead lighting above your computer screen or even directly in front of the computer screen. That will cause eyestrain. But, thanks to energy-saving guidelines, It is now way easier to pick units with reduced light intensity than what it was before. The most critical factor for choosing the right lighting is ensuring that it allows you to control the intensity and brightness.
Have the Right Amount of Privacy
None of us can work effectively in a sea of interruptions or noise. Especially when you’re planning an office area, you should ensure that it provides the right amount of privacy from surrounding activities.
While headphones might help to isolate certain sounds, no one wants to wear headphones all the time. One of the budget-friendly options here is that you can opt for low fans and air filters that operate quietly to muffle other noises.
You can also use portable screens for shielding the work area from any nearby activities. Alternatively, wall dividers that work as bookshelves won’t just help to add privacy but also provide storage solutions.
On the other hand, if you can’t add a door to your office, then it might be helpful to add signage that says, “Quiet Please” or “No Interruptions”. This will help remind others that it’s “work time” and they need to behave accordingly.
Know when to splurge and when to save
When we speak about saving, you might be having a rough estimate of the products that will cost you significantly. For instance, a high-end chair, artwork or other electronics generally come with an expensive price tag. But on the other hand, you can save up a considerable amount when purchasing lights, shelves, window coverings, and desks.
That being said, you need to be smart enough in finding the right place to buy your products from. Plus, it’s important to stay on budget even when you enjoy a few splurges along the way.
Consider Everyone’s Needs
Want to use your office area as a homework corner for the kids? If so, then you should keep them in mind when you’re designing this space. This will allow you to incorporate design elements that you believe will work for your kids comfortably.
For proper arrangements, you can also take your kid along when you’re picking the fabrics or other office supplies that will be shared by them. It will help both of you to showcase your individuality as you customize the space according to your preferences.
From the right chair size to the colour of your wall, it can make a difference when it comes to productivity. And the shelves should also have a separate corner for keeping children's books, so losing them in between the piles of official documents won’t happen easily!
Be a Minimalist!
There are several reasons as to why minimalism is favoured by some of the most successful people in the world. A clutter-free space that comes outfitted with pretty simple furnishings and neutral colour palette has a distinct way of sparking creativity and freeing the mind.
This instead helps you stick to the budget, as it enables you to pick only the products that you require. It also makes it easy for you to clean your office space, which, in turn, gives it a professional look and feel all the time. Plus, your focus and efficiency tend to increase significantly because you will no longer be searching for a single item in a large pile of papers.
Improve your D.I.Y Skills
Instead of depending on electricians, painters and furniture assemblers you should try and do everything yourself. It will be a creative and fun way to learn new skills that will help you save a lot of dollars on these otherwise costly services.
Plus, when you learn to do things yourself, you’ll be able to understand the details of what makes a high-priced service or product costly. Another benefit is that you’ll know the main features that you should look for in an affordable unit.
The price between high-end and ultra-high-end products can be thousands of dollars. And when you know that a lower-priced option will work for you, then you can use the remaining money for other essentials. Overall, you don’t have to be an excellent handyman to ace the DIY skills, because what matters is the way you complete the task.
Final words
When you want to work from home, it’s essential to improve the working environment to maximize the benefits of such an arrangement! This not only helps in enhancing productivity but also enables you to complete the tasks more efficiently.
And one of the joys of getting to work from home is the freedom to be in a place that you love and feel comfortable in. Even though you need to invest time and energy to incorporate some of the best home office ideas, the rewards are plenty. This makes it worth all the efforts!
Now that we have come to the end of our guide, we hope it has helped you find what you have been looking for. So, go ahead and pull together an organized, chic home office on a budget right now!
In offices world-wide the cork is present for your pins, they help you remember that things that matter for your and whether they`re family photos or important tasks for the day ahead they`re role is indisputable. The simple cork board can be purchased online inexpensively yet their look is quite bland and uninspiring and while that functions in modern minimalist settings in creative environments they`re not everything that they can be. A beautiful gallery follows to present the product of insane creativity, diy cork board projects for your office started from scratch or from a simple plane board that have achieved the "extraordinary" status.
The difficulty level of most crafts involved is easy yet the results are highly rewardful, cast a glance bellow and surge inspiration.
A simple frame can integrate the new item in your interior design seamlessly while the chevron pattern adds dynamicity. The craft can also be considered a graphic piece of wall art.
via cuteandpaste.co.uk
2. Use a special fabric on a plane board
Choose a color pallet and a pattern that fits your interior needs, something inspiring that makes you check the new beautiful board every now and then, it can greatly increase motivation.
via masteringdiy.com
3. Burlap texture and black thumbtacks
An insanely simple craft that brings a traditional rustic vibe to a cork board. The black thumbtacks bring rhythm and a slight, elegant contrast.
If you have the opportunity to re-use an old frame, use it creatively. It can hold your new ideas and your beautiful memories at your grasp in the office for years to come.
The most delicate and high end interior designs can receive the cork board in a more elegant, sumptuous look. These can be re-built with any texture in the world thus making them ready for any setting. Above the right fabric overwritten with a geometric pattern has sculpted something really magnificent, awe-inspiring.
In a simple frame of your choosing the wine corks you`ve collected off every celebration and festive cooking session can be carefully arranged to shape an extraordinary cork board. Use color accents here and there and transform the whole craft into something truly positive. The colors used can integrate your new office toy into the setting as a complementary item or as a contrast.
The contrast through detailing can be used to your advantage. The frame makes the board a more special, particular item for your office, arrange your memories and things to do in style.
Recycling old frames is a great responsibility and in the craft above corks and the gradient pattern contained make it great justice creating a slight contrast with the bright yellow frame. A really splendid display for your to-do`s.
A really accessible method of achieving a dynamic, simple look on a bland cork board. Use tape to create the pattern needed and simply use spray paint, interesting gradient can also be obtained in these patterns.
You surely know by now what you`re next traveling destination should be. With a simple cork board and the right dimensions you can map everything down with pins, pictures and landmarks.
Exquisite look with a simple simple craft, highly rewardful.
Source Unknown
20. Double a thin cork sheet with foam board
The most inexpensive solution to nestle in epic frames with custom sizes is a simple cork sheet and one foam board; both can be cut to any size with a simple cutter.
via thistlewoodfarms.com
21. Textiles and imposing frames
The physical feed of things to do can be hidden in plane sight as wall art.
Cork cutting boards painted using a single color palette can be recognized as a graphic ensemble that your blank walls will surely appreciate as wall art; needless to say that they can still function as a bulletin board in your home.
A sufficient cork board can offer you the chance to get organized in a graphic and practical manner, pin your tasks everyday for a month, pin pictures that inspire you, pin things that you look up to.
Source Unknown
25. Inspire a state of well being
A small wall art piece crafted with corks in a narrow, tall area can be filled with the wine-inspired wall art above, the simple craft can also present your to-do tasks for today or the menu in the kitchen .
via Pinterest
26. Heart it in cork
Shape a heart with wine corks and enjoy the graphic shape they bring forward.
via countrylove.co.za
27. Frame and pattern in contrast
Elegant and powerful in appearance, the right frame emphasizes the right pattern with a slight contrast.
via newhousenewhomenewlife.stfi.re
28. Geometric modular composition
The same shape used to form a colorful layout that can be changed as you like and need. Here color emphasizes the geometricity and adds depth.
The DIY Cork Board Projects above are nothing if not creative, inspiring, they can make your home office great justice, enhancing it with a positive, joyful yet highly practical look. What do you think? We would love to hear your opinion in the comment section below !
Your DIY bulletin board is there when you need it ! Crafted with love, great attention to details and now encompassing memory it is definitely one of the most practical items in your office; it motivates you, it reminds you what is worth remembering and it displays your memory and future travel destinations, a small area to which we can really relate too.
In the following galleries we have curated a list of exceptional DIY bulletin board ideas to revamp your home office, cast a glance and find something inspiring !
How do you see it and for what do you use this area most often?
1. chevron pattern embracing a cork board
Use a chevron pattern to integrate your new bulletin board in a modern setting wearing black, gray and white; the small detail scale and the beautiful dynamicity added greatly contribute to the overall design.
via annetheadventurer.com
2. glue buttons on THUMBTACKS, share color
Thumbtacks are sometimes difficult to manage due to their small caps, they`re also not that graphic pretty much all the time. Use a collection of buttons to create super cool retro thumbtacks dedicated to your interior. You can sort them by color, material, size, palette or you can simply share the rainbow and its diversity.
The golden thumbtacks here and the premium looking fabric create a really special look here; feel free to experiment with the fabric of choice and colorful thumbtacks.
via houzz.com
10. geometric diy painted cork boards
One line and one color will you shape you an extraordinary composition that can be easily scaled with great results.
11. SALVAGED old frame and retro fabric
The exquisite craft driven by decor above includes a pocket for you correspondence; the vintage fabric in reclaimed wood clothes balances the neutral color scheme.
13. artistic composition playing a functional role
A composition of framed cork boards can be used to create wall art; these can nestle different activities, different hobbies organized or simply the days of the week awaiting tasks.
One old window, a cork behind it and it already has a great functional value, the chic component speaks of authenticity.
via debbie-debbiedoos.com
16. black frame contrasts burlap
Natural elements like pine-cones and yarn string work to one`s advantage complementing the scene ready to share your memories in coziness and warmth.
via funkyjunkinteriors.com
17. map your future travel endeavors
Cork is the ideal medium and the travel map can beautifully function as motivation tool and wall art alike in your office.
Source Unknown
18. one row of wine corks
Your bulletin board can be as narrow as you need it. Here it keeps photographs in the right place, capturing smiles and laughter.
via shuterbugsage.com
19. Alternate patterns, create contrast
By creating contrast between colors and pattern on the same board you can easily shape a focal point in your office; this gives your tasks more coverage, more attention.
Spray paint and tape can help you shape a really graphic piece of wall art to double as a bulletin board; use the color that fits your interior scheme and feel free to experiment with the pattern.
via Pinterest
How do you see the DIY Bulletin Board Ideas above? The selection is inspiring and definitely share-worthy, we would to hear your thoughts in the comment section below.
Related Articles
For most adults, staying at least eight hours a day (or more) in an office cubicle is a fact of life, which is why we end up calling the office their second home.
Considering how much time we spend glued to our desks, you should feel comfortable and safe within your office cubicle, as this helps increase creativity, productivity, and a sense of home away from home. But how?
Here is where we come in, as we introduce 68 cubicle decor ideas to liven up your office space in this article.
68 Easy Cubicle Decor Ideas For Personalizing Your Work Area
One of the keys to productivity is having a personalized and livable workspace. To help you achieve this, we have compiled 68 ideas to make your space shine.
A workspace lamp adds warmth and lighting to the confines of cubicle walls. You can put a work-space lamp in the corner, near the station where you frequently write, or even close to your keyboard.
In a research on the importance of lighting in offices, experts found that a well-lit workspace increases productivity and elevates the well-being of employees. This is why your light fixture must be well-planned.
Some of you are given limited cubicle spaces. With this, you need to be creative when increasing the functionality of your areas, along with elevating your office cubicle décor. For this problem, the solution is adding a shelf.
A shelf is a piece of furniture made of plain rectangular wood (or steel) connected to your cubicle's walls. There are also stand-alone ones with rollers that you can hide under your desk.
A shelf will give you a place to put on your office essentials, plants, and others.
To ignite your productivity and tickle your imagination, you need to see colors that contrast what you see on your computer screens every once in a while. Here is where the multicolored accessories come in.
The multi-hued accessories can be your personal and office essentials, such as organizers and supplies. The key here is to incorporate colors that you like. It could be brown, blue, violet, or even a complete rainbow representation.
Flowers give off a calming scent, aside from being visually appealing. So, if you are not allergic to flowers, put on a seasonal bouquet over your desk.
When choosing the flowers, ensure they align with your office cubicle's color scheme. If you do not mind the colors, you can choose whichever you feel happy with!
Moreover, you can put a flower in ceramic containers of your choice. These ceramic containers will surely make your desk chic and ultra-modern.
Wall decors accentuate your cubicle, adding color and variety to a neutral office color scheme.
More importantly, wall decors can add personality to your area, especially when you decorate it with personal photos, mood boards, and other things that spark a little joy.
Although gadgets and online applications already exist to remind us of the current date, nothing beats the style and usefulness of a desk calendar, especially when it is DIY.
When creating a DIY desk calendar, you get to enjoy the process of making one, and you also reap the efforts of your hard work as you can now quickly identify the month and day, every day.
Sometimes, that one happy color excites us, which can extend to how enthusiastic we can be going into the office as we get bombarded with tasks.
The statement above is why you need to get your office supplies and office cubicle decoration ideas in the same color, or at least in complementaries.
You do not have to brush your walls with pink or blue; you just have to get at least the majority to complement each other. Aside from giving you a sense of motivation, others will see your cubicle as an inspiration for style and creativity.
A poster whiteboard is a simple cubicle décor that holds much more importance than just mere visuals in your workspace, as it helps you be reminded of everyday tasks and a to-do list for the month.
You can even use it to write a phone number through an impromptu call and other valuable functions.
To make it right with a poster whiteboard, hang it on a corner within the level of your eyesight when standing or sitting down and within your hand's reach for jotting important notes.
Organizing your essentials is one way of keeping indoor environments livable and work-friendly. To get organized one thing that you can use is a wooden organizer.
A wooden organizer has several slots and drawers that fit your push pins, paper clips, documents, and other supplies.
Nevertheless, always remember to keep the wooden organizer within your reach to make it accessible when you need the things stored.
Most cubicles, those standard given by offices, are made of plain walls and desks. But you can always have the opportunity to give life to your booth. After all, it is you who will stay there for hours.
To do that, you can use your painting prowess (and spray paint!) by creating random objects, like rectangles, a leaf, and other patterns. Make sure to vary their colors, too!
Painting your walls will surely add style to your cubicle and give you a more comfortable stay while working as you look at your hand-painted eye candies.
You will be surprised at how a simple addition of a throw pillow can give a pleasant glow to your little cubicle, and it can even provide comfort to your back throughout the long hours of working.
In choosing a throw pillow, consider three things: comfort, style, and size. You must get a pillow that will give you comfort, is stylish, and is small or big enough to fit into your office chairs.
If you think only kids use peg boards, then you're wrong. You can also use them to stimulate creativity and develop visual perception skills.
Sometimes you get drowned in work, and it can get quite monotonous. But, with a simple glance at a peg board, you can be reminded of why you are working, who you are working for, your passion, and other things.
Your office cubicle décor options are not limited to expensive items or buying new things to add personality to your space. It also includes transforming everyday objects into modish yet helpful decoration ideas.
By this, we mean that you can put a comfortable scarf (or another textile) on the backrest of your chair, and it can already add style to the entire space.
You can even use knitted fruit trays to pin on your area walls. While you're at it, you can put fresh flowers or display photos over the trays for an instant wall design.
A stylish tray can be a defining factor in making your work environment a balance of style and business.
Much more than the appeal it can give, trays as decorative elements are also functional by nature as you can file your documents neatly and appropriately.
If you want inspiration, motivation, or a cubicle decor that screams who you are without presenting yourself, a photo wall would be right for you.
Even within the margins of your cubicle, you can put it on a small photo wall. Just make sure you vary the sizes and orientation of the frames to make them fit like puzzle pieces.
Getting stuck indoors for hours will surely have you inhaling lower-quality air. But a succulent plant can help filter the air for you.
Investing in succulents is also ideal for office workers because it is low-maintenance and only needs to be watered once a week. So, you do not have to worry about dried flowers the next day if you skip watering them for a day.
Now that you know how vital succulents are as office cubicle decor, then up your game and put plants inside tiny geo planters.
These tiny planters have geometric shapes that signify creativity, balance, and even masculinity or femininity, depending on what you want to exude through the color scheme.
A work environment can only feel comfy and warm when you have an ergonomic office cubicle chair that also looks good in your eyes and feels good on your back.
In choosing the office chair, you can opt for those aligned with your preferences and harmonized with the overall theme of your office cubicle decor.
When in a rush to finish office work, the last thing you want is to bump into one of the edges of your desk. We suggest that you invest in an asymmetrical layout for the desks.
If you have an L-shaped desk with curved angles, your workflow can be much easier as you can glide from one side to another without worrying about painful edge bumps.
Family is everything. They inspire you to work efficiently and motivate you to finish your tasks on time. Even far away, you can always have your family with you through framed photos on your desks or walls.
You can try the image above, which shows a box with photo-framed walls. This can also be your storage for keys and other small items.
During Christmas time, you surely want to keep your office cubicle decor as festive and joyful as the environment outside of work. To do that, you can decorate your wall units.
There are several ways of decorating, but the easiest way to go is to hand some Christmas balls in a lantern-like manner.
You can also add ornaments in different Christmas colors that will act as borders for your office cubicle wall, like in the image above.
To liven up your desk, you do not have to go far. You can do it through washi tape, especially when your office desk is made of wood with a glass cover.
Working on this decor idea is easy; you only need to get your washi tape in different patterns and line them alternatingly. Then, you get to have a colorful and stylish desk.
Wood elements such as cubicle décor can help you stay grounded and feel the outdoors even when confined in your small cubicle.
With that, put a wooden pencil holder over your cubicle desk and get the perks of having the earthy element while ensuring your pens are secured.
If you opt for the pencil holder as shown above, you can quickly identify and get the pen you need without getting them piece by piece compared to a cylindrical holder.
A new desk can bring the best out of you even in the darkest days because who wouldn't want a fresh start with a new desk, right?
Whether you are just starting your job or take up a new position and office, we suggest you get a new desk. It can be made of marble, steel, wood, or anything you prefer for as long as it's shiny, shimmering, and brand new.
Speaking of book ends, you can do it yourself by using your current table organizers and putting them on both ends.
You can even use your geo planters, pencil holders, and other things you have in pairs to keep your books standing tall and mighty while looking clean and modish.
Tip
When you're budgeting money but still want to decorate your cubicle, whether at home or in an actual office, check out our home office ideas on a budget article!
Aside from family photos, you can hang framed art on your cubicle wall. It can be your first painting, a friend's, a family member's, or something you bought that captured your attention.
But, you need to be wary of proper placements and sizing as a group of framed art can take a significant area out of your cubicle wall.
In this article, we look at how much aesthetic the cubicle décor ideas can give and how much functionality they can provide.
So, a better way to deal with functionality and style is by starting at your cubicle wall-slash door. You can transform the usual open space with a sliding door if you want privacy.
Of course, while attaching the door, make sure its design and color complement and balances the entirety of your space and office.
When you want to be in a peaceful state of mind, you should incorporate zen cubicle décor into your office cubicle.
To do that, you need to include earth tones and plants. You must also apply this to your desktop background to provide a sense of continuity and harmony.
Being an employee of a production company or a journalist, you would need a magazine rack to stack all your copies for easy filing.
Often magazine racks take the most out of your not-enough space. You can always work around that by pinning them into your cubicle walls, similar to the image above.
It is not just functional, but it also acts as a removable wallpaper of some sort to fill your dull walls.
Investing in office decor means buying helpful desk organizers, too. They do not need to be fancy, but they need to blend in with the elements of your already existing cubicle décor.
To give you an idea, the best desk organizers come in two or three tiers because of their space-saving characteristics.
We discussed how book ends could elevate your cubicle's style and utility.What good are book ends without a few books?
You can put at least three books of your preference for your desk cubicle. You can read them on your breaks or just put them there for a bookworm vibe.
Do you know what else can make your cubicle desk a standout?Keyboard stickers!
We usually think that changing keyboards is the key to increased productivity and aesthetics within the room. Still, we must remember that even simple stickers can light up the day.
There are full keyboard stickers that cover up your entire keyboard, but there are also individual keycap stickers. It's up to you what to choose; just ensure it matches your cubicle décor.
When you are left with a small cubicle desk area, and you need to keep a lot of things on top of your table, then raising your computer can help a lot.
In raising your computer, make sure you find a practical stand. By this, we mean those with a built-in desk tray.
Having the same environment over and over will make your life dull and monotonous. Yet, you can always change how you see your office, even without looking for another job, by changing the colors in your environment.
From hot pink and bright blue, you can change the scheme to olive green or any other colors. Just make sure it's different from the first hue of your cubicle.
Technology can make a third-class office cubicle superior, especially when you know what equipment to invest in.
The technology as decor that you use can include a double monitor, a new Alexa-connected device, a modern desk lamp that also acts as a clock, a digital desk calendar, and more.
When tracking your daily tasks or monthly progress, magnets can help you do your job efficiently and keep track of what you need to do, just like in the image above.
Aside from being your little trackers, these can also elevate the overall appeal of your cubicle desk (of course, if you integrate the magnets with neutral colors).
The number one rule when doing cubicle decor is to think of what you like, stick to it, and use it as your cubicle decor theme.
You can mix and match two themes, but you can never prosper when you put everything you can think of in one space.
When going with patterns as your main cubicle decor ideas for cubicle wallpaper, pair them with plain desk accessories. This allows the designs to harmonize and not go against each other.
If you want to get fancy, you can always hang some wallpapers on your cubicle's wall. It can beflowers, minimalist patterns, or just plain but bright-colored wallpapers.
The trick in getting a suitable wallpaper is to choose removable ones so that you can change it once your likes and preferences change.
As we have mentioned in the earlier sections, pen holders are a must to keep your pens in place all the time.
With this, we present to you this geometric pen holder in a slanting orientation. It will not just hold your pens but also your contact paper, calling cards, and other essential things.
If you think aesthetics are the only reason small rugs on the floor must be on your list of cubicle decor ideas, then you are missing the point.
A touch of a small rug into your overall cubicle design can reflect your personality and can even provide comfort to you and those who visit your office cubicle space.
Like the effects of the statues and personalized display boards, pinning up a few posters can also give you a sense of ownership of your cubicle and inspiration from those you decide to put.
You can add a poster of your favorite band or a poster that states the most inspirational quote that got you through the most challenging times of your life.
When discussing organization, another cubicle décor idea that comes to mind is floating shelves.
These shelves are different from the traditional ones because you cannot see the bridge that connects them with the wall. With that, it gives an illusion that it floats. Hence its name.
Additionally, shelves like this will give your cubicle the impression of more space, which is beneficial for your productivity.
An empty mason jar or any other jar can be an excellent addition to your cubicle decor. They can be purely for the visuals or bear some functions, too.
You can use empty jar decor as holders for fresh flowers or another organizer for pins and pens.
Moreover, you can envelop the empty jar with wrapping paper before making it useful with the abovementioned things. However, if you want to retain its glass glory, you can add fairy lights inside for extra lighting.
One of the rules of organizing is that you can never go wrong with small storage boxes under or beside your cubicle desk.
These small storage boxes can be a home for your magazines, books, monthly documents, and more. You can even use them as a filing system to separate incoming and outgoing papers.
When you want to increase the soundproofing of your cubicle and feel more comfortable taking on some confidential calls, wall cushions are the way to go.
You can put it on your walls and even your DIY doors. Just make sure that your walls are sturdy enough to handle the weight of the cushions.
With the bit of office space given to you, you just have to make the most out of it for style and organization. For this, a bag hanger can be your buddy.
You can add a bag hanger at the end of your desks or the entrance of your cubicle, wherever you find it safe to hang your bags and other things.
Since you have already been designing your keyboards with stickers and your computer monitors with a seasonal theme, why not let the mousepad join the party, too?
A computer mouse pad is essential in keeping your workflow smooth, particularly when you rely on computers and typing all the time.
Aside from that, a custom mouse pad can increase the visual appeal of your cubicle décor because it will complement your pre-existing decorations.
The organizing does not stop in this list as we include this desk filing cabinet with a unique geometric shape.
Obviously, this cabinet will help you arrange your documents instantly. But it can also be a place where you can put your geo planters and make the overall design of your cubicle a must-have for your workmates.
Remembering the good old days can help you carry on with your work life. So, why not bring your plushies to work and make them a part of your cubicle decor?
To be honest, plushies can help stimulate your creativity, get you out of a stressful situation, and even bring your office cubicle to a higher level of coziness.
You can find a companion in metallic file holders when sporting a tropical or minimalist theme.
Besides giving your files a stylish place to organize, you can also have a chic addition to your cubicle decor that uplifts the vibe within your cubicle area.
If you need to work in a limited cubicle area, add a rectangular mirror on top of your cubicle desk or walls, as it creates the illusion of extra space.
Your cubicle decor can be a single mirror, or if you really want to enlarge your area, you can put two mirrors facing each other.
To further brighten up your office cubicle, what you need are wire organizers that can be mounted on your walls or at your desk.
With wire organizers, you can have both functionality and style. On the one hand, wire organizers can hold your items while allowing you to easily see the things you need through the holders.
On the other hand, wire organizers give off a monochrome vibe compatible with those who like contemporary or industrial designs.
If you want your desk to stand out, pair your wire organizers with a letterboard with a black background. You can use this letter board as a reminder, daily list, or important contact details board.
Moreover, to make it blend well with the rest of your office cubicle decor, put it on top of your shelves or right at the side of your computer monitor.
Earlier, we talked about how fresh flowers can elevate the look of your cubicle. But, it is equally important to note that a glass vase where you will place your flowers holds equal importance in increasing your cubicle's sophisticated look.
Aside from glass vases, there are also wooden and metallic ones that you can use depending on what you prefer.
You can also use ceramic containers to spice things up around your desks!
You cannot have a valuable and convenient cubicle to work in if your cables are literally everywhere.
To keep them in place, you can incorporate a cable organizer into your workflow. With a cable organizer, all your wires pass through it to lessen their visibility and clutter.
Reminder
To efficiently use cable organizers, you MUST keep them near the electric outlets/where the wires bundle up.
The last decor option, but not the least, from this list is this cross-stitch wall decor. It is a handmade art piece created using the techniques of embroidery.
To put it up on your walls safely and securely, do not forget to use wooden or full-glass frames.
Advantages of Employees Decorating Cubicles
As employees, decorating your cubicles can give much more than visual appeal. It also means that you can gain the following perks:
Create a healthy working environment
Give comfort and a welcoming atmosphere
Provide a boost in motivation
Elevate creativity
Increase productivity
Build rapport with coworkers
Cubicle Decor Ideas FAQs
After all the cubicle decor ideas we provided, we are sure you have some things in mind you want to address.
With that concern, we have this section to address some of your FAQs. Read on!
How do you hang things on a cubicle wall?
You can use wall hangers, push pins, mounting squares, and cubicle hooks to hang things on a cubicle wall.
How do I personalize my office cubicle?
You can personalize your office cubicle using one or more things we have provided above. But, to summarize, here are some of the essential decor ideas you can use to personalize your cubicles:
Add a hanging photo wire of your family and friends
Include your achievements (e.g., medals and certificates)
Incorporate your passion and likes (e.g., yarn, colors, pens, toys, etc.)
Verdict On Cubicle Décor Ideas
With everything included in this article, from the 68 ideas to the advantages and even your FAQs, you now have the decor ideas you will need to do to liven up your office space.
Just remember the three important interior design elements every time you decorate: color, creativity, and comfort.
Now that you are ready, you can put these office cubicle decor ideas into reality!
In our chaotic world smart corkboard ideas can help us organize our pantry, our office, and our memories, they can inspire and share knowledge being used all around the glove. The beautiful material can be found in sheets everywhere and whether it`s natural or synthetic it is a simply great organizer. To showcase the immense options brought forward by 19 ingeniously smart corkboard ideas for your home follow, cast a glance and surge inspiration.
1. Double your cabinet door with cork
It can help you organize your measuring caps and keep cool recipes at hand, a simple yet highly rewardful craft.
A super mom created one board for each child, it is meant to keep their rucksack as well as the daily chores around the house.
4. Smart cork jewelry organizer
A corkboard can organize any type of jewelry beautifully thanks to its customization format, use this to your advantage and the jewelry can become beautiful wall art in your setting.
Wrap your corkboard with a traveling map and pin every place you`ve been to in this life, highlight your home and the ultimate traveling destination, and pursue your goals, one pin at a time.
via agosnesrerose.wordpress.com
7. Use wine corks with a cool pattern as a board
Shape your bulletin board by using the wine corks you`ve saved so far, extraordinary and practical solutions for your home office. Feel free to color a few corks to create contrast.
You certainly have these around the home, salvaged in time from various jackets. It is time to put them to good use!
via grandmasvintagebling.wordpress.com
10. Create a safe zone in your man-cave
A wine cork can stop the arrow darts from messing your wall, they can also point out how far off your enemy was with his shot.
via Pinterest
11. Full month cork calendar
By far the most useful and practical craft in your gallery, the full-month gallery allows you to create tasks for each day, each month. You can pin things you`re looking forward to, things that you have to do at a certain point, or simply highlight deadlines for your team at the office. It can be extraordinarily practical, use it if you have the chance to craft it!
Source Unknown
12. Full wall in cork
The artist will surely love the feed of imagination that a full wall of cork can serve, everything inspiring can go onto it, everything worth saving. It can help in research, in organizing, it can de-clutter through creativity.
The design above illustrates a bland cork board being transformed into an exquisite, elegant bulletin board, the result is exceptional; choose the fabric of choice and start crafting.
via dimagiohomedecorideas.xyz
16. Tall cork installation shapes epicness
A simple, beautiful, and highly practical option that will serve your needs in the hallway.
via hometechstar.com
17. Welcoming organizer
It will hold your mail, your photos, keys, flowers, and to-do list in a small factor that can be installed everywhere.
The ingenious corkboard ideas below might not be everyone`s cup of tea yet we think they can help in one`s organizing. How do you see them? We would love to hear from you in the comment section below!
Office furniture should always be associated with efficiency, and a Lucite office desk is a good choice if you want to organize a small corner without intruding too much in a room and keeping things clear and tidy.It's his attribute of transparency that gives the furniture the illusion of taking little to no space and its shine makes everything seem more luxurious . It does have a small inconvenience though: everything is seen more clearer so you have to keep things nice and neat all the time, which can end up being a plus after all.
You can find all sorts of acrylic desks from completely transparent ones to lacquer desktops with acrylic legs. Further on we will present you a selection of acrylic home office desks meant to inspire you in creating your perfect interior design.
Acrylic Home Office Desks for Your Interior Design
1. Acrylic Home Office Desks
The first piece is designed out of 4 smaller ones that slide together and adapt to the dimensions of your interior space. [fromPenny Farthing Design House]
Acrylic Desk from Penny-Farthing Design House
If you like compact, unitary pieces and not divided ones try utilizing a console table .The Peekaboo Clear Console is a simple form bent to avoid accidents but without having a wide surface to work with. [from CB2]
Peekaboo Console
Peekaboo Console Desk
2. Acrylic and Glass Desks
If you like the aspect of sleek clean glass try combining acrylic desks with glass desktops. Such a desk is the Lawrence Desk below.
Lawrence Desk by H-Studio
If you have a dining acrylic table to spare you can use it very well as a desk. The Atlas Dining Table is a piece that can work beautifully as a home desk .[from Acrylics of Naples]
Atlas Dining Table from Acrylics of Naples
The Apollo Dining Table/desk below features acrylic pedestals that are sold in pairs. [from Allan Knight]
Allan Knight Acrylic Pedestal Base
3. Desks With Acrylic Legs
The zebra wood and black granite top of the Lobeira Desk below is quite impressive and in combination with the acrylic legs offers an impressive design. [from Allan Knight]
Allan Knight Lobeira Desk
4. Alexandra Von Furstenberg Acrylic Desks
Alexandra Von Furstenberg is known for her colorful bold acrylic designs and her love for clean, geometrical shapes is transposed in her pieces. Neon colors or transparent ones Alexandra's pieces integrate perfectly into any modern design and even traditional ones, contrasting strongly with the rest of the design.
Brillant Acrylic Console Table
AVF Luminous Acrylic Desk
Ice Acrylic Dining Table
5. Lucite Desks
Lucite is the brand name for the acrylic first manufactured by the DuPont Chemical Company beginning in the 1930s. All Lucite pieces are acrylic, but not all acrylic pieces are referred to as Lucite. In fact, other acrylic brand names include Perspex and Plexiglas. Lucite was initially used in the manufacturing of war materials during the 1940s, but its appeal was eventually noted by fashion and furniture designers alike.
The Lucite desk below mixes the wonder of acrylic legs with the shine of a lacquer top. [fromTarnish & Tinsel]
Lucite Desk
Another Lucite desk by Plexi-Craft (shown below) combines a traditional and a modern styles, customizable by the purchaser. [from Sketch 42]
Lucite Desk of Amanda Nesbit
You can use Lucite tables which initially where used for another purpose as office desks and add a plush office chair to make it more personal.
M.-Design Interiors Inc.
6. Lucite and Glass Desks
Glass is always a good choice to empower an acrylic desk and make it look more elegant and sleek. The piece below has Lucite base and a glass top.[from AtlantaHomesMag.com via Decorpad]
Glass and Lucite Desk
Depending on the thickness of the glass the effect is more or less glamorous.[from Modern 24/7]
Lucite and Glass Desk
Vintage has its charm and a vintage Lucite desk with a glass top can work wonders into your interior design. [from Janel Holiday Design]
Lucite and Glass Desk
So in conclusion the possibilities when it comes to acrylic home office desks are endless and you just have to keep in mind to be creative and to customize your every piece to make it your own. Be bold and try colored in mass acrylic or a combination of Lucite and glass desktops. Vintage pieces are a great find and if you are lucky to find an acrylic vintage piece make sure to integrate it in your interior design and exhibit it properly.
In today's ever-changing society, the luxury of working from your own home office has become a common encounter, especially for the younger generation.The freedom of organizing your own time and making your own schedule is constantly encouraging young mind into this particular direction and developing the need for home office design where there was none before. In most cases, the work from home trend expands from an individual need to a couple or family activity which involves a slightly different approach in considerations of design and functionality.
We now take into account different needs and preferences, we bend the space to accompany and include two personalities and different tastes and ideas about how an home office should look like. The solution lies in compromise and in taking into account the true essential needs of the involved individuals in order to provide a stimulating, friendly environment for both parties. Further on we'll present a list of 30 brilliantly beautiful shared home office ideas for your household, cast a glance.
In fortunate situations, tastes do not differ radically and a common ground is reached in matters of design and interior expression. A shared office implies a certain coordination and mutual respect towards your partner, a visual connection that encourages communication and stimulation. It's a scientific proven data that people who work together are more effective and productive than the ones who are left to work alone.
by LEICHT New York
A neutral color scheme is the most common choice, one that function well for both parties. Accents can be tough used to break the pace of the hues and add a tad of contrast.
by Residents Understood
If incredible views are available make sure to position the desk towards it. The example above has chosen quite an uncertain stand as in one of the individuals using the office space will be privileged with the amazing view and the other deprived of it. Position the desk perpendicularly to the window to offer both parties the chance of admiring an incredible view.
by The Decorators Unlimited
Vapor Bar Stools are often used in interior design for their sleek minimal presence in a room. For individuals who spend quite a lot of time tied to the desk a more comfortable and ergonomic option should be considered.
by Jute Interior Design
Planning and organizational skills are something that should not miss from our daily routine and vocabulary. Create a common zone where each one or both as a couple can plan and organize their time effectively. Writing down your tasks and positioning them in a constantly visible space will increase productivity and the sense of accomplishment and responsibility.
by Derrick Tamara
A simple narrow room can accommodate a long narrow desk treated in a minimal manner. Notice how the natural light is guided in through windows situated in adjacent planes for maximum visibility on the working surface.
by David Neiman Architects
Sometimes couples do tend to think alike and to have similar tastes. Choosing a desk and doubling it can be a simple efficient idea to take into consideration.
by Andrew Snow Photography
A sleek white office space long enough to accommodate two is ideal for a modern minimal house with a seaview.
Natural light is a key element in home offices and offices in general, we are more productive, less stresses when we have a window to look at from time to time, especially if that window offers surreal landscapes. If we are talking about a shared office space, choose that special corner from your house were you both feel safe, comfortable and the natural light is in abundance.
by Tracy Murdock Allied ASID
Even if the overall design is an unitary one, a tiny contrast that differentiates the two individuals is recommended for a feeling of appurtenance to cet space.
by ASAP House
The advantage of working from office, apart from the flexible schedule, consists in the versatility of choosing your own space to dedicate to the actual office. Here a staircase landing has been transformed into a joined office space.
by Dixon Construction
Common work spaces are often designed in line for saving up on space.Nonetheless, the feeling of the other one constantly looking over your shoulder might appear, reason for which, for a person who gets distracted easily, a face t face layout is preferable.
Transform the office space with personal family photos to avoid the sterility of an actual office space.
by Jennifer McCarthy
Art should be part of your working environment.
by Anita Roll Murals
Protect your eyes and your monitor visibility in bright summer days by adding colorful shades to your windows.
by Charlie Barnett Associates
Even a small space can become a shared office, intimate and cozy.
A basement can be transformed into a useful shared office space, make sure there is plenty of natural or artificial lighting.
by S.I.D. Ltd.
Dare to be different and invest in your style and comfort. In a shared office space both individuals can claim their own style and private space.
A cozy chair without actual desk space can be your choice for a more relaxed approach to a home office whilst your other half needs the presence of a working surface.
by Laura Hardin
Position your cozy chair to admire both the view and maintain visual contact with the other.
by Garrison Hullinger Interior Design
Bright colors and contrast can stimulate creativity require din an office space.
by Artistic Designs for Living, Tineke Triggs
If an all white design is to your taste, add a touch of texture through wallpaper to avoid plainness.
by After Design
Storage space and plenty of it should not miss.
by Graceful Vintage
Choose to add focused lighting systems for increased visibility and visual comfort.
by Michael Abrams Limited
Keep things to a minimal if this is what keeps you focused.
by CONTENT Architecture
Share the space, use it to the maximum and invest in storage units, especially in the ones placed between the two of you, they will guarantee a certain barrier, a limit.
A powerful colorful wallpaper connects the two similar working stations who share a common storing space in the middle.
by Catalina Estrada
Choose to work back to back to avoid distractions.
by CCS Architecture
Stylish Sayl Task Chairs for the compact home office
by GB Group Construction
Respect should be mutual, use headphones to avoid unwanted audible stress but stay engaged with your partner for encouragement and stimulation.
The large window offers a wonderful view, increasing productivity.
A feminine touch can be noticed in this purple office design.
Some prefer a much larger working space for increased privacy, funny, no?
by B Fein Interior Design
Adding a seating zone in your shared office space is recommended, especially if you plan on spending a lot of time at the actual desk. Take a break from time to time and change your position without leaving the working environment and distracting yourself with other house chores.
by NOA Architecture Planning Interiors
How do you feel about the idea of a home-shared office space? Feel free to express your opinions in the comment section below.
Creating a home bar is one of the most rewarding ways to enhance your interior while adding functionality, sophistication, and a personal touch to your living space. Whether you envision a built-in wet bar, a compact cocktail station, or a custom wine-tasting nook, today’s home bar ideas span a range of styles—from modern and minimalist to vintage and industrial. A thoughtfully executed home bar design offers far more than aesthetics—it brings convenience, privacy, and the pleasure of in-home entertaining. Perfect for winding down after work or hosting guests on weekends, a home bar transforms unused corners, kitchen extensions, or basement layouts into stylish, social-ready zones. In this guide, we explore 52 inspiring home bar concepts designed to suit every layout, lifestyle, and design preference.
The first step to using any of these home bar ideas is to determine how much space you want to use: a seated bar for two to eight people will need more space than a single wall wet bar. Next, consider where you want it to be located; a wet bar will need plumbing to operate efficiently. Your personal decorating style comes into play for the design of your home bar.
If you are considering a seated home bar, the best area would be one that you can use exclusively for this purpose. Location-wise, one of the most popular home bar ideas is to dedicate the basement area. This home bar style sparks images of a place to retreat from the world, and indeed, it can be the center of your entertaining universe. However, there are many ways that your seated home bar can be designed to blend into your living room as well.
On the other hand, if seating is not part of your design, the number of home bar ideas are even greater. There are wonderful materials available for creating a traditional single-wall wet bar with cabinets for glassware, an undermount sink with a decorative tile backsplash. A single wall home bar can be designed to fit into a small space using the corner of a room, an alcove, or even a closet. For a larger expanse, you can use wall-hung cabinets for glassware with refrigeration and storage units for wine, mixers, and liquor bottles.
via enjoycolorfullife.tumblr.com
Elements of Your Home Bar Design
Due to the demand by homeowners and apartment dwellers alike, interior designers have focused on home bar ideas that creatively extend the use of a room. For example, you can design a home bar into your kitchen decor with a wood cabinet to hold glassware, an icemaker, and drawers to hold liquor bottles and utensils, along with a wine refrigerator. Wood is not the only material you can use: there are many home bar ideas for designs that utilize stainless steel, marble,e or granite laminate as well as leather.
Designers will more than likely suggest that wherever you decide to have your home bar, it should have a theme and be designed with materials that match your style. Choosing a theme begins by considering how you enjoy spending your leisure time. For example, if you are a movie buff, a dramatic theme of a black wood bar topped off with a silver marble counter, black leather and chrome chairs with spot lighting would reflect a cinematic tone perfectly.
Using a particular sport as the focal point is another popular theme. For the car racing enthusiast, home bar ideas use vibrant colors such as red and black or white and blue for the walls and furniture to add contrast. A glass countertop on a stainless steel bar and a racing flag check board design on bar stools enhance the feeling of excitement.
When you are incorporating your home bar design into a living room entertainment center, for instance, attention to seating arrangements is important. You want to ensure that it’s accessible without being open to damage. Using a console for your home bar is convenient; however, you need to keep in mind the number of stock items you want to store. Selecting from the variety of home bar ideas that are available depends a great deal on this factor. If you want to keep a vast wine collection along with many bottles of liquor, you may need to complement the console with a standalone wine storage unit.
Storage and shelving systems are the two elements of home bar ideas that receive the most attention after selecting a theme. The shelving system relates directly to the amount and type of glassware you have to store. Your glassware depends on the type of wine and liquor you will keep in stock. Champagne flutes, brandy snifters, shot and wine glasses for a party of eight, along with mixing equipment,t can easily fill a cabinet.
Your new entertaining feature can be realized with low costs; get creative.
via Pinterest
Your home bar can be nestled in the most beautiful settings, emphasizing your current outdoor features.
While the theme is the focal point in the multitude of home bar ideas, one element that is often overlooked is lighting. Matching the lighting fixtures to your theme is key to creating the right mood for relaxation and entertaining guests. Even for a small home bar, you need enough illumination for the counter and the surrounding area to focus attention as well as make it easy for you to prepare drinks. One elegant way to accomplish this is to use recessed lighting in the ceiling, especially above the counter or the wall trims of a single-wall home bar area. To add light to a seated bar, you could use small frosted hanging lamps. For a more traditional style basement bar, Tiffany lamps are a popular choice to bring a touch of elegance to the area.
Hiring an interior decorator is one option you have to find the perfect way to express your style. There are an unlimited number of home bar ideas to use when you are ready to design an entertainment area where you and your guests will love to spend leisure time, and we have selected a quite impressive gallery to surge inspiration from. Cast a glance at the gallery below.
Penny covered home bar design offering a push, luxurious vibe to your home bar at a low cost.
Modern living area envisioned by Ryan Street & Associates. Simple, delicate texture tailored in an airy atmosphere.
Home wooden bar design ready to greatly enhance your parties.
Awe-inspiring home bar design with intricate textures.
Extensive bar design by Jauregui Architects.
Circular home bar design in the Diamond Star Ranch In Eagle, Colorado.
Modern living area with home bar by Star Daun Curry
Sumptuous home bar design surrounded by a library. Elegance at its best.
All wood bar contrasting with the white and blue textiles on the chair with a subtle elegance.
via Home Bunch
Black and white built-in home bar design saving a lot of space and greatly emphasizing entertaining options.
Home bar design in the McCaffrey Lake Cabin - Lake Point, Shaver lake, California - RMT Architects
Splendid eclectic decor featuring elements of great design. R-R Ranch -- Lodge by Miller Architects
Intricate elements and decorations in a basement home bar design, multiple intricate textures contributing to a dense, unique composition.
Airy home bar design flooded by light.
Granite home bar counter top in a highly luxurious living space.
via basementandbeyond.com
Chick and creative home bar design idea for a small parties. Highly personal and graphic design language.
Small home bar design with extensive options.
Flashy Hollywood living area with an extravagant home bar design.
Luxury at its best.
Shabby chic composition on a home bar design. Simple, delicate elements.
Fabulous spatiality dressed in vintage clothes. Elegant mixture of elements shaping a great home bar design.
Neat space saving home bar design featuring everything one would need in for festive entertaining.
Circular elegant and luxurious home bar with expansive views.
Reclaimed wood home bar design in red with industrial bar stools. KuDa Photography.
Attic man-cave design featuring industrial elements and intricate textures by Robert A. Cardello Architects
Natural textures emphasizing a luxurious home bar design.
Extravagant and vibrant home bar design by Denise Richards .
Industrial minimalist design in neutral tone nestled in a basement man cave. Jauregui Architects, Interiors & Construction: Portfolio of Luxury Custom Homes
White, light wood and gray are great combo. Basement Renovation by Princeton Design Collaborative
Impressive rustic home bar design ideas beautified by wooden textures.
Unique mixture of elements and colors in a contemporary home bar design.
Sculpted wooden home bar in an elegant décor. Jauregui Architects, Interiors & Construction: Portfolio of Luxury Custom Homes
Mosaic and marble home bar design emphasizing a living area.
Simple wooden kitchenette featuring a home bar.
Wooden texture defining a classic interior design of immense beauty - Jauregui Architects, Interiors & Construction: Portfolio of Luxury Custom Homes
Supreme luxury in the Old Tahoe House by OOA Design
Elegant marble bar counter top defining the interior.
Extensive living area in stone and wood featuring an beautiful home bar and dinning area.
Home theater and game room in neighbored by a beautiful wet bar.
Extensive wine cellar in the basement including an elegant bar.
Lorenzo-Castillo. An insanely luxurious home bar filled with glamour.
Simple bar framed in an noble wood, functioning as a great transition towards the kitchen.
Elegant home basement bar nestling luxury.
A sober elegant man cave with an impressive bar and pool table.
Eclectic compositions can easily tailor breathtaking scenarios.
Simple raw and extraordinary DIY man-cave decor stands in front of you. Some little alone time to fill the void for every individual should be always reserved in our schedule. A man cave is something really unique, a lifestyle that many of us would love to embrace if we had to choose yet only a few manage to practice it and trespass the average male psyche. Further on DIY man-cave decor and furniture projects for an extremely bad-ass man cave have been showcased, all can be realized with ease on your own with little to no costs depending on what you already own . Scroll on for more details.
DIY Mancave Decor
1. Raw Wooden DIY Toilet Paper Holder
via funkyjunkinteriors This little item is probably the world`s most used man cave item and the most straightforward project in the list. The license plate is a statement for masculinity in its brute rusted shape. All you need to create this is some wood and an old license plate, assuming you have the tools at hand.
2. THE DIY Jack Daniels Soap Dispenser
via 9gag By far the most extraordinary cool item in the list. A scent of whiskey in your soap in the morning will give you the boost much needed during the day. The best part of these extraordinary project is that you actually have to go and drink the whiskey first, making this diy project the most enjoyable one in our list .
3. Stylish Hooks Made From Wrenches
via The Black Workshop A screw driver, superhuman manliness strength, old wrenches and you are good to go. Be bold, be yourself.
4. Wooden Log DIY Cutting Board
via manmadediy- Extremely simple to realize and unique at the same time. Follow the link for a step by step tutorial on a website dedicated to man.
5. DIY Wood Pallet Coffee Table
DIY Wooden Pallets projects are by far one of the most successful projects that you can materialize on your own, mainly because the pallets are extremely cheap and easy to find everywhere. You can find more inspiration on diy pallet projects and recycling pallets here.
via DIYesq You can purchase everything at your home depot and materialize a customizable shelf of any length or height with ease. What do you think?
7. Huge Beer Barrel Made Transformed Into Bed
A giant barrel cropped and transformed into a very bold bed. What can be better?
8. Simple Neat DIY Pac Man Ottoman
We will never forget Pac Man. Materialize this very simple Ottoman as a tribute to the game that changed everything.
9. DIY Tire Sink
via Pinterest Hardcore sinks in a gas station. Very original, simply extraordinary.
10. Cap Catcher Underneath a Bottle Opener
Make sure that you collect your caps for your collection. A simple bottle opener with a cap catcher underneath is something very rudimentary that will change the dynamic of the beer drinking process.
Point things out with raw wood cropped from a wooden pallet. Whether it says " GET OUT" or "TOILET" it is your choice.
12. Classic Car Transformed Into a Stylish Barbecue
Remove all the parts and replace the engine with a worthy barbecue. A barbecue can`t get cooler than this.
13. DIY Floor Penny
via reddit Probably one of the most inexpensive and most shiny floors you will ever walk on. Patience and caution required in the process.
14. DIY Bar Wooden Shipping Pallets
Wooden Pallet Bar to entertain in style on a budget. pinterest
15. Neat Corona Drinking Glasses
Acetone, string and bottle cutter, all you need to realize these DIY glasses.
16. Graphic Balanced Book Shelf
via manmadediy Simply spectacular in any interior design. This furniture piece will surely become the main focal point in your interior.
17. DIY Suitcase Wall Shelves
The process for these is extremely simple, however, many suitcase models in decent conditions are required, preferably in pastel colors. via manmadediy
18. Vintage High-End Nintendo Controller Coffee Table
via Bohemian Workbench Nintendo Controller Coffee Table. Only $3500 dollars. No big deal. Pricey? Yes! Extraordinary? Yes!
19. Wooden Ice Chest Made Out of Recycled Pallets
If you have the ice chest this project is most likely free of charge if you have a few basic tools. Entertain in a sustainable manner!
What do you think about our selection of DIY mancave decor? We would love to hear your opinion in the comment section below and add your own work in here !
Are you searching for an incredible way to create a unique space in your home that caters to your personality and interests? Look no further than your basement: an often overlooked area that has the potential to be transformed into an impressive and personalized bar. By turning your focus to basement bar ideas, you can make your house truly feel like home.
In planning your dream basement bar, it's crucial to consider available space and any necessary improvements. Ensure your basement is dry and safe, addressing waterproofing, ventilation, and insulation to create an inviting environment. Don't forget that soundproofing and acoustics, particularly for the basement ceiling, are key aspects in achieving a comfortable and functional space. Effective ceiling soundproofing will ensure the fun in the basement doesn't disturb the rest of the house and vice versa.
With proper planning and optimization, your basement can be more than just storage or technical space, its natural soundproofing qualities make it a perfect location for an enjoyable and relaxing retreat. Take inspiration from the 43 insanely cool basement bar ideas featured in this article and let your imagination run wild. Incorporate a game room, and you've got yourself a fantastic bachelor pad or entertainment hub for friends and family — all while maintaining a peaceful atmosphere for the rest of your home.
Cool Basement Bar Ideas for Your Home
1. Simple and cozy basement bar idea
2. Using light to make the bar more inviting
3. Combining materials adds flavor
4. A black bar is always striking
The coolest basement bar ideas don't need to be big, but they all need to make justice to the space they occupy, they simply need to be capable of properly entertaining.
5. Space-efficient basement bar design
I love this idea because it makes use of a residual basement space that would otherwise be used as a simple storage space if not for nothing at all. A small bar opened in your basement will present new options, and it will lead to great opportunities when it comes to entertaining your friends and family.
6. Stunning rustic basement bar
Old buildings were made primarily of bricks. If that's the case for your basement, simply paint it or leave it natural and complement the whole with a wooden bar, the brick and wood combination will make the place charming.
Basement bars are cool by default but with exposed brick, rustic wooden accents, and industrial stools, your basement will go to a whole other level.
7. Make the bar more visible by using warm light
8. Lovely wine storage wood structure
If your wine collection is something that you cherish then the storage solution deserves special attention. Common rectangular storage units will always do the job but to make the place special you need something that catches the eye and removes the ordinary attribute.
Here the bar shelf displays the liquor while the splendid geometric shelves differentiate wine types in a pattern that can even be called wine art by enthusiasts.
9. White always suggests elegance
It's not just the color though. The proportions, the wooden frames, and small details, here, the shape of the handles, contribute to turning this into a very stylish basement bar idea. Also, imagine how surprised your guests will be when you open the doors to what looks like a normal cabinet to reveal an extraordinary basement bar.
Your entire bar and the bar shelves can be hidden in a cabinet to declutter your ambiance.
10. Choosing contrasting colors makes the bar stand out
While this home basement bar looks simple and neat do note that your bar shelf can have lights incorporated within. That not only enhances visibility but also puts great emphasis on the best bottles in your collection that might reside on these shelves.
11. Retro design is not something you see every day
12. Space-conscious bar design idea
You don't need an entire room to fit the home bar that you've always dreamed of having. Even a small wall will do. It's the design that counts more and the way it connects to the rest of the room. By fitting it with a mirror, you'll make the space feel bigger and the bar more interesting.
via The Creativity Exchange
13. An illuminated countertop is a must
The upper cabinet was fitted with small lights that illuminate the countertop, it is where the magic happens and the bar comes to life. It doesn't only look good but it's also very practical, helping you prepare any drink you want.
Storing different beverages efficiently might seem a difficult task in small spaces but with the right drawer, this changes rapidly, you`ll have all the drinks in sight, easily accessible, and the entire home bar in one place.
14. Small bar cart Ikea Hack
15. The black bar - a courageous and remarkable setup
If the home bar itself isn't special enough, then you can make it even more alluring by going for an all-black design. It's still pretty uncommon and people generally don't opt for it because it's a slightly unusual thing to have. It's very subjective though, for example, Holland nestles many black designs that look great. If you're gonna do it, do it properly, choose something unique.
via Summit Signature Homes, Inc. and Denise Hauser Design Co.
16. Epic bar built in Victorian-styled cabinet
17. Trendy drink serving table
18. Gorgeous mini bar cabinet for small spaces
19. Appealing built-in wall white bar
This great basement bar idea is perfect for adding a touch of style to your home. The confined space could have been a drawback but instead, it has led to a very clean and clear solution. The fact that the setup is contained just like a frame would constrain a picture makes the home bar look very intimate and inviting. It's the perfect example for supporting the idea that bigger isn't always better.
via Benjamin Moore Smoke Embers. & John K. Anderson Design
20. It's the surprise that counts - the great space-saving idea
And, on top of that, just look at it! It's so simple and yet fits so well in the room, making it so much more interesting. Every guest will be curious and intrigued by it. What makes this object look this good is the way the wood textures blend together, keeping the design looking unitary. The colors are different but don't vary much in tone and saturation. Too much contrast and you will lose the elegant, discreet effect.
21. Enhance the setup by adding a contrasting background
What if the wall was white? Would the home bar look the same? Definitely not. The chalkboard wall now highlights a powerful contrast and by adding a respectable amount of light into the scene the designer created a very appealing basement bar.
via Elle Decor
22. Get a smooth white cabinet for a discreet bar
23. Adding a stone pattern was never easier
24. Polished drink trolley for great flexibility
25. Bar - pool table combination is a definite thrill
This one speaks for itself. All we can do is admire and dream of having a basement like this for ourselves. I know where I'd spent most of my time. Notice the difference in color and materials between the bar, the pool table, and the rest of the room and the way the bar is built into the wall, making it a special place in comparison to the rest of the room.
26. Wonderful all-black modern bar design
via KraftMaid
27. Applying a different texture makes the bar stand out
28. Combine wood and marble for exquisite results
29. Add unique details for exceptional and personal designs
If you think about it, most people have access to the same materials and ideas as you. The designs can be very different of course but if you really want to personalize your bar you'll have to infuse your own personality. Something that was invented and, even better, created by you.
30. Amazing combination of wood, marble, metal, and light
This design is in a league of its own. Can it get better than this? Maybe yours will. The designer has definitely put a lot of thought into it by choosing the right materials and proportions for each element. Analyze it and be inspired.
31. Crafty wooden bar embedded in the kitchen cabinet
32. Fill that unused corner with a cozy bar
33. No better way of storing the fancy wine collection
34. Ingenious drink storage solution
via heidipiron.com
35. An all-white classy design
36. Awesome pipe design for storing wine bottles
This is what we mean by one-of-a-kind ideas that can personalize your home bar and make it special. You might have to put a lot of thought into finding the right idea but your bar will be the only one fitted with it.
37. Fresh bar design idea for a great relaxed atmosphere
It's all about the atmosphere that you wish to create. After all, that's the part that the visitors feel, and experience the most. Not everybody will notice the details or the color matching match but everybody will remember the way it made them feel.
via petitepassport.com
38. A secret bar for the spy in you
39. Add epic juicy-unique details
Your basement bar can have small epic details incorporated, unique details that will grant it authenticity and memory.
40. Build a frame for increased notability
There are several aspects that make this example brilliant. First of all, there's a combination of materials. Not just the right types but the right kind. Perhaps using the same dark wood for the horizontal glass supports would have looked good as well but by adding a third texture, the material becomes so much more luminous and charming. Secondly, there's the way the bar was built, not in the middle of the wall but in a special area that marks its position and makes it more noticeable, important, and special. Thirdly, there's the lighting that makes the whole feel welcoming and inviting.
41. Add colored lights for great special effects
42. Little details, big design
43. Add a darts board to your bar
Sometimes a drink isn't enough and you ought to combine it with another activity like watching a football game or playing something. Add a little flavor to your room with a dedicated dartboard area for a better atmosphere.
The designs above are covering an extraordinary range of designs, from small tricks to immense bars, they ought to inspire the individual to pursue the things that they love, things that they really like, from a good beer and a darts game up to a sophisticated cocktails, art venues, and classical music.
How are you using your space? We would love to hear from you!
Most of us want our home to be special right? Some invest time in gardening, others build a pond, a cinema or a game room. Provided you have the space available and want to turn your home into an even more welcoming environment, you have to decide what is the best choice for you. If there's something you have always dreamt about, than you are settled. There are many ideas to choose from yet today we are going to take a closer look at one that can fit any home, doesn't take much space and is appropriate for both bachelors and family men.
The bar. Or, to be more specific, the bar top, which is the essence of any drink serving setup. It's the item around which the entire activity revolves and the one that makes the greatest impression on your guests. Without further ado, lets take a look at a few examples and try to figure out which of these super cool bar top ideas suit your desires and needs.
Super Cool Bar Top Ideas
1. Drinks cooler embedded in kitchen top
No matter what your drink is, this recipient will keep it cool and at an arms reach. The clean cuts in the marble make it look very neat, a very clean and elegant design.
Source Unknown
2. Simple wooden bar top design
A wooden bar top will always look good and it will fit any room and any look, whether it's modern or rustic.
via Oregon Live
3. Symmetric patio bottle tap collection bar top
This one's a gem and definitely an eye-catcher. What else can be collected and turned into such an item?
This might not fit into an elegant living room but I bet there are few beach or backyard bars that can match its appeal. Even though it's pretty small, it definitely makes a great impression and would fit great in any man cave.
Is it a bar? Is it a kitchen top? Could be both in my opinion. Either way, the colors and materials match perfectly. I like the fact that the chairs are made of different fabrics but look great together.
via Ricardo DeAratanha/Los Angeles Times
6. natural wood forms wooden bar top
Taking a roughly shaped wooden slab and fitting it inside has become quite a trend but make sure it fits your place and match the rest of the materials and colors in the room. It would look great fitted with some rugged iron legs but I'm not so sure about the stainless steel kitchen top on the right.
Remember. It's not just the bar that counts, but the interior setup as well. Here, the lights make all the difference, they make the bar much more attractive. I think some contrast might have made everything look even better.
via brewwinefun.com
10. creative use of a penny collection
In any work, the detailing defines the element. You might admire a wood piece for a minute or two but I bet you'll look even closer when you see this amazing bar top.
A bar is all about the drinks right? What better way to decorate it than with engraved wooded pieces that represent each drink you serve. Some come with a great drawing as well.
One very important factor that you need to take into account is where to place the bar top. Do you want it in a separate room or adjacent to another activity?
When searching for ideas for new projects, always try to find the a way to connect them to the purpose they will fulfill. The surfboards are the very essence of surfing, in haunting a legendary haunting rifle or a set of antlers would have a similar relation for example.
Once again, it's all about the detailing. No matter how many times you'll look at it, you'll be delighted and intrigued by the various shapes and colors. This mosaic bar top is definitely the heart of the room.
This one is truly special. Metal is a very hard material to work with and such amazing detailing requires time, dedication and skill. The contrast between the bar top and the parts sustaining it make the whole thing stand out.
Every type of design has certain attributes that give it particularity. When going for an industrial appearance, remember that clean and fresh is not exactly what you're looking for. Instead, try to show the patina, the way time and work has affected the material. Make them look like they were properly used while keeping the composition look good and safe.
via foter.com
22. an old steampunk look is always attractive
In this case, the steampunk look is always related to steam powered machines and technology. Pipes, switches and copper are some of the the main design features that this style employs to create its definitely unique appearance.
While this idea is rather special and appealing, I'm not sure if the chairs match the bar. Make sure that when put together, all the elements and materials relate and bring the best out of each other. In this case I believe that a wooden bar would have been more appropriate.
Choose the theme of the bar wisely as some have more potential than others. You can never run out of ideas ot items when going for such a design. In the design below you can just hang a skull flag at the top and it becomes a pirate bar that even Jack Sparrow would fancy.
If you decide to use an object like an old car as a base for your bar top, you have two options. Keep its aged look or repaint it. Choose either option according to how you designed the rest of the room.
Source Unknown
27. turning an iconic car onto a dream bar
Because the old van occupies so much space, it becomes the center of design, whilst everything else is chosen according to it. Maybe adding a few more automotive inspired wouldn't be such a bad idea, regardless the VW van is the symbol of freedom and therefore it is a great choice for a bar design.
Source Unknown
28. modern techniques meet traditional wood design
If you want wood to last, you have to protect it with a layer of protective finish. There are many ways to do it but you can either go for one that keeps the wood looking natural or adds color or texture. Match the color with your design language and enjoy the result.
A collection of corks is a statement for time well spent with family, friends and good wine, if you don`t have sufficient a restaurant can surely help. Either way, every guest will fall for it, simply pay attention to the way the corks are arranged.
The phosphorescent liquid fills the cracks and gaps in the wood in a way that cannot be reproduced by hand. The pattern is unique, striking and will add a lot of flavor to your home.
via Pinterest
32. composition of aged copper and wood
The rusty look makes it perfect for a house in the countryside or a rustic themed room. The chairs make it very distinct.
33. exclusive bar top design - the license plate collection
You'll love this design especially if you're a car enthusiast. Notice the way the colors balance in this composition, something beautiful brought forward by the particularities of each and every plate.
Some of us usually forget about the effect of lights in certain setups. You can use artificial lighting to make some parts stand out whilst others act only as a background. Also, light has the power of gathering people around it.
via colorcopper.com
35. beautiful natural wood pattern
via woodworkingdevotee.com
36. intriguing copper bar top
No painted metal will look as good as copper. Its natural pattern and appearance make it very special. Use it as a standalone material or combine it with a darker colored metal.
Do you think a cleanly cut base for the bar would've been a better choice? The copper surface on the top creates a really powerful yet delicate contrast here, one that certainly cannot be overlooked.
How do you see the solutions above ? What do you think about this collection of cool bar top ideas? Copper and wood seem extraordinarily beautiful in essence yet they seem rapidly followed by various other mixed solutions like the wine cork bar, the bottle caps or penny counter. What do you think? We would love to hear from you in the comment section below.
Interior design is usually conceived on the idea of satisfying basic needs, functionality, comfort whilst maintaining either a neutral tone or one that will satisfy the couple'es'/ family's tastes. But when it comes to singles, things are allowed to get creative and a tad different. A feminine apartment is easy to achieve, delicate, elegant, sumptuous, beautiful and complex in detaining, whilst a man cave decor is rather more difficult even if it might not seem so at a first glance. Surely, mixing all sorts of elements, rough, shiny, metallic, dark, bold, controversial appears to be a piece of cake, but actually managing to make them combine harmoniously takes practice and experience. The ideas are endless and all of them so creative and fun, because, let's face it, a man cave should be above anything else fun and relaxing. With this idea in mind we have gathered a few basic various unique toughs perfect for the ultimate man cave decor. Enjoy the quirkiness.
1. man cave approved wall art
Art can be present in different shapes and forms, rough materials being preferred, wood, palettes, metal. Funny messages with a twist will complement the overall interior man cave decor.
Baseball bats can be merged to form a bizarre form of art for a man cave design, especially if it represents a form of patriotism.
4. recycling the old jack
Recycling glass bottles has become such a huge trend nowadays it was only natural that a Jack bottle should be used as a soap dispenser in a manly bathroom.
A man cave can be composed of a single room as well so make sure you make it special by offering it a secret entering spot camouflaged by a large painting or poster.
7. INVITING the car inside
If you are to go to the extreme, why not invest money into a car pool table? You will definitely obtain the unique wow factor everyone is looking for.
8. COzING up the atmosphere whilst keeping a manly style
A pool bar candle holder that merges both delicacy and coziness of the candle light with the roughness of the old metallic balls into one swift man cave approved package.
The ultimate bar zone is the key element of any man cave decor.
Source unknown
What do you think about the man cave ideas presented above? Do they satisfy your needs? Feel free to share your thoughts on this topic in the comment section below.
You’ve heard of feng shui, right? The 3000 year old Chinese practice that is supposed to help you attain a delicate balance of energies? Well, believe it or not, this practice actually both a combination of art and science that has proven itself to be effective in bringing positive vibes and good health to the places it is used.
If you want to feel the benefits of feng shui as a beginner, the best way would be to use it on your entryway. You can then consider gradually moving on to complex levels if you so desire. But for now, we’re going to teach you a few ways you can imbue this ancient practice on your entryway.
1. Strong and Decorated Main Door
The main door of the house should be well-built, sturdy, and decorated differently than other doors of your home. This is important because the main door attracts the best feng shui energy in your house. The main door should be more significant than other doors so that it opens widely giving more space for the positive energy to flow inside and be welcoming. If a good relationship is maintained between the front door and the home structure, the Chi will flow in your home with perfect balance, maintaining harmony.
2. Good Feng Shui Designed Main Entry Rug
The main entry rug also plays a significant role in attracting good Chi in your house. When choosing your main entry rug, you need to consider the color, shape, and design of it. The main entry rug should look attractive to give a welcoming feel yet it should be proper to step on every day. For example, do not choose a main entry rug with your business name written on it or with pictures of angels and birds which are not appropriate to step.
Consider a rug with a feel of stepping on sand or grass. However, if you are choosing an abstract design, check for the colors and shapes associated with the place your front door is facing. For instance, if your front door is facing the east, select a rectangular or square shaped rug with colors representing wood, earth or water elements. Do not use a round and red or gray colored rug in this direction which represents metal and fire elements.
3. Front Door is facing the Back Door
Feng Shui is primarily about the flow of energy where the main door is responsible for attracting the positive flow of energy in your home if the back door is in direct alignment with the main door, it resembles Sha Chi, a harsh quality of feng shui energy. It is best to avoid this construction if you are going to make your home. However, if it is already built, try by repositioning your furniture, placing a plant or work with colors to obstruct the flow of good energy going away from the back door.
4. Bathroom or Toilet is facing the Front Door
This is another awkward positioning of the toilet which you will feel your home not welcoming if the toilet or bathroom is facing your main entrance. Feng shui experts say that if your toilet or bathroom is positioned in front of the main door, the good Chi escapes through the bathroom or turns into negative energy. Consider not constructing this plan and if this is already built, try using a screen room divider if there is space or improve feng shui of your toilet or bathroom.
5. Bathroom above the Main Entry
Bathroom above the main entry also has a negative impact. You need to strengthen other areas and the main door for proper inflow good feng shui energy. Also, consider the bathroom remedies in feng shui for a proper balance of the good energy.
6. Staircase is facing the Front Door
The good Chi energy will flow upwards without maintaining a proper balance of good energy in your area for the main entrance. Usually, you have bedrooms in the upstairs, and so, the living or dining area will have no good energy. Moreover, it creates a pushing movement of energy which will act in a way to push the good energy out of the house. For remedies, it is best to consult a feng shui expert for cures.
7. Mirror facing the Front Door
Mirrors can work greatly to maintain a proper balance of good energy in your home, but ideal positioning is very crucial. If a mirror is placed in front of your main door, the positive energy entering into your home will be pushed back resulting in no flow of energy. So, it is highly recommended not to keep a mirror facing the main entrance and also, it is bad to keep a mirror facing directly to your bed.
8. A Close Wall in front of the Main Door
When the positive feng shui energy enters through the main entrance, it needs space to flow properly in your home maintaining a good balance of energy. If there is wall very close to the main door, the flow gets obstructed and results in a pushing force backward.
9. Flower or Garden in front of the Main Door
If you have gardens or flowers in front of your main door, it adorns the area which also attracts good energy. However, pointed leaves or thorny plants can create negative energy and so it is important to avoid these plants. Fresh and colorful flowers bring luck, and green plants symbolize richness and abundance.
10. Keeping the Space Clutter-Free
How will it look if the area in front of your main entry is cluttered? You are sure not to feel nice, and moreover, it creates fatigue and frustration evidently making you realize the negative flow of energy in your home. Simply, ensure to keep the main entrance and also the front of your house clutter-free so that good Chi is attracted and flows in your house without any obstacles.
11. Avoid Sharp and Pointy Objects
Sharp or pointed objects create a negative Chi similarly like pointed leaves or thorny points. So, it is important to avoid keeping sharp or pointed objects especially facing towards the front door which turns the positive Chi into negative energy. Pointed objects include triangular roofs, electric poles, etc. Some feng shui experts suggest using mirrors in proper positions to nullify the negativity with the reflection.
12. Kitchen is facing the Front Door
If a kitchen faces the front door, the good Chi entering through the main door gets destroyed by the fire while cooking. In this process, some experts tell that the occupants face problems with saving money and expenses. There is no real remedy for this issue and reconstruction is recommended.
13. Leading to Doors of Other Rooms
The problem with doors of other rooms facing the main door is similar to the problem with staircase facing the main door. The remedies are also similar, and so you can add heavy furniture or place plants to obstruct the flow of the energy directly to the only specific room.
14. Color
Colored main doors can also make it attractive, attracting positive Chi. Based on the direction in which your main door is facing, choose a color so that best energy is harnessed. So, if your main door is facing the east, choose a color from brown, black, blue and green symbolizing wood element, and the worst colors will be red, orange or purple in this direction as they symbolize metal and fire elements.
15. Material and Maintenance
Security is of primary importance and your main door should be made of good materials to be safe. Wooden doors are mainly preferred in most houses. Metals are also used but more maintenance is required for metallic doors. Make sure that they are well-maintained to be attractive and do not make any squeaking sound when opening or closing the door. This sound actually turns the positive Chi into negative making it important to add grease often on the hinges.
Reading the Bagua map is important to understand the energies of any given space. The energy map can be divided into eight segments based on the directions, and each segment represents an aspect of life. North corresponds to career, east to health, south-east to money, south to fame, south-west to love and relationships, and west to creativity. The main entrance is an important factor in determining flow of energy.
However, a single way or consideration can either make or break the positive energy flow from your main door. Either of the factors can outweigh the others. So, it is vital to ensure all the considerations to create a perfect harmony.
Storing shoes in a shoe rack is one of the most common practices many follow.
But what makes the shoe storage bench so versatile? This functional piece of furniture works both as a seat and convenient storage for your favorite footwear. And while they’re most commonly found in garages or entryways, you can conveniently place one in your bedroom as well.
Keeping your shoes organized ensures that your hallways or entryways don’t look like a mess, and it is the perfect spot to protect and store shoes to maintain their quality. Besides, you wouldn’t have to scramble to look for your shoes in a hurry.
But there are various options on the market, so we wanted to help find the perfect storage bench for your needs. That’s why we have reviewed the top 6 models in the following sections. So, let’s begin!
【SPACIOUS STORAGE】This shoe bench features 2 wide...
【VERSATILE】You can also use this entryway bench as a...
This natural bamboo shoe rack does a lot more than just store shoes. It can work as a versatile piece of furniture, perfect for any room in your living space. You can also use this 2-tier benchtop as a seat or to display items.
Why Did We Like It?
If you’re looking for something compact to occupy your narrow entryway, hallways, or doorways, then this can be the ideal storage bench. Measuring 70 x 28 x 45 cm, this shoe organizer can hold up shoes while accommodating items like your handbags, plants, and other accessories.
You receive an accessory bag, instructions, and the contents to assemble your bamboo storage bench. And the installation is pretty easy, so it shouldn’t take more than an hour if you follow the provided instructions correctly.
The 100% natural bamboo plank comes with stripe patterns on it. This makes it more durable, as it maximizes the stability of the shoe rack. Moreover, it’s designed to have smooth edges, and the sunken screws prevent snagging. This means you can place it anywhere in the house.
What Could’ve Been Better?
It may be helpful to know that due to the size of the racks, we couldn’t store more than 3-4 pairs of shoes. But then again, it’s meant for storage in compact corners of the house. Other than that, there was a creaking sound every time we sat on it, although we didn’t notice any cracks or damage.
[4-in-1 Hall Tree] Combining a hanging rod, a shoe bench, a...
[Practical Hanging Rod] The sturdy and stable top bar of...
A functional piece of furniture is an essential part of small living spaces. And this coat rack with a bench top gives you the best of both worlds without taking up too much space. It’s a 2-in-1 solution that gives your home a unique decorative look with adequate storage.
Why Did We Like It?
This unit contains a shoe bench, shoe rack, hanging hooks in one, and an anti-tip kit to ensure a safe home. And to ensure installation doesn’t take up too much of our time, the instructions are easy to follow, and the parts are numbered.
The shoe storage bench top has a sturdy rustic brown shelf and a strong steel frame that makes it highly durable. Besides, each hook has a load capacity of 66 lbs, while the engineered wood shelf has a load capacity of 176 lbs.
This is a practical piece of furniture to have in a small house, thanks to the dual utility on offer. And it can accommodate your shoes along with items like coats, scarves, and gym bags. The bench top comes in handy when you need to put on your accessories, especially in a hurry.
What Could’ve Been Better?
Some of the areas to screw in on the bench were set a little too deep. And because of this, we couldn’t tighten the bench, making it slightly unstable to sit on. Aside from that, a couple of metal parts had chipped portions of paint on them.
Sturdy, durable and built to last - Heavy-duty bench top is...
Shoe bench and storage - Each shoe rack shelf accommodates...
A shoe storage bench doesn’t have to be the most extravagant accessory in your house. And while this bamboo shoe rack bench is a little on the minimalist side, its 2-in-1 design gives you the perfect blend of accessibility and style.
Why Did We Like It?
Honestly, we weren’t sure whether assembling this unit would be easy. But thankfully, the package came with all the required tools and parts to put it together, and the instructions are just as easy to follow. It took us a little under an hour, which is reasonably quick.
The 100% bamboo benchtop has a smooth finish, is sturdy, and is long-lasting. It is also water-resistant and can be wiped down with a damp cloth after every use. Hence, you can place this benchtop in your bathroom, patio, bedroom, entryway, and practically anywhere.
When we found out this 3-tier shoe rack bench could hold up to 300 lbs easily, we were skeptical. But it has been able to hold the weight incredibly well. And there hasn’t been any creaking either, which usually is the norm with bamboo products.
What Could’ve Been Better?
The unit is pretty compact and slightly smaller than we had expected. While that isn’t a big issue, it would’ve been nicer if the bottom rack was a bit higher because all we could fit were flip-flops under there.
【COMPARTMENT DESIGN MEETS OPEN STORAGE】This shoe bench...
【EVERYTHING IN ORDER】End entryway messes with this shoe...
Finding the perfect shoe storage bench for a small space may not seem as easy, but this cubby shoe storage bench is the perfect combination of style and convenience. The structure and design add a touch of chic to your living space. And you get all of this at a great price!
Why Did We Like It?
A shoe storage rack would often sport same-sized cubbies ideal for someone who owns flip-flops, sneakers, or flat sandals. But that wouldn’t be able to store boots or high heels. With this shoe storage bench, not only do you have more space to store shoes, the shelves are adjustable. That means you can move them around to create extra storage for your shoes.
This shoe storage rack is constructed of particleboard, making it sturdy enough to sit two adults. And the cushioned top elevates the comfort factor and offers great support.
If you’re looking for a functional, compact piece of furniture, then this shoe storage bench would make a great addition to your living space. You can display this in the entryway or your hallway and can store as many as 10 shoes in one go, regardless of the kind.
What Could’ve Been Better?
The product looks and functions the way it’s supposed to, but that’s about it. The shelves have scratches on them and chip easily, even though it isn’t adjusted as much. And they look and feel brittle too, almost like they might break at any point.
Dimension - 39.4" L x 11.8" W x 17.7" H; Load capacity: 198...
Space Saving & Large Capacity - Each storage mesh shelf...
This Rolanstar shoe rack bench gives your house a rich, rustic vibe. It may be a large-capacity shoe storage bench, but it works incredibly well for small spaces too. On top of that, the solid wood has a smooth finish, elevating the aesthetics even further.
Why Did We Like It?
One of the things we have to compromise with when it comes to small living spaces is getting a storage unit that either doesn’t fit well enough or function enough. But this solid wood shoe rack bench serves both of these purposes. It is compact enough to fit small entryways or hallways but large enough to store your shoes comfortably.
Since you might end up placing this in the corner of your entryway, it comes with 5 corner protectors. It’s also accompanied by all the tools and instructions you’d need to assemble this shoe rack bench.
Furthermore, this shoe rack bench is constructed of solid wood and has a durable metal frame. The wood is water-resistant, easy to clean, and has a smooth finish, giving your room the perfect rustic look while maximizing its stability on different types of floors.
Why Didn’t We Like It?
Even though this unit is easy to install, we struggled with it for a bit due to the screw holes being slightly smaller. While we did manage to get them pushed in, it wasn’t deep enough, making the bench slightly unstable.
Organize Your Entryway: The shoe rack for entryway is a...
Space-Saving Shoe Rack: A combination of a shoe rack and...
Without a shoe rack, you tend to have a messier hallway or entryway because of your shoes. And it doesn’t matter if they’re scattered or placed neatly. But it will still feel messy. But with this 3-Tier bamboo shoe rack bench, you get to keep your shoes protected and the floors clean.
Why Did We Like It?
If you’re looking for a compact shoe rack bench that is aesthetically pleasing but does the job well, then this 3-tier bamboo shoe rack bench is the perfect product for you. It is made out of 100% natural bamboo, and is eco-friendly and water-resistant, making it the ideal product to use outside your bathroom, your bedroom, or the obvious place being the entryway.
This shoe storage bench is perfectly functional and helps save space by offering 3 racks to store your shoes, sit on, or display your pictures, plants, toiletries, and more. You might even have enough space under the last rack to store your flip-flops easily.
It is just as easy to assemble this simple shoe storage bench. You receive illustrated instructions, along with all the required parts and tools. And if you follow the instructions correctly, installation shouldn’t take you more than a few minutes.
Why Didn’t We Like It?
Even after being handed the required tools to assemble this shoe rack with ease, there were still a few hardships. The wood had a few scratches on it, and some panels didn’t even have screw holes on them. We had to push them a little harder to get the screws in, making the bench unstable.
Pros
Compact yet large capacity
Multi-purpose use
Easy to install
Space-efficient design
Cons
Screw holes were missing
Shoe Rack Bench Buying Guide
Shoe rack benches offer the dual function of storing your shoes while also allowing you to either display other items or use the top as a seat. And while this feels like it is reason enough to purchase a storage bench, there are various factors to consider before making that decision. So, we listed down a few for you.
1. Storage Capacity
No two-shoe rack benches are the same. While some shoe racks can hold only 8 pairs of shoes, others can hold anywhere close to 20-30. The bigger racks would make sense if you had as many shoes or were a collector. But purchasing a big rack for 10 pairs of shoes isn’t the most practical thing for you.
So, take your time and look into a shoe rack that’s more practical and convenient based on the number of shoes you own.
2. Shoe Rack Bench Material
Just like with their storage capacities, the materials used to construct them differ too. It ranges over a bunch of materials like wood, metal, fabrics, and more. If you’re looking for a portable, durable shoe rack, then fabric shoe racks are the ideal product and come at a great price too.
However, they trap dust a lot easier compared to other materials, so you will spend a lot more time regularly cleaning these shoe racks up. Similarly, while you wouldn’t have to clean as regularly with wood or metal-based shoe rack benches, they do happen to be on the pricey side.
3. Easy Installation
Many often opt to make DIY shoe racks due to them being cost-effective and creative. However, if they don’t work out the way they should, then things can be frustrating. So, to avoid this from happening, it is essential to look for racks that are easy to assemble or construct. While you don’t have to do it yourself, hiring someone else just adds up more to the cost.
Best Shoe Rack Bench Final Words
It is essential to have functional furniture around your house, even if you DIY it! Along with being aesthetically pleasing, they should also conveniently do the task it was meant to do. Shoe rack benches are simplistic, 2-in-1 functional pieces of furniture that allow you to easily save space in your home.
And we have a few favorites that make a perfect shoe organizer based on the points we’ve made above. Our first choice would be SONGMICS sturdy shoe rack bench because of its multi-purpose uses. The coat rack bench from VASAGLE comes next due to the 2-in-1 function of a shoe and a coat rack. And lastly, the bamboo shoe rack bench from Homemaid because it is water-resistant and durable.
We’re aware of the various options on the market depending on the few factors that we earlier mentioned. So, if you’re looking for the ideal shoe storage bench, then we hope this list helps narrow it down for you.
No one wants to deal with a pile of shoes every time they’re looking for something to wear!
Shoes aren’t only a necessity, but they also always make the perfect accessories to pair with all of your outfits. And just like your clothing has an allotted space to be stored neatly, all of the shoesshould have one too.
Regardless of the occasion, we wear shoes more often than most of our clothes. So keeping them out in the open to collect dust or just leaving them scattered around isn’t the best for your footwear.
Not only does this affect the quality of your shoes, but it also clutters the wardrobe or space in the house, making it look messy. Hence, we have curated a list of the best shoe cabinets that will come to your recuse.
Shoe racks tend to make a small space look a lot more compact, which is why many opt for leaving their shoes out in the open. But why do that when you can instead look into a small chic fold-down doors shoe storage cabinet?
It gives the cabinet an illusion of being slimmer and is perfect for narrow hallways and compact spaces. Hence, you can store footwear in style and wouldn’t have to worry about a bulky structure taking up all your space.
If you’re looking for a cabinet that not only has enough room but also looks good storing all of your shoes, then something like this will be ideal. You can neatly store them, without taking any extra space.
Additionally, you can customize it by using decals or paint over it. This way, it won’t look like a shoe storage space per se and would blend with your furniture well.
Wall Shoe Cabinet
A lot of shoe cabinets tend to take up even more space in your houses and end up looking bulky and awkward. But what if you could mount it on a wall? Aside from providing enough space to store shoes, it will free more floor space to either occupy or leave it as is.
A shoe rack often doesn’t do more than storing your shoe collection, which leaves many wary of investing in one. However, this shoe cabinet comes with a shelf space that allows you to store little knick-knacks - a plant, a bowl for keys, and more. It allows you to use up the extra space on shoe storage without having it look bland and empty.
A shoe storage is a lot more than just the perfect place to store your shoes. What if there’s some extra space to store the rest of your accessories? Storing sneakers and a pair of socks in the same space with this shoe cabinet makes it a lot more convenient.
The drawers can hold anything from keys, socks, and other accessories to pair with your shoes, preventing panic and scrambling around to look for them if you’re in a hurry. And the space-efficient design ensures that it makes the room look and feel a lot bigger.
It is always the hardest to accommodate large pieces of furniture like shoe cabinets in hallways, an entryway, or vertical spaces. They’re either too wide or not tall enough. But with a shoe storage rack closet, your room receives a massive boost.
Moreover, it can store more than just your shoes. For instance, converting it into a coat rack will make for the perfect accessory to keep in the hallway or entryway.
If you want to opt for something more accessible that can easily fit in the closet, then this shoe storage cabinet would be ideal. Regardless of whether you live in a small or spacious living space, optimizing and organizing your room will be easier with this shoe cabinet. You can even have some fun with it and match the aesthetic of your cabinet with the rest of the room.
Shoe racks with cabinet doors tend to add a lot more to your living spaces aesthetically. They also help keep the materials of the shoes dust-proof, ensuring that they stay in pristine condition for prolonged periods.
Besides, you can customize these shoe cabinets to match the rest of your furniture to avoid making it look too small or lived-in.
Shoe Storage Bench
Shoe cabinets don’t always have to be boring or stick out from the rest of the furniture. If you’re looking for something that stores shoes while adding something to the interior, this product would be ideal for you.
This chic bench shoe cabinet features a large space to store shoes and keep them out of the way. It would be perfect for the entryway allowing your guests to use the bench whenever they visit.
If you’re looking for something simple yet versatile, this cabinet with cubicles would be perfect. It is easy to clean and would fit perfectly well in the entryways or hallways. Aside from being easy to clean, it can double up as a piece of furniture.
It protects your shoes from dust and any other factors that could affect their quality. Plus, the air circulation on offer will prevent the formation of mold.
Narrow Shoe Rack
Shoe cabinets don’t always have to be placed in the entryway. You can place them next to the closet in the bedroom to make mornings more convenient. However, no one wants a bulky storage cabinet taking up even more space in their sleeping quarters. It would make the room feel smaller.
But a narrow shoe rack would be able to accommodate all your shoes without taking up too much space in the room. You can also make the best use of the open shelf on the left by storing miscellaneous accessories, while the shelves on the right store all the shoes.
Shoe cabinets don’t always have to be bulky, over the top, or have multiple compartments. Sometimes, simple A-Line shoe rack styles can do wonders, especially if you don’t have a large shoe collection. This shoe storage is low maintenance but also adds a touch of rustic charm to your room. And all of this can be done without having to compromise on quality or space.
Shoe Storage Cabinets With Doors
If you have a large shoe collection and have been collecting dust and boxes over the years, it’s time for a change. This shoe storage with cabinet doors neatly stores your shoes and keeps them looking and feeling fresh. Easy, convenient, and neat. That is what you can expect with cabinets like this.
Most racks tend to be very simplistic, rustic and give your room a contemporary vibe. But it doesn’t always have to be the same thing over and over. This shoe cabinet with a cane front is perfect for giving that vertical space in your home some much-needed sprucing up.
The pull-down doors are easy to operate, and they can easily store shoes while oozing some retro charm.
Why Should You Own A Shoe Cabinet?
It doesn’t matter if you have 20 shoes or 4, but keeping them unorganized would invariably result in a messy doorway.
Daily-wear shoes need proper air-circulation, while all of your shoes need to be kept away from dust and any other factors that would ruin their quality. And to further elaborate our point, we have listed a few more reasons you should own a shoe storage cabinet.
1. Keeping Your Shoes In Prime Condition
Certain shoes need to be stored in a specific way to ensure that they remain in good condition.
Moreover, no one would want to leave their fancy dress shoes out in the open, especially when they’re likely to step on them accidentally and damage them. Shoes go through a lot during the day, especially if you’ve got them wet. So, leaving them in a cluttered closet or a damp, cold corner can lead to odors and mold.
It may seem like getting a shoe closet would be an unnecessary expense, especially if you don’t have as many shoes. But this one-time investment will ensure that regardless of how many pairs you have, they will still look and feel new.
2. You Know Where To Look
Have you ever wanted to find a specific pair for an event, meeting, or just a casual meetup with friends? You might think having your shoes laid out would be convenient, but it isn’t the best thing to do.
If you live in a small space and are concerned about shoe cabinets taking up all of it, a shoe rack in the coat closet would be the perfect solution. Not only will it stay hidden away from your view, but it will also help neatly stack your shoes. As a result, you won’t have to conduct raids all over the place when it’s time to step out.
3. Your Floor Won’t Look Like A Mess
A busy house can make it nearly impossible to keep your floors clean, and shoes tend to bring in more dirt from activities that involve mud and more. Besides, they make your carpets prone to dirt, which can be a health hazard for anyone that suffers from allergies.
However, the right shoe cabinet will solve these problems and make your hallway or other spaces look less cramped up. This way, your shoes can avoid taking more space on the floor and will always be neatly stacked, regardless of how big the collection is.
Things To Consider
While it may be convenient to let your sneakers, slippers, and heels pile up next to the front door, doing this will only further damage them. Piling your slippers up can make the straps give away a lot quicker. The heels could get damaged due to being stored incorrectly or have scuff marks due to another shoe being on or around it.
Apart from this, there is dust, mold, and other factors that could affect the shelf life of your shoes. But by investing in a good, sturdy shoe cabinet, shoe rack, or more, avoiding this gets a lot easier. So, what’s the difference?
A shoe rack is more open and convenient, while a shoe cabinet is a closed shelf that helps with keeping them dust-proof and more. Since picking the ideal shoe rack can be a difficult decision, seeing how there are so many options on the market, we’ve curated this concise list to help narrow down your choices.
How Much Space Do You Have?
There are various factors to consider before investing in a shoe storage cabinet for you. However, one of the most important criteria would be to check the dimensions and availability of the space you’re looking to place it in.
If you’re looking to place it in the hallways or entryways, you’d most likely opt for a small, narrow shoe cabinet. However, if you’re looking to place it in the bedroom, it could be compact or large and spacious with added features like drawers or shelves.
This would partially depend on how many shoes you have as well. If it’s a shoe collection consisting of sneakers, heels, flats, and more, opting for a small, compact shoe rack wouldn’t be ideal.
Lifestyle And Storage Requirement
Another essential factor would be the kind of shoes you own. If you often wear heels and boots, the shoe cabinet would need to have wider or larger racks, but if you’re just a sneakers and flats person, getting away with a compact shoe storage cabinet is easier.
You also need to assess where to place the shoe rack as well. It needs to be accessible and shouldn’t result in wasting as much time looking for the right pair. And if you’re on a tight budget or just don’t want to invest in a shoe cabinet, DIY is the way to go. By constructing an easy shoe rack using materials from around the house.
Aesthetic And Functionality
Just because you’re looking for a functional piece of furniture, it doesn’t mean that the shoe cabinet shouldn’t look as good as it functions. And look for something that not only accommodates the different types of shoes you own but should also save space and be high on functionality.
So, if you have tall boots, opting for storage units with hooks or even a shoe storage cabinet with a bench would be preferable. If they double up as a bench and store all the shoes easily, they will fit in with the rest of the furniture.
Features And Styles
It is essential to consider your lifestyle, personal style, space availability, and more while looking for the ideal shoe rack. A smaller house would accommodate compact shoe storage cabinets with drawers that store shoes and the rest of the accessories. However, if you wear boots or sneakers, a shoe cabinet with a seat could be the best bet.
Shoe cabinets are supposed to make it easy to store shoes while maintaining their quality. However, having a few features like drawers, glass doors, shelves, and more will add a little more charm to your living space.
Final Words
Regardless of how many shoes you have, a shoe cabinet should help protect and display your footwear without having to worry about any damage. Adding an aesthetically pleasing shoe storage cabinet to your living space helps elevate the look of the room.
But if you’re someone who merely collects sneakers, heels, or boots, a shoe cabinet is the most convenient and safest way to showcase your entire collection. And all of this can be done without having to stack on boxes. It would, otherwise, only continue collecting dust without showing off any of your shoes.
If you’re looking to invest in a shoe cabinet, we hope this list narrows down the options and helps find the best shoe cabinet for you!
Outdoor mats are a great way of improving the appearance of your home while also preventing the entry of dust and dirt.
Unlike indoor mats, purchasing mats for the outdoors requires more research as many additional factors need to be considered. For instance, outdoor mats must be tough and resistant to harsh weather conditions. At the same time, they need to ensure that dirt from shoes does not enter the house.
We understand that shopping for outdoor mats isn’t a fun task; most people do not have the time to go through a list of the best options available. That is why we bring you our curated selection to help you select the right product.
Not only that, but we have also included a buyer’s guide that will inform you of the factors you should consider while selecting a doormat. So, without further ado, let us dive right in!
Let us start with the Plus Haven Coco Coir Door Mat, which is made of 100% pure coconut coir, one of the most durable natural fibers. These fibers help the mat easily capture dirt, moisture, and other particles, thus preventing them from entering your home.
Attractive Design: The eco-friendly material has a...
Indoor and Outdoor: The rug is designed specifically for...
Why Did We Like It?
To begin with, this coconut coir mat is a heavy-duty mat that can withstand regular traffic without shedding. The 0.60" thick pile also ensures that there are no see-through patches.
This outdoor mat is an excellent option for those who wish to follow a sustainable lifestyle because the coconut coir is a renewable material produced by hand. Now you can keep your house clean, and your planet too.
Not only that, but the fibers of this doormat have excellent water-resistant capabilities, making it a great option if you live in an area that sees heavy rainfall. On that note, it can be very useful for preventing any wet marks — sunshine or rain.
Also, as far as maintenance is concerned, this outdoor doormat is also very easy to clean. You only need to vacuum it once in a while to keep it in good condition.
What Could've Been Better?
It was nearly impossible for us to find any downsides to this impressive doormat, which is excellent for outdoor and indoor use. However, we would like to point out that the dye used in this product is pretty strong and can even stain the area where the mat is placed.
We bring you the Ubdyo Extra Durable outdoor doormat, an excellent product for the holiday season. This Christmas-themed doormat comes with rubber stripes and artificial grass that provide an attractive appearance to the mat while preventing the entry of dust and water inside.
Super durable rubber stripes of our garage door mat in...
Non-slip rubber backing - use our floor mats for home as...
Why Did We Like It?
First of all, we were very impressed by the design of this outdoor mat. Ubdyo has rightly named it a functional smart design as it offers an attractive appearance while effectively capturing dirt particles.
This durable doormat has been manufactured in such a way that it will last a long time, even if your home witnesses a regular stream of visitors. Besides that, the raised pattern ensures dirt from shoes is completely scraped off when a person steps on the mat.
Furthermore, cleaning the product is simple and only requires you to spray water on the outside of the rubber doormat and shake it off. Alternatively, you can simply vacuum this product or wash it with warm water.
You will also be glad to know that the rubber backing is leak-proof and provides a non-slip design. So, you can ensure that there are no accidents even when the floor is wet.
What Could've Been Better?
Once we tested this product, we found that this doormat is incredibly thin and can easily be rolled up like paper. And while it does not compromise durability, some customers may prefer a thicker doormat, especially outdoors.
DII is a brand that has been manufacturing high-end products for homes for over thirty years, offering quality items for a great experience. The CAMZ11552 is a classic example of just how good their products are. It offers a timeless design with excellent dirt capturing capabilities for both indoor and outdoor areas.
100-Percent Natural coconut coir fiber face provides the...
Why Did We Like It?
We came across the DII CAMZ11552 while searching for an indoor-outdoor doormat and are happy to say it did not disappoint. This versatile product can be used in several locations, such as patios, garages, porches, etc.
Constructed from coconut coir, this is one of the best outdoor doormats when it comes to sturdiness and durability.
At the same time, the fibers of this doormat also do an excellent job of keeping dirt and debris out. And thanks to their water-absorption quality, this outdoor doormat is ideal for areas with frequently wet weather.
Furthermore, if you love customizing the look and appearance of your home, this product is available in several different colors and designs. It is great for adding style and personality to your entryway.
The CAMZ11552 also comes with non-slip PVC backing that prevents slipping by keeping the mat in its place in all conditions.
What Could've Been Better?
We loved the DII CAMZ11552 for its versatility, durability, and multiple design options. Unfortunately, these excellent features come at a significantly higher price. Indeed, this doormat is one of the costlier options on the market and may not be an ideal choice for those with a tight budget.
The 8541848335 model from Gorilla Grip is one of the best options on the market for those who are looking for a low-profile door mat. It comes with a premium build, a 100% natural rubber border and backing, and a woven polypropylene fabric center for welcoming guests in style.
THE ORIGINAL WEATHERMAX ALL SEASON DOORMAT: Gorilla Grip's...
STAIN, WEATHER AND FADE RESISTANT: constructed to withstand...
Why Did We Like It?
The Gorilla Grip 8541848335 model is manufactured by Hills Point Industries LLC, a manufacturer dedicated to bringing customers household products at affordable prices.
At the same time, this premium product offers excellent value for money, superior construction, and an appealing design. It also features a beveled border that helps trap moisture, mud, and dirt, preventing them from creating unsightly tracks indoors.
This outdoor doormat is also available in a wide range of stylish patterns and colors, making it easy to find a product that matches your home's decor. Not only that, but the design is also flexible enough to allow you to place the mat in various locations, such as living spaces, lobbies, and even office spaces.
Other than that, the low-profile design of the 8541848335 model from Gorilla Grip makes it excellent for doors and entryways with a low clearing. That said, you can easily use it in areas that are unsuitable for thicker rugs.
What Could've Been Better?
The only flaw we noticed with this otherwise excellent product is its relatively strong rubber smell, which emanates from the rubber backing and beveled borders. However, the smell tends to fade away with use and will completely disappear after a few weeks.
Outdoor doormats are not only meant to prevent dirt and grime from tracking into your home but are also one of the first objects guests come across while visiting. They can help create the right kind of impression, which is why the Barnyard Designs Welcome Doormat is a great choice.
Many of you must have heard of Barnyard Designs. It is a brand that focuses on designing and developing home decor products that make life easier and more comfortable. The Welcome Doormat from the brand offers an excellent way to greet guests while also making a bold statement.
One of the things that we liked most about this front door mat was the size. The Welcome Mat is one of the largest outdoor doormats that we could find on the market, which is great for capturing dirt and debris from a wide area.
This front door mat comes with a non-slip rubber back and is completely waterproof and weather-resistant. Not only can you use it in different weather conditions, but you can also clean it easily by washing it with a garden hose.
Another thing to mention is the excellent durability, which is why this doormat will last for several years.
What Could've Been Better?
This Welcome Door Mat from Barnyard Designs offers a delightful experience, making it difficult for us to find any significant drawbacks. If we had to nitpick, we’d say that this welcome mat does not come with a finished edge, so you will need to place a rug underneath it for a better grip.
Moving on to the next product on the list, we bring you the BeneathYourFeet outdoor doormat, one of the highest-rated products on the market. It is a multipurpose door mat that comes loaded with several exciting features that will be incredibly useful for your home.
Charming Mats For Your Home: our outdoor mat is made of...
Traps Dirt Well: the concave word and convex border helps...
Why Did We Like It?
There are many reasons why we decided to include this product on our list, the first of which is the excellent construction. The BeneathYourFeet mat is made of premium PVC material, making it one of the most durable products in this segment. Even with heavy use, you won't be needing a replacement anytime soon.
Furthermore, the concave embossed word and the convex border work flawlessly for trapping dirt and mud from shoes and feet of pets. We tested out the product and were delighted to see that it could even trap snow as well, making it suitable for all weather conditions..
The manufacturer has also made it very easy to clean the mat. The simplest way is to shake the mat outside, and the debris will fall off. Otherwise, you can also use a broom to sweep away the particles or use a vacuum cleaner.
What Could've Been Better?
While testing out the mat, we discovered that the non slip backing works very well on dry surfaces to prevent slipping. However, the manufacturer advises using the mat only on dry surfaces as the backing is not very effective. Water under the rug can cause slippage.
A steadily increasing number of manufacturers are now offering products that meet sustainable standards, as demand for them is multiplying. Sierra Concepts is one such brand, and its SC105, made of eco-friendly material, is one of the finest outdoor doormats that you can buy right now.
Includes 2 Indoor Outdoor Floor Mats: Enjoy two amazing...
Durable, Safe & Easy Maintenance: Cleaning and maintaining...
Why Did We Like It?
The Sierra Concepts SC105 is the perfect option if you are looking for the best value for money option on the market. It includes two indoor outdoor floor mats in a set, helping you save money without compromising on the product quality.
The mats are available in a large size and are made of high-quality polyester and recycled PVC materials. These recycled materials provide additional sturdiness to the mat while also preventing moisture leaks.
Additionally, the PVC material provides a non-slip backing to the mat, which reduces the chances of slipping by keeping the mat in place.
Moreover, these outdoor doormats have a ribbed surface ideal for scraping dirt and mud off dirty boots and feet. As mentioned earlier, the SC105 is an indoor outdoor welcome mat and can withstand different weather conditions reasonably well.
Additionally, there are multiple color options available for use with different types of decor.
What Could've Been Better?
These heavy-duty mats are undoubtedly one of the best ones we tested while compiling this review. The only concern was that they were prone to slipping if water got underneath. It is recommended not to keep them on surfaces where water can go under the mats.
We are nearing the end of our list, so it is time to introduce you to the MontVoo Front Door Mats. MontVoo is well known for its range of home and kitchen products. This welcome mat is another excellent product from the brand, offering premium quality with exceptional performance.
Water Absorbent&Dirt Trapper: Terry polyester surface with...
Natural Rubber Backing: Crafted with a textured heavy-duty...
Why Did We Like It?
MontVoo is one of the newer entrants in the home products industry and is rapidly making a name for itself through its extremely high-quality home products. This doormat from the brand is one of the best ones we came across, suitable for heavy-duty use and offering multipurpose functionality.
It comes with a non-slip rubber backing, which helps it stay in its place on all types of floors. We tested the mat on marble, concrete, and even wood and were impressed with the results. Additionally, the A-class absorbent polypropylene surface that absorbs moisture from shoes and feet.
Since the mat is highly resistant to weather and seasonal changes, you can also use it in several types of different locations. Besides performing well in rainy weather, we also found that it does not fade even when exposed to direct sunlight for prolonged periods.
What Could've Been Better?
There is hardly any drawback worth mentioning about this product, which offers the perfect combination of durability and versatility. The only thing we wished was there were more attractive designs and colors to select from. The available patterns are somewhat limited compared to what the competition is offering.
The Chichic Entrance Door Mat is the final product on our list, but don't let that fool you. This fantastic product has a high-quality construction that ensures long lasting durability and impressive performance. The unique fabric also provides it with an attractive design, so you can impress visitors easily.
Material and Unique Design: Made of sturdy rubber; flocked...
Why Did We Like It?
Starting with the design, the Chichic Entrance Door Mat comes with a flocked fiber surface that helps provide it with a beautiful appearance. Not only that, but the fabric is very effective in trapping dirt due to the patterned grooves.
You can place this mat near the front door, back door, porch, and other similar areas, and it will stay in its place due to the excellent rubber grip backing. The chances of anyone slipping due to this mat are extremely slim.
This durable doormat is also available in different sizes suitable for various types of locations. One thing that we liked most about this mat is that maintenance is effortless. It can be easily cleaned by either sweeping, vacuuming, or washing it with a garden hose.
Furthermore, the firmly stitched edges provide it with an elegant look while ensuring additional durability.
What Could've Been Better?
This mat is one of the costlier options currently available on the market. Those who are willing to spend that much can get an excellent product with superb features. However, if you think the price is too much, it would be better to look for more affordable alternatives.
Pros
Beautiful design
It can be used in many different areas
Sturdy construction
Suitable for heavy usage
Cons
Costly
Outdoor Doormat Buying Guide
We have listed the best outside doormats that are available on the market. To make your task even simpler, we also include a buyer's guide. This guide lists all the critical factors that should be considered before making a final decision. Read on to learn more about these factors.
1. Build Material
One of the primary considerations when purchasing an outdoor doormat is the type of materials that it is made up of. Manufacturers use different materials, such as polyester, coir, recycled, etc. Each material comes with different advantages and disadvantages.
For instance, polyester is easy to clean and slip-resistant, while coir offers a more natural look and is environment-friendly. On the other hand, recycled rubber is non-porous and long-lasting.
2. Shape And Size
Outdoor mats are also available in different shapes and sizes, even unique ones like round, oval, semicircle, etc. Since mats are meant to be used in various locations, the numerous options make selection easier.
It is recommended to select that mat size that can fit comfortably in the required space while ensuring proper coverage and protection. The shape can be selected based on personal preference, looking at what might be most suitable for the existing decor.
3. Surface Of Doormats
The surface of the doormat not only determines how the mat looks but also how effective it is for capturing dirt and grime. For instance, ribbed textures are highly efficient in capturing mud particles and help the mat stay in place. Different mat surfaces can be used with various types of decor.
Verdict
Outdoor mats are the perfect solution for preventing dirt from tracking into your home while also adding to your home decor. We hope you found our review-based guide helpful in selecting the right product to keep your indoors clean and outdoors more beautiful.
Before you go, check out our favorite products from the list. Firstly, the Plus Haven Coco Coir Door Mat is our overall favorite as it is suitable for heavy-duty use and is a sustainable option.
And if you are looking for a versatile and low-maintenance option, then the Ubdyo Extra Durable outdoor doormat might be more appropriate. Finally, DII is an excellent choice for those who want multiple color options and a sturdy build.
With that, it is time for us to sign off. Until next time!
Entryways can dramatically set the tone for your visitor’s first impression and represent your homes introduction to the world. Natural light, small elegant decorations and an overall airy bright atmosphere will exude elegance and a cozy warm atmosphere. For entryways, mirrors are a perfect addition, as they can brighten things up simply by reflecting light. Moreover, they create the illusion of a bigger space, being the perfect antidote to crowded poorly lit and constructed entryways.
With this topic in mind, we have searched for some outstanding ideas for making your entryways beautiful, clean and spacious looking and we have selected 18 captivating mirrors that can help you do so.
go big and infuse light
A big entryway requires a lot of natural light so we recommend a floor to ceiling huge elegant mirror that will double the light infused through your windows. McGill Design Group and the Chroma Design Collectivehave designed two entryways that take advantage of the natural light and maximize the feeling of an airy fresh space by using gorgeous big mirrors.
Designed by Su Casa Designsthis gorgeous wooden framed mirror fits perfectly into the blank white entryway infusing contrast as well as light.The other furniture elements of the design manage to keep up with the vintage rustic feel of the space.
use reflections to your advantage
A small wooden bench placed strategically just under your entryway mirror will add depth to you space. Just check out these examples from Decorating Your Small Space and an Instagram user @megtimjakebay.
choose a minimal style
Sometimes the best choice is to go minimal and not overcrowd a small entryway. The right mirror and a few special decorations will transform any space into an elegant and attractive one. Have a glance at this great mirror with antlers above it taken from Design Sponge. Another simple round mirror from Refinery29manages to reflect the perfect minimal decorations with a touch of gold.
The below three entryways from Notey, Oracle Foxand My Scandinavian Home keep things to a minimum whilst exuding a clean airy properly lit space.
small entryways
If you are unfortunate to have a small tiny entryway, do not despair.You can opt for a small mirror which will infuse a larger quantity of light in and still manage to look chic.Check out these two small, yet beautiful entryways from My Love for Woods and Little House of Four. A few accents will fill up the space and add contrast to any design you decide to choose.
masking the stairs
If your staircase represents a focal point of your entryway, setting something up in that awkward space underneath the staircase can make more sense, instead of placing it on one of the walls behind the front door. Check out these beautiful examples from My Domaine and The Yellow Cape Cod.
mimic real windows using mirrors
Natural light and its lack in small entryways will always represent a problem you could easily solve by adding a set of window looking mirrors that could fool anyone and enlarge your space.We recommend you these gorgeous examples from Flicker user Shizzi who shows us how easy it is to mistake these mirrors for windows.
This breathtaking Grand Chateau Window Mirror featured exclusively on How to Decorate took our breath away. Elegant and classy, such a piece would be an incredible addition to any home owner.
be bold in your choices
Irrespective of the style of your entryway, there is always a mirror to fit. Have a look at this wild entryway design from 11 Magnolia Lane that blends black and gold together. Also see the other chic design taken from Tidbits and Twine, all in black and white.
At the end, I would say that having mirrors in your entryway could make it a winner. There are multiple options of shapes, sizes and frames to choose from. You can easily transform and enlighten your entryway simply by adding a mirror. We would love to hear your take on this topic in the comment section below.
Shoe storage ideas are a hot commodity online, especially DIY shoe storage that is clever, quick, and inexpensive considering that the average person owns 12 pairs of shoes. Getting creative with DIY shoe storage solutions is a great way to neatly organize your footwear and reclaim space in your home. Read on for 19 genius DIY shoe storage ideas you can implement to keep your shoe collection tidy and impress your guests.
Metal Sticks Behind The Wardrobe Door
Keep shoes hidden but easily accessible by installing metal sticks on the back of a closet door. Hang shoes by their heels for an organized display.
Cardboard Shoe Storage
Get creative with cardboard boxes to DIY customized shoe cubbies on a budget. This modular storage solution can be scaled to your space and replaced as needed.
Pallet Shoe Shelves
Repurpose wooden pallets into shelving units for an easy shoe organization project. Stack and arrange pallets to fit your space.
Shoe Box Storage
Store shoes in their original boxes and label them with photos for a neat, personalized storage system.
Wall-Mounted Coat Hooks
Install wall hooks designed for coats to hold shoes and free up floor space in small rooms.
Ladder Bookcase Shoe Storage
Upcycle a wooden ladder into a leaning bookcase. Add shelves to store shoes creatively.
Crate Shoe Storage
Stack vintage crates or buy new collapsible ones to hold shoes in a rustic cubby storage unit. Arrange crates vertically or horizontally.
Cardboard Pipe Shoe Storage
Get crafty with cardboard tubes or PVC pipes cut to size. Lean tubes against a wall or stack them to create DIY cubbies.
Metal Grid For Heels
Install a metal pegboard and use hooks to neatly store heels and keep them in view.
Corner Wall Shelves
Optimize wasted space by installing corner shelves. Use them to neatly store shoes vertically.
Display Shoes On Shelves
Show off your favorite pair by dedicating a shelf to artfully arrange shoes. Add lights for dramatic effect.
Build A Walk-In Shoe Closet
For the ultimate shoe storage, construct a customized walk-in closet with plenty of shelves and cubbies. Add a window for natural light.
Dedicate Dresser Drawers To Shoes
Make use of furniture you already own by storing shoes in empty dresser drawers. Line drawers with fabric for a tidy presentation.
Shoe Display Shelves
Build or buy shelving units specifically to showcase your most prized shoes. Add lighting for extra flair.
Shoe Wall Decor
Get creative by arranging shoes into wall art patterns and designs. Paint or stain shoes to complement your décor.
Laundry Room Shoe Storage
Install shelves or cubbies in your laundry room to store shoes near the entryway. Keep shoes off the floor to avoid tracking in dirt.
Rotating Shoe Display
Get the most out of your walk-in closet by installing a rotating shoe rack. Spin to view all your pairs with ease.
Garage Shoe Storage
Keep garage floors clear by mounting panels or shelving to hold shoes. Add hooks for hanging bulky shoes.
Repurposed Furniture Shoe Storage
Give old furniture new life by refinishing and using it to hold shoes. An old dresser or cabinet works great.
Open Shelving Units
An open storage design allows you to easily view all shoes. Keep shelves near the entryway for convenience.
Hallway Built-In Shelves
Maximize hallway space with built-in shelving that spans the length of the wall. Store shoes of every height.
Luxury Walk-In Closet
Go all out with a professionally designed walk-in closet complete with plentiful shoe storage. Consider glass doors to admire your collection.
Custom Pull-Out Drawers
Make use of wasted cabinet space by installing custom pull-out shelves just for shoes. Keep shoes hidden but easily accessible.
Organized Shoe Closet
Invest in a closet system with plenty of shelves, cubbies, and drawers to neatly accommodate all your footwear.
Repurposed Furniture Shoe Storage
Upcycle old wooden pallets or metal file cabinets into DIY shoe racks. Stack and arrange them to fit your space.
Minimalist Shoe Shelves
Adopt a minimalist style by dedicating a small shelving unit near the entryway to neatly store shoes out of the way.
Bathroom Shoe Storage
Make use of vertical space in your bathroom by mounting shelving on the wall to attractively display shoes.
With some creativity and elbow grease, you can implement any of these storage solutions to keep your shoe collection neat. Find a method that fits your space and style. Your feet (and guests) will thank you
They not only keep your house clean but can also make a statement when placed judiciously. For people with a funny bone, it is best that you purchase a doormat that will leave your guests in splits. But choosing the right doormat can be a pretty challenging task.
And we thought that it might be helpful if we made a list of our favorite choices. So, let’s quickly take a look!
SIZE: 23.7''(W) x 15.9''(L) ,3/16'' thickness.This is a thin...
Material: Colorful print Top with personalized Design Ruer...
Since doorbells have long lost their charm, putting this humorous mat on your front door will become quite a conversation starter. This durable mat would also be a great fit for homes with newborns too.
If there are kids in the house, you would not want unexpected visitors to come and ring the doorbell. So, you can make the visitors scream “Ding Dong” and embarrass themselves in front of your neighbors. We hope you don’t lose your friends though!
Pros
Unique and eye-catching design
Durable and easy-to-clean material
A practical solution for homes with newborns or light sleepers
Dimension: 29.5"(W) X 17.7"(L). One-Side Printing,using heat...
Material:High quality Felt and Rubber. Non-slip backing(...
If you are a fan of Monty Python, this welcome mat will surely be a great addition to your home. Through this hilarious doormat, you can easily spot the other Monty Python fans. So, next time you have guests, see how they respond to this doormat.
We suggest that you keep it outside the house and keep the animals away from it. In case they are nestled on it, they will cover the writing, and your guests won’t be able to read it.
You are most likely to tilt your head to read the quote on the doormat. And that is exactly what the makers intended! The sign on the doormat is such that everyone has to tilt their head if they want to read what’s written on it.
Interestingly, this eco-friendly doormat is made of coir and will last for a long time. You and your guests can have fun looking at it. It is pretty interesting, and we are sure no one would keep their shoes on it.
For a cheeky doormat that every guest will love, this one is a perfect choice. This option is perfect to create a bit of mystery and confusion when you have guests over. To be honest, it is best for first-time visitors and might lose its charm when you have guests coming over often.
The writing is quite funny and will make the visitor ponder, “Is it a good idea to enter the house?” Well, that only time can tell!
Pros
Cheeky and mysterious design
Made from high-quality coir material
Durable and practical
Perfect for new homes or housewarming gifts
Cons
Coir can be sensitive to extreme weather or excessive moisture
●Dimension: 30 inches (length) x 18 inches (width) x 0.12...
● Funny logo: Funny design can make the home more fun and...
When wanting to make your distaste for unwanted guests clear, we suggest that you give this doormat a try! This humorous mat is a subtle way to tell guests that they should make an appointment with you before dropping by.
You can keep it on any floor, and it will amp up the space immediately. You just have to shake the mat to remove any footmarks on it. Rest assured, your visitors will raise an eyebrow on seeing it!
★★DURABLE AND SAFE - The Doormat is made of high quality...
★★PRO DESIGNED FOR INDOOR / OUTDOOR - This Rubber...
Psychedelic music lovers, we suggest that you give this item a try. This 70s-inspired piece is a great option to go for if you want to give your house a retro look. The font is pretty bold and welcoming. Also, the vinyl back of the doormat helps to keep it in place.
And you would be happy to know that the text is printed in premium-quality UV ink that won’t fade easily.
Pros
Retro 70s-inspired design
Bold and welcoming font
Vinyl back keeps it in place
Premium-quality UV ink prevents fading easily
Cons
Limited to one design for fans of psychedelic music
A good way to deter burglars from entering your property is by deflecting them to your neighbors. Just kidding!
This humorous doormat reflects deep thinking that will surely make your guests laugh. And maybe it will make the burglars run away! If that happens, what’s the harm?
Made of natural coconut bristles, this mat is durable and will keep your visitors entertained for a long time.
Pros
Humorous design that can make guests laugh
Durable construction with natural coconut bristles
Next up, we have another option for the Monty Python fans. You can place this mat outside the door the next time your buddies are coming over for a Monty Python marathon party. This is a great way to celebrate the all-time favorite show of many.
Not to mention, the print quality is exceptional and, with little maintenance, will last for a long time. The price is also pretty affordable, and you can easily replace it with a new one when it wears out.
This doormat is a pretty fun option to amp up your home décor. Right when your guests are about to step their foot in your house, they are going to be greeted with two options: tacos or wine. And if your guests are anything like us, they are mostly going to ask for both!
You would be happy to know that the manufacturers of these doormats use special technology to make sure that they are mildew resistant.
Pros
Fun and unique design adds a playful touch to home décor
Provides a welcoming and lighthearted atmosphere for guests
Durable rubber back prevents slipping and ensures stability
All Guns N’ Roses fans out there, this pick is just for you! Drawing inspiration from the very famous track “Welcome To The Jungle,” this doormat is a long-standing favorite of music lovers. Everybody who loves the band will go for this doormat without any second thought.
It is designedout of natural coir and also features a weatherproof vinyl backing. The durability of this item enables you to keep it outdoors or even under your couch.
Pros
Popular choice among music lovers and fans of the band
Made of natural coir, a durable material
Features a weatherproof vinyl backing
Suitable for outdoor use
Cons
Requires occasional maintenance to keep it clean and presentable
Dimensions: 23.6 X 15.7 inches, 3/16" thickness to fit most...
Material: the front is made of high-quality felt printing,...
Install this doormat when you have to break it to your guests that the man in the house is super lazy and most likely won't answer the door. It also tells the visitors that the pet in the house is shady and is most likely going to bark at them.
This pigmented coir doormat is the perfect way to let your guests know who to ask for when they visit: the woman. There's no way it won't create a fun moment for your visitors.
Tired of your ex dropping by every now and then? Maybe it's time that you get your hands on this funny doormat. On this mat, you will see cacti of different kinds, which clearly is a direct way to show your displeasure to unpleasant guests.
This is a rather straightforward way to tell douchebags that they should rather stay away from your house. The mat is sturdy and is most likely to see many of your exes come and go!
Want to tell the visitors that overstaying at your place is probably not a good idea? Then this doormat is made for you. Whenever your guests stay longer than they intended, this doormat can be a subtle reminder that you would prefer that they don't overstay their welcome.
This handmade outdoor doormat is a favorite of many introverts who don't like entertaining guests for too long.
When you want to make the pyramid-scheme sellers go away from the house, it is best to get your hands on this rug. This is a good way to let people know that they are only welcome in the house depending on who they are.
As people read what's written on the mat, they will wonder on which side of the fence they fall. To be honest, it is the best way to filter out unexpected visitors.
Pros
Humorous message adds personality to your entryway
Helps filter out unwanted guests
Made of durable coir material for long-lasting use
Want to let your guests know that your house is all about good vibes? Then you should probably check this option out. When folks enter your home, they will have to channel all their good vibes.
It is an excellent way to ensure that no negative energy crosses your threshold. The mat is pretty sturdy and can easily handle kids running over it. To sum it up, this doormat is a fun way to do a vibe check.
Pros
Sends a positive message to guests about good vibes
Helps prevent negative energy from entering your home
Sturdy and durable, can withstand heavy use
Suitable for households with children
Cons
May not effectively deter negative energy for everyone
☻Specifications: 30"(L) X 18"(W)(75X45cm), Our doormat is...
☻High-Quality: Our mat's back are made of high quality...
With this mat, your house will surely get turned into a party hub. Next time you have people coming over to your place, simply put this doormat out on the porch to set the mood right.
In short, the dark brown coir rug is a favorite of every party enthusiast. Place it inside your door or outside it; there's no way people are not going to notice. With this doormat, now you can welcome your guests in style!
Pros
Eye-catching design with “Hi, Welcome to Chili’s” message
Adds a fun and lively touch to your home decor
Durable and made with rubber and coir material
Suitable for both indoor and outdoor use
Cons
May not effectively trap dirt and debris compared to more specialized doormats
Practical year-round decor - Entertain your guests with our...
Great for covered patios and porches - Built tough with .6...
Honesty is the best policy, and this mat is as honest as it can get. This doormat clearly says, "welcome to the shitshow," and is a great way to welcome the guests to the happy madness that is your house.
With the help of this mat, your guests will know what they are in for. The writing spans across the entire doormat and will surely make your guests pause before they enter your abode.
Dimensions: 23.6 X 15.7 inches, 3/16" thickness to fit most...
Material: the front is made of high-quality felt printing,...
If you have young kids and pets in the house, it is safe to say that your home is not like the other homes. Kids can be as naughty as wild animals, and it is best to let your guests know what they are getting into before crossing your threshold.
It is true that a doormat like this might turn many of your guests away. Only "grandmoms" and "granddads" will have a gala time at your place.
Pros
Adds a touch of humor and lightheartedness to your entryway
Helps set the tone for a kid and pet-friendly environment
Serves as a conversation starter for guests
Can strengthen bonds between pet and kid-loving visitors
Cons
Might be off-putting to guests who don’t appreciate the humor or are uncomfortable with kids and animals
Welcome doormat for front door entrance, patio, new home,...
Made from 100% natural coconut coir.
Live, laugh, love, that's an old dictum now. This doormat has “live, laugh, leave” inscribed to make it clear to unexpected visitors that you are not going to entertain them for too long. It is a pretty straightforward way to tell people you are not up for random chit-chat.
With a cute little heart symbol, you can rest assured that no one will get offended. We feel that when your guests see this, they will not be able to control their laughter.
Pros
Clever and humorous text discourages unexpected visitors
Cute little heart symbol softens the message
Great conversation starter that can bring laughter
Offers a unique and personal touch to your doorstep
Cons
Potential risk of being misinterpreted as rude by some
Looking for a good excuse to justify why your house is a mess to your guests? Grab this doormat, and your problems will be sorted. It clearly says that your home was clean yesterday, but unfortunately, the people visiting you missed it.
You can wipe your feet when entering the house on this mat, and it will keep the house clean. The size of this rug is decent and won’t cause any hindrance while entering.
Pros
Entertaining conversation starter
Encourages cleanliness by reminding guests to wipe their feet
Dimension: 23.6 inch (LenGth) x 15.7 inch (Width) x 0.12...
Material: Heat-Resistant Non-Woven Fabric and Backed With a...
We are undecided about whether this mat is a bit threatening or brings relief to your guests. Whatever be the case, it will indeed evoke laughter in some. With this warning in place, we are sure that your visitors will sleep with one eye open.
The writing is in bold font and spread out all across the mat. You would have no problem reading what’s written on the mat. In case a shady person decides to drop by, they will indeed feel overwhelmed seeing this.
Pros
Hilarious message
Bold, easily-readable text
Potential deterrent for unwanted visitors
Engaging conversation starter
Cons
May come across as too threatening for some guests
Everyone knows that one family that is a bit weird but super fun to be around. If yours is like that, get your hands on this doormat. Place this doormat on your stoop, and people will have a smile on their faces when entering your house.
This sturdy coir mat is a significant investment when you want to create a warm vibe for your house guests. It is the best way to welcome people to the happy madness that is your home.
★※★SIZE:18"(W) x 30"(L) x 3/16" Thickness, this is a...
★※★Materials:High quality RUBBER back make...
Are you a LOTR fan and want to make that fact known to all who visit you? Then it is time that you give this mat a try. When people see this mat, they will understand you are a LOTR fan, and in case they are one too, they will surely get more excited.
On seeing this excellent mat, your friends may feel encouraged to make LOTR references, and that would make for great conversation starters.
🐶 SIZE - Size of the doormat is 16 X 23 inches.The...
🐶 MATERIAL - The rug is made of 100% polyester...
Is that vacuum salesperson visiting your house every weekend and getting on your nerves? To deal with this issue, you just have to put this mat on your stoop.
This is one of those funny doormats that sends your visitor on a guilt trip before they enter the house. It will make them question if they should really be there.
For all the Star Wars fans out there, we have the perfect mat choice for you. This doormat is the best bet for all Star War nerds who want to make their allegiance known. Made out of environmentally-friendly material, this Buzzfeed choice doormat will surely amp up your space and help initiate exciting conversations.
Practical year-round decor - Leave the dirt outside with our...
Great for covered patios and porches - Built tough with .6...
This is one of those funny doormats that will successfully drive away unexpected visitors. When people plan to drop by without a prior appointment, this doormat will make it clear that they aren’t welcome. There’s no doubt that your friends will have a hearty laugh when they see it.
Take little care of it, and rest assured that it will last for a long time.
Are you a HIMYM fan who just could not stop talking about the show? Then we are sure that you will have an opinion about this rug. When you are feeling experimental and want to get your friends confused, this is the one to go for. And you can rest assured that it will safely keep unexpected visitors at bay.
Is that A jimmy Choo that your guest is wearing? It does not matter, as the house rules are to take the shoes off before crossing the threshold. And this doormat gives the right cue to your guests to take their shoes off before entering your house. The house rules are such, and everyone must follow them!
Size:29.5"(L) x 17.7"(W) 3/16",this is a thin welcome...
★※★Materials:High quality RUBBER back make...
Your friend might not feel delighted after texting their ex after getting drunk with you. We suggest that you place this doormat strategically to warn your friends on time. When there’s a party in the house, before they enter, they can read this doormat and quickly put their phones on airplane mode.
Pros
Funny and relatable message
Warns guests about potential texting mishaps
Encourages responsible use of mobile devices
A strategic addition to house parties
Cons
May come off as too controlling
Buying Guide For The Best Funny Welcome Mat
Welcome to the comprehensive buying guide for the best funny welcome mats! A doormat is the first thing that visitors see when they come to your home, so why not make it fun and humorous? with so many choices on the market, it can be overwhelming to decide which one to buy. That's why we've put together this helpful guide, covering all the important factors to consider when purchasing a funny welcome mat. So, whether you want to add some personality to your doorstep or make your guests happy, keep reading to find the perfect welcome mat for your home.
Humor
The main purpose of a funny welcome mat is to make your guests smile and set a lighthearted tone for their visit. Choose a mat with a quote or image that fits your sense of humor and that you think your guests will appreciate.
Durability
A welcome mat is exposed to weather and foot traffic, so you want to choose one that is sturdy and long-lasting. Consider mats made of durable materials like coir, rubber, or vinyl that can withstand wear and tear.
Size
Make sure to measure the space where you plan to place the welcome mat before making a purchase. A mat that is too small may look odd and a mat that is too large may be impractical.
Safety
Consider purchasing a mat with a non-slip backing or a low-profile design to prevent tripping hazards. A mat with a non-slip backing is especially important if you plan to use it in an area where it may get wet.
Eco-Friendliness
If you're concerned about the environment, choose a mat made of eco-friendly materials like coir, recycled rubber, or recycled plastic.
Ease of cleaning
Choose a mat that is easy to clean, especially if you live in an area with lots of dust or mud. Mats made of coir or rubber can usually be easily cleaned with a broom or vacuum.
One important tip when purchasing a funny welcome mat is to make sure the humor is appropriate for all ages and types of guests. Avoid mats with offensive or controversial messages that may offend or upset some of your visitors.
What should I consider when buying a funny welcome mat?
When buying a funny welcome mat, consider the durability of the material, the size of the mat, the design and message printed on it, and the price.
What material is the best for a welcome mat?
Coir, rubber, and synthetic fibers are commonly used materials for welcome mats. Coir is a natural material that is durable and absorbs moisture well, while rubber is sturdy and has a non-slip surface. Synthetic fibers are also durable and come in a variety of designs.
Can I use a funny welcome mat outside?
Yes, most funny welcome mats are designed for outdoor use. However, it’s important to ensure that the mat is made of a material that can withstand outdoor elements and has a non-slip backing.
How do I clean a funny welcome mat?
The best way to clean a funny welcome mat is to shake off any loose dirt and debris, then use a vacuum or broom to remove any remaining dirt. You can also spot clean the mat with a mild detergent and water.
Conclusion
With that, we have finally reached the end of this informative guide. We hope that you had as much fun reading it as we had while curating these quirky doormats for you.
Doormats are the first thing that people notice before entering your house, and it’s best to make it worth their while. If you liked this guide, keep an eye out on this space for more exciting reads.
The front yard says a lot about the homeowner, a well-kept nicely landscaped front yard means an owner that sees to it, one that offers to his guests, pedestrians, and the entire community something that they`ll enjoy, something emphasizing the environment, a beautiful front yard. The space in front yards differs and there are some which seem too small to be landscaped and yet some succeed beautifully even with the smallest plots. A list of small front yard landscaping ideas has been built to aid you in creating something lovely, a beautiful first impression for guests, family, friends, and pedestrians alike.
1. bring on the greens for display
Green is a color that is ever so common in gardens and yards that never goes out of style. Whether it's the grass, brush or trees, the different hues of green create a lovely background for flowers of strong and dainty colors. Green is also fresh, relaxing for one`s eyes and mind.
2. colorful succulents on display
While others prefer larger plants, colorful succulents are options that will brighten up a small front yard. Displaying a mix of colorful succulents on a decorative pot brings color to the usual green front yard. Succulents are also relatively easy to maintain and can be transferred to different pots and plant boxes easily.
3. using the corner in use
Small front yards should be maximized but not overcrowded with plants. The center and front are great places, but corners of yards can also be used for creating a stunning design. A mix of stones, trees, and bushes will liven up the yard and will provide a beautiful accent on the front yard.
A perfect lawn can create a lovely backdrop for other plants as well as other decorations for the front yard. The solid green of the grass can help other colors pop from the rest of the display in the front yard. A clean lawn also makes the front yard more attractive even when it is smaller than other usual yards.
5. display of stones in different colors
Plants are not the only decorations small front yards can display in terms of landscaping. Stones or rocks of different colors can be used in landscaping small backyards. Some would use small rocks but larger rocks can be used for edging small front yard landscapes.
Some plants can stand out because of their color. One very common plant with dainty colors that stands out easily from all the greens of the backyard is the Azalea. Azaleas are also easy to take care of and do not grow much, making them ideal for small spaces.
Red stones, red bricks, and red flowers. It may sound like a bad idea, but sometimes mixing and matching works just fine. The red stone makes all the green pop and will make anyone stare at the plants on the landscape. Even a small front yard will look bigger with this kind of combination.
Small front yards do not equal small plants. Small front yard landscaping can make use of larger, ornamental plants, giving an illusion of an extensive space. Bromeliads are ornamental plants big and colorful enough for creating this pleasant small front yard landscaping.
Landscaping smaller yards can have an advantage especially since edging will also be easier to design and will only require a few items to create a stunning clean effect.
Small spaces may look unfit to have a lot of plants cramped in one place, but this will simply depend on how a space is used and what plants are used. A larger plant with smaller flowering plants scattered around its foot will still look lovely.
When the front yard is a little too small, plant boxes will come in handy when landscaping. This will add a little layering effect on the front yard rather than just having the landscape on the ground. The dainty flowering plants create a dreamy effect on the plant box setup.
12. create a lovely landscape from mixing and matching textures
A mix of materials and plants looks stunning when set right. The added texture and details by the stones and bricks are the perfect background for the lush greens used in this landscape.
13. mixed borders of different colors and features
The layered effect on this landscaping idea is simply attractive. The different colors of these plants and the different heights create a refreshing mix.
Stone slabs on raised beds are simply perfect in this small front yard landscaping idea. The mix of red and white tulips with the soft colors of the stone slabs can make anyone stare in awe.
15. creating art in small front yard landscaping
Curves and swirls in different colored stones and textures create a stunning effect on a small backyard. The different plants scattered within the patch of swirls and curves create the perfect bed for the landscape. This landscaping is common for most Japanese gardens and has caught much attention in today's trends.
16. adding more than stones and plants
While stones and plants are lovely decorations, adding something else can make front yard landscaping unique and appealing. On this simple landscape, the small patch of stones with a "burnay" jar surely stands out from the rest of the landscape. The flowers also pop out from the red mulch.
17. simply surrounding the larger trees
When larger trees are already present in the front yard, adding smaller flowering plants around each tree is already a landscaping idea. The flower bed will create an attractive effect on the tree and the whole front yard.
What does your front yard look like? Feel free to share your projects in the comment section below.
Seeking to create curb appeal at the front of your home? The list of ideas is endless and various, for those on a tight budget, for those with a green thumb and love for experimenting with landscaping and even for home-owners who are junky craft makers. The curb appeal is all about enhancing the beauty of the frontal view of any home, building or business place.
It would be well to consider a fish pond, a fruit tree or one that bears beautiful, brightly colored flowers in its season. A plant that bears flowers whose odors permeates in the evening, like 'Lady of the night. Take into consideration creating a water fountain with wire made fairies will be just as practical in attaining the desired effect.
Consider planting an array of flowers of diverse colors or adding a fresh coat of paint to an old worn out front door. Nothing captures the attention of a passersby more than a structure with a pretty mailbox at the curb. Spruce it up with some daisies or morning glory flowers planted around the bottom of your letterbox. An ancient sculpture or artistic creation on a large tree or along the walkway will certainly cause your neighbors to stop in wonderment.
Why not use boulders to form a path along a flow of water having the appearance of a small stream with potted plants in the mix. This would serve as a great camouflage for a drain - be sure to clean out any remaining filthy water or muddy unsightly areas. A simple thing as putting the number of your house on the front door or a picket fence would add a homey touch. No need to pay a professional, stick to what you know and allow the artist in you to shine through. Use paint, floral decorations, foliage, and lighting fixtures to create borders around your home.
Your home's curb appeal will give guests and onlookers their initial perception of you and your family. So take control of what that first impression will be. To help here are 16 picturesque curb appeal ideas that can inspire your creative juices.
Curb Appeal Ideas
#1 in most cases simplicity is he bets option so let the greenery speak for yourself
The traditional style is one of the most popular choices in interior design, but why is it so popular and what really is traditional style? Everybody has different traditions so the word "traditional" can have a different meaning for each of us.
Unlike what many people think, the traditional style is a design direction inspired by 18th century European decor. The style itself is a timeless example of comfort and elegance and is perfect for anyone who loves deep wood tones, thorough architectural details and elegant furniture design. This style is often referred to as the classic home style because it has that "homey" feeling that the modern styles lack.
But don't let that fool you because the traditional style also emphasizes simplicity and comfort. There is no space for clutter or excessive furnishings.
So how will you know if this style is for you?
If you feel comfortable with dark wood finishes, refined colors as well as rich tones, then you are probably in the right place. Do you like plain walls? Because the traditional decor mainly relies on neutral paint color on the walls so that the colorful furniture and accents can be in the foreground.
We are going to show you how the traditional decor looks like in the dining room. You will immediately notice that, symmetry is paramount in the traditional interior design. Pretty much anything comes in pairs. If there are 3 chairs on the left side of the table, there have to be 3 chairs on the right side. You get the idea. This symmetry creates a balanced space around a focal point and in the case of the traditional dining room , it is the dining table. Enjoy!
1. Display shelves break the monotony on a plain wall
Your locations, your traditions and what feels natural to you in design ought to define the traditional design that you ought to pursue. We are the sum of our experiences and in design too we ought to expressed that, what do you think?
Opening a restaurant can seem quite fun, but it comes with a lot of responsibilities, a major one being designing it.
If you want to ensure that your restaurant is always brimming with happy guests, it is necessary to make sure that they feel comfortable. And for that, you have to pay special attention to designing and implementing a favorable seating layout.
However, it’s a job easier said than done. There are many things to consider, and you need proper guidance for that. And to help you design the perfect restaurant space, we have curated this guide to throw light on how to have the best seating layout in a restaurant.
Without any more delay, let’s dive right in!
Effective Restaurant Seating Layout
We will start with a list of the most important things that should be on the top of your priority list before you get to the designing part.
Is There A Need For A Waiting Area?
This depends on the kind of footfall that you are expecting and the overall vibe or ambiance of your restaurant. For example, if you’re building a fine-dining restaurant, you won’t want long queues in the dining area.
Not only will this make your restaurant look cluttered but it will also affect the movement of the servers. And there’s a good chance that even your customers would not like all that crowd when they are trying to simply enjoy their meal. So, including a waiting area is a good way to prevent any such problem.
No matter the type of restaurant that you will eventually own, we will always suggest that you consider making a waiting area if there is enough space. When you design a nice and welcoming waiting area, your guests can wait comfortably, especially during bad weather, before starting with the meal.
What Appeals To You?
Before thinking about designing the restaurant, it is crucial that you figure out the things that you find visually appealing. After all, the restaurant is going to be an extension of your dreams and vision. So, it only makes sense that the space reflects the person that you are and your sense of aesthetics.
Some people like to keep their restaurant spacious with minimal seating arrangement and a lot of blank space. On the other hand, there are some who like their restaurant to be cozy and warm, where people can come, sit and talk for hours.
Hence, you need to figure out the kind of vibe that you want for your restaurant before designing the layout. And once you get that right, other things will soon fall into place.
Plan On Making The Space Inclusive
It is essential that you think about the different types of customers that you will have and how to accommodate them better when designing a restaurant. Not every customer will be able-bodied, so you should think of installing both ramps and staircases for ease of access. The former will make it easier for customers to enter with a wheelchair without any difficulty.
Similarly, you should consider designing your bathrooms in a way that all kinds of people can access them. Apart from that, bring in high chairs so toddlers and kids can easily sit on them. This would let families know that they are welcome, and they will feel more comfortable visiting your restaurant often.
How Crucial Is Privacy?
It is extremely crucial to consider how much privacy you can offer to your guests to design the restaurant space better. If you are planning to welcome office parties, you should create an atmosphere that can accommodate critical professional meetings.
On the other hand, make enough privacy arrangements if you plan to create a romantic environment that couples would love. For intimate date nights, you can either design booths to accommodate your guests or simply install walls for added privacy.
However, you might not like to erect walls all across the place, and there’s a solution for that too. In such scenarios, you can simply establish a few private rooms for the said purpose. Furthermore, we would recommend creating these spaces in the nooks to create a more intimate and cozy atmosphere.
Think Of Ways To Increase Your Sales
A good and effective seating layout will come in very handy for increasing the sales as well. For example, if you offer a bar in your restaurant, try to design the seating area in a way that people don’t end up spending hours just sitting at the bar counter.
The trick here is to offer limited seating in order to first limit congestion around the bar and second to increase your sales. You might be wondering how this would enable your sales to shoot up? Well, when there’s a limited amount of space to sit around the bar counter, people would soon move to the tables to order more drinks and appetizers.
And in case they decide to hang out at your restaurant a little longer, they may even opt for a proper meal. So, design the place in such a way that it can covertly persuade the guests to splurge at your restaurant.
How To Manage Seating Space Effectively
Making The Floor Plan
You cannot start furnishing your restaurant without having a floor plan in place. So, it is best that you start with a well-laid out and detailed business plan. And before you can finalize that, keep in mind a few important things.
Firstly, it’s crucial to understand your target clientele, the budget you have, and the available space. The idea here is to make a floor plan that not only looks good but is also efficient. Before finalizing the project, make sure that you talk with the designers to ensure you’re making the most of the space. This is one thing that you should not compromise on.
Multiple-Room Setup
Before deciding the kind of furniture you want to put in the restaurant, you need to select a layout first. You can have one ample open space where you put the entire seating arrangement or small rooms for private parties.
The advantage of having multiple rooms is plenty. None of the guests will be disturbed by others, and you can easily anchor tables without disrupting the restaurant layout. However, there are a few drawbacks to plans like these. It would get difficult for you to host huge parties as the area would get compartmentalized.
And in case you plan to renovate your restaurant in the future, even that would become quite a task.
Open space
The other option to try is to keep an ample open space where you accommodate all the tables and seating arrangements. This would increase portability manifold, and in case you are hosting a massive party, you can always add extra tables.
It is also better in terms of the visual pleasure that you give your guests as they can view the entire space and do not have to restrict themselves to a small room. Moreover, when your arrangement is like this, your clients can better enjoy the music, too, as it spreads across the place.
However, this arrangement comes with its fair share of downsides. If you end up playing music too loud, your guests may have trouble talking. Also, in one big space, the waiters and the guest might have difficulty moving in case there is aisle traffic. So, navigation under a scenario like this might be pretty challenging.
Shape Of The Furniture
You would be surprised to know the amount of effect that the furniture shape can have on your guests. You would see that in most Cafes, the tables are round, which encourages more extended conversations. If you are planning something similar, now you know what to do!
From our research, we also found out that square tables are more efficient when it comes to saving space. And if you are planning to create a restaurant that more couples would like to visit, it is best that you keep the table for two-person use and keep more tables with two seating.
Otherwise, if you keep four chairs with a table, most of the time, two seats are likely to remain empty. Now, that’s not a good optimization of space, is it?
The Quality Of Furniture
The kind and quality of furniture you plan to put in the restaurant depend entirely on your business plans. If you plan on having a fine-dining restaurant, there can be no compromise with the quality of food and furniture. Everything needs to be top-notch. This is not the case when you are planning for a more casual space.
However, the simple rule to follow is never to compromise on quality irrespective of the décor you plan. If you go for cheaper furniture, the chances are that they will not be durable, and you’ll end up spending more money in the long run.
And to add to the feel, take into consideration smaller things like the fabric too. They are what put the final touch to the décor.
Style Of The Furniture
The style of the furniture that you select has a significant impact on the seating layout in your restaurant. It goes without saying that bulky furniture would occupy more space than sleek ones. So, the first thing that you need to do is study your space in great detail.
Once you are well-versed with that, it will become easy to decide on a theme that you can accommodate in the space. Go for old vintage décor, only if you have a big space and can accommodate hefty, carved-out chairs and tables. Alternatively, you can go for minimalist modern décor if you have less space to work with.
When the space is less, you can even opt for a portable or anchored table to reduce floor space as much as possible. The trick is to use the space in an efficient manner to maximize the number of guests that you can host.
Selecting The Space Between The Chairs
It will be a really bad experience if one of your guests ends up stepping on another guest’s foot, right? To avoid problems like this, it is essential that you arrange the chairs in a way that there is a considerable gap between them. This will prevent the guests from bumping into one another or waiters while they serve food.
In case you decide on going with a square or rectangular table, it is best that you keep a minimum of 25 inches gap between the chairs. On the other hand, when going for round tables, make sure that you maintain a gap of at least 30 inches between two diners.
Moving on to the tables now, ensure that there is a gap of a minimum of 5 feet between them. And as I have mentioned before, in case you don’t have so much space to spare, you can always erect walls and create compartments.
Final Words
With that, it’s a wrap!
We hope that you had a good time going through our guide. And that after reading this, you will be able to manage all the restaurant furniture better and more effectively. Your point should always be to try and create an enjoyable overall experience for your clients. By now, you must have understood how important the seating layout is for this purpose.
It is not really a big task, and you will be able to make the most of your space with a little effort. In case you have any further questions, feel free to drop them in the comments section below. And keep a watch on this space for more interesting reads.
The dining setting speaks about a shelter, about the household, it expresses emotion and part of the inhabitant`s personality.
The article that follows is defined by authenticity and identity thanks to no less than 23 spectacularly inspiring mismatched dining chairs compositions carefully curated and beautifully envisioned by their home-owners into sculptural presences ready to receive guests, seat and shape extraordinary memories with family, friends and loved ones.
A setting that sends the right message and transcends out of the ordinary due to diversity around the dinning table.
via instagram.com
6. same color on different shapes
In a setting defined by airiness color cannot contest the light- subdued atmosphere that sculpts everything hence the color becomes a constant in the setting above, shape varies though, elegantly highlighting the interior with the dominant color. Different shapes invite different shading.
To emphasize the feeling of space and break monotony thin designs can be used to your advantage.
via hdbuttercup.com
11. contrast surfaces elegance
Authenticity can be brought in by items with memory, items with a story, items that become timeless once acquired. Define your space with identity and memory.
In the green armchairs and in the oak benches strength presents itself differently. The metal chairs on the other hand complement the sober elegant atmosphere. Airiness greatly contributes to the extraordinary interior.
via Jen Langston Interiors
22. scale play
Mix and match diverse elements; a bench and two armchairs shine in the setting above. Highly different elements at highly different scales shaping a beautiful composition.
Mismatched dining chairs in different compositions and settings can be extraordinary, spectacular. What do you think about the items above, we would love to hear from you in the comment section below !
The dining room holds a unique place in our homes. It's more than just a space for meals; it's a gathering spot, a communal hub where families can spend quality time together. Therefore, it's only fitting that its design promotes a warm, pleasant ambiance, making it a place where everyone loves to spend time. One dynamic and effective way to achieve this is by introducing statement walls into your dining room design.
Statement walls have the power to infuse life into otherwise dull and monotonous interiors. A well-executed statement wall can be a vibrant contrast to traditional white walls, adding depth, color, and character to your dining room. Take a moment to explore our selection of Impressive Statement Walls In The Dining Room, which are sure to grab your attention and spark your imagination.
If you're fortunate enough to have a separate dining room, the possibilities for playing with statement walls are truly endless. However, beyond the visual impact, did you know that certain types of statement walls also offer functional benefits, such as improved soundproofing?
Due to their material composition and design, statement walls can possess unique acoustic properties. This is particularly beneficial in dining spaces, where conversation and laughter can cause echoes and increased noise levels. Materials like bricks, wood, and even certain types of wallpaper can act as natural sound barriers, enhancing your dining experience by creating a quieter, more serene environment. Studies have shown that effective soundproofing can reduce noise transmission, dampen echo, and even minimize noise in your home. Thus, while planning for your statement wall, you might want to consider options that not only enhance the aesthetics but also contribute to the acoustic comfort of your dining room.
So, let's delve into the realm of statement walls. Whether you lean toward bold colors, intricate patterns, or understated textures, you're sure to find inspiration in the following examples.
If you have kept everything in your decor to a minimum then you should be bold when it comes to choosing the right wallpaper. The patterned ones are really interesting and make the room more fancy and stylish through contrast.
When you are thinking about adding a statement wall in the dining room, don't think just about the side walls, take the ceiling into consideration as well. Ceilings designs are often neglected but they`re a lot of options that
Have you thought about adding decorative pieces to the colored wall in the dining area? Well, naturally, plates are an awesome pick for your dining, find some interestingly shaped and patterned plates and will see how they create an interest instantly!
The black statement walls can be combined with light colors to create an immense contrast.
Have you wondered how to implement the map of the world in your home? We have the perfect solution for you! Your dining room wallpaper should be a map! In order to pull off this look well, you should stick to pastel colors and keep the rest of the room simple, clutter-free.
The wallpaper will help you add the wow factor in the dining room with ease, so choose a glamorous one if that's the style of your home. Chandeliers go hand in hand with glam statement walls.
Wooden statement wall in the dining room? Hell yeah!
Bricks walls are another interesting way to spice up your space!
Frames are currently on trend, so create a gallery wall to bring all eyes to it!
Use your imagination and come up with interesting ideas for the statement wall in the dining room. Just by changing one wall in the room, you can change the whole appearance of the home. Give it a try, you will love the new atmosphere!
Source Unknown
How do you see the spectacular statement walls in this short article? We would love to hear your take on the subject in the comment section below!


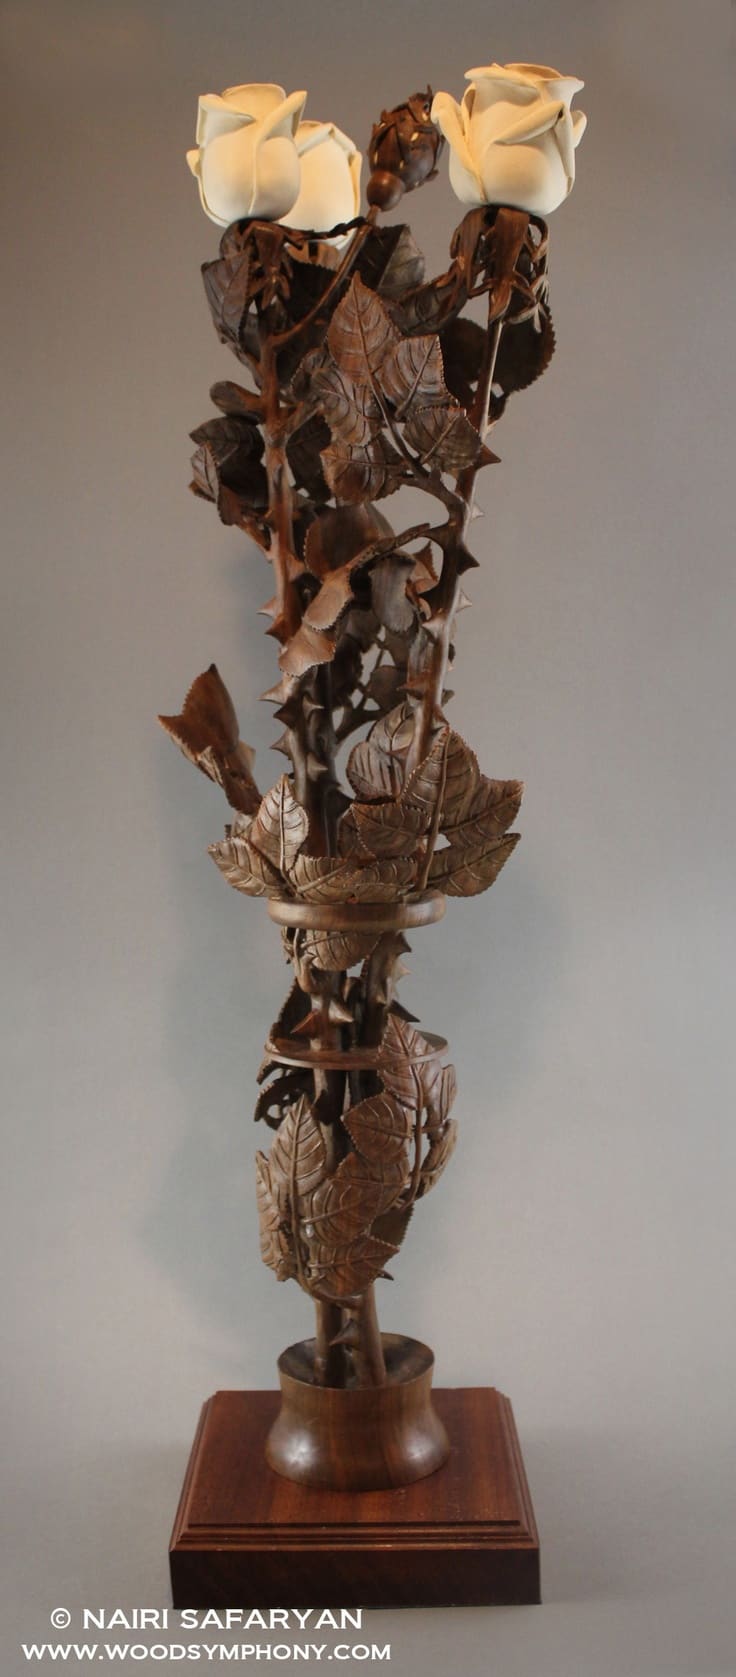
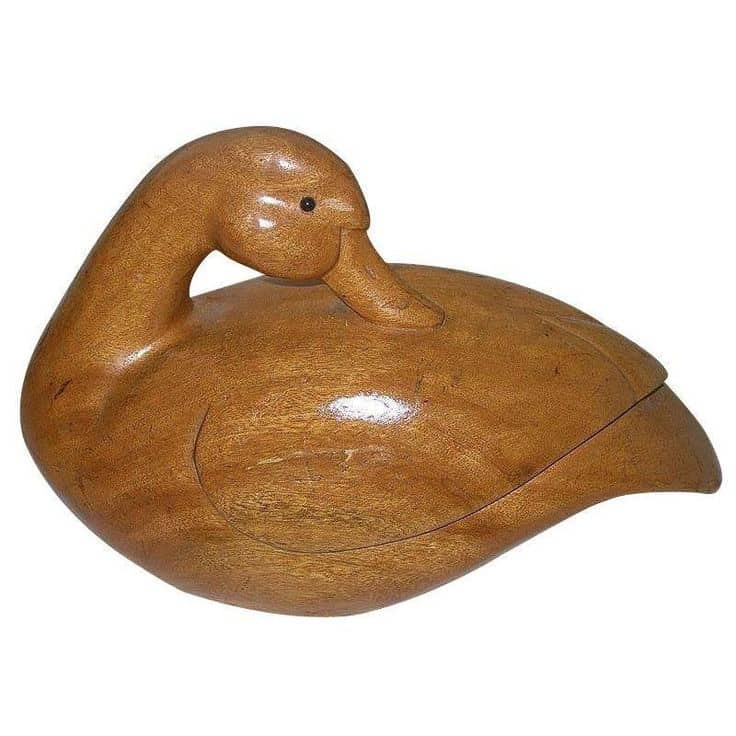
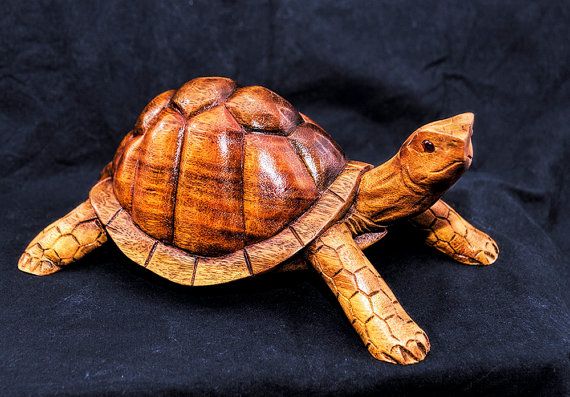
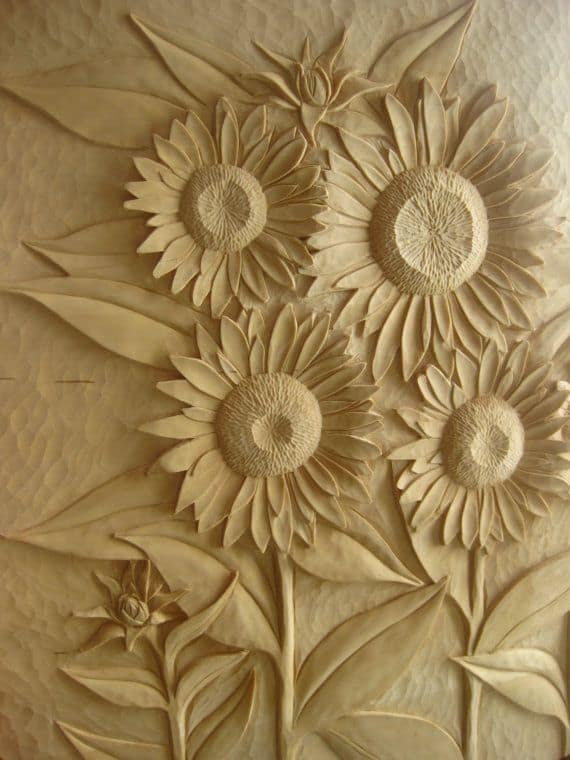
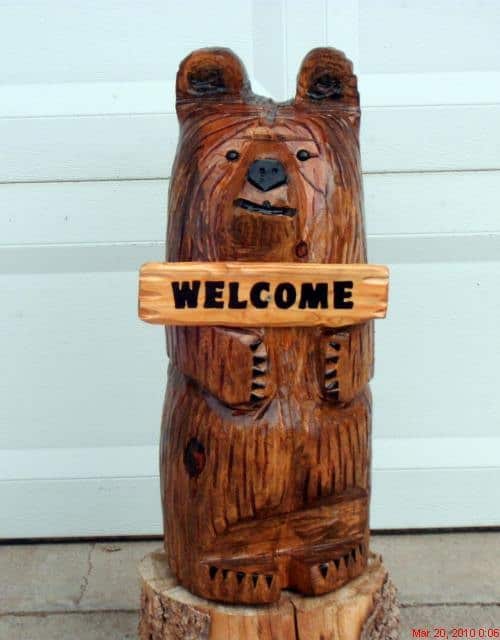
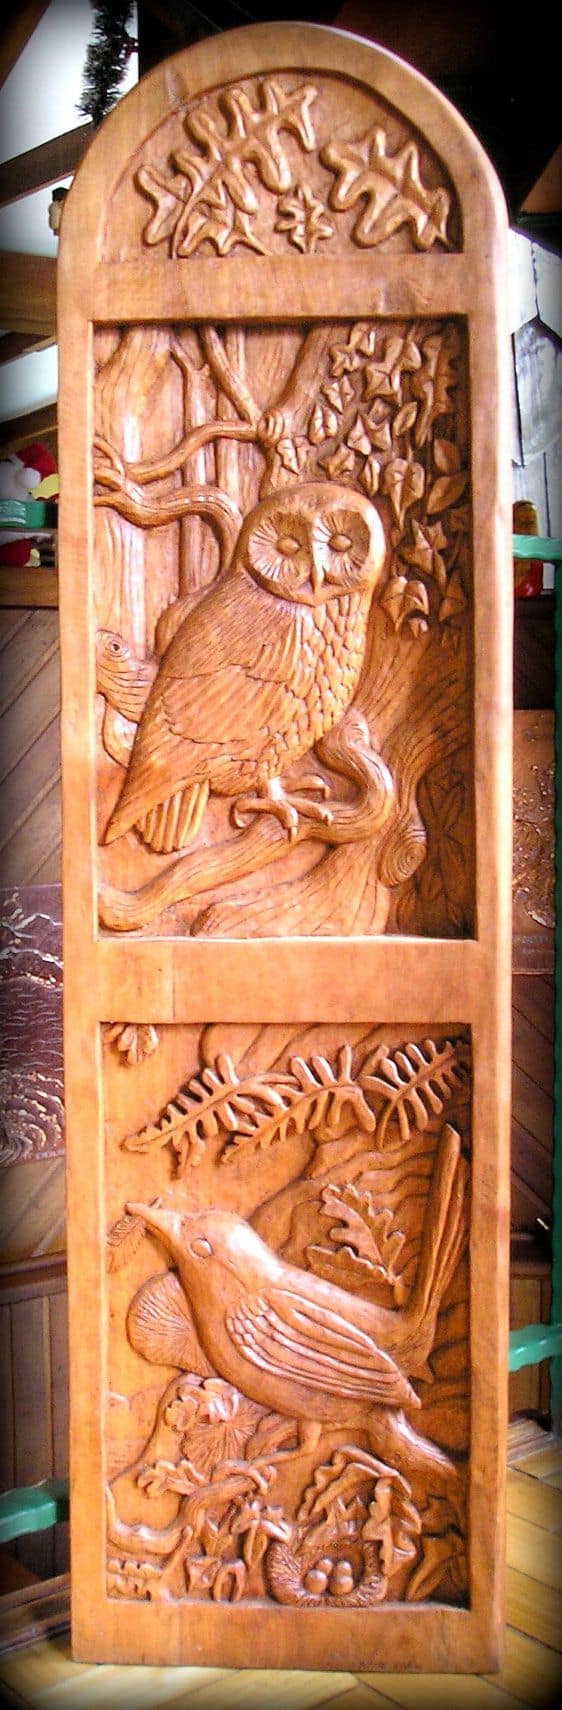
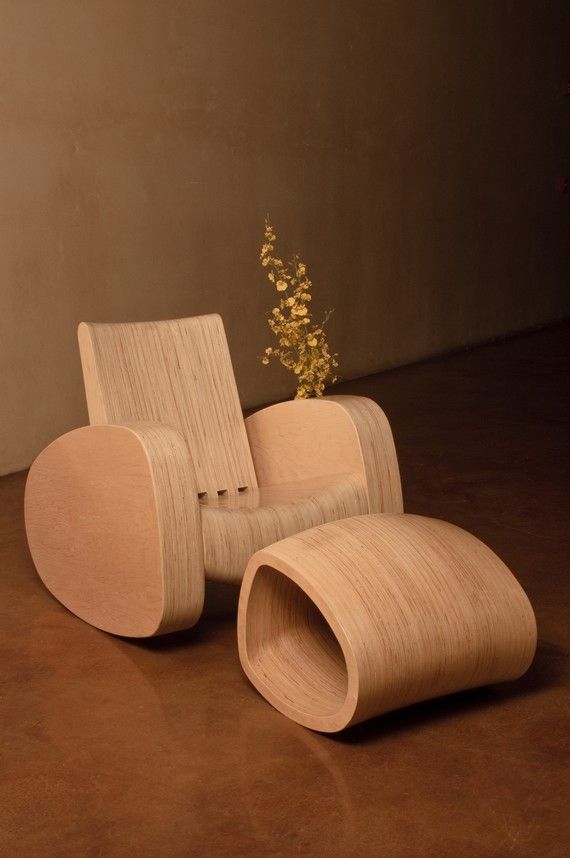
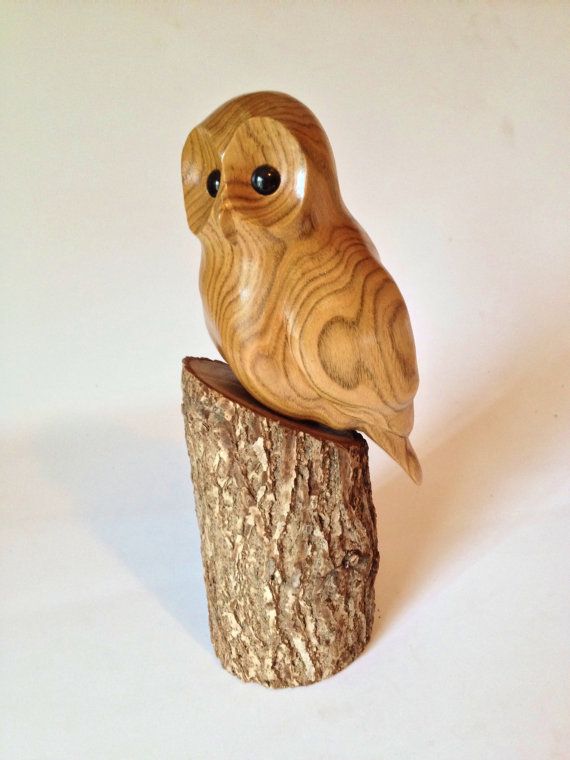
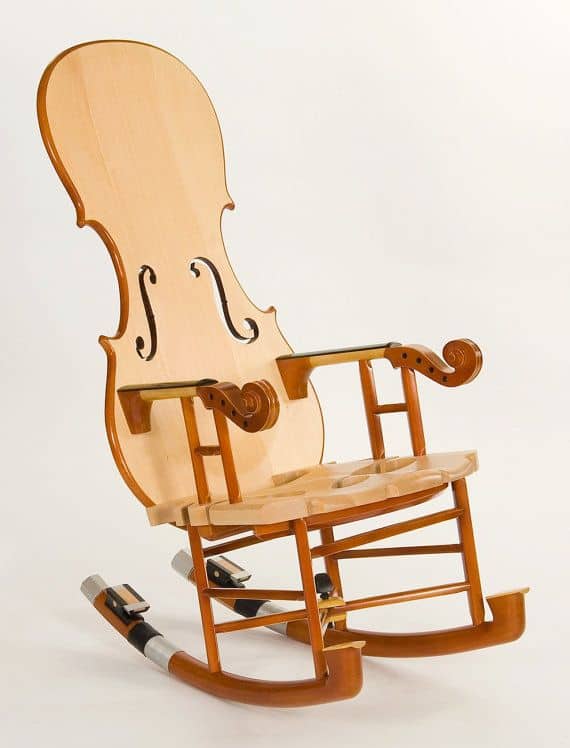
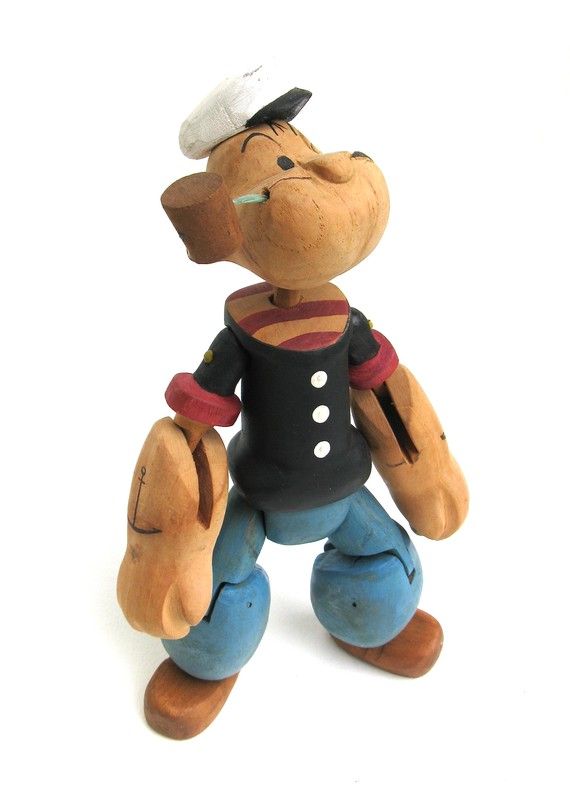
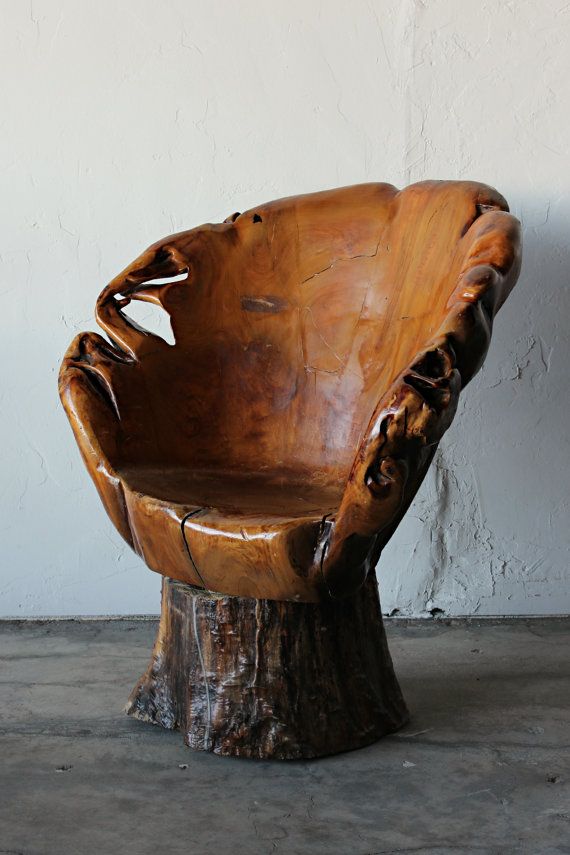
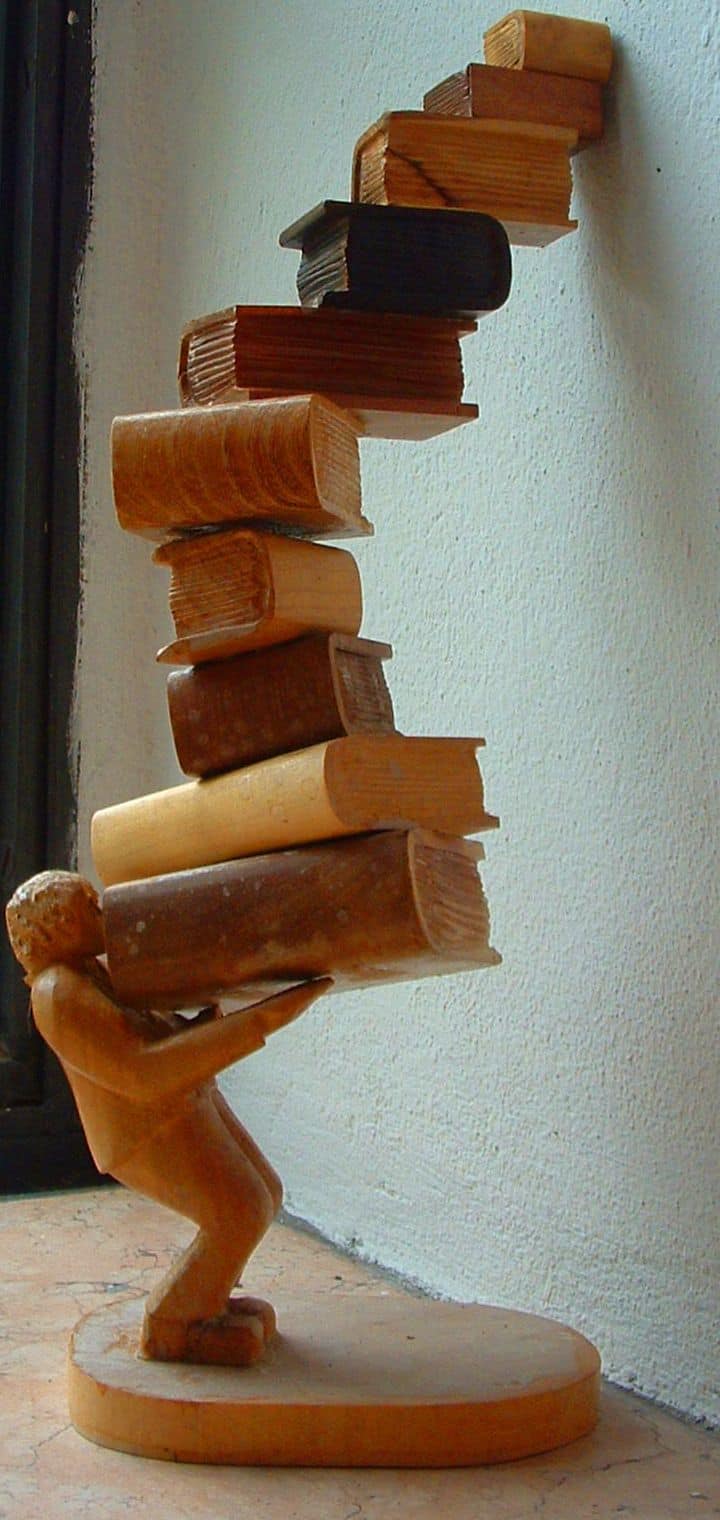
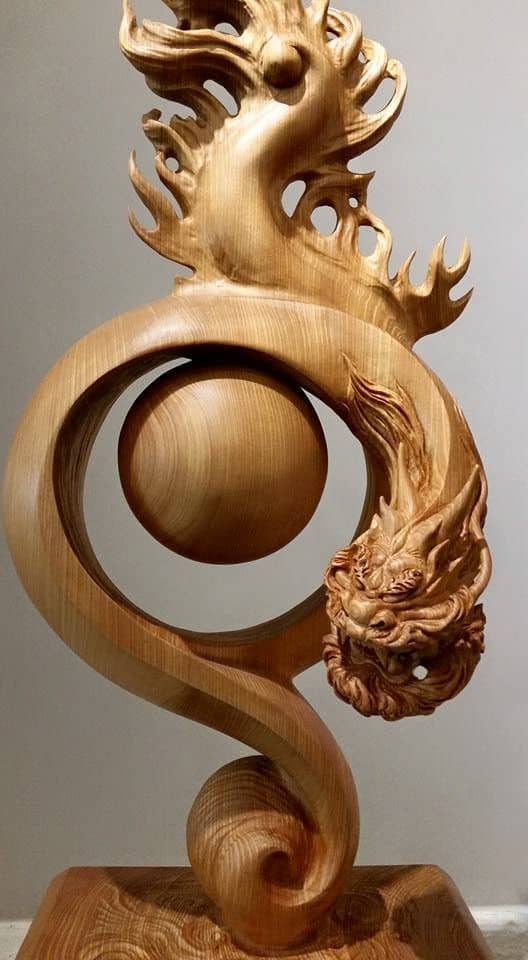
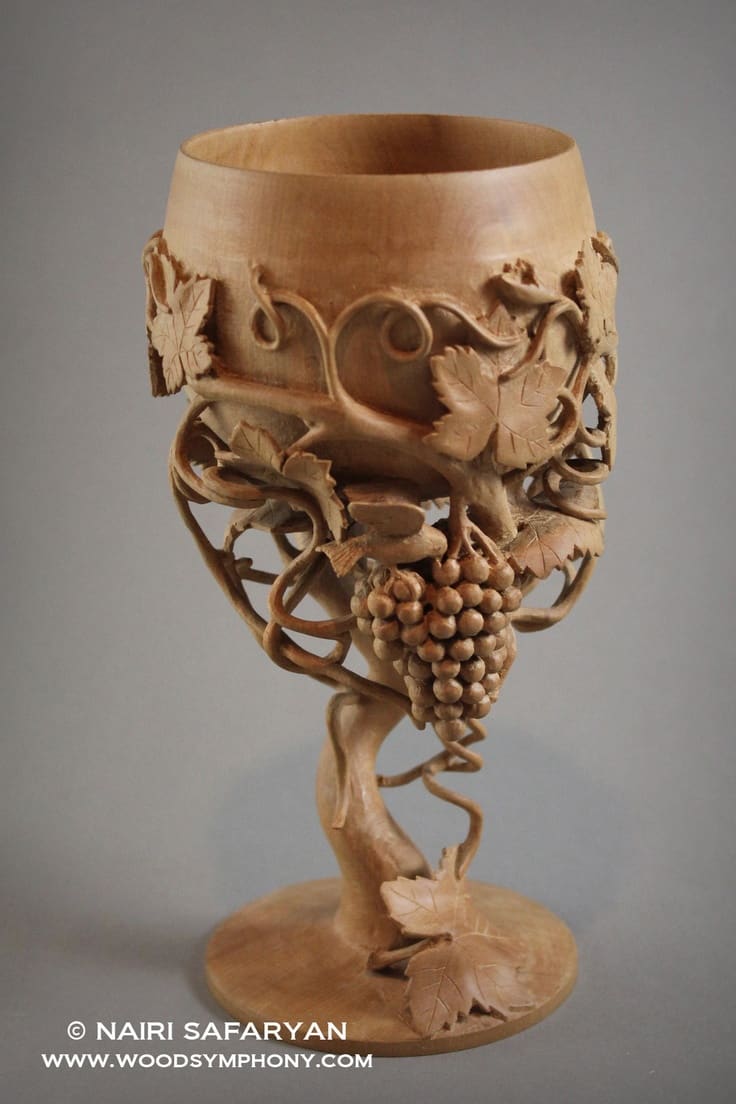
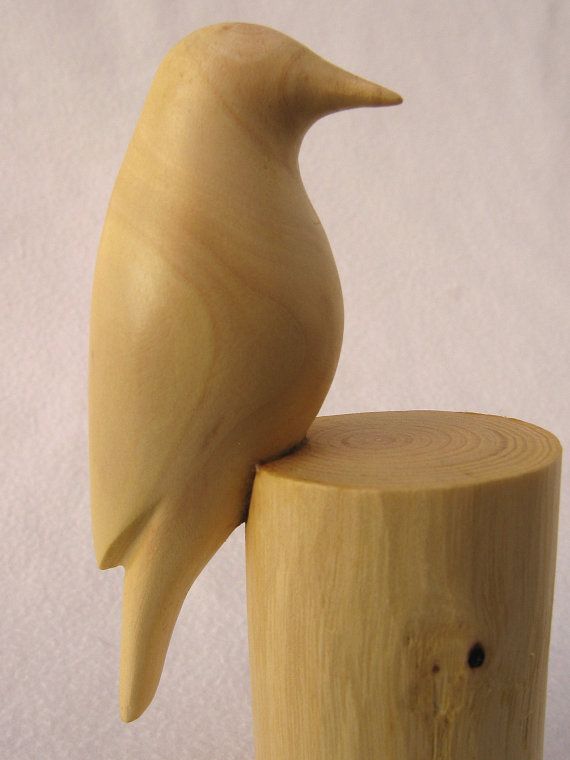
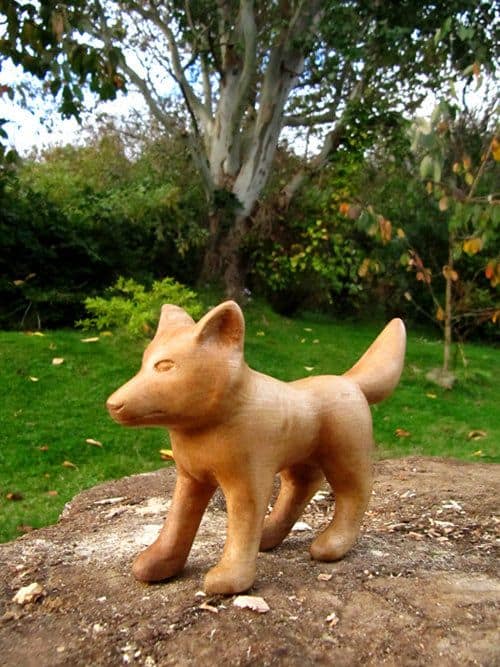
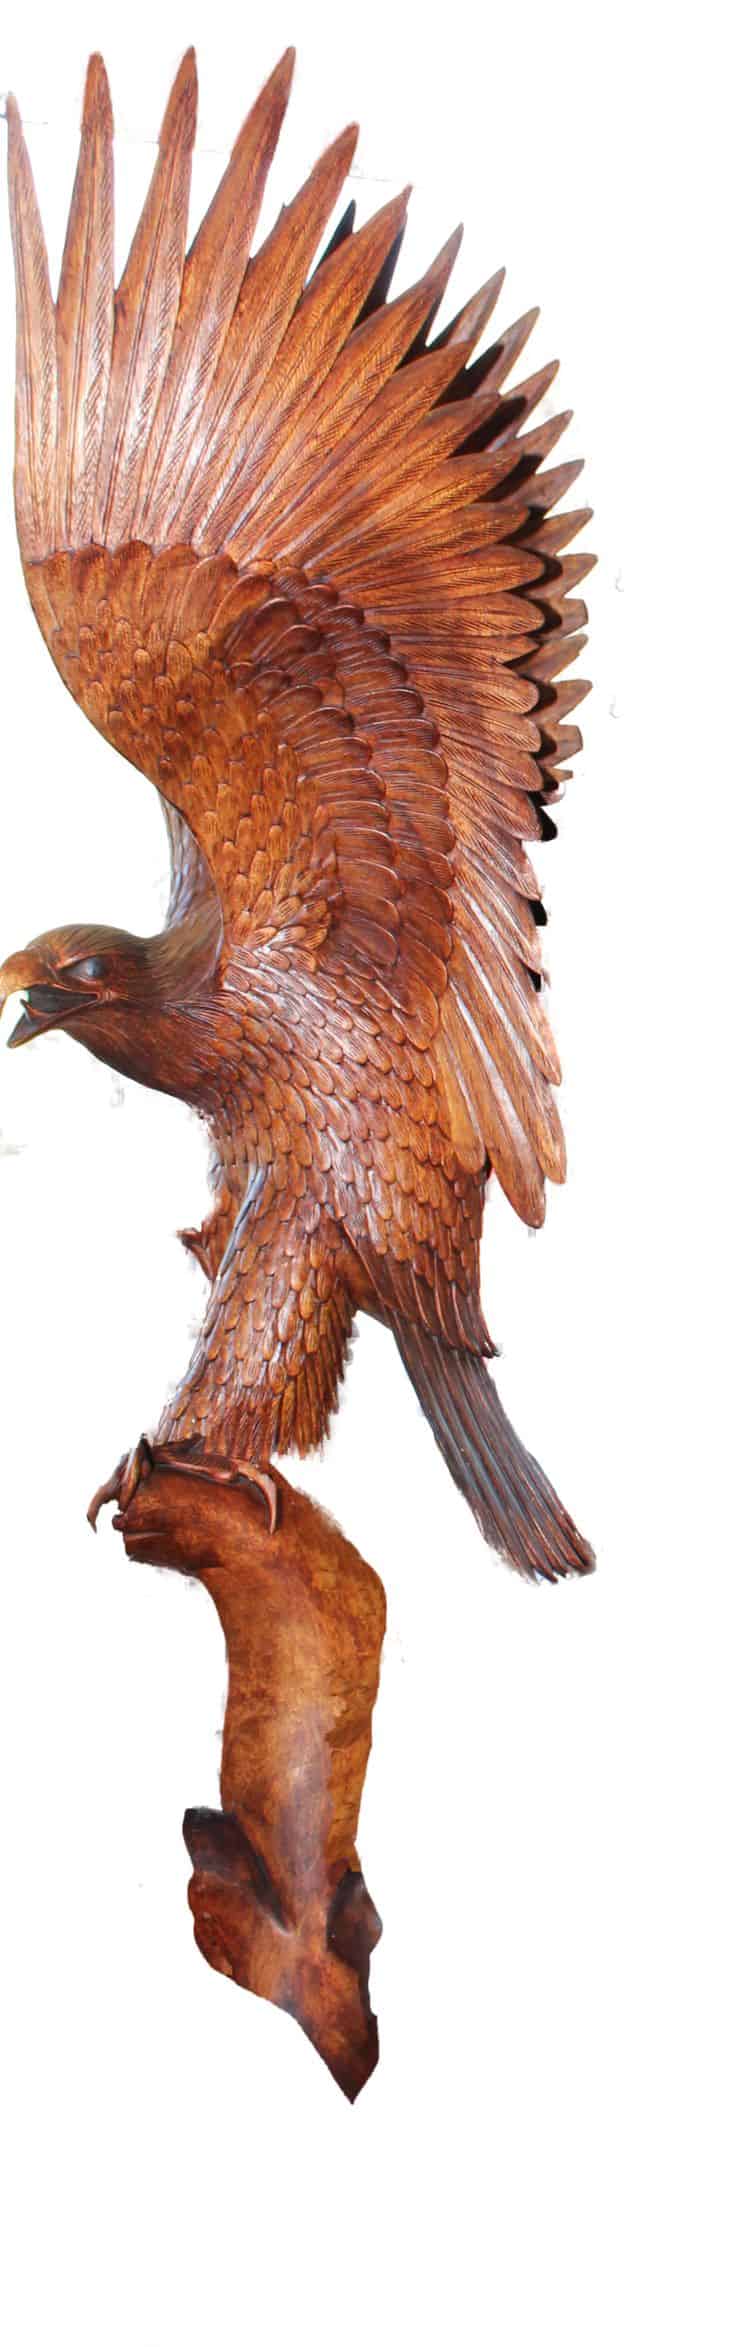

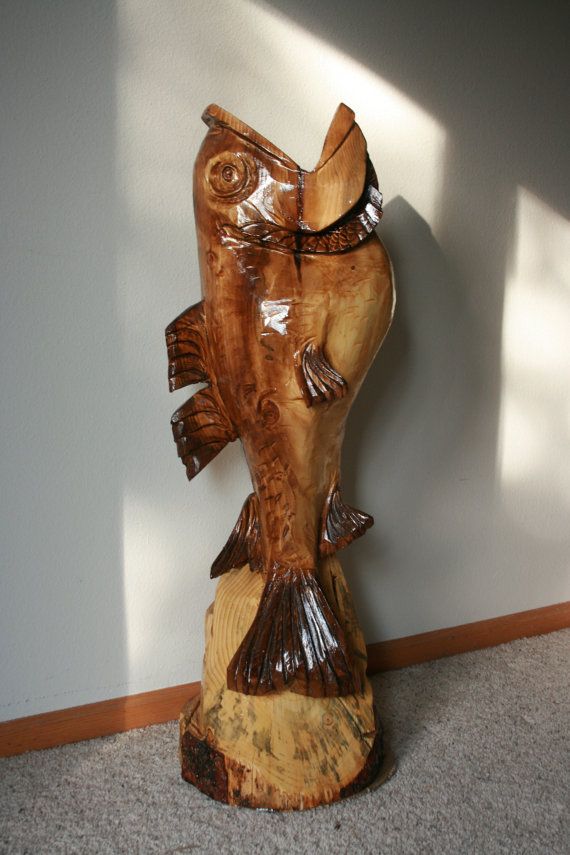
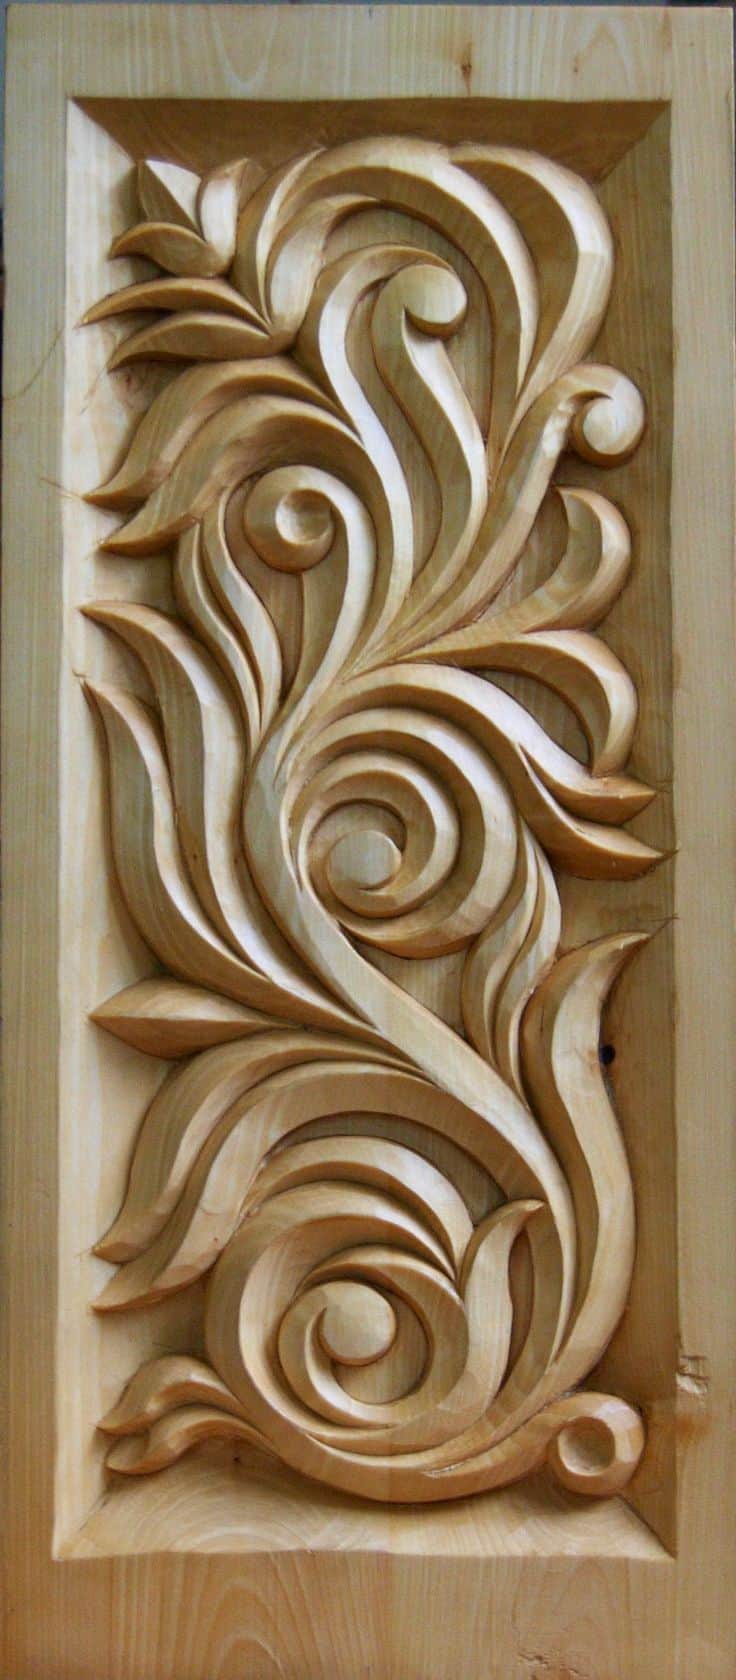

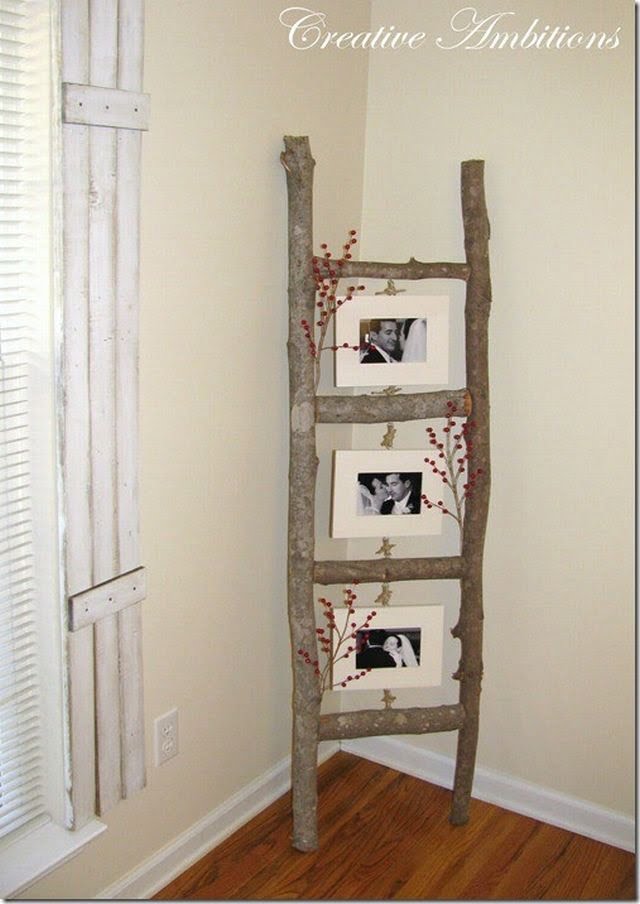
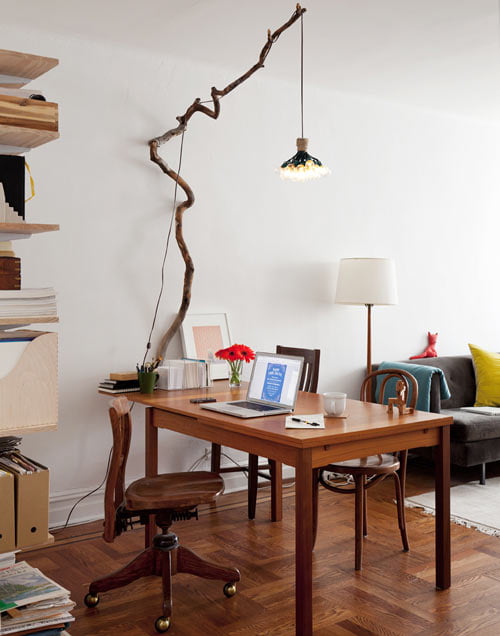
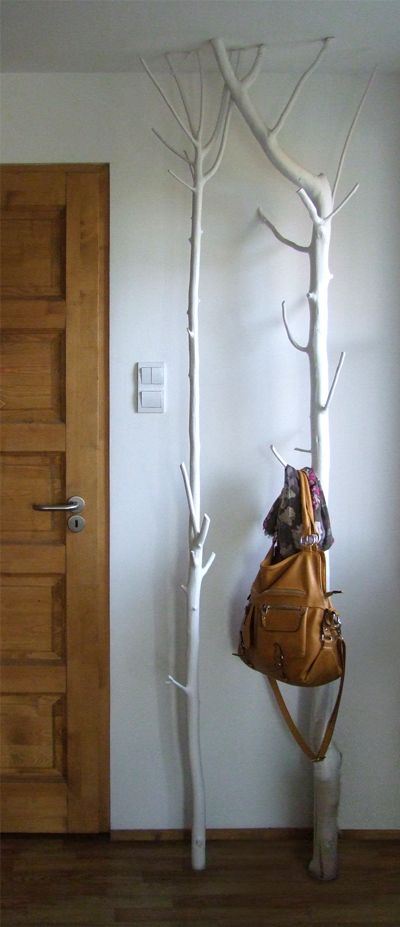
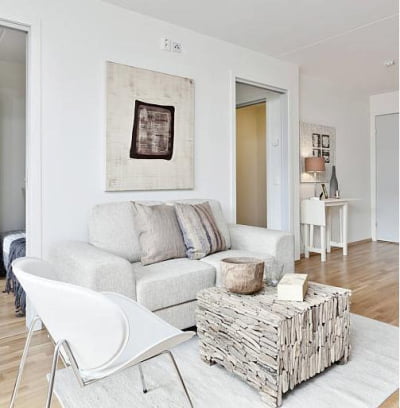
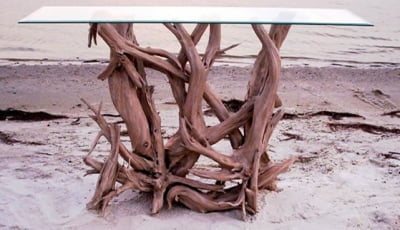
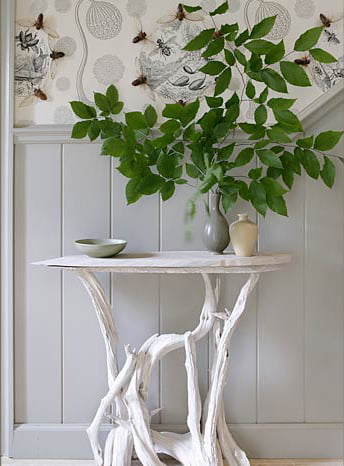
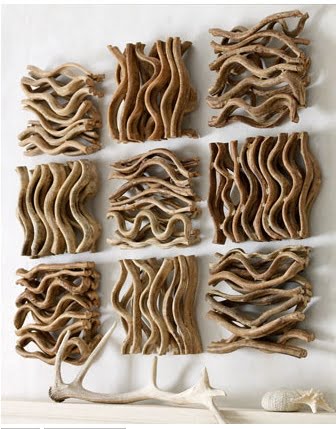
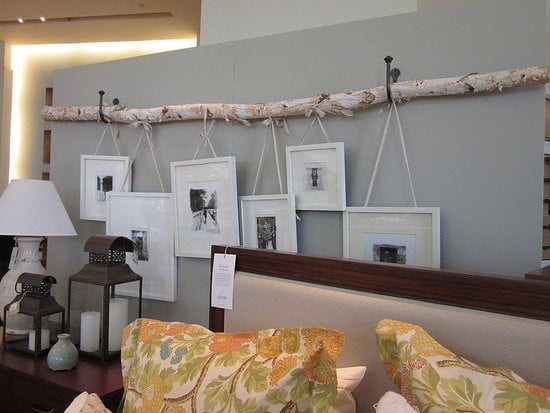
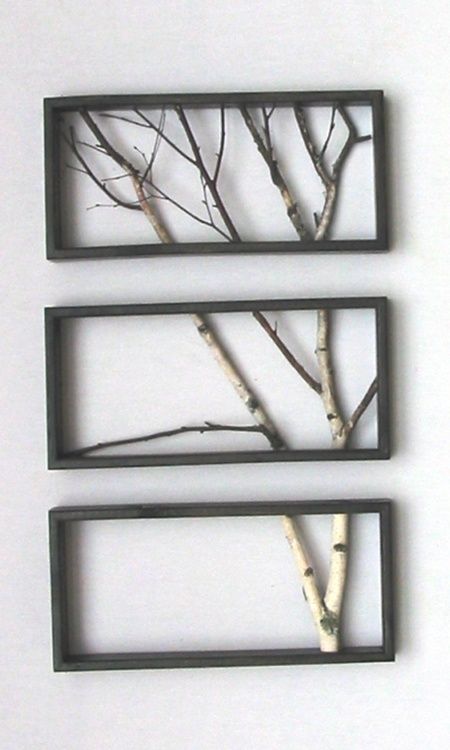
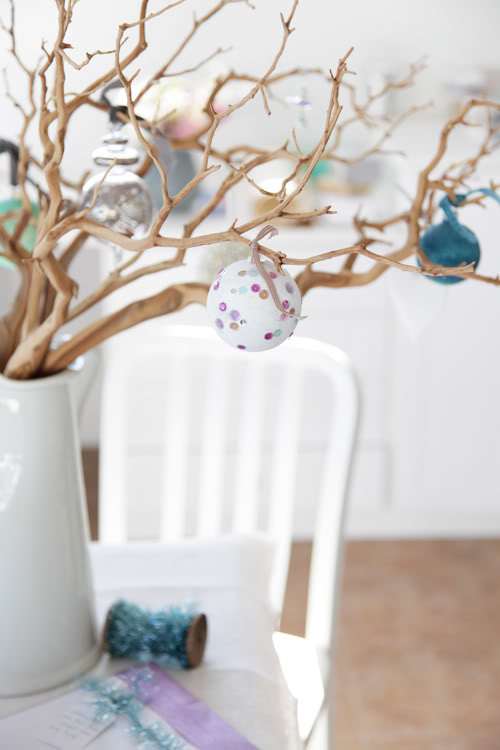
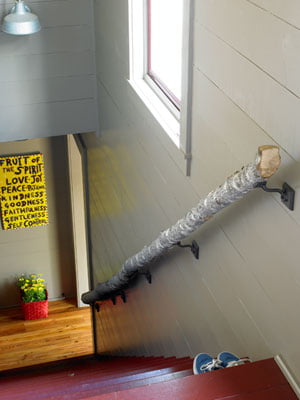
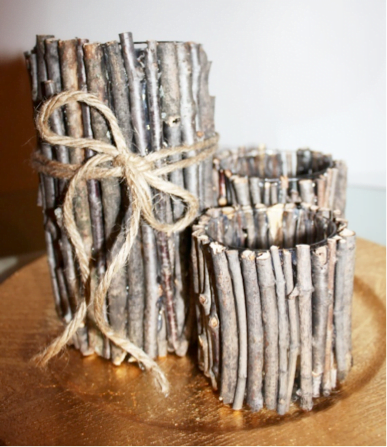
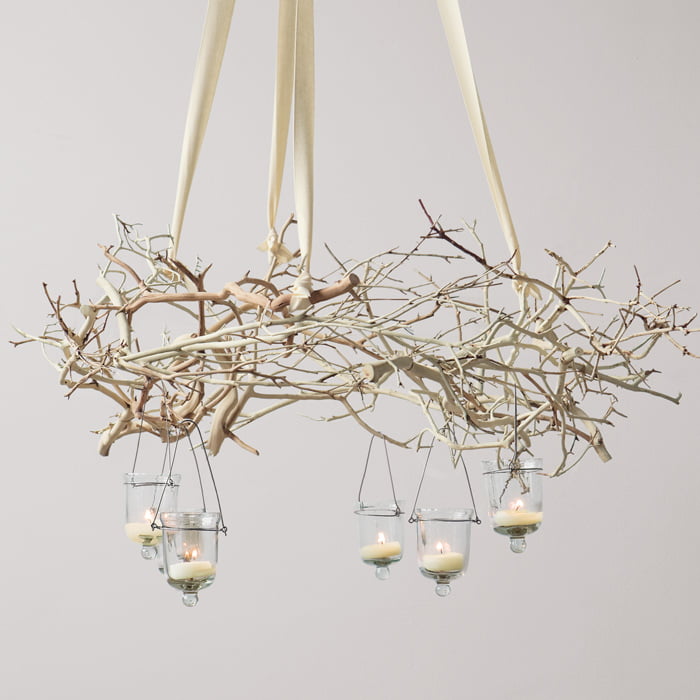
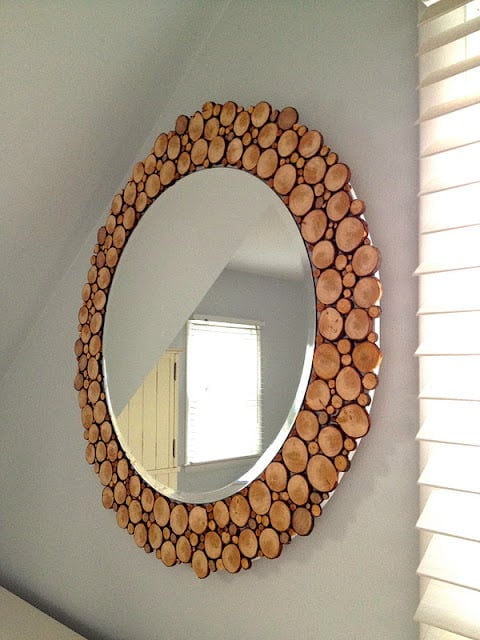
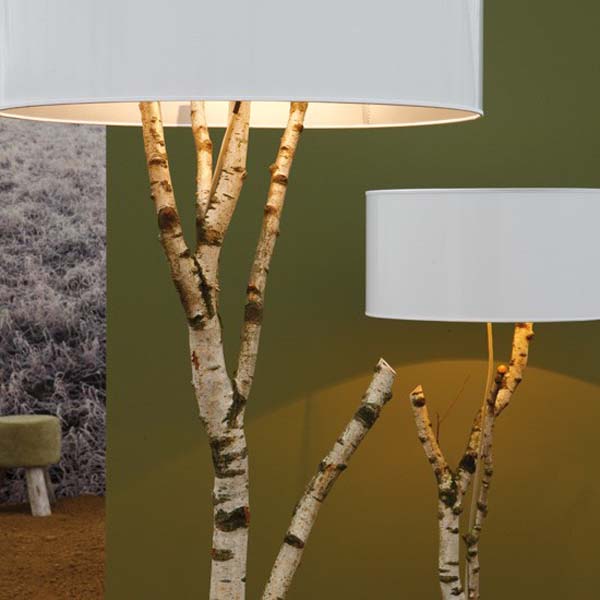
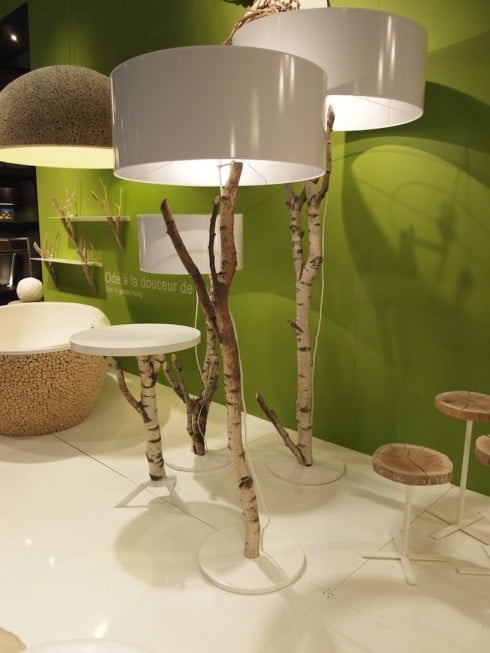
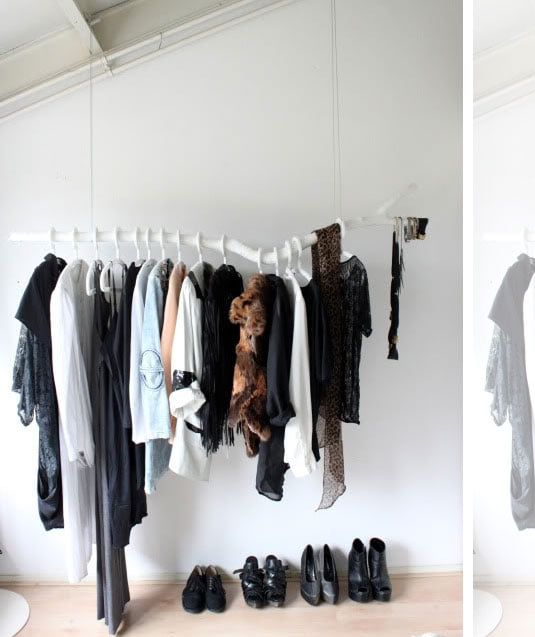
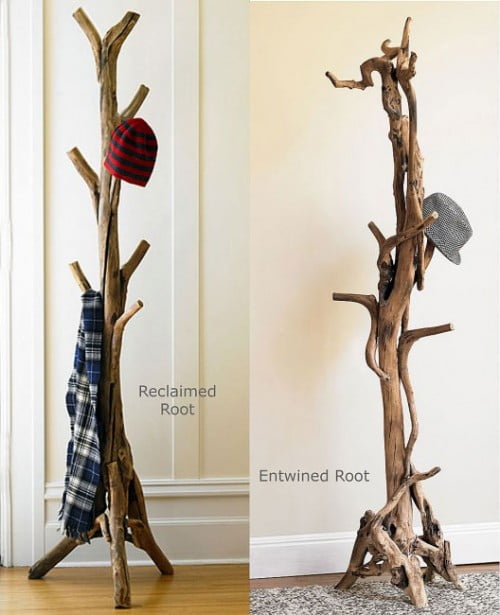
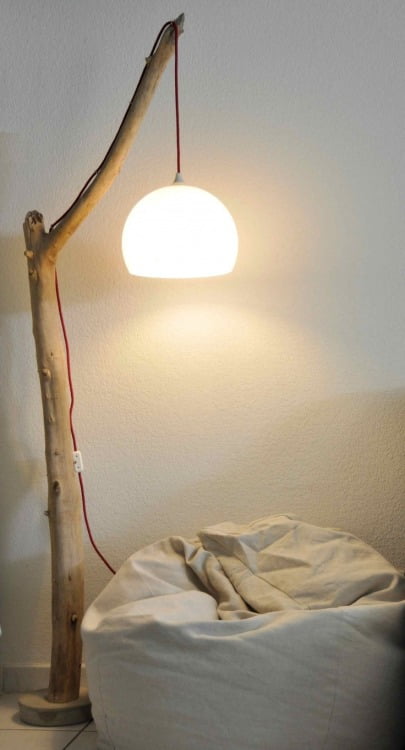
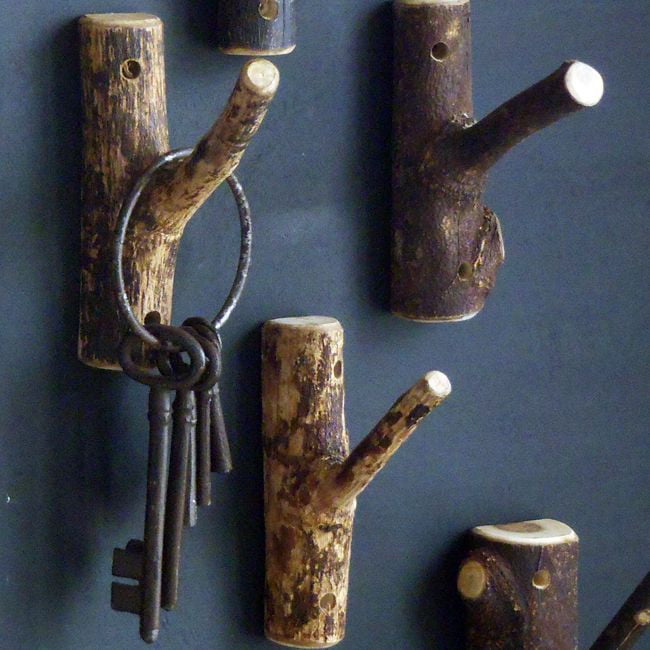

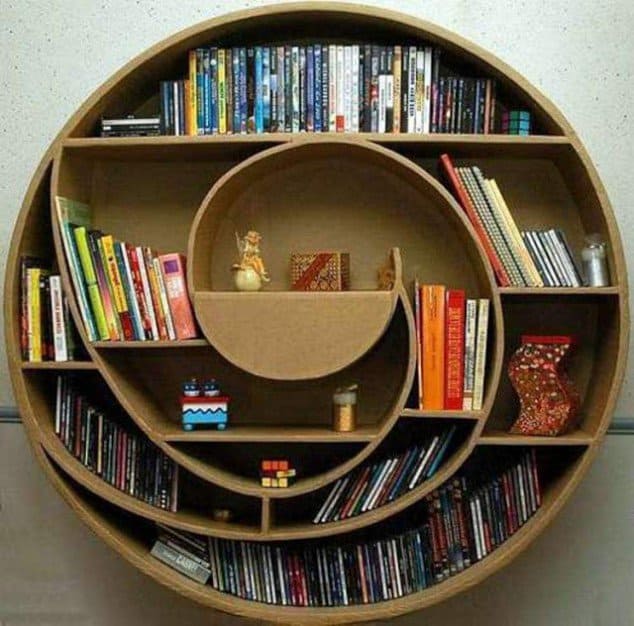
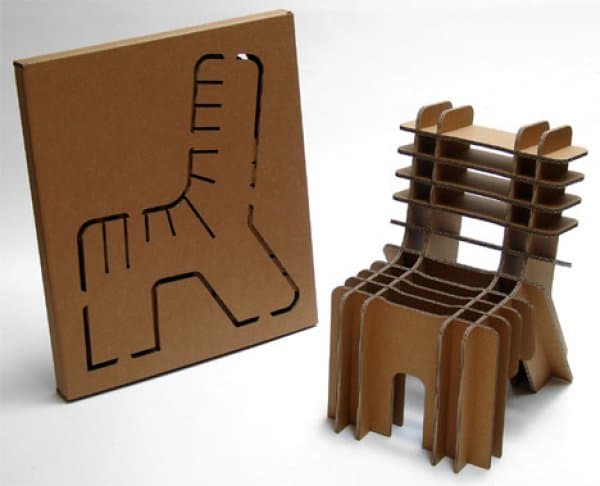
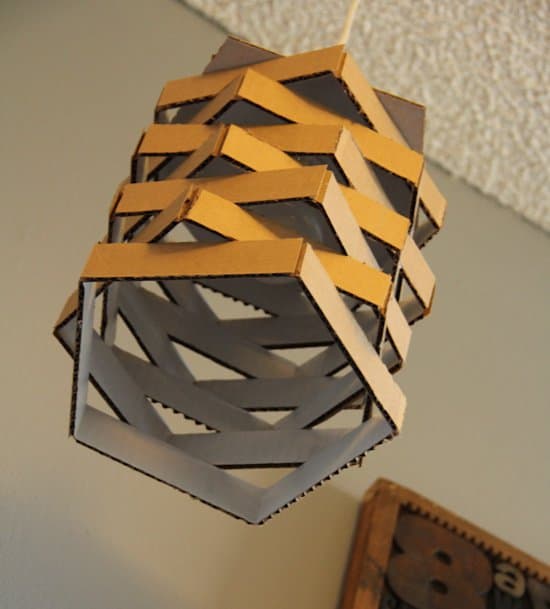
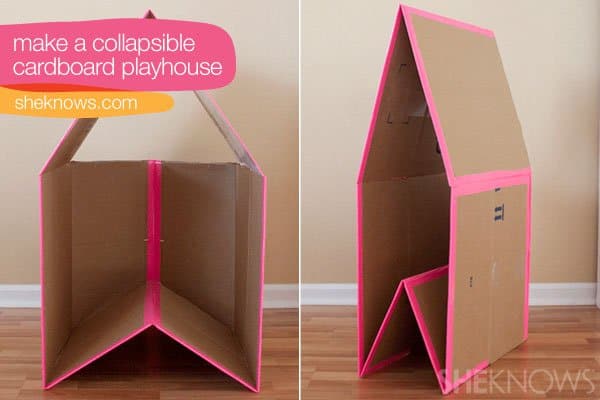
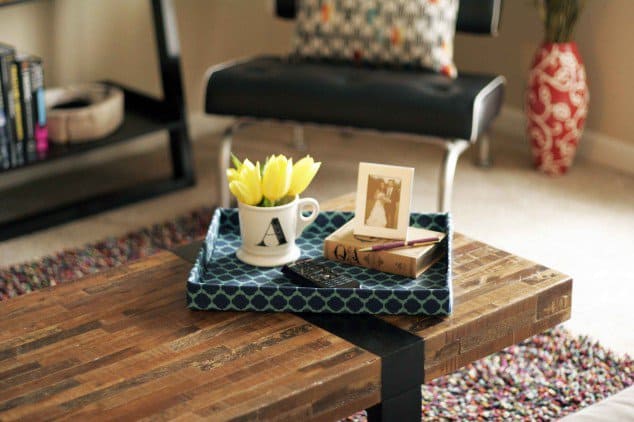
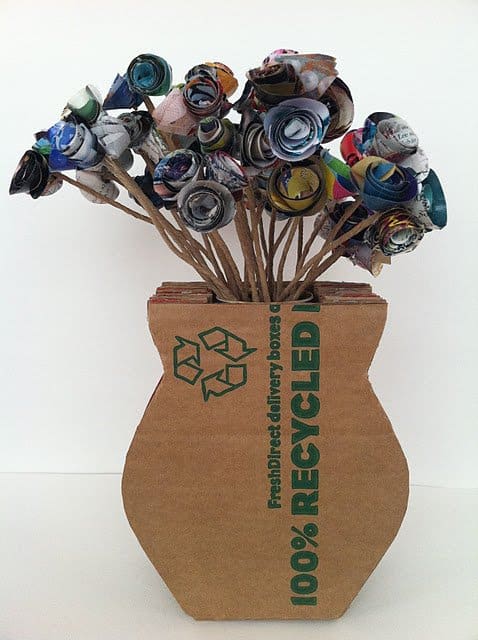

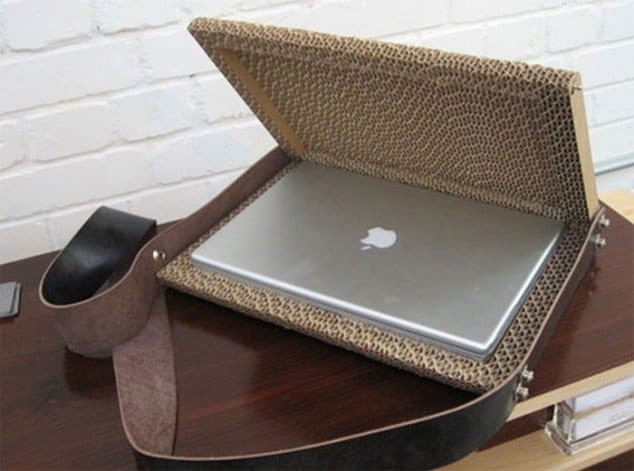
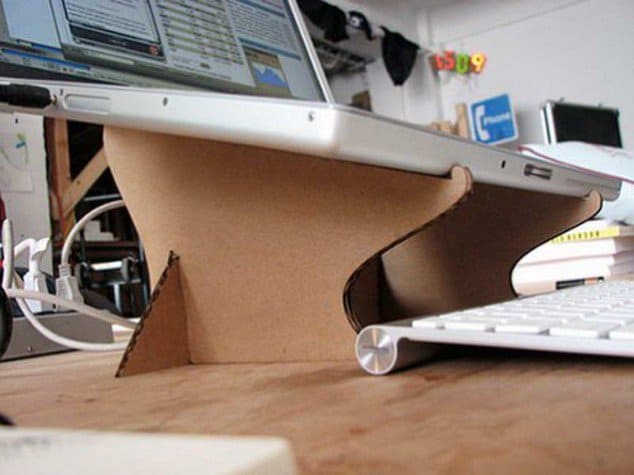
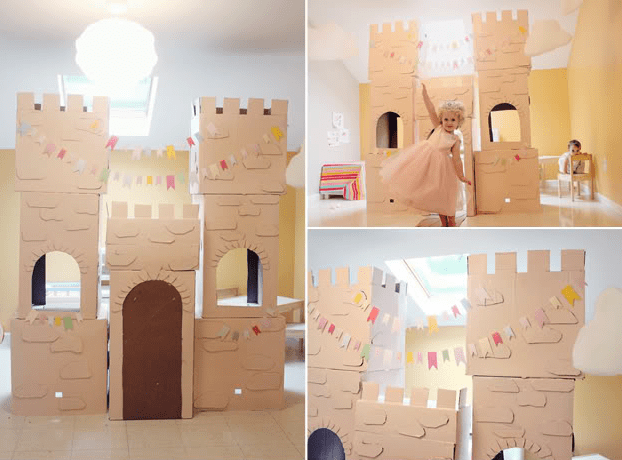
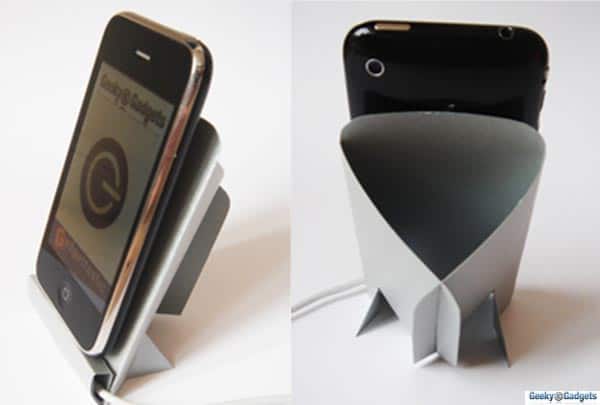
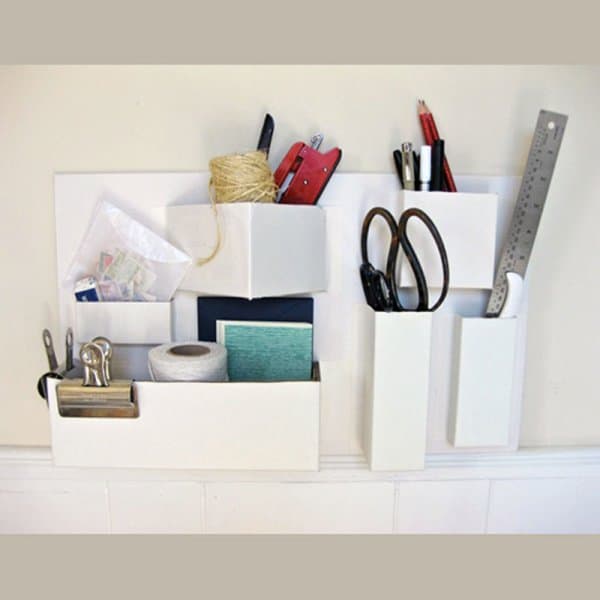
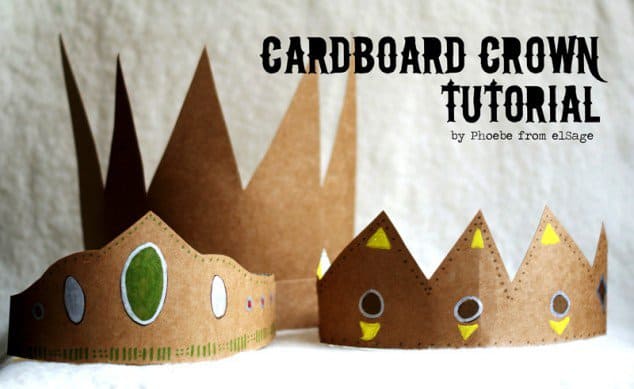

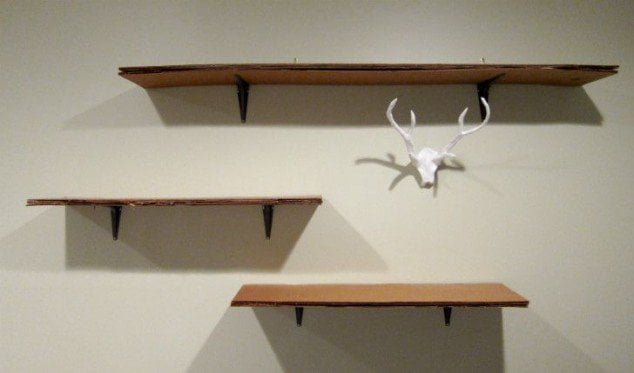


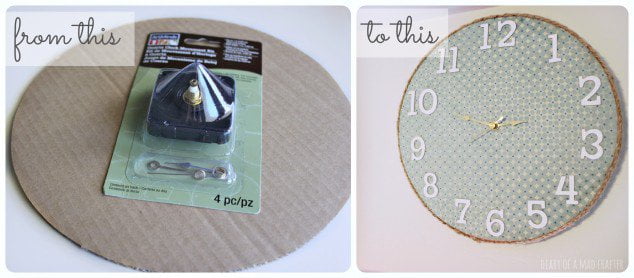
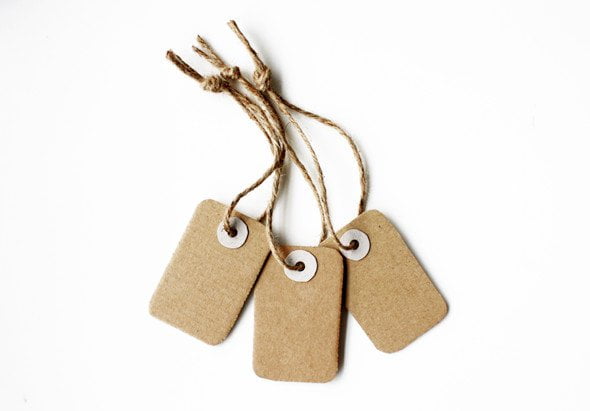

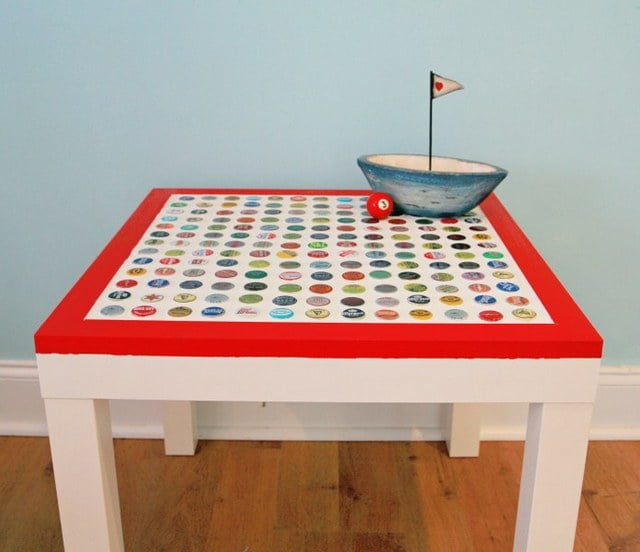
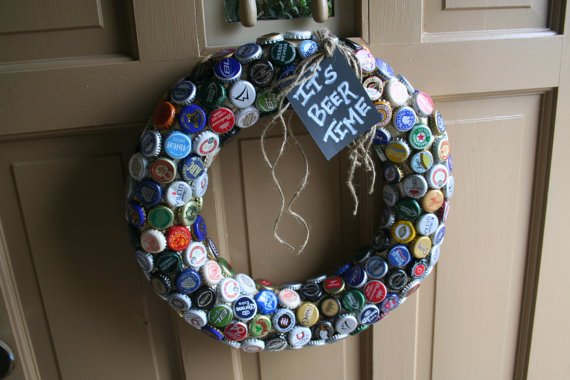
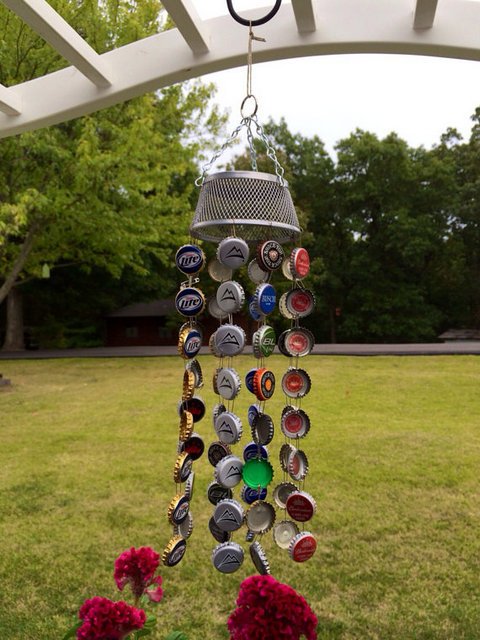
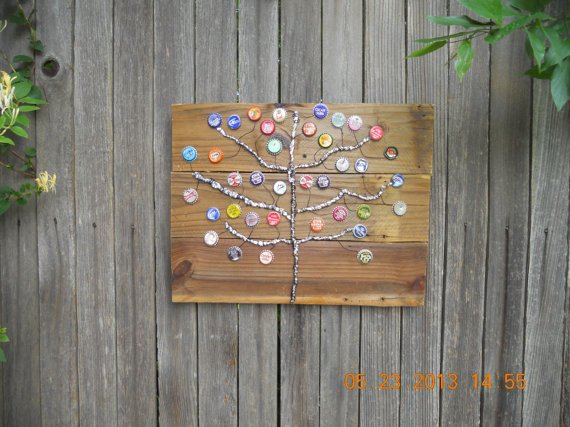
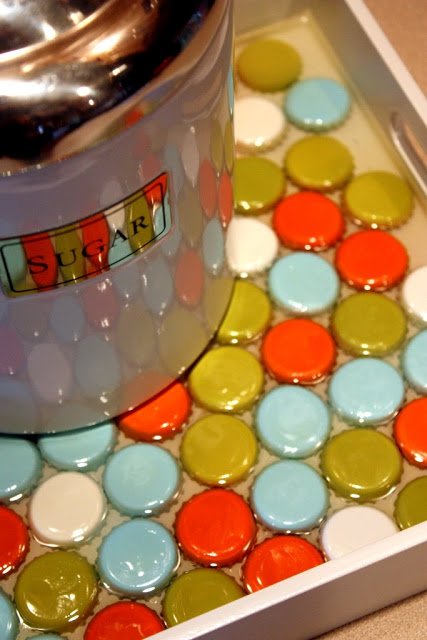
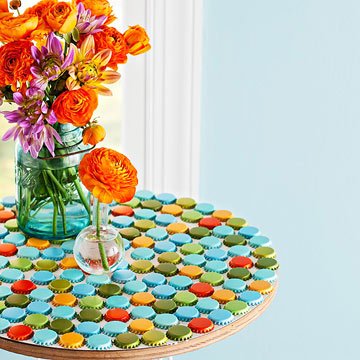
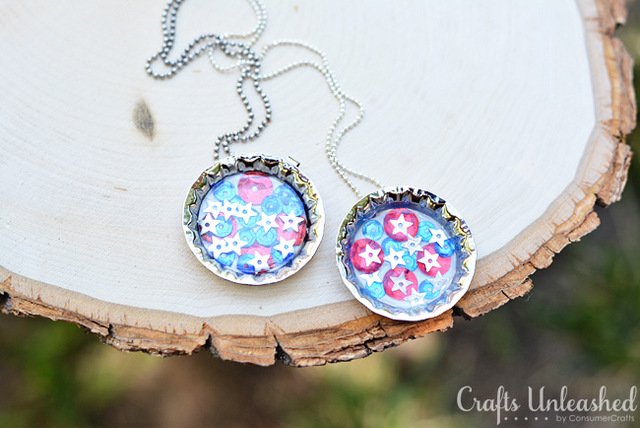

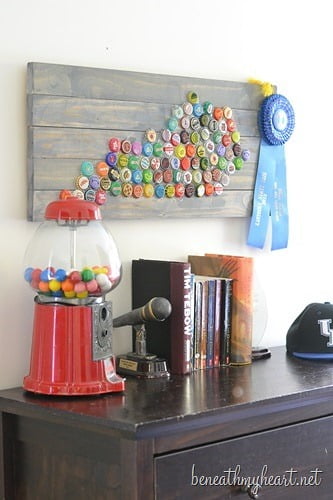
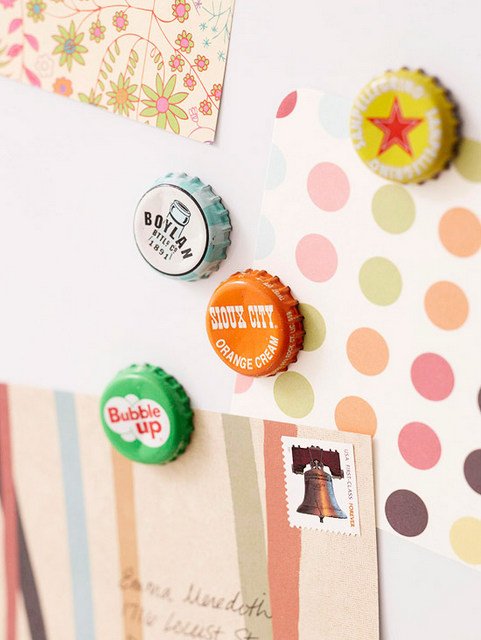
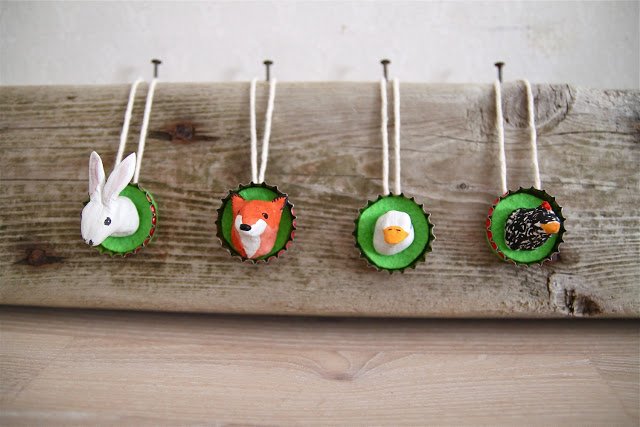
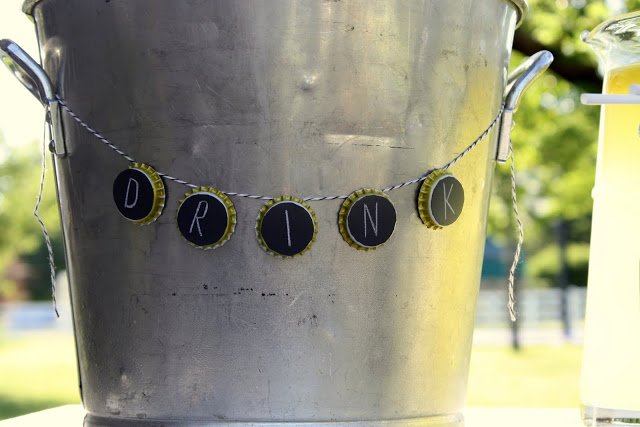
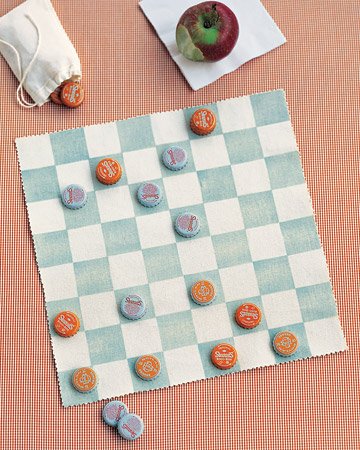
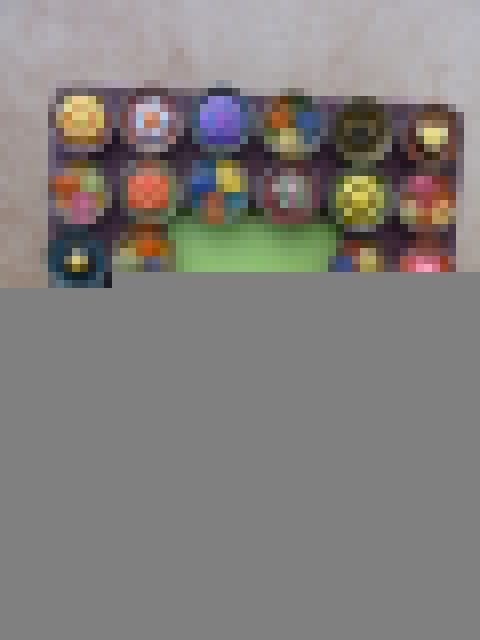
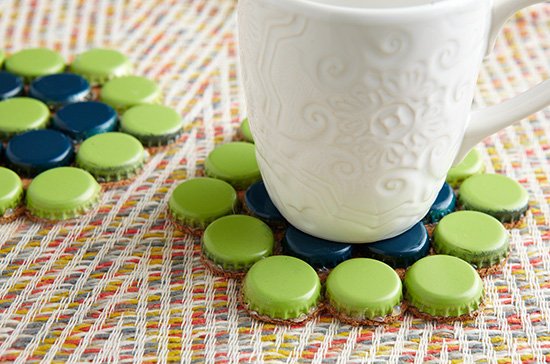

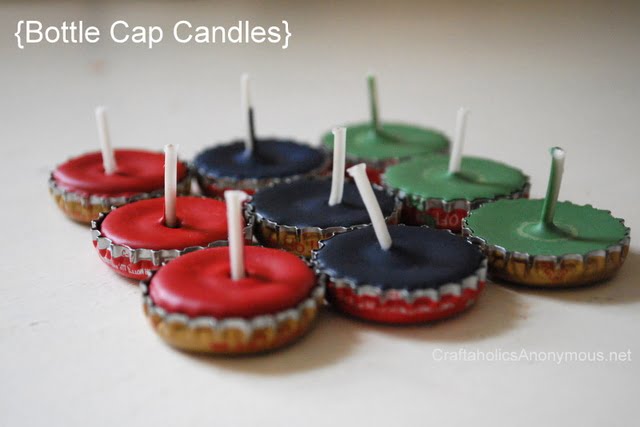

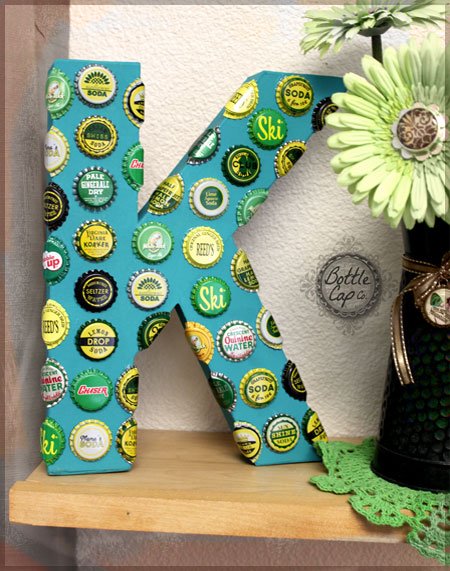


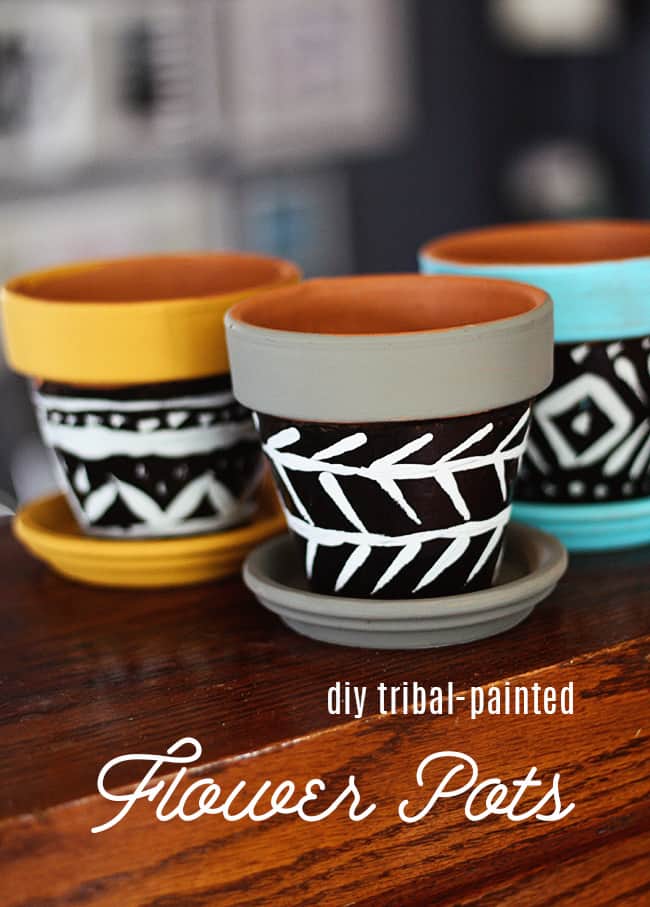
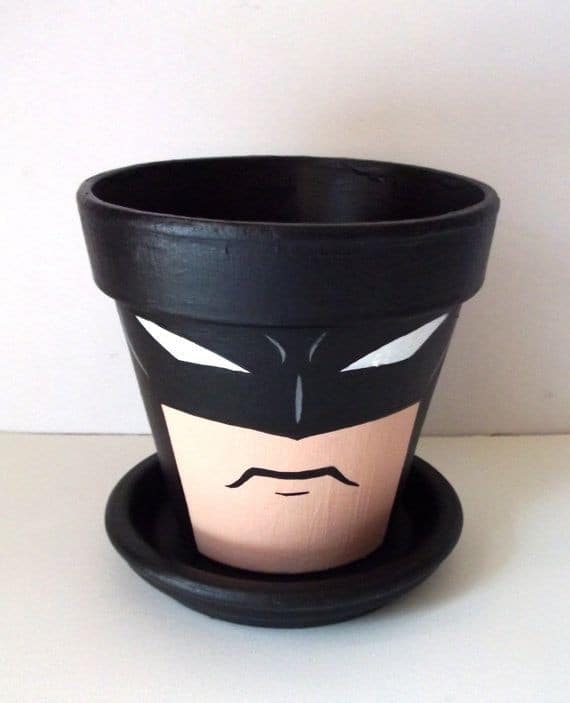
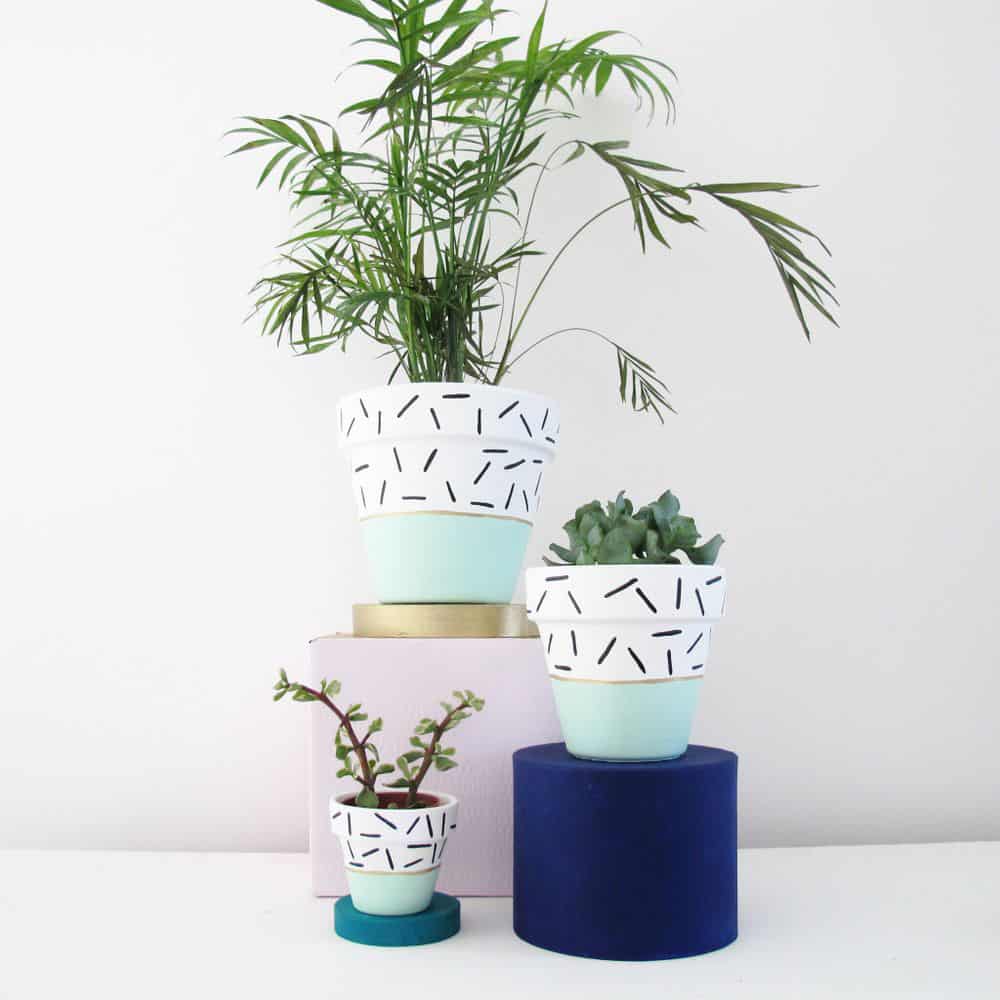
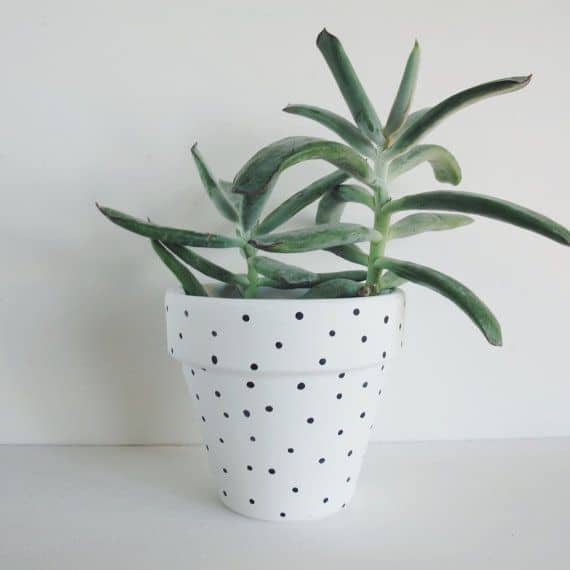
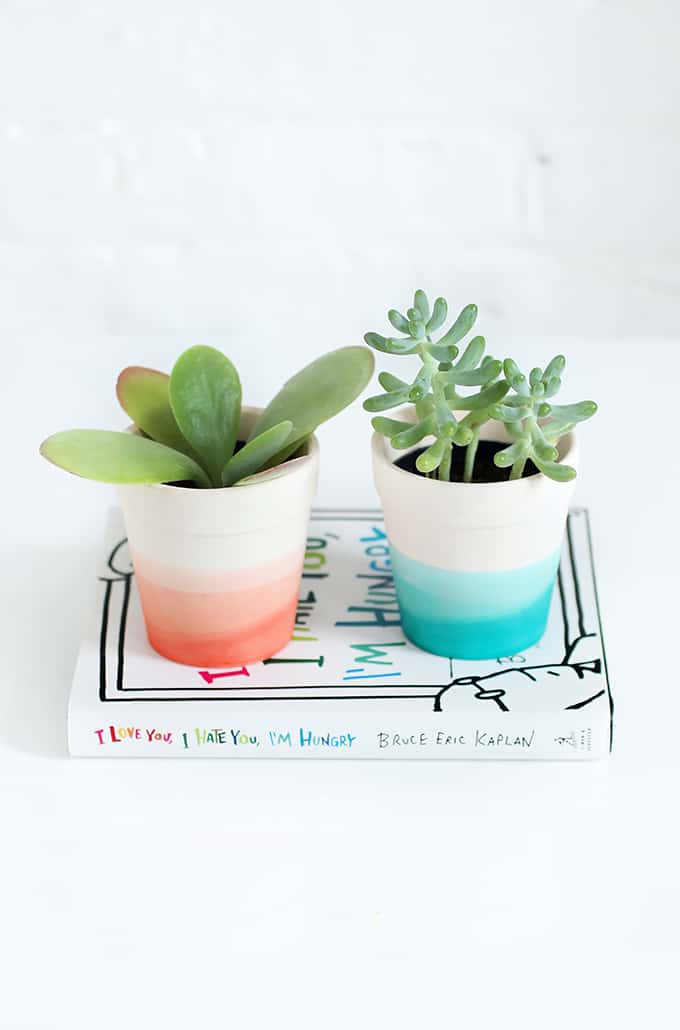
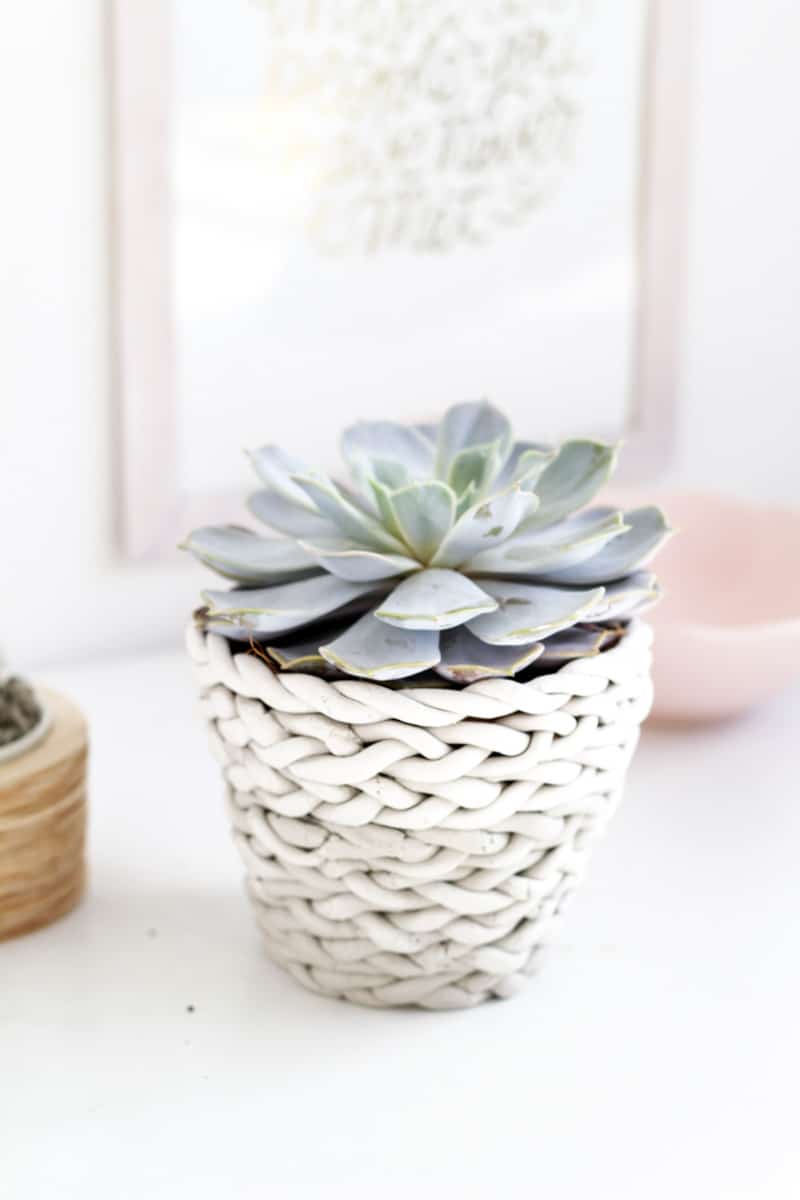
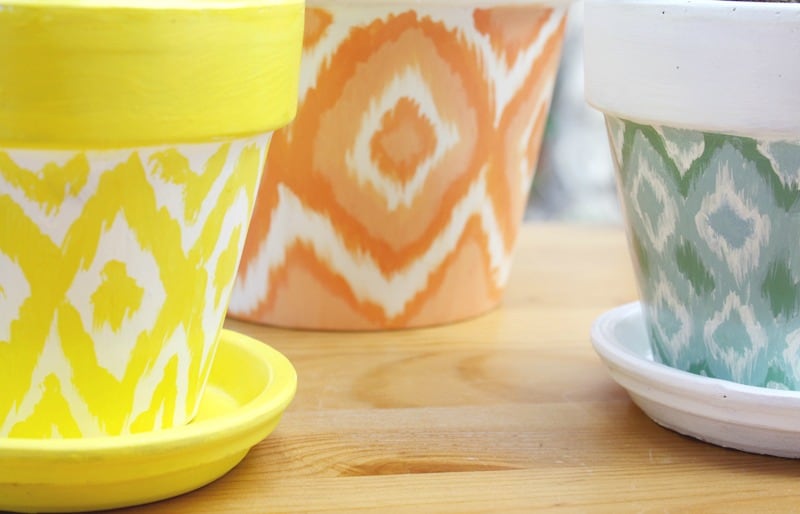
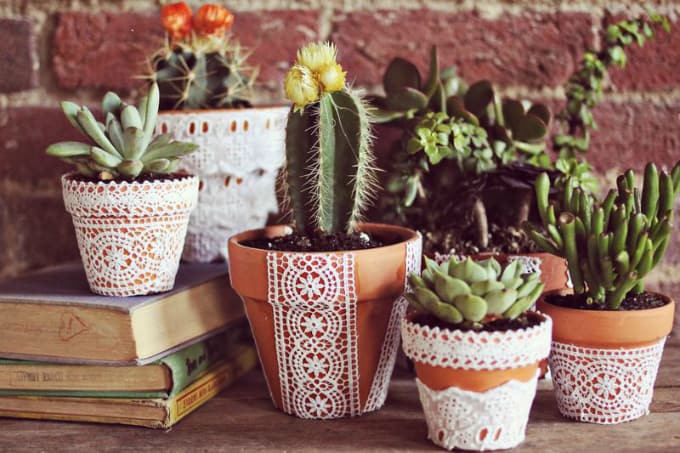
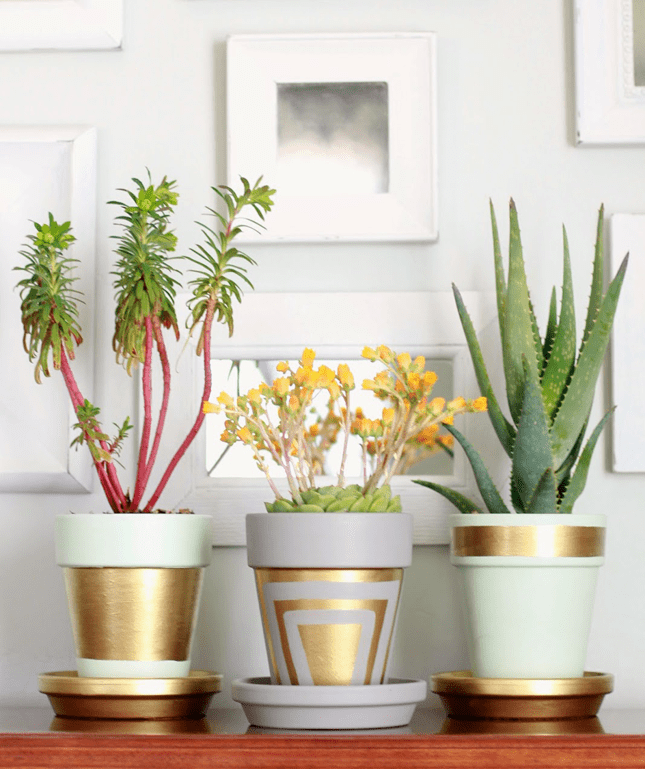
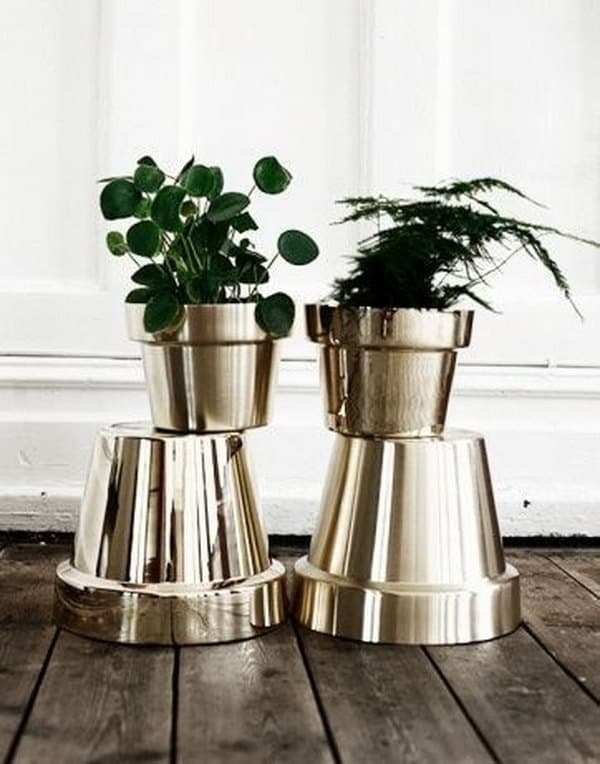
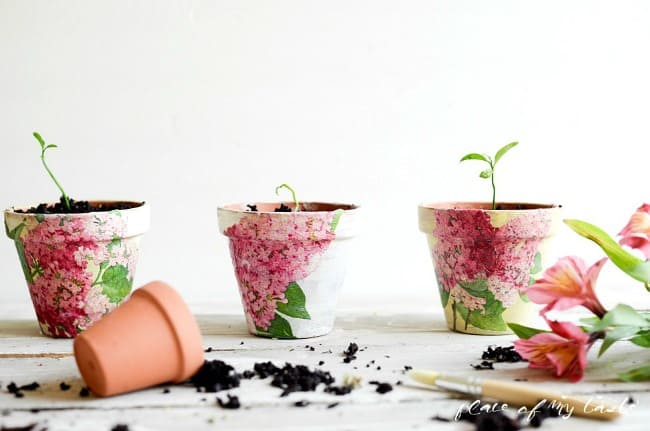
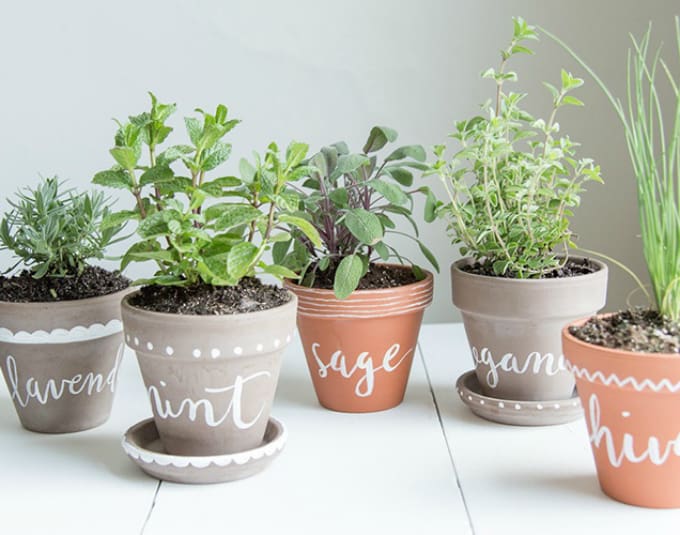
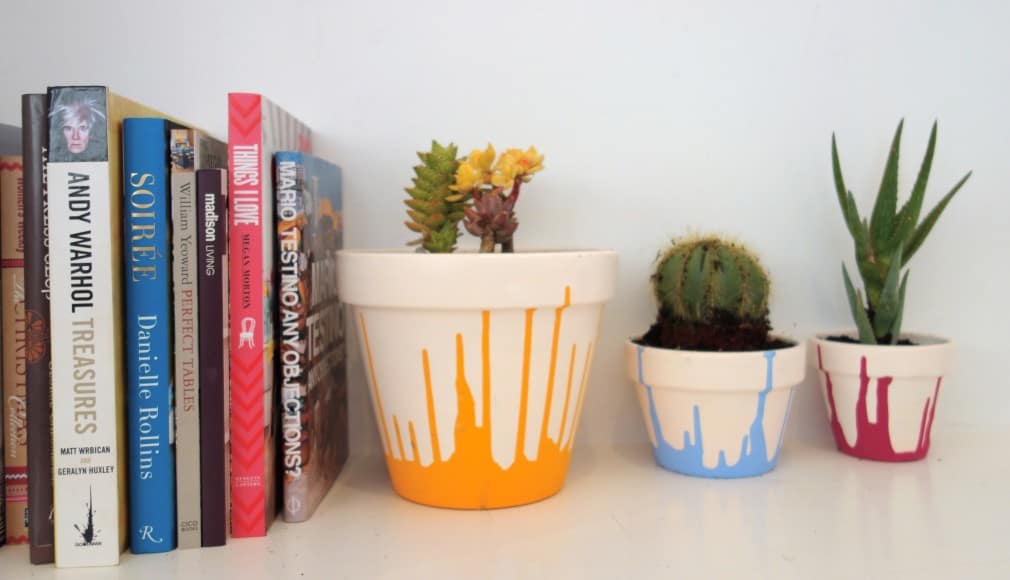
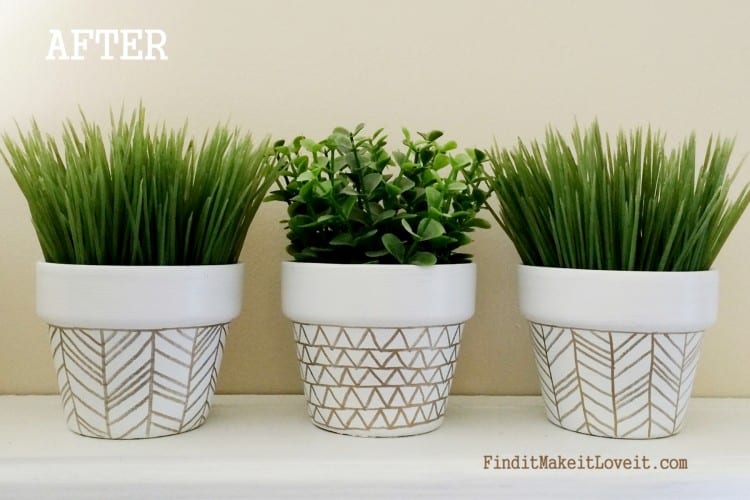
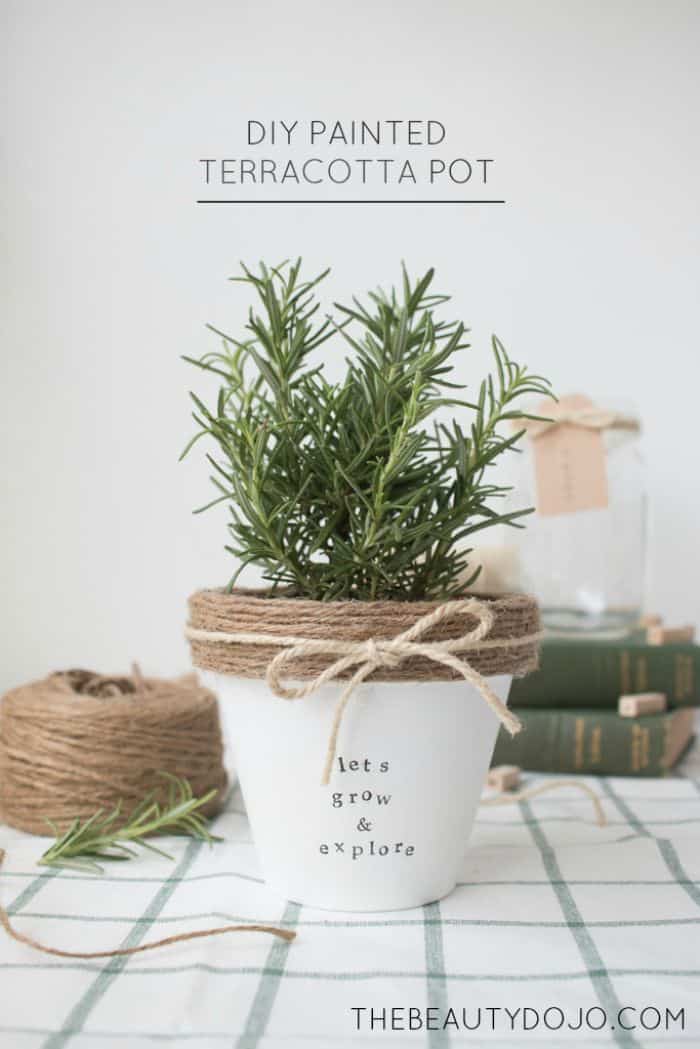
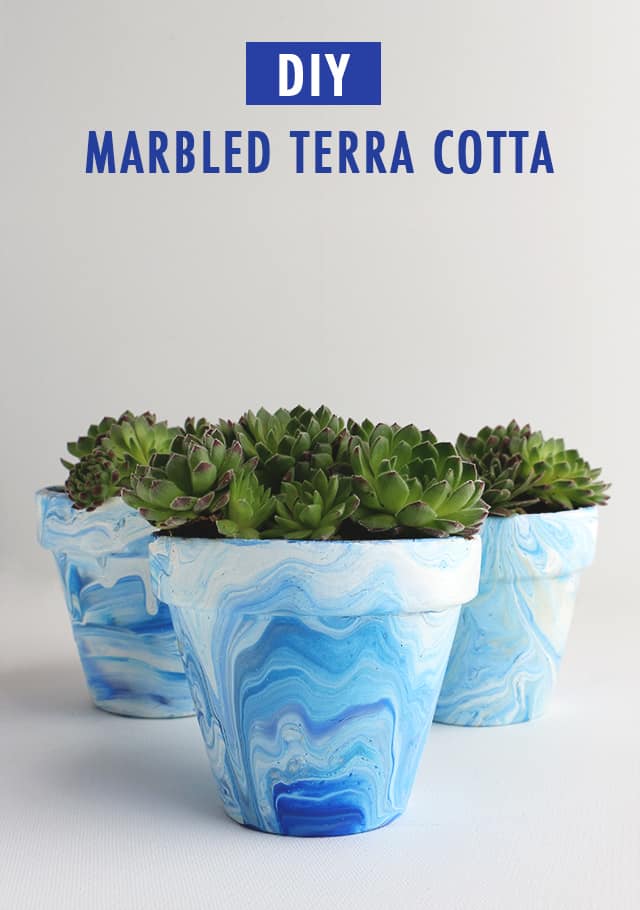
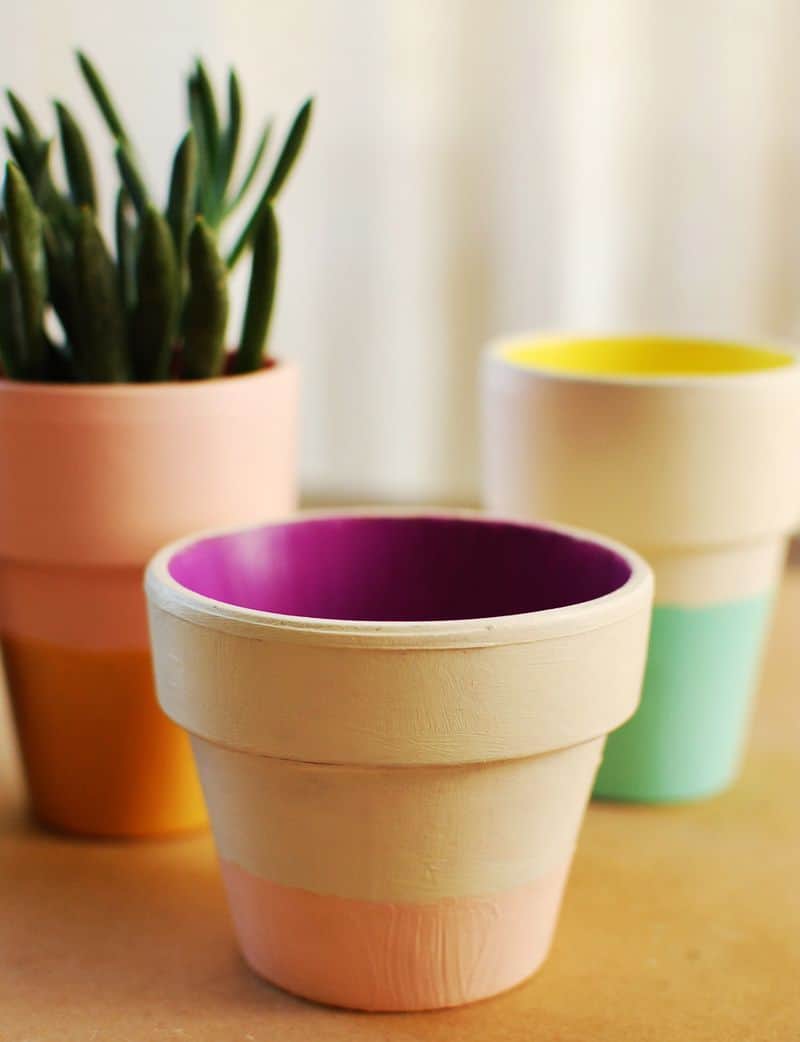
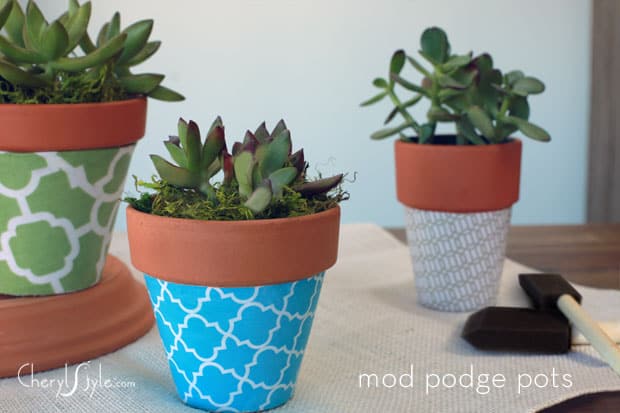
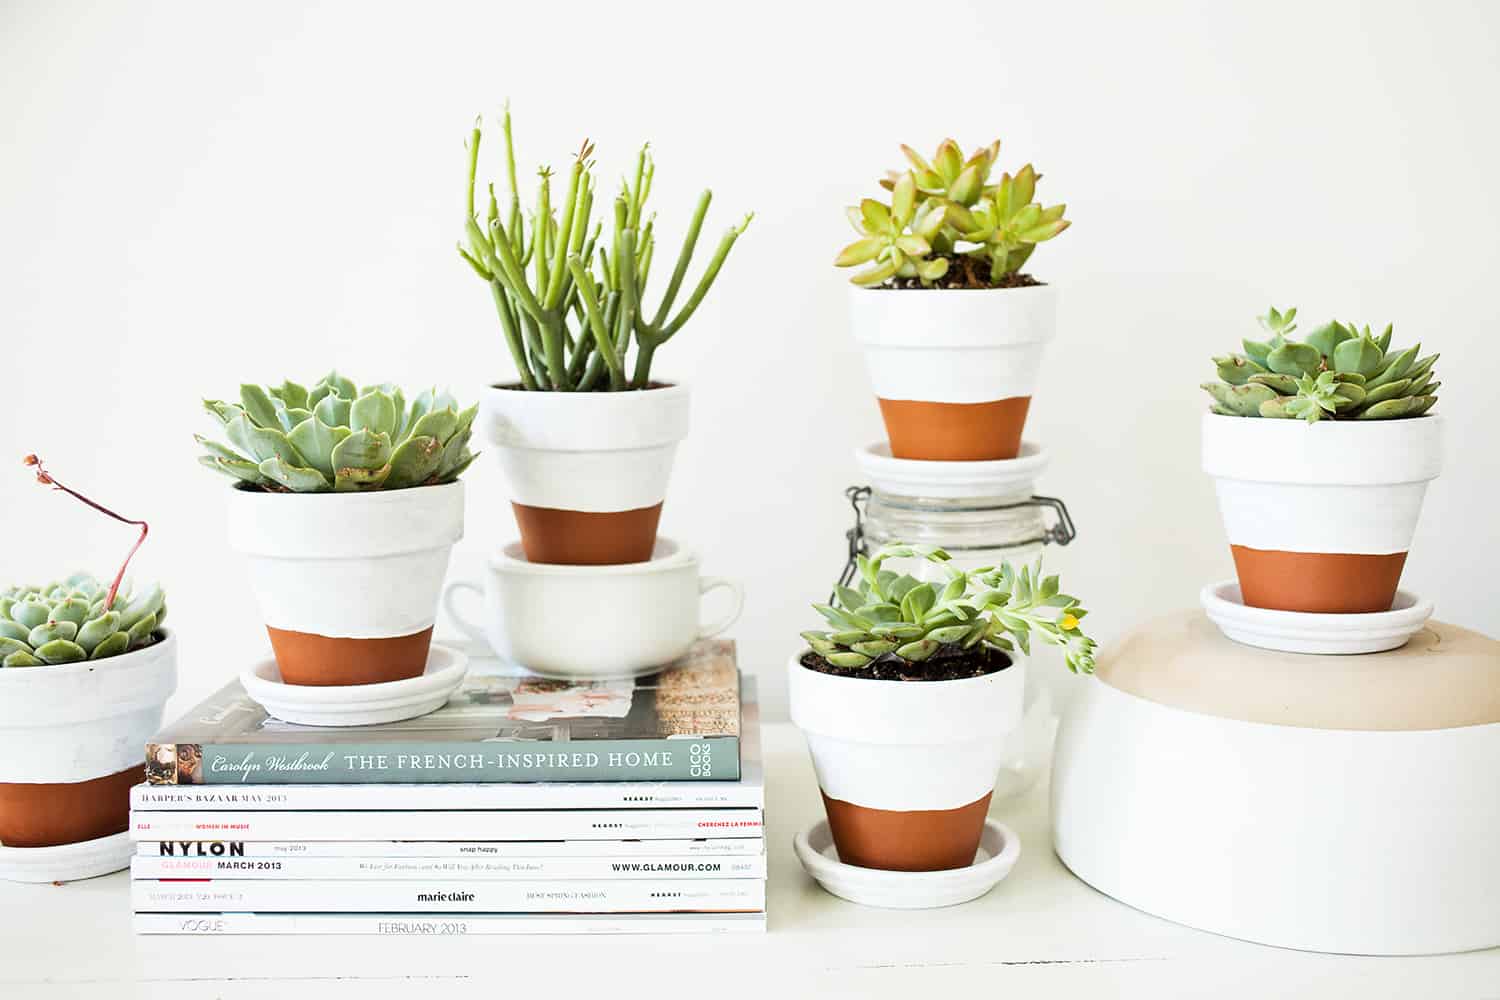
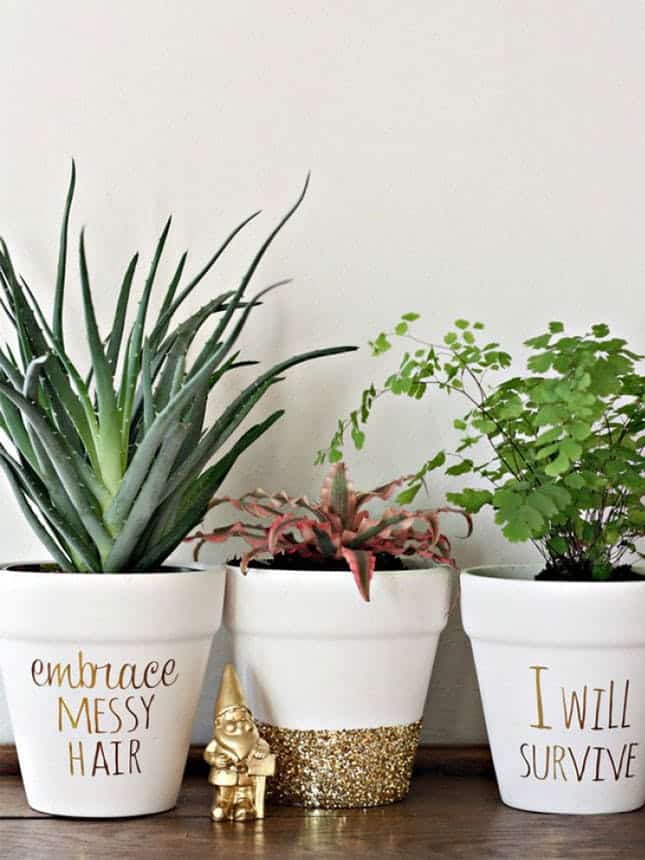


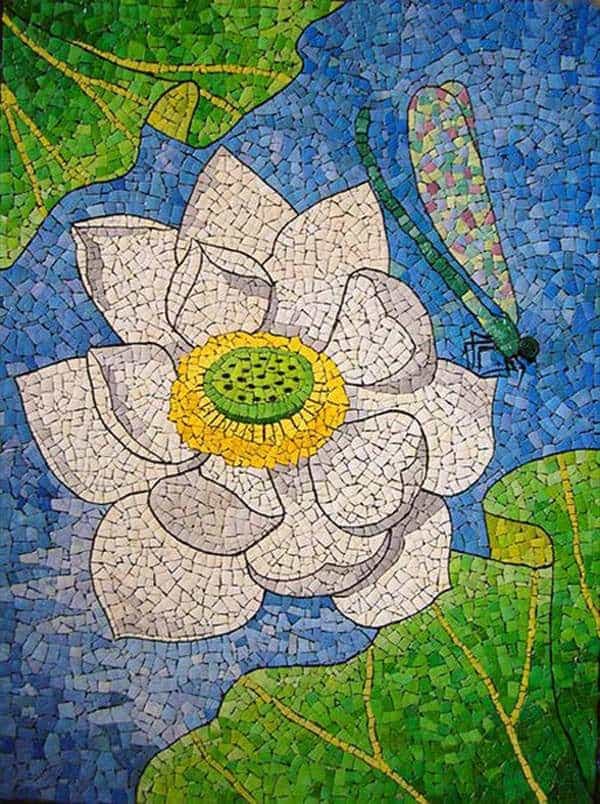
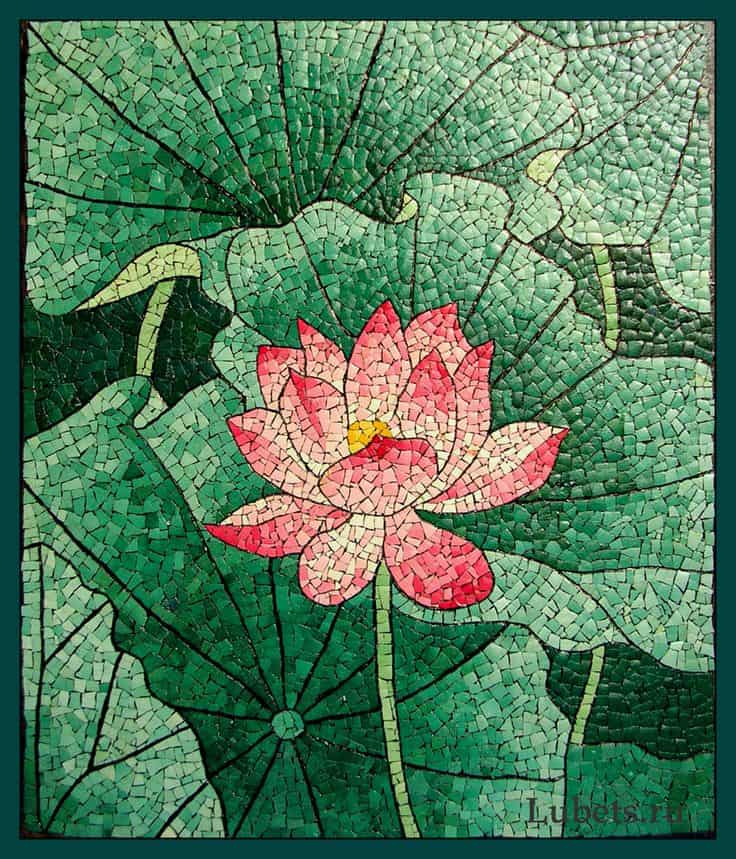

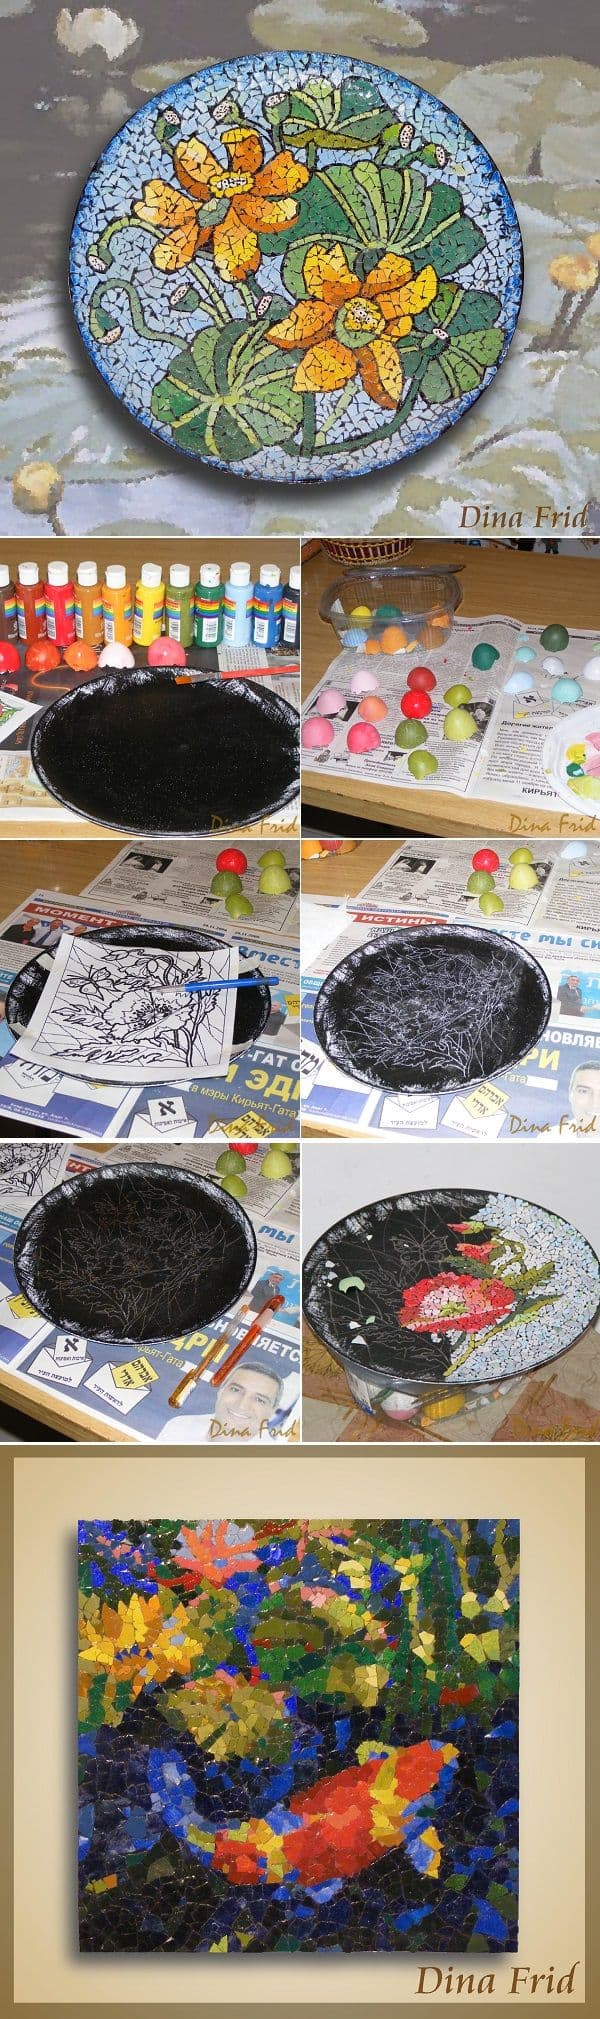
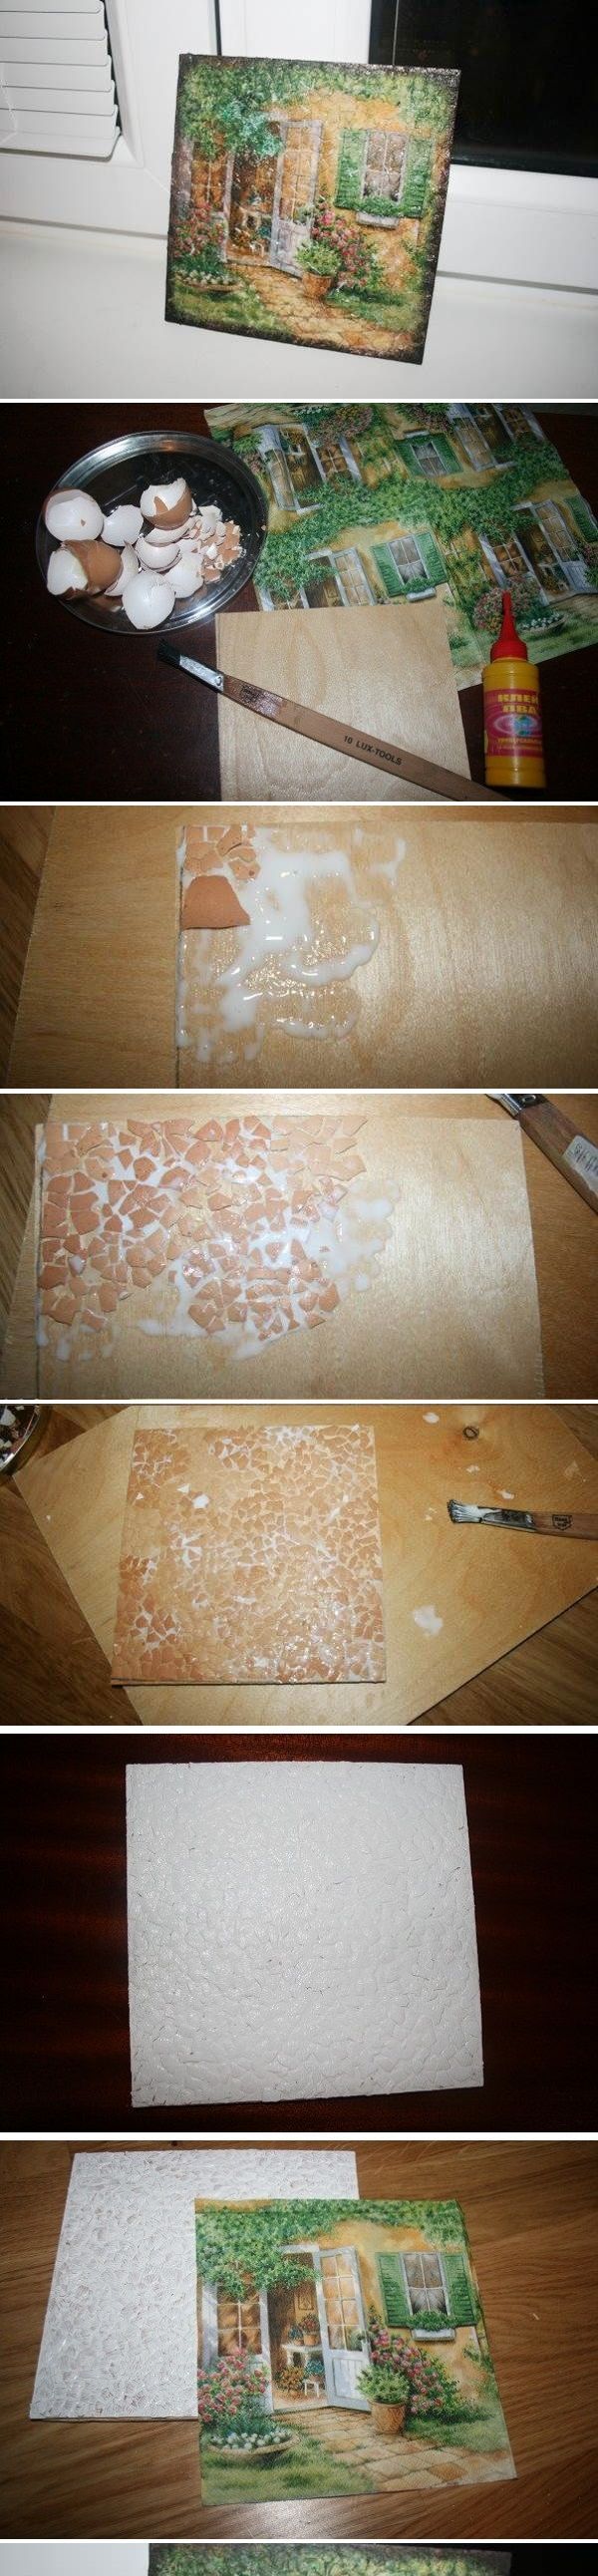
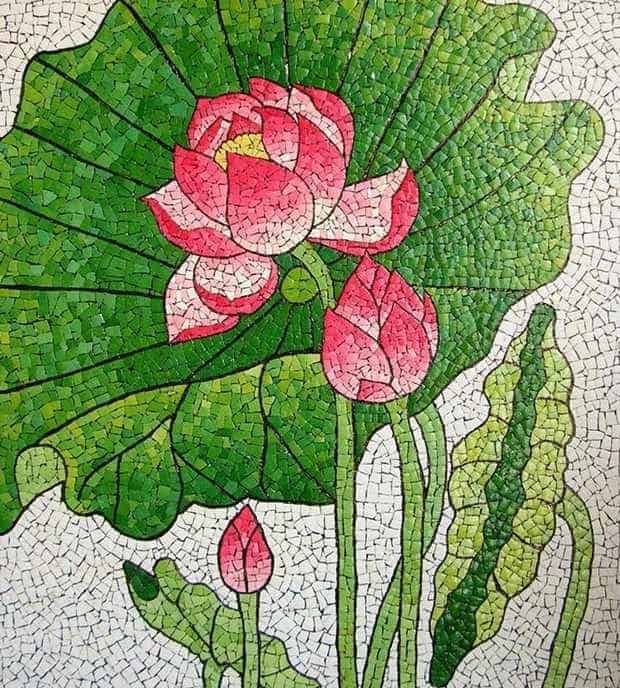
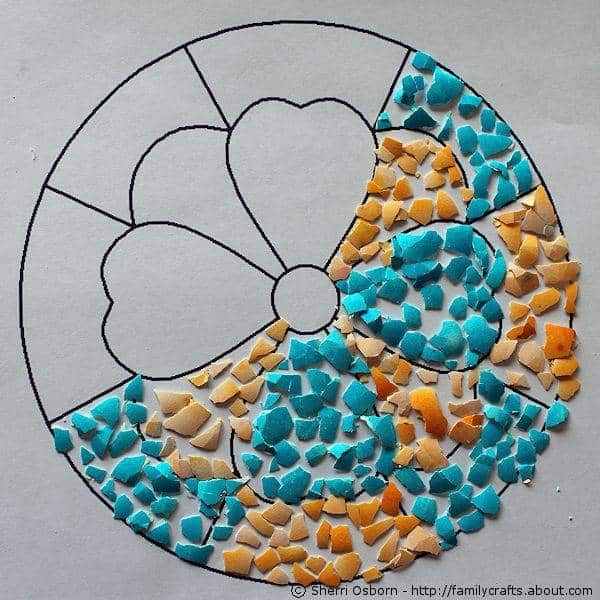
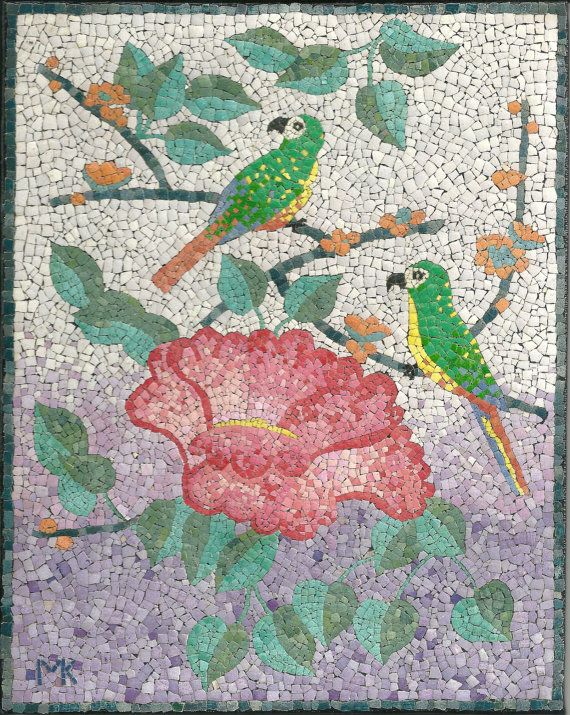
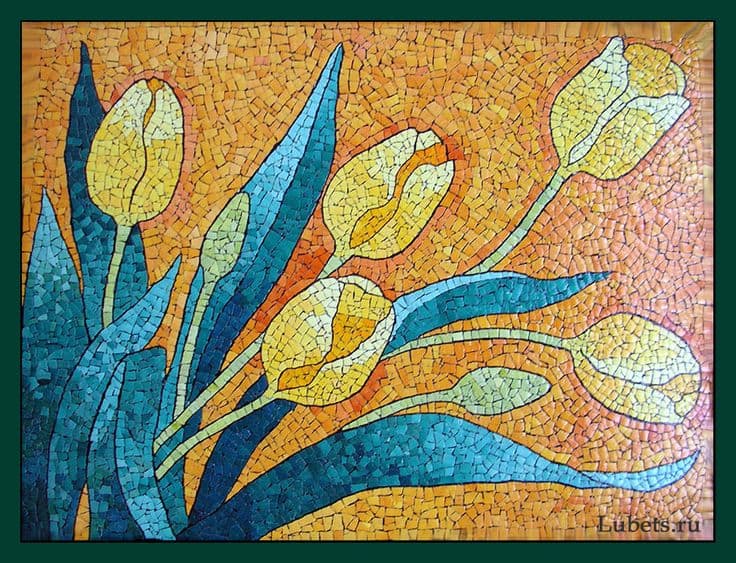
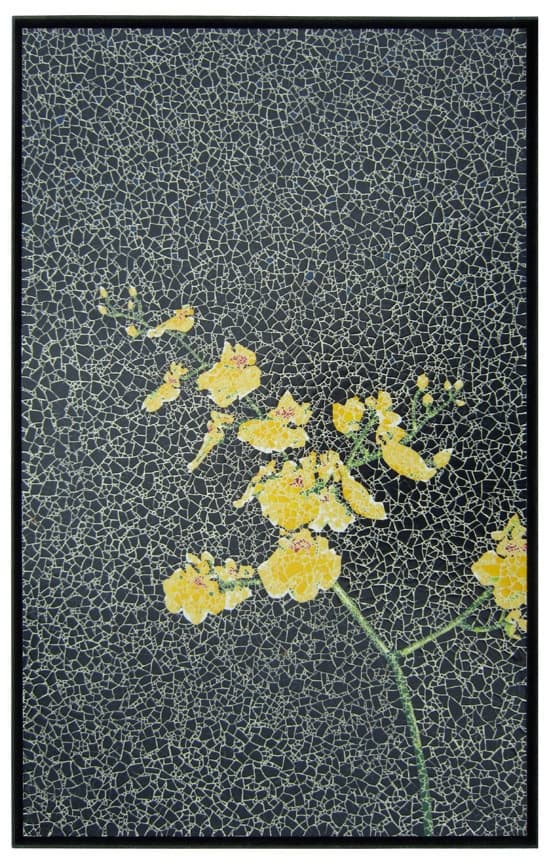
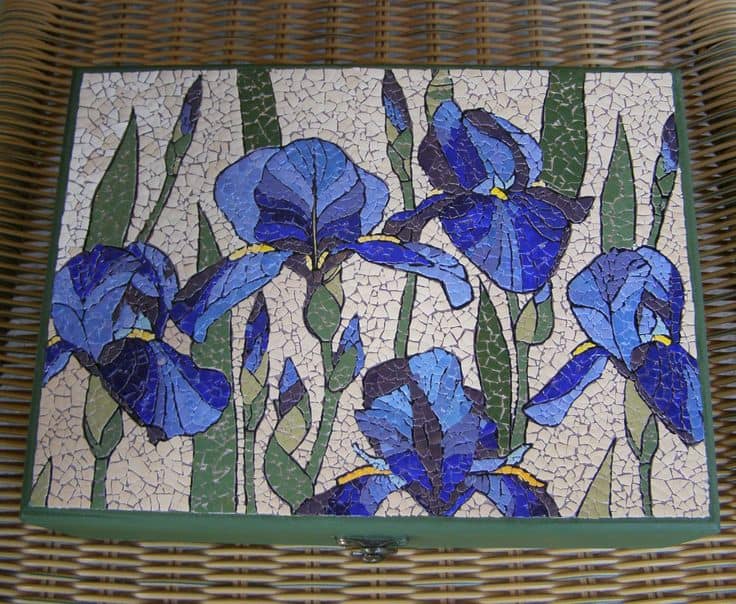

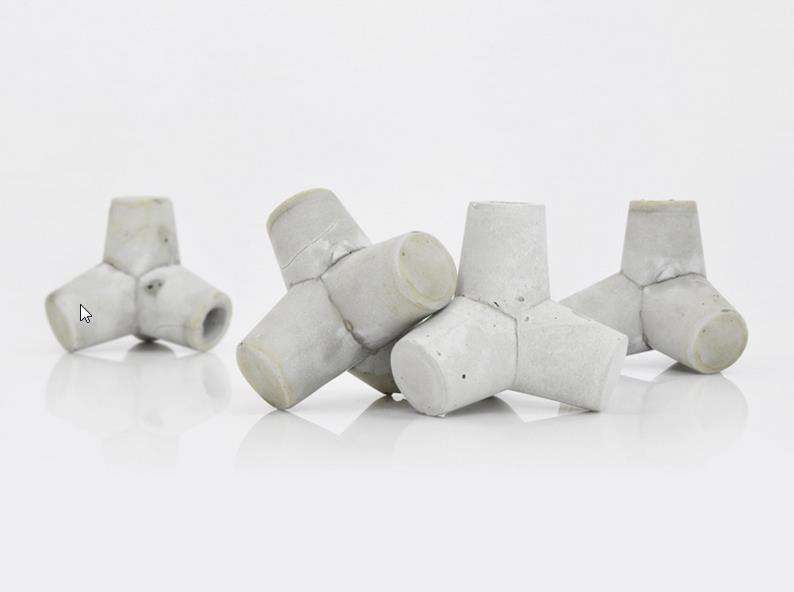
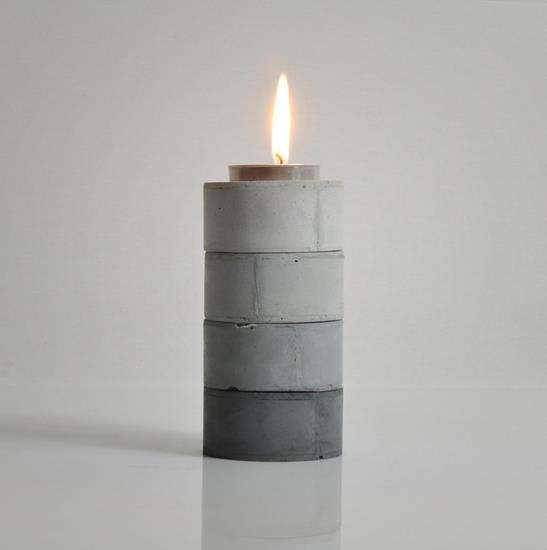
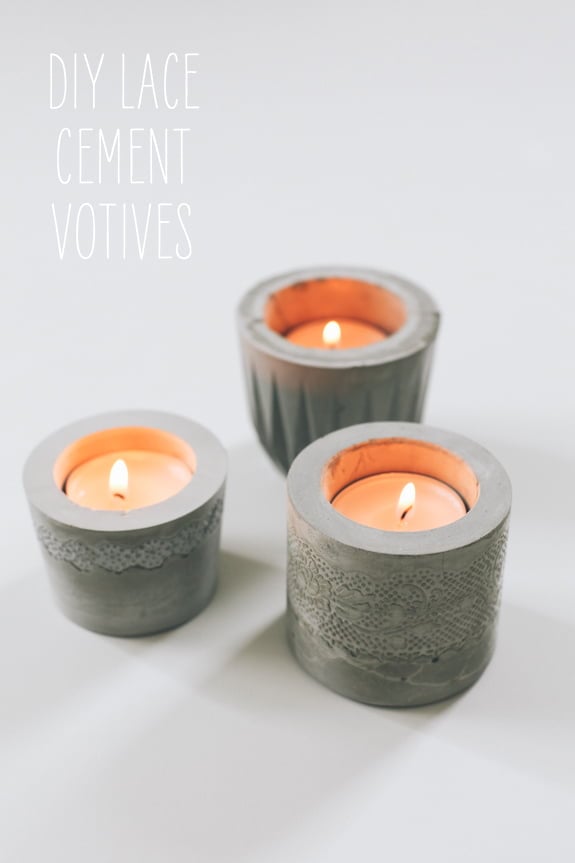
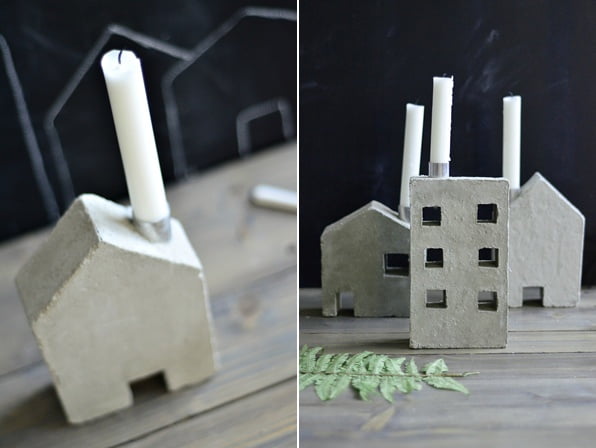
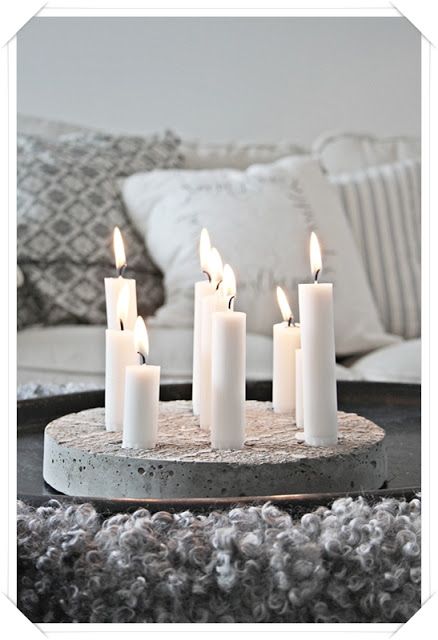
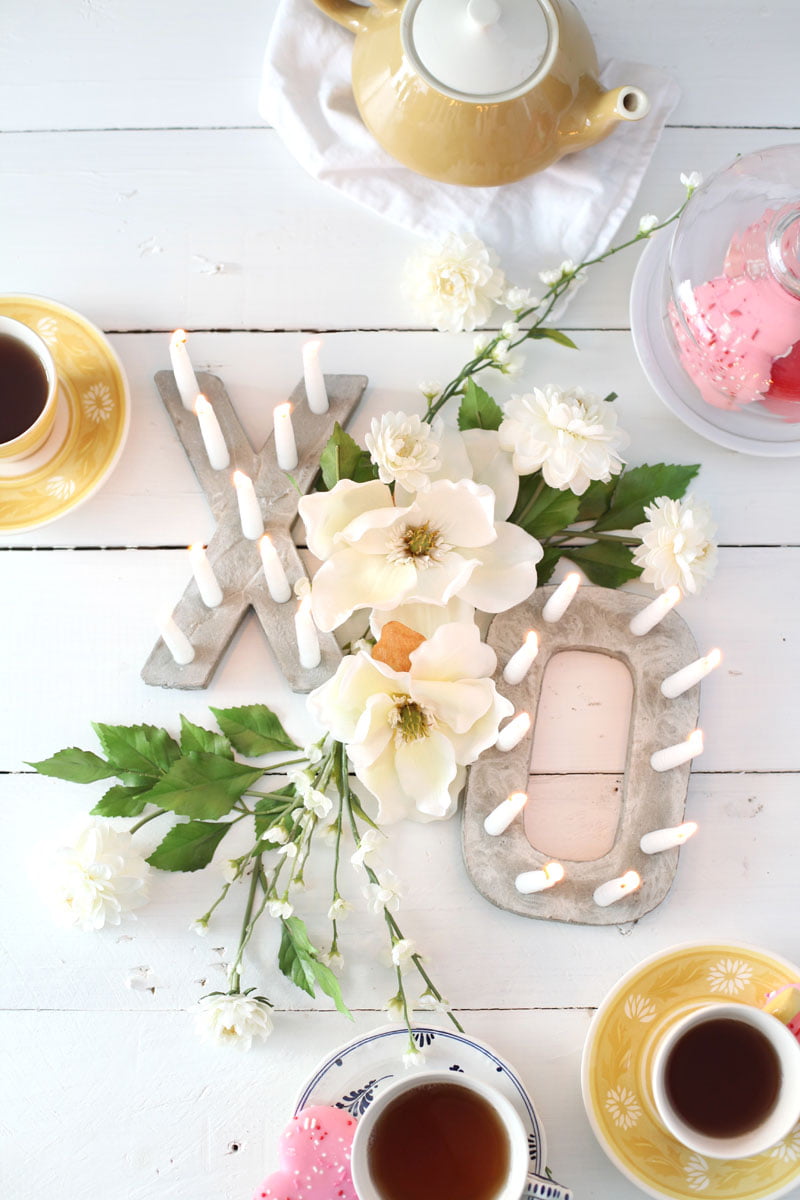
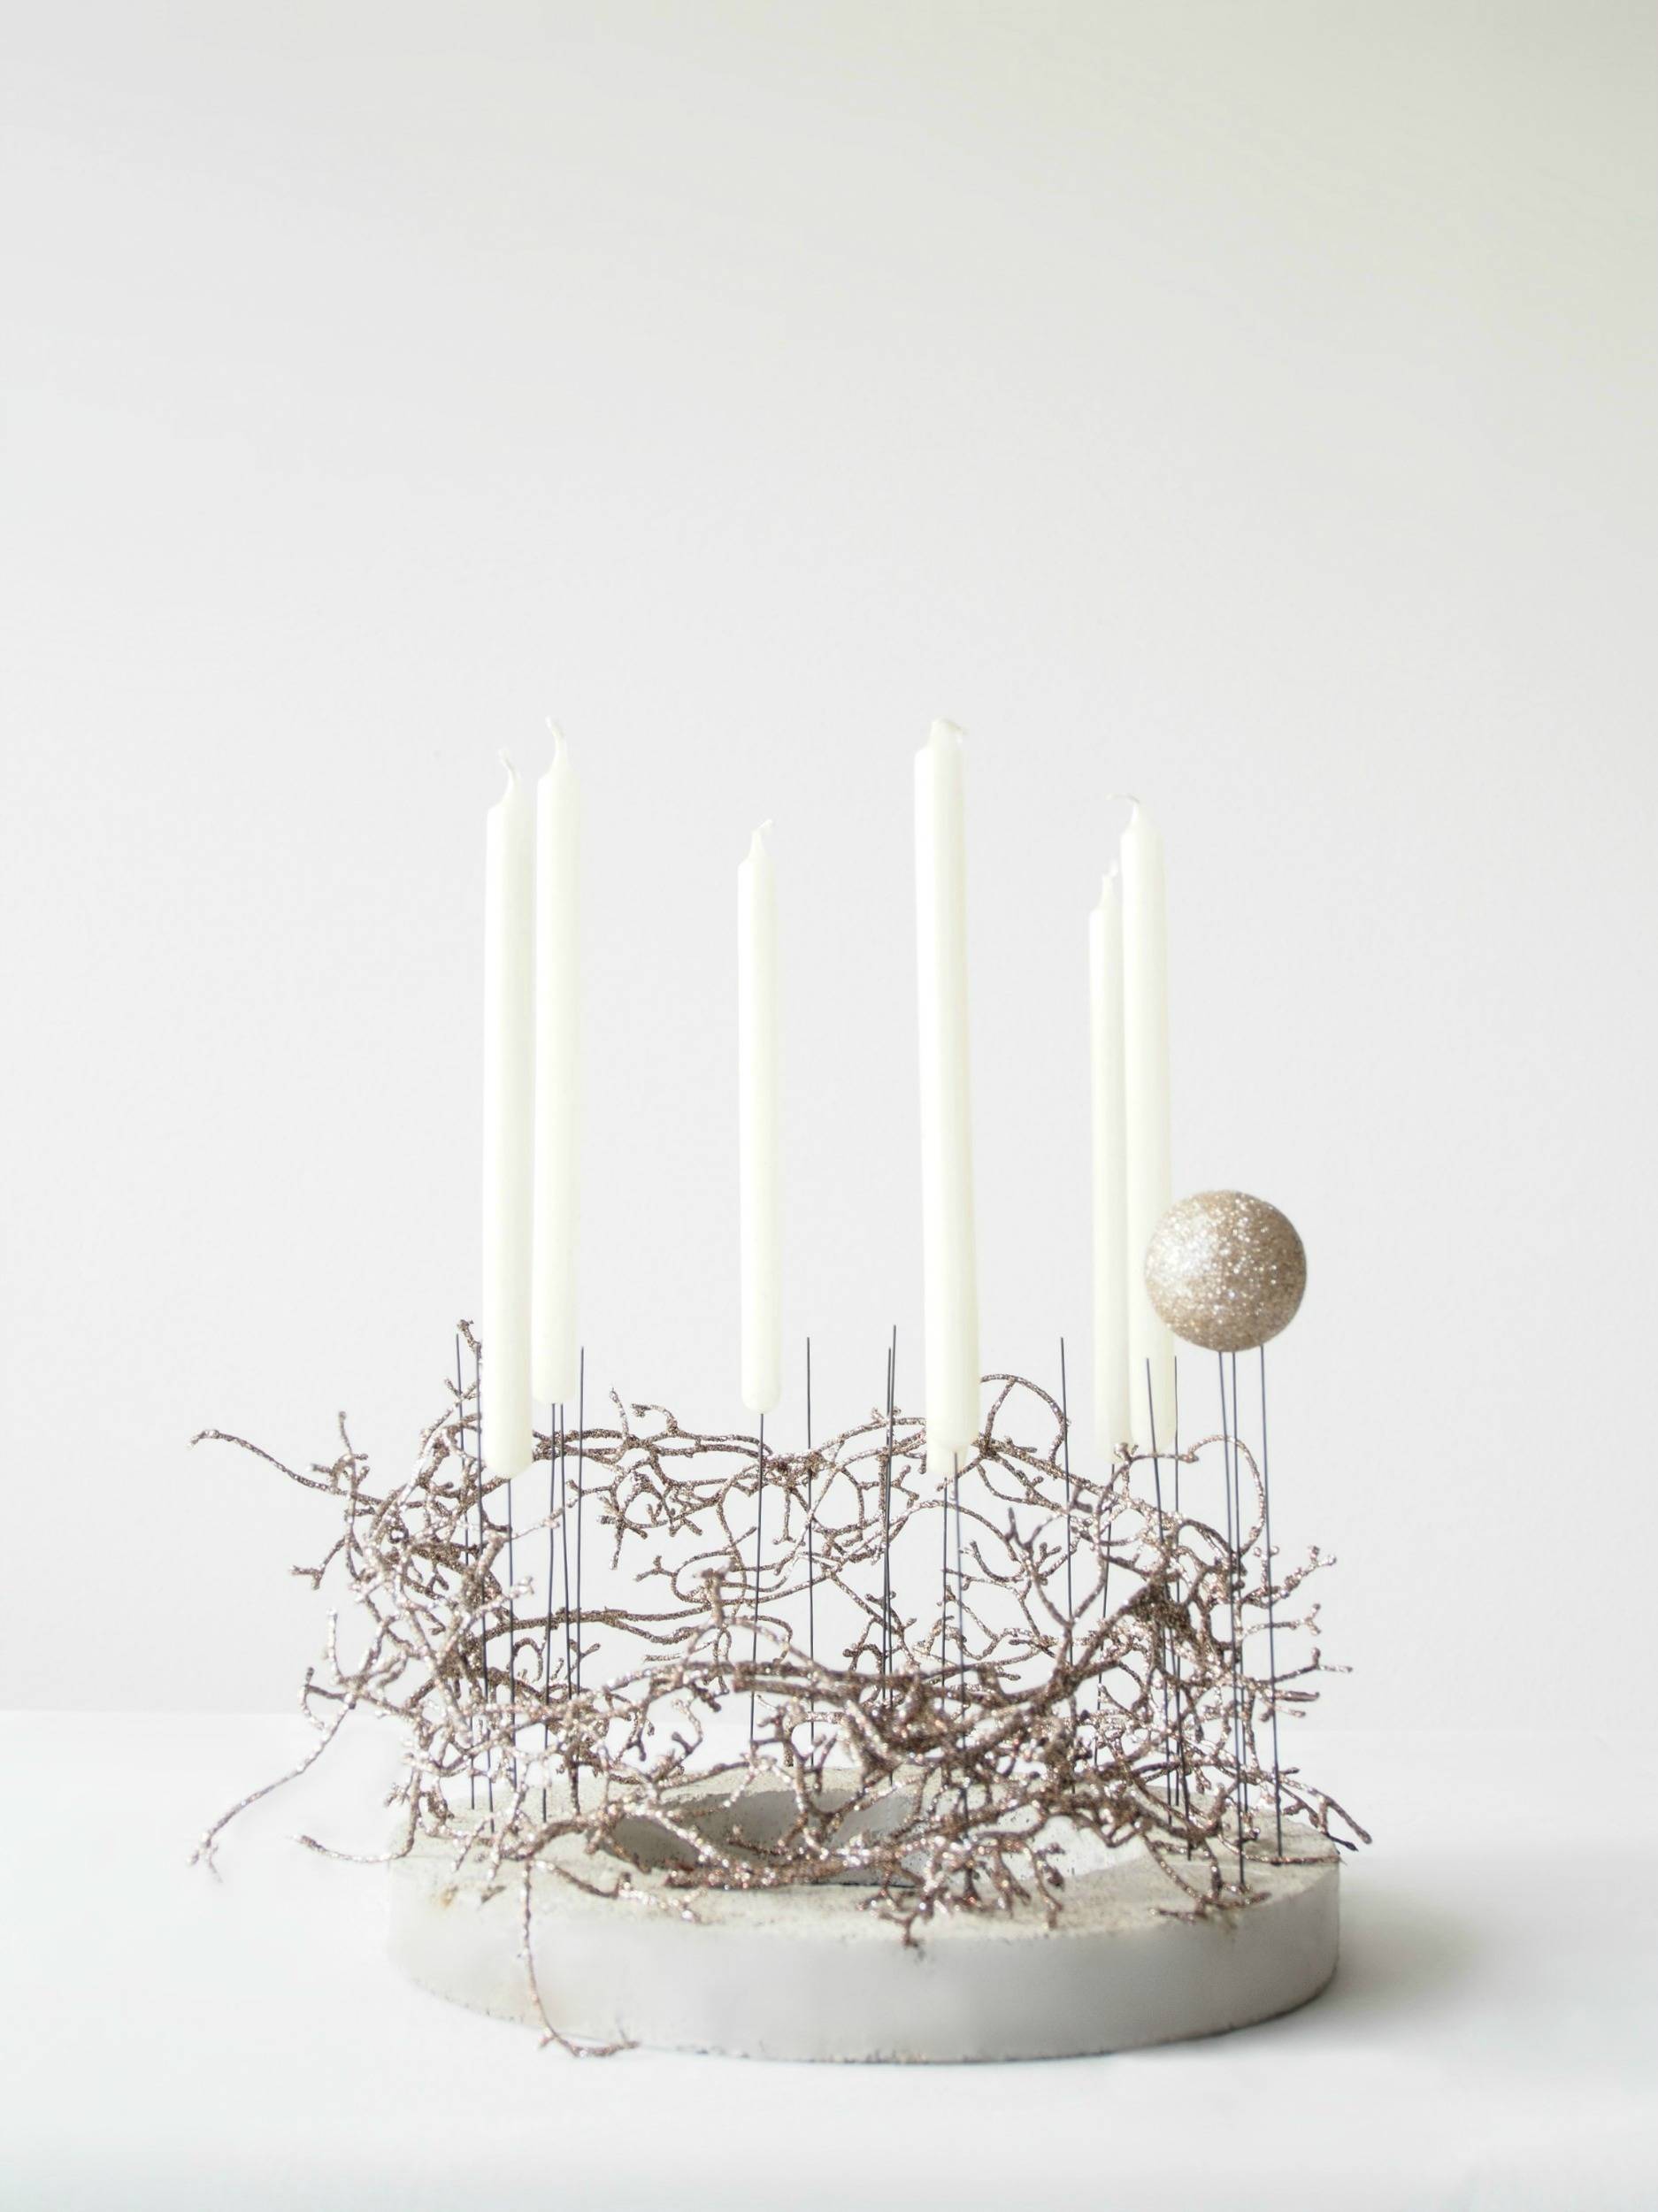
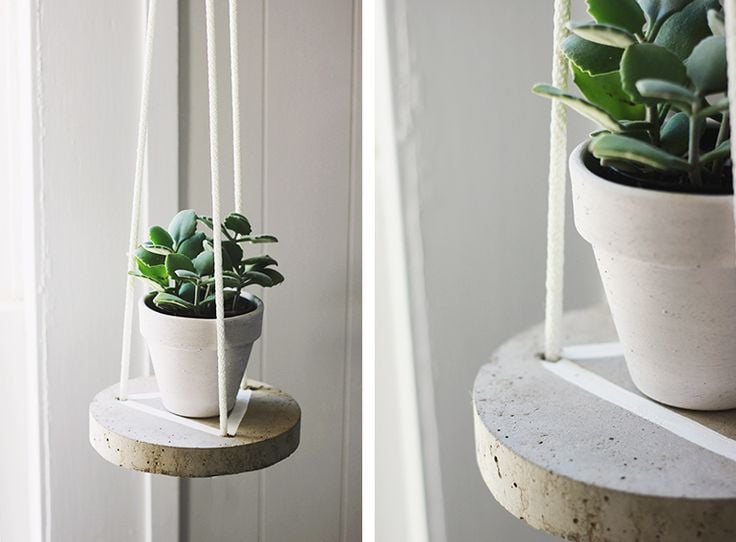
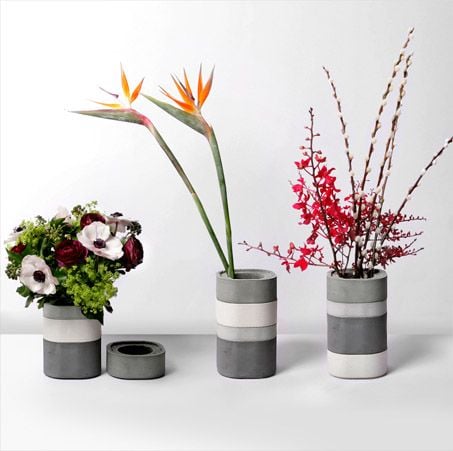
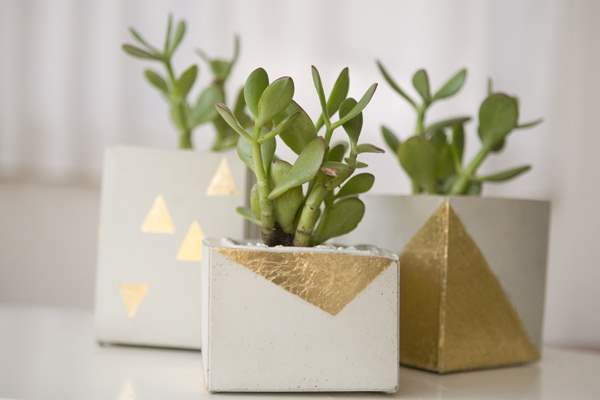
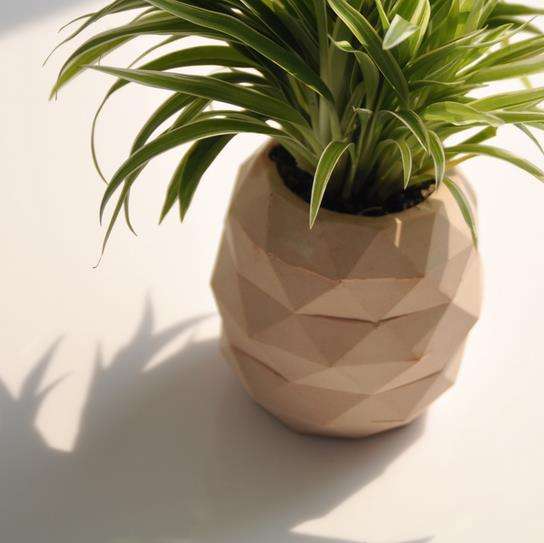
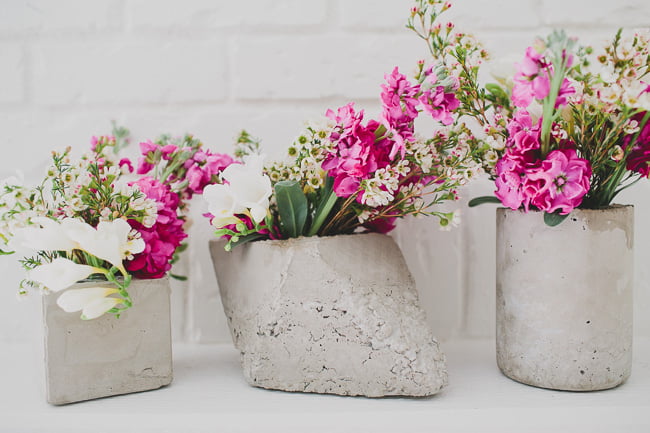
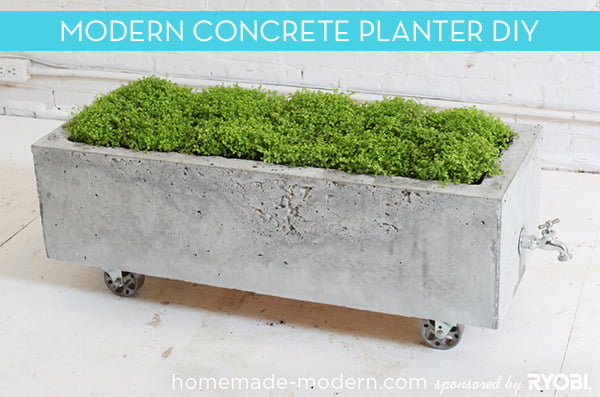
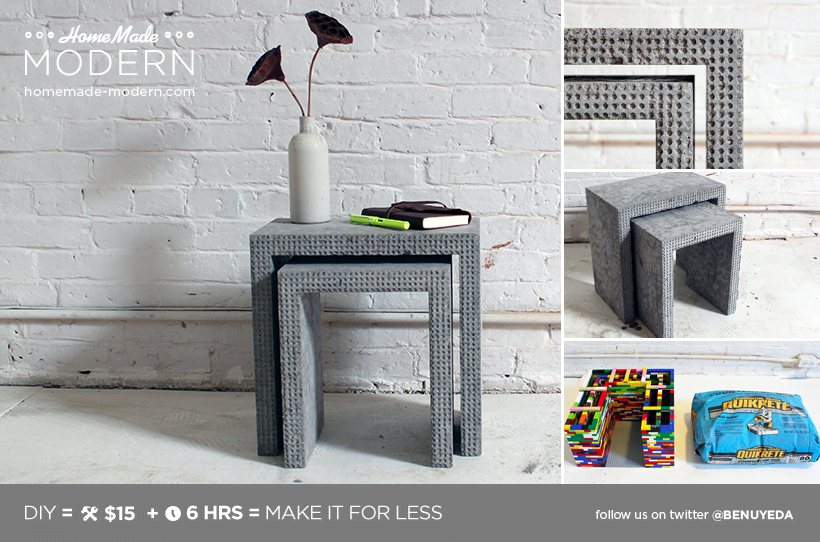
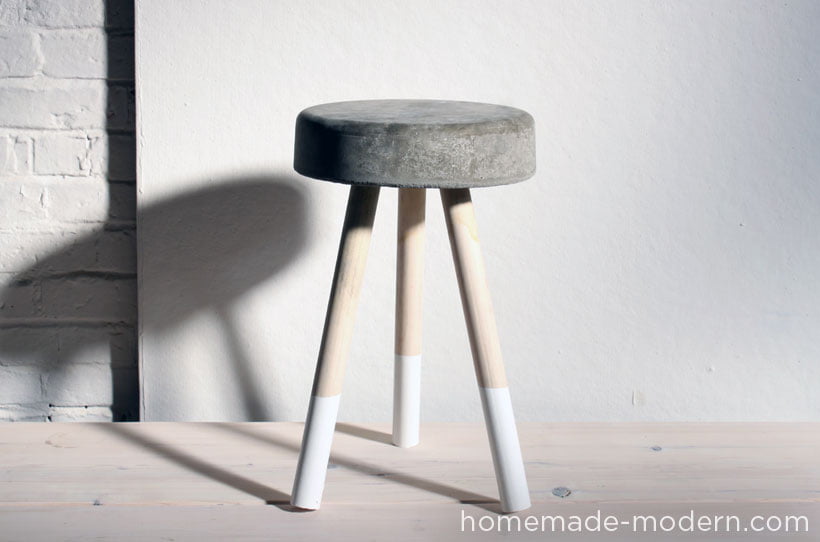
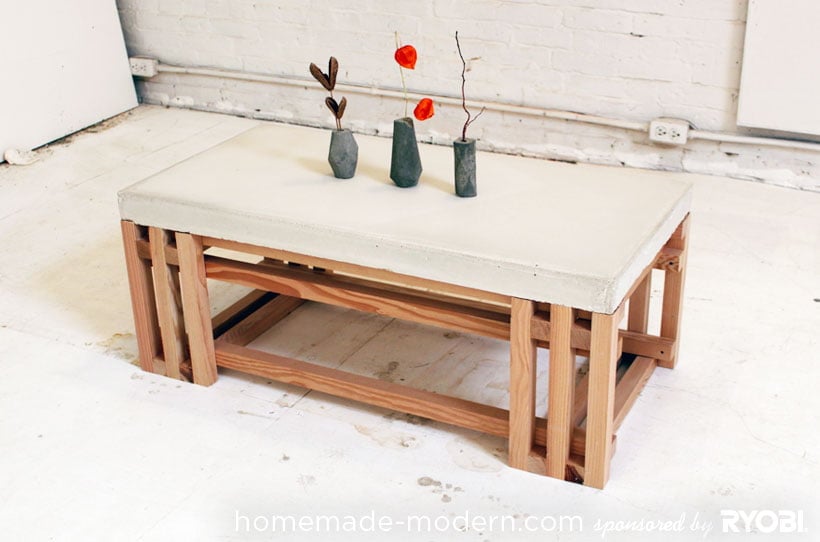
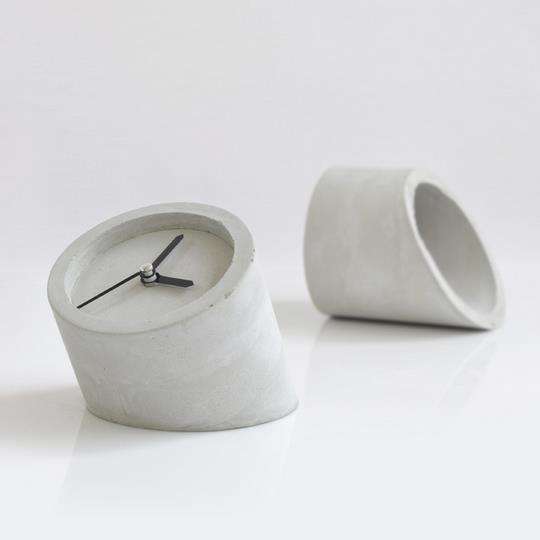
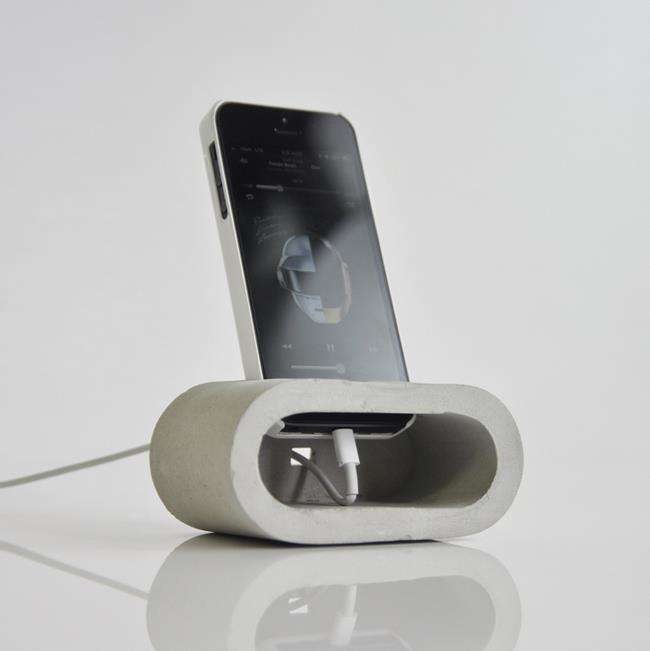

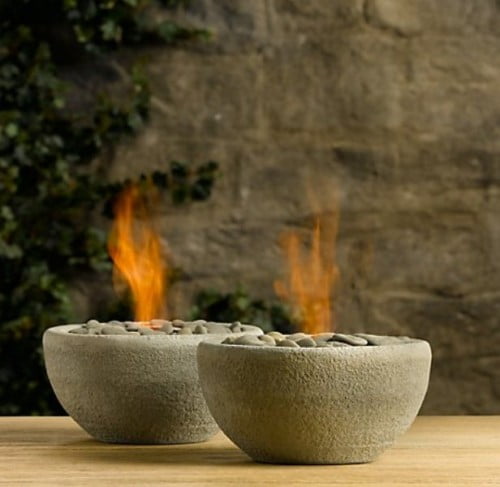
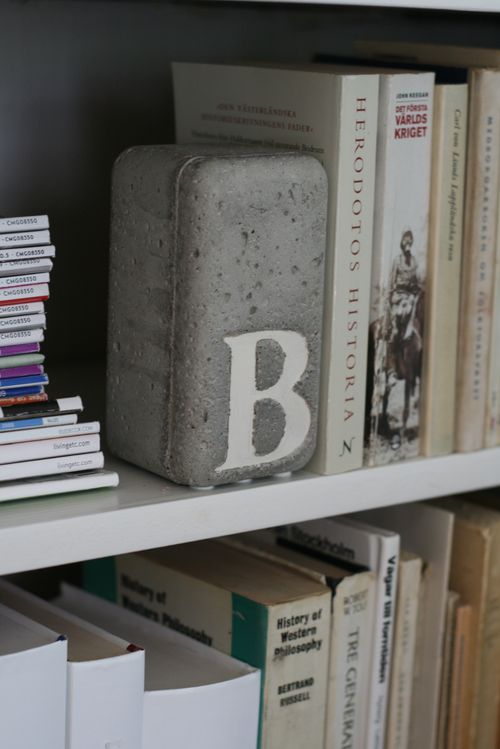
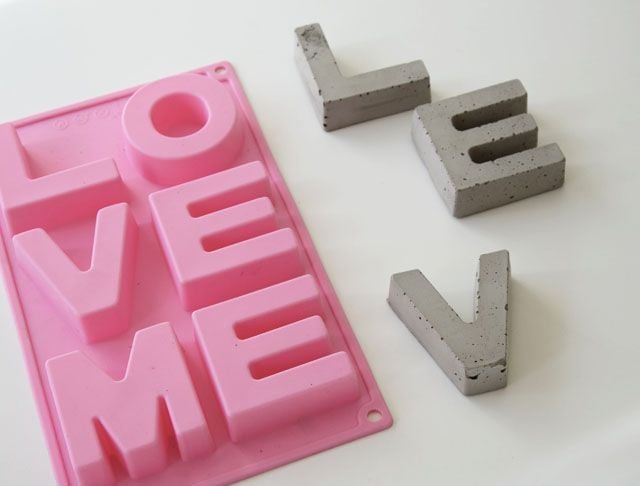
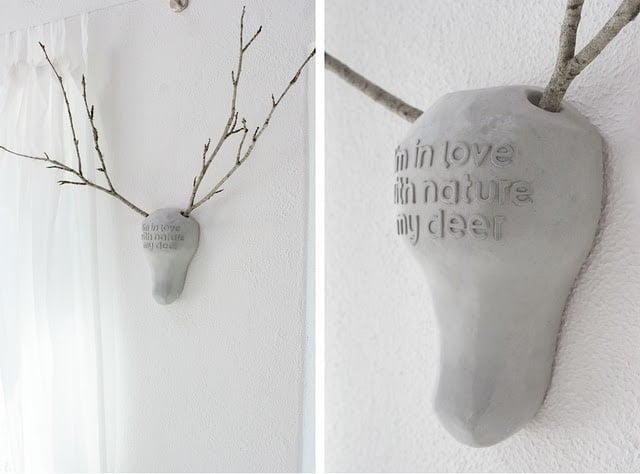
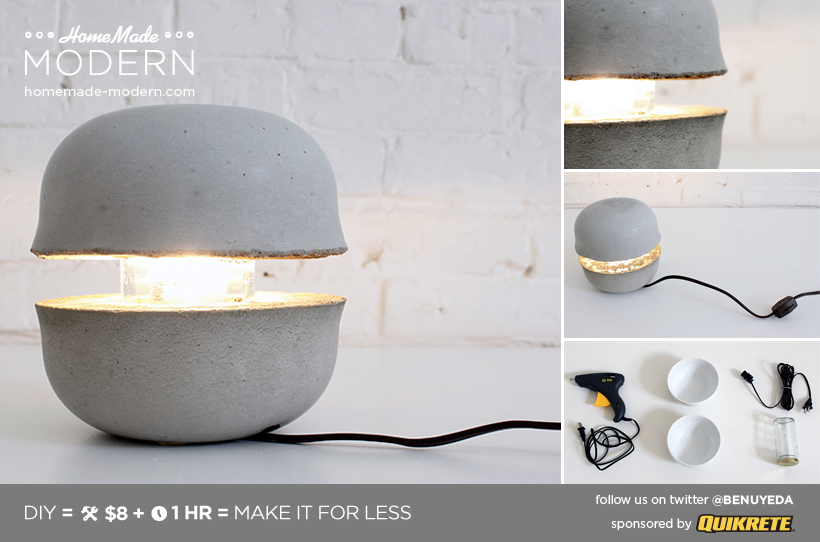
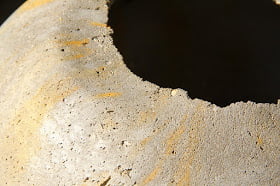
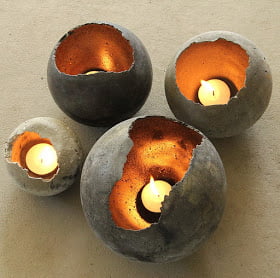
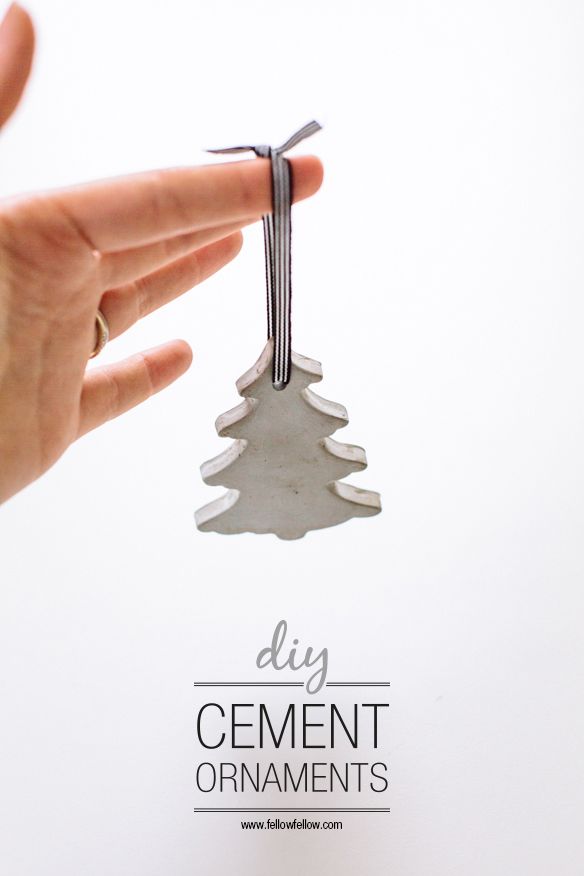
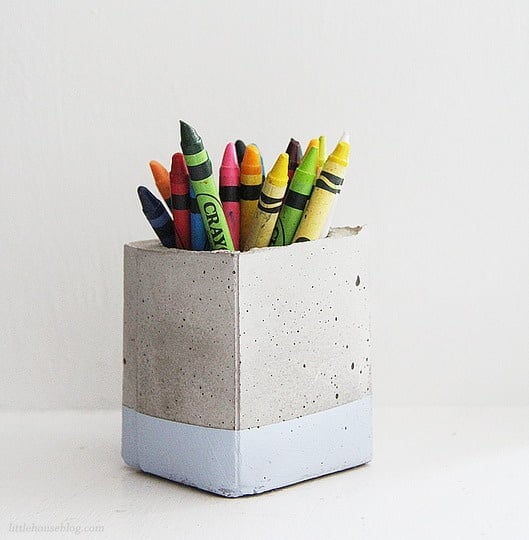
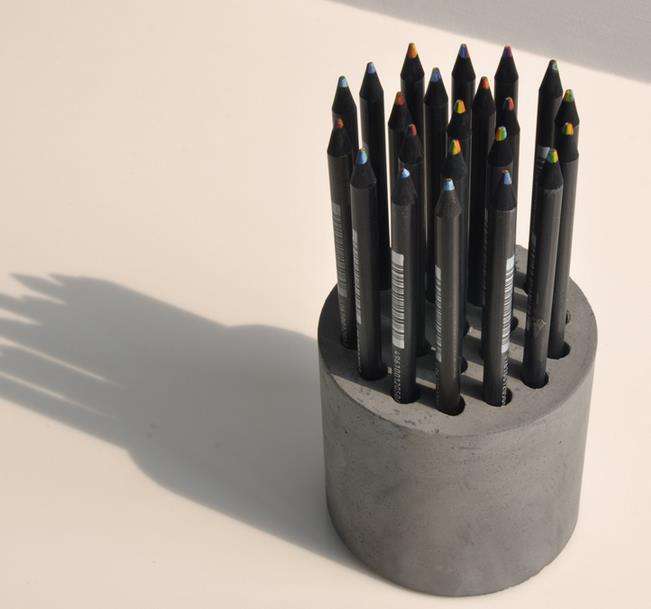
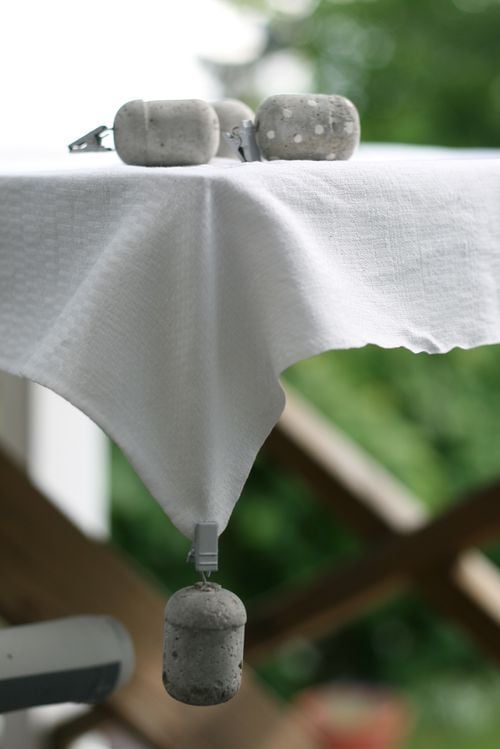
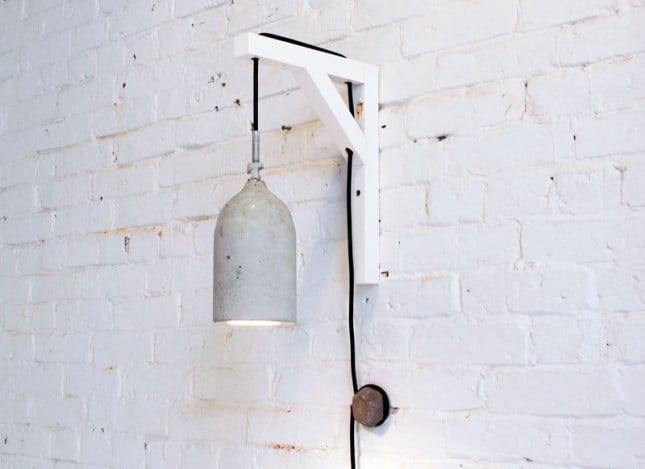
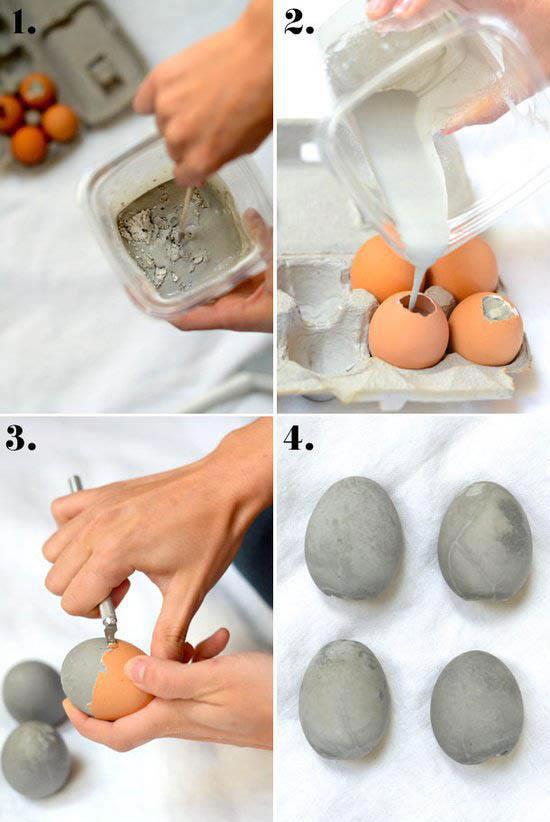
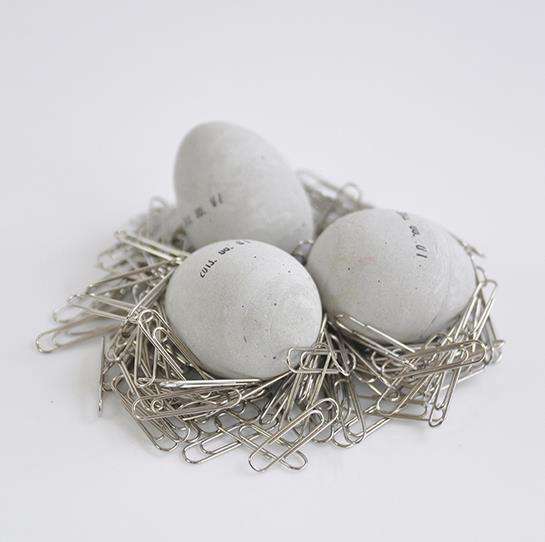

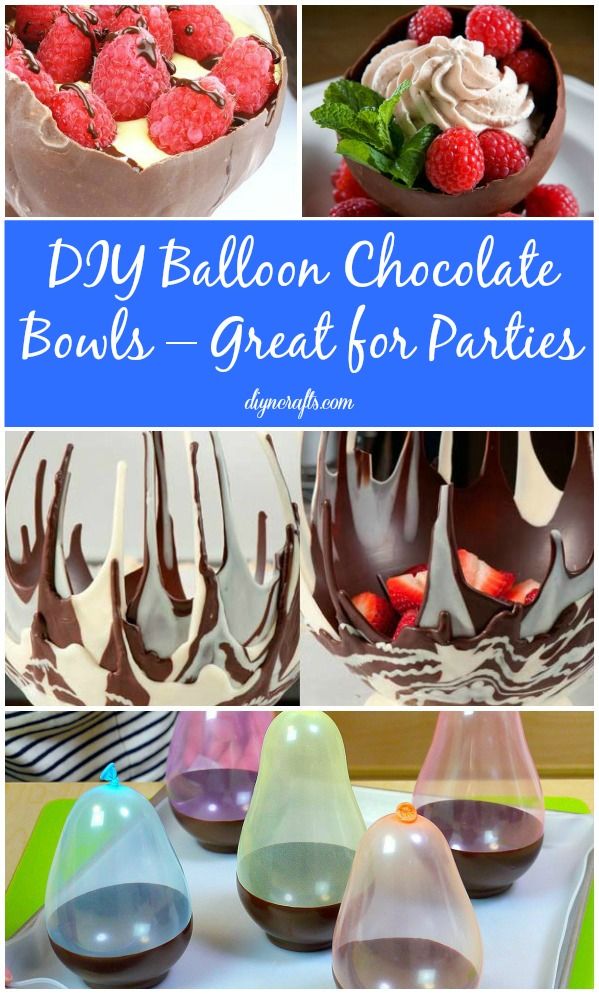
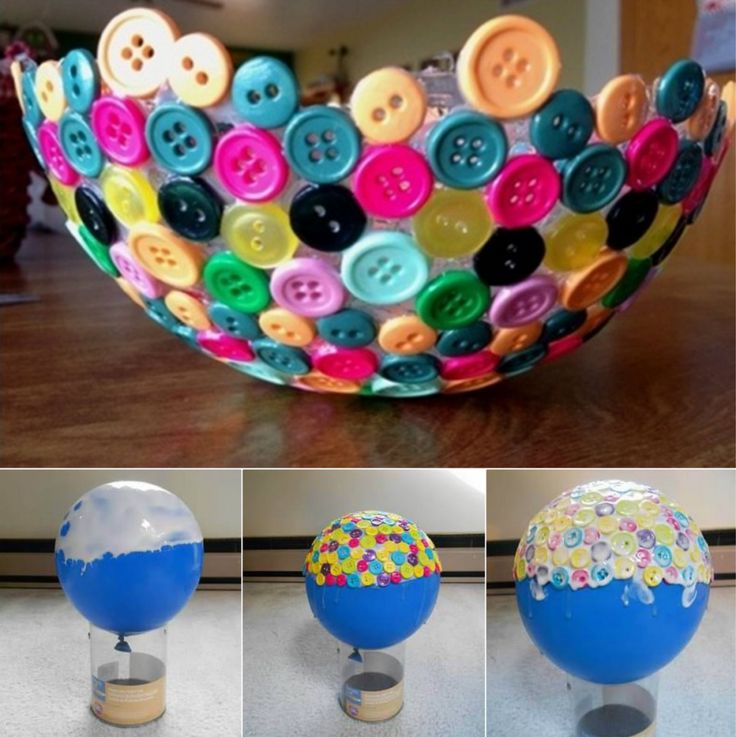

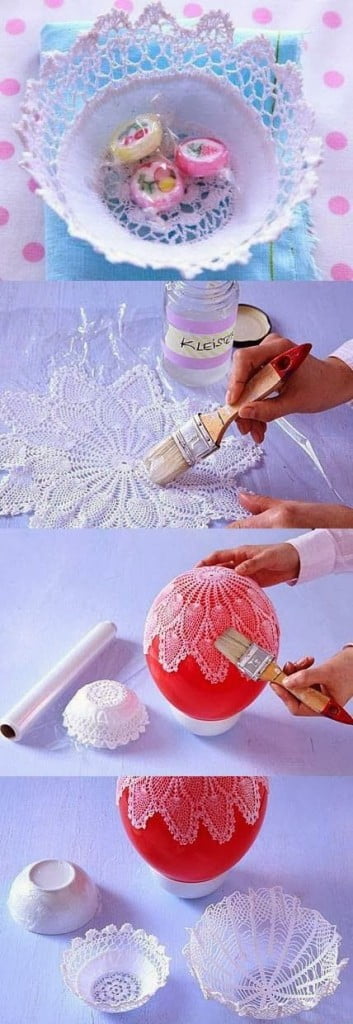
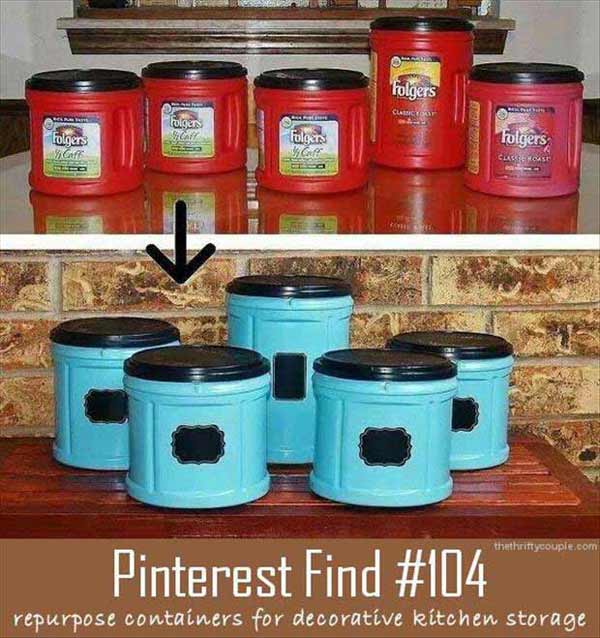
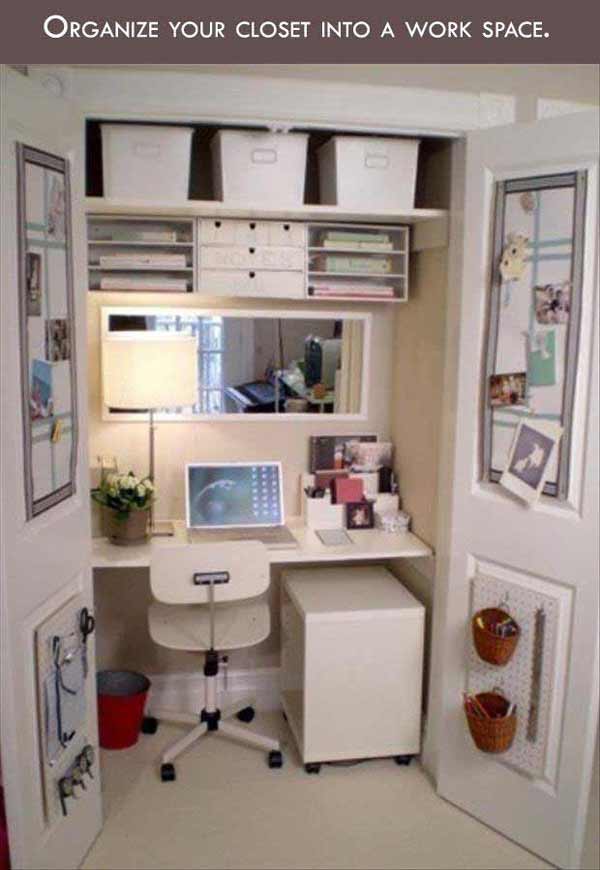
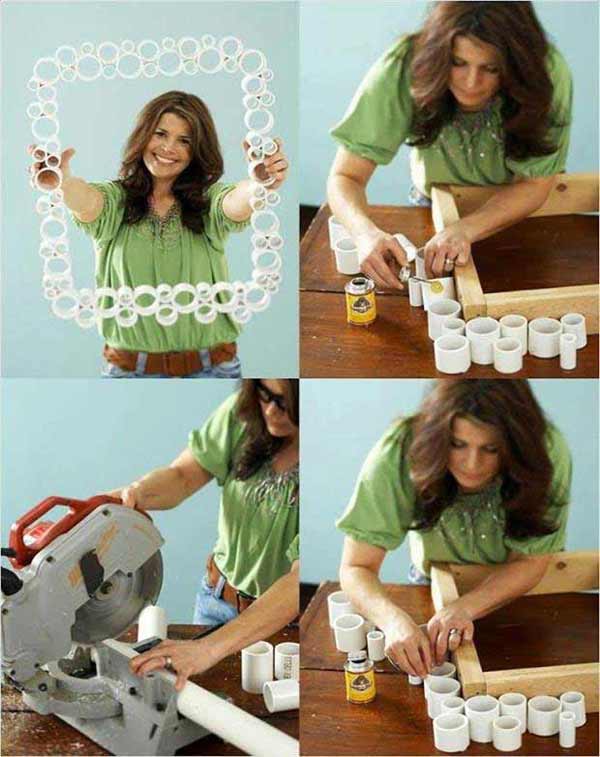


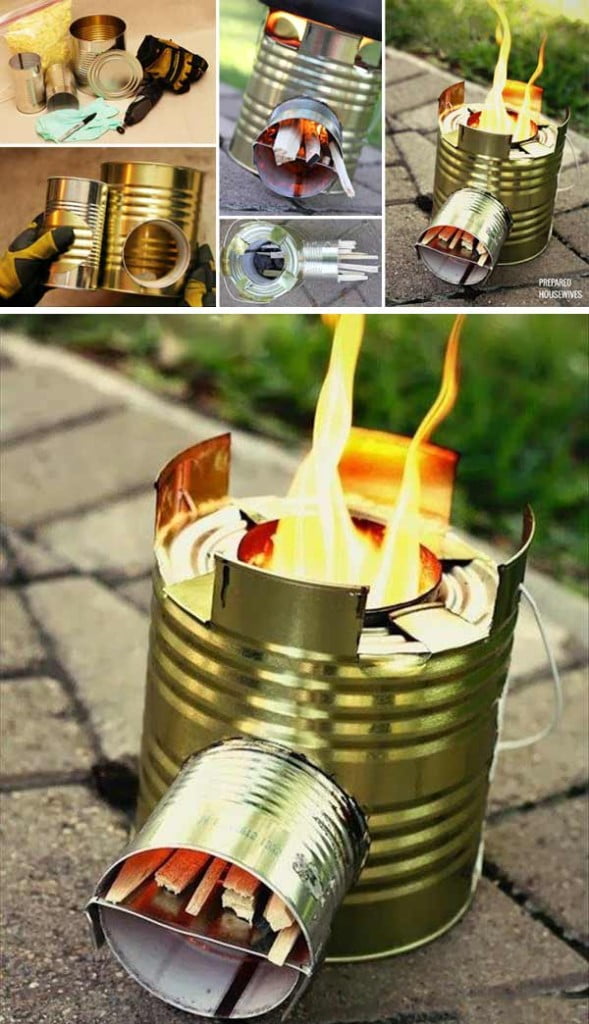
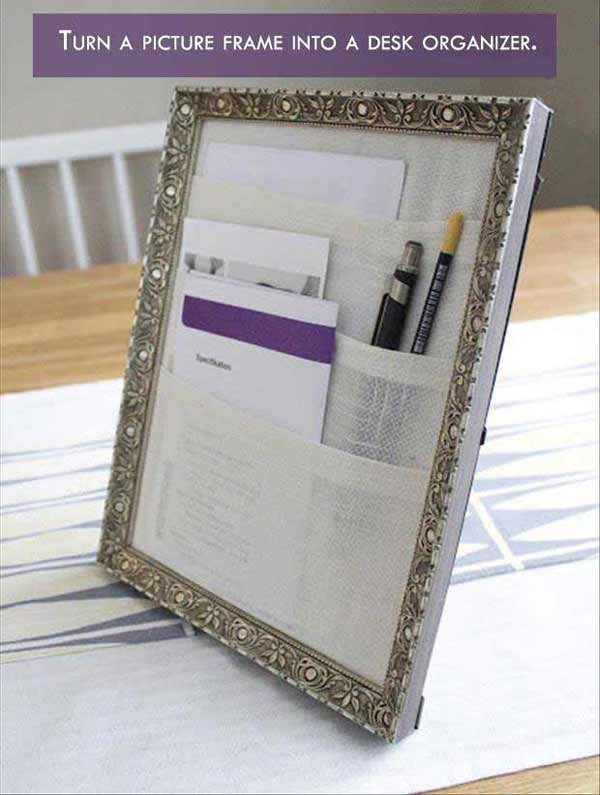
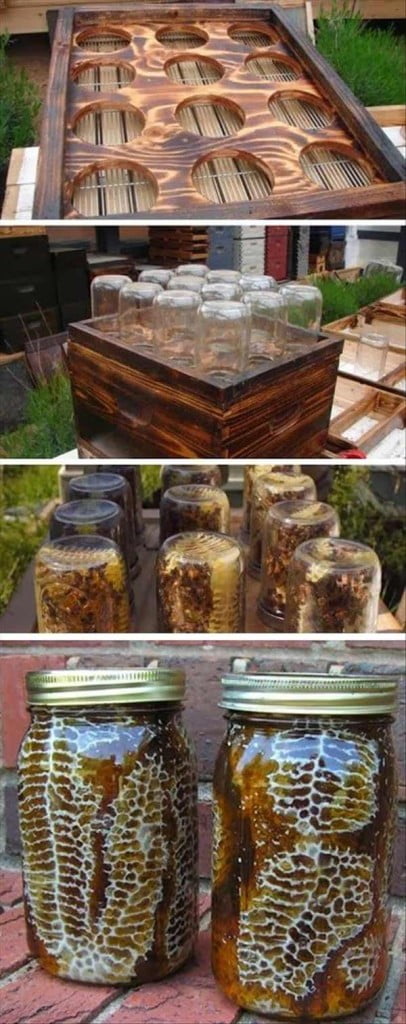
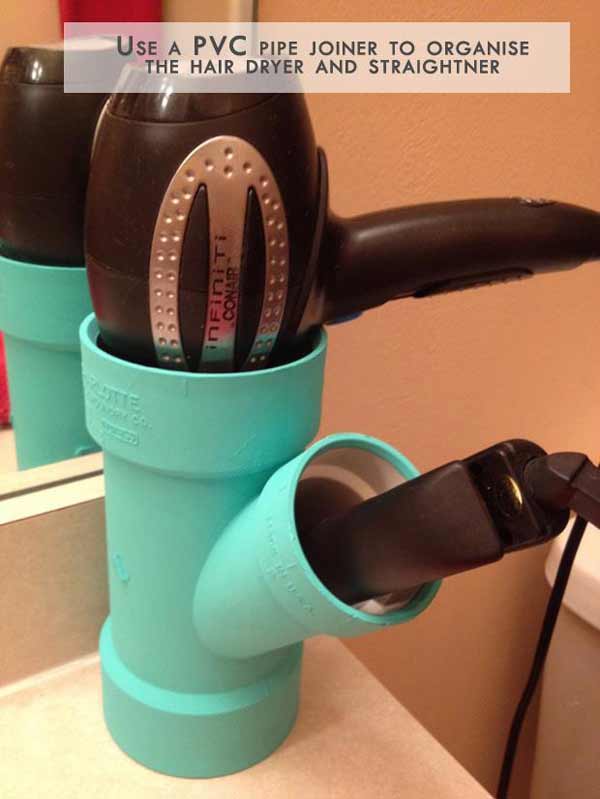

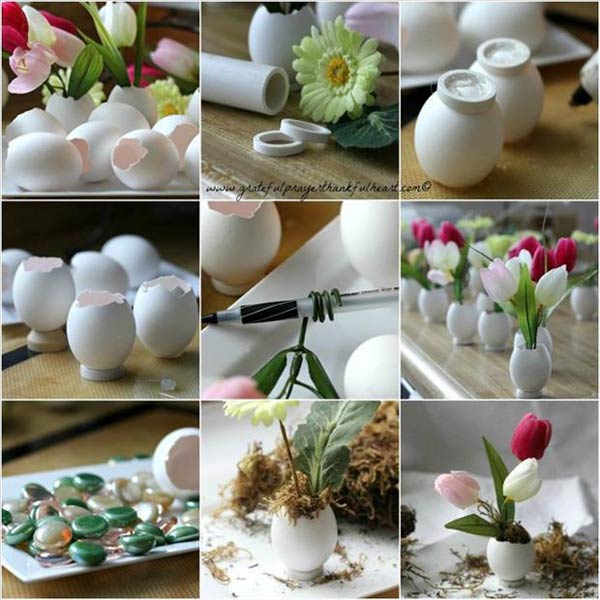
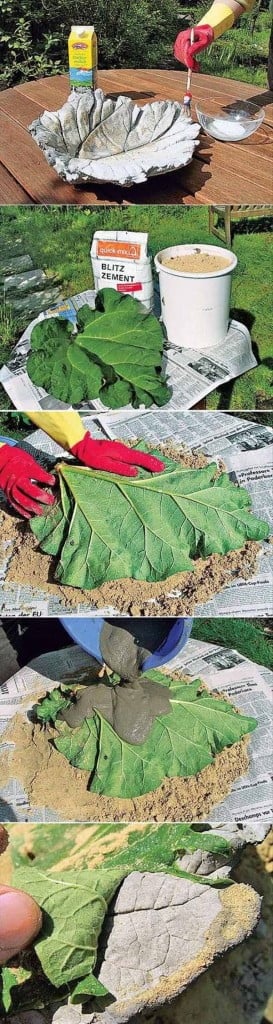
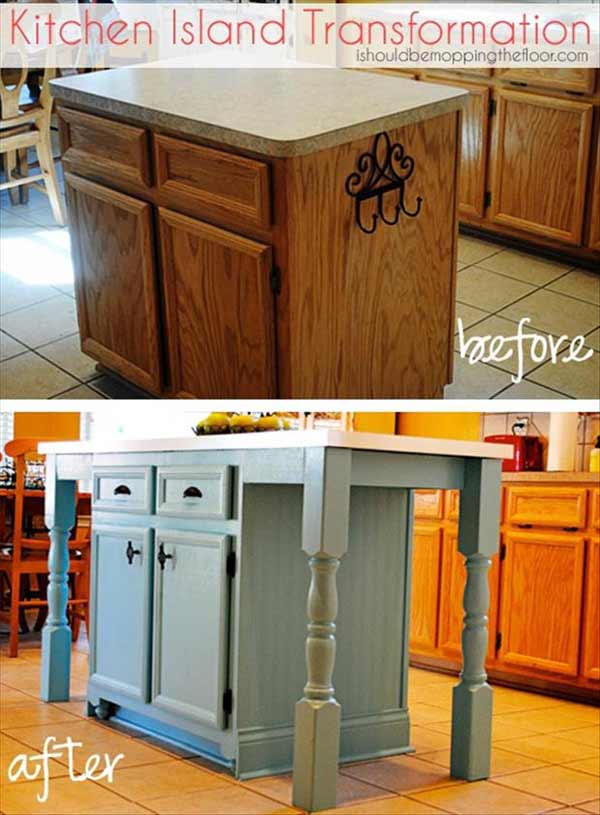
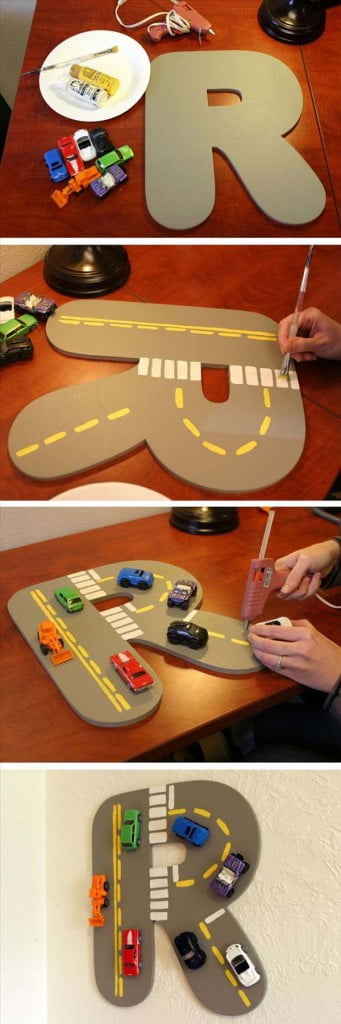
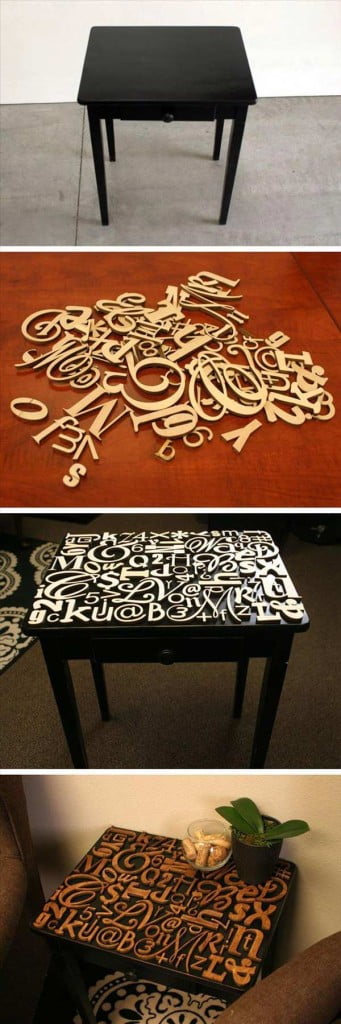

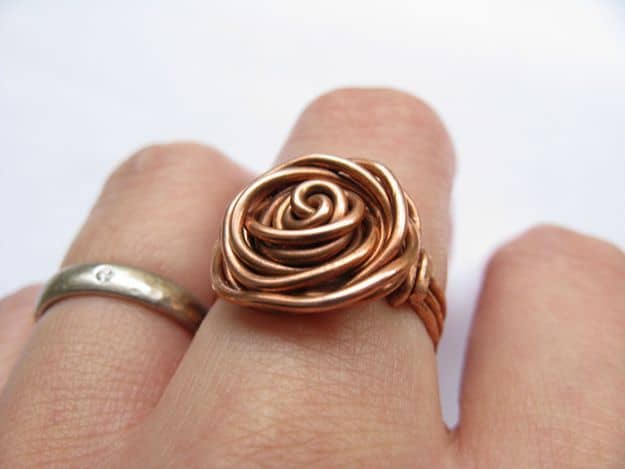
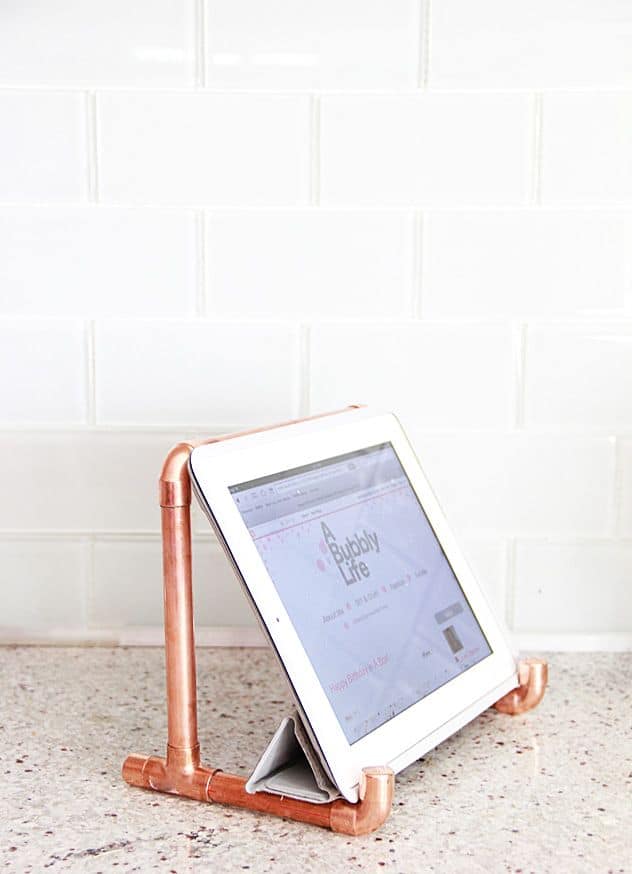
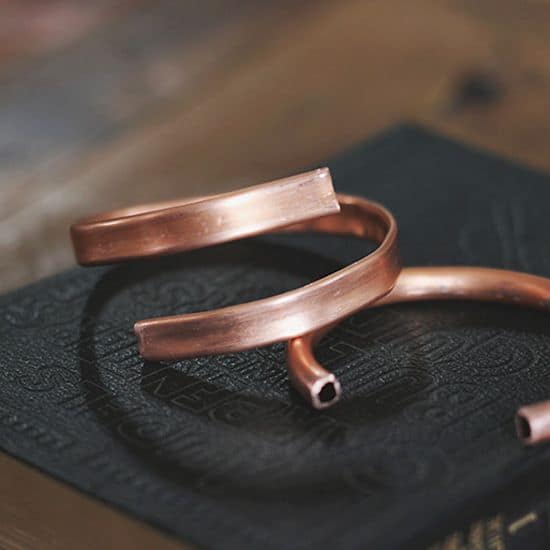
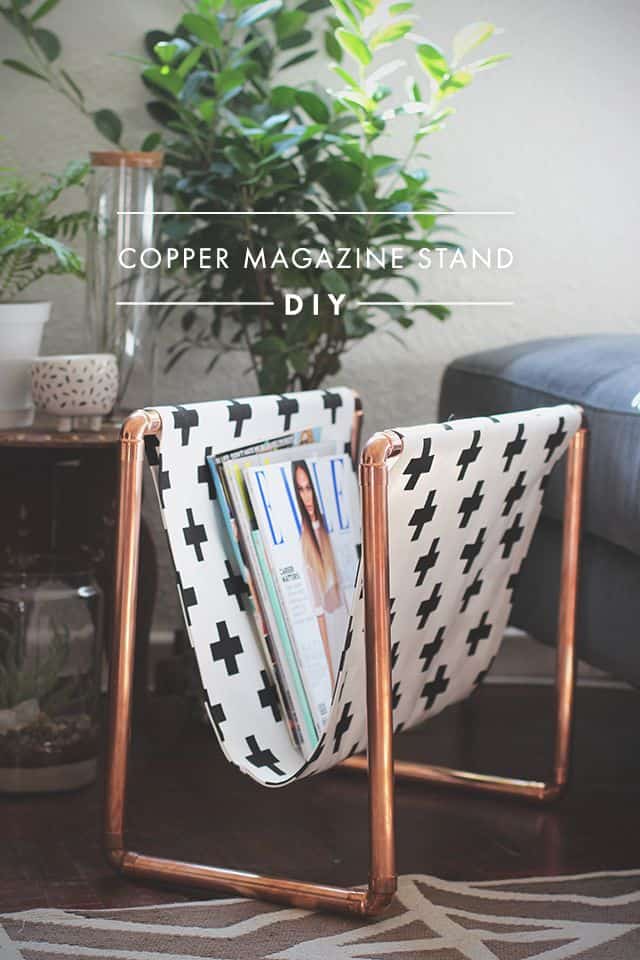
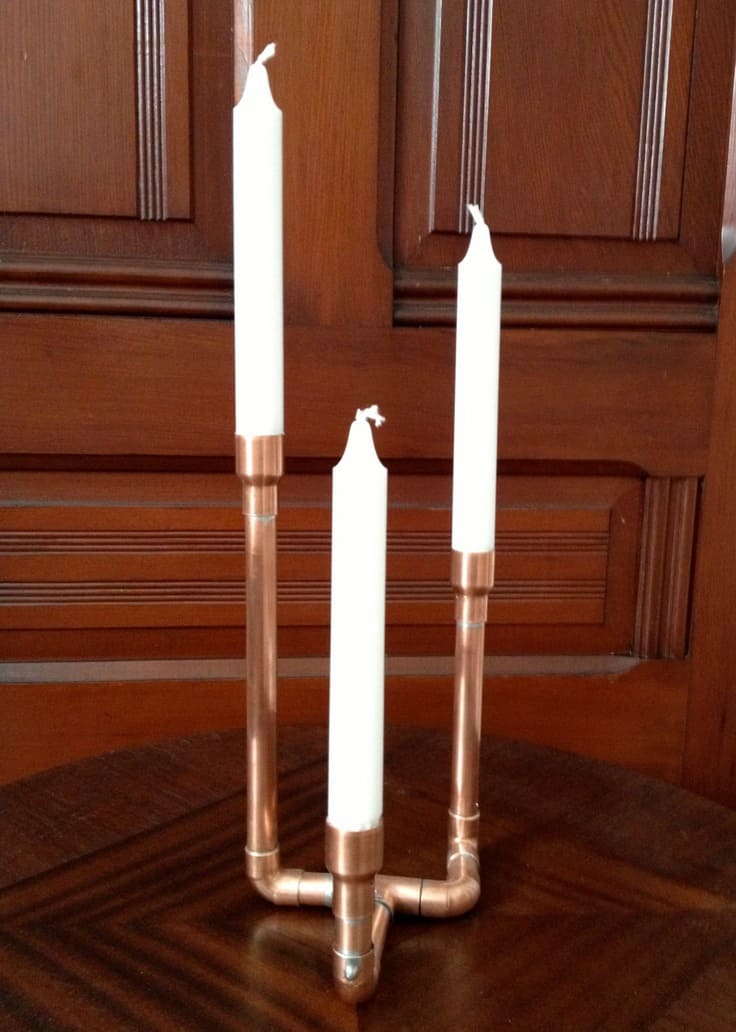
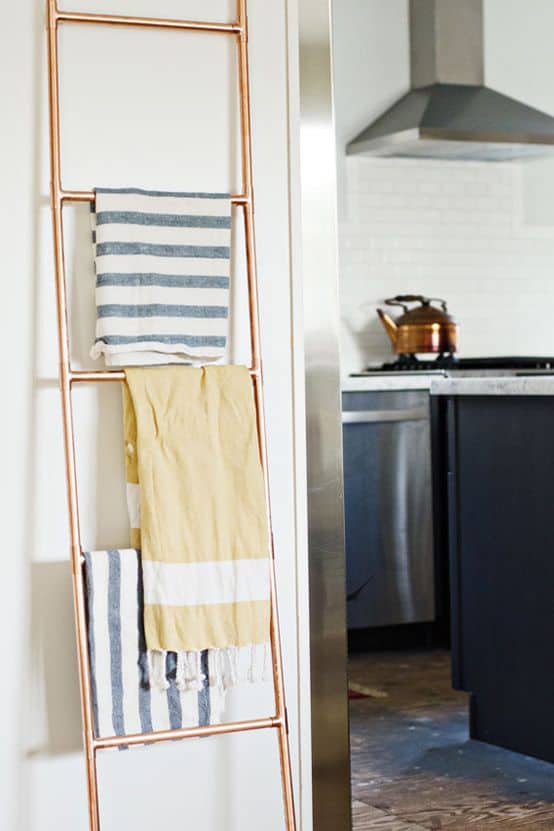
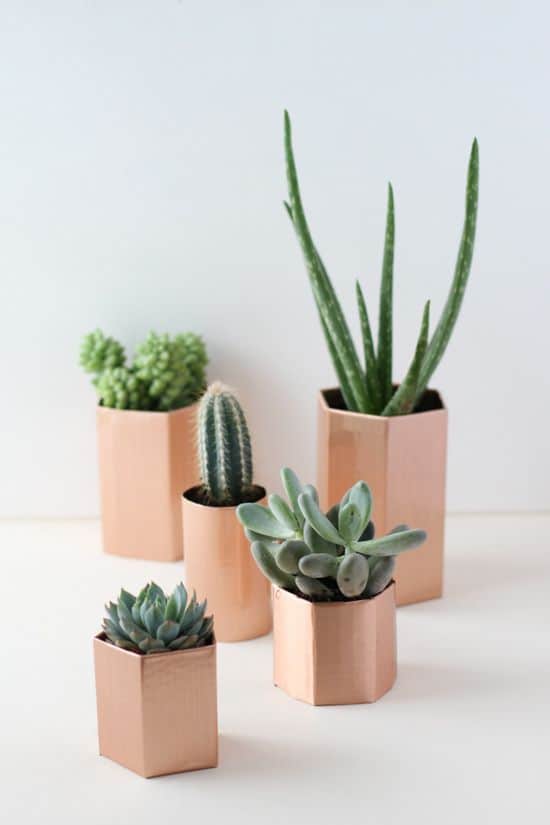
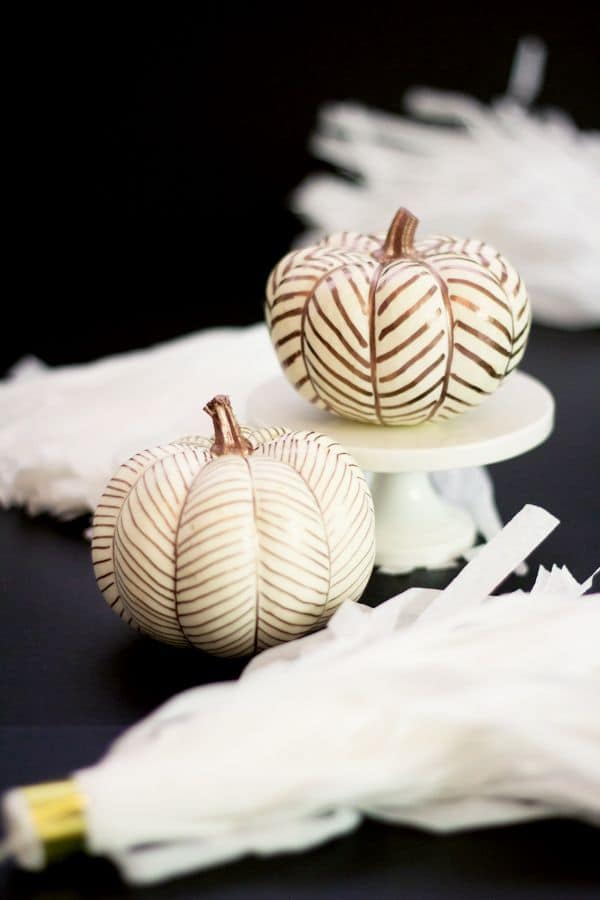
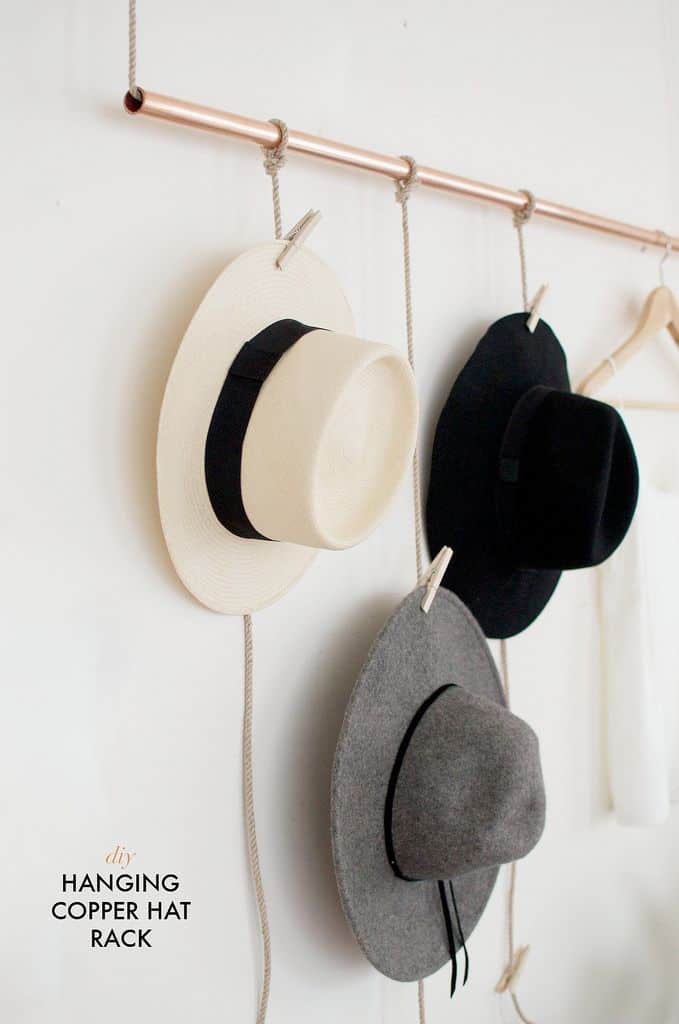
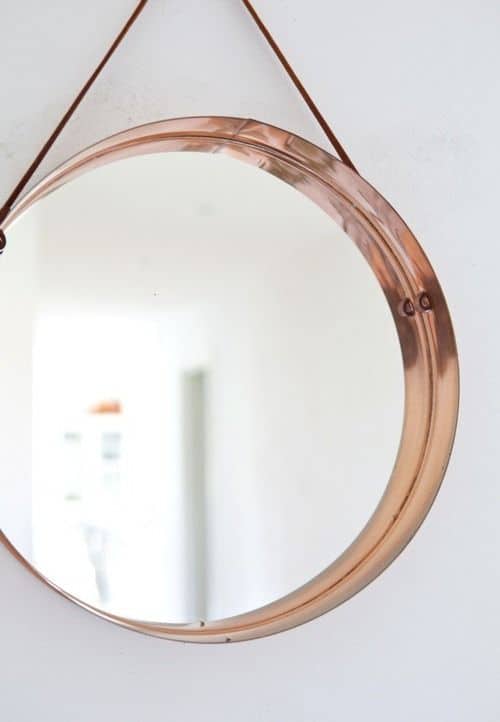
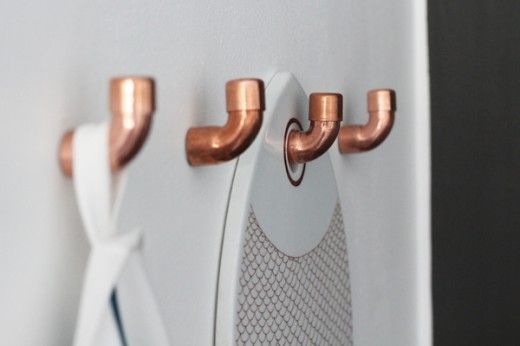

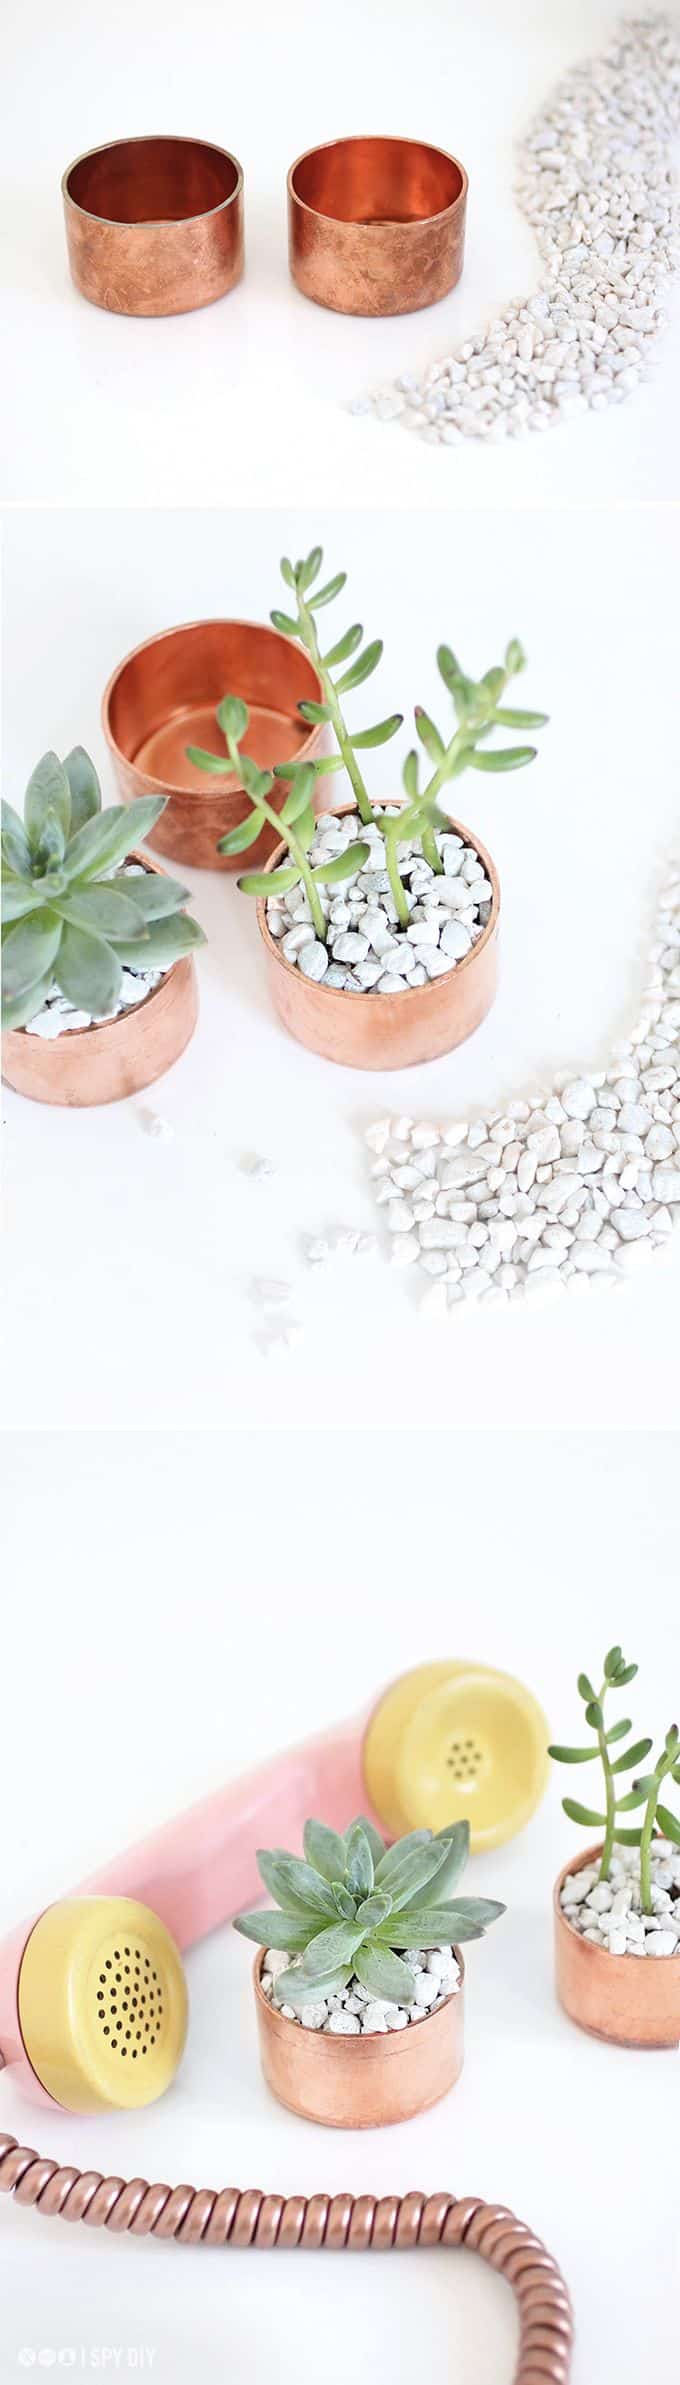
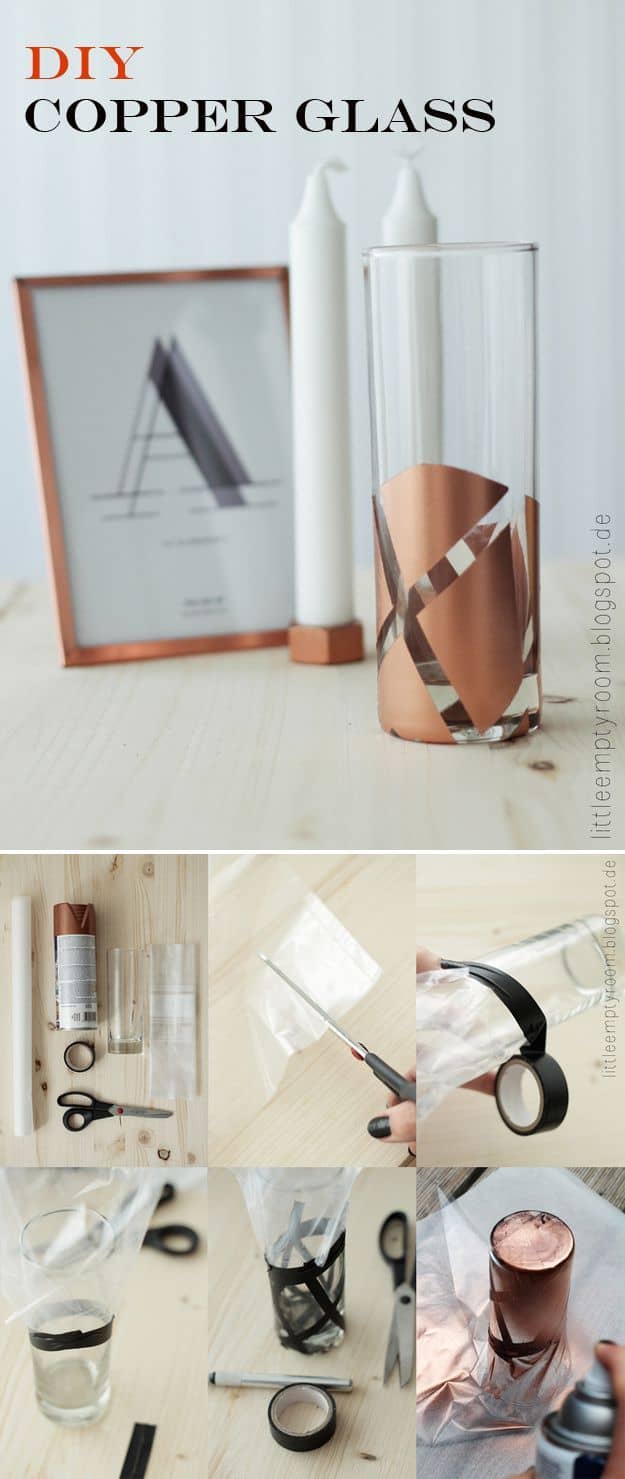
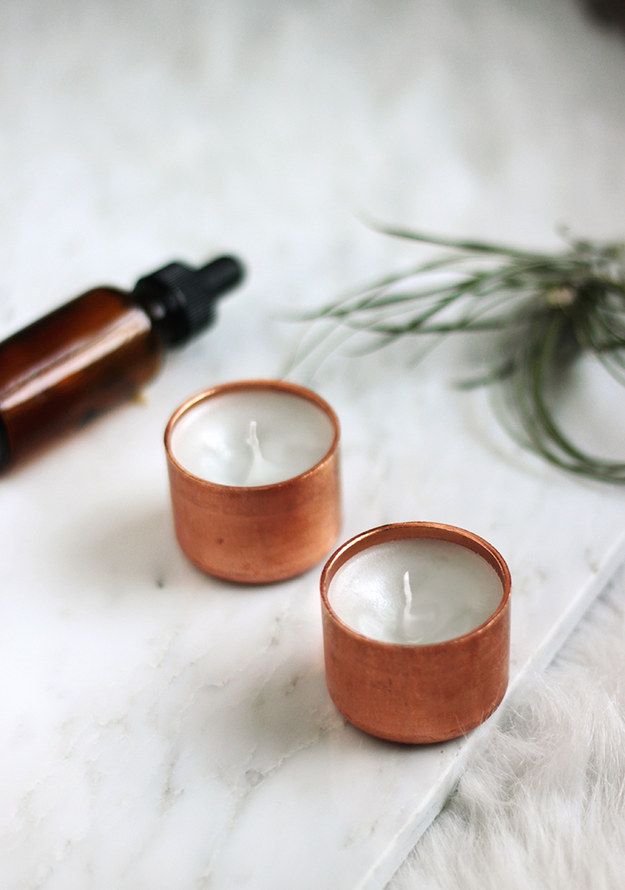
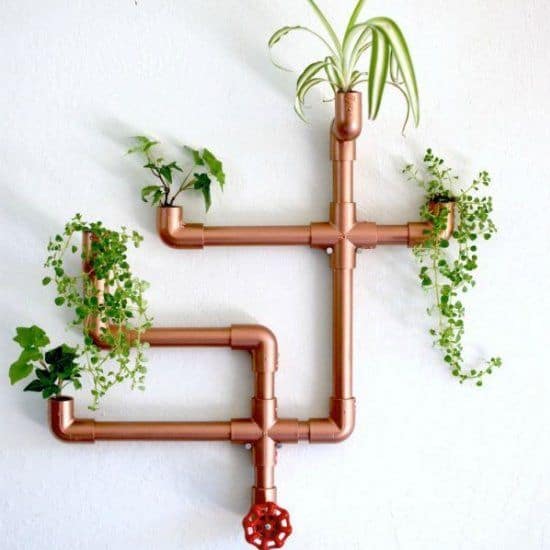
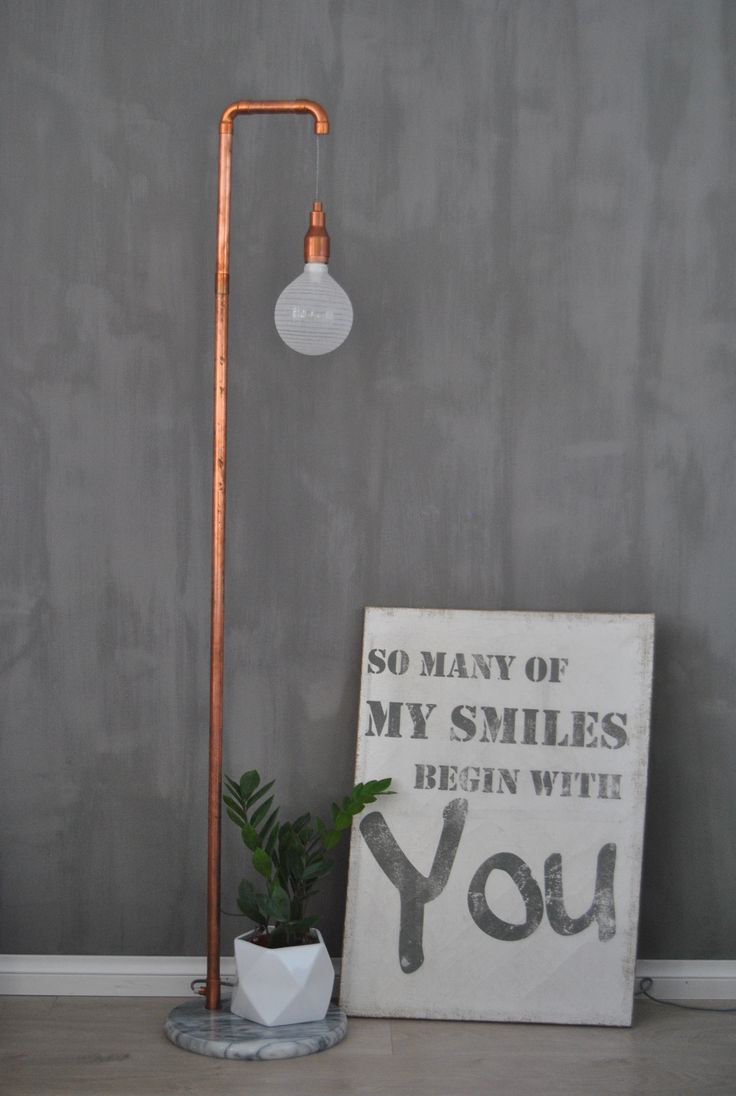

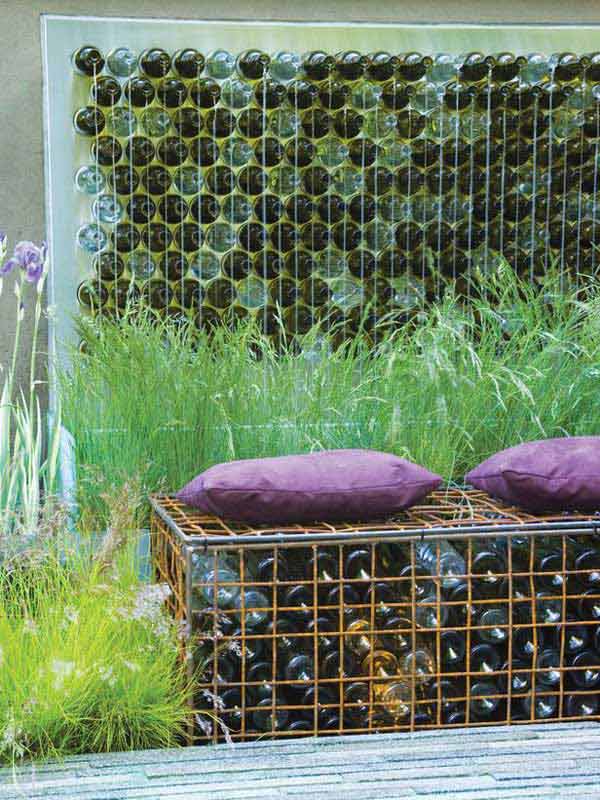

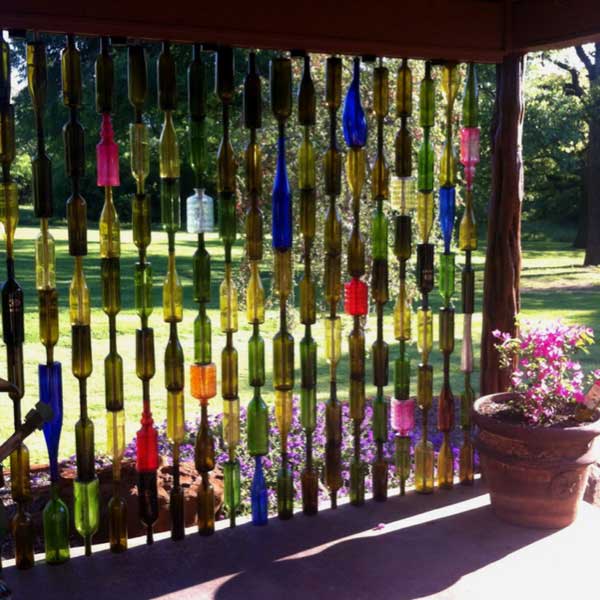
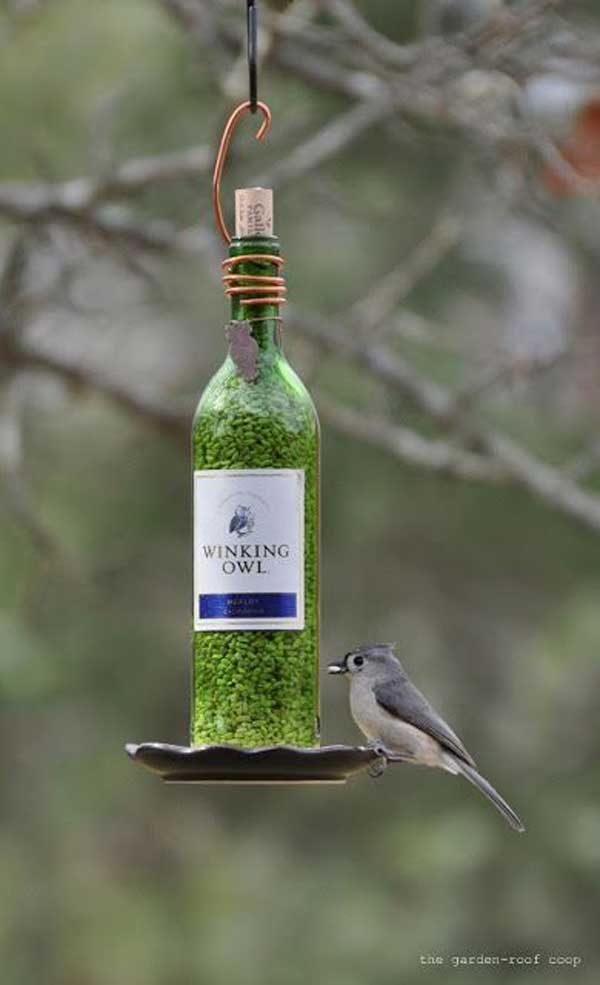
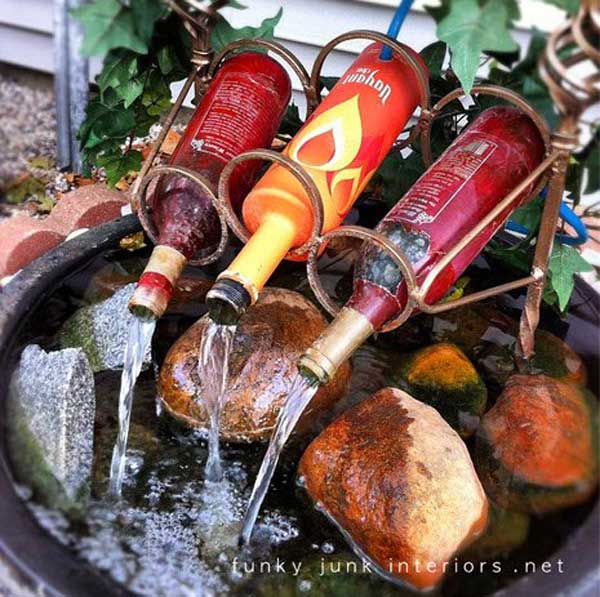
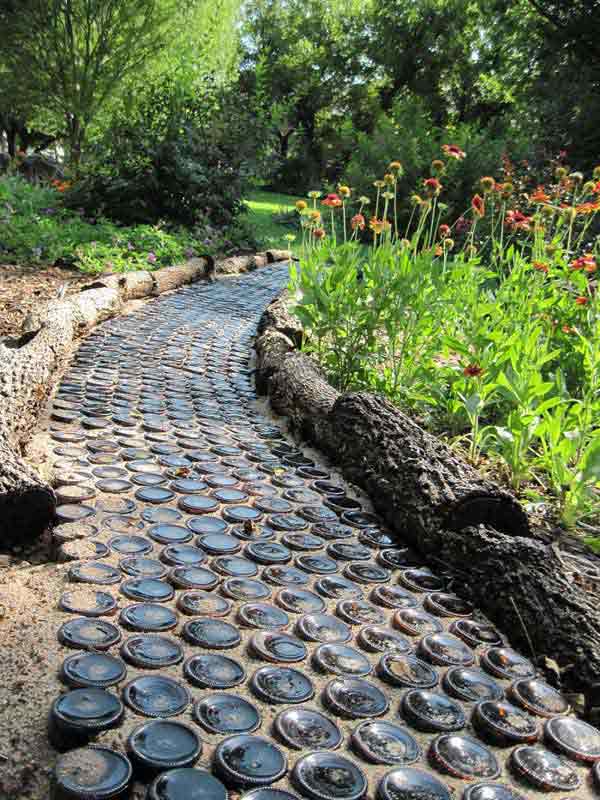
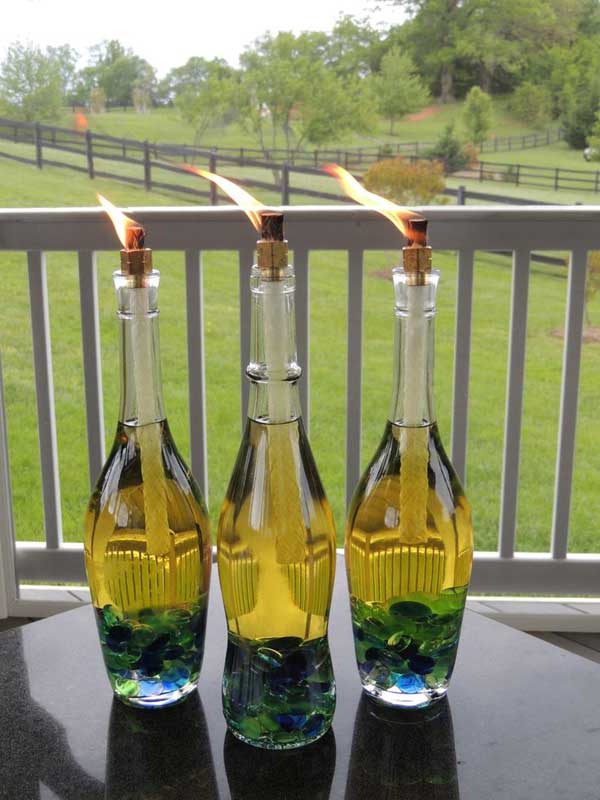
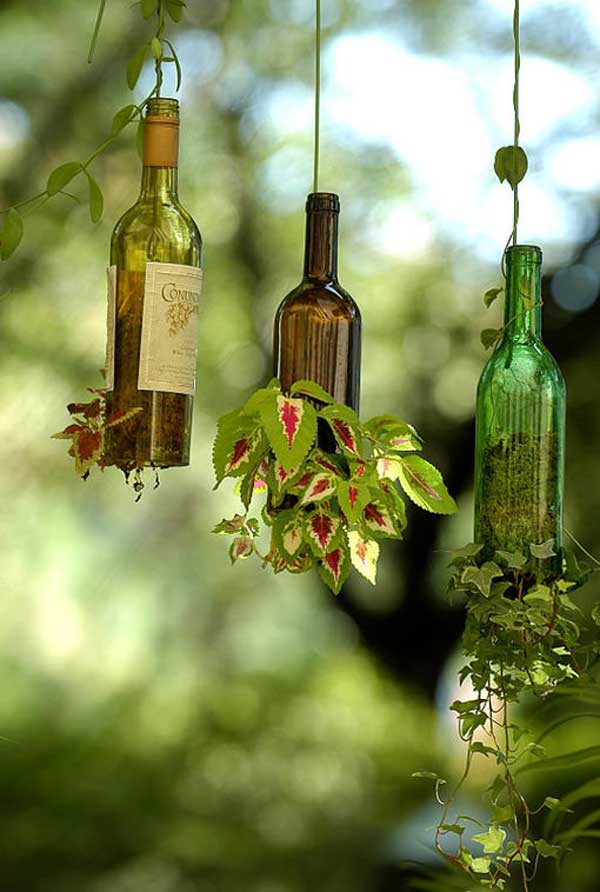
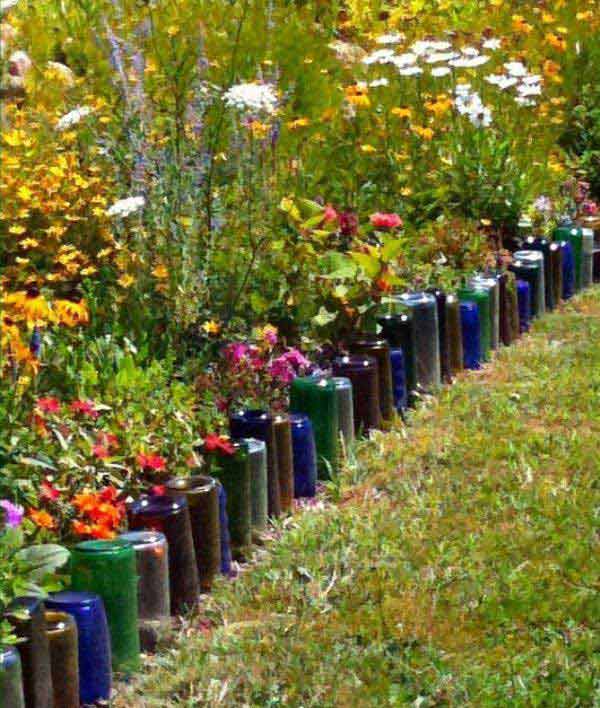
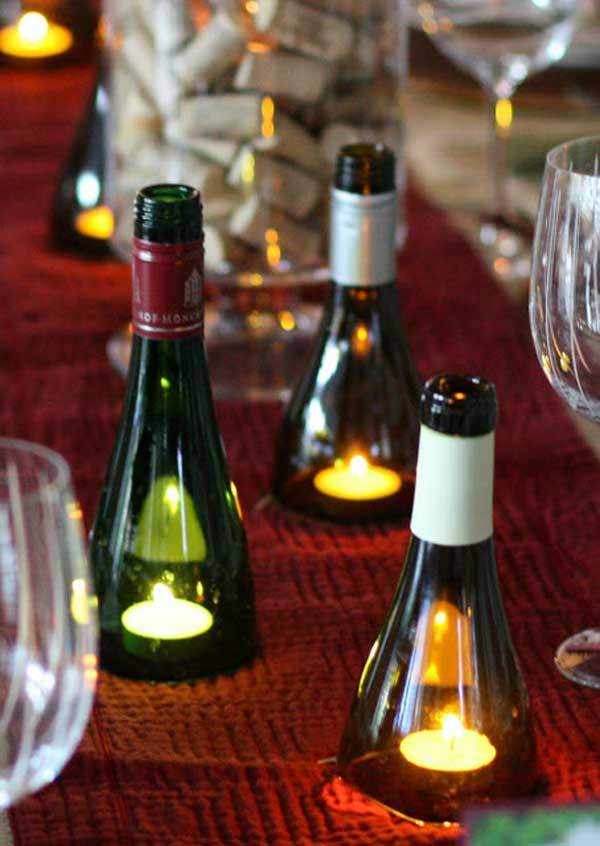
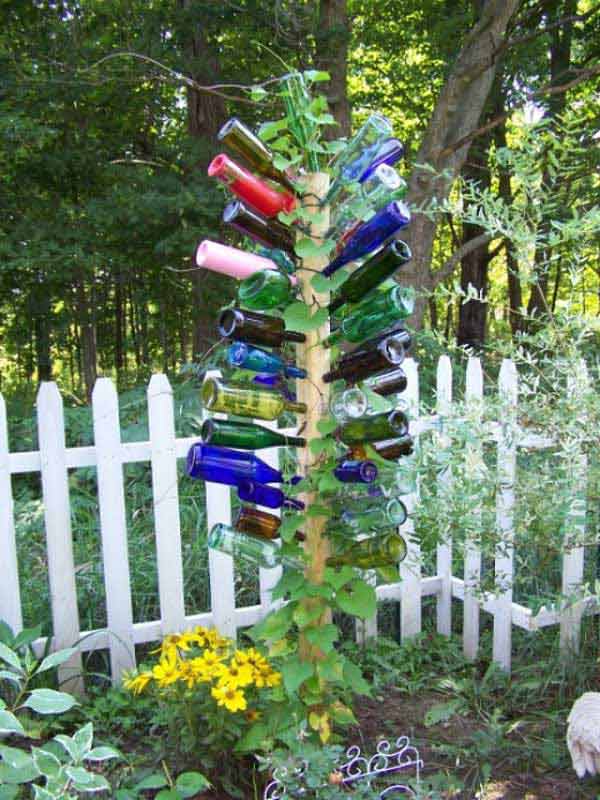
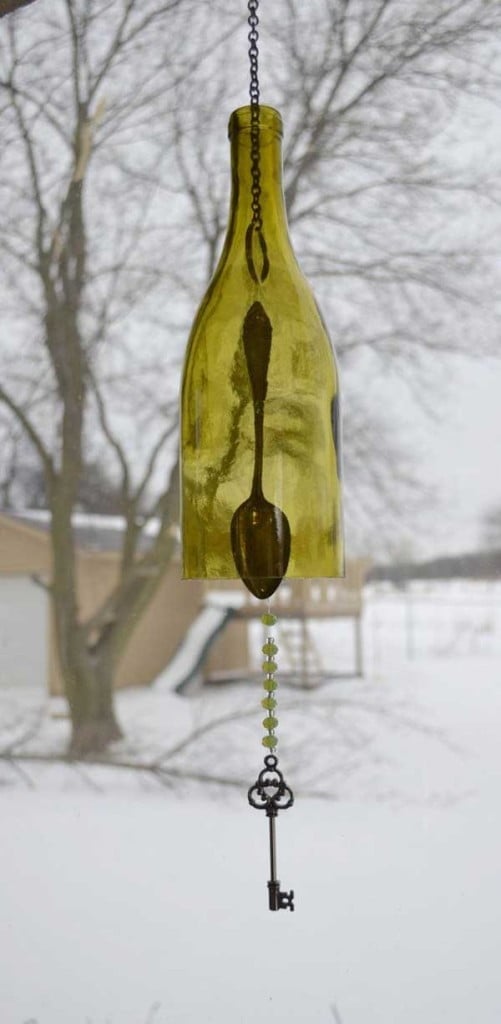
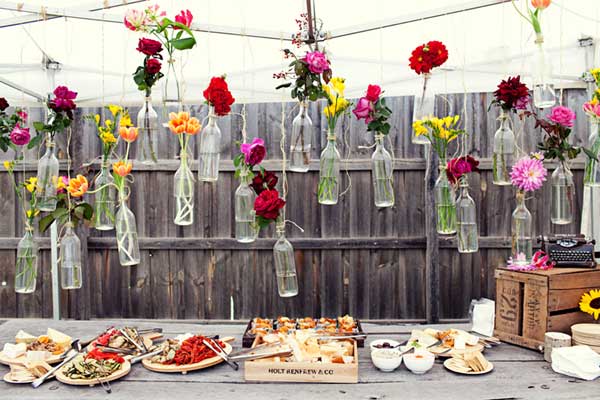
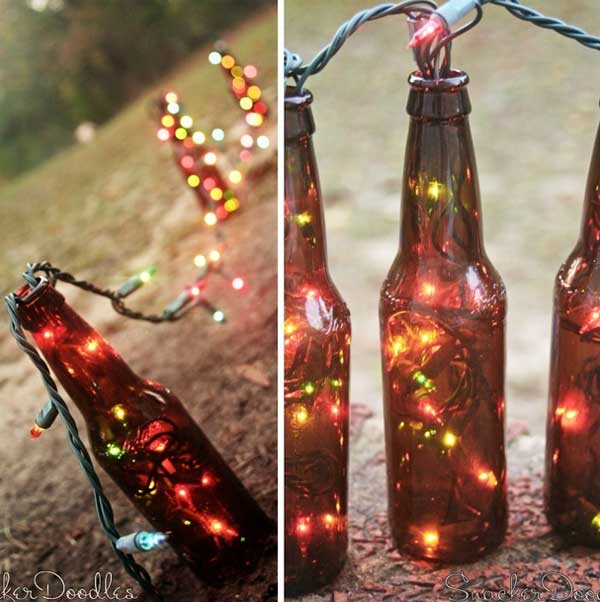

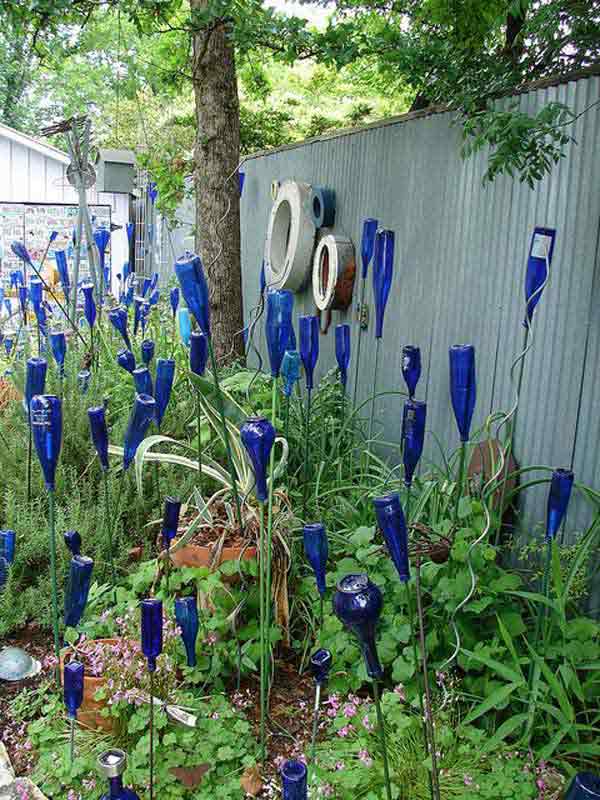
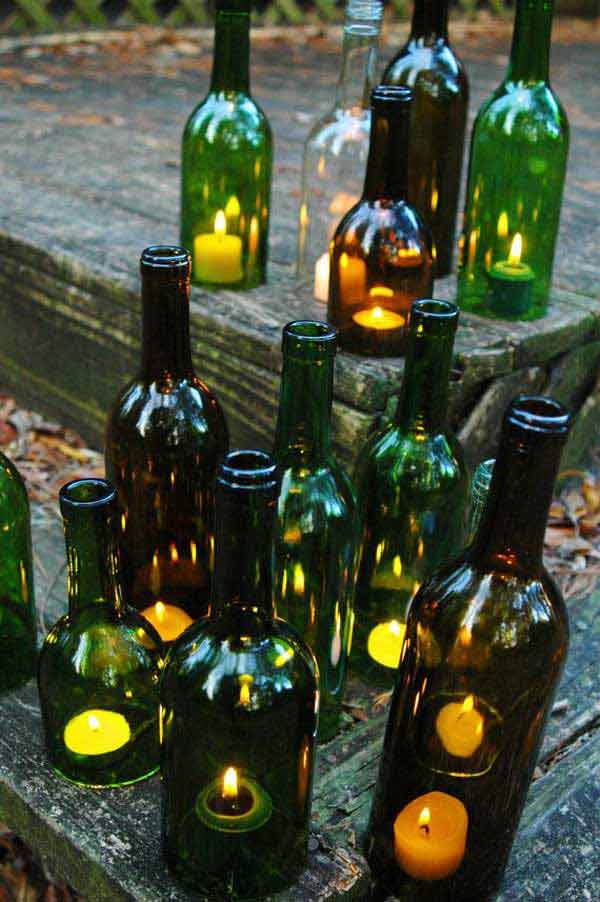
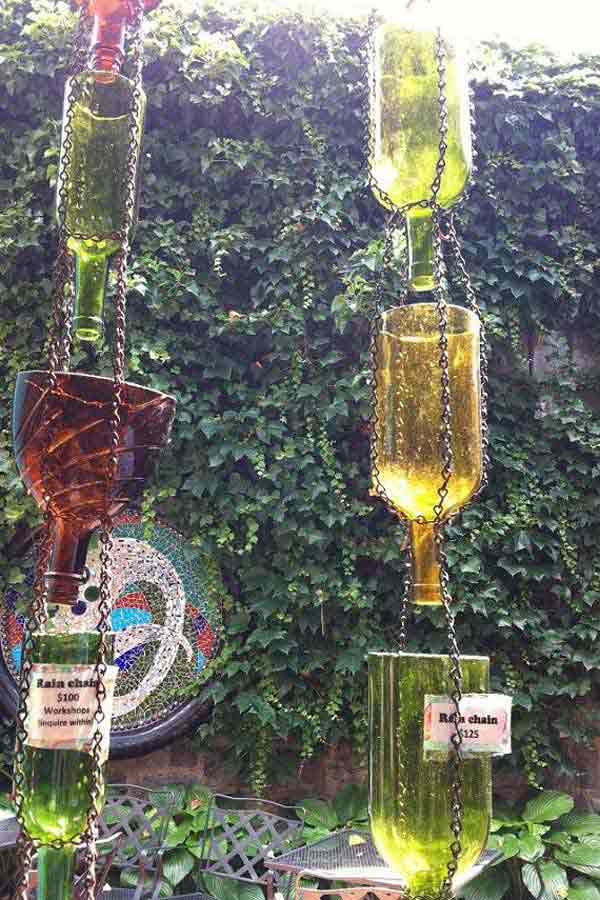
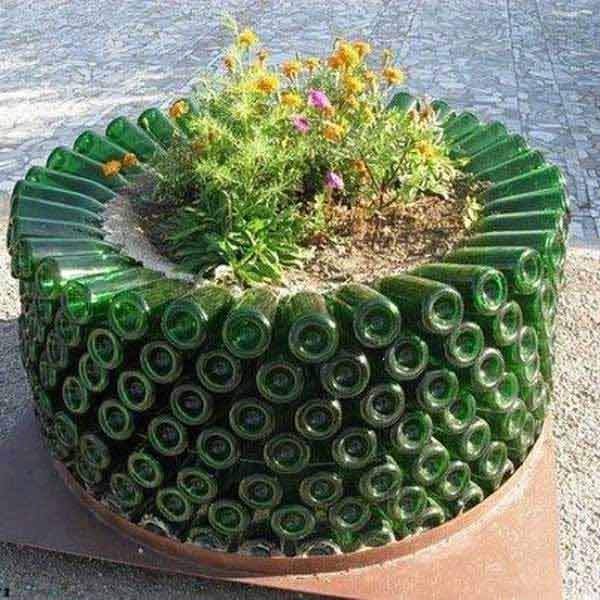

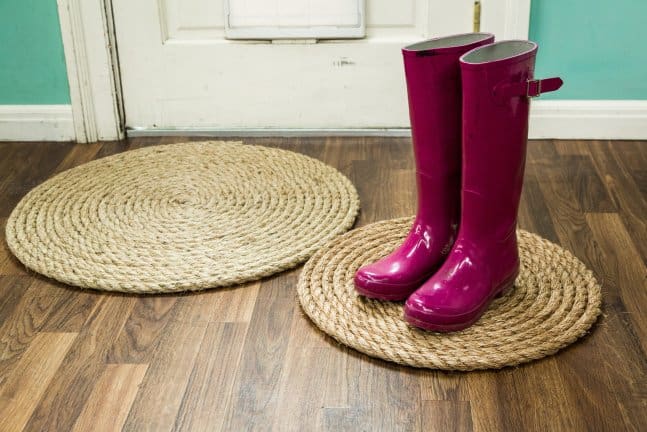
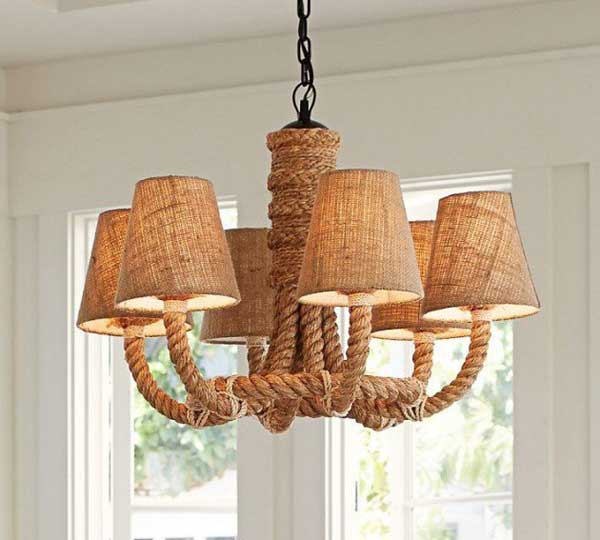
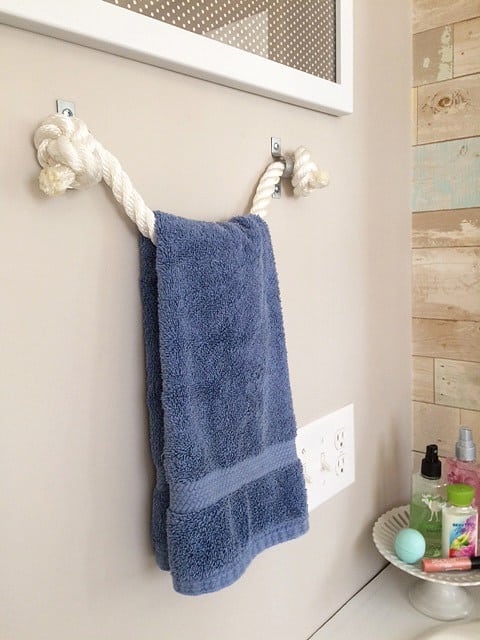

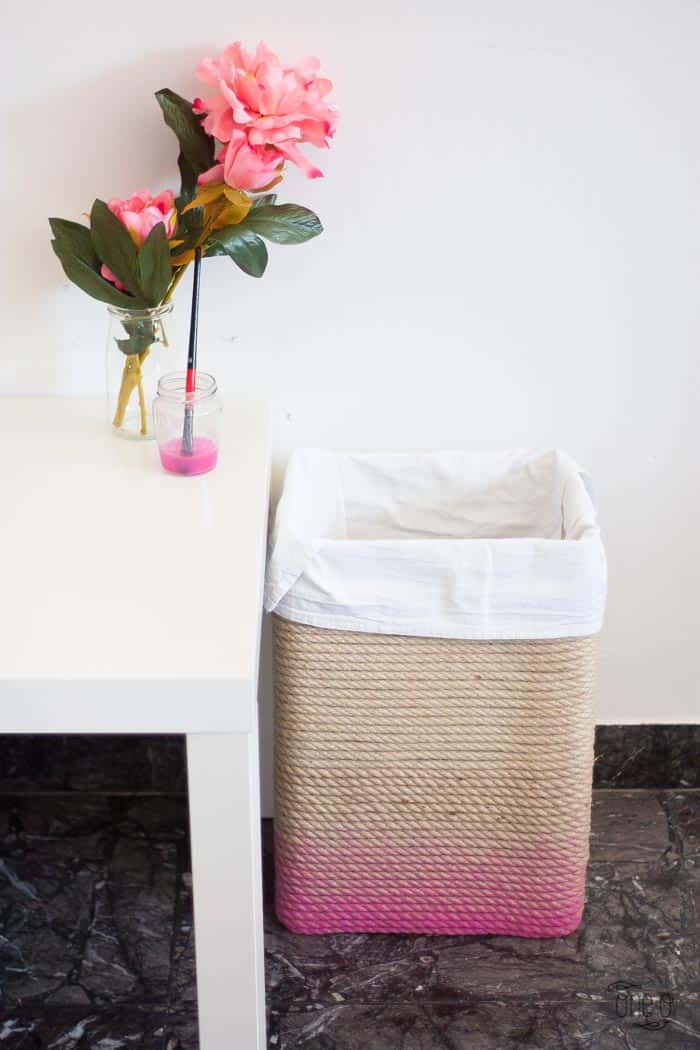
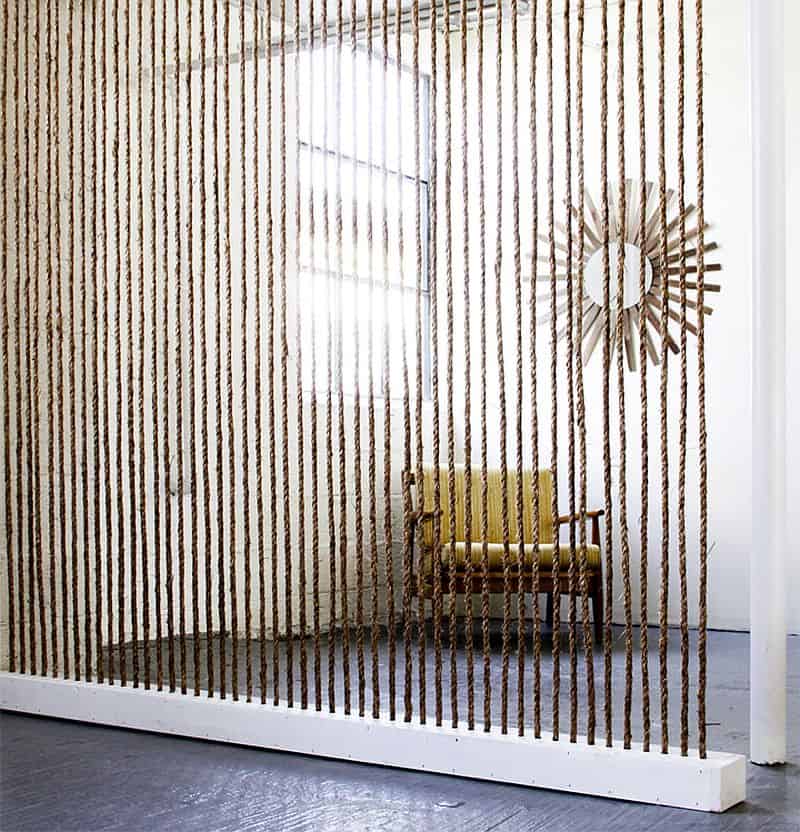
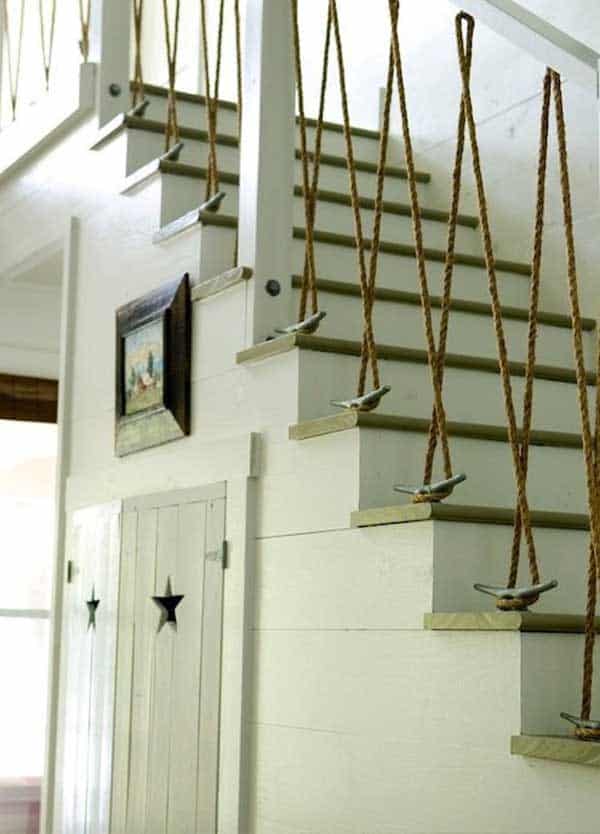
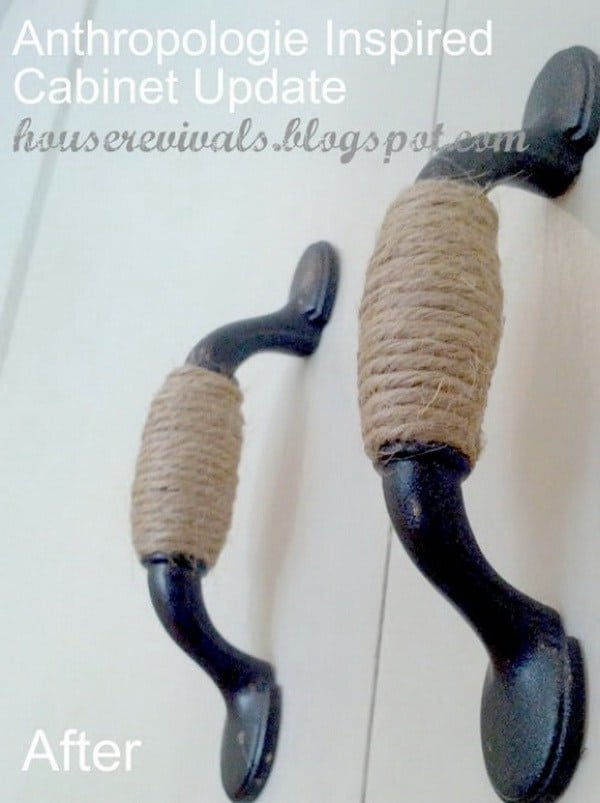
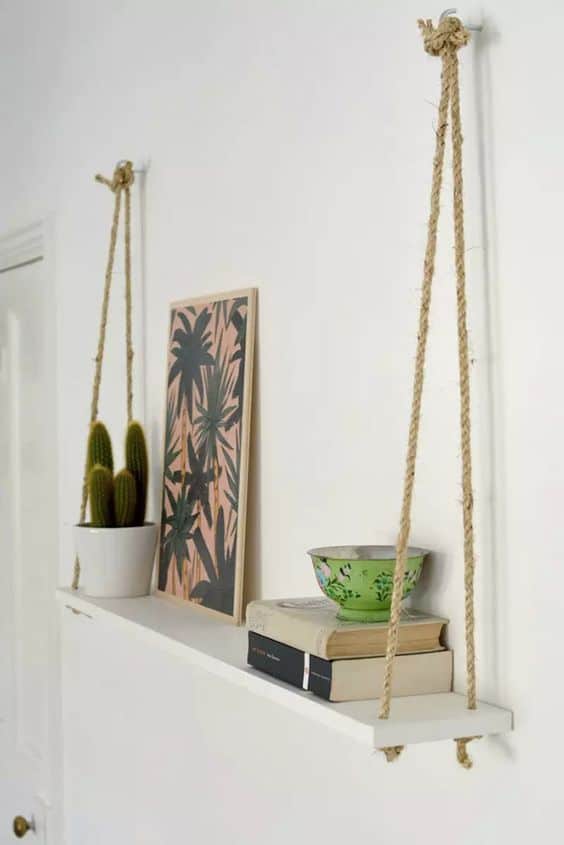

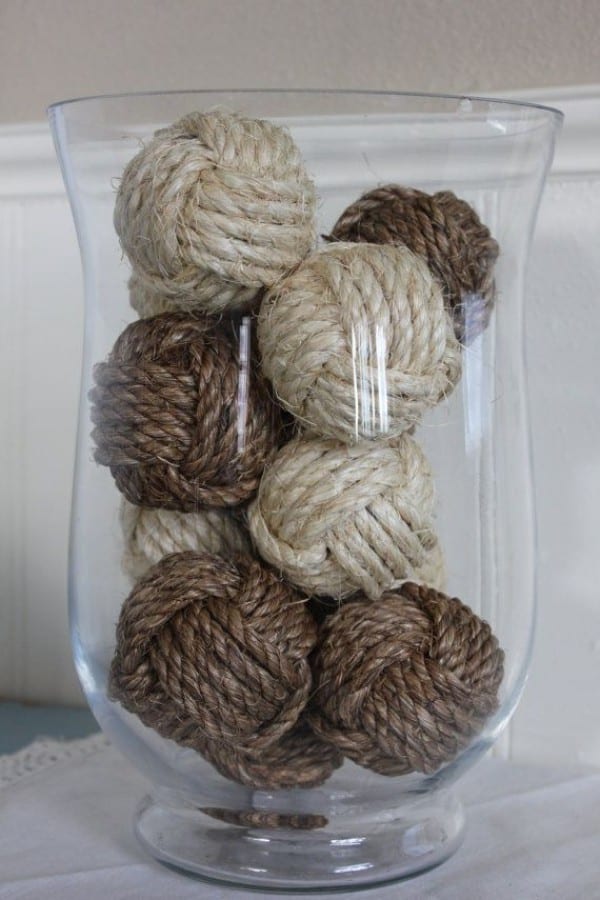
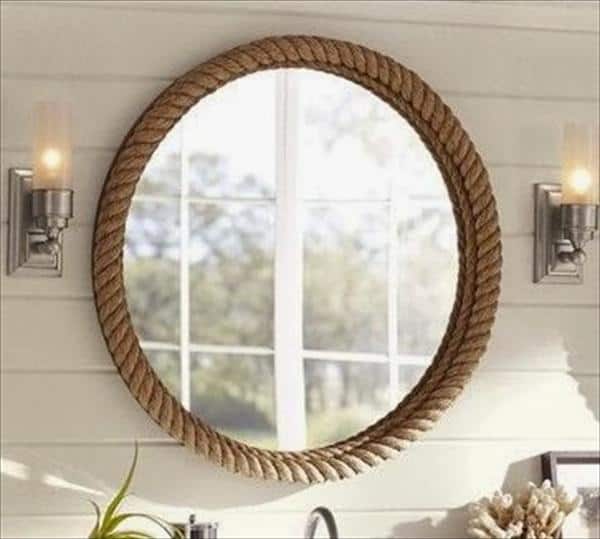
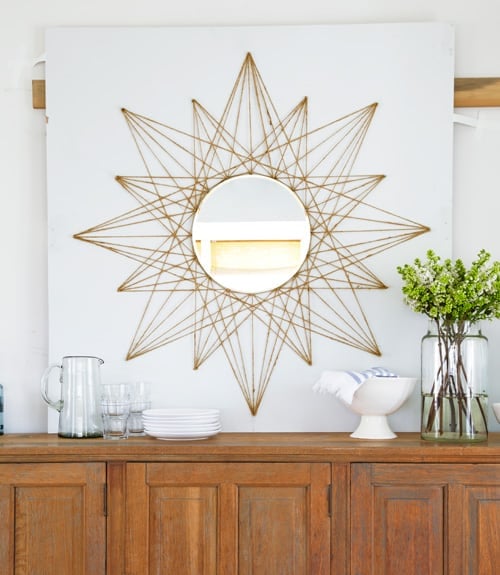
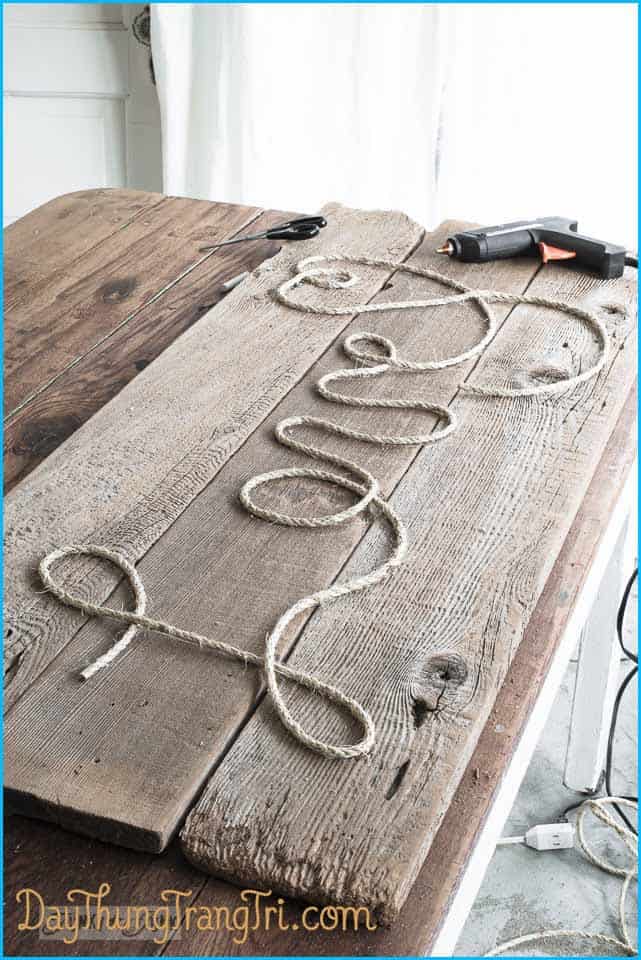
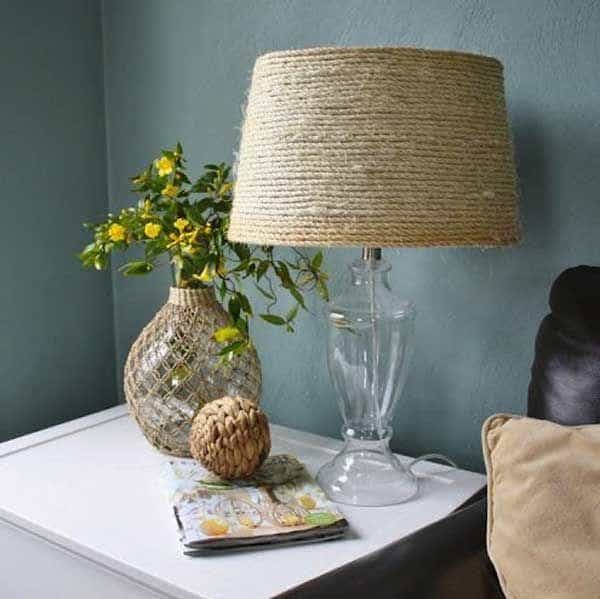

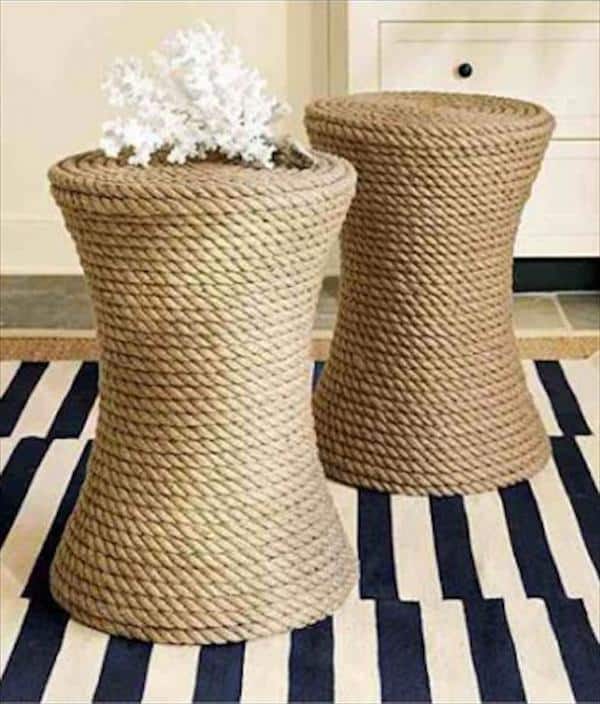
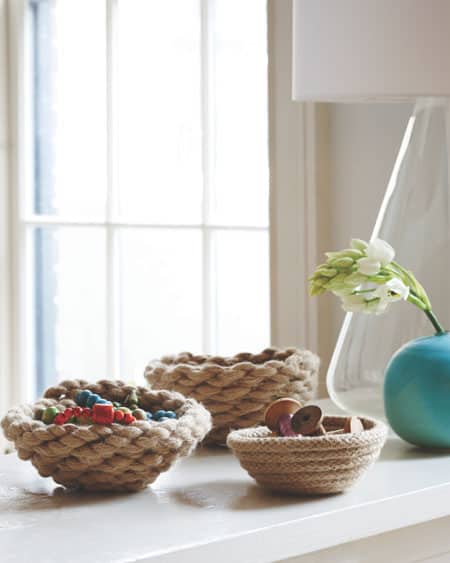
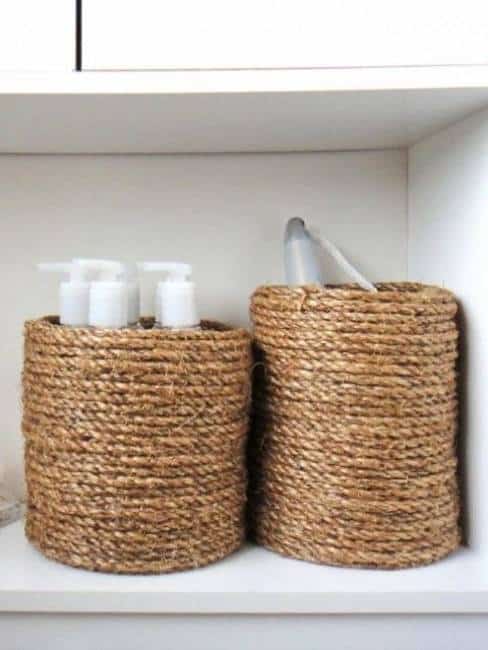

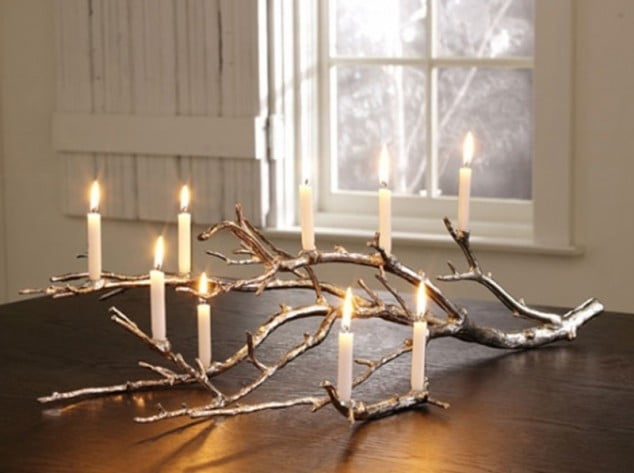
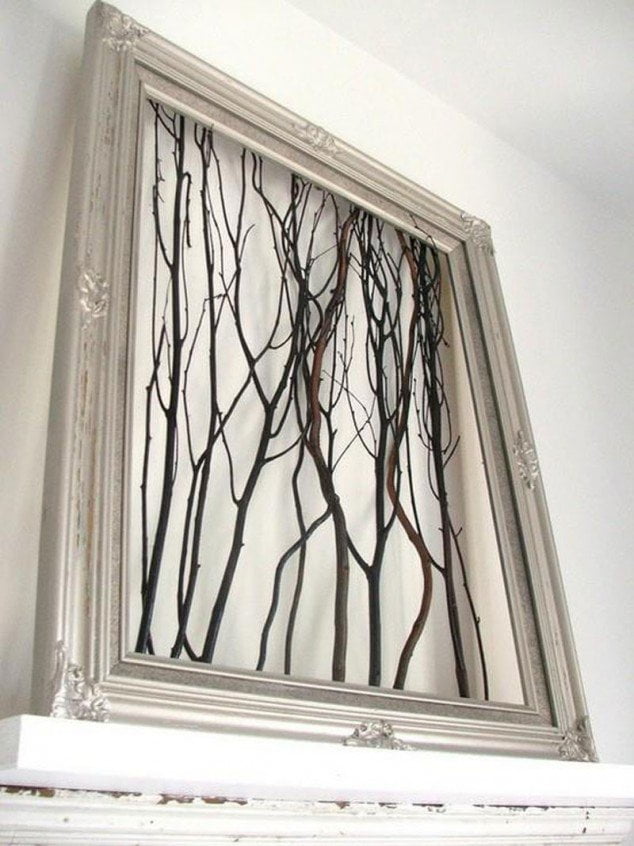
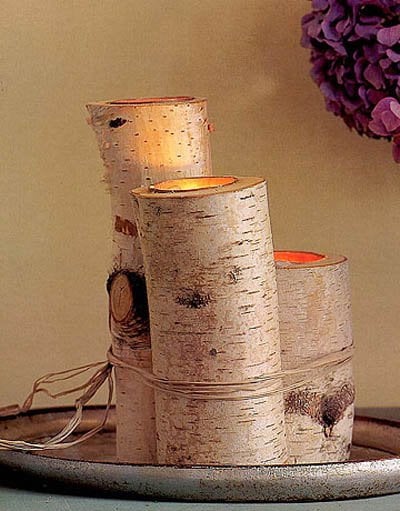
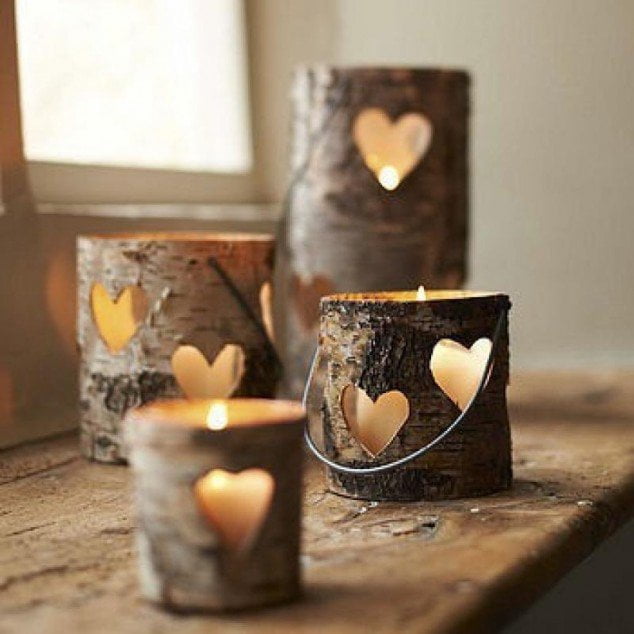
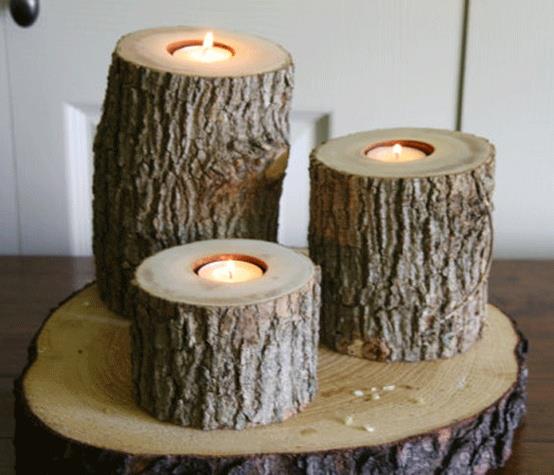
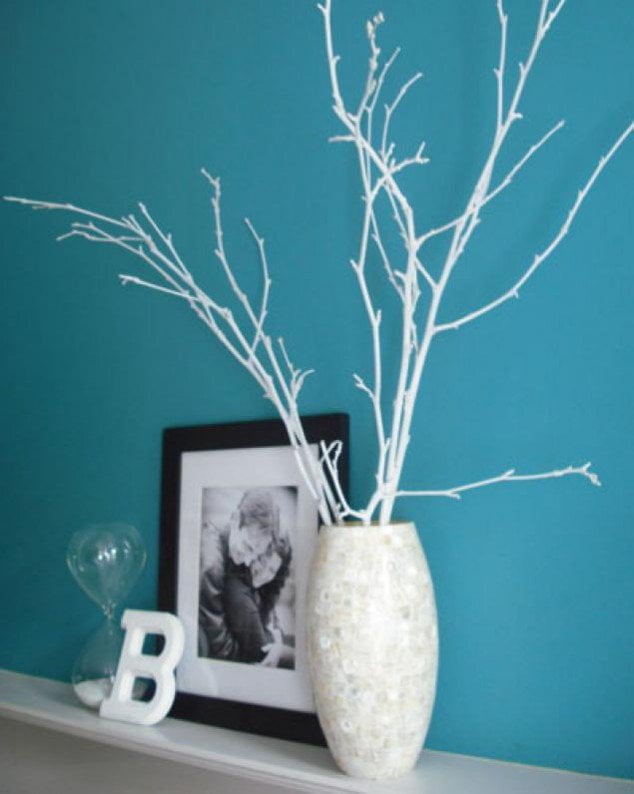

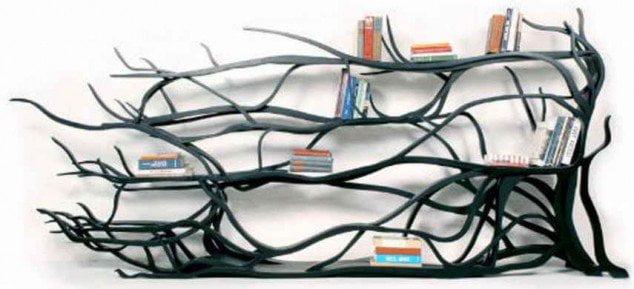
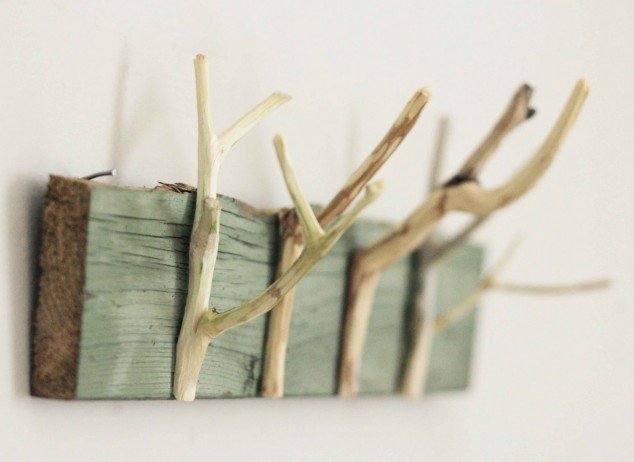
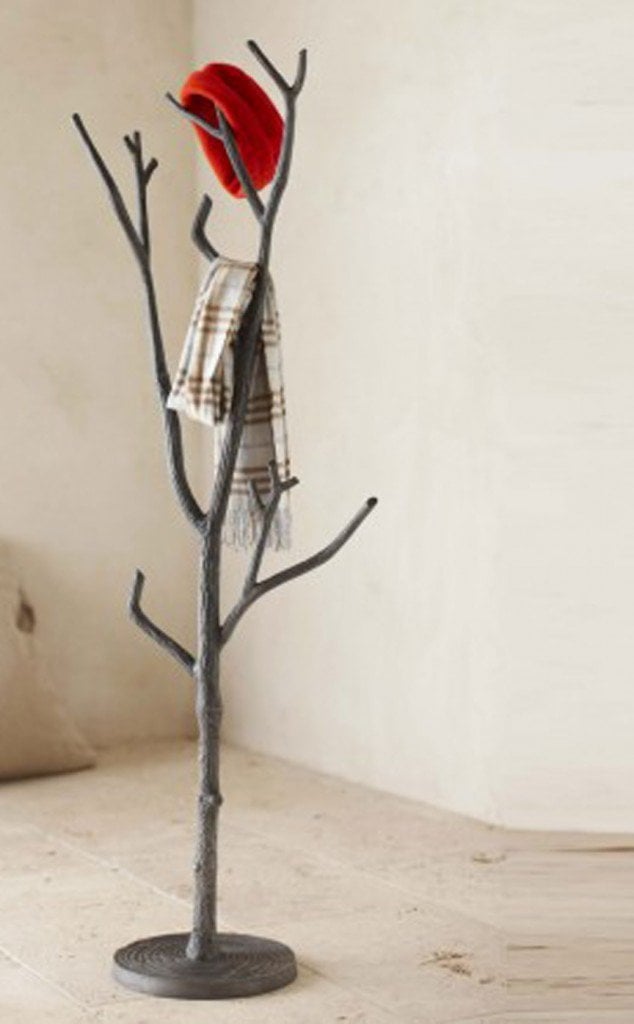
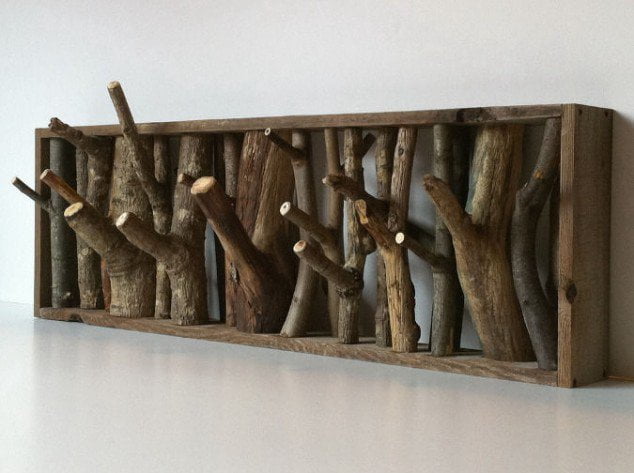

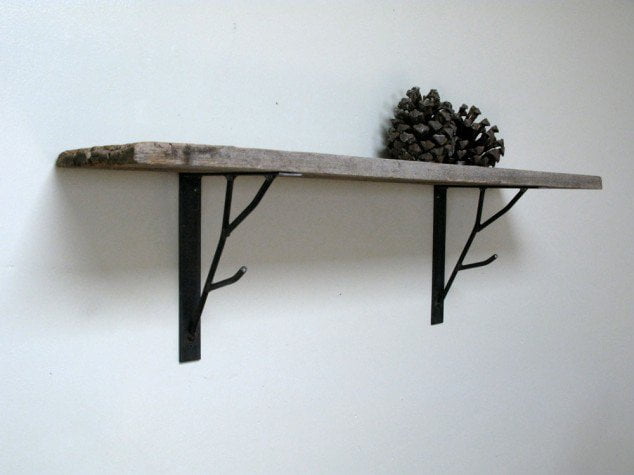
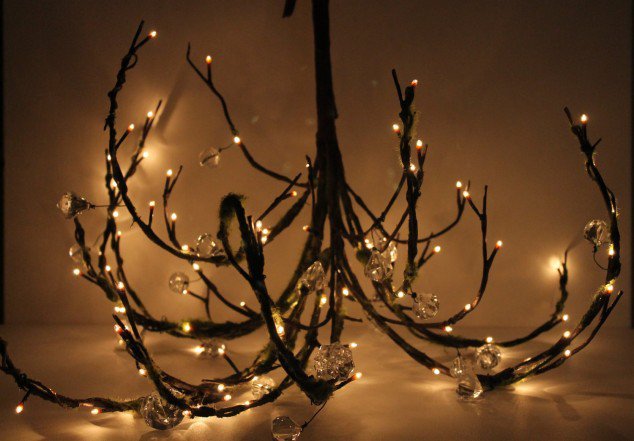
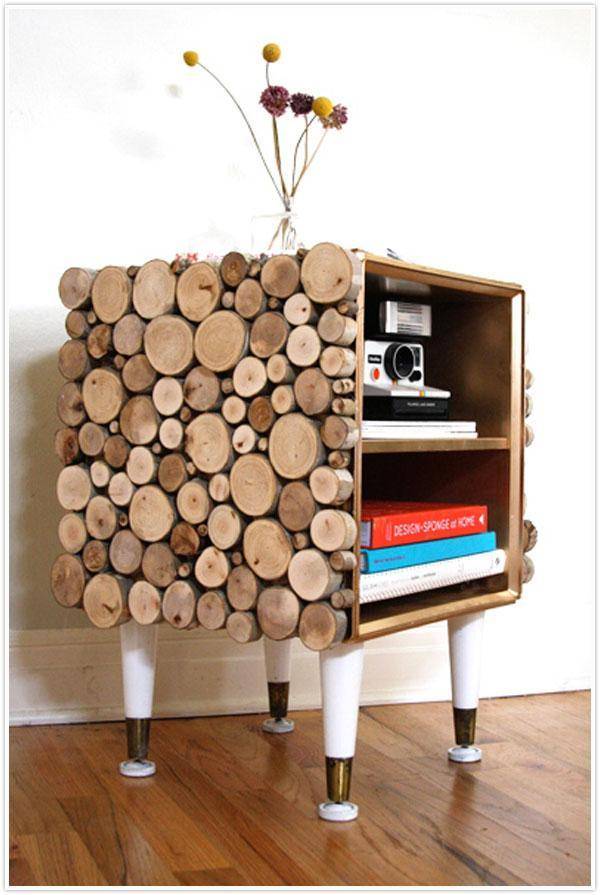
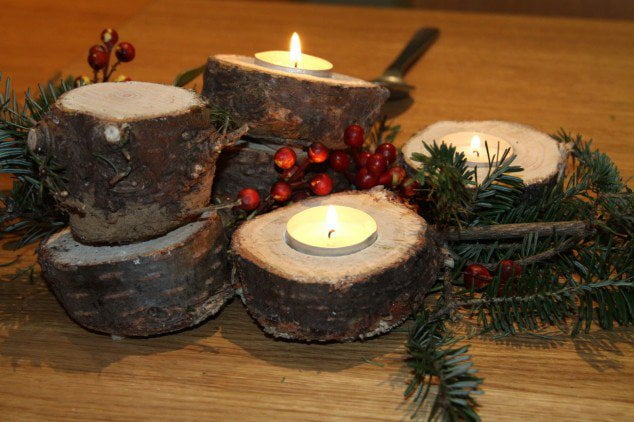
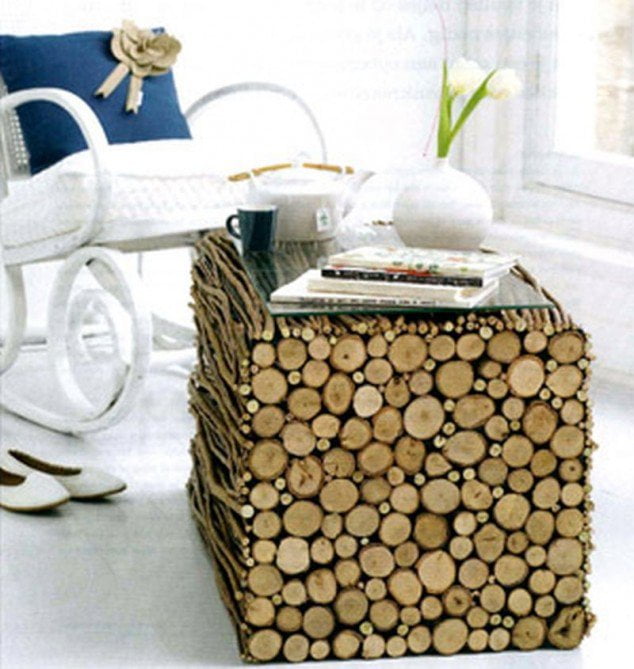
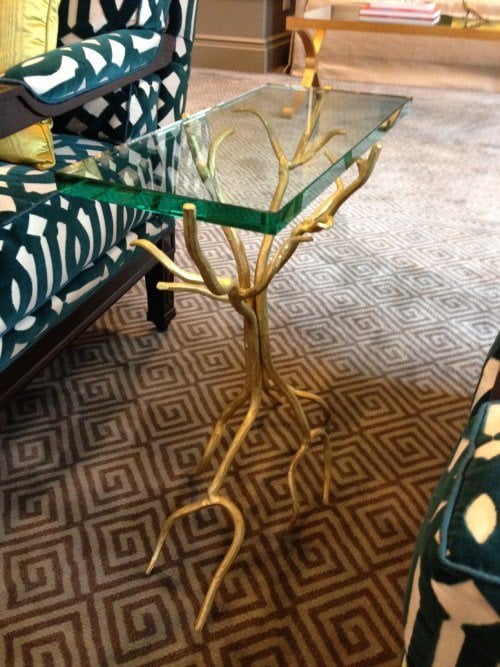
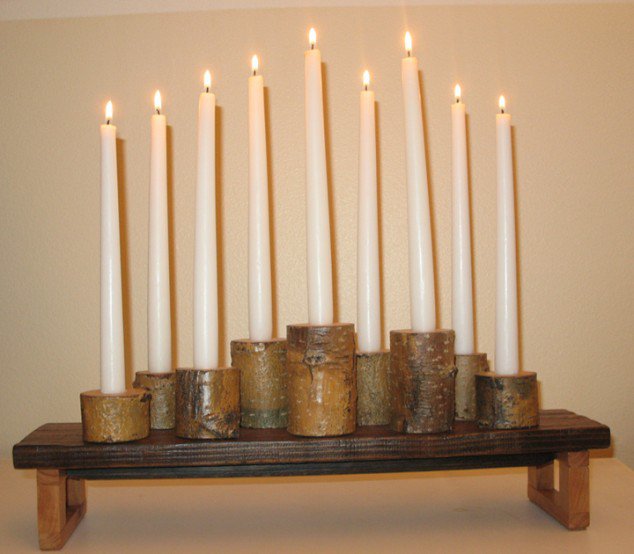
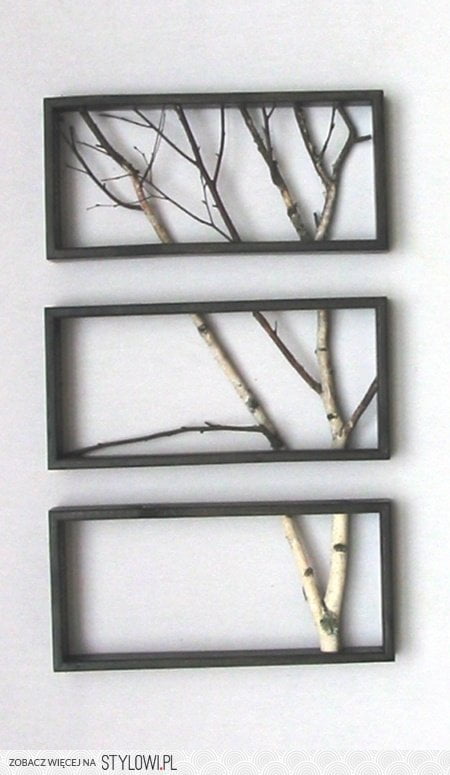

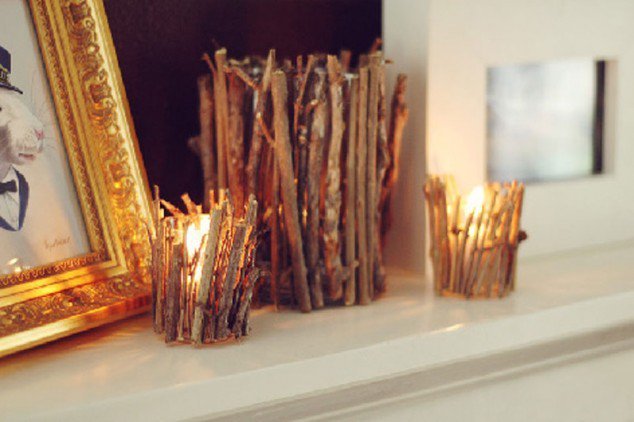

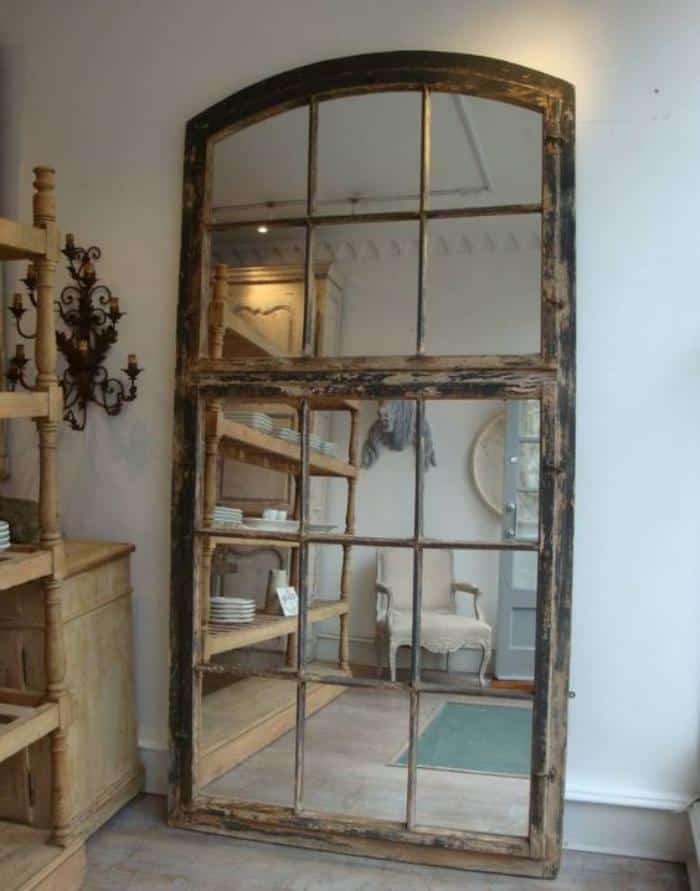
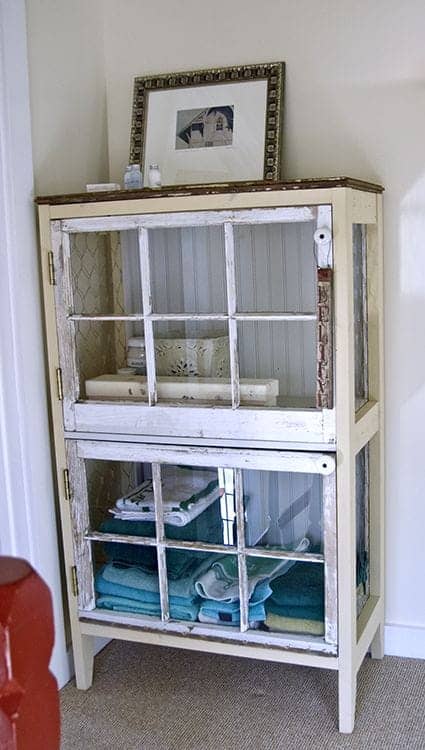
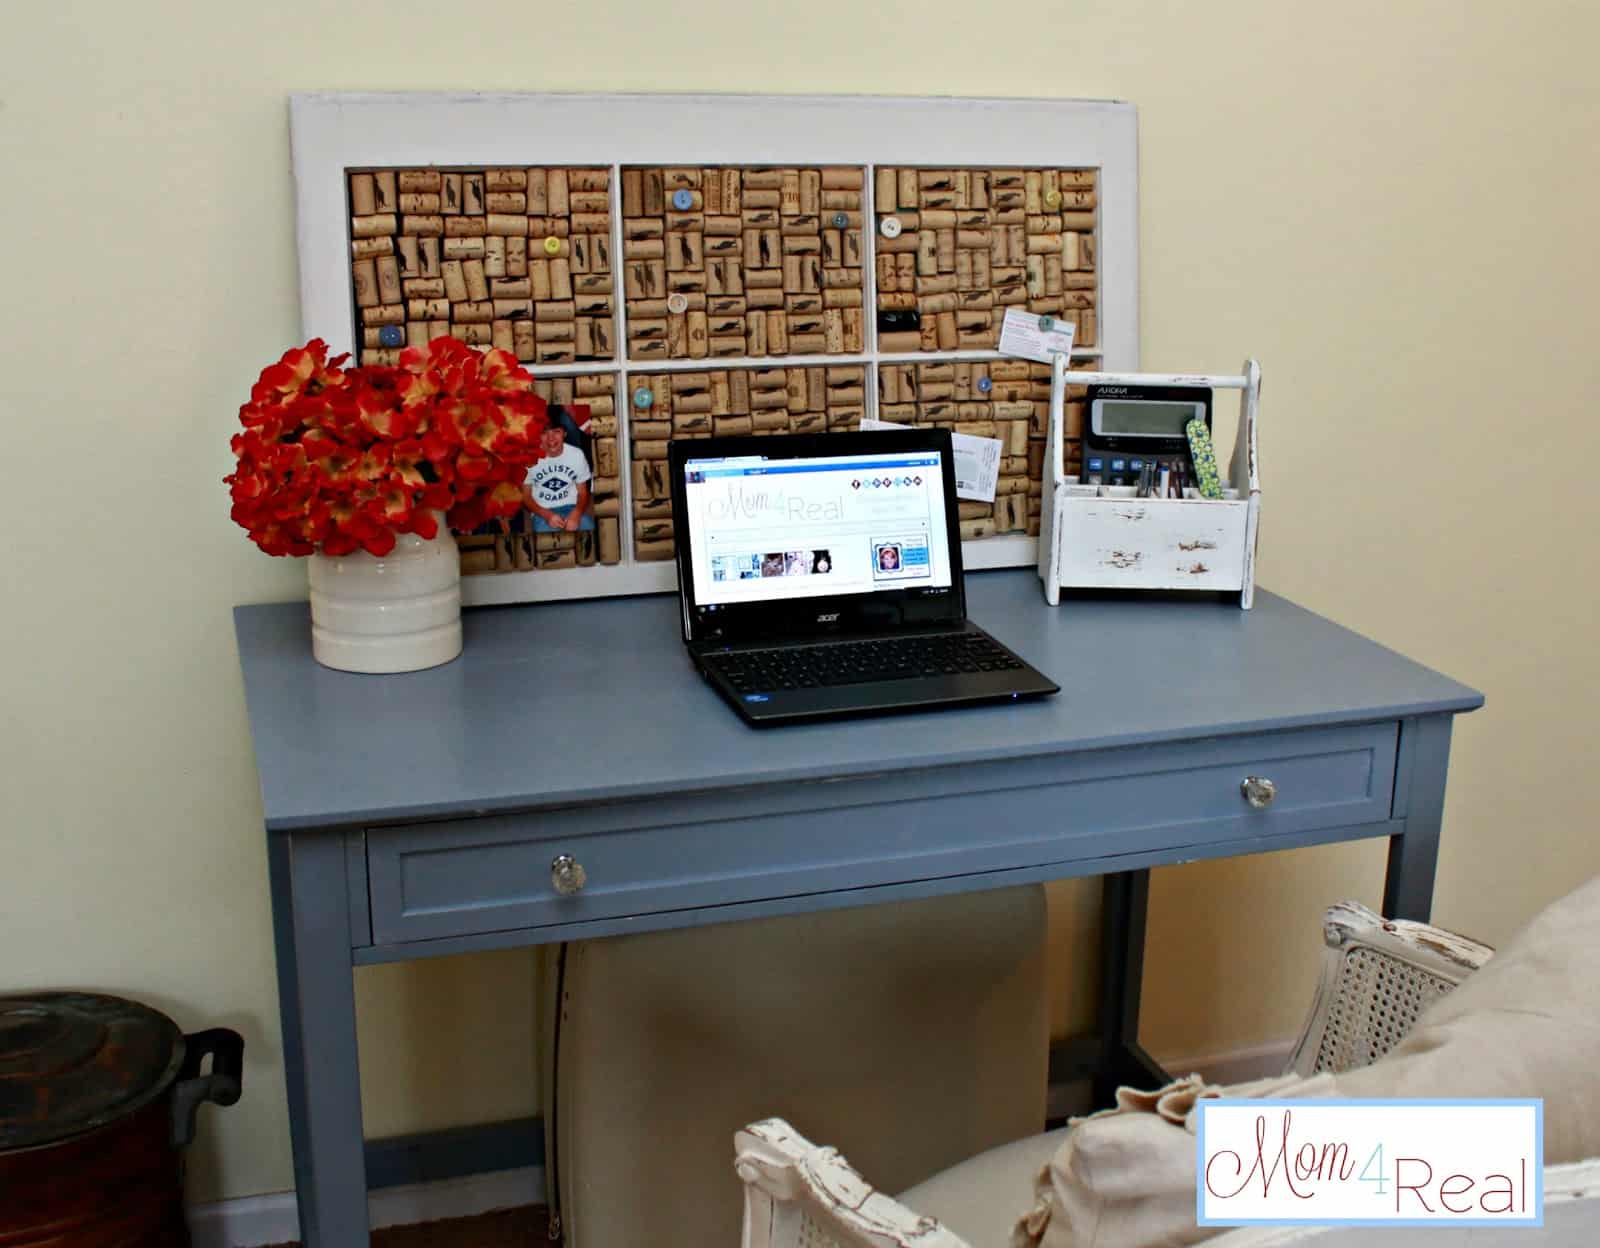
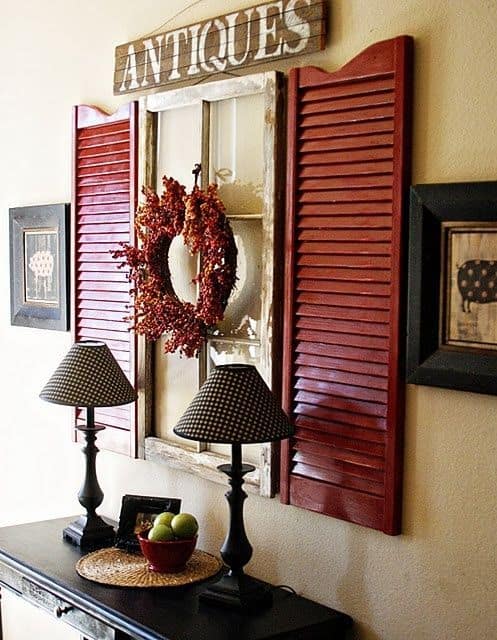
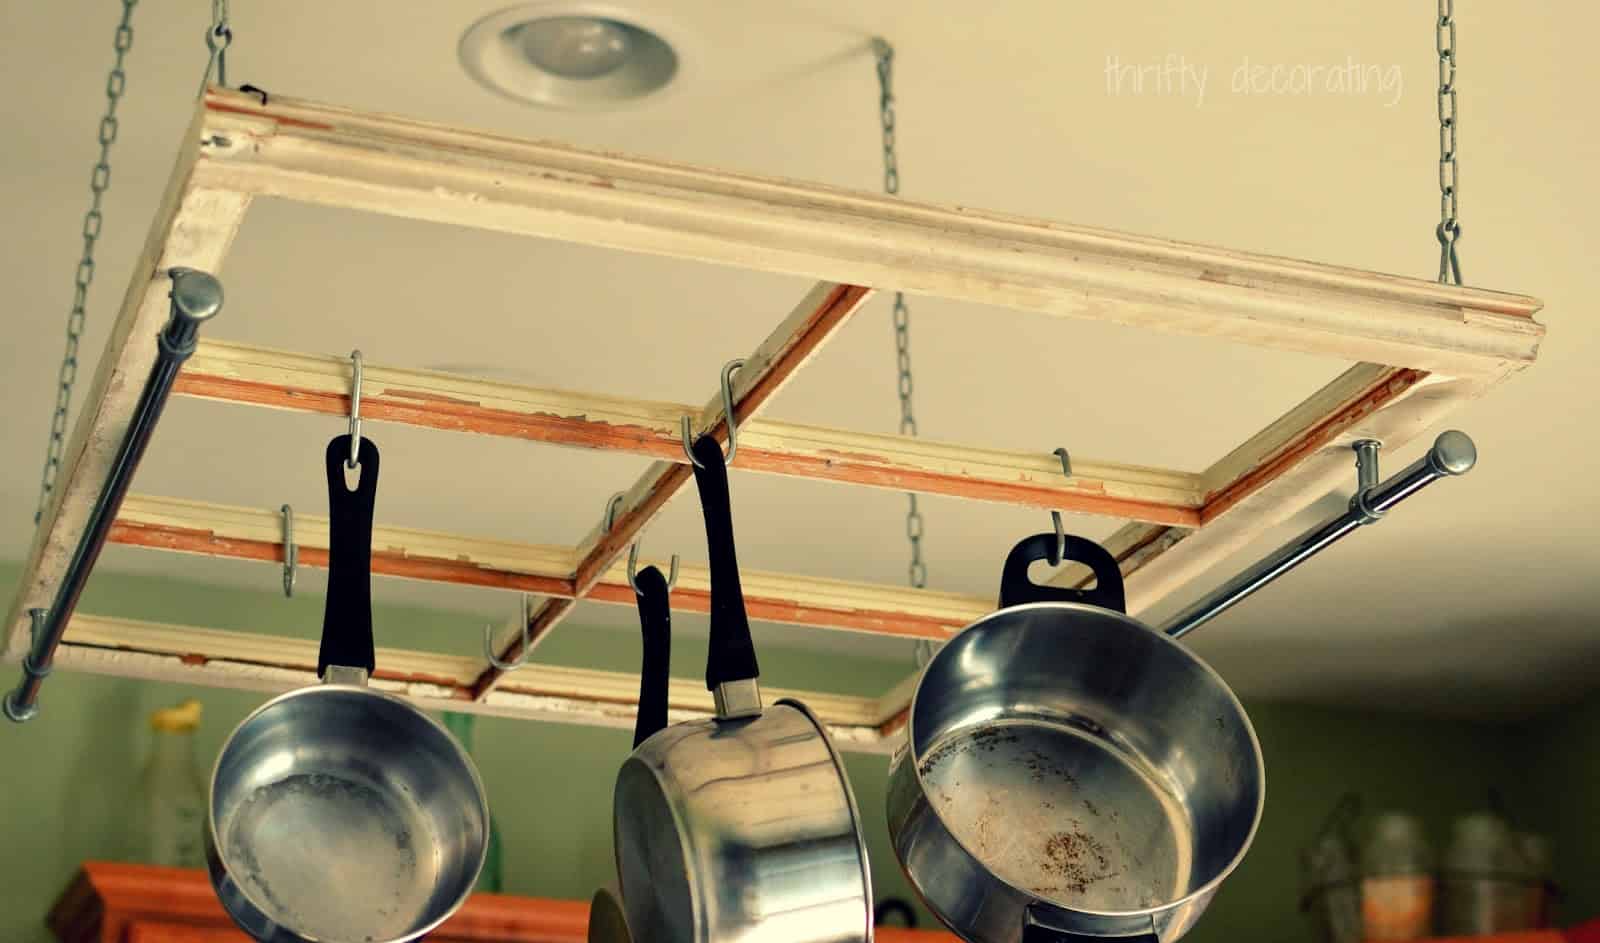
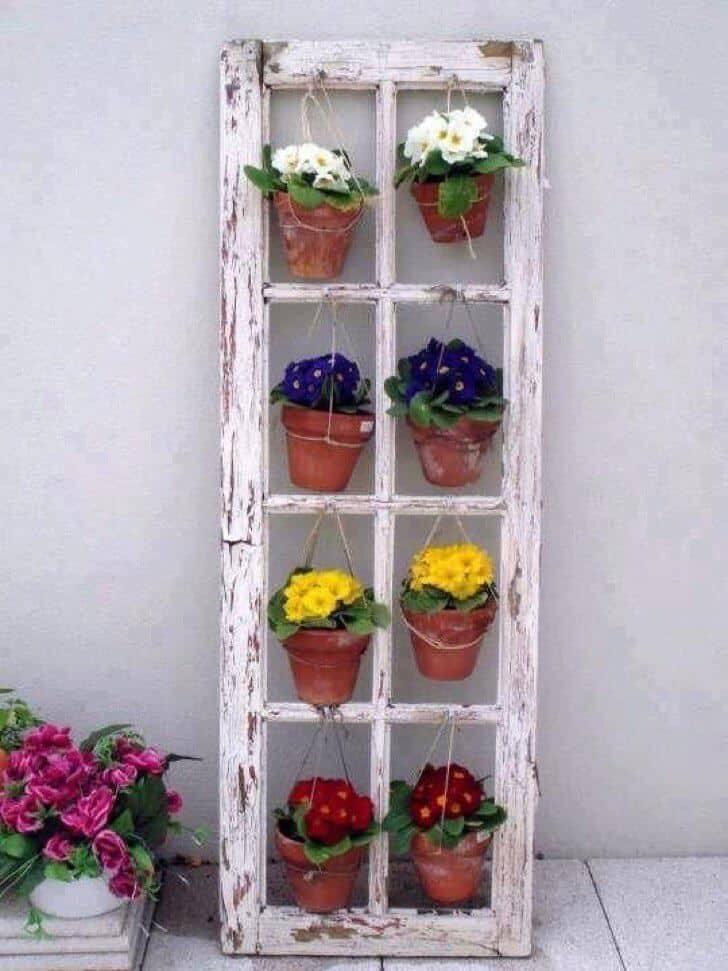
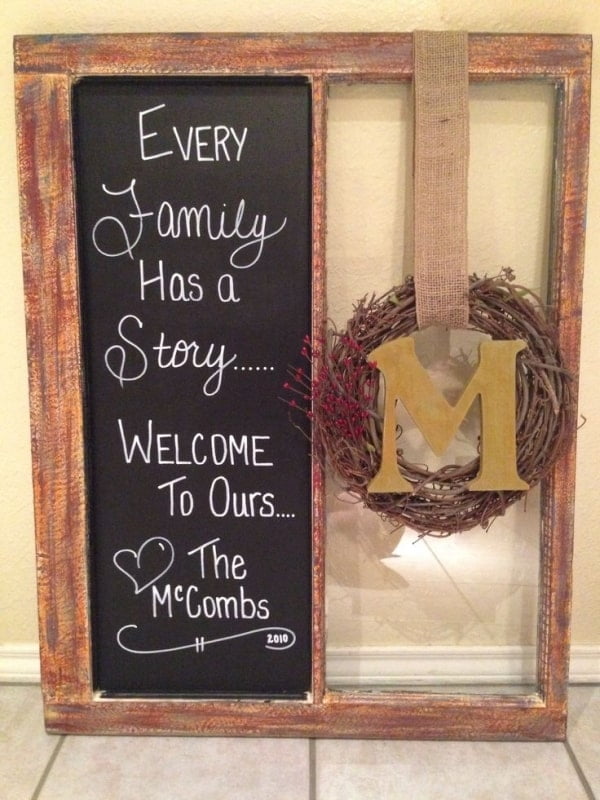

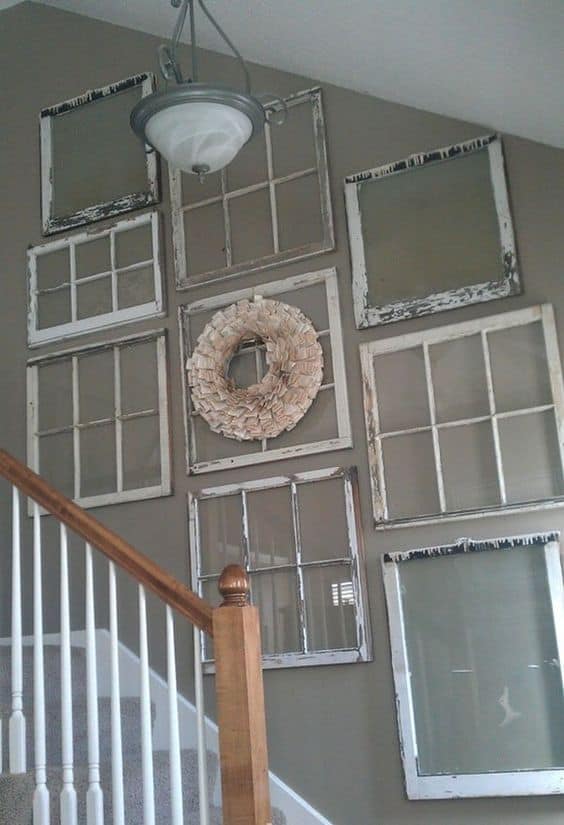
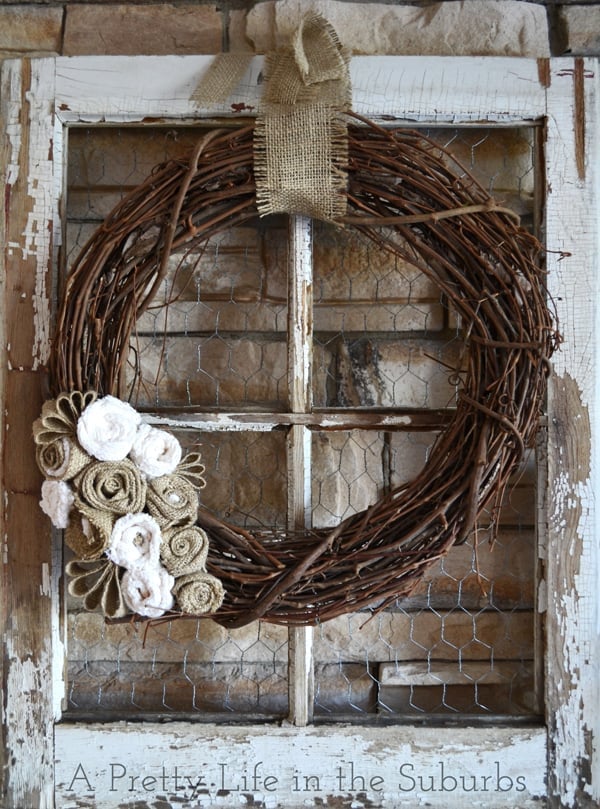
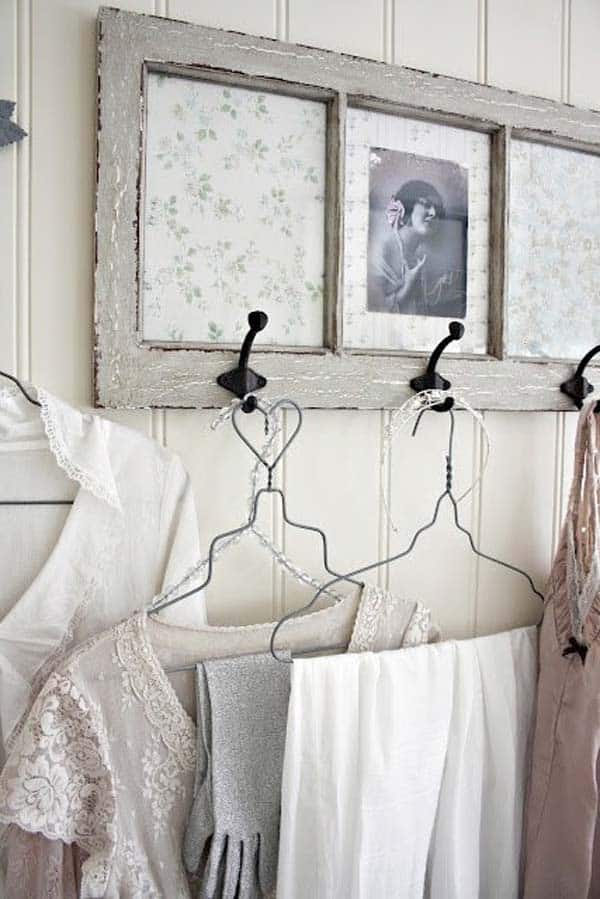
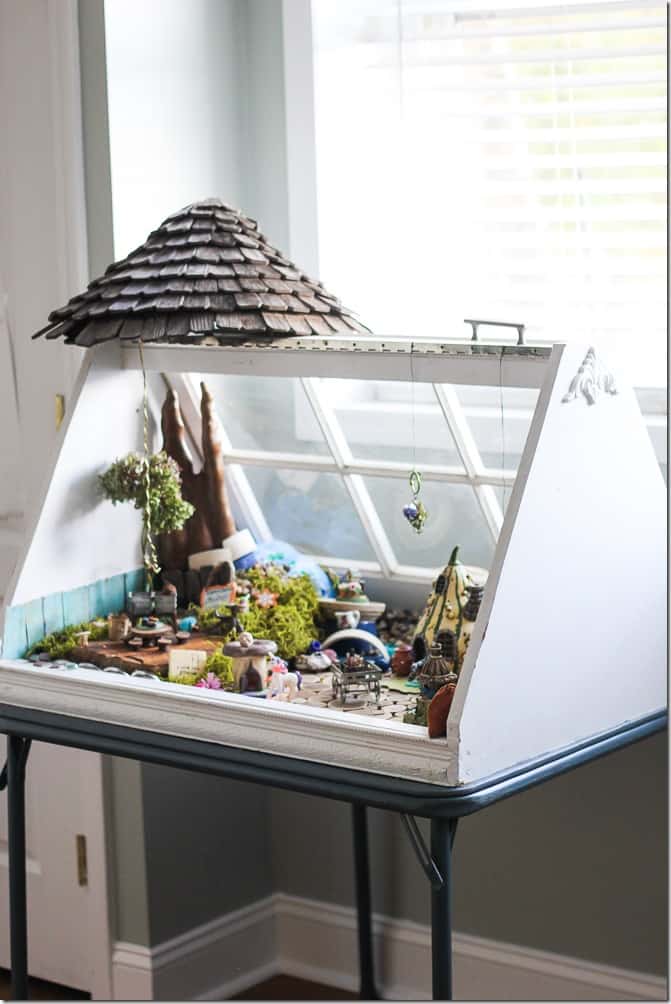
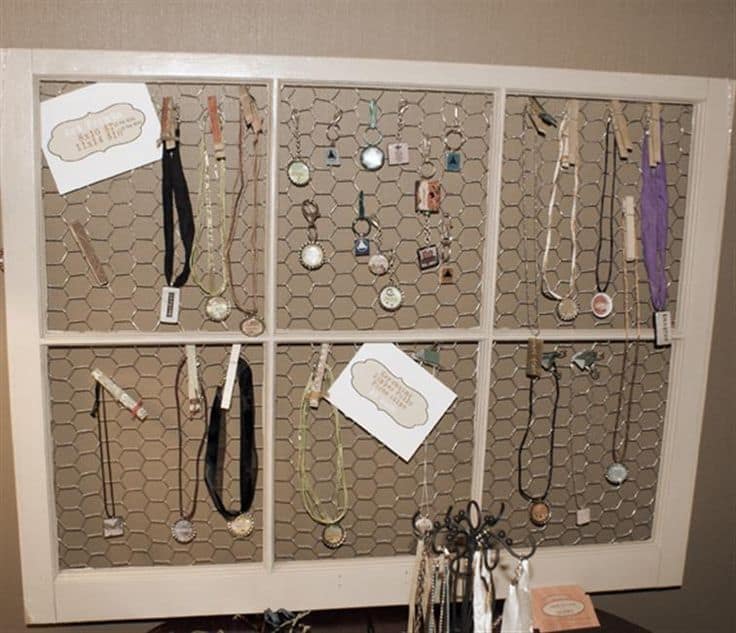

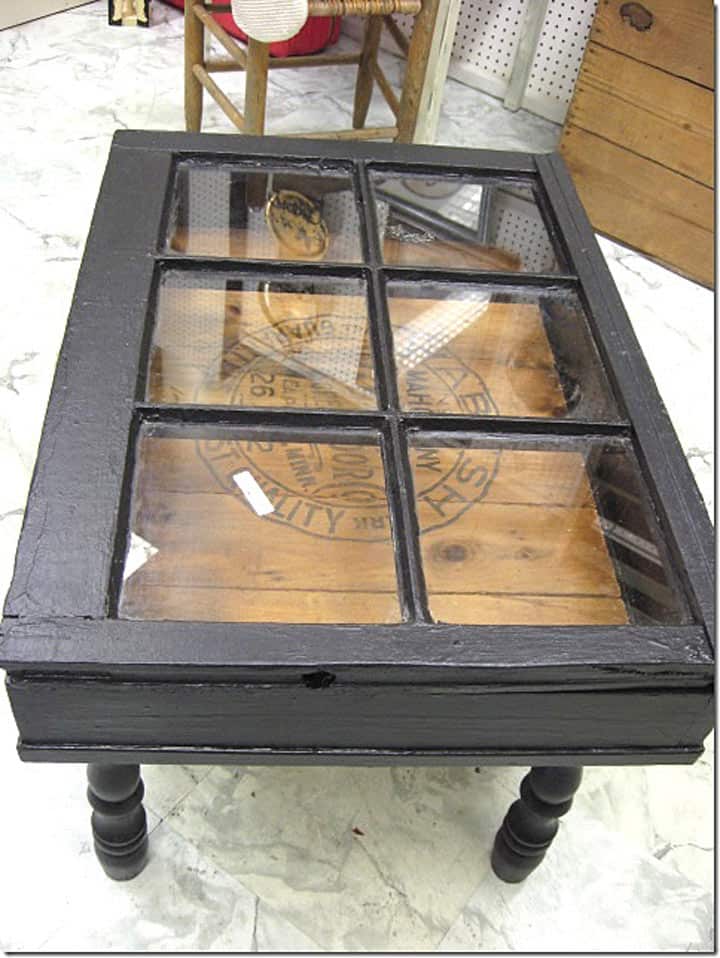

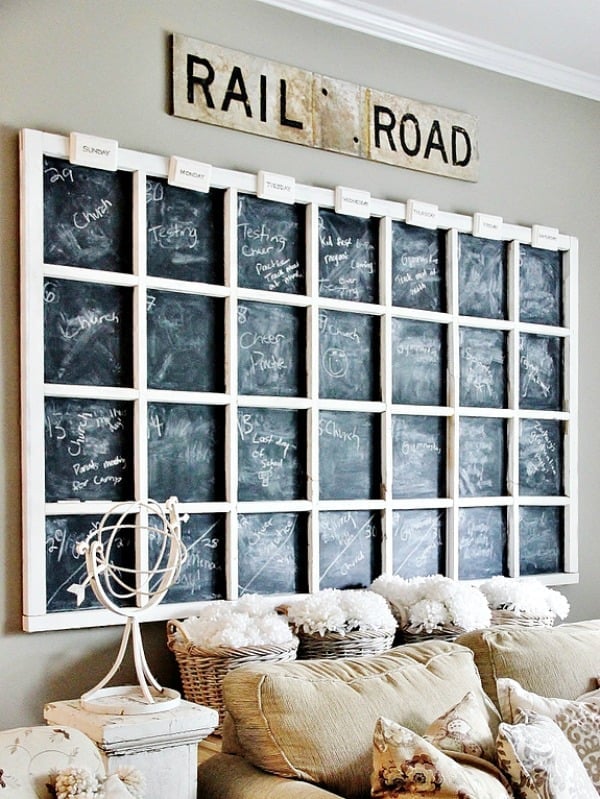


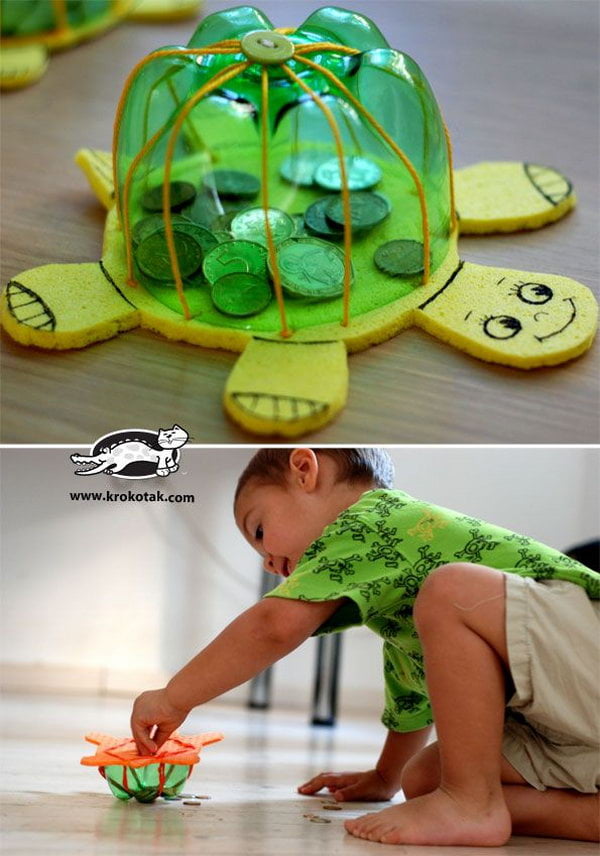

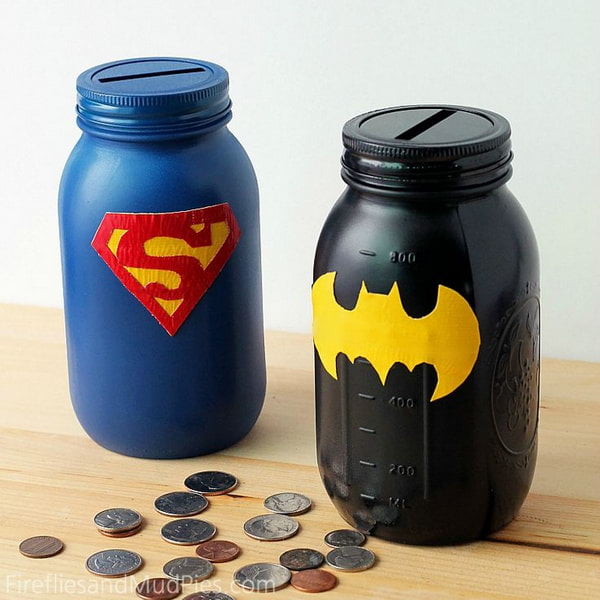
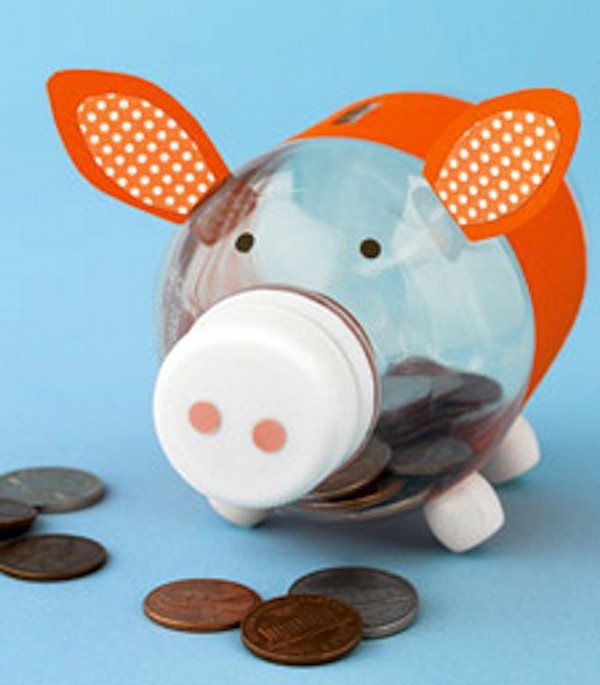
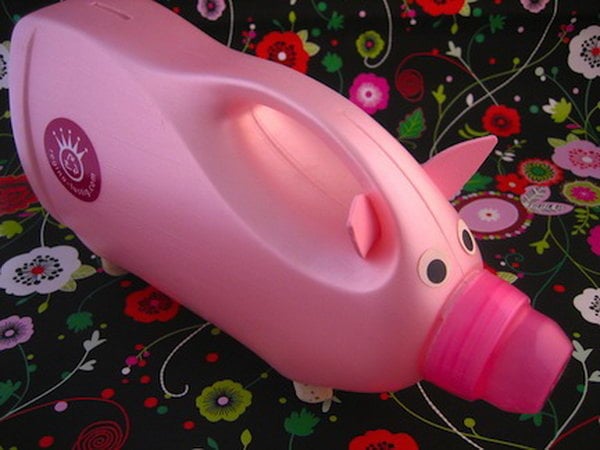

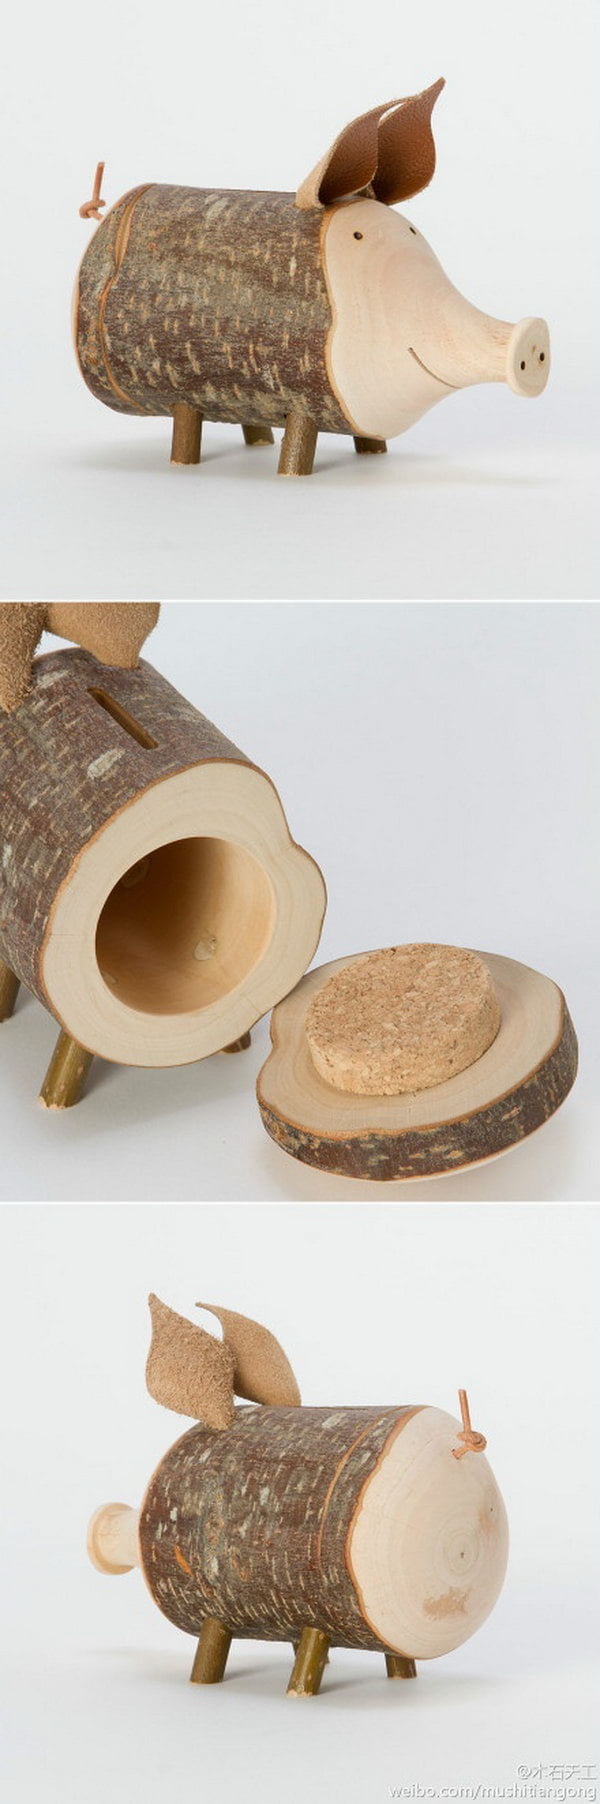
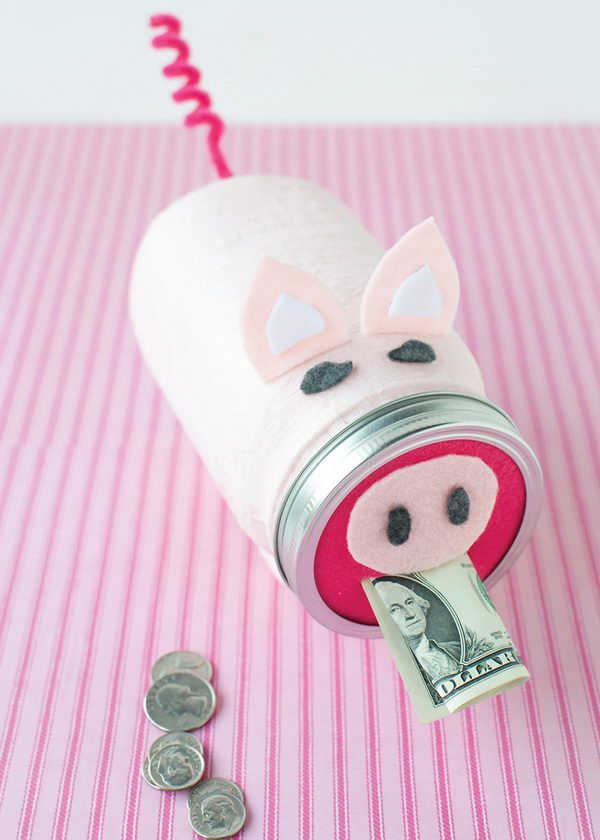
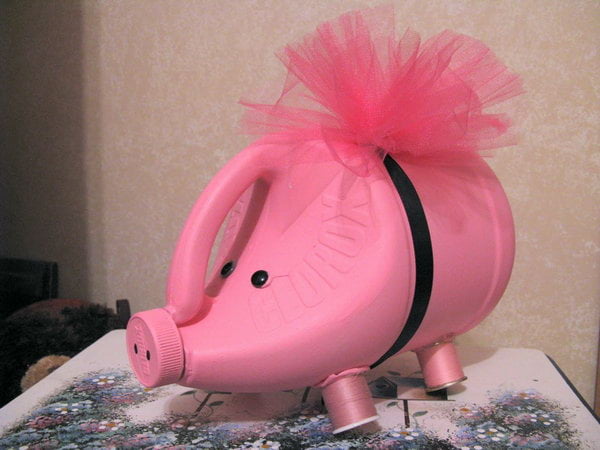
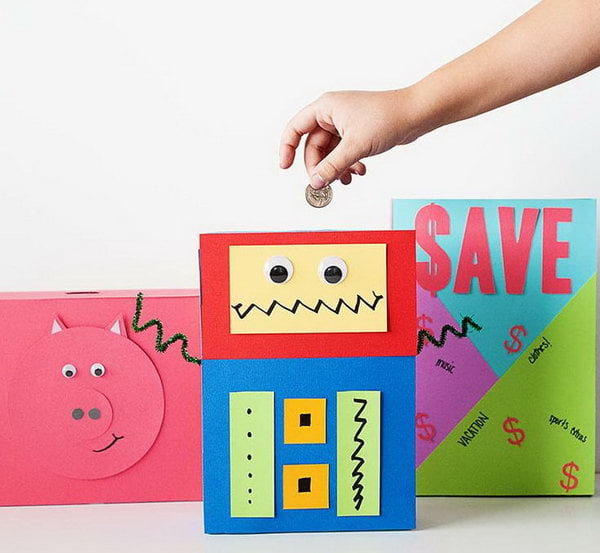
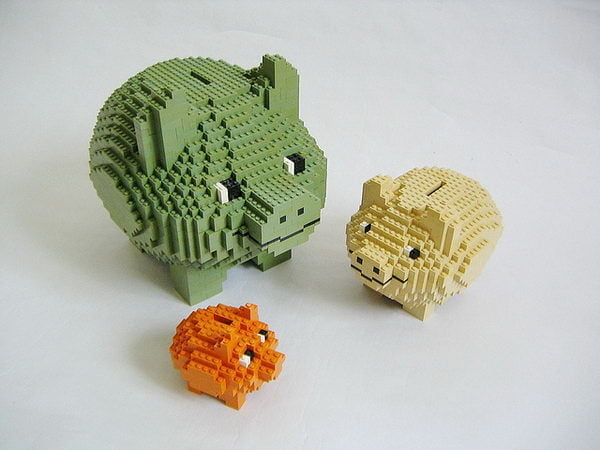
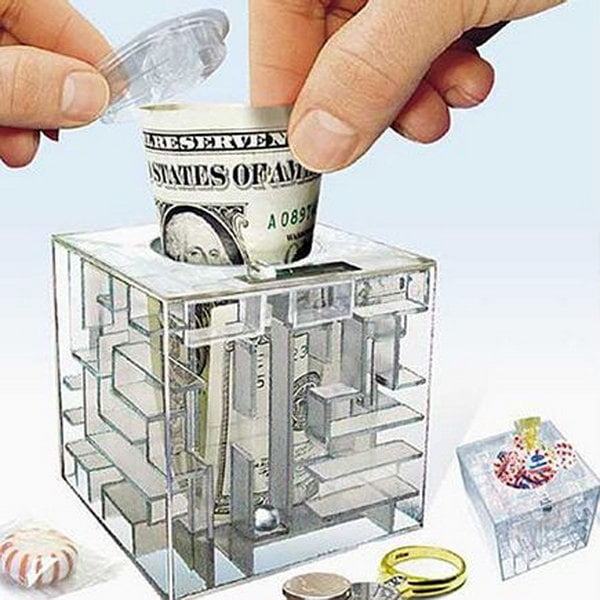
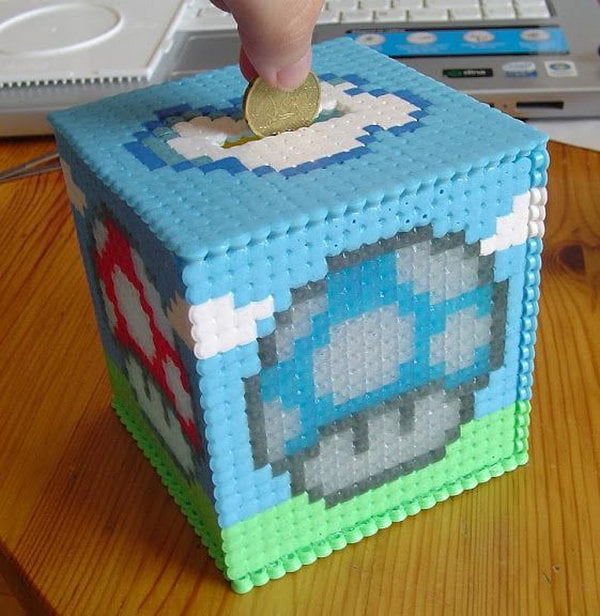
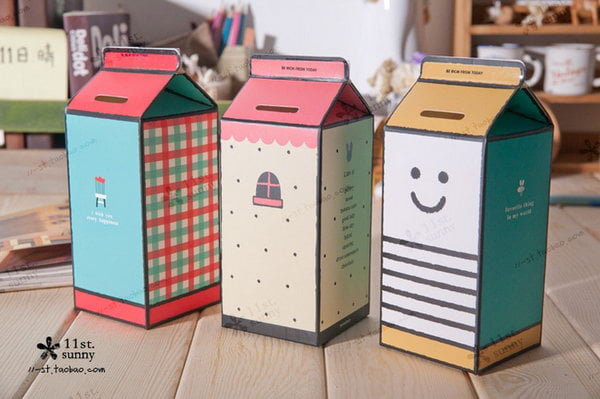


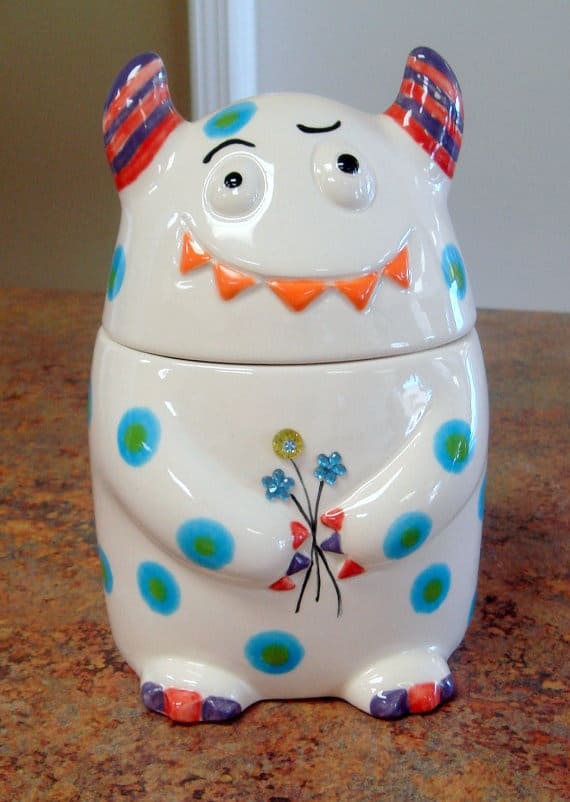

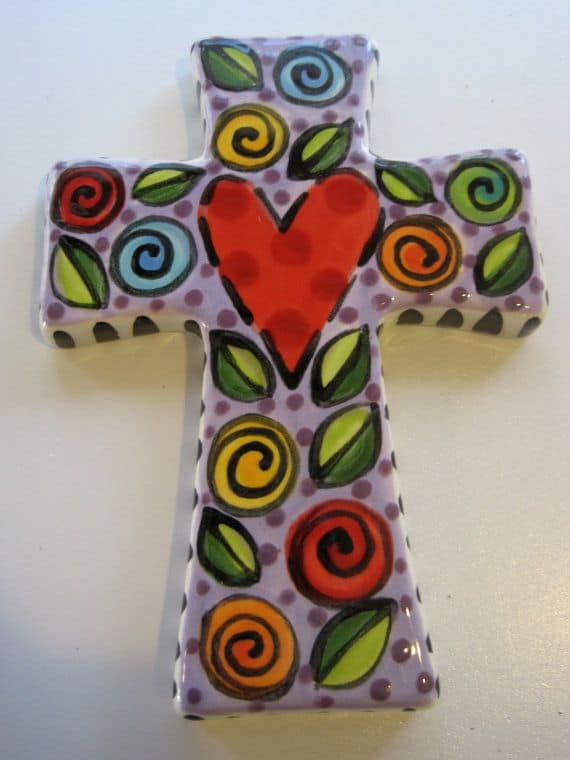
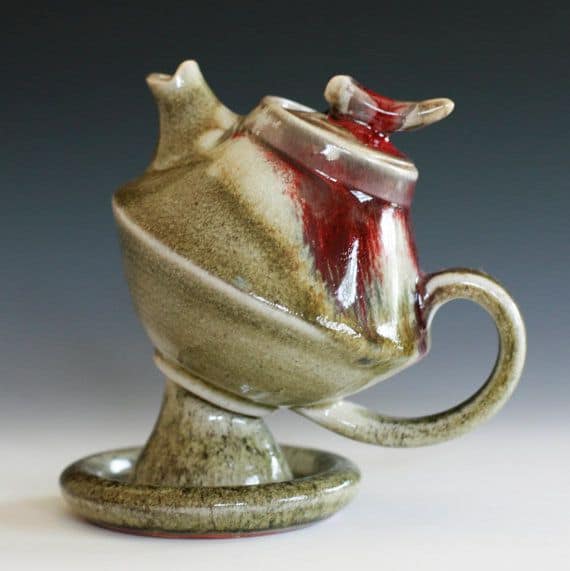
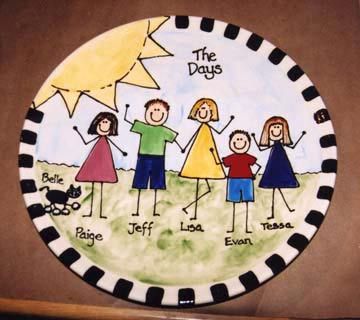

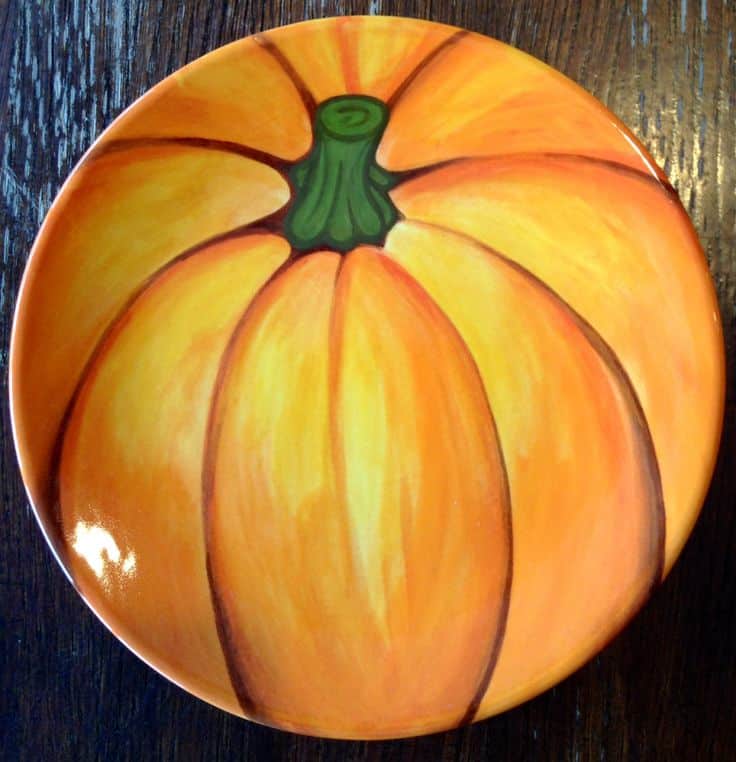
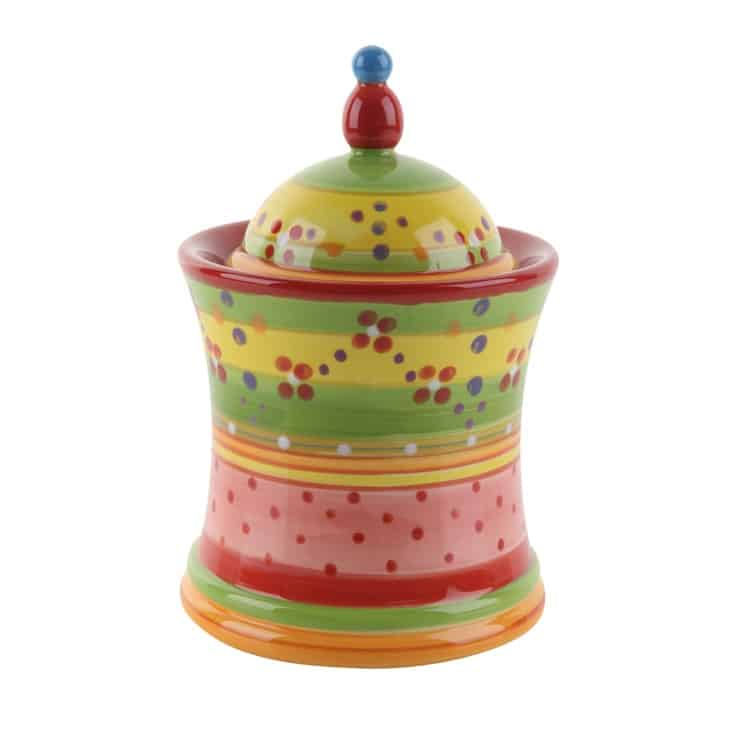
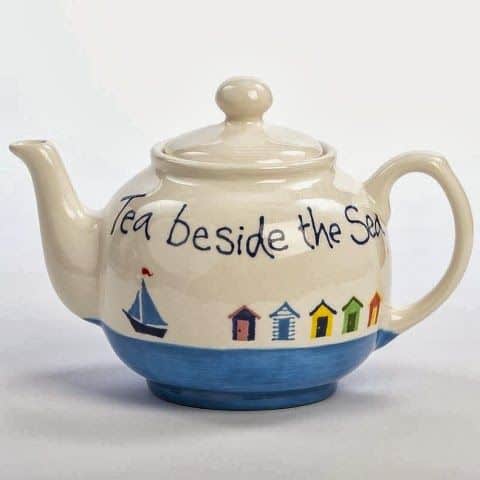
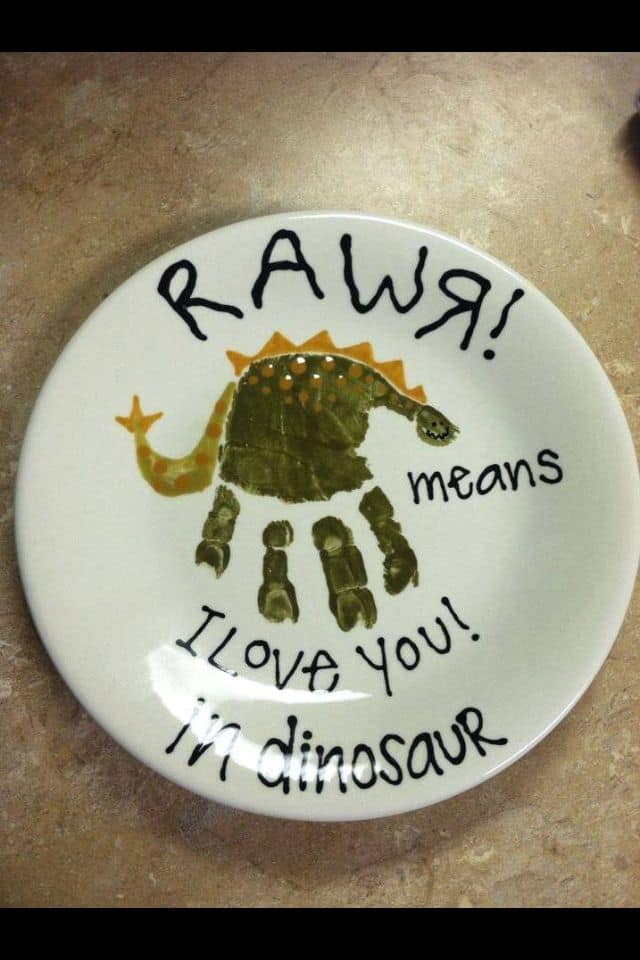
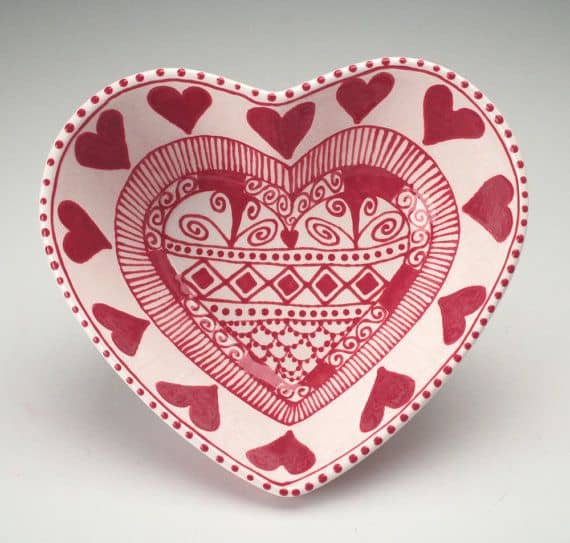
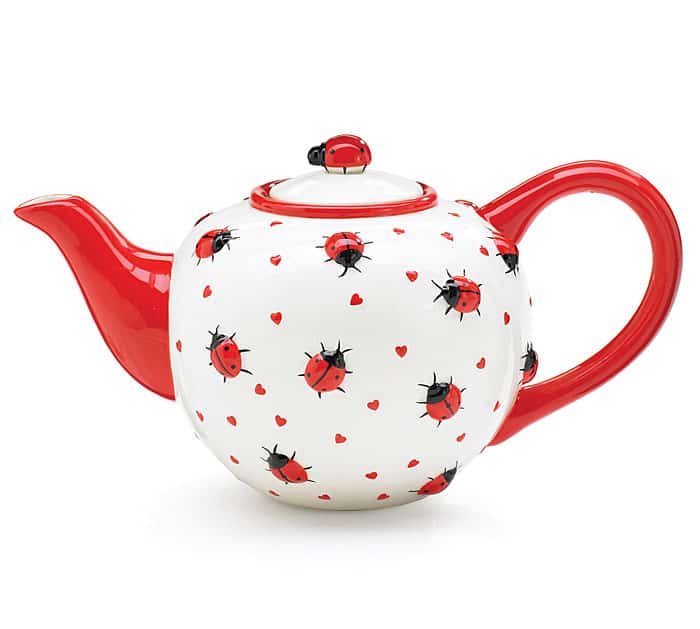
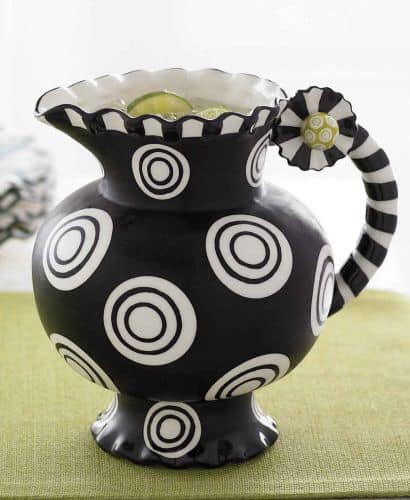
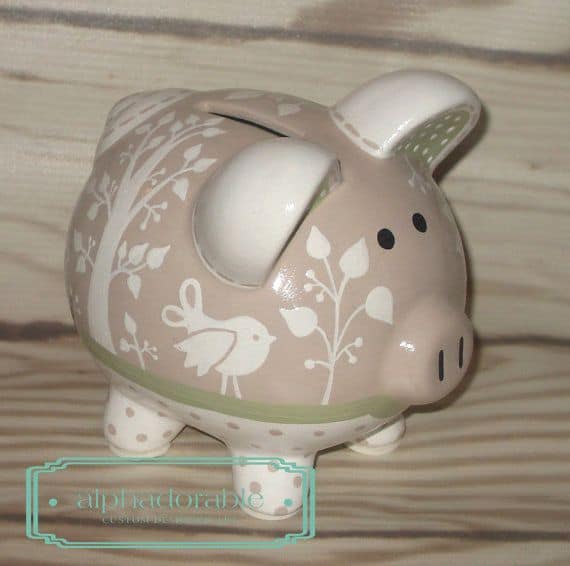

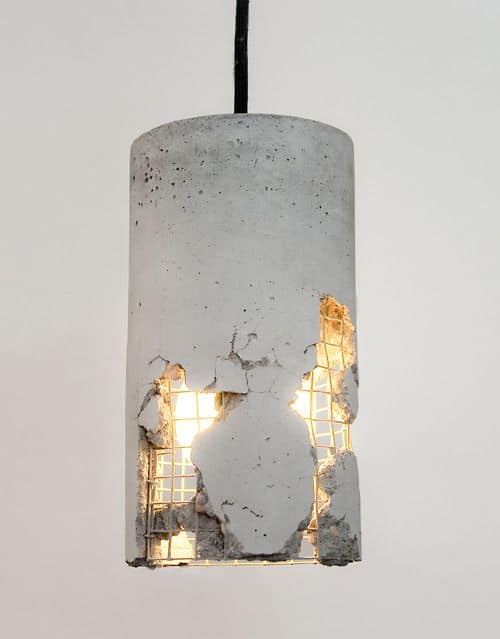

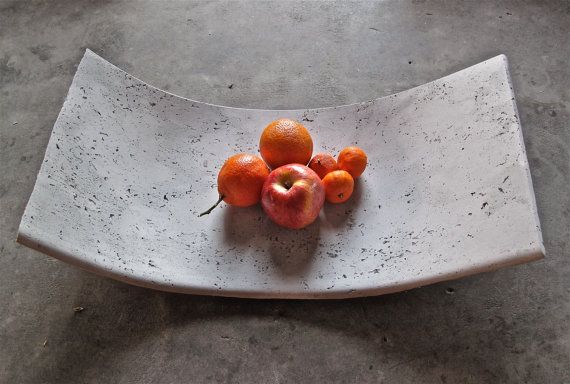
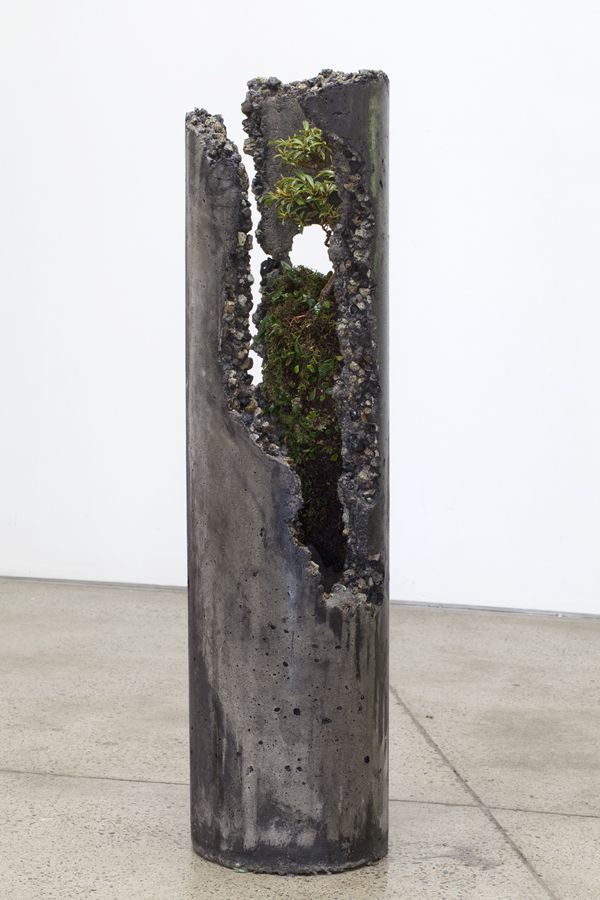
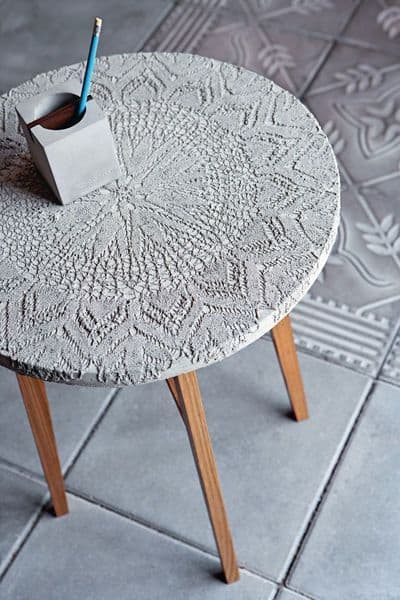
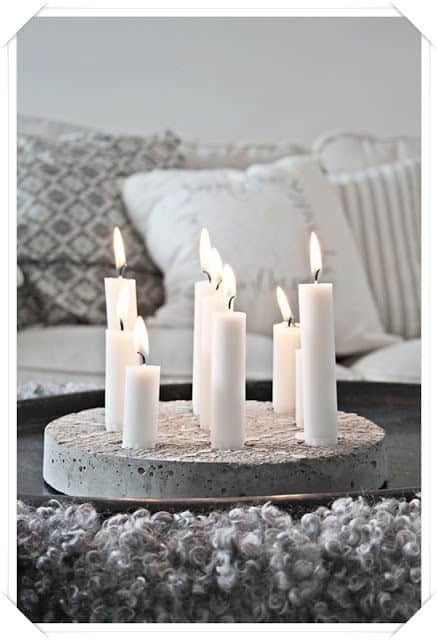
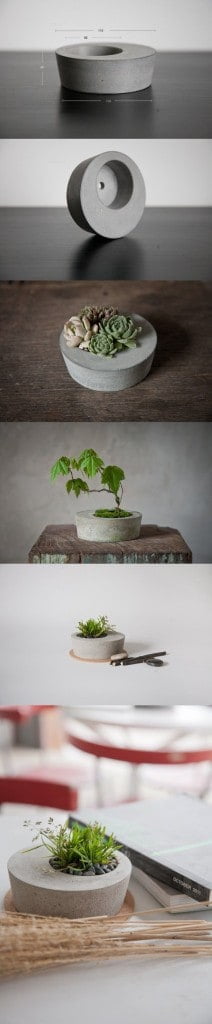

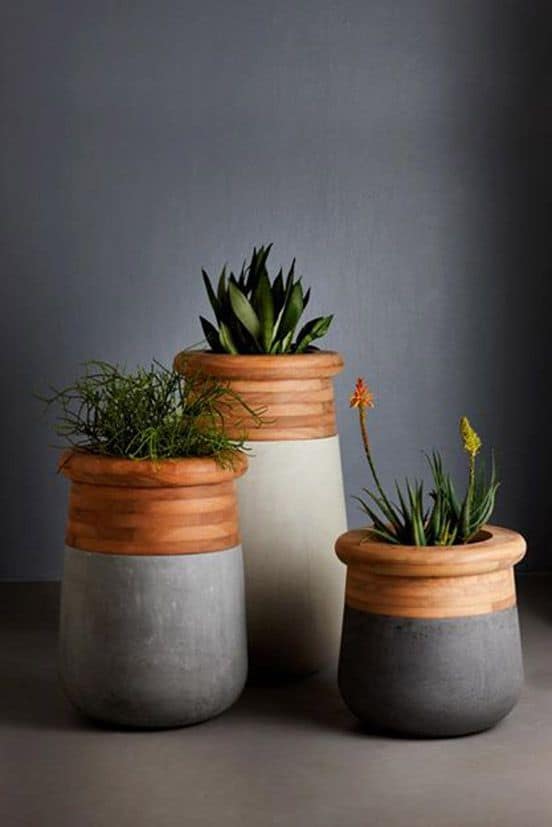
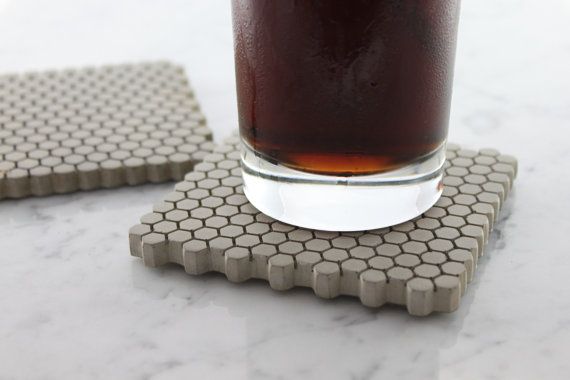
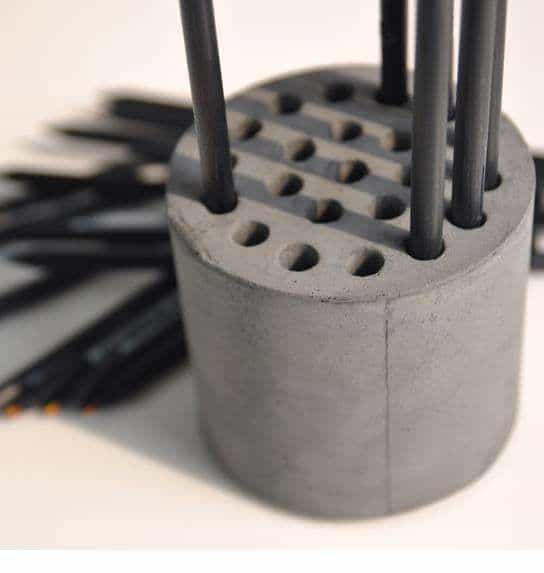
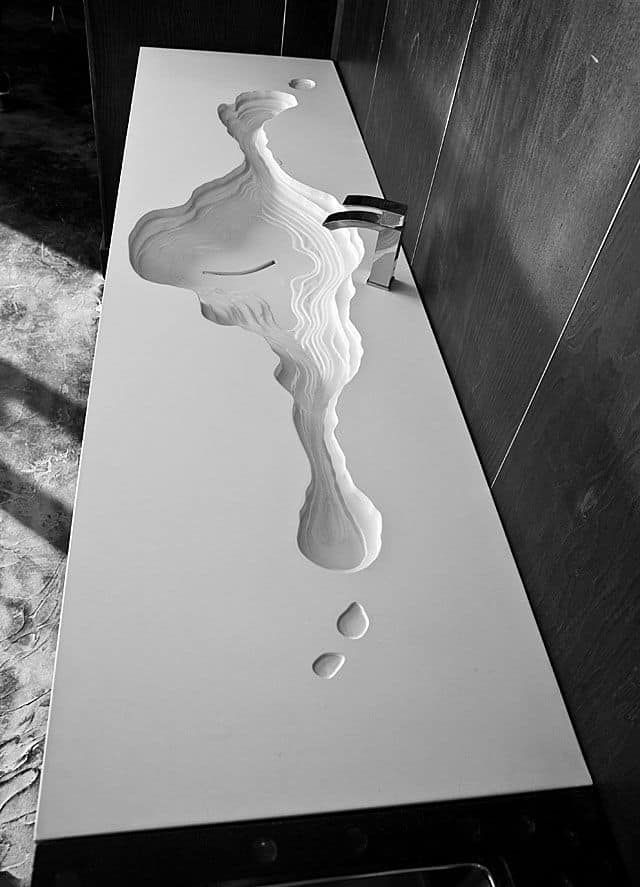
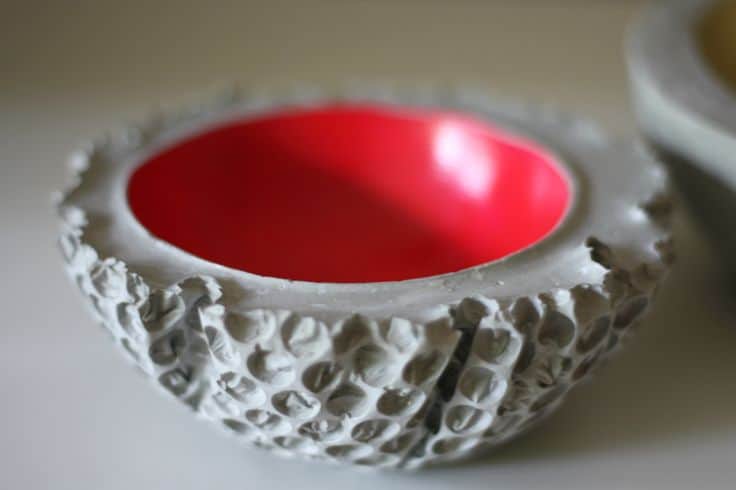
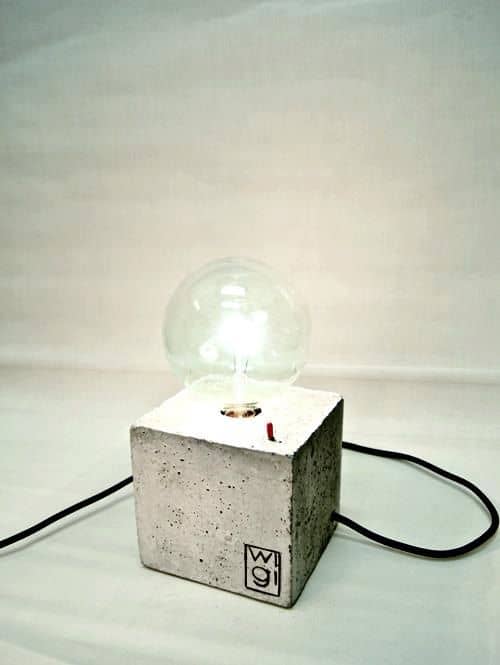
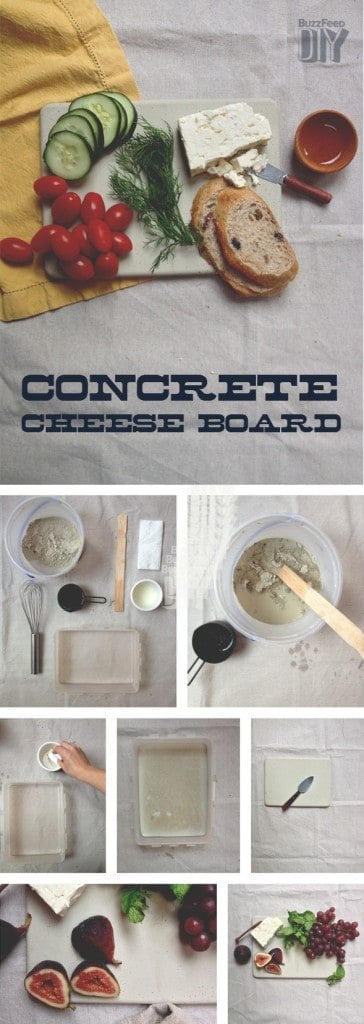

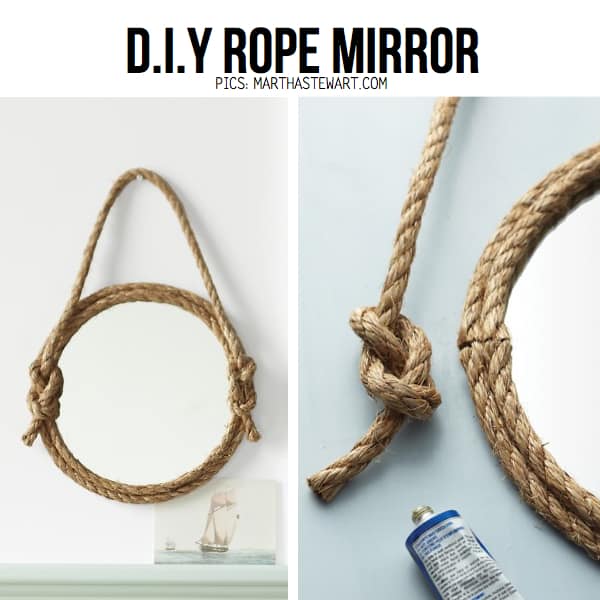
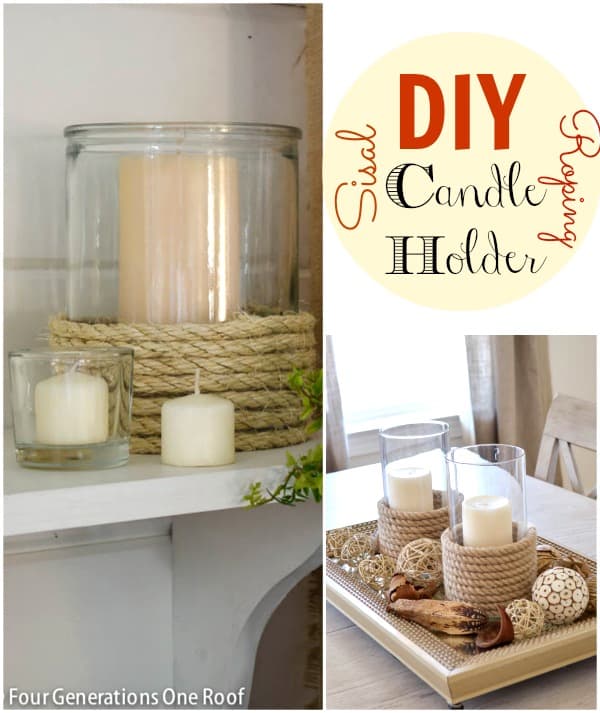
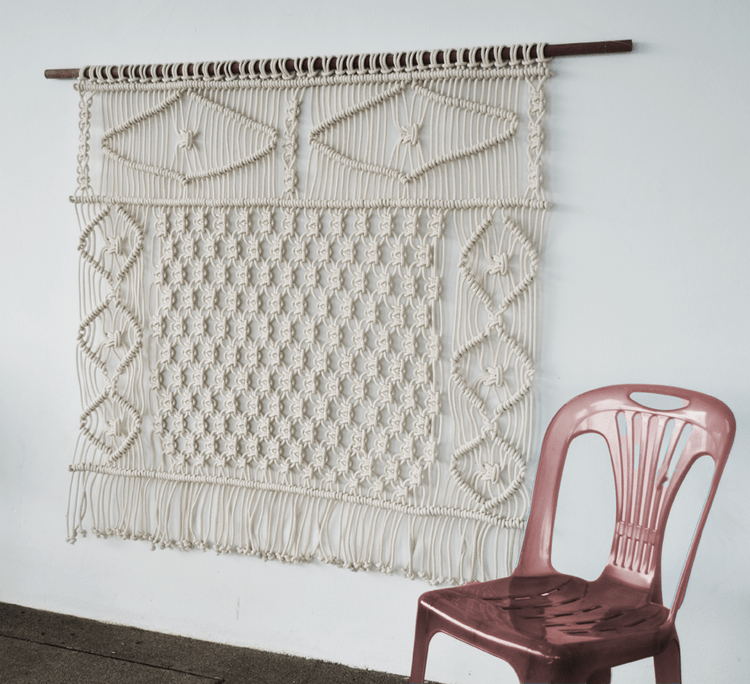
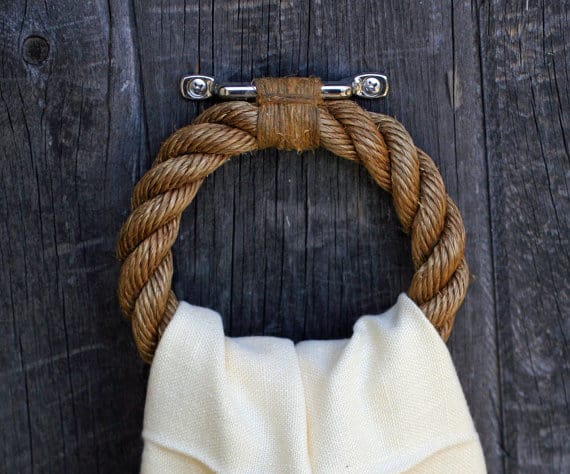
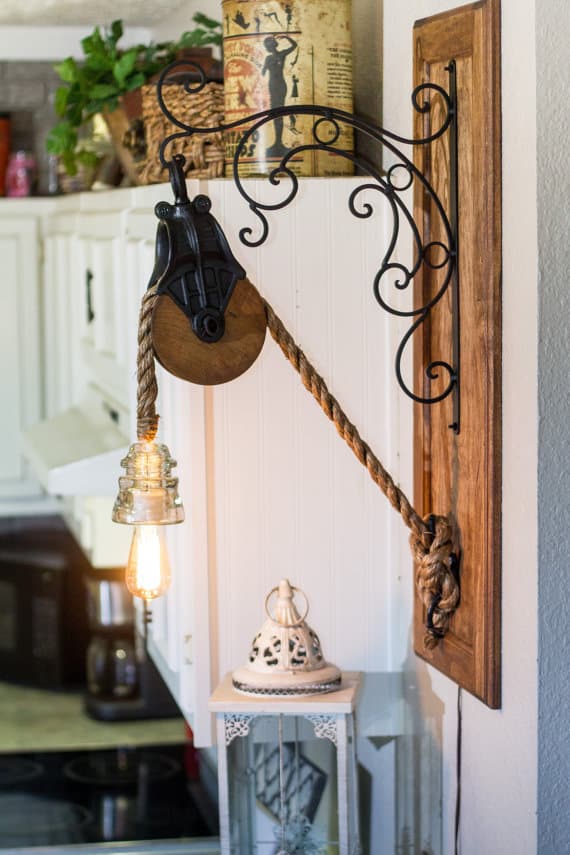
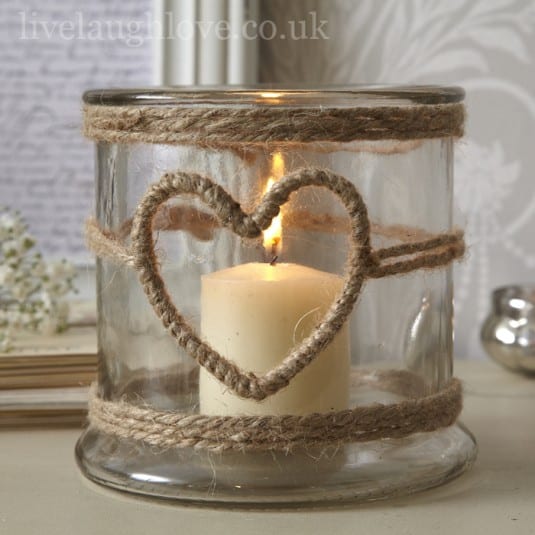
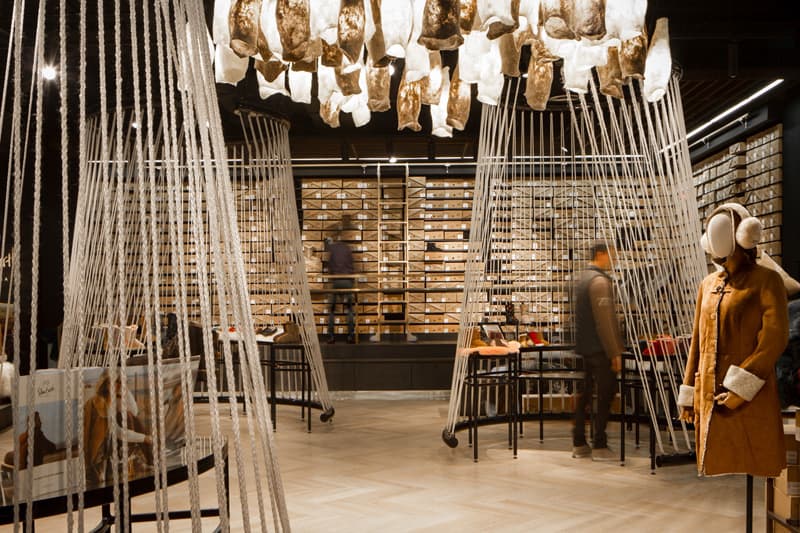

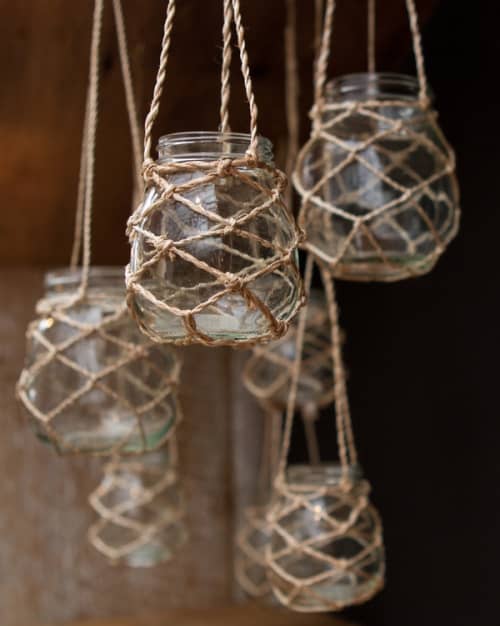
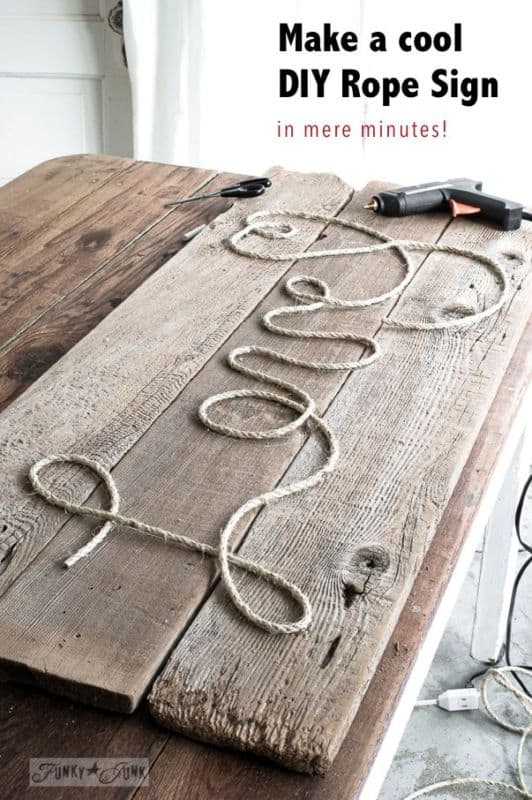
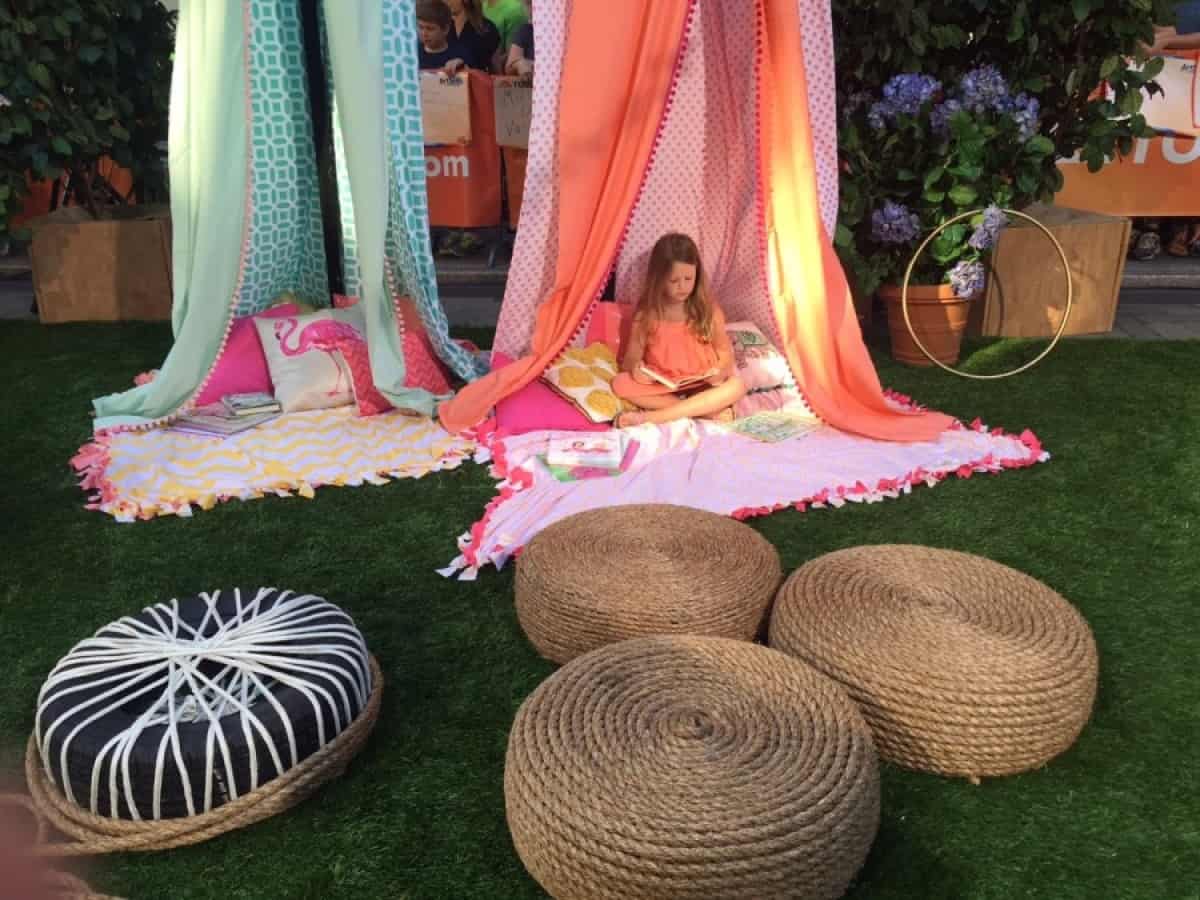
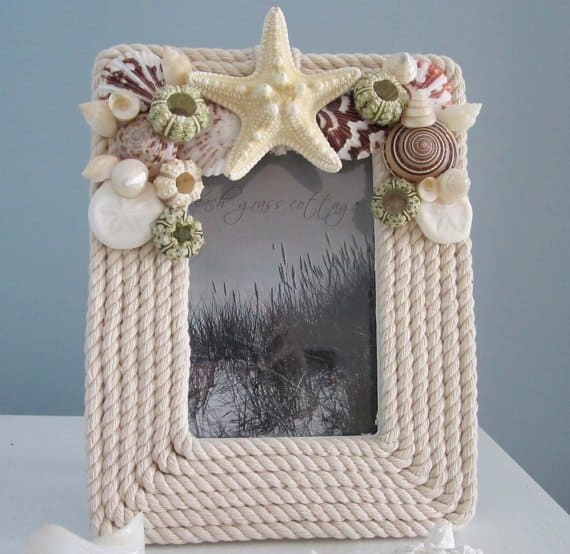
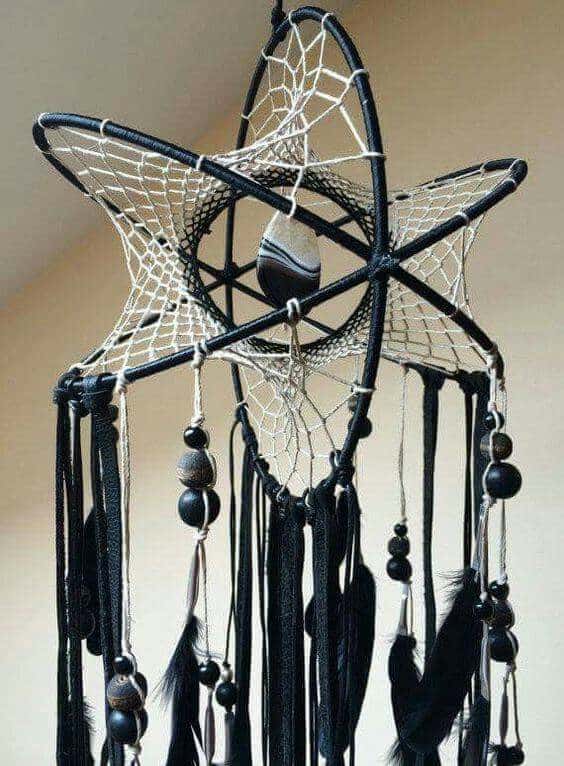
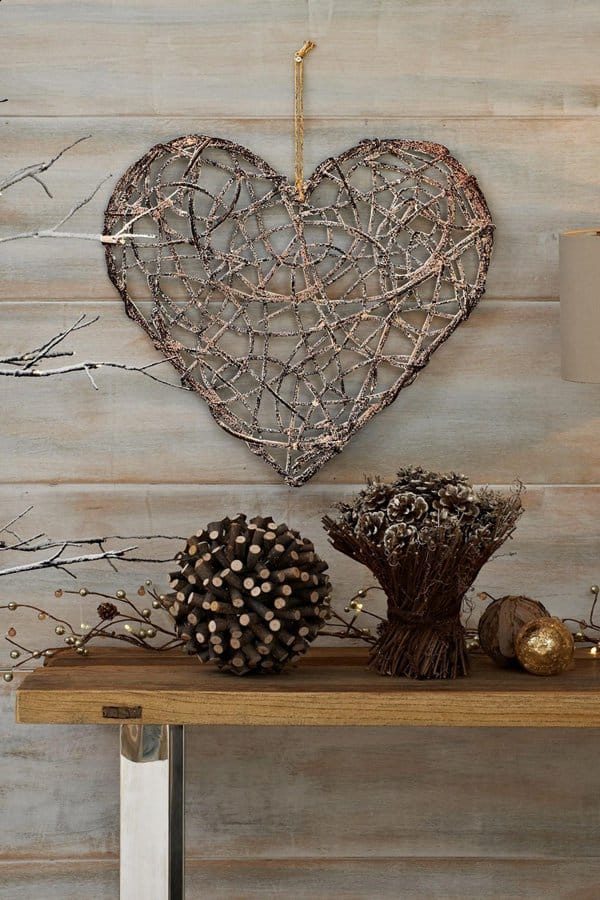
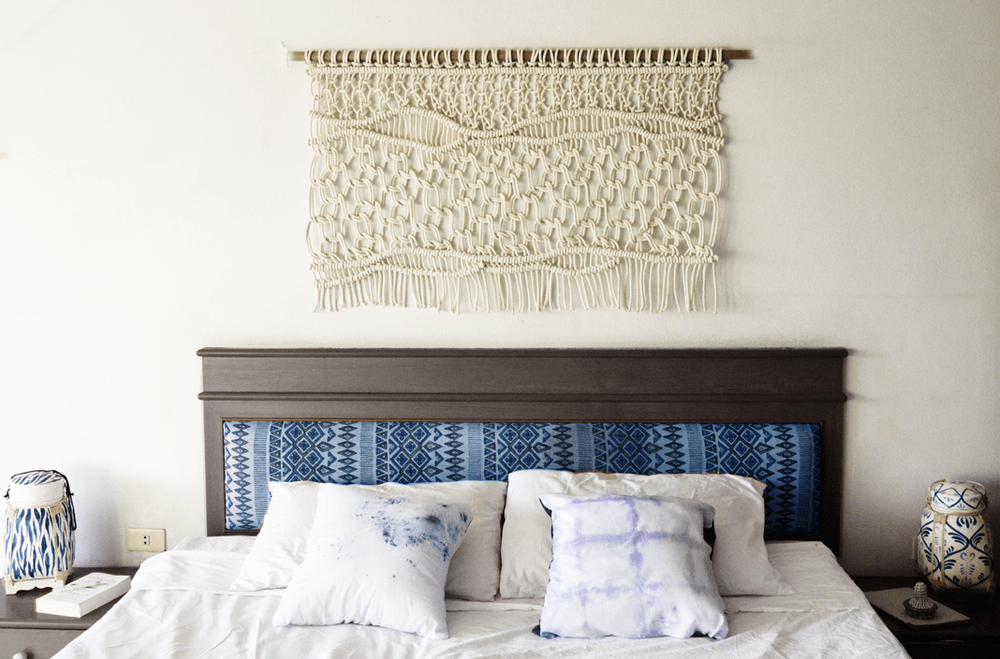

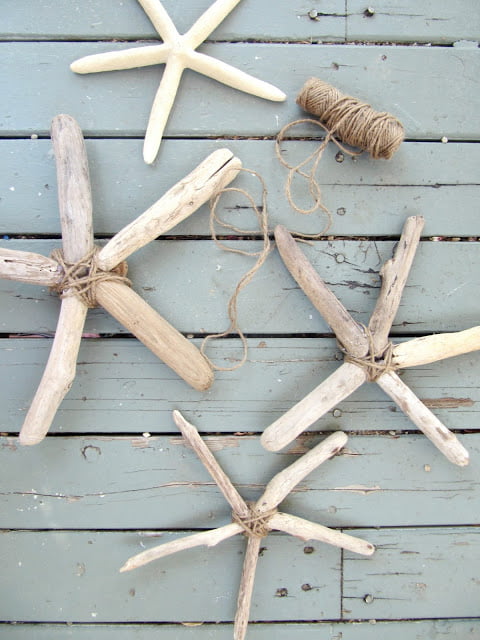
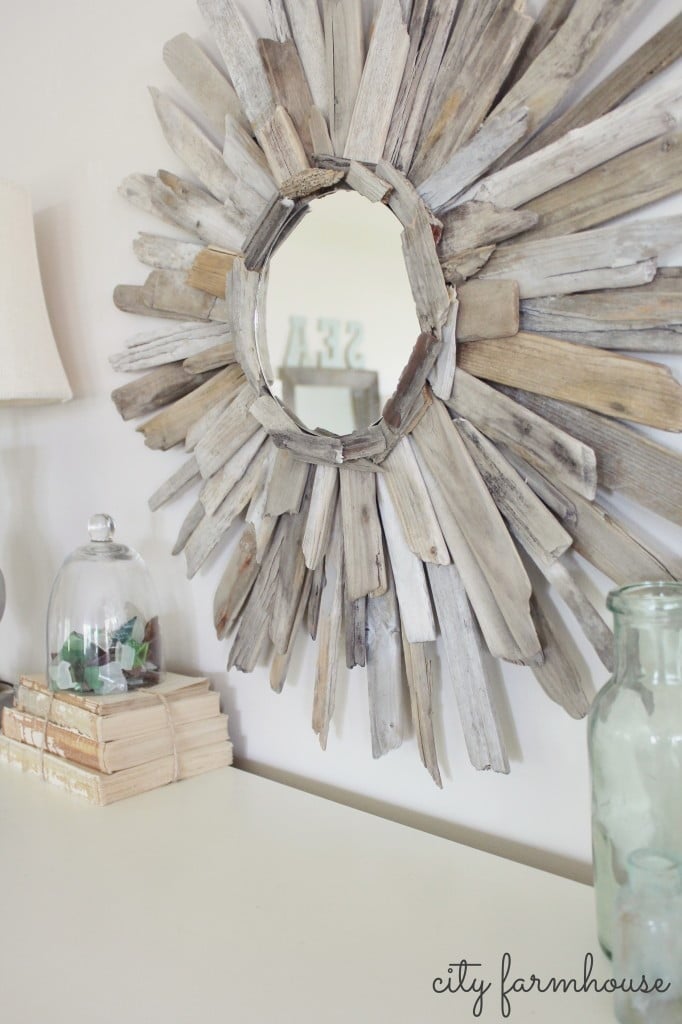
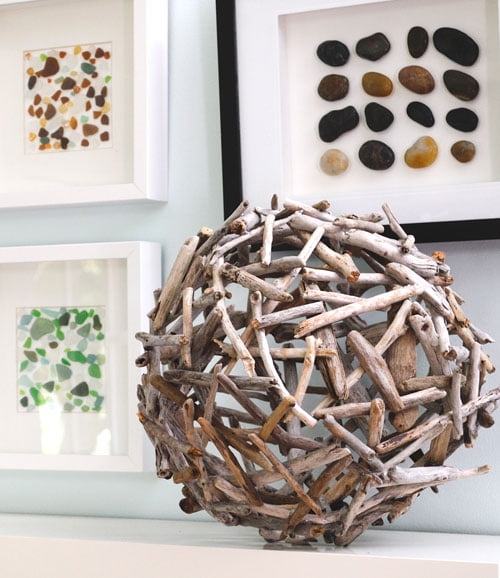
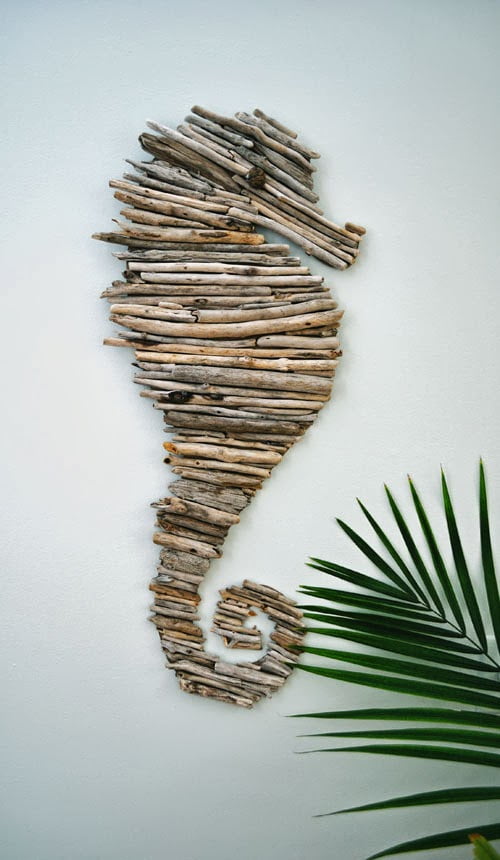
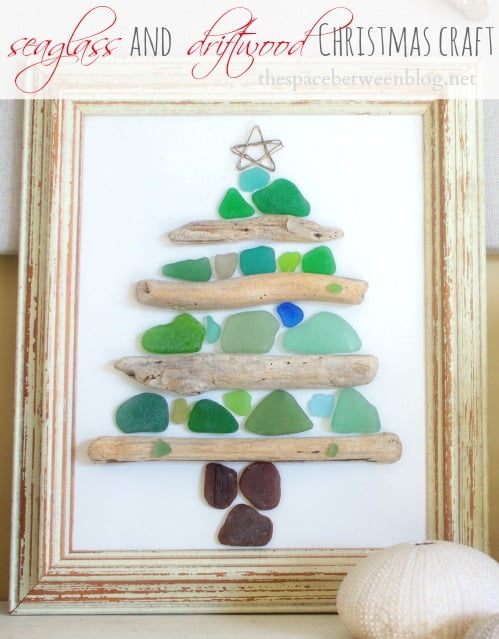

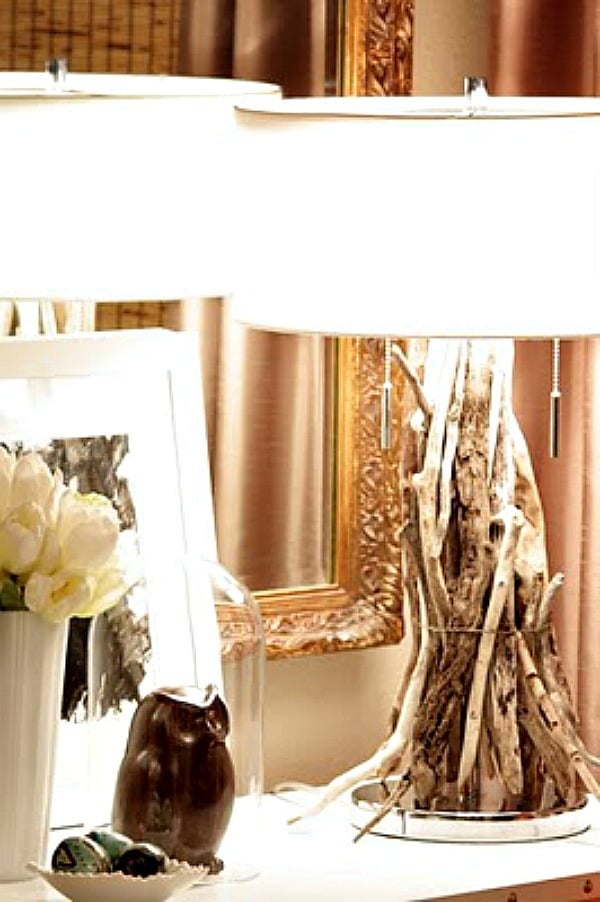
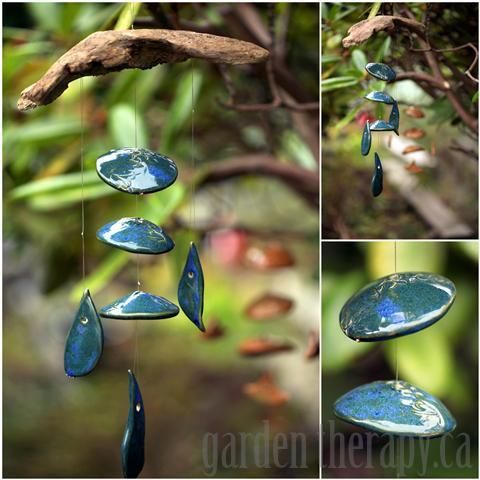

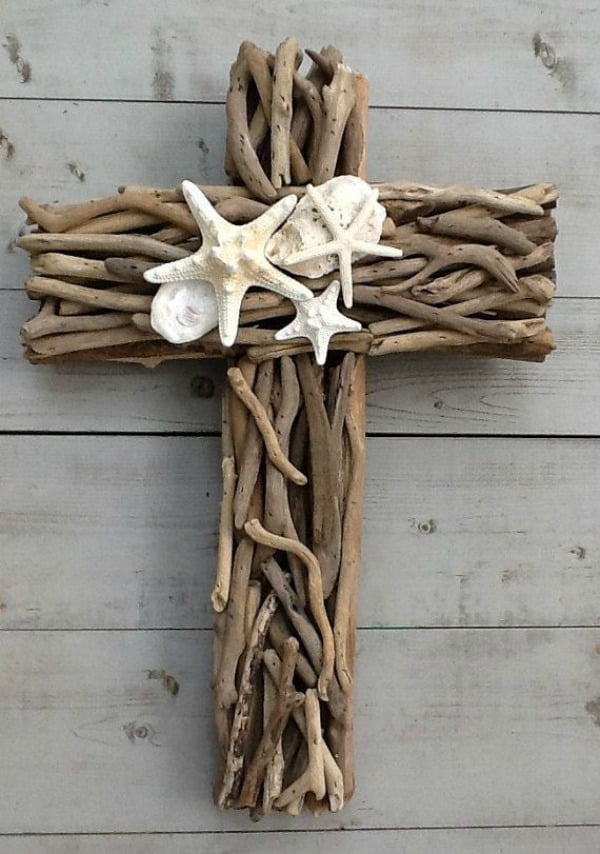
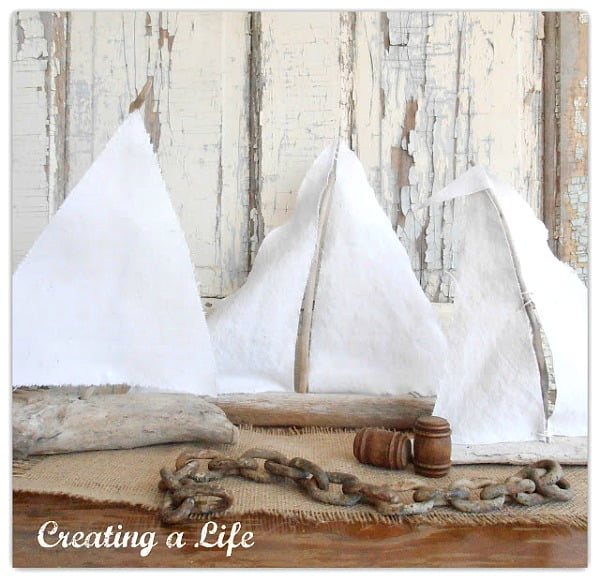

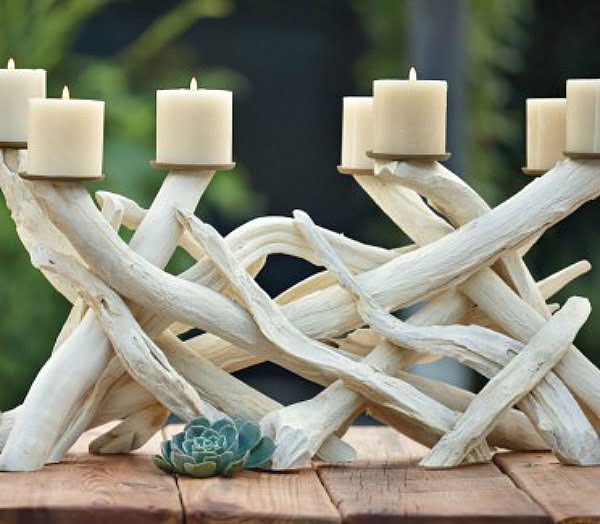
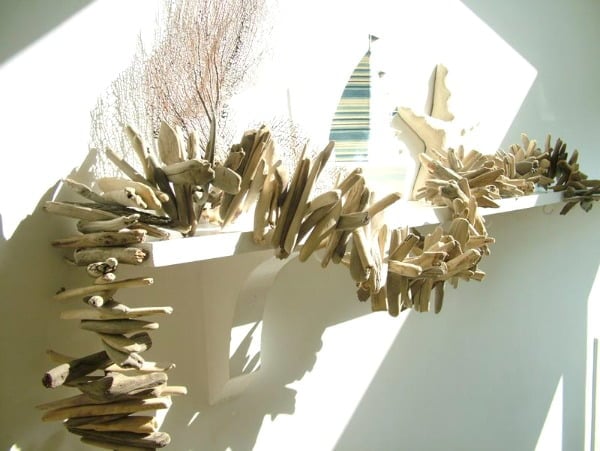
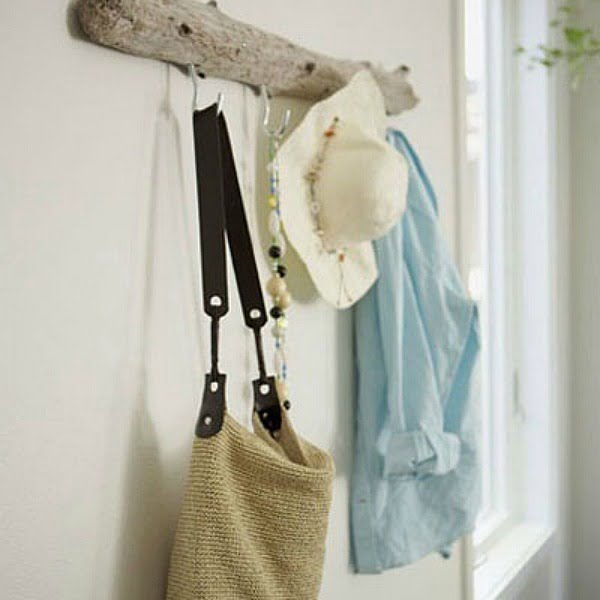
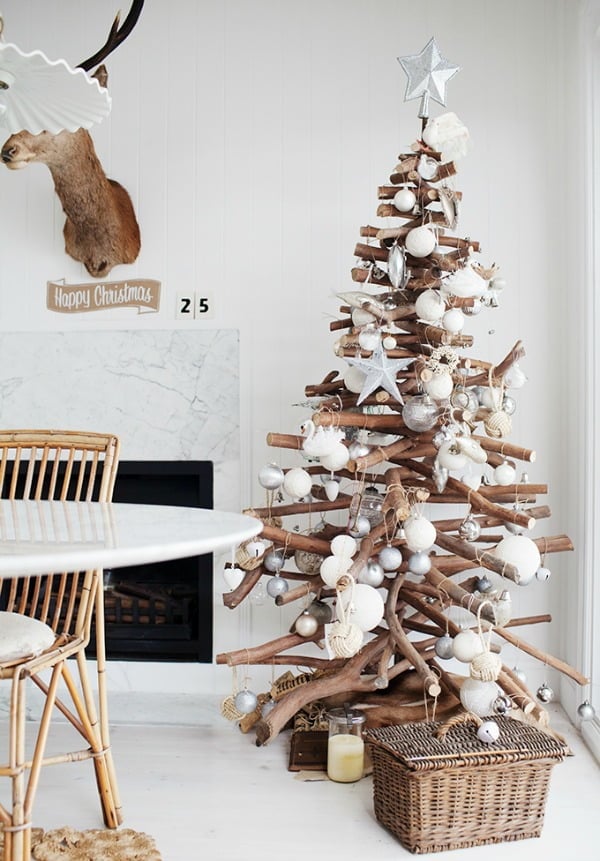
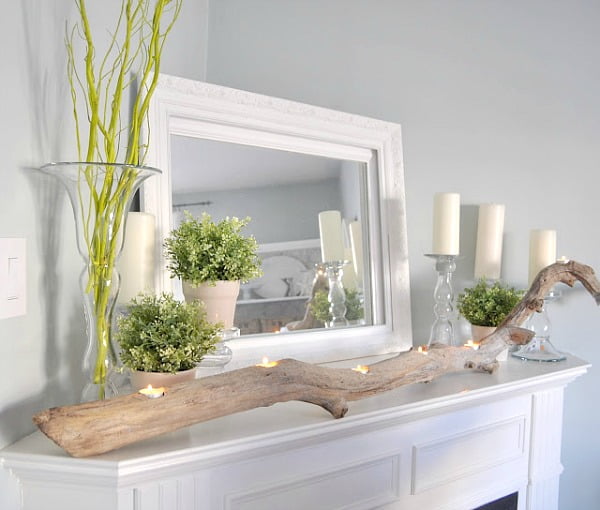


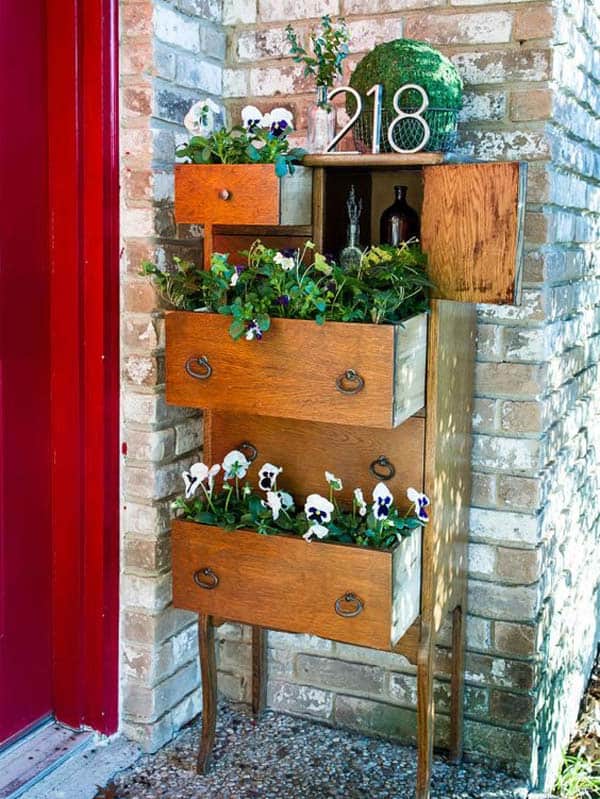
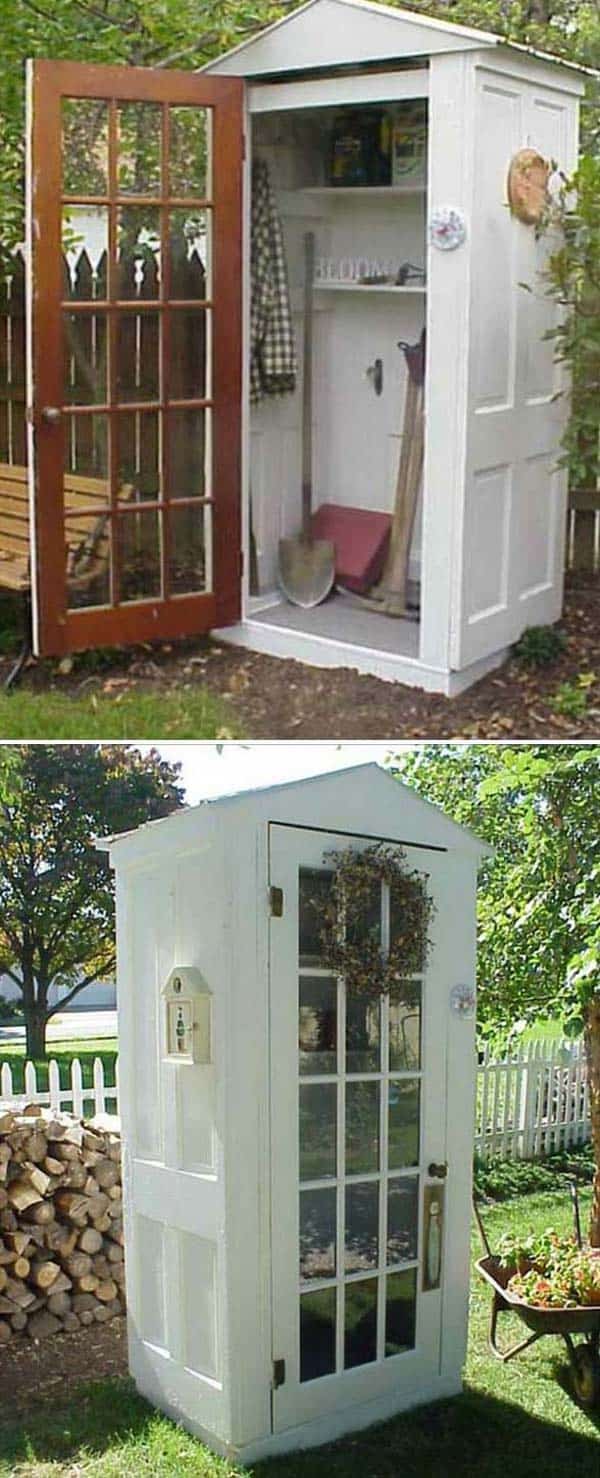

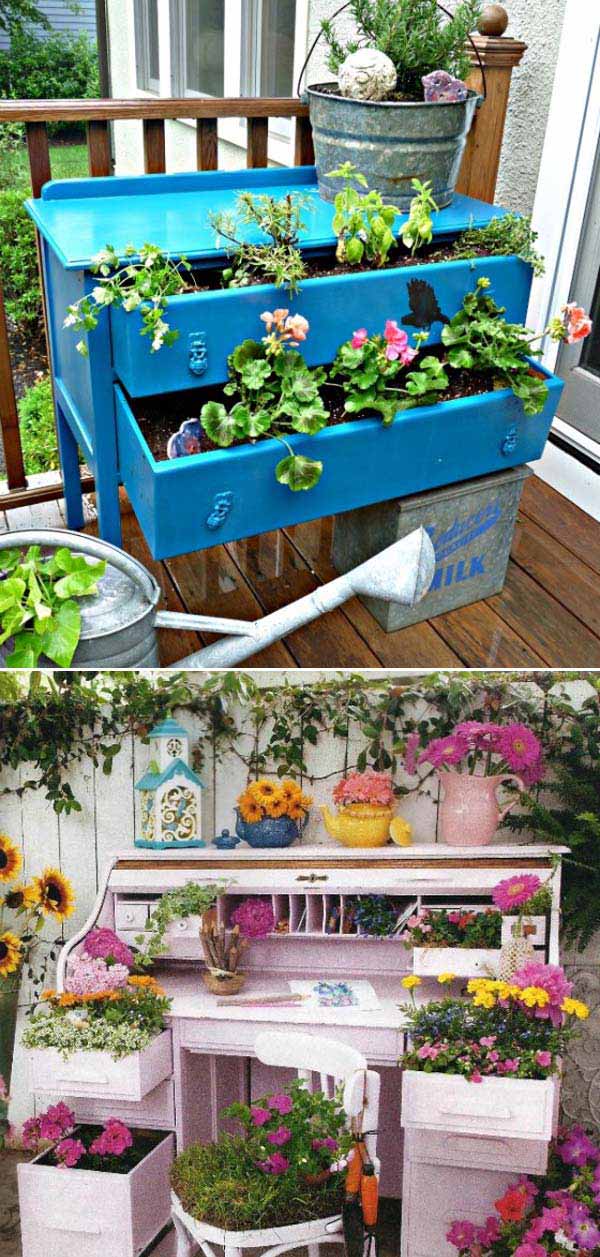
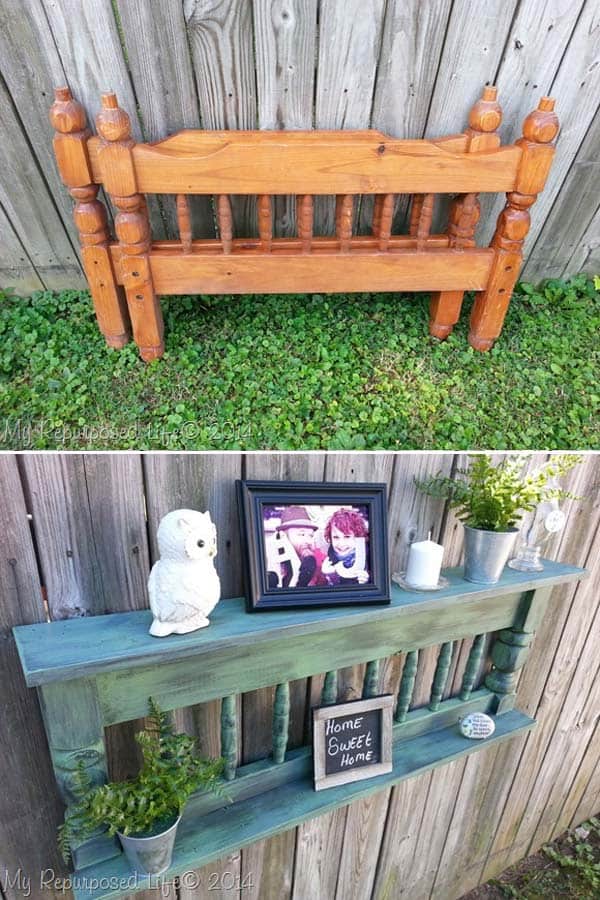
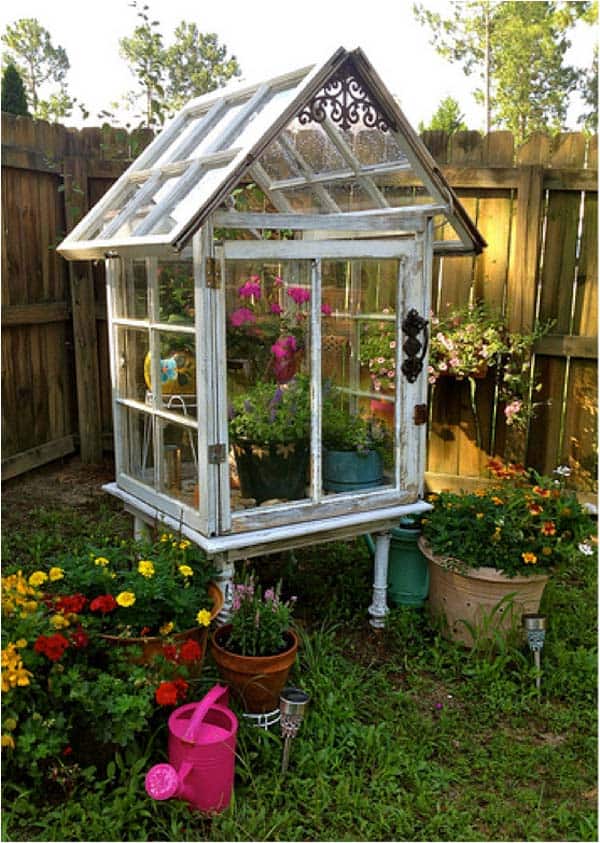
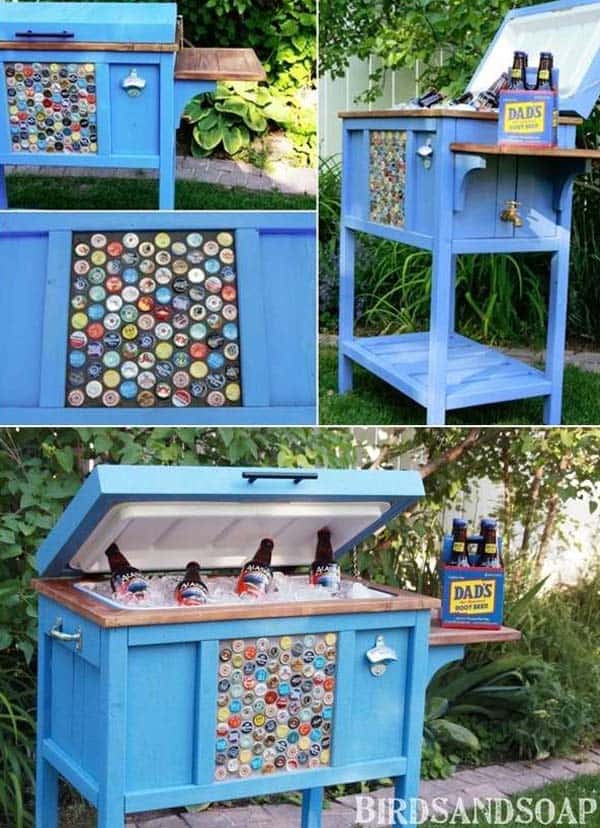
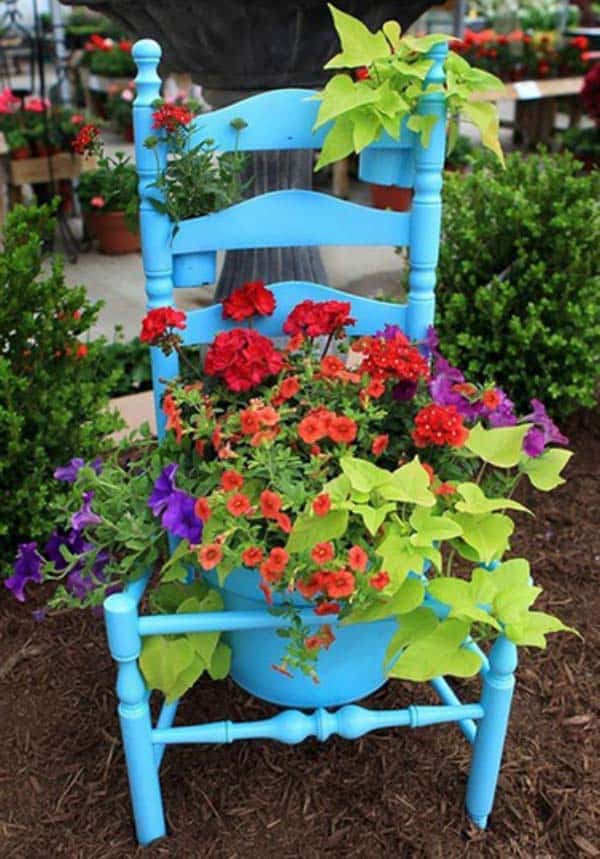
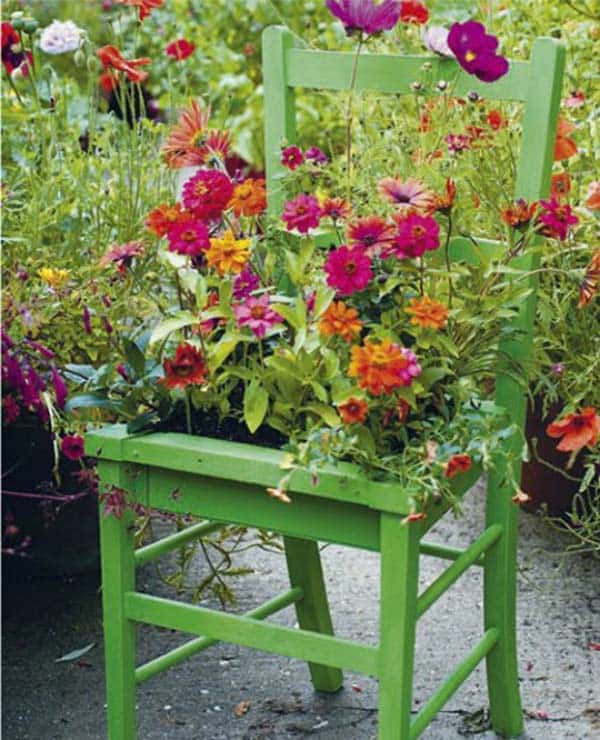
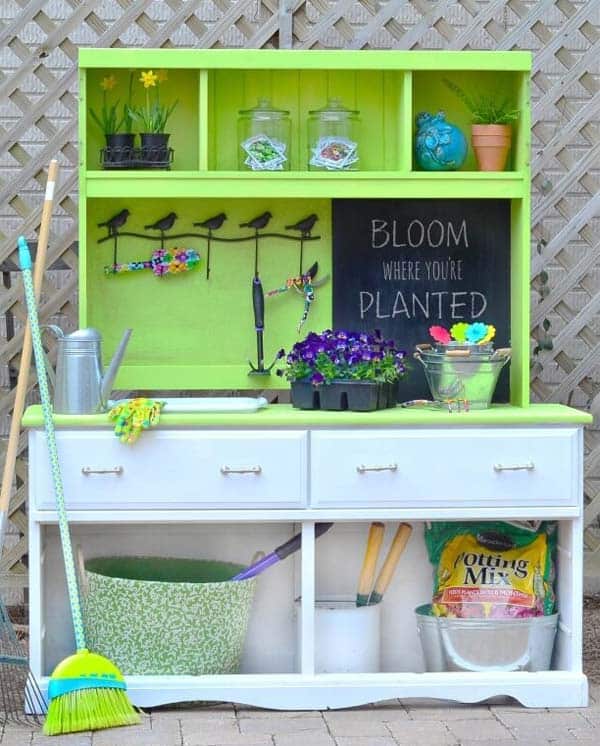
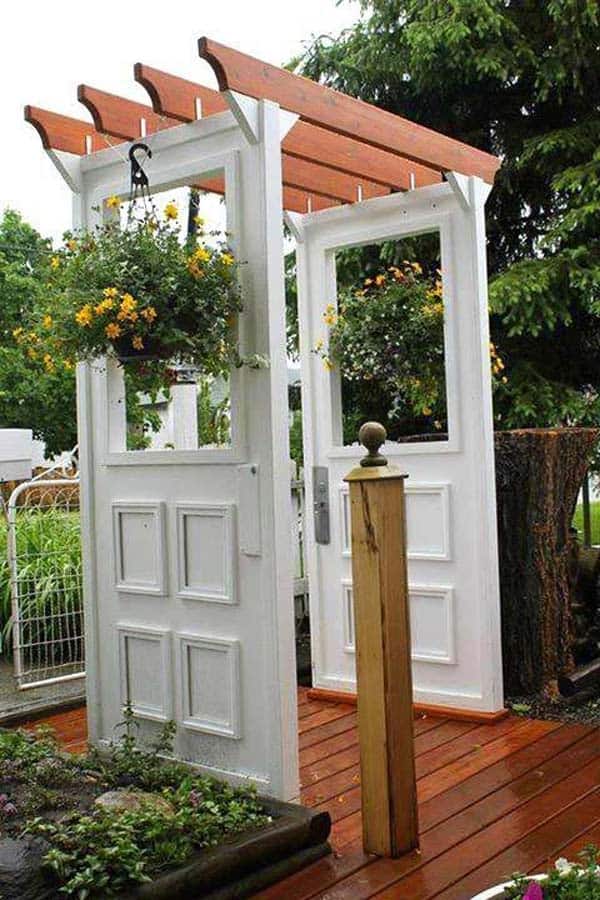
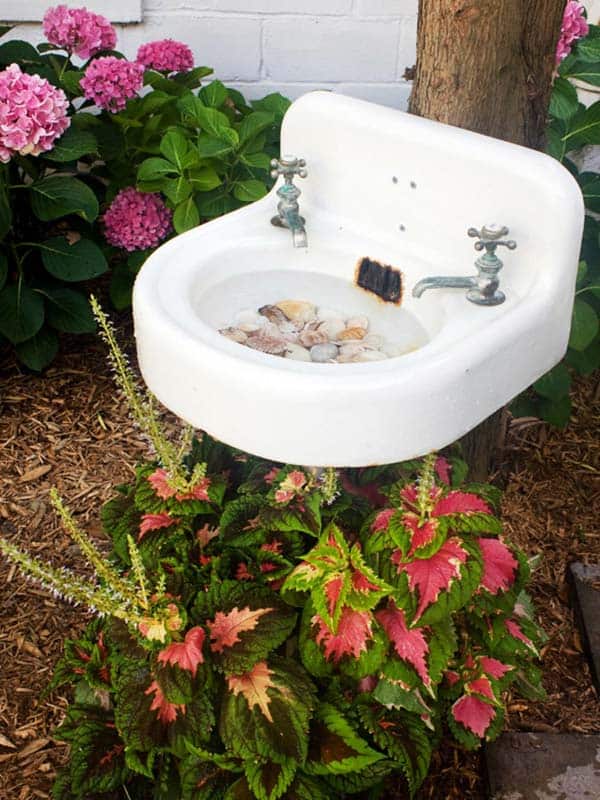
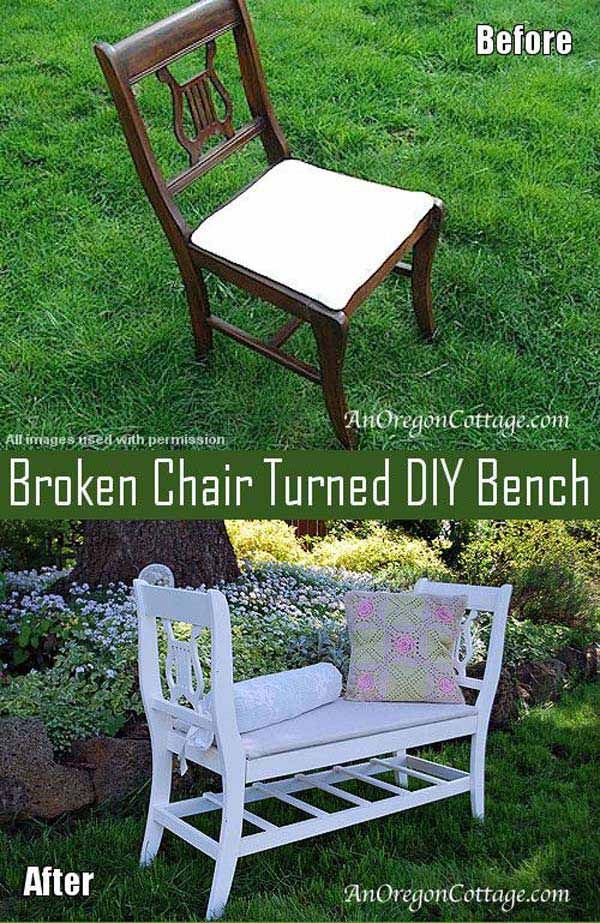

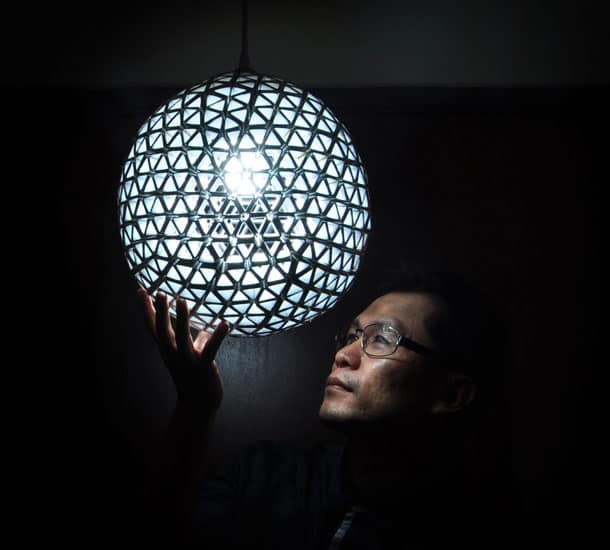
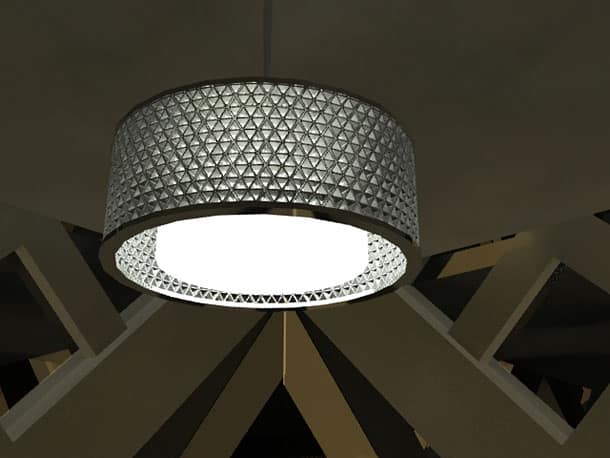
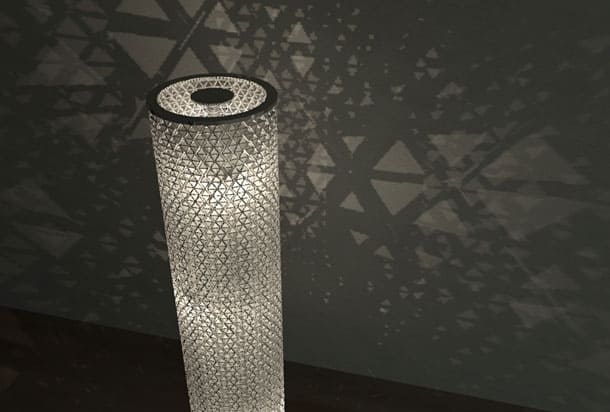

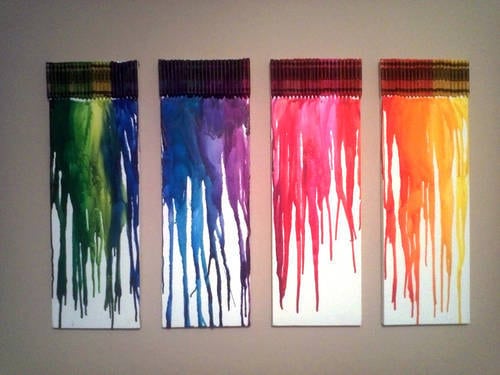
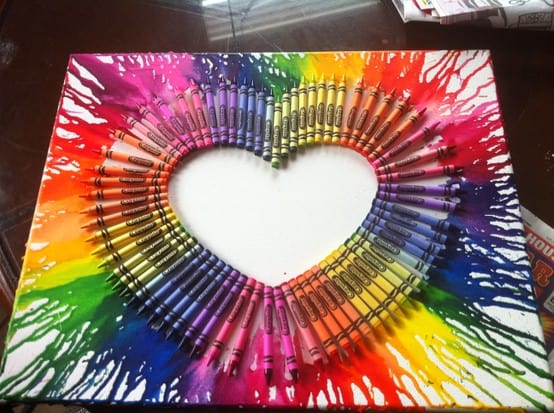
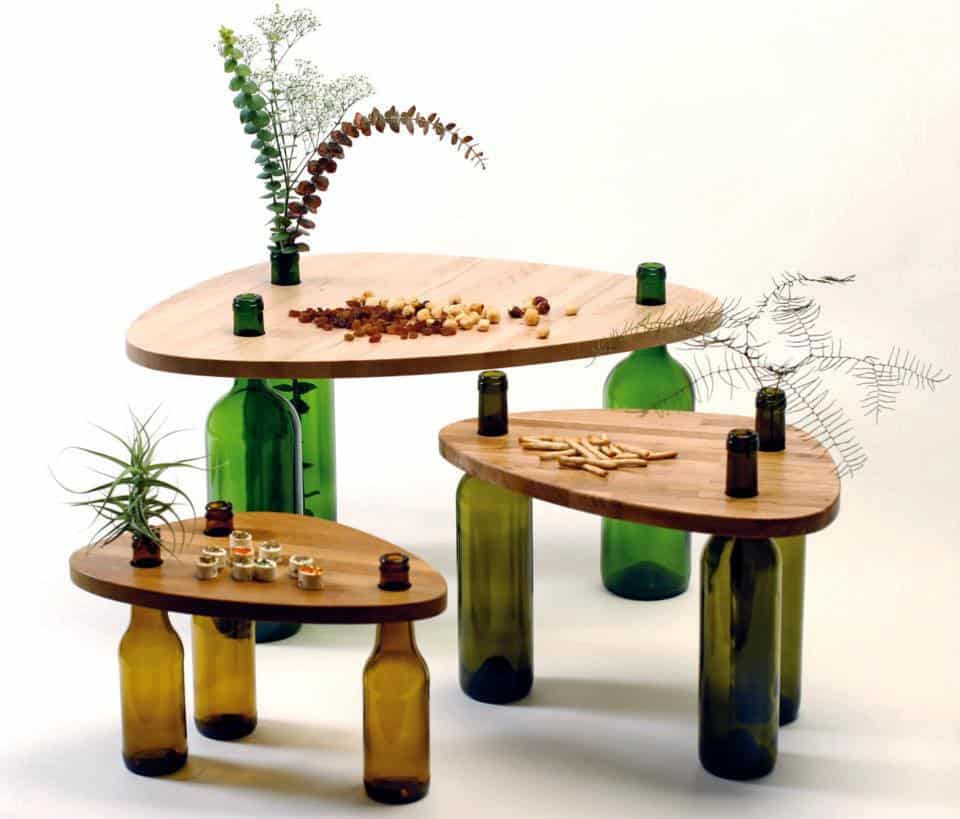
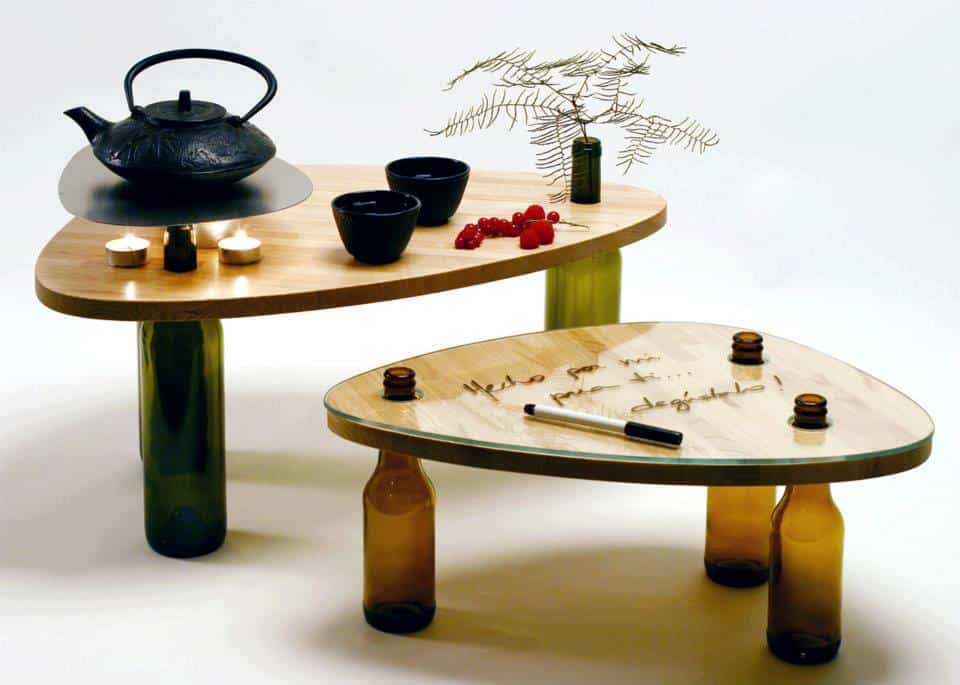

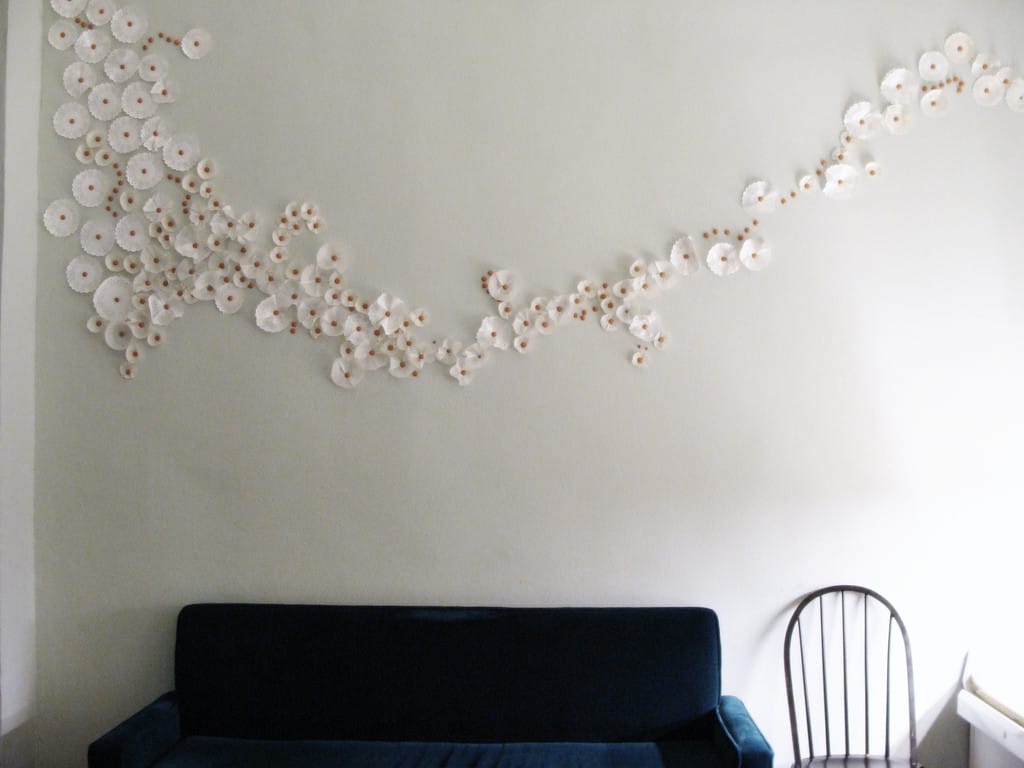
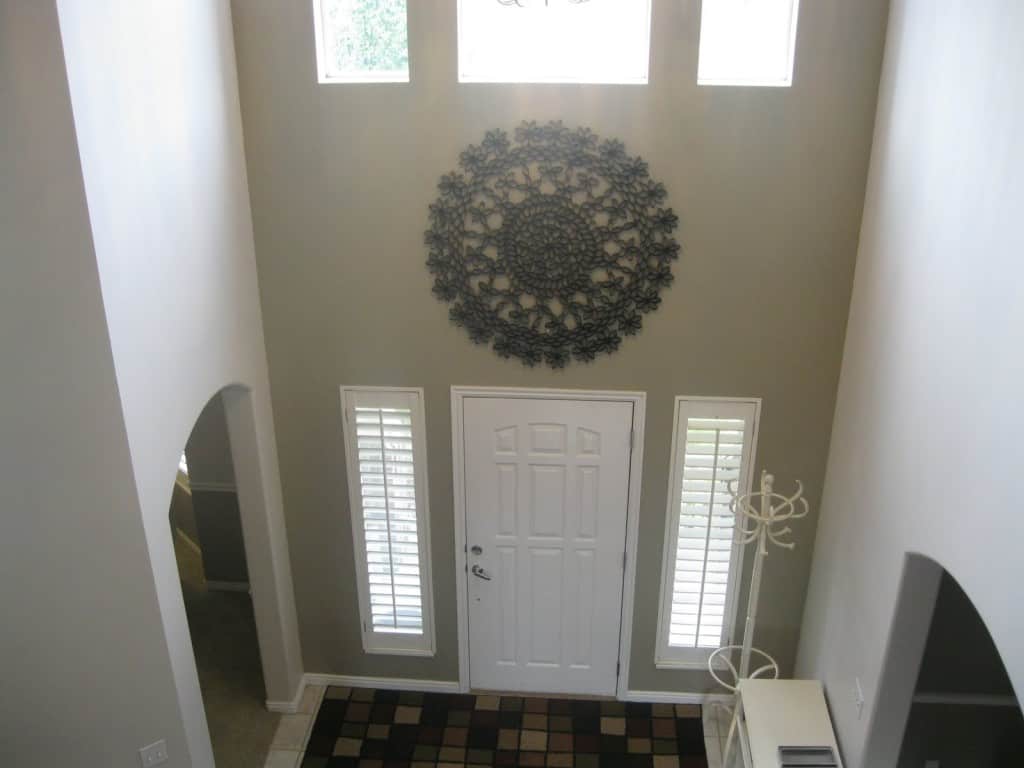
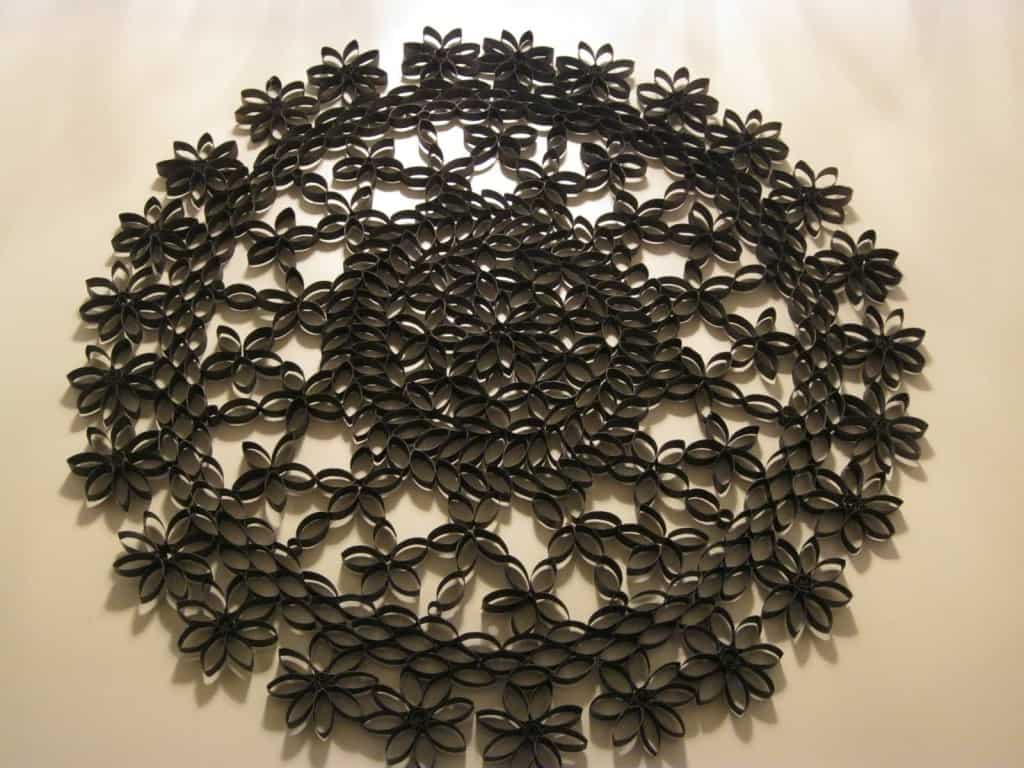
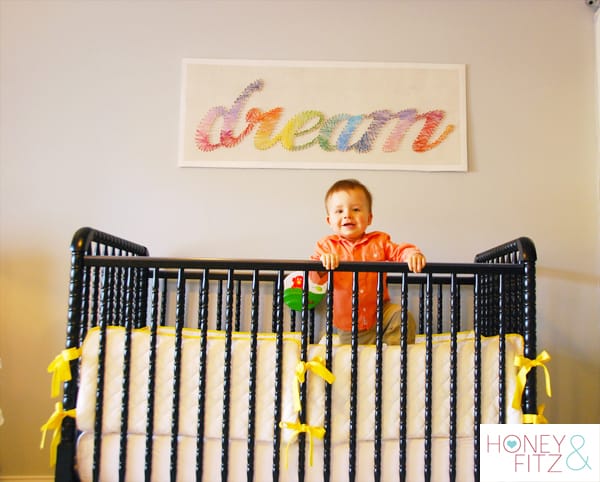
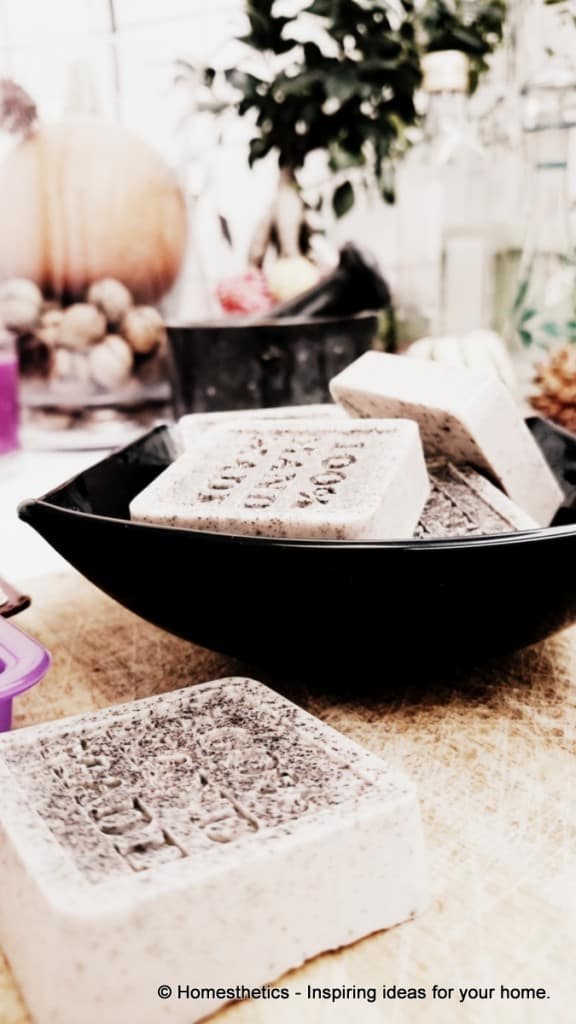
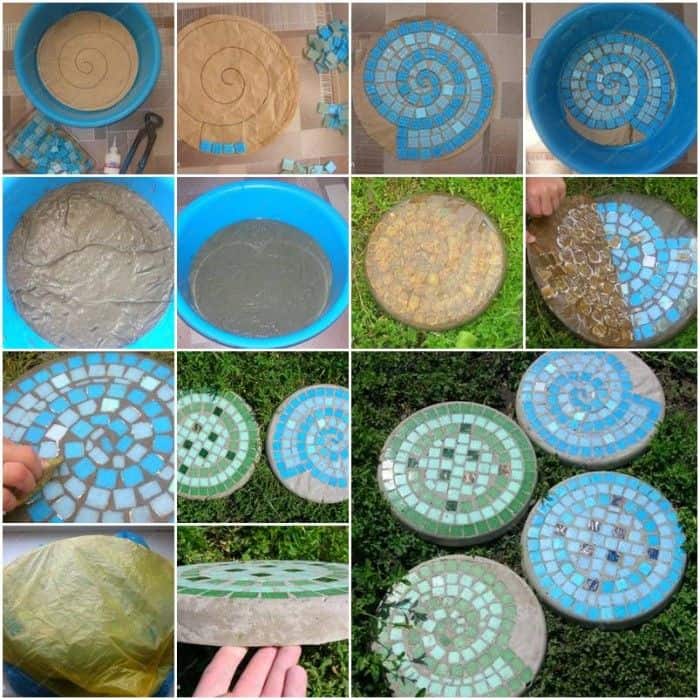
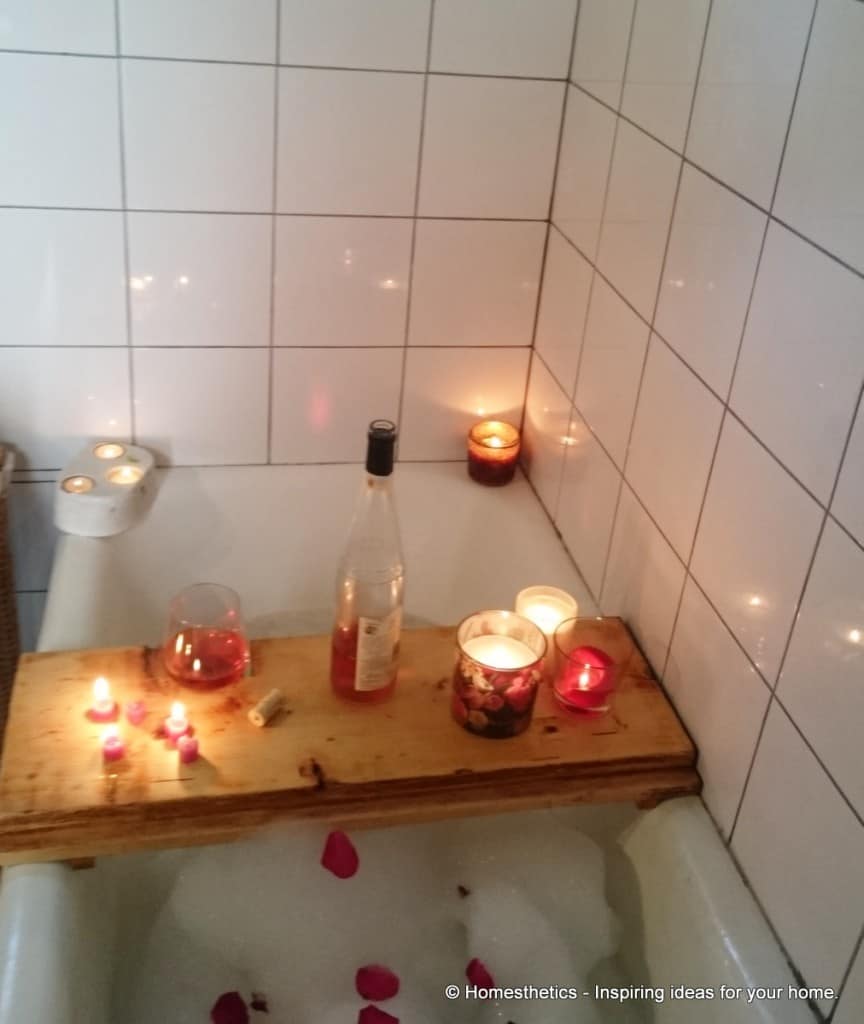 Source: Homesthetics
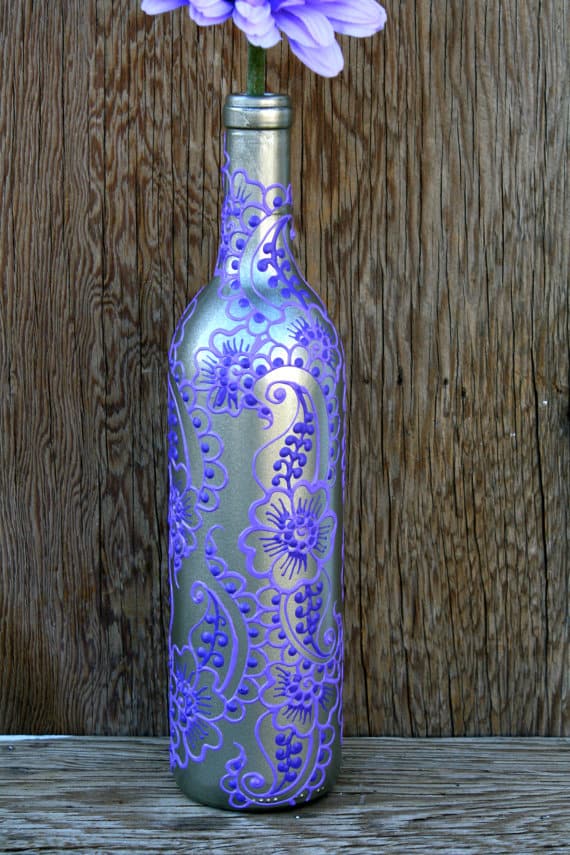
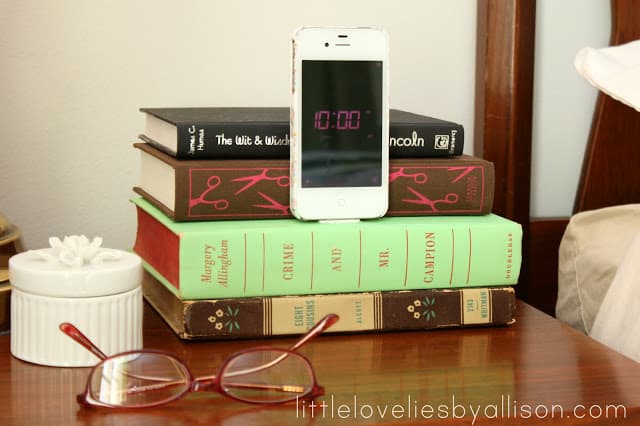
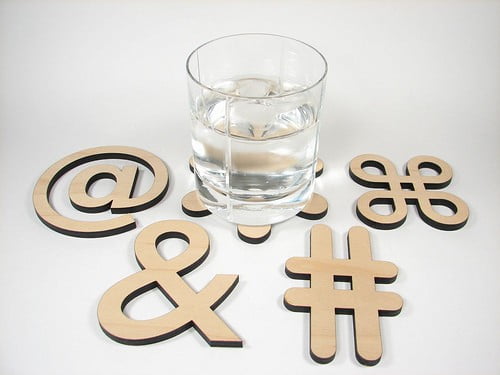
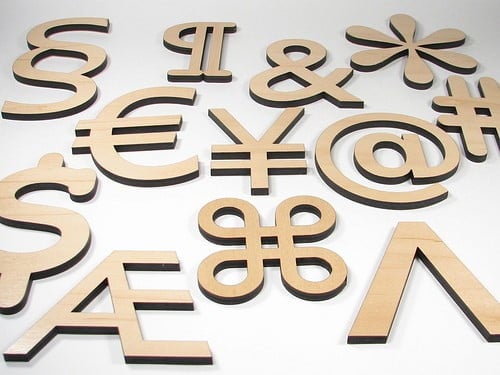
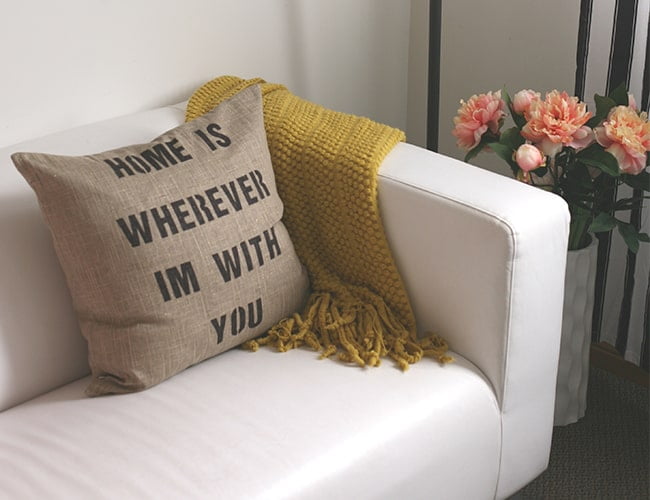
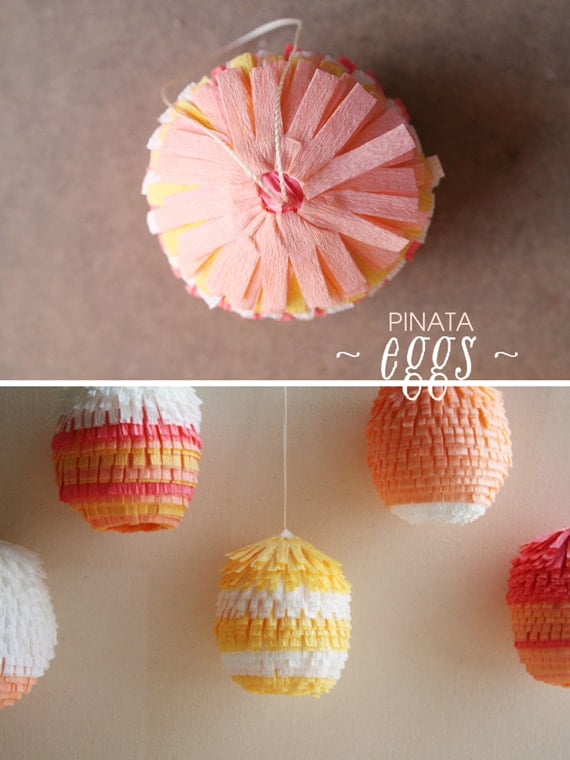
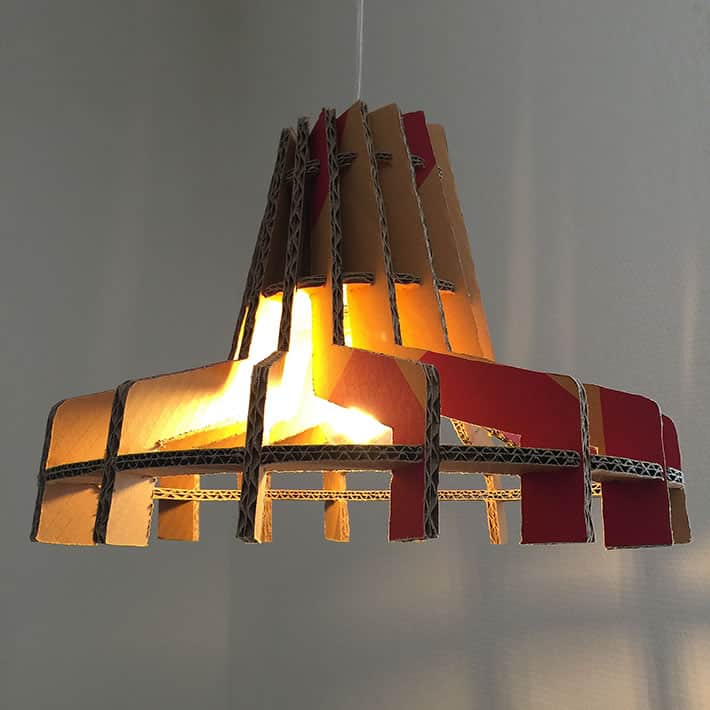


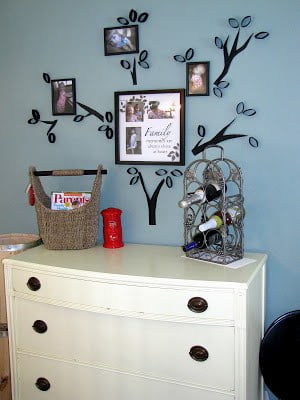
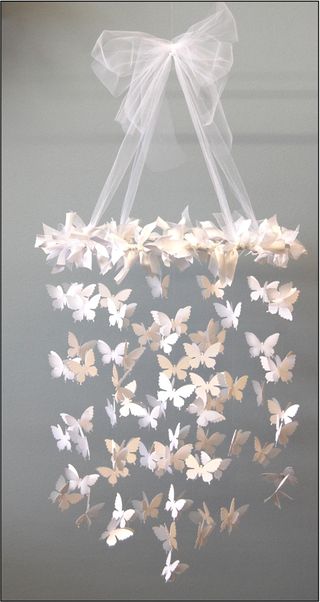
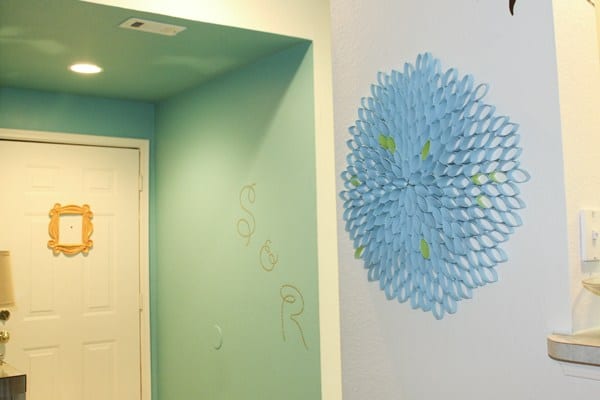
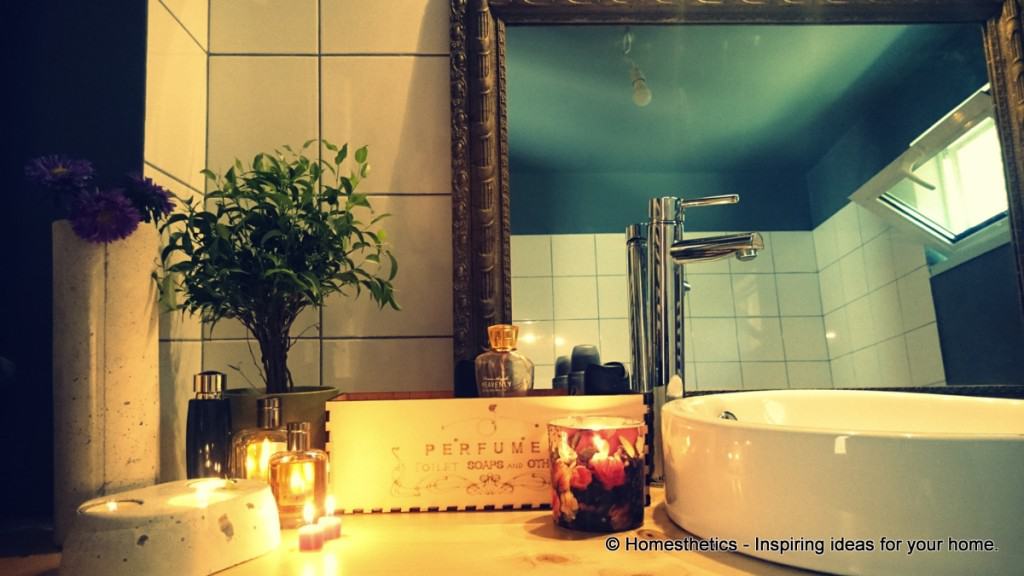 Source:
 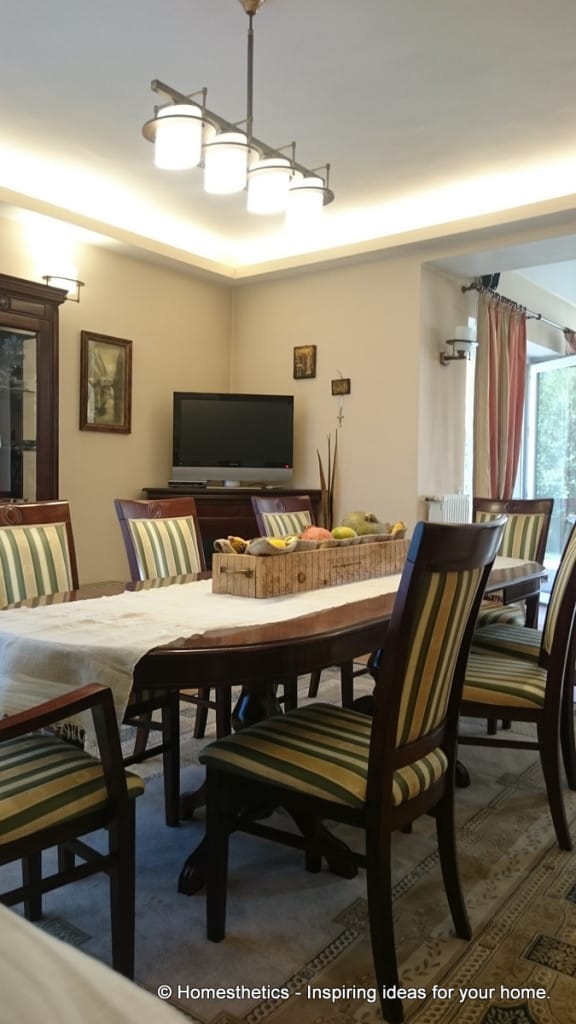 Source: Homesthetics
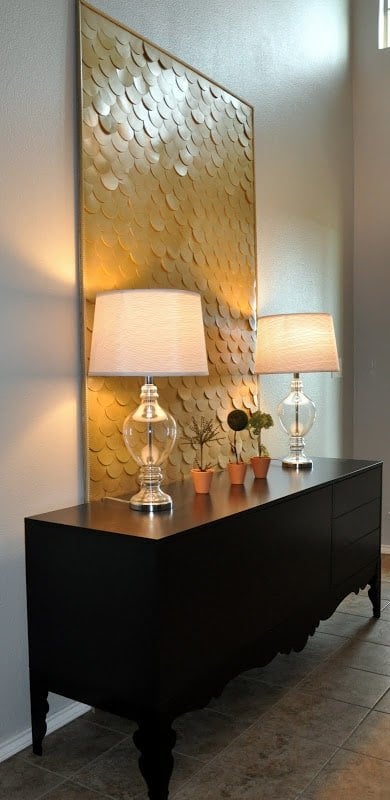
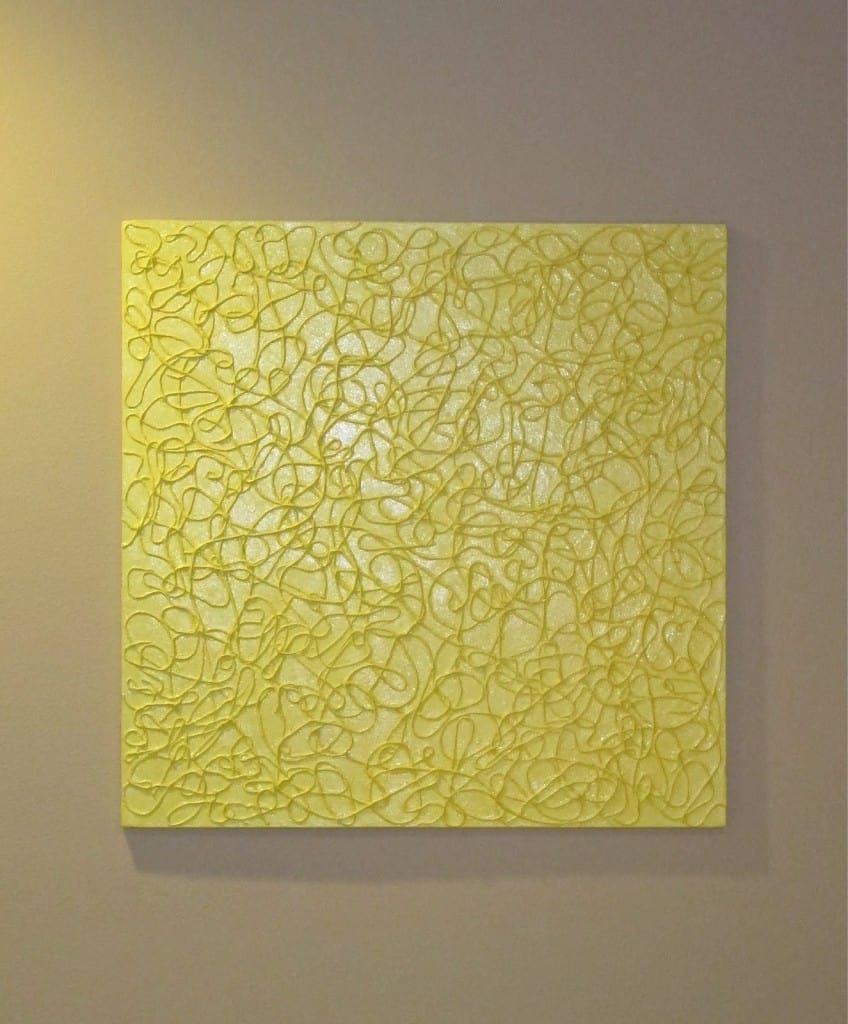
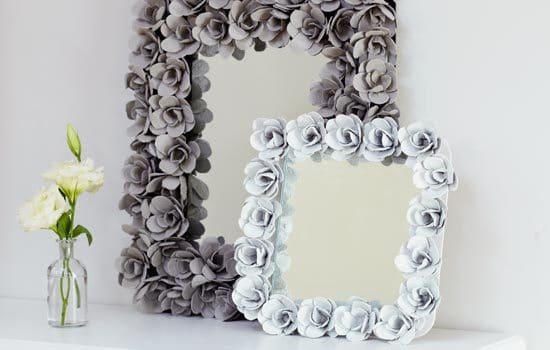
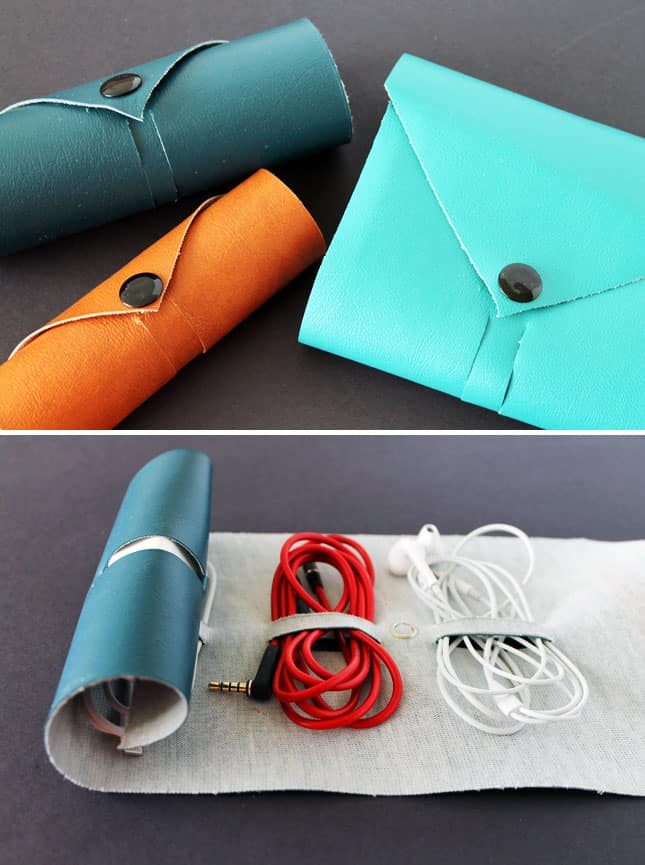
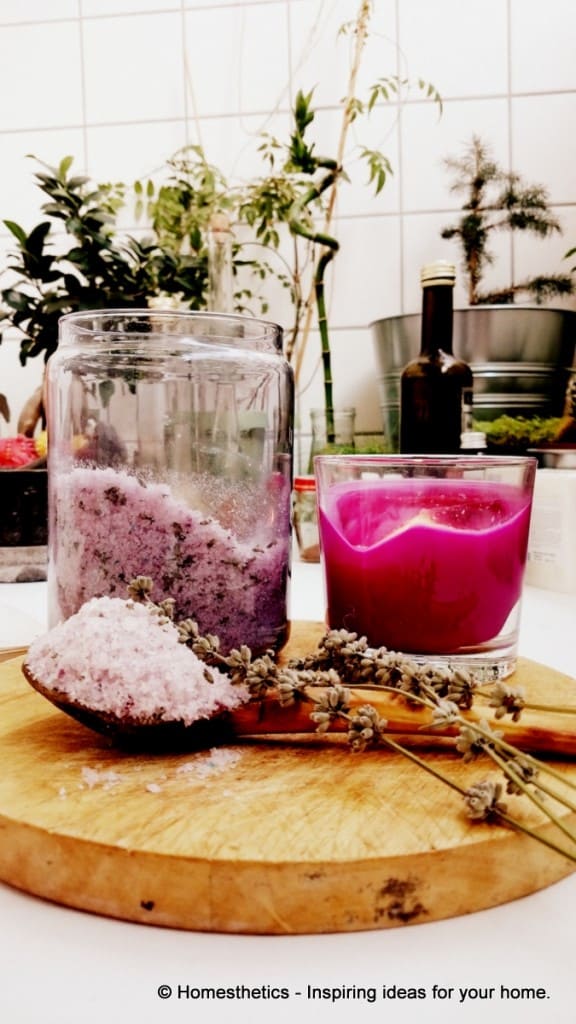
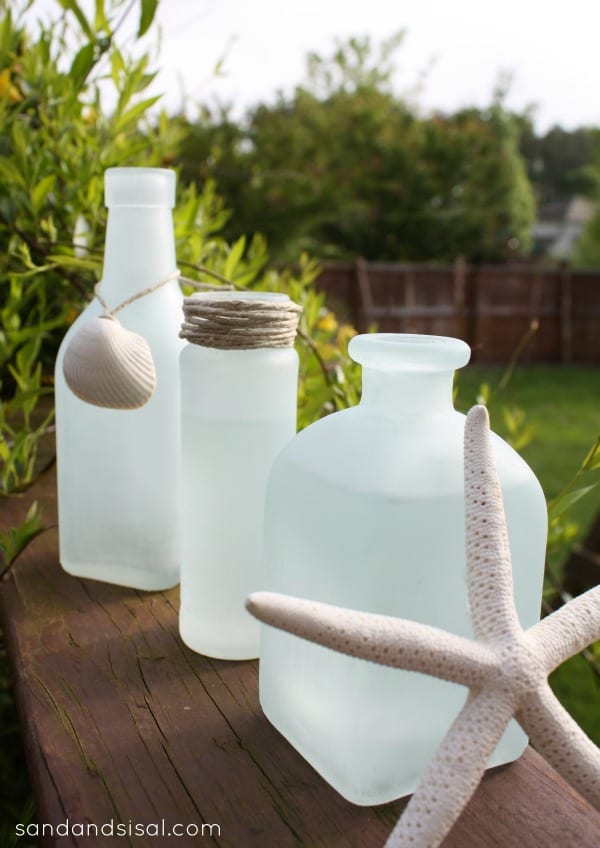
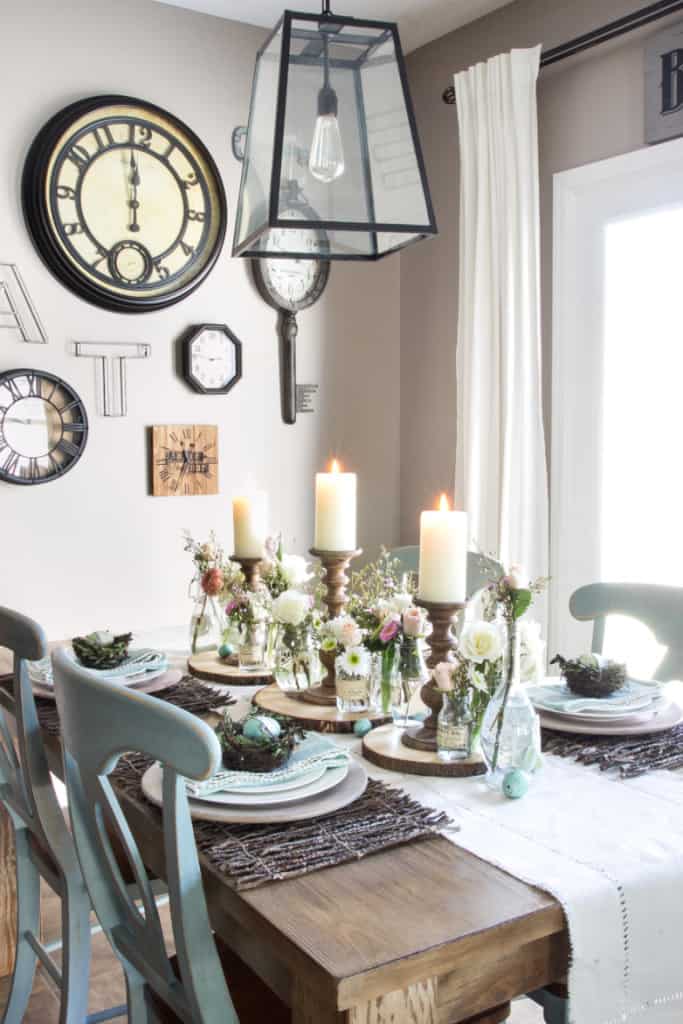
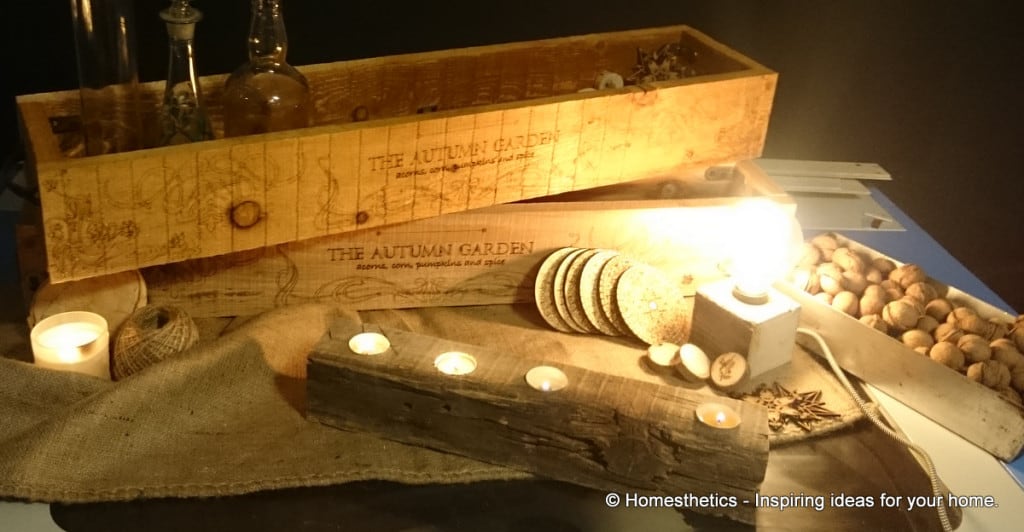
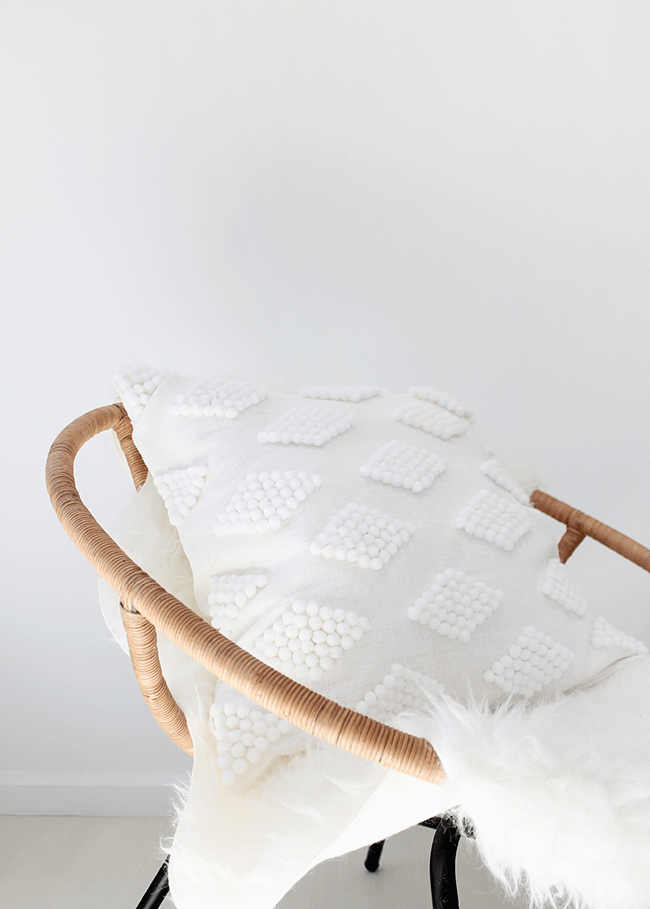
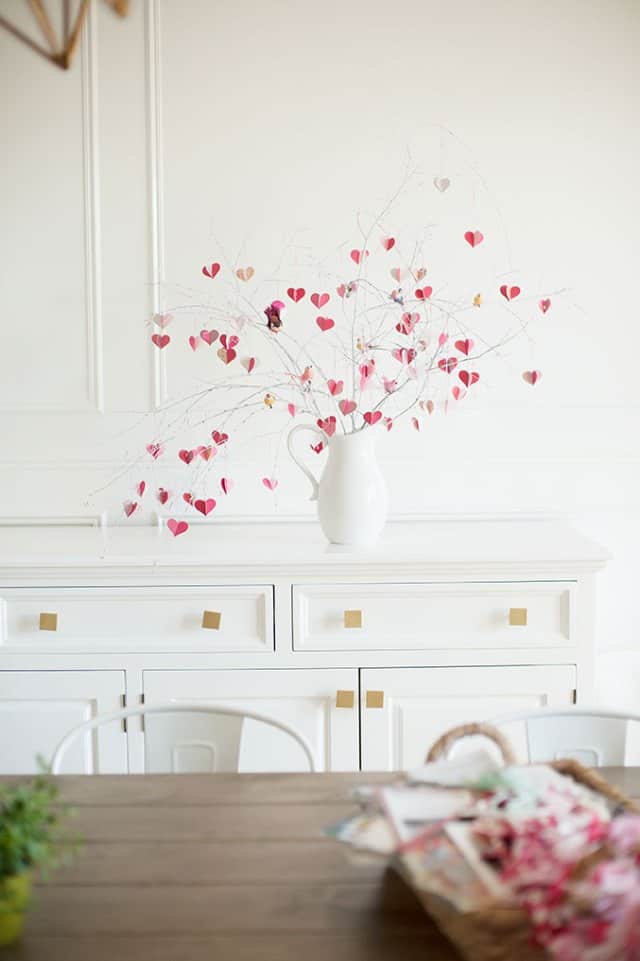

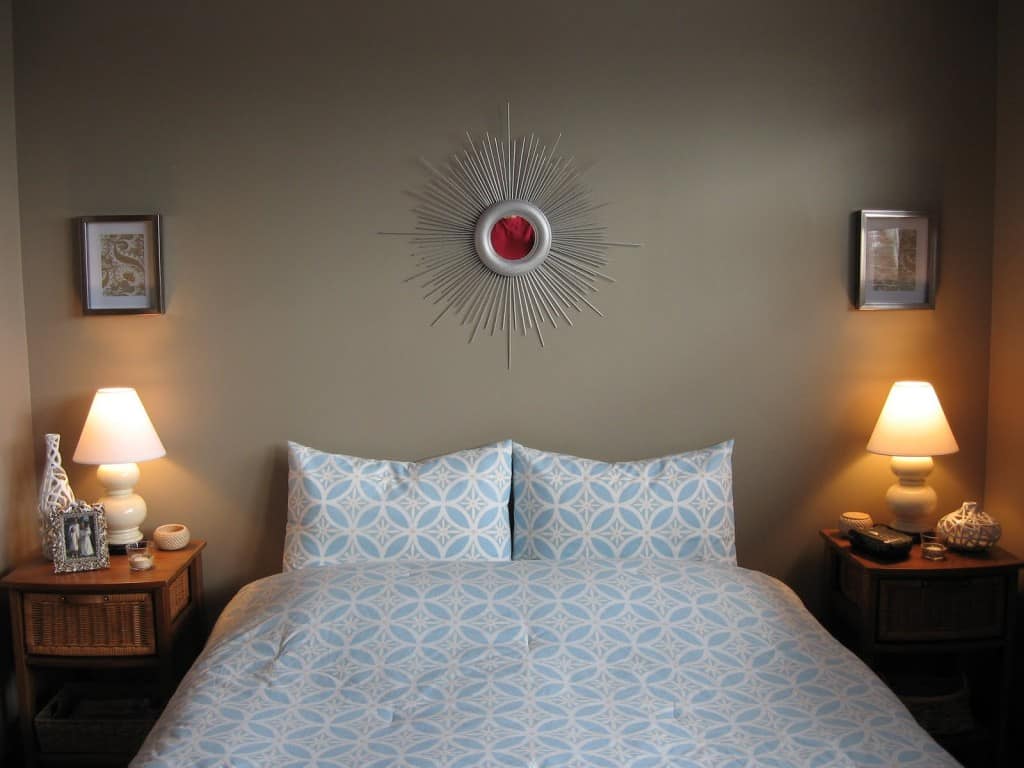
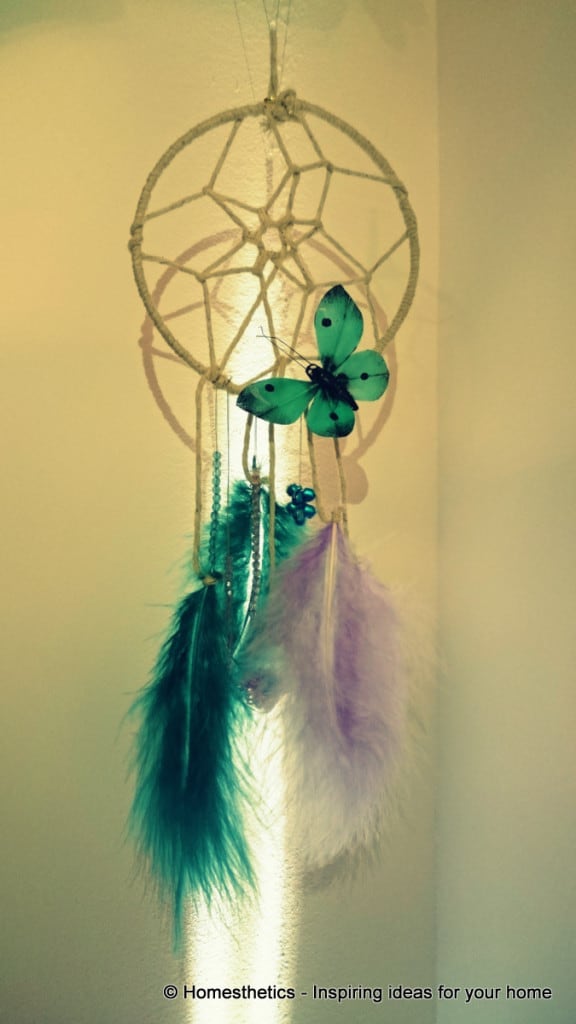
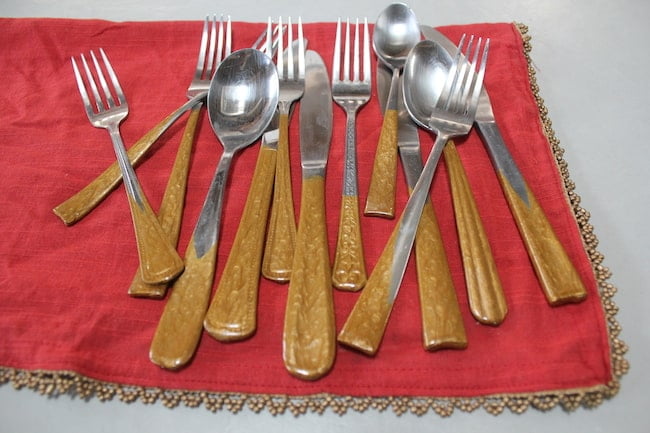
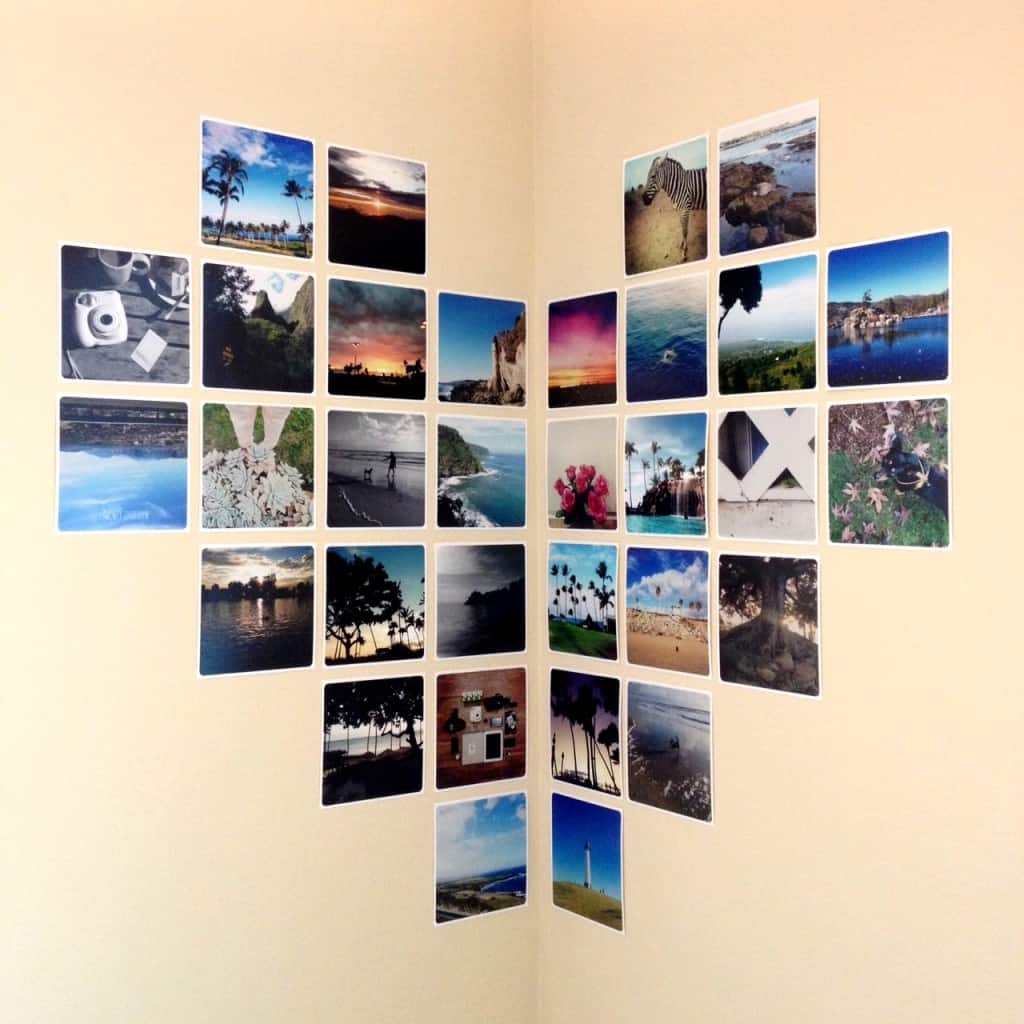
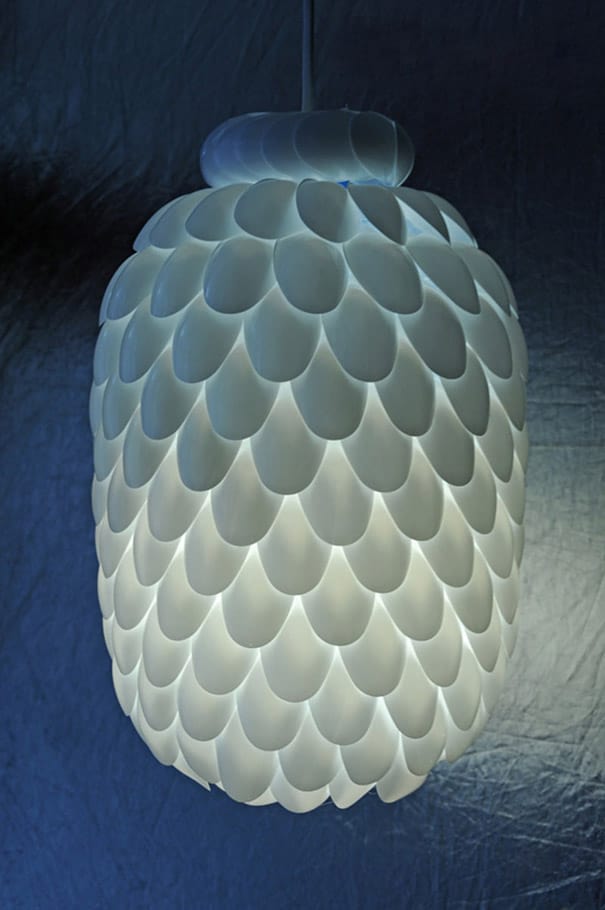
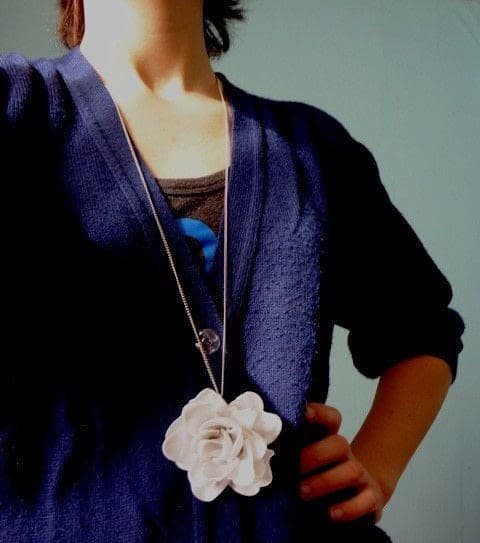
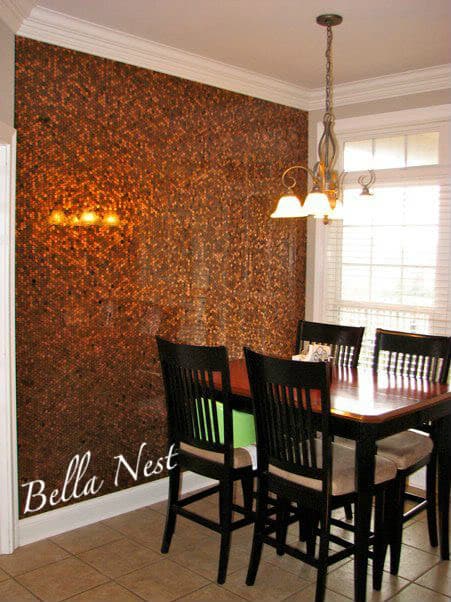
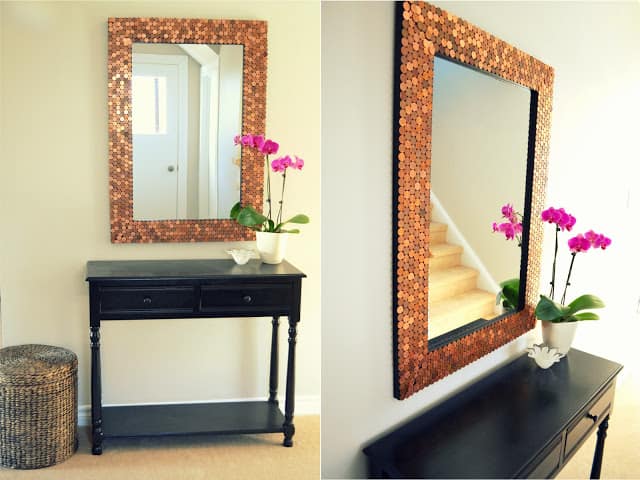
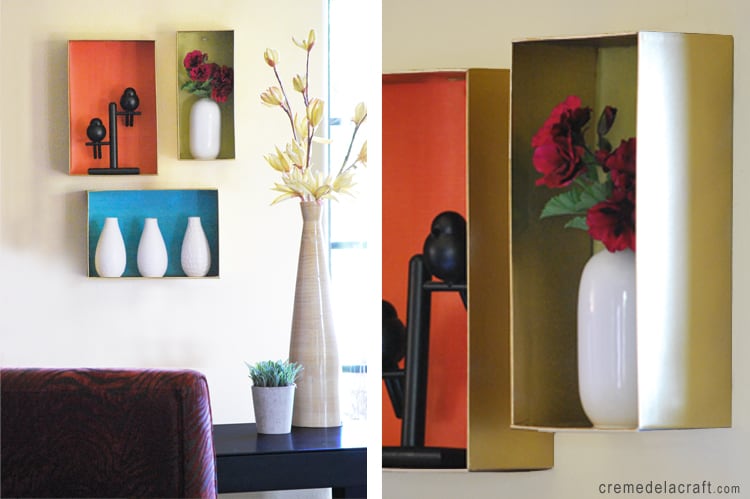
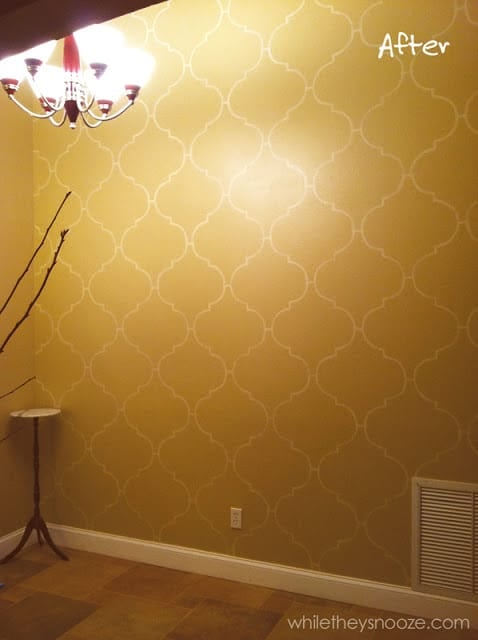
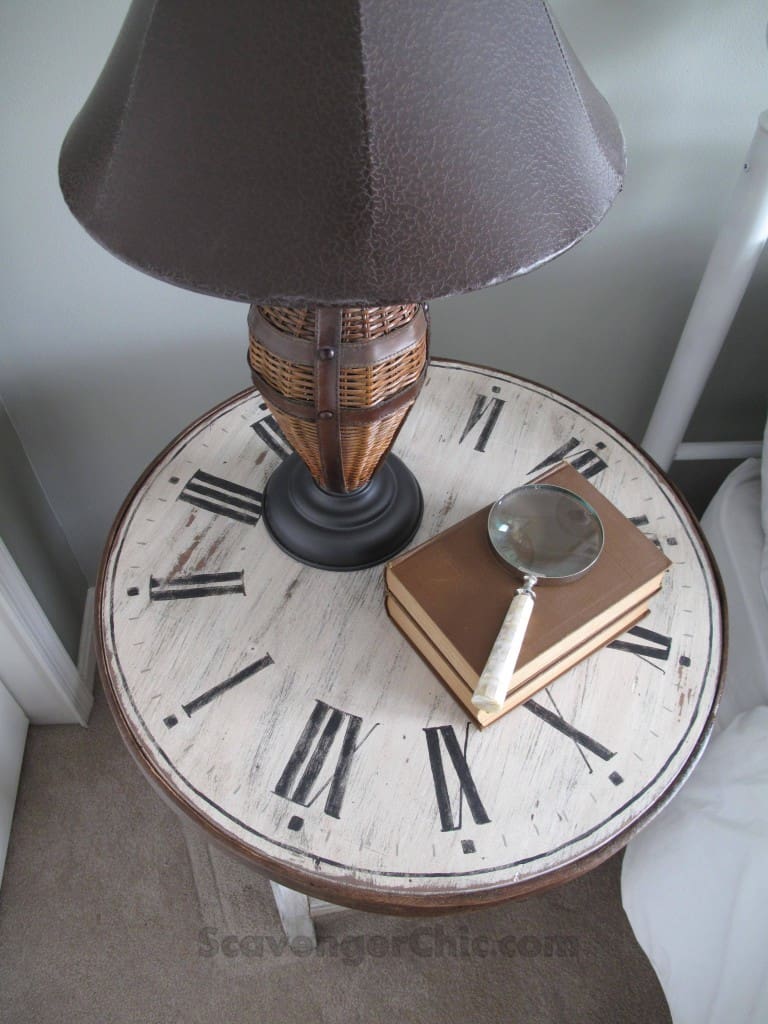
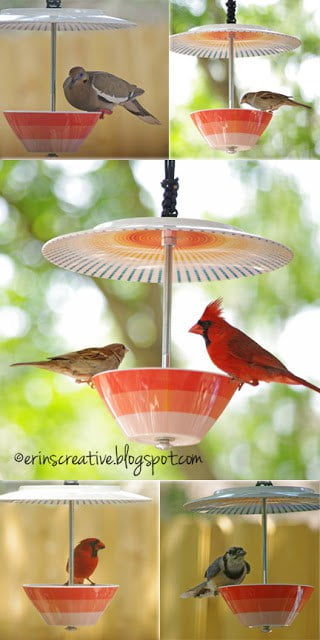
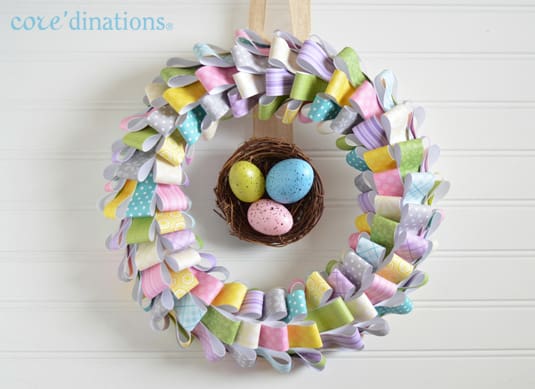
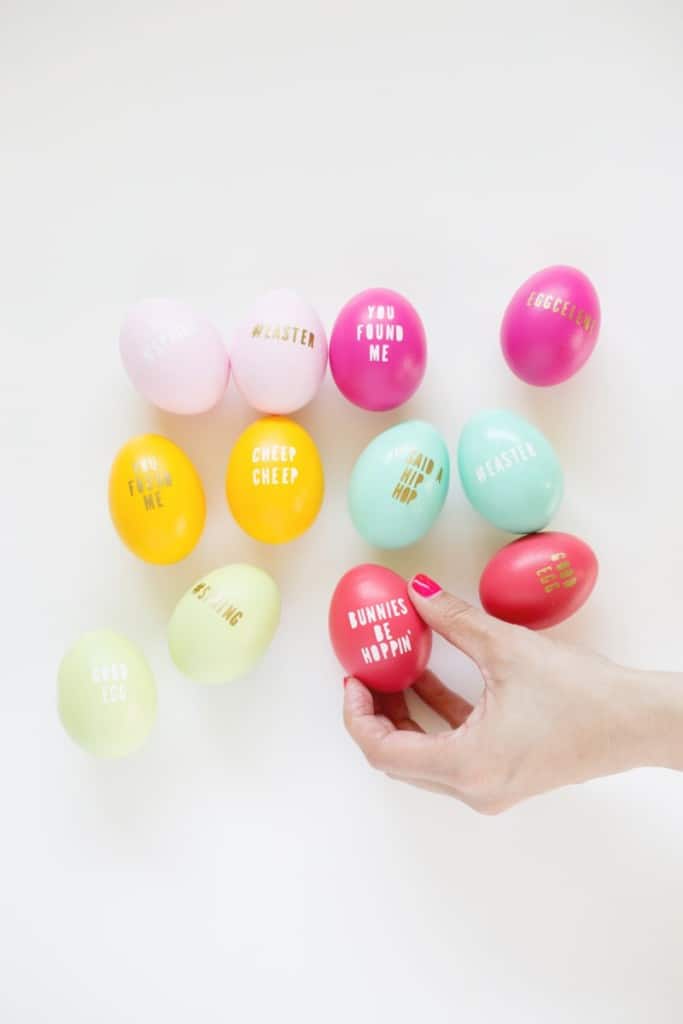
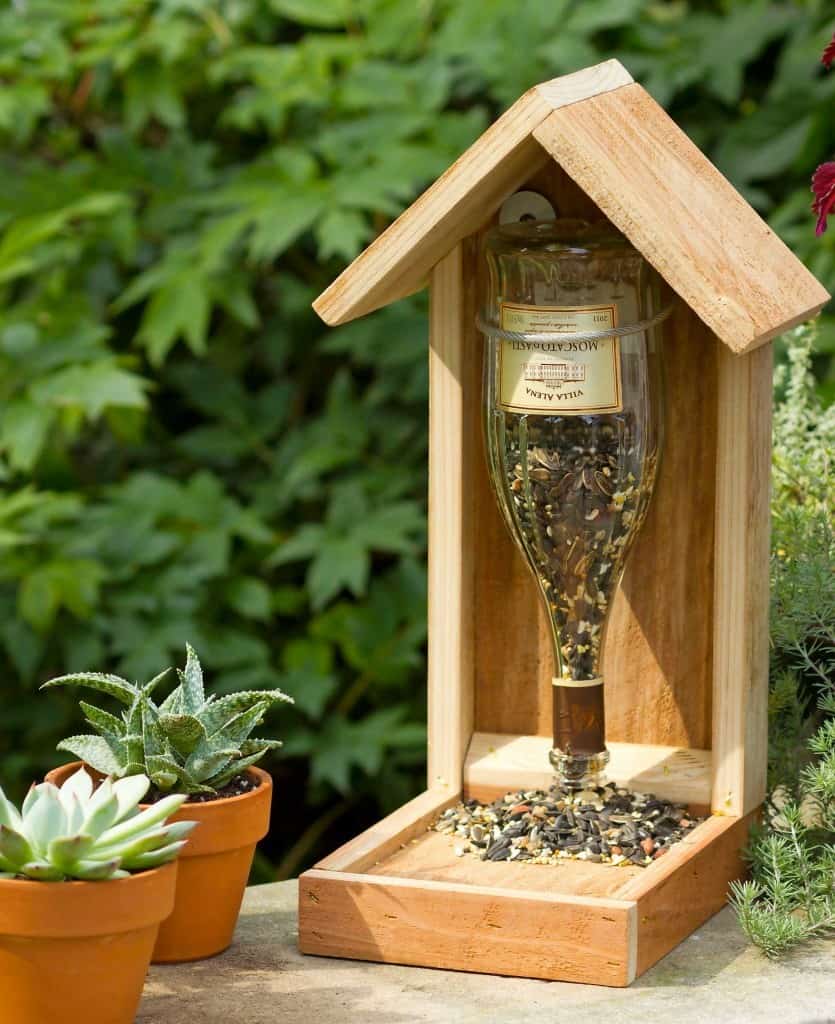

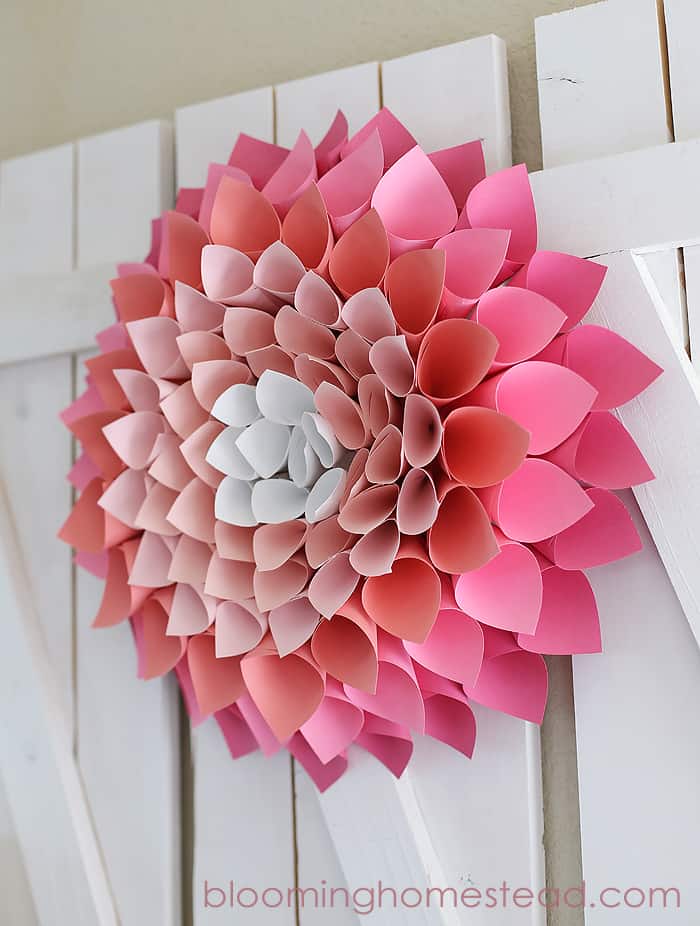

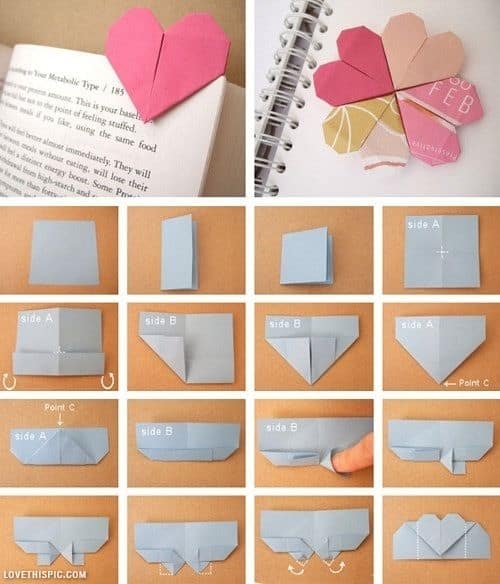
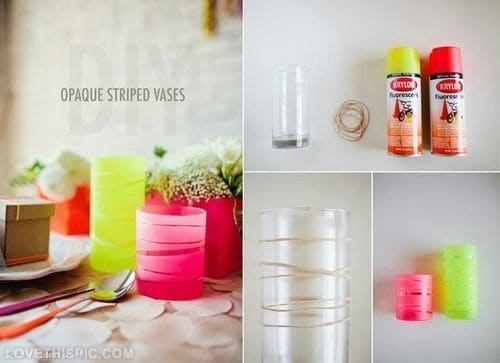
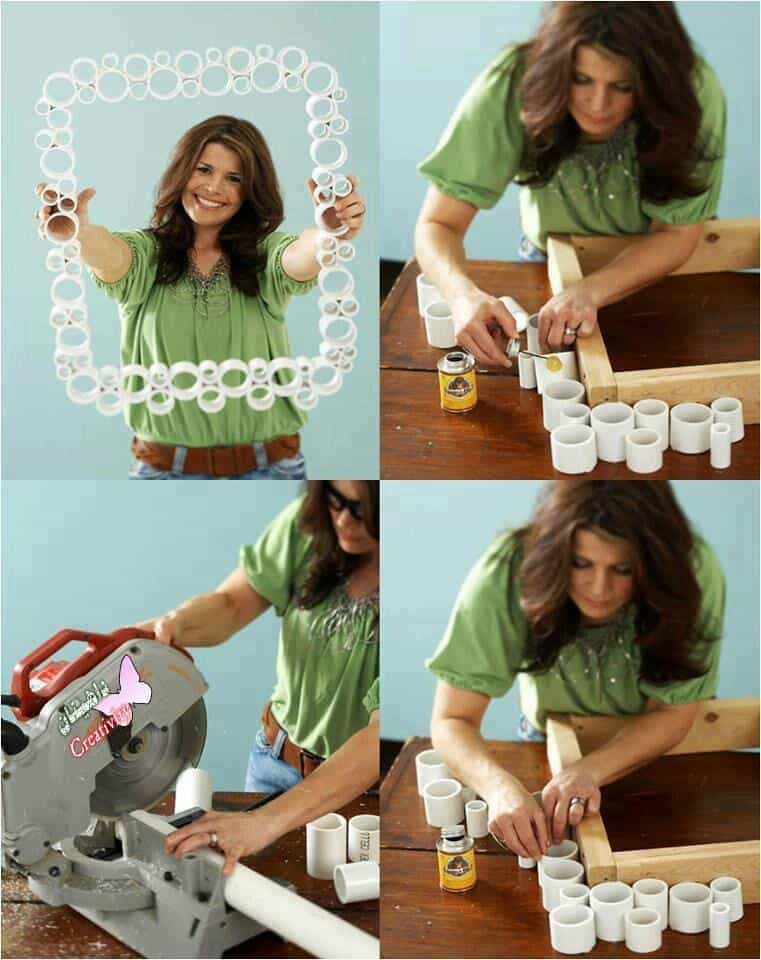
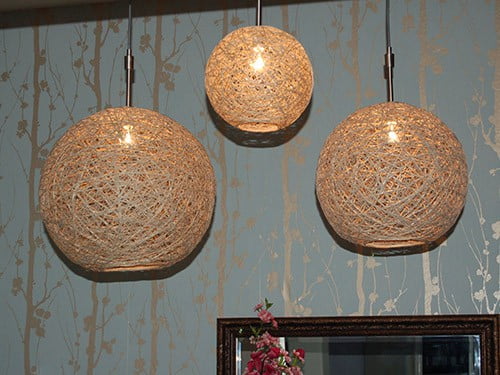
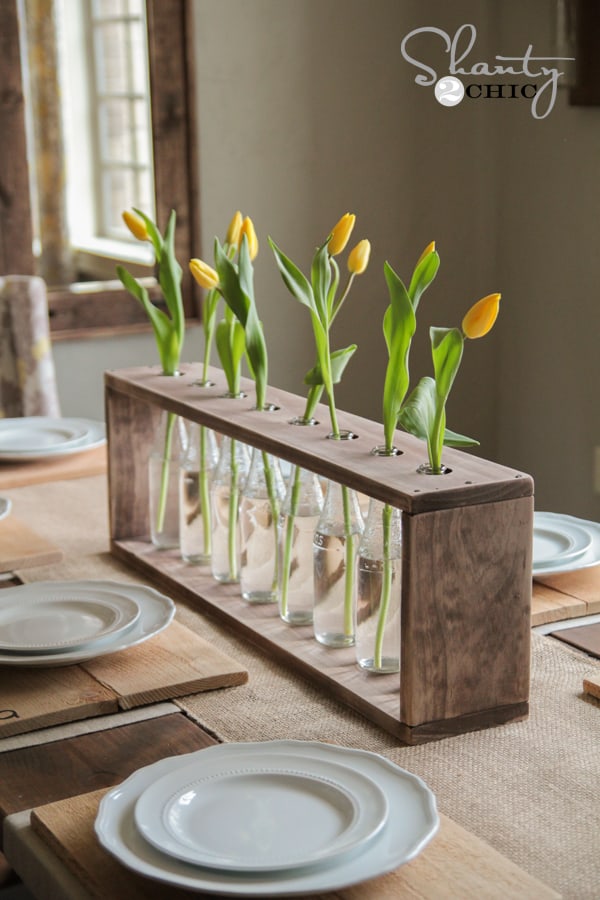

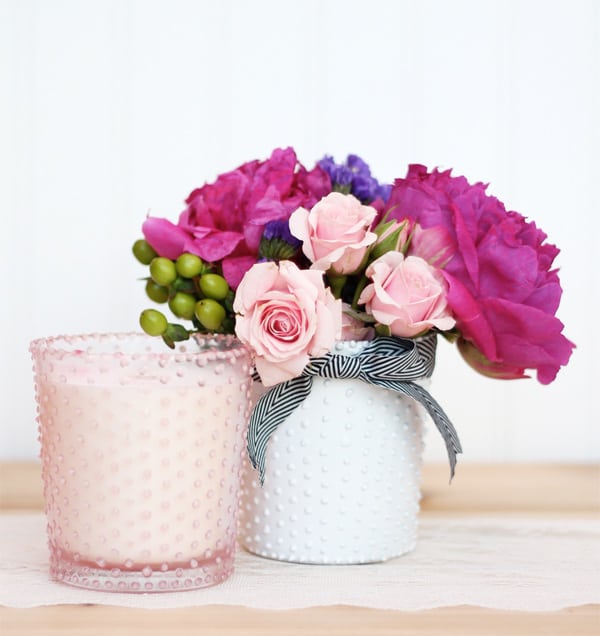
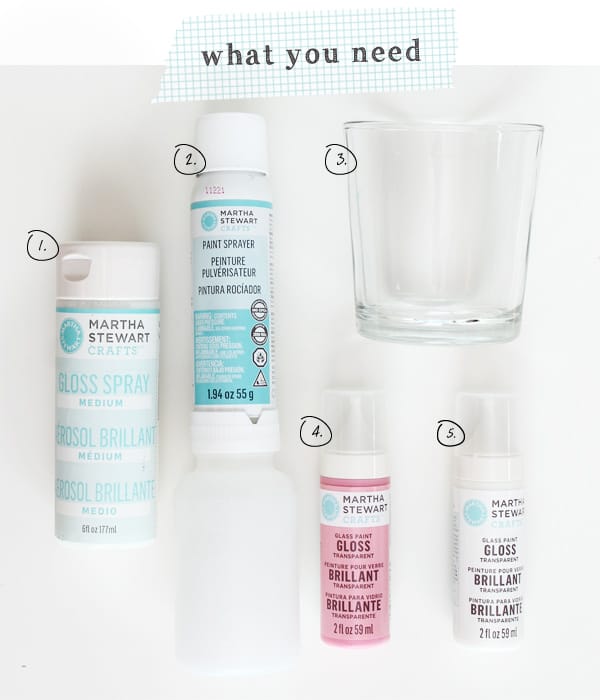
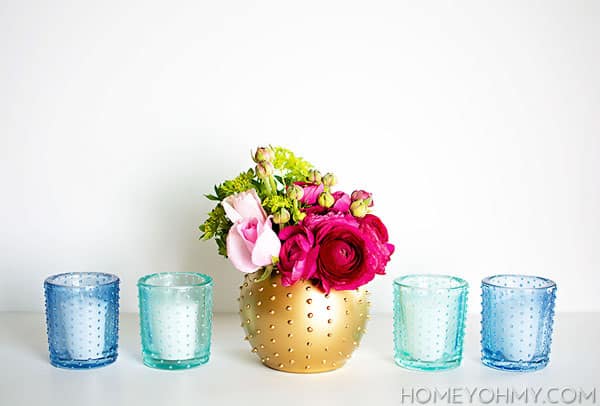

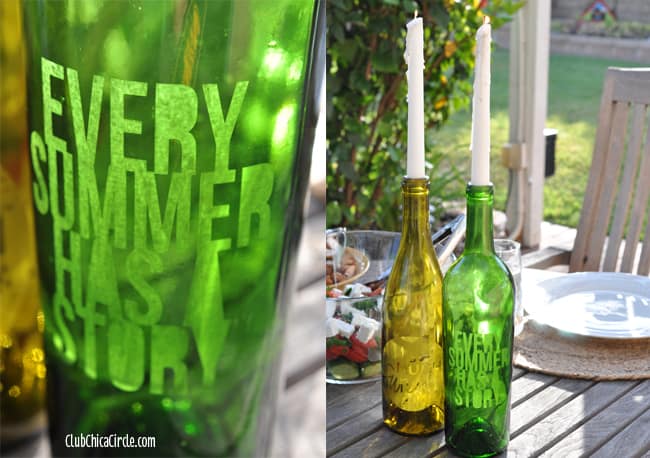
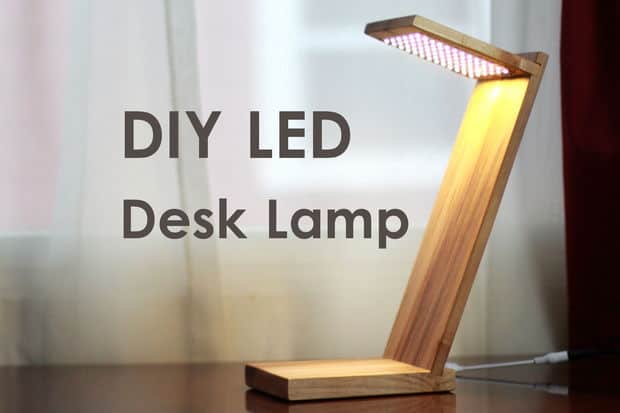
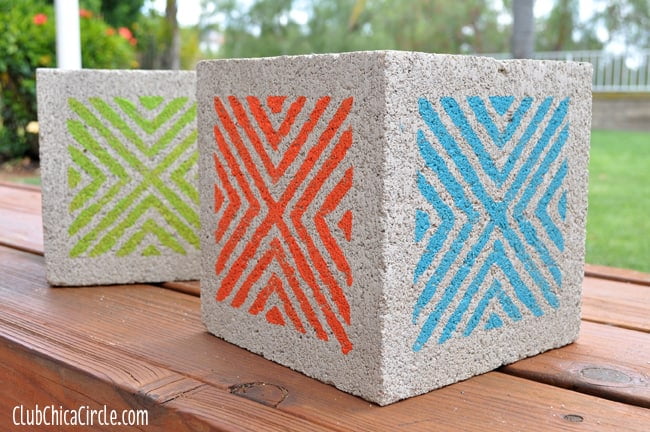
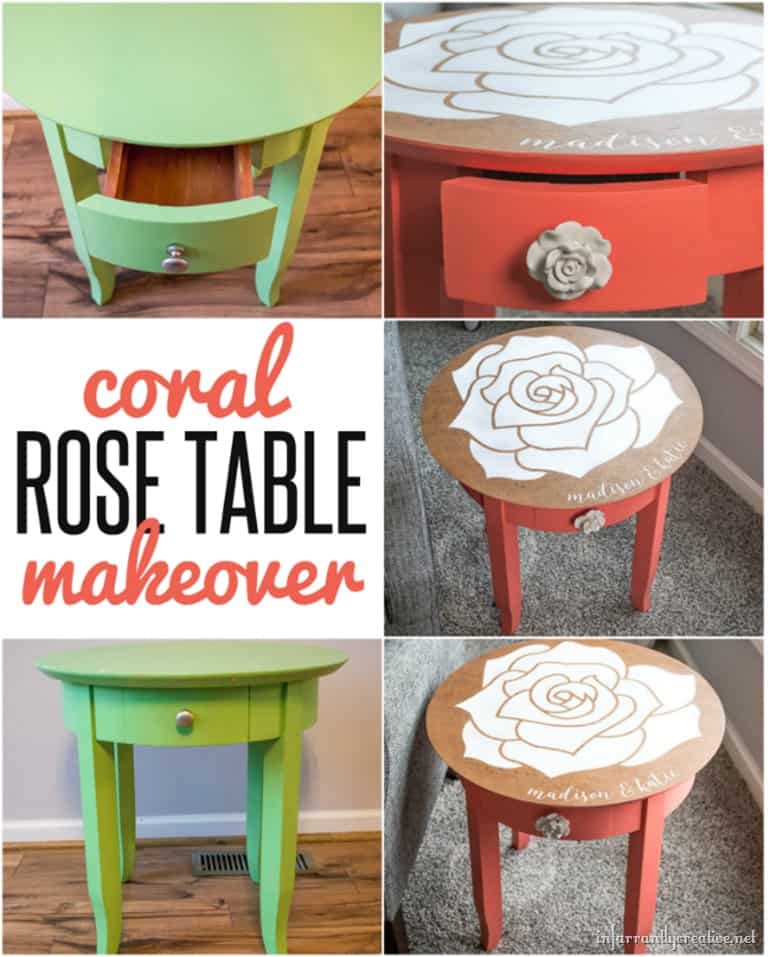
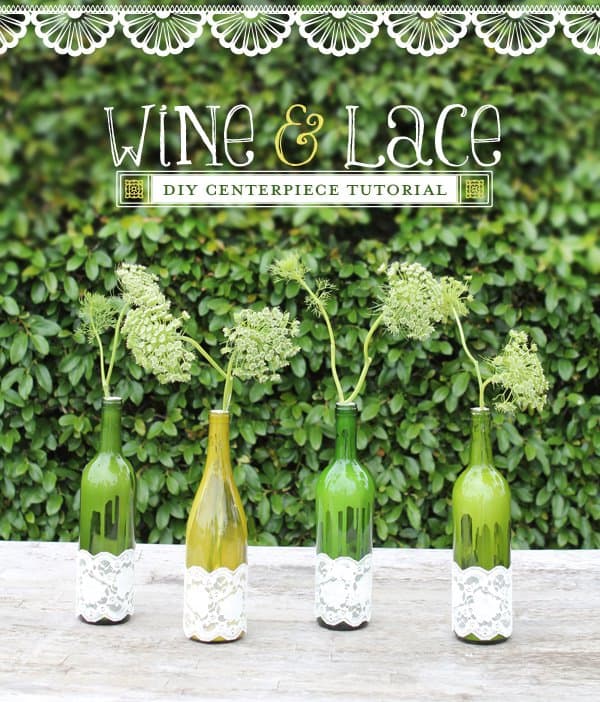
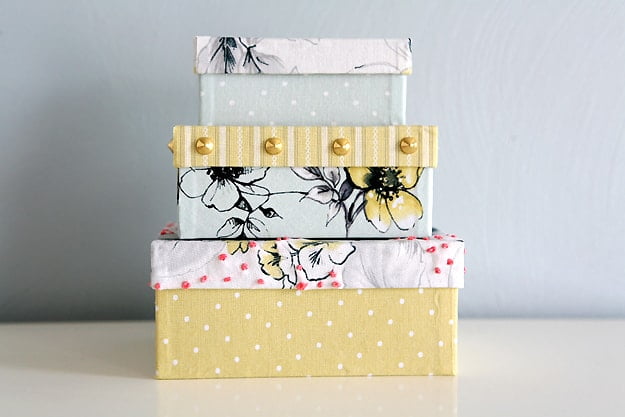
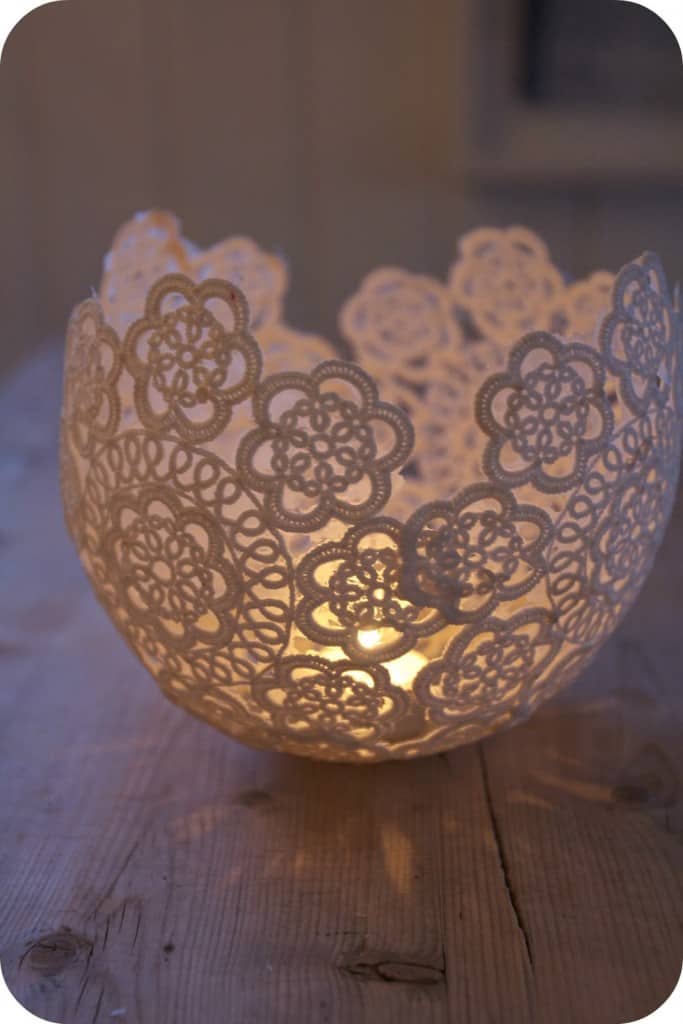
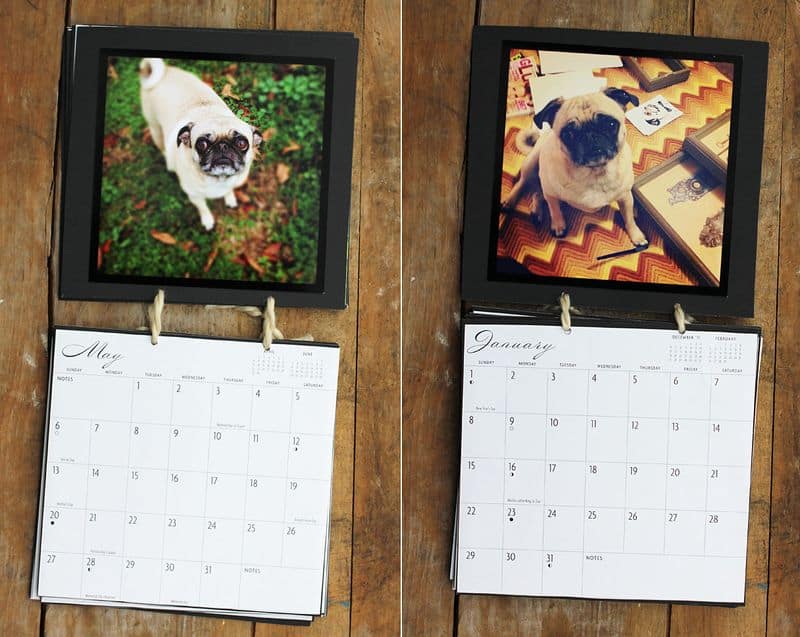
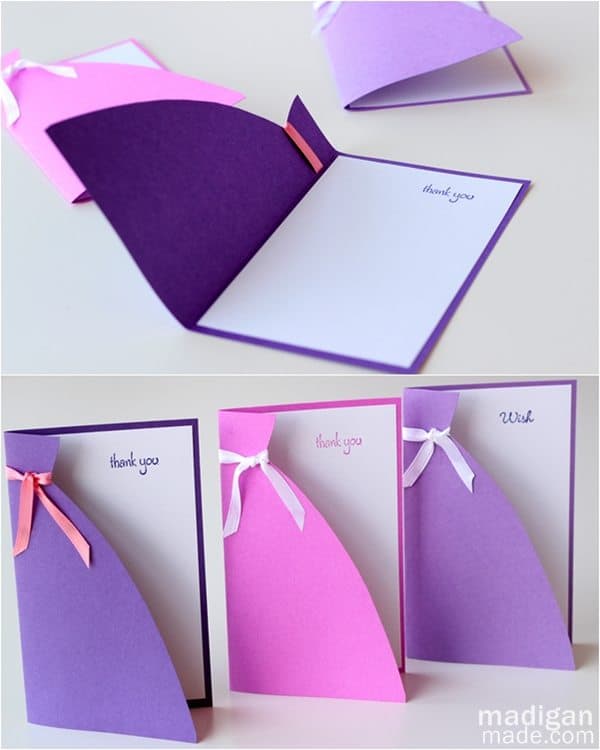


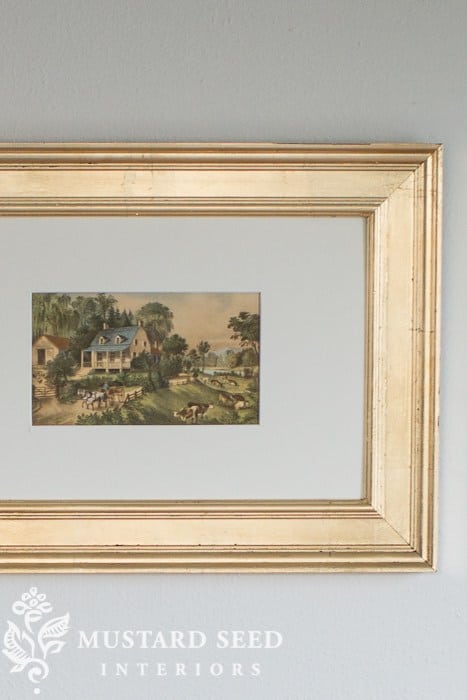
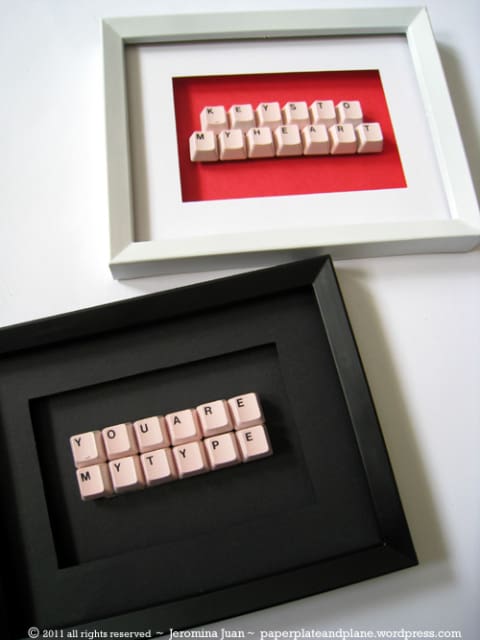
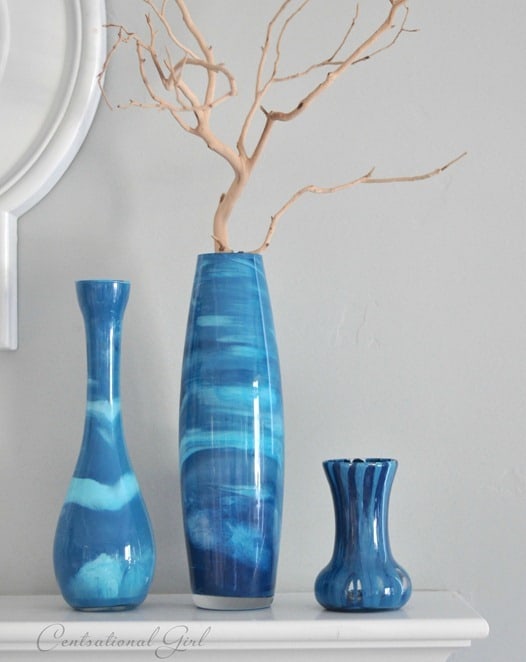
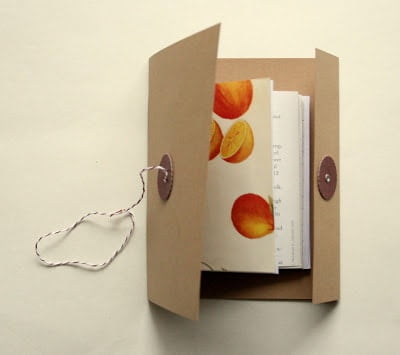
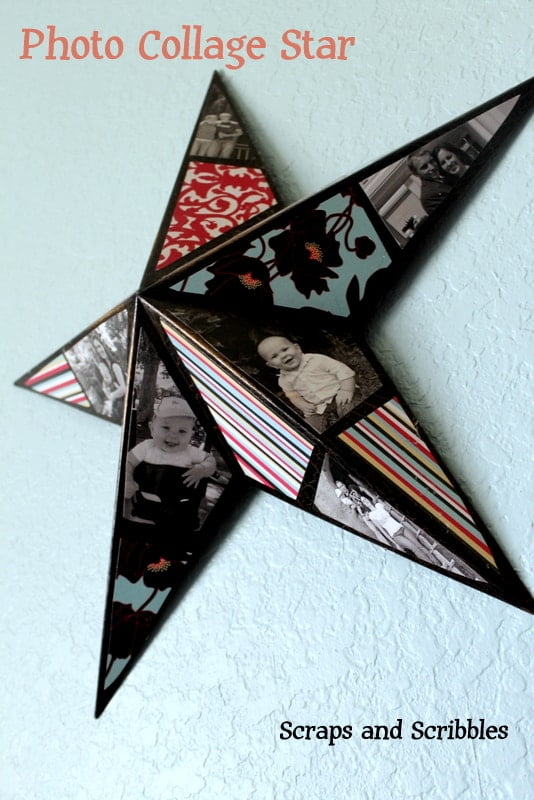
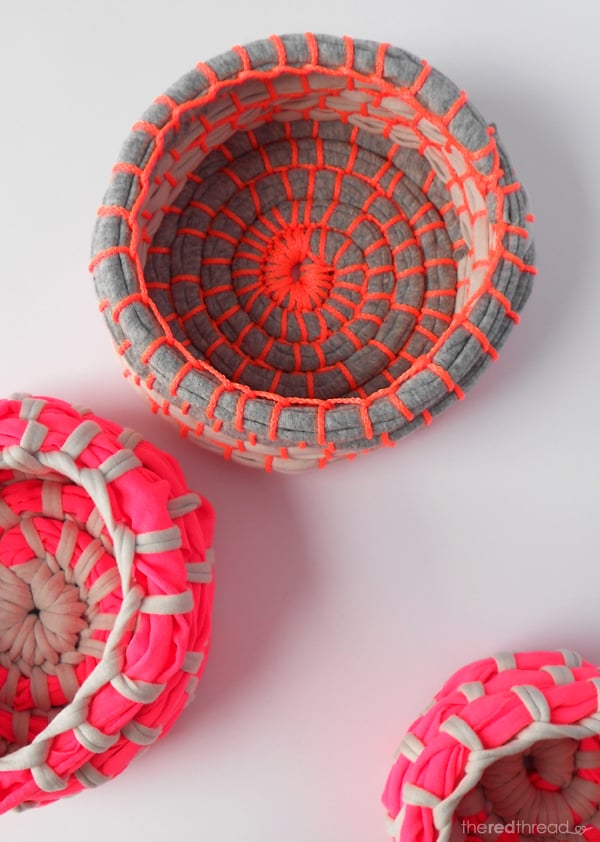
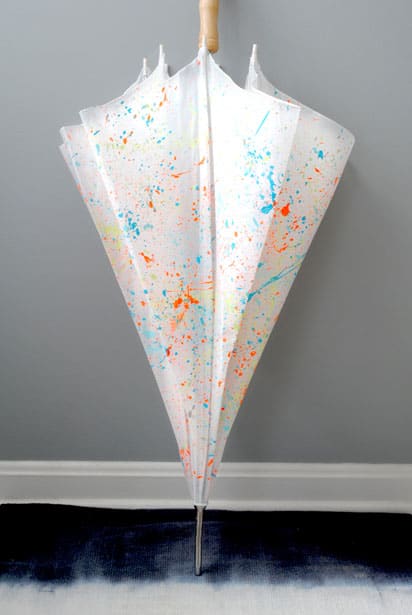
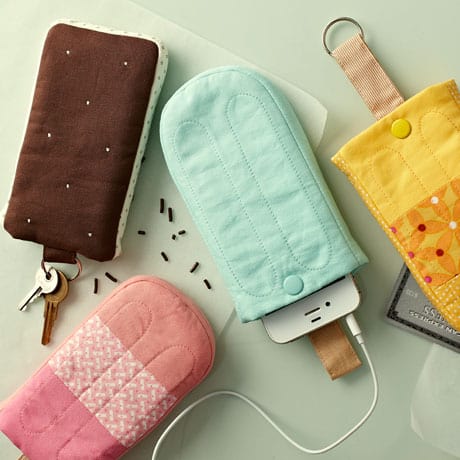
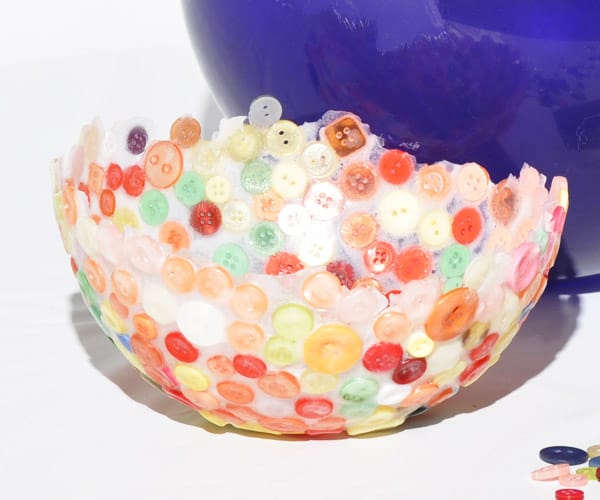
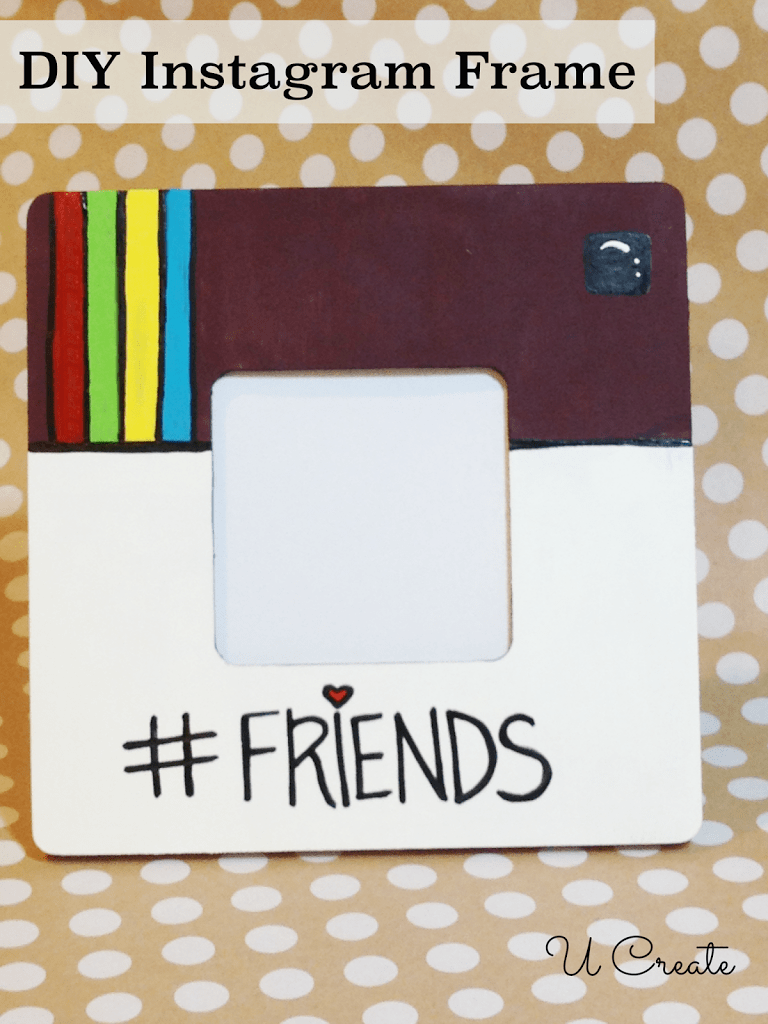
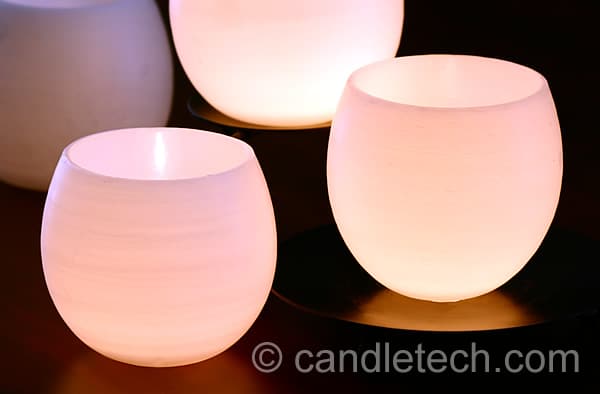
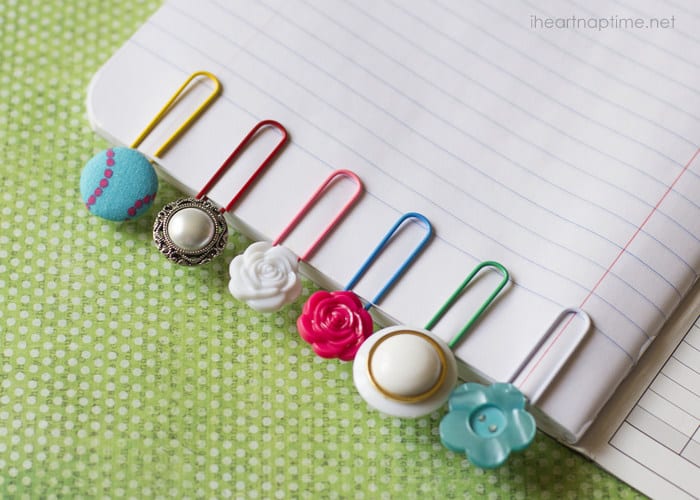
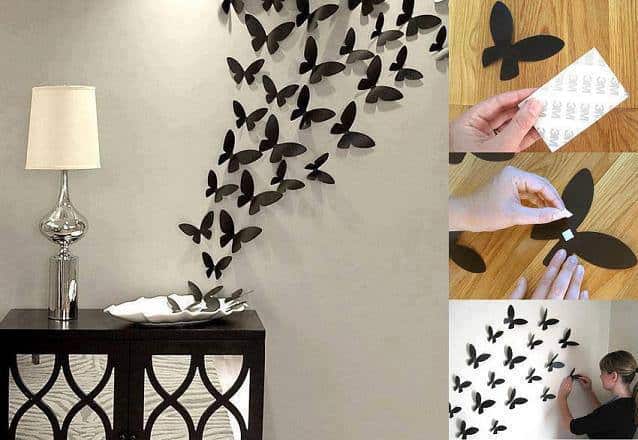
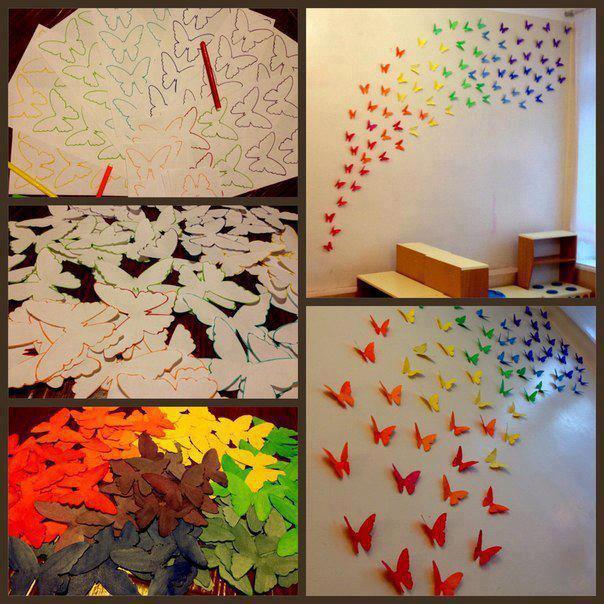
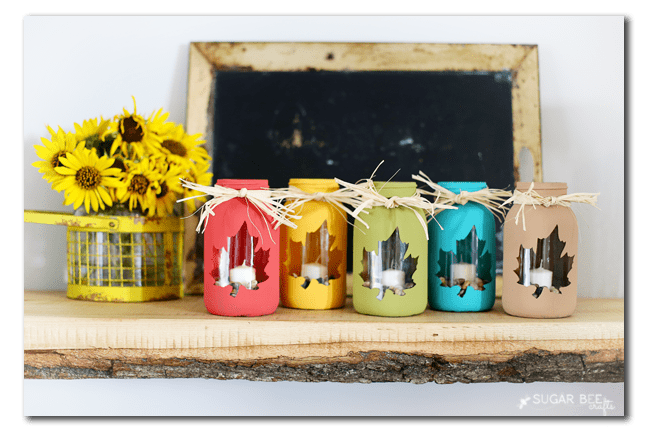
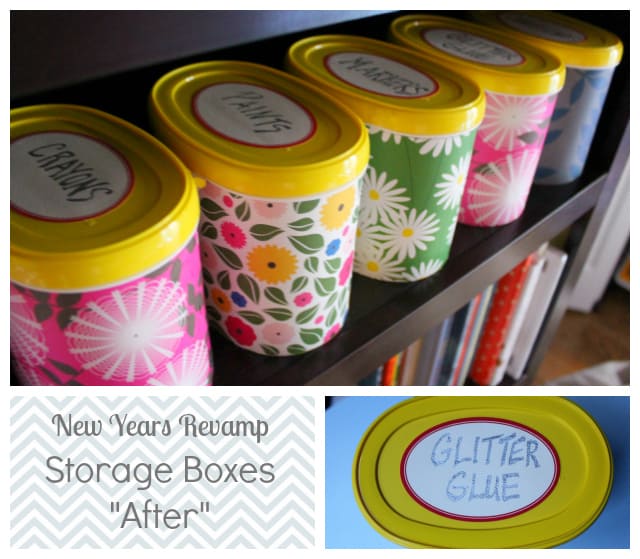
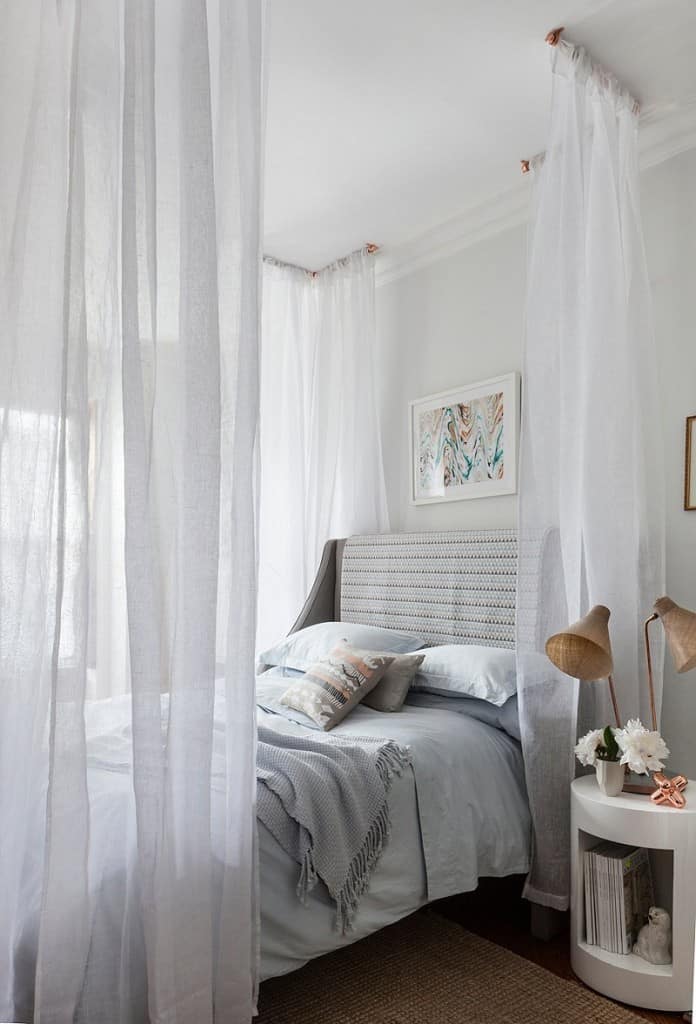
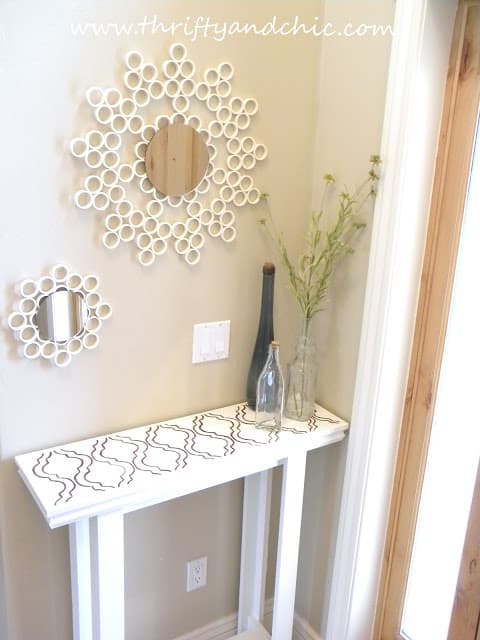
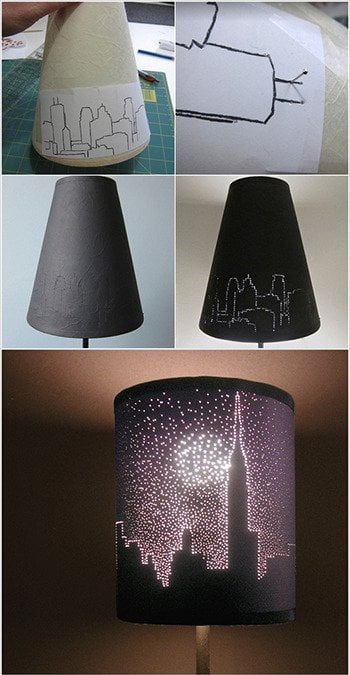
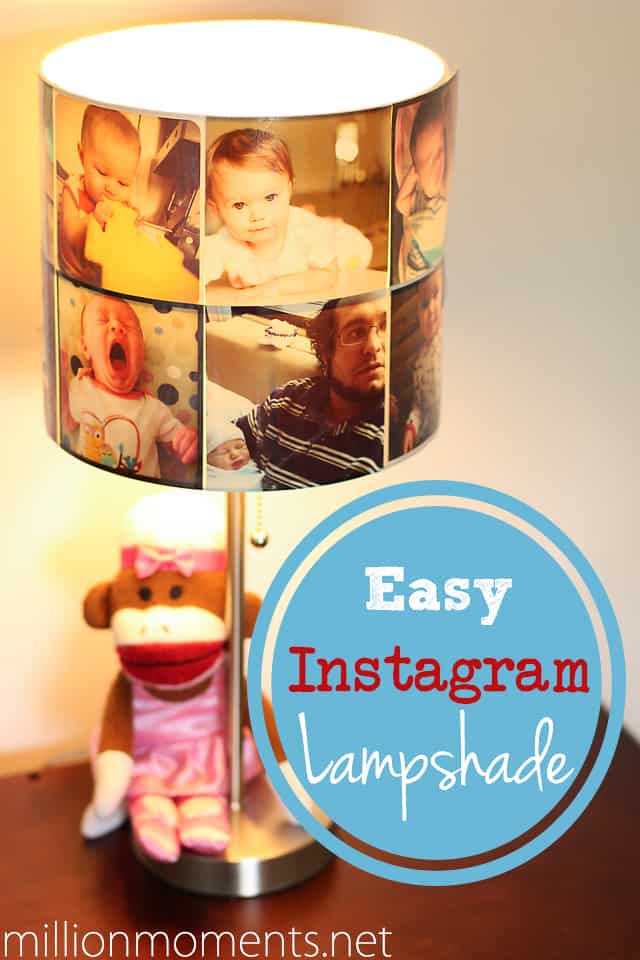

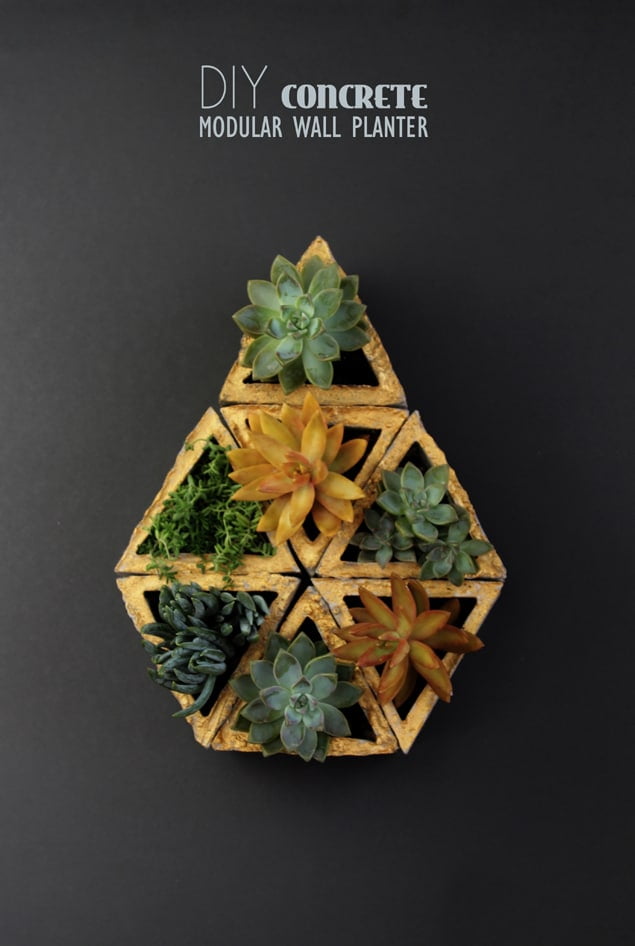
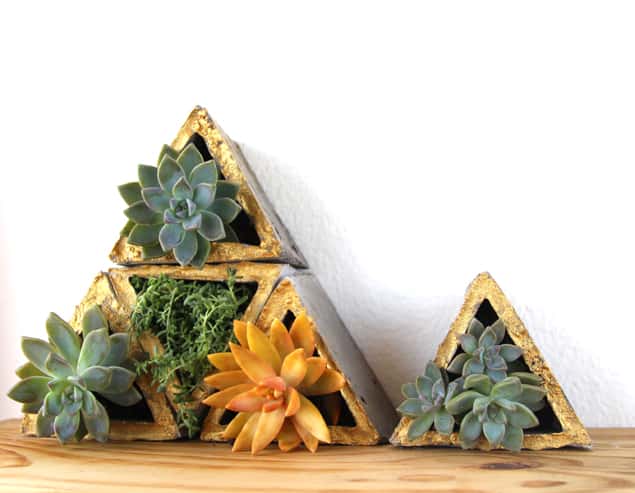
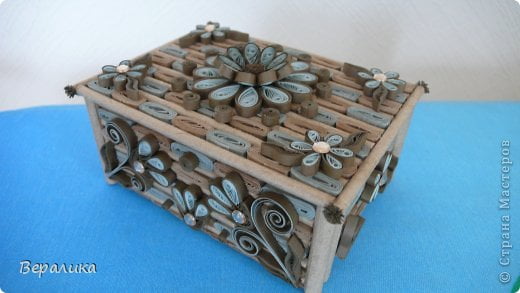
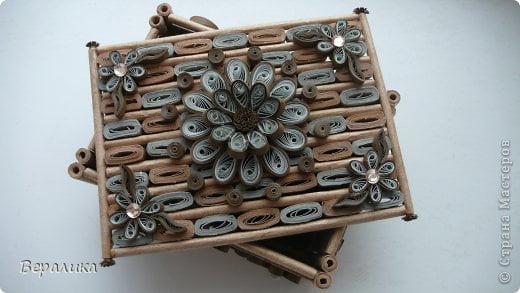
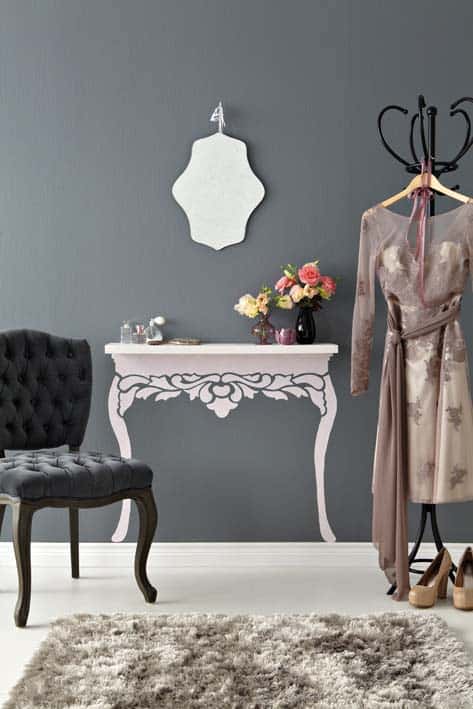
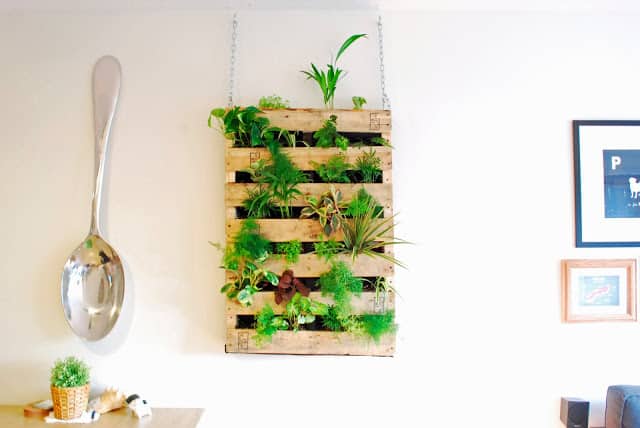
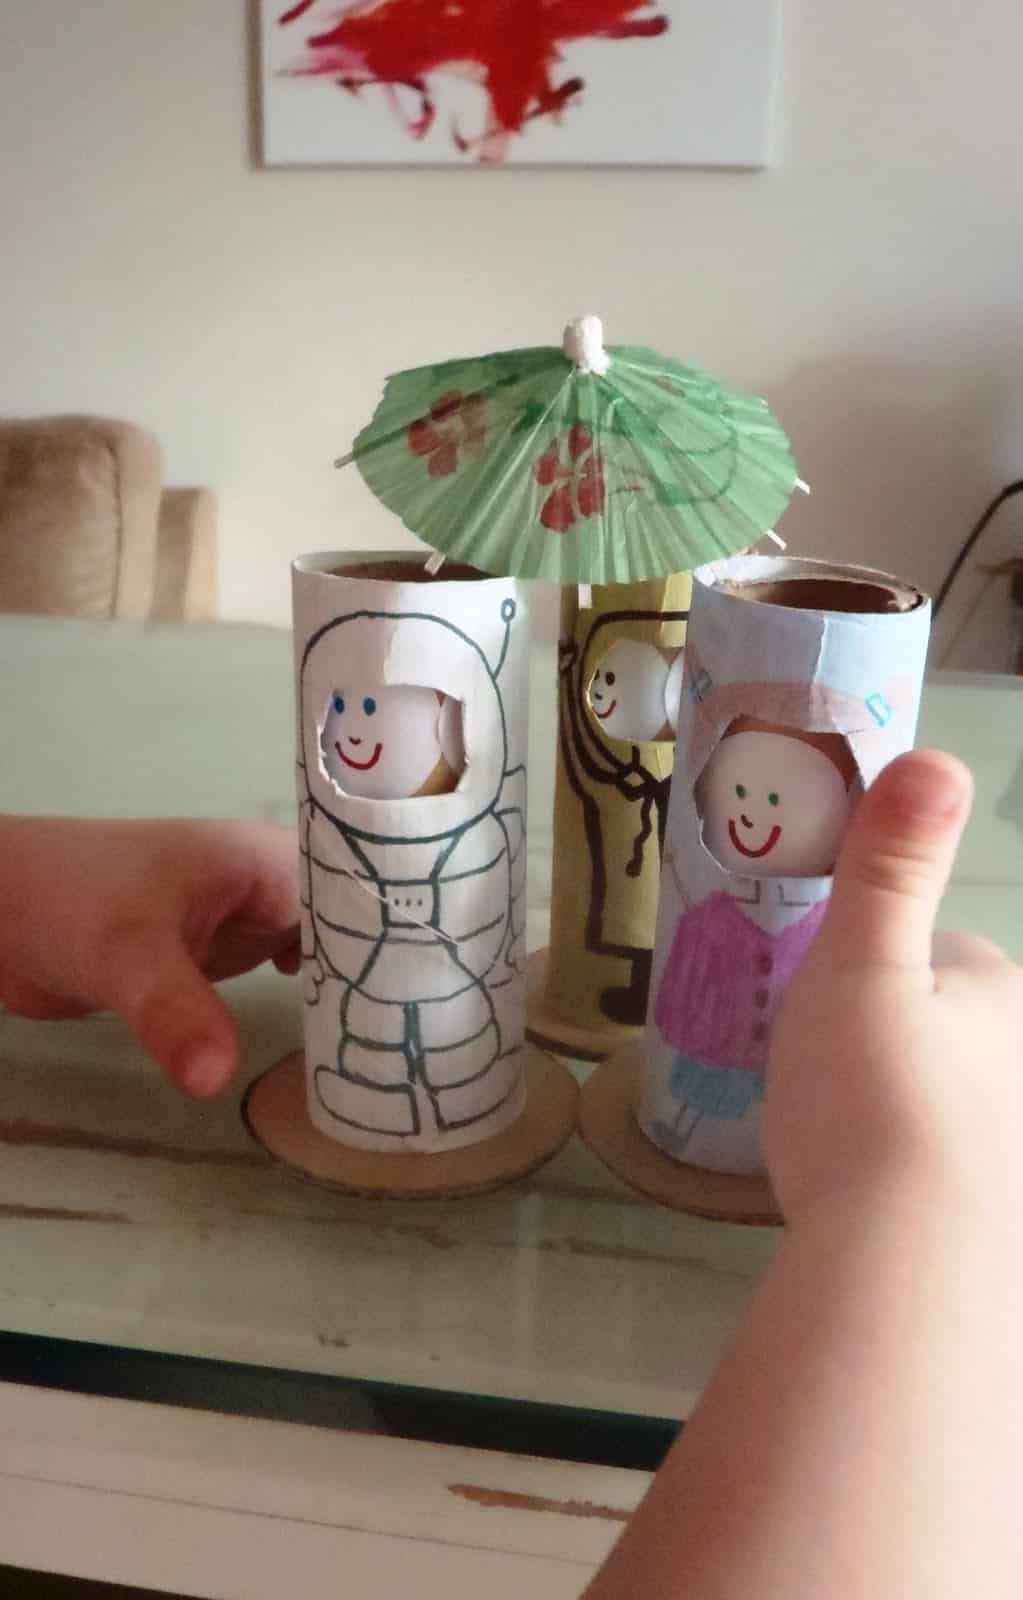
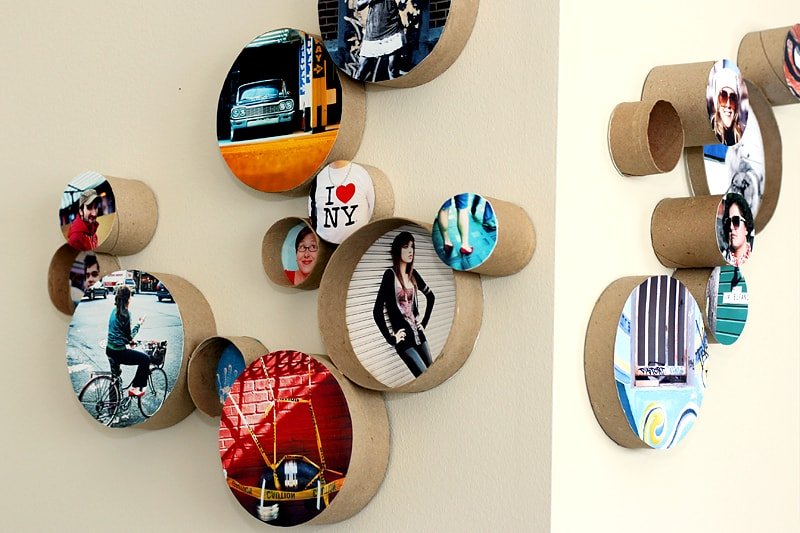
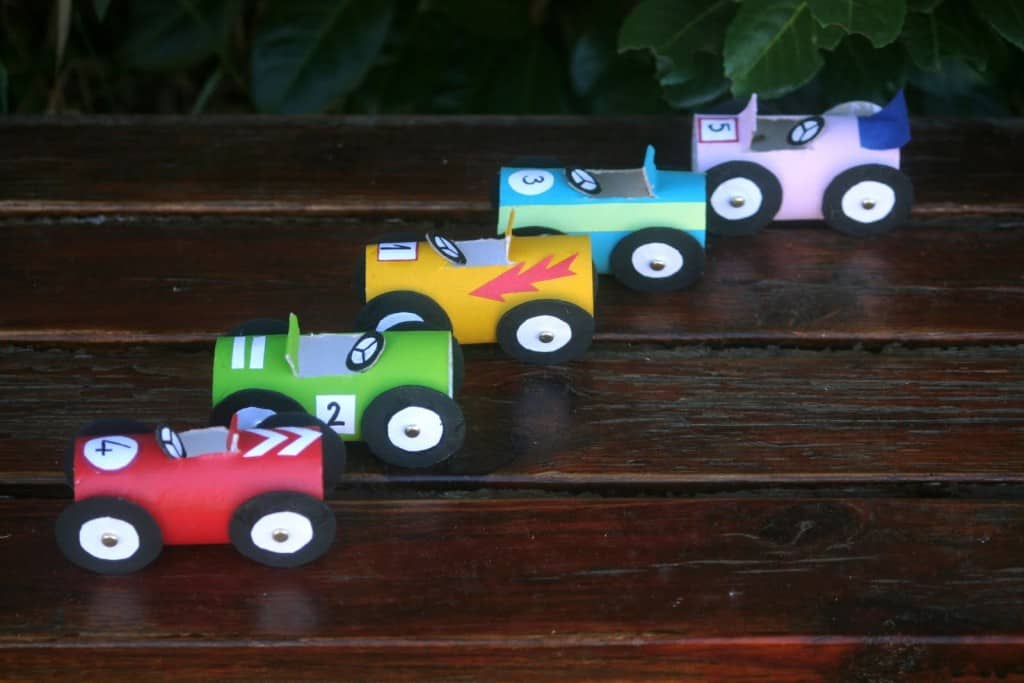

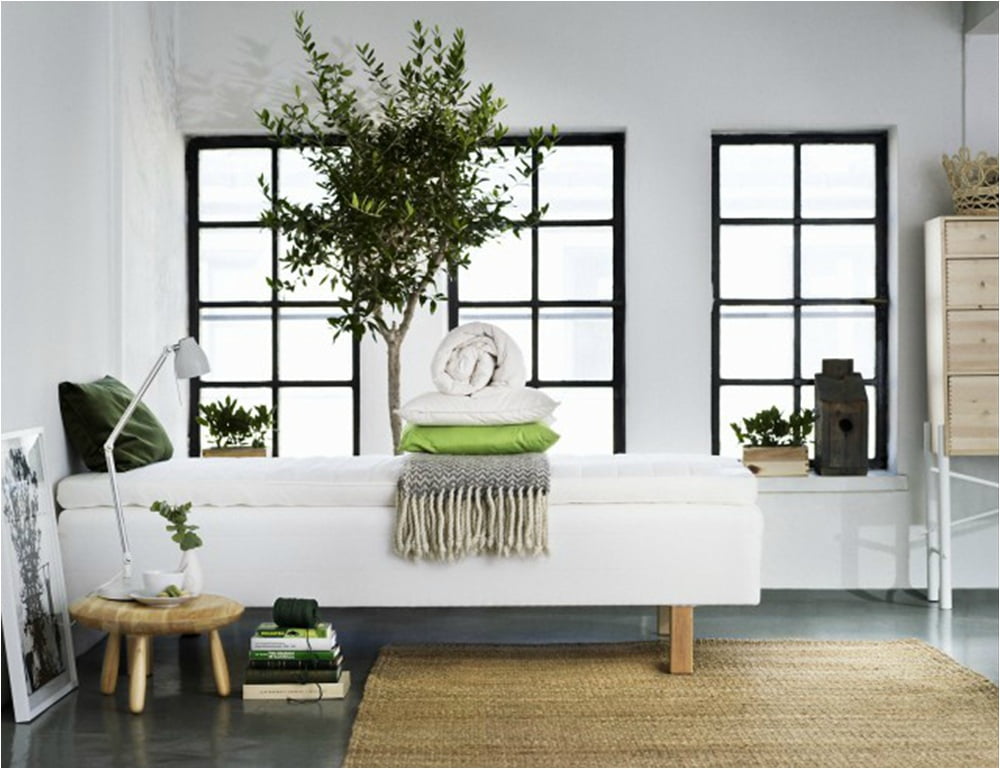
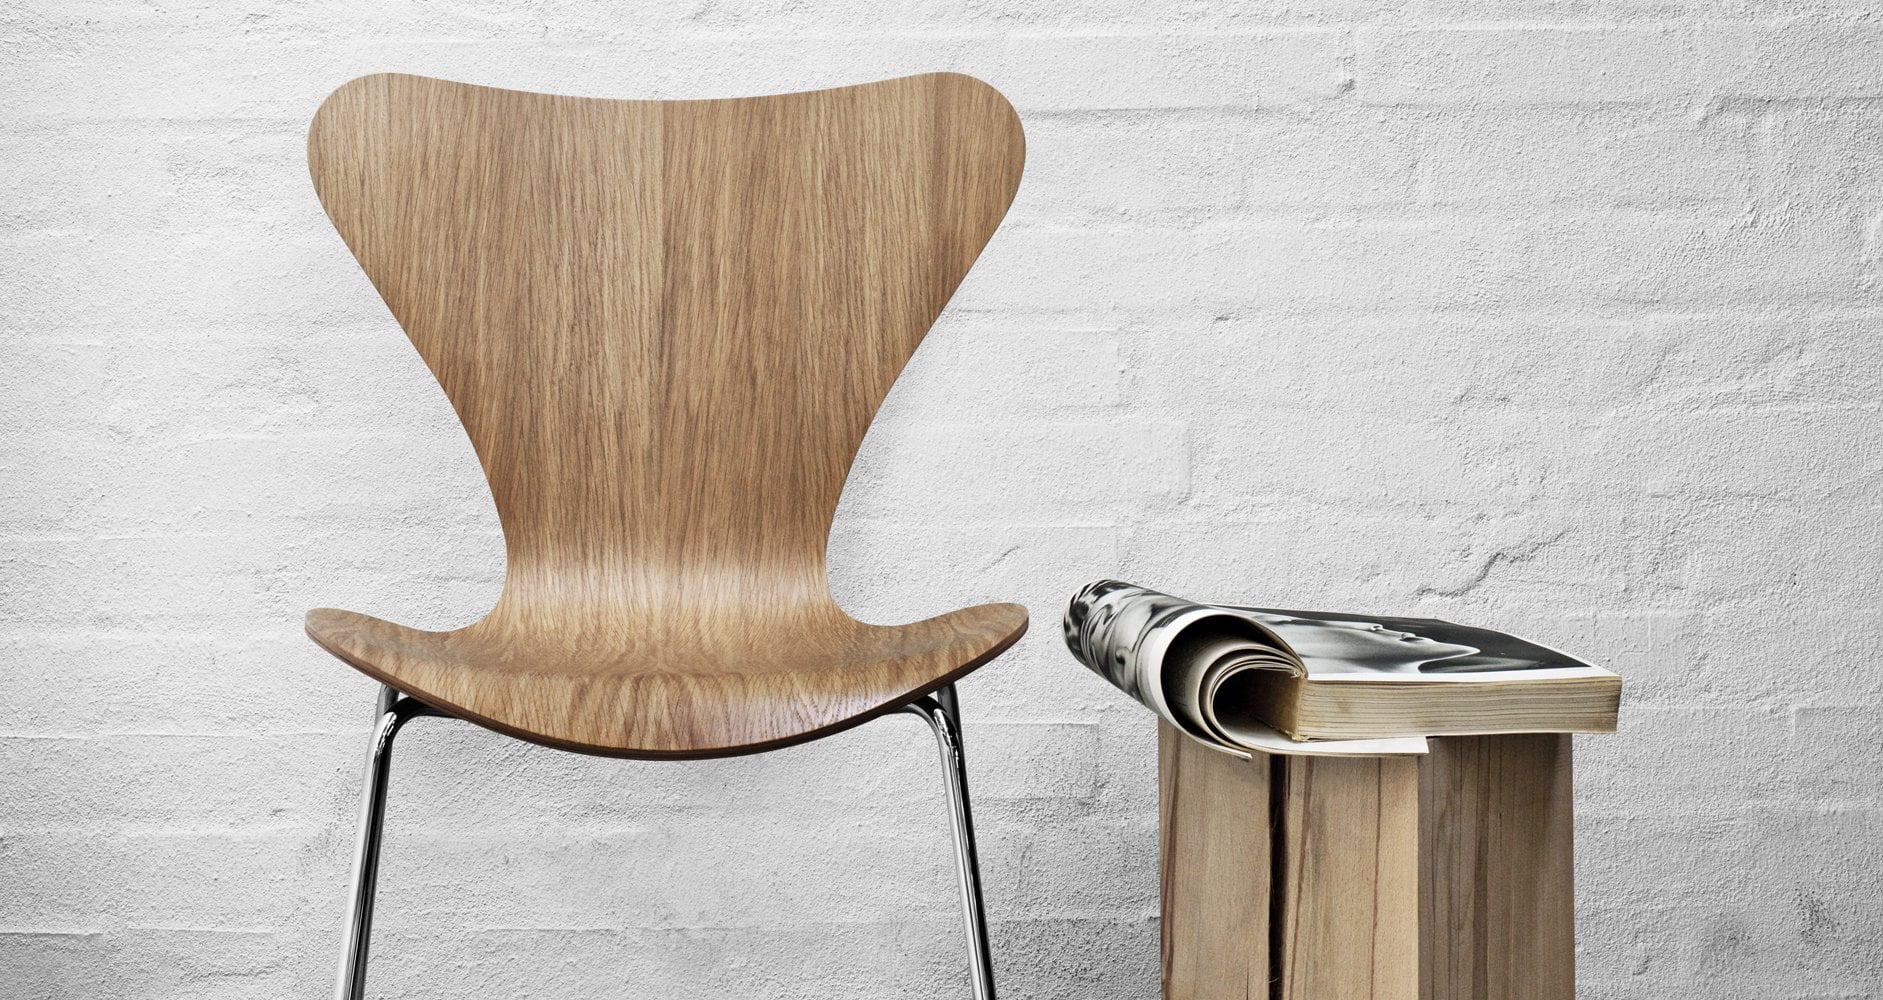
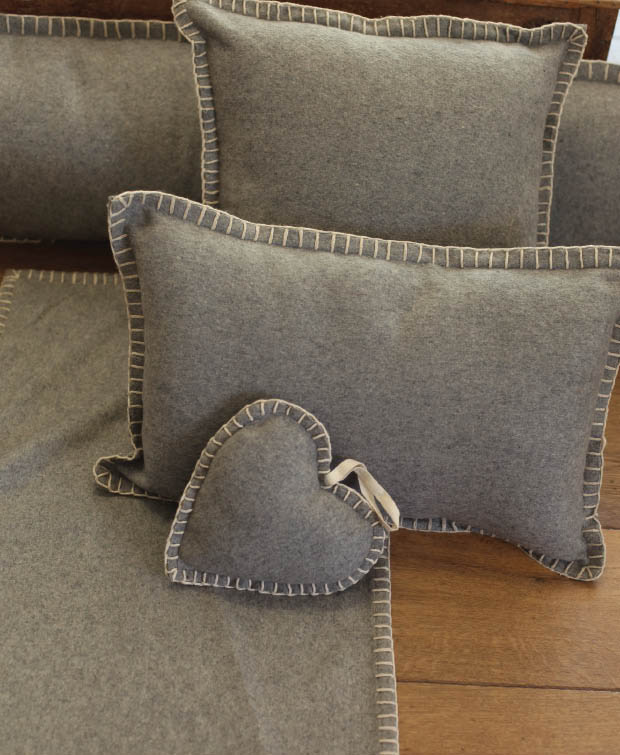
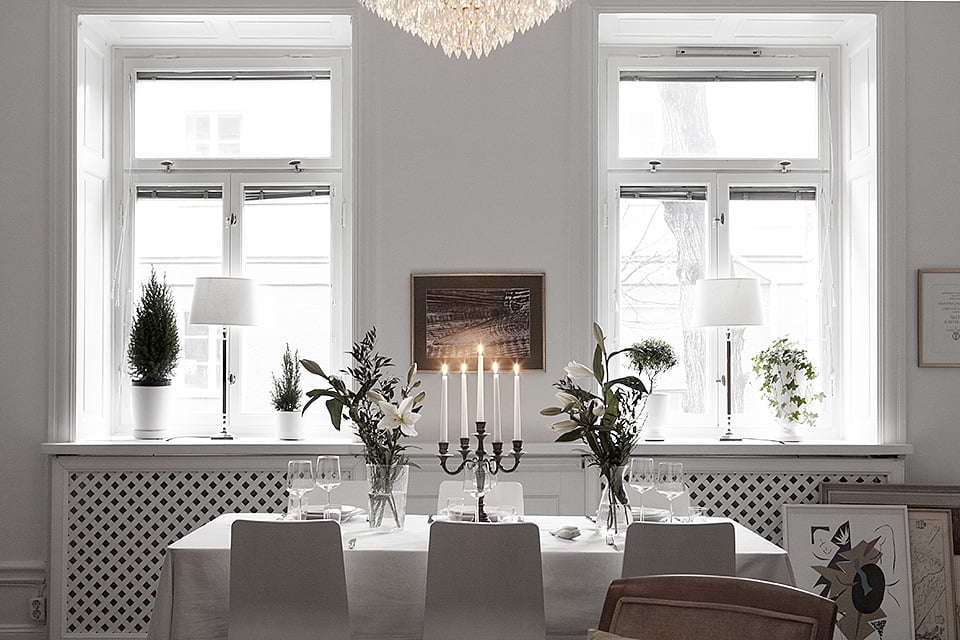
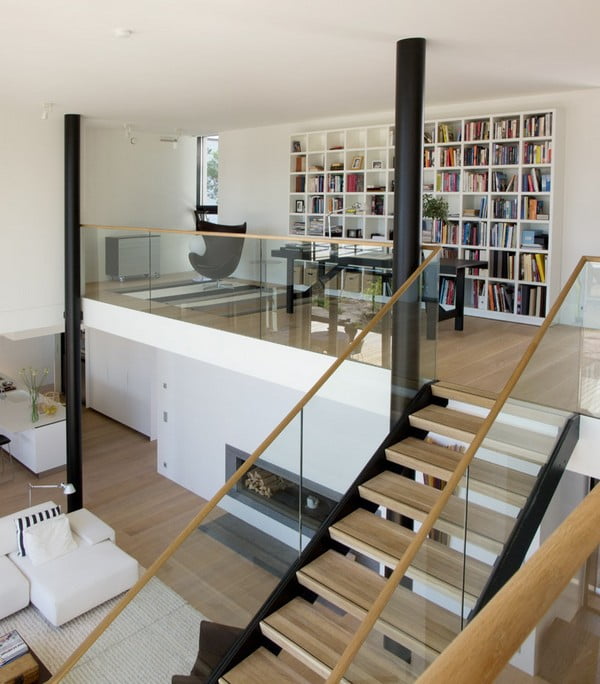
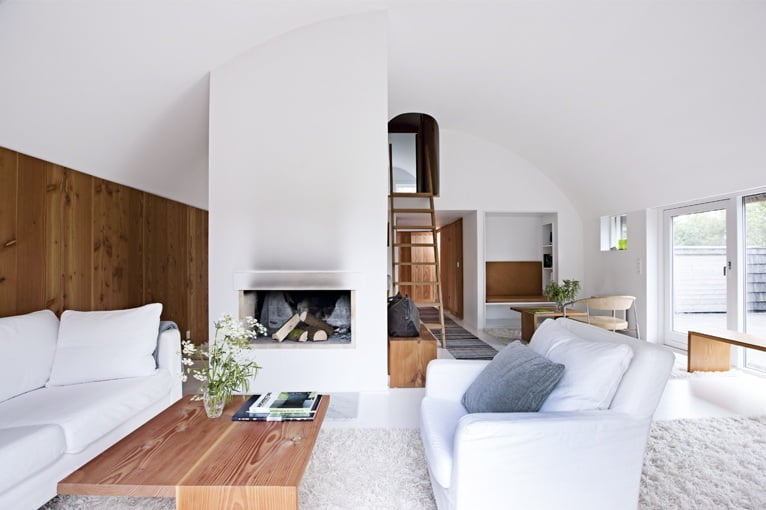
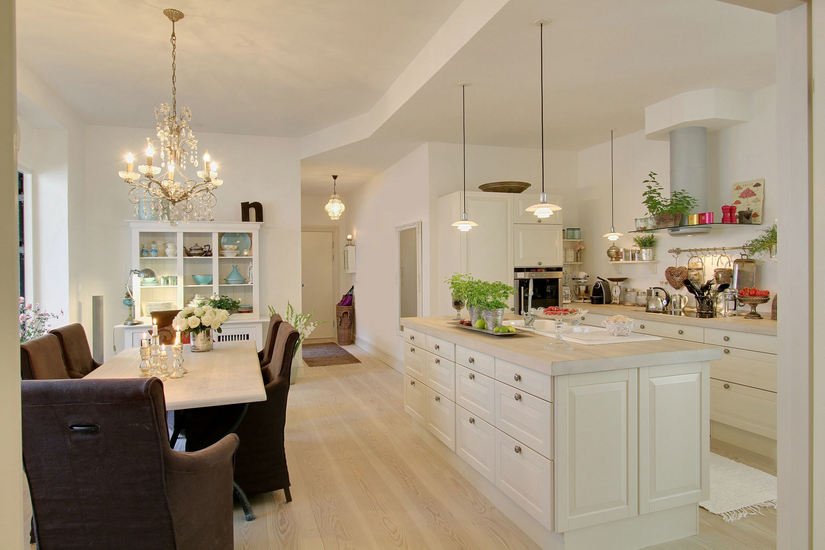
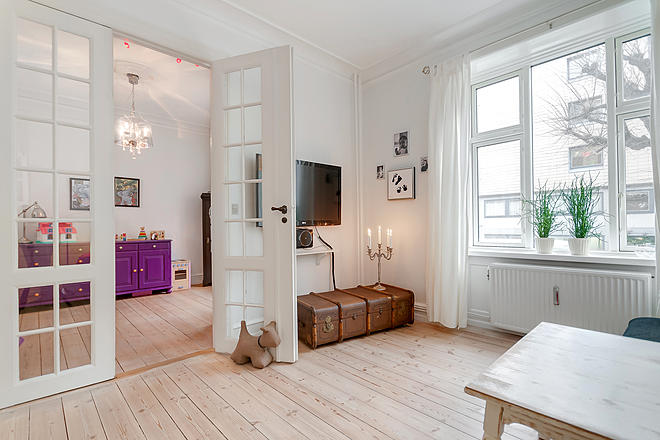
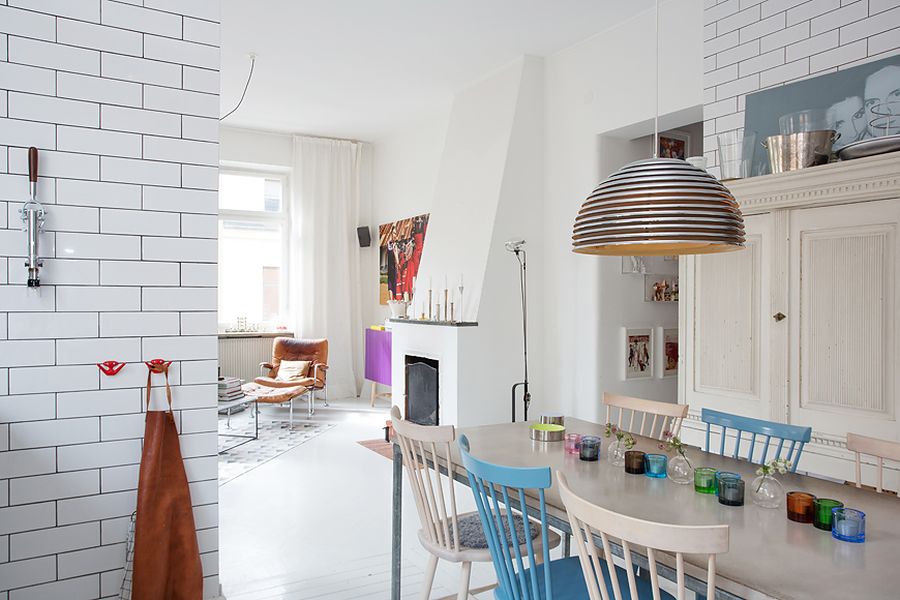
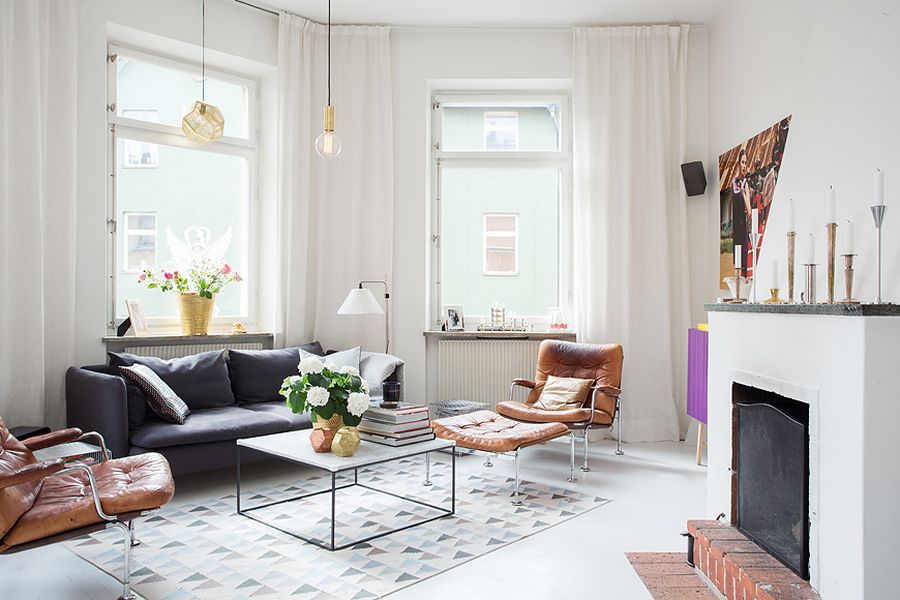

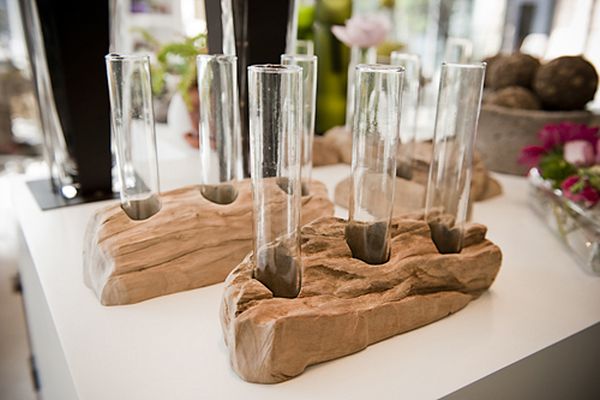
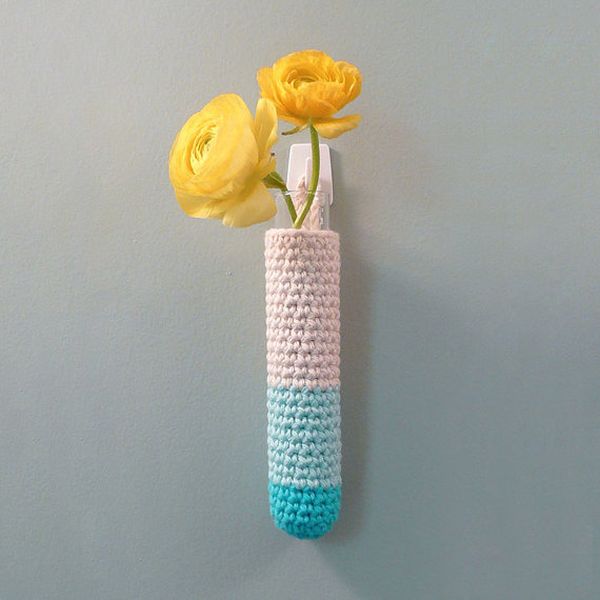
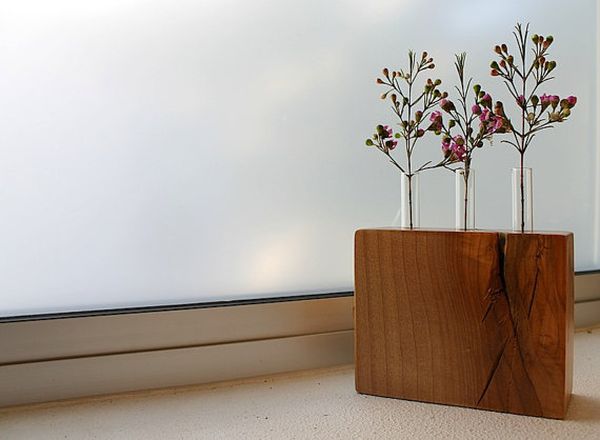
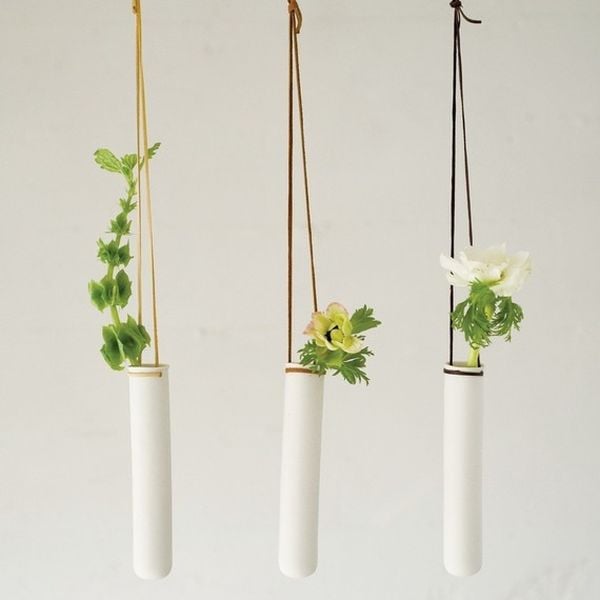

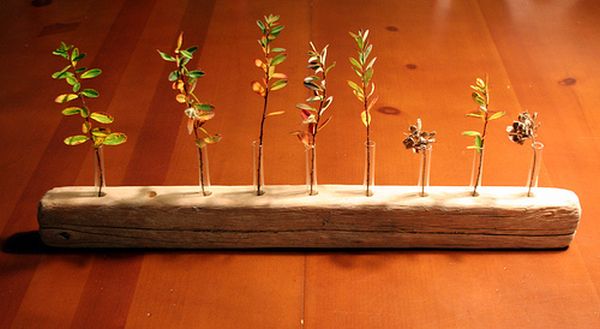
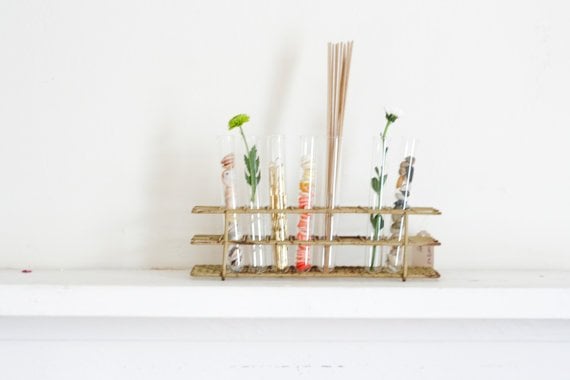
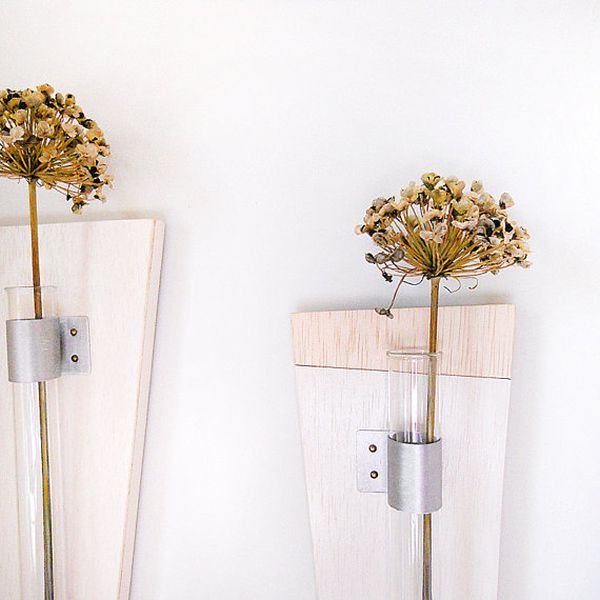
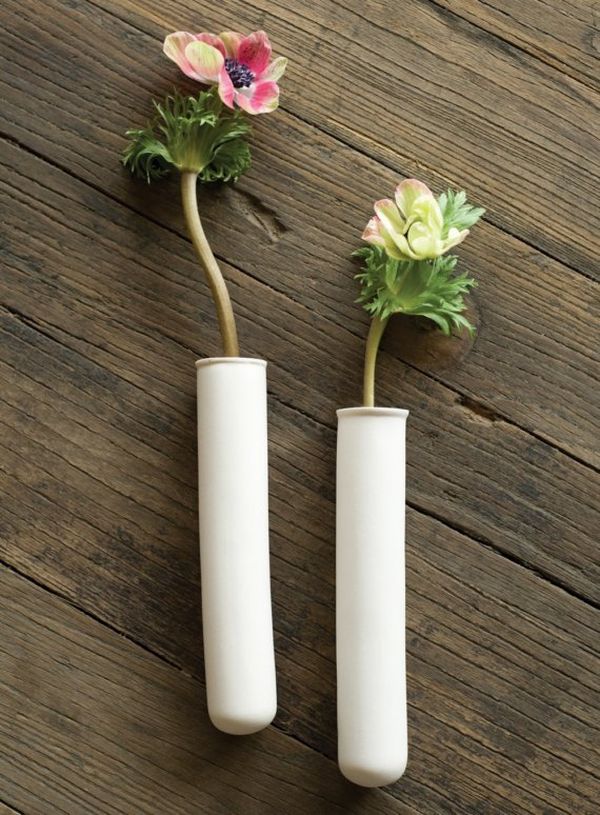
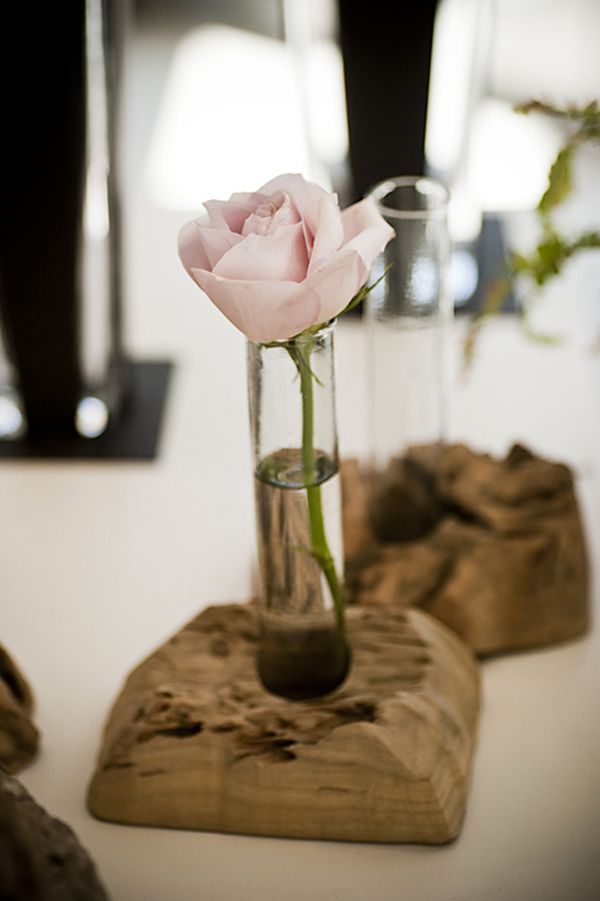

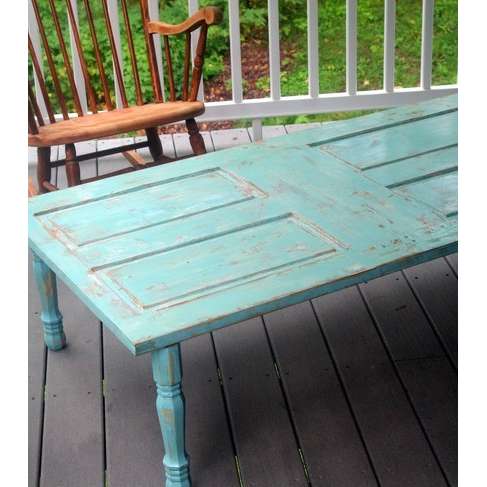
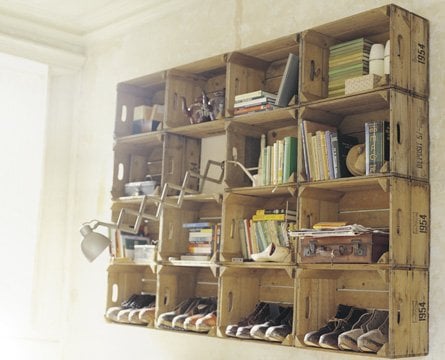

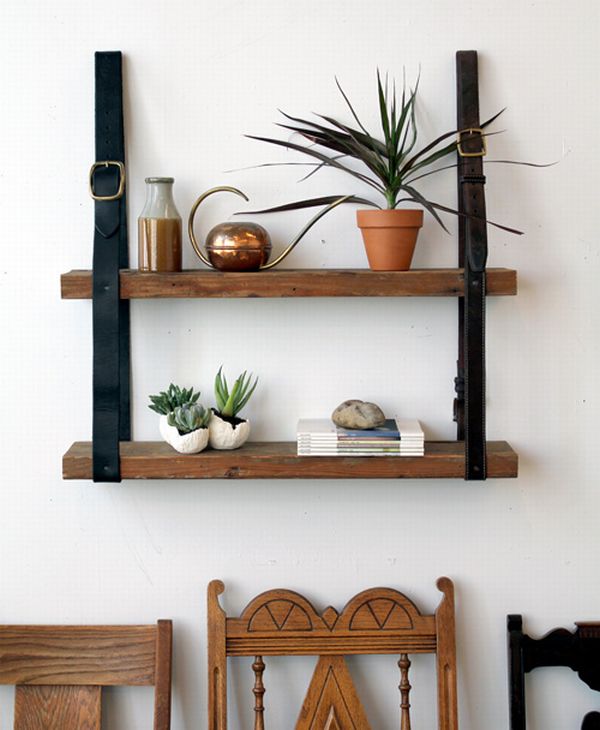
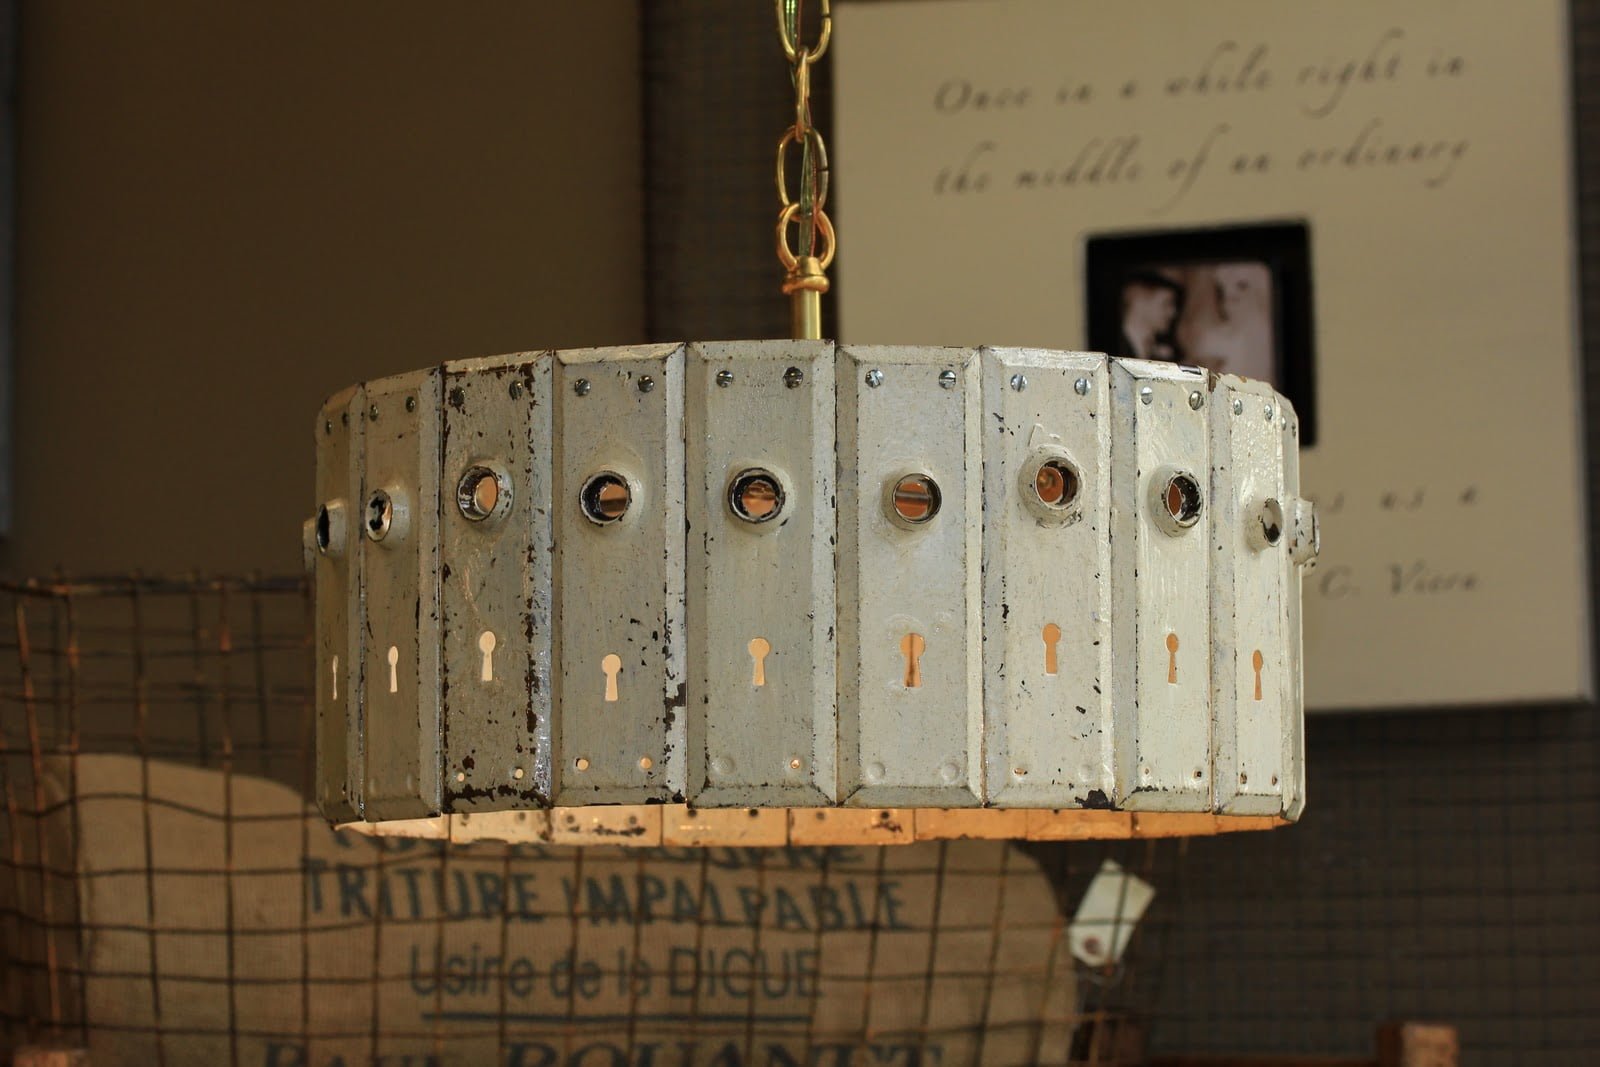

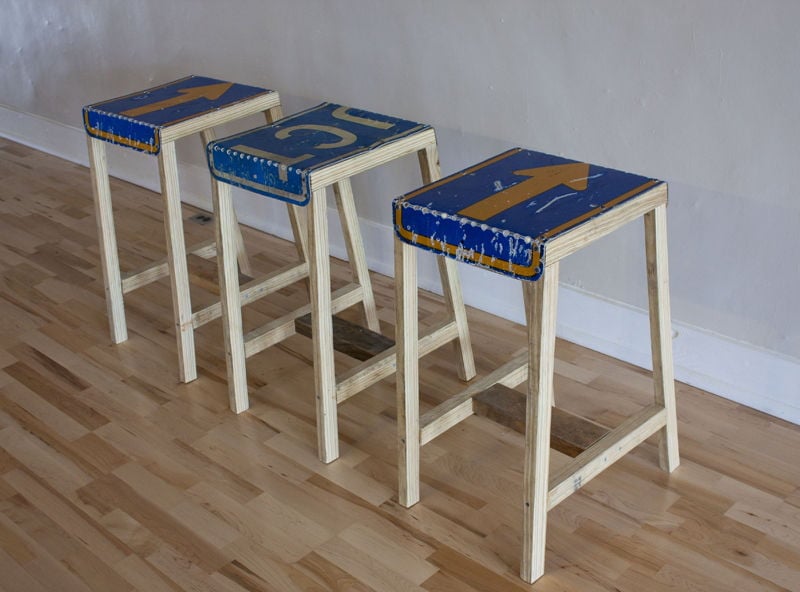
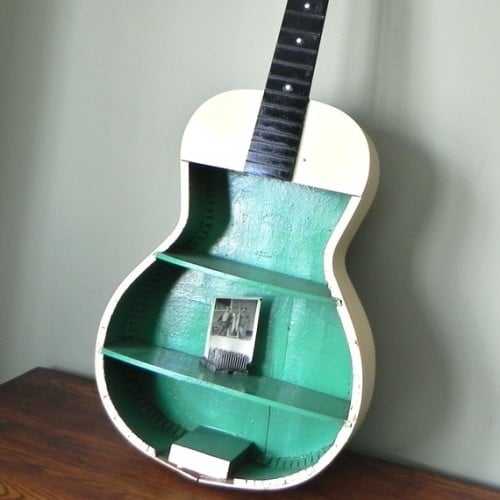
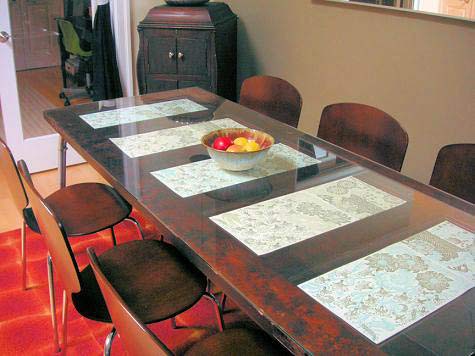


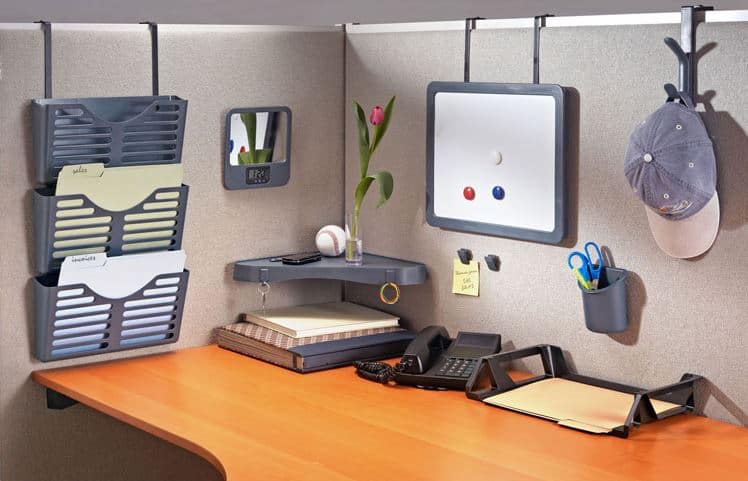
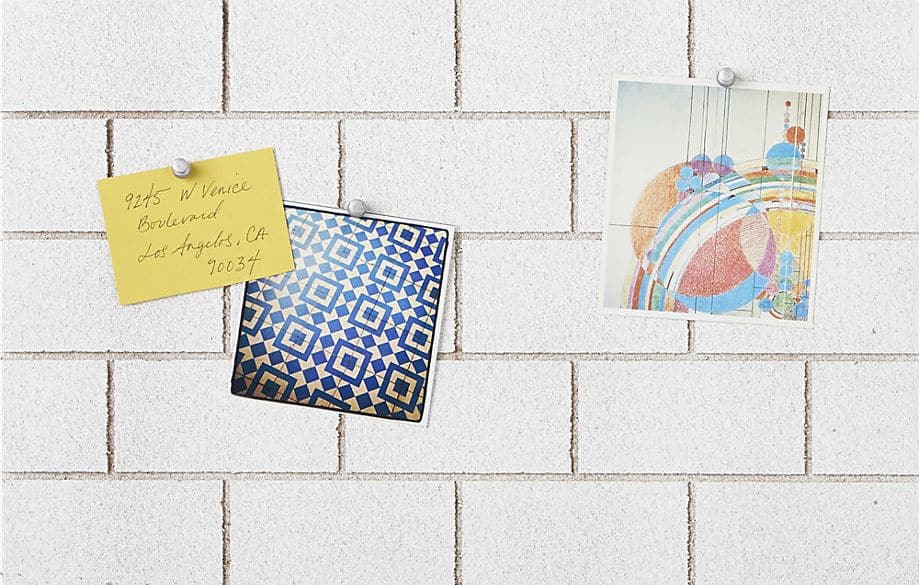

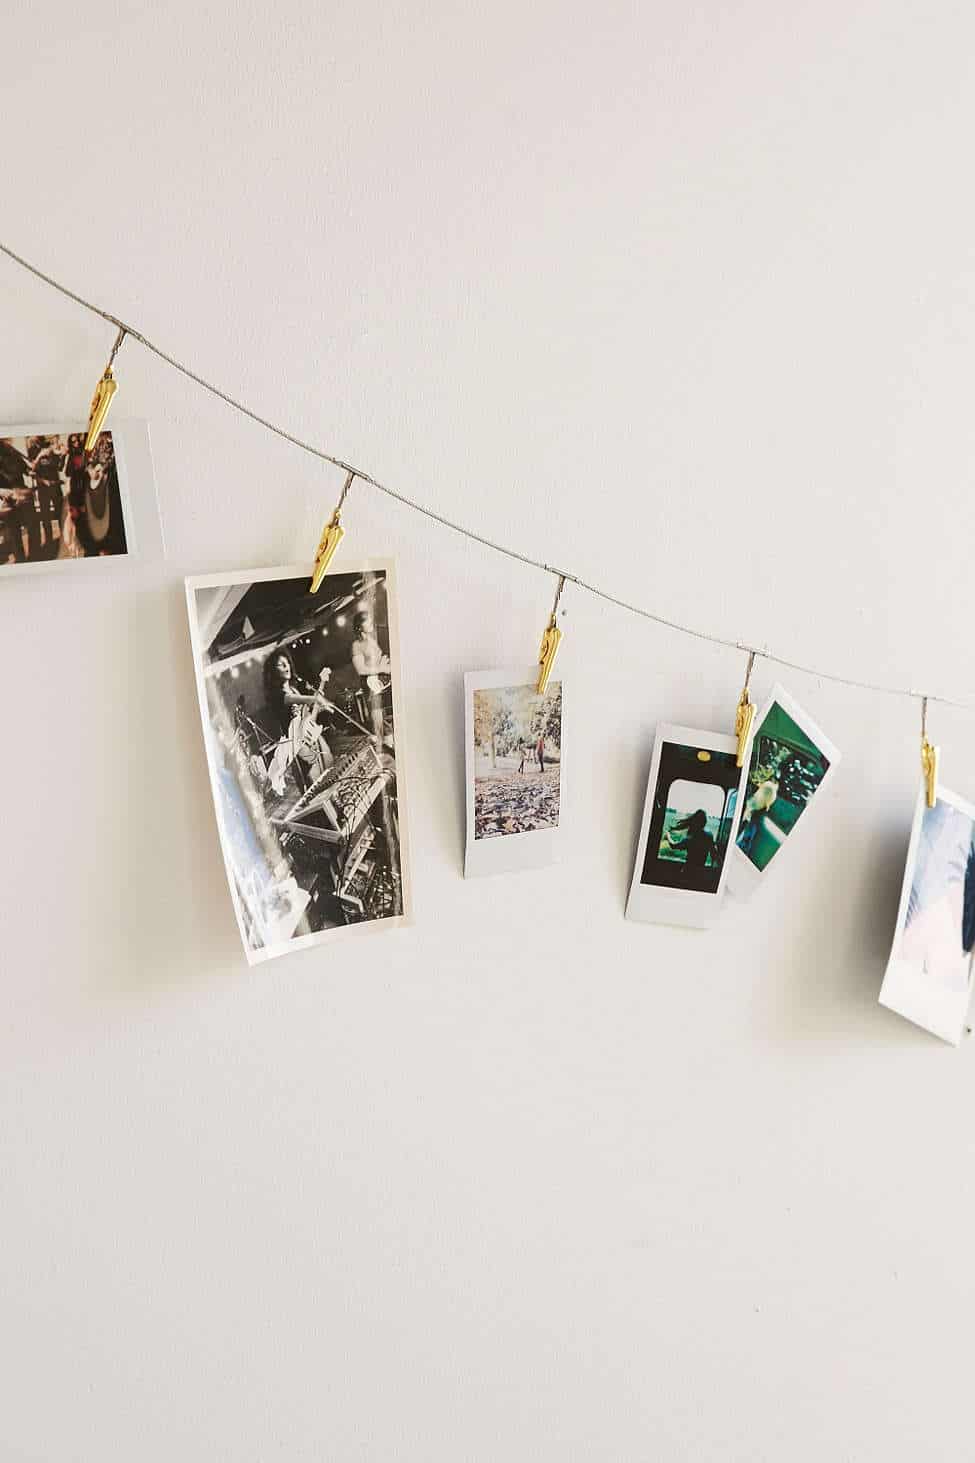
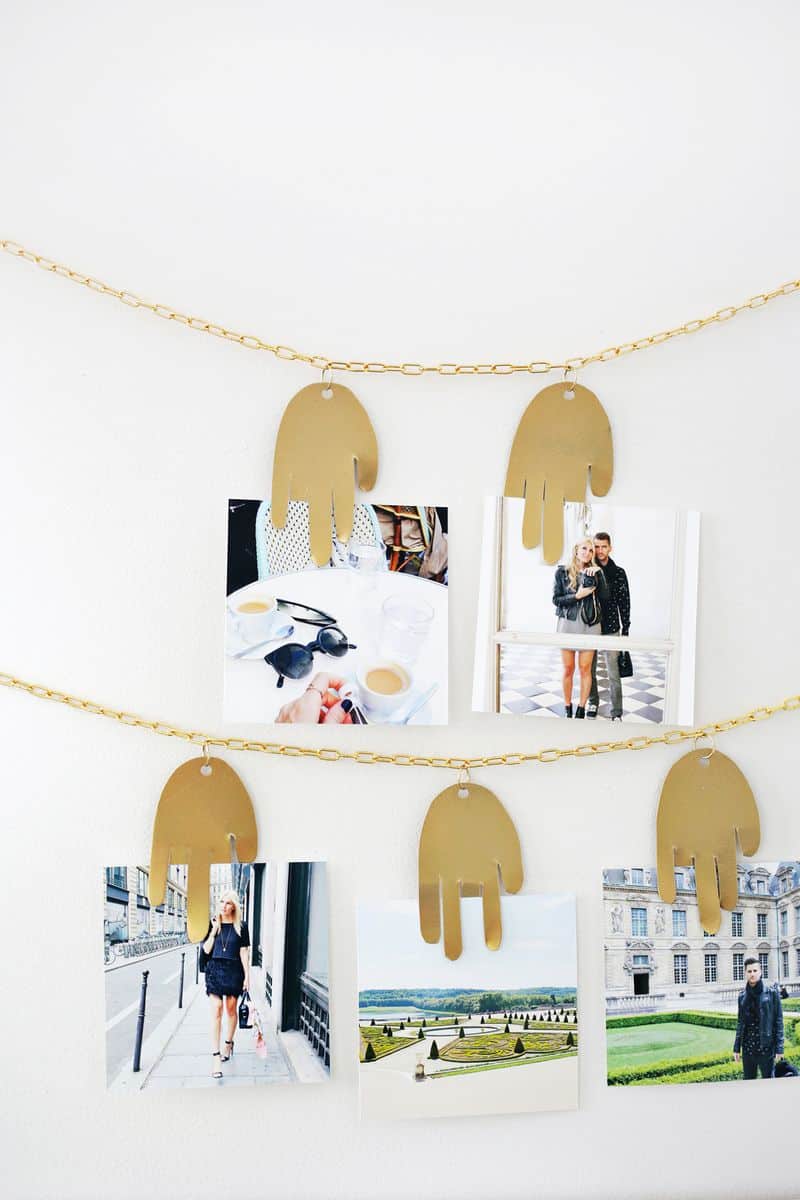
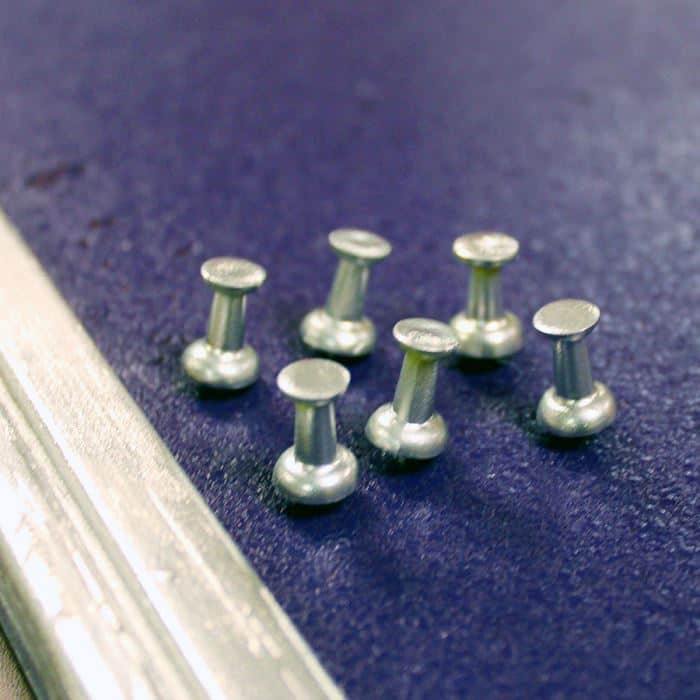
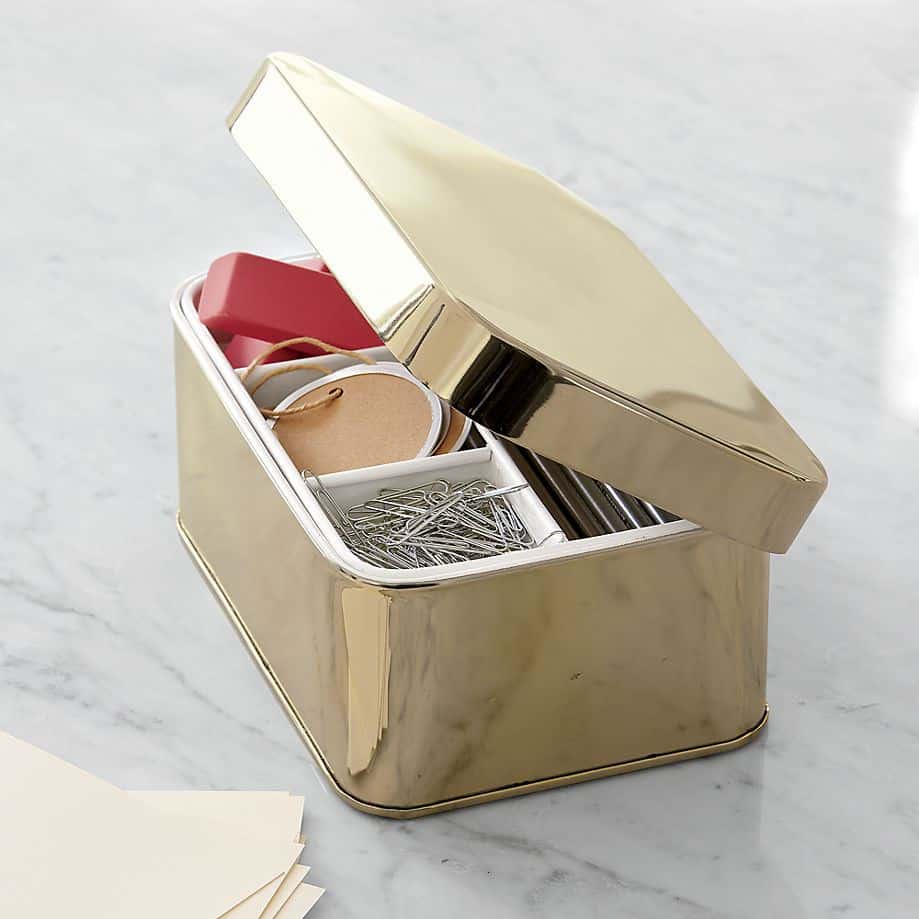
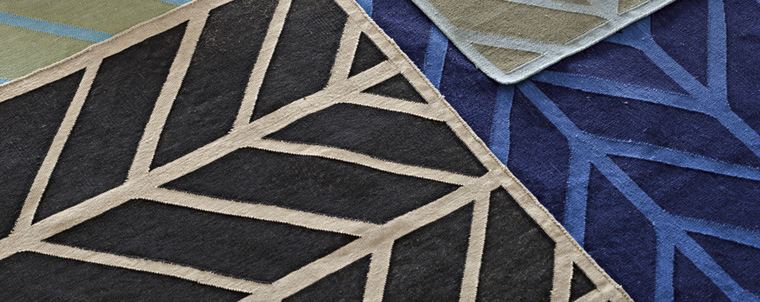
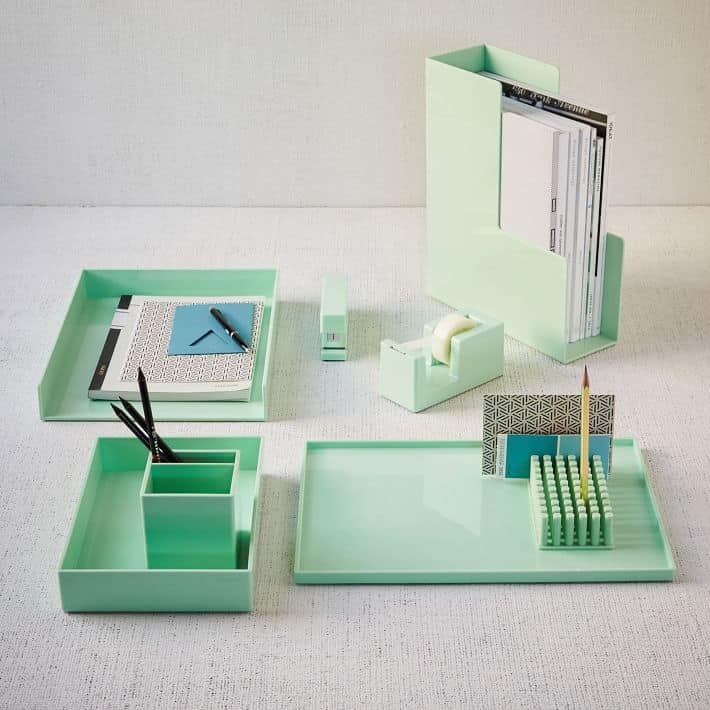
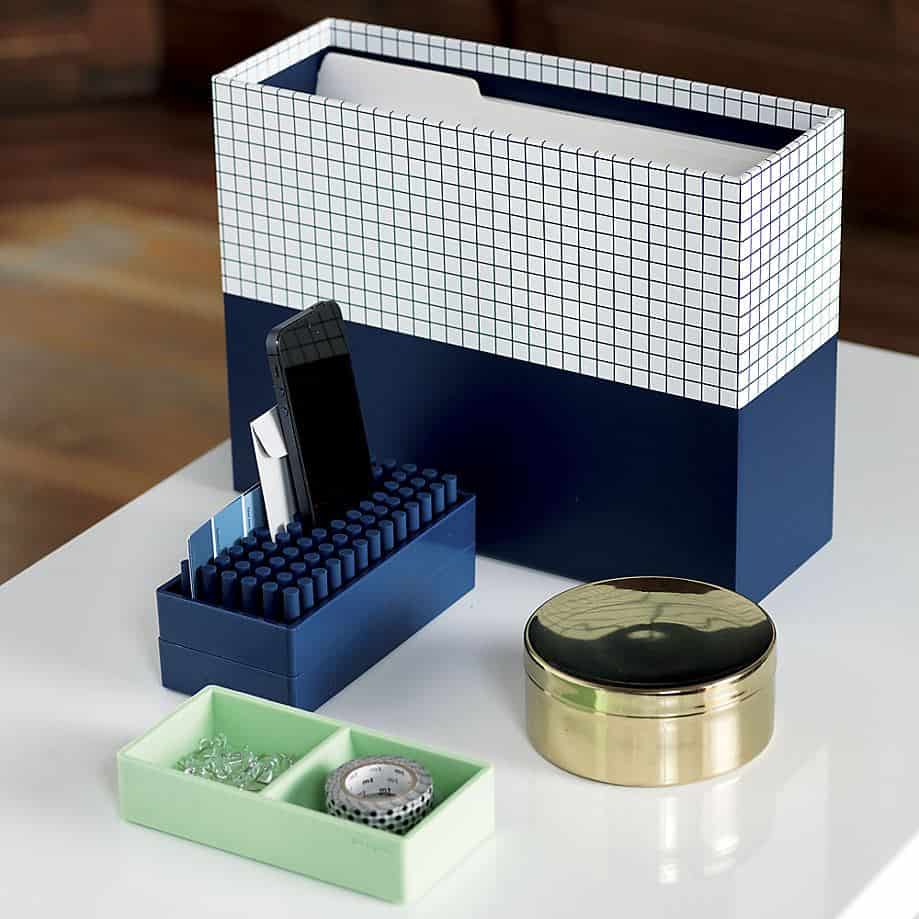
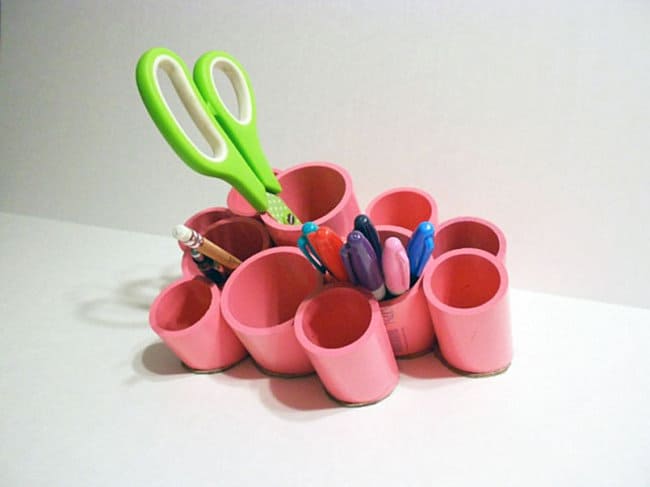
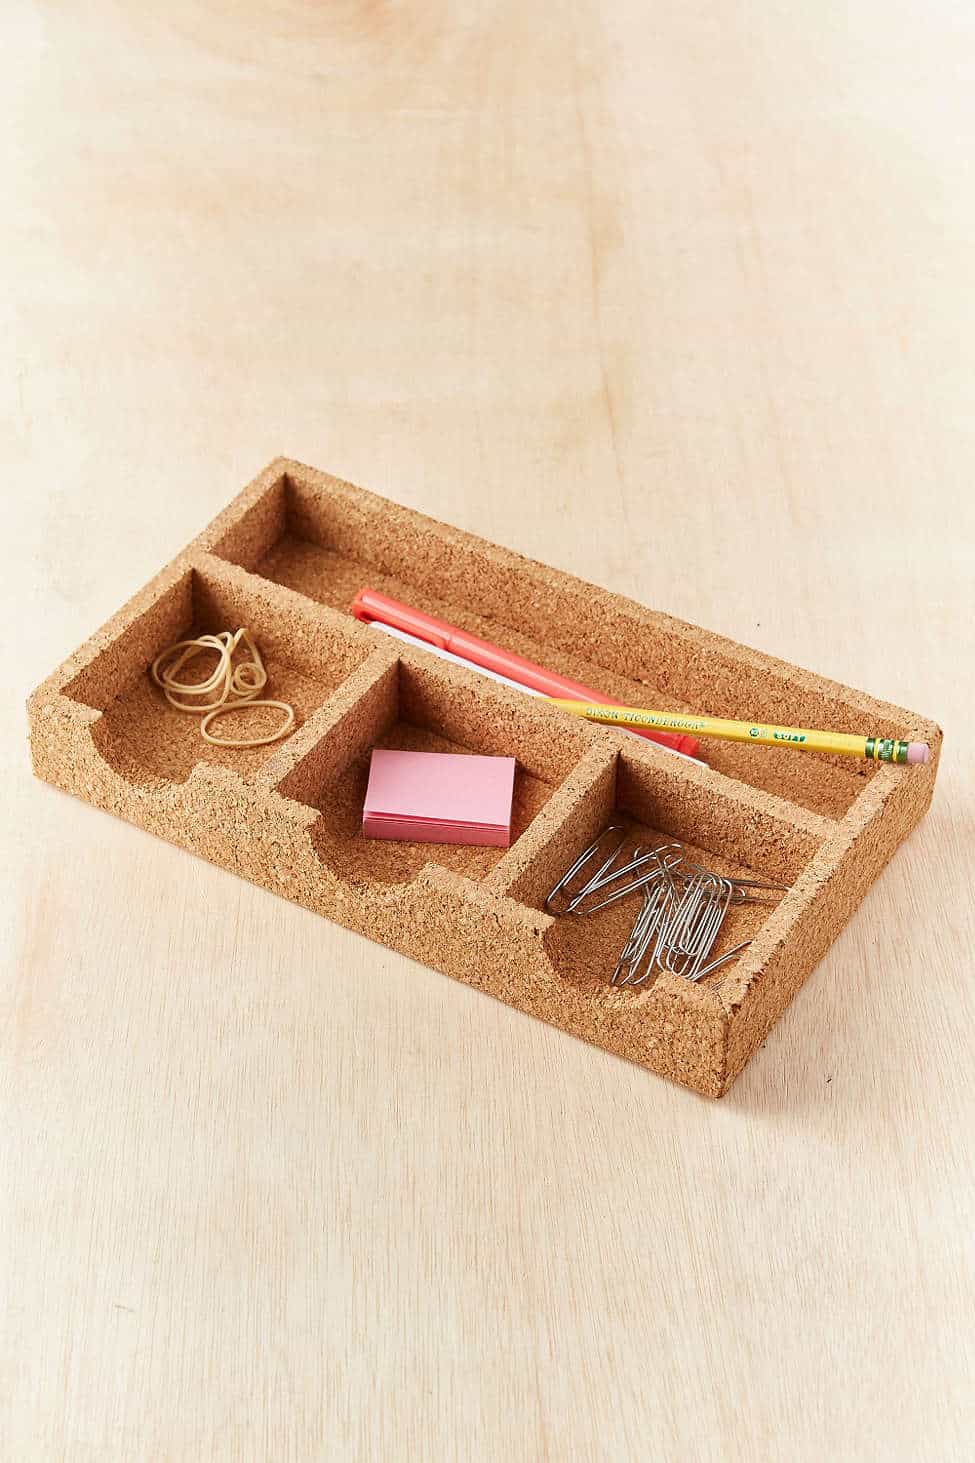
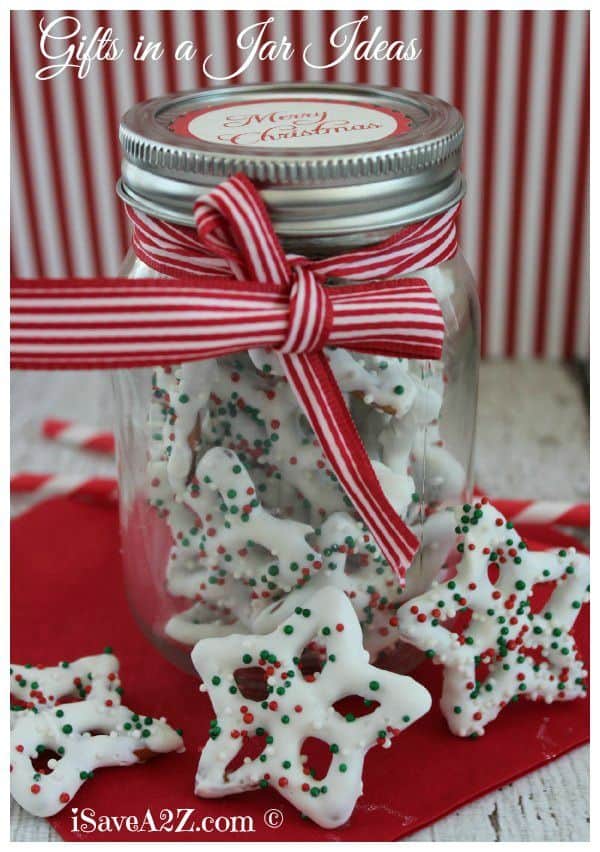
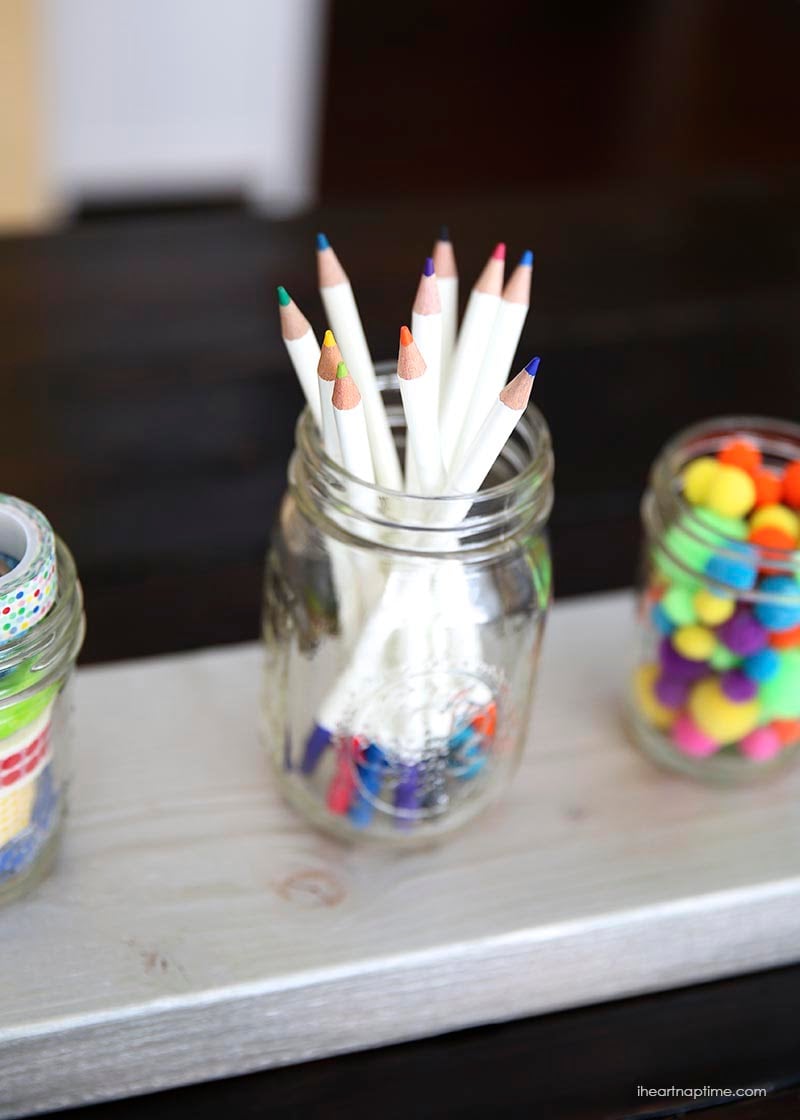
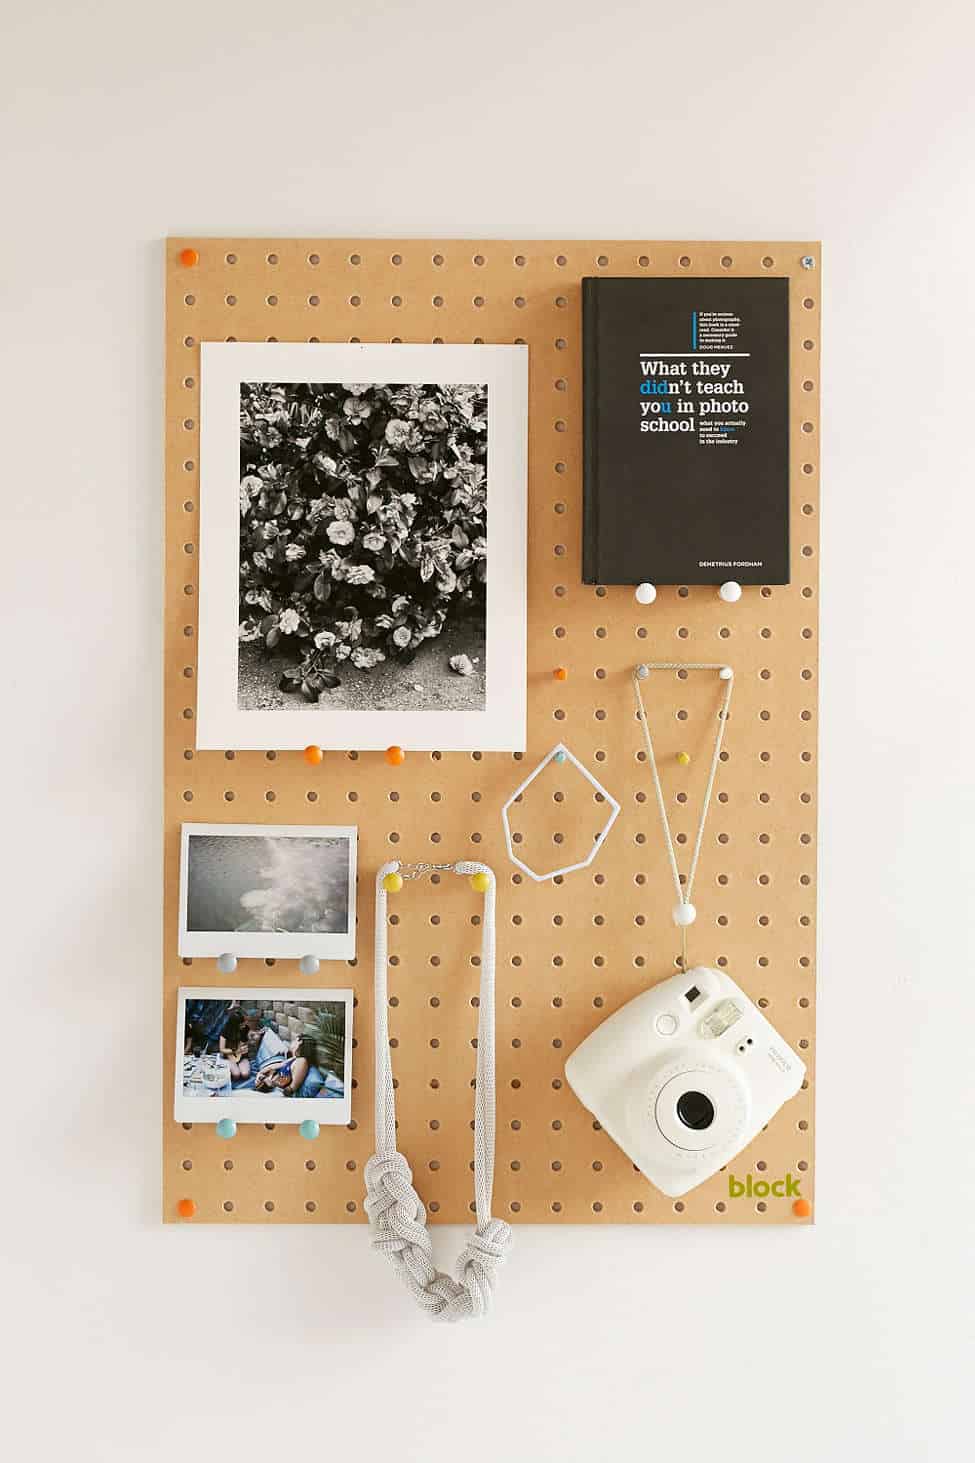
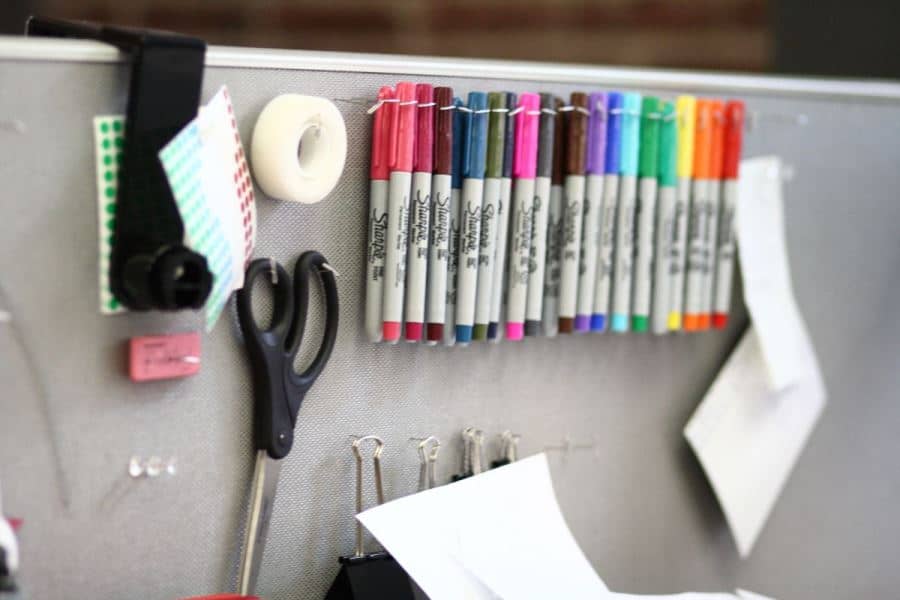
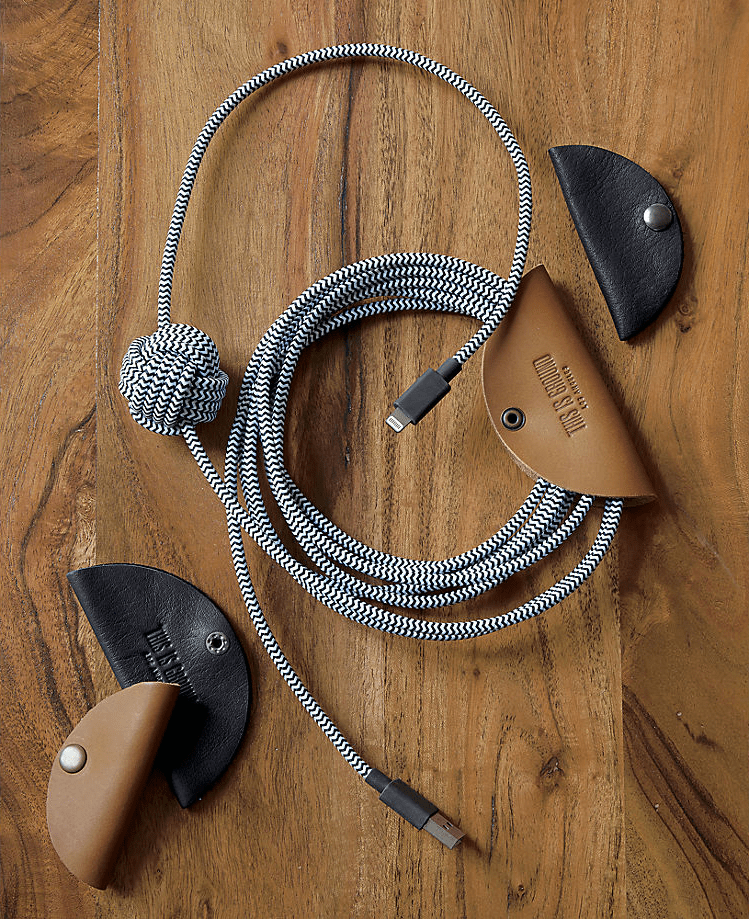
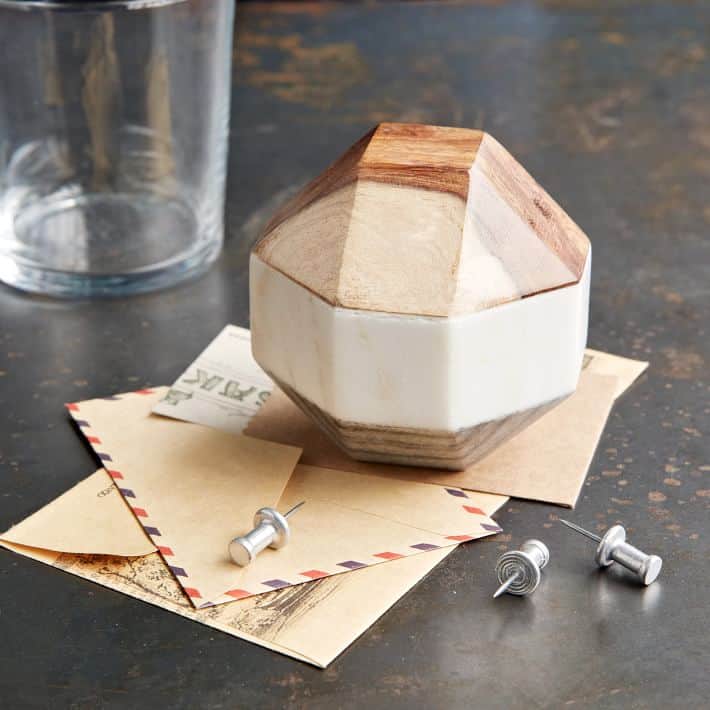
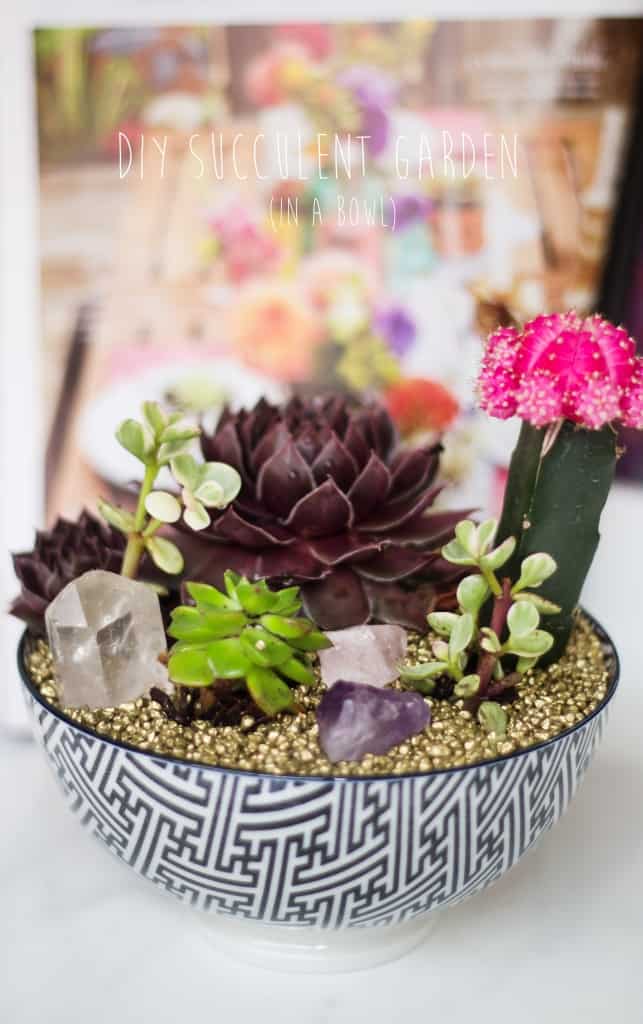
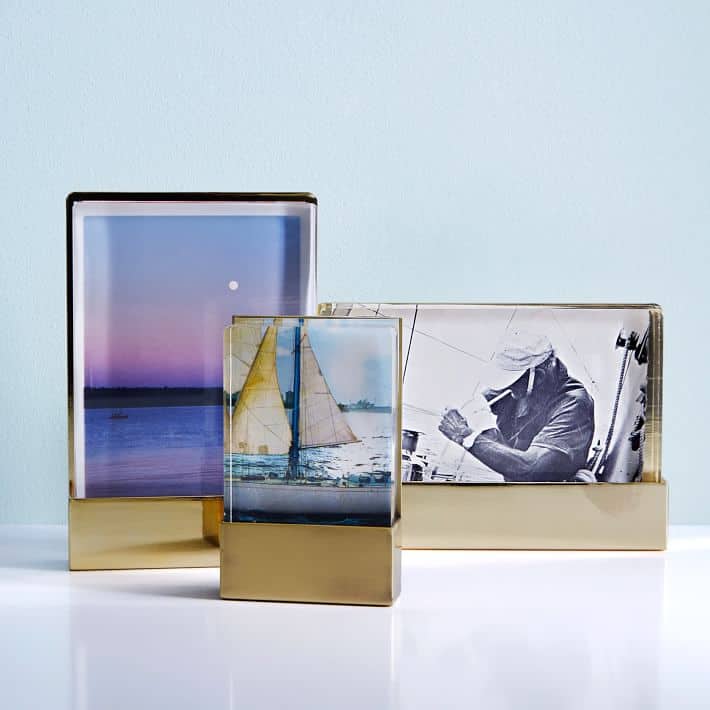

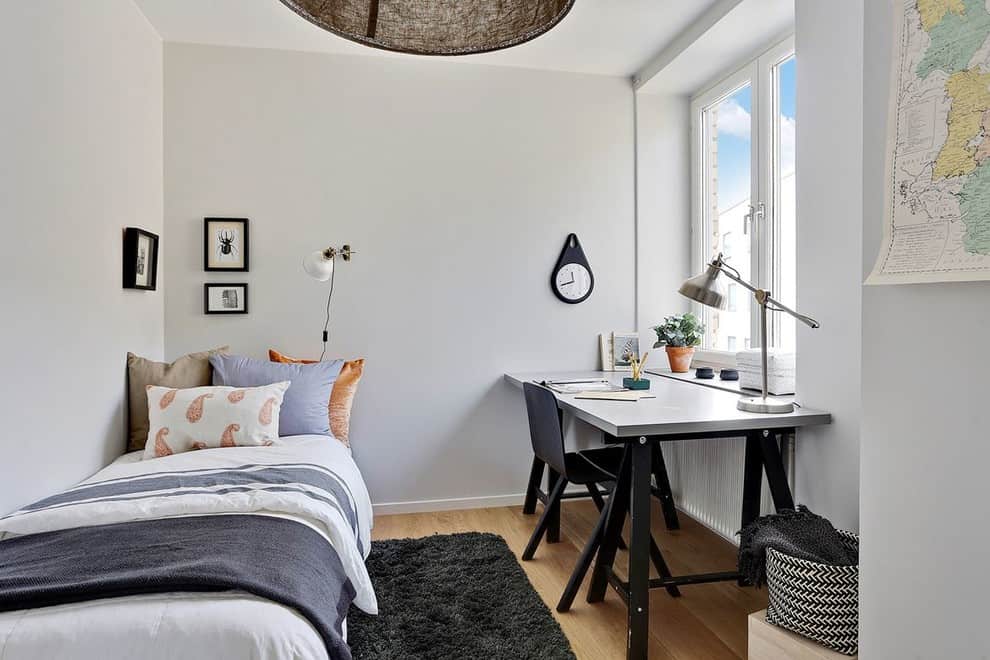

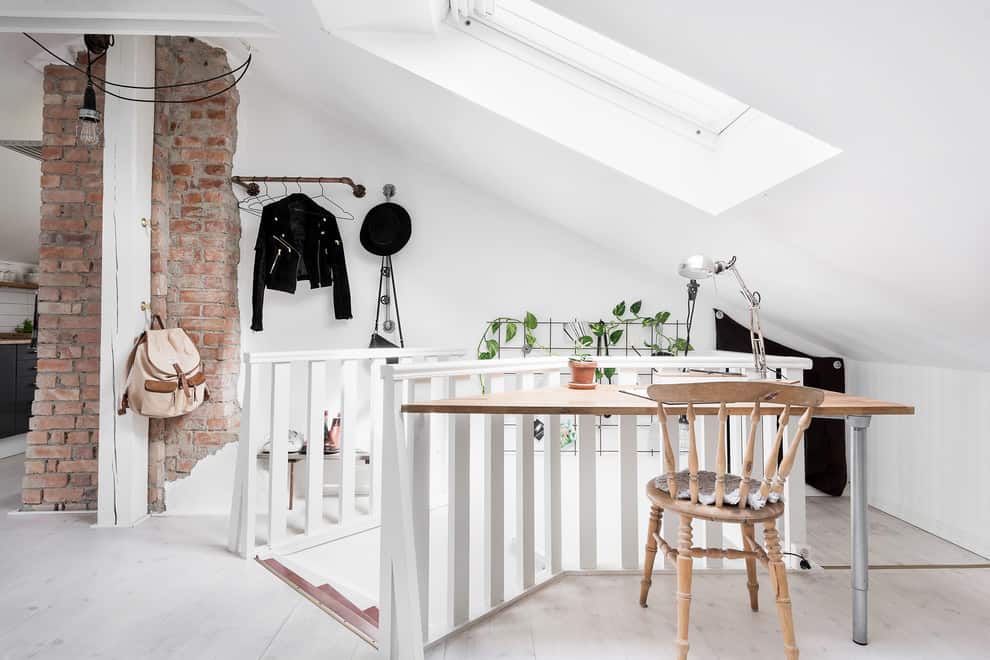
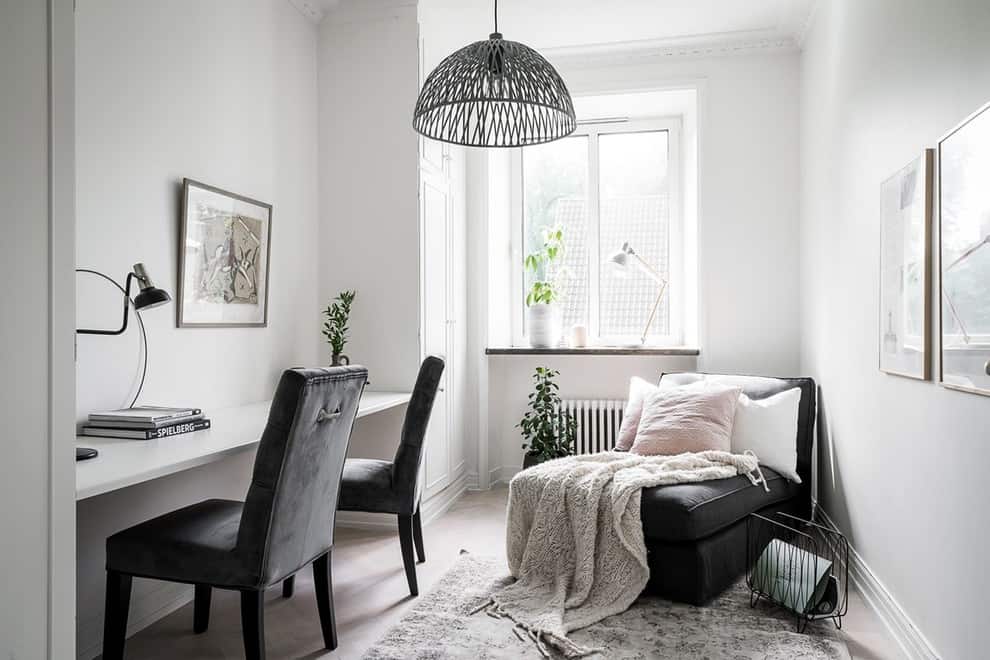
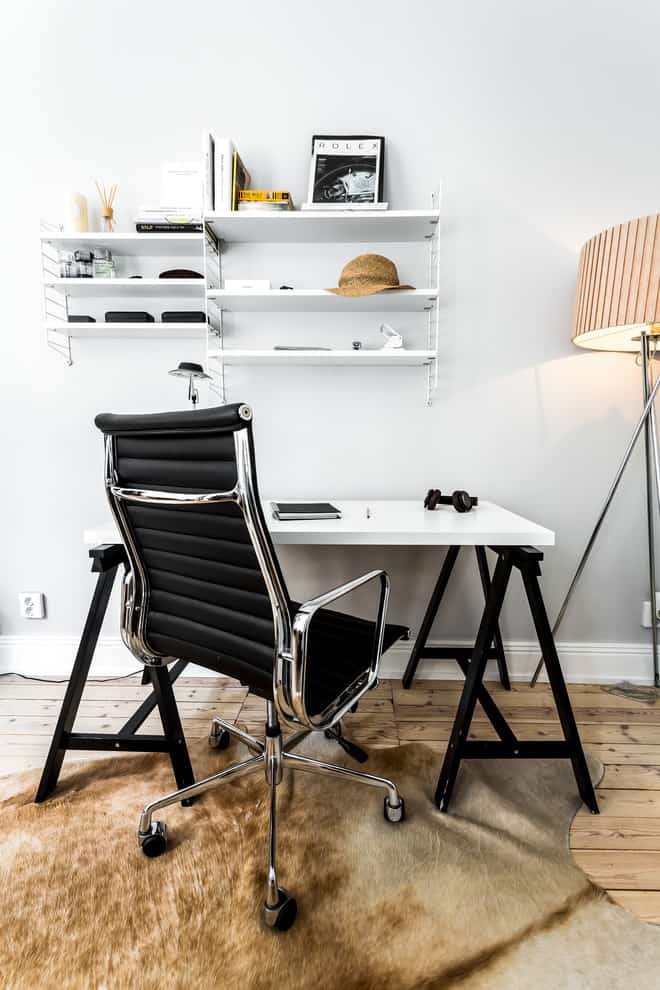

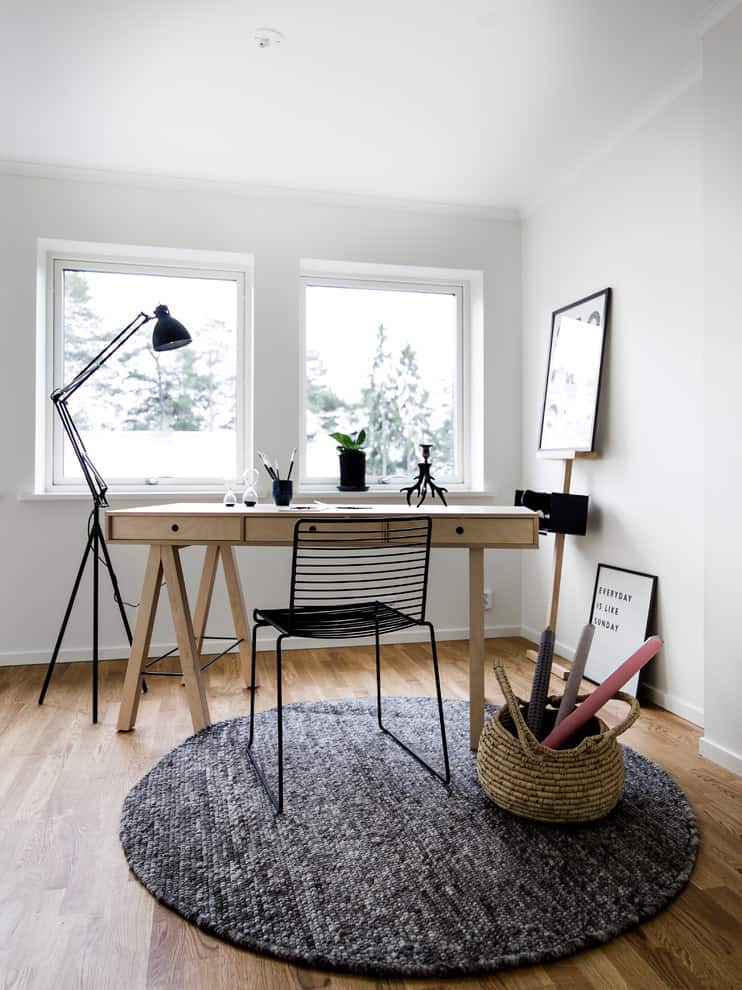
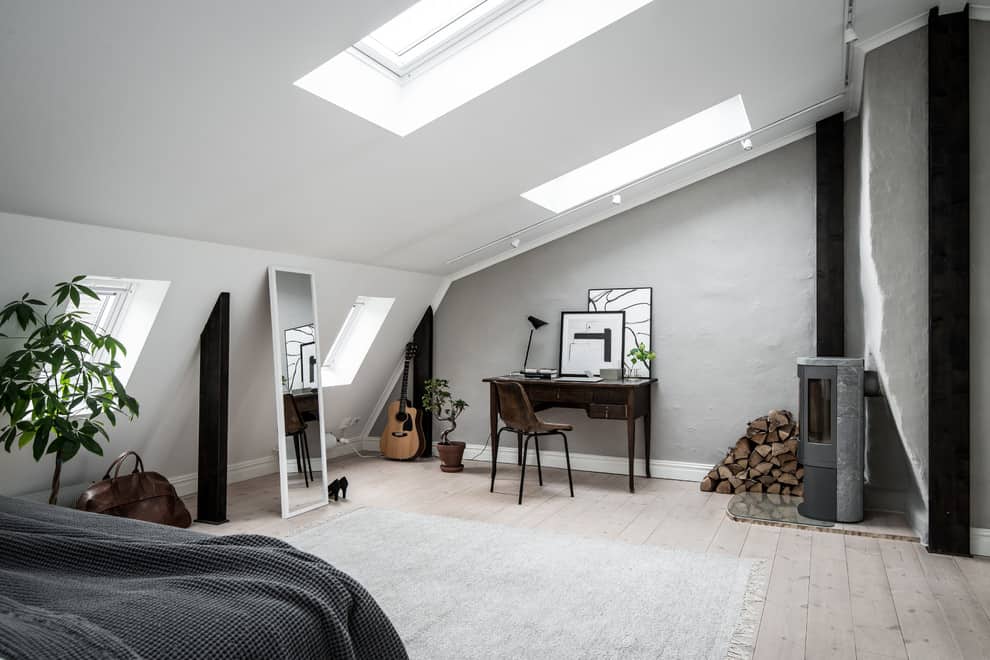
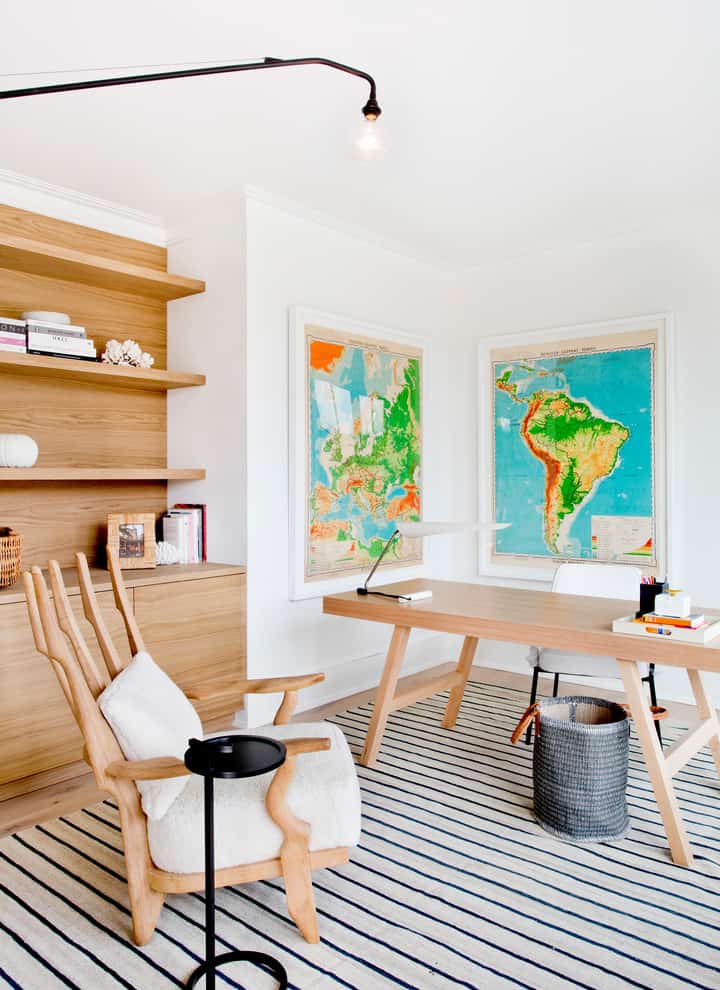
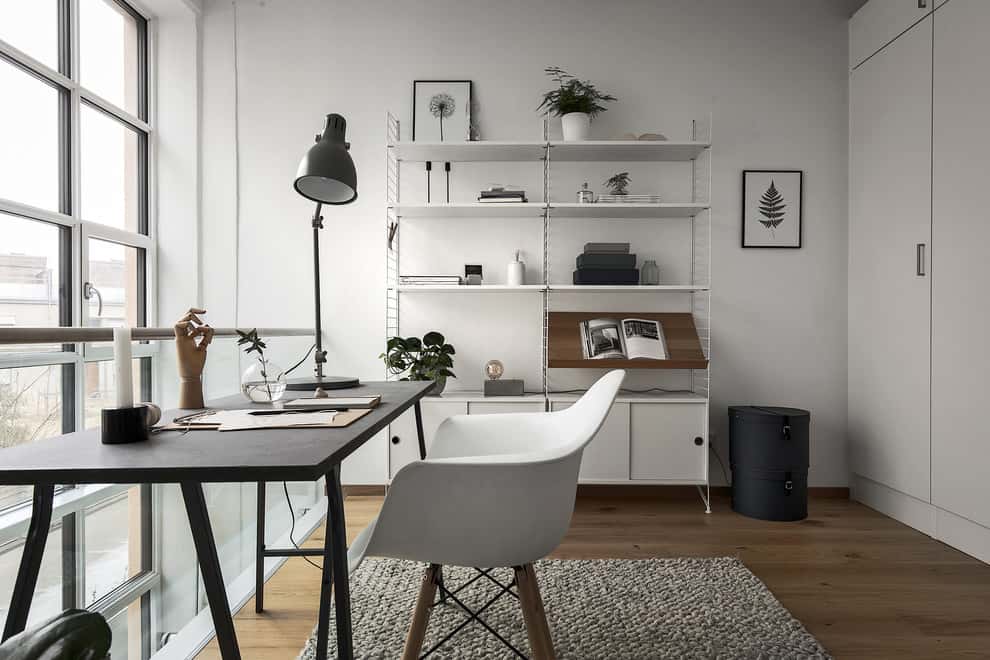
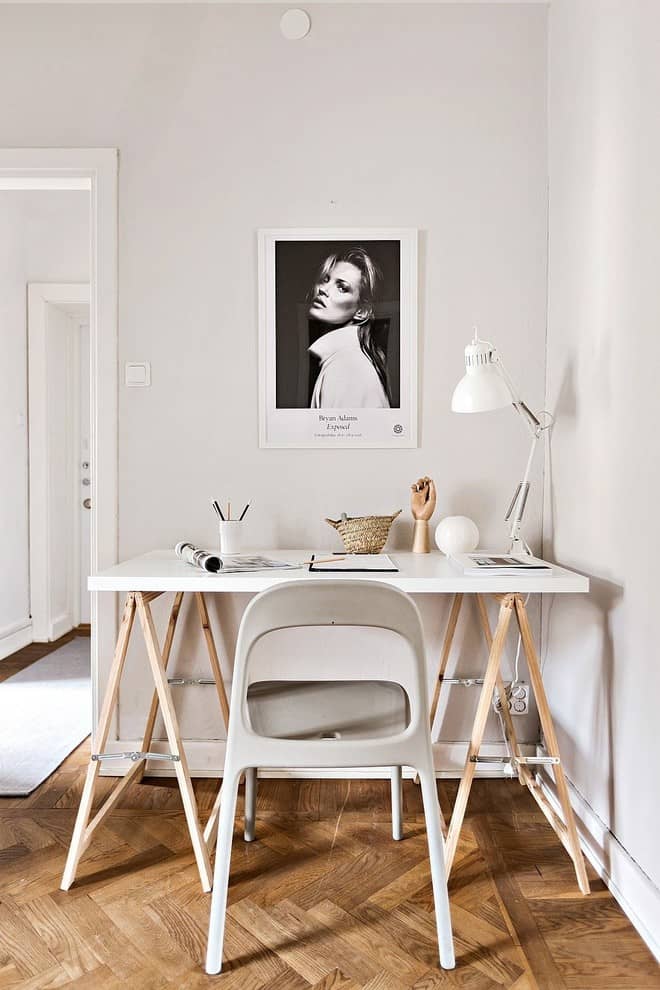
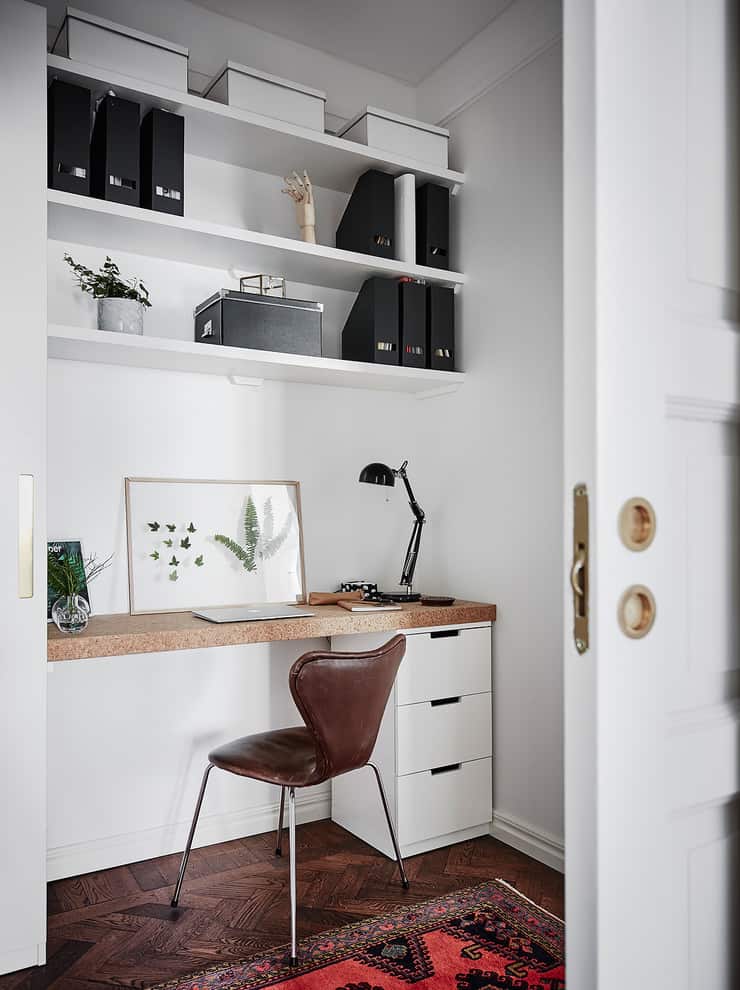
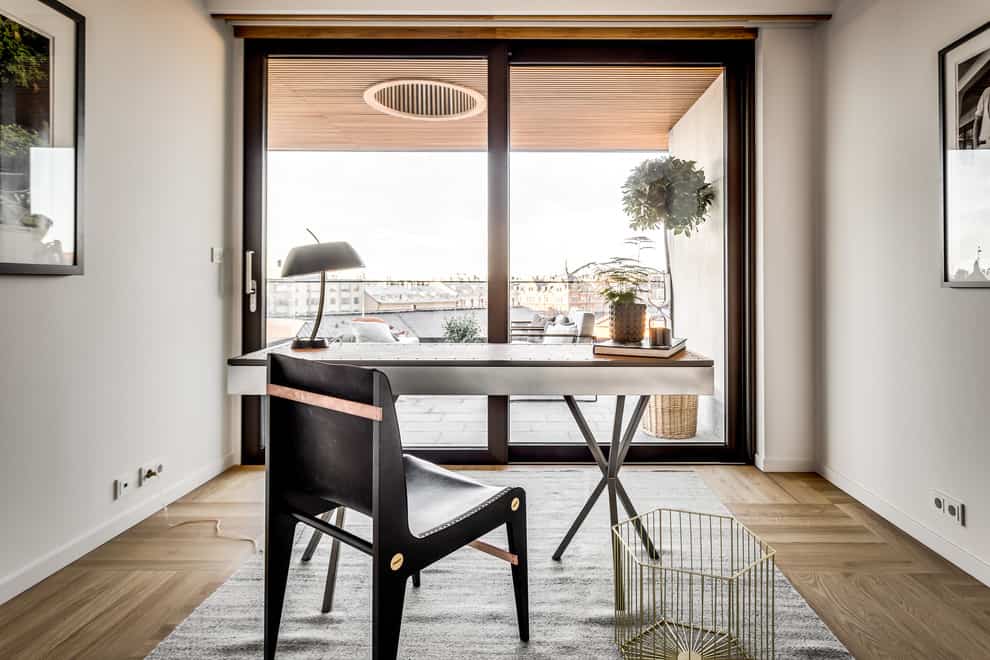
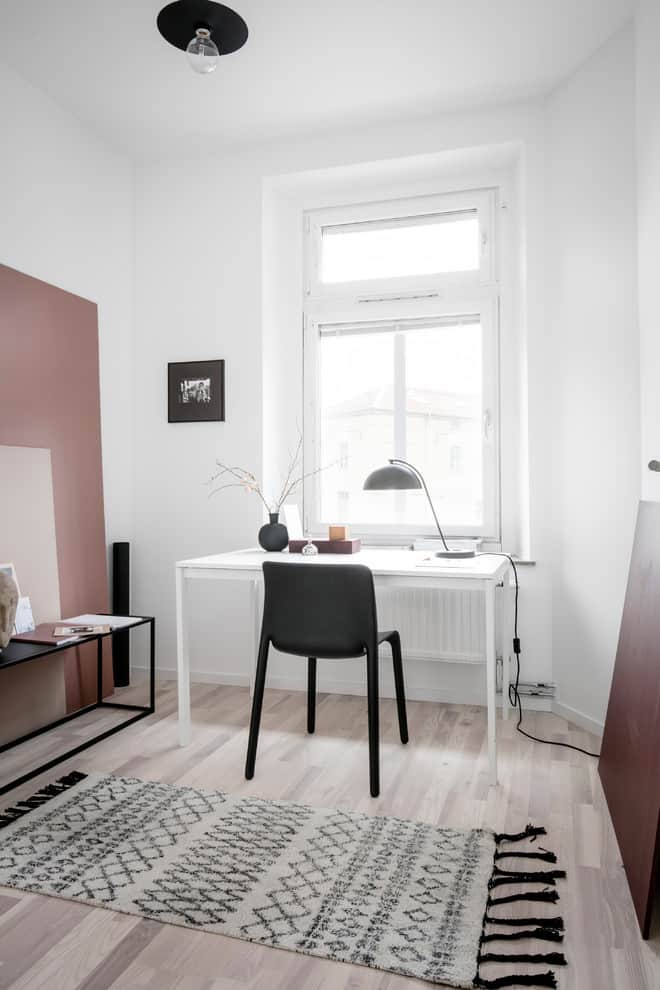
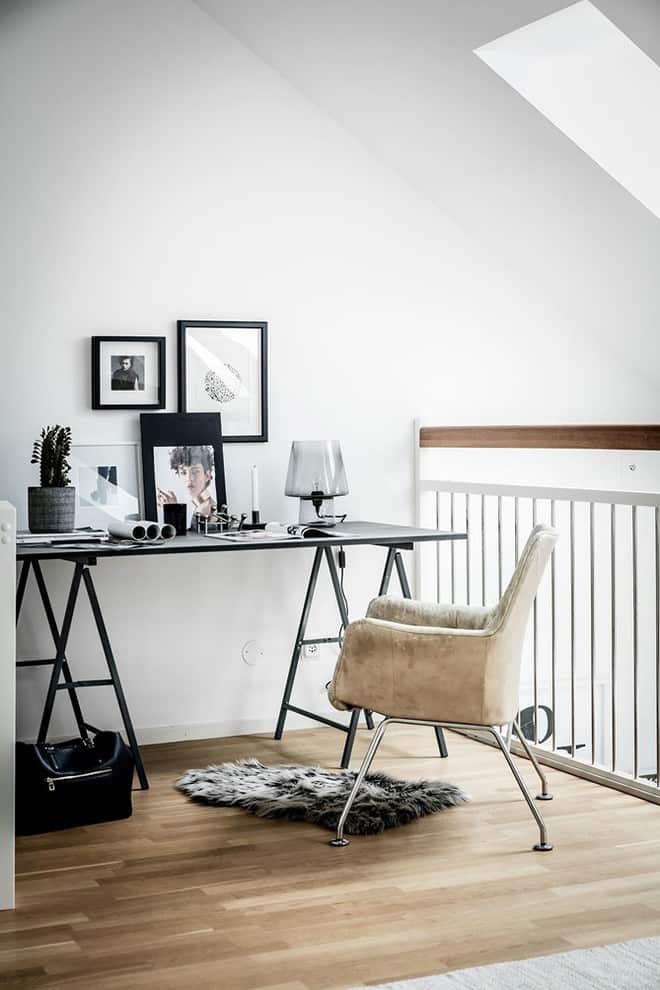
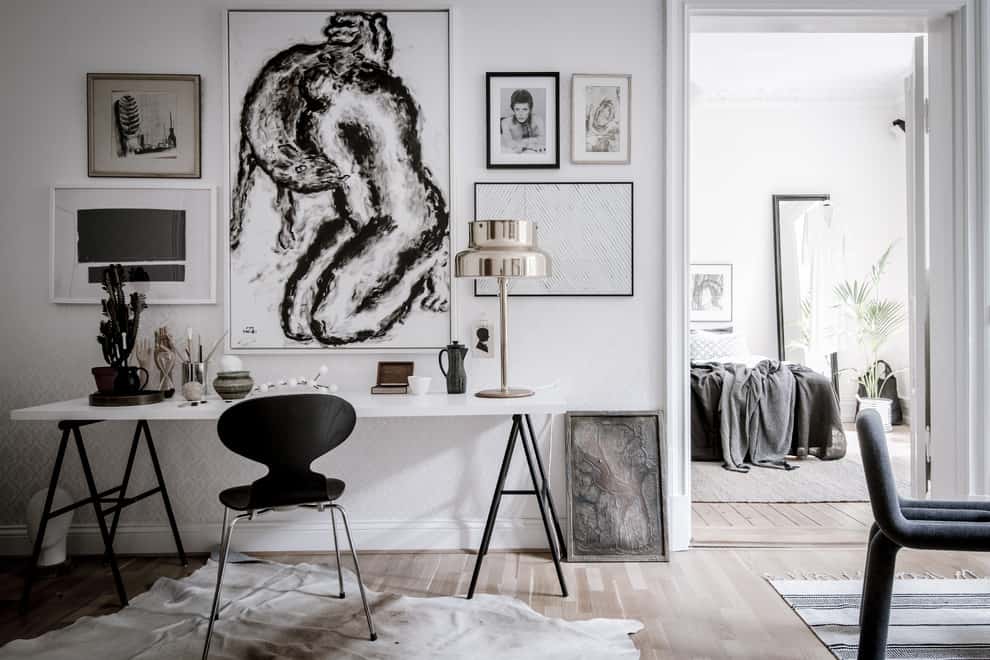
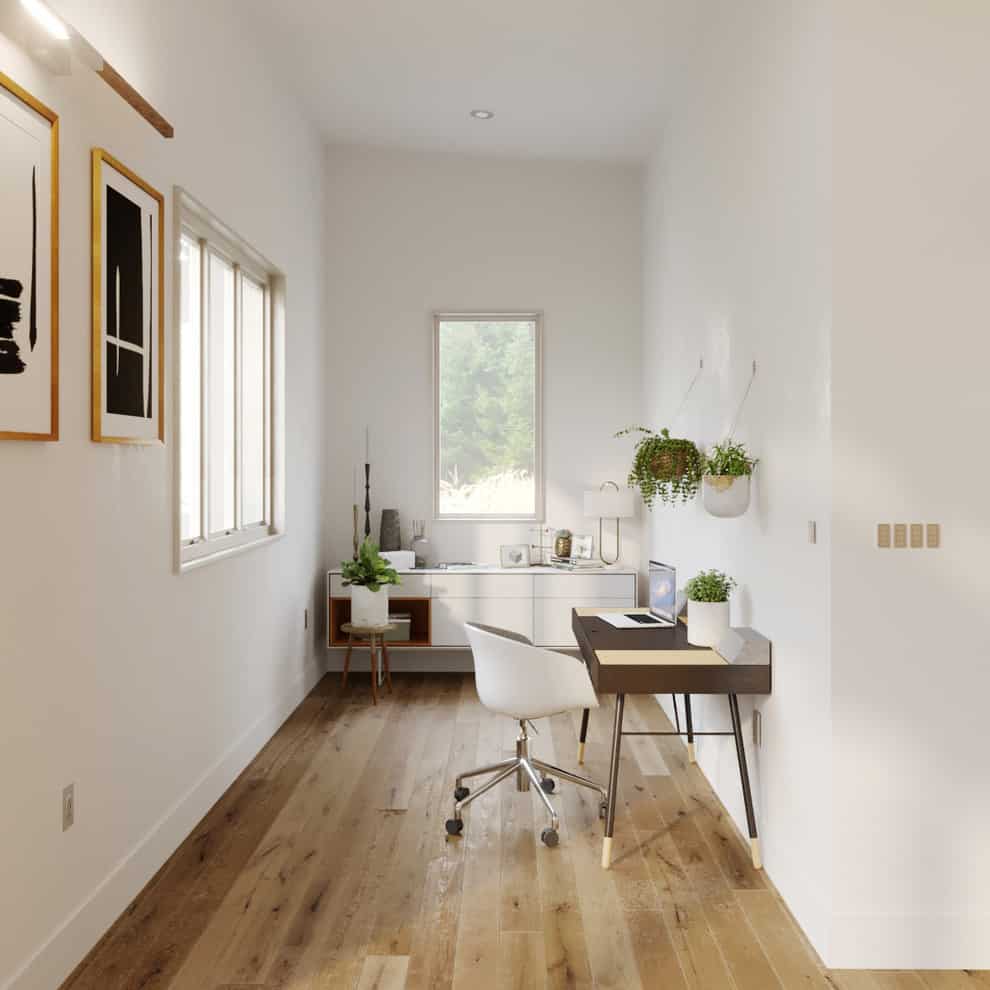
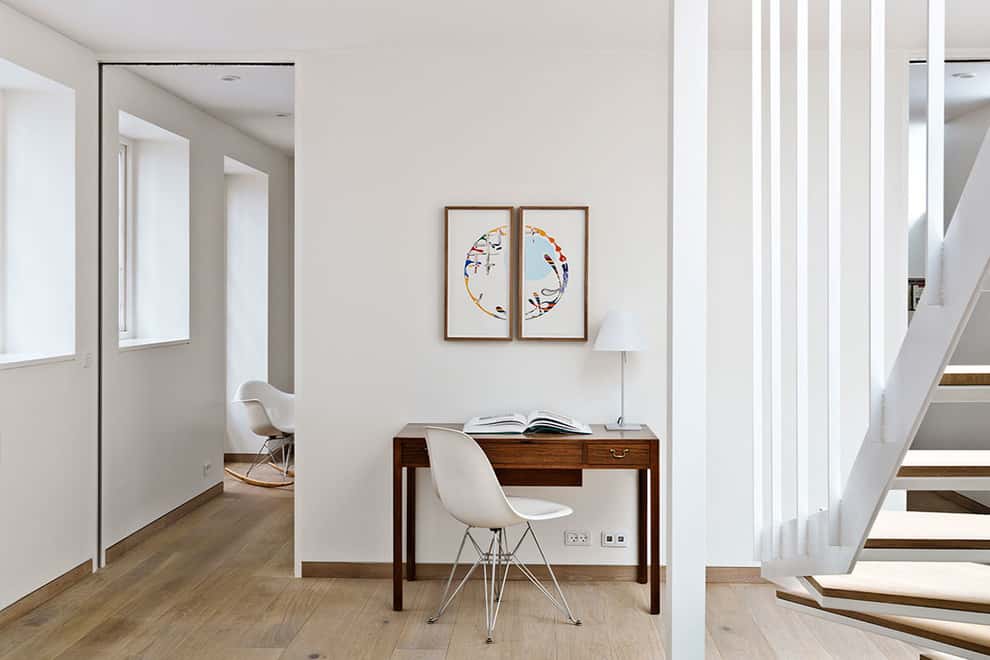
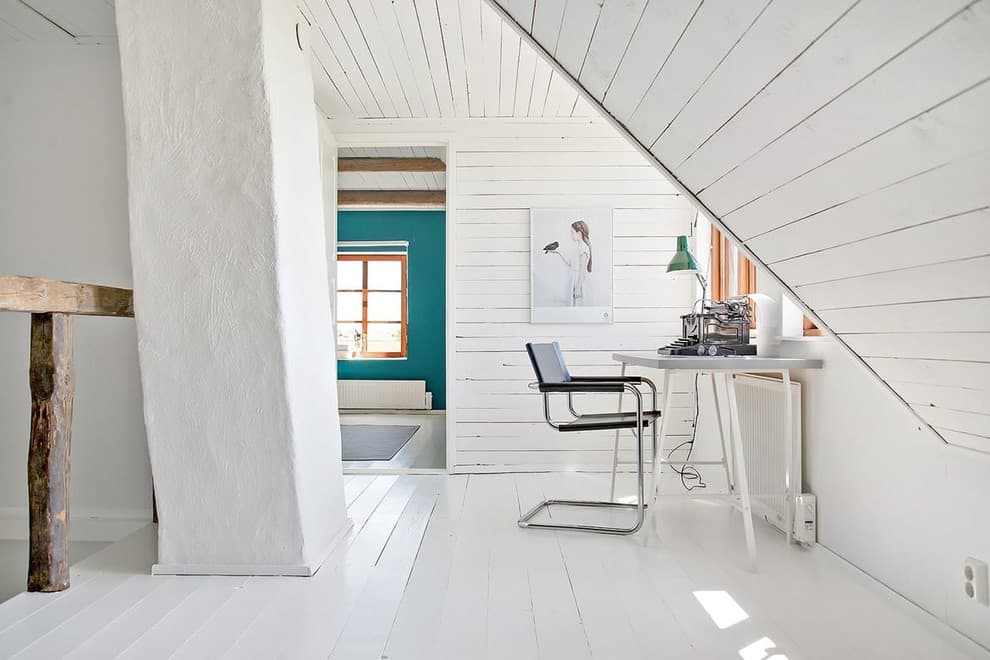
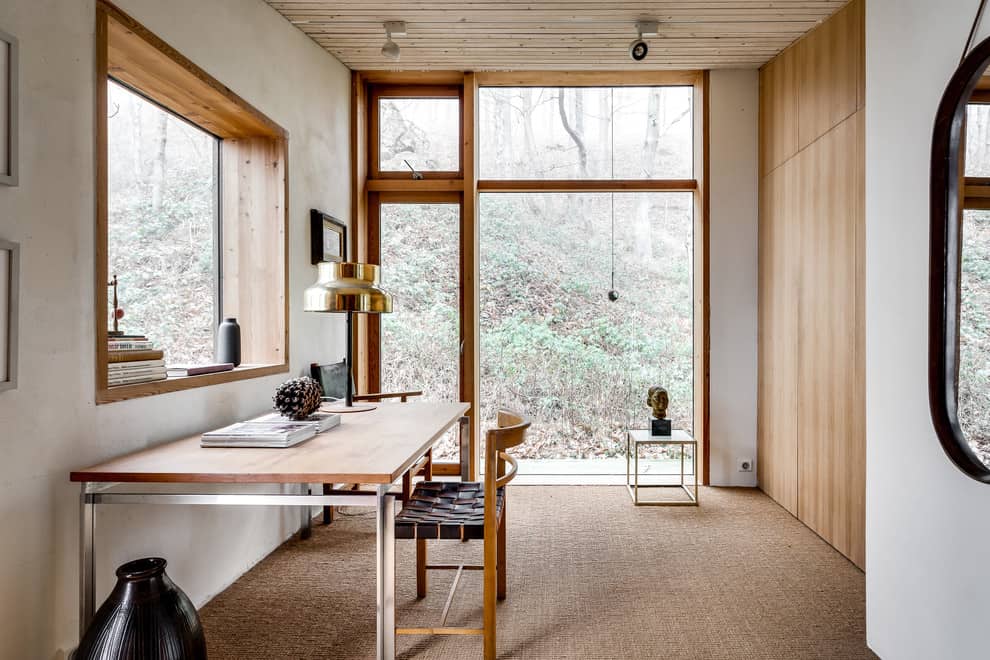

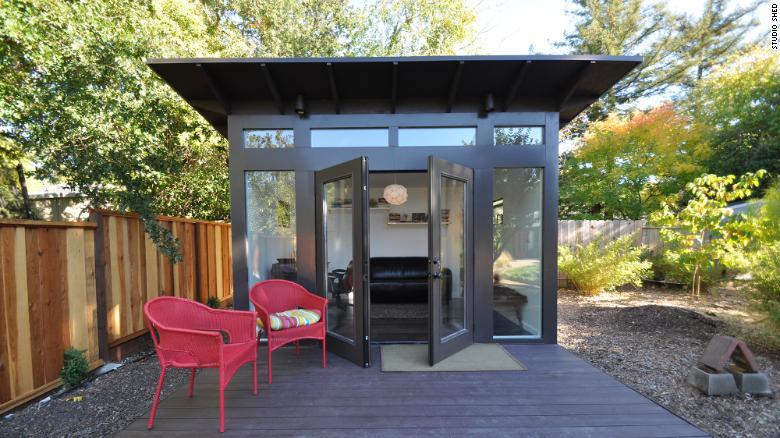

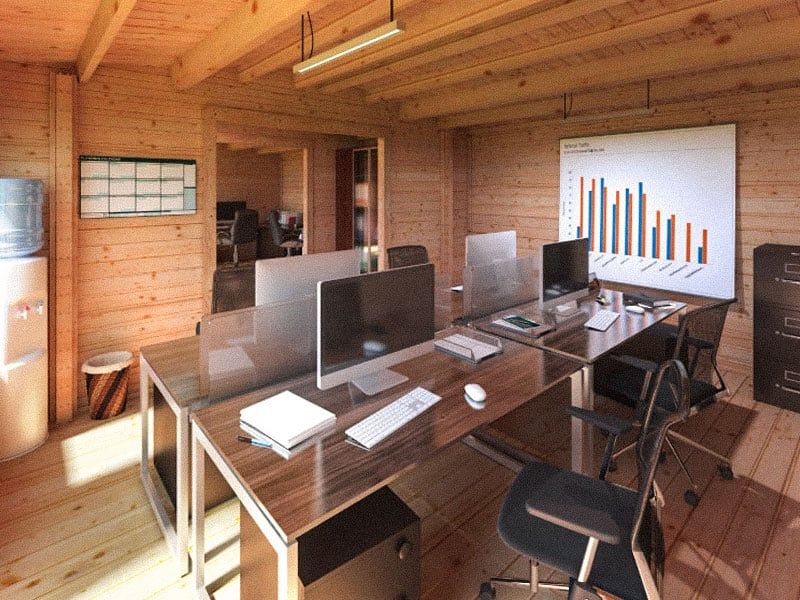
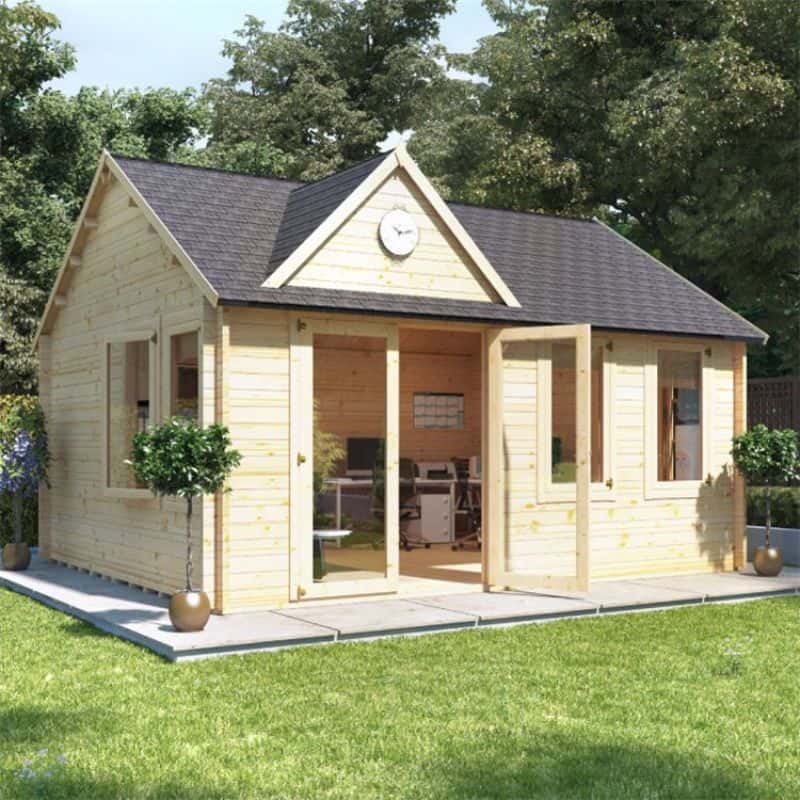
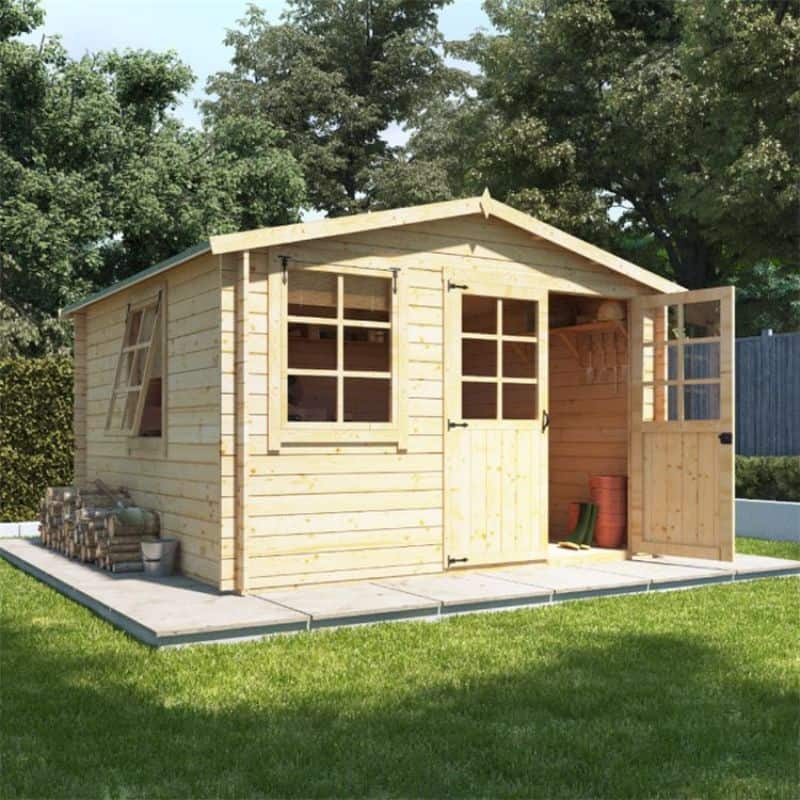
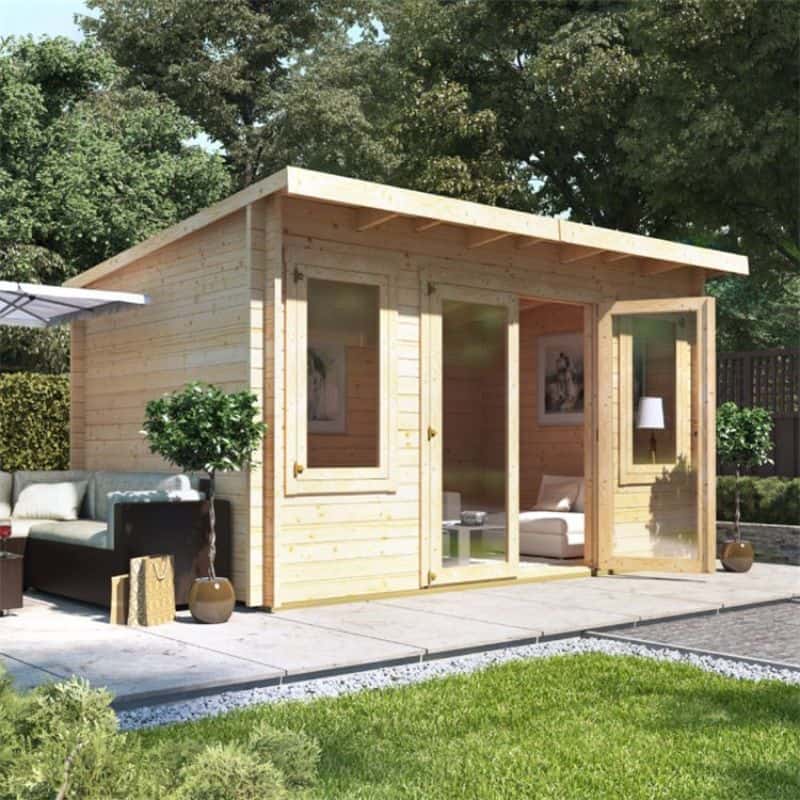
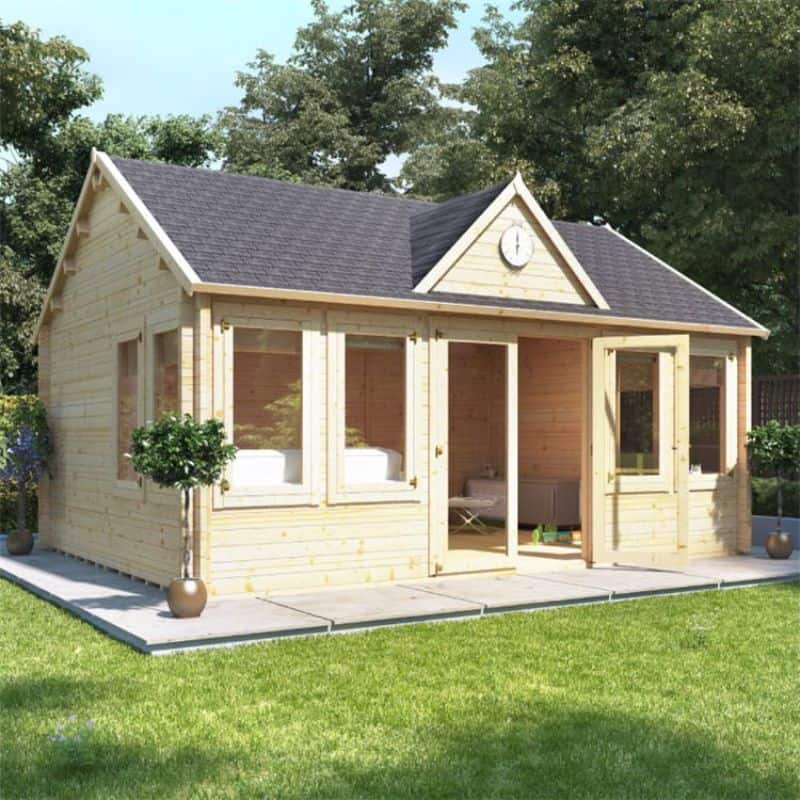
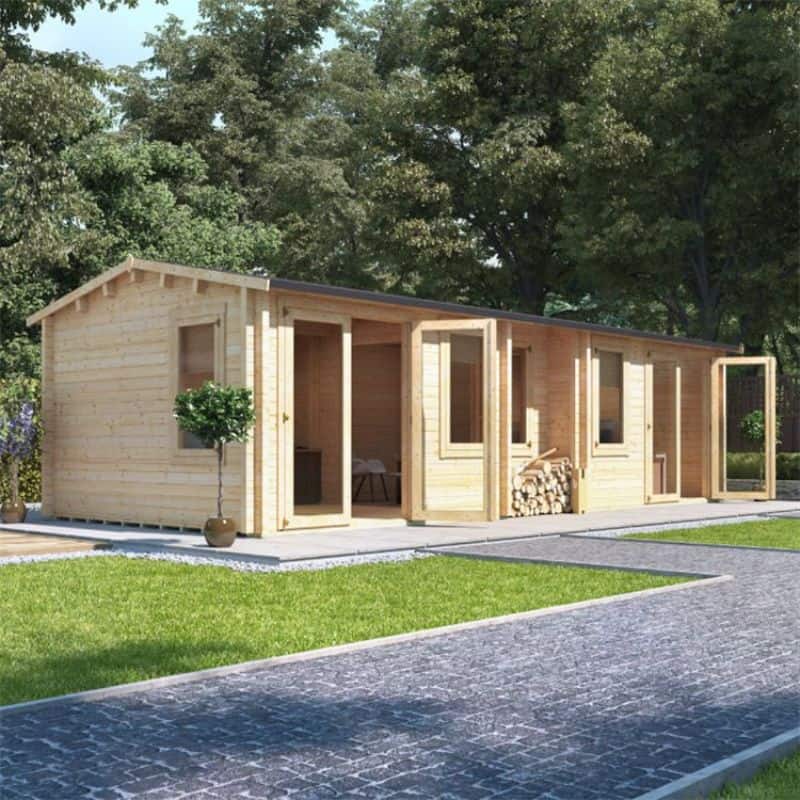

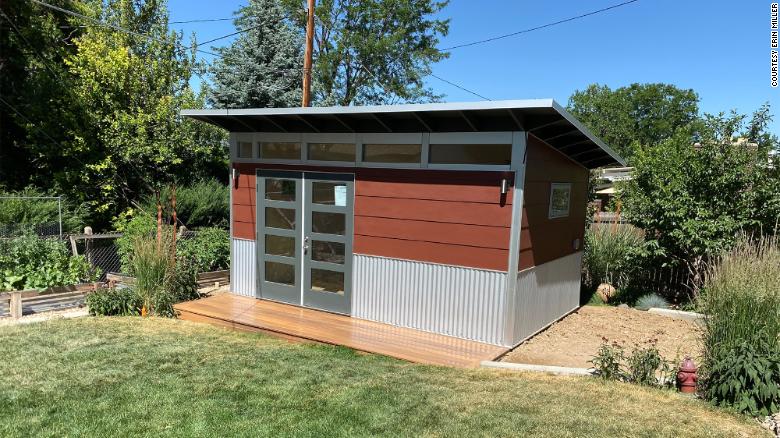

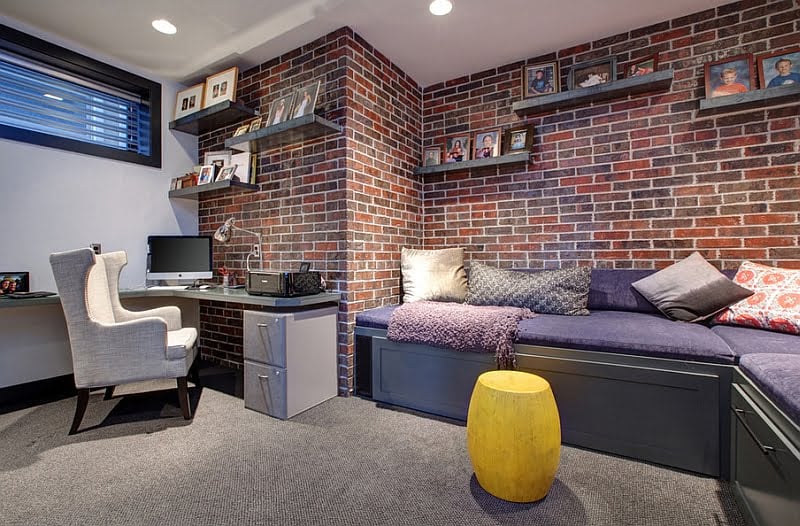
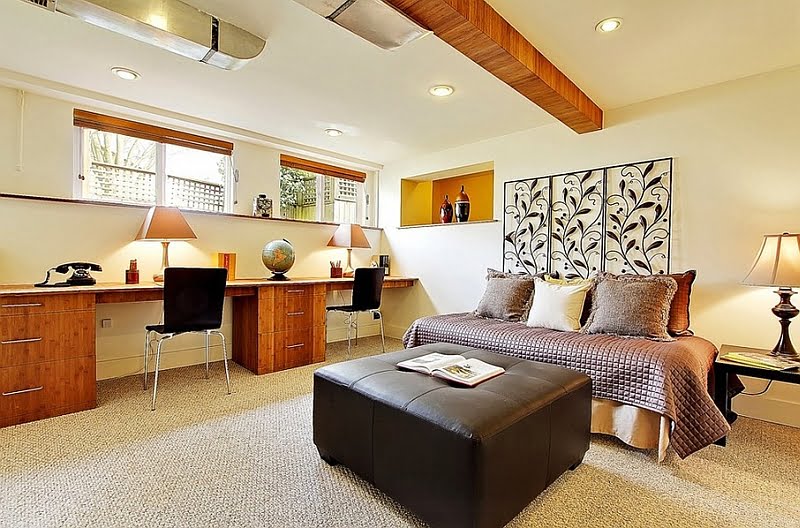
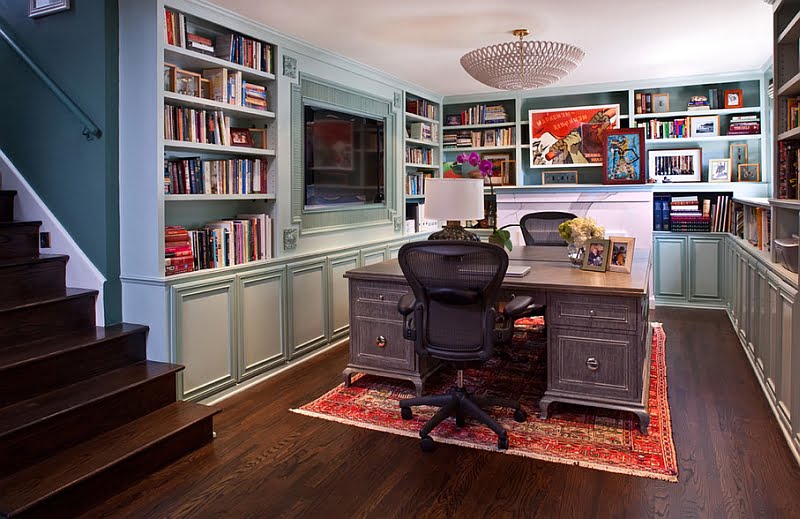
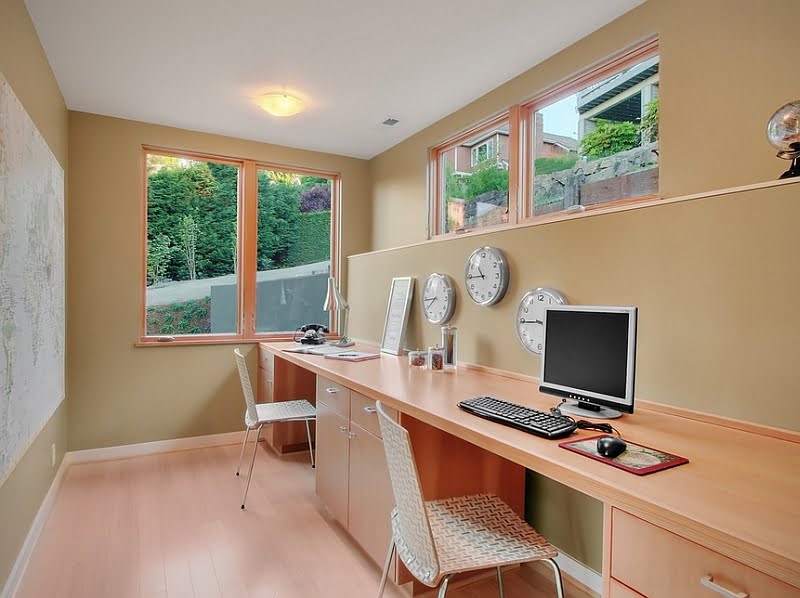
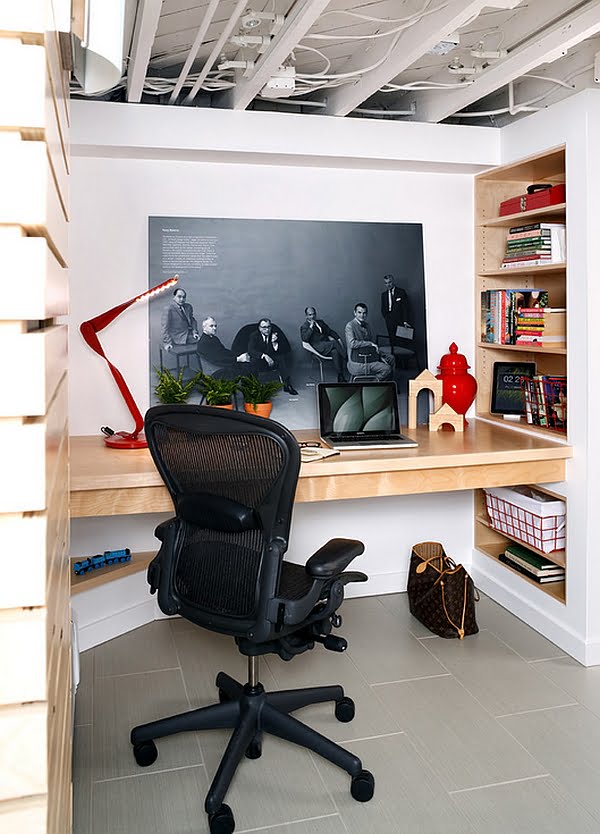
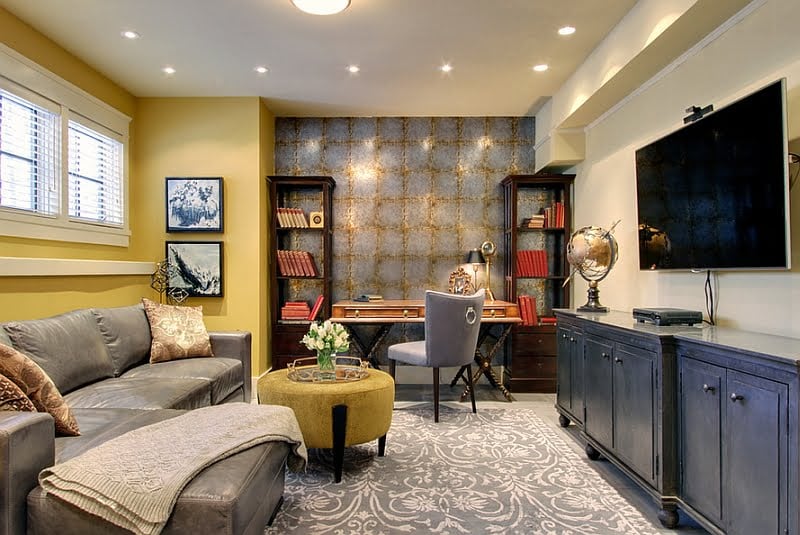
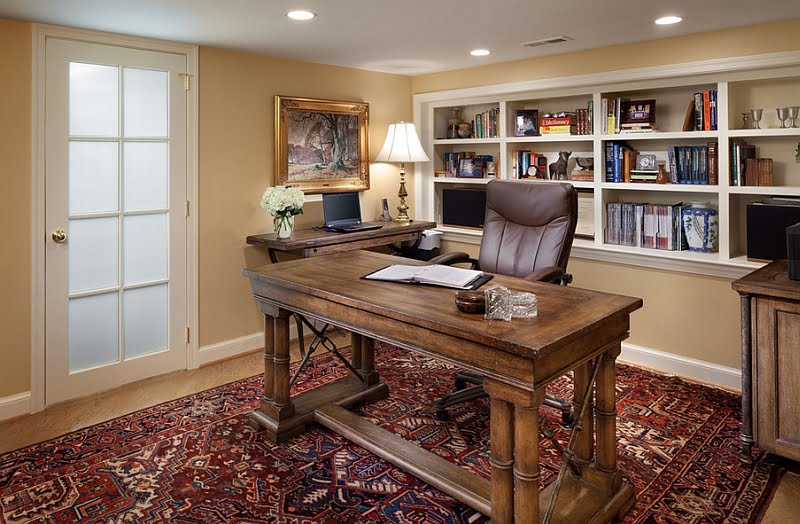
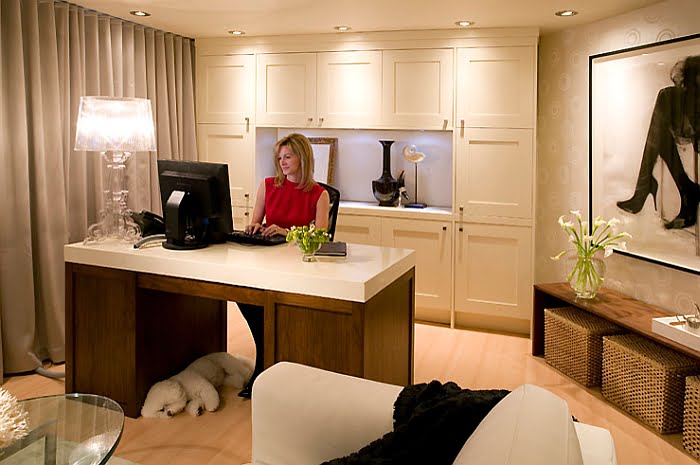
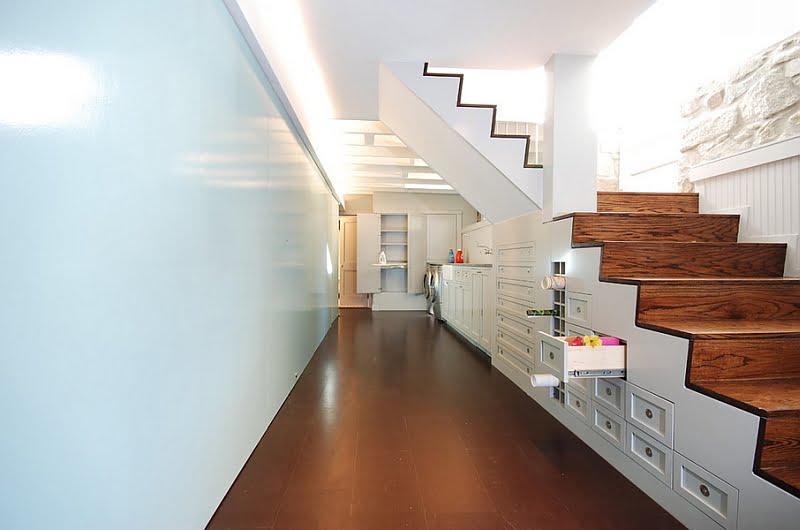
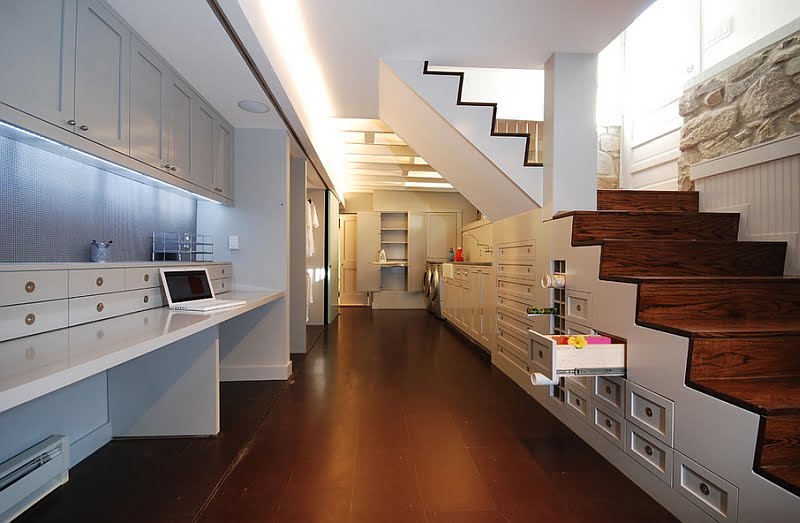
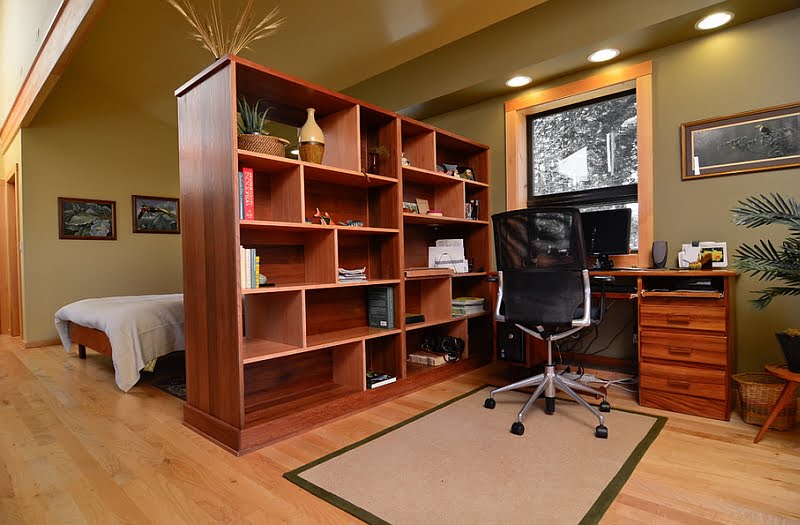
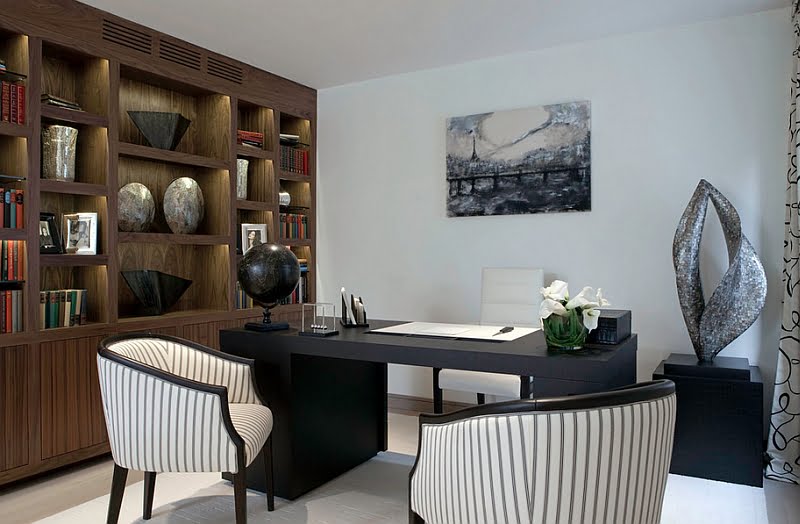
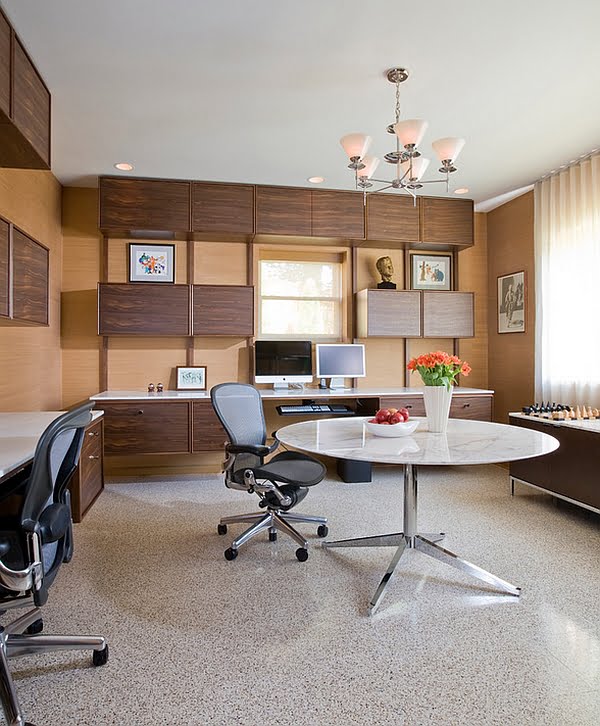


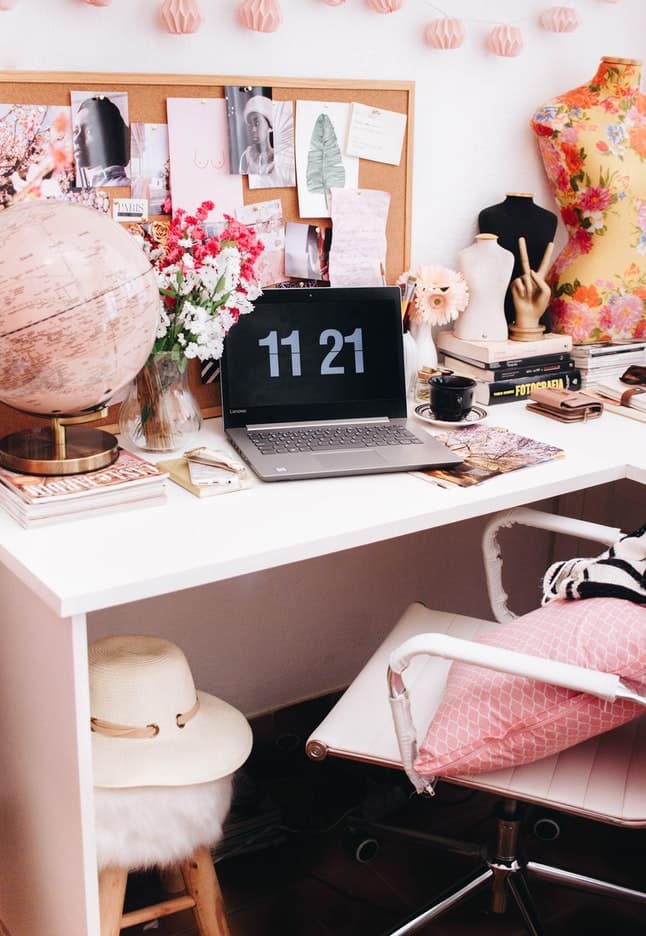

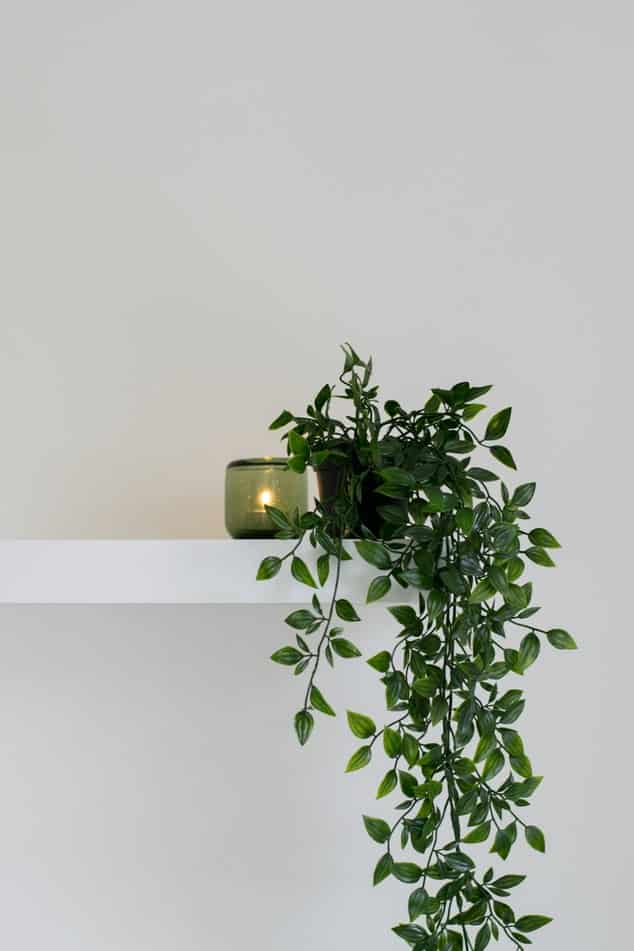


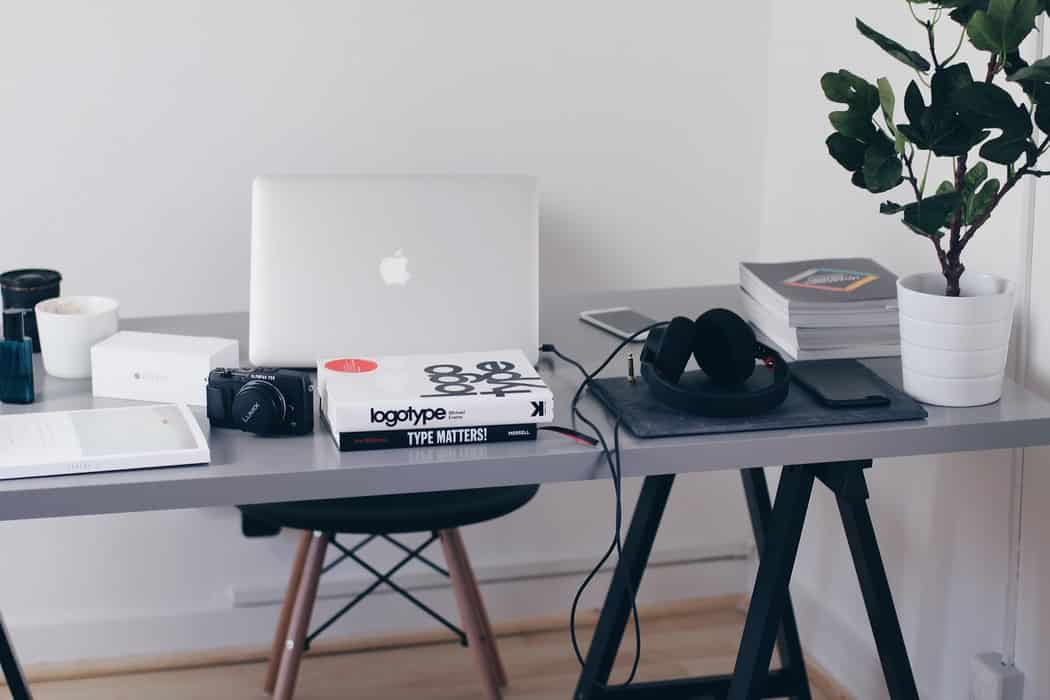
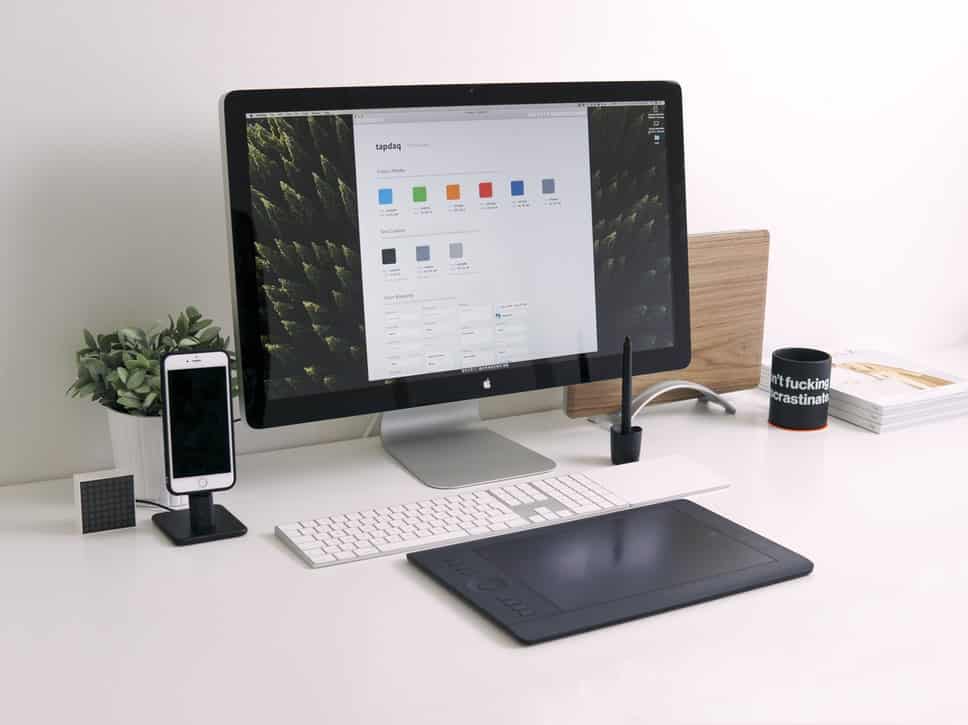
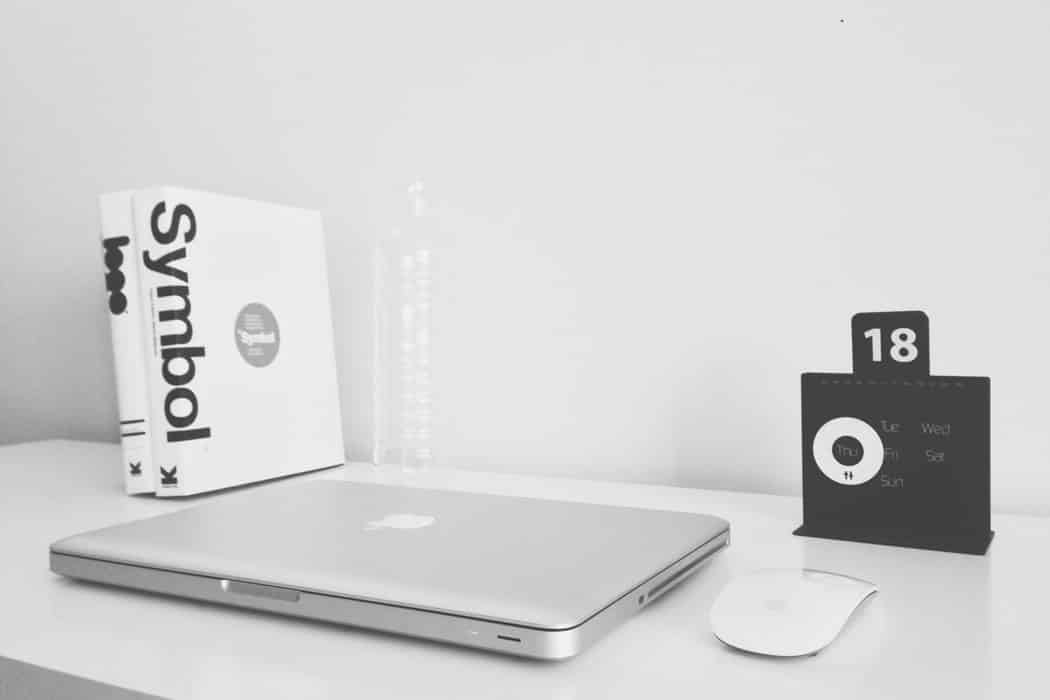

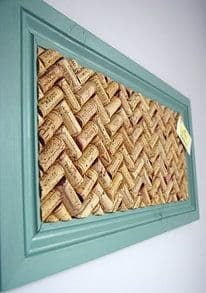

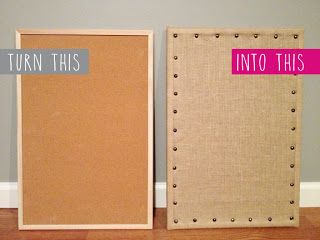
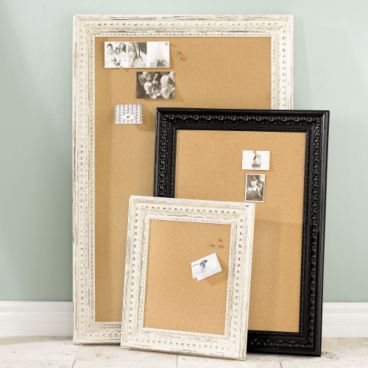
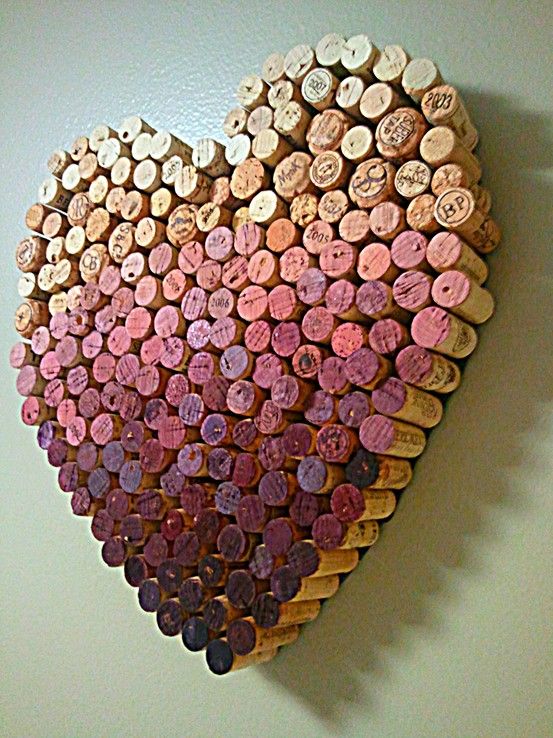

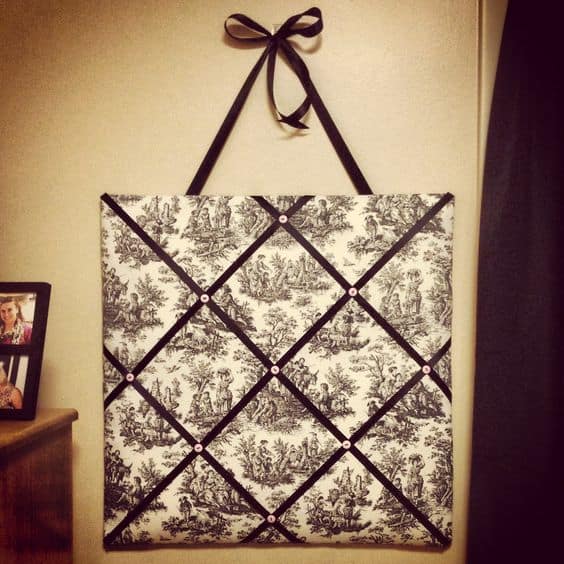
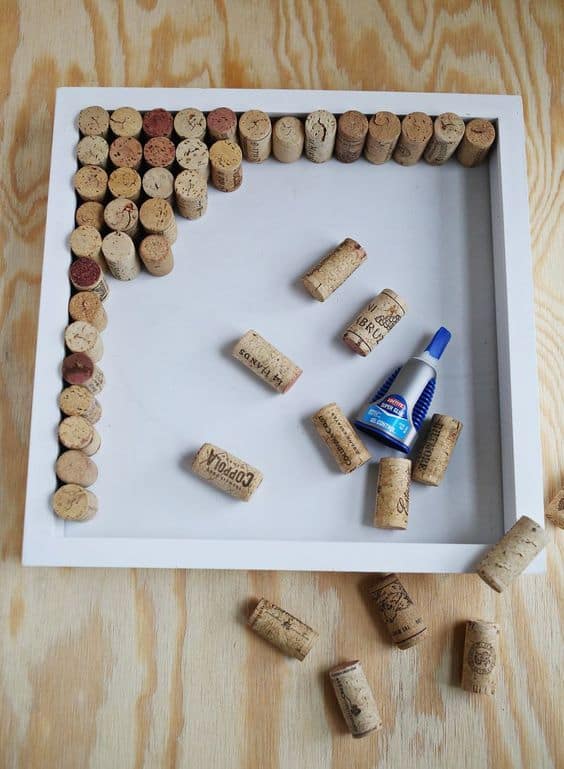
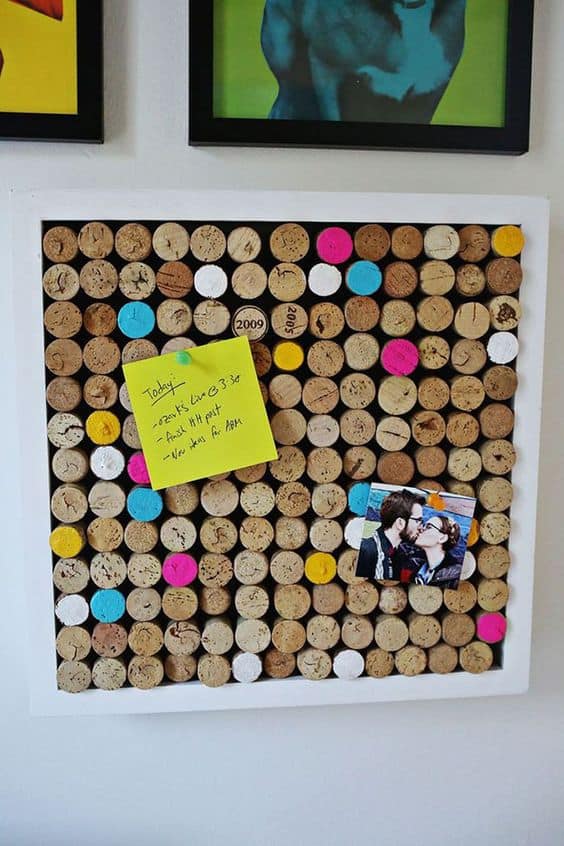
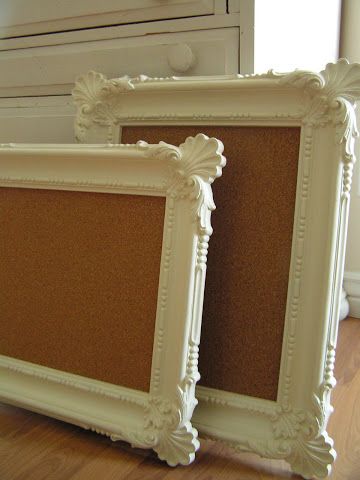
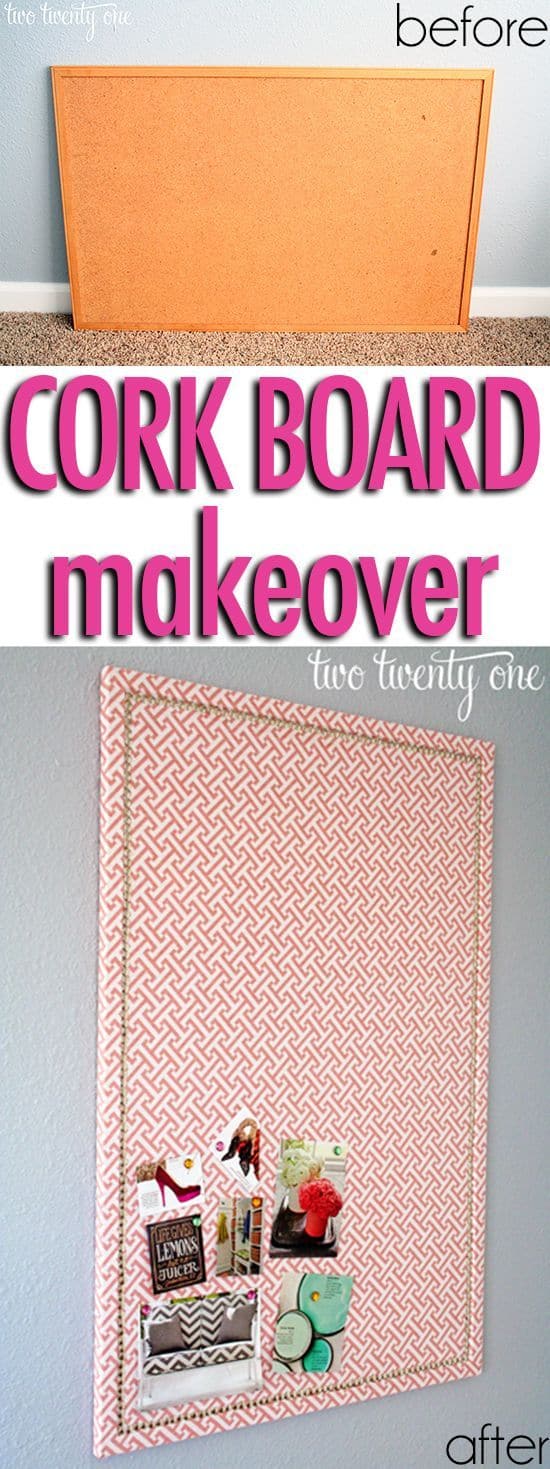

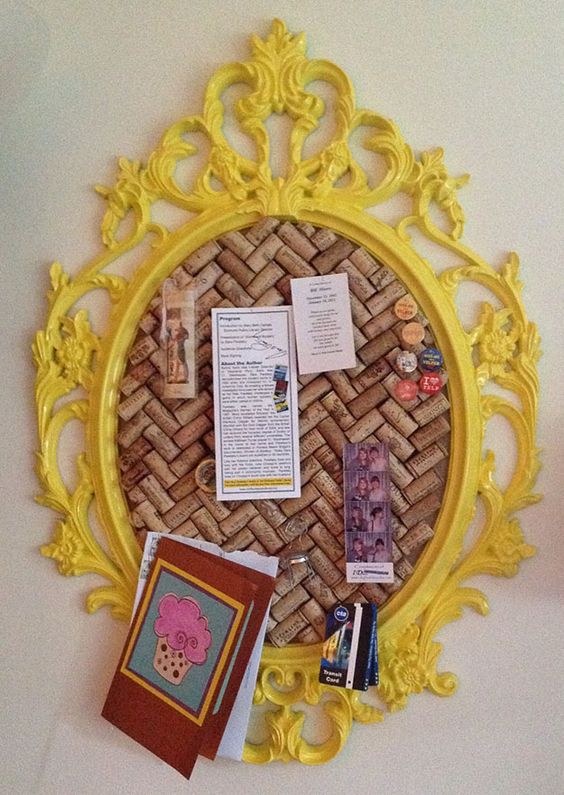
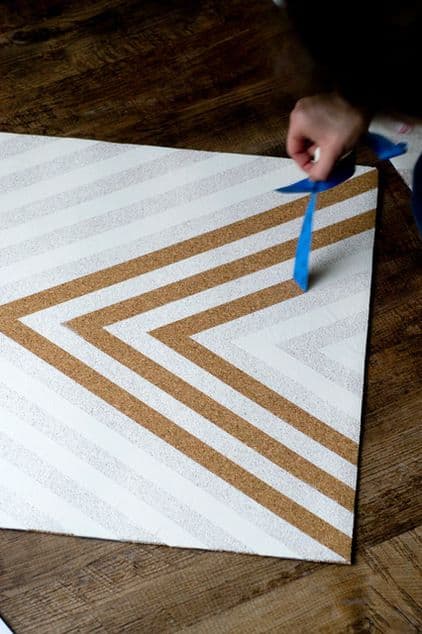

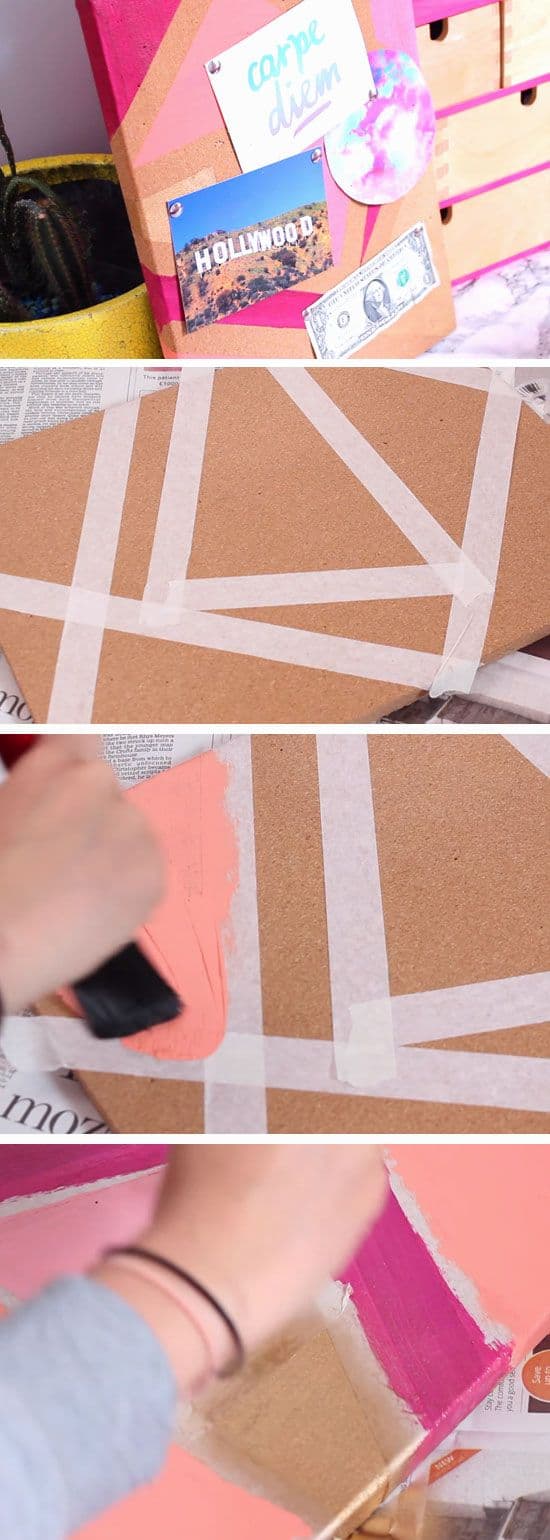
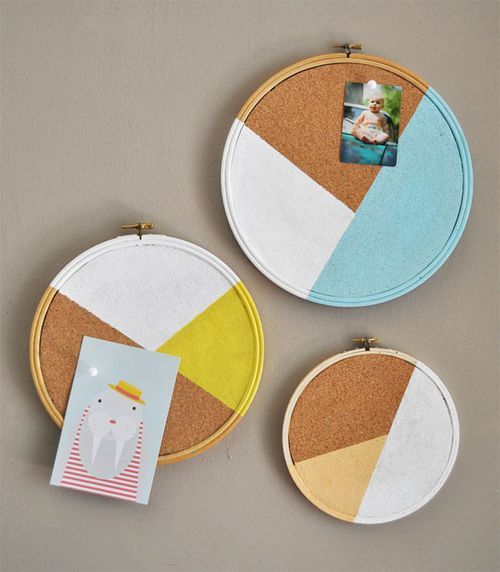
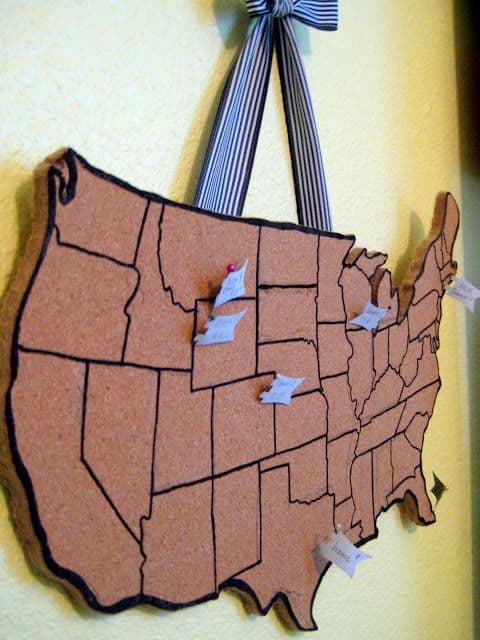
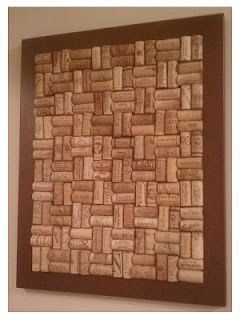
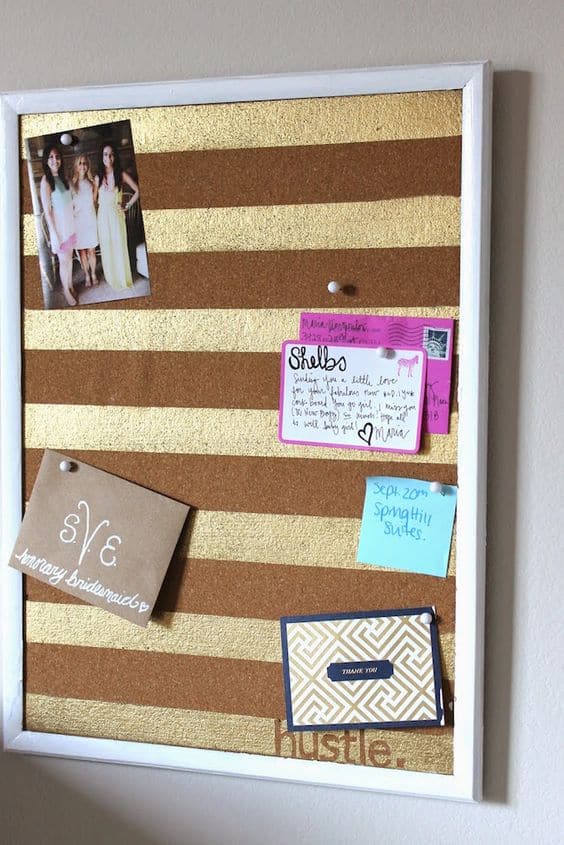
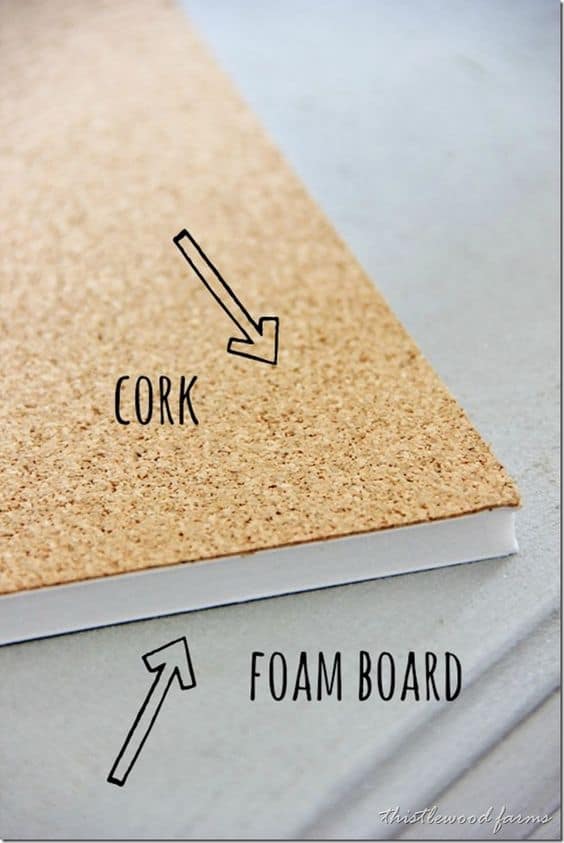
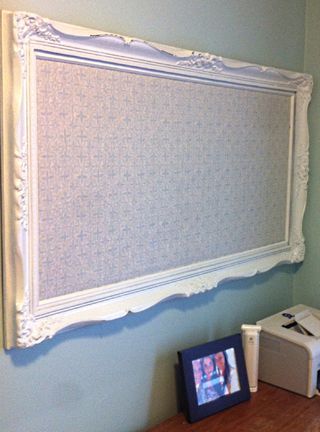
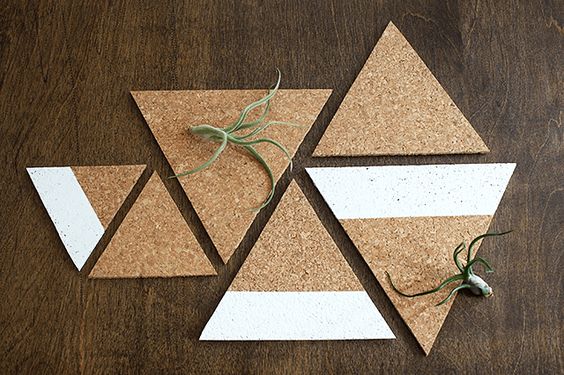
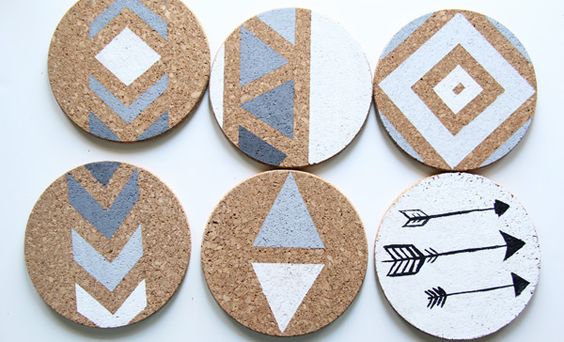
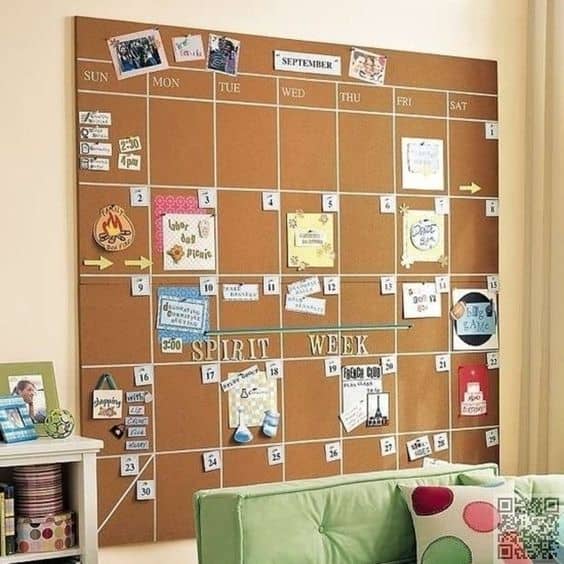
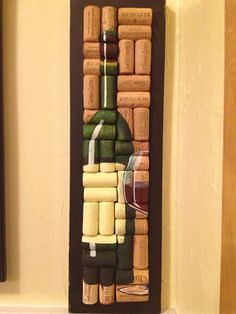
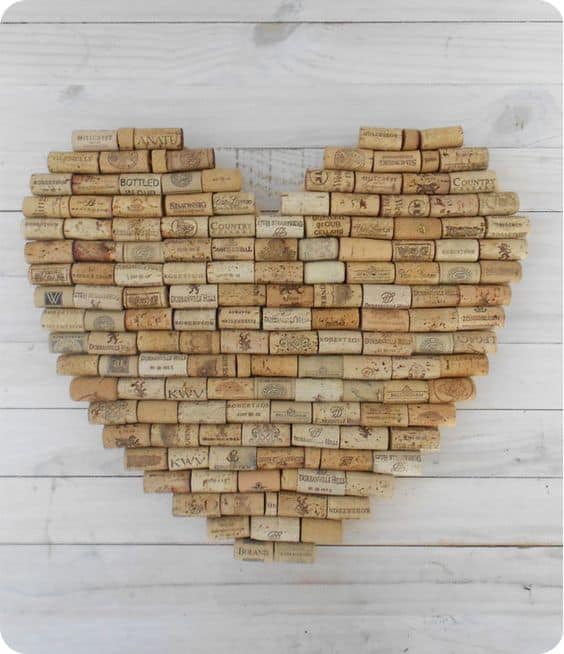
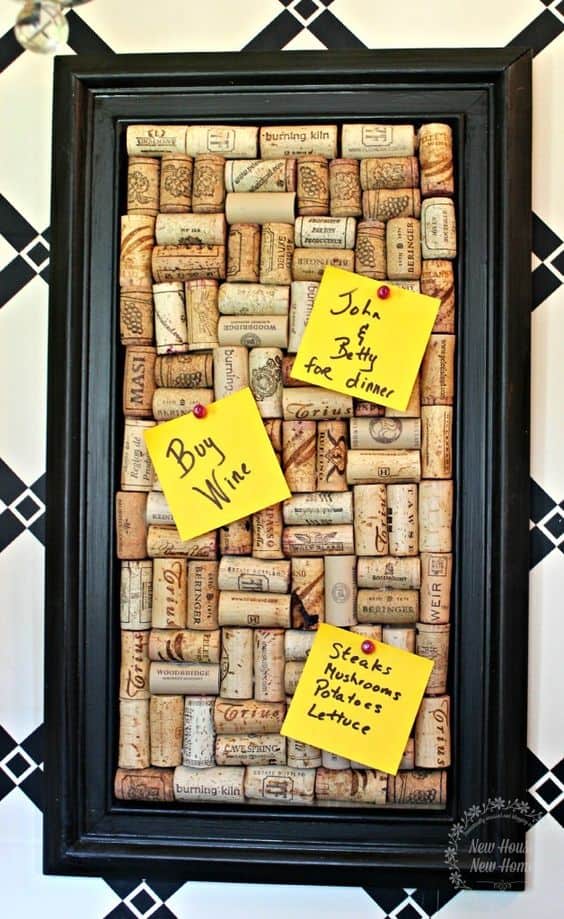


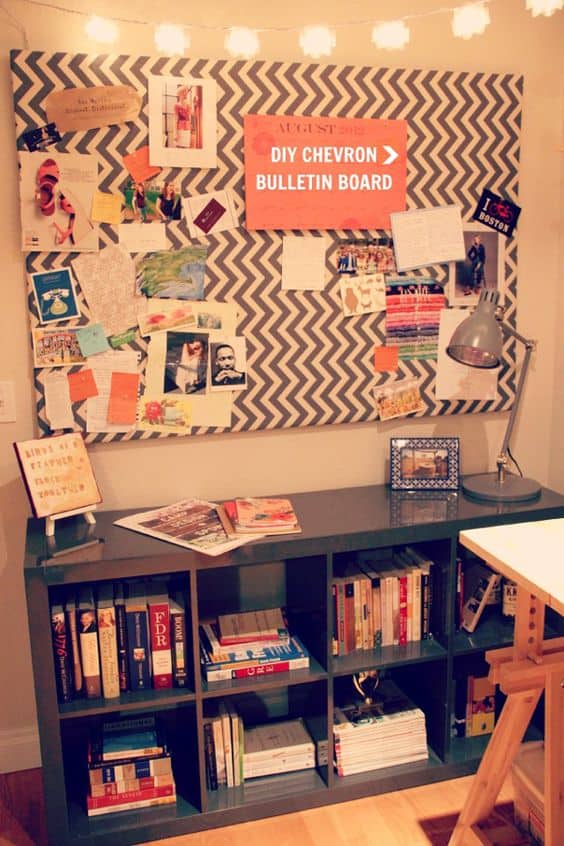
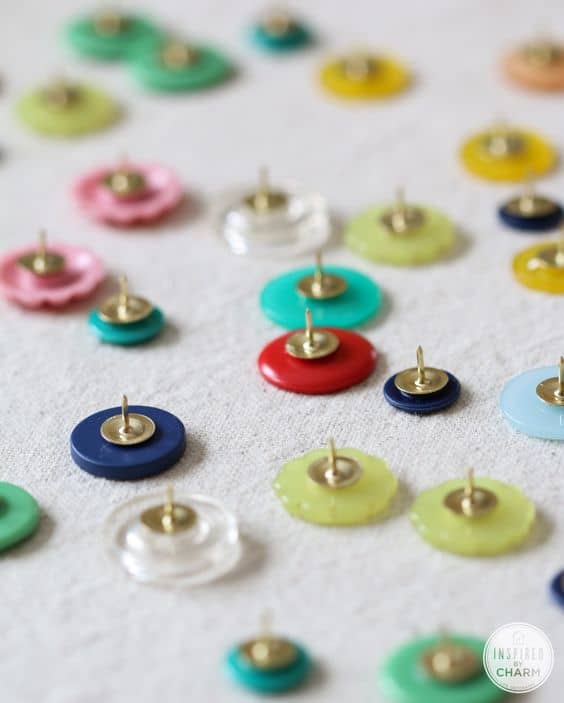
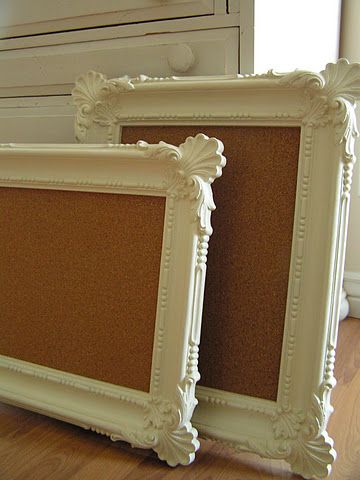
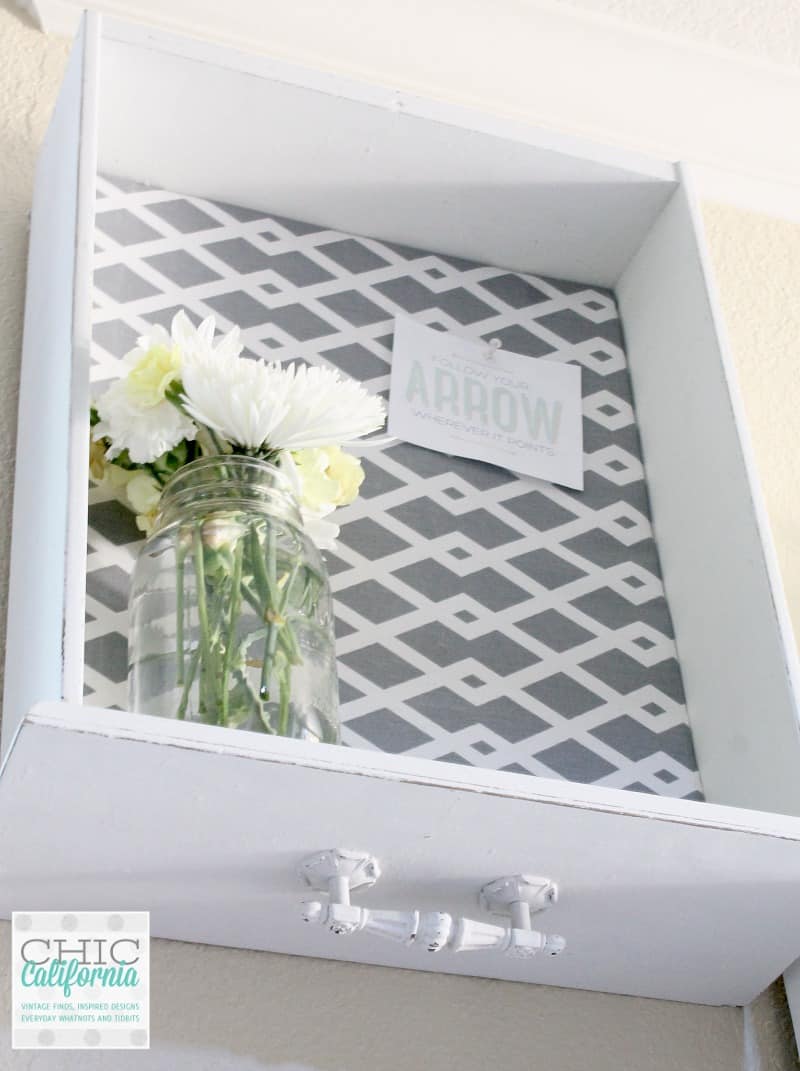
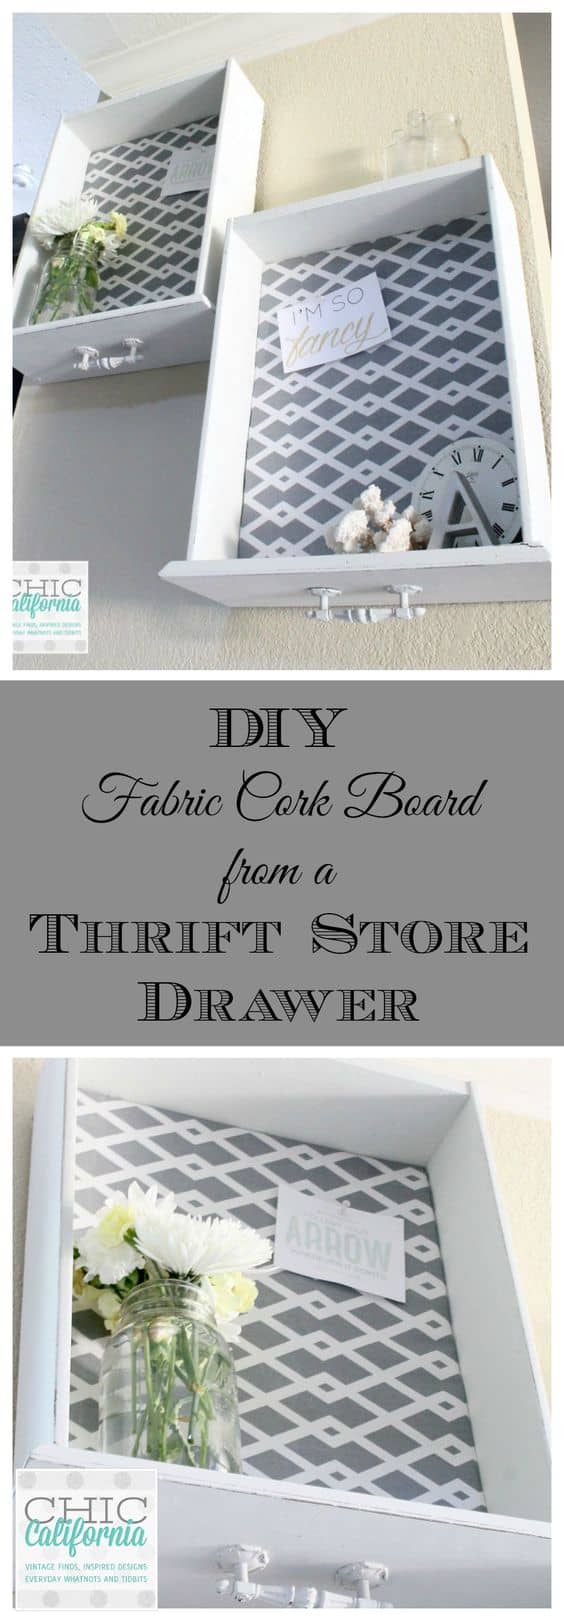
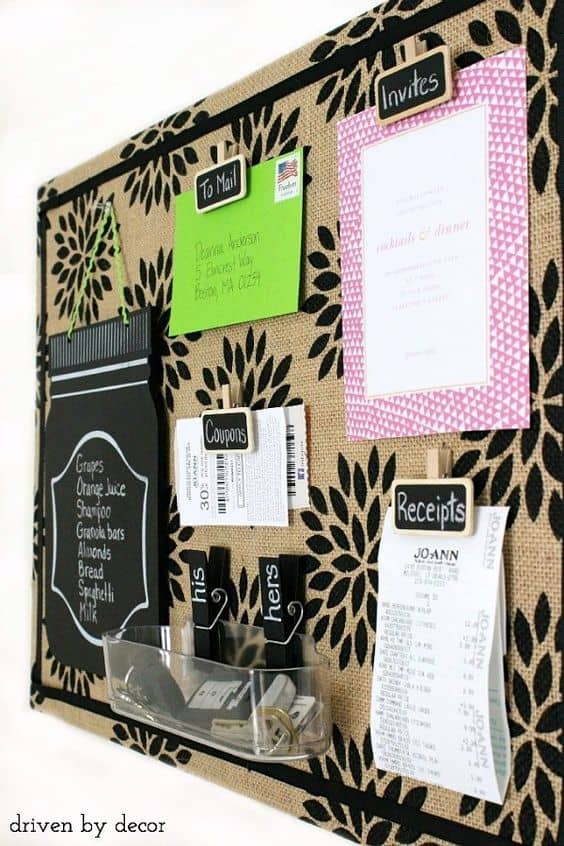
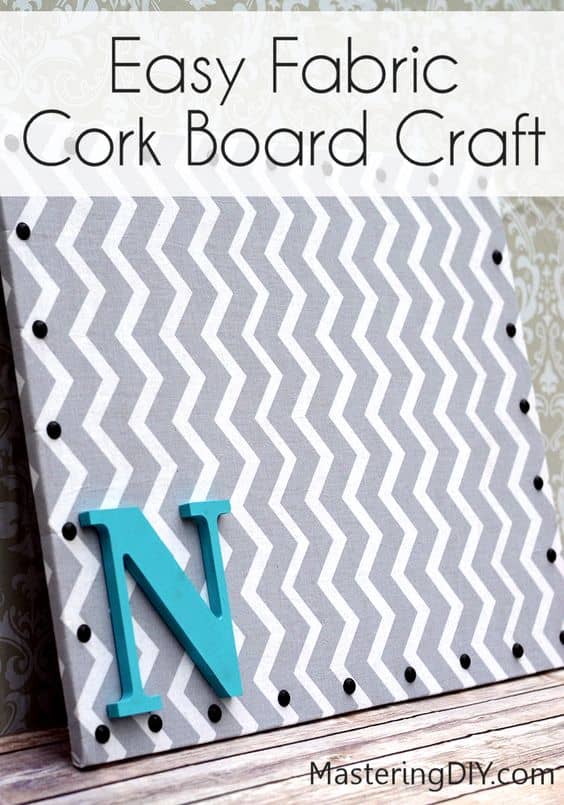
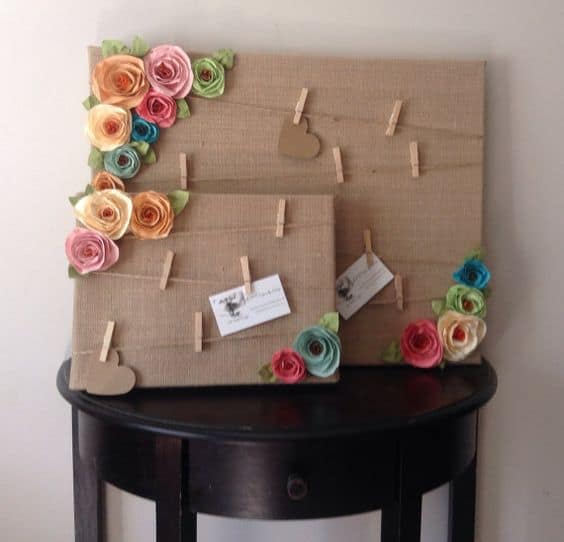
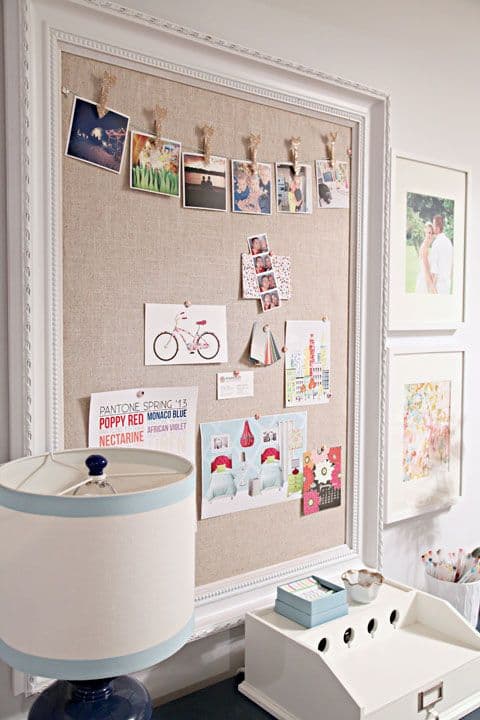
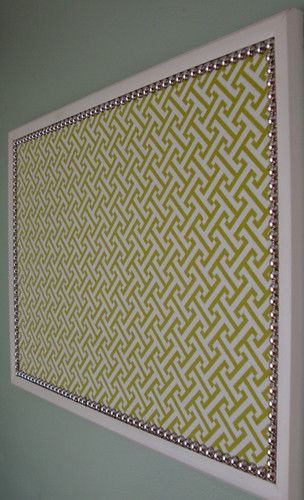
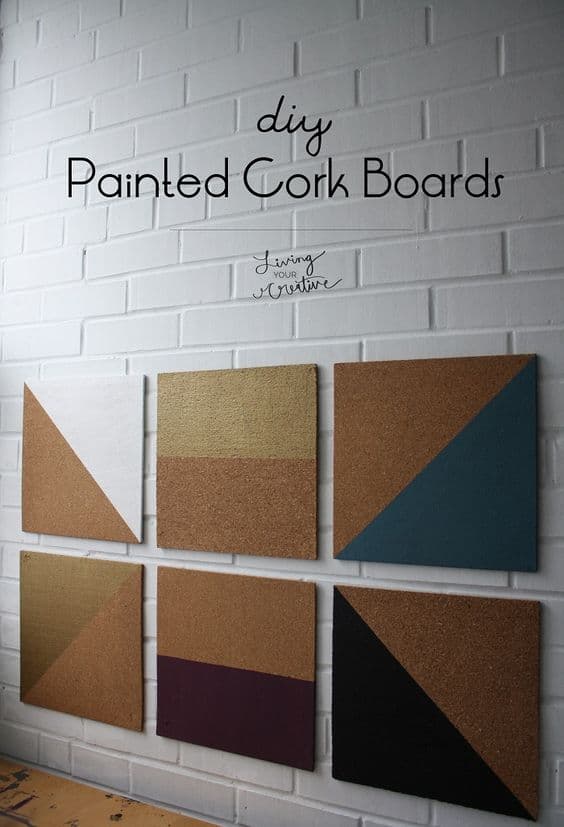
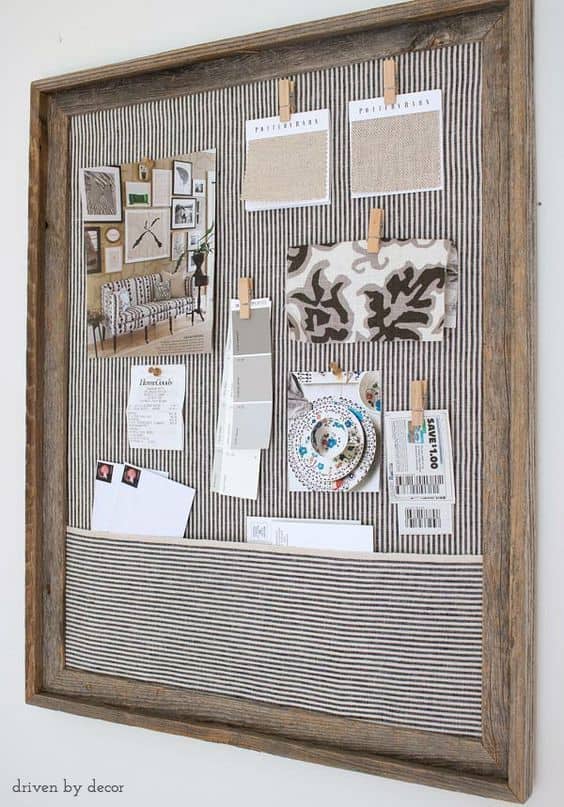

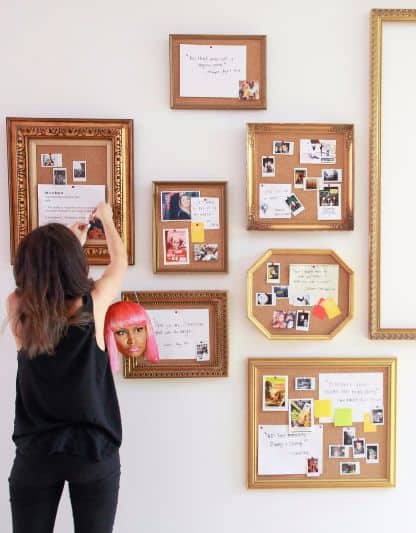
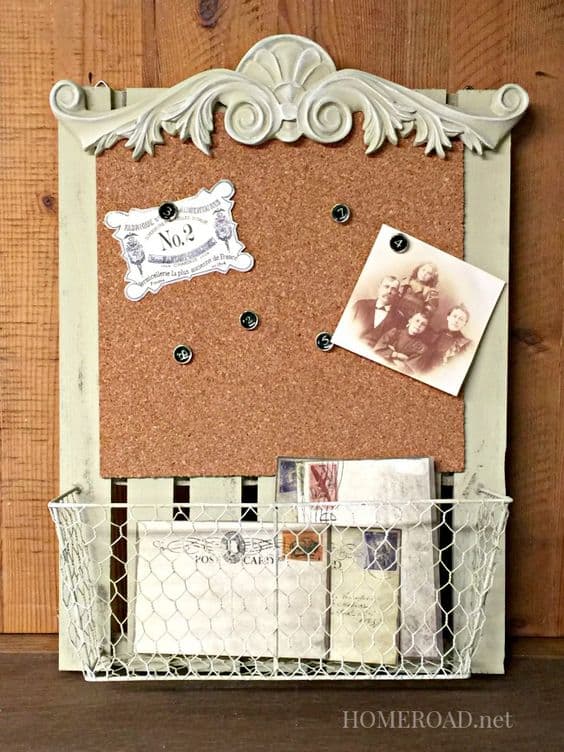

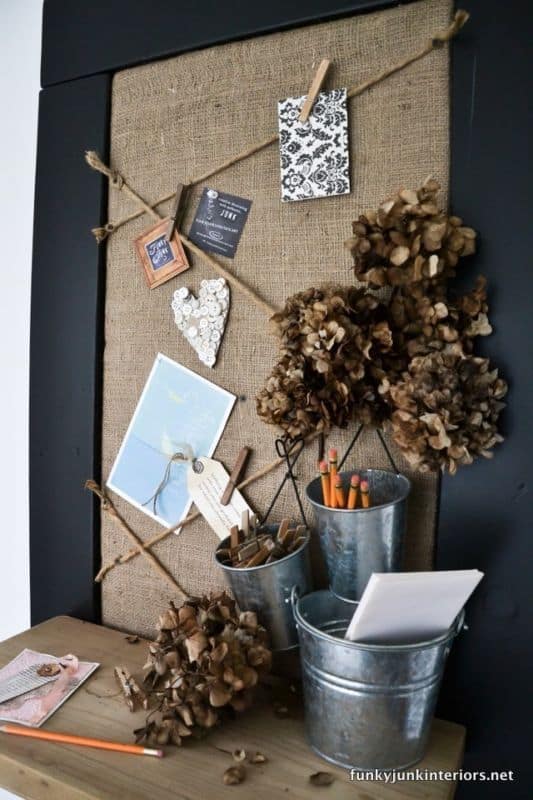

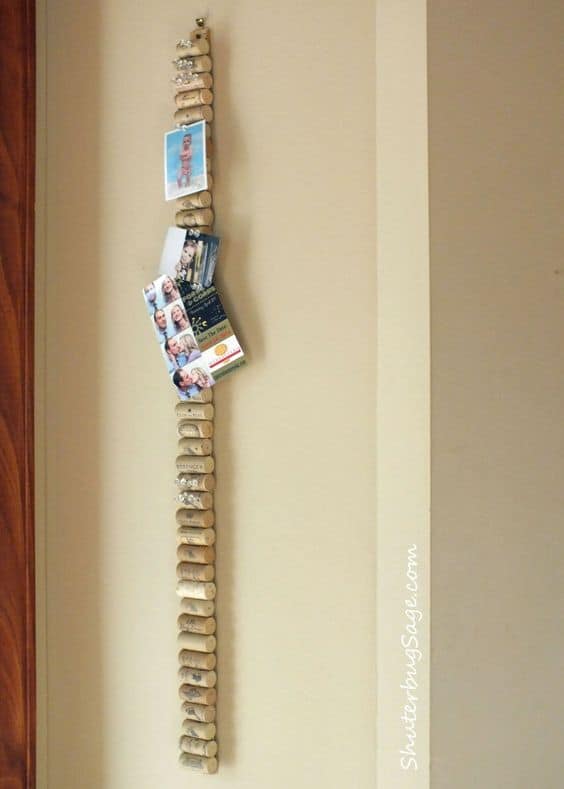
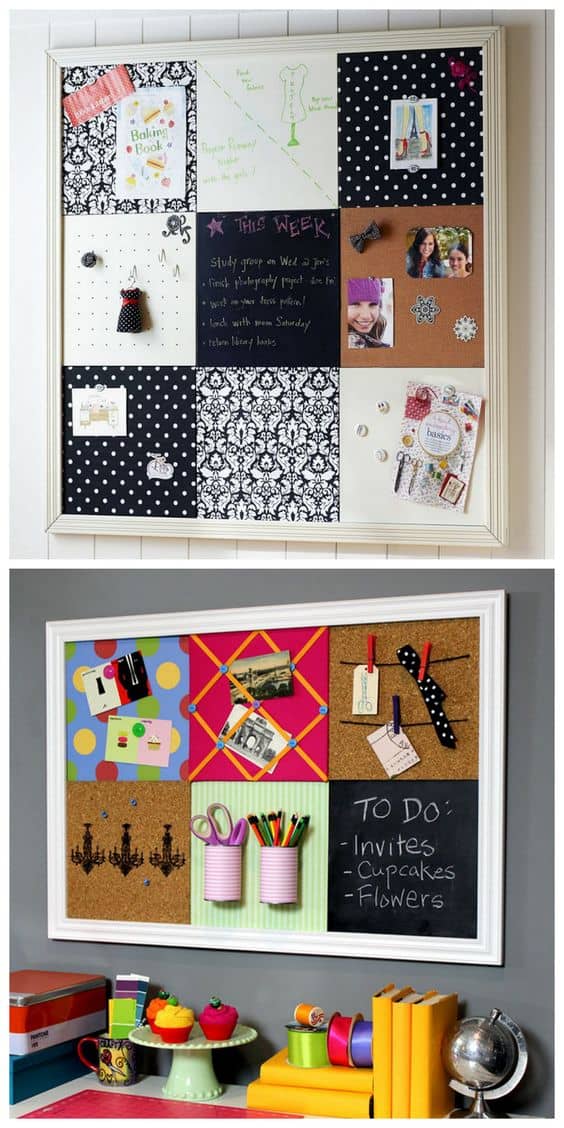
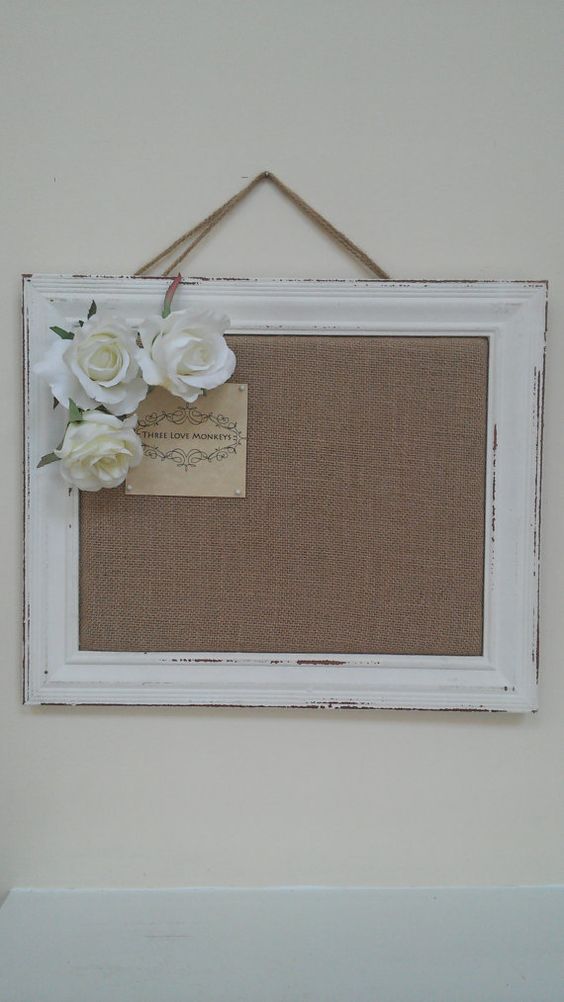
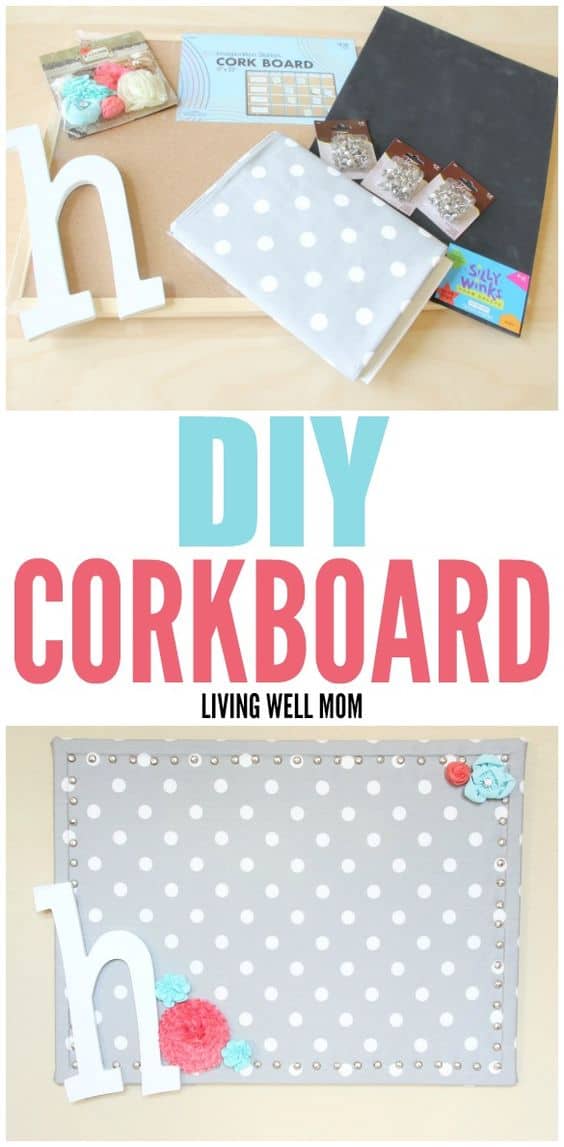
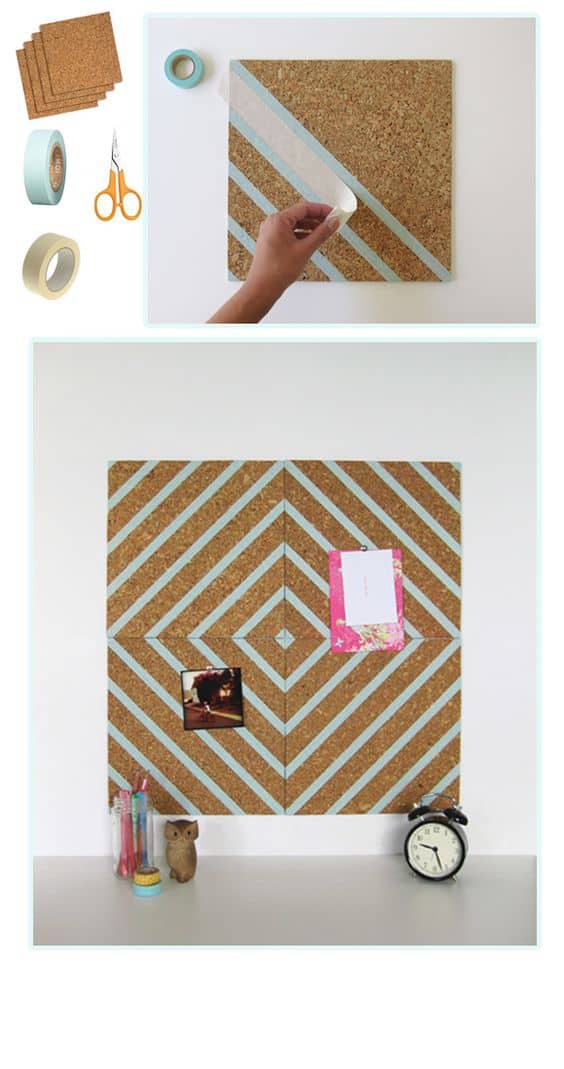

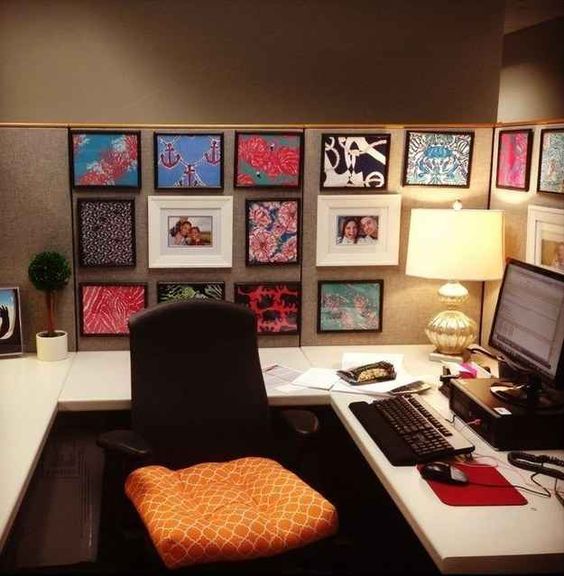
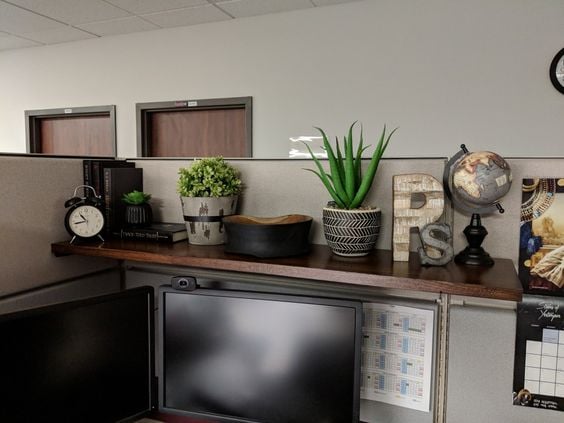
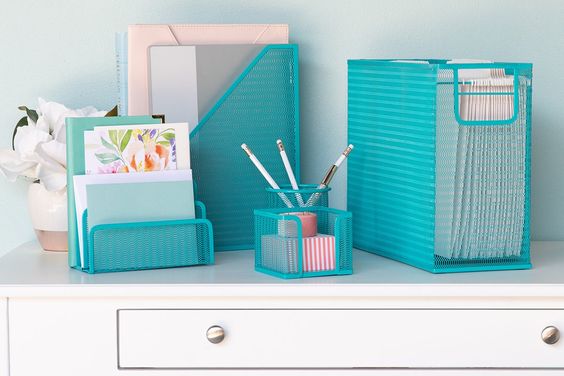
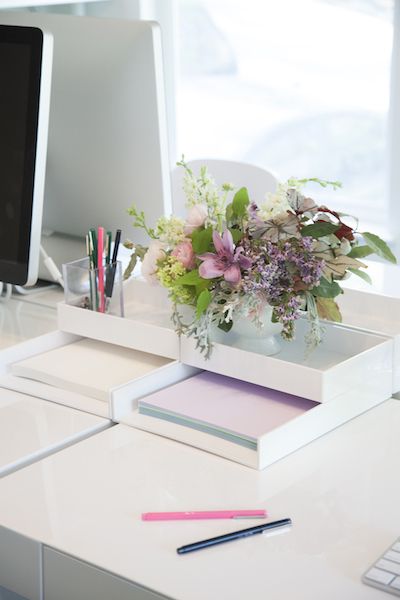
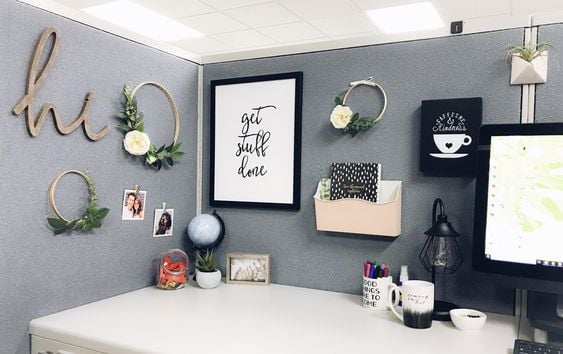
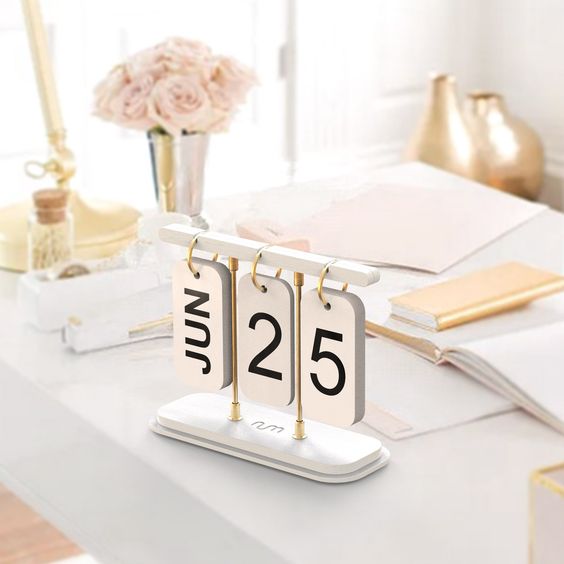
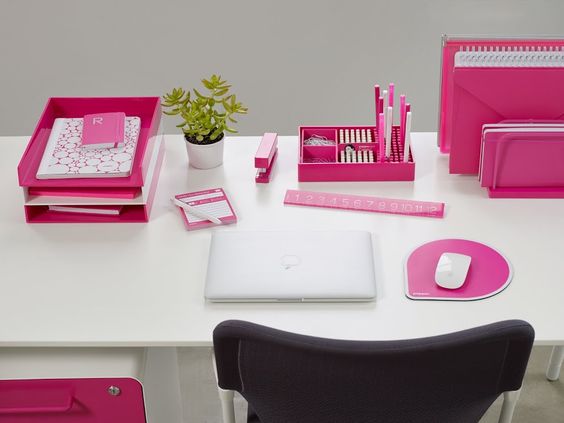
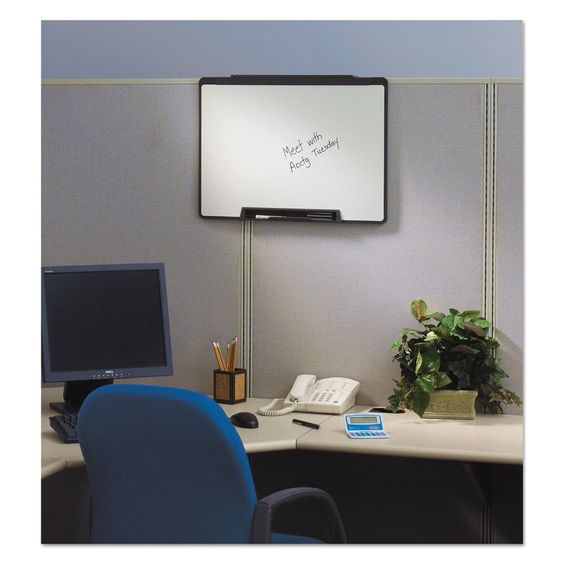
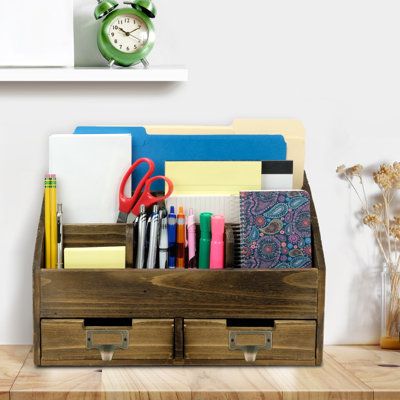

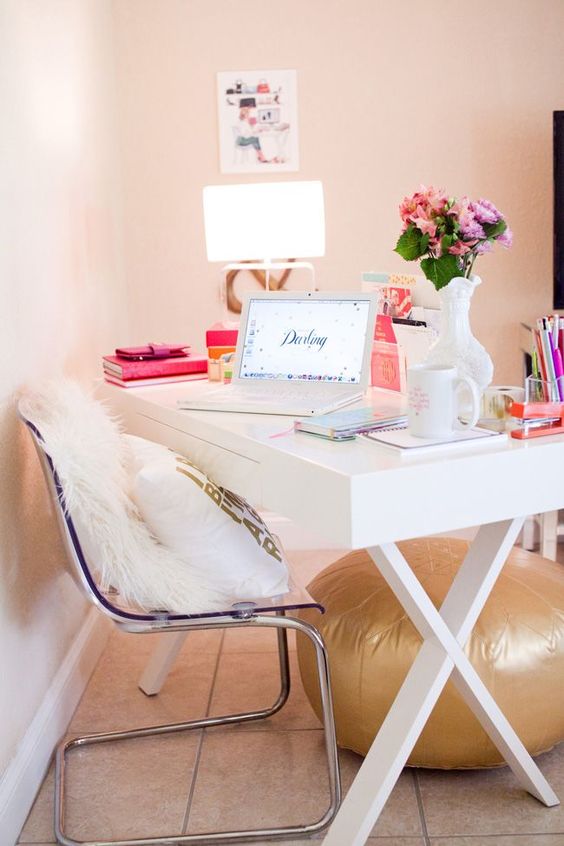
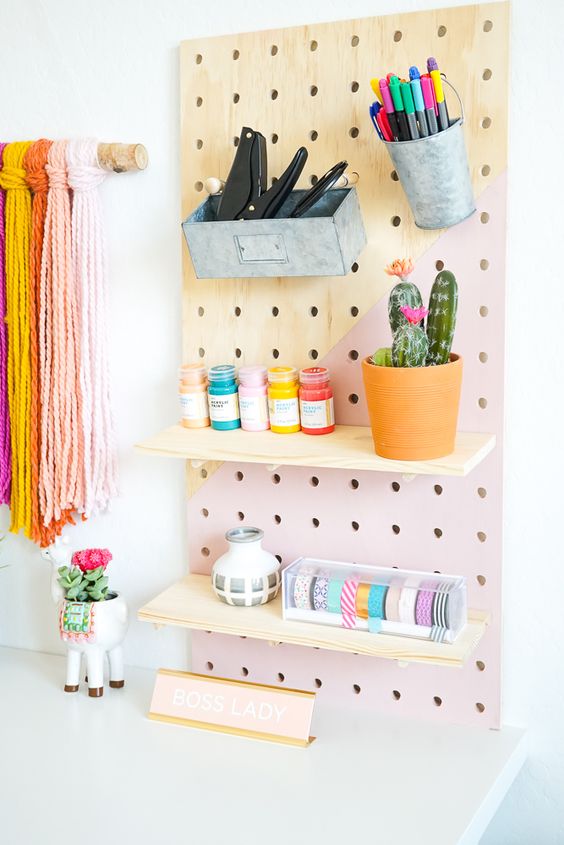
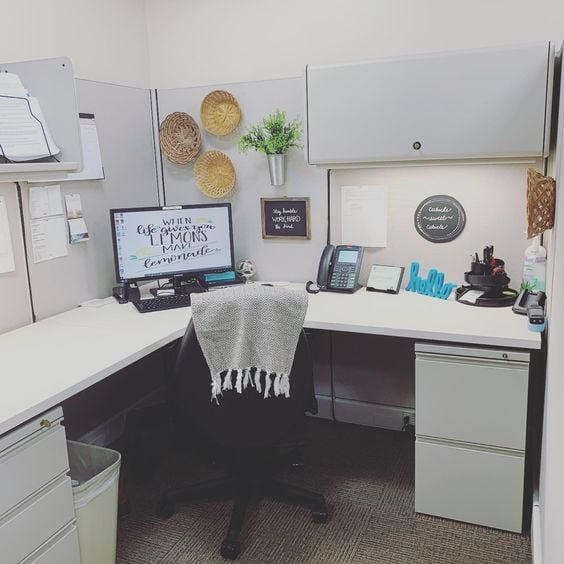
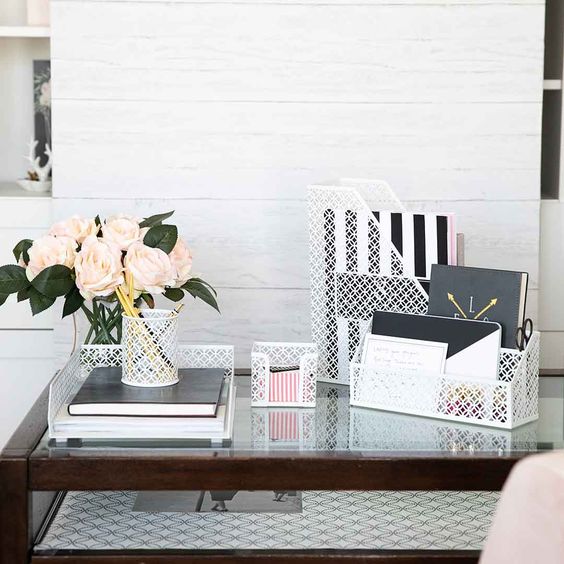
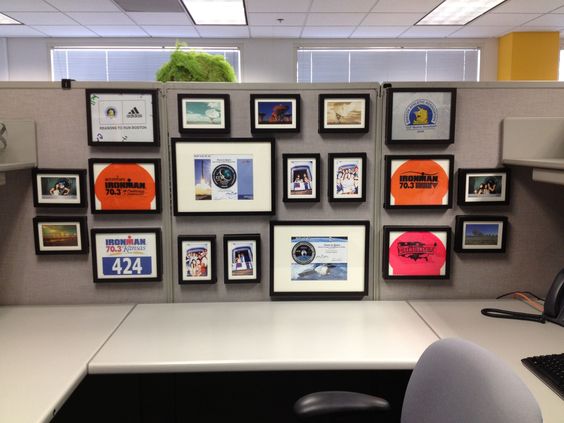
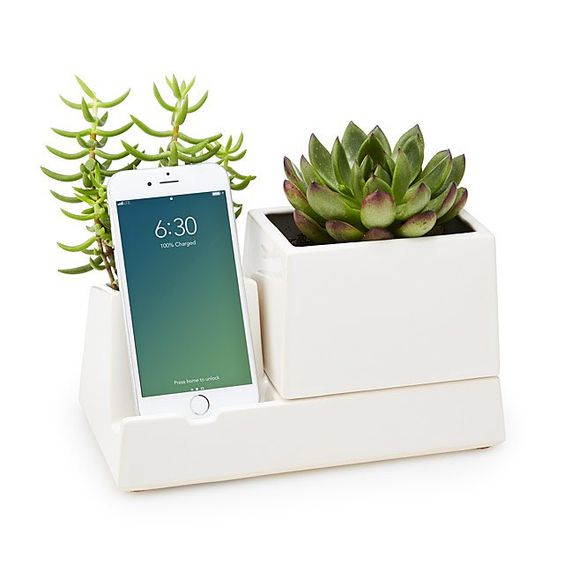
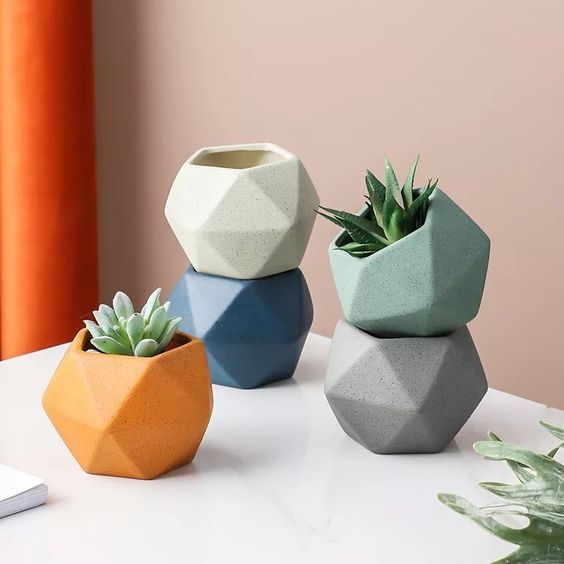
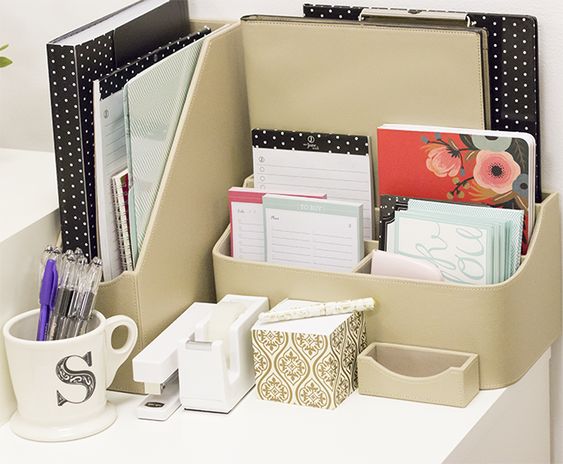
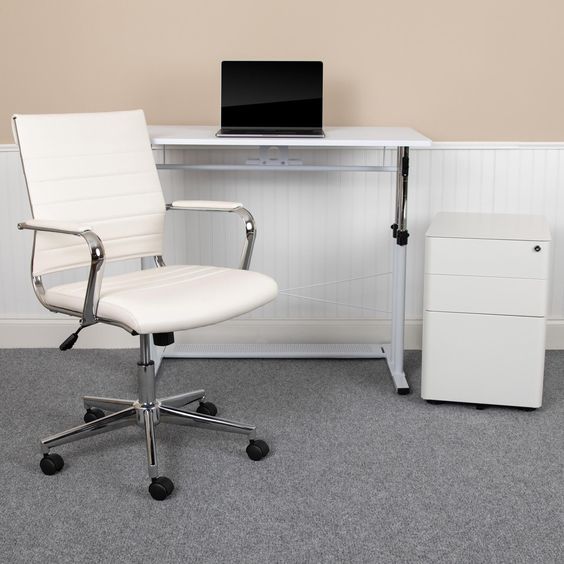
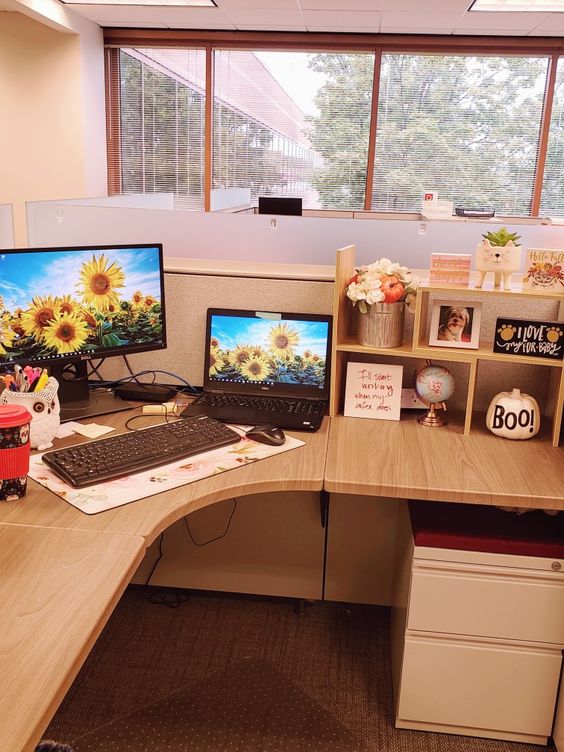
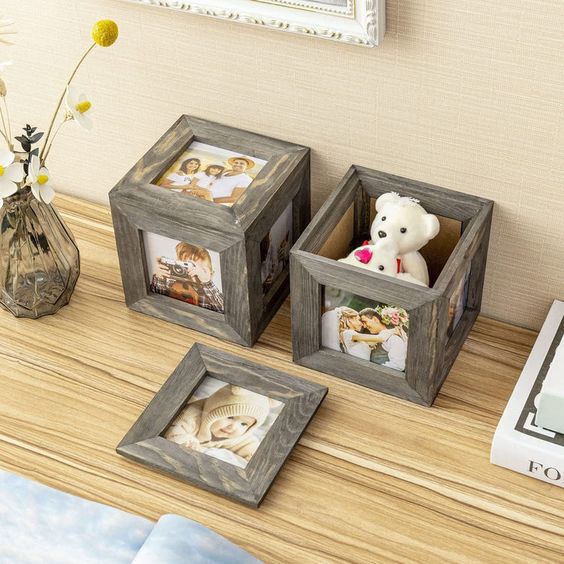

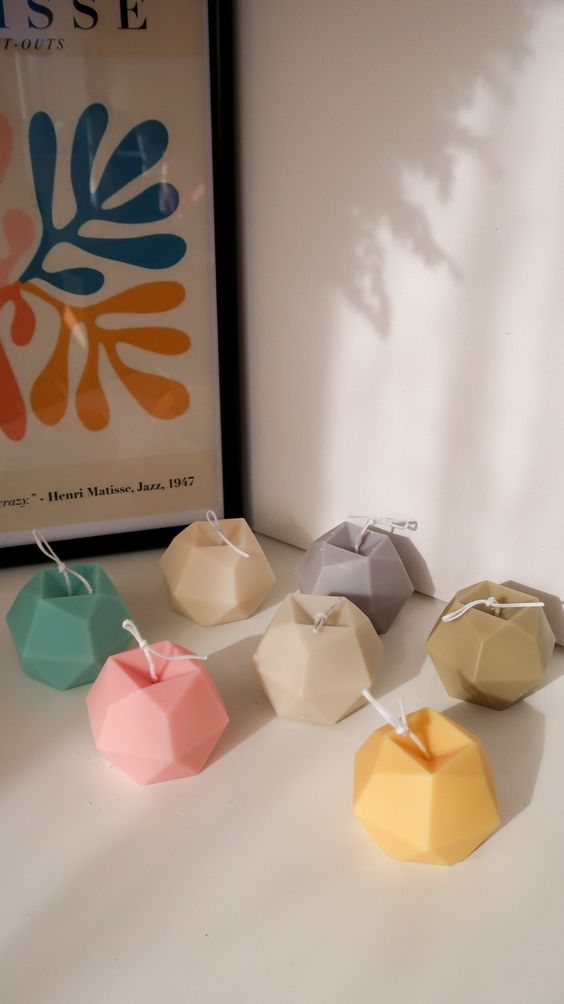
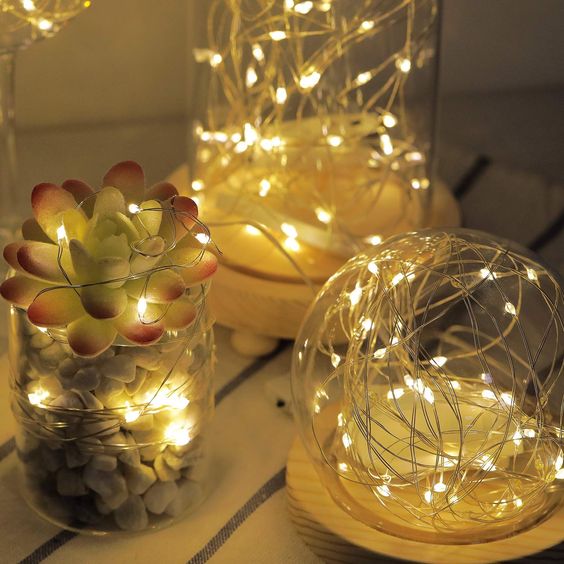
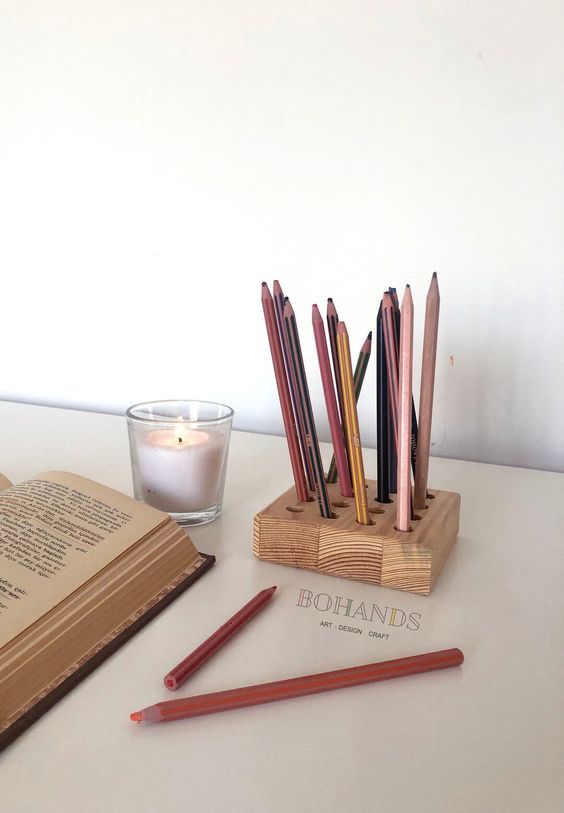
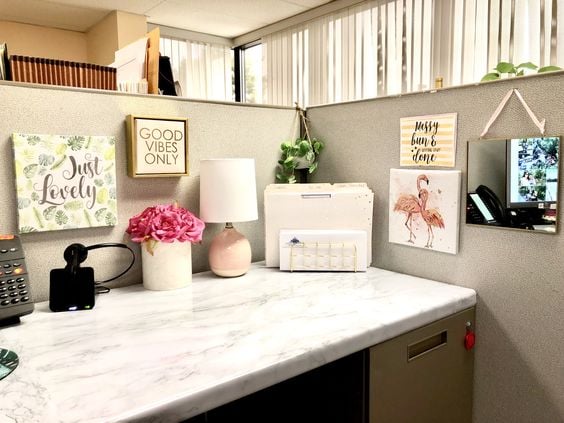
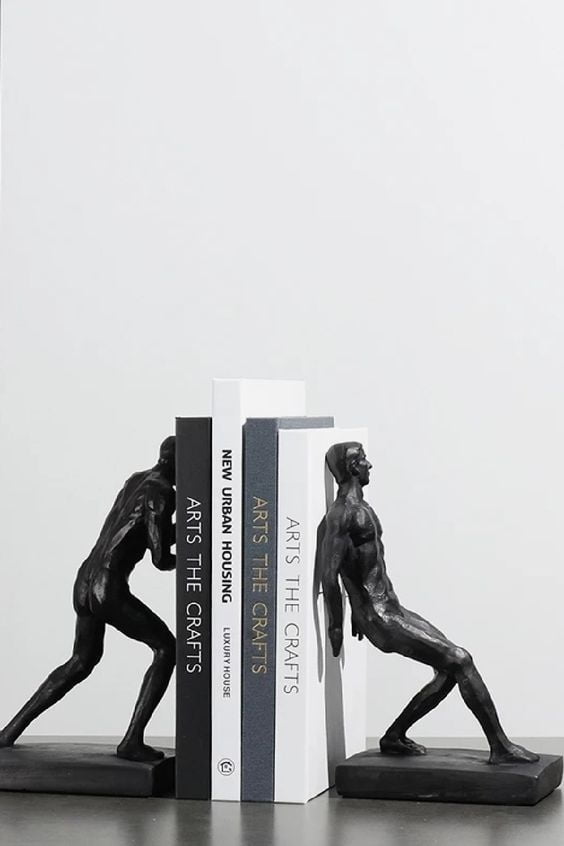
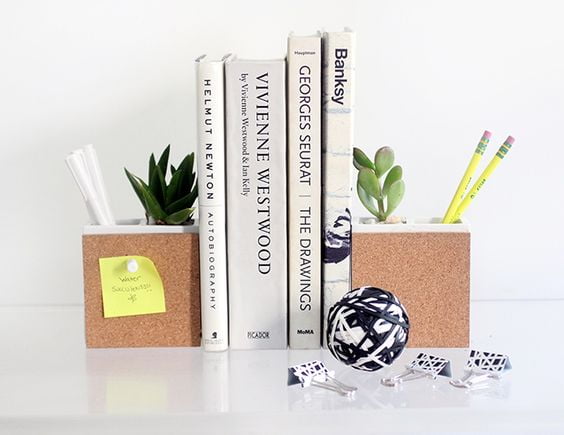
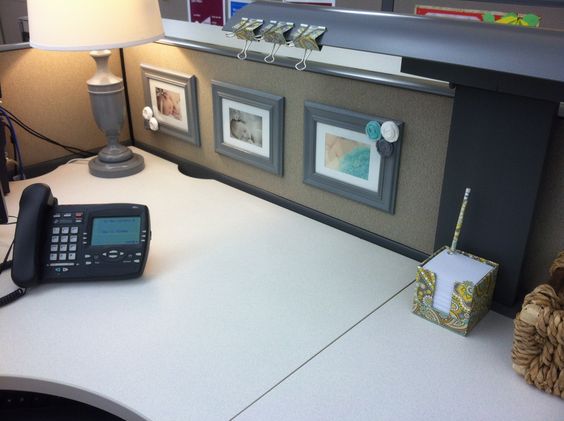
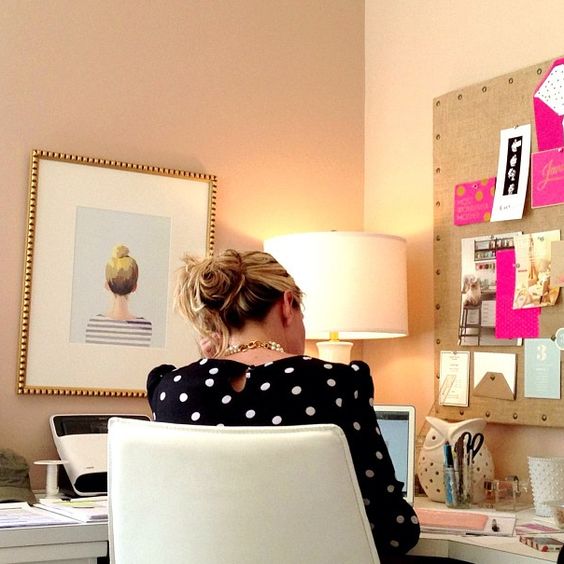
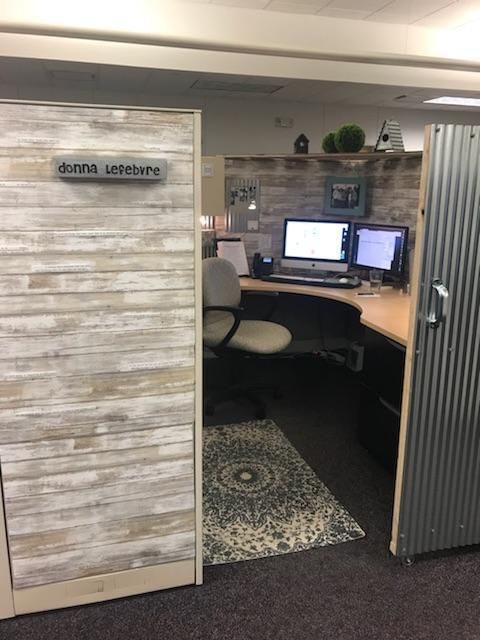
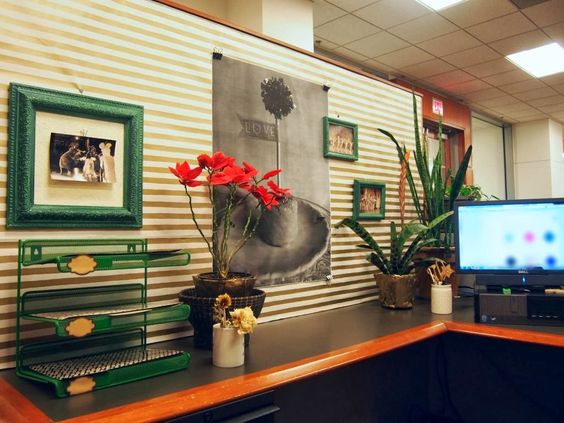
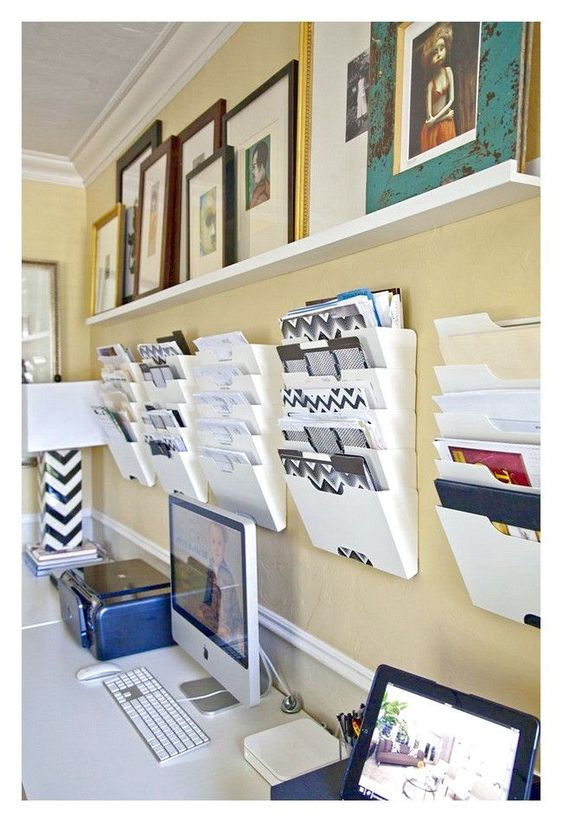
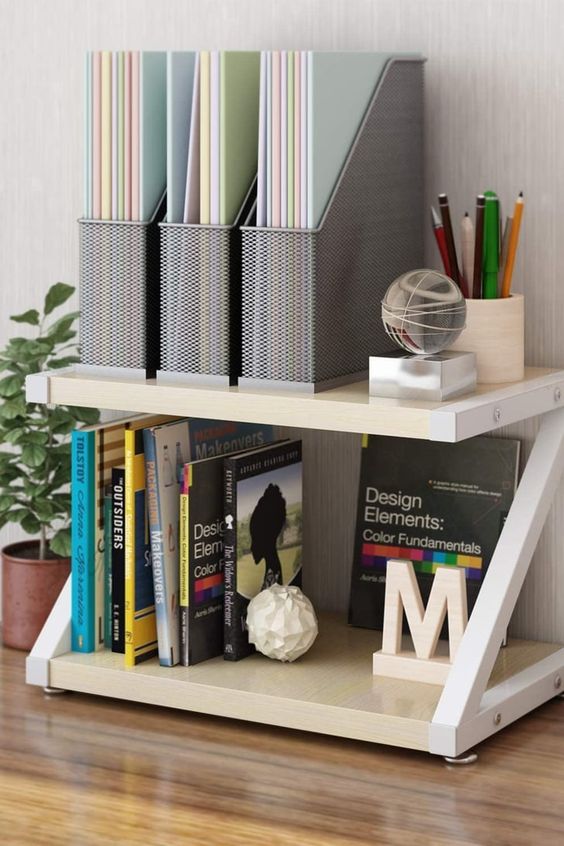
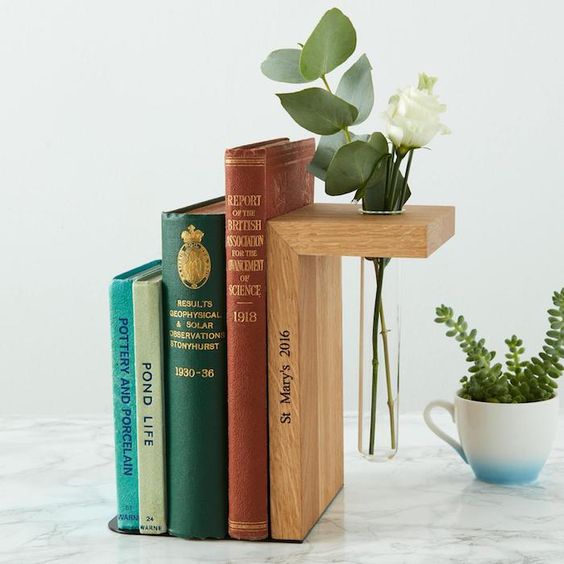

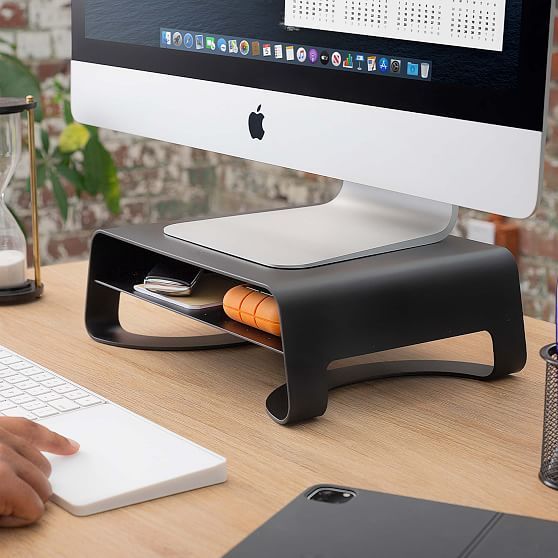
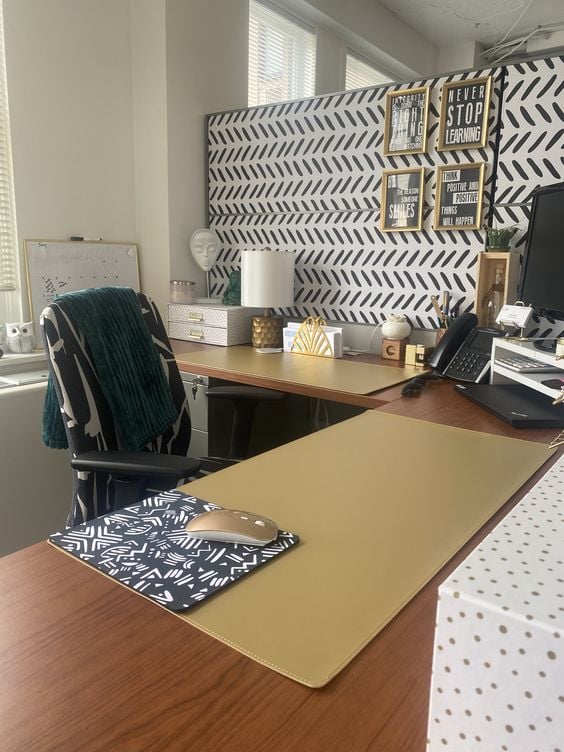
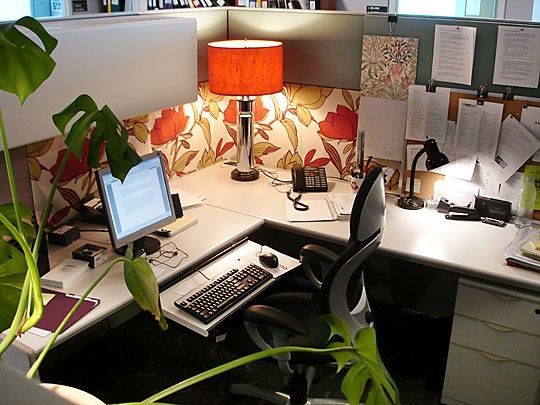
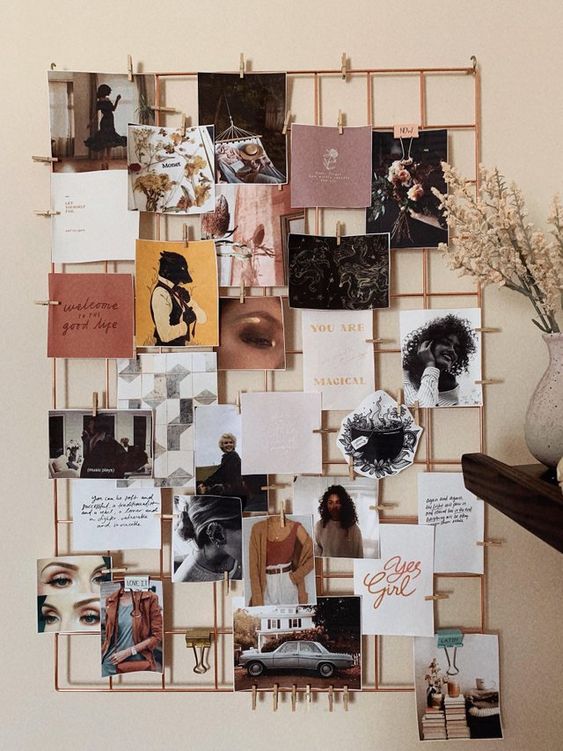
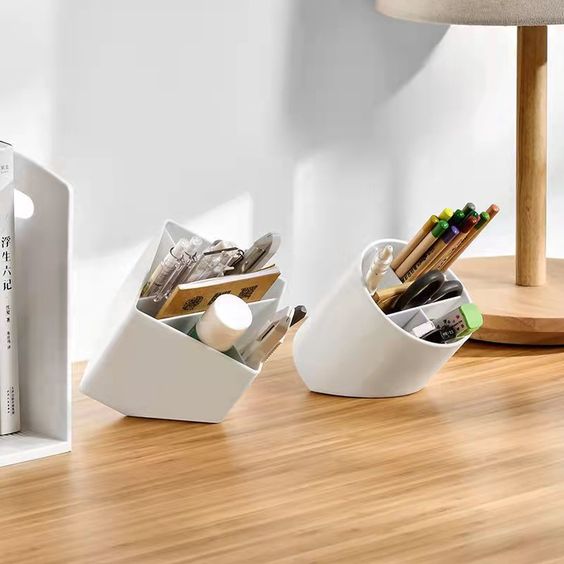
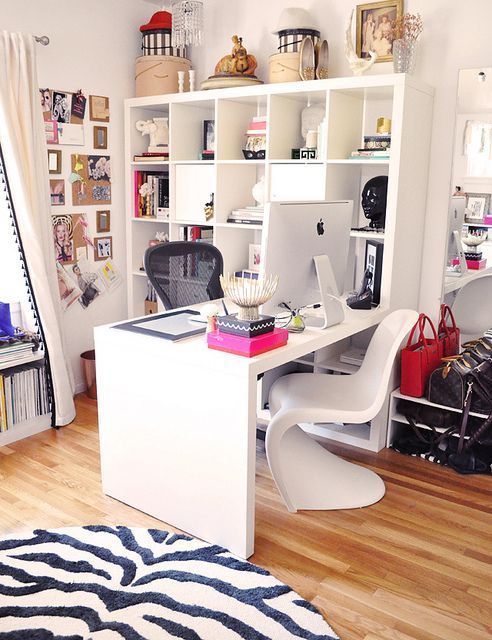
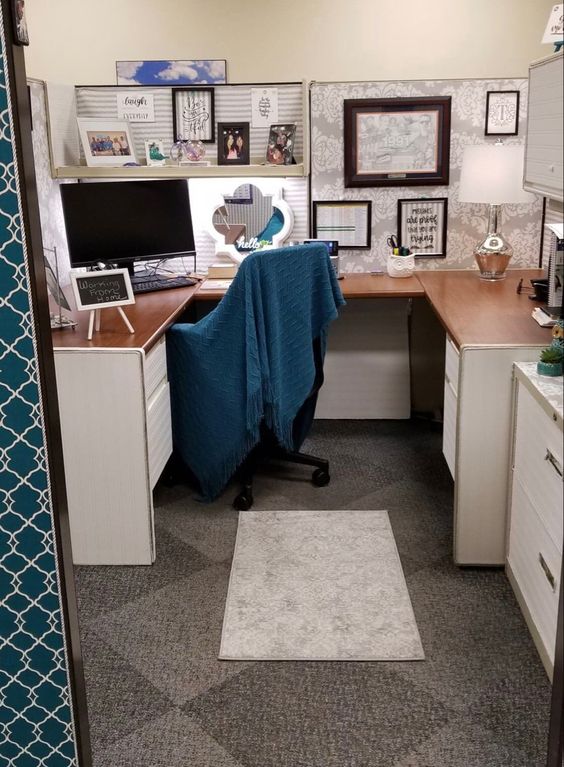
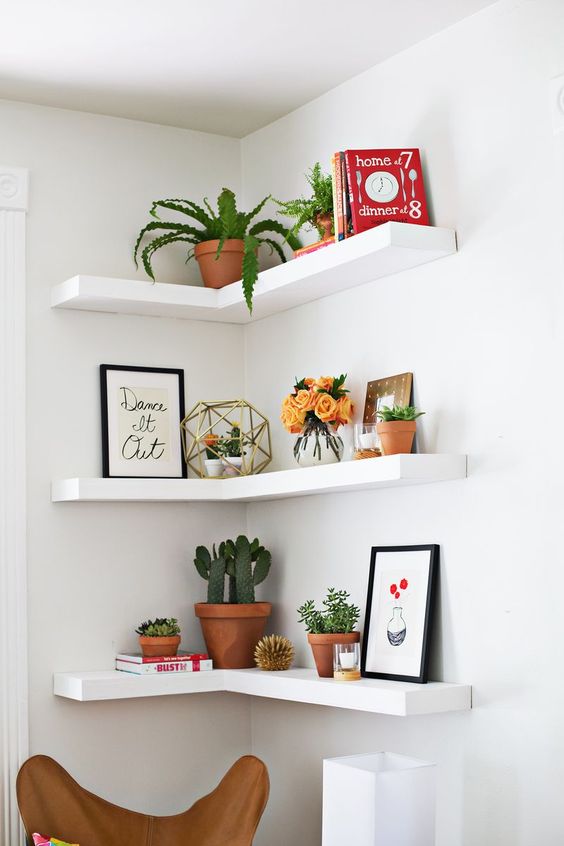
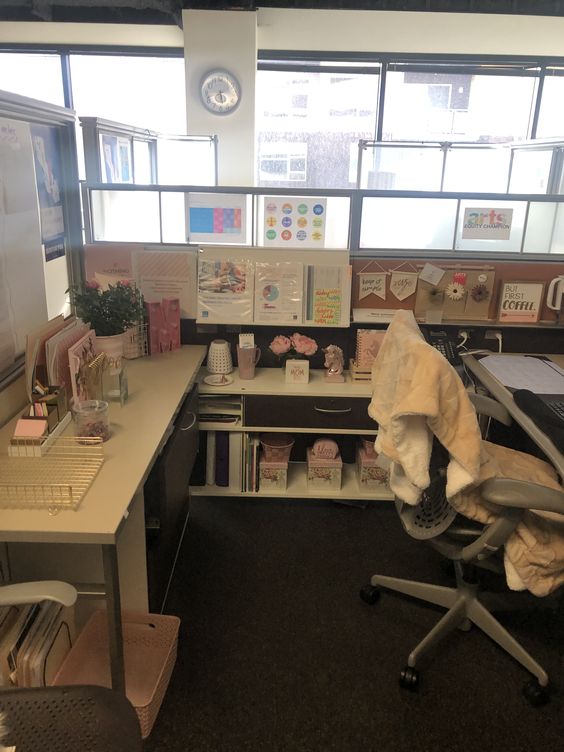
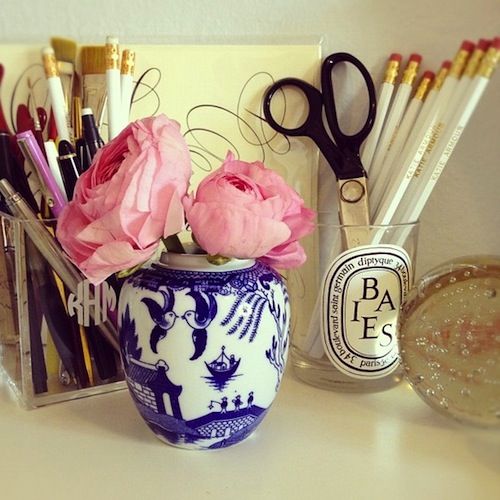
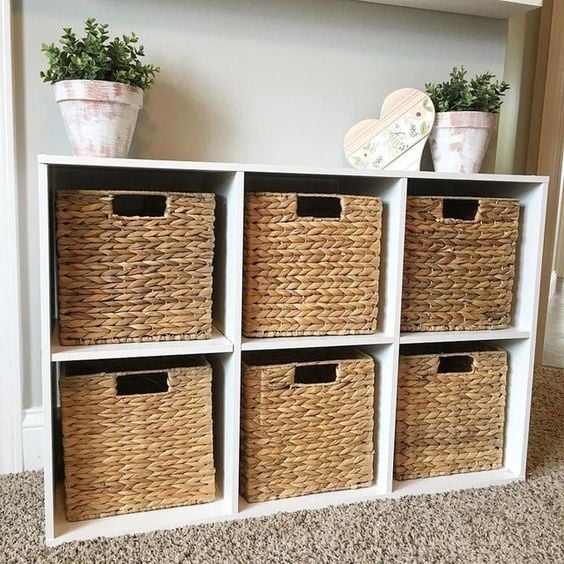
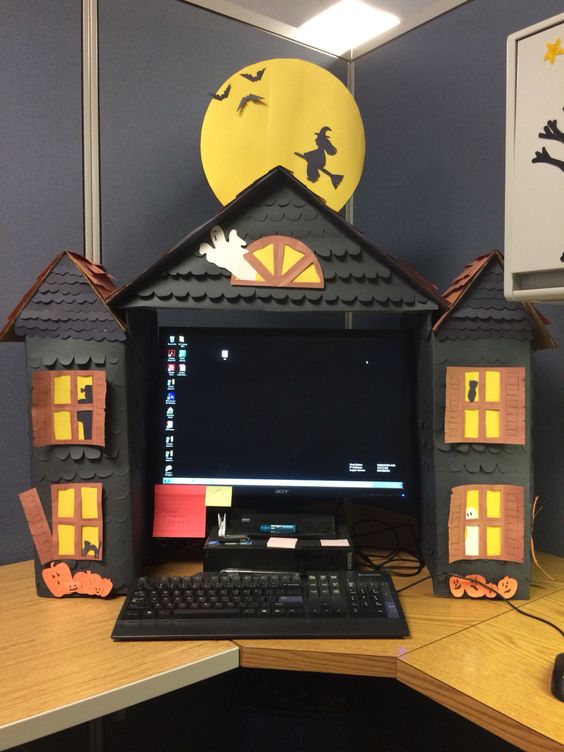
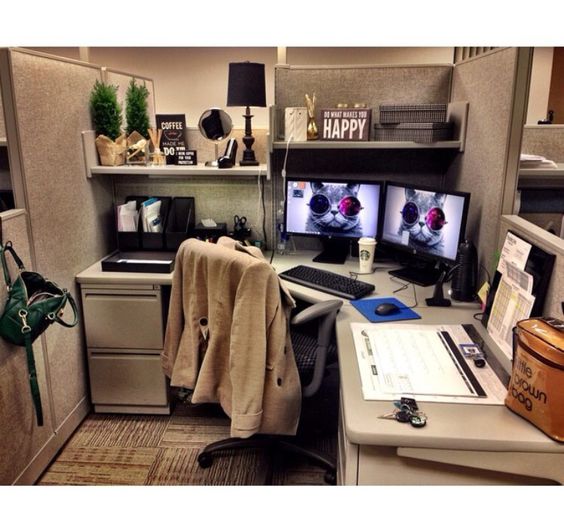
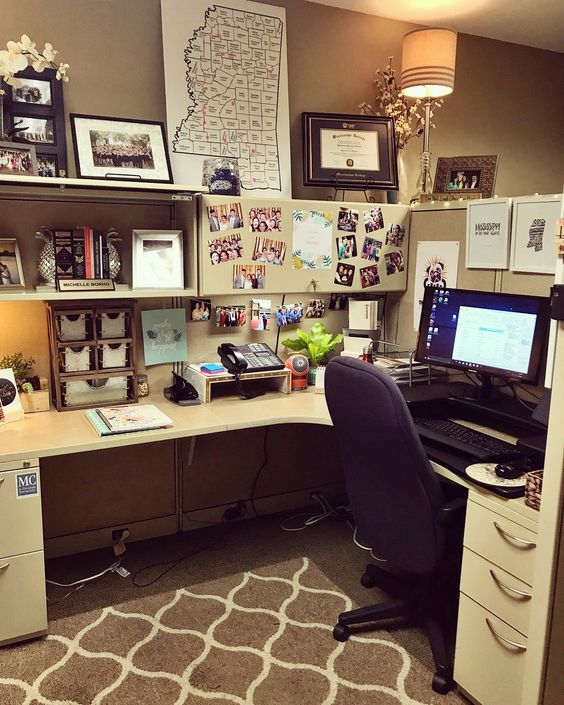
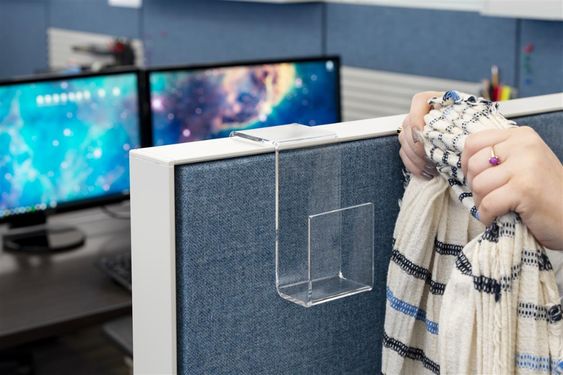
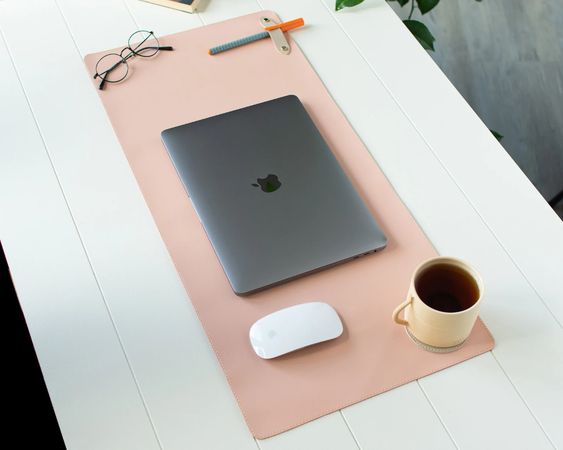

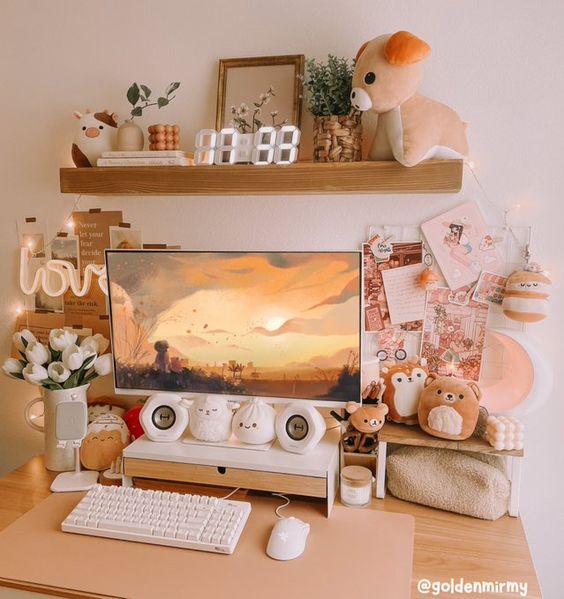
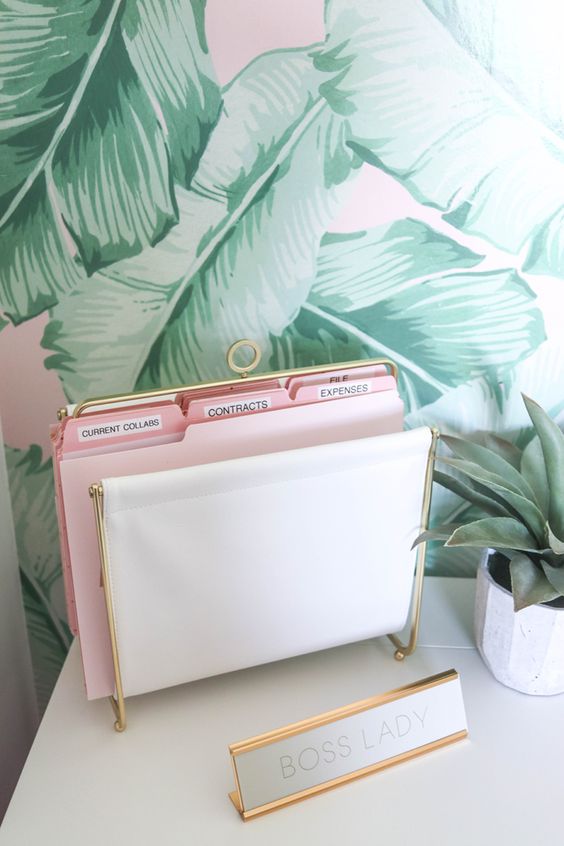
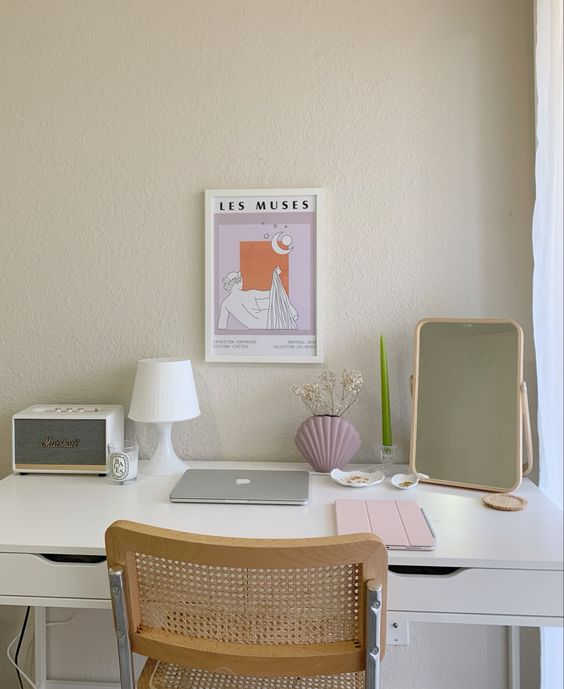
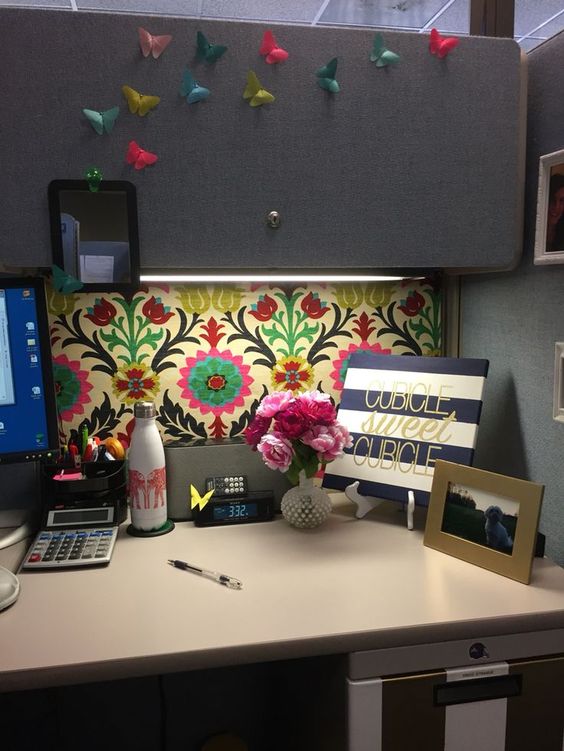
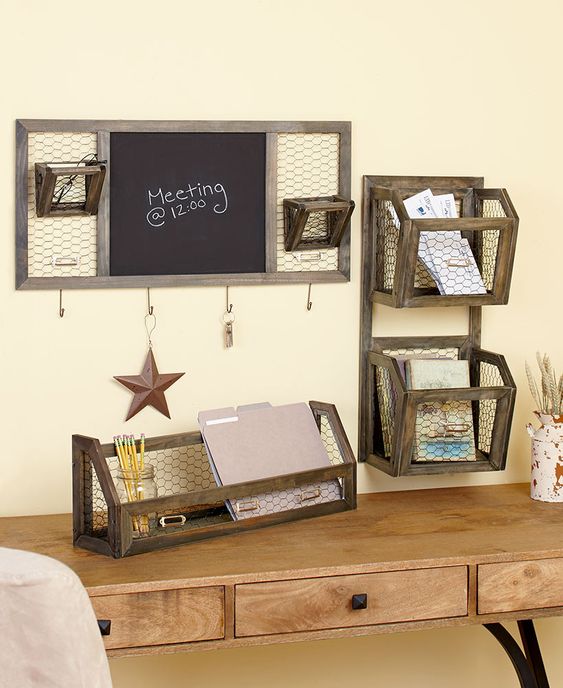
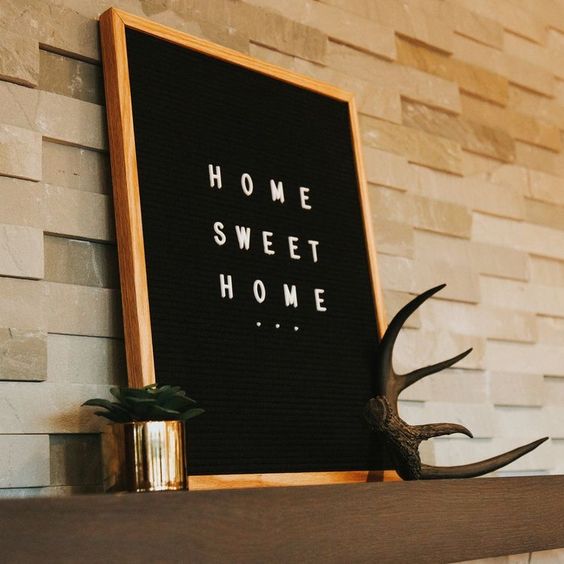
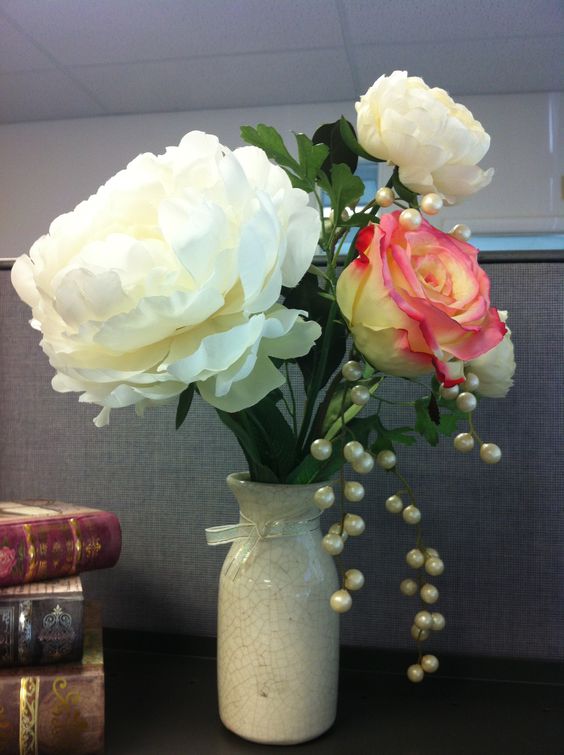
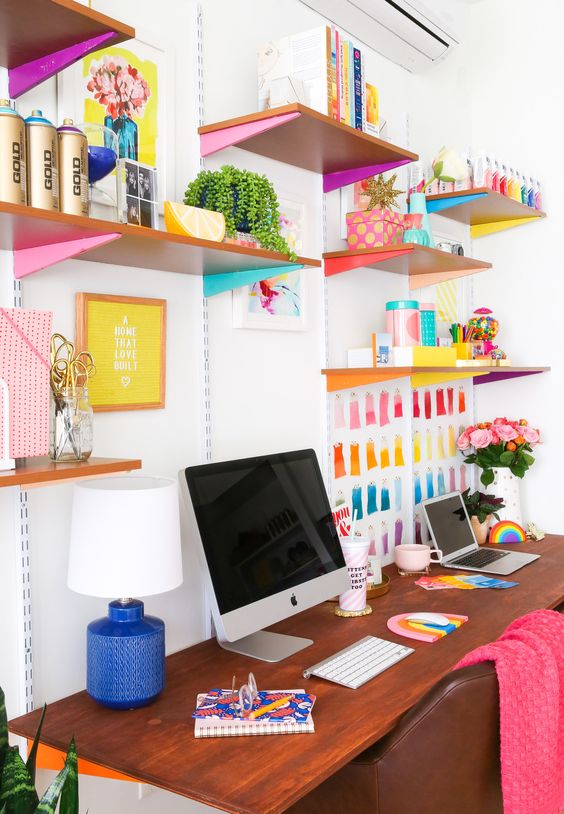
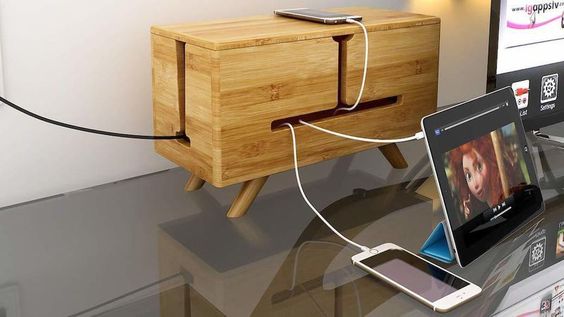
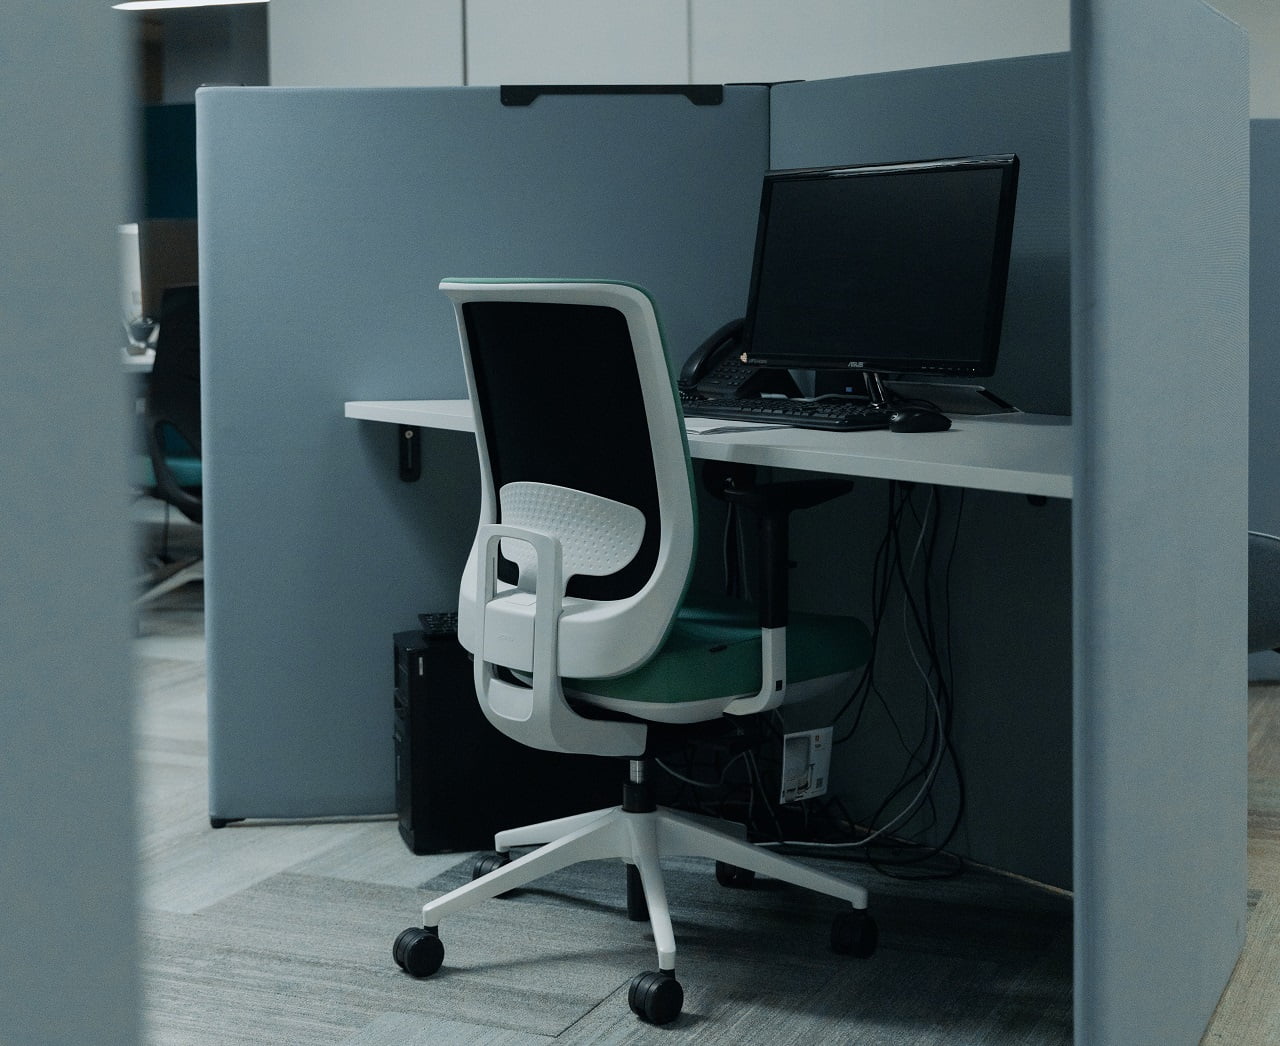

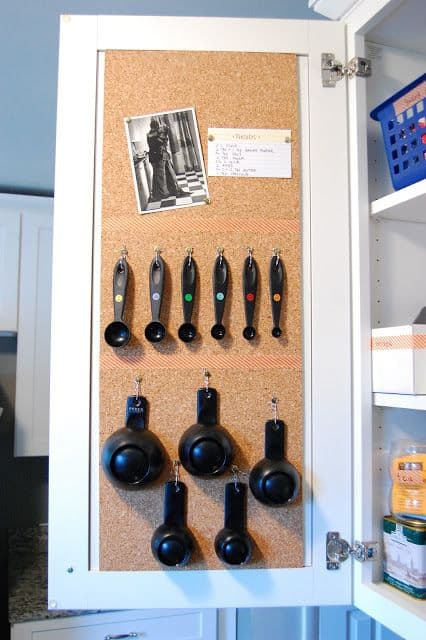
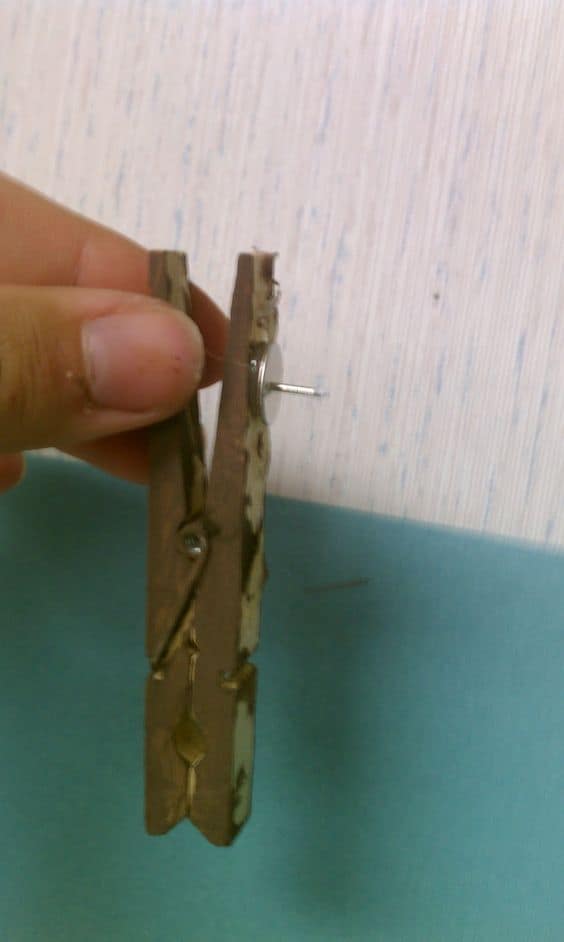
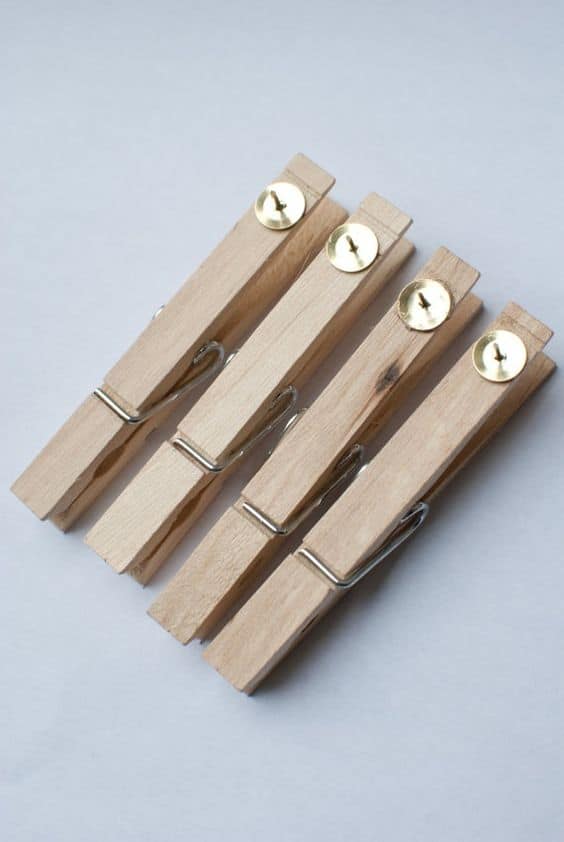
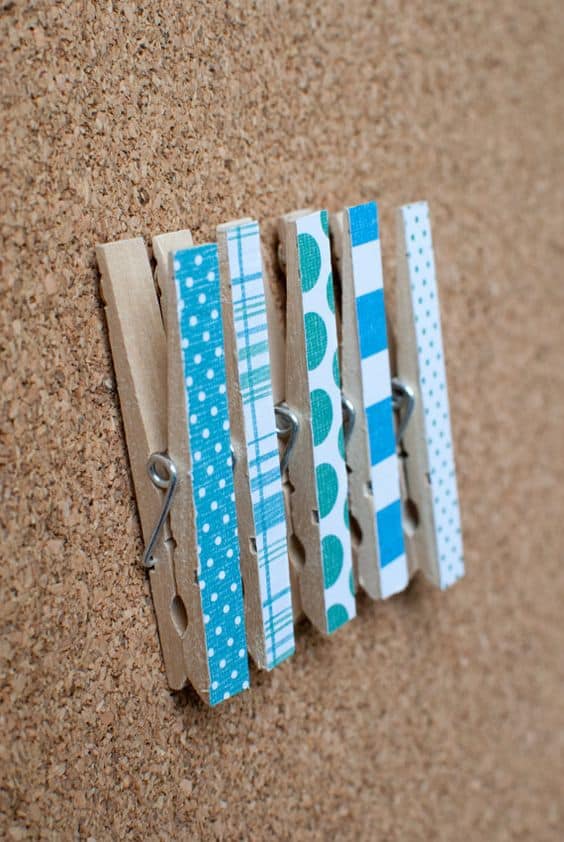
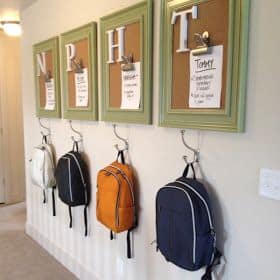
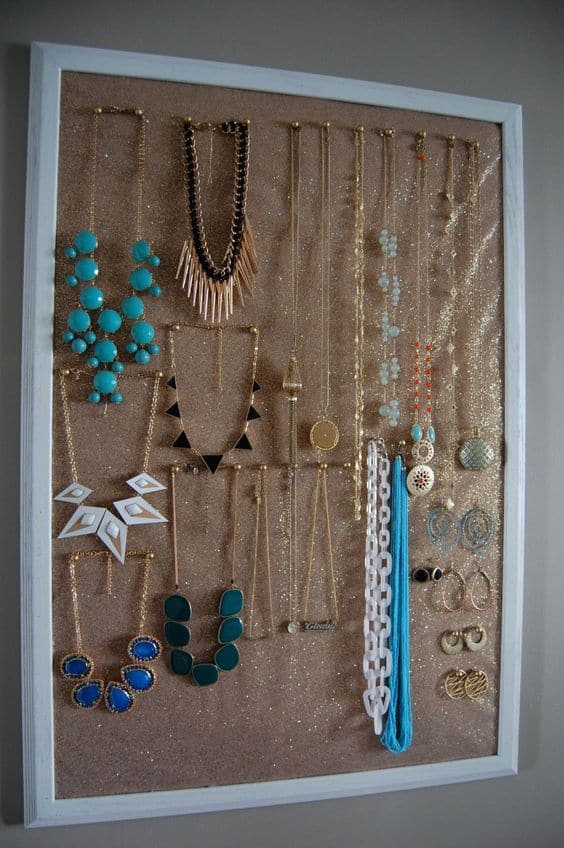

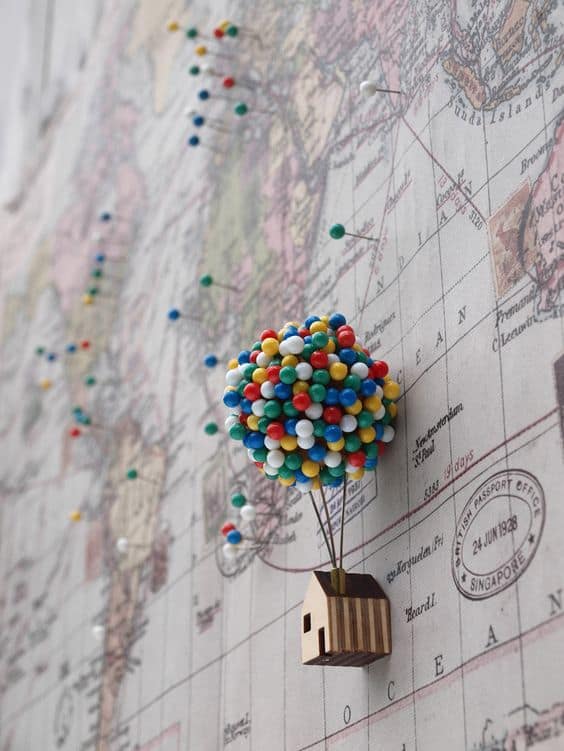

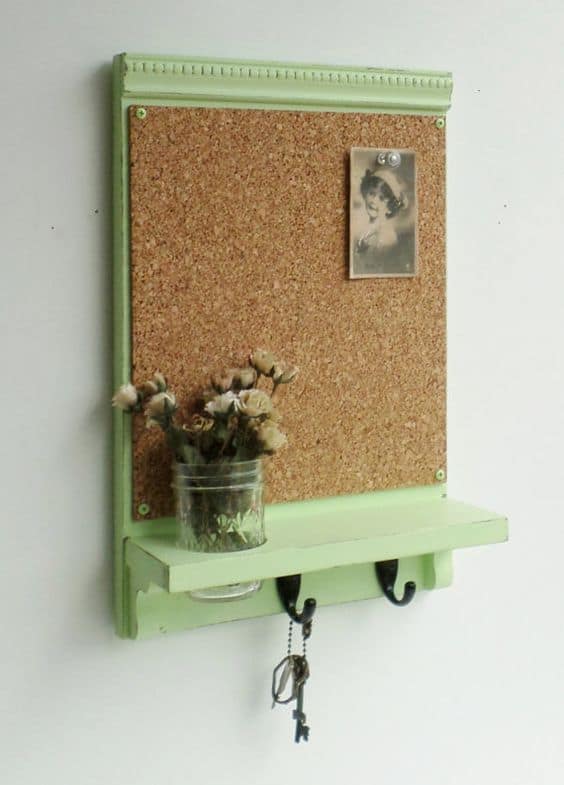
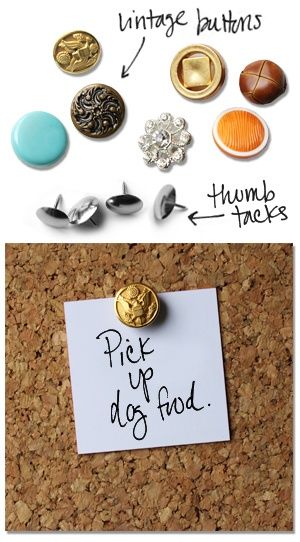
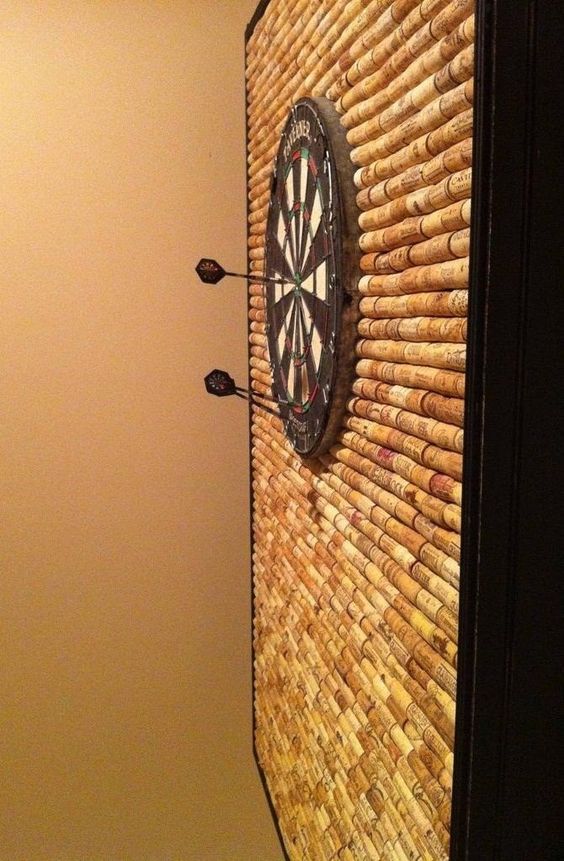
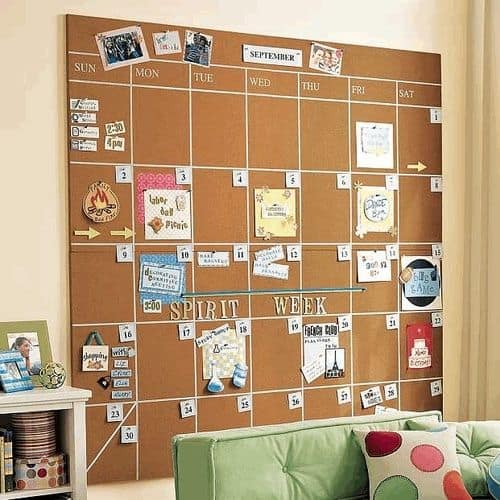
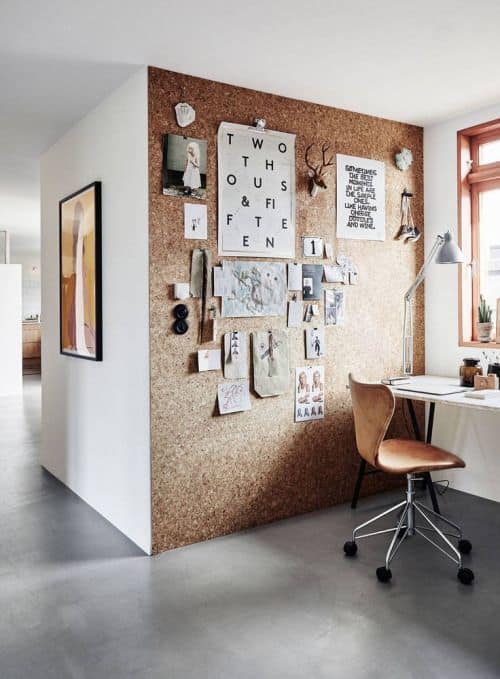
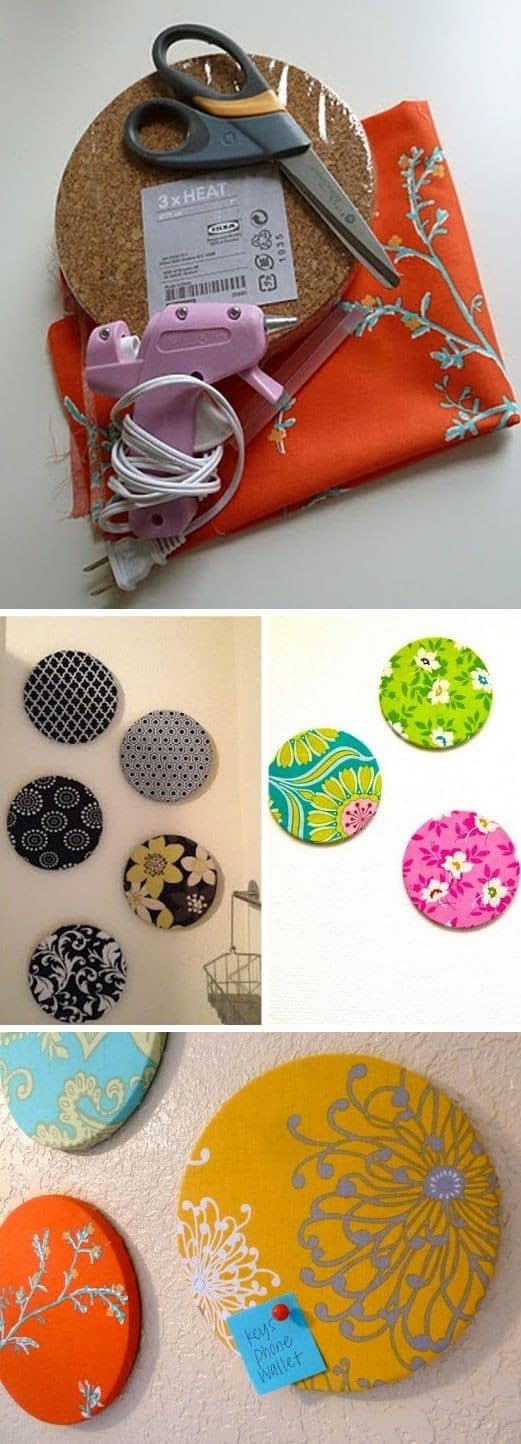
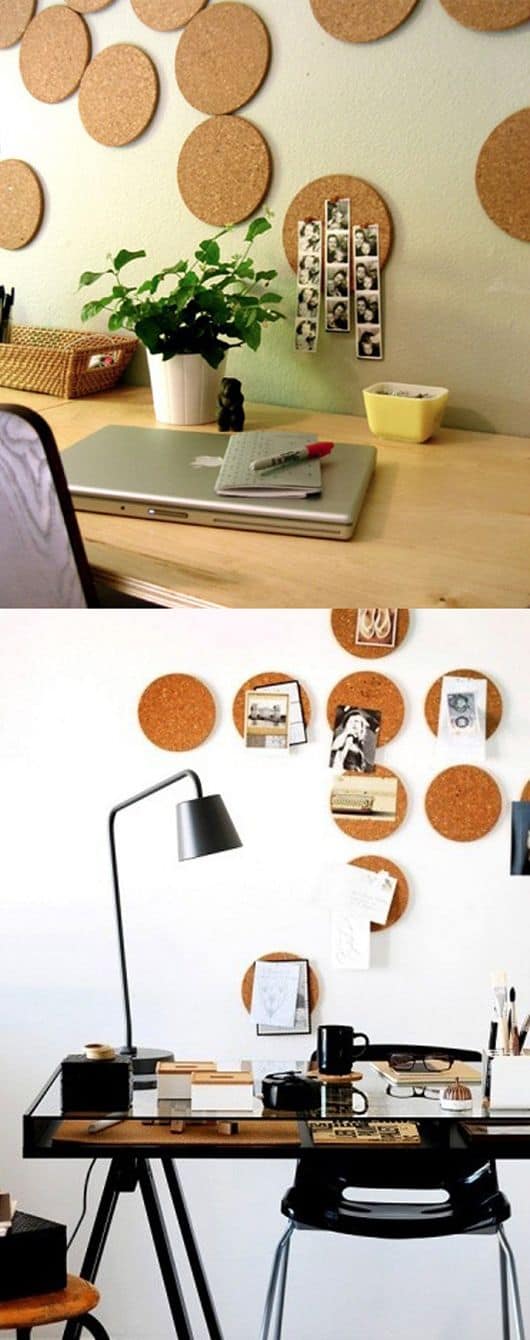
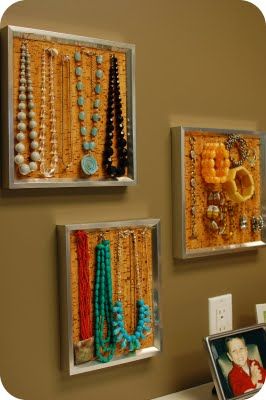

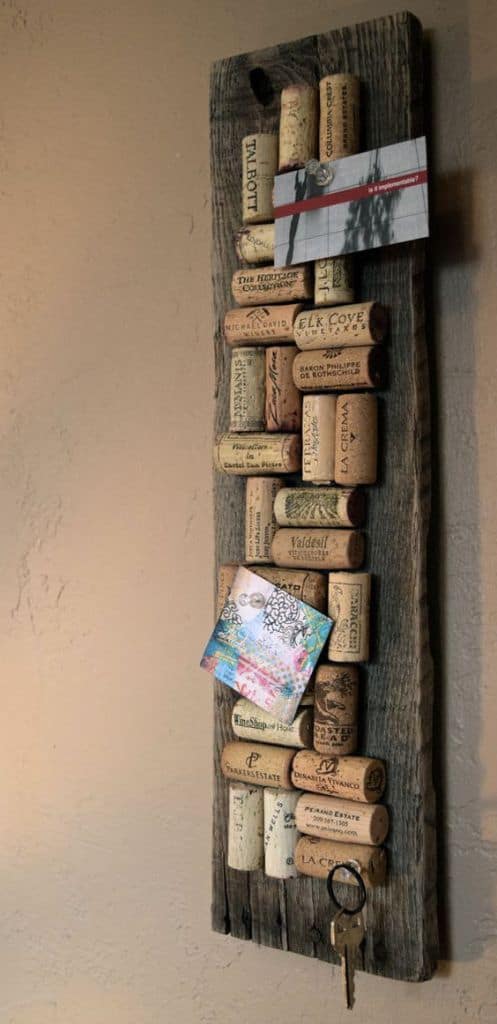


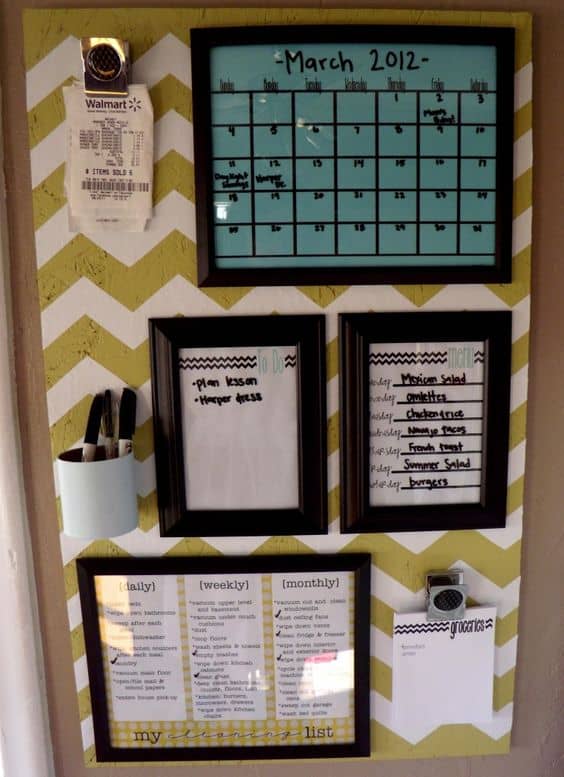

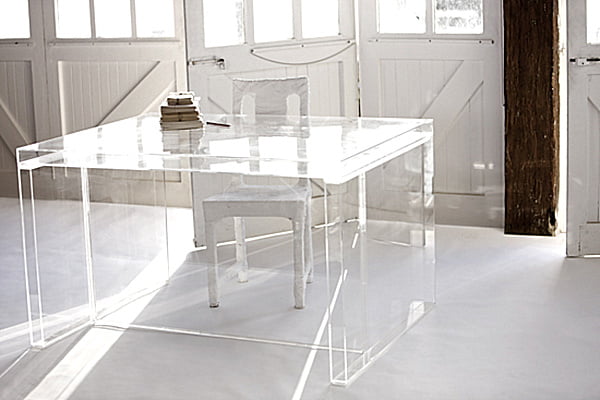
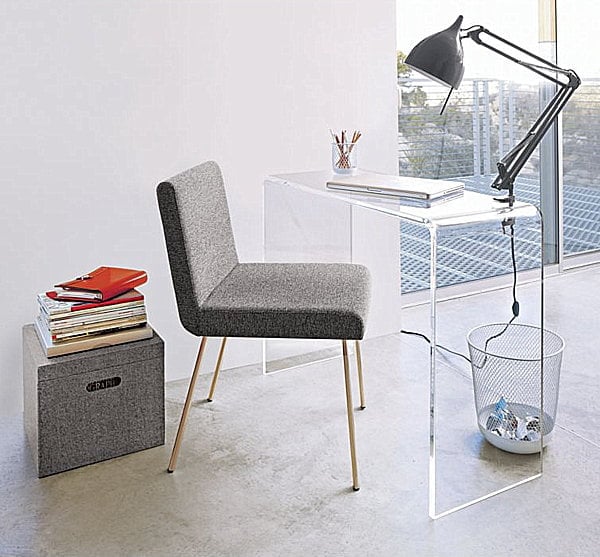
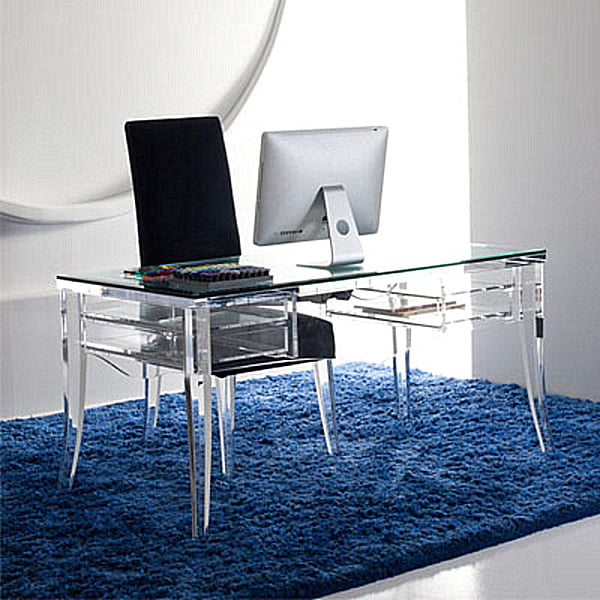
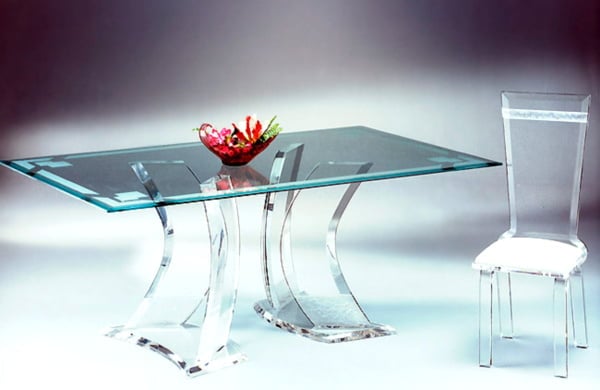
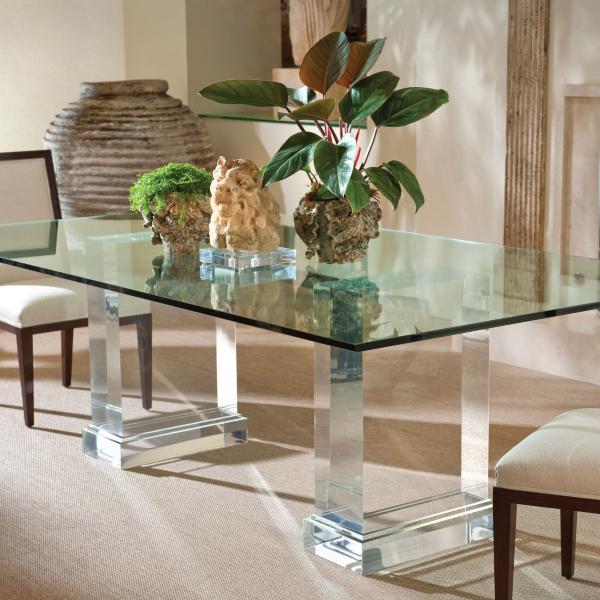
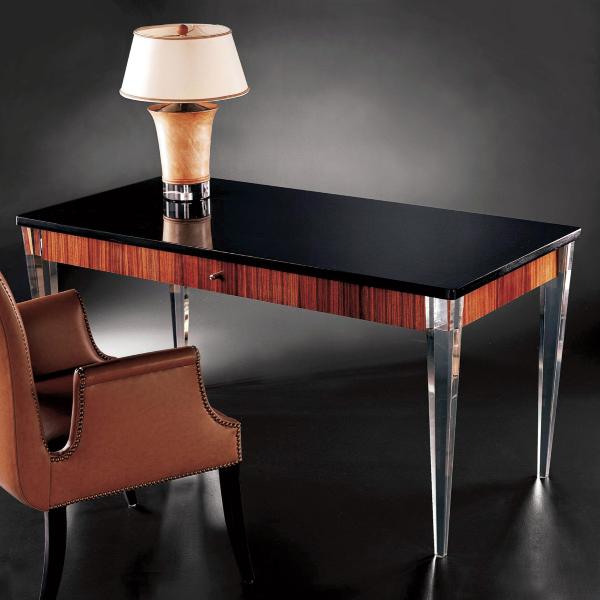
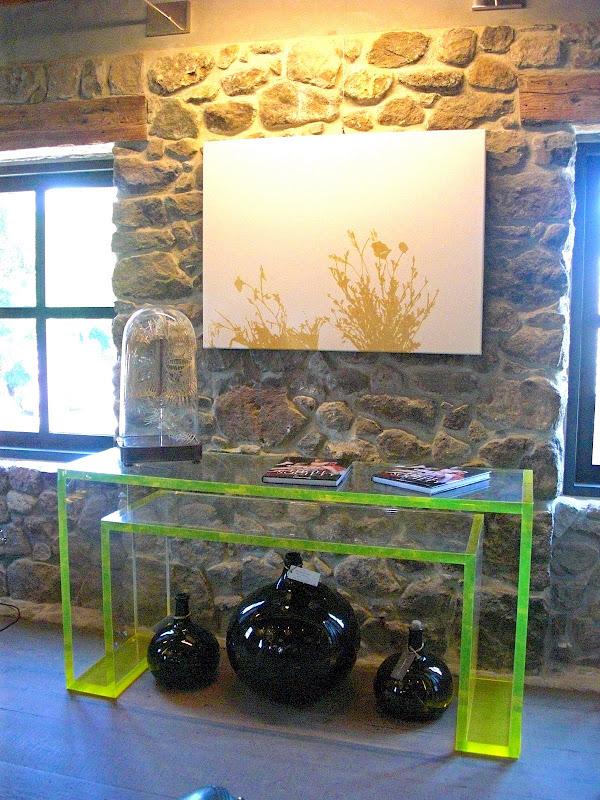
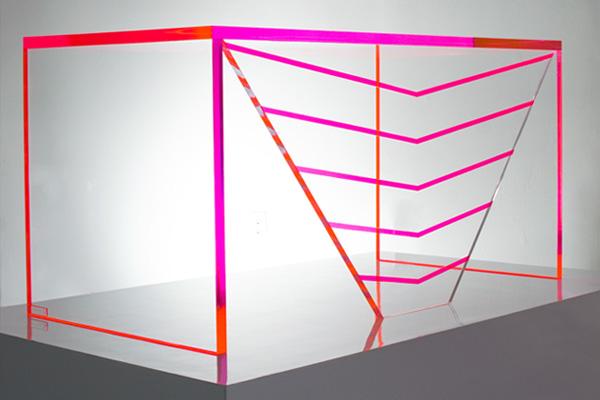
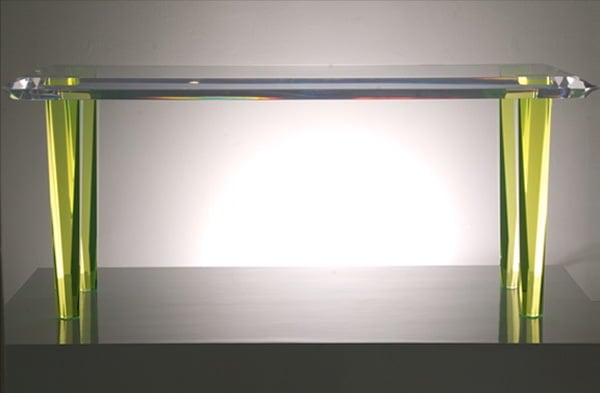
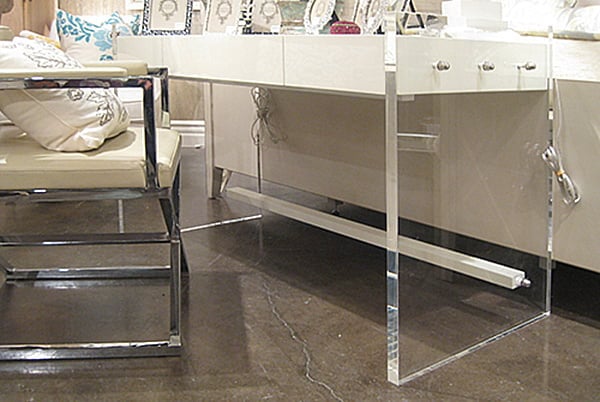
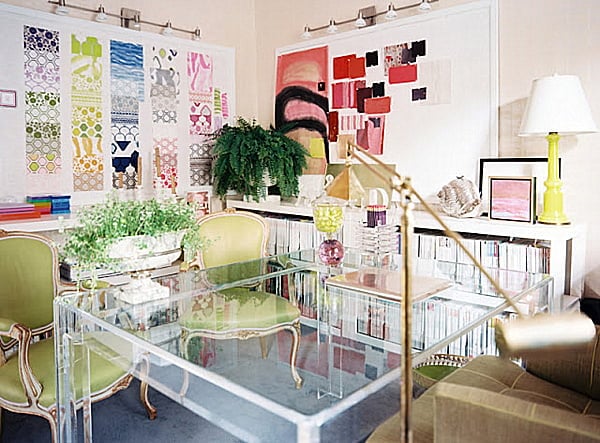
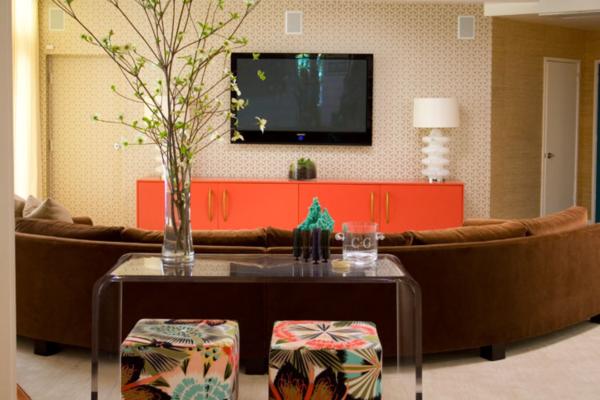
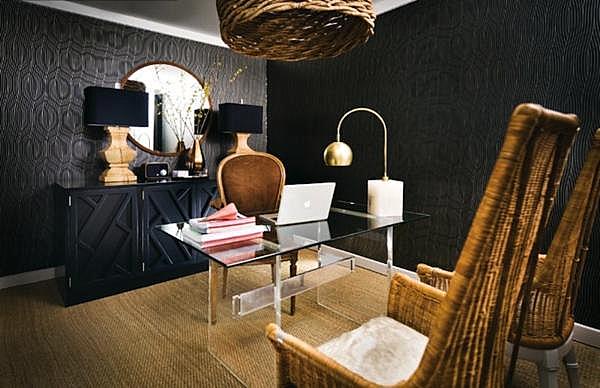
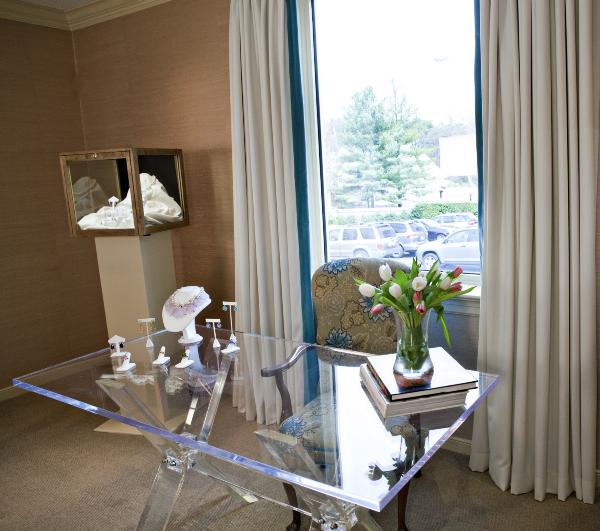
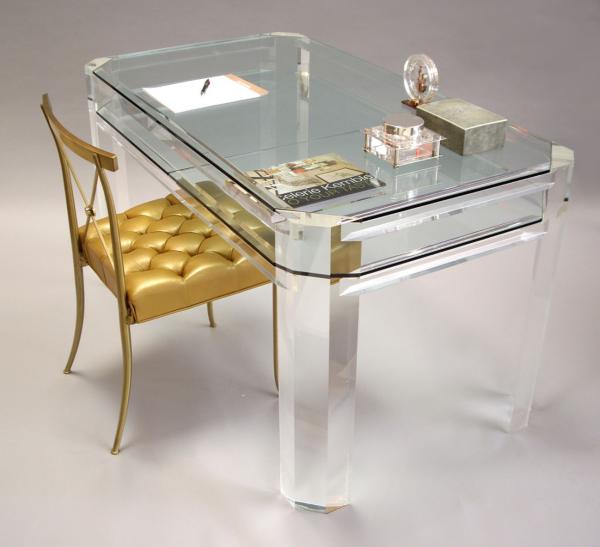


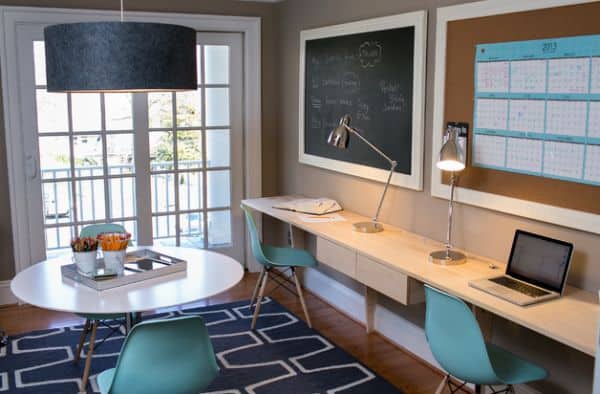
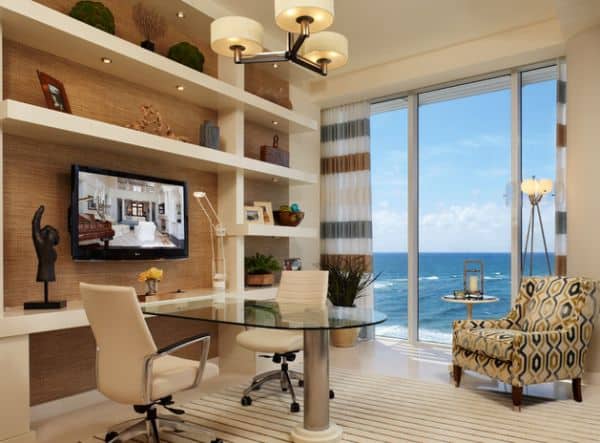
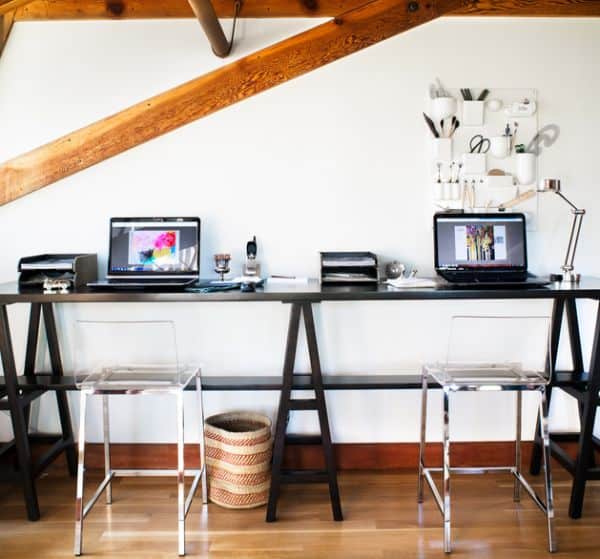
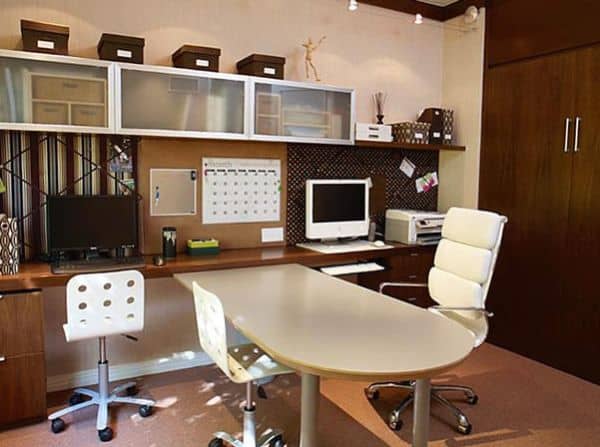

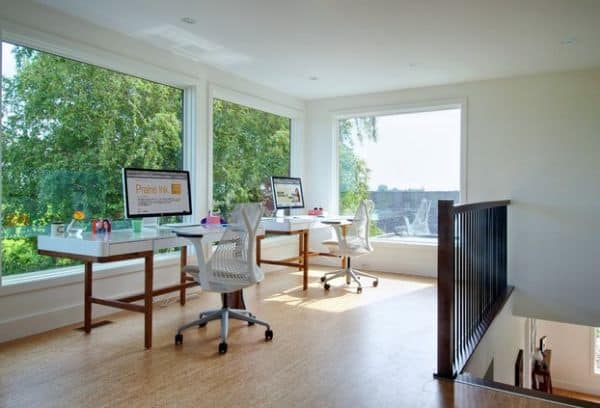
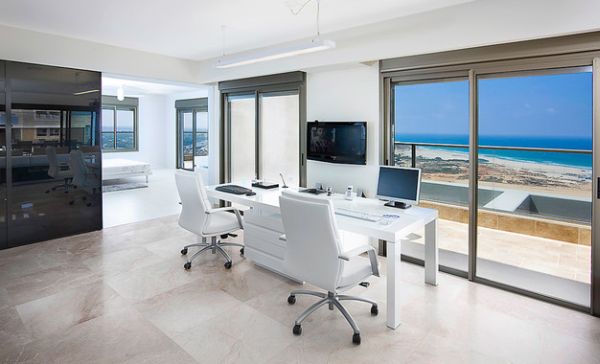
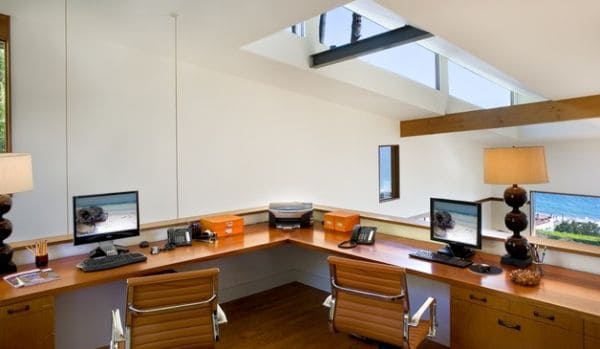
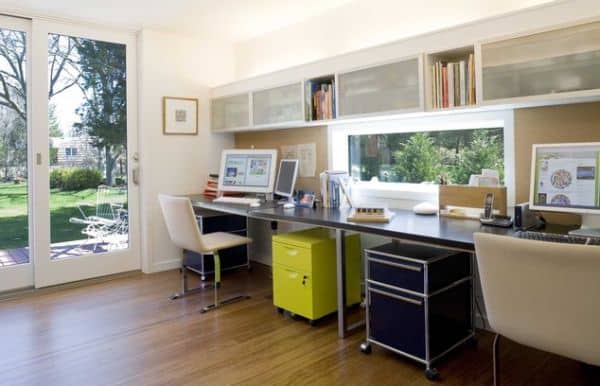
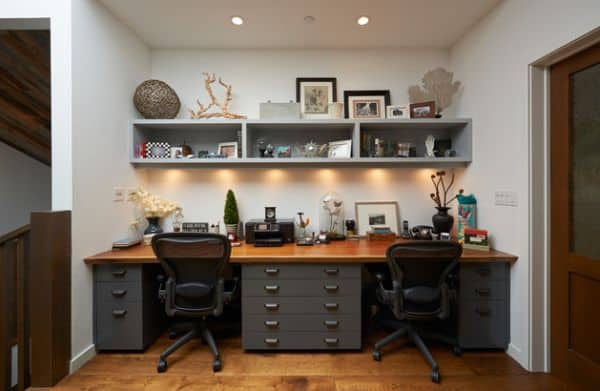
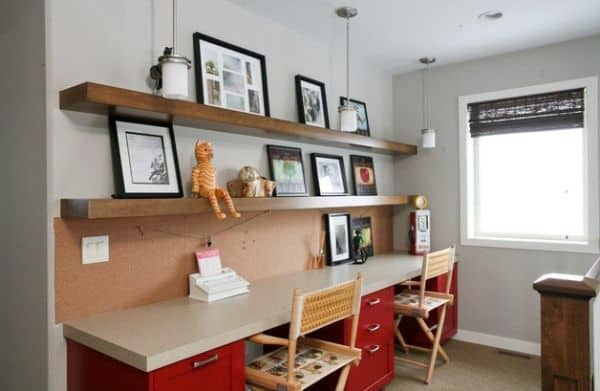
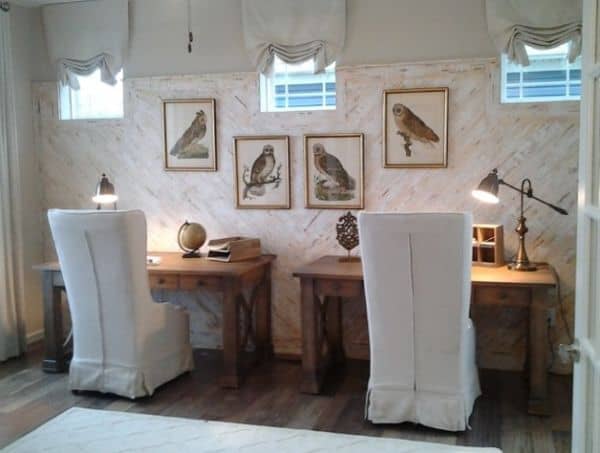
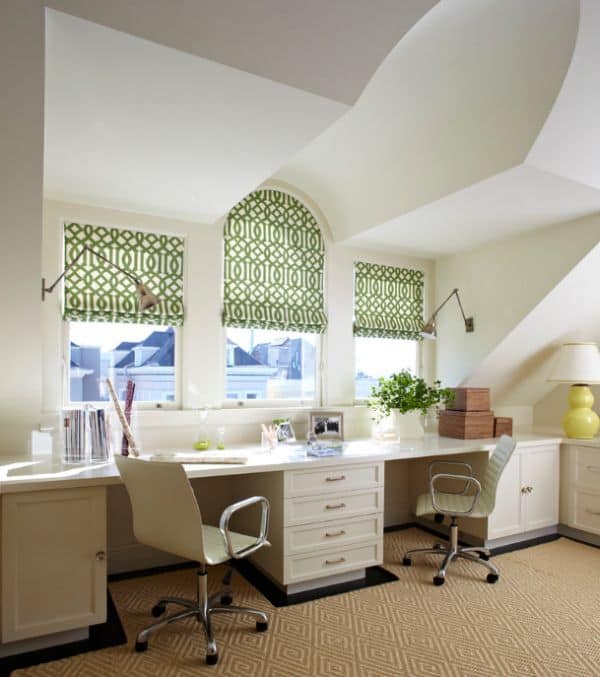
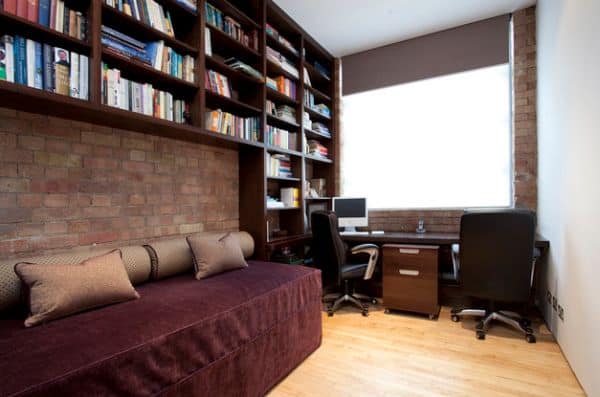
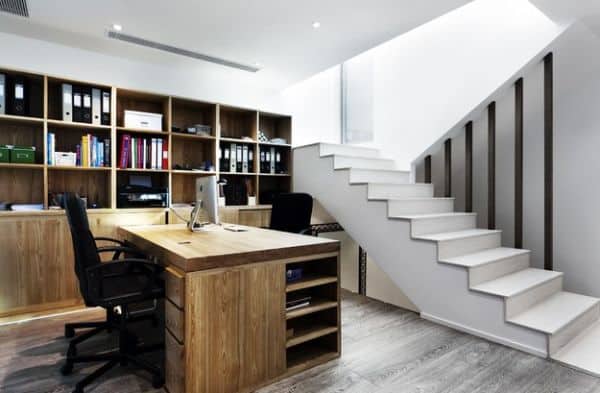
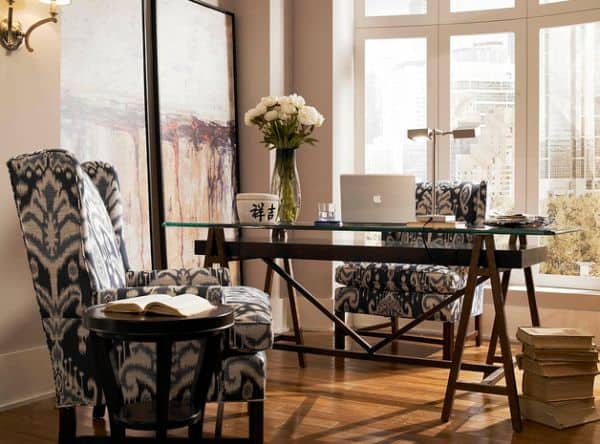
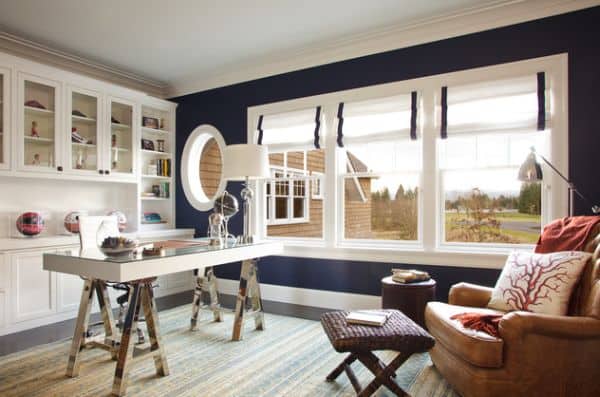
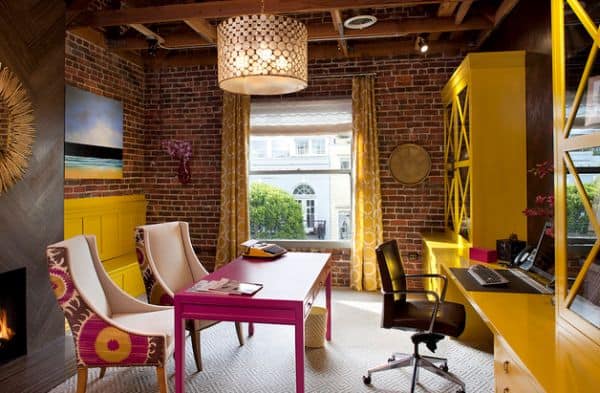
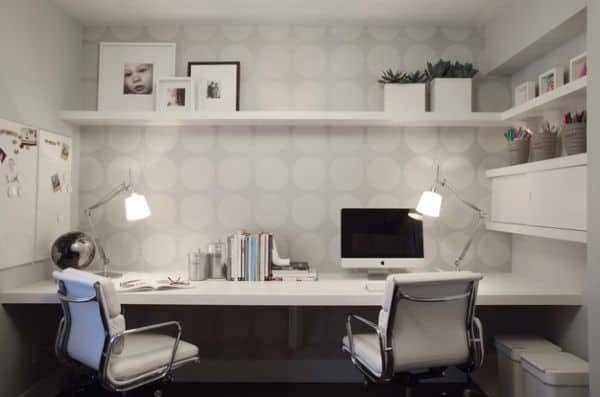
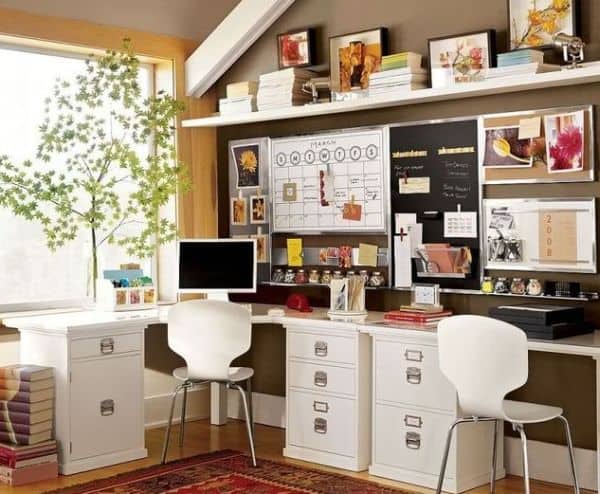
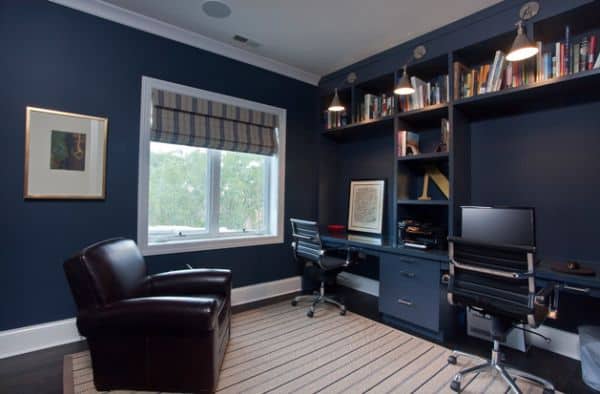
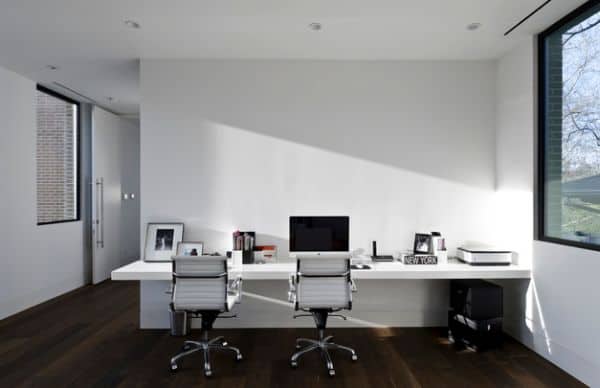
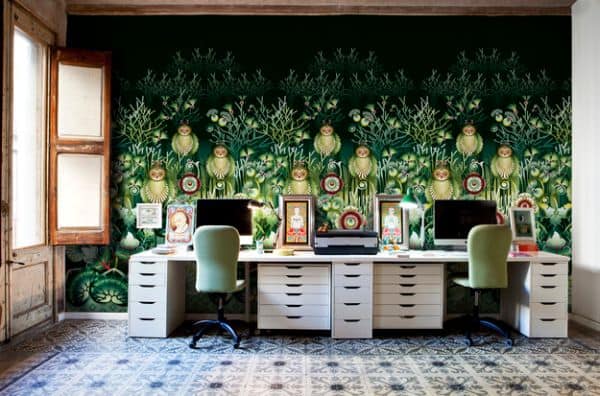
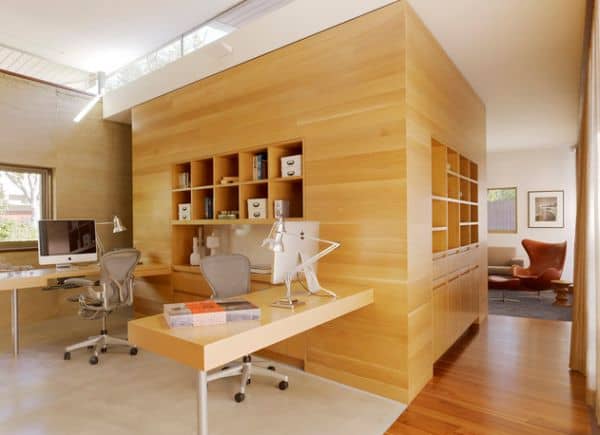

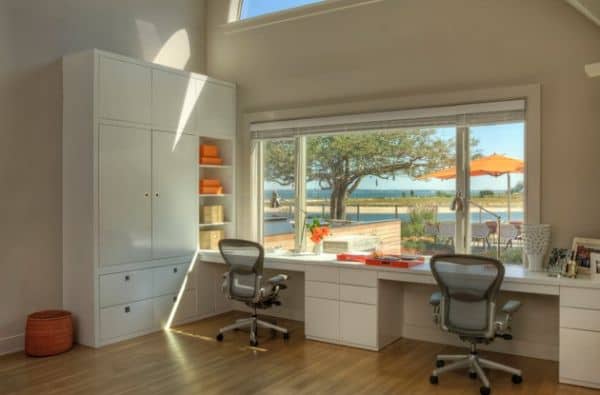
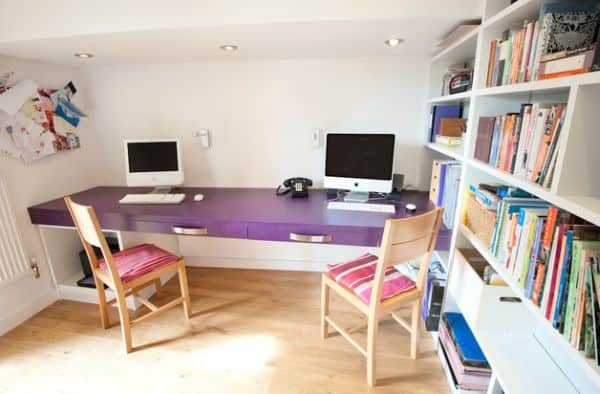
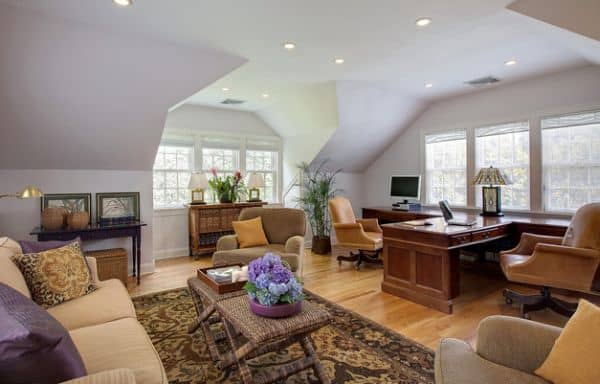
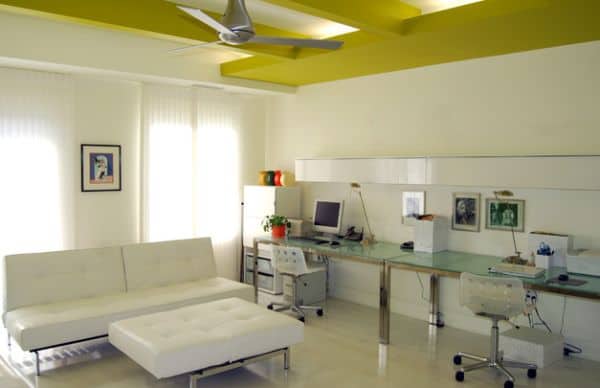

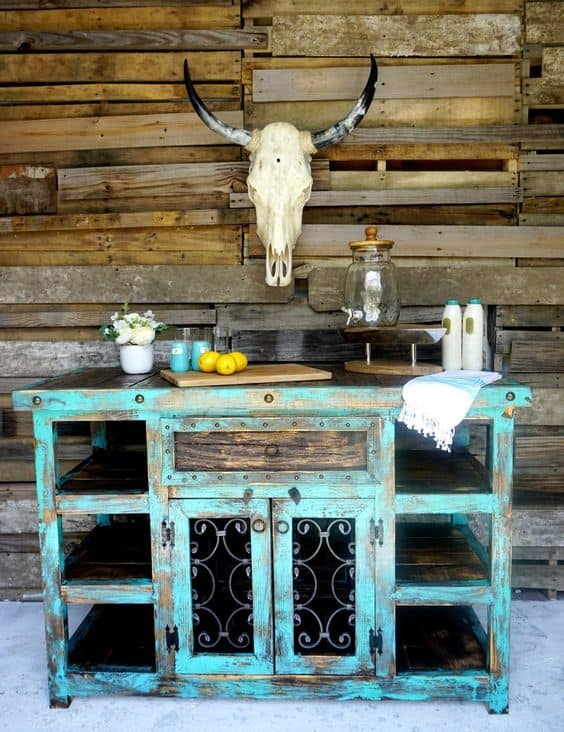

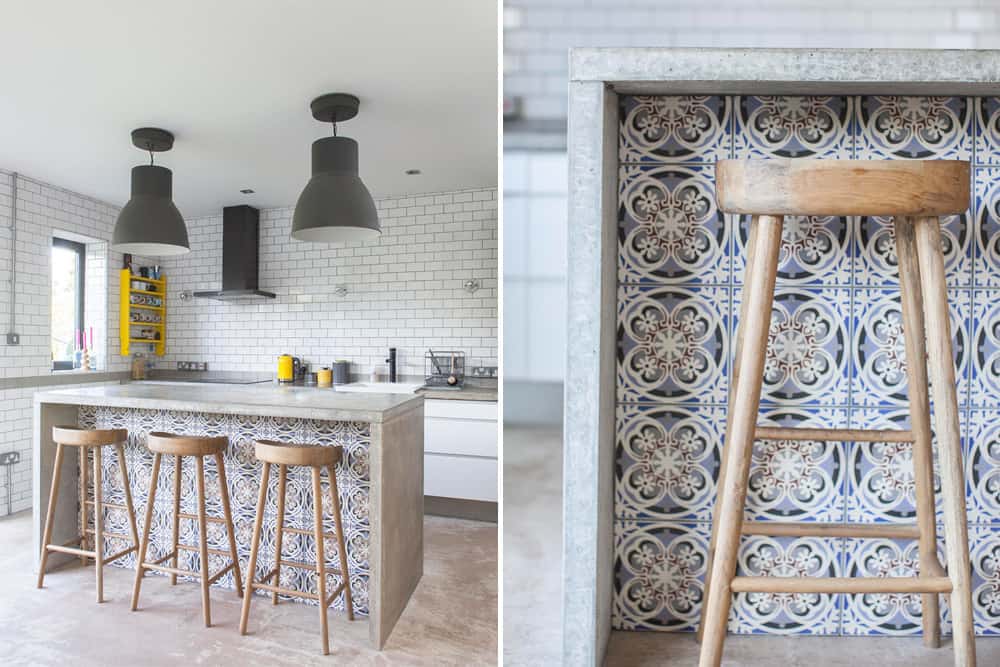

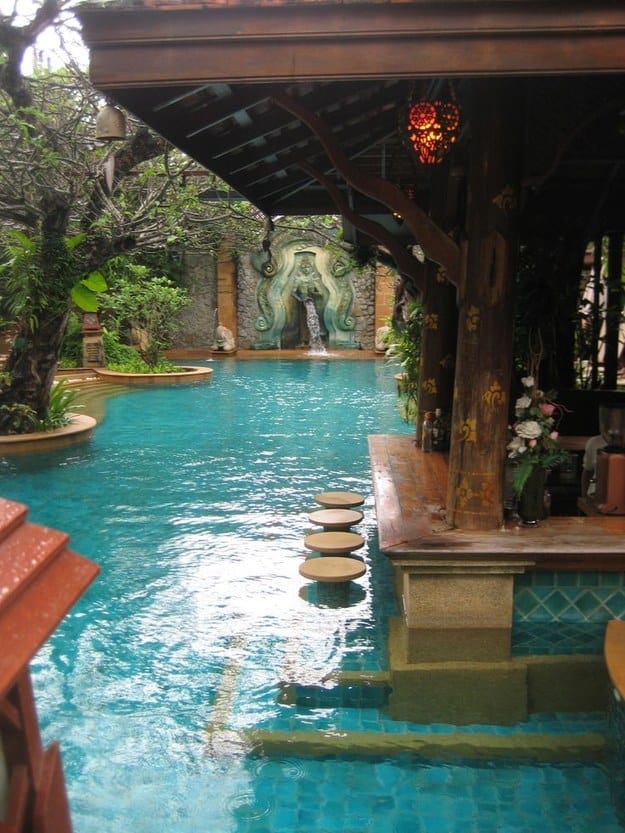
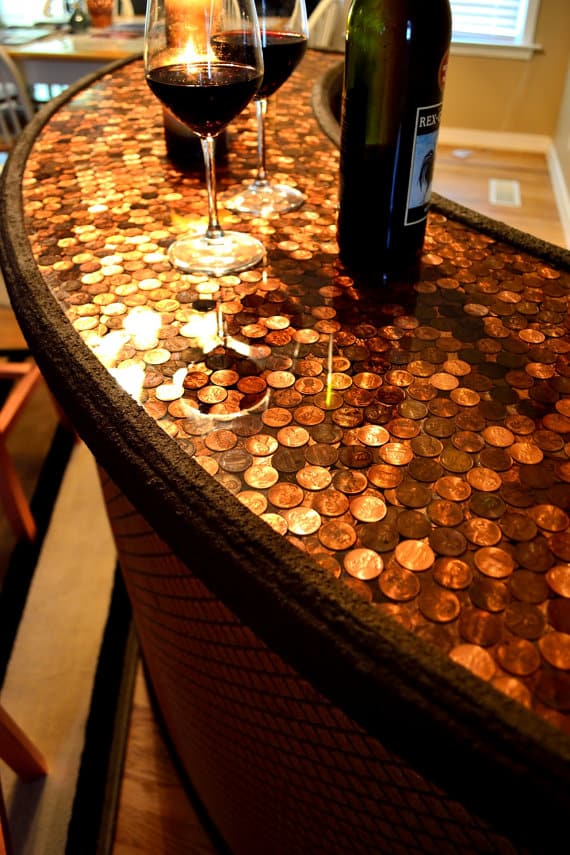
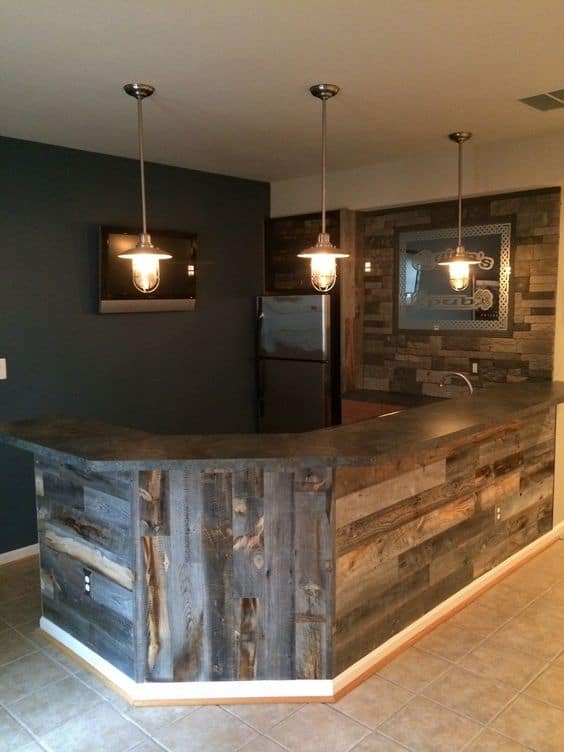

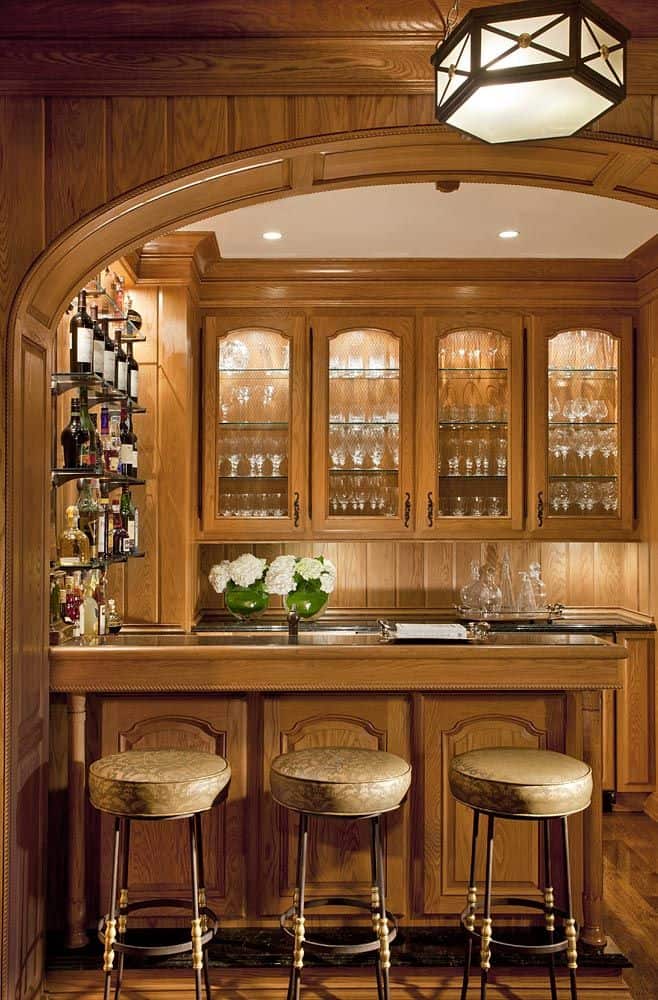
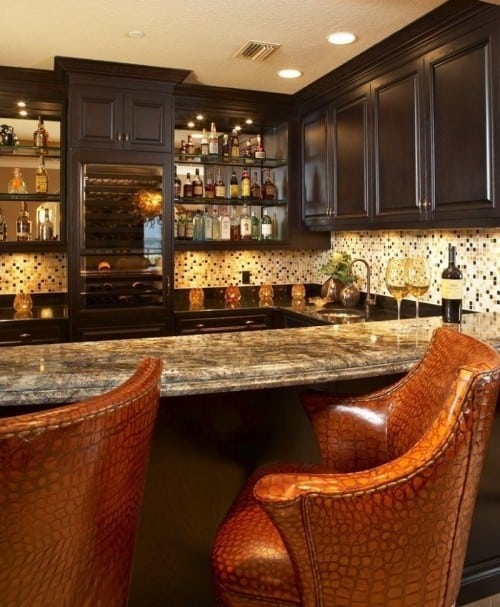
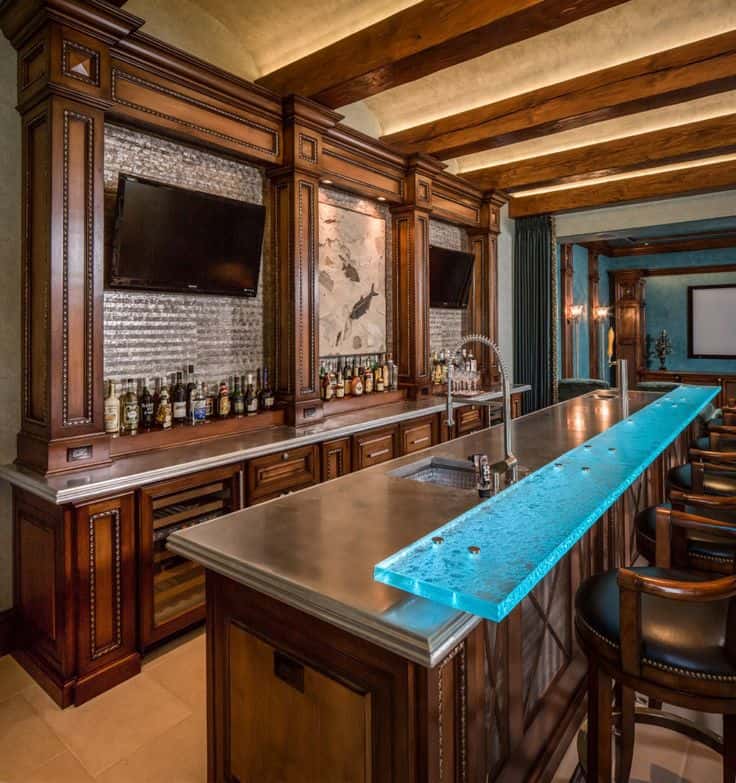

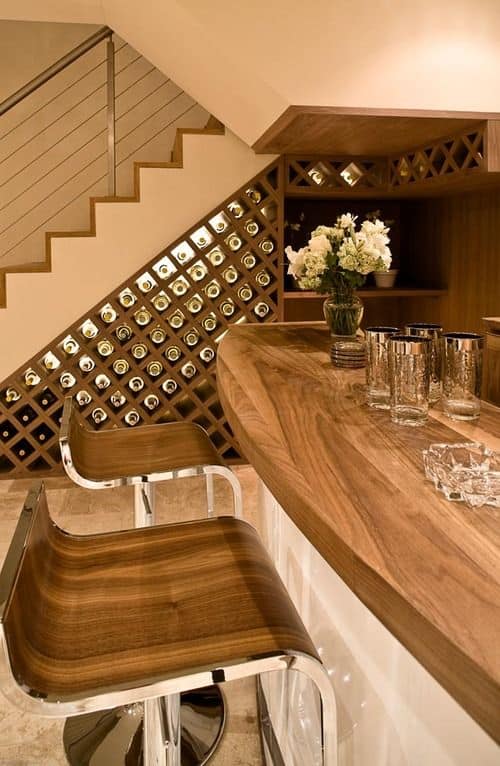
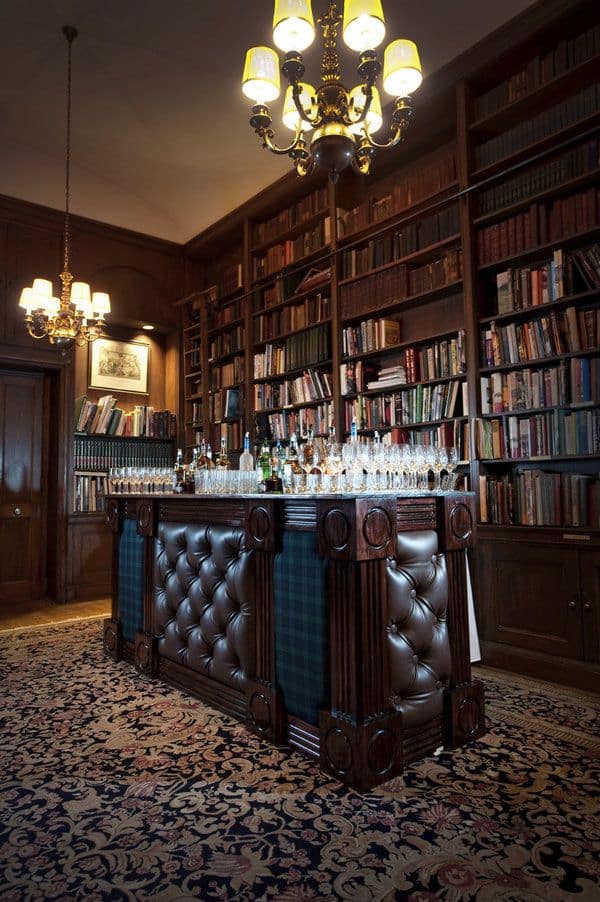
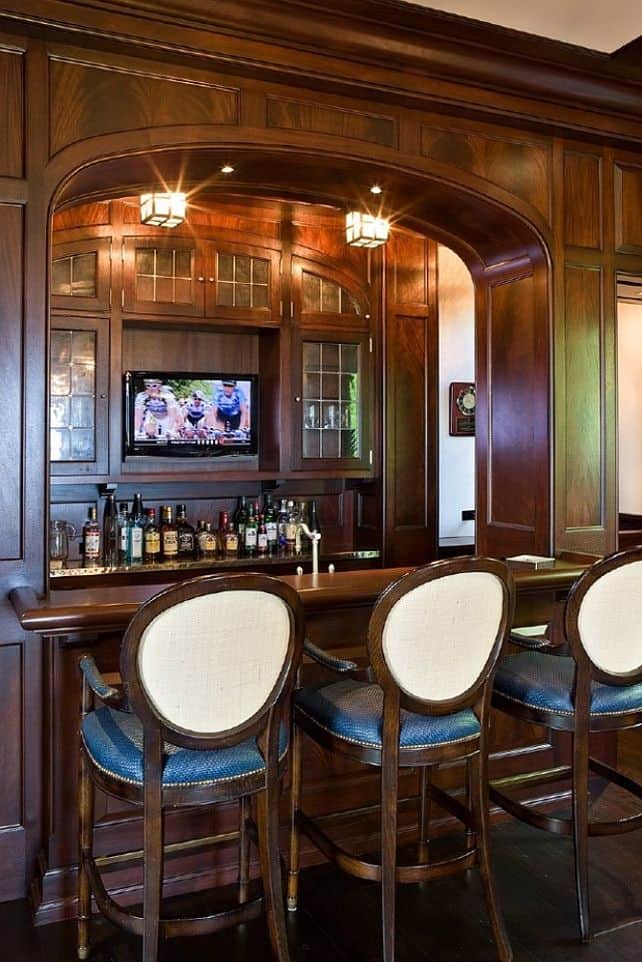
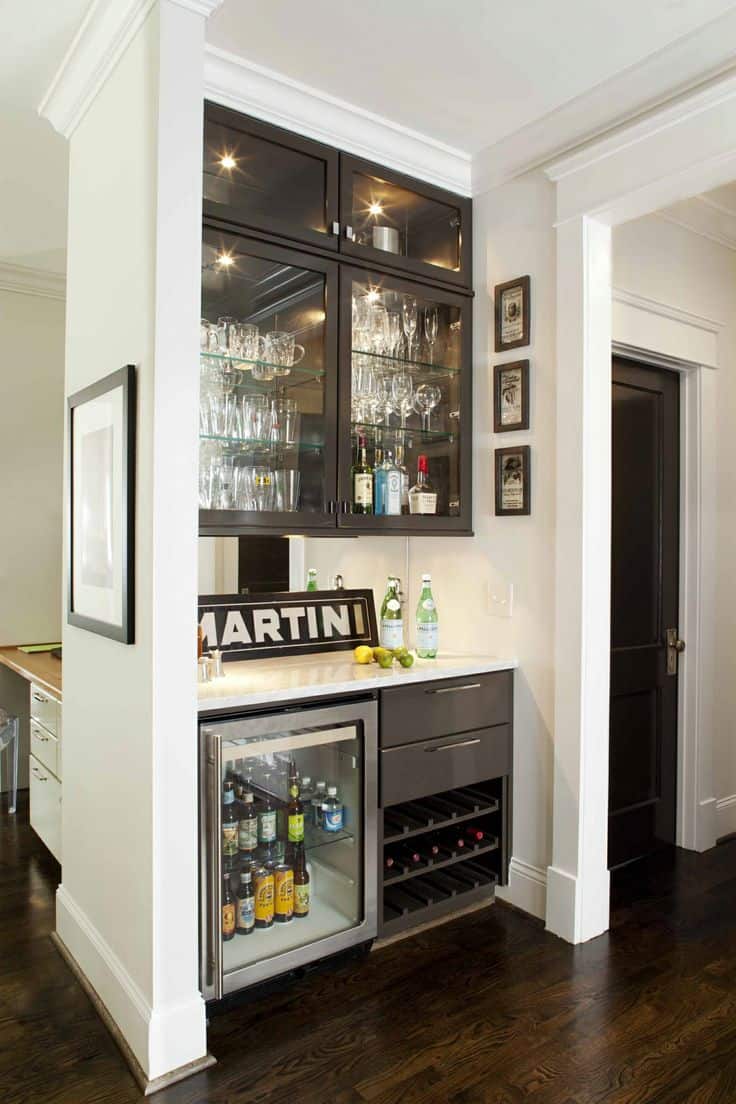
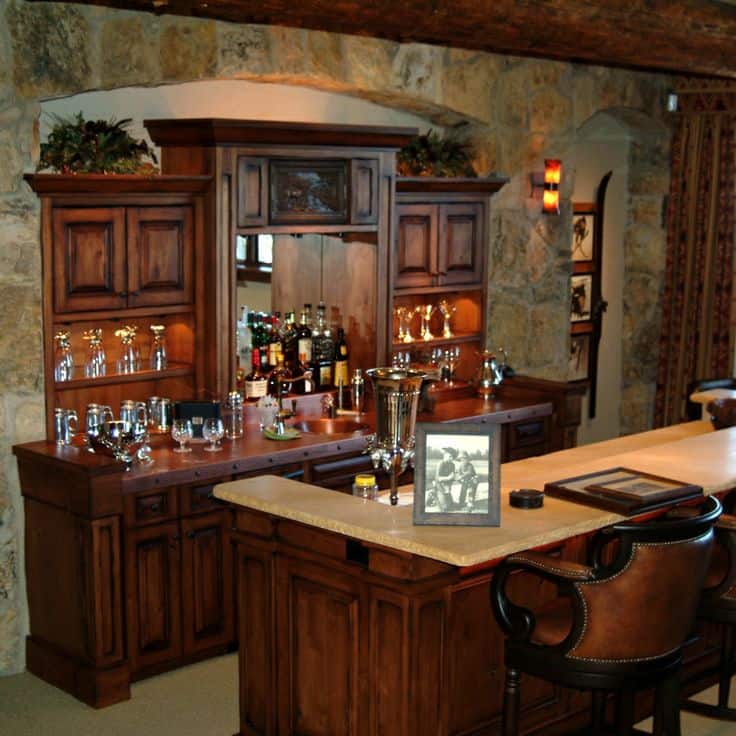

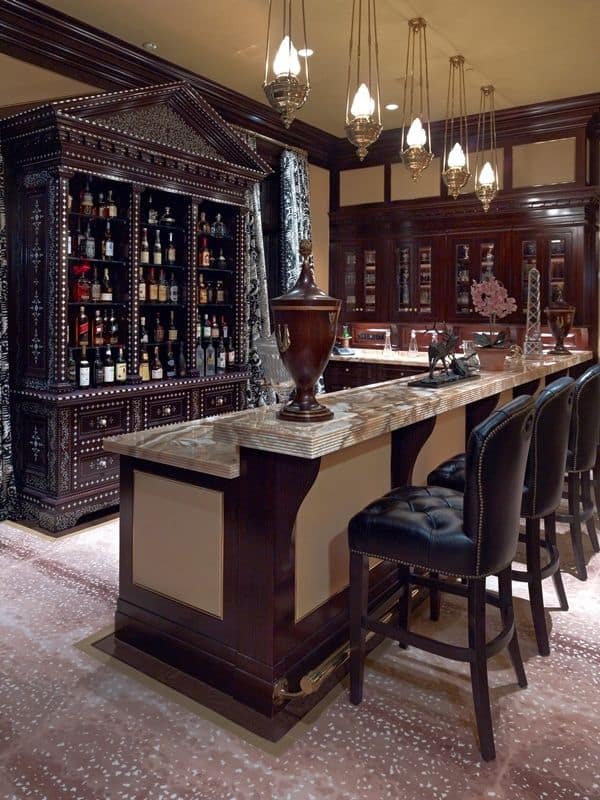
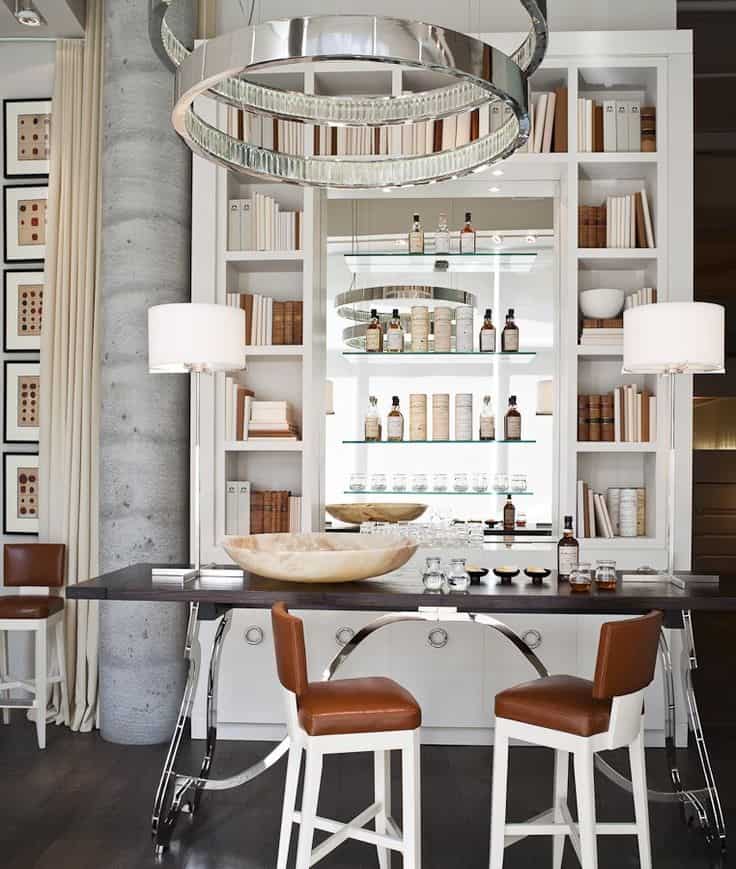
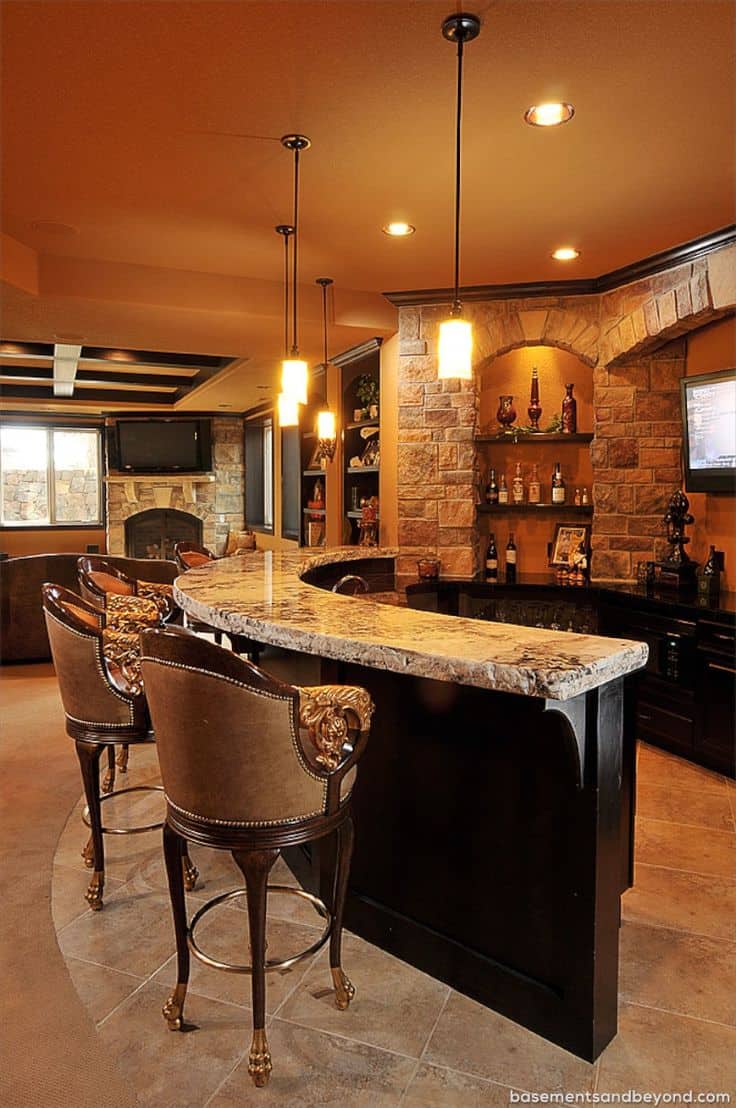
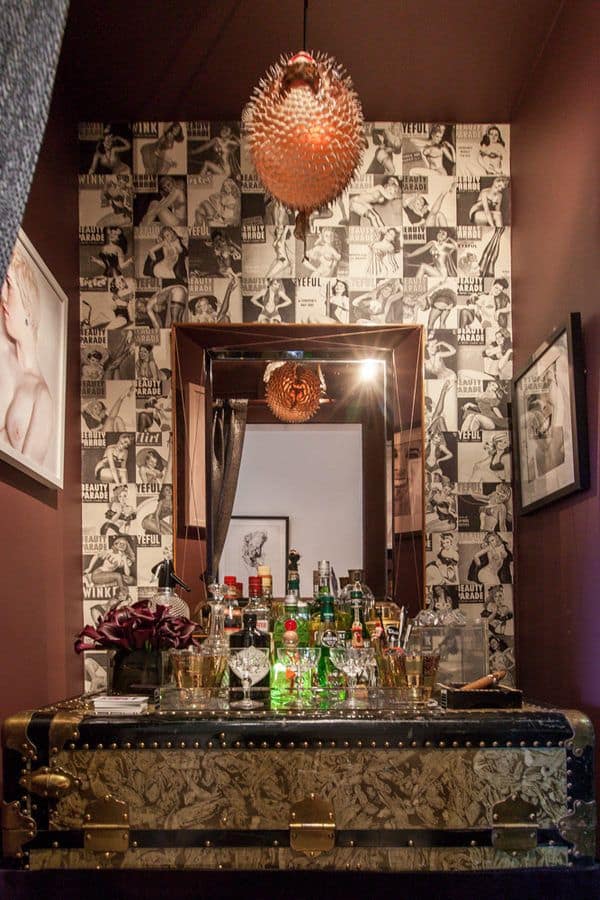

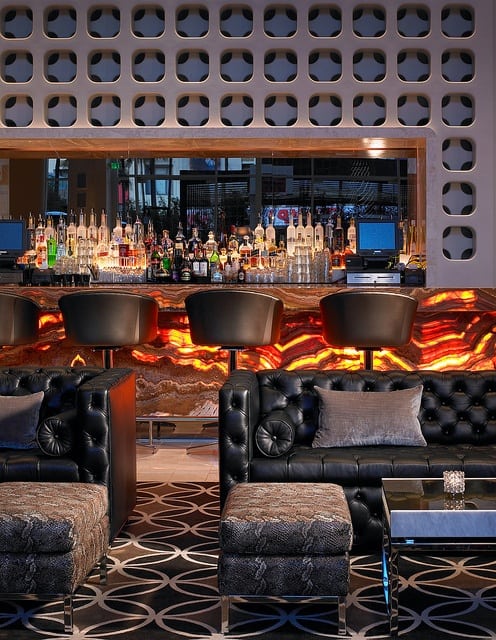

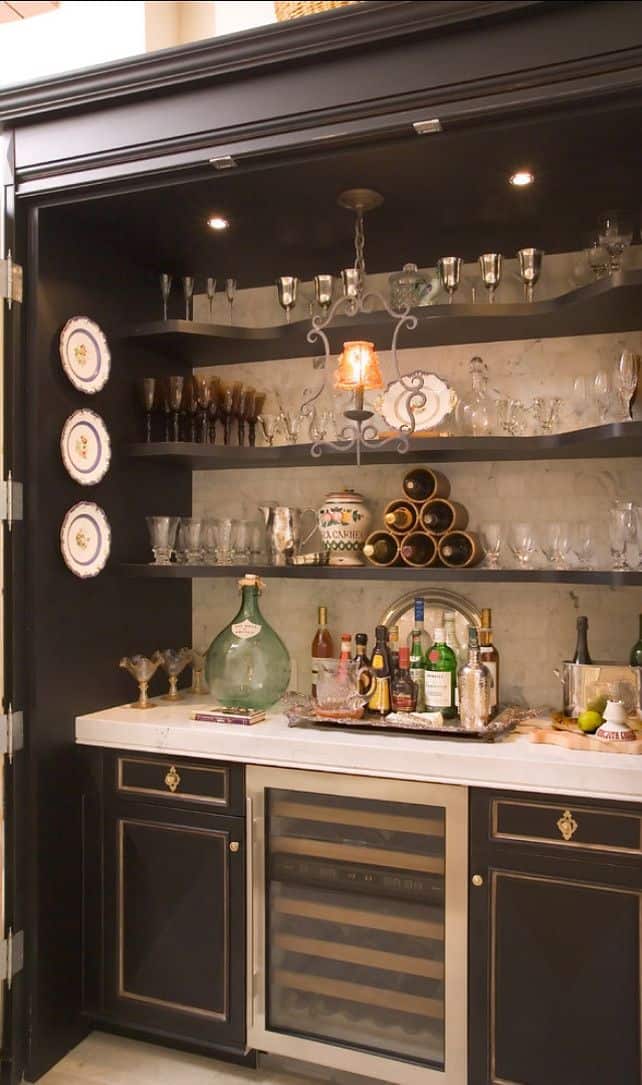
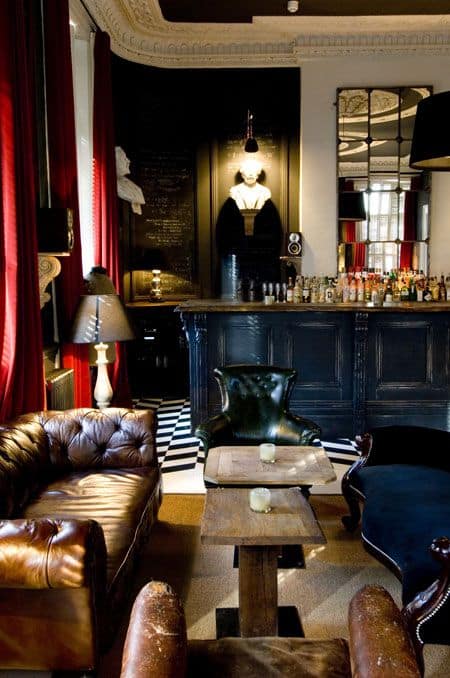

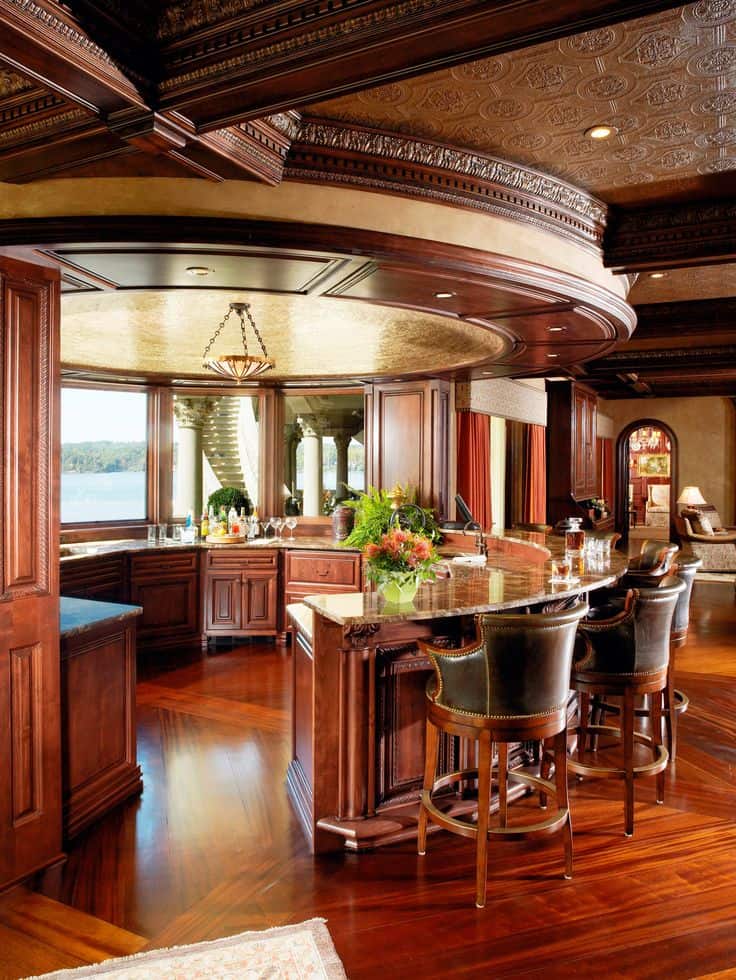
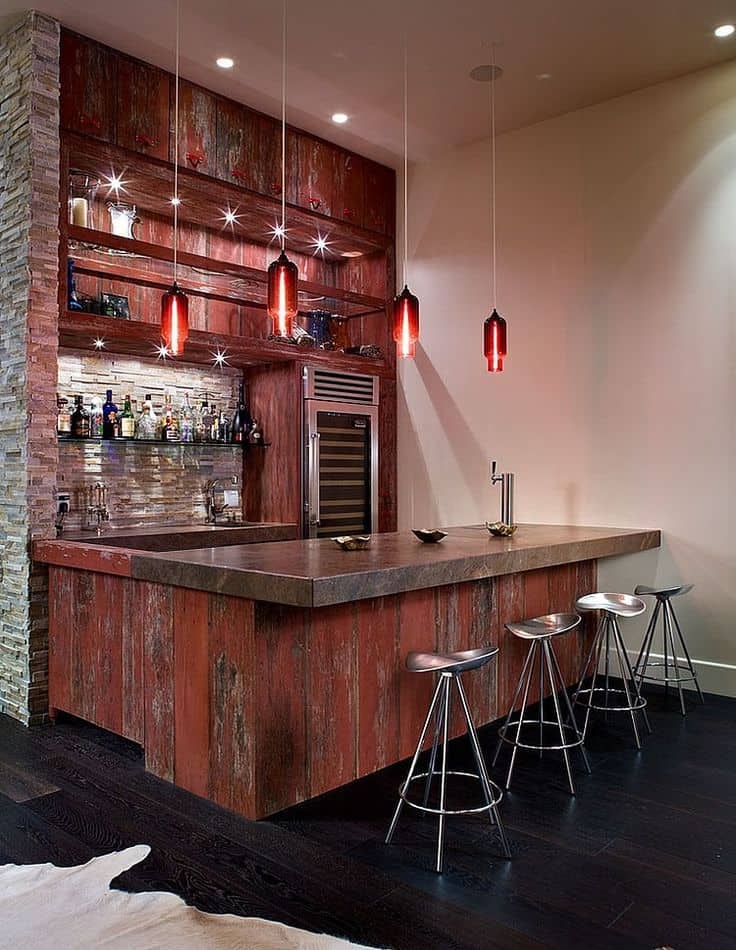
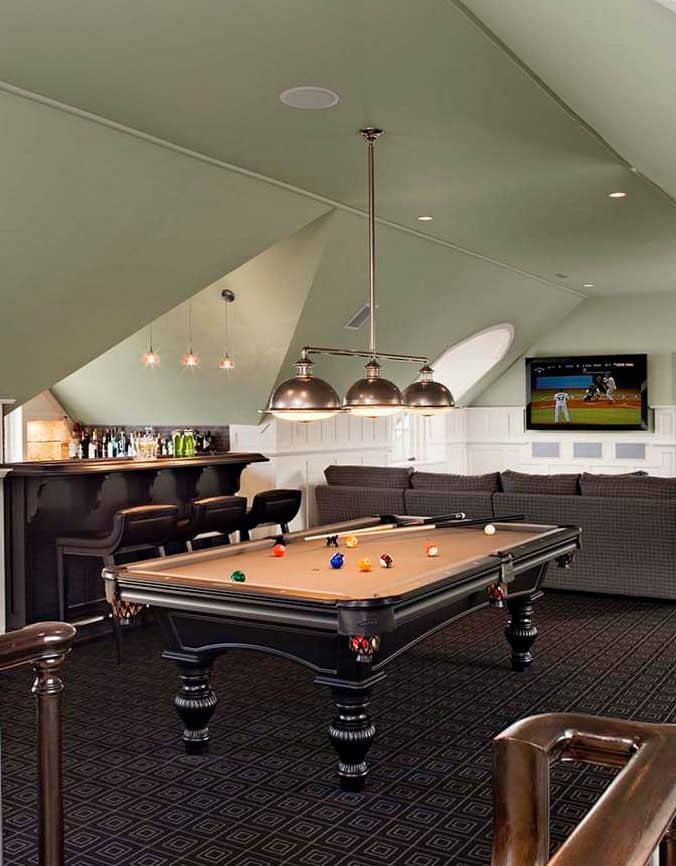

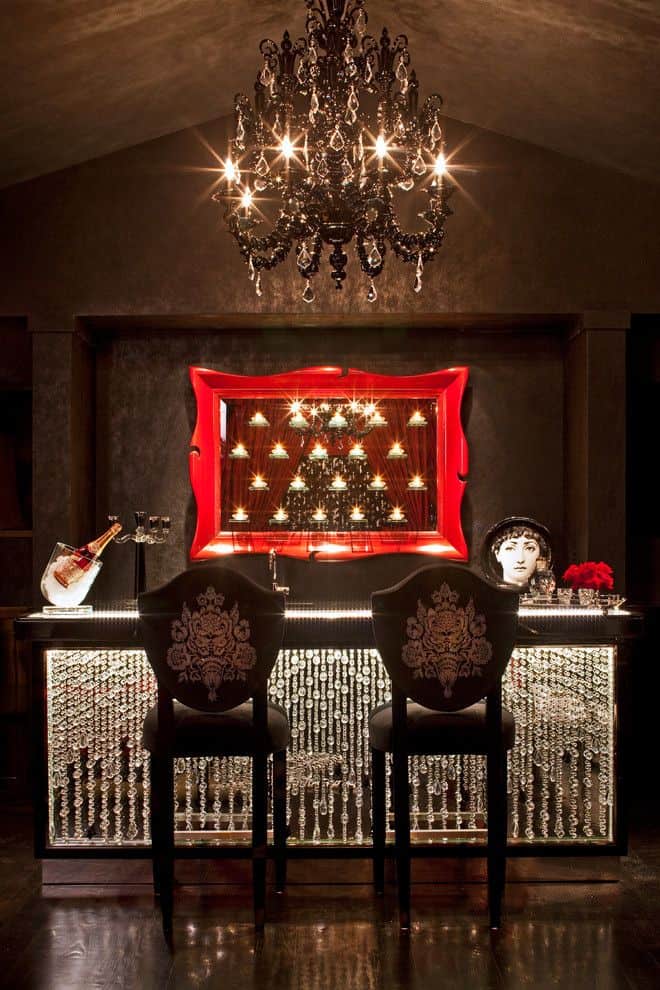
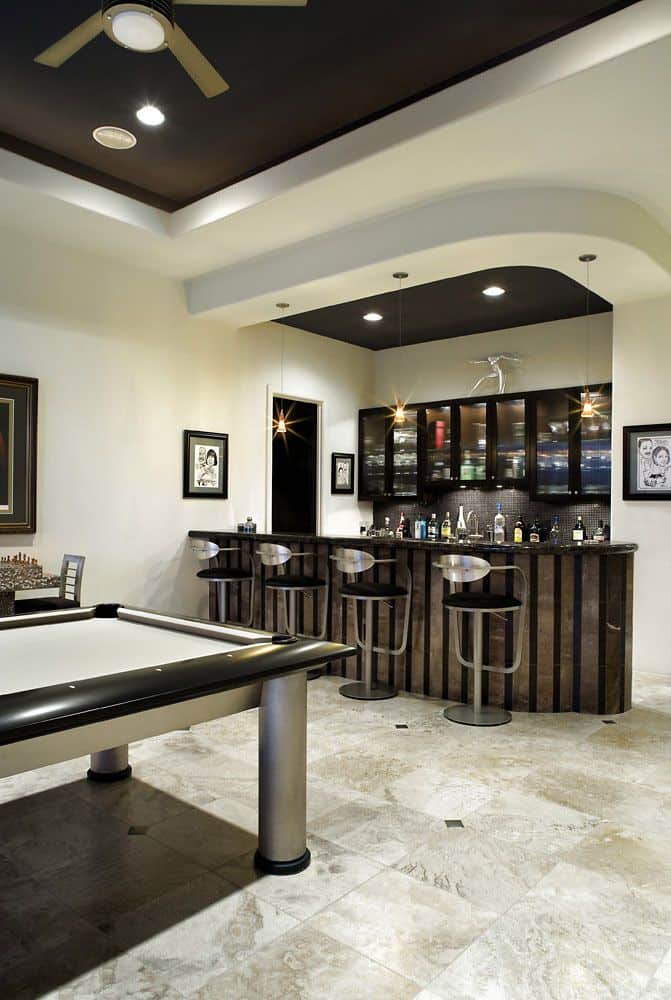
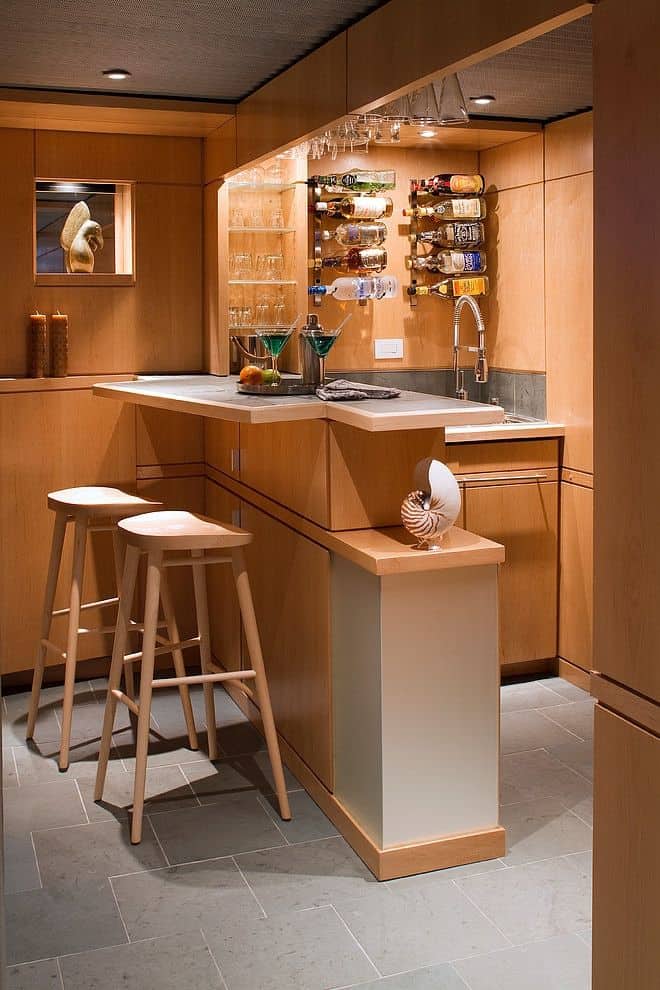
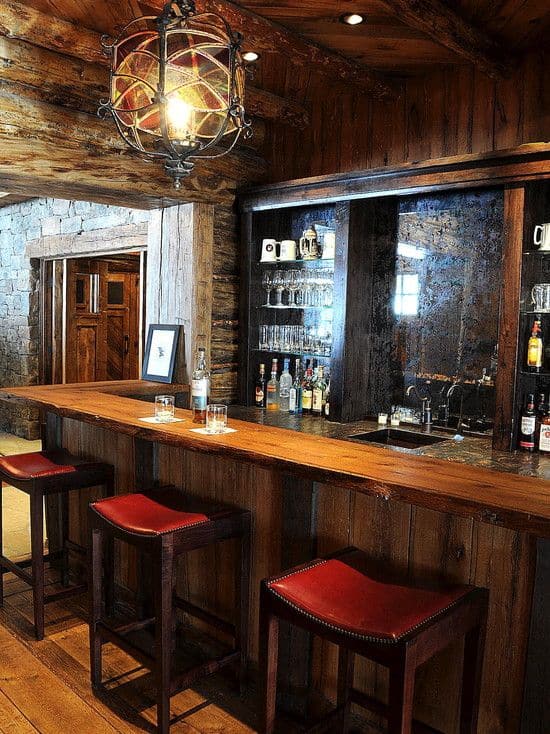
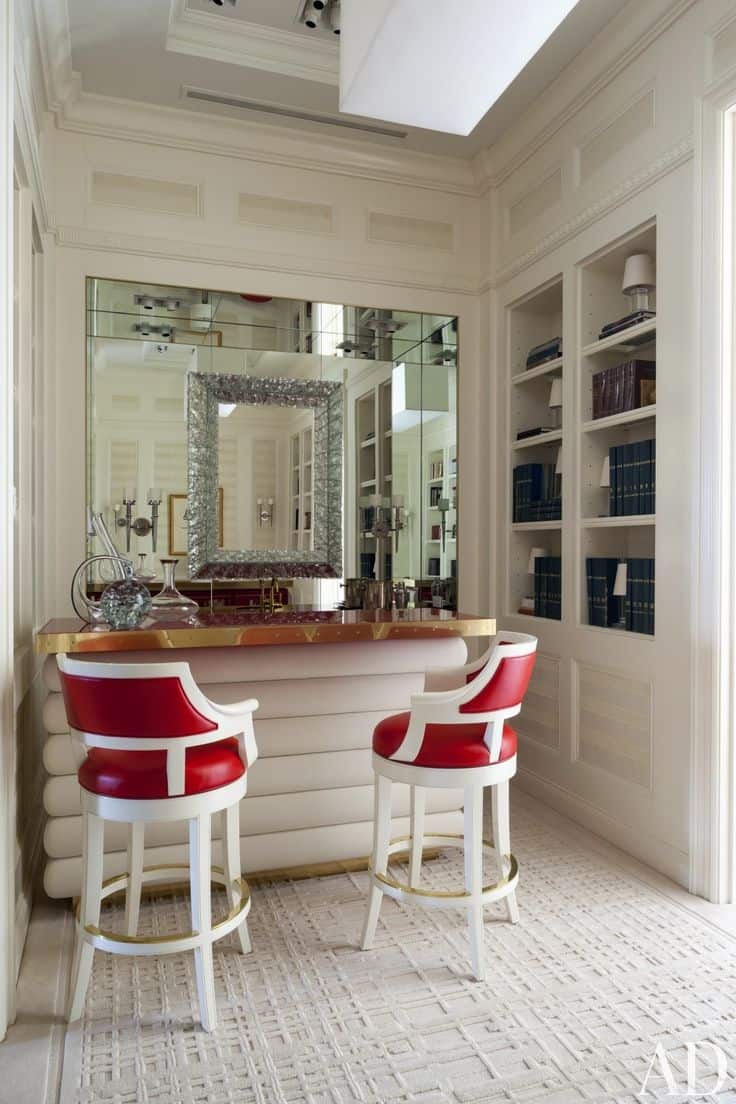
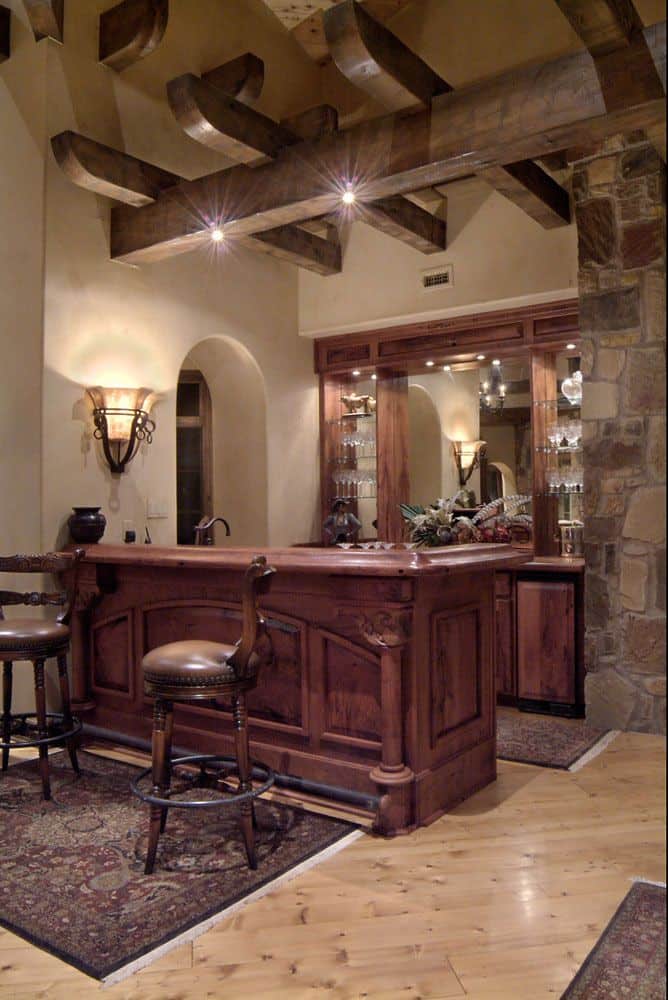
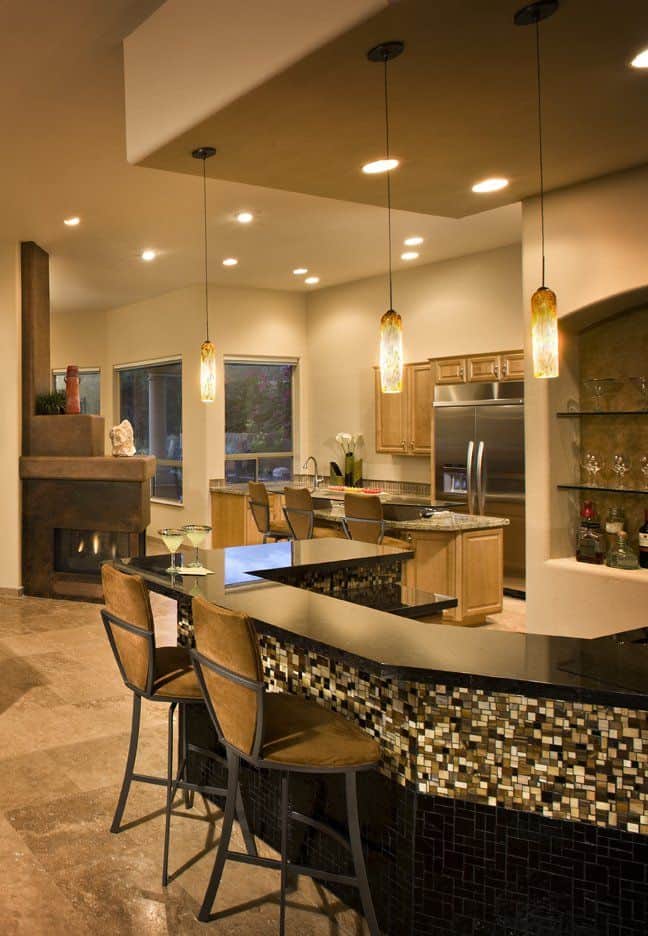

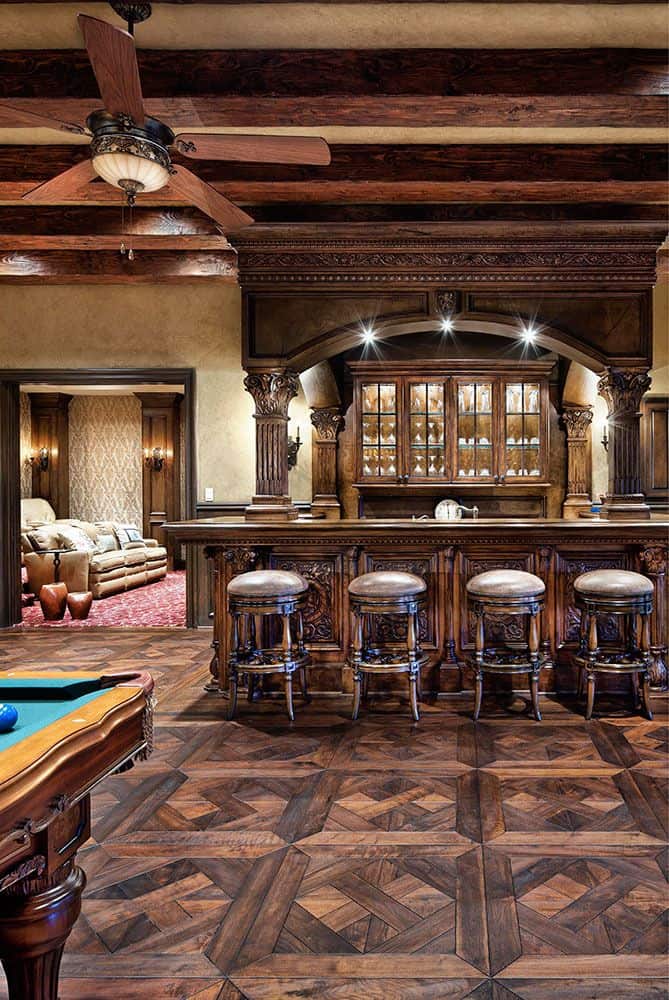
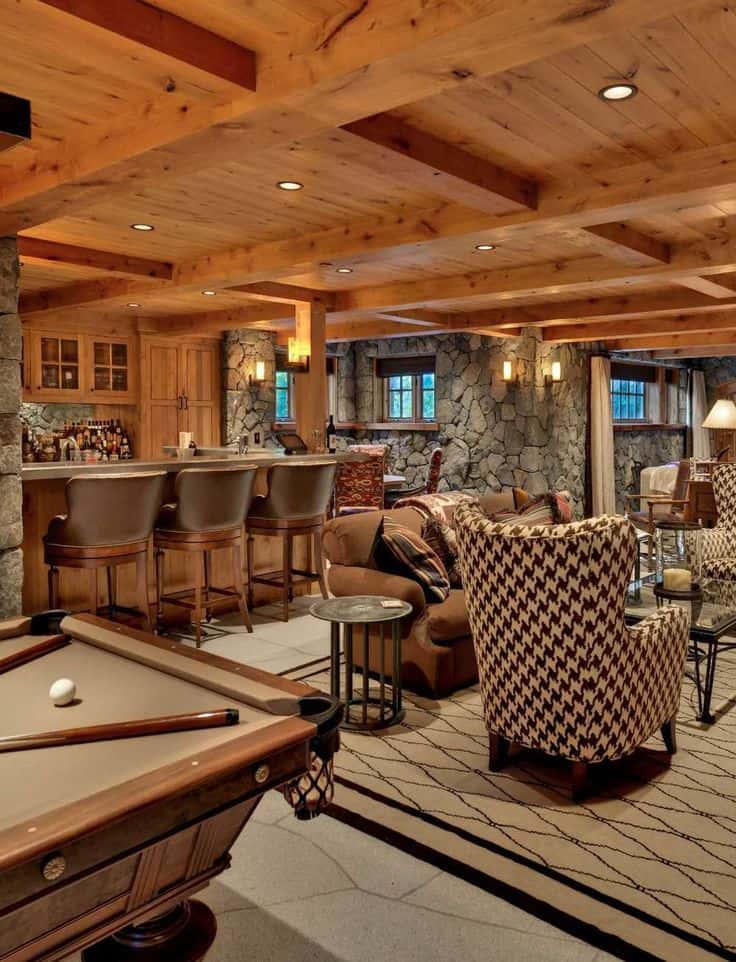
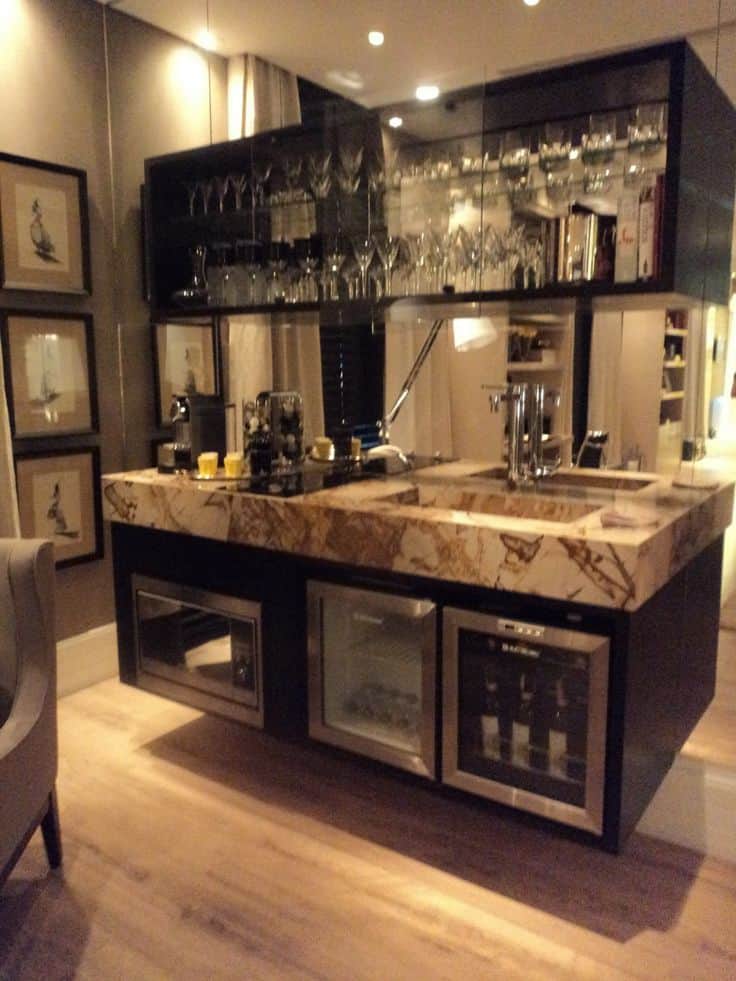
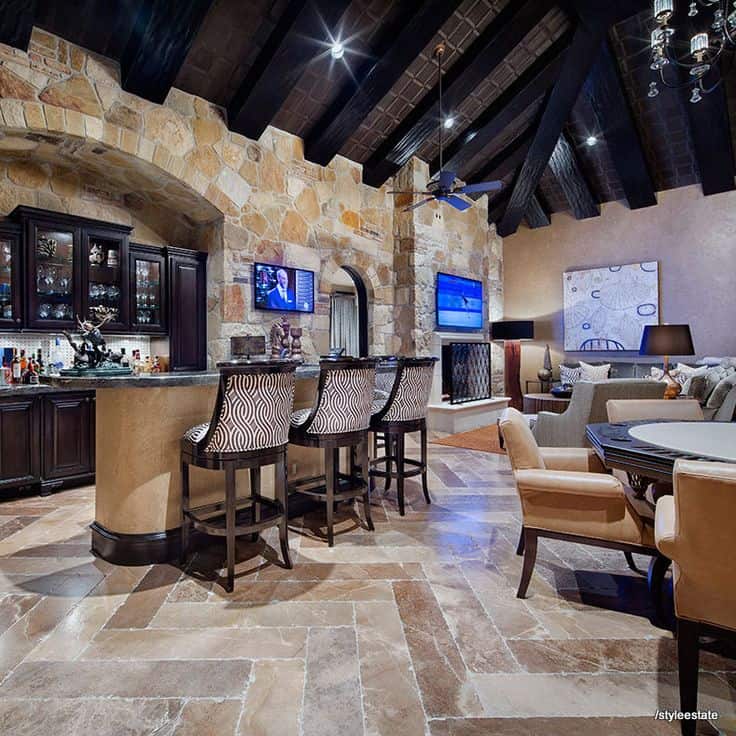
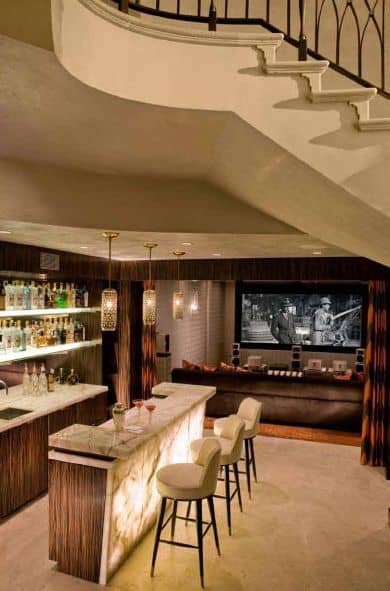
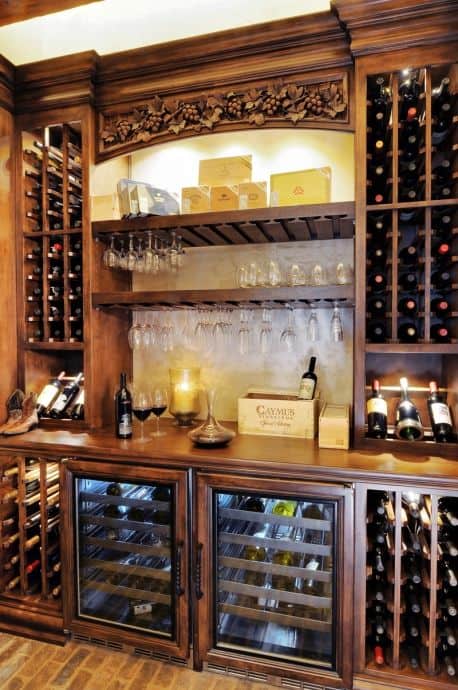
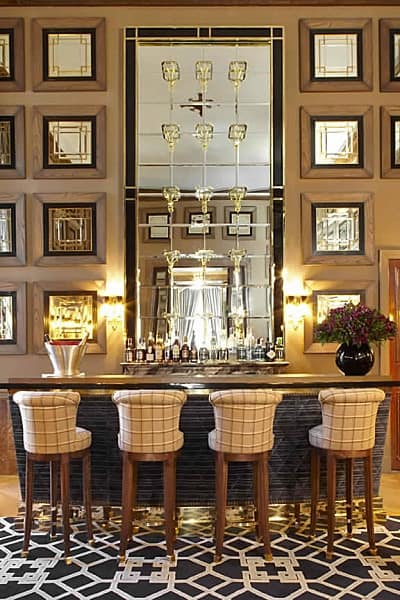
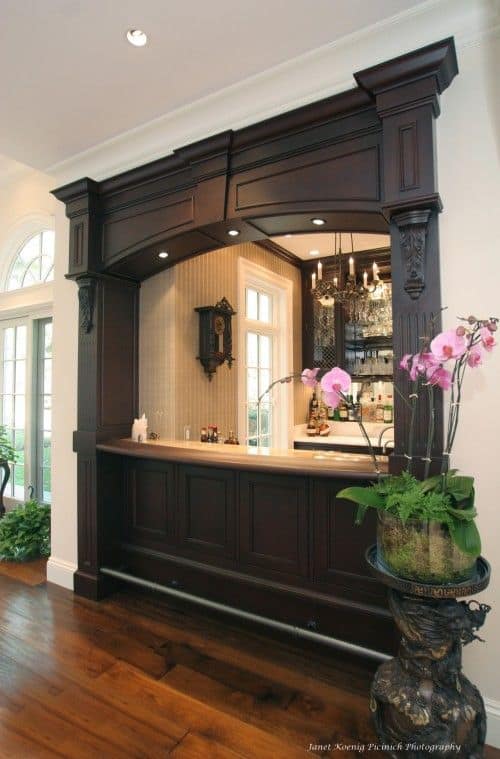
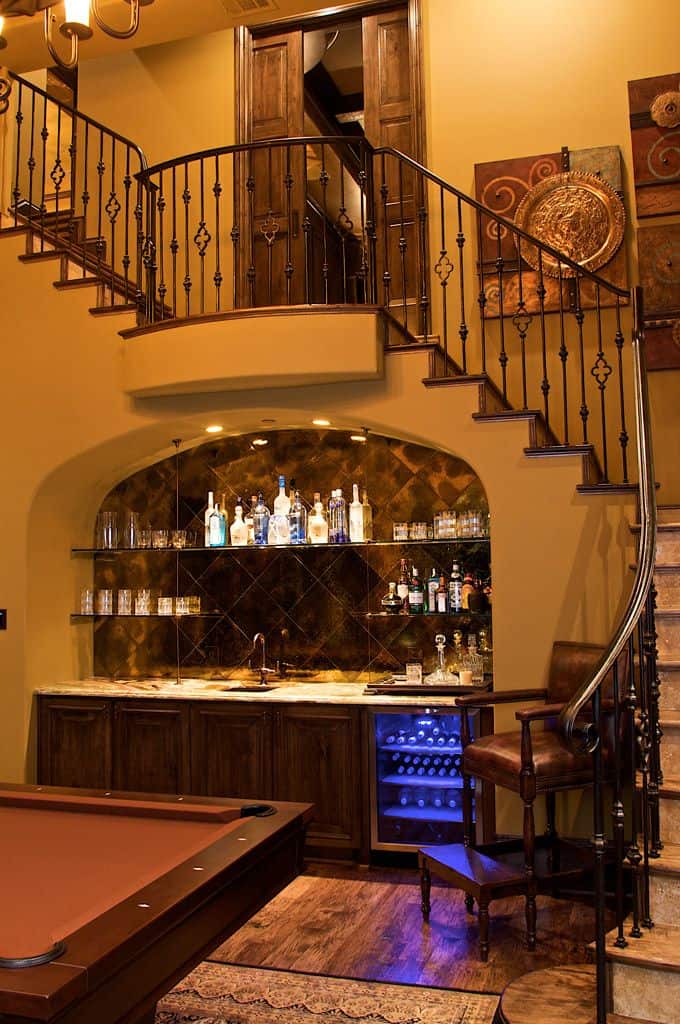
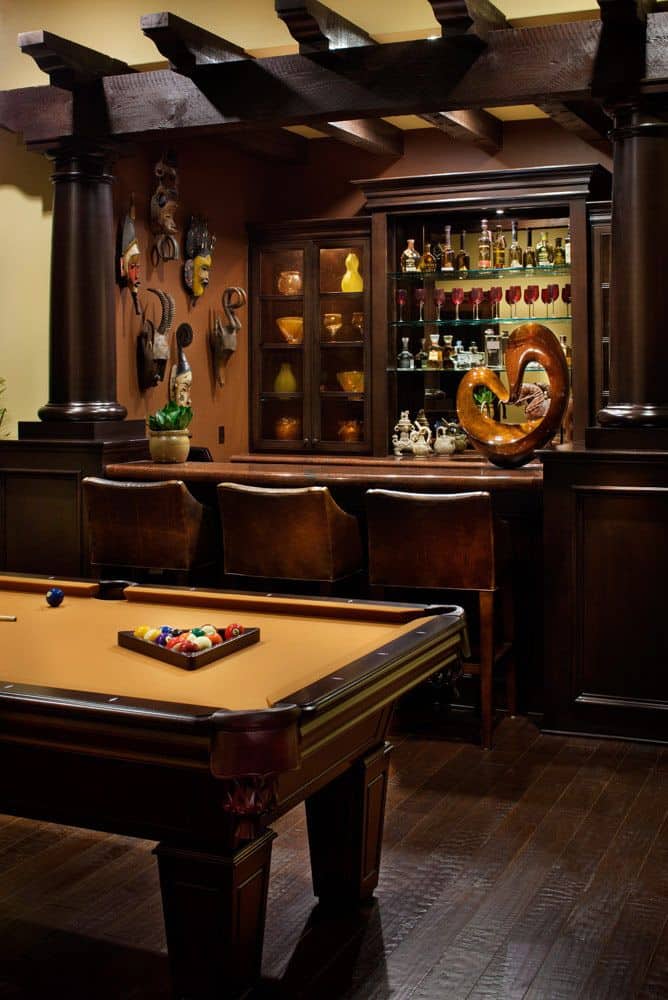
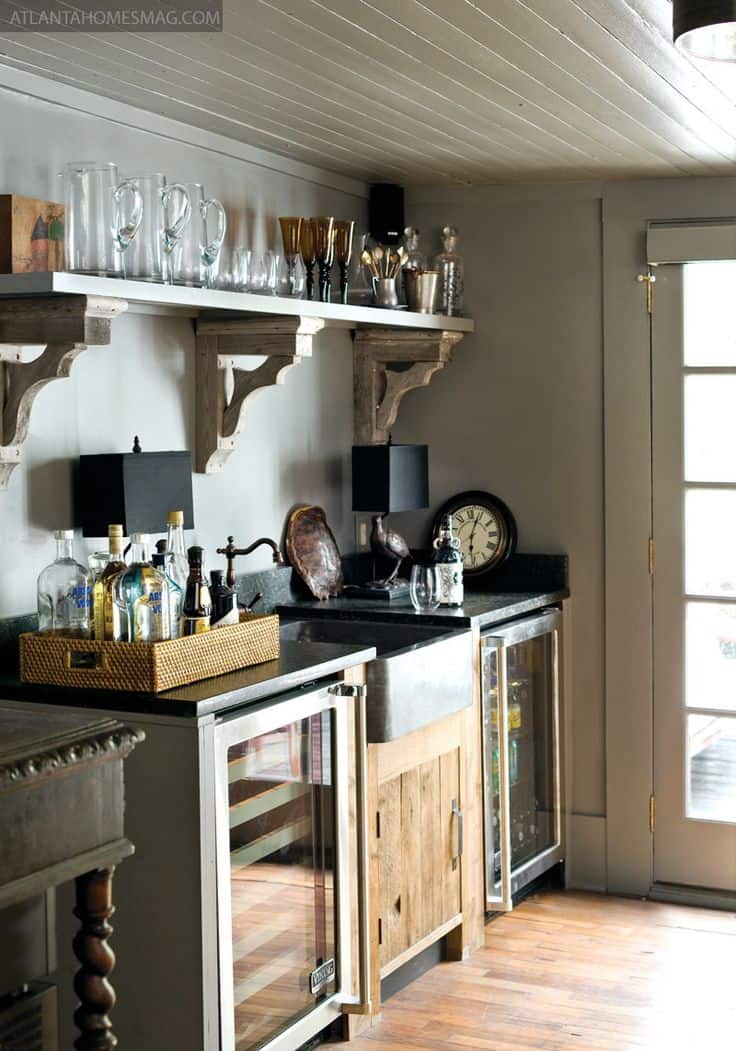

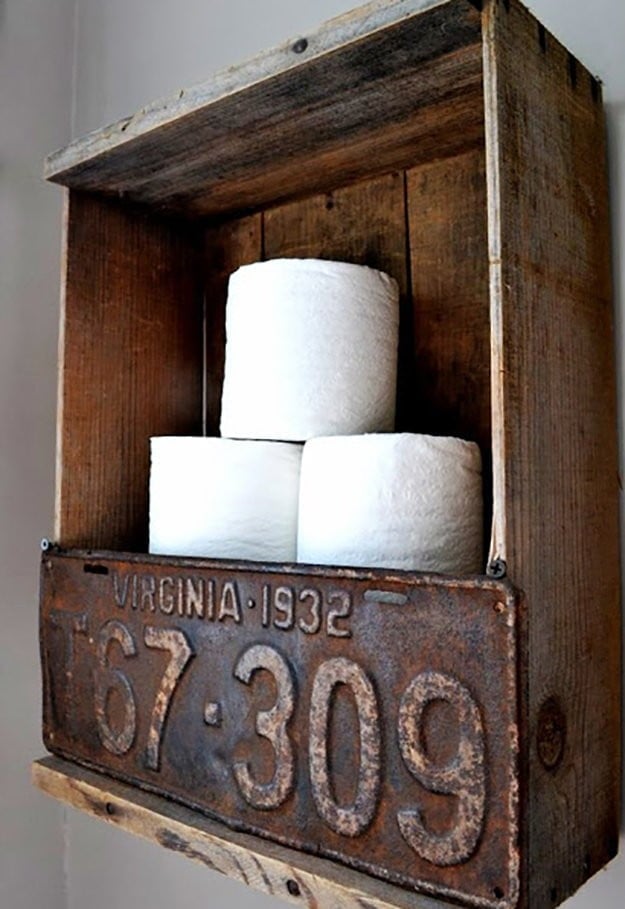
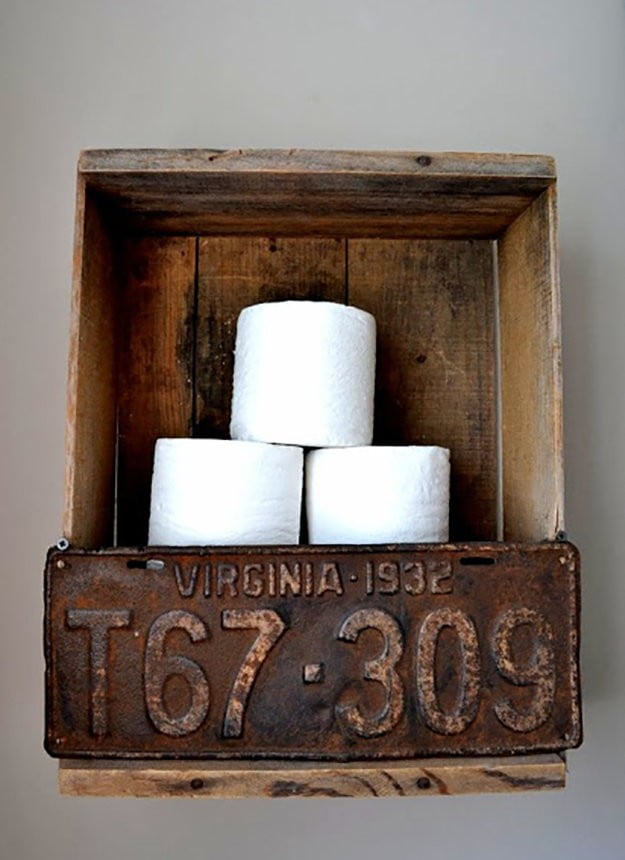
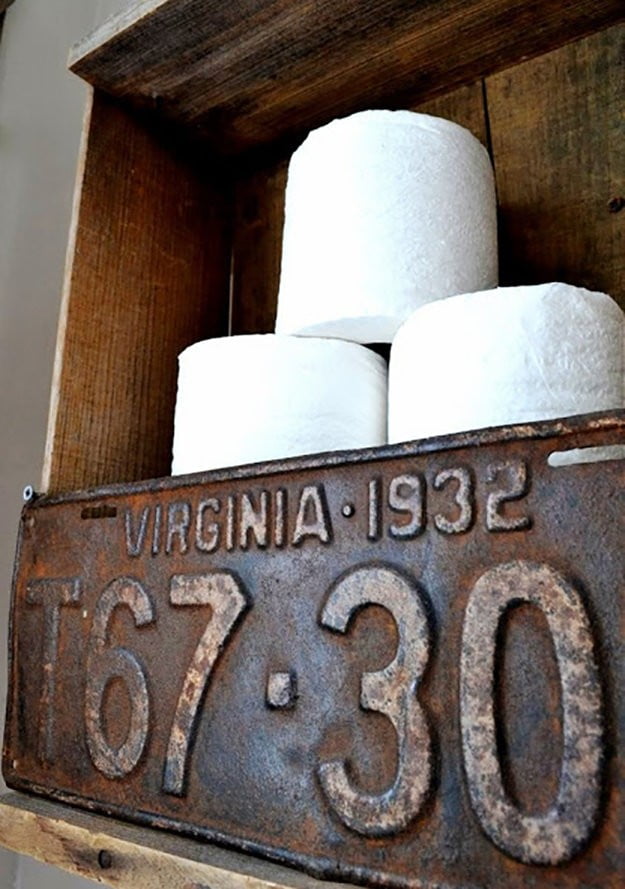


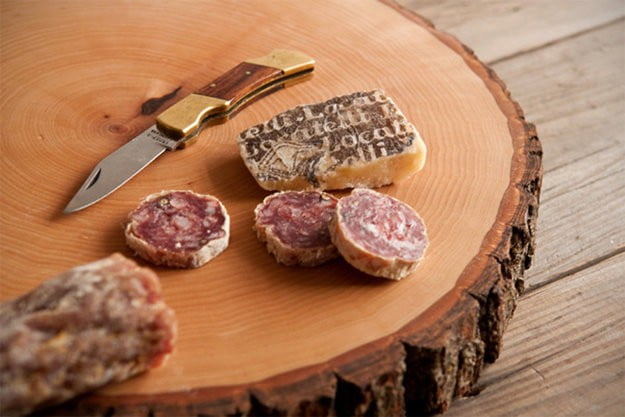
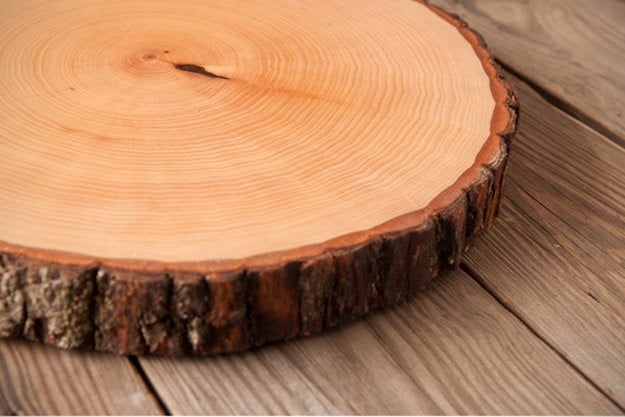
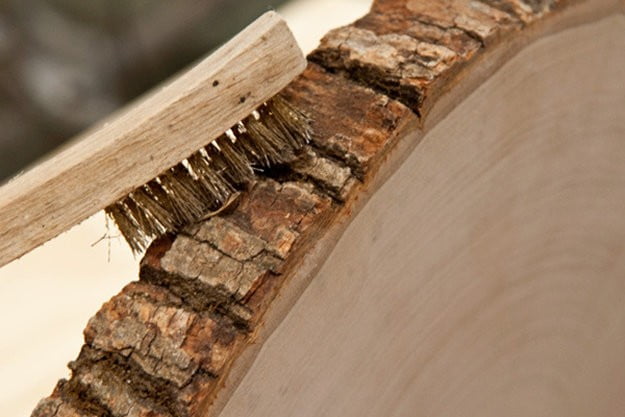
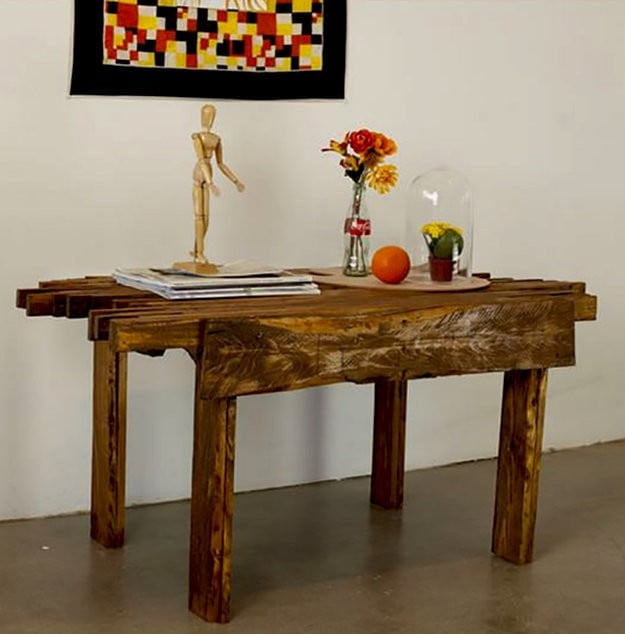
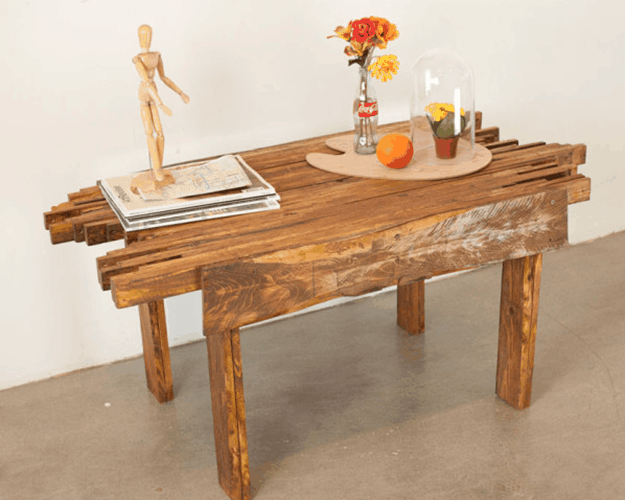
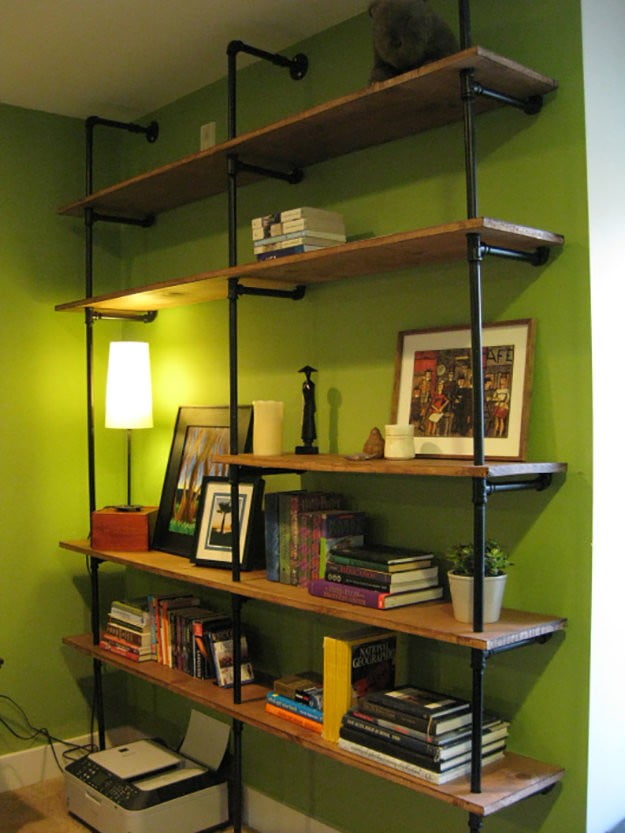
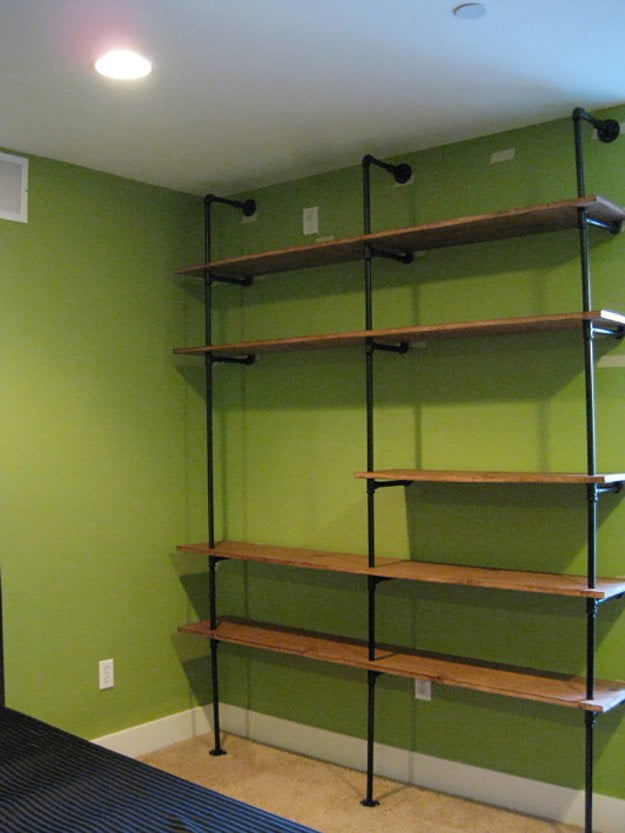
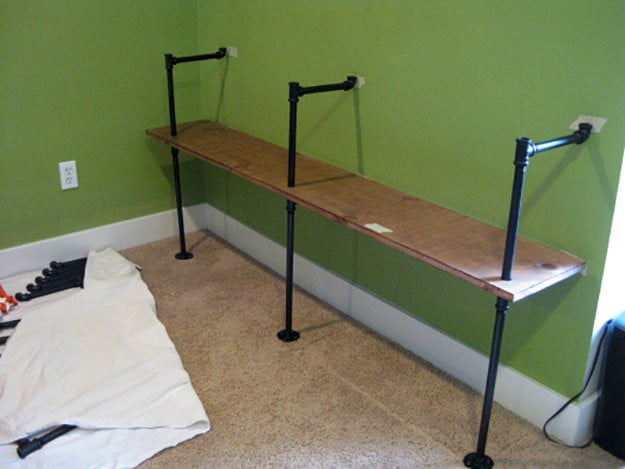
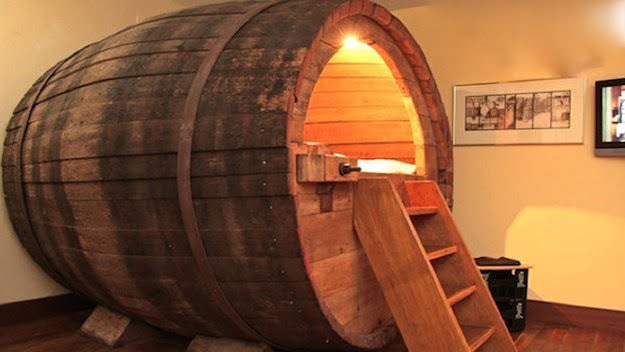
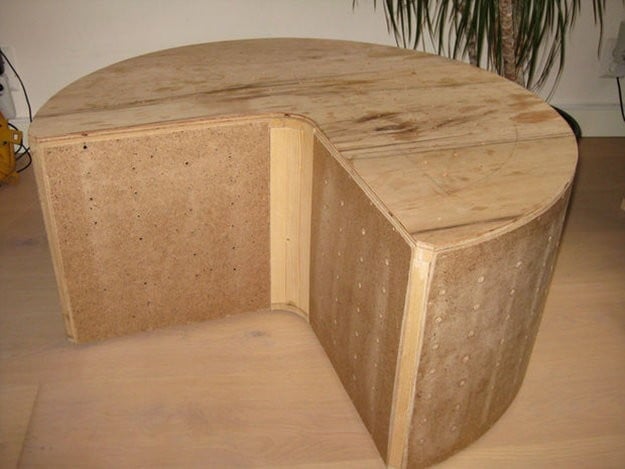
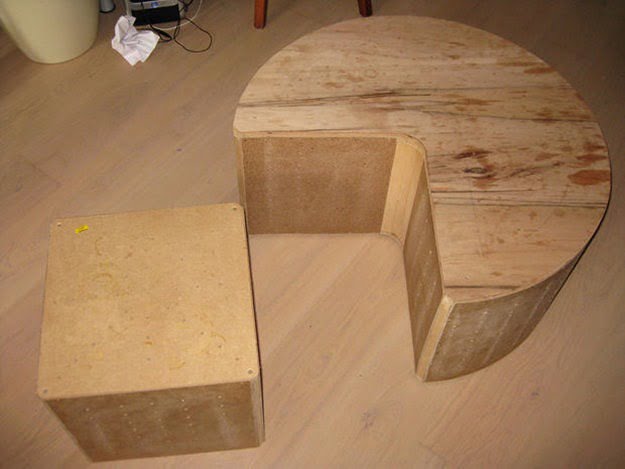
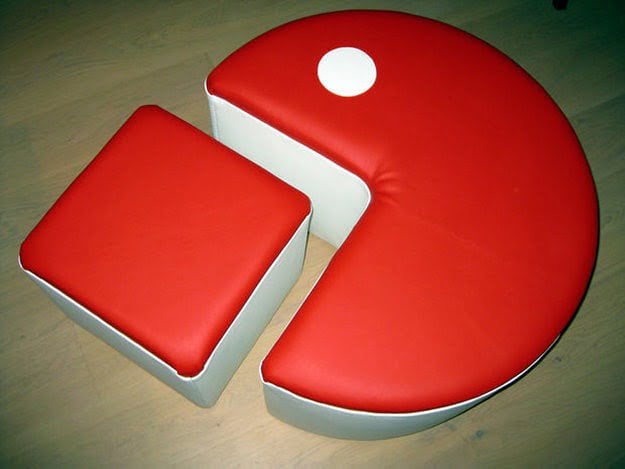
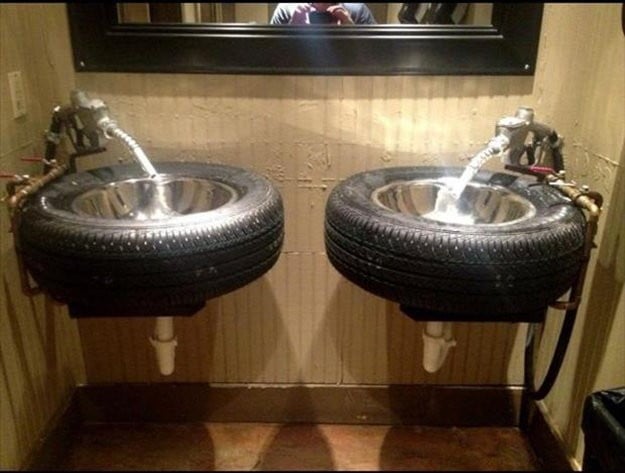
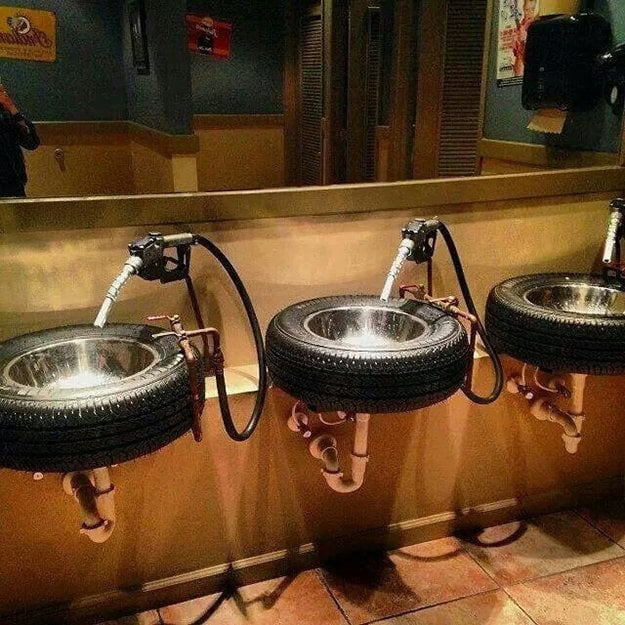
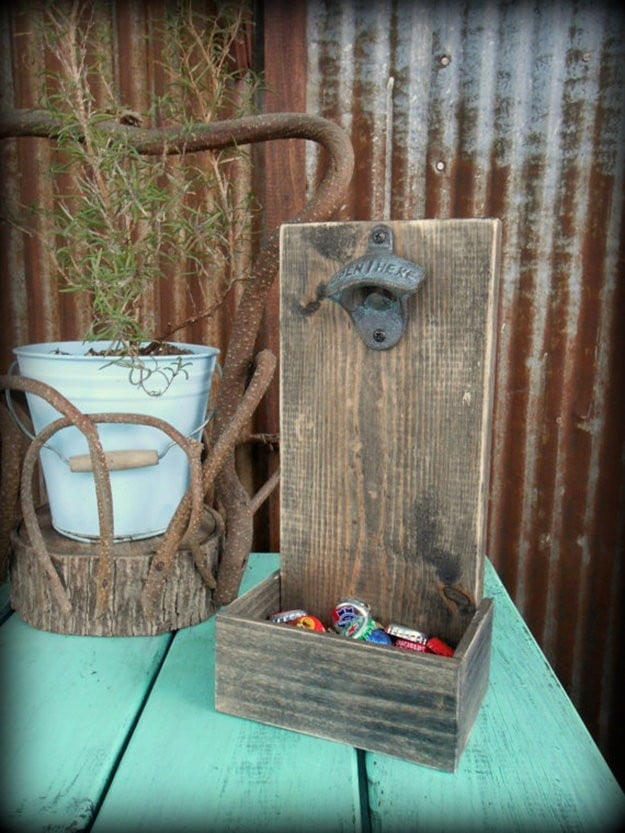
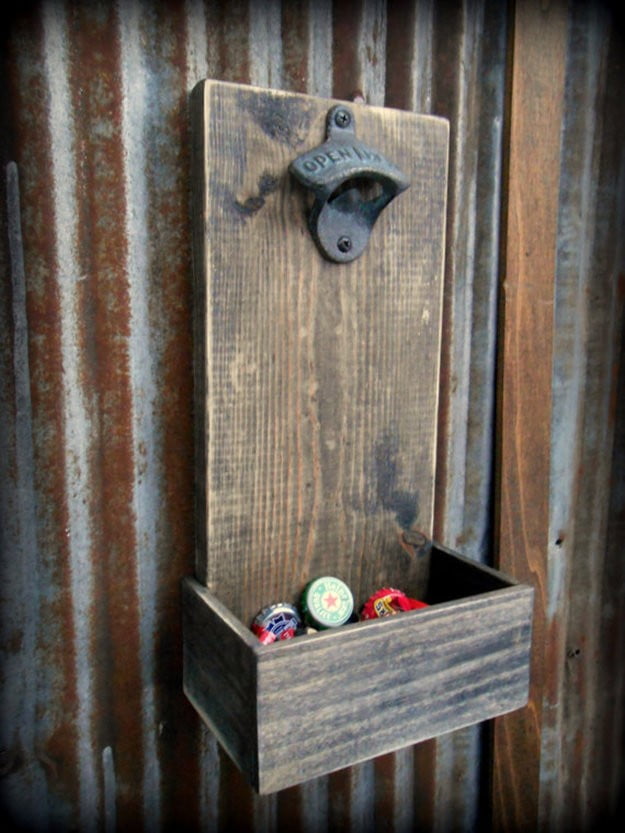
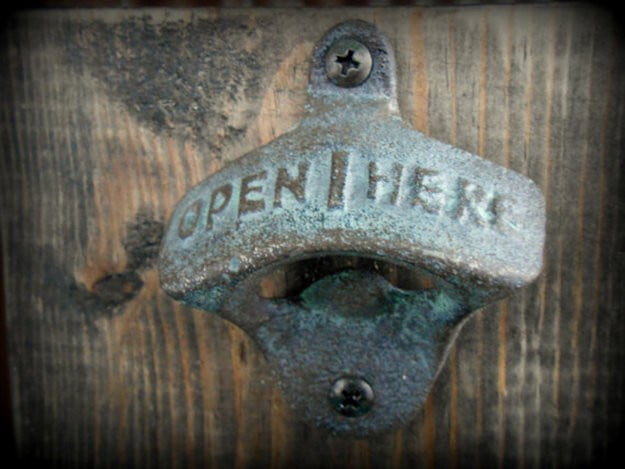
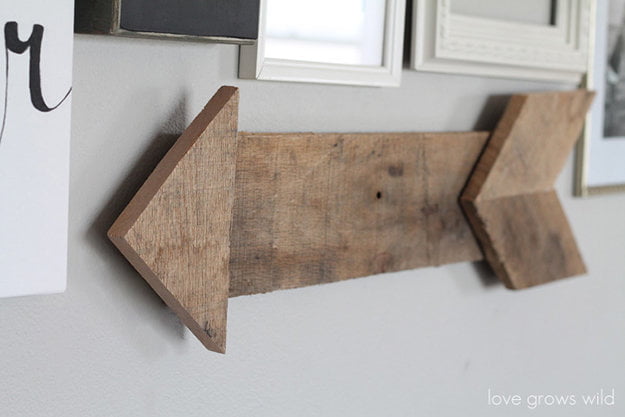
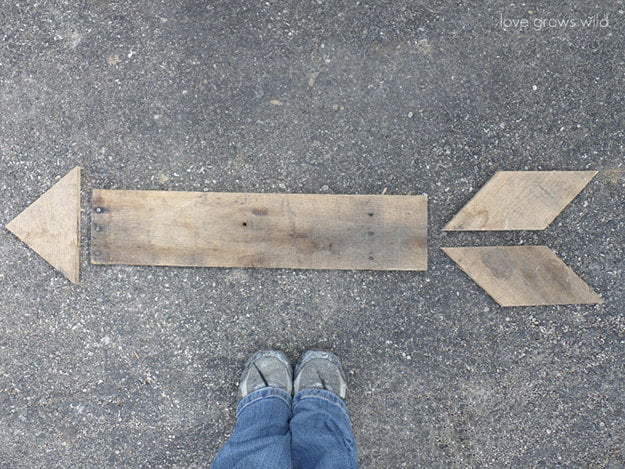
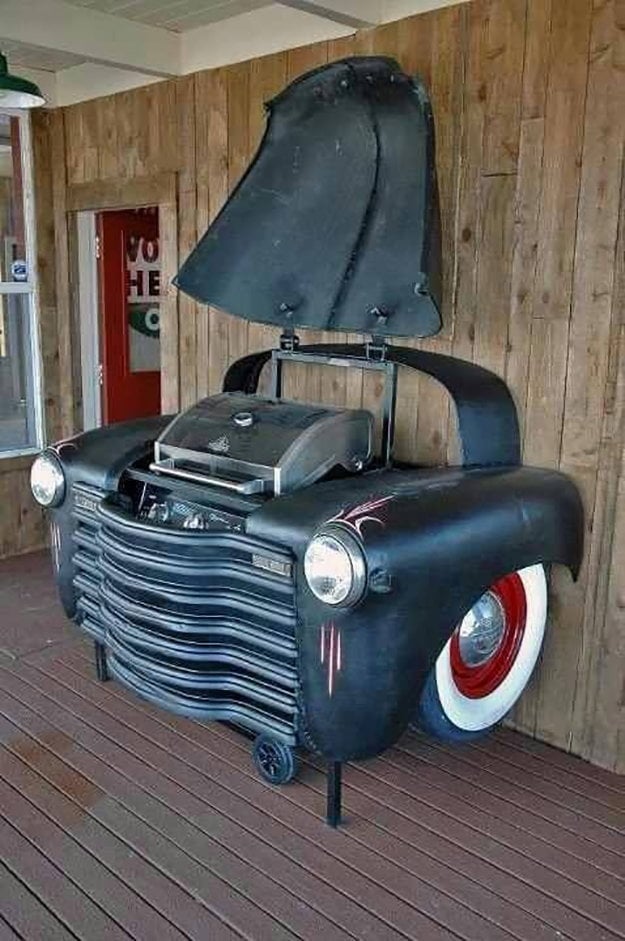
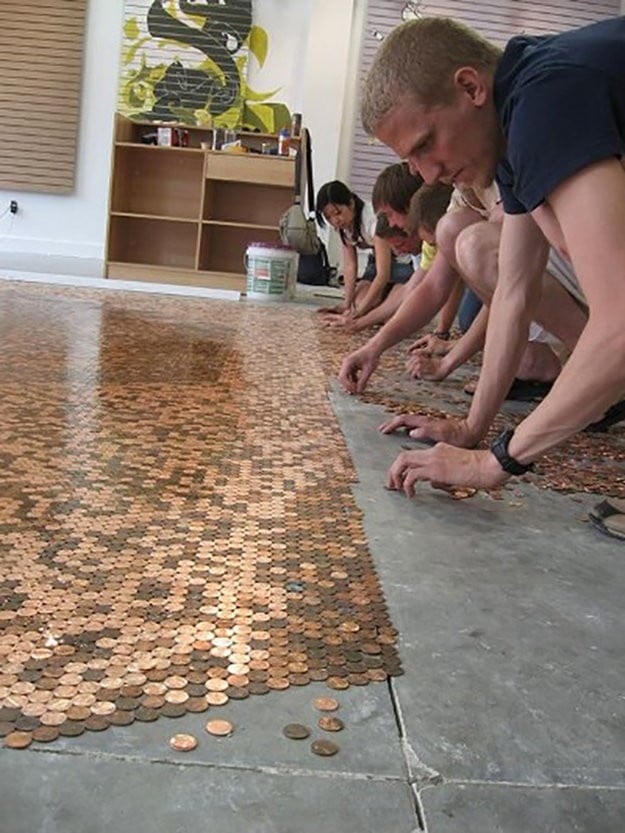
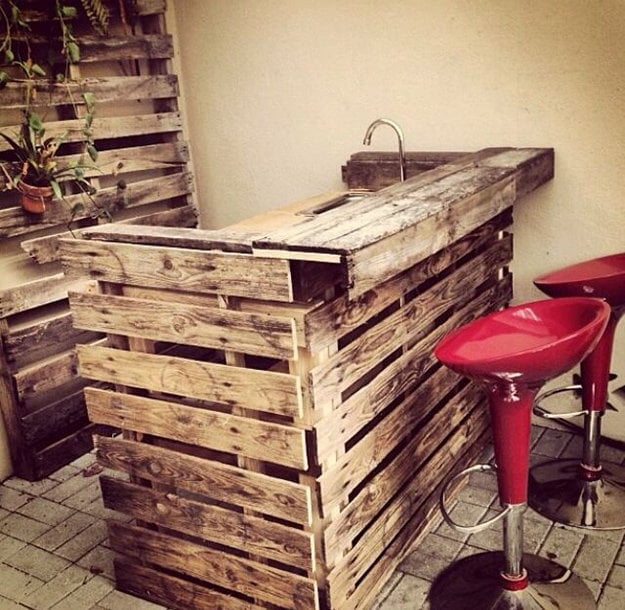

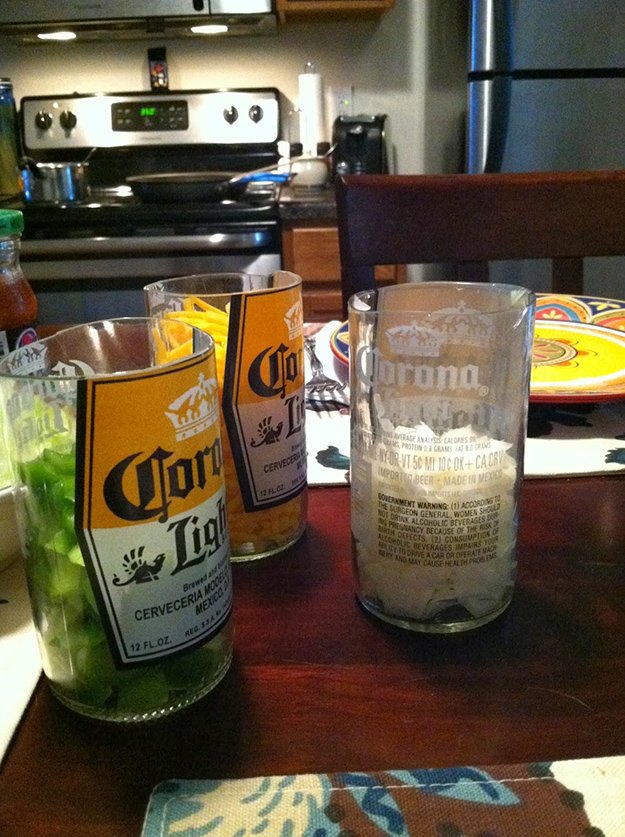
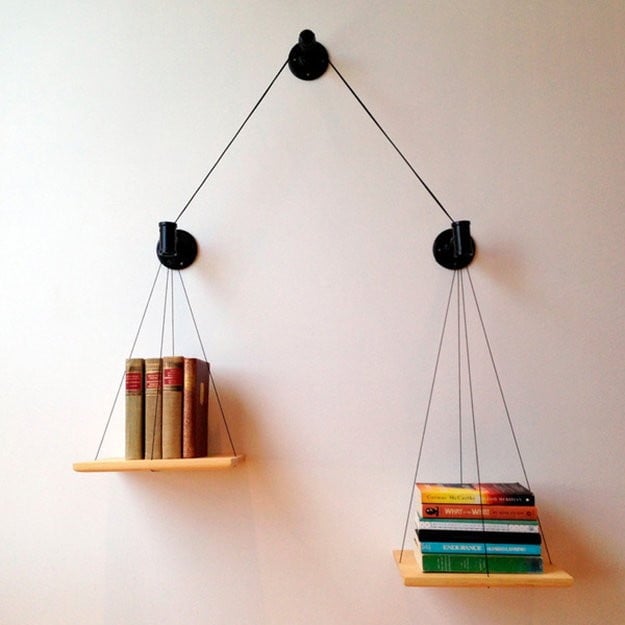
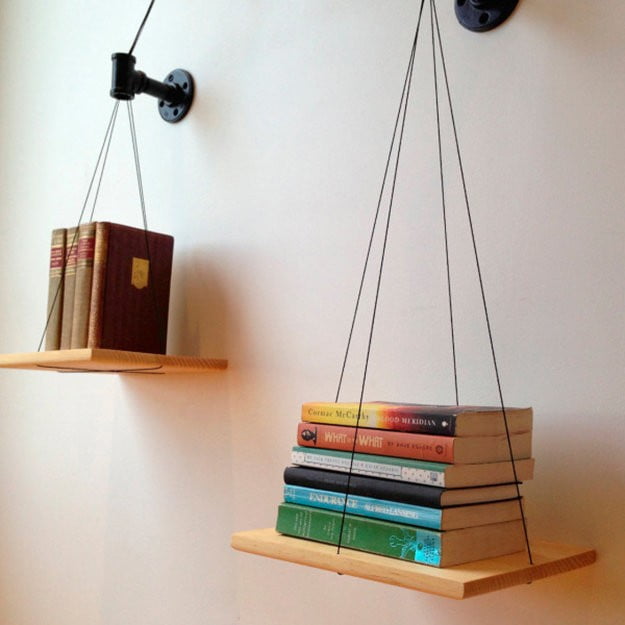
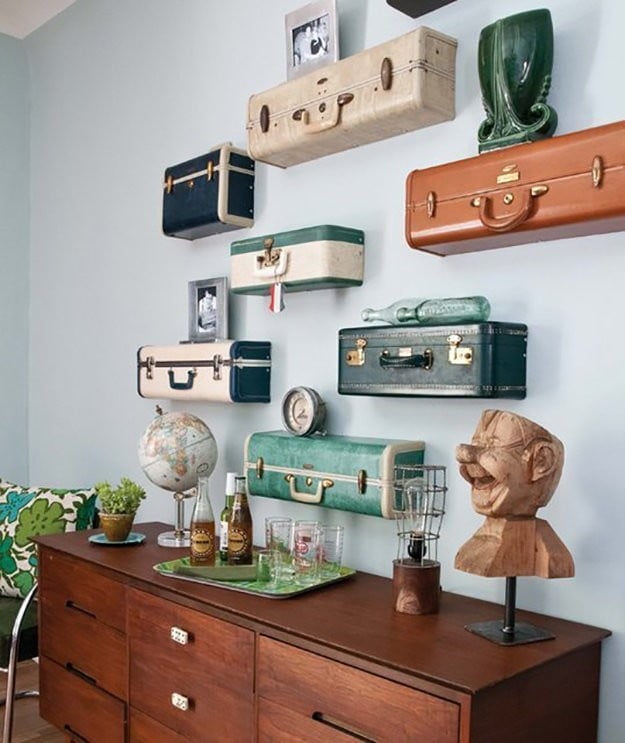
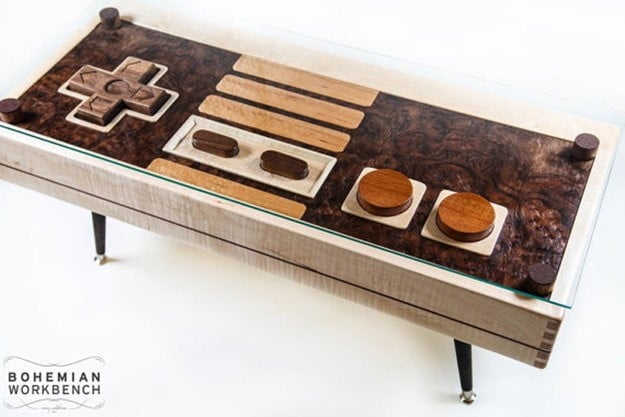

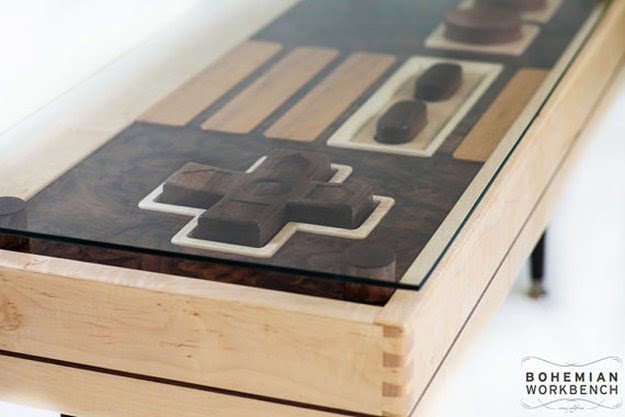
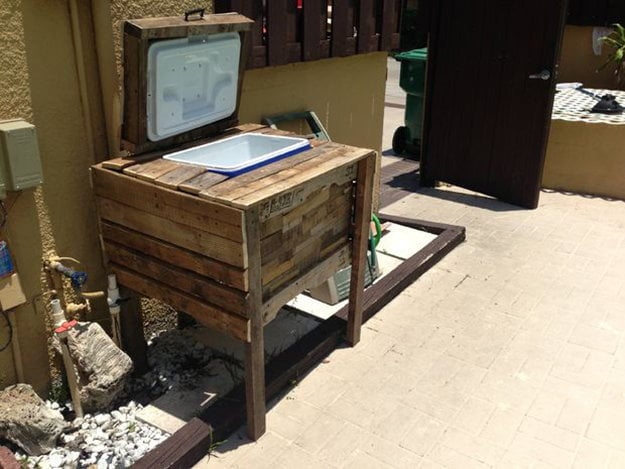
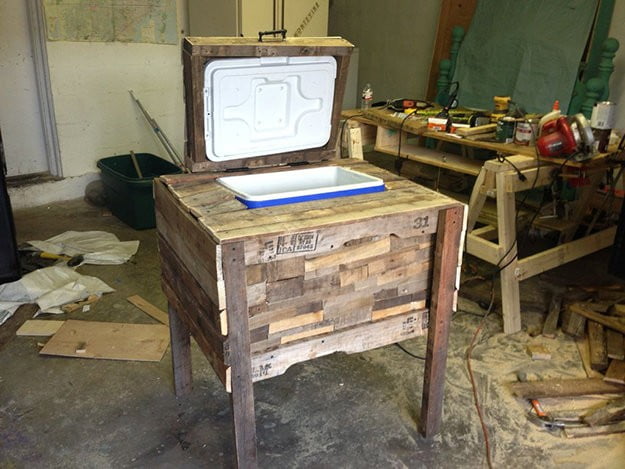
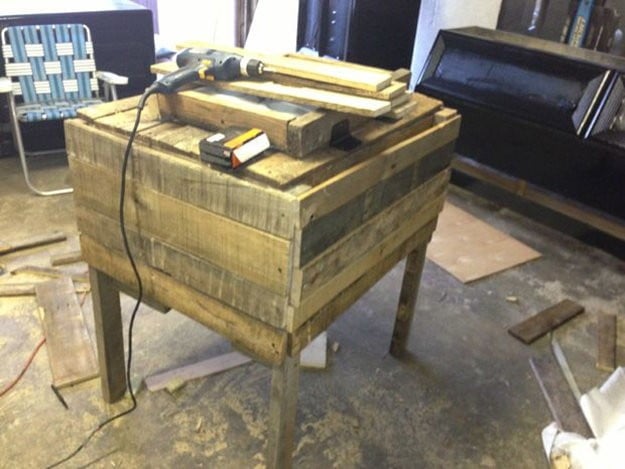


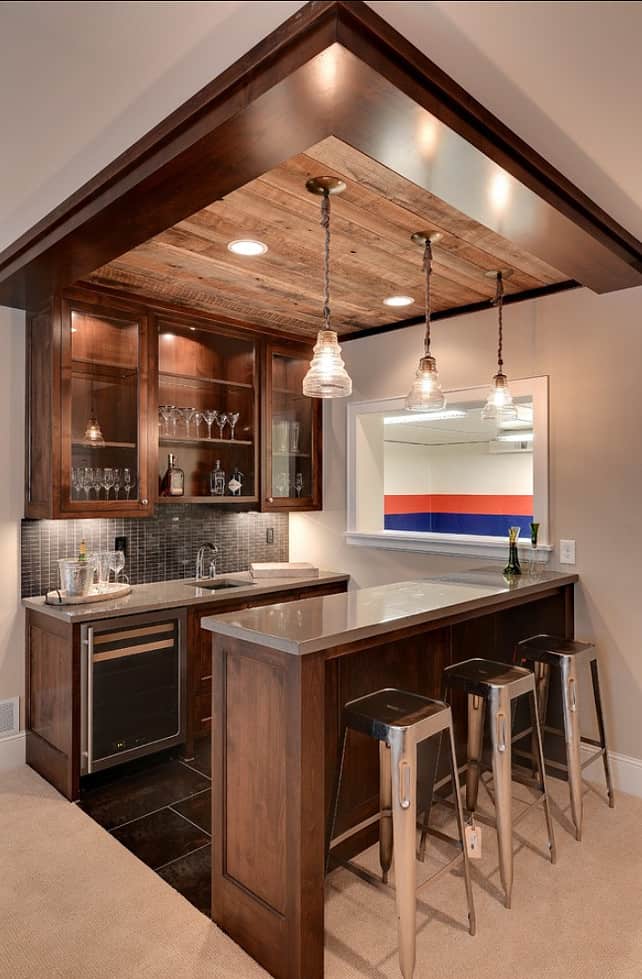
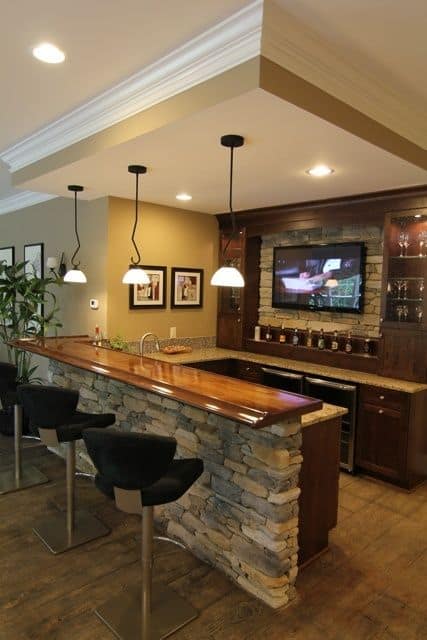

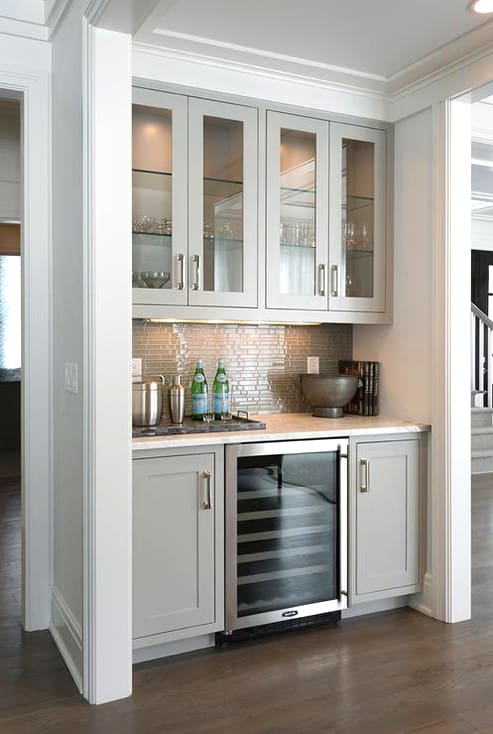
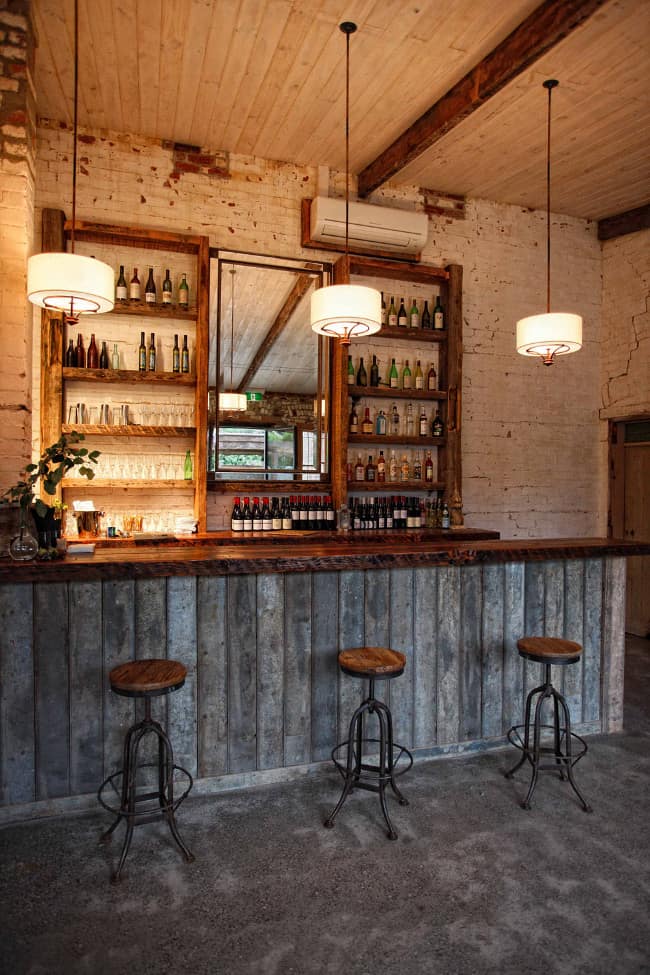

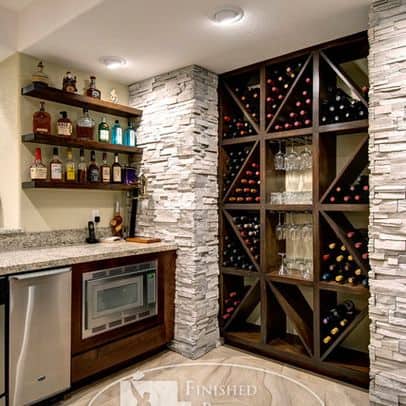
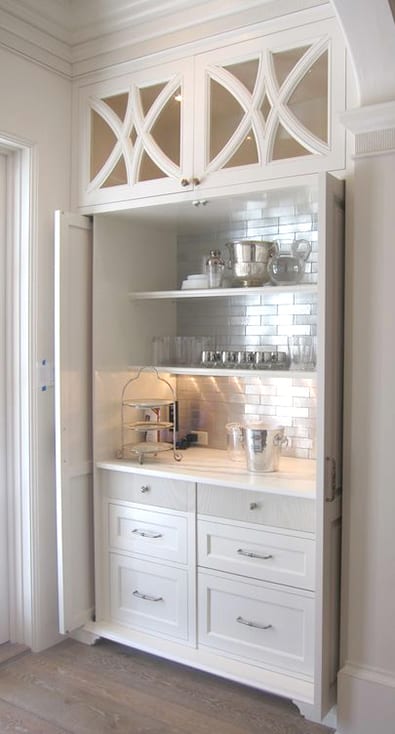
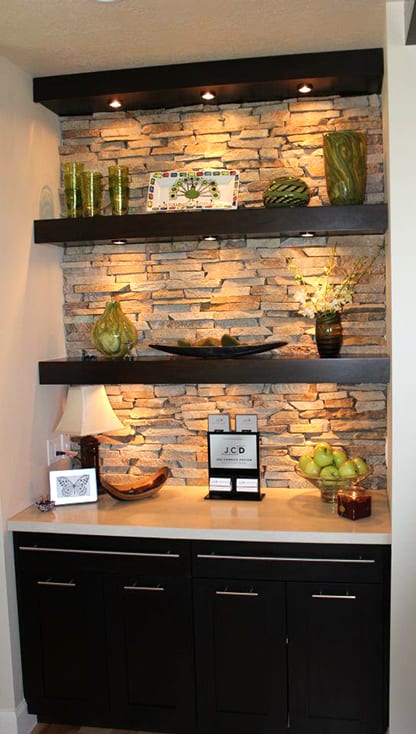
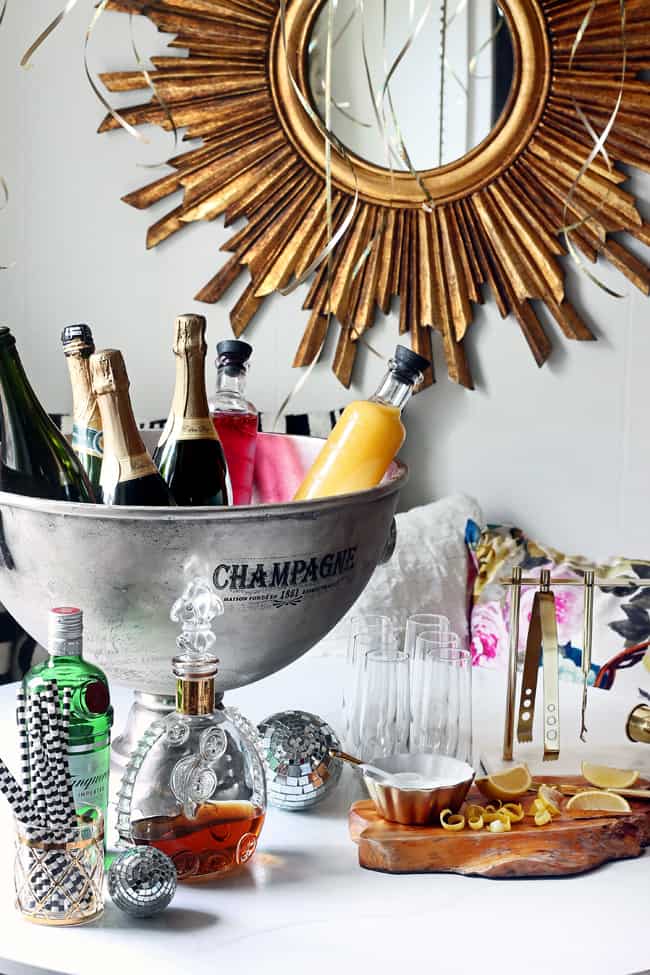

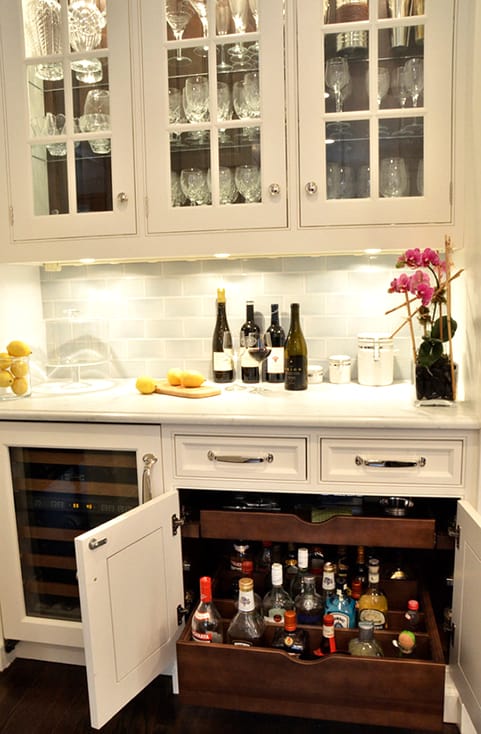
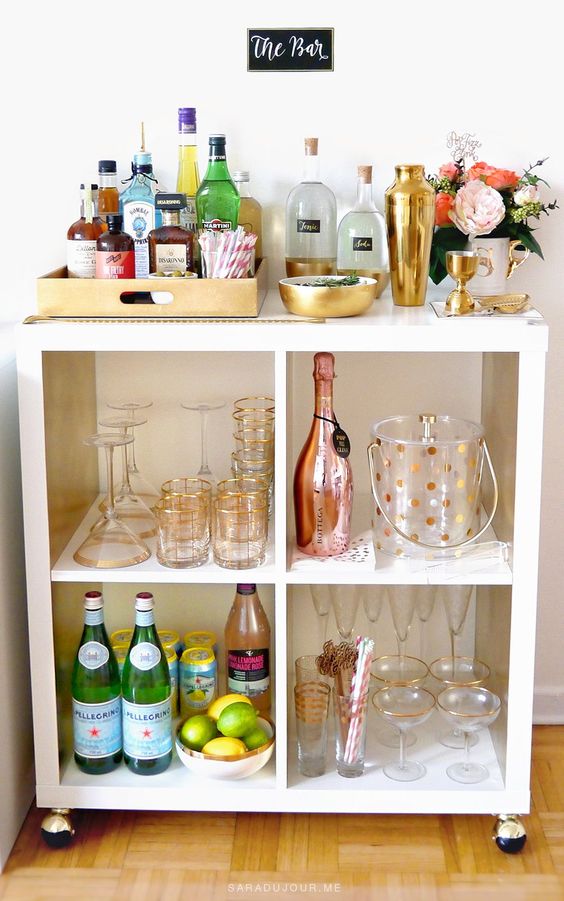
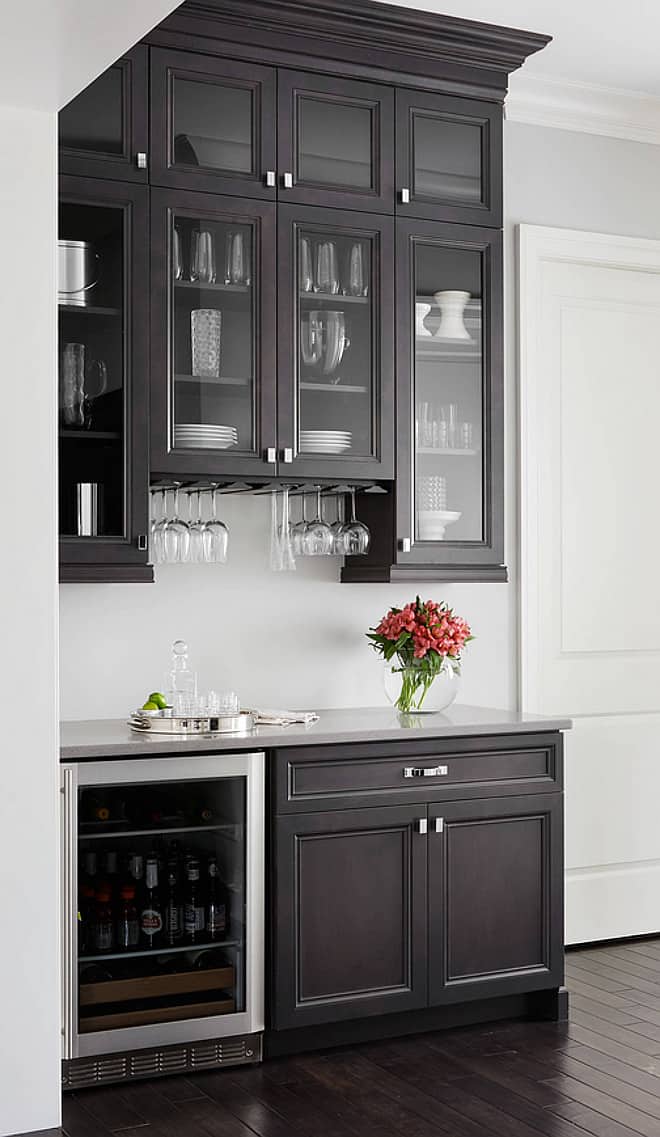
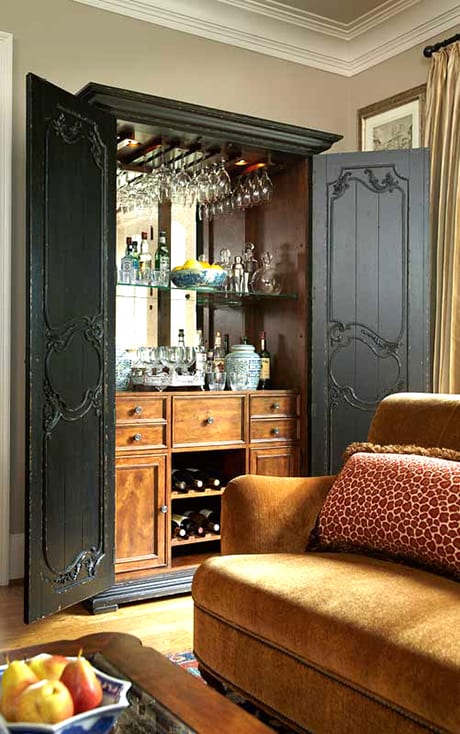
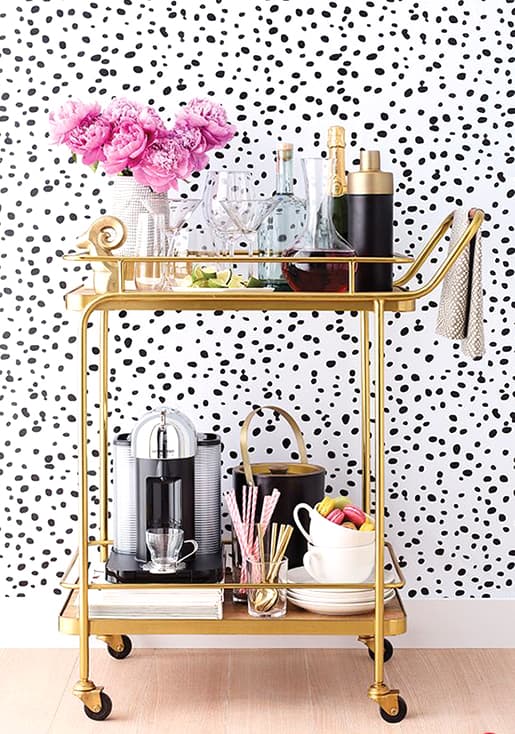
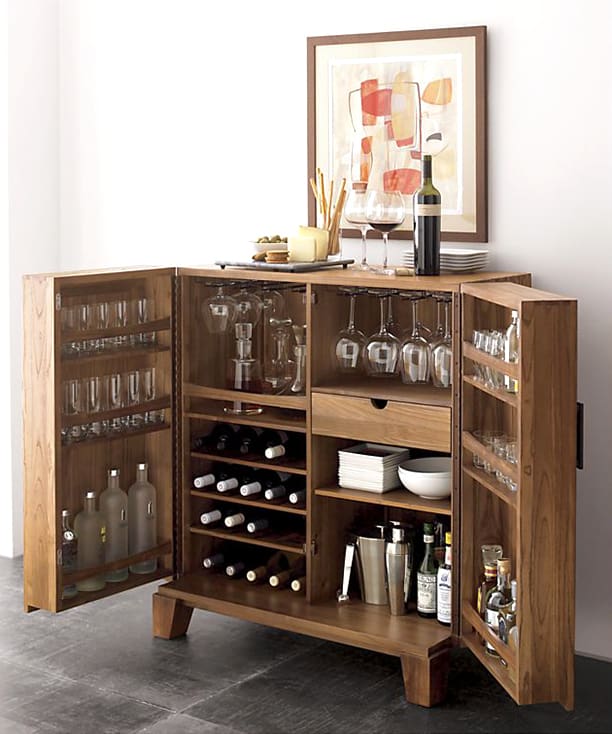
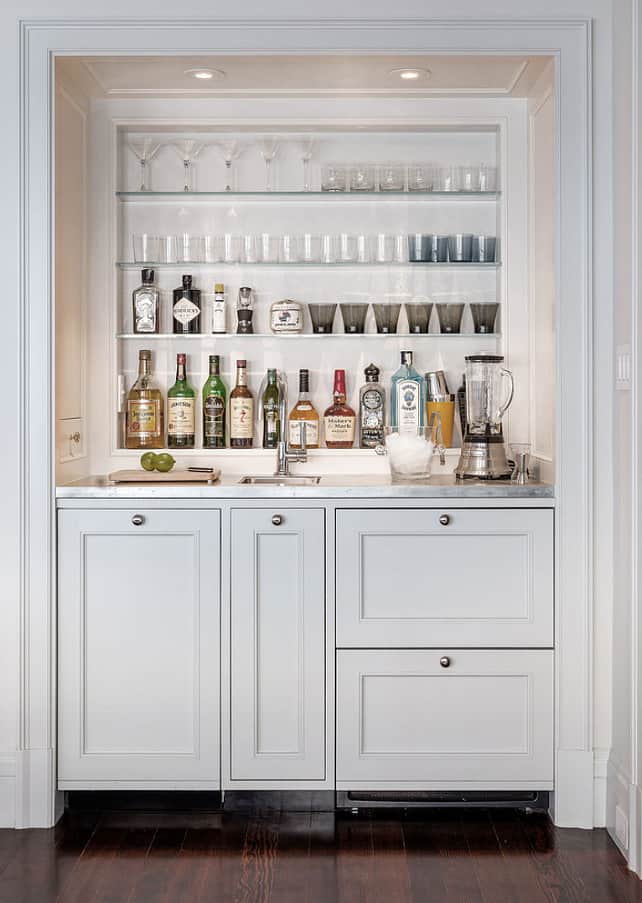
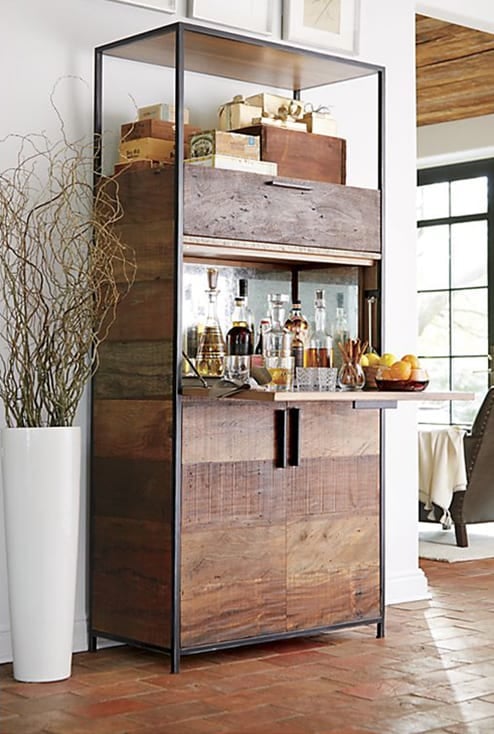
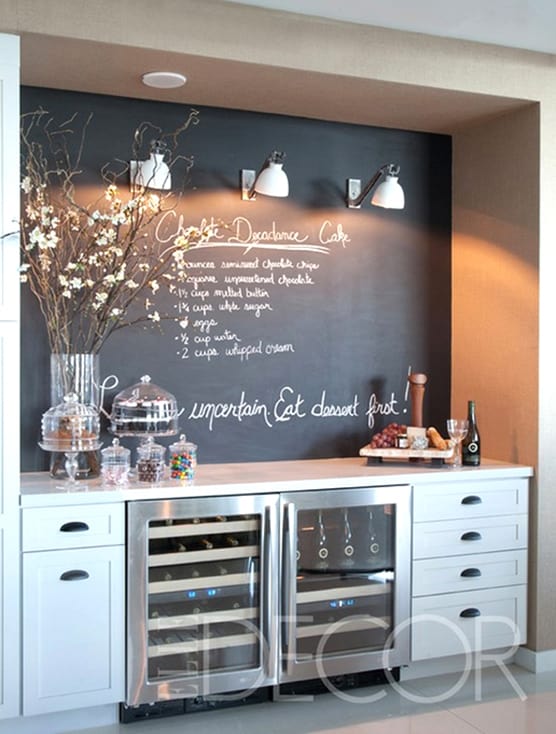
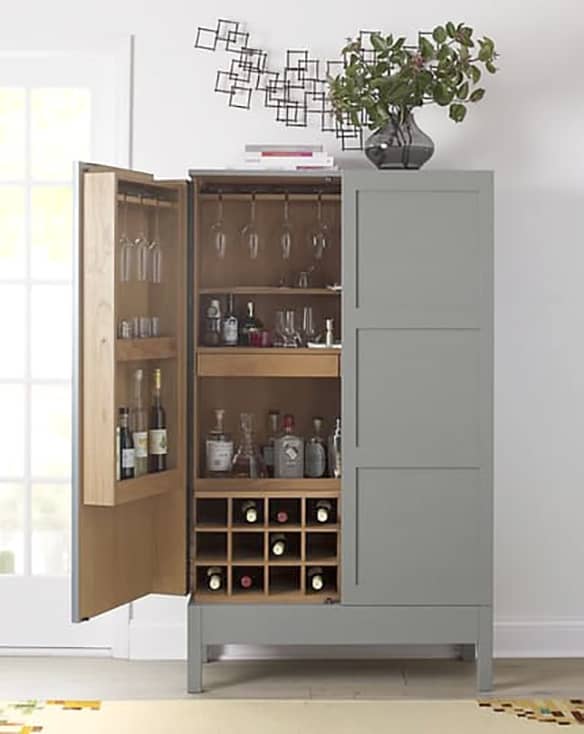
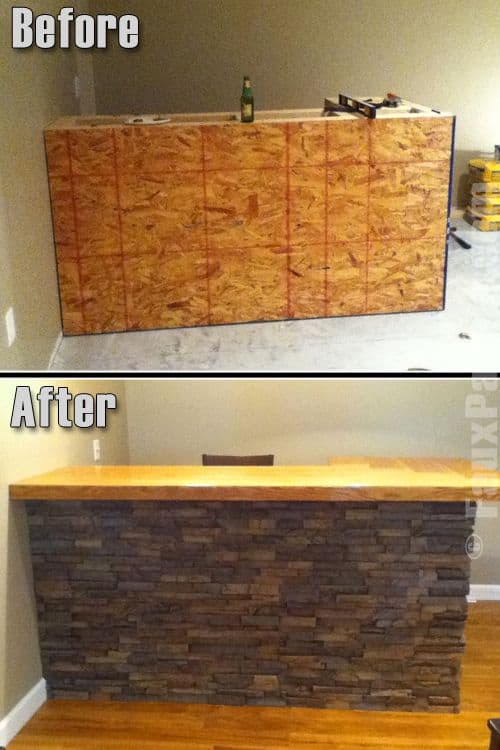
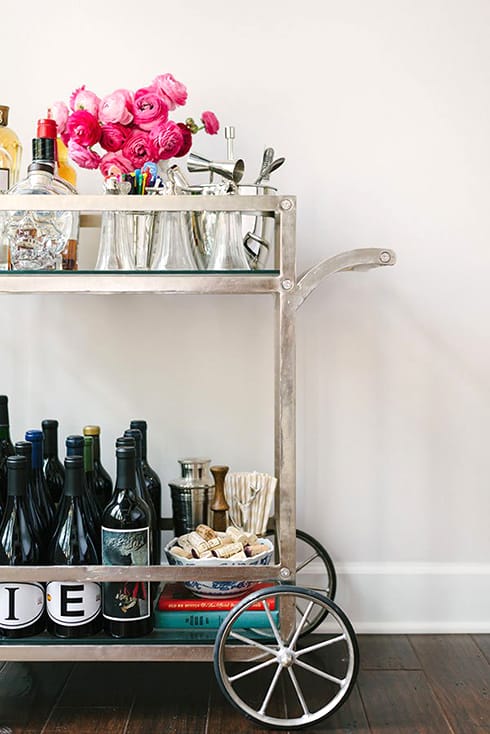
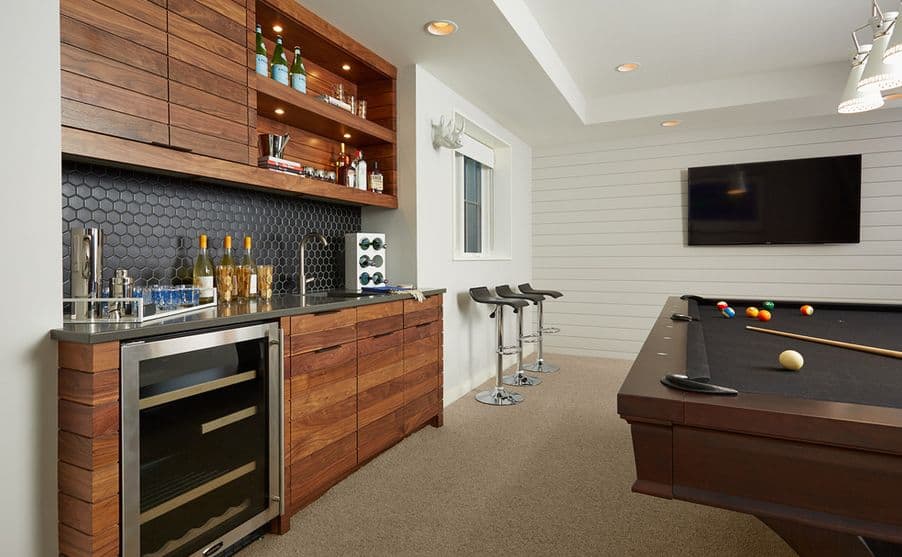
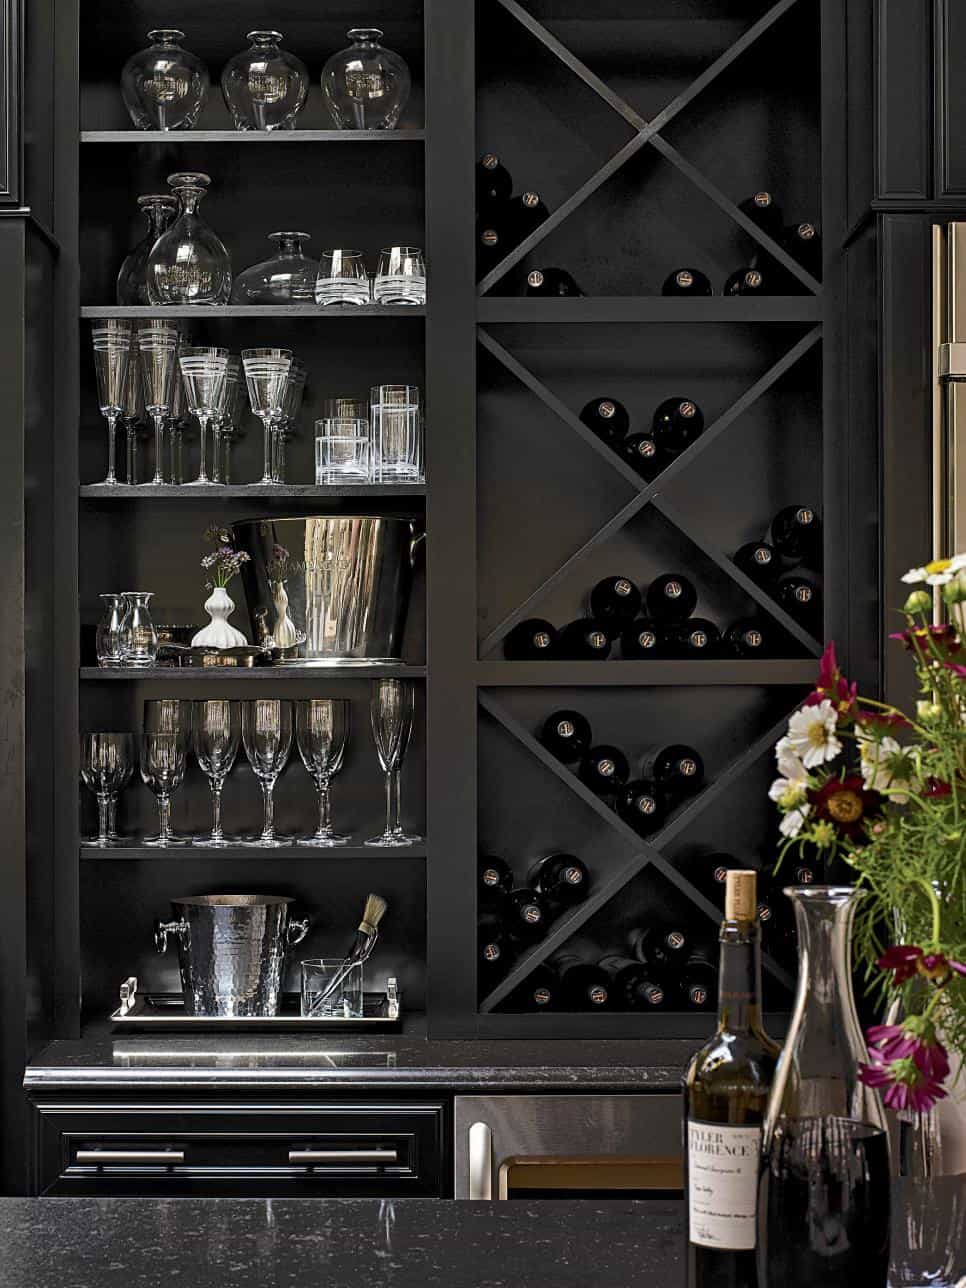

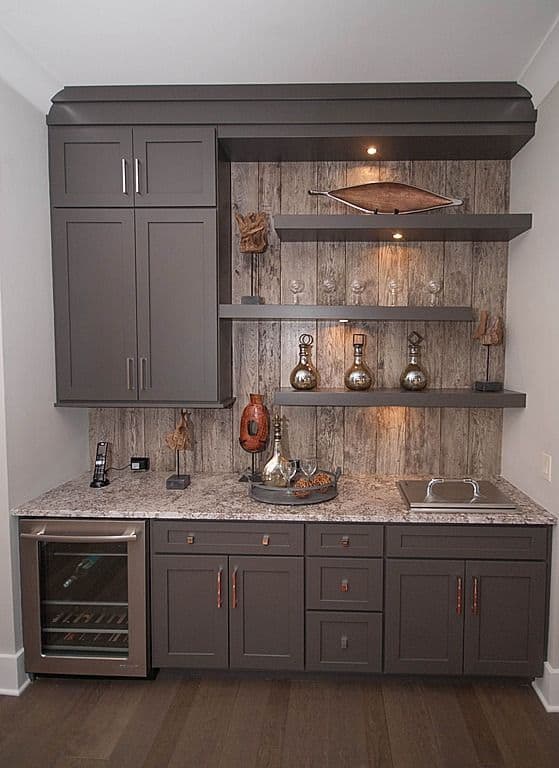

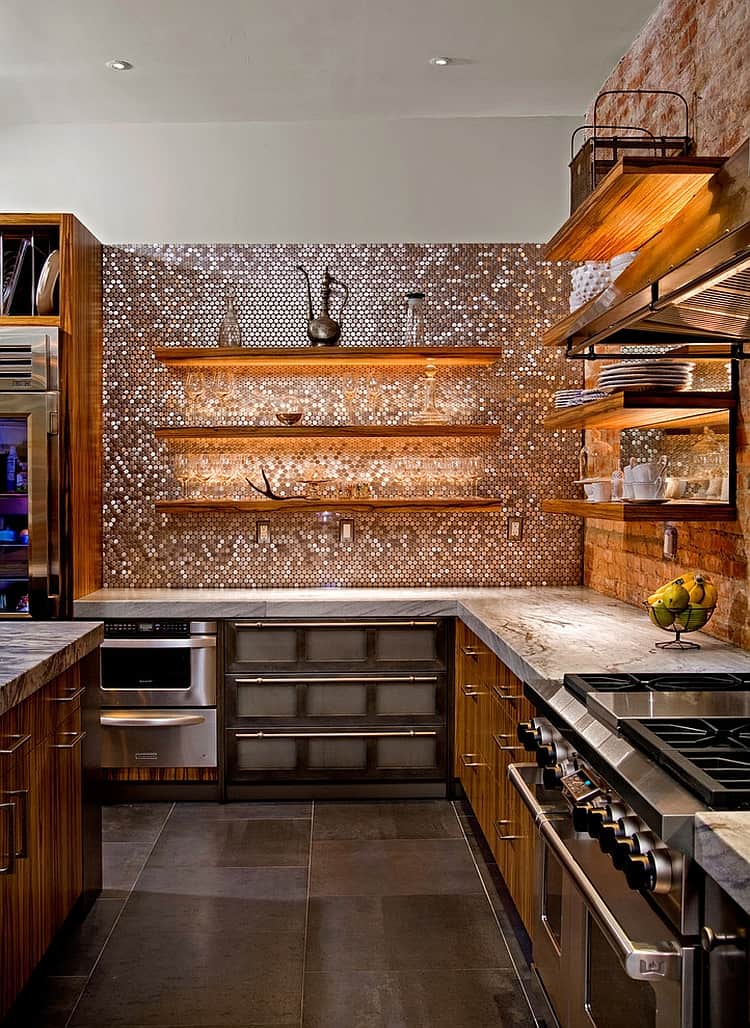
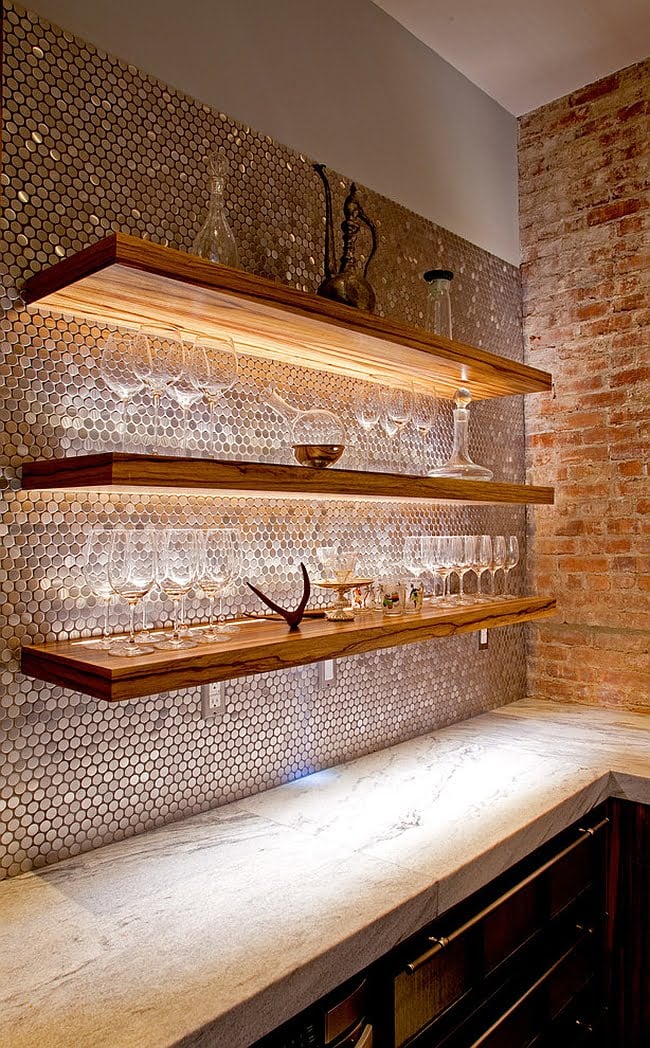
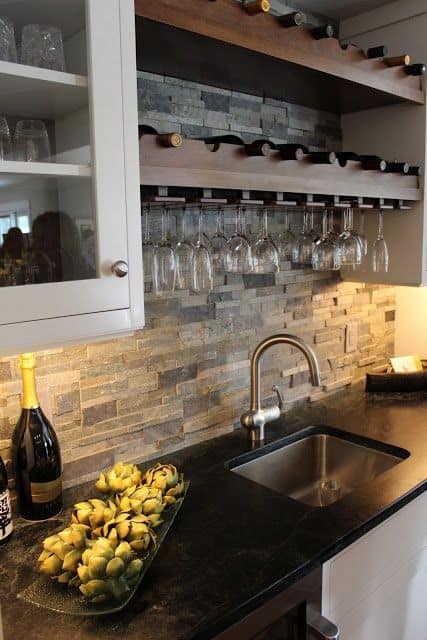
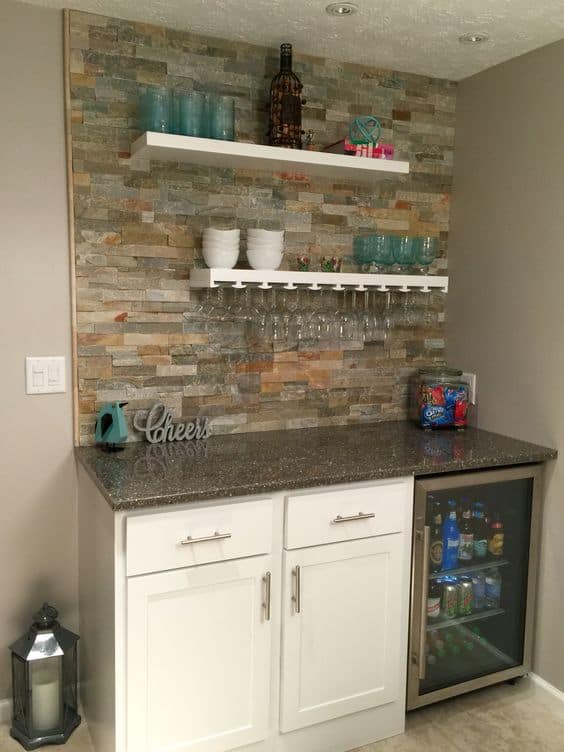
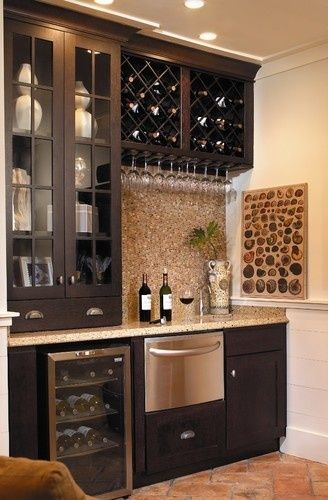
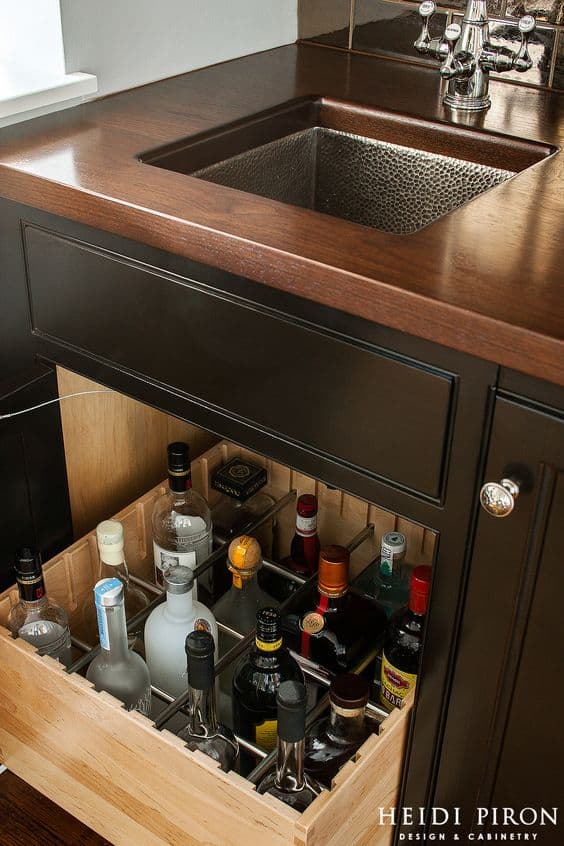

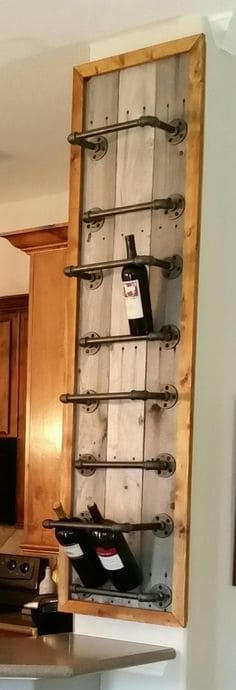
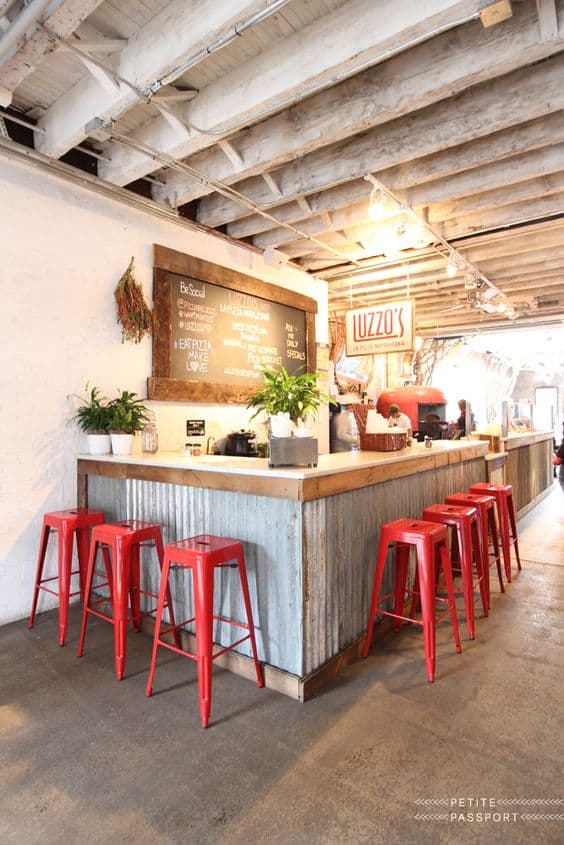
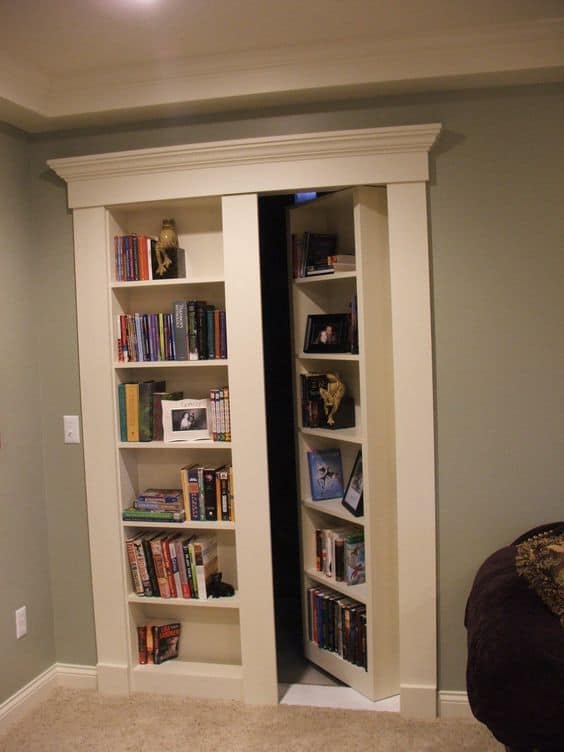

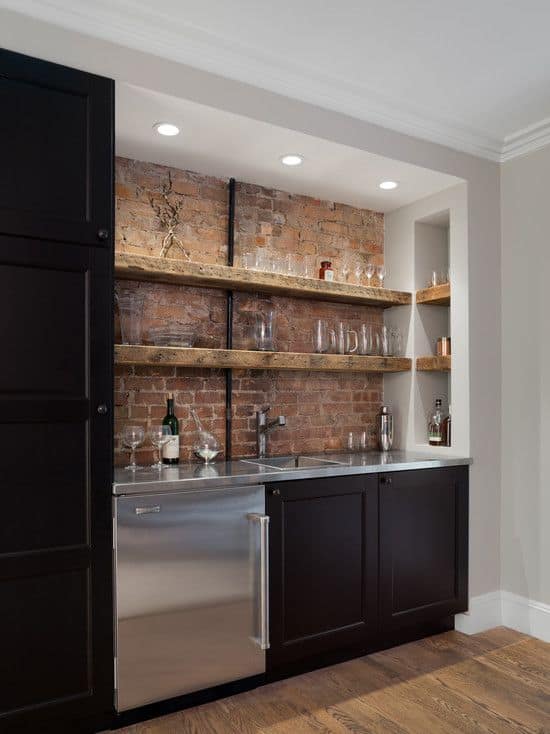

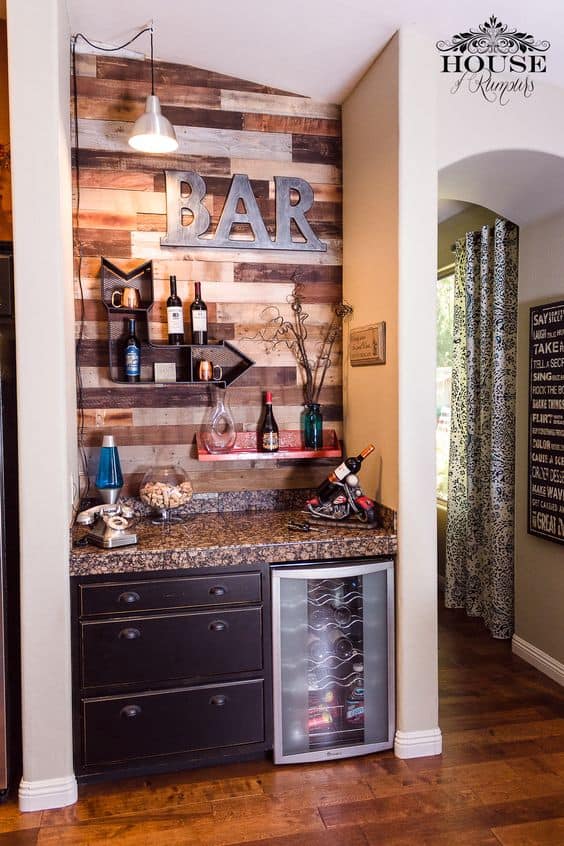
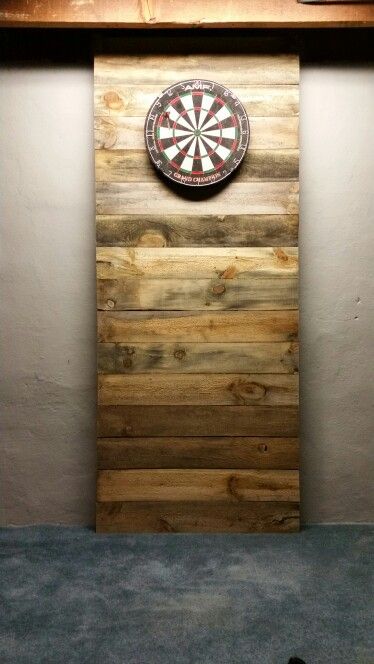

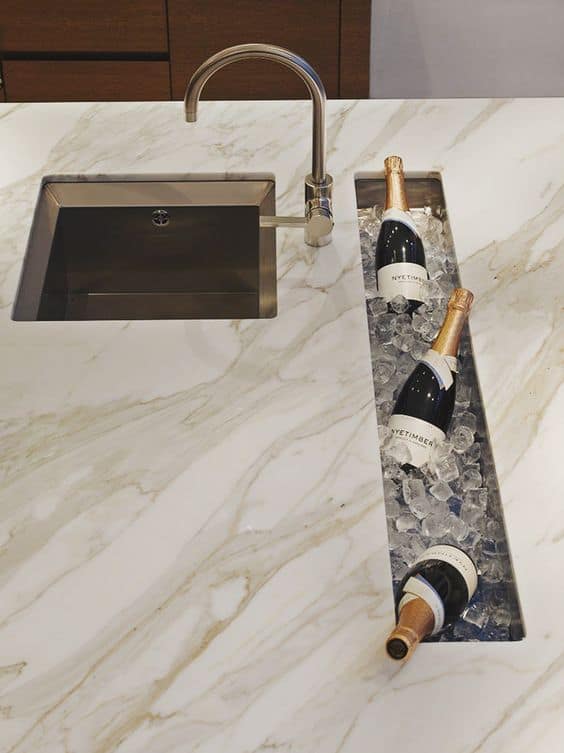
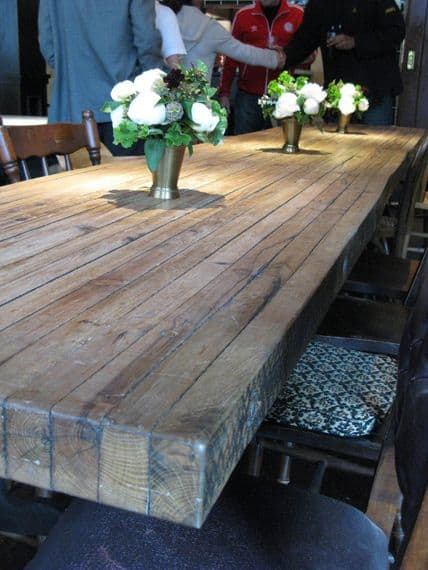
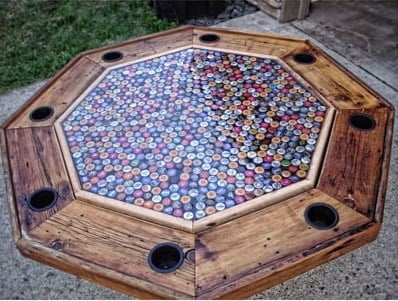
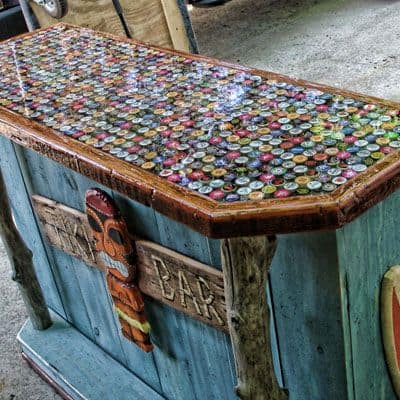
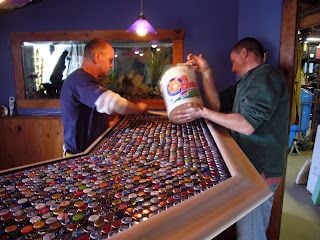
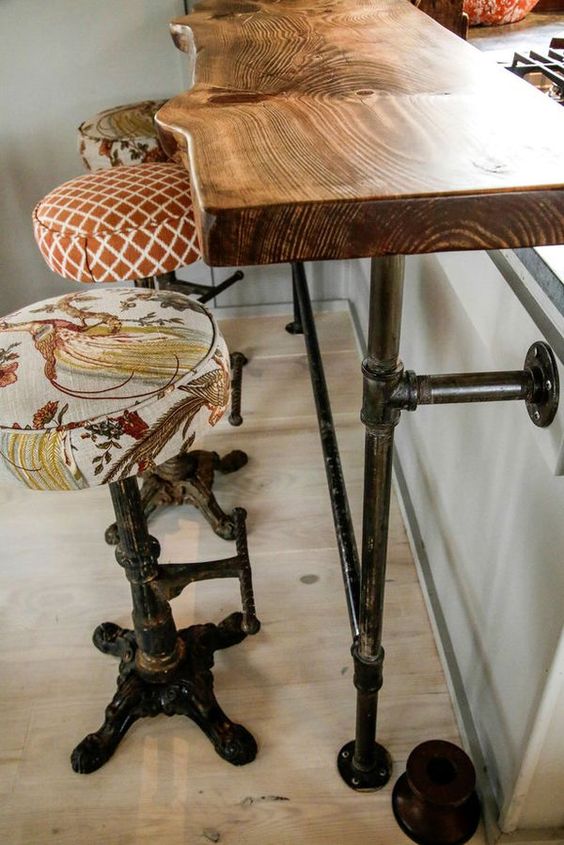
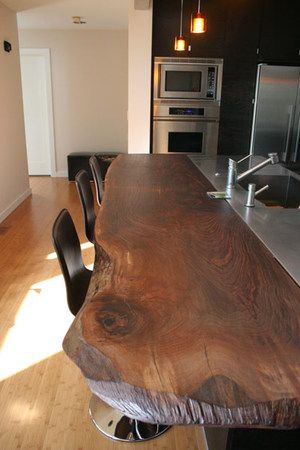
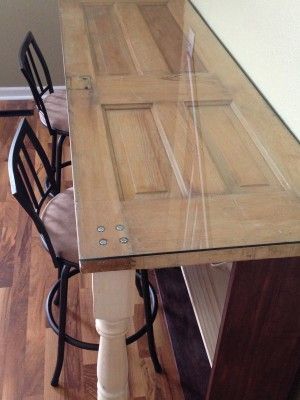
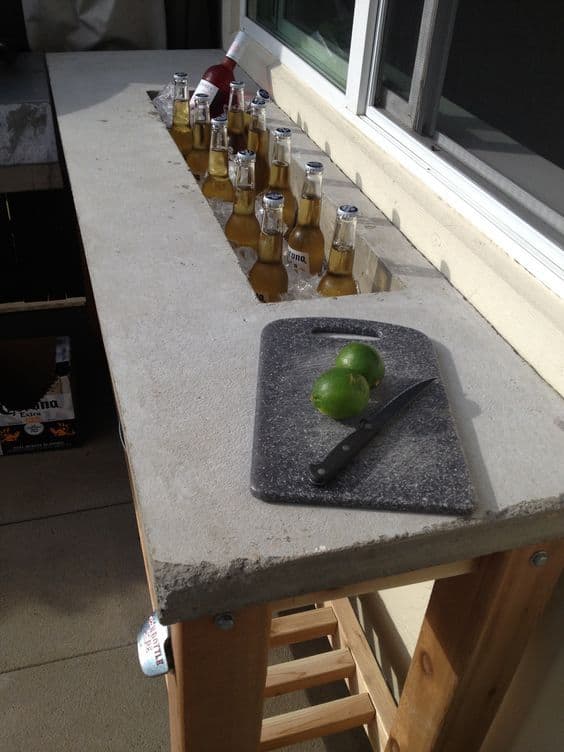
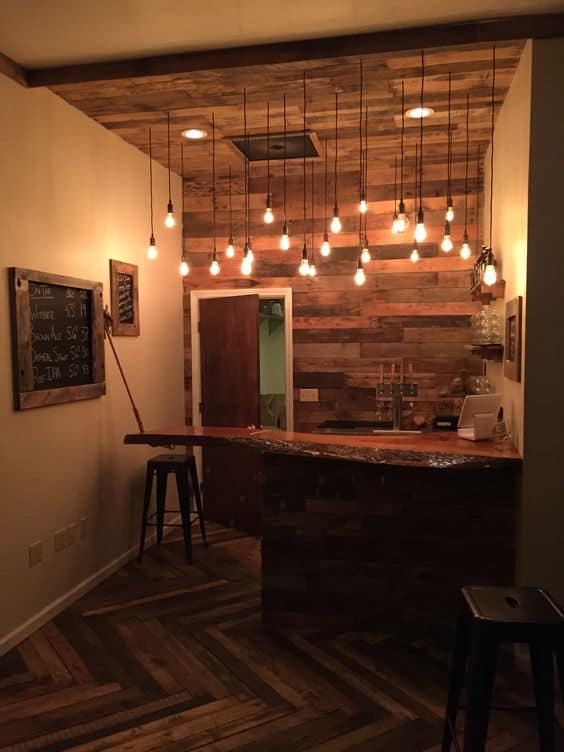
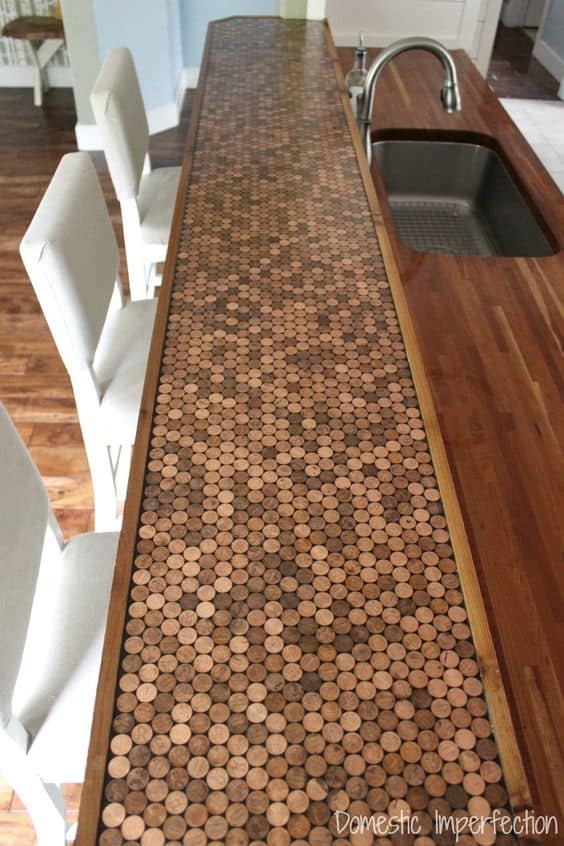
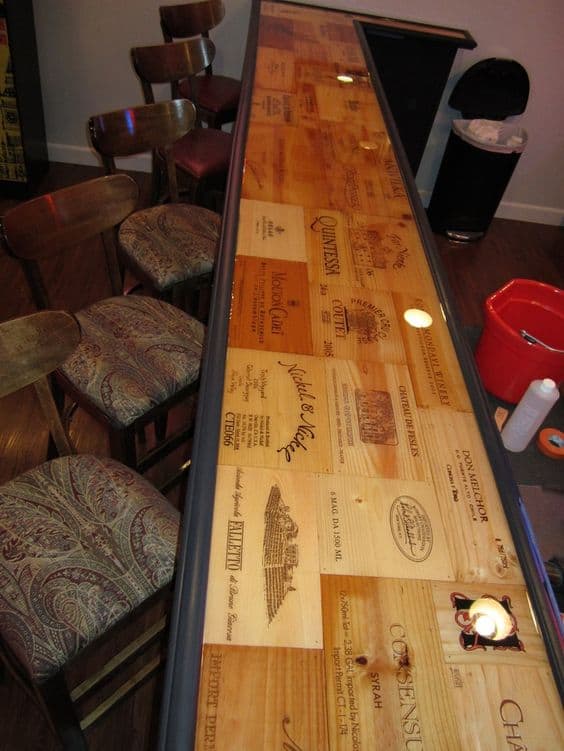

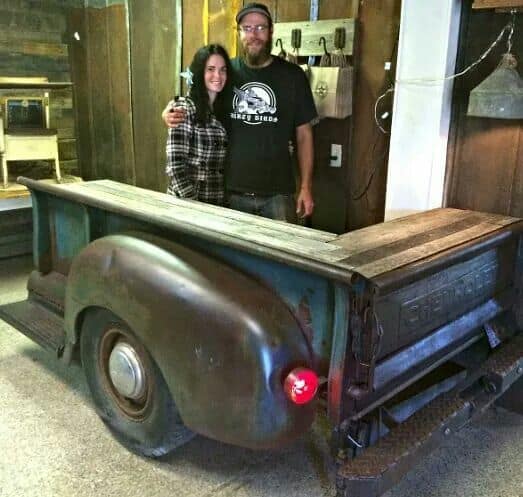
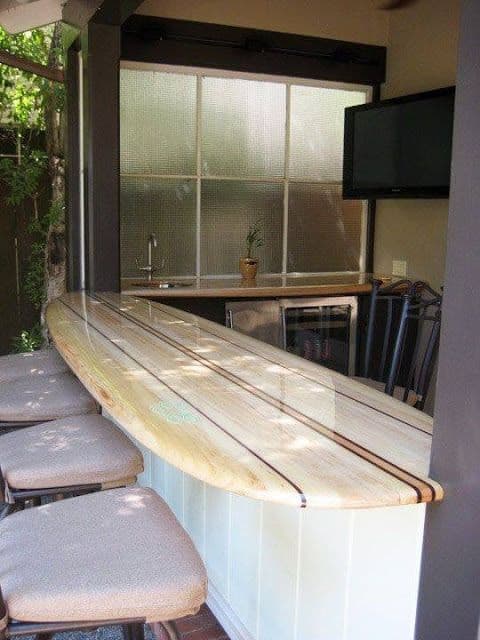
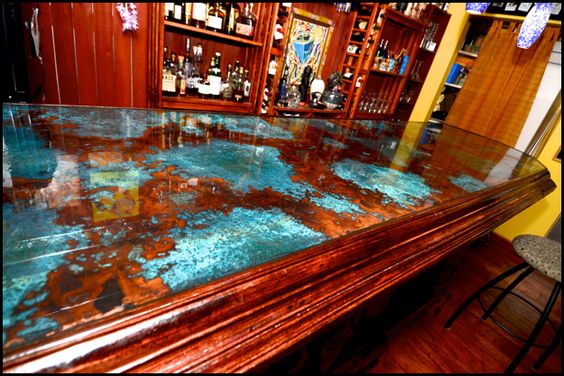
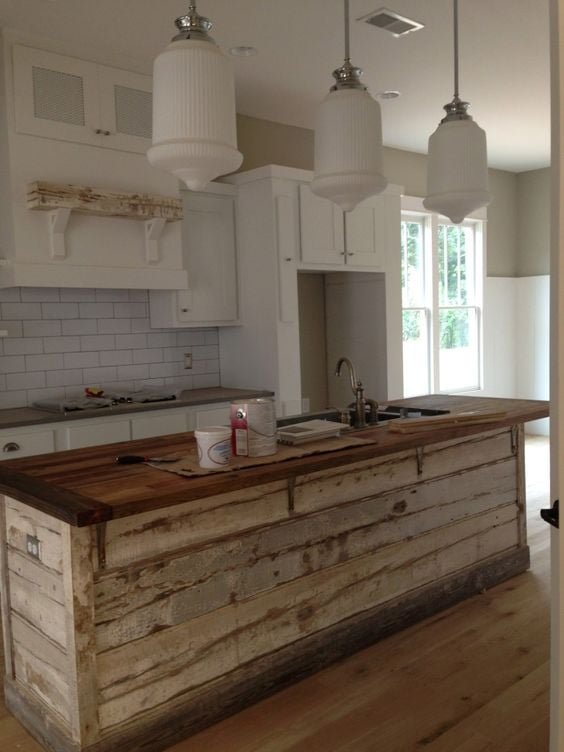
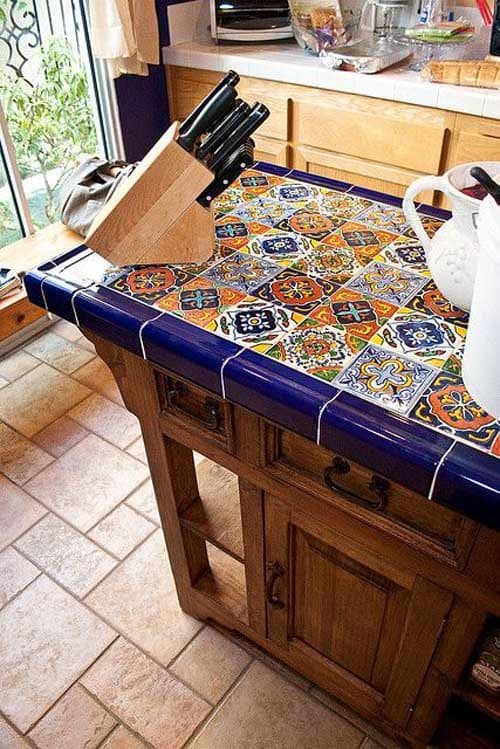
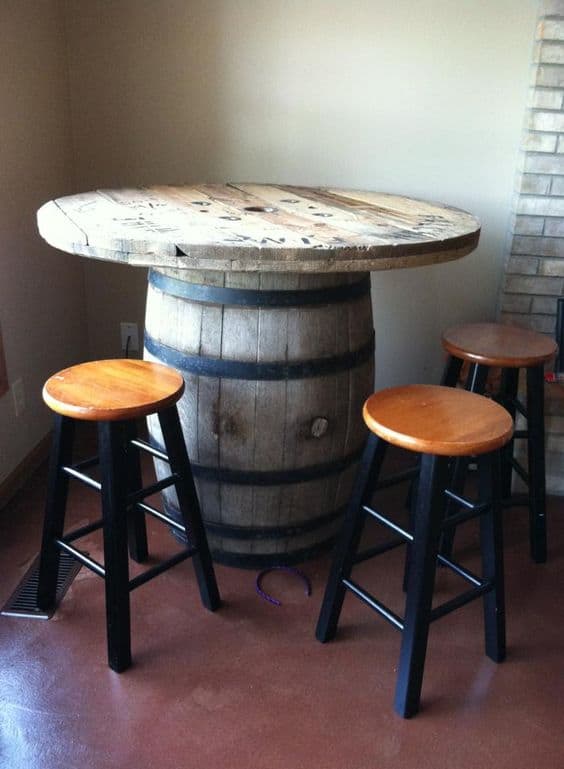
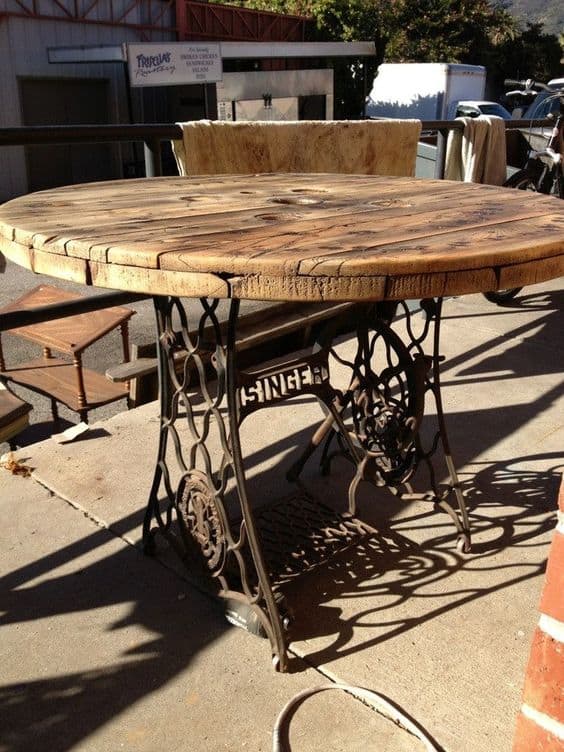
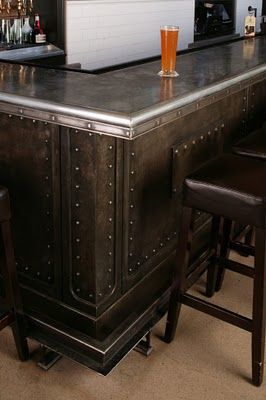
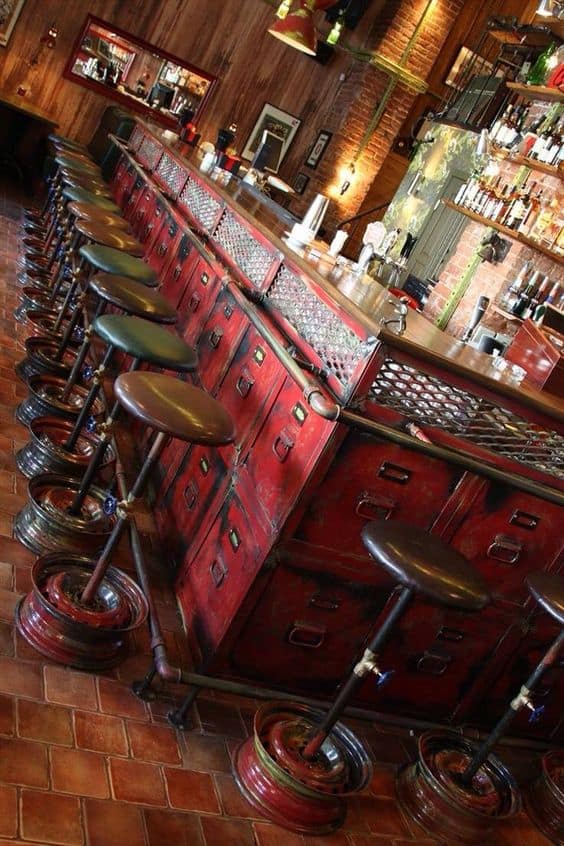

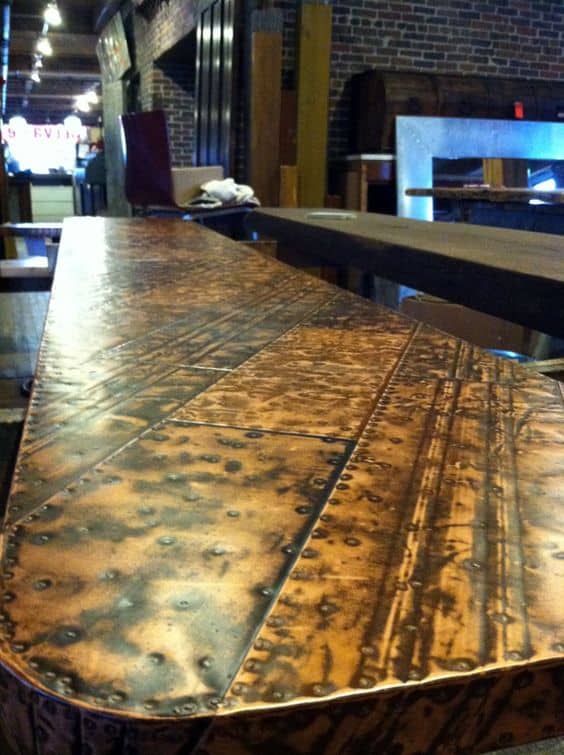
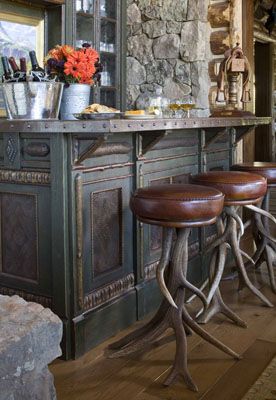
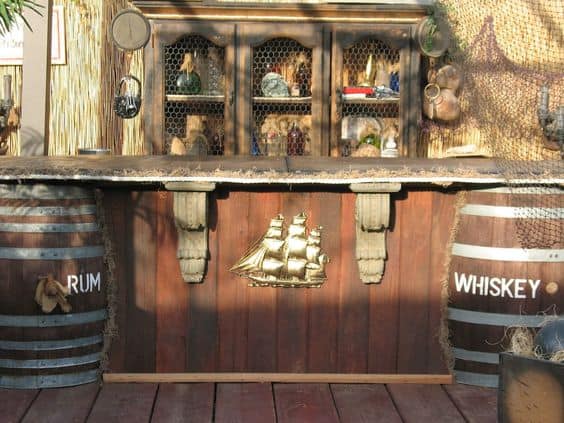
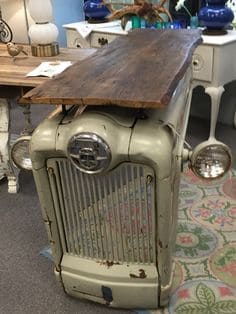
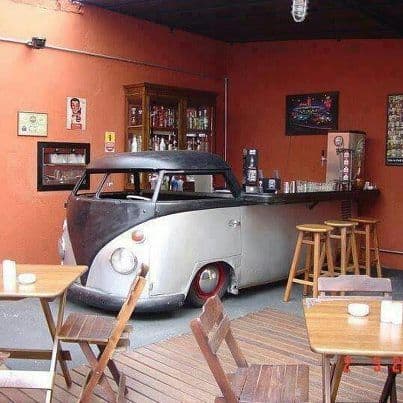
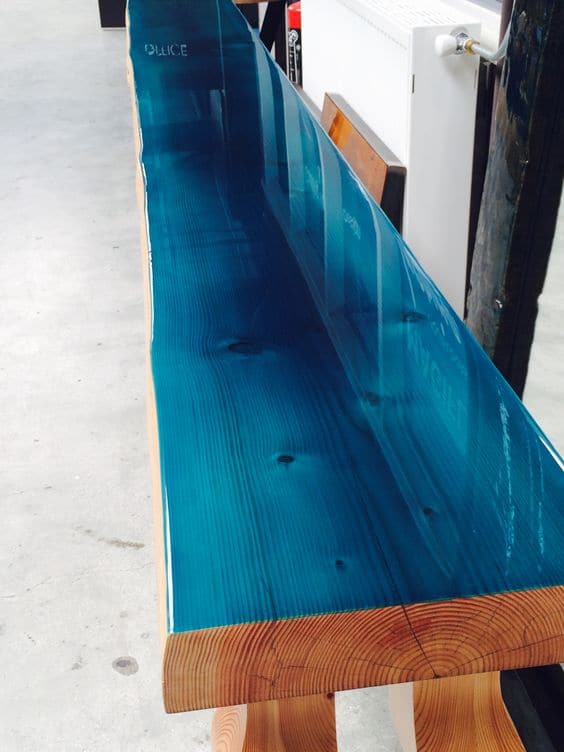
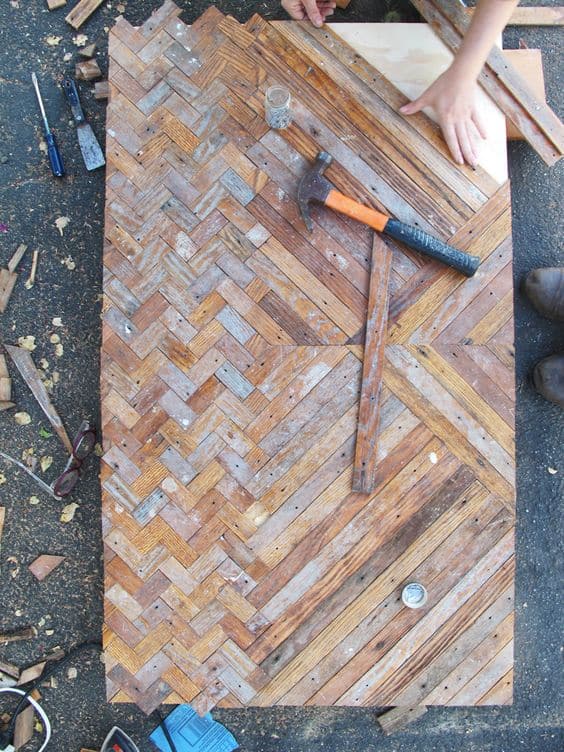


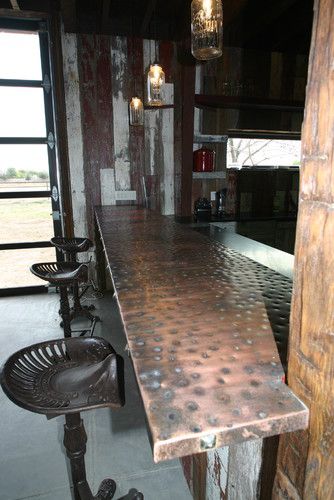
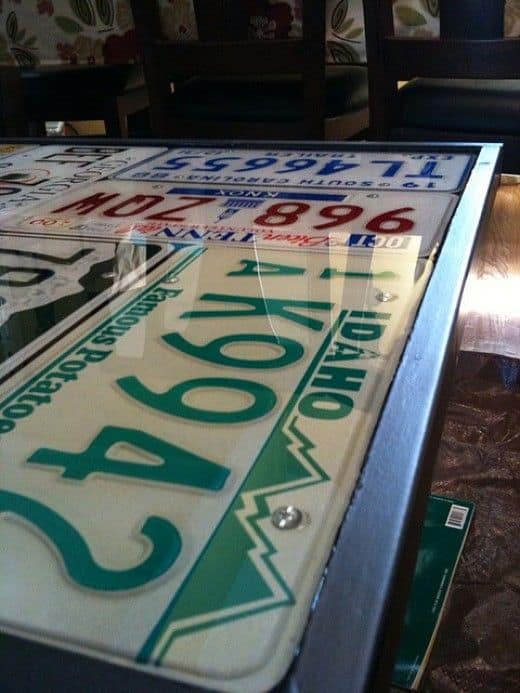
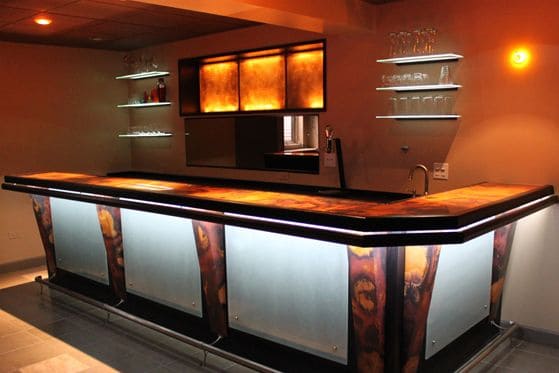
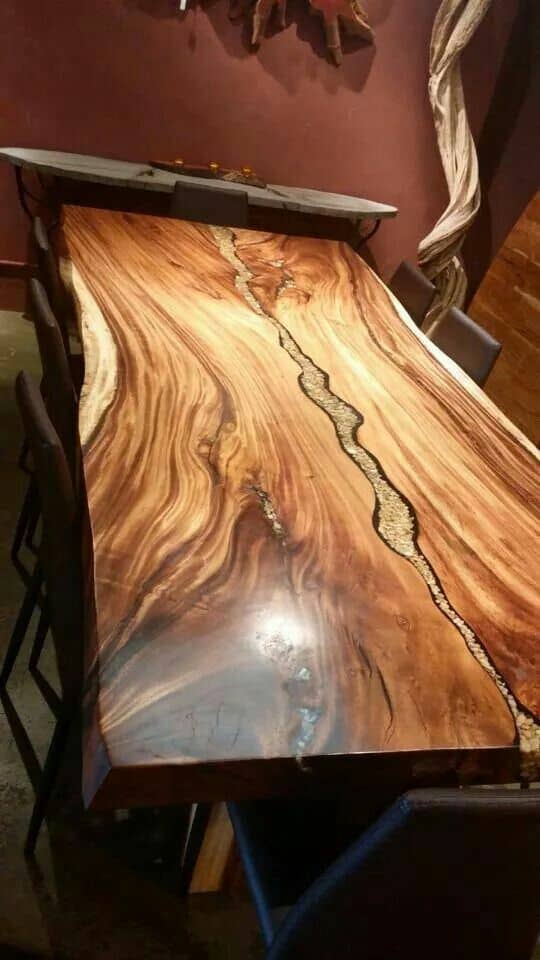
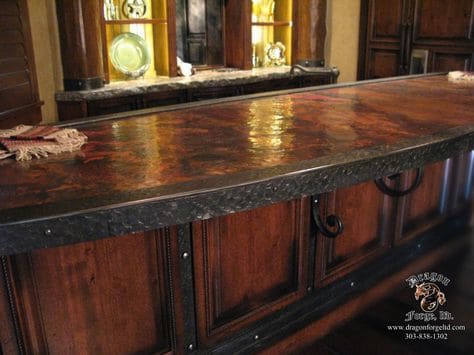
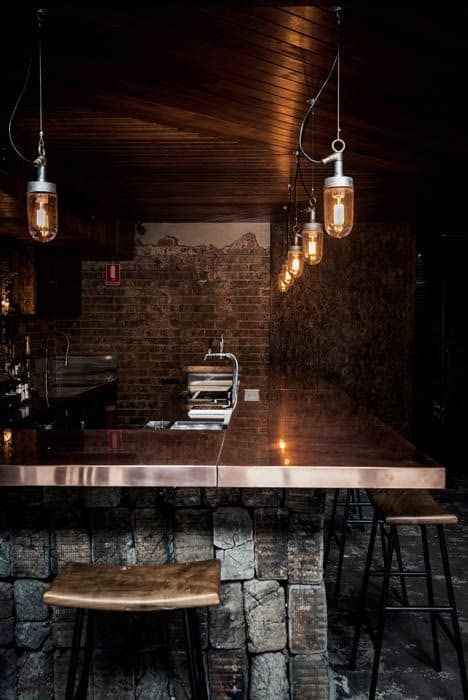
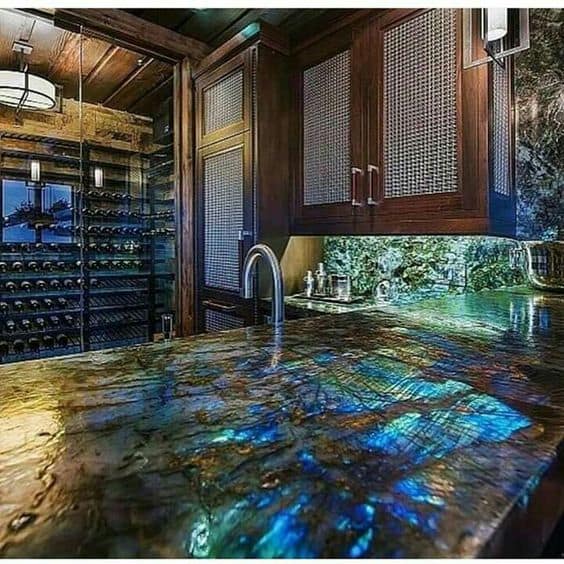
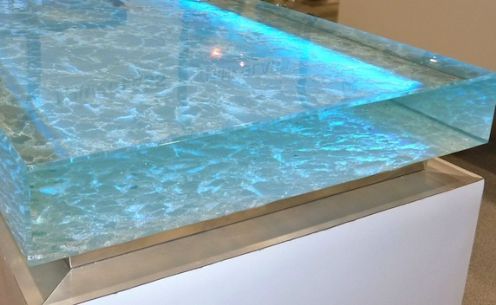
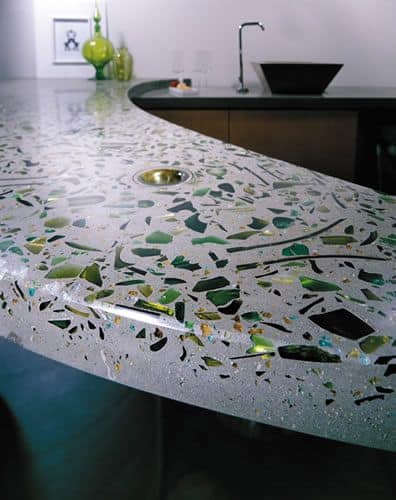
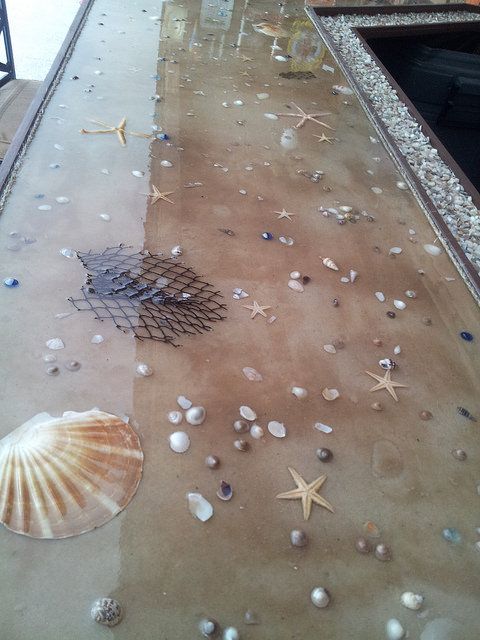
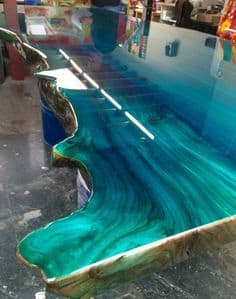
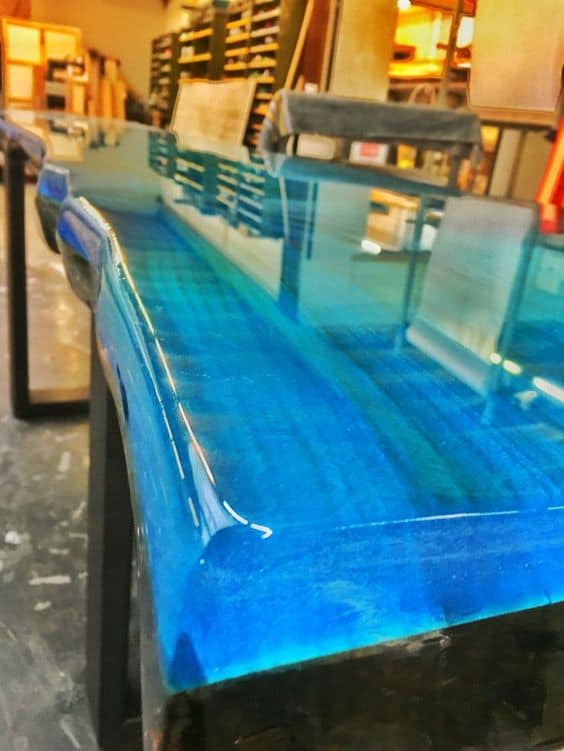

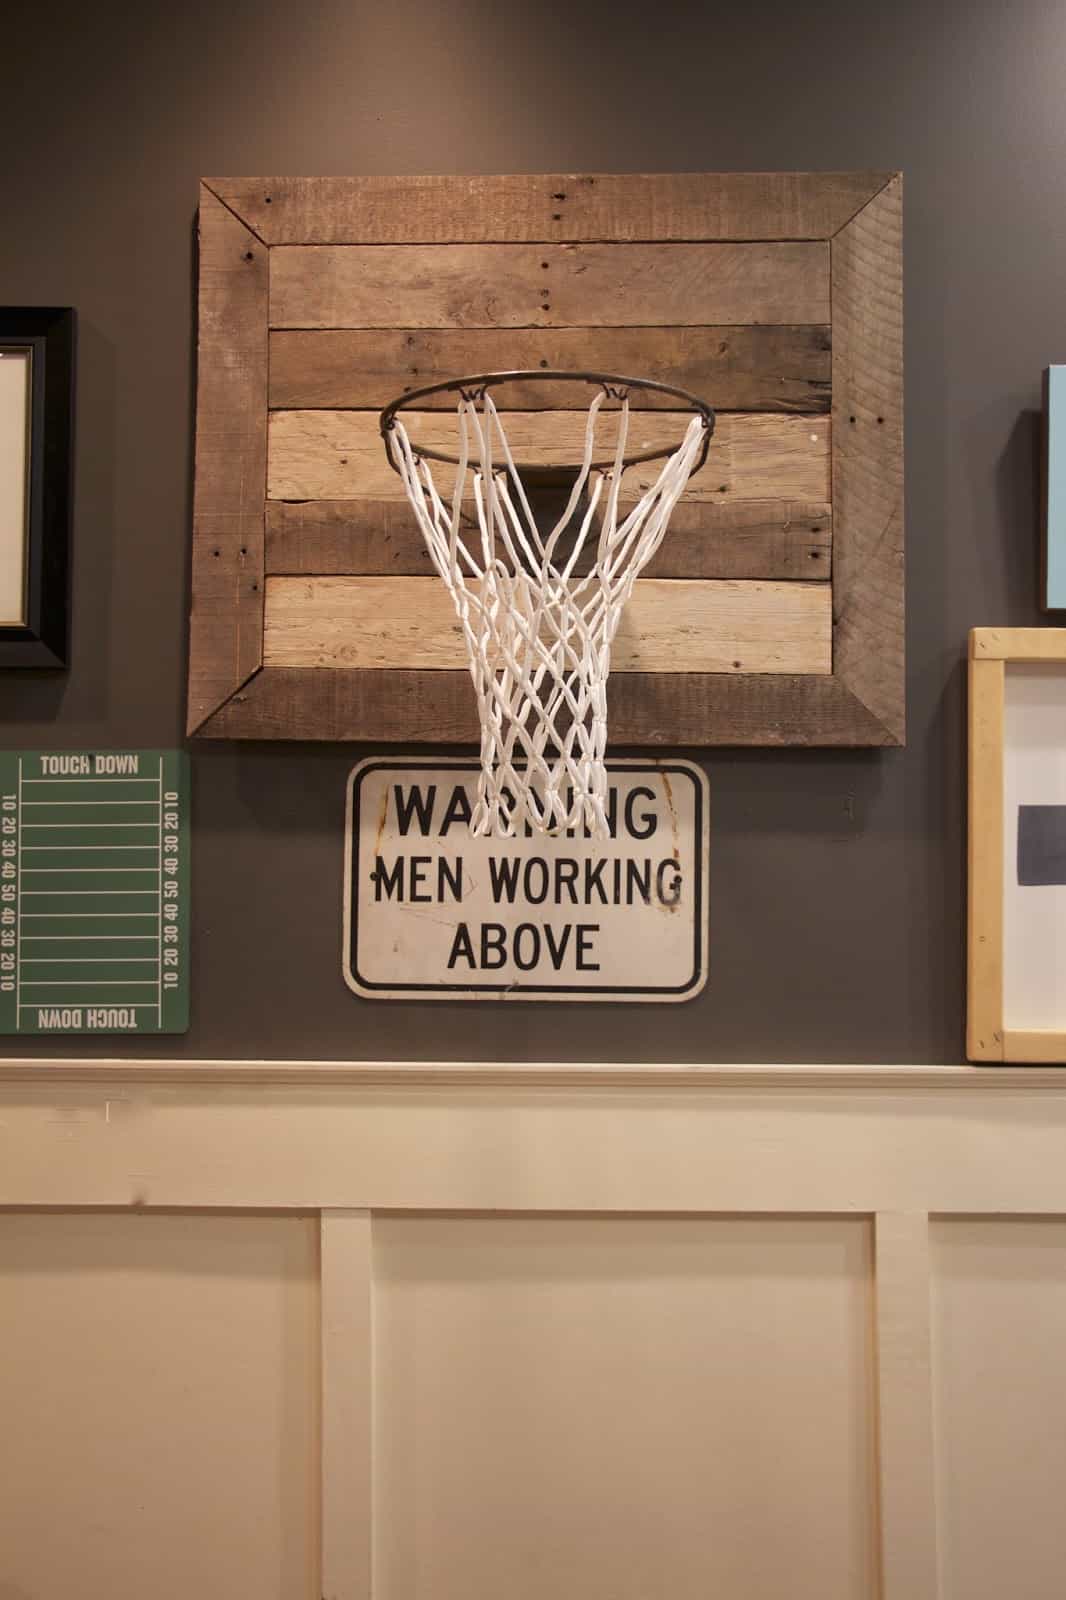
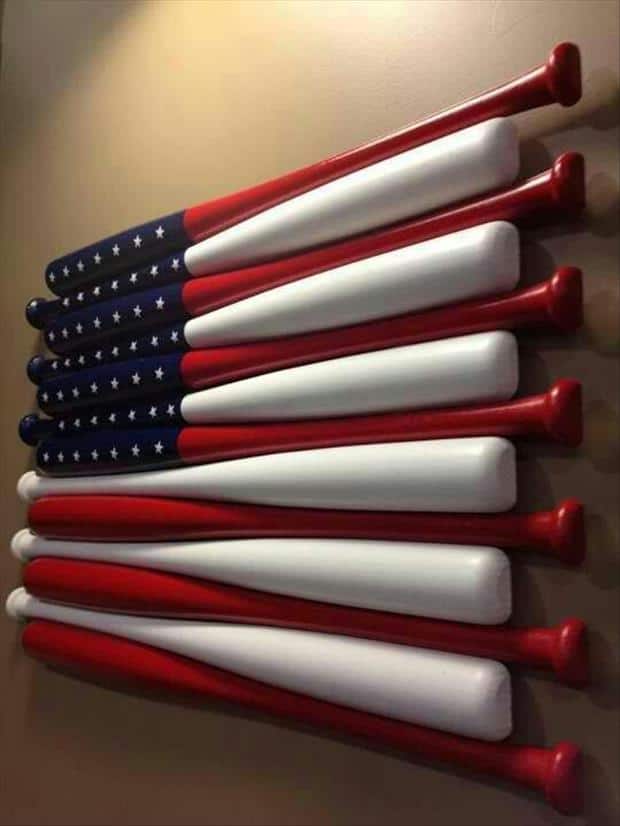
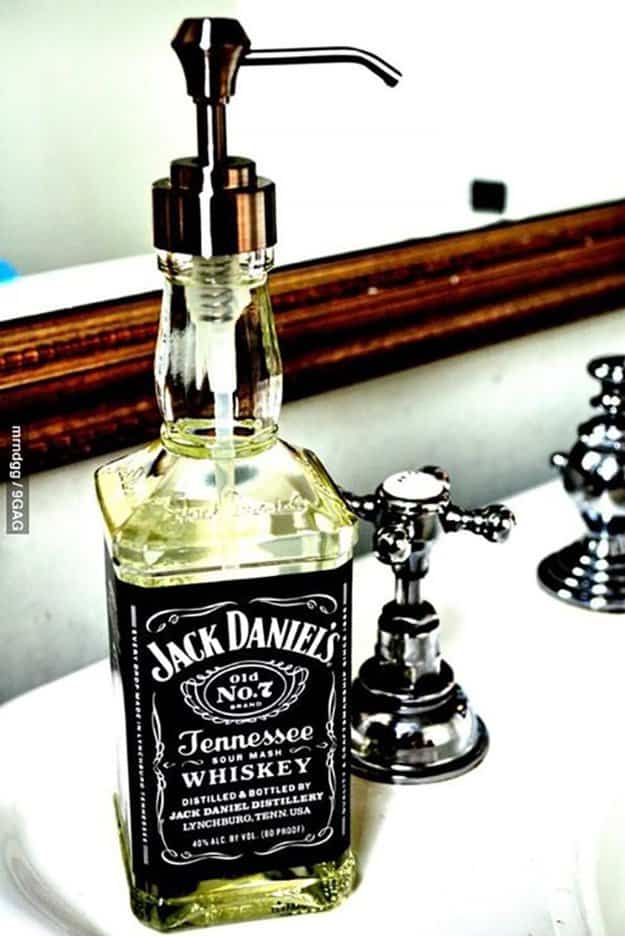

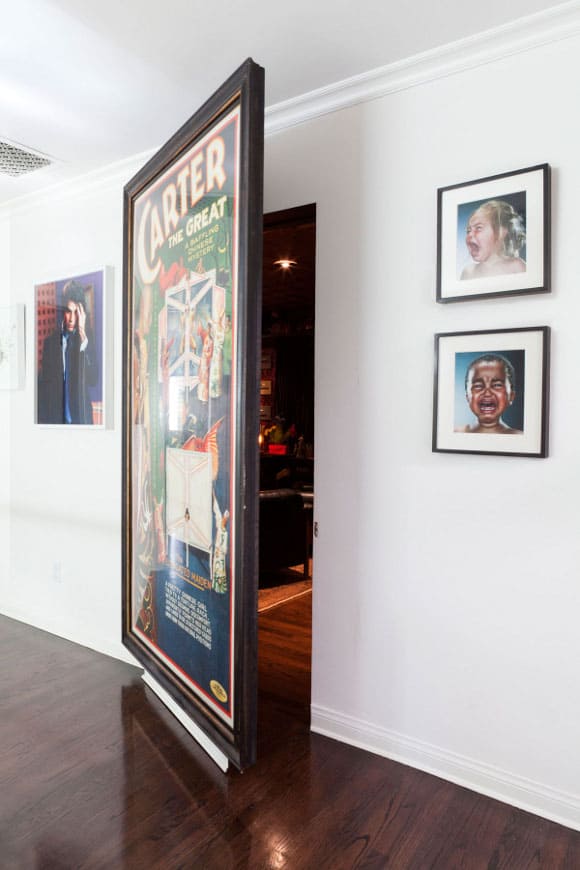
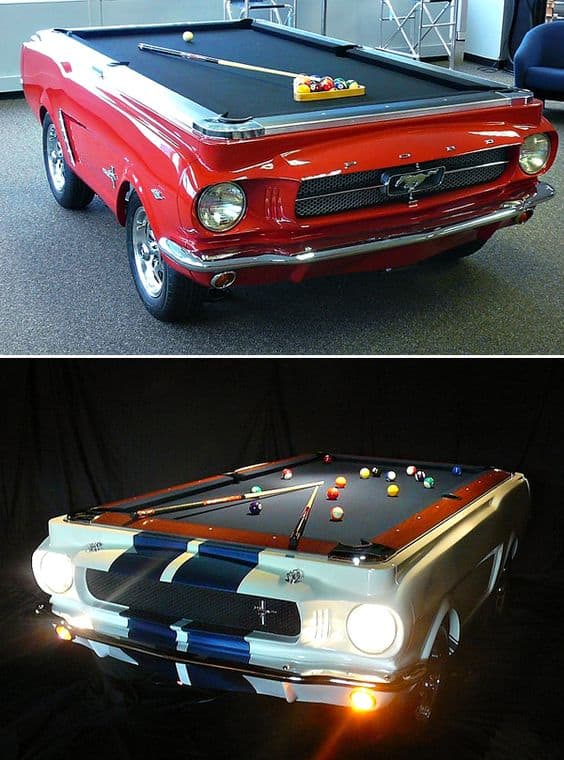

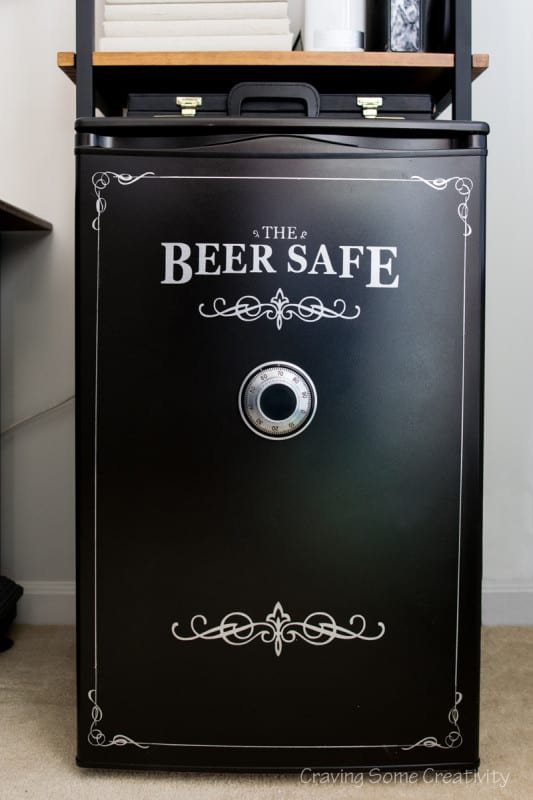
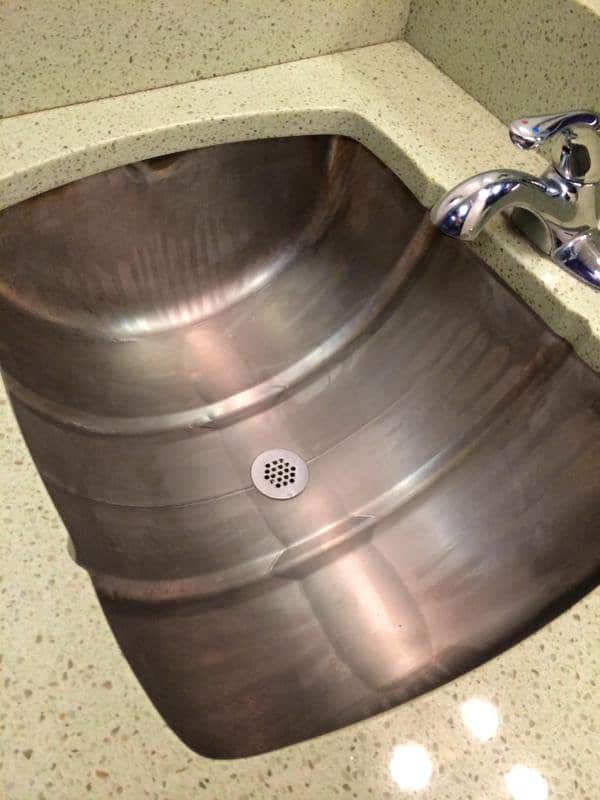
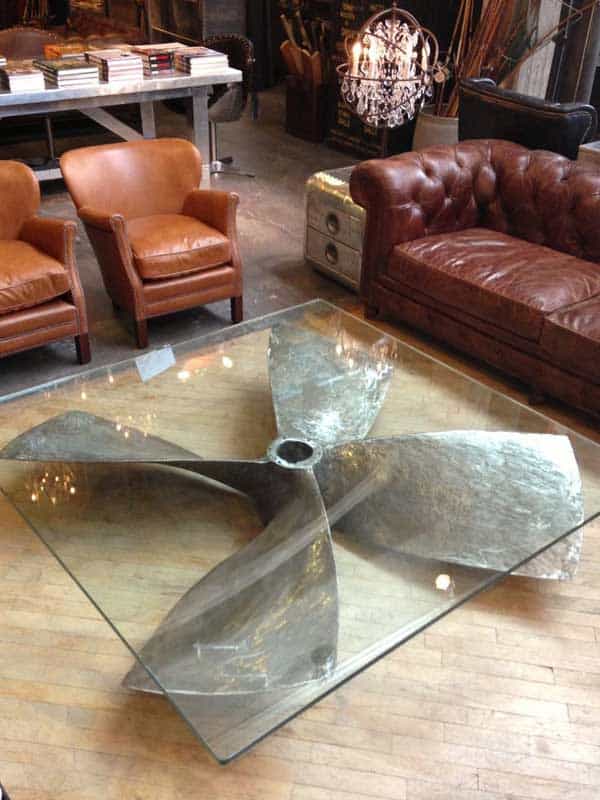
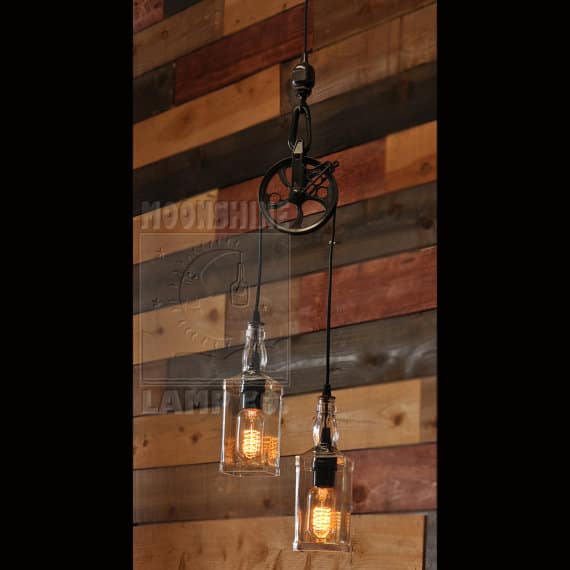
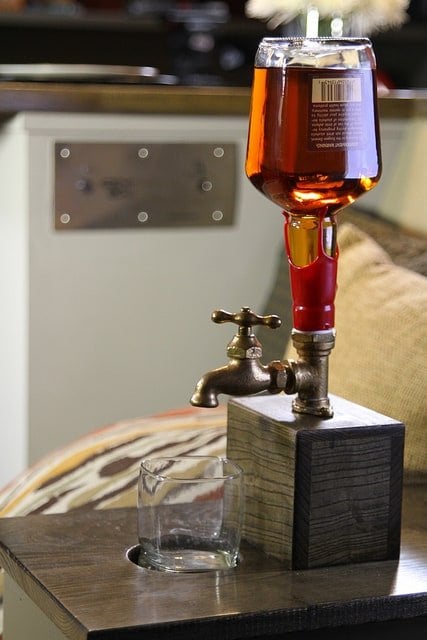
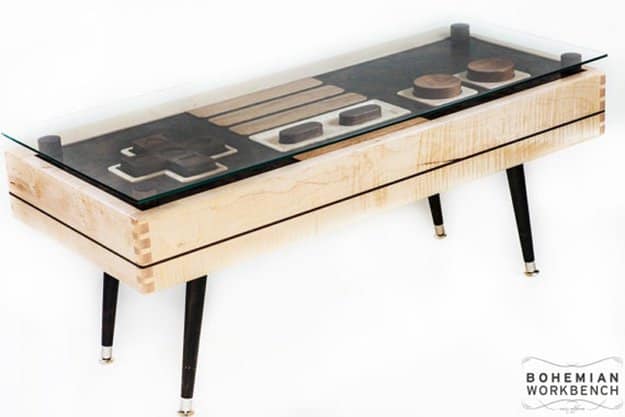
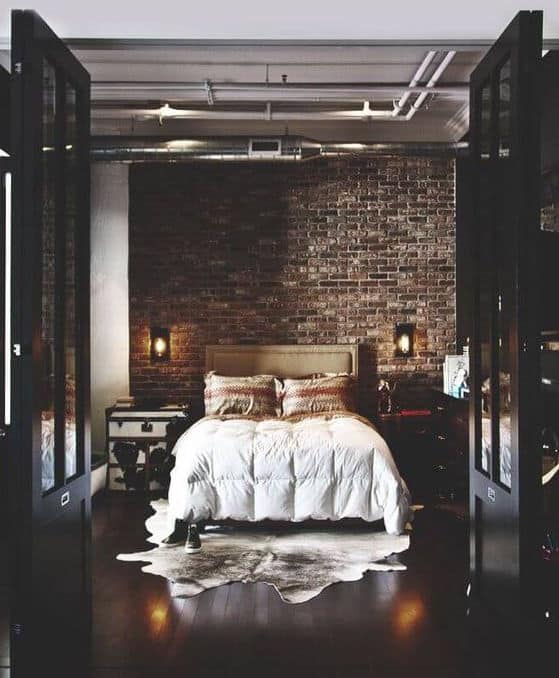
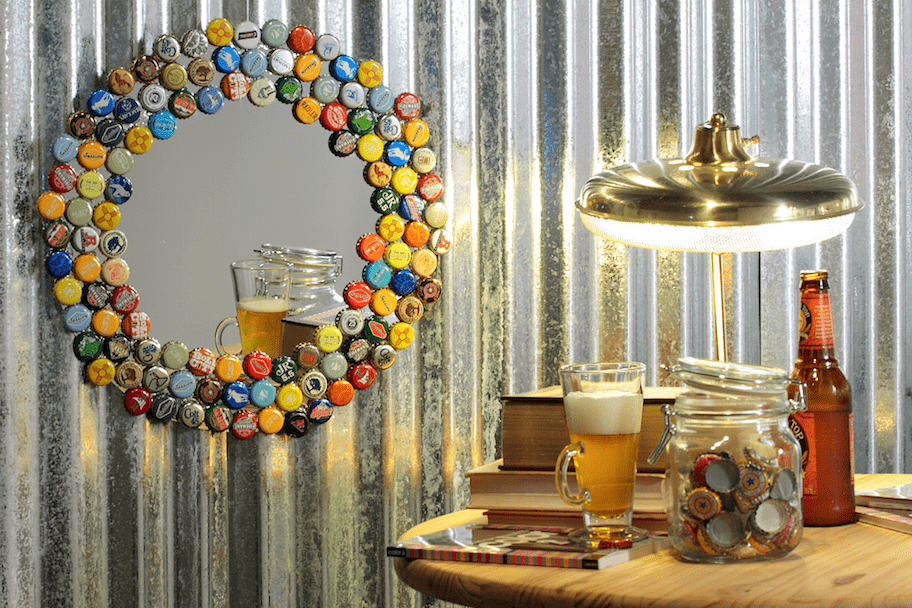
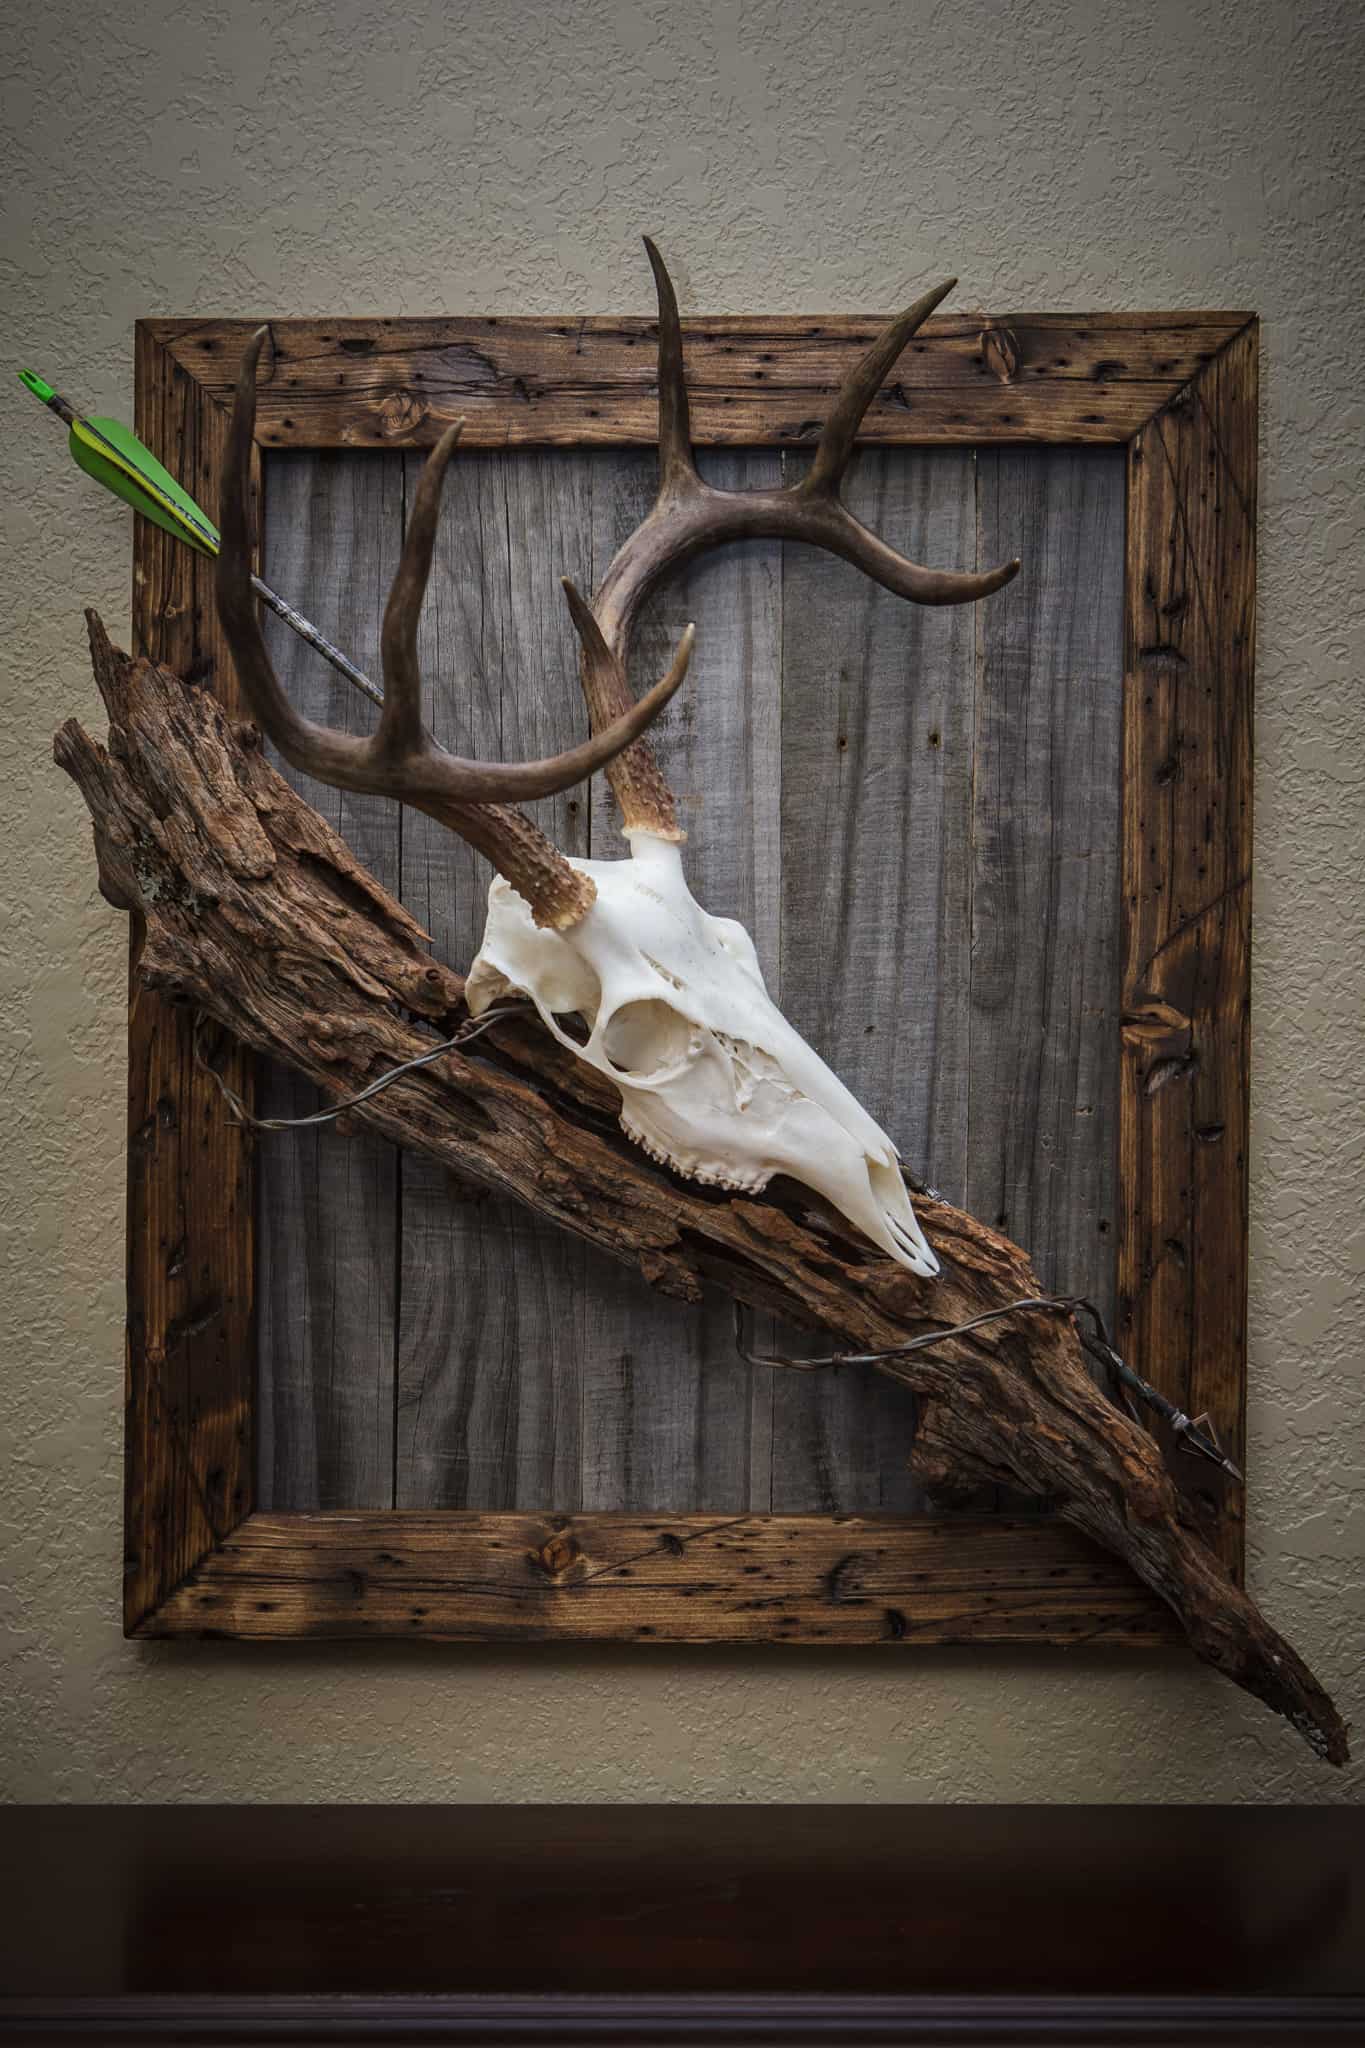

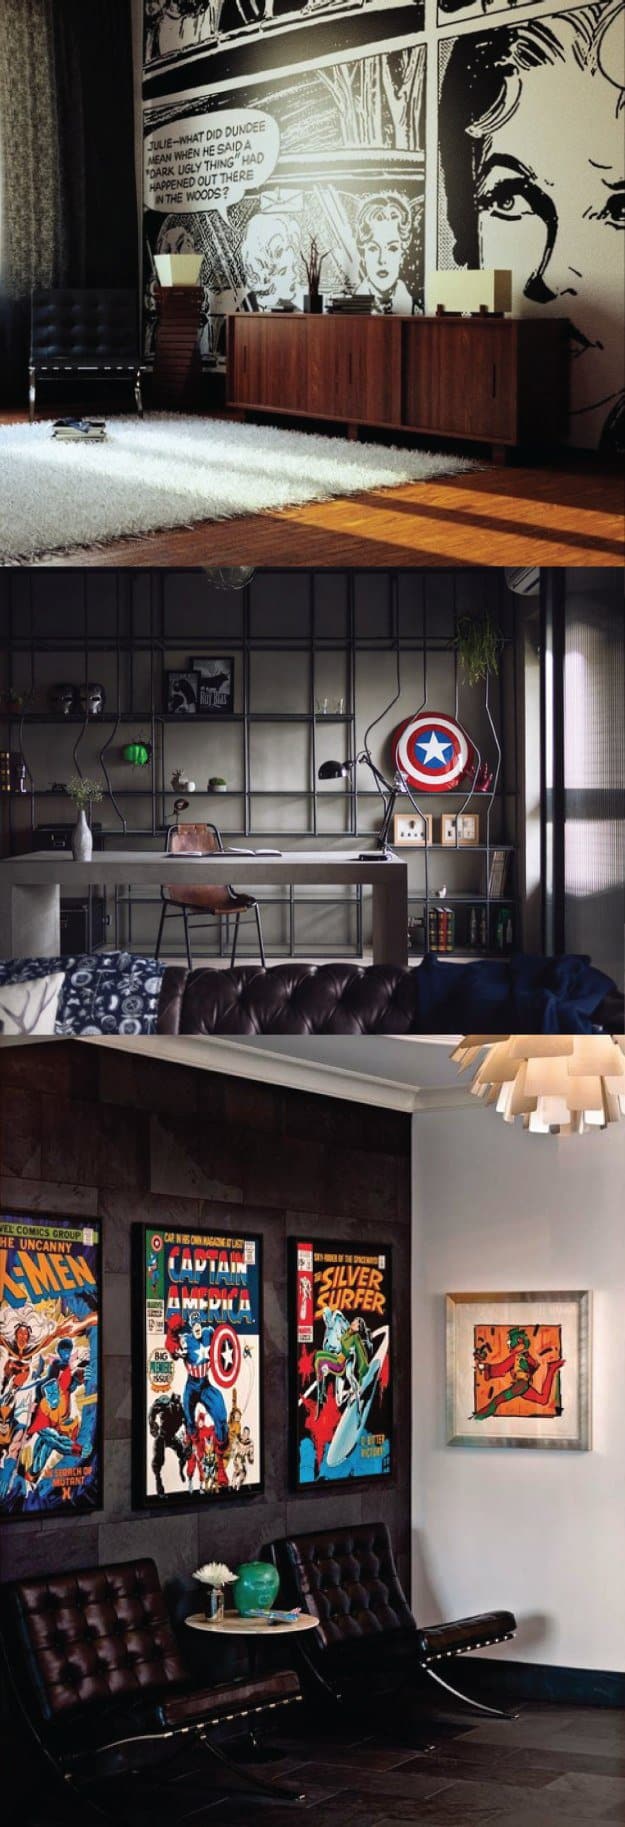
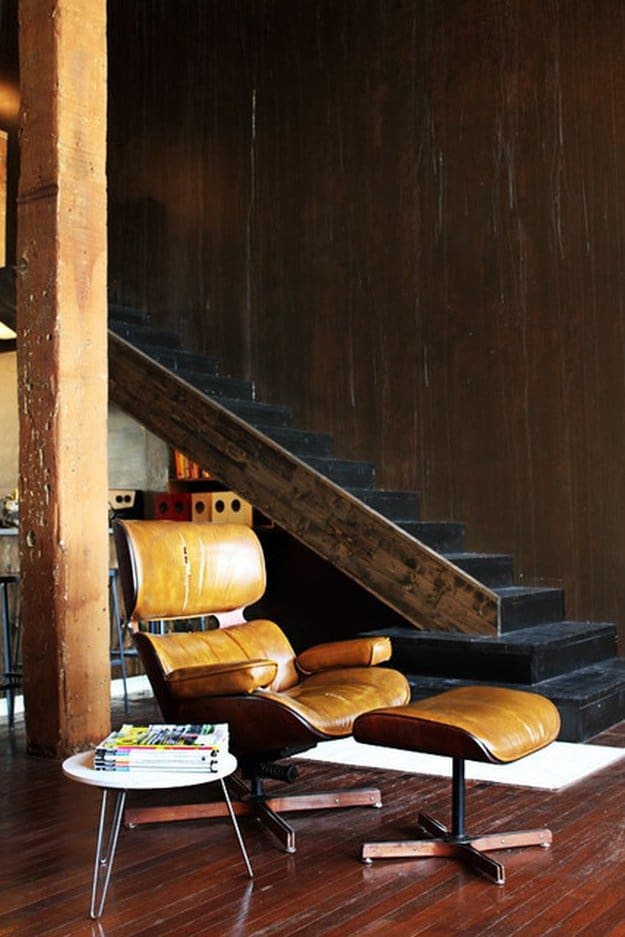
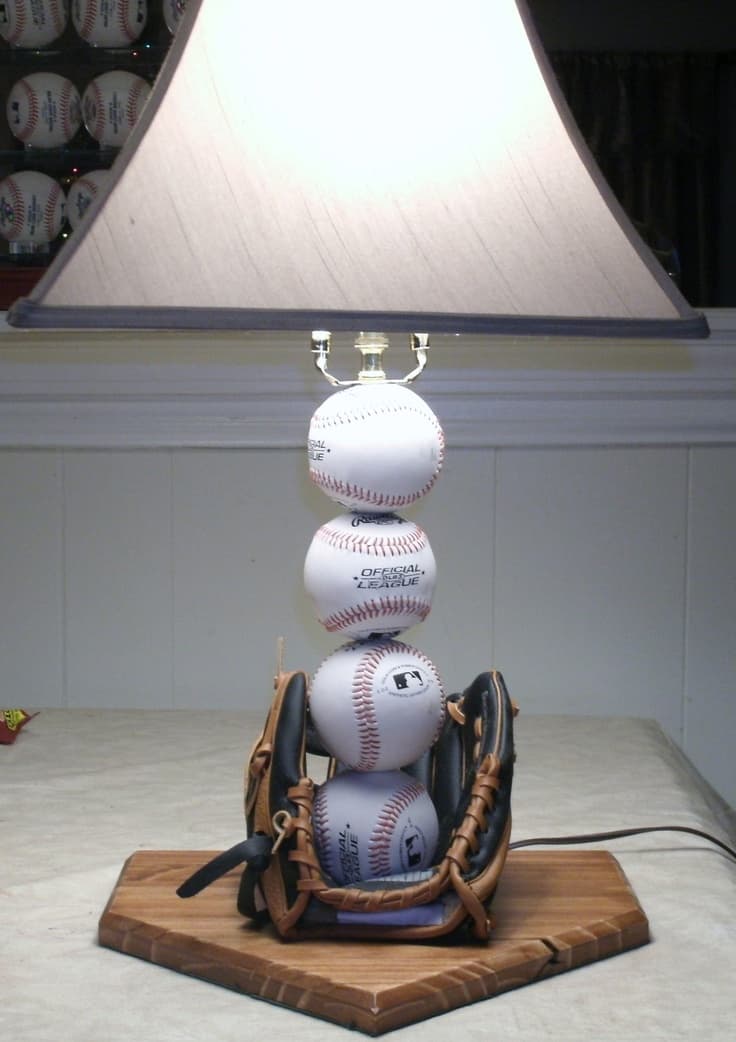
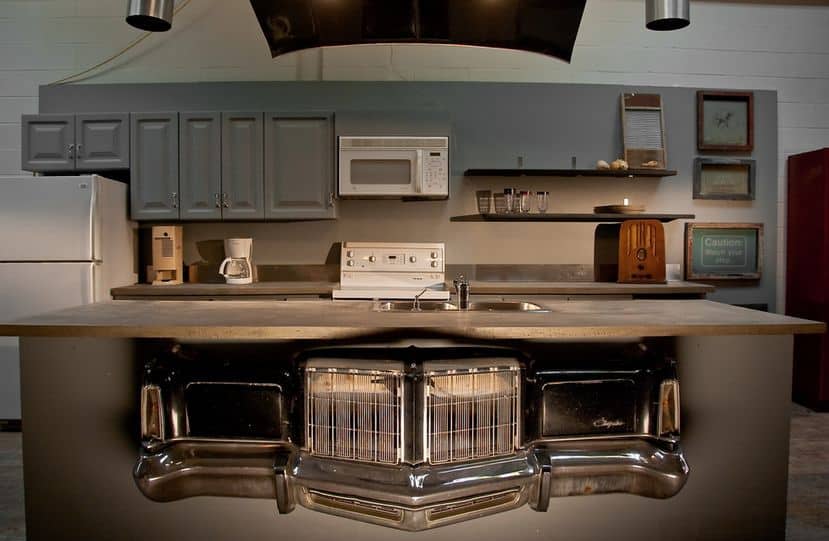
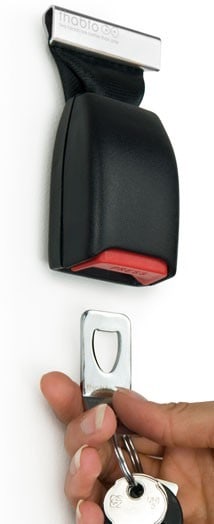
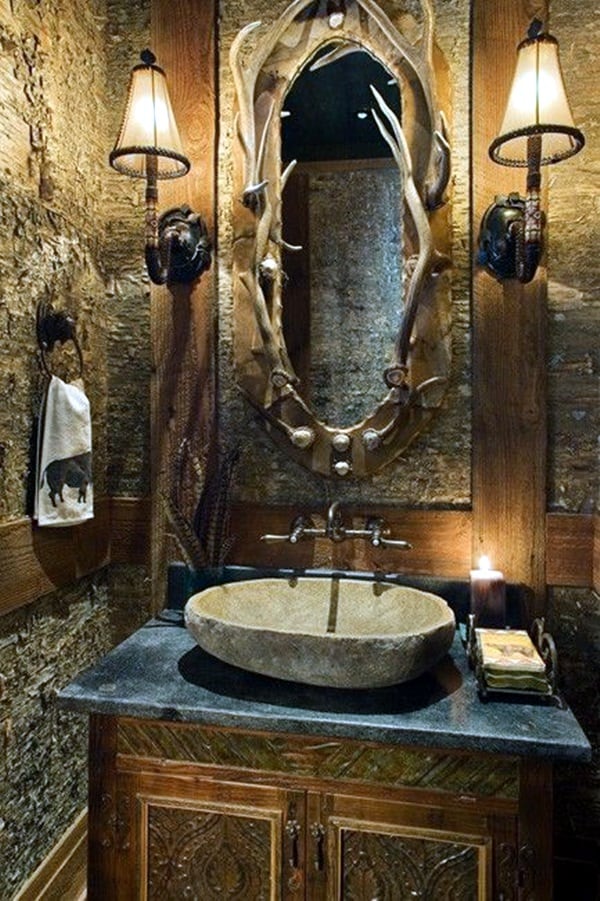

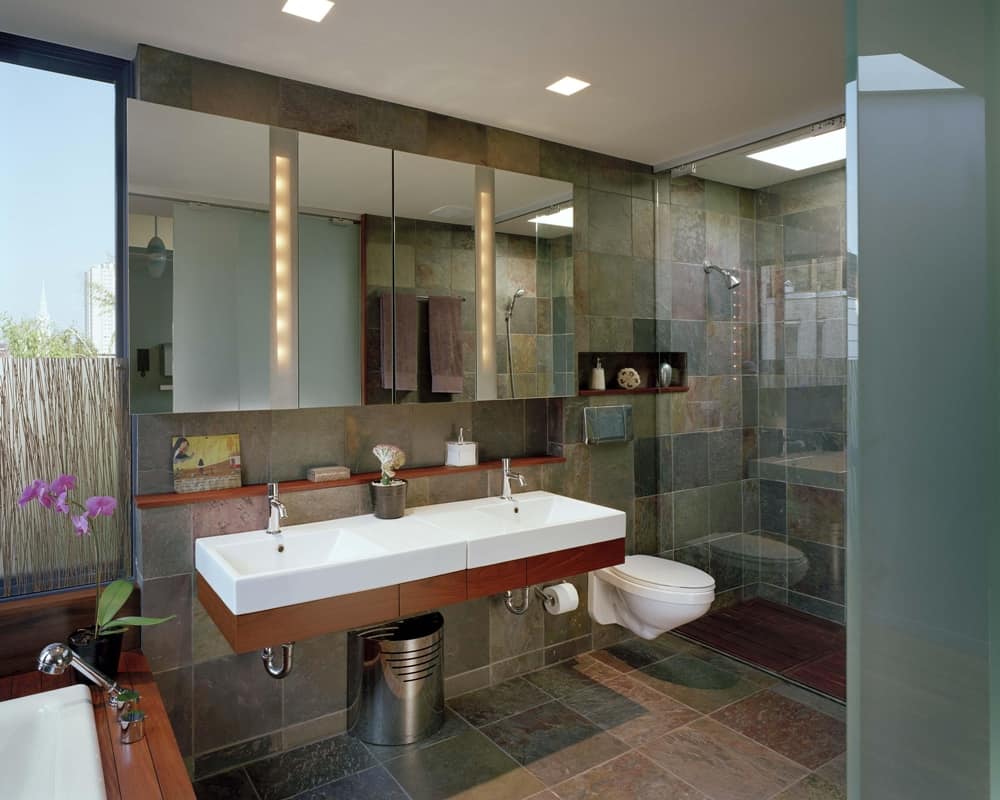
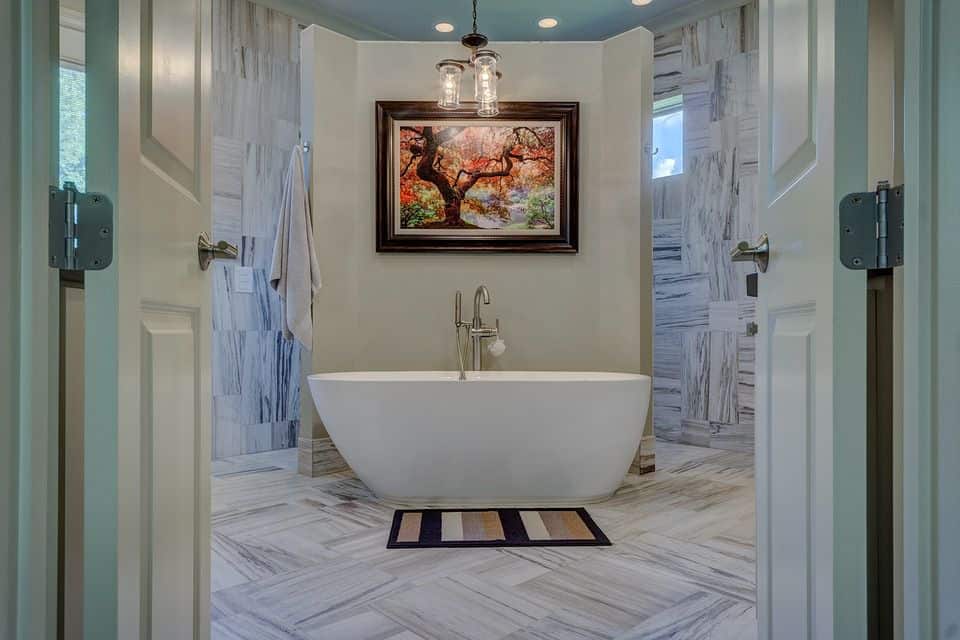
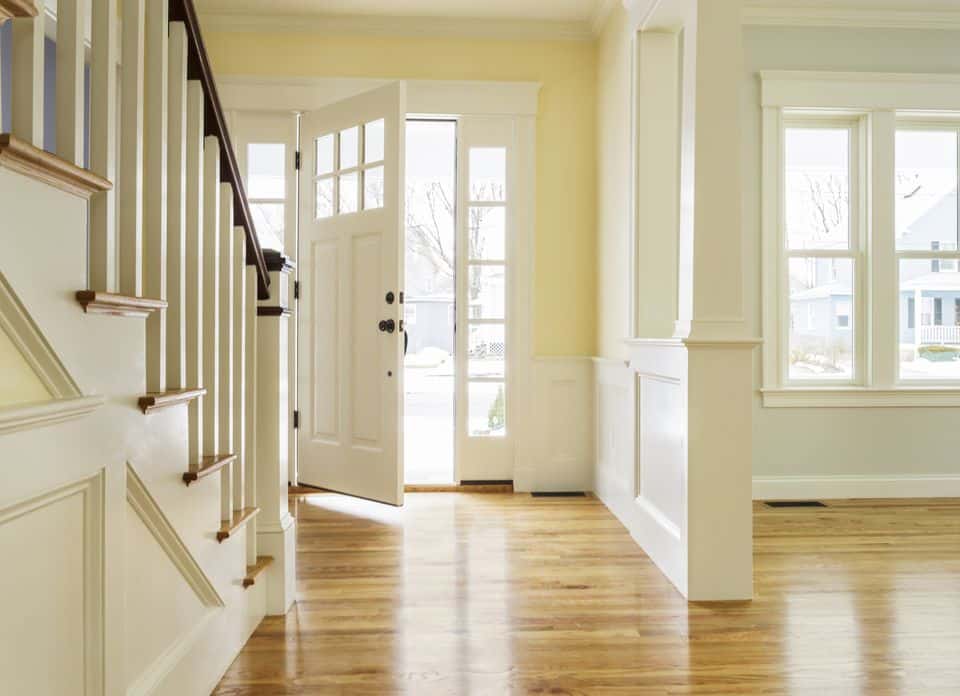
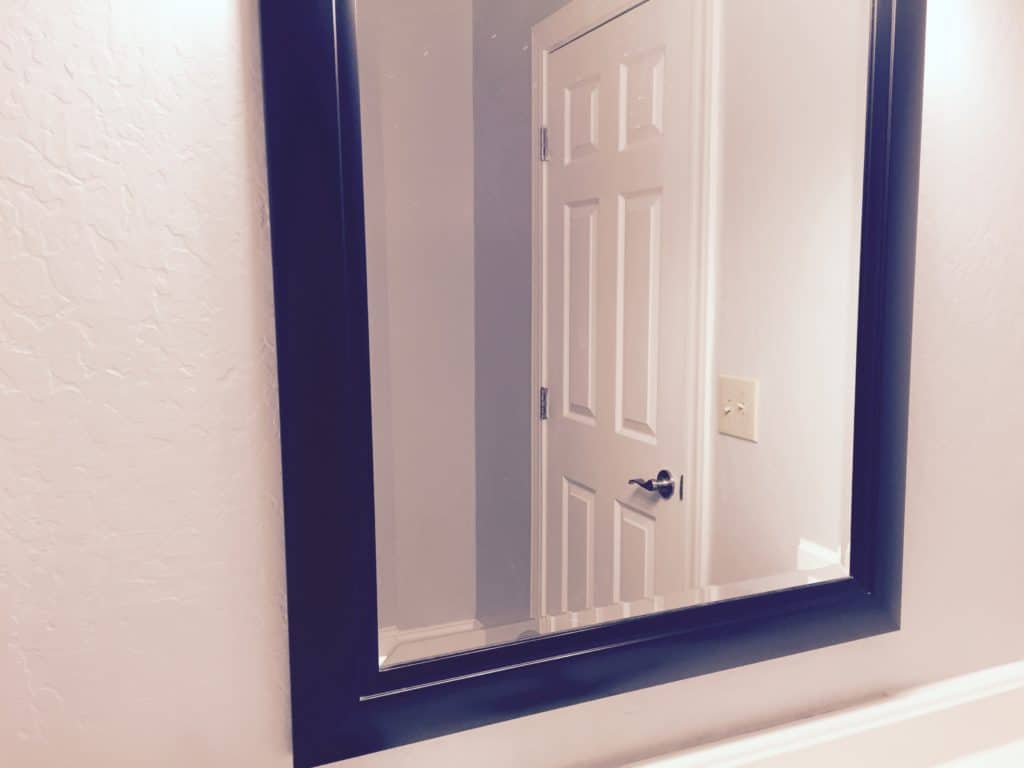
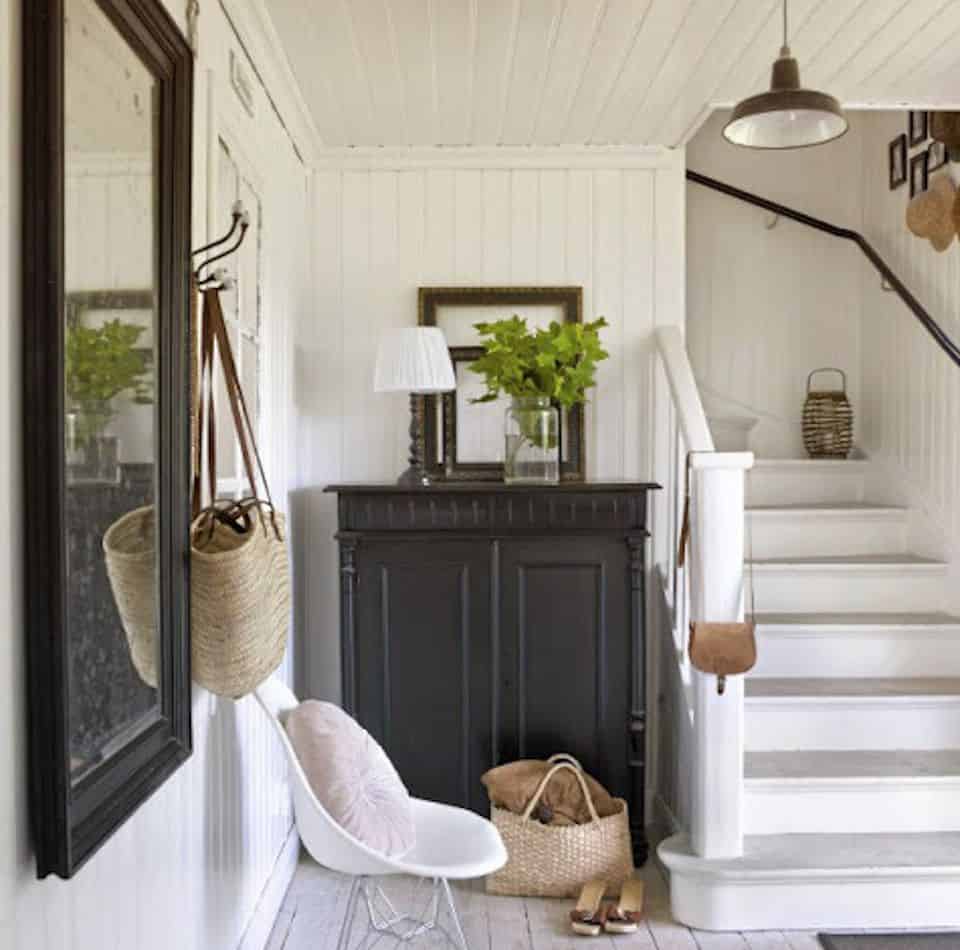
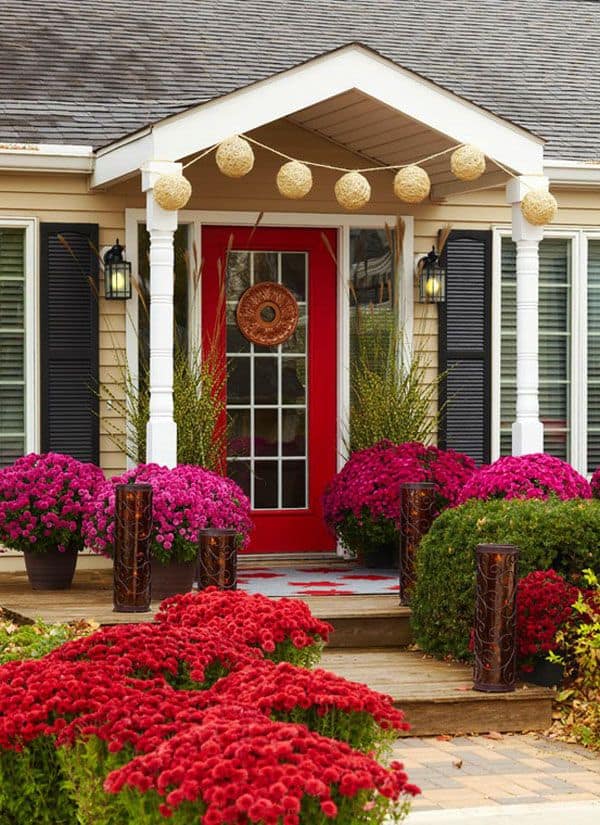
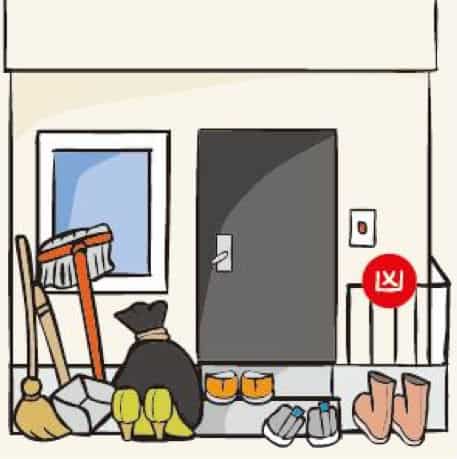
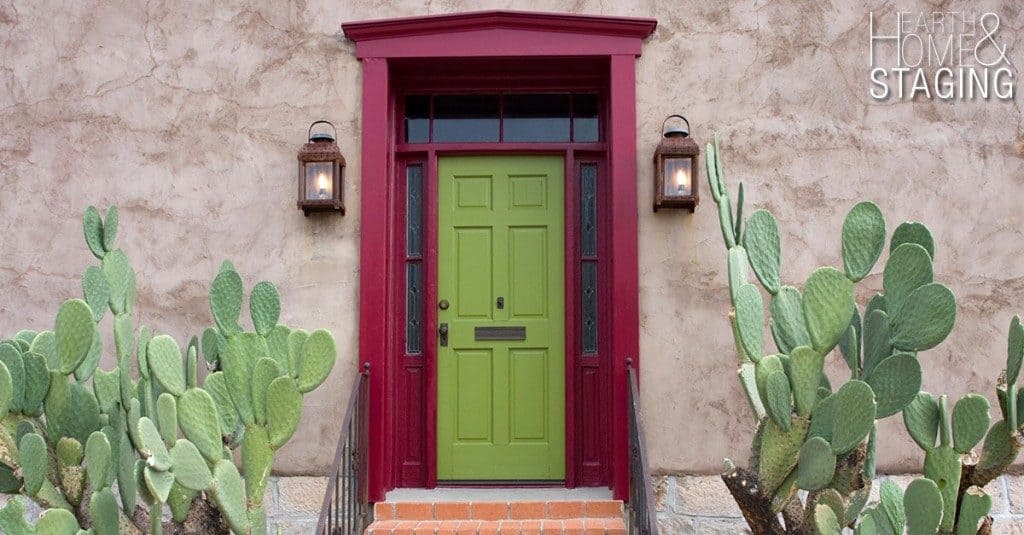
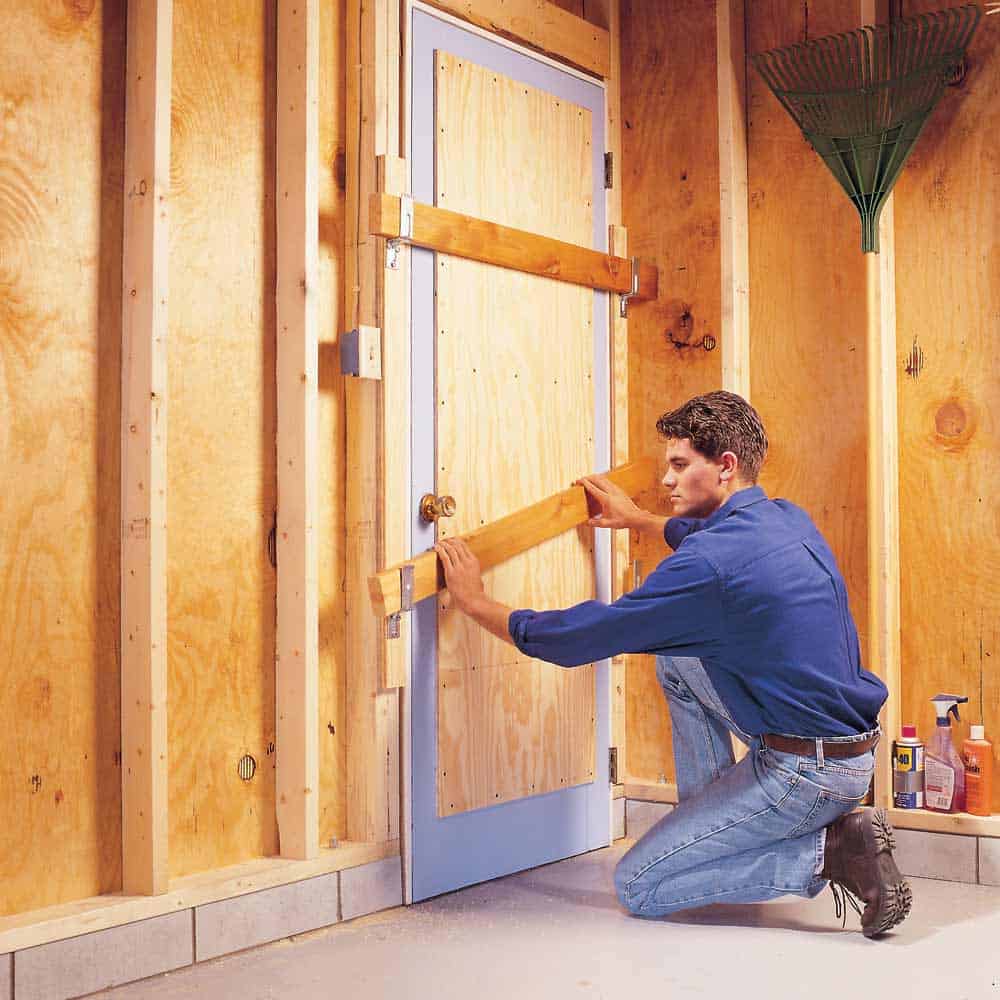

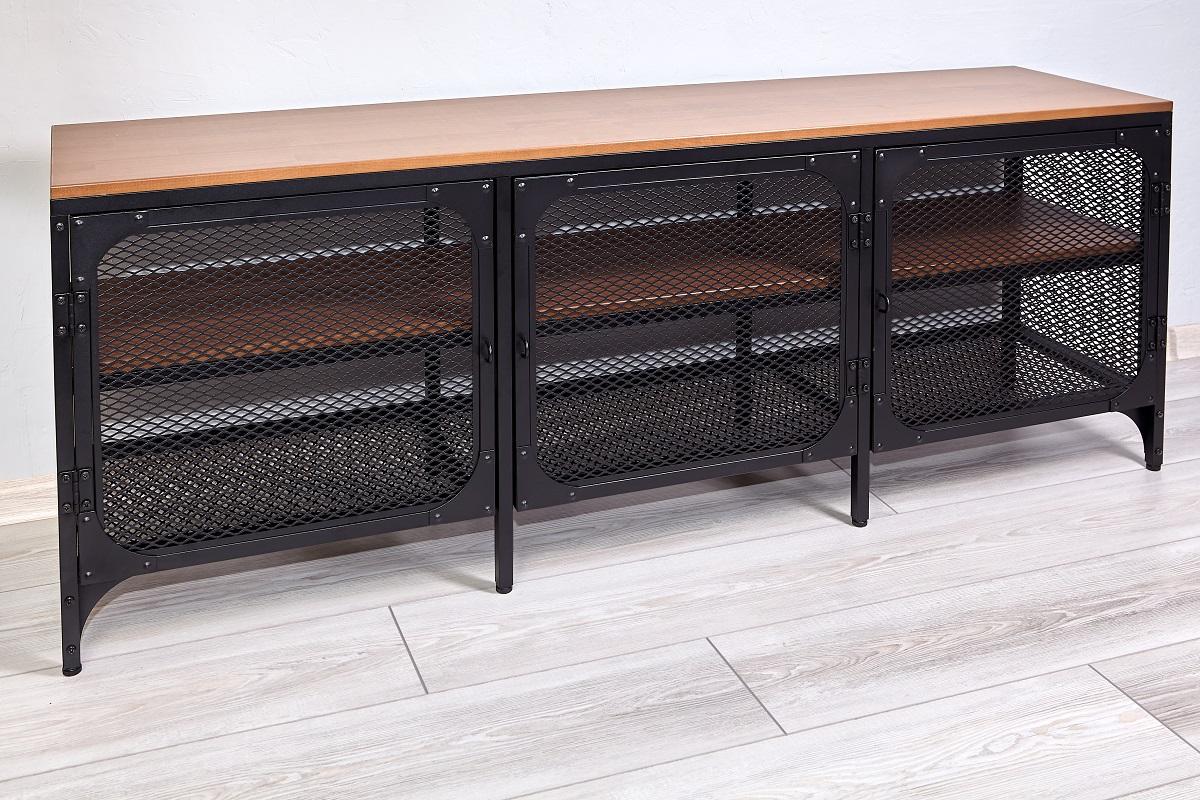

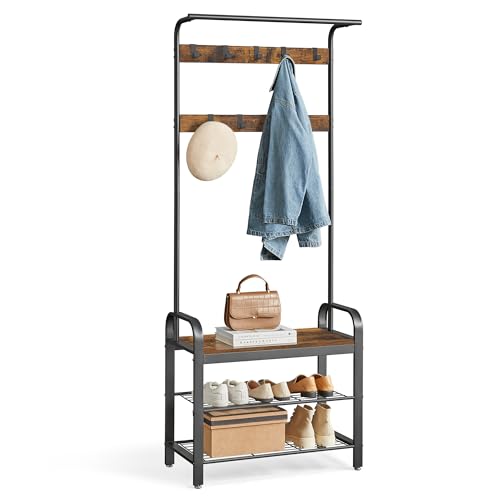
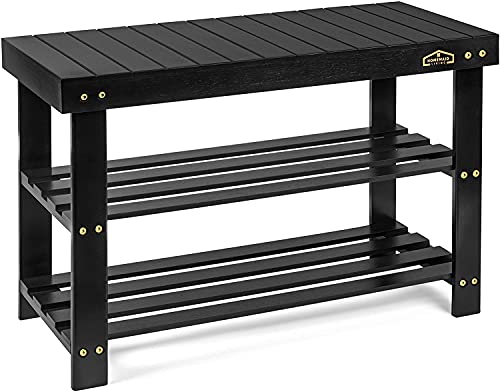
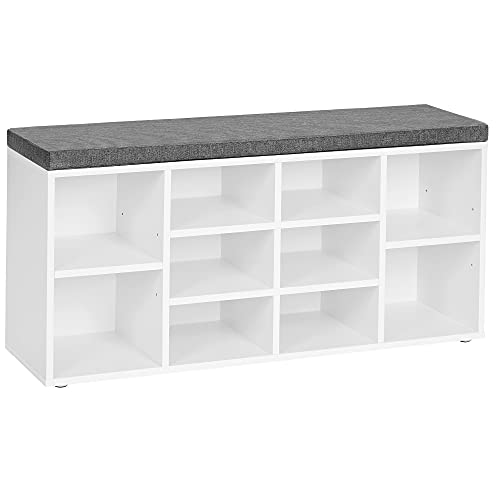

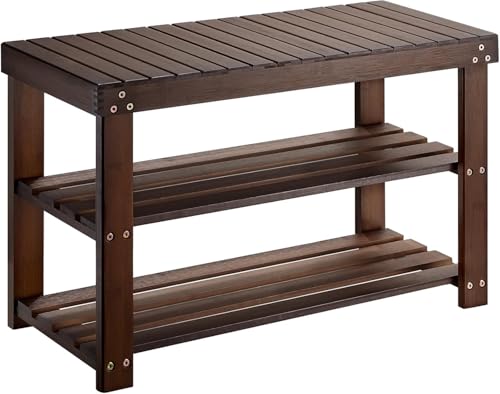
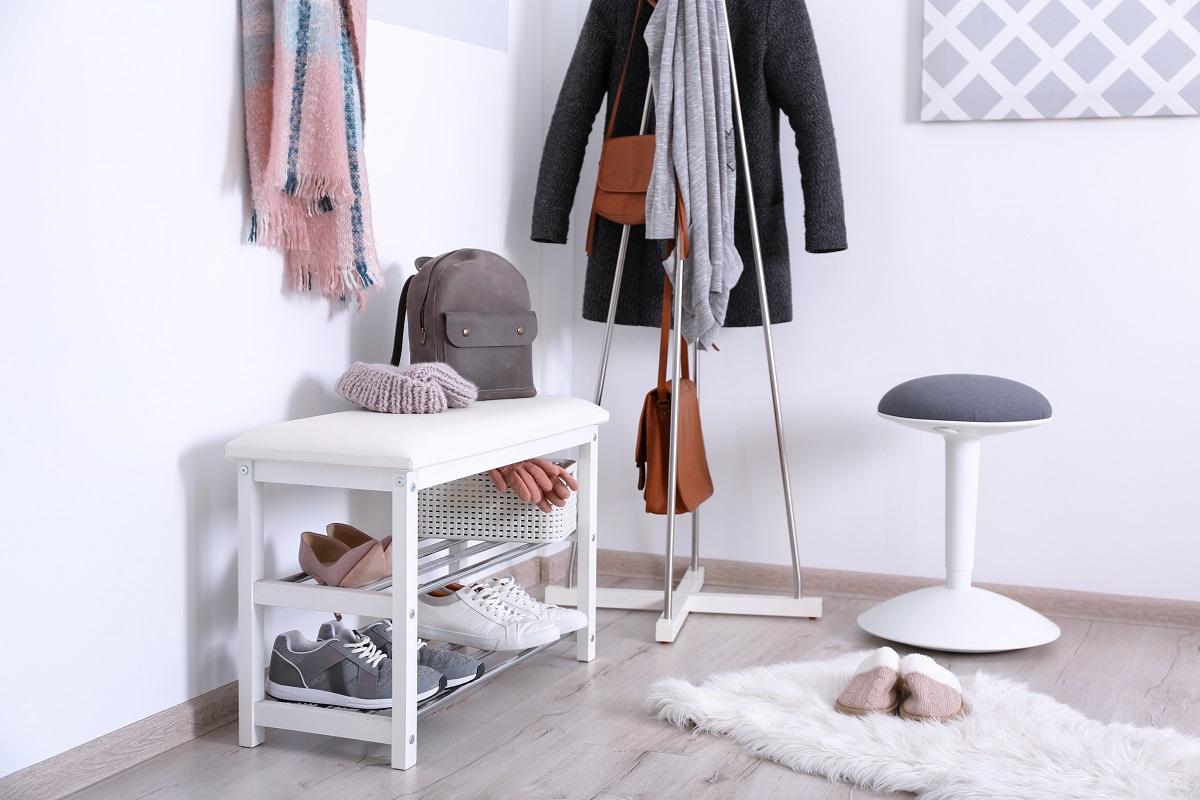

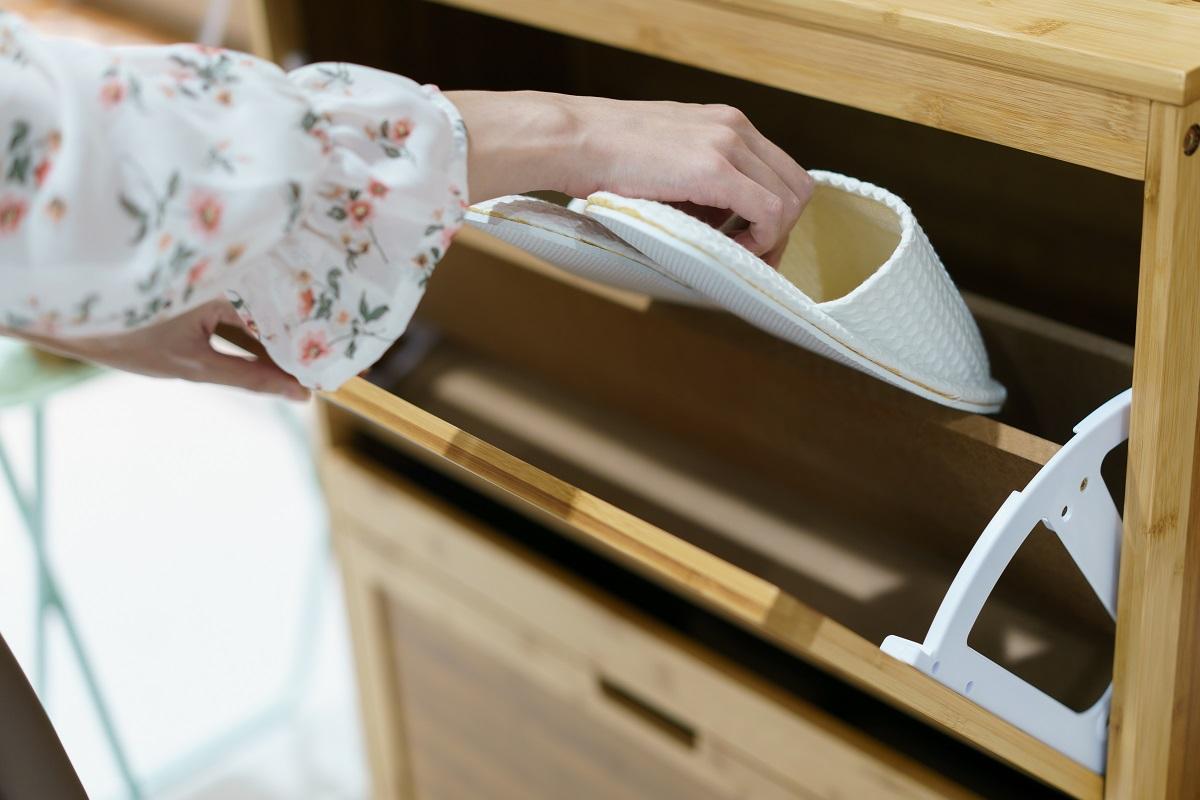
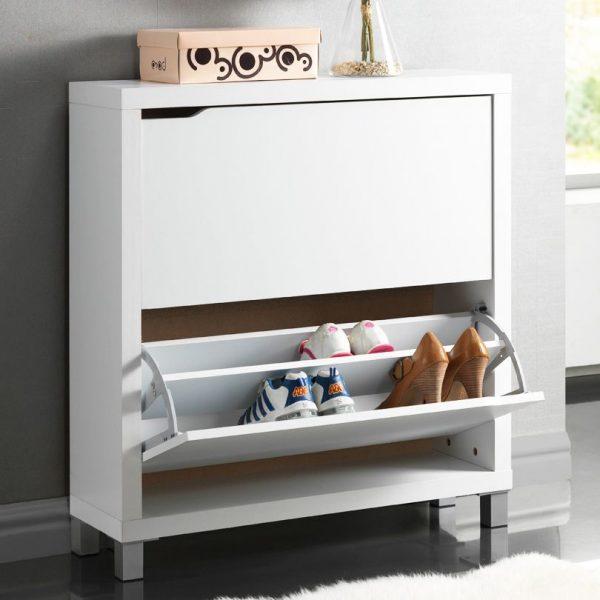
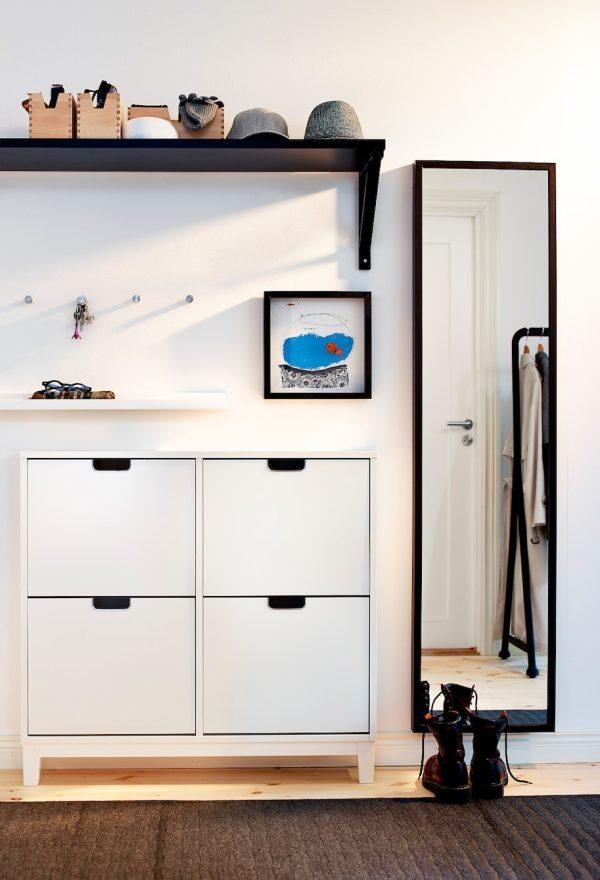
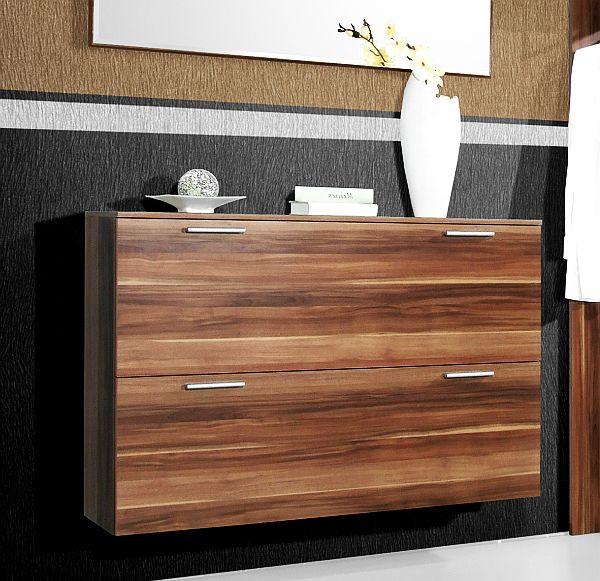
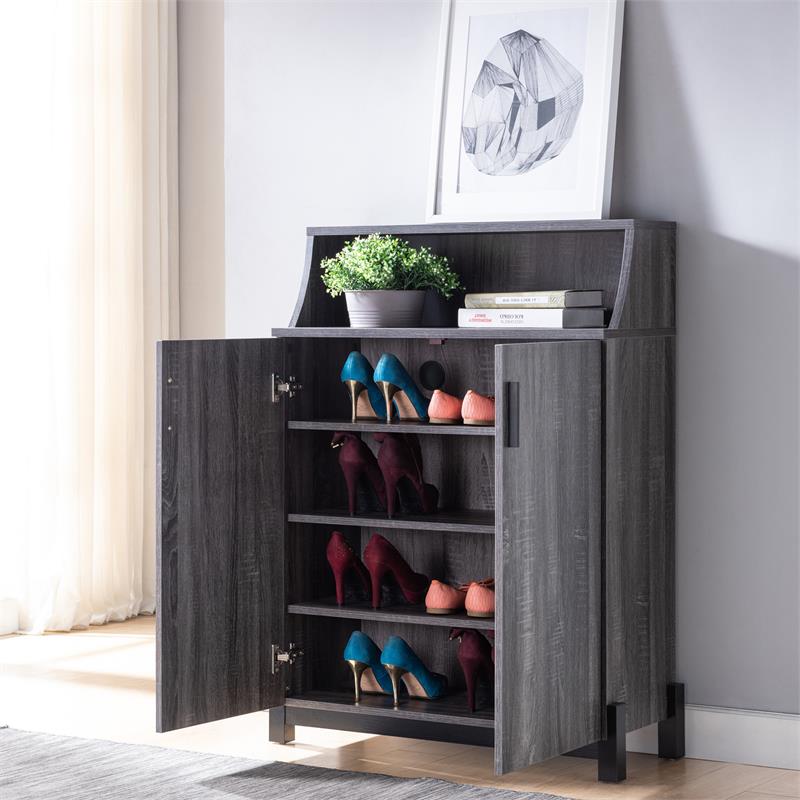
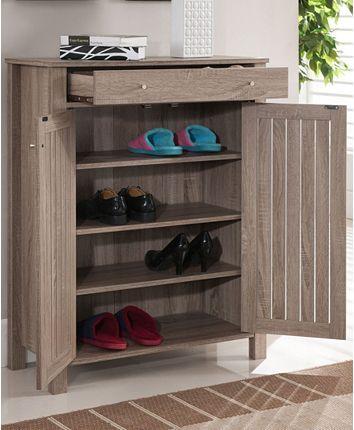
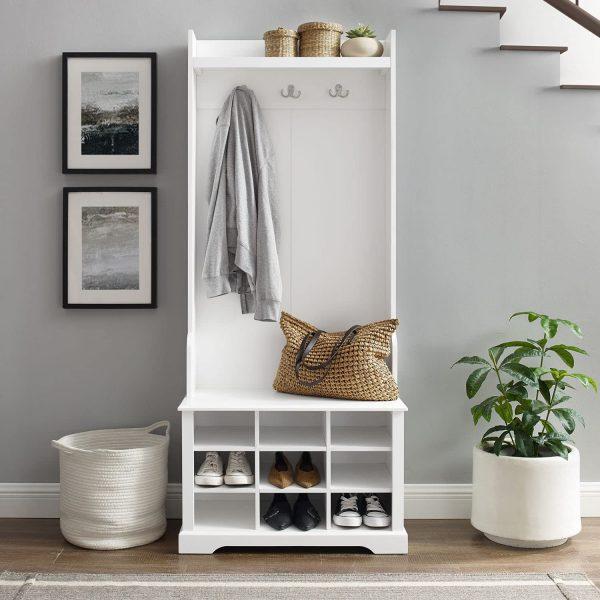
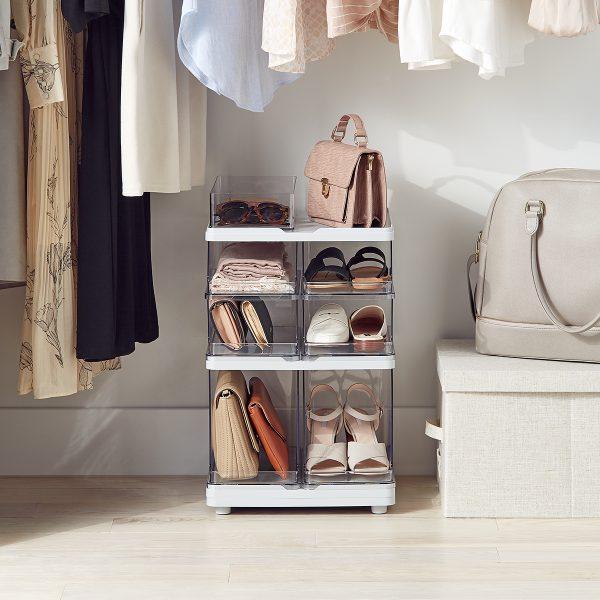
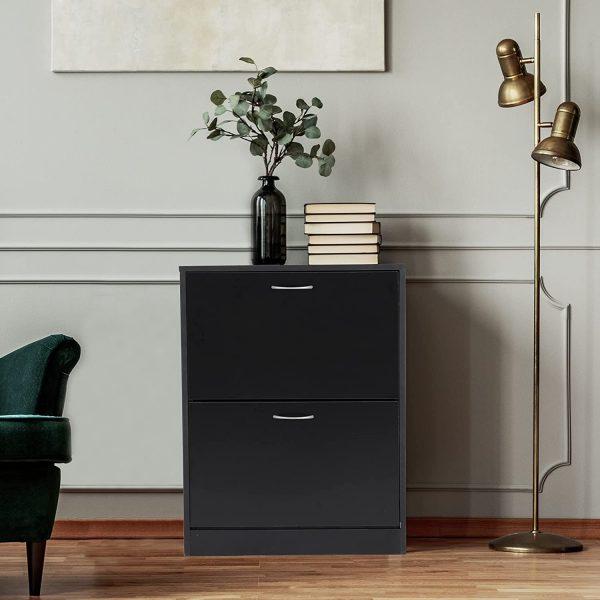
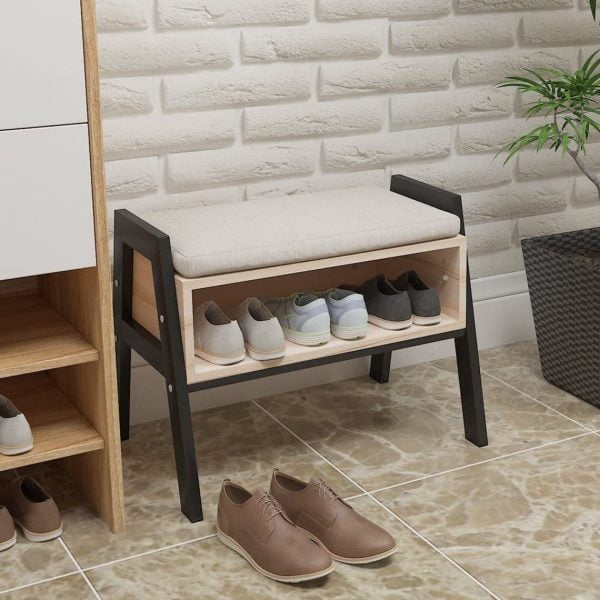
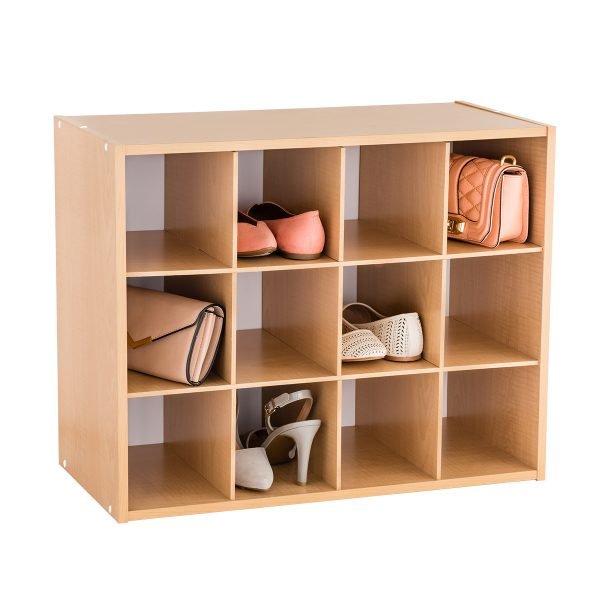
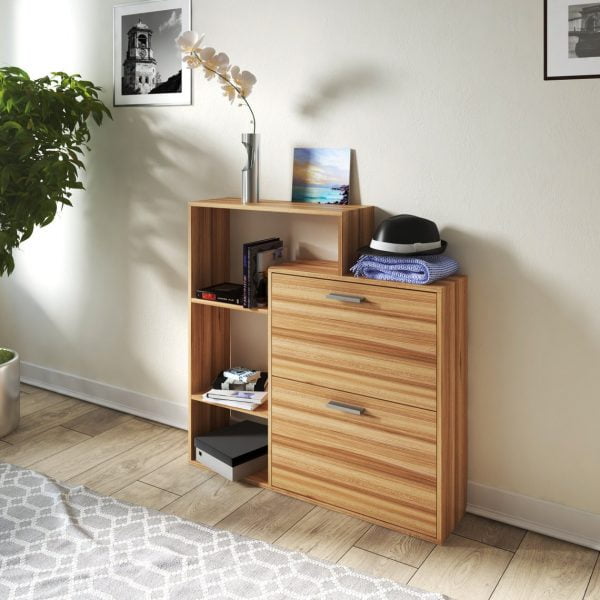
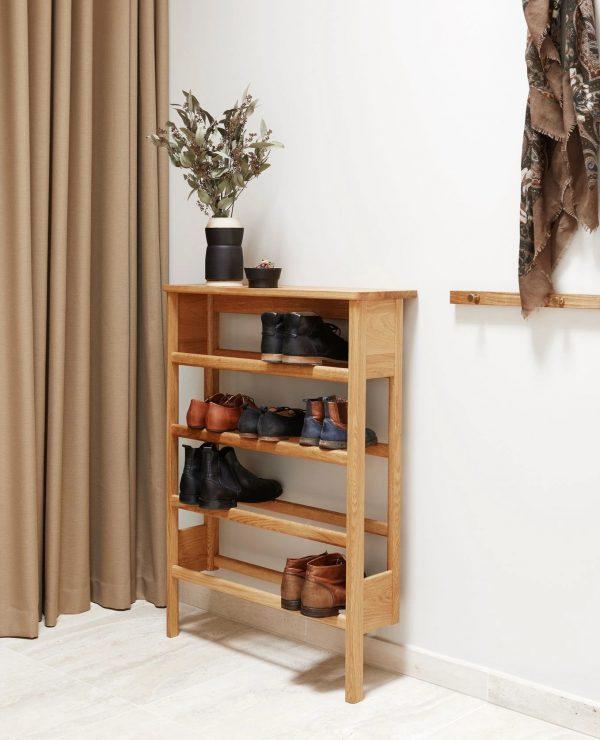
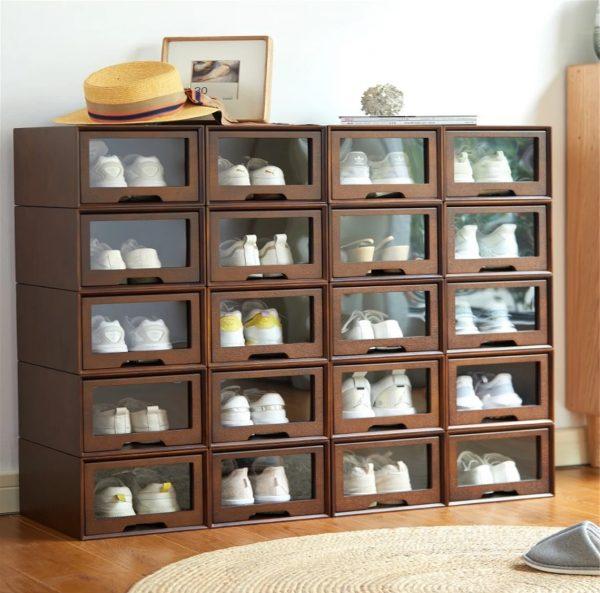
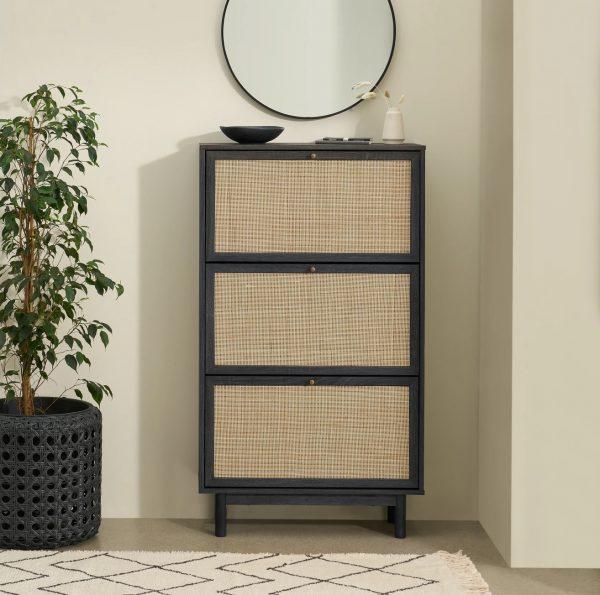


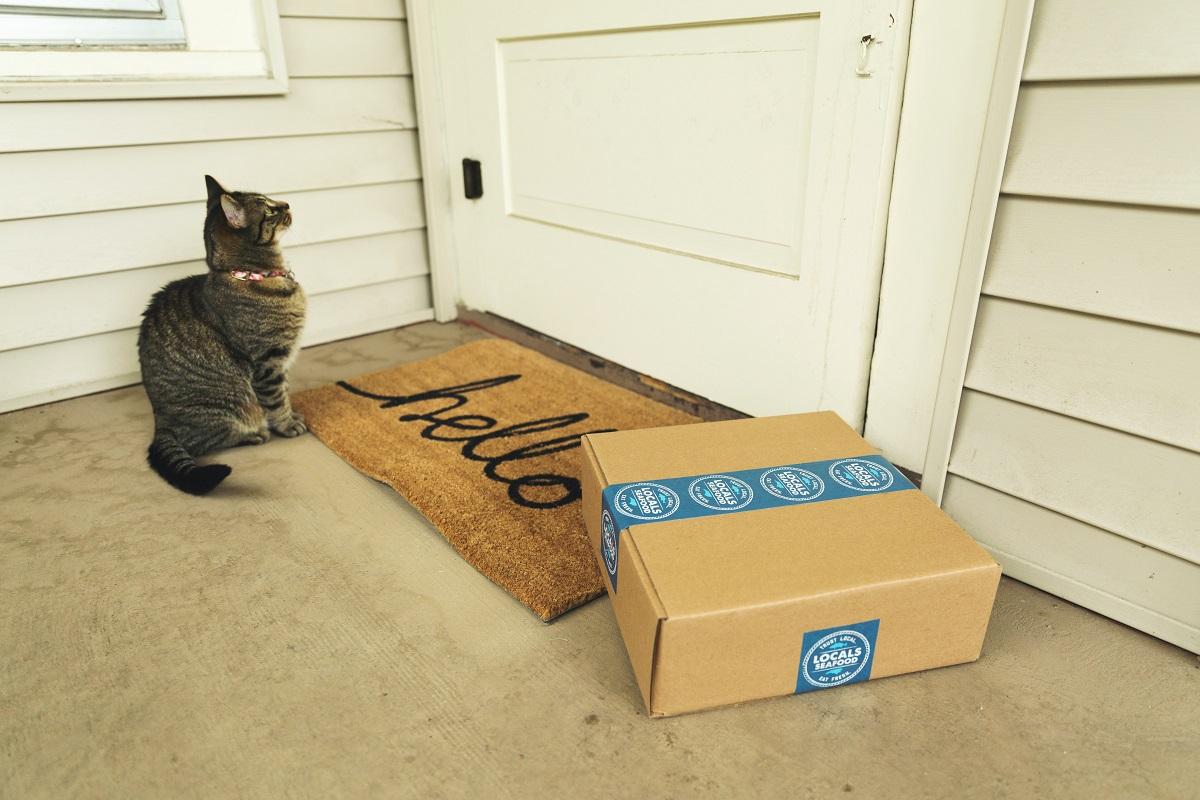


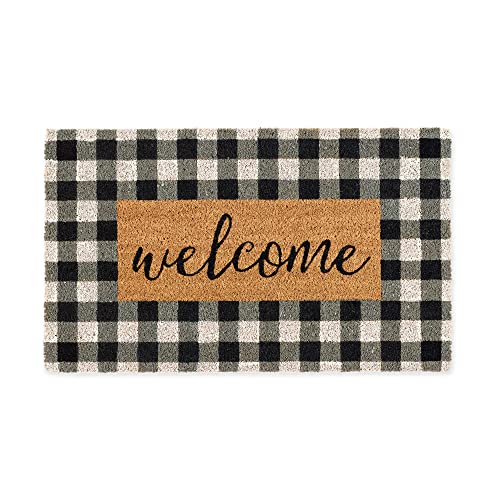
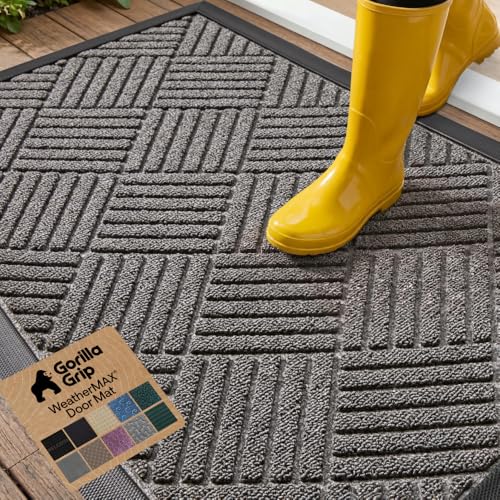


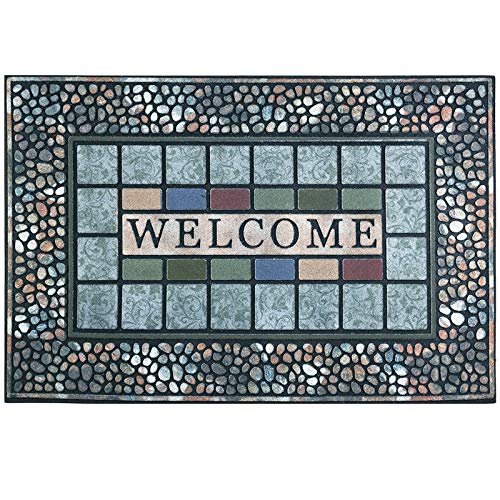


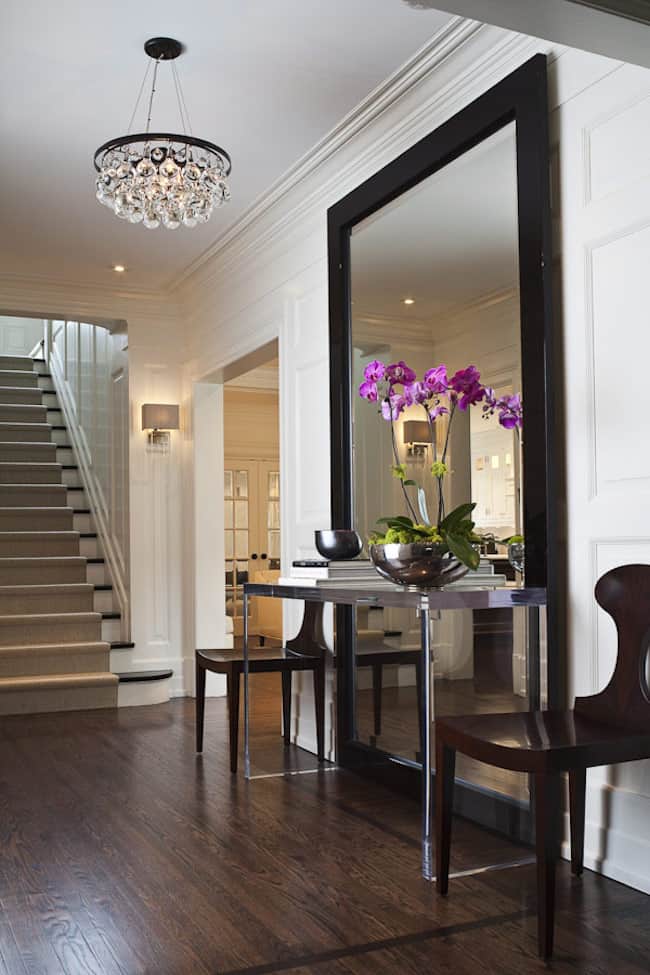
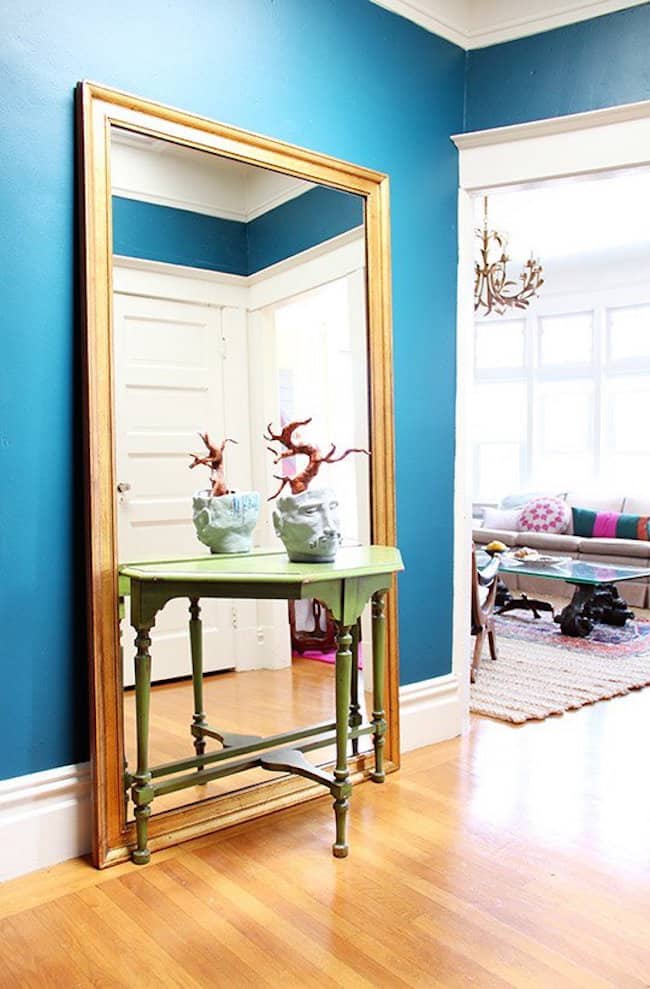
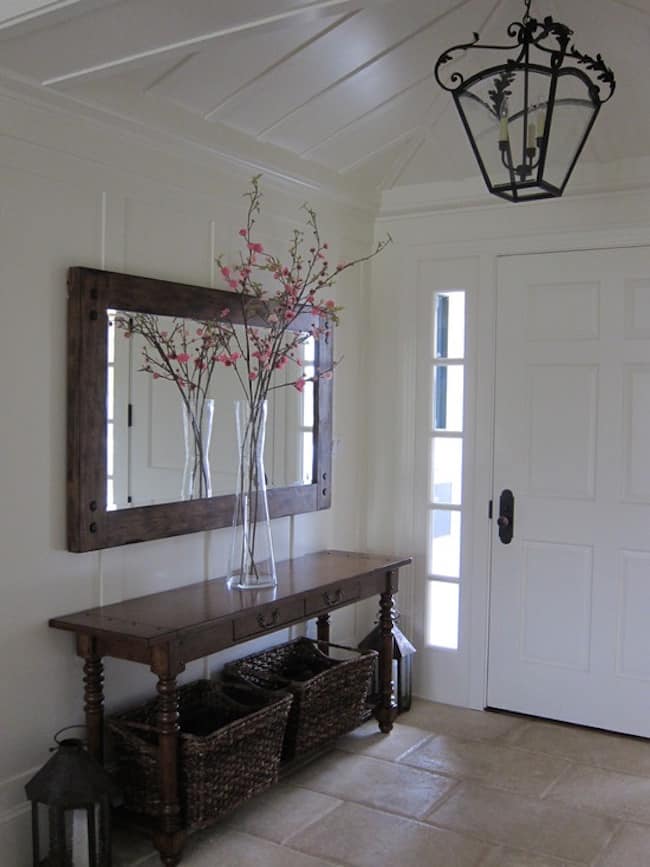
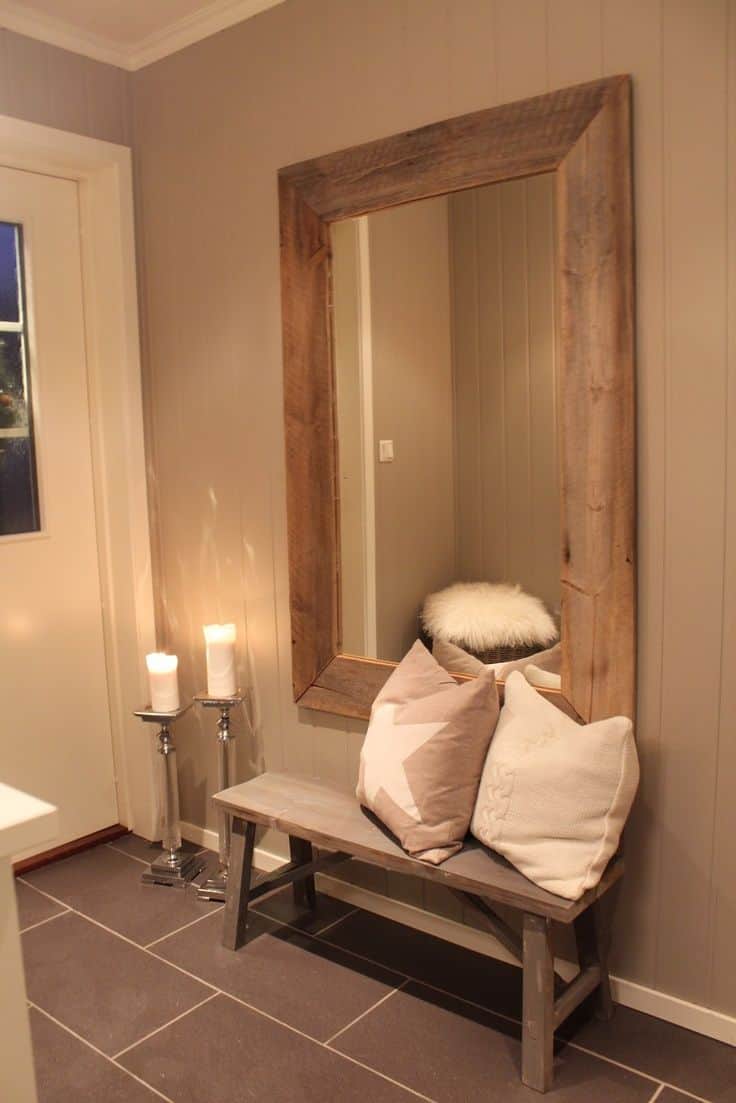
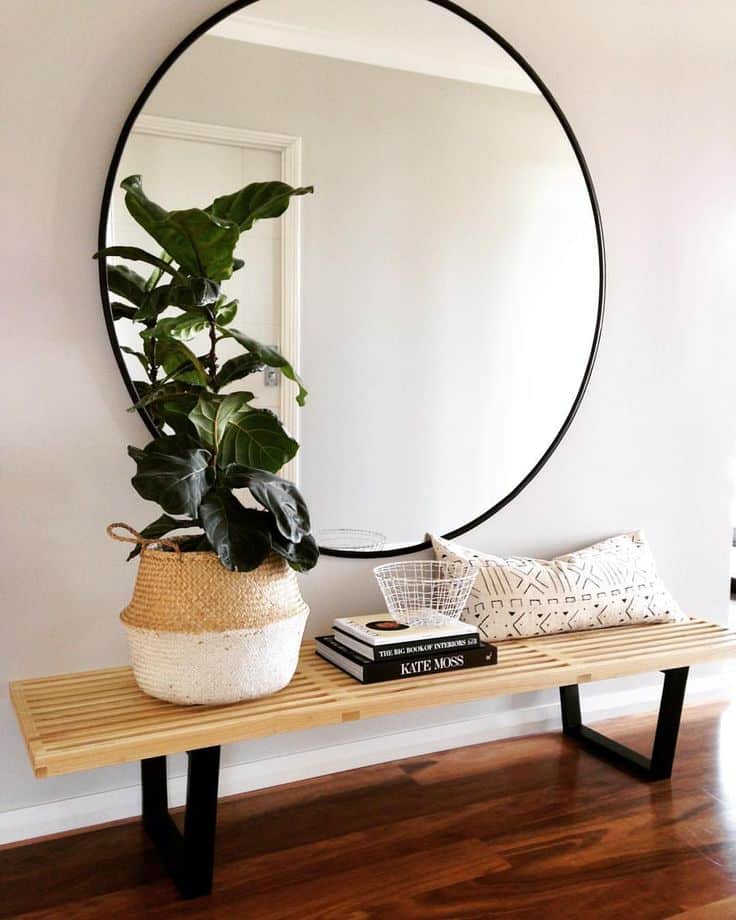
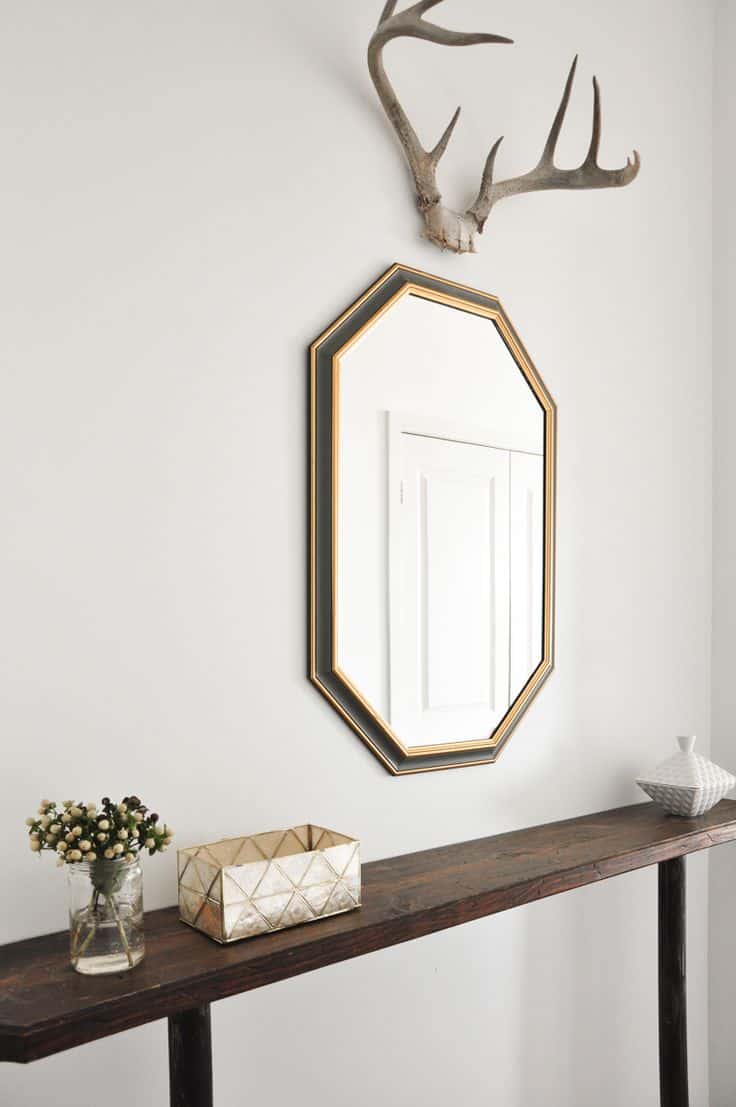
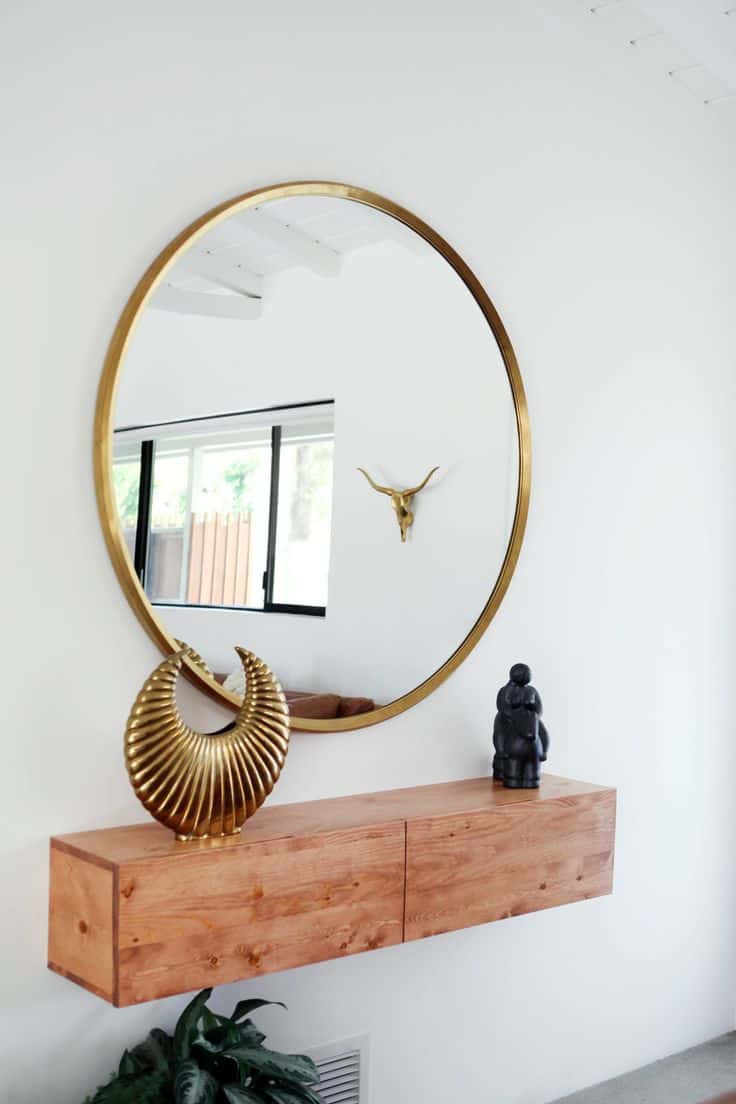
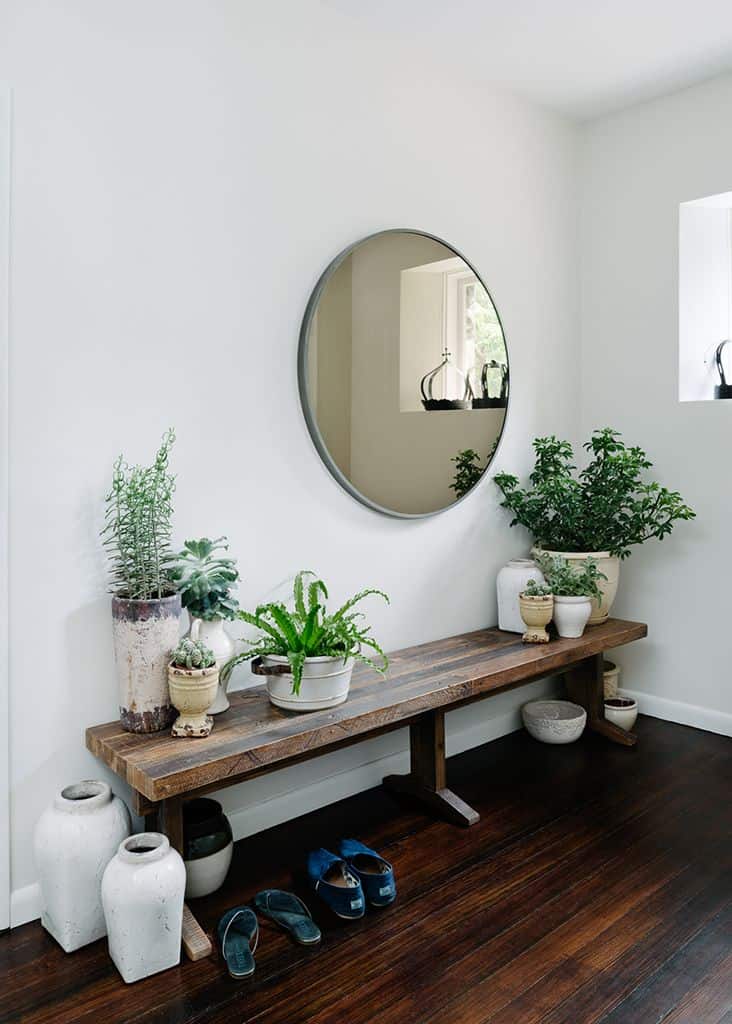
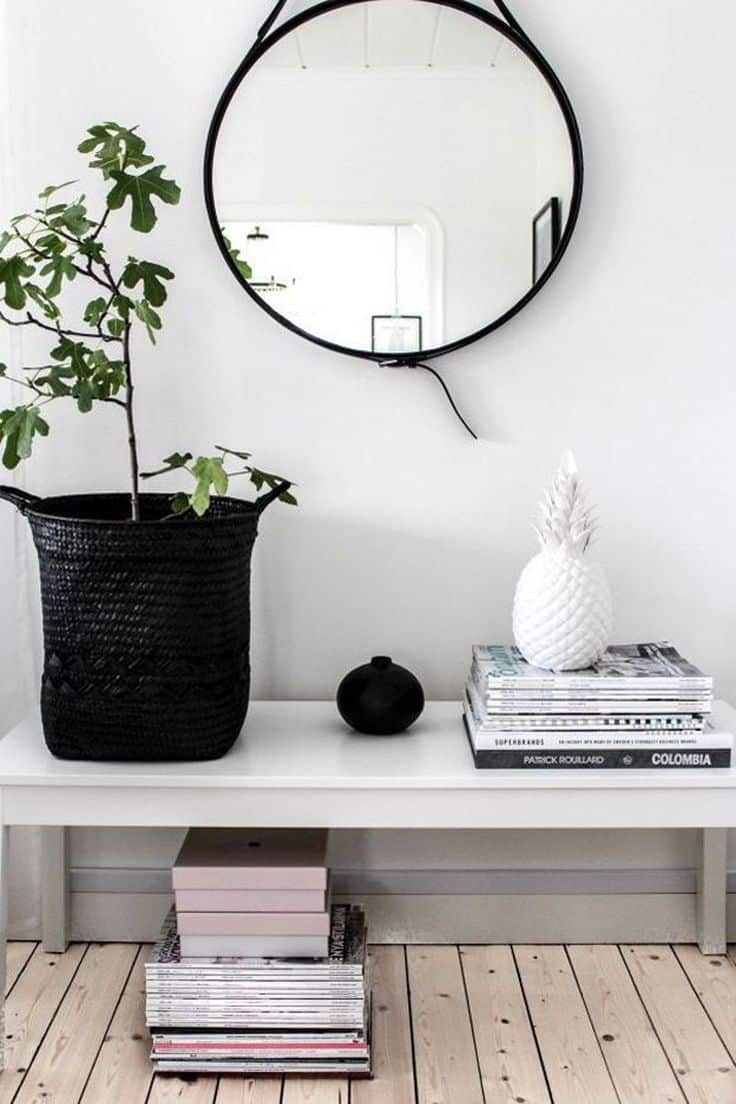
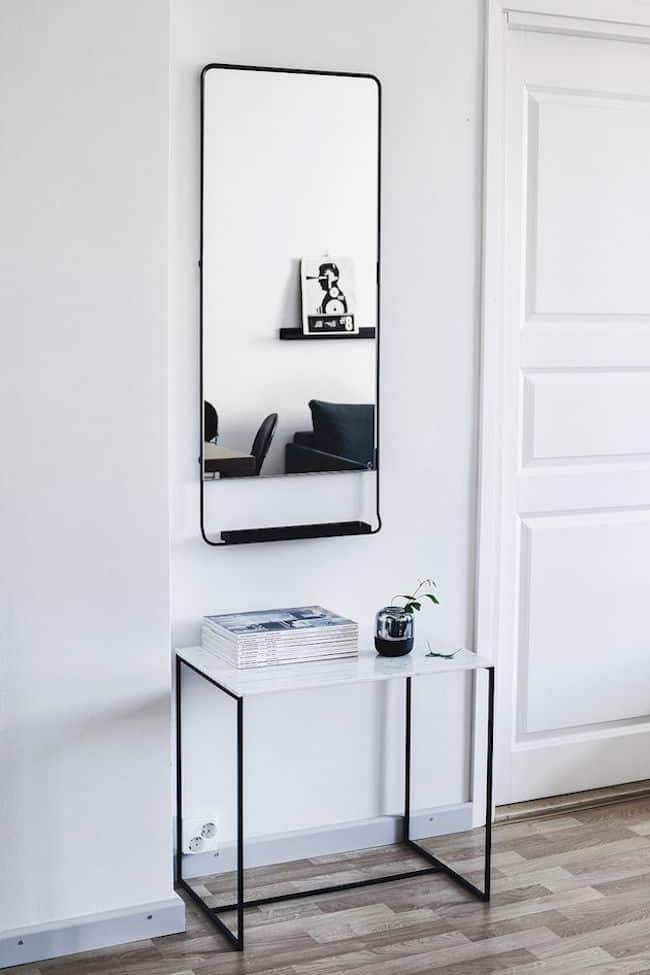
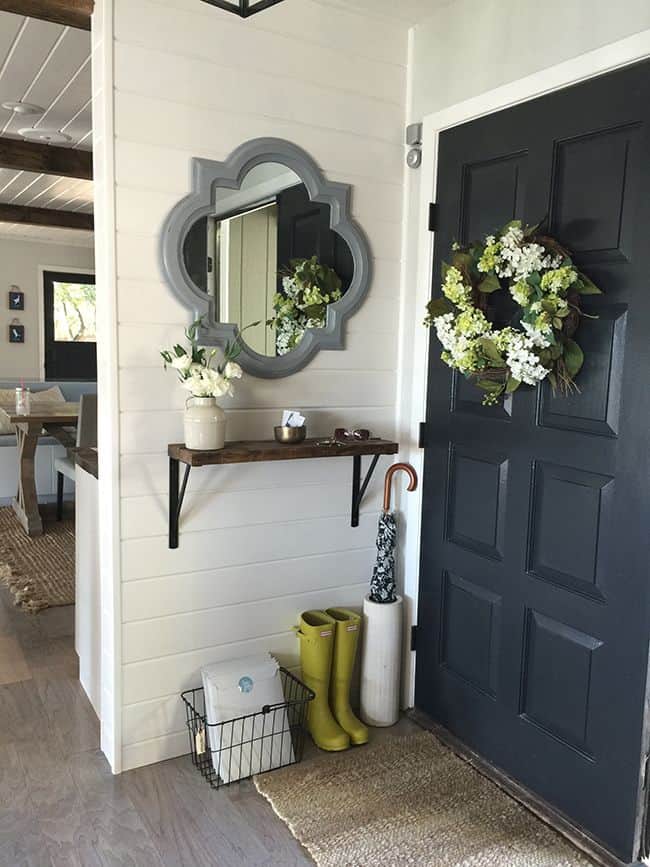
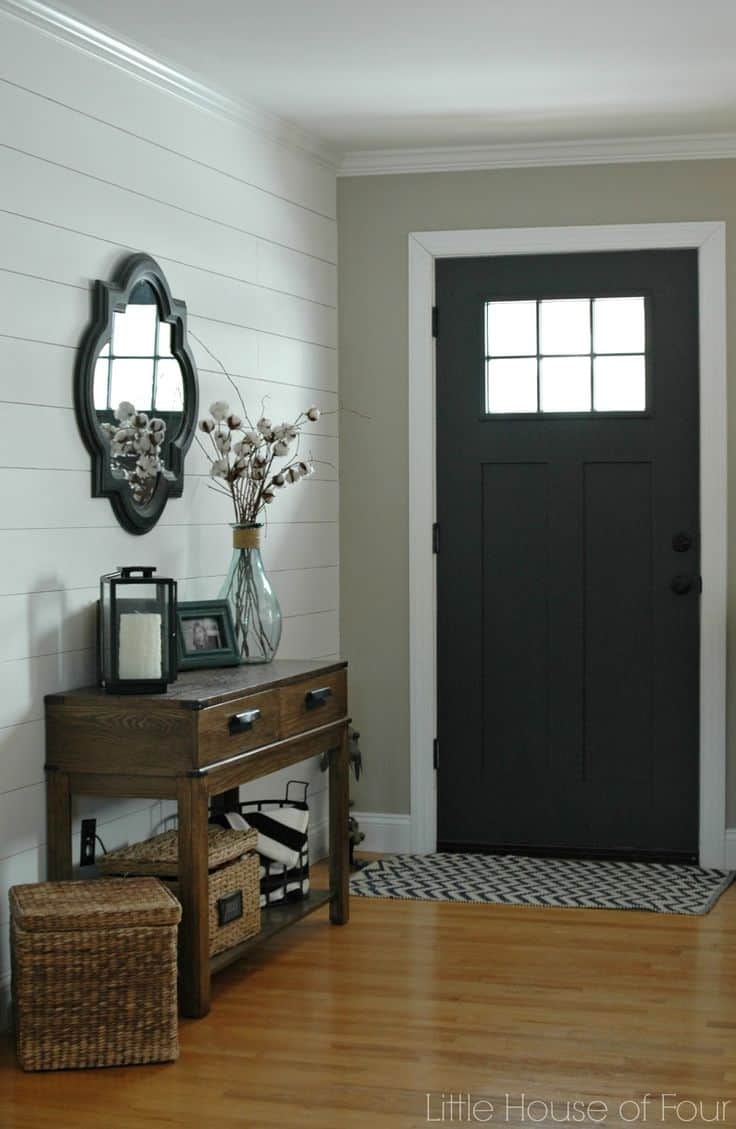
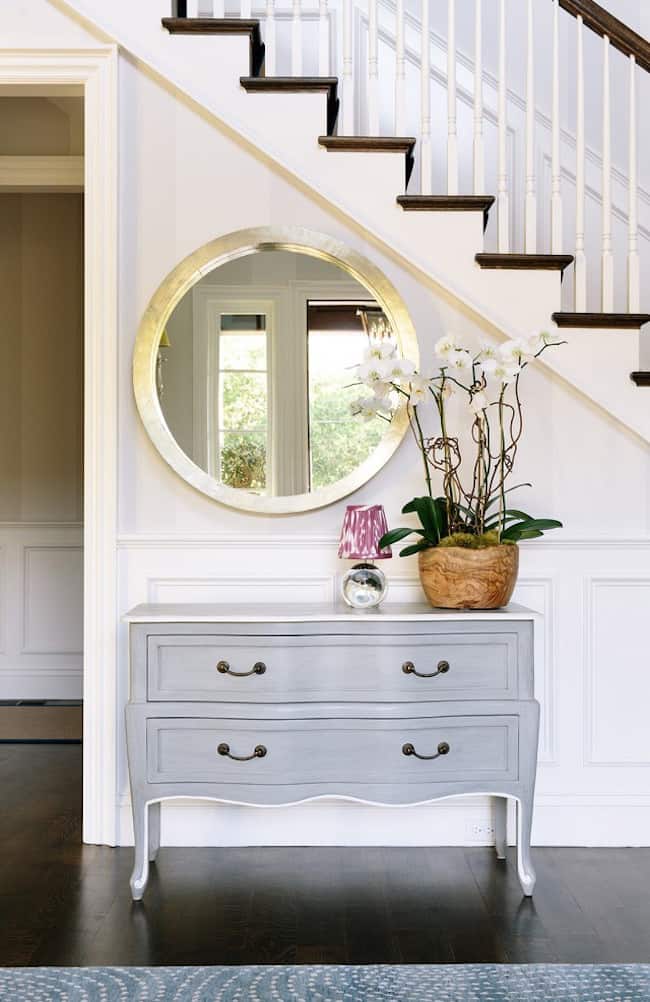
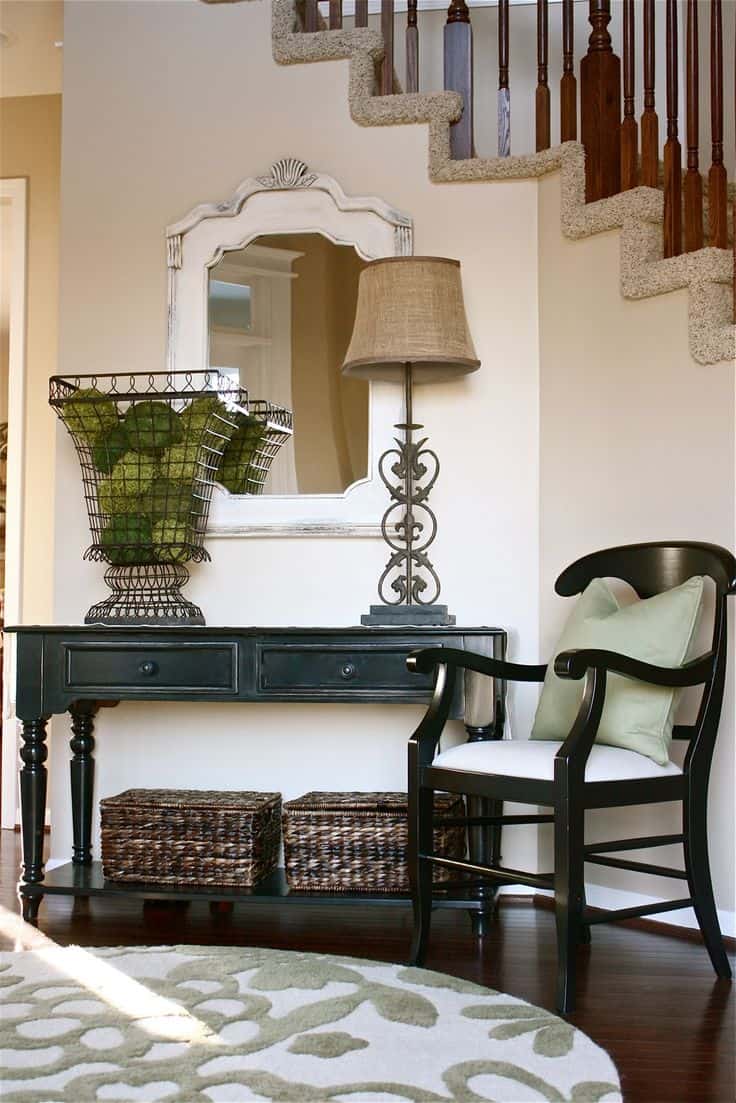
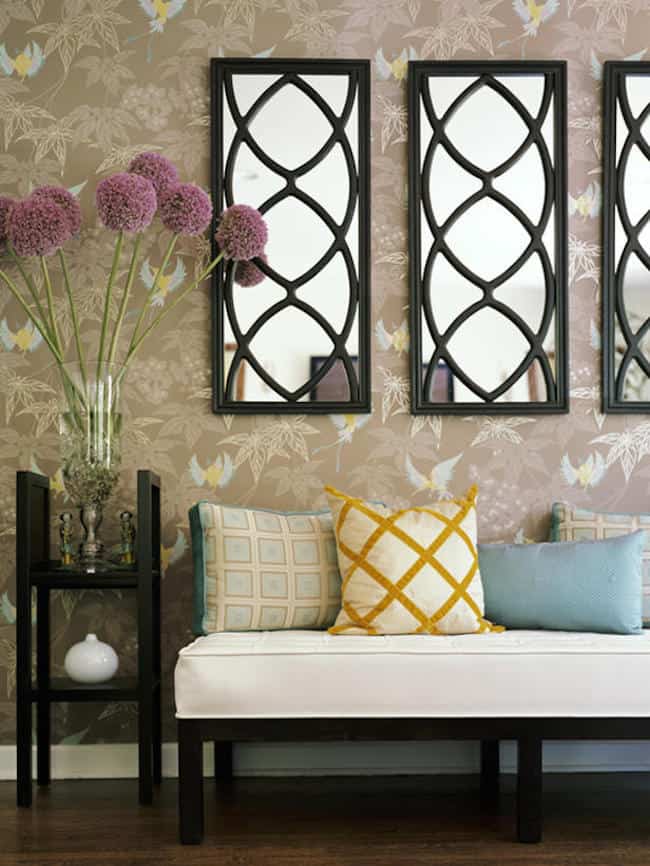
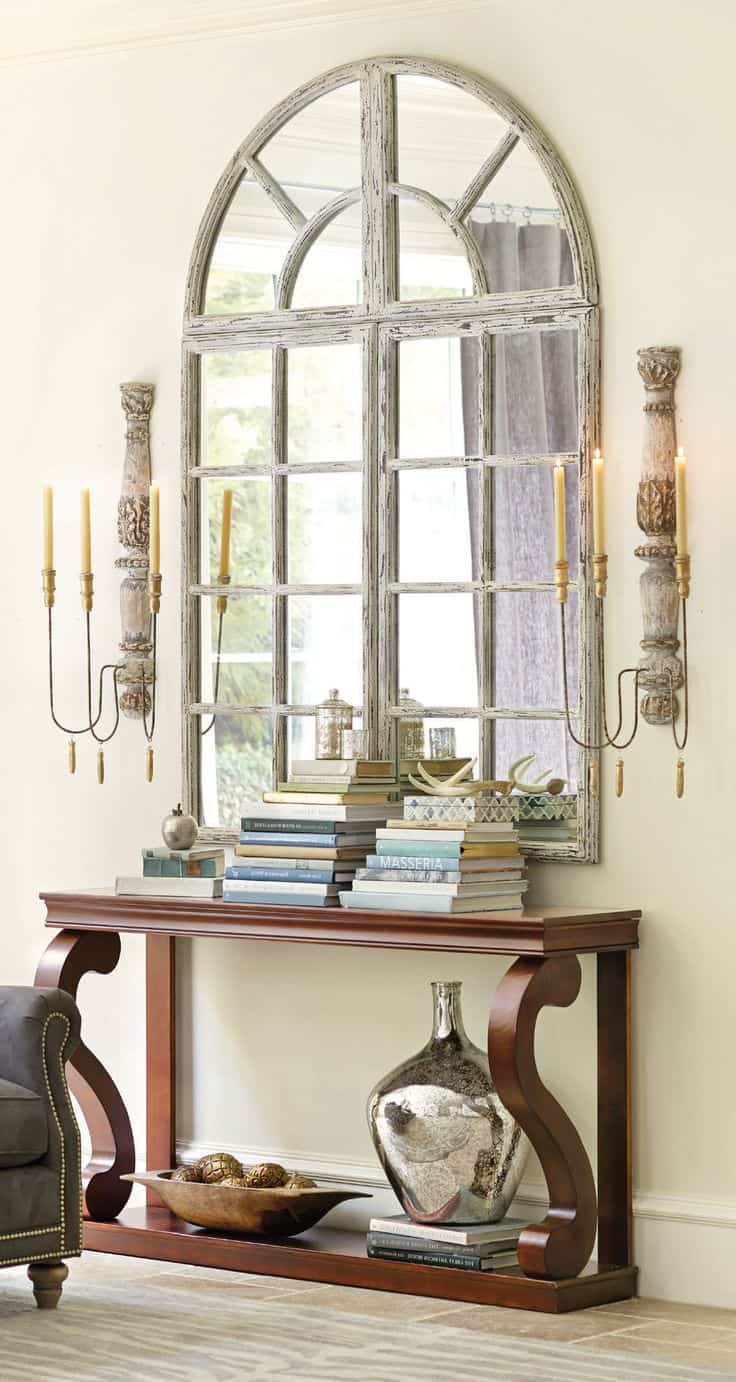
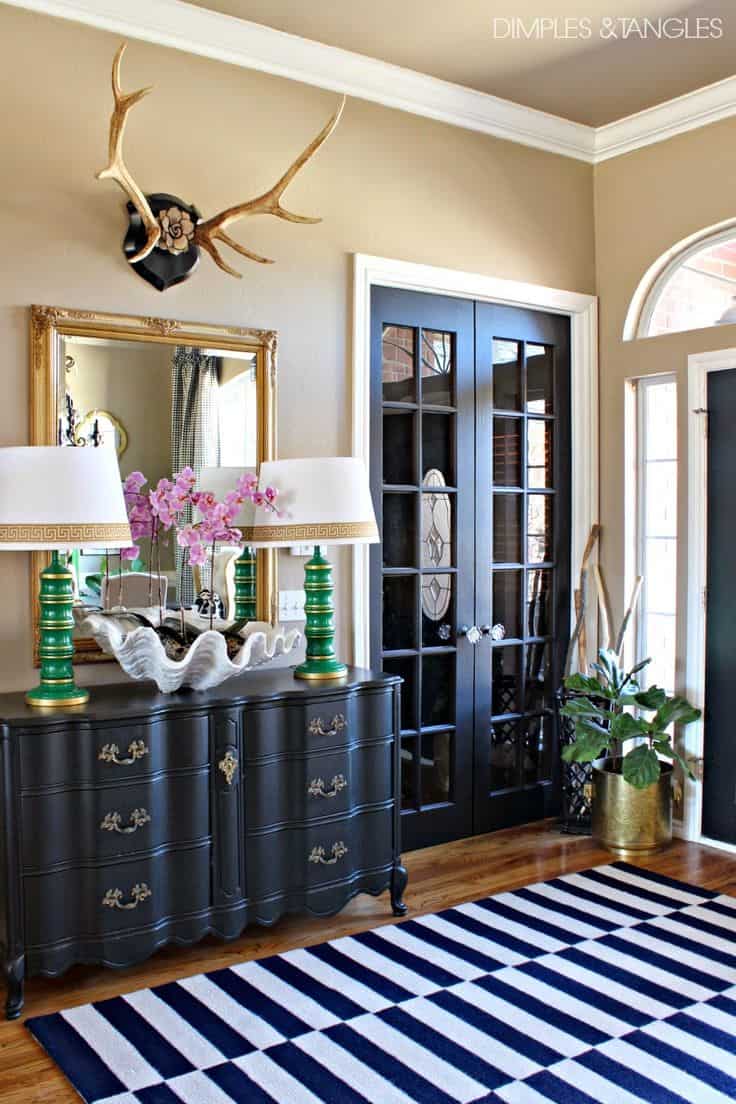
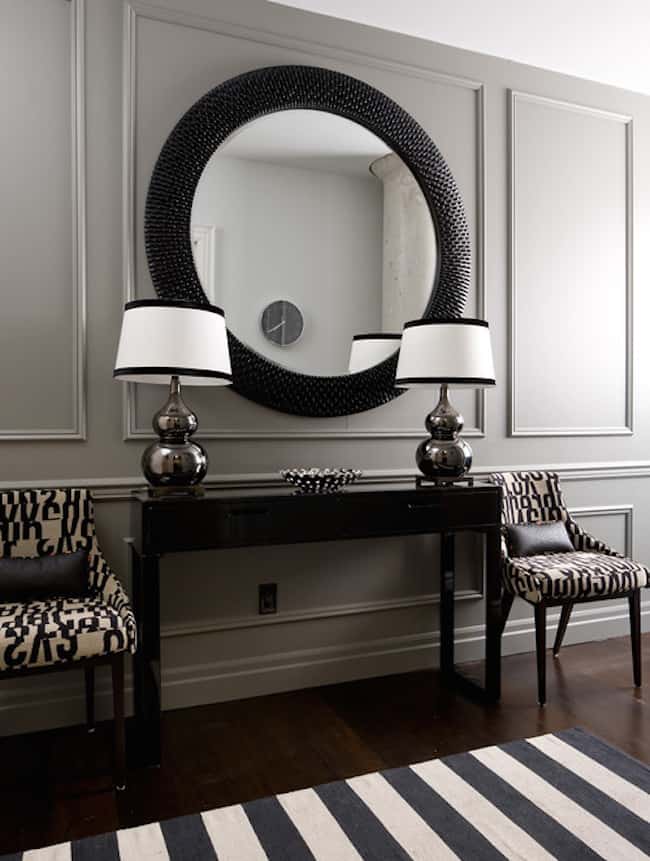

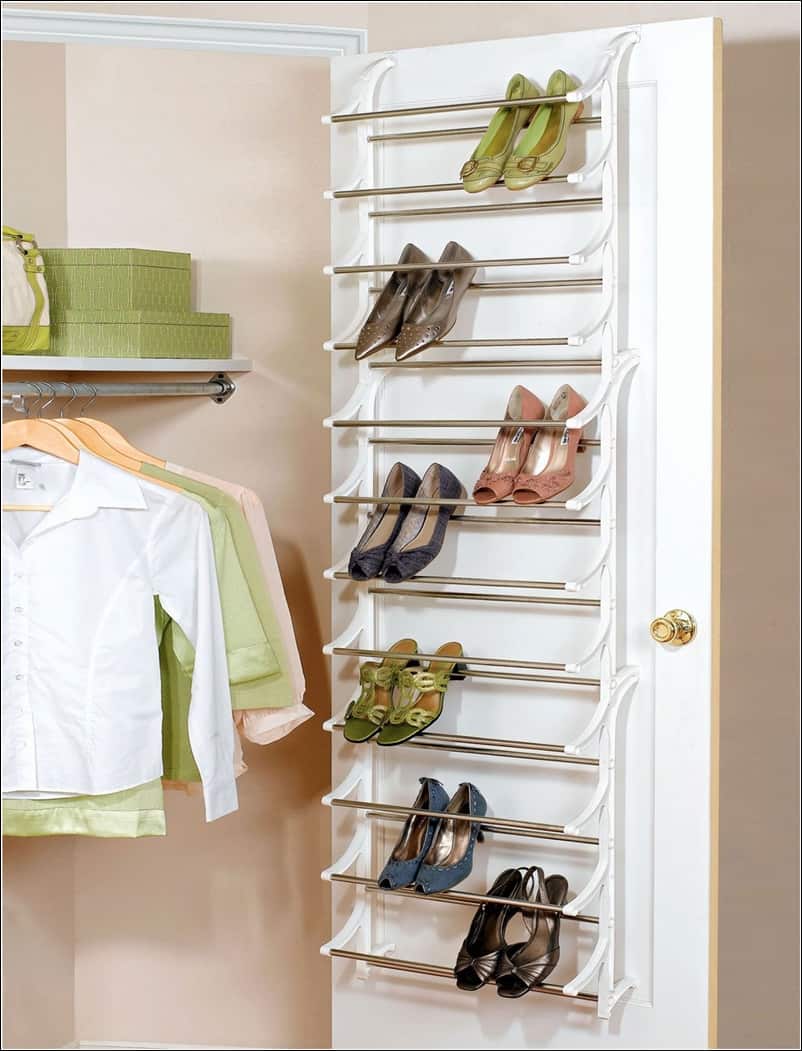
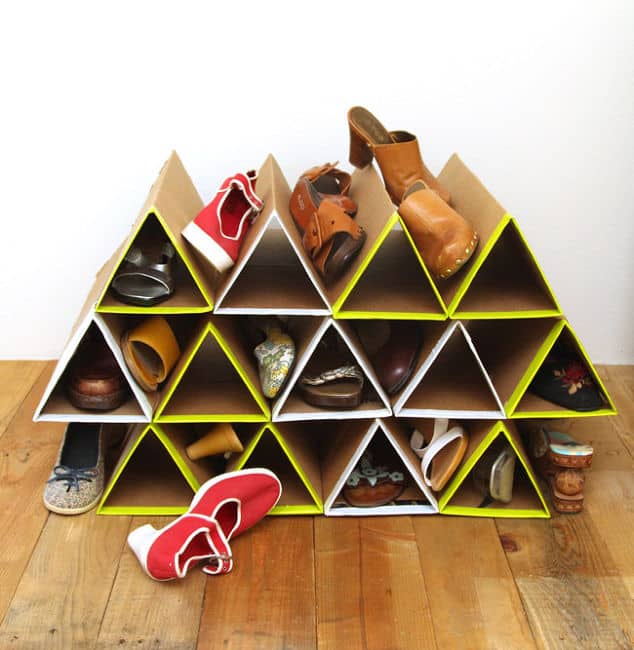
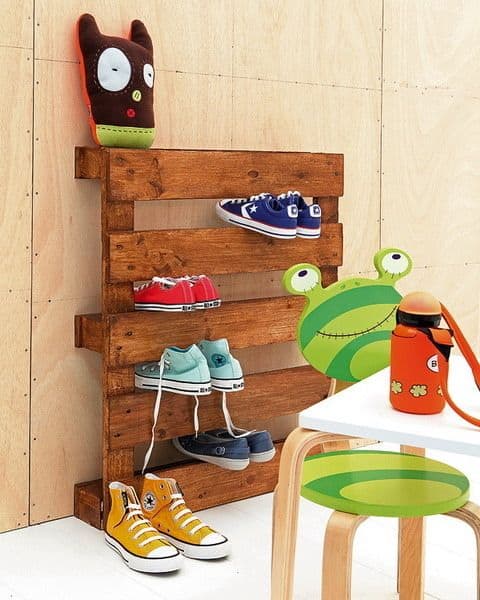

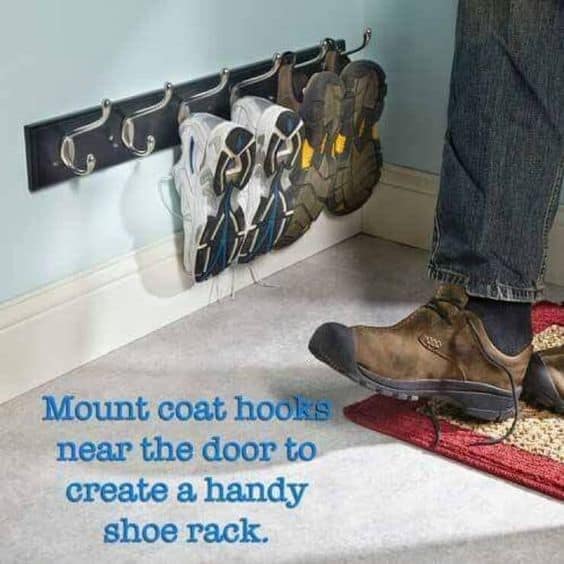
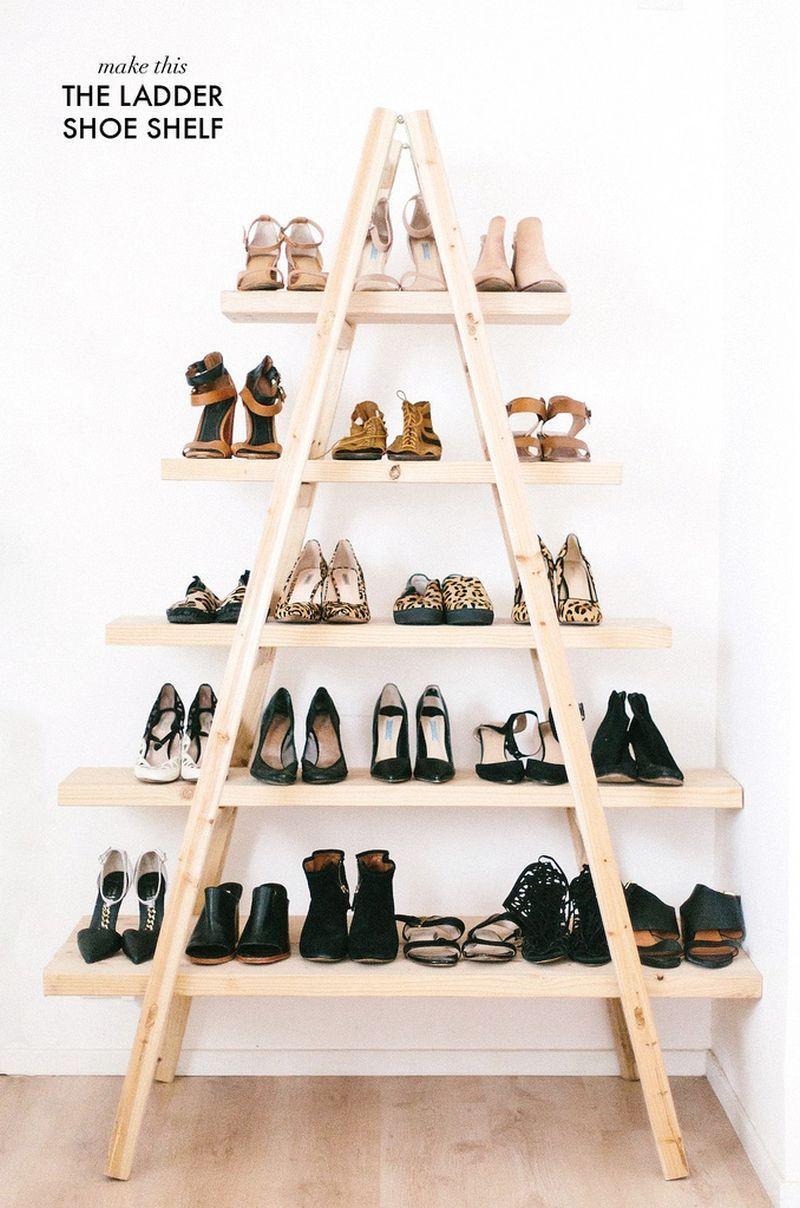
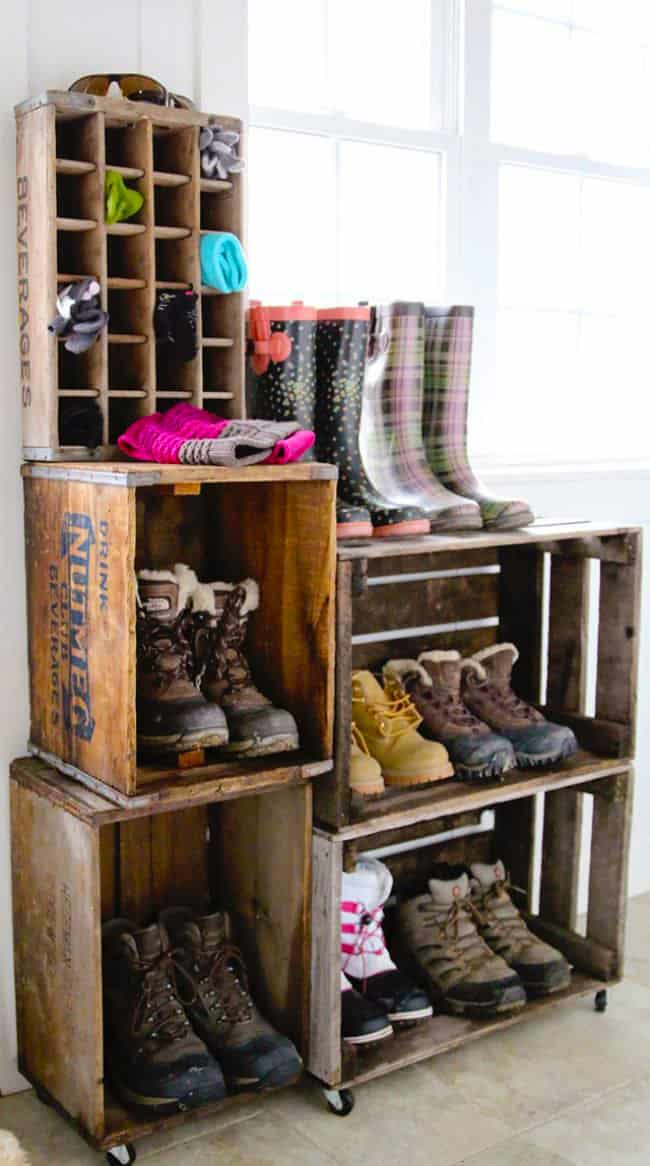
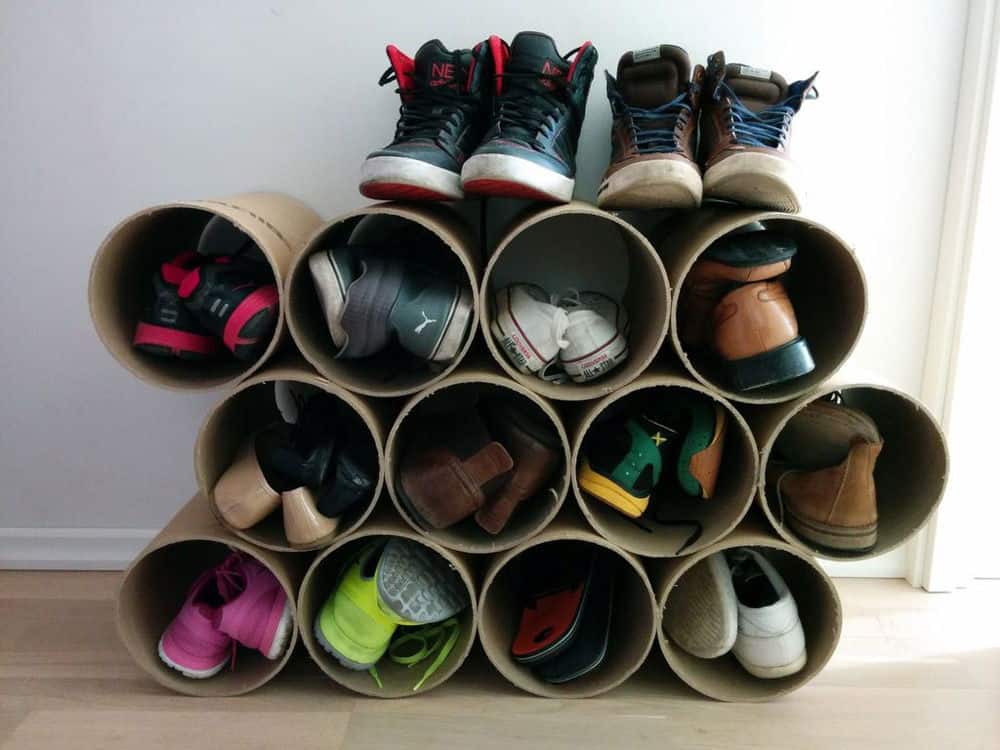

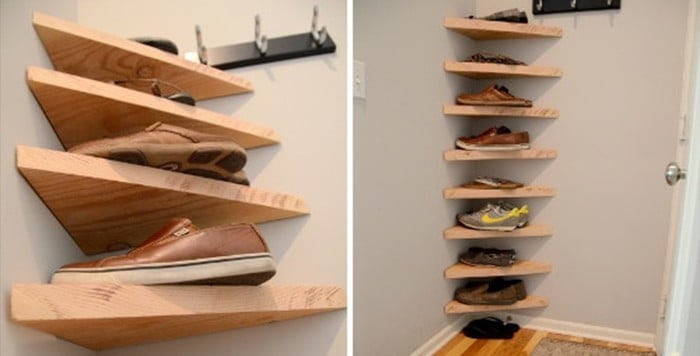
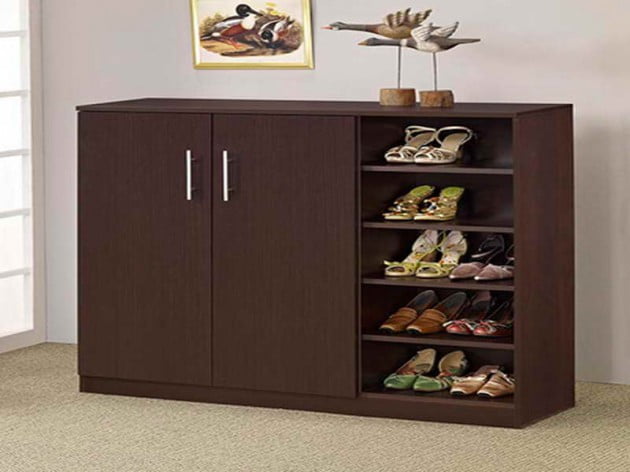
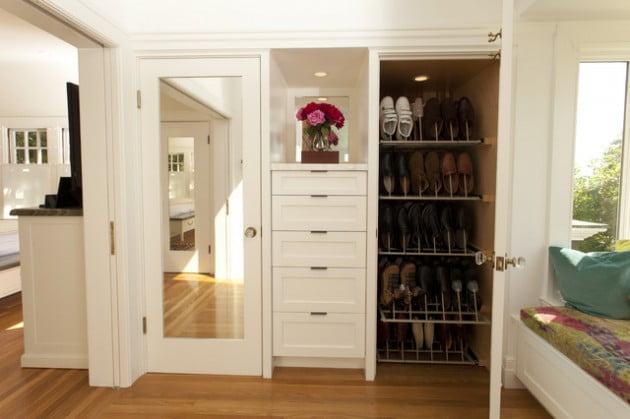
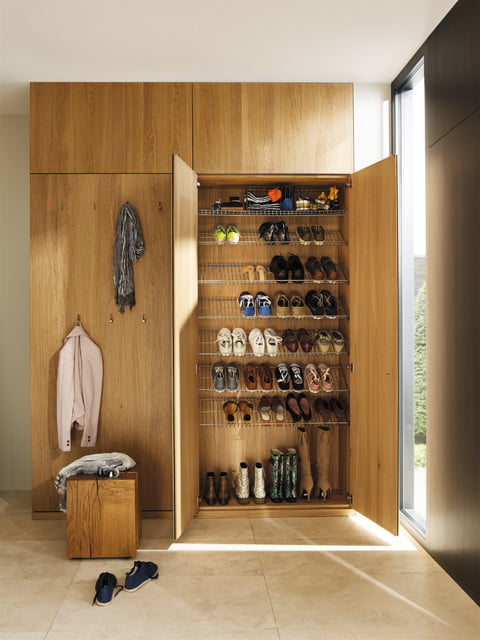
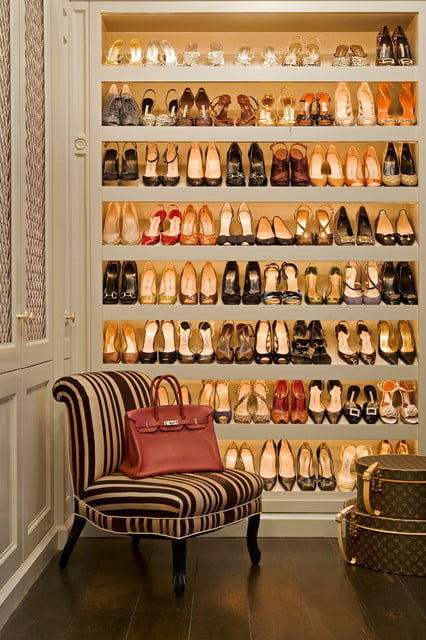
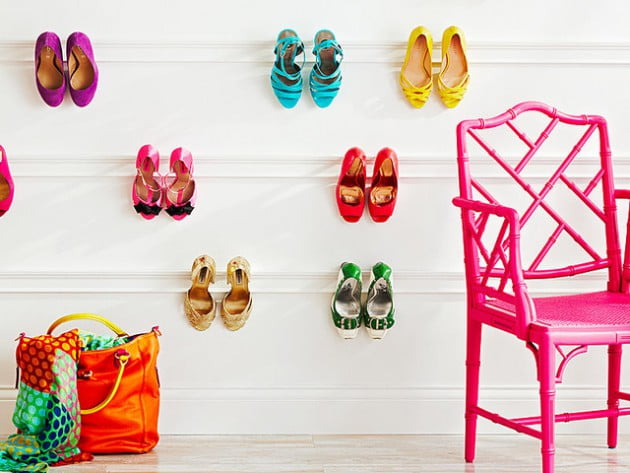
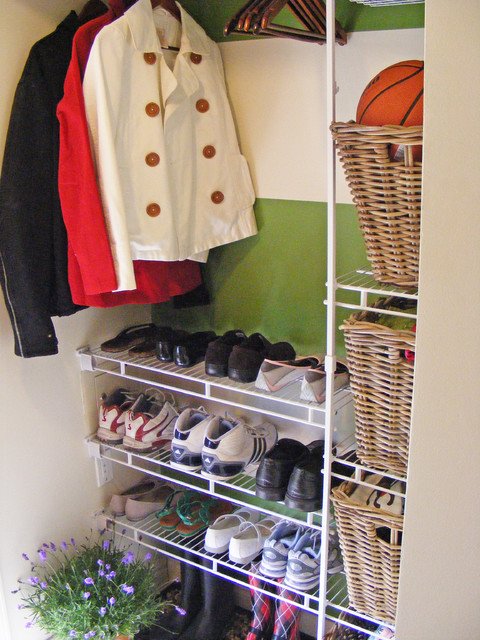
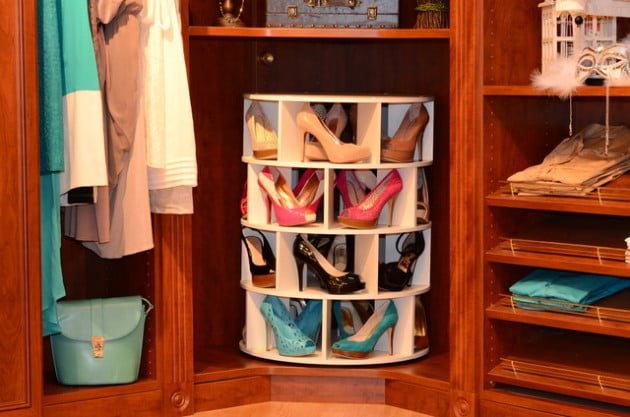
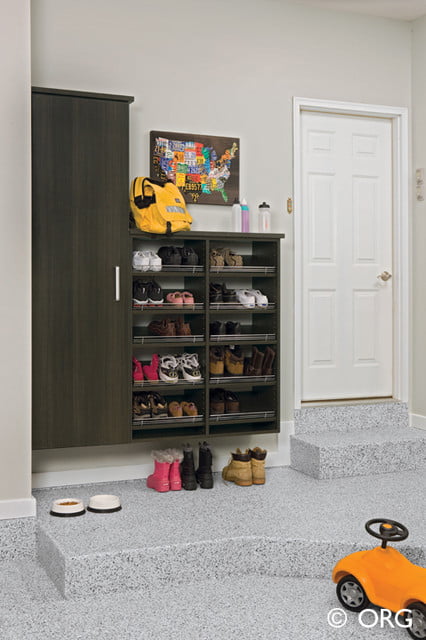
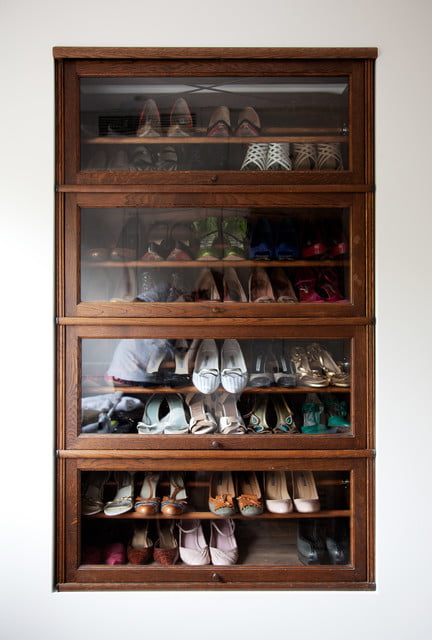
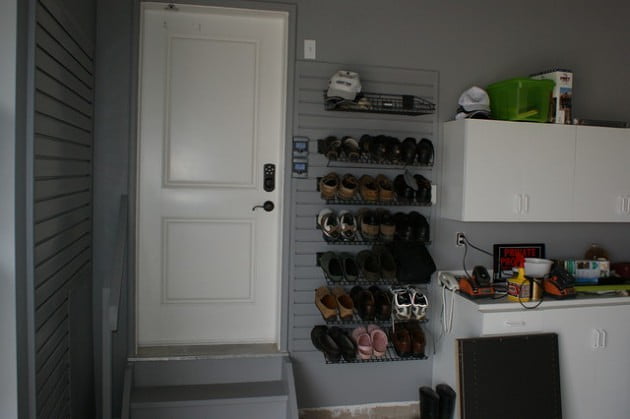

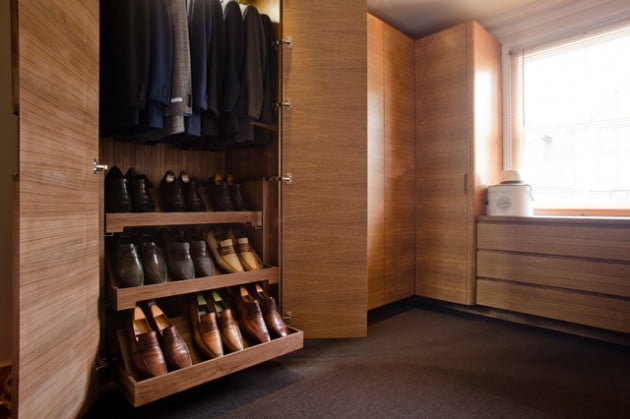
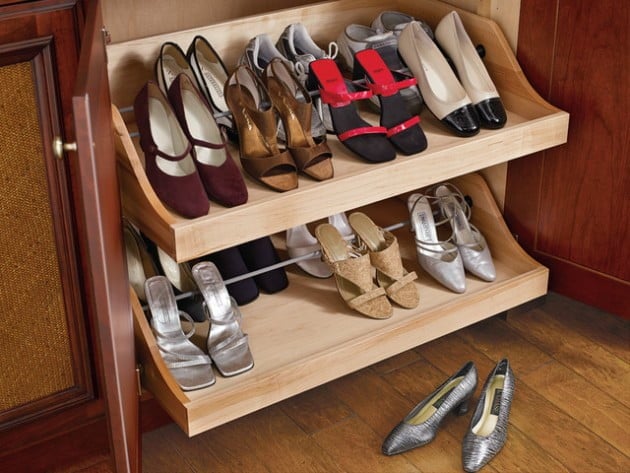
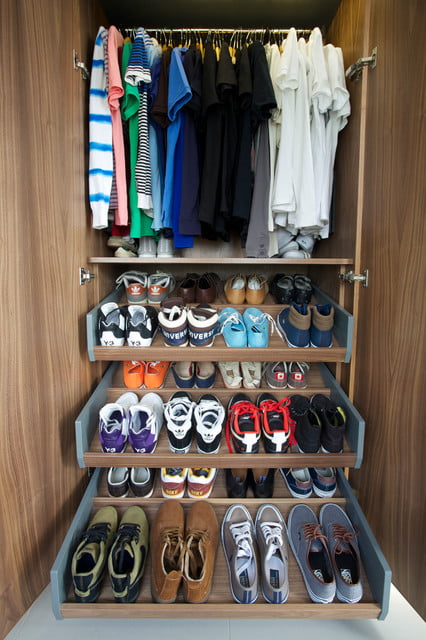
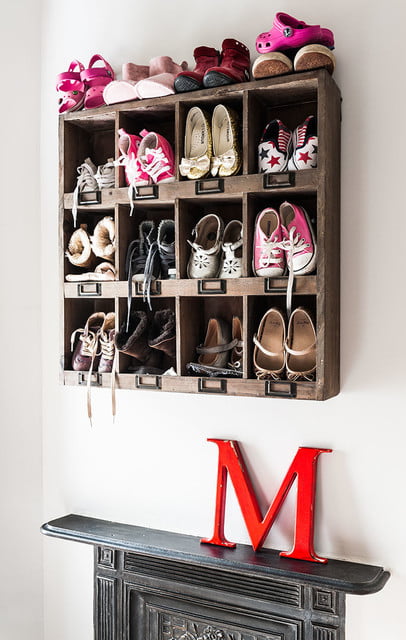
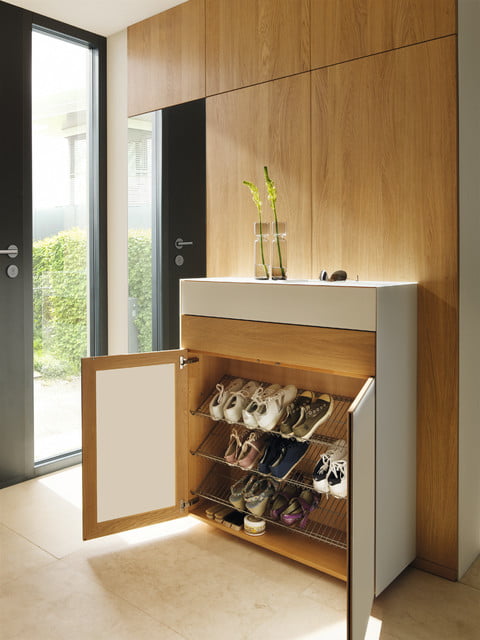
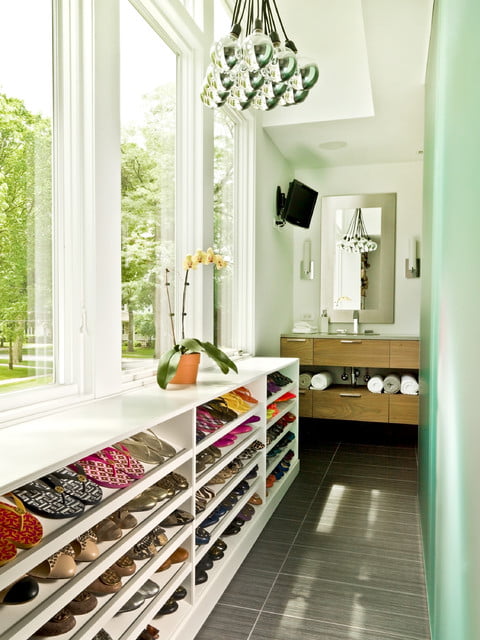


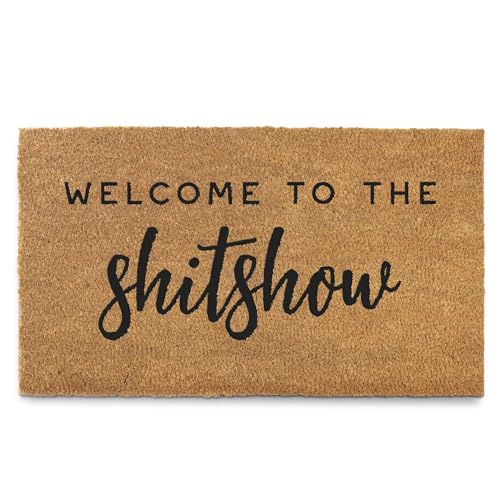


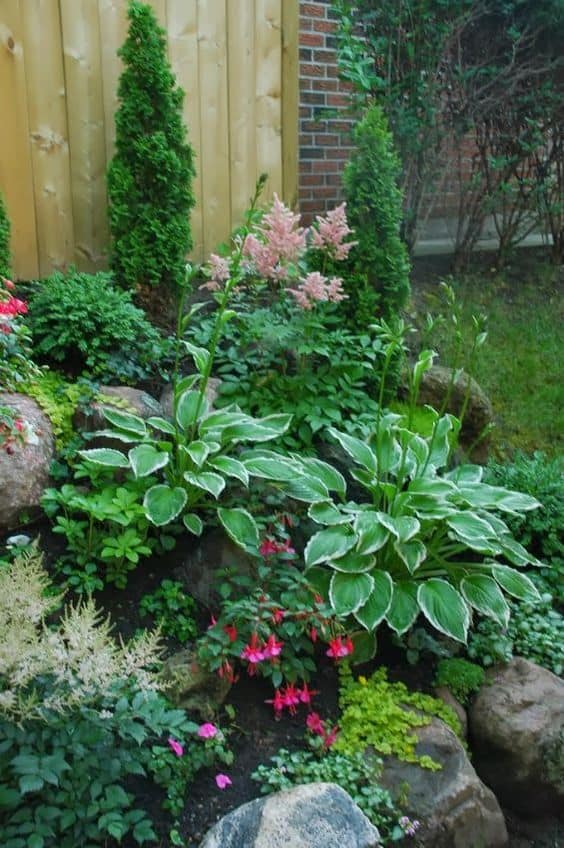
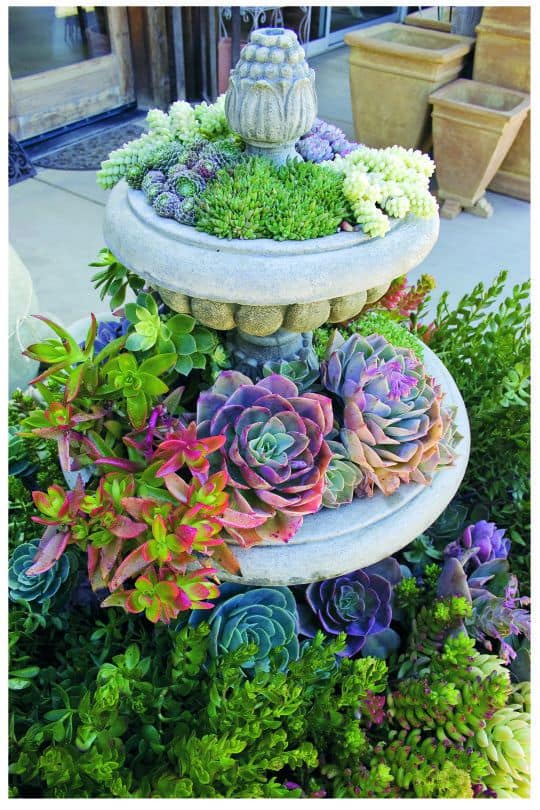
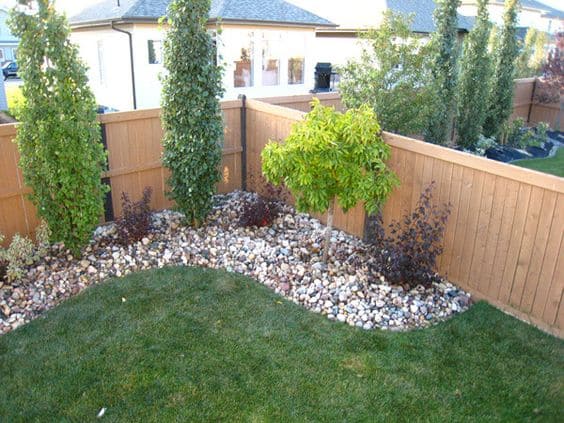
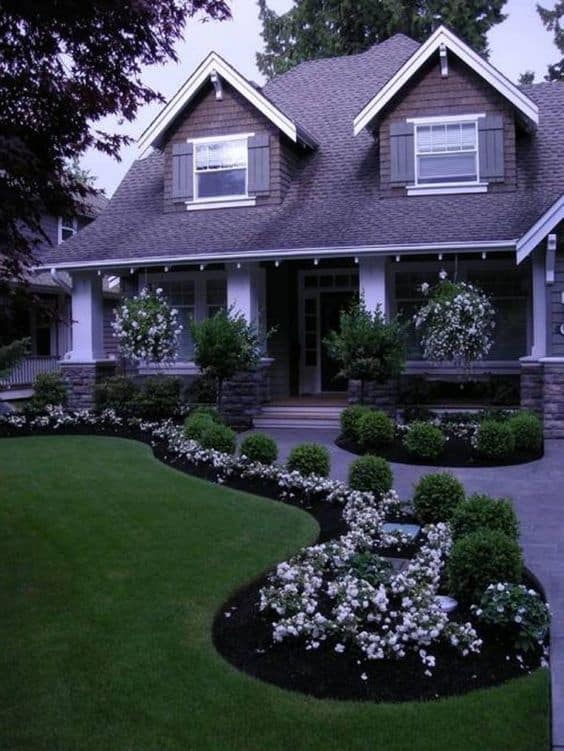

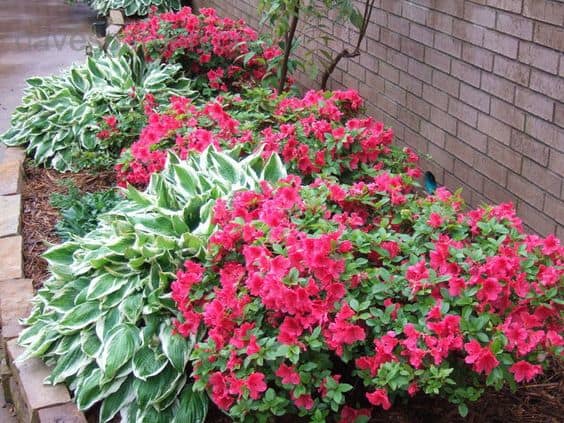
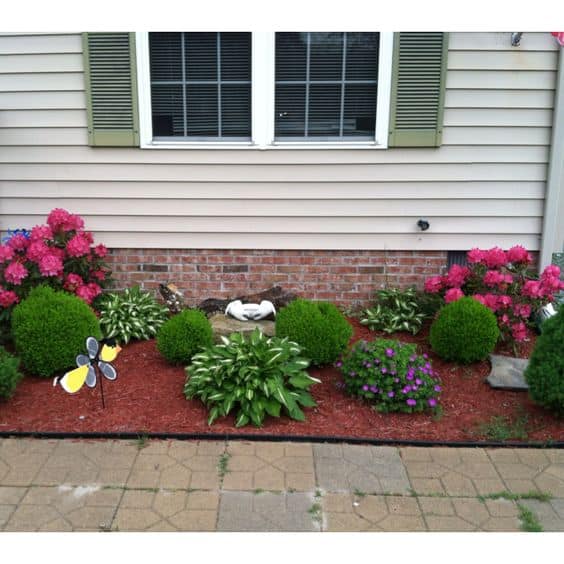
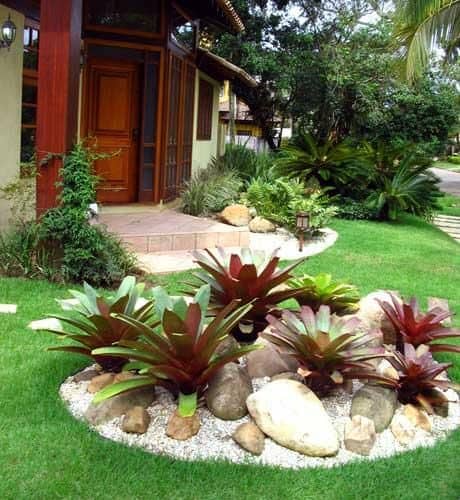
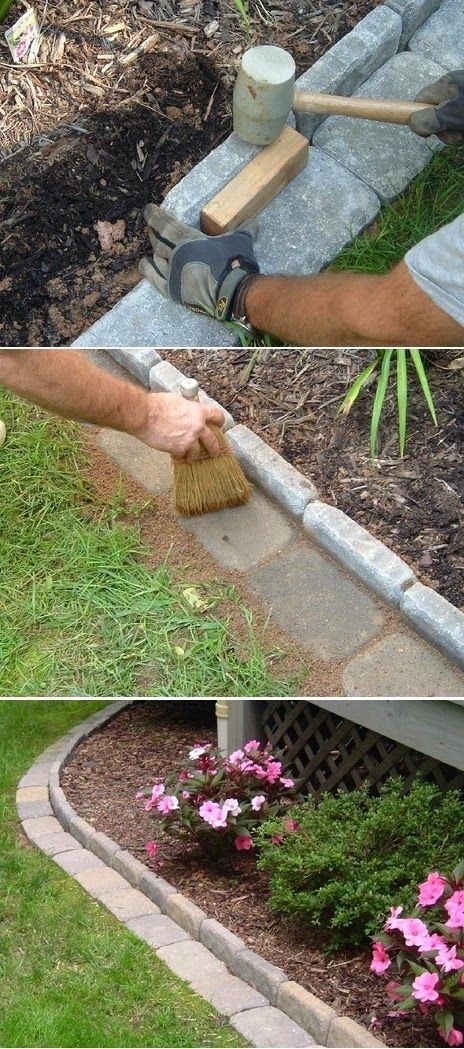
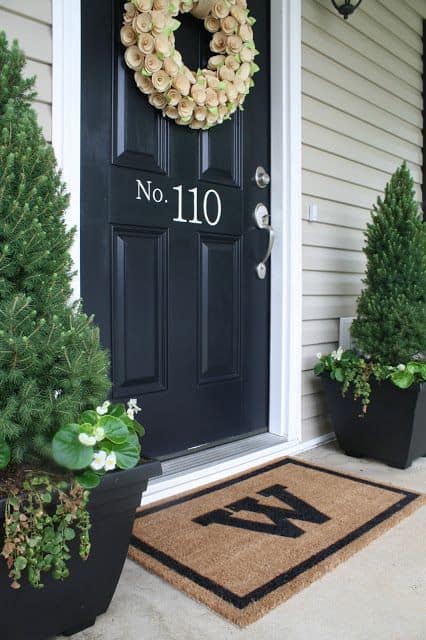
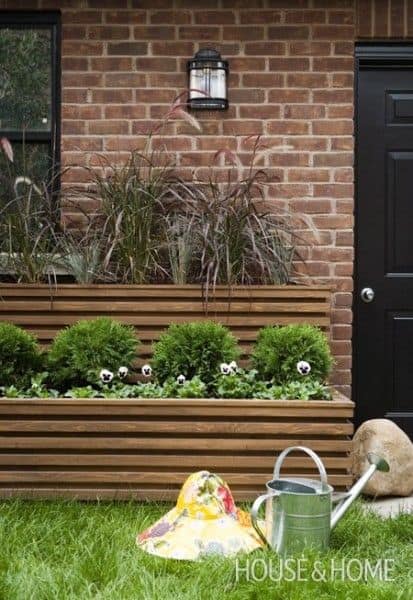
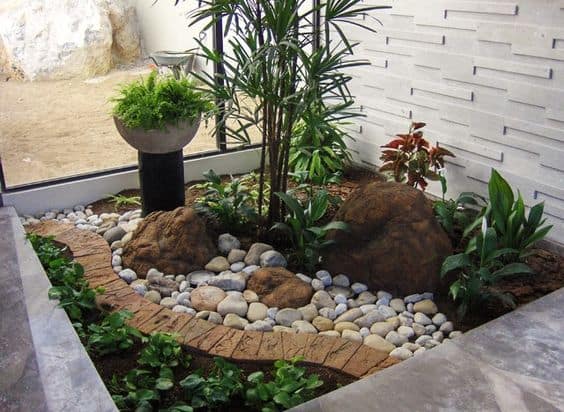
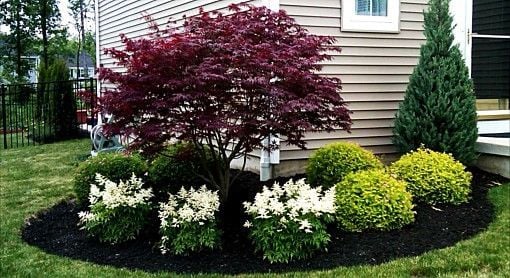
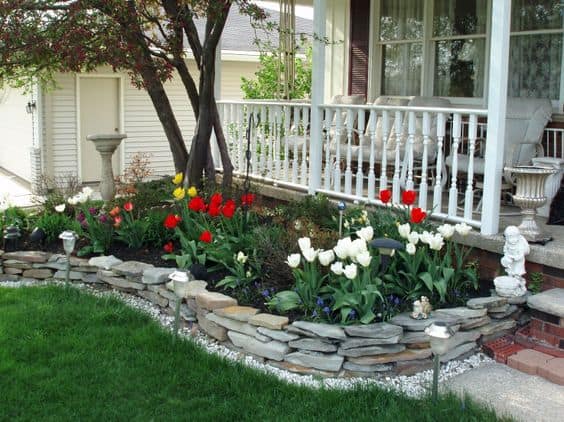
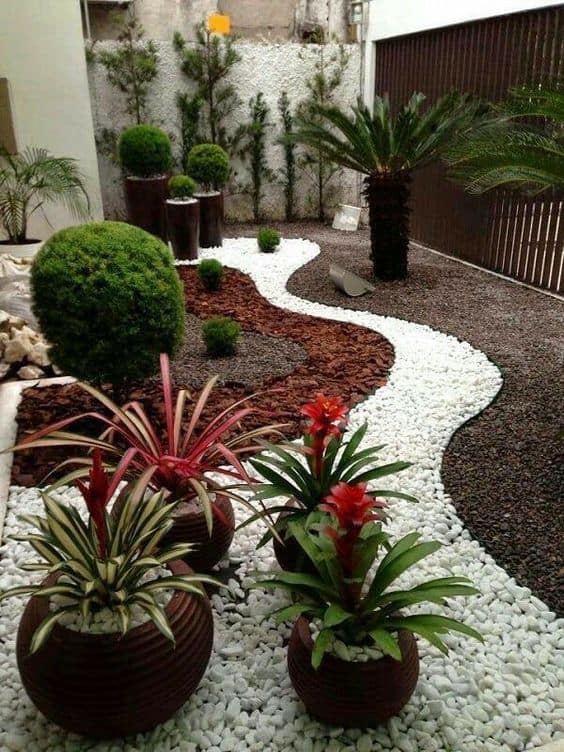
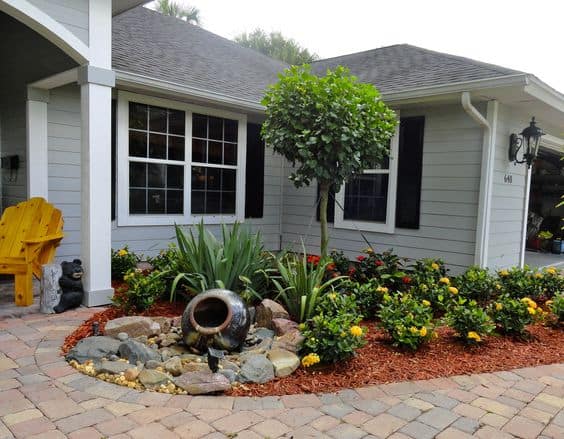
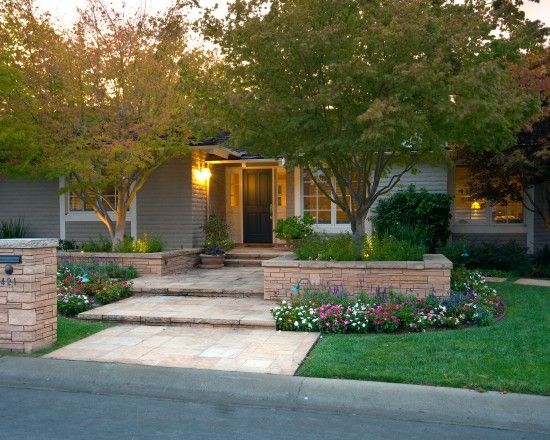

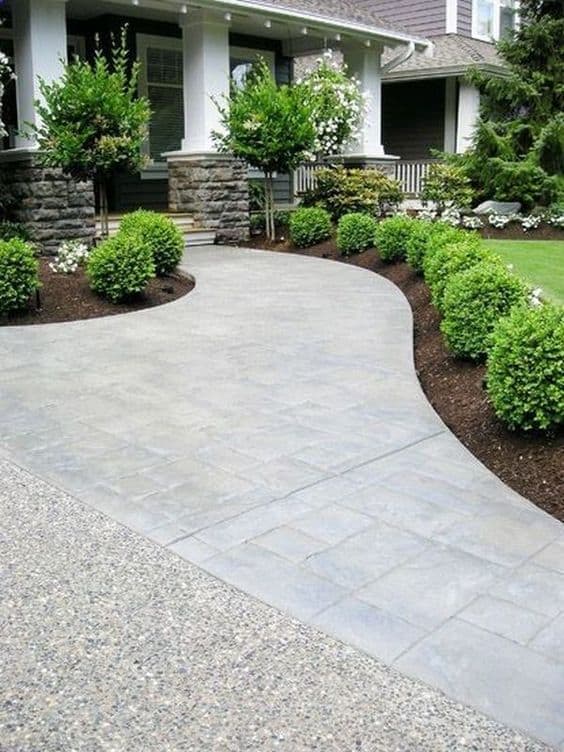
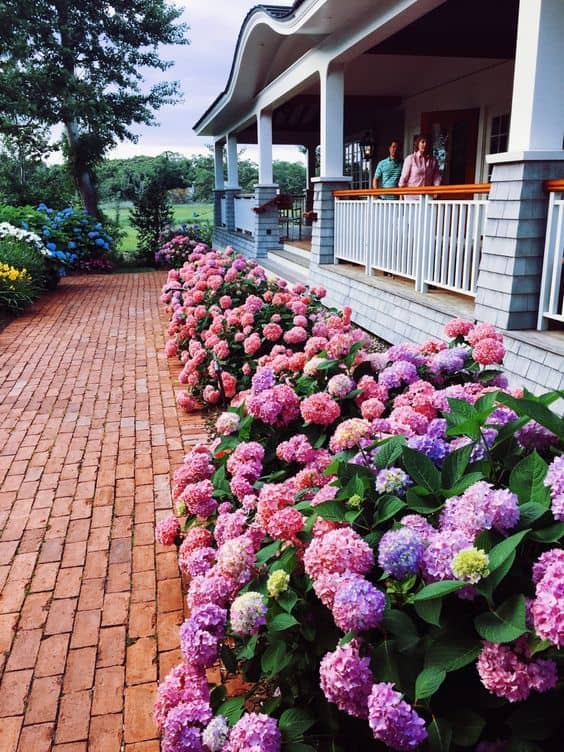
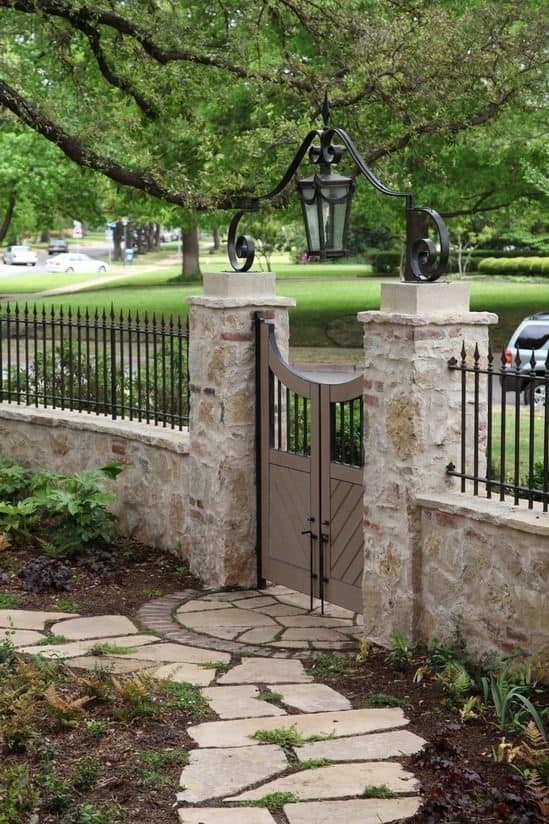
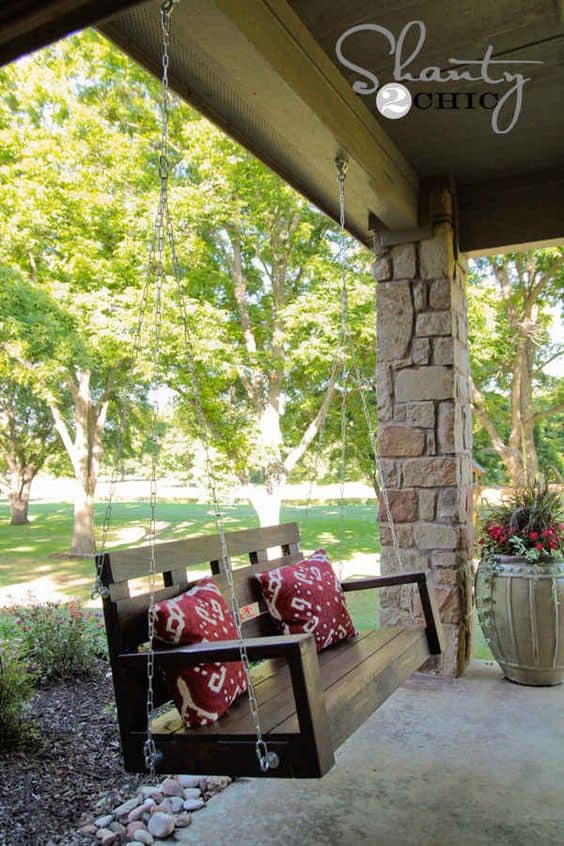
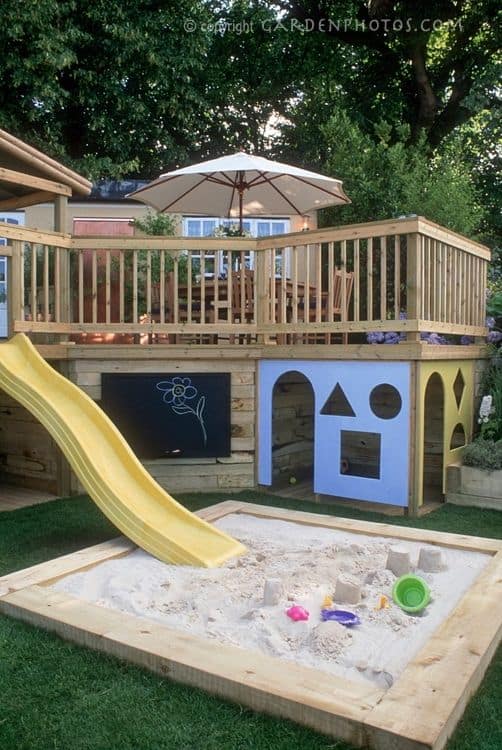
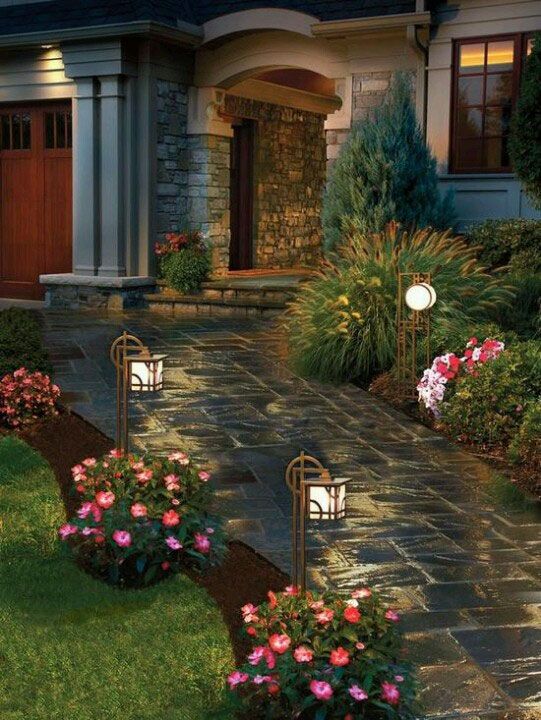
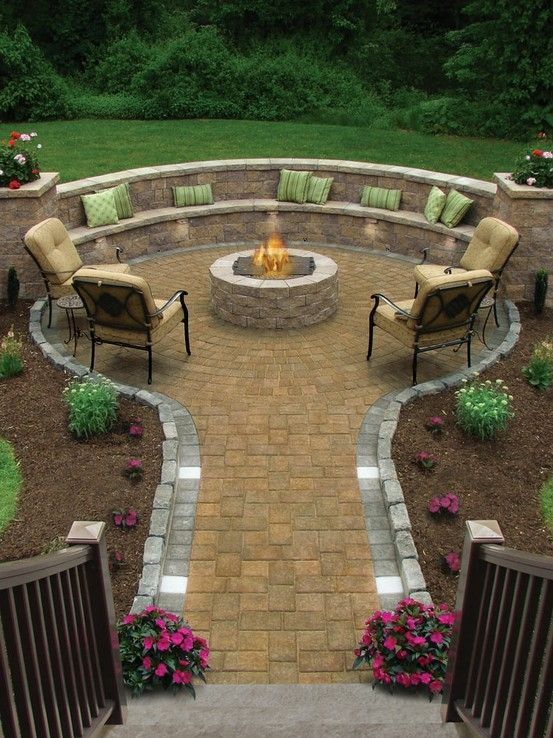
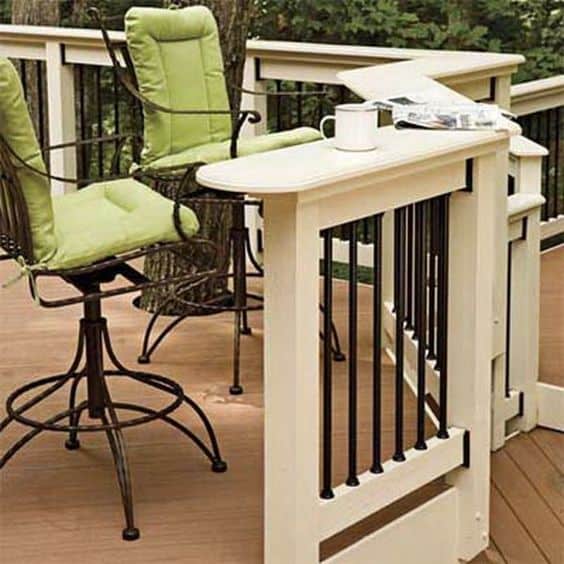
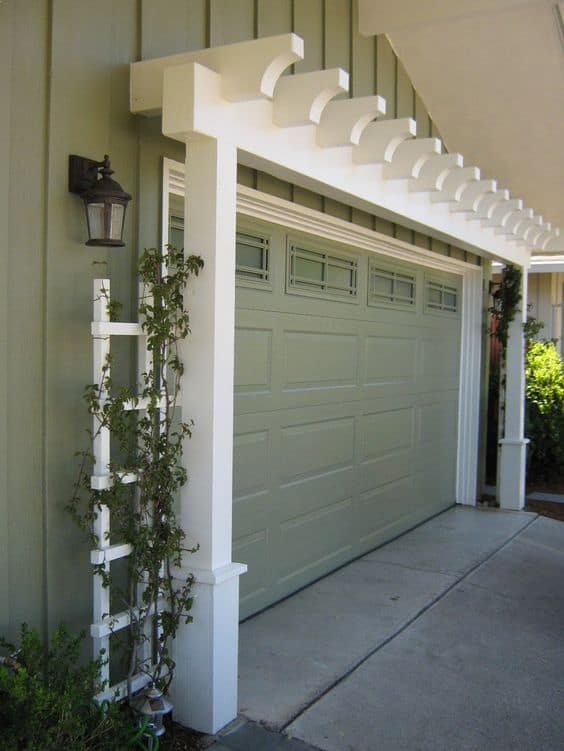
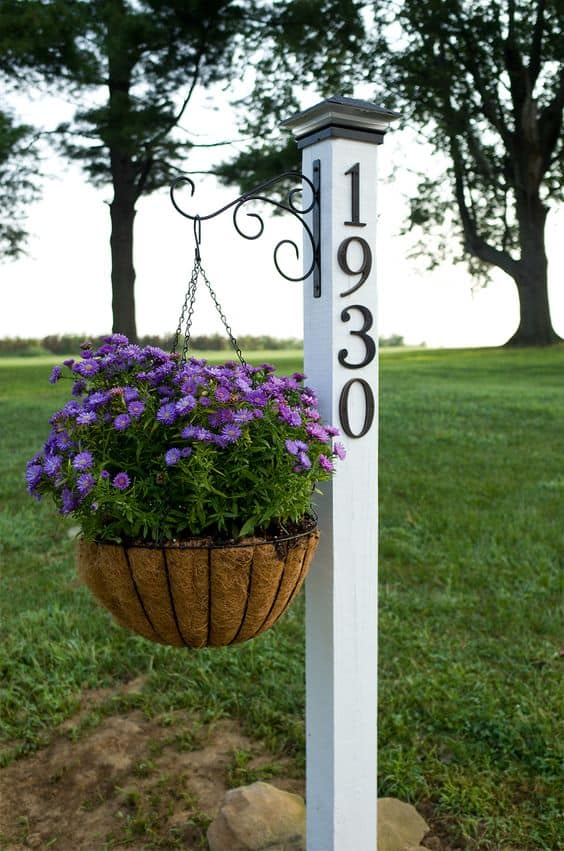
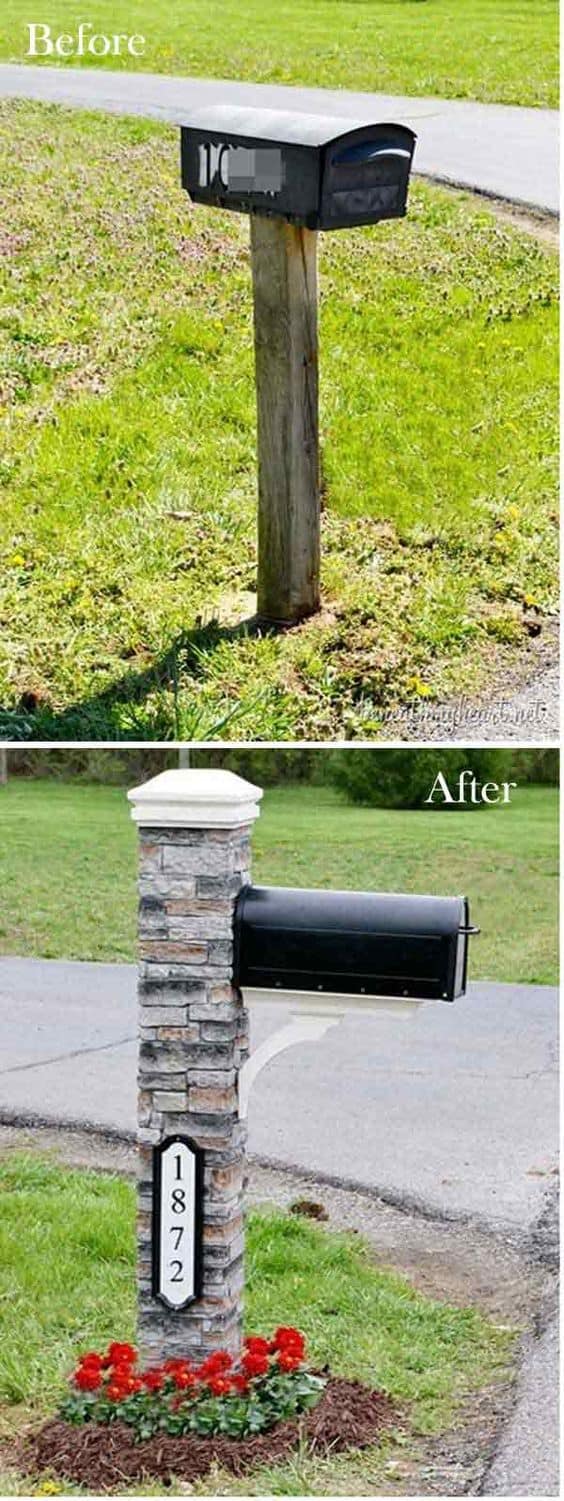
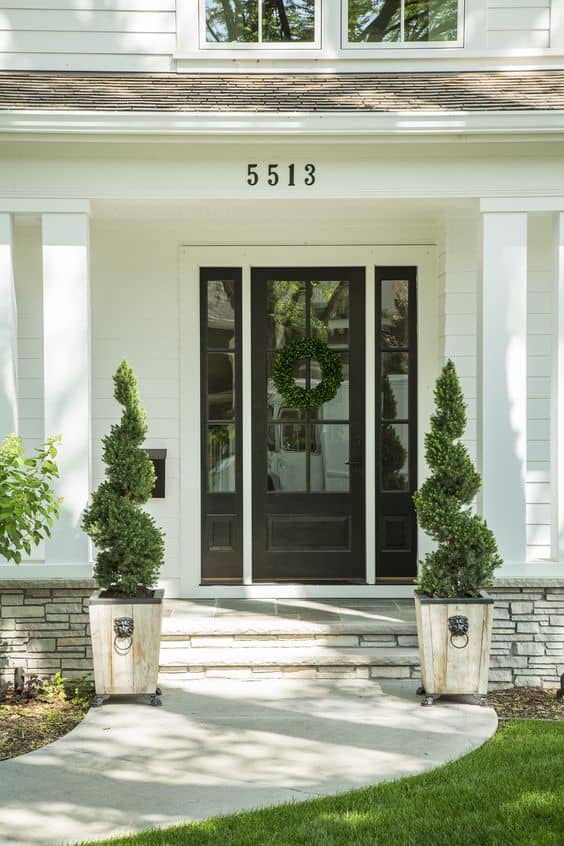
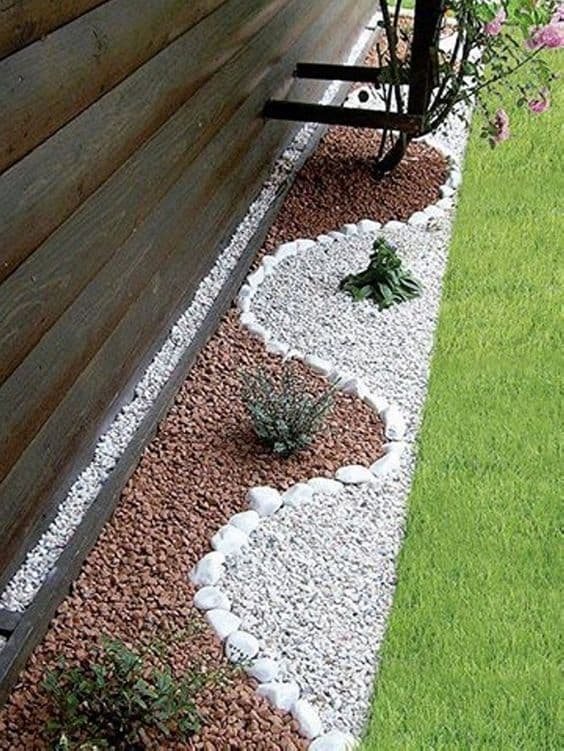
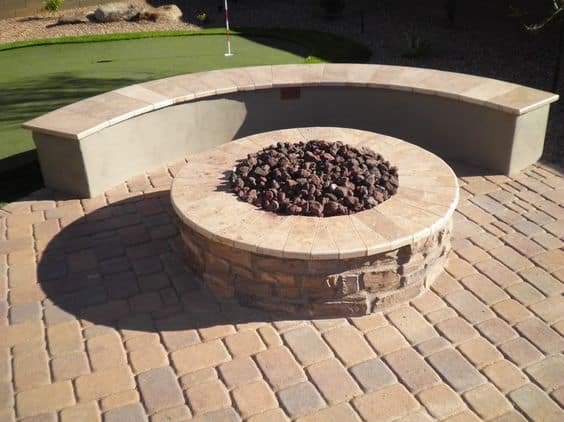
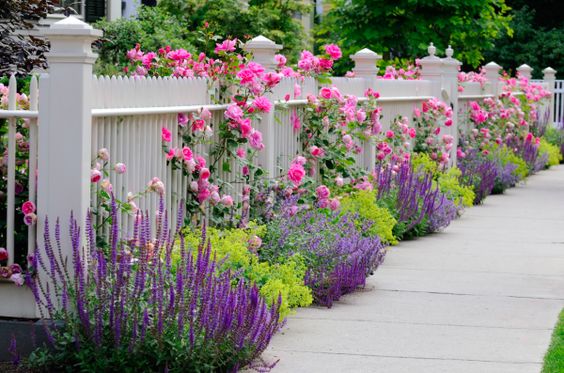
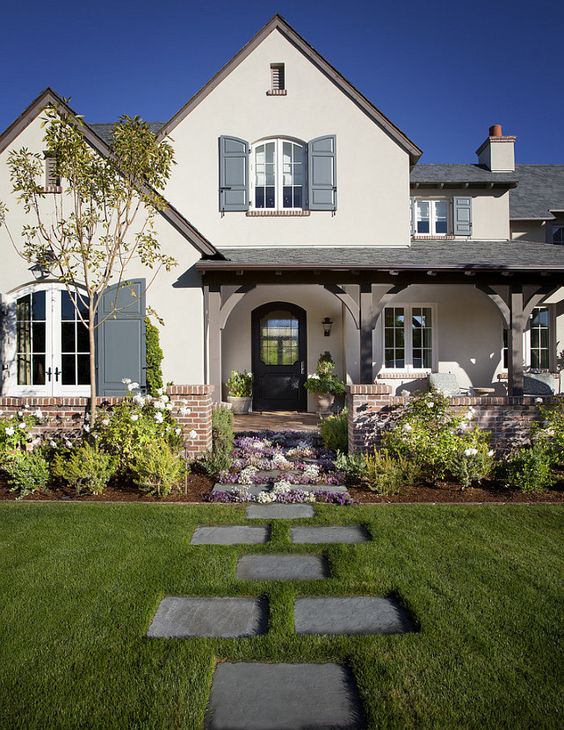

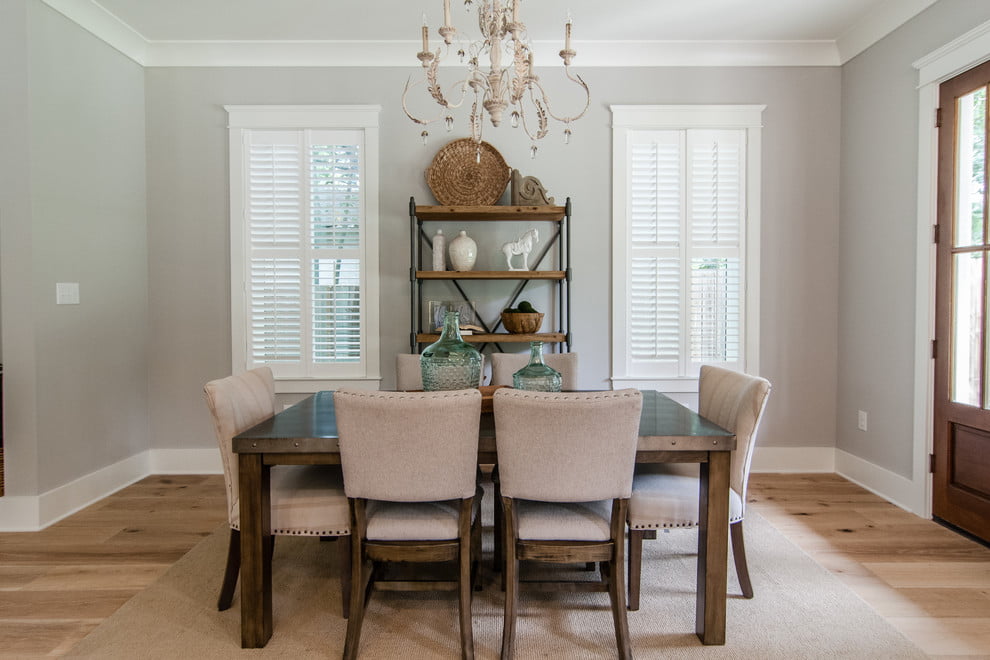
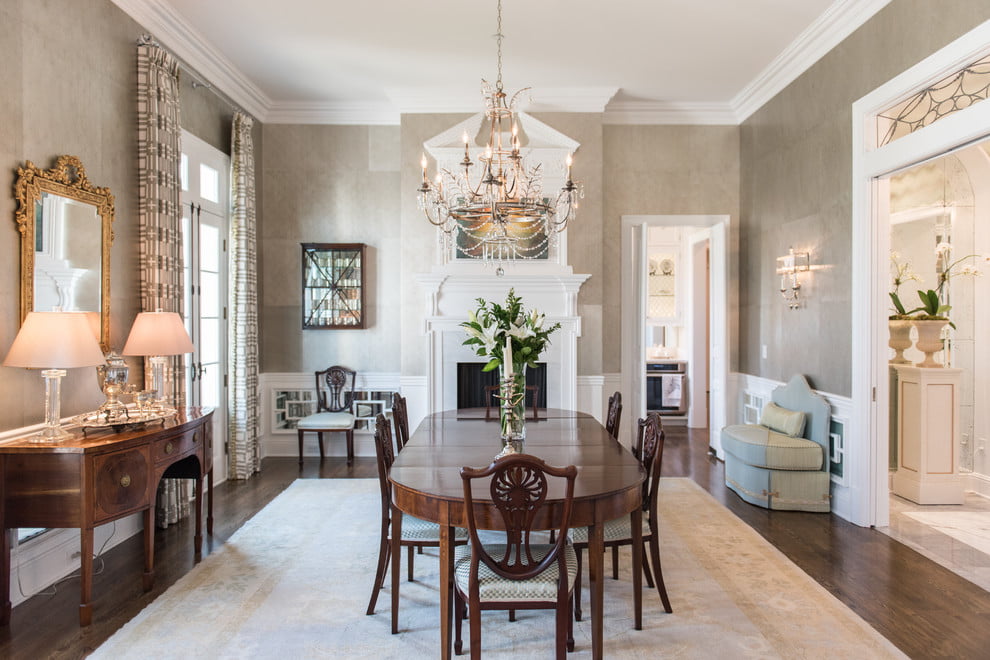
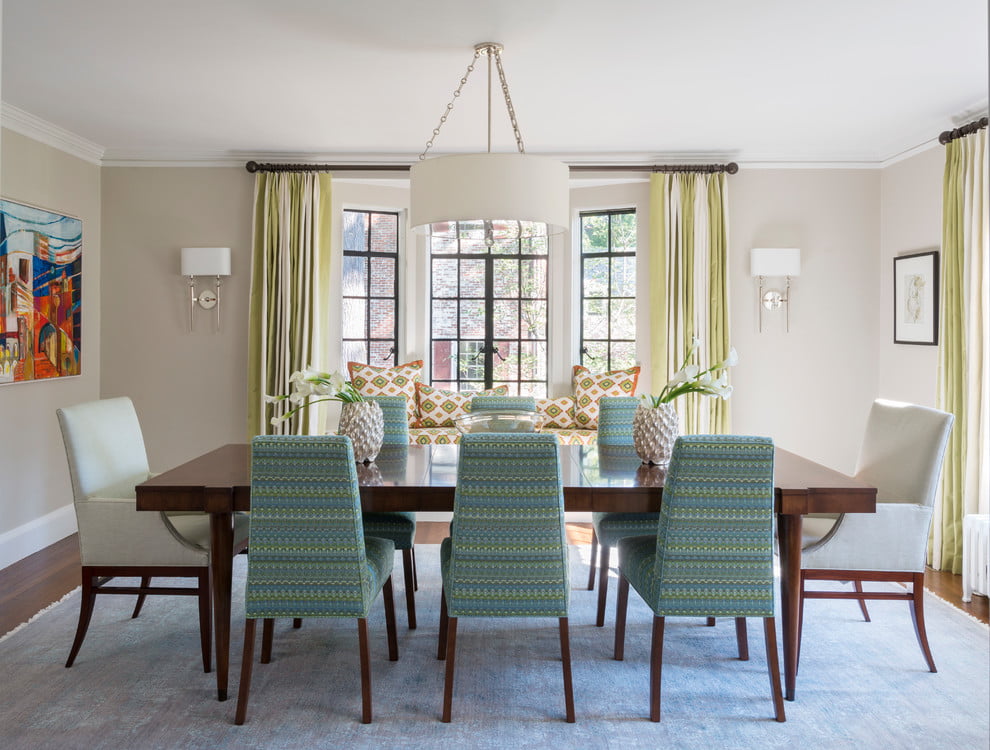
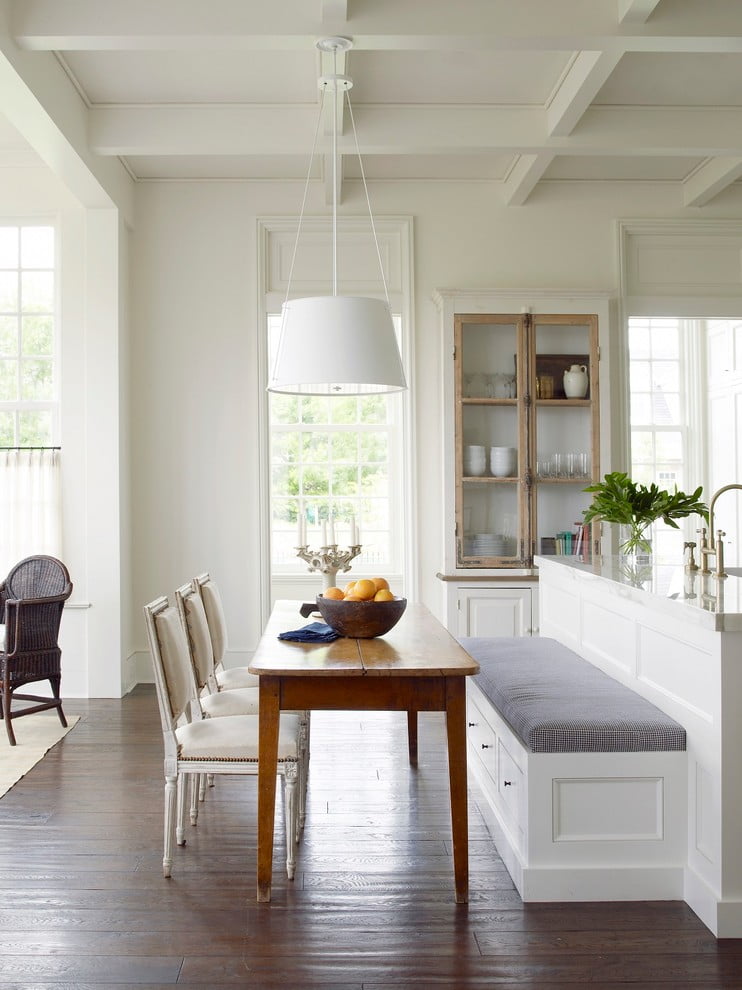
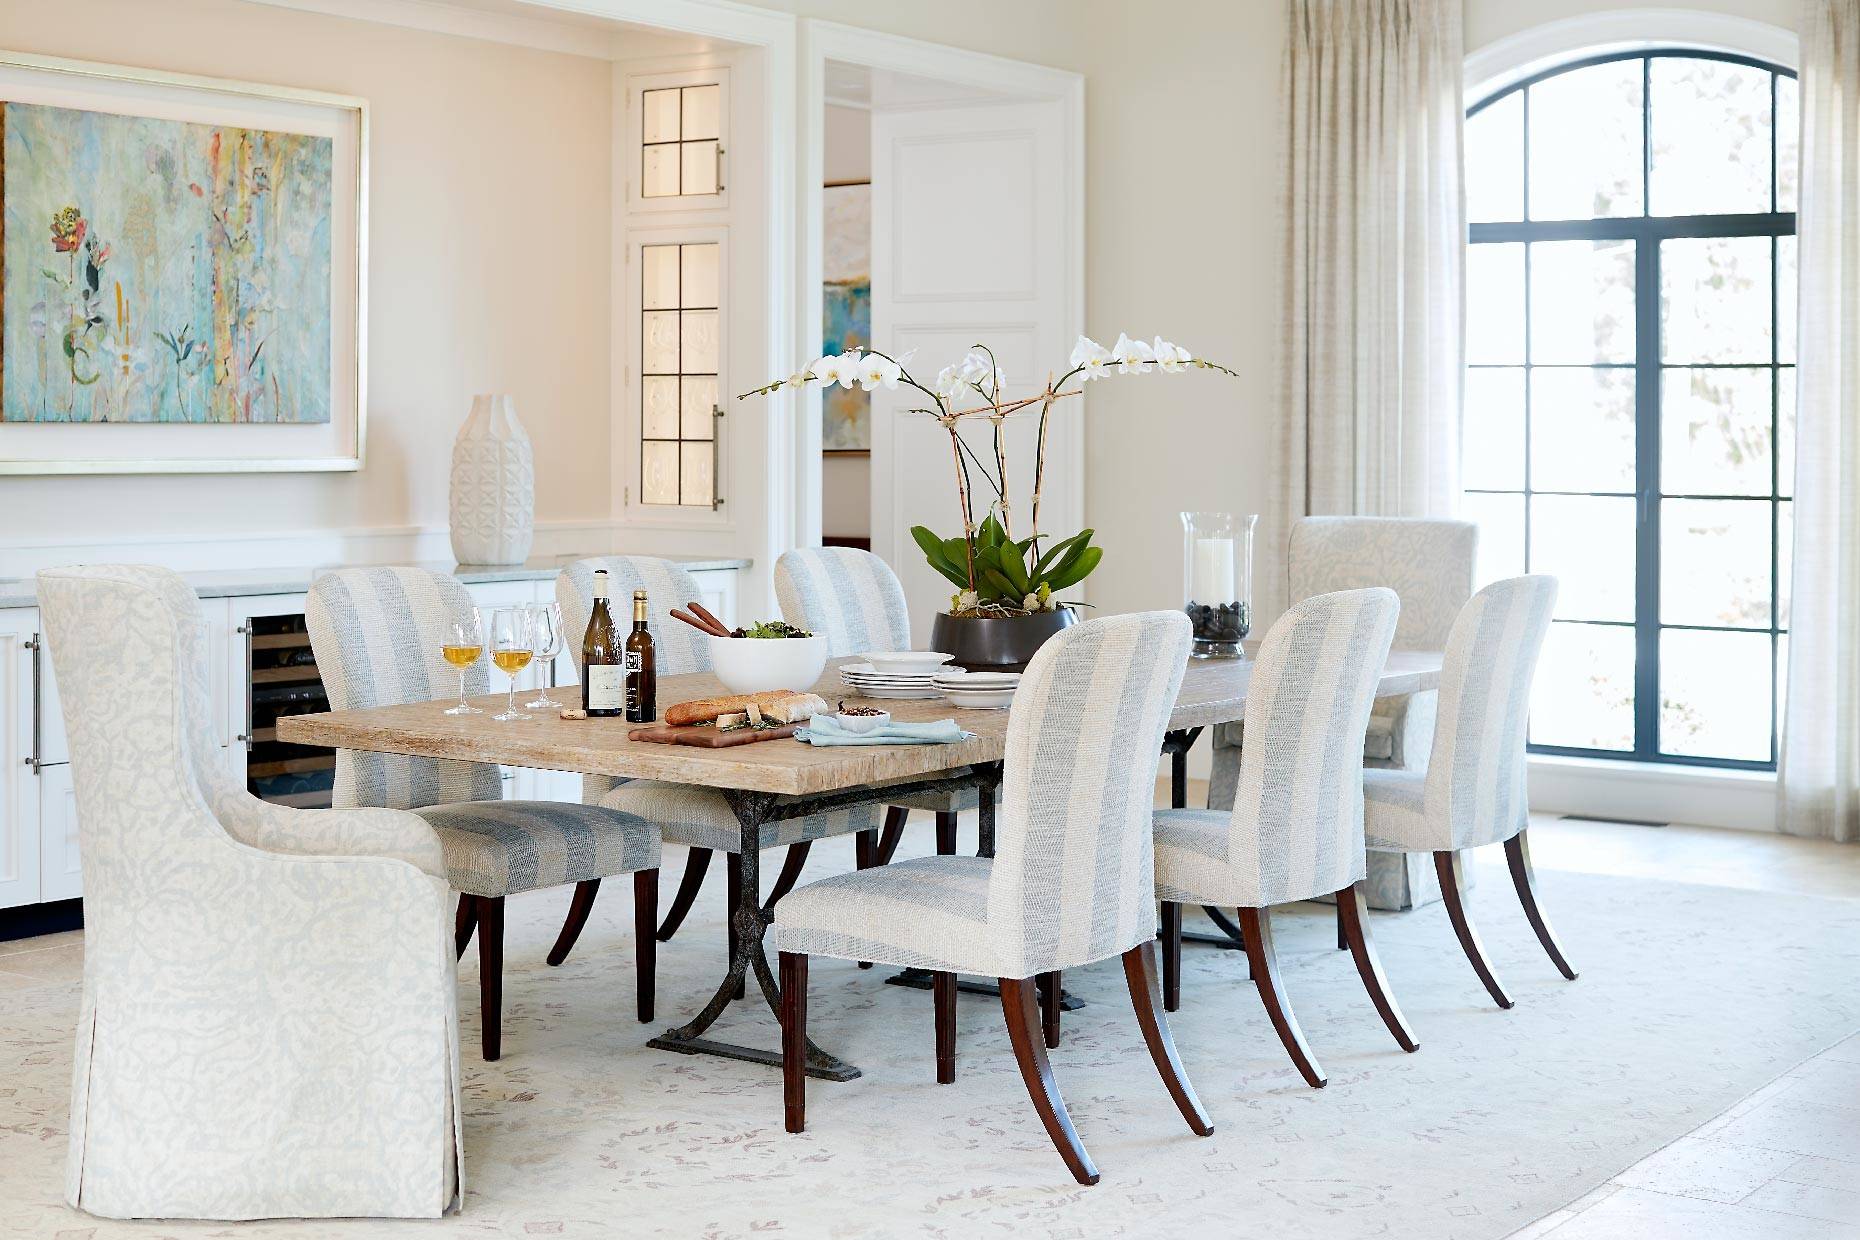
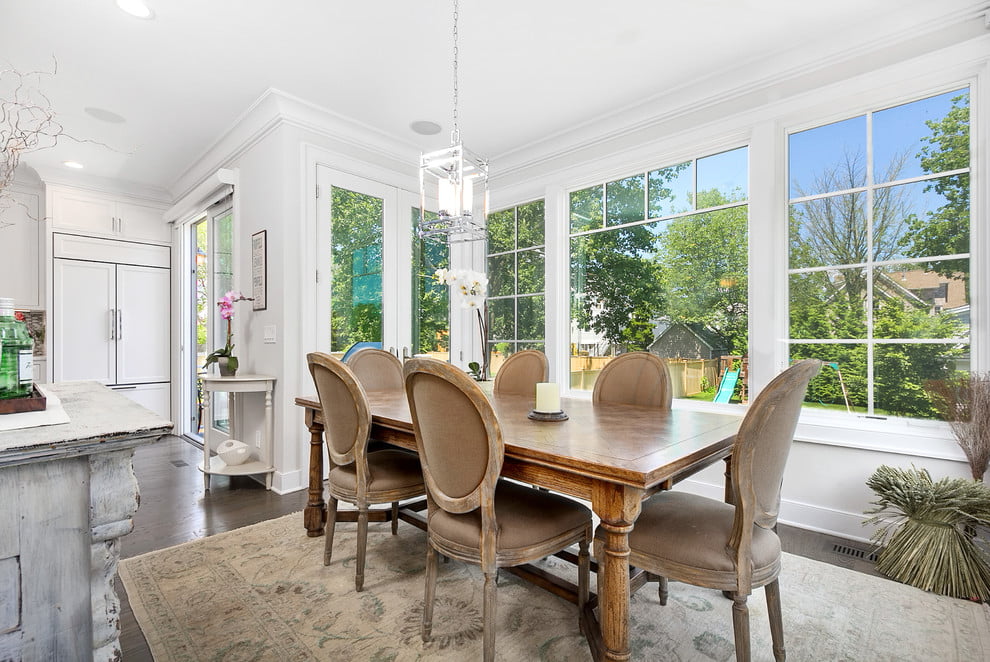
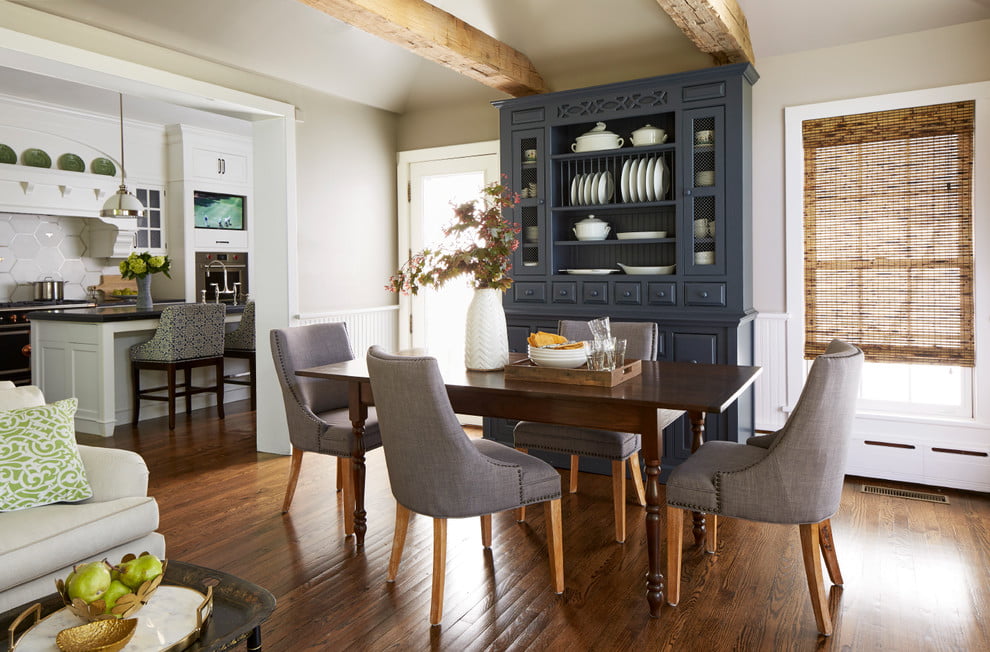
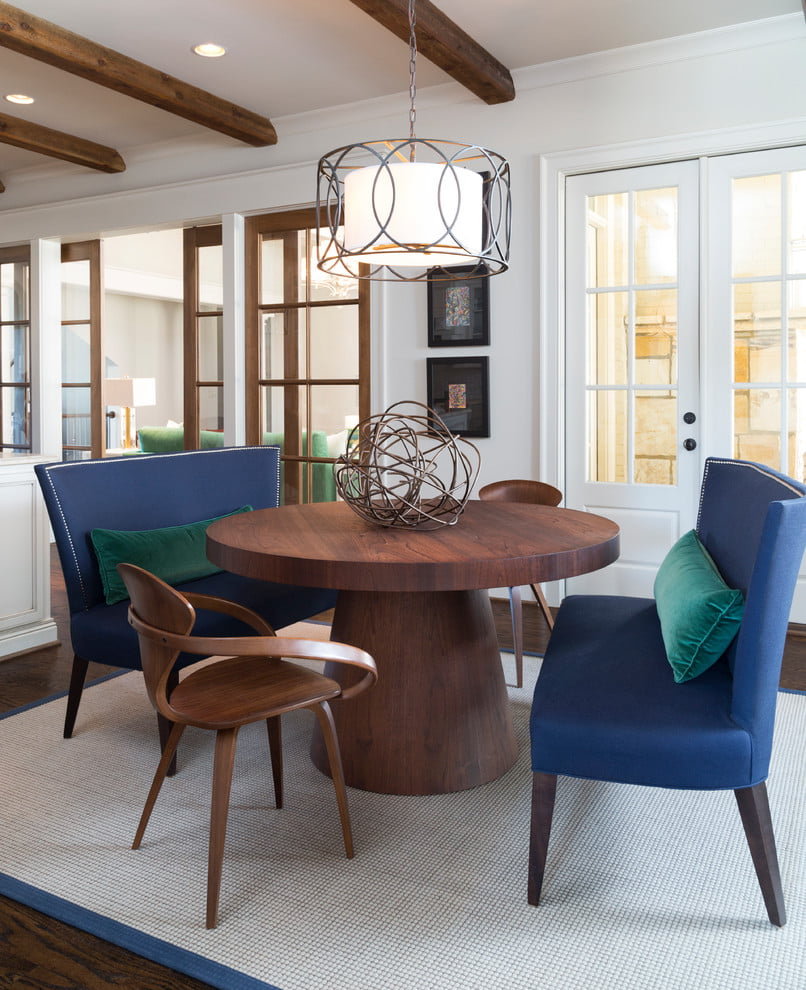
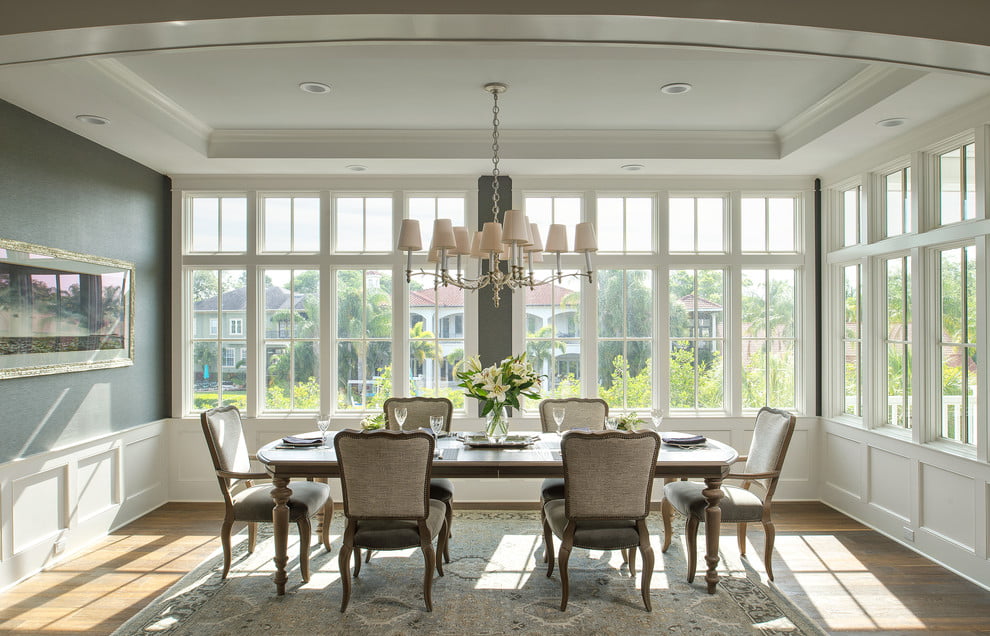

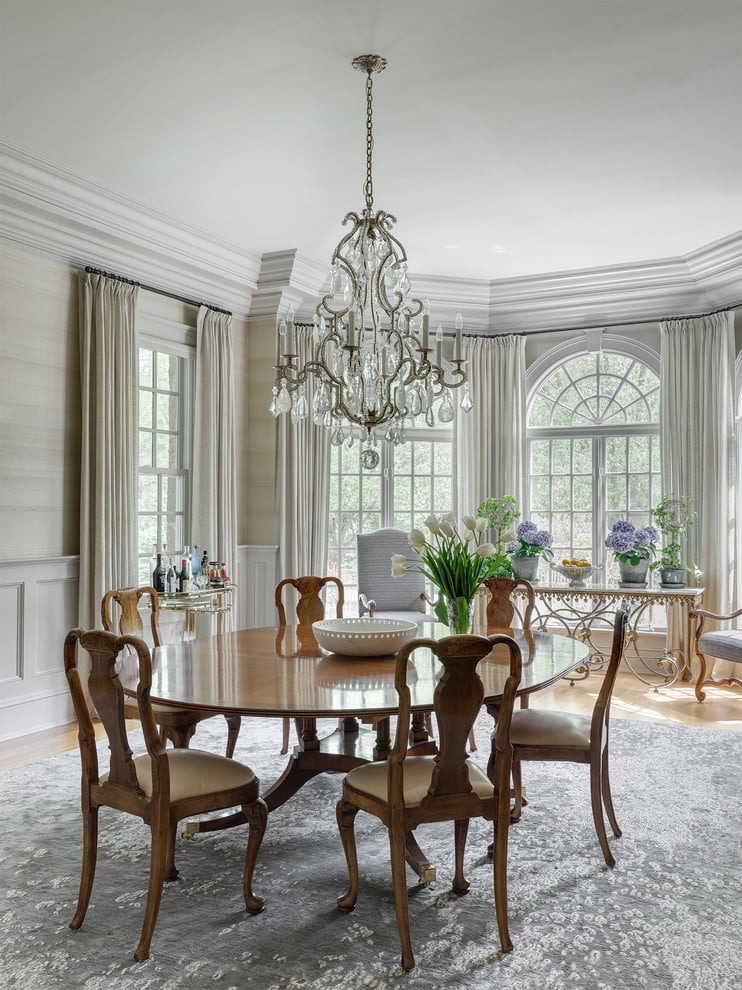
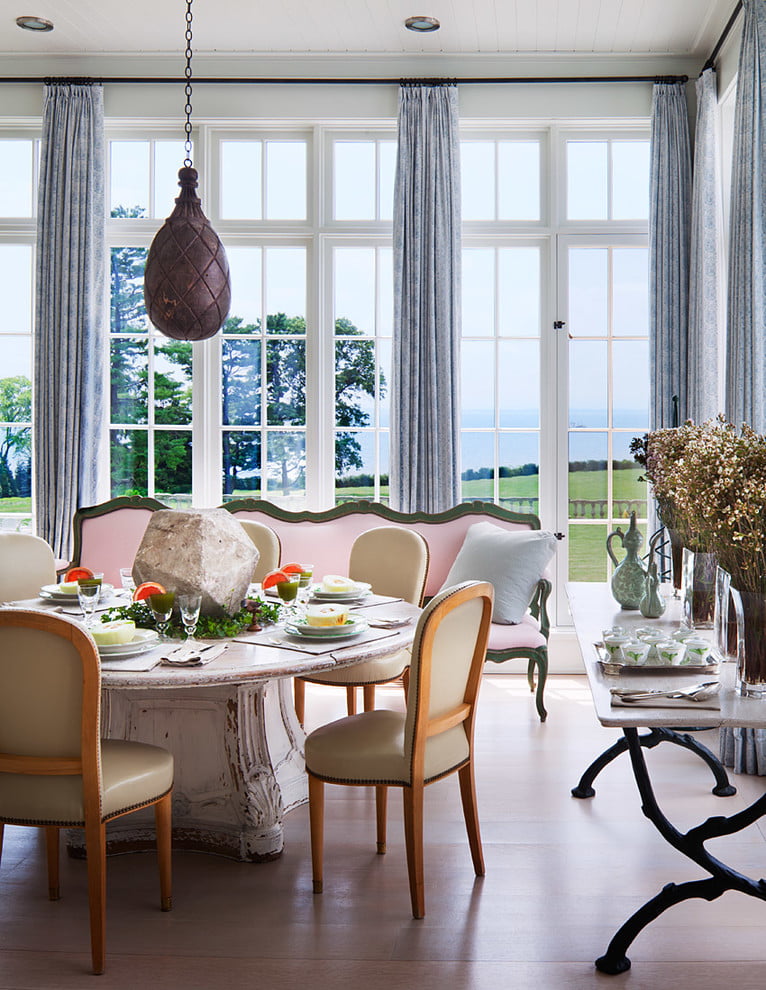

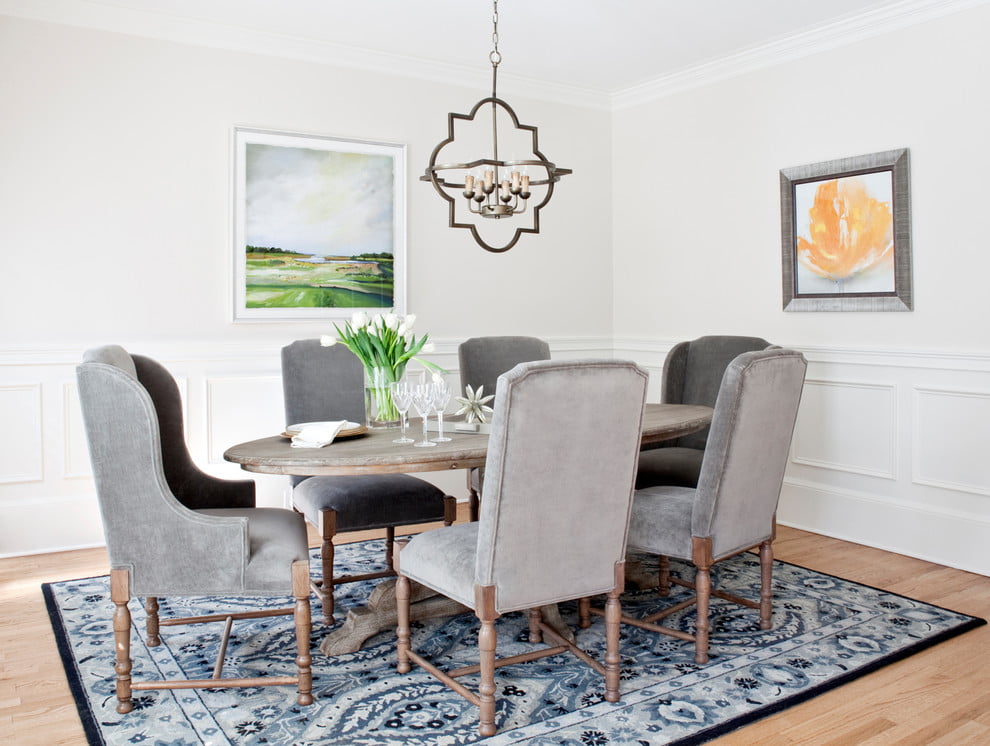
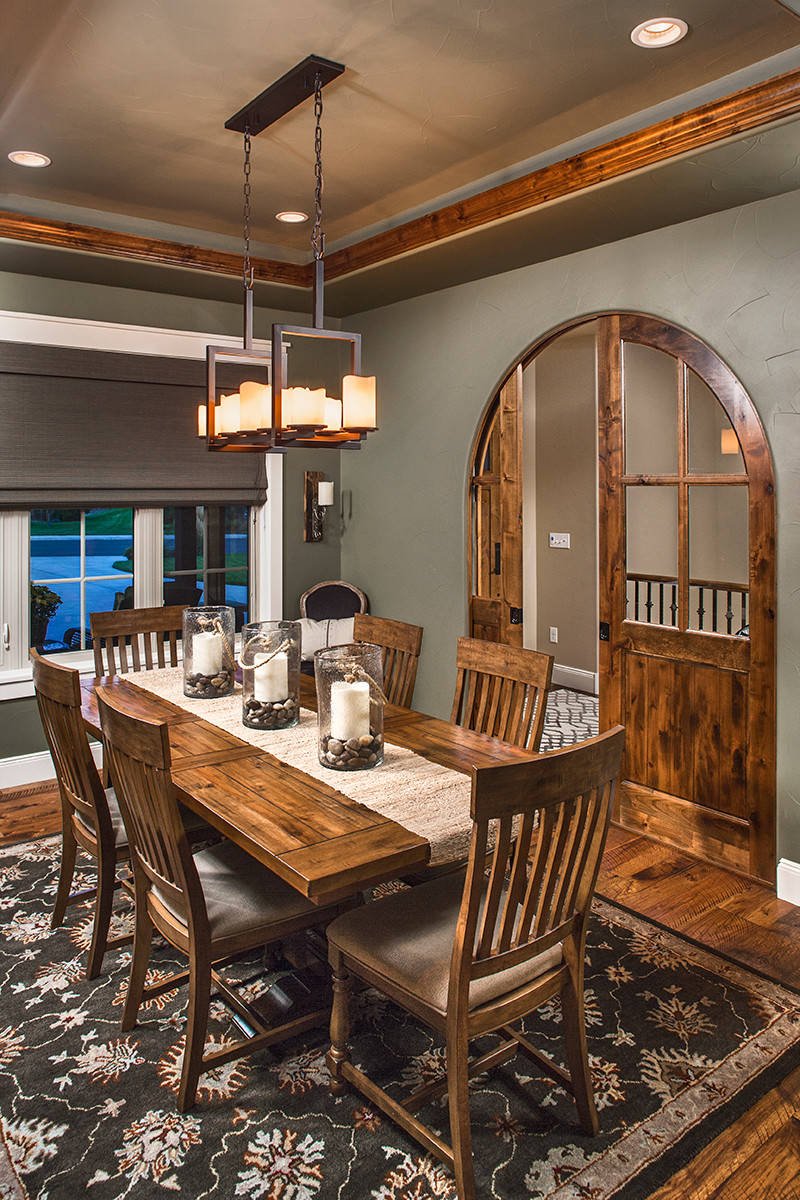
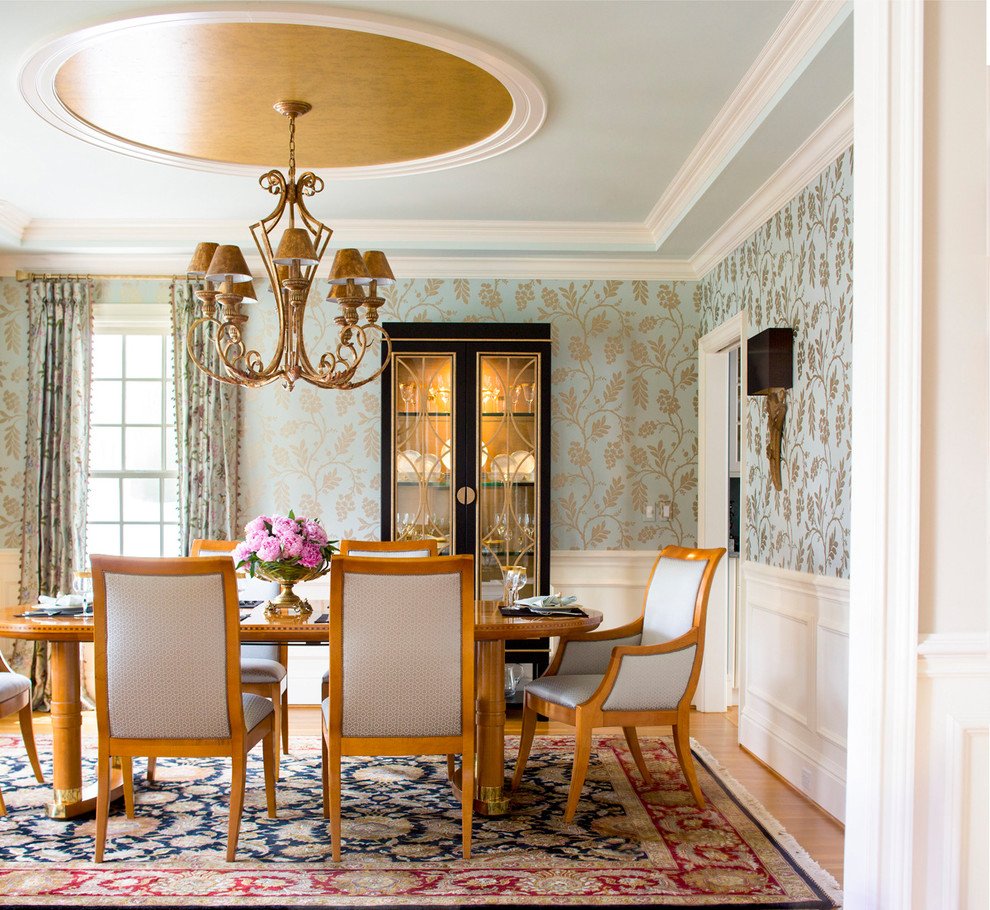
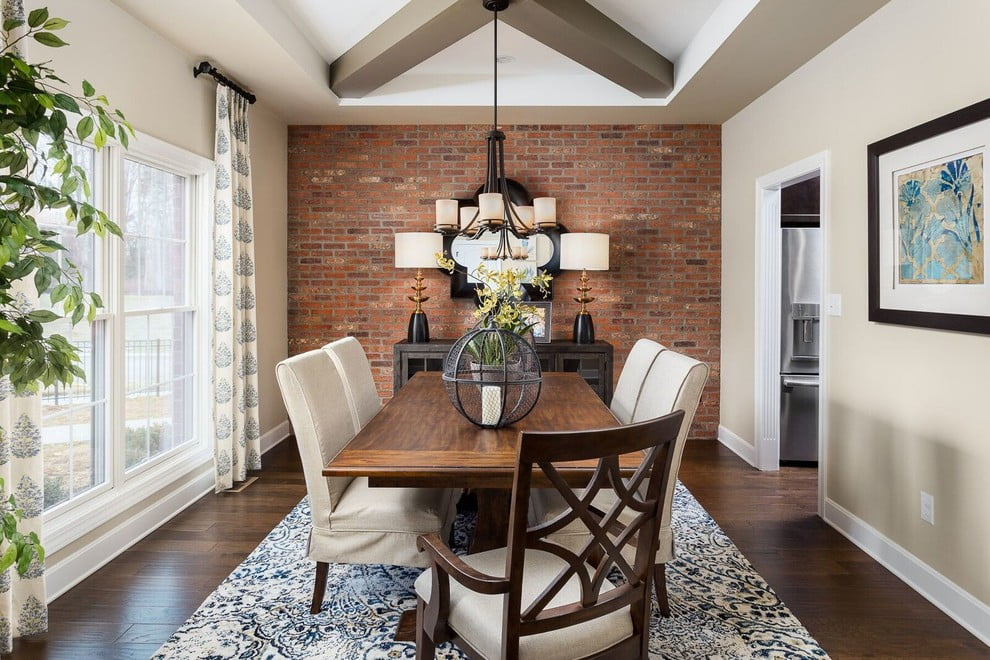
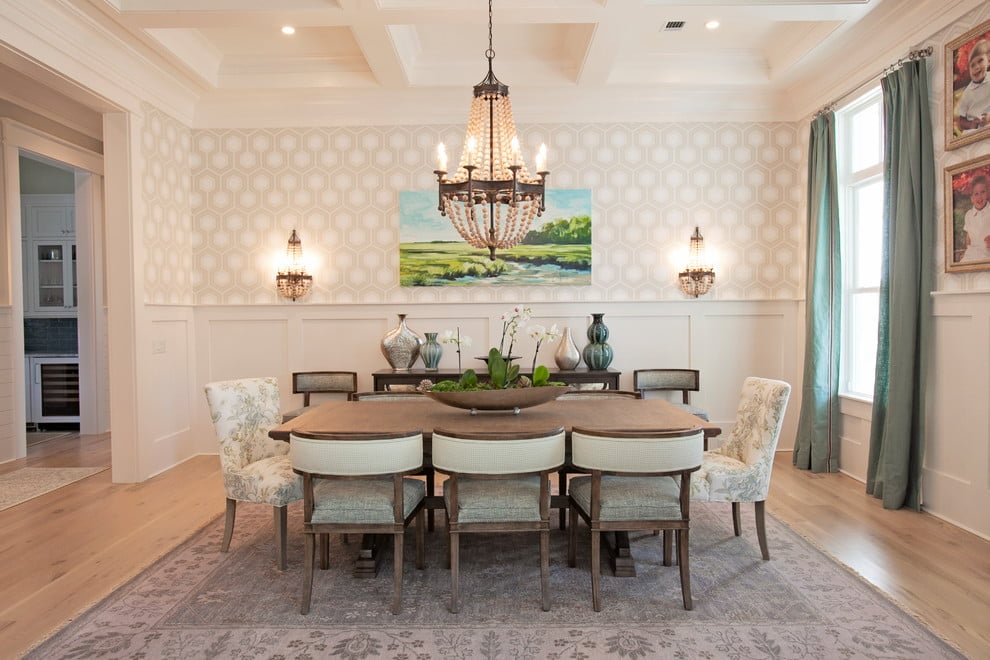
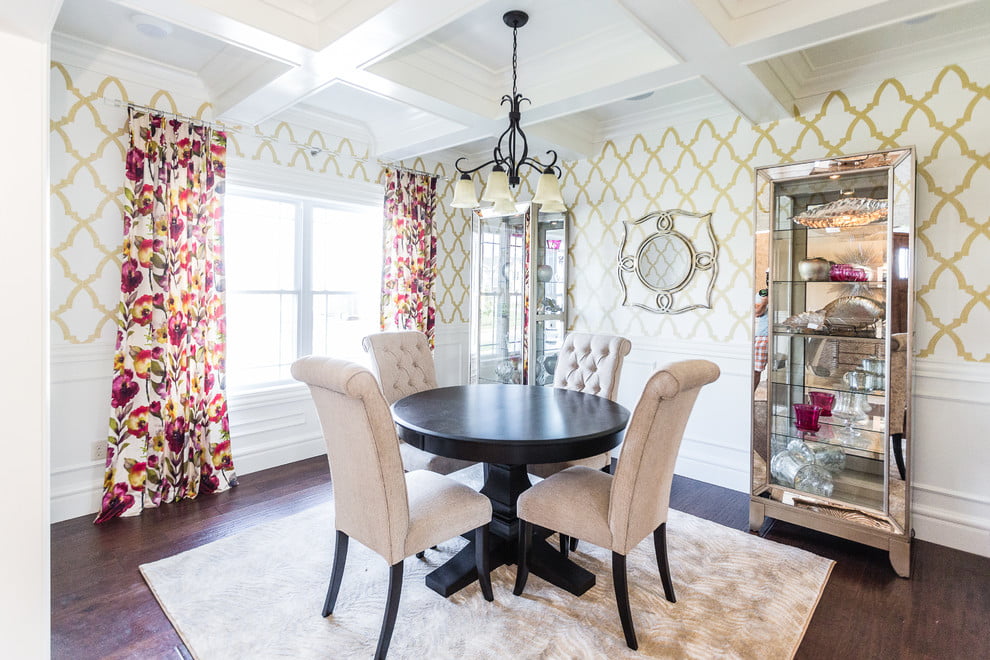
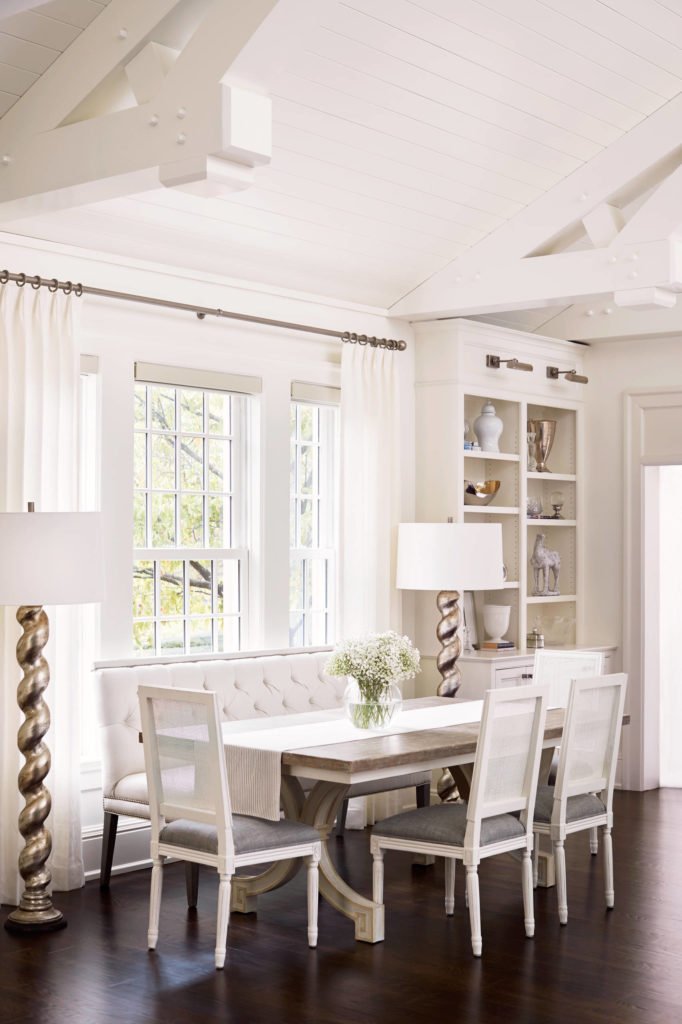

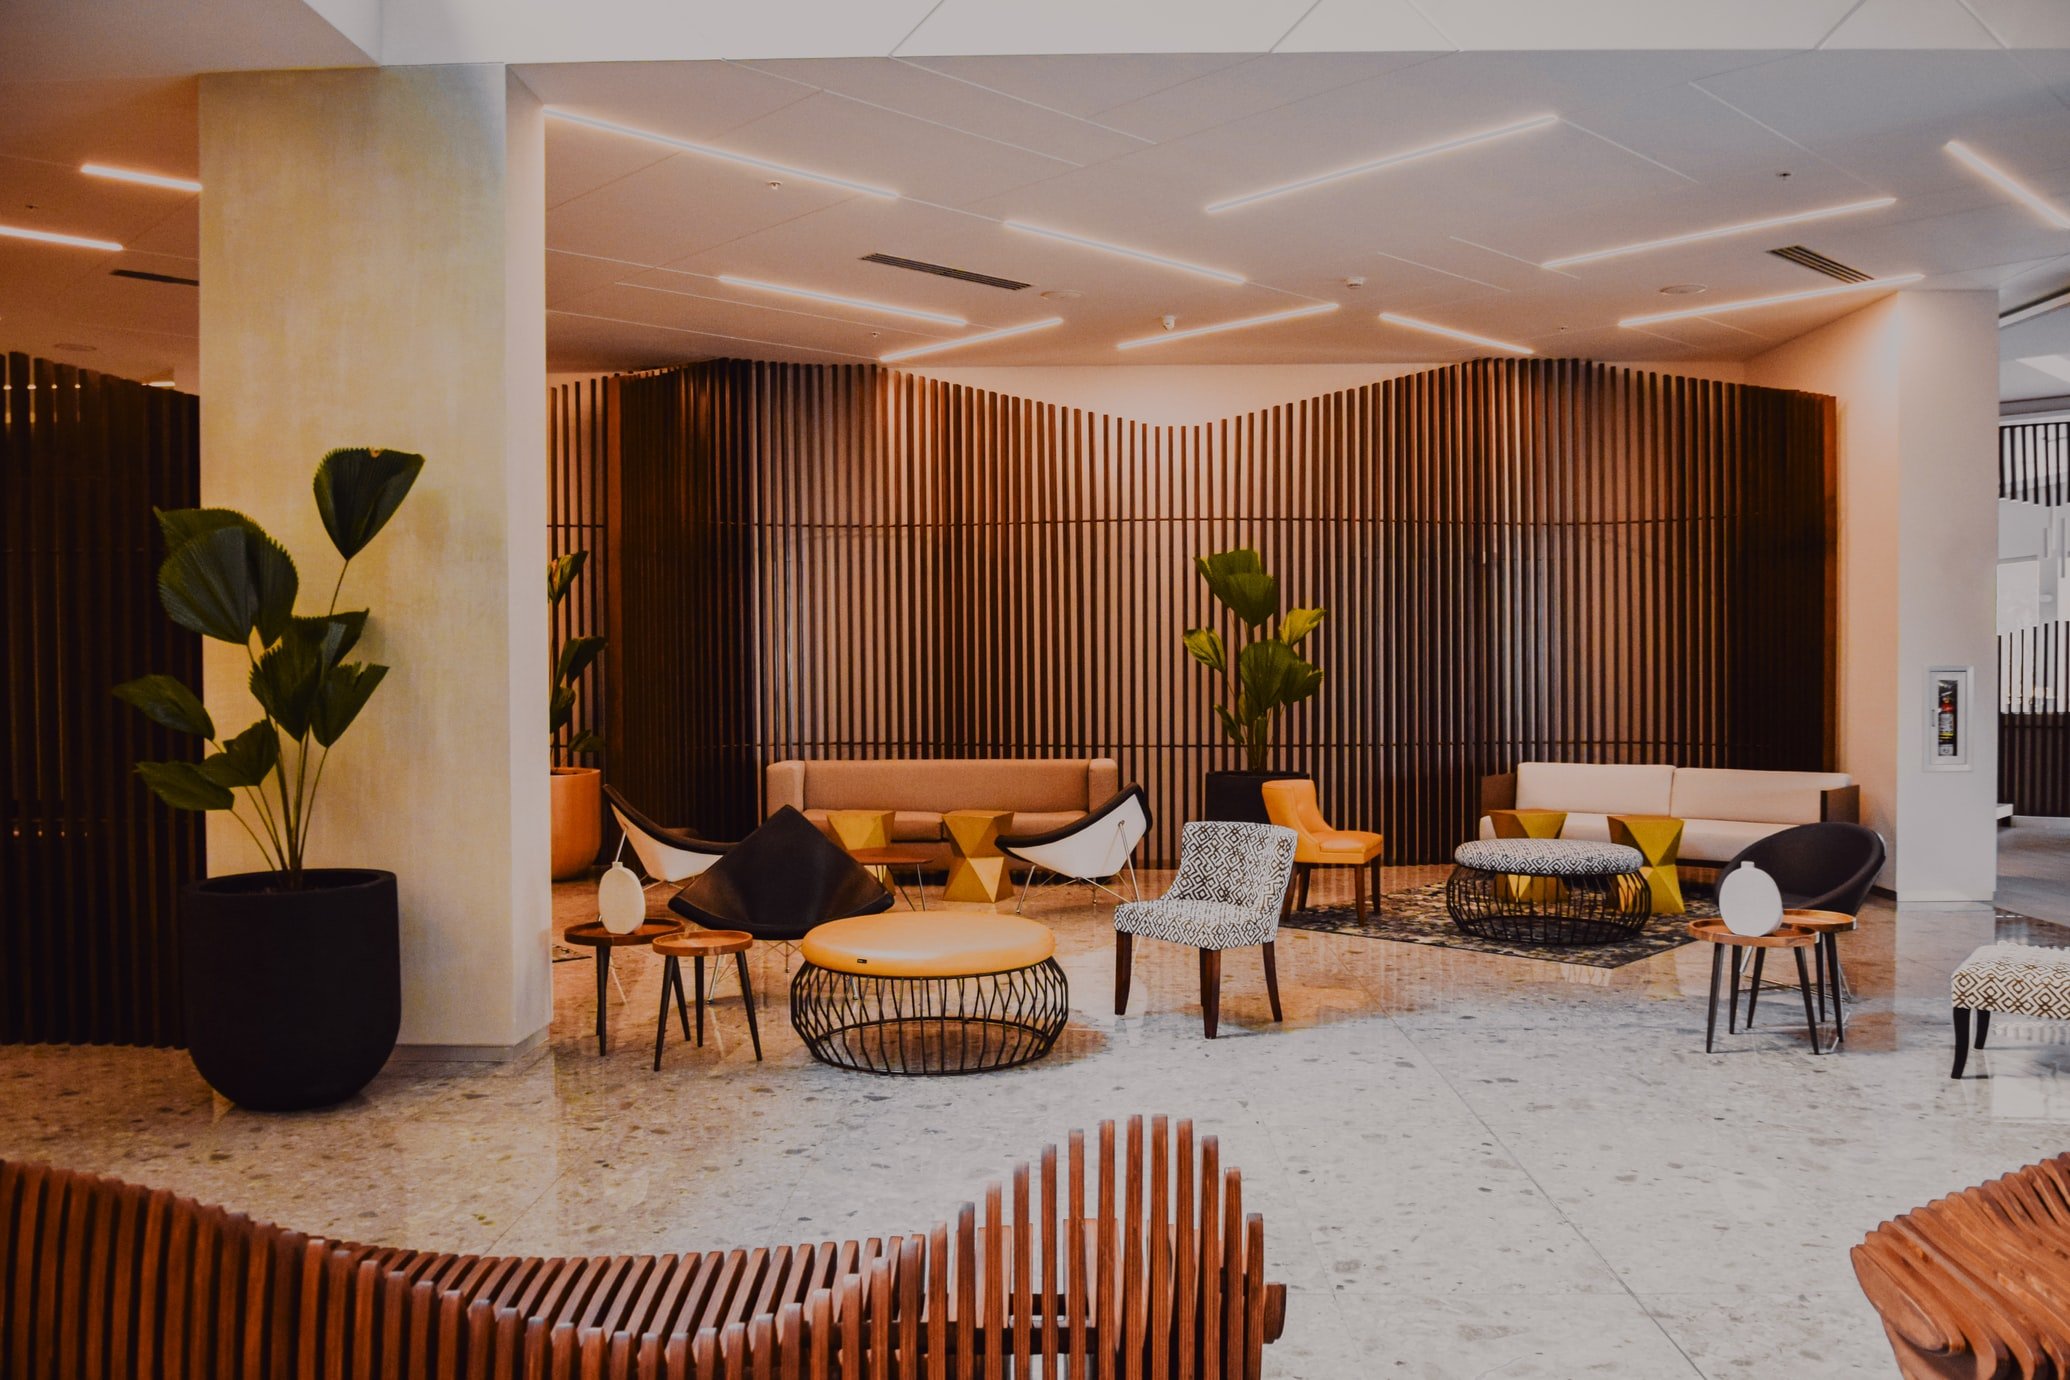
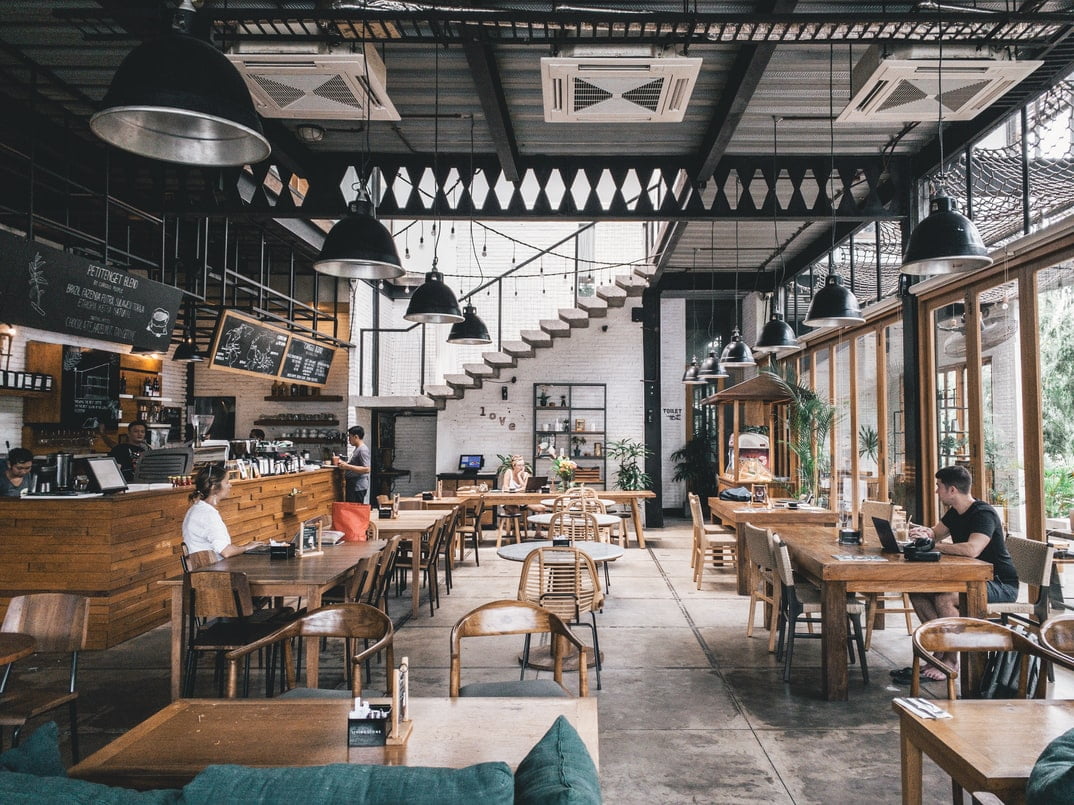
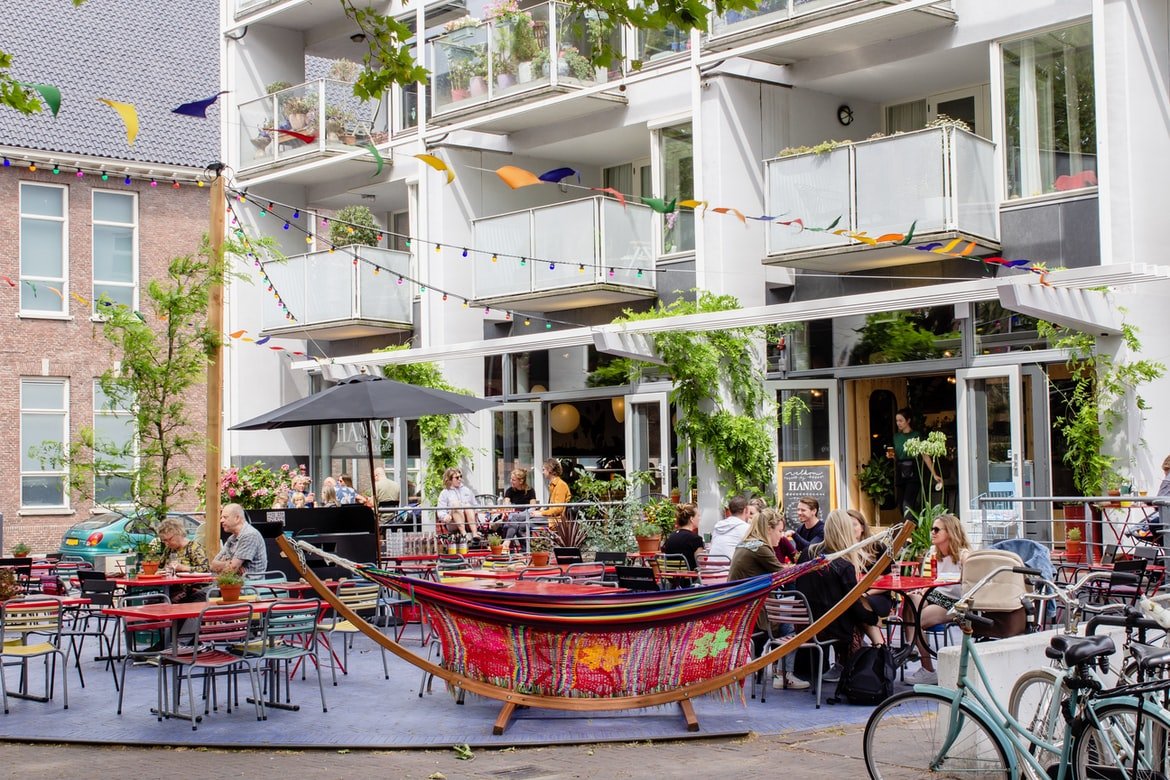


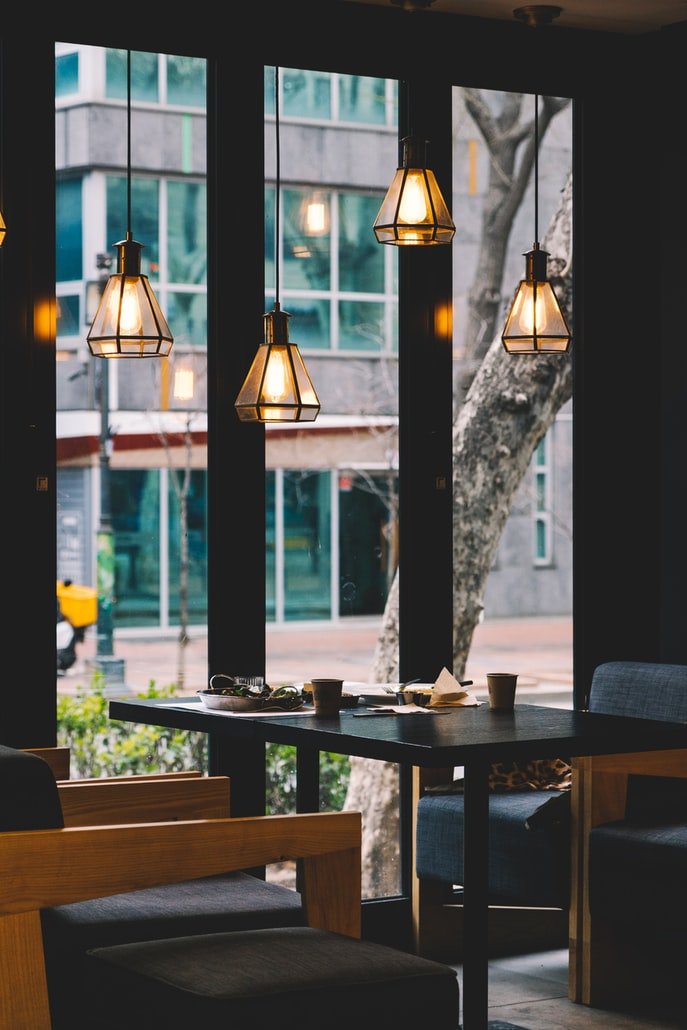
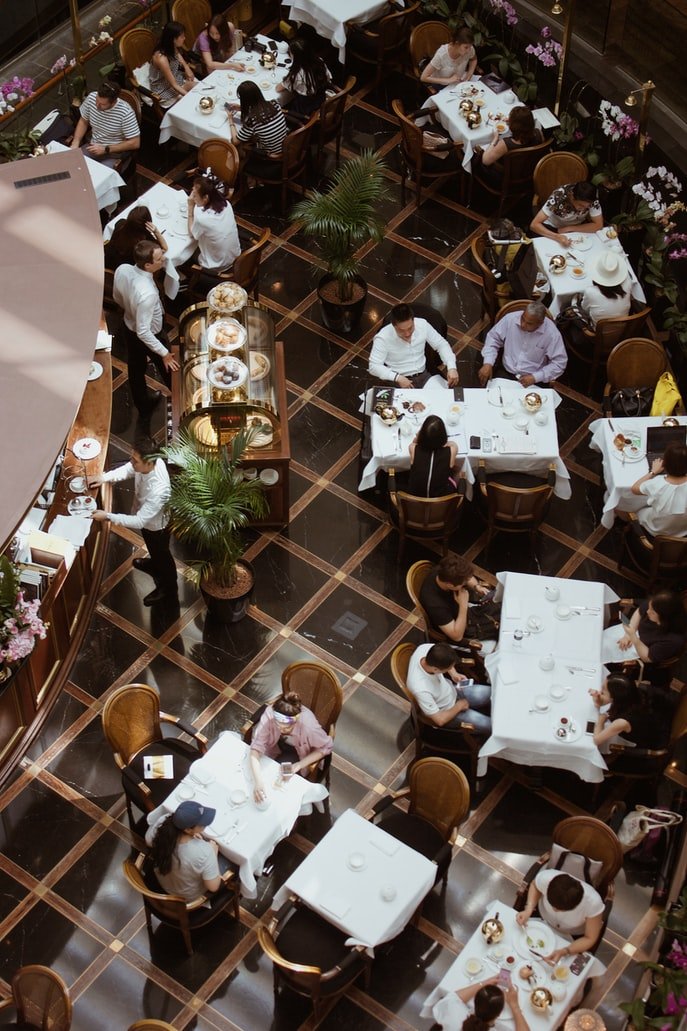

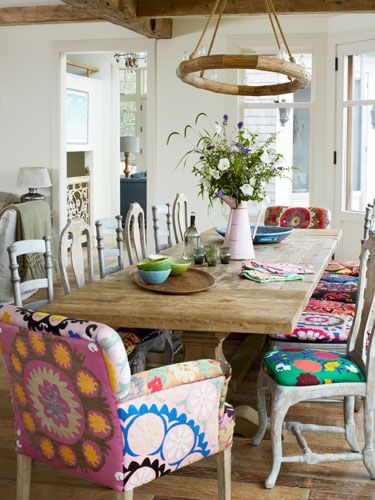

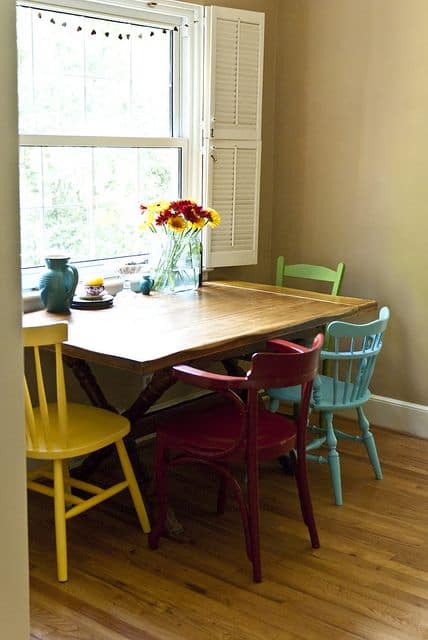
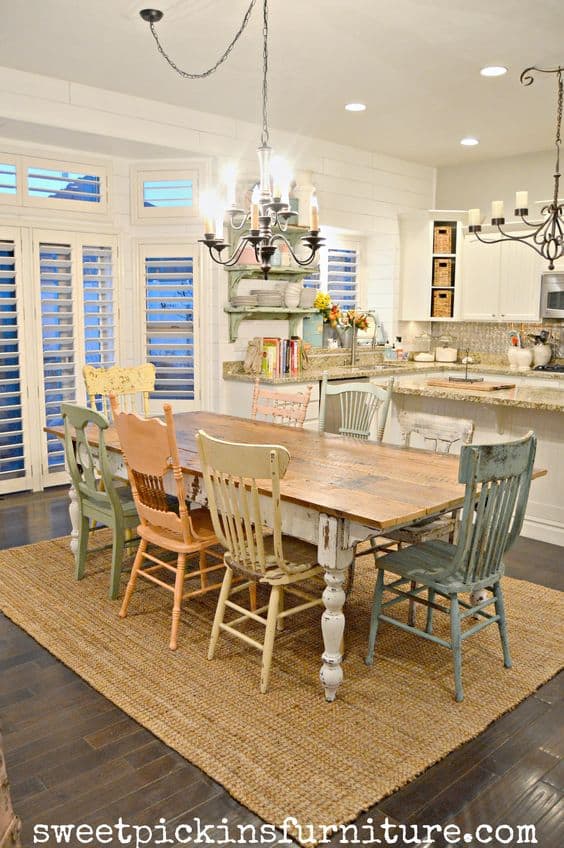
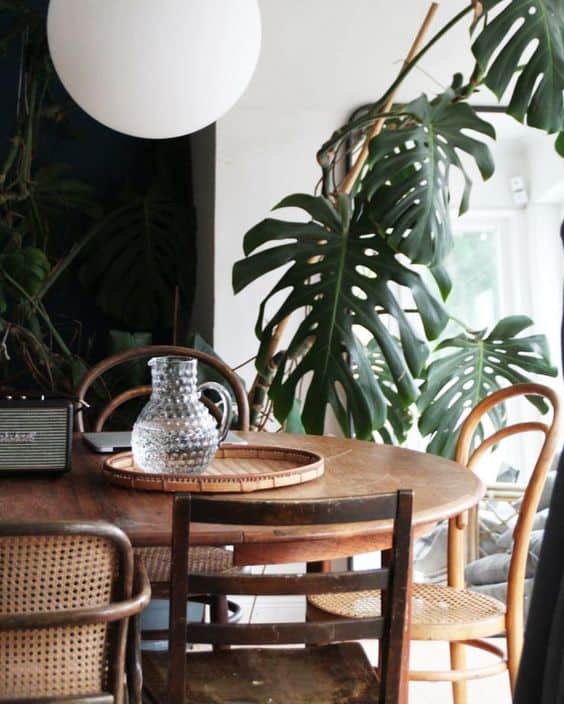
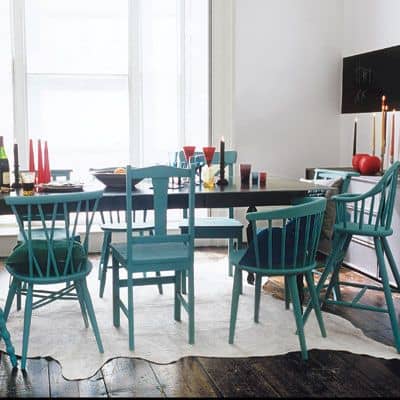
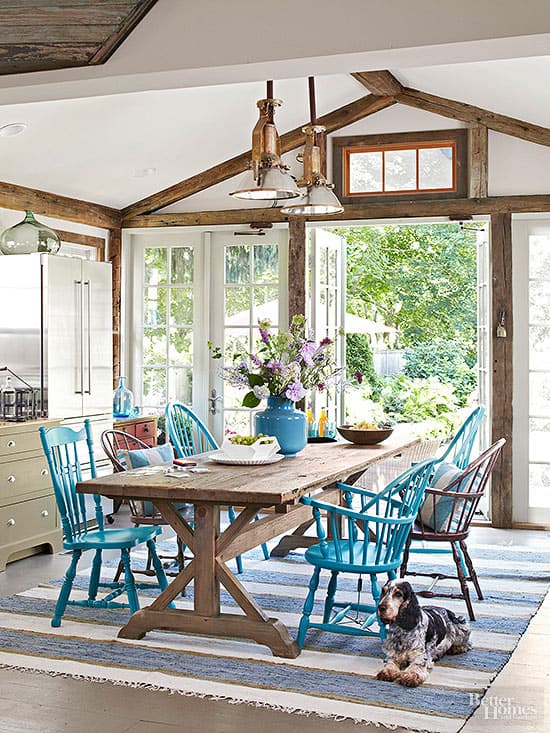
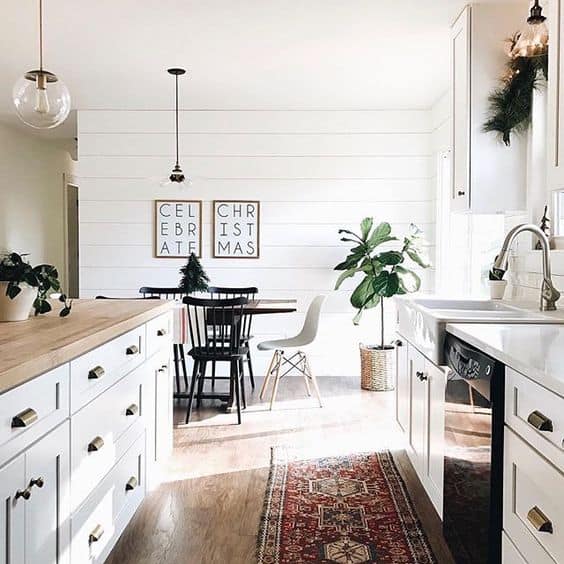

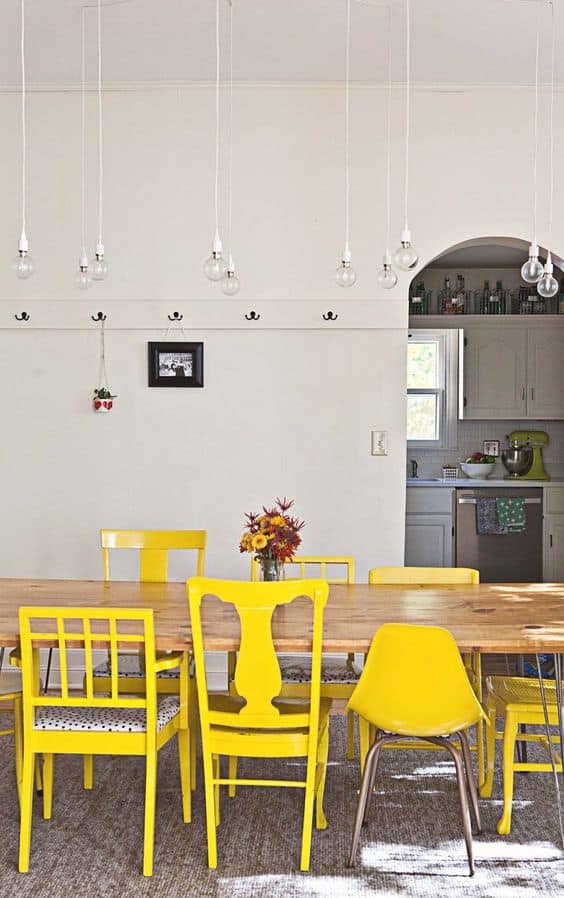
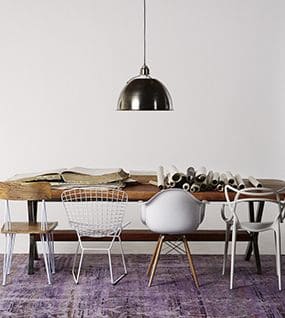
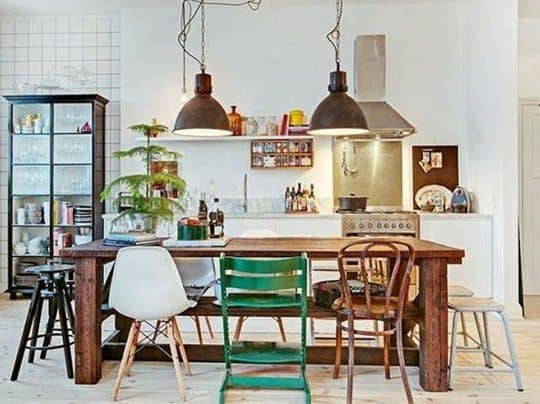
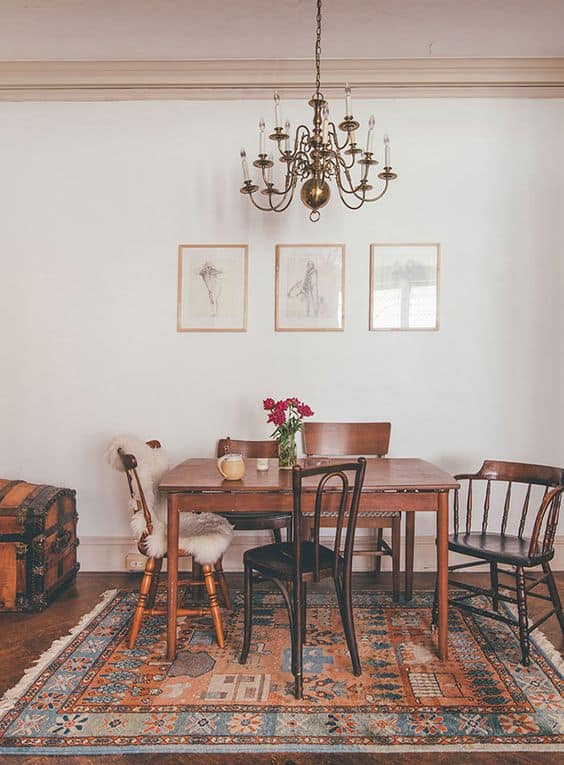
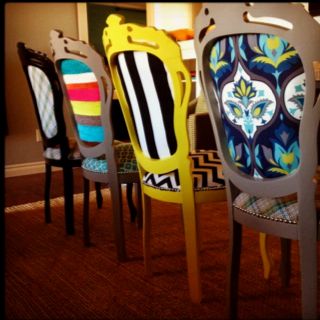
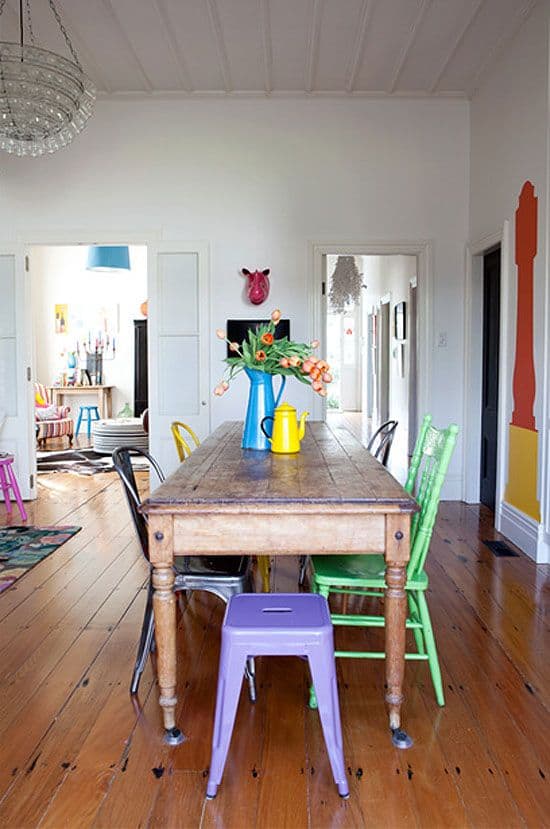
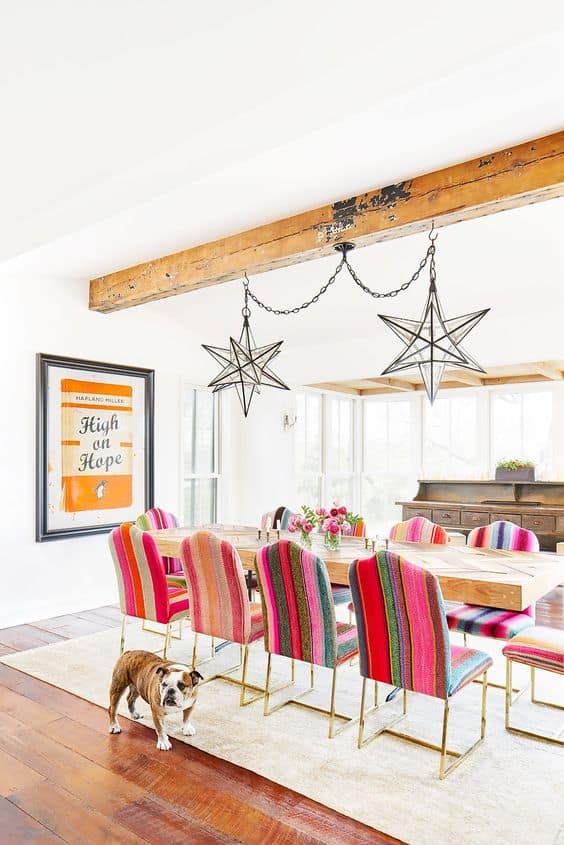
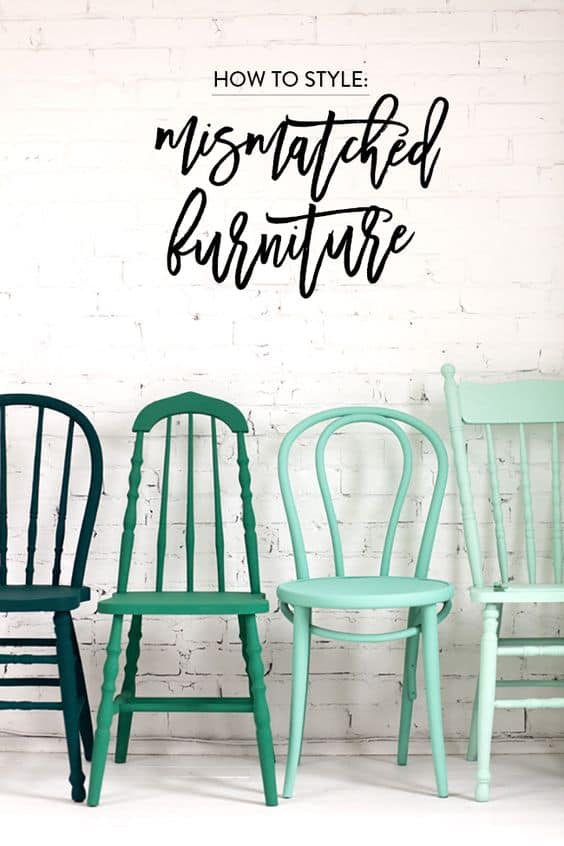
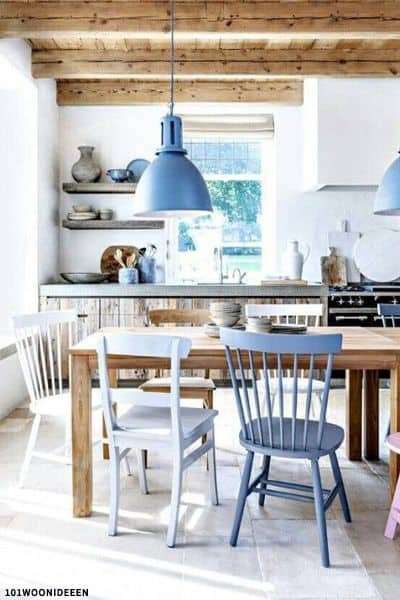
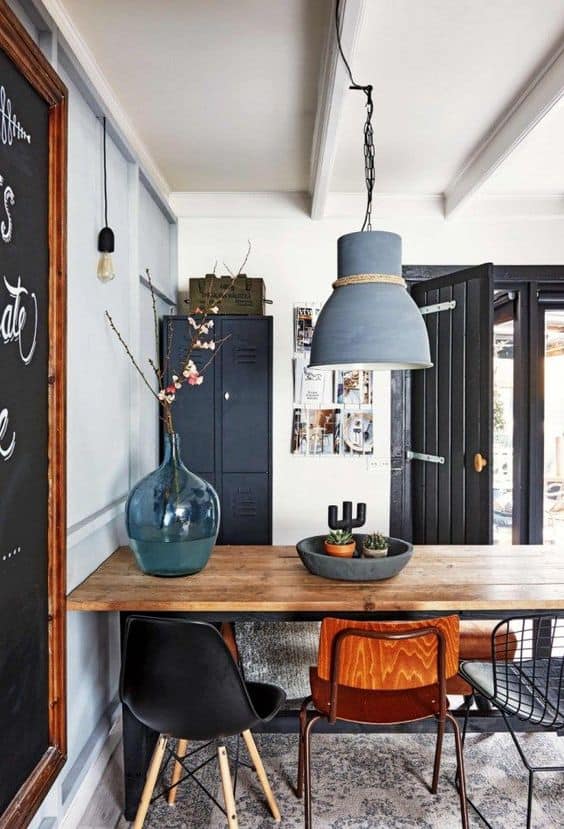
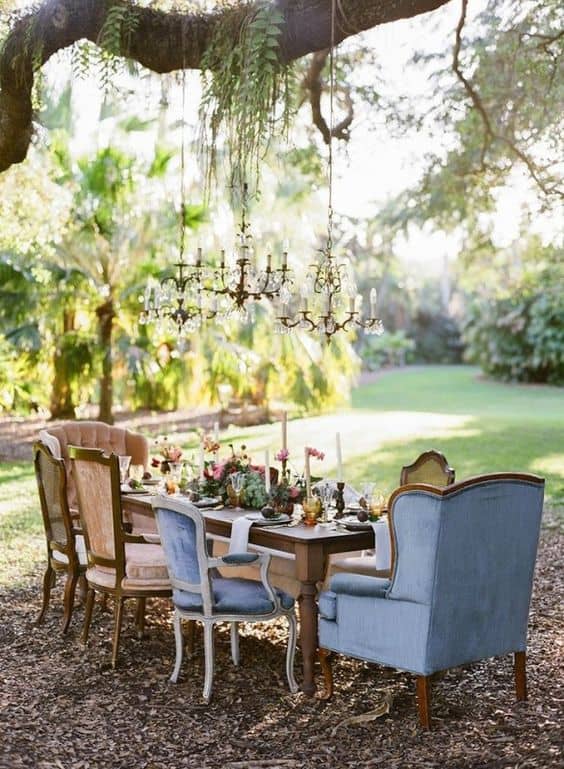

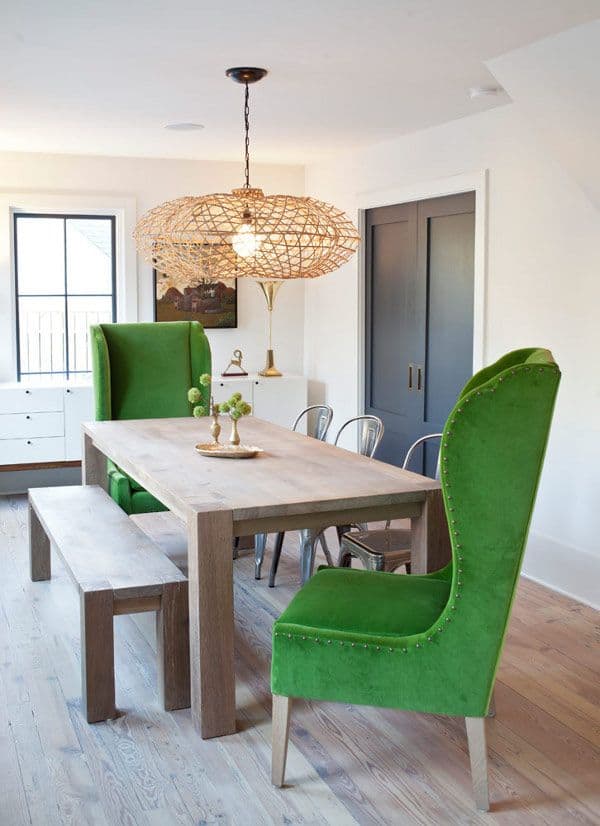
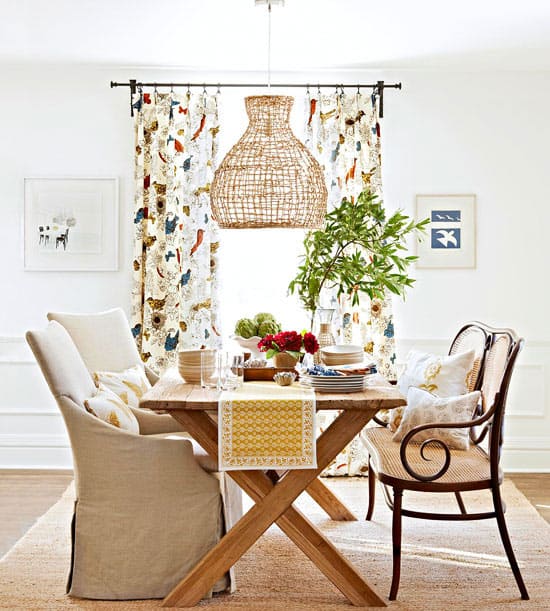
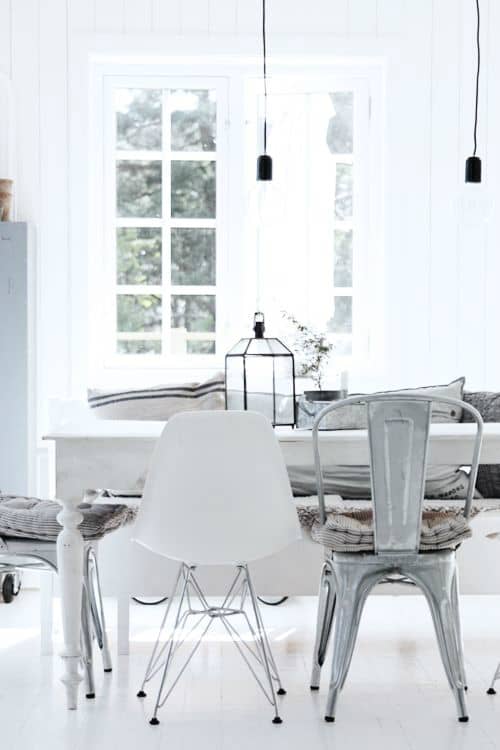

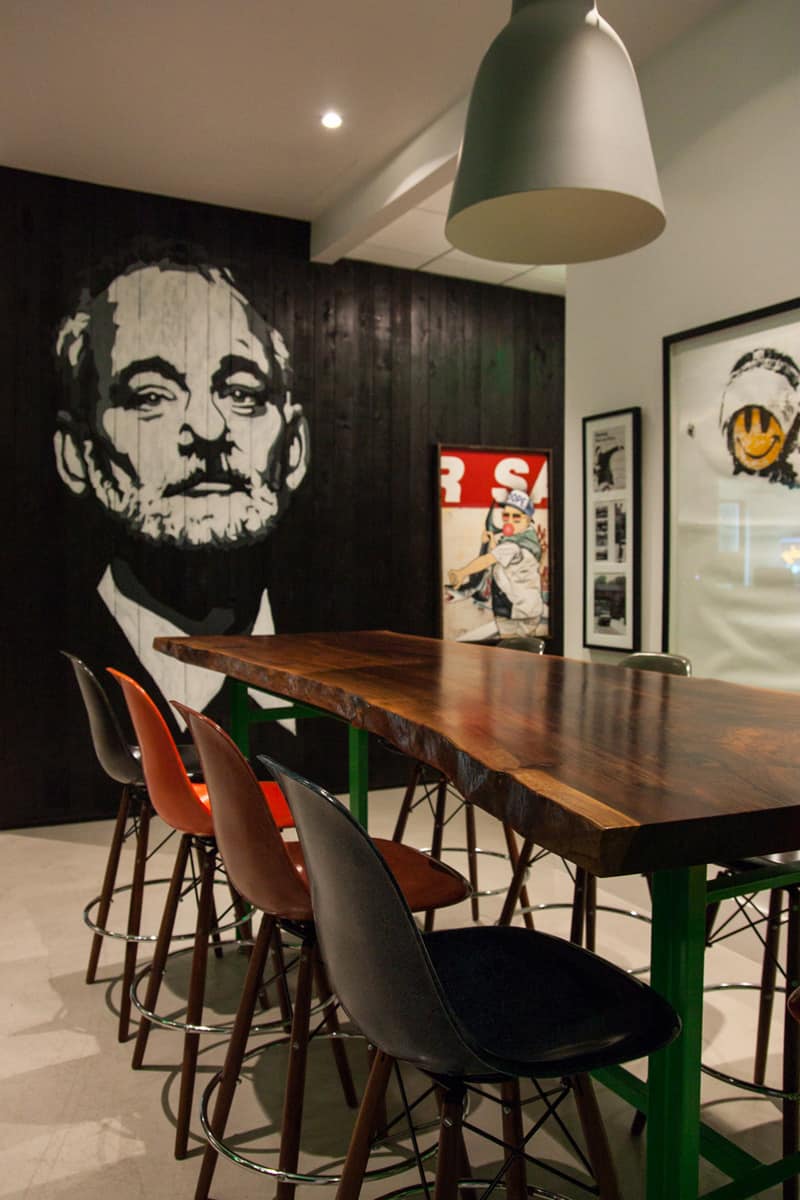
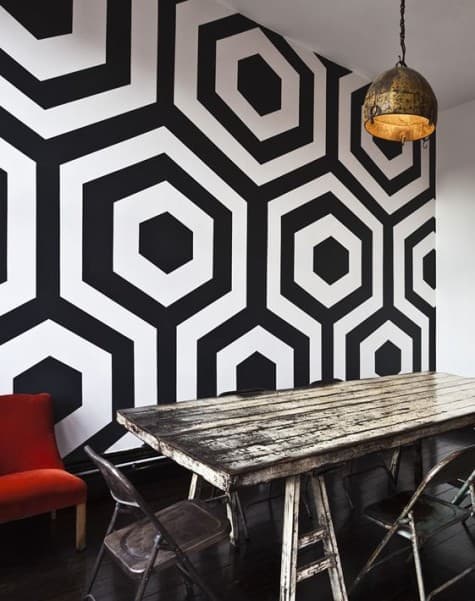
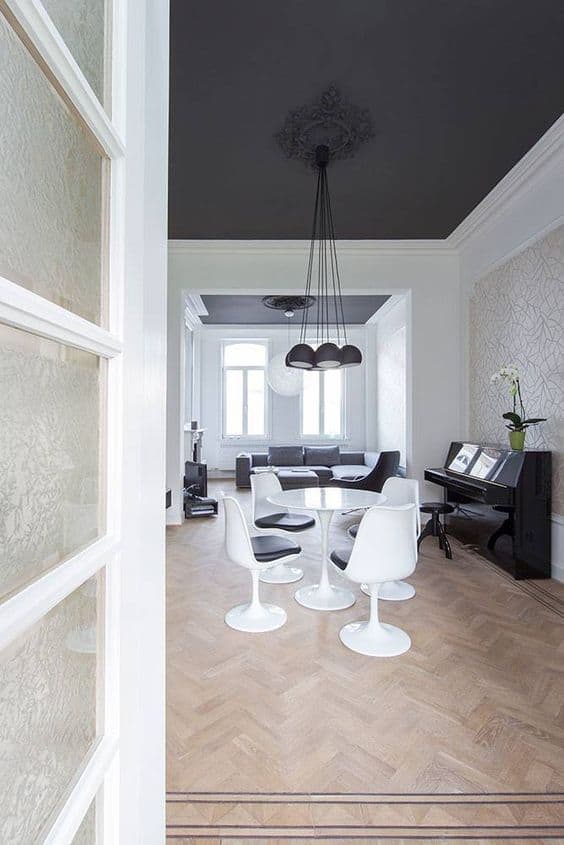
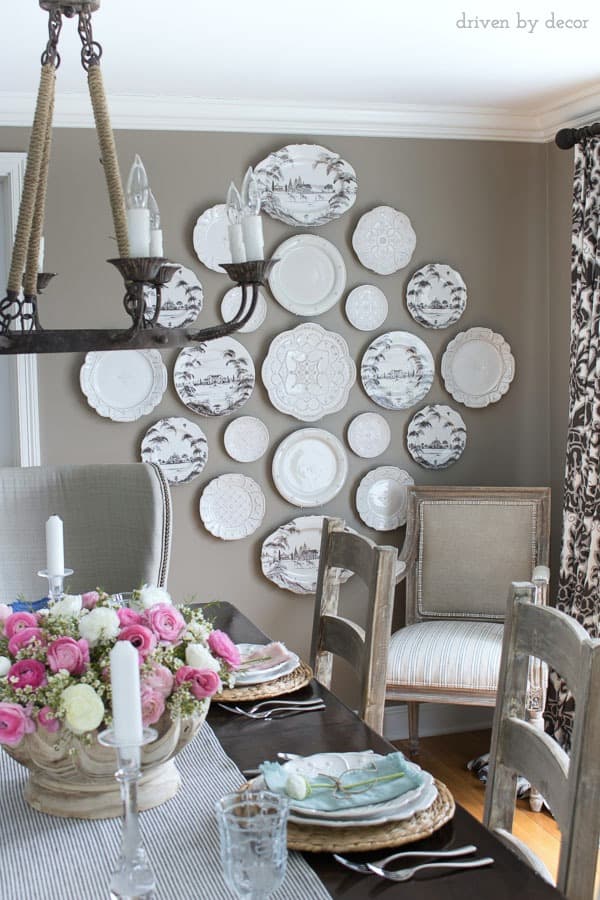
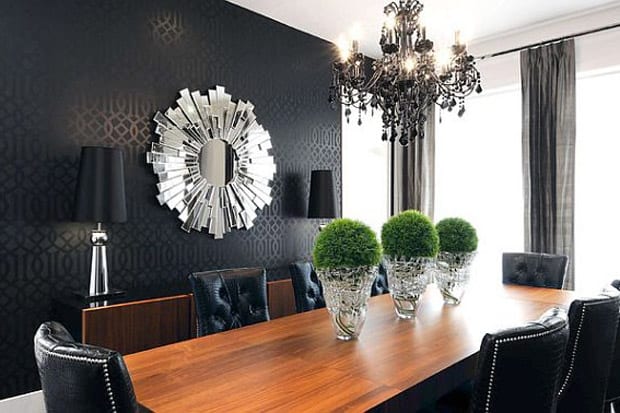
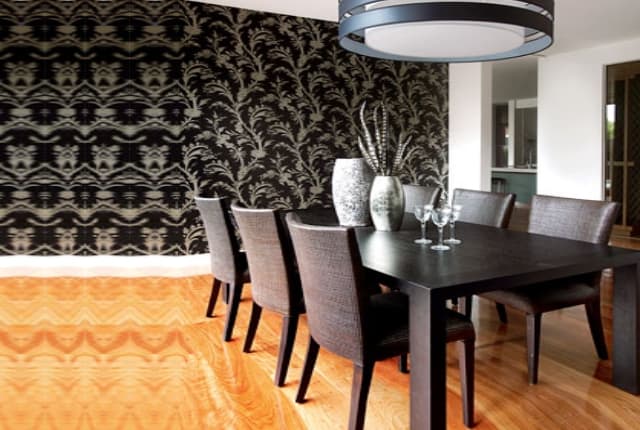
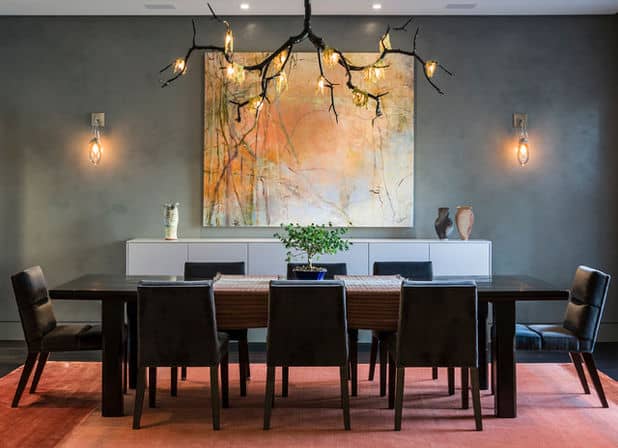
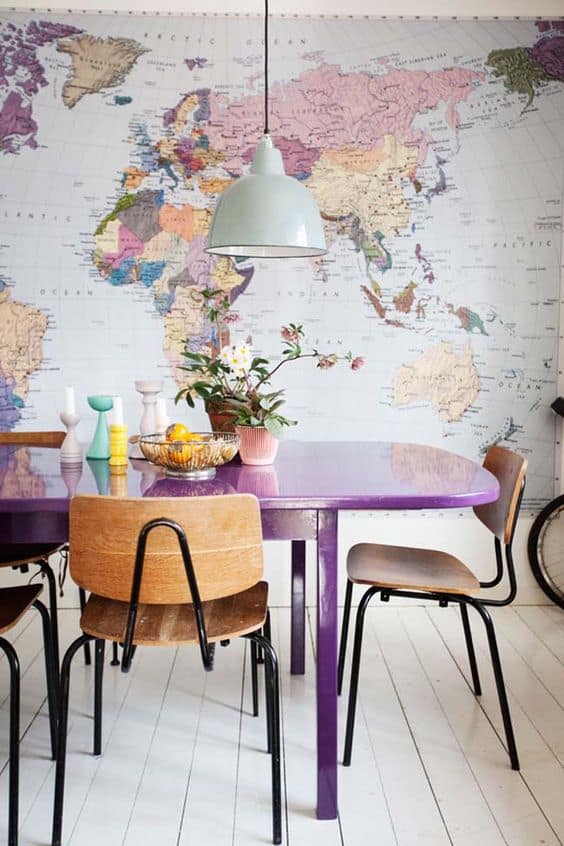
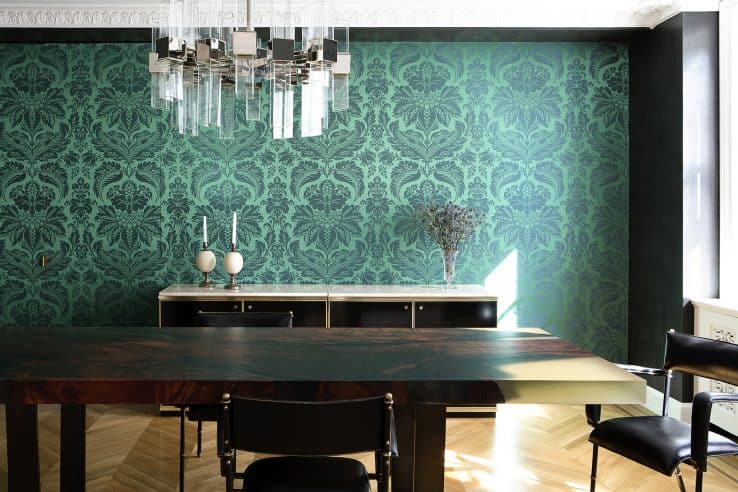
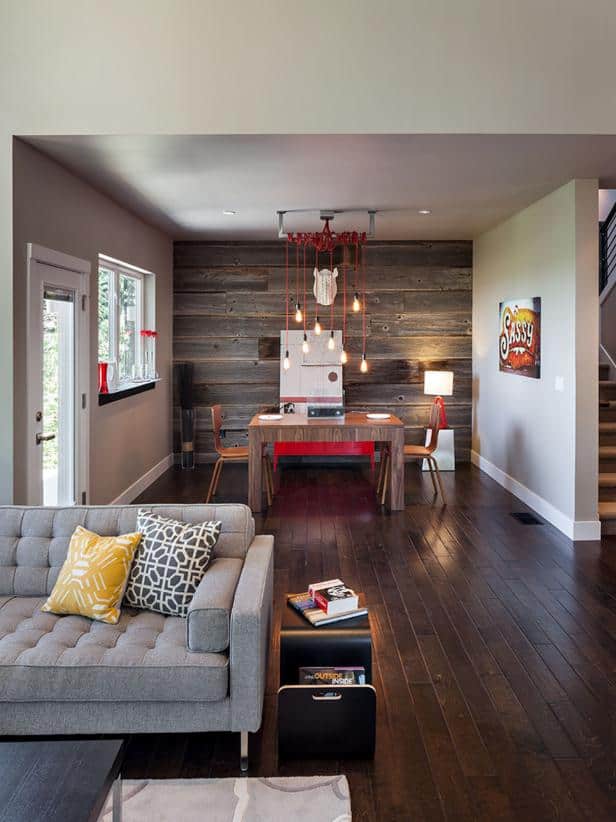
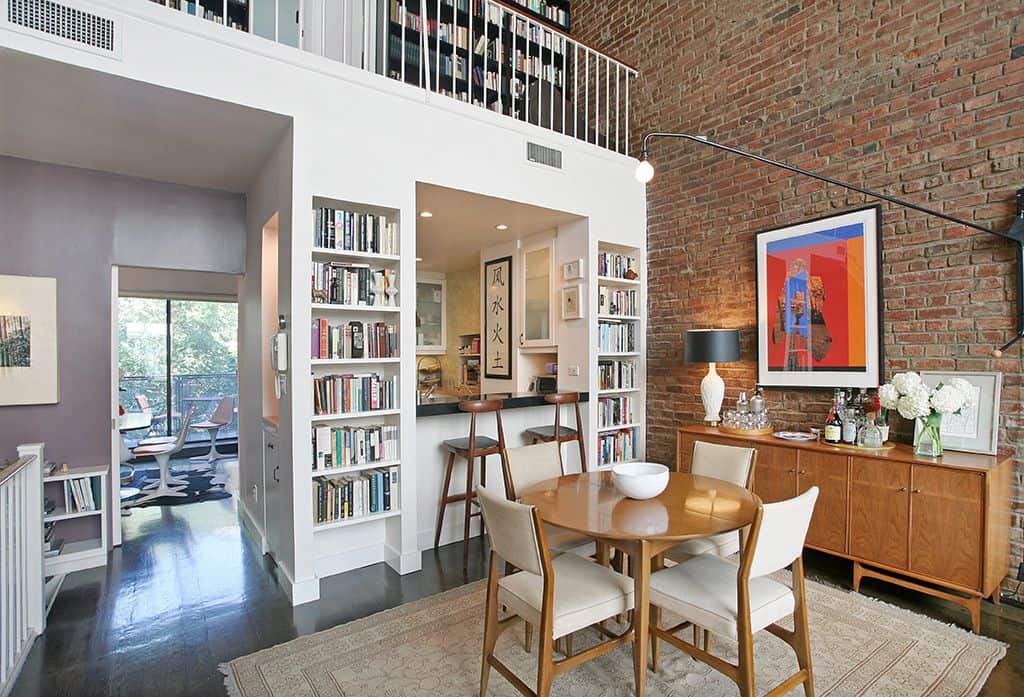
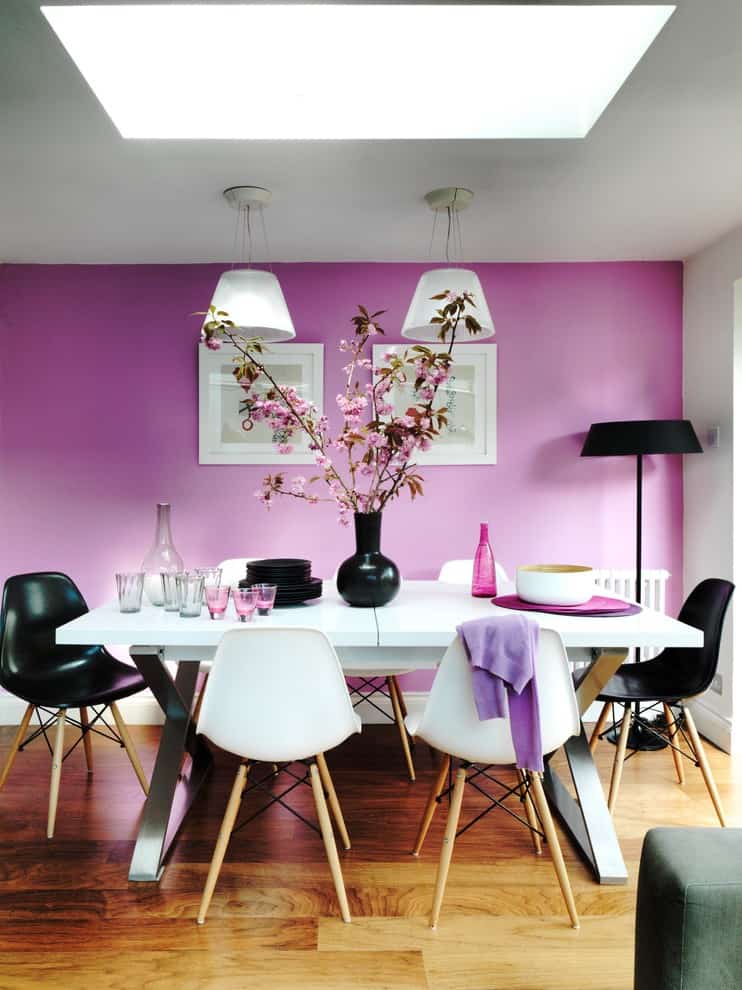
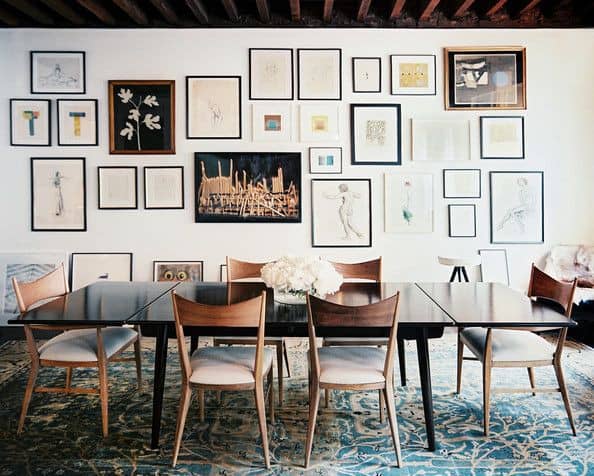
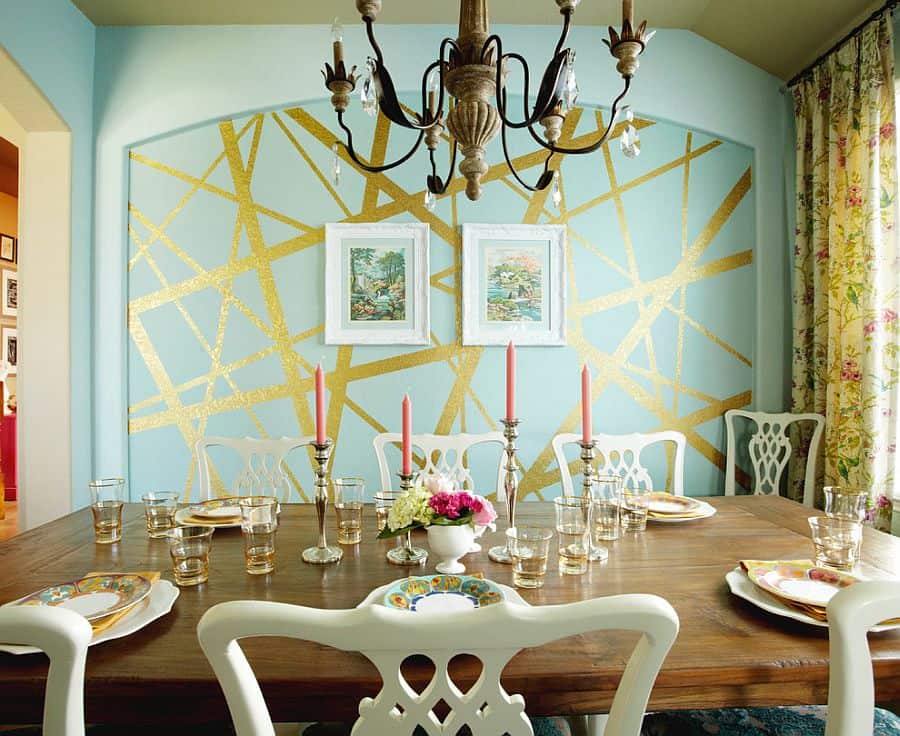
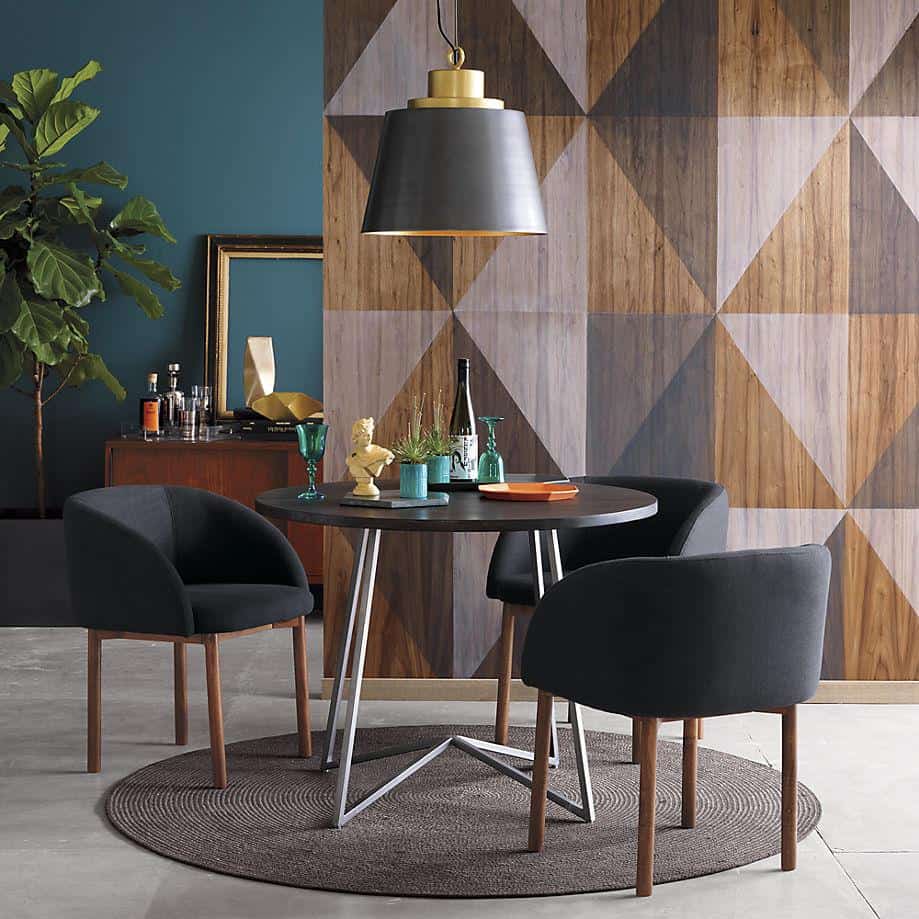
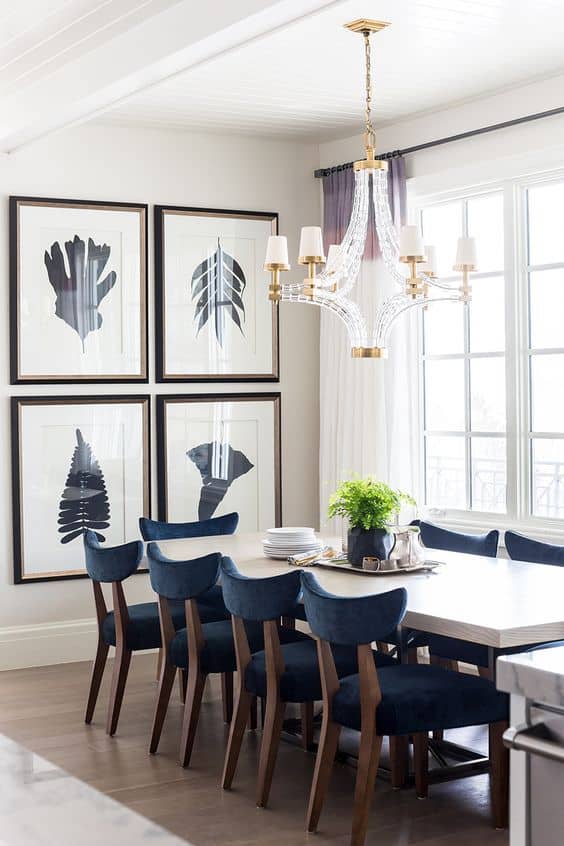

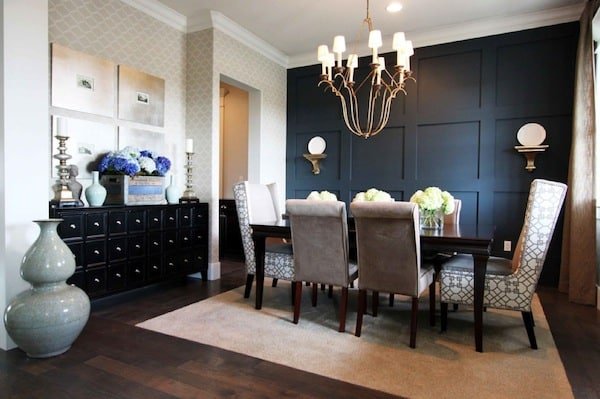
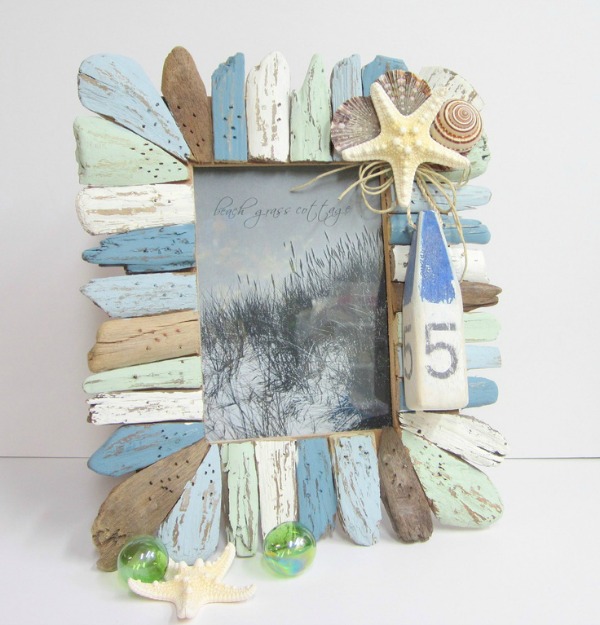