Quilting is the art of combining three layers of fabric together like a sandwich, and stitching them either by hand or a quilting machine to achieve a desired style for a specific purpose such as to beautify one's home decor. To do this, first choose out the design you would like to work with, keeping in mind that a quilted material can be the same on both sides as well as have different patterns on either side. Place the cotton material in the center of the two layers of designed fabric being aware of which one you desire to have as the top layer and back or underneath sheet; then stitch as desired. This craft is usually taken up as a hobby, or someone looking to make a living. In some countries, quilting is usually carried out by a group of people around a huge sheet of material, all collaborating using hand stitching to complete a project.
Table runners on the other hand have been deemed to be useless by some while there are many who disagree for good reasons. These centerpiece fabrics, as I would call them add so much elegance and luster to your dining decor, in other words they basically compliment your dining room the same way a bouquet of flowers or a chandelier would. Many people are passionate about keeping traditions, well this is one that will always be a classic because it brings so much character to the relevant setting.
Before laying down the fabric, ensure the table is measured to determine what will be the length of your pad; note this can be used to bring attention to a beautiful centerpiece or in accompaniment to an actual full length cloth that covers the entire dining surface.
#1 Choose to quilt a winter heart box pattern as a valentine's day table runner idea
Despite what many say, using fabric will various designs to enhance a dining room'a decor is very much in style and considered vogue. What is your take on this DIY topic? Feel free to speak your mind in the comment section below.
Joyful summer décor awaits you. Aromatic scents and thousands of colors are at your disposal in this cheerful cozy season ready to delight you and your guests wherever you are. With this happy though in mind we are sharing underneath 12 mesmerizing beautiful and fresh summer table decoration ideas that are able to transform a festive entertaining into a memorable dinning experience.
Whether it is a special occasion or a simple launch in the summer you have the opportunity to experiment with floral arrangements and naturalness. Use simple elements from your household in the arrangement and seek inspiration in nature where, design with organic elements resides and do your best to emphasize and embrace greenery .
Summer Table Decoration Ideas
#1 Barn Background With Impeccable Teal Pink and White Stripes
#8 Dine Between Vine Rows in Breathtaking Scents and Lush Greenery
#9 Yellow and Blue Dinner Table Setting Idea With Small Flowers
#10 Flowers in Colorful Centerpiece Nestled in Natural Setting
#11 Small Wooden Box Doubling as a Centerpiece in Beautiful Table Setting
#12 Transparent Airy Table Setting Beautified Through Teal
Table settings are a highly particular and highly personal decoration that few pay attention to despite their monumental importance in festive dinning. We would love to hear in the comment section below how do you organize your table setting.
If you’re a coder or designer, you might know what #008080 stands for. This string of numbers has no reason to leave you hexed [pun intended] but gives you a lot of room to explore the versatile, gorgeous color—Teal! So, what is teal?
Teal is a cool tone made up of two colors in medium tones: blue and green. It brings about a modern, aesthetic feel to any setting.
And we are here to tell you that Teal is your way to go when you plan the interiors of your home or office!
So, here’s a handy guide on how you can work wonderfully with this color in your interior design project.
What Is Teal and How To Use It In Interior Design
1. Showcase Some Pastel Perfection
Modern homes are often pictured in pleasant pastel colors. These colors are usually pale, meaning they have low to intermediate-level saturation.
Pastel colors are mostly preferred for walls, as they invite an air of contemporary finesse. Pastel Teal is elegant beyond words on walls. It compliments almost any wall decor that shall adorn the vast area that walls cover. White frames look best on pastel teal backgrounds, but most cool colors and a few warm colors like the beige and pale yellow look just as good.
Teal walls also complement the overall furniture in the room wonderfully. Your furniture can be as vibrant as you desire - be it vibrantly colored, bright or somber, solid or printed. Pastel teal is the kind of color that does not hit you in the eye.
So when you paint your walls with this pleasant color, it ensures that it doesn't stand out on their own. Instead, it stands out collectively with all the home decor and furniture in your space. That's the beauty of this color - pleasant and welcoming.
Teal makes room for versatility when it comes to interior design. Pastel Teal, because of its pleasant characteristics, also looks very chic when used for kitchen cabinets, dining tables, or even planters! Place some flowers in pretty teal planters, and rest assured, your home now has both freshness and a modern appeal!
via soopeewee.com
2. Dark Teal in Velvet for Royal Elegance
When dark teal is the color of choice for velvet bedspreads and pillows, it brings about royal magnificence. Cots made out of rich, dark, wood complement this color gorgeously.
One can also get their couches or sofa sets done in dark teal velvets. When placed in the living area, in the focal point of the room, or even by the fire, the sofa set is bound to stand out with royal importance.
Dark teal especially looks stunning in settings with yellow lighting. Natural light looks beautiful as well, but white light is not the best kind to bring out the true essence of this color. Also, you can add some tassels to your pillow covers, to make it look even better.
Dark teal furniture like chairs, end tables, and lamps can also accentuate your home decor. Apart from velvet home decor, this deep shade of Teal, when painted on walls, can make excellent backdrops for homes with more wooden furniture.
What's more, dark teal looks brilliant when paired with other soft colors. If you are using a dark teal sofa set, you can always bling it up with ash silver throw pillows, or maybe green printed throw pillows if you're the classic kind.
via Pinterest
Dark teal is the kind of color that awes people right from first sight. It's magnificent, royal, and gorgeous.
Give your luxurious home the taste of this royal color. You can almost imagine yourself enjoying a beautiful evening by the fire, with some folks sipping wine and a vintage gramophone playing classical music, or jazz in a home that is adorned by dark teal furniture.
Isn't that absolutely picturesque? There's no doubt that dark teal makes for the perfect color for the interior design of luxurious homes.
3. Blend It in With Solids and Prints
Teal prints on throw pillows and bedspreads make a statement of their own. They invite an artistic, modern air into your homes and offices. Flowery teal embroidery is feminine and gorgeous. On the other hand, teal prints reflecting modern art and portraying historical significance in the form of traditional Indian rangoli, Chinese symbols, or exotic animals, make up for amazing decor pieces.
When matched with solid colors, teal in print and embroidery make the perfect combination for spectacular interior decor! Printed teal decor items like China plates for your walls, and ceramic vases with teal print on end tables, are accessories that bring color into your home.
What's more? Geometric prints are in this season! Get some throw pillows in covers enveloped by geometric print - diamonds or circles, squares or lines, whatever the choice may be, teal looks great in geometric shapes!
Embroidered teal cloth can also be framed and used as wall decor. Ditch the standard paintings and get creative with beautiful frames to adorn the walls of your home. A spectacular teal print fashionably stands out in the living room. Rest assured, your guests will stare at the beauty in teal time and again.
via ideastotry.com
Teal prints on walls serve as classic backgrounds for photography. Now, who wouldn't want to take pictures in their lovely home? After all, homes are where conversations are born in the most comfortable ways, where laughter is shared, and joy is multiplied with each member!
4. Go Gorgeous in Glass
Whether they are mirrors, glass doors, or bottles, teal green looks ravishing in the glass.
Teal green is the best choice for the glass bottles that sit pretty in your bar, for storing precious wine, and alcohol. Just because liquids like wine and juices can be exposed to some light for them to persist without ruining the flavors, they are often bottled in green glass.
Teal green glasses, therefore, are not only elegant and fashionable but also serve the important purpose of keeping your wine timelessly tasteful. Teal-colored lighting will also do wonders for your home bar!
Teal glass vases also make for some of the most ravishing decors. Especially if there is art on the teal glass, it's certain that the vase will add finesse to your interiors.
Now, who says that teal is only a color for living rooms, bedrooms, and kitchens? This color looks just as good when used for the interior design of your bathroom.
When it comes to bathroom interiors, if there is clear glass that separates the shower from the rest of the bathroom, then the teal tiles simply look ravishing here. They reflect beautifully on the glass, making your shower look elegant.
Teal-colored wash basins are also a way to go. With pearly white faucets or dull grey faucets, these basins can make a combination so utterly beautiful that the bathrooms redefine themselves around them.
With teal-tinted glass, your wall decor, bottles, home accessories, and bathroom interiors get a stunning, fresh look.
5. Get Classy with Teal Crockery
Didn't we speak of China plates in the last section? Oh yes, we did. Because teal crockery is classy, elegant, and a product of fine artisanry.
Beautifully embroidered and painted plates have climbed their way up (quite literally) from kitchen cabinets to walls in living rooms.
Intricately decorated plates adorning walls can be traced back to the 19th century when royal families hung plates on their palace walls along with paintings. This style is back in interior design now and modern houses these days are showing off their grand collection of antique plates.
Antique plates look beautiful in teal as it is the perfect shade, neither a bright color nor a dull one. A collection of both printed and solid-color teal plates can really add beauty to your interiors.
Now when it comes to traditional crockery, teal-colored crockery is both classy and artistic. It looks beautiful on tables of any color. Use solid teal-colored plates if you have a printed tablecloth and vice-versa.
via Pinterest
Teal is also gorgeous for tea cups and kettles. When hosting guests for dinner, amaze them with your exquisite taste in interior decor by serving them tea in gorgeous teal teapots and cups. A beautiful idea for a cup and saucer would be for a decorated saucer and a minimally painted cup.
Pastel teal can be used for fork and spoon handles and also for napkins! Teal napkins in satin or cotton, when placed by your side during meals make it the perfect, pretty companion. Fruit bowls and decorative trays in teal are all the more beautiful in teal as it is a very pleasant color.
Crockery is aren’t just confined to the kitchen in modern homes. Having classy crockery adds to your interior decor and tells people a lot about your taste in fine design.
6. Teal Zeal From Walls to Floors
Walls cover 50% of an empty place. The other 50% is covered by floors. Teal is such a versatile color that using the color in different shades, and in different patterns can pretty much plan the entirety of the interior.
As walls occupy a lot of space, it becomes necessary to choose the right color and plan how you decorate them. When solid teal is painted across the surface area of the walls it radiates beauty. At the same time, printed teal wallpapers are just as good! To adorn walls, teal paintings, photo frames, mirror frames, and planters can be used.
Also, what one often overlooks is the fact that a fine set of curtains can really bring out the aesthetics of your space. Curtains in teal do a gorgeous job at this.
But interior design hardly ends there. Flooring, and what goes on the floor form a major chunk of interior design. Area rugs in teal, in combination with blues and yellows, look marvelous in these cases! Delicate chairs and end tables placed on these rugs will only look more beautiful when combined with teal. A fine choice when picking colors for end tables in solid teal either leaning towards pastel green or dark blue.
Apart from tables and area rugs, teal looks great on bathroom flooring as well! Teal tiles certainly add glamour to your showers and the space it covers in bathrooms.
via Pinterest
A space that you call home or where you put in your hours of work is of extreme importance. Designing the interiors with finesse, artistry, and class takes the front seat in planning.
Teal is a color that can be used for the entire room's interior - be it walls, tables, sofas, chairs, etc. You may be surprised how well it works together even if everything is of the same color!
But teal is essentially used in interior design for its characteristic nature of blending beautifully with almost any color. Teal bottles, vases, area rugs, and other home decor items make sure that your space looks one of a kind.
Whether you choose to color block your interiors or decorate in multiple colors and designs, teal is at your service. This gorgeous mix of green and blue is the unique color that has been missing from your modern home or office. Teal—a name derived from the color around the eyes of a bird—the common teal, is a color that shall fly into your homes, bringing brilliance and charm along with it.
Teal Interior Design Inspiration
Cast a glance over the extraordinary ideas and surge inspiration!
How do you like the ideas above and teal as a color?
We would love to hear from you in the comment section below!
Gray is one multifaceted color that is fun to work with.
However, we understand if you're finding it difficult to match colors for the first time. Matching colors to create a harmonious appearance may seem easy at first, but any interior designer can tell you there are several nuances to consider.
When colors don't make sense, the simplest thing to do is fall back on the neutrals. Neutrals do not disappoint, no matter where you place them, and gray is simply the most superior of them all. It's not just us; many experts agree that gray is one of the most versatile choices for creating a timeless, calming atmosphere in any space.
And while gray is just a mixture of black and white, there are tons of gray hues that need care when pairing with any color. A deeper look into the undertones is necessary to get the harmonious color combination you are looking for. Read till the end to find the best color goes with gray.
Colors That Go With Gray
1. Steel Gray With Brown And Yellow
A bedroom with gray, white, warm brown, and honey-yellow colors makes for a soothing combination. While the steel gray will have a hint of blue undertones, it somehow goes well with warmer shades of brown and yellow.
To get the best of this combination, you can use the gray for walls, curtains, carpets, and the head stead of the bed. Then add different gray shades but make sure they lean towards the warmer side of the palette for a gentle contrast. To jazz up further, include lines and texture in the bedding and carpets.
2. Charcoal Gray With Blush Pink
It's a tried and tested combination- gray and pink are superb companions if you select the correct shade. We think that adding charcoal gray to pastel pink creates a cohesive look because it allows the lighter color to pop. The dark and dramatic gray adds cool tones that create a striking contrast with pale pink.
A clever way to improve the warmth in such a room is by adding brass pieces to the decoration. The color schemes might seem unusual at first but surprisingly work well if you put them together.
3. Pale Gray With Classic Crisp White
You can't go wrong with the classic combination of pale gray with bright white. Whether it's the living room, lounge, or bedroom, this combination can easily adapt to any style you select. When it comes to darker grays, proportion, and tone can change the effect entirely.
So, if you are going for a breezy, dreamy look, use clean white furniture, adding a few gray pillows to the mix. If the end result is too simplistic for you, using textures like weaves, marble, wood, and even rugs in fluffy whites will add interest.
4. Neutral Gray With Sage Green
Hues of green are good with gray, but sage green provides by far the most superior gray-green combo that we know of. This collaboration will remind you of earthy features and natural elements and show up as a clean and calming combination.
If you want to maintain a mostly gray room but introduce a secondary accent color, light green will be the ideal choice. Pale gray and light green will blend in together to create a harmonious mix of neutral colors. But if this happens to look too light overall, you can add depth and color by introducing dark brown and wooden textures.
5. Gray With Beige, Red, And Orange
Natural gray and beige is a cozy and subtle pairings that can lighten the mood of any room. But if you want to add a hint of drama or a pop of color, orange and red go surprisingly well with this combo. The intensity of red and orange is up to you.
A subtle addition would look like a few pillows or curtains in warm orange with a background of gray and beige carpets. But if you want to create a statement section, adding red or orange chairs with light shades of gray and beige should do the trick. Navy blue and cobalt blue will also have the same eye-catching effect but will add a cooler tone to the space.
Why Gray Is a Popular Color For Interiors
1. Gray Adds Elegance To Any Interior Style
Gray is the perfect color to add a modern yet classic appeal to interiors. Lighter shades on the walls are used to create a spacious and airy atmosphere. But adding darker gray and its various shades creates a cozier vibe, especially during winter.
The good thing about using gray for interiors is that it allows other elements to shine. Natural wood, velvet, or even leather look great in varying shades of gray. And if you are worried about the room looking dull after selecting gray as the primary color, do not worry.
The final result does not have to be a monochromatic look. Instead, you can add plenty of bold color choices for contrast. Predominantly wooden furniture with gray walls gives a contemporary feel to any kitchen or dining room.
2. Gray Is The Most Versatile Color
When you think of neutrals, gray might be one of the first colors that pop up in your mind. Needless to say, this color is a perfect match for any other neutral color, too. You don't see this kind of flexibility with any other neutral shade.
Since it is neither black nor white, not too dark and not too light, there are endless ways in which you can use gray shades. Combining light gray with beige, cream, or taupe creates a soft palette for the bedroom, giving it an unsurpassed cozy feeling.
3. Gray Is Understated And Minimalist
You could reduce unwanted clutter from your interiors and bring quality pieces for a relaxed, minimalist room. Instead of decorating each aspect with various colors, select one or two and combine them with gray for a Scandinavian-inspired interior. Beige, pink, navy blue, and even orange are great for adding personality and oomph to a clean gray and white room.
4. Gray Allows Natural Elements To Take Center Stage
If you select the correct shade, a gray room can be the most soothing and relaxing corner of your house. And it also pairs beautifully with natural elements so that you can add plenty of natural woods, furniture, and plants with the cool-toned gray background.
Since gray is a neutral color, it complements the rustic elements in the room and helps them appear warmer. If you are looking for a stark contrast, use the same natural elements with a backdrop of coal gray and see the splendid effect.
For example, you could use gray tones on the walls, countertops, and chairs with a lighter wooden dining table. Simply adding plenty of natural light to the mix will create a charming farmhouse look.
5. Gray Combines Perfectly With Bold And Pastels Alike
The gray color palette does not distract from other elements and colors added to the room. This is why it is the perfect background color for bright and muted colors alike. Nowadays, pops of a vibrant color like bright red are popular for living rooms and lounges. We will also discuss how to make a statement with bright colors with tones of gray in this article.
But if pastel colors are your calling, there is no need to change the gray background. Light blue, pink, and green go with gray exceptionally well. Adding accent pillows is a smart way to add texture to gray couches and carpets.
Final Words
In conclusion, we would like to say that gray can be your go-to option for interiors because it goes well with almost any color you can think of. You can create the best possible combination by playing with tones and adding colorful or white shades to gray.
And, if you adore monochromatic looks, don't be afraid to pair gray with gray. We'll admit it's a risky move because the room can easily become dull with an overdose of gray. However, the challenge is to discover contrasts and differences in tones to create harmony within the gray color scheme.
Have fun decorating the space with contrasting and neutral tones to complete the look.
Taupe is a sophisticated neutral color created by blending brown and gray, often enriched with undertones of mauve, green, or beige, making it one of the most adaptable hues in interior design. Defined within the Natural Color System (NCS) as a low-chroma tone between warm and cool, taupe’s nuanced spectrum includes variants such as rose taupe, greige, mushroom, and mauve taupe. It is favored by major paint brands—Benjamin Moore's "Stone Hearth" (984) and Sherwin-Williams' "Anew Gray" (SW 7030)—for its unparalleled ability to balance contrast and cohesion in both modern and traditional interiors. According to the American Society of Interior Designers, over 60% of professional designers use taupe to establish visual continuity across open-concept spaces, leveraging its chromatic neutrality to anchor bold accents or soften architectural transitions. Color expert Maria Killam emphasizes taupe’s value in home environments, noting that “its quiet complexity creates depth without visual noise.” This chromatic subtlety, combined with taupe’s ability to react dynamically to natural and artificial lighting, makes it essential for creating emotionally resonant, well-composed interiors.
What is Taupe?
Taupe is a low-saturation, chromatically neutral color situated between gray and brown, characterized by its complex undertones and exceptional versatility. Derived from the French word taupe, meaning "mole," the name references the soft, earthy tones of the European mole’s fur. In color science, taupe resides in the gray‑brown space of frameworks like the Munsell and NCS systems, and may display undertones of mauve, green-beige, or mushroom depending on formulation and lighting—making it a metameric hue that shifts in appearance under different conditions. Leading paint brands such as Benjamin Moore and Pantone recognize taupe within their neutral and textile palettes, respectively. Its most significant design strength lies in its ability to bridge warm and cool schemes, offering chromatic stability and spatial nuance in both minimalist and richly layered environments. As Jean‑Louis Deniot, a renowned interior designer, succinctly puts it: “I aim for my interiors to be eclectic chic as well as serene.”
Some common hex codes for different shades of taupe include:
Cool Taupe: #8B8589
Warm Taupe: #B38B6D
Classic Taupe: #918C88
A popular taupe interior paint shade from Benjamin Moore is "Revere Pewter" (HC-172), which is a blend of gray and beige, often chosen for its ability to create a warm and inviting atmosphere. Its hex code is #A59B94.
The widespread popularity of taupe in interior design and fashion can be attributed to its versatility and compatibility with a broad range of colors. Taupe's ability to serve as a neutral backdrop or a sophisticated accent in any space makes it a highly sought-after choice.
Taupe is an elegant and versatile color that goes well with pretty much everything. However, there are various shades that you can choose from.
As such, below are a few quick tips for choosing the right taupe shade for your room:
1. Familiarize Yourself With the Taupe Hex Code
First, you should really understand: what color is taupe exactly?
The RGB taupe color code is #483C32. The RGB taupe color code for the most saturated tone is #773803, while the least saturated tone is #3f3d3b.
Below are other more specific codes for taupe:
Hex triplet: #483c32
RGB Decimal: RGB (72,60,50)
RGB Percent: RGB (28.2%,23.5%,19.6%)
CMYK: 0, 17, 31, 72
HSL: hsl (27.3,18%,23.9%)
2. Consider Room Size and Natural Light
You can get the right taupe shade by considering the following factors:
Room size
The direction the room is facing
Amount of natural light the room gets
If your room is small and dark, light taupe will make it feel brighter and larger. Meanwhile, you should opt for dark taupe if you want a big room to feel smaller and cozier.
A north-facing room doesn't get a lot of natural sunlight. As such, taupe with warmer tones can give the room a warm glow.
But with south-facing rooms, any shade of taupe can work. However, one with cool undertones can balance out the sun's warmth.
Having east- and west-facing rooms is trickier since you'll have to study the lighting yourself. This is to check how much light it gets when you use the space the most.
3. Think of a Theme
Do you want a rustic living room, a homely kitchen, or a cozy bedroom? Combine the color taupe with others to create the atmosphere you want for a room.
For a rustic living room, have taupe trims and walls in a light neutral shade or off-white.
Alternatively, you can have taupe walls as a base too. This is more calming than white (which can be too bright or stark) since it has a brown or gray base.
Meanwhile, for a homely kitchen, a mid-tone neutral taupe for the cabinets can add depth and richness without being too dark.
Bring the color out with a stone countertop and white subway tiles for the walls.
To make a cozy bedroom, dark taupe walls create an enveloping effect. Alternatively, you can use that dark shade on the curtains or furniture.
4. Try a Monochromatic Scheme
Instead of choosing just one shade of taupe, why not use multiple shades?
Utilizing a monochrome scheme is an easy way to instantly create an elegant, timeless, and tranquil room — especially if you incorporate a warm taupe in the palette.
Combine various shades and see how you can balance them in the room. Another is to layer different textures to add depth.
So, you can have matte taupe walls but have satin taupe on trims and cabinets.
5. Incorporate Taupe With Lively Colors
Taupe is a neutral hue, but it's not boring. In fact, this is a great option if you want to make bold interior design choices!
You can pair taupe colors with more vibrant colors — like emerald green and fuschia. Any shade of blue is a sophisticated match for taupe too.
6. Use Dark Taupe as an Accent
Taupe is certainly great as a foundation. But it's also an excellent option for an accent color — especially dark taupe.
Add warmth to and ground a cool color palette by adding an earthy taupe shade. Cerulean blue, for instance, has a beautiful green undertone that can be complemented by taupe.
A dark taupe accent can also stop white interiors from feeling too clinical.
There are many ways to incorporate this dark gray-brown shade, such as:
Upholstered furniture
Throw pillows
Textured woven blankets
Trim work
Built-ins
Ceilings
What Are the Different Shades of Taupe?
Benjamin Moore & Co., a manufacturer of paints, stains, and other architectural coatings, released their top six shades of taupe.
But there are more beautiful shades that we'd like you to know about.
So, below, we've listed a few shades of taupe, alongside their RGB and CMYK codes to help you find them if you wish to use them:
Gray taupe is a darker shade of taupe that's gray-brown. This pairs well with other gray shades and warm colors.
Gray taupe also looks good with sky blue.
Taupe hex code: #8b8589
CMYK taupe color code: 0, 4, 1, 45
RGB taupe color code: 139, 133, 137
Various Taupe Color FAQs
Taupe colors are certainly very easy to work with — especially if you have a good grasp of the color wheel.
Below, we’ve answered some questions to help you understand this grayish-brown color more:
How Do You Create Taupe?
The color taupe is a combination of black or red with yellow and green undertones. To change the shade or saturation, adjust those mixed colors.
If you’re using paint colors, it’s better to use a palette knife than a paintbrush to mix them together.
What Is Perfect Taupe?
Taupe is a pale brownish-gray.
Interior designers say that perfect taupe walls become great backdrops for brighter shades, warm woods, and brass or gold accents.
Is Taupe Gray or Brown?
Taupe is somewhere in between. You can control the shade depending on what colors you’ll be adding to it.
If you put in more gray, then your taupe can appear as a very warm gray.
Do Beige and Taupe Go Well Together?
Beige and taupe are both universal colors, so they go well with anything — including each other.
Beige and taupe are a great combination if you want a monochromatic modern farmhouse vibe.
What Color Best Fits With Taupe?
Taupe best fits its complementary colors on the color wheel, which are blue and purple — but you can pair it with pretty much anything. However, you’ll have to consider shades.
For instance, darker shades of taupe go beautifully with darker shades of blue, like navy blue. Meanwhile, a light taupe color goes well with lighter shades of yellow, such as buttery and creamy yellows.
These balance warm and cool tones to make a room more cohesive.
Flesh tones are also good to combine with taupe.
What Does the Color Taupe Represent?
This versatile color can represent many things in color psychology. Some of them include the following:
Practicality
Intelligence
Passivity
Reliability
Elegance
Modesty
Dignity
Maturity
Are Taupe and Khaki the Same Color?
No, taupe and khaki are not the same color.
Khaki, coming from the Urdu word meaning “dusty,” is a light brownish green that’s normally connected to military uniforms.
Khaki is also called khaki green.
Meanwhile, the word taupe comes from the French word taupe and the Latin word Talpa, which was used to describe moleskin.
It’s a gray-brown color, also described as pale brownish gray.
Why Are Taupe and Greige Being Interchanged?
From the name itself, greige is a gray-beige that’s grayer — so it’s a cooler color. Meanwhile, taupe is a warmer color.
However, some people say that greige is actually a shade of taupe, while others say they’re different.
Taupe Home Interior Ideas
Taupe colors are some of the easiest to incorporate into any color palette — whether for acrylic paint projects or interior design.
Below are 20 easy ways to use this versatile color in any room:
1. Plush Taupe Curtains
Taupe curtains — especially full and plush — can highlight any room beautifully. That's because curtains are a feminine and classy way to display any shade of taupe.
This makes taupe curtains an easy but stylish addition to any room.
Taupe won't overwhelm a room. Instead, it can even add some airiness and lightness to the space. You can also add accents of the same shade to your furniture.
There are many shades of taupe. As such, it's a matter of what atmosphere you want your room to have.
For something more relaxing, you can have a mid-tone shade complemented with lighter curtains and furniture. A good combination is dark taupe walls and white and rose gold neutrals.
If you want a Victorian theme (even in terms of just color), layer shades of taupe, gray, and white tones.
7. Taupe Shades
Why not decorate a room with all shades of taupe? Taupe isn't overwhelming and comes in varying shades, so it's a good color for creating a modern-looking room.
The different shades look like different colors too, easily adding texture to the room.
If you use the taupe color right, you can make a stylish and modern nursery.
The neutral tone lets you adjust the style as your child grows.
For instance, you can add colorful decorations for the baby, then switch out the crib for furniture in the future, and change the decorations and accent colors.
As a soft and subtle color, taupe also works well with bold colors and prints.
But if a strong orange isn't to your liking, you can choose a more muted orange — or a different color altogether, like cool lavender or light green.
10. Slight Furniture
A slight taupe on the furniture blends well in a room with a gold and mustard theme. Taupe makes the room brighter and can also act as a point of reference.
Use taupe as a base to make a space that inspires you to be creative and focus on tasks that need to be done. This will also be a space where you'll enjoy spending time.
Add some pops of color or other accents to give some more character to the space.
13. Taupe Undertone
Rather than use taupe with undertones, why not try a color with taupe undertones? For instance, gray with strong taupe undertones give a muted but sophisticated atmosphere.
Pair the taupe color with another neutral shade, like gray or white. Then, sprinkle some color (like yellow or green) into the room to create points of reference.
15. Bucolic Comfort
You can add taupe to an already-existing rustic theme. Place some taupe accents on throw pillows, stools, or other decor.
If your rustic room has planked walls or warm wooden flooring, taupe textiles will be perfect for it. It adds to the rustic feel, making the room homelier and more inviting.
Conclusion
Taupe is a refined neutral that straddles the line between gray and brown, with a range of undertones such as mauve, beige, and green-gray that allow it to shift in character depending on lighting and context. Its nuanced versatility makes it an ideal bridge between warm and cool palettes, allowing designers to create depth and cohesion across a wide variety of styles—from minimalist to traditional. As a tone derived from the natural coloring of the mole, taupe brings an earthy, grounded elegance to interiors, functioning as a subtle yet powerful backdrop that enhances surrounding elements without overwhelming them.
Whether used as a primary wall color, an upholstery base, or a contrasting trim, taupe offers both spatial calm and visual sophistication. It pairs effortlessly with muted pastels, rich jewel tones, metallics, and organic materials, adapting to modern, rustic, and classic environments alike. For a deeper understanding of how taupe behaves in applied design, including its various shades and ideal combinations, this comprehensive guide to taupe color offers valuable insight into its full design potential.
Orange is one of the colors that are best avoided inside the home or office.
At least, that’s what everyone used to believe.
Now, perceptions are slowly changing. Orange is a vibrant and fresh color that lends citrusy characteristics to any room it’s used in. True to its parent colors of red and yellow, orange is representative of the bold enthusiasm that reflects from its very name.
But that’s not all that’s special about orange. It can also be paired successfully with a number of different colors to produce outstanding effects that can change the very nature of any interior.
In this article, we are going to take a look at the different colors that can be successfully paired with orange to stunning effect.
So let’s jump into the color palette and make a splash.
Colors That Go With Orange
Orange And White
Two of the most noticeable colors, orange and white complement each other like no other. While completely orange or stark white walls can be a bit unsightly, the orange and white combination lends a fresh and fruity feel to any interior.
For this reason, combinations of orange and white are used on carpets, clothes, and even furniture. Pairing orange interiors with white furniture, or vice-versa, can be a fun way to spruce up any domestic or corporate setting.
Brown is certainly not a color that one would think of pairing with orange. But contrary to intuition, browns go well with orange when you think in terms of style. When darker shades of browns are paired with soft oranges, it goes on to create a contemporary combination that speaks to anyone with an elegant aesthetic sense. Just try it out once, and see the magic happen.
One of the warmer hues of purplish red, burgundy and orange share a common ancestry. Due to this, they go with each other with a certain sense of camaraderie that can only come from shades belonging to a shared origin.
Both colors are bright and bring a sense of confidence to any setting individually, but when combined, they create an amalgam that exudes elegance from every angle. Plus, purple has always been the color of royalty, and burgundy being just a shade apart can lend that royal feeling to your surroundings, along with the vivacity of orange to spruce things up.
Gray is not a color one would usually associate with home decor, yet it has been used in multiple settings and with alluring effects. Gray has a certain dependable charm that seems to attract anyone who sets eyes on it.
When paired with orange, which represents the hues and brightness of joyous creativity, gray creates an environment where both colors bring out the best in each other. Together they manage to foster a sense of confident creativity that can be the perfect setting for achieving grand objectives.
Orange And Green
Anyone looking to add a dash of youthful fun and frolic to their surroundings should always choose to go with a fresh combination of orange and green, preferably lime green. As both are sourced from nature, they automatically combine to create a setting that brings a breath of fresh air to your home or office environment.
In another twist, mixing orange and green produces brown, which can lend an earthy, sophisticated accent to any room. With orange as the dominating shade and green acting as a companion color, these two shades can zest up any property.
At first glance, the above combination might seem just plain outlandish. But done correctly, these three shades match with each other in perfect harmony without the slightest trace of conflict.
Furthermore, as black and gold are a combination that can seldom go wrong, they bring out the vibrancy of orange in a way like no other color can hope to achieve. The black backdrop provides the perfect setting for bringing out the brighter spirits of orange and gold.
Lilac is the one color that everyone likes, and when paired with orange cleverly, the two create a combination that is hard to ignore. Vibrant, light-hearted, and cheerful, the fruity feel of orange goes perfectly with the flowery essence of lilac. Throw in a shade of white for that extra edge, and you’ve got a color-combo made for winning hearts.
Some would balk at the apparent contrast that exists between orange and aqua; surprisingly, though, the two colors go with each other like brothers-in-arms, fighting to keep the spirits up in the home or at the office.
A blue and orange color palette works to create a vibrant room that brings in a funky, retro-ish vibe, be it the bedroom, living room, or the kitchen.
Orange And Dark Chocolate
These are two flavors that never go out of fashion, and the same is true for their color-counterparts. Orange and dark chocolate can give a spicy accent to any room and transform it into a warm gathering place for near and dear ones.
Image via colorpaintroom.com
If you think about it, shades of reddish-orange against chocolate interiors make for a beautiful combination. Add the same to furniture and upholstery, and what results is the ideal ambiance that can lift eyebrows in appreciation.
Orange And Pink
A new twist to an old partnership, orange plus pink is a vibrant color combination that brings to mind the unique relationship between orange and red, which again is a cousin of pink. The play between these two warm colors makes for an exotic shading scheme that can bring the sunny side right into your home.
Image via Anna Richmond
Plus, as both orange and pink are derivatives of the primary color red, they carry within them the power and vibrancy of their parent. So it’s not a surprise that both these colors meld with each other in a perfectly harmonious alliance.
Fuchsia is a mixture of red, pink, and purple. And as we have already seen, these colors go well with orange. So it’s no wonder that fuchsia too is an eligible partner for orange.
The rather flirty offspring of red and yellow, orange is an essential addition to any modern interior. Be it an office environment or a domestic setting, painting ideas with a carefully thought out combination of orange with any of the colors mentioned above results in the creation of a brilliant vista.
So get ready to explore colors with the multiple combinations of orange. Which are the colors that you think would go best with orange in a contemporary setting?
Let us know in the comments below. We’d love to hear your thoughts.
The color scheme is one of the most important things to take into consideration when you are decorating your house.
On entering a house, the color palette immediately sets the mood and tells a story. A place that has blue-green as the dominant color is likely going to look a little somber. In contrast, a house with a dominant chartreuse color is likely to feel more vibrant. So, you can understand how important it is to get the color scheme right for your home.
When in doubt, simply turn to the color wheel, and you will have your answers. The newest and the most trendy thing to try, however, is the analogous color scheme. If you are excited to know more about what it is, you are at the right place.
In this guide, we take a deep dive into analogous color schemes and tell you everything that you need to know about it. So, without any more delay, let’s check it out!
Analogous Color Schemes 101
What Are Analogous Color Schemes?
Contrary to how scary the phrase may sound, analogous color schemes are actually pretty easy to understand.
Grouping of any three shades from the color palette is all it means but remember, it has to be in the same order as on the color wheel. For example, if you look at the color wheel, green, blue-green, and blue can be considered analogous colors.
An analogous palette can begin from any end of the spectrum, and that means that you can either go clockwise or anticlockwise when choosing the colors. You can also opt for warmer shades such as red, red-violet, and red-orange, as these complimentary colors work great together.
When choosing the colors, keep in mind that two of the colors need to be primary colors, and the other one can be of a neutral shade.
How To Decorate Your House With Analogous Colors?
There’s no way someone can tell you whether a blue-green is going to look better than a red-violet on your living room wall.
Some people like bold colors, whereas others would prefer more mellow hues. In short, there is no right or wrong, and you are free to experiment with different colors.
Before you decide on which option you would want as the base color, it is best to select the dominant shade. After you have decided on a few colors, it is time to find some supporting hues to make the color scheme complete.
To make things easier, you can make a mood board to choose from the color wheel. This makes it convenient to pick a color scheme as you have a color wheel right in front. Over time, people end up developing a taste for a particular color palette and select the color scheme from the same palette.
Once you have decided on a color, pick the two other colors surrounding it to make your color scheme complete. In case you have liked two colors, select the one present in between to bridge the gap. This way, you will have an analogous color palette ready for your house.
How To Create Contrast When Playing With Analogous Colors?
Because the colors in an analogous color scheme are so similar, creating contrast with them might feel a little challenging. But achieving contrast with analogous colors is actually easy if you know the right tricks.
To begin with, pay special attention to the subtleties of the colors that you are working with. By understanding their nature, you will learn that the colors behave differently when they are light or dark.
Even if you modify the saturation, the colors will look significantly different. That’s why when you play with undertones, you can introduce an excellent contrast to the home décor.
The more simple thing, however, is to just play with the tone of the color that you like on your color palette. Not all the three colors that you choose have to exude the same kind of vibrancy and can be used to create contrast. You can even infuse accent colors into the mix to create a great contrast in your home.
What’s more, when you are thinking of home décor, you can even add textures and prints to the mix. But make sure that the pattern matches the color palette and add some complimentary shades to ensure excellent cohesion.
How To Maintain Balance When Choosing Colors From The Color Wheel?
Maintaining a good balance in an analogous color scheme is not too difficult because all the colors are harmonious as they are in order.
In order to maintain a good balance, always ensure that you are not using the dominant color too much. Doing that would make your space look a bit off-balanced. Instead, you should strive to find the right balance and stick to the 60:30:10 as the thumb rule. Don’t know what that is? Let us break it down for you.
A perfectly well-balanced color scheme in a room is nothing short of an art. For that, you need to use a dominant color on 60% of the space. The next 30% of the space needs to be filled with one supporting color of your liking, while for the rest, 10%, select another supporting color of your choice.
Irrespective of the analogous color scheme, following this rule is always a good idea. We have seen many people use the same color too much in one space, so try to avoid this mistake as it will only make your home look clustered.
How To Introduce Neutrals In An Analogous Color Scheme?
Only adding bold color may make your space look overwhelming. In order to make the space look a little calm, you can consider adding a few neutrals to the triadic color scheme. This is simple, and all you have to do is add white, black, or gray to the colors to bring about a change in them.
When you add white, it is called a ‘tint,’ and the color gets lightened. On adding gray, the ‘tone’ of the color changes. And when you add black, the color gets a different ‘shade.’
We have a red-violet color on one of our walls. If we have to introduce a neutral tone, we won’t definitely go for a blue-violet, right? In this scenario, what we did was add a little white to the red-violet and put it on the other walls to create a good balance.
When you use the neutral shades right, the dominant color in your room gets a chance to stand out among the other colors. The same is true when you are using an accent color.
How To Put An Analogous Color Scheme To Use?
In this section, we take a look at some of the best ways that you can use an analogous color scheme to amp up the décor in your house.
When you ace the game of selecting the suitable color scheme for the rooms, the décor in your home will be simply jaw-dropping. So, let’s take a look at how you can use the color wheel to your benefit!
1. Using Wood As The Neutral Shade
When you are playing with colors such as blue-green, blue-violet, or blue-purple, finding furniture of that color is going to be pretty tedious. There’s hardly any store that makes furniture in these colors.
But there’s nothing to worry about as there is no way you would go wrong with adding a few wooden pieces of furniture to the mix.
2. Use Analogous Colors To Set The Mood
You can use analogous colors to your benefit and make the rooms stand out. Depending on the kind of color that you prefer, you can select the analogous color scheme accordingly.
If you are feeling experimental, select somber colors like blue-green or blue to make one of your rooms stand out. Playing with darker color shades might feel a little challenging sometimes. But when done right, the results can be amazing.
3. Orange, Yellow-Orange, And Yellow
This is one of the best bold color palettes that you can choose from the color wheel if you want to give the room a vibrant touch. People who like to give their house a retro look often go for this color scheme.
It is one of the best combinations of primary color, secondary colors, and tertiary color and has the capacity to make your space look revitalized. These colors are bright and will surely add a youthful touch to your space. Not all types of décor go well with yellow, so you might have to research a little on that! If you are feeling experimental, you can even give Mikado a try.
4. Using Violet, Blue-Violet, And Blue
If you like to add a feminine touch to your home décor, try to incorporate analogous colors that are feminine in spirit. And this color scheme scores a perfect ten on that count.
Using this combination of three colors is surely going to make your interiors look more trendy and chic. When using this palette, do not forget to throw in some wooden furniture to the décor to make the space look even better.
In case you decide on working with four colors, make sure that the fourth color is a complementary undertone that would bring forth a cohesive output. You can even add teal to the mix to complement the other colors.
5. Pastels To Your Rescue
There’s no need to always stick to the base color on the color wheel, and you can easily experiment with different shades of the colors that you like. If you like yellow and orange, you do not need to simply stick to the base colors.
You can mix black to orange to get a darker shade or add white to yellow to get a lighter shade. This would help you achieve the pastel shades of the colors that you like. And it will leave you with immense scope of playing with colors.
Analogous color schemes are more versatile than you think! When you select the color scheme wisely, you are left with an extensive color palette that would make the room stand out like no other.
Final Words
That’s all we have on analogous colors!
As we promised, we tried to make analogous colors simple for you to understand. When you think of incorporating an analogous color scheme, you do not necessarily have to stick to just the walls. You can use an analogous color scheme in all the decorative items that you use.
Plus, make sure that your curtains and rugs also fall into the scheme. If the furniture in your house is predominantly of wooden color, it is best that you search for colors that go well with brown.
Analogous colors mostly look cohesive, but with some extra effort, you can mix and match to make your interiors stand out. If you have any other suggestions that you would like to share with us, feel free to write in the comments section below. And for more exciting reads on interior decorations, keep a watch on this space.
The Significance Of Color In Design, Marketing and Sensation
We are surrounded by colors. The light itself is composed of colors.
"White light is a mixture of colors, which we conventionally divide into six major hues—red, orange, yellow, green, blue, and violet. We can identify each of these basic colors by passing light through a prism. In principle, the original beam of white light could be restored by passing the entire red-to-violet range of colors—called a spectrum (plural: spectra)—through a second, oppositely oriented prism to recombine the colored beams. This experiment was first reported by Isaac Newton over 300 years ago
What determines the color of a beam of light? The answer is its wavelength (or, equivalently, its frequency). We see different colors because our eyes react differently to electromagnetic waves of different wavelengths. A prism splits a beam of light up into the familiar "rainbow" of colors because light rays of different wavelengths are bent, or refracted, slightly differently as they pass through the prism—red light the least, violet light the most. Red light has a frequency of roughly 4.3 1014 Hz, corresponding to a wavelength of about 7.0 10 -7 m. Violet light, at the other end of the visible range, has nearly double the frequency—7.5 1014 Hz—and (since the speed of light is the same in either case) just over half the wavelength—4.0 10 -7 m. The other colors we see have frequencies and wavelengths intermediate between these two extremes, spanning the entire visible spectrum; radiation outside this range is invisible to human eyes."
Without colors, our world would really be a sad place. Each color has been proven to be associated with a different emotion and state of mind. Red represents passion, yellow jealousy, white purity etc. Depending on the color tone, we can change the atmosphere of a room and what it exudes to its inhabitant. Therefore, we must think hard before buying a colorful decorative piece for your interior and consider its role in your color scheme ensemble. But first, we must understand what does a certain color say about us and about our character. The following info-graphics contain a series of useful formation we consider you should know before going ahead with that drastic color change you have in mind for your home.
30 Beautiful Interior Design Color Scheme Ideas To Inspire You
The following interior design come with their color scheme which as, you can see, is a complementary list of tones. Modern or classic, each interior must follow a color scheme for the design to be understood and perceived as a hole. The chosen interior have one thing in common: bold colors as an accent surrounded by soft, complementary tones to calm it down and put it to attention as well.
Just like a lower fan, it’s quite common for a ceiling fan to malfunction due to incorrect rotation, damaged blades or bases. And a malfunctioning ceiling fan needs to be fixed at the earliest unless you want it to stop functioning altogether.
Although ceiling fans can be complete lifesavers during the humid summer months, they aren’t immune to malfunctioning. In many cases, they can become dysfunctional and reduced to just an accessory in your room.
As mentioned above, ceiling fans can malfunction or produce less air for a number of reasons. And today, we are going to decode some of the most common causes behind this trouble. And compare it with blowing fans which are different in many things, such as size, function and others.
So, let’s dive in!
Reasons For Ceiling Fan Not Blowing Air
1. Incorrect Ceiling Fan Size
If the fan is smaller compared to the size of your room, chances are that you won’t feel its cool breeze at all. Small fan blades are only suitable for tiny spaces and not when the room’s square footage is more.
Be it a ceiling fan or a pedestal, when the fan blades are too small they cannot move enough air on the surface area. So, the ceiling fan blades will be turning all day without providing the required air.
Another problem that is commonly noticed with these fans is small fan motors, which do not have enough power to generate high speed or move the heavy blades. In that case, you will be stuck with a slow fan that doesn’t serve the purpose.
2. Improper Fan Blade Rotation
The direction in which your fan’s blades spin determines how far the air will reach. Contrary to the much-popular myth, you won’t experience proper airflow in the clockwise setting. On the other hand, the blade pulls air upward and pushes air down the walls when spinning in the opposite (anticlockwise) direction.
If you do set the fan to spin anticlockwise, the blades will push air downward, and you will experience better airflow in the room. The only problem here is that the airflow can be best experienced right under the fan, as the blades won’t blow air much to the sides.
Most ceiling fans that you find on the market come with a switch that allows you to change the fan’s direction. An incorrect fan blade rotation can completely ruin your experience, so we’d suggest checking and changing the settings when you get a new ceiling fan.
3. Dysfunctional Motor Base
You might have to do a ceiling fan troubleshooting when it has been used for a long time and if the motor’s base does not rotate properly. If the ceiling fan wobbles, it’s likely due to the motor shaft or base becoming tilted. And when tilted, the weight completely shifts to one side, resulting in reduced fan speed.
With dysfunctional motor bases, fans won’t pull air upward or circulate it well. In that case, you will need to fix the issue soon.
If you are not sure if the motor base is tilted or not, keep an eye out for these indications:
The blades incline to one side, especially in older fans
The ceiling screws or the blade screws are no longer tight
Loose wires are visible above the motor base of the fan and touching the ceiling.
Loud clicking or ticking noise when the fan is switched on.
4. Issues With Fan Height
You would be surprised to know that the height of your fan might actually affect how well it can circulate air. If the fan is installed too high, you won’t feel enough airflow. So, if you have a high ceiling, try installing the fan lower to increase the airflow.
On the other hand, if the fan is installed too low, it won’t be able to circulate more air and will concentrate the flow only to a smaller area. While this might not be a problem in a small room, the fan would become pretty useless in a large room.
5. Issues With The Blade Shape And Style
Not all fans are made equal. While some are designed for high performance, there are others that will function more as art pieces to enhance the beauty and decor of the room.
The good news is that the blade size won’t make much of a difference if your room is big, well-ventilated and already has good airflow. However, if the room is small and doesn’t have proper airflow, you should find a fan with a powerful motor. That way, it will move air well, irrespective of the blade size.
Ceiling Fan Not Blowing Air Frequently Asked Questions ?
Does a ceiling fan capacitor affect the fan speed?
Whether it’s a new fan or an old one, you should always check if the capacitor is functioning properly to ensure high speed. When there are faulty capacitors, you will notice that the mounted fans turn slow, or in the worst-case scenario, they stop functioning altogether.
There are many people who wonder, “what fan blows the coldest air?” But let us tell you, more than the fan, it is the attachments that should be functional and in the best shape. Only when the fan capacitor, circuit breaker, and motor shaft are all in place and running well can you experience the best air movement.
How to fix misaligned fan blades?
You might notice misaligned blades on your fan for a variety of reasons. Whatever the cause, misaligned blades cause an imbalance in the overall weight of the fan to affect its efficacy.
To fix this issue, start by loosening the screws on the blade arms. Once they are loosened, realign the blades to ensure they are straight and aligned. Then tighten the screws properly.
After you are done, switch on the fan and check if all the blades are aligned correctly. In case you notice that the blades keep getting loose, use larger screws to ensure they stay tightened and in place.
How to make the most of ceiling fans in summers?
Always make sure that your ceiling fan is spinning anticlockwise during the hit summer days. This will create a downdraft, and you will experience a cool breeze when you sit right under the fan. Besides, the fan should be set at the highest speed.
You can even put a blower fan in the room to facilitate improved ventilation. Read our guide on “how does a blower fan work?” to learn all about it.
How to stop the screeching noise in ceiling fans?
You will need to get the base of the fan fixed if you notice that it is rusted or corroded; otherwise, it will keep grinding and generate an annoying screeching sound. The sound is an indication that the bearings need to be replaced, so changing them should resolve the problem.
Ceiling Fan Not Blowing Air Final Words
In most cases, it isn’t a major malfunction that stops a fan from functioning efficiently. Rather, it is the small mistakes on our part that prevents it from functioning optimally. For instance, a fan rotating in the “reverse” direction can cause it to pull the air upwards instead of pushing it down.
Such issues can be fixed the DIY way with a few simple alterations, some problems may result from a more serious technical fault. So, if your DIY fix is not yielding satisfactory results, it may be a good idea to call a professional to detect the problem and resolve it at the earliest.
See you next time!
Do you want to give your home a fresh new appearance? Then you can consider giving it a fresh new coat of paint.
Painting your home from time to time keeps it looking new. Although there are certain things that you need to keep in mind while undertaking a home painting project, which includes purchasing different paints for your walls and ceiling.
If you’re not a DIYer, you might feel confused with the above statement. The ceiling is just like the other walls in your house. So, what is the difference between regular and ceiling paint anyway?
Well, for starters, ceiling paint is thicker than wall paint, and its composition is slightly different. But there are more differences besides these, which is what we have addressed in this brief guide. So, if you are suddenly feeling curious about it, then allow us to satisfy that curiosity.
Let’s get going, then!
What Is Ceiling Paint?
When we were conducting our own research on this topic, one of the first questions that popped into our minds was this one. And that’s why we have discussed a little about ceiling paint first in this section. Once we are done, we can get to addressing the differences between the two paints.
If we were to answer the above question simply - ceiling paint is a special type of paint that is best suited for painting your ceiling. Well, obviously, the name makes that clear enough, so you could make it out on your own. But there’s more to it than just that; allow us to elaborate further.
Ceiling paint is a type of paint that is highly viscous and dense so that it doesn’t drip from the ceiling. Typically, ceiling paint is made from latex resins, which are responsible for its thickness and viscosity.
What’s more, it is designed to give your ceiling a flat paint sheen. Its texture and chemical composition can resist staining and discoloration when exposed to dirt, dust, or smoke. Furthermore, it can resist stains and water patches caused by roof leaks. And as a bonus, a good quality ceiling pain will prevent the growth of mold and mildew.
On the flip side, you do not get too many ceiling paint color options. So, if you want to apply a fresh coat, then be advised - you’ll get only a handful of shades to choose from.
How Is Ceiling Paint Different From Regular Wall Paint?
Now that you know what ceiling paint is, it’s time to address the main question. In this regard, there are quite a few points of difference between the two paints, which have been described below.
1. Composition
There are some obvious differences between the composition of ceiling paint and wall paint or interior paint. For starters, ceiling paint is usually latex-based, while conventional wall paint is acrylic.
Ceiling paint uses water as a solvent, which gives it a dense texture, similar to latex resins. On the other hand, due to most wall paints being acrylic, they use different chemical solvents and thinners.
There are some instances where wall paints are water-based. But even in such cases, they do not have the density and texture of ceiling paint.
2. Viscosity
The most obvious point of difference between these two paints is their viscosities. Ceiling paint is highly viscous, while typical wall paint is thinner and less viscous in comparison.
This can be explained in light of the previous point of difference. Due to the water-based nature of ceiling paint, it is thicker, which, in turn, makes it more viscous. In contrast, the presence of thinning solvents makes regular wall paint more fluid.
Because of its high viscosity, it does not drip as much as wall paint. But, it is comparatively less elastic than wall paint, which means it does not contract or expand as easily.
3. Finish
If you have painted your home before, then you know that regular wall paints come in a variety of finishes. You have satin wall paint that has a subtle shiny finish. Then there is the eggshell finish, which is slightly less polished compared to the satin paint finish. It has an appearance that is similar to an eggshell, hence the name.
You also have semi-gloss paint that is comparatively shinier than satin paint. And if you want a higher gloss, you can opt for high gloss paints for your walls, which will give them a shiny finish. Or, simply go with matte finish paint if you don’t prefer shiny walls.
On the contrary, ceiling paints are only available in a flat finish. If you are wondering why that is, then the answer is simple. Flat paints are non-reflective, which helps them conceal stains and imperfections better. Besides, the flat appearance of this paint helps minimize the reflection of natural light, as a reflective ceiling may be too bright to look at. It's important to note that while textured wall paints might offer minor acoustical benefits, ceiling paint does not provide such improvements. If sound reduction is a concern, you should consider exploring alternative soundproofing materials and strategies.
4. Durability
Ceiling paint can be considered to be durable, as it does not become stained or discolored as easily. And since it is thicker, it is less prone to flaking or chipping.
Wall paint is comparatively not as long-lasting, especially if it has a glossy finish. In fact, as the paint gets glossier, it becomes less durable. The polished surface of such paint is not so great at preventing stains and discolorations. And they are more prone to chip off from the walls.
5. Coverage
Ceiling paint has a considerably greater coverage than wall paint. Usually, when using ceiling paint, one coat is enough to give you a uniform color. However, with conventional wall paint, you need to apply two or three coats to get uniform coverage.
6. Color Choices
Another point of difference between these two paint types is the color choices. With wall paint, you get a relatively diverse selection of colors but the same cannot be said for ceiling paint. This paint generally is available in a flat white color, with some occasional lighter shades.
Can You Use Wall Paint On A Ceiling?
So, now you know what makes ceiling paint different from conventional wall paint. The question that now arises is - can you use regular wall paint for painting ceilings? The answer is yes, you can, but there are some limitations to it.
First off, you will have a lot of drip spots on your ceiling if you use wall paint on it. On top of that, the paint will spatter all over your room, which can create quite a mess. As a result, the cleanup after you are done will be a major headache.
However, there are ways by which you can manage these problems. If you use a paint sprayer instead of a brush or roller, there will be fewer drips. It will also eliminate the issue of paint splattering all over your room. But using a sprayer can be a lot slower and more inconsistent than a roller or a brush.
Conversely, you could minimize the mess by undertaking extensive prep work. Start by covering the whole room with a drop cloth to protect it from drips and spattering. Or, you could clear out the room by removing all of the furniture and fittings before starting the paint job.
On that note, the above steps will make the work significantly more inconvenient and time-consuming. So, it is simpler just to use ceiling paint instead.
Can You Use Ceiling Paint On Walls?
As a counter to the above question, you may now ask - can ceiling paint be used for painting walls? Simply put, you can definitely use ceiling paint on your walls. It might even be advantageous in some cases, thanks to the viscosity and thickness of ceiling paint.
Moreover, if you use it to paint walls, your paint job will be a lot less messy than using regular wall paint. That’s because you will have considerably fewer drip spots on your wall.
Also, it is far easier to fix noticeable drip spots with ceiling paint. All you have to do is roll over these drips once, and the thickness of the paint will take care of the rest.
However, there is one downside to using ceiling paint for your walls. You will not have a lot of color options to choose from. And due to its finish, all of your walls will have a flat sheen. So, if you are fine with that, then, by all means, go ahead and use it.
Otherwise, use ceiling paint as a primer to get most of its benefits without being limited to a few colors and finishes.
What Are The Best Scenarios To Use Ceiling Paint?
There are certain scenarios where using ceiling paint is more favorable than using wall paint. These include areas that are more vulnerable to dust and stains, such as basements, stairwells, and closets. Here’s where you can color both the ceiling and the walls with the same ceiling paint.
It can also be used when you want a uniform look for your entire room. In that case, your walls and ceiling will have the same sheen and coloration.
Can You Mix Ceiling Paint With Wall Paint?
There is no rule against mixing these two paints together. So, if you want to experiment a little bit, you can do so. But be advised - the resultant paint mixture might not be as consistent or uniform as its constituents.
For instance, if you mix glossy wall paint with flat ceiling paint, the paint that you get might have a peculiar finish. Moreover, the difference in composition of these two paints may not create a very stable mixture.
The best method to mix these two paints together is to apply them separately. You can use ceiling paint as an undercoat or a primer and apply a topcoat of wall paint as the finishing. This indirect method of mixing may give you better results than blending them both directly.
Is Flat White Paint The Same As Ceiling Paint?
Based on our previous discussions, you may think that ceiling paint is the same as flat white paint. However, that is not the case, as there are some obvious differences between them.
Yes, most ceiling paints are white, but that doesn’t apply to all of them. You do get a few color choices, even though they are pretty limited. Besides, flat white paint is not as viscous as ceiling paint, which is further proof that they are not the same.
That said, there are certain similarities between them. For starters, both of them have a flat appearance, and they are good at concealing or covering up stains and other imperfections. But those are the only similarities, and since they are not that significant, it is safe to say that these two paints are different.
Difference Between Ceiling Paint And Regular Paint Final Words
That’s all we have to say about the differences between ceiling paint and regular paint. While in some cases, they can be used interchangeably, for the most part, they are two distinctive types of paint.
So, keep these differences in mind the next time you want to paint your home. It will help you decide better on which paints to buy for your interior walls and your ceiling. And it will make the paint job a whole lot more convenient.
It is time for us to wrap up this guide. In the meantime, check out our other article on ceiling paint vs wall paint for more head on comparisons. We will be back with more informative guides in the future.
Until then, we bid you farewell!
Vaulted ceilings, characterized by their arch-like structure and expansive, open appearance, create an airy and spacious atmosphere within a room. These sophisticated architectural elements give the illusion of vastness, captivating the senses with their grandeur. As such, emphasizing and showcasing the stunning features of a vaulted ceiling through various design approaches becomes essential, whether adopting a minimalist aesthetic or a more eclectic, personalized style. It is imperative to give prominence to the vaulted ceiling, as it reflects a significant investment of thought, craftsmanship, and architectural innovation.
What Is a Vaulted Ceiling?
A vaulted ceiling is an architectural design feature characterized by its arch-like structure and raised height, which creates an open and spacious atmosphere within a room. It is often found in residential spaces, churches, and other large buildings where a sense of grandeur and airiness is desired.
Vaulted Ceiling History
Vaulted ceilings have been an architectural feature in various structures throughout history, originating in ancient civilizations such as Neolithic settlements in Crete and the Egyptian Pyramids. They later became a prominent choice in cathedrals and basilicas due to their capacity to create an expansive, open atmosphere.
Some of the earliest types of vaulted ceilings were domes, barrel vaults, and groin vaults. The rib vault and fan vault were developed in medieval times, adding intricate design elements to these structures.
Vaulted Ceiling Types
Barrel Vault
A continuous, semi-cylindrical arch that extends across the room's length, resembling the shape of a barrel.
Groin Vault
Formed by the intersection of two barrel vaults at right angles, it features a curved edge at the junction, creating a visually striking design.
Rib Vault
Consists of diagonal arches called ribs that intersect and create a web-like pattern, often seen in Gothic architecture in cathedrals and churches.
Fan Vault
An intricate variation of the rib vault, featuring multiple ribs with curved, fan-like patterns radiating from a single point.
Dome Vault
A hemispherical vault that resembles a half-sphere, provides an impressive and visually prominent ceiling.
Cathedral Ceiling
Features equally sloping sides that meet at the room's centerline, similar to the triangular gable of the roof, often seen in places of worship and residential buildings.
Cloister Vault
Also known as a "domical vault," this type features a series of low, segmented barrel vaults, typically seen in the covered walkways of cloisters in monasteries or religious buildings.
Cross Vault
Similar to a groin vault, but with more than two barrel vaults intersecting at various angles, creating intricate configurations.
Quadrant Vault
Consists of a quarter-cylindrical arch, commonly used for porticos, porches, and semi-enclosed spaces.
Segmental Vault
Characterized by a shallow arch that is less than a full semi-circle, often used for ceilings with a modest height.
What Are Vaulted Ceilings in a House?
In residential architecture, vaulted ceilings are characterized by self-supporting arches located underneath the ceiling and above the walls. Almost any house with a slanted roof can support a vaulted ceiling if there is adequate attic space for its construction. High vaults require steeper roof pitches, while shallower vaults can be used in lower-pitched roofs.
Do Vaulted Ceilings Affect Room Acoustics?
Vaulted ceilings can impact room acoustics, often amplifying sound and causing echoes due to the larger volume and angled surfaces. Utilizing sound-absorbing materials, such as carpets, curtains, and wall hangings, can help minimize these acoustic issues and improve the overall sound quality within the room.
Are Vaulted Ceilings Difficult to Maintain?
Maintaining a vaulted ceiling can be more challenging due to its height and unique construction. Cleaning, painting, and changing light bulbs in hard-to-reach areas may require specific tools, such as extended ladders, scaffolding, or lift equipment. Moreover, the increased surface area of vaulted ceilings may require additional effort for cleaning and maintenance.
Do Vaulted Ceilings Affect Interior Design Choices?
The expansive and open atmosphere created by vaulted ceilings allows for unique interior design opportunities. The height enables the use of large decorative elements, such as chandeliers and statement artwork. Additionally, since vaulted ceilings often have more exposed beam-work, integrating these features into the overall design can result in a cohesive and visually appealing aesthetic.
Are Vaulted Ceilings Bad?
Vaulted ceilings are not inherently bad; they bring an antique vibe, elegance, and grand appeal to a room. However, they may be considered out of date or inefficient in terms of space and energy usage. In colder climates, heat loss and increased energy consumption for heating and cooling are significant disadvantages of vaulted ceilings.
Is a Vaulted Ceiling More Expensive?
Constructing a vaulted ceiling increases the square foot costs of a home due to labor and material requirements, including scaffolding or ladder usage, shaping, and trimming. The additional expenses can range from 5% to 20% of the total cost or more, depending on the height, style, and detail of the vault's construction.
Do Vaulted Ceilings Add Value?
Vaulted ceilings can increase a property's value by offering more spacious rooms and larger windows that allow for more natural light. This added space enhances the room's appeal and can lower the energy demand for artificial lighting during daylight hours. However, in warm regions, these larger windows can cause faster heat build-up, requiring more air conditioning usage.
Does a Vaulted Ceiling Need to Be Ventilated?
Vaulted ceilings can create air circulation issues in a home due to the trapped warm air caused by their height. This confined air can also hold cooking odors, pet smells, and other aromas. To improve air circulation in a home with a vaulted ceiling, various adjustments, such as proper ventilation and fans, can be implemented.
Vaulted Ceilings Décor Ideas
The following are 16 strategies for ensuring your magnificent vaulted ceilings receive the recognition they deserve:
1. Best Paint Color For Your Vaulted Ceilings
Finding the most suitable ceiling paint color should be your first priority. You want a color that would blend in well with the theme of your room. This way, your Vaulted ceiling would not seem like a separate, forgotten blank canvas you had no idea what to do with. The color of any room is one of the initial things that will catch the eye of your guests. It tells people so much about your taste, and personality and adds such meaning to your room. Providing it’s the right color, it would immediately draw attention to everything in the entire area.
2. Lighting Fixtures - A Must For Your Vaulted Ceilings
Awww wow!!! is the first expression from someone after walking into a room graced by magical lighting fixtures. Your lighting would be the key to illuminating your Vaulted ceiling area. From gorgeous chandeliers to wall lights, they all magnify every inch of your room. If you have a Vaulted ceiling, then you should aspire to have it noticed by your guests. Otherwise, what's the use? Or at times even you and your family members can sit back, relax and soak up the fruits of your labor or well-spent money.
3. Vaulted Ceilings Go Well With French Windows
You may ask why? Then again, thinking about it, you would realize it only makes sense. The whole idea of having a high or Vaulted ceiling is to give the impression of being in a fairly large room. Also to create a more airy, lighted area. Yet still maintaining quite a classy interior atmosphere. Personally, traditional exterior French windows add a chic, yet simple décor to the inner and outer parts of any home. In addition, a home with a Vaulted ceiling, glass windows, and doors would give the illusion of being outside vs feeling stuffy, cramped, and crowded in what would be the alternative.
4. Adding Drapes To Your High Wall/Vaulted Ceiling
Adding drapes to any décor would certainly transcend it, awakening its fullest potential. That being said, drapes that hang close to your vaulted ceiling, would arouse compliments and attention to its lofty character. The undeniable beauty of your architecture would be incredible. Drapes would carry one's eyes upward and inevitably to your vaulted ceiling.
5. Accessorize Your High Wall
Hey! Don't be afraid to go nuts with your wall artwork or lighting. Ensuring of course that the main purpose is achieved. Dressing it with paintings or fancy drawings, or better yet family photos will certainly do. You can arrange them in an ascending or descending order if you so desire. This is provided you want them to be along the same slant as your Vaulted ceiling. You should note, this is not a must. Going parallel to the ground or floor of your ceiling would work equally as well. Have fun decorating while bringing your own personal style into the whole color scheme.
6. Patterned Vaulted Ceilings
Most patterned Vaulted ceilings are either Groin shaped or Cathedral. Groin Vault ceiling can be a bit confusing to comprehend, but once you understand what a Barrel Vault ceiling looks like, not so much. Barrel Vault ceilings have their names because they are in the shape of a barrel, similar to a semi-circle looking up. Now just cross or intersect two Barrel-shaped Vault ceilings at their right angle (90 degrees) and there you have your Groin Vault ceiling. This is why the Groin Vault ceiling is also called Double Barrel or Cross Vault. Now here is a reason anyone would want to look up! Oh, the beauty of a Groin Vault ceiling plastered with a fine Victorian pattern.
7. Choosing White For Your Vaulted Ceiling/room
If you're looking for true beauty (in my humble opinion), nothing stands out more than a Vaulted ceiling painted in pure white. It may not be your cup of tea, especially with kids and a pet. Thus, white reflects light and makes things appear larger than they are. A white room would brighten and generate a feeling of serenity and clarity in your home. Complete with some Exterior Modern or Contemporary French windows and doors. Voila! Now you have your dream abode. The choice is yours to add another color that would harmonize well with your décor. Black and white always give an elegant, chic look. Black furniture or metallic furnishings would be a stunning contrast to your white wall and ceiling.
8. You Will Want Your Furniture To Blend In
Without a doubt, having one's furniture color fused with the hue of your Vaulted ceilings, walls, or floor would be the perfect amalgam. Sure the alternative would induce a feeling of disorientation and wonderment.
9. Make Your Tv Work For You
One great way to draw attention to your high or Vaulted ceiling is by using your television. Whether your ceiling is Cathedral or Vaulted shaped, adding a flat-screen wall TV would complement any room. Place it as reasonably close to your ceiling as possible.
10. Fireplace Under Your Vaulted Ceiling
Having a fireplace with a stone wall that leads straight up to your Vaulted ceiling would be well in place. Depending on the theme of your room, you can go for a rustic, nautical, or elegant look. So unless you reside in a tropical area, this is always a classic.
11. Build Beams In Your Vaulted Ceiling
What a way to add character and charisma to your vaulted ceiling. I love the rustic, country accompaniment the beam here brings to this room. A complimentary finish.
12. Show-off Your Vaulted Ceiling With Skylights
You don't have to own a studio of some sort to have skylights in your Vaulted ceiling. This will only accentuate and do more justice to your roof. So no need to be bashful if contemplating such a bold move. It will certainly bring in more light and give the illusion of being in a bigger area.
13. Your Vaulted Ceiling Should Be Your Crown And Glory
Talk about adding character and definition to your Vaulted ceiling, if a crown molding doesn't do it, then I don't know what will. You have two choices, hire someone to install them or do it yourself.
14. A Bookshelf Would Be Great For Your Vaulted Ceiling
A bookcase filled with a library of books all the way to the top of your Vaulted ceiling is another way to go.
15. The Idea Of A Ledge Or Shelf Under Your Vaulted Ceiling
Oh! The numerous decorative ornaments, lights, and plants you can line along this surface just under your vaulted ceiling.
16. A Loft Would Certainly Create More Space
Also known as an attic or upper deck, depending on what use you make of it. Another way to flaunt your sense of style and unique, elegant taste.
We hope these few ideas were helpful in assisting you with your vaulted ceiling décor. Whatever you decide to do with your interior design, have fun and let it reflect you so that the final decision would be yours. We invite you to share your ideas and thoughts in the comment section below.
Lacking space at home is a dilemma that most owners may face especially when there is simply no option of building an additional room and while others have attics to a use for storage, the use of under stairs have become a popular choice for the ones that do not. It is an ideal and ingenious way of utilizing the spare space under the stairs, not to mention a lovely addition inside a home. If the need arises for any additional storage at home and if the space under your stairs may be available than here are some clever and attractive under stair storage designs that you will surely find inspiring.
Free Under Stair Storage
1. Simple and classic cabinet design
Under stair storage can be as simple as having compartments that can fit items to be stored. These compartments can be concealed by cabinet doors that fit the shape of the under stairs. Even with plain white paint these useful under stair storages can be just as lovely and useful as any customized cabinets.
Storage areas do not need to be boring or less attractive. This under stair storage design hits two birds with one stone- having an area that can be used for storage and a reading area inside the home. This idea is a great way of maximizing all the space while complementing the whole interior design of a home.
4. Easier access to home cleaning equipment storage
Not all homes have proper storage areas big enough to hold large cleaning equipment and materials. This under stair storage can hold big cleaning items inside a home and still have space for other cleaning items. The storage is also very discreet, making it perfect for people who do not want to let anyone else see where the cleaning items are.
5. Under stair storage rack for convenience and style
Storage areas under stairs can go for drawers but having draw out racks can also be an option especially for people who want to have more than drawers and/or compartments for under stair storage, people that need this area as an open display to showcase various items. This is also a lovely change and a way to revamp for those who already have an under stair storage.
The kitchen is not the only place where cupboards can be found, under stair storage is also a perfect place to store food and keep the stash for the rainy days in a safe and accessible place.
Wine storage inside a home may not be always an option especially with restricted home space. Having this wine and beverage storage is genius and can be an amazing part of any home that guests will truly envy.
Under stair storages are mostly used for items that can be seasonal but it is also great for items that are used every day. With clean, white and mold free interior and spacious shelves, this can be the perfect storage for fresh produce and other dry foods used for everyday meals.
Drawers are very common way of designing a storage, but it is not always the most practical option. Having just shelves can be a great alternative to having drawers. These shelves make use of all spaces and the woven baskets add as lovely and useful decoration for the under stair storage.
This under stair storage design is perfect for people who want to organize personal items as much as possible. It gives enough space for each individual and can hold items that are used every day. A grab-and-go design that is perfect for a busy household.
While drawers, shelves, and cabinets are common under stair storage, combining these three and adding more function to the under stair storage is just as lovely. This idea for under stair storage with TV rack gives more space for other furniture and also have space for other decorations at home. This is perfect for apartments or homes that have small living rooms.
12. Maximizing work and storage space
There are homeowners who would want to have their own space as an office or work area. When space is limited, using the under stair space can be a wise and beautiful option. It adds aother functional area of a home and more storage area for important items. The idea is also stunning even with its limited space.
Creating a library may not be possible for most homes and having bookshelves can take up space that can be used for other items or furniture inside a home. Using the under stair is a perfect use of spare space and have a mini library at home. The under stair bookshelf can be filled with more than enough books and magazines for any bookworms.
14. Lovely display of memories and storage for knick knacks
There are some decorations and little displays that define a home and give a personal touch. The under stair can be a perfect place to place these photos, personal knick knacks and decorations. Adding small drawers gives more room for storage of items that are needed inside the home.
15. Not-your-typical pet home
Pet sleeping areas may also take some space. Though this is not a typical storage idea, this is unique and gives space to pets. It is a perfect way to keep pets tucked in while keeping the whole home in order.
16. Simple pull out storage for fragile items
Fragile items at home, such as plates and bowls, can easily be stored inside the under stair pull out storage. The storage is strong enough to hold fragile items and big enough to have space on multiple layers for numerous items. The setup also looks modern and can be a great addition inside a home.
Most of the time, spaces under the stairs are not used or left empty and do not necessarily look appealing for the rest of the interior design. Creating shelves and storage or compartments under the stairs where books and other small items can be placed allows it to look more attractive. Add cozy chairs and the under stair storage becomes a perfect backdrop for a reading corner.
18. Open under stair compartments for seasonal items
Having a place for seasonal items that can be accessed easily and in an organized manner can be done by having under stair storage. The compartments are big enough to hold items big and small. This type of storage also creates a discreet space where items can be pulled out anytime when needed or in season.
While the simple designs may not be extraordinary solutions they are insanely useful and they will definitely make your everyday life easier. What do you think about them and how do you use the under stair storage ? We would love to hear from you !
Paying extra attention to your flooring is vital if you plan on remodeling your house. However, they take a lot of punishment, which means that they need that extra eye to get them just right to your needs. This is what gives them the strength to stay strong for a long time. But that doesn’t mean that you have to choose something ugly. You’ll be pleased to know that there are a plethora of options when you’re choosing to change your flooring.
Here are 21 amazing flooring options that you should look into when you’re redoing your flooring.
Types of Flooring and Flooring Options
1. Tile
Tile flooring is a popular choice among many and for a good reason. It’s one of the cheapest options available when it comes to flooring. It also comes in a variety of colors and patterns, making it very useful to match the decor that you’ve planned for your home.
But keep in mind that the tile flooring can get rather cold in the winter, and it’s expensive to install tile warmers. But among other high-maintenance carpets, this is one of the best options that you can consider.
2. Carpet
Carpet is a fantastic flooring choice for those who appreciate a soft, cozy feel underfoot. With its numerous color options, it can seamlessly complement any décor style you have in mind. Additionally, carpet flooring provides effective sound insulation, reducing noise transmission and creating a quieter atmosphere.
Maintaining a carpeted floor is relatively simple, as periodic vacuuming—approximately once a week—will keep it clean and fresh. One of the key advantages of carpet is its luxurious appearance, making it an appealing option for homes where you frequently entertain guests. However, keep in mind that carpet can be one of the more expensive flooring options, so it's essential to factor in your budget when making a decision.
3. Cork
Indeed, cork is an exceptional flooring option for those who enjoy the look and feel of wood flooring. Apart from being a great insulator, keeping your feet warm and comfortable during colder months, cork flooring provides excellent sound absorption properties, making your home quieter and more peaceful.
Cork's natural anti-microbial properties help keep germs at bay, maintaining a cleaner and healthier living environment. However, it's important to note that cork's softer texture makes it prone to indentations, and its susceptibility to discoloration in sunlight may make it less suitable for sun-drenched spaces. As such, cork flooring is recommended for colder regions or rooms with limited direct sunlight exposure.
4. Penny
The offbeat flooring options keep getting more offbeat these days! Penny flooring is not something that we would recommend for your whole home, but it does make for an interesting addition to your game room or kitchen.
It’s unique with regard to looks, and it only costs you a few pennies! Another advantage is that since it is made of pennies, it will be very durable.
The downside of this kind of flooring is that you can’t do this alone, not unless you’ve got a ton of experience and know-how. So, hire a professional to get the job done.
5. Concrete
Concrete flooring is one of the more solid options. It’s no-nonsense, and fully intended to be functional. It’s best done by professionals, but if you have the knowledge, experience, and equipment, there’s no reason why you can’t do it yourself.
But just because it’s concrete doesn’t mean it has to be ugly. You can stain it with acid to give it a different hue or paint it to give it a completely different look. Keep in mind that concrete can get fairly cold in the winter.
6. Paper and Concrete
It is more of an addition to the concrete flooring method that we mentioned previously. But if you already have a concrete floor, and don’t want to spend too much ripping it apart and doing something new, then it makes sense to go for this.
This is also called the “Paper Bag Floor,” and it’s relatively cheap and easy to do. Another advantage of this, it looks great and is easy to maintain even if it gets damaged. Paper and concrete are a combination that can also last a very long time.
7. Foam Flooring
Foam isn’t necessarily the first thing that comes to your mind when you’re thinking about flooring options, but it’s definitely a choice worth going for.
Nowadays, you can buy foam flooring in squares. They come in a ton of colors and patterns, so you aren’t limited just to the bright colors that you can use for your kids’ bedrooms.
The best part about this is that it feels great on your feet, is easy to maintain, and can be installed and removed quickly as well.
8. Faux Brick
This isn’t brick per se, but merely more wood. Faux brick is basically broken or discarded pieces of wood from other projects that are collected and stuck end to end to give the appearance of brick.
They’re also painted in such a way as to give the appearance of bricks. You’d already have guessed that this is one of the inexpensive methods of flooring. If you’re on a very tight budget for your remodeling, then it makes sense to do this. But just make sure to sand it before you start walking.
9. Vinyl
Vinyl flooring is what you’d usually find in the kitchen. It’s easy to apply, easy to maintain, but it’s not very durable.
Depending on the type of vinyl you’re going for, the prices will vary widely. But I wouldn’t particularly advise using this as a flooring option unless you’re sure that there won’t be much damage happening around the house. A small dent on the vinyl can magnify into something huge very easily. But it is easy to clean and keep the look anew, so there’s that.
10. Painted Vinyl
Continuing the vinyl flooring trends, this comes as another method of vinyl flooring. If you have existing vinyl flooring in your home and don’t want to completely rip it apart, then you can just paint it and give it some new life.
This is one of the cheapest options available in the market. But you should keep in mind that the durability of the paint job will depend on the quality of the vinyl that you have, the quality of the paint job, and how rough your usage is.
11. Peel and Stick Flooring
We’re still on vinyl with this, but this isn’t the same type of vinyl that I mentioned before. This is pretty much the cheapest you can get when it comes to flooring, costing an average of $1 per square foot.
As the name suggests, one of the biggest advantages of peel and stick is the incredibly easy installation process. Another thing to note is that this isn’t limited to one single room. You can use peel-and-stick flooring in any room that you want.
12. Recycled Pallet Flooring
You know those old pallets that supermarkets and stores have lying around? Those can now be used in flooring as well.
One of the biggest advantages to this is that it is a cheap and inexpensive alternative to more expensive wood options. Also, depending on the quality of the pallets that you get, and the quality of your installation work, this can be very durable.
This is a great option to consider for living rooms, where you’ll be inviting guests, but don’t want to spend too much on something like bamboo.
13. River Rock
This is another flooring option that you might not necessarily consider at first glance, but it does work. And it’s incredibly inexpensive.
You can collect the rocks yourself, and with some know-how, can do the whole flooring yourself. It’s very beginner friendly. And if done right, it looks incredible.
This is a great flooring option if you’re looking to do something to your bathroom floors. And it’s not as uncomfortable as you might imagine it to be. The lumpy feel of river rocks on your bare feet is soothing.
14. Stone Flooring
Stone flooring is one of the more traditional options, but traditional doesn’t mean bad. If installed properly, it’s very durable. It looks incredible as well, giving your home a rustic and earthy feel.
The cost of stone flooring varies wildly depending on the stone that you are choosing. But there is no reason why you can’t find something cheap yet attractive at the same time.
Keep in mind that stone can get very cold in the winter, so you’ll either want to invest in floor warmers or look for another option.
15. Marble Flooring
Marble might be considered a stone, but it’s a league above for most people. Marble has a unique pattern for every floor. So, getting marble flooring means a unique feel to your home that no one else has.
Keep in mind that marble can be incredibly expensive, so go for this only if you have the resources to spend on professional installation.
Another thing to note is that, like stone, marble can also get very cold in the winter.
16. Bamboo
If you want the best aesthetics and a lot of durability in your floors and don’t mind spending a lot to get it, then you might want to consider bamboo flooring. This is one of the most expensive flooring options out there, but it does look great.
To top that, bamboo is super durable (They even use it as scaffolding for skyscrapers in China!), and will take a lot of punishment without much visible wear and tear.
I’d recommend that you only choose this if you have money to burn.
17. Plywood Farmhouse
Plywood flooring is another flooring method that you can do by yourself, even if you don’t have all that much experience in doing your projects.
This is also very inexpensive and easy to maintain. Compared to some more expensive wooden flooring methods like bamboo, it gives similar visual results. If you don’t like the light color of the wood, you can always stain it to give it a darker look.
If one of the pieces is damaged, it’s easy to replace without needing to rip apart the whole floor.
18. Rubber Flooring
Rubber flooring is indeed an unconventional yet practical flooring option for specific applications. Boasting excellent sound absorption properties, this flooring solution is particularly suitable for spaces where noise reduction is essential, such as home gyms or recording studios for professional music production.
Although rubber flooring might not be the ideal choice for your entire home, it can greatly benefit specialized rooms or areas. However, please note that installing rubber flooring can be a complex process and may require the expertise of a professional to ensure proper installation and optimal performance.
19. Laminate Flooring
Laminate floors work for places in homes where there is a lot of traffic, and you would rather prefer the durability and ease of maintenance over sheer looks.
The cost of laminate is dependent on the type you choose. There are cheap laminates, and then there are expensive laminates. They are all equally easy to maintain, but some are more durable than others.
Another thing to note is that if and when your laminate is damaged, there is no way of fixing it. You will have to replace it.
20. Hardwood Flooring
One of the most classic options for flooring is hardwood, but the problem with this is that they don’t fit into everyone’s budget that easily.
Hardwood flooring can be rather expensive. But if you aren’t worried about that, then investing in it would be worth your money.
One of the biggest selling points of hardwood floors is the aesthetics. They look great and can be stained according to your preference as well.
But keep in mind that they can also be easily damaged, so this isn’t something to choose if you have kids.
21. Engineered Wood Flooring
Engineered wood flooring is real wood on top, with multiple layers of high-density fiberboard at the bottom (HDF). This is stronger and more durable than regular wood while having the same aesthetics.
It’s very easy to install and makes for a great DIY project. So if you don’t want to spend on a professional installation, going for this makes sense. Also, the wood they use is real hardwood, not compressed sawdust.
Before choosing from all the options above, the first thing that you might want to consider when you’re choosing flooring options is your budget. Find out what your budget can allow. If you’ve got a generous amount of money to spare, then it makes very good sense to go for something expensive and durable like bamboo or concrete.
But if you’re a fan of saving money and love being a DIYer, then there are plenty of options that can give you the aesthetics that you want, while saving money as well. But do keep in mind what kind of climate you’re living in, your usage, and how much damage your floors will face before making a choice.
Are you planning your future home but can't determine the type of carpeting to use?
There are so many options to choose from, and it's natural to feel a bit overwhelmed. The key to making the right choice is to determine the type of floor you're likely to have or the kind of setting in which to use it.
You can opt for either natural or synthetic materials, and in some cases, these two components combine to provide a better texture. If you're looking for durability, you can choose nylon or any other sturdy substance to ensure it doesn't stain. And you don't have to spend much time on maintenance.
But the question is, how do you choose from the numerous options lining the market? To help you, we have provided a detailed guide on the various types of carpets. And that’s not all; we’ve also included some maintenance tips and FAQs to clear all your doubts.
So, let’s get started, shall we?
Types of Carpet
Nylon
First and foremost, you're guaranteed two things with a carpet made of nylon – softness and durability. Nylon is one of the sturdiest materials, enabling you to get the most use out of the carpet for a long time. It's incredibly resistant to stains and abrasions, which is perfect if you have a pet or accidentally spill anything.
Moreover, it's most popular among all the other materials used for making carpets with an estimated 90% of residential mats made from nylon. It's capable of withstanding mold, mildew, and rot, so you won't have a hard time cleaning it. Plus, you'll be pleased to know that it holds color for a long time and is easy to dye.
With the help of hydrogen molecules, you can revive the carpet to prime condition using hot water. The heat reactivates the hydrogen molecules, thereby ensuring the fibers get back to their original condition. With the proper care, you can use them for 12 to 15 years before buying a new one.
But the most critical factor perhaps is the feel. For a highly durable material, it offers a soft feel making it a favorite. Due to the texture retention, it can hold on to the original appearance for maximum comfort. Additionally, the price is very reasonable, making for a valuable deal.
Polypropylene
Straight off the bat, Polypropylene is incredibly popular and used in 80% of carpets for commercial and residential use. The reason for its popularity is its high durability combined with the soft texture, making it desirable. In some cases, it's also called olefin, so don't be confused.
Besides, it's mainly used for loop style carpets like Berbers because though it is durable, it doesn't match up to nylon. Apart from that, it's affordable, thereby making it an excellent option. You won't have to spend too much to get a quality carpet for your home. Furthermore, it's environment-friendly as it doesn't generate any harmful by-products.
Another reason why most people prefer it is because of the similarity to wool, whereby it acts as a synthetic substitute for it. Moreover, it's sturdy enough to withstand daily use, and you can rest assured that it'll last a long time. However, it's prone to soiling, which may be a point of contention for some people.
As a result, it gathers oil over time, which in turn collects dirt and so you'll have to clean it regularly. But the good news is that it's easy to clean, and you even have the option of using bleach without affecting the integrity of the carpet. The fibers are woven into a heavy textile for carpeting while retaining a smooth exterior.
Polyester
Firstly, the advantage of using a Polyester carpet is that it helps to retain the vibrant colors. It's fade-resistant, and even after regular use, you can rest assured that it'll hold the colors to provide a stunning look. Moreover, polyester makes the carpets eco-friendly because they are made by recycling plastic bottles.
Likewise, it doesn't stain easily because it's a closed-cell fiber, making it completely stain-proof. Many people tend to confuse staining with soiling, which occurs when you accidentally leave something on the carpet or forget to remove the cleaning agent. As a result, it can hold on to dirt, appearing as stains to the naked eye.
However, users have noticed that it tends to flatten underweight, which may not make it the ideal option if it's prone to encounter a lot of movement. Plus, if it does get soiled, it's likely to affect the look as it's not easy to clean. On the other hand, if you manage to be careful, you can enjoy the carpet's visible luster.
Meanwhile, it doesn't rate high when it comes to durability, and materials like nylon are sturdier. Apart from that, it's budget-friendly due to the low cost of raw materials and production. So, you're likely to get good value for your money.
Acrylic
Right away, it's often referred to as synthetic wool as it offers a feel similar to the original product but at a lower cost. There are instances when it's also blended with wool to deliver a fantastic performance. Since the feel is so good, most people would want to purchase it at an affordable price.
As a result, it's highly popular and has generated a lot of positive reviews. Moreover, it offers terrific resistance against several elements such as static electricity, moisture, mildew, fading as well as staining. So, you can enjoy the vibrant colors for a long time, and it's also easy to clean, with the integrity remaining intact.
Apart from that, it has exceptional wick ability and can dry itself quickly to remove moisture trapped in the fiber. Additionally, it doesn't degrade in sunlight, which is sure to please you. And complemented by the unevenness of the material, it provides a great feel which you'll love.
However, there are doubts regarding the durability, and buyers have reported it may not last a long time. There's a chance it may flatten if subjected to a lot of movement, which isn't the ideal scenario. Plus, it's prone to soiling, and if you fail to remove the cleaning agent altogether, the alkaline in the solution could stain it brown.
Wool
Having gone through several substitutes, it's time to discuss the details of the authentic carpet material. You can rest assured if your carpet consists of wool, it's likely to be one of the softest products going around. But don't worry as the naturally luxurious material also scores high when it comes to durability.
Manufacturers can combine it with synthetic fibers or acrylic to make a carpet with both materials' best qualities. If you decide to opt for a pure wool carpet, you'll love it doesn't include any chemicals or additives. As a result, it's perfect if you're susceptible to specific allergies or chemicals, making it suitable for residential use.
Likewise, it has excellent texture retention ability, ensuring you can use it for a long time. Plus, it resists soiling since it's a natural fiber with microscopic scales preventing the dust from grabbing onto the carpet. But if soiling does occur, it tends to disperse light, making sure it isn't visible.
However, it's not particularly resistant to stains, and nylon is a more durable fabric. It can absorb any stain easily, making it difficult to clean. Furthermore, if it experiences too much activity, there's a chance it could flatten, which you may not like. You can solve the issue by purchasing high-grade wool, but it's costlier than the low-grade version.
Loop Pile
First and foremost, it goes by many names, among which are uncut pile or the Berber pile. The latter is derived from a particular type of knotted pile prevalent in North America and has several advantages, which is the reason for the unique design. As a result, the yarn loop remains intact for optimum comfort.
Meanwhile, it's very sturdy, ensuring you can use it for a long time. And coupled with longevity, it's also resistant to stains, which is sure to please many users. Even if you spill anything, the fibers don't absorb the stain making it easy to clean. As a result, it can withstand a lot of activity without wearing out.
Likewise, you can choose from a range of options making it highly versatile. There are two major types – the level loop and the patterned loops. While the former compromises of fibers of the same size, the latter features loops of varying lengths. You can also opt for a cut-and-loop construction where the threads are mixed.
However, it's important to remember it's less soft and has considerably less padding than a cut-pile carpet. Moreover, if you have pets or small children, it may cause snagging issues, and so you need to keep a close watch to avoid accidents. Consequently, many people may have second thoughts and opt for some other option.
Cut Pile
Straight of the bat, discarding the exposed fibers gives the Cut Pile carpet a soft feel. Moreover, by changing the angle of the cuts, each rug can provide a different texture to suit various needs. In much the same way, the fibers can be subjected to multiple treatments to deliver distinct sensations.
As a result, the carpet's length and thickness vary, and you can use it to cover all the floors of your house. The strength of the product lies in the twist, and the more the fibers the twisted, the higher will be the strength. It, therefore, ensures the model isn't susceptible to matting or crushing.
Furthermore, thanks to the enhanced texture, it requires low maintenance, and any wear or dirt remains masked. Besides, you can also opt for a shag carpet having the unique feature of being longer than average. However, there are specific issues like durability, and you may have to change it earlier than you want.
Due to the range of options on offer, you get exceptional versatility suited to your needs. While it can withstand excessive use, you can spot the footmarks along with the vacuum trails. It's not likely to affect the softness underfoot, but you may not like the exterior fading after regular use.
Saxony Cut
Firstly, it's a variant of the cut-pile with the fibers being soft and dense to provide a terrific sensation. The threads being short can stand straight up, thereby creating a fuzzy yet lush surface for optimum comfort. Moreover, it offers excellent versatility and can blend with nylon, wool, and polyester.
The density, the type of fiber, and most importantly, the twist all come together to produce a quality product. The twist is essential for imparting the necessary strength, and the higher the twist, the more is the durability. As a result, it's useful in preventing foot marks or vacuum lines in most top activity areas.
It comes in handy, reflecting the light, which helps mask stains, making sure the color doesn't fade. If you rub your hand on the surface, you'll see it doesn't leave any lines, leading to increasing popularity among users. So, it's easy to clean, and you won't have to worry about it gathering too much dust.
But there are issues when it comes to wear and tear. Because of the unique standing fibers, it tends to get flattened quite quickly, and it's susceptible to soiling as well. It's perhaps best to use it in formal living areas where the chances of the fibers remaining intact are higher. Moreover, it's costlier, too, which could be a deterring factor.
Plush Pile
Right away, the Plush Pile is also known as the velvet cut pile and presents a regal look, thereby providing a degree of sophistication. The fibers have deliberately been kept short and packed together, enabling you to get a luxurious surface and incredible sensations underfoot. Additionally, you can choose from a range of colors to spruce up any area.
An important factor is a twist in the fibers, and a higher twist provides more strength. But even with a lower twist, you get a smooth texture producing a classic look, making it very versatile. You can quickly assess all the factors and purchase the type best suited to your needs.
Another aspect is the shading and tracking of the product, meaning it'll show light and dark areas during use. While it's not a significant issue, many users may not like to see vacuum lines or the color changing due to a lower twist in the yarns. It also means that in areas with regular use, it tends to show footmarks.
It fails to score high on durability, affecting longevity and making it prone to wear and tear. You'll have to spend time on maintenance or even change it if you have to. Most customers may opt for some other model that doesn't show much scuffing.
Textured Cut
First and foremost, the Textured Cut's primary characteristic is the fibers are of uneven length. As a result, it gets the unique texture providing maximum comfort for a long time. The manufacturers use a special steam treatment helping to curl individual strands for more cohesion.
It ensures the fibers have the necessary twist, which has several benefits, one of which is the trackless nature. So, it isn't troubled by footprints or vacuum marks like some of the other products. Meanwhile, the strands' spiral view reflects light and helps to mask if it's crushed down.
It's suitable for use in areas where there's a lot of activity without needing to spend much time on maintenance. You'll love how the tightness of the texture makes it a fantastic option for preventing stains, and if you do spill something accidentally, it's easy to clean. Another point to consider is the texture changes with regular use.
While the durability remains intact, the textured look differs as the years go by. It's not a big problem, and issues like this appear in most models. It provides much-needed reliability, making it highly accessible, thereby generating positive reviews. You can rest assured; you'll be able to use it for a long time to get a terrific performance.
Frieze Cut
Straight of the bat, the long fibers, interspersed with the shorter ones, are twisted together to provide the necessary cohesion. You'll see the tangled threads spread across the surface, delivering a comfortable texture. Apart from that, it has several benefits and scores high when it comes to durability.
You can use it for a long time without worrying about wear and tear, while it's also useful in hiding dirt and footprints. As a result, you can use it in areas experiencing a lot of activity without affecting the quality of the product. It also ensures you get a soft feel, providing great comfort for your feet.
Likewise, it doesn't require a lot of maintenance, thanks to the unique design. And as the fibers are long, the load is transferred to the sides, keeping the surface intact. However, there are a few downsides, and it's not the easiest to clean. So, it's best to remain careful and avoid spilling on the carpet.
While there are aspects where it delivers a cracking performance, it doesn't precisely spruce up the place's appearance. Besides, the price is higher than some of the other models, and since the price is a crucial aspect for customers, it may lose out on potential buyers.
Sculptured Cut
Firstly, it uses a combination of both looped and cut pile fibers to create the ideal texture suited to your needs. Due to dual nature, you get variations in both height and feel on the surface. Cutting the various strands differently, provides different geometric patterns, ensuring you get a three-dimensional feel.
The variety of patterns in different colors creates a fantastic appearance meaning you can use it for residential and formal settings. Moreover, it can withstand daily use and ensures there are no trails left behind because of high activity. It's also stain-resistant, though not a lot, but helps to mask small spillage.
However, over time it tends to wear out, and the appearance starts to fade. But it's not a significant issue, and a similar problem is seen with other products as well. The longer fibers lose their twist, causing it to droop over the shorter fibers, thereby hiding them from sight. Meanwhile, the cost of the model is also high.
Many customers may not be flexible with their budget, and given the range of choices on offer, they may opt for some other model. We understand the price is higher due to the extra effort required to make different patterns. However, if you decide to purchase it, you won't be disappointed with the look and feel.
Woven Carpets
Right away, with Woven Carpets, you have the choice of decorating your room uniquely. Although made from traditional methods dating back to the 16th century, there's no cause for concern as it doesn't compromise with quality. You can choose from vibrant colors, which are ideal for most rooms or formal gatherings.
Moreover, it scores high when it comes to durability, making it extremely desirable among people. You can use it for a long time without having to worry about wear and tear. And it also has excellent variety, ensuring you get great versatility. Among the choices at your disposal are Axminster and Wilton carpets.
While the former provides you the option of choosing intricate patterns, the latter is simple yet elegant. The Axminster variant is made by weaving fibers through the backing material giving rise to eye-catching designs lending a degree of sophistication. On the other hand, the Wilton version, produced from the loom, involves weaving the fibers in a continuous strand.
As a result, even after regular use, the fibers can withstand prolonged activity and are complemented by the anti-static nature. Furthermore, it has the added benefit of absorbing harmful pollutants like nitrogen and sulfur dioxide.
So, the air around it will also be cleaner, preventing adverse side effects. Finally, it absorbs or releases moisture depending upon the humidity.
Plant-based
First and foremost, using a carpet based out of plant materials is very popular because of the eco-friendly nature. There aren't any harmful chemicals meaning if you have allergies, kids, or pets at home, you won't be affected in any way. Moreover, it flaunts a contemporary design to suit the latest trends.
Some of the materials used include sisal, jute, seagrass, and coir, making it highly versatile and suited for different needs and settings. While some are rough underfoot to provide added durability, some other products are soft, scoring high on the comfort scale. If you're worried about staining, you can opt for seagrass, which is resistant to watermarks.
As a result, it doesn't require a lot of maintenance, making it incredibly efficient. Meanwhile, it produces 63% fewer greenhouse gases, providing a significant step in protecting the environment. Besides, you get the option of dyeing it as well, meaning you can choose from a variety of colors.
You can use it in areas experiencing a lot of activity without the top surface wilting away. However, there are a few downsides, one of which is the price. The price is considerably higher than other models, which could cause you to think twice before purchasing it. Additionally, it's hard to get the perfect blend of durability and comfort in one carpet.
Twist Carpet
It derives its name from the fibers, which generate a twisting pattern, thanks to the tight weave. As a result, it gets a stylish look on top of providing the necessary durability and can withstand rigorous activity without losing its shape or finish. Moreover, you get a lot of variety to choose from.
It comes in varied colors and patterns, meaning it isn't prone to shading or vacuum trails like other models. And you can use it in most rooms, helping to grab the attention, and brightening up your space. Plus, you'll be glad to know it doesn't require much maintenance and is easy to clean.
Furthermore, thanks to the hardness of the external fibe0r, you don't have to worry about staining, and it doesn't absorb any accidental spillage. The most exciting aspect, however, is that it acts as a temperature and noise insulator. So, even if you have kids running around, the carpet muffles the sound while keeping your room at optimum temperature.
Additionally, it's very safe, and due to the high moisture content, it's flame-resistant as well. Besides, the biodegradable nature doesn't have any harmful effects, proving suitable for people with allergies or pets. Finally, it presents an affordable option, and you don't have to squeeze your budget to make the purchase.
Carpet Maintenance Tips
The process doesn't end with buying a carpet because you have to make sure you get the most use out of it. To help you, we have listed down specific ways to help you take care of your carpet. By keeping these points in mind, you can enjoy it for a long time.
Patching Your Carpet
It's possible to patch a carpet, but you'll need professional help. In case you're a DIY enthusiast, you'll have to get hold of a patch repair kit containing adhesive disks. You'll need to measure, using a tape, the size of the area that requires patching.
Proceed to remove the damaged area and replace it with the freshly cut out area. Ensure it's in the right position and then apply glue to hold it in place. Lastly, you'll have to smoothen the edges of the carpet to ensure the seams aren't visible.
Stretching the Carpet
Over time, if your carpet becomes loose, wrinkled, or lumpy, it's possible to solve the problem by pulling it. As a result, you'll need a power carpet stretcher, pry bar, knee kicker utility knife, tack strips, and a stapler with 5/16" staples. First, you'll have to secure one end of the carpet using the tack strips.
Next, with the carpet stretcher, pull the carpet right across the room to get rid of the rolls and creases. Then proceed to take the other end of the rug, embed it into the tack strips, and restore the worn-out spots. All that's left is to continue using your old carpet without compromising on performance.
Different Types of Carpeting
For those of you who are wondering, it's possible to carry out carpeting on different types of floors. Since it consists of various materials, you can opt for carpets suitable for a particular kind of space based on your need.
Carpeting a Hardwood Floor
You'll need to use tackless strips and nail them on the floor on the baseboards situated along the perimeter of the room. Remember to apply masonry nails for reliable performance and use the carpet padding to cover the surface. Next, cut the carpet four inches larger compared to the size of the room.
It's essential so that you don't run out of the carpet to cover the floor. Then lay down the rug and keep two inches extra near the walls. Beginning at the corners, take one end of the carpet and hook it to the tackless strip and stretch it to the other wall with the help of a power stretcher.
Now, hook the other end of the carpet to the tackless strip and trim off the excess portion. Please make sure the rug covers the room in the entirety, making it ready for use.
Carpeting over Concrete
If you want to carpet over concrete, the necessary steps remain the same, but there are some additional aspects you'll need to keep in mind. Firstly, nail the tack strips into the floor covering the perimeter of the room. Next, cover the concrete with carpet padding thoroughly and connect them by using tape.
Now, you'll have to unroll the carpet on top of the padding, starting at one corner of the room while fitting the edge into the tack strips. Cover the end of the back wall in its entirety by connecting it with the tack strips while using a power carpet stretcher to stretch it to the other wall.
Check the tightness and ensure it isn't slacking. Hook the other end to the tack strips and replace the baseboards. After completing all the steps, make sure no portion of the floor is left vacant.
Types of Carpet FAQs
Is it possible to dye the carpet?
Depending on the type of carpet, it can be dyed. It's possible for wool and nylon carpets while acrylic, polyester, and propylene resist staining. Also, important is the current color of the product, which will determine the colors you can use.
There are three methods to carry out dyeing. A wand having poundage ranging from 150 to 500 can spray on the dye. At the same time, another option involves using aerosol spray cans, while the third method consists of using a rotary scrubber having nylon bristles.
Can I paint my carpet?
Certain types like Berber, jute, seagrass, and sisal carpets involve using upholstery paint. For plush carpeting, you won't need much color, and it becomes hard, along with a matte texture.
What's the correct way to measure carpeting?
To conduct the measuring process, you'll need a diagram of the area you want to carpet. The description is essential because it's necessary to transfer it to the sketch after measuring the space. You'll have to calculate the total square footage and make sure you round up to 0.5m of one foot.
Remember to round up rather than down, ensuring you have enough material to cover the floor. Additionally, 5% extra material needs to be taken for the seams, and similarly to match the pattern, you'll also require additional elements.
How long does carpeting last?
If you avail of the cheapest form of carpeting for your apartment, it can last close to five years. On the other hand, medium-grade carpeting has a lifespan of 15 years, thanks to the higher durability. And opting for the highest quality of carpets will ensure you can use it for 25 years.
The longevity depends upon the frequency of use and the amount of activity it has endured. You'll also need to make regular checks and fix the problem areas so that it lasts longer.
What are the prevalent materials used for carpeting?
Carpeting involves an array of materials, including both natural and synthetic components. Based on your preference, you can opt for a carpet made from acrylic, polyester, nylon, wool, polypropylene, SmartStrand, and recycled plastic.
Depending upon the area of use, you can opt for uncut carpet pile, cut carpet pile, Saxony cut pile, textured cut pile, velvet cut pile, and plush carpet. You get a terrific variety of materials to choose from, and these components can also blend to deliver a fantastic output.
Can I recycle my old carpet?
All carpets can be recycled irrespective of the duration of use. The fiber separates from the backing, and in certain instances, both elements can be recycled by breaking them down and subsequently processing it. As a result, it's possible to produce new carpets, including certain by-products.
Final Words
We hope you have a much better idea regarding your carpeting needs after going through our informative guide.
With the right carpet, you'll get the optimum comfort for many years. Moreover, depending on the fiber strength, it's easy to clean and helps resist staining or soiling to reduce your stress. Likewise, you can choose from various patterns and colors to brighten up your living space.
Having the right product will give you the perfect balance of comfort and longevity for a cracking performance. So, all that's left is to bring home the ideal carpet and enjoy luxurious living.
That's all the time we have. Until next time. Ciao!
The space right under the stairs is most of the time left unused and people wonder what to do with it. Probably it ends up filled with lots of different items in an unorganized way, a great opportunity lost. Modern designers have come up with some really Smart Under-The-Stairs Designs That Will Impress You and we have curated an interesting gallery, check them out.
Maybe here you will find your inspiration to repurpose that area and turn it into something functional that the whole family will enjoy!
Epic ideas follow, cast a glance !
Do you miss that small extra toilet in your home but you don't have enough space to build it? Well, you probably haven't considered the space under the stairs, so think about it and give it a try!
Have you ever thought about placing your living room under the stairs? It's a smart way to save space if you are living in a small house or apartment.
Your kids will love to have their own play area and you can sculpt the space under the stairs to fit this need beautifully !
Is there someone who wouldn't want to have a laundry area where all the dirty and clean clothes will be placed in an organized way? The under-the-stairs area has proven to get the job done successfully!
If you are living in a large house, then you don't have to turn that space into something functional. Think about decorating your home aesthetically! How do you like the idea below?
Yes, you can also consider the idea of placing your bedroom under the stairs!
This nook looks totally adorable! I would love to rest here and look at the outside world nestled in the warmth of my home.
You can never have enough storage in the home, so if you are still struggling to organize things in your house, then you should definitely turn that space under the stairs for storage.
A home library gives a new dimension to your house one can be considered under the stairs epicly !
The home bar is a must for those who want to enjoy drinks with their families and friends from time to time. The space under the stairs is just perfect for that purpose. What do you think about the idea?
Place your kitchen under the stairs and save lots of space in your home in a super smart way.
Add shoe and coat storage under your stairs and get rid of the mess from the entry door effectively!
What do you think about these under-the-stairs designs? We would love to hear your opinion on the subject in the comment section below !
Probably the best way to brighten up a room is by applying a refreshing coat of paint on the ceiling.
If you have textured ceilings, the first thing to determine is whether it needs a coat of paint at all. If yes, you'll need to look at the types of ceiling paint available and which ones would suit your textured ceiling. After selecting the ceiling paint, here comes the biggest part—the process of applying the paint.
And, this is where it gets challenging because not everyone knows how to paint a ceiling. Also, there are other aspects like discovering ceiling finish typesand deciding the best ceiling paintfor your home. But, before we get into details like how many coats of paint are required, let's find out if you need ceiling paint in the first place.
Is It Necessary To Paint Newly Textured Ceilings?
One may assume that a newly textured ceiling is good as it is, and paint must be added only if a change in color is required. However, it is generally accepted that adding a few coats of paint is a must for textured or popcorn ceilings.
Considering the drywall textured ceilings are made of a soft compound, the layer is susceptible to damage with regular activities like cleaning. It means, the moment you try to wipe the popcorn ceiling with a wet rag, it will come off. Besides, textured surfaces look more unfinished without a coat of paint as compared to flat ceilings.
Before painting the ceiling, it might be a better idea to prime it entirely for a smooth finish. For best results, PVA (polyvinyl acetate) primers are used to prime ceilings before adding a fresh coat of paint. Priming the surface seals the textured walls in and allows it to retain its look for a long time.
The bottom line is that you definitely need to paint a popcorn ceiling to retain its texture. The next logical step is to select the best ceiling paint for textured ceilings, which we will discuss in the next section.
Considerations For Applying Paint On Ceilings
1. Paint Color
There are no prizes for guessing which color is the most popular for applying over ceilings. That's right! White ceiling paint is preferred over all other colors for the simple reason that it makes the entire room look fresh and bright. The same is true for popcorn ceilings, with the only difference being that any color on a textured surface will not look as reflective as white.
Flat white ceiling paints do not reflect as much and can be used on all textured surfaces if that's the look you are going for. Otherwise, it is always possible to make custom colors by mixing the required tint in the white paint. You can use the same color as applied on the walls to create a cohesive effect in the room.
2. Type Of Finish
Apart from ceiling texture and color, you should also decide the kind of finish you'd like to see on the entire ceiling. The two popular types are flat and satin, in which flat paints are non-reflective while satin ones are shiny. People often use satin finish paints for the walls and continue with the same paint for the ceilings as well.
On the other hand, using a flat finish is the safest option for most ceilings because it does not draw much attention.
3. Number Of Coats Required
In most cases, one coat of primer should be enough for sealing after adding texture, but at least two coats of paint should follow. Some superior quality paints need a single coat, but those options can get expensive to apply over the entire ceiling.
Also, some companies sell paints mixed with primer claiming that one coat of paint plus primer is all you'll need to apply. Although we agree that painting a ceiling is tough work, there should always be a separate layer of primer and at least one coat of paint.
What's The Best Paint For Textured Ceilings?
Every company makes its own unique blend of paints for various ceiling finish types. Some paints are multi-purpose and can be used for any surface including the walls, while other blends are specifically for ceilings.
If you buy ceiling paints from a local store, chances are they will sell flat paints that stick well to primed surfaces. This option should be good enough if you're painting the entire room and need a fresh-looking space within a budget. However, specialized paints are available in bigger stores, but they will cost much more than your average tub.
Applying Paint On A Textured Ceiling
We will explain the detailed steps of applying paint, but we just wanted to quickly point out that tools are as important as paint. Painting on ceilings needs the most careful application; otherwise, the result might look shabby.
This is why it is essential to buy a good quality roller brush that is wide enough to cover a sizable portion at a time.
Types Of Ceiling Textures
Smooth ceilings are easy to paint, but textures like orange peel, popcorn, swirl, knock-down, and Santa-Fe skip trowel require decent application technique. The best coverage style is to get done with the corners first and then apply a thick layer on the center.
The Right Painting Direction
Most rooms have flat ceilings, so you simply have to move from left to right or vice versa to finish the painting. However, keep the direction of the painting consistent so that the final paint job looks cohesive. Submerge the roller in paint and apply in long strokes in one direction to prevent lap marks.
Also, make sure to take out some time to finish a large room because painting ceilings require upwards motions which are tiring to the arms.
How to Paint A Textured Ceiling
Now that we've covered the basics, it's time to learn how to paint a ceiling, especially a textured one.
How Much Paint Is Enough?
If you can calculate the amount of paint required in total, you can buy the exact number of tubs so that nothing goes to waste. Keep in mind that textured ceilings can utilize more paint as compared to regular ones since they have a higher surface area.
Generally, 400 to 500 square feet flat ceilings require one gallon of paint, textured ceilings will require double that amount.
Materials Required
1. Paint
We've already discussed in great detail the type of paint you can buy. If you want to keep things simple, go for flat paint such as white or any color of choice because this type will hide imperfections.
2. Roller And Tray
Regular paint rollers and trays might not be well suited for painting ceilings. The rollers for textured ceilings will have a thicker nap of about ½ - ¾ inch. This design helps the paint reach the dents of the surface and cover it all.
3. Extension Pole
Unless you have really long hands, it won't be possible to paint the ceilings without an extension pole. It doesn't have to be an expensive model, but it should be long enough to reach the ceiling without requiring a ladder.
4. Angled Paint Brush
Painting carefully across the corners is challenging to say the least, and you'll need an efficient tool to cut in the sides. Invest in a good angled brush to get those clean lines on the edge of the ceiling.
5. Ladder
Although you can paint on the ceiling using an extension pole, cutting in at a right angle with a paintbrush will require a ladder.
6. Painter's Tape
Any light fixtures on the ceiling will inevitably cause paint splatter unless you tape them off. Using painter's tape around the light fixtures will make it easier to cut around the ceiling edges.
7. Drop Cloths
Either remove the furniture from the room or use a drop cloth to cover them. The cloth can also be used to hide any other part that does not need painting.
8. Putty Knife And Spackling
Any dents, holes, or imperfections in the wall will need to be evened out before you paint a ceiling. So, keep a putty knife handy to fix those dents as you spot them.
9. Safety Glasses
If you want the best ceiling paintwork, you'll need to look upwards to cover it perfectly. Ceiling paints are usually thick, so they do not drip from the rollers as much, but one can never be too sure. Stay on the safe side and wear safety glasses for as long as the ceiling paintwork is in progress.
10. Sandpaper
Before adding the first coat, you may need to smoothen the ceiling, for which sandpaper will come in handy.
Steps To Painting A Textured Ceiling
1. Clear The Room
Cover all the items that need to be protected and remove as much as you can from the area. If there is a chance of paint splashing on them, you should fully cover them. Paint stains are difficult to remove, and no one wants to deal with them. So, cover the entire floor with a protective layer that can be removed later on.
2. Protect The Ceiling Light Fixtures
After the floor and furniture are safe, use some painter's tape to protect the paint from covering the light fixtures. If there is any other structure on the ceiling, cover that with tape too.
3. Patch The Holes
If there are any tiny holes remaining from previous hooks or nails, fill them up with spackling and even out using a putty knife. Also, large patches are bound to show up and you'll have to redo the texturing on the ceiling.
Making a new popcorn ceiling from scratch can be time-consuming, so you can try working with a paint texture additive for a quick fix.
4. Paint The Edges
The fixed popcorn ceiling is now ready for paint, and you can start by painting the edges of the area. If you are worried about going off the edges, use painter's tape to protect the walls. Also, divide the room into sections if it is large, and work your way through each section.
5. Paint The Ceiling
Now, dip the roller in the paint while making sure to avoid using too much of it, and start rolling the paint in a W pattern. One does not have to follow the exact shape but make sure the strokes go in the same direction.
6. Apply The Second Coat
After the first coat dries, the ceiling might look uneven and patchy. It is better to apply the second coat of ceiling paint so that the color shows up prominently and it looks neat and fresh. Once this coat dries up, the process is finally complete.
Paint For Textured Ceiling Frequently Asked Questions ?
How do I fix any damage to textured ceilings?
If your textured ceiling gets damaged due to water seepage or any other reason, painting won't fix the problem. Textured surfaces are sensitive to damage, and once a patch gets spoiled, it is recommended to redo the entire ceiling to add the texture again.
Quick fixes tend to look strange after the paint is applied, so even out the ceiling once and start again for a better finish.
Can I use ceiling paint on the walls?
Ideally, you should not use ceiling paint anywhere other than ceilings, but some people do use it for walls. The thing is, ceiling paints and wall paints are similar at the end of the day and cover your surfaces with a new color. So, it is not strange to think of the two as the same thing.
However, ceiling paints are thicker and flatter than wall paints which means they do not reflect light. Of course, imperfections in the walls get hidden with the thicker paint and it is certainly durable enough for any wall.
Still, ceiling paints do not look appealing on walls, and they don't even come in a variety of colors.
Do Textured Walls Really Help With Sound?
Textured walls can have a marginal impact on sound absorption, though their primary function is often aesthetic. The relationship between textured walls and sound lies in their surface irregularities, which can slightly disrupt sound waves and reduce echo, thus providing minor acoustical benefits.
However, for optimized sound absorption, specifically-engineered acoustic materials (such as acoustic panels, foam, tiles, or fabric-covered walls) should be used. These materials are designed to significantly minimize sound transmission and reverberation, making them more effective for acoustical purposes than textured walls alone.
Paint For Textured Ceiling Final Words
Here we come to the end of this guide for painting a textured ceiling. The process might be slightly different from painting a regular surface, but it becomes easier when you know how it's done. Ultimately, stick to the processes as we've described them, and you'll enjoy a bright new ceiling in no time.
See you next time, bye!
Basements are mostly dark and compact spaces with very little natural lighting. So, deciding on designing or choosing thebest ceiling paintcan be more difficult than doing so in any other room.
One of the newest additions to interior decoration is exposed basement ceilings. While there are some excellent old-school and contemporary basement ceiling designs, going all bare-bones with the ceiling can give your basement an edgy look. Moreover, an exposed ceiling gives you easy access to the wiring and plumbing.
Whether you go for an exposed industrial vibe or a nicely painted but covered ceiling, the tucked-away basement space will give you a chance to be creative.
Need some pointers on how to get started and see the project through? Worry no more! We have compiled a comprehensive guide that will help with it.
So, without further ado, let’s jump right into it.
Best Ceiling Paint For Unfinished Basement Ceiling
There is no lack of appealing colors for your ceilings. But in most cases, white, gray, or black paint is used for unfinished basement ceilings. The following are some of the perks of this basic color palette for your exposed ceiling.
1. White
Basements are generally darker, but with a white ceiling, you can have a bright basement space where different bright colors will suit well for walls, decor, or furniture. One of the best colors for an exposed ceiling, the illuminating color of white enhances the lighting in the basement space.
White is versatile precisely because it reflects more light, making your basement look bright, colorful, and fresh. Hence, a basement with white ceilings is excellent as a playroom, craft room for kids, or vibrant living space.
However, if you intend to hide flaws in the ceilings, white is not your best choice. It has low coverage and usually needs several coatings. White also needs special primers to prevent it from gradually yellowing with time. As it involves several factors to be taken care of, painting your basement ceiling white will be time-consuming and more expensive than the alternatives.
2. Black
Many people will not find black the best choice for their exposed basement ceiling. It might seem like a confusing choice considering it’s too dull for a dingy basement space. But trust us when we say that a black basement ceiling offers a plethora of advantages.
The disguising black hide any flaw your unfinished basement ceiling may have and makes it look sleek and stylish. It generates a smooth synergy of colors between the exposed pipes and wires. A black ceiling also helps other colors of the basement walls and furniture to pop, giving you the liberty to choose either neutral or bright colors for the furniture or walls.
With its bold tones, black will add a certain charm to the exposed ceiling. It is a particularly fantastic choice for exposed basement ceilings of old houses. Darker colors also make a space feel warm and cozy.
However, the disadvantage of painting your basement ceiling black is that it may make the ceiling seem lower. Also, the basement ceiling acquires a lot of cobwebs, gunk, and dust. These will stand out even more with an exposed black ceiling. So, if your basement has absolutely no natural light source, black might not be ideal for you.
3. Gray
Don’t know which color to choose for your basement ceiling? Go for gray. It’s neither as dark as black nor as low coverage as white. Gray-painted basement ceilings look excellent if you have a comparatively darker basement. As it provides better coverage than white, fewer layers will do the job.
Gray might sound like a boring color, but it’s actually available in a number of shades. There are gray shades mixed with other colors as well. For instance, a gray shade with hints of red accents will provide ample lighting. So, if you plan to transform your basement into a hobby room, gray shades will be ideal.
4. Sky Blue
Painting your basement ceiling in a non-neutral color might be an unorthodox choice. But if executed correctly with the right shades, it will render fantastic results. And if you are going for a non-neutral color, why not paint your ceiling like a bright sky?
To make your basement feel more like an open space, pair up sky-blue ceilings with off-white basement walls. The contrast between the two colors will make the ceiling stand out. A sky-blue ceiling is playful and turns your basement into a welcoming and playful space.
Estimated Cost To Paint An Exposed Basement Ceiling
The average expense of paint for basement ceilings depends on the size of the basement and the materials you choose to use. However, the cost of painting an exposed basement ceiling is a little higher because of the ducts and beams. In the below table, we have detailed an estimated expenditure for you to expect if you are planning to paint an exposed basement ceiling.
Average Cost
$260
Average Range
$125 - $300
Minimum cost
$50
Maximum cost
$2,500
Benefits Of Painting Exposed Basement Ceilings
Aesthetics
Exposed ceilings have become quite fashionable in recent years. With the exposed pipes, beams, and wires, such ceilings bring an industrial vibe to the space. Painting this ductwork will add a shine and pop to your basement.
Better Lighting
Painting an exposed basement ceiling white will not only upgrade the whole look but also reflect more light in the otherwise dark space. That way, your basement will look much brighter and larger.
Budget-friendly
Paying a professional to drywall the exposed basement ceiling will be heavy on your pocket. On the other hand, painting the ceiling is a much cheaper option. And if you already have a paint sprayer, all you need is the paint, primer, and a weekend!
Saves Time
Putting up drywall on the exposed basement ceiling involves a lot of work and thus, takes up a significant amount of time. But if you spray paint your basement ceiling with a spray gun, putting one layer will take just a couple of hours. While you need only a few hours for each layer to dry, drywalling your ceiling may take days to complete.
Shopping List For Your Next Painting Project
To paint the basement ceiling, you will need the below-mentioned items.
Low VOC interior paint (as per your choice)
Primer
Protective gloves
Painter’s tape
Overalls
Respirators
Dust mask
Exhaust fan
Lead testing kit
Turpentine
Cleaner (preferably citrus-based)
Vacuum Cleaner
Broom and cleaning brush
How To Paint An Exposed Basement Ceiling?
If you are not a professional, being confused abouthow to paint a ceiling is evident. It is even more relevant if you are planning to paint an exposed basement.
You can follow the below steps to complete the task at hand.
Step 1 - Secure The Area
As the first step, cover the unfinished basement area you are working on. Instead of plastic coverings, using a drop cloth on the floor will prevent the floor from getting stained and will provide a better grip. If you are using spray paint, it might result in some overspray. To avoid this, hang plastic covers over your walls.
Step 2 - Check The Vents And Pipes
Painting an exposed basement ceiling can be a tricky business. If it’s an old house, the chances of vents and pipes becoming loose is high. So, make sure the exposed pipes, wires, and beams are secured and are not in need of any maintenance.
Adjust them according to your requirements. You can even use sturdy wires to secure the beams tightly.
Step 3 - Trim The Sticking-out Nails
Check whether your basement ceiling has any long nails protruding from the upper floor. You can use a rotary tool to trim them. It is important to trim the nails for leveling them with the ceiling as it makes the paint job much smoother and safer.
Step 4 - Set Up Ventilation
After securing the work area, you need to set up ventilation. This way, air from the work area will be pulled outside. Good ventilation will help you minimize overspray and keep the toxic fumes out of the basement.
Step 5 - Fill In The Gaps
Having gaps in the exposed ceiling will make the painting process inconsistent. Foam insulation is a great ingredient to fill in the gaps and create a smooth surface for you to paint on.
Step 6 - Securing The Equipment
Cover the exterior of the paint sprayer, handle, and hose with spray silicone for convenient cleaning up. It will stop the paint from sticking to the outside of the sprayer and make cleaning up afterward much easier.
Step 7 - Clean The Ceiling
Now that you have placed the necessary preparation, it is time to start cleaning the ceiling. Use a broom for initial cleaning. You can also use a vacuum to nicely clean up the built-up cobwebs. Then use a fine and thick brush to scrub down the remaining dust, cobweb particles, and gunk.
If your basement ceiling has stubborn dirt sticking to it, using an air compressor will be a good idea to clean up the debris.
Step 8 - Apply Primer
After cleaning up the ceiling, apply primer to the ducts, pipes, ductwork, rafters, and wires you plan to paint. Choose a primer that matches the color you intend to use. Primer will help the paint to stick on the surface properly. If you are using gray or black paint, choose a primer that has a gray tint for more coverage.
If you opt for a white ceiling, cover the wood with a sturdy primer to prevent the color from fading over time. Using a primer with shellac is the best way to go with white paint.
Start spraying the primer all over the ceiling surface and cover the ducts and pipes first. Every joist has to be covered with primer for the results. So, pay attention to the difficult corners of the ducts and beams. You need to maneuver the spray gun with quick moves for an even layer. Make sure you use your arm instead of just the wrist.
Avoid spraying on the same patch for too long, as that may cause the primer to drip. After you apply the first coat, wait for some time and let it dry before you apply another. Check if you have covered all the areas you intend to paint. Don’t paint over the primer unless it’s absolutely dry.
Spray Or Brush?
While many people use a traditional paintbrush or paint roller to paint their ceilings, using an airless sprayer to paint the exposed basement ceiling will produce the best results. Just ensure that the spray nozzle is lightweight.
If the basement ceiling is made of wood, you will require extra primer and paint. When it comes to exposed basement ceilings, keep in mind that with joists, pipes, or wires, the surface area will be two times more than the surface of a flat ceiling.
If you want full coverage, an exposed basement ceiling requires at least three coats of paint on average. Use a ladder to get access to every edge. But do remember that painting with a brush or a roller would be much more tricky and time-consuming.
In case you have decided to ditch the good old brush and go with the spray gun instead, your job will be much easier. Start spraying the paint evenly on the exposed basement ceiling. Then move your paint sprayer through all the edges of ducts and pipes. You don’t want to spray in one area for too long as that would cause drip.
Let the first coat dry completely. After that, check if you have missed any corners, and start applying the second coat. Also, ensure that you smoothen out any remaining drips before the paint dries off.
Tips For Painting Basement Ceilings
For a clean and efficient process, invest in an airless paint sprayer.
Buying a 5-gallon paint will be much more cost-effective than buying in small quantities.
It is always better to have a surplus of ingredients when you are not an expert on the task.
Do remember to cover yourself with overalls.
Finish painting the entire ceiling the same day with all the pipes, wires, and ductwork.
If you are painting the ceiling black, use less paint in each layer for better and smoother coverage.
Blue painter’s tape does not stick well to concrete walls
Taping the room is likely to take much longer than the whole painting process with a paint sprayer, and start the work with ample time on your hands.
What is the minimum height for a basement ceiling?
The allowed measurements for the height of the basement ceiling vary based on the locality you live in. However, the International Residential Code requires the ceiling of basement space to be at least 7 feet of clear floor-to-basement height. Exceptions to this code depend on the existing beams, ducts, and mechanical systems attached to the ceiling.
But those must have a space of at least 4 feet between them and must not extend beyond 6 inches below the basement ceiling.
Should I insulate the basement ceiling before painting it?
If your basement ceiling is not already insulated, we recommend promptly getting it done before you start painting the ceiling. The basement is one of the spaces of your house that is prone to losing heat.
So, if the basement ceiling is insulated, you will have a more comfortable and energy-efficient space. Another perk of having an insulated basement ceiling is that it considerably diminishes any noise between the basement and the upper floor.
To insulate the basement ceiling, people mostly use rolled fiberglass batting. It is essentially fiberglass placed between two paper sheets. You can also use spray foam insulation for the same.
Can I paint the wires of the basement ceiling?
Yes, you can paint wires in an unfinished basement ceiling. Painting them will only change their look and won’t interfere with their efficiency. If the wires do not match the color you are going with, painting the wires will be a good idea to make the ceiling look smooth and uniform. Also, spray painting the wires is the easiest way to get it done.
Note that painting over wires attached to your basement ceiling is safe. However, make sure the outlets and switches are covered with painter’s tape.
Can I paint the ducts and pipes attached to the exposed basement ceiling?
Yes, you can paint the exposed ducts and pipes on the basement ceiling. It is a good idea to keep their visibility to the minimum while still maintaining the industrial look.
Pipes and ducts can be made of various materials like PVC, metal, etc. So, ensure that you use a primer to make the paint stick to the duct’s surface better and last longer.
What kind of paint should I use on an exposed basement ceiling?
Choosing the right paint for your basement ceilings is important to yield the best result and make it last longer. If you are not a professional, then latex paint is the ideal option when it comes to painting a basement ceiling. They are easier to apply and easier to clean and dry much faster than the alternatives.
Such ceiling paint doesn’t result in too much fading or peeling, and the shine lasts longer. They are also non-flammable. Hence amateurs can use it to paint their basement ceilings safely.
What kind of paint should I use to paint the ducts and beams?
It would be best if you paint the ceiling ducts with latex paint. That way, you can easily maneuver within the nooks and crannies of the duct joints.
Latex paint also works very well with the wooden beams of the basement ceiling. Consider mixing paint and primer to save time and effort.
How to properly store excess paint after painting the basement ceiling?
If you are not a professional, estimating the exact amount of required paint is tough. So, you might have some leftover paint. Storing it properly is necessary to make use of it later.
Always store the leftover paint in a dry and cold place - the colder, the better. Place the lid tightly and store the container upside down. If there are children in the house, we suggest storing the paint inside a cabinet that you can lock properly.
Is the marble effect a good look for basement ceilings?
Yes. If done right, the marble effect on the ceiling, instead of a monochrome look, will make the otherwise dark space stand out. Instead of white or black paint, opting for multiple color layers on the basement ceiling to create a marble effect will give your basement an exuberant effect.
Such a ceiling will bring synergy with the other colors in the space and bring a unique warmth to your basement space.
However, painting the basement ceiling with multi-colored layers is on a more difficult spectrum. So, we suggest you hire a professional for the best results.
Are white basement ceilings out of fashion?
If there is something that would never go out of fashion, it’s the color =white. Painting your basement ceiling white is not just about tradition. Homeowners and interior designers alike, most people prefer white for their ceilings because it reflects light.
A white ceiling will reflect more light than the four walls. As basements are mostly dingy, compact spaces almost devoid of natural light, choosing white paint for the basement ceiling is actually a smart idea.
What is a textured ceiling?
Also known as popcorn ceilings, textured ceilings have bumpy surface made of polystyrene or vermiculite. Such coatings block sound from traveling through floors.
There are various advantages of having a textured ceiling in your basement. Some of these are
Textured coating mixtures are available in fine, coarse, and medium grades. The ideal paint for textured ceilings is white, but there is no harm in experimenting with DIY projects.
Despite its useful features, the popularity of textured ceilings has significantly reduced around North America. Textured ceilings are also more prone to acquire dust and different contaminants. Plus, they are more difficult to patch up if you want to have drywall installed. Besides, smooth ceilings reflect more light than popcorn ceilings.
For all the above reasons, people are now more inclined towards smooth or exposed ceilings to give their homes a more trendy interior.
Paint For Basement Ceilings Conclusion
As we wrap up today’s blog, here is a reminder to take all necessary safety measures before and after you are done decorating the basement ceiling. If the basement has a popcorn ceiling, check if you’re using the best ceiling paint for a textured surface. In case you have an unfinished basement ceiling, thoroughly consider the pros and cons of painting it without professional help.
The fun with DIY projects lies in the liberty of creating according to your own style. Whether you decide to opt for a traditional color or an abstract design for your basement ceiling, don’t forget to put some personal touch on it.
So, stay safe from the toxic paint fumes and have fun with some color this weekend!
While working at the office, it becomes essential to be at your best and perform tasks methodically and coherently.
Sometimes the situation demands swift movement from one desk to another to collect files or discuss something with your peers. And let’s agree- it can get frantic for anyone!
If the chairs are not complacent with your pace, the situation might get even worse, and you might feel drained out after some time.
It so happens that after some years, many chair wheels get worn down or turn squeaky over time. And the hardwood floors beneath them can add to the misery. Although selecting a pair of wheels might not be very tricky, it sure is a time-consuming affair.
But do not worry at all, as we are here with a list of the top 9 chair wheels available on the market. We have specially selected and reviewed some replacement wheels that work better on hard floorings.
These unique replacement caster wheels by LIFELONG are guaranteed to protect your office floors from marks and scratches from the movement of chairs. Whether it's for hardwood, laminate, tile, carpet, stone, concrete, or vinyl floor, these wheels made of industrial-grade steel and polyurethane, will prove to be durable and long-lasting.
THE LAST OFFICE CHAIR WHEELS YOU'LL NEED – Not all chair...
DESK CHAIR MAT WILL NOT BE NEEDED ANYMORE – Our desk chair...
Why Did We Like It?
The primary issue with heavy-duty wheels is that they can damage the floor, no matter how much money you have spent to make it look better. And this is where the LIFELONG caster wheels come in.
The company claims it to be the ultimate product, and that users won’t need another replacement in their lifetime. Apart from their looks, what appealed to us was the durable build made from precision ball bearings, industrial-grade steel, and durable polyurethane.
These polyurethane wheels are primarily made for hard floors and are guaranteed to render a scratch-free performance, unlike rough plastic wheels. Also, they can roll and glide on any floor or carpet with ease, thanks to the softness of the polyurethane mixture. This allows users to tackle most uneven surfaces with ease.
What Could've Been Better?
There aren’t a lot of disadvantages of this product which bothered us. However, its non-compatibility with IKEA chairs can be a slight issue. Most commercial spaces prefer IKEA due to its high-quality, economical price range, and readily available products. In such cases, they might opt for some other office chair caster wheels.
STEALTHO offers a unique set of modern office supplies designed by engineers for you to remain organized, minimize waste, and enhance your overall productivity. It’s committed to its mission of product sustainability through its durability, multi-functionality, recyclable materials, and innovativeness. You can install STEALTHO 8541740421 rolling wheels for effortless moving and gliding on almost any rolling chair.
100% SAFE FOR ALL FLOORS – NO CHAIR MAT NEEDED – Soft...
ENGINEERED TO OUTLAST – U.S. PATENTED (No. 10,434,820) |...
Why Did We Like It?
One of the most common issues with chaste wheels are their balls, analog casters, body failure, and vertical pin fracture. The unique design of STEALTHO 8541740421 ensures you do not have to go through these problems. Furthermore, you do not need to make additional investments on a computer chair floor mat and it is safe for any kind of floor surface, be it hardwood, laminate, tile, parquet, or linoleum.
Coming to its design, these wheels are made of highly advanced elastic urethane, which makes noise-free and smooth movements. Hence, you can glide from one area to another without damaging the hardwood floors.
Moreover, the ABEC-9 bearings and stem design integration ensure smooth rolling and gliding. As a result, you do not have to worry about loosening and falling off of bearings.
Last but not least, it can also withstand a weight of up to 660 pounds, and its heavy-duty steel build can withstand exposure to high temperatures.
What Could've Been Better?
Although the company boasts about its 660 pounds weight-bearing capacity, many customers have complained about it not being the case. They claimed that the caster wheel is durable enough to take only half the weight, without deformation. Also, this product does fall in the premium price range, which might be unaffordable for some.
Next up on the list is another stellar product by UVII, which manufactures and distributes quality office furniture, supplies, and more. Having said that, this set of wheels by UVII ensures optimum portability for your desk chairs. Hence, you no longer have to worry about replacement wheels anytime soon.
If you are looking for caster chair wheels that provide a smooth motion and produce minimal sound, then this set is made for you. These are made of precision ball bearings, and high-grade soft polyurethane, and the axle provides easy and smooth rolling without any noise. Also, its high strength and durability can withstand up to 650 pounds.
What’s more, these 3-inch circlip chair casters fit most computer and office chairs from brands like Steelcase, Miller, Aeron, Draxler, Herman, etc. Besides, they can be used for workstations, salons, drafting stools, and swivel chairs that use heavy-duty casters.
You will be pleased to know that these caster wheels are ideal and safe for all floors, including hardwood, tile, carpet, laminate, parquet, wood, or vinyl floors. Your office hardwood floors are now safe from scratching and marks. That being said, the company also promises a 100% money-back warranty for unsatisfied users, so it's a win-win situation.
What Could've Been Better?
You might struggle to turn or change the direction of the wheels despite having precision ball bearings. It is a significant disappointment, especially considering its premium price and exceptional functions. Other than that, some customers also complained about them not working on carpet flooring. However, these caster wheels have been proven to work just fine on hardwood floors.
Encased in soft polyurethane, the ATOMDOC ATD-0002 wheelset is one of the standout products on the market that guarantees easy and carefree gliding throughout the day. It is available in a set of 5, and its heavy-duty design can support up to 550 lbs, making them one of the most robust caster wheels on the market.
These Heavy-duty caster wheels by ATOMDOC made of stainless steel bearings are a durable option to consider. The all-metal bearing rod and hard polyurethane bracket ensure years of effortless gliding and durability. Plus, the protective nylon rubber encased in soft polyurethane guarantees a scratch-free and damage-free surface.
Apart from that, these wheels have a standard 7/16-inch diameter and 7/8-inch length stem size. It means they will fit a majority of office chair brands on the market.
We also found its installation to be relatively easy and hassle-free. Just take out your old casters and push the new ones until they lock firmly- no tools are required. Furthermore, their exclusive design ensures compatibility with fancy office furniture and guarantees user satisfaction.
What Could've Been Better?
Sidewise movement with these chair wheels can get slightly untidy. Along with that, changing their direction can be a bit of a struggle, but you need not fret too much about it. You can easily glide and swivel by applying a forward push rather than going sidewise.
LONGADS has always been committed to delivering ideal solutions for a more user-friendly experience. Likewise, these office furniture casters by LONGADS are wrapped in soft polyurethane material that facilitates smoother and quieter movement than traditional ones and keeps the floor scratch-free. You would not want to miss this product for its heavy-duty construction and easy rolling.
✔ Works Great for office Chair : Office Chair Wheels With...
✪ No More Chair Mat Needed : Locking chair casters are...
Why Did We Like It?
Squeaking and unsmooth casters can significantly affect your work efficiency and leave the floor scratched. However, this wheelset by LONGADS is not aren’t anything like the conventional casters. They are designed with a universal stem with a screw size of 11mm x 22mm and a wheel size of 3 inches. This makes it compatible with chairs from Herman Miller, Humanscale, Serta, Boss, etc.
Aside from that, their installation is eminently easy and doesn’t require any tools by just pulling out the old casters and pushing in a new one. Their heavy-duty nature is cleverly and exquisitely designed for fitting your fancy computer chairs.
Talking about the package, includes a set of five caster wheels with brakes, which allows you to stop the chair immediately.
What Could've Been Better?
Despite using rubber coating on the wheels for smooth movement, you may sometimes find it difficult to swivel them easily. Also, it will not fit with Ikea and other switch chairs, so don’t forget to check the compatibility factor before purchasing them.
Pros
Uniquely engineered design with brakes
PU rubber coating makes rolling comfortable and silent
Before ending the list, we have these heavy-duty and stylish office chair wheels by PLDWRV, designed with solid steel and encased in soft polyurethane for a safe and carefree glide on the hardwood. The design is inspired by wheels used in inline skates to make your chair look more modern and fashionable. But there is more to it, so let’s read on.
[Universal Type]: The rod of the wheel is a metal piece...
[One-wheel Style]: Not used double-row wheel design. Our...
Why Did We Like It?
The worst thing about using incompatible or low-cost office chair casters is the floor damage they cause. Well, with the PLDWRV ER-ESTAVEL, you would not have to worry about your floor at all. Their smooth rubber finish produces minimum vibrations while moving, ensuring a smooth and quiet roll.
In fact, the one-wheel design is inspired by inline skate wheels, which makes it more modern and fashionable. Solid steel is used to make the bracket, and using a new and improved C-ring handle in the valve system ensures easy installation. Furthermore, the use of soft plastic-like and transparent polyurethane material provides a scratch-free floor and gives a fashionable and compact appearance.
Finally, these caster wheels can bear a weight of 650 pounds, which makes them most suitable for heavy users. Plus, the rubber-made design provides an excellent cushioning effect and does not make any squeaky noise when used.
What Could've Been Better?
Without any doubt, PLDWRV ER-ESTAVEL can be a perfect choice for your office chairs because of its one-steel design and use of a C-ring handle. But due to the unavailability of any brakes, you might struggle to change direction or stop altogether.
A manufacturer of office chair wheels, delivering quality products to its customers has always been at the core of Toplimit. And the particular product by the company is not an exception. Made of crystal-soft polyurethane, these wheels provide an unsqueaky, long-lasting, and scratch-free performance.
YOU WILL GET WHAT YOU NEED:Our office caster wheels are made...
NO NEED CHAIR MATS ANYMORE:Our desk gaming chair caster...
Why Did We Like It?
These caster wheels by Toplimit can be an ideal choice for your office chairs due to their convenient installation and 2.5-inch size upgrade. You can easily replace the old casters with these premium body wheels through a standard plug-in replacement.
Unlike low-quality and frail caster wheels, this set does not require office chair mats to support them. Since they are made of crystal-soft polyurethane, you essentially get a better combination of softness, durability, and sleek surface. Hence, you don’t have to worry about longer marks and scratches on laminate and hardwood.
Furthermore, the quick-rolling internal bearing and sleek surface ensure the wheels do not get stuck by hair or debris so that you can enjoy a smooth and silent roll.
Lastly, these rollers are well-suited for most office chairs and perfect for standard, big, and tall Herman Miller Aeron chairs, NobleChair Epic gamer chairs, or mid-back office chairs.
What Could've Been Better?
These Toplimit office chair casters might not be suitable for buyers with modest budgets. But they won’t disappoint once you have them installed in your office chairs. Apart from that, we did not find any significant drawbacks. However, you may sometimes find it difficult to turn or stop the wheels.
Longads has been known to push boundaries with its product quality and superiority over others on the market. They believe that in this manner, it becomes possible for them to maintain their superior brand image in the market. Similarly, the LONGADS 0204ABGLYLN wheels are consistent with the beliefs because they are heavy-duty and have a universal fit.
With LONGADS office chair wheels, you would not need to worry about the installation process. Without any doubt, these are pretty reliable because of their industrial-grade steel and the soft polyurethane build. Each unit is of high quality and passes through a series of inspections before leaving the manufacturing unit.
Not only that but it is also manufactured by using Roller Skates technology, which multiplies their durability and provides years of effortless rolling. If you are worried about wearing out a chair wheel for being overweight, don’t worry any longer. The heavy-duty solid steel frame and stem and strong plastic rim can take up to 650 lbs so that you can glide freely, irrespective of your weight.
Apart from its durability, the vibrant color helps add to the look of your office chair. Also, the universal size allows them to attach seamlessly to any office chair.
What Could've Been Better?
Honestly, we were satisfied with the utility and design on offer for the most part. However, the premium price range can be an issue for some customers. But we can assure you that installing these wheels would save you from the hassle of getting frequent replacements.
Pros
Smooth-rolling without any noise
Ensures years of durability and effortless rolling
Universal fit and adopts a straight-line design
Easy to install
Cons
Expensive
Hardwood Floors Chair Wheels Buying Guide
Now that you have gone through the reviews of the 8 best office furniture casters, have you been able to make a suitable choice? Well, it’s not that simple.
Before selecting wheels for your office chair, you need to focus on factors like price, design, and brand and align them with their individual needs. This is why we have taken the initiative to provide you with a detailed and comprehensive buyer’s guide regarding the factors to be considered prior to purchase an office chair wheel. Read on to find out more.
1. Size Of Load
A simple rule is that the greater the weight your caster wheels have to withstand, the denser it needs to be. You should not forget to have an appropriate load-to-caster ratio, which will need to divide the total load by the number of casters installed.
Generally, most of the casters available in the market can bear up to 500-700 lbs., so you will need to determine the amount of weight you will keep on it.
2. Floor Condition
Apart from the size and weight of the load, you will need to determine the floor condition before selecting the right caster. For instance, a clean and leveled floor would provide you with many options on the market.
However, in the case of an uneven and rugged floor, you have a limited number of options. In this case, you need office chair wheels with a solid tread, as softer treads made of rubber will deteriorate quickly. A set made from cast iron or a phenolic will be most suitable for such flooring conditions.
3. Required Ease Of Roll
Easy-to-roll caster wheels will always be convenient and effective in preventing agitation and fatigue in your employees as well as reducing the risk of injuries. It also allows your workers to move seamlessly and effortlessly.
When it comes to rolling, big caster wheels and softer rubber treads are pivotal. They make perfect sense when you think about it. If you were to carry heavier items, would you rather have a skateboard or a bicycle?
4. Bearings
Office chair wheels are available with a range of bearings, each suited for varied uses and applications. Commonly available bearings include sintered iron, plain, ball, roller, and Delrin bearings.
The selection of an appropriate bearing will depend on the size load and the floor surface on which it will be used. Generally, roller bearings are suited for hardwood and wood floorings.
5. Extreme Environments
Most office chair wheels are engineered to be used in moderate and dry environments. So, suppose you are working in an environment where wet places or unusually high or low temperatures are a concern. In that case, chair wheels specifically designed for these environments should be chosen.
Verdict
You would agree that good and smooth caster wheels are important not only for the free movement of workers but also for the longevity of your hardwood floor.
On that note, we have come to an end with our comprehensive and informative review-based guide. We hope the buyer guide will pave the way for selecting a perfect caster wheel.
But before we end, we would like to mention some favorites from the list. The Lifelong chair wheels deliver unmatched performance through precision ball bearings and iron cast body, while the UVII wheels can withstand heavy loads.
Are you planning to give your bedroom or living room a quick makeover by repainting the ceilings?
Choosing the right color and getting top quality ceiling paints along with proper tools from the market is not enough to get the job done. As exciting as it may sound, painting the ceiling can be a daunting endeavor if you don’t have the necessary skills, patience, and a bit of practice. However, fret not because there are plenty of ways to pull off the task without ruining your floors with drips and splatters or making your ceilings patchy.
Irrespective of whether you have textured or smooth ceilings, the best way to coat them is by using a roller and working in grid-like sections to ensure an even coat. Flat white, adventurous blue, or dramatic red - no matter which color you wish to paint, we’ve got your back.
Although ceiling painting is difficult, it is not as complicated as painting body art; where you’ve to keep in mind the color, the types of paint and style for various art forms. Know more on body art starting with types of paints used for face and body.
Today, we’ll walk you through the nitty-gritty of painting a ceiling that will help you achieve a smooth and flawless finish like the pros. So, grab a cup of coffee and start reading!
How To Paint A Ceiling - The Easy Way
Whether you want to make your room appear spacious or add a modern touch to it, painting the ceiling is no doubt the best way to spruce up the space. Of course, you can hire a professional for home improvement projects, but they will charge exorbitant rates just to paint the ceiling.
Instead of spending a fortune by hiring professionals, the best way to revamp your ceiling is to paint it yourself. Not only will you save money, but you will also develop a new DIY skill.
Though slightly tricky, painting the ceiling isn’t a Herculean task. With the right skills, tools, and knowledge, you’ll be able to get the job done efficiently. Knowing the difference between ceiling and other regular paint is very important when it comes to painting ceilings.
Having said that, we’ve put together a step-by-step guide on how to paint a ceiling, so you can go about it without issues. Let’s dive in, then!
Step 1: Prepare The Room
Before starting your painting project, it’s advisable to remove the furniture, mattress, carpets, and all the other items from your room. After that, lay down canvas drop cloths or paper on the floor so that they don’t get stained by drips or spills.
In case any piece of furniture is unmovable, spread plastic tarps over them to protect them from the paint. And, don’t forget to remove any ceiling fans, light fixtures, and smoke detectors from the room, so you can paint the ceiling without worrying about ruining your expensive décor items.
Step 2: Hang Plastic Sheeting To Protect The Walls
Let’s assume you’ve painted the walls before the ceiling, which is why you will have to protect them by using plastic sheeting. Since you’ll have to use the sheets to cover the walls, make sure you buy a sufficient number.
Start with one wall and then move to the other, while including windows and doors. And don’t forget to measure the height and length of the wall using a measuring tape for accuracy before buying the sheets.
Step 3: Use Painter’s Tape Over Trim
After hanging plastic sheeting over the walls, you’ll have to grab painter’s tape and use it over the molding and trims of the ceiling. Mainly, such tapes are used to create crisp lines and protect the trims from the paint.
If you skip the painter’s tape, the ceiling paint will lack perfection and smoothness.
Step 4: Prep The Entire Ceiling
Now that you’ve taken care of the trims and moldings, it’s time to prep the ceiling to make your job easy. Though it may sound challenging, cleaning the ceiling is an easy task.
Take a vacuum cleaner and use it all over the ceiling to remove the dust and other minute particles. When the ceiling is free from impurities, the primer and paint will adhere to the surface properly.
In case there are cracks or tiny holes in the ceiling, fill them before priming the ceiling. Ideally, it takes two hours for the spackle to dry, after which you’ll have to sand it to smooth the surface and blend the patches seamlessly.
If there are rough spots on the ceiling, use sandpaper for sanding and then vacuum the surface to ensure it’s free from dirt.
Step 5: Grab Your Tools And Arrange Your Supplies
Before moving on to painting the ceiling, we suggest laying a liner on a paint tray on one side of the room. You can even keep it outside the room so that you don’t trip over it while painting.
Now, attach a spout to the primer can and pour it over the paint liner in the tray. Next grab a paint roller frame and replace the old roller cover with a new one.
Subsequently, dip your roller into the primer and attach it to the extension pole so that you can have better control while painting the ceiling. Another benefit of using an extension pole is that it reduces strain on the arms and back, which means you can work for hours without any issues.
Note that the secret to success lies in using the shortest possible extension, or the weight of the pole will lead to pains and aches.
Step 6: Start Priming The Ceiling
When it comes to applying primer, start by cutting in the borders of the ceiling using a paint edging tool or an angled brush. After completing the edges, apply primer onto the rest of the ceiling and allow it to completely dry.
More often than not, people prefer using a stain-blocking primer to prepare their ceilings before painting. Mainly, they use it to hide stains, flaws, and other imperfections while preventing stains from bleeding through.
Step 7: Paint The Edges Of The Ceiling
After the primer dries, it’s time to paint the ceiling, and we suggest starting with the edges. But before that, pour paint onto the tray and use an angled brush or a paint edging tool to coat the edges.
However, make sure you only paint the edges of the ceiling, not around them. And once you’re done painting the edges, let them dry before moving on to the next step.
Step 8: Apply Paint To The Rest Of The Ceiling Using A Paint Roller
As soon as the edges dry, you’ll have to paint the other parts of the ceiling without further delay. Certainly, changing the paint roller cover is important, so replace the dirty cover with a new one and then start painting.
Before that, make sure you pour more paint into the tray and dip the roller into it to soak the paint. As already mentioned, the best way to paint the ceiling is to use the roller in three-foot by three-foot sections. That’s because keeping track of how much area you have covered is easy when you paint in grid-like sections.
When painting a new section, make sure you overlap the wet edge of the previous portion to prevent lap marks and blend the sections seamlessly. Once the ceiling is painted, you can apply a second coat of paint if need be.
Another thing we’d like to mention is that you must move the roller slowly in straight lines to avoid splattering the paint. And you’re done!
3 Tips That Every DIYer Must Know Before Painting Their Ceiling
1. Ceiling Paints Are Thick And Sticky
Only a few people know that ceiling paints are different from wall paints because they are formulated to prevent paint drips. That is why they are slightly sticky, have a thick consistency, and are compatible with roller covers.
2. Different Ceilings Require Different Naps
While thick naps are perfect for textured ceilings, a 3/8-inch nap is excellent for smooth ones. Before buying roller covers, make sure you consider the surface of the ceiling and then buy the one that fits the bill.
3. Flat Or Matte Paints Are Best For Painting Ceiling
As you already know, the market is saturated with varieties when it comes to ceiling paints. Different colors can go with different types of ceiling finishes, and mastering them all is almost impossible if you’re not a professional.
However, we suggest going for flat or matte paints because they hide imperfections better than others. Going for a satin or gloss finish ceiling paint is a big no-no because they highlight every dent, bump, and flaw present on the surface.
How To Paint A Ceiling Frequently Asked Questions ?
How Many Coats Of Paint Does A Ceiling Need?
Basically, a ceiling needs a minimum of two coats of paint, only then will it cover imperfections from the surface.
How To Paint High Ceilings?
If you want to paint high ceilings, using a sturdy and premium-quality extension pole is the best bet. However, those using a brush for painting ceilings must use a durable step ladder to reach the ceiling.
How To Paint A Ceiling Summing It Up
There you have it - everything you need to know about painting a ceiling like a pro!
Without a doubt, painting the ceiling is the best way to add depth and element to a room. Though white is the most preferred option by homeowners, you can go for any other bold color like yellow, brown, blue, and red to add an understated effect to your room.
With that, we’ve reached the end of our guide on the topic. But before we sign off, here’s a last piece of advice - don’t forget to wear a face mask or respirator, safety glass, and gloves before starting your project.
And that’s it for today. Happy remodeling!
Do you want to change up the look and feel of your home? Then you should give it a nice fresh coat of paint!
It feels great to refresh the appearance of your home from time to time. But painting your home can be a lot of work, especially if you are a DIYer. And when it comes to the ceiling, painting it may feel like a nightmare. Even the best quality ceiling paint can result in a messy failure, if you don’t know how to paint your ceiling.
However, we would suggest that you use a roller to paint the ceiling. That will make the process a lot easier to complete. All you need to do is clear out the room, get some basic arrangements done, and then apply the paint with the roller while ensuring uniform coverage.
Then again, we understand that not everyone may be familiar with using a roller. That’s why we have prepared this guide so that you can easily learn how to use a roller to paint your ceiling.
So, let’s roll!
What Is A Roller?
Before using the tool, you should first get familiar with it so that you can grasp the process better. So, let us begin by discussing a little about what a roller is. It is a standard piece of equipment that is used by professional painters and interior decorators.
Usually, a paint roller comes with two components - the roller frame and the roller cover. The roller cover is a cylindrical component that absorbs the paint and transfers it to the wall. Conversely, the roller frame makes up the remainder of the paint roller, which comprises the handle and an attachment for the roller cover.
It may be made using metal, plastic, wood, or any other durable material. On the contrary, the cylindrical cover is made from rubber foam, pile fabric, or urethane fibers. Although, the material may change based on the type of paint you are using and the texture of your ceiling.
However, the fundamental method of operation is more or less the same. It is designed to soak up the paint from the paint container or tray. And when you roll it on the walls or other flat surfaces, the paint is transferred to the surface.
During paint application, only the cover rotates while the frame holds it in position. Thus, compared to other painting tools like the paintbrush or a sprayer, a roller is a lot more efficient and convenient. It is also less messy since the paint usually doesn’t drip from it like paint brushes.
But you should know that the roller covers are typically not reusable, due to which you will need to replace them after painting. Roller frames, on the other hand, are durable enough so you can use them for a long time.
How To Paint A Ceiling With A Roller?
Now that you know what a roller is, let’s get back to our primary objective - how to use it to paint the ceiling. First off, you will need to make a few preparations before you begin painting. You need to gather all the supplies and additional tools that will be necessary while painting.
Ideally, you should keep them ready at hand so that you will have easy access to them whenever necessary. In this regard, besides the roller and the paint, you need a can opener, stirring stick, paint roller extension rod or extension pole, and painter’s tape.
You can also keep an angled brush, paint tray, step-ladder, drop cloths, rags, and sweepers. And always make sure to wear protective clothing, such as safety goggles, caps, and so on.
Gathering the necessary equipment and tools is essential to make painting your ceiling a lot smoother and more convenient. Once you are done, it’s time to proceed further by following the steps below.
Step 1: Clear The Room
We know that you are eager to start rolling the paint on your ceiling, but let’s not be hasty. Otherwise, you will be making the process a whole lot more bothersome than necessary.
You need to prepare the room that you are going to paint. If you plan to paint the entire room, such as the ceiling and the walls, a few extensive preparations will need to be made.
In any case, preparing the room is an absolute necessity before getting started. And to do that, you will first need to remove or cover all of the furniture and other items using old bedsheets. This will prevent paint from splattering all over your household items and furniture.
Then, you will need to remove all the objects from the ceiling, such as ceiling fans, light fixtures, vent covers, and so on. And if you are painting the whole room, then remove all the wall fixtures as well.
Step 2: Prepare The Room For Painting
After you are done clearing out the room, it is time to prep it for painting. For this step, you will need to cover the flooring with drop cloths to prevent splattering. And if you only intend to paint the ceiling, you can cover the walls with them too.
Even the fixtures which are unremovable, like your windows, vents, or switchboards, can simply be covered with these drop cloths. The same applies to any heavy furniture or household items that you are unable to remove from the room.
Make sure to use sufficient drop cloths so that there are no gaps left. It will be ideal if they overlap each other, which eliminates the chances of paint getting through them almost completely. Furthermore, to keep the drop cloths in place, you can use painter’s tape along the edges.
Step 3: Clean And Fix The Ceiling
Before you apply ceiling paint, you will need to make sure that it is clean. You may not know it, but the ceiling can get pretty dirty due to a number of reasons, which include cobwebs, roof leaks, spills, tobacco smoke, and so on. And if your ceiling surface is dirty, the paint will not adhere well to it.
Therefore, you can clean it up with a brush or a rag to eliminate most of the grime and dirt. Unfortunately, this will not be enough to clean out stains caused by roof leaks or tobacco smoke. To remove them, you need to use a stain-blocking primer. We recommend using white shellac, which will cover up these stains effectively.
Following that, you will need to fix any imperfections on your ceiling. So, if you have any holes or cracks on the ceiling, you need to repair them. And to do that, you can consider using spackle or caulk since they can fill in any holes or cracks completely.
As a good measure, you can also rub your ceiling with sandpaper. It will flatten out any imperfections and give you a smooth surface that will form a better bond with the paint. However, this step is not necessary if you have a textured ceiling, as it can affect the texture. Although, painting a textured ceiling is a different task for newbies and DIYers.
Step 4: Tape Off Walls Along The Top Edge
You need to apply painter’s tape along the top edges of your wall and on the crown molding. That will prevent the ceiling paint from touching the areas when you are using the roller near their edges. Make sure you use tape that is at least two inches thick so you can mask them off properly.
If there are vents, smoke alarms, or other unremovable fixtures on the ceiling, then you need to tape them off as well. This will keep the roller marks off them and also prevent any damage. On that note, if you wish to paint the walls as well, applying painter’s tape will not be necessary.
Step 5: Prime The Ceiling And Cut Along The Edges And Corners
Before applying the ceiling paint, it is necessary to prime the ceiling. The primer you need to use for this purpose depends on the type of ceiling you have. For smooth ceilings, you may use interior latex drywall primer, and for textured ceilings, high build primer can be used.
After you have applied the primer, you need to let it dry for a while. Once it has completely dried, cut along the corners and edges of the ceiling. Meaning, apply paint along these edges and corners with a brush.
The reason for doing this is to cover these parts with paint, as the roller will not be able to reach them completely. Besides, it will effectively conceal any uneven brush marks along the edges and corners.
Step 6: Apply The Paint On The Ceiling With The Roller
Now that all the above steps are complete, it is finally time to get the paint rolling! Dip your paint roller in the tray to soak it with the paint. Roll off any excess paint by running the roller on the edge of the tray. Then place the roller at one of the corners of your ceiling and slowly roll on the paint.
It is advisable to use slow and gentle strokes when painting, as that will give an even layer of paint. Also, we would suggest that you start by painting in small sections instead of rolling over the entire ceiling at once. This will prevent any uneven overlapping of the paint and minimize the overlap marks left behind.
However, it might not be possible to avoid lap marks altogether. Especially along the edges and corners, where you have already applied paint, the lap marks may become too prominent. So, to conceal them, gently roll over the lap marks while they are still wet to get an even paint texture.
Step 7: Dry The Paint And Apply A Second Coating If Necessary
Once the paint has been applied, you need to let it sit for a while so that the wet paint can dry completely. After the paint has dried, you may choose to apply another coating over it to give your ceiling a deeper and even coloration. And if you notice any imperfections or irregularities, you can rectify them with the second coating.
Now, applying the second coat of paint is not mandatory, so if you are satisfied with the first coat, you can skip it altogether. But if you choose to do it, then you need to follow the same procedure as described in the previous step. You will need to allow the second layer to dry as well before wrapping it up.
Tips For Painting The Ceiling With A Roller
In this section, we would like to provide some helpful painting tips for you to keep in mind. If you follow these tips, painting your ceiling with a roller will be a breeze.
1. Select A High-Quality Paint
You need to get good quality paint for your ceiling to give it a richer color. Such ceiling paint will not dry off very quickly, preventing it from leaving behind unsightly lap marks.
Conversely, it won’t take a lot of time to dry either, so you won’t have to wait for a long time to finish your painting. Furthermore, with good quality paint, only one coat of paint will be enough.
2. Choose A Suitable Color
Typically, you might be inclined to go with white or any other lighter colors. But don’t be afraid to experiment with different color options. If you select another color besides white, that might make your room feel more spacious and give it a professional-looking finish.
3. Follow All Safety Guidelines
Safety is of paramount importance when painting the ceiling. So, you need to make sure that you follow all guidelines and instructions. Always wear protective equipment, such as goggles, masks, and hair covers. Also, make sure not to paint directly overhead, as the paint may splatter all over you in that case.
If your ceiling is too high, you can use a step ladder or a paint roller extension rod. That will be a lot safer than straining your arms, neck, and shoulders. And make sure to clean up properly after you are done painting.
4. Always Roll Slowly And Gently
When you paint a ceiling with a roller, you should always be gentle and slow. Be careful not to apply too much pressure, as that will make the painting uneven. The same will happen if you roll too quickly, as the paint will not be properly transferred to the surface.
Maintain a uniform pressure and pacing throughout the process. And try to move the roller in a single direction for the most part. To spread the paint in a smooth and consistent manner, move the roller in both forward and backward motions evenly.
5. Use A Suitable Roller Nap
If you have a textured or popcorn ceiling, you will need to use a suitable roller nap as well. The roller nap refers to the width of the material on the roller cover, which absorbs the wet paint and transfers it to the surface.
There are different roller naps, and each has a specific usage scenario. For a smooth ceiling, you need to use a thin roller nap, while for a textured ceiling, a thicker roller nap is more suitable.
How To Paint A Ceiling With A Roller Frequently Asked Questions ?
How Long Does It Take To Paint The Ceiling With A Roller?
Usually, the whole process of painting a ceiling takes one whole day or two days at the most. However, this duration is not set in stone, and it may vary based on how much effort you want to put in and the area of your ceiling.
If you are in no hurry, then you may allocate more than two days to get the painting done. Likewise, if the surface area of your ceiling is large, it might require some more time to complete.
How Much Paint Do You Need For Your Ceiling?
The amount of paint required depends on the surface area of your ceiling, as well as the number of layers you want to apply. One gallon of paint can sufficiently cover around 300 to 400 square feet.
You first need to calculate the square footage of your ceiling by multiplying its length and breadth. If you divide that number by the coverage area of your paint, you will know how much paint is necessary.
In case you want to apply a double coat, the paint required will consequently double, so keep that in mind as well.
What Type Of Paint Is Best For The Ceiling?
Any normal paint that you use for the interior walls of your house can be used to paint the ceiling. However, if you want, you can use a special ceiling paint that is available on the market. Such paints have a matte or soft, flat sheen to make the ceiling stand out from the walls.
Should You Paint The Ceiling Before Or After The Walls?
If you are planning to paint an entire room, we would suggest that you start by painting the ceiling first. Then you can gradually work your way down to the walls. Not only will this be convenient, but it will also be a less messy job.
How To Paint A Ceiling With A Roller Final Words
The ceiling is an integral part of your home’s interior so it is crucial that you pay equal attention to it, just like the other walls of your home. Whether it’s your living room or basement, a ceiling must get a fresh coat of paint from time to time. Although, choosing paints for basement ceiling is slightly different from regular ceiling paints, due to its damp-proofing and mold-resistant nature.
That’s why we have prepared this informative, stepwise guide so that you can easily paint it with a roller. So, it is time that you shrugged off your fear of painting ceilings and gave them the love they deserve. We have also included some tips to make the work even easier for you.
With that, we have reached the end of this guide. We hope you enjoyed reading it.
Take care, folks!
Installing smart thermostats or multiple thermostats, setting the right thermostat temperature, undertaking proper cleaning and maintenance of the ductwork, and installing insulation can help keep the upstairs cool in summer. Other solutions include replacing the AC system and opting for a mini-split unit.
A common problem in multi-story houses is that the upper floors do not remain cool in summer.
Even with powerful AC systems operating for most of the day, your upper floor may remain uncomfortably hot. This can become a serious problem and even pose a health hazard during summer.
This guide explains some of the reasons for this problem and provides some effective solutions to help you resolve it. So, let's begin!
How Does House Design Affect Cooling?
In multi-story houses, the upper floors are hotter than the lower ones simply due to the design of the house. It is important to understand the relationship between the design, temperature, and air to know why your air conditioning may not be doing a good job cooling the second floor.
When the temperature is high, the air becomes hot and loses density, becoming lighter. When it becomes lighter, it rises up while cold air, which is denser, sinks down. Because of this, your air conditioner has to work harder to keep the rooms on the upper floor cool in a two-story building.
It will have to function continuously to control the temperature and prevent the second floor from becoming unbearably hot. This will not only lead to higher power bills but also result in faster wearing down of the air conditioning unit. So, you may need to spend more on repairs and maintenance or even replace the unit sooner than expected.
Apart from the fact that heat rises, you should also be aware that it actively moves towards colder areas to ensure that the temperature is in equilibrium. So, in interior environments such as the inside of your home, the air will try to maintain this equilibrium between different rooms having varying temperatures.
The hot air will constantly try to move toward cooler rooms, heating up the space through which it passes. For instance, uninsulated attics allow the entry of hot air from the roof, which will then move toward the cooler areas, heating up the rooms on the upper floor. This will prevent them from getting cooled properly.
While this is the basic reason why your second floor does not remain cool in the summer, other factors also affect this. And I've shared these factors in the next section.
Factors Preventing Your AC From Cooling Upstairs Properly
1. Single Thermostat Or Air Conditioner
In multi-story homes, a cooling system that has a single thermostat may not be effective enough to keep rooms on the upper levels cool. The reason is that a single thermostat will only sense the temperature of the area where it is installed and will adjust the temperature accordingly.
This will result in other areas, such as rooms located upstairs, not getting cooled properly. Generally, this problem occurs in homes where the thermostat is located on the first floor. In such cases, the thermostat will only turn on the air conditioner when the floor gets warm.
2. Improper Functioning Of The Ducts
The ductwork present in your home allows cool air from the air conditioner to reach various rooms and areas of the house. However, in many cases, there can be a problem with these ducts. They may be allowing hot air to leak through, or their design may be faulty, leading to ineffective cooling.
Alternatively, the installed ductwork may be very old and may have worn out, or the number of ducts present may not be adequate. Sometimes, the ductwork may be installed incorrectly, which will also result in this problem.
In any case, faulty or outdated ductwork will prevent cool air from reaching your second floor, so you will always feel hot upstairs.
3. Incorrect Location Of Your AC Unit
Besides bringing cool air into the house, an air conditioner has to remove hot air and humidity and push it outside. In most houses, the central heating and cooling system is located on the first floor, which can prevent it from expelling hot air outside effectively. The reason is that cool air always sinks down while hot air tends to rise.
So, if the cooling system is located downstairs on the first floor, cool air will not rise to the upper floors. Instead, it will sink back to the same or lower level. To offset that, the air conditioning system will need to work harder to push cool air upwards.
In such circumstances, the system can overload, and its components can wear out more quickly.
4. Hot Air In The Attic Or Roof
In houses where the roof is not insulated or improperly insulated, hot air can enter from the top and keep the temperatures high on the upper floors. The heat of the sun is absorbed by the roof, which in turn leads to the heating up of the air present upstairs.
This heat transfer can also occur from the attic area if it is not insulated properly.
5. Cooling Requirements Exceed The Cooling Capacity Of Your AC
You should check the cooling capacity of your air conditioner if it is unable to cool the second floor properly. The system may lack the capacity to cool multi-story buildings or may have become ineffective if more rooms have been added to the house recently.
6. Outdated HVAC System
If your roof is insulated properly and the air conditioner is located on the second floor, then the lack of proper cooling may be due to an outdated HVAC system. This usually happens when you continue using the same air conditioner for more than ten to 15 years. The best solution, in this case, is to replace the worn-out cooling system with a new one.
7. Incorrect Temperature Setting On The Thermostat
Sometimes, your upper floors remain quite hot even with multiple air conditioners and proper roof and attic insulation. If that is the case, the most likely cause is an incorrect temperature setting on the thermostat.
People tend to set the same temperature for all the floors in their homes. But as hot air rises, the temperature upstairs becomes much higher, and the thermostat setting may not be adequate for proper cooling.
To resolve that, you can simply adjust the temperature setting on the thermostat to make it cooler for the second floor. Or use zoning, sensors, and smart thermostats that can control the temperature automatically.
Why Should You Keep Upstairs Cool?
Houses with more than one floor are more difficult to cool properly, especially upstairs, due to the reasons I mentioned above. While it will cause discomfort to the residents occupying the rooms on the upper floors, there is another reason why you should keep the second floor cool.
And this is related to the functioning of your AC system. While the first floor can be cooled effectively, your air conditioners will perform even better if the hot air can be eliminated. They will require less power while delivering better cooling, resulting in lower power bills.
How To Keep Your Upstairs Cool
Depending on the reason why your upper floors are not getting cooled properly, there are a few solutions that can help you resolve the problem. I've mentioned the best ones here.
1. Undertaking Maintenance Or Replacement Of The Ductwork
If the cause of your upper floors not cooling properly is that the ductwork is clogged with dust, then the best solution is to get it cleaned. For that, you will need to hire duct cleaning professionals who can clean the ductwork and undertake other maintenance activities.
In some instances, it is possible to seal the ducts using metal tape if the rest of the ductwork is fine. But a complete replacement might be the best solution if it has become too old or worn out. This can also be performed by the professionals hired for ductwork maintenance.
2. Installing Additional Thermostats
If you have a single thermostat on the first floor, it won't be enough to cool the second or higher floors. For that, you should get additional thermostats installed in the house. Ideally, having a thermostat on each floor will provide the best cooling results.
Or you could go with zoning thermostats that adjust the air conditioning automatically by sensing the temperature on various floors. However, keep in mind that the effectiveness of a thermostat depends on the efficiency of your air conditioner.
3. Installing Proper Insulation
Air leaks can allow hot air to enter your home, after which it reaches the upper floors and leads to a rise in the temperature. To prevent that from happening, you need to block such leaks using insulation materials like foam insulation, weatherstripping, or caulk. This solution will also work in homes where the roof or attic lacks proper building insulation.
4. Replacing An Old Or Ineffective AC
If your AC is limited by its capacity and fails to deliver proper cooling to the upper floors, installing additional air conditioning units can be helpful in the short term. However, managing multiple units can be quite tedious and will also result in a rise in energy costs.
So, instead of investing in multiple small units, you should consider simply replacing the old unit and getting a new one that meets your cooling needs. Also, think carefully about where to install the new heating, ventilation, and air conditioning system so that it cools the entire house, not just the lower floors.
Some Useful Tips To Keep Upstairs Cool In Summer
1. Installing A Programmable Thermostat
Apart from installing thermostats on each floor, you can opt for a programmable or smart thermostat. A smart thermostat has programmable settings which allow it to adjust the temperature automatically. So, when it senses that it is hot upstairs, it will automatically lower the temperature for better cooling.
2. Using Fans For Better Air Circulation
Ceiling fans can be very helpful in improving the airflow on the upper floors of your house and can help you remain cool. And such fans work well with AC units to circulate air, ensuring that cool air reaches all areas of the house. Moreover, ceiling fans can be used throughout the day since they do not require a lot of electricity.
3. Closing The Curtains And Blinds On The Second Floor
Sunlight entering through the windows on the upper floors can lead to a rise in the indoor temperature. To prevent this from happening, keep the curtains and blinds closed in summer. This will also make your ceiling fans and air conditioning more effective. You can opt for insulated curtains and window blinds to make this method work better.
4. Installing A Mini-Split Air Conditioner
Another useful method to prevent your second floor from becoming too hot is by investing in a ductless mini-split air conditioner. Since these AC units do not have ducts, their efficiency will not be affected as energy will not be lost through the ductwork. They can prevent warm air from accumulating upstairs and will also help you avoid the problems common with regular air conditioners, such as clogged ducts and air filters.
Bonus Tips
1. Using Natural Ventilation
Since hot air rises and cold air sinks, having proper ventilation on your second floor will allow the hot air to escape outside, keeping the indoors cool. While a ceiling fan or an attic fan can be very helpful in providing such ventilation, using natural methods is even better.
Depending on the weather conditions, you can open the windows and ventilators to allow hot air outside.
2. Turning Off Appliances And Electronics When Not In Use
Appliances generate heat when they are in use, which can lead to a rise in indoor temperature. Again this heat will rise and make your second floor warmer. So, avoid leaving appliances like water heaters and ovens turned on when they are not being used. And when possible, use alternatives that do not use as much energy and will not generate as much heat.
3. Installing Awnings And Planting Trees
Green environments are generally cooler, and trees can also block sunlight, preventing your upper floors from becoming hot. So, planting more trees is an environment-friendly solution by which you can keep a two-story house cool. Another option would be to install awnings that can provide shade from the sun and summer heat.
Tip
Blocking the ultraviolet rays of the sun through the above-mentioned methods can help prevent the second floor of your two-story house from getting too hot in the summer. Another way by which you can do this is to add window films to the windows, especially if they are old and don't block sunlight very well.
You can find such films in several sizes, and they are very easy to install. What's more, these films do not block the view, so they can be used in almost any room.
Conclusion
The methods I've mentioned in this guide will help you know why your upper floors are not getting cooled properly and what to do about it. All of the solutions mentioned here are easy to try out and are sure to deliver excellent results.
What's more, besides helping you keep the upper floors cool, these methods will help ensure efficient energy use, resulting in lower power bills. They can help you keep cool in the summer, which is extremely important since exposure to heat can lead to problems like heat strokes, hypothermia, and heat cramps.
Are you thinking about remodeling your home flooring because the color has faded and the planks emit a hollow sound?
If we are not wrong, your top two choices are solid hardwood and engineered wood flooring, as these are the most sought-after options. The allure of wooden floors may entice you to spend a few extra bucks on actual hardwood, but what if you get the same benefits at a lower cost?
Or perhaps you want a durable flooring solution that won't need replacing anytime soon. Today's guide looks at the best bits of both solid and engineered wood flooring to help you make the right call.
What Is Engineered Wood Flooring?
Engineered wood flooring is one of the most popular and reliable options on the market. It is quite similar to solid hardwood flooring, and even shares many characteristics, which we will discuss later, but the primary difference between the two is in the construction.
Most people who know about the different flooring types will tell you that engineered hardwood floors have a plywood layer in the middle. A thin hardwood layer is bonded over and under this layer to lend stability.
You should note that engineered floors can last around 40 years and are less expensive than solid hardwood floors which makes them highly desirable.
They are made of 100% wood, but the best part is that different wood species are used for designing the flooring, especially the bottom and top layers. The final result is a durable and strong product that doesn't shift after installation and can withstand weather changes.
Another reason for its increasing popularity is that the flooring works well in areas like the basement, where other options may wear out soon. Thanks to the intricate layering, the chances of moisture warping or damaging the planks are less, particularly when you have a concrete subfloor.
The only thing you must remember is that engineered wood flooring requires refinishing. The planks are wider than solid hardwood flooring, and since they arrive in prefinished form, it's essential to maintain the quality of the wood over time.
What Is Solid Hardwood Flooring?
As the name reveals, this flooring comprises solid wood and comes in many hardwood species, such as oak, walnut, and maple. But we already told you that engineered hardwood flooring is less expensive, so why choose solid wood flooring?
This is because you can refinish or sand a solid hardwood floor several times without any deterioration in its quality. Also, people don't like the thin hardwood layer of engineered floors that can be refinished just once in most cases.
You will notice that the wooden planks on a solid wood floor are longer and feature grooves and tongues on either end. It helps with installation and ensures that the planks interlock and don't shift positions after a few years.
But the catch is that you will have to nail the flooring to the subfloor, which requires expertise and precision.
Advantages Of Engineered Hardwood Flooring
Now that you have a basic knowledge of both solid and engineered hardwood flooring let's review each type, starting with the advantages of engineered flooring.
1. Pocket-Friendly
If you're looking for a beautiful flooring option but don't want to spend a fortune on renovations, premium-quality engineered flooring will bail you out. The wooden layers on the top and bottom of the planks look just like solid hardwood floors with only minor differences.
Moreover, engineered hardwoods are available at half the price of their solid hardwood counterparts. You get the best of both worlds - quality and affordability in one product.
2. Easy Installation
You will love how easy it is to assemble engineered hardwood flooring, which makes the entire process swift and hassle-free. It would be best if you had durable glue to set the flooring and prevent it from shifting. But it's also possible to nail, screw, or place it gently over the underlay, like a floating floor, due to the stability offered by its unique design.
3. Durable
A major point in favor of engineered wood floors is the sturdiness of the surface since it can resist temperature variations and moisture to retain its quality. You already know how two layers of wood sandwich the middle plywood layer - this makes it suitable for rooms with underfloor heating.
If needed, you can reinforce the flooring further and add a scratch-resistant topcoat without affecting the color, width, and style of the plank finish. Sometimes, you can confuse engineered hardwood floors with laminate flooring but remember that the latter only has a picture of wood on the top surface, instead of real wood.
Advantages Of Solid Hardwood Flooring
Solid hardwood flooring offers different benefits than engineered wood flooring, although their dissimilarities aren't profound.
1. Appearance
It's often considered the holy grail of flooring options, and even people opting for engineered hardwood floors determine its worth by its resemblance to solid wood flooring. We noticed that it's made from only one solid piece of pure hardwood and has narrower boards to deliver a refined look.
You can choose between unfinished and prefinished boards while there are several colors and species of wood for specific needs. Also, the boards are interconnected through strong seams to prevent displacement.
2. Location
Solid hardwood floors are ideal for living rooms, dining areas, kitchens, and drawing rooms. Most above-ground rooms will benefit from this flooring, provided there's little humidity or moisture. That's why manufacturers advise against installing solid wood floors in the bathroom, basement, or laundry rooms where chances of contact with water are high.
3. Longevity
The durability of solid wood flooring depends on the species of wood and finish that you wish to achieve. If you live in an area with high footfall, we recommend going with oak or hickory as these are harder varieties and can resist denting or scratching. Many brands even offer products with a lifetime warranty, so be sure to read all the information before purchasing.
While solid wood flooring isn't the best option for dealing with moisture, it's still pretty durable and can last for several years. You can even sand or refinish the surface multiple times to uphold its quality.
Hardwood Vs Engineered Wood Flooring Comparison
It's time to answer the all-important question - solid wood flooring vs. engineered hardwood, which is better? Solid hardwood and engineered hardwood floors look pretty much the same. The differences between the two are more prominent in other aspects like lifespan, cost, type of wood, etc.
1. Versatility
A solid hardwood floor has planks of different widths that range between 8 and 12 inches. This ensures that the planks tightly adhere to each other, which strengthens the seams between boards. The best part is that you can choose from various color options, wood types, and finishes to personalize the flooring according to your requirements.
An engineered hardwood floor has more options for width and is flexible, thanks to a hardwood veneer layer. But you won't get many choices in color, style, or finishes compared to solid wood flooring since the panels are available in a prefinished form.
2. Construction
Hardwood floors are made from one solid block of 100% pure wood to guarantee durability. It imparts a timeless quality to the surface and ensures value for your money. Also, most solid hardwood floors in America come from the Appalachian region and feature intricate craftsmanship to deliver color consistency, stability, and a refined grainy texture.
An engineered wood floor has three layers(as said before), with two thin hardwood layers holding the middle plywood layer in place. You should note that the core comprises 5 to 7 layers of plywood that adhere to each other through a crisscross pattern for strength. It's also made from 100% natural wood, while the middle plywood construction lends stability to the surface.
This is how engineered hardwood resists shifting and withstands humidity, moisture, and temperature changes.
3. Type Of Wood
The three most popular options for solid hardwood flooring are - oak, maple, and hickory. All three species are durable and resistant to wear and tear due to their hardness. Apart from the many colors and textures, the width of the planks ranges up to 5 inches for customizable flooring solutions.
An engineered hardwood floor comes in many of the same designs as a solid hardwood floor. But you will find unique patterns and textures owing to many softer, exotic species of wood. Hence, you can subject the flooring to specific surface treatments and colors or choose extra-wide planks, which isn't possible with solid hardwood floors.
4. Lifespan
The lifespan of solid hardwood floors depends on the protective finish and wood species. As mentioned, you can choose stronger woods to prevent scratching or denting the surface, which makes them more long-lasting compared to other options. Solid wood planks won't deteriorate even after 30 to 100 years of heavy use, provided you don't compromise on maintenance.
That's why these wood planks can be sanded and refinished multiple times.
On the other hand, the thin layer of hardwood in engineered floors reduces the chances of refinishing or sanding. If refinishing is your priority, you can opt for a thick layer of hardwood on the top, but the number of times you can do it would still be less than solid hardwood floors.
Engineered wood surfaces also resist scratching, but they are most popular for not warping or changing shapes under the influence of moisture or humidity. All things considered, solid wood has the edge in terms of longevity since engineered hardwood flooring will last slightly more than 30 years even with proper maintenance.
5. Installation Method
Solid hardwood flooring has tongue and groove boards and needs to be nailed to the subfloor underneath. These grooves ensure the planks don't move after installation, and you can re-floor major areas of the house, such as the kitchen, dining room, bedroom, or sitting area. Any area with low humidity and less moisture is good for solid wood flooring.
Installing engineered hardwood floors is equally easy, and you can either nail the planks or use click-and-lock planks to design the flooring, a popular method for constructing a floating floor. Some manufacturers also allow you to glue the planks to the concrete subfloor, and most people install it in rooms with radiant heating systems, over basements, or concrete floors.
The main point in favor of engineered wood flooring is that it can resist moisture, humidity, and other environmental factors. Since it's thinner than solid hardwood, it's ideal for creating a thin space underneath kitchen appliances or matching the height of an adjoining floor.
6. Sizes
Most types of solid hardwood flooring have planks measuring ¾ inches thick and 2-¼ inches wide. The length also varies between 12 and 84 inches, and even though you can find other lengths or size options, the planks are seldom wider than 4 inches.
Engineered wood flooring is thinner and has ⅜ to 9/16-inch boards. The planks are much wider than solid wood floors and extend up to 7 inches, while they can be 12 - 60 inches long.
7. Cost
The price of solid hardwood floors is higher than engineered wood flooring, but it depends on several factors like quality, wood species, longevity, etc. Usually, the protective finish, staining technique, and texture all add to the cost. Prefinished solid hardwood flooring costs $8 per square foot, but options are also available for as high as $15 per square foot.
Engineered hardwood flooring is more affordable, but premium options can cost as much as solid hardwood. The flooring cost varies between $2.50 and $10 per square foot, with the average cost ranging around $7. But a thicker top layer, with the option of sanding and refinishing it multiple times, and higher durability will increase the cost.
8. Soundproofing
When considering the soundproofing properties of hardwood vs engineered wood flooring, engineered wood generally offers superior noise reduction capabilities. The multi-layered construction of engineered wood flooring helps absorb and dampen sound vibrations more effectively than solid hardwood. Although both flooring types can benefit from added soundproofing measures such as underlayment or padding, the inherent structure of engineered wood inherently contributes more to noise reduction.
Engineered wood flooring consists of multiple layers, including a core of high-density fiberboard (HDF), plywood, or medium-density fiberboard (MDF) which adds stability and improved acoustic performance. The presence of these layers creates a naturally better sound barrier when compared to solid hardwood, making it a more suitable choice for spaces where noise reduction is important.
In summary, if soundproofing is a priority for your flooring project, engineered wood flooring may be a more effective option due to its unique construction and enhanced acoustic properties. This makes it an ideal choice for spaces like music rooms, home theaters, or multi-level homes where sound transmission between floors is a concern.
What are some popular engineered and solid wood flooring brands?
Popular engineered wood flooring brands include:
Bruce hardwood flooring
Somerset hardwood flooring
Mohawk Industries
Harris Wood Floors
From the Forest
Well-known solid hardwood flooring brands are:
Shaw Floors
Carlisle Wide Plank Floors
Armstrong Flooring
Bruce and Somerset hardwood flooring also manufacture premium solid hardwood planks.
How can you tell the difference between solid hardwood and engineered floors?
Pick up a loose plank and check its side to determine the type of construction. If you notice a solid wooden plank with a grainy texture, know that it's solid hardwood while multiple layers will point to engineered flooring.
Can pets scratch solid or engineered hardwood?
Solid hardwood is more resistant to scratching than engineered planks, but the latter features a premium-quality wood top layer. This protects the surface from scratch marks even when the other layers aren’t of the same wood species.
Conclusion
As you can see, solid hardwood and engineered hardwood flooring are good for specific purposes and add to a property's resale value. If durability is your primary concern, solid hardwood is the best choice and lasts longer than most flooring options.
But when you're short on cash and looking for an effective flooring solution, engineered wood floors will be worth the investment. Even in terms of maintenance, you won't have much difficulty vacuuming or wiping the planks to sweep away the dust to uphold the quality of either surface.
Before installing a flooring option, think about where you live, the amount of footfall, climatic conditions, etc., to make an informed decision.
Ceilings play a crucial part in the perception and ambiance of a room. They have a significant impact on both the aesthetic and acoustical aspects of interior spaces. Gypsum, a versatile and cost-effective material, has been extensively used in the construction of both simple and complex ceiling designs due to its ability to easily form various shapes.
Gypsum's effectiveness as a sound barrier stems from its inherent properties, such as its mass and density, which help reduce the transmission of sound between spaces. When combined with other materials like insulation or resilient channels, gypsum can substantially improve a room's soundproofing capabilities. In comparison to other materials, gypsum offers a balance between performance and cost, making it a popular choice for both residential and commercial applications.
Our curated gallery features a range of gypsum ceiling designs that showcase its potential in enhancing the visual appeal and acoustic properties of interior spaces.
A perimeter rectangular niche in your ceiling may emphasize the feeling of space without cluttering. The central point in the ceiling gains importance in this combination.
Create parallel light niches illuminated through two means alternatively, it can offer you an interesting rhythm indoors, one you could use to fit your ambiance for the right mood.
A simple niche can create a shadow that is rightfully used and can present the ceiling far higher at first glance, encouraging courageous perspective manipulations to the homeowner`s advantage.
Smart gypsum ceiling designs can also be used to direct one`s glance, here the niches are oriented towards extraordinary glass openings with expansive views and serendipity.
Notice how the light ceiling appears to float over a space defined by a room with dark walls. A really splendid play with simple chromatic principles in perspective and perception.
A simple line or profile may add a dramatic feel to your space.
Light can sculpt space beyond belief, notice the extraordinary positive-negative game above and how it is defined by light.
Emphasize the position of a centerpiece and encourage the creation of certain visual focal points with your new gypsum ceiling design.
Dynamicity can be added swiftly and rapidly, here the ceiling enhances a rather bland rectangular ceiling offering it great opportunities.
Parallel stripes of light can direct one`s attention, they can also enlarge the room, use them to your advantage.
One small intricate detail will add sensibility and beauty to your space.
A folded geometric shape in two planes can really change a bedroom as the design above clearly showcases. Feel free to experiment with light manipulation and color.
Gypsum ceiling designs can be used as a transitional element, here between two powerful chromatic presences a simple white profile creates a visual bridge.
Simple and clear gypsum ceilings can emphasize the feeling of space thus enhancing your design.
Use light to shape a certain atmosphere, in the theater above the focus is on the stage therefore creating a professional cinema experience.
In a setting the ceiling can become the art piece, it can be the only intricate detail in your space, a simple focal point that will stun your guests at first glance.
Create layers, and sculpt space.
Create on the ceiling an extension of an element in your setting, here a very functional gypsum feature illuminates the kitchen bar.
A simple ceiling in extended living spaces with an open plan may require your attention and gypsum ceiling designs can surely help you in this endeavor.
You set the rules, you choose the level of detail.
Simple stripes in a minimalist setting.
The ceiling design here builds on the already well-established black-and-white direction, beautiful, simple, and splendid.
Add dynamic to a really simple space, a spectacular setting can be sculpted through the ceiling.
Enhance the position of your bed, and set the atmosphere that you see right, that you see fit.
Gypsum can be extended from the ceiling downwards to shape composition that emphasizes the entire room.
A line of light in an impeccable setting, spot-on, exemplary design in the simplest, most beautiful way possible.
Gypsum ceiling designs are offering you the chance to manipulate perspective, and perception, you can use this design feature to trick the eye into believing the room is wider, taller, or brighter through simple, inexpensive means. What do you think? How do you see these solutions?
The popularity of hardwood flooring is steadily increasing, with more and more homeowners opting for this classic option. Hardwood floors offer several advantages over other types of flooring, such as enhancing the look of your home, offering excellent durability, and easy maintenance. In fact, you can install hardwood floors without any professional help.
So, if you plan to install hardwood flooring at home, one of the first things to consider is the glue. The correct adhesive ensures the durability of the flooring and adds to the finishing.
On that note, selecting the right product can mean the difference between a successful and unsuccessful installation. However, choosing the best glue for hardwood floors from the many available options on the market can be quite challenging.
Listed below are the top 5 recommendations for the best glues for hardwood floors:
Roberts 7350-1: Facile application and robust adhesion across diverse flooring materials. Extended drying duration, albeit delivering commendable results.
DAP 142: Potent water-resistant bond coupled with low-odor attributes. Ambiguous instructions may challenge novice users.
Titebond 2104: High bonding potency, water-resistant, and extended shelf life. Elevated cost positions it as a premium choice.
Titebond 1415 III: Versatile with superior bond strength across applications. Bottle design may impede seamless application.
Whether you're a professional installer or a DIY enthusiast, here's the list of the 9 best glues for hardwood floors that will help you achieve a flawless and long-lasting installation.
1. Roberts 7350-1 - Best Versatility
Let us begin with a product from the House of Roberts, a premiere brand known for its high-quality installation tools, adhesives, and accessories. The 7350-1 is an excellent product that can be used for joining together a range of flooring materials and is also an environment-friendly option.
The Roberts 7350-1 glue is one of the finest products we tested and comes with a solid cross-linking formulation for installing tiles and planks indoors for your hardwood floor. It is compatible with a wide range of materials, including luxury vinyl tile (LVT), luxury vinyl plank (LVP), and even wood composite.
Additionally, it can create a solid bond with concrete and plywood, steel, marble, and other materials. One of the things we liked most about this versatile product is that it is effortless to apply and clean up. All you need is a trowel for application and soap and water for clean up.
Not to mention how the 7350-1 dries clear, leaving a polished and sophisticated finish. Moreover, the thickness of the glue makes it the perfect choice for using it for hardwood floors, as it enables application with great precision without running off across the surface.
We did not come across any significant downside to this excellent product during our testing phase. However, we wish that this hardwood floor glue did not take such a long time to dry, as it can even take over a couple of days. But the product redeems itself as it is firm and delivers excellent results.
What We Like
Very easy to use
Strong bonding
Versatile
Easy to maintain and clean
What We Don't Like
Long drying time
Adhesive Type: Polyurethane | Cure Time: 24-48 hours | Dry Time: 24 hours | Bond Strength: High | Heat Resistance: Yes (up to 150°F) | Waterproof: Yes
2. DAP - Best Water-resistance
Next up on our list is the DAP 142, a water-resistant multipurpose glue that is great for different types of flooring, including hardwood floors. DAP has been developing a range of caulks, sealants, and adhesives since 1965, and the 142 is another high-quality product that offers impressive performance.
We discovered the DAP 142 while looking for the best glue for hardwood floors with water-resistant capabilities and were delighted with this product. Besides creating a water-resistant bond, the 142 also increases shrink resistance during installation on hardwood flooring. This property allows you to reposition tiles or planks as required easily.
Another thing that you’ll like is that, unlike most adhesives, the DAP 142 is a low-odor and low-VOC product, which makes it one of the safest options available. Since it emits a low amount of VOC, it is ideal for use indoors and in all types of locations.
From a safety point, this item from DAP is also non-flammable. Besides being one of the safest options, this wood flooring glue is also very easy to clean and maintain. Just use some soap and water, and it will scrub off easily from unwanted areas.
Once again, we have nothing to say against this outstanding product. However, we would like to point out that the instructions are not very clear, which might be tricky for first-time users. However, other buyers have provided detailed instructions online to help you out.
What We Like
Powerful bond
Safest option
Reasonable pricing
Easy to clean
What We Don't Like
Unclear instructions
Adhesive Type: Polyvinyl | Cure Time: 24 hours | Dry Time: 30 minutes | Bond Strength: High | Heat Resistance: Yes (up to 150°F) | Waterproof: Yes
3. CalFlor - Best Durability
Moving on to the next product, we bring you the CalFlor GL82114CF, one of the most well-received glues for general flooring purposes. Apart from its water-resistant properties, this hardwood floor adhesive comes with a D3 certification, making it ideal for use indoors.
There are several things to like about the CalFlor GL82114CF, the first of which is its high-strength bonding capacity. This highlight makes it one of the best adhesives for hard surface flooring, including ceramic, concrete, and wood.
Not only is the GL82114CF strong, but it is also reasonably flexible once it dries. The flexibility also makes it more durable as your flooring can take a more significant amount of stress without breaking.
Also, this product comes with a D3 certification, which ensures that it is resistant to water and humidity. You can rest assured that your hardwood floor will not be affected by any short-term exposure to condensed water or give way to mold.
Other than that, this product from ClaFlor is a low-VOC option and comes with the FloorScore certification, making it an excellent choice to preserve indoor air quality.
The CalFlor GL82114CF is undoubtedly one of the best products if you want to glue hardwood floors. However, it does not perform well on luxury vinyl plank (LVP) material. If you are looking for a more versatile option, better alternatives are available on the market.
What We Like
Easy to use
Comes with safety certifications
Strong, durable bond
Low maintenance
What We Don't Like
Not suitable for LVP
Adhesive Type: Cyanoacrylate | Cure Time: Instant | Dry Time: 30 seconds | Bond Strength: High | Heat Resistance: No | Waterproof: Yes
4. Titebond 2104
Now we bring you an exciting product from Titebond, a leading manufacturer of high-quality products for hobbyists and homeowners. The Titebond 2104 is a dynamic product that promises solid and lasting bonds on all types of laminate and hardwood flooring with excellent results.
To begin with, the Titebond 2104 is one of the strongest adhesives that we came across for both laminate and floating floors.It can even be used on floors that lie over radiant heating systems without any issues.
It is also worth mentioning that 2104 has passed the ANSI Type II water-resistance test. In other words, the glue creates a highly effective barrier against moisture, providing stability and durability to your hardwood floor.
Another thing that sets the Titebond 2104 apart from the competition is its two-year shelf life, so you won’t have to throw out any leftovers. Also, it is entirely non-toxic and non-flammable, making it an environment-friendly option.
This wood floor glue has a low chalk temperature and maintains a strong bond. However, it dries to a white color, which may be favorable as it becomes easy to see and clean on all types of flooring. These include ceramic, concrete, and even engineered wood flooring.
We were very impressed by the performance of the 2104 wood floor adhesive from Titebond. However, the manufacturer has recently increased the price of this superb product, making it one of the costlier options on our list. Despite the cost, this product remains a fan-favorite due to its excellent results.
What We Like
Excellent bonding strength
Easy to apply
Can be stored for future use
Protects against moisture
What We Don't Like
Costly option
Adhesive Type: PVA | Cure Time: 24 hours | Dry Time: 20-30 minutes | Bond Strength: High | Heat Resistance: No | Waterproof: Yes
5. Titebond 1415 III
Titebond has mastered the art of developing high-performance adhesives for all types of flooring requirements. On that note, here is another noteworthy product from the brand — the 1415 III Ultimate Wood Glue. Specially designed for use with hardwood floors, this glue guarantees exceptional results.
While most of the other items on our list are meant for a wide range of flooring substrates, the Titebond 1415 III is designed to be used as wood glue. It creates a powerful bond with wooden surfaces and remains one of the best hardwood flooring adhesive options to get today.
That is not to say that the 1415 III does not offer versatility. In fact, you can easily use it for indoor and outdoor applications. It can be the perfect solution for redoing your patio or installing and repairing hardwood floors in the kitchen — or perhaps, both.
The 1415 wood glueis also waterproof and can be easily used on flooring frequently exposed to moisture. On that note, some customers have used it on surfaces other than flooring with success.
Also, if you are looking for an option that gives you a longer working time for repositioning and making adjustments, this is the ideal choice.
We could not find any drawbacks worth mentioning while testing the Titebond 1415 III. The only thing to note is that the large handle on the bottle is not required and gets in the way when applying the adhesive. Perhaps, the manufacturer should look into improving the design of the bottle.
What We Like
Wide application
Decent setting time
Waterproof bonding
Superior bond strength
What We Don't Like
Inconvenient bottle design
Adhesive Type: Polyurethane | Cure Time: 24 hours | Dry Time: 8 hours | Bond Strength: High | Heat Resistance: Yes (up to 200°F) | Waterproof: Yes
6. Roberts 1407-1
Another excellent product from Roberts, the 1407-1, is a wood glue that is specially manufactured for use with wood flooring, plain back parquet flooring, and acrylic-impregnated planks. It is a high-performance product meant for heavy-duty use and is excellent for hardwood floors that witness heavy traffic.
Being a product from the Roberts brand, we expected the 1407-1 to deliver impressive results and are delighted to say that it did not disappoint. Due to its high-strength bonding, this wood floor glue is one of the best adhesives for engineered hardwood floors.
Despite being developed for use with hardwood flooring, the 1407-1 can also be used on concrete, plywood, and acoustic cork underlayment. While testing the product, we found that it comes with an easy-to-apply bottle that makes it ideal even for first-time users.
Even more impressive is the fact that this product is LEED-compliant, making it one of the best environment-friendly options to get. Add to this the low VOC emitting property of this product, and you get one of the safest value-for-money options on the market.
While testing the product, we noticed that this glue has one of the strongest and foulest odors in the segment. It is highly recommended to use a face mask and keep your face covered while using this product. However, the odor fades away after a few weeks.
What We Like
User friendly
Value for money
Strong and durable bond
Safe to use
What We Don't Like
Emits foul odor
Adhesive Type: Multipurpose | Cure Time: 24-48 hours | Dry Time: 20-30 minutes | Bond Strength: High | Heat Resistance: No | Waterproof: Yes
7. Henry W.W Co.
The Henry W.W. Co. 12236 is one of the best adhesives for all types of wood flooring, including engineered hardwood floors and solid wood flooring. Featuring urethane-enhanced acrylic technology, this product offers a long working time and excellent bonding strength for a great experience.
The Henry W.W. Co. develops and manufactures high-performance resins and adhesives for both commercial and residential purposes. The 12236 urethane adhesive is one of the finest products from the brand that can be used on different types of wooden flooring.
We tested this product on engineered hardwood and solid hardwood floors with excellent results. It has an impressive initial grab and provides a long working time. So, if you need to make adjustments or reposition the planks, this is a great choice. It is also very easy to use, making it an ideal option for new users as well.
Additionally, the 12236 also provides an excellent moisture barrier, preventing moisture from entering your floor and ensuring that the wooden floor is intact. Furthermore, cleaning it up is also very easy. We used mineral spirits to clean it up after installation, and we’re happy with the results.
While we were very impressed by the performance of this excellent product, however, it is specifically meant to adhere wood to concrete. It is unsuitable for other purposes, such as gluing wood to drywall. For more versatile applications, we recommend going with another option.
What We Like
Easy to use
Flexible
Easy to clean
Provides repositioning and adjusting time
What We Don't Like
Only meant for wooden surfaces
Adhesive Type: Multipurpose | Cure Time: 24 hours | Dry Time: 30 minutes | Bond Strength: High | Heat Resistance: No | Waterproof: No
8. Bostik GreenForce
Our penultimate product for you is the Bostik Greenforce, one of the most potent hardwood flooring adhesives. This glue for hardwood floors comes with excellent bonding strength to keep your hardwood floor in place while also offering moisture control to prevent any damage to the flooring.
The superior green grab immediately caught our attention among the many impressive features that the Bostik Greenforce offers. Green grab refers to how effectively an adhesive can adhere to the wood plank on first contact. With this product, the wooden planks are set down and fixed in position, ensuring stability in your wood flooring.
Additionally, the manufacturer has developed this hardwood glue so that it does not let any moisture permeate through the subfloor. You do not need to worry about water spilling over your hardwood floors and damaging them.
What is more, we also like the fact that the Bostik Greenforce is a highly versatile product that can be used easily with almost any subfloor and flooring. You can use it over concrete, plywood, well-bonded vinyl, and more.
Being a highly effective product, it is vital to read and follow the instructions properly to get the desired results. This adhesive does not provide any space for experimentation, and you will not be able to get the desired results if you do not follow the exact results.
What We Like
Wide application
Protects against moisture damage
Easy to clean
Excellent bonding
What We Don't Like
No room for experimentation
Adhesive Type: Polyurethane | Cure Time: 24 hours | Dry Time: 2 hours | Bond Strength: High | Heat Resistance: Yes (up to 170°F) | Waterproof: Yes
9. DriTac
Coming to the final product, the DriTac CECOMINOD081282 is another excellent option if you are looking for hardwood flooring adhesives. It also works exceptionally well for installing engineered wood flooring, even in situations where other products do not work, and can be used for repairs over concrete as well.
The Dritac CECOMINOD081282 is one of the best glues for hardwood floors available on the market, and it is easy to see why. It is meant for repairing damages in hardwood flooring but works equally well for new installations, offering stability and durability to your wood floor.
One of the features we liked most about this product is that it comes with a refillable bottle that allows multiple uses. You can even store it for use on other projects later on.
Besides that, this glue for hardwood floors is also very efficient in creating a solid moisture barrier. It can help protect your flooring from water spills. What is more, you can even fill voids between your flooring and the subfloor with this excellent product.
The Dritac adhesive is reasonably easy to use and is one of the more cost-effective options on the market.
The Dritac CECOMINOD081282 comes with a syringe that tends to clog up and requires frequent cleaning during the application process. You will need to keep a small pin or similar object handy to unclog the syringe while working. However, performance-wise this hardwood floor glue does an exceptional job.
What We Like
Prevents moisture damage
Suitable for installations and repairs
Easy to use
Creates a strong bond
What We Don't Like
The syringe tends to clog up
Adhesive Type: Polyurethane | Cure Time: 24-48 hours | Dry Time: 4 hours | Bond Strength: High | Heat Resistance: Yes (up to 170°F) | Waterproof: Yes
What Is the Best Glue for Hardwood Floors?
This table compares key attributes, including adhesive type, cure time (in hours), dry time (in seconds/minutes/hours), bond strength, heat resistance (in °F), and waterproof properties, aiding in the selection of the optimal glue for hardwood floors.
Buying Guide for the Best Glue for Hardwood Floors
We hope you enjoyed going through our review-based guide for the best glue for hardwood floors, and it proved helpful in your search for the right product. However, there are still a few things that we need to share before you can get down to selecting a product.
Even after knowing about the best options, several factors need to be considered before you can find the right product. In this section, we will share with you some of these factors that can help select the right product.
1. Substrate Type
One of the primary factors to consider when buying flooring glue is the type of substrate you have. Substrate refers to the structure or material that lies directly below the wood flooring finish. Not all adhesives work well with all types of subflooring, which is why you need to select the glue that is most compatible with the subflooring installed.
For instance, some adhesives can be used to install flooring over plywood subflooring, while others can even work over radiant heating systems.
2. Flooring Type
Another equally essential factor is the type of flooring you plan to install or repair. There can be several types of flooring even within a particular segment. For instance, in the case of wooden flooring, you can have hardwood floors, engineered wood flooring, or even laminate wood floors.
The type of flooring will determine which glue works best for it. Some products work well on a wide range of floors, offering versatility, while others are limited to a specific type of flooring. The greater the compatibility between the type of floor and glue, the better the results.
3. Drying or Curing Time
The amount of time that glue takes to dry or cure directly affects how much time you get for the installation process. It also determines the amount of adhesive that needs to be prepared for each process stage. Furthermore, the curing time decides how soon the wood flooring is ready to support weight and can be put into use.
Adhesives with a smaller curing or drying time will make your flooring ready to use sooner. On the flip side, however, you won’t get much time for repositioning or adjustments with such products.
4. Location
For interior installations, adhesives do not need to withstand a large amount of weathering or environmental damage. Most options available can be used for interior flooring installations or repairs. On the other hand, for exterior environments, it is advisable to get glue that can handle stress from environmental factors, such as the sun, rain, snow, etc.
The location also determines the climate, which plays a critical role in the performance of the adhesive. Some adhesives work better in warm and humid conditions, while others are meant explicitly for hardwood floors in freezing temperatures.
5. Ease of Use
Ease of use is a vital factor to consider depending on how you plan to get your flooring installed or repaired. If you plan to undertake the installation or repair without hiring any contractors, get a product that can be applied easily.
Ease of use should also be considered if you are a first-time user. Those with prior experience using such products for repairs and installations can work with products that may not be very simple to use. However, even in that case, an easier-to-use option can help save a lot of time and effort.
6. Soundproofing
An important factor to consider when choosing the best glue for hardwood floors is the glue's impact on soundproofing. Certain adhesives can improve the soundproofing properties of the hardwood floor by filling the gaps between the floor and the subfloor, thus reducing sound transmission. This can lead to a quieter and more comfortable living space. Some adhesives on the market are specifically designed with sound-dampening properties and can significantly enhance the overall soundproofing performance of hardwood floors.
While choosing the best glue for hardwood floors, it is essential to look for products that specifically mention their soundproofing capabilities or are recommended for use with wood flooring systems that require enhanced soundproofing properties.
7. Cleanup and Maintenance
Flooring glue can be one of the most challenging things to clean. Fortunately, manufacturers are now paying attention to this and altering their formula to make the adhesives easier to clean.
Generally, water-based glues are easier to clean than solvent-based ones, but that also makes them more susceptible to moisture damage. Select the flooring glue depending on how much time you have to clean up the mess afterward.
Can I use regular glue for hardwood floors?
No, it’s not recommended to use regular glue for hardwood floors. Regular glue is not designed to withstand the weight and pressure of hardwood flooring and may result in a poor quality installation.
How long does it take for hardwood floor glue to dry?
The drying time for hardwood floor glue can vary depending on the type of glue used and the environmental conditions. Generally, most hardwood floor glues take anywhere from 24 to 48 hours to fully dry.
Is it necessary to glue hardwood floors?
Gluing hardwood floors is not always necessary, but it’s a popular method for securing the flooring to the subfloor. Gluing can provide added stability and prevent squeaking or movement in the flooring.
Can glue for hardwood floors be used for other types of flooring?
No, it’s not recommended to use glue for hardwood floors on other types of flooring. Different types of flooring require different types of adhesives, so it’s important to choose the right adhesive for the specific flooring material.
How do I remove glue from hardwood floors?
Removing glue from hardwood floors can be a difficult and time-consuming process. It’s important to use the proper tools and techniques to avoid damaging the flooring. Some methods for removing glue include using a heat gun, a scraper, or a solvent specifically designed for removing adhesive. It’s recommended to consult with a professional for the best approach.
With that, we’ve come to the end of our comprehensive review and guide to the best glue for hardwood floors. It is now time for us to leave you to make a decision, But before we go, here are a few of our top picks.
Our overall favorite is the Roberts 7350-1, which offers excellent performance and is LEED-compliant to boot. However, if you’re looking for a multipurpose option for your hardwood floor that is also moisture-resistant, then the Henry W.W. Co. is a better choice.
Finally, there is the CalFlor if you are looking for a safe and beginner-friendly option. On that note, we will be signing off. Feel free to leave a comment below and let us know what you think of our recommendations.
In contemporary architecture and interior design, grid ceilings, dropped ceilings, T-bar ceilings, and suspended ceilings are commonplace. These are all types of false ceilings, specially designed to add a sense of modernity and provide an opportunity to customize spaces with unique shapes and lighting. False ceilings are often used to achieve particular aesthetic and functional goals, but they also come with certain advantages and disadvantages.
What is a False Ceiling?
A false ceiling, also known as a secondary or suspended ceiling, is a supplementary architectural layer installed beneath the existing structural ceiling, typically supported by a metal grid framework. This versatile design element serves multiple functions, including concealing utilities such as ductwork, piping, and electrical wiring. Moreover, false ceilings contribute to enhanced room acoustics, thermal insulation, and overall aesthetic appeal.
Pros of False Ceilings
Easy to install with the proper tools, offering numerous online resources for DIY enthusiasts, though professional consultation is advised.
Effective for hiding ductwork, pipes, and electrical wires, creating a clean, clutter-free appearance.
Easily replaceable and repairable in case of damage.
Offers a cost-effective and less disruptive repair process compared to traditional ceilings.
Traps a layer of air, reducing heat during summer and cold during winter, potentially lowering energy bills.
Considering a false ceiling design does not require a continuous layout from wall to wall. Reflect on what lies above the existing ceiling and the potential benefits of adding a full false ceiling for acoustic insulation.
Cons of False Ceilings
Reduces room height since it hangs below the existing ceiling, which can be a potential issue in certain settings, such as historical buildings.
Lacks the solidity and sturdiness of traditional ceilings, potentially becoming unstable during natural disasters like earthquakes, impacting fixed elements like lights, speakers, and sprinklers.
In vast areas, false ceilings can be challenging to maintain, as they might attract pests seeking refuge in the concealed space.
As you evaluate false ceiling designs, consider these pros and cons and how they impact your specific interior space.
False Ceiling Design Ideas
Spectacular geometric play of texture and shape animating a modern interior that uses exposed concrete.
The light here is used to boost the lush extraordinary space yet the direction expressed in the ceiling emphasizes the expansive views captured through immense floor-to-ceiling windows.
Detail here comes in the form of geometric play in both furniture and ceiling finish thus creating balance.
You can use light to accentuate a pattern or material of choice.
Sculptural organicity contrasts the rigid black-and-white composition on the floor.
Photography by Gatis Rozenfelds
Photos by Rien Meulman.
Image via Taylor Grant Photography
Photography by Robert Hoernig
Image via Marion Brenner
Photography by Ben Rahn/A-Frame
Image via Mark Pinkerton VI360 Photography
Photography by Michael Weber
Photography by Pavel Babienko
False ceilings have no limits in terms of design, while their practical-pragmatic component is rather simple and rigid, design-wise one could realize absolutely anything. How do you see the settings above? We would love to hear from you in the comment section below.
Have you been trying to revamp your garage floor? If so, you would have come across several options.
The most common one being the bare concrete flooring that's found in almost all garages. Some people may even end up painting the concrete to make it more aesthetically pleasing. In contrast, those with a higher budget may gravitate towards a tiled garage floor.
However, other than these, another option has been getting traction in recent times - the epoxy-coated garage floors. Along with adding brightness to your garage, these floorings also last for a long time and protect the underlying concrete floor.
Even though epoxy resins have been available for a while, most people are still confused about the right way to use the substance to create durable floors. Hence, we thought of making this informative guide to give you a crash course on epoxy garage floors.
So, without further ado, let's get started!
Epoxy Garage Floor 101
What Is An Epoxy Garage Floor?
When it comes to epoxy garage floors, many people think that the resin is painted on the surface. But, that isn't true, as an epoxy floor is actually covered with a coating of a two-part resin. The mix contains a polyamine hardener and an epoxide resin which is applied to a concrete or wooden floor and let to cure with heat.
There are several reasons for which you can install an epoxy garage floor, but most people get it for the durability it provides to the floor. When the heat cures the resin, polymer bonds are formed that make the substance moisture-resistant and stable against harsh chemicals and solvents.
How Is An Epoxy Garage Floor Prepared?
One of the most exciting things about epoxy floors is the way it's created. The steps aren't that hard to follow, so we thought of giving you an overview of how the epoxy floor is installed.
Step 1| Preparing The Concrete
Even though epoxy resin can be applied over wooden floors, most applications are on bare concrete surfaces. If the garage doesn't already have a concrete floor, then you may proceed to get it done before installing the epoxy floor.
And, if the garage already has a concrete floor, then you should start by proceeding to clean and scrub the surface. The top surface needs to be scoured or shot blasted to get a rough edge so that the epoxy can have a better grip.
For those who are remodeling a garage floor, you may need to do additional prepping, which includes filling in cracks and degreasing the surface. There might be a need to grind the floor if it has an existing layer of paint or epoxy.
To avoid problems in the future, you would also need to do a moisture test on the concrete floor. Some people like to acid-etch the concrete floors to get a cleaner surface. Do remember to clean all the dust and debris to ensure no foreign particles remain between the floor and the epoxy coat.
Step 2| Applying The Base Coat
It's time to apply the first epoxy coat onto the concrete floor. You have to make sure that the epoxy proportions are correct so that the substance can act as a sealant on the floor. While working with a large amount of resin, using a drill helps to provide a smooth mix.
Those who want a colored epoxy floor may add a few drops of the desired paint into the epoxy. It's best first to use duct tape to define the perimeter and then proceed to use a brush to apply the epoxy along it to get a straight edge. Then, you may use the roller to apply the epoxy to the rest of the floor.
Many people like to add paint chips and flakes at this stage so that they can stick to the epoxy. And this coat needs to cure for the duration stated by the manufacturer.
Step 3| Add A Second Coat
At this stage, you would want to apply a clear topcoat to the flooring to make it shiny. But, to give it a little more texture, you can mix in the anti-skid additive, which makes the floor less slippery.
As this is the final layer, you want it to be as smooth as possible and keep it even throughout the floor. Don't forget to apply the resin on the corners to give the space a cohesive look.
Now, you need to wait for the coat to cure so that the garage can be used, and it takes three to seven days for this process.
Benefits Of An Epoxy Garage Floor
Protects The Underlying Concrete
Rather than just being a floor coating, the epoxy actually helps to protect the underlying concrete. Garages with bare concrete floors often see a lot of damage due to the constant wear and tear. And, a layer of epoxy helps to minimize the damage even on a garage floor.
As a non-reactive layer, the epoxy coating acts as a barrier between the concrete and the outside environment. You wouldn't even need to worry about dropping heavy things on the floor, as the polymer bonds of the resin make it shock absorbent.
However, when it comes to concrete floors, moisture and harsh chemicals are the first ones to cause extreme damage. Because the epoxy acts as a protective layer, it won't let the water seep into the concrete. Similarly, harsh chemicals and oils dripping out of the car will remain on top of the surface without reacting with the epoxy layer.
Durability
One of the common reasons for getting epoxy garage floors is their durability. It looks and feels the same even after several years and continues protecting the concrete.
Yes, you may need to retouch the top layer after six or seven years, but it is inexpensive compared to other floorings. Moreover, if the epoxy floor is kept clean, it wouldn’t give you any trouble for a long time.
That's why many commercial establishments are opting for epoxy-coated floorings. Because of epoxy's ability to withstand a lot of weight, your cars wouldn't cause any damage or crack on the floor.
Aesthetics
Are you tired of looking at the bare concrete floors? Think about revamping it with an epoxy coating as there are various aesthetic looks that you can choose. Apart from the usual dust specks, metallic epoxy floors are also a popular option.
An epoxy floor can change the entire look of your garage by making it brighter and more presentable. And, if you are a car enthusiast, then choosing the right epoxy garage floor can set the ambiance of the place. Many people prefer to install epoxy floors while building their showroom style garages.
Cost Effective
While thinking about any home renovation, the cost is one such factor that can make or break a project. Epoxy resin is one of the most affordable options available on the market that can truly change the look of your garage.
Professional installation may cost you a bit more, but in the end, it's cheaper compared to other options like tiles or vinyl floorings. But, if you want to save more money, try to learn the techniques to DIY the epoxy garage floor. It might be a little time-consuming because of all the wait time, but it drastically cuts the cost of getting the job done.
Besides, if you are thinking about selling your home, installing an epoxy garage floor may make a difference in the property price evaluation.
Ease Of Maintenance
When was the last time you tried cleaning a tiled or hardwood floor? You don't need to worry about the upkeep of this flooring as it's hassle-free, and it gets done faster. Because of the smooth and shiny texture of the epoxy floor, picking up dust is easier than bare concrete surfaces.
All you will need to clean the floor is a bucket of soapy water and a mop. You may even use a wet and dry vacuum cleaner to make the floor shiny and bright. However, it's best to avoid acidic cleaners as using them may lead to peeling of the epoxy surface.
You can safely work on your cars in the garage as there’s no need to worry about the grease and oil stains, as they don’t last on the epoxy floor. And, as it’s a smooth surface, cleaning up a spill is never an issue.
Disadvantages Of An Epoxy Garage Floor
Slippery When Wet
As the epoxy resin cures to be a non-porous surface, any water left behind after cleaning won't be soaked into the floor. Hence, whenever you are washing the garage floor with water, make sure to find a way to dry it as soon as possible.
This can become a serious problem for those who live in places with significant snowfall, as melting snow can turn the floor slippery. An easy solution is to add aggregate to the topmost layer of the epoxy coating. Because of the added texture, you can move easily on the ground without falling.
Alternatively, you may also add slip-resistant additives such as Shark Grip or aluminum oxide to reduce the slippery tendency of an epoxy floor. But, you should also note that adding these may lead to a less shiny surface.
Cannot Stand Welding And Hot Objects
One of the biggest advantages of epoxy is its ability to stand many solvents. But, you should never weld on epoxy garage flooring as it can seriously damage the surface and leave burn marks. This is also true for hot tires as they may also end up leaving an impression on your beautiful garage floor.
In fact, you should be careful about dropping any hot object on the floor to avoid it from getting damaged. Furthermore, you can opt to install an epoxy floor with high heat resistance to evade these problems.
Long Curing Time
Yes, it does take a while for the epoxy resin coating to cure. The total curing time for a garage floor can also depend on many aspects like the number of layers and the area coverage. However, usually, it takes around 72 hours for the coating to fully dry. This might be inconvenient for people who lack any other parking space near their homes.
Having said that, most experts suggest waiting for at least seven days before you start using the garage space. And, in most cases, the resin sets to become walkable within 24 hours.
Epoxy Garage Floor FAQ
Q1. Is It Worth It To Install An Epoxy Garage Floor?
Yes, it's worth it to invest in epoxy-coated garage flooring. Apart from looking gorgeous, it's one of the most durable flooring options out there. And, the resin layer protects the underlying concrete flooring from scratches, dents, and other common damages.
Also, it's pretty simple to maintain epoxy flooring, and there's no need for any special treatments. However, the best thing about epoxy flooring is that it lets you add a bit more shine and beauty to your garage at an affordable cost.
Q2. Can You Install An Epoxy Garage Floor Yourself?
Many people like to skip on a contractor while installing epoxy floorings to cut down on the cost. If you have had experience working with the resin, then DIYing it wouldn't be a problem. Just make sure to check out the proper way of installing the flooring, and don't be negligent about prepping the floor.
But, for those who have never worked in home improvement, it's better to consult a contractor to get the best results. This is especially true for those building a garage floor from scratch, which may include pouring concrete. Working with a professional also opens the avenue to incorporate newer designs and techniques to make the floor look even better.
Q3. How Much Does It Cost To Install An Epoxy Garage Floor?
If you are thinking about DIYing the epoxy floor, then it can cost you around $2.85 per square foot. However, the overall cost will depend on several factors like the area that needs to be covered, the amount of material required, and the expense of tools. Even though it's hard to come up with the exact cost, you should always strive to maintain a budget and remain within it.
The cost will be significantly more while working with a contractor, but it also means that you will need to spend no time physically doing the job. After you have set the budget, go through some contractors that install epoxy floorings, and ask them for a price quote.
Final Words
That's everything we had to tell you about epoxy garage floors. We have tried to keep the information comprehensive so that each point is easy to understand.
Having said that, if you decide to DIY the epoxy floor, make sure to learn the techniques needed to achieve the desired finish. When done right, an epoxy garage floor can last for a long time without the need for any retouching.
Moreover, make sure to use the recommended safety precautions while using the two-part resin. And, if you are new to home improvement, try to get in touch with a contractor who has experience in installing epoxy floors.
With that, we have come to the end of this informative guide about epoxy garage floors. Do let us know if you have any queries related to the topic.
Looking for an energy-efficient and cost-effective way to keep cool during the warmer months? Go ahead and install a ceiling fan.
However, there’s a common misconception about the energy consumption of ceiling fans. Do they use a lot of electricity? Well, here’s a hint - not really!
Although some models use more energy than others, they still consume relatively less electricity than coolers and air conditioners. That’s why they’re commonly used by most individuals to enjoy the indulgence of a cool breeze comforting their skin.
Still not convinced? Not a problem; we’re here to provide all the required information on the topic.
Through this guide, we’ll not just discuss how much electricity ceiling fans consume, but we’ll also explain the factors that determine their power consumption. Furthermore, you’ll be gaining valuable insight into the key differences between using an air conditioner and a fan.
So, without further ado, let’s get going!
Do Ceiling Fans Use a Lot of Electricity?
There’s no point in beating around the bush, so let’s get straight to answering the primary question, which forms the basis of this guide - do ceiling fans consume a ton of electricity? No, they don’t!
Ideally, most ceiling fans run at 50-80 watts while costing you around $0.006-$0.01 per hour at $0.12 per kWh. However, the cost of running a ceiling fan largely depends on its speed, how long you use it, and if you’re using lights with it or not.
How Much Electricity Do Ceiling Fans Use?
Now that you know that ceiling fans don’t really consume much energy, we’re sure you’ll be interested in learning how much electricity they actually use. There’s a simple formula for this, but you’ll need to know how many watts your fan requires to operate.
Those with a new fan can easily find its wattage listed on the box it came in. For an older fan, you might be lucky enough to find its user manual lying somewhere around the house. If not, it’s better that you go online to look up the manufacturer and model.
Once you know the wattage, simply multiply the number of watts needed to power the fan with the price per kWh electricity charged by your utility company. Let’s take an example to further our understanding related to this.
For instance, your ceiling fan requires 60 watts to run, while you pay your utility company $0.12 per kWh for electricity. The following calculations will help you determine the electricity usage of your ceiling and the total cost you’ll have to pay.
Per Hour Electricity Consumption
The cost of using the ceiling fan for one hour will be: 60 watts x $0.12 = 7.2
Since we’re calculating in kilowatts, and we know 1 kW = 1000 W. So, you’ll need to divide 7.2 by 1000 = 0.007
Therefore, your ceiling fan will cost you $0.007 for one hour of electricity usage.
Per Day Electricity Consumption
Now, suppose you use your fan on an average of 6 hours per day; a single day’s electricity consumption by the fan will be: 60 W x 6 hours = 360 Wh
You can also easily calculate how much you’ll be charged by your utility company for one day’s electricity consumption. Simply multiply the cost per hour by the average number of hours you use the fan, i.e., 6 hours (as per the example).
So, your ceiling fan will cost you $0.007 x 6 hours = $0.042 per day.
Per Month Electricity Consumption
Taking the average electricity consumption of your ceiling fan as 360 Wh per day, the total electricity usage for the month will be: 360 x 30 = 10800
As we’re calculating KWh, you’ll have to divide 10800 by 1000 = 10.8 KWh. Now, taking 1 KWh as 1 unit, the total energy consumption of your ceiling fan would be 10.8 units.
Finally, we’ll calculate the total amount you’ll be charged for using your fan for a month. For this, you need to multiply the total energy consumption for the month by the price you pay per kilowatt, i.e., 10.8 x $0.12 = $1.3.
To sum up, your ceiling fan will cost you $1.3 per month and $1.3 x 12 = $15.6 for the entire year. So, you can well imagine how cost-effective and energy-efficient these appliances are.
Factors That Determine The Electricity Consumption Of Your Ceiling Fan
As mentioned earlier, the electricity consumption and cost of running a ceiling fan may vary depending on a few factors. In this section, we’ll be briefly highlighting these points to create a better understanding. You may also consider these key factors as tips to help you save more energy and money.
Wattage
It’s quite evident that the fan’s wattage plays a significant role in determining its total energy consumption. And depending on the manufacturer and model, the wattage may vary anywhere between 10 watts to 120 watts or more.
Energy Star Certification
If you’re using an older ceiling fan, it’s time you replaced it with a newer Energy Star certified model. These fans have been designed to consume lesser units of electricity, making them more energy-efficient and cost-saving.
Fans With Light Fixtures
We agree that ceiling fans with light fixtures are extremely attractive and help enhance the contemporary or modern aesthetic appeal of your home decor. However, they aren’t really as energy-efficient as ceiling fans without light fixtures
Even if you do plan on getting a fan with light fixtures, make sure you go for the ones that come with LED light bulbs. Being more energy-efficient, they tend to consume much less electricity compared to traditional incandescent light bulbs.
Ceiling Fan Usage
This is undoubtedly another crucial factor that determines the electricity consumption of your ceiling fan. It’s obvious that the more you use your fan in a day, the energy usage is bound to be higher. But even then, it won’t cost you an exorbitant amount to operate.
However, it’s always advisable to not waste energy or your money for that matter when you can save them. So, make sure you switch off the fan whenever you leave a room to reduce the total electricity consumption along with your expenses.
Ceiling Fans vs. Air Conditioners | Which Is Cheaper & More Energy-Efficient?
Before we talk about electricity consumption and the price differences between ceiling fans and air conditioners, we’d like to discuss their functions.
Now, ceiling fans are powered by electric motors, which help in rotating their blades while uniformly distributing air in the surrounding areas. And as the cool breeze touches your skin, the sweat of your body evaporates to cool you down.
On the other hand, air conditioners use chemicals to eliminate the heat from inside your room to the atmosphere outside. These chemicals convert from gas to liquid and then back to gas at a significantly faster rate to carry out the cooling process.
So, which one of the two appliances is more energy-efficient? Well, on average, a ceiling fan requires 10 to 120 watts of power to operate, while air conditioners need a wattage ranging from 750 to 3500 watts. Seeing the huge difference between the two, we’re sure the answer is self-explanatory.
And of course, the higher the electricity usage, the higher the price. So, as the power consumption of a fan is comparatively lesser than an air conditioner, it’s cheaper to use.
Let’s discuss the costs further in detail now, shall we? Ideally, good ceiling fans would require 30 watts of power to operate. In comparison, any decent air conditioner would need around 1.2 kilowatts of power.
That said, using a 30 W fan for three hours will cost you only around 1 cent, while an air conditioner at 1.2 kilowatts per hour would cost around 14 cents. But even then, people still prefer using air conditioners, especially in warmer climates.
This is because ceiling fans fail to cool the room; instead, they only cool your skin, whereas air conditioners actually lower the temperature of the room. Therefore, keeping your fan running for an extended duration won’t alter the room temperature; it will simply waste electricity, especially when you’re not under the fan.
That’s why people often use the combination of a ceiling fan and air conditioner to cut down expenses on electricity bills.
To sum up, using an air conditioner is an efficient way of cooling your room; at the same time, ceiling fans are the cheapest to use. And to cool your room more efficiently, we’d suggest using a combination of both.
Final Words
There’s no doubt that a ceiling fan helps provide cost-effective cooling! It requires minimum units of electricity to run, costing much less than any air conditioner. However, the ongoing debate on whether an AC unit is more energy-efficient than a fan shouldn’t be ignored.
Through this guide, we’ve tried to address these queries using practical examples and explanations. And we hope that you come across clear-enough reasons that answer the most important question, which forms the basis of this article.
On that note, we have reached the end of this informative guide related to ceiling fans and their energy consumption.
Coved ceilings used to be a very common and integral part of the décor of 20th Century homes, especially in Northern European countries. Not just in Northern Europe, but many other parts of the world, like North America or even India used to influence coved ceilings, this trend influenced massive home interior design and home décor. However, with passing years, the usage of the coved ceiling has seen a downfall. Old houses still may have coved ceilings, and instead of getting rid of them, incorporating sculpted ceilings with modern-day designs is gaining a lot of popularity.
Coved ceilings and designing them could sometimes be tricky. From the usage of wired ceilings to various textures, different patterns, paints, etc.- coved ceilings have made a comeback! It would be worth it to mention some of the coving designs and how they could be incorporated to give your house a unique look.
What is a Coved Ceiling?
A coved ceiling is a decorative architectural element in which the traditional sharp intersection between the wall and ceiling is replaced by a rounded concave curve. The coved ceiling was popularized in the 18th century and is still widely used today as a distinctive feature in homes and commercial spaces. The curve in the coved ceiling serves a dual purpose of adding a visual element of interest and reducing the harshness of the right-angle intersection between the wall and ceiling.
Cove Ceiling vs. Drop Ceiling
Cove ceilings and drop ceilings are two distinct ceiling design styles prevalent in architecture and interior design, each with its unique characteristics, benefits, and applications:
Similarities
Both cove ceilings and drop ceilings serve as aesthetic enhancements in a room, contributing to the visual appeal and overall ambiance.
These ceiling styles offer customization options, which can include the incorporation of lighting fixtures, acoustic panels, or specific materials according to the space's requirements.
Cove and drop ceilings can act as decorative elements that align with various design aesthetics, complementing the overall décor of a room.
Differences
A cove ceiling is a curved design that follows the lines of the walls, creating a smooth transition from the wall to the ceiling. Drop ceilings, also known as suspended ceilings or false ceilings, are grid systems installed below the original ceiling, with individual tiles or panels filling the grid openings.
Cove ceilings are generally constructed using more solid and heavier materials, such as plaster, drywall, or wood. In contrast, drop ceilings typically consist of lightweight materials, like mineral fiber, fiberglass, or lightweight metal tiles or panels.
In terms of soundproofing, drop ceilings usually provide better acoustic performance due to their adaptable nature and the air gap insulation created between the original ceiling and the suspended grid. Sound-absorbing or sound-blocking materials can be used as ceiling tiles to enhance noise reduction. Cove ceilings, on the other hand, offer only minor acoustical benefits through their curved design, which disperses and diffuses sound waves to a limited extent. To address soundproofing concerns in both types of ceilings, proper soundproofing materials can be employed. Explore the best soundproofing materials that can complement various ceiling styles.
How to Use Coved Ceilings
1. The seamless cove
Certain houses which already have coves could be either accentuated or blended with the ceiling with either the same paint or wallpaper. The coving, as well as the ceiling, is first painted in the same color, and keeping in mind the complementary shades that would go with the color, the wall is then designed and painted. This helps in seamlessly adding that unique look of coves in the décor, without getting into a lot of hassle.
2. Furniture used for coving
A lot of olden days, as well as modern houses, have furniture which is attached to the walls. This could again be used creatively, and a coving could be added on top of them. It could be a wardrobe, study table, window pelmets, etc. Coving could be added on top, and the wall could be given a new definition. It looks very chic and saves space.
3. Accent coving
This technique is unique in the way that the room could be made to look different and colorful. Accent coving focuses on accentuating the coving, by painting it in a color different than that of the ceiling or the wall. This helps the coving to stand out and have its space in the room. After all, a coving does add to the intricacy of the room décor.
4. Sticking to the classics
One of the biggest problems of coved ceilings is to get the perfect fit of the wallpaper in the joint between the ceiling and the wall. This joint is 90 degrees and is very sharp, hence maintaining the same could be tricky. The classic coving has a similar color as that of the ceiling, and the wall has sharp paint or wallpaper. This needs to be executed with precision.
5. Ornate coving design
Coving can be given a twist by adding a lot of grandeur to it. It is not necessary for a coving to be incorporated with the ceilings and make it look seamless all the time, it could even be given a vintage look by adding intricate details and work to it. If the house is old and already has high ceilings, ornate coving adds a great deal of panache to it and changes the entire décor of the room.
6. Picture rails
Picture rails are not one of the most adapted concepts, but they are a great way how covings could be used. Also, for individuals who like to mix and match their pictures and play around with their home décor, this is a great idea. The pictures could be changed from time to time, and the coving could also be used wisely. It helps in defining the coving of the room.
These are just some of the ways how the interior of a modern home could be revamped by adding coved ceilings or even incorporating pre-existing coved ceilings in the décor. They look grand as well as chic at the same time, adding a wee bit of vintage vibes to the design.
Coved Ceilings Designs Gallery
What do you think? How do you like the designs above? We would love to hear your thoughts on coved ceiling designs!
Coved Ceilings FAQs
What materials are best suited for coved ceilings?
There are various materials that can be used for coved ceilings, including plaster, gypsum, wood, and polyurethane. The choice of material depends on several factors, such as the desired aesthetic, the location of the room, and the budget.
How are coved ceilings installed?
Coved ceilings are typically installed by using specific adhesive, screws, or both to attach the coving to the ceiling and wall. The type of adhesive and screws used can vary depending on the material of the coving and the surface being installed on. For example, polyurethane coving can be installed using a suitable adhesive, while wooden coving may require screws in addition to the adhesive. Using incorrect or unsuitable adhesives and screws can cause issues such as instability, peeling, or even damage to the wall and ceiling.
What are the benefits of coved ceilings, apart from their aesthetic appeal?
Coved ceilings have several advantages, such as providing a sense of spaciousness, improving acoustics, hiding imperfections, and enhancing lighting. They can also add value to a property and make it more attractive to potential buyers or renters.
Can coved ceilings be used in all types of rooms?
Coved ceilings are versatile and can be used in almost any room, including living rooms, dining rooms, bedrooms, and bathrooms. However, the type of coving and the installation method may vary depending on the humidity levels and other factors specific to each room.
Are coved ceilings difficult to maintain?
Coved ceilings are generally low maintenance and can be easily cleaned using a soft brush or a damp cloth. However, they may require occasional touch-ups or repairs depending on the material and the wear and tear. It’s advisable to consult with a professional for specific maintenance guidelines.
If you are confused about whether the best ceiling paint can also be used as wall paint, you need to know more about the two.
When you are planning to give your home a facelift, it is essential to pick the best paint colors for ceilingand walls. There are many like you who face confusion about these two types of colors and often use them interchangeably without any understanding. Ceiling paints and wall paints are not the same as they are fundamentally different.
To make the most of both these types, you need to understand their properties first. And, that will help you apply them in a perfect manner. Whether you’re confused about how to paint a ceiling with a roller, or wondering if you can mix wall and ceiling paint, we are here to clarify all doubts.
In today's guide, we will see how ceiling paints are different from wall paints and how to make the most of both.
Ceiling Paint Vs. Wall Paint
What Is Ceiling Paint?
When engaging in a paint job for the first time, many people get confused between ceiling paint and wall paint variants. But, they are not the same and need to be handled differently. For choosing the top paint colors for the ceiling, it is essential that you first understand the medium properly.
Ceiling paint colors are relatively a lot thicker (viscous) than wall paint. Most ceiling paints have a latex base, and when applied correctly, they never fail to deliver an even and smooth finish. The paint sheen of ceiling paints is not too high, and they mostly have a flat finish.
One of the major advantages of using ceiling paints is that they are resistant to a number of things. Be it staining, cooking vapors, or smoke, ceiling paints are impervious to all. However, this is not true for wall paints. Unlike wall paints, ceiling paints are formulated in a manner that they can resist mildew as well.
When using ceiling paints, you can consider putting just one coat as they are quite thick and won’t drip, unlike wall paints. And, ceiling paint also tends to dry quicker than typical wall paint.
Most Common Ceiling Paint Finishes
1. Eggshell Finish
For most painters, the eggshell finish is the best choice as it falls between flat paint and high-gloss paint. It is versatile and offers just enough reflectivity to show that the ceiling has been recently repainted, without the high sheen that draws too much attention to the ceiling. Moreover, eggshell finishes can also reduce sound reflection and improve sound quality, making them an excellent choice for larger rooms that require better acoustics.
However, if you prefer a slightly shinier finish than eggshell, you can opt for low-luster or satin finish paints. These paints offer a subtle sheen that is slightly more reflective than eggshell and is ideal for walls and other areas that require more moisture resistance. This finish does a better job of hiding flaws such as minor wall imperfections, roller marks, and skim-coat dust than eggshell or flat paint. However, it is less reflective than semi-gloss paint, and it is easier to touch up due to its more muted finish.
2. Flat Finish
A flat finish is a suitable choice for ceilings that don't require any particular visual appeal, as it provides a dull, smooth appearance while hiding any imperfections like dents or other forms of damage. This texture reflects less light than eggshell finishes, making it ideal for use in spaces like garages or storage areas.
If a flat finish isn't your cup of tea, you might opt for a low-luster finish instead. A low-luster finish shares many of the benefits of a flat finish while offering a slight sheen that makes it more durable and easier to maintain. It also hides flaws better and is more resistant to moisture than a flat finish. However, it also reflects more light than a flat finish and may show roller marks or other minor flaws.
Difference Between Ceiling Paint And Wall Paint
The most important characteristic of ceiling paint is that it is flat, and flat paints are great at hiding blemishes. And, unlike wall paint, ceiling paint reflects less amount of light. As they do not reflect light, ceiling paint can also be used on walls to even out and remove marks and bumps.
And, as we have mentioned before, ceiling paint (latex paint) is more viscous than wall paint and does not drip easily. The advantage to this is that ceiling paint is thick and tends to be more durable than wall paint. It also makes the painter’s job easier, as you can get done with just one coat of color.
On the other hand, if you are working with wall paints, a single coat is nearly impossible. As wall paint is much thinner, you would require to make at least a few coats to get the desired effect.
Are Flat White Paints And Ceiling Paints The Same?
Flat paint and ceiling paint are not exactly the same and are mostly used for different purposes. In many homes, flat ceiling paint is used in place of regular ceiling paint. This does the job well and gives a matte finish, and hides unwanted imperfections.
On the market, you will even find wall paint with a flat white finish. But, these paints are mostly not marketed as ceiling paint because of a number of reasons. Most importantly, wall colors, unlike ceiling colors, come in semi-gloss paint types. Now, this won't really work on ceilings, as the sheen would reflect a lot of light.
And, too much light reflecting from the ceiling can cause problems. If you take our advice, try not to put wall paint in place of ceiling paint, as that will create too much brightness. However, if you still want to do it, choose a flat white wall paint that does not have too much sheen.
Using Ceiling paint On Walls
From our experience, we can say with conviction that ceiling paint can be best used on a wall as a primer. On the whole, using ceiling paint on walls can make the painting process much smoother and easy to fix noticeable drip spots. This is possible because the ceiling paint is quite thick and tends to dry pretty fast.
However, there is one major problem when you try to use ceiling paint on walls. The best paint colors for ceilingare not available in too many shades, and you might not get many options to choose from.
Keeping the problems aside, there might be certain scenarios where ceiling paint can be best used on walls. This is particularly true when you are painting high-traffic areas that tend to get very dirty. Imagine a sports room where you keep your muddy shoes and boots. In such a room, painting the walls with thick ceiling paint can be the best bet as cleaning the walls would become easier.
When To Use Ceiling Paint On Walls?
Interior designers often make use of ceiling paints to create a pleasant aesthetic by covering an entire room with the same color. Apart from that, there are a few other ways in which you can use ceiling paint on walls.
Sometimes, people use ceiling paint on walls not just because it looks pretty but because it is convenient. When moving to a new house or renovating an existing one, you can completely avoid taping the closets when painting them if you are using ceiling paint.
Other than that, some people swear by ceiling paint when it comes to painting stairways. This is because stairways have to handle heavy traffic, and ceiling paint can easily hide scuff marks, dirt, and imperfections. Apart from painting ceilings, you can use these paints on both exterior and interior walls.
Unlike regular wall paint, ceiling paint can handle stains well, even if someone leaves a mark on the wall. If someone does it, you simply have to get a bucket of ceiling paint from the local paint shop and put a coat over the marks.
Using Wall Paint On Ceilings
By now, you must have understood that the consistency of wall paint is low. That said, it is not like these paints cannot be used on ceilings. It's just that you will be required to take a few precautions.
Because wall paints are thinner, there's a chance that they will splatter more, and you would need to do the extra work of cleaning. If you are using wall paint on the ceiling, be prepared to handle the drips.
Having said that, wall paints can work great for textured effects on a popcorn ceiling. When using wall paint on the ceiling, we recommend that you use a roller and not a paint sprayer. In case you are not aware of how to paint a ceiling with a roller, you will find hundreds of blogs on the internet that can be of help.
Not all wall paints are runny, to be honest! With proper research, you will be able to find wall paints that are thick, durable, and can be cleaned easily. These variants can be put on the ceilings to create great textures.
Can You Mix Wall Paint And Ceiling Paint?
Mixing ceiling and wall interior paints can be quite a task unless you have proper experience in working with paints. When mixing, keep in mind that the two paints should be of the same type. In case you end up mixing oil-based paint with latex-based ceiling paint, the results can be disastrous.
If you mindlessly mix ceiling paint and wall paint, the chances are that the top coat won't dry properly. For example, mixing satin wall paint with thicker ceiling paint is definitely not a good idea.
Your main idea should be to get the best of both worlds. And, for that, we suggest combining the two paints as an undercoat and topcoat. You can put the ceiling paint as an undercoat as it would make for a great layer, given that it is highly viscous and durable. And to highlight the beauty of the walls, you can then proceed to put a wall paint of your choice as the topcoat.
Pro Tip: Do not mix a lot of paint in one go. If things do not work, you will end up wasting a lot of colors. Instead, try mixing small quantities and experiment by putting them as small patches on your wall. This will help you understand how the mixture is behaving and how you can put it to best use.
Ceiling Paint Vs Wall Paint Frequently Asked Questions?
How To Paint My Ceiling Perfectly?
To get the best results, you need to have all the right tools handy. Before you begin to paint the ceiling, make sure that you put a primer on it first. We suggest that you keep brushes handy to cover intricate areas.
However, when painting ceilings, try to use a paint roller instead of a paint sprayer.
How Should One Prevent Stains On Walls?
In case you are painting a wall that receives high traffic, it is best that you put high-sheen paint on it. High-sheen colors, especially oil-based paint, do not catch dirt easily and are quite simple to clean.
On the other hand, low-sheen paints are not that scrubbable, and it can get pretty difficult to remove handprints and other marks from them.
Ceiling Paint Vs Wall Paint Final Words
With that, we have reached the end of this informative guide!
Whether you are looking for the best ceiling paint or wall paint, you can only find the perfect match through hit and trial. As a rule of thumb, always try to prefer thicker paints for ceilings as that will prevent the problem of dripping. Unless you are a professional painter, skip out on the sprayer and use a roller and a brush instead.
You can choose an elegant eggshell finish for your bedroom, a semi-to high-gloss for the kitchen and bathroom walls and ceiling. And, you can opt for a matte finish for the living space. For more interesting reads, do not forget to keep an eye out on this space.
Until next time, take care!
There’s no denying that ceilings play an integral role in making your room look beautiful and aesthetic.
And ceiling textures today have become more vibrant and multifunctional than ever. Some ceiling textures can be used for adding aesthetics to the room, while others can be used for adding utility to your place. Modern ceiling paints allow you to create many forms of ceiling art, and achieve a certain texture as per your preferences.
When it comes to the realm of ceiling texture, there are several options to choose from according to your personal taste. Some ceilings are made from plaster and mud, while others are made from materials to keep your room nice and cool.
Keeping this in mind, we have curated this guide to help you make the right decision for your existing ceilings. Keep scrolling if you want to learn more about the popular ceiling textures. Check out our other article on repairing cracks in concrete to know more and avoid any cracks in the roof texture.
Different Types Of Ceiling Textures
1. Knockdown Ceiling Texture
Knockdown texture is often known as a voluminous texture since it is made from drywall mud applied to the ceiling. It uses layers of plaster as a foundation before it’s tapped on with a soft sponge for effect. Additionally, the sponge creates an uneven and high edge all over the knockdown ceiling.
Once the step is complete, a knockdown tool is used to flatten the surface, eventually removing all the edges from the ceiling, giving your room a smart and uniform look.
Besides this, some professionals prefer using a scraper or drywall knife to press down the textured finish and remove the edges. Overall, this texture is best suited for adding depth and warmth to your living and bedroom.
2. Skip Trowel Ceiling Texture
The skip trowel ceiling textures are heavily dependent on the way you use the trowels. So, it is recommended to watch a few tutorials on how to use a trowel before you proceed with this texture. However, this is one of the easiest textures to make on your ceiling, and it requires no additional help from an expert.
For beginners, we suggest pressing the trowel texture at an angle against the wall and moving it gently across the ceilings as it forms a rough pattern all over the ceiling. If you plan to make the textures more aggressive and uneven, then you should move it around more roughly. Also, the smoothness of the ceiling can affect the overall outcome of the texture.
Alternatively, you can alter the angles to form unique styles with the trowel, which can add dimensions to your room if they are executed correctly. On that note, old-world finish and Spanish finish and two of the most commonly used styles when it comes to trowel textures.
3. Orange Peel Ceiling Texture
Orange peel texture is usually made from texturizers that are found in cans. Spray guns are used to eject the texturizer onto the ceiling by using different sizes of ovals. Since the texturizer is applied through a spray gun, the texture is pleasant to the touch and uniformly distributed.
If this is your first time working with an orange peel texture, then we suggest spraying the texture onto a cardboard surface and observing which angle suits your liking
Although orange peel textures are one of the simplest textures, we still suggest being cautious since they are tough to clean, and dust can easily get trapped between the ovals formed by the texture. Hence, they may not be ideal for bathrooms and kitchens.
4. Popcorn Ceiling Texture
Popcorn ceiling textures are extremely popular due to their utility. At first glance, you might not like the texture since it doesn’t have a “flashy” finish, but it can make your room soundproof. So, if you’re into practicing music, then this is just the right texture for your ceiling.
Popcorn texture is one of the deepest and heaviest textures to work with, so you should be careful while working with it since it can easily deform under too much pressure. However, the retro look of popcorn textures can add to the unique personality of your room.
5. Stipple Ceiling Texture
Stipple ceiling texture is a form of slap brush finish texture that is usually made from the strokes of a stomp brush. The brush has long bristles, which can be used for designing uneven shapes on drywall. Besides, it has a long handle which makes it ideal for working from the ground.
Start the process by applying the mixture onto a roller and pressing the brush against the ceiling. Move the brush gently across the ceiling to fill and cover imperfections or any irregular shapes and gaps on the ceiling. This texture is also suitable for covering up or patching any imperfections on the ceilings.
6. Stomp Texture
Stomp texture or crow’s feet texture is a type of texture that uses different brushes to form textures on the ceiling. Most professionals consider stomp texture as an alternative form of stipple texture, but they are still different from each other. The patterns formed by this technique resemble that of a fan or a crow’s feet.
Moreover, the tools and materials required for creating this texture are a bit similar to the skip trowel texture. So, if you have done a skip or mud trowel knockdown texture earlier, you can reuse the leftover materials for designing this texture on the ceiling.
One of the biggest advantages of stomp texture is that it blends well with all types of textured walls to add the aesthetics of the room.
7. Smooth Ceiling Texture
Smooth ceiling textures are the most commonly used ceiling finishes when it comes to renovating a building. Flat ceilings have a uniform and classic look, which always make the room look organized and aesthetically pleasing. On top of that, they are pretty affordable.
The smooth texture of these ceilings is easy to remove and it can blend well in each and every room without any hassle. Most offices and business owners prefer to use this texture for its smooth and consistent look.
8. Fish Scale Ceiling Texture
Next on our list is fish scale ceiling texture, a texture that is known for its unique design and personality. Unlike most textures, fish scale textures have one of the most intricate and detailed patterns, which make them stand out from the rest.
However, you will need to hire a professional to design your ceiling since the process is time-consuming and it requires a lot of precision and technique. We highly recommend this texture for your living room since it can draw the attention of the guests. Plus, this texture is suitable even if there’s a single coat of paint on your ceiling.
9. Lace Ceiling Texture
Out of all the textured ceilings, lace textures require a lot of energy and time if you want to see results. Nevertheless, the results will always be fruitful and rewarding. The texture uses the same tools that are used during the skip trowel process, which makes it a convenient option for those who already own the materials and the required tools.
Firstly, you need to apply one coat of self-mixing paint on the ceiling and wait for it to dry before applying the second coat of a different color. The trowel is then used to create texture on the second coat of fresh paint. Once this is done, you need to use a tool of your choice to make splotch designs on the surface of the ceiling.
10. Spray Sand Ceiling Texture
The spray sand texture is similar to the orange peel texture since they share the same technique of application. A spraying tool such as a hopper gun is sufficient for creating the texture on the ceiling.
We suggest spraying all the spaces and corners carefully if you want to achieve a beautiful ceiling texture. However, you should be careful since the texture is finer than the orange peel texture, which makes it less smooth and prone to dust.
Ceiling Finish Types FAQs
Do You Need Professional Help For Creating A Ceiling Texture?
Although there are many ceiling textures that can be created the DIY way, some may require a more specialized process. Hence, you will need to do thorough research before selecting the right materials for your ceilings.
However, experts and professionals have years of experience when it comes to creating ceiling textures and finishes. Therefore, it is recommended to take professional help to get the job done.
Should You Go For a Smooth Ceiling Or a Textured Ceiling?
Smooth ceilings are an excellent option when a high-end, clean, and sleek look is desired. They are ideal for bold colors and are well-suited for environments that require a modern and sophisticated feel.
Textured ceilings, on the other hand, create a more casual and subtle environment. They are best suited for soft colors and can help to make a room feel cozier and more inviting. In addition to the visual appeal they offer, some textured ceilings can also marginally improve the acoustics of a room by helping to reflect and absorb sound.
Which Ceiling Texture Types Are More Affordable?
If you have a tight budget, then we suggest using a textured ceiling for your room as the required materials are mostly affordable. On the contrary, smooth ceilings require a lot of technique and dedication to achieve a smooth and consistent look.
Apart from this, smooth ceiling materials are harder to procure. Therefore, smooth ceilings are recommended if you don’t have any limits on your budget.
Where Should You Use Rosebud Ceiling Texture?
Rosebud ceiling texture is a form of an artist’s ceiling texture, which gives the room a more beautiful and enhanced look. Since Rosebud ceiling texture requires a lot of technique and work, you should only use them if your walls have intricate designs.
The design of the rosebud ceiling textures usually goes well with any artist-themed bathroom as it adds a unique depth to the bathroom.
Can Acoustic Ceiling Textures Cause Allergies And Asthma?
Under normal circumstances, acoustic ceiling textures or popcorn ceilings don’t cause any types of allergies or irritations. However, airborne dust can easily get trapped between the fine gaps of acoustic ceilings, and this can cause unwanted allergies and asthma problems in the long run.
Moreover, popcorn ceilings are tough to clean and maintain; therefore, we suggest creating a popcorn ceiling only if you don’t have any allergies or breathing problems.
Ceiling Finish Types Conclusion
With that, we have come to the end of our article. Choosing the right ceiling texture can add to your home decor and make the said room the highlight of your space.
Before signing off, we would like to sum up a few factors that are important to consider while choosing the right ceiling texture. First and foremost, you should always pick a ceiling texture that matches the aesthetic of your room.
Also, keep in mind the color of your furniture and lighting before picking a suitable texture for your ceiling. Plus, consider the height and volume of the room before adding texture to your ceiling.
A noisy ceiling fan is a common issue in most households. However, it’s very easy to determine the root cause by carefully identifying the type of noise. Be it rattling, clicking, grinding, or humming noise, they can be quickly resolved by tightening a few loose parts and checking the fan motor.
Using ceiling fans on hot and humid days instead of an air conditioning system is a great way to save energy and money. Most ceiling fans run on minimal electricity and make almost no noise - you may not even notice the fan running if it’s in good condition!
However, a noisy ceiling fan can be really annoying since it can disrupt your sleep and even make you lose focus while working. That’s why it’s important to purchase a ceiling fan that makes little to no noise. But if you have an old fan that’s having this issue, the solution is usually as simple as tightening a loose screw.
In this article, I will walk you through some of the most common noises ceiling fans make and how to determine their ideal troubleshooting method. Read on!
Types Of Ceiling Fan Noises
A specific noise coming from the ceiling fan can help you determine what’s wrong with it. Pay close attention and listen to the noise carefully to identify what kind of noise it is making from the list below:
1. Humming Noise
If your ceiling fan is making a humming noise, there might be some issues related to the light switch or remote control, if any. This is a common issue, especially if it is set on a dimmer switch or low fan speed. If the issue persists even after increasing the speed and checking the wall switch, consult an HVAC technician.
2. Clicking Noise
A clicking sound may occur if one or two of the ceiling fan blades have come loose. This issue has an easy fix - you need to simply tighten the blade screws, which are typically located near the fan motor. If there’s a built-in light fixture on the ceiling fan, check its mounting screws since a loose ceiling fan light can cause accidents. Often, a loose light fixture can also cause a clicking noise.
3. Rattling Noise
Ceiling fans usually make a rattling noise if loose screws have fallen into the wrong place. This is especially common if there’s an electric light fixture attached to the fan motor - so look for any loose screws that have fallen into the glass box.
Rattling sounds may also be due to an improperly installed bracket. In this case, you must ensure the fan bearings are tightened. But if it continues to make a rattling noise, consider replacing the ceiling fan brace.
4. Grinding Noise
A grinding or scraping noise may sound a bit alarming, but it can be easily fixed if you can figure out what exactly went wrong. The most common cause of this noise is unbalanced blades - this usually happens when dirt and debris accumulate on the fan blades, thereby changing their weight unevenly.
Simply clean each fan blade with a damp rag to remove dust or grease that may be responsible for making it unbalanced. Cleaning the fan blades periodically will help reduce the grinding sound and prevent dust from dispersing into the room air.
If the ceiling fan continues to make a grinding noise after this, then the fan motor or bearing might require oil or any other lubricant. I recommend using the W-40 lubricant. However, it’s best to check the user manual to see which lubricant suits your ceiling fan’s bearings.
Causes of Ceiling Fan Noises
I’ve mentioned most of the causes of a noisy fan while categorizing the different noises, but I’ll go over them again to help you get a clear understanding:
1. Loose Parts
Loose fan components, such as the light fixture, blade mounts, screws, etc., can cause whirring or rattling sounds that can disrupt your peaceful home environment. So, checking for any loose ceiling fan blades or other parts during cleaning or maintenance is useful.
2. Blade Imbalance
If you let your ceiling fan blades collect dust by not cleaning them frequently, there’s a high chance of blade imbalance. In this case, the fan will make a grinding noise since the weight of the blades will become uneven when covered in dust.
3. Motor Problems
This is an obvious cause - the fan motor runs on electricity, so if there’s anything wrong with it, the internal mechanism will malfunction, making a whirring noise. If you hear this noise, it’s best to call an HVAC technician and get the motor checked.
4. Installation Issues
Improper ceiling fan installation can greatly impact its noiseless operation. Be it a loose screw, loosely attached fan blades, or even improperly installed light fixtures - they can affect the fan’s performance and make it noisy.
5. Poor Quality Materials
Poor-quality materials can not only contribute to a noisy ceiling fan but can also lead to several accidents. Poor-quality mounting screws can start decaying, making the fan blades loosen and fall off under some circumstances. Further, low-quality metal turbine blades can also peel with age and affect indoor air quality.
Fixes for Ceiling Fan Noises
1. Tightening Screws And Bolts
Most ceiling fans have their blades attached to the fan mount - this central portion of the fan may seem to be decorative, but they’re quite functional since they hold the entire fan together. However, with regular use, the screws on the mounts may come loose.
Check for loose blade screws and tighten them when necessary. Taking this simple step can solve the issue of a noisy ceiling fan.
2. Clean The Fan Blades
As already discussed, dirty fan blades are the most common cause of a noisy ceiling fan. Since the fan blades have flat surfaces, dust, and debris can easily settle on them, making a thick layer that can cause an imbalance. That’s why you must wipe down the blades regularly using a damp cloth - don’t forget to clean the blade mount!
Tip
If there’s grease on the blade surface, add a few drops of isopropyl alcohol or a degreaser into warm water and use it to wet the cloth.
3. Look For Warped Blades
Often, fan blades can warp or have dents due to rough use - and if uneven blades cut through the air at high speed, they’re sure to make some noise. So, I recommend closely observing the fan blades for any dents, or use a ladder if needed. If your fan blades are made from malleable materials, you can bend them back to their original shape and orientation.
If this is too difficult for you, replace the blades that are warped.
4. Tighten The Fan Canopy
If you observe closely, you’ll see an upper canopy that covers the part that is attached to the ceiling. New ceiling fans have a tightly fastened upper canopy, but it can loosen over time. If you see this, simply tighten the fasteners or re-attach the canopy cover back into place.
Some HVAC experts use a locking liquid on the fasteners to make them last longer and prevent them from coming loose.
5. Apply Lubrication
Lubricating the fan motor helps reduce friction between the mechanical parts and keeps them protected from damage. If there’s a lack of lubrication, the ceiling fan will emit a buzzing sound; however, you can easily fix this.
Get a ladder and take the fan motor apart to check if there’s any lubrication. If the motor parts are dry, add several drops of oil and rub the excess on the body of the motor. Then, put all the screws in place, and check how the fan is working.
6. Balance The Blades
Since some ceiling fans can be poorly constructed and made from low-quality materials, they will likely be imbalanced and wobble while rotating. I recommend purchasing a balancing kit to fix this issue - they are easily available online and in stores.
7. Check The Pull Chain
Most modern ceiling fans have a remote control or are operated by a switch, but there are still some models that have a pull chain. These chains are typically attached away from the moving parts of the fan. However, they often strike the blades or light fixtures, making a loud noise.
Observe the pull chain - if you see it’s swinging, then the fan blades may be imbalanced. You can try shortening the chain to a length that wouldn’t strike the moving parts, but it should be long enough for you to access it.
8. Tighten The Motor Cover
Every ceiling fan’s motor has a cover to protect it - but it can often come loose and scrape against the moving blade, making a grating noise. To fix this issue, access the motor cover fasteners and tighten them properly. Once tightened, turn on the fan in dimmer mode. The fan should be operating silently and efficiently.
Noisy Ceiling Fan FAQs
How do I diagnose the source of the ceiling fan noise?
Diagnosing the source of the ceiling fan noise is simple. You need to operate the fan at a low speed and carefully listen to what kind of noise it’s making. The common types are humming, clicking, grinding, rattling, and whirring noises. If you manage to identify the type, you can simply follow the troubleshooting methods I’ve mentioned in the article to prevent noise.
How can I fix a wobbling ceiling fan?
A wobbling ceiling fan is mostly caused by loose parts, blades, or improper installation. You can fix this by tightening any loose screws, mounting brackets, or motor covers, and while you’re at it, check if the ceiling fan is firmly attached to the ceiling.
How can I reduce the vibration noise of my ceiling fan?
If there’s a ‘vibration’ noise coming from your ceiling fan, there must be something wrong with the fan motor. Before you call an HVAC technician, consider adding a few drops of lubricant to the motor to see if it’s due to friction. If the noise persists, there’s a more serious mechanical problem that will require professional expertise.
Can a noisy ceiling fan be dangerous?
A noisy ceiling fan is commonly due to small issues, such as loose screws, unbalanced fan blades, lack of lubricant, loose motor cover, etc., which can be easily fixed. However, if you neglect a noisy fan and don’t address the issue at its roots, it can be quite dangerous.
If you run the ceiling fan at high speeds with some of its screws loose, it might fall off the ceiling and cause accidents. Likewise, not lubricating the motor properly might lead to short circuits and electric fires due to high friction.
When should I call a professional to fix my noisy ceiling fan?
Typically, fixing a noisy ceiling fan doesn’t always require a technician. However, if the issue persists even after following the correct troubleshooting methods and is reducing the fan’s performance, then you must call a professional.
Final Words
Ceiling fans are the most common air circulation equipment throughout the world. However, a noisy fan significantly reduces the comfort and peace of the environment. Various issues can lead to different noises - loose parts, improper installation, motor problems, blade imbalance, etc. - but they can all be fixed with a few simple steps. I have extensively talked about these solutions in this article.
Alternatively, you can consider installing window fans instead of ceiling ones since they come with significantly fewer risks. I’ve discussed the best window fans in another article for your consideration.
With that, I’ll be signing off for now. Goodbye!
Vacuum for stairs selection is crucial to maintaining clean, dust-free staircases that enhance your home’s ambiance and reduce allergens. Traditional cleaning methods—like brooms or indoor-outdoor vacuums—can be cumbersome, time-consuming, or prone to spills. Modern stair vacuums, ranging from lightweight sticks and cordless handhelds to upright models with motorized brush heads, make cleaning steps fast and effective. For pet households, specialized attachments and upholstery tools are invaluable for tackling embedded fur on carpeted treads and risers. In this guide, we’ve tested and reviewed 11 of the best stair vacuums based on weight, run time, tool compatibility, and surface performance, to help you find the perfect fit for your home setup.
Listed below are the Best Vacuums for Stairs:
Bissell Featherweight Stick Vacuum: Renowned for its lightweight versatility, this convenient stair-cleaning vacuum transforms easily into a handheld version. Its short power cord necessitates frequent outlet changes.
BLACK+DECKER Dustbuster AdvancedClean Vacuum: Rotating 180 degrees for superior cleaning, this cordless model ensures ergonomic handling. The non-replaceable batteries could limit its lifespan.
Shark Navigator Upright Vacuum: The standout feature, anti-allergen seal technology, makes it a choice for pet owners. It's heavy hose influences maneuverability.
Eureka RapidClean Pro Cordless Vacuum: Extended 40-minute runtime and multi-floor cleaning capacity are key selling points. It lacks practical attachment storage.
BLACK+DECKER dustbuster Handheld Vacuum: Delivering powerful performance in a handheld design, it's perfect for varied cleaning. The model would benefit from a charging stand.
Here's the list of the 11 best vacuums for stairs of 2024, carefully curated to make your cleaning routine a breeze.
1. Bissell Featherweight Stick Vacuum - Best for Lightweight Convenience
One of the most convenient and powerful vacuums that we found is the Bissell Featherweight Stick Vacuum. It is versatile, making it perfect for cleaning the entire house. With this piece of equipment, you can easily get dirt and dust off the floor and the stairs without facing hand pain or backaches.
To begin with, the stick vacuum comes with powerful suction capabilities, which ensure dirt gets easily picked up. You can use it to clean the stairs and hard floors and remove surface dirt from carpets and rugs as well. So, for all those with carpeted stairs, this should be a brilliant fit.
Moving on, the vacuum cleaner comes with a floor nozzle and a crevice tool. This nifty tool allows you to easily convert it into a handheld vacuum, which should help clean in between sofa cushions and around floor rugs.
Plus, it is compact and convenient to use, and we especially loved the lightweight body, which is easy to work with in small and big homes. Also, it comes with bagless cleaning technology, making it less bulky. You can just take it out of the box, plug it in, and start cleaning.
The only issue we had while using this vacuum cleaner was that we had to keep plugging it into different power outlets as we moved about. That is because the existing power cord is short, and you will not be able to go far away from the power outlets.
What We Like
Compact and easy to use
Can be used on floors and stairs
Does not cause hand fatigue
Easy to empty
What We Don't Like
Short cord length
Capacity: 0.67 liters | Filter Type: Disk | Dimensions: 8.3 x 9.5 x 44.25 inches | Weight: 2.6 pounds | Voltage: 220V | Cordless: No
2. BLACK+DECKER Dustbuster AdvancedClean Vacuum - Best Cordless Handheld
If you are looking for a cordless vacuum for easy cleaning, then the BLACK+DECKER Dustbuster AdvancedClean Vacuum will fit the bill. It is easy to maneuver and sports an ergonomic design. The product can be beneficial for large staircases with no power outlets nearby.
Firstly, this cordless handheld vacuum is lightweight and portable, making it easy to carry around and fit in tight spaces. You can use this tool for narrow staircases as well as nooks and corners. For further convenience, the 180-degree rotating nozzle allows you to enter these spaces and clean them at different angles.
Aside from that, if you are planning to clean in between couch cushions and on top of shelves, the pull-out crevice tool comes in handy. Then, the flip-up brush adds to its versatility, allowing you to vacuum and dust carpets, rugs, and other fabric surfaces.
Finally, you will love the cyclonic action that will spin debris and dust, moving them away from the filter. The vacuum cleaner will indeed provide you with strong suction power.
While the absence of a power cord makes the vacuum cleaner more portable, you should know that the batteries may not last for more than a few years. Most users have mentioned that they had to dispose of the cleaner once the battery ran out.
3. Shark Navigator Upright Vacuum - Best for Pet Owners
Next, we have a product with a sizeable dirt-storing capacity. Let us introduce the Shark NV360 Navigator Upright Vacuum, which is perfect for houses with pets. Pet owners know how annoying it is to find hair everywhere in the house, from stairs to carpets, and this product will help you deal with them easily.
One of its key properties is the anti-allergen complete seal technology used by the brand. The vacuum cleaner has a HEPA filter, which locks away allergens along with dust inside the machine. This can make the atmosphere healthier and easier to work in.
Moving on, it has a large dust cup that will let you clean the stairs and the entire house in one go. The vacuum cleaner is versatile and easy to maneuver, adding to the features. Equipped with dynamic swivel steering, you can take it around tight spaces and obstacles.
In case you just want to sweep the floor or stairs, turn off the brush roll and begin cleaning gently. Also, it can be lifted to clean spider webs on top of the wall. The pod comes with a carry handle, allowing you to control the movement smoothly.
While it comes with a lot of interesting features, so not that the hose is relatively heavy. Hence, you might have some difficulties maneuvering it around the place if you are not physically strong. We will recommend keeping this in mind if you are buying it for the elderly.
What We Like
Brushroll shutoff allowed
Swivel steering for easy movement
HEPA filter
Perfect for houses with pets
What We Don't Like
Heavy hose
Capacity: 0.85 liters | Filter Type: N/A | Dimensions: 14.37 x 11.61 x 26.77 inches | Weight: 15.96 pounds | Voltage: N/A | Cordless: No
4. Eureka RapidClean Pro Cordless Vacuum - Best for Late-Night Cleaning
Another cordless device known for its highly efficient performance is the Eureka RapidClean Pro Cordless Vacuum. It comes with LED headlights, making it a technologically advanced option. You can use this at night as well, thanks to the lights, which will allow you to see dust and debris a lot more clearly.
This vacuum cleaner offers a runtime of 40 minutes, which should be enough to clean the stairs and floors in the house. Plus, you can achieve efficient cordless cleaning, thanks to the latest motor technology. If you notice more dirt, then switch to MAX mode, which will increase the suction power immediately.
Furthermore, it is equipped with a cyclonic filtration system, which is specifically designed to separate and store particles. The dust, debris, and large objects will be trapped and kept separately inside, making space for more dirt to be sucked in.
Besides, you will admire the slim nozzle, which will allow you to reach under the stairs and furniture easily. The nozzle can be laid down flat and moved around, thanks to the low-profile head.
Moreover, it can clean multiple kinds of floors, including laminated ones, tiles, vinyl, hardwood, and low-pile rugs.
We were slightly disappointed to find no storage space in this vacuum cleaner. It does come with a few attachments, which have to be kept separately. Now, we keep the attachments in a larger storage box with the vacuum cleaner so that they stay together, and we recommend buying a storage box and doing the same.
5. BLACK+DECKER Dustbuster Handheld Vacuum - Best for Versatile Use
A high-performing handheld vacuum that can work perfectly in cleaning the car and the house is the BLACK+DECKER Dustbuster Handheld Vacuum. You can clean stairs, and floors as well as big messes made by pets or kids. We will now discuss the best features in the section below.
This handheld vacuum is a cordless model known for its high performance. Equipped with a 20V MAX lithium-ion battery, you can use it to clean multiple places at once.
As most of you may be aware, reaching the top corners or below stairs can be difficult. However, this handheld vacuum offers extended reach with its in-built crevice tool to solve such issues without having to stretch your body.
Next, the cordless vacuum offers two-speed cleaning. Here, the Powerboost mode is useful for cleaning big messes, and you can shift to it by just pressing a button.
Not only that, the vacuum comes with a large dustbin, which has a capacity of 75 ml. Hence, you can clean the entire staircase and floor in one go. The 35 AW of suction power will let you suck up dirt and debris at a higher speed making the process quick.
To charge the handheld vacuum, you will have to plug it in and unplug it manually. A charging stand would make it more convenient as you would have to put the vacuum on the stand, and it will charge by itself. Then, when needed, it could just be lifted up. However, we are not going to hold this as a drawback as the functioning is not affected.
One of the best vacuums for stairs is the Shark IZ363HT Cordless Stick Vacuum. It is known for efficient cleaning and is ultra-lightweight. You can enjoy accelerated suction capabilities as you clean the stairs. Plus, it can be turned into a handheld vacuum when needed for smaller cleaning tasks.
One problem that occurs with pet and human hair is that they tend to wrap around the brush and get stuck. However, this vacuum comes with a self-cleaning brush attachment that can easily pick up pet hair without wrapping them around.
Moreover, it is known for HEPA filtration and is anti-allergic in nature. That means it can easily capture dander, dust, and allergens, keeping the air fresh and healthy. As a result, you and your family members can live and breathe safely.
That is not all; the handheld vac has a runtime of 50 minutes when you are using the standard model. So, you can clean the entire staircase and the house in one go. What's more, it works on all kinds of floors beginning, from hardwood to carpets and thick rugs.
We found this product to work very well, but it caused our hands to ache after using it for a long time. The suction power is tremendous, and that might lead to pain in the upper arm area if you are not physically strong. Keep this in mind while purchasing, especially for elderly people.
If you are looking for powerful suction power, then the Dyson Cyclone V10 Stick Vacuum Cleaner will be a brilliant option. It is one of the best vacuums for stairs, and it comes with three power modes to toggle among. Learn more about its features in the section below.
To begin with, the Dyson stick vacuum motor spins very quickly at 125,000 RPM, which then generates a lot of suction power. It is a handheld vacuum that works perfectly for cleaning tight corners and carpeted stairs. Equipped with a runtime of 60 minutes, you can look forward to cleaning stairs without stopping in between.
Additionally, the machine is known for its advanced whole-machine filtration, which will cleanse the air around you in the house. It can capture tiny particles as small as 0.3 microns and remove 99.97% of the dirt in the air.
Moving on, the stick vacuum can deep clean carpets and remove pet hair that lies deep on rugs. You will also be able to reach under furniture because of its low-profile design.
Moreover, you can transform it into a handheld vacuum to clean stairs, between sofa seats, and in the car.
We noticed that the body keeps pulsating when it is being used in high-power mode. This would mean that you would have to hold it in place firmly while working. Thus, this might not be for those who are not very strong physically. The brand can look into this and reduce the pulsations while working with the device.
What We Like
Advanced docking station
Mini motorized tool
Capture dirt up to 0.3 microns
Low profile to reach under furniture
What We Don't Like
Keeps pulsating while working
Capacity: 0.76 liters | Filter Type: Disk | Dimensions: 9.84 x 10.08 x 49.17 inches | Weight: 5.86 pounds | Voltage: 21.6V | Cordless: Yes
8. EUREKA Cordless Vacuum Cleaner
The EUREKA Cordless Vacuum Cleaner is lightweight and is perfect for daily cleaning. You can easily assemble it when needed. And we could maintain a much cleaner house after this was added to our cleaning supplies. Read on to know more about its bells and whistles.
The best vacuums should be easy to assemble and use, and this one fits the bill. Assembling it is not going to be cumbersome, and you can wall-mount it as well. This will make storage easy, and you should be able to keep a well-organized space.
Moving on, the cordless vacuum cleaner has two cleaning modes, and you can switch it on and off when needed easily. Also, switching from low to high mode is simple, and you have a button right near the top, which makes it easily accessible. Moreover, you will be able to enjoy 30 minutes of runtime, thanks to the 21.6 V battery.
Another feature to consider is the low profile design, which makes reaching under cabinets very easy. All hard-to-reach places can be accessed with this lightweight vacuum. And there are LED headlights that will guide you while working.
While you can hang the product easily, the crevice tool attachment keeps hanging out awkwardly. That looks very clumsy, and it is best to open the crevice tool and store it separately. Now, this could mean misplacing the product, which is not wanted. Hence, you will need to find an easily accessible place to store it.
One of the major problems in houses and stairs is fine dust that keeps accumulating. That is where the iwoly C150 Cordless Vacuum Cleaner comes in. With 18,000 Pa of suction power, this product will spin all the dust away, leaving the stairs clean.
Like some of the top cordless stick vacuums, this one has multiple uses. You will get a number of accessories that can be used for vacuuming stairs, floors, and corners. If needed, you can also disconnect it from the power outlet and use it as a handheld device.
Adding on, the upholstery tool sports a HEPA filtration system. It is a 4-stage cyclone filtration device that is completely sealed. Hence, it will lock all the dirt and collect them in the dirt cup provided inside. We will recommend cleaning the sponges and the filters daily to ensure better efficiency.
That’s not all; there are three methods to charge the device. You can leave it at the charging station, or you could charge the battery in or out of the battery slot.
While the product works fine, the battery lasts for around 35 minutes, which is a shorter period when compared to most other models. This is an area where there can be a lot of improvement. However, other than this, the product will work fine, and you should not face any further problems.
Have you been trying to get rid of pet hair but have ended up purchasing products that are unable to do so? The Dreametech T30 Cordless Vacuum Cleaner is going to be a great addition to your cleaning supplies. It comes with an anti-tangle pet hair brush, which can remove pet hair easily.
This is one of those brilliant products with a large dust cup. The cup can hold 600 ml of dust and dirt at one time. Plus, it comes with a damping design, which prevents dust from flying around.
Moreover, this has a V-shaped roller brush with a comb and teeth. This will prevent hair from becoming tangled in the roller. Paired with it is a flexible elbow joint that can easily clean carpets and rugs.
You can effortlessly maneuver the fiber stick around the top and bottom of the room. It even has self-lock technology, which will let you vacuum continuously without having to hold on to a button.
What’s remarkable here is that the dust cup and the filters are washable and reusable. You will just need to take them out, clean and put them back. This makes it more effective, and the vacuum should last longer.
The batteries provided with the pack should last for a long time. However, you will need to replace them at some point. We faced a lot of issues in getting the right batteries after the initial ones died, and it is best to talk to customer care about it. They should be able to provide replacements if needed.
One of our last final recommendations is the Belief Cordless Vacuum Cleaner, which will offer you powerful suction and a brushless motor. It is lightweight and cordless, making it a perfect choice for many. We found the assembly process to be simple, even for first-timers.
To begin with, this offers a six-layer filtration system that can capture particles of all sizes. Even ultra-fine dust can be sucked in, making it a very efficient product. The dust then gets collected into a 0.7-liter bin present inside. This is big enough to collect all the dust around the house easily.
Moving on, the vacuum has brilliant cleaning power achieved with a 25,000 Pa and 50-minute runtime. The product is also equipped with a motorized brush head. You can switch between three modes, which include standard mode, economical mode, and strong mode.
And the best part is that there is a wide touch screen with an LED display. It will let you adjust the power easily, ensuring trouble-free use.
The only flaw that we noticed here is with registering the warranty. We tried doing it many times on the website but failed. But the customer service team is supportive, and they helped us finally get the warranty in place. So, if the same happens to you, please remember to contact customer care.
Staircase cleaning demands specialized vacuum cleaners catered to its unique challenges, including hard-to-reach corners and varying step heights. This comparison table focuses on the features of top-performing vacuums for stairs. It displays diverse products in terms of dust capacity (measured in liters), filtration system type, spatial dimensions (displayed in inches), weight (given in pounds), operating voltage, and cordless functionality.
The best vacuum for stairs should be able to suck in the dirt making your stairs look like new. There are some cool vintage vacuums to collect and backpack vacuum options if that is what you want. Then you will find Miele vacuums if you are looking for canister vacuum options. Moving on, there are shop vacuums that would work well for workshops and garages.
If you already own a central vacuum, there are hose options to make it more efficient.
Now, you might still have problems choosing an option, and that is why we created this buyer’s guide. Here, we have listed down all the points that have to be remembered before purchasing.
Type Of Dirt
What is the kind of dirt that you need to remove? Some vacuum cleaners are perfect for cleaning pet hair and will come with a motorized brush. These are perfect options for households with pets.
On the other hand, a dusting brush can come to use if your stairs see a lot of traffic and get dusty easily. Then there are options with rubber bristles that would work for wet wastes.
Tools And Accessories
You will get a number of tools with every vacuum. There will be a crevice tool, an extender, a motorized brush head, and a dust brush. If you need to clean tight corners, then look for slim brush heads which can easily go under sofas and beds. A motorized pet brush is also available, which can remove pet hair better.
Alternatively, cordless vacuums will be needed for places with no power outlet. It is best to opt for a compact handheld vacuum in this case so that you can work easily.
Moreover, you might get an extra-long crevice tool with a specific model, which might be very much needed.
Filter
Usually, stair vacuums will come with filters that suck in all the dirt and keep larger objects away. These filters become very dirty and will need to be cleaned often. Please do so to ensure that the vacuum is being used at its full capacity.
Headlights
Some vacuums may have headlights, which will help you spot dirt and dust easily. They will light up dark corners or under the stairs so that you can capture and remove dirt well.
How long can a cordless vacuum cleaner last on a single charge?
The best vacuums for stairs can last between half an hour to 90 minutes, depending on the type of battery and model that you opt for. They will then have to charge before using it again.
Can vacuums suck in food crumbs from fabric?
We believe that vacuums can suck up food crumbs easily. However, some vacuums cannot be used on fabrics as they are made for hardwood floors or solid tiles. So, please read the description well before.
While there are budget-friendly options available, we will always ask you to check the purpose before buying. There are models with better battery life, while you will find those with a self-cleaning brush roll that adds to the convenience.
So, while choosing a stair vacuum, take all your needs into consideration and only then settle for one. Now, before we wrap up, we will take you through our favorites one last time.
The Bissell Featherweight Stick Vacuum is an ideal option for lightweight convenience. With its powerful suction capabilities, versatile design, and lightweight body, it is perfect for cleaning stairs and hard floors without causing hand fatigue. But if you are looking for a cordless vacuum that can be maneuvered easily, then the BLACK+DECKER Dustbuster AdvancedClean Vacuum will fit well.
On the other hand, the Shark Navigator Upright Vacuum is the right choice for pet owners. With its anti-allergen complete seal technology, large dust cup, and swivel steering, it effectively tackles pet hair and allergens on stairs and throughout the house.
With a stair-climbing cart, carrying heavy groceries or travel bags up the staircase is simpler than ever.
These hand trucks are integrated with sturdy wheels, which makes transporting them a breeze. Plus, they are sturdy enough to withstand regular wear and tear.
And the best part about these stair-climbing carts is that they reduce injuries and fatigue. Just push them above the stairs, and they move over smoothly. But it often gets challenging to find the right one with so many options available on the market.
And this is where our review-based guide comes in, we’ve shortlisted some of the best options available out there after testing 6 climbing carts for 3 weeks. And we have also included a buyer’s guide to help you understand the factors to be looked into while purchasing these 6 and what we've learned after conducting experiments with them across countless stairs.
So, without further ado, let’s dive in!
Listed below are the Best Stair Climbing Carts:
dbest Stair Climber Trolley Dolly: The dbest Stair Climber Trolley Dolly offers everyday versatility, valuable storage options, and can handle up to 110 lbs. Its higher standing wheels might pose a usability inconvenience.
Helping Hand Folding Cart: The Helping Hand Folding Cart excels in being lightweight and easy to assemble, ideally suited for everyday groceries. Yet, its 65 lbs capacity limits its usage scope.
Quik Cart Elite Stair Climber: The Quik Cart Elite Stair Climber benefits professionals with its dual function as a cart and a stool, though its 120 lbs weight capacity doesn't match other high-end models.
Amazon Basics Folding Stair Climber: The Amazon Basics Folding Stair Climber provides comfortable stair-climbing and easy storage, but its durability and lower carrying capacity need consideration.
Vevor Stair Climbing Cart: The Vevor Stair Climbing Cart stands out with its hefty 330 lbs weight capacity and robust design, with offsetting factors being its overall weightiness and less comfortable handle.
Here is the list of the 6 best stair climbing carts if you are in search of a reliable and efficient solution for navigating stairs with heavy loads.
1. dbest Stair Climber Trolley Dolly - Best for Everyday Versatility
This Stair climber cart by dbest is an ideal multi-purpose hand truck for stress-free movement of deliverables on any terrain. Being a collapsible cart, you can fit it in your car trunk or any small space. Plus, its weatherproof material ensures your packages won’t get wet in case of heavy rain or thunderstorm.
After using this cart for 3 weeks, our key scrutiny aspect of a stair climbing trolley is the ruggedness and quality of its wheels, and the dbest stair climbing trolley excelled in this respect. It features a 6-wheel design that easily glides over rough terrain or stairs. Besides, you can carry up to 110 pounds of weight (irrespective of its size) to flea markets, supermarkets, or the beach.
It also has seven storage compartments, including a beverage holder, rear pocket, inner pouch, and more, so you won’t have to worry about leaving anything at home. The trolley bag is removable and becomes a separate grocery-carrying option.
Also, the unit can easily be folded in half and kept anywhere without worrying about it taking up any extra space. You can store it in your car trunk, in the closet, garage, or under the bed. What’s more, its waterproof body protects your clothes and other items from getting wet.
The primary issue that we encountered and which is reported by most customers is that its standing wheels are higher than its platform. As a result, some users might feel uncomfortable while moving the hand truck. Apart from that, you might find the loading area a bit small to fit slightly oversized items.
What We Like
Can be folded in half
7 compartments make storage easier
Rugged wheels
Waterproof
Removable trolley bag
What We Don't Like
Wheels larger than the platform
Small loading area
Capacity: 110 lbs | No. of Wheels: 6 wheels | Handle: Standard | Foldable: Yes
2. Helping Hand Folding Cart - Best Lightweight Utility Cart
Through our trial and error tests, we concluded that if you are looking for a folding shopping cart suitable for carrying everyday groceries, then this Helping hand-folding cart is the best pick, the best utility cart that folds. Its lightweight tubular construction, sturdy wheels, and foam grip handle make it easier to move around. Also, the basket offers a decent holding capacity for your daily baggage.
First and foremost, it features a convenient folding design that you can assemble in mere 15 seconds even without going through any complicated instruction manual. And thanks to its folding design, you can fit it anywhere, be it a car trunk, under the bed, or any other compact space.
Due to its lightweight tubular design and slim width, it's a great option to carry your everyday groceries on a bus or a sidewalk. And the rugged three-wheel design makes it easier to push through the stairs.
The most important aspect of a climbing cart needs is its operation, and this hand truck excels in this respect. A sturdy wheel design and foam grip handle ensure added comfort, and it's easier to push it around for hours.
Unlike our previous models, the basket capacity of this unit is approximately 65 pounds. You might find it underwhelming when carrying several items or multiple baggages at one time. However, the capacity is decent enough to fulfill your everyday grocery-carrying needs.
3. Quik Cart Elite Stair Climber - Best for Business Professionals
This elite quality stair climber by the best products can be used for shopping, transporting, laundry, traveling, or as a stepping stool. With a carrying capacity of 120 pounds and a heavy-duty plastic seat, this is probably one of the most durable products on the market. And its wheels are made of high-quality polypropylene for smooth rolling and smooth it is according to our firsthand experience.
This handcart comes with an upgraded retractable telescopic handle, which expands and collapses to 17.5-inch and 3-inch, respectively. So, you can load it with baskets, bins, boxes, crates, books, and all kinds of supplies.
It hauls up to 120 pounds, allowing you to keep your documents and files organized when traveling or going to the office. Hence, it serves as a handy companion for business agents, teachers, and handymen involved in home improvement tasks.
Moreover, it has 6 wheels, which are made of high-quality polypropylene to allow lifting heavy loads on stairs. Plus, its re-engineered wall panels are made of 100% virgin polypropylene for added durability and strength.
Another unique feature of this cart is its non-slip lid that supports up to 270 pounds and can be used as a step stool or seat. Hence, you can use it as a seat whenever you get tired of waiting at the bus stop or airport.
The only limitation that we came across while using this hand truck is its lower weight capacity compared to some high-end models on the market. Although it can hold 120 pounds of weight, it might get loaded quickly when carrying large items.
Bringing a folding shopping cart by Amazon, under their umbrella brand, Amazon Basics. This versatile product lets you transport heavy objects up and down the stairs with ease, thanks to its long padded handle and triple-wheel fixtures. And, all of it comes at an affordable price, with 3 colors: black, blue, and red, our test group considered this the most beautiful folding card in the list and one of the most honorable to carry around wherever your business takes you.
The smooth and easy movement of this Amazon Basics stair climber up and down the stairs makes it a desirable product amongst customers. Its dual three-wheel fixtures make it easier to push, and anyone irrespective of their age can move their baggage with ease. Its ergonomic padded handle ensures a firmer grip, making movement much easier.
Besides that, it features a detachable polyester bag that you can use to carry loose supplies and groceries. It also includes a pocket for storing your beverages, eliminating the risk of spilling off drinks on your dry items.
What’s more? The troller folds down easily for easy storage in the closet, trunk, or garage. And, assembling the unit is not that challenging, even if you’re not a DIYer.
Our main concern with this climbing cart is its holding capacity. As compared to other items in our list, this might not pull up your heavyweight items with ease. And also, the body not made of durable material might break down in cases of extra load. So make sure you look into it before purchasing.
Now that we’ve almost reached the end of our list, we present you with a heavy-duty dolly cart to ride up and down the stairs. With a massive holding capacity of 330 pounds, it’s mostly suitable for delivery purposes, and its robust and durable construction means it doesn’t break very soon, we certainly couldn't stress it enough in our tests despite moving one fridge and a laundry machine with it.
The amount of load this hand truck can hold is the highest on our list. With a 330-pound holding capacity, you can carry huge amounts of baggage at a time, thereby improving overall efficiency. You can now deliver heavy packages to your customers with ease.
Such a massive weight-holding capacity is complemented by its sturdy design and wear-resistant wheels. It features a pair of 5-inch rubber tri-wheels that are wear-resistant and can move quietly and stably on rough terrains. Plus, its frame is constructed of Q235 steel which is guaranteed to be rust-less and stays rugged for longer.
Apart from that, its handle is designed to be adjustable for most people. It comes with an adjustment range of 45 inches to 29 inches.
Lastly, it comes with two protective mats, two small wrenches, and a binding rope that becomes suitable for future use.
After using the product and lifting heavy loads for some time, we identified a sizable crack near the front wheels. It might break down if we continue using it that way for a long time, which is not suitable. Also, many found the handle not very handy, so holding and pushing are an issue sometimes.
The usefulness of this stair-climbing cart as a grocery shopping cart makes it another highly recommended product on our list. Its three-wheel design is designed especially for stair climbing, and its rotatable and long handle design makes it easier to push it up and down the stairs, regardless of the height, our tests revealed.
This lightweight cart comes with a three-wheel design designed especially for easily climbing up the stairs. The pushing is facilitated with its rotatable and long handle design, so a tall person doesn’t need to bend down when pulling or pushing the cart. Also, the rear wheel is a universal one with a 360-degree rotation ability. So turning your cart is never a problem.
Moving on, the stair cart can be folded or oversized easily, suitable for carrying small and oversized items, respectively. It, in turn, adds versatility to our carrying ability. And, its ability to carry 220 pounds at a time delivers an added advantage.
Apart from that, you’ll just love the sturdy design and stability it possesses. Made of a high-quality stainless steel alloy frame, the unit is durable and rust-resistant.
Installing this stair-climbing cart can be difficult even for DIYers, so we had to call upon an expert to do it for us. Apart from that, we found the wheels to be made of average-quality materials, which is a significant setback for the unit.
What We Like
Large holding capacity
Sturdy design
Can be folded or oversized
Adjustable handle
What We Don't Like
Installation is challenging
Wheels are of average quality
Capacity: 220 lbs | No. of Wheels: 3 wheels | Handle: Rotatable and long handle design | Foldable: Yes
Not all climbing carts are equal we've found out through trial and error, nor is the target audience for them the same, but the choice of a climbing cart is entirely yours, so it’s essential to keep in mind certain aspects before purchasing one. In this particular section, we’ll discuss such factors in detail so that you can make an informed decision.
Cost
A sprain in the spine due to heavy lifting can be a costly affair. But if you consider investing in a stair-climbing cart, you won’t have to worry about back or muscle injuries. The cost varies from one unit to another due to the several layouts of climbing carts on the market.
You will definitely find an inexpensive cart, but it might be easier to carry or have flimsy wheels that might cost you further. So, it’s viable to opt for one that offers decent features and comes at an affordable price.
Features
The question remains: What features would you be looking into while purchasing a stair? We’ve summarized the considerations.
Capacity
The quantity a cart can hold without breaking down at the same time is important. Greater the carrying capacity, the more items you can carry from one place to another.
Size
On the basis of the weight along with the load which you want to move, these carts are available in several sizes. You are to decide which sized cart is suitable for you.
Wheels
The movement of materials up and down the stairs depends on the kind of wheels attached. Wheels can be made of plastic or stainless steel, whereas the latter is more durable. Although it might cost more than a plastic wheel, it's worth the investment.
Use
Features of the cart, including the presence of straps, are worth checking.
Substance
These carts have metallic construction, utilizing either aluminum or steel. We’d suggest you go for one made of aluminum as it's both lightweight and durable.
Layout And Construction
These days we can see varied types of stair climbing carts on the marketplace, where some have walkers with front wheels, while others use a push arm.
An important aspect of a cart is the ease of movement and its weight-handling capability. Wheels are most effective in ensuring this. Many carts feature 360-degree rotating design tires, making it easier to move carts.
From the list, you’ll see that manufacturers have adopted a tri-wheel setup, which involves the usage of three wheels on both sides. And the handle is also a crucial aspect, so opt for one, where it's easy to maintain grip. So, it’s important that the handle is made of rubber or plastic and anti-slip.
Performance
Stair climbing carts are easy to use once you have a standard construction one in your hands. It's important to be aware of the weight your cart can handle and ensure not to overload it. You also might need to assemble some hand trucks, and it's not very challenging if you have a detailed instruction manual.
Concerning maintenance, it’s important to maintain the condition of the wheels, as they wear out after using them for some time. Replacing these is not that complex, but a handyman is needed to fix it. Call a relevant professional to make a visit to your home and get your trolley fixed.
Saying that these carts don’t require much maintenance, and there’s no need to stress much about it. Many of these hand trucks are foldable, in turn ensuring easy storage.
What is a stair climbing cart?
A stair climbing cart is a specially designed utility cart with usually three or six wheels that enables easier transportation of items up and down the stairs. These carts are typically lightweight and foldable, making them convenient for various tasks like shopping, moving items, or transporting heavy objects.
How does a stair climbing cart work?
Stair climbing carts are equipped with a tri-wheel (per side) or a six-wheel setup that allows them to glide effortlessly over stair edges, curbs, or rough terrain. These wheels are usually attached to sturdy frames and ergonomic handles for easy maneuvering, helping to distribute the cart’s weight evenly and reduce physical strain on the user.
What is the weight capacity of a stair climbing cart?
The weight capacity of a stair climbing cart varies depending on the model and its construction quality. Typically, these carts can carry between 65 to 330 pounds of weight. It’s essential to consider your requirements and choose a cart that suits your needs and has a weight capacity suitable for your planned use.
Can I use a stair climbing cart on uneven surfaces?
Yes, stair climbing carts are designed to work efficiently on various surfaces, including stairs, curbs, and uneven terrain. The tri-wheel or six-wheel design allows the cart to adjust automatically to the surface and maintain balance, ensuring easy transportation and reducing the effort needed to move items.
How do I maintain my stair climbing cart?
Maintaining your stair climbing cart involves regularly checking the wheels for wear and tear, lubricating the wheel joints when necessary, and keeping the cart clean. Additionally, make sure to store the cart in a dry and cool place when not in use to avoid damage caused by moisture or extreme temperatures.
Now that we’re concluding our detailed review-based guide for the best carts, we’d like to name a few of our favorites.
For those who need a versatile and weatherproof cart, dbest Stair Climber Trolley Dolly is an ideal option. With its collapsible design, numerous storage compartments, and 6-wheel stair-gliding feature, this cart proved to be quite rugged and user-friendly during our testing period.
Also, For everyday grocery transportation, Helping Hand Folding Cart is a good option. With its convenient folding design and lightweight tubular construction, we found it exceptionally easy to maneuver and carry around, making it perfect for regular use.
If you're in need of both durability and versatility, the Quik Cart Elite Stair Climber is the right choice. Our firsthand experience showed that its heavy-duty plastic construction and large weight capacity make it ideal for various tasks, including use as a stepping stool or seat.
With this, we’d like to say goodbye. And we hope our guide will help you select an ideal product for carrying your luggage up the stairs. Take care!
Liquid floor wax is one of the most effective and time-tested ways to preserve and enhance the appearance of hardwood floors, offering a protective barrier that restores shine, reduces minor surface imperfections, and extends the wood’s lifespan. When applied correctly, wax penetrates the grain and seals the surface, creating a natural luster while shielding against foot traffic, scuffs, and UV damage. Formulations today range from high-gloss revivers and conditioning blends to all-in-one wax and polish combos, many of which are non-toxic, eco-friendly, and safe for families. Whether you’re restoring worn-out boards or maintaining premium hardwood installations, the right product depends on floor finish compatibility, traffic levels, and application ease. In this guide, we’ve reviewed the 6 best liquid floor waxes for hardwood floors, breaking down their performance, ingredients, and ideal use cases—so you can protect and beautify your flooring with confidence.
Listed below are the best liquid floor waxes for hardwood floors:
Quick Shine: The Quick Shine High-Traffic Hardwood Floor Luster and Polish excels in being non-toxic and UV-resistant, with its Carnauba ingredient enhancing the hardwood's natural grain. Its potential downside is the unclear water resistance capability.
Minwax: The Minwax Hardwood High Gloss Floor Reviver offers a time-saving, single-coat application that revives old, dull hardwood floors. Its limitation lies in possibly underperforming in high-traffic areas.
Weiman: The Weiman Hardwood Floor Cleaner and Polish Restorer Combo provides dual functionality, both cleaning and waxing hardwood floors. It expertly fills scratches but is not compatible with waxed, oiled, or unfinished wood floors.
Howard Products: The Howard Product is ideal for multiple wooden surfaces. This Howard Products polish sustains the wood’s health. The longer drying time on unfinished surfaces is a known constraint.
Rejuvenate: The Rejuvenate Professional Wood Floor Restorer and Polish bonds excellently with existing finishes, providing a high-gloss shine. The high shine might lead to slippery floors.
Can enhance the richness and natural color of the floor
Easy to apply
Dries completely in 24 hours
What We Don't Like
May not be waterproof
Quick Shine has been providing premium products for maintaining hardwood floors, and its high-traffic floor luster and polish is one such product. It has a simple and ready-to-use formula that’s free from any harsh substances like aluminum, ammonia, parabens, formaldehyde, and phthalates, making it relatively safe for use. As such, the brand suggests this liquid wax is safe for use around pets and kids.
One of the main ingredients in this floor wax is Carnauba, which adds a deep glow to the hardwood floor, enhancing its natural color. Not only that, but this luster and polish can also fill in the micro scratches on the surface for an even appearance and reinforced durability. And this is what makes the product suitable for hardwood floors with heavy foot traffic.
Moreover, it can offer protection against UV (ultraviolet) rays, meaning you may use the product for sealing and polishing outdoor hardwood floors. However, it’s not clear if the product is waterproof or not.
Application-wise, the brand recommends squirting the product in an S-shape in small sections and quickly spreading it uniformly with wide strokes. Once the first layer is applied, it will dry down for a glossy finish in about 30 minutes, and you should wait for an hour before applying the second coat. This coat will dry in 24 hours, but you should prevent the treated surface from moisture for 24 hours.
Quantity: 27 fl. oz. (800 ml) | Approximate Coverage: 500 sq. ft. | Scent: Fragrance-free | Single Coat Drying Time: 30 minutes
2. Minwax hardwood high gloss floor reviver - Best floor wax for old and dull hardwood floors
What We Like
Can be used on unfinished floor
Adds shine and durability without changing wood color
Easy one-coat application
Quick drying time
What We Don't Like
May not work for heavy foot traffic areas
If you’re looking to wax hardwood floors without spending a lot of time, this product from Minwax may fit the bill. This brand is among the top wood finishing and wood care products brands in America, and this floor wax is an addition to its long list of reliable products.
Made from a blend of water-based ingredients, this product works best for old and dull hardwood as well as other wood floors. Besides, applying this reviver doesn’t require any special preparation- as long as the floor is dry and free from any dirt or debris, you can easily apply it.
The key ingredient in this formula is polyurethane (urethane), which is known for its ability to restore shine on even the dullest wood floors. Along with the other water-based ingredients, this floor reviver can add shine and a durable protective layer to the finished floors.
You can apply it to unpolished floors or unfinished wood floors, and the product can do the job with only a single coat. Let the coating air dry for at least 2 hours on light-foot-traffic wood floors, but you should wait for 24 hours before replacing any furniture.
Overall, this product is pretty cost-effective, but it may not be suitable for heavy foot traffic floors.
Quantity: 32 fl. oz. (946 ml) | Approximate Coverage: Maximum 225 sq. ft. | Scent: Mild Chemical Scent | Single Coat Drying Time: 120 minutes
3. Weiman hardwood floor cleaner & polish restorer combo - Best cleaner and floor wax combo
What We Like
Compatible with different hardwood sealed surface
Fills scratches without any sticky residue
Protects the floor from scratches
Safe to use around pets and children
What We Don't Like
Not for use on waxed, oiled, or unfinished wood floors
One of the most important steps for waxing hardwood floors is cleaning the surface properly so that the wax can better adhere to it for optimum efficiency. However, finding a cleaner compatible with hardwood floors can be difficult. And that’s where the Weiman hardwood floor cleaner and polish restorer combo stands out.
The cleaner comes in a ready-to-use formula to remove dirt, dust, and scuff marks from hardwood flooring, and its citrus scent doesn’t leave any nasty odor. Just spray a few squirts from the bottle on the floor and mop it, or clean the surface with a soft cloth.
Next, the floor polish restorer is made from a special micro-filling technology that can remove scratches and create a scratch-resistant layer on finished wood surfaces. Moreover, it’s compatible with different types of wooden floors like engineered hardwood, luxury vinyl tile, and laminate floors. However, the product is not for use on waxed, oiled, unsealed, or unfinished floors.
The brand recommends applying this liquid wax in zig-zag motions and using a dry mop to spread it uniformly while working in small sections. It takes only 30 minutes for a single coat to dry down for a natural finish, but you can apply more for a high-gloss effect. Make sure each coat is allowed to dry for 45 to 50 minutes, and don’t apply more than 3 coats in 24 hours.
Quantity: 32 fl. oz. (946 ml) | Approximate Coverage: 590 sq. ft. | Scent: Citrus | Single Coat Drying Time: 30 minutes
4. Howard Products wood polish & conditioner - Best liquid floor wax for conditioning
What We Like
Wood oils enhance depth grain
Adds a protective and shiny layer
Can be used on both finished and unfinished surfaces
Can be used on antique wood surfaces
What We Don't Like
Longer drying time on unfinished wood
This wood polish can be used for practically any wooden surface, such as floors, doors, wooden furniture, cabinets, etc., to add a soft luster and a protective layer. Its potent formula is made from different types of wax (beeswax and Brazilian carnauba wax) and ‘wood oils’ (mineral and wood oil) that penetrate deep into the wood.
While the wax components add shine to the surface, the oil components feed the wood grain to keep it from fading, drying, and subsequently cracking. At the same time, they are devoid of silicone and linseed oils, which can make the drying process longer and take away from the durability of the floor.
As such, this polish and conditioner formula can be applied to both unfinished and finished hardwood surfaces (including floors) to enhance the natural beauty and depth of grain.
However, keep in mind that you need to work in very small sections by saturating a lint-free cloth with the polish and wiping it on the floor. The formula typically dries within 20 minutes, after which you can wipe off any excess with a dry cloth. But unfinished flooring may take longer to dry, generally overnight.
And you can apply the polish as soon as you notice instances of fading color or drying.
Quantity: 16 fl. oz. (473 ml) | Approximate Coverage: 500 sq. ft. | Scent: Orange | Single Coat Drying Time: 20 minutes
5. Rejuvenate professional wood floor restorer & polish - Best floor wax for high gloss shine
What We Like
Can be applied to existing finishes
No sanding required
One coat application
Fills in scratches for an even look
What We Don't Like
A dry floor can become slippery
The Rejuvenate professional wood floor restorer has been exclusively developed for hardwood flooring, and it can bond with existing finishes to create a shiny and durable protective coating. As a result, users don’t need to perform the extra step of sanding for waxing hardwood floors with this product. And its formula can fill in scratches to provide an even appearance.
Much like the Minwax hardwood high gloss floor reviver, this formula facilitates one-layer application that dries in just an hour to give an ultra-slick coat that’s high on shine. You can pour the liquid directly on the floor and use a microfiber mop to spread it uniformly across the floor.
That said, you can apply a second coat (if deemed necessary) after allowing the first coat to dry for at least 2 hours. Moreover, it’s suitable for application on both residential and commercial wood flooring.
In hindsight, the water-based polyurethane bonds in the formula stick to the hardwood surface (and any existing finishing) to resist any stain and spill without wax residue. The brand also claims that the polish can last for years, thereby reducing the need for frequent maintenance and the cost of regular waxing.
However, some users have mentioned that the floor can become slippery after the last coat has dried, which can take some time to go away.
Quantity: 32 fl. oz. (947 ml) | Approximate Coverage: 525 sq. ft. | Scent: Wooden | Single Coat Drying Time: 45 minutes
Pipihia is among the most reliable home floor wax brands on the market, and its beeswax furniture and wood polish is a versatile product that can be used on floors as well. Made from different natural ingredients like Carnauba wax, eucalyptus oil and orange oil and mixed with potent mineral oils, the formula is non-toxic and non-GMO. In other words, it’s suitable for use in practically any room.
The formula acts as a penetrating wood sealer to moisturize the grain from within and restore any dryness, thereby reducing the chances of cracking. Apart from that, the shine from the wax can infuse new life into dull wood floors as well as prevent water spots and scratches. You can even apply this polish on newly finished floors to improve floor life.
At the same time, the formula doesn’t leave any harsh odor, sticky residue or toxins on the floor. Just pour a little floor wax on a soft and clean cloth and apply it in the direction of the grain on the finished hardwood surface.
But the drying time of the formula is significantly longer (a minimum of 3 hours), after which you should polish the floor thoroughly with a dry cloth to get rid of any excess liquid.
Quantity: 15.52 fl. oz. (480 ml) | Approximate Coverage: 80-100 sq. ft. | Scent: Natural | Single Coat Drying Time: 180 minutes
What is the best liquid floor wax for hardwood floors?
The table below compares liquid floor wax products for hardwood floors. It includes the quantity (fluid ounces and milliliters), coverage (square feet), scent, and drying time (minutes) for each product.
Although all of the products mentioned above are suitable for waxing hardwood floors, there are a few factors buyers should keep in mind to ensure that their requirements are met properly. These include:
1. Formula
The formula of liquid floor wax for hardwood will largely depend on its ‘function.’ For instance, liquids that are meant just to add a layer of wax on the floor will typically contain ingredients like beeswax and Carnauba wax, while those meant for wood conditioning may contain oils as well.
But no matter which type of formula you choose, it’s always better to opt for a natural floor wax that doesn't contain any harmful chemicals. As such, you can check the product description to see if the formula is eco-friendly, non-GMO and doesn’t contain any toxins.
However, as a rule of thumb, wear work gloves and a nose mask while applying the wax coat. Also, make sure that the entire room is properly ventilated, as most floor wax tends to have a strong smell that can be troublesome for most users.
2. Compatibility
Hardwood floors can be both finished (sealed) and unfinished (non-sealed); hence, it’s important to choose a formula that’s compatible with the type of flooring in your home or office. While some products can be used for both, others are meant for only a specific type. And using the wrong type of wax for your hardwood floor can lead to dullness, fading, and even reduced durability.
Another factor in this regard is the compatibility of the wax with other surfaces, like wood furniture and doors. This way, you won’t have to invest in different wax products for different parts of your home or office.
3. Additional Features
People generally apply floor wax to make the floor slip-resistant and shiny, but with time, floor wax formulas have been developed to provide additional benefits. For example, lacquer-based wax liquids popular today add more durability to waxed hardwood floors than shellac-based wax products that were popular years ago.
Likewise, some floor wax liquids have waterproofing and stain-resistant ingredients to protect the shiny look of your hardwood floors. As such, you can choose a product that best matches the needs of your floor.
4. Preparation Requirements
Floor wax liquids, irrespective of their formula, require a clean surface for effective adherence. However, some products may require users to take off any existing finishing or moisture from the floor. Moreover, you may need to use sandpaper to even out the entire floor before applying the wax.
On the other hand, some products may be applied directly on any existing floor finishing without sanding. That’s why all wax bottles come with detailed preparation instructions, which should be strictly followed for the best results.
5. Application Tool And Process
Floor wax liquids can be applied using different ‘tools’ like a sponge mop, microfiber cloth pad, terry cloth head, or even a brush. Here again, you will find the recommendation in the product descriptions so that you can select a product that’s compatible with the existing application tools at your home.
That said, most of these additional resources aren’t very expensive, so you don’t have to worry about incurring heavy expenses if this is your first time waxing floors.
Talking about the application process, the general technique is to apply a thin layer of the wax directly on the clean floor and spread it uniformly with the recommended tool. You may then be required to polish the floor with a clean cloth after letting the wax coating air dry according to the time mentioned in the instructions.
6. Quantity And Coverage
You may think that more liquid wax will cover a larger area, but that may not always be the case. As such, the area that one bottle of liquid wax can cover primarily depends on the number of coats required to wax floors.
So, a 30-fl.oz. liquid wax bottle that requires multiple coatings may only cover 300 sq. ft. of floor space, whereas a 2-fl.oz. A liquid wax bottle may cover 400 sq. ft. with its single-coat formula.
Can you apply colored wax on hardwood floors?
Unless you’re looking to conceal the original, natural color of the hardwood or change the color of the floor altogether, applying a colored wax may not be the best idea. The primary function of hardwood floor wax is to restore and reveal the natural shine of waxed floors, and colored wax liquids are typically used as an exception.
In short, the decision to choose a clear or colored wax will depend on the personal preferences of the user.
Is liquid wax better than solid wax or solid paste wax?
The biggest advantage of liquid wax over other types of wax, like solid or paste, is that the former is easier to apply, and it typically has a fast drying time. Besides, liquid floor wax products are ideal for unvarnished hardwood floors, unfinished cork, PVC (polyvinyl chloride), and linoleum floors. But they shouldn’t be used for vinyl and urethane-finished floors.
What’s the difference between varnish and floor wax?
While varnish forms a tough coat or protective seal on hardwood floors, floor wax penetrates deeper into the wood and needs to be buffed in to restore the natural shine of the surface. It’s not as durable as varnish, but waxed floors can still offer some form of resistance to scratches and regular wear and tear.
Keep in mind, though, that you may apply wax over varnish but not vice versa.
Should you wax darker or lighter woods?
Both dark and light wooden floors may become dull and develop scratches over time, meaning they may need waxing from time to time. However, with darker woods (like dark oak), the signs of wear and tear may not be visible for long. But waxing such floors regularly can help prolong their durability, delaying the signs of damage even further.
How to maintain waxed wooden floors?
One of the best things you can do to maintain your newly waxed hardwood floors is to clean them regularly with a vacuum cleaner to remove loose dirt and debris. Aside from that, you can use a mild floor cleanser (instead of soap) to thoroughly clean the surface from time to time.
To keep your waxed hardwood floors looking their best, place a natural rubber doormat at room entrances to reduce tracked-in dirt, and consider adding a rug in high-traffic zones to minimize surface wear. When it's time to strip and reapply wax, use a soft cloth dampened with white spirit to loosen the old layer, then gently scrub with steel wool for a clean, residue-free finish. For a reliable, all-around solution, the Quick Shine high-traffic hardwood floor luster and polish is a standout—its non-toxic, UV-resistant formula offers impressive shine and protection for both indoor and covered outdoor hardwood surfaces. If you’re pressed for time, the Minwax hardwood high-gloss floor delivers a quick refresh with no sanding or prep work required. Whichever product you choose, ensure proper drying time and shield the treated area from drafts and humidity to lock in results.
For more expert advice, check out our guide on hardwood floor maintenance basics to extend your flooring’s lifespan. If you’re still weighing your flooring options, our breakdown of hardwood vs. engineered wood flooring can help you decide what fits your lifestyle best. And for those living in multi-story homes or apartments, explore our tips on soundproofing hardwood floors to combine quiet comfort with lasting beauty.
The best ceiling paints are formulated to deliver flawless coverage on overhead surfaces while minimizing splatter and hiding imperfections that are more visible under light. Unlike standard wall paints, ceiling paints use flat, high-opacity finishes, drip-resistant viscosity, and stain-blocking resins to ensure smooth, uniform application on plaster, drywall, or textured ceilings. Performance is typically judged by hiding power, coverage per gallon, splatter resistance, and long-term durability. As coatings expert Carl Minchew explains, “Ceilings demand paints that combine forgiveness in application with strong opacity to achieve a uniform surface.” Whether your project calls for brightening a living room, sealing water stains, or reducing roller marks, the right ceiling paint makes the difference between a patchy result and a professional finish. For application techniques, see our guide on how to paint a ceiling. In this article, we review the 11 best ceiling paints for flawless coverage, tested across a variety of use cases to help you choose the most effective product for your space.
Best Ceiling Paints
Whether you are looking for paint that is easy to apply, covers imperfections, or offers a smooth finish, we have got you covered. So, without further ado, here's the list of the 11 best ceiling paints.
Elegant metallic paint adds a decorative touch on...
Low odor, water based formula contains mica beads for...
First on the list is an excellent paint from Rust-Oleum, an established brand in the field of paints. Elegant and well-pigmented, this is a product you can trust on the exterior as well as interior surfaces. Along with coating your ceiling in lush shades, the paint also ensures user safety and is long-lasting one.
Why Did We Like It?
This water-based paint from Rust-Oleum makes for one of the top choices for ceilings for good reason. The presence of mica beads in their composition greatly enhances pigmentation and results in a gorgeous finish with a metallic appearance. Long story short, your ceiling gets the conversation started.
In addition to aesthetic appeal, the product also offers a number of features that speak in favor of its quality. Compared to its counterparts in the market, it is a low-odor pigment that ensures comfort during and after painting. Also, it dries to the touch in 30 minutes and is highly time-efficient.
Furthermore, what magnifies operational efficiency is the hassle-free application process. This greatly reduces mess and eliminates additional clean-up time. Not that cleaning is a problem; soap and water suffice just as well. With a coverage of 105 square feet per 32 fl oz container, this paint offers good value for money and looks great while at it.
What Could Have Been Better?
Although excellent in every way, the paint suffers from a weaker consistency, especially in comparison to its silver counterpart. However, the copper penny shade is hard to find elsewhere, and given its advantages, consistency is hardly a dealbreaker!
Pros
Odorless paint
Simple, mess-free application
Impressive coverage area
High operational efficiency
Cons
Inferior consistency in comparison to the silver shade
Paint Type: Water-based | Coverage Area: Up to 105 sq. ft. | Finish: Metallic | VOC Level: Low | Eco-Friendly: No
Excellent hide to brighten a ceiling that has dulled over...
If you are a stickler for perfection, you are onto the right product for your home. A thoroughly impressive buy from Glidden, the latex ceiling paint offers a stunning finish on a budget. Composed of high-quality material, it delivers well on all ceilings and gets the job done well and fast. Read our review to know all about it!
Why Did We Like It?
Glidden’s product has a stunning array of features on offer, especially given its affordable price. Comprising a splatter-resistant material, it delivers a luminous white finish that leaves your interior looking roomier in comparison. In creating such an illusion of space, the paint enhances the room’s aesthetic appeal and makes your space an area worth taking inspiration from!
In addition to that, this paint emits low odor and keeps the rooms free of any undesirable smells. Also, it covers imperfections with ease, thus resulting in a smoother finish, and does not splatter during application. In this way, cleaning up becomes a breeze, which speeds up the entire process of painting.
Last but not least, the volume of paint available is a big feather in its cap. The product comes in 3.75-gallon containers that leave you with little to want in just one coating. This means you don’t need to buy a large number of units, and additional expenses are greatly reduced. For paint that dries in under one hour, this is a win-win situation!
What Could Have Been Better?
The only issue this otherwise excellent product suffers from is consistency. It is a little too watery on occasion. However, given its properties, this is no deal-breaker and not something that cannot be easily resolved with assistance from the customer support team.
Pros
Great value for money
Bright, matte finish for high aesthetic appeal
Large quantities of paint in one container
Cons
Consistency tends to be watery
Paint Type: Water-based | Coverage Area: Up to 400 sq. ft. | Finish: Flat | VOC Level: Low | Eco-Friendly: Yes
✅EXTREMELY VERSATILE - Montage Signature is the #1 choice...
✅SUPERIOR COVERAGE & PROTECTION - All of our specialty...
Another superb product on the list, this environmentally-friendly paint from Montage makes for a great buy for the environmentally-conscious buyer. Highly adaptable and well-pigmented, it caters to a variety of customer needs and proves its utility as a versatile ceiling paint.
Why Did We Like It?
Montage’s product is impressive on all accounts, especially variability. With the number of finishes and shades available, you are not only spoilt for choice but also end up saving time and money on different products. From low sheen to semi-gloss finishes and a plethora of colors, this paint has something for everybody’s needs.
Additionally, the paint offers excellent coverage on uneven or stained ceilings. Complementing that is its capacity for protection against mildew, mold, and moisture. Altogether, it would be safe to say that with this product, the maintenance of your ceiling is not something that will hamper a good night’s sleep!
Moreover, and especially relevant in today’s times, is the fact that Montage’s paint is entirely devoid of pollutants and makes for an eco-friendly choice for your house. And last but not least, this paint does not chip. However, in case it does, you have a 10-year warranty to fall back on!
What Could Have Been Better?
The paint is near without flaws; it’s incredibly difficult to find even one. But since we delved deep, we found that the swatch behind the can is quite small which made it difficult to gauge the exact shade. As you can tell, this is hardly an issue at all, and Montage ranks high on our list regardless.
Pros
Caters to diverse choices
Budget-friendly option
Good coverage on rough surfaces
Cons
The swatch behind can is too small to gauge the shade
Paint Type: Water-based | Coverage Area: Up to 2,000 sq. ft. | Finish: Matte | VOC Level: Low | Eco-Friendly: Yes
KILZ Stainblocking Ceiling Paint is a unique combination of...
This ceiling paint rolls on with a subtle pink color that...
Next up is a very unique product, which is quite the chameleon. This ceiling paint from KILZ promises good coverage coupled with aesthetic appeal. Also, it comes with a hassle-free application and a reasonable price tag. All the reasons for potential buyers to take a good look at it!
Why Did We Like It?
This is definitely not among the ceiling paints you come across every day. Alongside providing excellent coverage on uneven surfaces and water stains, it changes color and brightens up any ceiling, no matter how worn and weathered. When it comes to style, few items can match what this has to offer.
KILZ is certainly not all talk, and this product is no exception to the rule. The packaging includes a dry time indicator that ensures flawless application with an adequate amount of coverage. Also, the drying time is an impressive one hour at the most! The indicator is simple enough to follow: the paint remains pink when wet and turns white on drying.
Last but not least, this is another product that is resistant to splatter and prevents mess. With a stunning matte finish, each coat covers an area of 250 square feet, and it is suitable for both indoor and outdoor use.
What Could Have Been Better?
Although an incredible product, the paint suffers from a slight drawback. At times, there is a discrepancy between the color indicated and the actual produc,t which misleads the customer. However, this may easily be verified by the seller or customer support and does little to deter the discerning buyer.
Pros
Enhanced features for ease of use
Improves the aesthetic appeal of the surface
Suitable for interior and exterior use
Cons
Discrepancy in shade
Paint Type: Water-based | Coverage Area: Up to 400 sq. ft. | Finish: Flat | VOC Level: Low | Eco-Friendly: No
Contains chip material that replicates popcorn, power lite...
Homax is a brand that is sure to feature on lists of interior paints, and its products unfailingly live up to the company’s values. It’s no surprise then, that we have one of them on our list as well! The Roll-On-Ceiling is a textured ceiling paint that lends a distinct character to the surface it’s applied on and becomes a focal point in any house.
Why Did We Like It?
This excellent paint from Homax impressed us from the get-go! Few paints offer the degree of versatility this does in terms of colors, finishes, and textures. Users may choose between a smooth finish or a decorative sand finish, both of which are a breeze to apply on the surface with the applicators provided.
Speaking of which, the product comes with a wide range of applicators that allow for a multitude of textures to be applied to ceilings. The set, therefore, is ready for use and at your disposal. Also, with a drying time of one hour, Homax’s ceiling paint is thoroughly enviable.
Moreover, there is little cause for concern in terms of odors. Made of high-quality material, there are no foul smells as often experienced by those painting their homes. The paints are available in cost-efficient tubs with a capacity of 2 gallons and offer a coverage area of 150 square feet with each coating.
What Could Have Been Better?
As with several ceiling paints, this otherwise excellent product faces minor issues with consistency as it is prone to drying out inside the container itself. However, Homax has a hands-on and responsive customer support team, and we’d suggest getting in touch with them instead of blacklisting a good product!
Pros
High aesthetic appeal
Impressive drying time
Cost-efficient
Pros
Cons
Prone to drying out inside the container
Paint Type: Water-based | Coverage Area: Up to 150 sq. ft. | Finish: Textured | VOC Level: N/A | Eco-Friendly: No
Prestige Paints has created a comparable Color based on...
This Benjamin Moore paint Color Name is a trademark of...
Another highly satisfactory item, this ceiling paint from Prestige makes for a worthwhile purchase if ease of use is your first concern. The product is ideal for those with less time on hand and who are sticklers for finesse. Read on to find out why!
Why Did We Like It?
With Prestige’s paint, not only do you get a high-quality semi-gloss finish, but you also have no problem cleaning up after. The hassle-free application is, according to us, the most attractive selling point of the product. It leads to no messes and saves you a ton of time and effort.
Moreover, this comes with a host of color options that are easy to select with the help of the Prestige comparable color base. Ceilings score high on aesthetic appeal when the finish is smooth, and this is something that Prestige keeps in mind. Also, specifically being an interior paint, it is optimized for best results indoors, which ultimately leads to greater finesse.
Lastly, the paint is low in VOC content and is a safe choice for all households. As a 100% acrylic latex paint, it is easily managed and allows for negligible to no spillage. All in all, Prestige’s product makes for a smart choice and should definitely be on your shortlist.
What Could Have Been Better?
This worthy ceiling paint sometimes presents a discrepancy in shades, and the colors are not represented correctly. However, this is more of an issue on part of the packaging rather than the product itself and hardly a red flag!
Pros
Hassle-free and low-mess application
Good value for money
Optimized for the best results indoors
Cons
Discrepancy in shade
Paint Type: Water-based | Coverage Area: Up to 400 sq. ft. | Finish: Eggshell | VOC Level: Low | Eco-Friendly: Yes
Acousti-Coat is a thick, soft coating designed to act as a...
Product is designed to reduce echo and uncomfortable high...
Next on the list is a worthwhile product from Hy-Tech, which is a brand that prioritizes operational efficiency and user comfort. Composed of high-quality material, the Acousti Coat Sound Deadening paint makes for a ceiling paint that leaves you with little to desire. The performance is close to flawless and ensures maximum comfort.
Why Did We Like It?
Hy-Tech’s product never fails to give us ample reason to be impressed, and this product is no exception to the rule. Right off the bat, its capacity to soundproof the house pleased us no end. It muffles ringing and tinging noises in metal structures and is made entirely out of non-toxic material. Thus, it makes for an eco-friendly purchase and is ideal for the environmentally-conscious buyer.
In addition to that, the paint is easily applied and utilizes a multitude of applicators such as brushes, rollers, and even sprays. Not only does this eliminate messes, but the occasional spillage is also easily dealt with using soap and water.
Furthermore, Hy-Tech’s product is available in tubs of 1 or 5 gallons, which allows for flexibility and makes it usable to both the homeowner as well as the commercial buyer. Last but not least, what you are left with is a bright white finish. This means that your paint can easily double up as a primer and save you an additional expense!
What Could Have Been Better?
Similar to most premium products in the market, the advantages of the Deadening paint come at a cost. Priced on the higher end of the scale, it is unlikely to suit the average budget. However, it does have an incredible range of features on offer and makes for a worthy companion to anyone willing to expend a little more.
Pros
Ensures maximum user comfort through soundproofing
Easy to apply
Two-pronged action as a primer and paint
Cons
Expensive
Paint Type: Water-based | Coverage Area: Up to 75 sq. ft. | Finish: Flat | VOC Level: Low | Eco-Friendly: Yes
True Value’s products never fail to impress. The JSE1-GL is no different and makes for a promising ceiling paint with properties that enhance user comfort. Keeping in mind factors such as drying time and cleaning, the product makes for a worthwhile purchase and proves useful in any painting project.
Why Did We Like It?
Specifically geared for indoor use, the Satin Latex Enamel makes use of commercial-grade material to provide a magnificent white finish to ceilings. The result is a smooth surface free of unevenness and stains. Also, it is washable, so you need not worry about dust collecting on it or any such hassle.
In terms of operational efficiency, the paint bears in mind the essentials. It is splatter-resistant as well as quick-drying and comes in handy for users who need the job done well and fast. The time-efficient formula of the product makes it one of our top recommendations, to say the least!
Lastly, it is available in convenient tubs with a capacity of 1 gallon and is ideal for all sorts of households. In addition to that, it is an affordable item that caters to various ranges of budgets and offers good value for money. And if that wasn’t enough, it boasts an incredible warranty of 15 years!
What Could Have Been Better?
There is literally no inherent flaw in the product. Yes, we were just as taken aback! The only disadvantage that could be mentioned is that it is not suitable for use on exterior surfaces. With such features under its wing, it’s but natural that one would want to make full use of the paint!
Pros
High operational efficiency
Incredibly time-efficient formula
Good value for money
Cons
Unsuitable for exterior use
Paint Type: Water-based | Coverage Area: Up to 400 sq. ft. | Finish: Satin | VOC Level: Low | Eco-Friendly: No
Manufactured by Rust-Oleum, a brand well-known for its superior painting solutions, the Zinnser 3688 makes for an efficient and convenient option for painting the ceiling of your house. A unique product on the list, it affords great comfort to the user and is a time-efficient item that does not disappoint.
Why Did We Like It?
Nobody likes chipped or faded ceilings, and property owners are on a constant lookout for the best products in the market. In that case, if you happen to chance upon this spray paint from Rust-Oleum, note that it is an item worth your time and consideration for several reasons.
This spray paint, essentially, acts as a paint and primer in one sleek bottle. Adept at covering up patches or stains on uneven surfaces, it is a handy tool to have around, especially in case of unprecedented emergencies. The oil-based formula lasts long enough and leaves you with a smooth finish and little to complain about.
Last but not least, the most unique selling point of this product is its method of application. Ceilings are vast surfaces in most cases, and painting them takes time and effort. The spray formula not only does away with considerable manual labor but also allows for incredible time efficiency. One of the most affordable options out there, we’d suggest you keep an eye out for this one!
What Could Have Been Better?
Although quite excellent in application and use, this product falls short on the consistency front. It is slightly thicker than its counterparts, which may interfere with the application and slow the process down. However, given its high operational efficiency otherwise, the issue hardly seems like a deal-breaker.
Pros
Time-efficient application
Long-lasting formula
Works well on uneven and chipped ceilings
Cons
Consistency is too thick
Paint Type: Water-based | Coverage Area: Up to 350 sq. ft. | Finish: Flat | VOC Level: Low | Eco-Friendly: No
Next up is a versatile product from Valspar, another known name in the industry. Easy to apply and offering an even more attractive finish, this product caters to a variety of customer needs and promises to deliver well. Read on to learn more about this color-changing ceiling paint!
Why Did We Like It?
There is much to like in this affordable and convenient painting solution from Valspar. First up, the coverage is even and always flawless. This is because the paint comes with an indicator that is purple during application and turns white on drying. It ensures that no spot is left unattended and that the entire surface area is adequately covered.
Speaking of finishes, the 1420 latex paint from Valspar dries to a sophisticated non-glare finish that is easy on the eye and adds to the ambiance of the room. Imperfections are camouflaged under the matte sheen, which affords a smooth finish to a variety of ceiling surfaces, such as acoustical tiles.
Moreover, this paint is a good choice for the environmentally-conscious buyer. It is made of high-quality materials that emit less odor and comprise an extremely low amount of VOC. This enhances the sustainability of the product, and the one-coat coverage also minimizes excess use, thus reducing waste.
What Could Have Been Better?
The only disadvantage it suffers from is the drying time. Although mostly convenient, Velspar’s product dries too soon, which requires constant touch-ups along the wet edges. This often leads to uneven coating. In case of such a predicament, we would recommend reaching out to customer support as it is a responsive team, always ready to help.
Pros
Good operational efficiency
Less polluting and versatile
Affordable price range
Cons
Dries too soon
Paint Type: Water-based | Coverage Area: Up to 400 sq. ft. | Finish: Flat | VOC Level: Low | Eco-Friendly: No
High water resistance and environmentally friendly.
Attenuation of 36dB (effectiveness of 99.98%) one layer,...
Next up is a product that you should definitely keep an eye on. This paint from a well-trusted brand makes for an excellent ceiling coating with its gorgeous pigmentation and attractive features. Comprising several qualities to ensure maximum customer satisfaction, the EMR Shielding Solutions paint ranks high on our list.
Why Did We Like It?
There is little to dislike about this product from EMR. Showing exceptional resistance to water, the paint makes light work of the largest ceilings and is available in 1.32-gallon containers. What impressed us the most is the importance placed on user safety. As far as ceiling paints are concerned, this one is a winner in terms of features that work to keep your interiors comfortable.
In this regard, its shielding properties take the cake. The paint is adept at blocking out high-frequency radiation as well as low electric fields and RF/microwave radiation. Further, it is composed of breathable elements and possesses low quantities of VOC content. This makes it suitable for several uses, thus increasing its versatility.
Moreover, the pigment doubles up as a primer and prevents abrasion from telecommunication industries operating across high gigahertz ranges. Last but not least, it is non-toxic and environment-friendly and offers great durability as it is not oxidized. All things considered, EMR’s product is one of the most premium paints you could invest in!
What Could Have Been Better?
Although offering a large number of advantages, this is an expensive product priced considerably high on the scale. While it may not suit the average homeowner’s budget, it fares well for commercial projects requiring a high degree of sophistication.
Pros
Exceptional shielding against water and radiation
Acts as a primer
Non-toxic and sustainable paint
Cons
Expensive
Paint Type: Water-based | Coverage Area: Up to 200 sq. ft. | Finish: Flat | VOC Level: Low | Eco-Friendly: Yes
By now, we hope we’ve been able to resolve some of your doubts. While making a purchase, keep in mind that specific paints have their unique uses.
For instance, the ceiling of your bathroom will require paint that is resistant to both mold and mildew. Also, even though wall paints work in most cases, paints for the ceiling are often thicker in composition so that they hold fast for longer.
Below, we have a comprehensive guide for you outlining the major factors to consider before buying ceiling paints. Your home deserves nothing but the best, and we always keep that in mind.
The Paint for Your Home Ceiling
In comparison to wall paints, these pigments are thicker. Not only does such a composition hold better, but it also enhances the splash resistance of the product. Most ceiling paints are washable and made to last years of use. Another feature that sets ceiling paints apart is the potential for coverage. As opposed to wall paints, they cover stains and watermarks without hassle.
Method of Paint Application
This is dependent on the type of ceiling. Rollers are the most common method of applying paint on regular ceilings that bear a smooth finish. Textured, popcorn ceilings, however, run the risk of abrasion from rollers. In this case, spray guns provide the best alternative as they minimize contact with the surface.
Paint Preparation
Before painting, a primer may be required. However, this is optional if your ceiling is in good condition. Although primers are excellent at covering up minor blemishes and ensuring that the final coat is smooth, and result in a fine finish.
Paint Color Options
The color of the ceiling holds the potential to make any room considerably roomier. They enhance the illusion of space while complementing the wall paints, especially in the case of contrasting shades. Also, this is bound to catch anybody’s attention as it offers a high degree of aesthetic appeal.
Flat, matte finishes are usually reserved for ceilings. But trends change like the weather, and gloss and metallic finishes are fast becoming popular choices among customers. Given their excellent quality, such paints walk the talk and upgrade your ceiling to a major focal point.
Ceiling Paint FAQs
How Many Coats Of Paint Does A Ceiling Need?
A single coat of paint is usually enough when painting a ceiling, even if you are only refreshing a white ceiling with a fresh coat. But if you want to give it a brighter and fresher finish, it is highly recommended to apply two coats. It is especially true when using bolder and brighter colors or if you need a dramatic color change, which will require the use of the color-drenching technique.
Is It Possible To Use Regular Paint On A Ceiling?
While it is possible to use regular interior paint while painting a ceiling, it is not recommended to do so. The reason for this is that regular paint is thinner than ceiling paint and has low viscosity, which can cause it to drip while you are painting. Not only will this make it difficult to work with the paint but it will also require greater work during the clean-up process afterward.
Why Is White The Most Commonly Used Color For Ceiling Paint?
The primary reason why most people prefer to have their ceilings painted white is that this color reflects the maximum amount of light, making the room look brighter. Additionally, it helps bring the other contrasting elements of the room together since it goes well with every color. For darker rooms, white can help create a sense of space, helping them appear to be larger than they actually are.
What Is The Most Suitable Type Of Paint For Ceilings?
You should always use flat, matte acrylic paint for ceilings, which offers several advantages. Since ceilings face minimal wear and tear, they do not require durable, glossy paint. Moreover, flat paint will not reflect any light and will not draw attention away from the room furnishings and the walls. Finally, it can effectively hide architectural blemishes and imperfections that may be present in the ceiling.
How Often Should You Repaint A Ceiling?
Dust, moisture, and sunlight determine the period for which a ceiling paint retains its appearance. Compared to walls, the paint on a ceiling takes longer to dull or yellow, but over a period of time, it will start to appear discolored. Generally, you should paint the ceiling every ten years, but it is a good idea to paint it any time you paint the walls to help the ceiling retain its pristine appearance.
Conclusion
Ceiling paints are a crucial element of a room's decor, adding to the overall aesthetic while also covering imperfections and ensuring your space looks well-maintained. Not only is it important to choose a high-quality product that offers good coverage, easy application, and durability, but also one that aligns with your specific needs and preferences in terms of finish, color, and eco-friendliness.
From the above 11 best ceiling paints, here are the top three expert recommendations:
The Rust-Oleum 253536 Metallic Accents Paint is an ideal option for those looking for a unique and elegant finish, as well as user safety and a long-lasting product.
On the other hand, the Glidden Latex Ceiling Paint is a good option for perfectionists seeking a smooth, luminous finish that easily covers imperfections and offers quick drying at a budget-friendly price.
Lastly, the Montage Signature Eco-Friendly Paint is the right choice for anyone prioritizing eco-friendly and versatile choices with protection against mold, mildew, and moisture.
Ultimately, selecting the best ceiling paint involves considering your specific needs, style preferences, and budget. With the right product, you can achieve the desired look while also enjoying the benefits of easy application and maintenance. So, transform your living space by choosing one of these top three expert-recommended ceiling paints and making a stylish statement that suits your lifestyle and vision.
Although we use staircases every day, we know little to nothing about them. However, that is about to change. In this article, we will not only talk about the different staircase designs and the materials used to construct them, but we will also introduce you to the common terms used when talking about stairs.
We believe that after going through this article, you will have enough knowledge to decide which staircase suits your home the best.
So, are you ready to begin your Staircase 101 class and learn everything you need to know about stairs? Let us begin, then, shall we?
Common Staircase Terms
Although this section has almost every conceivable term relating to staircases, we are quite sure that most of you are already familiar with some of these. In that case, feel free to skip over to the ones you have not heard of.
Steps Of A Staircase
You can think of this as a single unit of the staircase. Each of these units is made of a tread and a riser.
Tread And Riser
The Tread is the part you step on. On the other hand, the riser is the vertical portion between two consecutive treads.
Since a picture is worth a thousand words; we will not give you boring definitions about Tread Depth and Riser Height. Just have a look at the image below if you are interested in these terms.
A Simple Illustration Demonstrating The Tread Depth and Riser Height
Nosing
Now, a nosing is a part that may or may not be present in a staircase. In fact, many staircases do not have even have this part. But, quite a few building codes make it mandatory to have stair nosings.
So, what exactly is a nosing? It is the part of the tread (if present) that protrudes over the riser beneath it.
Do nosings have any benefits? Yes, of course. They are a requirement for many buildings because of their anti-slip properties which help in increasing pedestrian safety.
A Flight Of Stairs
A continuous series of steps which are not interrupted by a landing or a platform is known as a flight of stairs.
Length Of Flights
The number of steps in a flight is its length. In case of commercial or assembly buildings, there is a requirement for the number of steps in a flight. It is limited to a maximum of 16 in a single flight.
Stringer Board Or Stringer
A stringer board or stringer is what provides support to the treads and risers of a standard staircase. In most cases, you will find three stringers. Two of the stringers will be on either side of the tread, while the last one is in the middle. If the treads are wider than usual, then more stringers are added as necessary.
Winders
In case of Winder Stairs, there are some steps which are wedge-shaped. These steps help in changing the direction of the staircase. Needless to say, Winder Staircases do not need a landing.
The stairs take a 90-degree turn in a Single Winder Staircase. On the other hand, it turns by 180 degrees in a Double Winder Staircase. We will cover more about these types of stairs in the next section.
Staircase Landing
A staircase landing is a flat area which separates two flights of stairs. In case of Straight Stairs, the landing is called Intermediate Landing. Staircases which bend can have a Quarter Landing (the angle between the consecutive flight of stairs is 90 degrees), or a Half Landing (the angle between the consecutive flight of stairs is 180 degrees).
While Quarter Landings and Half Landings are where the staircase changes direction, another benefit is offering a place to rest. This is especially useful if you are trying to move a heavy object up the stairs.
Balcony
In case of a staircase with an open landing or upper floor, that area is typically a balcony. If the balcony is long enough, it might need multiple newel posts to support the length of the railing.
If you are still unclear about the balcony of a staircase, take a look at the illustration below. The Arched Staircase flows up to a balcony on the first floor.
This type of stairs creates a mesmerizing floating effect. It seems as if the treads have nothing below them. In fact, floating staircases do not have risers. Moreover, they typically have a single stringer which provides support on one end of the tread. In some cases, there may be more than one stringer board present, but the number of stringers is always less compared to a standard staircase of the same width.
Some floating staircases entirely omit the handrails for an even more dramatic effect. Now, this impractical design philosophy cannot be implemented everywhere as building codes might not allow it.
Spandrel
When there is no other flight of stairs below, the triangular space underneath is known as the spandrel. This area can be used as a storage space as shown in the illustration below.
A Unique Storage Solution For The Spandrel
via nengen.club
Staircase Runner
Although a Staircase Runner is not a structural part of the staircase, it not only elevates the safety but also adds a touch of luxury. These runners are nothing but carpeting for the staircase.
While some runners are directly nailed or stapled to the steps, others might be securely held in place by a stair rod.
Distinguishing Staircases According To Design
In this section, we will talk about the various designs of staircases, ranging from Straight Stairs, Half Landing Stairs to Single Winder Stairs, Spiral Stairs and more. So, read along to find out everything you need to know about the different designs.
Staircases With A Straight Flight
Staircases with a straight flight – these are perhaps the most common form of staircases you will come across. They are the simplest to construct and can save you a fair amount of cash compared to the more complex staircase designs.
In this category, you will find the Standard Straight Stairs, Half Landing Stairs and, Quarter Landing Stairs. We will talk about them in a lot more detail.
When it comes to the construction, these types of staircases follow a simple rule – the number of treads must be less than 16 in a single straight flight of stairs. However, do not let its simple construction fool you. These staircases are extremely popular in modern, minimalistic homes.
Let us now find out more about the different types of staircases with a straight flight.
Types of Staircases With A Straight Flight
Straight Stairs
Now, this is the simplest form of Staircases with a straight flight. However, simplicity is not a bad thing. In fact, it is surely the most functional and convenient to use. Since there are no turns, it is simpler to carry heavy items up the staircase.
We have already mentioned that a single flight of stairs cannot exceed 16 treads. So, what if the next floor is at a height where it is not possible to create 16 treads without making each tread unnaturally large?
Sure, you can create a straight staircase with a quarter landing or half landing. But, what if you want to keep it absolutely straight, with no bends? Well, you can create an intermediate landing like the one featured in the illustration below.
Just like the rule for the number of the treads in a single flight of stairs, there is also a rule for the minimum depth of landing. And that should ideally be equal to the step length and the depth of a single tread.
Even if your plan does not require a landing, you should include one. It will surely make things even more practical and convenient.
Half Landing Stairs
Next up is the Half Landing Staircase. You must already be familiar with this type of stairs. These are most commonly found in apartment and tall office buildings.
In the previous case, the landing flowed along with the staircase. However, in this case, the landing changes the direction of the flight of stairs by 180 degrees. It is almost like taking a U-turn, albeit in the upward direction.
Although Half Landing Stairs are not as convenient as Straight Stairs, they save a lot of space. That is why they are the staircase of choice for buildings with multiple floors.
This staircase also has rules for the dimensions of the landing. And in this case, the depth of the landing must be longer than the whole tread width of a single flight of stairs.
Finally, we have Quarter Landing Stairs. Unlike its Half Landing counterpart, the landing changes the direction of the flight of stairs by 90 degrees. While they are not the staircase of choice for tall buildings, they make perfect sense in a house with two or three floors.
A Staircase With A Quarter Landing
via www.tolet.com
Compared to the Straight Stairs, they take up less space and are almost as convenient to use. In fact, they are more practical compared to a standard straight staircase without an intermediate landing.
Now, Quarter Landing Stairs do not have to be limited to a 90-degree shift. If you want it more akin to a Half Landing Staircase, you simply need to add another quarter landing. Just check the illustration below in case you are not familiar with Double Quarter Landing Stairs.
A Floating Staircase With A Double Quarter Landing
via www.houzz.co.uk
When it comes to the size of the landing, it is identical to that of the Half Landing Staircase. In other words, the depth of the landing must be longer than the whole width of the tread of a single flight of stairs.
Winder Stairs
Winder Stairs, as its name suggests, have a winding design. Instead of a landing, which breaks the flow in the case of straight stairs, Winding Staircases have wedge-shaped treads.
Hence, there is no need to construct a landing of any sort in this case. While the obvious downside is the convenience and practicality, this design concept surely has a few benefits.
For starters, it looks a lot cooler, wouldn’t you agree? Moreover, it saves space compared to a Straight Staircase. How, you ask? Well, the wedge-shaped treads are smaller compared to a standard landing. Moreover, since each of these treads rise vertically, you save even more space.
Sure, carrying heavy objects up the staircase will be quite tricky. But if the vertical climb is not much, it makes perfect sense. Another potential downside to Winder Stairs is the cost to build it. The more complicated the design, the more specialization it requires. And thus, a grandiose spiral staircase will be much costlier compared to its straight counterpart.
So, what are the different kinds of staircases which fall under this category? Winder or Winding Staircases generally comprise of Single Winder Stairs, Double Winder Stairs, Arched Stairs and last but not least, Spiral Stairs. We will cover all the different types in the next section.
Types of Winder Stairs
Single Winder Stairs
Single Winder Stairs are staircases where the angle between the first flight and second flight is 90 degrees. They are quite similar in construction to the Quarter Landing Stairs featured above.
In fact, the only difference is where the flight of stairs bifurcates. In case of the Single Winder Stairs, you have wedge-shaped treads, while the Quarter Landing Stairs has a landing.
When it comes to designing the staircase, it is better to have the winder treads in the beginning compared to the end. Why, you ask? Well, having the wedge-shaped treads earlier make it visible and thus make it more convenient to walk up, especially if you are moving a heavy object.
A Single Winder Staircase
via www.ebizbydesign.com
Double Winder Stairs
Next up is Double Winder Stairs. If you want to compare this to one of the Straight Staircases, then the Half Landing Stairs and Double Quarter Landing Stairs would be closest to its design, especially if you observe the top-down views.
Unlike the Single Winder Stairs, this staircase has a 180-degree turn. Moreover, they are more compact than the former.
Double Winder Stairs can be divided into two categories - one with a smoother passage of winder treads from turn to turn and another with a more abrupt passage. Of the two, the staircase with the smoother passage is surely the more convenient to use.
As its name suggests, the flight of these stairs resembles an arch. These staircases exude a premium feel, and you will find them in many high-end homes. Just take a look at the illustration below. These Arched Double Stairs look stunning, don’t they?
When compared to the Winder Stairs featured earlier, these do not have any straight treads. Instead, all the treads are wedge-shaped. However, none of the treads taper as much as the ones found at the junction of a Single or Double Winder Stairs.
Needless to say, these types of staircases are really complicated to build and can only be done by experts. All the basic details of Arched Stairs are curved. That makes the construction not only tedious but also quite costly. Then again, that is the price you pay for opulence.
Spiral Stairs
Among all the different staircase designs, Spiral Stairs are surely the most photogenic. Don’t believe us? Just take a look at the illustration below. It looks stupendous, doesn’t it?
Top Down View Of A Surreal Spiral Staircase
via boredpanda.com
Unlike Arched Staircases, which are usually found in high-end homes, spiral staircases can be both simple and luxurious.
Small Spiral Staircases have a central vertical post like the one featured in the image below. This vertical post acts as a support for all the treads in the flight. If you observe the treads of a spiral staircase closely, you will notice that all of them, except for the last one, are wedge-shaped and uniform in size.
A Simple Spiral Staircase With A Central Vertical Post
via www.britishsc.co.uk
Spiral staircases cannot be ascended or descended as quickly as a traditional staircase due to the corkscrew design. Additionally, the space-saving structure often doesn't pair well with larger spaces or more traditional décor.
Compact Stairs
Compact Stairs are built with one thing in mind – minimizing space. These staircases are most commonly found in tiny homes where saving space is of utmost importance.
A Space Saving Staircase
Source Unknown
Although these stairs save a lot of space, they sacrifice convenience and practicality. They are quite hard to climb and surely not suited for old people. Moreover, it is almost impossible to go up while carrying heavy items.
Some of these compact staircases have unique treads like the ones featured in the illustration below. The treads you see here are known as “goose steps.”
A Compact Staircase With Goose Steps
via staircasedesign.xyz
Building Materials For Stairs
In this section, we will focus on the various materials which are commonly used to construct staircases. While some of these materials lean towards practicality and durability, others are more aesthetically pleasing.
So, which of these materials will be perfect for your staircase? Read along to find out.
Wood
Although wood is not a popular choice of material in tall buildings, it is still one of the most traditional and affordable staircase materials in private homes.
Now, do not be fooled by the affordability aspect of wood. In fact, some high-end, luxurious homes sport wooden staircases made with opulent materials. Just take a look at the illustration below. It looks absolutely stunning, doesn’t it?
A Luxurious Arched Wooden Staircase
Concrete
When it comes to practicality and versatility, concrete reigns supreme. Concrete staircases can be installed quickly and are durable enough to last a lifetime. Moreover, it can be easily shaped to your desire. In other words, it is quite easy to make a complicated arched or spiral staircase using concrete.
However, concrete alone looks quite mundane. But once it is plastered and topped off with premium materials like stone or granite, it will surely be fit for any luxurious home. Just take a look at the illustration below. The concrete staircase topped off with marble treads looks mesmerizing, doesn’t it?
A Luxurious Concrete Staircase With White Marble Treads
via pinimg.com
Glass
Nowadays, many modern homes and commercial spaces use glass staircases to create a contemporary vibe. And thus, glass has gained a lot of popularity, especially in the 21st century.
Some of you might still feel that glass is not a sturdy material. However, that is not entirely true. Sure, some forms of glasses can be quite brittle, but new varieties of glass have emerged that are easily capable of holding a large amount of weight.
The main downside of having a glass staircase is the maintenance cost. A single day of use can ruin the appearance, and thus, it must constantly be cleaned to keep it in tip-top condition.
A Modern Glass Staircase With Stainless Steel Railings
Source Unknown
Metal
Although not a popular choice for commercial building interiors, metal staircases are often used in private homes. While they are robust and durable, metal stairs do not age well if they are not properly maintained.
While metal offers quite a bit of flexibility when it comes to the design, the cost can easily shoot up depending on the complexity. Thankfully, metal stair components can be readily purchased for a low price. However, going down that route means that you do not get many options when it comes to the design.
A Contemporary Spiral Metal Staircase
via makaan.com
That brings our Staircase 101 class to an end. Whether you are an expert builder, aspiring architect or someone looking to remodel your home, we hope that this article has helped you in one way or another.
If you have any suggestions, do let us know in the comment section below. We would love to hear from you.
Bamboo floors are highly popular these days thanks to their similarities to hardwood flooring, lower costs and quite phenomenal aesthetic values the solution gains ground with its dense fiber and exotic look. Bamboo flooring is one of the most interesting flooring options out there, one that comes with advantages and disadvantages as any flooring type-and with the short guide that follows we tend to cover all you need to know about bamboo flooring, both pros and cons along with a graphic gallery of bamboo floors meant to feed your imagination.
To the question " What is bamboo flooring ? " one could answer swiftly, bamboo flooring or bamboo floors are the covering material of floors with a natural wooden essence, in this case bamboo being a type of grass that grows extraordinarily fast. The bamboo floors are a great alternative to traditional hardwood floors so without further ado let`s have a look toe the feasts of strength of this solution and its weaknesses alike; we hope this information will come in handy in all your design endeavors and we would love to hear your feedback in the comment section below.
The Advantages Of Bamboo Flooring
Durable
High quality bamboo floors are known to be as durable as their traditional hardwood floors counterparts yet the high quality term is relative to each country and industry. Note that un-carbonized bamboo can be as hard and strong as red oak where special solutions like strand-woven bamboo floors can be even better, heavier.
one stylish flooring
The modern look brought by the small delicate fiber of the bamboo is something that draws in many home-owners as the look on ensemble is modern, dense and sumptuously rich. The differences between bamboo flooring and hardwood are small yet the difference is there, subtle, hidden yet undeniable.
possibilities-variety
Bamboo flooring can be found in quite a large array of variety styles and colors yet one should note that each color represents something different in terms or processing; darker colors for example result from heat treatments most often than not, this, softening the bamboo fiber and slightly affecting its longevity.
green flooring option
As bamboo is in theory a grass, a fast growing glass that matures and hardens in five to seven years, the bamboo is seen by many as a far more sustainable option when compared to traditional hardwood floors.
Natural material
In theory it would be ideal to construct our homes with natural materials only and even though this option is not easily achievable due to the high costs of natural materials, bamboo flooring is a solid choice adopted by many sustainable-ecologically conscious people. The subtle elegant difference between bamboo floors and hardwood floors yet again highlights a sense of uniqueness and individuality with which many are comfortable, sense that is actually pursued more often than one would think.
easy maintenance
A great thing about bamboo floors is that they require no special treatments, they`re easy on maintenance and they can be cleaned with a mop and mild soap with ease making it a great feat of strength for most homeowners.
bamboo floors can be refinished
Bamboo floors too can be dented, discolored and scratched over times so it is a great relief for a home owner to know that the surface can be refinished if need be. By default the bamboo floor requires more layers of finishing than its hardwood counterparts making the entire surface look spectacular; sanding and refinishing these layers down to the surface and than reapplying finishing coats will refresh the design.
Moderate water resistance
In a comparison with the traditional hardwood floors it`s a great thing to note that bamboo comes slightly ahead when it comes to water stains, warping and overall water damage. Bamboo too suffers from such accidents yet in the bigger picture if performs better.
lower costs
It is exotic, it has a unique vibe and yet the bamboo flooring is less expensive than hardwood flooring. In most areas the price difference is noticeable as the bamboo floors range from 5 to 8 dollars per square foot.
Bamboo Floors Disadvantages
Disclaimer - In no way are the following pictures part of the disadvantages section; they`re here to emphasize the capacities of bamboo floors not undermine it in any way.
likely to suffer from scratches
One should note that lower quality bamboo options do suffer relatively easily from scratches yet even high quality flooring can be distressed, scratched if used intensively. Pets, high heeled shoes and even furniture can scratch the surface in time as well as tiny particles of sand that your shoes might bring in on an everyday bases.
potential water damage
The natural options are vulnerable to water damage and even though the bamboo floors are a little more water resistant than their hardwood floors brothers the naturalness of the organic materials can suffer from prolonged moisture, reacting with warping, discoloration and in extreme cases even mold growth.
humidity sensitive
As the bamboo planks are less rigid and heavy the surface can suffer in very dry or wet environments. In humid areas the planks can expand and plump up fast where in dry environments they can shrink causing cracking in both cases. This happens due to lightweight structure of the wood itself; the bamboo is actually a grass basically and even if hardwood floors, in theory, are to suffer the same consequence in extreme cases, the wooden essence of a tree is far superior, perfected in years and years that the bamboo grass had not had.
softness potential
One should know very well what he purchases. Bamboo floors look exceptionally in their first year regardless of the harvest year yet in time, general softness and a very weak structure would define an early harvested bamboo plant, in extreme cases these being harvested when three months old, not being allowed to mature as it should, five to seven years. Keep in mind that stran-woven bamboo and un-carbonized options are always more durable where darker bamboo represents a weakened structure due to the heat treatments that cause it to soften.
Design restrictive
The modern look of bamboo cannot be overlooked yet it`s particularities are a feat of strength and a disadvantage at the same time as the powerful essence, strong looking fiber cannot be undermined therefore restricting the interior design lines a great deal.
toxic emissions may arise
Everywhere in life, there is a shortcut; a shortcut that no one should take yet one that is well ridden by so many. It is known that certain bamboo floors, mainly the ones mass produced in China, might contain dangerous amounts of toxic chemicals like formaldehyde-based glues and finishes. In the plank making process, the bamboo is shredded or sliced only to be afterwards adhered together in the plank form that constitute the flooring; in this process the wrong adhesives can be used, these realizing VOCs in air in time making the flooring a safety hazard for the environment and more importantly for the inhabitant.
A proper certification from FSC - Forest Stewardship Council (FSC) can keep you clear of problems. Always make your due-diligence.
Uncertainty on harvesting practices
Bamboo is presented often as a highly-sustainable eco-friendly option and in theory, it is as it can be grown far easier then oak for example yet forestry practices can be irresponsible, and environmentally unfriendly like so many times it was proven to be. Not all bamboo comes from dedicated farms that actually grow it for harvesting, clear-cutting natural forests did happen and needless to say that the same happens for hardwood flooring yet one ought to do his due-diligence, to make sure he purchases the right product and does not indirectly encourage this highly toxic and harmful part of our world.
Make sure your bamboo floors are green; part of the responsible movement. Be aware of what surrounds you.
Bamboo flooring is a great great option with an extraordinary look, it deserves people's attention and it can change the world just a little bit if the whole process is cleansed and the option is clear green, and eco-friendly. What do you think? Would love to hear your opinion on the subject in the comment section below.
Redoing your home is a laborious job and the process itself can prove to be a nightmare. But once in a while we need a change from our daily routine, to make us see things differently and appreciate life once more. Thus we have thought of minor makeovers which can change the entire atmosphere of a home with a single touch and we have focused on DIY Stair Projects. Easy to accomplish, the right staircase will improve the view of your ground floor as well as the upper ones, offering that proper passage. After a long tiring day climbing the stairs should be a beautiful experience. Hand painting, spray painting, stenciling, using wallpaper, navy tones, floral touches or bold strong combinations, there are tons of ideas and methods of redoing your staircase into the perfect one you have always wanted. And the best part of it is that you can redo the thing all over again you've decided its old news quite easily and with a big impact on your home. Have we caught your attention? Explore the gallery below and feel free to share your thoughts in the comment section below and on our social platforms. Enjoy!
1. The piano staircase
2. DIY Stair Project-Bold combination of colors
3. When the cat's not home...
4. The message staircase
5. Degrade staircase in elegant tones
6. We could always need some glamour
7. DIY Stair Project-Fresh spring theme
8. Vibrant contrasts
9. A navy theme
10. Marking the staircase boldly
11. Wonderland theme
12. DIY Stair Project- Red black and white elegance
13. Complementary colors
14. Repainting wood stairs
15. Baby blue touch
16. Ombre blue tones
17. The book collection staircase
18. Chalk-paint stairs
19. Using tape
20. Fluorescent combination
21. Floral dream
22. Rainbow approach
23. Using wine crates
24. Stenciling
25. The beliefs of the house
26. Dark blue tones
27. Black rug paint
28. Use complementary tones for painting wood
29. You can choose to paint the railway
30. Washi tape
31. Texturing
32. Install a carpet
33. Navy motifs
34. Using wallpaper
35. Color variations
36. White and red is a bold combination
37. As well as zebra stripes
38. Numbering your stairs
39. Hand-painted stairs
40. Delicate leaves stencils
We step on them everyday and don't really pay much attention to their design. But a properly designed floor is the foundation of your entire interior and exterior design line. It reflects your taste and personality in a discreet way, inviting, guiding you through your home in unexpected ways. Marble floors, hardwood floors or the already classical DIY pallet floor, the possibilities are numerous and vary according to taste and budget. Which one is your favorite and would opt for? Choose from the gallery showcased below of 32 Highly Creative and Cool Floor Designs For Your Home and Yard the right design for you.
Cool Floor Designs
#1 transparent leveling compound over a concrete floor resembling water
What do you think about the gallery showcased above? Are you ready to transform your design through floors only? We would love to hear your opinion in the comment section below.
The beautiful mixture between old and and new, rustic and modern, minimalist and intricate has always been sought in the design world. In home decor exposed wooden beams are a highly appreciated element known to add a new, warm and vibrant dimension.
Decorating wood is a top choice adopted all around the world and where wooden beams already thrive in the interior decor we highly encourage you take safety measures against fire but keep the wooden beams exposed, beautiful, natural, real. To observe the structure, to see the beautiful honesty of the home is something we fail to do today in contemporary solutions, protect it.
Sensible kitchen decor emphasized by exposed wooden beams
What do you think about this beautiful interiors featuring Exposed Wooden Beams? We would love to hear your valuable feedback in the comment section below.
Wood is definitely the most extraordinary material in the world. It can take absolutely any shape, it comes in thousands of tones and textures, it`s noble and elegant whilst being versatile. Further on we will present you a selection of wooden types of stairs for modern homes in which you`ll see just a small part of the wood`s capabilities. Wood had a key role from the very beginning in architecture an design and so did the stairs.
Wood will enhance your staircase with warmth, coziness, elegance and style ;you can obtain whatever color and texture you want or need with the right information and resources. You can obtain one of the most smooth surfaces in the world or an extraordinary textured one, the possibilities are endless; it can be materialized in any shape with the right resources.
In the selection bellow you will see wooden helical stairs, free floating stairs, wired anchored floating stairs, organic staircases, monolithic staircases, sculptural staircases and many others. We would love to hear your opinion about the different wooden types of stairs presented bellow and some information about the ones that you are using.
Ceiling decorations have gained popularity in contemporary interior design as homeowners strive to create personalized living spaces that showcase their creativity and individuality. These decorations, serving both aesthetic and functional purposes, can significantly enhance the atmosphere and ambiance of a room. From DIY enthusiasts to professional designers, the use of ceiling decorations has become an innovative way to transform and tailor living spaces.
Ceiling decorations can be employed for various purposes, such as seasonal décor, event decorations, or everyday interior design. Suspended from walls, ceilings, or even pergolas, these decorative elements can alter the perception of a space and add a distinctive design motif. Some ceiling decorations, particularly those with intricate or irregular shapes, can help disperse sound waves and improve a room's acoustic properties, providing an added benefit to their visual appeal.
Ranging from chic and whimsical to sophisticated and elegant, ceiling decoration ideas can be adapted and realized in various settings, involving friends and family in the creative process. The use of ceiling decorations encourages exploration and experimentation, inspiring individuals to seek unique solutions that elevate their interior spaces and contribute to a more personalized living environment.
DIY Ceiling Decorations Ideas
#1 Craft paper leaves for your fall decor
If you find yourself some graphics leaves you can use them for a small, short event. If you choose to install this decoration in your home and keep it on for the entire fall, paper wins. Paper is used thanks to its durability, this decoration can be reused next fall or be gifted to a happy friend of yours. Simply use scissors to cut out the leaves and paint them; if you have the resources and skill you can use a laser cutter to make them faster; the disadvantage of the laser cutter is that they lose authenticity, all being identical. Get creative with ceiling paint and mix colors well to obtain that beautiful, natural fall gradient.
Salvage a wooden beam and use multiple Edison bulbs to obtain depth in your lighting installation. If you have sufficient height in your room, play with the cords of the bulbs and create a playful, creative, light game.
#3 Explore your decor with multiple handmade chandeliers
If you are proficient with glass work you can actually craft different chandeliers, and play with colors and shapes to obtain a versatile decor.
Source Unknown.
#4 Install a cloud for your baby shower party
Simple to realize and inexpensive, you can use cardboard and colored paper to realize it in one hour or two. Enjoy your decor.
via somanytables.com
#5 Craft lace support for your planters
Easy to realize in minutes, lace is able to transform your decor thanks to the delicate, intricate texture added. You can use mason jars to save costs on planters.
#6 DIY mason jar lighting fixtures
Probably the most graphic installation in our shortlist, diy mason lighting installations are easy to realize at home especially if you use string lights with a battery system. Simply find a way to arrange them in your decor, and design them to your advantage.
A natural element that will last for a one-day event. The craft is very easy to realize and it becomes a focal point of immense beauty in your decor in a matter of seconds thanks to the great contrast between yellow and black.
#8 Craft ceiling decorations with colorful melted beams
A simple creative craft to realize at home with your loved ones. It opens up great opportunities for your decor and a creative mind can showcase various graphic elements on the medallion created.
#9 Create a beautiful butterfly chandelier mobile for your party
You can use paper origami cranes for this decor piece or butterflies as showcased above. The element of great design can be installed in your child's room after the event or gifted to a happy mom. Simple, beautiful craft.
#10 Salvaged wood used to construct an airy floating nightstand
A very unique take on how to create a nightstand. The usual diy nightstand projects are not known to float by the bed but this beautiful craft is certainly memorable. Get creative with simple elements and craft something magnificent.
If your event takes place outdoors, string lights and candles are mandatory elements, and greenery is a must-have too but sadly that is not easy to realize in a day or two. The beautiful craft above showcases how you can use a string or iron structure, a sphere-globe-like structure here, to add light in a beautiful, unique way. Glance at the reflection in the window in the last picture; in certain cases, these globes can enhance your decor a great deal. Use dark hues on the metal structure.
#12 Install pom poms or lanterns and animate them with string lights
Craft ideas for toddlers are not as present online as you would expect. Certain mobile and pom poms installations exist though and they`re quite graphic, especially when string lights are added into the setup. Craft something memorable for your toddler and forge his dreams and future memories.
This might not be everyone`s cup of tea but the installation is really unique and far safer than one would expect. Small candles do come in different sizes, pick the larger ones to avoid incidents and create something beautiful.
#18 Use different textures on creative shapes to obtain amazing decor
Cut out a shape that is relevant to the decor motif carried by your event and use various textures to emphasize them, versatility and delicacy are attributes that will be added to your decor thanks to the intricate details of the textures used.
You can realize a beautiful shabby chic chandelier or wind chime with little to no cost. You can realize this craft at home in one afternoon. Beautiful simplicity in shabby chic clothes.
#23 Use traditional Christmas elements in your decor
Hang simple elements to your chandelier, window, or fireplace mantel and obtain a very merry atmosphere.
Source Unknown.
#24 user birdcages in your decor
Birdcages simply have a beautiful, vintage allure, and thanks to it they can emphasize your decor with ease, whether you choose to leave them bare or add candles or flowers, the space will be beautified. Pure and beautiful.
The selection presented above has been diverse enough to instigate you we hope, we would really like to hear what ceiling decorations you use and in what instances. DIY design elements are items of great authenticity crafted by gifted, patient individuals, they transform their spaces every day, improving their living quality through simple elements. Do you craft? We would love to hear from you in the comment section below!
White is seldom associated with serenity, purity and calm. Therefore, a white bedroom design is usually the first choice, a smart choice because the bedroom should be associated with a restful color. Further more, white is an excellent background for other colorful accents that can add a note of happiness and drama to the entire decor. Whether you are a fan of elegant, classical interior design where black, heavy furniture pieces take place in a white decor or you prefer the more bold approach of a modern, colorful, vibrant atmosphere, the basic white bedroom is a good starting point.
White can also represent romantism so don't hesitate to compose a decor based on fragile white curtains and a baroque bed with a baldaquine and a bunch of fresh cu colorful flowers on the nightstand. There is also the big issue of how to control the overall design in order to not transform the chamber into one which can strongly resemble a hospital room. But here the answer is an easy one: just remember to personalize the space. Family pictures, mirrors, a touch of color on a chic chair, unusual nightstand lamps, candles for romantic nights, flowers. Every little accent and detail can make the difference . Materials and textures are also of the most importance: silk, velvet which can exude richness and elegance or cotton, wool more cozy and warm, each can express a different state of mind and attitude of the owner.
Many could state that choosing to adopt a pure design is the most easy choice but from that to transforming it into your bedroom, your serene piece of paradise and relaxation is a long way to go. We have prepared a selection of white bedroom design ideas to inspire you in the search of the perfect interior design that can truly represent and express your personality. Enjoy!
We usually complain about not having enough space in our closets for ll of the things we tend to gather in our life. But most of the time the problem is not the lack of space itself but the poor organization of it. We need to keep every little corner of our house organized in order to function properly everyday. Which is why we present a few methods of organizing an transforming your unused or poorly used better said closets. You will find that organizing and dividing the space can increase your storage and transform it as a whole. The entire organization scheme is not a complicated one, it just requires the proper shelves, cardboard boxes and a little bit of imagination and creativity. because you can turn your closet into a private little study, a hidden desk, a reading nook or a playground for your kid with little effort while being practical at the same time. So get bold and Transform and Reorganize Your Unused Closet And Think Outside The Box!
Transform and Reorganize Your Unused Closet
1. Organize the doors and store your wrapping necessities on it
2. Keep your clothes in order
3. Make a sewing desk
4. Organize your entry closet and make a bench where you can sit and put your shoes on
5. Turn an unused closet into a bar
6. Make a hidden work area
7. Play with colors and wallpaper for a beautiful design
8. Use cardboard boxes to store paperwork
9. Mix the sleeping area with a reading nook
10. Pops of color bring everything to life
11. Surround a sitting area with books
12. Don't be afraid to make a drastic change
13. Colors can make a huge difference
14. Hide a bed in a deep closet
15. Transform your unused closet into a kid's fortress
16. Or store your wine
17. Another sewing station
18. A little library in a closet
19. Turn an unused closet into a laundry station
20. Or a kid's changing station
21. Add more sitting spaces
22. And store your paperwork and stationary properly
23. Add chalkboard paint
24. And display your art
25. Make it into a cozy relaxing space
26. Use even the tiniest of spaces
27. Place the crib in an unused built-in-wall closet
28. Mix storage with a playground
29. Hide the desired space with curtains or doors
We have been accustomed with the phrase "Form follows function" but who says a function has just one form? Trends come and go and just s few stick with the general population whereas others remain in history as bold experiments designers try hardy to bring to the every day life. So today we are talking about round beds. The concept itself is not a new one but finding a round bed in a common bedroom is quite unusual. But the round shape of the bed can freshen a bedroom design up and bring something new to the design scheme. Besides the aesthetic appeal, a round bed is also very practical. They can be placed literally anywhere in a room: in the center of it making the design scheme gravitate around it or in a round corner so hard to use otherwise. It can save up lots of space due to the lack of angles and makes cleaning a hole lot easier. A round bed is easy to move around and generates a feeling of lightness and freshness in the interior design, occupying less space than a regular bed. Traditional or modern, a round bed can fix any bedroom design. Its just a matter of taste and mixing the right textures, colors and materials. On the other hand it is a matter of perception. Round beds are not usually promoted so a regular customer will probably not be inclined to buy a round bed for his own private bedroom. But in the end we all have to adapt to the changing trends and transform them, mold them to our own taste and personality.
Round Bed Collection for Your Bedroom Design
1. Get romantic
A round bed can be the perfect item in a romantic bedroom scenery. The following hart bed from Cranium Furniture can be a bit over too much but the essential idea of romance is perfectly exuded by the overall red and dim light ambiance.
Red harted bed with red matching side lamps
by Cranium Furniture
2. Round fits perfectly into a minimalist design
The following decor by S.ID Ltd features a simple white leather bed in a modern futuristic interior design with simple clear round lines and a neutral color scheme. Next a bold black and yellow contrast brings to life a small room.
Simple minimalist round bed design.
by S.I.D Ltd
Contemporary round bed in bold black and yellow contrast
by Cranium Furniture
3. Retro round style
Where would you think to find a round bed better than in a retro bedroom? Dots, bold contrasts, mirrors, velvet and the center piece-the round bed placed not in the center in this case but in a round corner.
Retro round bed creation.
by Catherine Condoroussis Design
4. A white color scheme with interesting accents
White is the all classical choice and the accents are the ones that bring a design scheme to life. The following bedroom designs focus on the surrounding atmosphere of the round beds: floral wallpaper, colorful pillows, a zebra rug or red velvet curtains.Every little accents can make a difference in the bedroom design scheme.
Black and white fluffy round bed.
by Dupuis Design
Modern colorful bedroom design.
by S.I.D Ltd
Neutral color scheme with the white round bed positioned in the center of this interior decor.
by EuroLux
Simple round bed with a touch of classic.
by Dupuis Design
5. Different textures generate different bedroom design atmospheres
Whether we talk about chocolate velvet, white leather or black wood, texture is very important and can make the difference. Velvet represents a more romantic, intimate ambiance while wood is classical and leather more modern, controversial decor. Leather is not the first choice for a bedroom bed but for the open minded the round bed-leather headboard combination is quite an interesting one.
Modern chocolate velvet round bed.
by SHH
Classical yet simple round bed bedroom.
by Vadim kadoshnikov
Multi-textured round bed bedroom.
by Pressoto
Black and white minimalist round bed.
by Cranium Furniture
Simple beautiful round bed.
by EuroLux
Pastel bedroom with white leather round bed.
by Prime Classic Design
In the end its a problem of taste and personality. So, what do you think? Is a round bed a viable alternative to the classical traditional bed or is the idea a little bit too eccentric for your taste? Do you by chance own a round bed? If you found inspiration here yet are not sure about the entire design you can follow some DIY headboard projects, you can upholster the entire bed if the finishing is not spot on or built your own circular bed entirely! Nothing can stop you! We would like to hear you thoughts and opinions in the comment section below.
Basketball is a very popular theme for either a children’s room or for that man-cave sanctuary. The good news is that it doesn't cost much to create this environment and many of the products are available online for minimal cost. Some wall art, a few items of memorabilia, and of course that wall-hoop is all it takes to turn a hum-drum room into a fun, sport’s themed environment.
Inspiring Basketball Themed Bedroom
Start with the art
The first thing that attracts the eye when walking into a room is the wall art and there’s a range of prints and framed art available on the market. The brightly-colored ball itself will be one of the main features but there are plenty of vintage prints available, which look great when hung above a bed. The larger prints will make an impact but use a little imagination and consider hanging team vests along one wall and consider items such as basketball-shaped clocks. Using a stencil to print team names directly onto a blank wall can also be very effective and you can buy large 2D team figures to hang on the walls.
Create your court
If you’re someone who likes to take it one step further then why not create your own indoor basketball mini-court? If your room already has varnished or hardwood floors then you’re ahead of the game and all that’s required is some floor markings and a hoop attached to the wall. Of course, this isn’t going to be a full-sized court but more likely just a corner of the room where you can throw a few slam-dunks. Paint the walls in your team colors and stencil up a few inspirational Michael Jordan quotes onto the court area.
Team memorabilia
Collecting sports memorabilia is a fascinating past-time and vintage finds can look great on walls or shelves. Check out those auction websites for framed prints, autographed posters, and even ‘signed by the team’ vests and balls. If you can get your hands on some authentic items then this will make a great display when collected together and will definitely impress visitors. Look out for game tickets that can be framed and search out those vintage magazines that can be fanned out on table tops.
You should be able to pick these things up easily at your nearest superstore or, if you’re a British reader, in your local Tesco. Don’t forget those themed bedspreads, pillowcases, the best in-ground basketball hoop you can find, and even rugs with court designs.
Get creative and experiment a lot with your ideas until you finally achieve that perfect look.
Considering Acoustics for Your Indoor Court
In creating a basketball-themed bedroom, one important aspect often overlooked is the acoustic properties of the room. Particularly in a residential setting, soundproofing becomes a necessary consideration to prevent noise disturbances to other members of the household or neighbors. One can achieve this through various methods. For instance, introducing sound barriers or absorbent materials, like foam panels or heavy curtains, can significantly reduce the noise generated in the room. Additionally, opting for sound-absorbent flooring materials instead of hard surfaces can dampen the sound of bouncing basketballs. Considering these measures not only ensures a serene household environment but also enhances the overall comfort and usability of the basketball-themed bedroom. For more in-depth guidance on how to soundproof your room, there are dedicated resources available that detail proven methods for reducing noise in your home.
What do you think? We would love to hear your opinion on Basketball Themed Bedrooms in the comment section below.
Earlier today we have published Fairytale Bedroom Interior Designs for Kids story in which the child was the protagonist of his own little story in his own little universe. In this article we are showing you another alternative, a cheaper and more effective dream. Building a small room in his own little bedroom by materializing a small tent. Such solutions are highly versatile because they can easily fit pretty much any bedroom interior design, saving up space for other activities. Please do not make the mistake of building a sleeping tent for you child, such solutions should be very carefully put to practice from ventilation to mattress and sleeping position. These small tents can become a very special retreat for your child a place in which he can play, hide secrets and day dream .
Same creative attitude should be adopted here as well we reckon. A tent built by your child or at least bought with him along, will definitely be more fascinating and fulfilling. Play along with their dreams and try to materialize them, make little rooms in the tent if you have the space. The kid will assign functions and activities to each one, like that he will start to develop his organization skills. The more you think about it the faster you realize how such scenarios are helpful to shape and orientate your child to the right path. Colorful accents will emphasize joy and determinate creativity along with a little mystery. We are inviting you to create their universe and if possible, take an important role in it.
Awe-inspiring bedrooms overall are easy to find in the internet era yet finding something tailored to your chain of thought remains difficult to find; we are all unique, it is known, it is natural to seek unique solutions.
More often than not we overlook the great importance of the bedroom yet today we address this exactly and you're here because we have a common point of interest, and one of great beauty that is, we're searching for inspiration on navy blue bedroom ideas!
Yep, this awesome color has inspired a lot of people, the very dark shade of blue is timeless and thus here to stay!
If you are wondering, the name of navy blue in contrast with white was worn by officers of the British Royal Navy ever since 1748 and was subsequently adopted by other navy groups rapidly, in the 19th century already being the usual color of sailor's uniforms back then entitled marine blue.
The earliest use of the term navy blue goes back to 1840, when Oxford English Dictionary surfaces a citation from 1813.
In the meantime, the former blue uniforms of the United States Navy and many other navies around the world changed to black as better response to combat fading.
So after this brief history you still have an interest in this awesome color?
Brilliant, let's proceed, cast a glance on our collect of navy bedroom ideas and please do leave your valuable feedback in the comment section below!
Navy Blue Bedroom Ideas
1. Navy Dark Blue Bedroom With Golden and Copper Accents
The elegance and stability of the navy blue is here enhanced by herringbone patterned wooden floors and herringbone gray rug both adding dynamic to an otherwise still interior, neutral palettes are used on textiles while rose copper and golden accents are being inserted on the light fixtures to increase the sumptuousness of the interior.
Image via nighslee.com
2. Rattan and Ochre Tone Support the Navy
A very earthy interior anchors the bedroom above to the ground, ochre tones earthen the bottom half of the picture while navy blue contrast the stark white walls contrasting the bottom half with the vastness of the oceans and/or the skies, one limit defines the other, one elements supports the other.
Yes, navy blue might be a difficult color for small spaces but there are solutions, in the example above, wooden floors anchor it while stark white embrace it with airiness, an additional glass gallery offers a small storage space backed by a mirror that bounces the light through out the interior even further emphasizing the feeling of space.
One ought to have an affinity for the blue color palette to express it throughout the bedroom so epicly. The interior above exudes elegance and sophistication beautifully. White wooden floors support it along with white fur and a white painting swimming in blue; together they bring airiness in heavy yet splendid interior.
Navy blue can be translate into sheer luxury, the right palette beautifully tied to an airiness ambiance with golden accents creates an image like nothing else, cast a glance over the image above. Nothing looks unattainable or hard to find right? The deep blue bedding here beautifully highlights and accentuates the whole.
Source Unknown
6. Bring Navy Blue in Through Textiles
All white, light wooden floors, birch airy nightstand and rattan light fixtures create a space that breathes and exude light in superb atmosphere. In this setting, the royal navy blue steps in through two elements, a bed cover and a pillow and that's it, a versatile insert with superb aesthetics.
7. Eclectic Mixture of Elements Bound by Navy Blue
A rustic bench holds magazines and candles modern round wall art, wooden pieces contrast black and white picture frame. Neutral tones are used throughout yet everything comes together aggregated by the navy blue, subtle wooden textures and neutral textiles support with airiness beautifully.
A simple bedroom that highlight it's Scandinavian inspiration through a splendid ambiance, everything is simple yet everything matters in here, textiles, furs, chromatic balance and rustic wood in equilibrium.
Image via blog.apartminty.com
9. Fresh Navy Blue Flooded by Light
A youthful vibration is of-course brought in by the floral duvet and pillow covers, this is anchored into elegance with the herringbone wooden floors and stripped navy blue bed, everything screamss sophistication, everything is flooded by light.
The right colors are sometimes enough yet when they're doubled by the right texture, things change. Gaze for a second on the vibration of the wallpaper in the image above, it seems far away, old yet dynamic, a sober elegance that enhances other shades of blue.
Source Unknown
11. Modern Dark Navy Blue Bedroom Design
Yes, the radiator brings the retro accent in but the rest of the furnishings are modern, simple and elegant. Navy blue contrasts white and wood here too, natural matches of the tone. In the bedroom above, the splendid drawings subdue everything and rightfully.
12. Navy Blue Interior With Intricate Patterns
A rather simple interior is here spiced up but small intricate details at textiles level and material level, notice the light wooden floors paired with the wired bed frame and lightness of the room. Despite the amount of dark shades, the interior remains balanced, light on its feet.
Image via Pinterest
13. Sumptuous Navy Blue Bedroom With Golden Accents
Chic interior brought in which really exquisite one of a kind looking items shine; navy blue walls are flooded by light, golden accents complement beautifully where white bedding and pink armchair create contrast.
Spices, spices all over isn't it? A multitude of different complementary blue patterns sparkled the interior above, they are different but they work somehow without blending one into the other, a fact that might distress one and please the other, how do you feel about it?
Do note the beautiful vaulted ceiling and the immense amount of light, great assets to blue spiced up interior!
15. Golden Retro Accents Defining a Dark Blue Bedroom
Yes, the golden accents are key here, they're the cherry on the top of a balanced natural materials and royal colors, notice the rug and how the multitude of wooden textures blend together to serve the navy blue god and his golden trinkets!
Wooden nightstands and white taupe tones complement really beautifully a navy blue accent wall, golden nightstands once more add a pinch of glamour to a sober ambiance.
Two really sophisticated tones tones that exude sophistication in a dance of colors. A combination hard to pull off and easy to love and hate; what do you think?
Source Unknown
18. Navy Modern Bedroom With Wooden Wall Art
A recipe of wood, gray and lightness paired with navy blue is bulletproof and here too it fits like a glove. Notable, the wooden trunk slices of wood art enhance with coziness and warmth.
by Denis Krasikov
Source Unknown
19. Gray, White and Blue Bedroom
Gray on the floor, white on the ceiling, navy blue in the back in a room flooded by light; everything simply spectacular. Accents here are brought through texture, black and white at pillow level; through color on the blanket and small round pillows and through materiality at the giant knitted duvet end on the bed. Flowers add organicity all around.
Balanced, what do you think?
Image via Pinterest
20. Sober Tones of Navy Blue
The humongous knitted blanket strikes again! In this setting it meets different tones of dark blue that leave little room of anything else; in here artwork receive more attention and the atmosphere is extraordinary sober, elegant, masculine.
In the image above, the bedroom is defined by the stark contrast between white and navy blue splendidly enhanced by light and a small pattern on the bed cover, despite the small interior, the high contrast unloads the dark navy color easily in a splendid ambiance.
Image via Pinterest
22. Natural Navy Tones
The color palette here is a far more more mature, the navy tones are a tad more subdued, in a more elegant balance with the grey and wood presence around.
Image via Pinterest
23. Light Navy Blue Bedroom in Contrast
With a lighter tone of navy blue, one can can find the contrast with white and gray in a less intense, more delicate bedroom interior design. The vibrant interior is supplemented by geometric patterns a great deal, note the pillows, bed cover and nightstand lamp.
Image via Target
24. Balanced Bedroom With Navy Blue Accents
Simple interior design, wire-frame nightstand emphasizing the airiness and feeling of space along with white wood bedding where simple navy accents create contrast.
Natural materials and extraordinarily elegant, delicate patterns define a bedroom above, one in which the navy blue color handles the contrast at a chromatic level without taking the first seat in the space. Note the density of natural elements, wooden textures, fur on the chair, vegetation by the mirror.
Earthy tones on the small half slide into shades of pink to create a more feminine presence near a masculine navy blue color, artwork make their presence felt in an epic position, note that all art pieces are white or black and white.
Image via Pinterest
27.Navy Blue Bedroom Interior Detail
This is a splendid bedroom that aims to create focus on a couple of great elements: the black and white rug, wire-frame nightstand with wooden top, blank wall art on navy blue wall, suspended greenery in rope and small but golden nightstand by the bed, have you seen the pillows too?
Note the wall to ceiling detail, the bedding, the fluffy cloud lighting fixtures and even the texture on the navy blue, they all bring in a unique, familiar vibe to a rather simple but certainly not dull interior. How much do you think the navy blue wall contributes to this ambiance?
30. Naturalness at Home in Navy Bedroom
The greenery, rough floors and powerful contrast make the whole space, gaze at how little it takes to create an extraordinarily powerful, vibrant atmosphere!
31. All Navy Blue Bedroom Design
This might not be everyone's cup of tea but it certainly is extraordinary beautiful and shatteringly beautiful space. It is dense, masculine and extraordinarily elegant! One could argue that the nighstand in this picture is unfit for the interior, what do you think?
32. Navy Blue Bedroom With White Base
Here a tall white base breaks the connection between splendid wooden floors and a great shade of deep blue, note how all the tree elements now enter in contrast one with the other, an harmonious contrast for which the wick basket and super plant as a nightstand has only words of praise, just like us.
33. Earthy Tones in Blue Bedroom
Neutral taupe tones come in to root a room down to the ground, a white base disrupts the between wooden floors and navy blue wall yet here the rug stops the contrast abruptly further enhancing the taupe presence in bottom half of the room.
Source Unknown
By now you should have an idea of what is trending around the navy blue color and how you would like to proceed.
In short, navy blue works extraordinarily when contrast is created around it or when it dominates the room completely, it is a tone far too powerful color to sit in a position of uncertainty.
The most common mixtures include natural materials, wooden floors, stark white walls and a lot of light to balance the darkness brought by this serious tone. If you would like to create more sophisticated contrasts, rose gold and golden accents are brilliant, a more feminine presence that complement and contrast the scene at the same time are the pink shades!
Navy blue whether it's as a dark blue, deep blue or marine blue hue, is a difficult but beautiful and sophisticated color, what do you think?
How would you use it?
Looking forward to hearing from you in the comment section below, happy redecorating!
Men are different from women. You can easily tell the difference between a girl’s and a boy’s room. Guy’s tend to be a bit more simplistic when decorating a room, and, the more spacious, the better. However, that doesn’t mean that their rooms should only have a bed and a TV. A lot of styling can be done and the outcome can be brilliant.
When we see glamorous interior designs in the magazines, we all take a deep breath and wish we had them in our homes. If you are considering the idea to decorate one room in the house in a more luxurious style, we suggest you to go for the bedroom design.
These Luxurious Bedrooms You Would Wish To Sleep In will charm you with their elegance, comfort and style. They will give you a pampering feeling, and you will feel like you are on seventh heaven. Scroll down through the photos below and lose yourselves in a daydream!
Whenever you are staying in a hotel, probably you are wishing to stay in the deluxe suit, so why don't you bring it into your home? These bedrooms require a spacious room because there are so many things that could be incorporated here to achieve the dramatic look. The king-sized bedroom is a must, and the satin bedding too!
As you can notice from the photos so far, the luxurious bedrooms feature a big, glamorous chandelier which adds up to the luxurious feel. The lighting fixtures can make or break an interior, so choose yours carefully.
The neutral colors can help you make an enjoyable ambiance, and this is the key to the good-looking hotel rooms. They will help you to create a bright and cozy environment which you will enjoy for sure!
Elevating your bed on a platform is another luxurious feature which will make you feel like you are climbing the throne when you go to bed.
Cushions, curtains and carpets are essential for the luxurious bedrooms, so don't keep them off the whole picture when you are decorating these lovely bedrooms.
If you are a lover of the bold and dark colors, then go for them because they will help you create a stunning bedroom with dramatic effects. Lighting plays a crucial role here, so pick it smart!
The purple color is considered to be a royal color, so you are going to notice a lot of luxurious purple bedrooms. If it's your favorite color feel free to add it in your bedroom area, but remember not to overdo it.
Lots of spacious and luxurious bedrooms have separate seating areas for enjoying their morning coffee, reading their favorite book before going to sleep or have intimate chats with their significant other. If the space allows you, add two armchairs and a coffee table, get your bedroom on a higher level!
Aren't these bedrooms simply stunning? In which one would you like to sleep and relax in your home? Pick your favorite and recreate the astonishing designs!
Given Japan's unique position in the world, it's no surprise that foreigners are fascinated by the country, culture, and societies of the Japanese people.
Whether it's Japanese food, anime, or its cultural elements, it has continued to perplex people worldwide, and the finest styles have become a part of a trendy lifestyle. One such fast-emerging trend is Japanese décor, especially the bedroom designs, both traditional and modern.
Minimalistic Japanesethemes have gained immense popularity with the proliferation of bedroom designs. Why? Probably because it’s all about sophistication and simplicity, making them aesthetically pleasing and appealing.
So are you planning to redecorate your bedroom with Japanese-style elements but are confused about what to choose? Don’t worry- we have prepared a list of some traditional and modern Japanese bedroom ideas for you.
Without further ado, let’s get in!
Traditional Japanese Bedroom Ideas
1. Zen Interior Design
What Is Zen?
Zen is a Japanese interior design trend, but more than that, it’s a philosophy about a person living in harmony with the world. Japanese culture pays homage to its historical traditions, instilling a sense of Zen among people and establishing peace with nature.
In this design, there is greater incorporation of greenery and nature within structures, and you will notice an abundance of natural light and open spaces. A Zen bedroom is intended to be meditative, tranquil, aesthetically pleasing, and visually balanced.
To have an aesthetically pleasing room, it is important to stick with light colors. It ensures a serene and calm sentiment so that you can easily breathe without any distractions. Earthy tones are generally preferred over gaudy and vibrant colors to maintain peace.
Similarly, to amp up tranquility, which is an essential essence of these traditional Japanese bedrooms, you should ensure natural light is let in as much as possible. Also, these bedrooms are established in places that are quiet and closer to nature. In simple words, you should have a serene environment around your room.
In case you do not have access to floor-to-ceiling large windows, then installing rattan pendant lighting will help keep the room remain well-lit always. You’ll indeed feel a sense of serenity and peace.
The most important aspect of this Japanese-style bedroom design is to keep minimum clutter. Often easier said than done, having a distraction-free room will evoke calmness in your bedroom. Without any confusion or distraction, you can simply focus on the moment without shifting your attention to other things. This is what sets an average Japanese bedroom apart from the rest.
How to Design The Bedroom In Zen Style?
In order to give your bedroom a full-fledged Zen style, you must clear everything and introduce the bare minimum. Just include main elements like a light, a low bed, and a nightstand. You can also hang some very neutral artwork and low tables. Known as Chabudai, these floor tables are most common in Japan and are generally used during summer. In winter, they are replaced by Kotatsu, which has a heater installed underneath.
Additionally, you will need to evaluate negative symbolisms or items in your room that don't suit the environment. For example, if you are looking for more headspace, make sure the surface is not cluttered.
Lastly, make sure to surround yourself with nature. You can keep small Japanese plants known as Bonsai trees. These are traditional Japanese art and science forms used to create miniature trees in small vessels or pots. Scaling whole trees into a miniature version makes it very aesthetically appealing.
2. Japanadi Interior Design
If you are an appraiser of “Hygge” and minimalist principles, then chances are that you have already started experimenting with the Japanadi style.
In order to design your room in this style, focus on natural materials like bamboo or wood pieces, which bring in a feeling of simplistic and natural beauty. We also recommend bringing greenery and plants or using muted colorslike pale green on your bedroom walls for giving your home a sense of outdoor living.
Similar to the Zen style, reducing clutter is also crucial in achieving a Japanadi style for focusing on open interior spaces and clean lines. However, if you live in a busy household and struggle to achieve a minimalistic look, try “faux minimalism” with natural containers like baskets, boxes or folding screens. Try to hide your extra items and maintain a clutter-free space.
To get the best of both worlds, draw on the coziness of Scandinavian design with soft pieces and warm textures while maintaining the elegance of Japanese interior design. As both styles focus on utilitarianism, you can establish a calm and serene space in your bedroom.
Japanadi decor focuses on craftsmanship, you should look for low Japanese furniture made of solid and long-lasting wood that will adhere to your decor for years. At the same time, we’d urge you to choose materials that are sustainable and don’t harm the planet.
Although both Scandi and Japanese decor aren’t new, the combination of these two as a single concept is a trend that's becoming popular quickly
3. Feng Shui Bedroom Design
What Is Feng Shui?
If you are looking to have a Japanese-style bedroom, you should definitely consider Feng Shui design as an option.
The bedroom is the most crucial part of your home, as you spend most of the time there sleeping or doing other leisure activities. While sleeping, your body goes into a passive state and gets affected by all the energies. So, designing your bedroom in a feng shui style can have a significant impact on your body and mind. Here’s what you need to do to feng shui in your bedroom.
As you’d probably expect, your bed frame and headboard play a crucial role in optimizing feng shui. This is mainly because wood oozes supporting and positive energy when sleeping. Moreover, they help eliminate negative radio frequency signals emitted by wireless appliances like cell phones, computers, and televisions from your energy field. But it will be important to keep these appliances away from your bedroom altogether.
Designing The Bedroom in Feng Shui Style
With respect to design, you should keep low furniture in your Japanese-style bedroom, like floor tables, low chairs, and beds. Make sure to place your bed against a solid wall as it will provide you with psychological protection and support. Aside from that, try to keep a clear vantage point of the doorway from the bed, thereby ensuring that the energy doesn’t flow quickly.
Avoiding clutters in your traditional Japanese bedrooms is always crucial, as it allows the energy to flow freely and rejuvenate you while sleeping. We recommend you to have some kind of storage for storing items and stick to soft items like blankets, linens, and pillows.
Feng Shui-style bedrooms generally opt for green and light blue colors. If you try to invoke passion in the bedroom, have splashes of red, while if you seek vitality and rejuvenation, neutral and earthy colors will best suit the purpose.
Like other elements in a traditional Japanese-style bedroom, the paintings need to be minimalist as well. They differ from the others owing to their emphasis on minimalism, as the focus of the artist lies primarily on core elements and significantly reducing or eliminating the background. Some examples of such paintings are the ones including bamboo, birds, Japanese symbols, or “Kanji”, and might recite Japanese poetry, known as “Haiku.”
Other than these, arranging your books on a bookshelf is vital. Books serve to be a great source of energy and stimulate our minds. So, for a night of sound sleep, try moving your books out of the way.
4. Family Countryside Japanese Design
Do you live in a large family and share a bedroom with others? In Japan, most family members stay in a single room due to their tiny houses and limited space.
In order to design your bedroom in a traditional Japanese style, you’ll need futons and a tatami mat under the bed. The Japanese futon is a conventional mat laid straight on the floor. Also known as Shikubuton, it is the most common type of bedding found in most Japanese homes.
Tatami mat is a traditional Japanese mat used in most homes of Japanese people and is covered by laguna, which is a design weaved from soft rice straw. These mats are of standardized sizes, with their length being twice their breadth. In other words, the length-to-breadth ratio is 2:1.
Unlike Western bedrooms, local Japanese people sleep on traditional mattresses placed on the floor or a low bed. It is considered a standard norm in Japanese society.
Other than that, you can also have a platform bed or Japanese floor bed for your bedroom. Its unique design and minimalist design set it apart from other beds. These are only a few inches from the ground and occupy less floor space.
Traditional Japanese homes were lit by lamps and other light sources, mainly because electricity wasn’t invented yet. Even today, you will see many Japanese homes with similar lighting, powered by electricity. Appropriate lighting is always essential for a family countryside bedroom design.
You can have nightstands or paper lanterns that emit a warm light. Not only will they radiate positive energy but they will also help maintain a serene and peaceful environment.
Additionally, if you have decorative items in your house, make a wooden shelf to keep them arranged and avoid any kind of clutter in the bedroom.
5. Mid-Century Japanese Bedroom Design
This is probably the most minimalistic and simplistic Japanese-style bedroom you will see on our list. The room has only four things: a table, a chair, a bed, and a bonsai tree! Although there are only a few items in this room, it still looks beautiful and amusing.
Huge wooden sliding doors, also known as screen dividers, are used in these rooms. Given that Japanese people emphasize privacy, finding these screens in every household is eminent. The most common Japanese screen dividers are byobu and shoji. It is not the case with Western designs, which prefer to divide their rooms by placing a solid wall.
Byobu are folding screens found primarily in Japanese homes to create separations in rooms or create a sense of privacy. These are primarily decorated with Kanji or other forms of calligraphy found in Japan. Wood is primarily used for making the frame of Byobu, while the screens are made of paper, bamboo, etc. However, such materials make them sensitive to rough use, and slight pressure on the screen is enough to damage them.
Shoji, another type of sliding door, is also ubiquitous in Japanese households, including urban areas. However, the screens of Shoji are not as delicate and fragile as its counterpart and are made of solid traditional material to increase their toughness. Similar to Byobu, minimal calligraphy or art is used to decorate the screens.
Regardless of the materials used and increased durability, these screens need to be handled with care as they are essentially just flat layers of millimeters-thick materials.
These bedrooms are undoubtedly one of the most inherently relaxing rooms. Apart from partition screens, these Japanese bedrooms need to be clean and organized. Additionally, you need to ensure that the right amount of natural light enters the room, provided through skylight doors and windows.
Best Modern Japanese Bedroom Ideas
1. Floral Japanese Style Bedroom
This bedroom design is more on the traditional side with a modern twist. Beautiful arrangements and floral bedding give a stunning look to your bedroom. Similar to conventional design, these modern Japanese bedrooms boast floor or platform beds with lower height and adorn them with floral pattern bed sheets, placed near long and skylight Japanese-style windows. Also, an artificial sakura flower in vases on low tables brings Japanese-style vibes to your entire space.
As mentioned earlier, having a well-lighted room provides a wide array of benefits to your body. Primarily, it improves your sleep by helping your body regulate the circadian rhythm and serves as a natural cue to regulate melatonin production, which makes our body alert and active. As seen in the image, you can add Japanese-style lamps to make your room well-lit and brighter at night.
Tatami mats are ubiquitous in a contemporary Japanese bedroom style. These mats are made of rush grass and straw, bound with a plain border fabric. If you want to give your bedroom an authentic yet modern look, these mats are a must. Besides, if you live in cold regions, it is better to have a mat to avoid feeling cold at night.
Apart from delivering a classy look to your modern Japanese home, it presents several benefits, ranging from supporting your back while sleeping, regulating humidity to being eco-friendly and biodegradable. Also, its maintenance is effortless, and its long-lasting nature helps maintain the look for a longer time.
If you wish to paint the walls, go with subtle blue tones or any color that fits perfectly with your bed.
2. Tatami Room
If you share your room with siblings or other family members, this modern Japanese-style bedroom will be an ideal design for the space. This tatami room features an en suite interior vogue.
As you have seen, a contemporary Japanese bedroom doesn’t have an attached bathroom, but you can include it if needed. Also, the room is filled with wooden furniture seen in most bedrooms. The primary reason for having wooden furniture lies in creating a unique ambiance of a room, and as compared to other materials, it is easy to clean, and maintain, and is long-lasting.
Similar to other designs, this one also features a low bed, complemented with a basic lacquered or bamboo dresser. You must ensure that only essential furniture catering to functional needs is introduced within the room such that there is no clutter and the theme remains constant.
The minimalist and simple mattress fits perfectly with this Asian interior design. Featured with three futon mattresses and Tatami flooring, this bedroom is essentially Japanese with a Western touch. Futon mattresses can be placed directly on the floor or with Tatami mats underneath.
Furthermore, the room features a cloth hanging rack, linen, heating, and other essential items required on a daily basis in an organized manner. As with Japanese bedrooms, the ambiance is also an essential principle of the particular design. Establishing a tranquil and serene environment around you will not only keep your mind at bay but also help concentrate on the impending task, in turn boosting the overall efficiency.
3. Mystical Anime Bedroom Design
Anime is popular not only in Japan but people all over the world are crazy about it. Having an engaging story, spectacular visuals, and relatable characters is the reason behind its massive popularity. If you are one of them, you’d want to design the room with an anime theme and design as favorite Japanese anime characters.
Whether your room is large or small, posters are a great and easiest way to start decorating your space. Posters from the same major television series or different movies can be put on walls. This modern Japanese-style bedroom will readily inflict anime vibes without investing much or damaging the walls. Added to it, you can also add colored lighting effects for making your bedroom much more lively and animated.
To complement the traditional Japanese beds, you can add a unique anime bed headboard to make it more comfortable and cozy. For creating this, print out some anime posters or pictures in varied sizes and glue them on walls just behind the bed.
Want something calm and contemporary? Just select one of your favorite anime characters and use it as wallpaper for your Japanese-style bedroom. Keep everything else in a simple design for keeping the wallpaper stand out. The furniture in the room is to be made with wood and a small bonsai plant can be kept for enhancing the beauty of the room.
Lastly, place a nightstand or a lamp with changing colors or string lights to add a soft touch to your bedroom. It can make your space heaven for anime lovers.
4. Luxurious Japanese Style Bedroom
A luxurious Japanese-style Bedroom is perfectly suitable for those who live in sky-high buildings. Laid with luxurious design and all facilities, it includes some Japanese elements for delivering its essence, such as skyline windows, traditional Japanese furniture, and screen doors.
This idea is for someone who wants Japanese style in their bedroom and doesn’t wish to change the ambiance and interior of their space. These rooms are very spacious and provide you with the liberty to customize and have the room of your dreams.
The advantage of planning a luxurious bedroom is a combination of exclusive sophistication, greater comfort, and relaxation in the desired way. You can paint the room the color you choose, black or gray. When selecting a black mansion bedroom, you can paint your bedroom wall black with a contrasting floor color.
Also, you can use gray color in combination with neutral hues for adding boldness and brightness to your room. Coordinating with it, you can add wooden and modular furniture to your Japanese-inspired bedroom to give it a futuristic and aesthetically pleasing vibe. The inclusion of wooden furniture also goes well with your Japanese theme.
Don’t be shy to play around with calligraphies or artwork in your empty space. If you want to keep on with the Japanese theme, make sure to keep it a simple and clean one. This helps to maintain serenity and tranquility in your space.
Tranquility and Quietness in Japanese Bedrooms
The essence of traditional Japanese bedrooms is rooted in Zen philosophy, which emphasizes tranquility and simplicity. Quietness is a crucial element in this context, symbolizing peace and serenity. The design principles aim to create a calm environment free from loud, distracting noises, contributing to an atmosphere of relaxation and mindfulness.
Soundproofing becomes an essential aspect of achieving this tranquility. By reducing the intrusion of exterior noises, homeowners can maintain a serene atmosphere in their Japanese-style bedrooms. Methods of soundproofing can range from structural alterations to the use of specific materials known to dampen sound, like tatami mats. Tatami, a traditional Japanese flooring material, not only adds to the authentic aesthetic but also offers a natural sound barrier due to its composition and density.
Understanding the relationship between tranquility, quietness, and Japanese bedroom design allows homeowners to create a space that not only embodies visual Zen principles but also delivers an authentic, peaceful auditory experience. For those seeking to minimize the noise in their home, incorporating soundproofing techniques into the design can significantly contribute to maintaining the peaceful ambiance central to Japanese bedrooms.
Final Words
With this, we have reached the end of the best Japanese Bedroom design (traditional or modern) that you can give.
As you can see, a wide range of elements is to consider when creating a Japanese-style bedroom. It’s imperative to remain familiar with Japanese culture and traditions in the form of Feng Shui and Zen. We recommend you start by decluttering your space and then design the bedroom with the ideas mentioned earlier.
Japanese furniture decorations, ambiance, & traditional style bedding are crucial aspects of every Japanese bedroom. When it comes to decorating in Japanese style, less is more concept is much more applicable to give you a more relaxing time to spend in.
You’ll discover that the fewer the belongings, the more the focus is on what’s essential, which in turn allows you to stay energetic throughout the day. We will now sign off to come back the next time. Till then, take care!
Hanging beds or suspended beds are great elements in interior design, comfortable, interestingly-floating around and practical they ought to be present in everyone`s home. Today hanging beds can be purchased from multiple online stores or crafted using numerous diy hanging bed tutorials brought forward by the crafting community but whether your buying or crafting the simple principles stand: comfortable, sturdy, airy in weight and simply incredible looking the bed must be.
Start by thinking how you are going to use the bed and where it will be positioned and you`ll start to realize how it ought to be to fit your needs and design standards. To help you in this endeavor a selection of incredible hanging beds have been curated; the examples vary a great deal and they range from do it yourself projects that an enthusiast can realize in 30 minutes to high end bed designs brought forward by huge retailers.
If you are looking for something that stays on the floor but still has sort of floaty feel, an easy to build platform bed might be a solution.
Cast a glance and find something inspiring !
A bohemian decor of extraordinary beauty uses intricate colorful patterns on a white background to create an airy, joyful atmosphere. Notice that the hanging bed uses branches and rope to provide comfort in mid-air.
Circular design that uses a radial structure woven with rattan can be extraordinary sturdy and graphic.
Source Unknown
A salvaged wooden boat can sail you towards peace, calm and tranquility. A simple setting can adorn this item of memory beautifully.
via Pinterest
Rope and branches have been used to shape the hanging bed above, here the wood`s naturalness creates a slight contrast with the airy, ethereal white ambiance. Plush textiles bring in coziness.
The paper white installation simply changes the perception on this splendid setting, despite the papers 2D limitations the garlands create a great 3D effect of depth beautifully building on the concept of suspension in an airy ambiance.
Wooden planks, a matching mattress and four strings of ropes keeping a bed in balance. That might be all it takes to achieve a truly beautiful and equally comfortable suspended bed.
The simplest bed frame that you can craft can be suspended in a matter of minutes. Simply make the frame to match its future mattress.
via anthropologie.com
A net in the right frame could represent the ideal concept of suspension yet the space to build this experience on is definitely not easy to find.
via babble
Swing your problems with a simple design in the right ambiance.
via Pinterest
Old furniture pieces can receive a second chance through numerous means yet to provide their owner comfort would be a great treat. Above, an old bench now floats in a splendid color to the owner`s delight.
Simple efficient graphic piece of furniture that you can craft and anchor to a tree.
via thedevotedwife.blogspot.com
The realm of dreams is filled of tranquility, calm and peace and to slowly fall asleep in the midst of the forest listening to nature`s melodies surely is a dream for many of us.
A bed that has been envisioned for the outdoors; the black and white design can be considered neutral if compared with the highly sculptural heavy chains used.
An intimate hanging bed that provides shade when needed is definitely worth considering.
via Pinterest
Pallets and a matching mattress are everything you need.
via richaldito.com
A simple design that follows the weaving technique of a dream-catcher inside a metal ring to provide the needed structure in a flexible form that boosts comfort.
The marvelous shabby chic design above looks nothing but adorable and insanely comfortable; a great setting to enjoy your morning coffee in fresh air on the front porch.
via designmom
A bedroom that opens up to your backyard should not be blocked by a stationery bed; there the suspended option greatly contributes in emphasizing the feeling of space.
Source Unknown
Simple and graphic design ready to rock your world.
If a tree is not an option nor is it a wooden beam in your terrace or pergola the alternative is a wooden frame; two triangles will provide excellent sturdiness and balance for your bed or sofa.
via gardeninglife.xyz
To use a floating piece of furniture to find peace at the end of a long day or week is an experience that ought to be pursued. Numerous diy tutorials make this task affordable and doable happily; what do you think? We would love to hear your thoughts !


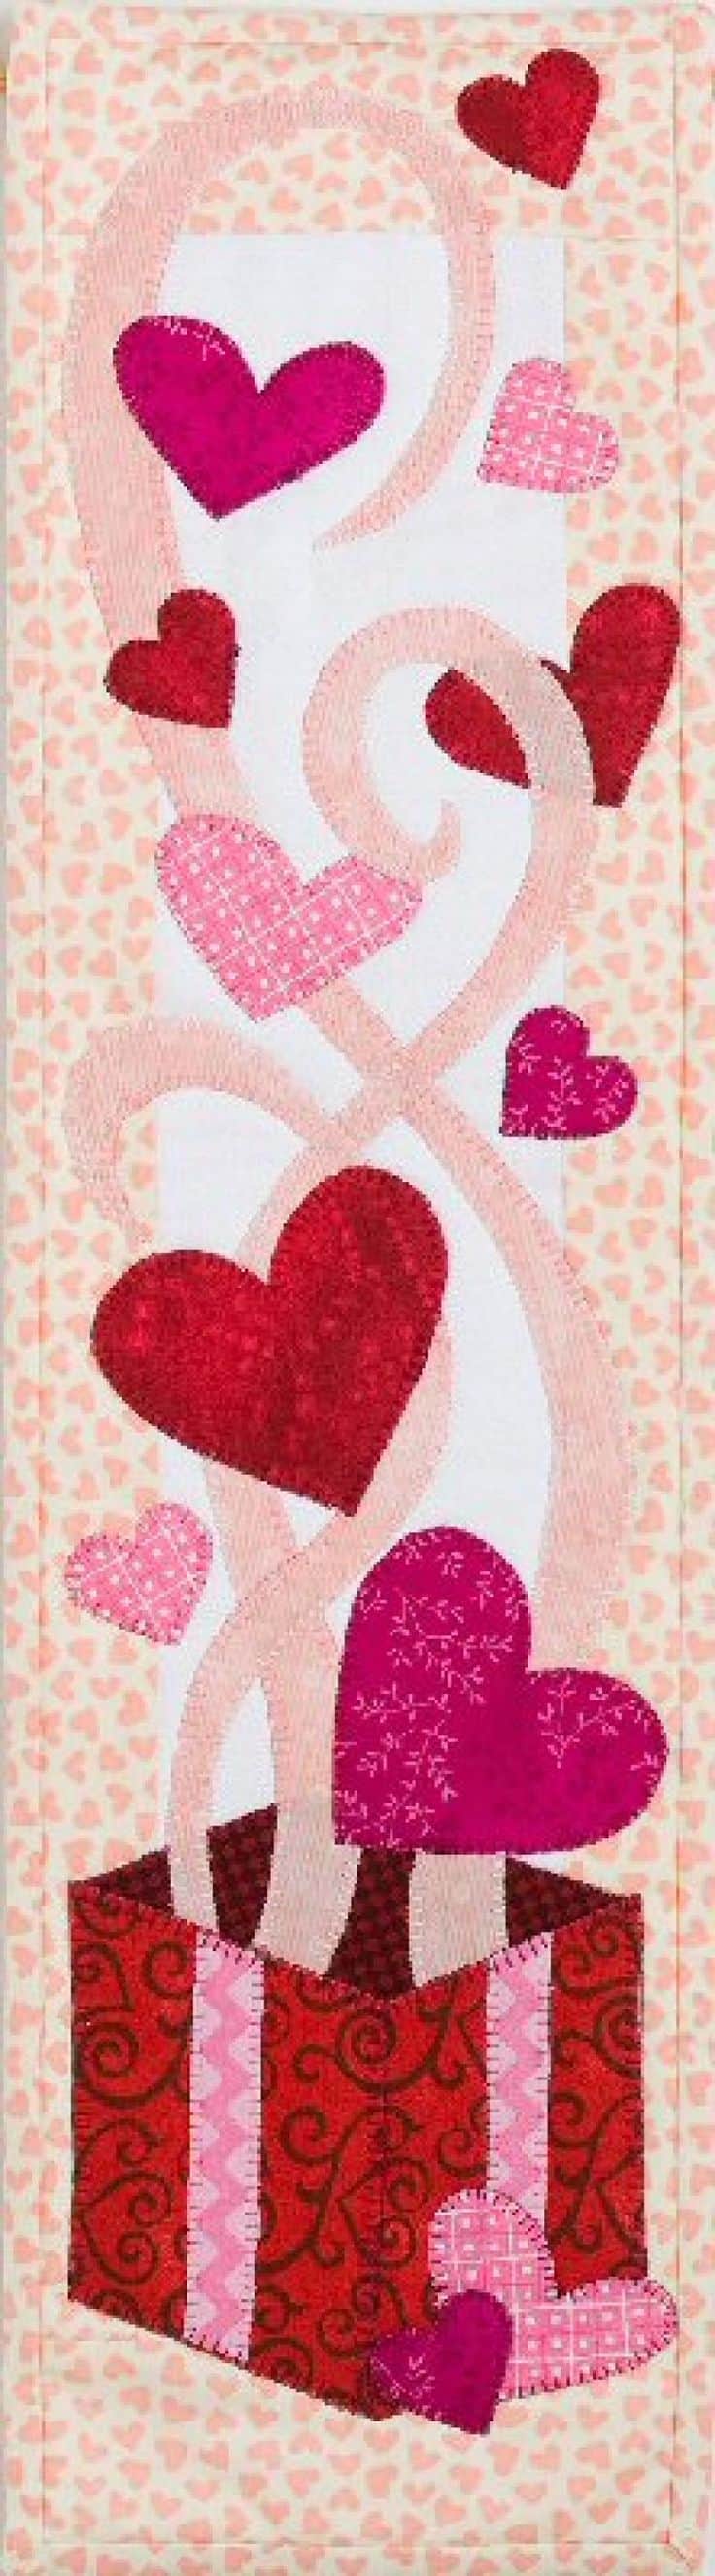
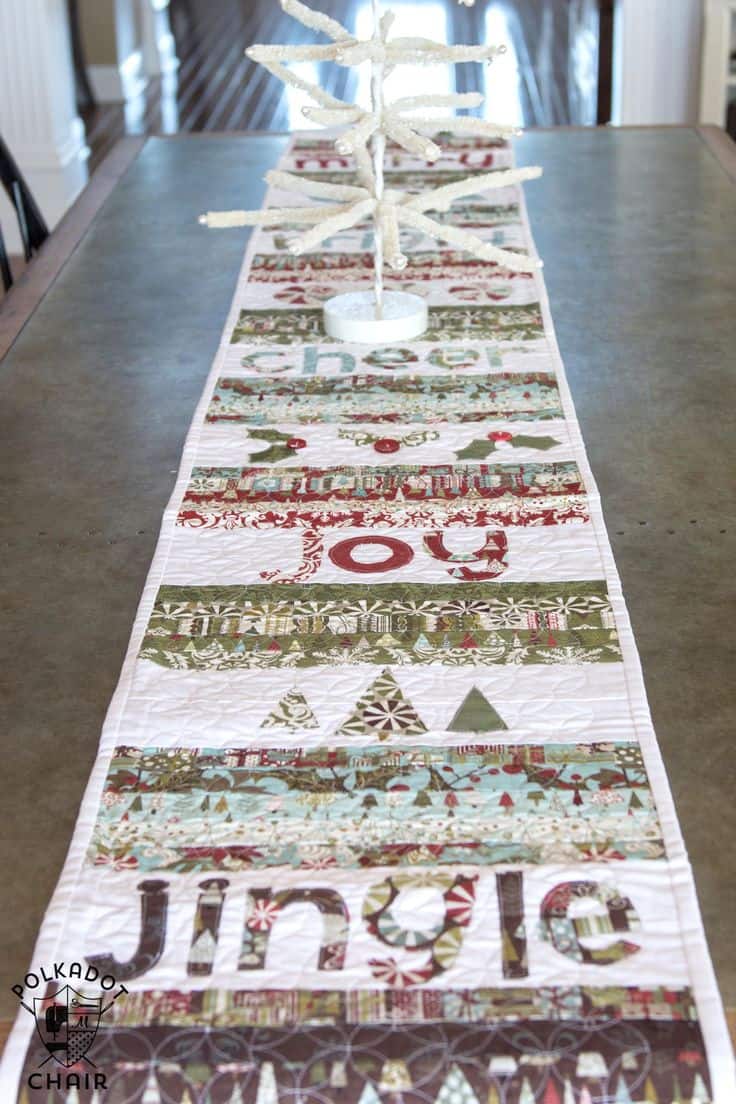

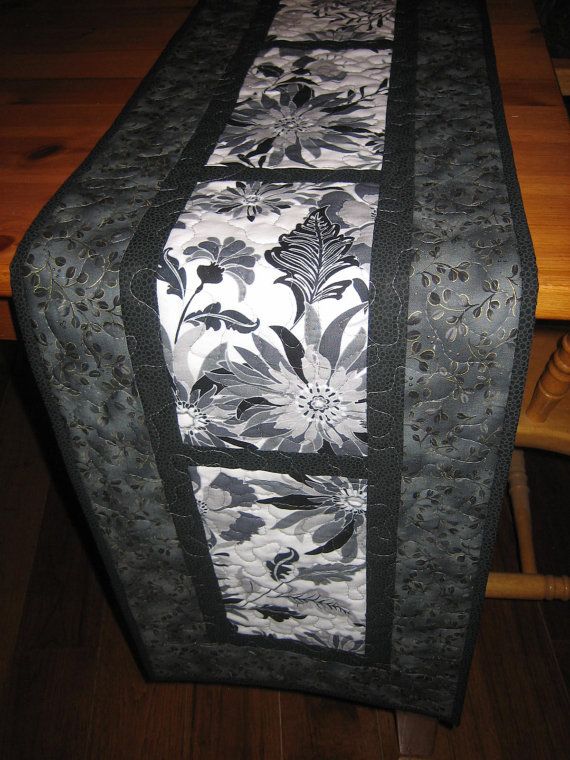
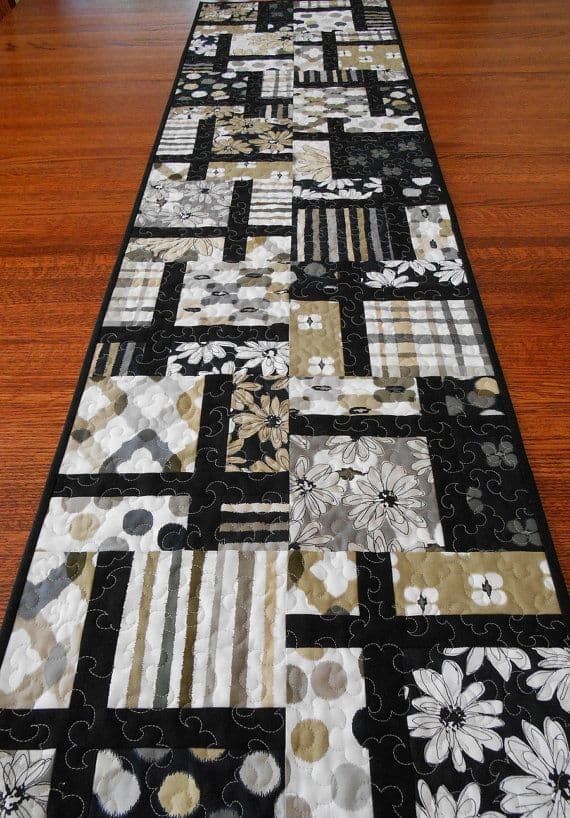
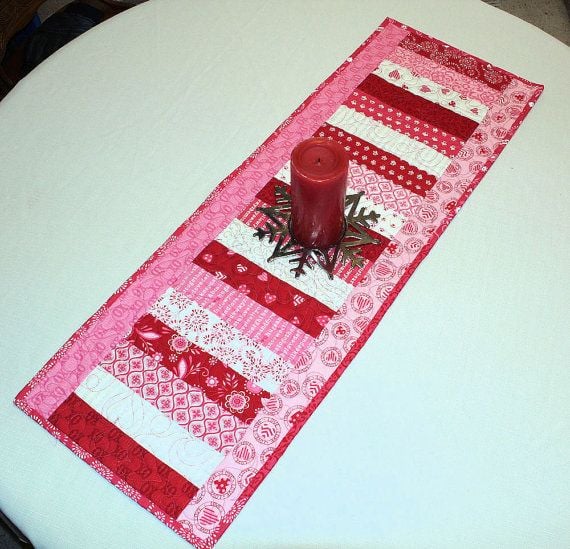
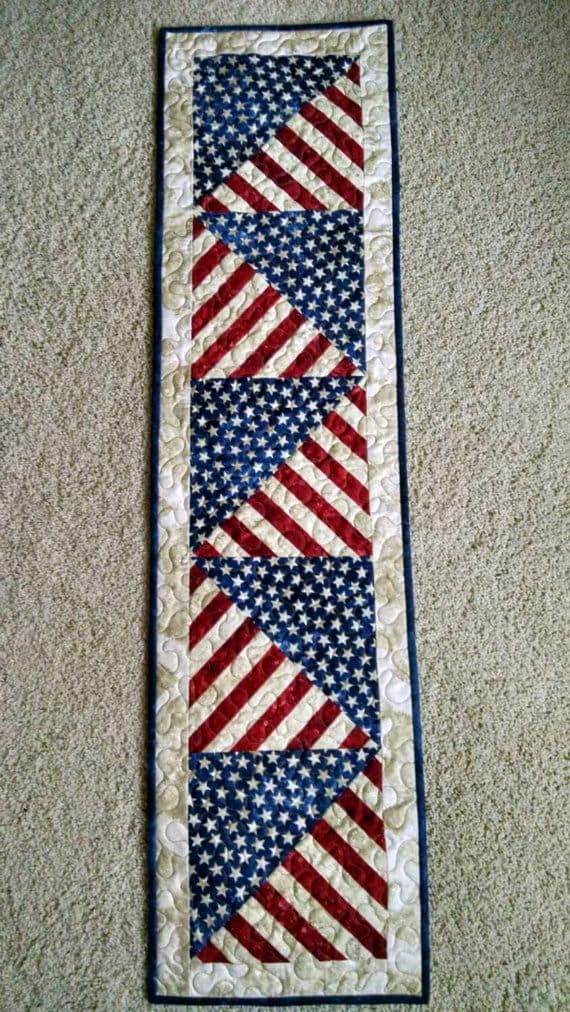
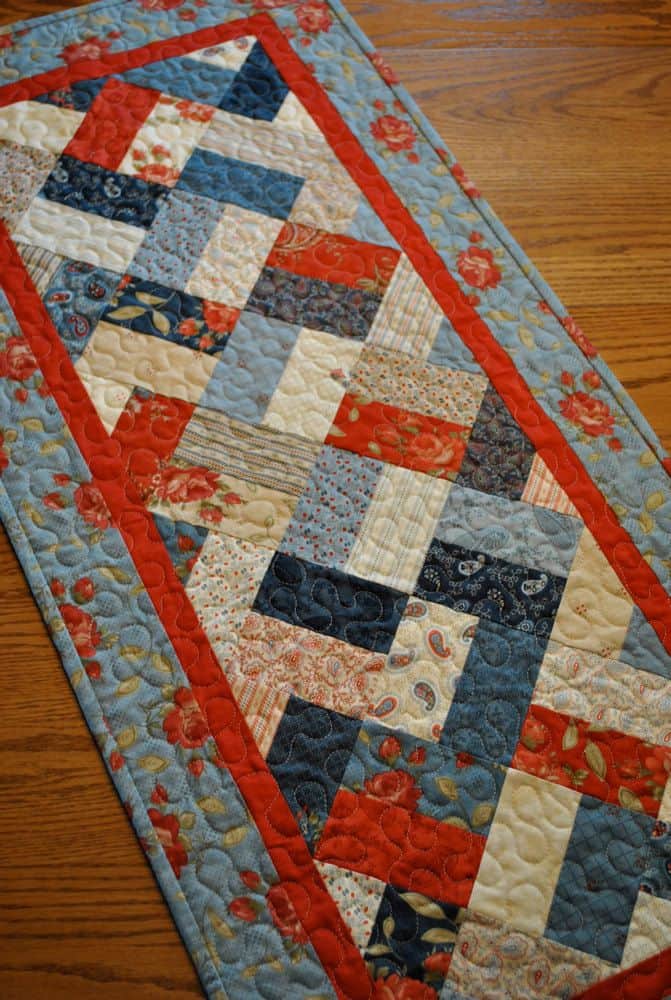
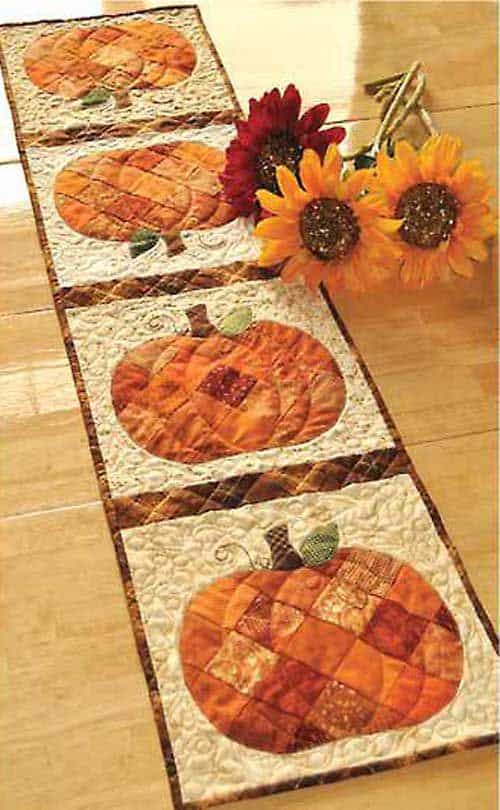
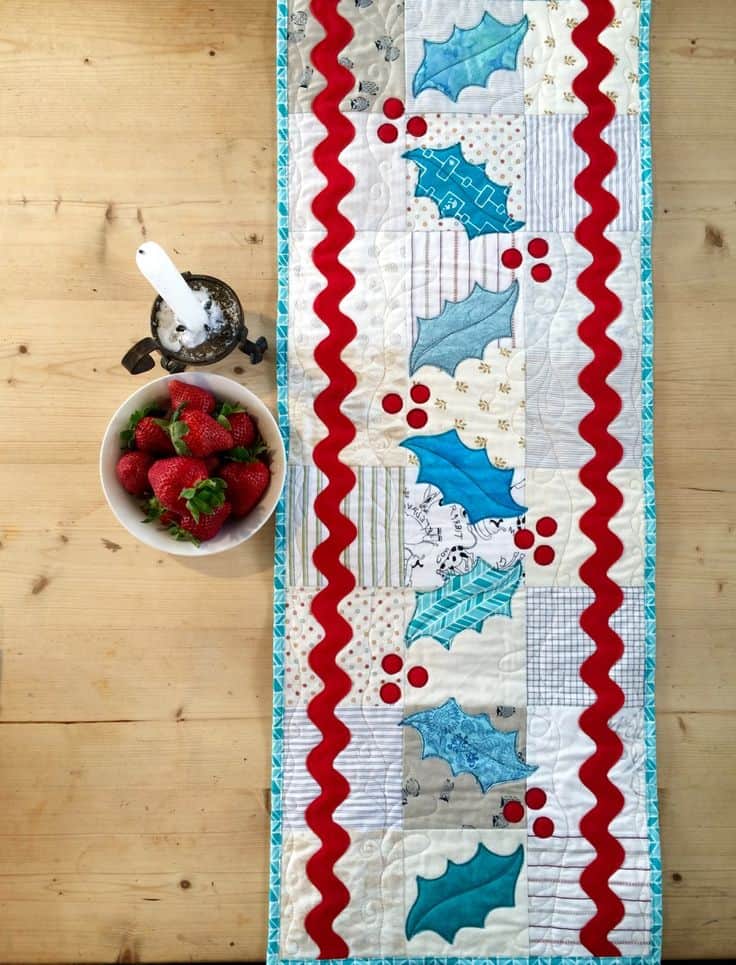
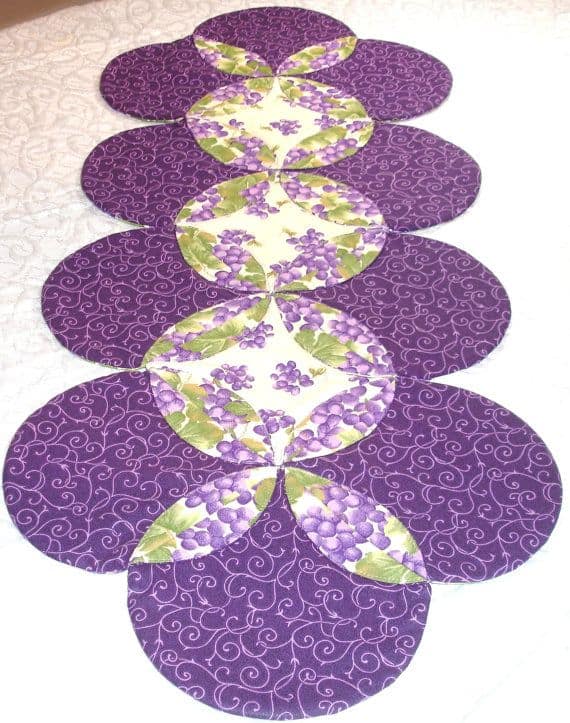
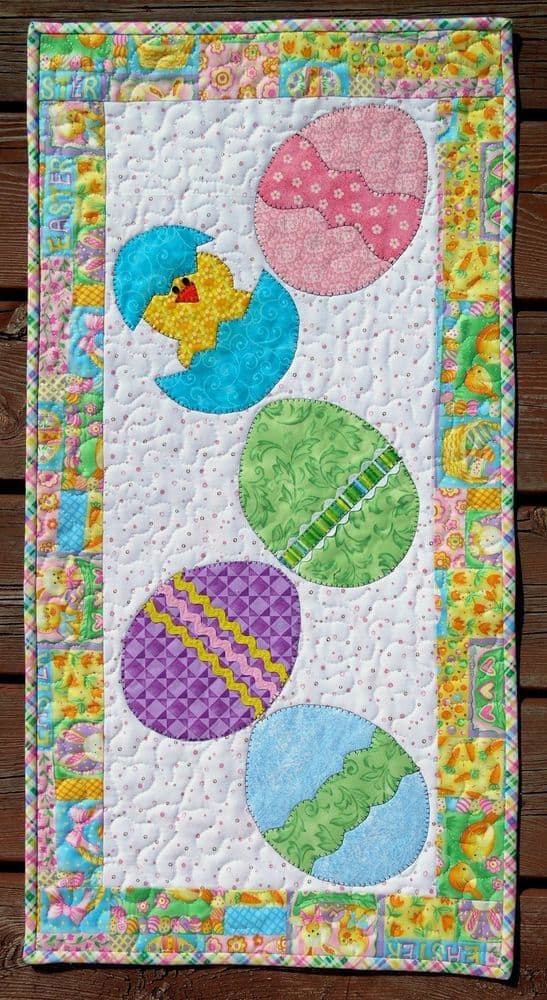
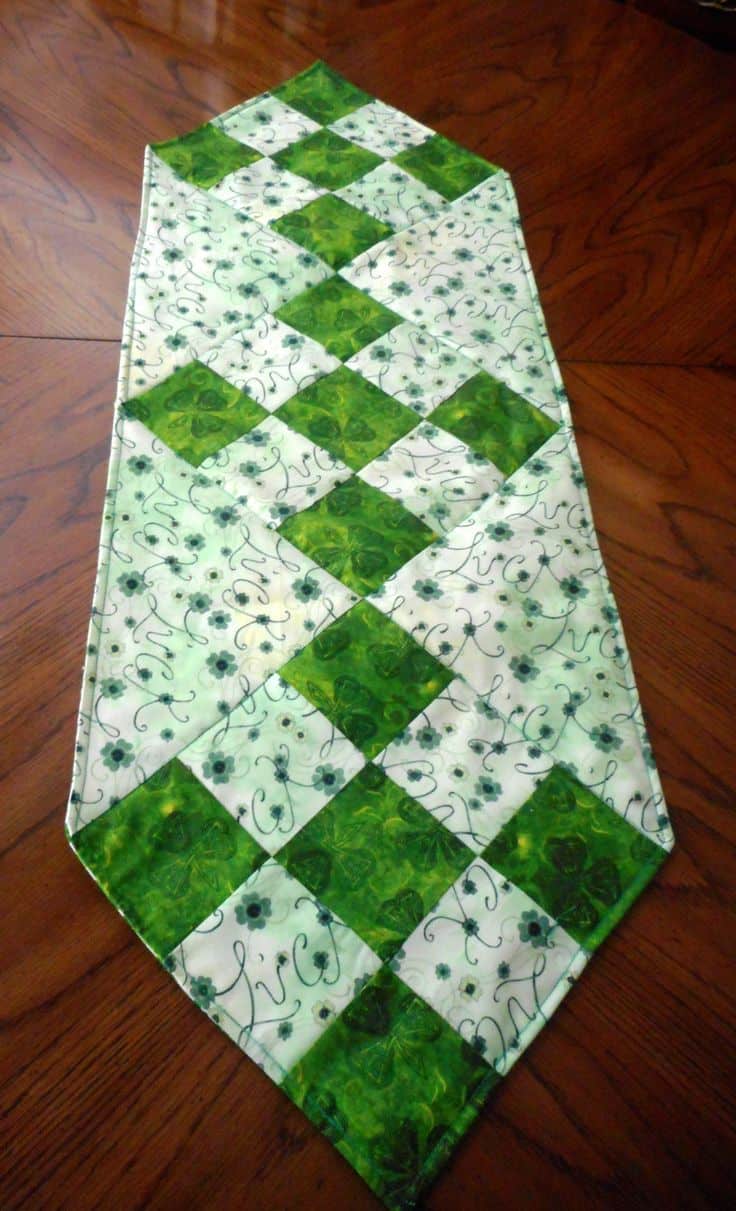
 Despite what many say, using fabric will various designs to enhance a dining room'a decor is very much in style and considered vogue. What is your take on this DIY topic? Feel free to speak your mind in the comment section below.
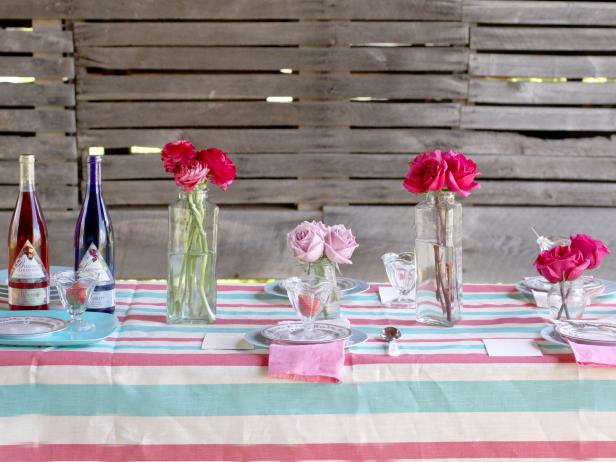

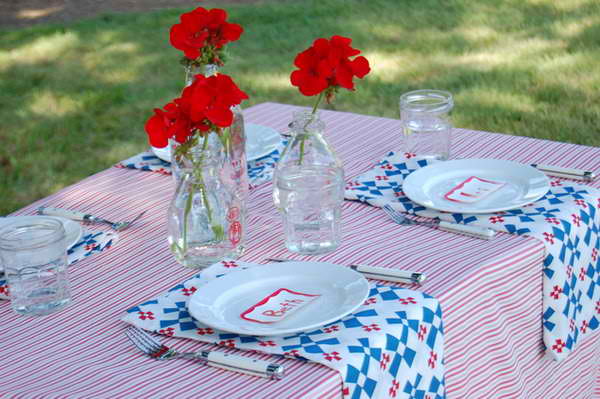
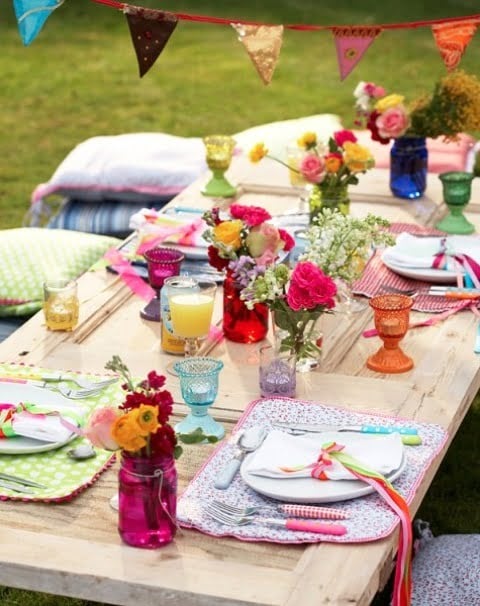
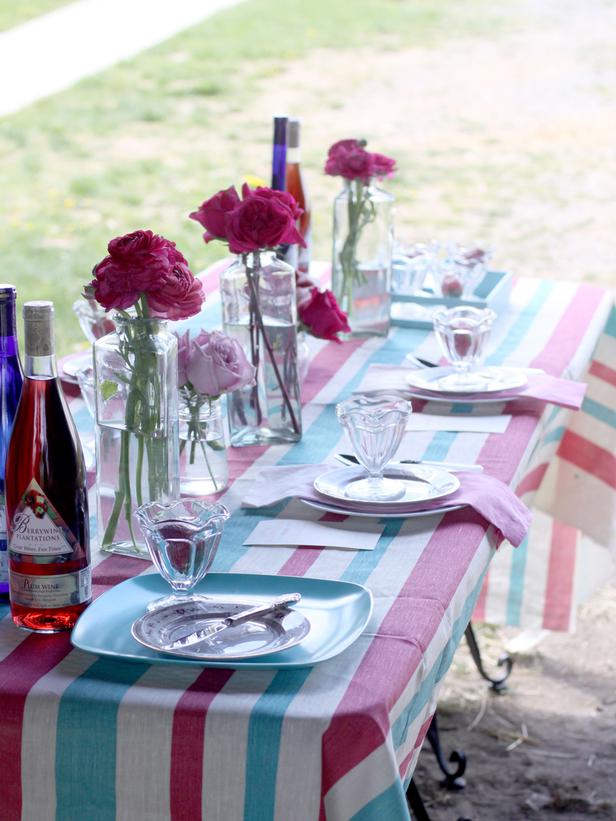

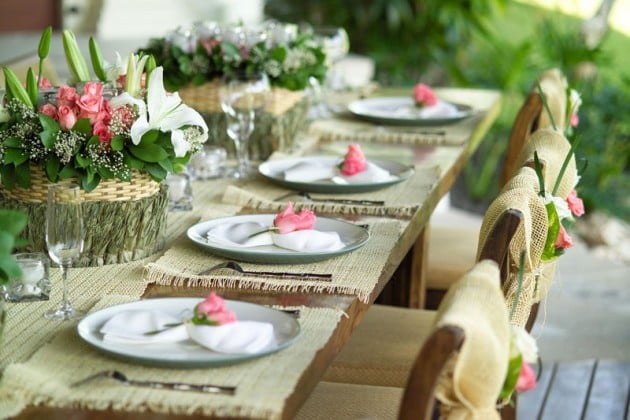

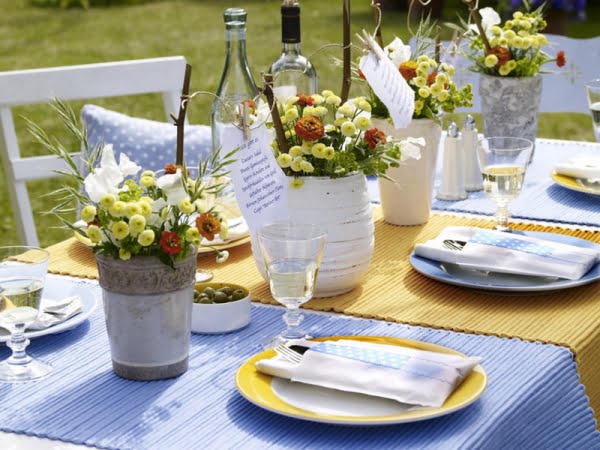

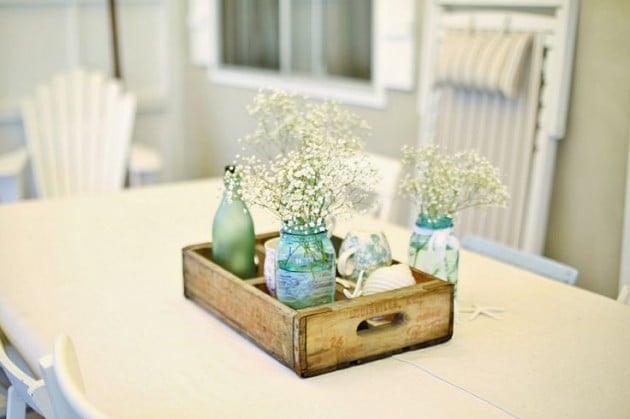
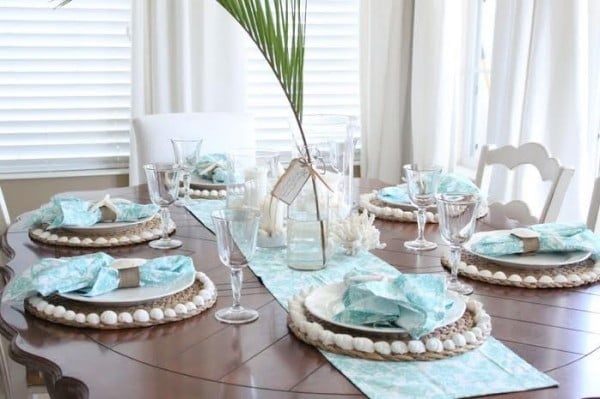

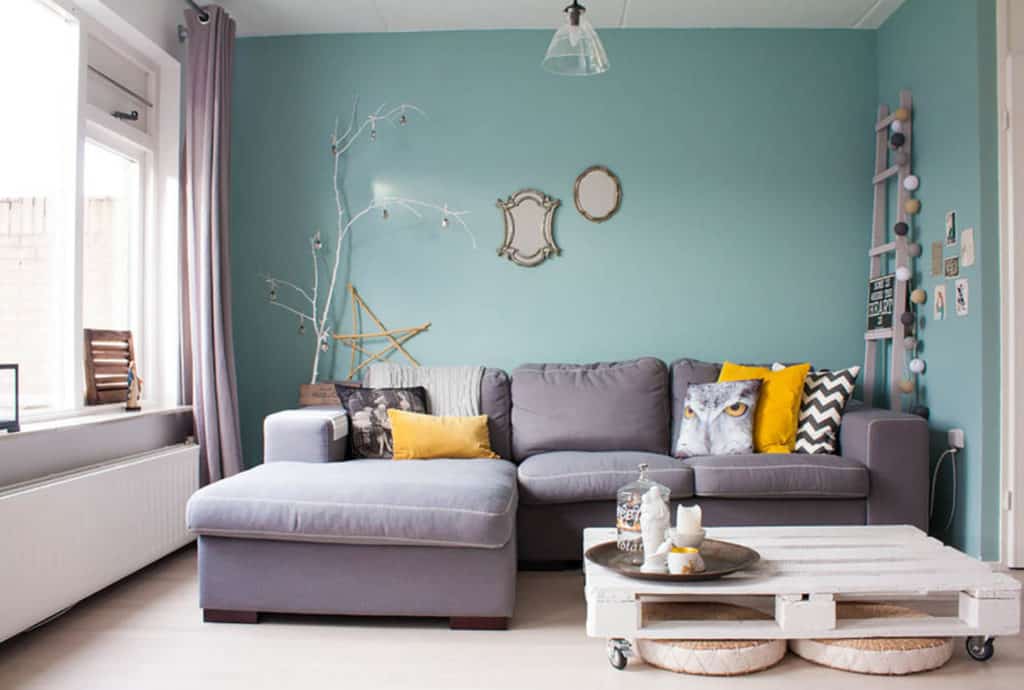
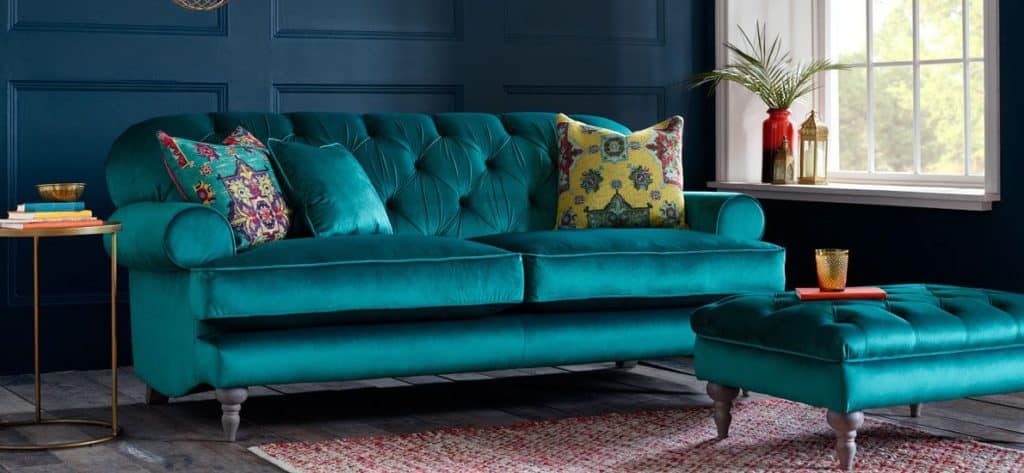
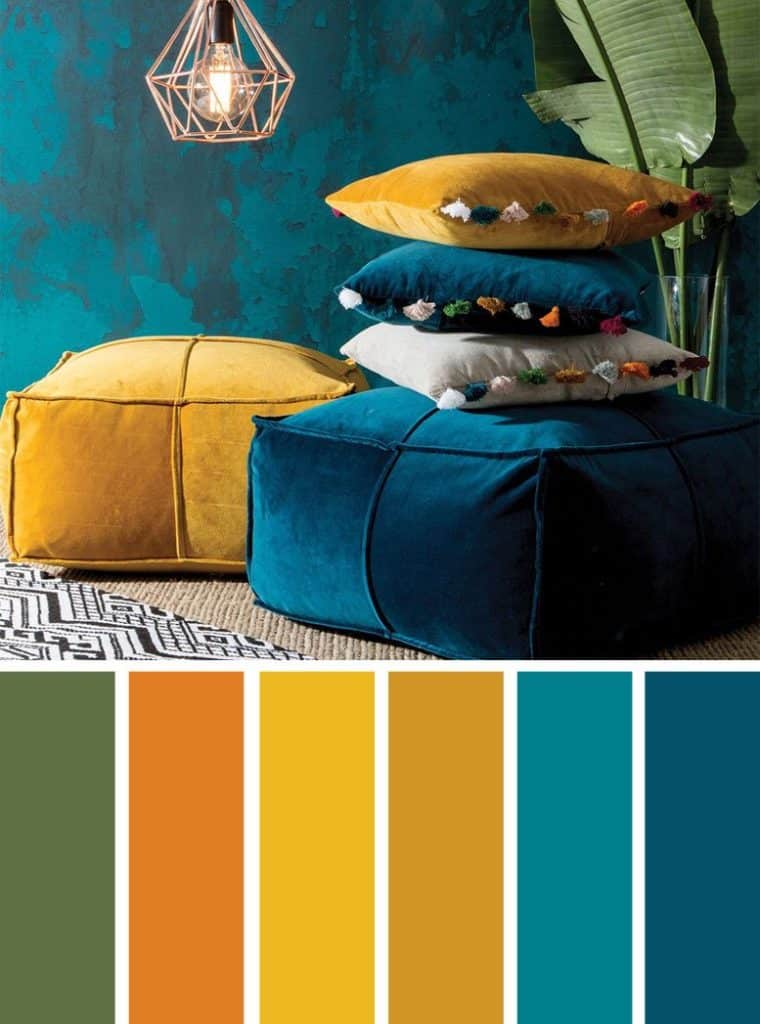
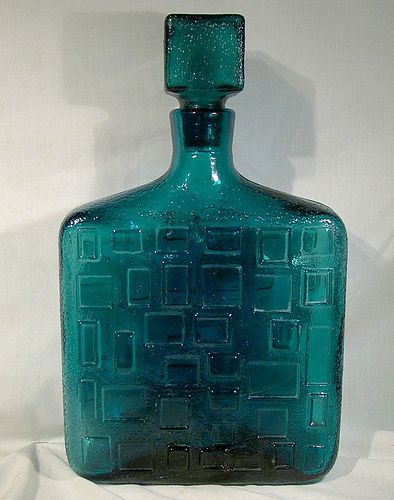
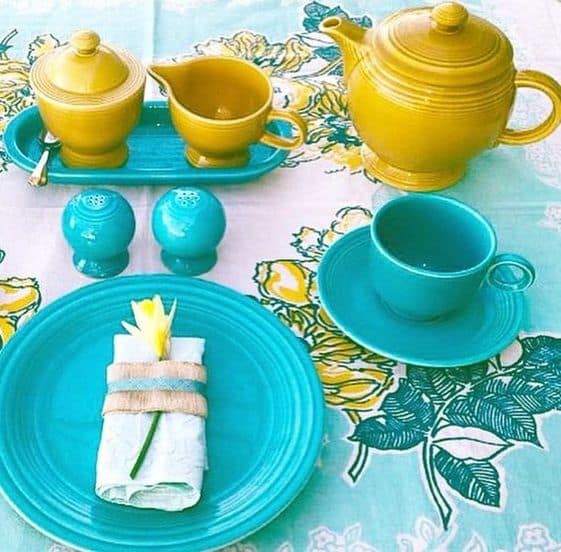
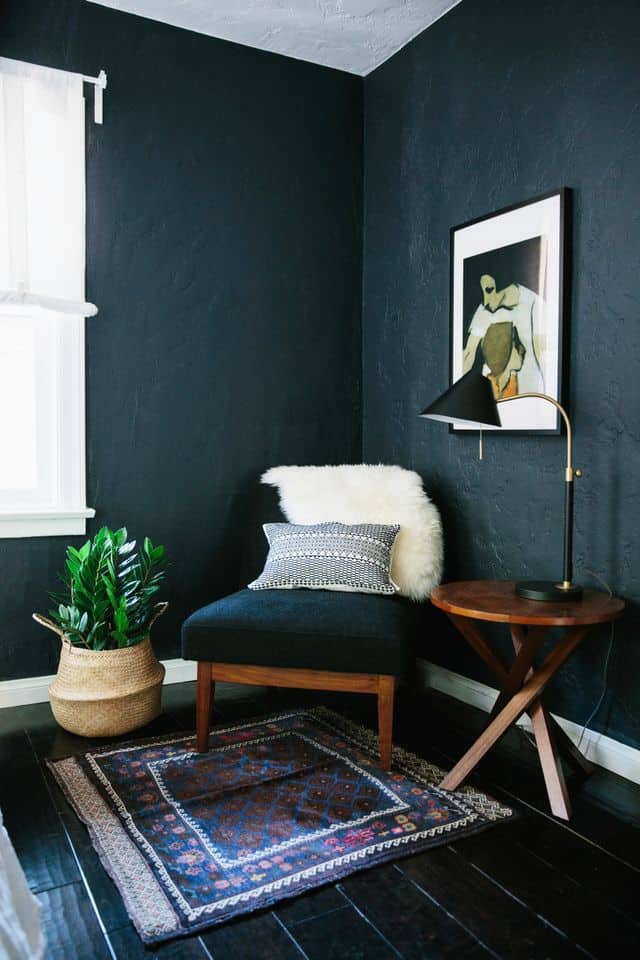

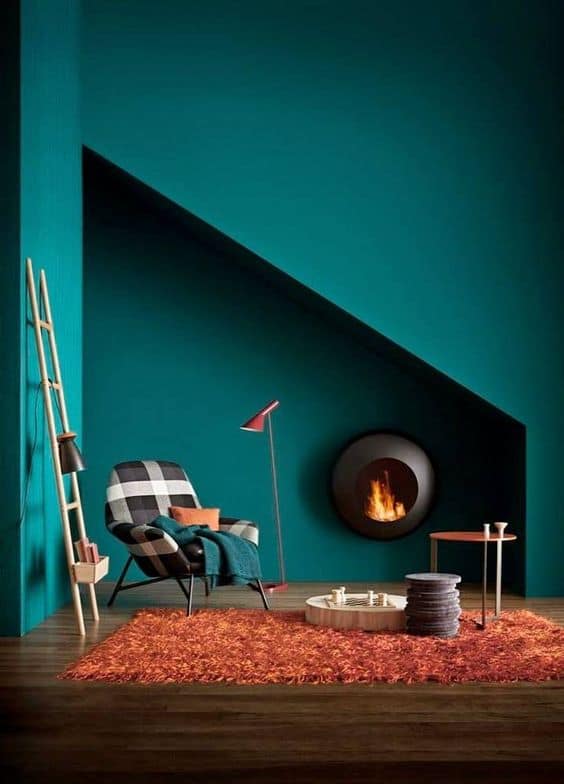
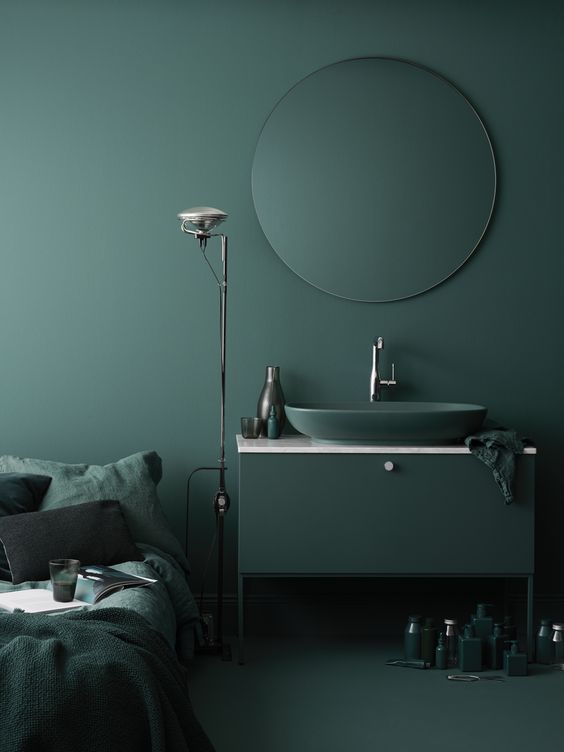

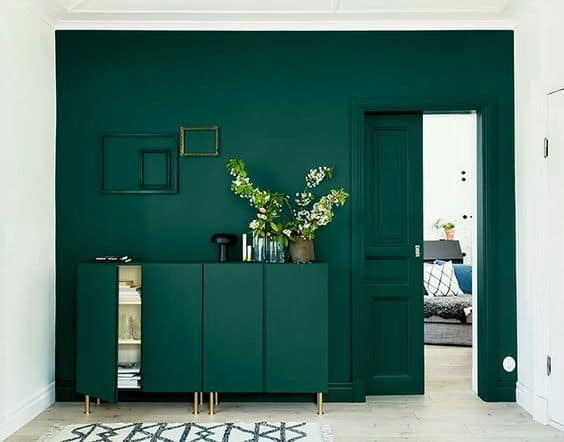
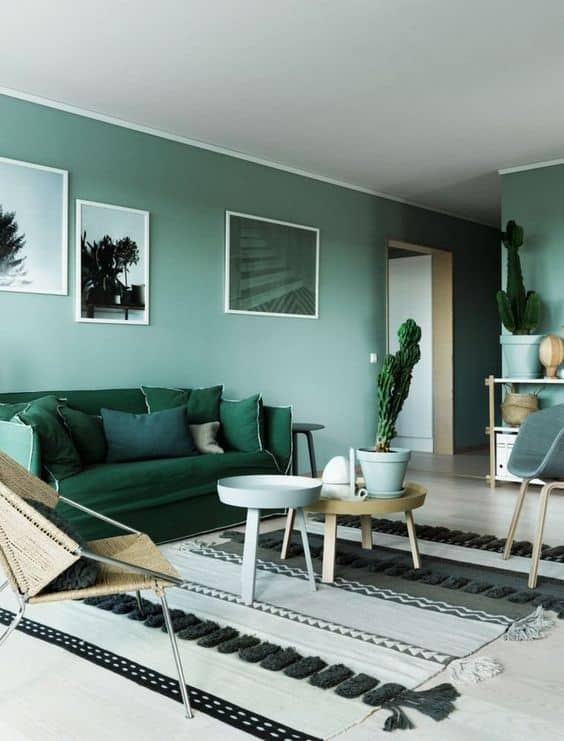
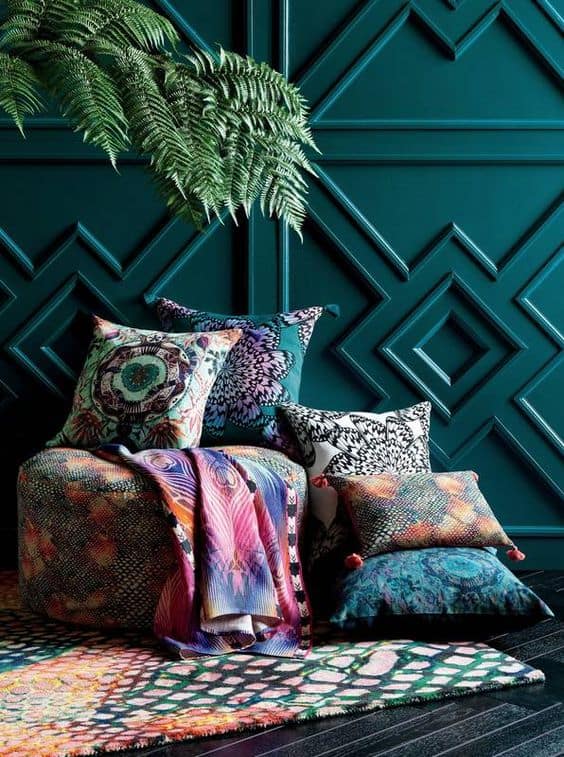
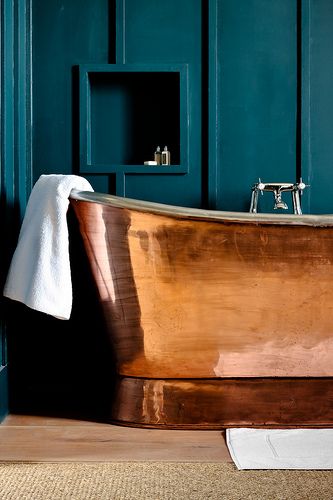
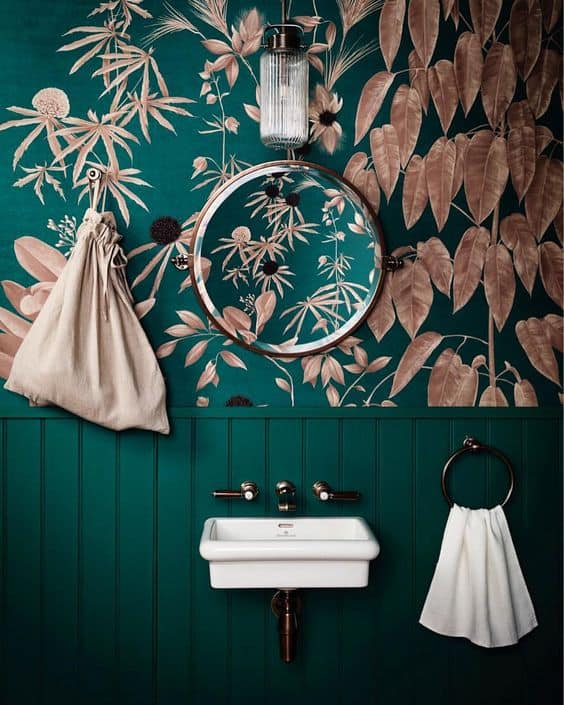
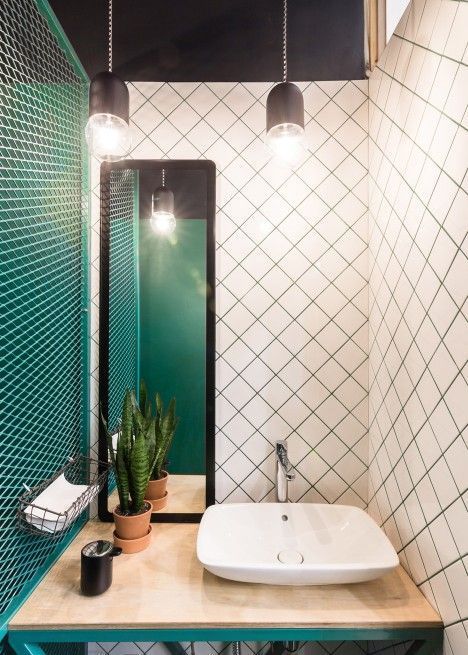

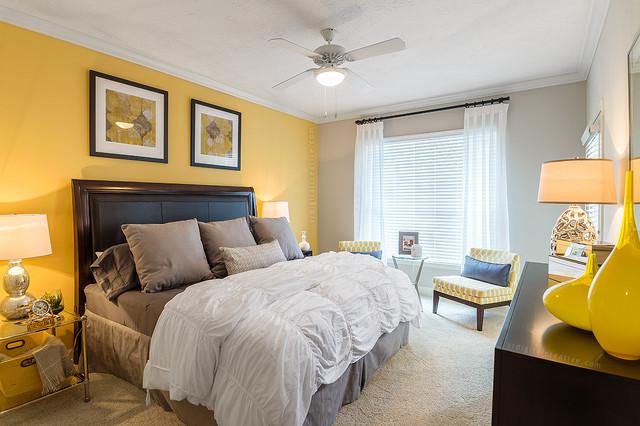
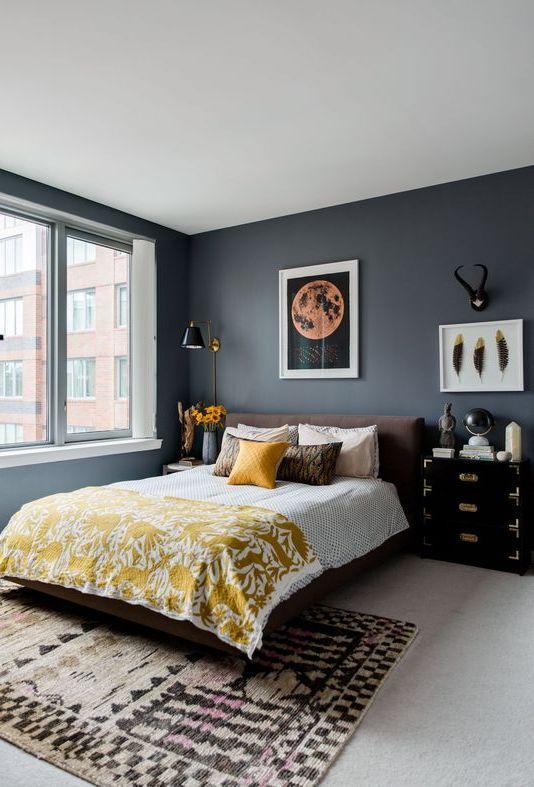
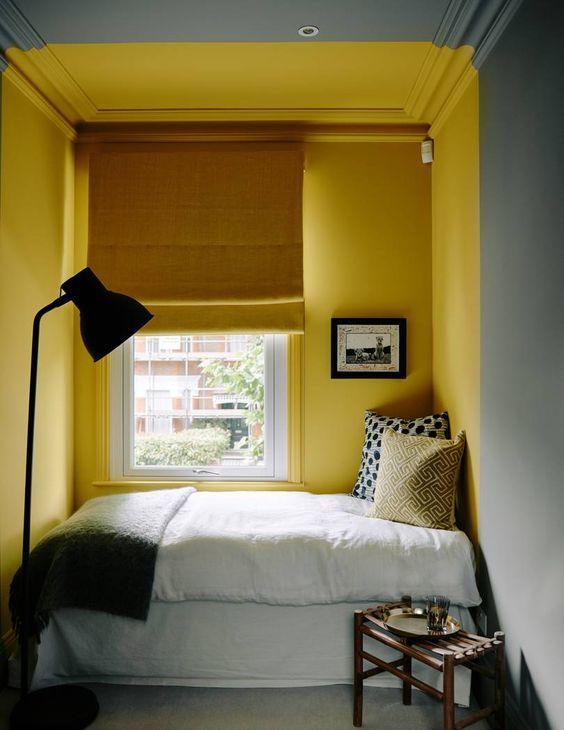
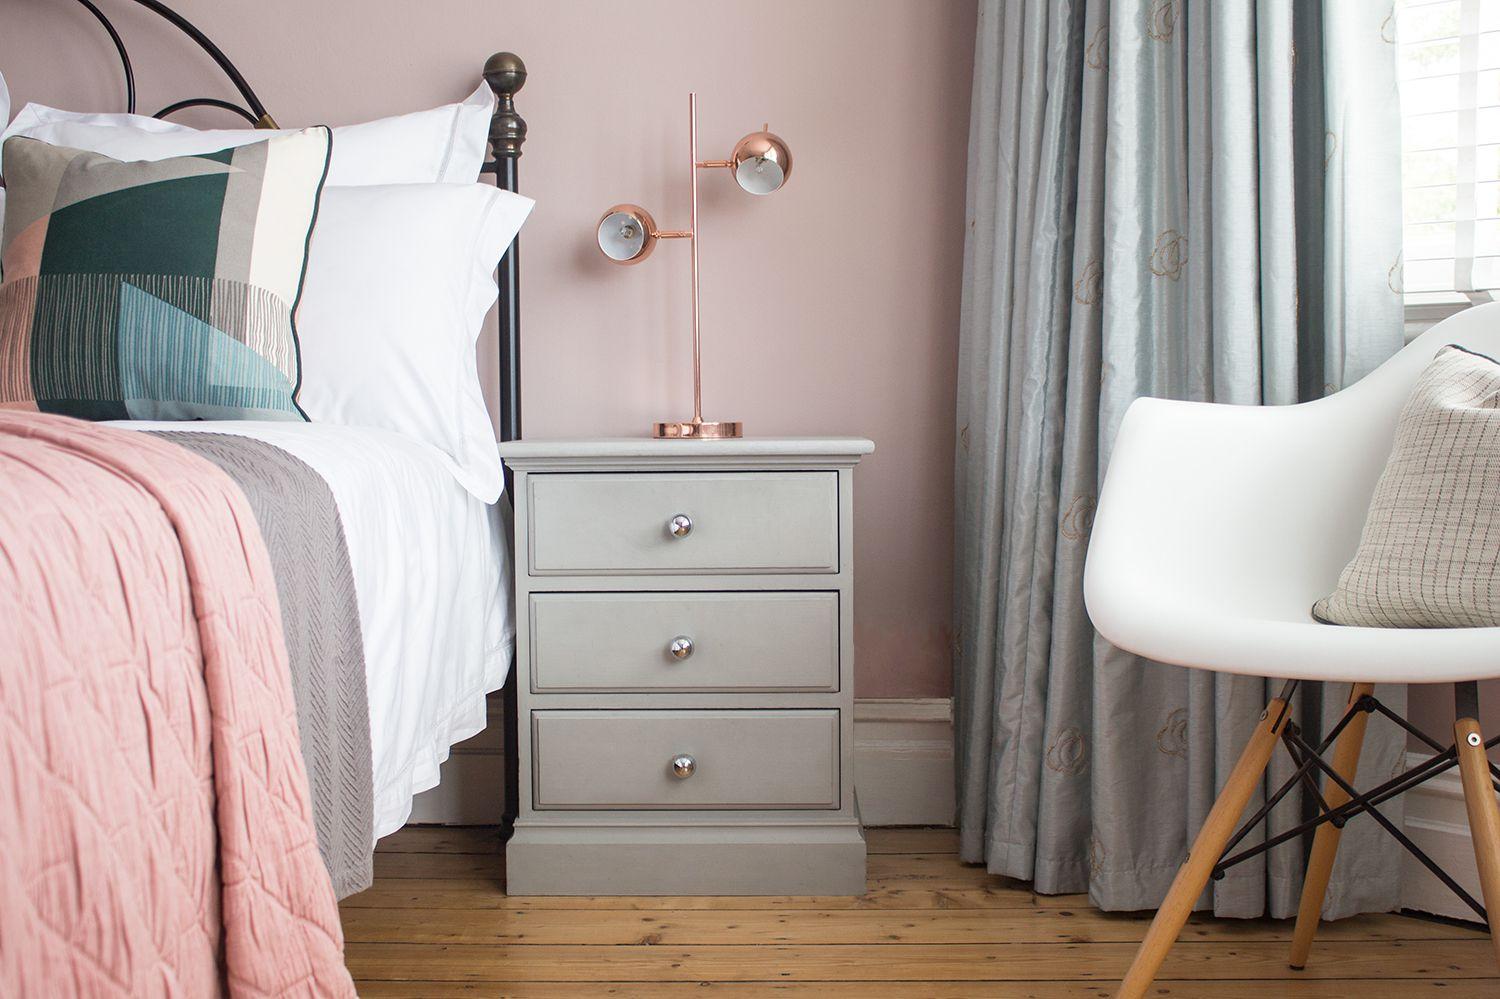
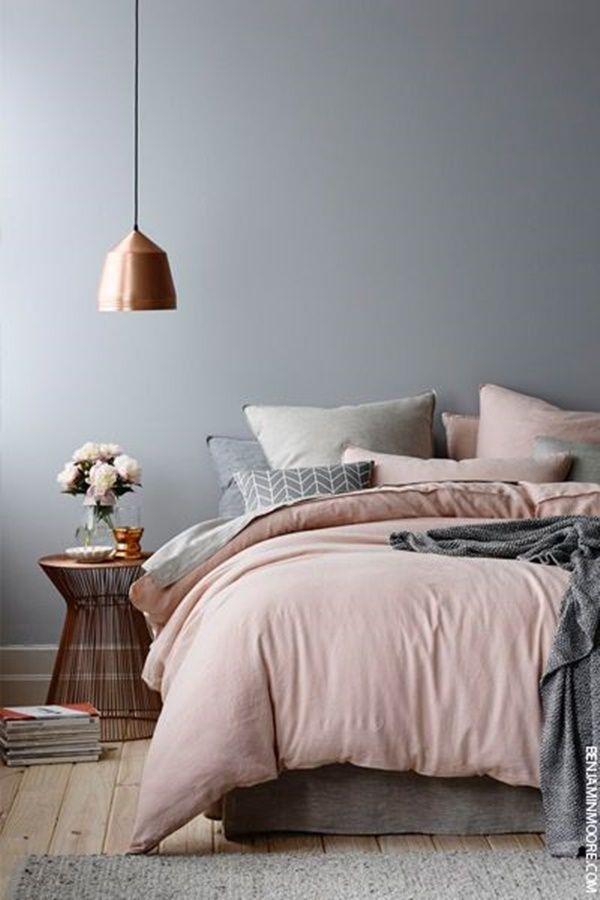
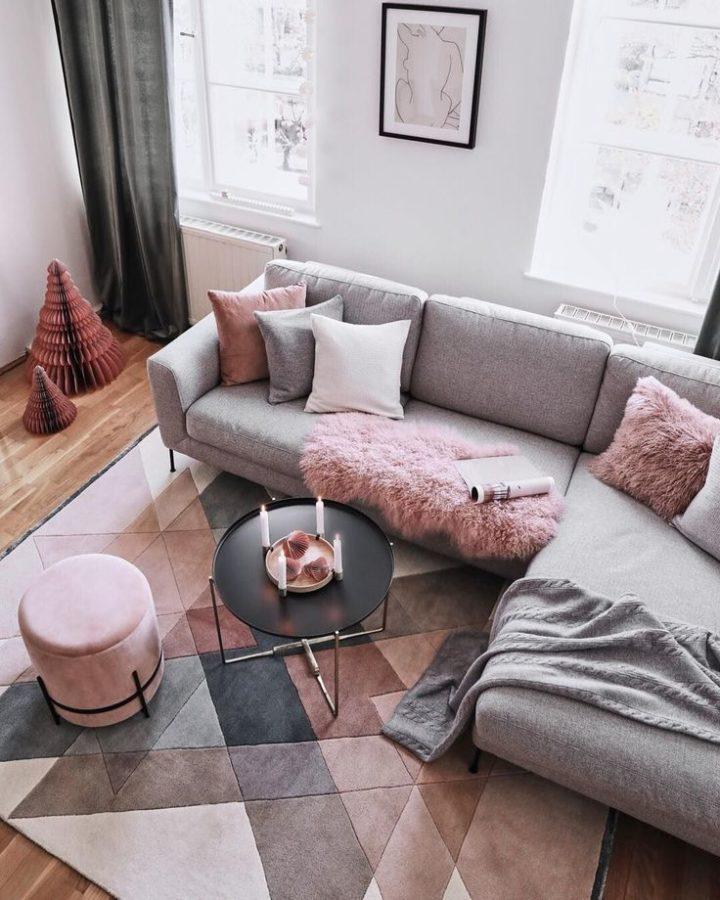
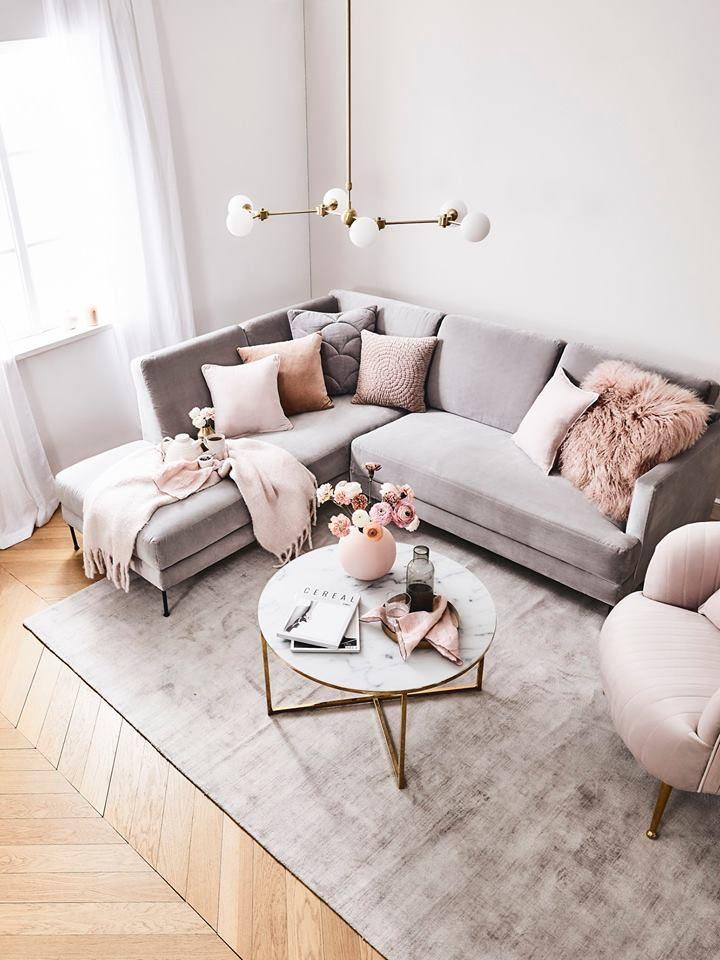
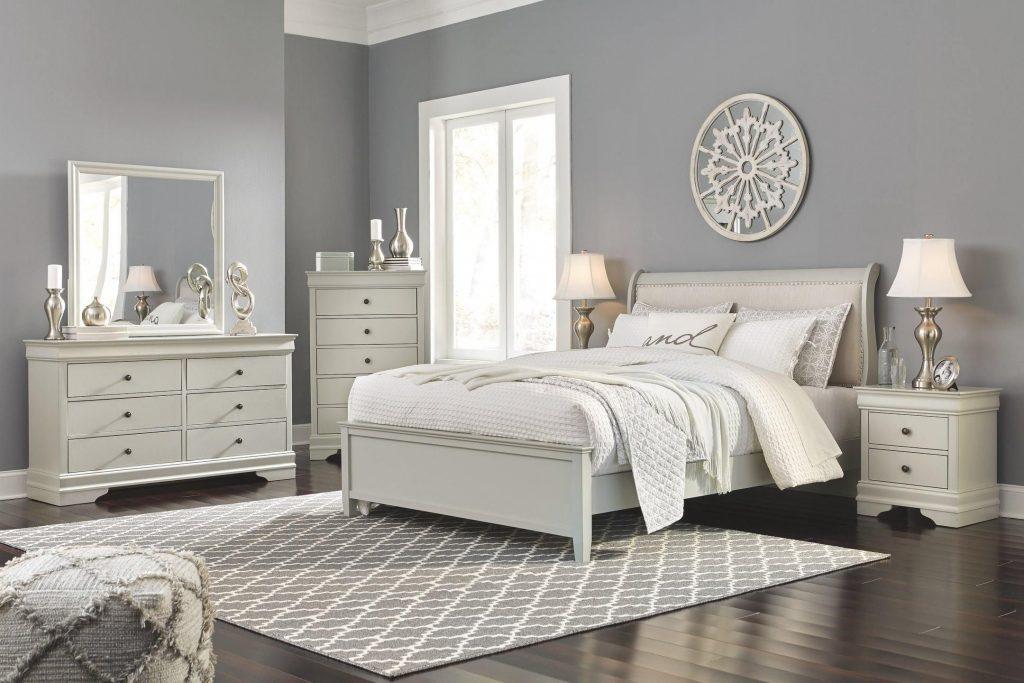
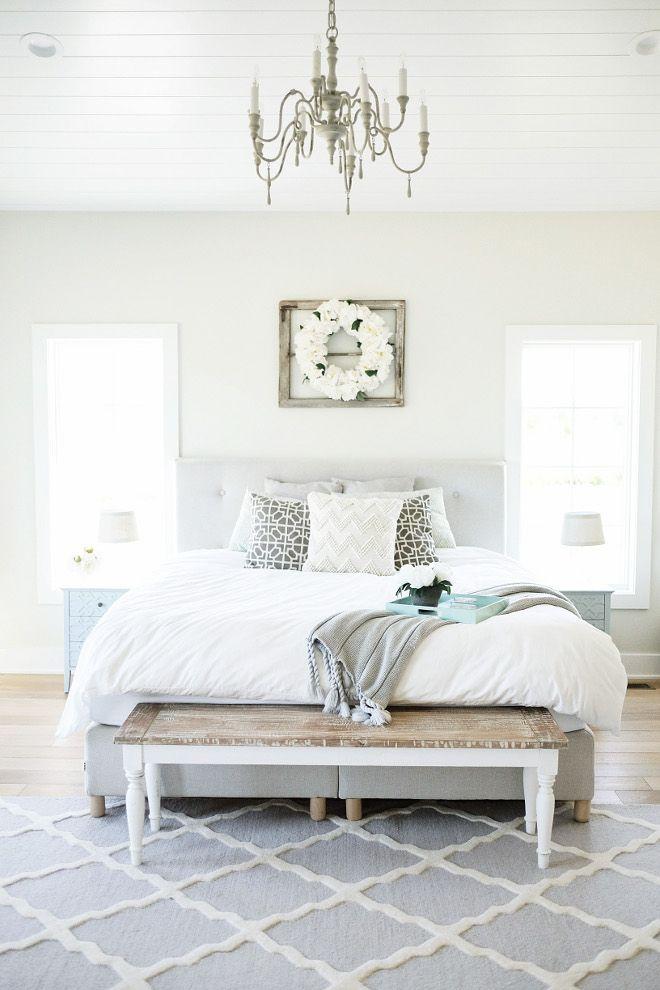
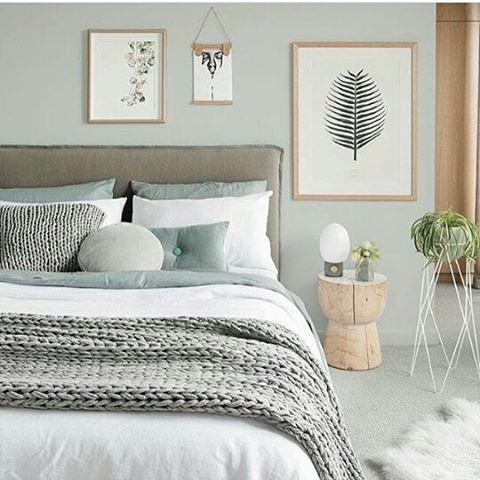
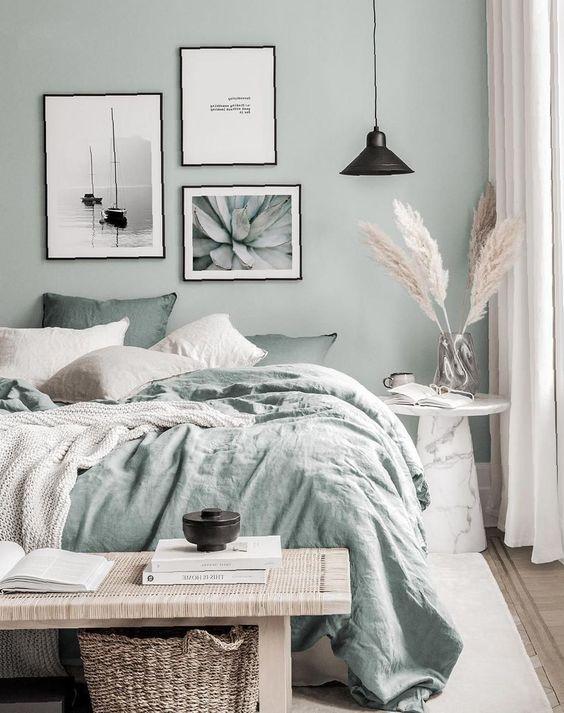
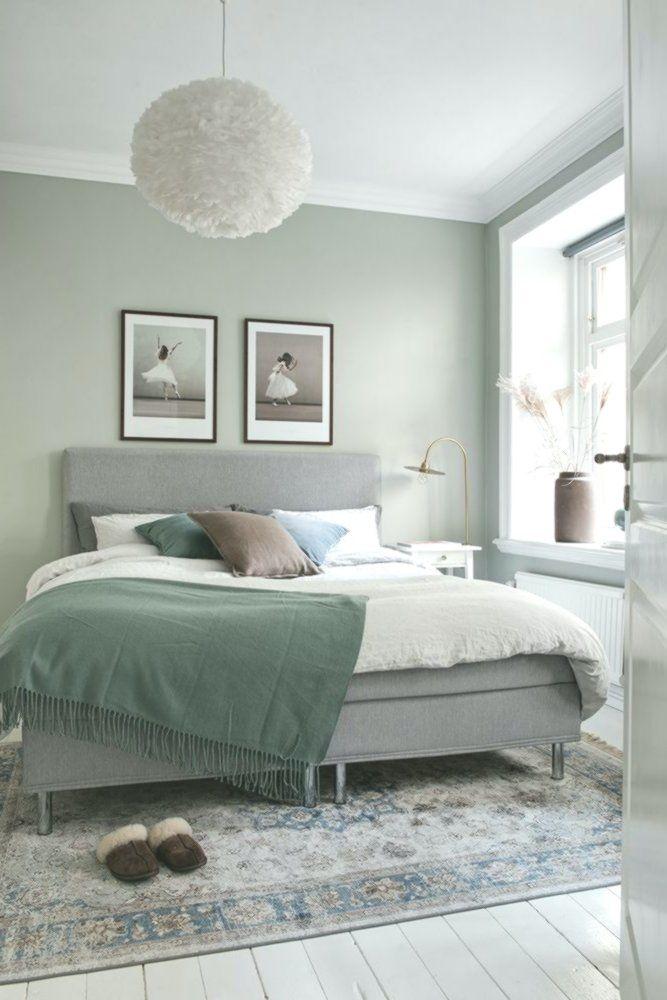
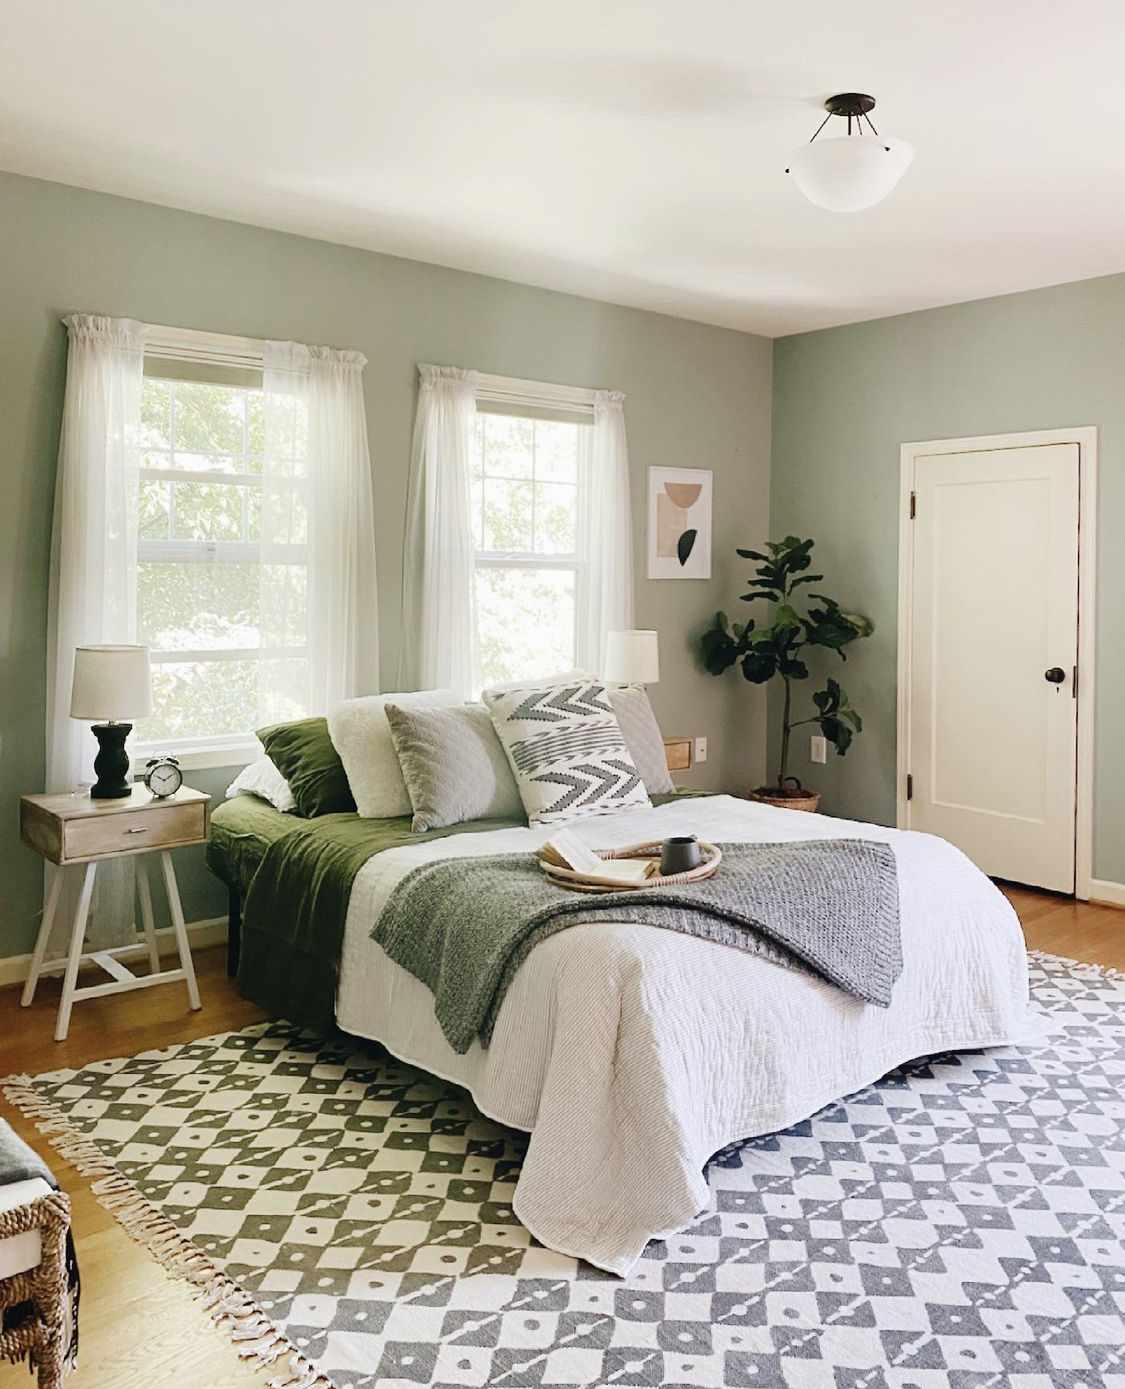
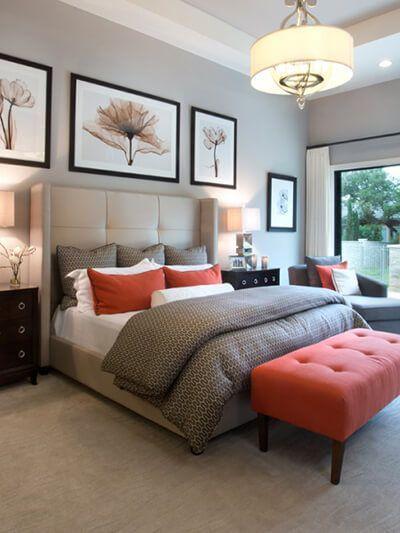
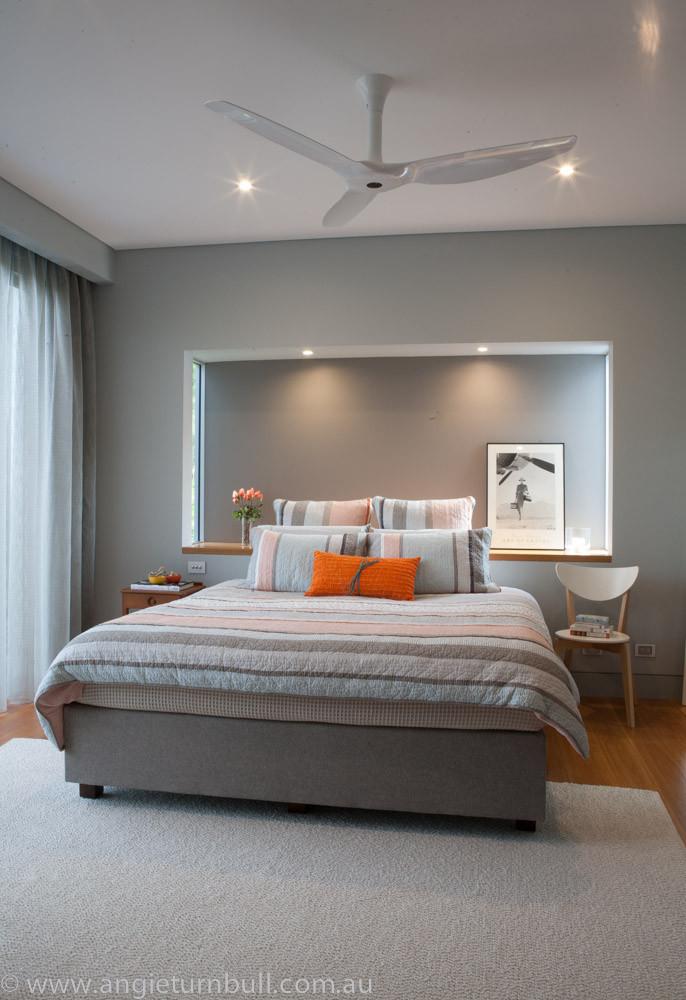
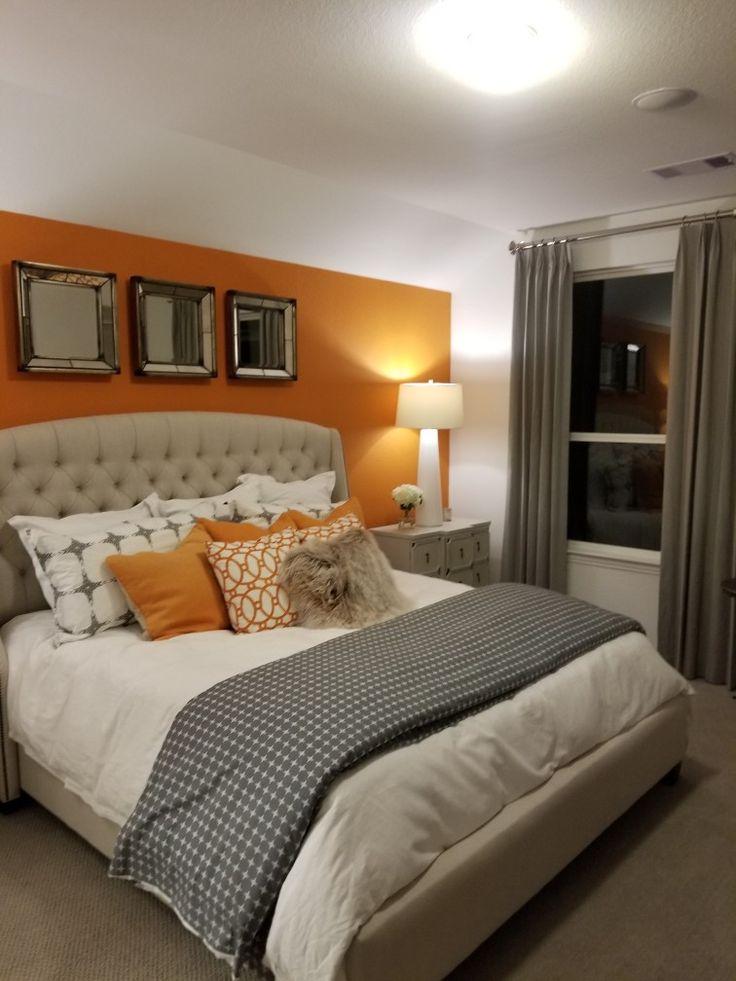
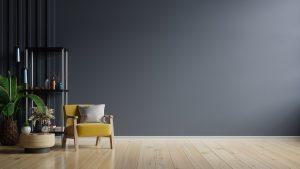

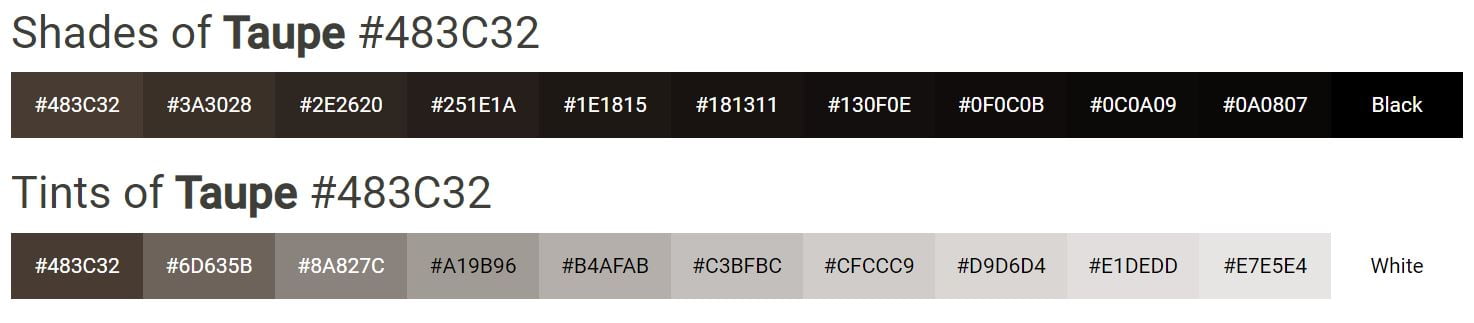
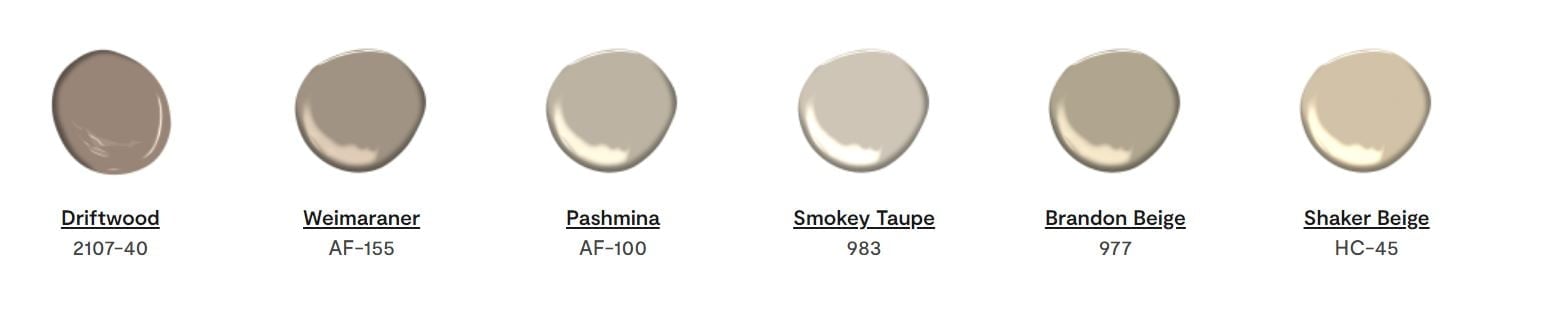
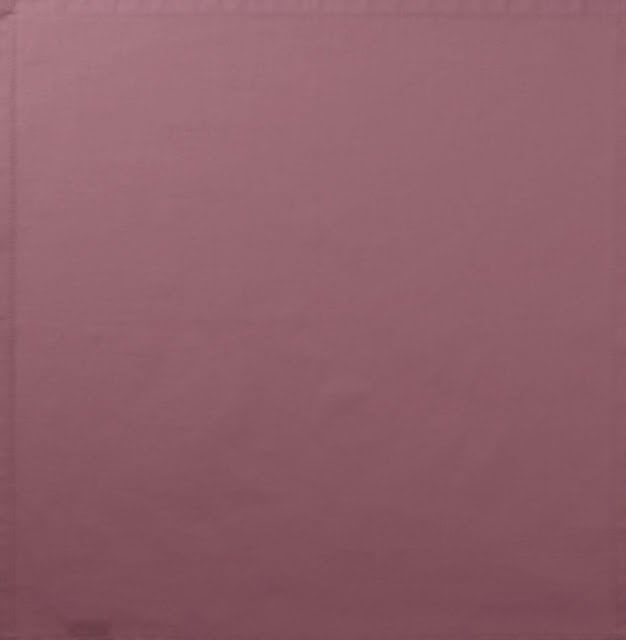
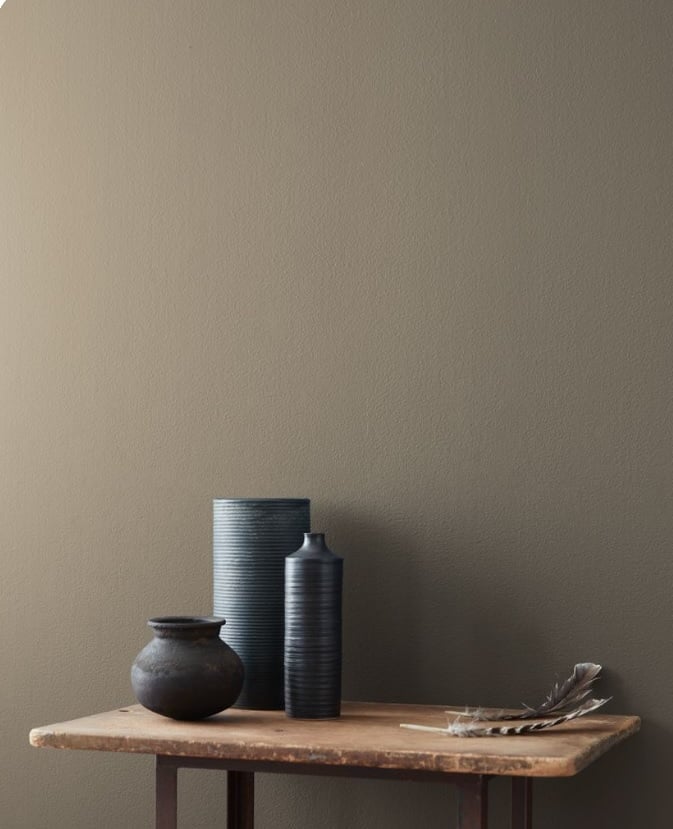
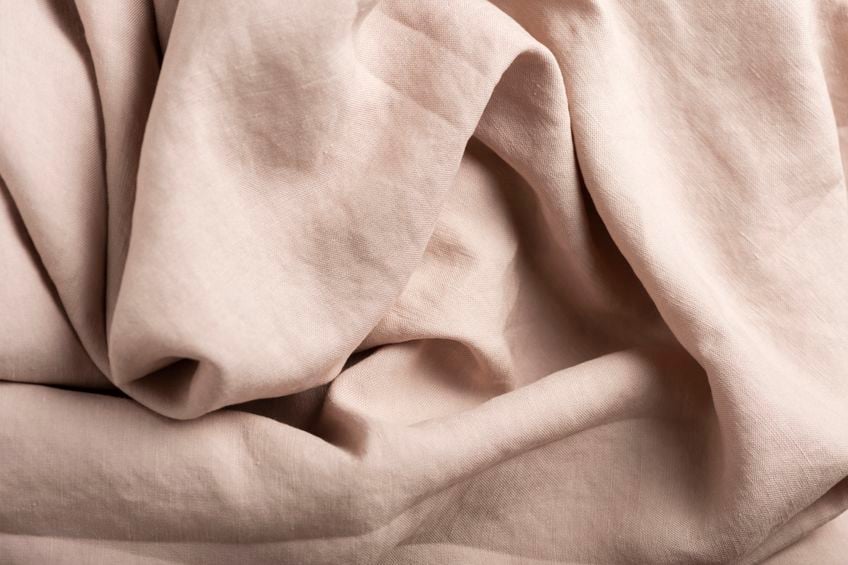
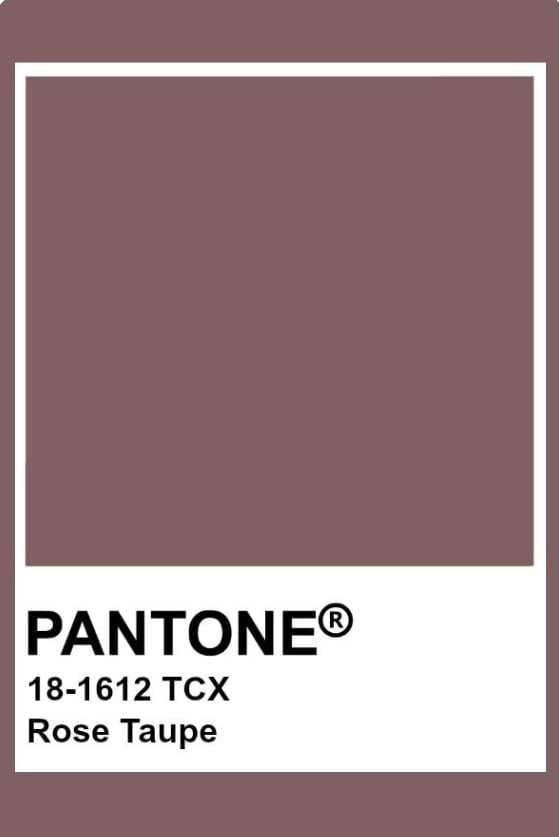
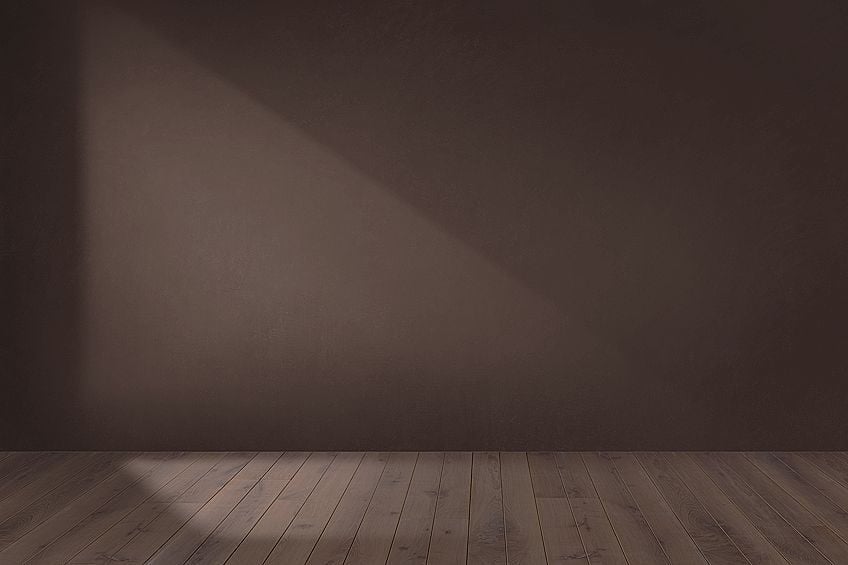
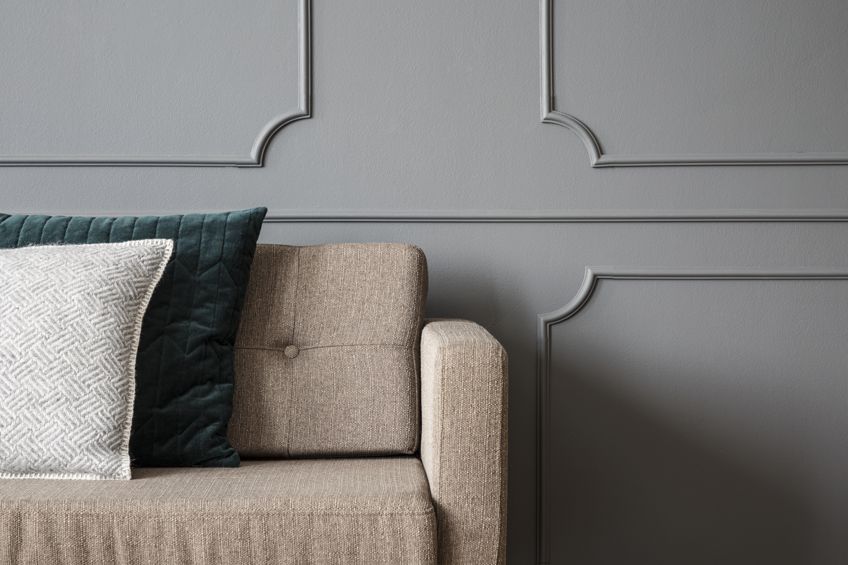

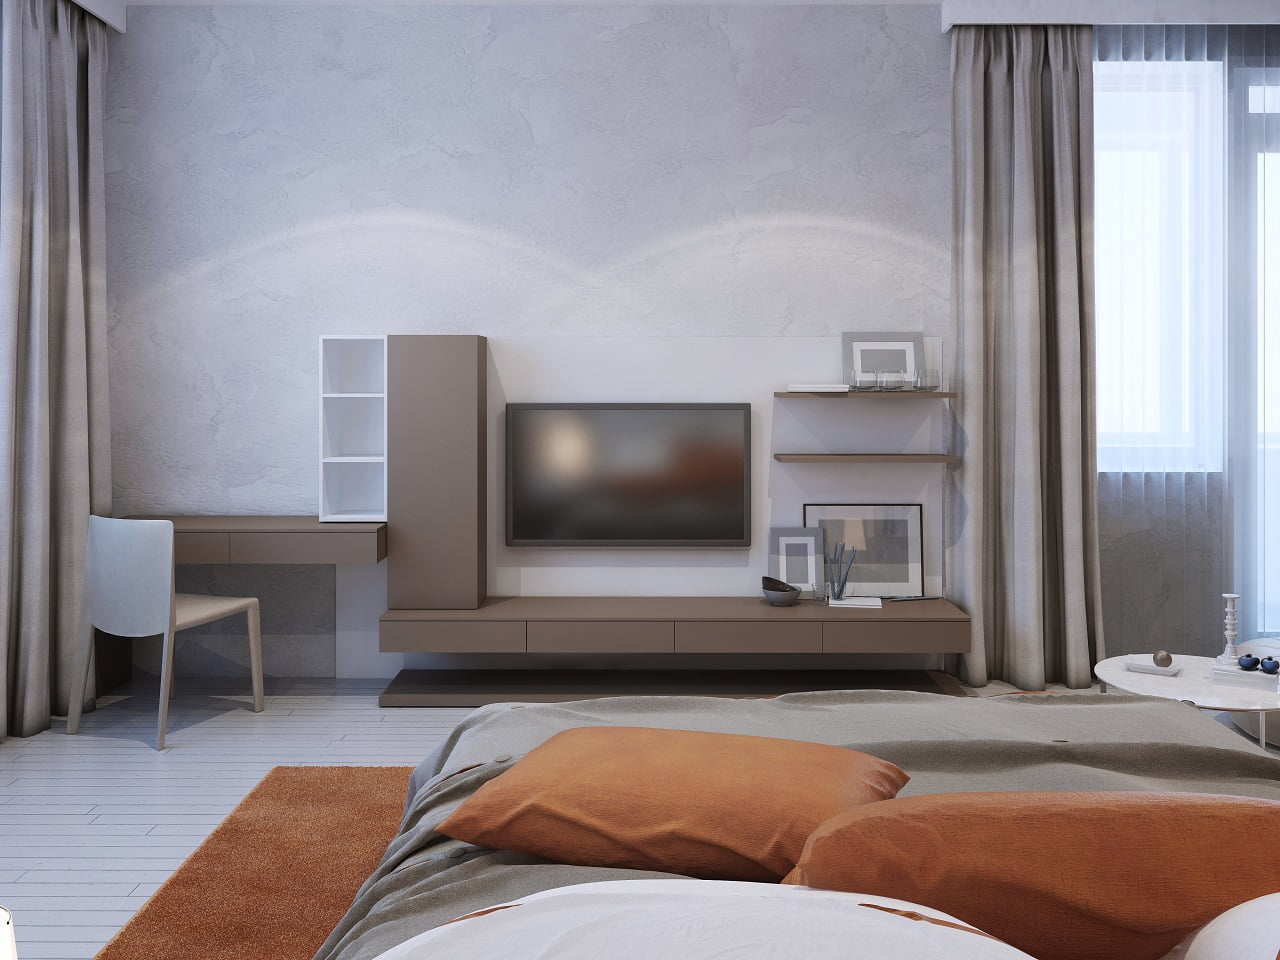
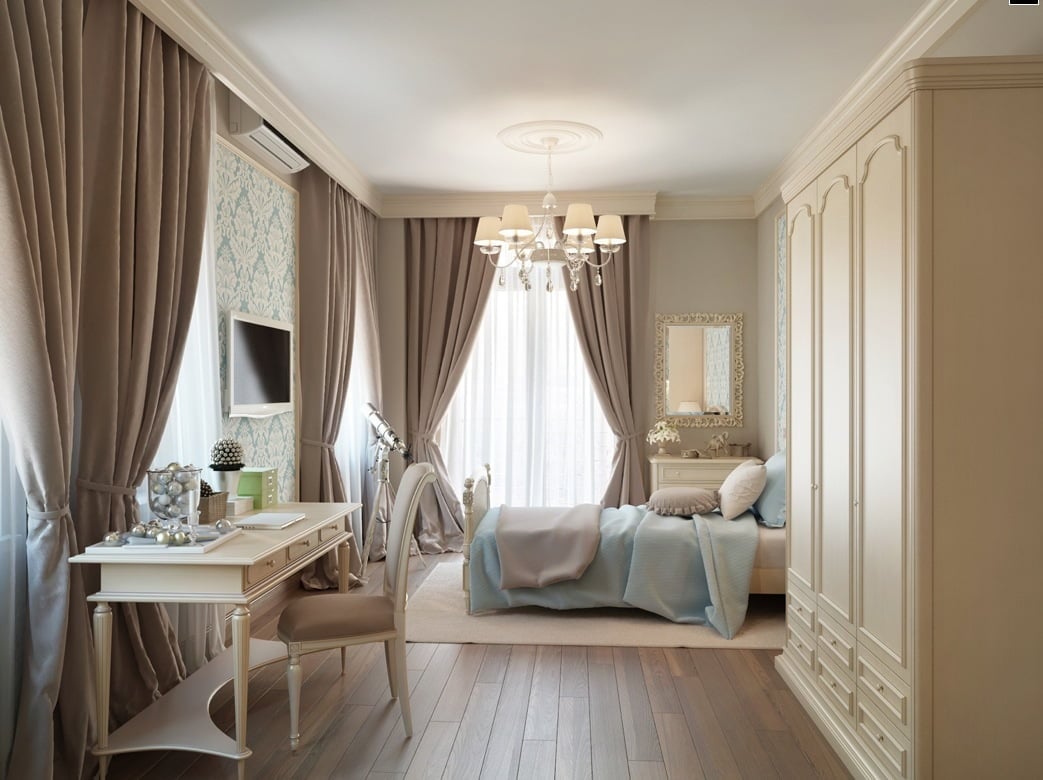
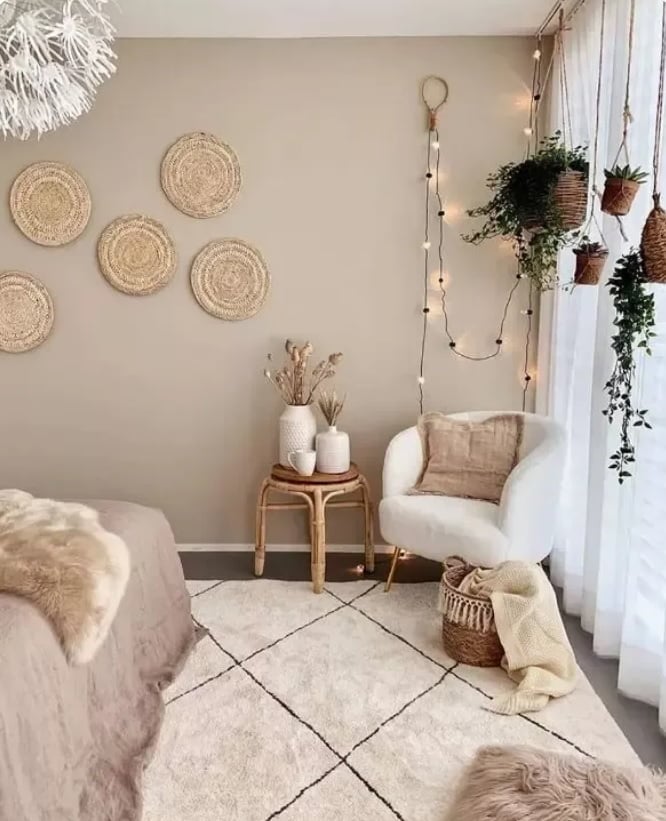
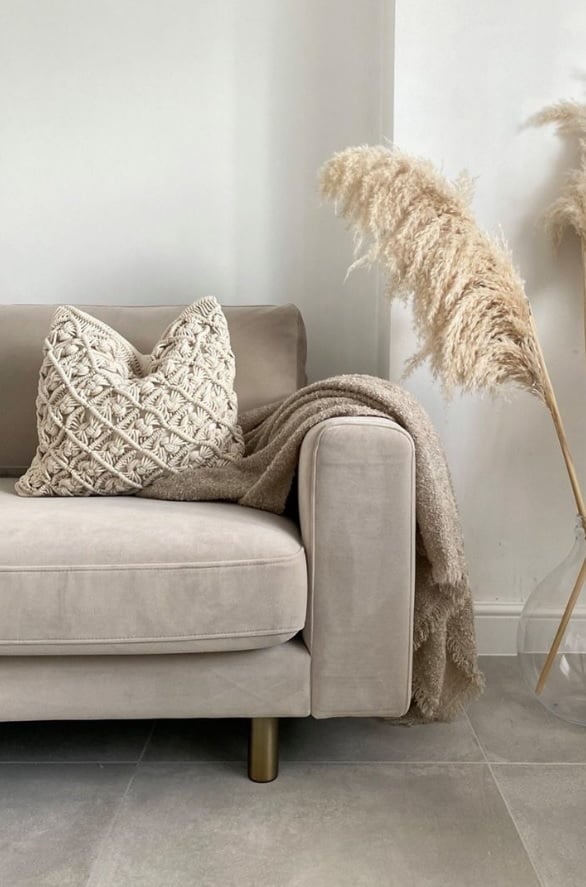

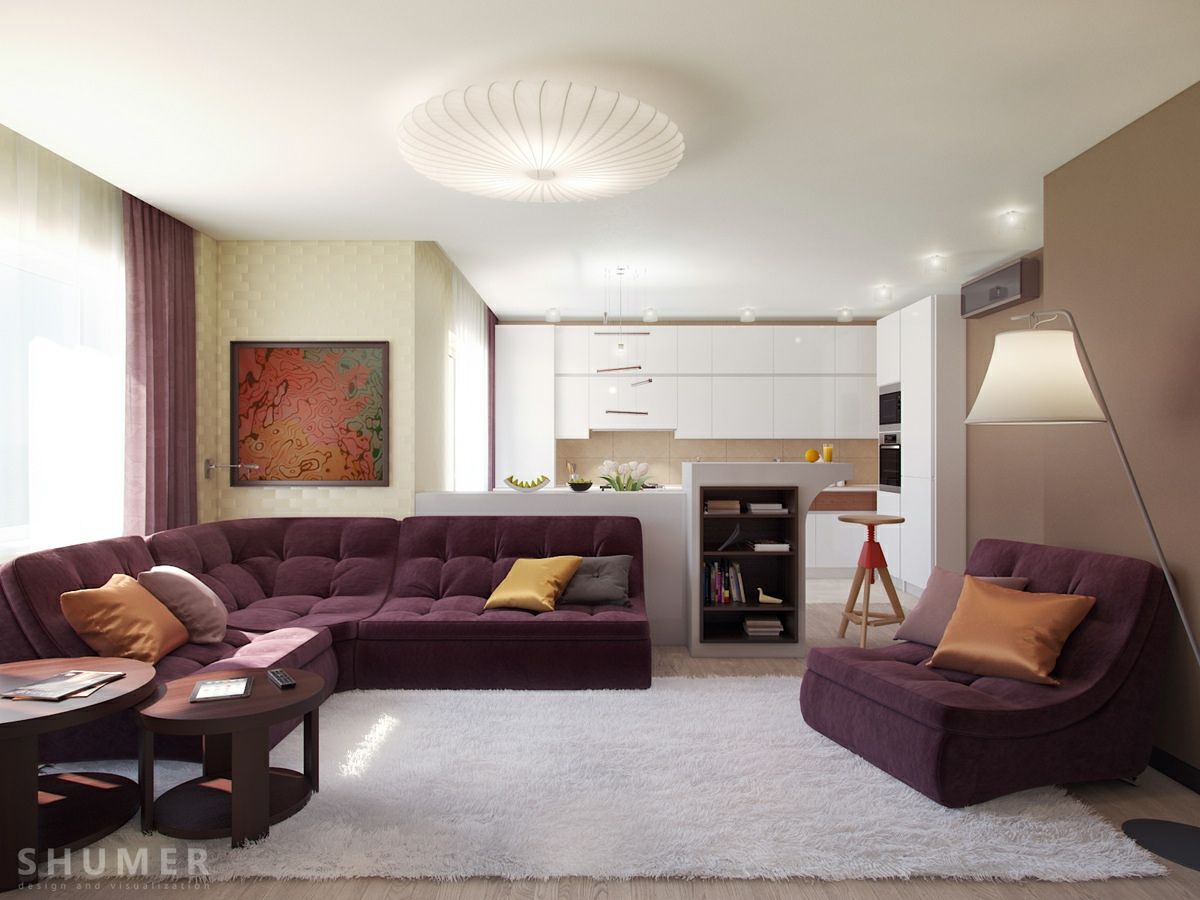
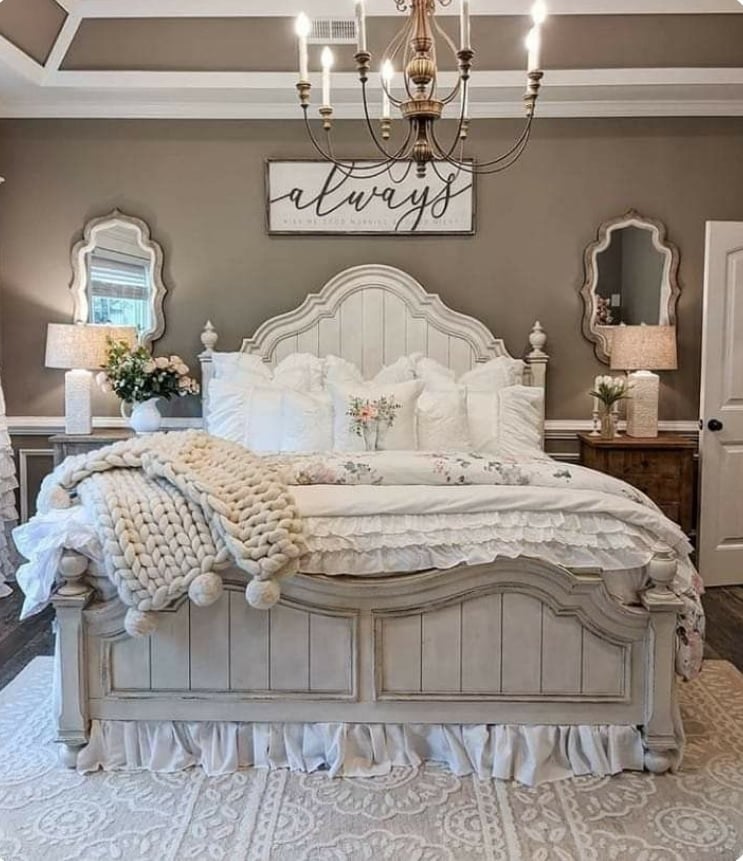
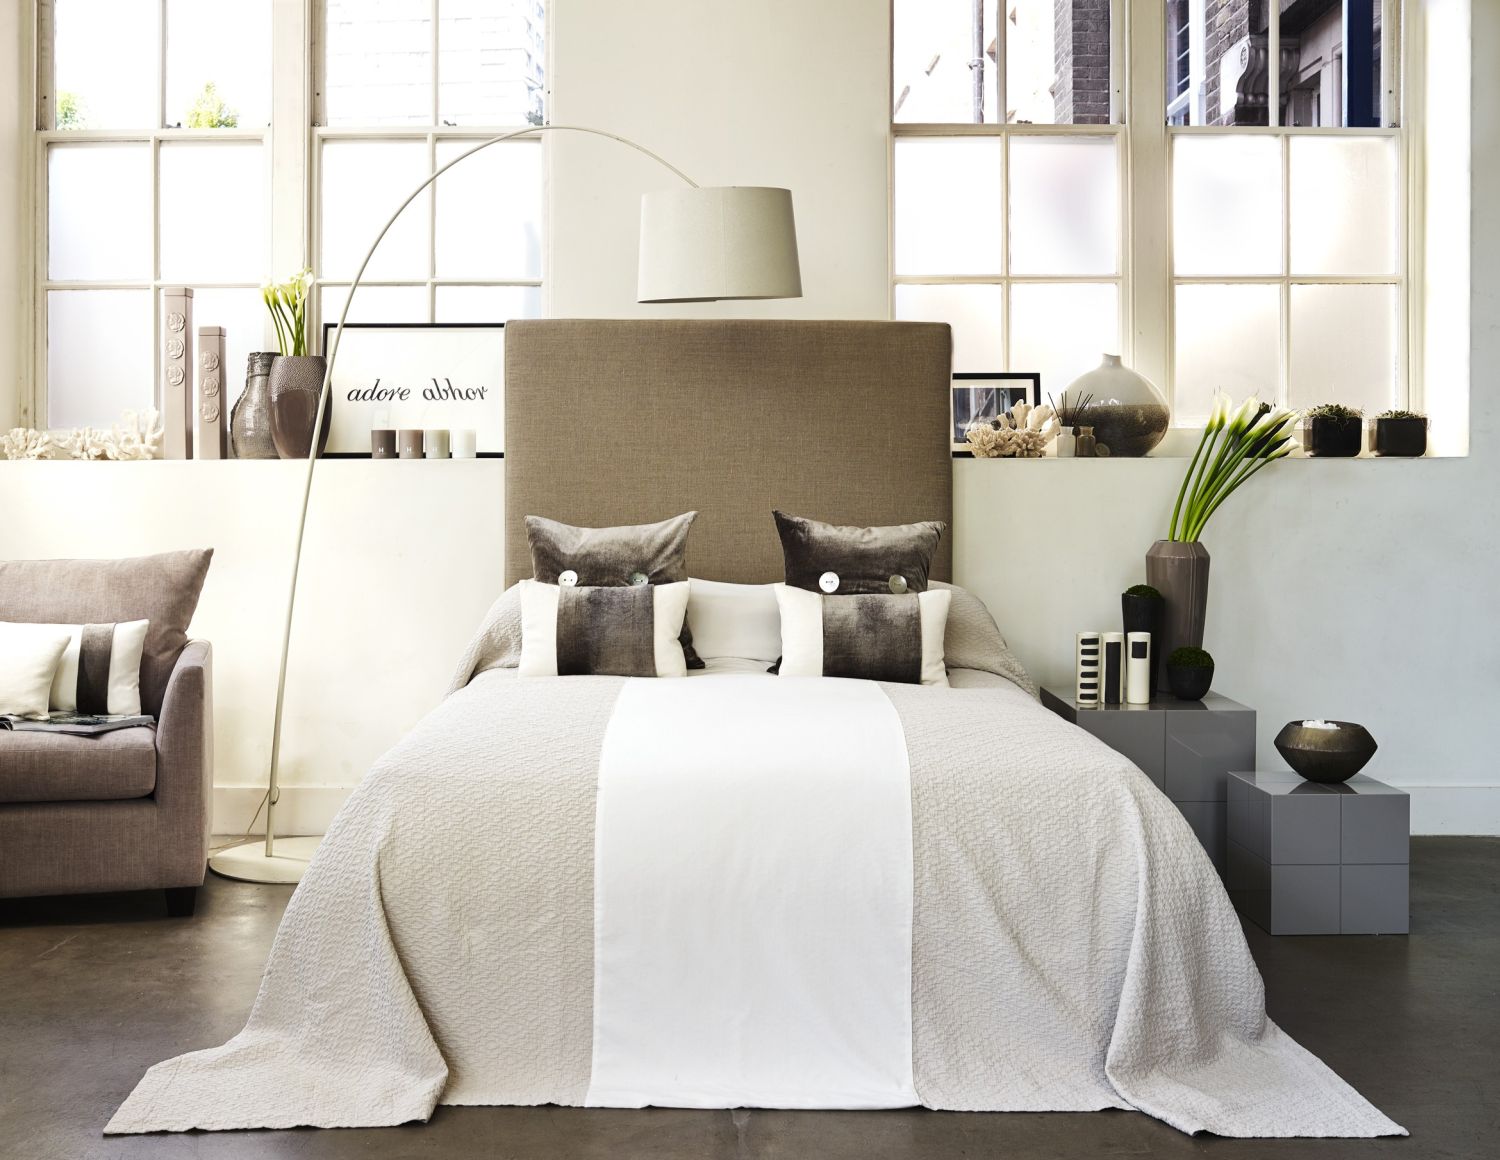
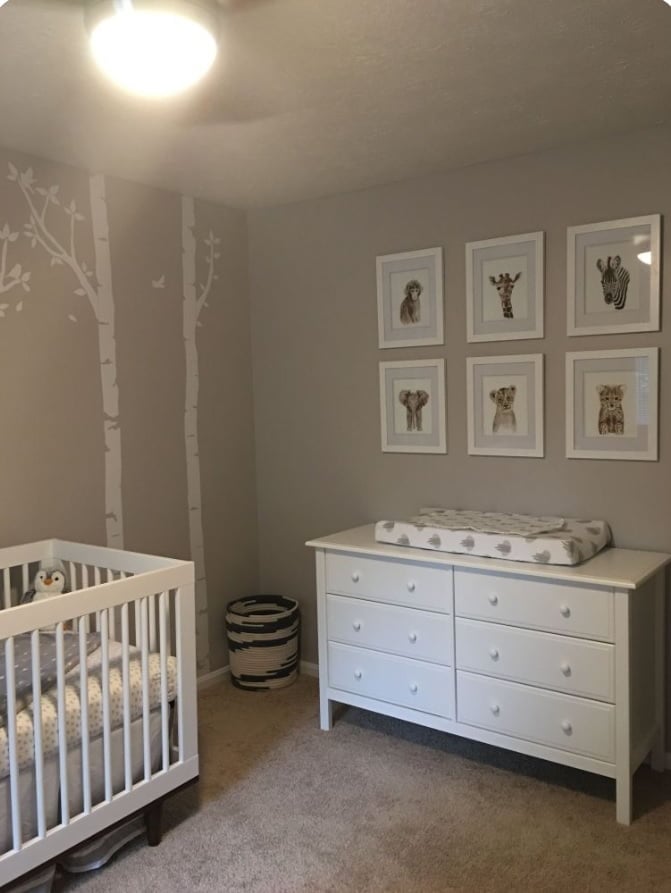
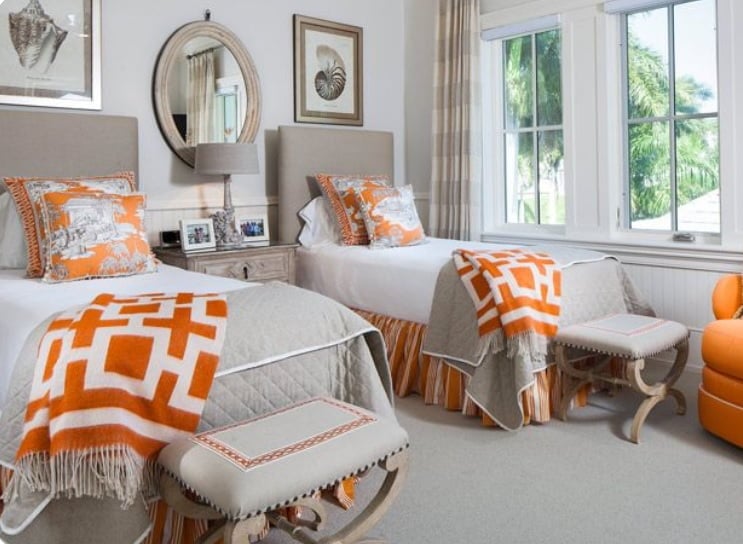
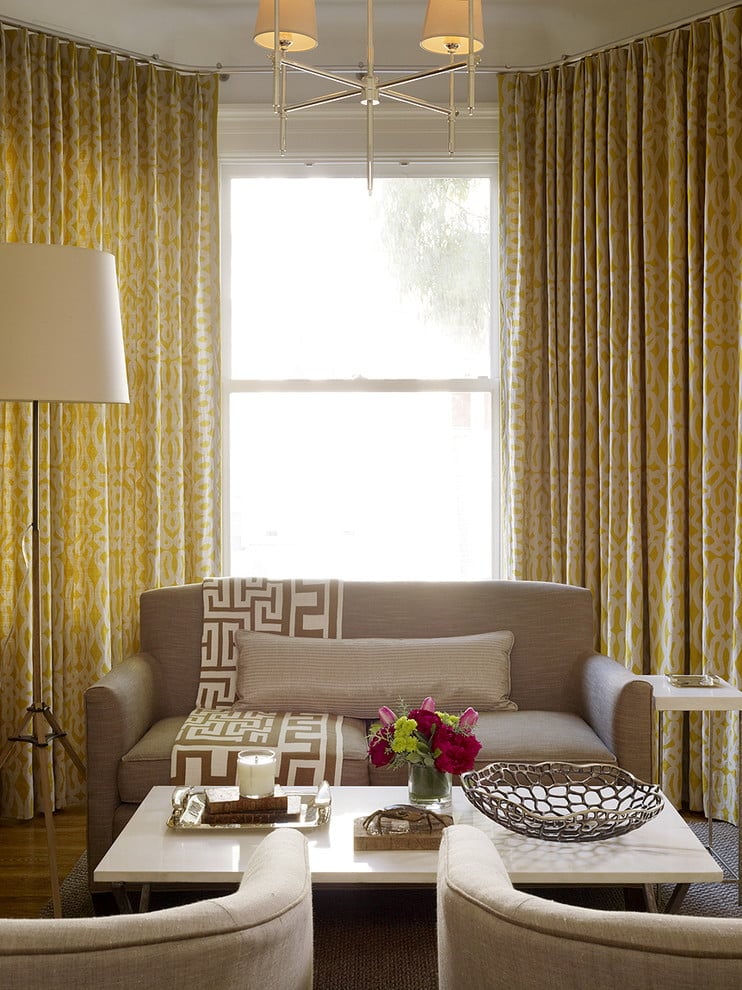
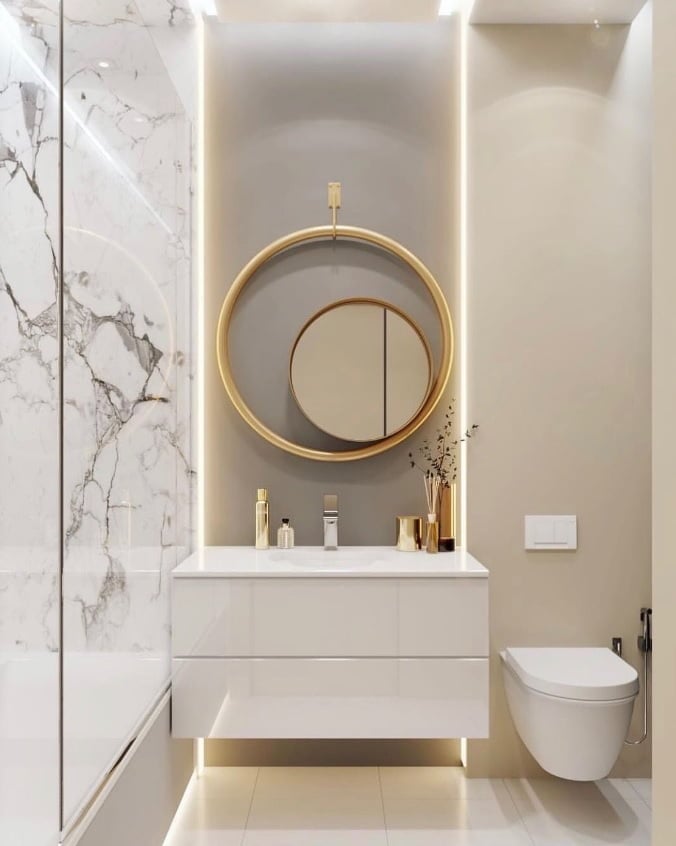
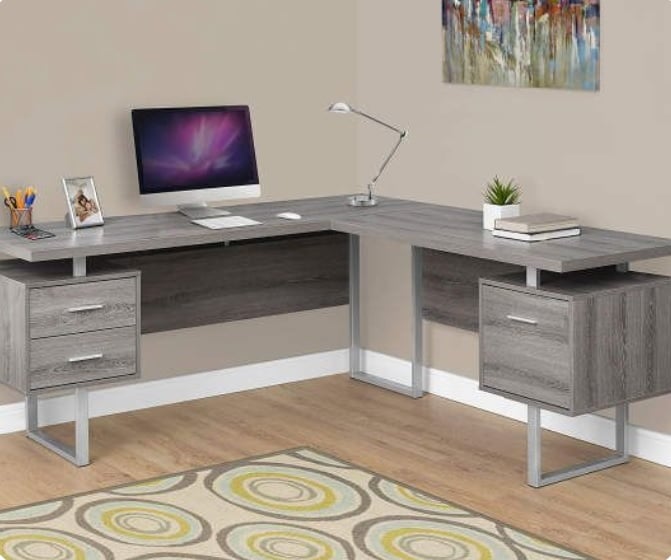
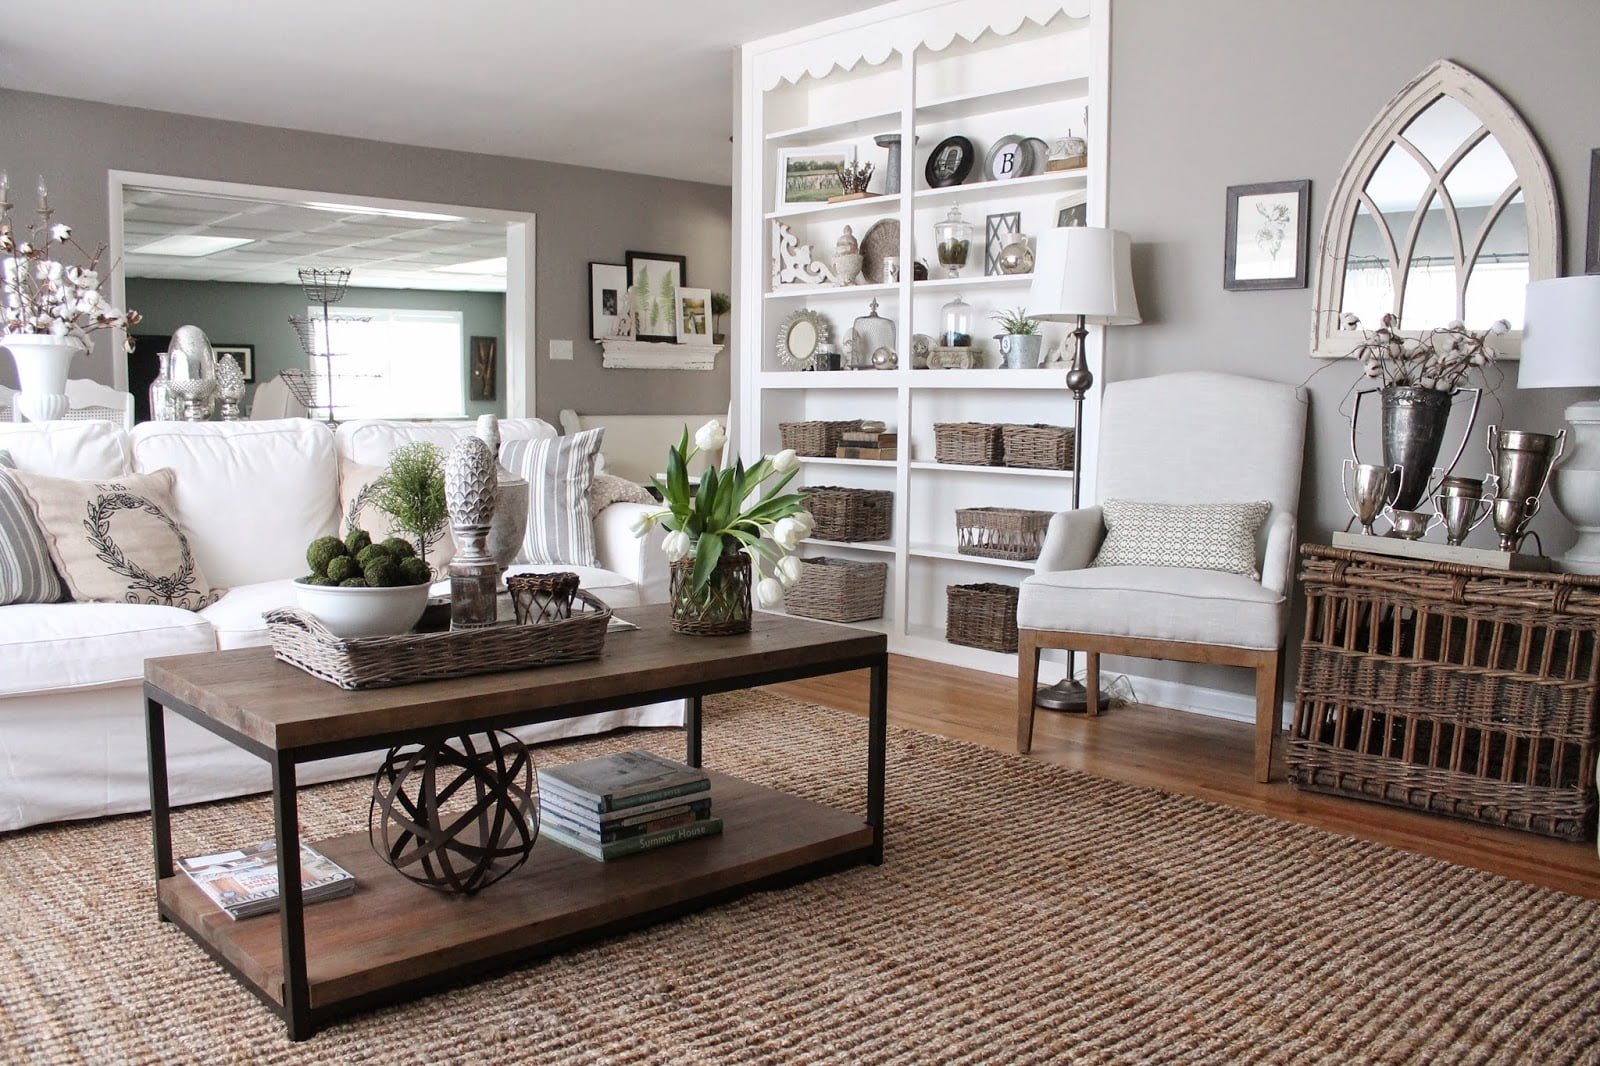
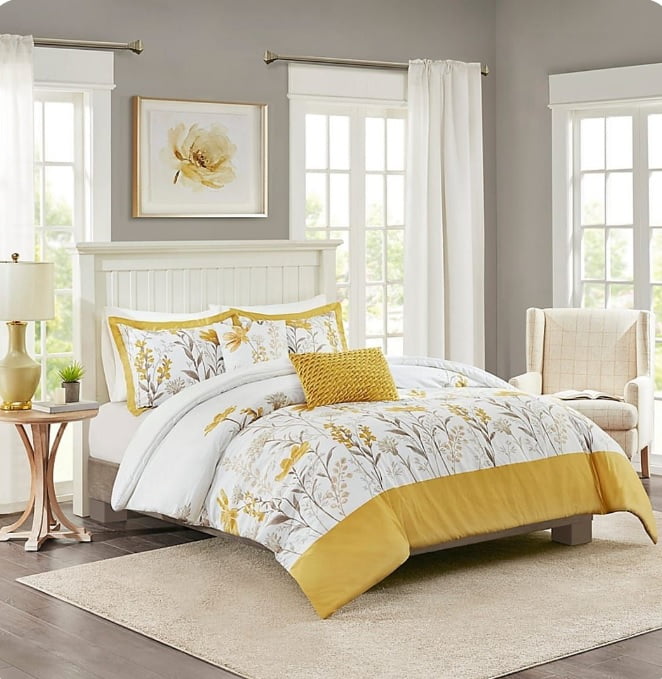
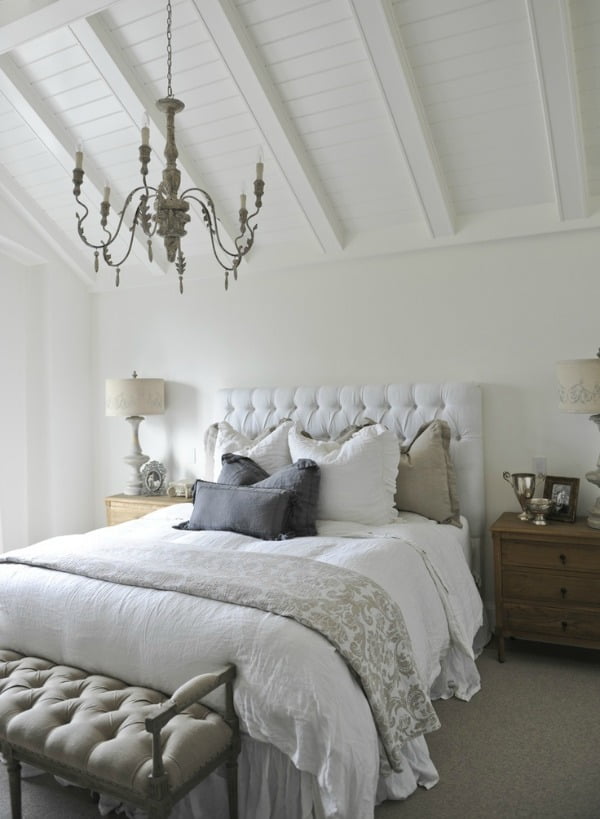
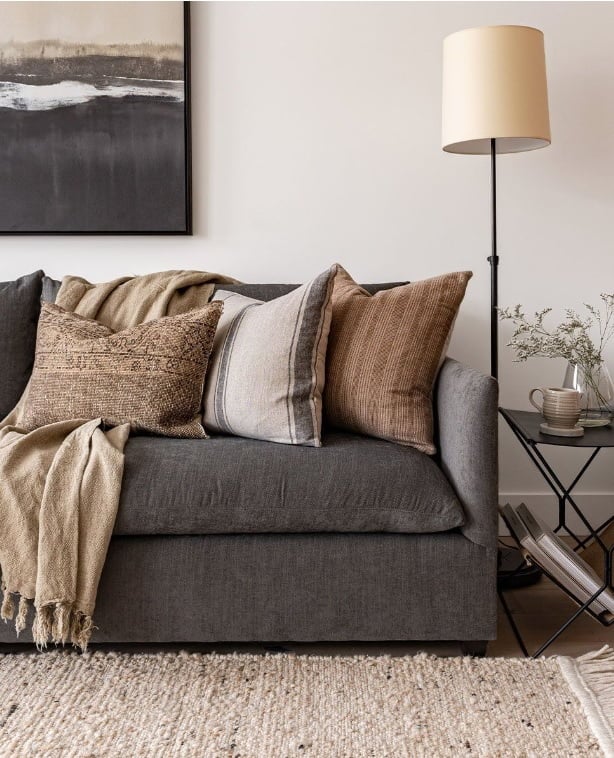
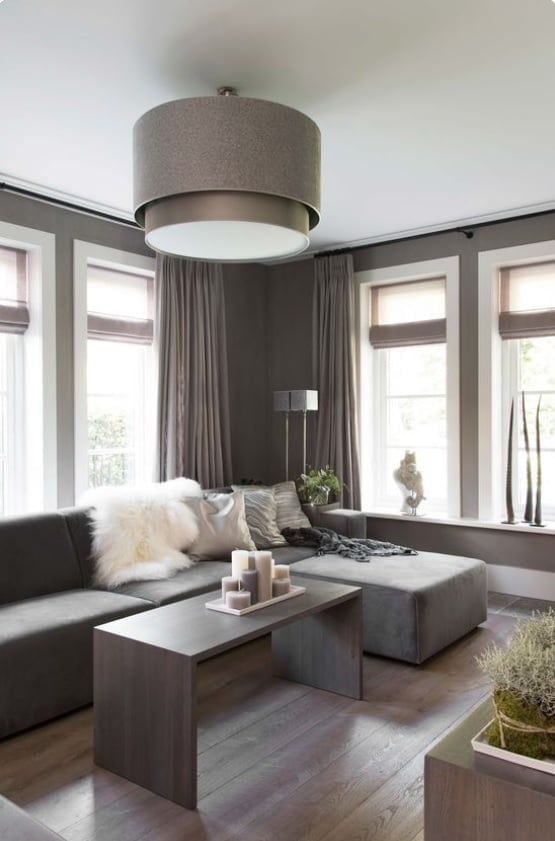
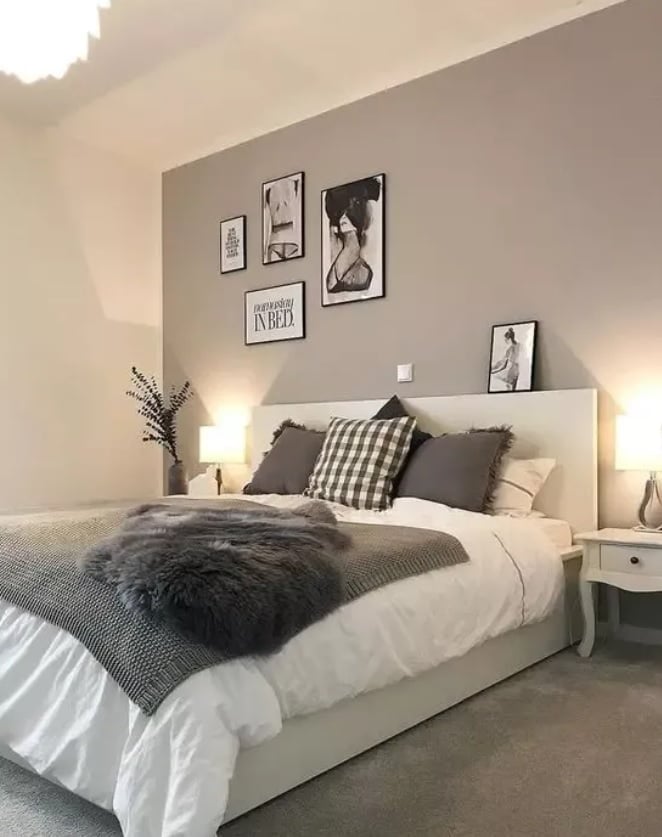

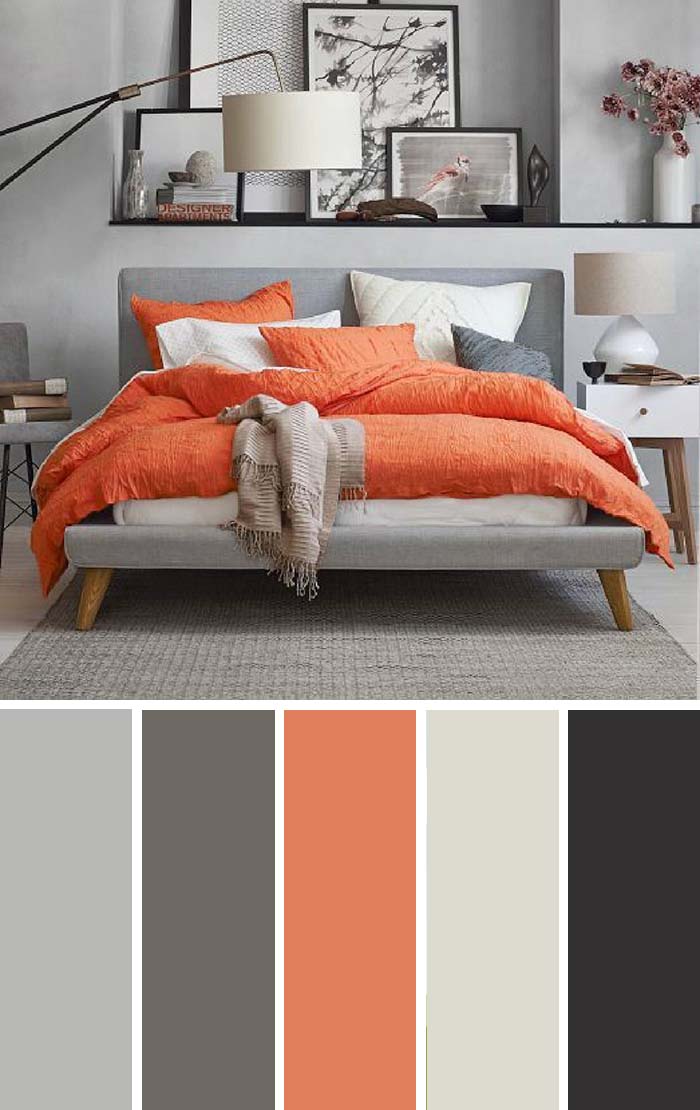
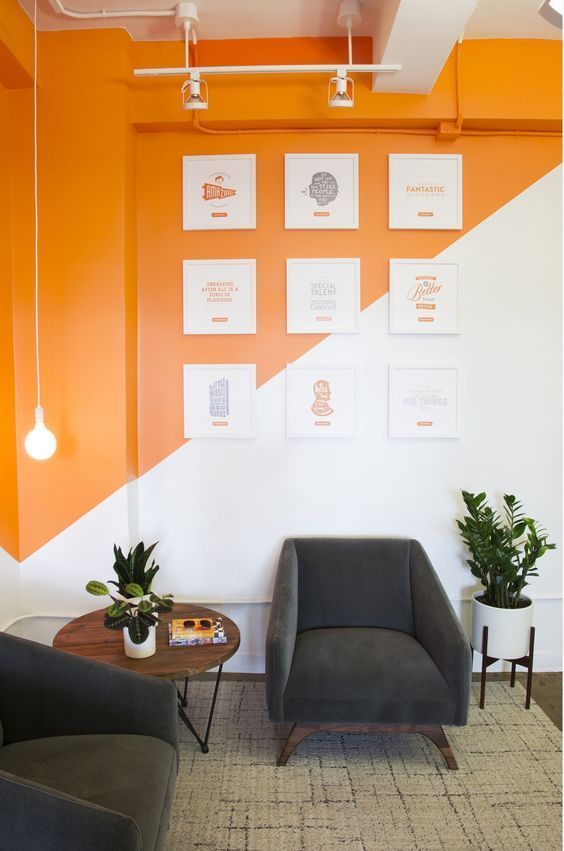
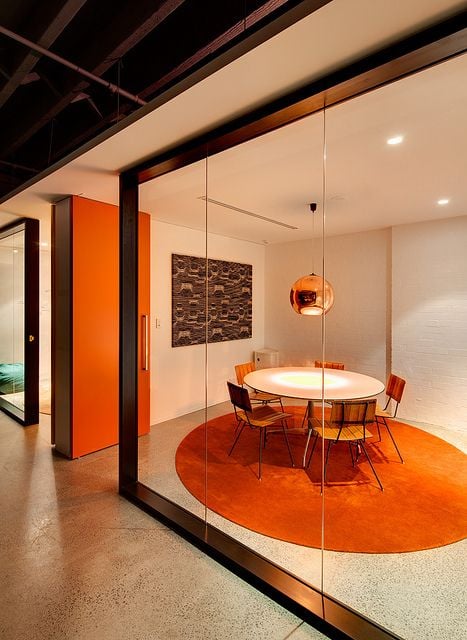
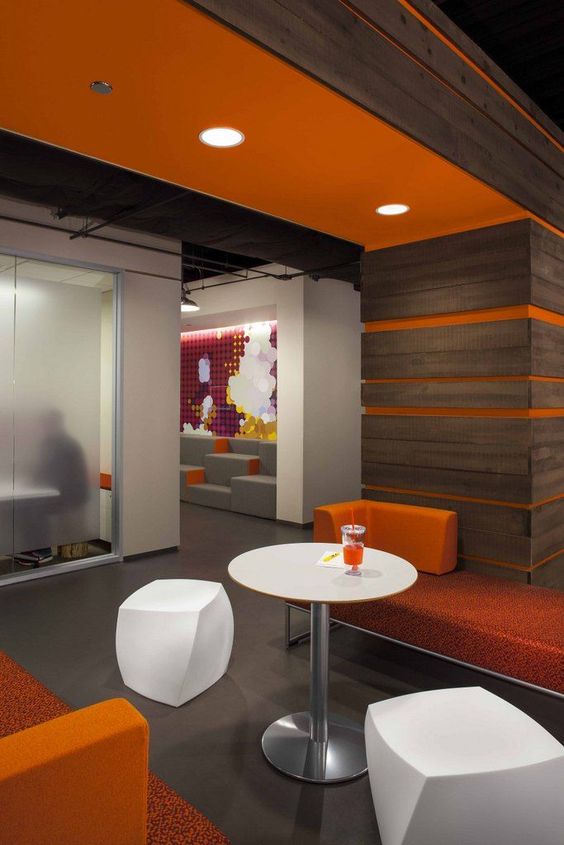
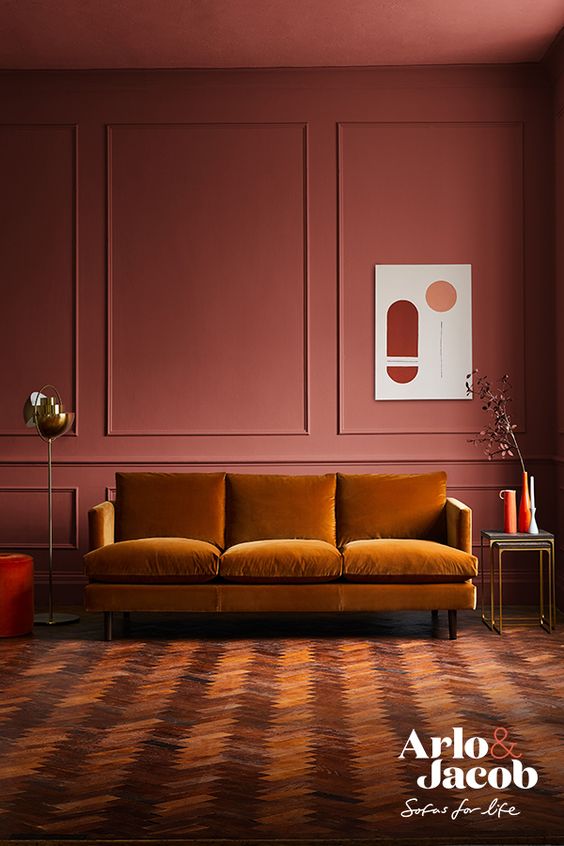
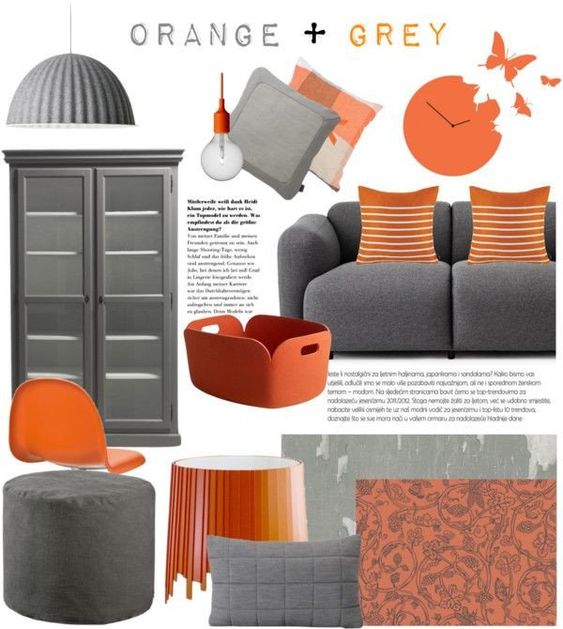
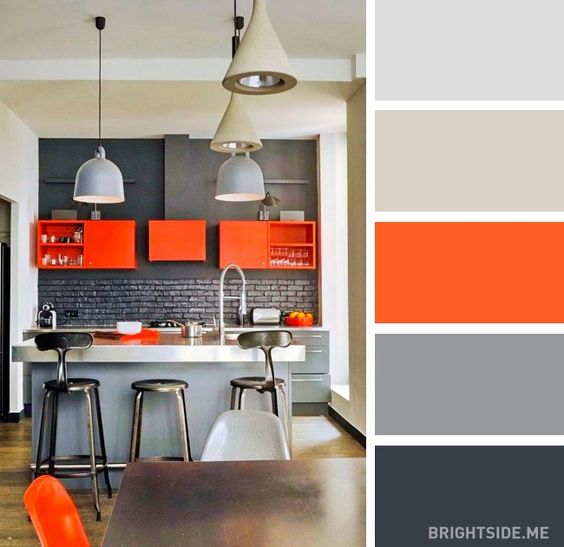
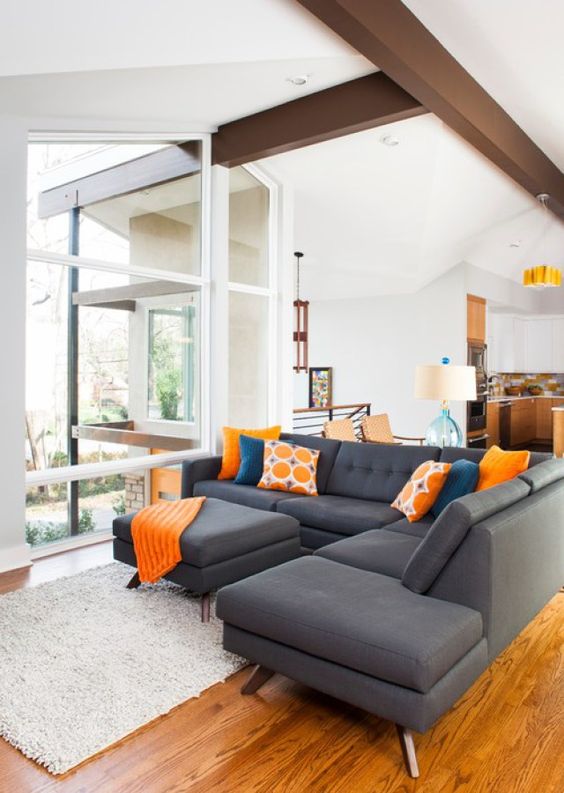
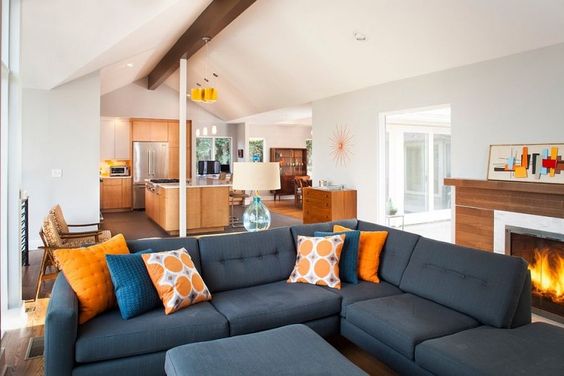
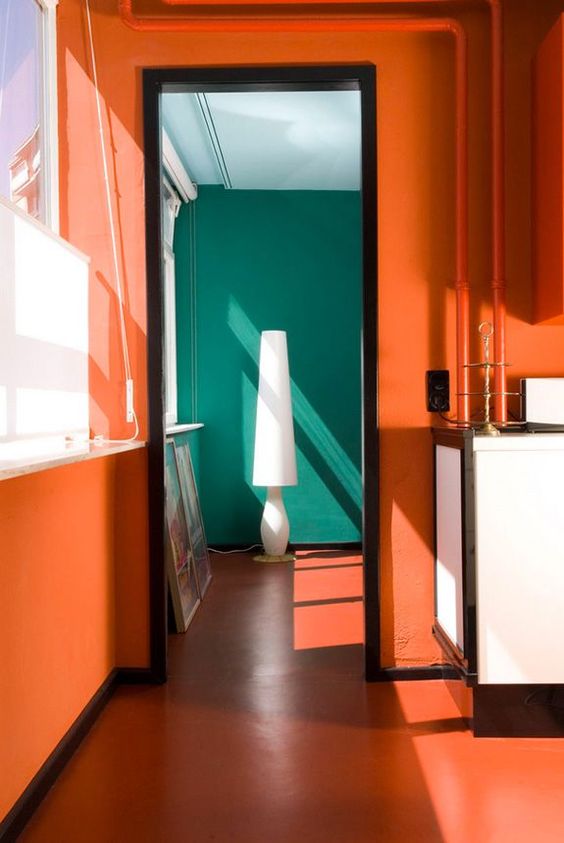
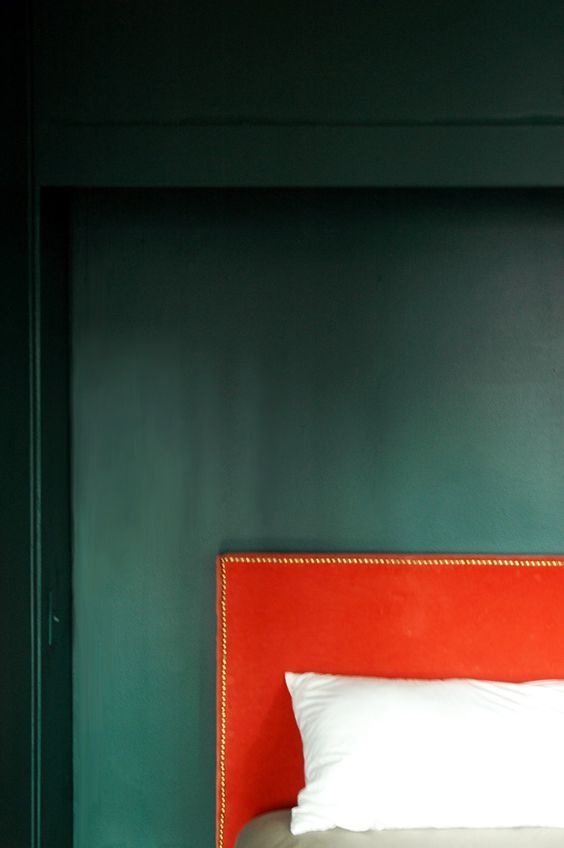

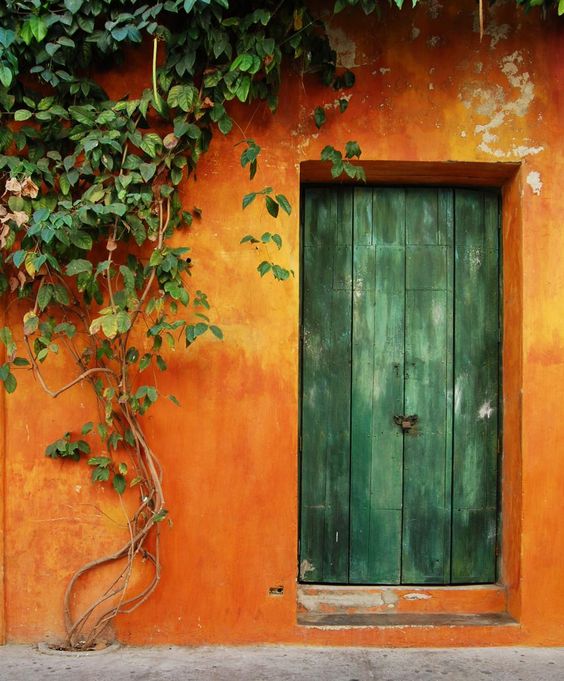
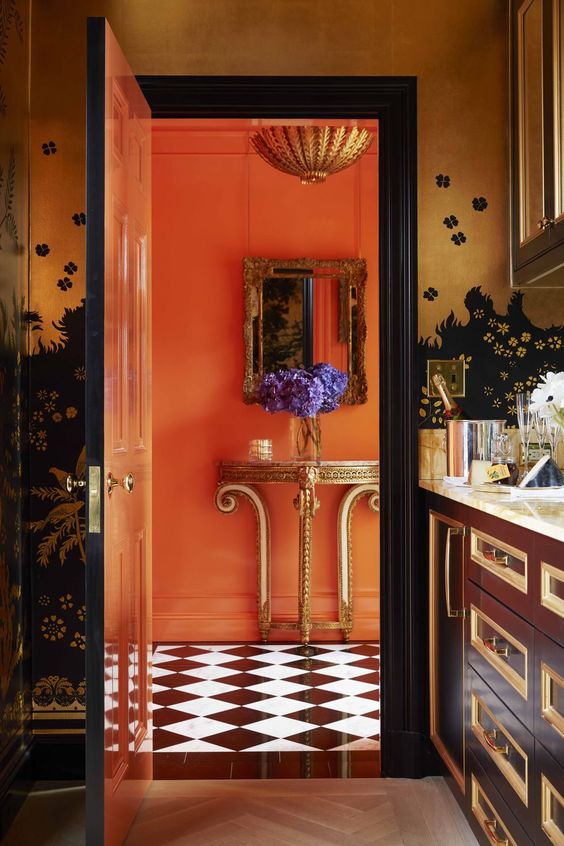
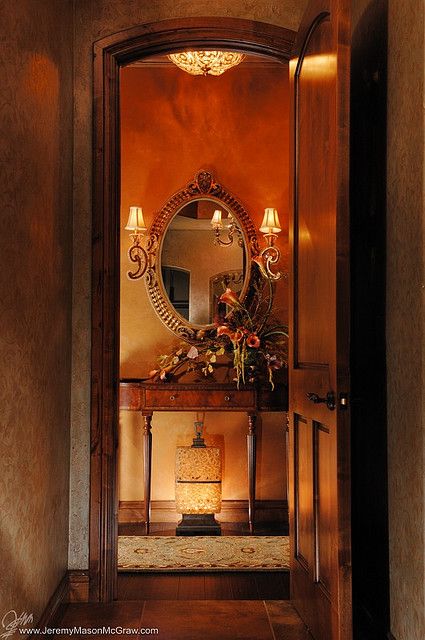
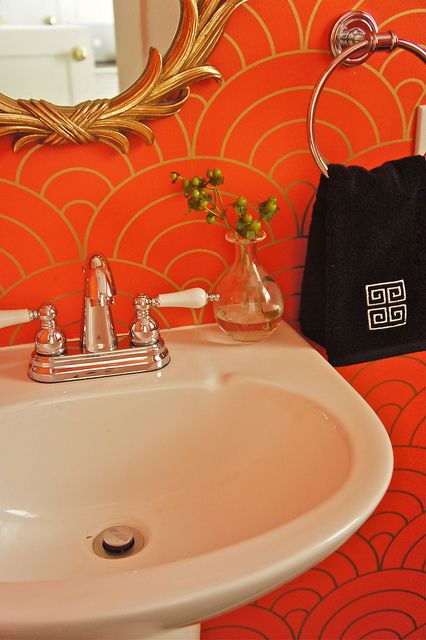
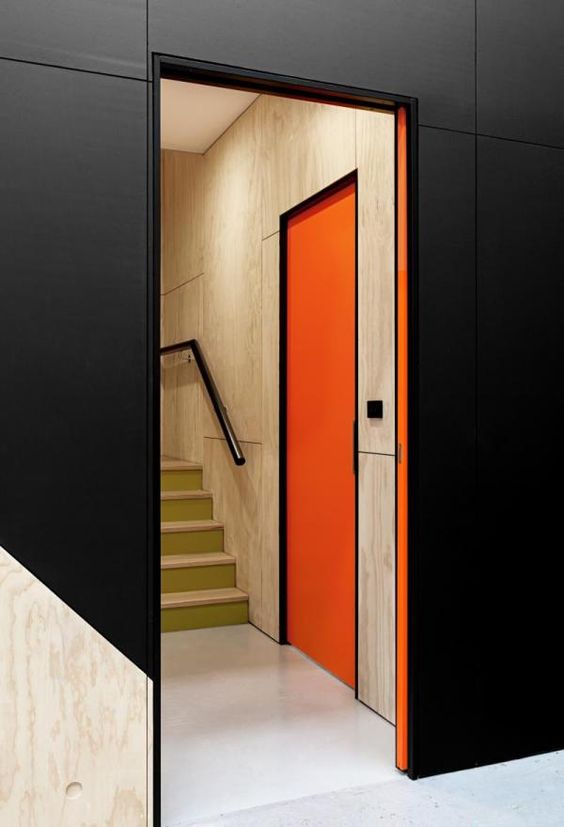
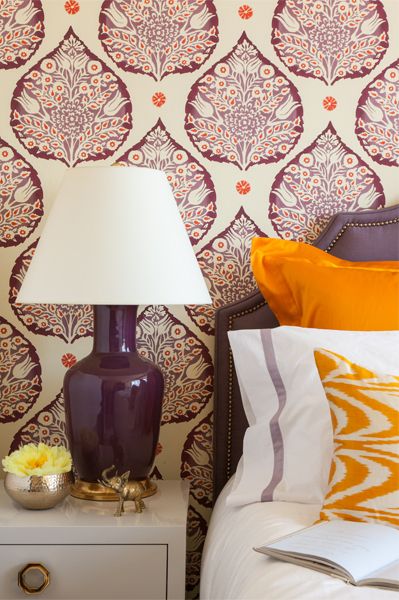
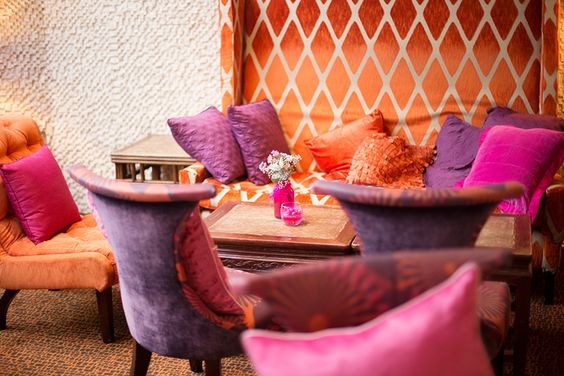
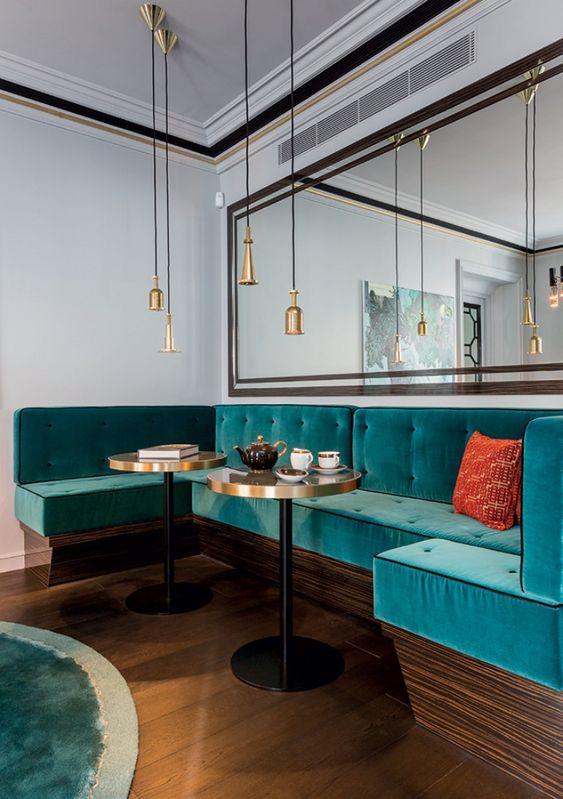
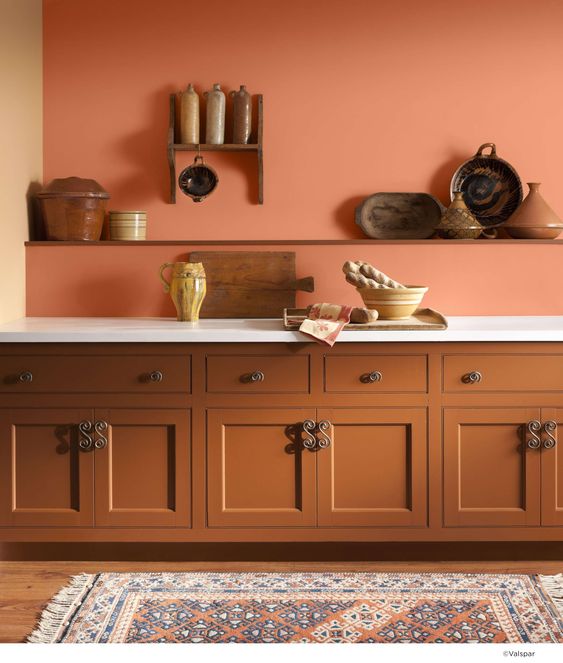
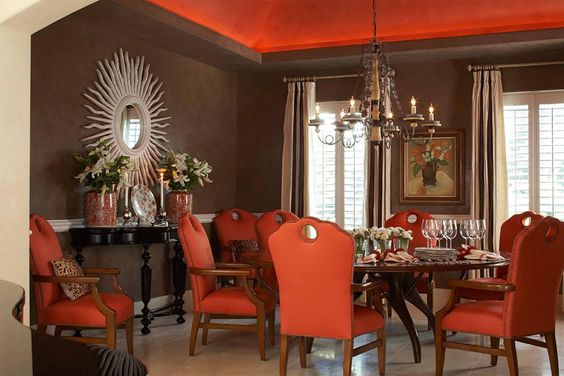
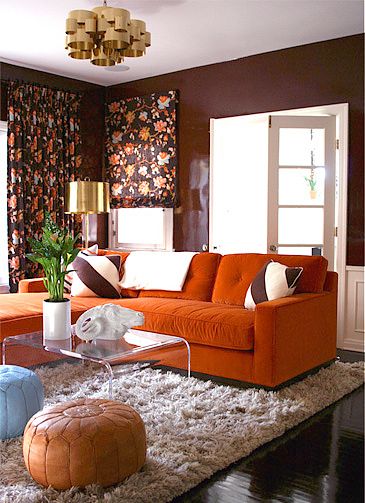
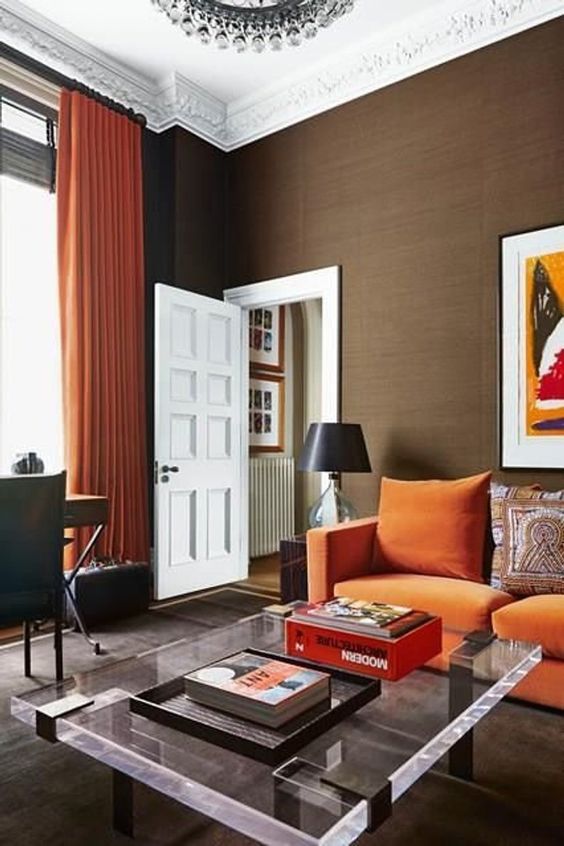
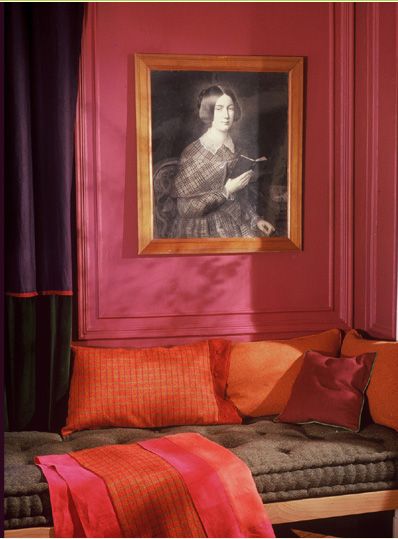
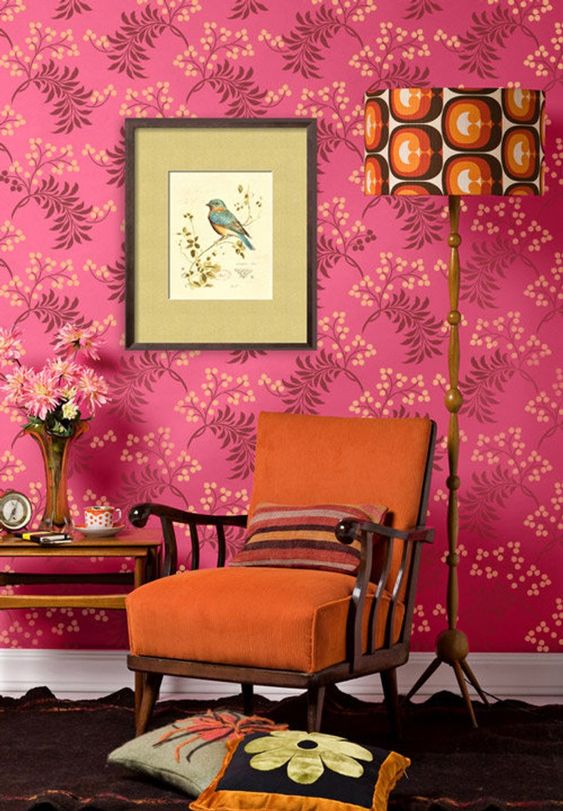
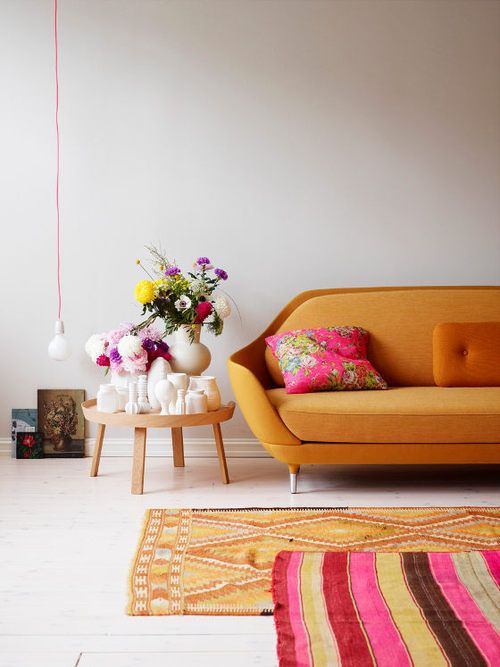
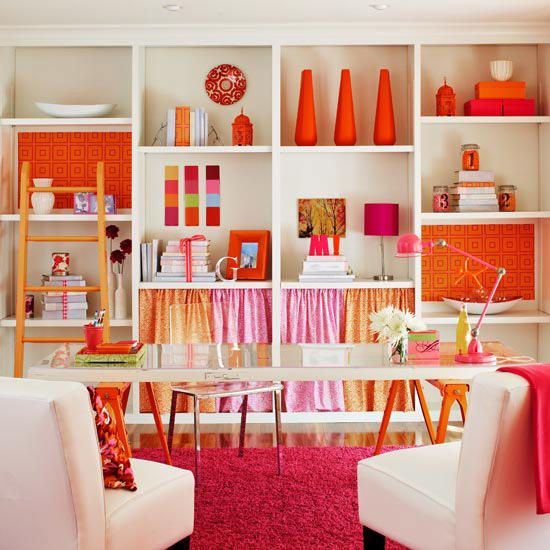
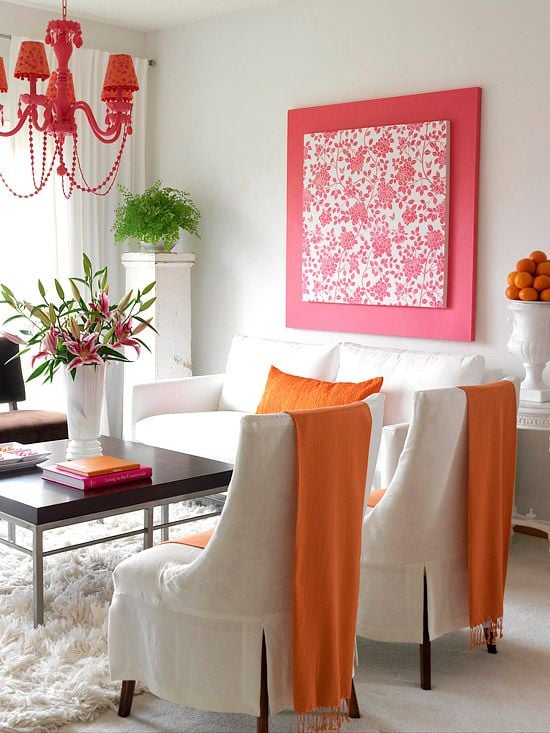
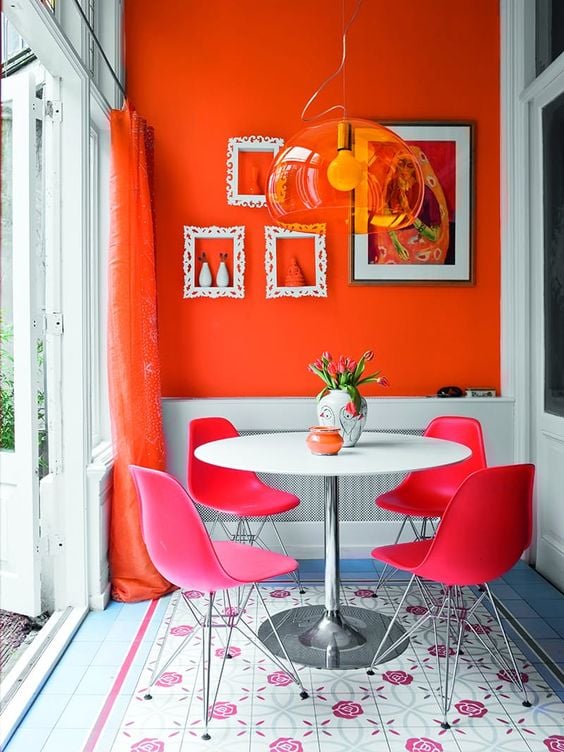


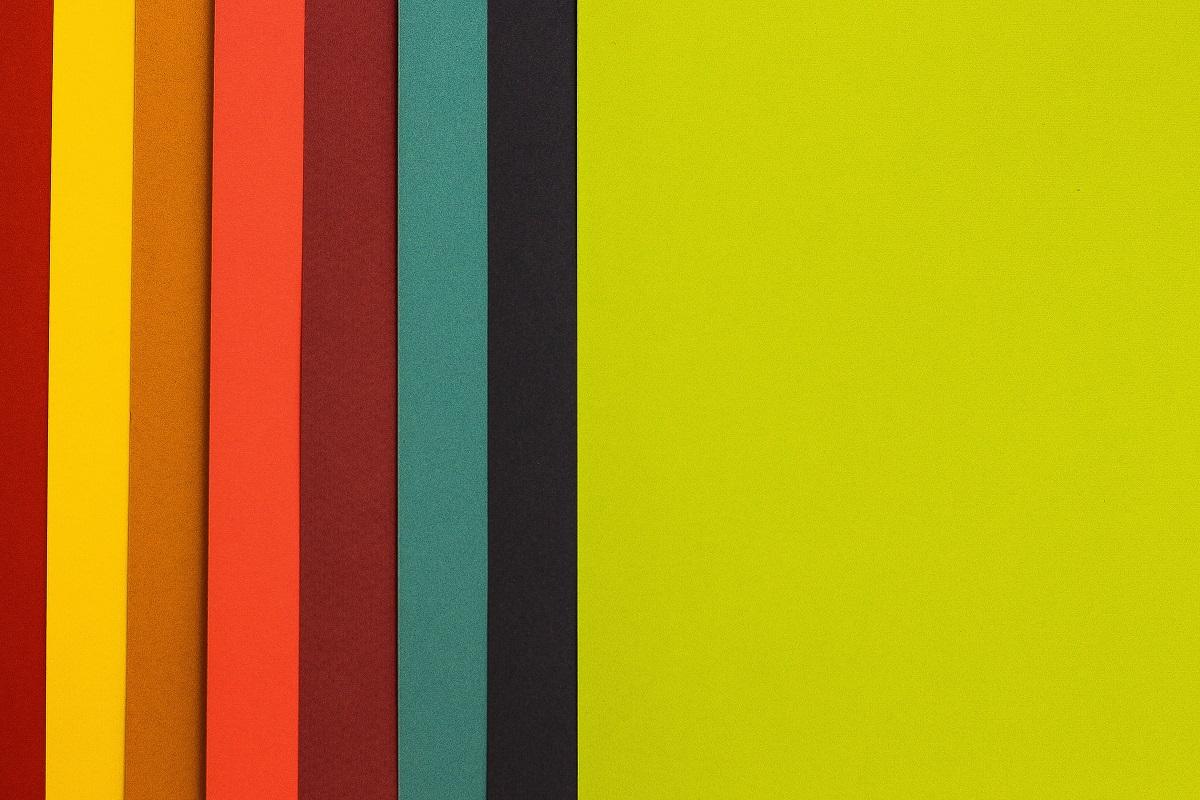

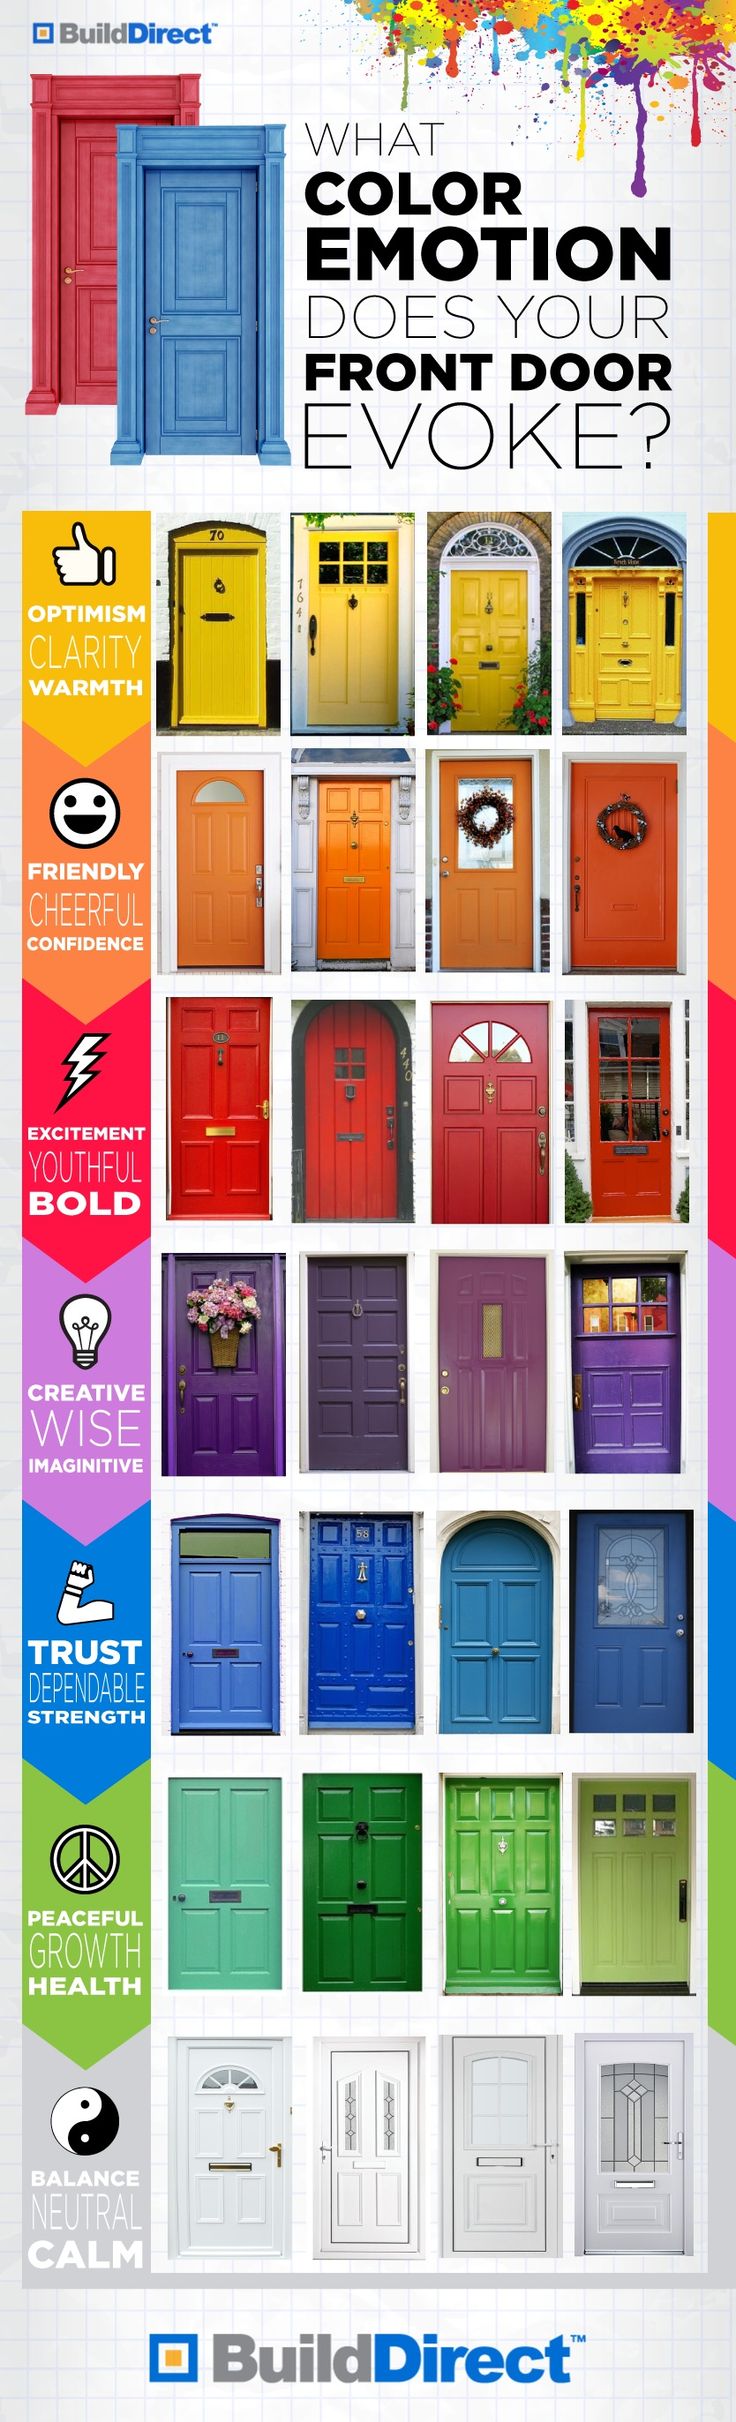


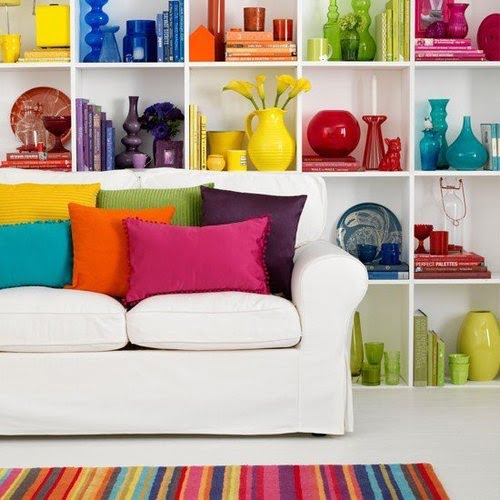


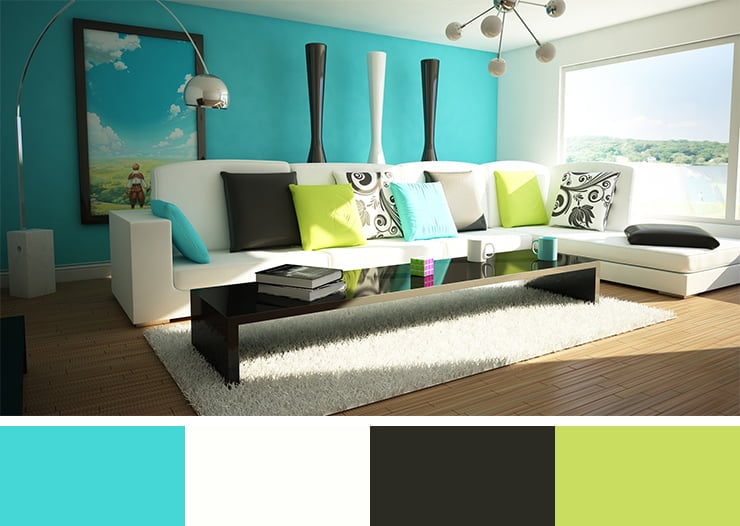
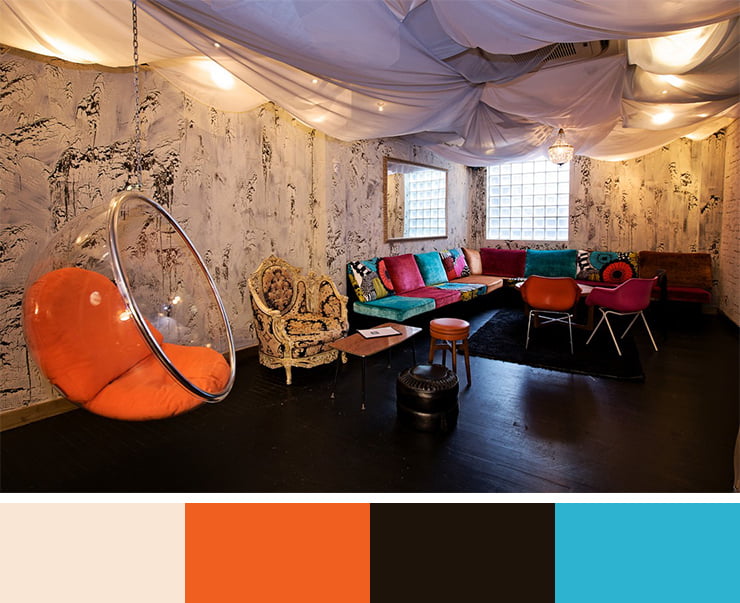
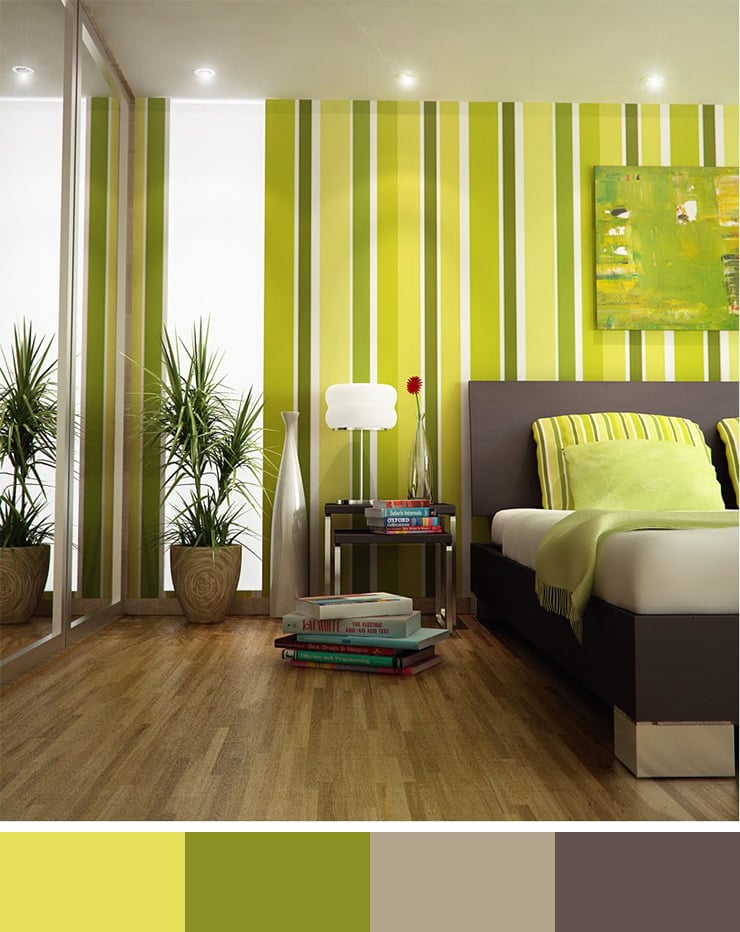
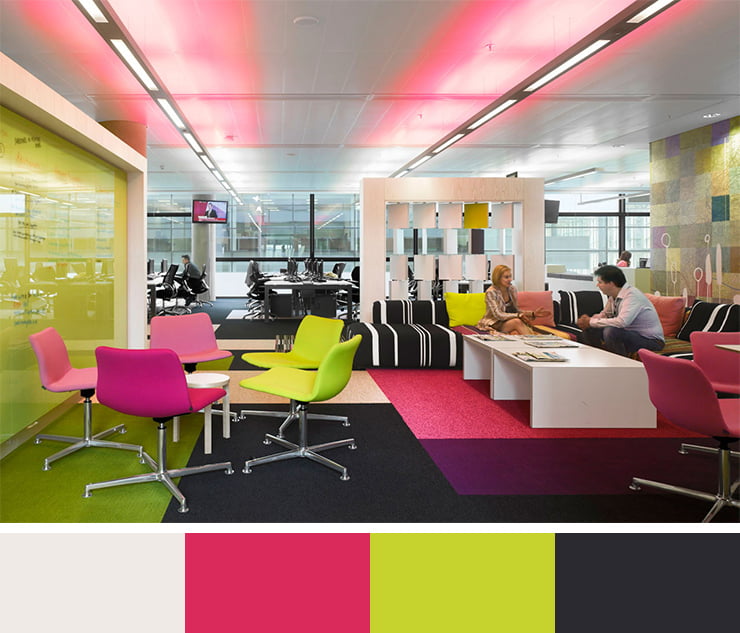
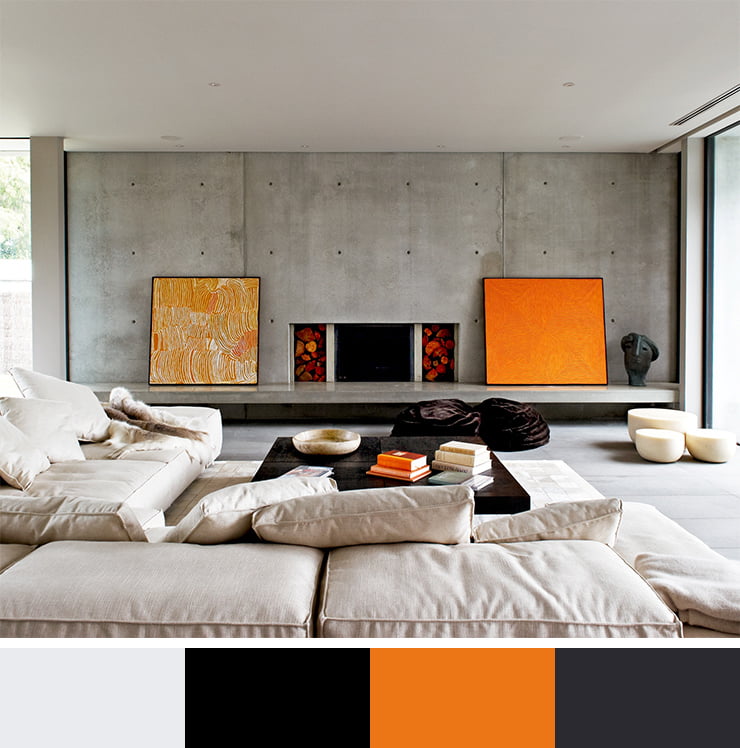
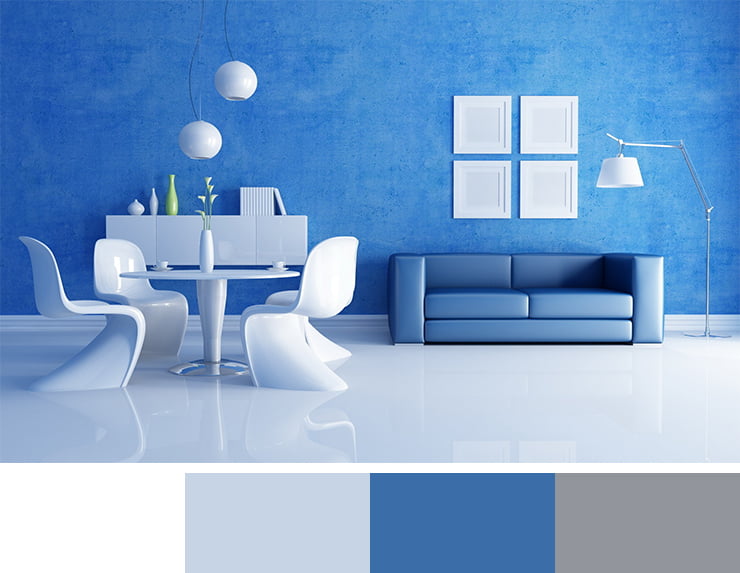
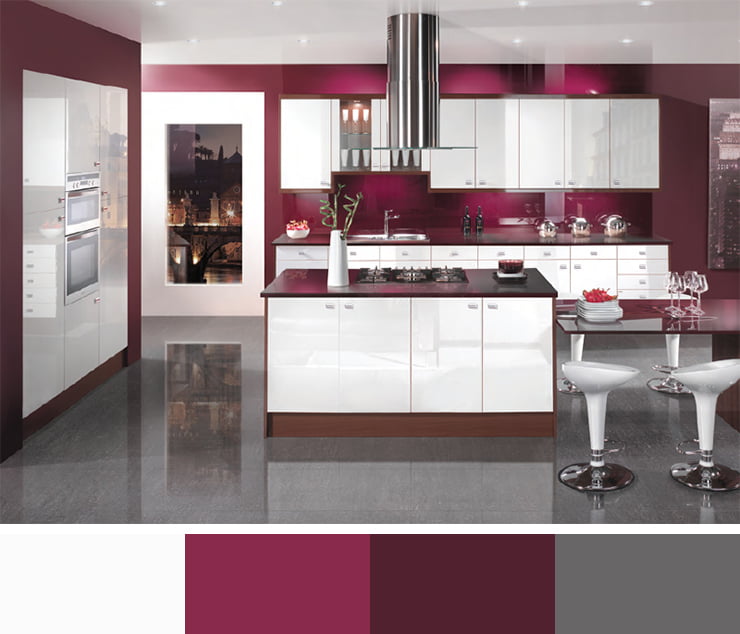
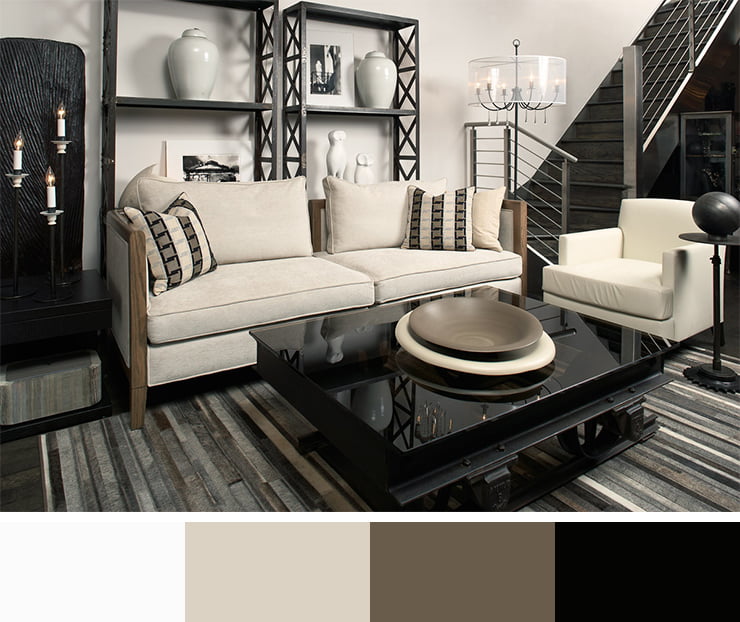
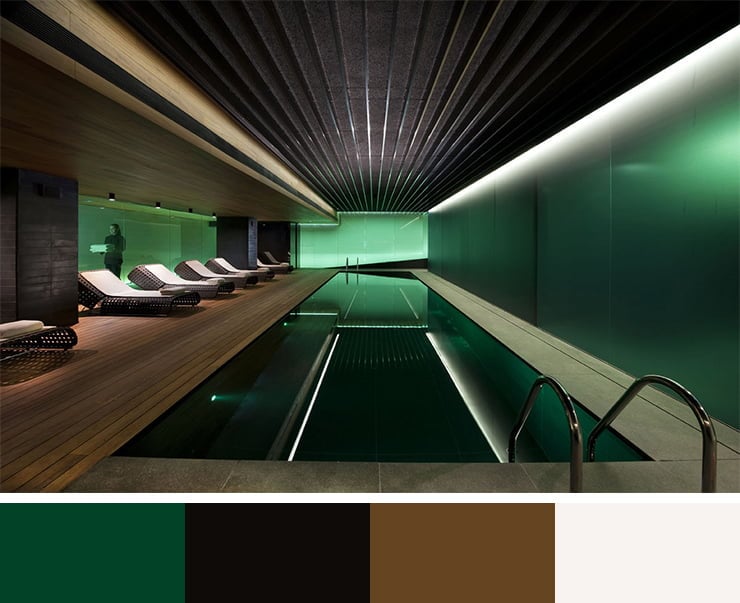
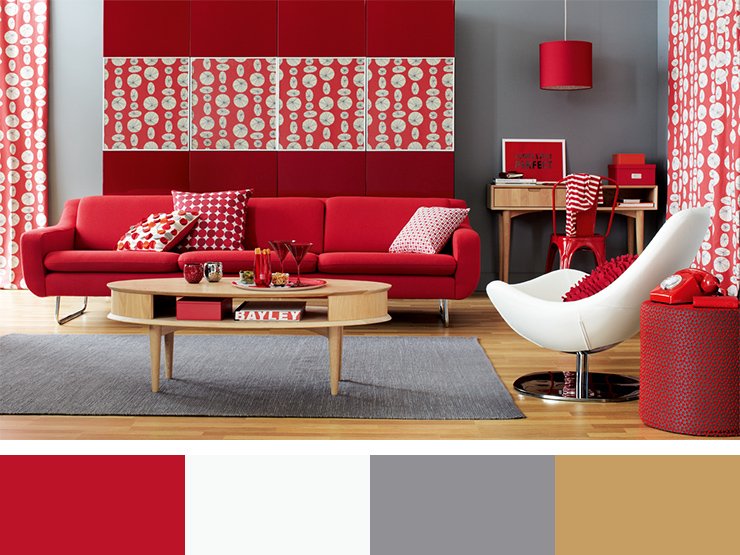
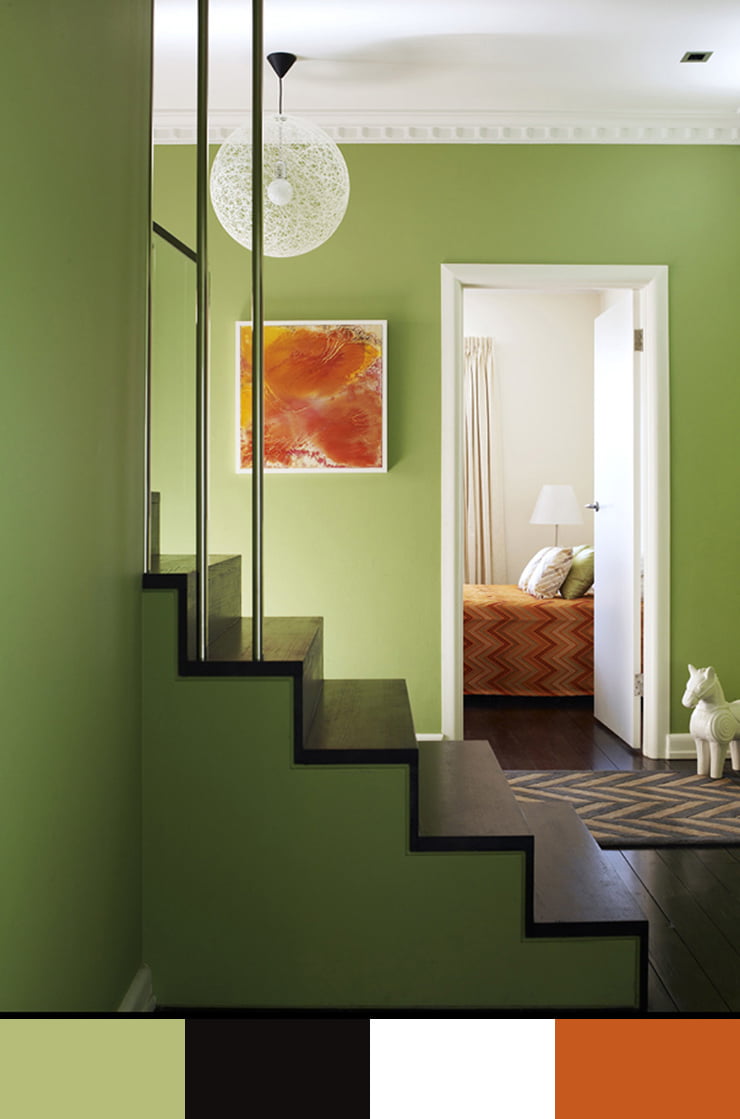
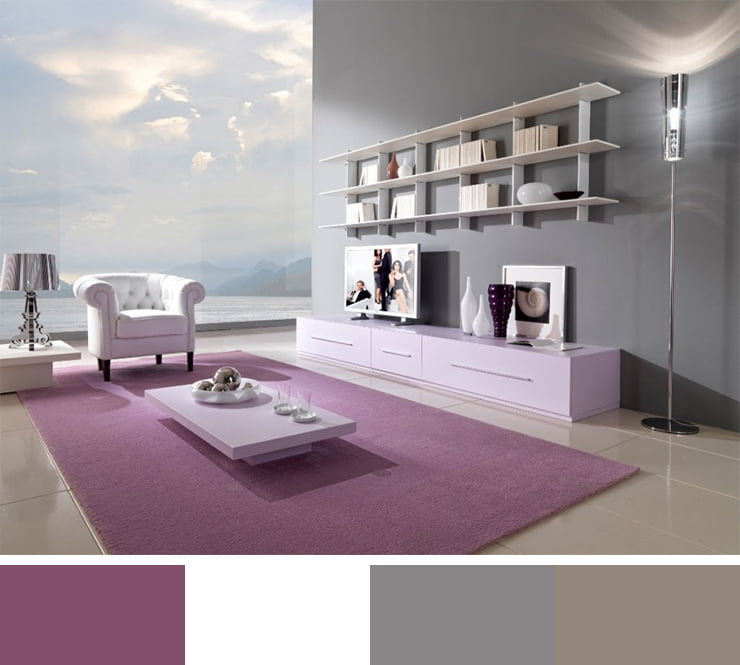
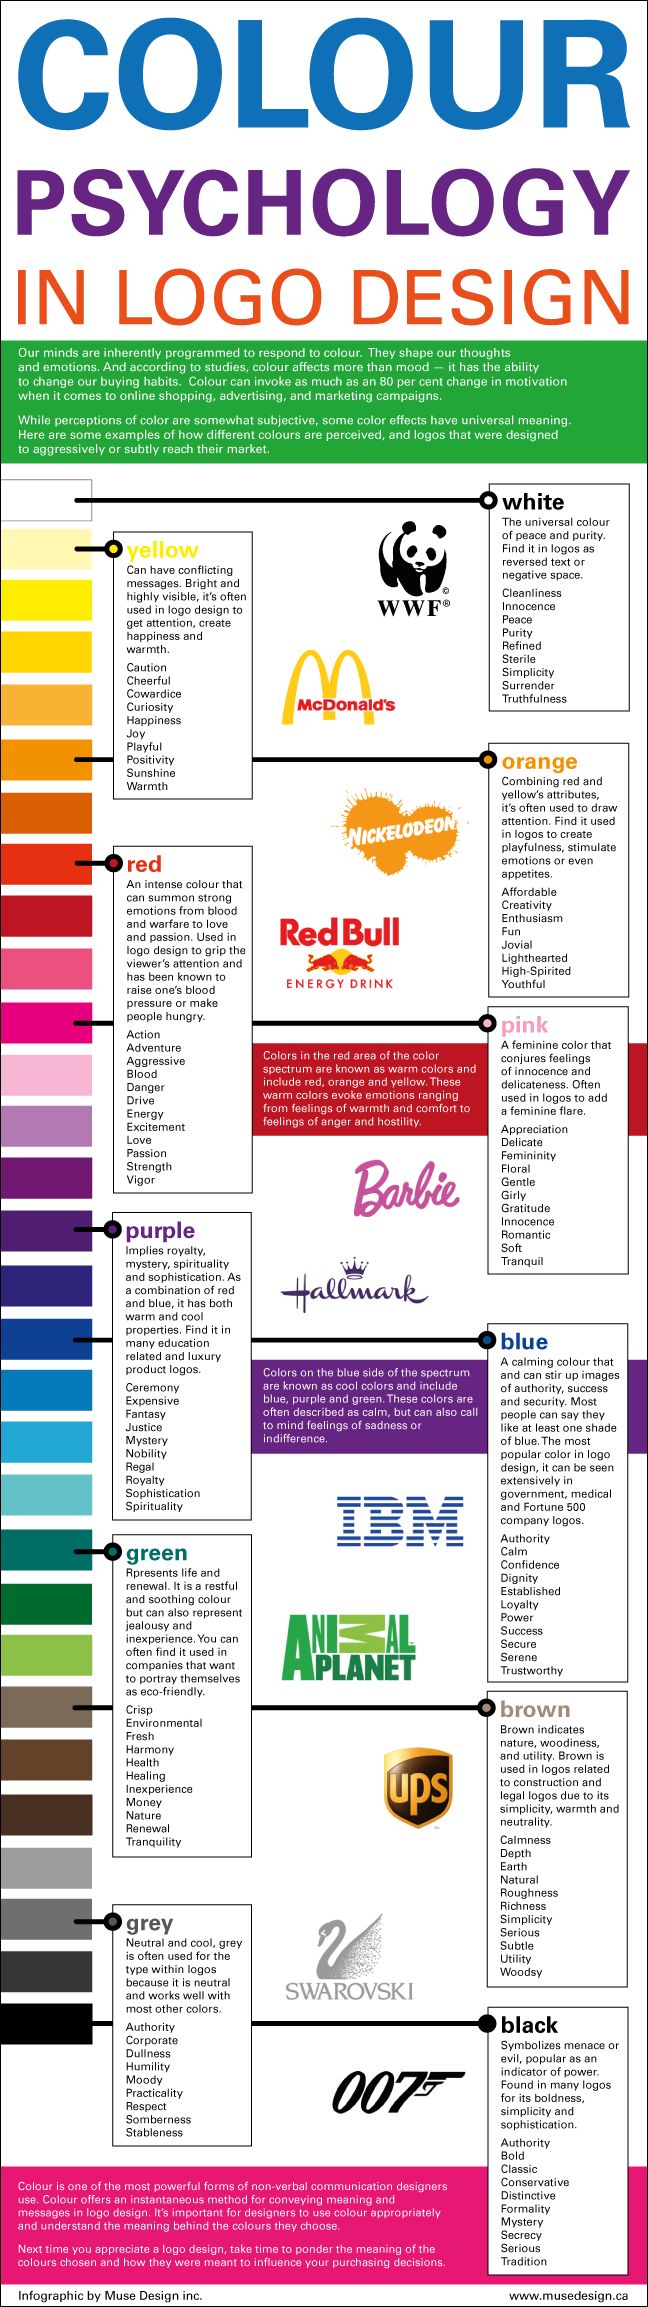

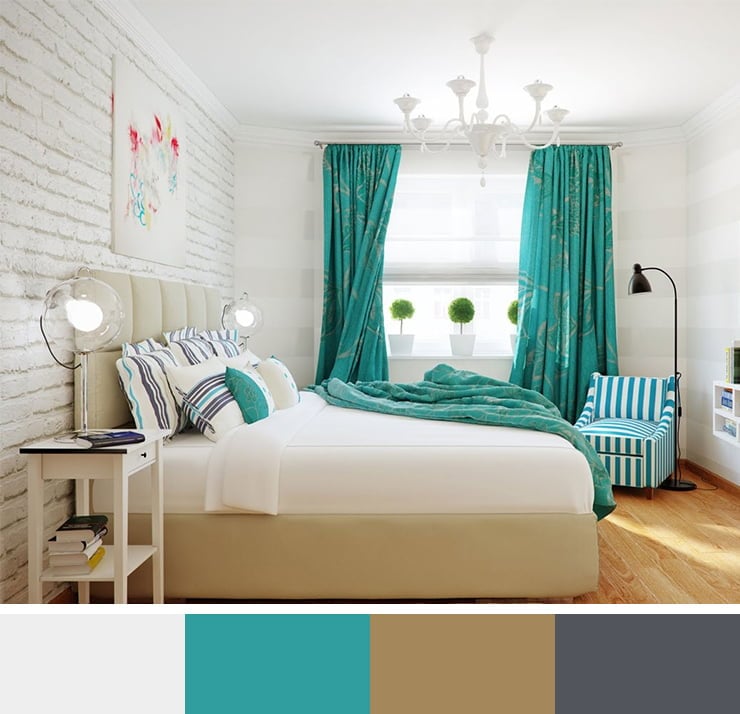
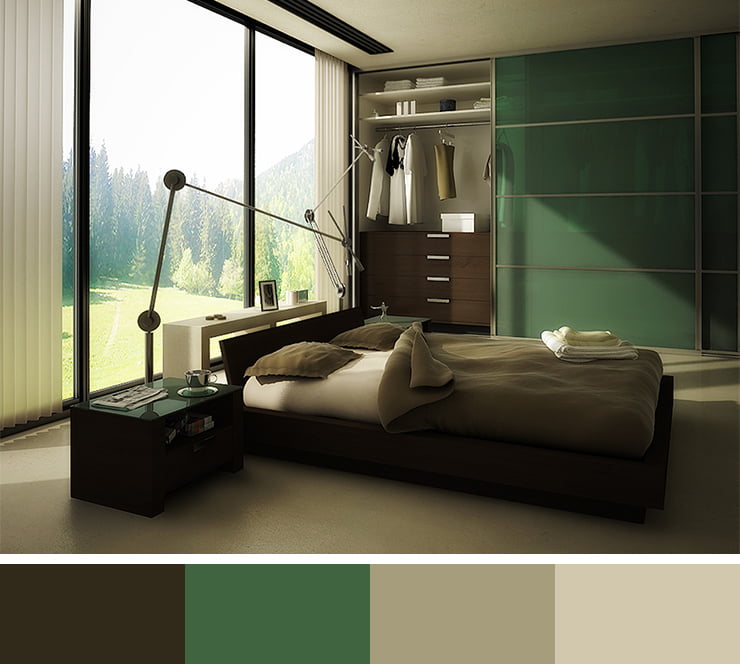
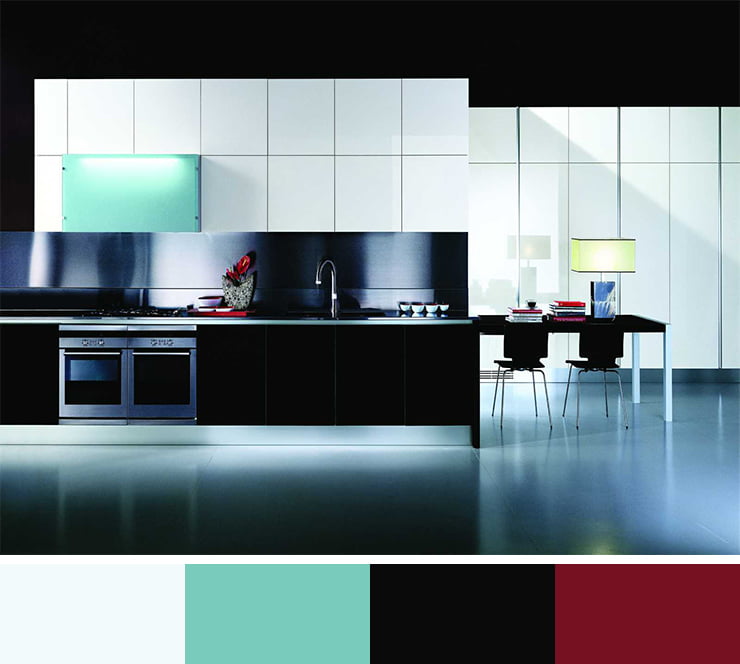
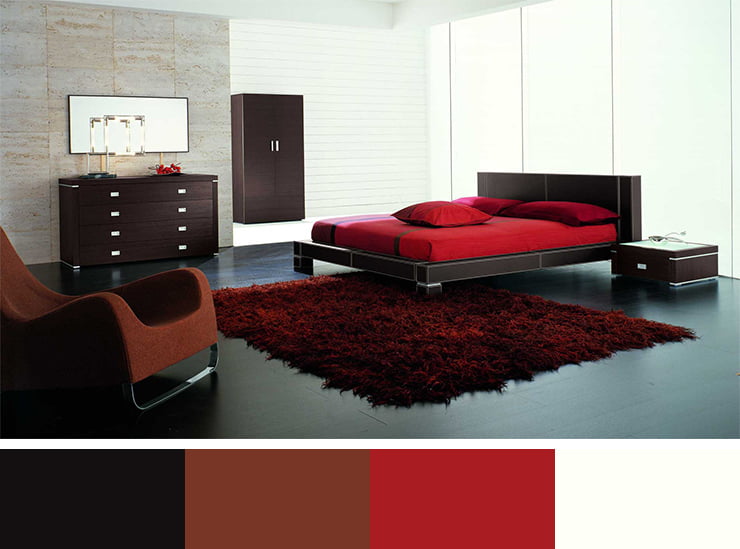
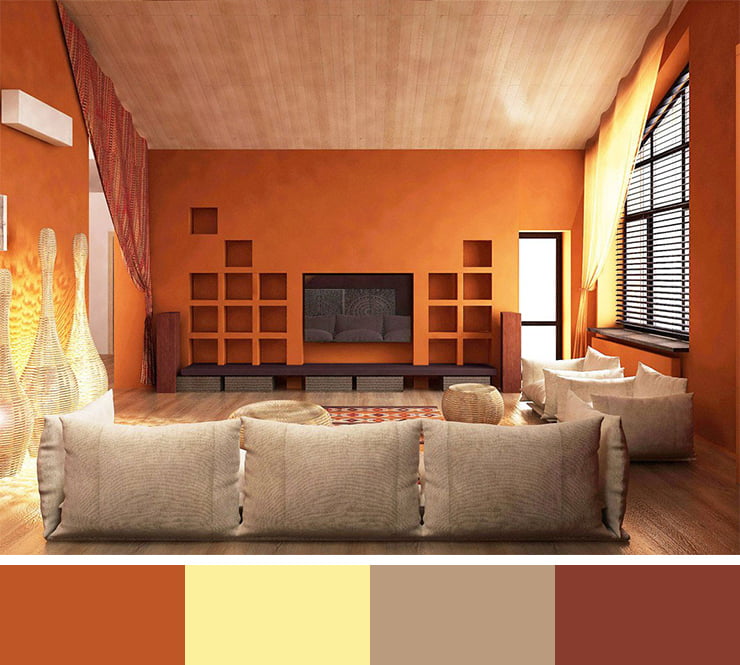
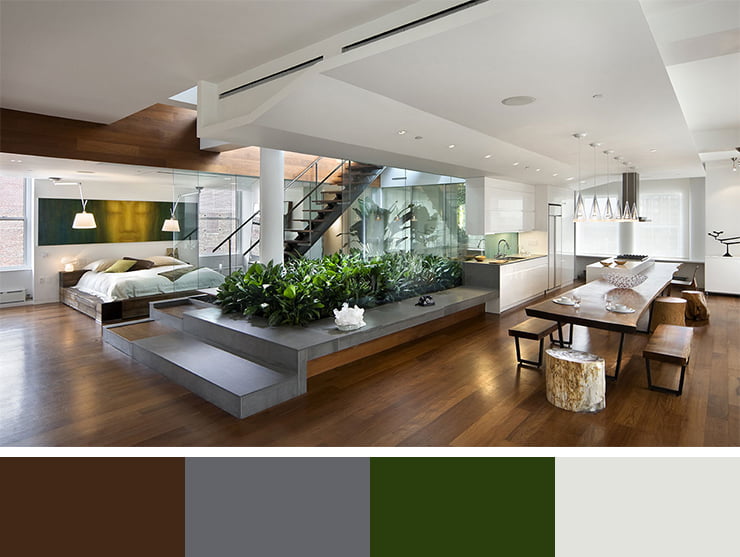
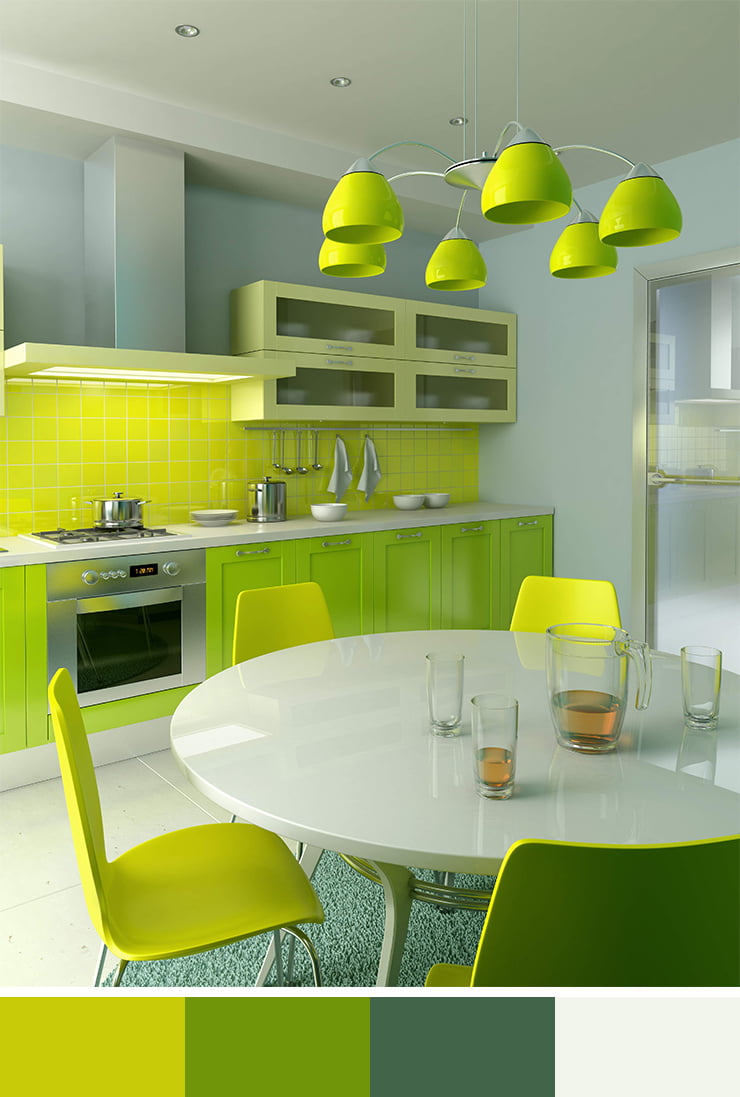
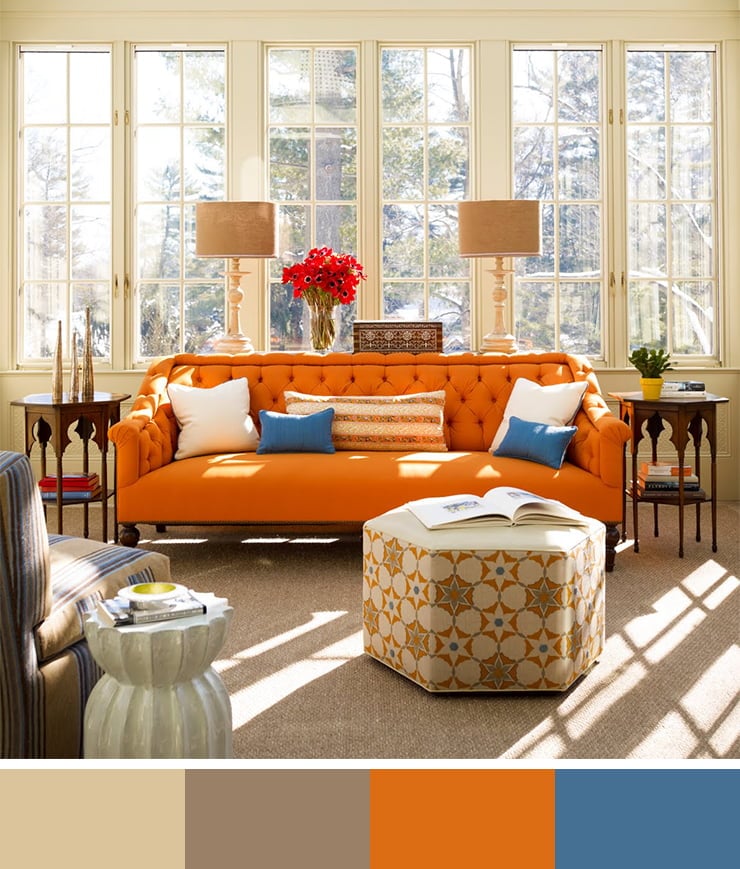
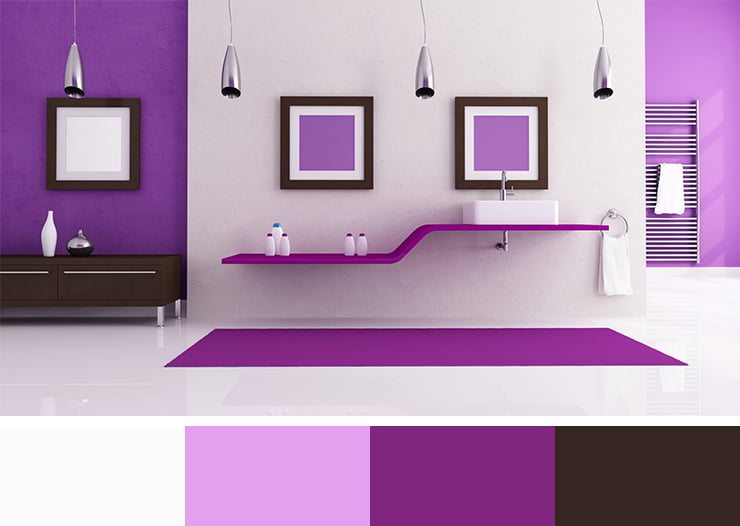
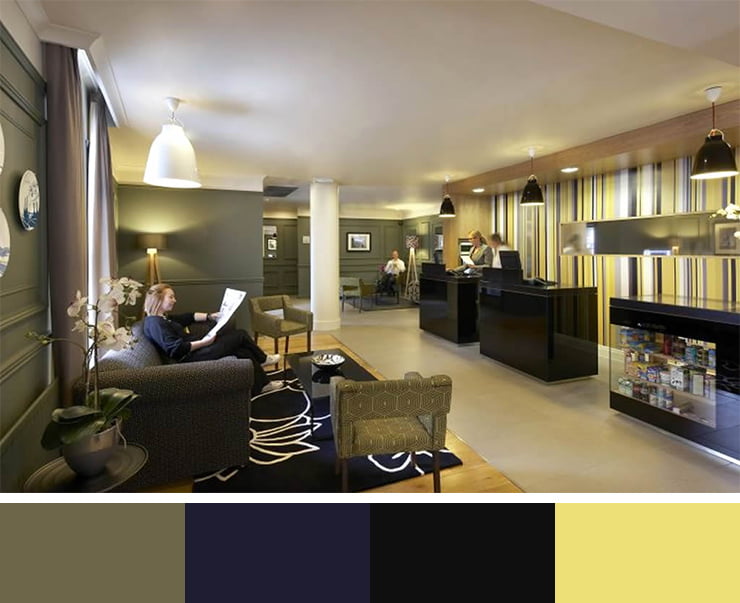
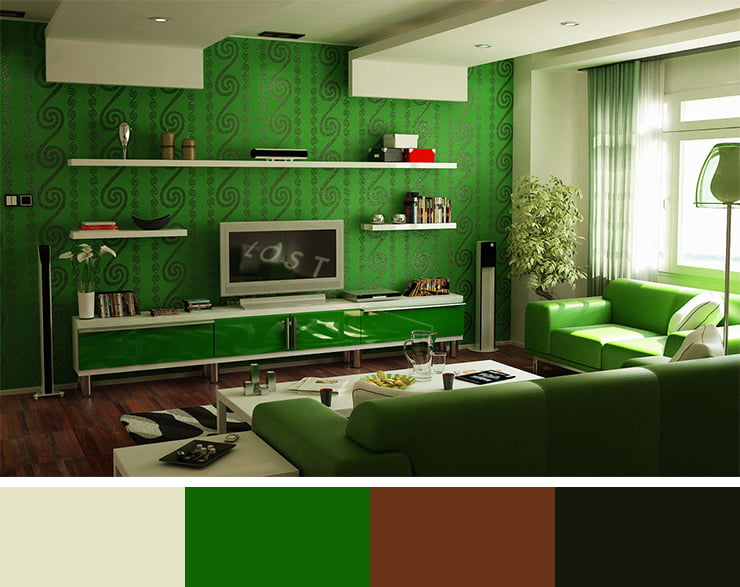
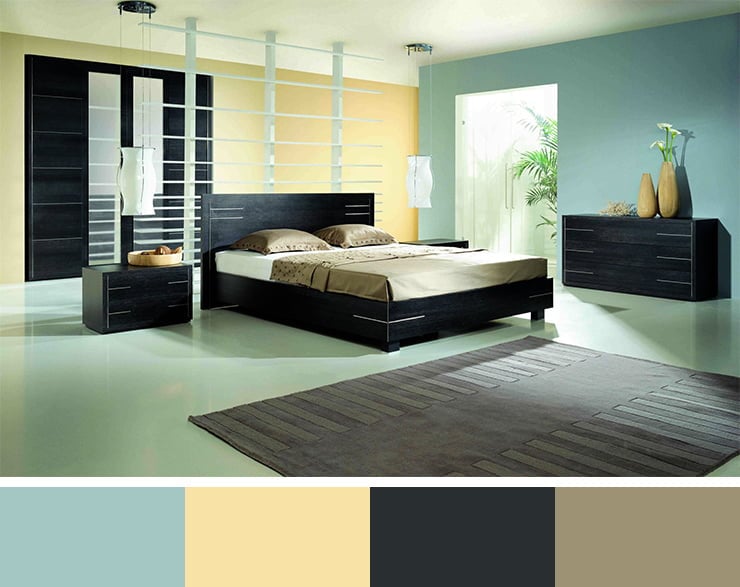
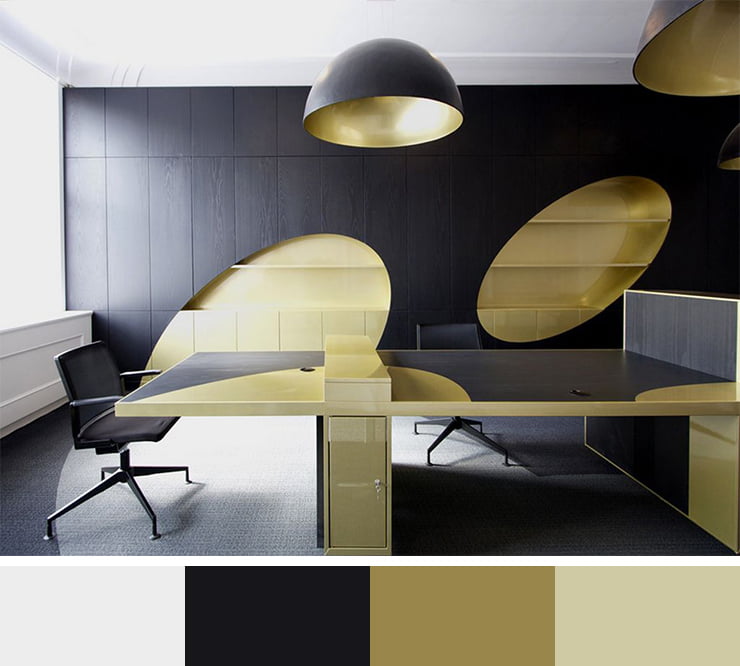
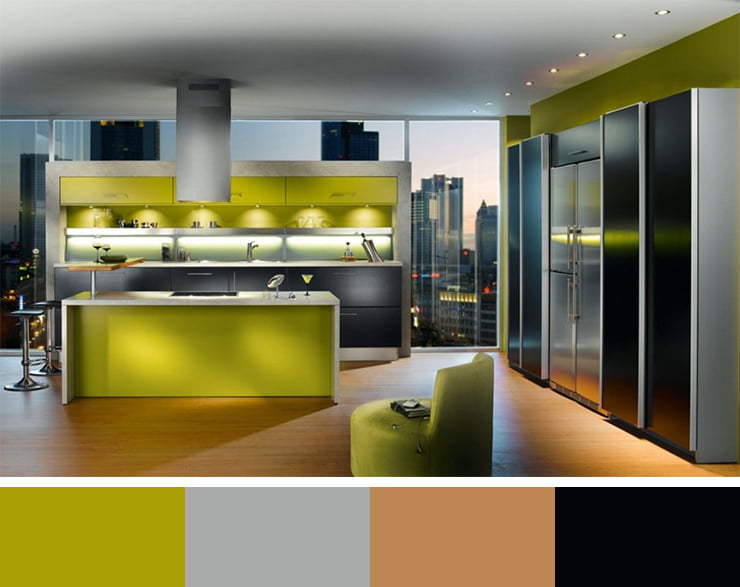
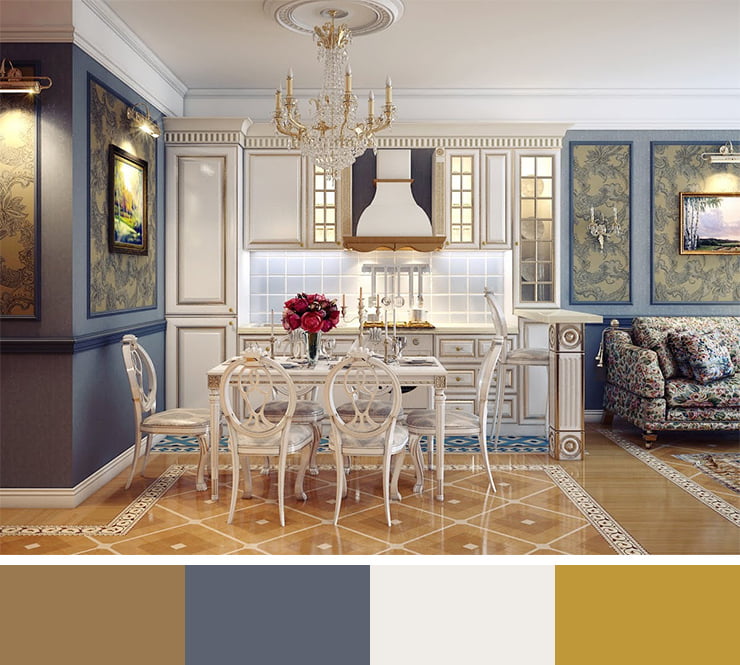
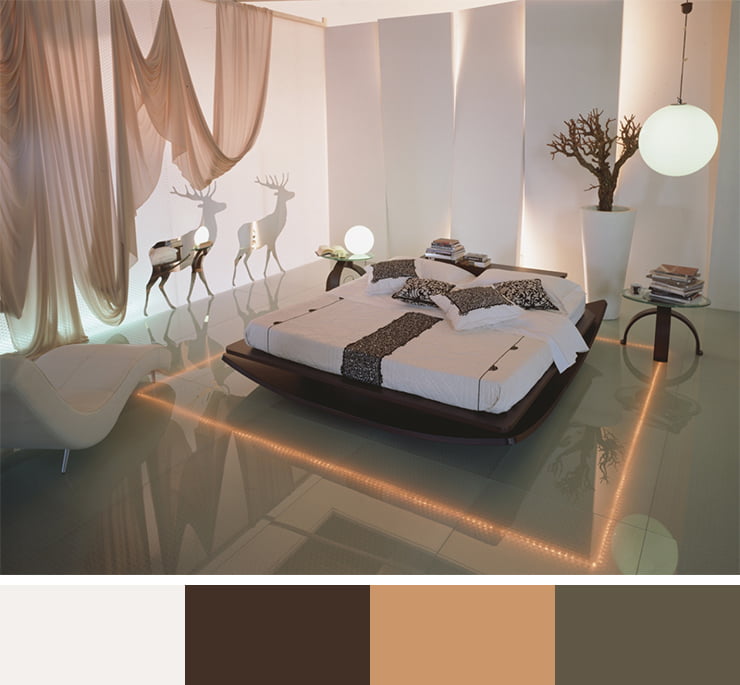
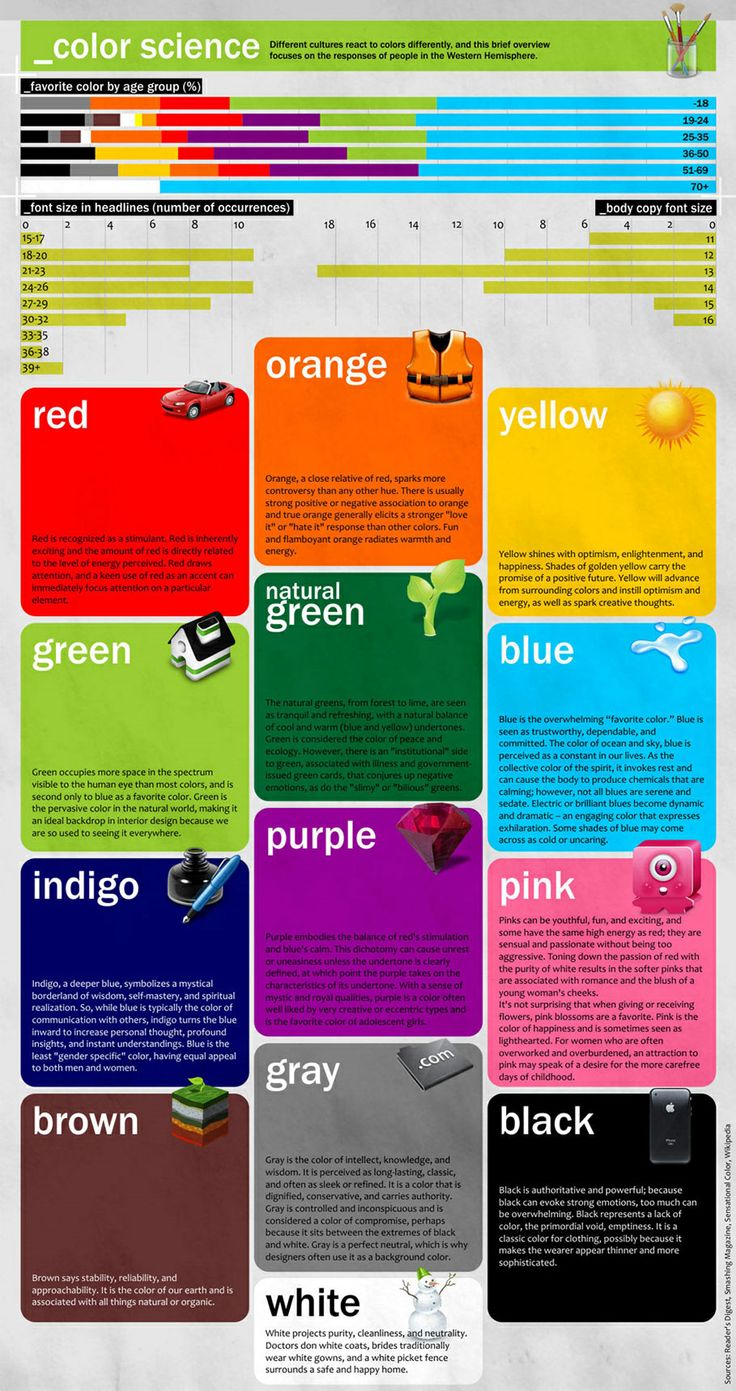


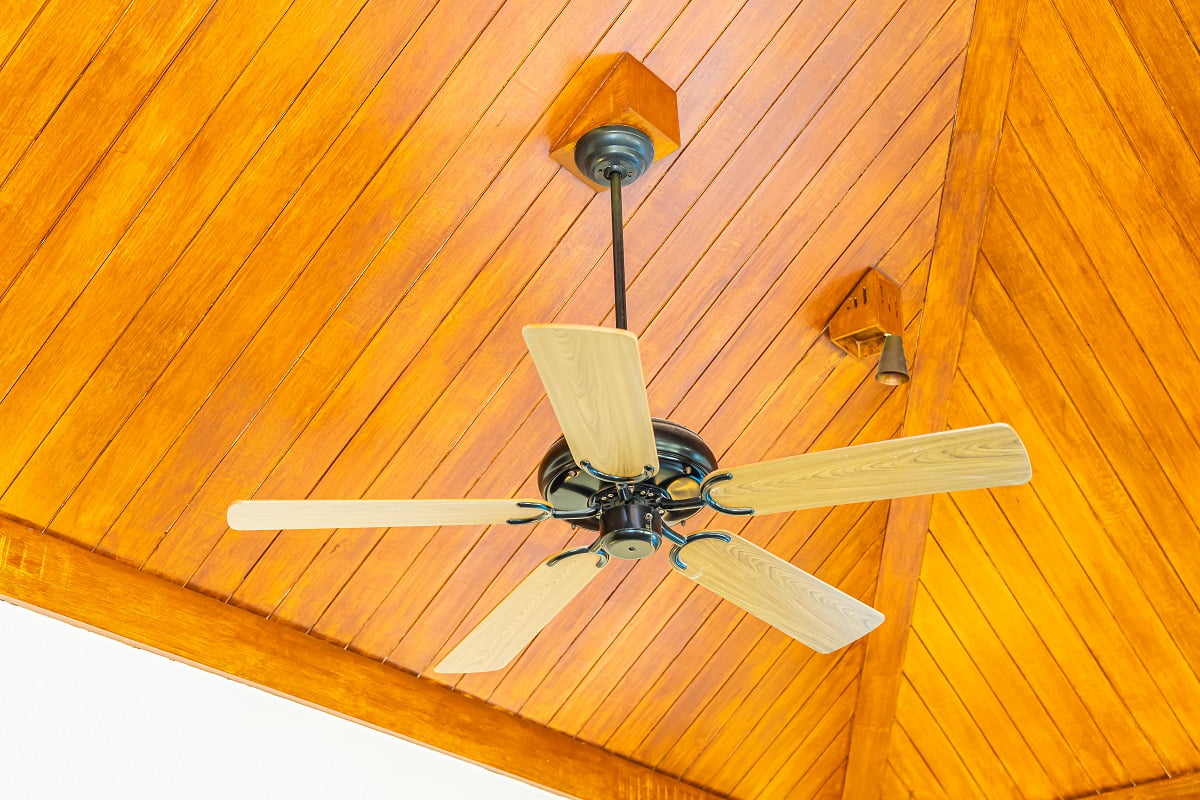
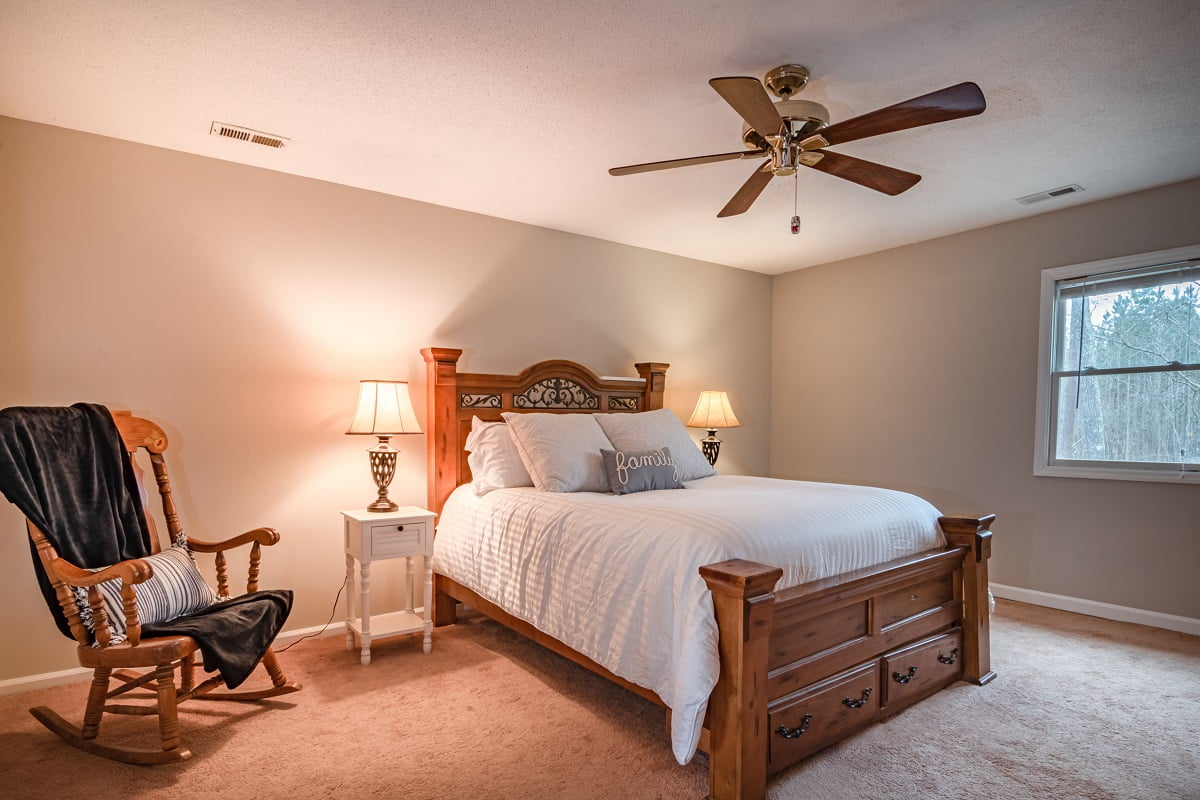

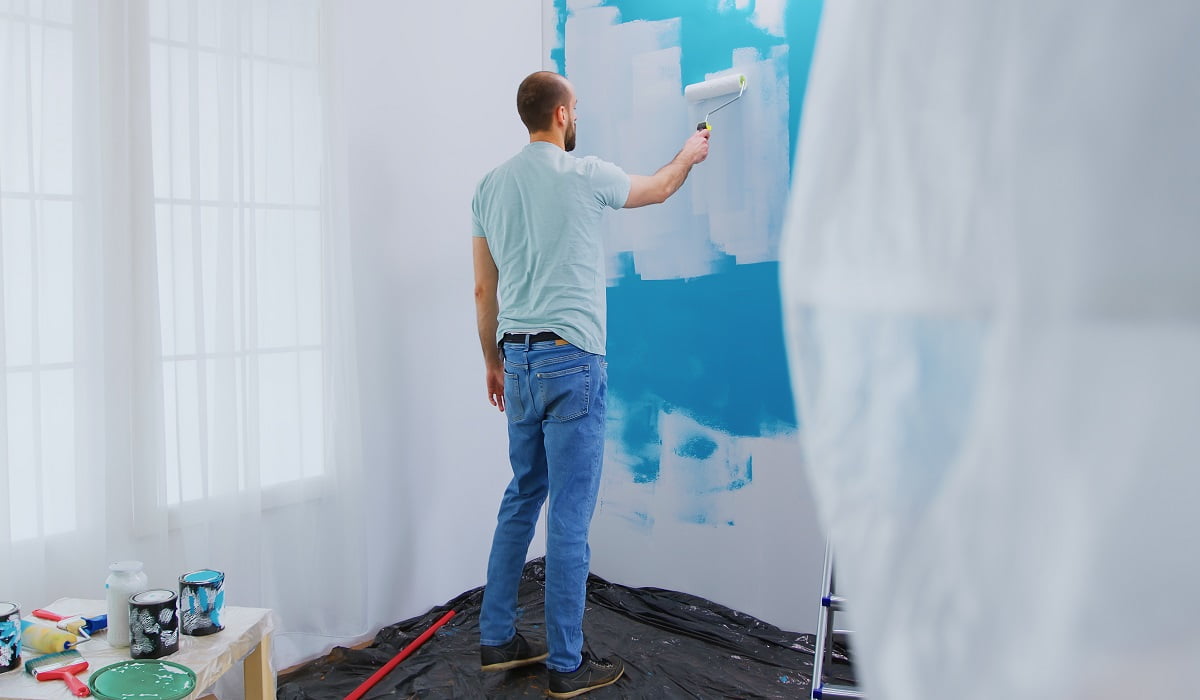
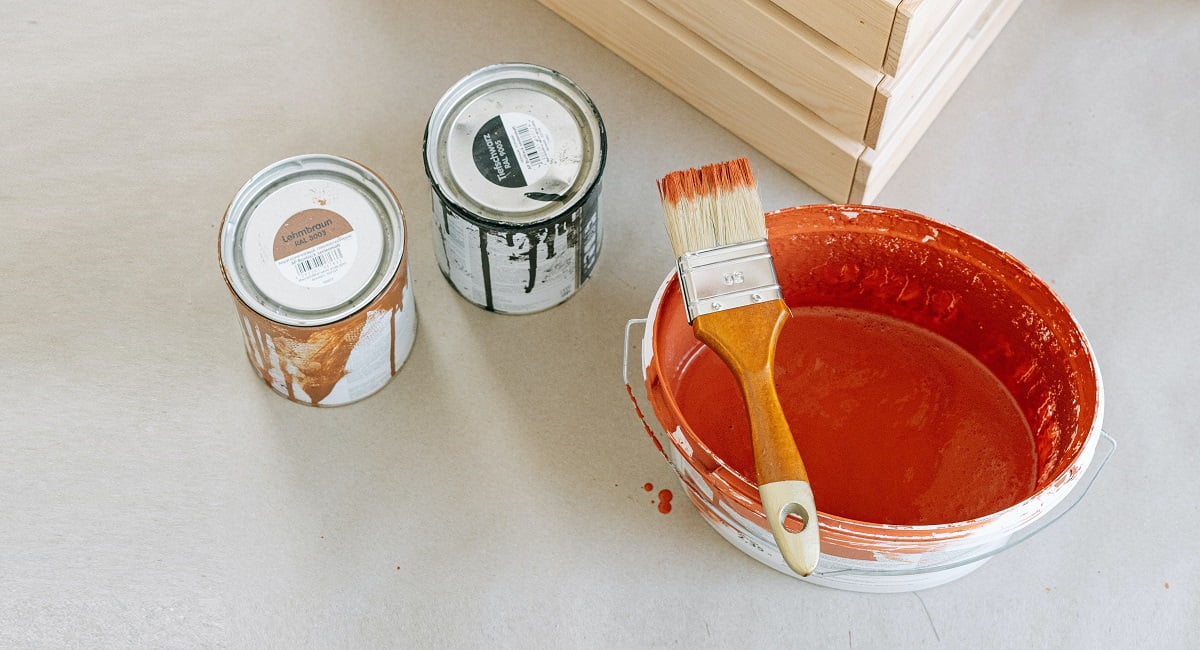


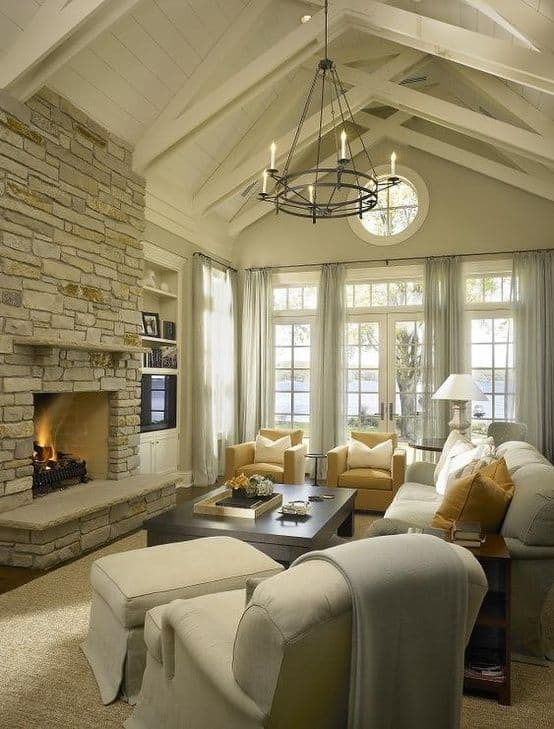
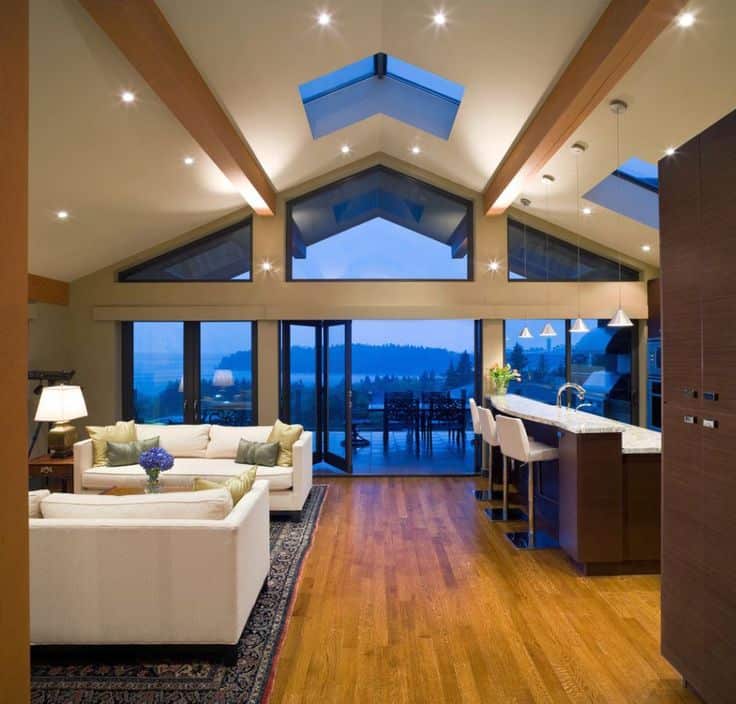
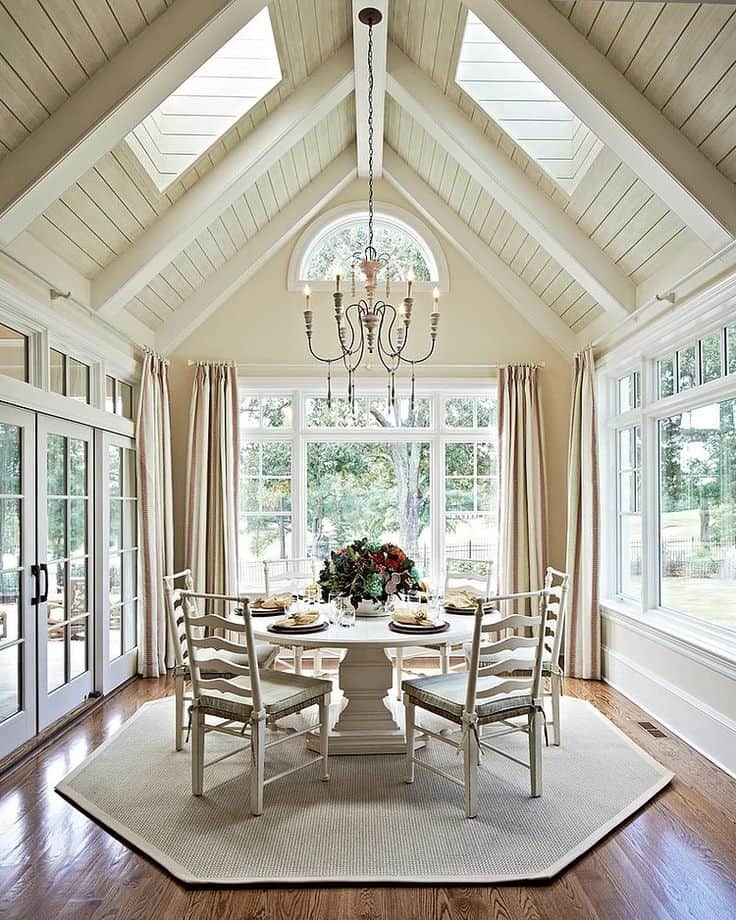
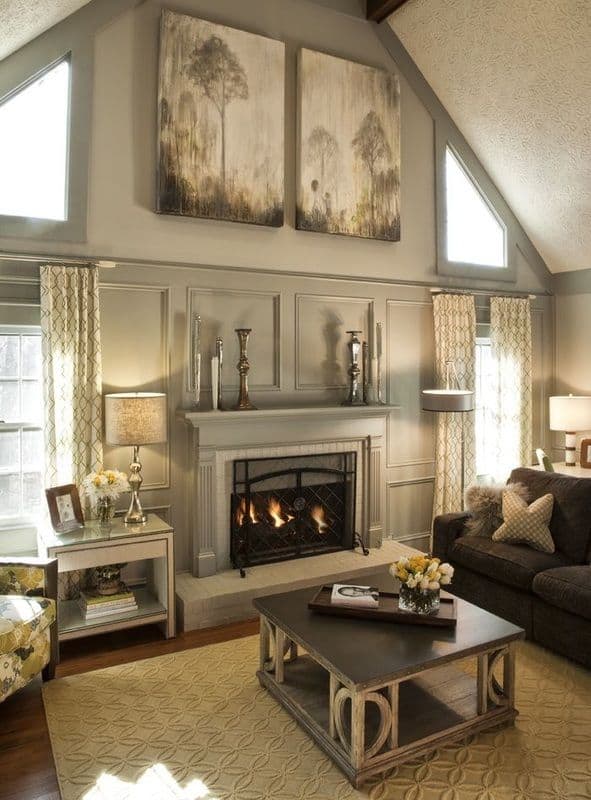
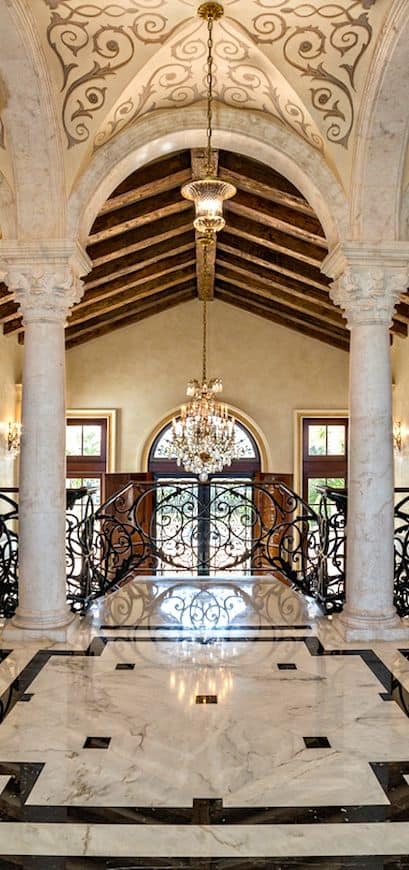
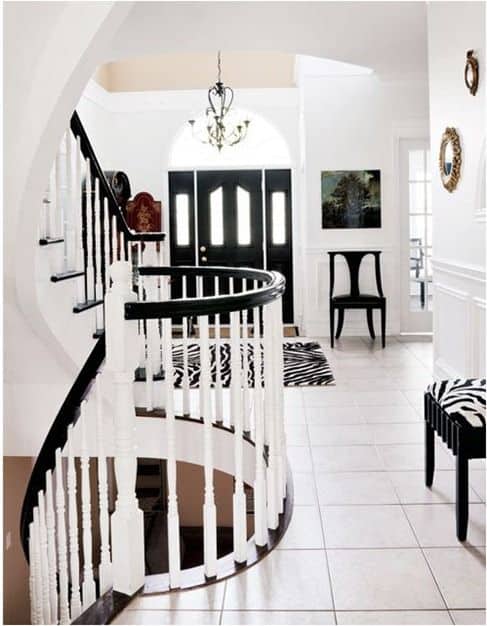
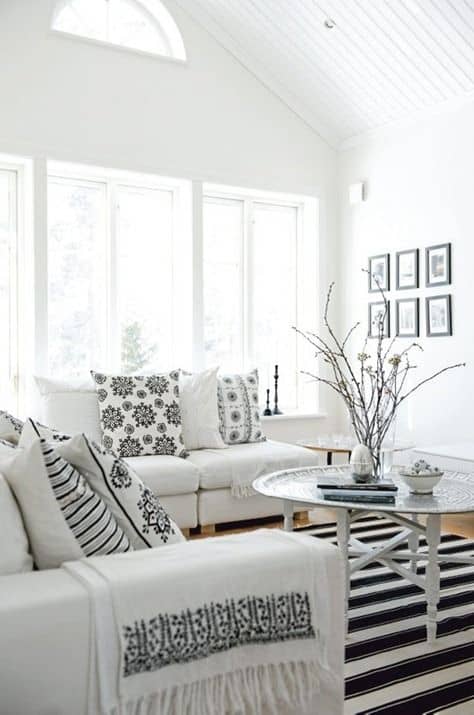
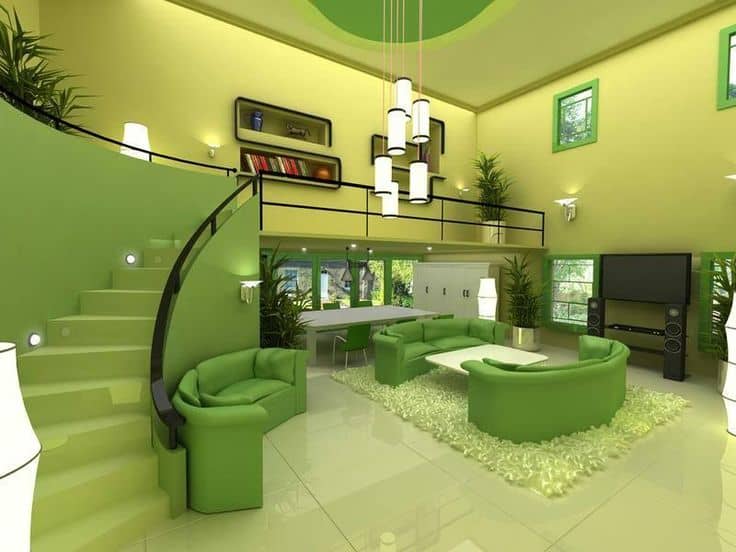
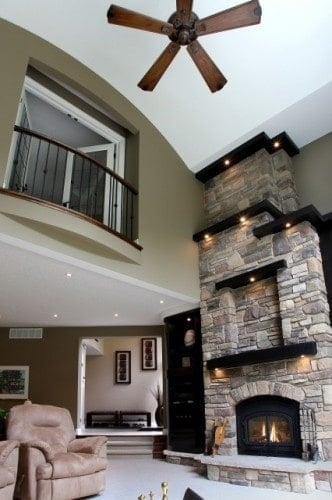
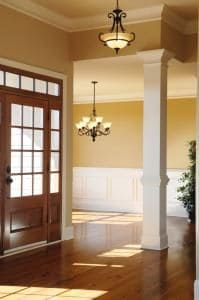


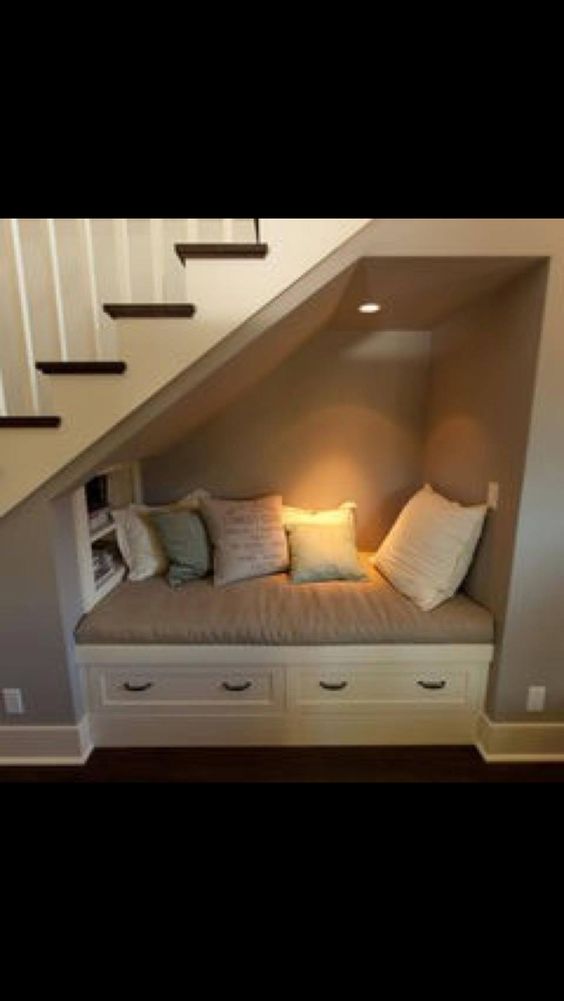
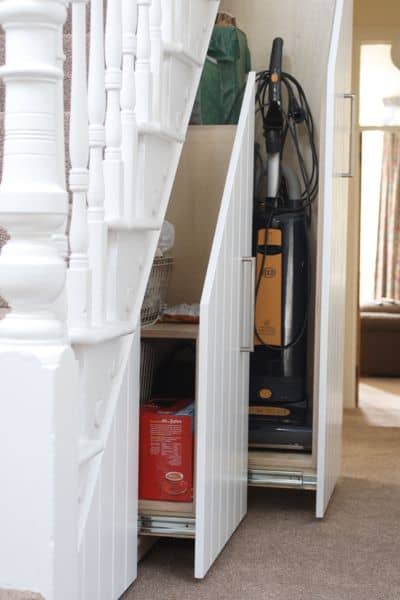
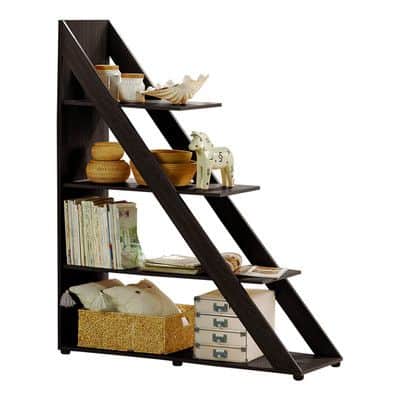
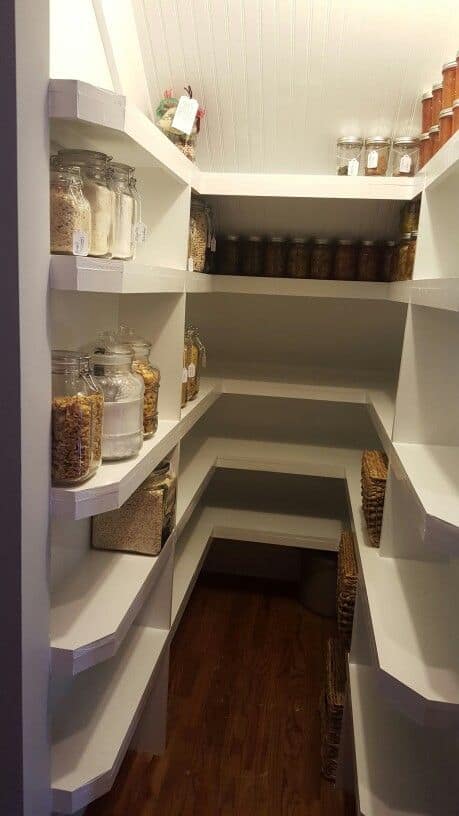

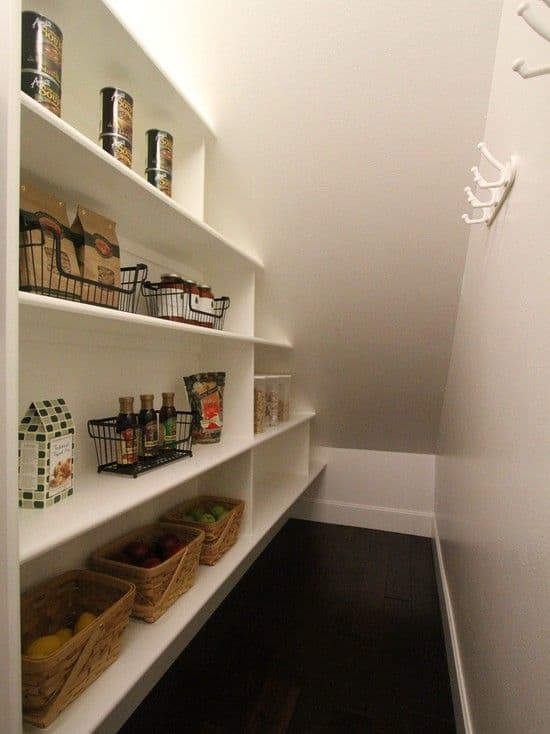
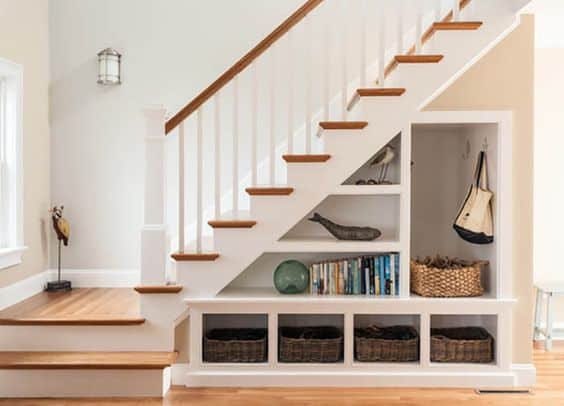
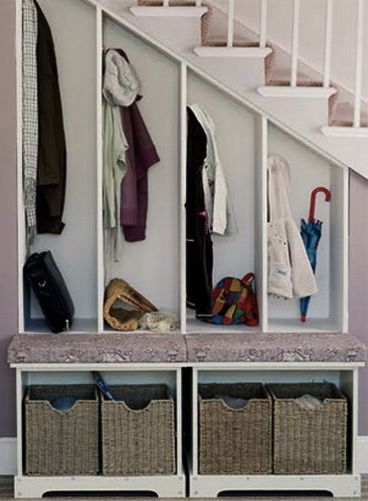
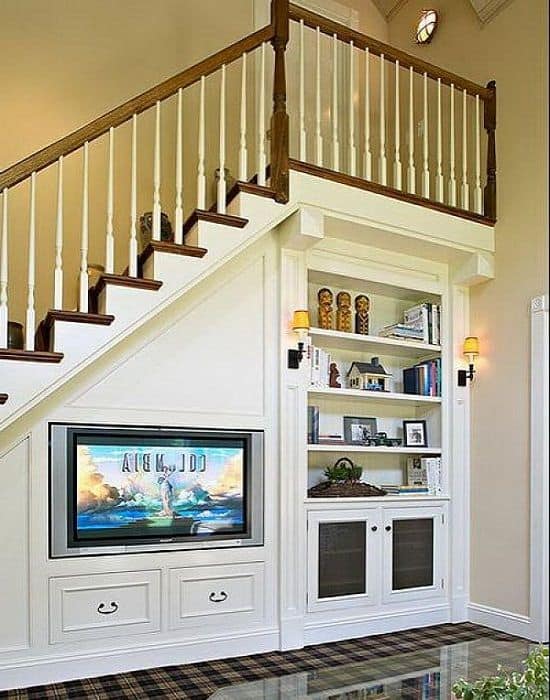
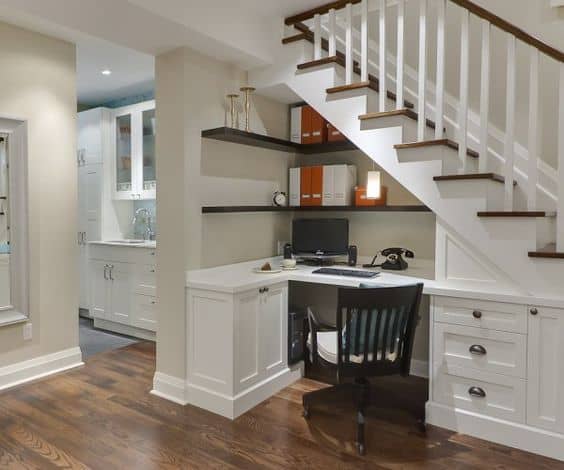
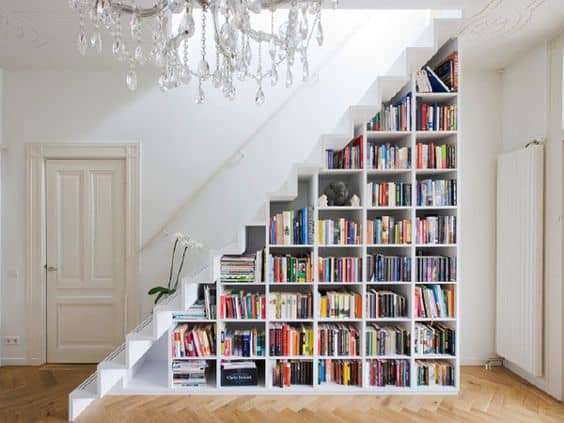
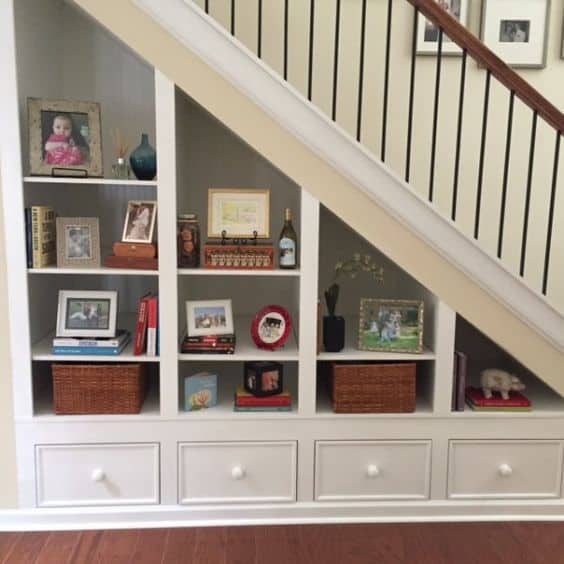
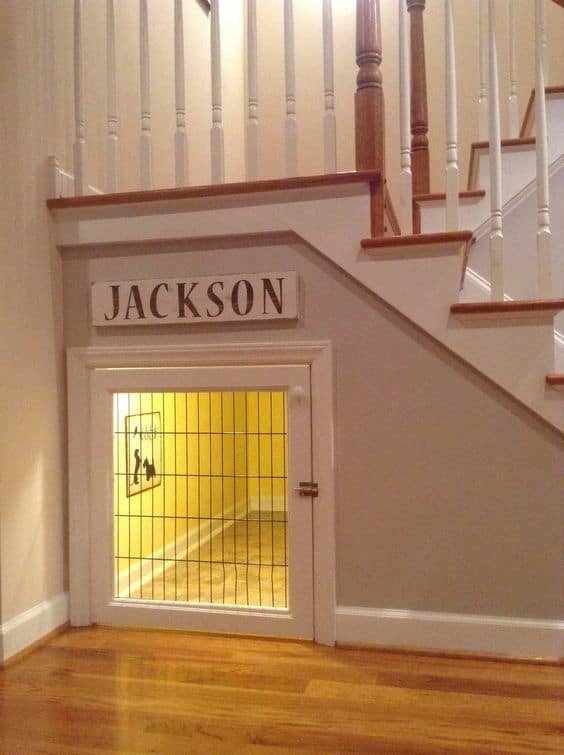
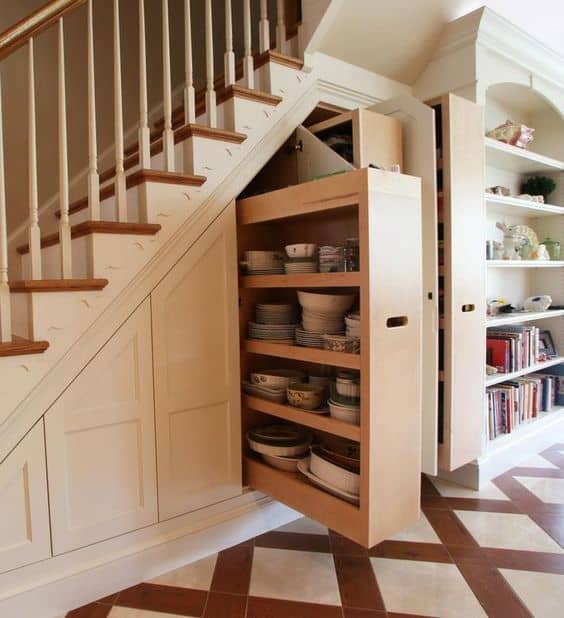
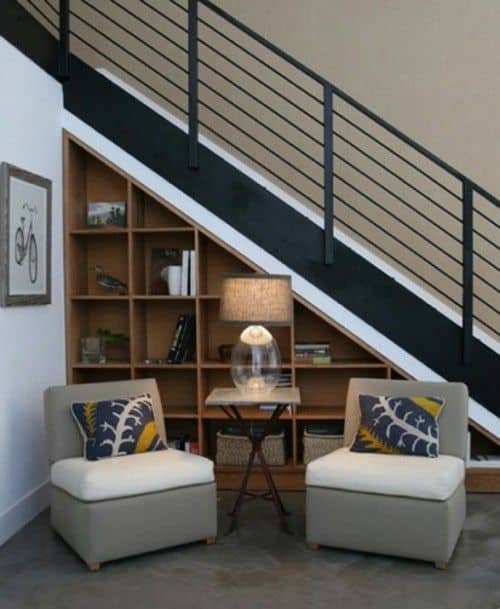
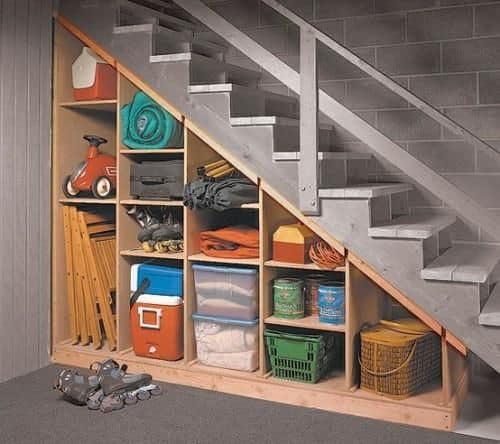


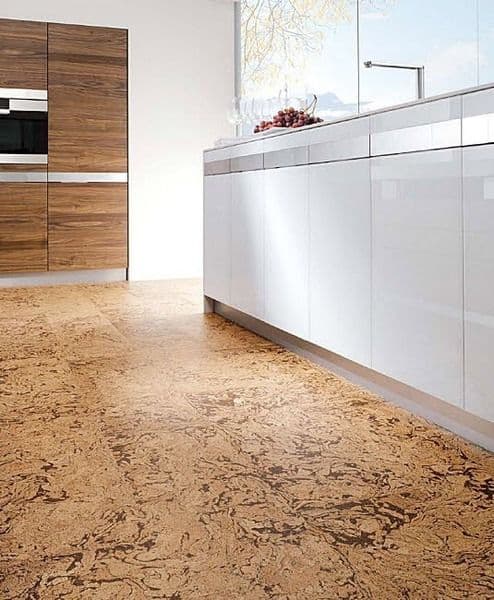
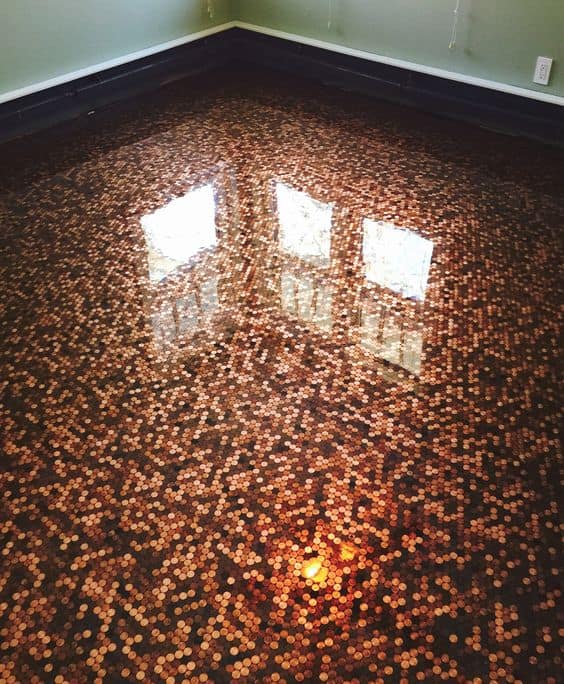
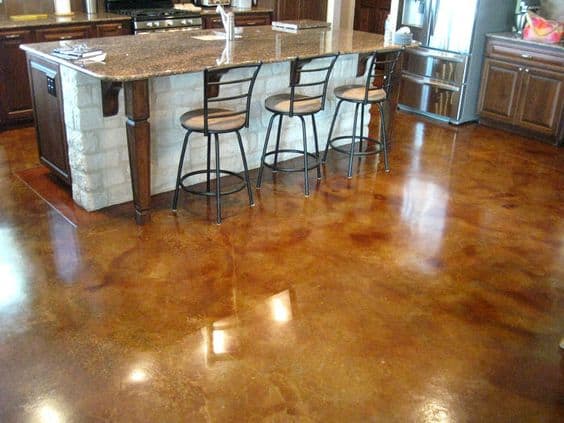
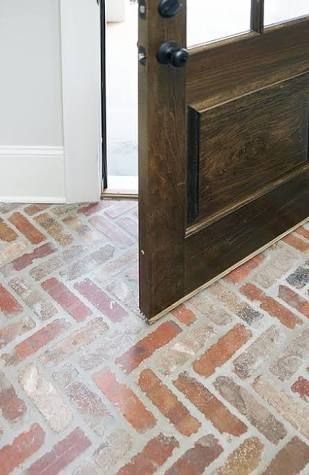
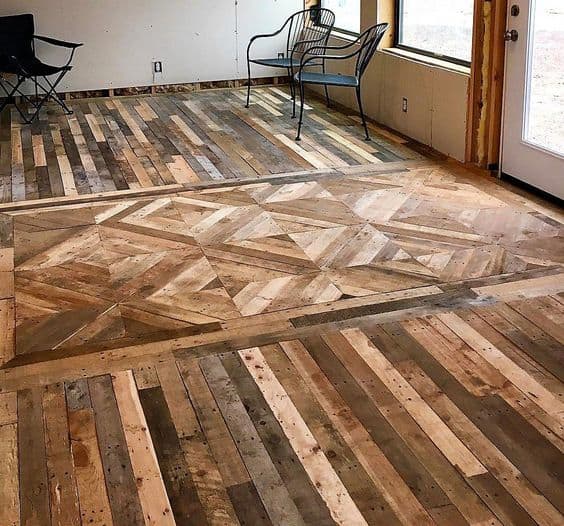
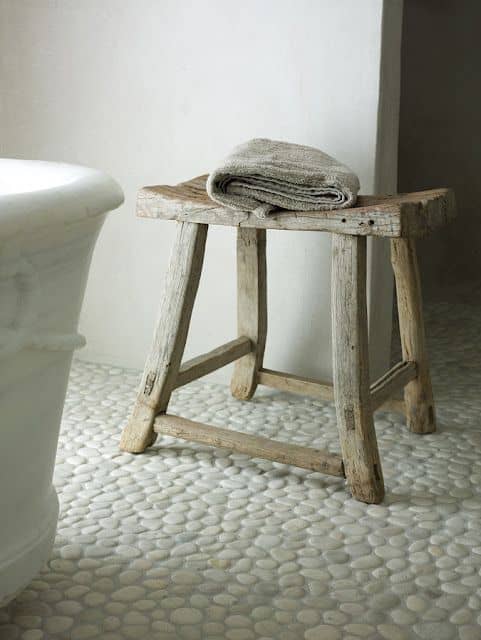
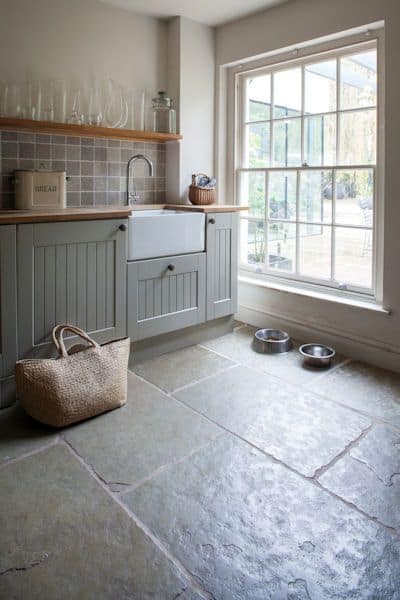


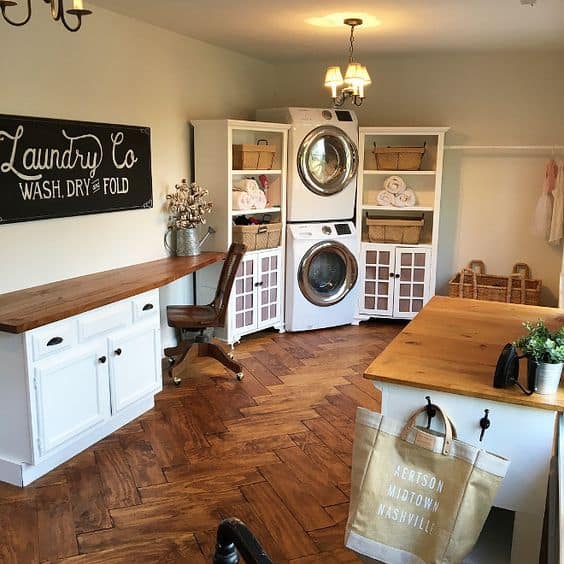
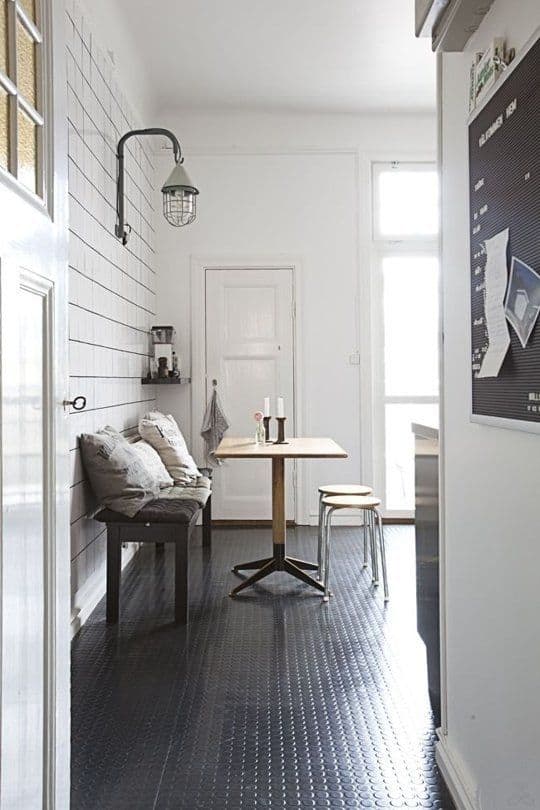
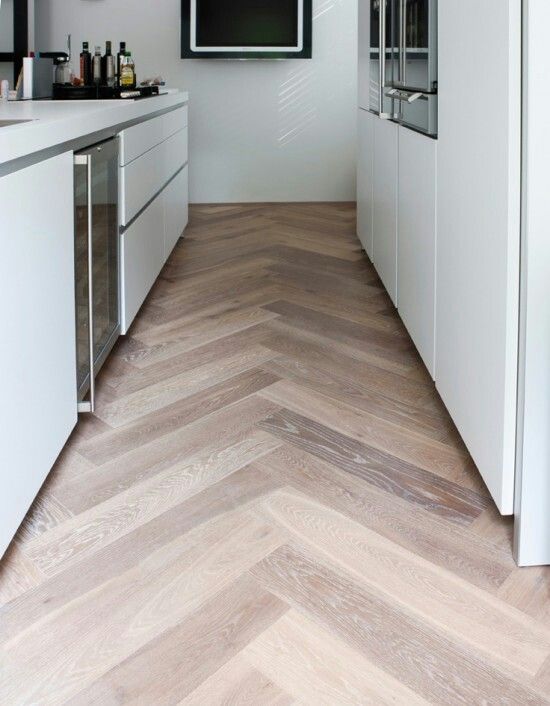

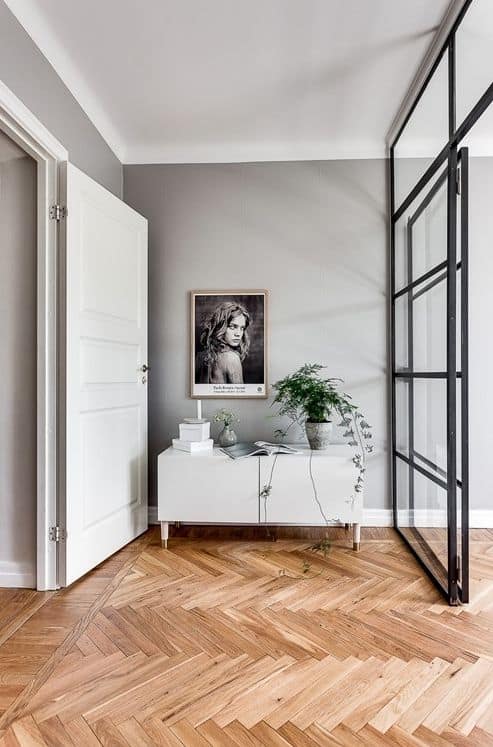

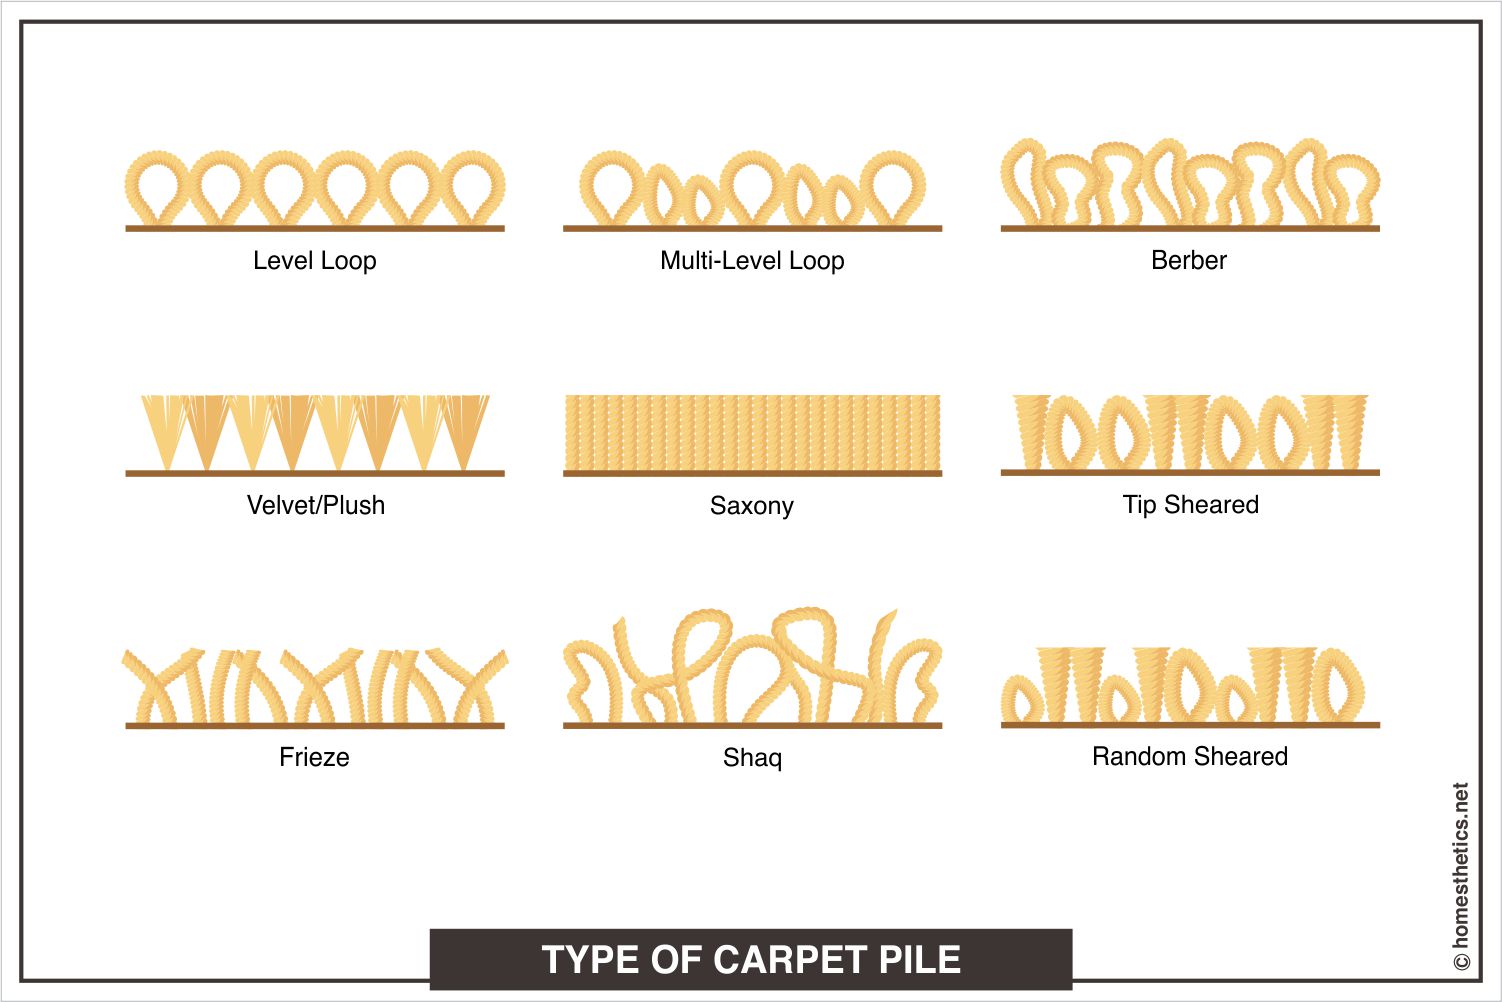
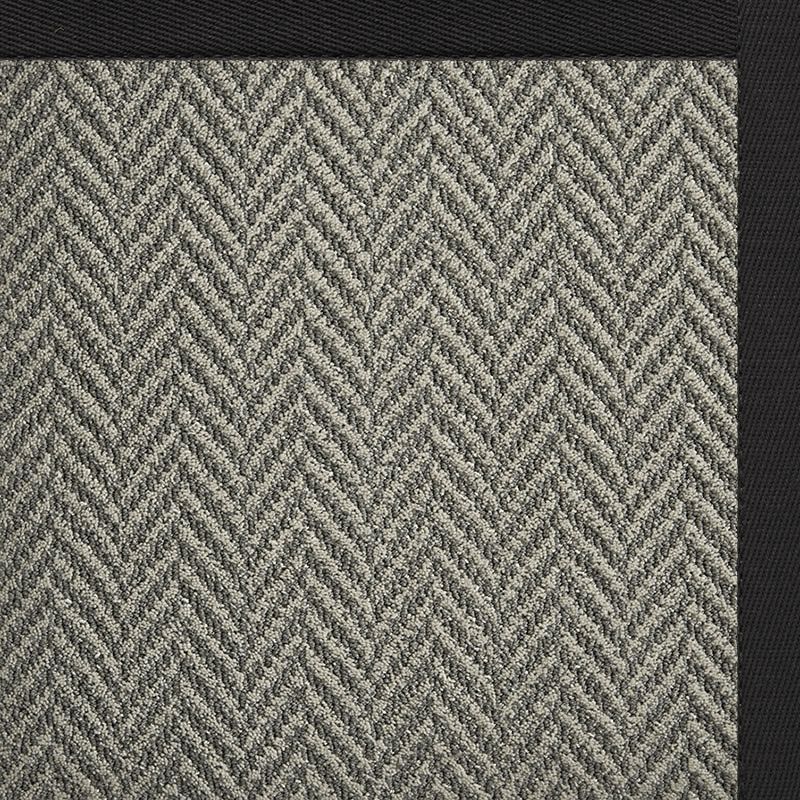
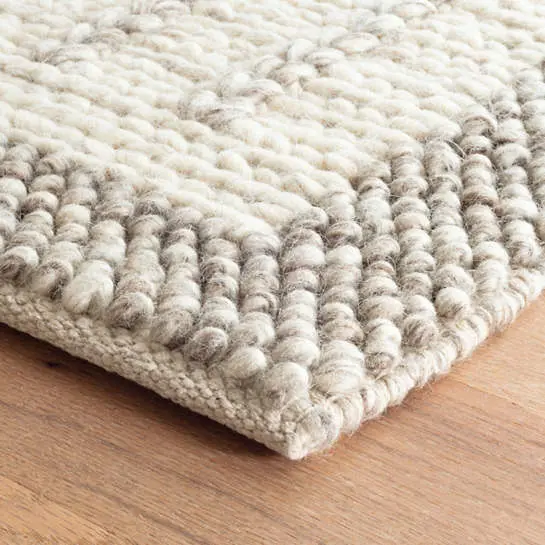
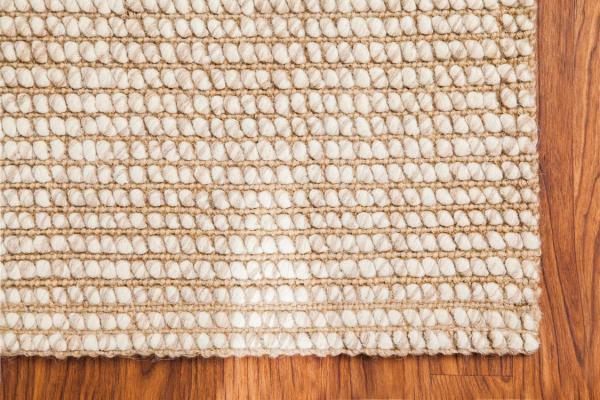

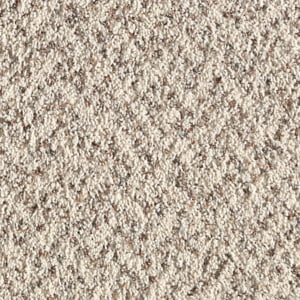
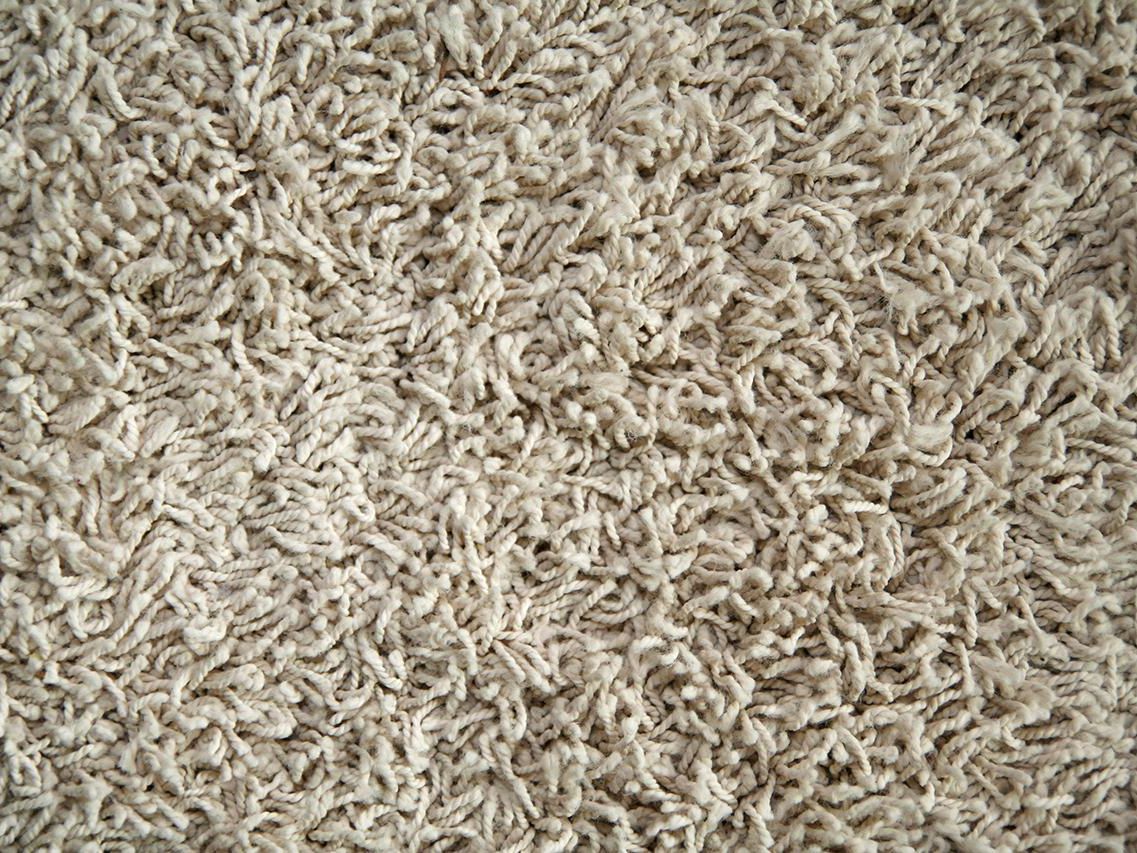
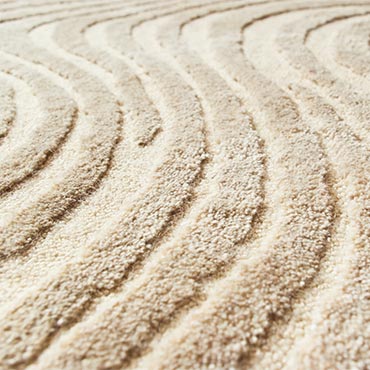
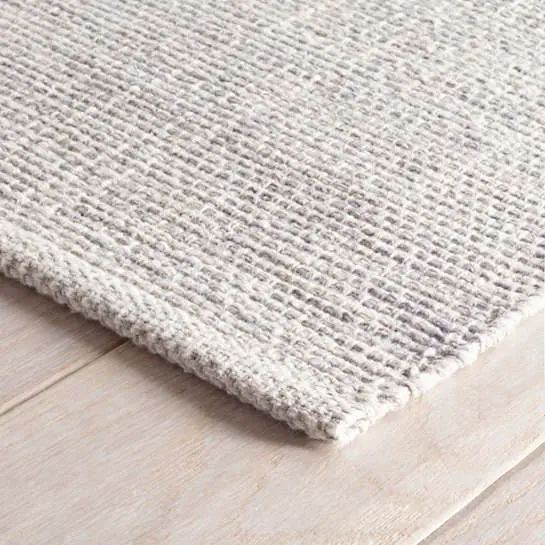
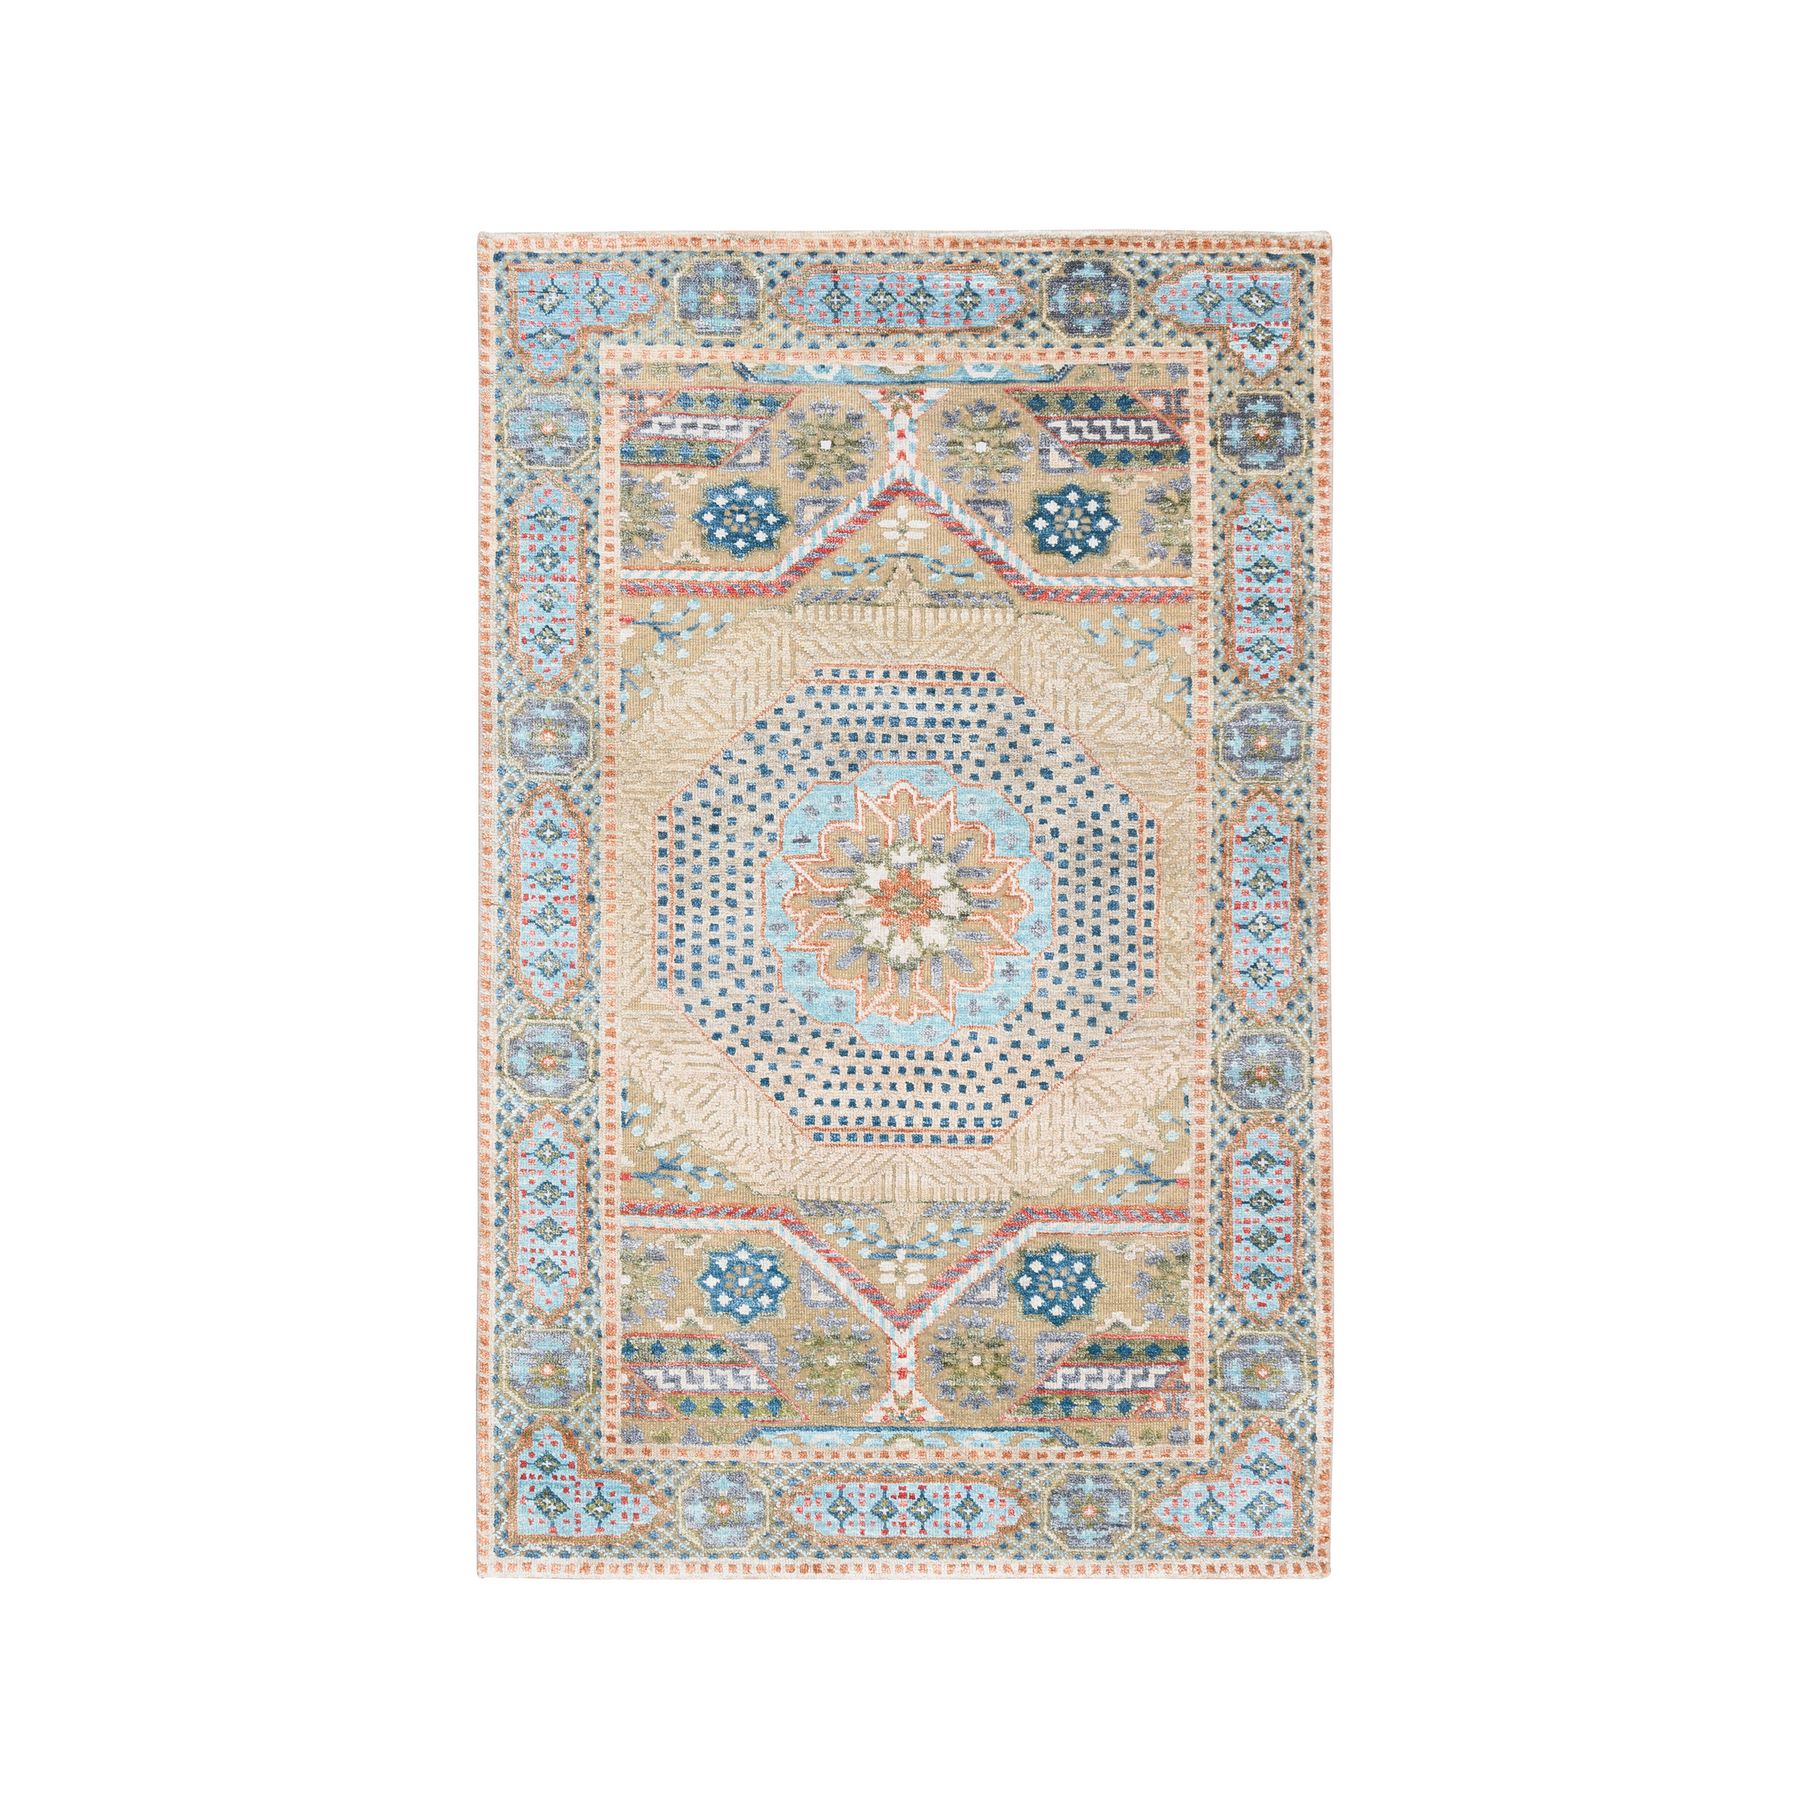

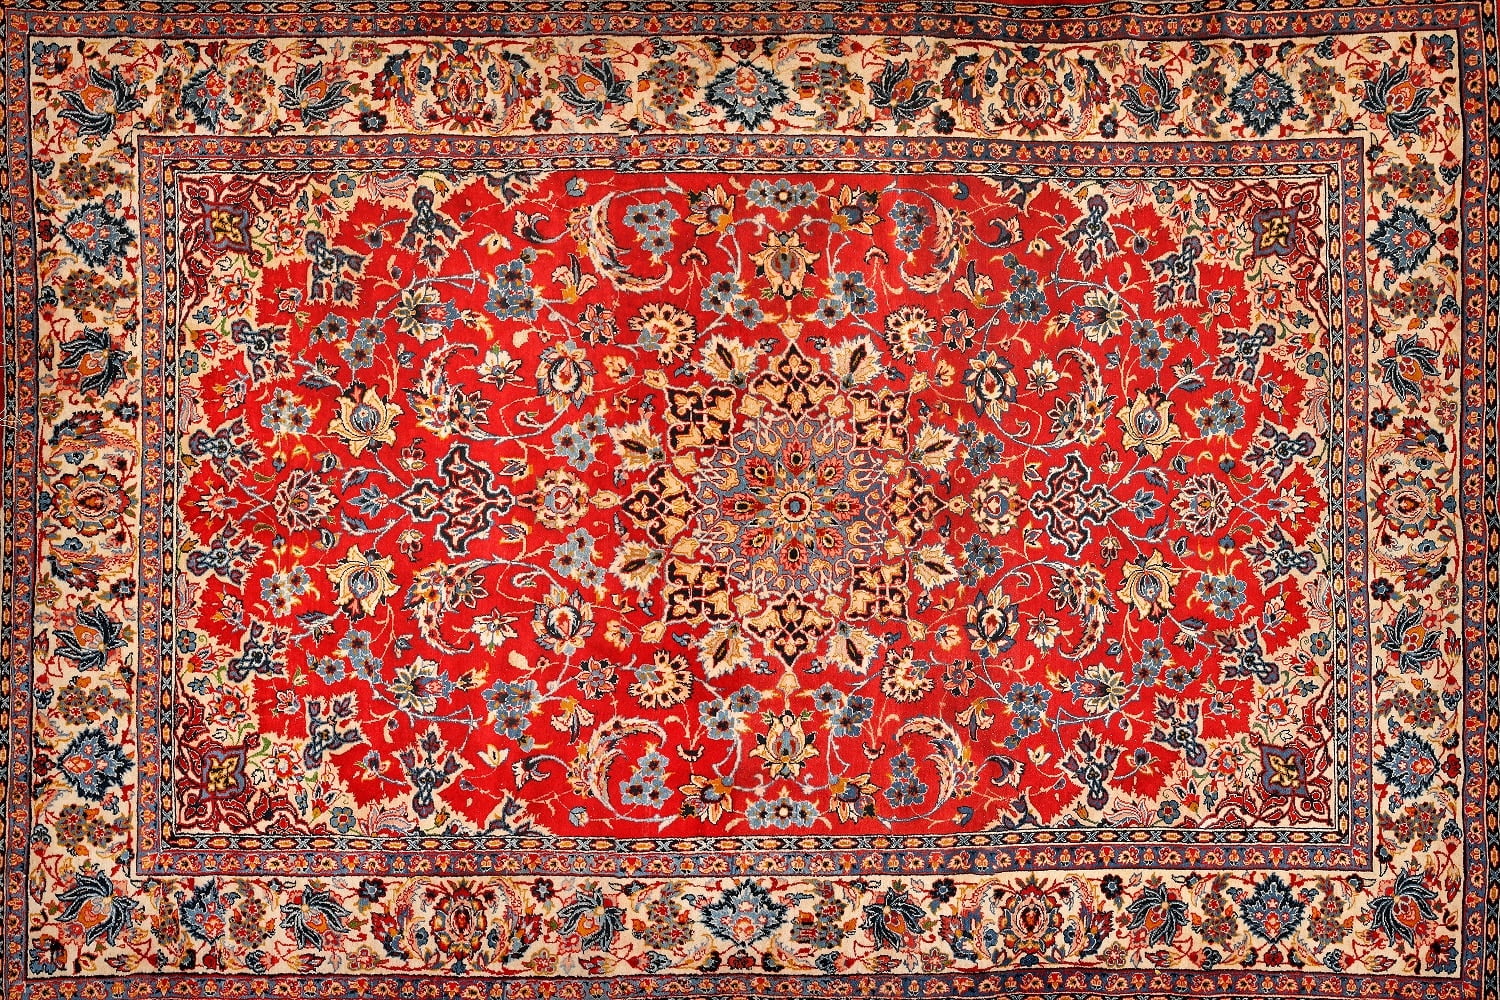
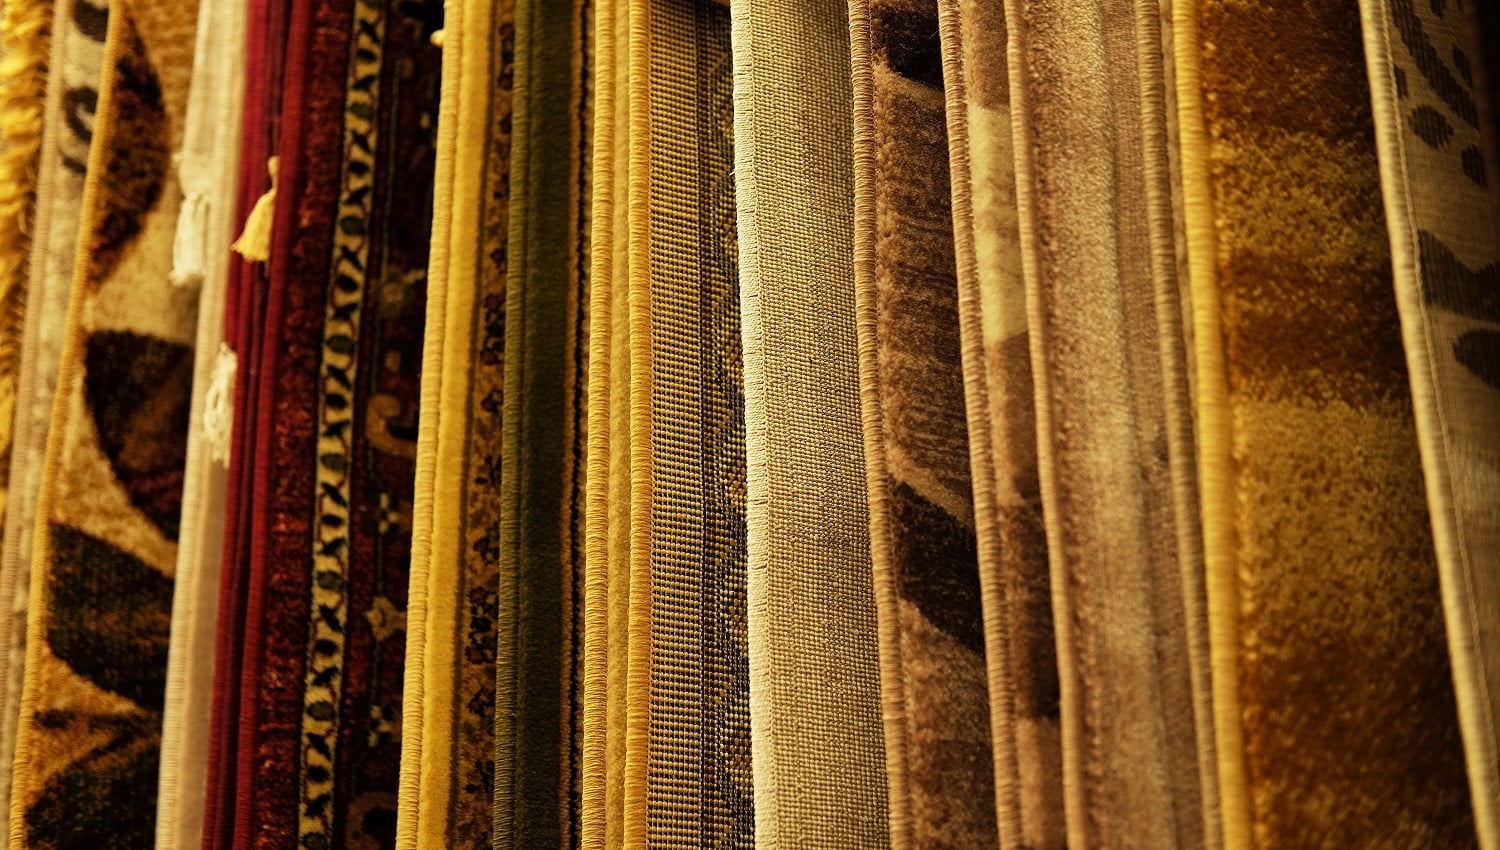

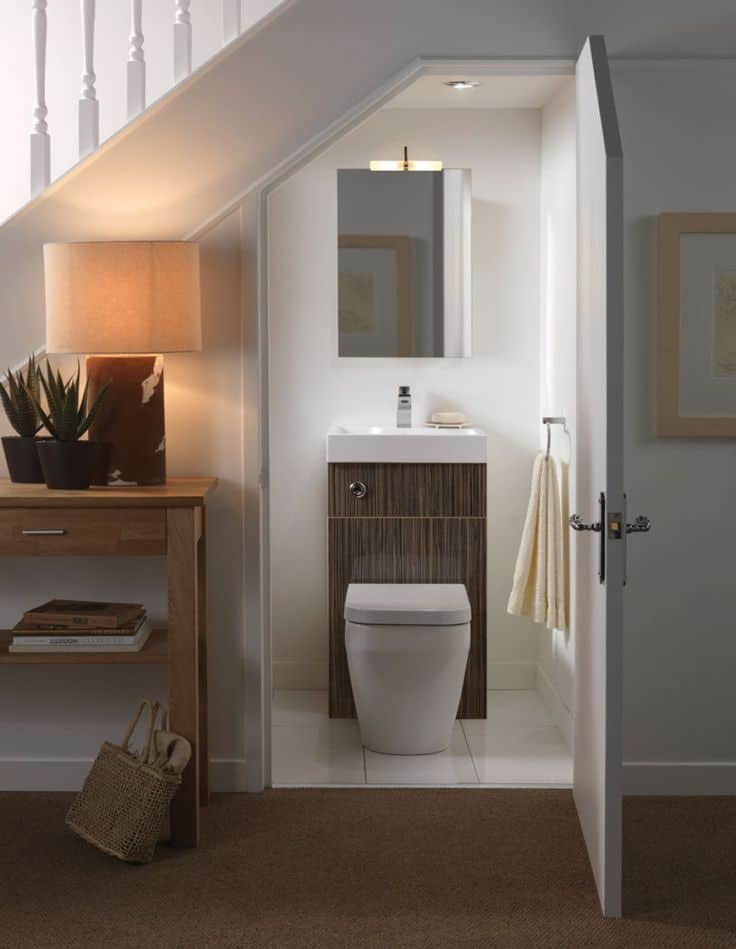
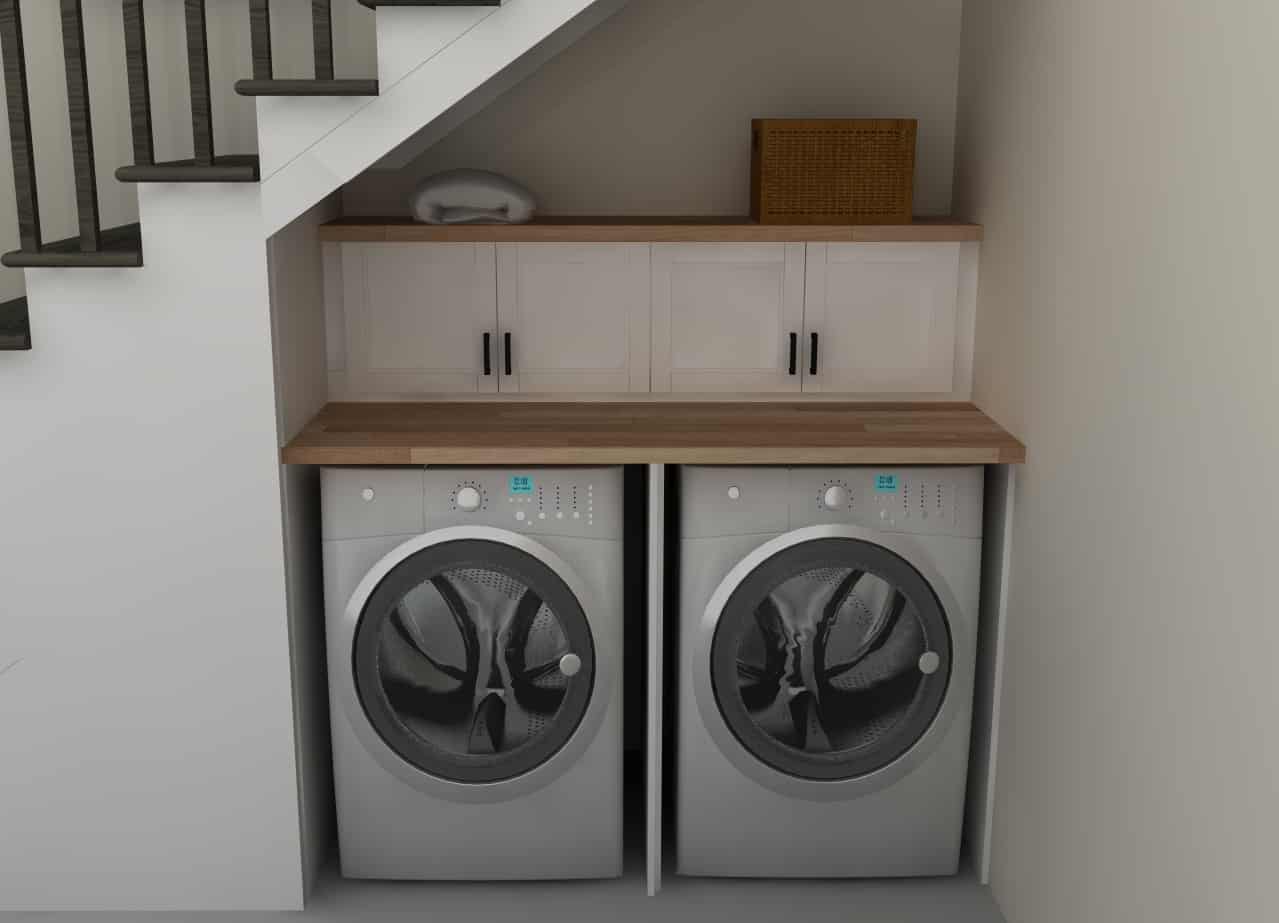
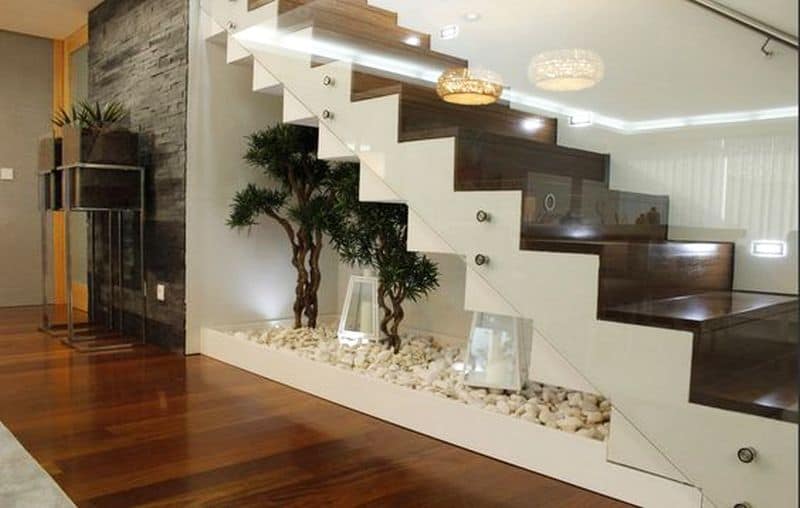
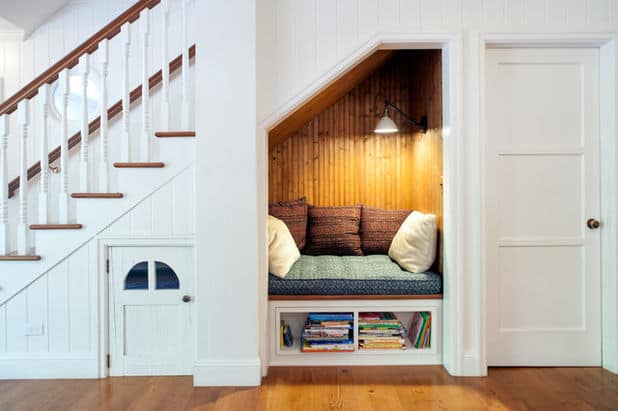
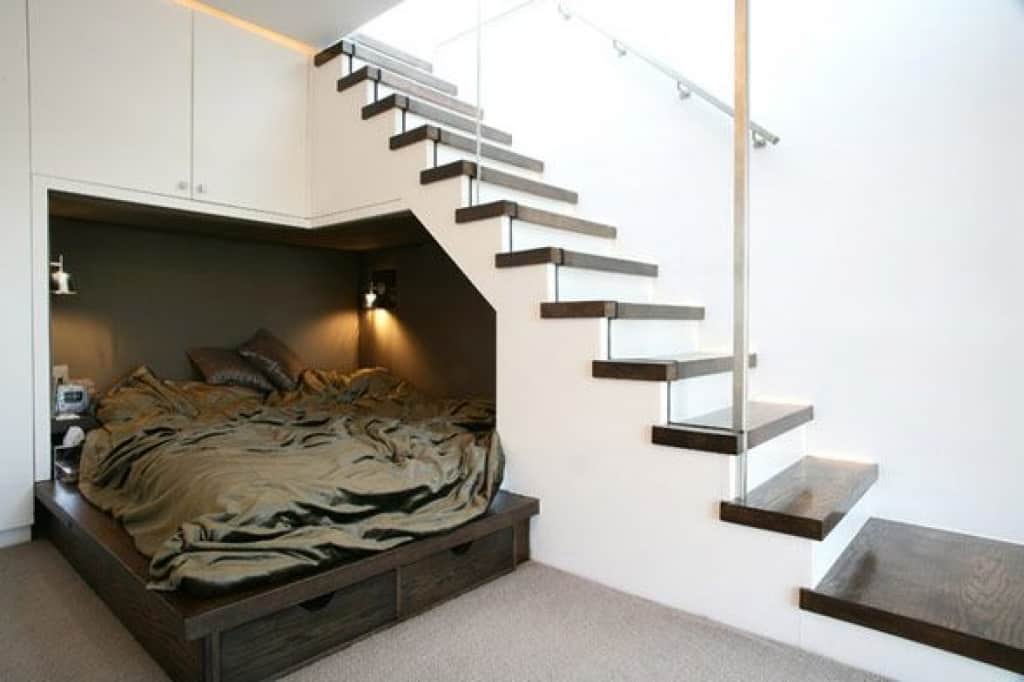
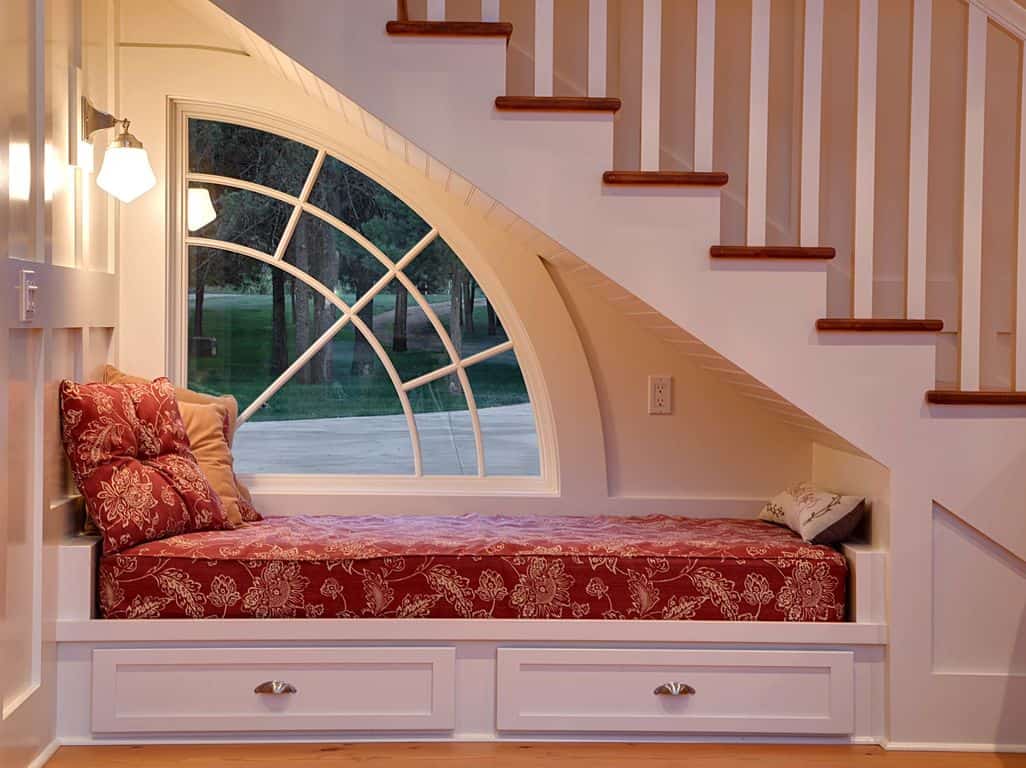

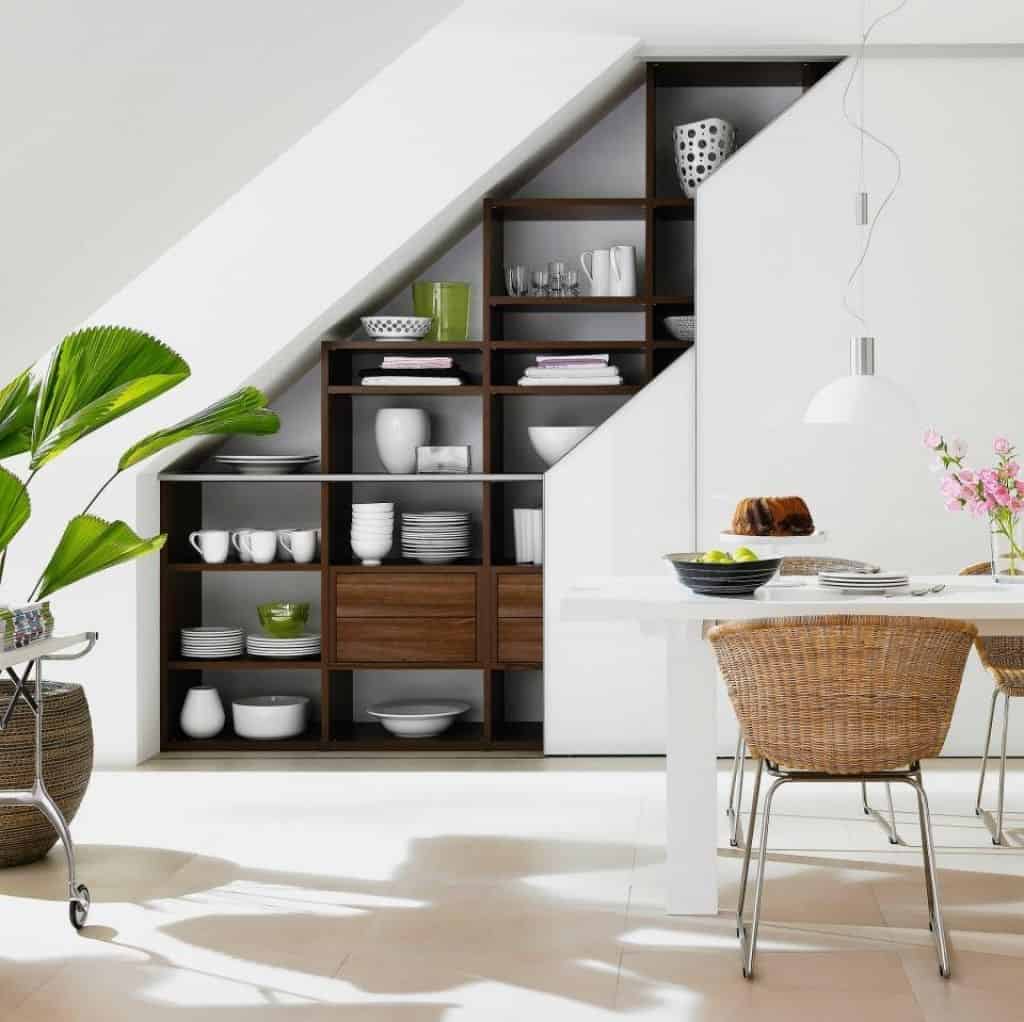
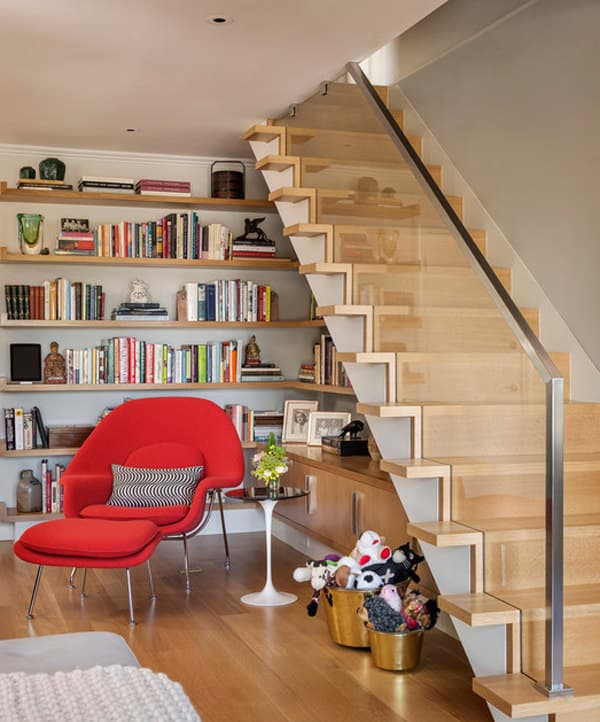
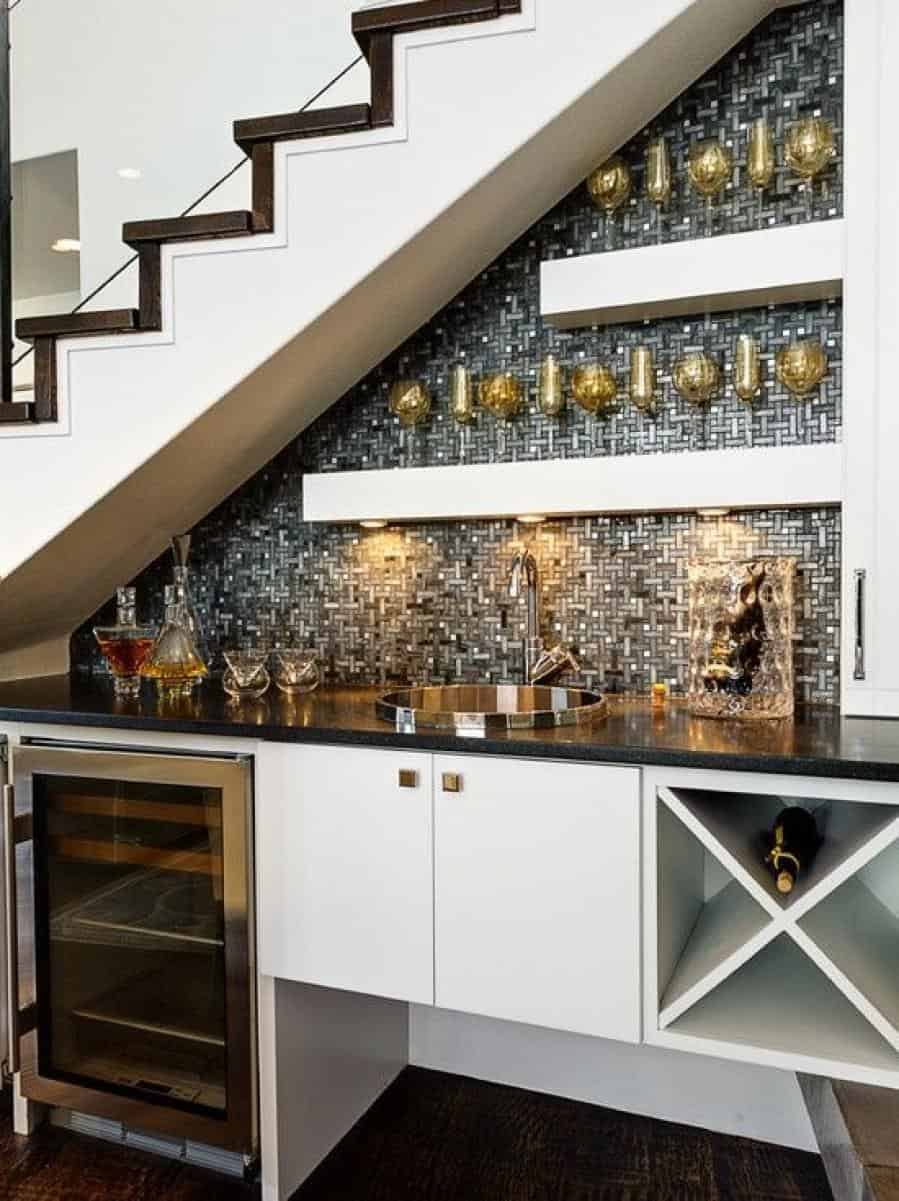
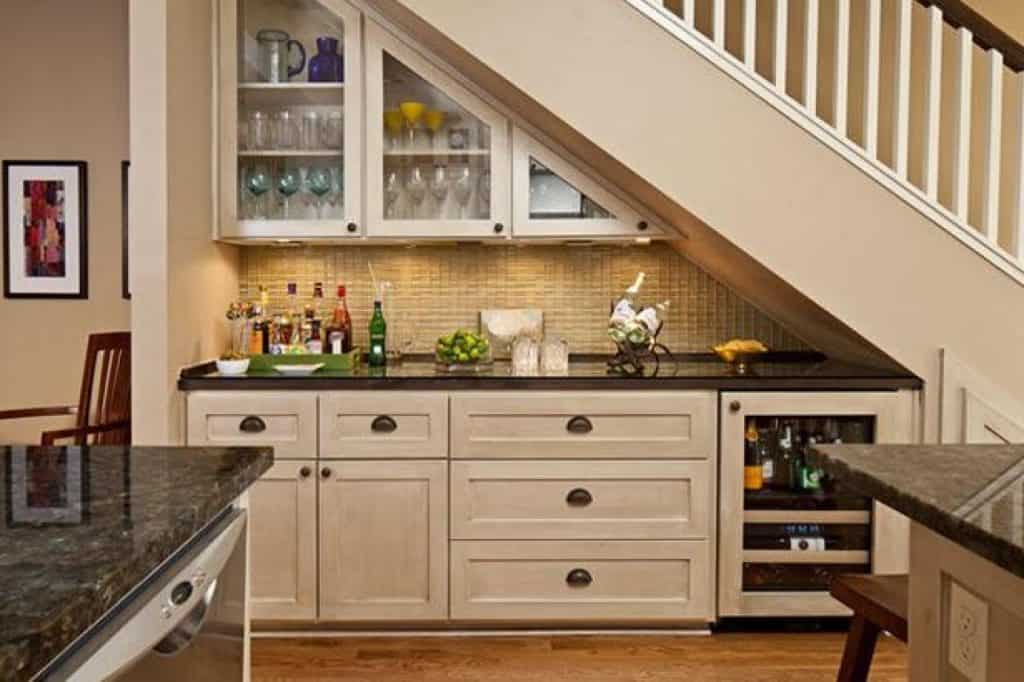
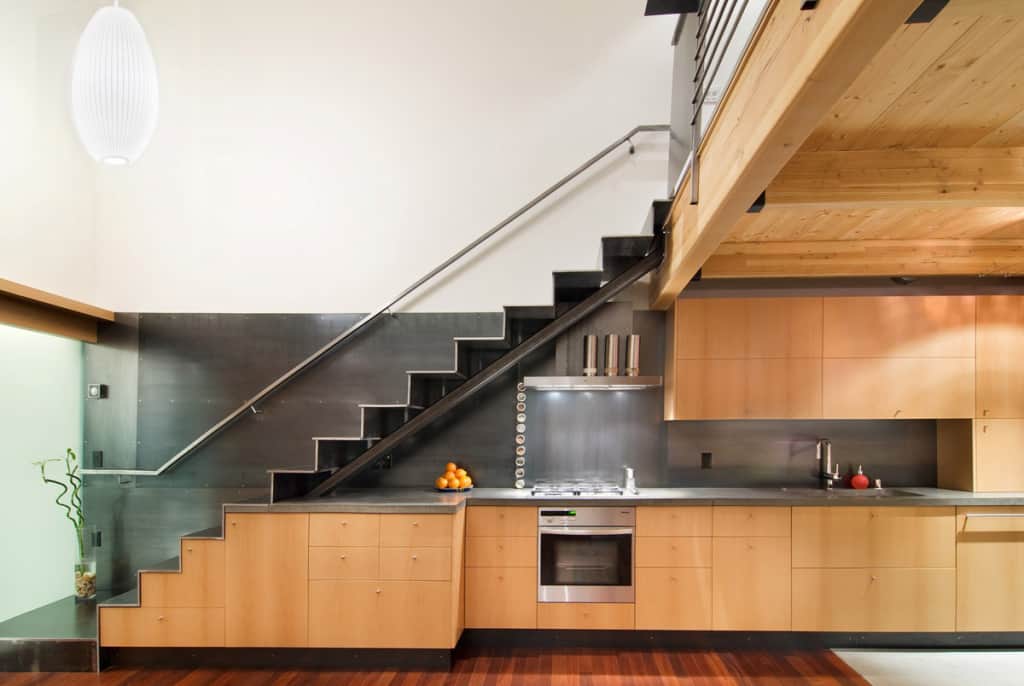
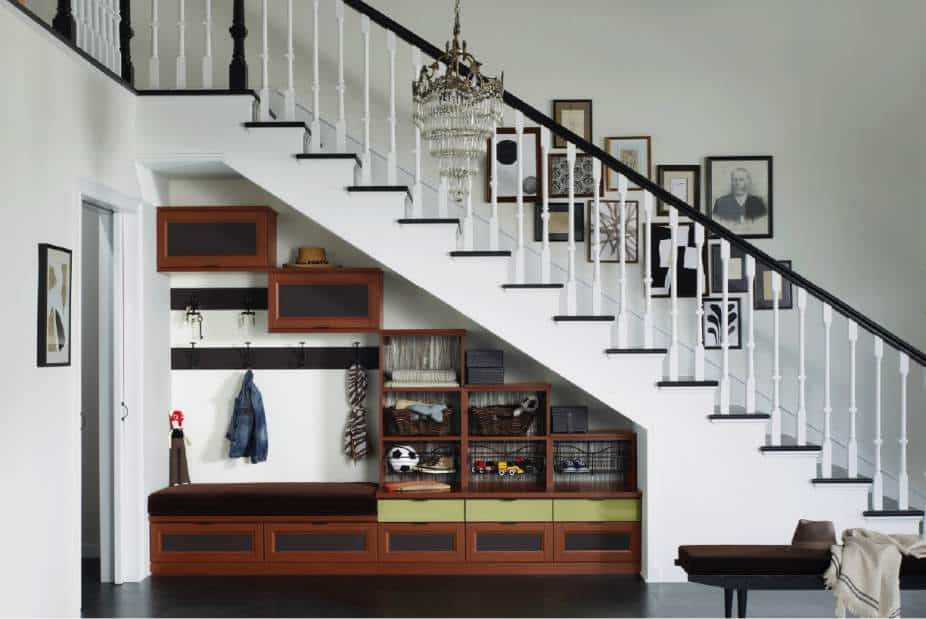

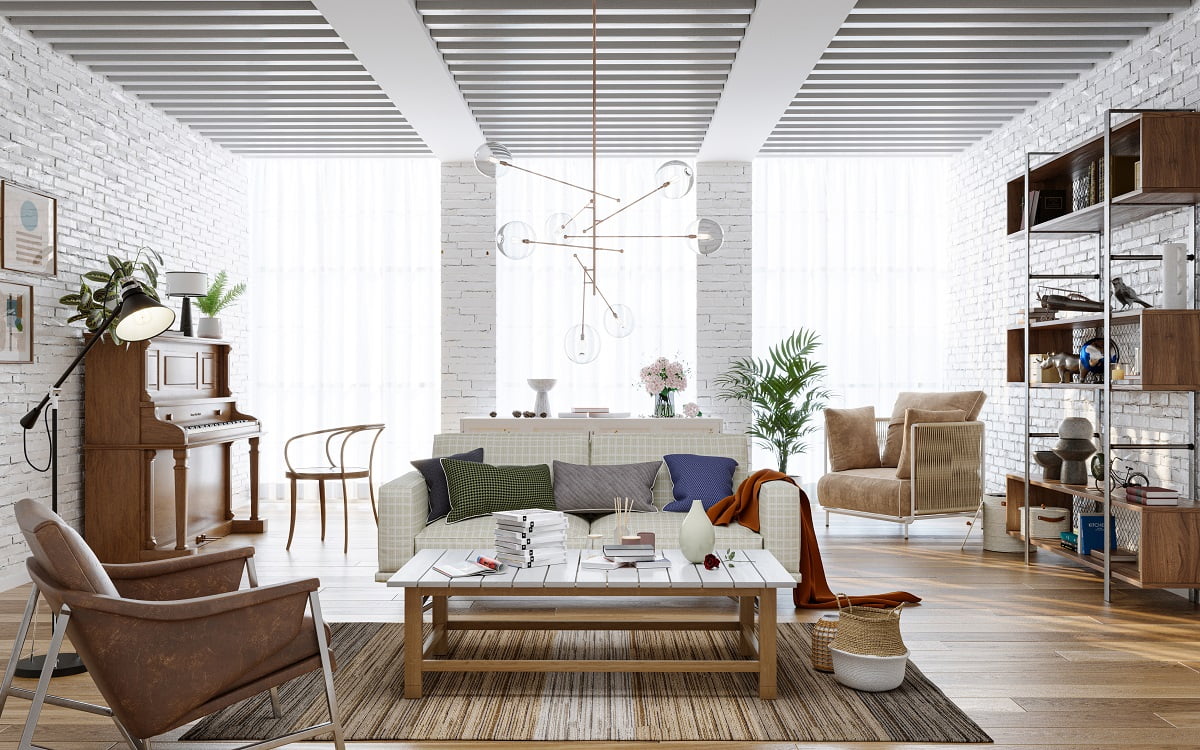

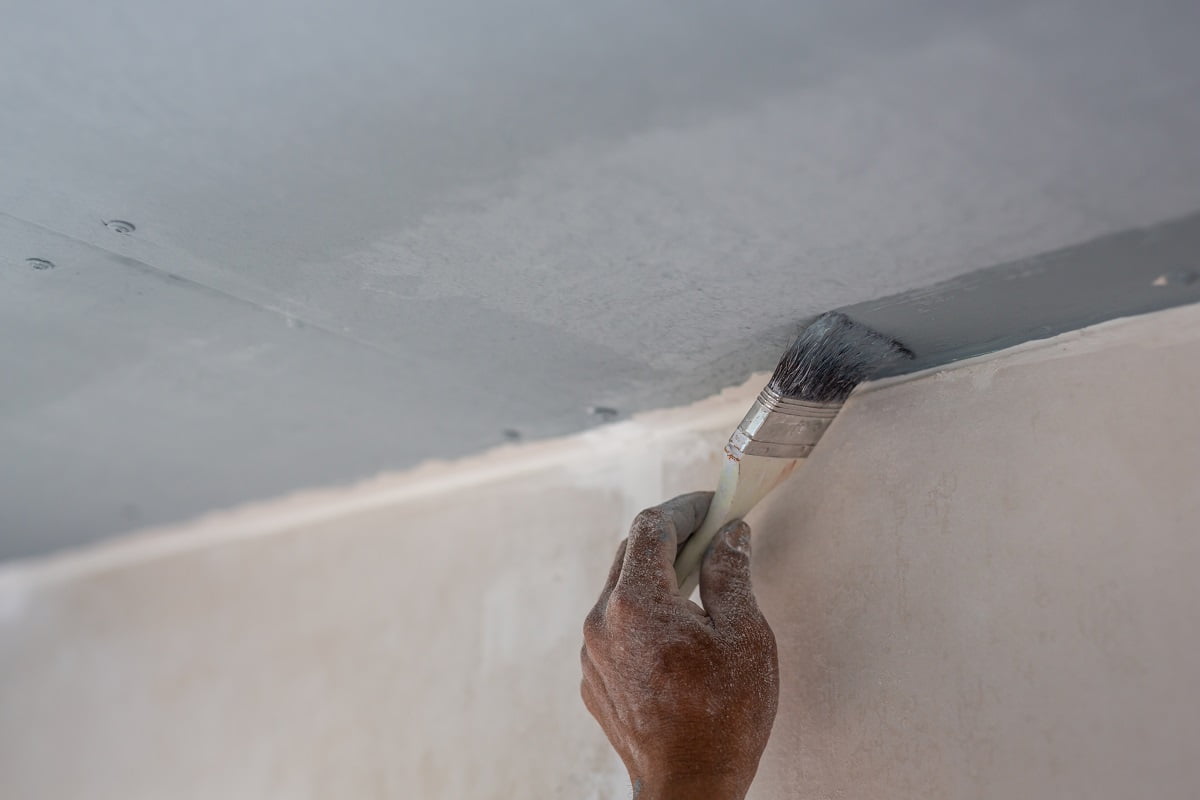


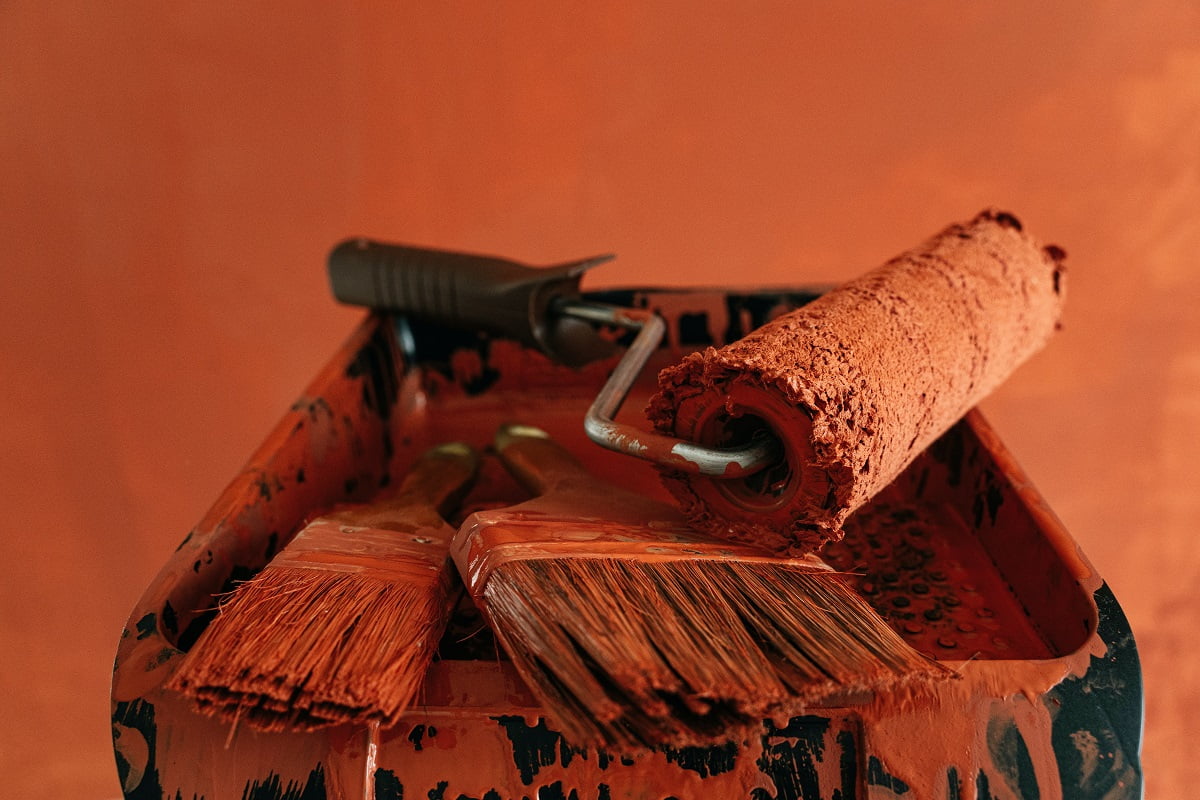
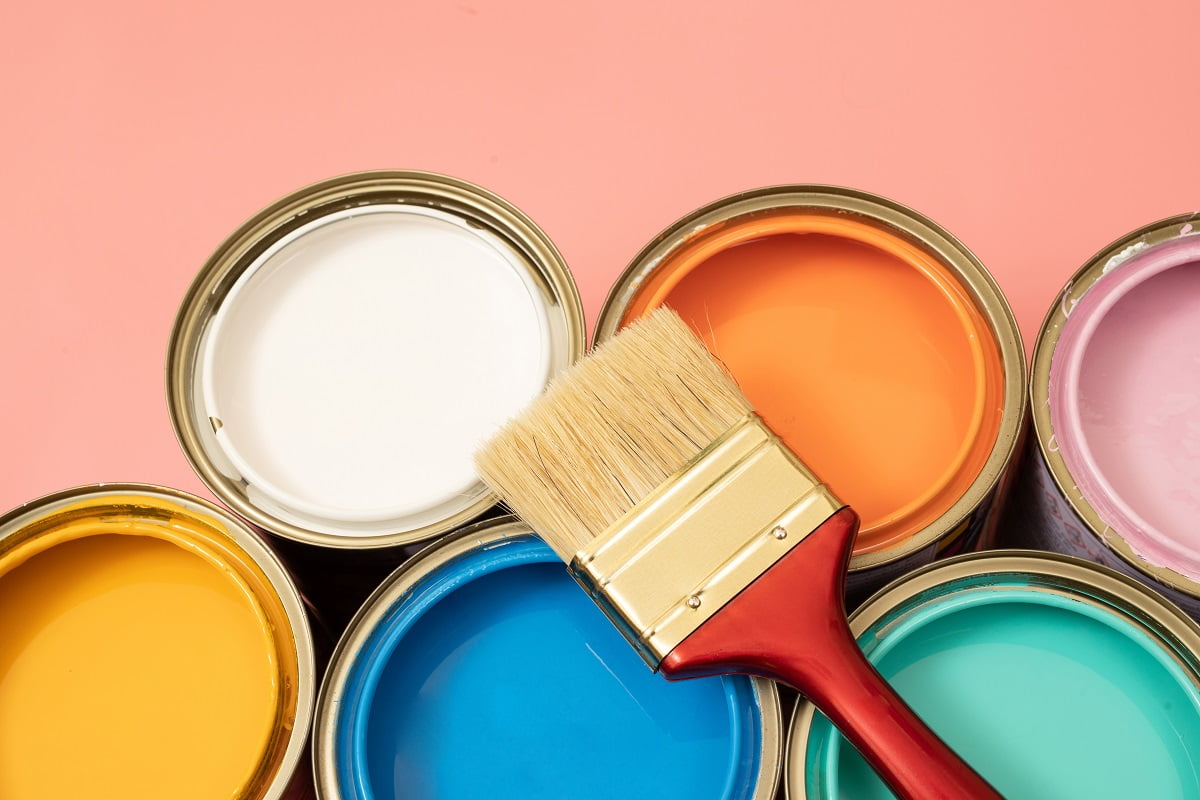


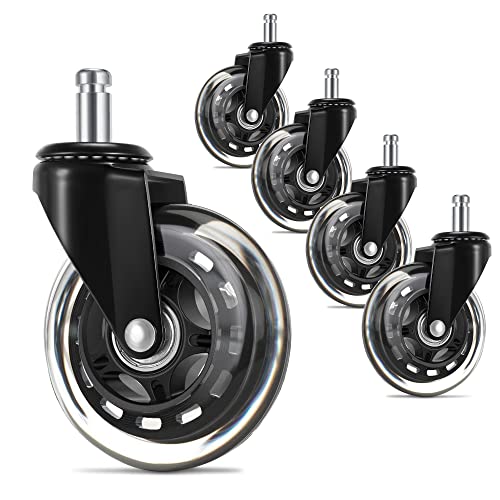


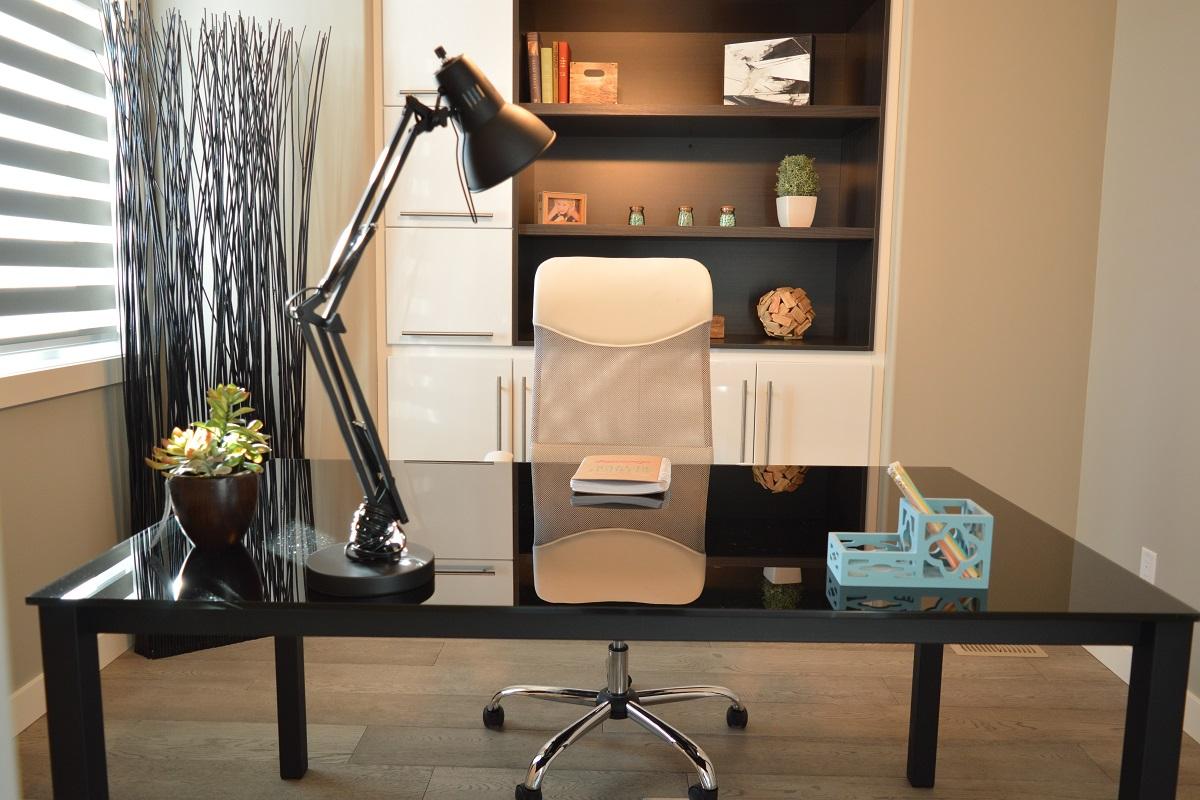


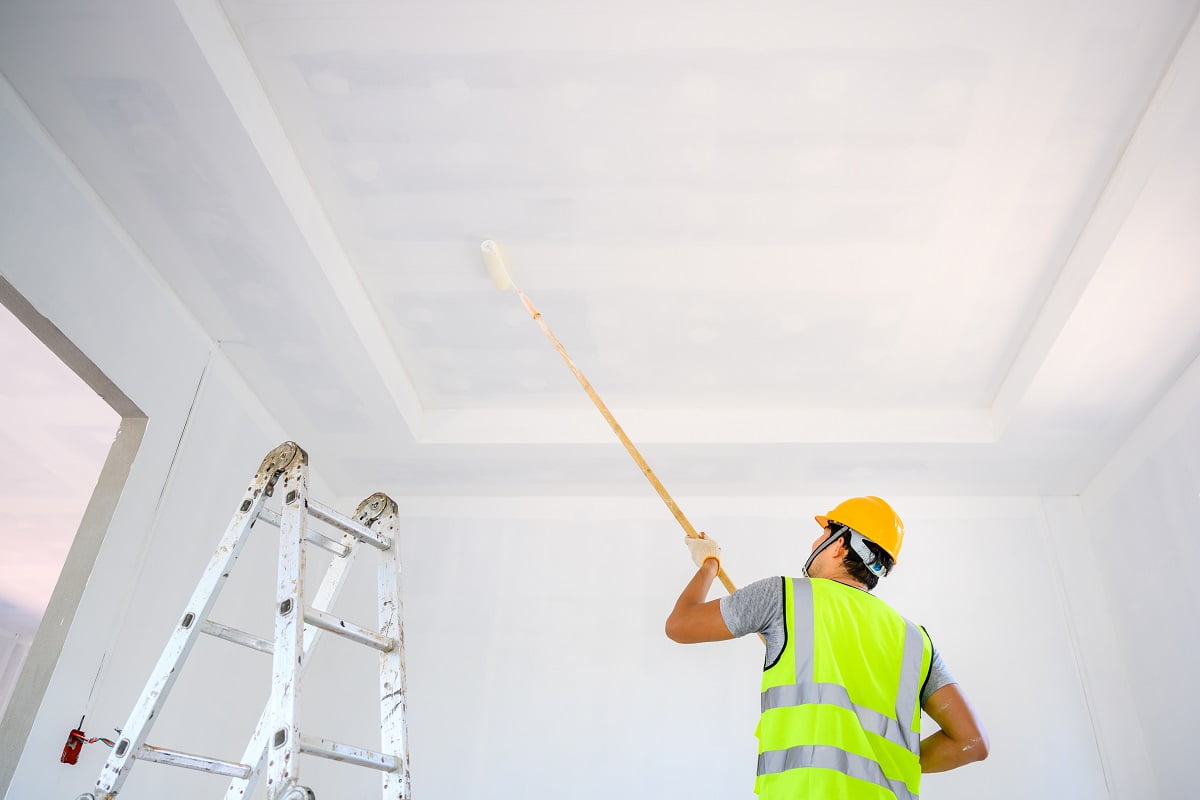


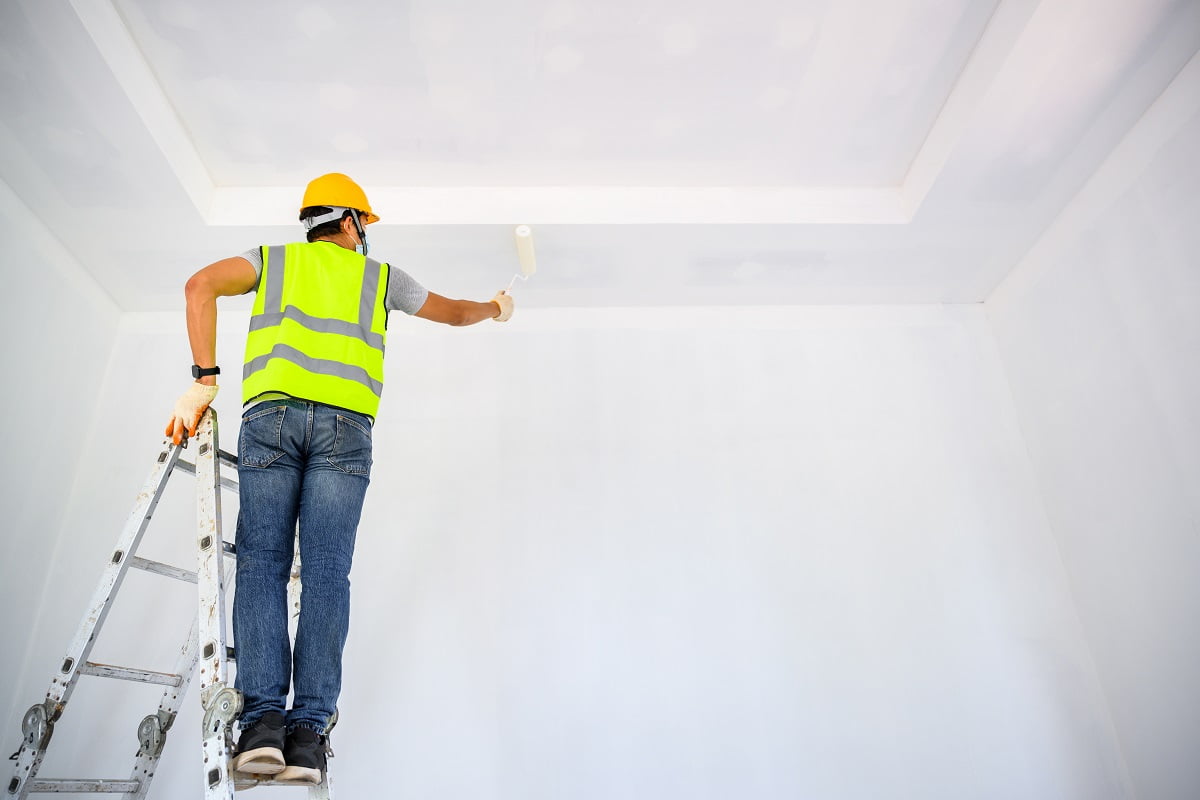
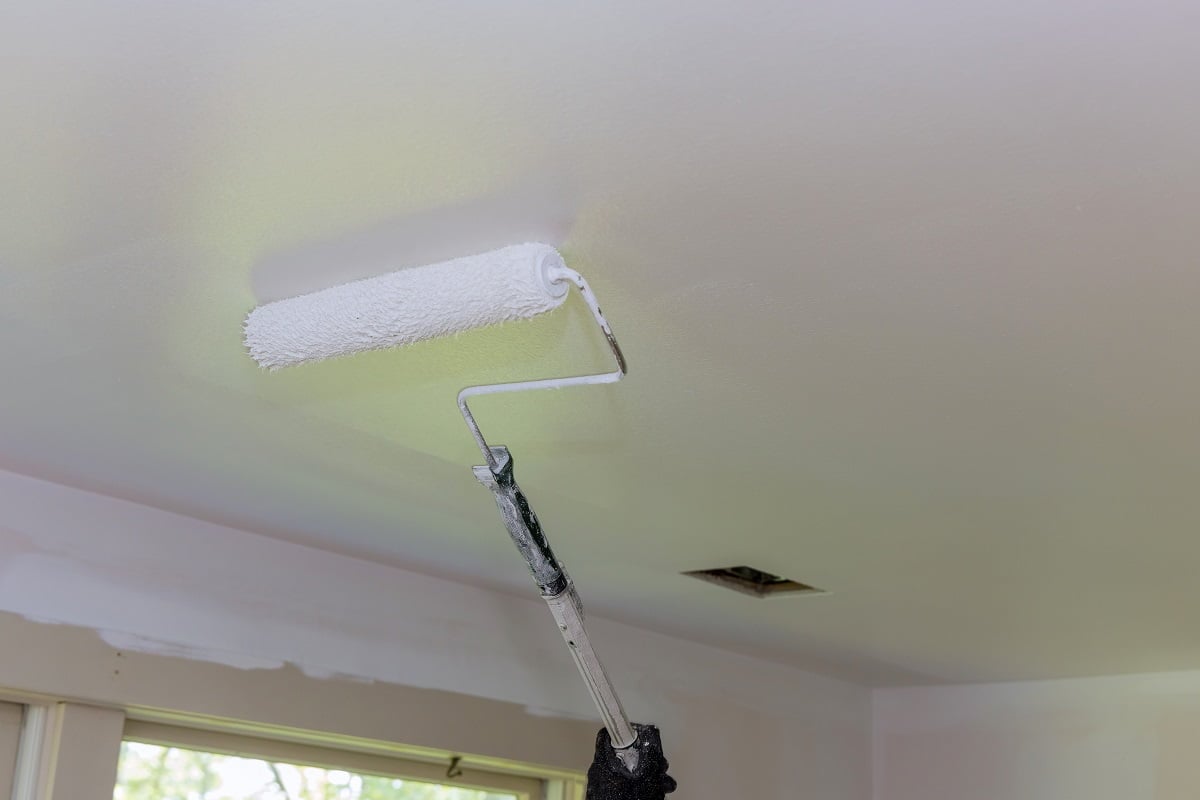
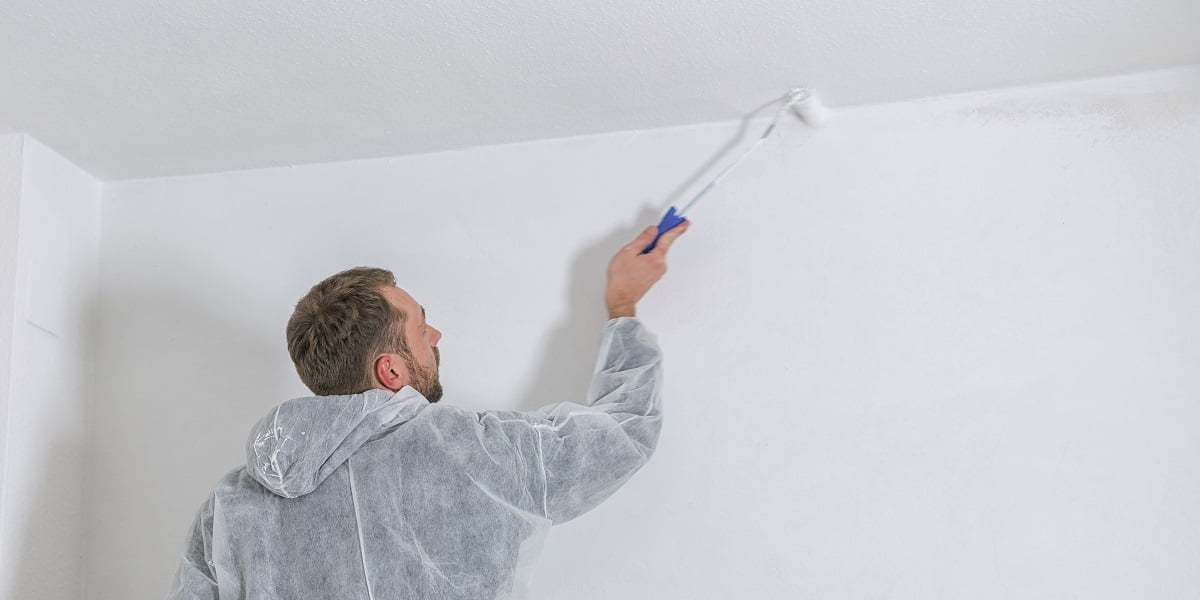


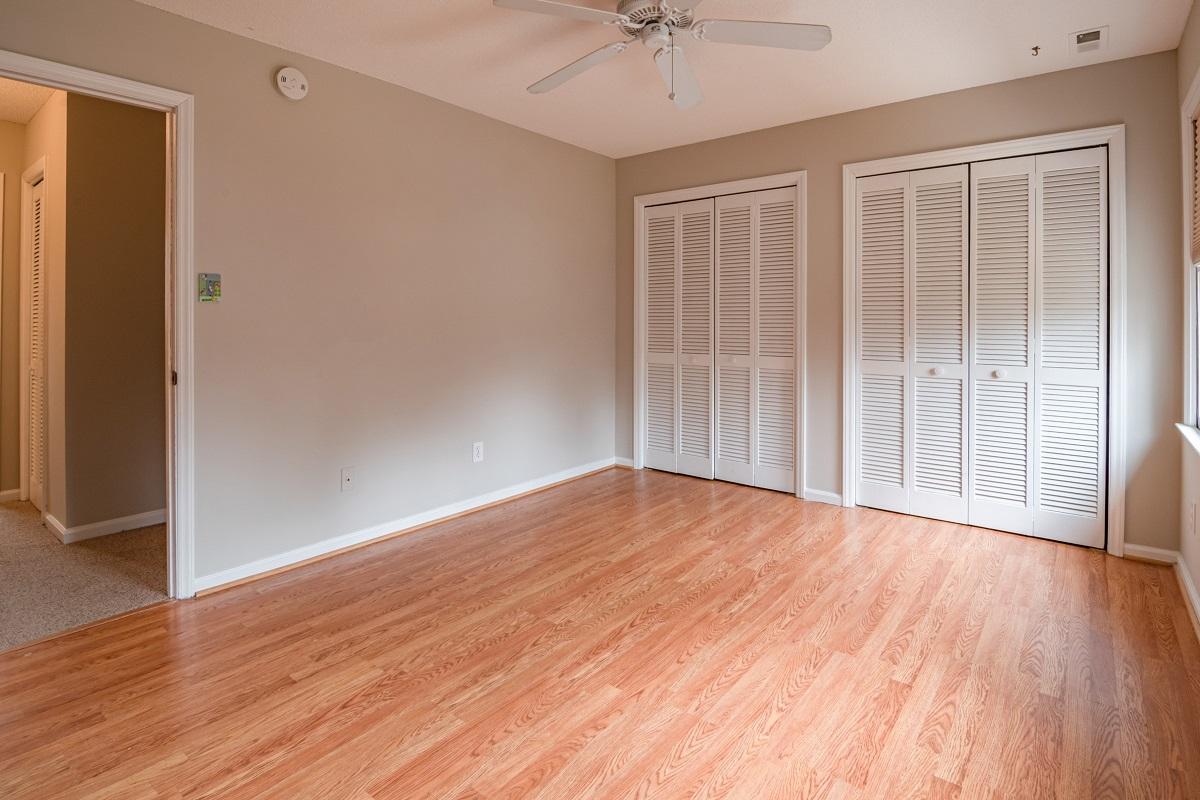


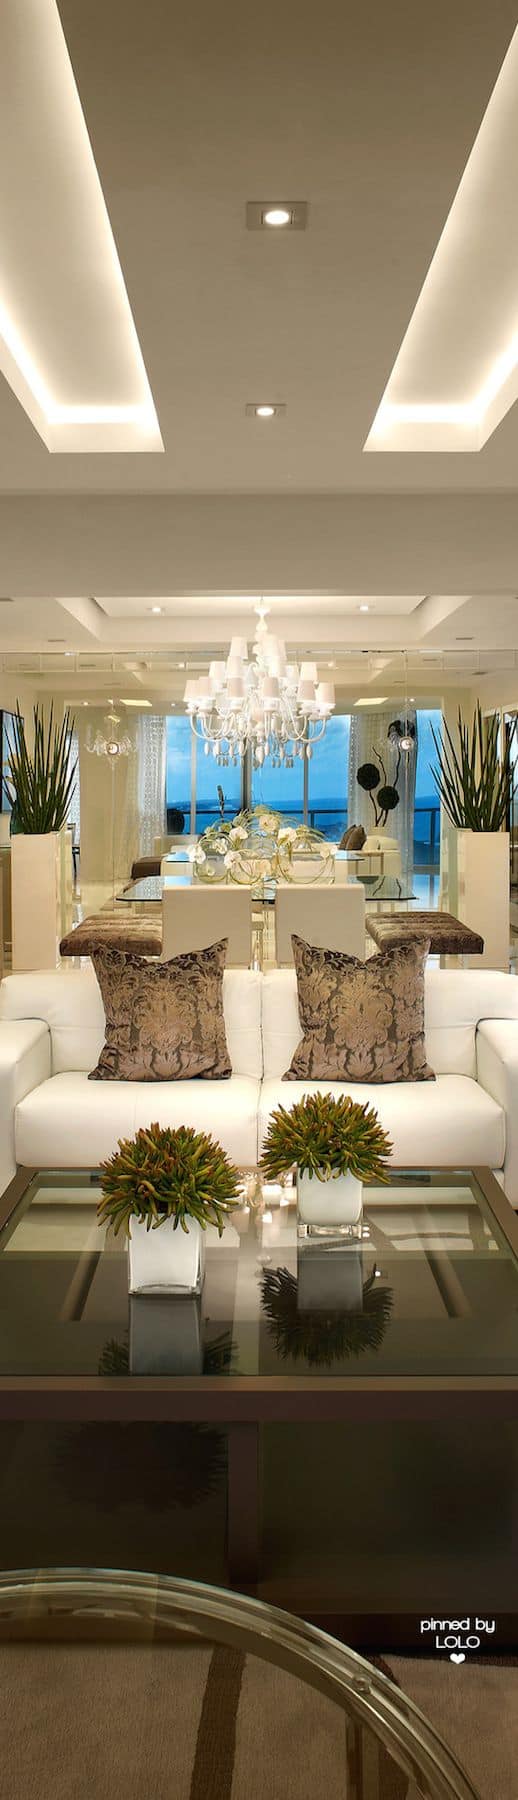
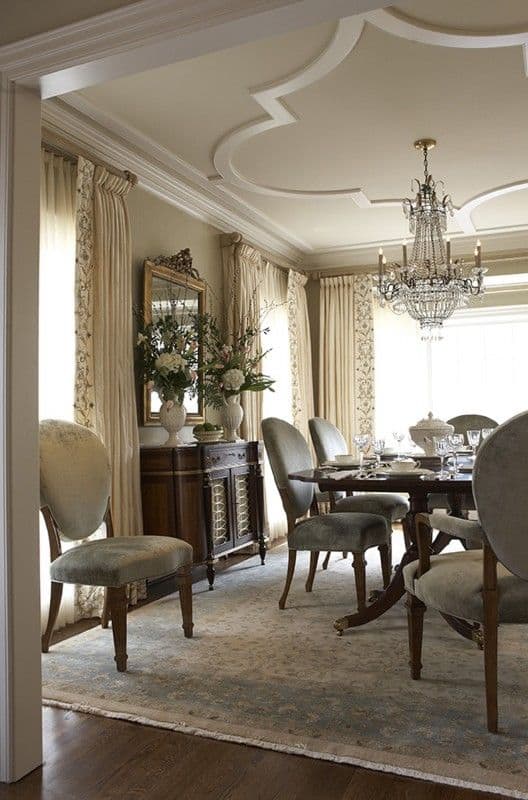
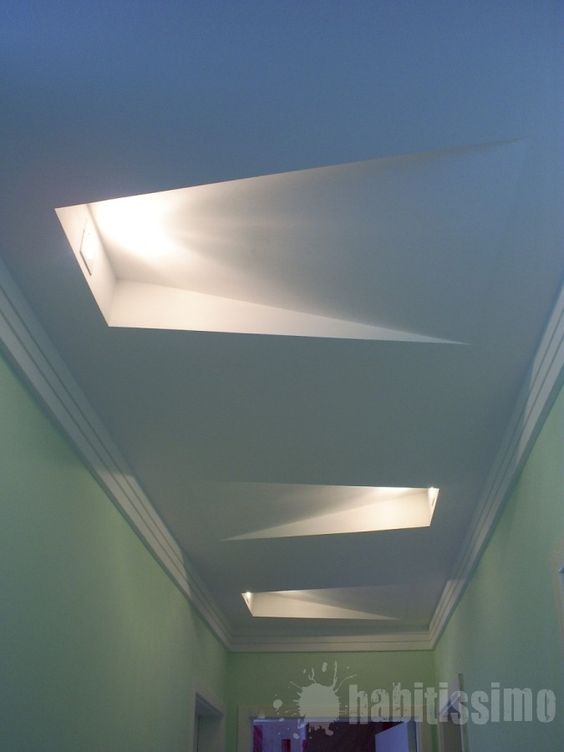

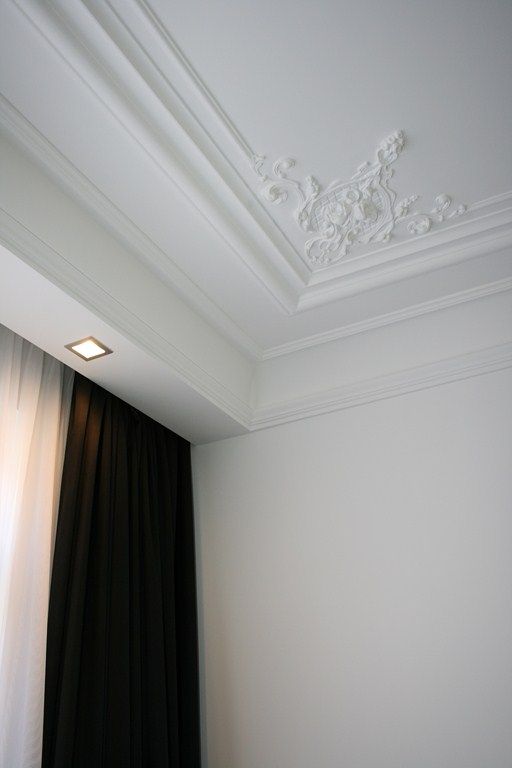
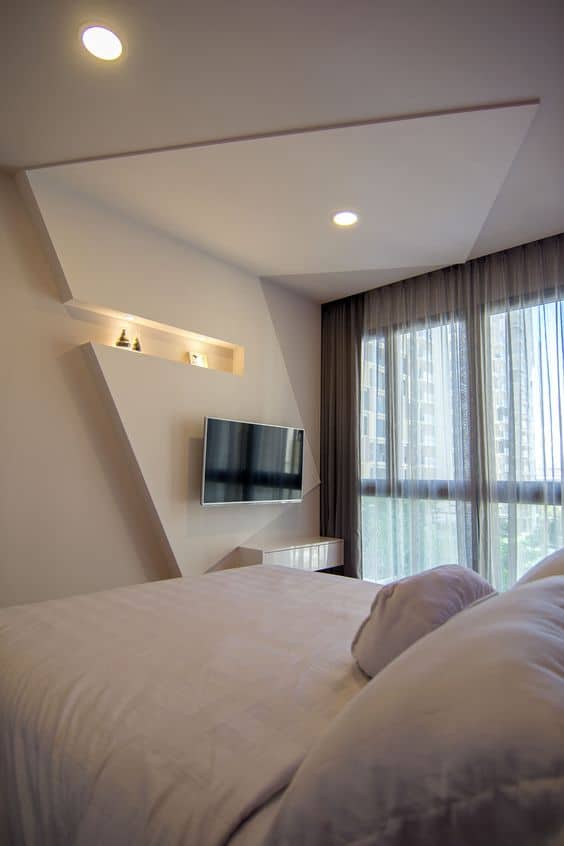
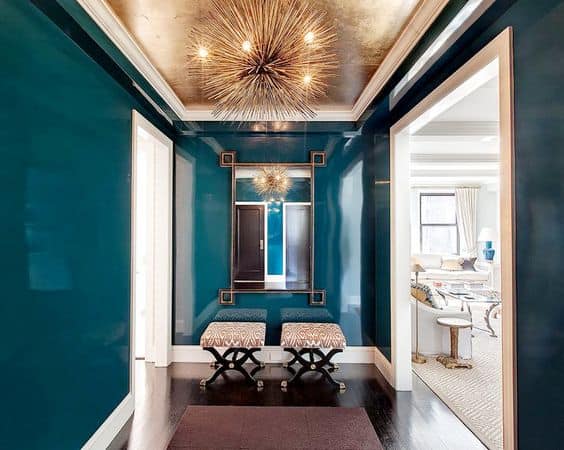
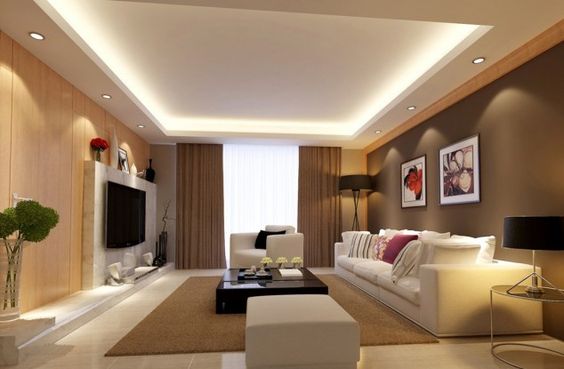
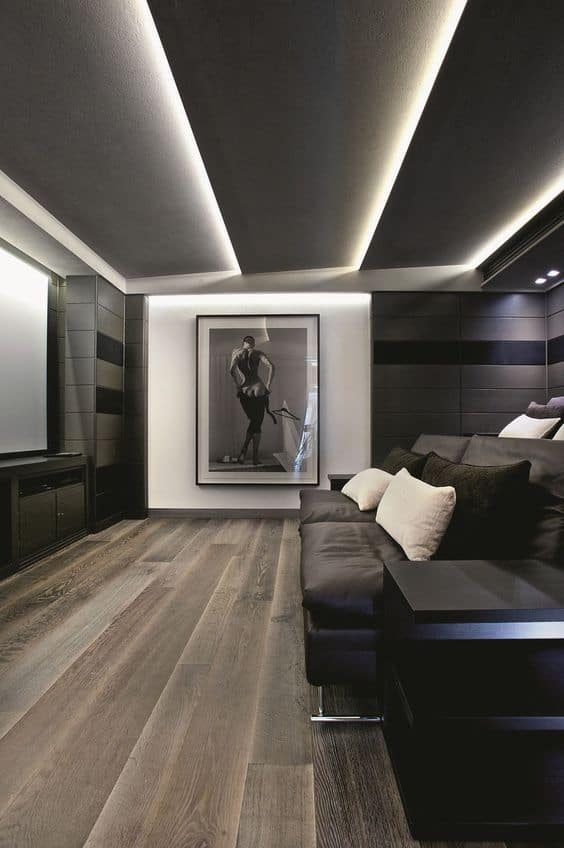
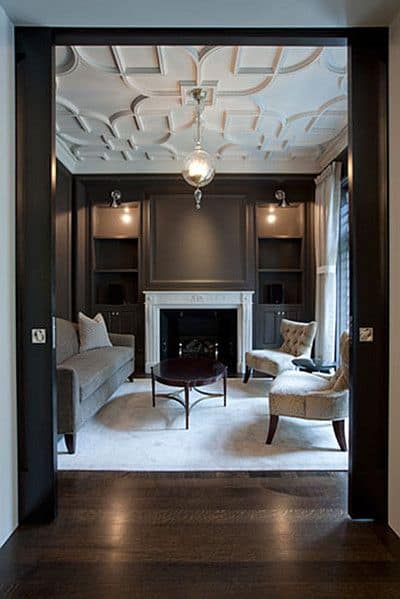
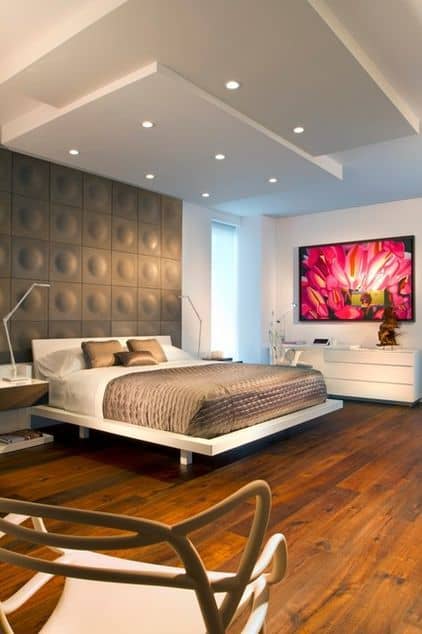
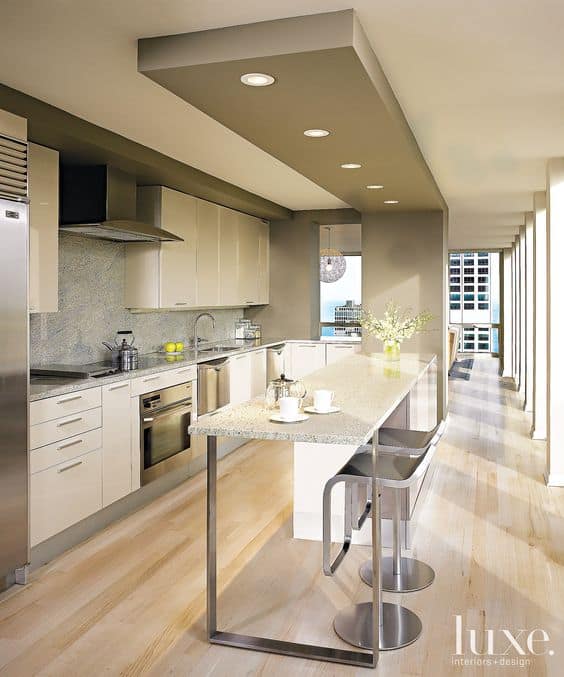
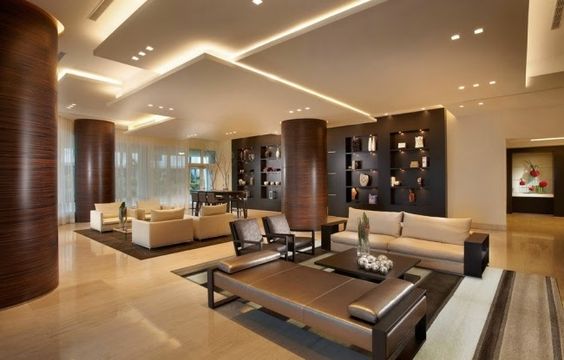
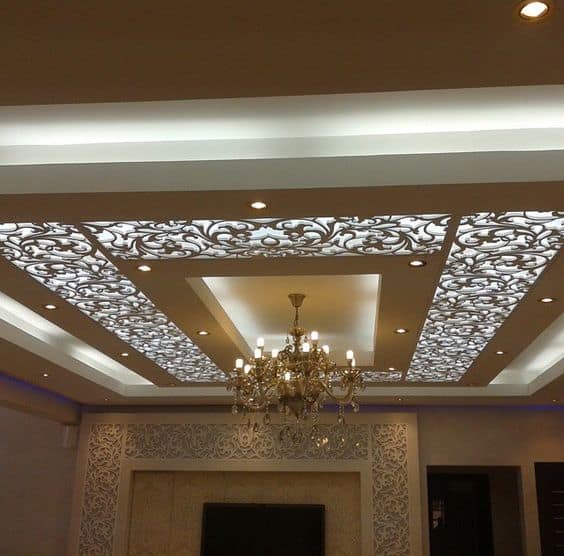
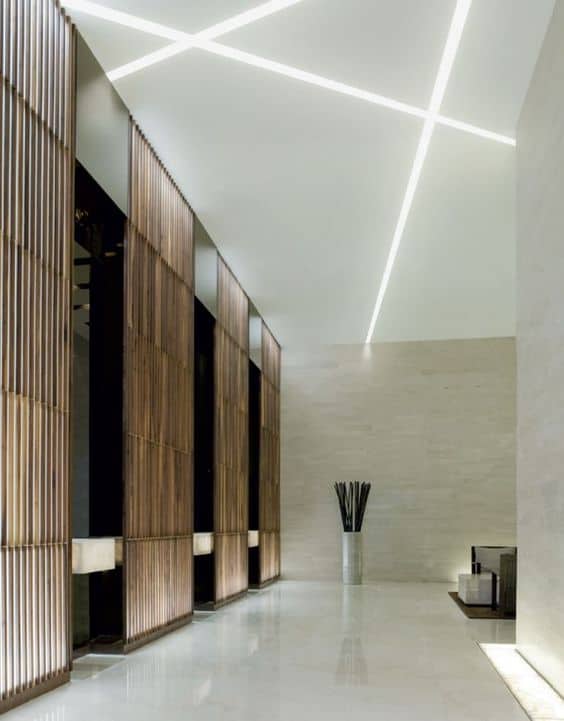
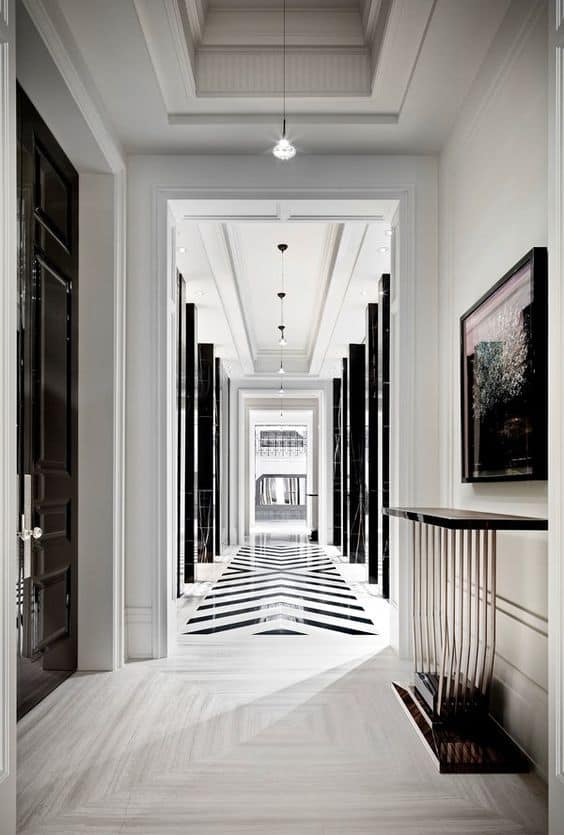
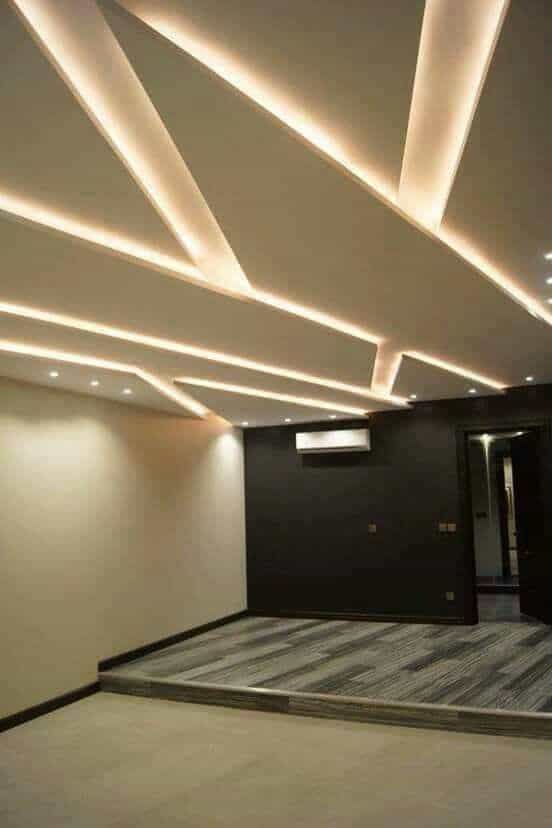
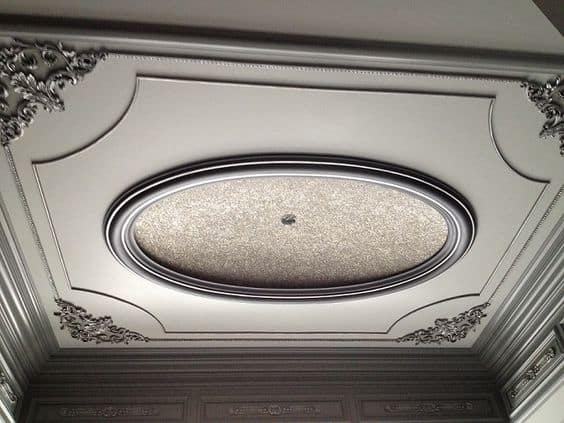
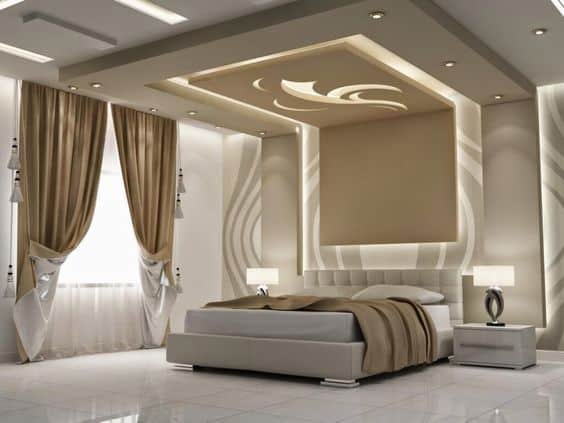
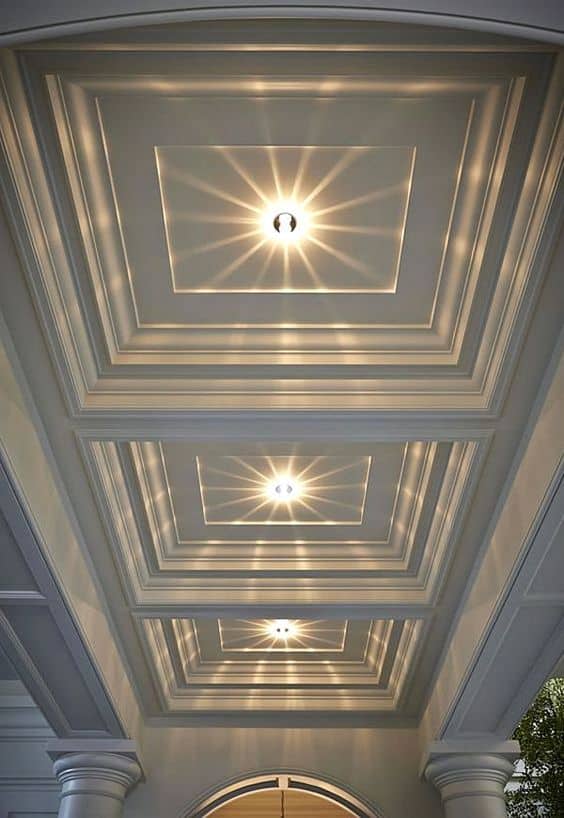
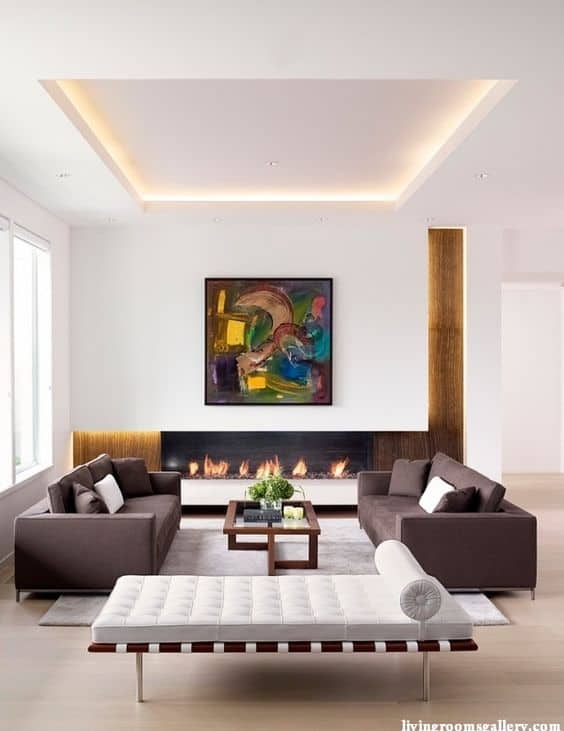
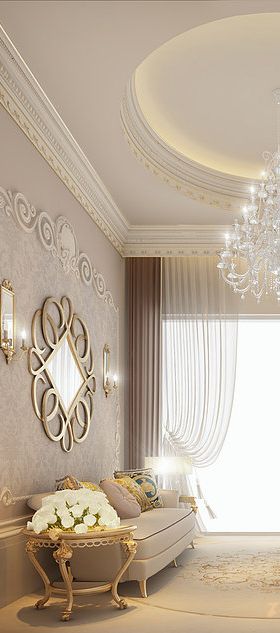
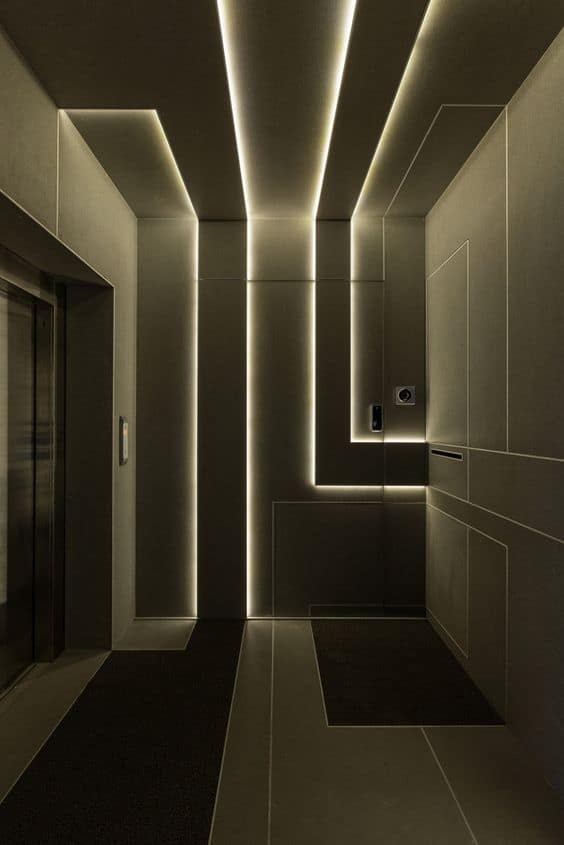
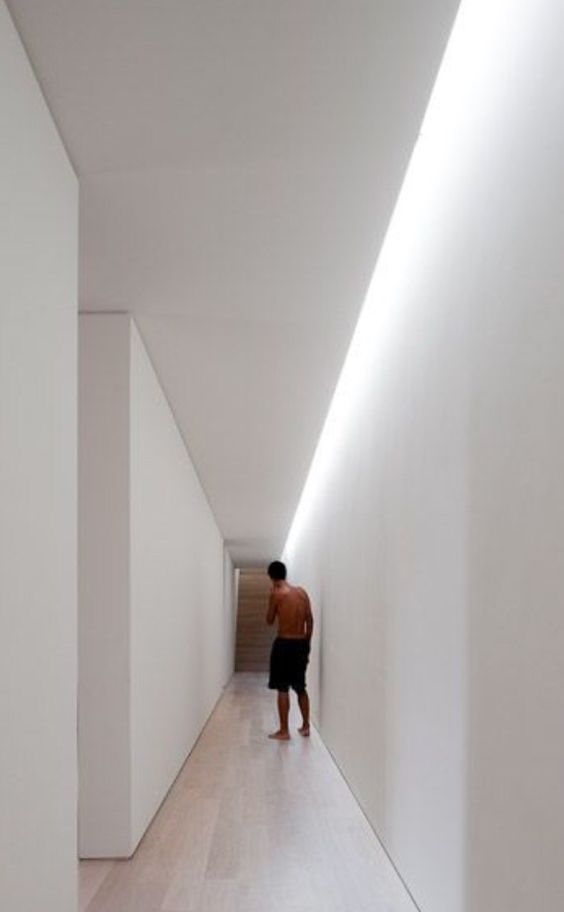

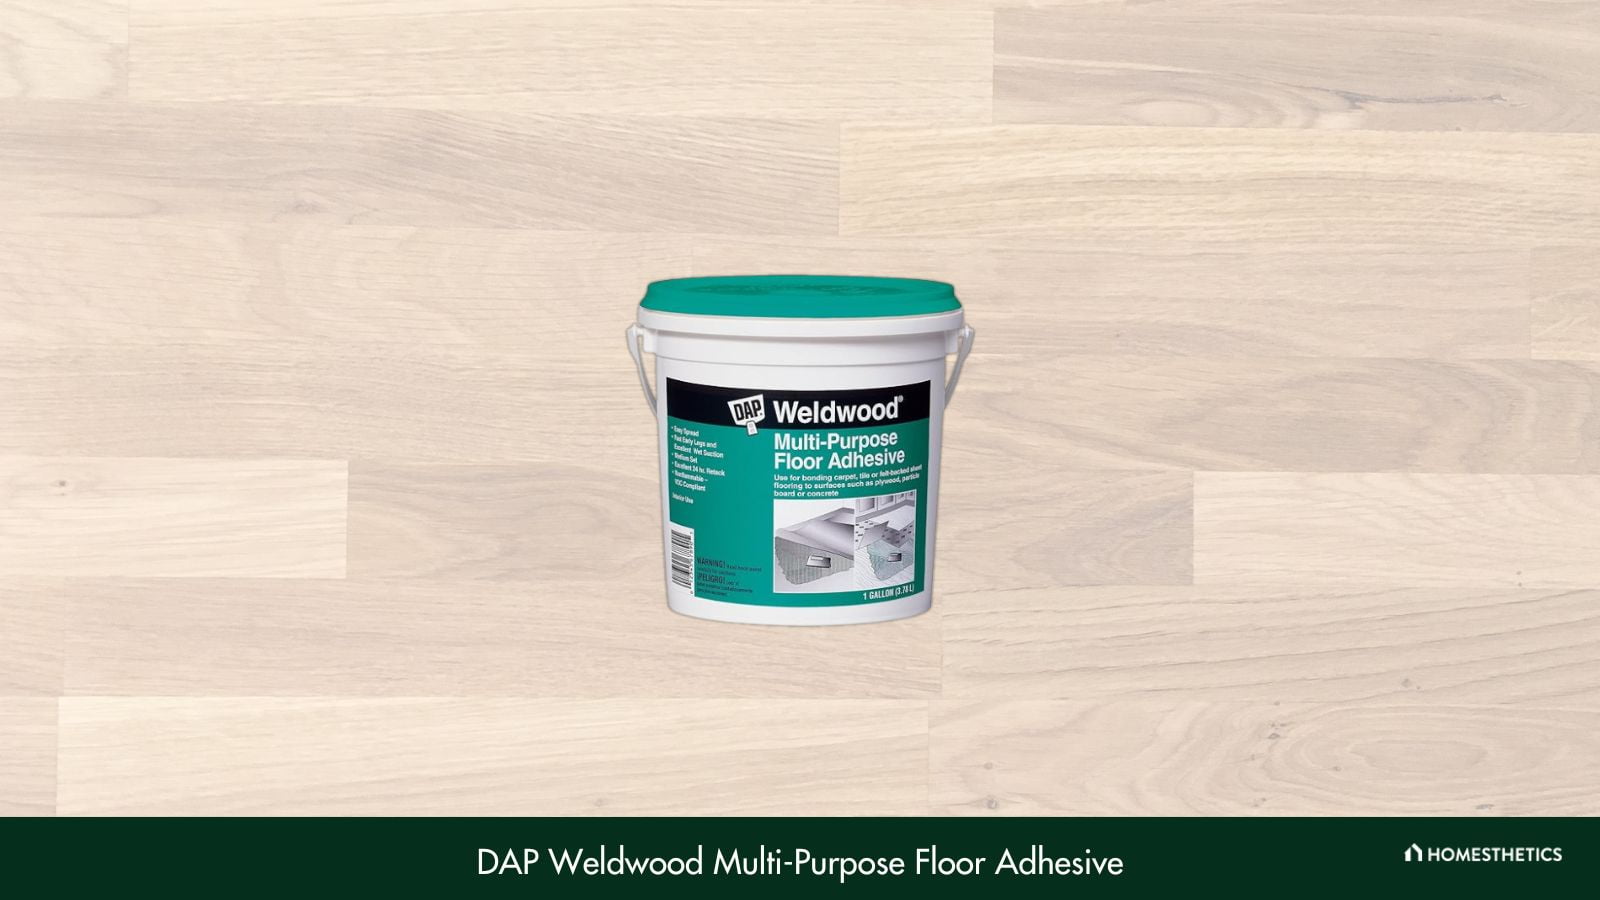
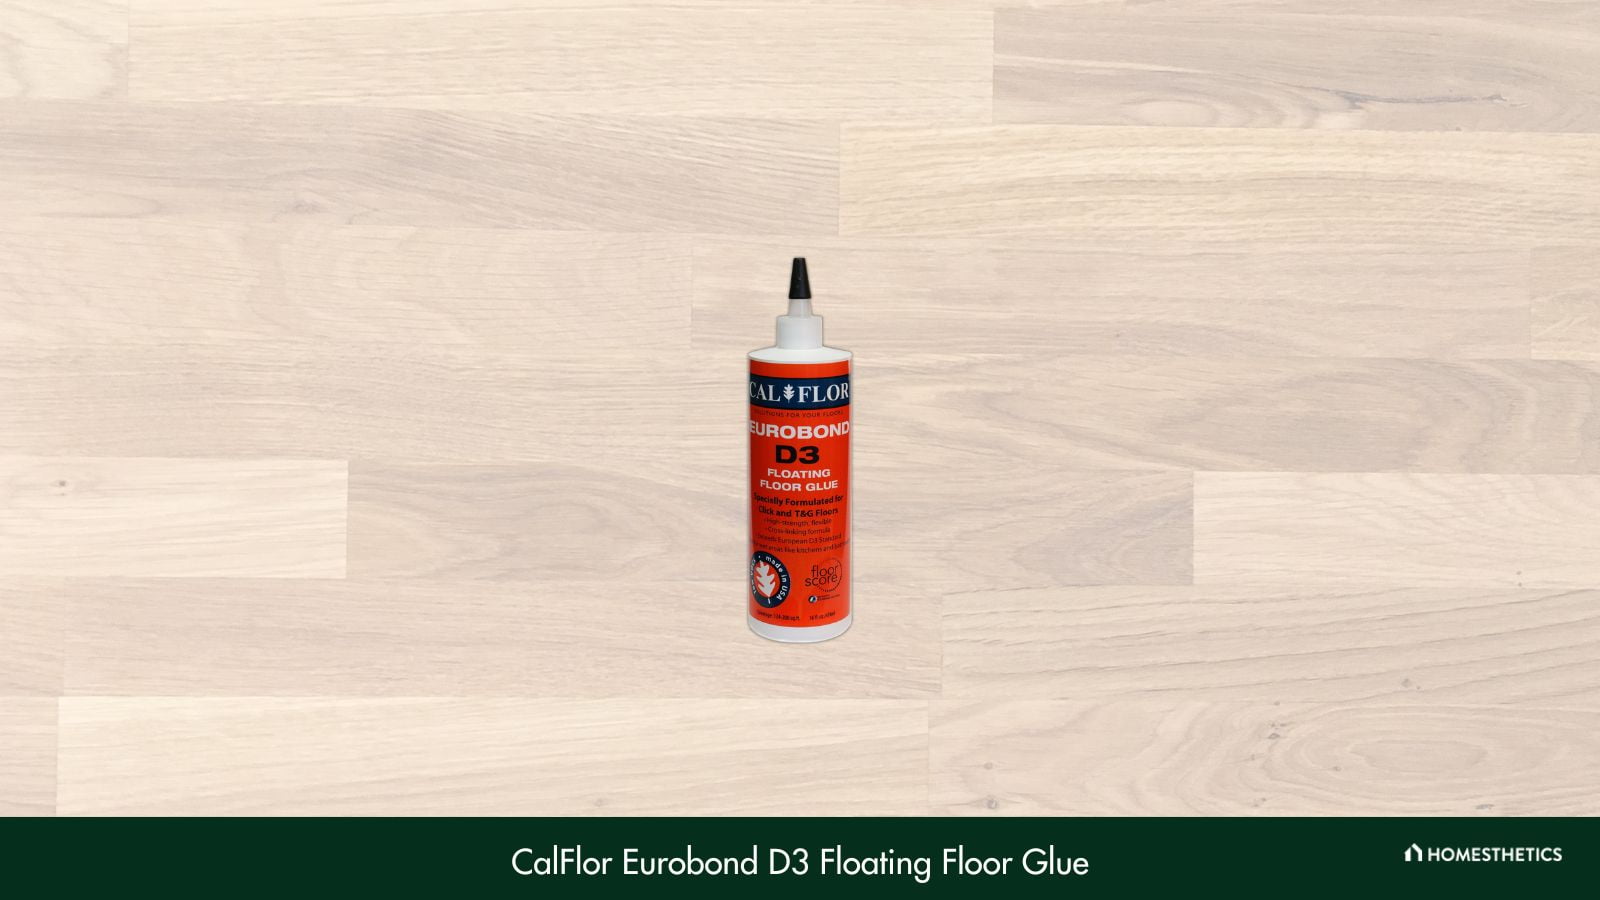
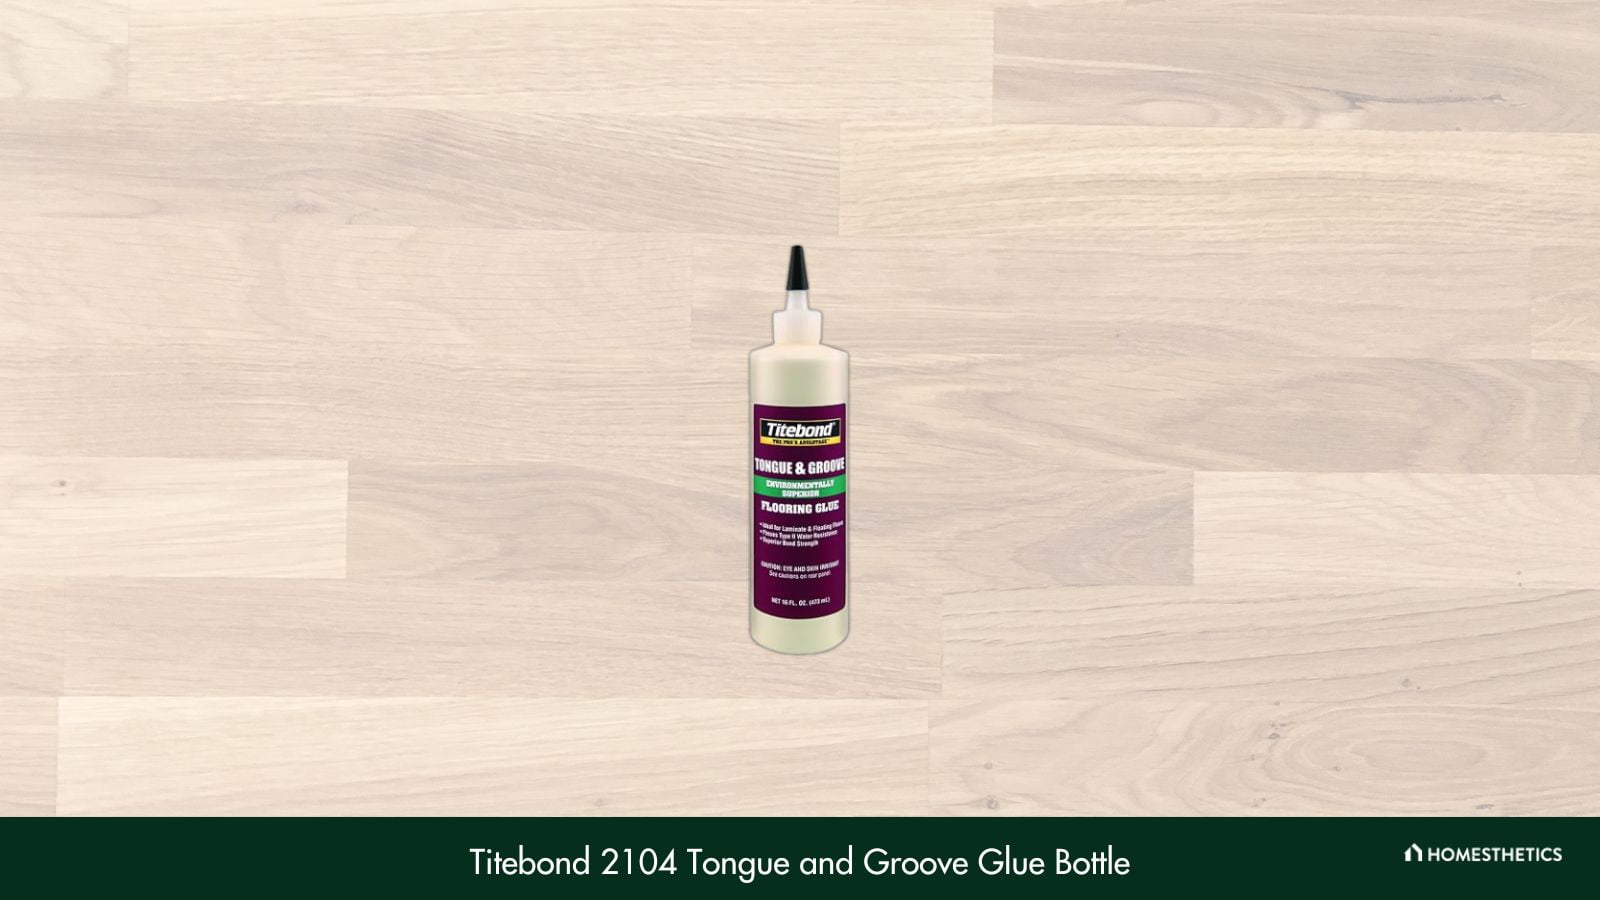
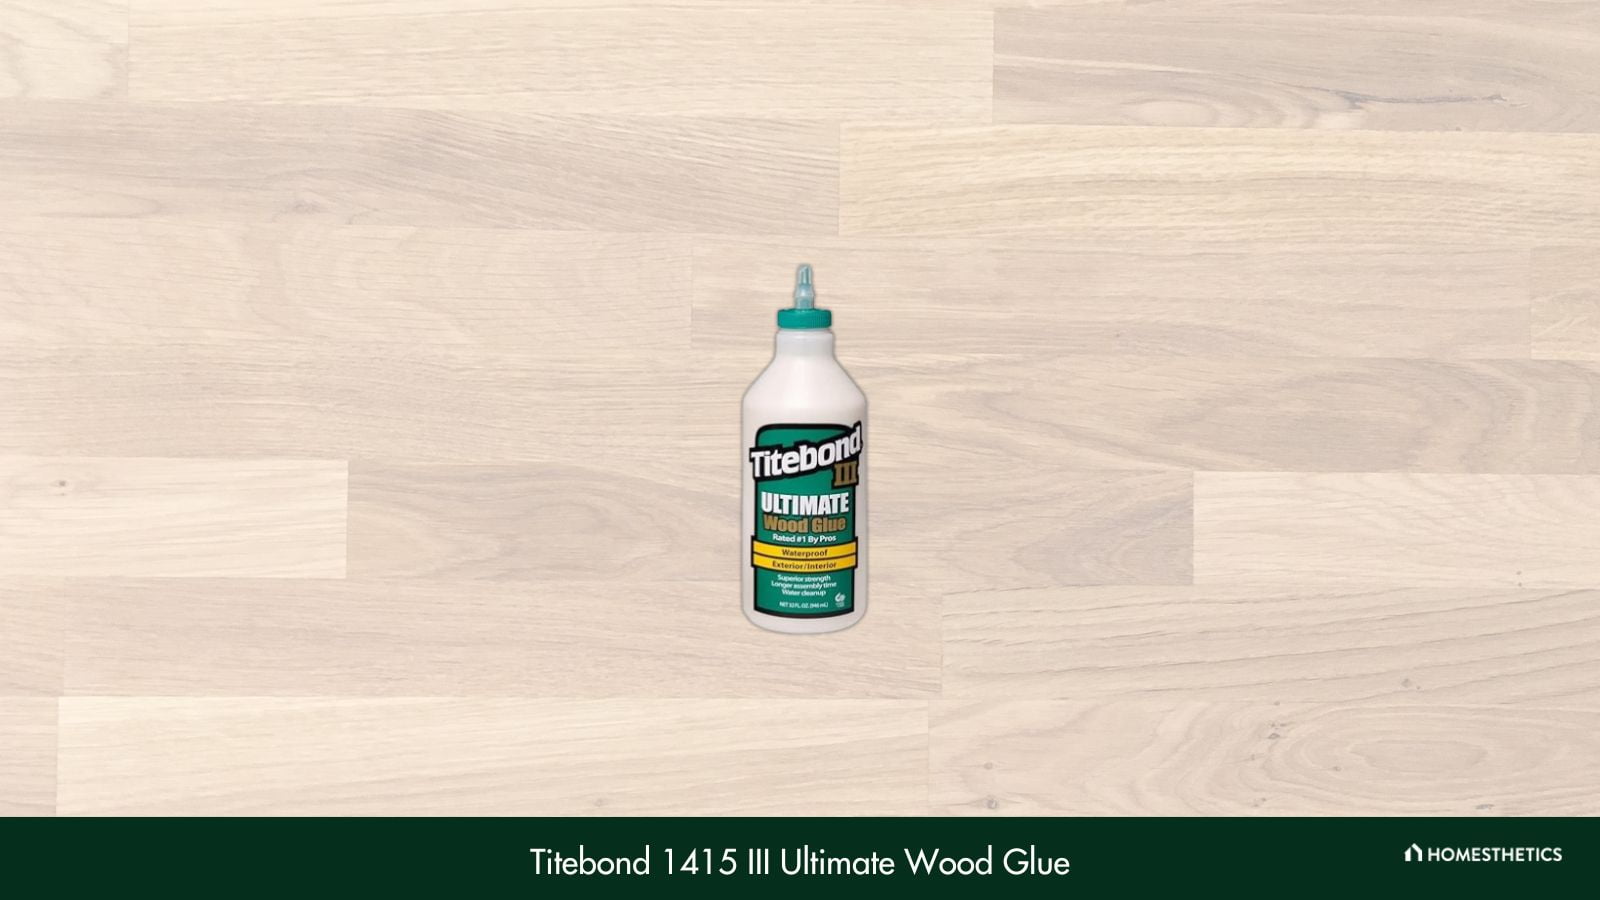
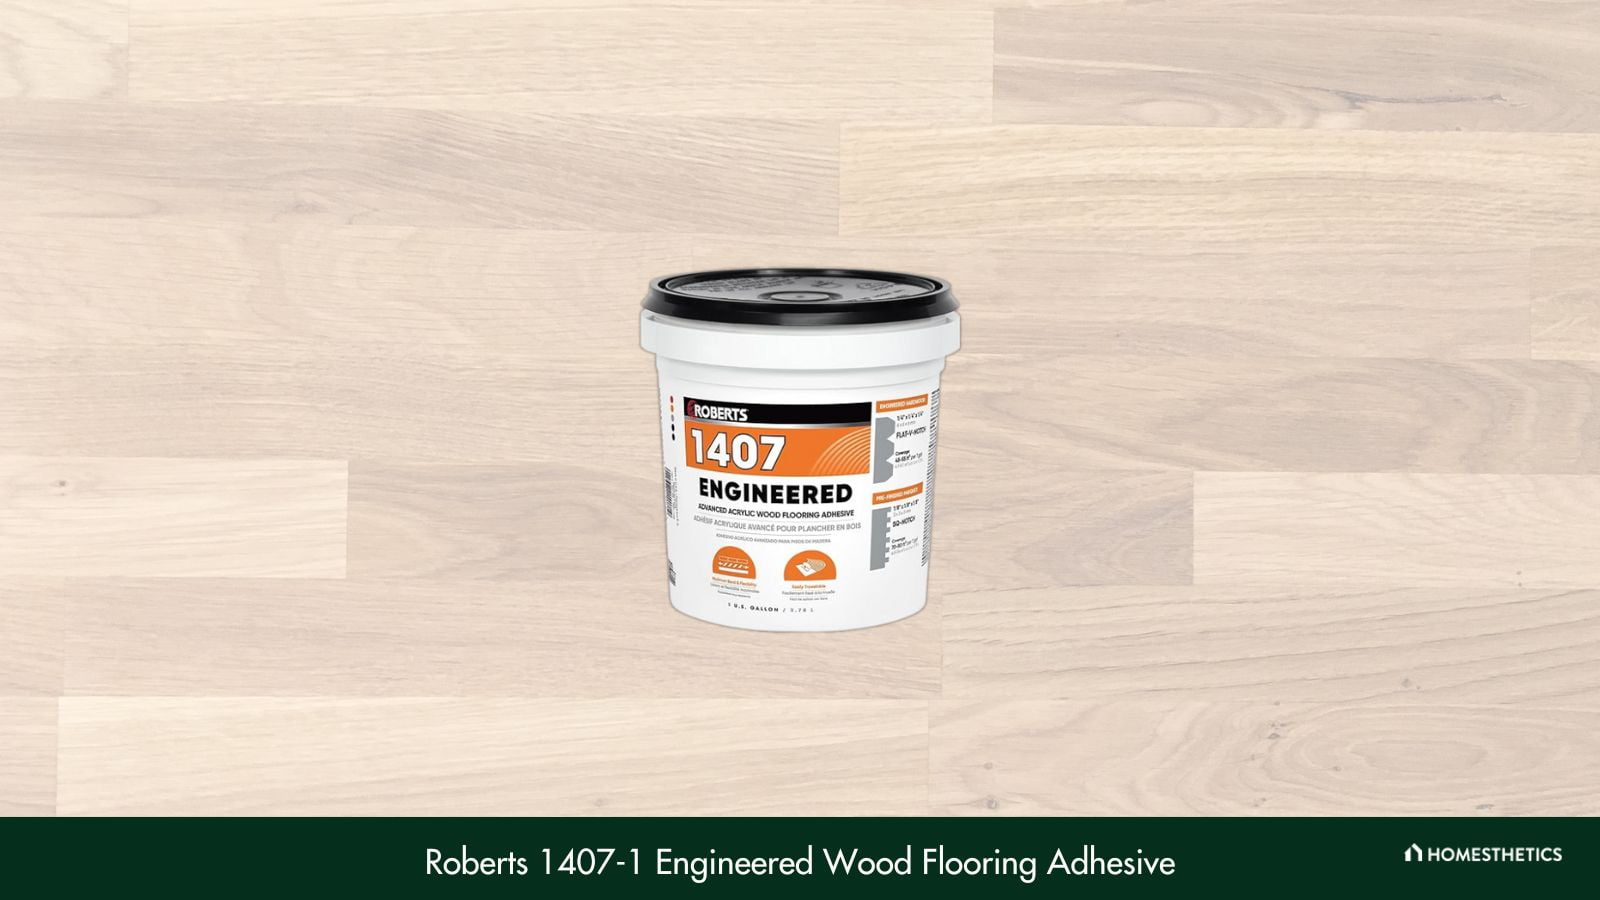
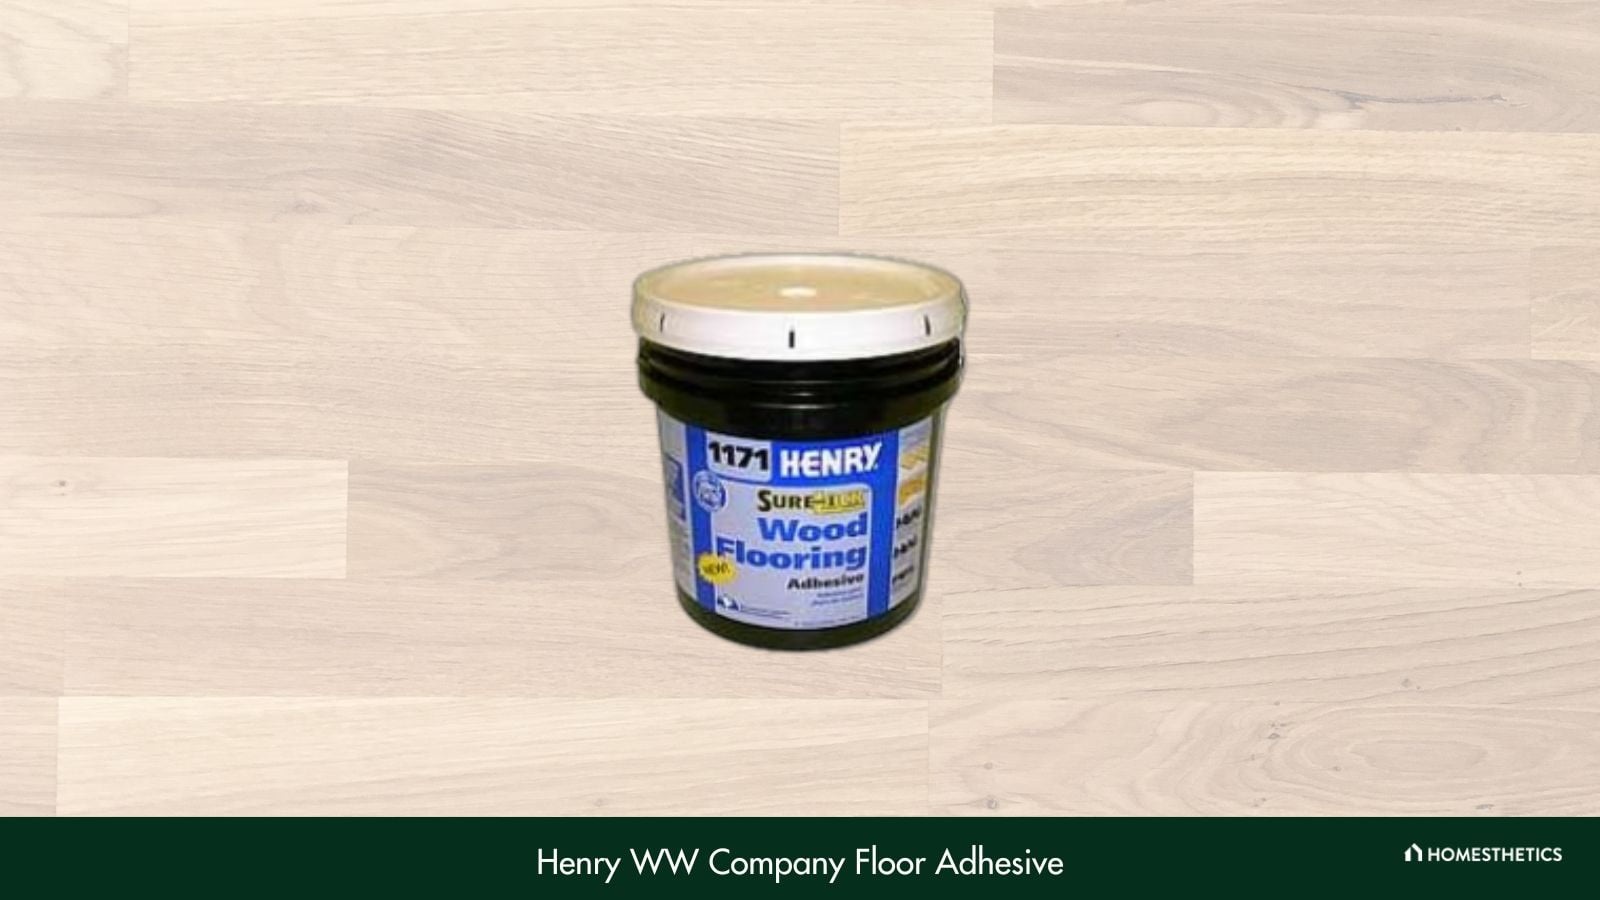
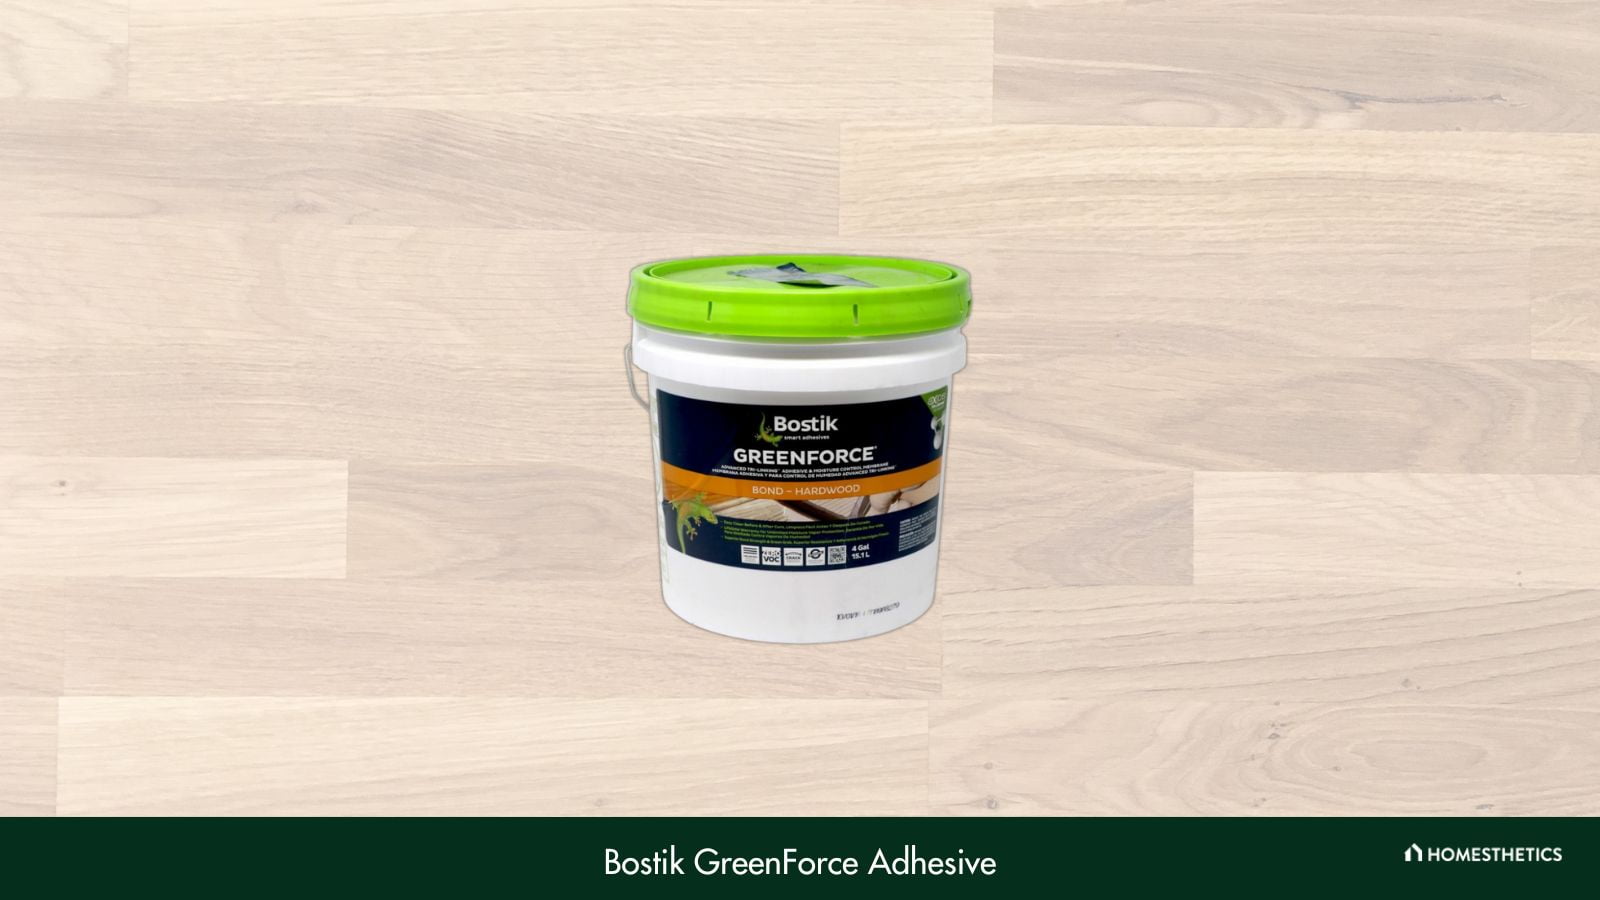


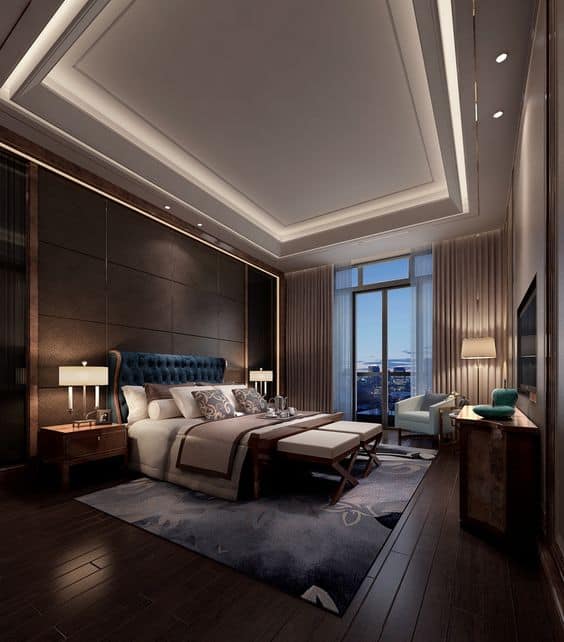
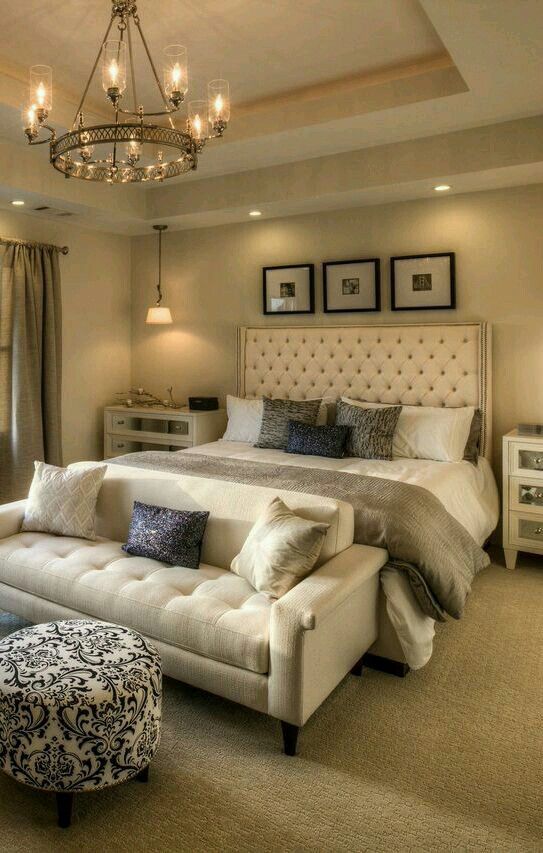
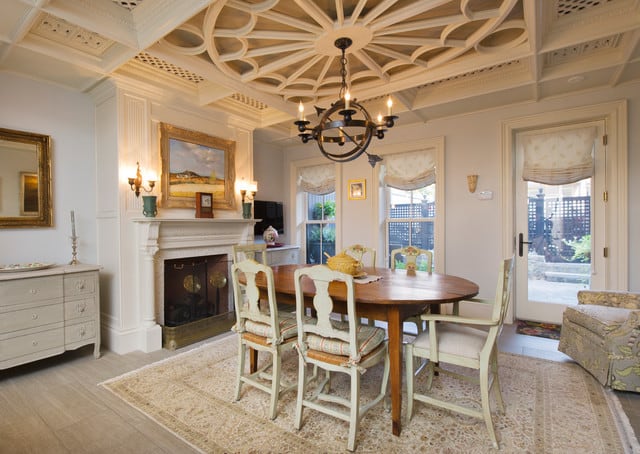
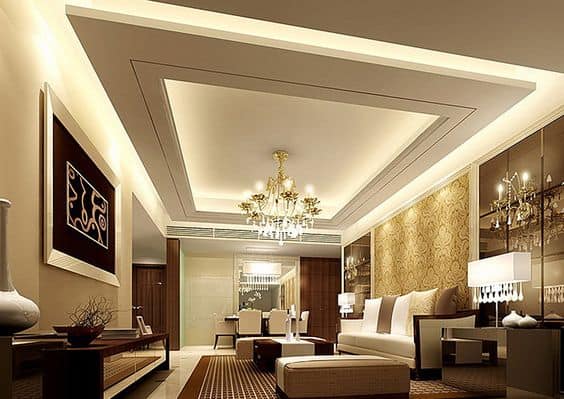
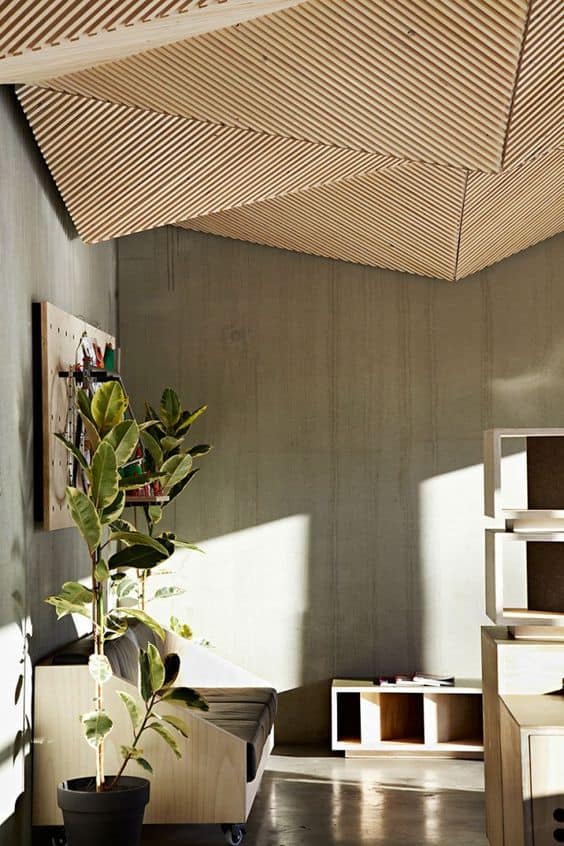

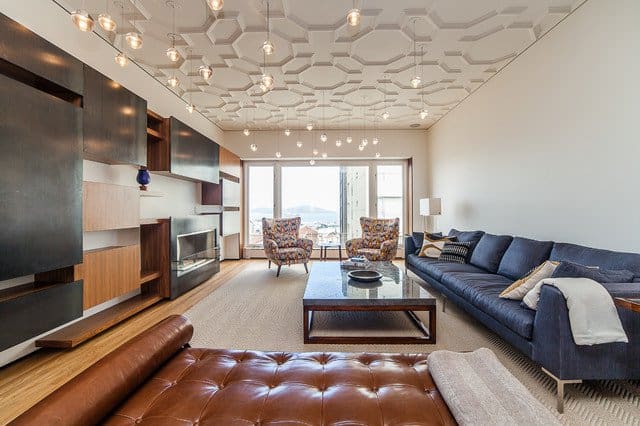
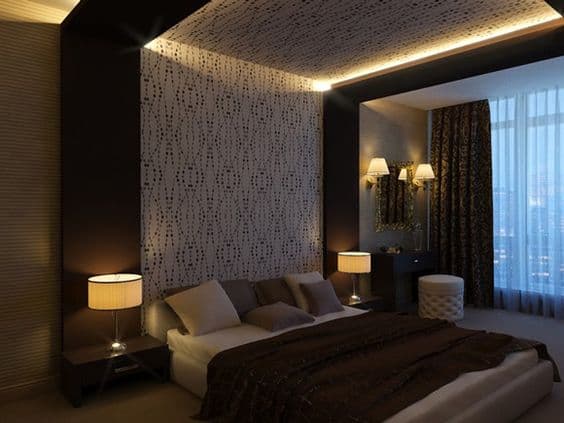
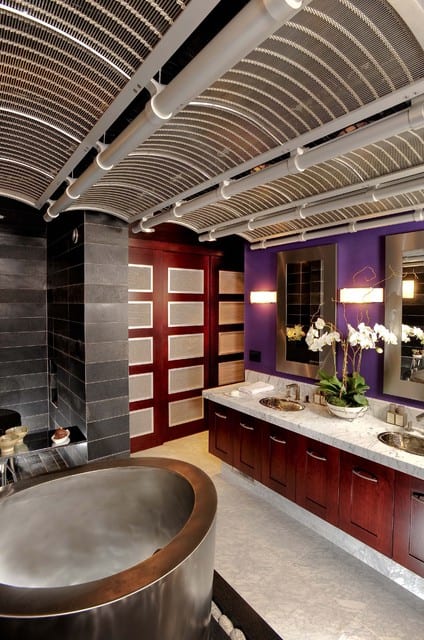
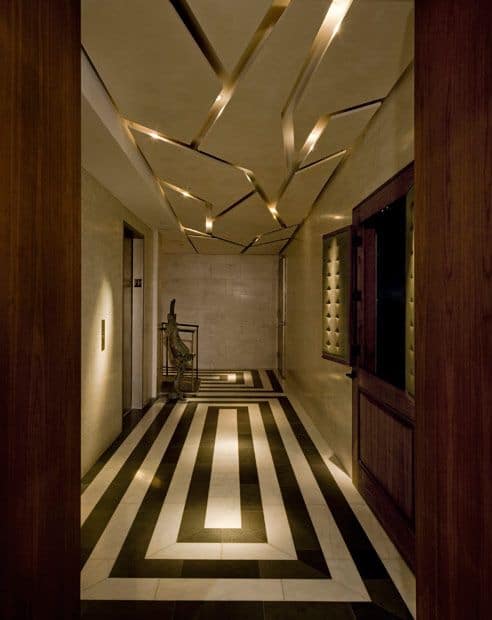
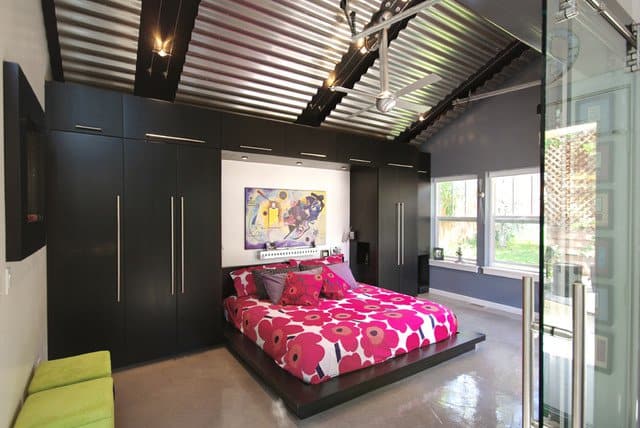
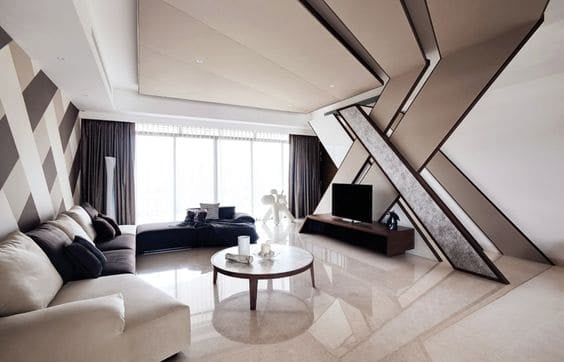
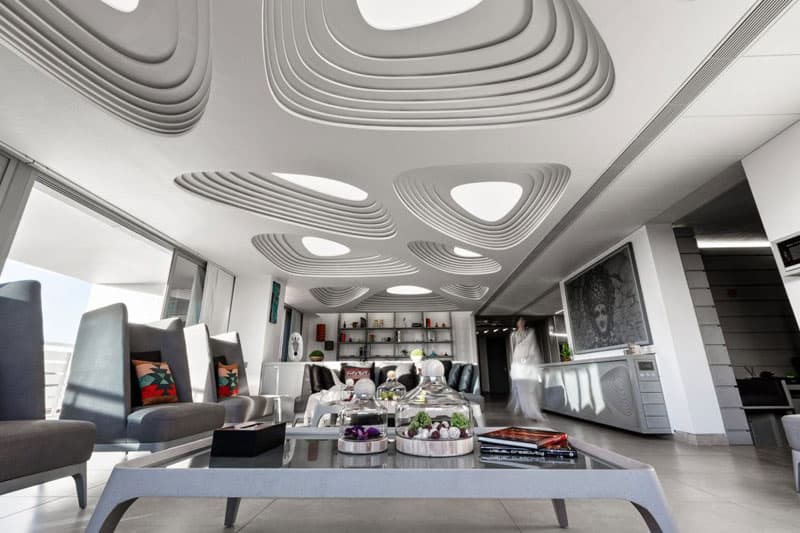
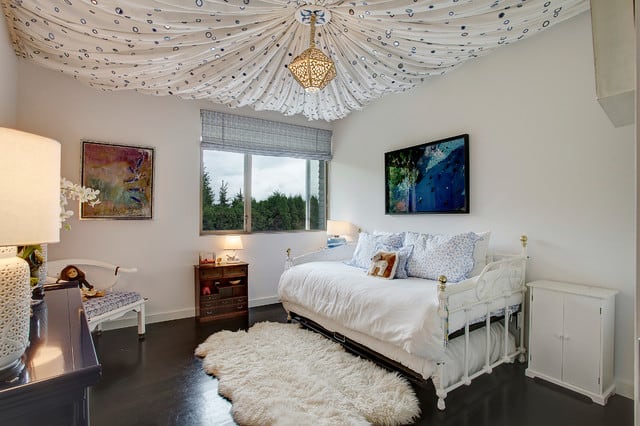
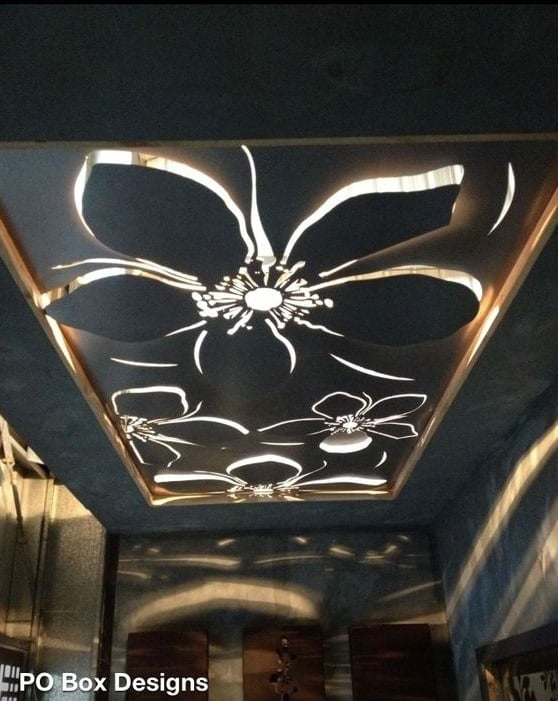
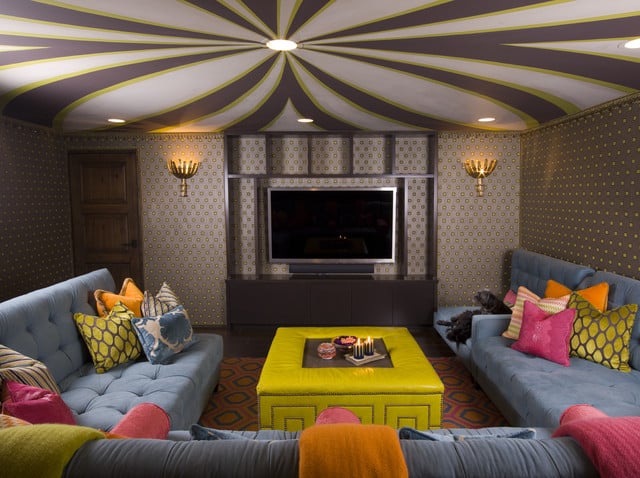
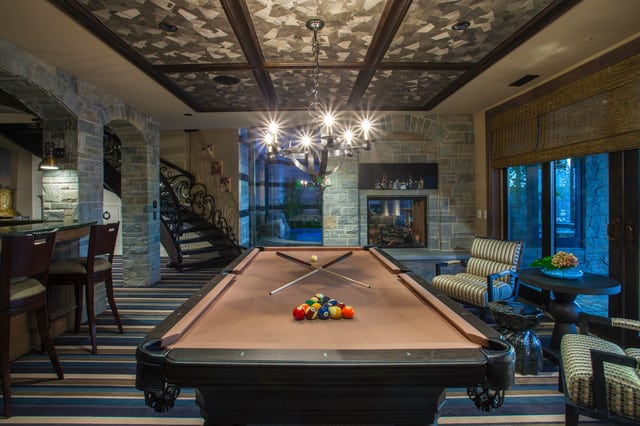
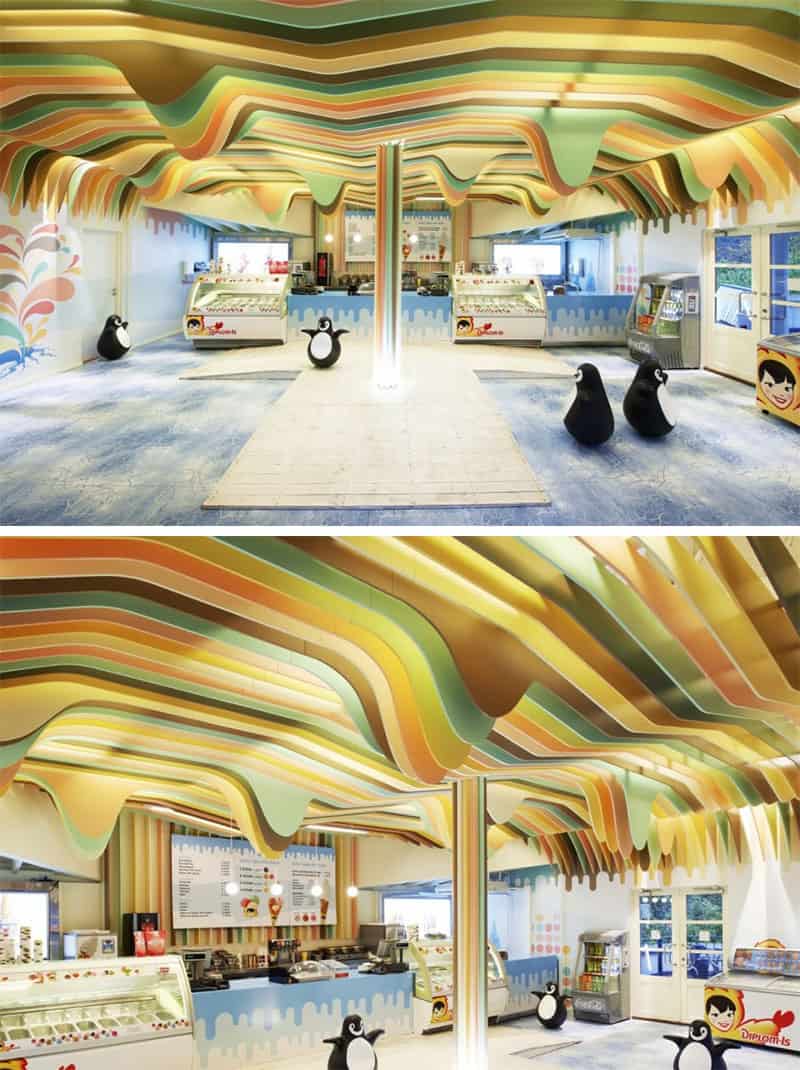
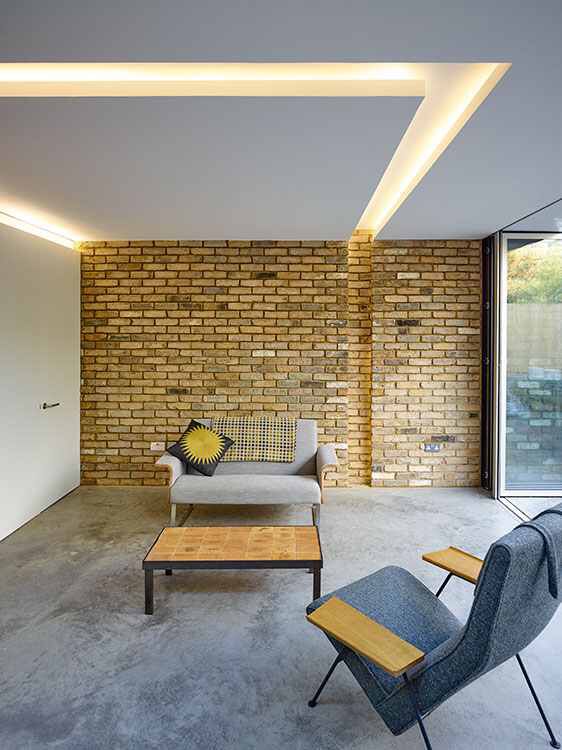
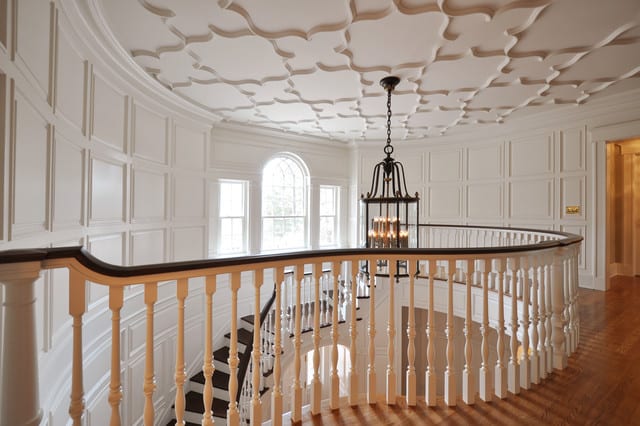


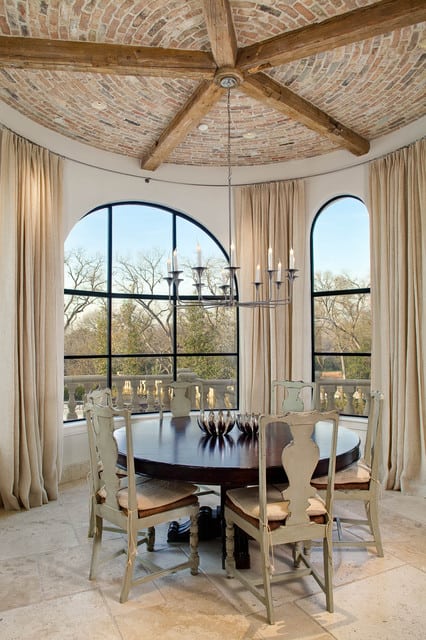
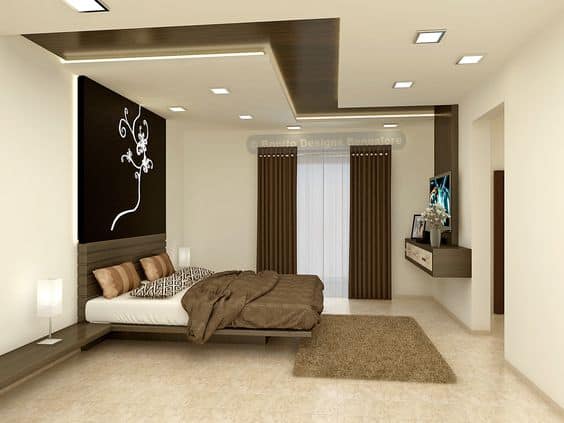
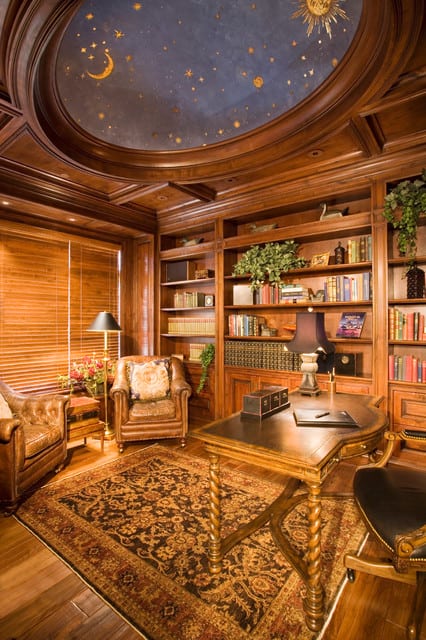
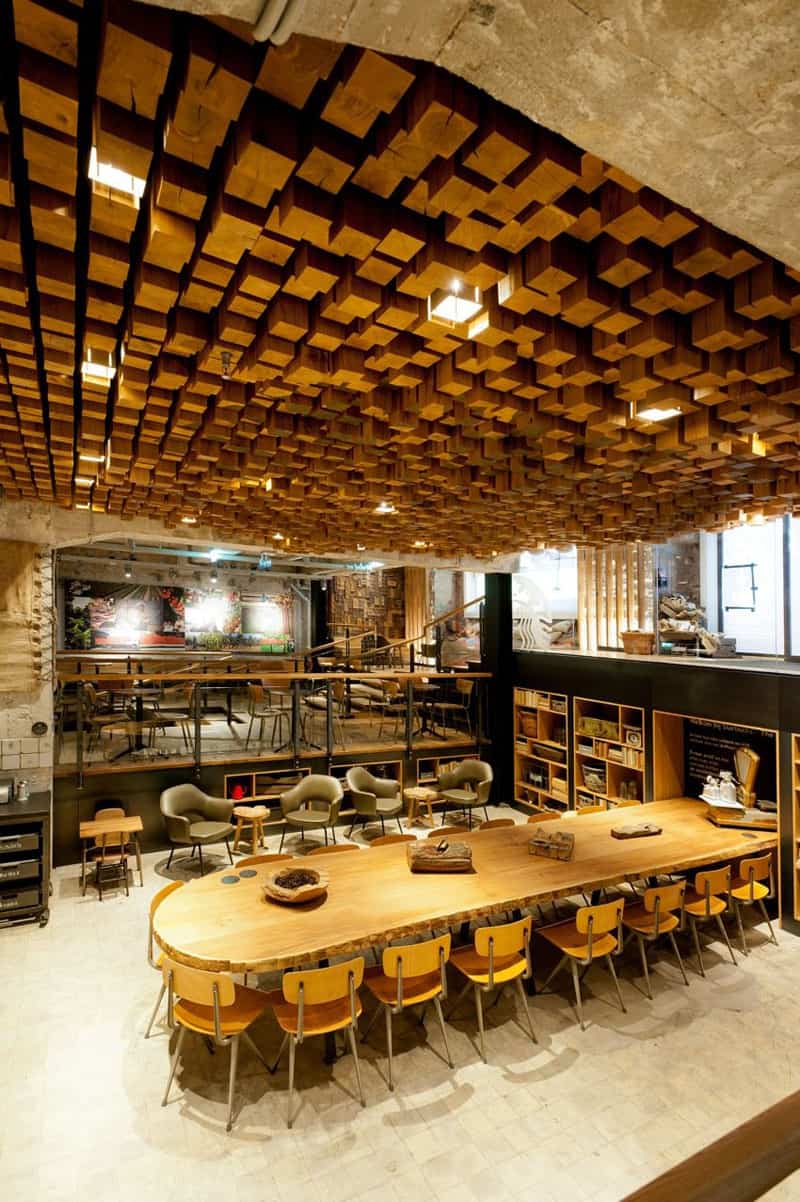
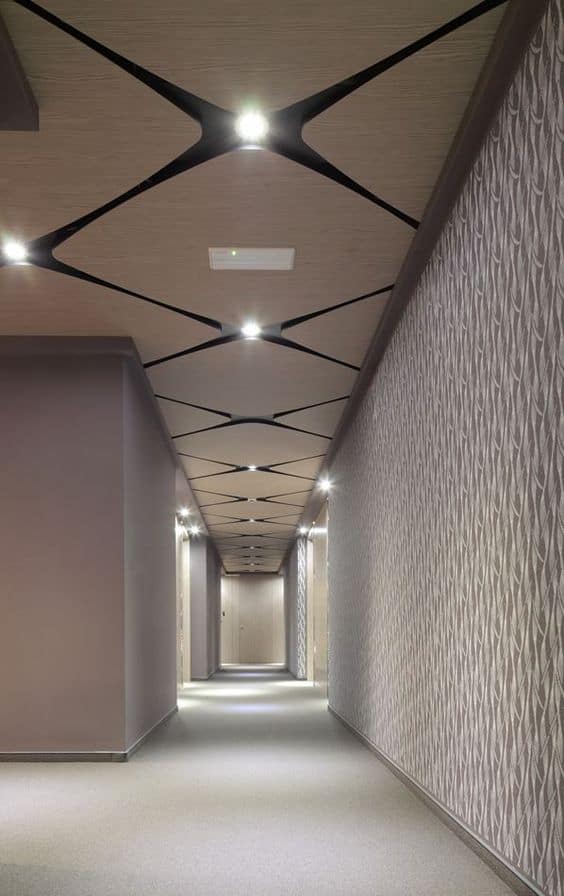
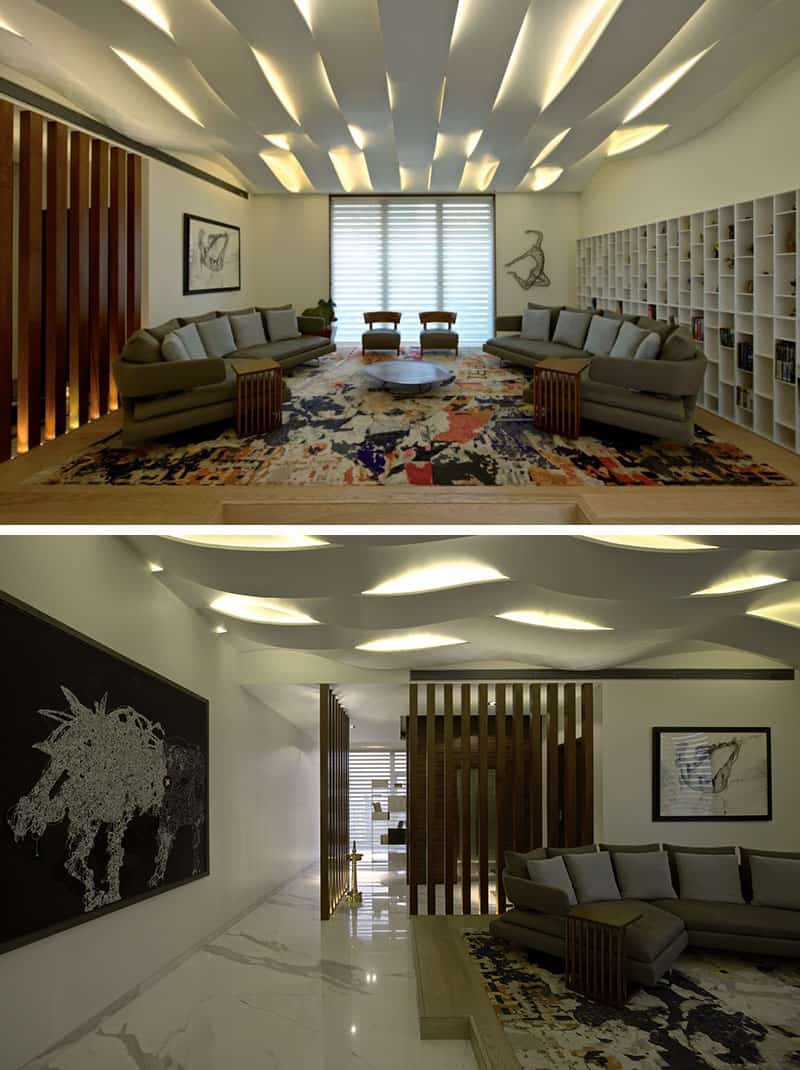

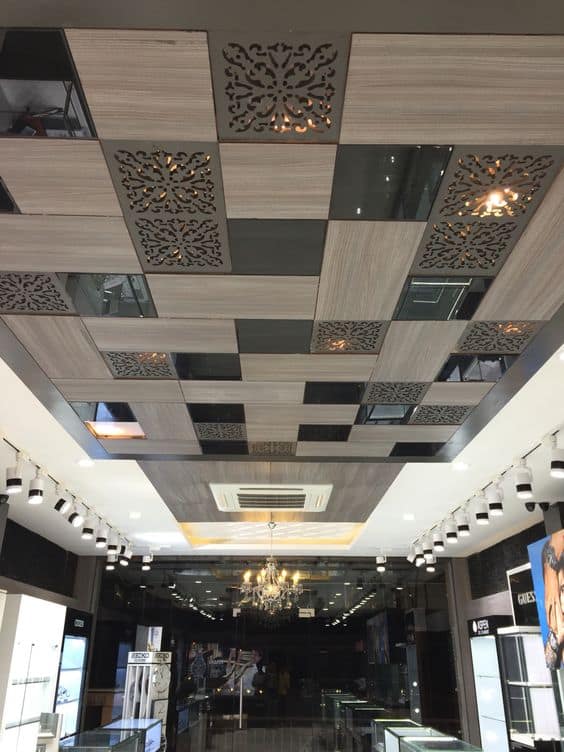

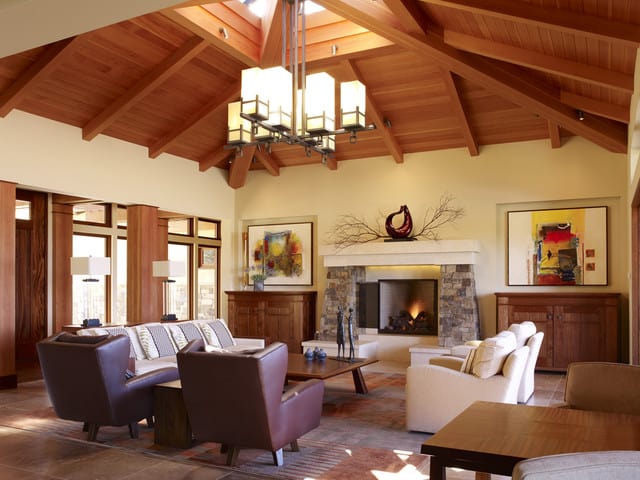
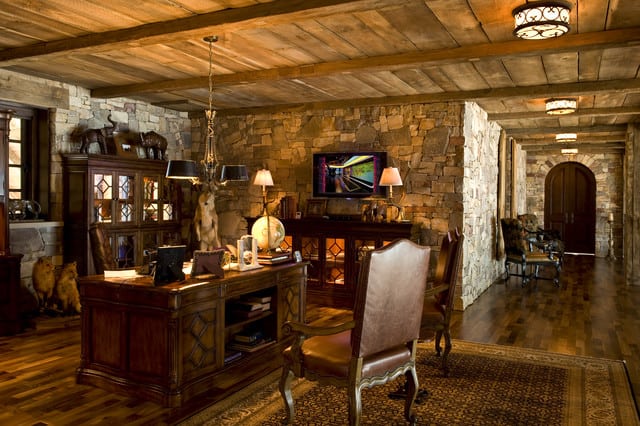
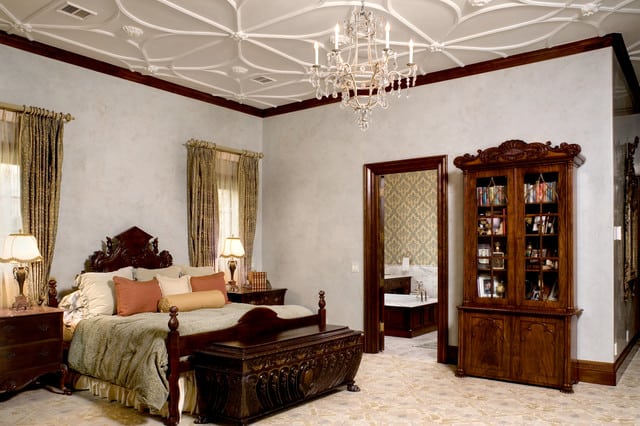
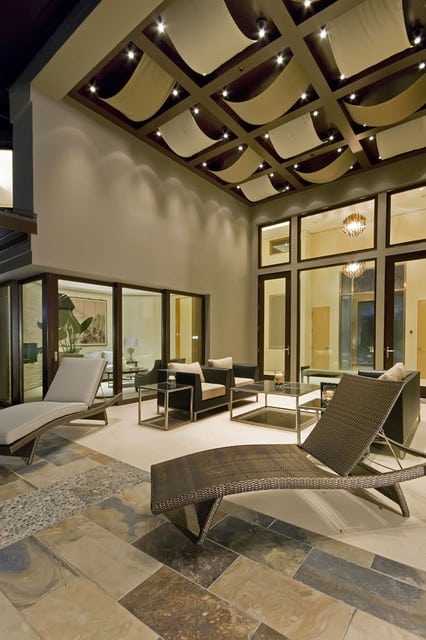
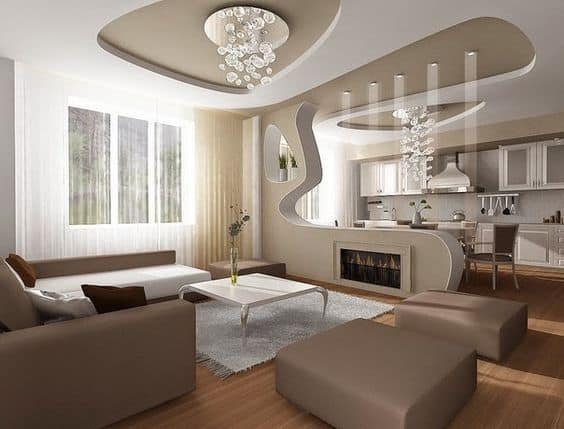
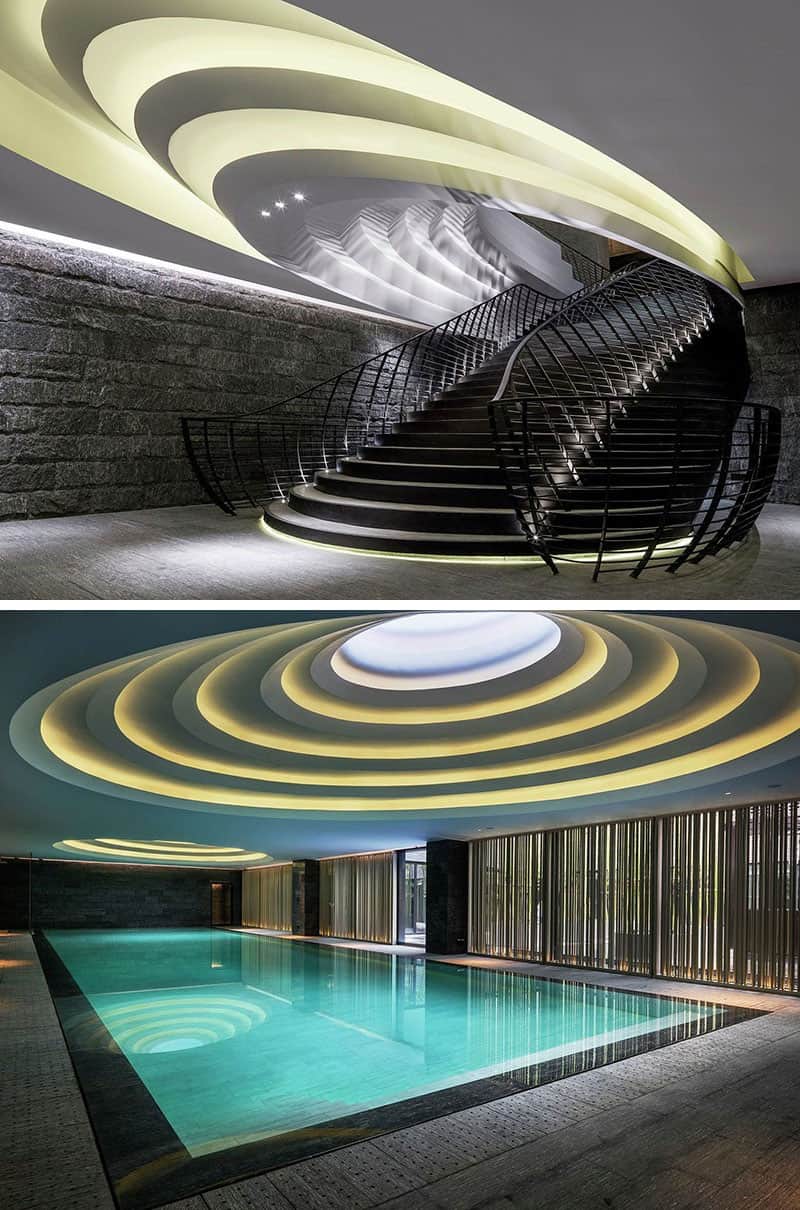
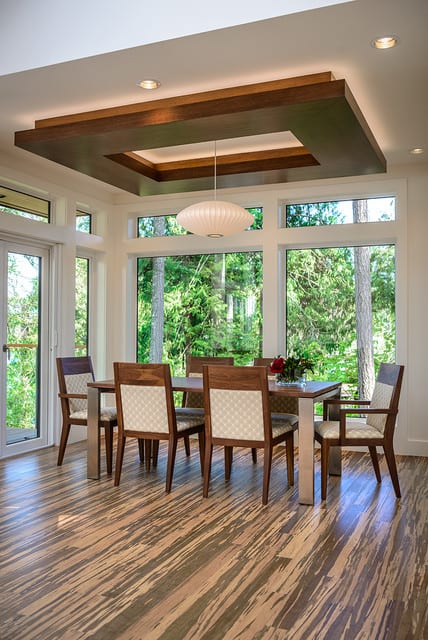
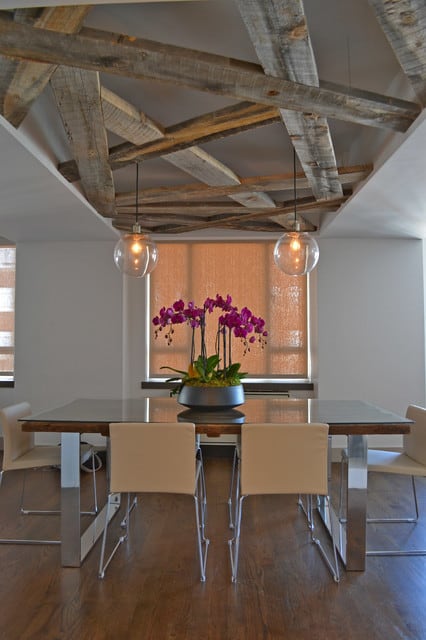

![Epoxy Garage Floor 101 [All You Need to Know]](https://homesthetics.net/wp-content/uploads/2022/01/Epoxy-Garage-Floor-101-3.jpg "Epoxy Garage Floor 101 [All You Need to Know]")


![Do Ceiling Fans Use a Lot of Electricity? [No, Not Really]](https://homesthetics.net/wp-content/uploads/2020/10/Do-Ceiling-Fans-Use-a-Lot-of-Electricity-No-Not-Really-1.jpg "Do Ceiling Fans Use a Lot of Electricity? [No, Not Really]")
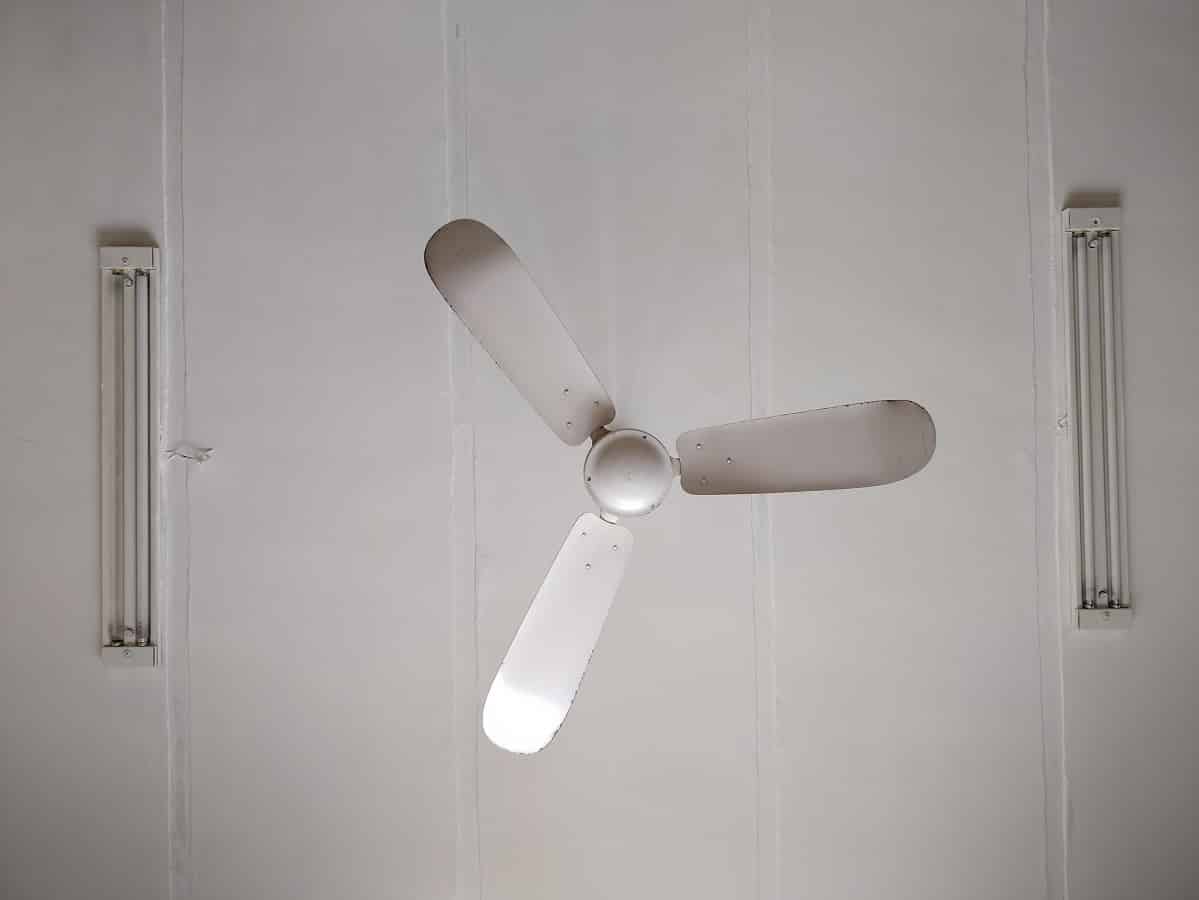


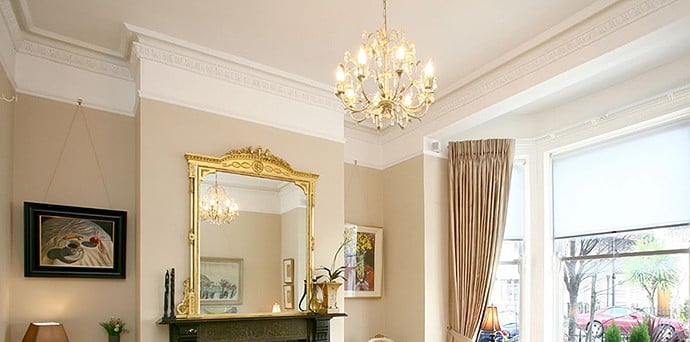
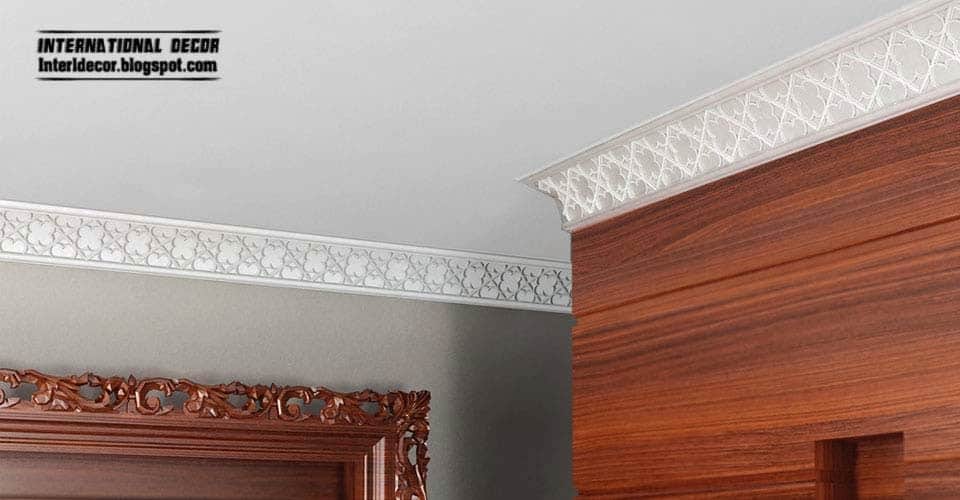
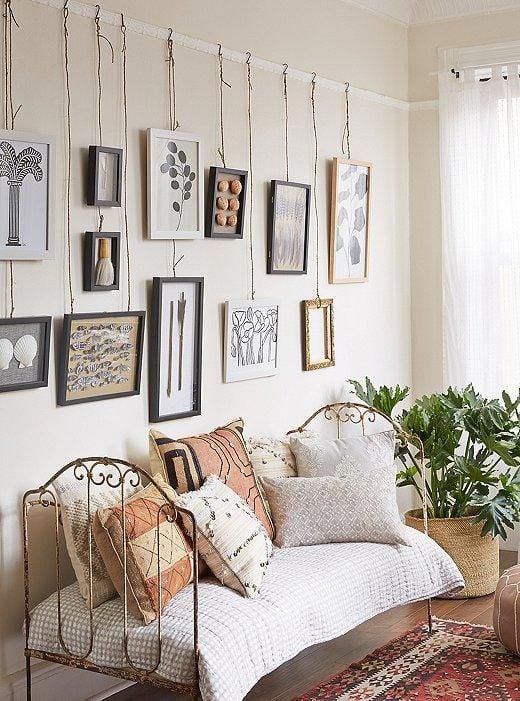
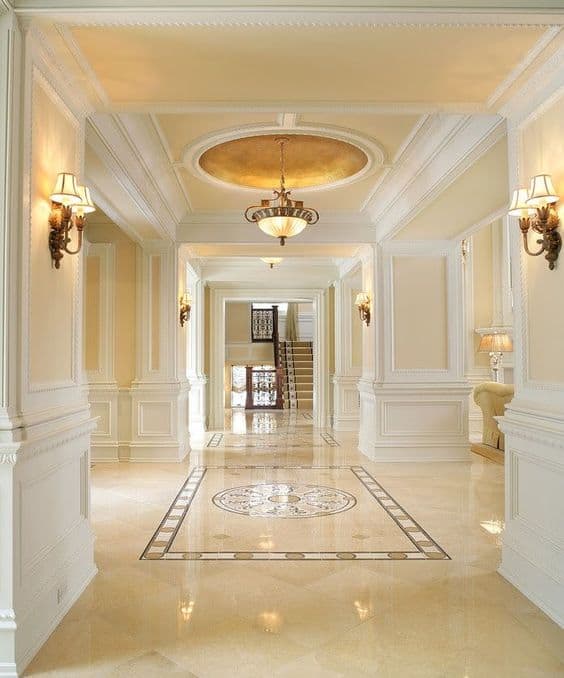
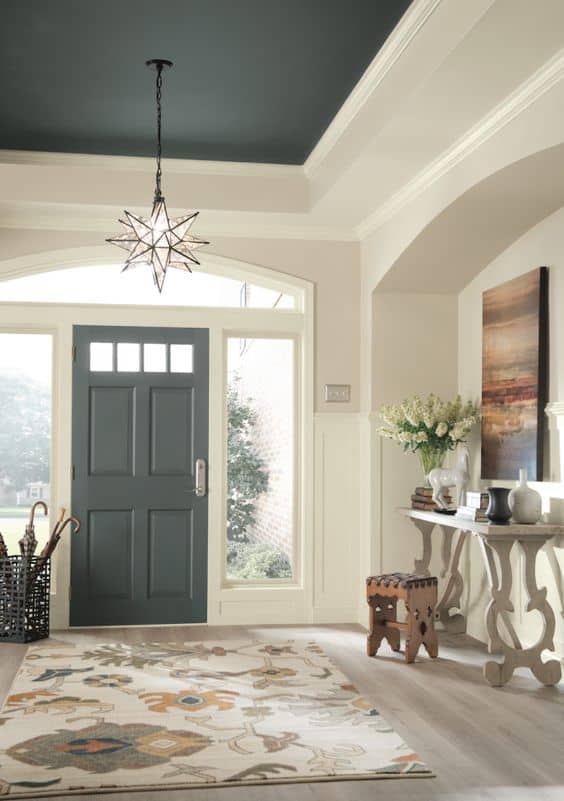
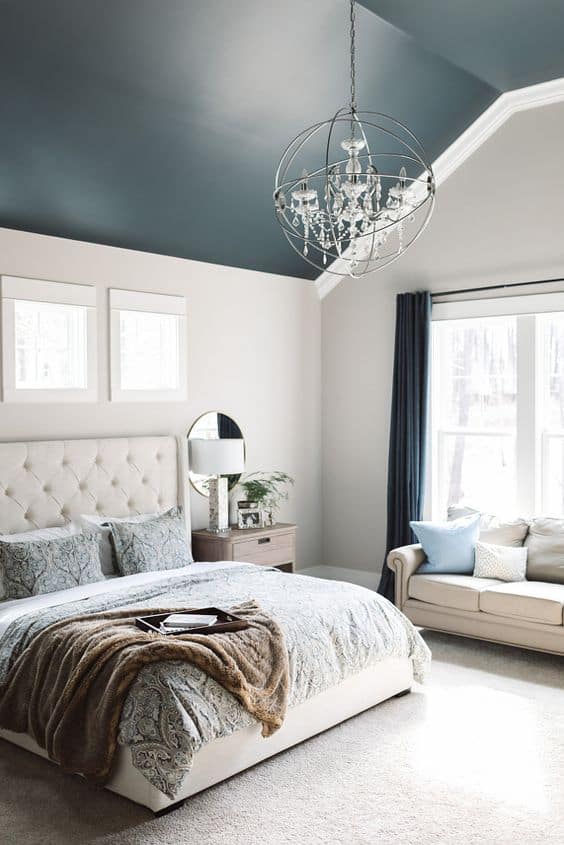
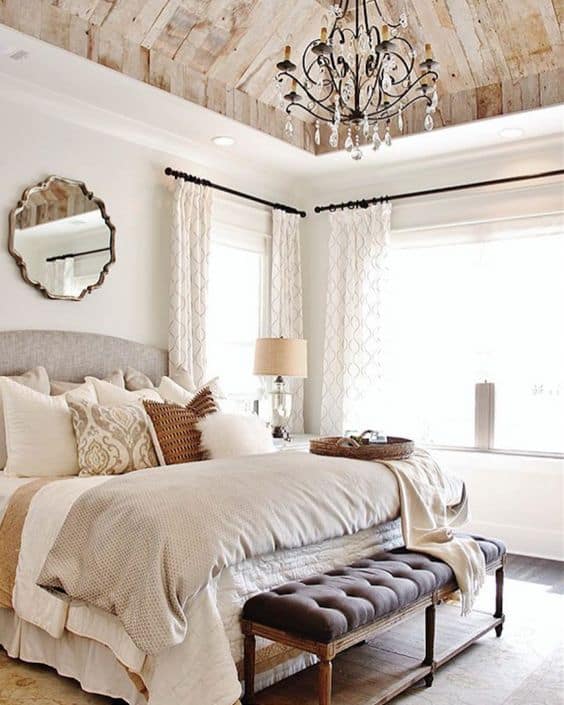
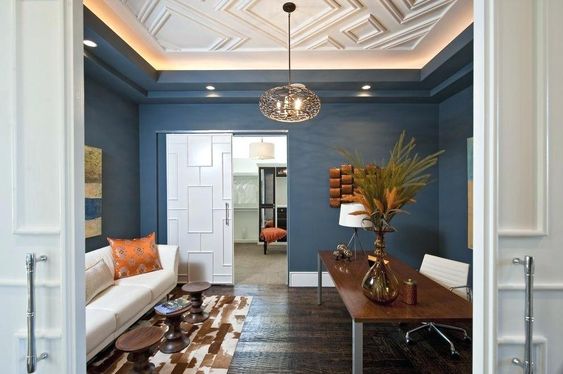
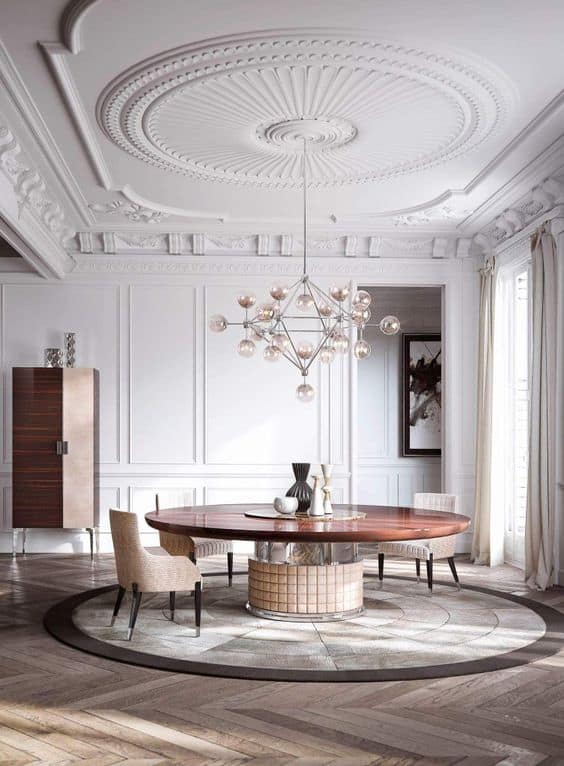

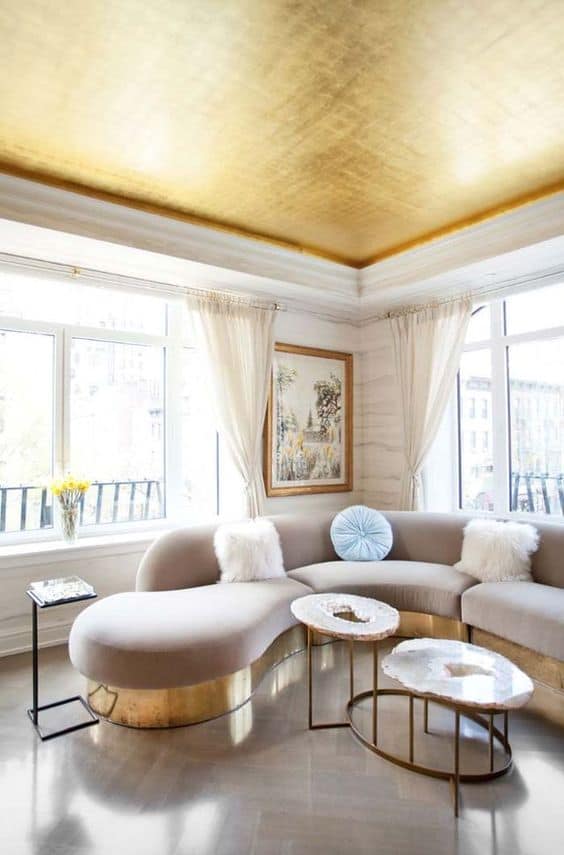
![Ceiling Paint Vs Wall Paint [Comparison & Ideas]](https://homesthetics.net/wp-content/uploads/2022/07/Ceiling-Paint-Vs-Wall-Paint-1.jpg "Ceiling Paint Vs Wall Paint [Comparison & Ideas]")
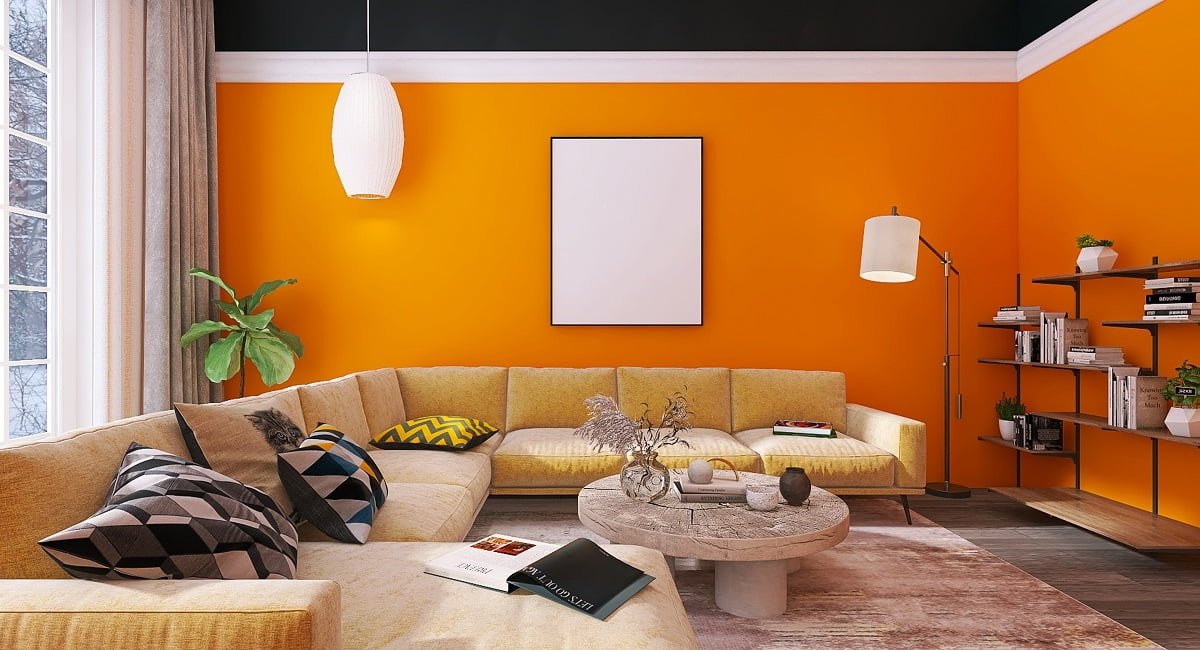
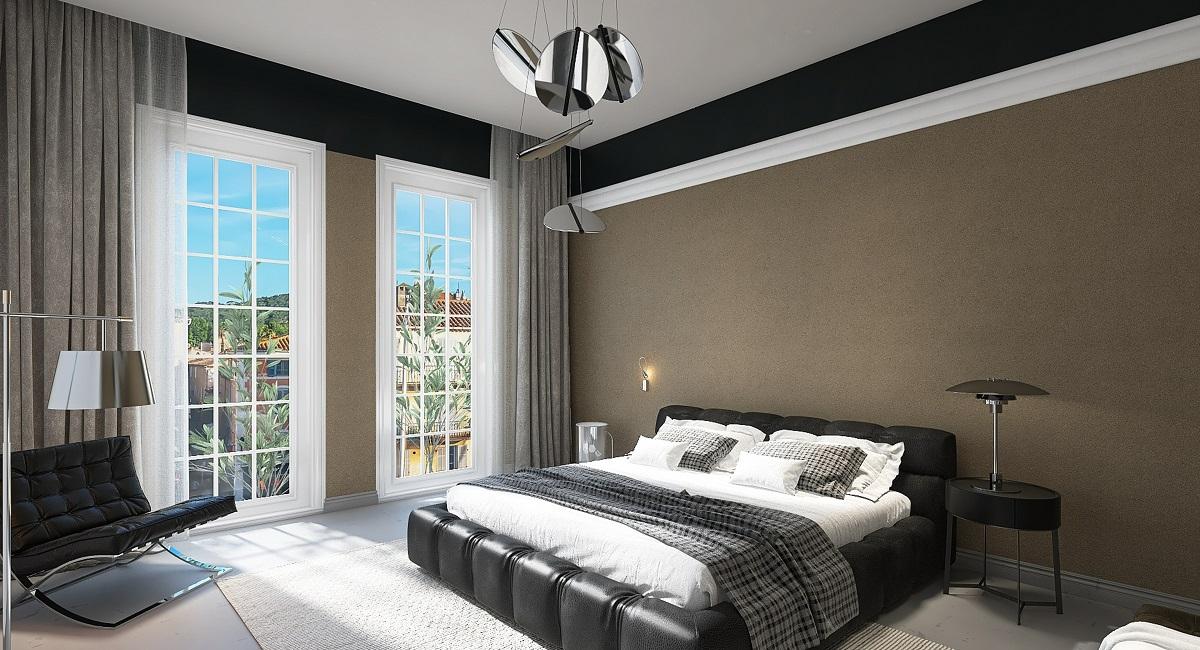
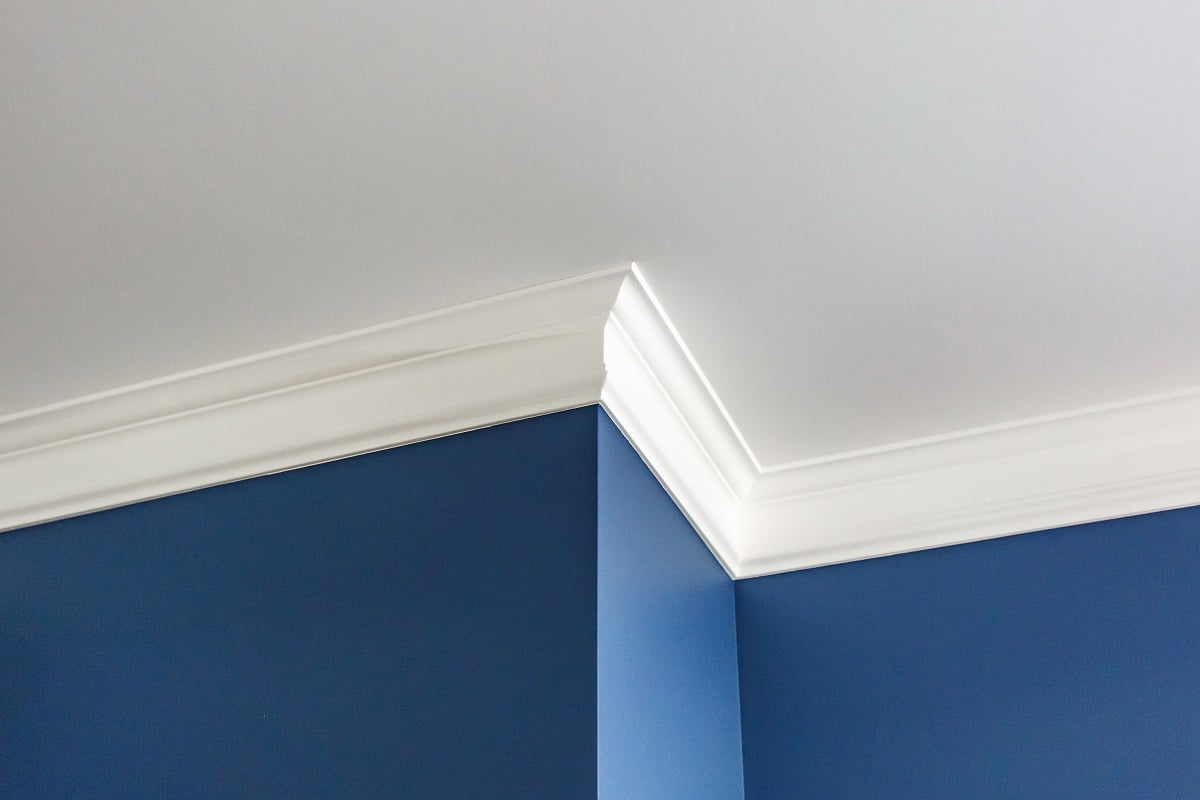

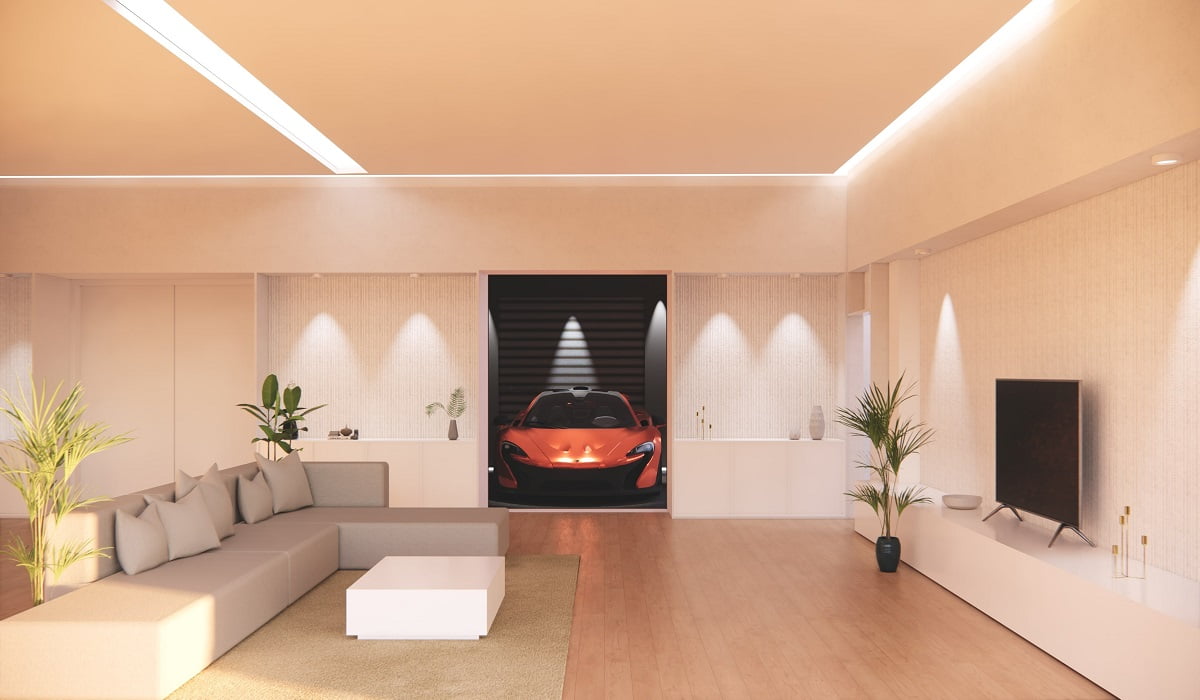
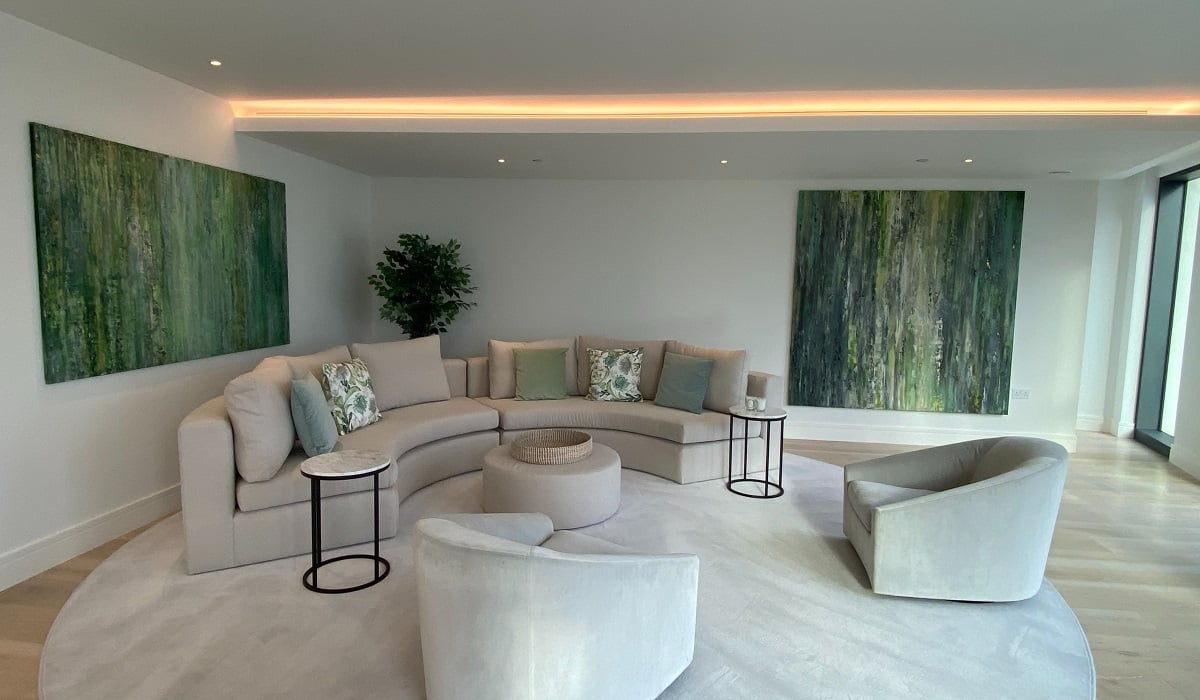
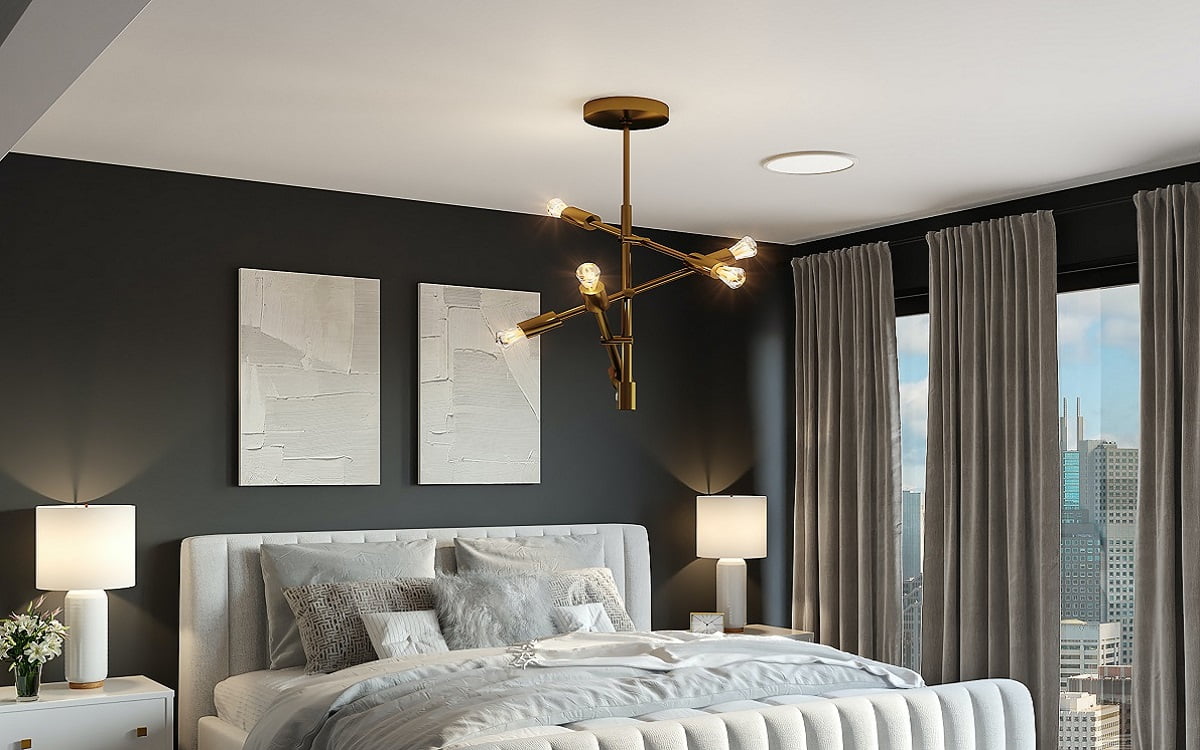

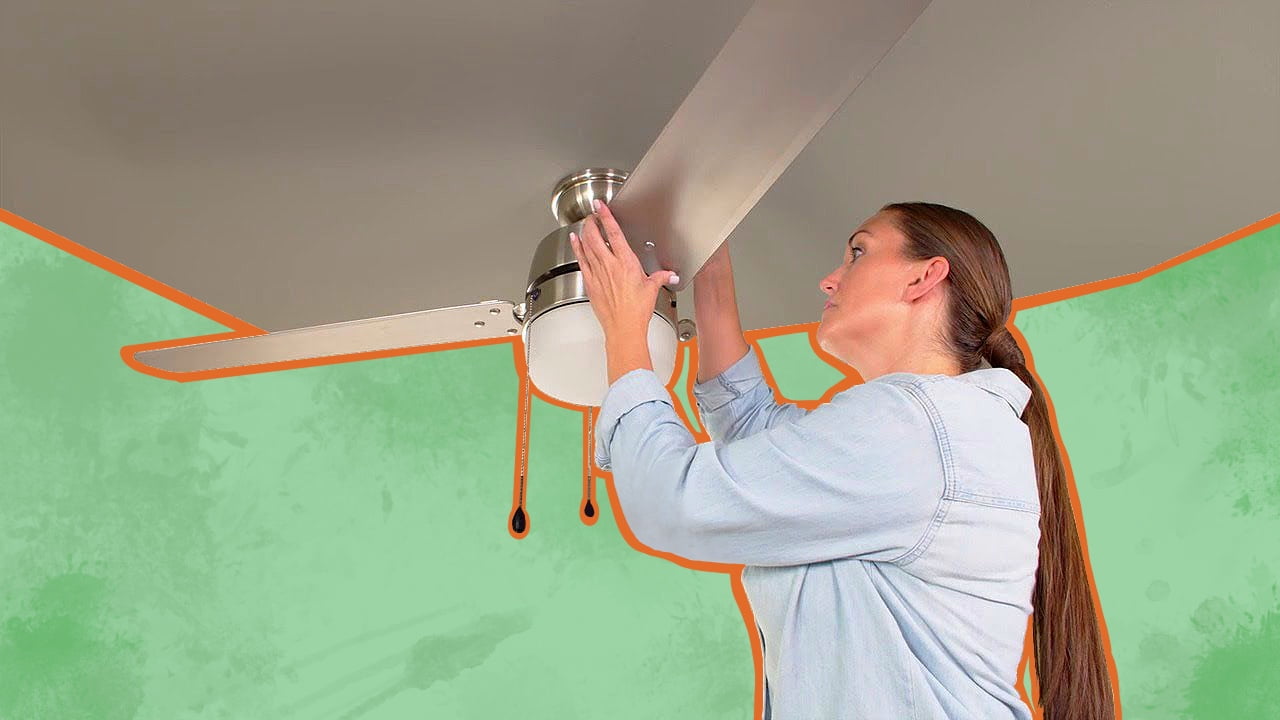
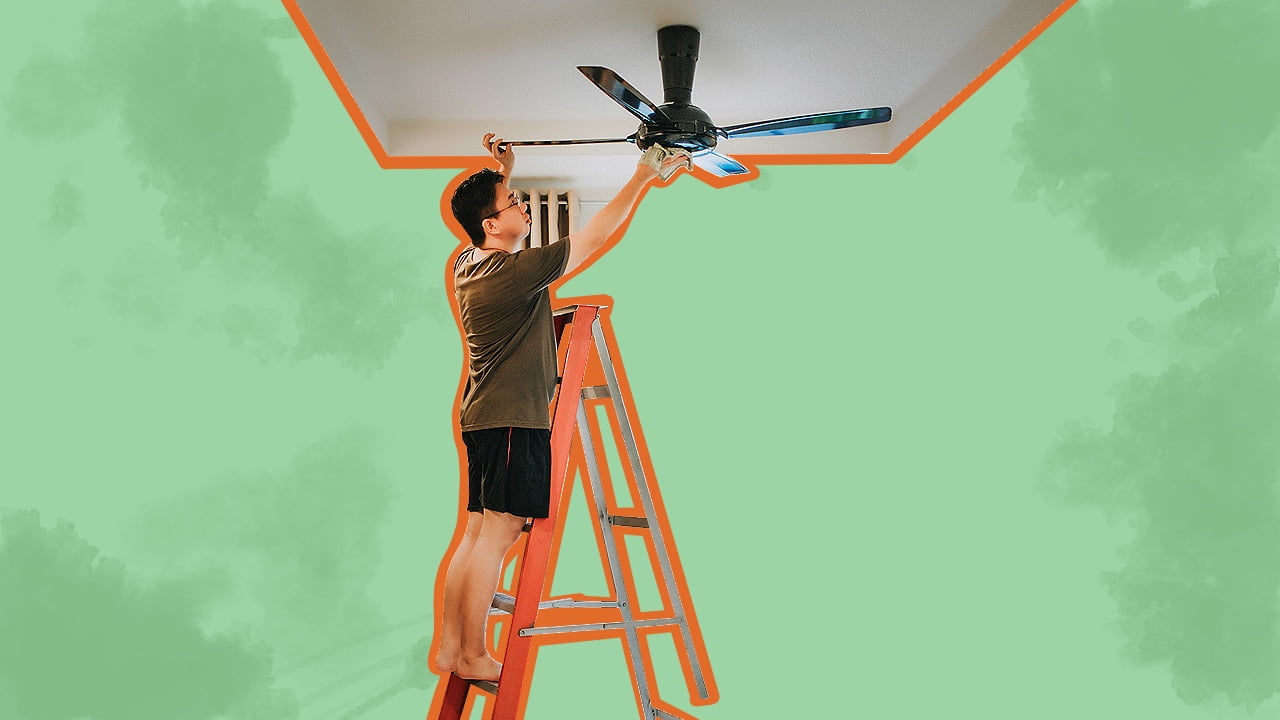


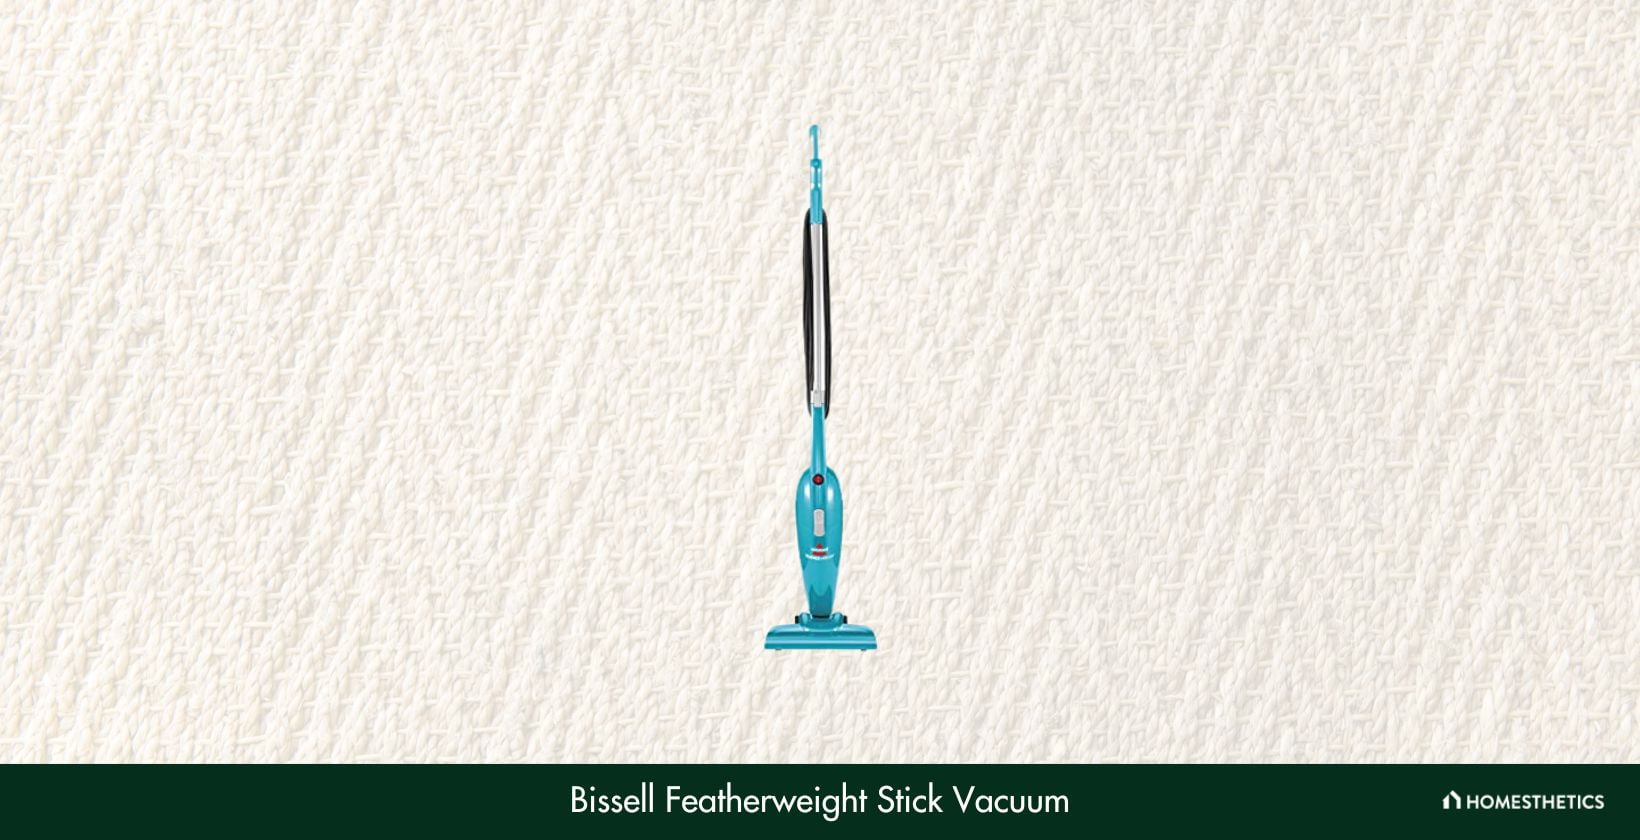

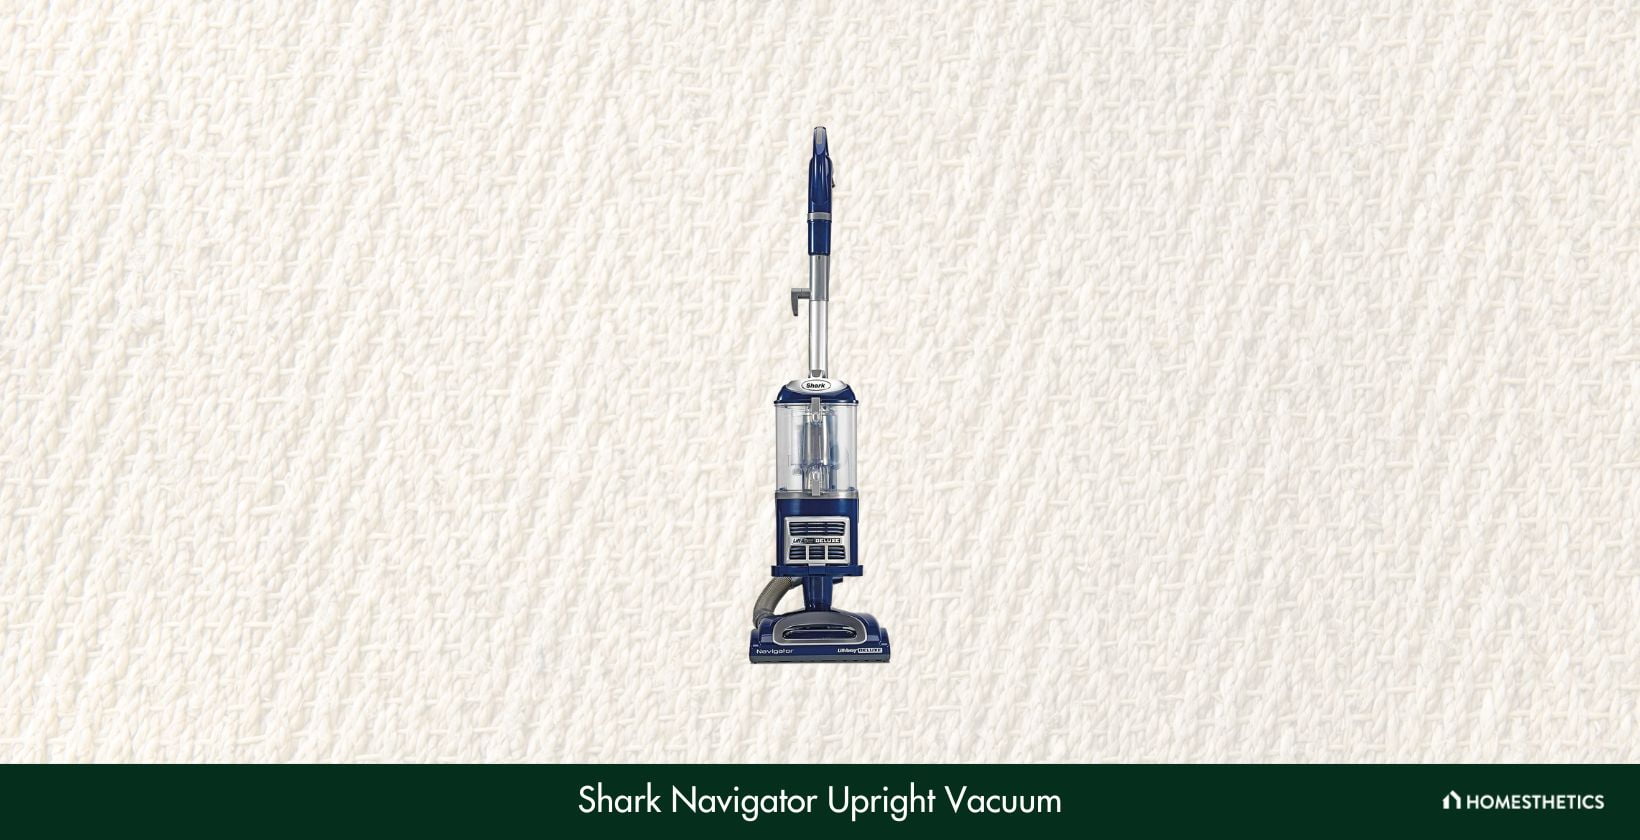
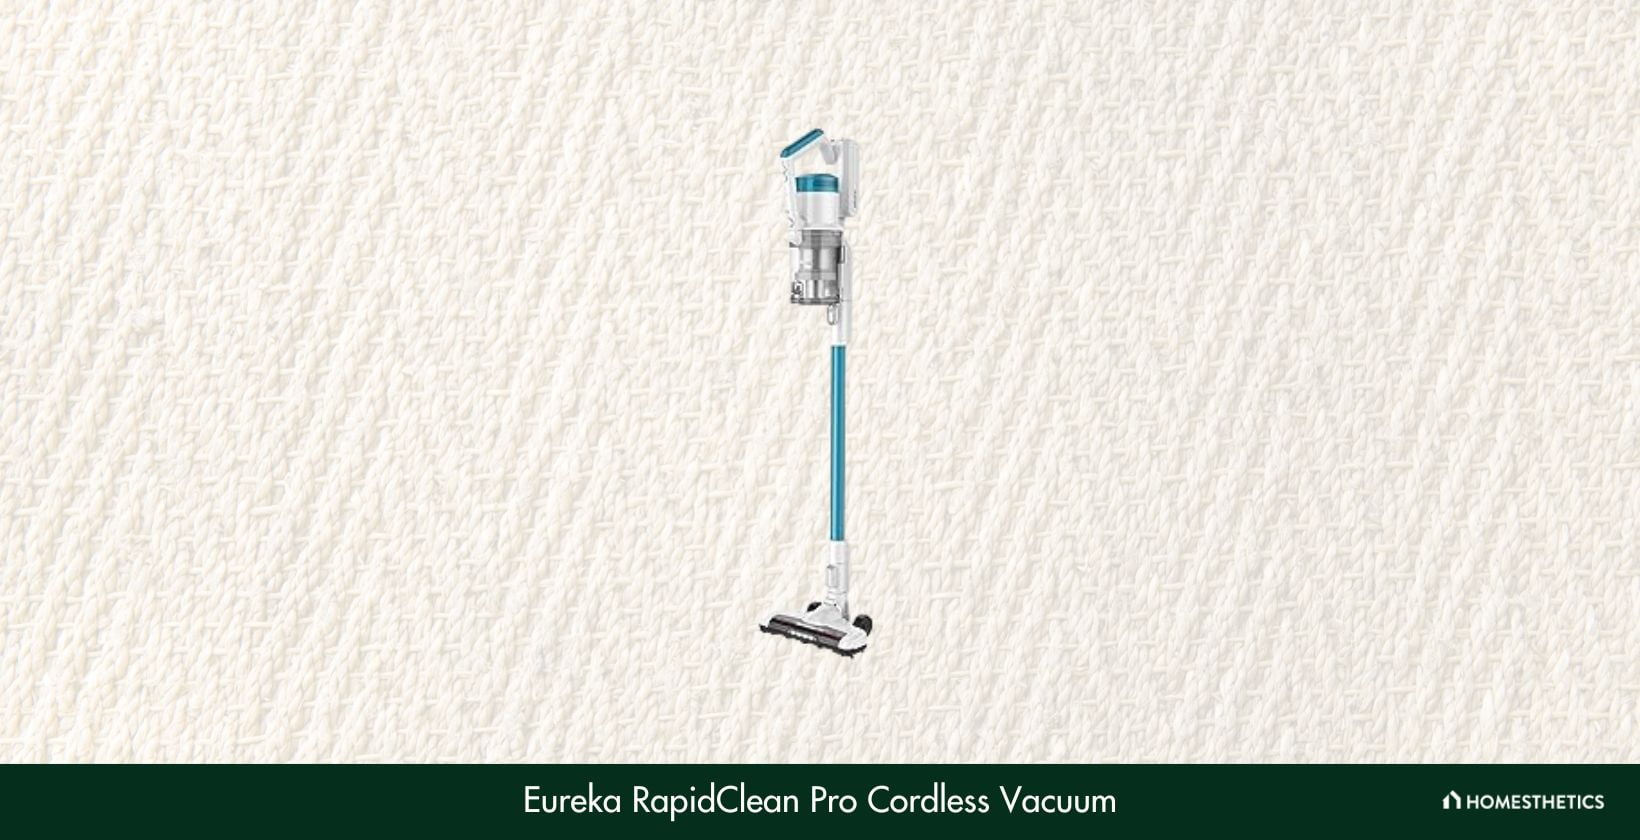
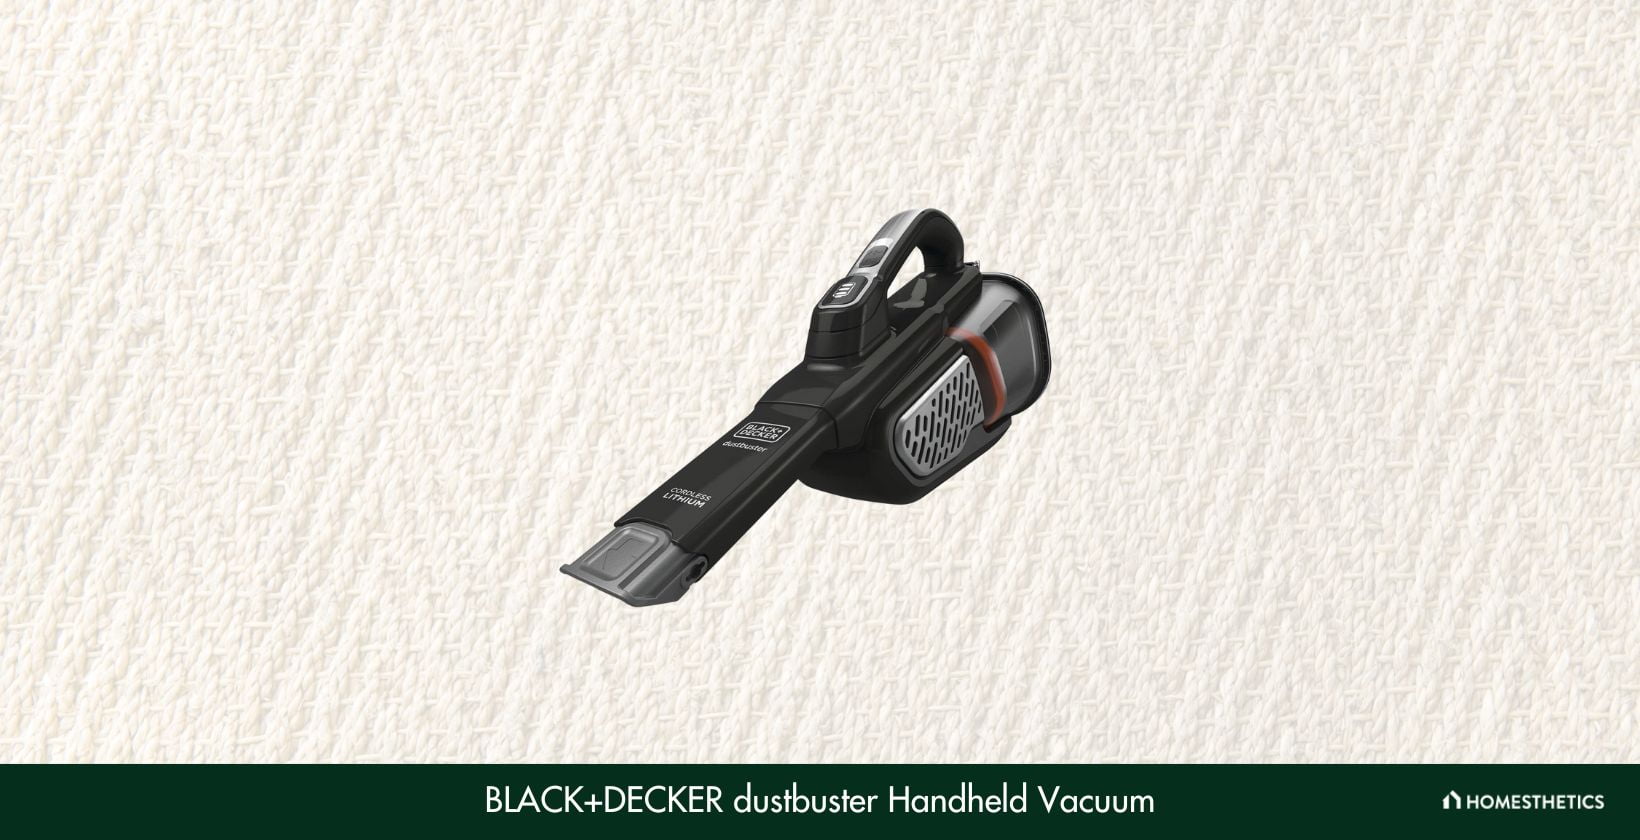
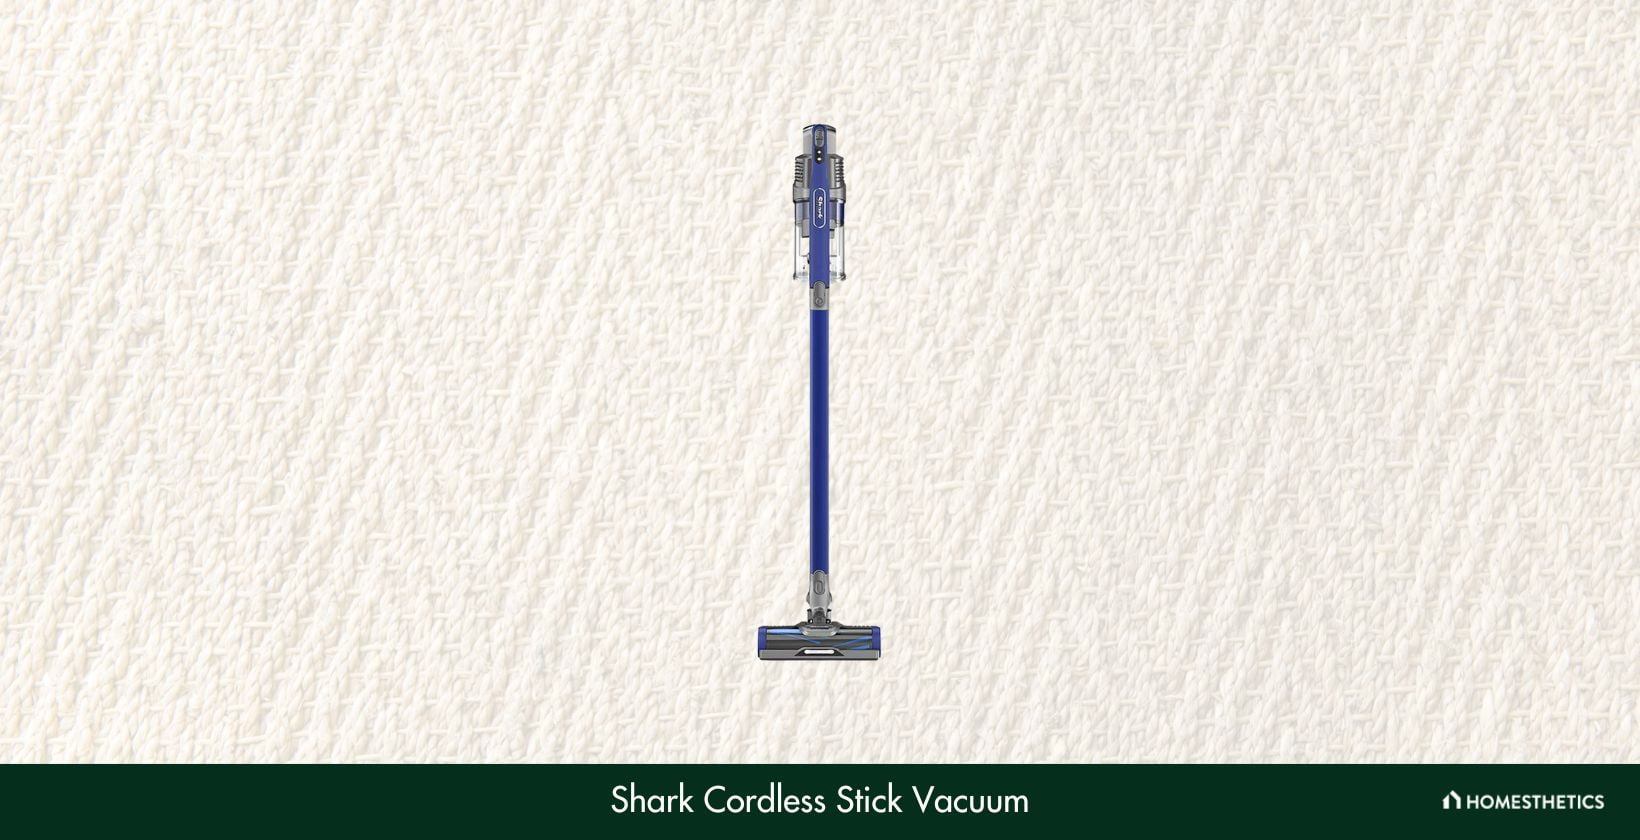
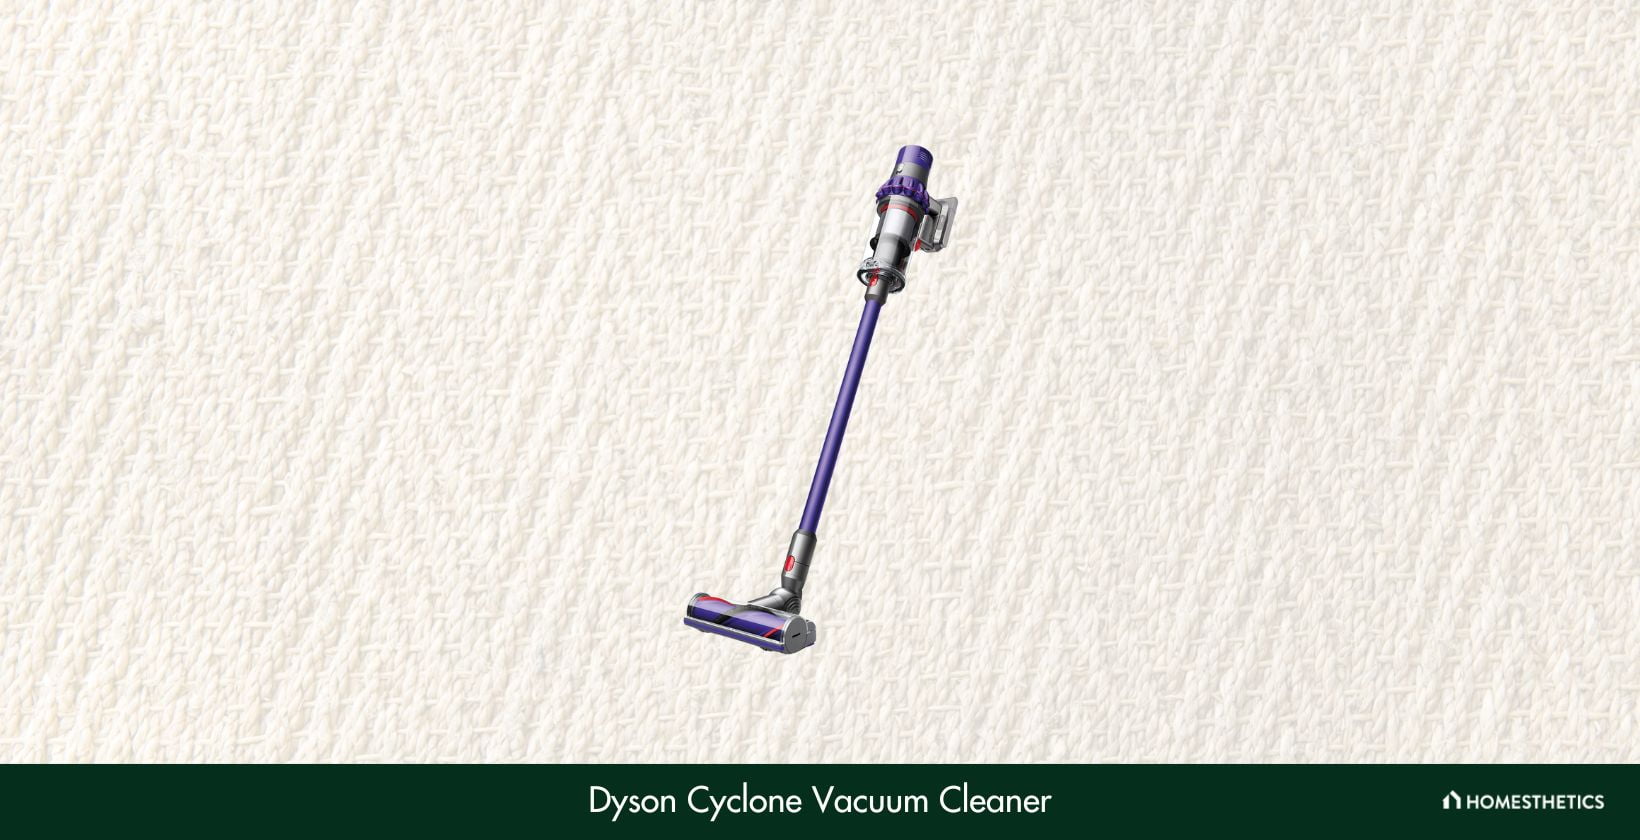
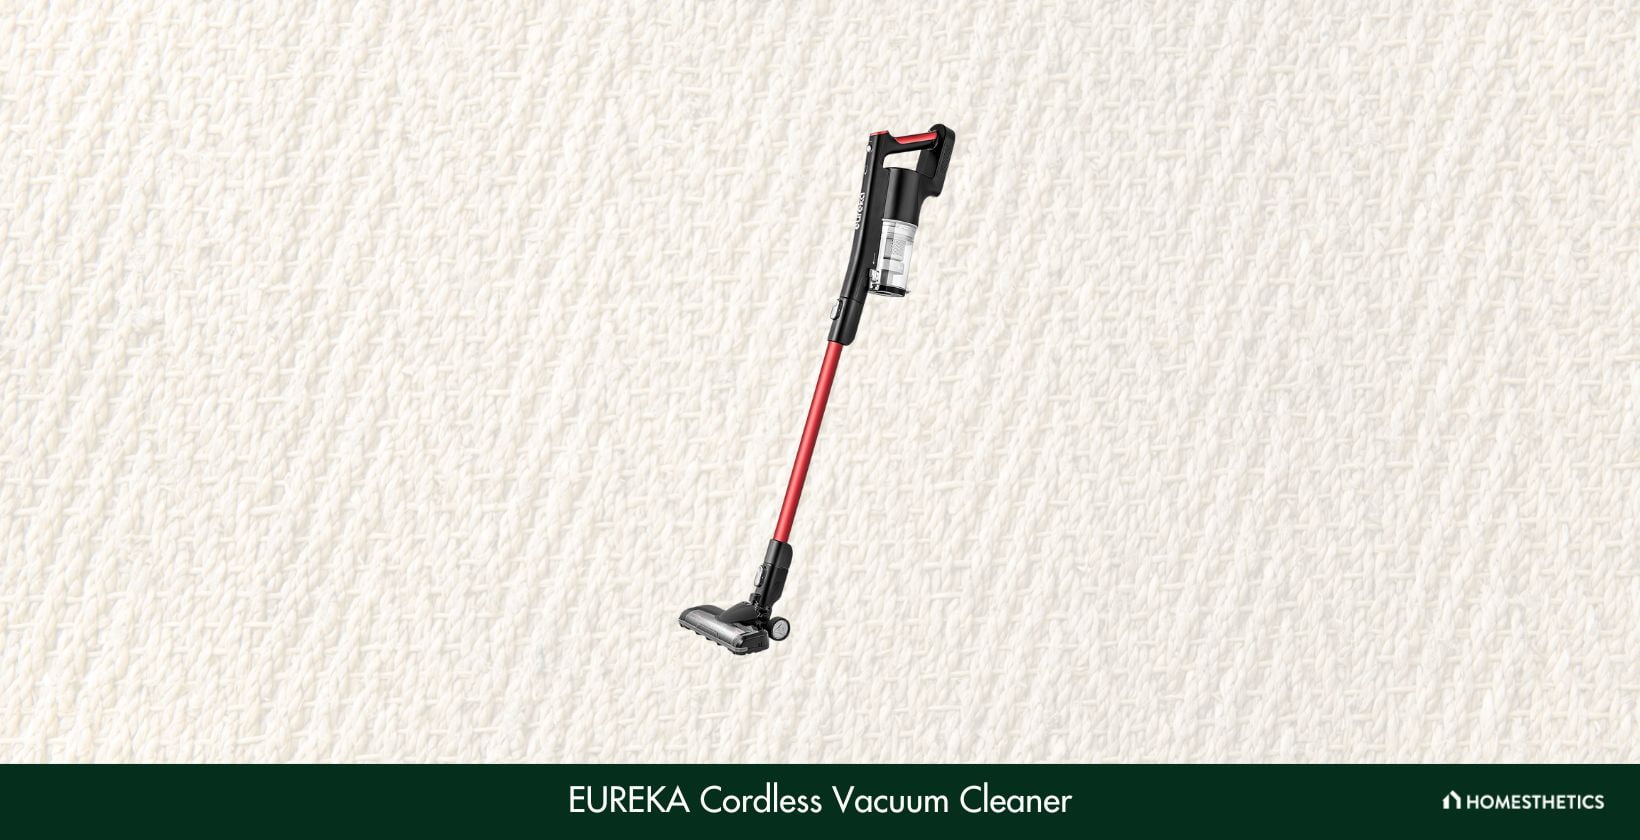
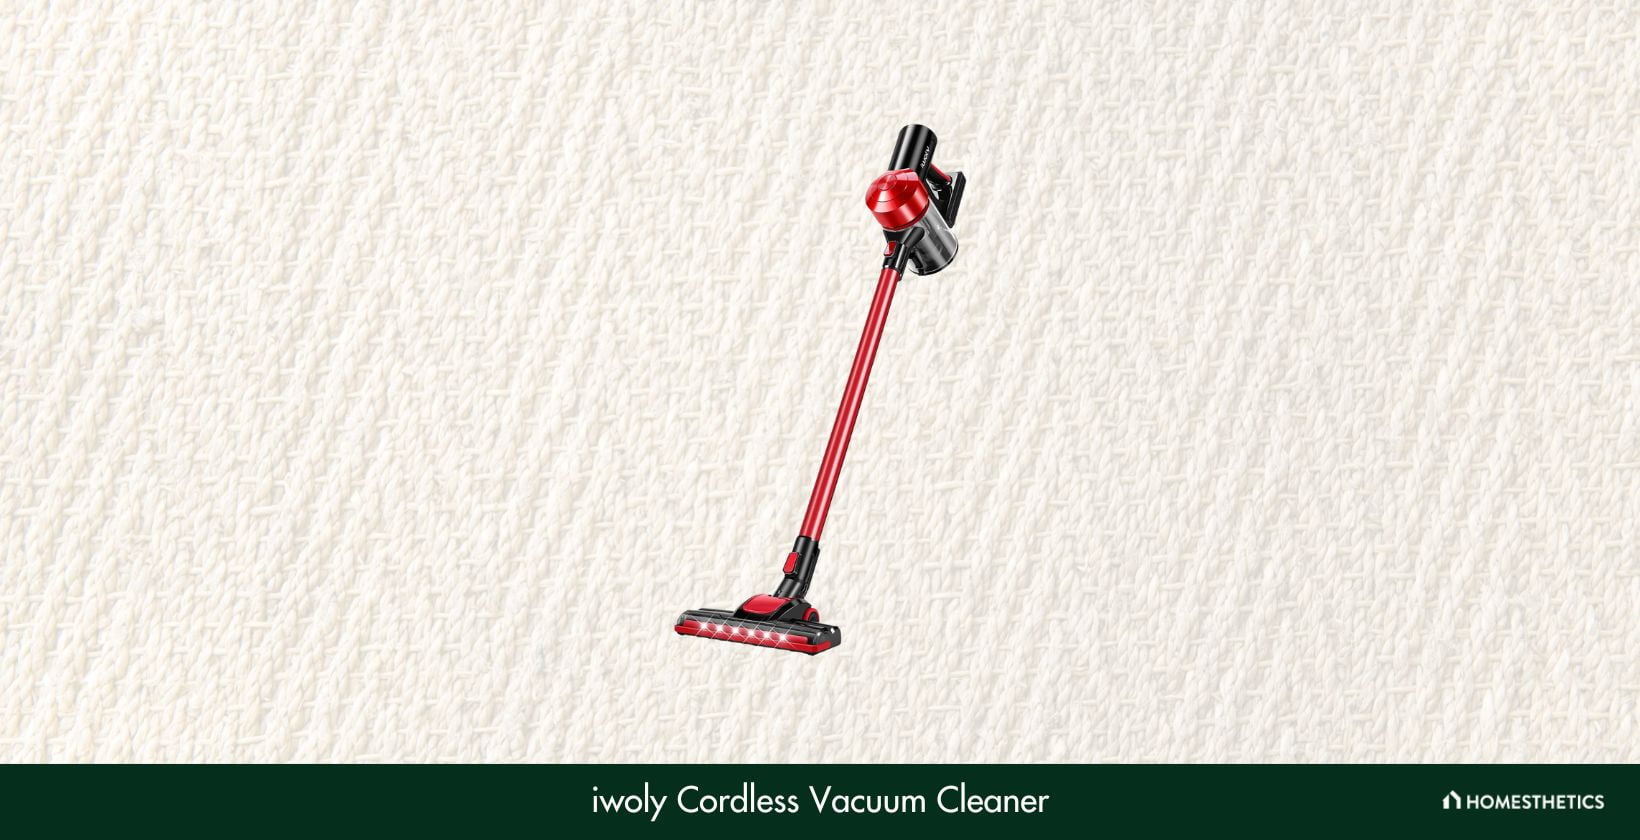
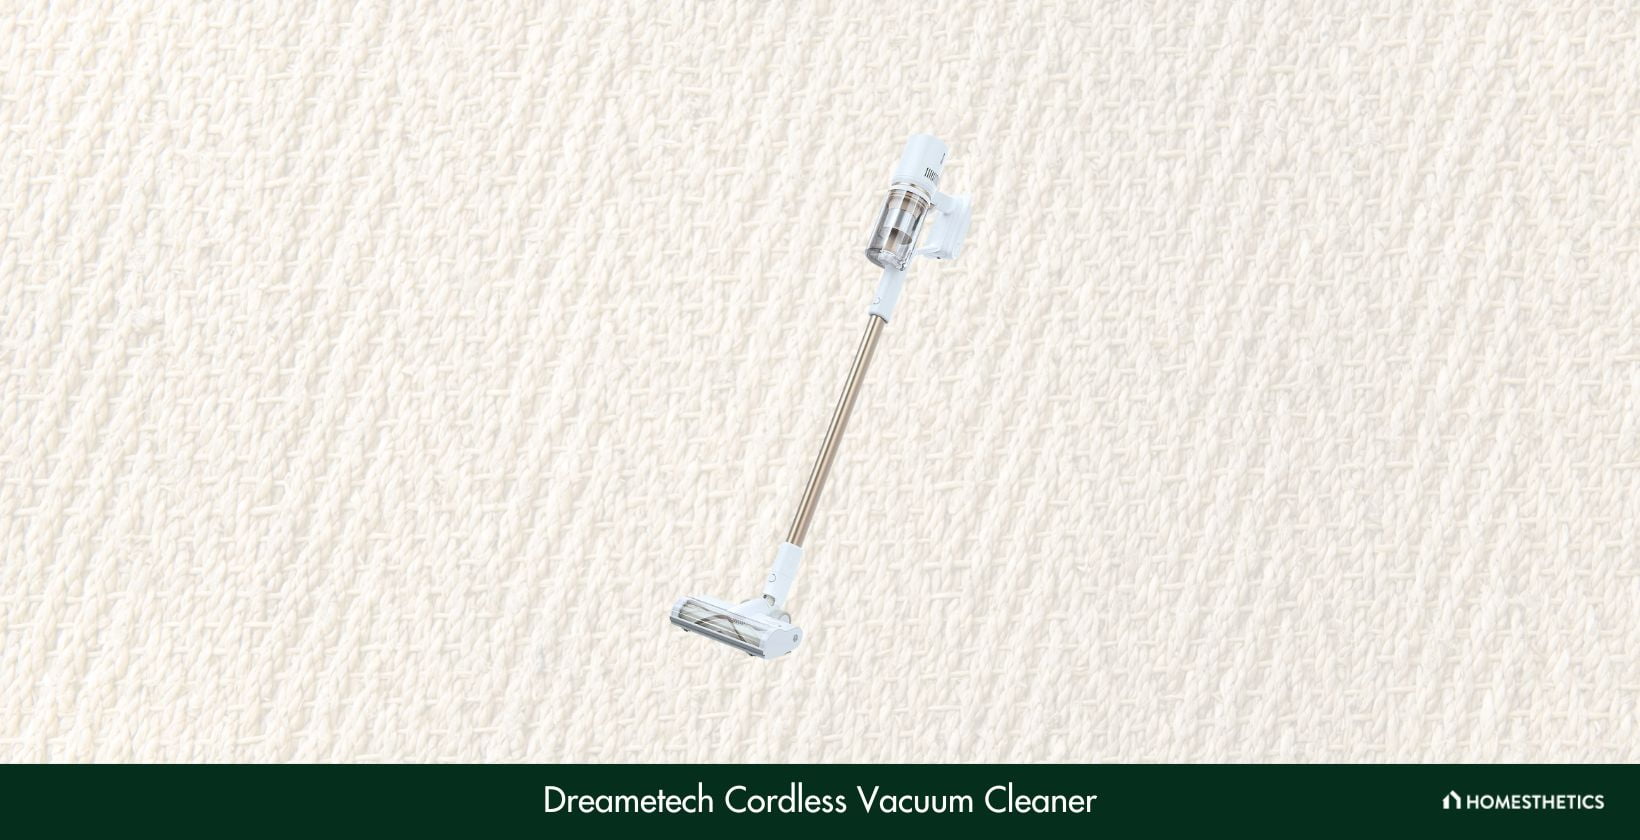
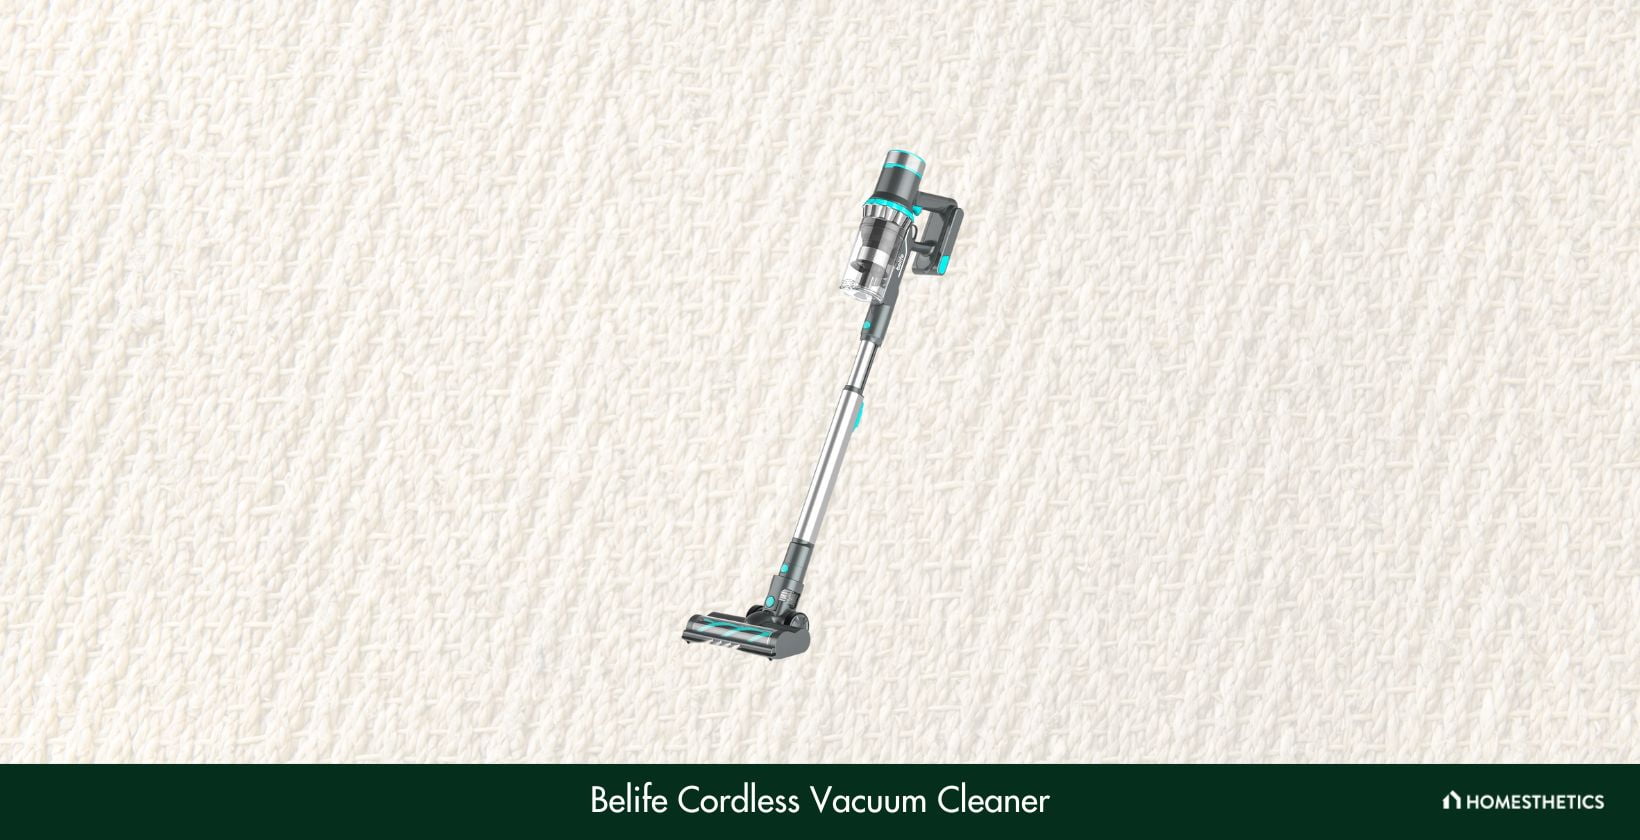

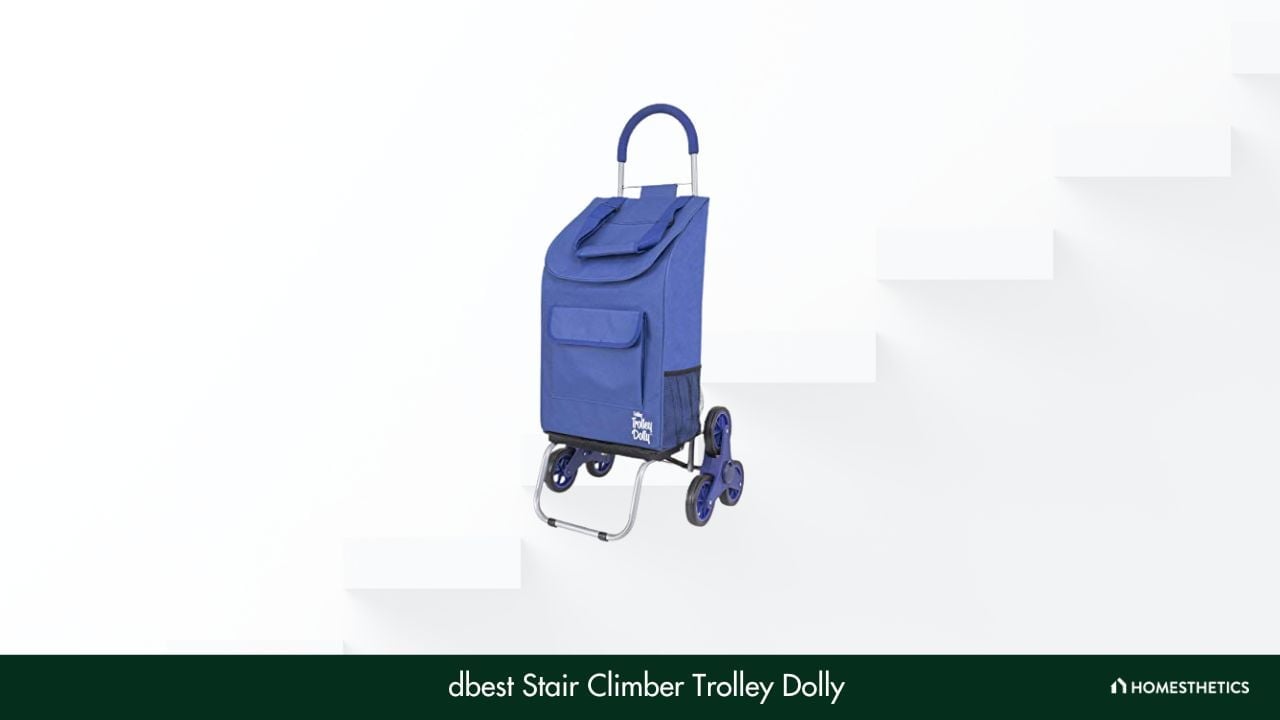

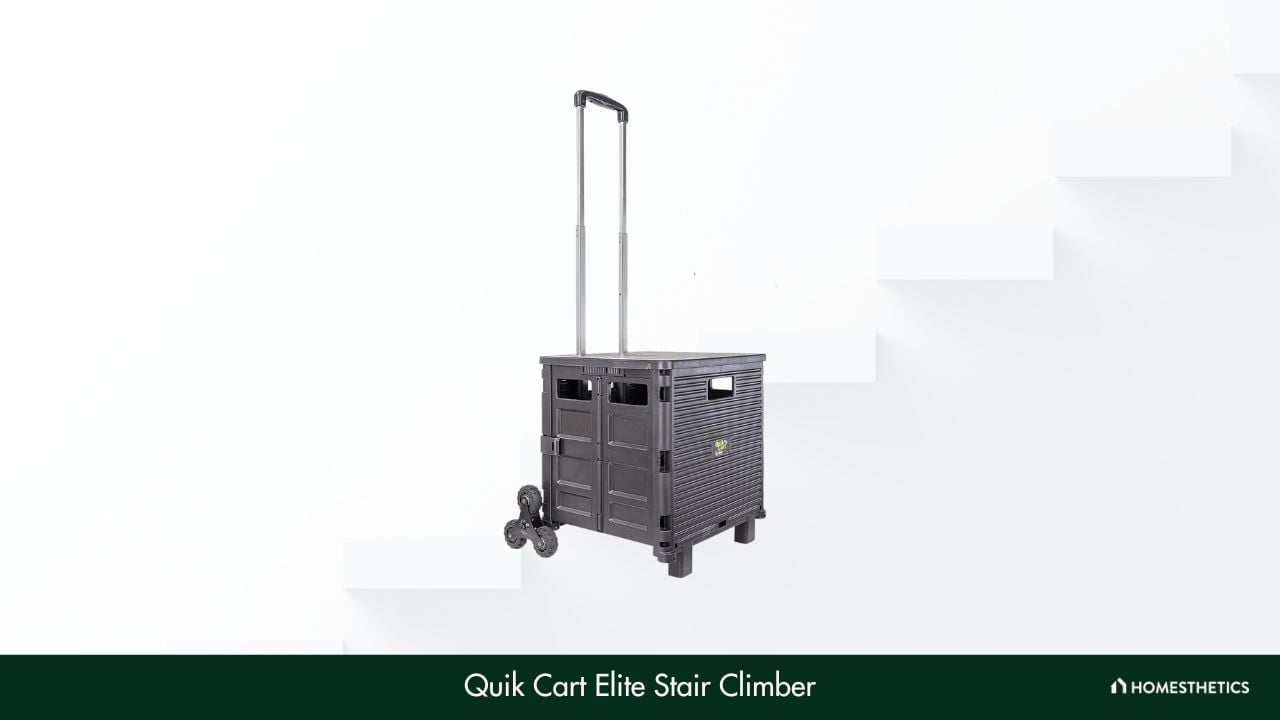
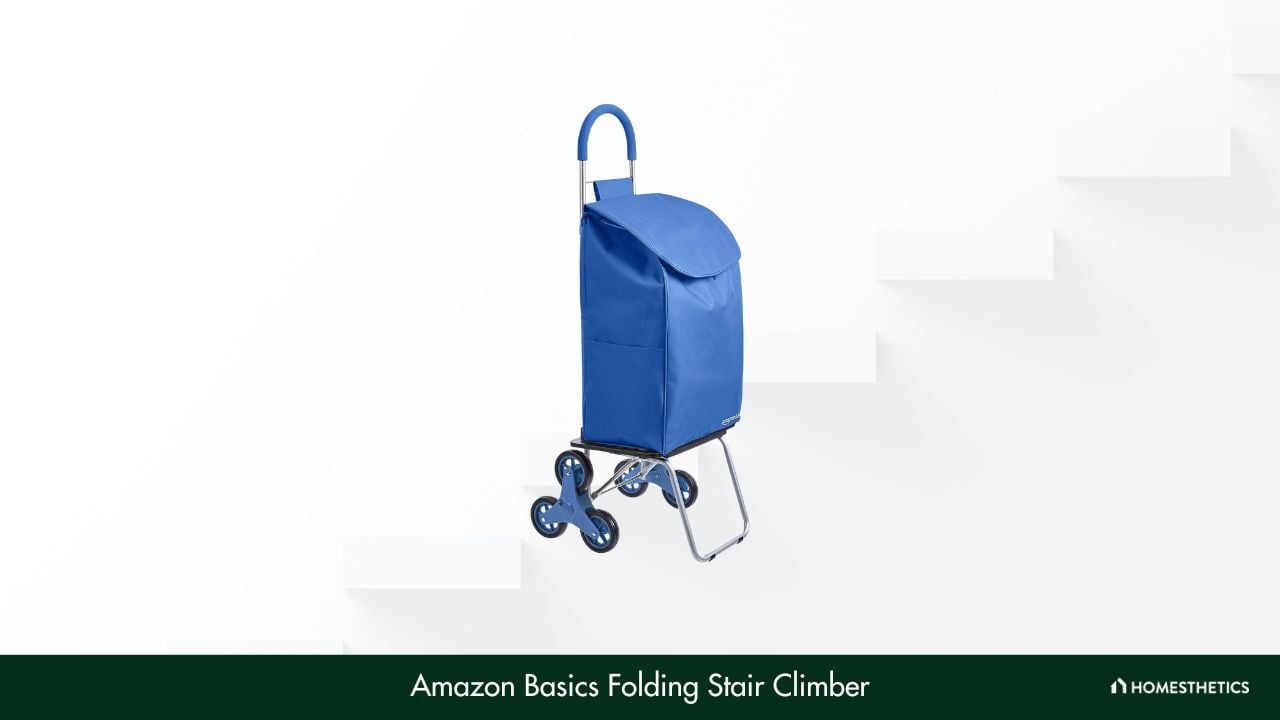
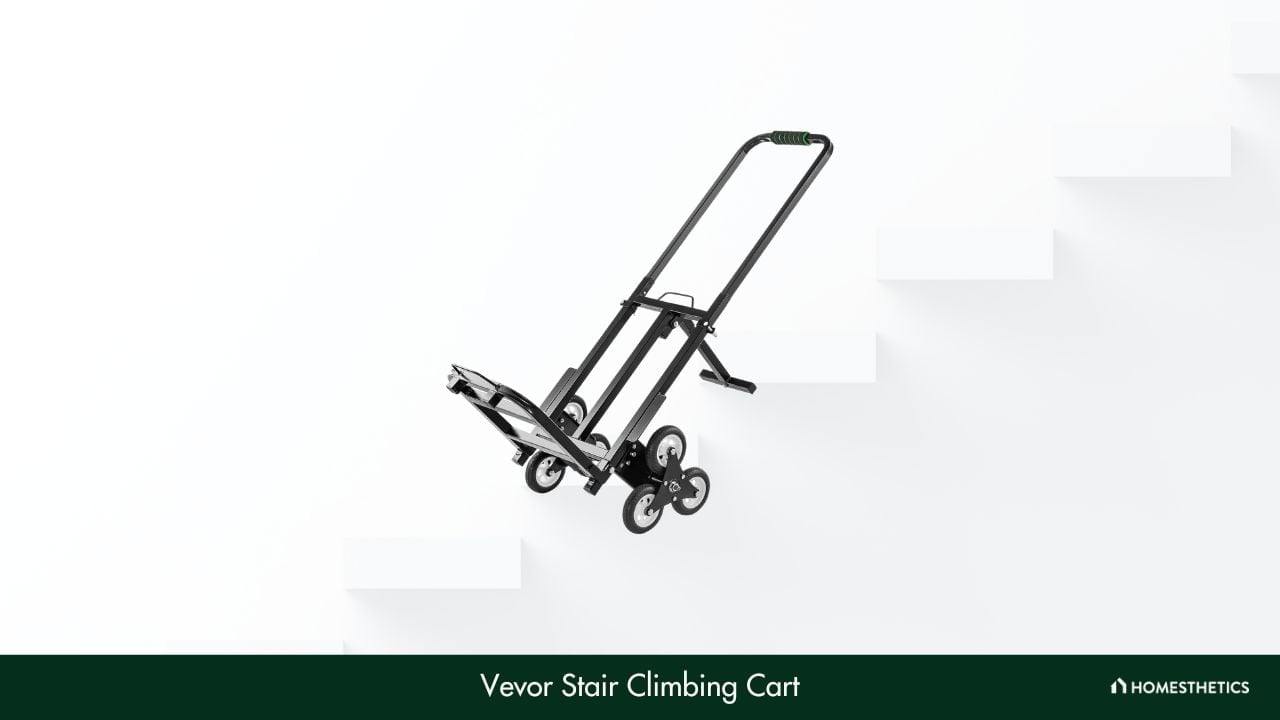
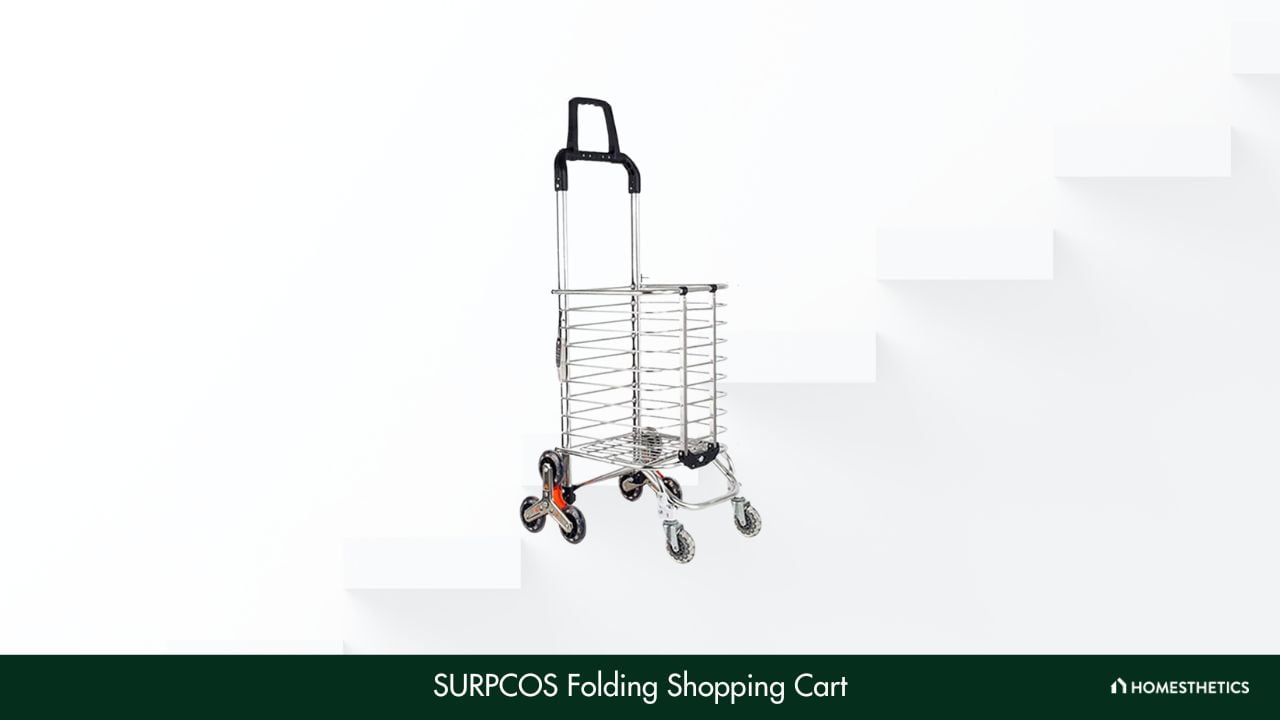

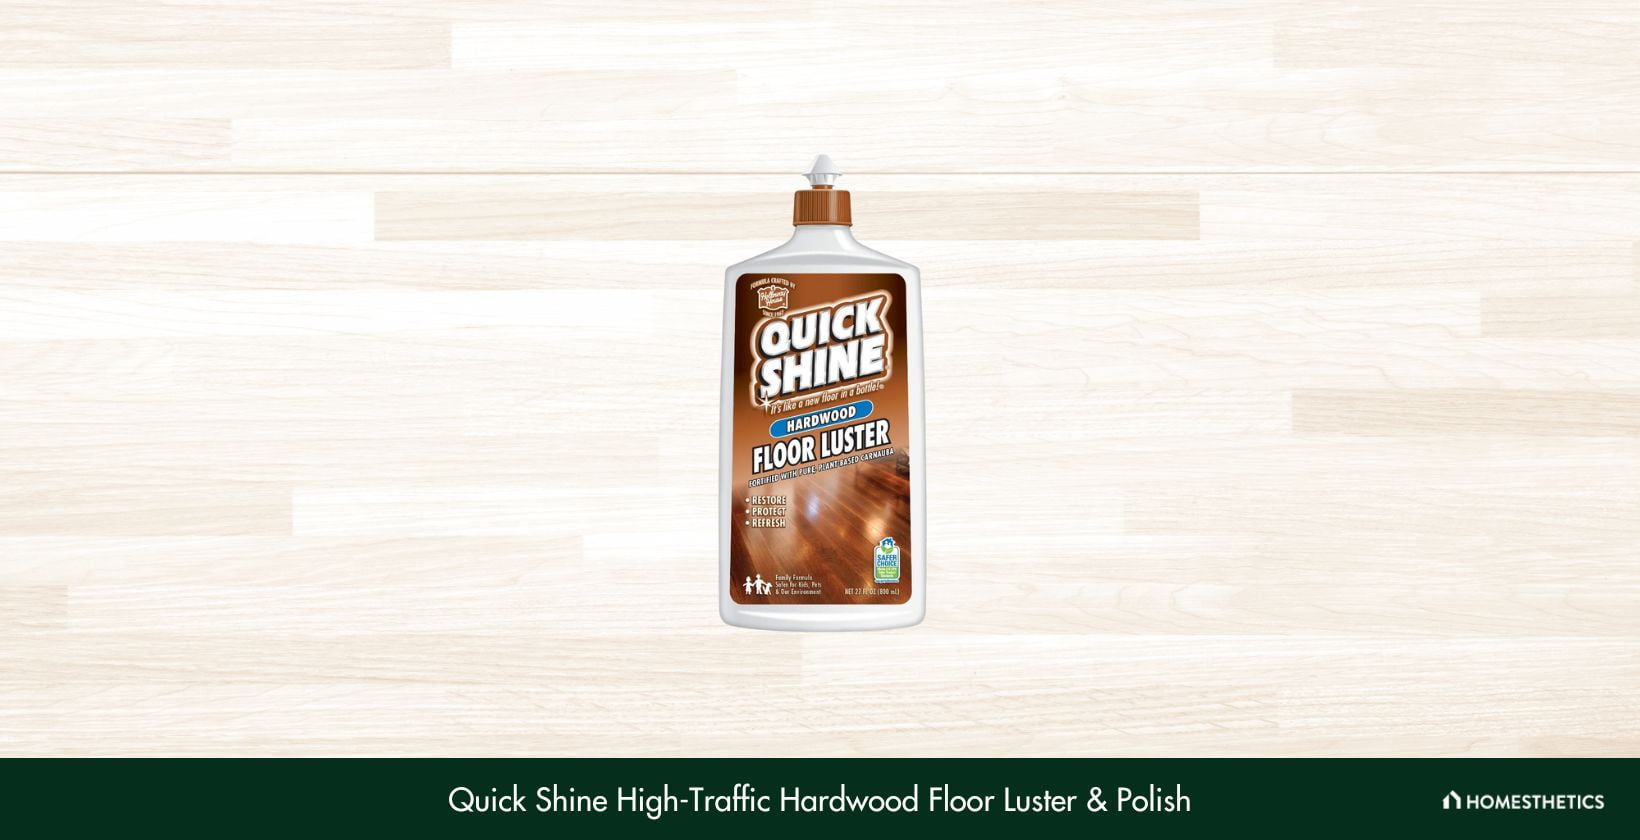
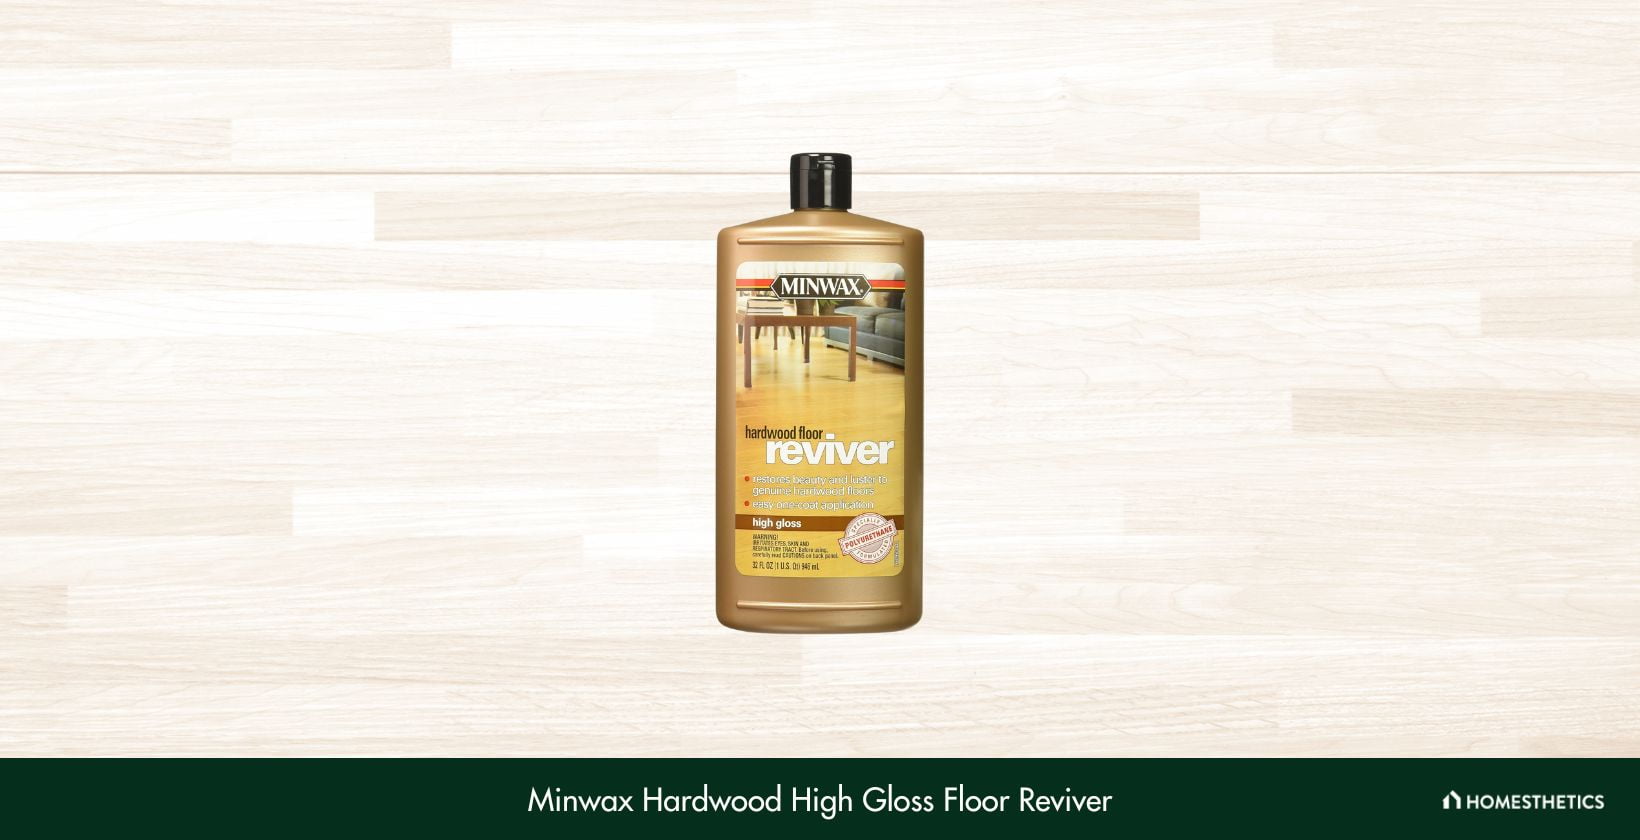
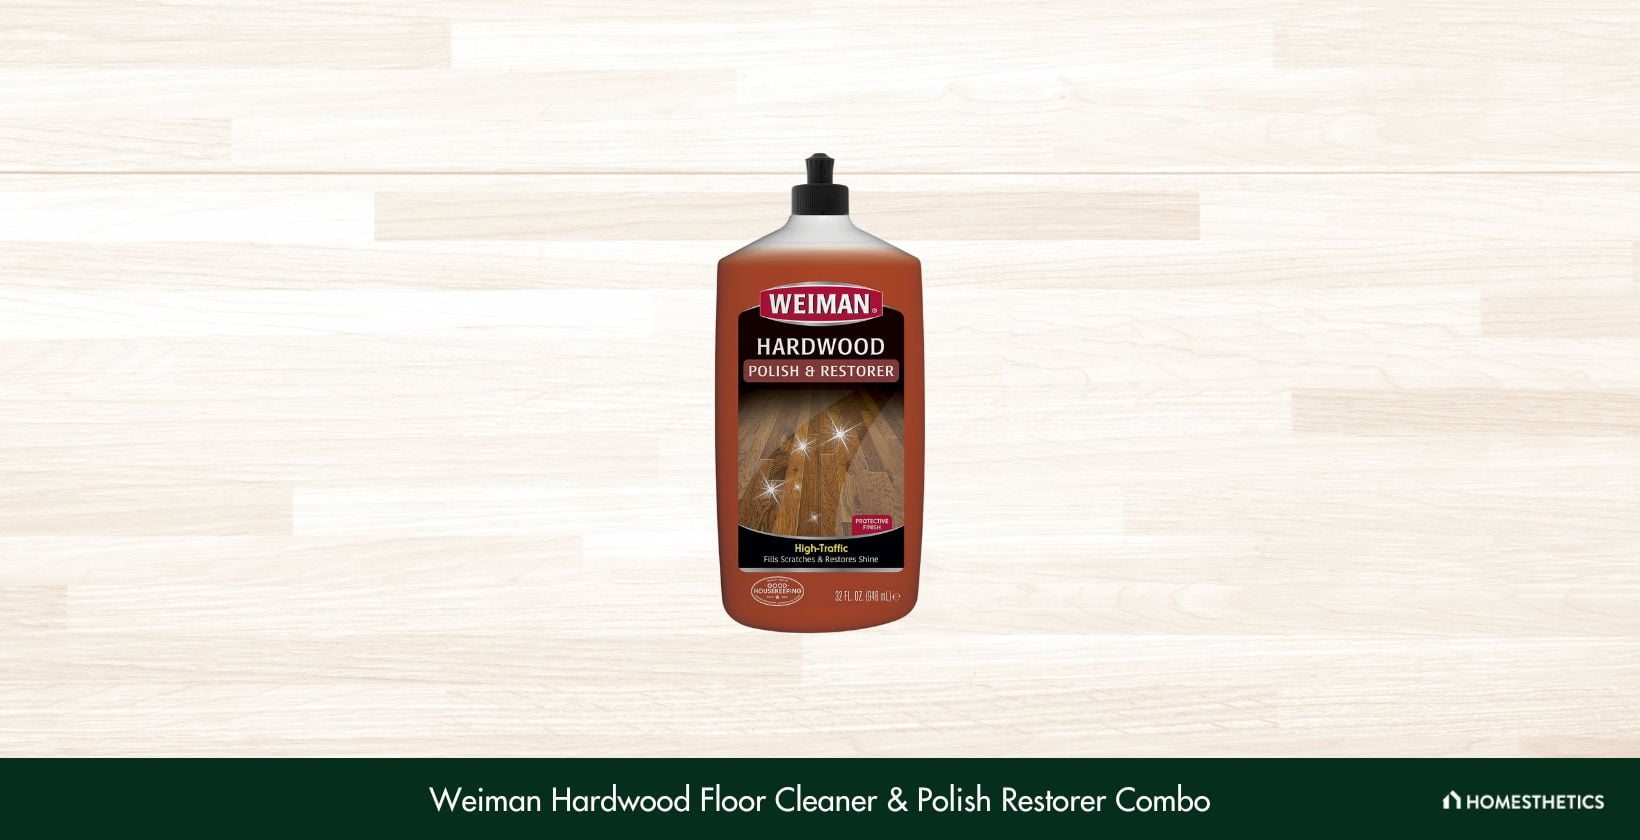
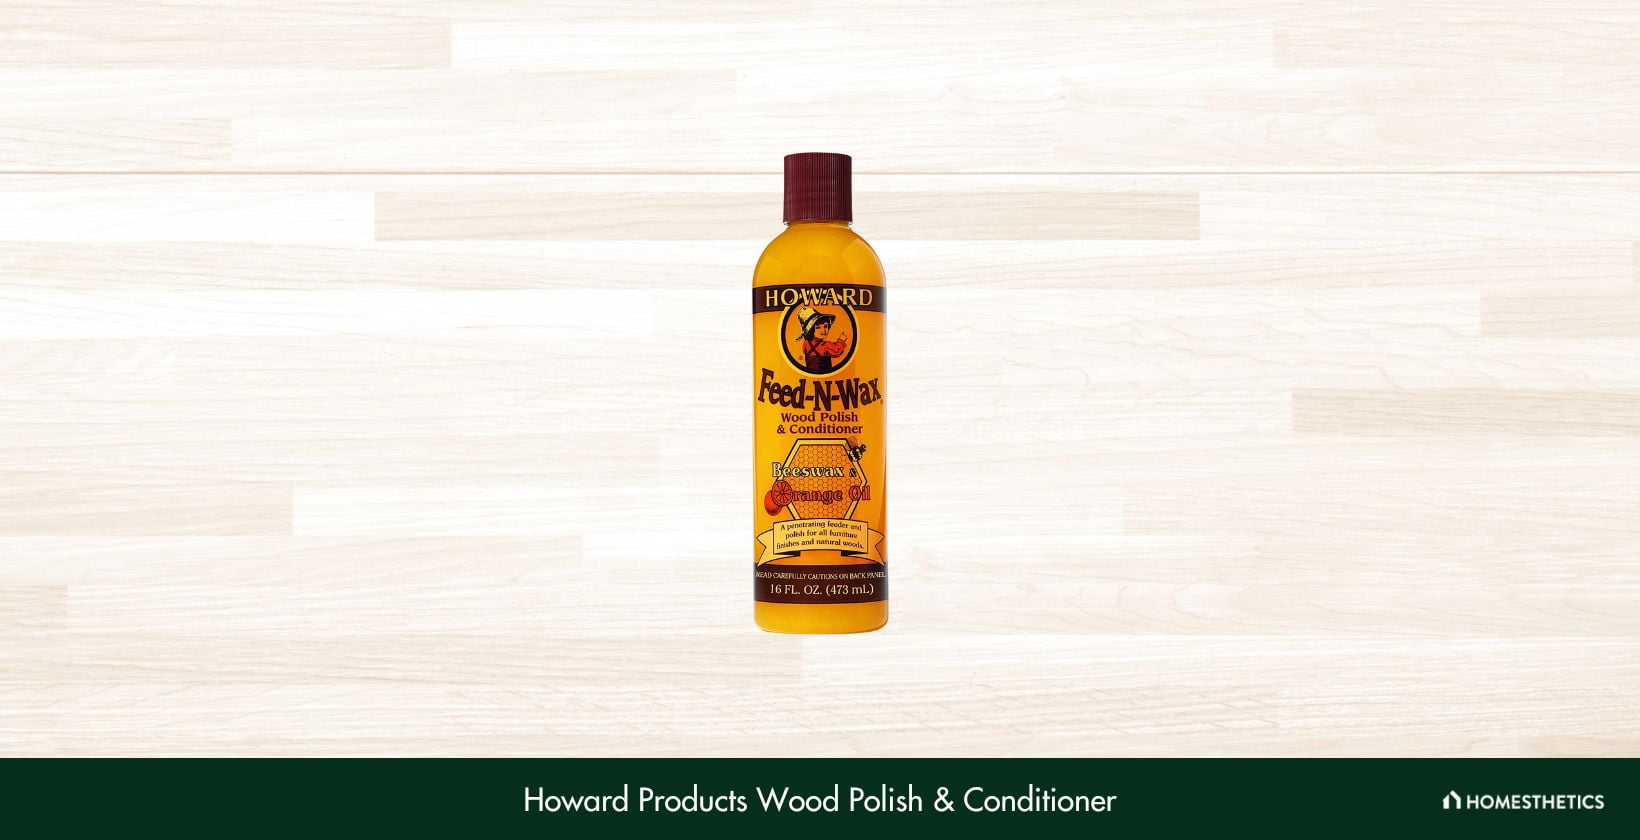
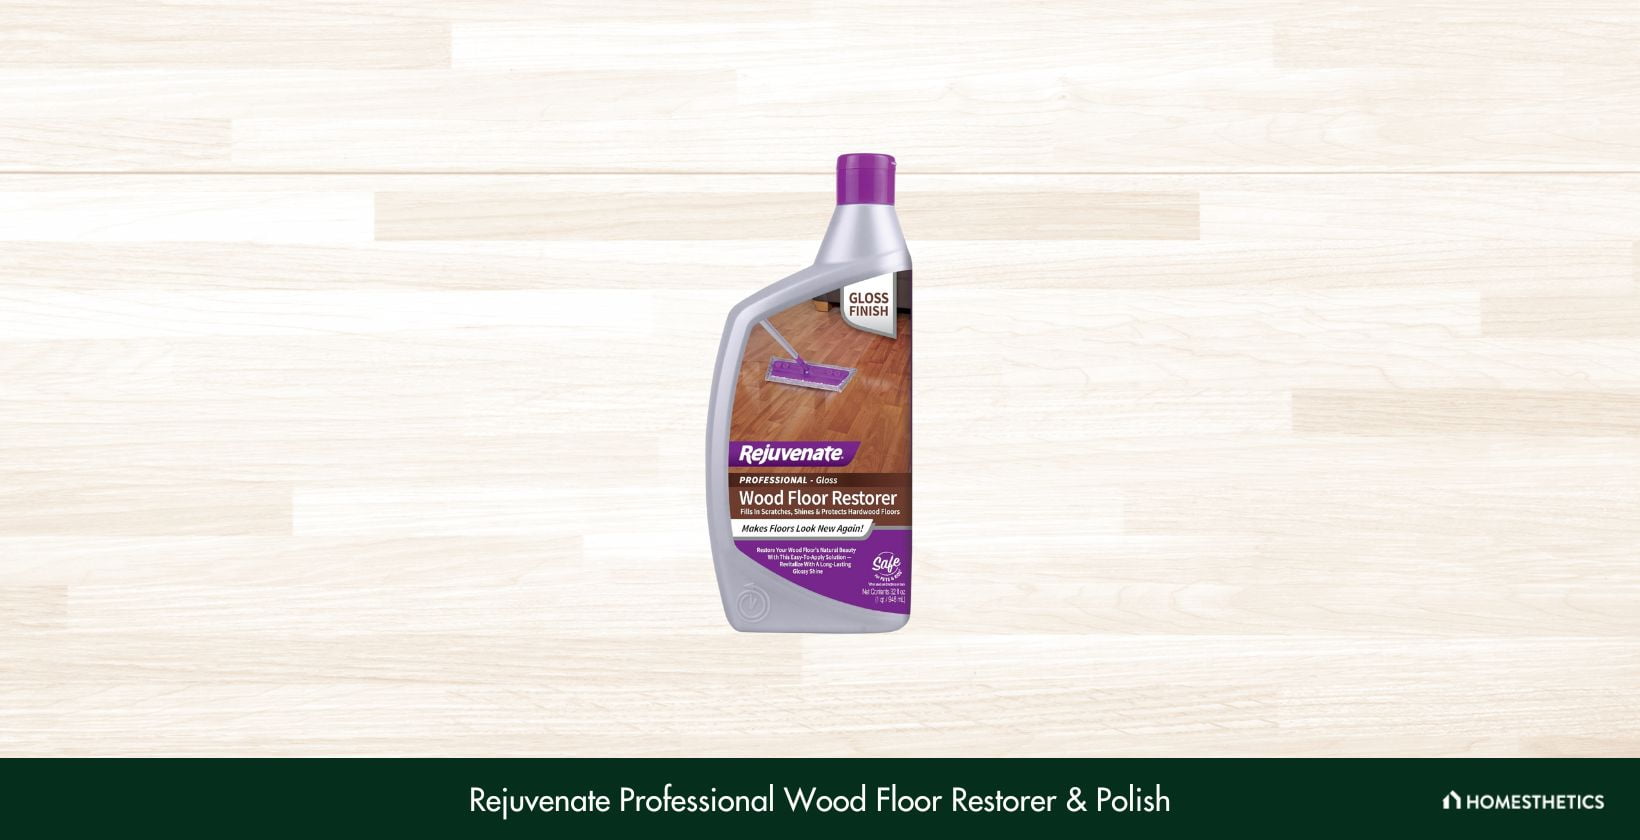
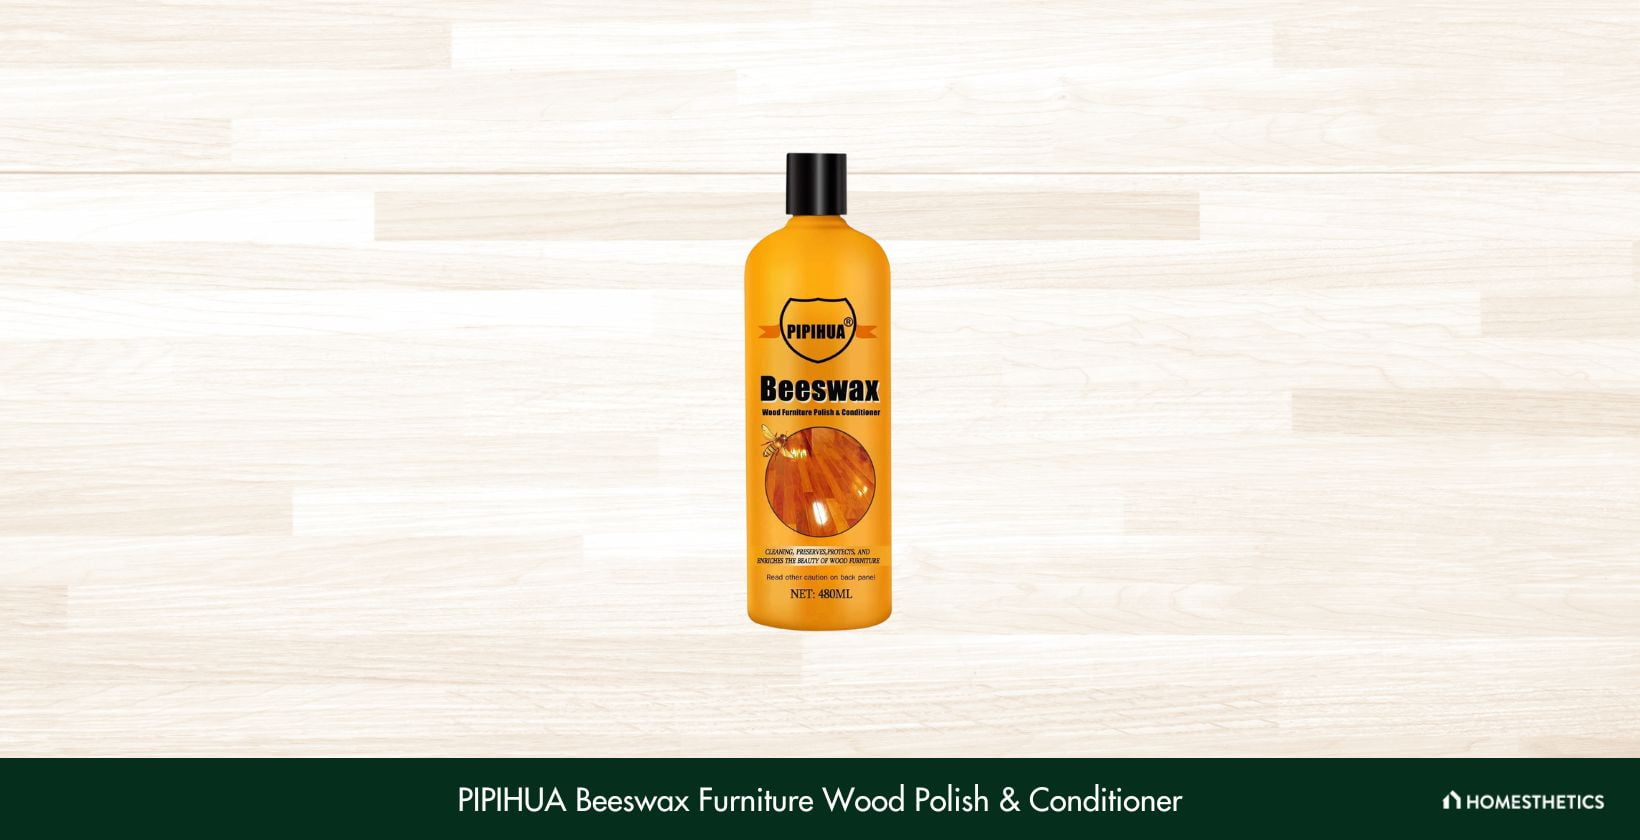


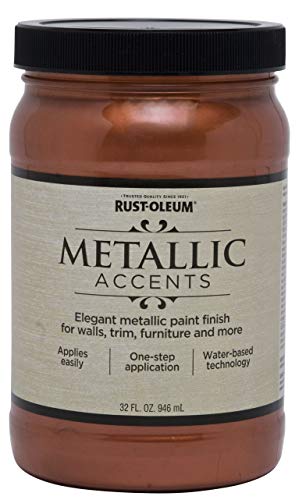

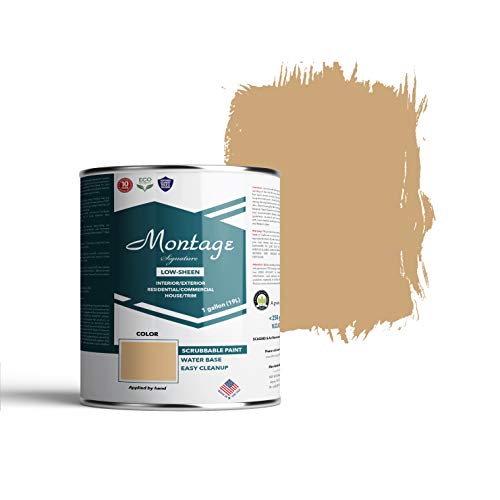


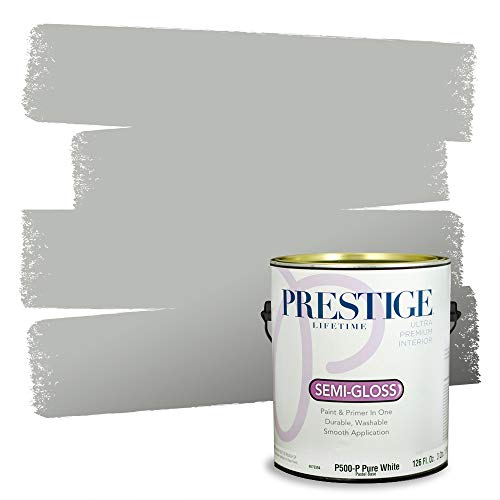
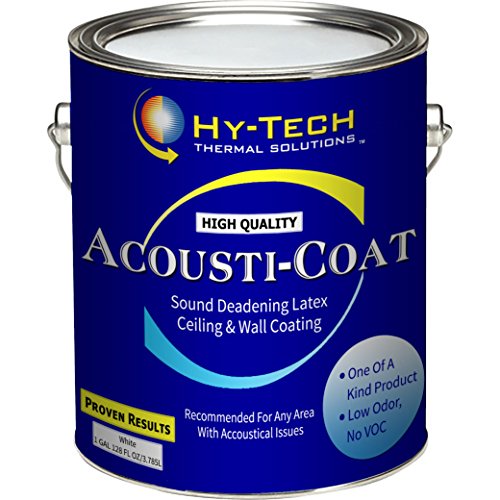

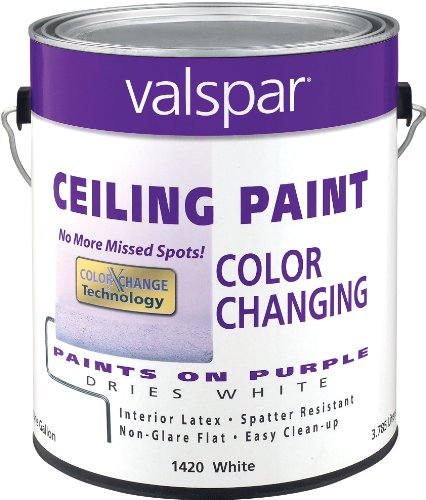


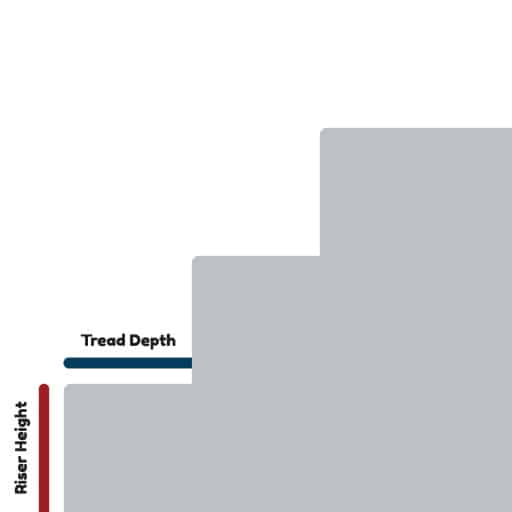
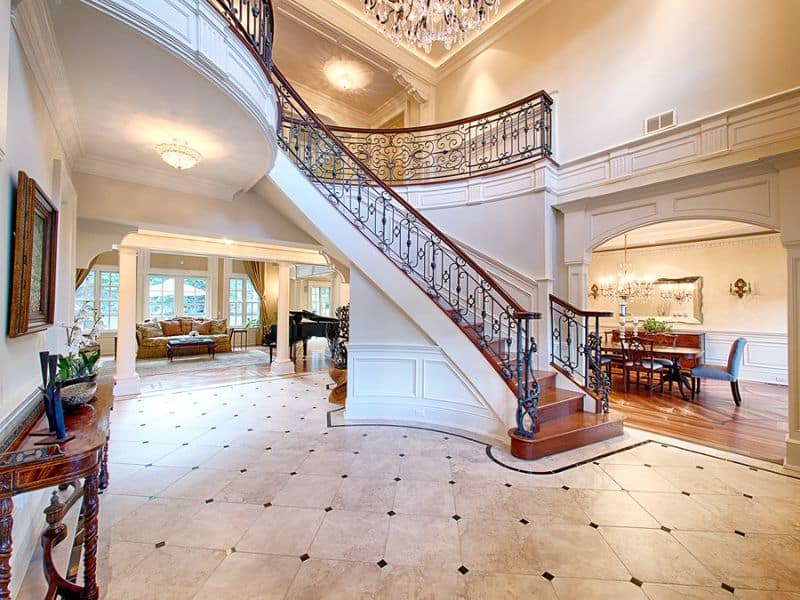
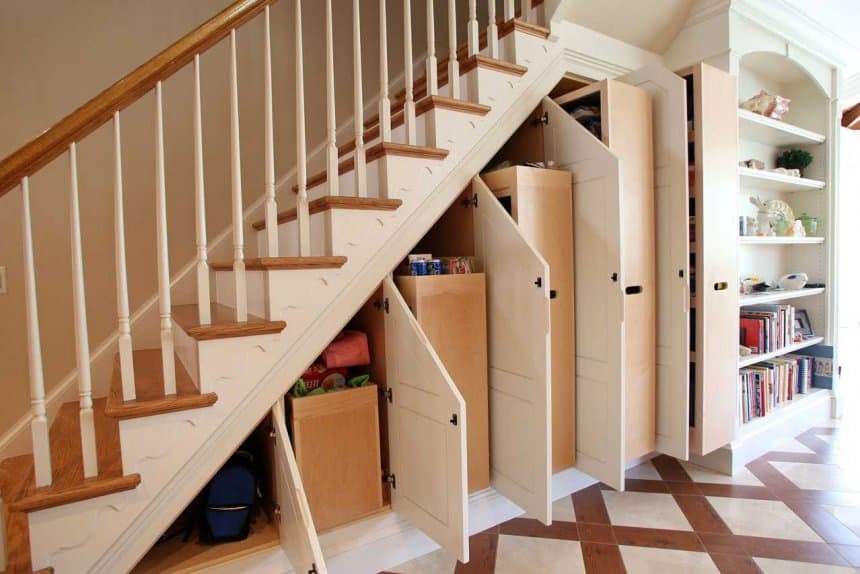
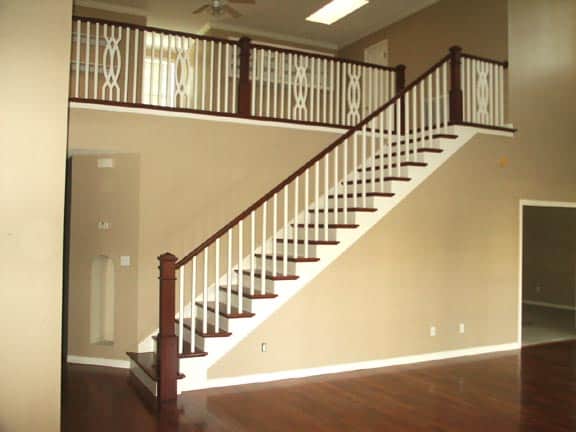
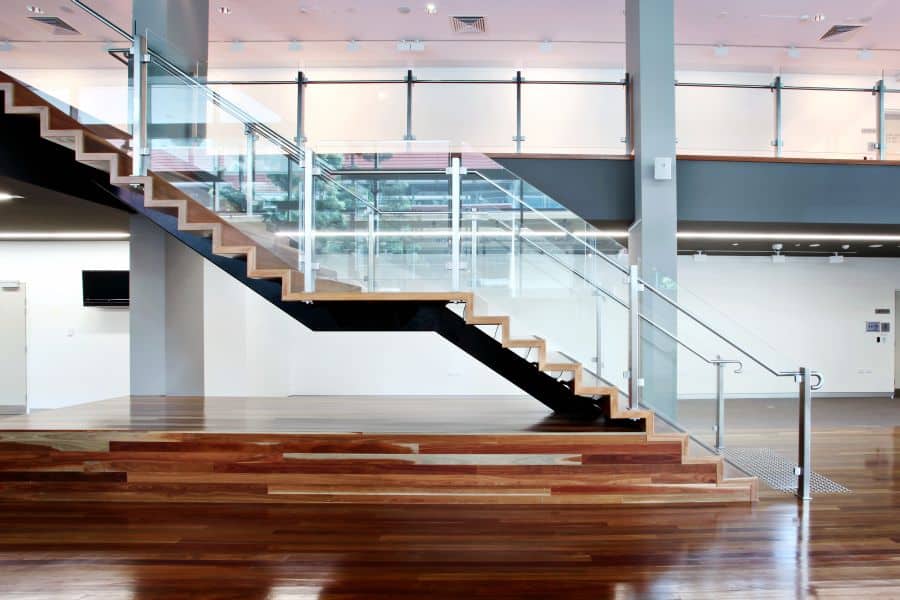
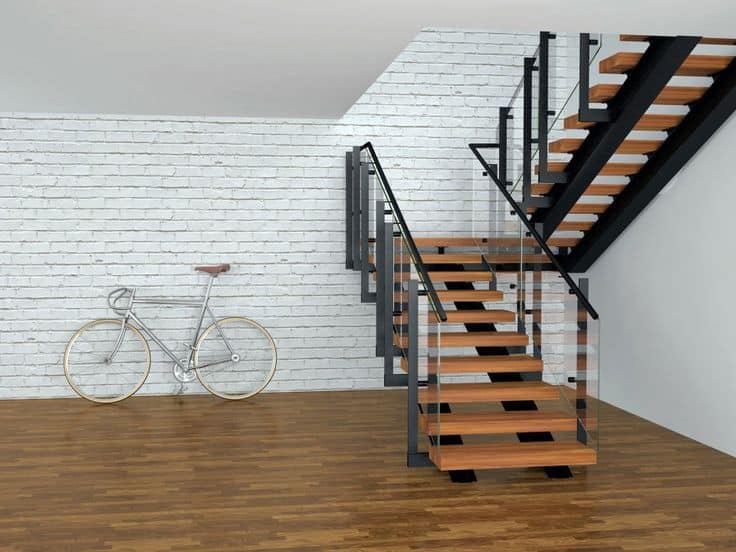
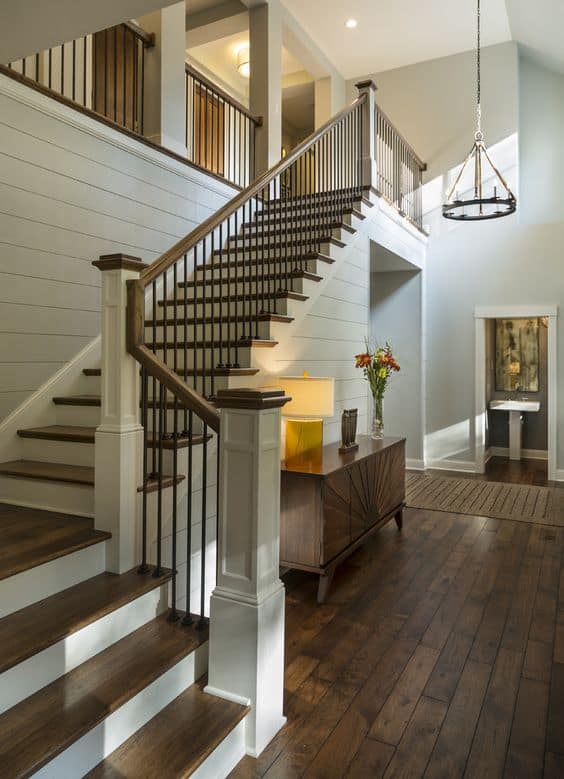
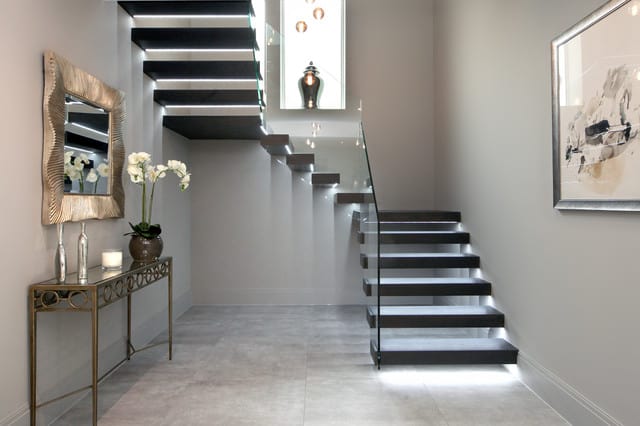
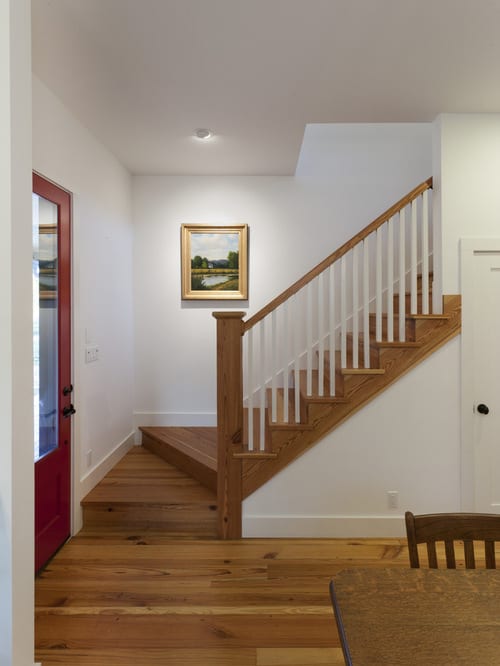
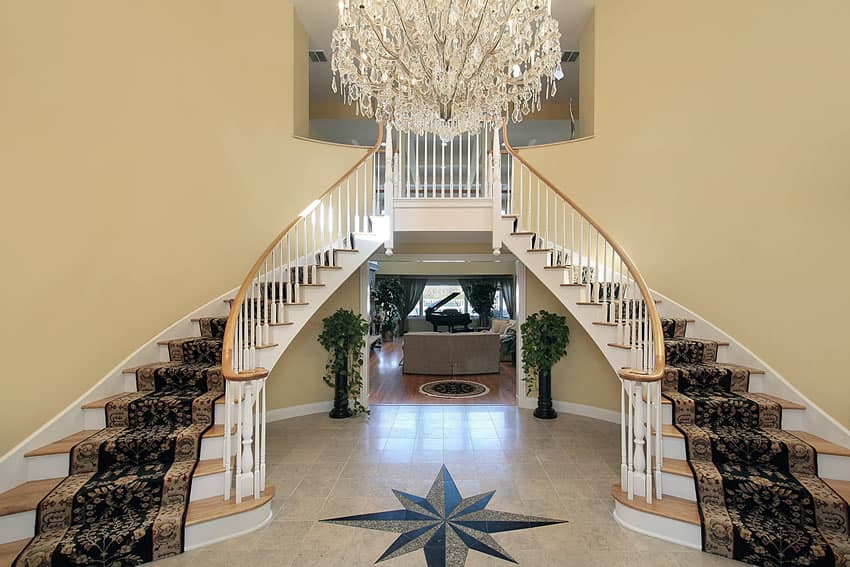
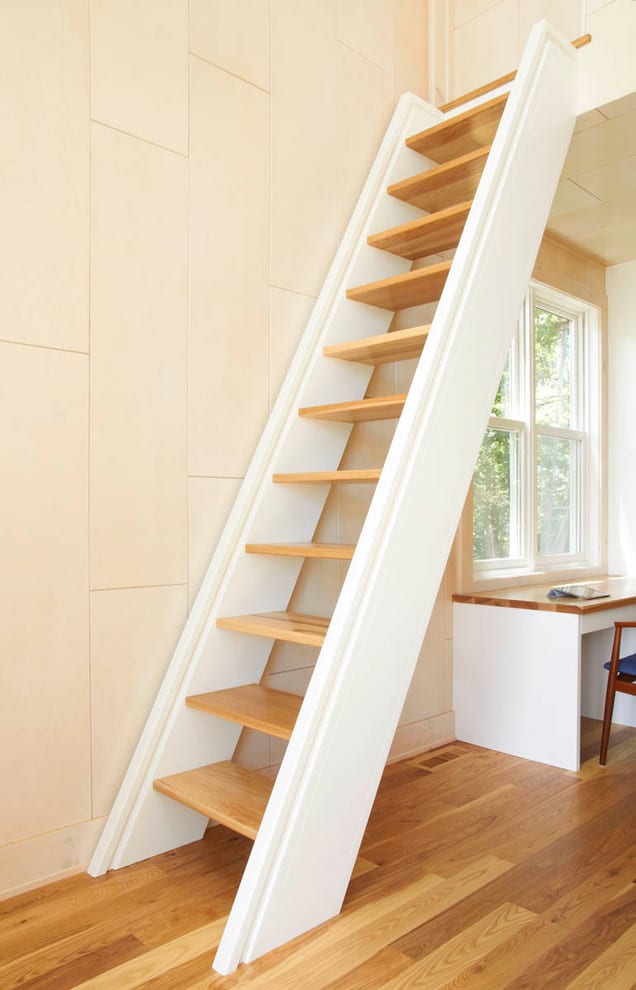
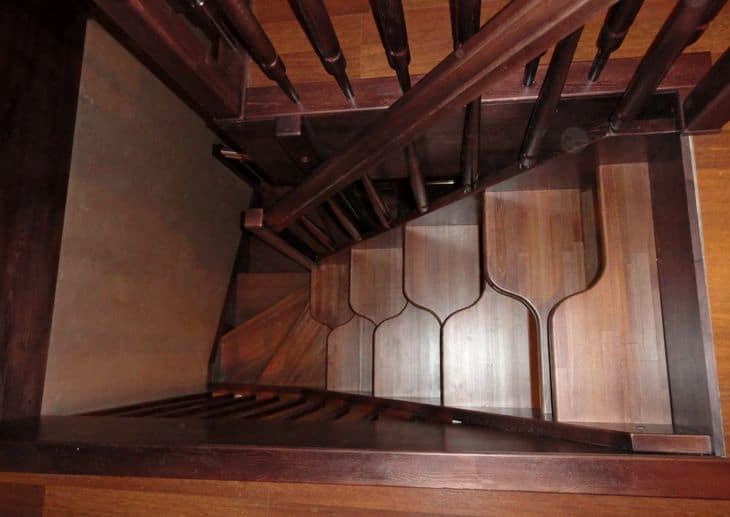
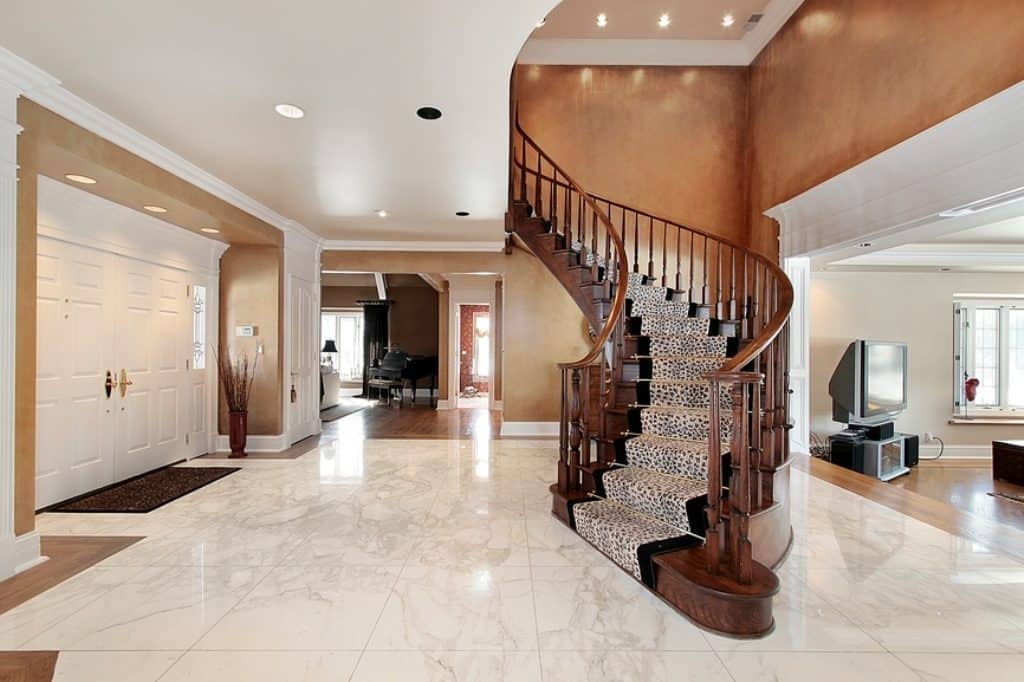
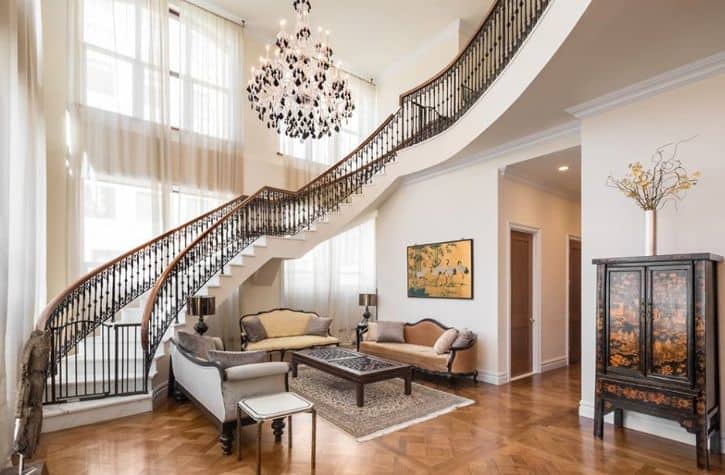
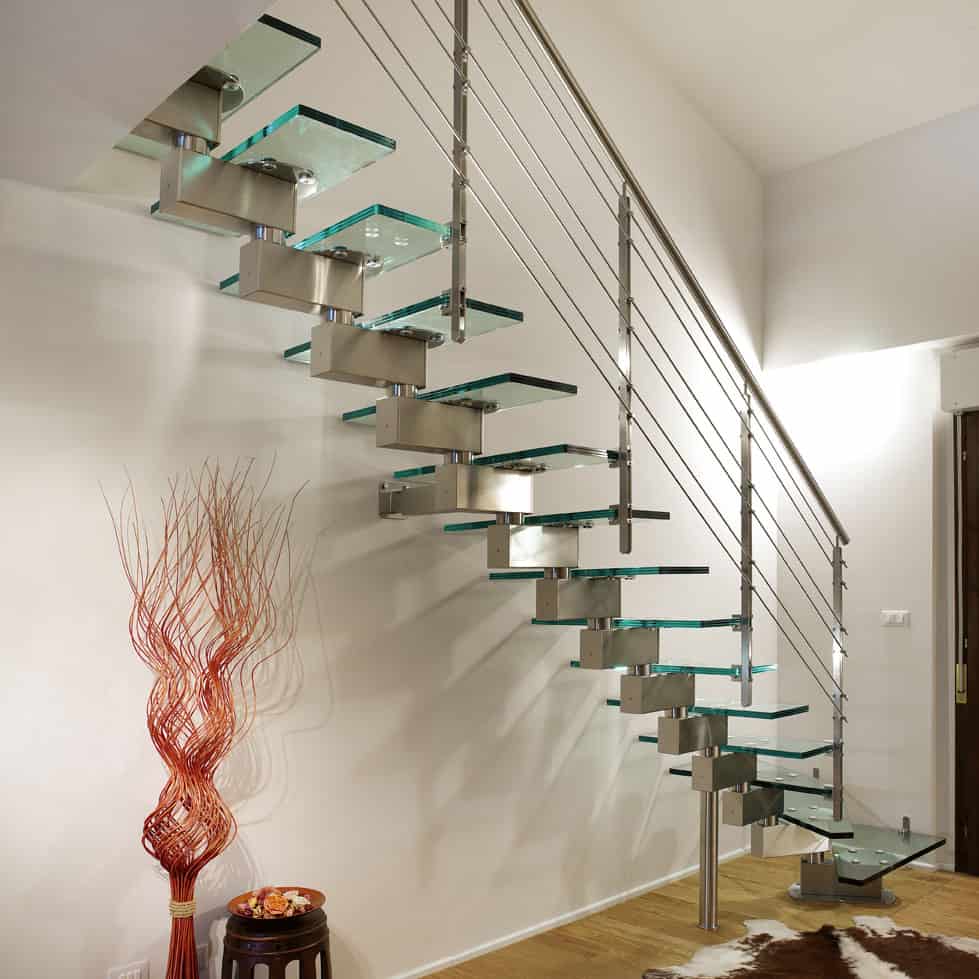

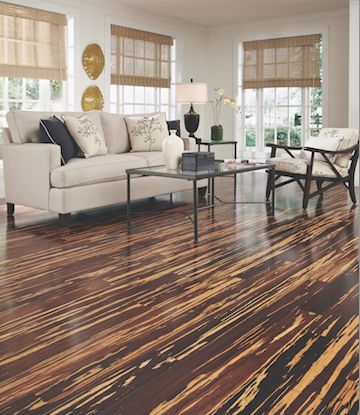
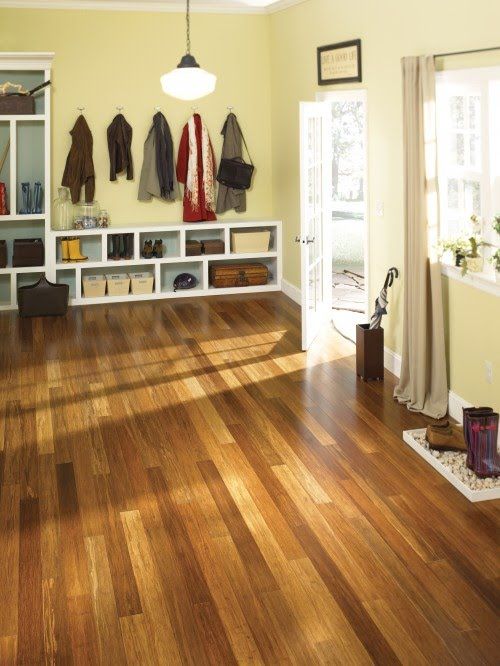
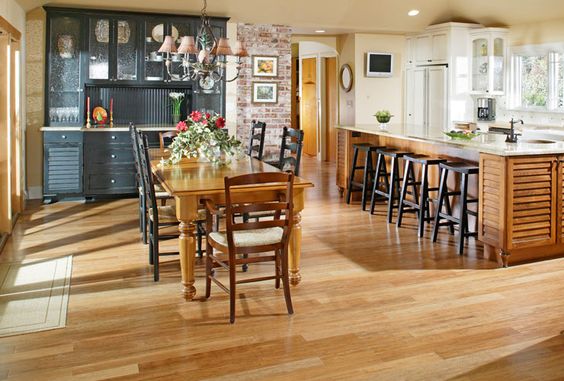
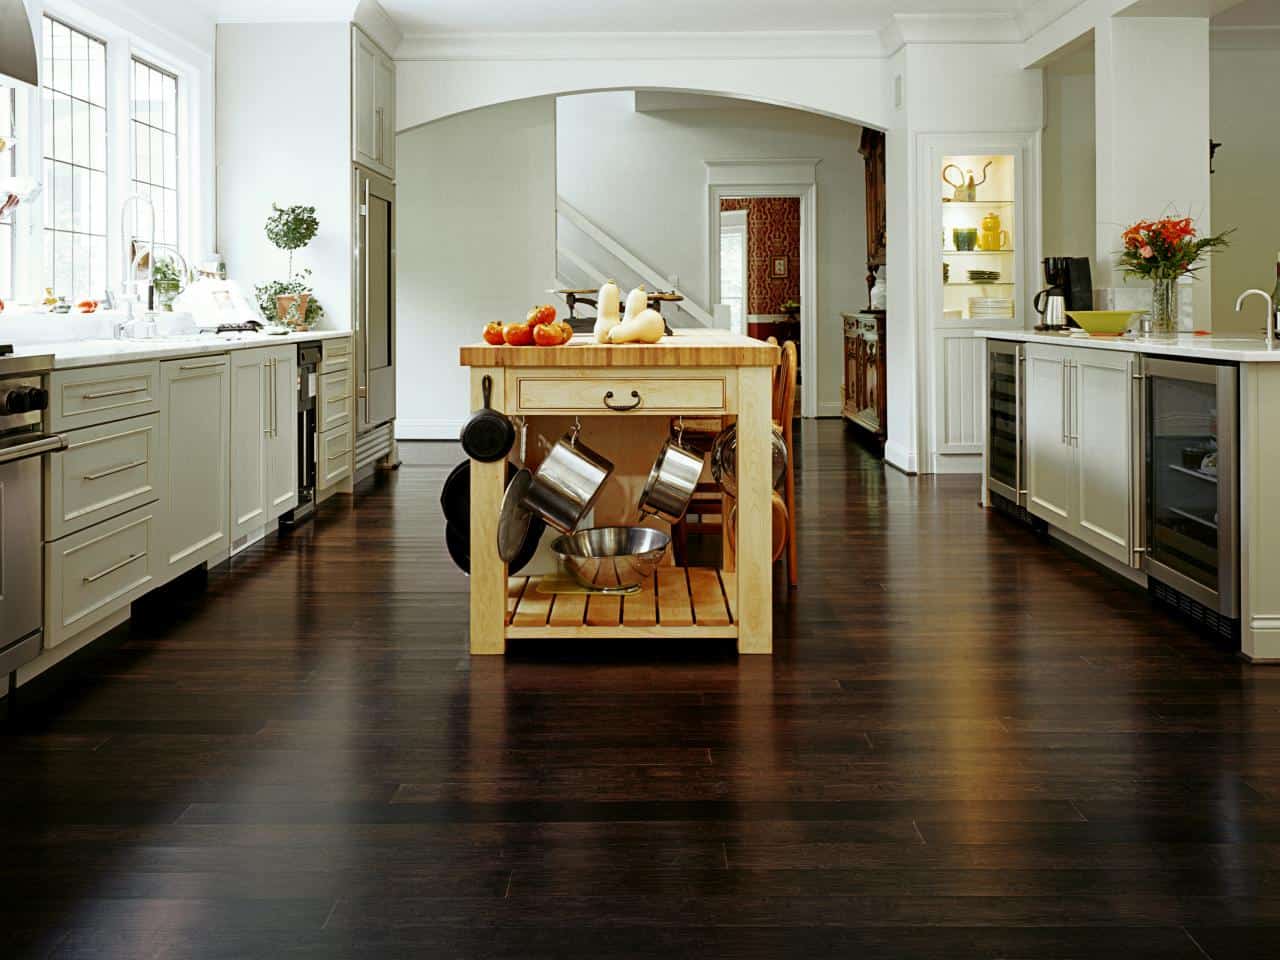
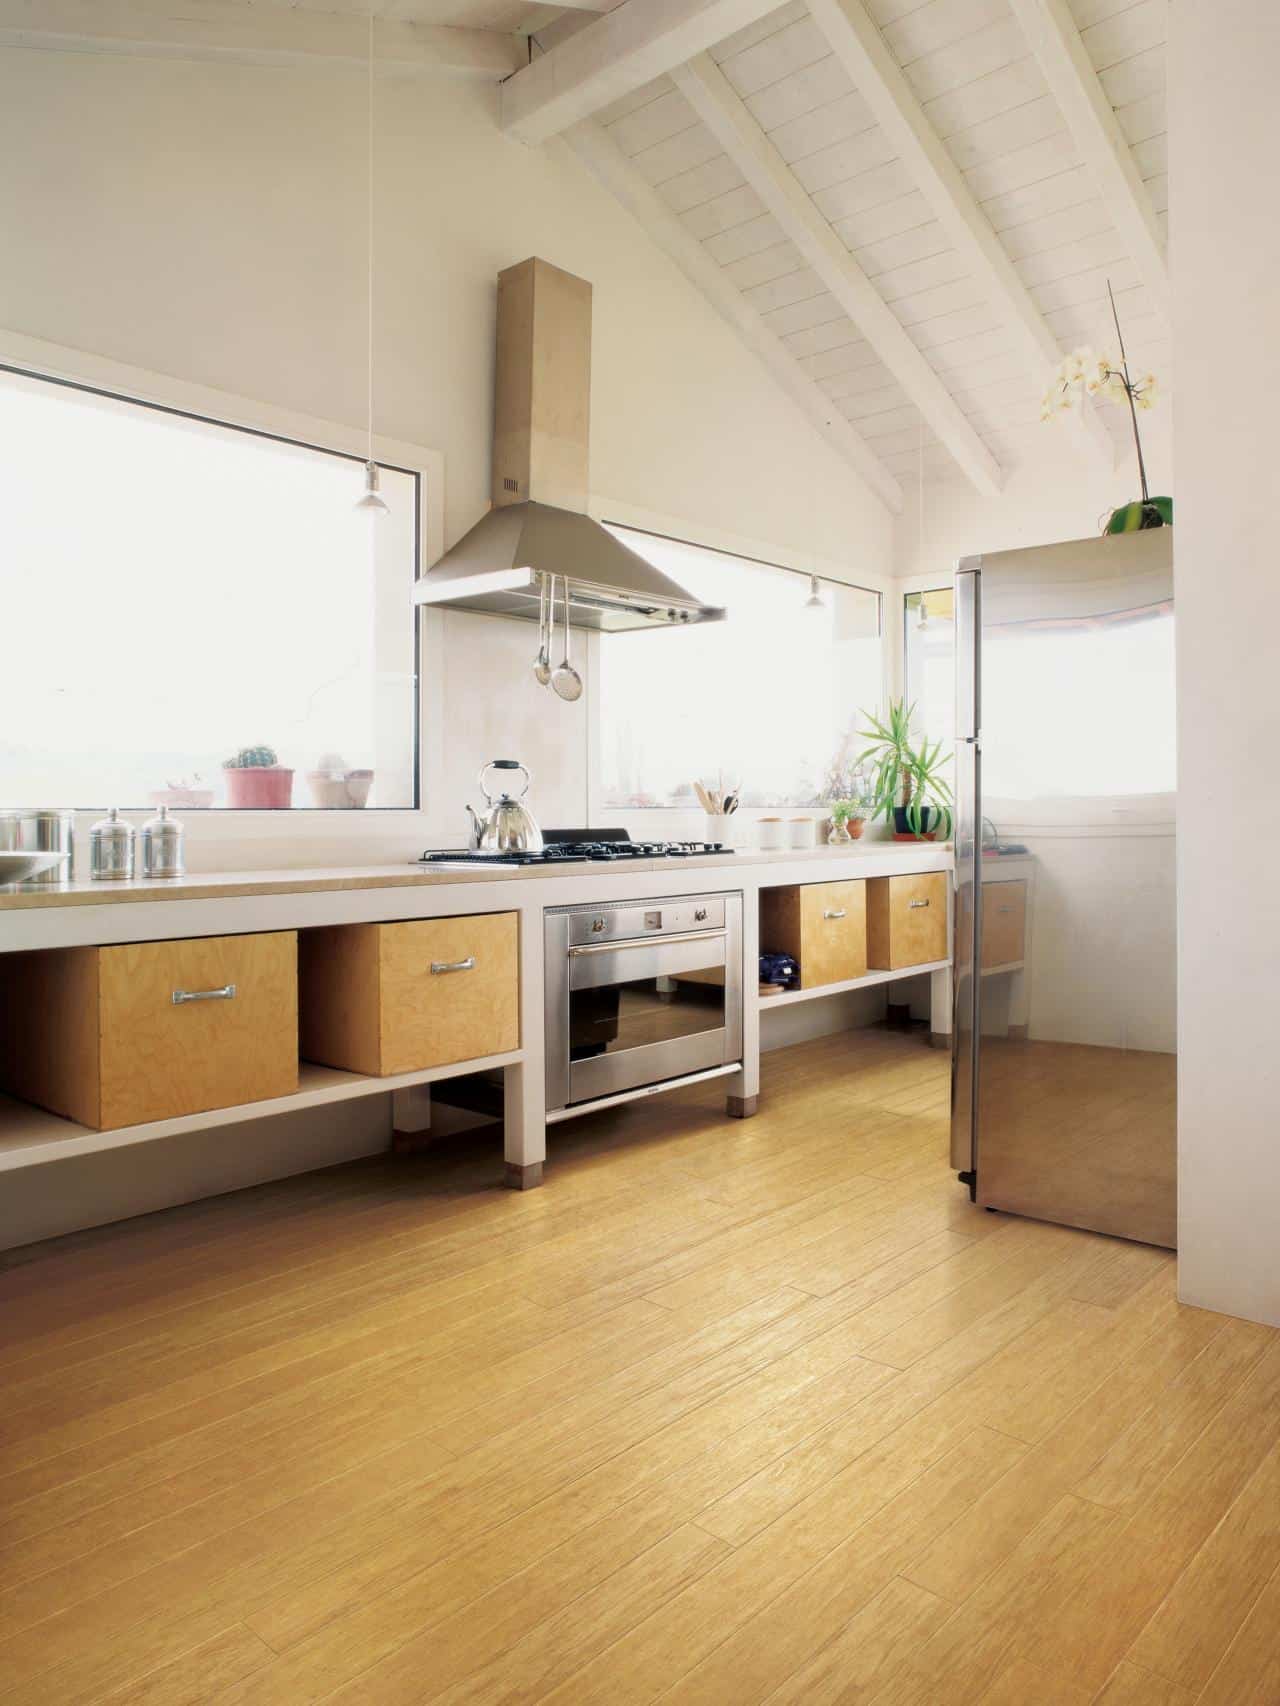
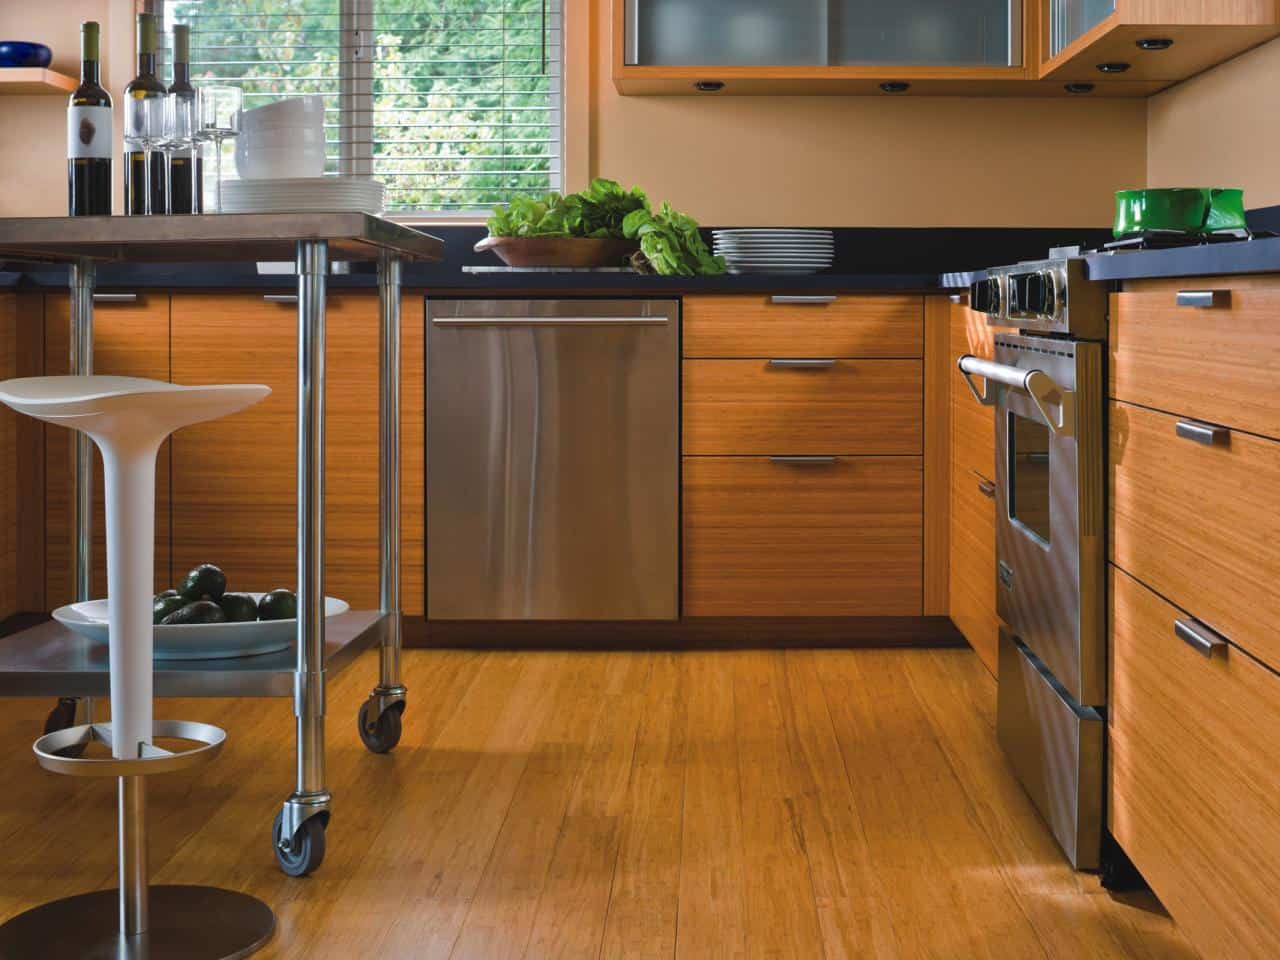
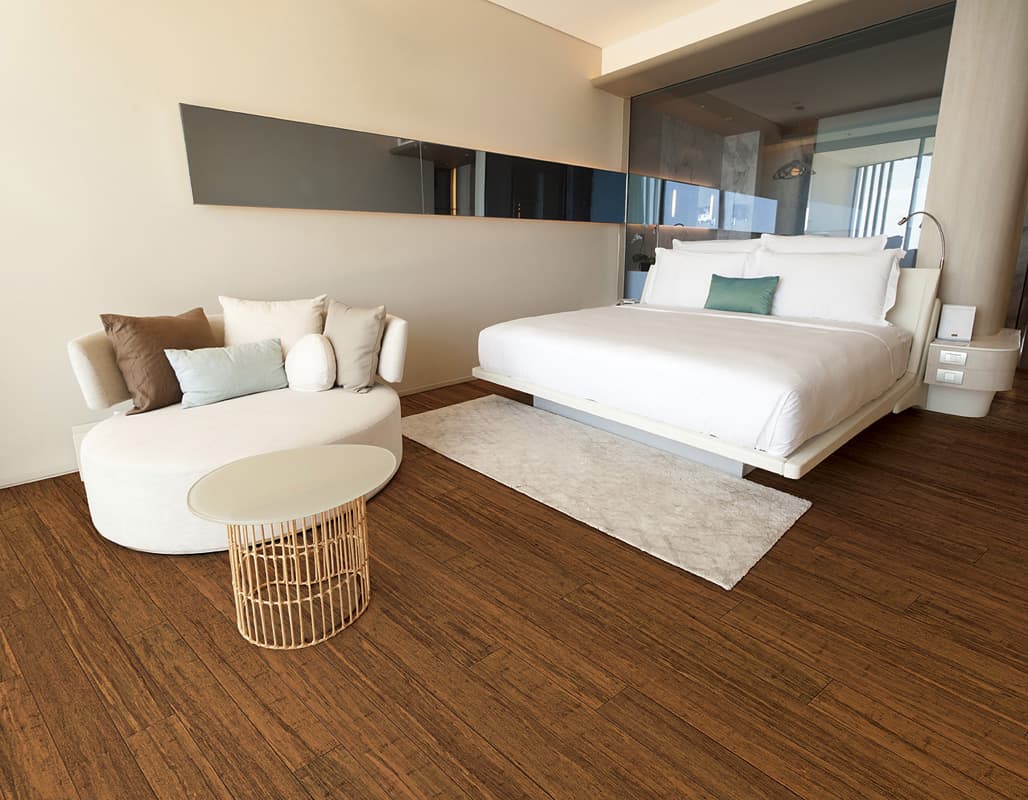
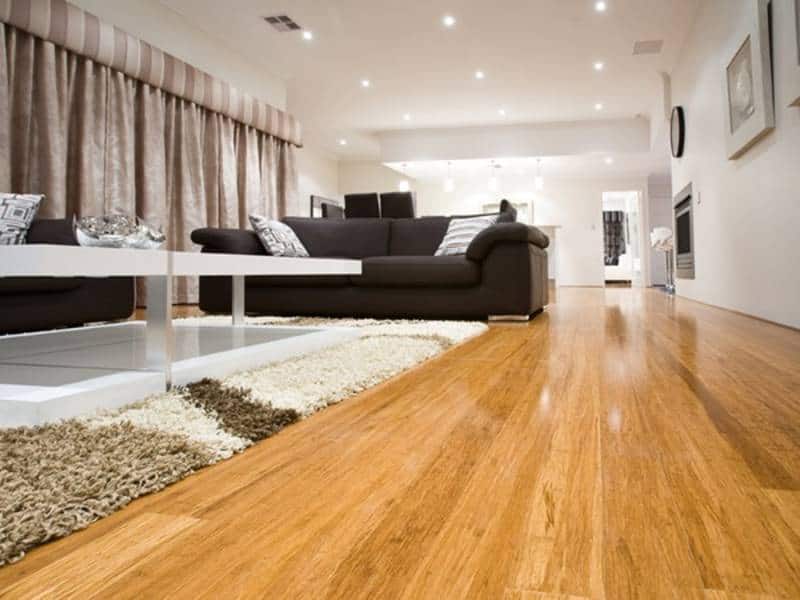
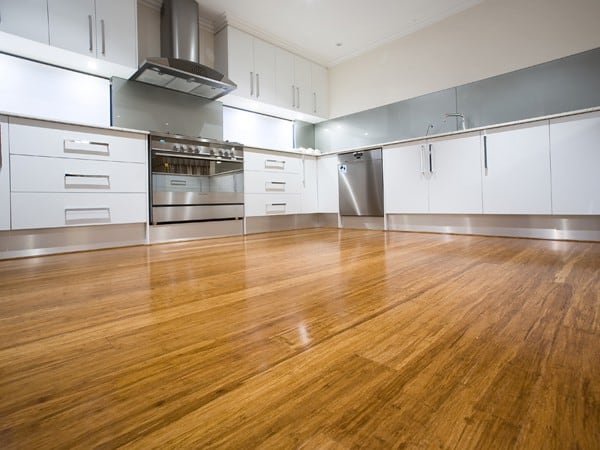

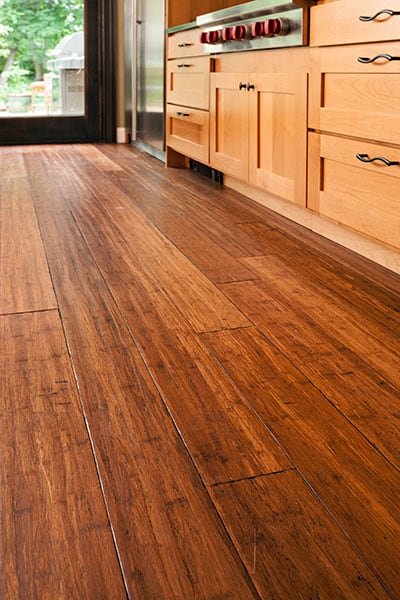
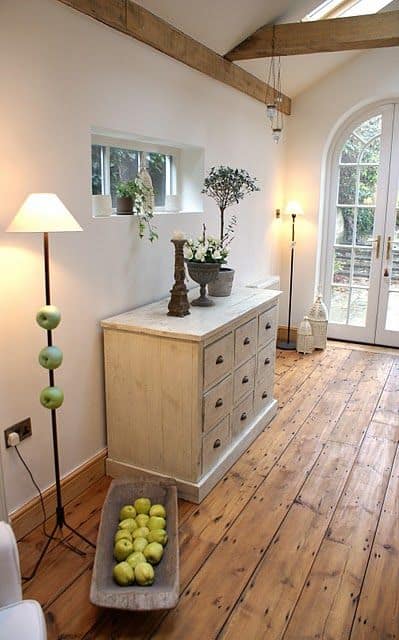
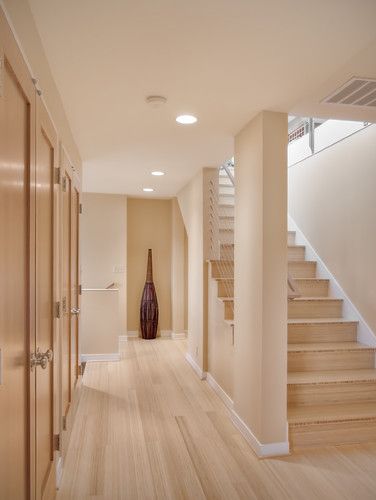

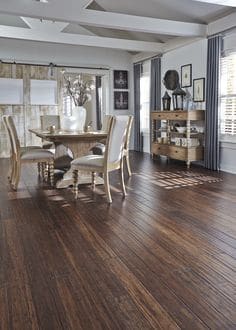


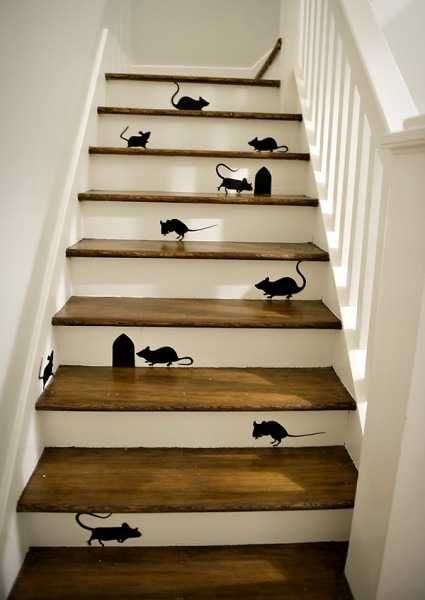
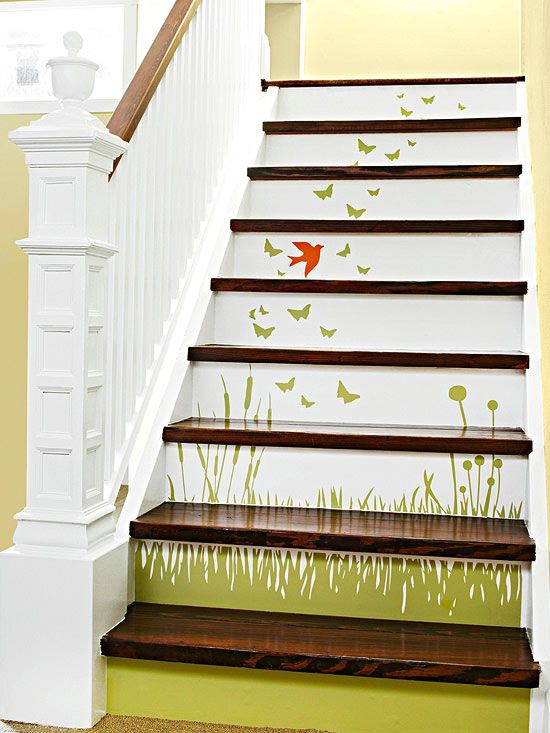

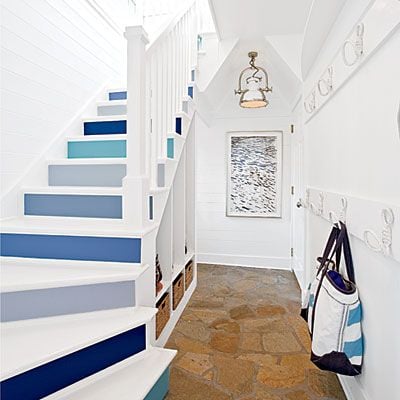

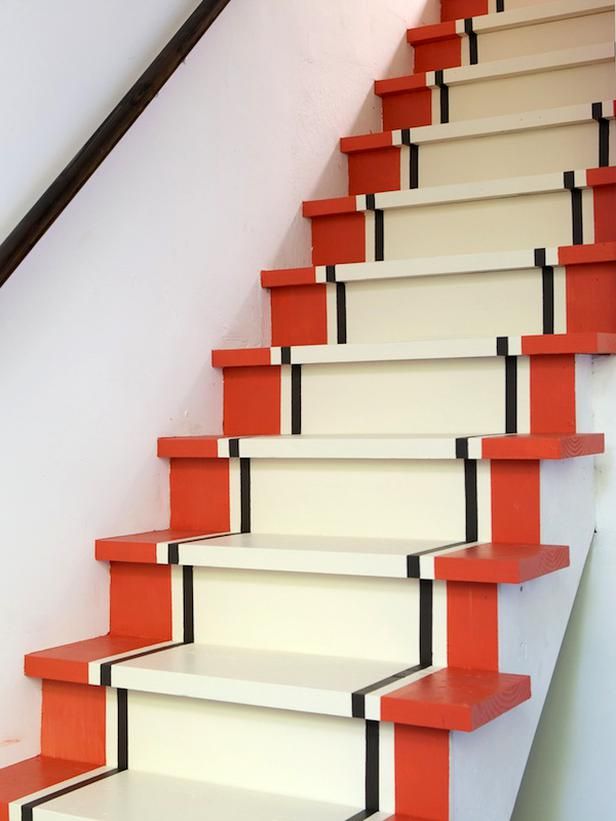
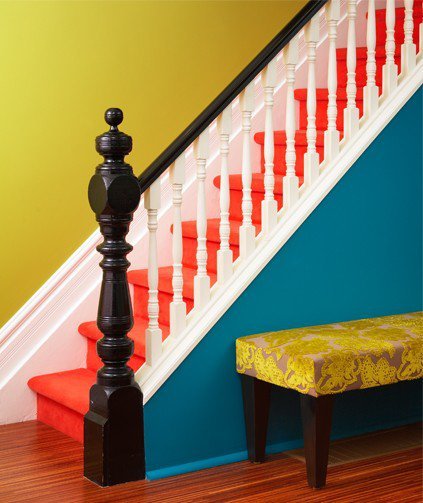


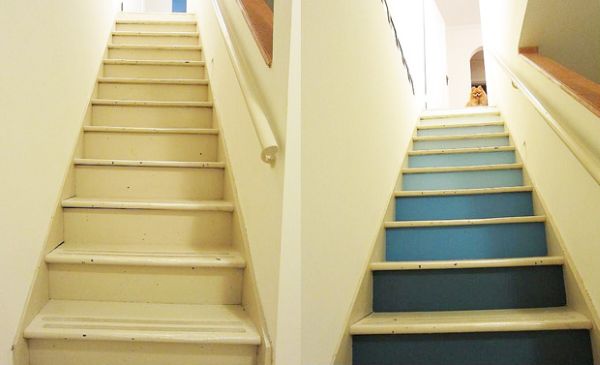
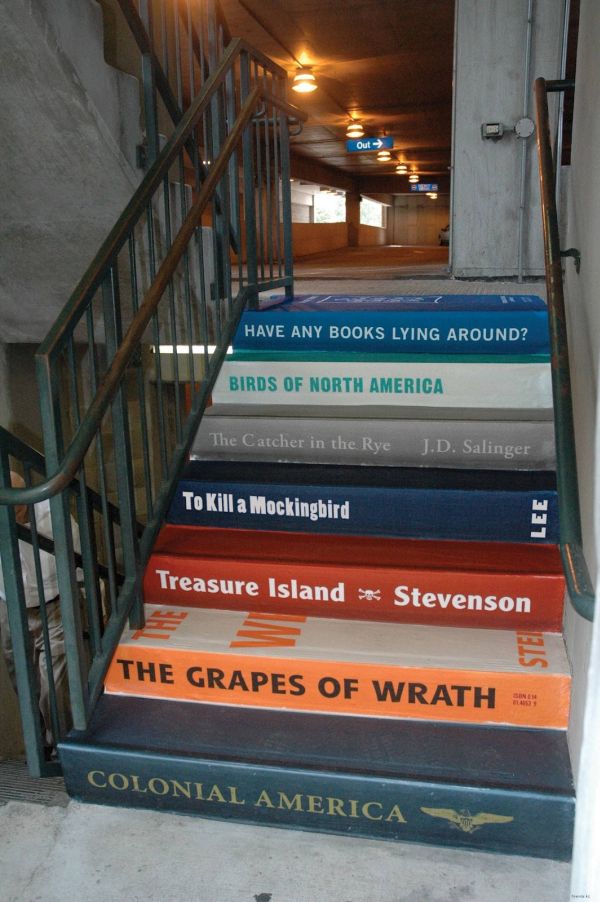

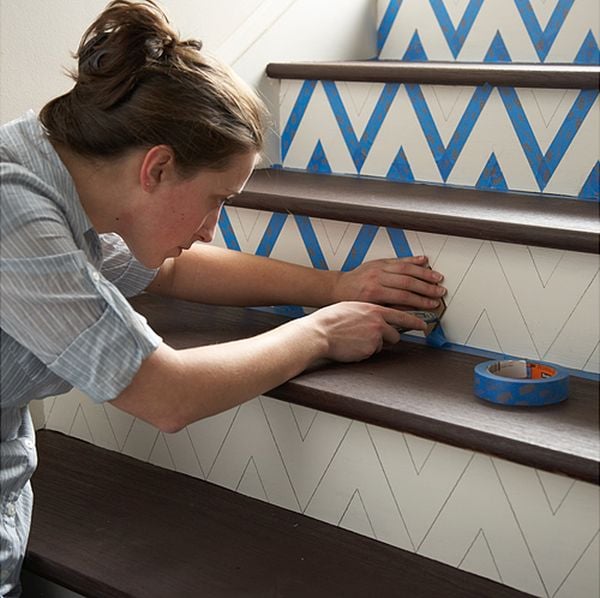
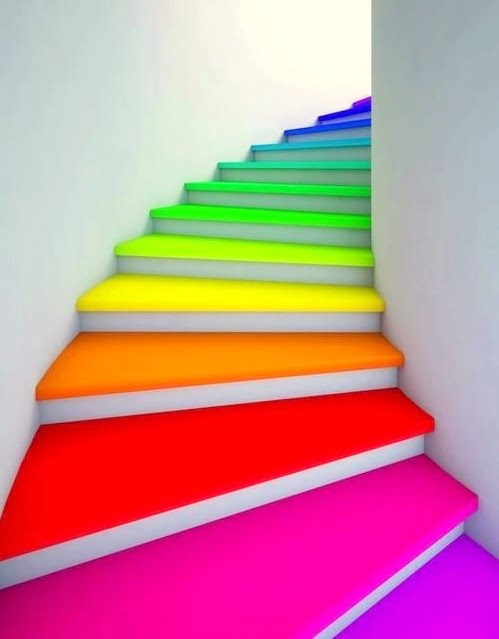

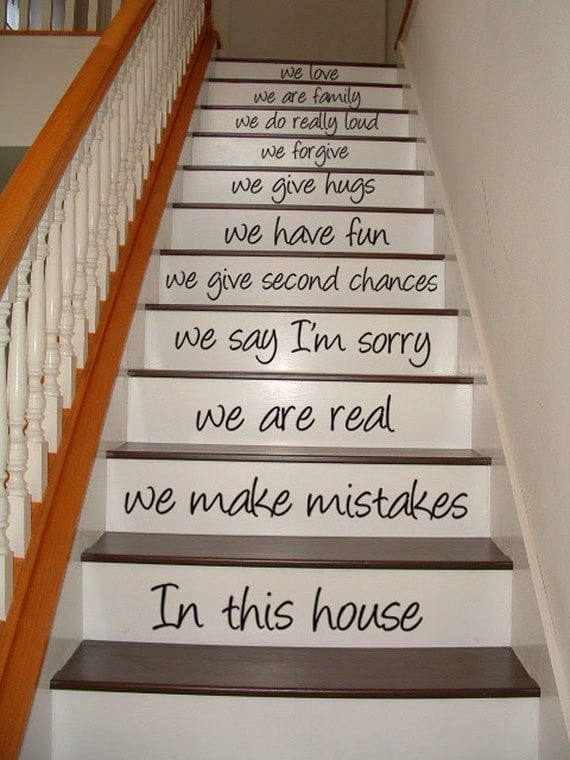
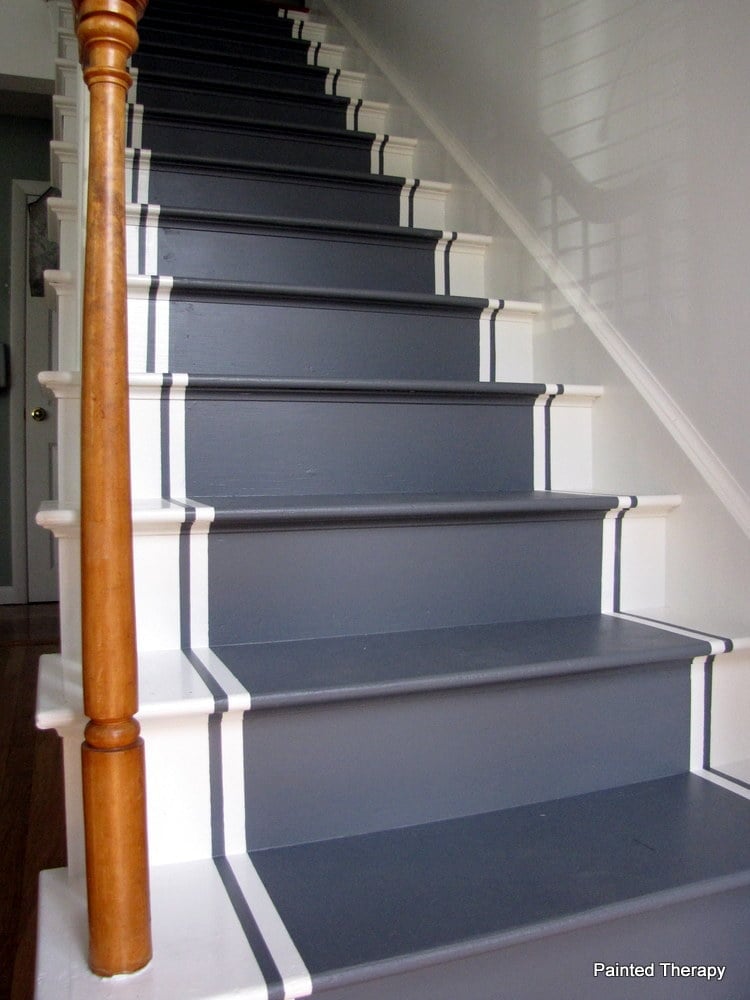

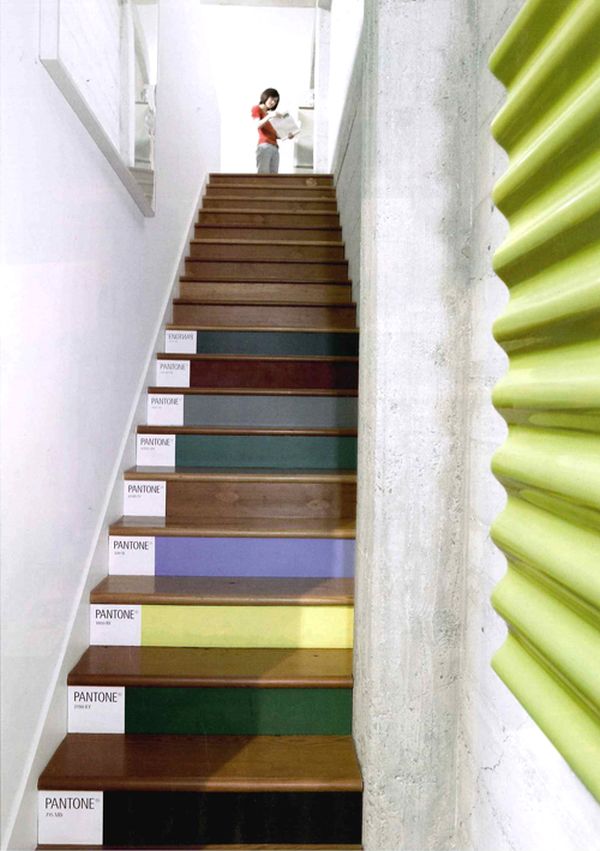
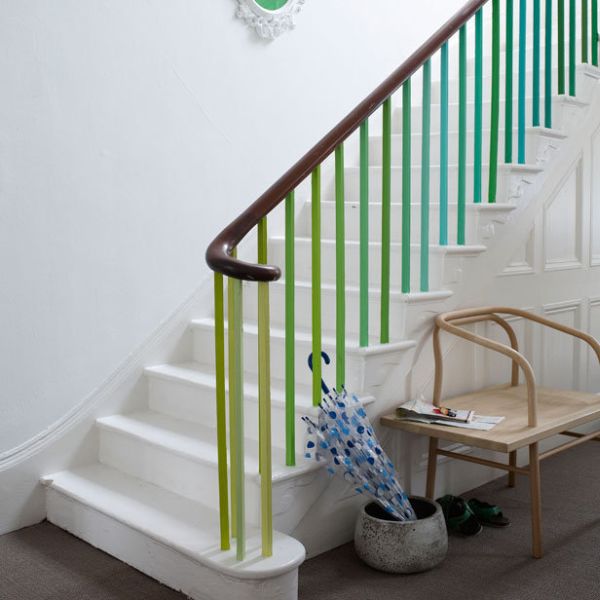
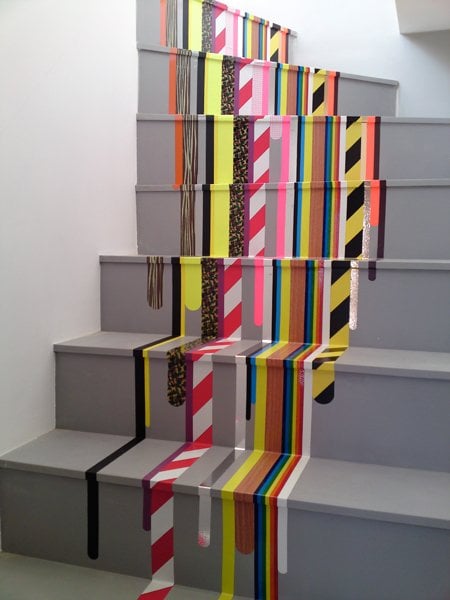
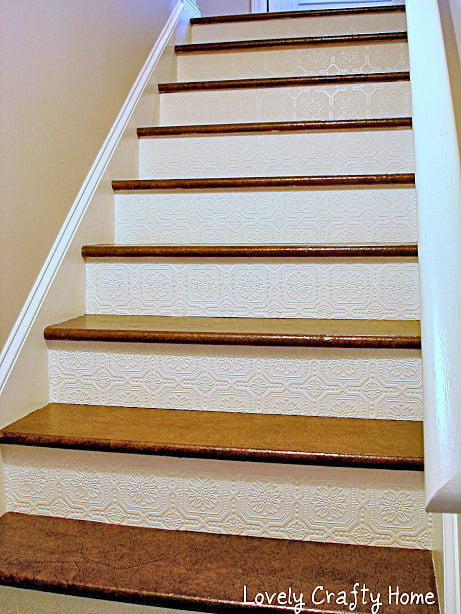

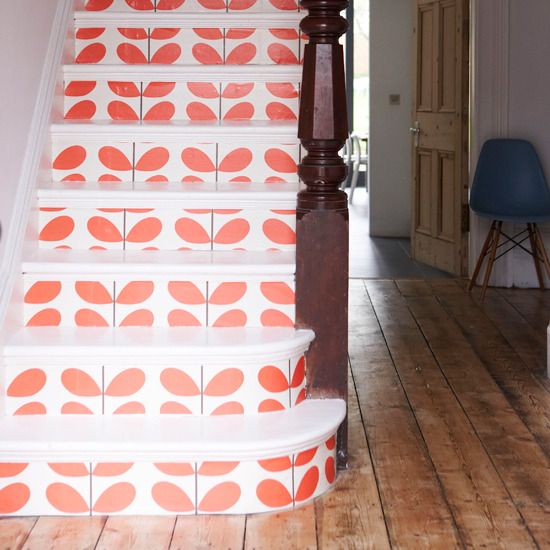
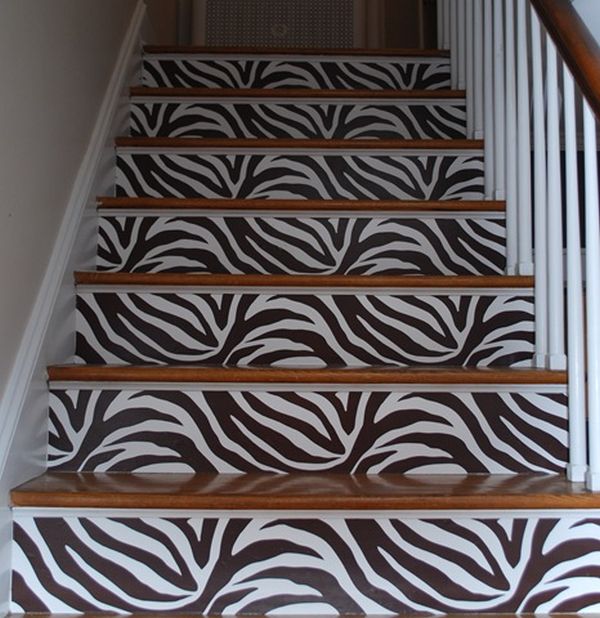
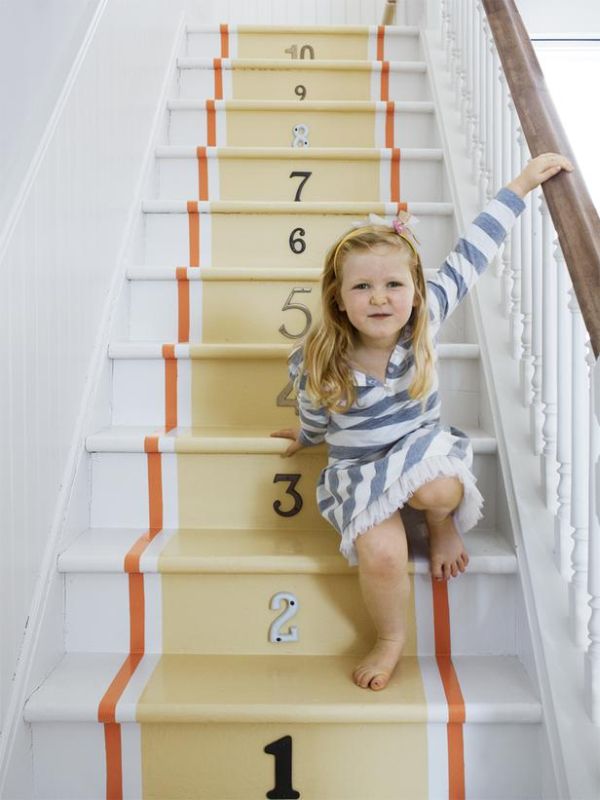
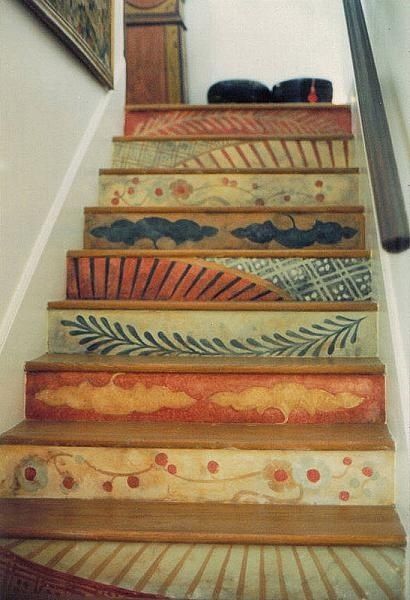


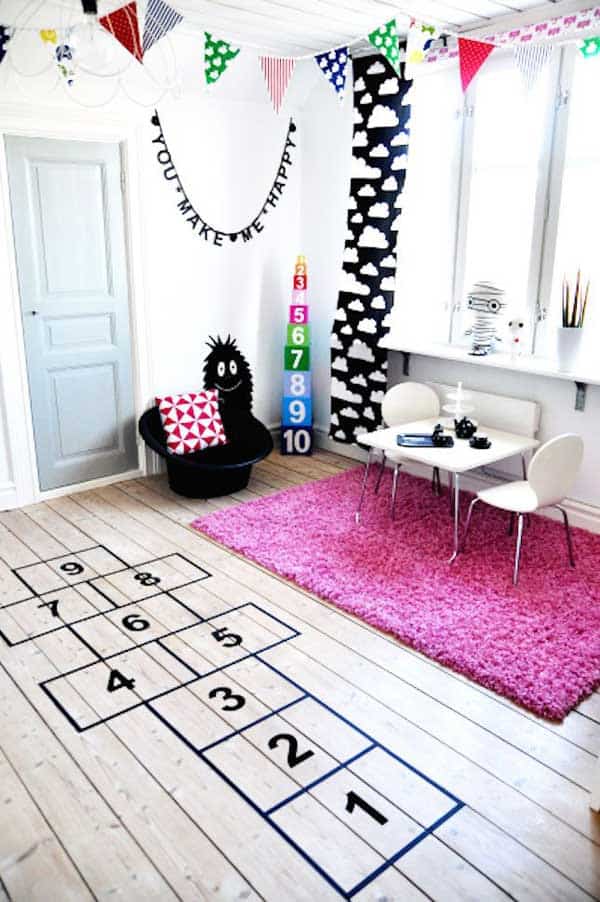
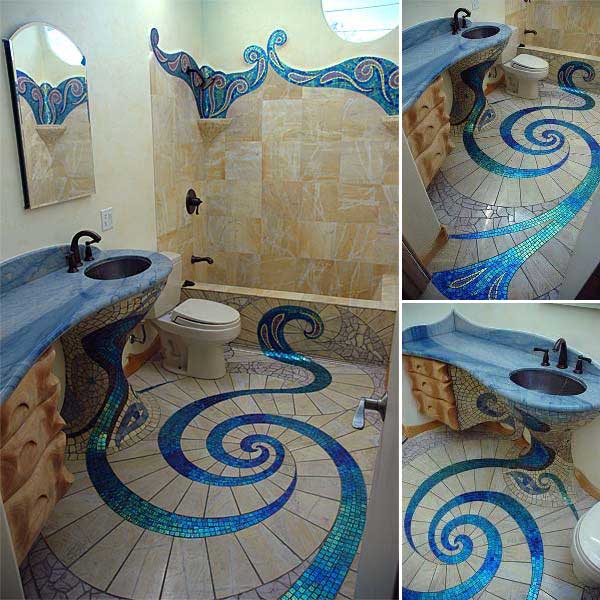

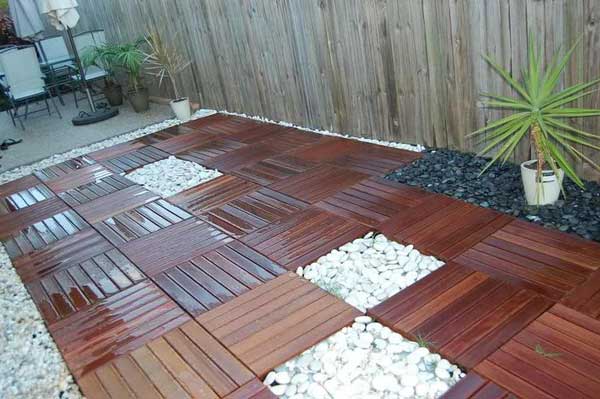
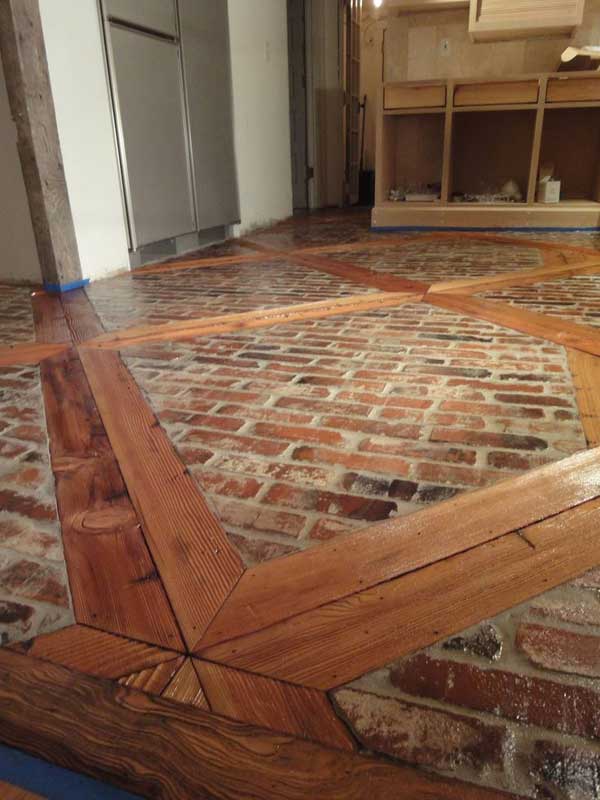
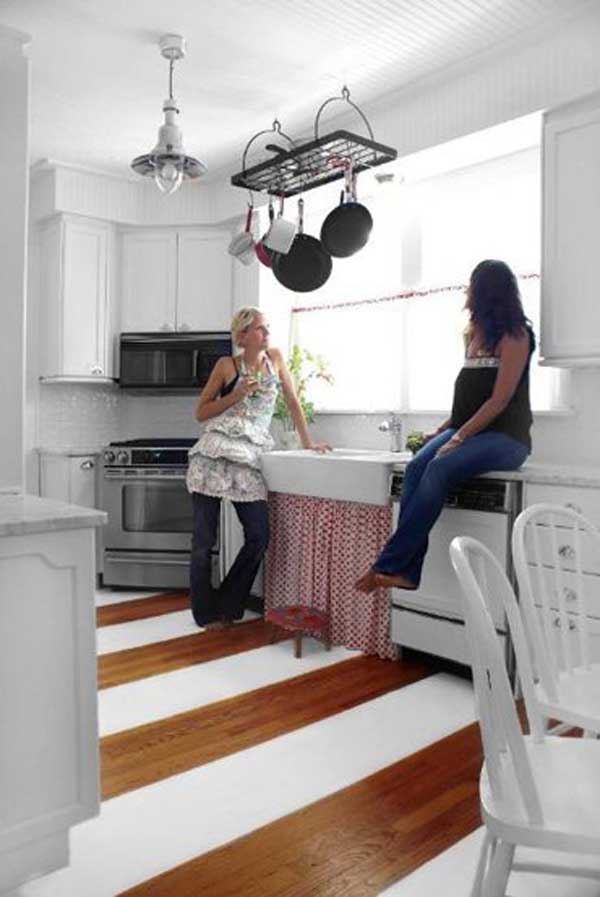
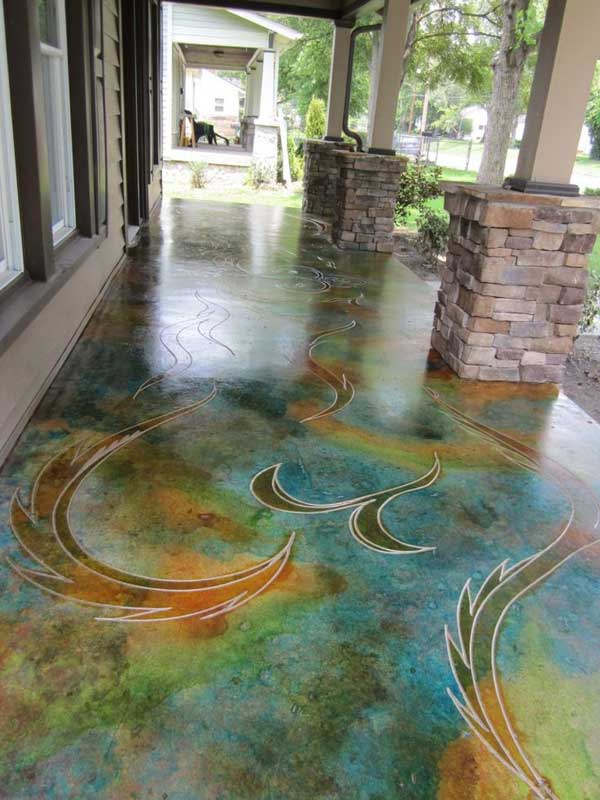
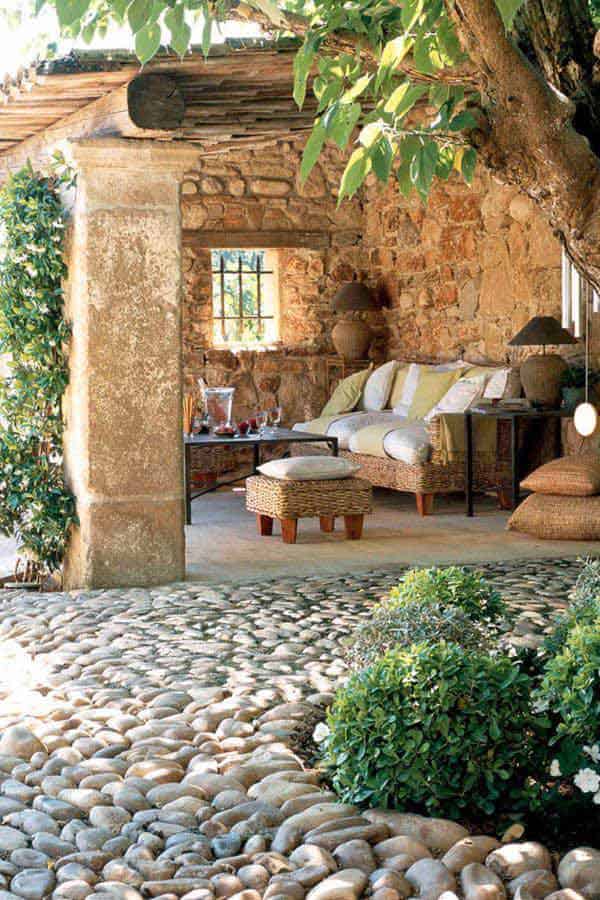


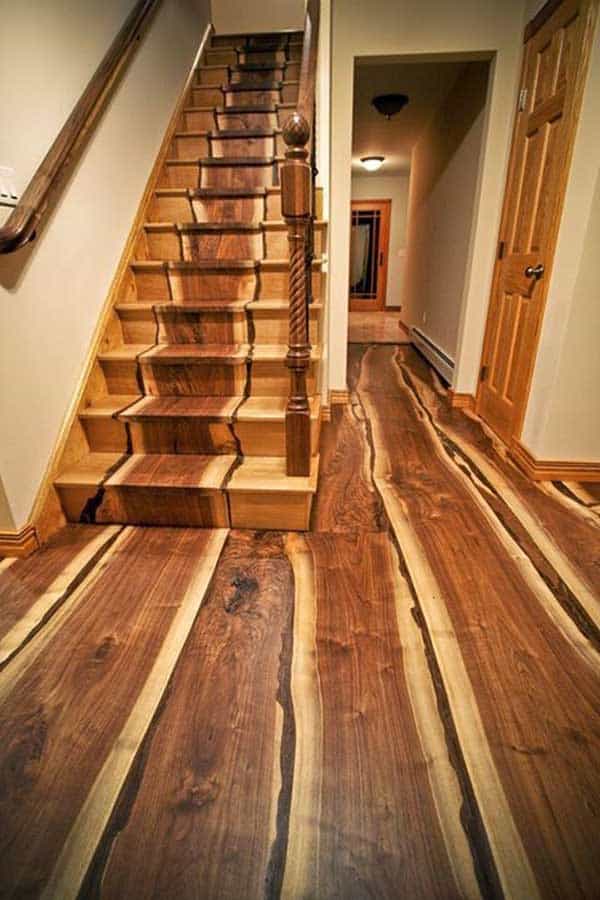
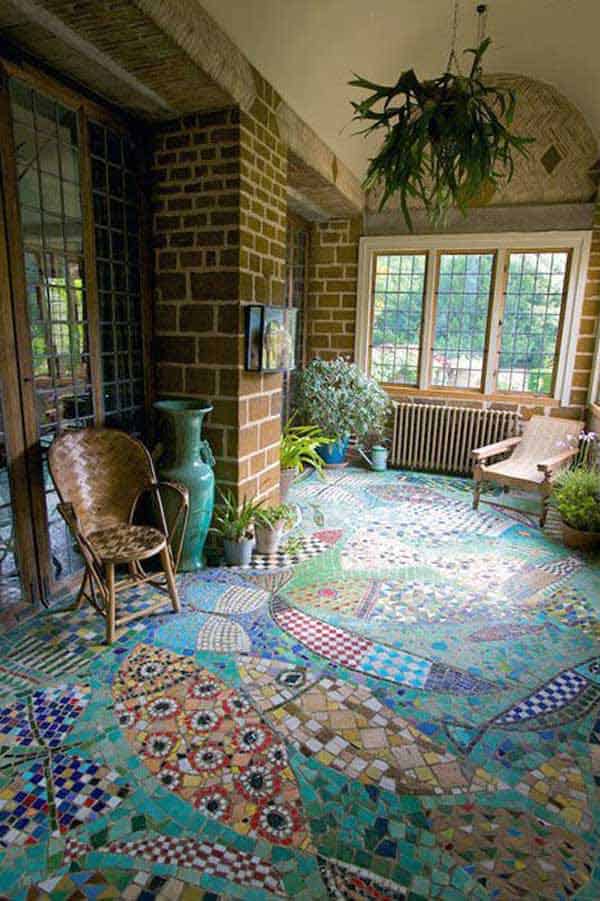

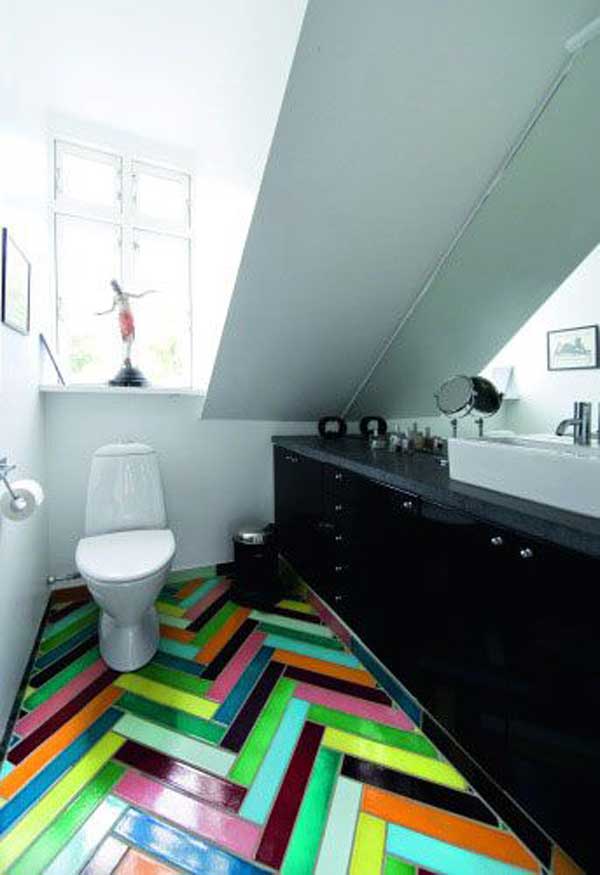
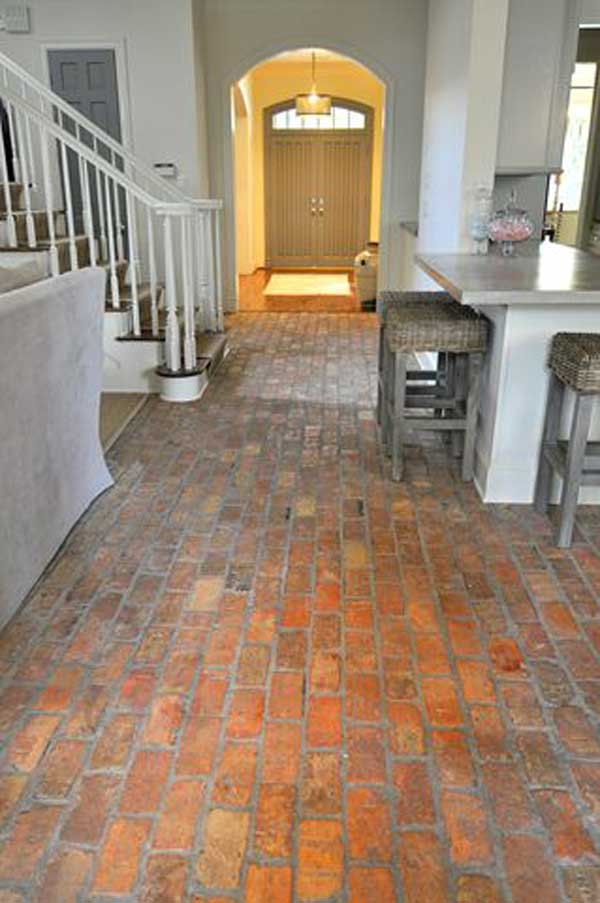
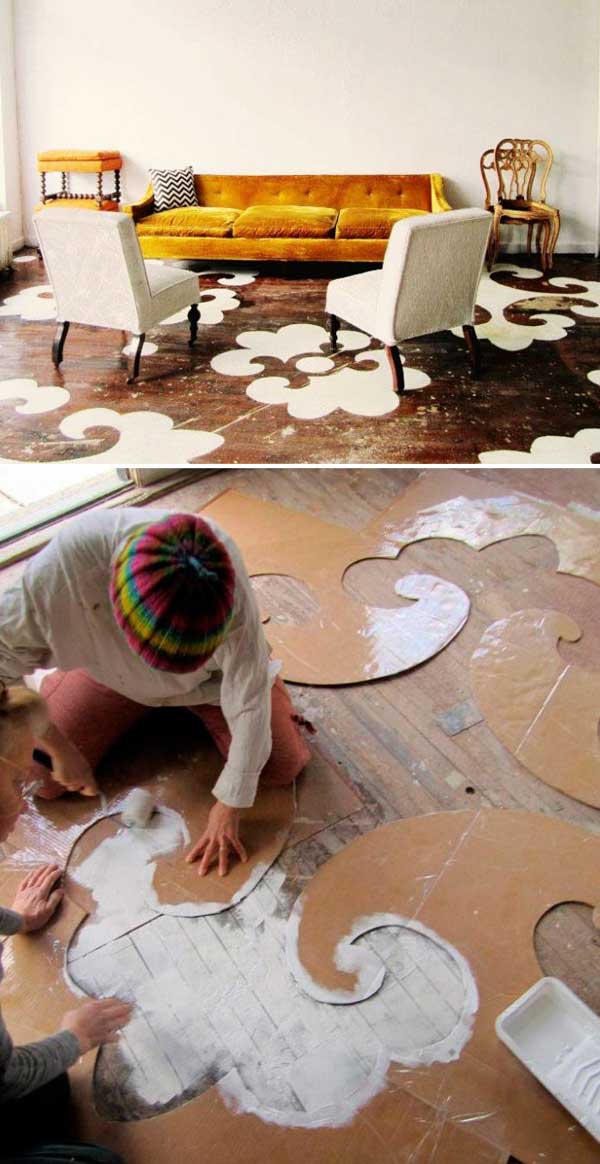
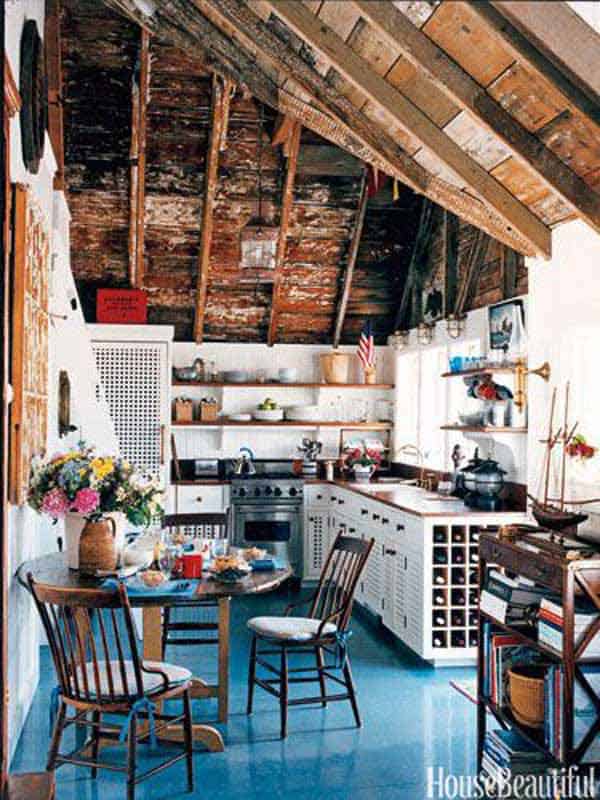
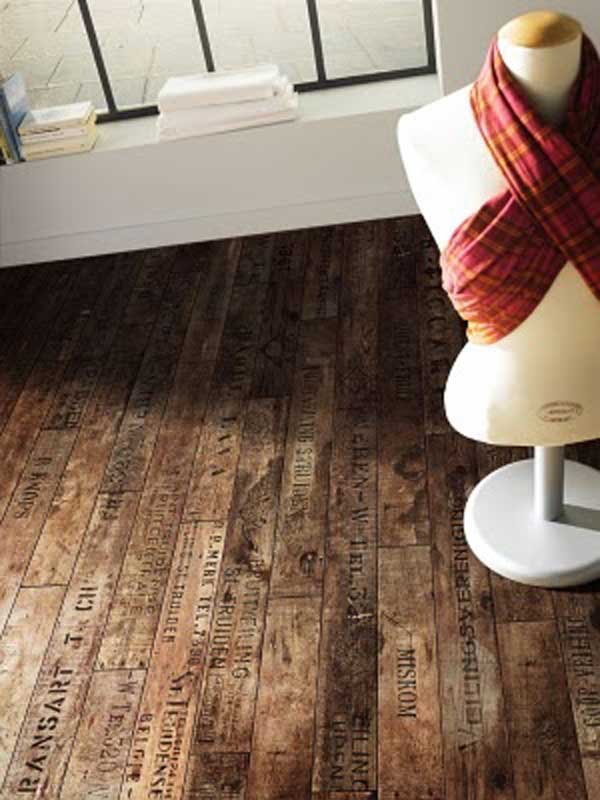

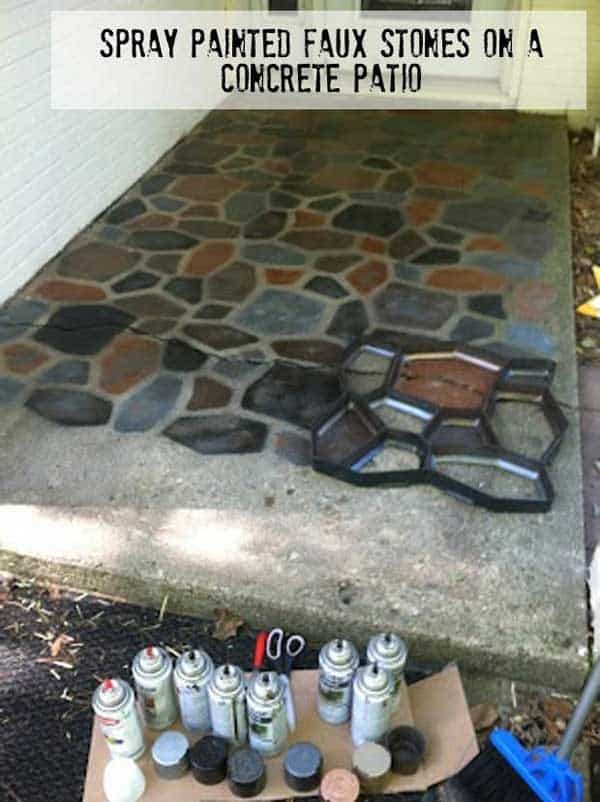
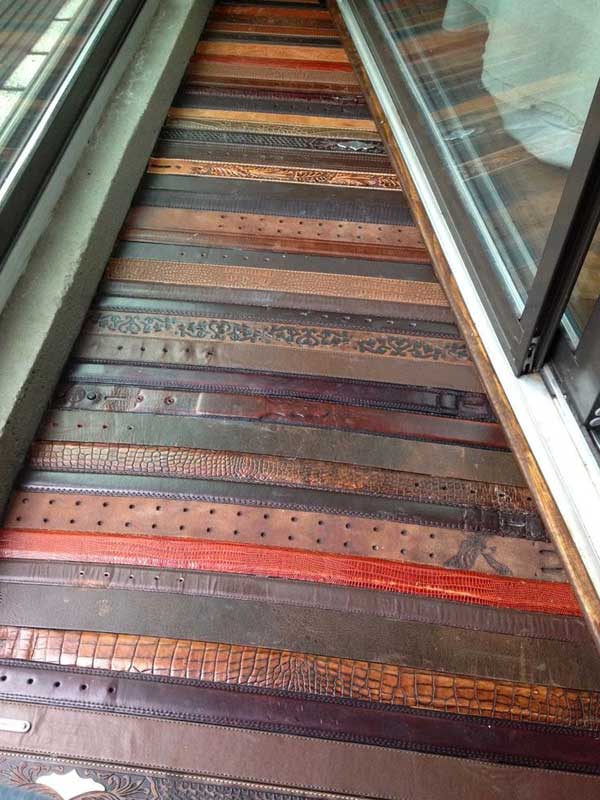
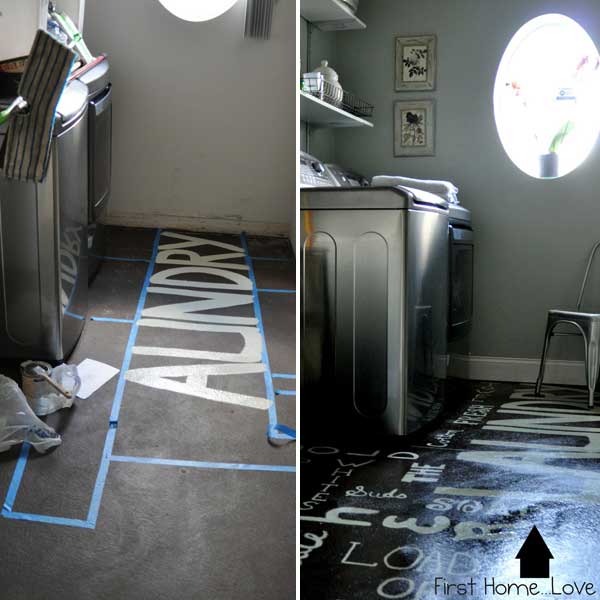
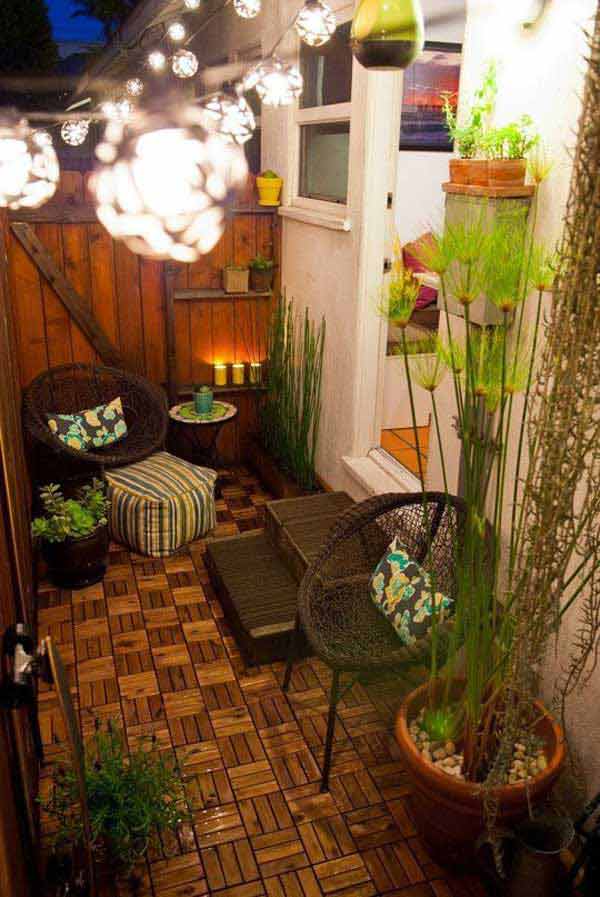

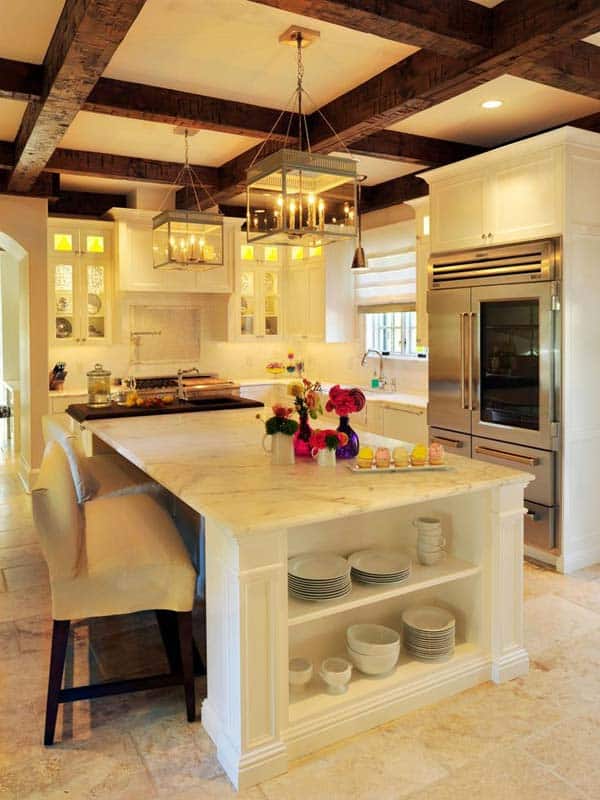
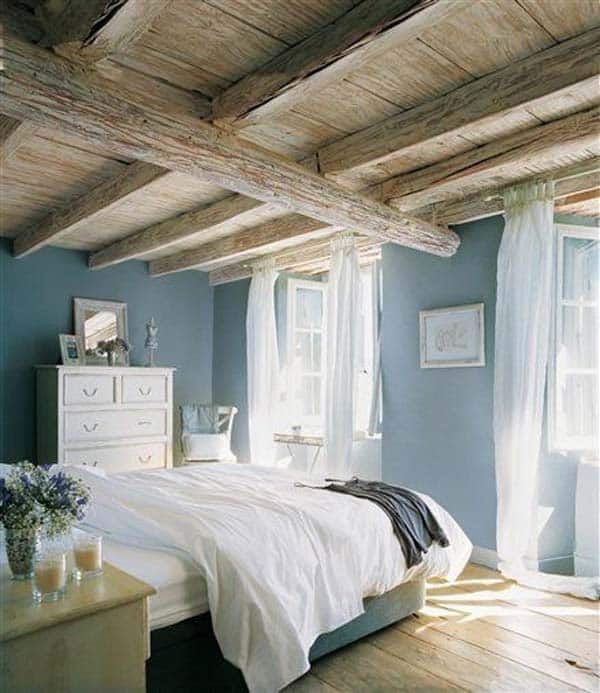
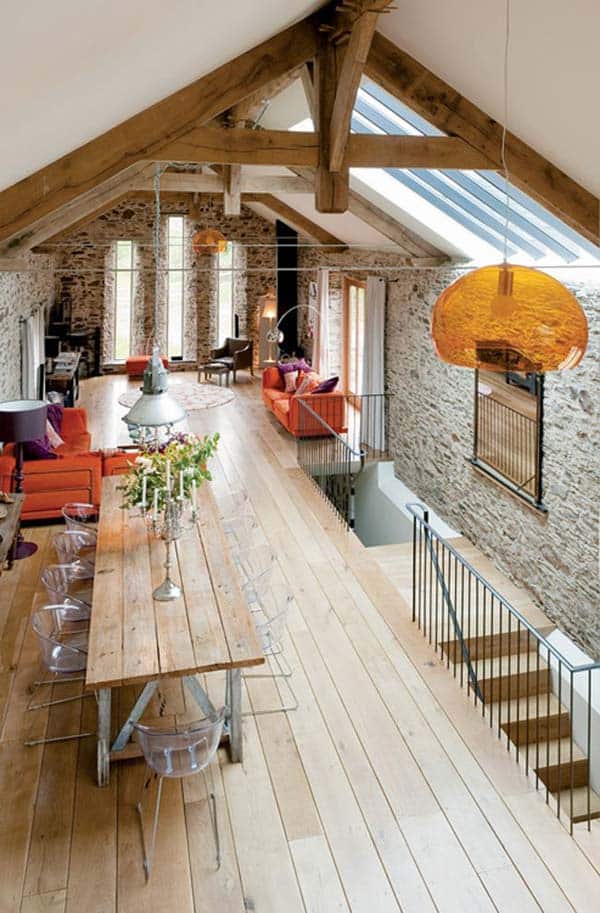
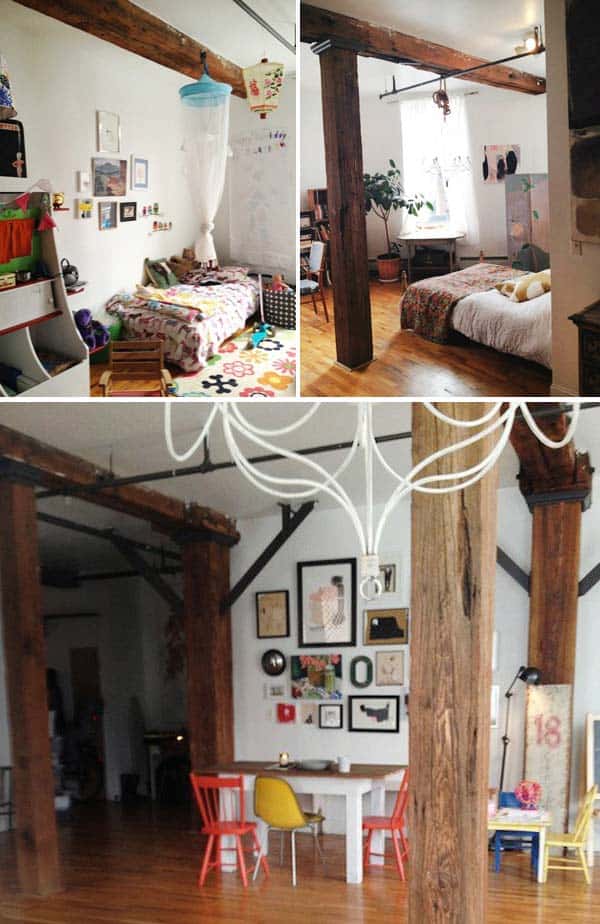
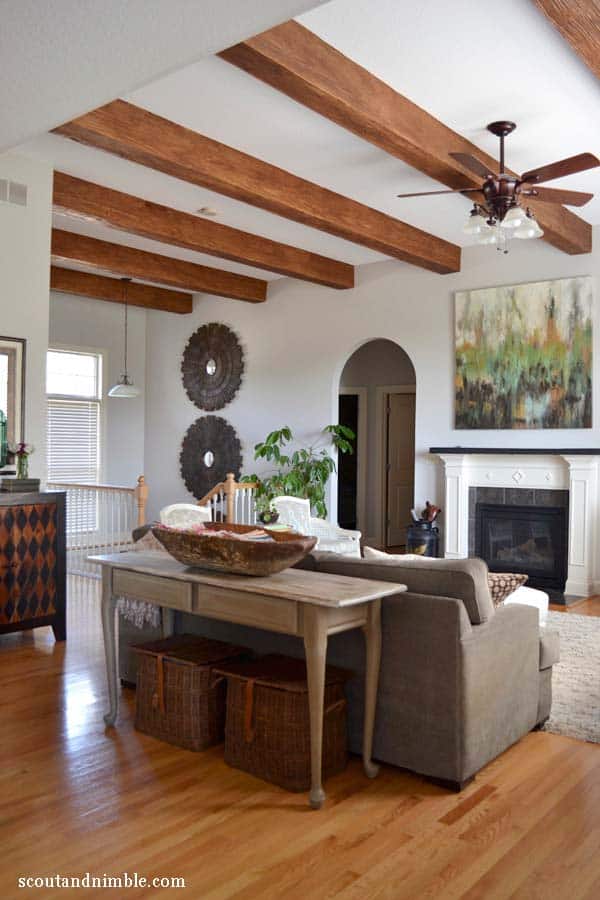
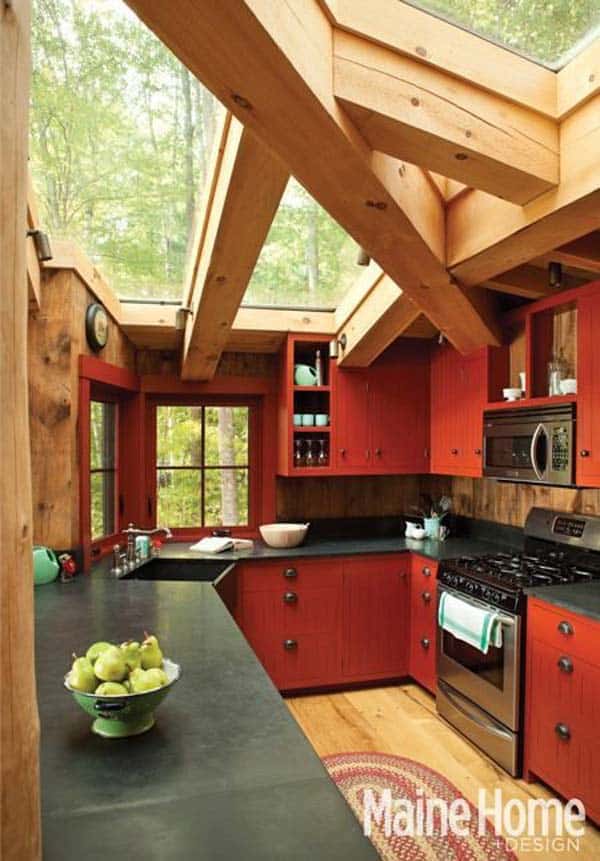
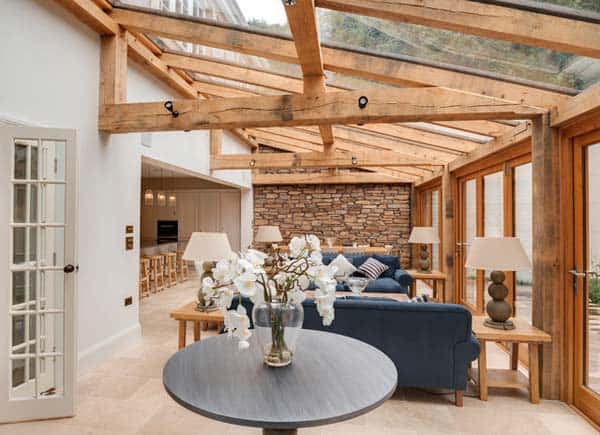
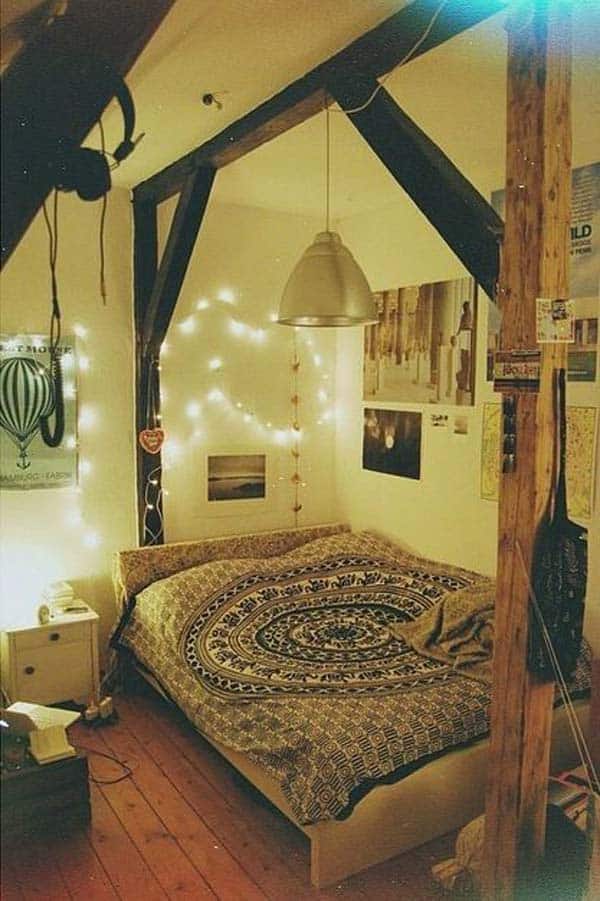
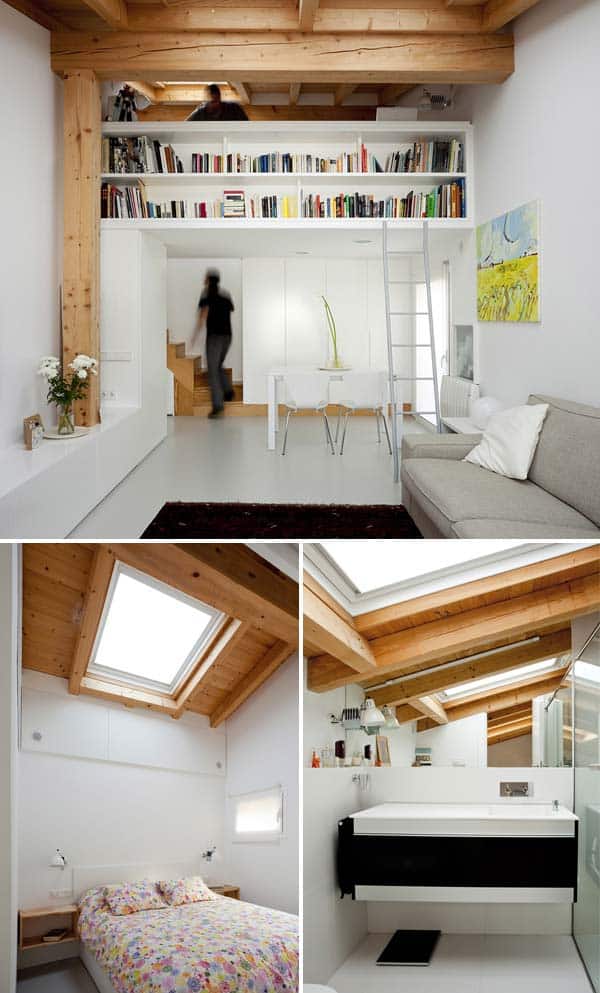
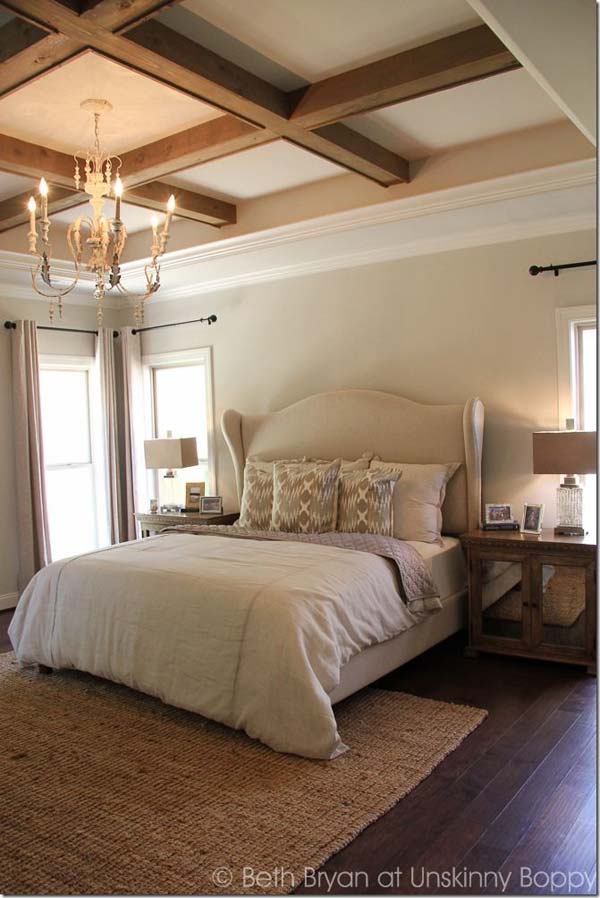
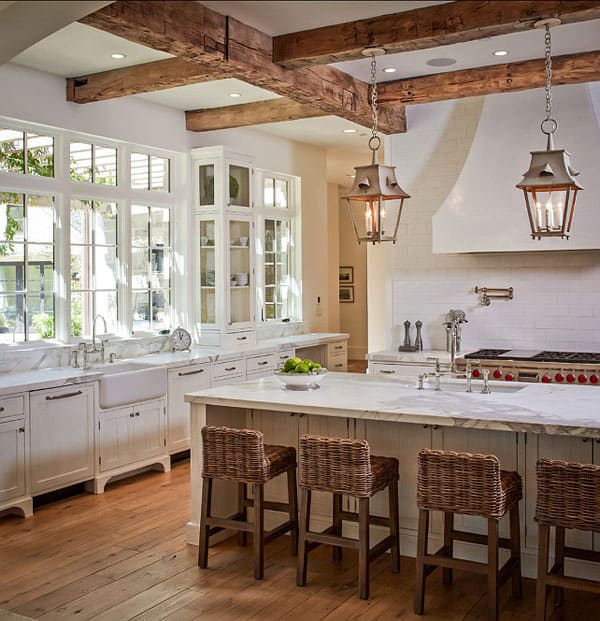
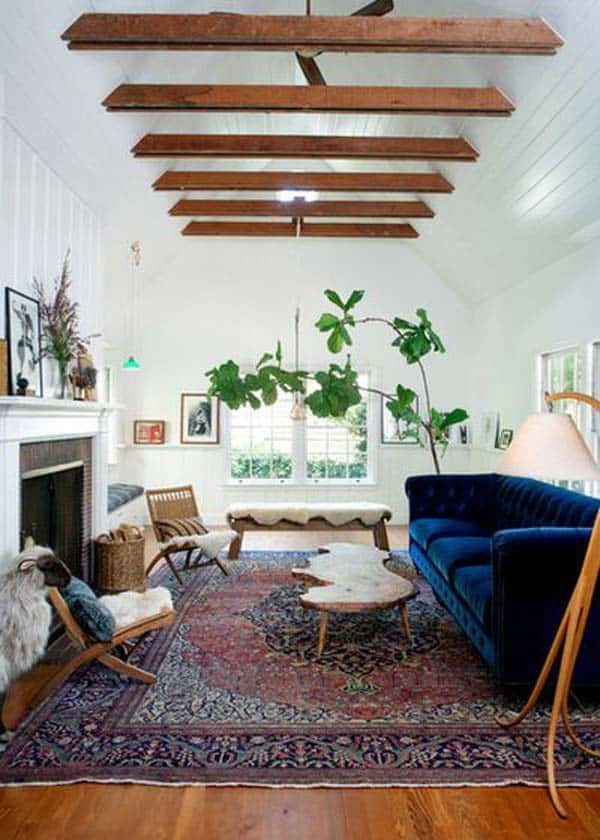
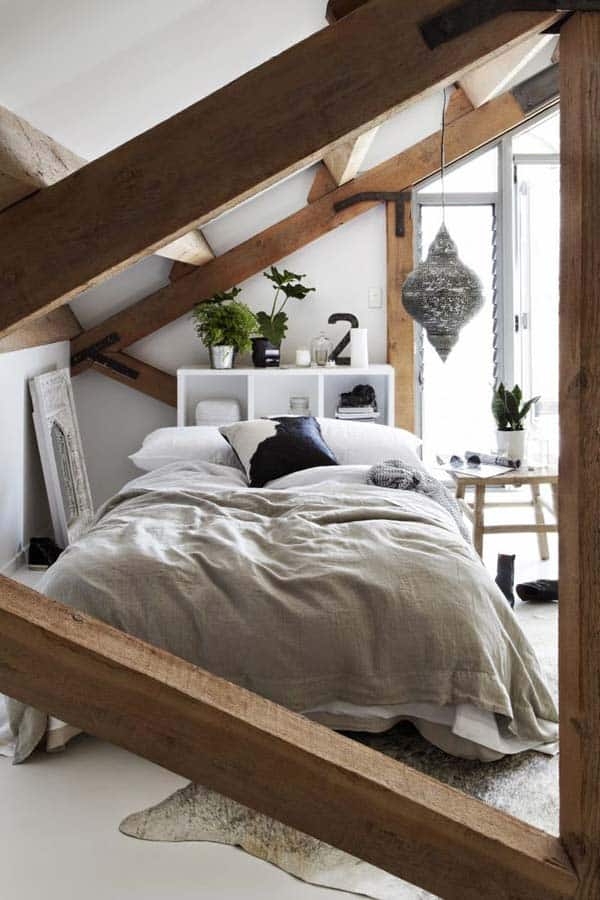
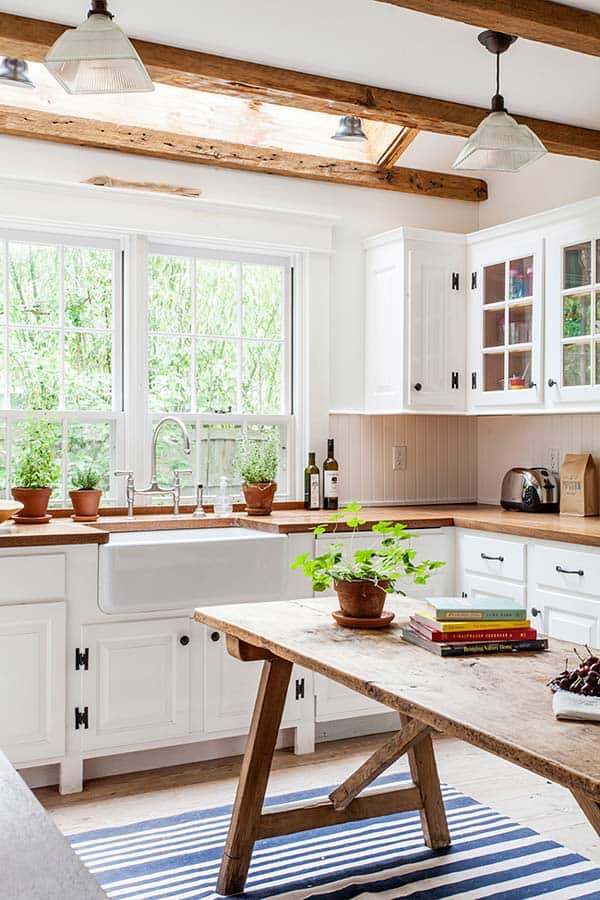

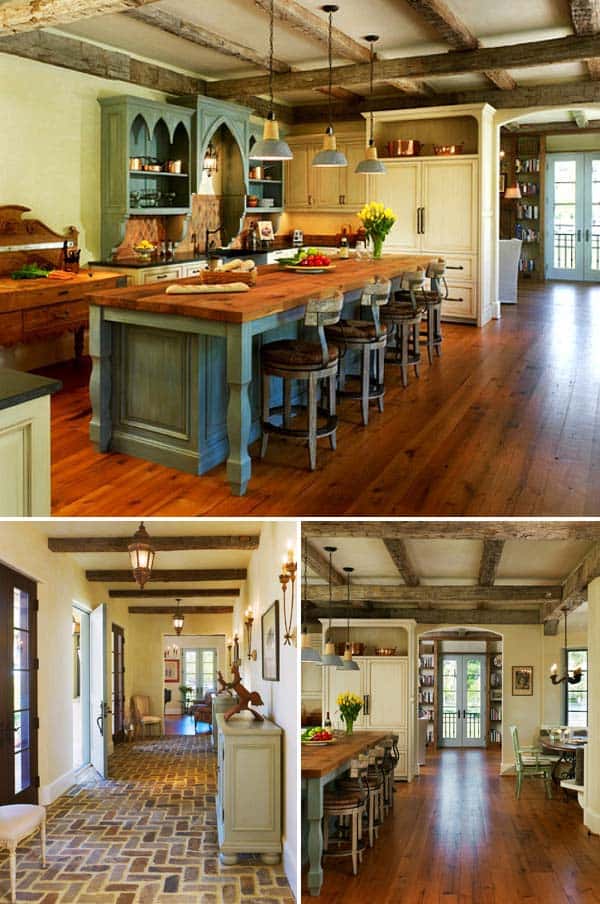
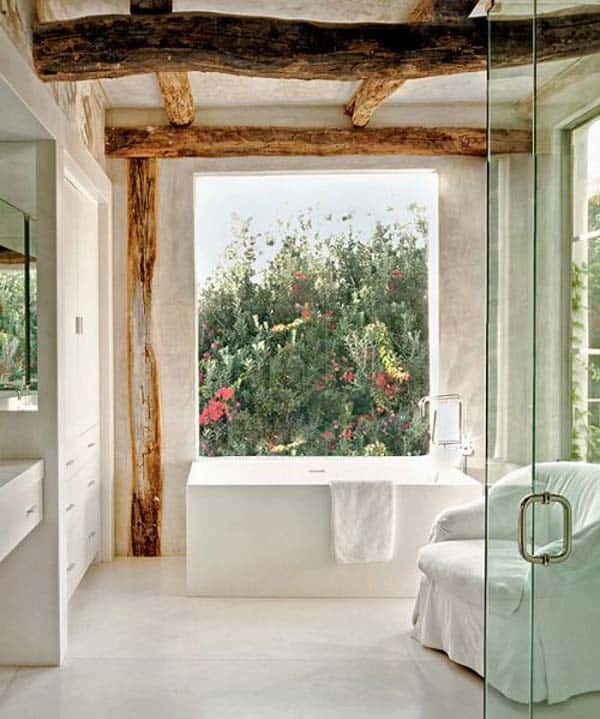
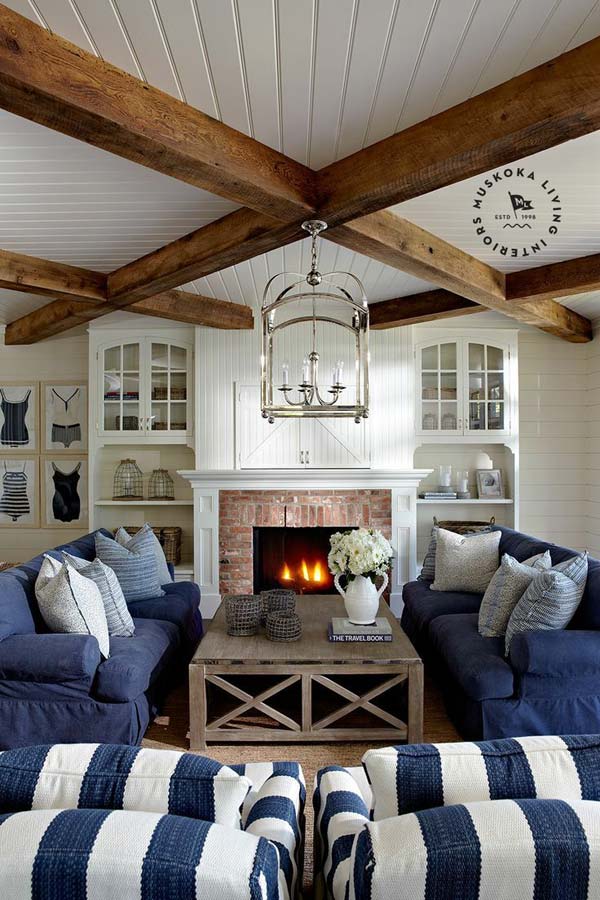
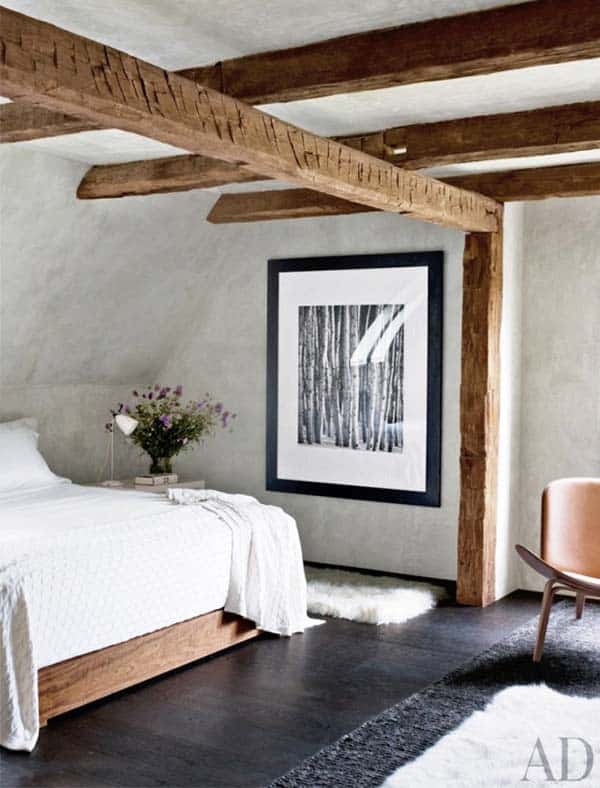
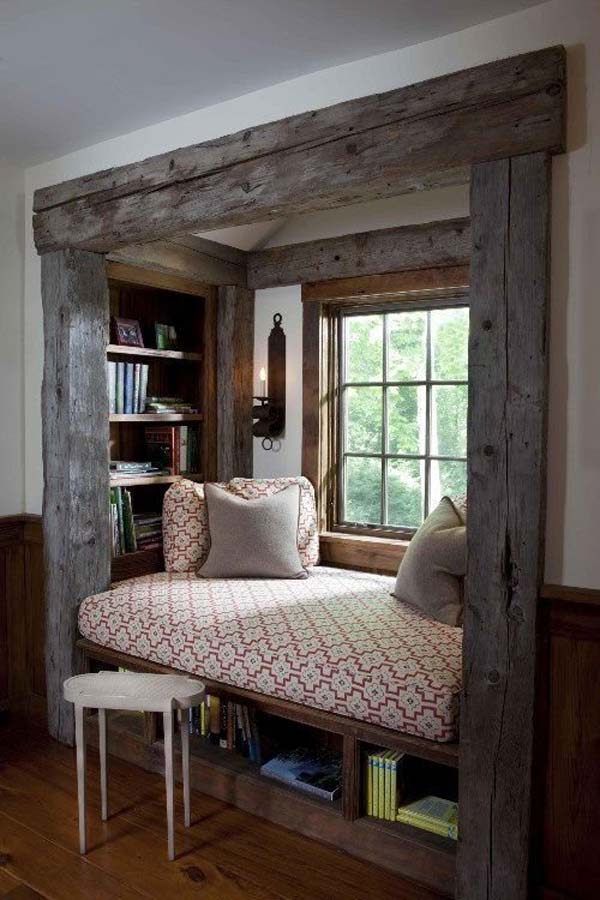
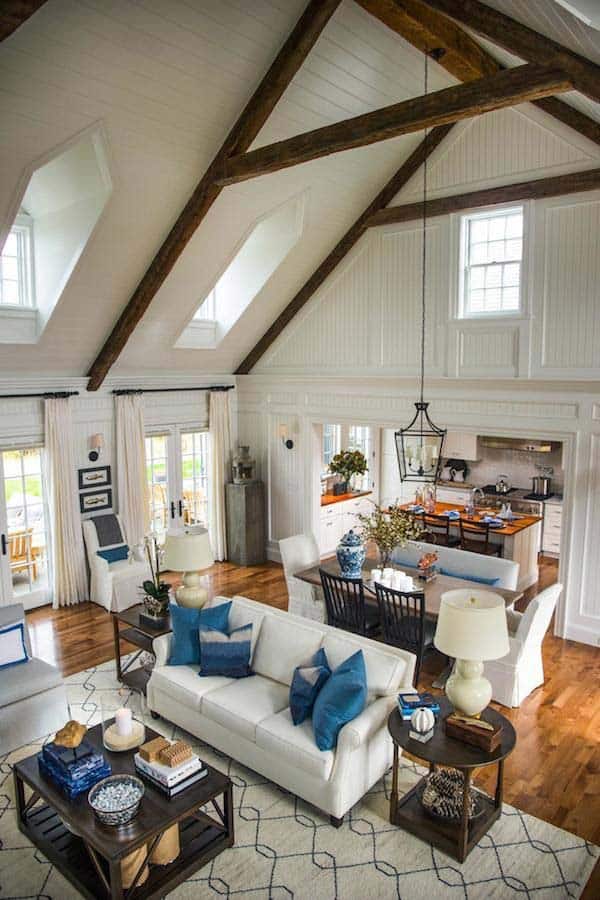
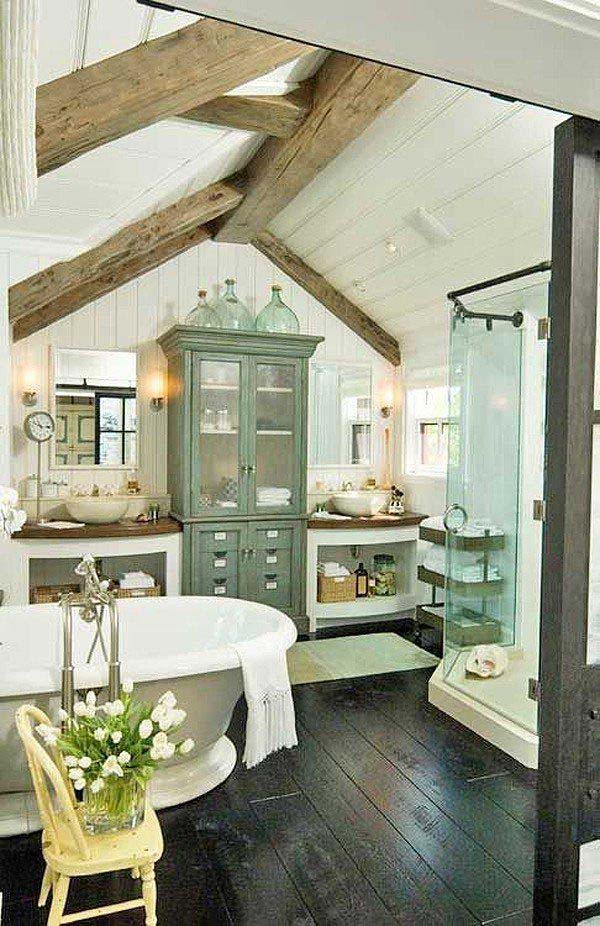
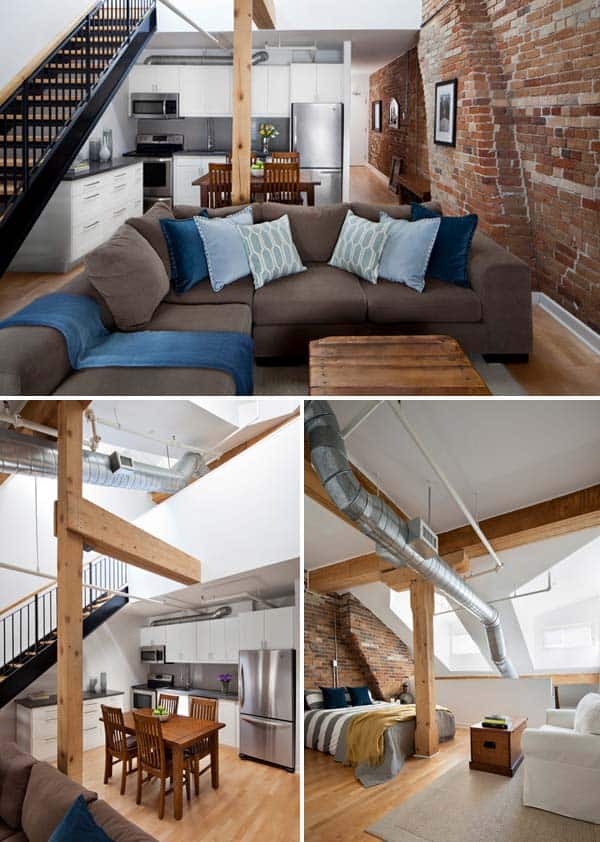


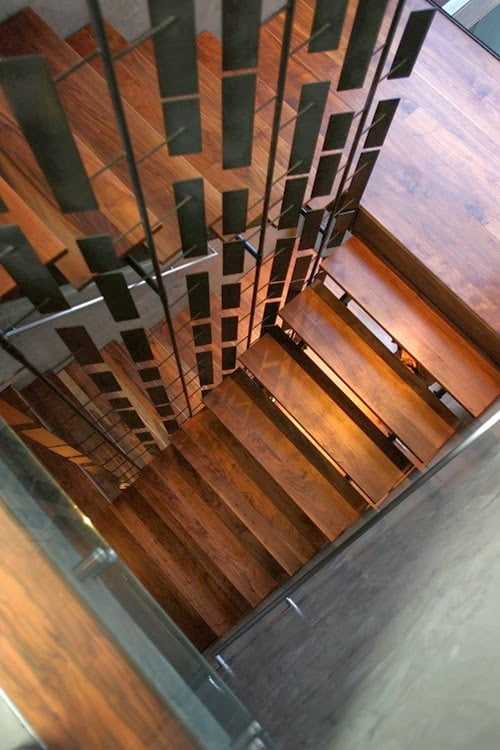
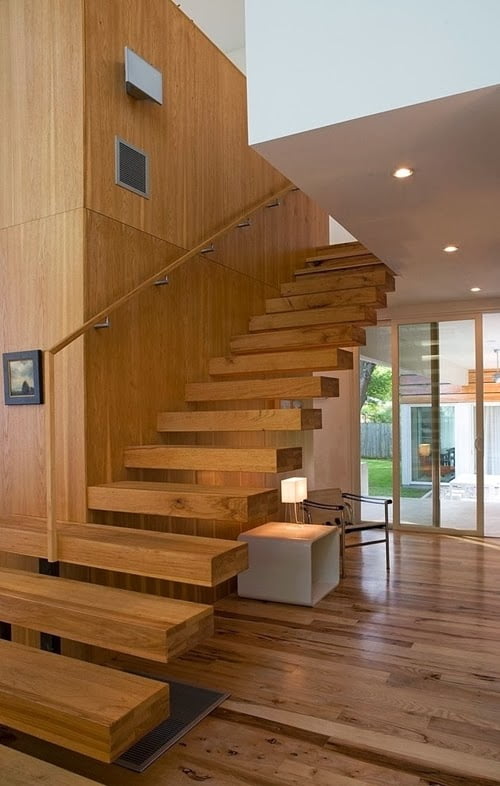

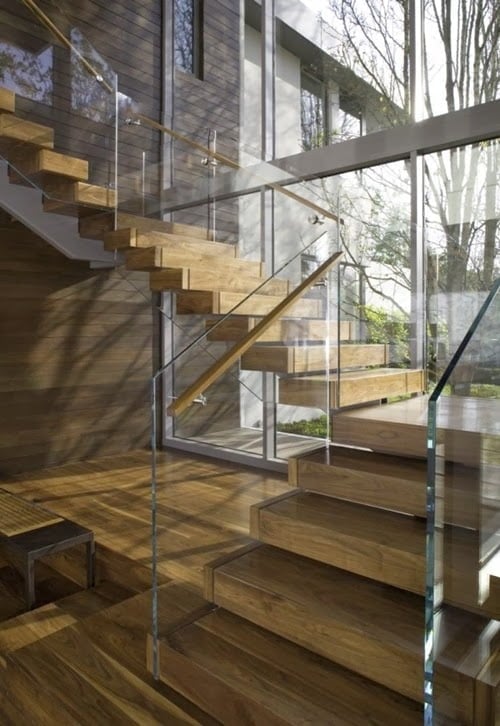
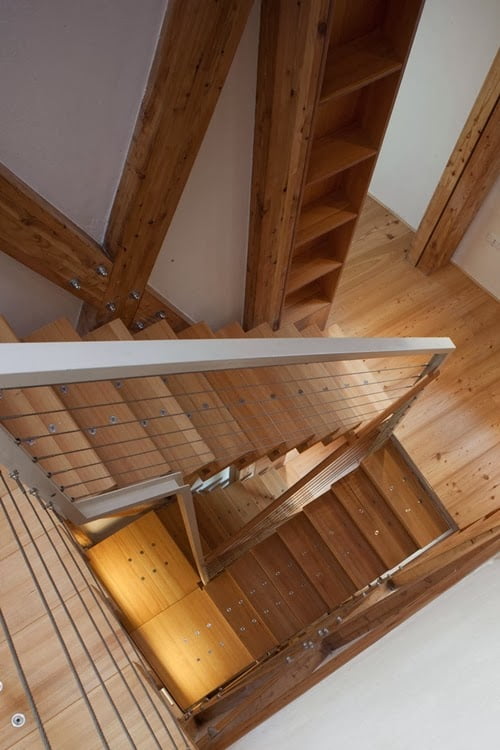


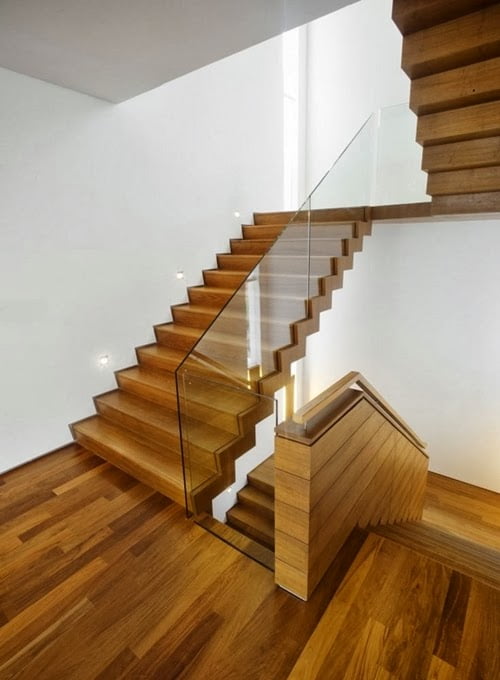
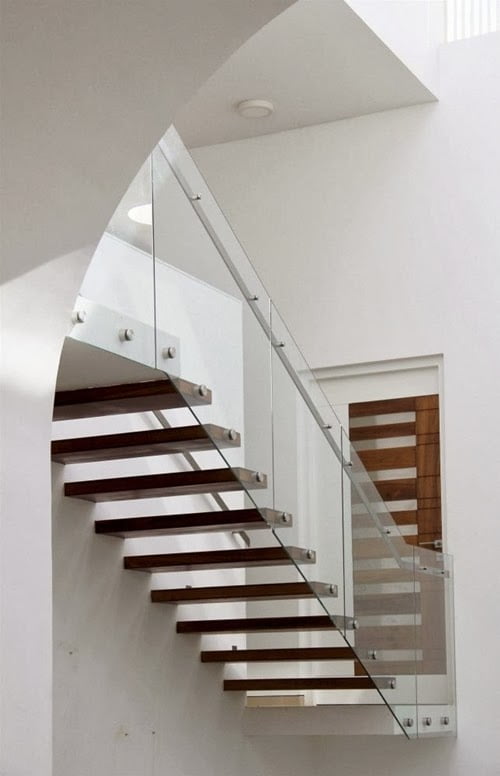
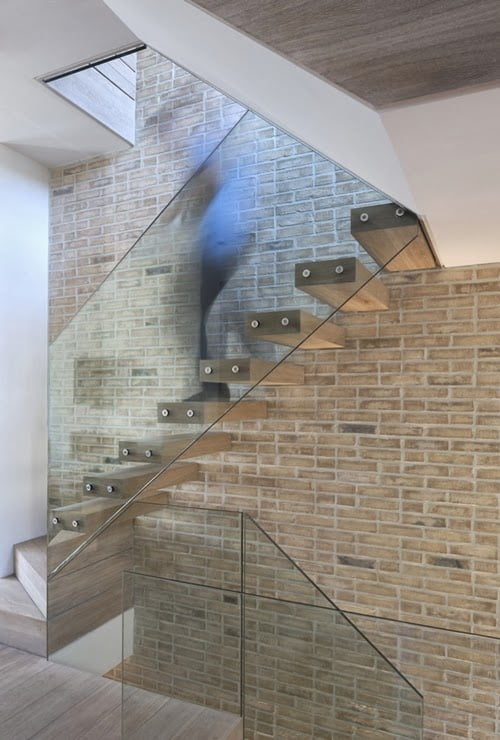
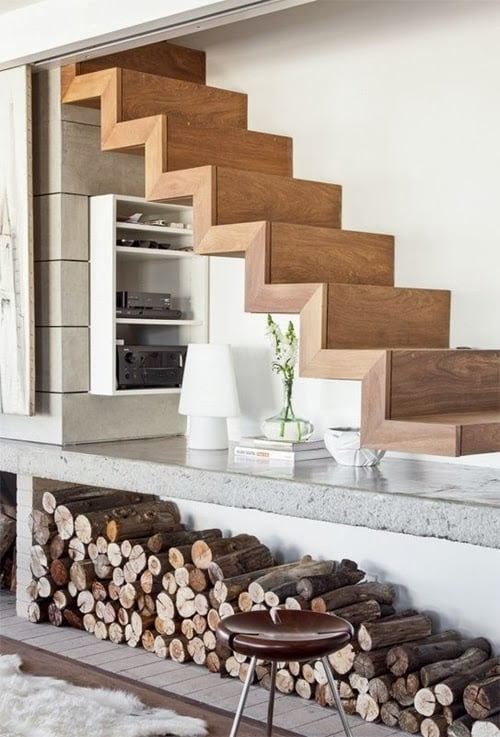

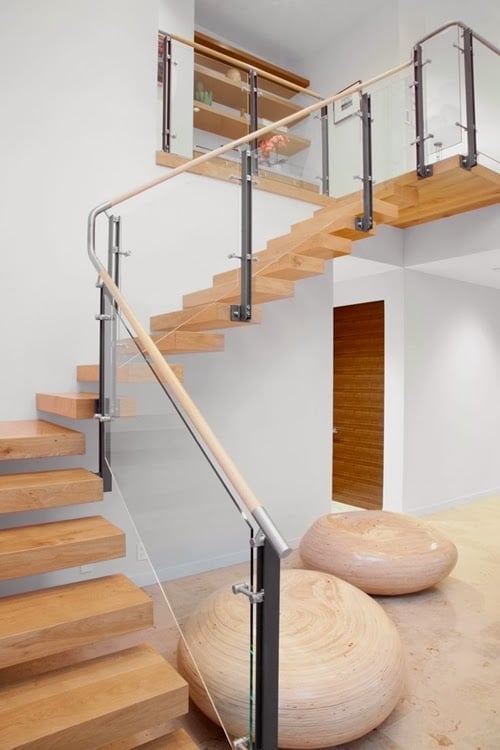
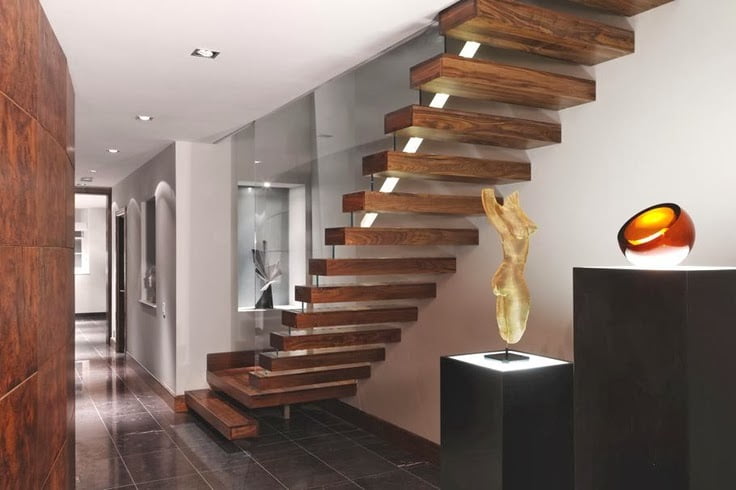
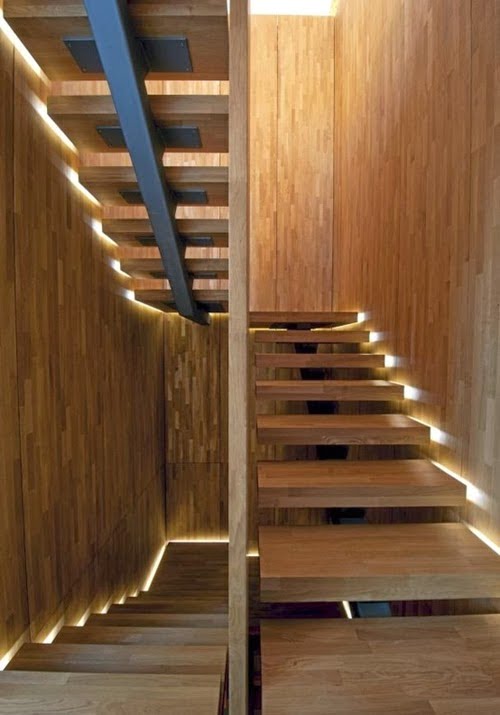
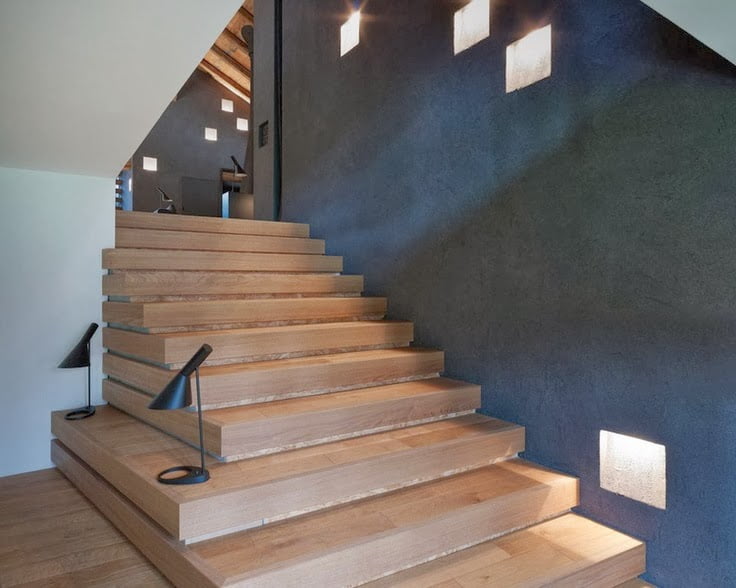


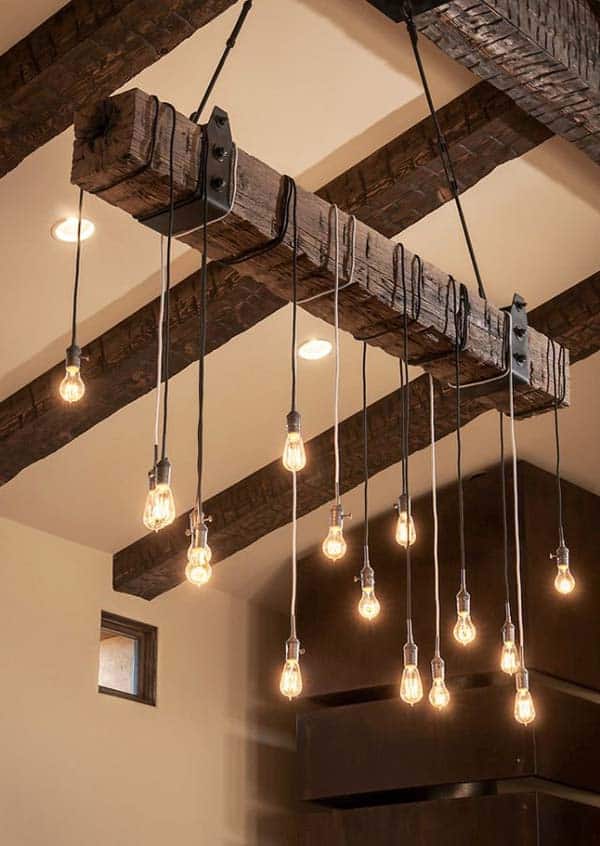
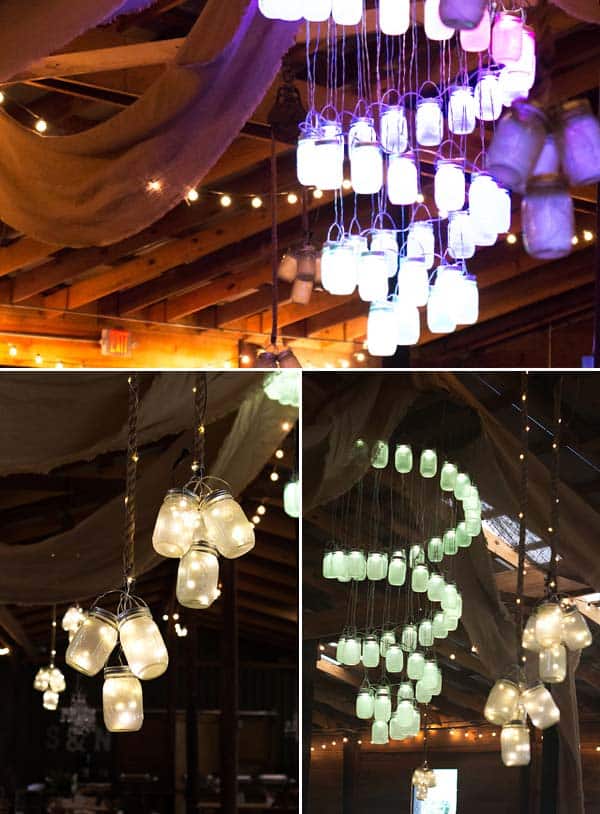


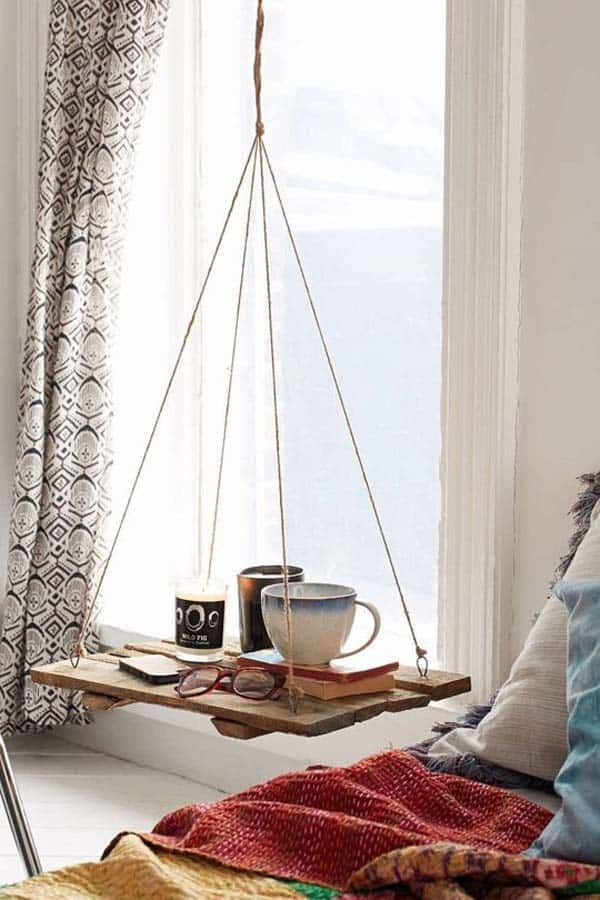
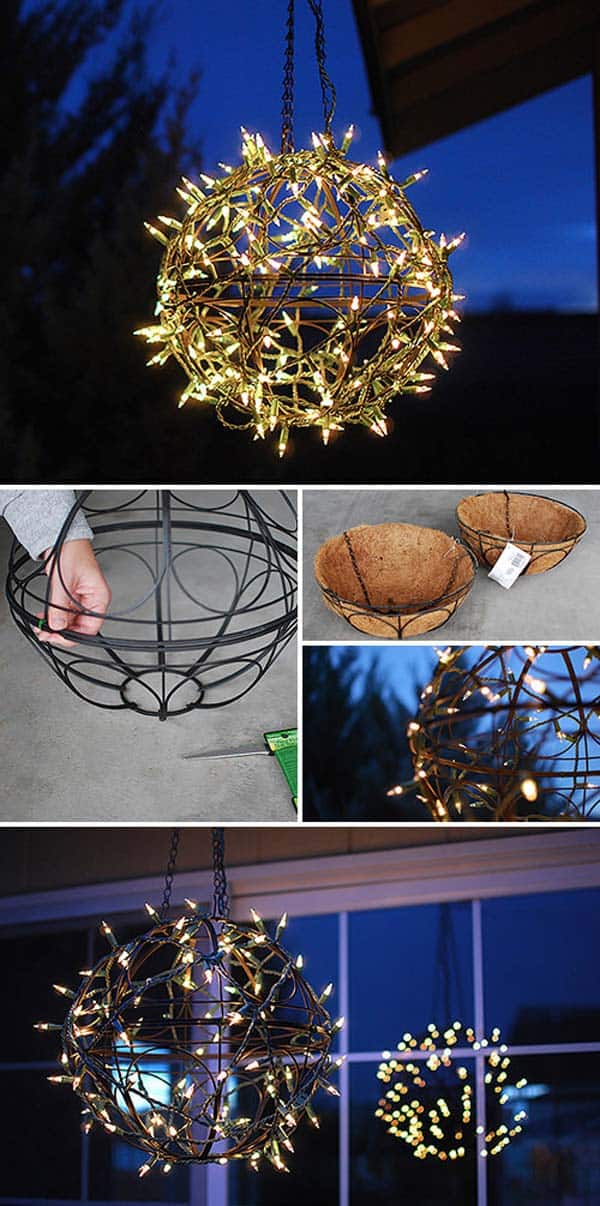
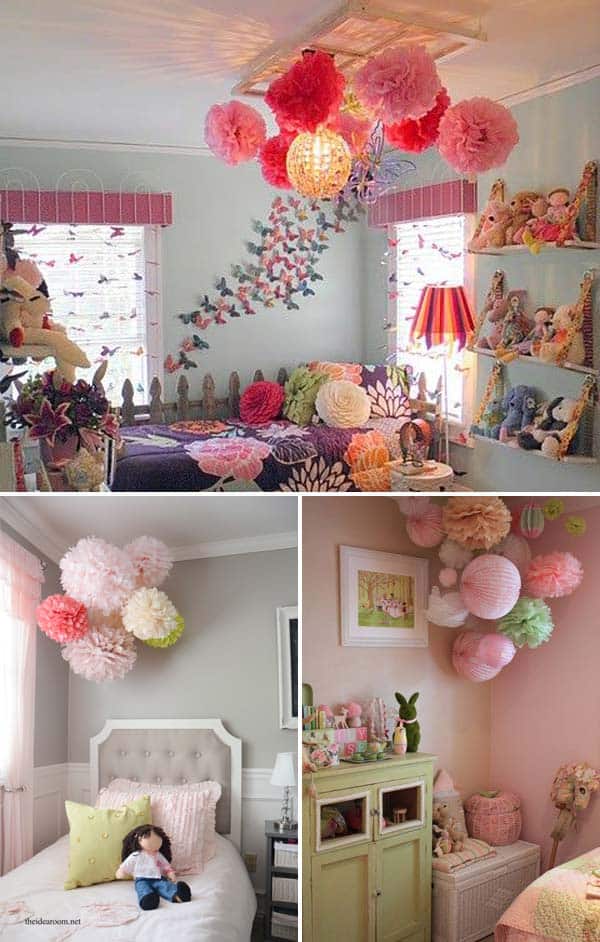
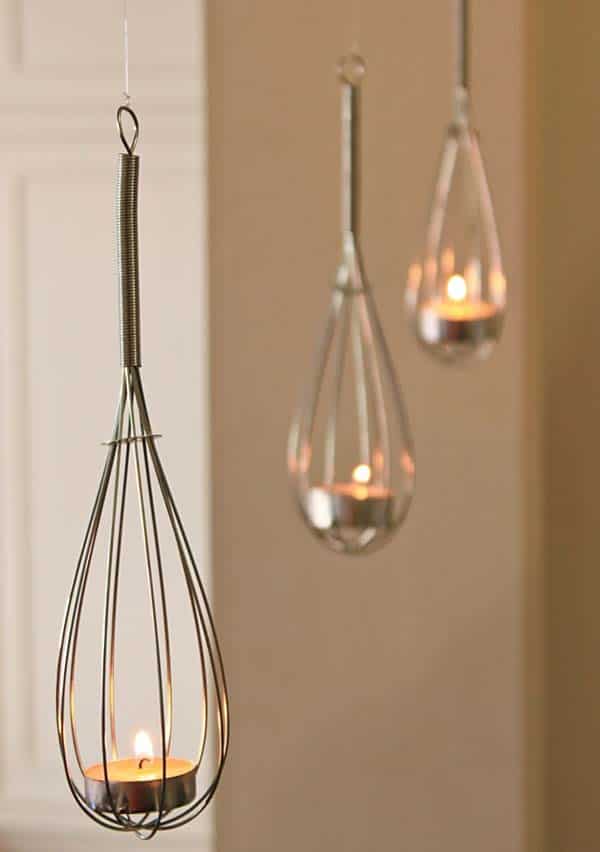
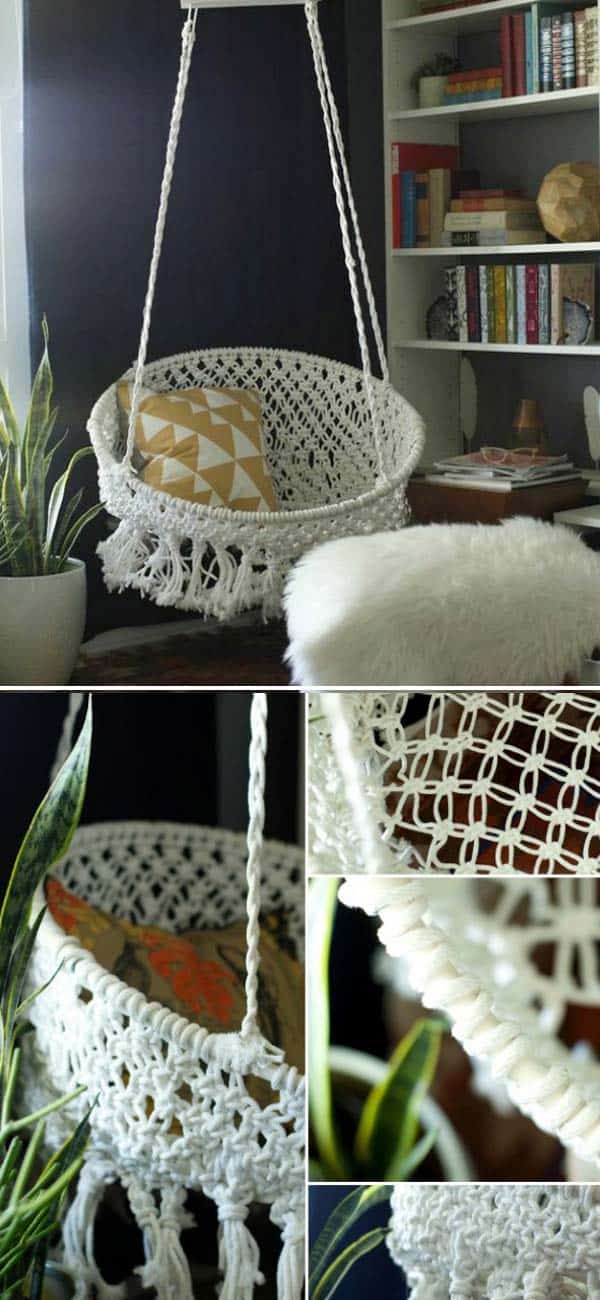


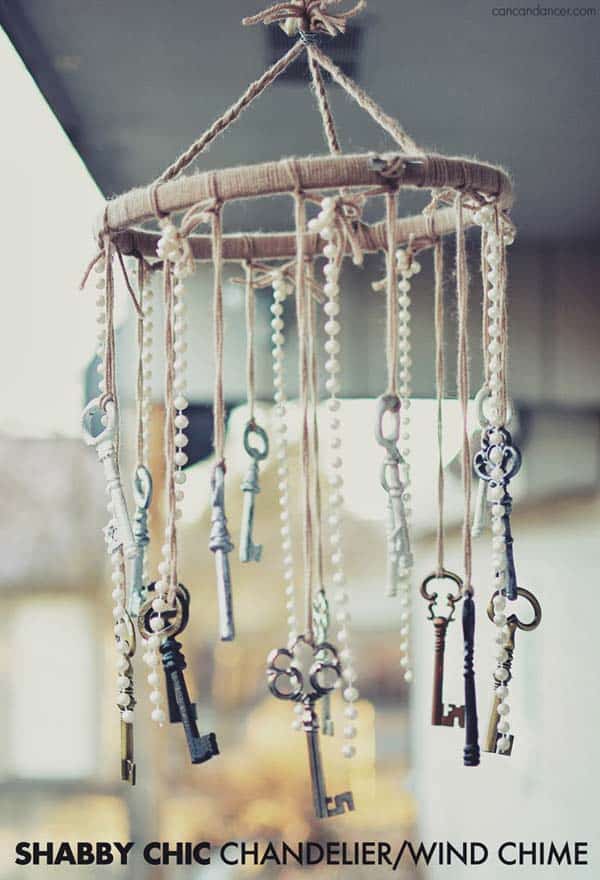
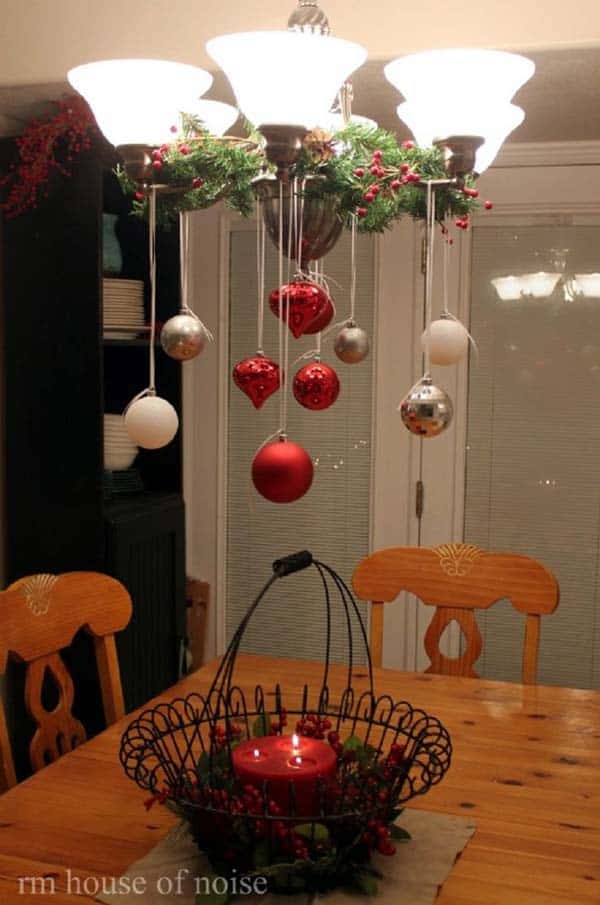

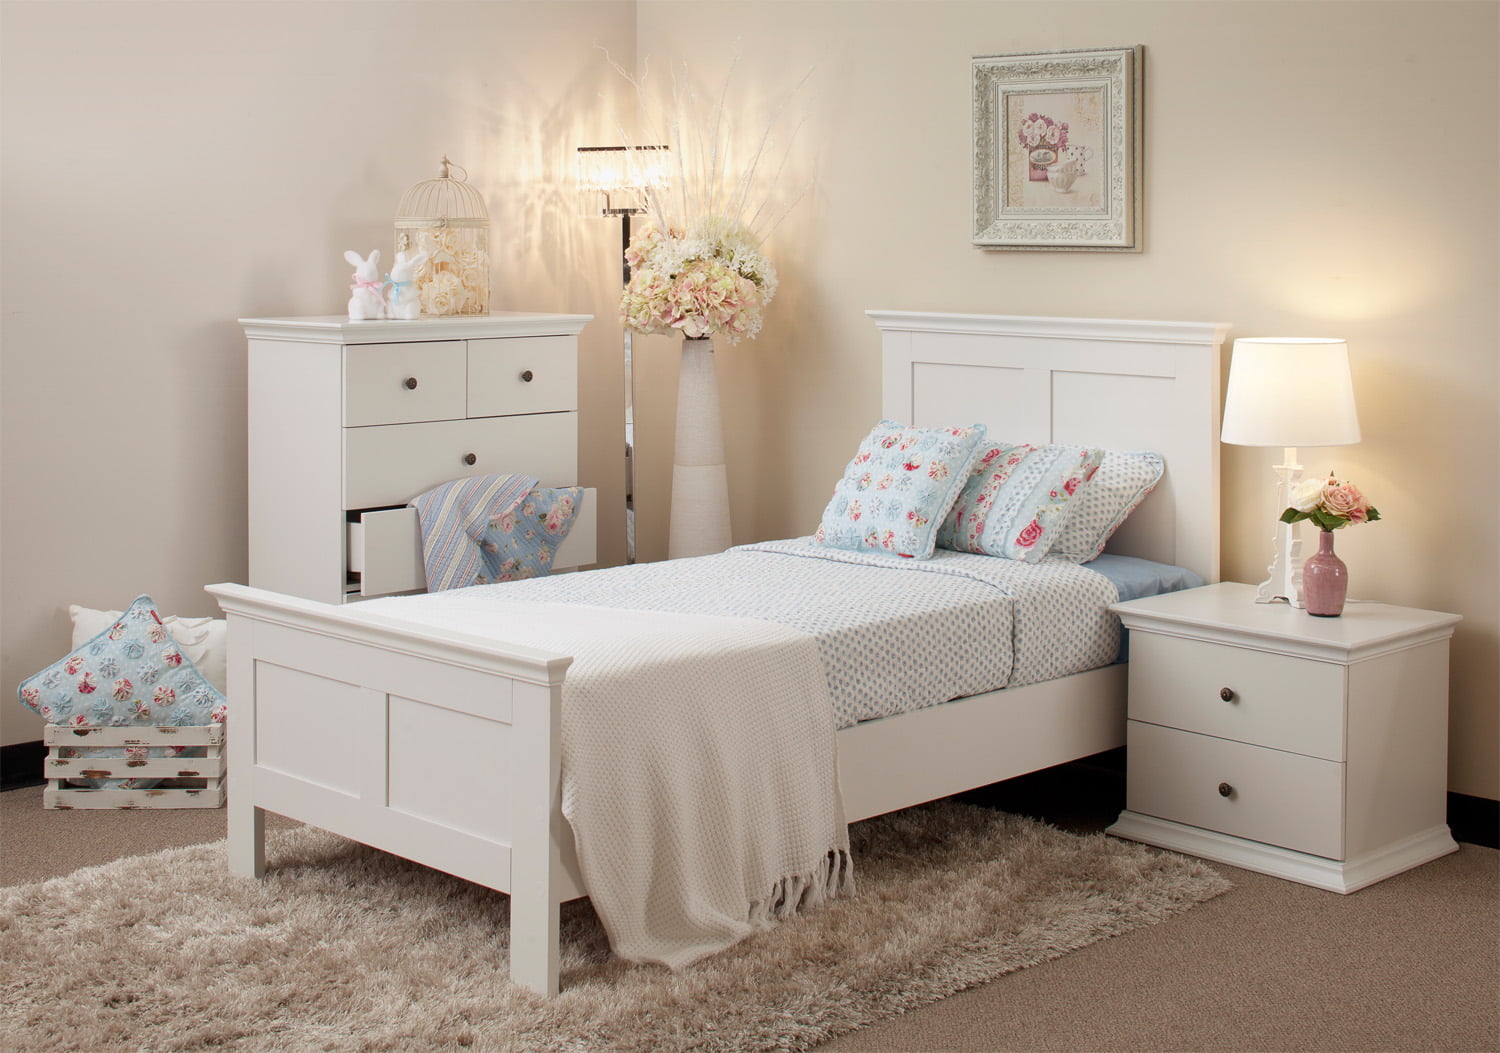
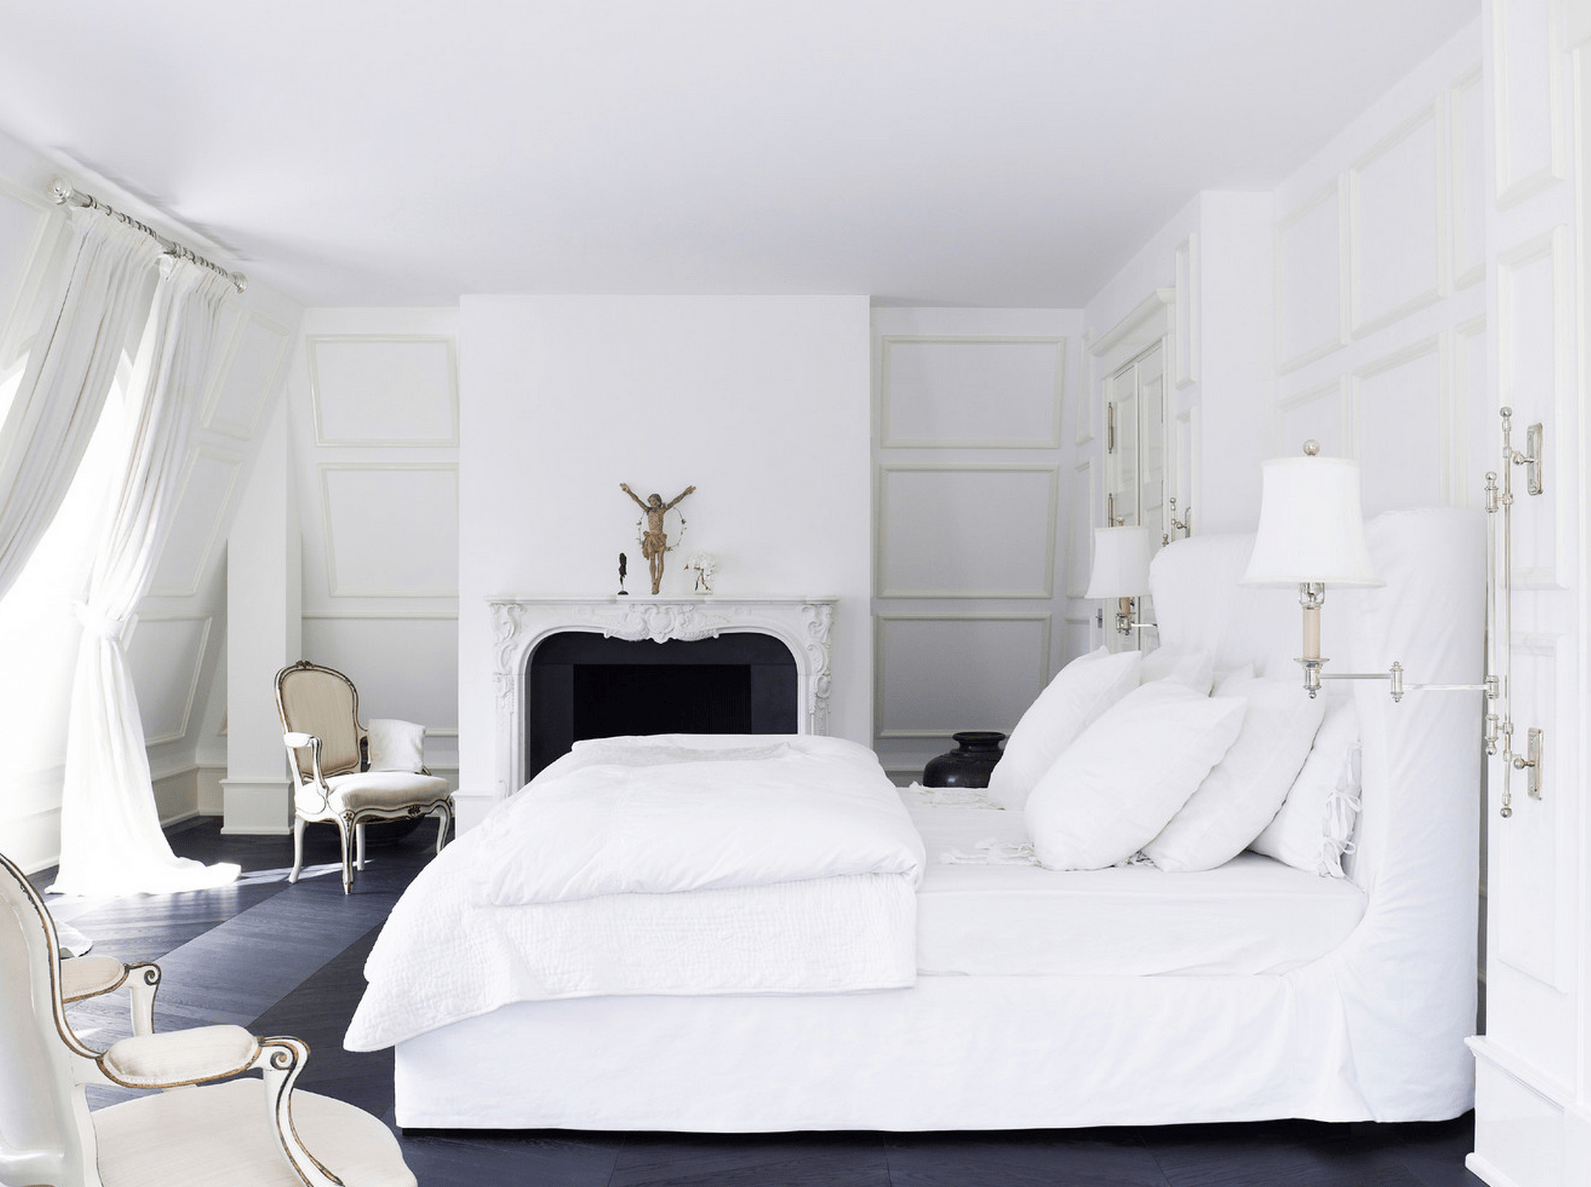

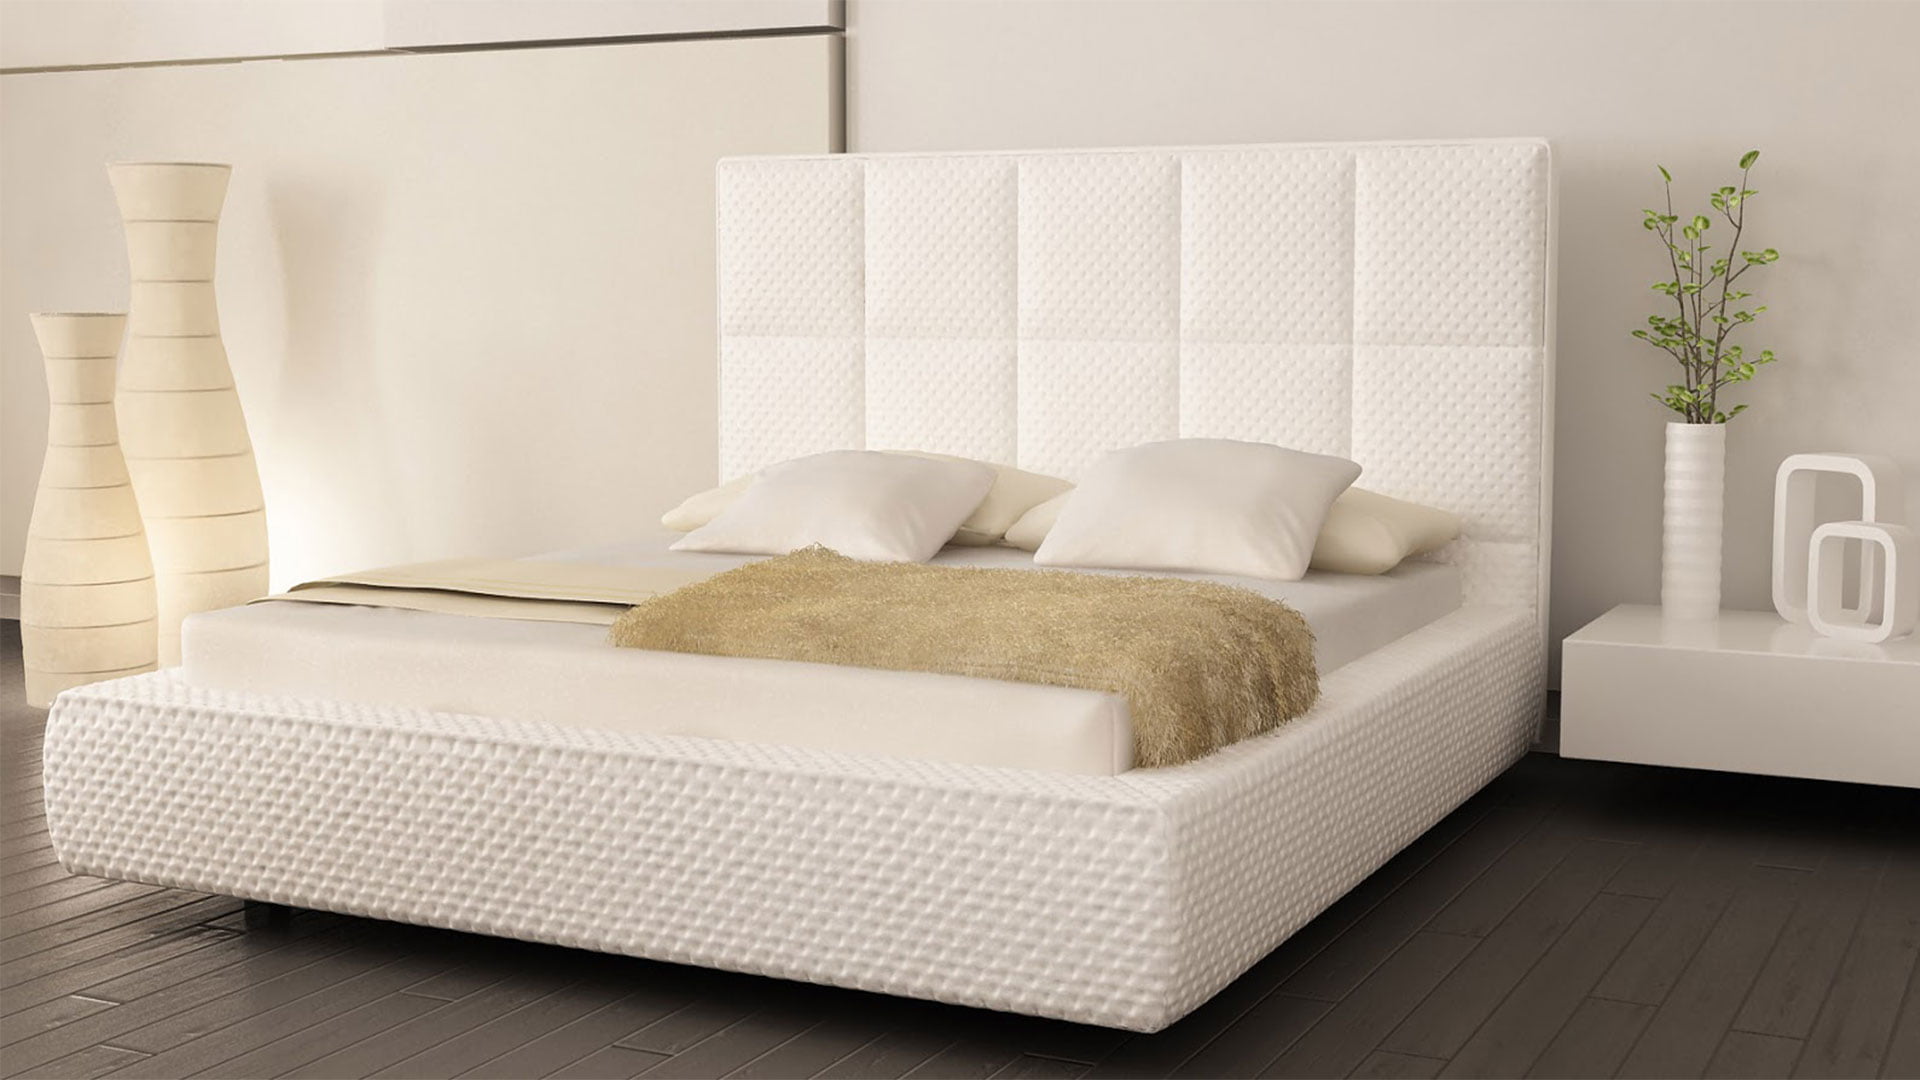
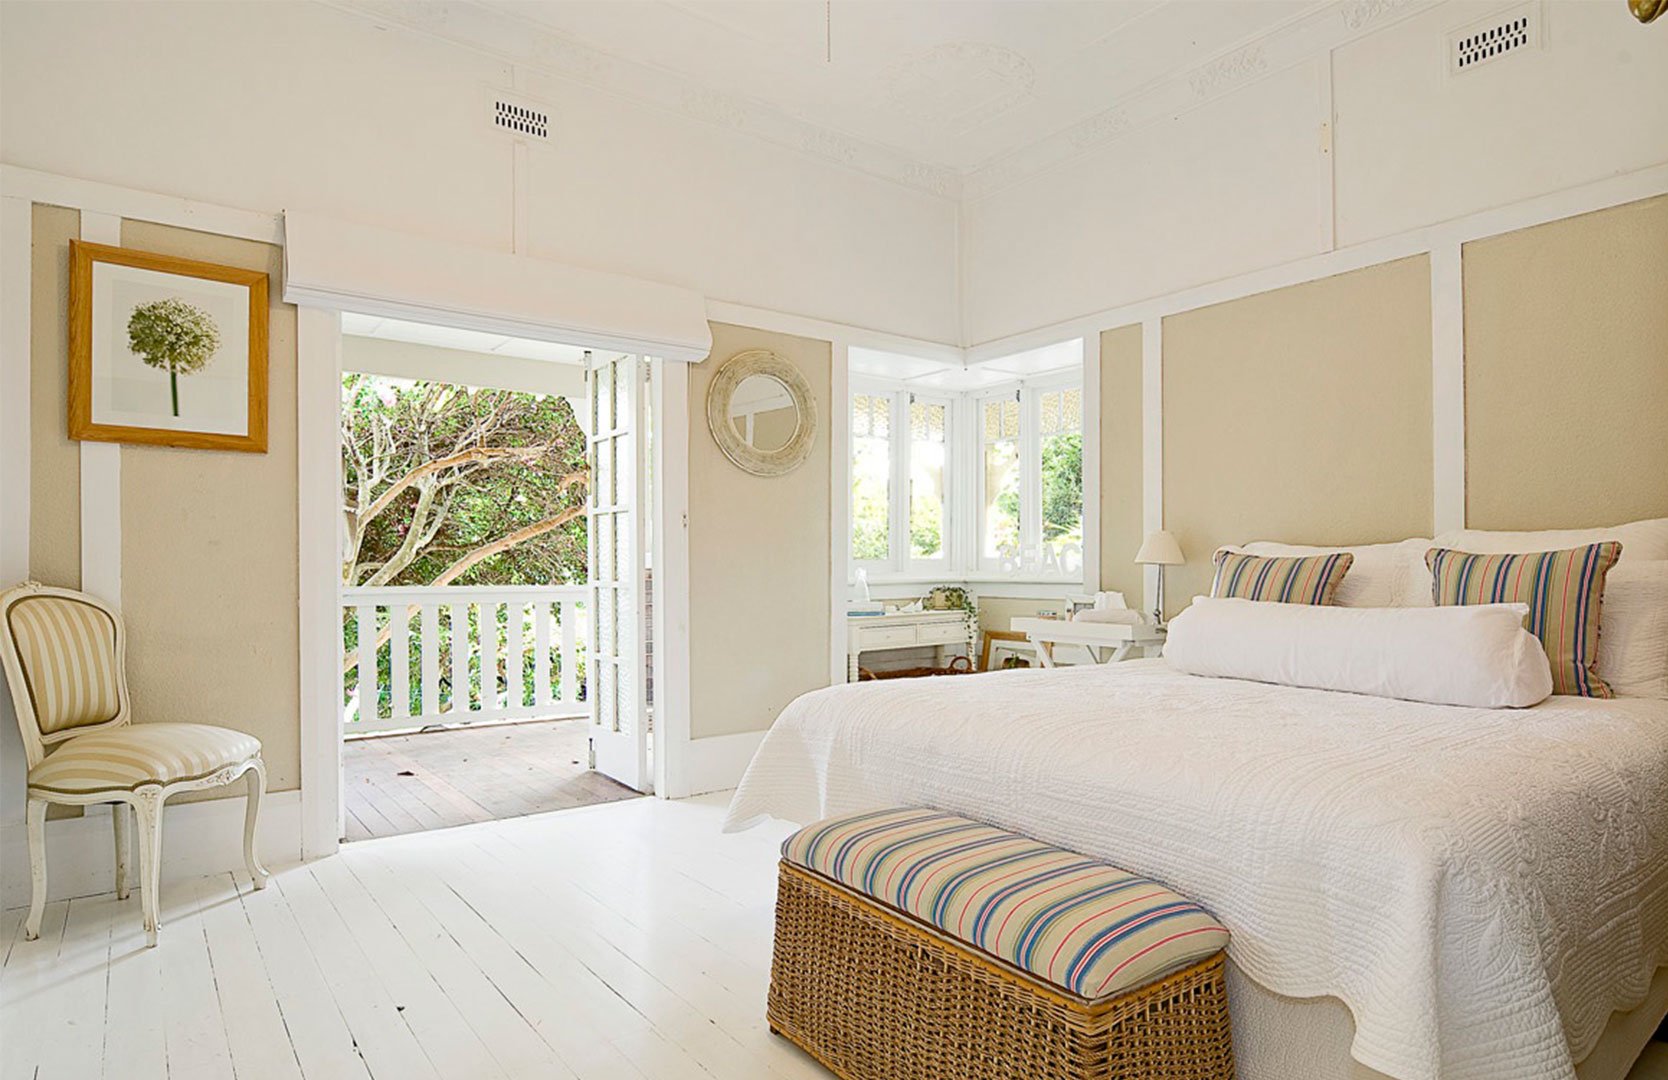
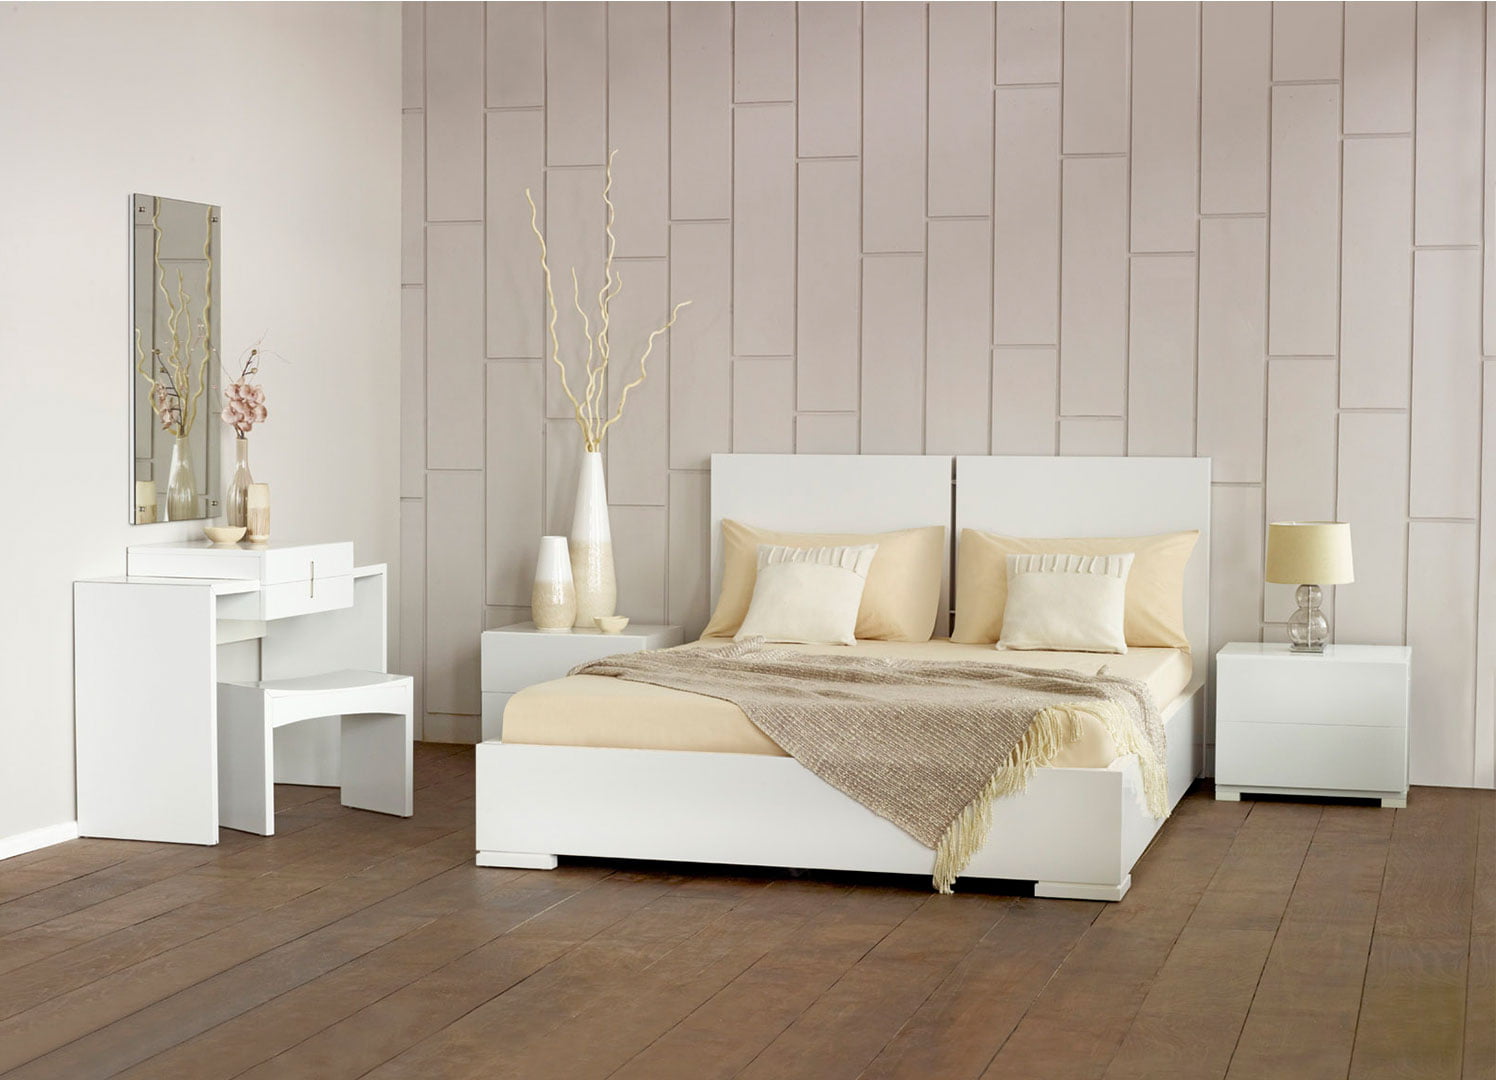
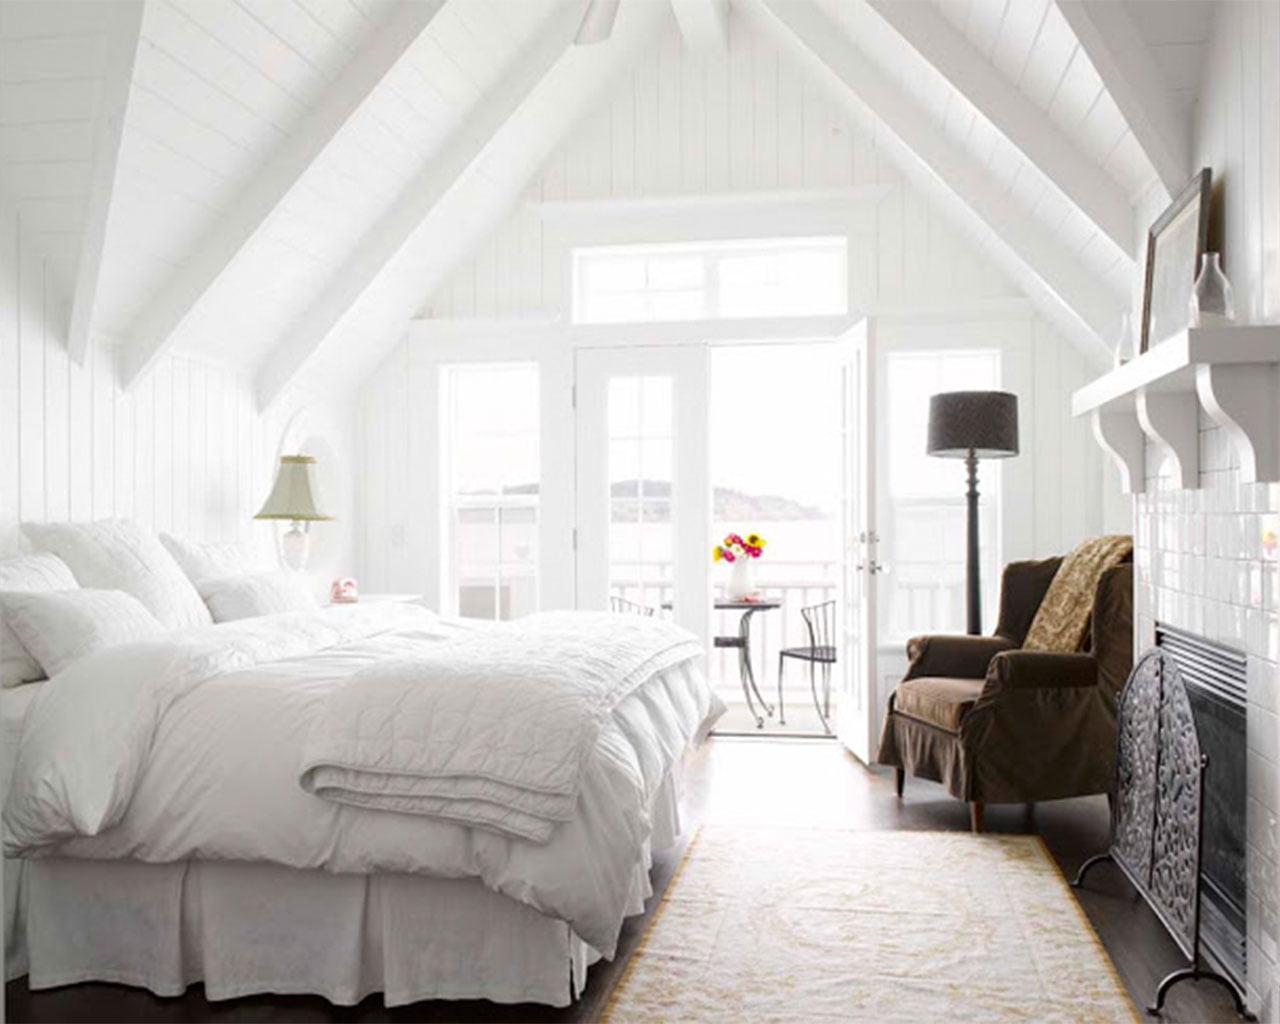

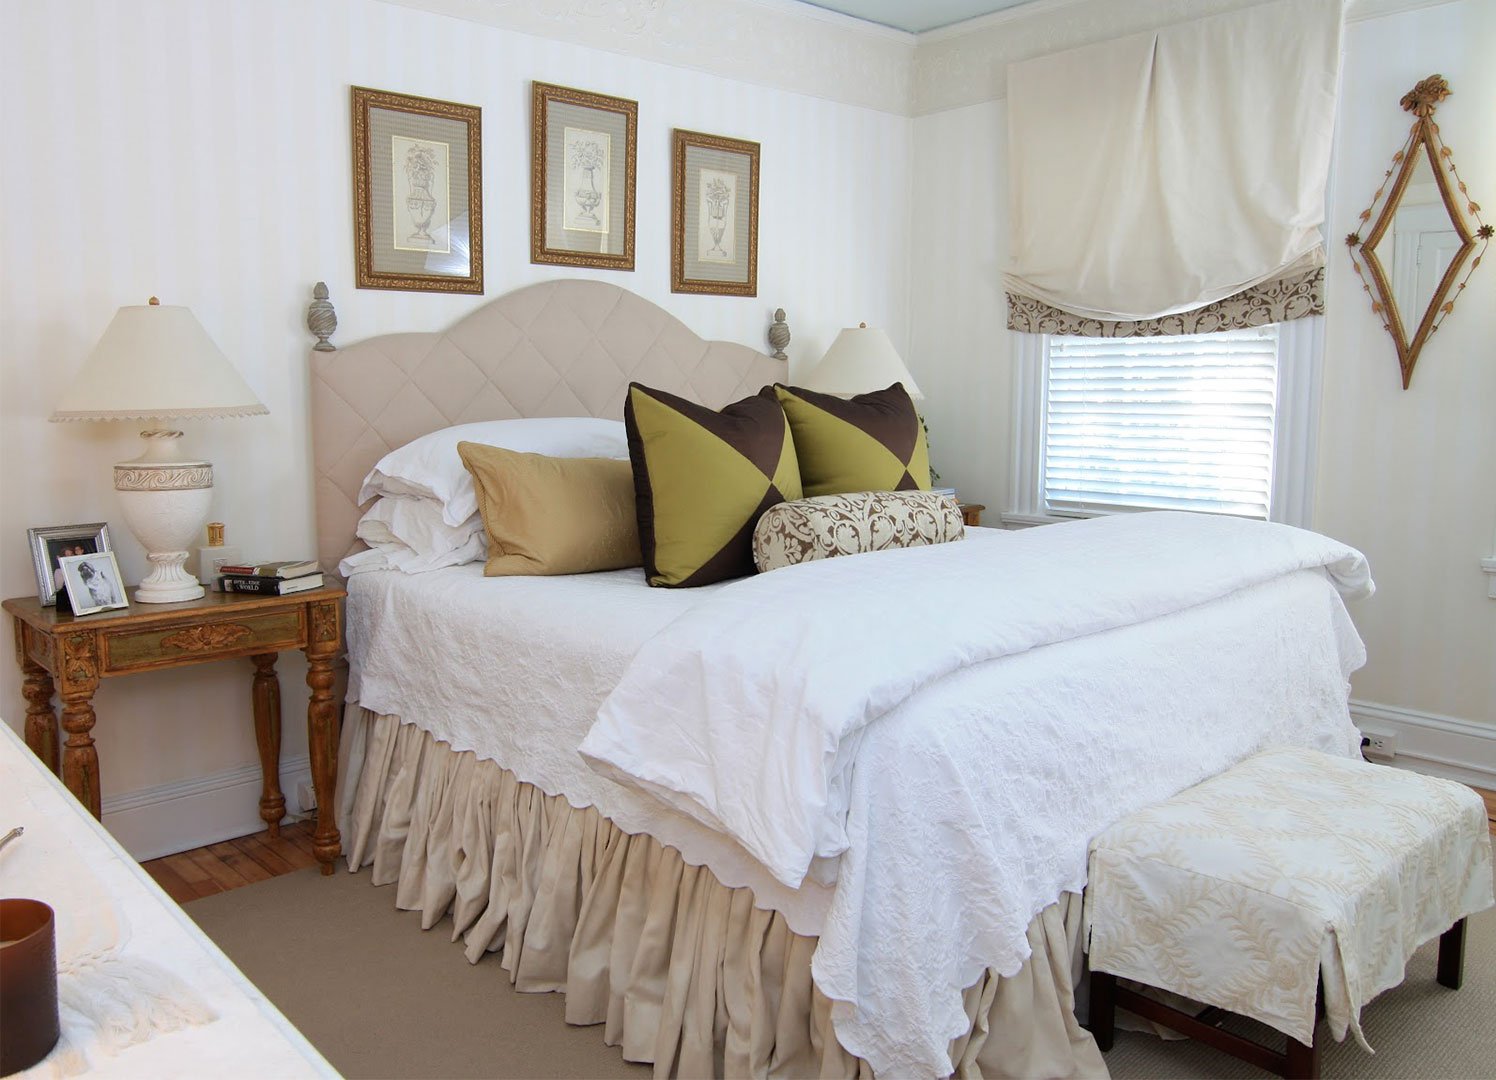
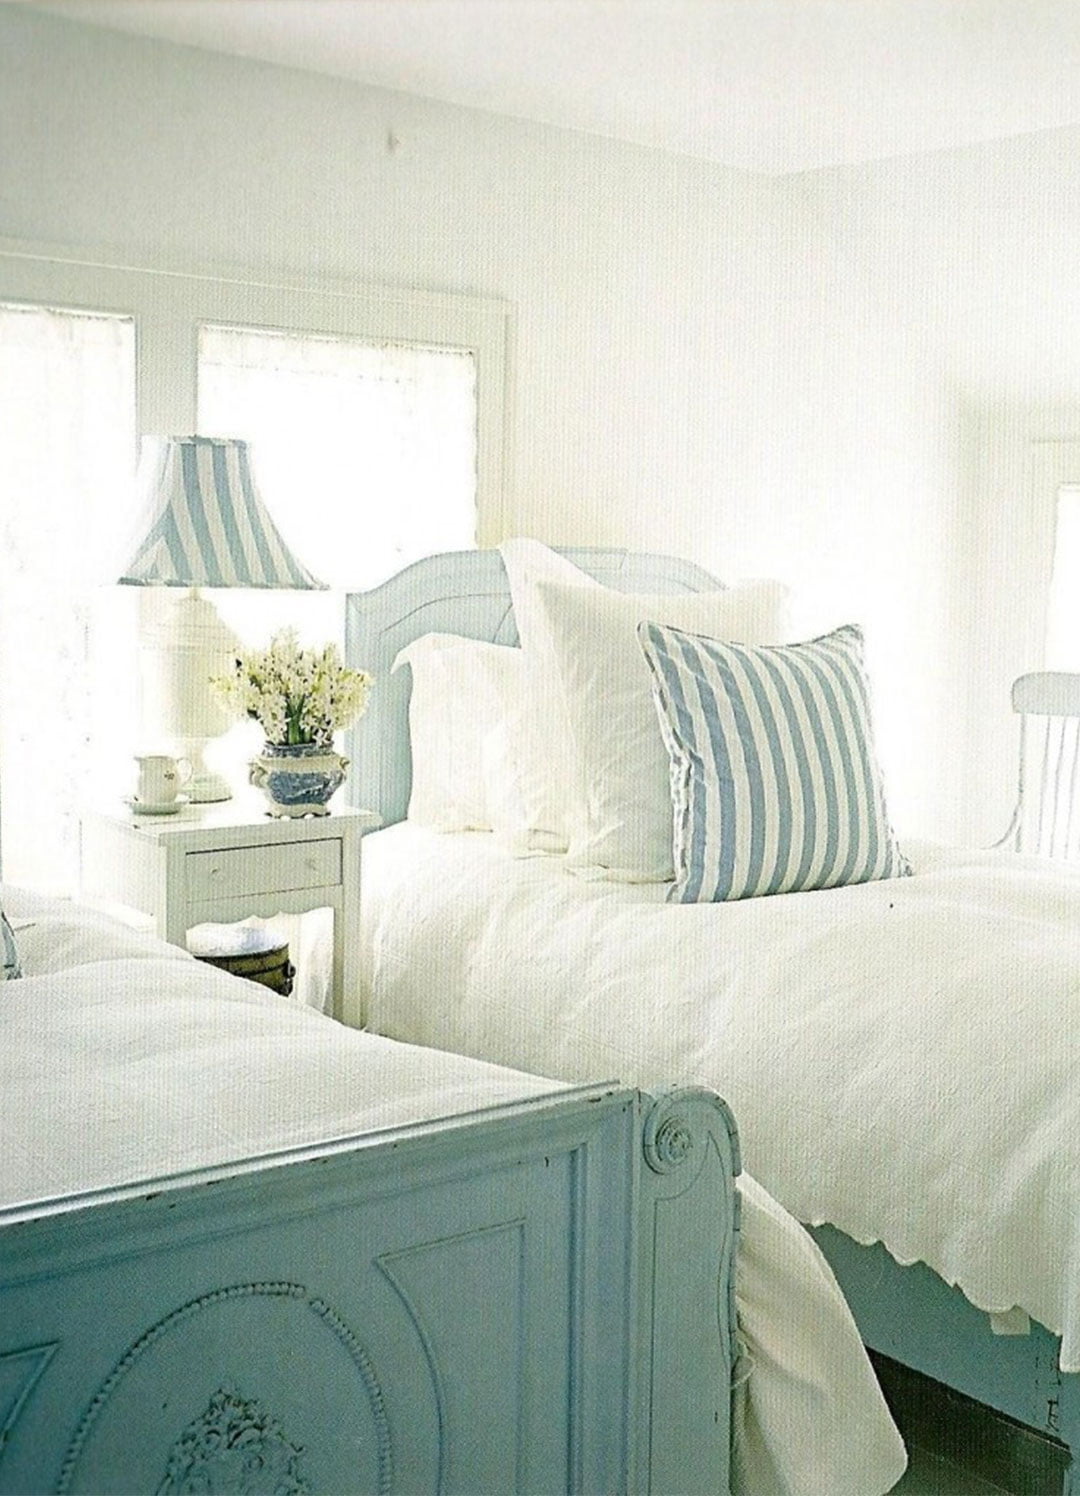
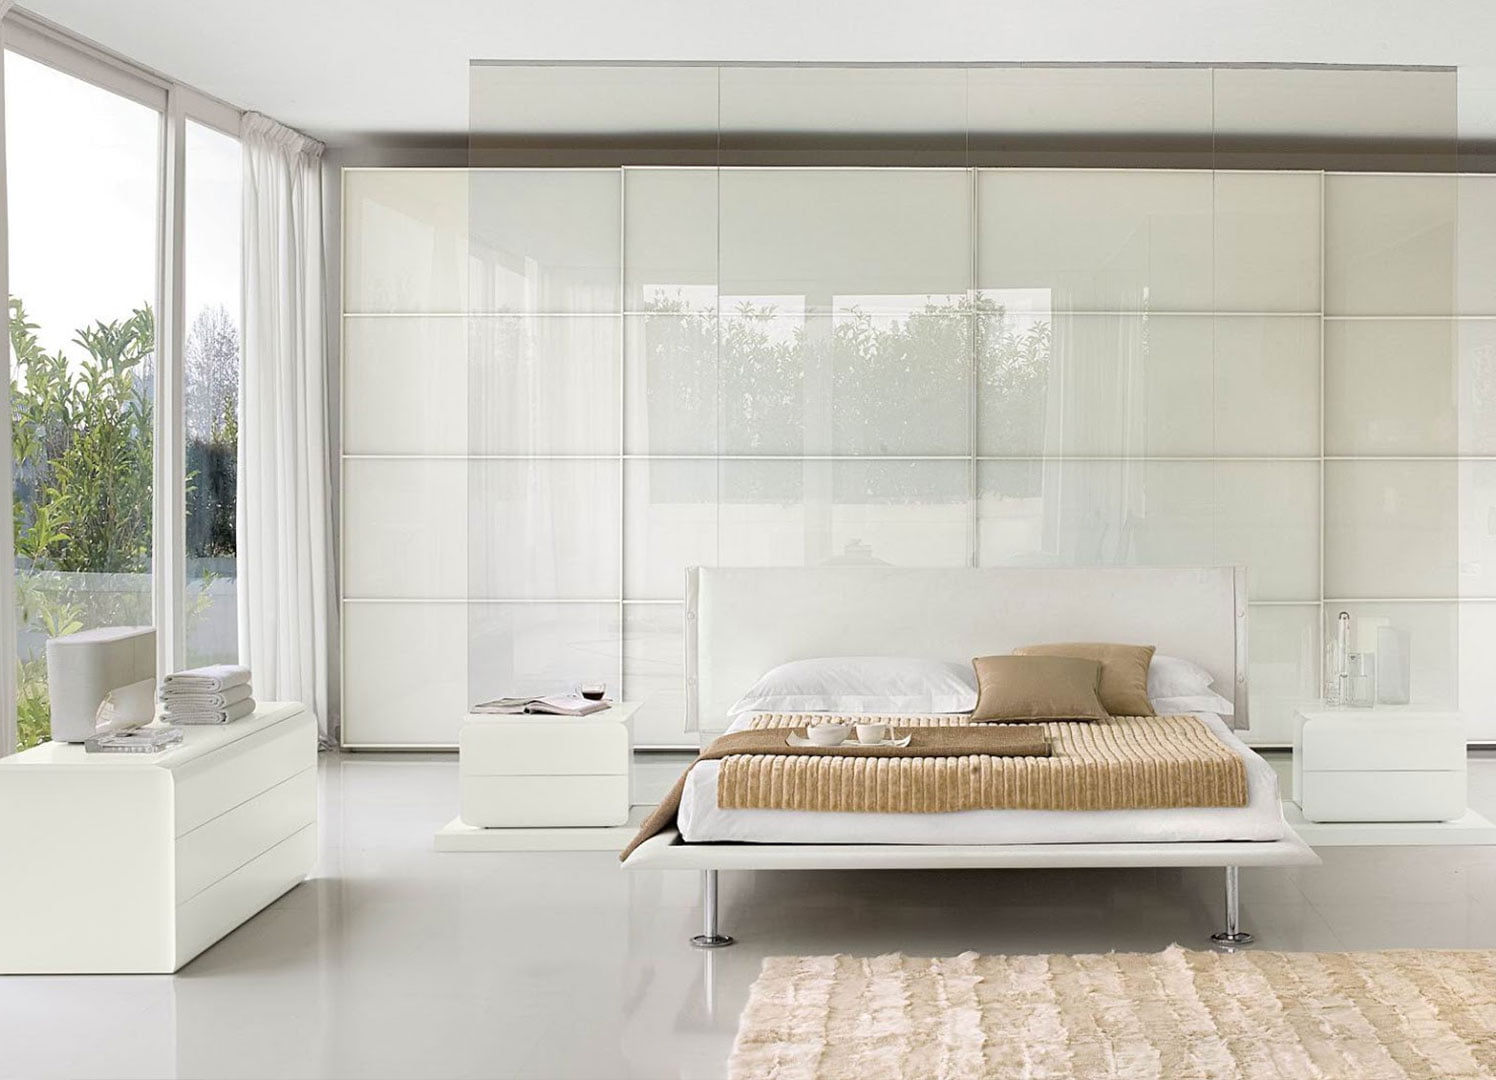


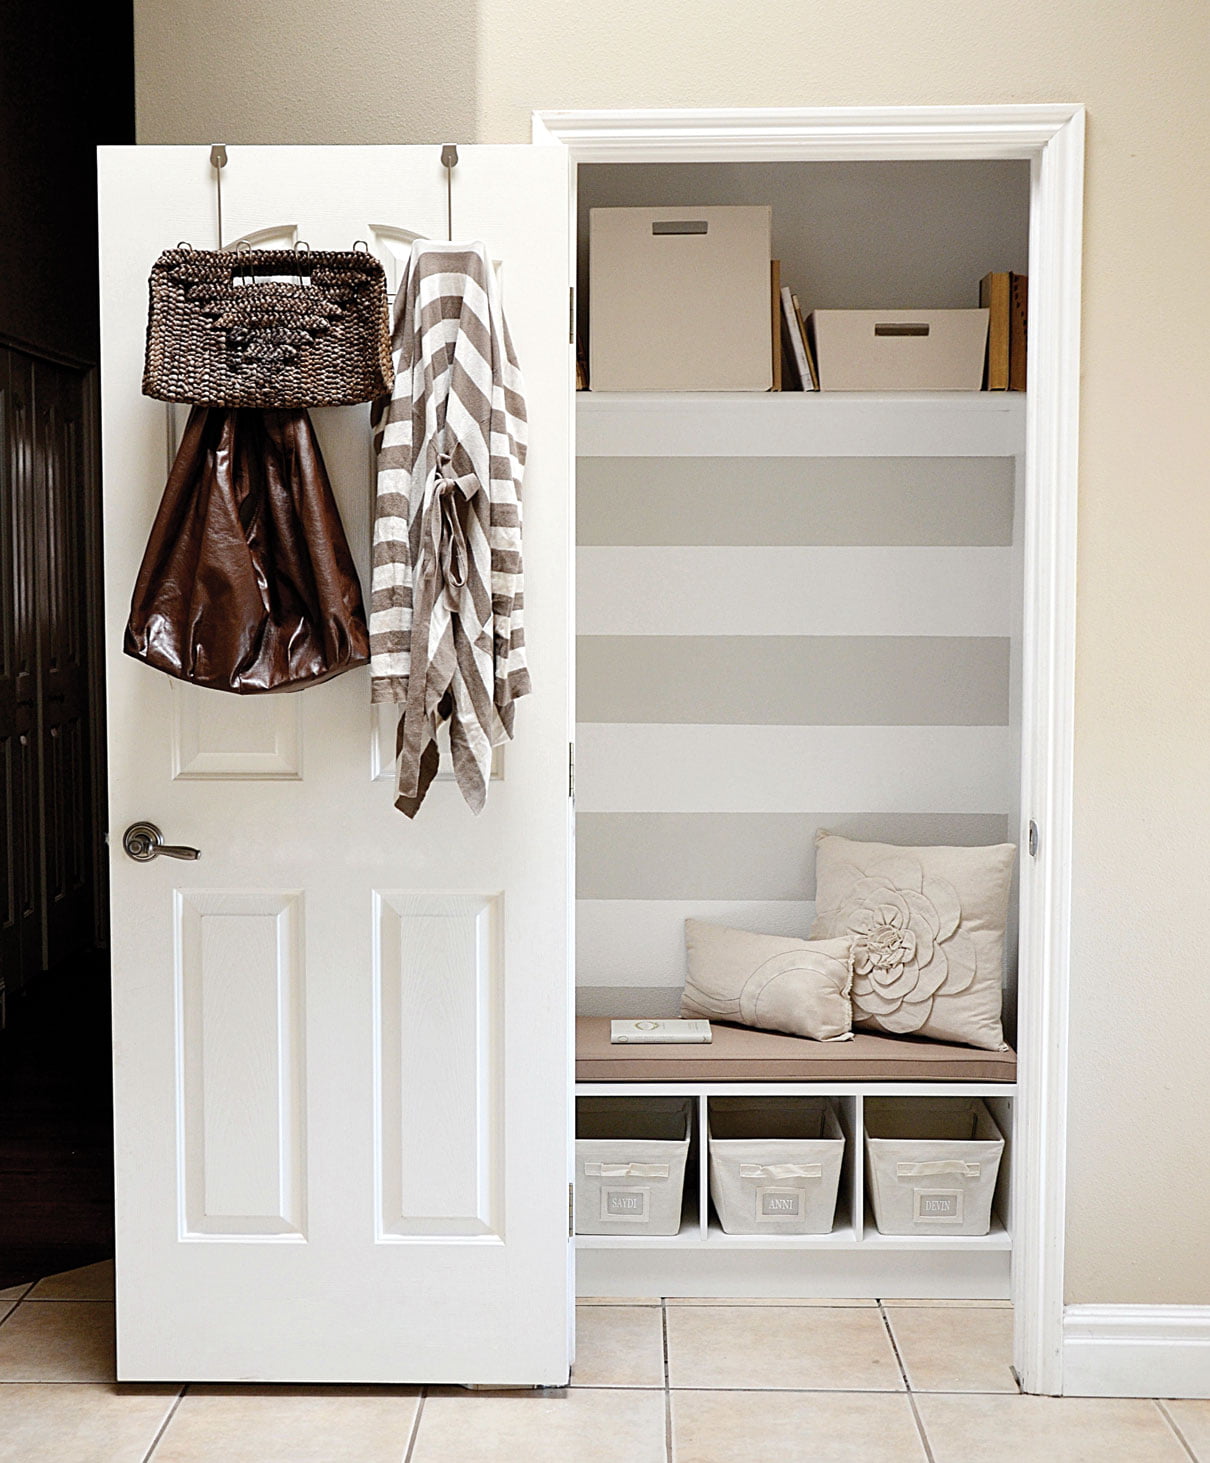
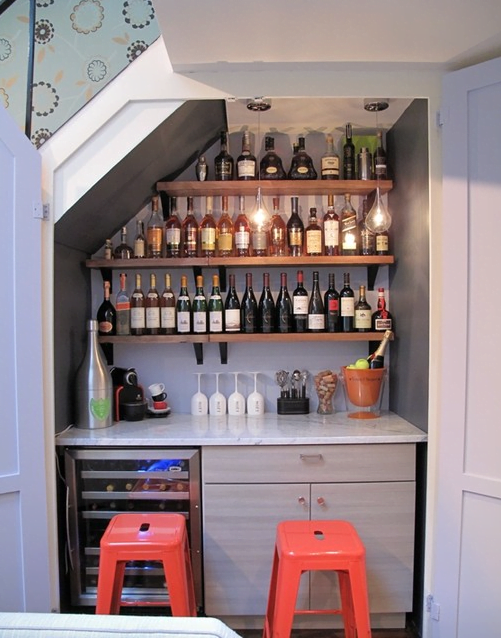
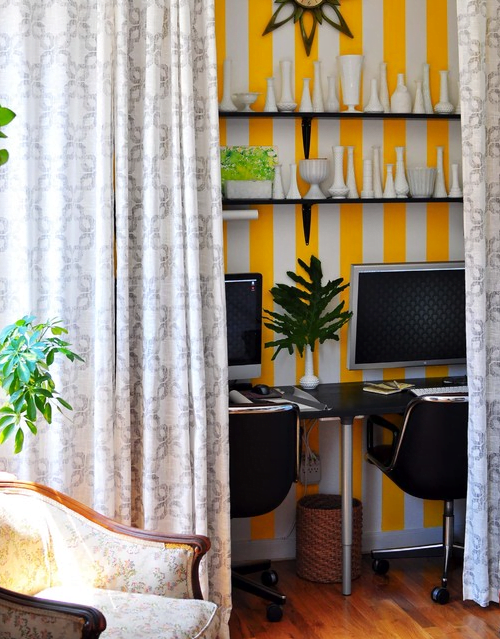
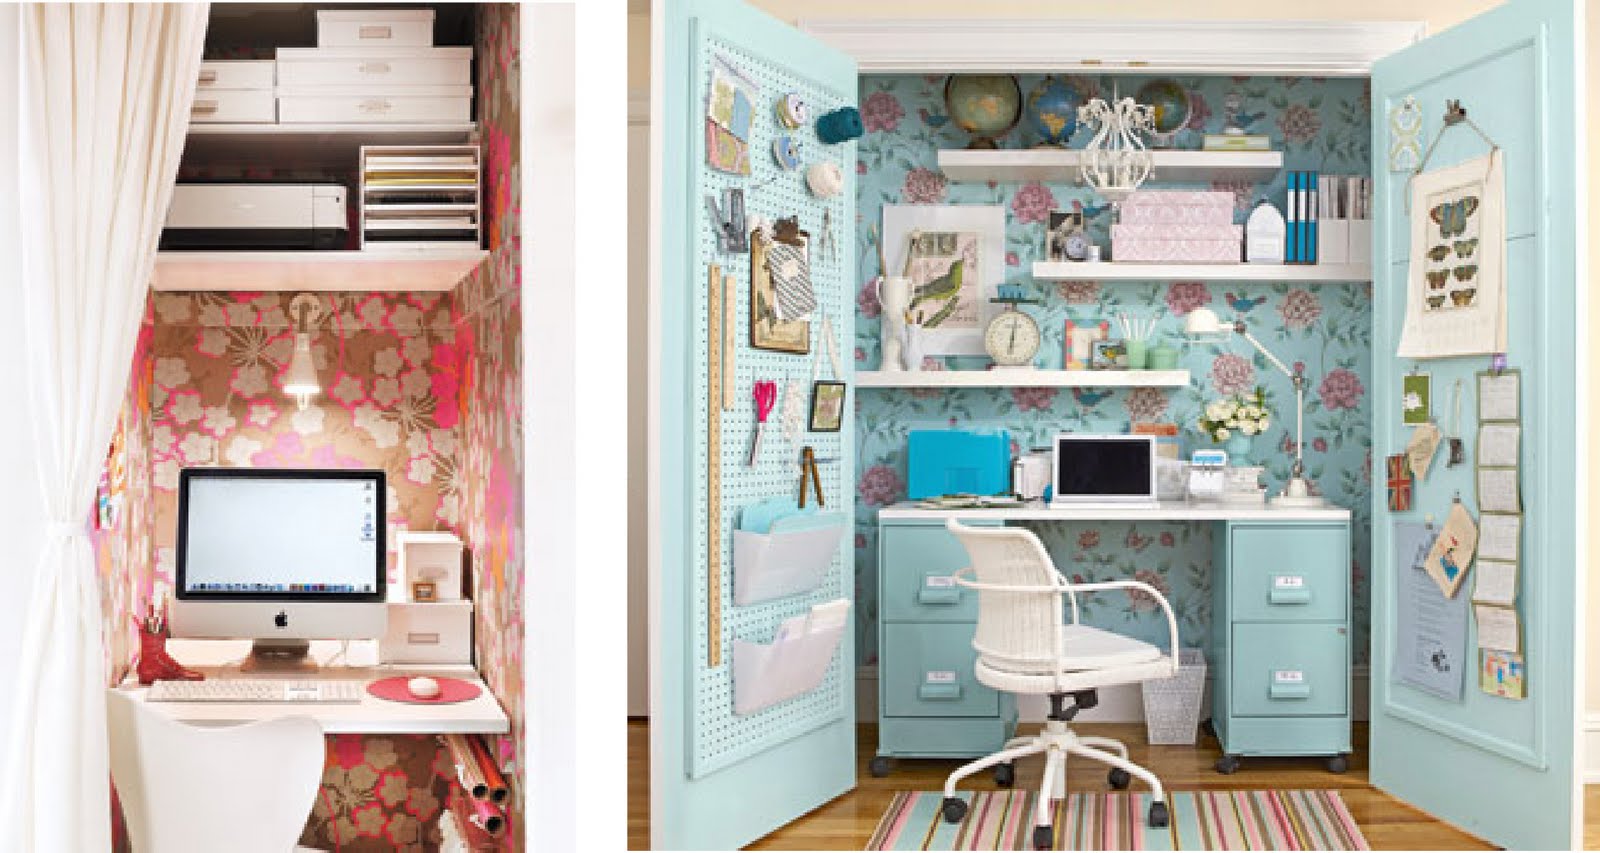
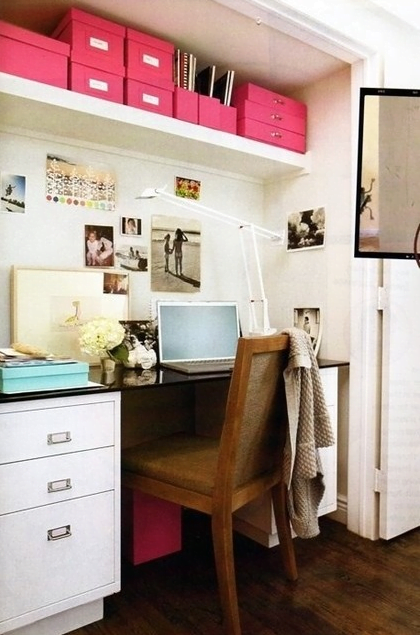
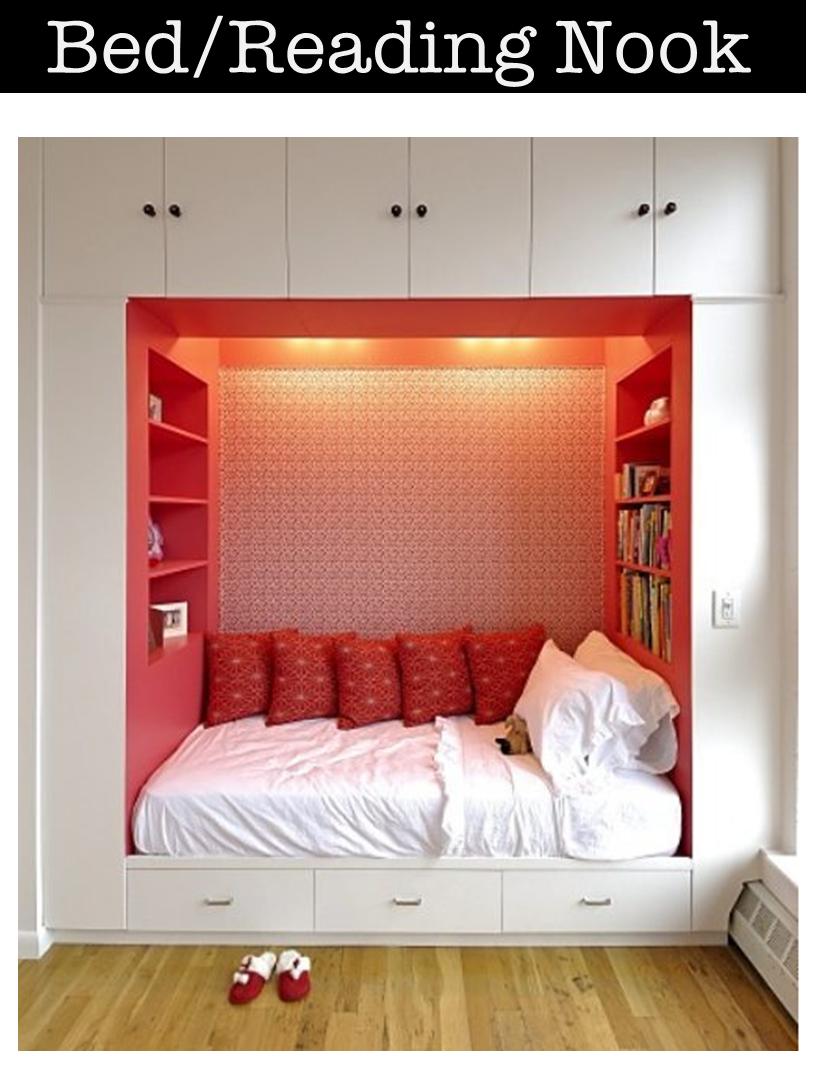
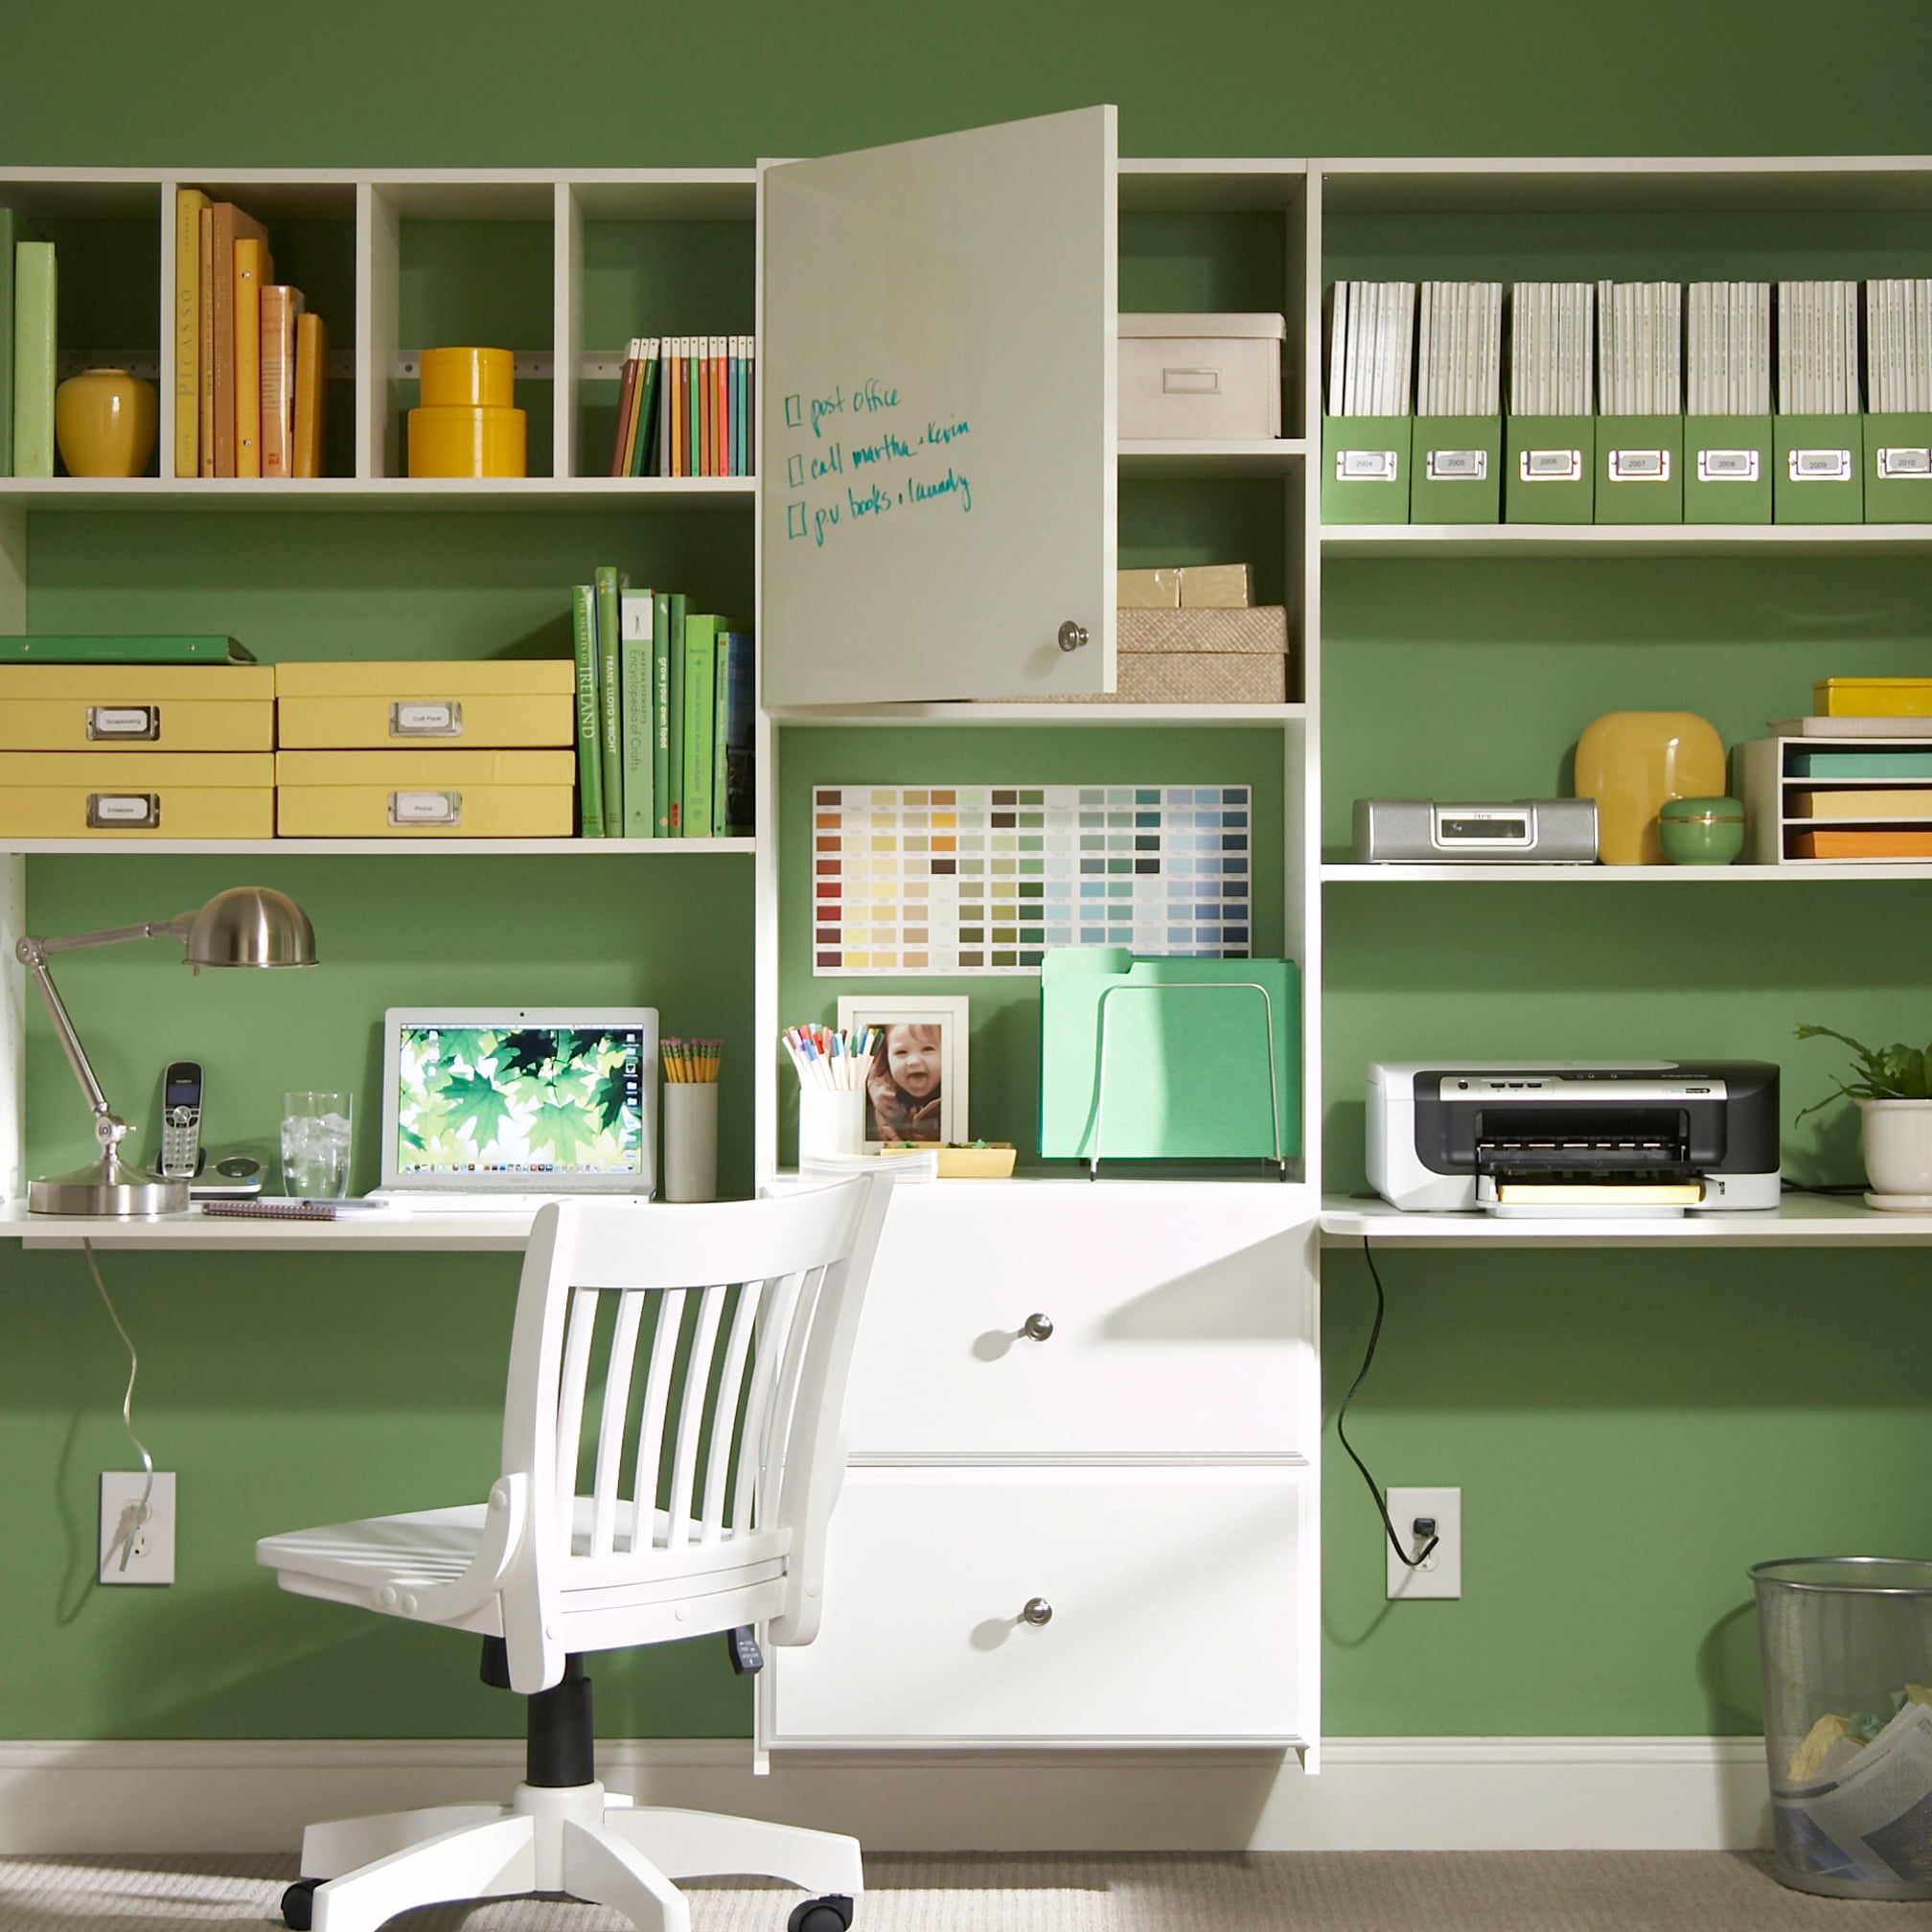
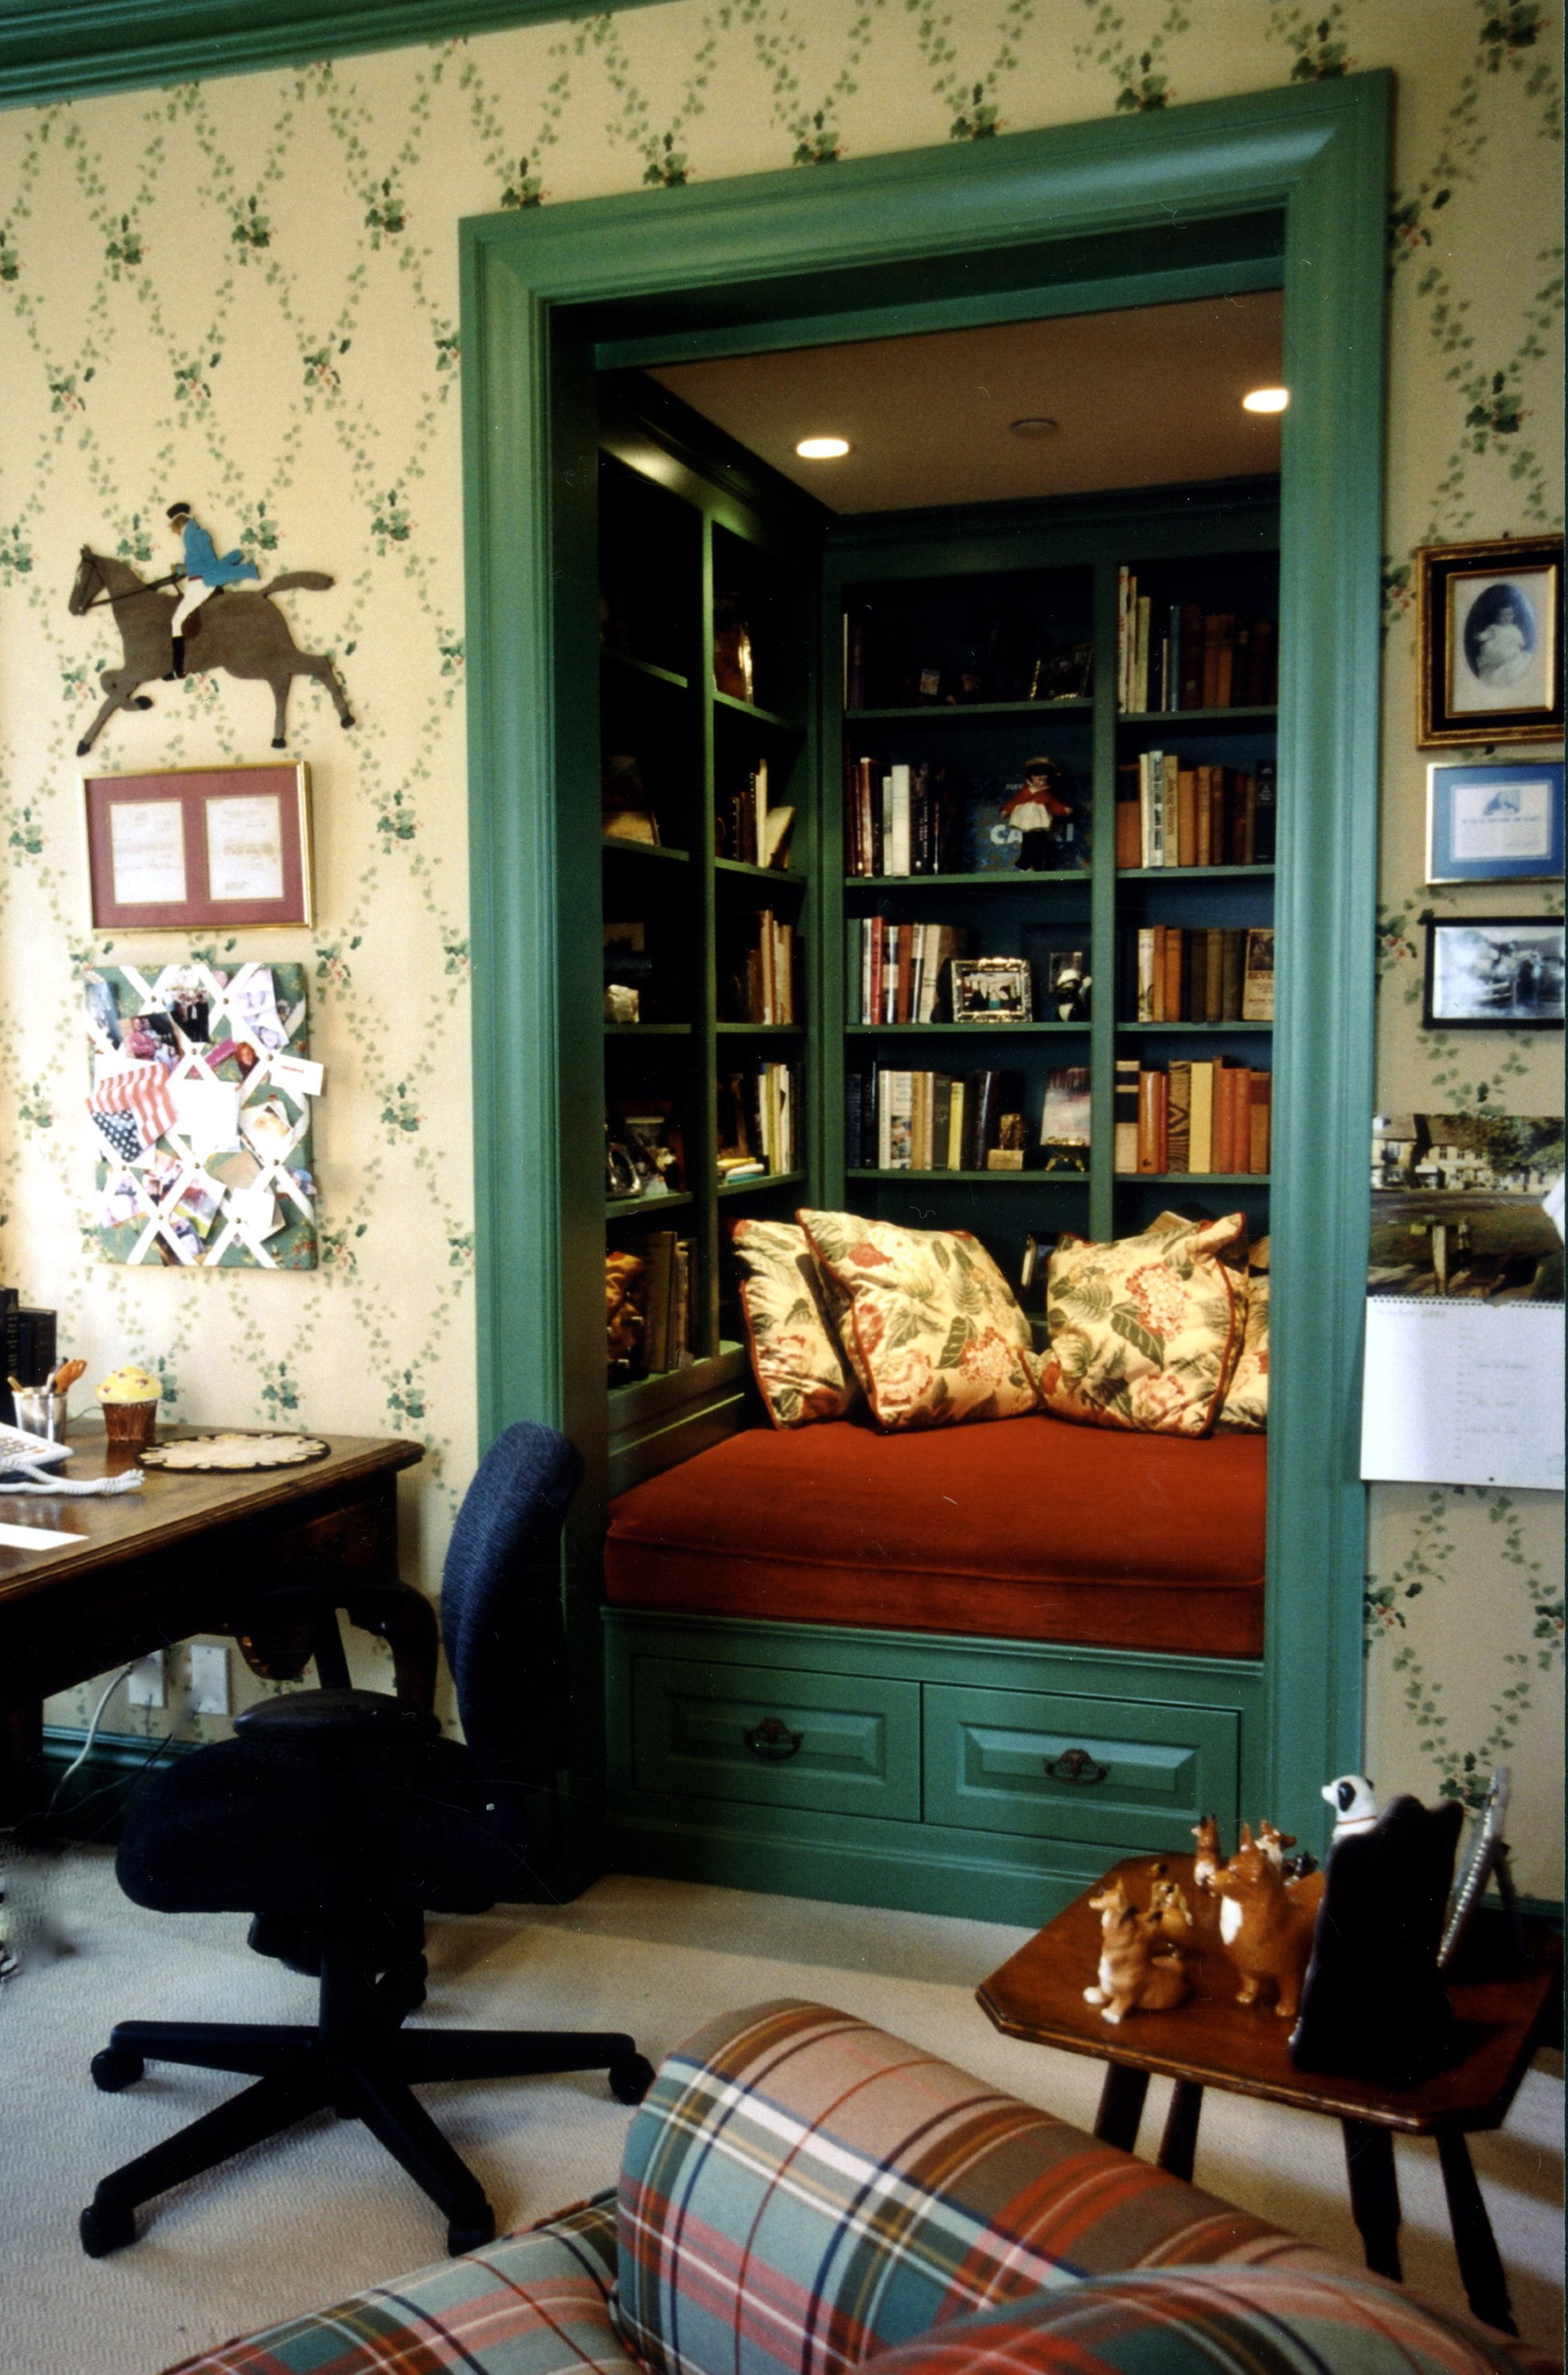
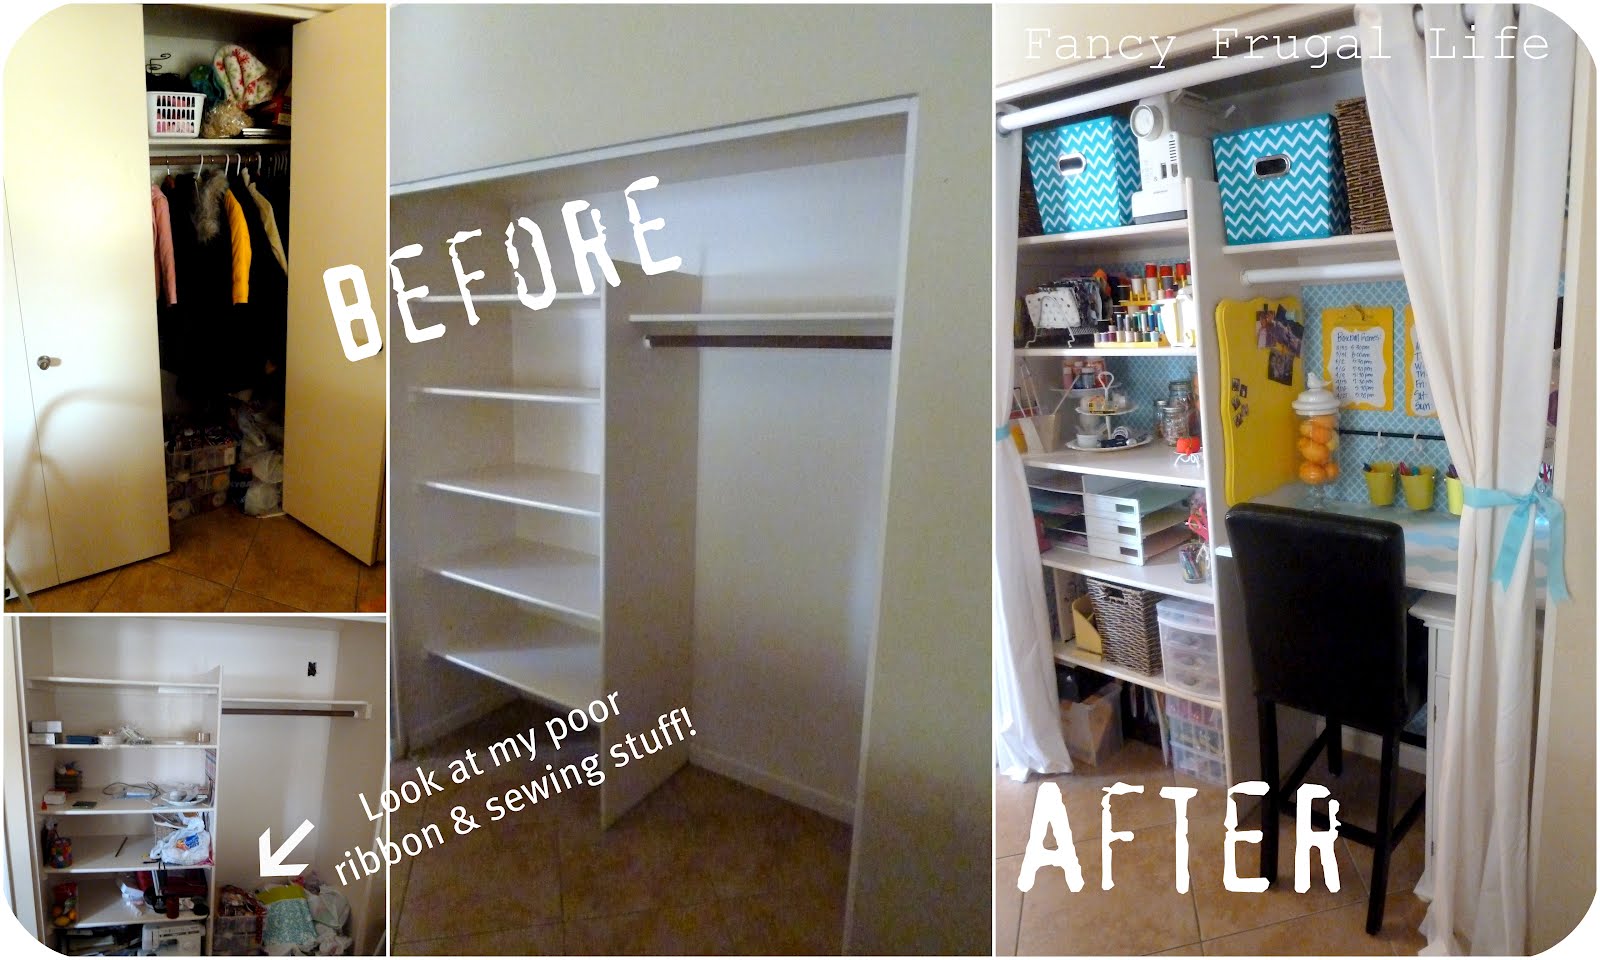
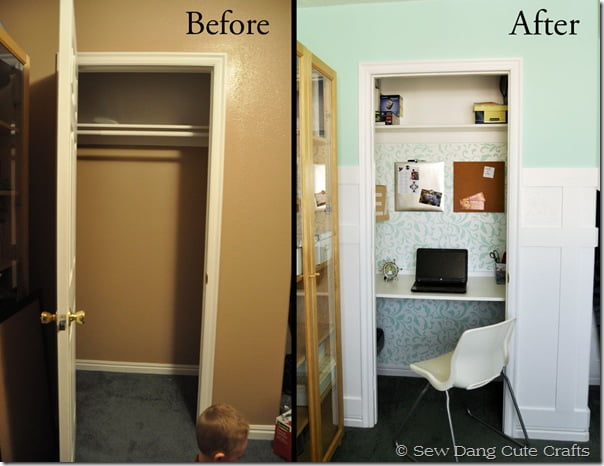
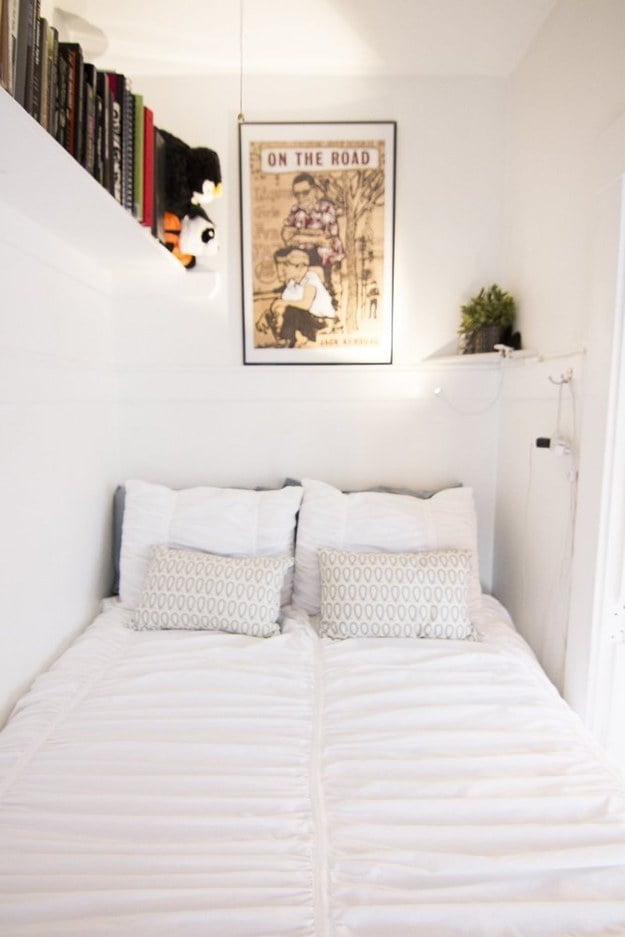
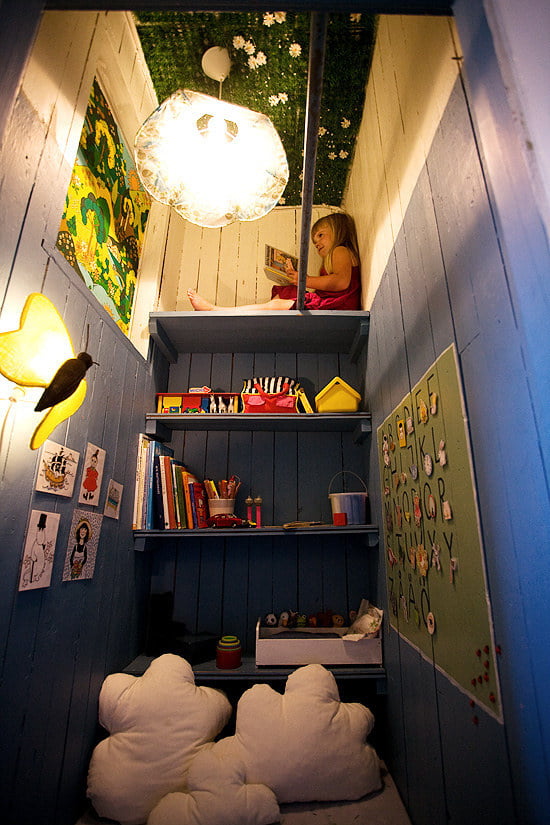
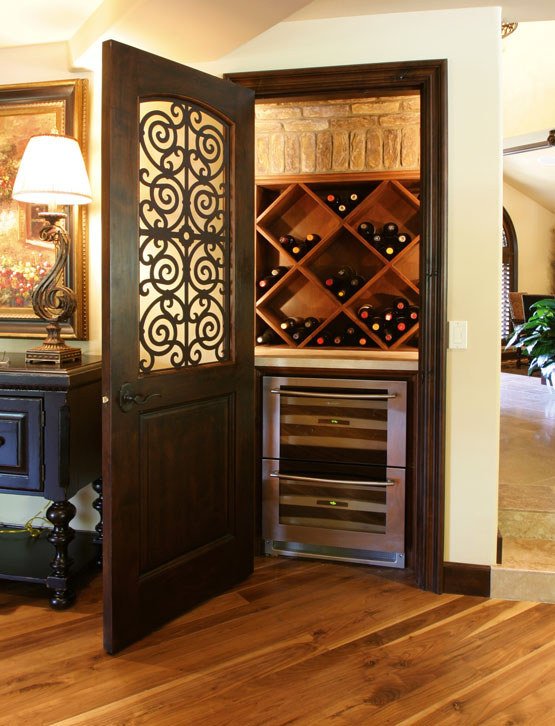
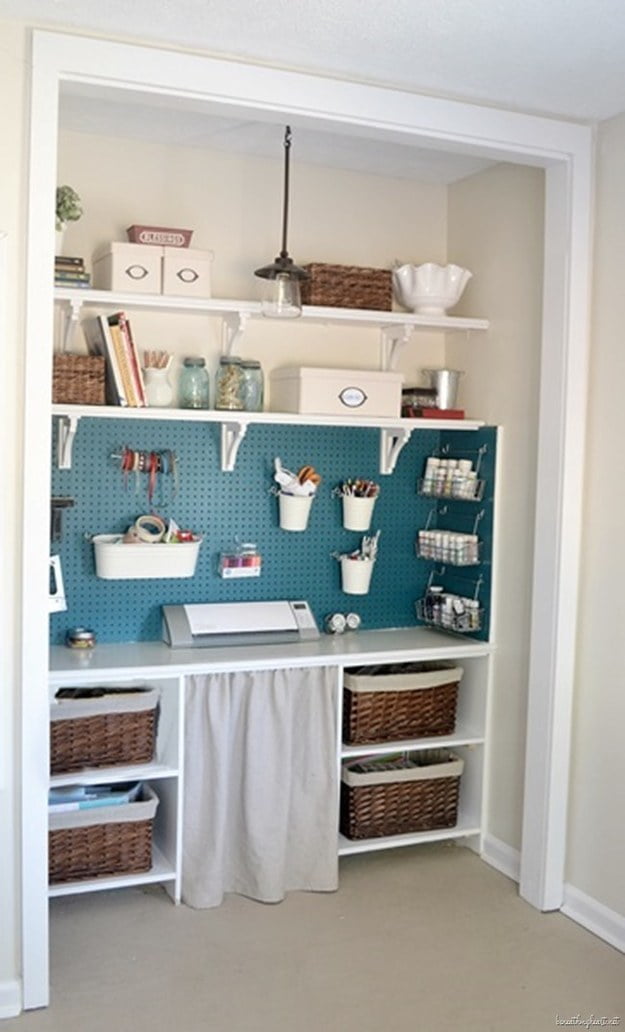
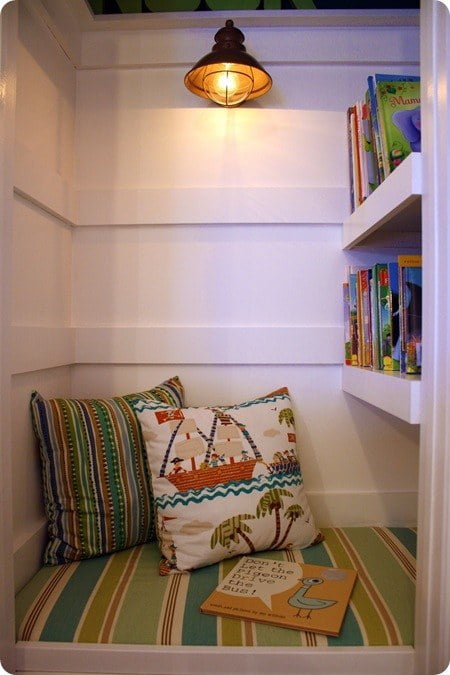
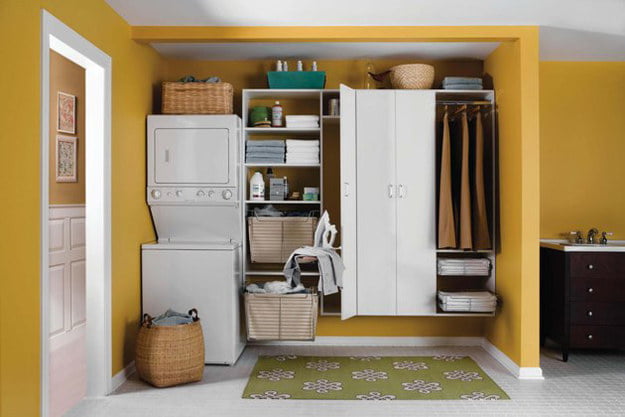
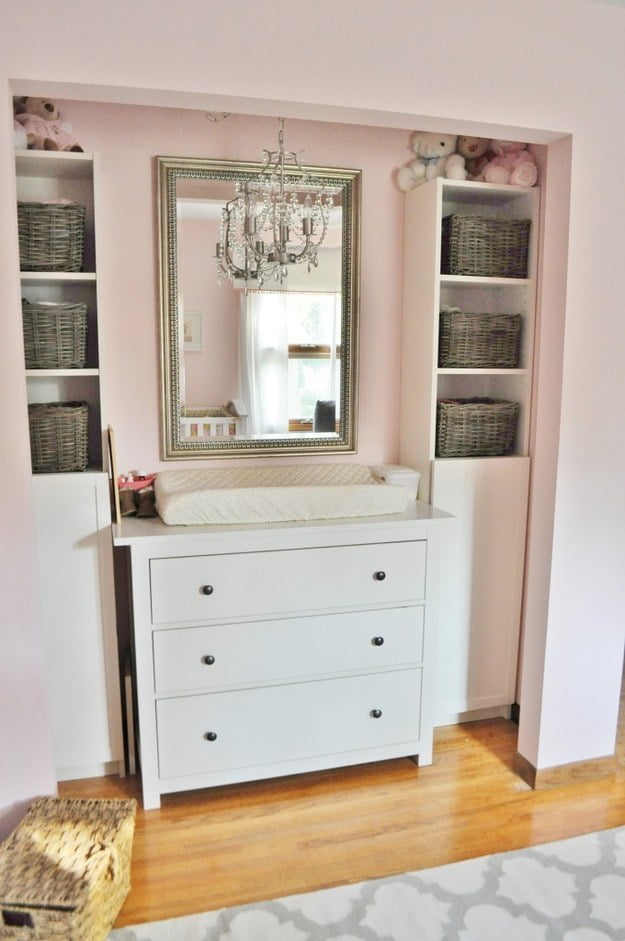
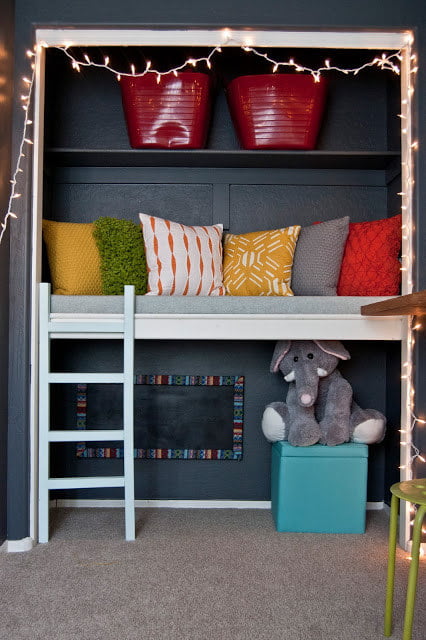
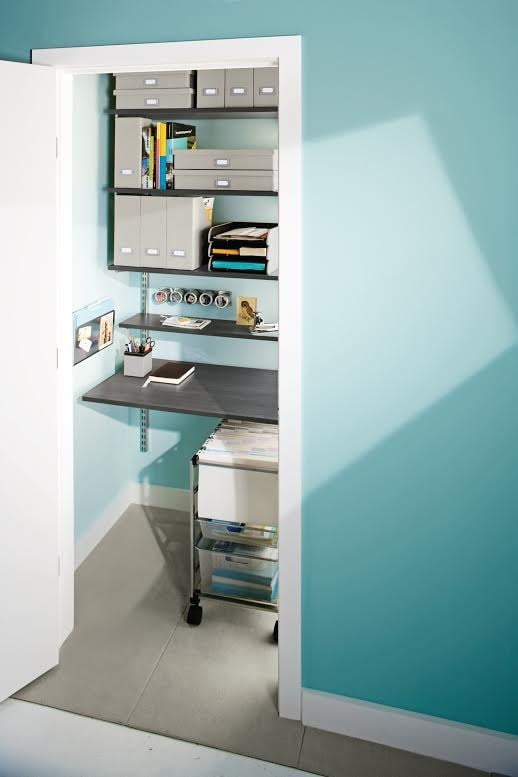
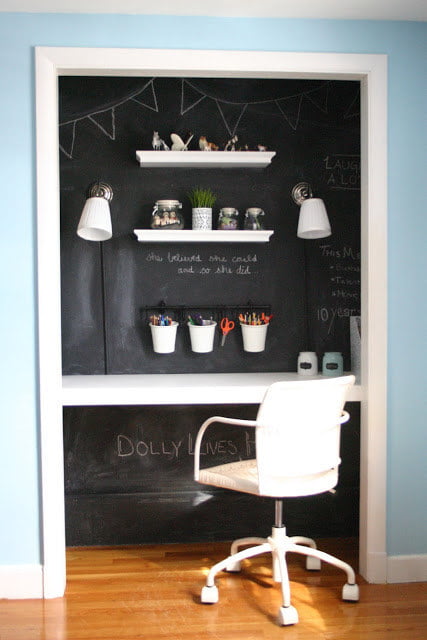
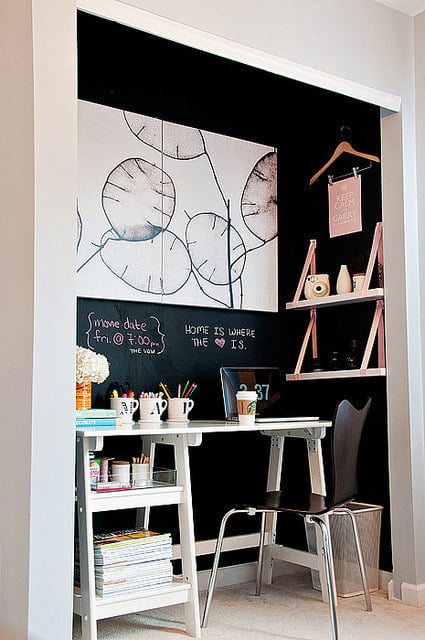

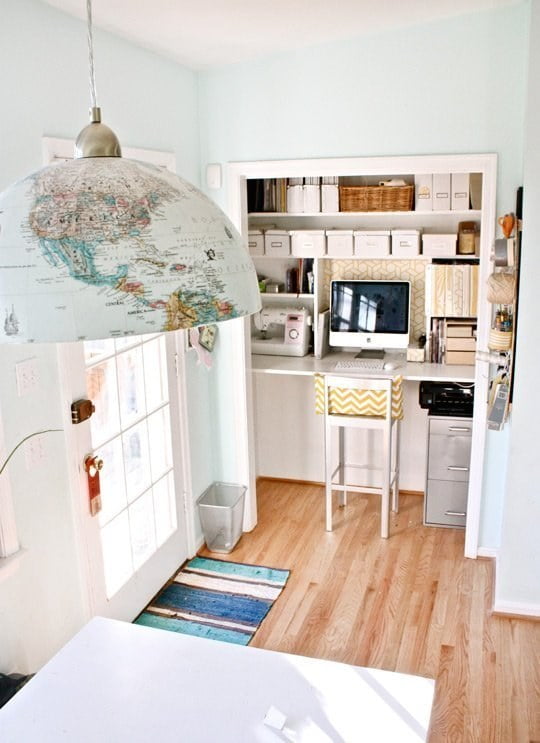
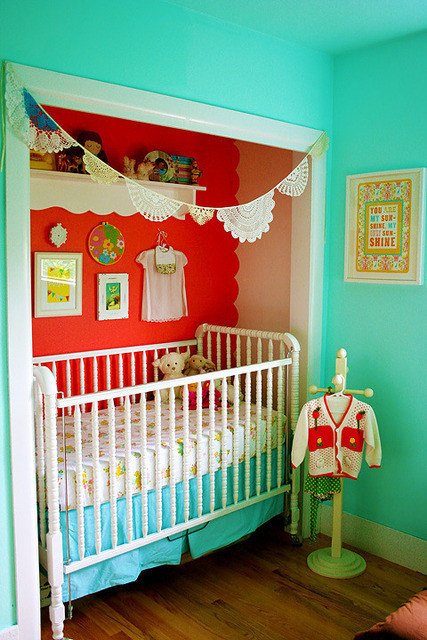

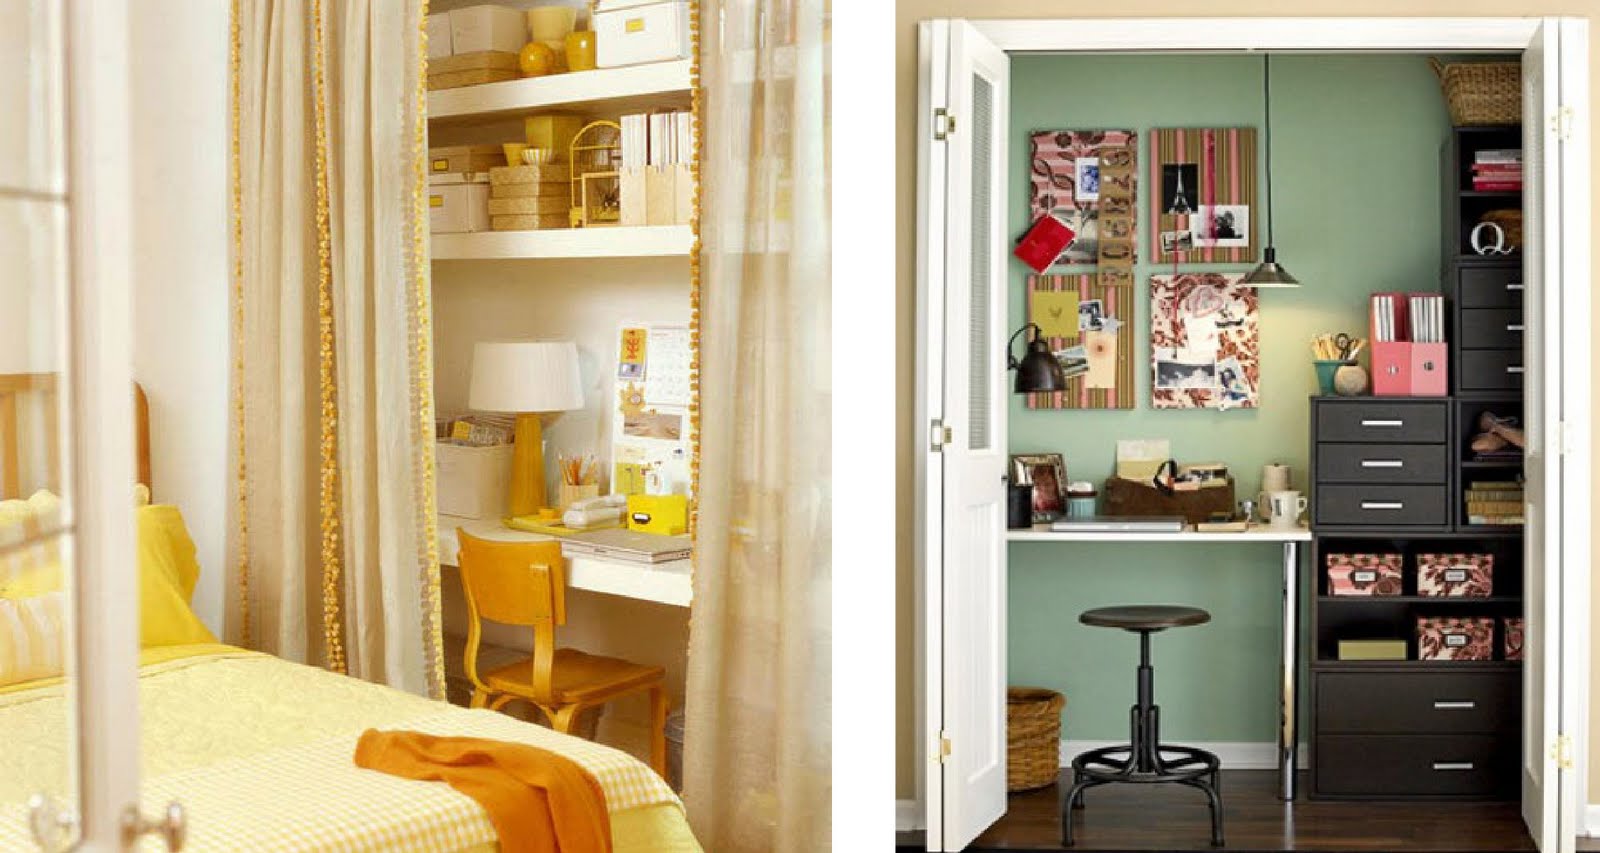

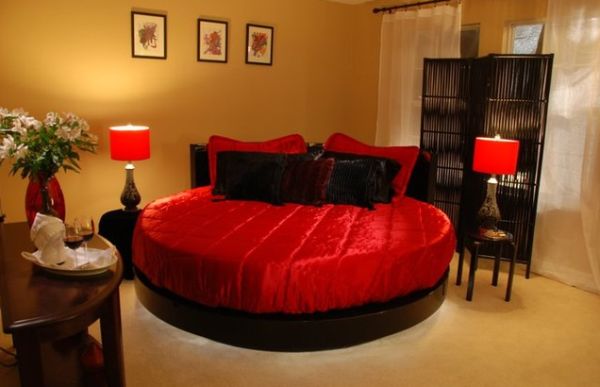


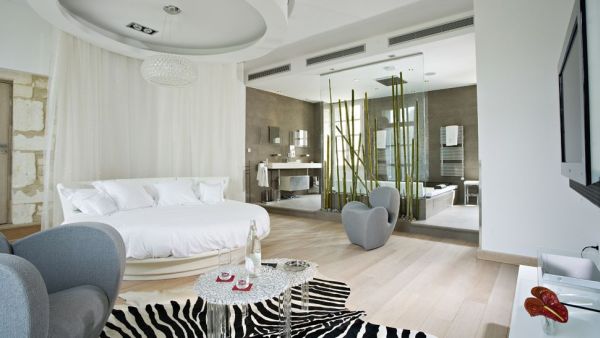
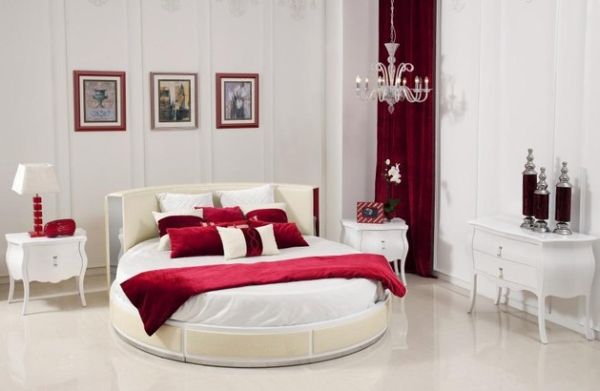 Simple round bed with a touch of classic.
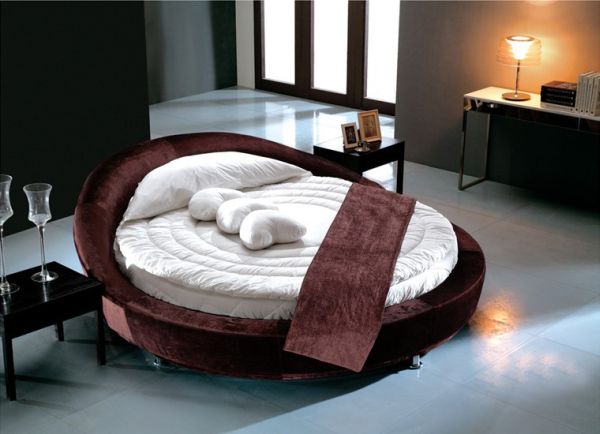
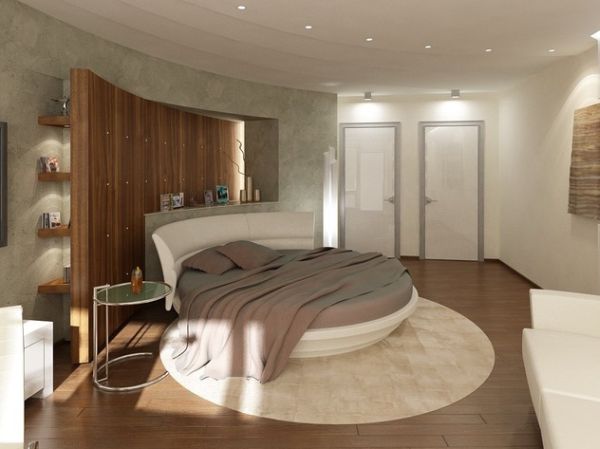
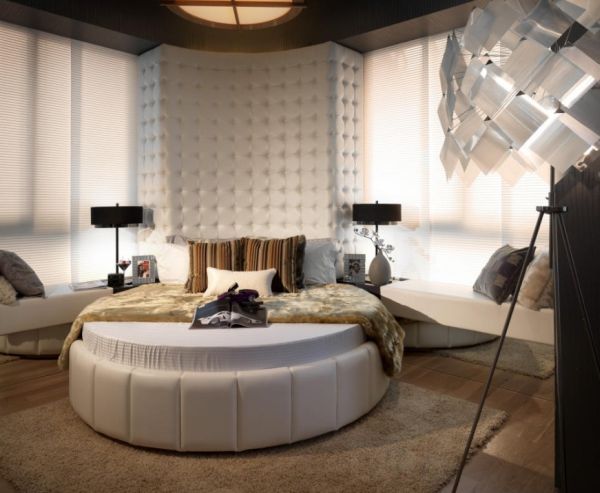
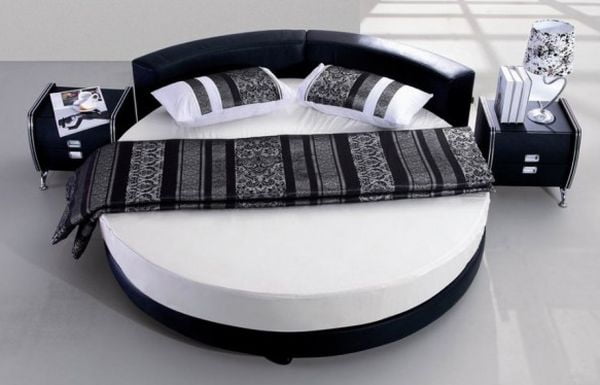
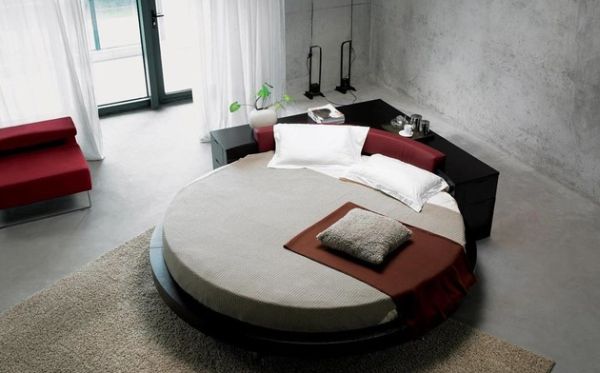
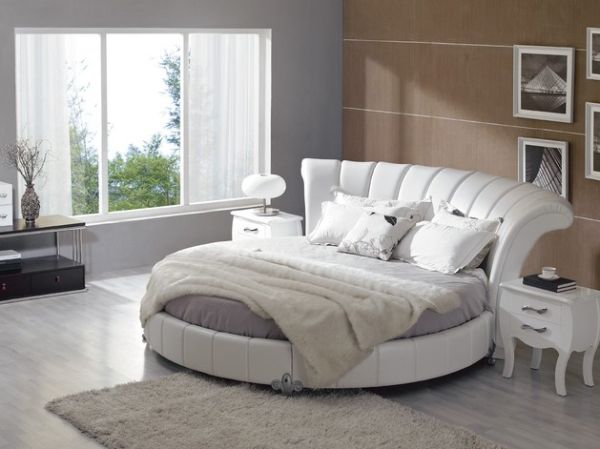

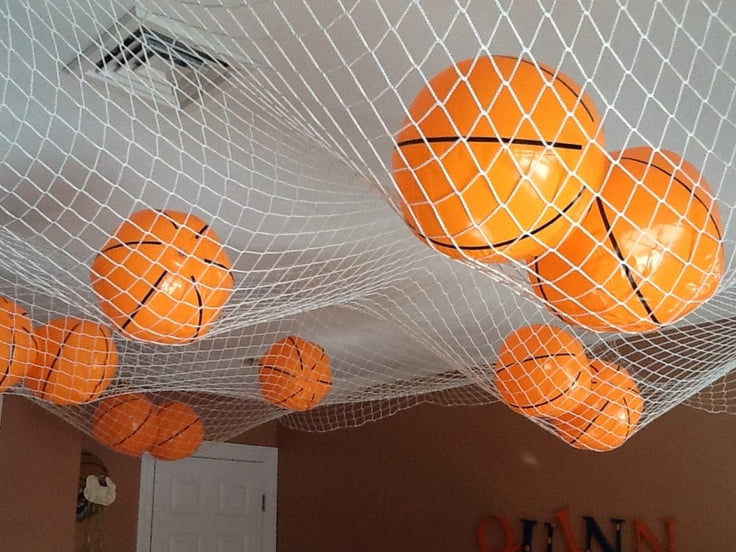
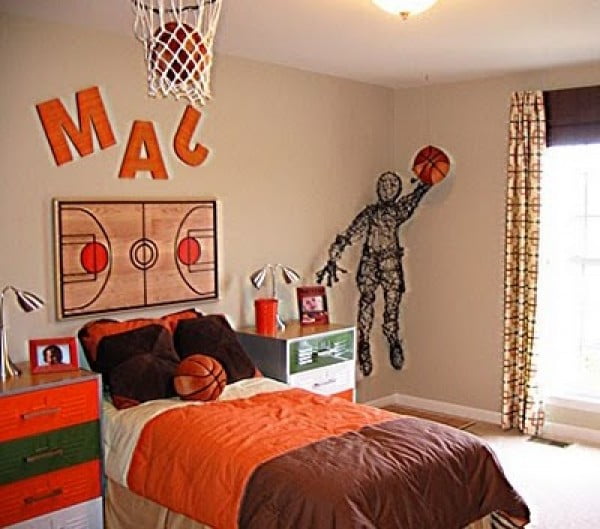
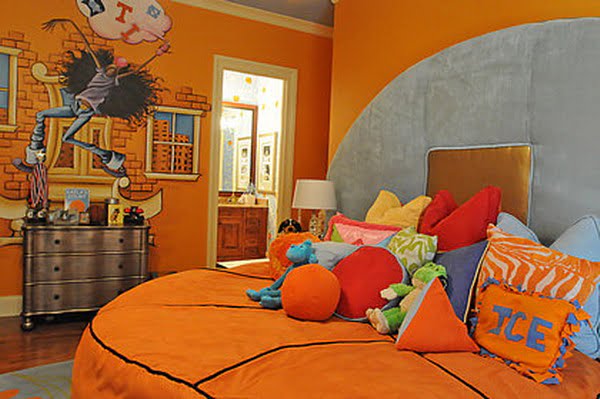
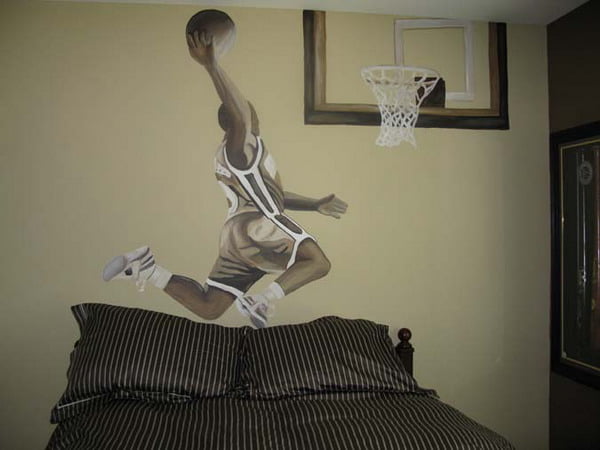
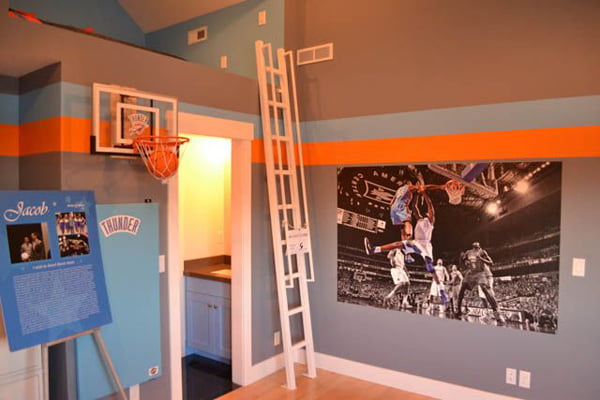

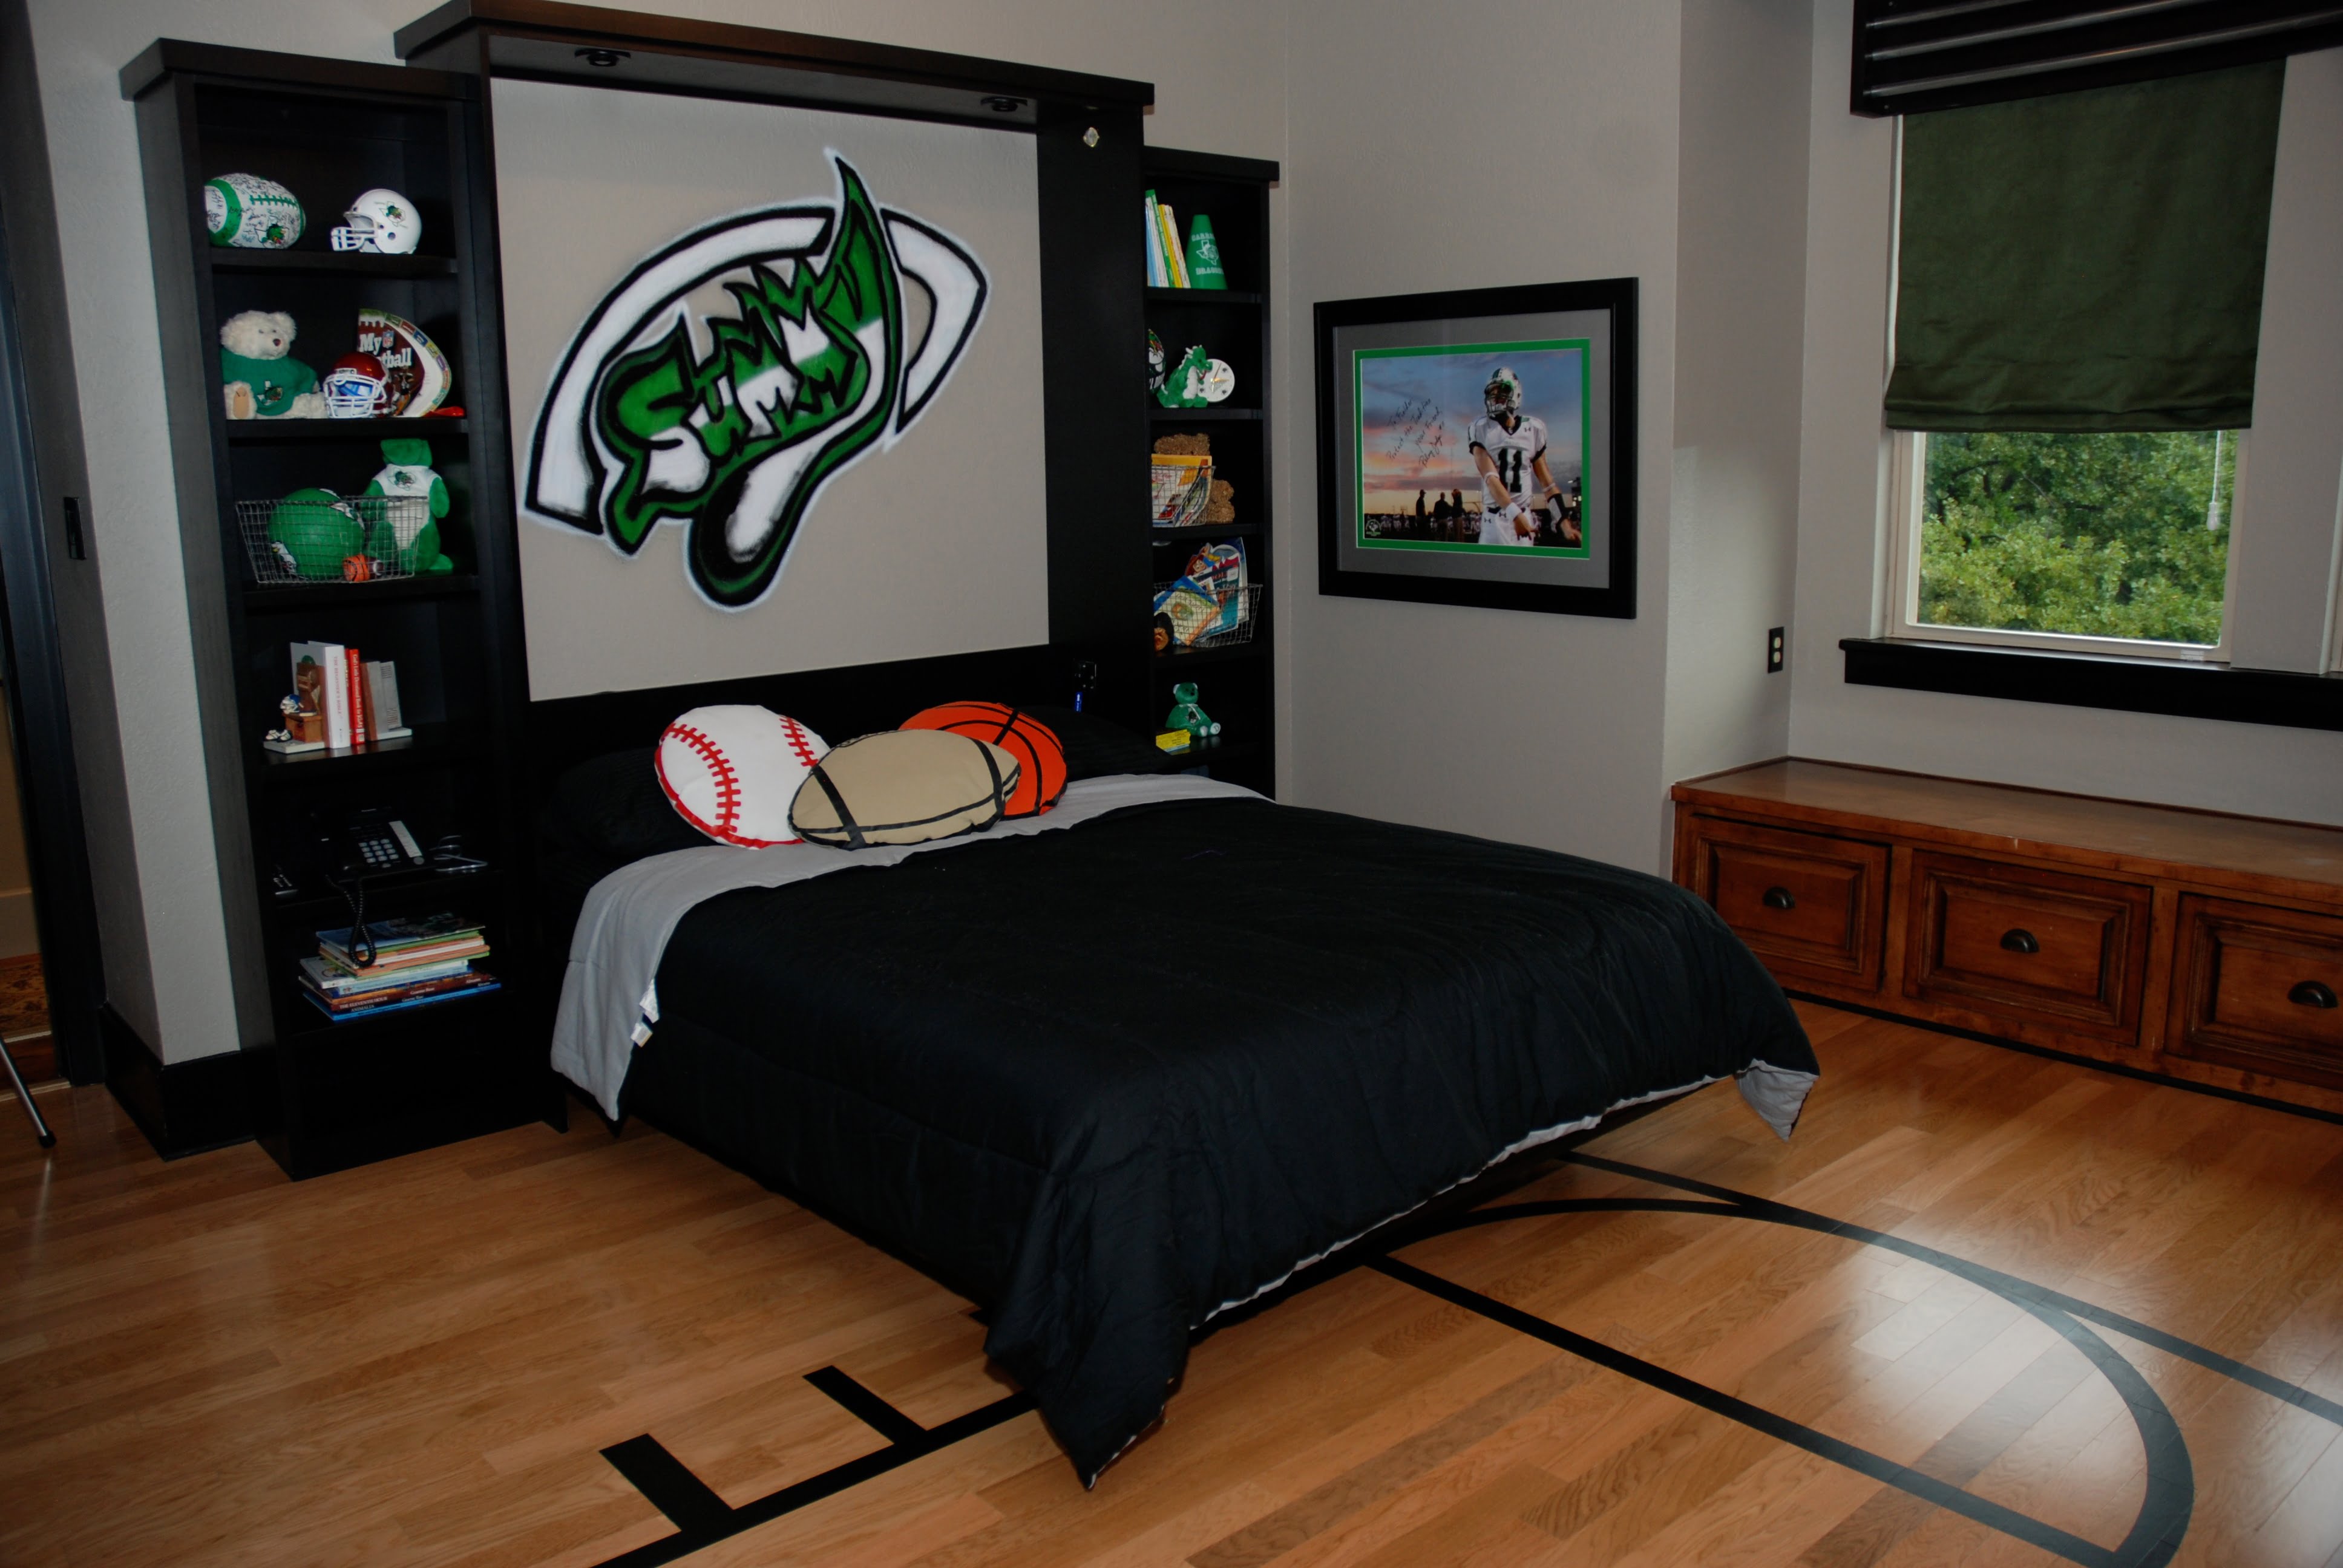
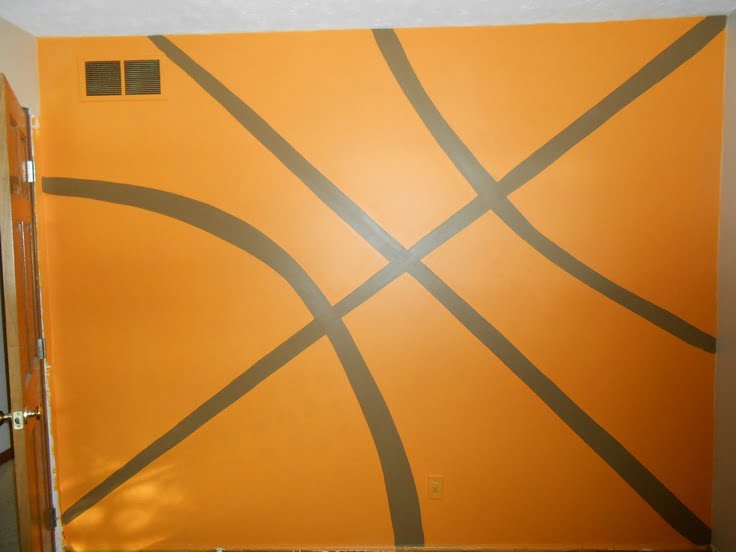


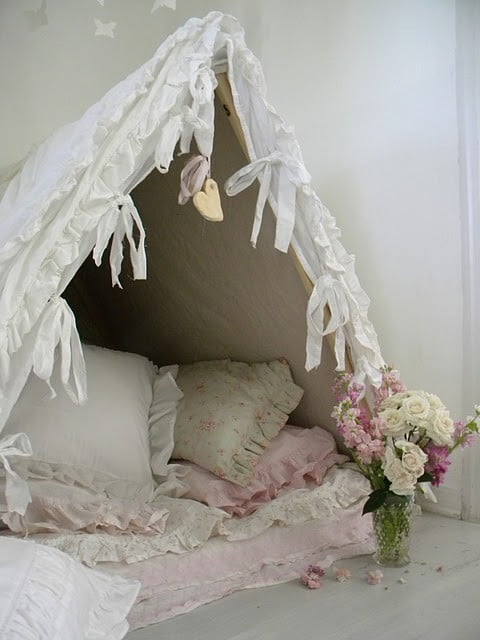
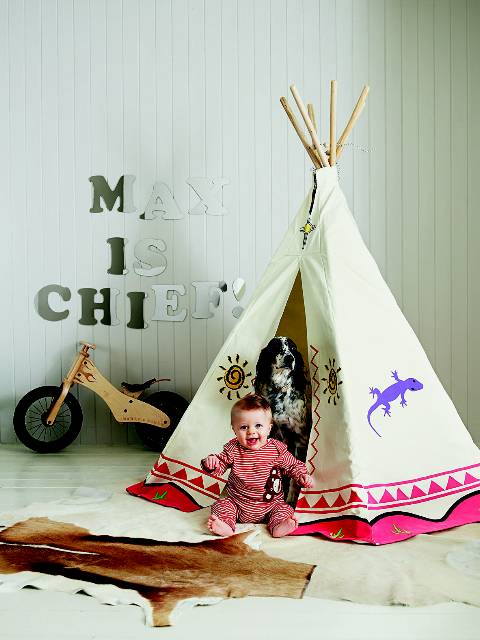


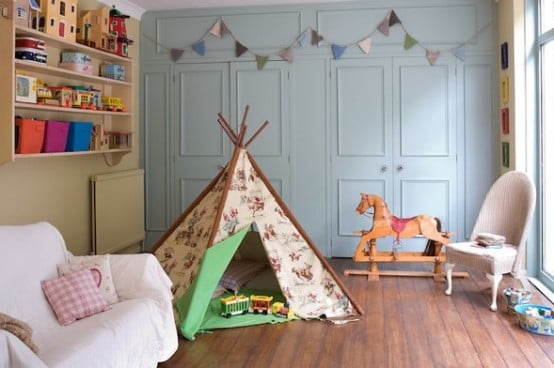
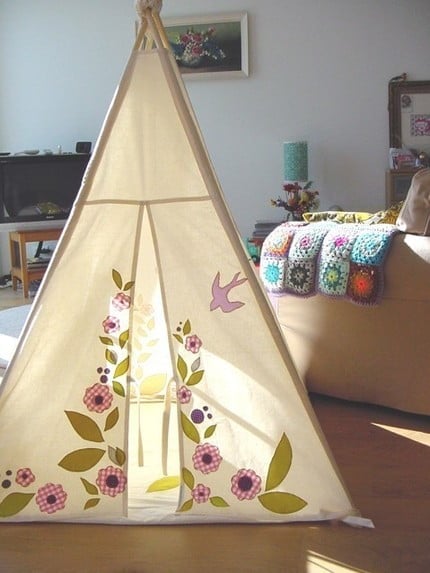

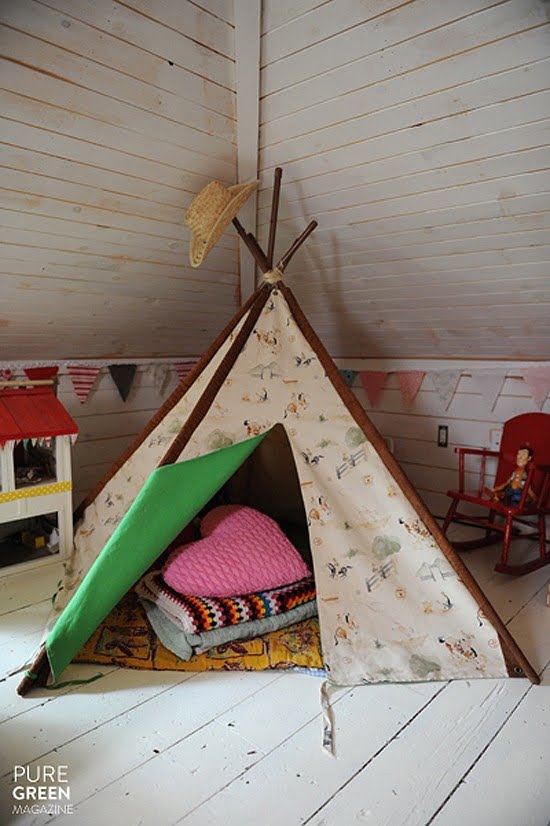
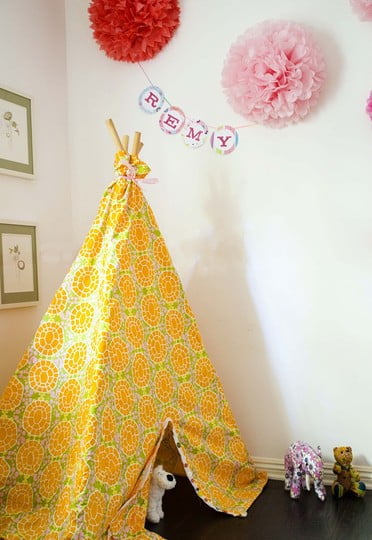
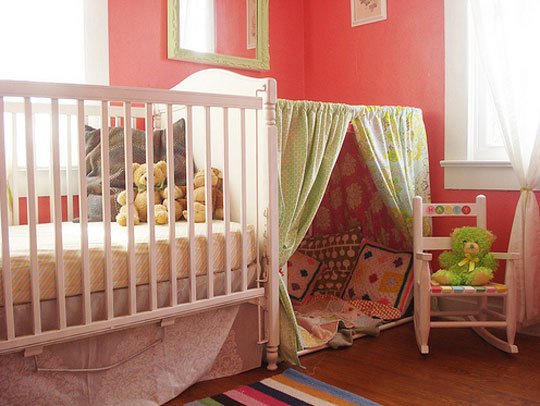
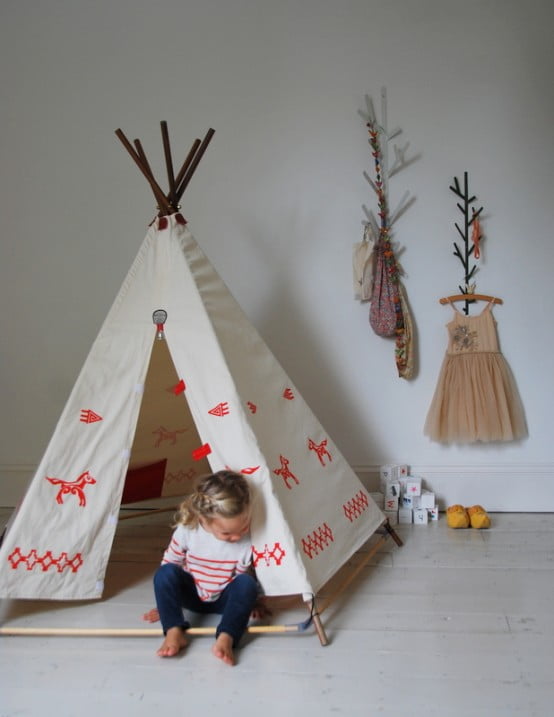
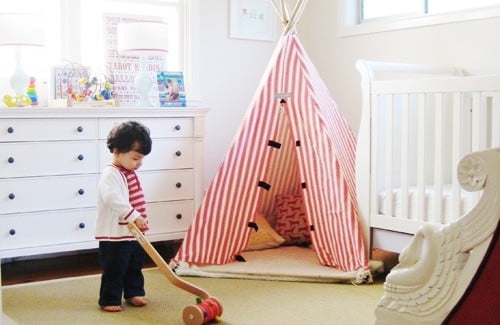
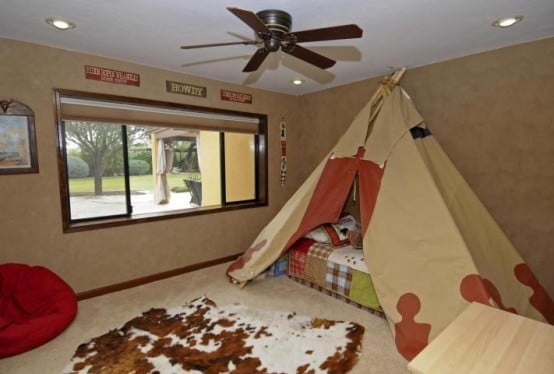
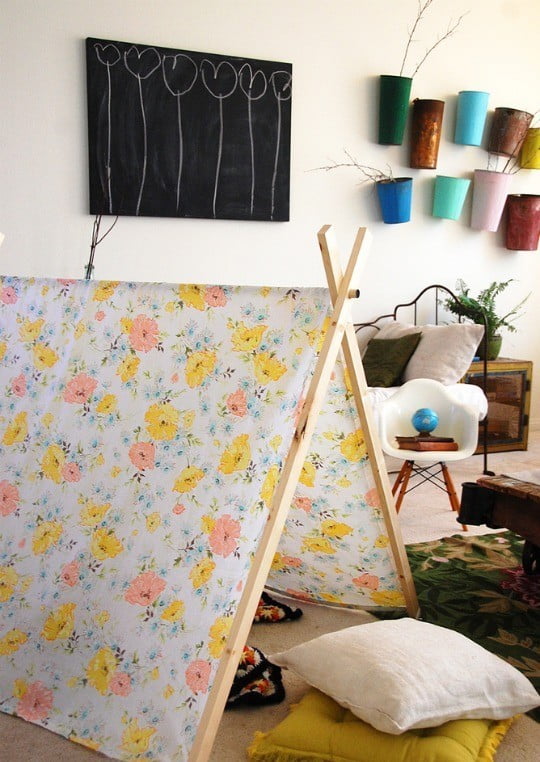
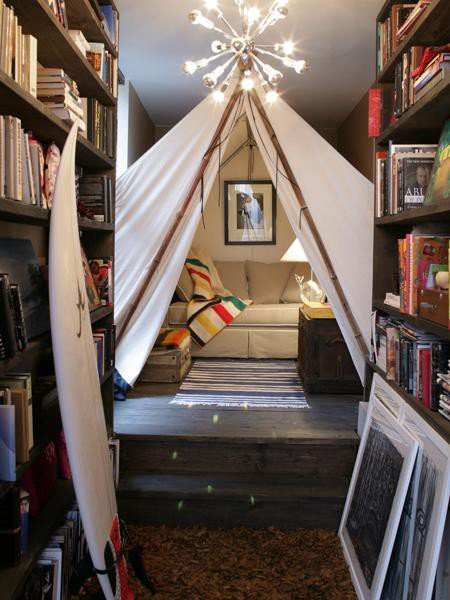

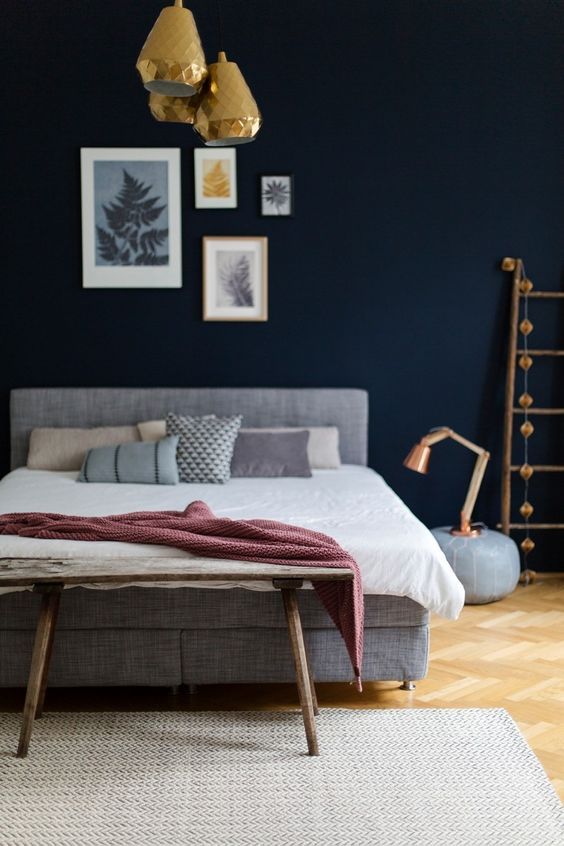
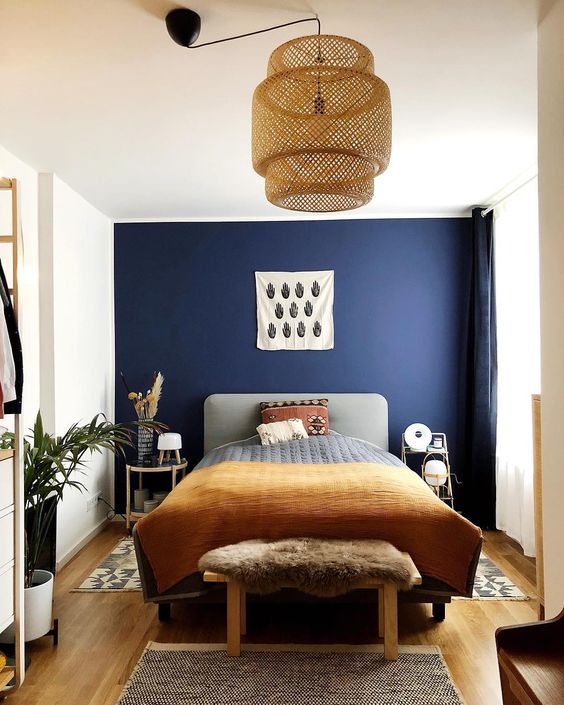
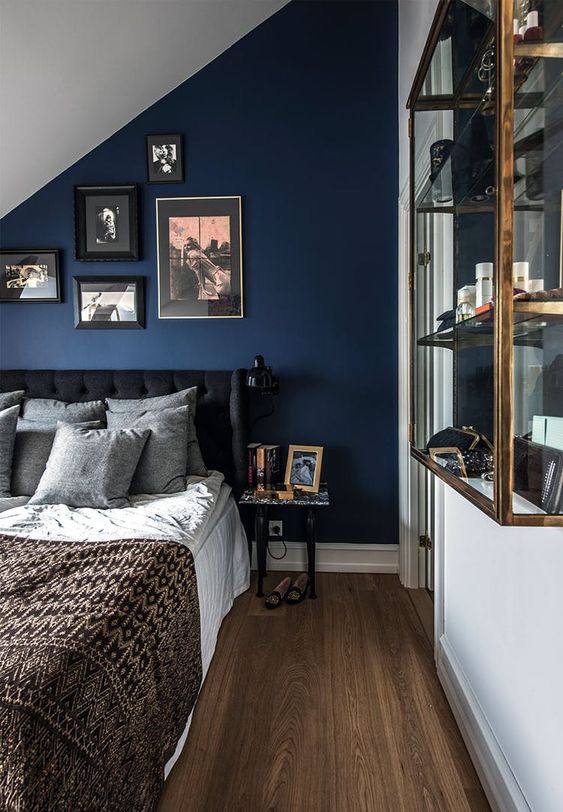
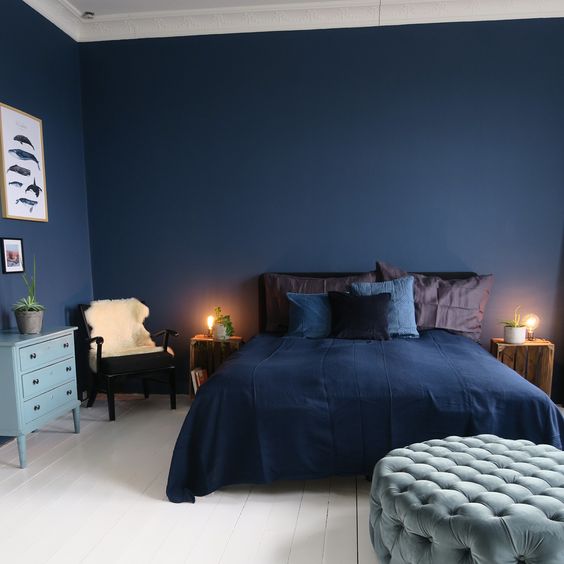

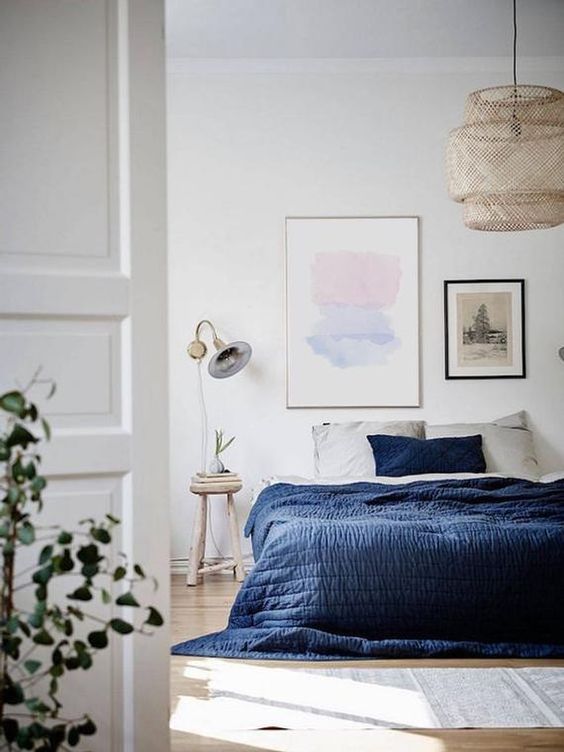
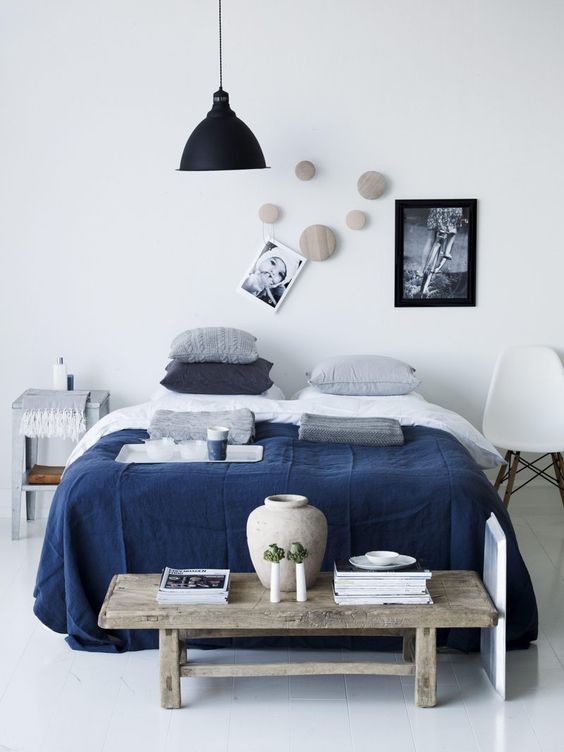

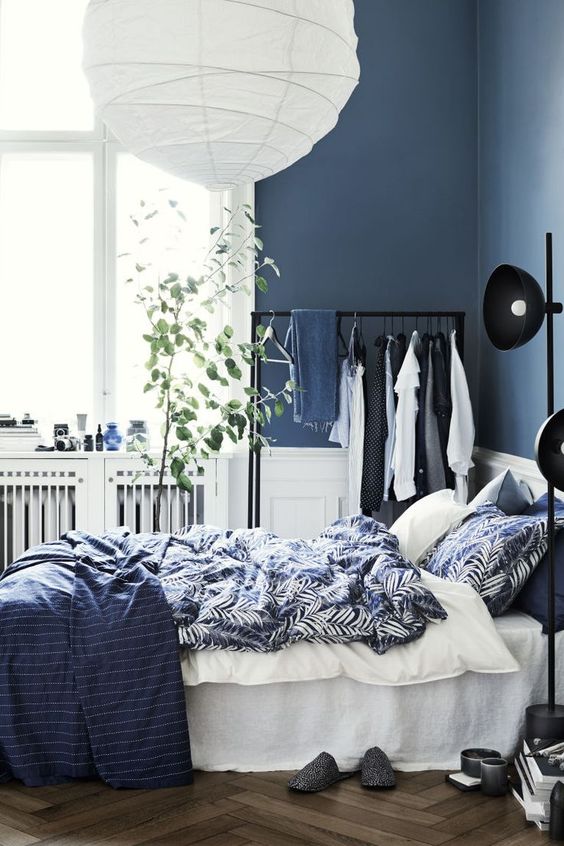
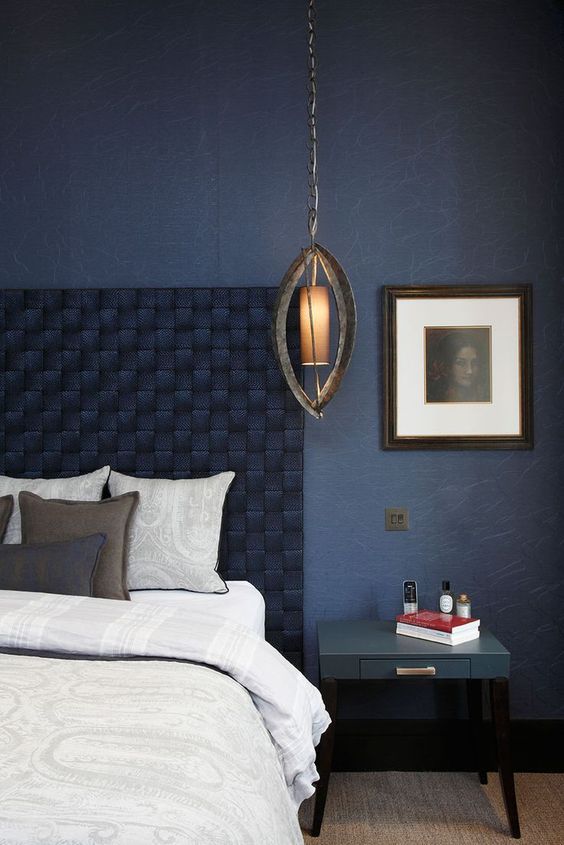
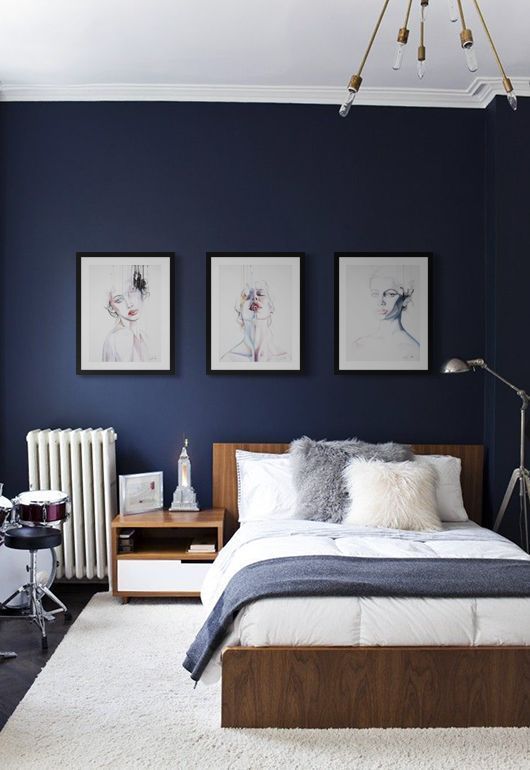
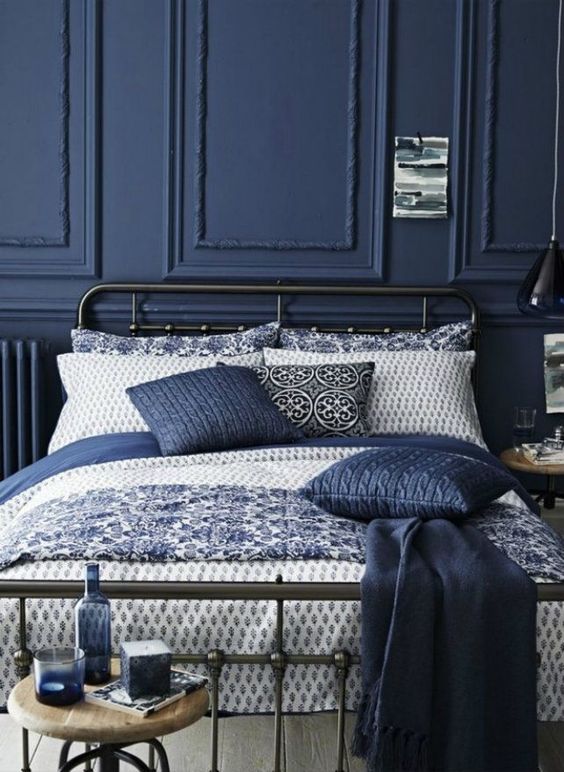
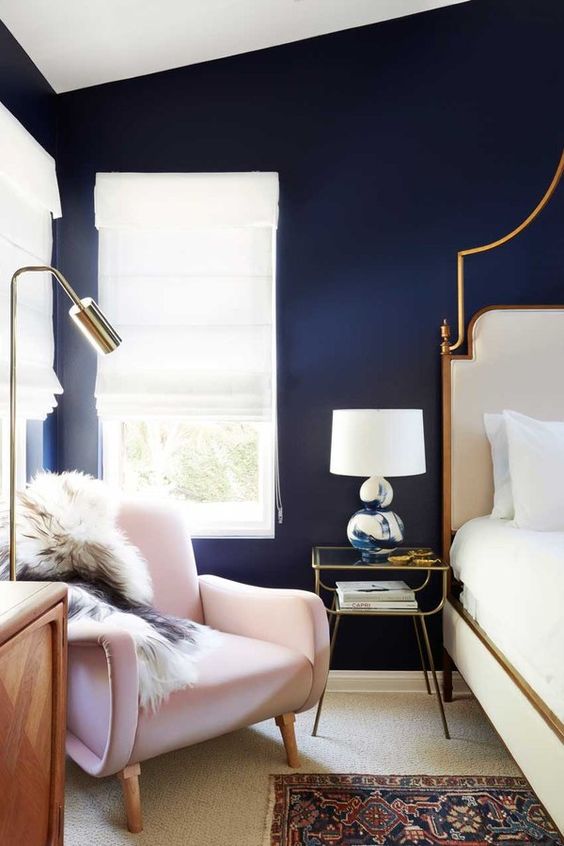
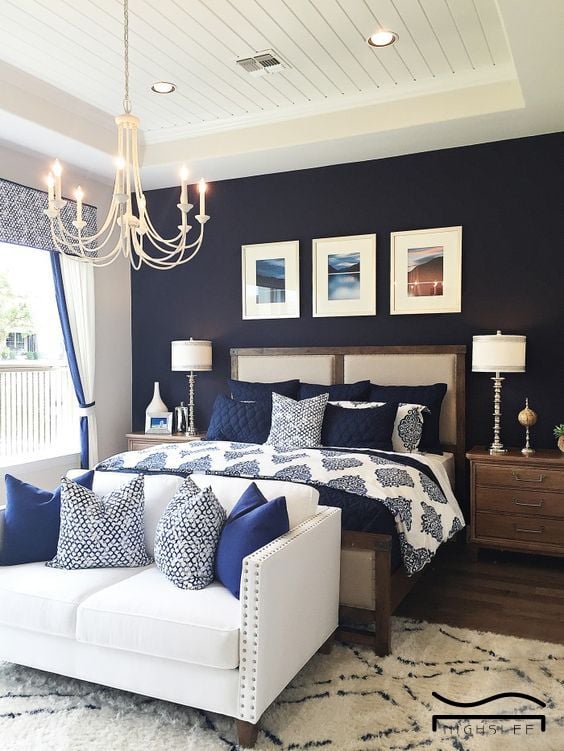

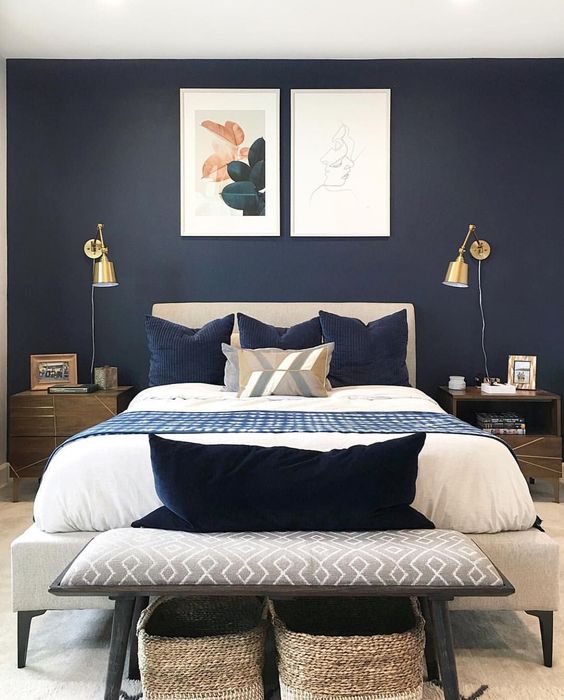
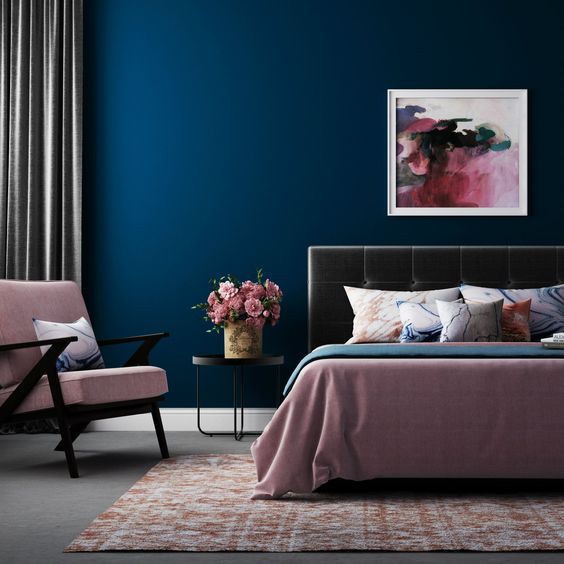
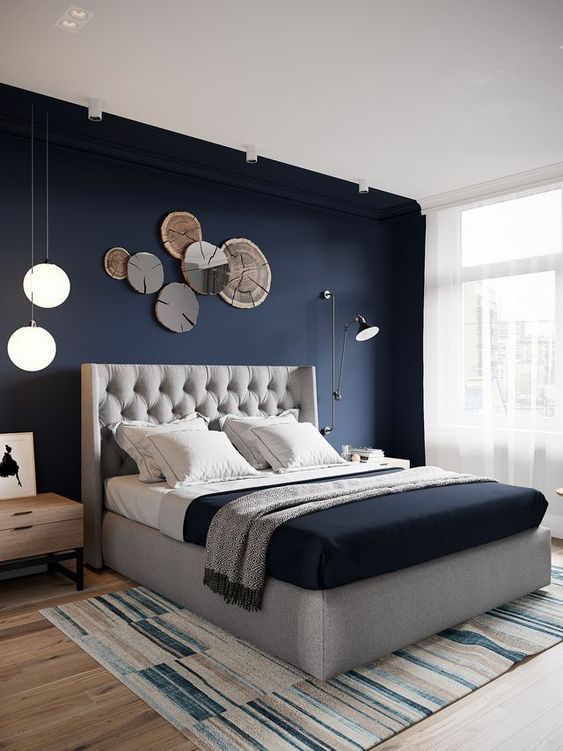
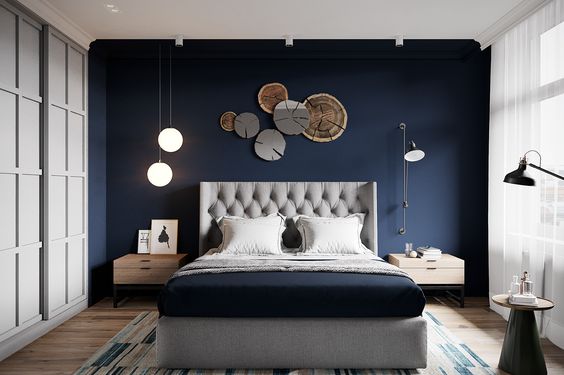
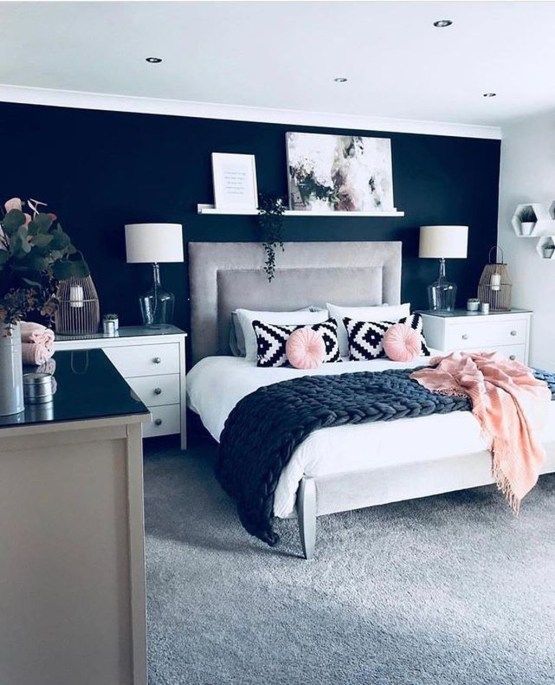
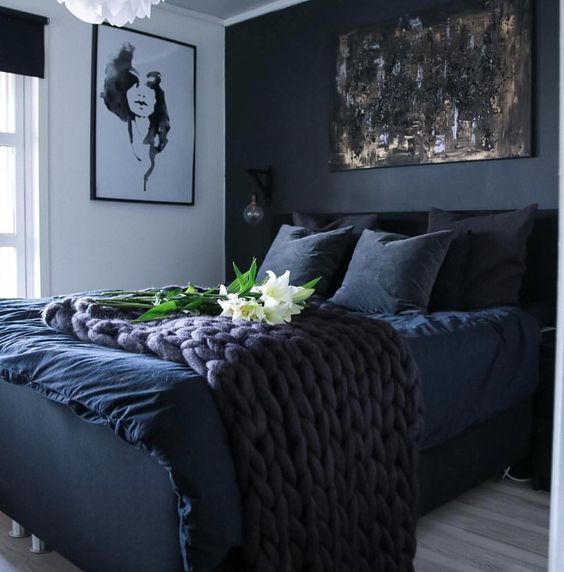
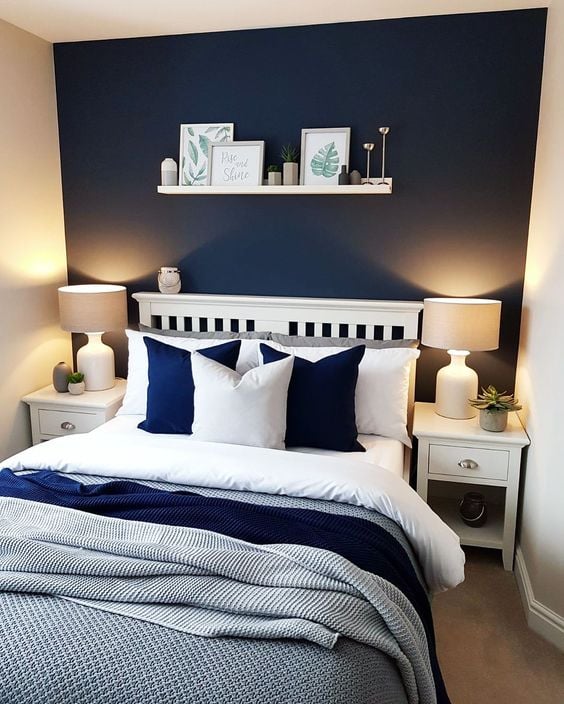
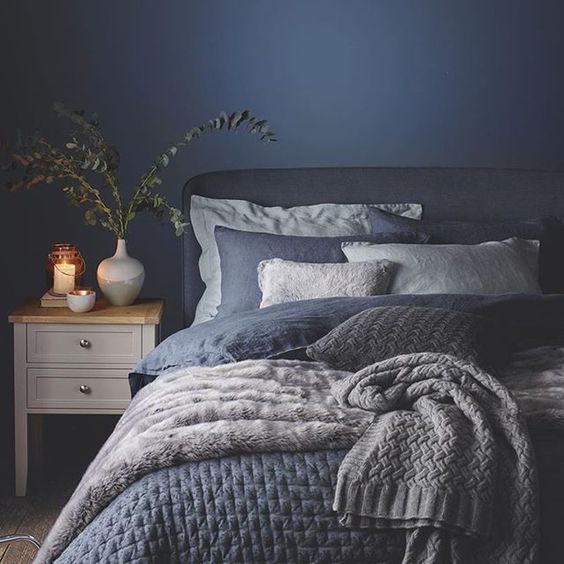
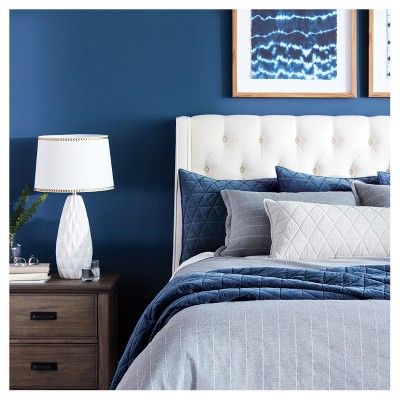
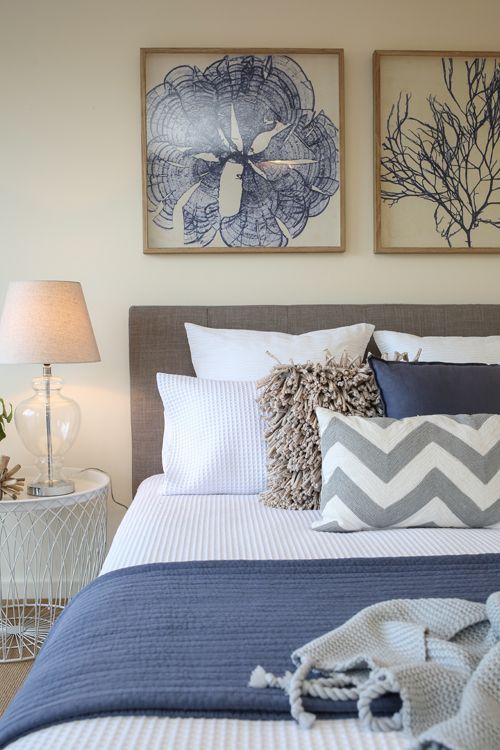
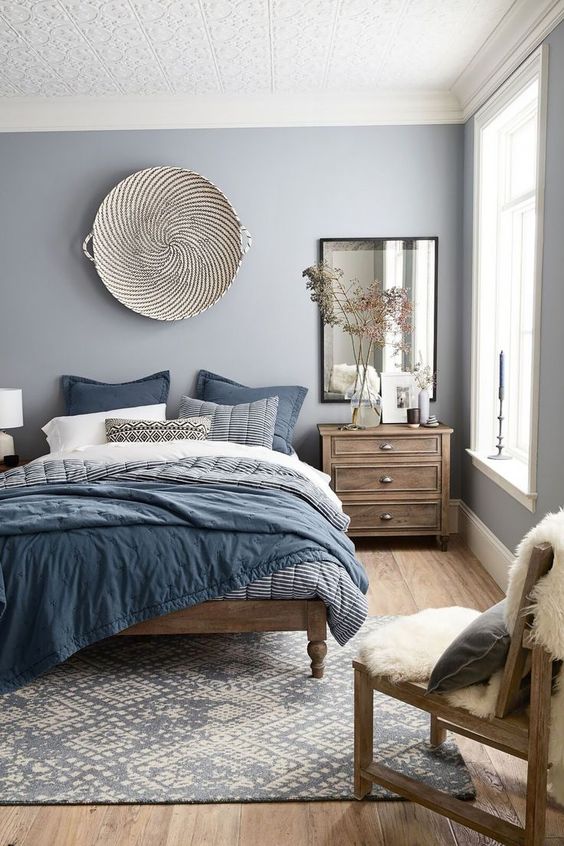
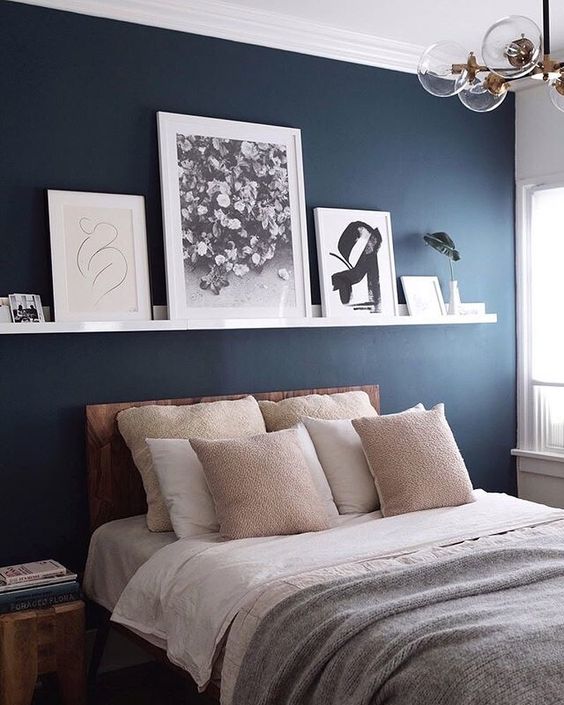
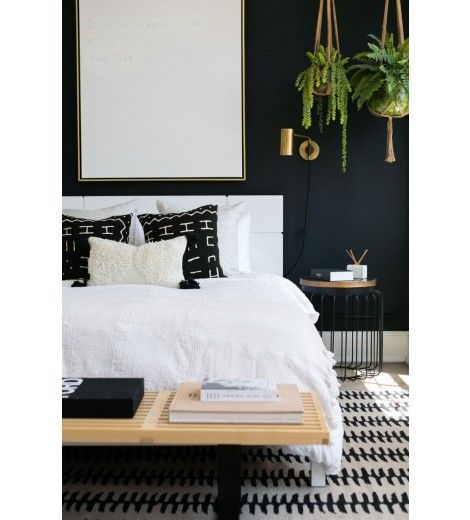
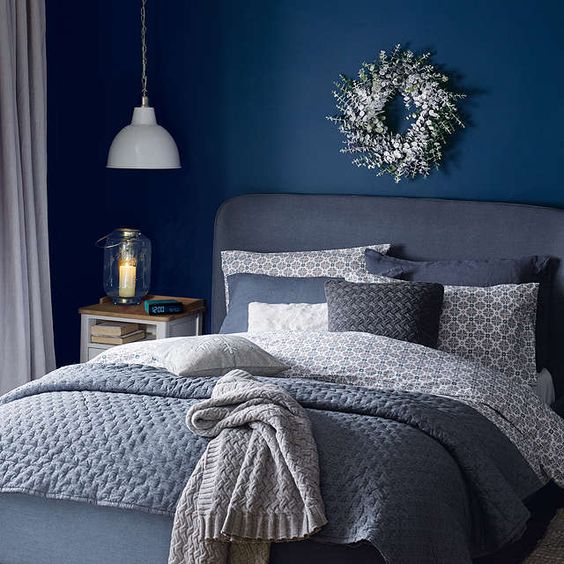
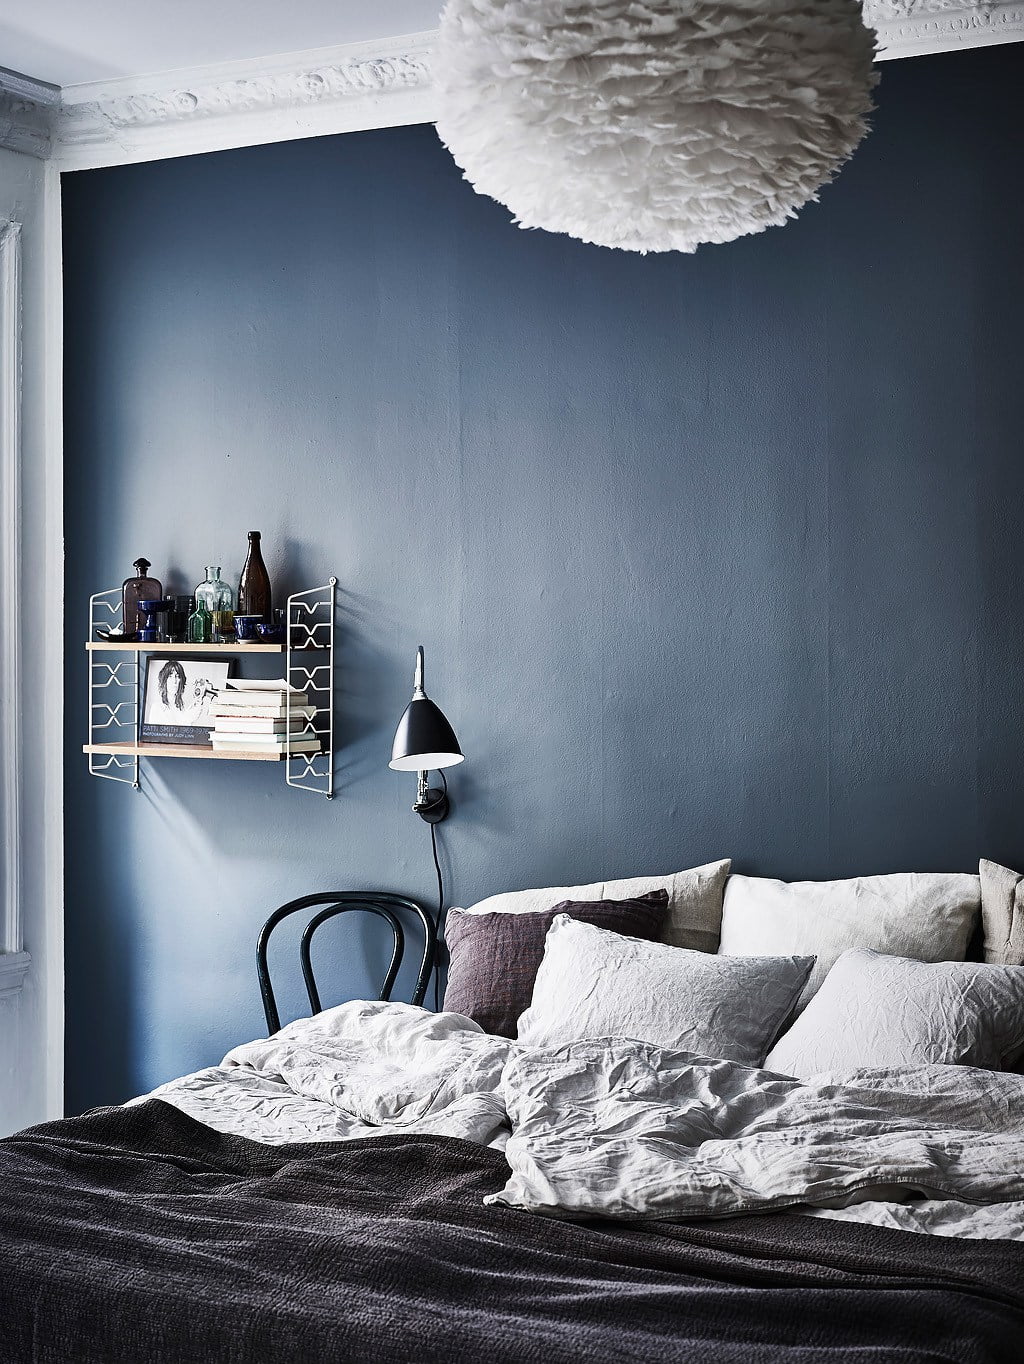

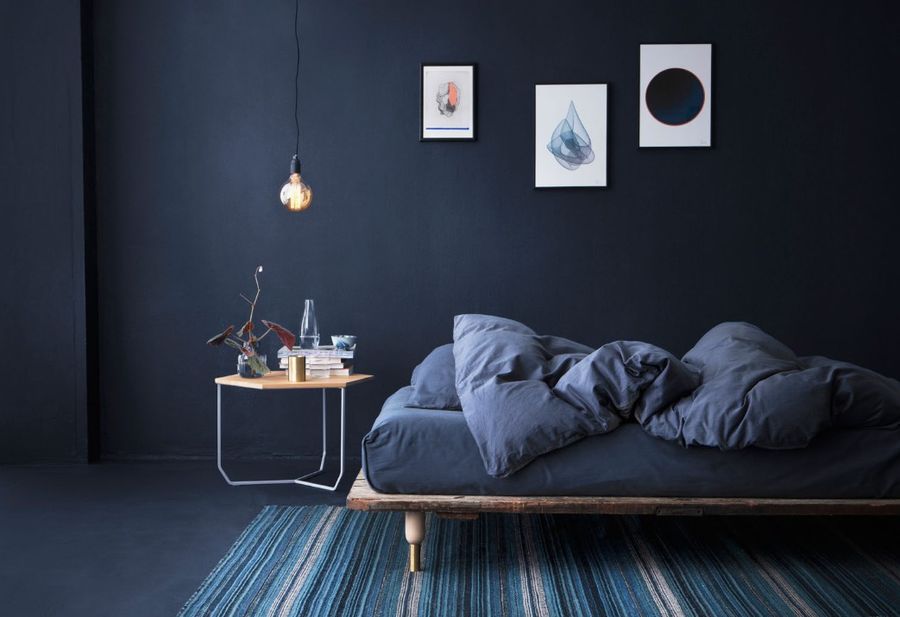
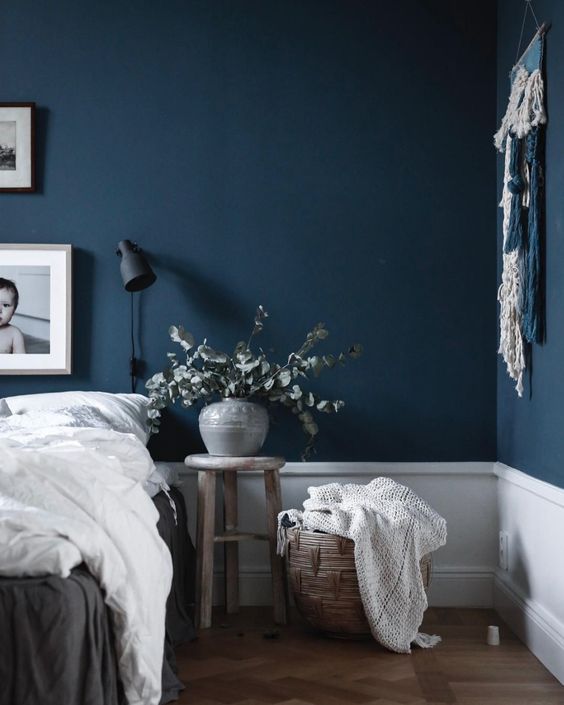
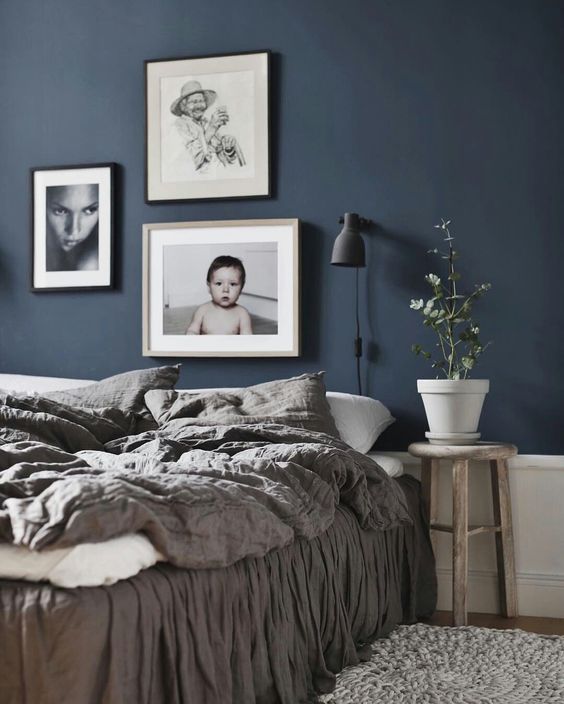


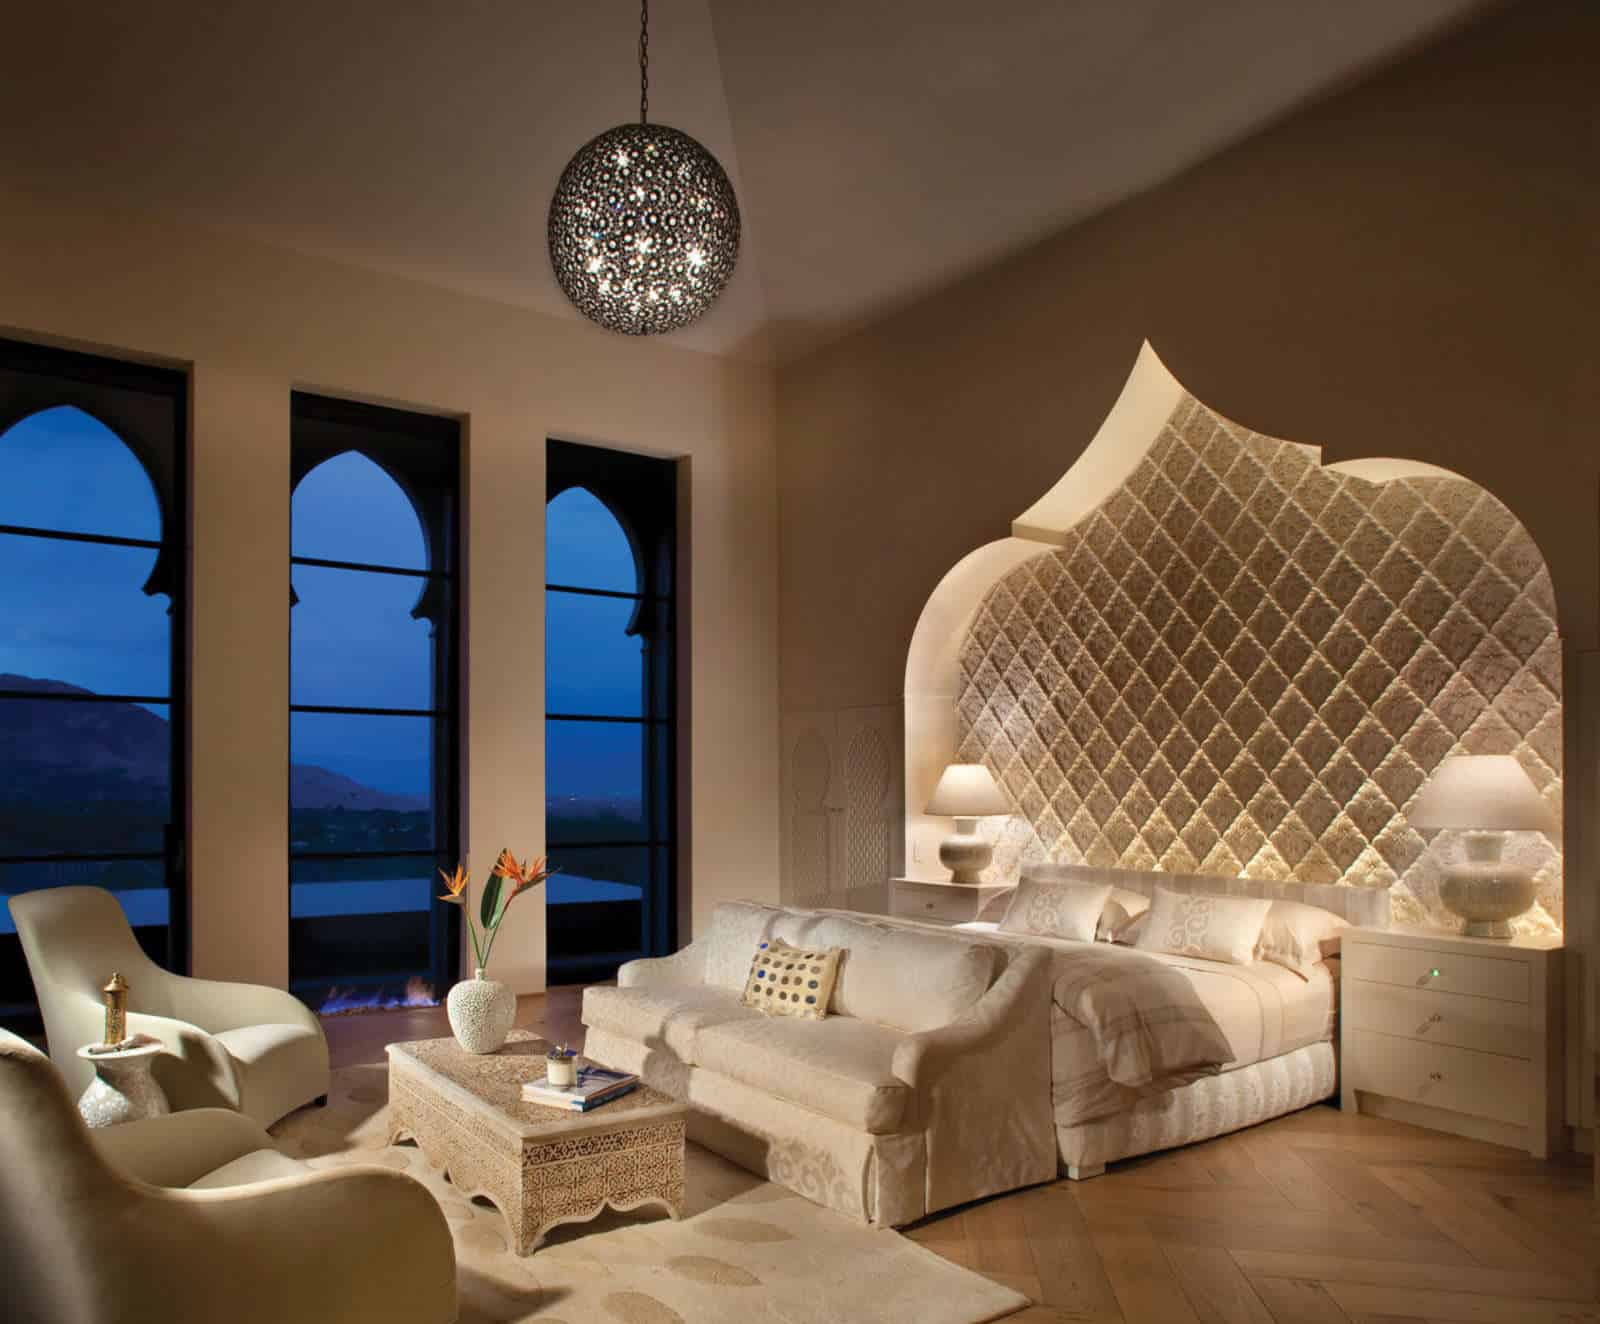
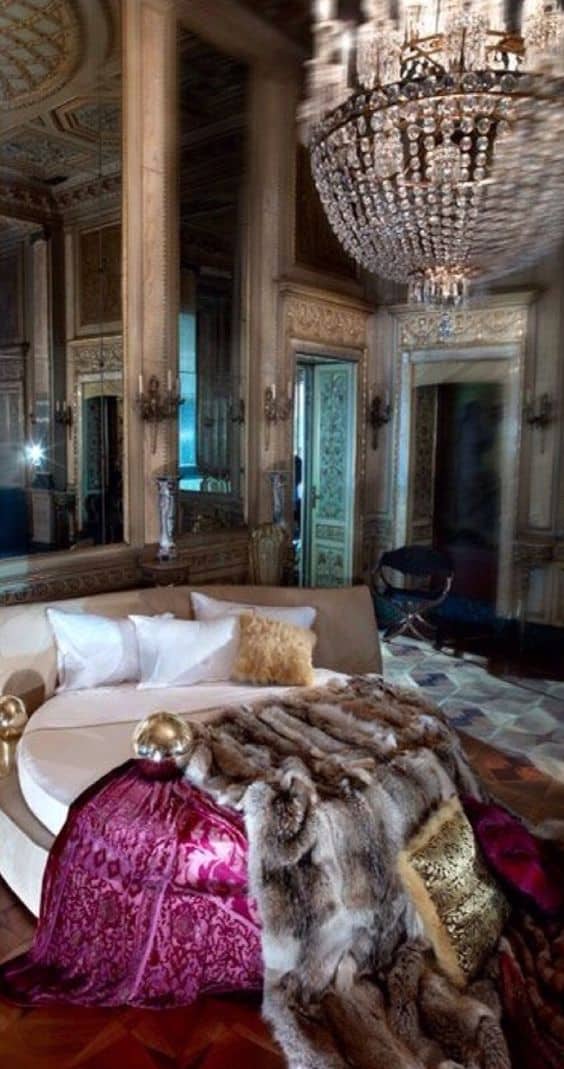
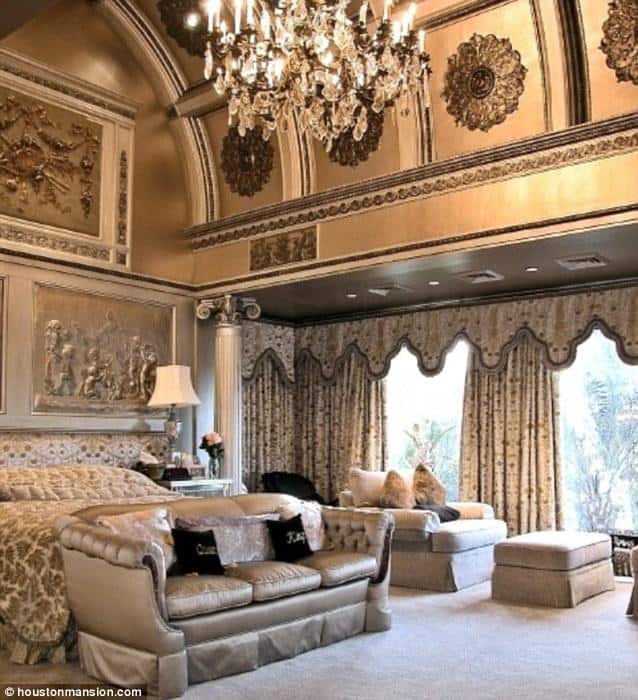
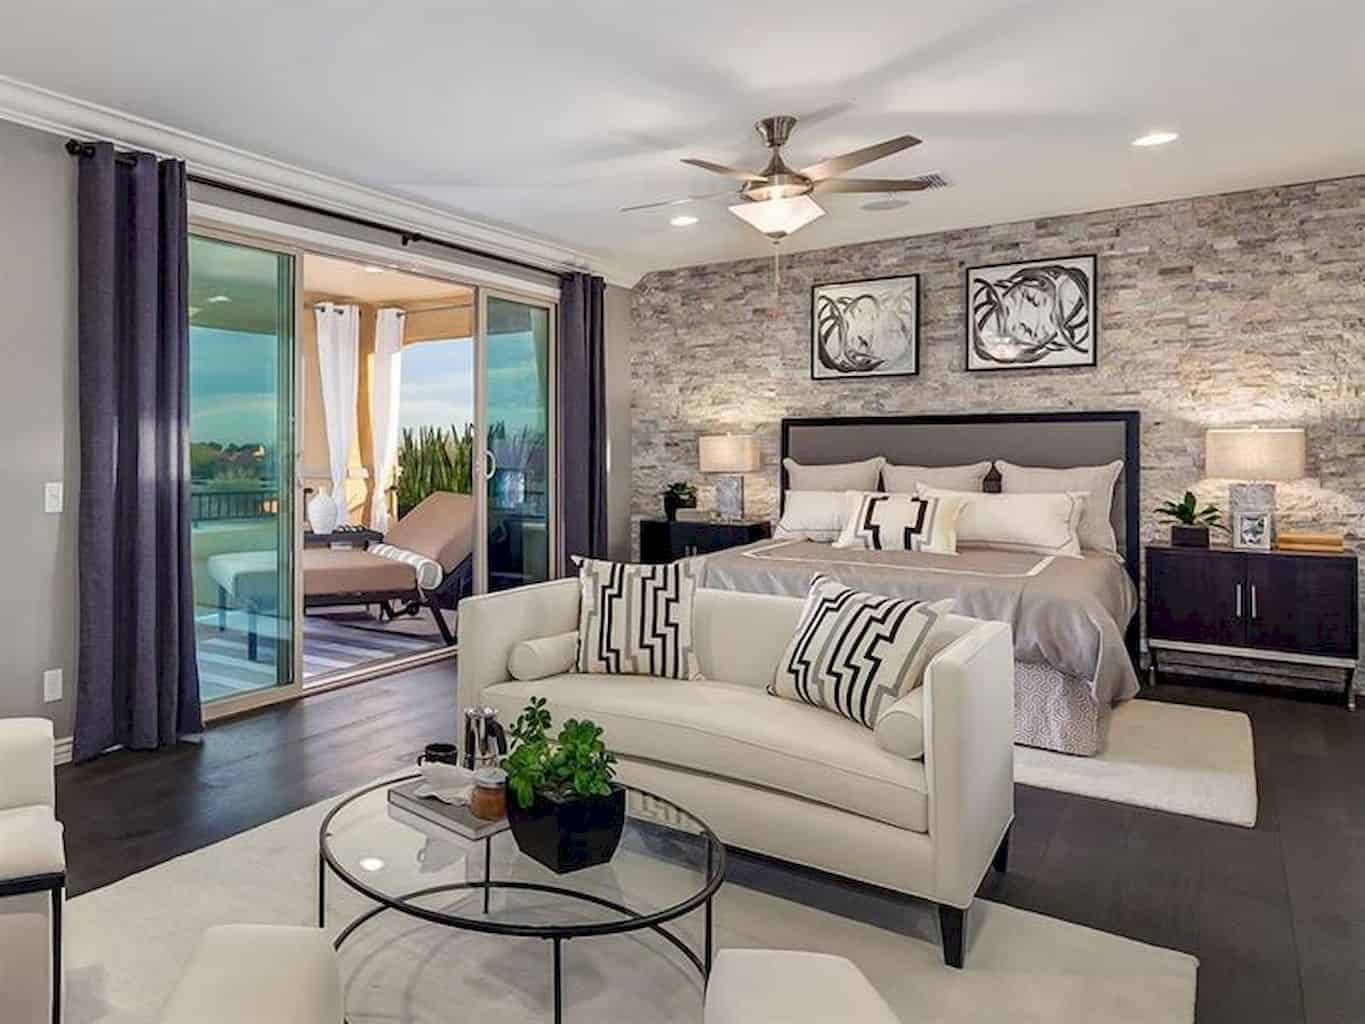
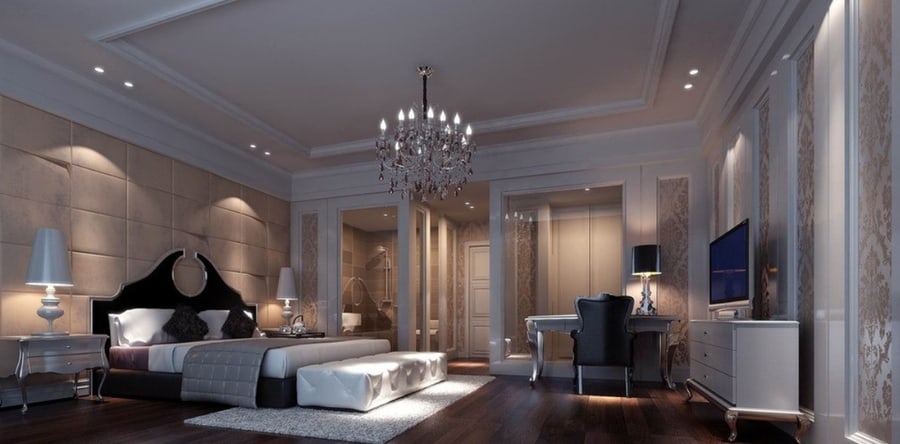
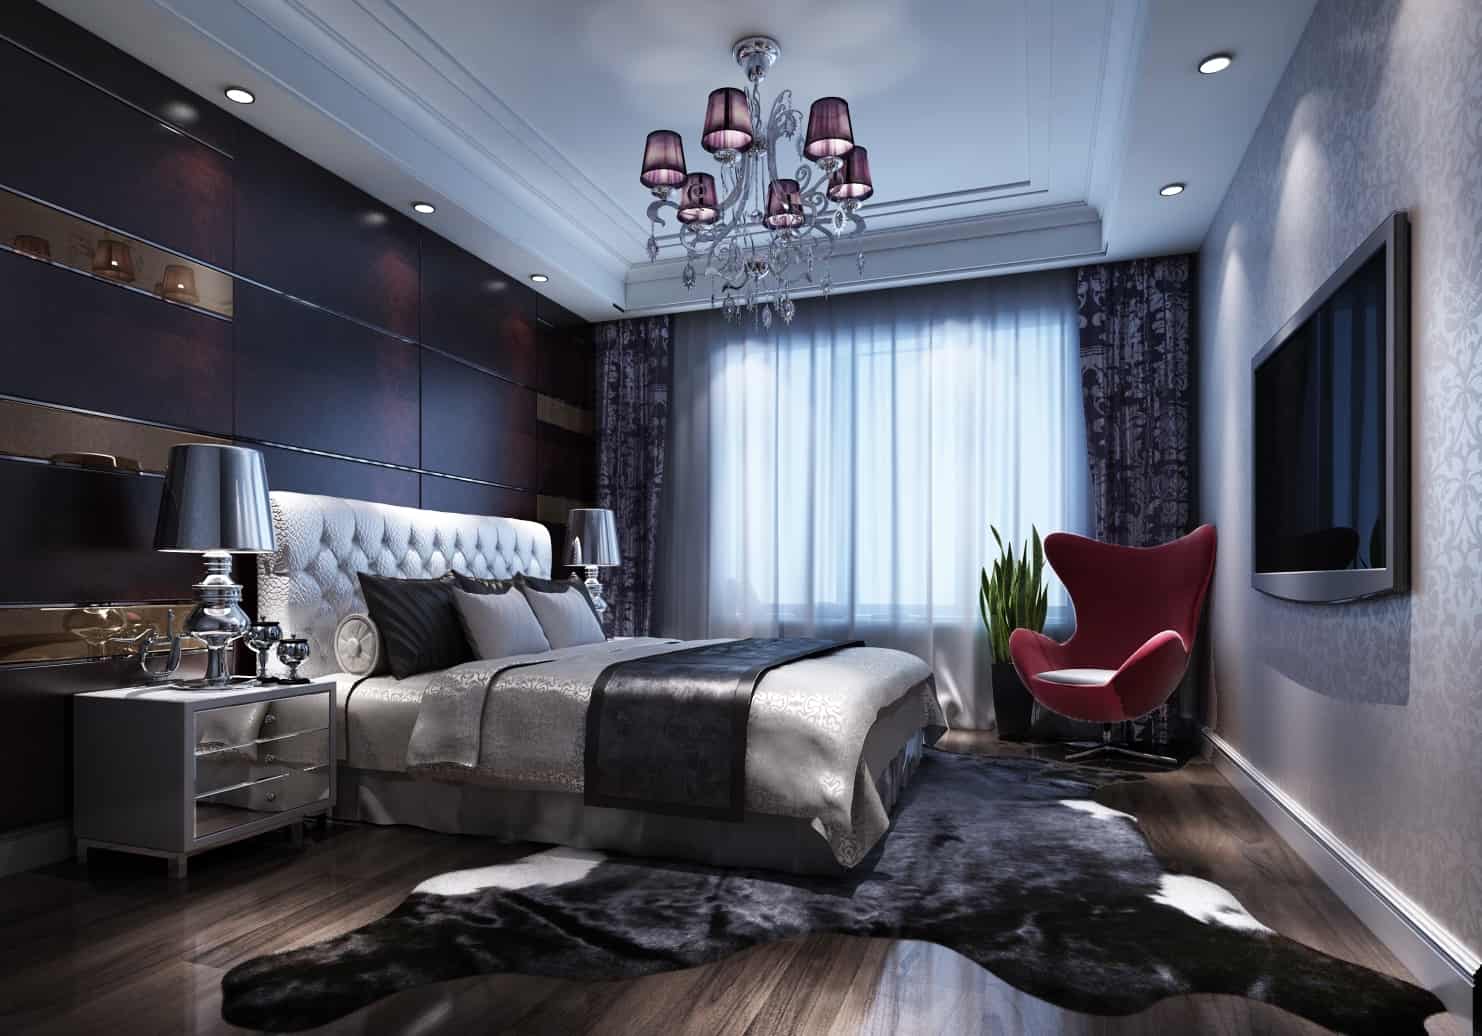
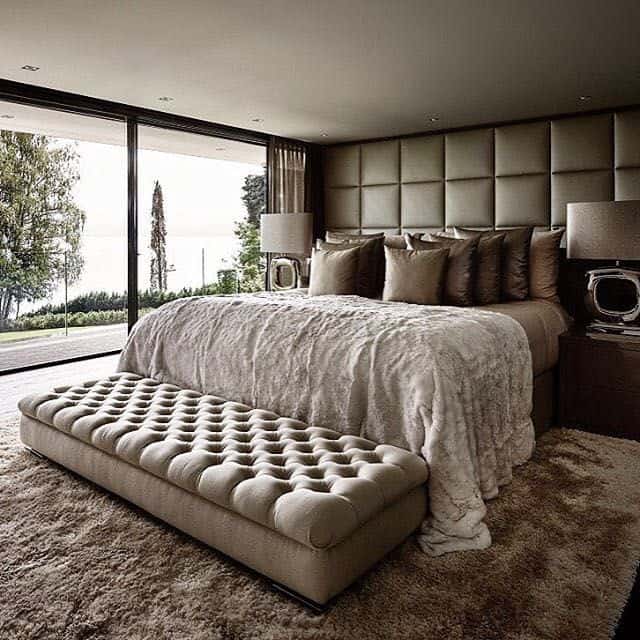
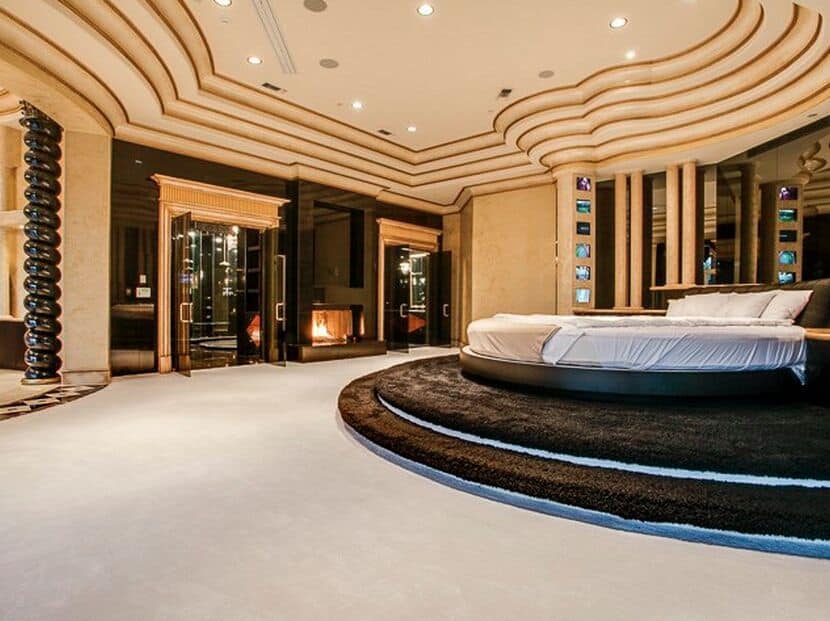
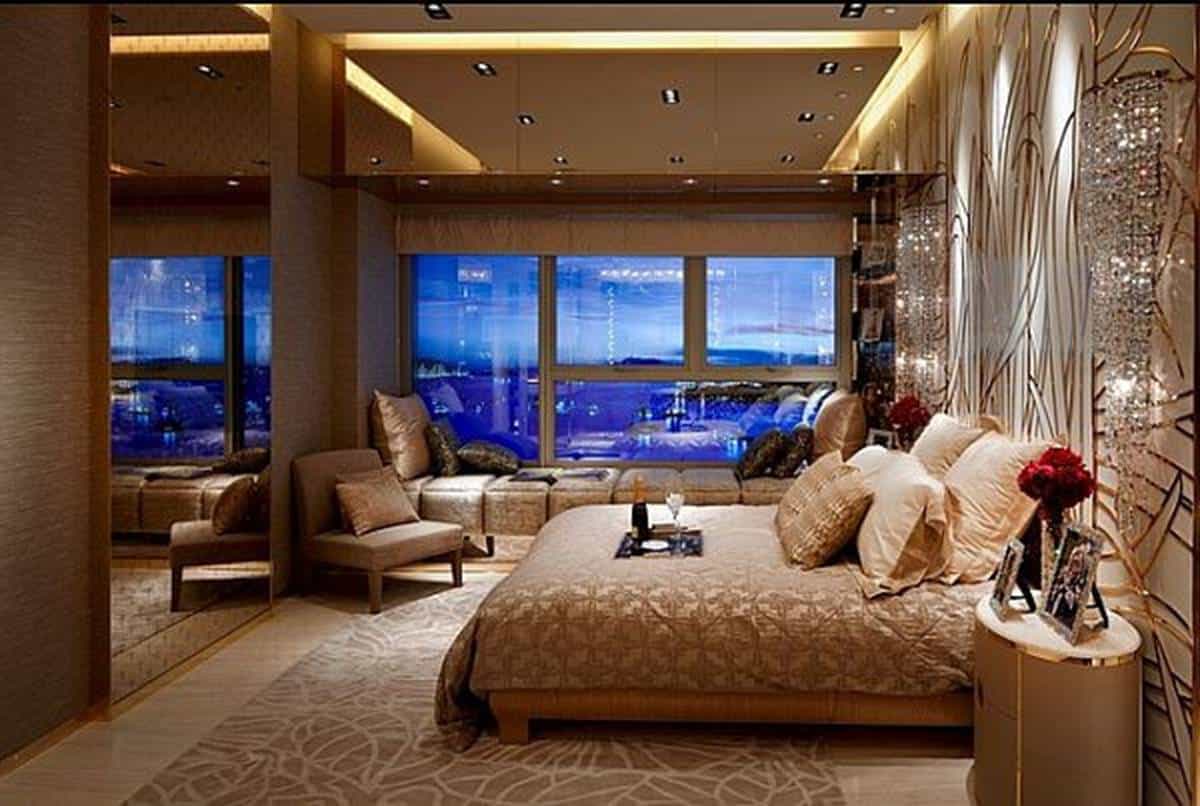
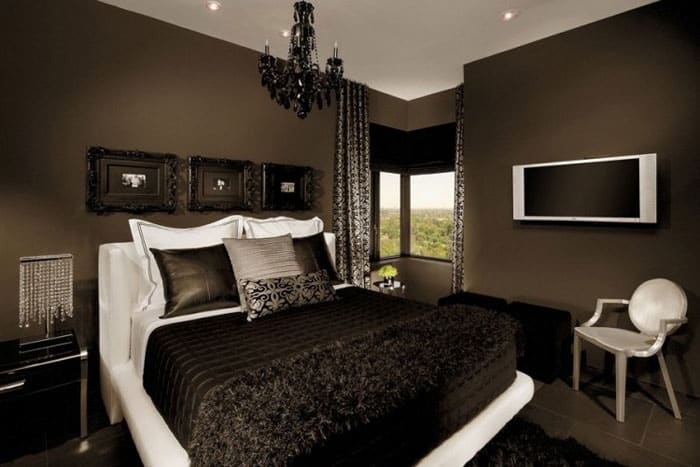
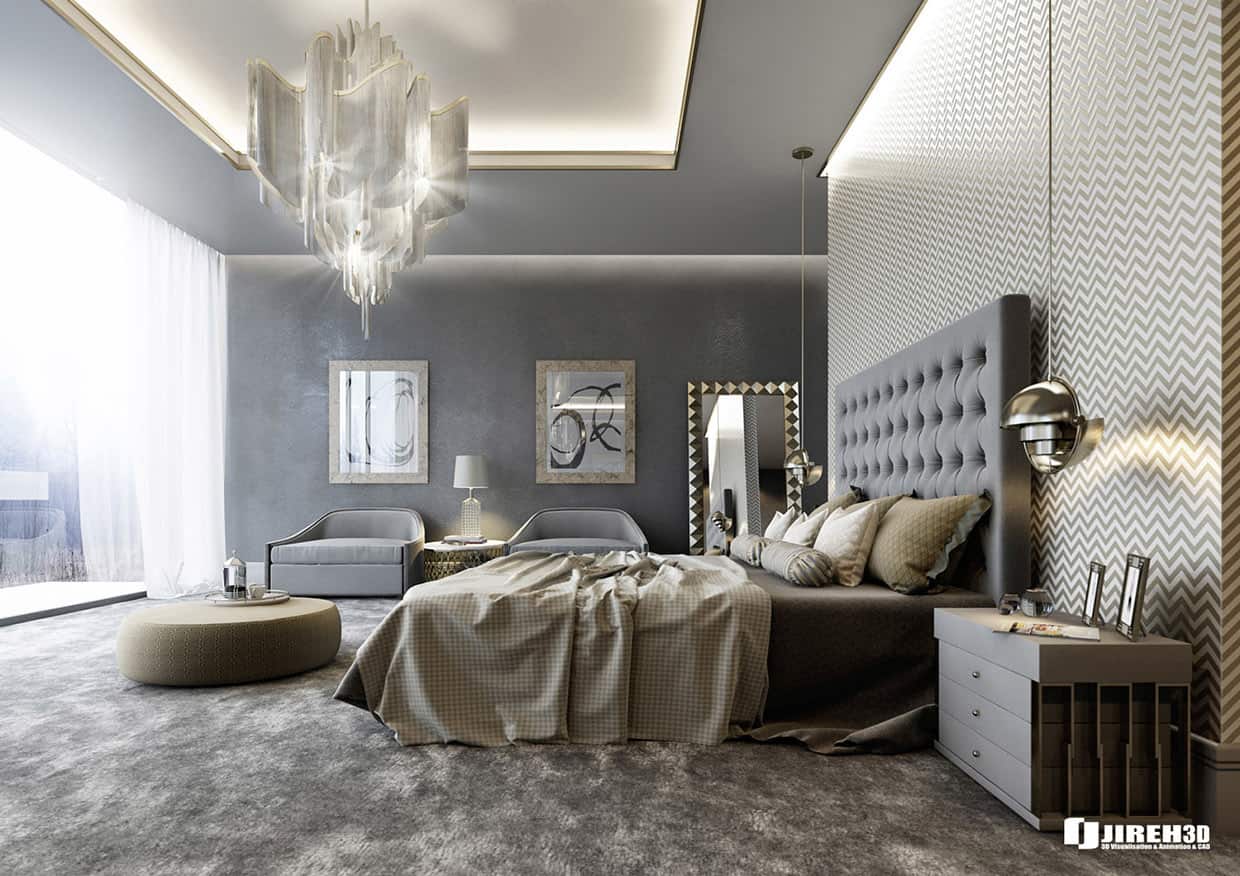
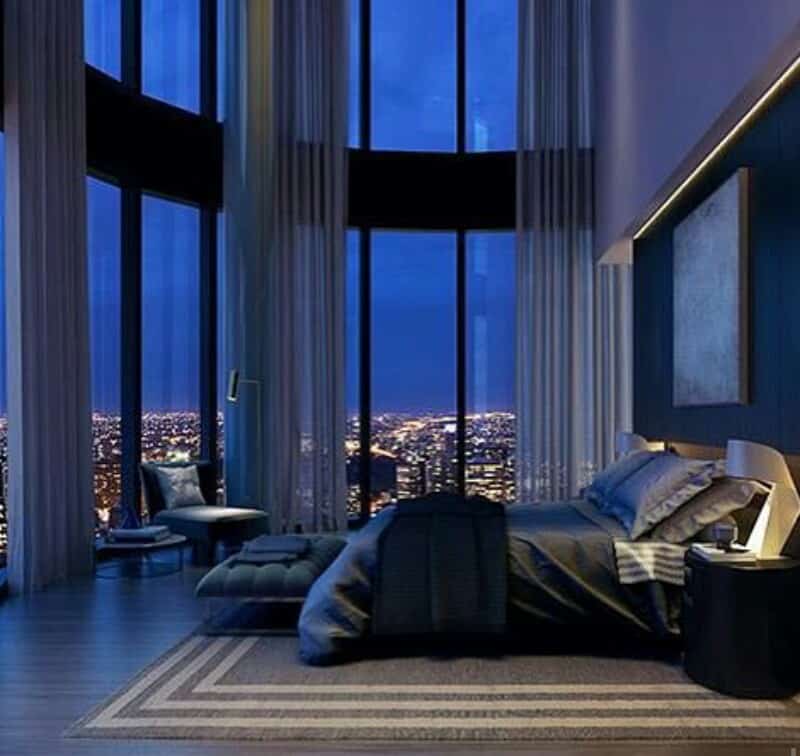
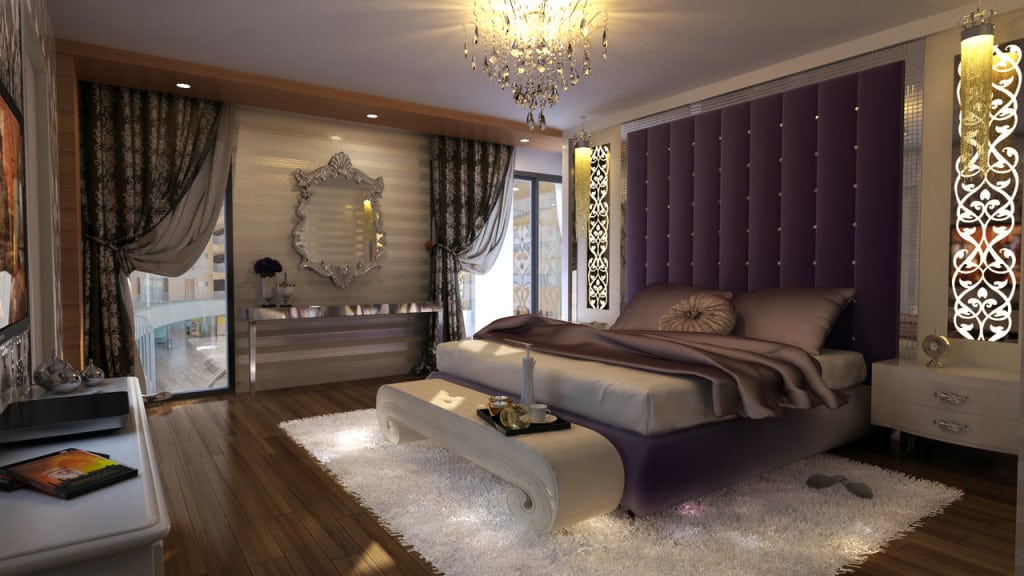
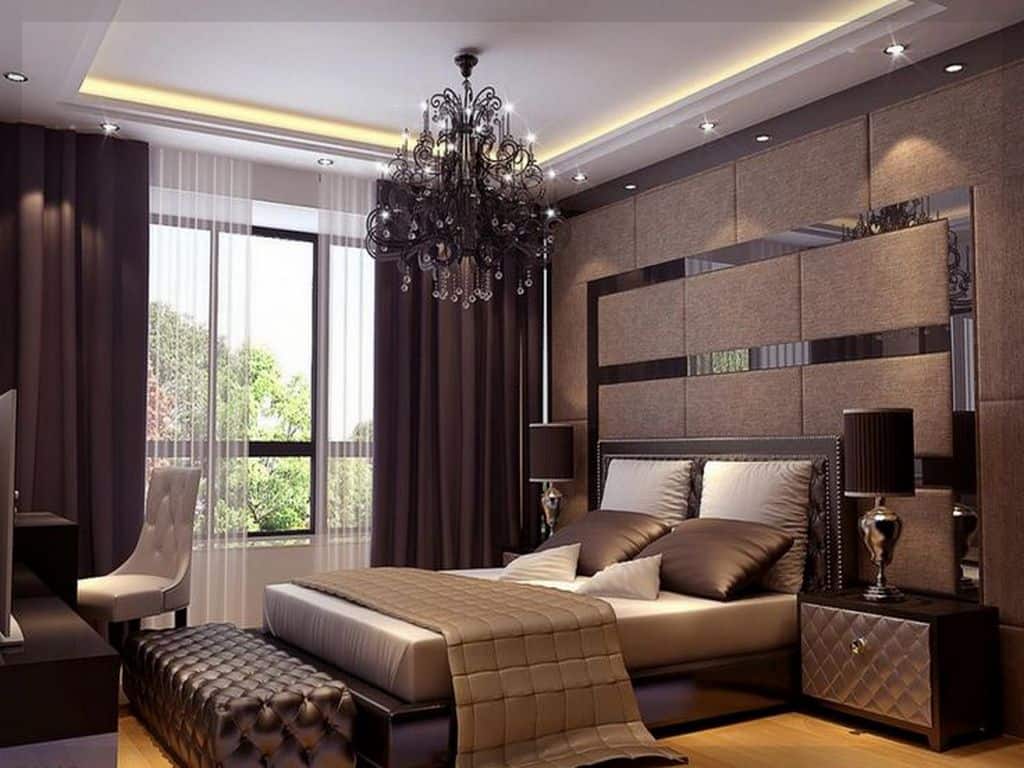
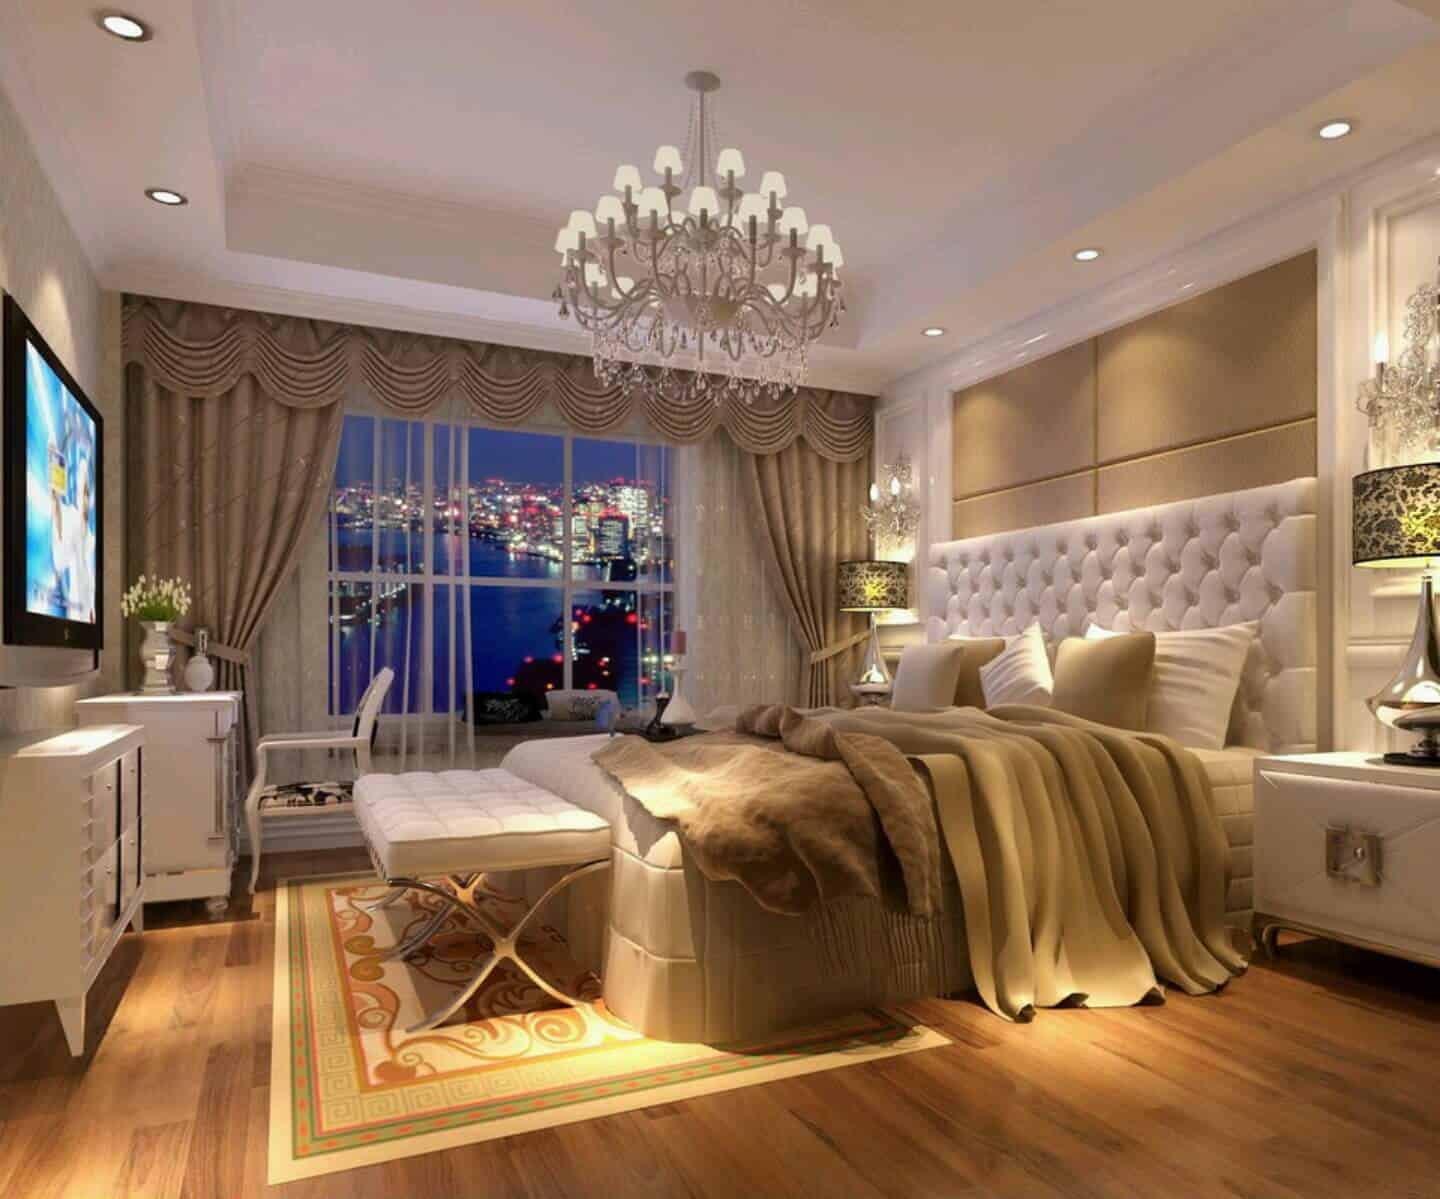
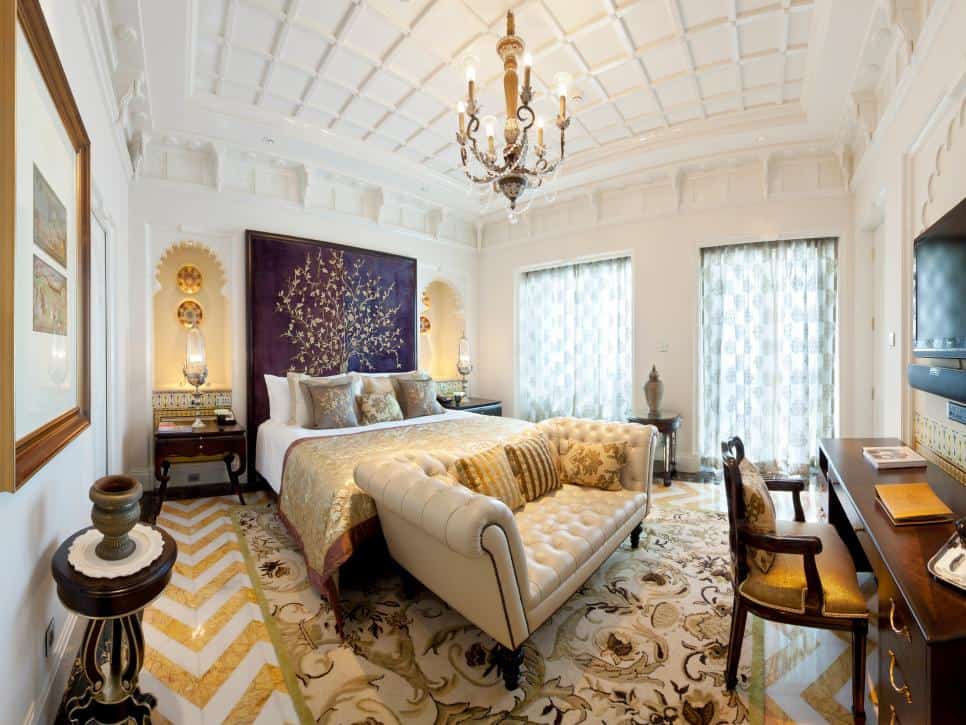
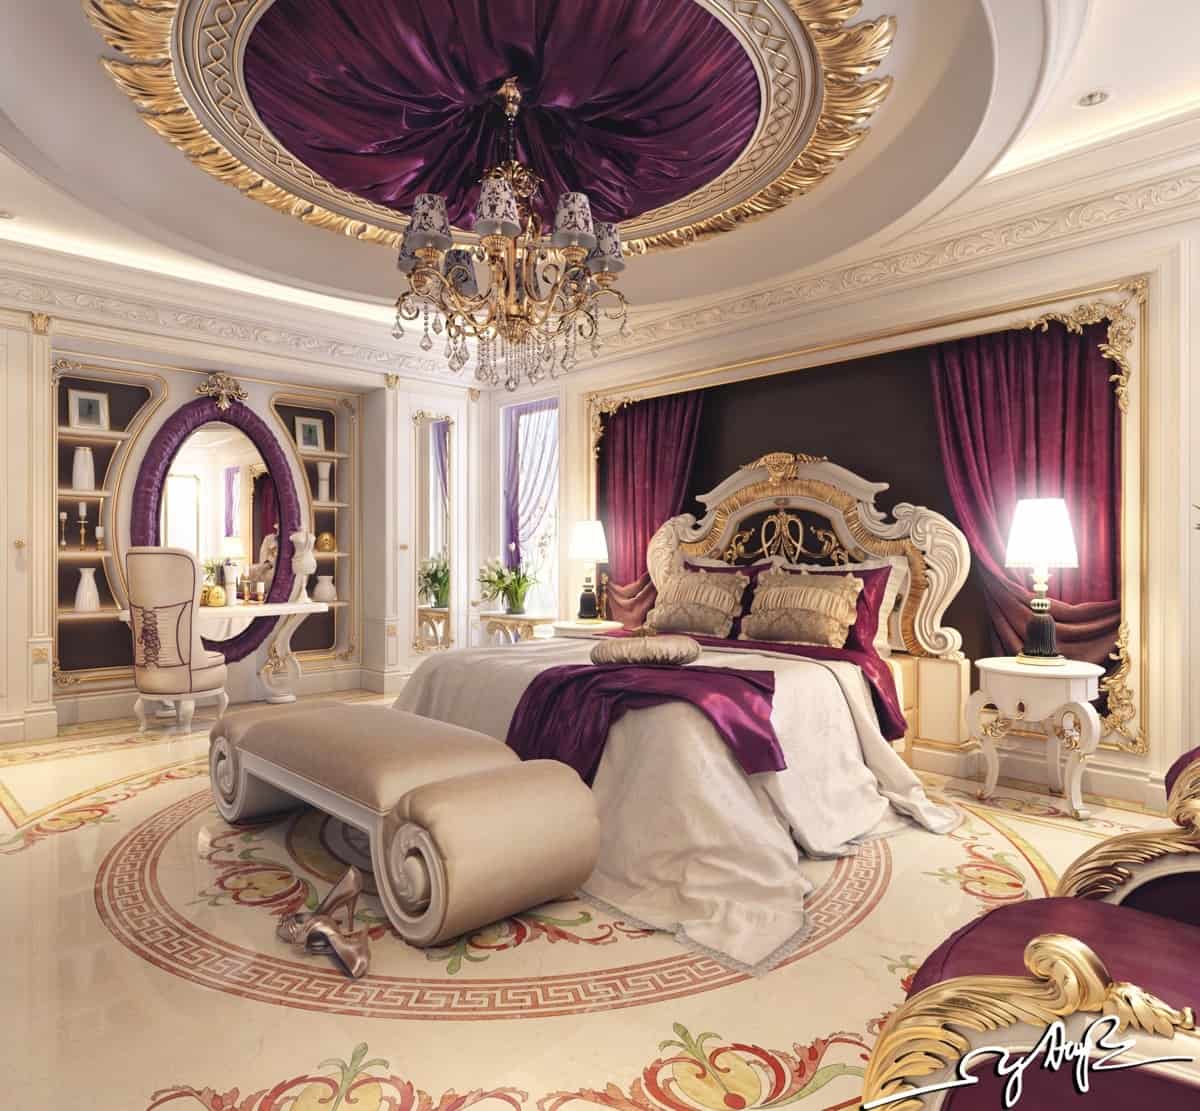
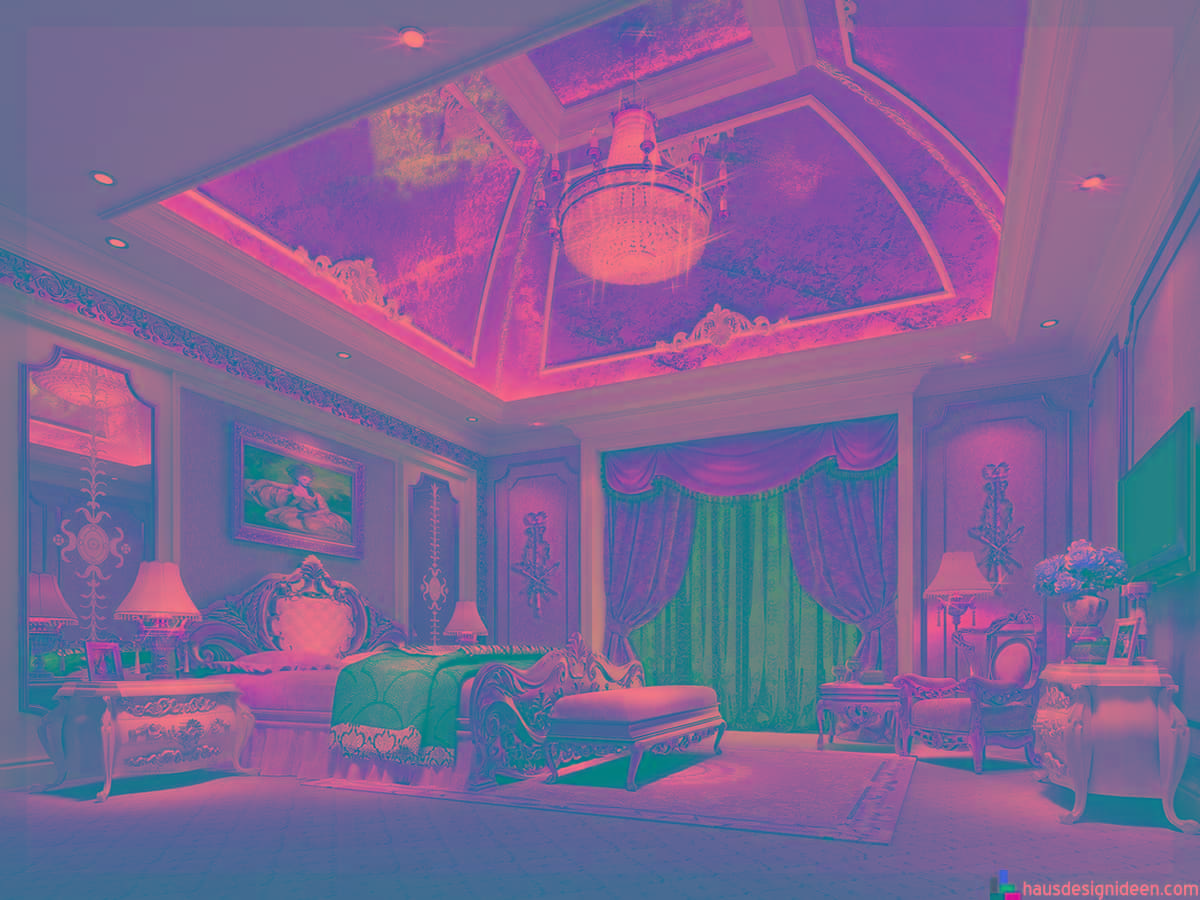
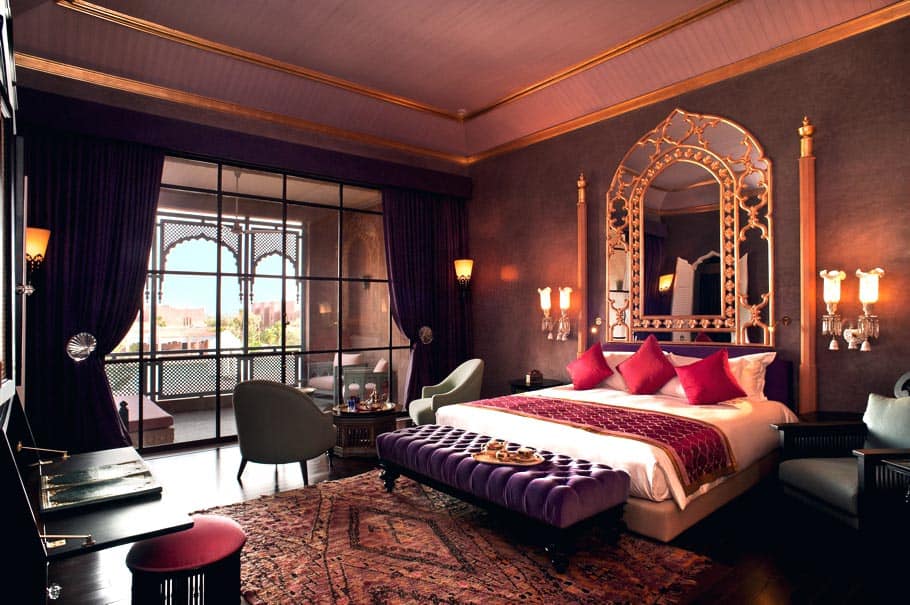

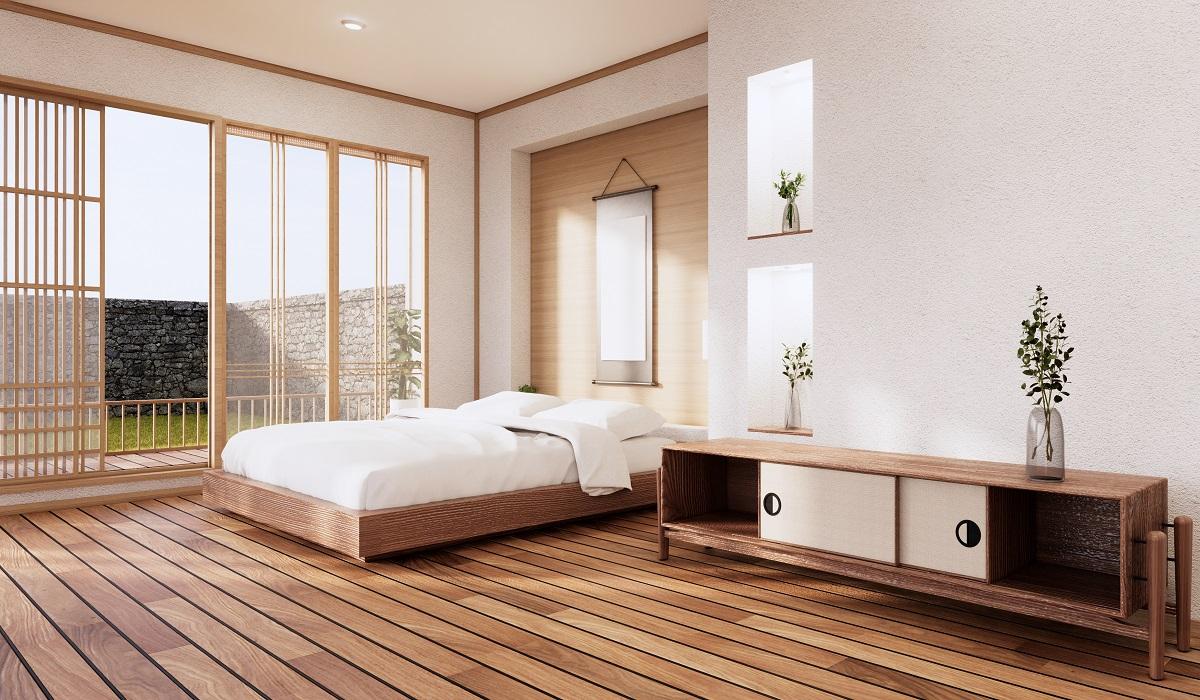
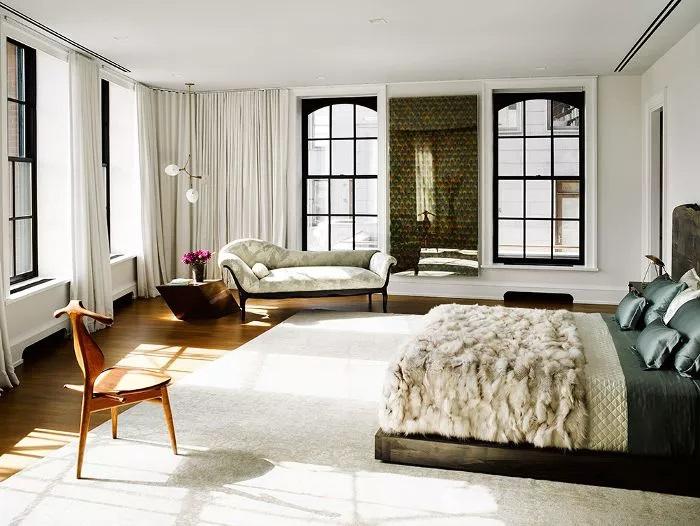
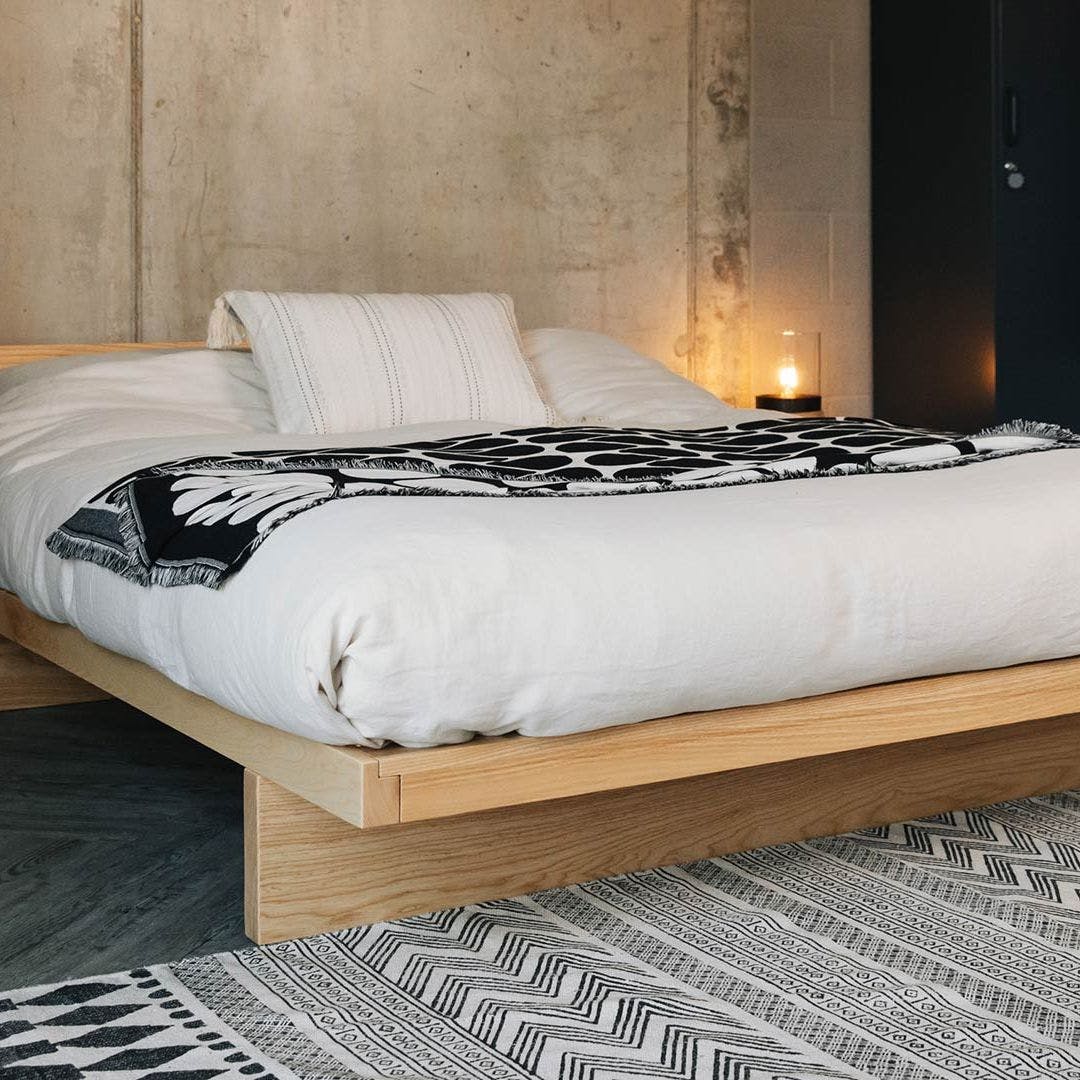
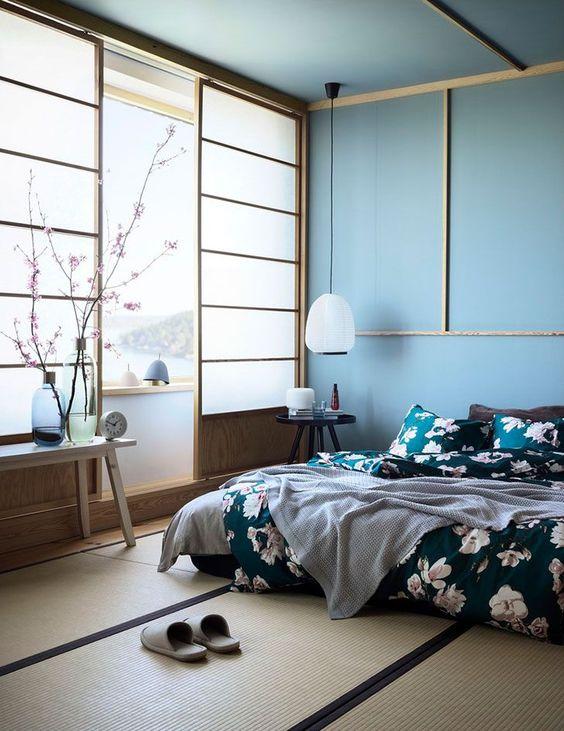


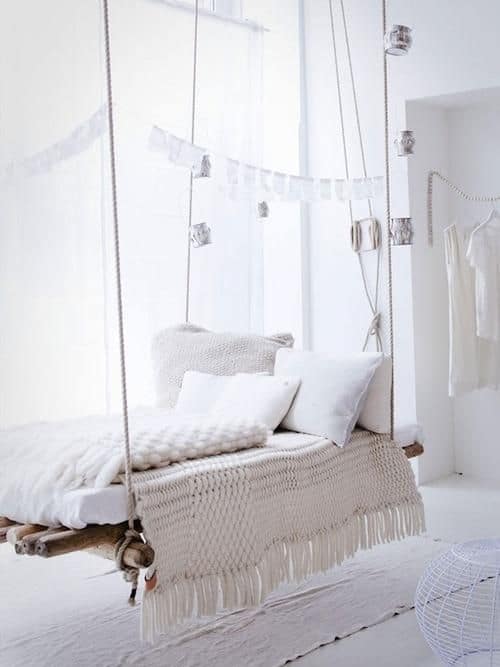
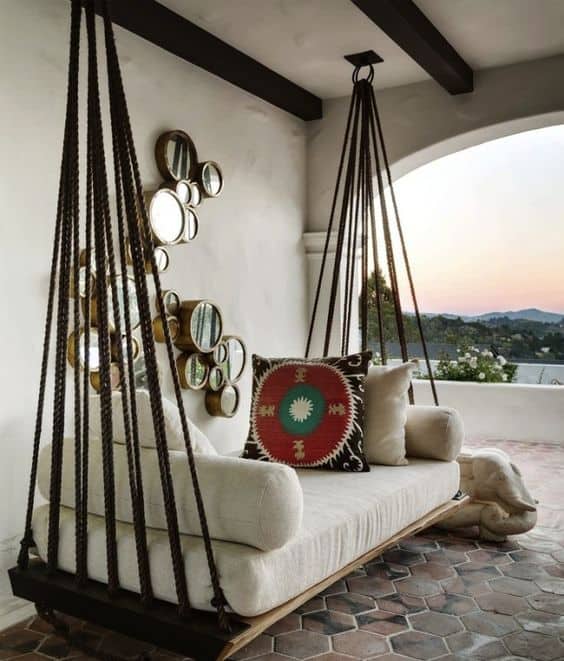
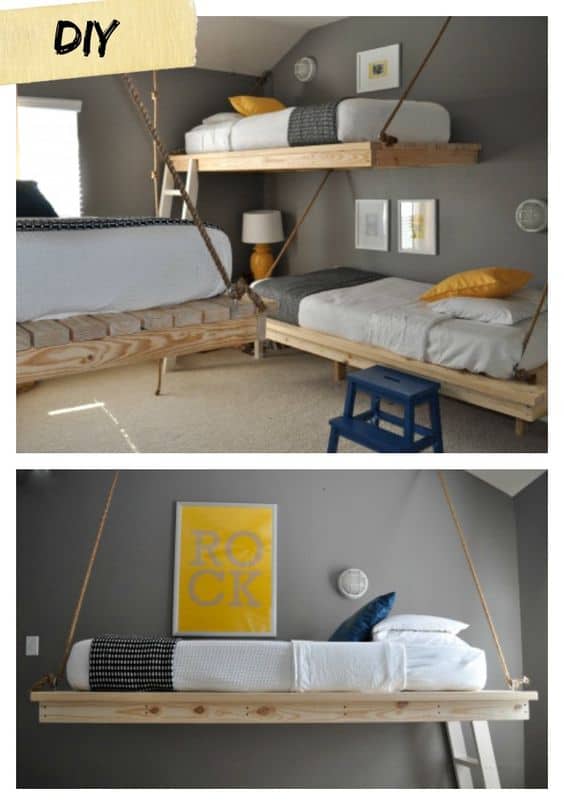
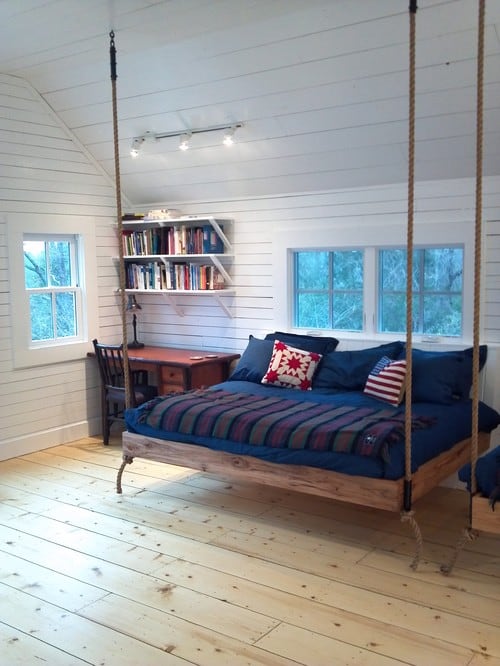
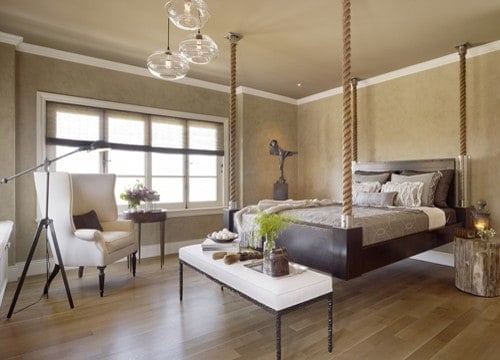
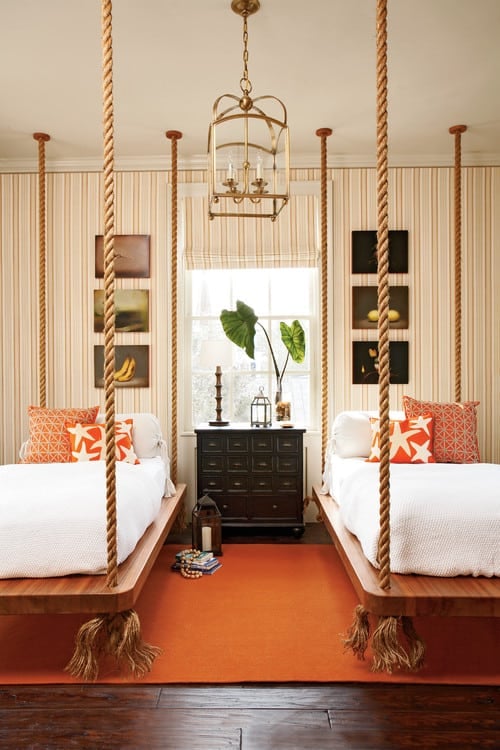
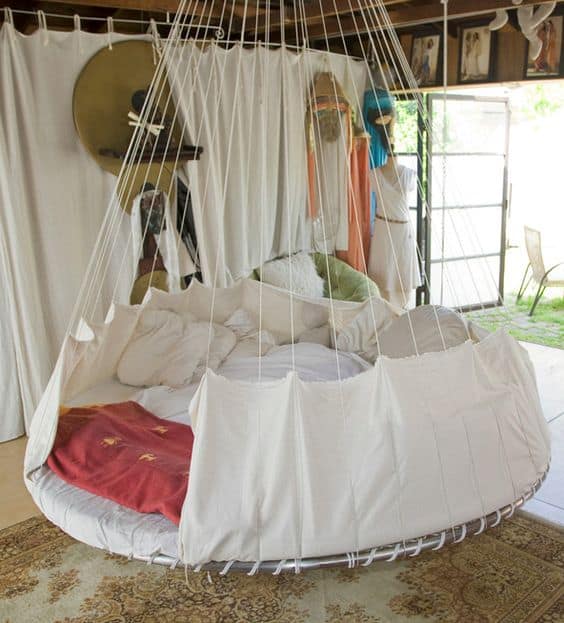
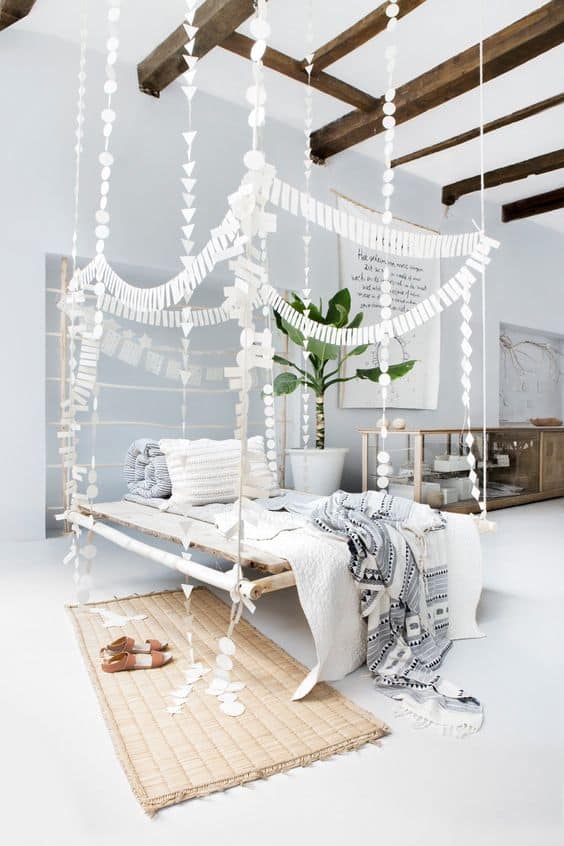
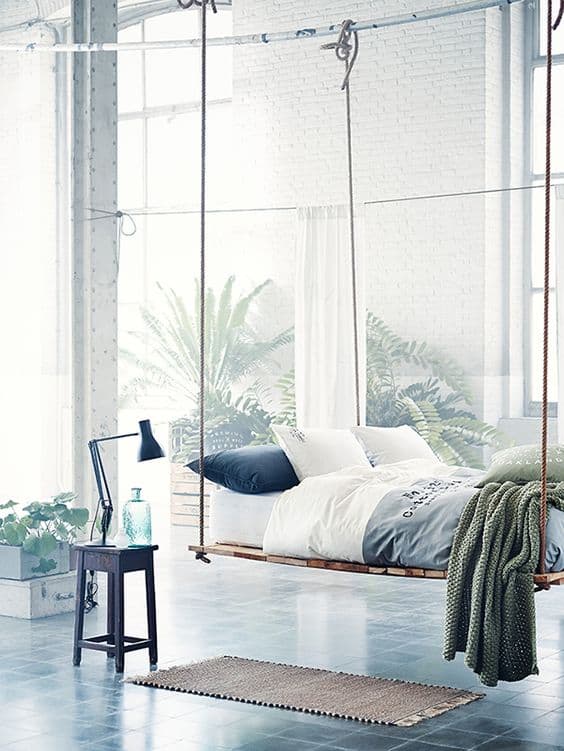
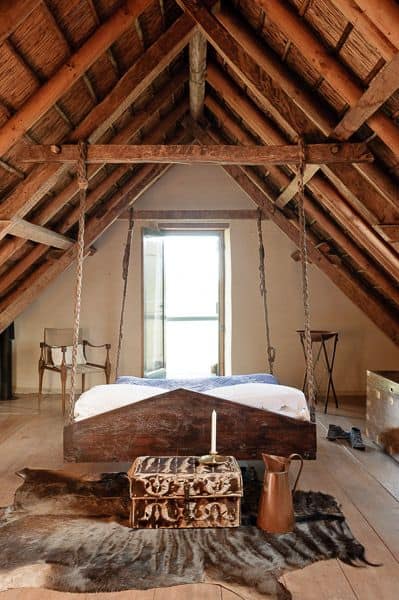
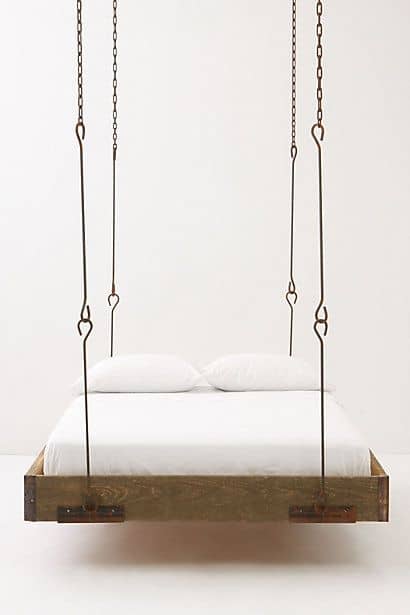
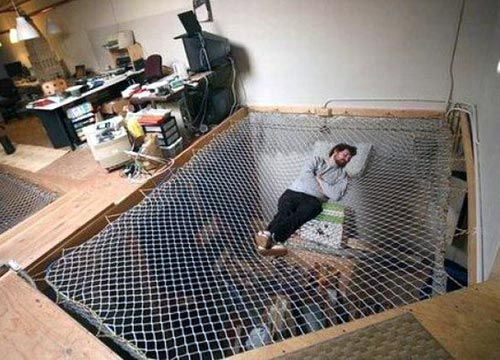
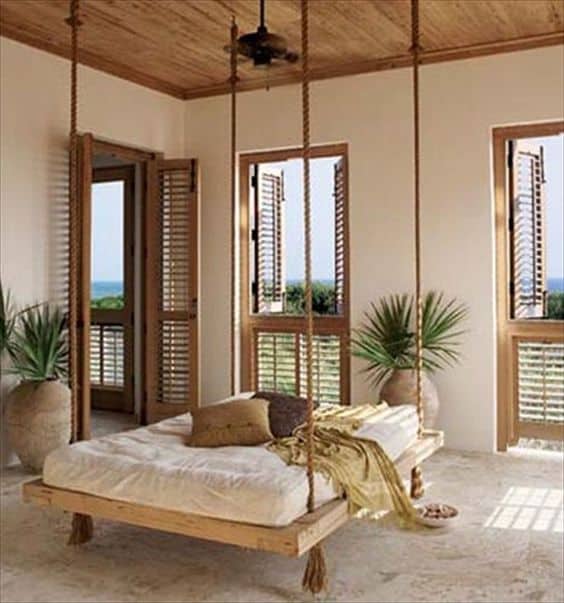
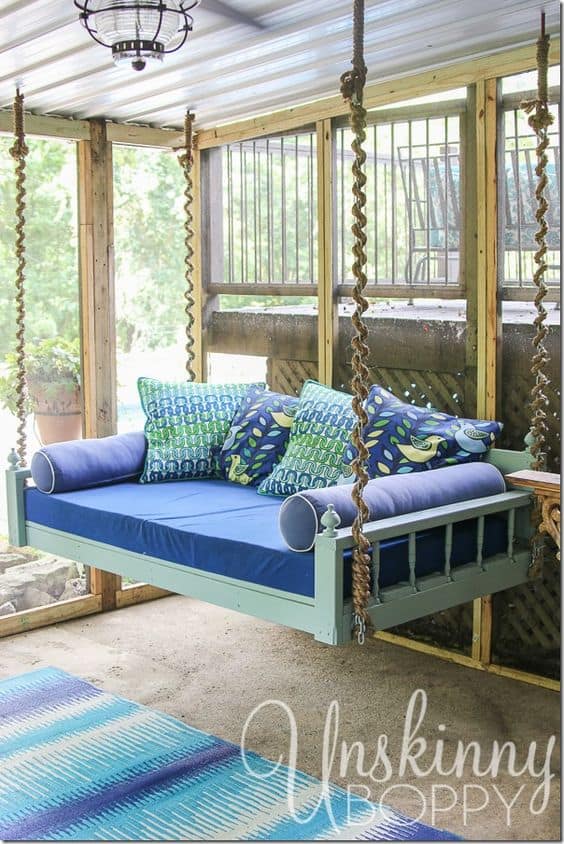


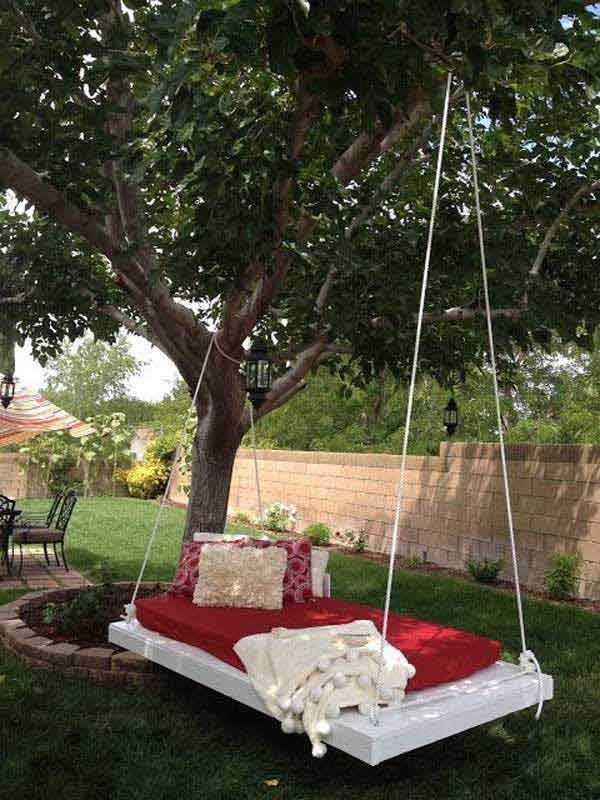

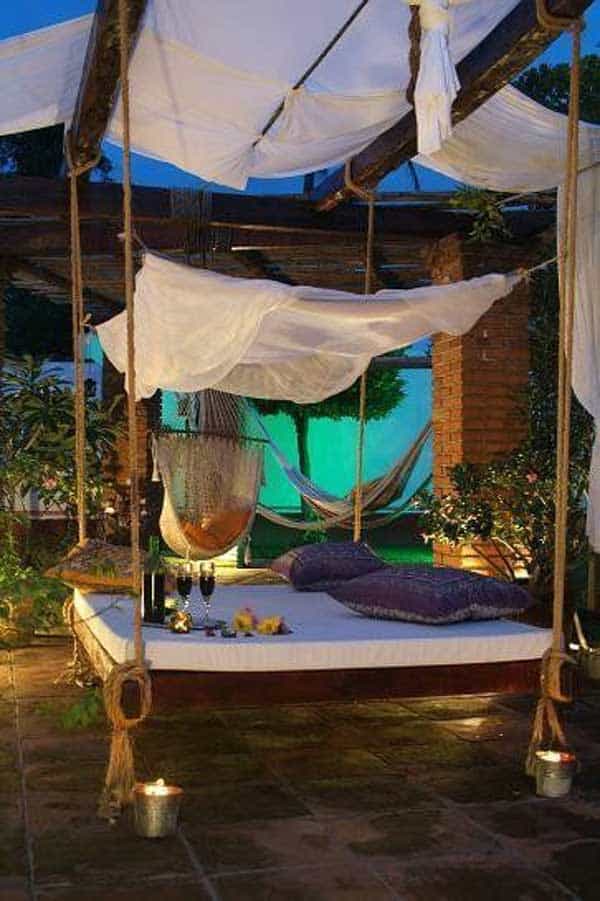
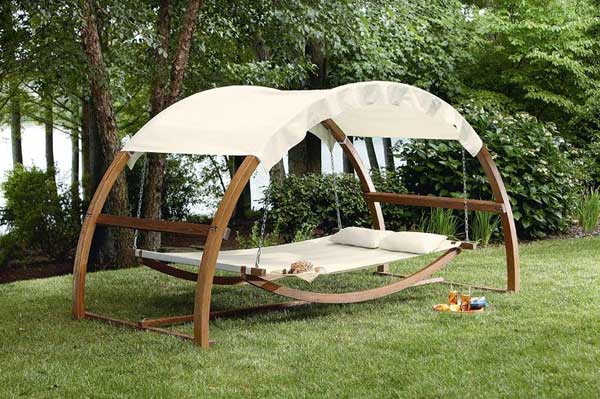
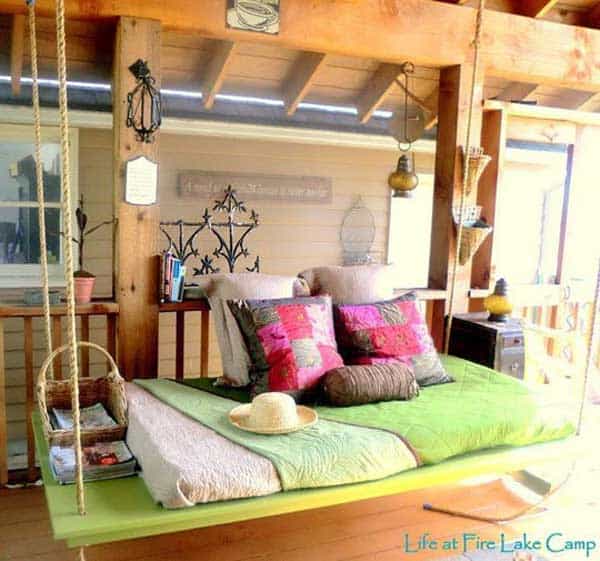
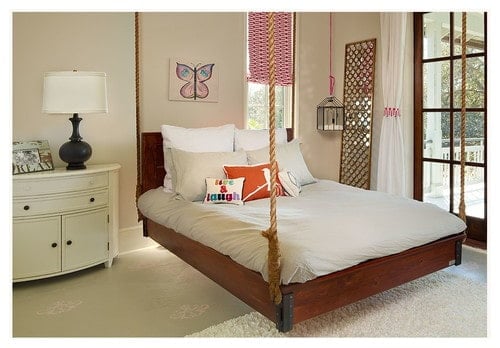


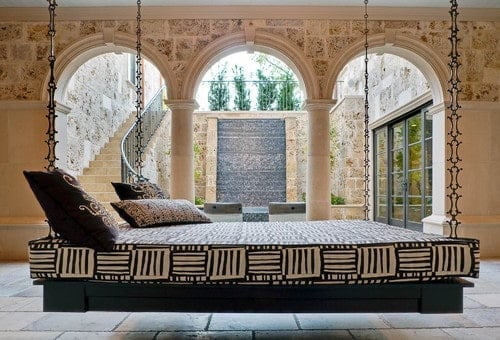
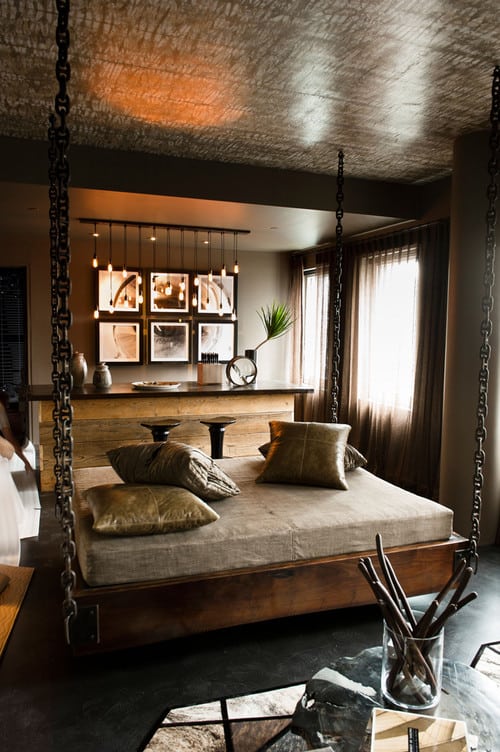


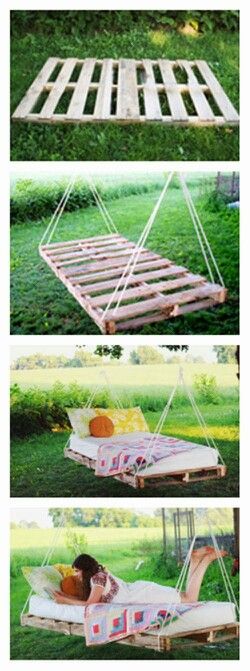

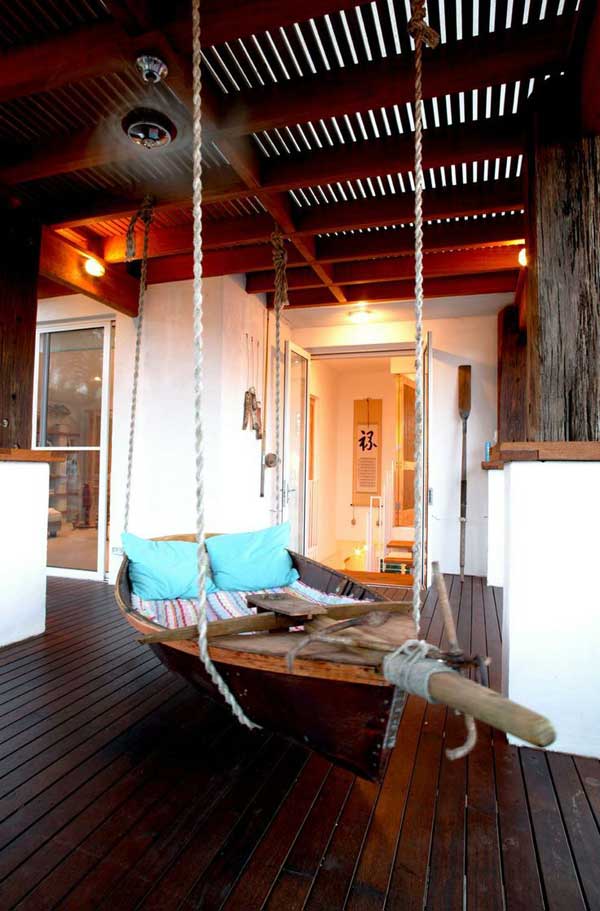
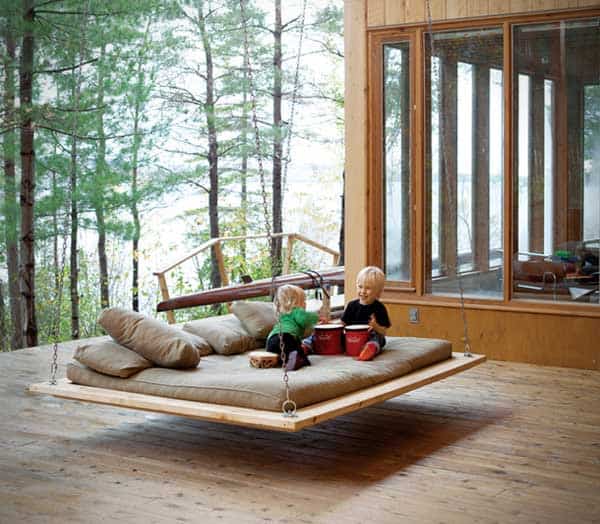

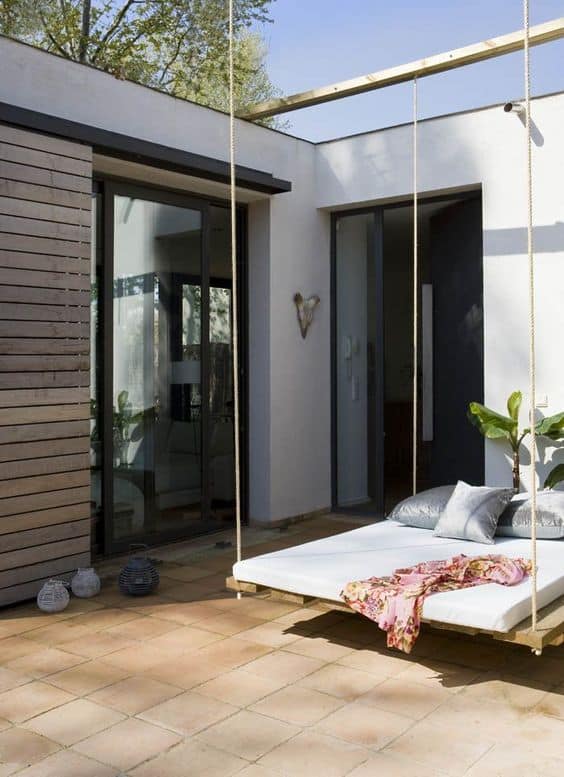

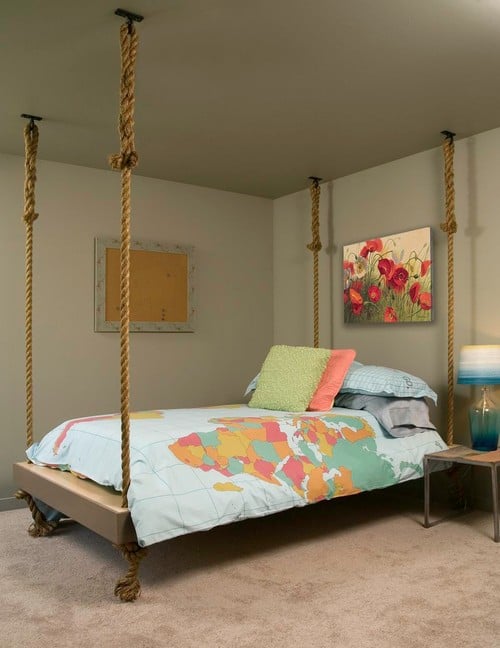
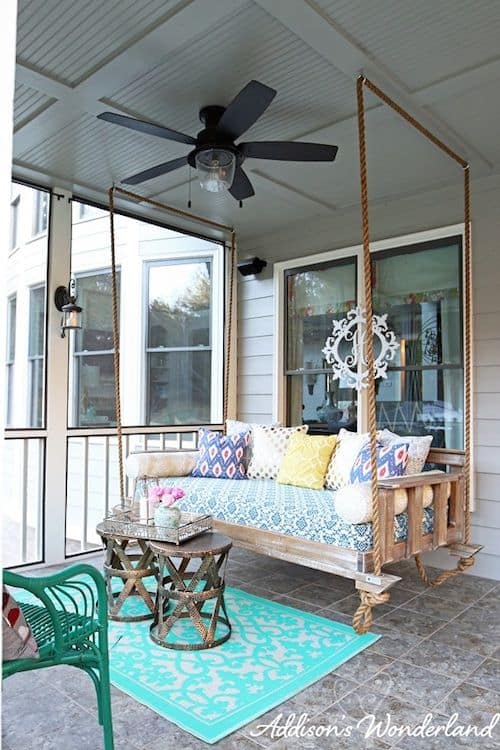
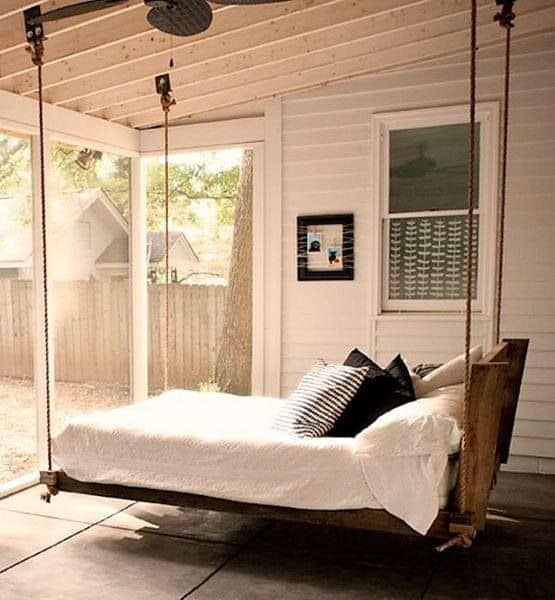
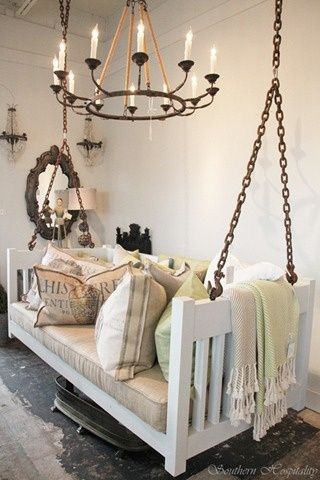
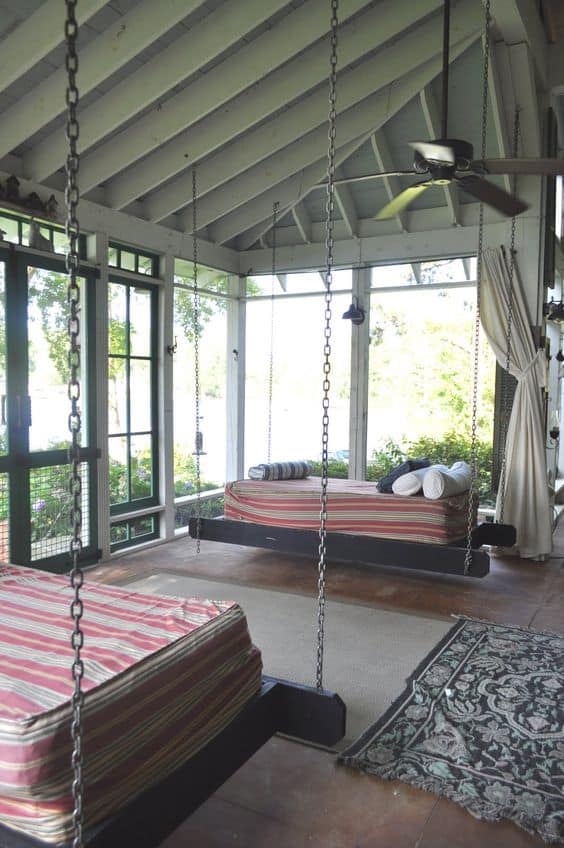


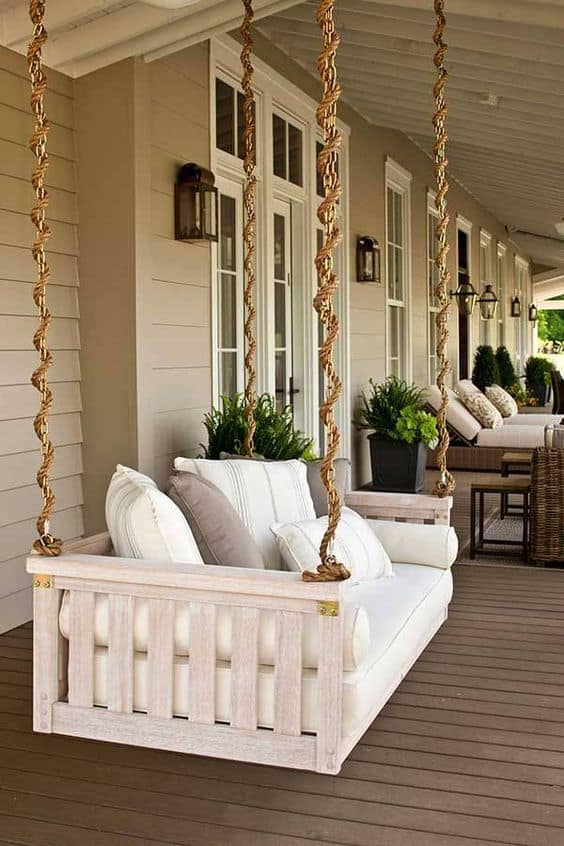
