In interior design the mirror is really quite a magical element, an element able to emphasize a design line by enchanting it with itself and enlightening with additional light. The possibilities opened in interior design by mirrors are unlimited yet few are the ones using them for aesthetics purposes.
A mirror today can take any shape and size and the variations between prices is not worth considering as it is insanely low when compared to the effect of the mirror in your design line. You can use them to reflect light in darker corners of your home, you can use them to emphasize the feeling of space by doubling the visual surface with a wall mirror and you can even use them to manipulate shadows and obtain visual control in certain points.
Spectacular DIY Mirror Design Ideas have been showcased below, 17 of them, all containing creativity and personality. Cast a glance at the collection below and leave your feedback in the comment section below.
#1 Driftwood Mirror DIY Project Showcasing Coziness and Warmth
What are your thoughts on these DIY Mirror Design Ideas? We would love to hear your opinion in the comment section below.
Today's society has placed women among men an equals, leading successful businesses, taking take of their families and home. But we are the more delicate, needy and prone to stress and over-exhaustion so we deserve to have a small piece of heaven in our bedrooms through design and a general serene atmosphere meant to relieve stress and relax our bodies and minds.
Designing a women's room is a very complex task. The possibilities are endless and multiple combinations generate different possibilities of the same idea.Today we have inclined towards a calm, floral fresh design line where small accents do count and change the hole ensemble. A touch of pink,a shade of silver or gold, a glass flower vase filled with wonderful roses and delicate white string light pendants will absolutely transform your bedroom into an oasis of relaxation and serenity. We invite you to browse though the 14 Lovely Girly DIY Room Decor Ideas gallery below and to leave your valuable feedback in the comment section placed at the end of the article.
1.String pendants in a delicate composition
2. Fun accents like a chalkboard used as an ever-changing painting
3. Your valuable fashion accessories exposed
4. Elegant composition that adds femininity to your interior design
5. Choose wisely where exactly to add pops of color
6. Flowers and glass is a wonderful must combination
How does your perfect refuge look like? We would love to hear your opinion on this subject in the comment section below.
3D Paper Art, Origami paper art or Kirigami paper art are three highly fascinating techniques that have evolved non stop since they first appeared. We can thank Japan for the paper, it originated there over a thousands years ago. Imagining just folded paper art, complex paper cutting or simply book curving is wrong as this segment of art has many other tehcniques and pieces of art created in various ways, the opportunities beeing almost endless.
Many intricate paper designs have been hosted by museums and international exhaubitious throughout the world this enaging more and more individuals to follow this fascinating art as a way of expressing themselves .
Further on 15 artists have been showcased, each with their individual design line and techniques. We invite you to throw a look and tell us which you like better.
Creative Examples of 3D Paper Art
Examples of 3DPaper Art by Cheong-ah Hwang
Examples of 3DPaper Art Sculptures by Eric Joisel
Examples of 3D Paper Art Sculptures by Peter Callesen
A room can change its atmosphere depending on the wall painting and color scheme chosen. But with so many options what should you choose? Well, there is no right answer. Everything depends on your mood and personality. Warm colors equal a cozy atmosphere while a bold red or black room is more likely to exude an agitated feel. It's all up to you and your own vision of that certain room. But always keep in mind the way it will connect with the rest of your home.The ideas featured below range from very tame and normal to right away crazy. In those cases, if you like those options, limit the wall painting to one room of the house in order to not overdue everything.Some creation use wallpaper but we loved them so much we just had to feature them. Feel free to express yourself through wall painting ideas and try to be original and not necessary copy something you see in a magazine. How much you try it's unlikely to obtain the same result. Thus improvise and let your imagination run wild. We have prepared a collection of 100+ Interior Wall Painting Ideas You Will Love. Enjoy!
100+ Interior Wall Painting Ideas You Will Love
In this world, there are thousands of different homes and happily, they`re all different. I live in a tiny home, a small apartment in the capital of a certain country and I feel that my home is far cozier and warmer than various other big ones. Small apartment designs are in my opinion in no way worse than regular ones. A small space challenges you and imposes a different lifestyle in which you keep your surroundings clean, smooth, and always uncluttered whilst not sacrificing coziness and warmth.
In a small apartment design furniture will enhance its versatility and functionality beyond recognition, an organized small apartment can store a whole lot of realized well and we do see such examples every single day. With this thought in mind, we are going to present further a superb idea that helped us a whole lot in our design: foldable desks and hideaway desks.
Hidden/Camouflaged Desks
For most of us, this solution is ideal without a doubt: space-saving hideaways desks, smoothly camouflaged behind a closet or a dresser hiding away the computing unit that should not be seen by anyone or a simple small DIY desk that you have wanted so much to be yours and yours only. Bellow a small and efficient little desk entitled Junior Living has been showcased.
Hideaway Home Office in a Immaculate White Stark Small Space Interior Design
White Folding Desk
All these great desks, including your own, can look smooth and clean for your guests and friends behind an armoire whilst it remains colorful, vivid, and joyful for your taste. The clean aspect of a room will also enhance the feeling of space making it seem enlarged.
Warm White Fold Down Desk
Save space as much as possible with the floating shelf below can be opened and transformed into a wonderful small desk. There is also a small storage area to hide away necessary things that can come in handy quite often. It can be used in multiple setups to match your desires. [Via KMillar]
Minimalist Small Pull Out Desk
A small red accent will be a bold accent, an instant focal point for anyone that walks in the room. This technique enhances the feeling of space as well. The red refresh the design below as well, diminishing the frigid cold feel of the room and making it more joyful and personal. When closed, the small desk design fits perfectly into the scene through the vintage-like cabinet design.
It also has a small lock that will ensure the privacy of your correspondence or simply protection for sensitive materials that must be hidden from sight. [Via Country Living]
Small Red Fold Down Desk by the Window
Below an extraordinary piece of furniture embodies a wine rack, a bookshelf, and a desk at the same time, a very creative use of space and furniture for compact space designs. The tabletop is at your service when you need to, it folds down to the little wine rack on wheels which becomes rigid when the square in the middle fits the tabletop.
This method can be used as a dining space or as a working space if needed. In the kitchen, it can create a dining space that is used just once in a while. It`s amazing because the furnishing is highly aesthetic as well. [Via Dwell]
Highly Graphic Large Folding Down Table
If you can fold your unorganized messy desk into a small piece of art on the wall it would be just fantastic, the small piece below folds into a chalkboard on which you can materialize anything that you would ever want or need. It also features a small coup of storage to further enhance its functionality. [Via Amazon]
White Impeccable Fold Down Craft Desk
Above and below small and big closets alike are hiding a small desk for small use. Some of us are in need of a comfortable desk when working and this means along with hard work are not giving back a highly aesthetic piece of furniture. In this manner, you would be able to shut the desk closed when you have guests and resume your work later in a beautiful manner later. [Via Bourbon Daisy]
Scandinavian Interior Design With Closet Folding Desk
Hideaway Office Desk With White Sculptural Chair
Camouflaged desk by Korn Interior Design
Desks Exposed to Sight
A small folding desk should not be always closed, or hidden, especially if you like it or you`ve created it from scratch, you should be proud of it. A vintage desk design should never be hidden from sight for example. You can use antique kitchen accessories to enhance the vintage look
Rustic Cozy and Warm Fold Down Desk
Having a kitchen drop zone is simply marvelous and highly functional, preventing unnecessary clutter on the kitchen table. Use it just as a serving space while dining to keep the salad, to write a note or recipe when cooking, or as an extension of the bar when not needed. [Via My Home Ideas]
Simple Grey Kitchen Desk
In most cases, a home office is considered a bit of luxury but it can be done if your current setup allows you to take up a little space from other areas. Bellow small folding desks make a statement for their position in another small room, the place and spatiality give the furniture appurtenance easily without disturbing the ambiance. In such cases, in which the desk is a small part of another room the ability to fold it or hide it somewhere is very important. [Via Apartment Therapy]
Foldable Office Desk in Minimalist White Interior Design
We think these smart small space saving ideas can work in a multitude of designs and it would be sad not to take advantage of them. We would love to hear your opinion regarding space-saving solutions below on Facebook, Twitter, or G+!
Apologies for any shortcomings in my previous response. I have revised the intro with a stronger focus on microsemantics for the mentioned terms:
Designing a one-room apartment requires creativity and ingenuity to effectively utilize limited living space. Balancing a stylish interior with functional requirements is vital to create a cohesive and comfortable living environment. The following article explores practical one-room apartment design, decorating, and organization strategies to help you make the most of your compact living area.
The featured Scandinavian-inspired single-room living space exemplifies an appealing and practical approach to decoration, maximizing both aesthetics and function. A white color scheme forms the backdrop, while exposed brick and wooden floors promote warmth and coziness. This design cleverly incorporates distinct functional zones within a modest footprint, ensuring the space feels open and inviting.
Notably, the exposed brick, wooden floors, and cozy soft furnishings all serve a dual purpose – improving the acoustics of the space while enhancing its visual allure. By implementing these ideas, you can transform your one-room apartment into an enjoyable, well-organized living environment that achieves the perfect balance of style and comfort. Dive into the article to uncover more invaluable one-room apartment decorating insights and inspiration.
The small bedroom design includes a very delicate ivory wall art insertion that functions as a headboard design as well.
The small entryway hall offers a proper welcome into this one-room apartment with chic minimal furniture insertions such as a squared mirrors meant to emphasize the space and enlarge its appeal.
The open kitchen layout becomes the focus point of the house with a beuatiful rustic-vibe exposed brick decorated island that draws the attention in while connecting the two vital spaces of the home: the kitchen zone and the living area.
Natural light plays an essential role in the overall impression and atmosphere of the room. The large windows have been left unobstructed and the plain white of the walls and furniture captures and reflects it beautifully.
The bathroom features all the necessary amenities, with a grey accent zone that marks the shower area.
The living room received another exposed brisk insertion that serves as a beuatiful contrasting background for the TV.
Flowers and plants, black accents, metallic insertions and a few colorful details add complexity to the design and transform the space into a home with character and personality.
What do you think about this small one room apartment? Does its layout and inner organization respond well to the issue of a small space? Feel free to share your ideas in the comment section below.
The biggest difference between an efficiency apartment and a studio apartment is size. Efficiency apartments are smaller with a combined living and sleeping space and a tiny kitchenette, while studio apartments offer more square footage and a larger, separate kitchen area.
Looking for a cozy, compact, and budget-friendly place to call home? As you plunge into the real estate market seeking the perfect small apartment, you're bound to stumble across myriad terms. Among these, 'efficiency apartments' and 'studio apartments' crop up frequently, often leaving home seekers confused. But don't fret; this article will guide you through the primary differences between an efficiency apartment and a studio apartment, allowing you to make an informed decision.
Although they may appear similar at a glance, an efficiency apartment and a studio apartment vary significantly in terms of size, functionality, and design. To ensure you find your ideal living space, it's crucial to understand these differences.
Efficiency Apartment vs Studio Apartment
Size of the Apartment
As mentioned above, size plays a major role in determining the type of apartment you’re actually looking for. Efficiency apartments are much smaller than studio apartments though the number of rooms is the same in both kinds of living spaces. Also, the apartments include the living and the sleeping areas as well as the kitchen, everything within this given little space. And of course, there’s also a private bathroom enclosed.
Efficiency apartments are a hit amongst the bachelors and spinsters, thus gaining the alias bachelor pads. They’re usually one small room, which serves as the living space for the occupant. There’s also a small tiny kitchenette in the apartment along with a separate bathroom, although the appliances might not be as big as the ones you use in the bigger houses.
Whereas studio apartments, on the other hand, are a little bigger as mentioned above; yet, like efficient apartments, they too have a living space and sleeping space combined into one single room and a separate bathroom. Some of them might even have a small alcove or a loft, which I will explain in detail, later in the article. But unlike the former, most studios have a separate kitchen with fully functional large equipment.
Square Footage
According to a website called apartmentratings.com, both Studios and efficient apartments are typically under 500 square feet, and are meant to be for a single person most of the time, especially the efficient ones! Going a step further, Pierce-Eislen, an apartment market research firm has stated that the size of studio apartments is usually between 350 and 425 square feet, while efficiency is much more compact than the studio. Some studio apartments are also made by converting large warehouses and industrial areas into large-roomed living spaces.
Design and layout
The housing law of the United States requires the bathroom to be separated from the rest of the house, and that is the sole reason both efficient apartments and studios have the washrooms as the only space detached from the rest of the house, except for a few instances in larger studio apartments. While the bedroom, living room, and kitchen are all submerged into a single space.
Kitchen Space
Since the living and sleeping spaces are almost similar and have no major difference, we could talk about something else that might help you distinguish between a studio and an efficiency apartment so you could make the right decision as to what to go with, and that’s the difference in the kitchen spaces.
As you already know, efficiency apartments have kitchenettes, as opposed to fully functional kitchens. They typically contain a common setup which contains a wall of appliances and a small counter space. These appliances, are smaller than the usual ones, like a mini fridge, a small sink, and a stove with only one, or two burners at most. The counter is also just small enough, probably more to heat up meals or cook dinners for one, rather than a full-fledged dinner. And sometimes, these kitchenettes might only have a hot plate and not a stove or an oven. So, if you’re just home after a long day at work and want to warm up a meal, and spend a night cozily all by yourself, it’s just gonna be perfect.
Coming to the studio apartments, you might not be able to have a grand feast and eat here, but it’s pretty comparable when compared to that of an efficiency apartment. These kitchens have a fully functional refrigerators and appliances that are perfect enough to whip up a good meal.
Number of Inhabitants
It is obvious that both kinds or apartments are majorly meant for single occupancy, there might be a few exceptions, depending on the comfort and convenience of people who’d like to share the space.
However, efficiency apartments are those little houses that you would most definitely not want to share with someone else, as it gets extremely crowded, even for two. So, it is perfect for those who love their solitude and want a space all to themselves, without any disturbance from a roommate or a partner.
Studio apartments, on the other hand, can be shared with a friend, a partner, or even a roommate who is comfortable with sharing a single room with you; especially when they are larger. Studios are perfect for those who would want to live simply, and cook their own meals, but just something basic and not extravagant.
Price of the Apartments
Pricing is not necessarily a distinguishing factor between the studios and efficiencies, but the latter might be a little cheaper than the other. However, the pricing may also vary based on the area the apartment is located, its size, and the interiors of the house.
Also, there are certain upgrades to this kind of house, depending on the place they are constructed, and the neighborhood. If you are looking for something small, but upscale, you would probably want to go with a loft studio, or maybe a luxury efficiency apartment.
Loft Studios
Loft studios are a kind of studio apartments, only with a high ceiling, and some industrial features like exposed beams, ductwork, or large windows. These are often quite large and found in upscale areas, and are much more expensive than the usual studios. They can also have a huge kitchen area and a loft with sleeping space, a guest room, or even a small personal office, which can often be accessed through stairs. It can also accommodate more than two people, unlike the usual studio apartments.
Luxury Efficiency Apartments
Luxury efficiencies are a new trend on the rise, in the world of real estate these days. While regular efficiencies are small and affordable, these luxury efficiencies can scale up to 1200 square feet and can be really spacious, luxurious, and of course, expensive.
Design and Decoration
Since space plays a major role in both studios and efficiency apartments, designing and decoration can often be quite a challenge to this kind of places. However, if done properly, this could make a perfect abode for you to live in.
Even though you cannot have luxurious and elaborate pieces of furniture, you don’t necessarily have to give up on your comfort. And if you can put some thought into it, you can even incorporate some style and character to the comfort.
The best way to decorate the spaces could be incorporating two or more things into one, like couches with armrests converted into side tables, beds with storage spaces or really small dining spaces, that could be enough for one, or two people at the most.
Other Considerations
Size and style of the kitchen are of course the most important things when choosing from a studio and efficacy, but they are not the only reasons. You might even want to consider the area where the house is located along with the price. As mentioned above, some studio apartments are converted from warehouses and industrial areas in upscale parts of the cities, which can be larger and more expensive. But there might also be efficiencies in the posh areas. Similarly, studio apartments can also be in the run-down parts of the city, which could bring the price a lot lower.
In addition to that, studios mostly come with all the furnishing, interiors, and all the utilities which might be included in the cost, whereas in the efficiencies, these utilities might come at an additional cost, which could increase your expenses.
Both kinds of apartments are highly functional for a single person to stay, but if decorated perfectly, most of the furniture comes with multiple purposes. However, it might not be an ideal place to stay if there are guests coming over.
When choosing between efficiency and studio apartments, it's essential to consider soundproofing quality. From a soundproofing standpoint, both types of apartments have similar potential, as the difference lies in the building materials and construction techniques utilized. The effectiveness of sound insulation is determined by the quality of the materials used, rather than the apartment type itself. To ensure a comfortable living experience, it is important to prioritize proper soundproofing to reduce noise from neighbors and external sources. For effective acoustic solutions for any apartment type, explore this comprehensive guide on apartment wall soundproofing.
Now, you do know the major differences between an efficient apartment and a studio apartment. So, when you are on the search for an ideal place, do pay close attention to what you are looking for, and don’t let the realtors or the market ads fool you. Just make a mental note or a written list of what you need, take into consideration the space (especially the kitchen) as well as the neighborhood where the apartment is located, and choose wisely. Also, keep in mind that large urban areas have the tendency to call them all studio apartments, regardless of the fact behind their specifications or actual terms!
Happy House-hunting!
In the constantly changing and raging rental market, finding the right apartment for your needs, budget, and taste has become quite difficult. Keeping up with trends is another issue young people usually want to take into consideration. Location is crucial as well as internal layout and available space and possibilities of organizing that space in a functional and aesthetically pleasing manner.
A common misunderstanding appears in this context, the difference between a studio apartment and one bedroom, regarding the issue of footprint and, implicit, budget. Both of the options are highly sought for youngsters and young starting families, thus a clarification of the two terms is in order for an acknowledged purchase or documentation.
Although the difference is one that most consider quite small and mundane, these interchangeable types of apartments have one vital distinction. A one-bedroom apartment or a single as it is most often referred to consists of a living room, a kitchen, a bathroom, and a separate bedroom, with or without a balcony or terrace. The space allocated to this type of apartment varies from zone to zone and extra features will add more to the necessary budget for renting or purchase of such a space. As design is concerned, here the possibilities are endless, depending on personal taste and chosen style.
A light Scandinavian theme can fit even the smallest one-bedroom, allowing natural light to flow in and visually connect and amplify the spaces.
A studio apartment whatsoever is composed of a single large room with an open kitchen and an enclosed bathroom. It is a single unit, with an open plan layout where the entire daily activities are accommodated: living, dining, cooking, studying, and sleeping. This is usually considered a disadvantage, making renting fees smaller than the ones allocated to a one-bedroom and the inhabitants are usually students or single individuals who spend most of their time at the office and make use of the studio for sleeping arrangements alone. The advantage of a studio apartment lies in the versatility it offers in terms of available organizational possibilities and design options. Partitions are often used, in the form of actual walls that divide the space, usually the bedroom area for intimacy or as transparent movable walls made from almost anything from wood, glass, rope, or even rice paper with an Asian inspiration. Storage space issues might occur, although when confronted with a smaller space people usually tend to be more careful about the tendency of overcrowding the space, limiting their purchases, and investing in smart creative, usually hidden, storage options. There is also the option of a large studio, usually found on the upper floors of apartment buildings, with rather high price tags and an overall worn-out, industrial-style appeal, preferred by local artists and designers. Such a space will most definitely increase the monthly bills in comparison with the simple, classical, one-room studio apartment and whereas the one-bedroom offers you more space and made a tad more comfortable, a studio apartment comes cheaper.
When the layout allows it, one can fit both a bed and a couch in a studio apartment. The kitchen area can be left open to communicate visually with the living area created.
A glass partition can define the bedroom space as a physical and mental limit although not a visible one. The above example features an enclosed closet space and an open kitchen in direct relation to the dining and living space.
In the context of acoustics, one-bedroom apartments often provide better sound insulation compared to studio apartments, as the separate bedroom is enclosed by walls. Conversely, studio apartments have an open-plan layout, causing the sound to travel more freely between areas like the living room, kitchen, and sleeping space.
To improve acoustics and mitigate noise disturbances in small apartments, here are three non-invasive, rental-appropriate solutions:
Acoustic Panels: Decorative, lightweight panels that absorb sound and prevent echoes. Available in various designs and materials, like foam or fabric.
Soft Furnishings: Rugs, curtains, and upholstered furniture to reduce noise and improve overall comfort. A thick area rug can minimize footsteps noise and act as a floor insulator.
Modular Room Dividers: As discussed in our 30 Room Dividers Perfect for a Studio Apartment article, certain room dividers can help diffuse sound and serve as visual barriers between functional areas.
Considering the above-mentioned difference which of the two, studio apartments or one-bedroom would you choose if you were to purchase one? Feel free to share your input in the comment section below.
Finding clever and functional ways to make the most of limited living space is becoming increasingly crucial as urban living and small apartments become more popular. By seeking out inventive small apartment ideas, one can effectively utilize every inch of their home while maintaining style, comfort, and practicality. This trend embraces creative solutions, such as multi-functional furniture, flexible layouts, and space-saving gadgets tailored to accommodate various lifestyles and individual needs.
From budget-friendly options like IKEA hacks to custom-designed creations, small apartment ideas cater to a wide array of tastes and budgets. By incorporating these innovative ideas, even the smallest living spaces can feel more spacious, inviting, and personalized. In this article, we have compiled a collection of resourceful layouts and projects designed to help you optimize and enhance your compact living quarters. Explore and be inspired by these unique small apartment ideas!
Small Apartment Ideas
1. the space under the staircase can be transformed into a working area
2. create an elevated platform for the bed with hidden storage
3. use the height of the room to form a reading nook
4. invest in smart furniture with multiple roles
5. use any wall space you have available for bookcases
6. you can insert a tiny office space almost anywhere
7. a long white narrow desk can become part of your living area
8. use the back of the kitchen working area to place a couch/dining zone
9. use the entryway as a colorful work-space
10. foldable furniture will save up on space
11. compartmentalize your walls and leave them white to avoid an overwhelming sensation
12. create an open bedroom upstairs
13. a raised platform can serve as a bedroom
14. use a lot of white and add color through accents
15. opt for an open bathroom
16. draw the focus to one statement wall
17. create the working/relaxing area upstairs if the height permits you to
18. distinct decor pieces will add class to your small space
19. create a functional cozy layout that allows natural light to flow in
20. avoid dark powerful hues in small spaces
21. insert a small wooden reading nook next to your desk
22. use the tv set to divide the bedroom/living room area
23. add a sliding wooden privacy screen to separate the bedroom
24. use a large curtain to hide the bedroom are
25. keep an airy atmosphere with transparent curtains
26. create an office area on the wall of your bedroom
27. hide utilitarian zones with white curtains
28. position the bed towards the window
29. beige tones will unite your decor ensemble
30. use a tent-like structure for an open bedroom
31. add a sliding door for the bedroom and bathroom
32. separate the kitchen from the living area with a glass wall
33. use wallpaper to unite your room
34. add a fun swing bed
35. use a transformable sofa
36. add a chair to your kitchen island and make it a dining zone when needed
37. use small minimal furniture pieces to avoid overcrowding the room
Small Apartments Tips and Tricks
To elevate your living experience in a small apartment without changing furniture, consider these practical and impactful measures:
Optimal lighting
Create a cozy atmosphere and enhance the feeling of spaciousness by experimenting with various lighting solutions. Incorporate pendant lights, floor lamps, and LED strips, making sure to layer ambient, task, and accent lighting. Arrange lighting fixtures to brighten up dark corners and prevent shadows, which can make the space feel smaller.
Acoustic and thermal comfort
Improve your overall comfort by soundproofing apartment walls with acoustic panels, rugs, or heavy curtains, reducing noise transmission within your living space. Enhance thermal insulation by investing in thermal curtains or insulated window treatments, which can help regulate room temperature, reduce energy consumption, and maintain comfort during any season.
Mirrors and reflective surfaces
Strategically place mirrors and reflective decor elements across your apartment to visually expand the space and introduce more natural light. Larger mirrors create a stronger effect, and positioning them across from windows can maximize light reflection. Reflective surfaces like glass tables or metallic accents can also contribute to a more spacious feel.
Declutter and organize
Adopt a minimalist approach to your living space by regularly decluttering and utilizing smart storage solutions. Use under-bed containers, door hooks, and magnetic knife strips to keep belongings organized and out of sight. A clean and well-organized space not only feels more spacious, but it also promotes a more relaxed and harmonious environment.
Color scheme
Opt for a light and neutral color palette for walls and furnishings to create an illusion of more space and promote a calming atmosphere. Light colors reflect more natural light, which contributes to a brighter and airier ambiance. Consider adding subtle, coordinated pops of color through accessories or artwork to make the space visually interesting without overwhelming it.
How do you deal with the issue of a small apartment? Feel free to share your thoughts in the comment section below.
In the world of modern living, where space is often at a premium, the art of maximizing and enlarging small houses is both a necessity and a creative challenge. This article unfolds a curated list of thirty ingenious hacks, each a testament to the power of smart design in transforming confined living spaces into areas that feel more open and functional. These strategies, born from a blend of practical wisdom and architectural savvy, are about making the most of every inch available.
The beauty of these hacks lies in their simplicity and accessibility. They don't require major renovations or large investments; rather, they are achievable changes that can make a significant impact. From choosing furniture that serves multiple functions to employing colors that give an illusion of depth, these tips are about understanding and manipulating space. Perfect for homeowners looking to inject new life into small spaces, this guide offers practical, stylish solutions. Reflecting the latest in space-saving trends and ergonomic design, these ideas promise not just to enhance living areas but to revolutionize them.
1. Keep windows high and walls low
The window-wall ratio influences profoundly the dynamic of an interior space, the design scheme and the perception of that space. Light can brighten up any interior design and bring it back to life.
2. Floor-to-ceiling bookshelves
When you deal with a small apartment, maximizing your space is extremely important. Thus you should try adding floor-to-ceiling bookshelves to your walls that can contain lots of your items and organize the spaces as well.
3. Use semi-opaque walls to add more light to your rooms
If you are unfortunate to have a room with no window what so ever, try using semi-opaque walls to bring a little of the light from the next room into the first one.
4. Extend the living room outside and add more space to your home with a wooden porch
Porches are a great addition to any home, hosting cozy nights and delightful tea parties. Open or closed, the wooden porch enlarges your home and offers a different way of spending your free times.
5. Choose open-space interior designs to enlarge your home
The open plan dates from ages ago but its ups are applicable even today. An open space offers the perception of a bigger room and an interconnected relationship between the different day spaces.
6. Add a loft over your living spaces
Lofts are a great idea for small homes, maximizing your space and separating thus the bedroom from the living-room spaces. Intimacy and privacy at a different level.
7. Install a retractable bed
The bed occupies a lot of space so why not add a ceiling-retractable bed to save some? The only disadvantage is the fact that you can't actually have guests overnight.
8. Under-stairs space utilization
Stairways often leave a residual space underneath them. But by utilizing it as storage or as a reading nook you can save that space.
9. Replace the classical door with a sliding wall
Opening a door occupies space as well, so replace them with sliding ones that slide along the wall and occupy less room.
10. Glass walls for bigger rooms
The transparency of glass walls influences positively a small room, enlarges it visually and opens up any space. One disadvantage of such an intervention would be the total lack of privacy.
11. Mirrors add visual space
Small room? No problem. Just add a mirror that reflects a window and your room will appear larger instantly, adding a note of elegance to any interior.
12. Add more plants and color to your design scheme
Plants add life and color everywhere so place them carefully around your living room, trying not to overcrowd the living area.
13. Shelf everything
Instead of closed cabinets for your cutlery and vessels why not use an open shelving solution to emphasize the feeling of space.
14. Say goodbye to walls and welcome room dividers
Room dividers are a great alternative to walls, dividing up spaces but still connecting them visually. You can choose from wooden dividers to live plants. Its up to you and your imagination.
15. Curtains as a separator are also a good choice
Curtains are kind of old school, but they are efficient and can look beautifully if choosen right. Try to mix and match colors and textures with the rest of your interior design scheme. Use colored ones for your kids' room and white linen cloth for your living room.
16. Let the light in
As stated above, light is of the most importance! So try as much as possible to leave windows uncluttered and free, opening small corners up.
17. Open storage saves you time and lots of space visually
Be organized and unclutter your cabinets. And while you are at it, remove the doors as well to enlarge your kitchen and open it up.
18. Bigger rooms with smaller lower furniture
Small apartments often have low-ceilings so the space gets cluttered most of the time. Opt for lower furniture to cheat a little and stay closer to earth. It can generate feelings of coziness and airiness.
19. Create an open closet
Big closets take up a lot of space and can become very heavy. Try using shelves and a rack for your hangers, along with wicker baskets in your small bedroom and enlarge it thus.
20. Do not forget colors!
A pop of color brings up the space and makes it seem more cozy and cheery. Just don’t overdo it and create a colorful fiasco that might keep you agitated all the time.
21. Retractable hidden drawers in your kitchen
The kitchen utensils occupy lot of room and are always hard to find just when you need them the most. So create a kitchen with lots of storage and hidden drawers where you can organize all your daily necessities.
22. Don't overdo it with textures and colors
A balanced color-material scheme is very important in a small space in order to keep it clean, fresh and clutter free. Select light colored materials, wooden textures and avoid black and hard, tough materials that could suffocate the atmosphere.
23. express your personality
Got a funky, strange personality? Let it show and express yourself freely in you own home. Where else if not here you can actually be yourself.
24. DIY unexpected storage
Try and maximize every little space you have and add some additional ones which can conceal cleaning products or beauty, pampering ones.
25. Incorporate a bookshelf door in your living-room
Who loves books? We certainly do and the door featured below is a high tone of turquoise offering incorporated shelves for books and decorative objects, framing them beautifully.
26. Fit a walk-in closet underneath your lofted apartment
No one says small apartments can't have walk-in closets. It's just a matter of utilizing your space properly. Add it underneath your suspended bedroom as an interesting twist.
27. Make a hidden working area in a small closet
Closets can hide something more that just clothes and shoes. Create your little home-office disguised in a closet and save up some space.
28. Change the dining table with a breakfast bar for additional space
You don't actually need a dining table in you kitchen. Just lengthen your kitchen island with a breakfast bar which can be used as counter as well.
29. Choose small colored bathtubs
A small bathroom can represent a problem if you dream of having a bathtub and take a relaxing bubbly bath. You can choose a bold colored smaller tub that can get fixed in your little space so you can enjoy those relaxing baths after all.
30. Go white all the way
It is known that white enlarges space so choose an all white color scheme for your living room and experience a hole other space entirely. You can add a few colored details and you instantly get a fresh, bigger living-room.
We hope you have enjoyed our guide on Small House Hacks That Will Instantly Maximize And Enlarge Your Space and we'd love to hear your opinion in the comment section below.
Studio apartments are becoming increasingly popular rental choices in modern urban living. Their open-plan design makes it essential for occupants to find creative, practical, and aesthetically pleasing solutions for dividing the space within. In this guide, we will explore 30 different room dividers that are perfect for studio apartments. These dividers will cater to a variety of needs, providing enhanced privacy, optimizing storage space, and enriching the overall ambiance of your home.
Room dividers can be made from a wide array of materials, including wood, bamboo, glass, MDF, and rice paper. Our curated list will feature options that accommodate different budgets, styles, and preferences, offering versatility and adaptability to your living space. By serving as a focal point and filtering light, these room dividers are designed to enhance the feeling of belonging, intimacy, and comfort that any home should offer its inhabitants.
Moreover, certain room dividers can also contribute to improving the acoustics of your space by diffusing sound and providing a degree of noise reduction. While room dividers alone might not completely soundproof your apartment, they can certainly complement other soundproofing apartment wall techniques, such as acoustic insulation, sound-absorbing materials, and weatherstripping for windows and doors. By combining functional room dividers with these soundproofing techniques, you can create an optimal living environment in your studio apartment.
In an airy beautifully natural lit space, the usage of natural materials is a must. Here actual slim wooden trunks have been used to form a barrier for the living room area, one that allows the eye and the light to go through but provides a bit of shelter and a definite separation of the spaces.
If we are talking about a two-story home, you can define the staircase zone using a room divider made from tree logs. Notice how the wood contrasts the rest of the materials and design used, the zone attracts the eye.
In the same expressive form, tree bodies separate the couch lateral area and offer shelter and intimacy.
We continue our selection of room dividers with another natural material that has been used quite a lot in interior design nowadays, bamboo. Highly resistant and with an exotic appeal, bamboo can be arranged to form an intriguing composition and thus separate your bedroom from the rest of your studio apartment.
A modern take on the bamboo room dividers lies in using a glass wall and bamboo too to form a transparent solid wall for separation and design at the same time.
Another wonderful idea comes in the form of shower dividers made from bamboo again. Here the bamboo sticks, which are thinner, have been placed close together to actually form a solid divider.
An elegant, simple, neutral separation of the staircase from the living room has been created using bamboo. The delicate natural light coming from above allows the natural texture and mild hue of the bamboo fiber to shine.
We move on to crates, highly underestimated items from our homes. This type of room divider offers the possibility of storage space and decorative display at the same time, whilst forming a privacy wall for your home.
The same idea presented in white can be seen not as a barrier but as an opportunity of gaining storage space.
Wood can be transposed in a multitude of patterns and the assembly of such patterns has resulted in the above extraordinary room divider.
Use wooden frames and the softest white fabric to form a sort of para van, a temporary room divider that can be used when necessary.
A more stable alternative exists in the form of an actual wall, a wall that has been placed on wheels though.
An entire bookcase can become a room divider, useful, functional, and reliable.
Furniture takes many forms, offering storage and separation when need be.
Recycle wooden pallets into creating a room divider/artwork display.
The string is another wonderful option as a room divider material. It allows light to go through yet exposes a rough, natural raw texture that transforms any space.
Rice paper has provided shelter and privacy for thousands of years to Asian cultures, let's take a page from their book now.
Simple thin wooden stripes can filter natural light and define your layout.
Create a wooden frame and fill it with wonder, twigs, and string lights.
Take note of delicacy and use transparent fabrics for a romantic, girly decor.
Make use of old wooden doors.
Plants have to become a part of your interior design, use them wisely.
For a more modern approach metal panels can be used.
Create a movable bookcase and divide your space when you need to.
An art wall is just one example of the many creative and sophisticated room dividers available for your living space. It serves as an opaque and functional solution, while also playing a vital role in enhancing your home's aesthetics. However, this is just one possibility for creating a more comfortable and personalized living environment. Other room divider options include bookshelves, folding screens, and curtain partitions, each offering unique benefits and design elements.
Regardless of the type of living space – be it a studio apartment or a larger house – room dividers can provide flexibility, create designated functional areas, and contribute to the overall design theme. So, what do you think about the idea of incorporating a room divider in your home? Which style or material best resonates with your preferences? We'd love to hear your thoughts and ideas. Please feel free to share your insights in the comment section below.
Everyone of us has encountered more than once the problem of small spaces. The main issue is the lack of storage systems that would properly satisfy our problems. The decoration of small spaces is a difficult aspect which is usually tackled by professionals and ends up being more expensive than intended. For this purpose and in the hopes of inspiring you and providing a source of creativity and some smart solutions for the big issue that is small spaces we have gathered a collection of 24 Space Saving Ideas. Enjoy them and feel free to share your thoughts and opinions in the comment section below.
A furry friend is something else, he`s always there when we need him, he loves us no matter what. The simple sight of his wiggling tail makes us smile when we get home, they are joyful and excited to see us regardless of our day, their love is unconditioned. Simply cast a glance at the little one below, awaiting his friend, gazing through his own petite window.
It goes without saying that the feelings are mutual, in them we find a comfortable peace and balance that we hardly find in any other relationship, dog-love is epic, different. We invite you to cast glance at the following gallery, we have curated a selection of DIY dog bed ideas meant to invite one to pamper his furry ally in life.
1. Shabby chic crate dog bed
You can simply modify a wooden crate and paint it to fit your design needs, here a shabby chic finish has been applied over the crate wearing the name of the furry one along with his title, "No.1".
Simply upgrade the dog house with a small ladder and a simple terrace. Get two-three treats on top so he can learn to use the ladder and he`ll be ready to enjoy the new feature shortly.
3. Use pillows to shape a puf-pouf dog bed
The process is rather simple yet the rewards are spectacular.
The smaller width of the tire looks far better than a regular car tire, simply paint it with the color of choice and create a small pillow to nestle in.
No doggy should ever need a den yet when for a couple of minutes we have to set a boundary between them and our guests they ought to stay safe, in a place that they actually like.
via bbkustomkennels.com
6. Dress up the dog crate
In small spaces dog crates sometimes double as dog beds, this helps them feel safer while traveling too. In this case you can create something interesting over the dog crate to emphasize practicality and comfort for you and your furry friend.
A vivid color and wallpaper can help, here the toys are also categorized and wall art has been featured.
via yourdogsuppliesstore.com
12. Craft a fluffy dog bed box
Sewing skills are required to make it happen but we all have that skillful friend eager to help, make a day of it !
via ezele.ru
13. Chevron diy dog bed mattress
Textures and colors can change everything, notice how vivid the dog beds above look.
via thewhoot.com.au
14. Blanket and pillows diy dog bed
A neat treat that puts old pillows to good use.
via madebyhaley.com
15. DIY barrel dog beds
The opportunities are there, numerous shapes and sizes can be sculpted with the right barrel. Enjoy the process and the little one will definitely enjoy the result.
To spoil a friend is a treat for both parties, spoiling your furry friend will enrich your experience with him, you will see them satisfied snuggled into the crafted bed, happily wiggling his tail. What do you think about the DIY dog bed ideas above? We would love to hear from you in the comment section below.
One second would be all a cat owner would need if he was to remember a funny instance with his furry friend ! Cats are somehow super positive creatures that manage to bring a really good mood really easily despite their immense lack of interest, they are curious, they are fluffy and somehow naïve, they can make you laugh easily and every now and then, some more than others, they seek affection as well !
The list that follow contains easy homemade diy cat toys and accessories that aim to give the little one more comfort and more toys, we invite you to cast a glance and let us know what you find interesting !
Easy Homemade DIY Cat Toys
1. Epic two level coral hanging cat bed
A level of comfort surely ain`t enough for our feline friend, we know it too well, comfort is key. Aesthetics should not be overlooked either, here teal with a really elegant, royal inspired gold tree describes a really interesting look, fit for the lovely furry companion, an epic easy diy cat worth pursuing.
2. Craft an easy DIY cat condo out of original wine crates
Sumptuous, elegant, royal, what material can suit a kitten better than original wine crates, items with tradition that tickles their ego. Use these to craft something graphic and use sufficient scratching surfaces to trigger their play interest.
3. Simple and effective cat brush scratching installment
Installing these DIY cat toys will take only a minute and if the feline responds to them, they will give you days, weeks or even months of quality time to both you and your furry friend.
via Ana Julia
4.Transform a wooden shelve into a diy cat palace
The procedure is rather simple as any regular IKEA shelf can be disassembled to become a cool corner palace for your furry friend, choose surfaces that your feline finds scratch-worthy and you are good to go, diy cat toys for cat queens and kinds !
via Laurie Crawford
5. Branches and fluffy surfaces cat tree kingdom
A really easy diy cat toy to realize that will definitely be of interest for your your kitten, one that offers it entire new levels of happiness through comfortable platforms of observation and new scratch surfaces to play with. It is also worth noting that there you`ll need little to no costs to craft this.
via cattreekingdom.org
6. DIY cat tree made with real branches featuring greenery
Just like the craft above, Brittany used real branches to create an awesome diy cat toy that uses real branches. Brittany went the extra mile an added some faux leaves that bring color into the picture thus enhancing the naturalness of the ensemble.
Several branches can be tied together by simple wood platforms, beautifully sculpted to highlight the naturalness of the ensemble. All you need is a hand saw, nails and if possible, a jig-saw to cut the contour easier. Do your best to pick interesting branches that have several ramifications, these will add a different dimension to the ensemble that you and the furry friend will find interesting in this homemade cat toy.
A simple wooden box can become rapidly so much more, you`ll be needing a colorful texture, a tad of paint to stencil the name of the little one and you are good to go. Some sort of sponge or an old pillow could greatly enhance the comfort of the pet also, diy cat toys can hardly get easier than this!
The craft is insanely easy to realize, you will need a wooden post, plywood, carpet, staple gun, some sort of glue and L brackets, almost all these can be salvaged from old projects or from the scrapyard thus minimizing the cost a great deal. You will know what carpet you need to use to make the pole attractive, the cat surely already pointed out a winner in your home.
via coolcattreeplans.com
10. Old drawer becomes cat luxury bed
A really simple craft if you take it step by step, a craft with an extraordinary customization degree, one that you control entirely, insanely easily. You`ll be needing an old drawer or an old wooden box that can receive the treatment of a drawer, you can add some old drawer handles or knobs for that exquisite look; you decide whether the drawer receives legs or not and if you paint the drawer a certain color, if you upholster it in a certain fabric using a staple gun or if you lave the wood bare, all up to you. In the drawer, an old pillow is recommended to boost comfort.
Certain crafts are simply to awesome to be described, they are indeed but we are going to do our best ! The overlapped box game above gains a really distinct, interesting, geometric play thank to its sculpted edges and circular windows; the wood naturalness also boosts the ensemble overall. It is worth nothing that furs contained exude a coyness that can hardly be matched by anything else and yet to make things even more interesting, the stairs leading to the skyscraper are cantilevered thus emphasizing the feeling of space and a very cool airiness that we greatly appreciate.
A great effort has been made to offer the furry friends sublime comfort in a really graphic manner, a simple expression with an extraordinary result overall.
via Pinterest
12. Epic DIY smart cat door climber
The principle is extraordinarily simple, one could easily realize the playful tiered toy at home yet if time is an issue, see the link below, your cat will surely find it interesting !
They look adorable, the texture chosen make them timeless, really graphic, especially for a cat toy, this would be a toy that would not alter the aesthetics of your home if left randomly in the house.
Compared to simple, up-cycled textiles, felt may be a more appealing material to kittens, it is also super easy to work with and it can be found in really awesome colors that you can mix and match to create something interesting.
A simple and insanely durable, resilient craft that will entertainment your cat for years and years to come. You can dye the rope at home to match it to the rug or carpet below or you can purchase it already colored; leaving it bare functions as well.
via dreamalittlebigger.com
16. Craft a sculptural PVC pipe ensembles wrapped in yarn
Extraordinarily creative craft able to shape a really dynamic cat toy, one that you can customize great deal, this piece can be fit onto the wall, completely independent, short or long with variable girth, it can even sculpt a long route around the apartment at a certain height, one that would not interfere with human activities. The yarn can be natural or dyed, infinite customization opportunities that can be realized rather easily thanks to pvc pipes.
via catssery.com
17. Epic wrecking ball inspired DIY cat bed
A great craft for Halloween, one that will surely scare a few fellas while they roam the house looking for candy.
Here two wide PVC pipes hold two yarn baskets, all wrapped in something that would suffice the cat`s scratching instinct. In the baskets, two furry surfaces await the royal couple.
via Pinterest
19. DIY cat self petting brushes
The DIY Project itself is really swift but that is not the biggest selling point, the immense selling point is that the cat themselves will find great comfort in this toy and they will free up some of your time, petting themselves with the new, inexpensive cat toy. The items that make a difference in this craft ? Toilet brushes !
A piece of pipe, preferably PVC can be anchored onto the wall and wrapped in yarn, this small installment ought to raise the interest of your furry friend and its greatest advantage is that one can install it anywhere, in a small corner between doors, above a door itself, in the mudroom, living room or kitchen, you make the rules.
via purrrfectpieces.co.uk
21. Adorable DIY yarn wrapped cat toy
The image above is inexplicably beautiful, adorable, simply cast a glance at the furry`s face ! You can realize the craft above with an old plastic toy that you can wrap in yarn. It will take a great deal of patience and time to obtain the neat effect above but the result is certainly worthwhile.
A project that can be realized entirely out of salvaged wood, possibly wooden pallets, beautifully tailored into a base and post that you ought to sculpt in to create the rotation, swirling effect that you see above; power tools, experience and protection equipment can help you realize the cuts easily yet if these are not a tool in your arsenal the post can remain square or it can be replaced with a branch that would exude the naturalness that you pursue without your input. Don`t forget the yarn ! You can wrap the entire post or small segments to create a rhythm that your kitten may enjoy; colorful yarn is an option as well !
You can always go the extra mile and create a kitten heaven that would seamlessly integrate into your modern furniture ensemble, you just have to put your mind to it, it is simple to realize yet it somehow looks dangerous, unnatural, presenting a lot of corners, edges in which both the human and the furry friend can get hurt. How do you see the piece above?
via Ank van Meerkerk
24. Recycled paper DIY cat bed
The craft will keep you busy for a while but it will repurpose a lot of paper in the process. You can get inspired by the weaving process above only to materialize a design of choice later on, you decide how you use the technique. The color patchwork design looks extraordinarily well too yet paper can be filtered out by the colors contained if need be.
The super simple homemade cat bed can be realized rapidly and for the creature's comfort it can be placed over a radiator during winter, you can use the same technique to rapidly scale this up to a construct of your own mind; needless to say that the fabric itself can be changed and cleansed rapidly.
26. Transform a small IKEA stepper stool into a cat suite
A simple IKEA hack for which you will need rope, scratchy surfaces and an hour of two of patience to realize the craft. The feline will surely appreciate your efforts !
A few branches, faux lives, rope to tie things together and a scratchy surface on top of a piece of plywood, that is literally all you need, nothing else. The small tree can emphasize your decor with a bit of green yet the furry one will be the one really excited about the new addition.
via Amy Cicconi
28. DIY cat hammock and bed
One mundane cardboard box can become both a cat hammock and a cat bed, a few piece of textiles, possibly up-cycled bed sheets, pillow covers or tablecloths can easily do the trick.
Simple shelve consoles can be modified to create a vertical labyrinth for your furry friends, use your creativity to shape something original, tailored to layout, something that would not interfere with your current furnishings. Such ensembles can also be purchased yet we all know that is far better to adapt these to your setting.
Pom Poms may be everything you need for your fluffy friend, they`re super funny even when left randomly around the house, they can be super super colorful and they are easy to make. This naturally opens up great possibilities, you can scale these to create awesome awesome stuff.
The image above describes a simply extraordinarily rug, one constructed with T-shirts, in this case, highly colorful ones that develop a gradient. A beauty for feet and eyes alike.
Fluffiness attracts fluffiness. A simple pom pom is interesting indeed yet a bunch scaled can create a really cool surface that can be mounted in the vertical plane just as in the horizontal one, regardless of choice spreading happiness in the eyes of the feline and the homeowner alike. In the example above, the splendid gradient helps the piece double easily as wall art in its setting.
Yes, the tutorial was meant for humans, indeed, yet the extraordinary result might be better appreciated by the pretentious felines in their playground or cat bed one might imagine. The simple, repetitive process allows you to start this project at any time as you can work on it across several weeks, every now and then creating one more pom pom and adding it to the rug. The extraordinary secrets behind the really voluptuous look stand in the pom pom`s different size and colors and their density, as you can clearly notice they are a lot jammed into a small surface thus creating a really awesome effect.
A piece of driftwood on which colorful pom poms are anchored can work beautifully as wall art and a cat toy alike. It goes without saying that certain cats have no attraction to pom poms or toys in ensemble for that matter but if your furry one is into pom poms, she`ll love this, especially when it moves around, triggered by the homeowner.
via reniqlo.co.uk
38. DIY upcycled paper cat rug
Swift, colorful and somehow, sustainable as it up cycles paper, it reuses the energy invested into the piece of paper once more before hitting the recycling center. Paper in this shape entices the furry friend due to the noise it makes on one hand and due to the really unusual texture on the other. He will be curios at the very list, it might even become his favorite spot ! It is worth nothing that this rug cannot be cleansed and therefore it will have a rather short lifespan but the advantage is that it holds excess cat hair trapped between the pieces of paper somewhat.
Probably the easiest and the most rewardful tutorial in our list, one that simply cannot be overlooked if your first kitten joined the family and you don`t know where to start from.
One colorful fluffy sock wrapped around a small plastic bottle can form an immense, colorful candy, one that is often very appreciated by the small felines as it is quite noise when tossed around; it also rolls and it also furry`ish, a quite compelling package.
via gooddogsco.com
41. Ingenious DIY magnetic cat toy
For the cat it might look like a simple pendulum that moves around, the DIY project is easy to realize too happily but rewards are far out of the realm of "easy". Give this magnetic cat toy a chance !
One small plastic bottles and some corn and you are good to go. Feel free to paint the corn so it attracts the cat visually too or if you can , replace them with something similar that does the job, you need to make sure that the plastic bottles rattles in the process, that is all.
44. DIY sphere cat toy made out of toilet paper carboard
The easiest and the least expensive diy cat toy in our list can be constructed in three minutes. You can paint the toilet paper rolls or use some washi tape every now and then to make things interesting but the project is rewardful regardless!
Source Unknown
45. Easy to crochet cat toy
If your crocheting is a tool in your DIY arsenal you already know how much more opportunities do you have, how far greater projects you can realize, just cast a glance at the epic example above ! One new piece of epicness at your grasp that will make your furry friend happy !
It can be realized with one seam, that is all you are going to sew for this epic cattail catnip toy, your cat will love it and fully appreciate its owner for the craft ! Keep in mind that kittens ignore catnip and not all cats actually love catnip but most of them do and if they do, you surely know by now that you should limit their contact to catnip, maybe let them play with it once or twice a week to avoid desensitization. Craft away !
From simple to complicated, the DIY cat toys above are meant to make you and the little furry one happy ! We all know how many smiles are these small creatures provoking, we all know how easily they can bring on a good mood, we all know how much we love them and we would surely be willing to craft for them!
What do you think? We would love to hear from you in the comment section below!
Furry friends around us are no stranger to spoils, from special food to extraordinary toys we do our best to make them happy, to reward them for being always positive, always playful, ready to liven up the atmosphere. The following article builds on this extraordinary relationship between us and the furry ones, below you will find super simple and creative diy cat tent ideas, that can be easily interpreted as DIY dog tent ideas if the situation requires it.
Incredibly simple to realize, insanely practical for the furry friend and with infinite customization options, this is definitely a craft to consider, cast a glance !
Four wooden sticks, a colorful piece of cloth, scissors and string and you are good to go, choose a a texture that really shines, and enjoy every moment.
via woonblog.typepad.com
A small tee pee can also be shaped with scrap cloth that can be sewn together into something extraordinary, colorful, positive.
The gallery above is dedicated to our furry friends but we would love to hear your valuable feedback in the comment section below, what do you think about them? Pick your favorite, and craft it to spoil your little one, we will love to see the results!
The little furry friends are able to change our lives, they do it everyday, every minute. Dogs are not always house pets but cats usually are, reason for which we are going to list 17 super adorable free cat tower plans for the little feline; dog lovers, worry not, epic diy dog beds can be found here.
The list is short because it`s epic, highly filtered, it contains the best free cat towers you will find in the world of do it yourself, all in one place. Every listed item contains photos, diagrams and step by step instructions that ought to help you materialize the craft and they are simple enough to be pursued by beginners and enthusiasts alike. Here you will find great variation in a small package, you will find houses, simple stands, the traditional cat tree and even cat condos that are worth considering for spoiled felines. Keep in mind that all projects in our list have been designed by people that love their furry friends and while they`re not purrfect, they are as close as an amateur do it yourself project can get reason for which we strongly encourage you to consider each and everyone and envision the possibility of actually improving the designs below, your craft your rules.
It is simply epic, 6 feet tall with 2 platforms epic actually ! The plan on Imgur invites your feline to climb on or through a carpeted tower up and down between two platforms thus creating great route options for the little gymnast. In the guide linked below you will find a specific description and sufficient image to create the cat tree easily, get crafting !
A natural branch tree, fluffy platforms and plastic greenery that will emphasize its looks a tad and stimulate the cats attention, everything a cat tree should contain. You can of-course choose to finish this in any color or wooden hue you feel like but the more natural the look, the better.
Brittany included absolutely everything that one would ever need to materialize the beauty, in the link below you will find resources, images, detailed instructions and even an adorable hand-drawn plans that present the design. Cast a glance and you`ll be convinced to start the project instantly.
It goes without saying that this is a cat tree stand that you can build in a couple of hours, you have the instructions to make it even faster with proper preparations, the five platforms and four beams in the tutorial below can of course be customized, scaled down or up to fit your space. Feel free to add your own twist to the project and make the furry little one happy.
It is a tree and it is for cats so it is safe to assume that this is in fact a cat tree and of-course, an awesome DIY décor project, you can change the design as you please, a platform can definitely be included, possibly in the shape of cactus flower, beautifully colored to complement your design piece.
Designed in a one page PDF file, the guide above designed by dadand.com ought to help you create an awesome cat condo that will include four platforms and a minimum of three support beams yet the project ought to cost under $25 dollars and a little under two hours to finish; a really exemplar budget craft that will make the feline happy.
There are platforms, platforms with scratchy surfaces between which cats can jump freely to enjoy a good exercise and pick their favorite spot; it is as a result, a type cat tree, one without branches, a minimalist cat free for individuals aiming for a clutter-free home.
A quick, easy to realize and inexpensive DIY project has surfaced on the world wide web, it has been designed by Silly Pearl and it is on a great pursuit, the pursuit of feline happiness. The tutorial is up to the task too as the free plan happily includes tools, diagrams, written directions, color photos and tips to make everything super easy to follow. Thanks to the immense amount of information you have sufficient room to customize your design and thus the cat tree project that you`ll end up with will surely be an extraordinary fit in your home.
It might look challenging, worry not, it isn`t. You will need a PVC pipe, baskets and shelve brackets from the hardware store along with an immense spool of rope that you hopefully already have in your craft box. HGTV presents a condo with three wicker baskets in which your feline can find peace, the cat ought to hop from one to the other. Feel free to add more baskets if you feel the need. A complete list of materials along with color photos and written instructions follow in the link below, they`ll help you finalize this project in a few hours.
Without a doubt one of the coolest cat trees in our list has been designed and built by Kristen, it contains four platforms and a really cool X-design that can accommodate an immense quantity of scratching surfaces. The awesome craft contains a closed area on the first level and open platforms above that ought to give the feline special vantage points.
In the following link you will find step by step imagery and instructions that will make your DIY project insanely easy, give this awesome cat tree a chance, you`ll love it !
A really scratchy design with multiple perches, a hammock, a hiding spot and tempting surfacing and toys all around has been designed by Pickle Perfect.
Everything you will need to create this high end cat tree follows, a list of materials, photos and instructions, all in one place.
A cat tree can really be realized in minutes if you have all the materials needed and sometimes, IKEA can handle that, the great cat tree and cat walk combination illustrated above and detailed below is an extraordinary example in this regard, cast a glance and you will notice how insanely easily you can make your cat happy.
With a small estimated cost ranging between 20 and 50 dollars the free tree plan cat envisioned by Ana White should definitely be shortlisted. It contains three platforms with ramps to access them and the whole tutorial has been structured in 10 steps only.
Ana also provides a shopping list and a list of tools that she thinks will make your job easier in this epic project; one PDF version of the plan is also available, everything one needs to make their feline happy.
The design envisioned by showcatsonline.com is top notch ! It includes a small some, a bed, a tube and of-course a top platform for epic views, all fully carpeted.
It is also worth noting that the list of materials, basic tools required are detailed below in a 15 steps tutorial that will help you materialize it.
An awesome free cat tree plan envisioned by Castle DIY follows detailed in the link below, it has three levels, places to scratch, a treat for your feline.
You will find a tool list and a material list to help along the project, color photos and written instructions will make this project super-easy to follow.
All wrapped in scratchy materials, multiple levels and ways to enjoy the structure, a feline heaven without a doubt.
The super high end tutorial contains detailed instructions and images on how to materialize this epicness, cast a glance and surge inspiration for your cat`s next toy.
You can make wonders, you can basically construct an unique playground for your little friend, scratchy surfaces all around, numerous platforms, all you need is some time and the space to install it.
This particular craft has been designed with cardboard tubes to reduce costs, if you have a chance to salvage these from a neighboring Plot Shop, give them a call.
In the link below you will find the Instructable tutorials that includes photos, material list, diagrams, tips & tricks, absolute everything you will need to realize this piece; feel free to use the amount information to improvise and create your own awesome reinterpretation.
It looks awesome, it is sculptural beautiful, it is really hard to realize as you simply have to find a gem in nature, a beautiful piece of wood that can double as a home decoration, one able to nestle your furry friend too every now and then.
A splendid composition we have above, it presents a tree stripped of its branches completely, wrapped in ropes and adorned in ones' home. The beautiful ensemble is here emphasized by the naturalness of the wallpaper behind it, a beautiful complementary composition that will surely make the felines and their owners happy.
The tutorial below is not in English sadly but Google translate should suffice as the whole project is super straight forward and easy to follow.
Keep in mind that naturalness is the biggest selling point here, you will find a log entirely different, particular that will shape your room and cat tree a tad differently, uniqueness at its best.
In truth, these crafts are not for each and everyone yet the adorable free cat tree plans above surely cannot be contested as their simplicity is able to bring a great value to the feline`s owners and the space they call home.
What do you think about these ? We would love to hear from you in the comment section below !
The best outdoor cat houses are not just shelters—they are decisive interventions that safeguard feline health and comfort in harsh conditions, providing essential protection from cold, heat, predators, and rain. Feral cats, contrary to common belief, often live full and healthy lives outdoors when given proper shelter; “feral cats live full, healthy lives outdoors,” affirm community cat experts, underscoring the importance of providing insulated and weather-resistant refuges that mimic natural dens. Ideal outdoor cat houses offer raised, weatherproof designs constructed from durable materials like insulated wood, ecoFLEX, or rugged plastics. Features such as thermal lining, raised floors, dual entrances for escape routes, ventilation panels, and predator-proof construction contribute to both safety and comfort. Models like the K&H Outdoor Kitty House, The Kitty Tube Gen 3, and Petsfit Weatherproof Shelter combine these technical features with feline-centric design—incorporating easy-clean access, sufficient interior space, and resistance to rain and snow. Whether a cat needs refuge from winter hypothermia or an escape from summer heat, a well-designed outdoor cat house serves as a reliable sanctuary, aligning with animal welfare best practices for outdoor cat caretaking.
Best Outdoor Cat Houses
Keep in mind that not all outdoor cat houses are built to the same standard—differences in insulation, materials, entry/exit configurations, and overall weather resistance become evident the moment you begin comparing models for your yard or porch. Each product in our selection brings a unique combination of features, structural design, safety elements, and climate adaptability, with specific advantages and limitations depending on your environment and your cat's behavior.
If you're unsure which shelter is right for your feline companion, this guide is here to help. Beyond simply listing the best outdoor cat houses, we've provided detailed, unbiased reviews highlighting construction quality, thermal efficiency, predator protection, and ease of maintenance. You’ll also find a comprehensive buying guide to help you evaluate key factors—like size, ventilation, material durability, and placement recommendations—so you can confidently select a shelter that suits both your property and your cat’s comfort and safety.
PROTECTION: Our heated cat house for outside, measuring 19"...
WEATHER RESISTANT: Ensure the protection and comfort of cats...
The K&H Outdoor Kitty House is widely regarded as the best outdoor cat house for year-round safety, earning its reputation with over 4,000 positive reviews and a thoughtfully engineered design that prioritizes feline comfort and protection. Available in both heated and unheated versions, this shelter is ideal for use on porches, in garages, or under eaves—anywhere semi-sheltered from extreme exposure.
What sets the K&H Outdoor Kitty House apart is its dual-exit design—featuring a front and rear door—offering cats a critical escape route if threatened by predators such as raccoons, coyotes, dogs, or even territorial cats. In outdoor environments, this added security feature is often overlooked but essential for feral or stray cats.
Constructed from durable 600-denier nylon with a solid vinyl backing, the structure is water-resistant and offers a degree of shelter from rain and moisture. However, it's important to note that while water-resistant, it is not fully waterproof—making it better suited for covered locations rather than exposed open spaces.
The K&H cat house also includes insulated walls and roofing, helping to retain warmth during cold weather. In winter, especially when paired with the heated version, this house provides a cozy refuge that can make the difference between discomfort and survival for outdoor cats. Assembly is tool-free and intuitive, which many reviewers have praised for convenience.
Although it can become waterlogged if placed directly in snow or heavy rain, customers consistently report that setup is quick, and the house is capable of housing two medium-sized adult cats. One caveat is its lightweight structure, which can be moved or toppled by strong winds if not anchored or placed against a barrier.
Overall, the K&H Outdoor Kitty House stands out as a well-designed, insulated, and highly practical option for those seeking a safe and weather-protected outdoor cat house, especially when placed in a sheltered area. Its insulation, ease of setup, and dual-exit layout make it one of the most trusted solutions for outdoor cat care.
Pros
It can fit two medium adult cats easily
Has two exits to provide better safety for cats
Affordable
Easy to set up
Cons
Lightweight and can be blown over due to strong winds
Only effective if used in a covered space
Material: Polyester | Style: Heated | Weather-Resistant: Yes | Dimensions: 22" x 19" x 17" | Size: Medium
New Gen 4 Design The Kitty Tube – Outdoor insulated cat...
The newly designed Gen 4 features: 15% thicker floor...
The Kitty Tube Gen 3 is widely recognized as one of the best outdoor cat houses for multiple cats, offering exceptional insulation, spacious interior capacity, and a durable design suited for harsh weather. Its large cylindrical build and removable lid make it a standout option for caretakers looking to comfortably house two large or up to three medium-sized cats, particularly in colder climates.
One of its most user-friendly features is the removable, twist-off top lid, which allows for easy interior access—ideal for cleaning, monitoring, or adding bedding. The interior is optimized for warmth and safety, with multi-layer insulation in the floor, walls, and ceiling, making it an excellent choice for pregnant cats or nursing queens who require a quiet, thermally stable space.
While the Kitty Tube Gen 3 only includes a single entry/exit point, its manufacturer emphasizes that the entrance is predator-resistant. The recessed and angled design is intended to allow cats to enter and exit freely, while deterring larger animals like raccoons or coyotes from reaching inside—a key consideration for outdoor safety. However, users should be aware that single-exit shelters may limit escape routes in some rare threat scenarios.
Made in the USA from post-consumer recycled plastic, the outer shell is not only environmentally friendly but also engineered to resist cracking, warping, and UV fading over time. The product is rated as water-resistant, though some reviewers have noted that under heavy or wind-driven rain, moisture can occasionally seep in, so placement in a semi-sheltered area is advisable.
All in all, the Kitty Tube Gen 3 is a robust, insulated outdoor cat shelter ideal for multi-cat households, especially for those focused on thermal efficiency, low maintenance, and eco-conscious materials. It’s particularly well-suited for colder regions, birthing environments, or locations where space and protection are top priorities.
Pros
Very easy to maintain and clean
A spacious cat house
Cons
Has just one exit
Not entirely waterproof, as the manufacturer claims
Material: Polyethylene plastic | Style: N/A | Weather-Resistant: Yes | Dimensions: 24" x 24" x 23" | Size: Medium to large
Unique Triangular Design: This outdoor cat house...
Windproof & Waterproof: our outdoor cat house not only...
The Petsfit Weatherproof Cat Shelter stands out as one of the best outdoor cat houses for those who value visual appeal and functional safety. Constructed from natural cedar wood and topped with a durable asphalt roof, this shelter offers reliable protection against the elements, making it suitable for use in uncovered outdoor spaces. Its use of non-toxic, water-based paint ensures that your cat isn’t exposed to harmful chemicals—a welcome detail for pet owners concerned about long-term exposure.
While its packaged dimensions may seem modest, the Petsfit shelter is deceptively spacious and can comfortably accommodate two adult cats. One of its most notable safety features is the dual-exit design, allowing a cat to escape if approached by a predator. The rear exit includes a plastic flap, which keeps wind and moisture out while preventing other animals from entering—adding a layer of passive security without sacrificing ventilation.
Elevated off the ground by sturdy legs, this outdoor cat house also shields cats from cold, damp ground during rain or snow. Its elevated platform, combined with the solid cedar construction, contributes to both thermal buffering and long-term durability. The standout feature, however, is the charming aesthetic—complete with wood paneling, a peaked roof, and even a flower box that adds character and visual charm to your porch, patio, or garden.
Despite its visual polish, assembly is straightforward. Most users report full setup in under 90 minutes, aided by clear instructions and pre-drilled components. However, several reviewers note that the shelter lacks factory-applied varnish and internal insulation, making it more suitable for mild climates or for use in partially sheltered locations.
To maximize its longevity and resistance to water ingress, adding an extra layer of outdoor varnish is recommended. Still, the Petsfit Weatherproof Cat Shelter remains an excellent choice for pet owners who want an outdoor cat house that balances weather resistance, feline safety, and design-forward craftsmanship—with just enough DIY potential to make it your own.
Pros
Very easy to assemble
Elevated floor
Sturdy product
Spacious enough for two to three adult cats
Two exits to allow your cat to escape
Cons
Not varnished
Not insulated
Not waterproof
Material: Wood | Style: Modern | Weather-Resistant: Yes | Dimensions: 20" x 20" x 21" | Size: Medium to large
MULTIPLE CATS: Our cozy cat heated house measures 35" x...
WEATHER RESISTANT: Keep all cats of any shape and size warm,...
The K&H Multi-Kitty A-Frame is a durable and well-insulated structure that earns its place among the best outdoor cat houses for small multi-cat households. Designed by one of the most trusted brands in feline shelter products, this model is available in both heated and unheated versions, making it ideal for year-round use. It features a single, stylish chocolate brown color and an angular, compact footprint that blends easily with porch, patio, or backyard environments.
One of the standout features of the K&H Multi-Kitty A-Frame is its dual-exit design, which ensures that cats have a safe escape route in the event of a predator encounter—an essential consideration for outdoor safety. Like other K&H models, it features tool-free assembly, meaning you can set it up quickly without specialized hardware.
This A-frame cat house is built to accommodate two adult cats comfortably, with enough interior space for bedding or insulation upgrades. Compared to the smaller K&H single-cat models, the A-frame offers sturdier construction, providing more wind resistance and overall stability—important for exposed or breezy environments.
While marketed as waterproof, many users report that the structure is more accurately described as water-resistant. In uncovered areas or during heavy rainfall, water can seep in, particularly since the base is not elevated off the ground. Moisture can wick up from below, making placement a critical factor in maintaining a dry and comfortable interior.
For best results, it's recommended to position the K&H Multi-Kitty A-Frame in a partially sheltered location, such as under an awning or porch overhang, to enhance protection from the elements. Its heating compatibility, escape-friendly layout, and reliable K&H build quality make it a smart option for outdoor cat caregivers looking to provide warmth and safety for two cats, with minimal setup and dependable performance in moderate weather conditions.
Pros
Two exits to provide your cat a safe exit
Spacious enough for two large cats
Does not need any tools for assembly – easy to set up
Cons
Not waterproof
It does not have an elevated flooring
Material: N/A | Style: Heated | Weather-Resistant: Yes | Dimensions: 20.5" x 35" x 20" | Size: Medium to large
KEEP LITTER IN THE BOX, NOT ON THE FLOOR: Unique, patented,...
MINIMIZE ODOR: A charcoal filter minimizes unwanted odors to...
The Petmate Kitty Kat Condo is one of the best outdoor cat houses for large cats, designed to provide maximum interior space, insulation, and weather resistance in a compact, igloo-style form. Built from nonporous, molded plastic, the structure is fully waterproof and well-suited for outdoor environments with exposure to rain or snow. Its seamless construction also makes it easy to clean, ensuring low maintenance for multi-season use.
Tailored for larger feline breeds or heavier outdoor cats, this shelter features a carpeted floor insert that adds a layer of thermal insulation and comfort. While the interior remains cozy and warm during colder months, the permanently fixed carpet may pose a challenge for users seeking easy deep-cleaning or modular bedding.
The Kitty Kat Condo has a single, generously sized entrance, which improves accessibility for bigger cats but also introduces a safety concern in areas where predators like raccoons are present. Some users have reported unwanted intrusions due to the open-access design, so this model may be better suited for secure or low-risk outdoor spaces.
The igloo-style roof helps to divert rainwater away from the entrance, and the plastic shell prevents water absorption, allowing it to be placed in uncovered areas. However, during heavy rain or wind-driven weather, moisture can still enter through the front, so positioning the shelter in a semi-covered location is advisable for added protection.
What sets the Petmate Kitty Kat Condo apart is its spacious interior, which not only accommodates larger cats but also allows them to move freely and rest comfortably—unlike tighter shelters that only offer enough room to curl up. While it lacks multi-exit safety and removable insulation, it remains a solid option for owners prioritizing durability, simplicity, and space for bigger cats.
Pros
Solid construction
Spacious enough for a very large cat
Cons
Carpet is very difficult to clean if it becomes wet
Has only one exit
Material: Blend | Style: Cleanstep litter box | Weather-Resistant: N/A | Dimensions: 22.5" x 22.5" x 19" | Size: Large
Unique Triangular Design: This outdoor cat house...
Windproof & Waterproof: our outdoor cat house not only...
The Petsfit Triangle Wooden Cat House is the best choice for homeowners seeking an outdoor cat shelter that blends seamlessly into a design-conscious yard or patio. Humans would call it the best A-frame cat house. Its distinctive triangular structure, made from natural cedar wood, gives it architectural appeal, while the asphalt-covered sloped roof offers basic weather resistance and sheds water efficiently during light rain.
Engineered with dual exits, this shelter prioritizes feline safety, offering a secondary escape route in case of predator encounters. Its sturdy wood construction also holds up well in windy conditions, and users appreciate its straightforward assembly process, thanks to pre-drilled parts and clear instructions.
However, the house lacks built-in insulation, which limits its ability to retain warmth in colder climates. Cleaning requires removing the top panel with a screwdriver, and because the house sits flush with the ground, it’s vulnerable to moisture seepage in rainy environments—making it best suited for mild or dry regions. Elevating it slightly with bricks or a wooden base is a simple way to extend its lifespan.
Ideal for medium-sized cats, the Petsfit Triangle Cat House delivers on aesthetics, stability, and basic weather protection—perfect for those who want a stylish and functional shelter that enhances the look of their outdoor space.
Pros
Has two exits for easy escape
Easy to assemble
Cons
Not insulated
Lies flat on the ground without insulation
Material: Wood | Style: Modern | Weather-Resistant: Yes | Dimensions: 20" x 20" x 21" | Size: Medium
REAL BIRCHWOOD: Outdoor kitty house constructed of real...
HEATED: This heated version includes the K&H Extreme Weather...
The K&H Thermo-Kitty Wooden Home is the best budget-friendly option among heated outdoor cat houses—delivering warmth, safety, and classic wooden construction at a lower price point than many comparable shelters. Made from durable birch wood, this shelter offers a cozy interior with two exit points, providing a critical escape route in the event of a predator encounter—especially useful in residential areas where dogs or other animals may roam.
Buyers can choose between a heated and an unheated version. While the heated model includes K&H’s trusted low-wattage heating pad for reliable winter warmth, the unheated version still offers comfort thanks to its plush cushioned flooring, which adds a layer of passive insulation.
Sized appropriately for a medium-sized cat, the wooden structure offers a safe hideout, but it does come with limitations. The house is not fully insulated, and since it sits flush with the ground, it may absorb moisture when placed in uncovered or rain-prone areas. Extended exposure to rain or snow may lead to wood degradation over time, so placement under a porch, awning, or other semi-sheltered area is highly recommended.
Assembly is simple, although cleaning the interior requires unscrewing the top panel, which some users find slightly inconvenient for routine maintenance. Still, the K&H Thermo-Kitty Wooden Home remains a reliable and attractive choice for pet owners looking for an affordable heated cat shelter that balances warmth, safety, and structural simplicity—especially when used in protected outdoor spaces.
Pros
Comes with a plush pad
Easy to assemble
Has two exits that offer an easy escape for cats
Cons
Not elevated
Not waterproof
Not insulated
Material: Wood | Style: Heated | Weather-Resistant: Yes | Dimensions: 16" x 18" x 15" | Size: Medium
ECOFLEX Construction – Made from recycled polymers and...
Cozy Dual‑Door Entry – Included Vinyl flaps shield from...
The ecoFLEX Albany Outdoor Cat House is the best choice for environmentally conscious pet owners looking for a durable, low-maintenance, and sustainable shelter solution. Made from a proprietary ecoFLEX™ composite—a blend of recycled polymers and wood by-products—this cat house is completely non-toxic, moisture-resistant, and engineered not to crack, warp, rot, or fade, even after years of outdoor exposure. Backed by a 10-year manufacturer's warranty, its structural integrity is one of the strongest in this category.
Unlike some wood-based models, the Albany Cat House is elevated, which prevents ground moisture from seeping in during wet conditions. This design helps maintain a drier interior, especially important in rainy or humid climates. Though not insulated, the thick, weather-resistant panels offer a basic barrier against wind and temperature shifts.
Assembly is fast and tool-free, making it one of the most user-friendly cat houses on the list. Many users report setting up in under 20 minutes, with no additional hardware or accessories needed.
While the interior is spacious enough for a medium-sized cat, it may be a tight fit for larger breeds. The structure’s low-profile roof and side access make it a solid choice for feral or outdoor cats who prefer enclosed, den-like shelters. For added protection from the elements, placing the unit in a semi-sheltered area—like under a porch or awning—is advised.
Pros
Easy to clean
Elevated off the ground
Sturdy and durable product
Has two exits to make for an easy escape
Very easy to assemble
Cons
Not waterproof
Small capacity, large enough for only one medium-sized cat
Material: Plastic-wood polymer | Style: Traditional | Weather-Resistant: Yes | Dimensions: 19.1" x 21.8" x 20.2" | Size: Medium
In this guide, we will explore the best outdoor cat houses available in the market. If you have a furry friend who loves spending time outdoors, providing them with a safe and comfortable shelter is crucial. We will discuss important factors to consider, such as size, construction materials, weather resistance, insulation, and more. We have carefully selected and reviewed eight top-rated cat houses to help you make an informed decision. Whether you have a single cat or multiple feline companions, this guide is designed to assist you in finding the perfect outdoor cat house to meet your pet's needs. Let's dive in and discover the ideal shelter for your beloved cat!
Size and Capacity
Consider the size of your cat and how many cats you have. Ensure that the cat house is spacious enough for your cat to comfortably move around and lay down. Some cat houses can accommodate multiple cats, while others are suitable for only one cat.
Material and Durability
Look for cat houses made from durable and weather-resistant materials. Common materials include nylon, cedar wood, plastic, and eco-friendly materials like recycled plastic. Ensure that the cat house is built to withstand outdoor elements such as rain, wind, and UV rays.
Insulation
If you live in a colder climate, choose a cat house with proper insulation. Insulated cat houses help retain heat and provide a warm and cozy environment for your cat during colder months. Look for features like insulated walls, floors, and roofs.
Waterproof or Water-Resistant
Consider the weather conditions in your area. If you expect frequent rain or snow, opt for a cat house that is waterproof or at least water-resistant. This will protect your cat from getting wet and cold.
Ventilation
Good airflow is essential to prevent condensation and maintain a fresh environment inside the cat house. Look for cat houses with proper ventilation systems, such as vents or small openings, to ensure a comfortable and odor-free space for your cat.
Safety Features
The cat house should have secure doors and exits to prevent predators from entering while allowing your cat to escape if needed. Check for features like double doors, locking mechanisms, and predator-proof designs.
Important Tip
Regardless of the cat house you choose, it's essential to provide additional bedding or insulation during colder months. Consider adding blankets, straws, or heated pads to ensure maximum comfort and warmth for your cat. Regularly inspect and maintain the cat house to ensure it remains in good condition and provides a safe haven for your outdoor cat.
Outdoor Cat Houses
Is the outdoor cat house predator-proof?
One of the basic reasons why you should get an outdoor cat house is to be able to protect your cat from the dangers out there. A predator-proof outdoor cat house is one that offers your cat the chance to escape if it is attacked.
You need to get an outdoor house that features two doors. You should only get a single door cat house if you are absolutely sure there is no danger from predators for the cat.
Do you want to place the outdoor cat house in a partially covered or completely uncovered area?
Most of the outdoor cat houses out there are not very good when it comes to being completely waterproof. There are a lot of them that feature water-resistant construction, but none of them are truly able to keep the water out.
In case of rainy weather, fabric construction cat houses will become soaked, no matter how water-resistant they are. One of the best water-resistant cat houses is the CozyCatFurniture Waterproof Insulated Cedar Outdoor Cat House for Winter and Summer, but you will really have to splurge on it.
If you decide to buy another cat house, you can still go for it. Just make sure that you keep it in a partially covered area to offer your cat a bit of protection against snow and rain.
Is the outdoor car house elevated off of the ground?
One more thing to look out for when you are considering an outdoor cat house is whether or not it is elevated off the ground. If the cat house is elevated, it will be better for the cat. It can protect both the cat and the cat house itself from the dampness in the ground. It acts as insulation from becoming cold as well.
Is the outdoor cat house easy to set up?
Nobody wants to get a product that will take them ages to assemble or if it is too complicated to assemble. You want to get an outdoor cat house that is easy to assemble and set up to save time and effort.
Is it easy to maintain the outdoor cat house?
Cleanliness is a virtue. Yes, that also applies to cats and cat houses. When you get an outdoor cat house, you should make the effort to clean it up regularly to protect your cat from any potential diseases or bugs.
The ease with which you can clean a cat house is one of the most important factors you need to consider when getting an outdoor cat house. Even if you are getting a cat house that takes more effort to clean, it is important that you already know about it so you can prepare yourself mentally when the time comes to clean the cat house.
How much space is in the outdoor cat house?
Knowing how much capacity an outdoor cat house has is a crucial part of the decision-making process. If you are looking for an outdoor cat house that can accommodate several stray cats, you need a larger and more spacious cat house. If you have just one cat as a pet, you do not need to spend a lot on getting a larger model. Just stick to a single-cat size outdoor shelter.
Do you want a heated or unheated version of the outdoor cat house?
There are some outdoor cat houses that come with the option of being heated or unheated. The heated ones feature an additional electrical heating pad. This comes in very handy when you want to make the cat house more comfortable, especially when the weather is very cold.
If you choose a heated cat house, you need to make sure you place it in a covered area that is safe. The electrical device should never come into contact with water.
Conclusion
Providing a secure, insulated, and weather-resistant outdoor shelter is essential for protecting your cats from the elements while offering them comfort and autonomy. Whether you're caring for feral cats, accommodating a growing group of outdoor companions, or simply giving your indoor cat a cozy outdoor retreat, investing in the best outdoor cat house can greatly improve their well-being. After evaluating critical factors such as predator protection, insulation quality, multi-cat capacity, construction materials, and ease of maintenance, we've identified our top three expert-recommended shelters. Each model offers a distinct balance of safety, durability, and functionality—ensuring that no matter your cat's size, behavior, or environment, there’s a solution that meets both their needs and yours. Use this guide to make an informed decision and provide your feline companions with a shelter they’ll rely on throughout the seasons.
The K&H Outdoor Kitty House is an ideal option for outdoor safety, offering two exits for better cat protection and insulated walls for warmth. The Kitty Tube Gen 3 is a good choice for multiple cats, providing a spacious interior and a removable lid for easy cleaning. Petsfit Weatherproof Cat Shelter is the right pick for aesthetics and security, featuring natural cedar wood construction, elevated design, and two exits for added safety. Consider these options based on your specific needs when selecting the best outdoor cat house for your furry companions.
If your love for cats runs deep, creating a safe and comfortable space for them is more than just a gesture—it’s a commitment to their well-being. We hope this guide has helped you better understand what to look for in the best outdoor cat house, so you can make a confident, informed purchase that supports your cat’s comfort and safety year-round. Before choosing, take the time to assess each option carefully—considering size, insulation, durability, and weather protection—because the right shelter isn’t just a convenience; it’s an investment in your cat’s health, security, and happiness.
The immense amount of joy and happiness brought into our lives by our little furry friends is inseparable. Nothing can match the eyes of a puppy, nothing can love you more than your puppy. Pay attention to them, make their life comfortable and memorable; take your pet with you and your family in trips and gain experience together. This small act will bond all of you more than you can imagine, it will create iconic family photos and will land thousands of smiles accompanied by laughter.
We have showcased underneath no less than 20 DIY Pet Craft Projects, all meant to change the life of your furry friends at home where they belong. The easier you make your life the easier and more pleasant they make yours. Cast a glance at the gallery below and choose your favorite craft to materialize. Just like us humans, our beloved pets get bored too. This is why we should always try to do something of a new experience when we are with them. Dogs and cats especially like to roam around the house and sometimes it just is not enough. They need to go outside or they are going to lose it.
DIY Pet Craft Projects
1. Create a Little Pool / Bar For Your Furry Friend
What crafts have you materialized for your pet till now and with what would you like to start from the gallery above? Leave your valuable feedback in the comment section below.
A splash of yellow could be exactly what your living room needs!
Yellow is often considered a bright, cheerful color. And many designers find various fun ways to incorporate them into your homes while being cautious. Yellow textures or décor can be fun and vibrant, but only if they are done right.
If the shade is a touch too bright, like a neon yellow or lime, it could be jarring to look at. However, if it’s a warm tone like mustard, honey, etc., it would draw people in, making them more comfortable.
And since most socializing happens in the living room, you want to ensure that it radiates warmth and hospitality. So, regardless of whether the room has a retro charm or mid-century modern furniture, a yellow sofa could liven your living space up. And we have some ideas that could help you out!
Why Choose A Yellow Sofa?
The color yellow doesn’t seem out of the ordinary but is still not a conventional color many would go for, especially for a sofa. However, the color is often associated with feelings of warmth, happiness, and positivity. So, incorporating even just a hint of yellow, in any shape or form, can give the room a playful yet urban look.
Moreover, it can balance the look of the room if incorporated correctly. And it goes incredibly well with other bright colors like pink, blue, orange, white, and a lot more. As a result, you can always add accents, like cushions or rugs in these contrasting colors to make the space look more vibrant.
Now that we know how a yellow sofa could elevate our room décor, let’s look at a few decorating ideas with it.
Decorating Ideas With A Yellow Sofa
1. Add Warmth To Neutral Tones
If your living room is painted a cool, dark tone to give it a calming effect, it could often make it look bland. For instance, shades of blue can give your room a more neutral look, but at the same time, it could make the furniture and accessories blend into the walls.
However, furniture is supposed to add to a room instead of melding into it. So, adding subtle yellow accents, like a yellow sofa can brighten the room. And with natural light, it can look a lot bigger and spacious.
2. Bring Balance To A Monochrome Look
A monochrome scheme is one of the most popular styles when it comes to interior designing. While we understand why everyone opts for this contemporary style, there’s nothing wrong with adding a modern twist.
How can you do that? By making a bold statement with a bright yellow-colored sofa. Stacking a bright color like this against a neutral backdrop will bring in the perfect balance. Besides, yellow sofas go well with white furniture and accessories.
3. Make It The Focal Point
This may seem odd, but a bright living room can feel cold and impersonal to many. Now there are other elements that could liven it up, but sometimes, all you need is a simple yellow sofa. Moreover, bold colors usually tend to attract attention towards themselves. And you can take advantage of that by placing a yellow sofa against a light-colored wall to give your living room a cheerful new look.
4. Pairing Bold With Bold
One of the many concerns with using bold colors like yellow is that you would have to limit any extraordinary design ideas. But you can incorporate layered rugs and crazy prints to make the yellow sofa stand out even more!
5. Get A Little Quirky
Yellow is such a bright color already, so many homeowners and designers try to use dull or neutral shades to balance the look. But what if you don’t have to do that at all? Just bring in the right-sized yellow sofa to make a bold yet fun statement with your decor.
And while it will do most of the work, adding bold colors in the form of pillow cushions, potted plants, and layered rugs can create a warm look for your living room.
6. The Perfect Vintage Look
Vintage decor runs synonymous to rustic colors, darker shades, and old-fashioned furniture. Interestingly, you can use all of them and then bring in a dark-yellow or mustard-colored sofa to tie in the whole look together.
In this regard, go for an old-fashioned couch, which would be slightly thicker and a lot more comfortable. And it will always be the first thing someone notices when they walk into the room..
7. Step Outside Your Comfort Zone
Most living rooms tend to be a neutral color like grey, brown, or beige. This is often because many homeowners prefer subtle living rooms, and these colors make for safe options. However, you shouldn’t be afraid to experiment.
Adding shade of colors in the form of furniture, rugs, and other accents can give your room a modern twist. For example, a non-conventional yellow floor-level sofa arrangement will not only give your room a much-needed makeover, but it will also help the decor show off your fun side!
8. Add Character To Your Living Room
Who says you have to paint your living room the same shade as the rest of the home? If your bedroom has light blue walls to make it more cozy and welcoming, then make your living room the show-stopper by painting it all black!
Besides, you can go with different light color shades, tones, hues, and furniture to complete the decor. But adding a stylish yellow sofa into the mix could bring the whole space together. And it doesn’t have to be a contemporary style sofa either- the more unusual the style, the better.
9. Incorporate A Warm Tone To Space
Adding the color yellow to your space will bring in more light and will make the room feel warm and cheerful. Moreover, the color complements earthy tones like nothing else. So, you can use yellow light fixtures, wall art in earthy tones, and accessories in neutral shades.
And you can further elevate the look of the living room by including a simplistic yellow sofa. It will visibly stand out, especially if it is of a slightly darker hue.
10. Create The Perfect Rustic Look
Decorating any space with wooden accessories is always a good idea because it makes the room look light, warm, and rustic. A heavy wooden coffee table with light, neutral color painted walls, and a warm yellow sofa can create the perfect setup for relaxation.
Not only does this add more warmth to your living room, but it also gives it a unique look. It would look even more put together if the room has yellow walls, as the space would appear coordinated while bringing in more light.
11. Make The Best Use Of An Open Floor Layout
An open, spacious living room can often look and feel empty, despite being engulfed in various shades of color or accessories. Decorating rooms like this can be slightly difficult since you would want to fill it up.
But sometimes, this can make the rooms look cramped up and cluttered. However, adding a warm yellow sofa to an open floor layout brings all the attention to the sofa, making it a focal point. This acts as an anchor, making a spacious room look and feel homey.
12. A Sprinkle Of Shades Of Green
Yellow doesn’t have to be the only pop of color. Pairing up bright colors can make decorating a lot more fun. The focus wouldn’t be on either of the colors, but it would still make the room pop. How do you do that? You can add a few potted plants, framing the yellow sofa. It will force everyone to look at the said corner every time they walk in.
13. The Freedom To Choose The Perfect Backdrop
A neutral backdrop may seem perfect, but it isn’t always the best choice to make. Certain tones like grey, white, and beige can be pretty uninviting or seem cold. However, if you have a solid yellow couch, you can choose almost any color for a backdrop. Regardless of whether it is bright or neutral, the bright yellow color would shine through.
14. Sunny Shades Of Yellow
Would too much yellow in a room be considered overkill? We don’t think so! Colorful yellow chairs, yellow walls, curtains, or even pillow cushions, can be used to decorate the room.
However, make sure that the sofa is the boldest shade because it should always be the piece that brings your room together. Not only does this show that your room has consistency, but it will also open up your living room, making it look a lot more inviting.
15. Golden Elements
Yellow pairs incredibly well with metallic tones, especially with gold elements. But you don’t have to add big metallic pieces to bring attention to the yellow. It can be something as simple as a pattentred wall, like in this picture.
The gold leaves on the wall go well with the warm undertones of the yellow couch. Plus, you can incorporate more gold by adding other accessories like artwork and lights to give the room the bright and welcoming effect you’re looking for.
How To Style A Yellow Sofa?
1. Bring The Room Together
When you put certain colors together, it makes the living room look complete and put together. So, if you have a warm yellow sofa, it would be essential to pick the same shade of yellow for cushions or rugs to balance it out. This will give the living room some uniformity and make your room feel and look unique.
2. Yellow On The Wall
Accent walls always make the room stand out a lot more. And to give the living room a pop of color, you can have a bright accent wall, preferably yellow or a hue that best complements the sofa.
You can then put the yellow sofa in front of it, bringing more attention to both of them. While a bright color could overwhelm your decor, a softer shade might help elevate the look of the room.
3. Yellow Accessories
If you’re still not sold on the idea of a yellow sofa, picking out a bold yellow cushion could be a step towards it. A neutral sofa with bright yellow cushions might help add a bit of color to your room and create a warm aesthetic. You could even add yellow elements around the sofa to test and see whether you’d like the idea more.
4. Go For Something Smaller
If you don’t have the space for a full-length sofa, but still want to get yourself a yellow piece of furniture, a side chair with yellow upholstery or even a beanbag would be good. This would still be the focal point and give you the warm tone you’re looking for.
You can still pair it with something neutral until you’re ready to make the change. It doesn’t always have to be a solid color chair, you can mix it up by getting pinstriped patterns.
5. Pair It With Shades Of White
You can pair textured yellows with creams and off-white shades, giving your living room a more casual yet modern appearance. Your entire room can be different shades of white or off-white with black cushions. But the entire focus of the monochromatic room would be on the solid yellow sofa.
6. Balance The Warm With The Cool Tones
Afraid the warm yellow tone will overtake your entire living room? You could instead complement it with neutral tones like gray (for the walls) to make sure that the space doesn't look overwhelming.
Sure more warm tones like red and orange can aid visual stimulation. But to avoid it from being overwhelming, you can incorporate these in the form of little accessories or trinkets.
Final Thoughts
A yellow living room idea may seem overwhelming at first, but if you ease into it, it might be just the thing you’re looking for. Opening up your rooms with the tone of yellow will not only make them more refreshing, but it will also be more welcoming for your guests.
By pairing it with a statement piece like a yellow sofa, you’re bringing a more cheerful look to your house. Along with being more inviting, the pop of color will give your room a different designer quotient. So, if you’re drawn to bold colors, a yellow sofa is the perfect piece of furniture for your house.
We hope this list has swayed your opinion on yellow sofas and encouraged you to create an innovative yet joyful space for family and guests alike. That’s it from us, until next time!
The advent of flat screens and LCDs with sleek designs has made it so much easier to mount televisions on the wall and get it over with these days. And if there’s a fireplace at your home, I’m sure you must have had a thought, at least once, that it would be incredibly great to hang your TV over it. I mean, imagine how awesome that would make your living room look.
But, is mounting an electric contraption over the fire really an idea worth your while? Let’s look at the pros and cons to find out!
The most prominent advantage of mounting your TV set over the fireplace is that you can save space – lots of it. This is beneficial, especially when you are living in smaller spaces.
If you aren't hanging the TV over the fireplace, the chances are that you have a separate entertainment center, TV stand, or a dresser taking up space in the living room. One might argue that the TV stands are getting thinner by the day, but nevertheless, it still take up more space when compared to the mounting, which doesn't take any footage of the floor area.
Creating A Common Focal Point
It’s a well-known fact that both Fireplaces and TV stations act as focal points in the living room. When there’s an absence of one, you know where to face your furniture, and how to set up the rest of the interiors. But if your house has both, then you’re sure to be in a dilemma as to how to set up your room.
Also, if you mount your TV elsewhere, you might feel the need to add extra elements and décor to complete the look, which could be a lot of effort.
In instances like these, opting to mount the TV over the fireplace will simply solve your problem by creating a single common focal point in your room. Now, there would be no more racking of brains as to how the furniture and décor should be arranged, and no more obligation to add extra elements to your setting!
By mounting the TV over the fireplace, you can hide all those ugly wires without having it peeping out and ruining the whole look. This could probably be one of the most important reasons why a lot of people prefer this arrangement. You might say that an on-floor TV station or a dresser also gives an edge of hiding the wires behind the TV, but they are still visible to the passers-by if not appropriately concealed.
On the other hand, TV over the fireplace means that all that mess is just thrown behind the wall, and covering it up with a wall plate. Of course, you would be needing the help of a professional to finish the job. But the end look is worth it.
Makes Your Living Room Look Spacious
Since there is no need for large entertainment stations and bulky table dressers once you mount the TV over the fireplace, your living room not only looks but also feels much bigger and spacious.
For an ideal viewing experience, the TV has to be placed at the eye level of the viewer. But if you mount the TV over the fireplaces, there’s a high chance that this isn’t possible, as you have to place it farther up than the ideal height. And the higher the TV is, the more you will be straining your neck.
Let me make it easier for you. Imagine you are sitting in one of the first three rows at the movies. It’s hard to watch the film, as you have to crank up your neck, ending up straining it. That’s why not a lot of people prefer sitting there, in addition to the poor viewing experience of course. Now, TV over the fireplace means that you are going to have first-seat syndrome every single day. Just think of how much effect it will have on your neck! Also, staring at the screen that’s raised for a long time can slowly cripple the functioning of your neck.
Electronics and Heat? Not a Good Combination
While space-saving is the most important reason why people go for the TV over fireplace setup, its juxtaposition to heat stands as a substantial reason why people go against it. Since electronics and heat don’t go together, they are usually placed in different corners.
A lot of televisions work best while placed in lower-temperature settings. Since a fireplace generates a lot of heat, many people argue that this arrangement could considerably reduce the lifespan of the TV sets, making the reparation costs expensive in the longer run. And then there’s smoke emitting from the fireplace which the TVs don’t get along with.
Despite this, if you did choose to place the TV over the fireplace, make sure to clean it regularly. Or else, the smoke could create a hazy film over the TV set, hindering your television viewing experience.
Affects the Visibility and Overall Viewing Experience
We invest a lot of money in our TVs so we could get a great viewing experience. A TV with pristine quality and visibility can cost you anywhere between $500 - $1000. And if you don’t set it up right, consider all that effort and expense gone down the drain.
Let me explain you why. The quality of the picture in any television changes as you keep getting away from the screen. For the best viewing experience, manufacturers even suggest a particular angle at the TV must be placed at. If you fail to do this, you end up seeing a lower-quality picture. You might as well be getting a cheaper TV instead of that.
So, make sure you think twice before mounting your TV over the place. You could maybe go for a swivel mount to improve the angle if you are extremely particular about the Fireplace-TV setting.
Overall, I can say that mounting your TV over the fireplace can be a pesky business. But if done right, can solve your problem with the viewing experiences while adding a great look to your home. So, consider these pros and cons that I mentioned above, and do a little bit of research by yourself before making a decision.
After all, TV over the fireplace trend has swept across the US and has become second nature to a lot of homes. But whatever you decide, make sure the arrangement isn’t cluttered, and your personal preferences are met.
With multiple ways to mount your TV on the wall, you can easily find one that suits your preference. For those on a budget, I recommend a minimalist TV setup. However, if you are in the mood to splurge, you can check out waterproof TV options for your bathroom wall!
Imagine planning a movie marathon with friends, only to have your necks aching after a while.
That’s when you need a suitable TV mount at the right height to enjoy your viewing experience and add some style to an otherwise boring wall. But choosing the right TV mount and installing it correctly can be challenging, especially if the room is already full of furniture and décor pieces.
Hence, I’ve compiled some of my go-to TV mounting ideas to help you pick a suitable one for your abode!
Top 27 TV Mounting Ideas
Are you looking for a creative way to mount your TV? Here is the list of the 27 coolest TV mounting ideas to help you find the perfect solution for your home. Whether you want to go for a modern, minimalistic look or a more traditional one, there’s something for everyone. Here is the list of the 27 coolest TV mounting ideas:
1. Wood Accent Wall
If you’ve got a wooden or faux wood wall, a wall-mounted TV right at the center will add a sophisticated, modern touch to the room. No matter what color of wood you have, a shiny black TV will complement it well. In fact, the warmth of the wooden wall will enhance the TV screen even when turned off.
2. Floating Shelves Around The TV
Got a plain wall with a TV wall mount? Consider adding floating shelves around it. You can add wooden shelves to recreate the previously mentioned minimal effect or choose different materials like metal. Either way, the shelves will help create a cohesive look on your TV wall while presenting your TV as the focal point.
3. TV Gallery Wall
An affordable way to amp up your TV wall is by adding art pieces around the mount. You can hang bold paintings or posters of your favorite movies. Or, if you have simple shelves around, add a statement décor piece, like a lamp, a crystal, or a flower vase.
4. Ceiling Mounted TV To Create A Stunning Statement
Although getting a ceiling-mounted TV may cost you more than the rest of the styles, it will instantly create a stylish impact in your space. In fact, a majority of homeowners opt for this TV mounting idea during home renovations, thanks to its ability to free up wall space.
However, you will require a lot of planning to build a ceiling mount for your TV. Right from the ergonomics to the weight capacity of the lift mechanism - ensure you are certain about everything before opting for a ceiling-mounted TV.
5. Vibrant TV Room
Sleek flat-screen TVs look great next to colorful furniture and décor. So, even if you have a room full of different colors, you need not worry about the wall-mounted TV sticking out like a sore thumb!
6. Corner Mounted TV
If you do not have much space to spare on the wall, consider a corner-mounted TV. But do make sure that it offers a comfortable viewing angle.
Tip
I highly recommend a corner-mounted TV if you do not have a separate TV room or living room. As such, you can create a cozy corner in any one of your rooms with the TV securely mounted on a corner.
7. Built-In Media Cabinet
Despite the popularity of Smart TVs, one cannot deny the vintage charm of older TV sets. However, they often come with tons of wires and accessories, which you may need to store securely, away from plain sight. That’s when a built-in media cabinet can add more functionality and style to your room with the spotlight on your TV.
8. TV In Open Concept Room
If you have implemented open-concept floor plans in your house, it is bound to have fewer walls. In such cases, you must be extra careful about the placement of your TV mounting bracket. It should be placed strategically to offer a comfortable viewing angle from every corner of the room. You could even invest in a movable mounting bracket.
However, in such room schemes, one thing is for sure - your TV wall is bound to make a statement!
9. Mid-Century Modern TV Room
The mid-century décor is known for its minimalism, timeless aesthetics, and functionality. And what’s better than a chic TV mounted on a muted shade wall, complementing the mid-century style furniture?
I always recommend my friends and family to stick to this style of home décor since it is easy to pull off and maintain. Plus, the clean-cut décor looks great in small apartments.
10. Wallpapered TV Wall
If you’ve got a patterned wallpaper on your walls, I recommend keeping it simple with just a mount to watch TV and no other shelves and decor pieces. Maybe you can add a dainty lamp next to the TV to create balance.
However, if your wallpaper features a single color scheme, you can experiment with more accessories around the TV on the wall.
11. Neutral TV Room
Prefer following a single color palette throughout your room? Try bringing in some contrast with a wall-mounted flat-panel display. Even if you have a grayscale theme, you can add interesting layers to the décor, like a huge statement sofa or hanging potted plants. As long as you add furniture of the same or complementing color palette, your neutral TV room will look as stylish as ever!
12. Mounted TV With Floating Entertainment Center
Lucky enough to get a dedicated room for watching movies, playing games, and listening to music? Then this is the best solution for you. After all, floating entertainment centers can offer a sleek overall aesthetic while adding more storage for your equipment.
13. Waterproof TV Mounted On The Bathroom Wall
Gone are the days when TVs were installed in living rooms and bedrooms only. Nowadays, besides having a separate “entertainment” room, some people cannot do without a TV in the bathroom, too! While it may sound bizarre, nothing feels quite as luxe as sipping some wine in the tub while watching your favorite Netflix series.
14. Modern Traditional TV Room
If you’re unable to choose between minimal modern aesthetic and the old-world charm of vintage pieces - why not try a fusion? Stick to a complementary color palette, and mix and match, say, a sleek lamp and an antique wooden trunk with gold carvings. Accordingly, you can install a wall-mounted TV over a rustic table adorned with vintage pieces, like a gramophone or a rotary telephone.
15. Tile TV Wall
Who says tiles are only meant for bathrooms and kitchens? With the right size and color of tiles, you can create a contemporary TV wall. Adding tiles to the TV wall can even be an affordable option for some, as it may not require the use of additional décor pieces, shelves, etc.
Consider adding tiles to just one wall in the room or limit its usage to only a part of the wall. This will not only help save money but also prevent your room from looking too busy and congested.
16. Mounted TV With On-wall Shelf
If you have a small TV room or living room, I recommend investing in an on-wall shelf located right below the TV wall mount. This will negate the requirement for a separate shelf or storage unit for hiding all the components that come with a TV, like a cable box, CD players, etc.
You can even mount smaller components and streaming devices behind your TV by placing it at an angle. But you will have to be careful about the overall height and viewing angle of the TV, as these factors can greatly influence its picture quality.
17. Dark TV Wall
Are you a dark academia enthusiast, or simply prefer a moody vibe? Then go for a dark TV wall.
And when I say “dark,” I don’t just mean black and brown. Try playing around with jewel tones like emerald green, ruby red, plum, teal blue, etc. These colors will create a dramatic dark vibe in your room while maintaining a striking contrast with your TV.
18. TV Around The Fireplace
A TV mount over a fireplace mantel is the safest bet for any household. In fact, it’s what homeowners have been doing for ages, and rightly so. Installing the TV on top of a fireplace gives it the right height and viewing distance.
That said, you can even place the TV beside the fireplace if you want a lower height. This works well if you have lower seating arrangements, like a low sofa, bean bags, etc.
19. TV On A Shiplap Accent Or Reclaimed Barn Wood Wall
A shiplap accent wall adds more texture and dimension, much like a wood accent wall, albeit a bit more subtle. As such, it makes the perfect frame for flat-screen TVs. I personally prefer the shiplap trend with farmhouse design décor.
Basically, the farmhouse look is all about simplicity, functionality, and comfort. Think oversized potted plants, rattan or straw furniture, matte over metallic finishes, and cozy color palettes.
20. TV Over Media Furniture
Another great idea for those who require more storage space is to slip in a stylish cabinet underneath the TV on the wall. You can sneakily store CD players, gaming consoles, Wi-Fi modems, and more while creating a chic look in your living room or bedroom.
Tip
To add some oomph to your space, I recommend investing in a high-quality cabinet or chest of drawers in a striking color. It will act as a statement piece and create balance with an all-black TV screen.
21. Minimalist TV Setup
If you do not have much space or money to spare, installing a TV mounted on a blank wall with simple furniture around it is another effective idea. You can just have a small sofa, coffee table, and a flower pot next to the TV mount, and the room will look impeccable.
However, you will have to choose your colors and textures (rugs, carpets, throws, etc.) wisely to ensure the living room does not look dull and boring.
22. Mounted TV With Soundbar
Despite the advancement in technology, newer, thinner TVs are often devoid of crisp audio quality. So, if you enjoy watching action movies or playing adrenaline-pumping games, you might want to invest in a high-quality sound system.
The flexibility of a wall-mounted soundbar can greatly support additional acoustics and soundproofing efforts, such as the use of acoustic panels or bass traps, which can increase the acoustic quality level in your household. Properly integrating your soundbar with your TV can contribute to a more immersive audio experience by evenly distributing sound across the room and mitigating distortions.
23. TV Mount With Industrial Décor
For those who like rustic industrial-style décor (shades of brown, leather texture, metallic finish, etc.), a wall-mounted TV can fit right into your industrial space. The combo looks clean, classy, fashionable, and functional.
24. Southwestern Bohemian TV Wall
If you want to create a carefree, boho vibe in your house, a TV wall decorated with earthy color artwork and macrame wall hangings will do the trick. I further recommend using woven rugs, lots of pillows (if they have fringes - even better!), and utilitarian, wooden furniture to complete the Southwestern look.
25. Framed TV
Framing the TV screen will ensure the device is the statement piece in the room while blending it into the background. If you have the budget to spare, you can hire the services of a professional. However, with the right material, you can make your own frame TV. For more details, you can check out my guide on “How to prop up a TV without a stand?”
26. Kid-friendly TV Room
Adding a TV in the kid’s room makes sense if both you and your kid are tired of fighting for the remote! I suggest adding colorful paintings or toys on the shelves around the mounted TV. And if you’re worried about your child’s screen time, you can always add a child lock to the TV.
27. TV Mounted Behind A Bookcase
A smart space-optimizing idea is tohide the TV inside or behind a faux bookcase. However, implementing it might get complicated, as you will have to get the right mounting bracket and invest in bespoke cabinetry. Moreover, the movement of the bookcase can be automated or manual, depending on your preference.
Another sneaky way to keep your super large TV hidden inside is to experiment with bespoke joinery that can slide open and close whenever required. This not only makes your space look stylish but also saves space.
TV Mounting Ideas Conclusion
Finally, I come to the end of this extensive guide. I hope my TV mounting ideas will help you install your television in a stylish yet functional manner. Whether you want your TV to be visible in its full glory or want it hidden, just make sure you choose the right mounting bracket.
That said, I suggest checking out my latest guide on “Best Pull-Down TV Mount” for more information.
What does it come to your mind when you see the world "relaxing"? To some relaxation means going for a walk, or taking a holiday in a tropical resort, to others it resumes to having a cup of coffee in a rainy day and enjoying a good book. I tend to fit into this last category and I run to a good book any chance I get. Therefore, one of my biggest dreams is having my little cozy reading nook in my home from where I can admire my garden enjoy some quality reading.
Designing such a place is not a difficult task, but a key factor that will contribute to your overall state of mind when relaxing here is the design scheme including shape, materials, textures and, most important, colors and tones. As you will notice in the collection displayed below, a neutral color scheme or pastel tones and even an all white decor empowers your corner and creates a more fresh, cheerful relaxing atmosphere suitable for reading. Mirrors, big windows, flowers, fluffy cushions complete the design and are the important factors in the following cozy reading nooks. Our top covers a list of 27 Cozy Reading Nooks That Will Inspire You To Design One Yourself In Your Home.
1. Use your existing window as a reading nook
2. Mirrors amplify the space and help you relax
3. An all white scheme keeps you dreaming
4. Level up reading nook, add a ladder to your private retreat
5. Use that window in between floors
6. Add paper lamps and different textures for a tent-like effect
7. Even strange organic homes can have reading nooks
8. A reading nook in the kitchen can be very beneficial and will invite your kids to spend some more time with you while you are cooking
9. Of you have floor to ceiling windows add a beatiful lounge chair
10. Make a reading nook is pastel colors in your kid's room as well
11. Your home desk deserves a reading nook for those work breaks everyone needs
12. Be creative and have fun with the decoration
13. Turn a very small room into your own little cozy retreat
14. Rustic decor can be cozy too
15. Flowers brighten up any atmosphere
16. Use that window seat at its maximum and even use the space underneath as storage
17. Add an Oriental touch to the decor
18. Cozy wooden reading nook
19. Get cozy with fluffy coushions and pillows
20. Big windows are a big plus. Surround them with book shelves
21. Or fit your reading nook in between book and decoration shelves
22. Sometimes simpler is better
23. Custom made nook in the attic
24. Curved shapes for a better pose
25. A glass reading nook as a transition between inside and outside
26. Use bright colors as accents
27. Use a wall niche as a cozy intimate reading nook
Washed up wood, white decors, freshly cut flowers and bright accents add glamour and charm to the shabby chic living room designs. A mix of different elements all brought together into an unique fresh cozy ambiance that represents a laid back unpretentious lifestyle. Comfortable but bright and elegant at the same time, a shabby chic decor will express your personality and personal taste. It will tell a story about your life and family in a discrete lovely manner, containing long time loved items recycled reconditioned and brought back to life in the most normal composition possible. Every design is one of a kind and representative for that particular home so if you like having a space hat reflects your style try the shabby chic design line.Cast a glance at the gallery below and allow this relaxed elegant style glamour your senses.
1. the most BEAUTIFUL coffee table-simple and everlasting
2. neutral color pallet exuding such a comfortable atmosphere
3. a modern shabby chic decor with a stilish French twist
4. elegant and delicate in its simplicity
5. delicate and feminine with pink accents
6. cozy and fresh in an scandinavian inspired decor
7. shabby chic with minimal accents
8. french styled living room
9. fresh and girly flowery decor
10.elegant and SUMPTUOUS in a perfectly merged decor
11.simplicity goes a long way
12. cozy and warm with little effort
13. elegant decor filled with one of a kind pieces
14. a marine vibe to an all white living room
15. pastel pink adding delicacy
16. choose a piece of furniture to make it stand out
17. TURQUOISE tones accentuate a cozy living room
18. An all white design filled with a personal touch
Are you a fan of the laid back shabby chic design line and its comfortable style? We would love to hear your ideas on this subject in the comment section below and see your own shabby chic designs as well.
The one design of sofa that conveys a drama and mystic into the interior and make an easy statement in the area is the Chester sofa. This deep-buttoned sofa has been in trend since ancient times and it doesn't have an intention to go anywhere anytime soon. You can find it in an array of fabrics, colors, patterns, shapes and sizes, so that means that it can fit almost in any interior design. If you are planning to add a Chester sofa in your home, scroll down through the photos below and get some ideas. Check out the Super Modern Chester Sofas That Will Make Your Home Look Classy and fall in love with their beauty and style. Furniture is an important investment, and we guarantee you that it won't go out of style and won't decrease in value.
If you are about to redecorate your living room, this is the perfect sofa to purchase. As soon as you enter the room, it will be the first thing that you spot and it will stay in your mind for a long time!
A Chester sofa in a bold color will be the focal point in the room. Don't be afraid to go for an eye-catching color because it works great on this design.
The incredible versatility of the Chester sofas makes them great for any home and they have the power to fit beautifully in every room in the house. Choose them for your living room, for you home office, library or just add them in the guest room. Wherever you add them you can be sure that the room will have a timeless look!
rating your home in the industrial style, the brown Chester sofa is the perfect choice for you. Your industrial living room will be complete with this type of sofa, and it will be your favorite piece of furniture in the room for sure.
The Chester sofas are really modern and popular, and you can never go wrong with them. Add them in your home and give it a classy and stylish look with ease.
What do you think ? How do you see the Chesterfield Sofa or in short, Chester Sofa ? We would love to hear from you !
In a hectic world where everything is digital and online, having a quiet time alone with a favorite book is luxurious to say the least. There are many people who would love to add a reading nook in their homes but have little to no idea on how they would like their reading nook to look like. A reading nook is a particular part of a home where a person will find comfort and quiet while having a great time with a book or two, and there are a lot of designs that can fit any style of a home.
surrounded by all the precious books
A reading nook is meant to have enough space for all the books that a person will and have collected. The more space for books, the better! This is why this reading nook is just as perfect as it can be since it has several shelves for a large collection of books.
Reading nooks are often in an open space, besides a large window to allow natural light in. However, open windows may not be available for some homes, and noise can be a nuisance. This hidden reading nook can prevent noise, provide the comfort of books without the noise or any other disturbance.
a cozy chair and steampunk lamp
A cozy, classic upholstered couch is never a bad mix with a steampunk floor lamp. Add a lovely side table to hold the books and comfortable pillows and have a personal reading nook that fits any small corner of the home.
Reading needs an ample amount of light and is necessary for a reading nook. Choosing the sunniest part of the home and making it a reading nook is perfect. A couch that complements the color of the wall and usually in neutral colors is ideal for this type of reading nook.
Creating a nook does not mean spending money for a small space of the house. Repurposing old furniture can be a perfect option for people who want to achieve the best reading nook bench, complete with storage for books. The use of light-colored finishings can even make the reading nook bench a lovely place to stay on for hours.
For homes that do not have much space, setting up a canopy for a makeshift reading nook is also a lovely idea. Using dainty fairy lights will help the nook stand out from the rest of the room. The canopy even gives a little more privacy for a person than other designs.
Attics can either become a room or a storage area that accumulates dust. The attic is also a place where the noise can be minimal and the light that comes in is abundant. Building a reading nook in the attic using pallet wood and cozy country pillows will be a great option rather than keeping the attic just as a storage area.
suspended pallet table for books and coffee
Pallet wood is useful in many ways, and using it in a creative way is the best way to go. This suspended table is perfect for an unique reading nook. The suspended pallet table is big and strong enough to hold books, drinks and other items and convenient enough for anyone who will use it.
Having a reading nook this cozy, with the right color and winter plants to add the right mood will make anyone grab a cup of hot chocolate or coffee in the cold winter days. This setup is also very flexible since changing the flowers and the pillows can easily make it ready for warm, summer days.
People want to have the perfect accessory in their reading nooks, like this witty pillow. It is simple but says all the great things in life in simple print. The white pillow and black print also go well with any design of the reading nook.
lovely suspended rattan cocoon
While benches and couches are lovely as a reading nook, cocoon chairs are also very desirable since comfort is part of it and cocoon chairs are aesthetically beautiful. If a regular cocoon chair are stunning enough, imagine having a suspended one and with lovely patterns. Add colorful pillows, a cozy blanket and have a reading nook that can make anyone want to sit and read.
a mix of white and gray
While many will say white and gray are just plain boring, this reading nook setup surely shows otherwise. The soft white drapery makes a perfect background for the gray pillows and stuff toy. Kids will not find this design boring and will probably want to spend time reading, and snoozing in this cozy little place.
The space under the stairs often gets left unused or just used for storing knick knacks, but making it into a reading nook is one idea that can be a better option to maximize space. It can be fixed with the right light, a little decor made with love and a cozy couch and earthy tone pillows and you have a reading nook that even kids will love.
Getting all warm and cozy for winter also means getting the right book to spend time with. This cozy chair will entice any winter and book lover to just sit for hours. The soft candle light complements the drapes and the autumn look of the whole chic setup.
rustic reading nook with colorful pillows
Rustic home settings certainly deserve a rustic reading nook. The earthly tone is enough to get this cozy nook the right appeal for lovers of rustic design. The colorful pillows and couch upholstery are refreshing to the eyes and pop out from the rest of the design.
Kids and young adults will definitely love this whimsical reading nook. The dainty fairy lights highlight the DIY canopy made with soft drapes. The big teddy bear is enough to find this small area a cozy place to spend hours reading books.
Whether for kids or for adults, this all white reading nook layout is enchanting. The soft lights with different shapes give enough light to illuminate the nook. The soft drape and the cozy makeshift couch will entice anyone of any age to just chill on this spot.
highlighting the best times and things on the best spot
Reading nooks can be as personal as they get. The accent wall which highlights memories, photographs and personal paraphernalia looks lovelier with the pallet wood background. The lively and cute chair also stands out because of its soft pink color. The table, though small, fits perfectly with the whole setup of the reading nook.
'
Have you ever considered building your own reading nook? Feel free to share your ideas in the comment section below.
A couple of years, decades ago napping at work would have constituted solid grounds for being fired out of some offices yet things are massively improving with the advance of technology today. Thanks to this insanely rapid growth you can actually take a nap at work. In fact, tech giants such as Google or Facebook are installing napping pods in their offices to encourage you to have this healthy refresh at your workplace. The simple idea behind this new epic trend is that a swift nap will actually increase your productivity as they rejuvenate the mind and body.
The most common presence in the trend are the EnergyPods envisioned by MetroNap, they look futuristic, greatly fit for a tech setting. In the following article we will go to through a couple of nap pods that might fit your workplace, cast a glance.
A nap pod in the wild awaits a subject to immerse into deep sleep.
a break with capsule pods
As previously mentioned, the EnergyPods are the most popular choice when it comes to these refresh capsule, they are basically C-shaped pods that have the bottom part extended to accommodate the taller individuals.
In certain workplaces there are dedicated napping rooms where one could rest peacefully.via Wellbeing Workout
The napping rooms sometimes include simpler setups like camp tents, pillows and blankets in a cozy cabin-like atmosphere that is meant to calm the individual and soothe its nerves, this is the case with the HootSuite napping room in Vancouver.
In Sidney the Google offices have tailored epic fluffy compartments for quiet work time, and they`re naturally being used as nap pods too. If you feel the need to work in a more comfortable setting sometimes though, you can do that here, you can find refuge in a small comfortable pocket and work in peace.
The nod pods sometimes take an odd space-travel inspired shape. Above three pods reside in a London office, they were installed in a room with a soft light in the attempt to make the refresh session easier, more efficient. This London office also features a small lounge, showers and a kitchenette thus encouraging one to feel at home, especially when a deadline is ahead and every creature comfort matters threefold.
You can stack nap pods too, nestle comfort in your company.
Podtime offers great customization options, and while the base poly-carbonate tube remains constant the company could choose from things that range from the technology in the tube up to the doors and light of the pod.
Capsule sleeping is already quite spread around the globe reason for which in the following section we will cover a few from various offices, we will start with the Facebook offices in Seattle. In this particular design the capsule is entered differently, on the long side thus making sleep far more accessible. It goes without saying that the capsule looks really comfortable, we would grab that pillow right now, wouldn`t you?
via The Daily Telegraph
Another sleeping pod has been noticed in the land down under, in this case, the pod is being used by Australian footballers, the ones that make the team entitled Sidney Swans. These capsules are especially useful for athletes when they have more than one training a day, it allows them to rest and refresh in between easily.
via Robert Aberman and Daily Mail
In particular scenarios in which getting to and from work becomes significantly difficult the approach of sleeping in the workplace has been adopted by certain companies. In 2012 the Summer Olympics have buzzed London beyond belief and for some business that cannot be interrupted Interxion installed their space pods, the PodTime capsules mentioned above, in the attempt to make the commute easier or eliminate it completely during those Olympic traffic times. Employees were able to take an hour nap after work to leave the office when things cooled down a bit or could have come in early to avoid it.
In Japan, people that are unable to reach their home for more than a couple of hours of sleep are occasionally using capsule hotels around the workplace to maximize their sleeping time. In this way they avoid running home and from home the next day for two-three hours of sleep, businessmen use these when 24 hours in a day are not enough.
One sure imagined once in the library that a nap would be the cherry on the top, a small break after hours of reading awesomeness would have been purfect before you would re-engage the world of written knowledge. The Library Australia’s University of Queensland has read your mind, a student now luckily can take a short sleeping break in full comfort using the EnergyPods, this ought to encourage studying and the time spent in the library itself.
EnergyPods can be found in the United States libraries too, the last example of a pod in universities comes from Wesleyan University in Connecticut, naturally, in a student library. You can enjoy a short nap in a super comfortable reclined seat, surrounded by soothing sounds and rhythms and a privacy visor.
Epic Dedicated Napping Space
In the start-up culture and tech companies in particular,world-wide, the versatile space is a must. Sleeping and relaxation areas get a great deal of attention, as they`ve proved that they can increase the productivity, health and well being of the employee. In the following section we will present relation areas from various office around the world.
Capital One Lab in San Francisco offers elevated sleeping nooks only accessible through a ladder, every bunk includes a soft mattress and various amenities meant to encourage you to relax whilst offering you the opportunity to read your mail, newspaper or book in silence.
In Pittsburgh at Google things are different, an immense rope area offers you the opportunity to sleep in full comfort, you are in your office, elevated off the ground in thin air, surrounded by pillows and invited to rest, sounds like a pretty good selling point for the office.
In certain offices the small space will not allow one to enjoy a sleep in a regular bed, in these cases there are alternatives, the Ostrich Pillow is one of them. Various workplaces around the world have stocked a few of these to encourage their employees to rest. They look weird and funny, they are comfy and they block sound and light, they encourage sleep. You can order one for yourself and try it out, if the current office is not offering you nap options you could use this one in your launch break for a quick 20 minutes refresh.
If your workplace lacks a sleeping option and the Ostrich Pillow simply ain`t enough to put you to sleep certain establishments have been envisioned for you, you get out of your office when need be and simply go to sleep somewhere, above illustrated, Natureland, offers reflexology sessions, you can get a massage, spa-like treatment and a nap in full comfort, happy times for folks living in Singapore.
Napping in the office might not work in every industry or every workplace but the trend not only encourages sleep and relaxation but a less stressful work environment altogether, something that will be surely felt in absolutely every job at a certain point as we get closer to robots that will start to replace stressful, irritating jobs. What do you think is going to happen next in the workplace environment and how do you see the napping pod trends? We would love to hear from you!
Want to add something different to your house? The good thing is that mid-century style furniture knows no age and does the job perfectly well.
You can add some bold patterns to your plain and dull wall or accessorize the cabinets with some contemporary utensils or glazed pottery. Or, you can just add something like a classy mid-century leather sofa that straight away catches anyone’s attention who enters the room.
Moreover, contemporary furniture like mid-century modern style leather sofas might just transform the look of your living room. And many options are available on the market to choose from. However, if you don’t know much about antique pieces, don’t worry. We have curated a list of recommendations available for you.
Without further ado, let’s dig in!
Top 19 Mid Century Modern Leather Sofas
1. Wells Leather Sofa
This Wells mid-century design sofa looks both modern and rustic, as its cushions are tucked into a slim frame, supported by sturdy iron legs. Its leather is kiln-dried and benchmade using plywood molding or similar techniques to prevent wrapping. And the cushions made from high-resilience foam ensure a relaxing seating or resting experience.
With an 84"Wx35.5" Dx31"H dimension, this sofais a perfect fit for any average-sized room. It is tailored with top-stitching, and the armrests are made of French seams, giving it a classy appearance while also ensuring its durability. Besides, the application of waxes and oils during the finishing results in an heirloom patina, which provides the leather with a glowing look.
It also features FSC certified wood from forests that are managed responsibly to be socially beneficial and environmentally sound. Plus, this mid-century sofa comes in three fabric colors, which are bound to create a timeless look for your room.
Looking to impress your guests? Then this classy mid-century modern sofa by Vonanda, made of handmade leather, will get the job done for you.
The company promises timeless comfort through select leather upholstery and wide arms while also creating a casual yet modern vibe. Its sumptuous cushioned soft backrest and seat with high-density foam provide consistent support and relaxed comfort. Hence, it provides ample space for you to call over your friends and enjoy a game of football together!
Apart from being classy-looking, its Eucalyptus and plywood-made frame provides structural stability and durability. The slender metal legs of this sofa adds to its exquisite elegance and are also easy to clean underneath.
Lastly, you can easily disassemble and transport it through small hallways and doors, which is an added advantage. Overall, this mid-century design modern sofa is well crafted that aligns with your room decor and guarantees matchless comfort to render a stunning look to the room.
This mid-century modern style sofa by POLY & BARK is made of semi-aniline or full-aniline dyed Italian tanned leather cushioning. The cognac tan dyed non-pigmented leather highlights the hide's natural beauty. Over time with use, the leather will scuff to develop into a vintage patina, giving it a glossy and classy look.
Moreover, the leather used for the different parts are unique and vary in color depth. The entire body is supported on a solid wood frame, and cushions are made of high-density foam with polyester filling, which deliver a relaxing sitting experience. Likewise, its legs are made of solid rubberwood with a simple walnut finish for a classy and modern look.
4. Antone 81'' Square Arm Sofa
If you’re searching for a soft, cozy, and welcoming vibe in your room, then this square arm mid-century sofa by Antone may just be the perfect choice. You can spend hours relaxing in front of the TV with your friends or family, thanks to the space on offer.
It’s made from genuine leather with intricate details, meaning the high-quality construction makes it both long-lasting and maintaining them won't be much of an issue. Additionally, the buttoned back cushions, chic tapered legs, and high-quality finishes contribute to the charm.
Apart from that, its removable cushions make sure you won’t lose anything precious under the sofa. The company provides its customers an option to customize the finishes for the wooden legs, with more than 30 options to choose from.
5. Ambler 81” Square Arm Sofa
Spice up your room with this vibrant-colored square arm sofa by Ambler. This mid-century modern style model aligns well with almost any room with its sleek yet attractive design. It’s available in six colors and with three materials options for tapestry. Not only that, but you can also customize the leg finishing according to your preferences.
We loved how the velvety cushion makes for a soft, feathery texture. Besides, the clean and simple look with a generous seating space make it an attractive choice for anyone.
Maintaining a mid-century sofa sometimes feels like a herculean task, as the corners and cushions attract a lot of dust. However, cleaning this couch feels like a breeze, thanks to its removable back and seat cushions. Plus, its square arm design and edgy solid wood legs allow you to play with more geometry in the space.
6. Ari 56.5" Genuine Leather Square Arm Loveseat
This mid-century modern style sofa keeps it classy and straightforward without compromising comfort. It is a perfect piece that stands out within your room and is worth considering if you want a premium-looking yet affordable furniture. Plus, it delivers an opulent look to your living room or office space if used as a central piece.
Italian-made top-grain leather upholstery is the secret behind its flawless look, and the utmost comfort comes from high-density foam-filled leather cushions. Just picture yourself sitting on a sofa with a glass of champagne in your hand and classic songs being played in the background. Heavenly, right?
Aside from that, it’s made from kiln-dried hardwood, which provides some much-needed sturdy support and makes it durable in the long run.
7. Aric 82" Genuine Leather Square Arm Sofa
When solid hardwood is combined with top-grain Italian leather, it results in this luxurious leather arm sofa by Aric. This intricately designed furniture adds a stylish look as well as comfort to your living room, thanks to its feather and polyester fiber cushions.
Furthermore, maintaining it won’t strain your nerves, as you can simply remove the cushions and back seat and use a dry duster to remove the dirt. You don’t have to stress much about the dust deposited on cushions and leather covers either.
The plywood and pine frame provides a sturdy and robust look to this sofa, and the solid wooden leg makes for added durability. Moreover, the webbing suspension ensures that the cushion doesn’t get displaced. Hence, you can now immerse yourself in elegance and comfort without the fear of slipping off the couch.
Overall, this mid-century design sofa offers comfort and relaxation and creates an elegant look for your living room or office space.
8. Lancaster Loveseat
Lancaster Loveseat combines a classic-looking handcrafted mid-century sofa with a modern design that brings a sophisticated vibe to your living room without burning a hole in your pocket. Its detailed design and sleek design will make it the showstopper of any room.
If you are a fan of intricate and small details, the metallic accent of the legs will appeal to you. Available in three color options, it features a button-tufted and single-cushion seat so that you can select one according to your room design. Also, its low-profile multi-density Dacron wrapped foam cushions ensure that you feel comfortable whenever you remain seated.
This hand-crafted and hand-stitched lawson sofa has the potential to win you over at first sight and is a suitable choice if you’re looking for a mid-century modern sofa.
This modern and designer loveseat by Signature design makes your room look stylish and elegant while bringing in comfort. Wrapped in caramel faux leather, it sets the scene for comfortable and easy living.
Its quality-built cushion is made of high-density foam and polyester upholstery, which adds to the comfort. Beyond that, its metal seat base and faux wood finish account for optimum durability.
Aside from a 2-over-2 cushion, it features non-reversible back seat cushions, track arms, chic stitching, bolster pillows, and tapered legs, which add to the mid-century flair. A pro-tip: try adding white faux fur on to this sofa for optimum comfort.
Lastly, disassembling and reassembling this model feels like a walk in the park. Simply attach the legs, and it’s ready to use.
10. Renae Genuine Leather 89″ Tuxedo Arm Sofa
Now feel like a Hollywood personality and transform your living or office space with this mid-century modern style tuxedo sofa by Renae. With mesmerizing details and elegant silhouette, this Italian-made furniture looks more exquisite with time.
The cushions are filled with duck feathers and high-density foam, which ensure you can glide over it for a comfortable experience. Other than that, it boasts a full-aniline or semi-aniline dyed-leather tapestry for a vintage and unique patina, giving your sofa a super glossy look.
Also, with the availability of several color options and diamond-tufted backdrops, it perfectly delivers the essence of mid-century decor.
It is available in five color variants so that you can choose a perfect shade for your space. Long story short, the solid construction, top-quality materials, and a refined look merge in this piece to make your room space stand out.
11. Deirdre Leather Sofa
A stylish mid-century sofa in the center of the room always acts as a focal point, whether you’re watching a cool Netflix show, hosting a game night, or dining with your friends. And this Deirdre leather sofa, designed with sleek features, tapered legs, and a high-density cushion, will serve the exact purpose and help you indulge in style and comfort.
You can keep things classy and simple with this piece. Its genuine leather merges with a solid wood frame to make it fashionable and durable. Additionally, cleaning the sofa also won’t feel like a daunting task when you can just dust the dirt away, thanks to its removable cushions.
12. Lidia 88'' Genuine Leather Square Arm Sofa
The mid-century furnishings enthusiasts will love this leather square arm mid-century sofa by Lidia. Beautiful genuine leather combined with clean lines and tapered legs makes this piece a must-have in your rooms. It will add sophistication and elegance to any home design, so it’s up to you if you want a regular product or one that stands-out from others.
In terms of durability, it features a kiln-dried and solid hardwood frame combined with high-density foam padding that ensures lasting comfort. Also, the mid-century modern style sofa is available in two gorgeous brown shades or a sumptuous gray tone, which perfectly complements the brown walnut legs for an inspired and cohesive design. The Italian-made leather makes it more durable and easy to clean.
So overall, this timeless piece of furniture is all you need for style and comfort. It's time you get cozy and feel inspired.
13. Rivet Aiden Mid-Century Modern Tufted Loveseat Sofa (74”)
Rivet is an Amazon brand that delivers a mid-century-inspired sleek leather sofa designed to impress. Now you get a combination of comfort along with durability with this beautiful piece of engineering.
A tufted bench seat cushion, tapered wood legs, softback cushions provide just the right mixture of contemporary edge and comfort. Along with that, a solid hardwood frame supports high-density foam padding for extended durability.
Like other leather sofas in this extensive list, cleaning this unit is easy due to its removable and reversible back cushion. Its seat cushion is fixed to the base to secure its position and doesn’t slip down. Plus, it comes in a wide selection of colors, so you can select one that fits your room design.
Lastly, an added advantage of this mid-century modern sofa is that it’s easy to assemble. You require only 15 minutes or less to assemble this piece.
Zinus is committed to developing high-quality, comfortable, and easy-to-assemble love seats and leather sofas that deliver elegance to your living room and fulfill your desire to create a dream house. A person on the search for a mid-century modern sofa will love this product.
The upholstery is made of durable fabric, whereas its padded and soft velvet back cushions are made of high-density foam, ensuring a comfortable seating experience. Plus, its hardwood frame wrapped in supportive foam cushioning makes it long-lasting and durable. And it comes with a one-year warranty.
An added advantage of this mid-century sofa is its easy and tool-free assembling. Just follow the instruction manual that comes along, and you can assemble the couch in just 15 minutes without using any tools. Lastly, its removable soft back cushions allow you to clean the unit efficiently within minutes.
The mid-century modern sofa by Modway is upholstered in quality polyester fabric and complements well with your room design. It serves as a center of attraction where you can just relax, watch movies and sports, have a conversation, or sip a steaming cup of coffee or tea.
In terms of construction, it boasts four cherry-colored solid wood legs to deliver a sturdy feel. Along with that, a solid hardwood frame supporting foam back cushion ensures long-lasting durability and added comfort. It always adds a welcome presence in your home.
Many mid-century sofas available on the market require to call upon a specialist or a professional to assemble, or if you’re able enough, it will take a large chunk of your quality time. However, assembling this piece feels like a breeze, as it takes only 10 minutes to do so and wouldn’t need additional tools.
With a futon sofa in your room, there is always a struggle to accommodate other furniture or beds there. But, with a Nouhaus Module convertible mid-century sofa, there is no struggle, discomfort, or settling on a design. With several furniture options and designs, it has taken the comfort of mid-century living to a whole new level. By merging a room couch with a proper mattress, it feels good as it looks.
The mattress is breathable and made of supportive latex, so days of hard crossbars, unforgiving foam, and squeaky springs are long gone. As the piece is “bed at night and sofa at day”, it brings everlasting comfort and functionality into your space.
Now you can easily impress your guests with this beautiful and elegant piece of furniture. Being a luxury piece, you will get upholstery in high-quality and won’t have to settle for less. It also comes in various fabric colors and designs, you can choose one that suits your vibe best.
Many convertible couches present complicated setups and hardware, which badly hurts your fingers. With this unit, you can turn your mid-century sofa into a bed in just three steps. One of those steps is just throwing out your velvet cushions. That’s how easy it is. When the product reaches you, attach the legs to make it a sofa and lounge, in style.
17. Lisson Genuine Leather 85” Square Arms Sofa
In Vintage Brown or Cognac Tan, the square arms sofa by Lisson adds a welcoming vibe to your home. This sofa is so mid-century with a solid wood frame and tapered wooden legs in a gorgeous honey brown shade. You won’t go any wrong with this piece if you’re looking to bring on mid-century styles to the living room.
With respect to comfort, it doesn’t go any wrong with high-density foam cushions supported by Pirelli webbing. Along with that, a pigmented leather tapestry will soothe your eyes. As time goes on, it won't lose its charm, and the gorgeous vintage tone along with full-grain leather highlights its beauty and continues to do so.
18. Mary Genuine Leather Reclining 52″ Square Arm Loveseat
The stylish and comfortable piece of mid-century modern furnishing is an option to look at. A top-notch grain leather and high-density foam ensure durability as well as comfort. Whether you are trying to have a nap after a hectic day of work or just want to have a bucket of popcorn to watch a cool movie, it’s sure to deliver the intended relaxation. Now push back and relax, as this couch can recline.
With respect to the design, hand-stitched details deliver an enchanting look, complemented by the tapered legs with a coffee brown finish. Its appealing color easily blends in and adds warmth to your site.
A mid-century convertible couch bed by DHP Paxson boasts a stylish linen upholstery with a low-profile design that makes it ideal for small living spaces. Being a convertible couch with a soft back cushion, it easily and quickly transforms into a bed. Also, its spit-back design provides multiple comfort positions so that you can have a sound sleep there.
Other than that, its legs are made of solid wood that supports the sofa, and padding underneath it protects your beautiful floor from scratches and scuffs. Its assembly is also pretty simple, which takes 10 minutes.
How To Select A Mid-Century Modern Style Leather Couch?
The primary characteristics of any mid-century modern sofa are its simplicity, shape, natural finishes, impressive crafting, clean lines, tapered legs, and bold colors. With a comprehensive collection of mid-century leather sofas available on the market, you will definitely get overwhelmed. So, continue reading to know more about looking for while shopping for a mid-60s couch.
Simple is beautiful and this furniture is a worthy example of that. If you do not want fastidious and vibrant colored furniture, it is the one you need. Clean lines, sleek design is essential here. These couches are full of angles, texture, woods, shape, graphic design, leather, lines, and whites.
High-level crafting ensures the longevity of your furniture and modern designers are paying utmost importance to the fact. For genuine vibes, we recommend having natural wood finishes amongst which teak is the most popular material to be used in these.
When buying a sofa, ensure the frame is durable enough and the cushion is comfortable enough. Also, if you have seen a picture of a mid-century room, you might have got an impression of floating pieces. The reason is short and tapered legs.
Furthermore, many mid-century style couches are easy to clean so you would prefer that. And, top-grain leather upholstery tends to get better with time in many of them, so it would also be a viable choice.
Final Words
Comfortable and appealing, a mid-century modern-style sofa is worthy of investment. So, if you value sleek design elegance and want to create some antique vibes for the living space, you know what to choose. These pieces are available in an offline or online shop at varying prices so that you can purchase from anyone accordingly.
We hope our extensive list of options gives you some ideas about elements that you could incorporate into home decor. Hope you’ll be able to select an ideal mid-century sofa for your home. We’ll continue to bring you valuable ideas to make your space appealing and glamorous. So, keep an eye on this space.
Turkish kilims were really popular in the past, history repeats itself. More and more homeowners are enjoying their unique beauty and design, and find a way to fit them in their contemporary and modern homes. Does the kilim makes an impression on you too? Are you thinking about getting one for you living room, bedroom or hallway? In this article you are going to see how well they fit in the modern furnishings, and you will definitely head to the store to get yours as soon as possible. Check out the Traditional Kilim Rugs That Are Making A Huge Comeback and add some texture and color in your home. Their bright colors will enliven the area and the geometric patterns will break the monotony of the plain and minimalist decor!
These kilims are here to stay on the long run, so don't have second thoughts about getting yours as soon as possible. They become the focal point in the room and it's the first thing that you will notice when you enter the room.
The kilims are a shortcut to adding a dose of the Mediterranean and Middle East style into your living area. They are made of wood and are very original and authentic. They may also cost you more money than the ordinary rug, but it's definitely worth it!
The warm colors of the kilim give the room both harmony and contrast. We have to mention that the wool is dyed naturally with vegetables. The kilim offer a visual interest and makes the room an enjoyable space with a relaxed ambiance.
Even if you have decorated your home in a modern style, the kilim will fit in effortlessly. Plus, it will make your living area stand from the rest of the crowd and everyone will be asking you where you have got it from, believe me!
If you think the atmosphere in the room is so dull and it needs something to attract the attention, then you definitely need a kilim. Maybe it's not the first thing that comes to your mind, but once you add it into your interior you will be glad that you have.
The yellow color is the most cheerful color in the world, and we can spot it all around us in nature yet few modern homeowners decide to add it in their homes in some daring and bold ways nowadays.
Are you thinking about adding this lively color in your home?
What do you say about a yellow sofa?
The yellow sofa would naturally become the focal point in the room and thus it's going to set the tone for the rest of the home. We invite you to scroll down through the photos below and see How To Style Around A Yellow Sofa. Watch out, these interiors are contagious, and you won't stop thinking about a yellow sofa after you see curated gallery, believe me!
neutral tones
If the rest of your home is decorated in neutral tones then the yellow sofa is the perfect pick for you since it will spice up the decor and will break the monotony in the room.
When you add a yellow sofa in your living room there are no boundaries when it comes to choosing the rest of the colors to incorporate in your living space. Choose colorful artistic pieces, pillows, carpets and other small details which will make your home playful, cheerful.
The exposed bricks and the sofa in the happiest color are a perfect match, they create a vivid and warm atmosphere in the living room that all family members will greatly enjoy!
When you combine this sofa with blue or emerald green walls, you are bound to get some fascinating living areas which are super modern and contemporary. These contrasting colors catch the attention immediately and create an impression that will last !
What do you think about the simple ideas below on how to style around a yellow sofa? How would you do it? We would love to hear your thoughts in the comment section below!
A TV stand is not required to support a flat-screen TV safely. A stable setup depends on the VESA mounting pattern, the TV weight, the wall or furniture load rating, and tip resistance in the room. This guide covers practical TV stand alternatives that work in real homes, including wall mounts, tripods, corner shelving, benches, fixed floor mounts, rolling TV stands, extending wall mounts, fireplace mounts, and ceiling mounting options, plus DIY approaches and the safety checks that keep the screen secure and the viewing height comfortable.
What To Use If You Don’t Have A TV Stand
A TV stand is not always necessary to prop up an average flat-screen TV in your home. If your main goal is to save space, then there are various alternatives to TV stands, such as a TV tripod, TV mount, corner shelving, etc., that are just as effective. You can follow these alternative methods:
1. Simply Mount Your TV
Installing or mounting your TV is the most common way of maximizing space without having to purchase anything. Since the open concept trend is becoming very popular in interior design, many people prefer to mount their TV for a cleaner, tidier look.
There are three kinds of TV mounts to choose from: fixed mount, full-motion TV mount, and tilted mount. Even though the installation process is similar in all three types, the choice usually depends on personal preference.
a) Fixed TV Mount
As the name suggests, a fixed TV mount is set in a particular position; however, it can be viewed from multiple angles across the room. These are easy-to-install, clean, and affordable options if you have a centrally-positioned wall with multiple seating arrangements. But you might want to go for other mounting types for a better viewing angle if you have an unconventionally shaped or large-sized living room.
b) Full-Motion Mount
Every TV mount that is not fixed is a kind of pull-down mounting system that allows improved mobility and multiple viewing angles. If you find yourself unable to view the TV screen from every seat in the room, you can consider a full-motion mount. Full-motion mounts can help you adjust the position of the TV screen freely due to its smooth hinges that swivel and rotate. Since it offers a wide range of motion, its price range is usually higher than the fixed ones. So, to get the best out of your investment, check if the full-motion mount is compatible with your TV size.
c) Tilted Mount
If you’re on a budget but want more mobility than fixed TV mounts, consider tilted mounts that are made from high-quality steel or alloy. Unlike the standard swivel and rotate movements, a tilting mount has limited mobility and can tilt 15 degrees upward or downward. Cheaper than TV mounts with a full range of motion, these television mounts are ideal for reducing glare in the living or family room.
2. TV Tripod
A TV tripod works best if you want to add a bit of style while saving space in your living room or bedroom. Besides securely holding your TV screen, it gives a floating illusion to your home theater.
Even though TV tripods are the cheaper and more stylish alternative, they do not have a cable management system, so you’ll have to deal with messy, tangled wires.
If you have a TV connected to a video game console, I recommend going for mounting types that conceal wires.
3. Corner Shelving
Corner Shelving is most common for medium and small-sized flat-screen TVs since the corner can only have so much space. A great way to utilize the storage space even further is to use a chest of drawers or a bookcase as the TV stand. You can use this for storing books, media accessories, cable boxes, computer hardware, or entertainment and gaming consoles.
Traditional or rustic dressers have been used as television stands for a long time, since they have a higher weight capacity, making them ideal for bulky televisions. Moreover, if you want a regular TV stand that is very cheap as well as aesthetic, consider recycling decorative storage boxes and cheap coffee tables.
4. Bench
Using a bench or similar flat furniture surfaces you already have at home is a simple way of propping up a TV at no extra cost. These television stands are ideal for small-sized screens; however, if you have larger screens, you must secure them with hidden furniture straps.
Make sure your bench has a flat surface for even weight distribution; otherwise, it might topple over if you bump into it. I always try using a bench with a longer height to prevent neck strain while watching television.
How To Prop Up A TV With No Base
If your modern television doesn’t have a significant base or legs, then propping it up with standard TV stands might not be easy. This is because the TV height may be too low for your viewing comfort and can be a potential hazard for young children and pets. So, to compensate for its lack of height and sturdy base, here are some innovative ways you can prop up a TV without a stand:
1. Fixed Floor Mount
Like a ceiling pole mount, this TV mount is fixed on the floor and thus can provide adequate support and hold enough weight. So, now you need not worry about the TV falling! What makes a fixed floor mount so ergonomic is its sturdy storage space that will hold the cable box, some media consoles, video game consoles, and other television accessories. You can also get the ideal height and viewing angle from a fixed floor mount.
2. Rolling TV Stand
This television stand is popularly used in a game room or entertainment center since it is affordable and easily portable. With rolling wheels under the TV-mounted base, it offers high-level flexibility for those who need to move their TVs from room to room or different corners of the room.
A rolling TV stand can securely hold an average TV size and makes watching TV a comfortable yet portable experience. However, this modern room TV stand takes up more floor space and doesn’t help if you’re looking for mounting solutions compatible with a limited space range.
3. Extending TV Wall Mount
If you prefer a wall-mount TV stand with extendable features, this might be the one you’re looking for. Once attached to a long or short wall or corner, the television flat screen can be extended from its base to adjust the wall mount height and viewing angle.
These wall-mount TV stands are as easy to install as the fixed wall-mount ones, but they provide better features and support. Its versatile and ergonomic design can save ample space and prevent eye strain, making you forget television stands even exist.
4. Fireplace TV Mount
This is also a pull-down wall mount variety, but it is specially designed for mounting TVs on fireplace mantels. With unique features such as heat sensors, heat-resistant metal build, cable clips, and a full range of motion, these help you combine minimalism with efficiency. Moreover, a fireplace TV wall mount can have many movement types, including swivel, tilt, rotating, and articulating.
Mounting Solutions For Ceiling
Often lack of space can be so severe that you might not have any free wall to mount the TV altogether. In this case, a ceiling TV mount or pole is your best bet for a comfortable viewing experience. Further, it is considered to be a space-saving, affordable alternative to an expensive entertainment stand, popular in home theaters and entertainment centers.
Here are some types of ceiling TV mounts:
1. Drop-Down TV Mount
If you want a functional television stand that can hide your screen in the ceiling or cabinet drawer when not in use, go for a drop-down TV mount. They are not only easy to pull down or pop up, but they also offer various viewing angles that help television viewing from any part of the room. It has a simple one-button mechanism that swiftly retracts the mounted TVs and entertainment consoles out of the way.
This TV mount can be mounted on both the ceiling and the floor; however, it is fixed to the surface, unlike TV stands, which you can move around.
2. Motorized Folding Ceiling Mount
This unique ceiling mount lets you flip up the TV when not in use and, likewise, fold it down when you want to watch. A motorized folding mount can support quite a large weight, so purchasing this might benefit you if you have a large flat-screen TV. Great for everyday use in the bedroom or entertainment room, they provide multiple viewing angles and prevent screen glare. However, installing these can be a little difficult compared to traditional TV mounts.
3. Fixed Ceiling Pole
It is a cost-effective television stand alternative that is easy to install and durable. Usually, the most affordable version of a ceiling pole is the fixed one, but you can invest a bit more to get a full range of motion.
Should You Make DIY TV Stands?
DIY TV stands have more to them than just cost-saving–you can create any aesthetic and use any material or design to customize it according to your preference. You can use a wide array of materials, including wood scraps, metal, and maybe some PVC plastic varieties.
Before making your own television mount or stand, thoroughly measure your TV and choose materials strong enough to sustain the weight. Since the average TV weighs around 32 pounds, it is recommended to use a solid and durable material like metal or wood.
If you want a more rustic and vintage look, you can use old wooden pallets or simply use a wooden dresser to prop up a TV. However, dressers can only work with small or medium-sized TVs with legs for support; a large screen with no legs can easily topple over. But you can prop up a TV on a dresser by using books, gaming consoles, and cable boxes as support.
Regardless of your DIY method, your handmade TV stand will not have enough flexibility, so try using high-quality materials and finishes to increase the aesthetic value of your next television stand.
Innovative Ways To Prop Up A TV
There are other DIY options if you don’t want to make a TV base from scratch and go through all that fuss trying to find the right material. You can simply turn a wall mount into a standard TV base and use it to prop up a TV without a stand.
A coach screw hook can be drilled into the wooden wall studs– you can use this ensemble to hang your TV like a frame with a wire. However, a flat-screen display with sharp edges can scrape your wall finish or paint over time. To avoid such damage to the wall, screw a soft block of foam at the back of your TV.
If you find that the base of the television is creating problems with proper mounting, use a screw to lift off the base from the body easily. Moreover, you should utilize the designated mounting holes at the back to mount it on the wall or ceiling since they guarantee better support and even weight distribution.
Tips To Prop Up A TV Without A Stand
It is tricky to prop up a TV or mount it properly so that it doesn’t fall off or tip over, and get enough support. Here are some things you can follow to improve your mounting ideas:
1. Don’t Seek Out Cheap Mounts
You might think purchasing the cheapest TV mount is the best way to maintain your budget, but that’s not true. Cheap mounts usually are not of high quality and can cost you more money in the long run. So, it’s better to invest in sturdy mounting hardware with accessible features and warranty periods.
2. Choose The Right Location
Finding the right location for your TV ensures better viewing angles and exposure from most parts of the room. The best way to decide on a location is to use a cardboard cutout the same size as your TV without a stand. Hold it up or tape it to different angles on the wall or ceiling, and observe whether you can see the screen from different sitting arrangements.
When you find the optimal location, mark the outline with a pencil for future reference. For easier installation, I like to mark the exact position of each mounting hole so it doesn't end up looking lopsided.
3. Pay Attention To The Materials
If you’re going to DIY a TV stand or base, choosing high-quality wood or metal like steel or oak is recommended. Besides that, make sure you have the correct tools for mounting the finished product. These usually include household power tools: a drill, laser level, screwdriver, socket wrench, tape measure, stud finder, pencil, and so on. Moreover, it is best to do your research on these tools if you’re not sure how to use them.
Conclusion
Propping up a TV without a stand can save money and time, but it is not always the most efficient. However, we have found that full-motion mounts are the best mounting solution when it comes to weight capacity, longevity, and multiple viewing angles.
You can also use an eco-friendly solution by recycling old wood, pallets, or PVC plastic to make your own television stand. Using a traditional dresser as a TV stand can also be a budget-friendly and space-maximizing way of propping up a TV. But if you would rather enhance the visual appeal of your living or family room by adding a bit of eccentricity, I recommend going for tripods and corner shelving.
With that, I will conclude my guide on how to prop up a TV without a stand. To ensure you don’t miss out on similar informational articles in the future, be on the lookout for my blog.
Until next time, goodbye!
Mounting a TV on the wall has a practical purpose, acting as a great space saver and helping organize the room better. Even without studs, you can mount a TV on uneven stone facades, brick walls, or over the fireplace.
Most people think that using a flat-panel display is guaranteed to improve their TV viewing experience, but that's hardly the case. What's particularly important is how you mount the TV and whether changing the viewing angle is possible.
This is particularly critical when there are no wall studs, as flimsy installation techniques will cause the TV to fall. My guide highlights all the steps you must follow to mount a TV without wall studs.
How To Mount A TV Without Studs
These are some effective techniques for mounting a TV without wall studs -
1. Wall Anchors
One of the easiest and simplest techniques for mounting a TV without studs is by using wall anchors. The wall anchors reduce the chances of damaging the wall and prevent the screws from falling out of the grooves.
Moreover, wall anchors are highly secure, and you can complete the installation without professional help if needed. The first step to using drywall anchors as TV mounts is determining the size and how many pounds the TV weighs before selecting the desired position.
For the best results, the TV should be at eye level, so mark the position of these TV wall mounts with a marker. After that, take the TV mountfrom the box and tighten the brackets to the television.
In most cases, the manufacturer provides all the components with the TV wall mounts, and you can simply fasten them with screws. Once satisfied, measure the available wall space and surrounding area to see if it's suitable for drilling the mounting plate into the wall.
You will again have to secure the screws tightly to the TV mount, followed by the mounting plates or plywood. Check whether everything is set and working properly, and tilt the mounted TV to the desired viewing angle.
2. Toggle Anchor
There are two popular drywall anchors you must know about - toggle anchors and pointed molly bolts. Toggle anchors have a butterfly toggle at one end that proves useful for anchoring to the back of the drywall.
Usually, when people pull the screw or apply some form of outward force, toggle anchors resist and prevent the drywall from crumbling under pressure. Without toggle anchors, you would be pulling down the whole wall instead of just one screw.
3. Non-Pointed And Pointed Molly Bolts
I suggest using molly bolts if you need strong anchors suitable for holding a medium to heavy load. They are slightly different than regular toggle bolts and are available in 2 types - non-pointed molly bolts and pointed molly bolts.
The pointed molly bolts have a sharp tip, and you can fix them to the wallwith a few strong hammer blows. On the other hand, it's essential to drill the installation hole for a non-pointed molly bolt, which makes them suitable for plaster walls.
You will find that when left loose, the bolt sleeves appear thin, but upon tightening, swells and acts as an anchor for the drywall. Once a molly bolt is properly attached, replace the existing screw with TV wall mount screws.
4. Ceiling Mounts
Another effective technique to mount a TV is by using a ceiling mount. While most people don't like this option, ceiling mounts are classy and don't require wall studs to install a flat-screen TV.
On the flip side, compared to other wall anchors or installation methods, using ceiling mounts are more complicated and time-taking. It would be best to use this method when there are beams on the ceiling; otherwise, it becomes more difficult.
The purpose of the beams is they act like studs and provide more stability during the wall mounting process. But remember to determine the weight and size of the TV, along with the ceiling height, before installation.
Make sure the ceiling isn't very high, and consider the type of ceiling mount you need. Look at the available joists and beams to know whether you need long or short anchor screws.
You will have to screw the mounts to the ceiling and connect the clamps to the TV before screwing them tightly to the base of the mount. All that's left is checking if the mounted TV is working and watching your favorite shows.
5. Mounting Plates
The third technique uses mounting plates positioned on the wall behind the TV with the help of anchor screws. Best of all, a mounting plate guarantees much-needed stability and security, as it's a solid surface.
Moreover, since several anchor points are present across the wall, the TV's weight gets distributed evenly. But the problem you will face when using a mounting plate is they don't blend with the aesthetics of the room.
In most cases, the mounting plate is visible from behind the TV on the wall; however, there is a solution. You can paint the mounting plate so it matches the wall color or makes the mounting plate smaller to cover it with the TV.
Locate the best position for fixing the plate on the wall and mark it with tape or pencil. After that, secure the mounting plate to the drywall with a nail and hammer or use wall anchors. Then hang the TV from the plate and ensure everything is fine.
Tools Needed To Mount A TV Without Studs
Here are some of the tools you will need to complete the mounting process -
Tape measure
Pencil or masking tape
Hammer
Level
TV stand
Flat-headed or Phillips-head screwdriver
All other mounting hardware provided by the manufacturer
Steps To Follow
To achieve the correct TV position after mounting, place the wall mount plate at the desired spot and mark it with a pencil. Then insert a screw into one end of the wall mount while holding it steady with the other hand to keep the base straight.
If there's any confusion, you can use a level to straighten the TV wall mount. Once you are satisfied, hammer in the screws at one end, especially nails that are the widest apart. This will be followed by the other nails and the TV bracket, ranging from 100 to 600 mm for VESA brackets.
Choose the right spacer, attach it to the bottom of the VESA holes, and fix the TV to the correct tilt. Then pull the cable to unlock the spring lock and mount the cable television on the wall.
The last step is pulling the cable again, but this time by reattaching the spring lock tosecure the TV.
Things To Consider
Before mounting the TV, read through the following points to see if you need to make any adjustments or repairs.
1. Weight Of The TV
The most important thing to determine is whether the wall mount can bear the size and weight of the TV. Although the dimensions of a TV vary from one model to another, in most cases, a 32-inch TV weighs around 25-30 lbs.
Any model with a bigger screen will obviously weigh more, so check the TV's weight and choose a TV mount with a suitable load capacity. But even then, it would be wise to exercise caution when lifting and mounting the TV.
I usually ask a friend to help me, even if I'm lifting a flat-screen TV.
2. Quality Of The Mount
You should know that every TV mount is suited to a specific model, depending on the size and weight of the television. But modern VESA mounts are compatible with all TVs for secure mounting while preventing the walls from getting damaged.
Understandably, a no-studs TV mount for a 32-inch screen won't hold the weight of a 40-inch screen TV. So, ask for professional help if needed, but don't use the wrong mount, or the TV could come loose and topple to the floor.
3. Proper TV Position
Check the wall where you will mount the TV and find a suitable spot with the necessary space to securely hold the screen. My TV is in the hall, considering it's a large space with plenty of chairs or tables, making it perfect for seating multiple guests.
And more important than comfort is ensuring the wall has the required number of AC power plugs and sockets for all the wires. After that, choose the correct mounting height, ensuring the TV is at eye level and at the center for proper viewing.
Once again, it would be best to ask for help so that while your friend holds the TV, you can check whether the mounting height and angle are correct. And remember to mark the location of the bottom right or left corner of the screen on the wall before mounting the installation hardware.
4. Condition Of The Wall
If the drywall or plaster is cracking and doesn't appear in good condition, you need to repair the entire wall first so that the mount is securely anchored. In such instances, even the strongest wall anchors will fall off, causing damage to the TV screen.
In most cases, hollow walls are flimsy and can bend or start cracking under the TV's weight, despite installing a sturdy anchor point.
5. Mount Type
Among all other drywall anchors, fixed and tilting mounts work best when installing a TV on a wall without studs. I have noticed that fixed mounts are set in one position, and you cannot move the TV screen to the correct angle, but tilt mounts offer greater convenience. With the latter, you can alter the vertical angle of the TV screen for the perfect viewing experience.
It's important to note that with a full-motion, no-studs TV mount, you must not use toggle bolts or wall anchor screws. This is because such types of no-stud wall mount anchors carry additional weight due to the swivels and arms and promote full-angle adjustments.
Moreover, continuously altering the angle and position of the TV will exert excess pressure on the articulated wall mount and wall. But there's no reason to worry when you want to use a no-stud TV wall mount, as there are multiple alternatives to choose from.
When you are confused, consult a professional to know the mounting bracket type and how to mount a TV to a wall without studs. I suggest that even if it costs a bit more, you can never go wrong with an expert opinion, especially to avoid shattering the TV or damaging the drywall.
After that, ask the professional to help you find the correct position for the wall plate, the height of the TV from the floor, and secure the mount. The most important thing is the wall position; otherwise, the ability to change the viewing angle is greatly restricted.
Tip
When the wall you choose for mounting a TV doesn't have studs, opt for fixed and tilt mounts that hang like a picture frame.
Toggle anchors work like pointed and non-pointed molly bolts, presenting another reliable option whereby you must simply attach the screws of the TV wall mount.
How To Mount A TV Without Studs Conclusion
The first thing you must do is seek permission from the apartment landlord to make constructions on the wall of your house. Once approved, use a stud finder to see if there are any wall studs and measure the length and breadth to calculate the available surface area for mounting a TV.
Then get all your equipment ready, including a cordless swivel gun, nut, washer, wire rope, fastener, etc. You must also wear protective gear like a durable cleat, gloves, and goggles, especially when mounting the TV as part of a Do-It-Yourself project.
Of all the places, installing a flat display mounting interface over a fireplace is possibly the trickiest, so get professional help since they use the latest computer hardware. For everything else, you can read my blog for easy installation without spending much money.
Covering the TV screen with artwork is a cost-effective way to camouflage the TV when it isn’t turned on. But if you don’t mind shelling out extra cash to enhance the décor of your living space, getting a smart TV like Samsung Frame TV will be the best bet.
Sure, a wall-mounted television isn’t the most aesthetically pleasing item in your living room or bedroom. But it’s an indispensable piece if you love binge-watching your favorite shows while hunkering down on the sofa.
Since choosing between binge-watching sessions and a good interior design is difficult, I’ve found some creative ways to hide the TV. From creating a gallery wall to installing a TV lift, I’ve got you covered with a multitude of clever hacks.
How To Hide A TV + Hidden TV Ideas
Despite advances in technology, modern televisions with flat-panel displays, thinner frames, and hidden buttons are still considered an eyesore. That’s because they don’t blend in seamlessly with the décor, so most people prefer hiding or camouflaging the TV screen.
If you love to watch TV but don’t want it to become the focal point of your space, the good news is that you can hide it or minimize its appearance.
Fortunately, there are numerous ways to hide a TV in plain sight so that it does not appear as a giant black box resting on a console or hanging on a wall. From gallery walls to cabinets or mirrors, I’ve got you covered with some ingenious ways to hide a TV.
5 Ways To How To Hide A TV In Plain Sight
1. Cover Your TV Screen With Artwork
During the day, when your TV is turned off, covering it with artwork will camouflage it well. One of the best ways to use art to hide your TV is to have a fixed piece of artwork that could be elevated upwards like a sliding panel.
Or you can install a flat canvas that can be retracted whenever the television is turned on– basically, acting as motorized sliding doors for the TV.
If sliding artwork or retractable panels don’t appeal to you, a foldable screen with artwork will definitely come to your rescue. Foldable artwork is useful whenever the TV screen isn’t in use and unfolded when you turn it on, offering the best of both worlds.
2. Upgrade To A Smart TV
In a modern living room, a regular TV won’t enliven your space as much as a smart TV would.
Smart TVs come with interactive features and an integrated internet connection to enhance user experience. Since they are standalone products, using digital art to cover the TV screen is one of the most cost-effective ways of camouflaging it.
To add a personal touch to the space, you can lay out a slideshow of your family photo or your own pictures on the TV screen. Although all smart TVs have the art feature, the Samsung Frame TV has some of the best digital art. The main benefit of owning a framed TV is that it mimics a piece of art, thanks to its flat and thin design.
Adding a decorative frame will also make the TV look like a framed picture.
3. Add Cabinet Doors
Wall-mounted TVs, especially those recessed into the walls entirely, make a space less cluttered.
Still, if you think the big black box in your living room is ruining the beauty of the space, adding cabinetry would be a practical solution. Note that this can only be done if there’s enough wall space on both sides of the television for the door to open easily.
Decorative cabinet doors are also feasible for TVs that aren’t mounted to the walls, although you will have to frame the doors first. And if you’re not short of space, I suggest going for barn doors (sliding doors).
4. Install A TV Lift
One of the creative ways to hide your TV is to install a TV lift– yes, you heard that right!
TV lifts or cabinets are usually installed underneath the bed from which the TV rises via a remote control. Or you can opt for those that flip down from the ceiling. The best thing about TV lifts is that they come in a variety of sizes, so you’ll find one for your space without much hassle.
5. Paint The Wall Dark
A big black screen against a white wall would make it pop out and divert your visitors’ focus (optics) from other accent pieces in the space.
So, if you’re not ready to install cabinet doors or add a TV lift to your space, painting the wall dark will make the screen less prominent. That’s because TV screens blend better with darker walls than lighter ones.
Although most people prefer going all-black in such cases, I suggest opting for navy blue to blend the TV screen with the background. Paint your wall black only if you want your space to appear dramatic or timeless; otherwise, navy blue will be a great choice.
Hidden TV Ideas– 11 Ingenious Ways To Hide Your TV Stylishly
Making your TV as unobtrusive as possible is slightly challenging, and I understand that. That is why I’ve brought you 11ingenious modern ways to hide your TV in style.
1. Distract With Accent Pieces
Surrounding your TV with accent pieces can disguise it, diverting the attention of your guests to the other important things in the room.
Books, wireless lamps, ornaments, or vases– you get plenty to choose from when it comes to decorating the space around the TV. Or you can simply opt for a few glass, ceramic, or gold items and place them carefully in the storage unit. By doing so, your TV will fade into the background and the accent pieces will become the focal point.
You can also arrange a wood wardrobe and the shelving unit symmetrically to make the space calming and balanced. A bookcase and a pair of armchairs will also be a great addition to the space, on which you can recline and read a book.
2. Hang A TV Mirror
Want to make your living room more friendly and cozy? Mirror TVs are worth investing in if you wish to create a social space not dominated by televisions.
What’s interesting is that mirror TVs are available in a variety of sizes, so you can choose a small or large unit easily. To turn it into a mirror, all you need to do is turn it off, and the TV will disappear.
3. Place It In The Corner
Instead of putting your TV in the center of your living room, slotting it into one corner of the space will hide it from sight.
Hanging the TV above the fireplace mantel or the middle of the room will dominate the space. On the other hand, positioning it to the side beneath the shelving while painting the backdrop in a dark shade, ensures the TV blends seamlessly with the dark backdrop.
4. Install A Sliding Panel
A country-styled paneled wall revealing the flat-panel display is one of my favorite ways to disguise the TV.
For this, you will have to first mount the TV to the walland build a shallow cabinet on the four sides. One thing I would like to mention is that creating mesh doors would be a practical solution in case you have a surround sound system. Mesh doors would hide the speakers but make sure that the sound flow isn’t obstructed.
When it comes to mounting TV, you get a variety of options to choose from. Like, a static arm is quite useful for homeowners with limited space, but for optimum viewing, articulated brackets would be the best bet, so the screen can be tilted or pulled forward.
5. Mix Your Big Black Screen With Shelving
In this approach, you will need a few framed pictures, while the color of the storage must be similar to the bezel of the screen. Place it carefully around the TV, as it will be a clever hack for small spaces, but will also make your TV set appear as part of the display.
6. Fit Your TV Flush To The Wall
Building a media room from scratch? Well, the good news is that you have the luxury of designing the space as per the dimensions of the big black screen. You can fit the TV in a custom joinery to hide the depth of its screen so that it doesn’t stick out and dominate the space.
7. Add A Bold Media Unit
While this may not conceal your TV unit entirely, it is effective in deflecting attention. On rich walnut veneer, install glass shelves and integrated spotlights while adding a few decorative pieces. Now carefully place the TV in one corner of the shelf, and turn on the spotlights to highlight the bold accent pieces.
Whichever accent pieces you choose, make sure they complement the other furniture in the space. Like, if there’s a dining room next to your media room, go for accent pieces that are similar to the items displayed in the dining room.
And if you have a small space, hang your TV against a dramatic backdrop, and it will blend into it seamlessly.
8. Get A TV Bed
If you like catching up with the latest release on Netflix, adding a TV bed is one of the best ways to hide the TV. TV beds also allow you to create a decluttered space, as such beds hide unsightly cables and wires from sight.
In a TV bed, the footboard is slightly longer than usual, from which the TV can be raised via a lifting mechanism.
9. Arrange Your Furniture Away From The TV
One thing I learned a little late is that angling all your furniture towards the TV can make it the focal point of the space.
Instead of placing your sofas and chairs towards the TV, arrange them in a convivial setup to deflect attention. This way, the people who come over to your place will know that the space isn’t a media room but a living room. .
10. Invest In A TV That Is A Work Of Art
Every interior designer suggests incorporating a TV that works as a piece of art so that you won’t have to hide it when it isn’t in use.
Samsung is one such brand that has invented a Serif TV with input from Ronan and Erwan Bouroullec, French interior design experts. The two experts have also added a “curtain mode,” which is midway between on and standby mode.
On such a TV, you can set up a slideshow of your own photograph, view a clock, and access some apps.
Around the rear, a woven fabric panel is added to keep the connectors out of sight so that your unit should look excellent from each and every side. Other than Samsung, Loewe and Bang & Olufsen offer super-stylish TV sets.
11. Buy A Projector
In an open-plan living room, a projector would be an excellent addition because of its high-resolution picture quality, allowing you to watch on a 100-inch or larger screen. Best of all is that the screen doesn’t need to be displayed 24/7, meaning you wouldn’t have to spend time and resources camouflaging it like your TV.
For a premium experience, I suggest spending on a motorized projector screen which can be pulled out of sight when you’re not watching anything.
Tip
One of the common mistakes homeowners make is to go for a TV that is too big for their room, because of which they struggle to disguise it. To avoid the hassle, I suggest going for a TV whose center of the screen is right below the level of your eye. That’s because peoples’ heads tend to drop a bit when relaxing, so mounting it overly high will cause discomfort.
A TV is an integral part of every living room, but it makes or breaks the harmony of any space where it’s placed. Therefore, sometimes hiding it is the only option to emphasize the finest aspects of the room.
Using a projector or artwork to create a gallery wall or decorating the shelving unit with accent pieces will divert your guests’ attention from the plain black screen. And if you don’t mind spending a bit to hide the TV in plain sight, installing a TV lift or sliding panels would be the best bet.
Remember, your budget plays a crucial role in determining which technique you should opt for disguising your TV. You need not spend tons of dollars to camouflage the TV; so, decide wisely.
When dealing with small spaces, each available corner needs to be put to good use and maximized. A sofa table represents that versatile piece of furniture that can play both a decorative, aesthetically pleasing role as well as a vital functional one. You can use it as a dinning table if your kitchen space does not permit you otherwise, as a small working desk facing your kitchen or TV, a wonderful bar that provides additional seating space at a larger party gathering, allowing you to be a part of the conversation, facing the living space or simply place it on the back of a sofa as a narrow long storage surface, filled with decorations, picture frames, flower vases, candles and so on.
Colorful, vibrant for a fresh pop modern decor, wooden, simple, basic for Scandinavian touches, or intricate, complex pieces of furniture exuding elegance and grace, sofa tables truly do come in all shapes, sizes and styles, available for each style and taste.We have gathered 17 such sofa tables to illustrate their simple beauty and functionality in an interior design. If you feel that your living room is not complete, opt for such a piece and add complexity to your vision.
Gorgeous Sofa Tables
1. a touch of complementary color to add contrast
image via sarahmdorseydesigns.blogspot.com
2. white hues and natural fibers add warmth to any interior décor
16. notice the delicate contrast between the subtle grey sofa and the oak sofa table
image source Heather Hilliard Design
17. modernity meets the old in elegance sublime composition
image source Desire to Inspire
What do you think about the idea of using a sofa table in your living space? We would love to hear your thoughts on the subject in the comment section below.
A layout that works should be the first priority in interior design; something practical and comfortable at the right scale, a balanced design that entertains without trying to much; without asking you to sacrifice anything. In the middle of your living space, the ultimate relaxation furnishing resides: the sofa that ought to be there for your for anything from movie nights and friends entertaining up to awkward moments. A list of comfortable floor level sofas has been curated to encourage towards a comfort delivered at a small height.
Floor level sofas have certain perks like the ability to emphasize the feeling of space in rooms with low height or the versatility to scale with pillows when you have a large group of friends over, a neat detail is that on pillows the one`s height is similar with the one`s on the couch thus eliminating awkward barriers and creating an engaging medium of conversation yet the most important perk is the kids safety. Floor level sofas are safer for children thanks to their low height and while the little ones can also get off the couch easier and far safer they can also get on it easier thus possibly improving the connection with family members and giving them a great-encouraging feeling that they can do one simple thing on their own early on.
Floor Level Sofas Follow
1. Beige and grey Beale flex sofa
Simple options always function, the Beale sofa above can be nestled in any design right away with great success.
via sofaland.ca
2. the versatile keaton
Simple in the right color can work to your advantage, choose that something that fits your layout !
via sofaland.ca
3. modular sofa emphasizing with color and pattern
The ability to mix and match patterns and colors in your setting is simply extraordinary and often it may lead to a splendid bohemian interior design.
via Decor Furniture
4. Impeccable white L-Shaped Sofa
via sofaland.ca
5. patterns and contrasting color
Source Unknown
One could create gradients, color plays, contrasts and intricate compositions within the same sofa by changing the clothes of the modules involved, get creative !
6. sculptural Waverunner Modules
The ability to modulate a sculptural item to your needs in extraordinary comfort is something highly convenient.
via Modway
7. Tan Leather Opollo
Leather floor-level sofas on epoxy flooring or directly on concrete summon a great industrial balance.
via habitat.co.uk
8. Patchwork sectional sofas can shape authenticity
Source Unknown
Intricate textures in a colorful settings animated by light, splendid.
9. arriane seating modules
The impeccable airy décor that your pursue can receive patterns and color alike without cluttering a décor.
The module has a low height highlighted by an elegant trimmed edge and the volume entirely wears vibrant colors and retro patterns that ought to be mixed and matched toward greatness.
>Match to fit your lifestyle the set above contains accent and elegance alike, you are to choose the amount of color, stripes or sobriety.
via Marco Fumagalli
12. The minimalist option of black and white
All white setting with black or gray couch. A simple fail-proof recipe.
Source Unknown
13. Balance color with pattern
U-Best Furniture
14. two MODULes configured as one
The module allows you to scale, a very important option when you need versatility or expect changes in the near future.
15. sailor exquisite fabric collection
The sea-inspired sailor themed living room recalls the sailor design motif once very popular. The furnishing is modular allowing you to customize it to your needs.
The two corners above with the ottoman can shape pretty much any layout one might need in his home thus greatly improving one`s life quality through versatility.
Arflex
30. the L-shaped welcome couch
Small, L-Shaped amusingly round form factor that seems to have captured the essence of relaxation.
A highly comfortable option implies pillows of huge variety in dimension, stacked to shape comfort. The bohemian decor invites one to find balanced colorful patterns to surround himself with and create visual comfort.
To enjoy a simple seating option that comforts us is one of the pure pleasures of this world, you simply lay down and relax, peacefully enjoying every second; nothing more, nothing less. The beautiful floor level sofas above are something unique, intriguing; what do you think? We would love to hear from you in the comment section below!
Rugs and door mats are those pieces that complete an interior design scheme. They provide comfort, coziness and warmth as well as elegance and accents of colors in some cases. But finding the perfect rug can be difficult and after a long, exhausting search, when you finally find that perfect piece, the price is over the top. So why not make it yourself? The process of making a rug can vary from very easy like the case of a stone mat for your bathroom to difficult for those fun pom-pom rugs that will take forever to make. We have found a collection of 11 Easy DIY Rugs Projects To Warm Up Your Home.
1. DIY Rugs Projects-The rope rug
To craft this simple rope rug you will need the following materials: thick rope, silicon adhesive, a cutter, and a canvas fabric for lining. The first step is rolling the rope into a spiral and when you feel the diameter suits your needs just cut off the excess rope with the cutter. After that use silicone adhesive to hold it all together and adhere a circular canvas to it. You will have to pre-measure and cut the fabric. Let the silicone dry to completion and voila, your rug is complete. You can also spray paint it anytime if you prefer a touch of color. Happy crafting!
2. DIY bright white carpet light
"Johanna Hyrkas had this great idea of using a simple strand of LED rope light that sits inside a knit pattern of regular ropes, spiraling out from the center. She created a wonderful carpet light that would be very practical and useful to you so that you would not need some other sources of light for your walking in the night."
Martha Stewart has become a DIY icon nowadays and her diagrams will show you the exact way of executing this braided door mat which is so simple yet so beautiful and elegant.
4. Turning a tablecloth into a rug
Preferably a 100% cotton tablecloth, water-based polyurethane, a foam roller, a rug pad for underneath, and a spray adhesive and you're ready to start this project. Follow the instructions in the tutorial linked below.
This project involves some painting skills, but with the perfectly executed pattern, you are safe.
6. Wine cork bath mat
Perfect for the bathroom, a wine cork bath mat will use all those saved-up corks from parties you had no idea what to do with. Find the materials needed and instructions in the tutorial linked below.
Home floors can be lovely and impressive on their own, depending on the material used, but adding a rug can create a drastic and splendid change. Rugs can easily give a room the revamp it needs without necessarily changing anything inside a room. Unlike carpets, rugs can be removed easily and cover only a small portion of your floor in specific chosen areas for comfort, warmth and design.We have chosen a selection of different cool rug designs meant to inspire you, cast a glance.
Cool Rug Designs
1. washed denim and simple botanic designs
The color of washed and worn denim has a certain appeal to many and it has become a fairly common color or design most would choose instead of solid colors. You can choose a botanical design in this washed up denim shade for a complex appeal.
Colorful is not always a pretty sight especially in rooms where relaxation is the main purpose. This white rug mixes well with the relaxing vibe of the bedroom, allowing its texture to complete the serene image.
Symmetrical patterns are another classic when it comes to rugs, offering through the chosen pattern and texture the final touch or the base of a room design. The pattern in this white and blue rug proves that even simple lines and solid colors can still look stunning and classical.
This blue and purple rug is magnificent not only because of the lively color combination but also due to its sophisticated design.
6. cool circle of pastel colors
Not all rugs need overpowering hues, even pastel shades can make a rug look cool and stunning. The colors used in this rug do not steal the show for the whole room's neutral color scheme.
When a room is light, getting a darker shade for a rug is the right color choice. The vivid red rug with the sophisticated design adds more edge to the room and makes the room stand out.
8. country and homey color and patterns
When the floor seems a little plain or empty, this earthly toned hand tufted rug with simple white arrow design can offer a stunning change. It gives more character to the floor while creating a pretty background for the whole room. It is a homey design that will look splendid for a classical or modern home.
If uniqueness is considered, this skull rug nails it perfectly. The skull design, despite being unusual, looks as interesting as any other rugs with intricate designs because it is truly one of a kind. It will stand out perfectly from everything else inside a room.
Light and dark mixes are not always the best choice for decorating a room. Soft earthly tones and stark white complement each other well and can make a room look brighter, more luminous.
12. colorfully soft pompom rug
Square and rectangular rugs are very common, but having circular rugs made with circular and colorful pompoms is a delightful change. It is definitely a way to brighten up the room and make guests wanting to know how it is made.
Choose to go the classical way with a pattern loved by many. Be careful with the powerful tone combination though.
17. chic pink with striking patterns
Pink is a dainty color meant for a lovely room with classical vintage furniture. This cool rug stands out from the natural wood because of its cute color and striking flowery patterns. An elegant addition inside a posh room.
TV mounts need to be selected carefully based on your requirements, budget and the rest of the furniture. The mount from Pipishell offers great versatility at its reasonable price point, while the Mounting Dream mount offers full range of motion.
A wall-mounted TV can be a great addition to any living room as it offers a sleek and space-saving setup while providing an optimal viewing experience.
It can be difficult to choose the right mount for your TV, as there are many different options available on the market. It's important to consider factors such as the weight and size of your TV, the VESA pattern, and the type of wall you'll be mounting it on.
You should consider the bestviewing angle and height to mount your TV. A good wall mounted TV should be sturdy, easy to install, and provide a full range of motion for easy adjustments. With the right TV wall mount, you can enjoy your favorite shows and movies in style.
12 Best TV Wall Mounts | Maximize Your Space And Viewing Experience
Are you looking for the right TV wall mount to create the perfect viewing experience? Look no further! Here is the list of the 5 best TV wall mounts that will provide you with the perfect position for your TV:
Whether you have a small TV or a large one, need a fixed or adjustable mount, or want a tilt or full-motion capability, we've got you covered. So, if you're ready to elevate your TV-watching experience and reclaim your living space, here's the list of the 12 best TV wall mounts.
TV Mount Compatibility - The swivel TV wall mount is...
Full Motion for Optimal Viewing - Our articulating arm small...
What we like
Full motion design allows easy adjustment
Neat and organized cable management
Built-in bubble level
Easy to install, instructions included.
What we don't like
Difficult to screw in bolts
The Pipishell Full Motion TV Wall Mount is a versatile and durable option for mounting your TV on the wall. This mount supports TVs from 13 to 42 inches and up to 44 pounds. It supports a VESA pattern range of 75x75mm to 200x200mm, making it compatible with most TV brands.
It allows for a maximum swivel of 90 degrees, making it easy to adjust the angle of your TV for the best viewing experience. It also has a tilting function that allows for a 9-degree up and 11-degree down tilt, which can help reduce glare and improve the viewing angle.
The Pipishell Full Motion TV Wall Mount is also easy to install. It comes with all the necessary hardware and detailed instructions, so you can get your TV mounted in no time. The mount also has a built-in bubble level, which helps ensure that your TV is perfectly level when you're done installing.
Additionally, the mount has a cable ties management system that helps keep cords and cables organized and out of sight.
Motion Type: Full Motion | Material: Alloy Steel | VESA Compatibility: 75x75mm - 200x200mm | Weight Capacity: Up to 44 lbs | TV Size Range: 13" - 42" | Swivel: Yes | Tilt: Yes | Cable Management: Yes
[TV Wall Mount and Suitability] The Mounting Dream TV wall...
[Space Saving] Due to the low-profile TV bracket being 1.5...
What we like
Low profile, space-saving design
Pull straps for easy locking and releasing
Durable and sturdy steel construction
Built-in bubble level
What we don't like
Lack of velcro cable ties makes wire management troublesome
The Mounting Dream TV Mount is one of the best TV mounts for your living room wall. This mount is designed to support TVs from 37 to 70 inches and up to 132 pounds. It has a VESA pattern of 200x100mm to 600x400mm.
It allows for a maximum swivel of 180 degrees, making it easy to adjust the angle of your TV for the best viewing experience. The tilting TV mount function allows for an 8-degree up-and-down tilt, which can help reduce glare and improve the viewing angle.
Moving on, the Mounting Dream TV Mount is easy to install. It comes with all the necessary hardware and detailed instructions, so you can get your TV mounted in three simple steps. The mount also has a built-in bubble level, which helps ensure that your TV is perfectly level.
The mount is made of high-quality steel construction and has been tested to withstand four times the weight it's rated to support, ensuring safety and stability. Additionally, you may require concrete anchors for installing this mount so keep an eye out for that. The brand clearly specifies that not all its wall mounts are meant for drywall.
That’s not all; the innovative pull straps on the mount enable you to lock and release the TV effortlessly.
Motion Type: Full Motion | Material: Metal | VESA Compatibility: 200x100mm - 600x400mm | Weight Capacity: Up to 132 lbs | TV Size Range: 37" - 70" | Swivel: Yes | Tilt: Yes | Cable Management: Yes
Universal Design: This full motion TV mount fits for most of...
Adjustable View Comfortable : This TV bracket with dual...
What we like
Full motion design allows for a maximum swivel of 45 degrees
Compatible with most TV brands and sizes, up to 84 inches and 132 pounds.
Beginner-friendly installation
Retractable design
What we don't like
Drill bit for the big bolts not included
Our next pick is undoubtedly one of the best TV mounts out there. Don’t take our word for it - it has nearly 40,000 ratings on Amazon with an average of 4.8 out of 5 stars. It is suitable for TV sizes ranging from 47 to 84 inches and up to 132 pounds. It sports a VESA pattern of 200x100mm to 600x400mm, making it a versatile pick for most TV brands.
Moving on, this mount allows for a maximum swivel of 45 degrees. It also has a tilting function of up to 5 degrees up and 15 degrees down, making it easy to adjust the angle of your TV and remove any glare.
Also, the USX Mount Full Motion TV Wall Mount is rather easy to install. You get detailed instructions and all the required hardware in pre-labeled bags, so you can get your TV up and running quickly. The mount also has a built-in bubble level, which helps ensure that your TV is perfectly level when you're done.
Another impressive feature of this TV mount is that it can be pulled out to 16.49 inches and retracted back to 2.40 inches from the wall. Lastly, you get a pack of 3 cable ties with it to ensure that your TV is not surrounded by untidy wires.
Motion Type: Full Motion | Material: Alloy Steel | VESA Compatibility: 75x75mm - 600x400mm | Weight Capacity: Up to 132 lbs | TV Size Range: 47" - 84" | Swivel: Yes | Tilt: Yes | Cable Management: Yes
Get your TV off it's stand and onto the wall in under 30...
Extend, tilt, and swivel your TV exactly where you need it....
What we like
Solid frame that’s built to last
Excellent hardware selection
Tested to hold more weight than its single-stud counterparts
Easy to install with all the necessary hardware and detailed instructions included, including a bubble level
What we don't like
Not suitable for extremely large or heavy TVs
The Echogear Full Motion TV Wall Mount is a versatile and durable option for mounting your TV on the wall. This mount is designed to support TVs up to 75 inches and 132 pounds. It has a VESA pattern of 100x100mm to 600x400mm, making it compatible with most TV brands.
One of the standout features of this mount is its full-motion design. It allows for a maximum swivel of 130 degrees and a tilting TV mount function of up to 15 degrees, making it easy to adjust the angle of your TV for the best viewing experience. This can be especially useful for reducing glare or finding the perfect viewing angle from your couch or bed.
The Echogear Full Motion TV Wall Mount is also easy to install. It comes with all the necessary hardware and detailed instructions, including a bubble level to ensure that your TV is perfectly level when you're done.
Additionally, the mount is designed with a built-in cable management system, which helps keep cords and cables organized and out of sight.
The mount is made of high-quality steel construction and has been tested to withstand four times the weight it's rated to support, ensuring safety and stability. The Echogear Full Motion TV Wall Mount also comes with a 5-year warranty and US-based customer support, which shows the company's confidence in the product's durability and longevity.
Motion Type: Full Motion | Material: Stainless Steel | VESA Compatibility: 200x100mm - 600x400mm | Weight Capacity: Up to 132 lbs | TV Size Range: 37" - 75" | Swivel: Yes | Tilt: Yes | Cable Management: Yes
Universal TV Mount - This full motion TV mount fits most...
Optimize Viewing Experience - The single stud swivel design...
What we like
Effortless installation
Compatible with most TV brands and sizes
Sturdy construction
Includes a bubble level
What we don't like
Additional tools provided are of low quality
The Elived TV Wall Mount is a portable and durable option for mounting your TV on the wall. This mount is designed to support TVs from 26-55 inches and up to 88 pounds. It has a VESA pattern of 100x100mm to 600x400mm, making it compatible with most TV brands.
The full-motion design of this TV wall mount allows for a maximum swivel of 180 degrees and a tilting function of up to 15 degrees. This allows the user to adjust the angle of the TV easily and enjoy the best viewing experience.
This can be especially useful for reducing glare or finding the perfect viewing angle from your couch or bed.
The Elived TV Wall Mount is also easy to install. It comes with all the necessary hardware and detailed instructions, so you can get your TV mounted in no time. The mount also has a built-in bubble level, which helps ensure that your TV is perfectly level when you're done.
The mount is made of high-quality steel construction and has been tested to withstand four times the weight it's rated to support, ensuring safety and stability. Additionally, the mount has a cable management system that helps keep cords and cables organized and out of sight.
The Elived TV Wall Mount also comes with a 5-year warranty, which shows the company's confidence in the product's durability and longevity.
Motion Type: Full Motion | Material: Cold-Rolled Steel | VESA Compatibility: 100x100mm - 400x400mm | Weight Capacity: Up to 88 lbs | TV Size Range: 26" - 55" | Swivel: No | Tilt: No | Cable Management: No
Universal TV Wall Mount - The tilting TV wall mount is...
Space Saving Tilt TV Mount - Designed to sit just 1.5”...
What we like
UL listed, ensuring safety and meeting industry standards.
Clear and concise instructions
The tilt feature allows for easy adjustment of the viewing angle
Heavy-duty steel construction and sleek appearance
What we don't like
No room for the cable input on the TV
The Mountup UL Listed TV Wall Mount is a high-quality and durable option for those looking to mount their television on the wall. This mount is UL listed, which means it has been tested and certified by Underwriters Laboratories, a globally recognized safety science company. This provides peace of mind knowing that the mount has been thoroughly tested and meets safety standards.
One of the standout features of this mount is its versatility. It can accommodate most televisions of up to 75 inches, with a maximum weight capacity of 99 pounds. This makes it a great option for a wide range of television sizes and types.
Additionally, the mount has a tilting feature that allows for easy adjustment of the viewing angle, ensuring that you can find the perfect position for your television.
The mount is also easy to install, with all the necessary hardware included in the package. The instructions are clear and easy to follow, making it a great option for those who want to do the installation themselves. The mount is also made of high-quality materials, ensuring that it will last for a long time and provide a secure hold for your television.
Motion Type: Full Motion | Material: Alloy Steel | VESA Compatibility: 150x100mm - 600x400mm | Weight Capacity: Up to 99 lbs | TV Size Range: 37" - 75" | Swivel: Yes | Tilt: Yes | Cable Management: Yes
Get the maximum amount of tilt no matter how big your TV is....
Mount extension means easy cable access. As a bonus, it...
What we like
Easy installation and compatibility
Allows for tilting of the TV to reduce glare
Premium mount features
Sturdy build
What we don't like
Poor customer service
The Echogear Tilting TV Wall Mount is a high-quality and durable option for those looking to mount their television on the wall. This mount can accommodate most televisions between 40-86 inches, with a maximum weight capacity of up to 125 pounds (UL certified to hold 4x this amount). The tilting feature allows for easy adjustment of the viewing angle, ensuring that you can find the perfect position for your television.
The mount is also easy to install, with all the necessary hardware included in the package. The instructions are clear and easy to follow, making it a great option for those who want to do the installation themselves.
The mount is also made of high-quality materials, ensuring that it will last for a long time and provide a secure hold for your television.
Additionally, the Echogear Tilting TV Wall Mount comes with a 5-year warranty, which gives you extra peace of mind knowing that the mount is backed by the manufacturer. The company also provides excellent customer service, so if you have any questions or issues, you can reach out to them for assistance.
Motion Type: Max Tilt | Material: Alloy Steel | VESA Compatibility: 200x100mm - 600x400mm | Weight Capacity: Up to 125 lbs | TV Size Range: 40" - 86" | Swivel: No | Tilt: Yes | Cable Management: Yes
Glare Reducing Tilt- This wall mount tv bracket features 12...
Versatile Fit: The Sanus Premium Tilt TV Mount is designed...
What we like
Well-built stand with sturdy handles
Easy-to-follow instructions for beginners
Easily pulls out enough for cable organization
Compatible with Sanus sound bar mounts
What we don't like
The wall bracket is not as wide
Lack of variety of bolts provided
The SANUS Advanced Tilt Premium Universal TV Wall Mount is a high-quality mount that is designed to securely hold televisions from 46 to 90 inches. One of the best features of this mount is its ability to tilt the TV up to 15 degrees, making it easy to reduce glare from windows or overhead lighting. This feature is especially useful for people who have to place their TV in a room with a lot of natural light.
The mount is easy to install and comes with a detailed instruction manual and a variety of hardware to ensure that it will fit most TVs. It is also compatible with VESA patterns up to 600x400, which means that it will work with a wide variety of TV brands and models.
Another great feature of this mount is its ability to hold up to 125 lbs, which means that it can accommodate even the heaviest of TVs. The mount is also made of high-quality materials and is built to last, which is why it comes with a 5-year warranty.
Motion Type: Full Motion | Material: Alloy Steel | VESA Compatibility: 75x75mm - 600x400mm | Weight Capacity: Up to 150 lbs | TV Size Range: 46" - 90" | Swivel: Yes | Tilt: Yes | Cable Management: Yes
Universal TV Wall Mount - This wall mount fits most...
Optimal Viewing Angle - Wall TV mount can swivel +/-45° to...
What we like
Articulating arm design allows for tilting, swiveling, and extending for a wide range of motion.
Flexible, full-motion design for better viewing position
Reliable cold-formed steel construction
Quick and easy to install
What we don't like
Innermost holes prevent free movement of the arms
The Elived Bracket Articulating TV Wall Mount is a high-quality mount designed to securely hold televisions from 37 to 75 inches. One of the best features of this mount is its articulating arm design, which allows for a wide range of motion, including tilting, swiveling, and extending. This feature is especially useful for people who want to be able to adjust their TV to the perfect viewing angle, no matter where they're sitting in the room.
The mount is easy to install and comes with a variety of hardware to ensure compatibility with most TVs. It is also compatible with VESA patterns up to 400x400, which means that it will work with a wide variety of TV brands and models.
Another great feature of this mount is its ability to hold up to 100 lbs, which means that it can accommodate even the heaviest of TVs. The mount is also made of high-quality materials and is built to last, which is why it comes with a 5-year warranty.
One of the unique aspects of this mount is that it can be folded up to only 2 inches from the wall, which makes it a great space saver option. This feature is especially useful for those who have limited space and want to have the TV mounted on the wall without sacrificing too much space.
Motion Type: Full Motion | Material: Alloy Steel | VESA Compatibility: 150x100mm - 600x400mm | Weight Capacity: Up to 100 lbs | TV Size Range: 37" - 82" | Swivel: Yes | Tilt: Yes | Cable Management: Yes
Watch the videos in the Image Gallery to See the MM340 In...
Full Range Motion: Up to 27" Vertical Travel, 30° Swivel...
What we like
Allows for pull-down and swivel features for a perfect viewing angle
Solid materials and sturdy build
Easy to pull down and push back with the right tightness adjustments
Clear instructions with pictures
What we don't like
Requires more than one person to install
The MantelMount MM340 Above Fireplace Pull Down TV Mount is a unique and innovative mount designed for people who want to install their TV above a fireplace. The mount allows you to pull the TV down from its mounting location, so you can adjust it to the best viewing angle and then push it back up when not in use. It is one of the best pull-down TV mounts. This feature is especially useful for people who want to be able to use their fireplace while still being able to watch TV.
The mount is easy to install and comes with a variety of hardware to ensure compatibility with most TVs. It is also compatible with VESA patterns up to 600x400, which means that it will work with a wide variety of TV brands and models.
Another great feature of this mount is its ability to hold up to 90 lbs., which means that it can accommodate even the heaviest of TVs. The mount is also made of high-quality materials and is built to last, which is why it comes with a 5-year warranty.
One of the unique aspects of this mount is that it allows you to pull the TV down to eye level and swivel it left or right, this feature is especially useful for people who want to be able to watch TV from different angles. The mount also has an auto-straightening feature that keeps the TV level at all times, even when you're pulling it down or pushing it back up.
Motion Type: Full Motion | Material: Alloy Steel | VESA Compatibility: 200x200mm - 600x600mm | Weight Capacity: Up to 90 lbs | TV Size Range: 40" - 80" | Swivel: Yes | Tilt: Yes | Cable Management: Yes
Full Motion TV Mount Compatibility - Our articulating tv...
Upgrade Your Viewing: Our 26-65 inch TV wall mount tilts...
What we like
Smooth extension and retraction for saving space
Graphical installation guide and video included
Robust design
Prompt customer service
What we don't like
Few instances of customers not receiving the required mounting hardware
The Perlegear Full Motion TV Wall Mount Bracket is a high-quality mount designed to securely hold televisions from 26 to 65 inches. One of the best features of this mount is its full-motion design, which allows for tilting, swiveling, and extending the TV, giving you the flexibility to adjust your TV to the perfect viewing angle. This feature is especially useful for people who want to be able to watch TV from different positions in the room.
The mount is easy to install and comes with a variety of hardware to ensure compatibility with most TVs. It is also compatible with VESA patterns up to 400x400, which means that it will work with a wide variety of TV brands and models.
Another great feature of this mount is its ability to hold up to 99 lbs, which means that it can accommodate even the heaviest of TVs. The mount is also made of high-quality materials and is built to last, which is why it comes with a 5-year warranty.
Motion Type: Full Motion | Material: Alloy Steel | VESA Compatibility: 100x100mm - 400x400mm | Weight Capacity: Up to 99 lbs | TV Size Range: 26"-65" | Swivel: Yes | Tilt: Yes | Cable Management: Yes
COMPATIBLE WITH MOST TVS: Full Motion TV wall mount is...
27.36 INCH LONG ARM EXTENSION: Extra long arm TV wall mount...
What we like
Packaging contains all the required hardware (including a spiffy torpedo level)
Step-by-step instructions with pictures
Pre-assembled
Heavy-duty construction
What we don't like
May require more than one person to install
Some customers have complained about the poor user design
The Perlesmith Full Motion TV Wall Mount is a versatile and durable option for mounting your television. This mount allows for full motion and swivel capabilities, making it easy to adjust the viewing angle for optimal comfort.
The articulating design also allows for easy access to cables and connections, making it a great option for those who frequently need to make changes to their TV setup.
In terms of construction, the Perlesmith Full Motion TV Wall Mount is made of high-quality materials that can support a wide range of TV sizes and weights. This mount can accommodate televisions between 37-75 inches and can support up to 110 pounds. The mount is constructed with heavy-duty steel and features a durable powder-coated finish that will last for years to come.
Motion Type: Full Motion | Material: Alloy Steel | VESA Compatibility: 200x100mm - 600x400mm | Weight Capacity: Up to 110 lbs | TV Size Range: 37" - 75" | Swivel: Yes | Tilt: Yes | Cable Management: Yes
Buying Guide For The Best TV Wall Mounts For Your Home
When it comes to mounting a TV in your home, there are a few key factors to consider to ensure you choose the best TV wall mount for your needs. These FAQs or factors will ensure that you pick the ideal product.
A. Size And Weight Of The TV
First, consider the size and weight of your TV. Not all TV wall mounts are designed to hold the same size or weight of the TV, so it's important to choose a mount that is compatible with your specific TV. It's also important to check the maximum weight capacity of the mount to make sure it can safely hold your TV.
B. Location Of The TV
Next, think about the location of your TV. Will the TV be mounted in a living room, bedroom, or another room? This will determine what type of mount you need. For example, a tilting mount may be more suitable for a living room where the TV will be viewed from multiple angles, while a fixed mount may be more suitable for a bedroom where the TV will primarily be viewed from one angle.
C. VESA Pattern Of The TV
Another important factor to consider is the VESA pattern of your TV. The VESA pattern refers to the distance between the mounting holes on the back of your TV. Many TV wall mounts are designed to match specific VESA patterns, so it's important to choose a mount that is compatible with the VESA pattern of your TV.
D. Style And Aesthetics Of Your Home
Additionally, consider the style and aesthetic of your home. There are many different types of TV wall mounts available, from sleek and modern to more traditional and ornate. Choose a mount that complements the style of your home and blends in with your decor.
E. Additional Features
Lastly, think about any additional features you may need. Some TV wall mounts come with built-in cable management systems to help keep cords and cables organized, while others may include adjustable arms or other features that can help improve the viewing experience.
By taking the time to consider these factors, you can ensure that you choose a mount that meets all of your needs and helps you enjoy the best viewing experience possible.
TV Wall Mounts FAQ's
How do I choose the right TV wall mount for my TV?
When choosing a TV wall mount, consider factors such as the size and weight of your TV, the VESA pattern compatibility, the desired mounting location (e.g., wall type), and the level of adjustability (fixed, tilt, full-motion) you prefer.
What is a VESA pattern?
The VESA (Video Electronics Standards Association) pattern refers to the standardized hole pattern on the back of your TV. It helps ensure compatibility between the TV and the wall mount. Common VESA patterns include 100×100, 200×200, 400×400, and 600×400, among others.
Can I mount my TV on any type of wall?
TV wall mounts can typically be installed on various types of walls, including drywall, concrete, and wood studs. However, it’s important to follow the manufacturer’s instructions and ensure that the wall can support the weight of your TV and the mount.
How do I determine the weight capacity of a TV wall mount?
The weight capacity of a TV wall mount is usually specified by the manufacturer. It is important to select a wall mount that can safely support the weight of your TV. Be sure to consider the weight of the TV along with any additional accessories, such as soundbars.
Can I install a TV wall mount by myself?
The installation process for TV wall mounts varies depending on the model and wall type. While some people may choose to install the mount themselves, it is recommended to have the installation performed by a professional to ensure proper and secure mounting.
Are TV wall mounts adjustable?
Yes, TV wall mounts come in different types of adjustability. Fixed mounts keep the TV in a stationary position, tilt mounts allow vertical adjustment for better viewing angles, and full-motion mounts offer the most flexibility with options for swiveling, tilting, and extending.
Can I hide the cables with a TV wall mount?
Yes, there are TV wall mounts available that offer cable management solutions to help hide and organize your cables. These mounts often have built-in channels or cable covers to keep the cables neatly tucked away.
Conclusion
In conclusion, when it comes to buying the best option for your home, it's essential to take into account several factors. These include the size, weight, location, and VESA pattern of your TV, the style and aesthetic of your home, and any additional features you may need.
Choosing the right TV wall mount can enhance your viewing experience by positioning your TV at the right angle, providing a safe and secure mount, and keeping your cables organized. Make sure to do your research and choose a mount that meets all of your needs and preferences.
The Pipishell wall mount is the most versatile option in terms of compatibility with different TVs, like OLED, flat panel display, and cable television. One of the best TV wall mounts for a range of motion is the Mounting Dream product we shortlisted. And the best TV mount for saving space is the one from USX.
Rolling TV stands—also known as mobile TV carts or TV mounts with wheels—offer a flexible, space-saving way to position and move your television across rooms or environments. Perfect for flat-screen, LED, and smart TVs, these stands are increasingly used in homes, offices, classrooms, and conference spaces for dynamic viewing and presentation setups. Equipped with features like locking casters, height adjustability, shelving for AV components, and universal VESA mount compatibility, the best rolling TV stands combine stability with seamless mobility. In this guide, we’ve reviewed 9 top-rated models based on build quality, design, and practical use to help you choose the right one for your setup.
Listed below are the best rolling TV stands:
Husky Mount Rolling TV Cart: The Husky Mount rolling TV cart can support 32" to 70" TV sizes, with a commendable weight capacity of up to 132 lbs. It may not work for smaller-sized homes due to its large dimensions.
Kanto MTM65PL TV Stand With Wheels and Mount: A TV stand that is known for its sleek design, it can support 37" to 65" TVs. The weight capacity is only up to 80 lbs, which is significantly lower than bigger options like the PERLESMITH.
PERLESMITH Mobile Rolling TV Carts: The PERLESMITH rolling TV cart offers rapid angle adjustments making it ideal for larger TVs between 32" to 75". It has a lower weight capacity of up to 100 lbs compared to the Yaheetech.
Yaheetech Portable Flat-screen TV Carts Stand: Yaheetech TV cart stand supports variable viewing angles for TVs between 32" to 75" and has a weight capacity of 110.2 lbs. Weakness: complicated instruction manual.
Rfiver Mobile TV Cart: The Rfiver TV cart is popular for its premium quality build. It comfortably supports TVs of 23" to 60". Assembly instructions are complex compared to the Husky Mount TV cart.
1. Husky Mount Rolling TV Cart - Best for Affordability & Stability
One amazing mobile TV stand that is available in the market today at an affordable price is the Husky Mount, which is equipped with 4 swivel caster that allows you to move your TV around the house faster without making any noise. What makes it such a great choice is that it allows you to adjust the height of the TV for a better view and has a tray that can store your electronic gadgets.
What We Like
Great cable management system
Extremely affordable option
Provides great stability and perfect safety for your TV
What We Don’t Like
Not the best choice for small apartments
Dimensions: 28" x 12" x 5.8" | Weight: 32 lbs | Material: Alloy Steel | Supported TV Size: 32" - 70" | TV Weight Capacity: Up to 132 lbs | VESA Size: 600 mm x 400 mm
2. Kanto MTM65PL TV Stand With Wheels & Mount - Best for Sleek Design & Mobility
We chose the Kanto MTM65PL as it is perfect for people who want to move their TV around their homes with greater ease. The wheels have quick-releasing locks that allow you to whisk your TV around without much trouble. You also get a very attractive-looking rolling stand as it is made from premium quality steel and has a powder finish to complete its elegant look.
What We Like
Extra locking mechanism ensures proper stability
Provides the optimal viewing experience
Minimal and very sleek design
What We Don’t Like
The assembly process is a bit complicated
Dimensions: 33.3" x 28.2" x 79.9" | Weight: 47.3 lbs | Material: Metal | Supported TV Size: 37" - 65" | TV Weight Capacity: Up to 80 lbs | VESA Size: 75 mm x 75 mm - 600 mm x 400 mm
3. PERLESMITH Mobile Rolling TV Carts - Best for Viewing Angle Adjustments
The PERLESMITH Mobile is one of the best mobile TV stands you will find in the market, and you can tilt it to get the best viewing angle quickly. The easy-moving wheels of the rolling stand and its adjustable tray ensure that you get a quality product with everything you want. This rolling TV stand can easily hold TVs that weigh nearly 100 pounds without a problem.
What We Like
Top-notch built-in cable system
Easier movement with high-quality wheels
Clear manual for easy installation of rolling stand
What We Don’t Like
Low holding power compared to other TV stands
Dimensions: 37.48" x 27.32" x 6.29" | Weight: 43.9 lbs | Material: N/A | Supported TV Size: 32" - 75" | TV Weight Capacity: Up to 100 lbs | VESA Size: 100 mm x 100 mm - 600 mm x 400 mm
4. Yaheetech Portable Flat-screen TV Carts Stand
If there is one mobile tv cart that is guaranteed to enhance your viewing experience it must be the Yaheetech Portable TV stand. It allows you to adjust the viewing angle of your TV in any angle and can also accommodate TVs of all weight capacities and designs. The maximum loading capacity of this TV stand is around 110 pounds which is more than enough for most TV models.
What We Like
Made from premium-quality materials
Additional storage option with component stand
Very reliable TV stand
What We Don’t Like
Complicated instruction manual
Dimensions: 35.04" x 25.98" x 77.36" | Weight: 33.3 lbs | Material: Alloy Steel, Plastic | Supported TV Size: 32" - 75" | TV Weight Capacity: Up to 110.2 lbs | VESA Size: 100 mm x 100 mm - 600 mm x 400 mm
5. Rfiver Mobile TV Cart
The Rfiver Mobile TV Cart is one of the most popular mobile tv cart models in the market today. It is a favorite due to its premium-quality material build and exceptional weighing power and wheel movement. You won’t be lacking any additional storage space with this rolling television stand, as it is equipped with a tray that is perfect for storing electronic gadgets and laptops.
What We Like
Extra-large wheelbase for added stability & safety
Best choice for bulky TVs
Excellent built-in cable management system
What We Don’t Like
Assembly instructions are complicated
Dimensions: 21.2" x 16.1" x 56" | Weight: 17 lbs | Material: Alloy Steel | Supported TV Size: 23" - 60" | TV Weight Capacity: Up to 88 lbs | VESA Size: 400 mm x 400 mm
6. Fitueyes TT207001MB Swivel TV Stand
If you want a rolling TV stand that goes with the minimalist interior theme of your home, the best option is the Fitueyes TT207001MB Swivel TV stand. The height of the TV stand can be manually adjusted based on your requirement, and it features a modern design, which easily supports TV models that are between 32 and 65 inches. You can also move the television in any direction that you want to elevate your viewing experience.
What We Like
Can easily move TV sets to nearly 15 degrees
Has a durable and compact metal body
Equipped with 2 different shelves
What We Don’t Like
Is an expensive option
Some components don’t match the stand
Dimensions: 27.5" x 16.5" x 50.8" | Weight: 34.1 lbs | Material: Alloy Steel, Iron | Supported TV Size: 32" - 75" | TV Weight Capacity: Up to 88 lbs | VESA Size: 200 mm x 200 mm - 600 mm x 400 mm
7. North Bayou Universal Mobile TV Stand
The North Bayou Universal Mobile TV Stand is one of the most sophisticated rolling TV stands in the market. It can easily accommodate TV models that are within the range of 32 to 65 inches, making it a perfect choice for use in homes, conference rooms, hospitals, and lecture halls. You also get excellent maneuverability with this rolling stand thanks to its 4 lockable wheel casters.
What We Like
Very easy installation manual
Adjustable tray for storing other devices
Aluminum alloy frame for extreme durability
What We Don’t Like
Some instructions don’t match the hardware of the rolling TV stand
Dimensions: 33" x 28" x 75" | Weight: 40.4 lbs | Material: Steel | Supported TV Size: 32" - 75" | TV Weight Capacity: Up to 200 lbs | VESA Size: 200 mm x 200 mm - 600 mm x 400 mm
8. Mount Factory Rolling TV Stand Mobile TV Cart
The Mount Factory rolling TV stand is the best choice for storing your TV along with other devices such as your music system, and DVD player. There’s also space for storing other items as it comes with a separate component shelf. The interlocking casters and sturdy frame of the mobile tv cart make it one of the best options out in the market right now.
What We Like
Highly compatible product
Rolls around quickly and easily
Loading capacity of 110 pounds
What We Don’t Like
Some complaints about incorrect manual
Stand's screws made from low-quality materials
Dimensions: 25" x 33" x 60" | Weight: 45.1 lbs | Material: Metal | Supported TV Size: 40" - 65" | TV Weight Capacity: Up to 100 lbs | VESA Size: 100 mm x 100 mm - 400 mm x 600 mm
9. Vivo Black TV Cart for LCD LED Plasma Flat Panel Stand
The last option for a rolling television stand on our list is the Vivo Black TV Cart, which is perfect for any family that is looking for a unique design and wants something different for their interior décor. It is made from premium-quality material, so you get a solid frame and body, while it can easily accommodate TVs from 32 inches to 65 inches in length. Moving it around your home or from room to room is easy as it has swivel wheels attached to the bottom.
What We Like
Easily transports your TV anywhere in the home
Comes with additional storage options
Long-lasting durability
What We Don’t Like
Some users don’t like the sharp threading on the pipe connector
Dimensions: 29.4" x 13.6" x 7.1" | Weight: 35.4 lbs | Material: Alloy Steel | Supported TV Size: 32" - 83" | TV Weight Capacity: Up to 110 lbs | VESA Size: 75 mm x 75 mm - 600 mm x 400 mm
What is the Best Rolling TV Stand?
If you're searching for the best rolling TV stand, listed below is a table that compares dimensions measured in inches, weight measured in pounds, material, supported TV size in inches, TV weight capacity in pounds, and compatible VESA mount size in millimeters.
A rolling TV stand provides the convenience of mobility and flexibility for your television setup. When selecting the best rolling TV stand, several essential factors should be considered to ensure a suitable choice that meets your needs.
Stability
A stable rolling TV stand is crucial for keeping your television safe and secure. Look for stands built with sturdy materials, such as steel or aluminum, which offer reliable weight distribution and durability. Stands with a broader base or a low center of gravity provide enhanced stability, preventing accidental tipping or wobbling.
Compatibility
It is essential to check the compatibility of a rolling TV stand with your television. Consider the weight capacity of the stand to ensure it can support your TV's size and weight. Verify if the stand aligns with the VESA mounting standard used by your TV. Common VESA mount sizes include 100 x 100, 200 x 200, and 400 x 400, among others.
Adjustability
Opt for a rolling TV stand that offers adjustable features for optimal viewing comfort. Height adjustability allows you to set the TV at an ideal eye level. Tilt and swivel adjustments provide flexibility to find the best viewing angle. Cable management systems can help keep cords organized and out of sight, maintaining a clutter-free appearance.
Storage Options
Consider the storage options available on the rolling TV stand. Shelves or compartments can be convenient for holding media devices such as DVD players, game consoles, or sound systems. Adequate storage capacity ensures that all your media components can be accommodated without overwhelming the stand.
Portability and Maneuverability
Look for rolling TV stands equipped with high-quality wheels or casters that can smoothly glide on different surfaces, including carpet and hardwood floors. Stands with locking mechanisms on the wheels provide stability, preventing any unintended movement. Consider also the weight and size of the stand, favoring lightweight and compact designs for easier portability and maneuverability.
Are rolling TV stands easy to assemble?
Rolling TV stands can be relatively easy to assemble, depending on the design and the user's proficiency with similar tasks. Most come with instructions and all necessary hardware. Some models may require tools that are usually found in a standard household toolkit. The complexity can vary, so refer to product-specific assembly instructions.
Can a rolling TV stand hold other electronic equipment?
Yes, a rolling TV stand can hold other electronic equipment. Many models come equipped with shelves or compartments that can accommodate devices like DVD players, gaming consoles, or sound systems. The weight capacity and size of these shelves or compartments can vary, so it's important to check the specifications provided by the manufacturer.
Are rolling TV stands suitable for commercial settings?
Yes, rolling TV stands are suitable for commercial settings. They provide mobility and flexibility that can be useful in many commercial environments such as offices, conference rooms, trade shows, hotels, or educational institutions. Their durable construction can often support heavier, commercial-grade televisions or display screens. As with any product, it's important to check the manufacturer's specifications to ensure it meets your specific requirements.
As we consider the various factors affecting your choice of the best rolling TV stand, it becomes clear that the options available cater to a range of preferences, from affordability and stability to sleek design and adjustability.
From the above 9 best rolling TV stands, here are the top three expert recommendations:
For those seeking affordability and stability without sacrificing quality, the Husky Mount Rolling TV Cart is an ideal option. This stand comes with a great cable management system, offers excellent stability, and is easy on the wallet.
For those in search of a sleek design and superior mobility, the Kanto MTM65PL TV Stand with Wheels and Mount is a good option. This rolling stand offers proper stability with an extra locking mechanism, a minimal and attractive design, and optimal viewing angles.
Lastly, for the best in viewing angle adjustments, the PERLESMITH Mobile Rolling TV Carts is the right choice. Equipped with top-notch built-in cable systems, high-quality wheels for smooth movement, and a clear installation manual, it provides a versatile and customizable experience.
In summary, the ideal rolling TV stand for your needs will depend on your specific preferences in terms of design, mobility, and adjustability.
Our top three recommendations cover different aspects, ensuring that you can find the perfect TV stand to suit your needs. Take some time to familiarize yourself with these options and weigh your priorities before making your final decision. Happy shopping!
Are you tired of the noise your hardwood floors make while walking on them? If so, it's time for you to try area rugs.
Even though it's a hefty investment, hardwood floors can be a bit squeaky when walking on them. The sound is amplified when you need to move furniture or something drops on the floor.
Hence, the best way to deal with this issue is to get an area rug covering a significant portion of the floor. These rugs are also a great way to add accent and color to the floor, which looks otherwise bland due to bare hardwood floors.
Moreover, area rugs are an excellent alternative for those who don't want to install wall-to-wall carpets.
Having said that, it can be a bit challenging to get the best area rugs for hardwood floors. Don't worry, as we are here to help you out with that by suggesting 11 options.
Vintage Traditional Elegance – The Maples Rugs Pelham...
Durable & Stain-Resistant – Expertly crafted with 100%...
Let's start with a simple yet good-quality area rug that would look good in any room. This 7 x 10 feet rug comes with a damask pattern, and it's made to last even after years of usage. Available in 10 color options, you're sure to find one that matches your interior and hardwood floors.
Why Did We Like It?
First of all, the best thing about this area rug has to be the quality of its material. The rug has a nylon pile with an aesthetic- dual-color damask design that stands out in any room. Along with durability, the nylon pile ensures that its beautiful color won't fade over time.
Additionally, this area rug comes with a skid-resistant latex backing, so there's no need to add a rug pad to it. The backing helps the rug to stay put under your furniture and secures it from being dragged around, especially if you have children or pets.
On that note, we have to mention that this rug is stain-resistant to maintain its beautiful appearance. If you drop something on the rug, there's the option to spot clean and air dry, making it extremely low-maintenance.
What Could’ve Been Better?
This is a great area rug to have in any part of your home. But, before purchasing it, you should know that this is a low-profile area rug. Hence, it isn't very thick like wool rugs. However, this rug is excellent at providing comfort over hardwood floors and saving you from tripping on it.
Durable Materials: Our area rug is meticulously crafted from...
Recommended Rooms: Transform your living room, bedroom,...
Are you someone who likes the mix of vintage and contemporary styles? If so, then this area rug from nuLoom won't fail to impress you. This Moroccan Blythe area rug is perfect for any home with laid-back aesthetics. So, let's check out what's unique about this area rug meant for hardwood floors.
Why Did We Like It?
First of all, let's talk about the construction of this rug. It has been made in Turkey, the carpet capital of the world, in a high-tech power loom for making the rug durable for everyday use. This product is made of polypropylene, a low-maintenance material that's known to last for years.
On that note, this area rug is entirely pet-friendly. So, if you have a furry friend, don't worry about their claws damaging the rug as they won't. It's also resilient to the daily wear and tears that a rug has to go through in high-traffic areas of hardwood floors.
Coming to the design of this rug, it has the perfect boho aesthetic without being too bright. The combination of gray and off-white seamlessly blends with any furniture and colors that might be present in your interior. And, because of the large size, you can fit it under everything from your king-sized bed to the large living room sofa.
Overall, this is an excellent rug that's easy to take care of, especially in busy households. However, while going through the reviews, we found that many people thought the colors were a tad different from the pictures given online. Hence, it's better to contact the brand if you face a similar issue.
Soft 0.25" (1/4") pile height. Made of 100% polypropylene...
French-inspired vintage traditional designs from Unique...
Next up, we have an area rug from Unique Loom brought to you right from Turkey. We cannot question the quality of this area rug as it's phenomenal. But, the best thing has to be the contemporary look heightened by the shifting color palette of this rug. So, let's check it out.
Why Did We Like It?
Right off the bat, the thing we noticed about this rug was the unique pattern. From a distance, it may seem as if the carpet has a traditional pattern, but on closer look, you will notice the contemporary aspect. The gray color of this area rug helps it blend with all kinds of furniture and any shade of hardwood floor you might have in a room.
However, the feature we like the most has to be the soft fabric. This rug has been made in a power loom with polypropylene giving its pile a delicate texture. Because of the tight weaving, there's no chance of shedding, even during strong vacuuming sessions.
On that note, it's pretty easy to clean this rug with regular vacuuming. Apart from that, you can also deep wash it with carpet shampoo and air dry it for the best results.
Even though this isn't really a drawback of the product, we would like to say that it would take a while to flatten the rug. However, the good thing is that the brand does give you all the instructions required for the process. We recommend having another person with you while flattening this area rug.
MID-CENTURY MODERN INSPIRED STYLE: The layered rectangle...
AVAILABLE IN A VARIETY OF AREA RUG SIZES: 9 x 12 rugs, 8 x...
If you are someone who wants to add earthy or neutral tones in their living space, check out this product from Home Dynamix. Along with having a contemporary design, it's one of the softest rugs we have come across. So, let's check out all the details about this area rug.
Why Did We Like It?
This beautiful area rug from Home Dynamix has a rectangular shape as the pattern has the finish of wooden planks. So, this rug will especially look good if your house has hardwood floors with dark finishes. On top of that, neutral colors have been used in this rug to mix into the interior of any home.
When it comes to materials, a mix of natural and synthetic fibers has been used in this product. The main rug is constructed of durable polypropylene and woven in a power loom to give the rug a soft feel. But, the backing is made of jute to restrict the rug from slipping on hardwood floors.
Furthermore, this is a non-shedding area rug, so you won't have to worry about the fibers getting everywhere around your home.
What Could’ve Been Better?
One of the common complaints that we got to know about this rug was that it takes a while to flatten it completely. In the initial days of use, you will see some wrinkles, especially on the straight sides. Do follow the instructions given by the brand to flatten the rug to make it safer for your house.
FUNCTIONAL MEDIUM PILE: Crafted with a versatile medium pile...
Have you ever looked at the intricate patterns in traditional rugs and wondered about having them at an affordable price? Worry not, as this beautiful Odelia rug from Artistic Weavers lets you enjoy the fascinating products without digging a hole into your pocket. So, let's check what makes this rug worth it.
Why Did We Like It?
The focal point of this area rug has to be the traditional design. But, a contemporary touch has been added by giving a worn-down finish to the pile. Along with that, the rug has vibrant colors like orange and navy to make it stand out in your living room.
Compared to other similar area rugs, this one sports a medium pile height that is perfect for any home area. We think this would be the right rug to place at entry points because of its intricate design and finish.
Moreover, this area rug would be perfect for a dining room to keep the hardwood floors covered and safe from damage caused by sharp objects. And, this rug has been designed for everyday use, so there's no need to worry about its durability.
What Could’ve Been Better?
Whenever you are buying a rug, it's essential to look at the colors to make sure it matches your interior. Even though this is a great rug, past customers have complained that the colors aren't exactly what is shown in the online images. In most cases, they weren't too bright but more subdued.
Perfect for Dining Room, Living Room, Bedroom. Lightweight...
VERSATILE GOOD LOOKS: Add a fashionable complement to a...
Are you still on the lookout for great area rugs for hardwood floors? If so, then you'll be thrilled with this product from Antep Rugs because of its beautiful pattern present on the borders. And, this can easily be the perfect rug to place anywhere around your home. So, let's check it out.
Why Did We Like It?
We are especially recommending this product because of its ease of use. There are times when area rugs require a lot of maintenance due to the nature of the fabric. However, nothing of that sort is needed for this rug, even in households with pets and children. Just vacuum the rug regularly, and it will look good on your hardwood floors.
One of the remarkable things about this area rug has to be the design present in its border. Yes, the rug is soft and feels good when you walk on it, but anyone visiting your home would be stunned by the elaborate design of this product. And, the combination of gray and white colors looks excellent in a contemporary space like modern homes.
Additionally, you don't need to worry about its durability as the rug is made of high-quality polypropylene, one of the hardiest synthetic fibers.
What Could’ve Been Better?
To be honest, one of the common problems seen in oversized area rugs is slippage. Even though this synthetic rug has a rubberized backing, previous customers have stated that it may slip if you have polished hardwood floors. In that case, we recommend you get an additional rug pad for better safety.
Are you tired of looking at the same old rectangular area rugs? Here's something new for you, as this is one of the round-area rugs available on the market. Worry not, as it still sports the traditional design to give your home the perfect bohemian aesthetic. So, let's check out everything about this rug.
Why Did We Like It?
When it comes to getting rugs for hardwood floors, most people gravitate towards rectangular or square rugs. But you can change things up by getting a round rug like this one. It has to be one of the best rugs to place under a coffee table or similar furniture to add an accent to a room.
Moreover, even though this area rug is on the thinner side, it comes with exceptional durability due to the superior quality of the polypropylene material. The pile of this rug is also stain-resistant, so there’s no need to worry about it getting ruined, especially if you have kids.
Coming to the design aspect, this is a floral rug with a distressed look and a subtle color pattern. Hence, it's bound to look good in any area of your house.
What Could’ve Been Better?
Before getting this area rug, you need to know that it comes without a rubberized backing. Hence, you have to find a rug pad that fits this round area rug. Not all rug pads would be suitable for this product because of the unique shape but do try to find one to reduce slippage.
One of the best ways to spruce up your bedroom is by adding fluffy high-pile rugs. These can change the look of your room entirely, and this product from RUGTUDER does the same. Walking on this rug will make you feel like being on a cloud, and it's incredibly comfortable.
Why Did We Like It?
Let's go back to the time when it was a trend to fill your room with fluffy things. This beautiful velvet area rug feels like an enlarged version of the popular fluffy slippers and makes having it in your room a worthy experience. Don't worry about the look, as the fluffiness of this rug goes well with most hardwood floors.
One of the best things about this rug has to be its quality. Every strand of the velvet hair is weaved into the base to minimize shedding. Moreover, this rug has a sponge interior to give it a softer and more relaxing feel.
Furthermore, among some of the fluffy synthetic rugs we tried, this one does have a rubberized backing to minimize the chance of slippage. Hence, you easily place this rug near your bathroom or even in the kid's bedroom. Just make sure to lay it on the hardwood floor properly without any wrinkles.
What Could’ve Been Better?
Our only gripe about this soft and fluffy is that it isn't machine washable. Hence, if you want to deep clean the rug it needs to be done by hand using cold water. Do remember to tell this instruction to the cleaner if you are opting for professional cleaning.
STYLISH DESIGN: This trendsetting ornamental medallion area...
DURABLE MATERIALS: Designed to withstand everyday wear, the...
Are you interested in adding a bit more color to your space? If so, check out this ornamental area rug from Mohawk Home, as it would instantly add brightness to any room. It has to be one of the best area rugs among the options we checked that used a bold color palette.
Why Did We Like It?
Most people who are looking for the best rugs for hardwood floors sift through a few options and typically pick up bland or dull products. But, you don't need to do that anymore as this product from Mohawk Home comes with a bright and attractive outlook. This area rug would especially stand out in homes with large living rooms with big sofas.
Furthermore, this area rug is made with wear-dated nylon, one of the most durable materials we love. So, along with being a stain-resistant rug, this product is meant to last for a long time by standing against regular wear and tear.
However, a unique aspect of this rug has to be the use of a high-low profile. Compared to the typical pile setting, this rug has a better texture making it incredibly soft and perfect for covering large areas.
What Could’ve Been Better?
Before we talk about the negative aspect, it's important to let you know that this is undoubtedly a great product. But, we would have liked it even better if there were a few more color options. Having said that, the neutral yet bold colors used in this rug do work for almost all areas of a house.
EASY TO CLEAN & WATER RESISTANT:Our anti-fatigue gel mats...
When it comes to dealing with fatigue, nothing can beat PVC rug pads in terms of comfort. We had to include one of these kitchen runners in our suggestions as it can quickly get tiring to stand on hardwood floors. So, let's check out the features of this rug.
Why Did We Like It?
People who have hardwood floors in their kitchens know that foot fatigue is real, especially for the elderly. It can be frustrating to stand on the hard floor for hours; hence, we recommended this premium quality PVC floor runner that's perfect for all kitchens. Just place it in your kitchen, and give your feet some rest while standing near the oven.
The best thing about this rug has to be its PVC Material. Made out of several layers of PVC, this product won't rip even if you drop a sharp knife on it. Moreover, it's water-resistant and has an anti-slip backing to make it ideal for use in kitchens.
What's more, it's pretty easy to clean this rug. Apart from regular vacuuming, you can occasionally wipe it clean with mild detergent and water to keep it shining like new.
What Could’ve Been Better?
No doubt this is a great rug for hardwood floors, but there's a problem with the maintenance of color standards. After reading reviews, we found that some people found discrepancies in the shade on ordering multiple rugs of the same color. Apart from this issue, we are pretty happy with the quality of this runner.
[KEY ATTRIBUTES]: Size: 2'3" x 3' (2' x 3') | Thickness: 0.2...
[LOW PILE]: A low pile thickness of 0.2 inches offers ideal...
Do you have a hardwood floor doorway? If so, then it's a prerequisite to have a rug to prevent slippage. This rug from Ottomanson is an attractive yet affordable option to add that nice touch to your home. Hence, let's check out everything you need to know about this area rug.
Why Did We Like It?
We know that wool rugs look great and work well to get your hardwood floors covered. However, they come with a huge price tag, but that wouldn't be a problem with this product as it's pretty affordable. You can even get multiples to place in front of every door in your home to create a cohesive theme.
Moreover, this area rug is made of good quality nylon that's wear and tear-resistant. To make it even better, the company has added an anti-slip rubber backing so that the rug doesn't slip, especially on a polished hardwood floor.
Furthermore, this is a low-pile area rug, so there's no need to worry about your furry friends or kids tripping over it. And, the best part is that this rug doesn't get scratched from regular usage.
What Could’ve Been Better?
The only gripe we have is that you can’t put it in the washing machine. Hence, if you plan to place this on your doorway with a hardwood floor, make sure to do regular vacuuming. Apart from that, this rug is perfect for all households.
Pros
Easy to use
Good for narrow spaces
Anti-slip backing works well
Low cost
Cons
Not machine washable
Hardwood Floors Area Rugs Buying Guide
Are you still confused about choosing an area rug for your home? Don't worry as we are going to tell you about some essential points to know for selecting the best products. These points have also helped us select the area rugs we suggested to you for use on hardwood floors.
1. Size
One of the first things to check in the case of area rugs is the size. To select the proper item, you'll first need to measure the areas you want to cover with the rug. Contrary to popular belief, area rugs aren’t always huge. Sometimes, they are found in slim sizes that fit in tight spaces such as doorways.
However, there are some standard sizes of area rugs, and it's usually mentioned with the measurements of the length and width of the product. Even though most area rugs have a rectangular shape, some brands also make circular rugs, in which case the size is measured by its diameter.
Furthermore, some people want to place area rugs under furniture. In that case, measure your furniture and choose a larger area rug to make the room look spacious and well-kept.
2. Material
Another key aspect of selecting an area rug is its material. Most of the rugs available on the market are made of synthetic materials like faux wool or nylon derived from plastic. Even though these last for a considerable time and are easy to maintain, they aren't the best choice for people looking to avoid plastic.
Hence, the alternative is to go for natural materials like jute, cotton, or animal-derived wool. Natural fiber rugs made of wool blends or plant fibers typically cost more than area rugs made of synthetic materials. Rugs with natural materials like cotton rugs also require more maintenance and may easily develop stains or tears.
Besides, check if it has a backing whenever you are getting a rug. The most common backing is made with latex or natural rubber to give the rug a better grip on a hardwood floor. But, those who are allergic to latex might do better with alternatives like latex-free backings or jute backings.
On the other hand, some area rugs may entirely lack any backing. In such instances, you may need to add rug pads under such a product to keep it in place.
Other than that, there might be times when a colored liquid falls on the rug. For natural fibers like silk or wool, you need to follow specific steps or call a professional rug cleaner to remove the stain. But, cleanup is pretty easy for most rugs with synthetic materials as they can be spot cleaned and air-dried.
3. Soundproofing
When considering area rugs for hardwood floors, it's important to take into account their soundproofing ability. A rug with effective soundproofing properties can help reduce noise transmission between rooms and floors, making your space more comfortable and quiet overall. Rugs with dense fibers and thick padding can provide better sound absorption than those that are thin or have fewer fibers.
Materials like wool, cotton, and other natural fibers tend to have better sound-absorbing properties than synthetic materials. However, there are also synthetic rugs available that are specifically designed for soundproofing and incorporate additional layers or materials for improved noise reduction. In addition to the rug material, adding a quality rug pad underneath the rug can significantly enhance its sound-deadening capabilities.
If soundproofing is a priority for your rug selection, look for rugs made from dense and thick materials, and consider adding an appropriate rug pad to further enhance noise reduction in your space.
4. Backing & Maintenance
Choosing an area rug might seem like a daunting task, but with careful consideration of the size, material, soundproofing properties, and maintenance, you can find the perfect rug for your hardwood floors. Remember to take your time and thoroughly research each aspect to find a rug that will not only look great but also be functional and durable in your home.
Area Rugs For Hardwood Floors Verdict
So, that's everything we had to tell you about finding the best area rugs for hardwood floors. We hope that our suggestions will help you pick the right product for your home. Moreover, it was a fun experience for us to go through the varied patterns present in the area rugs.
Among our recommendations, we will suggest the Maples Rugs area rug to anyone looking for a high-quality product that can last for years, even in high-traffic areas.
On the other hand, the nuLOOM Moroccan Blythe area rug goes better with homes with pets and kids. However, it lacks a rubberized backing, so the rug may move around a bit.
With that, we come to the end of this guide. Do let us know if you have any queries regarding our suggestions.
Black and white decor has become a traditional combination that can be both playful and elegant at the same time. Ok, so we know it might seem like we are all set on black and white decor inspiration, but honestly, we can't get enough of them. The contrast between these two non-colors is the one that generates a certain tension in the design scheme, being able to be at the same time a perfect background for the main pieces of the decor or the focal point of the entire room. The more usage of black the more sober the atmosphere so be careful not to overdue it and create a claustrophobic chamber. Accents are of the most importance, whether colorful or with a specific design or texture because they are the ones that unite all the components and merge them into one solid creation.
Black and white decor collage
White creates the sensation of openness and liberation. Thus it should be used in open spaces like open-kitchens and living rooms and even in the bedroom if you like a more serene clam atmosphere. In contrast the black, a grave, strong non color implies a more intimate, serious state of mind and it is suitable for the privacy of you bedroom or study. Nonetheless don't feel obliged to not use it in the kitchen where combined with a steel furniture can turn it into an industrial designed room. Add touches of crystal and gold and choose rich textures and materials like silk and velvet, leather and transform your living room into a luxurious decadent space perfect for romantic evening or dinner parties. Just keep in mind to find that balance and to have fun with the design itself.
Black and white decor-picture frames wall
Black and white decor- vintage bathroom
Simple interior design with black accents
Modern interior design with simple black and white elements
Minimalist black and white kitchen decor
Modern black and white decor kitchen
Simple living room design with a black and white color scheme
Rich black color scheme
Scandinavian interior decor
Black and white sitting nook
Black and white living room
Elegant bedroom designed in black and white
Patterned bedroom in black and white
Minimalist interior design
Small industrial black and white kitchen
Luxurious black and white kitchen
Modern living room decor
Stripped black and white wallapaper
Simple yet elegant open ktichen
Retro inspired living room with black and white and yellow pillows as accents
White and black wall and ceiling transiiton
Chalk black wall
Black shiny leather living room furniture
Minimalist decor of a living room in black and white
Autumn is finally here and I for one could not be happier. I love its rainy days when you just want to get cozy and lay in bed all day long and the first smell of burning wood and scented cinnamon tea, the surreal color pallets of falling leaves and the cold mornings standing barefoot in your balcony admiring a breathtaking view. Autumn is a season for dreams and fantasies,a season when you can let go and really appreciate a perfect morning no matter what you are doing. If summer makes us lazy and not fond of actually working, the fresh autumn mornings and chilly nights make me feel inspired and keen to start new creative projects.Today we are starting to get in that autumn mood with a few ideas On How To Add The Cozy Feel To Your Home In The Rainy Season. Get comfortable and surge inspiration in the gallery below. I assure you'll feel excited for this wonderful season in no time.
1. You deserve to want to get cozy and lay in bed all day long with a great book
2. or go to the other extreme and put together a cozy intimate party where string lights set up the mood
3. choose the perfect corner from your home and turn it cozy and warm
4. it is never too early to start a fire
5. find cozy BLANKETS that add something special at th same time to your decor giving it an AUTUMN feel
6. candle light is that essential twist you should go to WHENEVER you feel melancholic and SNUGLY
7. prepare a collection of "autumn" books in your favorite corner
8. and definitely enjoy scented autumn teas to warm you heart and toes
9. coppery details are an elegant touch to a AUTUMN decor
10. take the dust off your old grandma's candelABRUM
11. and CREATE your own SCANTED CANDLES WITH A TOUCH OF NUTS AND TREE BARK TO ACCOMPANY THE DECOR
12. RECYCLE MASON JARS AND CREATE A COZY HOMEY CHANDELIER
13. PUT THOSE SUMMER LONG GATHERED SHELLS TO GOOD USE
14. FIND SPECIAL AUTUMN SCENTED TEA RECIPES AND INFUSE THE FEEL OF AUTUMN INTO YOUR HOME
15. ADD A WARM FLUFFY BLANKET TO YOUR WORKING SPACE CHAIR
16. TRANSFORM THE SUMMER HAMMOCK INTO AN AUTUMN RELAXATION SPOT
17. THERE IS NOTHING MORE DELIGHTFUL THAN THE SMELL OF FRESH CUT WOOD
18. CREATE A COZY CHAIR-FIREPLACE CORNER
19. LIGHT THAT BEDROOM FIREPLACE AND RELAX
20. OR CREATE A WONDERFUL EXPERIENCE BY ADDING A FIREPLACE INTO YOUR MASTER BATHROOM
21. AND BECAUSE WE ARE TALKING BOUT AUTUMN DECORATE YOUR FIREPLACE MANTLE ACCORDINGLY
How do you dress up your home for autumn? Feel free to share your thoughts and ideas in the comment section below.
When someone close to us says black and white interior design we all instantly imagine a modern minimalist interior design; while our imagination is definitely feeding us a good thread we should start feeding it with some classic traditional black and white interior designs as well. Starting with this article today we are going to slowly review some interior designs that are wearing black and white on a beautiful traditional style.
We are starting the series with the living room because it is our inner home, our center around which we all orbit trough the day, trough the weeks, months and years. Moreover the black and white living room design is definitely the black and white design that will be showcased to most of our guests, for the special ones that will get past the living room we will have other spaces dressed in tradition black and white published soon.
Depending on the living room you might want to think the black and white ratio and to paint different items within the interior if you would like to manipulate the perception of the viewer. For example black walls are making the space seem smaller yet very pretentious, noble and elegant where stark white walls are going to brighten the space and emphasize the feel of space, enlarging the room.
The proportion of black and white in the interior will also discourage or encourage tones as accents, in a interior design in which the black and white ratio is balanced an item in this color palette or close to it will be hardly remarked while a red one will be the main focal point at an given time.
It is up to you to decide how your small universe will get dressed in black in white, our point being that a black and white living room design can very well be classic or traditional, a far cozier and warmer space then a black and white minimalist living room.
We encourage you to take a look on the pictures selected bellow and leave us your opinion in the comment section bellow.
Your enter your home, you take the first steps and you reach your universe.The Living Room is the place in which, everyday, is written the story of your family and your own.It`s your refuge and your paradise.It`s the center of your home.The unique charm of this universe is entirely by your own creation.You build it by yourself, piece by piece, according to your own taste and needs.From the moment you have chosen the center piece all you have to do is to complete this puzzle of happiness: pick the coffee table, the rug, the lamp and curtains and make the place your home.
If we would be asked to describe our living rooms, how would you describe them? Just try to describe your own on the comment section bellow.It`s very hard to catch all the details in a short description and a large one will get most of us bored or unable to keep the pace of our imagination, but happily for us we can all extract the most important things from a picture that we can relate to and make our own interpretation of a design that can bend to our needs. One picture is worth a thousand words.
Further on we present you an amazing selection of modern living room designs, mostly being proof that:
“Simplicity and repose are the qualities that measure the true value of any work of art”
(Frank Lloyd Wright)
Form and material combined into a new innovative trendsetting product. Making the old and boring new and exciting or just playing with sensations, light and textures ,we bring you some bright ideas that we ourselves find catchy.
Blue vintage suitcases, which we don’t come across often, recreated into comfortable classic chairs; Relegs chair-A chair that is able to go down to its knees for your personal comfort; Cactus chair - an experimentation to investigate the effect of visual data to the user’s experience(the existence of the Barrel Cactus gives a temporary discomfort, even though the user knows that the cactus behind the glass is not a real threat ); Affinity chair- exploring our relationship with light and space beneath; Chair inside a chair –a very comfortable and versatile sitting that reduces storage space .And the list can easily continue. Just take a look and let your imagination wonder .
Sometimes, a well-thought-out lighting set-up can make all the difference in any decor style.
Not to mention how lights determine the usability of any space. Moreover, it is a much cheaper alternative to renovate a space than incorporating new furniture frequently to give your home a facelift.
Indeed, installing fashionable and modern lighting won’t require you to stretch your budget too much. On the other hand, high-quality furniture is expensive and comes with additional costs for maintenance. So, if you’re thinking of changing the existing lighting scheme in your home, we’d say it’s a great decision.
But the huge variety of lights available on the market can perplex anyone looking to choose a suitable type. That’s why we thought of penning this extensive guide on the different types of lighting. So, without further ado, let’s begin!
Types Of Lighting
The Three Main Lighting Categories
Firstly, know that when you’re looking to set up lights in any space, you must be aware of the three basic types of lights — task, accent, and ambient light. Let’s take a look at their differences.
1. Task Lighting
As the name suggests, such light sources provide illumination directed toward a particular area to brighten up certain objects or a workspace and provide safe passage. Thus, task lighting is generally more localized compared to other lighting categories.
Notably, our vision deteriorates with age, and that’s where task lighting can help immensely — it can reduce light glare and prevent eye strain. Such lighting sources are centered around workspaces meant for reading, cooking, studying, crafting, and other stationary hobbies.
2. Accent Lighting
Such a light source is more decorative and design-oriented than the other types. That said, design is a crucial factor while you’re selecting general or accent light fixtures.
This type of lighting primarily aims to build a focal point in a room to highlight a statement piece, such as an architectural design feature. Also, if a portion of the wall has some interesting photographs or artworks, it works to bring out their beauty. And that’s not all; accent lighting can even be used to enhance the color or texture of the walls or show off the lighting fixture itself.
3. Ambient Lighting
Also referred to as general lighting, it’s the primary light source for any room and provides broad lighting for the whole space. Interestingly, it even influences the mood and ambiance of the space — hence, the name “ambient lighting”.
Note that general lighting fixtures can vary from magnificent chandeliers to recessed lights, which we’ll discuss later in our guide. In fact, if the room is abundant in natural lighting, it serves as the general lighting source during the daytime.
Now that you know about the basic types of lighting, it’s time to look at some of the most popular lighting fixtures available on the market. And to make things simpler for you, we’ve divided our list into three categories, viz. indoor lighting fixtures, outdoor lighting fixtures, and light bulbs.
Indoor Lighting Fixtures Types
1. Pendant Lighting
First off, let’s talk about these interesting lights that are designed primarily to enhance the aesthetic appeal of a room. Note that glass pendant lights, or pendant lights in general are made to hang low from a ceiling, which might have been the inspiration behind the intriguing name.
Available in different sizes, lengths, and styles, these lights can blend seamlessly into any room décor. Plus, you can choose to install a single piece or a group of pendant lights based on your needs.
Setting them up is pretty simple — just attach a few sturdy hooks to the ceiling, run the wire of the pendant through them, and then along floors and walls to keep it out of view. And that’s it — let there be light.
2. Architectural Lighting
The beauty of such lighting fixtures is that they are integrated into the structure of a building. Notably, you can get these fixtures in different styles, like a valance, soffit, and cove lighting. Most architectural lights are placed on shelves or ledges, with the light typically bouncing off the upper parts of a wall or the ceiling.
Apart from that, valance-styled lights come enclosed in a structure made of glass, metal, or wood, which are mounted high above walls or windows. And as for the soffit-styled lights, they have to be placed near a ceiling so that the light can radiate downward to create a softly-illuminated ambiance.
3. Recessed Lighting
Up next is this widely used lighting type that’s installed in various preset ceiling fixtures to illuminate a room using narrow bands of light. Many such lights can be installed together to provide an excellent general room lighting source.
Recessed lights require at least six-inch clearance for proper installation, plus the area around the fixture must be insulated properly. Interestingly, you can also use these lights in a few spots around the room as a form of accent or task lighting.
These ceiling lights take up less visual space and can beautifully complement any room decor.
4. Chandeliers
Firstly, chandeliers have to be suspended from a ceiling just like pendant lights — the difference between the two lies in the direction of the light. While chandeliers emit light that points upwards, reflecting off the ceiling, most pendants are directed downwards.
Furthermore, chandeliers lend a more decorative look to the overall decor and are available in a multitude of captivating designs. These luxurious status symbols are a great example of ambient or general lighting and are popular choices for modern dining and living rooms.
5. Under-Cabinet Lighting
As the name suggests, such lighting is often installed underneath a kitchen cabinet to facilitate better visibility therein. After all, the area underneath a cabinet tends to be quite dark, making it difficult to find several kitchen essentials. And you would never want to end up slicing your fingers on a sharp tool!
It is worth noting that this prevalent version of task lighting for kitchens is easy to set up.
While recessed lighting uses pre-installed fixtures to direct light from the ceiling, track lights make for a more convenient alternative for the same purpose. They are mounted to the ceiling with a supporting base and may comprise multiple light heads attached to a continuous track device.
Notably, track lighting is mainly used as a task lighting or accent lighting source. However, it can work as an efficient general lighting source based on the bulb strength.
7. Wall Sconces
This style shines in stark contrast to most lighting types we’ve dealt with till now, as it consists of lights extending from the walls instead of ceilings. As such, these lights can illuminate side tables and hallways efficiently.
At this point, you might assume that installing such lights will require setting up wiring behind the walls. But hang on— that might not always be the case.
You can eliminate the mess using plug-in wall sconces: just hide the wire properly, plug the lights in the scones, and mount them. And nobody has to know that you actually opted for a plug-in instead of a more permanent fixture.
8. Portable Lamps
The best part about these lamps is that there is no installation involved; you need only plug them into a power outlet. That’s why you can move them around easily in case you feel they would look better in a different part of the house. Furthermore, the sizes and styles available will leave you spoiled for choice. So, go ahead and find a suitable option for your decor style.
The easy accessibility and versatility of these lights make them a universal favorite worldwide, and they can even act as a perfect task lighting source. That said, larger floor lamps might emanate enough light to make for an efficient source of general lighting.
9. Laser Lighting
If you want to incorporate a distinct lighting element in the room that can transform the ambiance altogether, laser lighting will be an ideal pick. Lasers are, in effect, electrical filaments utilized for generating light created by a variety of fixtures.
They travel along a thin beam and don’t diffract in different directions, ensuring the brightness and focus of the light aren’t lost over a distance. Note that such lights come in the form of lamps, so you can easily use them in different areas around the home.
Plus, the narrow path of lasers makes it very easy to diffract a beam into thousands of smaller ones, helping to create the much sought-after, captivating starry effect. And in case you’re looking to create a more happening ambiance for a house party, you can even use two to three laser lights of different colors.
10. LED Lighting
LED Lights are one of the most popular lighting options today since they offer a much more energy-efficient performance than traditional lights. Moreover, LEDs diffract in different directions and fill the room with a soft glow that most homeowners prefer over the extra-bright light emanating from traditional lighting sources.
They are also quite long-lasting and won’t need replacements for a long time. Not to mention how some variants have color-changing abilities as well. Another significant advantage is that LED lights can be found in several forms, ranging from accent fixtures such as string and strip lights to standard light bulbs.
11. Portable Lighting
Portable lighting is another great pick for those who prioritize convenience over design and other factors. Such lights can be plugged into a regular power outlet or a USB port. What’s more, they come in compact and lightweight designs, so you can take them along to create a thrilling ambiance anywhere you go.
Light Bulbs
Light bulbs can very well be regarded as a separate division when it comes to listing the different types of lighting options on the market. They can even be incorporated in both indoor and outdoor spaces to create different lighting effects as per your needs and preferences.
Here are the types of light bulbs that are most common on the market today:
1. Fluorescent Light Bulbs
In case you’re searching for flat light bulbs that offer cold illumination, fluorescent bulbs will fit the bill perfectly. Just like halogen bulbs, these try to imitate natural lighting but work to provide excellent ambient lighting.
That said, since the light might be too harsh sometimes, it isn’t ideal for many rooms apart from attics and basements. Fluorescent lights are also utilized as commercial lighting due to their powerful ability to light up large spaces.
Adding to its commendable lighting efficiency is the availability of different variants on the market, including warmer colors. Also, they are much more long-lasting than incandescent light bulbs.
2. Incandescent Bulbs
Coming with an inviting and warm glow, these inexpensive bulbs are among the most widely used lighting options nowadays. Moreover, they complement the majority of skin tones and are hence quite flattering light choices. That’s also why they are an apt choice for dimming light bulbs in a bathroom.
However, a downside is that they aren’t very energy efficient and generally last for just about 700 hours of continuous use.
3. LED Light Bulbs
These light bulbs use the energy-efficient LED technology to offer quality and long-lasting lighting for most spaces. In fact, they have shown great promise as economical choices worldwide, with more and more commercial establishments using such lighting solutions on a large scale.
A noteworthy feature of such lights is their ability to provide directional lighting, due to which they can serve as excellent task lighting sources.
At the same time, there are differently styled variants offering colored lighting, providing users the opportunity to accentuate different spaces to enhance their visual appeal. And that’s not all; You can even find other innovative models coming with clusters of LED bulbs that can provide broader illumination.
However, if you’re looking for options that offer diffused light, these might not be the ideal choice to go for. Another point of caution is that the more decorative versions of LED bulbs tend to be much costlier than the standard units.
4. Halogen Bulbs
First and foremost, you’ll love these lights for the way they can replicate natural light, which is actually why they are fairly popular lighting choices worldwide. Halogen light bulbs are, in effect, a variant of incandescent lights, with the colors popping and appearing to be sharper. That’s why they can serve as perfect lighting sources for vibrantly colored rooms.
Furthermore, these lights are more energy saving than most incandescent bulbs. But keep in mind that this property makes them costlier than the latter. Also, these lights burn at higher temperatures compared to other bulbs, so be careful while you’re handling them.
Outdoor Lights
Just like indoor lighting options, there’s a pretty huge number of choices when it comes to outdoor lighting. That said, we’ve picked the ones which offer truly effective lighting for outdoor spaces and are popular among a large section of people.
1. Outdoor Wall Lighting
Lighting on the exterior walls are quite popular, with lots of variants available to suit different outdoor lighting needs. For example, you can opt for wall lanterns if you prefer to set up traditional-style solitary accent lights on different parts of the boundary and exterior walls. They come in the form of semi-flush mount sconces and are fairly popular choices for wall-mounted lighting.
On the other hand, cottage and rustic-style lights provide a more casual feel to any outdoor space that ultimately exudes the much-loved beachy vibe. But if you’re looking to install wall-mounted lighting for security or functional purposes, it’s better to go for bulkhead lights or spotlights. These offer the optimum lighting essential for such purposes.
2. Hanging Lights
These lighting fixtures lend an attractive, welcoming feel to the outdoor space while illuminating the surrounding area just the way you want. Plus, they can beautifully highlight any significant architectural or landscaping feature in the outdoor space. At the same time, you can use them to make areas such as backyards more usable by illuminating them as per your needs.
Like indoor lighting solutions, hanging lights come in a variety of styles such as pendants, chandeliers, lanterns, rustic lights, industrial lights, and many more.
3. Garden And Landscape Lighting
Adding some lights to your landscape can help elevate the overall appearance and design of your outdoor space considerably. But as numerous lighting options are available for the purpose, you’ll have to research a bit on the style that will be ideal for your home.
For instance, you may choose to incorporate path lighting to create a warm and welcoming atmosphere in and around the walkway leading to your home. Note that such lights will also serve to illuminate the path adequately.
Alternatively, you can go for post mount lights for the gate, fence, or entryway. These actually consist of outdoor lanterns fixed on tall posts and are also referred to as pier mount lights. Remember that they are just as useful for lighting up the space as for accentuating its look, which makes them ideal for patios, decks, and poolsides.
4. Floodlights
This immensely popular type of outdoor lighting offers a beam with an adjustable angle that can be rotated to focus on a particular area. You can get these lights fixed in the ground, or they can even be mounted on walls, poles, or structures. Notably, these last much longer than most other forms of outdoor lighting and are also more energy-efficient.
By using floodlights in dark areas, you can improve the safety of your outdoor space as people will find it easier to spot potential hazards. Moreover, these can discourage crime, vandalism, and property damage.
5. Barn Lights
If you’re looking for a casual outdoor fixture other than lantern-style lights, this option will be a fairly suitable choice to go for. It tends to cast the light in a circle downwards, rather than a host of outdoor lights that can shed light in many directions.
Notably, a large section of people are under the impression that barn lights are suited for traditional styles. But contrary to this popular belief, they suit modern and contemporary decor styles equally well. Furthermore, you can purchase them in a range of finishes.
6. Motion Sensor Lights
Before we end our list, here’s another modern form of outdoor task lighting that has gained much popularity of late. A motion sensor light comes with an internal photocontrol or motion sensor that helps regulate lighting consistently.
To elaborate further, motion sensors light up just when an object passes by their infrared beam, and the light remains on for a particular time. Note that such lights are excellent options to enable safety and security in any outdoor space.
On the other hand, photocells or photocontrols are similar to timers and are generally found in lights used in parking lots. These lights turn on during dusk and then turn off during sunrise. Photocells are also applied for several outdoor lighting purposes.
Here, it’s worth noting that you can adjust built-in timers based on the duration for which you want the lights to remain on.
Things To Consider While Choosing Lighting
To determine the most suitable type of lighting for your home, being aware about the various types available is only half the battle won.
After all, your choice will ultimately depend upon your requirements and preferences. And apart from that, you’ll need to consider certain crucial factors that influence the applicability of a lighting in a particular ambience and its overall performance.
1. Coverage
First off, you’ll need to consider the size of the space you’re looking to light up, as that will, in turn, determine the amount of light required to keep it lit. And after you have estimated the area to be covered, you must figure out the ideal brightness for that area accordingly. Note here that the brightness is nowadays measured in lumen (LM) instead of the older unit of wattage (W).
As a rule of thumb, interior spaces such as bedrooms or sitting rooms require a brightness of around 10 to 20 lu/ sq ft (lumen per square ft). But spaces like kitchens and bathrooms that must have greater visibility need a stronger brightness level of around 70 to 80 lu/sq ft. So, to figure out the lumens you require, you’ll simply have to multiply the area of the room by these figures.
Speaking of outdoor spaces, you’ll require lighting of at least 50 lumens if you plan to use low background lights. On the other hand, security and driveway lights must come with high brightness levels of around 2400 lumens.
That’s why it’s a must to check the brightness of the option you’re considering purchasing.
2. Application
It’s also worth noting that the ideal lighting choice for any space will depend on how you wish to apply the lighting therein. And when it comes to application, the color temperature will play a crucial role.
Though this term might not be familiar to many, it’s actually a crucial factor affecting the overall performance of any type of lighting. After all, the color temperature helps you understand the appearance of the light and how well it will blend with the surroundings.
Long story short, the suitable color temperature will be different depending upon whether you want to incorporate accent, task, or ambient lighting.
Note that color temperature ranges from warm-white to true daylight, with the former being on the lower end of the scale and the latter on the higher end.
While warm light gives the room a cozy and inviting tone, true daylight is pure white light and projects a crisp and stark tone akin to natural light. And in between these two levels of the temperature scale is a cool-white light that provides the right balance of vibrance and brightness.
3. Quantity Vs Quality
The quantity and quality of the lighting are, of course, two of the most essential considerations when it comes to choosing lights for any space. But more importantly, you must strike the right balance between both while making a choice.
For example, homeowners generally tend to design bedrooms using an overhead lamp, supplemental task lighting such as glass pendant lights, and some bedside lamps.
True enough, that could provide a well-lit bedroom, but when you’re looking to unwind after a tiring day you will certainly not want a brightly lit surrounding. That’s why an efficient bedside lamp and overhead light are enough to provide the required lighting along with a calming atmosphere in the bedroom.
Hence, you must make sure the quantity of lights you’re getting for a space never overpowers their quality.
Final Thoughts
On that note, it’s almost time for us to wrap up the guide. We hope you enjoyed reading about the different varieties of lighting, just as we enjoyed exploring and analyzing them.
So, don’t delay decking up your favorite space in the home with the lighting of your choice. But make sure you also consider your lighting needs with regard to the space apart from the design-related aspects.
Plus, for those planning to set up interior lighting, we’d strongly recommend using lighter reflections and colors to create the desired atmosphere. You can add reflective surfaces and mirrors for a brighter and shinier appearance.
With that, we’ll bring down the curtains for now. But we’ll return soon with more guides on home designing and décor. Till then, take care!
Light translates into life. It has utmost importance in our homes, it influences our state of mind and therefore it plays a huge role in design, ever since the first sun-ray entered a cave. Natural light shapes our interiors and an equally important manner so does artificial light, especially in cloudy days or small apartments that simply lack the comfort of immense windows.
Contemporaneity brought forward smaller living spaces and while these often meant less natural light, infinite opportunities arrived with to artificial light, diy lighting fixtures of all kinds are surfacing around the internet, thousands of world class designers are launching products meant to enhance our living quality each day. In this permanent movement every possible item on the Mother Earth draws the attention of design enthusiasts and in the following article we will be cover a quite peculiar one, Jellyfish Pendant Lights, thus highlighting the immense array of options, opportunities. Jellies, or jellyfishes are soft-bodied free swimming aquatic creatures defined by an umbrella-like dome and trailing tentacles, they`re often transparent an extraordinary intriguing in shape and materiality, these creatures have roamed the seas for more than 500 millions and they are today the oldest multi-organ animal known to mankind.
In design, their transparency and movement have been an inspiration for years, they are also highly popular in cartoons thus channeling the attention of the little ones. The water creatures have inspired the world for thousands of years and in the following article they will continue to do so through a series of jellyfish lighting fixtures, these are meant to entice little ones and anchor sea-themed designs, cast a glance.
It goes without saying that these will not fit any decor, they`re not going to surprise any individual nor be the subject of thousands of diy projects yet the exercise of researching a sculptural shape drawn from nature surely cannot be challenged. The soft-bodied creature is an extraordinary source of inspiration and in the right medium the right jellyfish pendant light will surely shine, children will definitely be fascinated by colorful LED jellyfish lights.
What do you think? We would love to hear from you in the comment section below!
Empty wine bottles stare in the face of wine drinkers like a big question mark asking what they will do with the empty lot once they are finish pouring sparkling white wine and textured French red wine in their goblets. The answer lies in choosing one of the two available alternatives: get rid of them or do something awe-inspiring. It is the inclination to choose the latter solution that has created a space for decorative wine bottle crafts, which, in turn, will also help the environment. It is important to add here that not all wine-bottle decorative ideas are too exciting to dissuade people from throwing the empty bottles away and trying their hands at decorating their house and garden with wine bottles. However, there are some ideas that can strongly put the case forward. In this article, we will show you how empty wine bottles can be used for lighting a house in a way that will inspire others to follow suit.
One of the ways in which an empty wine bottle can help in adorning a home is turning itself into a LED lamp. To function as such a wine bottle, an AA batter box, 2 AA batteries and a glass cutting drill bit to make a hole near the bottom of the bottle for power cable to pass will be required. The LED lamp created from these materials will brightly shine on a corner table. It can also be placed on shelves or anywhere that needs to be accentuated by decorative light, all thanks to its portable power source.
Typically white LED lights are used to make such lamps, but other colorful variants can be used instead should the bottle be white. If the former is chosen, the color of the light will depend on the bottle color, and in the later case on the color of LED lights placed in the bottle. For example, the bottle used in the above image is blue so the light that comes out is blue, whereas, light looks more yellowish and greenish in yellow and green bottles, as shown below.
Making a pendant light with wine bottles is trickier than the one suggested above, but the reward is so beautiful that it is worth the effort. The most challenging part of the process is cutting the wine bottles. Just having a bottle cutter kit will not make the process easy. It will need some practice to get the precision. The following video and the link serve as a useful guide on how to cut a wine bottle.
https://www.youtube.com/watch?v=-kSVgzCgmok
The next step in the process is to paint the bottle from the inside to get a colorful set of evenly cut and sandpapered wine bottles. The step is followed by adding wires, bulbs, bulb holders and plug to complete the wine bottle pendent light or chandelier.
As mentioned above, cutting wine bottles is a challenging task, so many will not venture towards cutting more than one or two bottles. In such cases, the following kind of wine bottle pendant light can be made. It works when used alone as well. The outer surface of the empty bottles can be embellished with paint or copper wires could be wrapped around randomly to give it a rugged look.
When the article is about recycling substance, which can be argued to be about saving earth as well, should not it share wine bottle lighting craft ideas that are not dependent completely on electricity? It should and this is exactly what the next idea is about. It is about turning empty wine bottles into candles. This also involves cutting wine bottles, so it is necessary to try one's hand at cutting wine bottles with precision. The skill will be helpful in all kind of wine bottle crafts.
Different colored wine bottles should be cut in various sizes, some in half, some more than half, around 2/3rd of the total size, while others of 1/4th of the bottle. The variations in size will create candles of all sizes, which will look attractive when placed together. Uniformity is not always desired in design.
When talking about wine bottle chandeliers, to practice cutting wine bottles to achieve precision in getting the desired output because if that is achieved the entire wine bottle will become useful. For instance, a wine bottle candle only requires the bottom part of the bottle to hold molten wax. The top part can be used in making pendant lights, as discussed above.
Simple candles work well in daily use or in a garden where the purpose is more functional than aesthetic, but when there is an occasion to celebrate these minimalist candles may not find a place in the decor. Therefore, it is required that decorated candles are made from wine bottles. Decorating the wine bottles in the spirit of the festivity with flowers, ribbons, paints or colorful papers will give the candles a whole new appeal. The resultant candle set can also be used for gifting.
It is about doubling the empty bottle as hurricane candle. This also involves cutting wine bottles to size. However, do not cut it in half, as suggested above. Only the bottom of the wine bottle should be removed to make a hurricane candle. It is always better that 3 or more similar wine bottles of one color be used to make a set of hurricane candles to make it look beautiful,two of which should be cut in an equal size. Two or more inches from the bottom should be sliced to get two long ones and the third one should be cut in half to get the smaller one for a set of 3 hurricane candles. If the bottle is sliced with precision, the bottom half can also be used as well to make candles, as suggested in the advice on making candles.
Wine bottles reused as lamps can also be used to create the mood for that special candle light dinner or when you dine out in your garden and wind is all set to refuse you a chance to look deep into her eyes in the shimmering candle light. Some examples of which are listed below. The ideas presented may not show decorated wine bottles, but when graced with flowers, colorful paper, ribbons, pearls or any other decorative items the candle will look even more beautiful.
A discussion of special dinners or dinner dates cannot be complete without talking about candelabra. Does it need mentioning that empty wine bottles can be used as candelabra as well? There are quite a few wine bottle candelabras circling around to inspire DIY geeks as well as home owners to create their own set of candelabras from empty wine bottles lying in the home, waiting to be thrown out. Some inspirations to make your own candelabras are shown below.
The above ideas might look great, there is no doubt about that, but such decorative candles may not be suitable for all occasions or they may not find a place in all design schemes. There are many occasions when minimalistic decorative items are preferred over the much fancier ones and there are also many people who like things when they are at their bare minimum. The following candelabra will suit the minimalist taste.
Message in the wine bottle
When things are spoken about empty wine bottles, it is imperative that the classical message in the bottle is not overlooked. For hundreds of years empty bottles have functioned as carriers of messages. The job of passing messages should not be taken away from empty wine bottles. There are ways in which it can be done, but how remarkable will it be when it is done on a wine bottle doubling as candelabra? All that is required for this is a glass itching kit, empty bottles and a message to itch on the wine bottle.
Insects and mosquitoes make it difficult for people to enjoy the calm summer breeze in the outdoor garden in the evening unless one re-purposes wine bottles for that. This does not sound intuitive, but empty wine bottles can double as an outdoor light source and also function as mosquito and insect repellent if used as citronella tiki torches. Making a citronella candle tiki torch is simple and does not require much equipment. The video following this paragraph shows the way to make a basic one. One can always decorate the bottle to make it look more attractive. The least one can think of is filling the bottom of the bottle with colorful pebbles, as shown in the two images following the video.
Empty wine bottles, beer cans, tin cans are not wasted until they are thrown away. There are always ways in which empty bottles and cans can be used. The article has limited its scope to using wine bottle crafts to light up a house and garden, but the scope of empty bottle crafts does not end here. There are many beautiful things that can be done with empty wine bottles,one just needs to explore. Home Lighting Ideas Expressed With Wine Bottle Crafts We would love to hear your feedback on this topic in the comment section below.
Simplicity is beautiful, the ultimate sophistication one might argue. The candle light, a simple shiver of simplicity encapsulating sensibility, coziness warmth and the feel of intimacy in it can beautify our world with ease. Often used to melt down our problems and calm us down, candles are becoming more and more popular each day as their simple light animates our interiors at the end of the day next to the glass of wine.
In the following rows you will find a simple to create DIY concrete holder, realized at home in less 15 minutes or less. Its simplicity and concrete texture has already beautified a few late nights with friends and a few relaxing bath sessions.
MATERIALS REQUIRED
surgical gloves - safety first
glass recipients for small candles
plastic ice scream recipient to use as mold
cutter
concrete mixture
STEP 1
Once you have your plastic recipient ready insert the glass, plastic candle holders into it. Place them on the bottom, facing the floor; in this manner the end item will use the smooth face of the recipient properly. Keep in mind that the recipient dictates the shape so try to find something that would fit your needs, not small nor big enough. In an ice scream container we`ve inserted the magical number of glass candle holders. It is worth mentioning here that the surface must make perfect contact and be heavy enough to support the pressure between the concrete and the air captured within.
STEP 2
Add water to you concrete mixture and with care pour spoon by spoon in the recipient. Make sure that you place the first spoons over the candle holders to apply pressure on them. Take a few seconds glancing on them, if you see any movement, pour the concrete back, clean the recipients, put them back into position and use some kind of glue or discrete tape to stick them to the sop surface.
STEP 3
After filling the mold you need to vibrate the concrete and get air bubbles out, ensuring that concrete has filled everything evenly. Do this with caution, we don`t want to get the air out of the candle holders or the concrete will replace it and ruin the little project.
STEP 4
If everything ran smoothly patience is now required. Let the concrete rest for at least 24 hours before peeling off the mold.
STEP 5
It is time. At least 24 hours have past and you can now peel of the magical object. In our case everything ran decently this time, this being the second attempt; some concrete milk managed to get past the candle holders but nothing that our cutter can`t manage.
STEP 6
Finish off the your concrete holder by removing excess and clean it with water to remove all the dust.
STEP 7
Enjoy ! Use your DIY concrete holder in your bathroom proudly, its shiver of light will beautify many magical moments from now on.
What do you think about this DIY concrete candle holder? We would love to hear your opinion on the project in the comment section below.
Why spend hundreds of dollars on sophisticated lights, when you can make much cooler ones for a fraction of that money? We are quite confident that after traversing our list of 33 Super Smart DIY Lighting Ideas, you will be inspired to work on an incredibly cool lighting idea. So, without further ado, let us begin with the amazing Rustic Whiskey Bottle Lamp DIY project.
Smart DIY Lighting Ideas
1. Learn How to Build a Rustic Whiskey Bottle Lamp
Take a look at this incredibly cool Whiskey Bottle Lamp. Impressive, isn’t it? The best part of the project is that it is quite simple to create, and we believe you can build it even without any prior experience in DIY projects.
While the whiskey bottle looks quite sophisticated, it is actually a standard bottle which is filled with metallic copper decor sand. If you have a hard time gathering copper decor sand, then you can use small rocks, glass pebbles, or glitter instead.
If you are interested in building your very own Whiskey Bottle Lamp, then we suggest you follow the link mentioned below the illustration.
If you want to take your Candle Light Dinner to the next level, then this is one way to do it. To get started with this project, you will require three candles and three wine bottles, which are preferably of different shapes and colors. This circular wooden stand you see in the illustration is optional, but we must say that it adds a touch of class to the entire décor. Finally, you will require a glass cutting tool to cut your wine bottles.
Once you manage to cut the wine bottles to your satisfaction, light up the candles and place your wine bottles over them. That’s it; you are done! This project will surely woo the special someone in your life. Just make sure that you put the same effort into cooking the dinner.
Do not worry all you environmentalists; this lamp is not made from a real sea urchin. It just looks like one. Now, that we have got the confusion out of the way, let us talk about this incredible project.
For this DIY idea, you will need a large LED Glow Ball, preferably one which can change colors. And, for the spines of the sea urchin, you will require a large quantity of cable ties. The more the merrier, we believe.
The detailed step-by-step instructions are mentioned in the link below the illustration. If you are interested in this project, then we suggest you click on it to learn more about this incredible project.
Take a look at this incredible Crystal nightlight. It seems straight out of a fantasy realm, doesn’t it? However, we must say that it is not exactly a simple project and you need some prior experience with DIY projects to bring this idea to fruition.
While the execution of the project may not be as simple as the ones featured earlier on this list, all the materials required for this idea are easily available. If you want the detailed step-by-step instructions for creating this incredible magical crystal nightlight, then click on the link mentioned below the illustration.
Although the last project was not for everyone, we believe that anyone can execute this amazing idea, albeit with a little time and effort. Moreover, the material list for this project is surely one of the simplest featured on our list.
In fact, all you need is a thick sheet of paper (250 GSM), mount board, Styrofoam sheet, LED array or normal LED bulbs, double-sided tape, and a 9V battery. The rest of the items required for this project are already present in every home.
If you are interested in building your very own origami light, then we suggest you follow the link mentioned below the illustration. In case the white paper triangles seem too mundane for your taste, you can always paint them up and add your unique artistic touch.
Batman fans, we have something incredibly cool for you. Feast your eyes upon the amazing Bat Signal. The best part of this project is that it is incredibly simple to create, and you can even have a lot of fun building this with your kids. However, before you get your hopes too high, we must say that the Bat Signal fails to call upon the Silent Guardian. Believe us, we tried!
Jokes aside, the materials required for this product are also easy to acquire, and all you need is an empty can of Pringles, black paint, an LED light bulb, tape, foam, and a hot glue gun. That’s it; you are now ready to get started with creating your very own Bat Signal.
If you are interested in learning more about this project, then we suggest you click the link mentioned below the image. The DIY Bat Signal is an amazing idea, especially if you are planning on dressing up as Batman for Halloween.
7. Stunning Ceiling Light Made from Reclaimed Wood
Take a look at this charming ceiling light made from reclaimed wood. Stunning, isn’t it? What is even more impressive is the fact that you do not need to invest in anything to create this amazing DIY light. However, this project only makes sense for those who have woodworking tools lying around. Needless to say, you need some experience with those tools as well.
If this DIY project is right up your alley, then we suggest you click on the link mentioned below the illustration. Although this light looks amazing as is, you can take it a step further by polishing the reclaimed wood using varnish.
8. Understatedly Cool Plane Light – Perfect for a Modern Home
Here is another project for woodworking lovers. While the last DIY light project would look charming for a rustic home, this incredible Plane Light will feel right at home in any contemporary environment. In some ways, this is reminiscent of an ice-cream cake, wouldn’t you agree?
If you are interested in building this amazing Plane Light for your home, then we suggest you follow the link mentioned below the illustration. P.S. It is incredibly detailed and an excruciatingly long article, so brace yourself for that.
9. The Incredibly Cool Ceiling Skateboard Light – A Must for Skateboarding Enthusiasts
Take a look at this amazing ceiling Skateboard light. While this DIY project, may not appeal to everyone’s tastes, it will surely pique the interest of any skateboarding enthusiast. This is a surprisingly simple project to execute, and you can easily do it using a single tool – the power drill.
Needless to say, you will need to sacrifice a skateboard for this project. And since the bottom of the skateboard will be visible at all times, make sure you get one with minimum damage on that side.
If you are interested in learning more about this project, then click on the link mentioned below the illustration. We are confident that you will love this idea.
10. A Project for Tech Geeks – The Amazing Fountain of Light
If you wanted to work on a cool and funky project, then you surely need to check out this amazing Fountain of Light. However, we must admit that this is not meant for everyone. In fact, you need to be a tech geek to be comfortable with executing this idea.
In case you believe that the Fountain of Light is something you can tackle with ease, then go right ahead and click on the link mentioned below the illustration. It will surely keep you enthused for a few days. If you manage to bring this idea to fruition, then do share it with us. We would love to hear from you.
Take a look at this amazing Softbox Light. It is almost hard to believe that this is a home-made project. Although this DIY idea looks quite sophisticated, we believe that you can execute it, albeit with a little time and effort.
To get started with this project, you will require a 26-inch road bike wheel + tire, white lycra material, cotton thread, LED light strip, among others. The detailed step-by-step instructions along with the full material list are mentioned in the link below the illustration, and we suggest you click on it if you are interested in this project.
Although this project is perfect as is, we believe that the use of an RGB LED strip will take it to the next level. There are many inexpensive options available in the market, and it will be a worthy investment over a standard white LED strip.
12. Learn How to Make an Incredibly Cool Wireless Tea Light Chandelier
Why spend hundreds of dollars on a chandelier when you can make something much cooler for a lot less cash? This amazing tea light chandelier looks stunning in the dark, doesn’t it? However, we must admit that this is not a simple project by any means and you need to be accustomed to using tools like routers, hand drills, and circle cutting bits.
If you are already comfortable with the tools mentioned above, then this project will be a piece of cake. Moreover, the materials required for this project are easily available and inexpensive as well.
The best part of this project is that it will be completely devoid of electrical lines. Whether you use LED tea light candles or actual candles, you do not have to connect any complicated wires. Moreover, you can save on your electrical bills by using this solution to light up your living room.
If you want to learn more about this project, then we suggest you click on the link mentioned below the illustration.
13. Yet Another Hanging Skateboard Light for Skateboard Lovers
Skateboard lovers, we have yet another amazing Hanging Skateboard Light project for you. And yes, unlike the last project, this one requires fewer tools.
To get started with this project, you will require a skateboard, two-way light bulb sockets, LED light bulbs, a hand drill, wiring, cable clips, chocolate block connector, screws, and a screwdriver. Most of these items will already be present in your home, and if not, they are readily available.
The detailed step-by-step instructions for this incredible DIY project is mentioned in the link below the illustration. And, if you are interested in bringing this idea to fruition, then we suggest you visit the link. We are quite sure that you will love this idea.
14. The Incredibly Hip Light Chest – Perfect for Your Nightstand
Feast your eyes upon this incredible light chest. It looks straight out of a fantasy game, doesn’t it? However, we must say that building this amazing wooden chest from scratch is by no means an easy feat and it will surely require some woodworking experience to get started with this project.
Although the lighting used in this project may seem quite complicated, you may add your own twist to make things more convenient. If you are interested in bringing this idea to fruition, then we suggest you click on the link mentioned below the illustration. You will find the detailed step-by-step instructions along with the full material list over there.
This amazing shard light was made in collaboration with famous YouTuber DIY Perks and instructables. The best part of this project is that it is quite simple to create, and you can do it without any prior DIY experience. Moreover, all the materials required for this idea are readily available for purchase, and that just makes it even more convenient.
If you are interested in creating this project, then follow the link mentioned below the illustration. Although this Shard Light looks quite incredible, we believe you can take it a step further by etching some cool design patterns on the plexiglass. That will make it truly unique.
16. Spice Up Your Christmas Lighting with This Amazing Light Ball
Feast your eyes upon this amazing Light Ball. Impressive, isn’t it? We believe that this project will be perfect for your Christmas décor!
Although the Light Ball may look quite sophisticated, it is actually incredibly simple to create. Moreover, this is one of the most inexpensive projects featured on this list. In fact, all you require are some transparent plastic cups, drill, LED lights, stapler, and a string. That’s it!
If you are interested in learning more about this project, then we suggest you click on the link mentioned below the illustration. This is a fantastic project that everyone can create, and you should definitely give it a try.
17. Create A Rustic Themed Chandelier with Mason Jars
If you loved projects made with recycled items, then you surely need to check out this product. The chain, mason jars, the vintage light bulbs, and the saw blade, somehow seem like they were meant to be together. It really is a cohesive design.
However, we must say that you need to be careful while drilling holes into the saw blade. In case, you are not comfortable with it; then you can use a circular piece of wood instead. If you can get past that hurdle, then this project is fairly simple, and we believe that you will be done with it in a few hours.
The detailed step-by-step instructions along with the material list are mentioned in the link below the illustration. We are quite confident that you this project will be well worth your time, and you should surely visit the website.
18. Learn How to Make This Surreal Bio-plastic Light
Would you believe us if we said that the non-electrical part of this project was made entirely from cornstarch, gelatin, vinegar, and water? We know, it is incredibly hard to digest what we just said, but it is the truth nonetheless. Although this part looks quite sophisticated, it is actually quite simple to execute.
However, we cannot say the same about the electronics used for this project. And, if you are someone who shies away from coding and electronics, then the Bio-plastic light might not be for you. On the flip side, if you love messing around with Arduino controllers, then you will feel right at home working on this idea.
If you feel you can take on this project, then go right ahead and click on the link mentioned below the illustration.
19. Learn How to Create This Rainbow Pinecone Light Using Spoons
While the last project featured on our list by contacting for everyone, this one surely is. In fact, it is incredibly simple to create you can do it even without any prior DIY experience. Moreover, the materials used for this idea are not only readily available, but also inexpensive.
To get started with this project, you will require an LED light bulb (preferably one which is RGB), 2-Liter Bottle with Lid, multiple plastic spoons (at least 100), light socket, and a string of feathers, which is optional. In addition to that, you will require some everyday tools like hammer, center punch, scissors, screwdriver, and a hot glue gun. Although the item list is big, you will mostly have all these materials in your home.
If you are interested in learning more about this project, then we suggest you click on the link mentioned below the illustration.
Take a look at this simple yet elegant pipe chandelier light. Beautiful, isn’t it? The best part of DIY chandelier light is that it is incredibly simple to create. In fact, the hardest part is gathering all the supplies.
To get started with this project, you will require 3 – 0.5-inch Black Pipe "T" fittings, 2 - 0.5-inch Black Pipe Nipples (18-inch long), 1 – 0.5-inch Black Pipe Nipple (10-inch long), and 2 - 0.5-inch Black Pipe Reducer Fittings. Moreover, you will also need 2 Light Fixtures of your Choice, and, an Outdoor Circular Metal Light Cover with 3 holes (0.5-inch). All the items mentioned here are easily available, and you should not have a problem purchasing them.
If you are interested in building this pipe chandelier light, then follow the link mentioned below the illustration.
This incredible Dodecahedron Light Fixture is truly a sight for sore eyes, wouldn’t you agree? Moreover, it is hard to believe that this is a DIY project. In fact, Dodecahedron Light Fixture such as this one can easily sell for north of $500. However, with some woodworking experience coupled with a few woodworking tools, you can bring this amazing light fixture to fruition for less. A lot less.
The creator of this project has gone to great lengths to make this complicated woodwork of architecture as simple as possible. So, suggest you click on the link mentioned below the illustration to learn more about this DIY idea. We bet you will love it.
If you are tired of complicated projects which are tedious and require a lot of expertise, then you should definitely check out this DIY Garden Globe Solar Light. Moreover, the materials required for this project are readily available, and you can purchase most of the items in the second-hand market.
To get started with this project, you will require a plain wire, a can of metal spray paint, 2 hanging baskets, curtain rod, washers, and Solar String Lights. If you want the detailed step-by-step instructions for creating this magnificent Garden Globe Solar Light, then click on the link mentioned below the illustration.
23. The Amazing LED Light Tube – Perfect Choice for a Night Light
Here’s yet another simple project which you can create without any prior DIY experience. While the LED Light Tubes may not illuminate your room, they do create a soothing ambiance.
For this DIY idea, you will require LEDs, coin cell batteries, tape, mason jar lid, acetate, paper, and a glue gun. The building process is as easy as it gets, and you can finish this project within an hour.
If you are interested in checking out the detailed step-by-step instructions for the LED Light Tubes, then click on the link mentioned below the illustration. Although this idea looks magnificent as is, we believe you can take it a step further with an RGB LED light. With that simple modification, you will be able to change the ambiance whenever you want.
A picture will not do any justice to this incredible LED Night Light project. You surely need to watch this video, before we proceed any further.
Now that you have finished watching the short video clip, we bet you are as excited as we were when we first experienced this amazing LED Night Light.
Needless to say, this is one of the more complicated projects on our list, and if you do not have any prior DIY experience, you should try out one of the simpler projects featured here. Having said that, we must say that the creator has explained this project in great detail and you should not come across any hurdles while attempting to bring this idea to fruition.
If you want to try out this amazing project, then follow the link mentioned below the image.
25. The Incredible Kusudama Night Light by Ezycraft
Although the Kusudama Night Light may look like an incredibly sophisticated DIY project, it is deceptively simple. And, the best part is that you can create it without any prior DIY experience. Moreover, the materials required for this idea are not only easy on the wallet, but they are also readily available.
If you are itching to learn the detailed step-by-step instructions for creating this surreal Kusudama Night Light, then follow the link mentioned below the illustration. It is definitely worth checking out.
If you loved the last project from EzyCraft, then you surely need to check out this amazing DIY Pilea Lamp. This is yet another project which will test your prowess in arts and craft. In other words, you do not require any complicated woodworking tools or hand drills to bring this idea to fruition.
To get started with this project, you will require a foam board (4 – 5 mm thick), sketch/watercolor paper (210 GSM), and bamboo skewers (25 cm long). In addition to that, you will require an X-Acto knife, craft knife, double-sided tape, ruler, super glue gel, pen (ink and ballpoint), and last but not least, PVA glue.
If you want to check out the detailed step-by-step instructions for this project, then click on the link mentioned below the illustration.
We just can’t seem to get enough of EzyCraft’s amazing DIY Light projects, and we are sure that you feel the same way. So, here is yet another magnificent DIY Light made by the master himself.
It is almost hard to believe that this amazing Swirl Pendant Lamp is made entirely of paper. In fact, you only require an A3 sketch/illustration pad (250 GSM), craft knife, super glue gel, glue gun, measuring tape, pencil, and ruler.
If you are interested in learning more about this project, then follow the link mentioned below the illustration. EzyCraft has put up an amazing video tutorial so that you can bring this project to fruition in a matter of hours.
28. Learn How to Make a Glowing Black Light Night Light
If you are looking for the easiest project on this list, then this is it. It is almost impossible to believe that this impressive Glowing Black Light Night Light can be made in a matter of minutes. Moreover, you can do it with minimum effort. This is surely the ultimate DIY project for lazy people.
To get started with this project, you will require a black light, highlighter, a jar of clear water and a cutting tool. That’s all!
The instructions for this project are mentioned in the link below the illustration. So, we suggest you click on it if you are interested in bringing this cool idea to fruition.
29. Beautiful Tea Light Lanterns – A DIY Project for Everyone
Take a look at these amazing Tea Light Lanterns. Beautiful, aren’t they? While this DIY project may not be as simple as the last one, we believe that anyone can create these wonderful lanterns.
For this DIY Tea Light Lantern project, you will require an A4 sheet of translucent paper, a pair of scissors, printer, tea lights/candle (preferably the electronic ones), glue stick, ruler, and any picture software. Since the translucent paper is flammable, we suggest you avoid normal candles and go for electronic tea lights.
If you are interested in learning more about this project, then click on the link mentioned below.
This stellar pair of LED Night Lights is truly a sight for sore eyes, wouldn’t you agree? However, despite its simple appearance, it is surely not the easiest project on this list. Having said that, we must say that the creator has gone to great lengths to make this project as simple as possible. So, it should not be as complicated as the list of materials suggests.
For this project, you will require a moderately large piece of wood, glass jar, glass beads, a charging brick which outputs 9V DC, and an LDR. In addition to that, you will also require an NPN transistor, 10K ohm resistor, 100 ohm resistor, 10K ohm trim pot, and 4 LEDs.
If you do not feel perturbed by all the electronics involved, then go right ahead and click on the link mentioned below the illustration to learn more about this project. However, we should tell you that the white light used in this project is not a wise choice for night lights. You should go for RGB LEDs instead.
Take a look at this amazing Leaf-Light made by DIY Perks. Impressive, isn’t it? The best part of this project is the simplicity. In fact, anyone can attempt to make this in a matter of an hour or two.
To get started with the Leaf-Light, you will require a dried-up hydrangea head, an LED bulb and a piece of drift wood. That’s all!
If you would like to know the detailed step-by-step instructions for this amazing DIY project, then click on the link mentioned below the illustration.
The Christmas Light in a Jar is a perfect DIY project for the Holiday season, wouldn’t you agree? Moreover, it is an extremely simple project and one that you can create with your kids.
For this DIY project, you will need an LED tealight, a printed motif, scissors, and a cylindrical glass jar. In addition to that, you will also require glue, muffin paper cup, pencil, and a ruler. All the materials are inexpensive and easily available, so you should not have a problem acquiring everything.
If you are interested in learning more about this project, then click on the link mentioned below the illustration.
We have saved the best for last! Feast your eyes upon this glorious Multicolor Runway Light. It really is a sight for sore eyes, wouldn’t you agree? However, this incredible DIY project is quite complicated to build, and you need to delve into some serious electronic circuits to bring this idea to fruition. Having said that, we must give props to the creator for going to great lengths to explain every step of this project. So, you should not have much trouble if you have some experience with electronic circuits.
The material list for the Multicolor Runway Light is quite long, and it is best if you follow the link mentioned below the illustration.
That brings our article to an end. We hope you enjoyed our list of DIY Lighting ideas. If you bring some of these incredibly cool ideas to fruition, do share your project with us. We would love to hear from you.
Beautiful candlesticks are usually quite expensive and not everyone wants to spend money on them. Thus the idea of making your own candlesticks by using some basic materials and following a certain layout and pattern. Candle light is a great method of changing the atmosphere of a room, highlighting certain design elements and creating that relaxing, cozy romantic sensation we all need after a tiring day at the office. Paper candlesticks are, in our opinion, the easiest project to make and do not require some special skills in order to achieve a beautiful end result.The following example is extremely easy to replicate. You will require three pieces of paper which should be cut and folded according to the tutorial in order to create that volume and layered effect, which are in the end glued together. And basically, that's it. pretty simple, no? You can choose any type of paper you like, we recommend you to look for special folding paper, in different shaded and even textures. In the end you can even decorate the DIY Paper Lotus Candlestick with glitter or beads for a glamorous effect. All that remains then is to buy some small pretty candles, place them inside the lotus flower and light up the room. Enjoy!
DIY PAPER LOTUS CANDLESTICK
MATERIAL REQUIRED
-three piece of colored folding paper
-one pen
-a pair of scissors
Are you searching for a simple and easy-to-install lighting solution that avoids the hassles of ceiling wiring? Well, you’ve come to the right place!
We know how expensive renovating or just simply refurbishing your home can get. However, sometimes one simply does not have the budget to hire professional electricians to add extra fixtures for cords and lighting.
That’s when DIY lighting kits come to the rescue. These usually have varied lengths of wires and simple installation procedures that enable you to spice up your home interiors in a jiffy!
But how do you choose the right kind of lighting setup for your home? I’m glad you asked. In this article, we have reviewed in detail 9 of the best DIY pendant lighting kits that you absolutely must consider.
So, what are we waiting for? Let’s get this party started, shall we?
Listed below are the Best DIY Pendant Lighting Kits:
Seaside Village 3-19FT: A vintage pendant light kit known for its flexibility, customizability, and 25-foot-long black cord. Lack of a water-rating certification restricts usage to dry environments.
FRIDEKO HOME: Distinguishing features of this traditionally styled kit include a unique hemp rope-wrapped cord. Compatibility is limited to 60-watt bulbs.
Aokpsrt Pendant: This modern, loft-style kit offers a unique cascading bulb arrangement. The short distance between the first bulb and the plug can pose operational challenges.
Westinghouse 7028600: With a modern look, adjustable wire, and ceiling-mounted base, this kit is unique. The installation process may be complicated for novice users.
Lightingsky Ceiling Pendant: Unique for its self-assembled lampshade, this kit offers a challenging and engaging DIY experience. The complexity of assembly may be daunting for some.
From minimalist designs to vintage-inspired creations, our list has something for every DIY enthusiast. So, if you're ready to illuminate your space with personalized charm, here's the list of the 9 best DIY pendant lighting kits to inspire your next project.
1. Seaside Village 3-19FT - Best for Customizable Ambiance
Seaside Village brings you accent lighting that lends a vintage feel to your home, whether that be the bedroom, living room, kitchen, or hallways. The vintage pendant light kit with its triple light sockets is one of its most sought-after lighting solutions. It is a great option to aesthetically brighten up any place you wish to set them up in.
If you’re looking for a lighting kit that can be used to create your very own DIY light fixture, then this is an exceptionally good option to consider. This kit is equipped with 3-light sockets and a dimmer switch allowing you to dim the lights to varying degrees and adding a sophisticated touch to your home.
The 25-foot-long twisted black cord can be looped around wooden fixtures, suspended showpieces, and pipes to create your very own unique light hanging. This light kit is compatible with all incandescent bulbs and certain kinds of LED light bulbs whose ASIN numbers are listed in the product description.
What’s more? This light kit also comes in handy as outdoor decoration for parties, weddings, and other celebrations. Each light socket can fit 60-watt light bulbs and has individual on/off switches, allowing you to choose which bulbs should be lit at the same time.
It’s important to keep in mind that this lighting kit is not water-rated and is therefore supposed to be fixed up in a dry place only. In a handful of cases, the installation of the wrong kind of bulbs caused the dimmer switch to short and burn through the plastic case.
2. FRIDEKO HOME Pendant Light Cord - Best for Traditional and Industrial Homes
The FRIDEKO HOME pendant lighting kit is an industrial product available in two variants; one with a single socket and the other with a triple socket for lightbulbs. The wires of this lighting are innovatively wrapped in hemp rope lending it a rusty vintage feel.
The 15-foot cord of this lighting is covered with twisted natural hemp providing its long-lasting durability and a rustic old-fashioned finish to any room it’s set up in. This hemp wire cord along with its UL-certified light socket further ensures that it’s safe to use in both traditional as well as industrial homes.
Apart from that, this lighting kit is extremely easy to install and does not require any tools to set up. All you need to do is adjust the long hemp-covered cord over old lamps and suspended installations to create your very own hanging light fixture. There’s also a range of metal and cloth shades that can be fixed on this socket to create unique designs that meet your personal preferences.
What’s more, the E26/E27 fit socket is widely compatible and can work with incandescent, CFL, as well as LED lights easily. They are hence an ideal product to spruce up your home and can be set up in any room you desire, including the outdoors during special occasions.
In a few cases, customers received a lighting kit that did not function at all. However, this issue can usually be resolved once taken to the customer service executives of the company. The sockets of these lights are also only compatible with 60-watt light bulbs.
3. Aokpsrt Pendant Hanging Light Cord - Best for Modern Loft-Style Lighting
Next up, we have Aokpsrt who have furnished us with a range of modern lighting kits with a classic vintage design. These are available in 3 antique socket colors namely - metallic black, bronze, and gold while having 1, 3, and 4 socket variants.
One of the unique features of this lighting kit is that each of the light sockets hangs at increasing altitudes. Hence, a popular way to fix them up is by hanging them according to the ascending/ descending order of the bulbs to create modern loft-style lighting with an industrial feel. It can also be arranged around suspended pipes and other fixtures to create your own DIY chandelier!
Provided with a breezy installation process, this lighting can be set up without the need for expensive electricians. The UL-listed antique finish light sockets, along with the 2 cloth-covered black braided cords have the ability to match any lampshade or décor in your house.
What’s more? This versatile lighting kit is compatible with most E26/E27 standard LED, incandescent, and CFL bulbs. Each socket of this lighting kit is also equipped with an individual on/off switch and supports up to 60-watt light bulbs.
This lighting kit has light sockets in varying lengths. For this reason, the light socket closest to the plug has a very short distance between them and is difficult to operate unless you have an electrical outlet/ extension nearby. Some users further noted that the plug of this light tends to short circuit and therefore is a potential fire hazard.
What We Like
A wide variety of options is available
High-quality abrasion-resistant cord
Easy installation process
Versatile compatibility
Individual switch control
What We Don't Like
Faulty plug
Short length to the first bulb
Cord Length: 15.9' | Material: Conductor Black Cloth | Bulb Compatibility: E26 | Adjustable Cord: Yes | Ceiling Compatibility: Standard
4. Westinghouse 7028600
Westinghouse is a global brand that functions with the philosophy of manufacturing products that make the lives of people easier. This company offers a range of lighting fixtures, light bulbs, lighting hardware, and lighting accessories meant for both commercial and consumer purposes. All their products have exceptional quality and are designed to innovate your living space.
This one-light adjustable pendant by Westinghouse provides customers with an easy and hassle-free way to customize home lighting. The glossy white finish of this product provides a modern, minimal, and sleek look to any room you set it up in.
Unlike the other lighting kits we have mentioned thus far, this light has a ceiling-mounted base, with a thick white adjustable wire protruding out of it. This adjustable function lets users customize the pendant to hang from the perfect altitude of their choice. Additionally, the shade ring and 5-inch diameter canopy provide an easy way to install and change your lampshade as and when you please.
If that wasn’t enough, this is also an incredibly affordable lighting kit that provides unique contemporary solutions to jazz up your old apartment. You can invest in a multitude of alternative lamp shades to change up the look as often as you like.
This pendant lighting, while very handy, is not ideal for self-installation. Unless you’re at least slightly experienced with electrical wiring and ceiling mounting, it’s recommended to hire a professional to do the installation for you.
What We Like
Quick and easy lamp shade installation
Adjustable wire for height
Classy and modern look goes with most home décor
Very affordable
What We Don't Like
Complicated installation process
Cord Length: 4' 2" | Material: Glass | Bulb Compatibility: E26/E27 | Adjustable Cord: No | Ceiling Compatibility: Standard
5. Lightingsky Ceiling Pendant and Lampshade Kit
Lightingsky has used its innovation to come up with a unique jigsaw puzzle lampshade pendant. This product thereby tests the user’s IQ by challenging them with the lampshade from the flat pieces of plastic provided by the company. It’s available in 10 colors and 3 wire lengths.
Lightingsky’s unique innovative capabilities have led them to design a lighting kit that comes with a lampshade you need to assemble like a jigsaw puzzle. The variety of sizes and colors this product is available in provides users to choose the light that fits their needs or personal preferences the most.
Furthermore, this kit includes 30 individual pieces of PP plastic that can be set up to assemble up to 15 possible lampshade designs. These lampshades are durable and washable and therefore can be hung both indoors as well as outdoors. The 15 feet lamp cord gives you extended access and can be plugged into electricity ports that are far away from the socket.
Multiple kits of this pendant light can be combined together to create an even larger multi-colored suspended light. Hence, these lamps make a very good addition to your home and are especially good to hang in children’s rooms.
This lighting kit is considerably complex to assemble. A lot of people were not able to figure out how the lampshade was constructed from individual sheets of plastic. Other than that, this light’s main attraction is the lampshade and not the light itself, which may not suit your requirements.
What We Like
Made of durable and washable PP plastic
A decent gift option
Versatile lampshade design
Incredibly affordable
What We Don't Like
Very complicated to assemble
Cord Length: 15' | Material: Plastic | Bulb Compatibility: E26/E27 | Adjustable Cord: No | Ceiling Compatibility: Standard
6. Q-Plusmore CH10261
Q-Plusmore is a highly rated brand known to manufacture superior quality and durable lighting fixtures, bulbs, and accessories. This pendant lighting kit of theirs in the model CH10261 is a two-pack white hanging light with a modern and sleek design.
If you’re looking for a premium hanging lighting cord that is reputed for its high durability and friendly design, then let me stop you right here. Equipped with a 15-foot extension cord and an on/off switch, this lighting kit is one of the most simple yet effective products in our guide.
It is the ideal light for DIY hanging lampshades and can be set up both indoors as well as outdoors for simply sprucing up your home or special events and occasions. This product is UL certified and has extra durable and fire-resistant materials that can last up to 30 years at a stretch.
It works with any type of E26/E27 LED bulb, making it one of the most affordable products that are super easy to use. If that wasn’t enough, this kit comes with 4-cord hooks, 4-ceiling hooks, and 4 plastic expansion screw anchors making this incredibly convenient to set up by yourself.
A few users have found this hanging light kit to be incompatible with many lampshades including the shades manufactured by the very same company. Hence, it would have been helpful if the product mentioned which lampshades this light socket is most compatible with.
This product by Industrial Rewind is the ideal lighting kit to buy if you want to make your own kind of ceiling light fixture or chandelier. It has a black phenolic socket and is available in four different types of rustic cloth-covered cords.
This antique-style DIY lighting kit is equipped with 6 individual 4-feet cords that are compatible with both LED as well as CFL light bulbs. The wire of this product is made of copper and covered in cotton cloth to maximize durability during usage.
This kit is incredibly versatile and can thereby be used to create an array of different lighting fixtures according to your requirements. So, it can not only be set up to create your own unique chandeliers but can also be fixed as single pendant lights across your house.
The shade holder rings provided are a part of the purchase, and the light direction it projects is downward. This light is compatible with LED bulbs and can be fixed with a dimmer as well. You will love the vintage look of this light when fitted with old Mason jars. They are the perfect accessory to be put in dining halls, living rooms, or even the kitchen.
While being an incredibly flexible lighting option, this kit is not recommended to be installed by amateurs. Unless you have some prior experience or knowledge of working with electrical circuits, it’s recommended you hire a professional to set this light up according to your specifications.
What We Like
Reasonably priced
Ideal for unique DIY fixtures
High voltage socket that’s compatible with 660-watt bulbs
AC Bungji pendant light in model SOUS006339 is a traditional ceiling-mounted lighting kit packed with a 4 feet-adjustable lantern wire. The lighting socket and structure are made of high-quality plastic painted with a shiny black finish. It’s available in 1, 4, and 6 packs and is ideal to be used in dining rooms, kitchens, or living rooms.
This Bungji Pendant Light Kit is real value for money. It can be easily set up in different ways to enhance the beauty of your room. This kit is compatible with most lights and hence works with fluorescent, LED, as well as CFL bulbs.
Furthermore, the cord of this lighting kit is durable and flexible and can be shortened as per your requirement with a wire stripper. The crowning feature of this kit, however, is its affordability. Since this kit comes in multi-packs they are one of the most affordable lightings on our guide today.
Moving on to the structure, the light sockets of this kit are dome-shaped and made of aluminum which provides it extra strength and durability. If that wasn’t enough, each of these sockets also has its individual switches allowing you to customize which lights remain on or off according to your personal preferences.
This is a very basic structured pendant lighting kit and therefore does not support a wide variety of shade fixtures. This alternatively, takes away some of the flexibility in decorating making it difficult to customize it according to your preferences.
Finally, we come to HESSION’s simple yet durable 2-pack pendant light kit. It’s made of sturdy and high-quality PBT and comes packaged with equipment for easy installation. This is a simple yet effective and affordable alternative to the other more rustic or antique-designed light kits on our guide.
This two-pack pendant lighting kit has a simple 15-foot wire structure that provides the flexibility you require to optimally customize your home lighting. You can, therefore, hang or wrap this wire around beams or lamps to fix up your light in creative positions. This kit also comes packaged with a few extra tools such as socket rings, cords, and ceiling hooks, which further help you install your lighting efficiently.
What’s more? These lights come with an on-and-off switch placed just 3.28 feet away from the plug to ensure easy accessibility. The socket itself is compatible with all E26/E27 medium base bulbs and can support a maximum of 60 watts per bulb.
You can install this lighting kit with a variety of lampshades and cages of your choosing to make it look unique and fun. Furthermore, you are highly recommended to reach out to HESSION’s customer service in the event of any problems. They are sure to get back to you within 24 hours and provide a quick replacement if there are quality problems.
Although this brand of lighting kit claims to be compatible with all bulbs, some users found that to be untrue. Hence, it’s recommended you check the kind of bulbs that are compatible with this socket before buying more for the same.
DIY pendant lighting kits offer a unique blend of artistry and practicality, allowing homeowners to imbue their spaces with their individual aesthetic preferences. These kits fluctuate greatly in terms of cord length, material composition, bulb compatibility, flexibility of cord adjustment, and ceiling compatibility. It's essential to consider these parameters when choosing the ideal lighting kit for your space. The table below provides a comparison of several top DIY pendant lighting kits, examining each against these critical dimensions.
Buying Guide For The Best DIY Pendant Lighting Kit
Are you still confused about which pendant lighting kit is the ideal purchase for you? Or maybe you’re stuck between a few options and are finding it difficult to make the final call? We’ve got just the thing to help you make your decision. In this buyer’s guide, we list out a few of the most important factors that determine a good lighting kit.
These will not only provide more insight regarding what you should be looking out for but will also help you narrow down the ideal lighting fixture. So, without much ado, let’s get started, shall we?
1. Wattage Of Bulb
The lighting kit you are considering will always mention the wattage of bulbs that is optimally compatible with it. This wattage (measured in watts) directly determines the amount of electricity the light bulb consumes and hence decides the voltage of electricity these lighting kits are able to withstand.
It is, therefore, especially crucial to check the wattage of bulbs your product supports because exceeding that wattage recommendation may lead to it not functioning at all, or worse, a short circuit.
2. Length And Type Of Cord
Different DIY pendant lighting kits come with varying lengths and types of cord. Most of the cords are usually wrapped or coated with insulating materials that will keep the wires working for extended periods of time. However, this is an important consideration for you because, unlike inbuilt lighting systems, the cords of these lights will be out for the show.
Hence, it’s important to figure out the length of the cord that would work with your hanging light fixture. This alternatively, eliminates the chances of excess wires hanging around and making your home look messy.
Alternatively, if you can pre-determine the length of the wire required, you can go for one that suits the aesthetics of your room. Whether that is antique, modern, or rustic there are multiple different types of wire finishes available that will help you decorate your house uniformly.
3. Number And Type Of Bulbs
Almost all the pendant lighting kits in our guide are compatible with E26/E27 bulbs. However, they are not always compatible with all the types of light bulbs available on the market. These different types of bulbs consume different amounts of electricity and thereby produce their distinct light. Therefore, if you tend to prefer one type of light bulb over the other, we highly recommend checking it for compatibility.
4. Installation Process
While most of the products in our guide have straightforward amateur-friendly installation processes, some are more complex than others. Depending on your knowledge and expertise, you must decide how they want to install their lighting kit. If you are comfortable with hiring a professional, then purchasing a kit with a more complex installation process shouldn’t be an issue.
5. Extra features
There are a few extra features that one might want to consider while buying a pendant lighting kit. For starters, if you’re looking for lighting hardware with an adjustable dimming feature, you must look for a dimmer in the product.
In another example, if you are looking for a lighting kit with individual or overall on-and-off features, then you must look for toggles or switches on the product. Each of these characteristics is mostly dependent on your taste and preferences.
What are the benefits of using a DIY pendant lighting kit?
Using a DIY pendant lighting kit offers several benefits. Firstly, it allows you to have creative control over the design and aesthetics of your pendant light. You can choose the materials, colors, and styles that match your decor. Secondly, DIY kits are often more affordable compared to pre-made pendant lights, making them a budget-friendly option. Lastly, assembling the pendant light yourself can be a rewarding and fulfilling DIY project.
What tools and skills do I need to assemble a DIY pendant lighting kit?
The tools needed for assembling a DIY pendant lighting kit may vary depending on the specific kit and design. Generally, you may need wire cutters, pliers, screwdrivers, and possibly a drill. Basic knowledge of electrical wiring and safety precautions is recommended. It’s important to follow the instructions provided with the kit and consult professional help if you’re unsure about any aspect of the installation process.
Can I customize the length of the cord in a DIY pendant lighting kit?
Yes, many DIY pendant lighting kits come with adjustable cords or cables that can be cut to the desired length. This allows you to customize the pendant light’s height and position according to your specific needs and the height of your ceiling.
Are DIY pendant lighting kits compatible with different types of bulbs?
Yes, most DIY pendant lighting kits are designed to be compatible with various types of bulbs, including incandescent, LED, and CFL bulbs. However, it’s important to check the kit’s specifications to ensure that the recommended bulb type and wattage are compatible with the socket and wiring provided.
Are DIY pendant lighting kits suitable for all ceiling types?
DIY pendant lighting kits can be installed on various ceiling types, including standard drywall, suspended or drop ceilings, and vaulted ceilings. However, the specific installation method may vary depending on the ceiling type. It’s important to read the instructions provided with the kit and consult a professional if you have any concerns about the installation process for your specific ceiling type.
If you’re into interior decoration or simply have a good eye for aesthetics, you know that lighting is everything. It can drastically change any drab old space and make it look vibrant and charismatic.
Before we leave you to your decision, we wanted to highlight some of our final recommendations. Q-Plusmore CH10261, for example, is an affordable yet elegant single-pendant lighting kit you will love if you’re looking for one with a ceiling-mounted base.
Industrial Rewind 6BlkRndSS, on the other hand, provides you the most amount of flexibility for creating a DIY chandelier. However, if you’re looking for a lighting kit with a simple plug-in and an unconventional antique look, then FRIDEKO HOME lights are a good bet.
With that, we come to the end of our comprehensive guide to buying the best DIY pendant lighting kit. See you later, folks, but until then, happy shopping!
With these Beautiful Ideas On How To Decorate With Repurposed Light Bulbs you will never want to throw an old light bulb again! We all know that once a light bulb is broken, it shouldn't be thrown away. If you wonder what can you do with them, because you simply don't know where to discard them, the answer is simple: you don’t! Recycling is one of the solutions that could help our world in getting out of this environmental nightmare we have managed to create our us. And if we ever want to wake up from this terrible dream, we must take action and think a second about something else, something bigger than our own little universe we revolve around every day.
The picture is much bigger than our lives and it is our responsibility to think about the next generations and about what we leave behind us on Earth after we're gone. Thus we at Homestheticsencourage you to recycle with every chance you get and repurpose and reuse old objects and give them a new life and a new purpose.
Here is what you can do with a little patience, a lot of care and lots of creativity!
What do you think? Is it worth the effort of working with such delicate fragile and elegant elements in DIY projects?


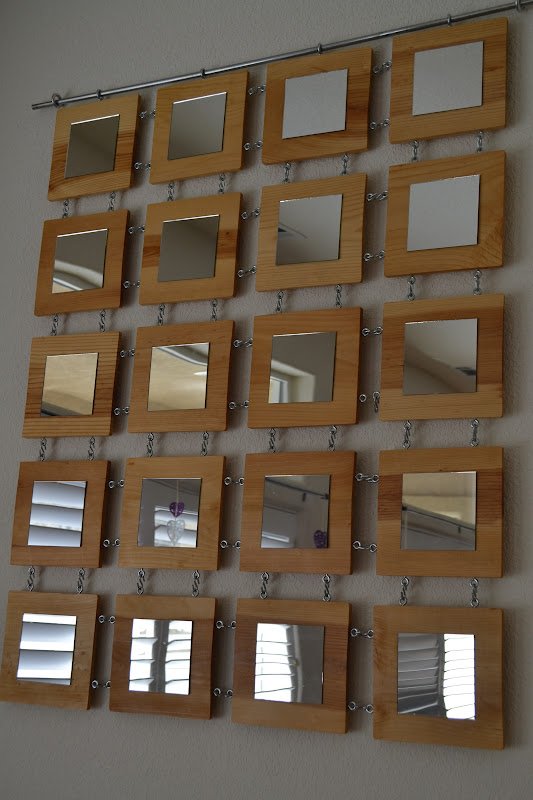
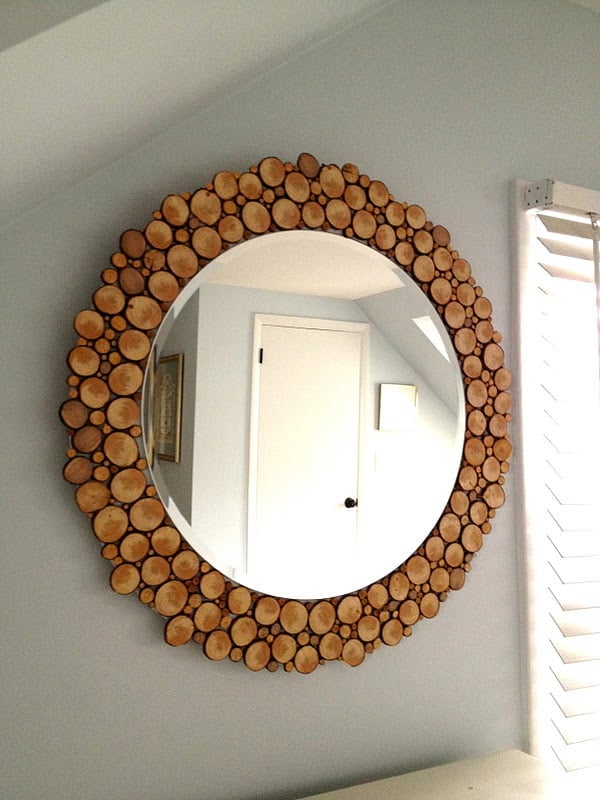
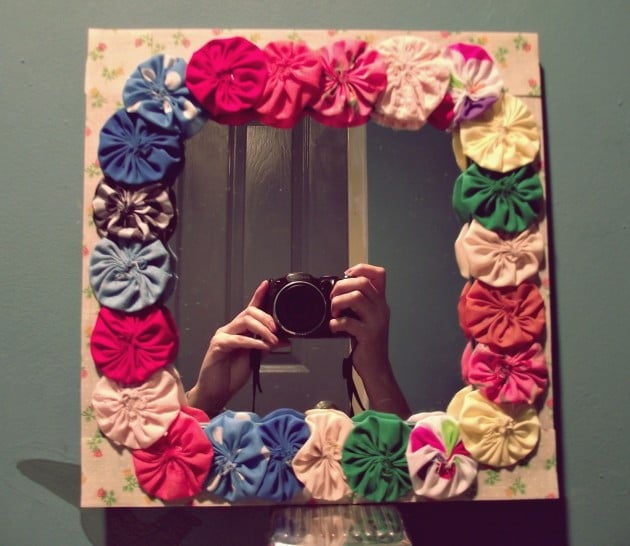
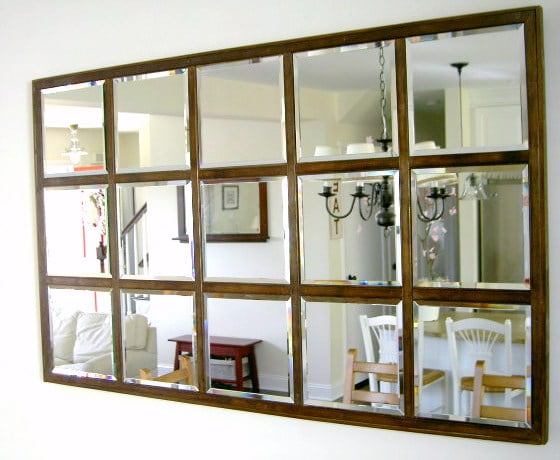


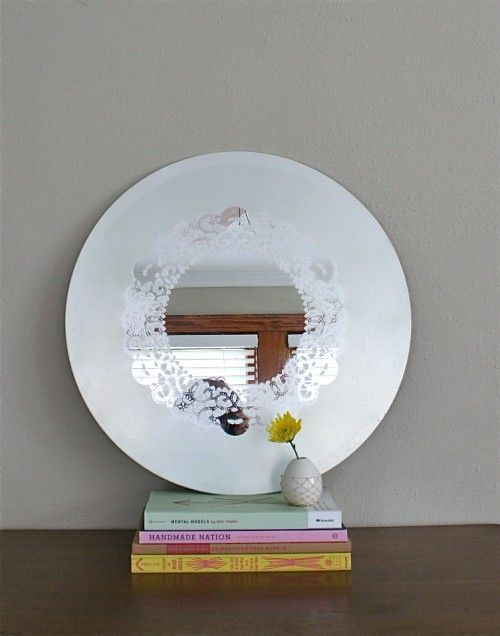
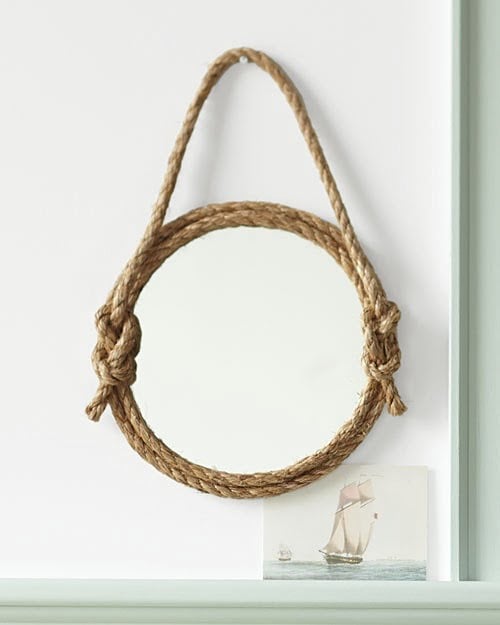

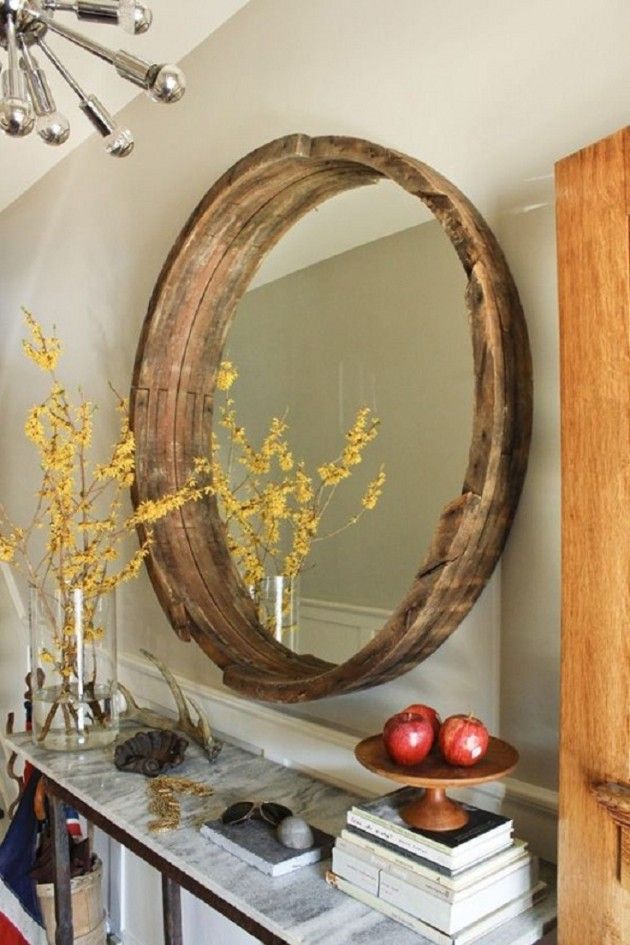

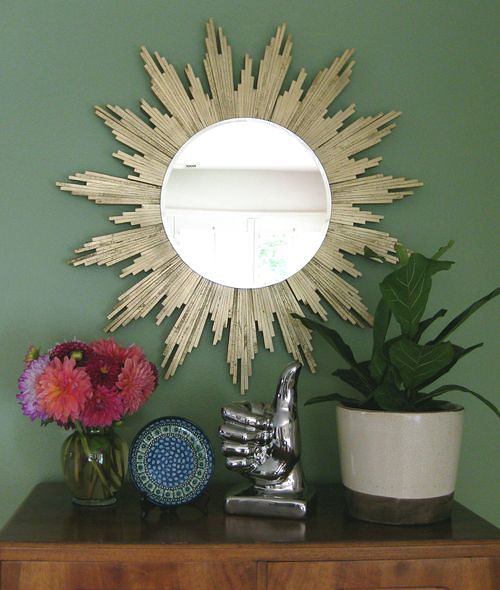
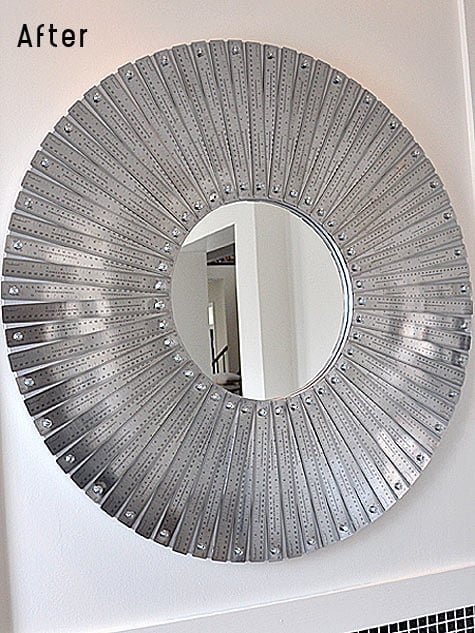
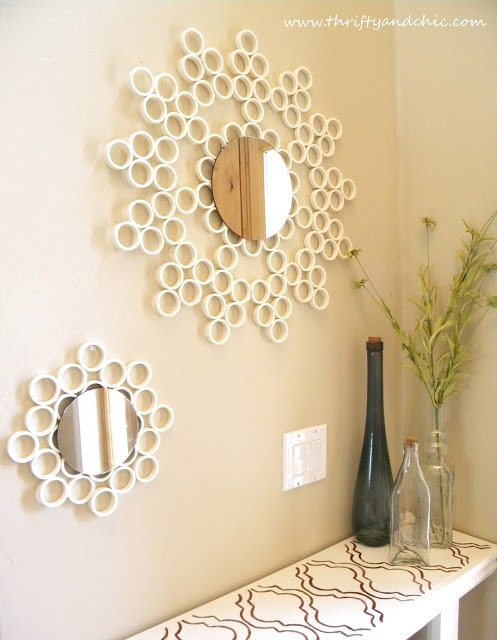
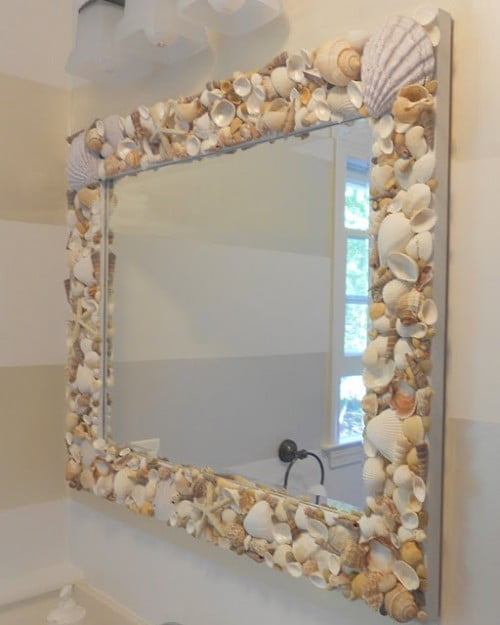
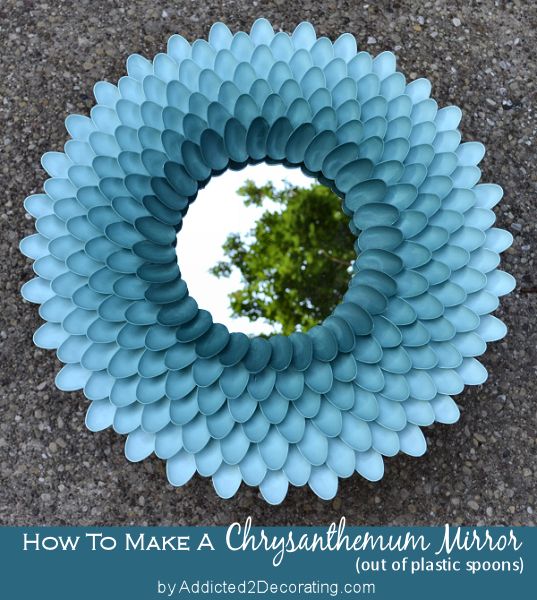

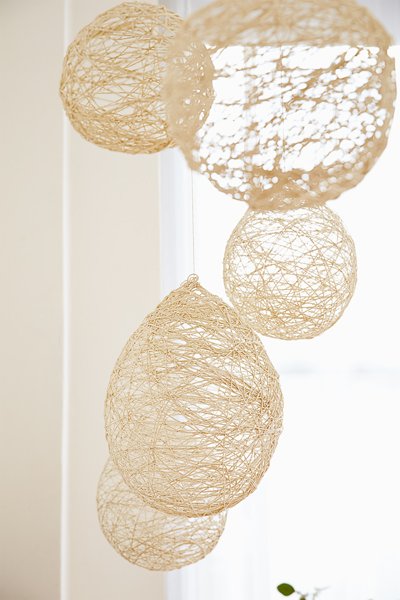
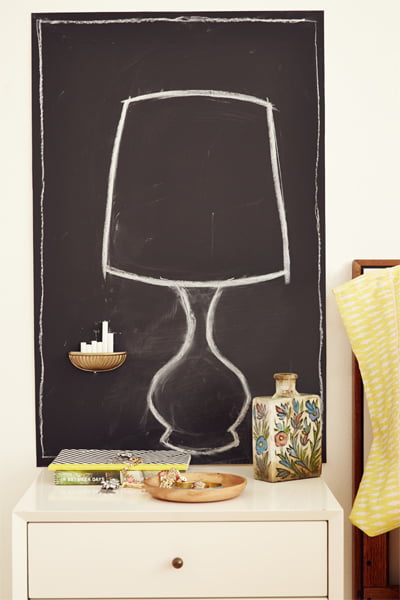


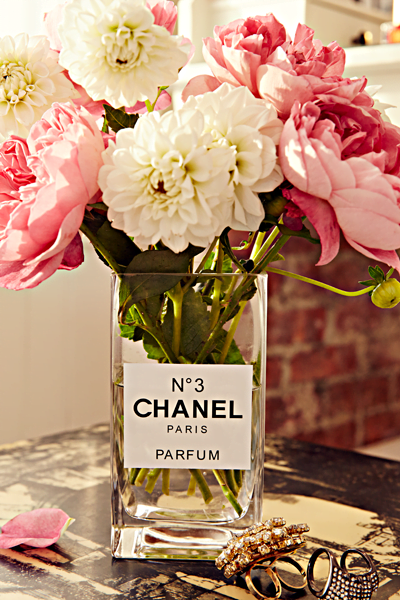
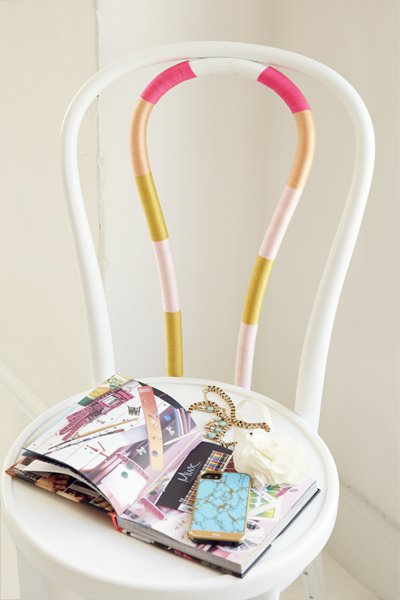
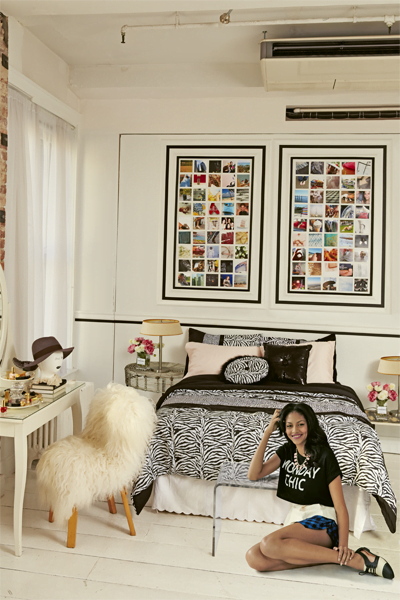
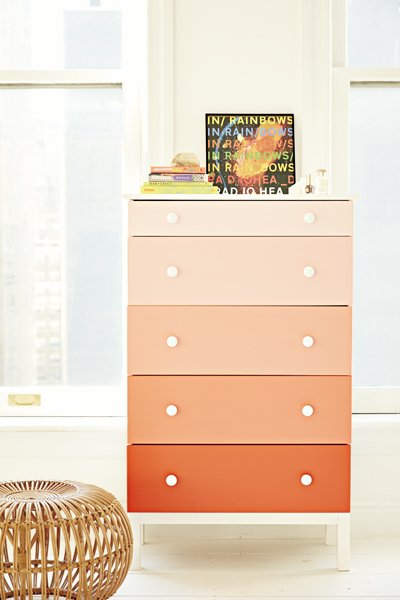


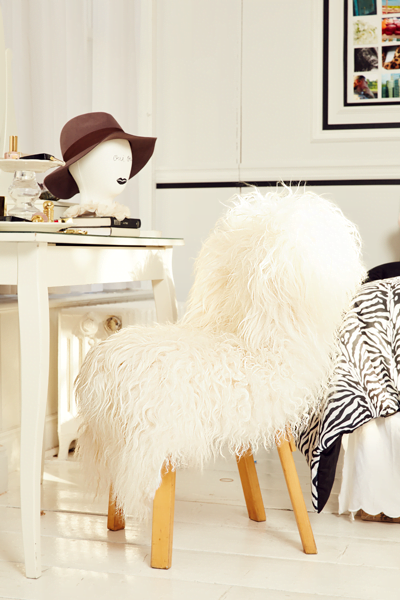
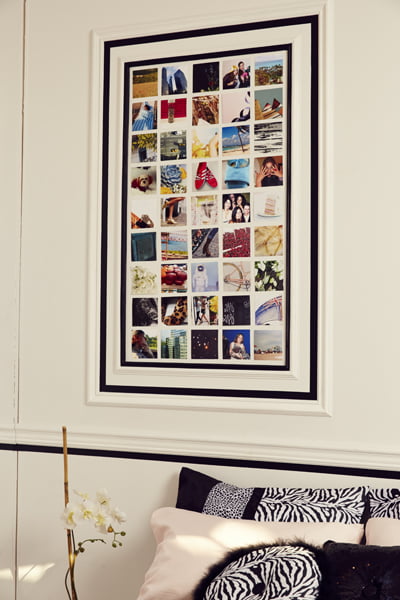


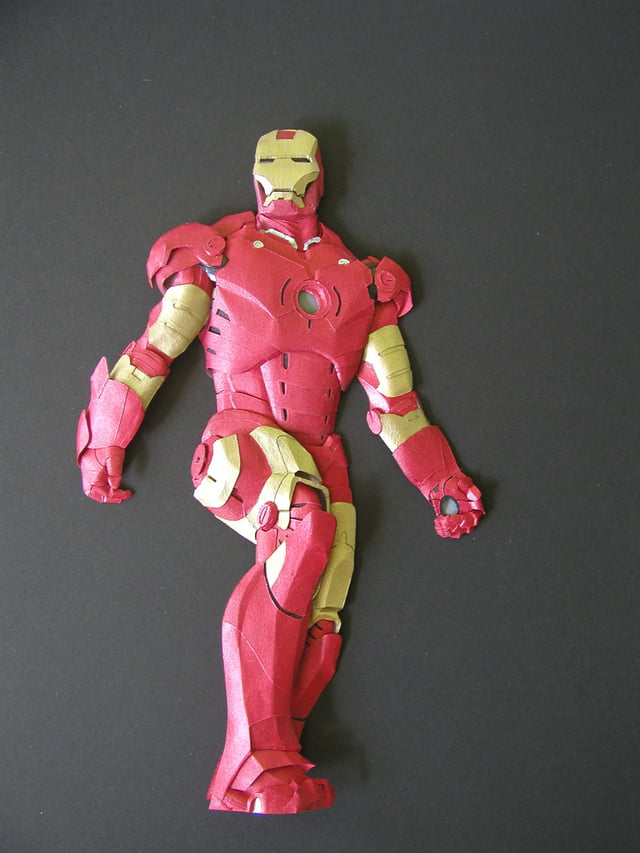
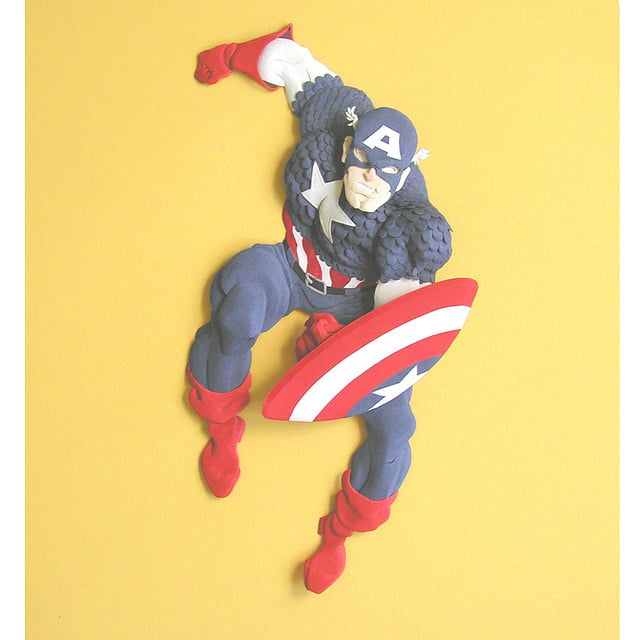


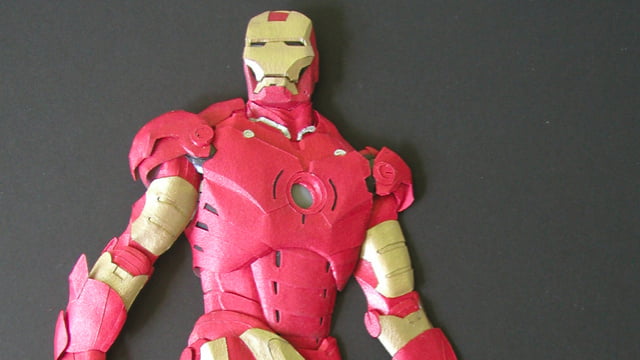


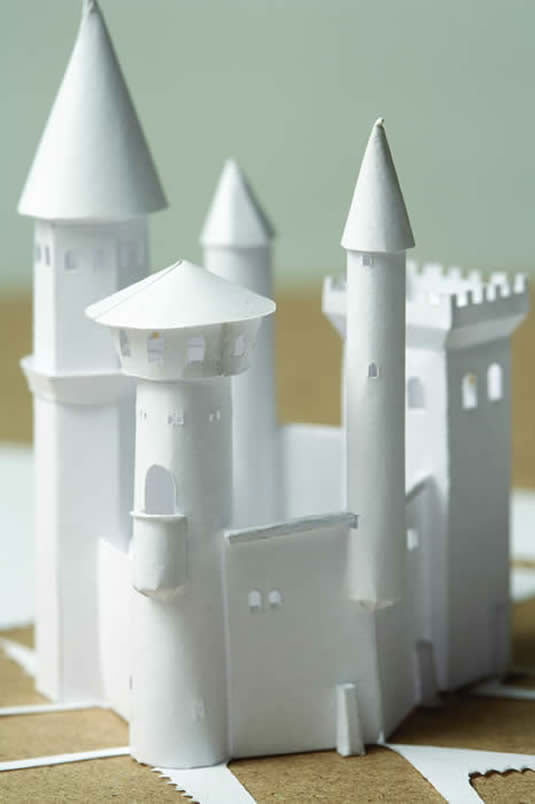


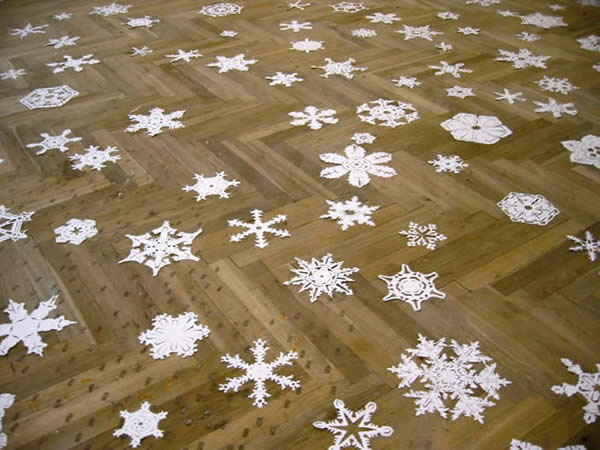

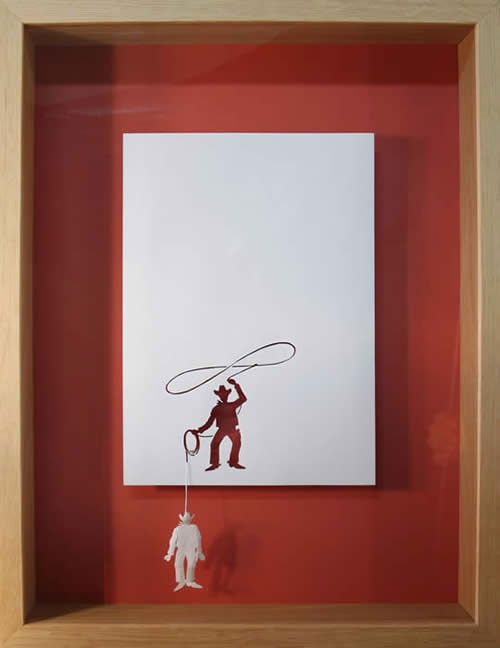


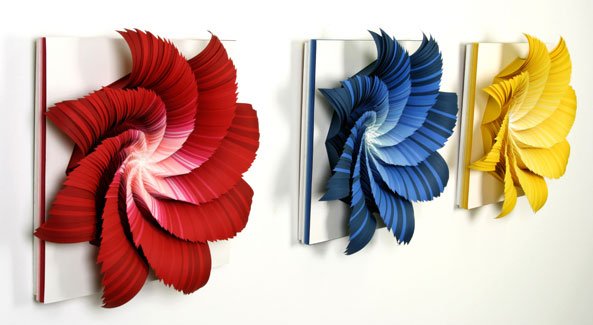

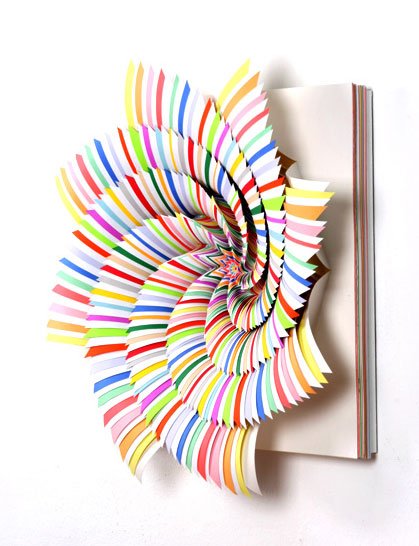


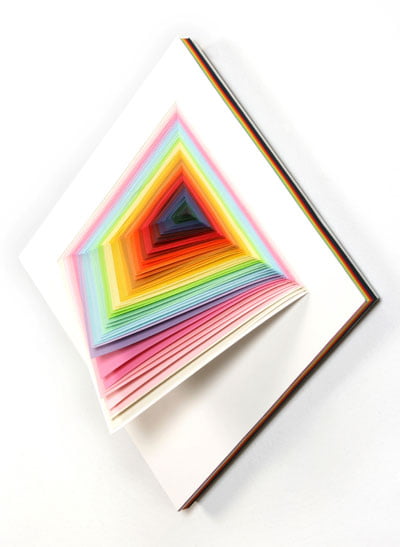
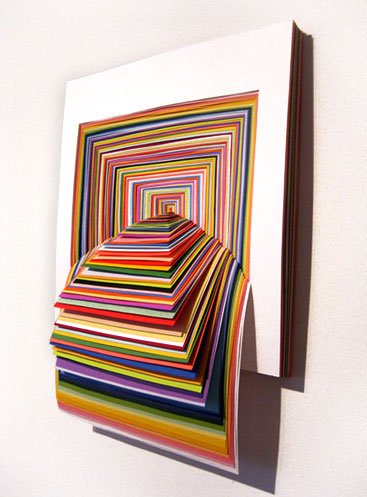

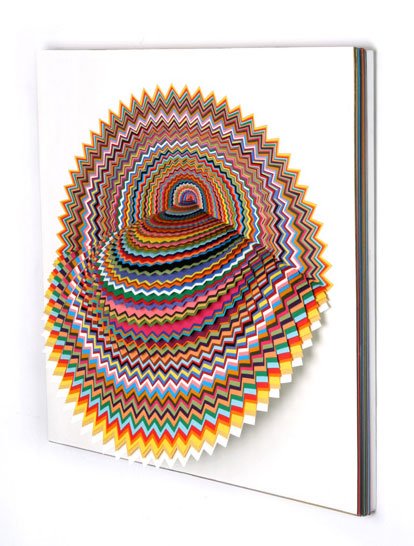

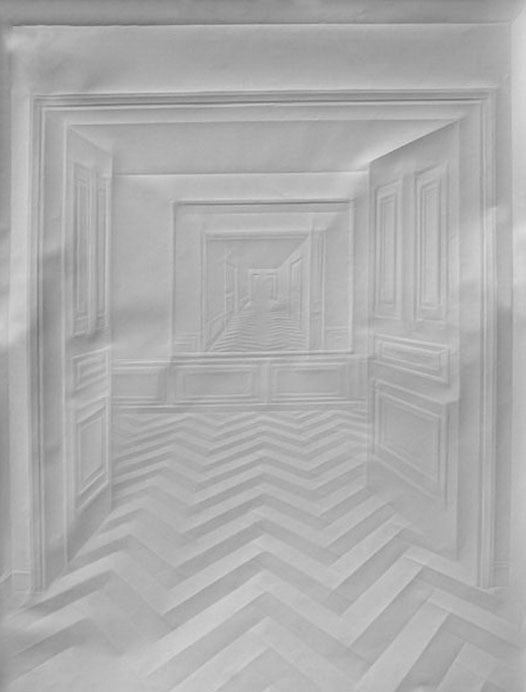


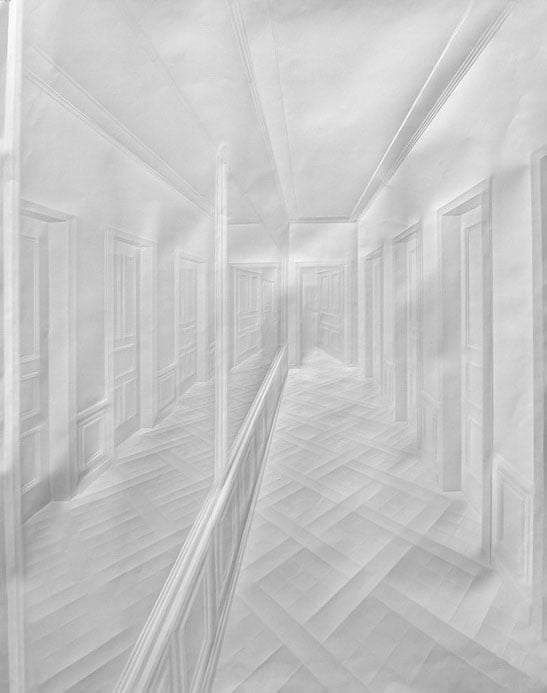
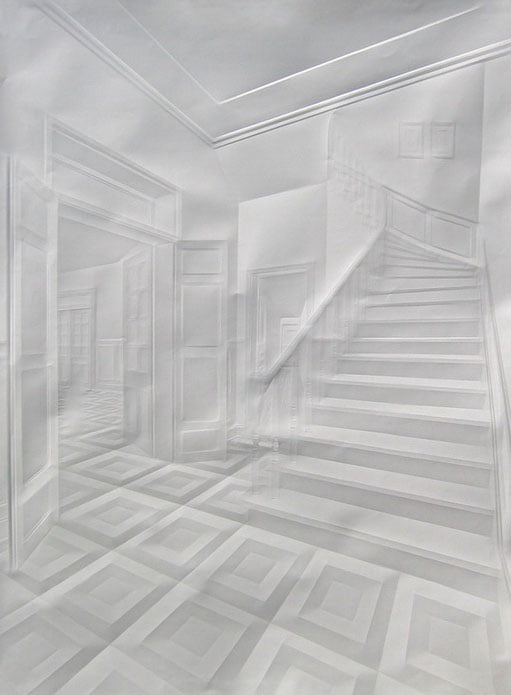


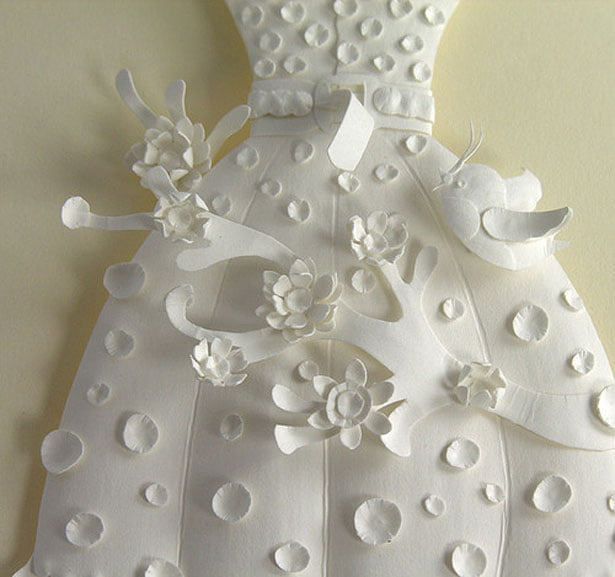

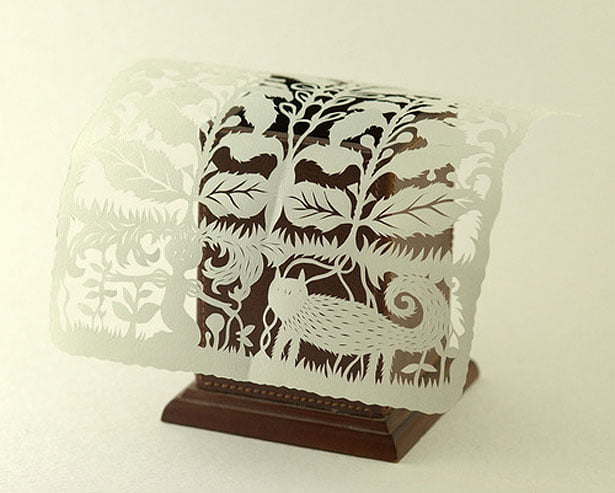


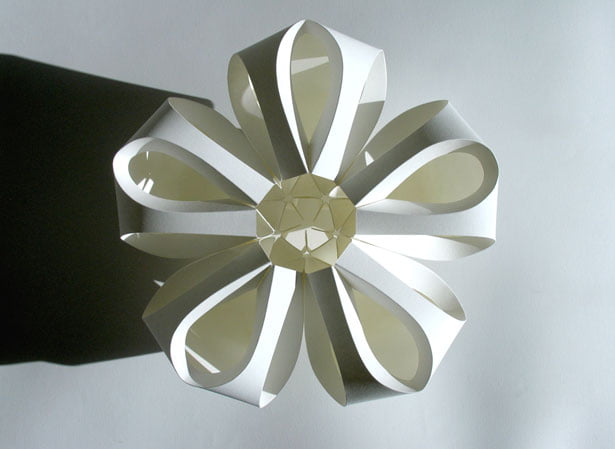


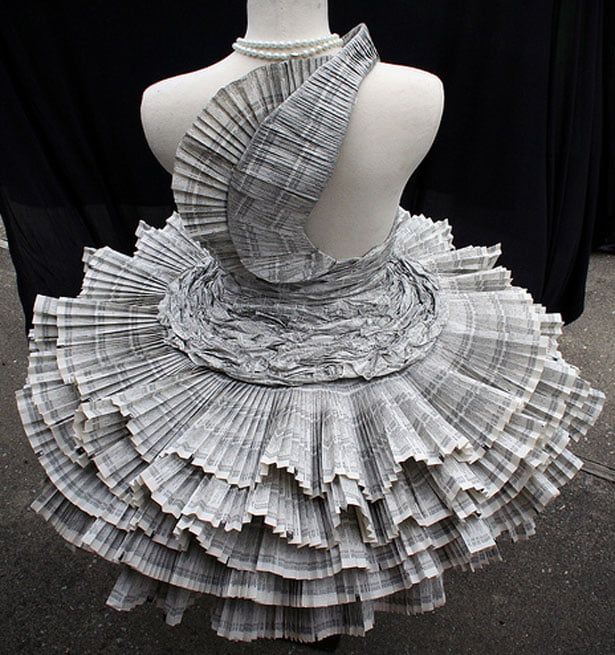


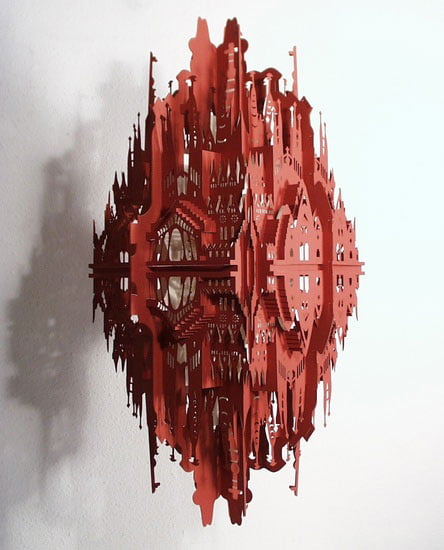

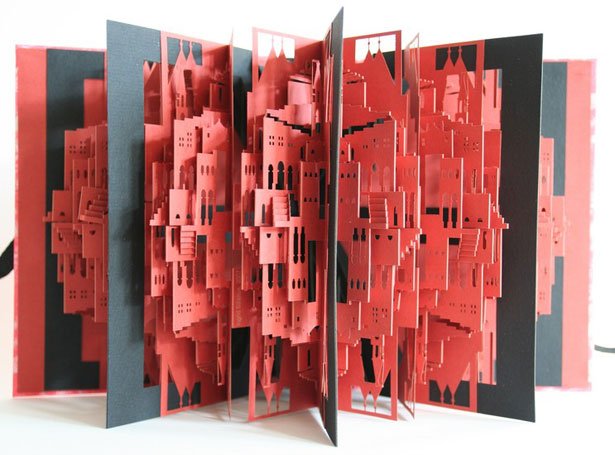


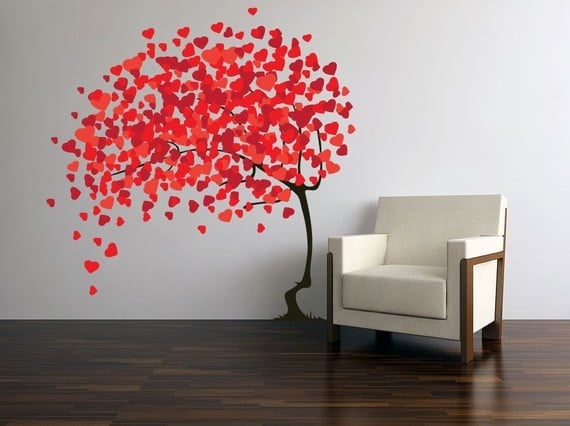

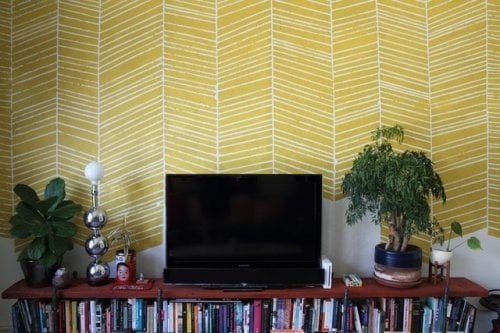
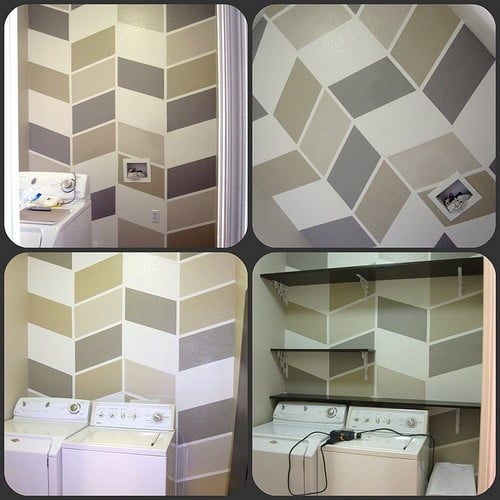
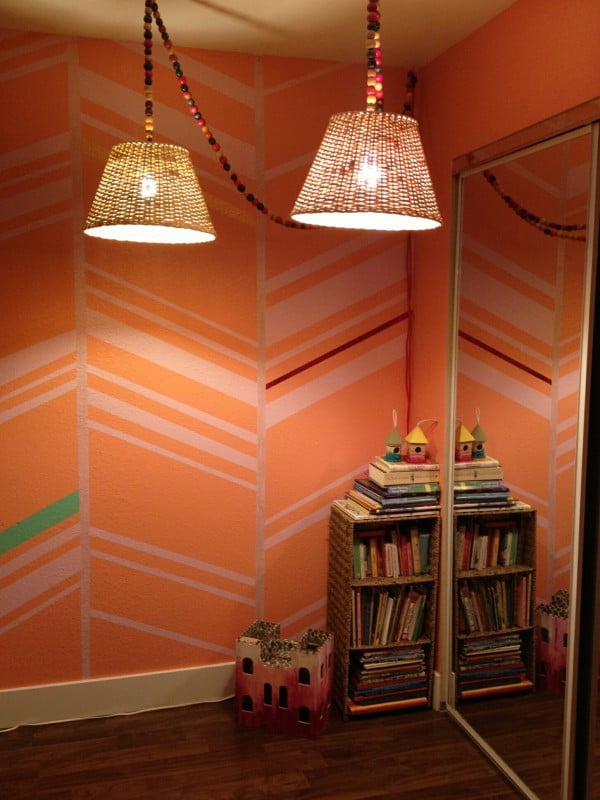
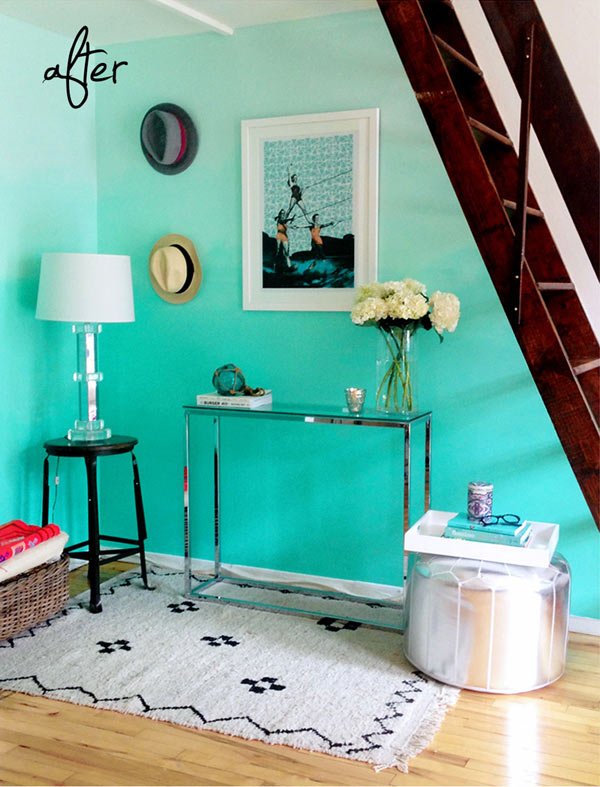
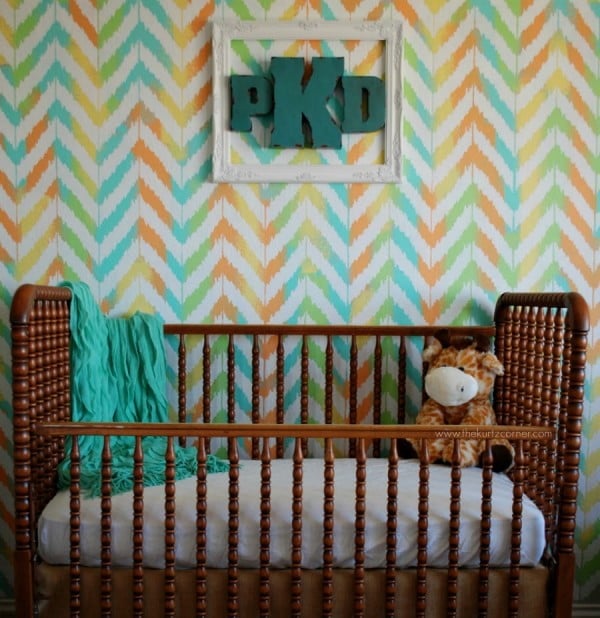
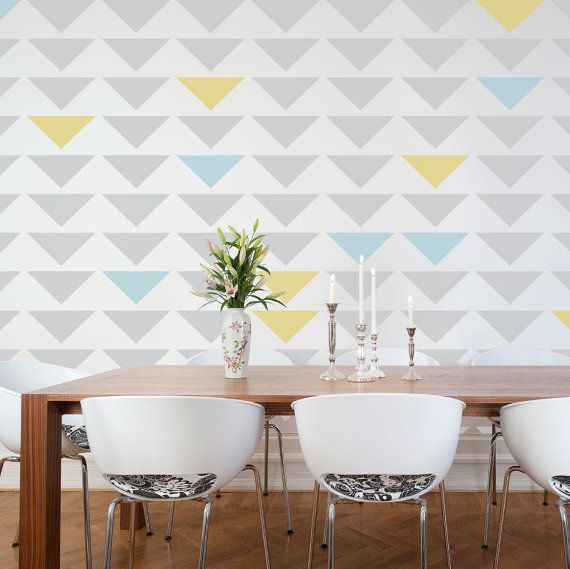
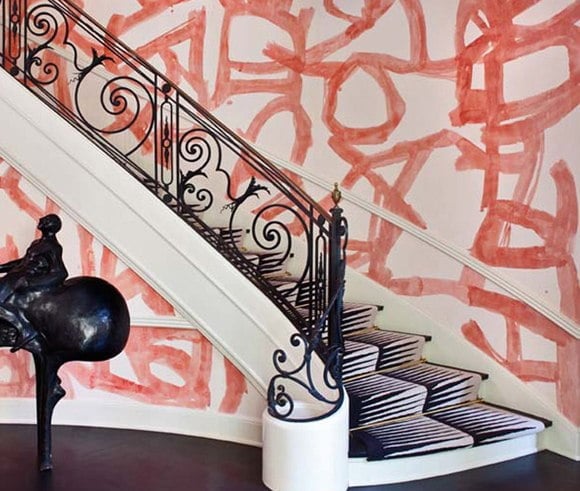
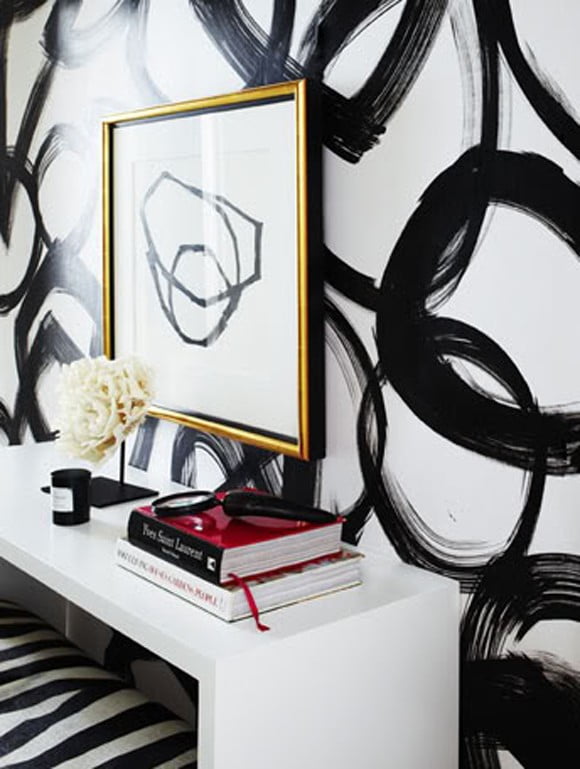
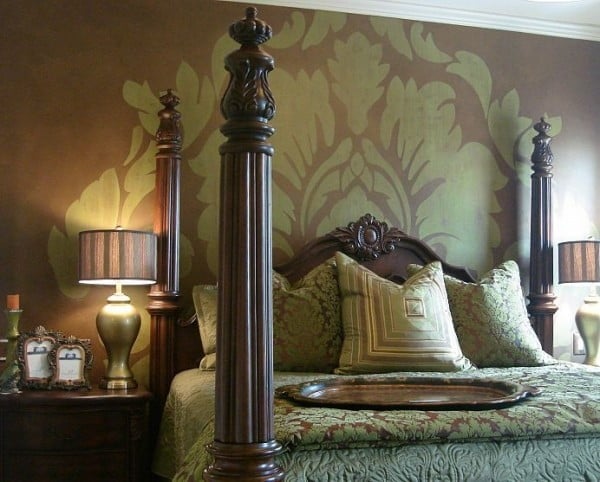
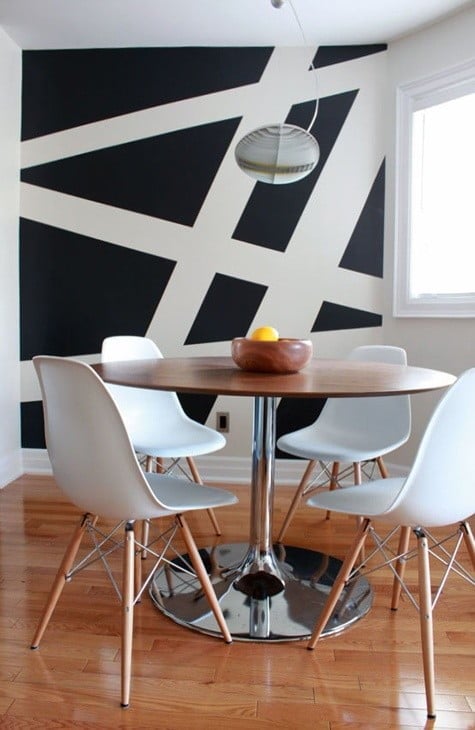
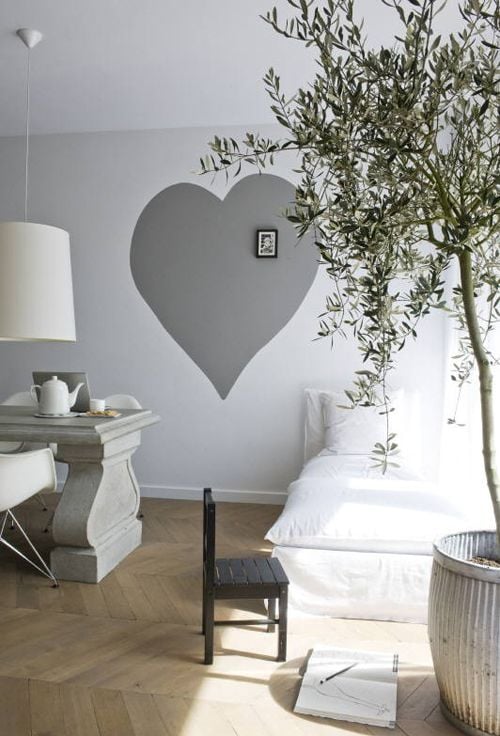
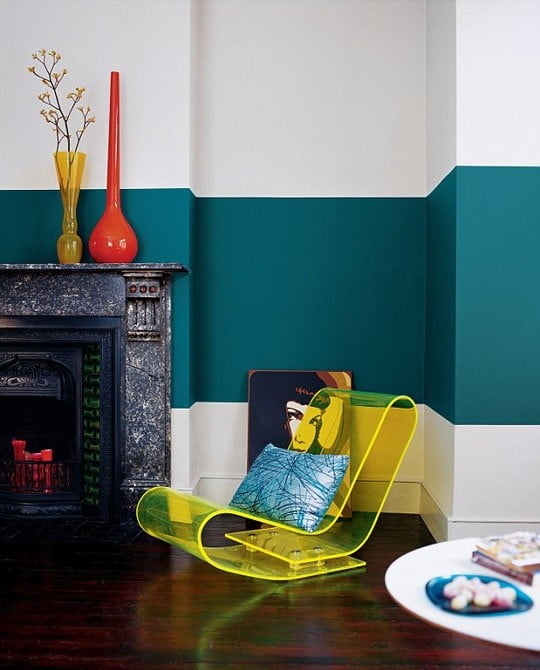
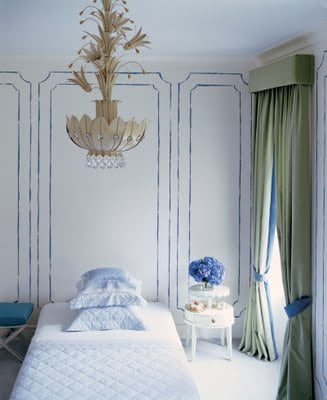
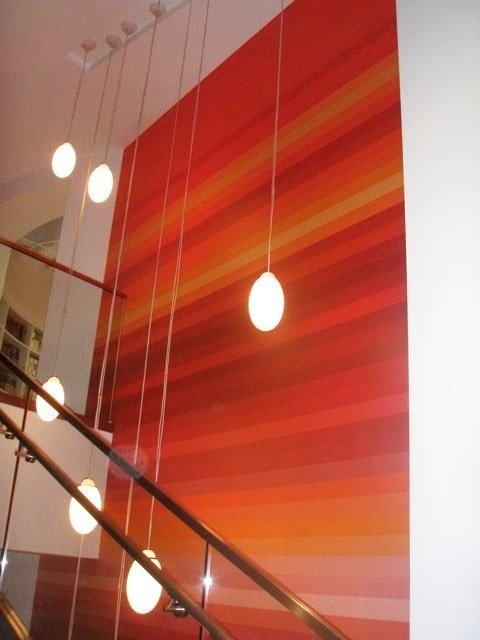

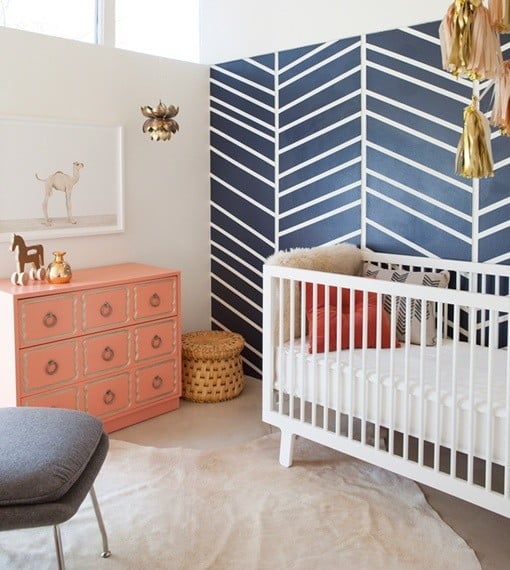


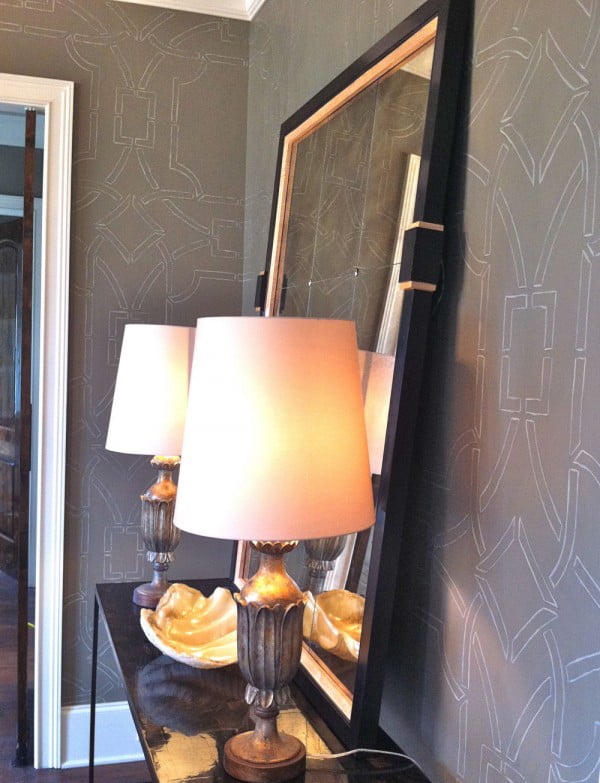
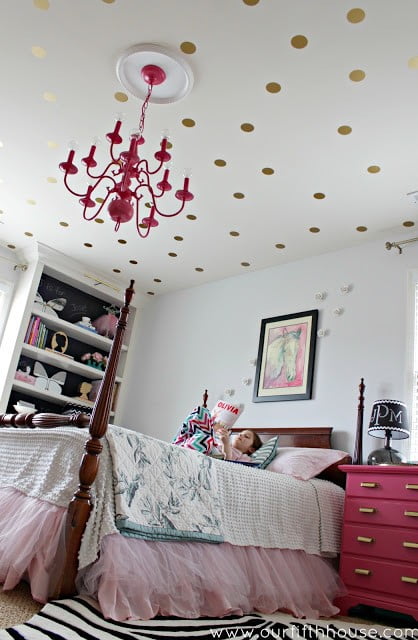
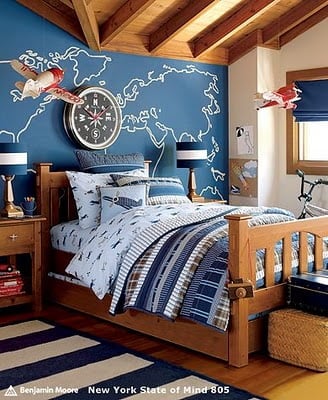
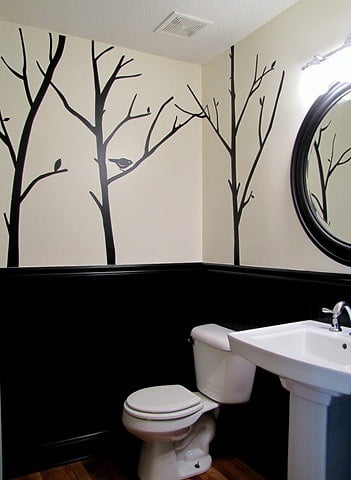
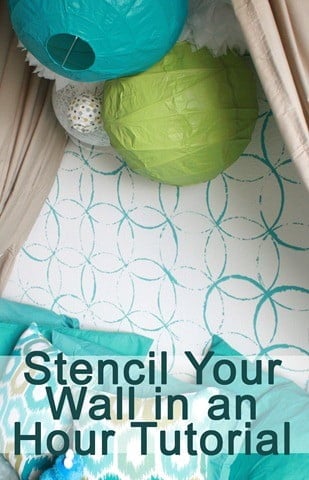
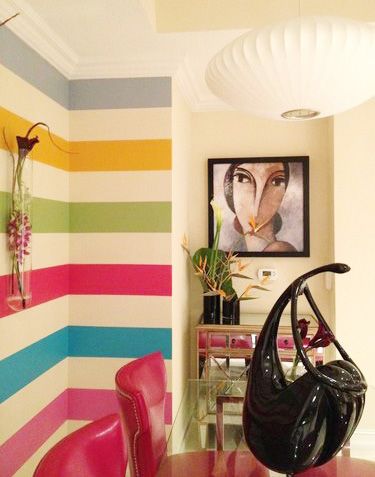
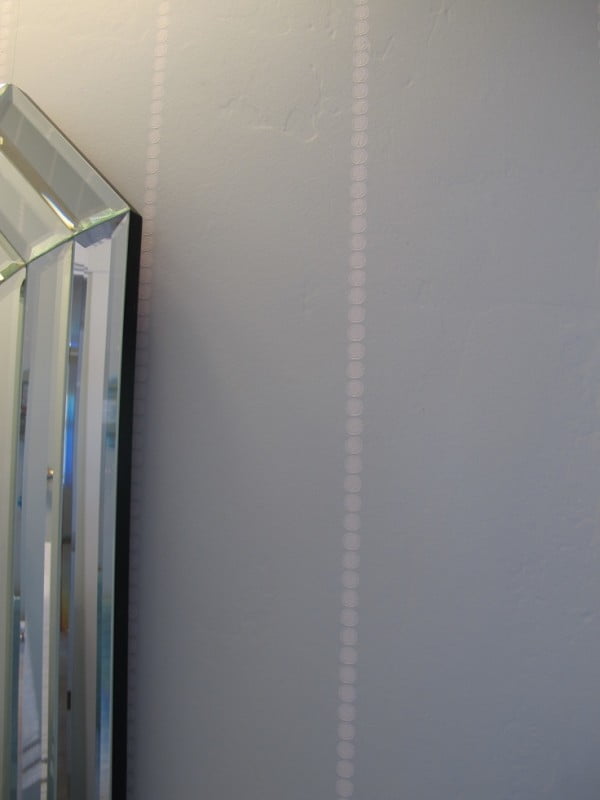
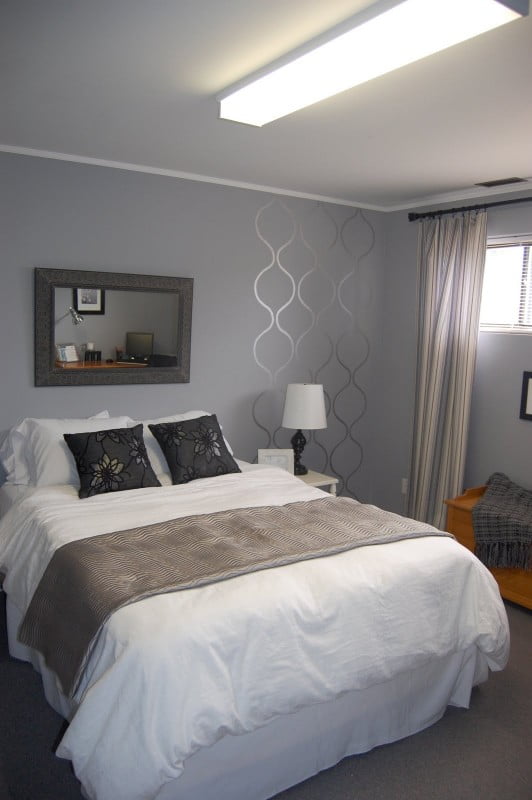
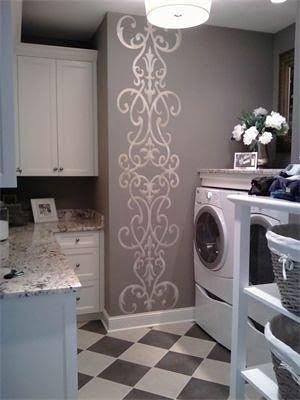
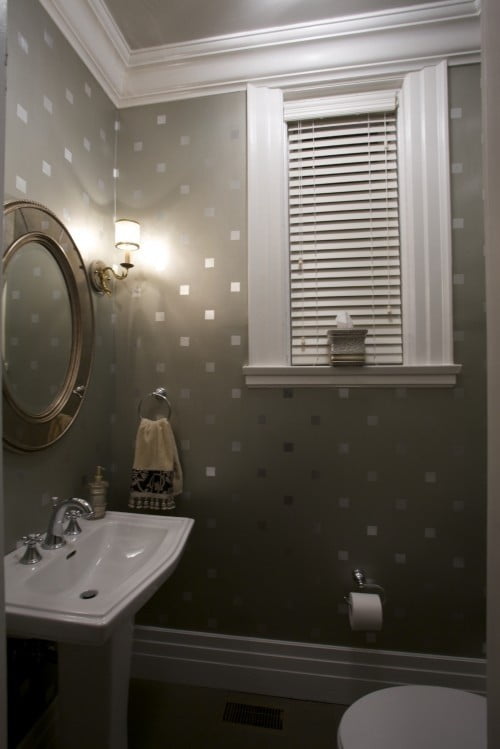
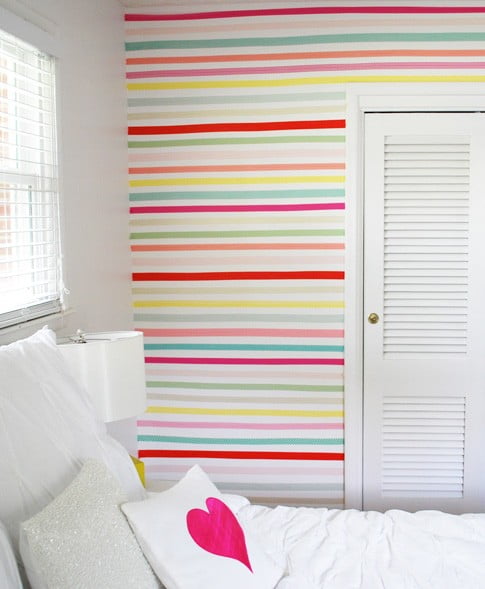
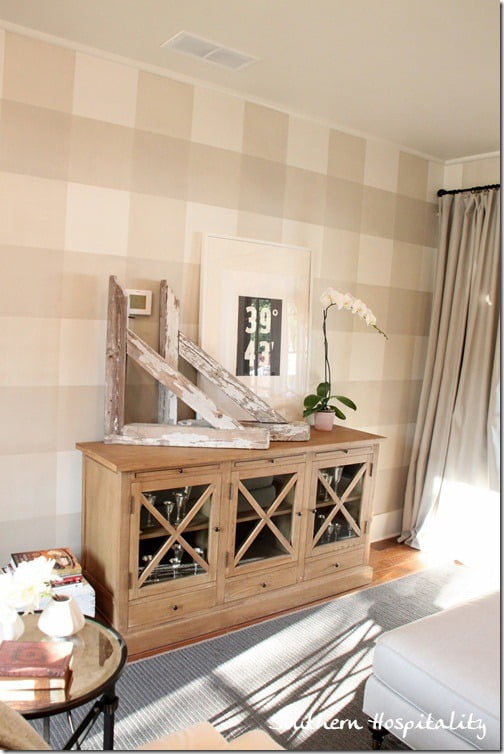
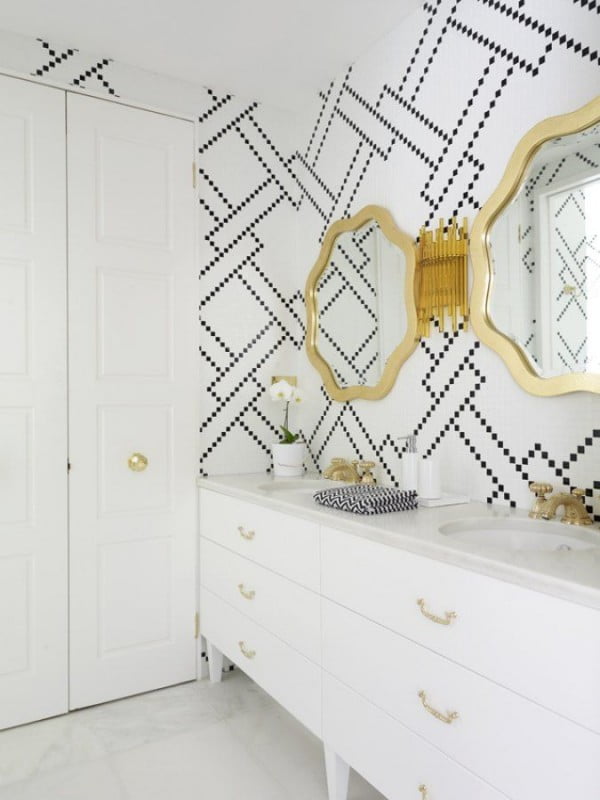
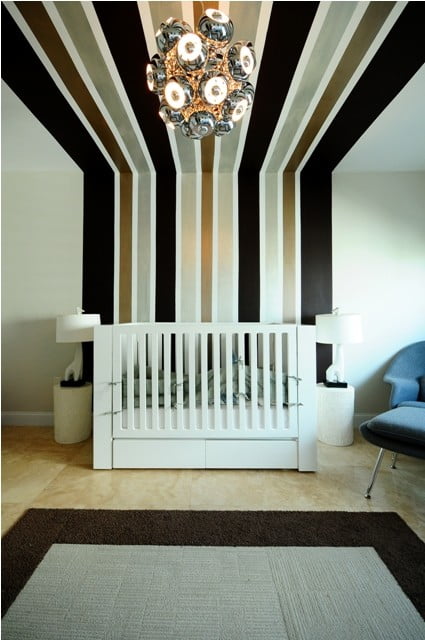


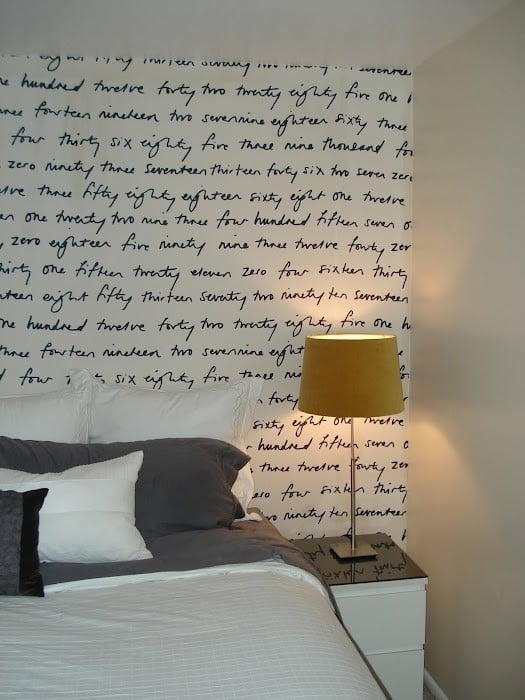

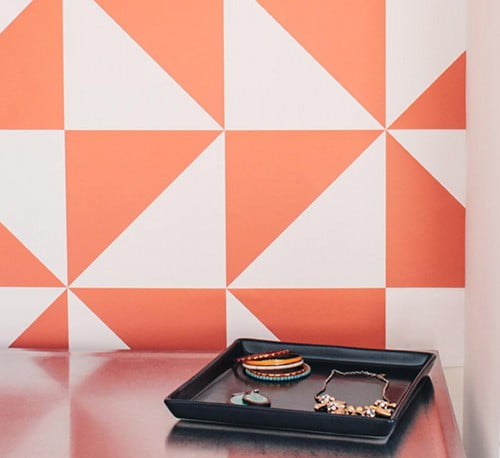
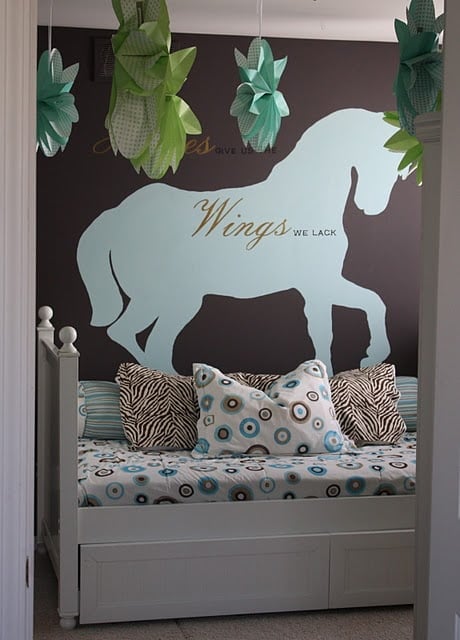
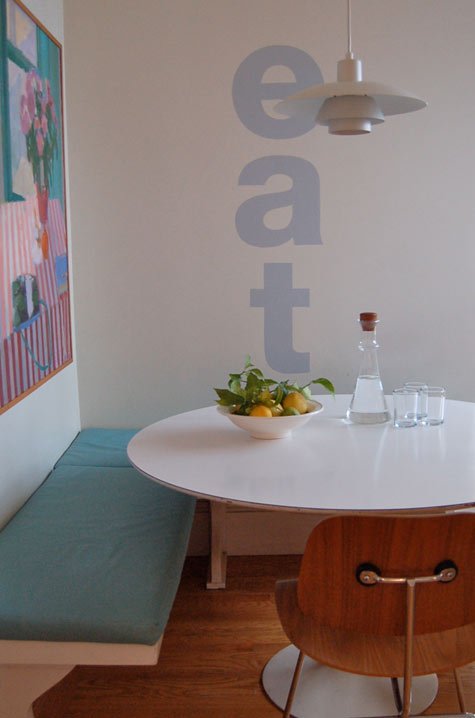
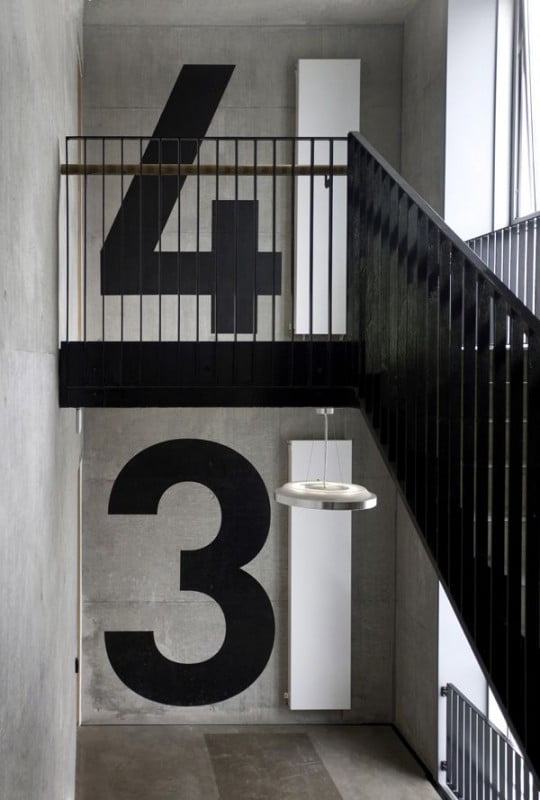
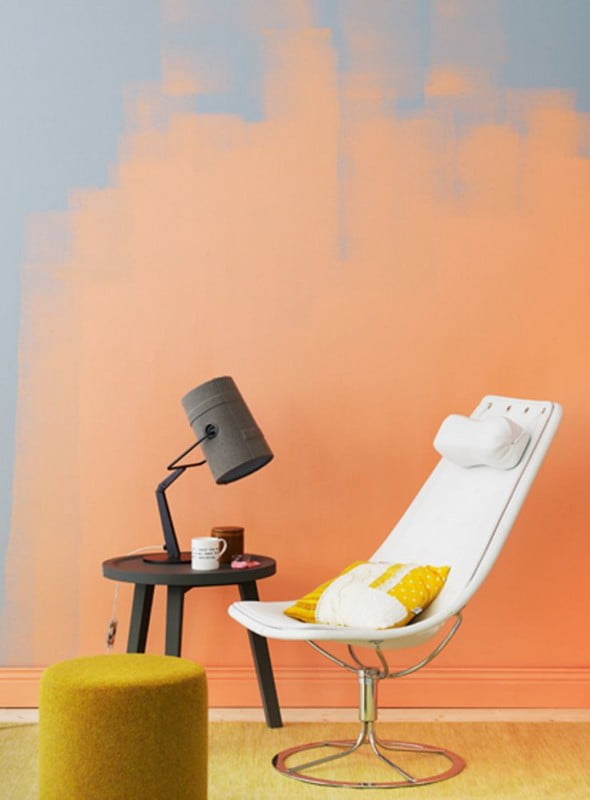
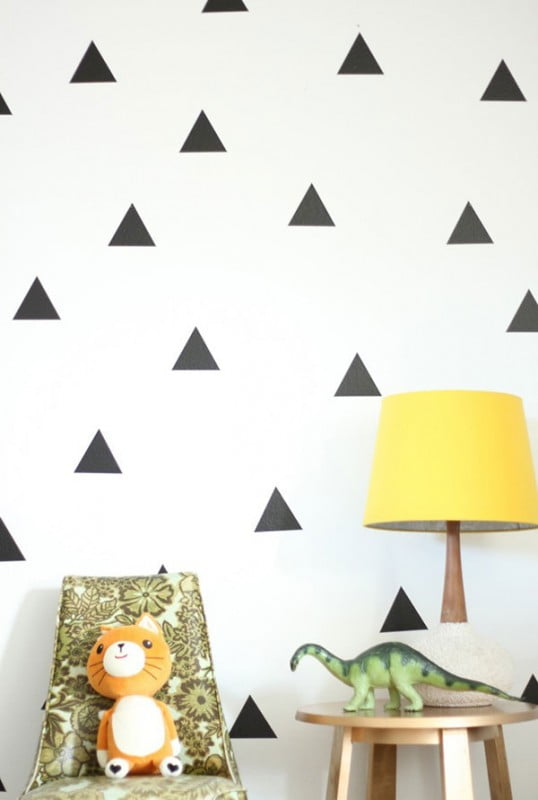
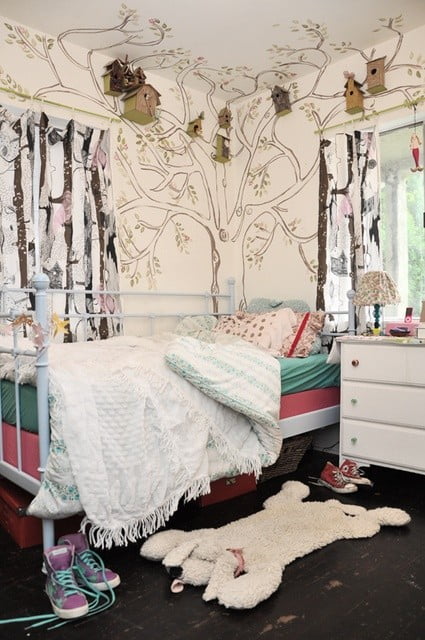
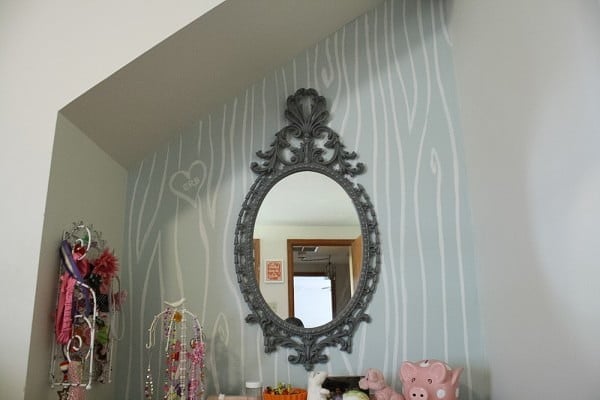
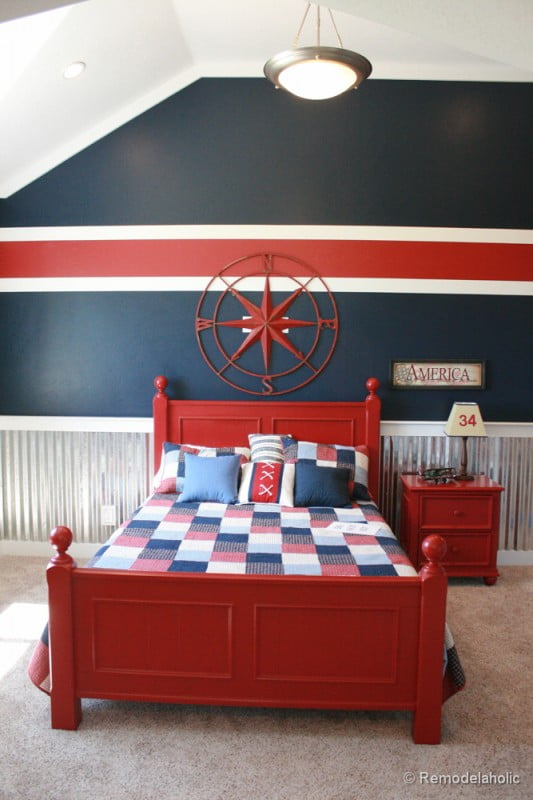
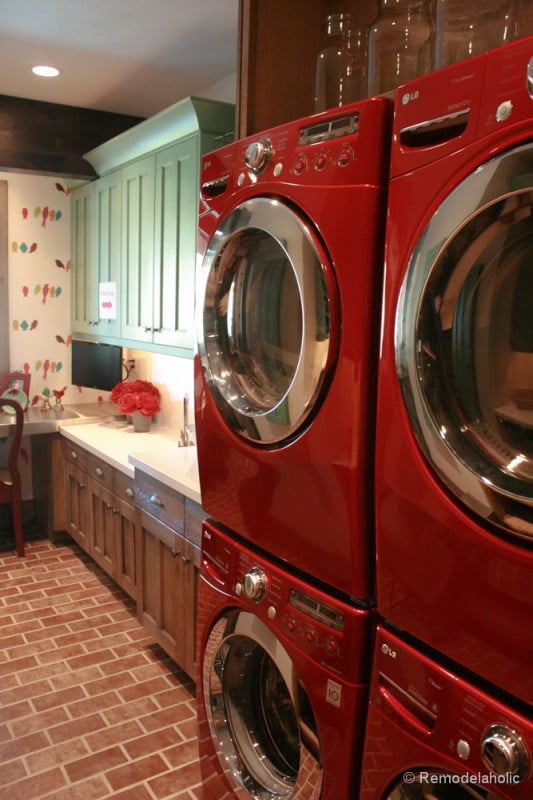
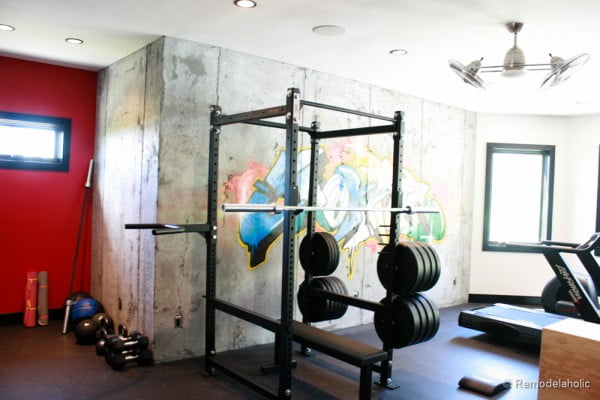
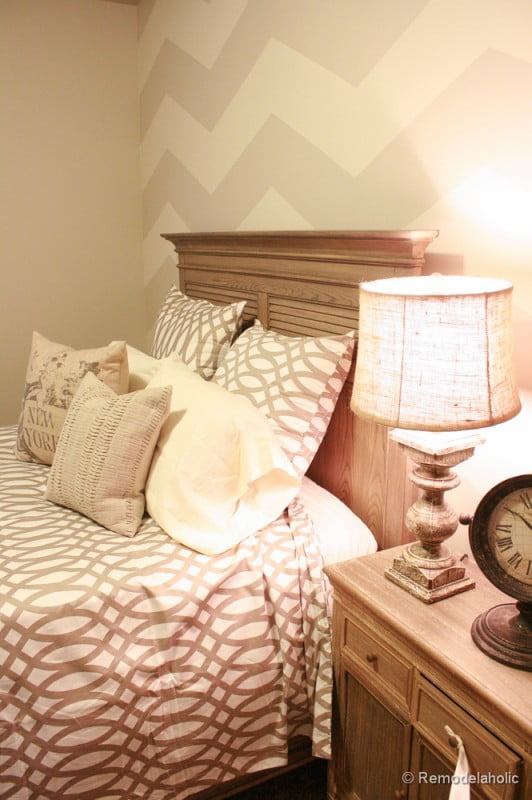
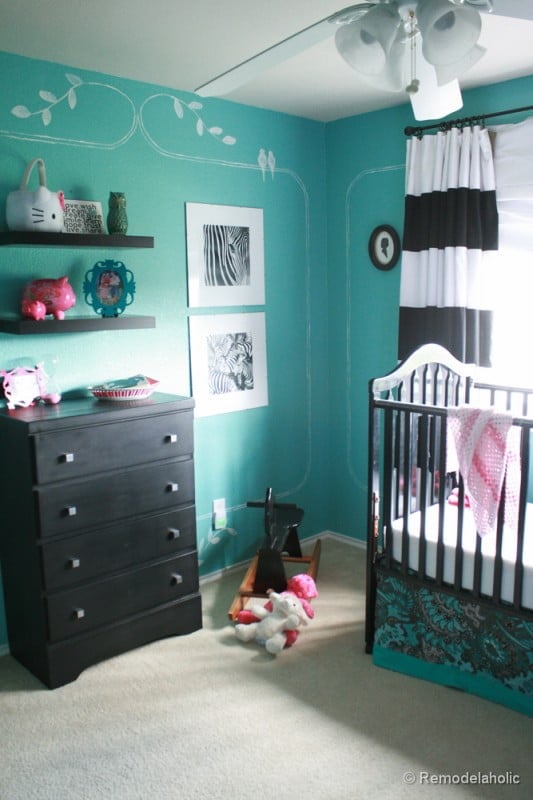

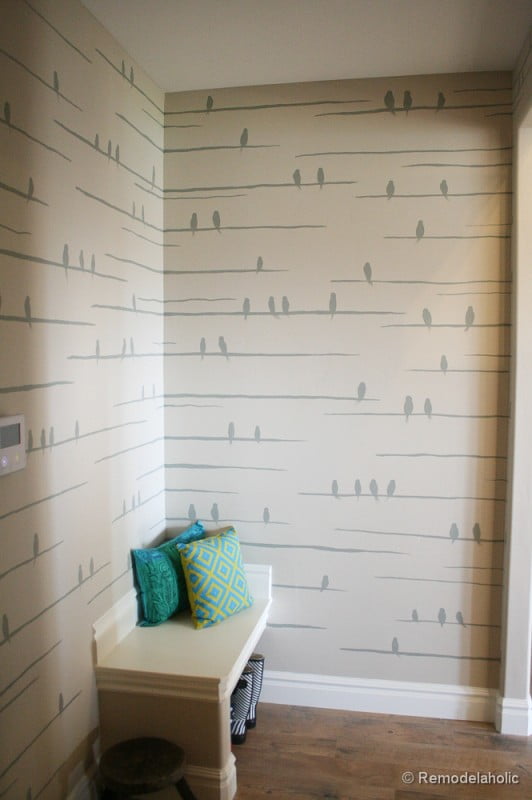
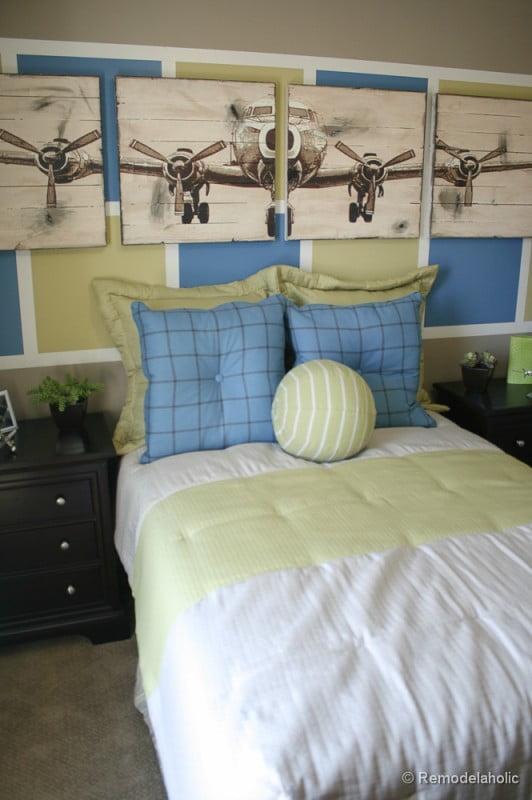
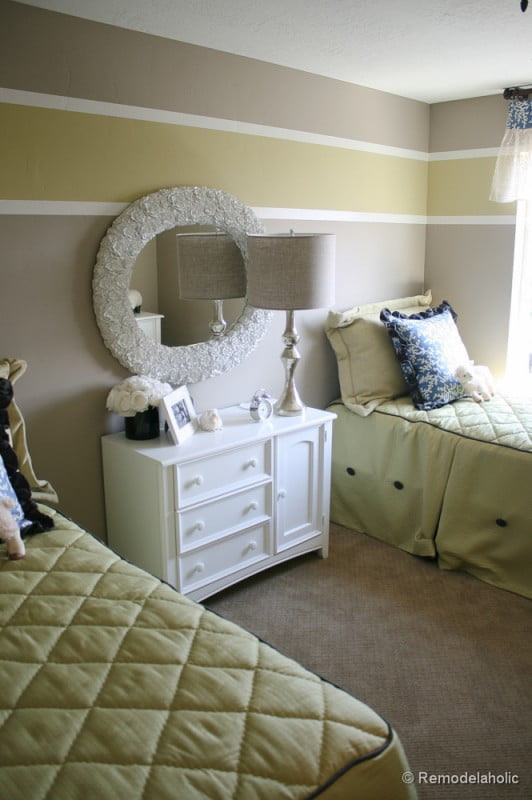

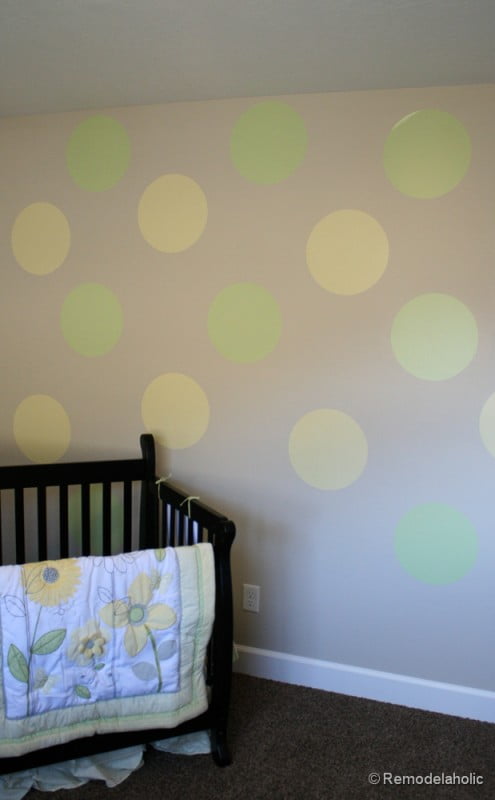
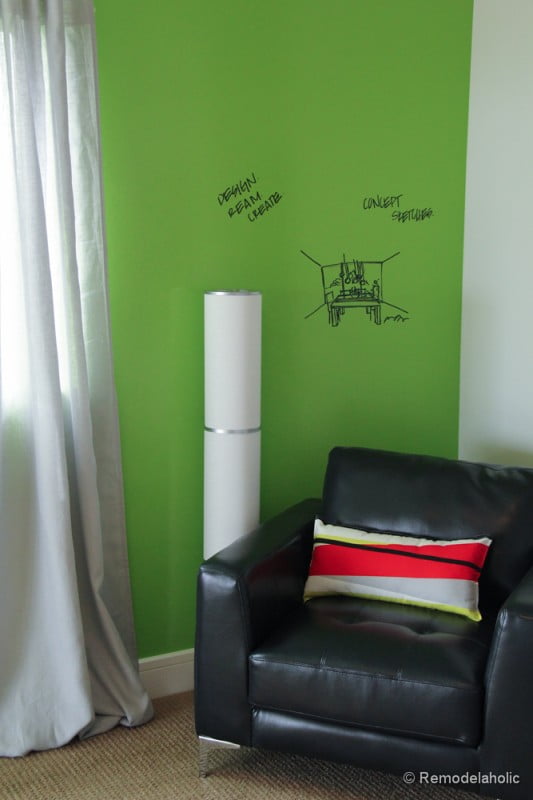

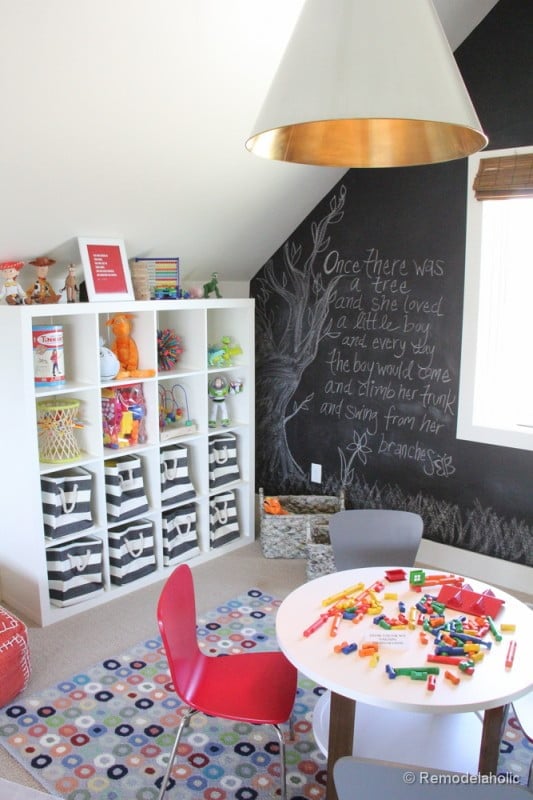
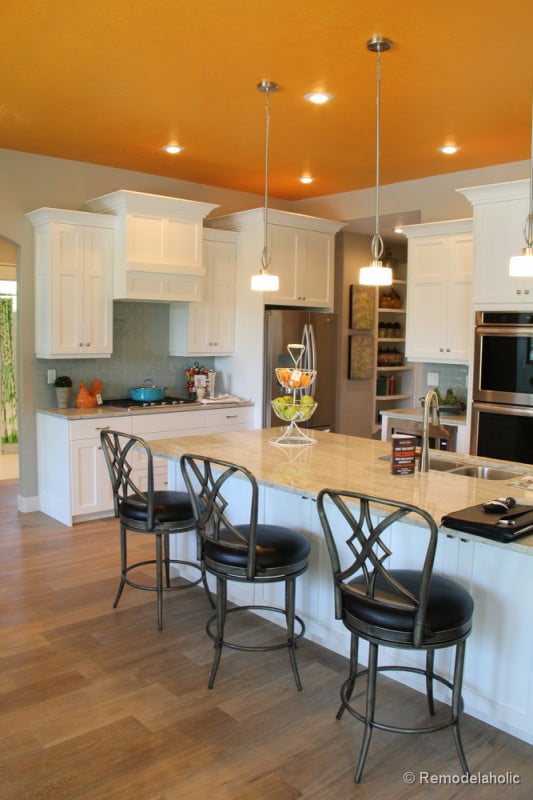
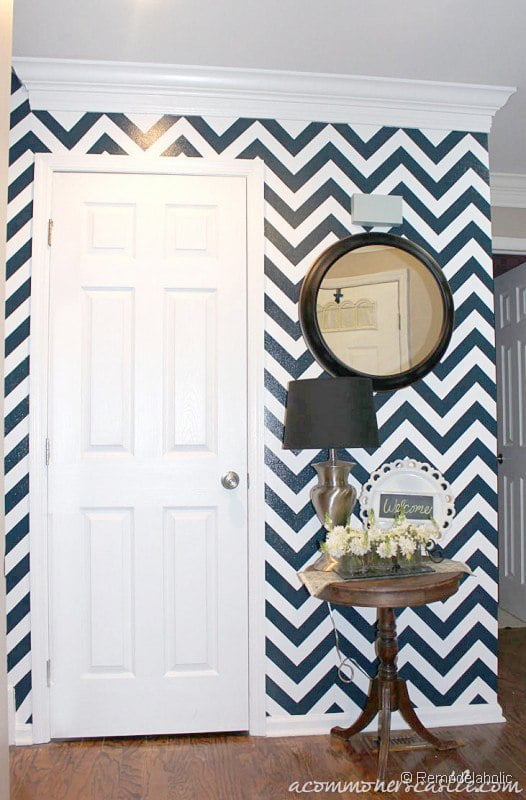
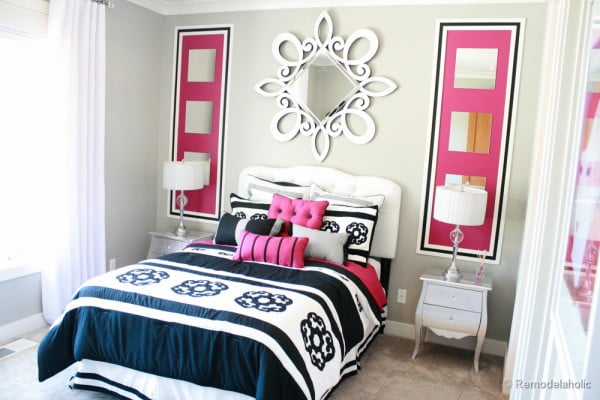

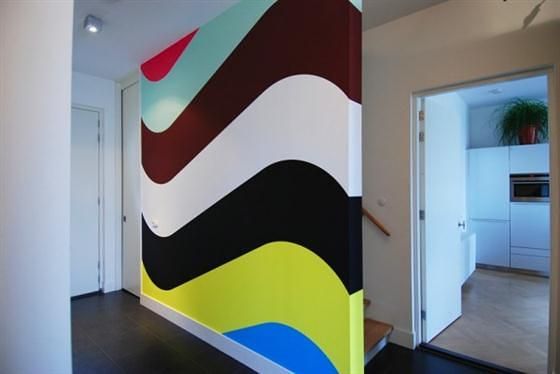


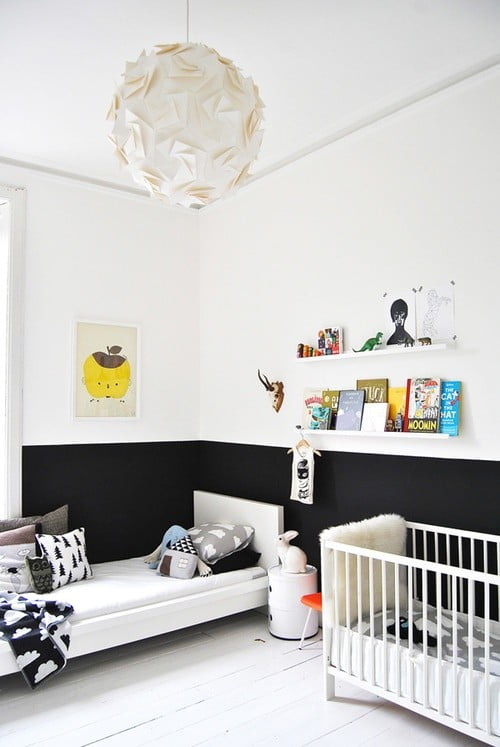

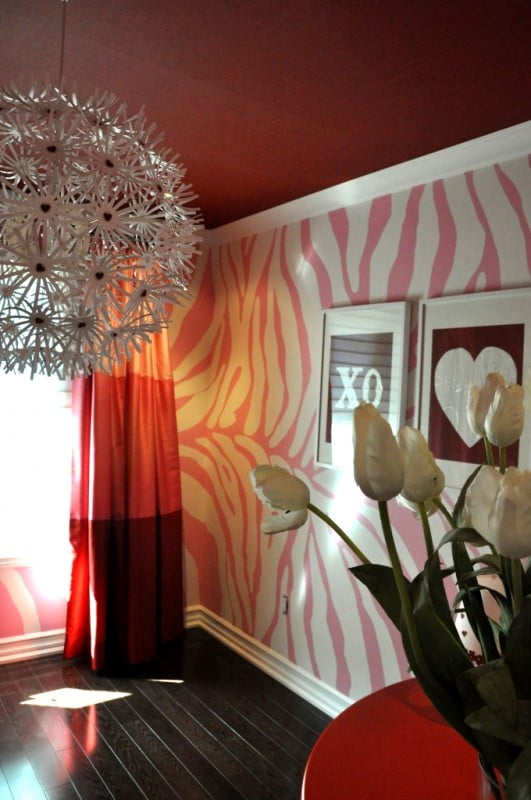
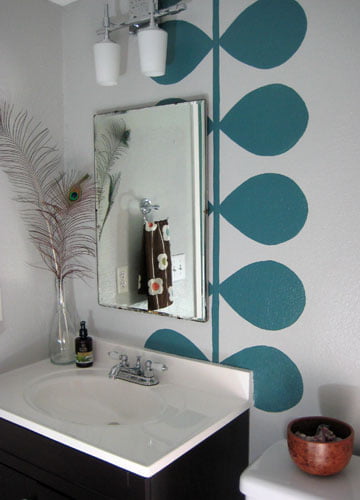
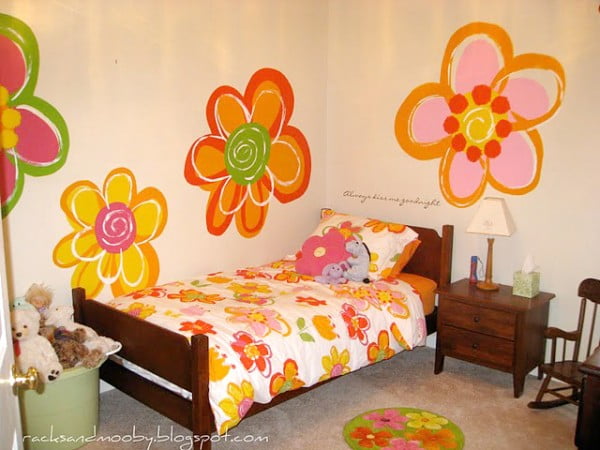
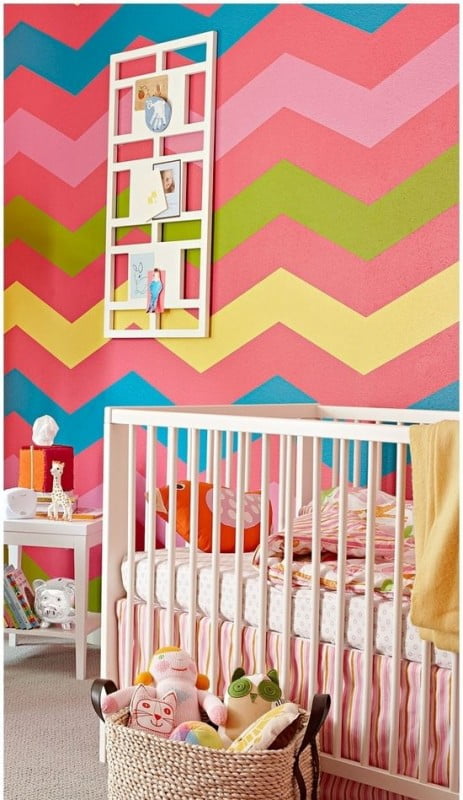
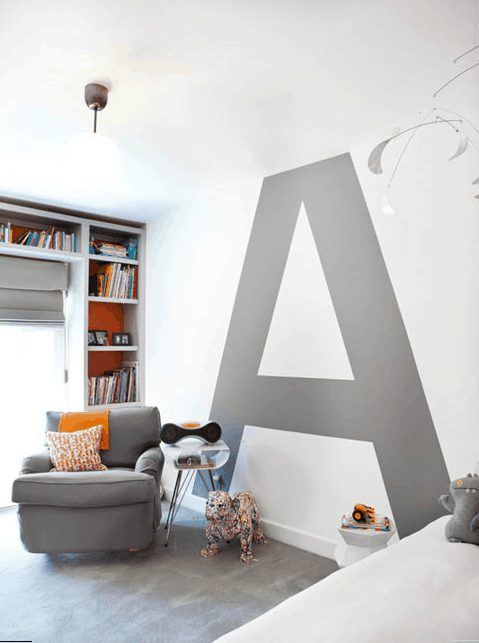
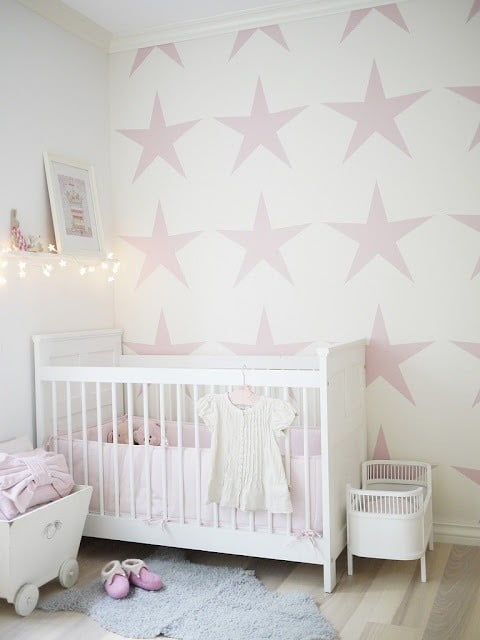
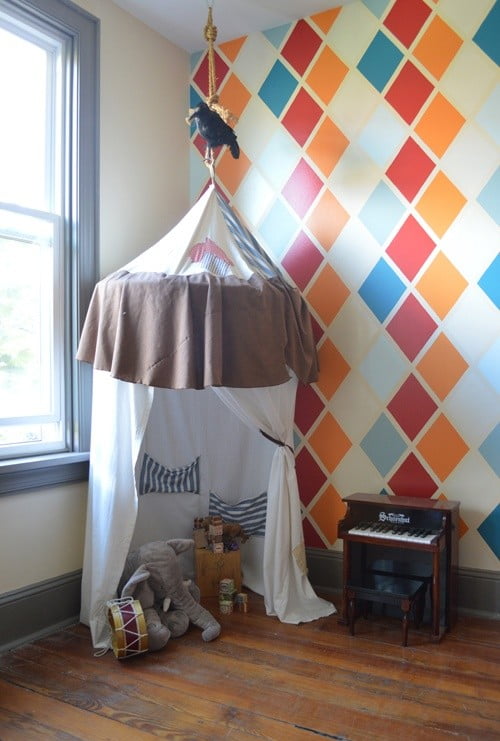
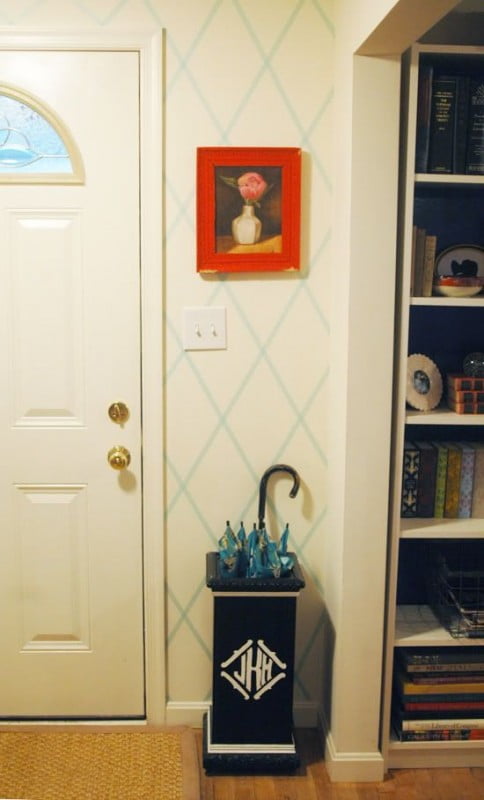
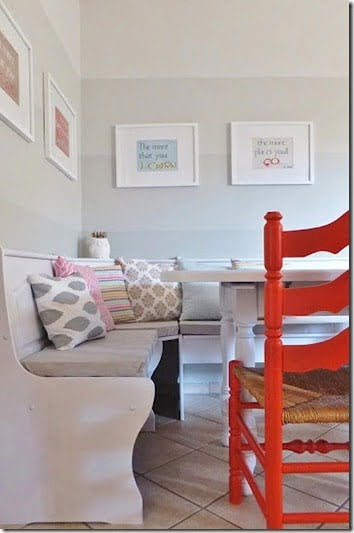
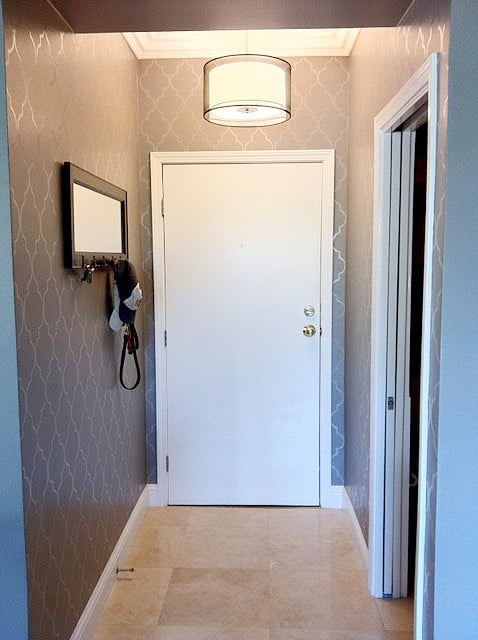
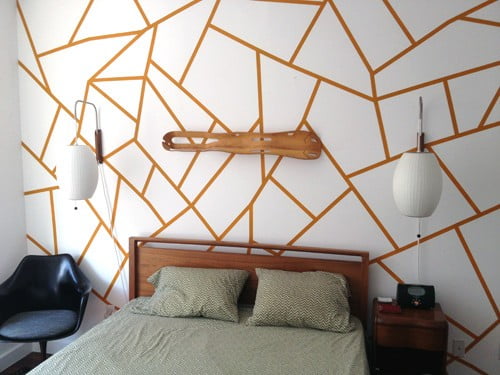

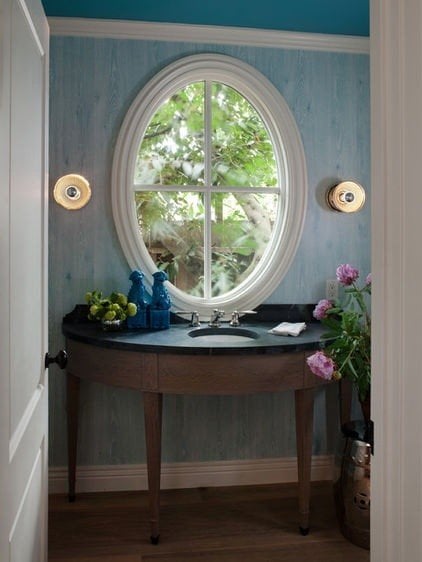
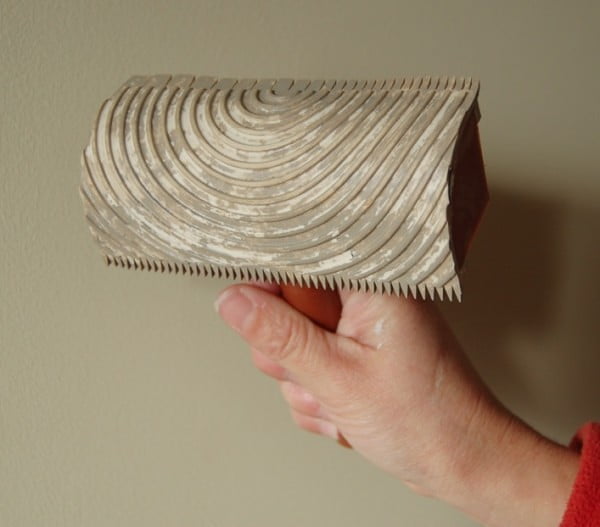
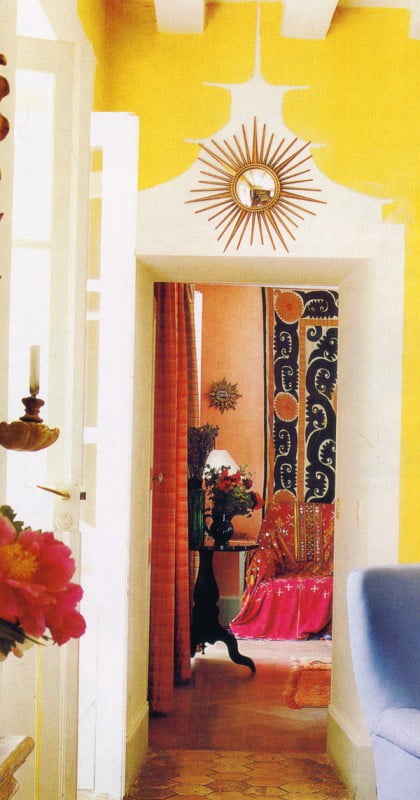

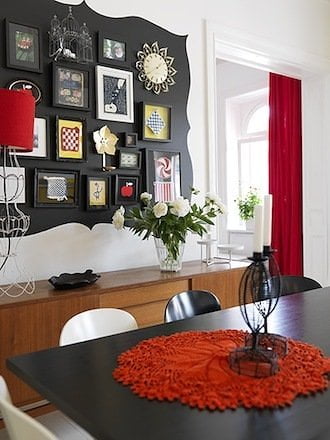
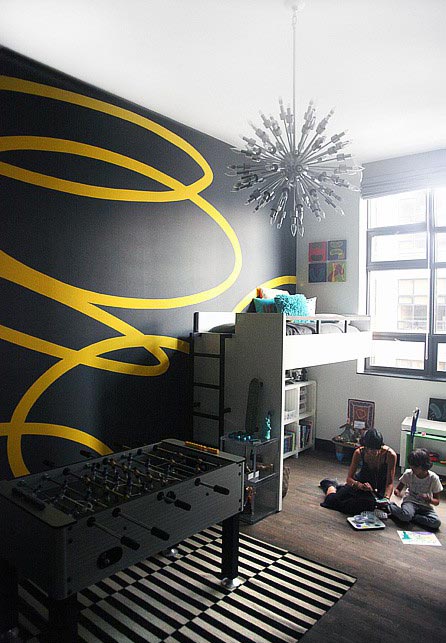
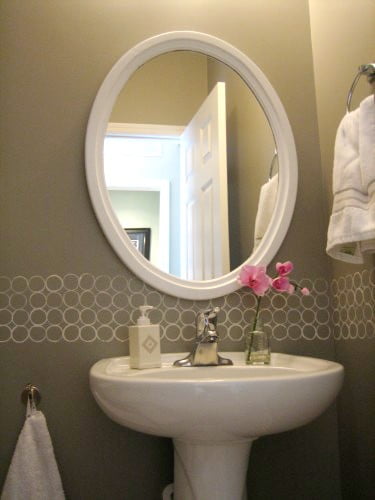
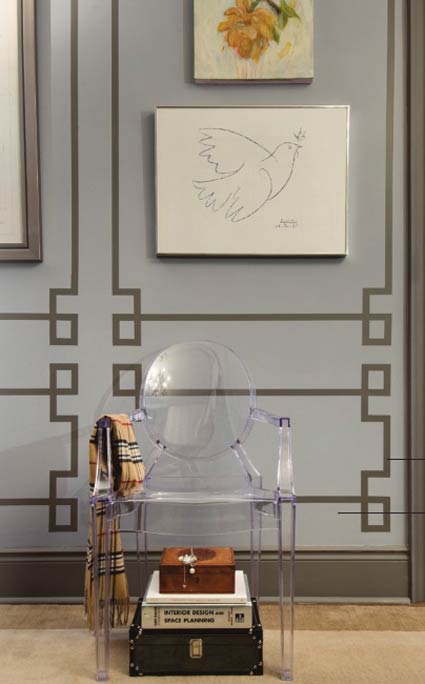
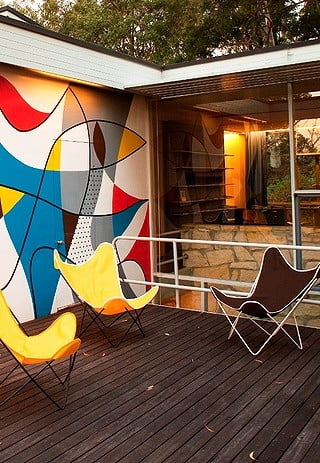
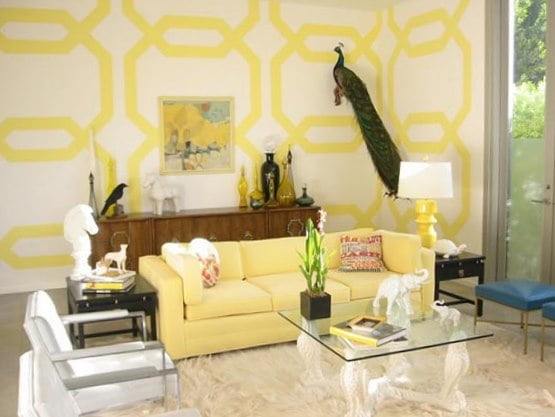
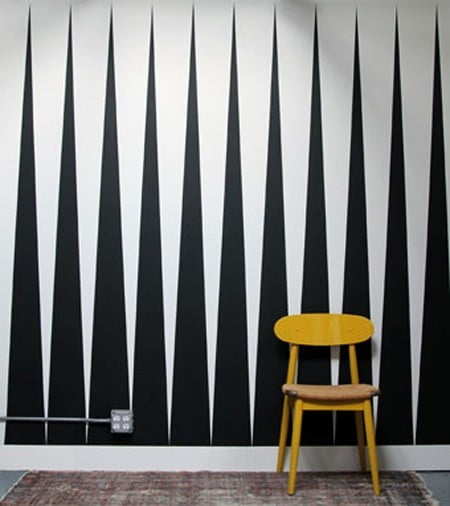

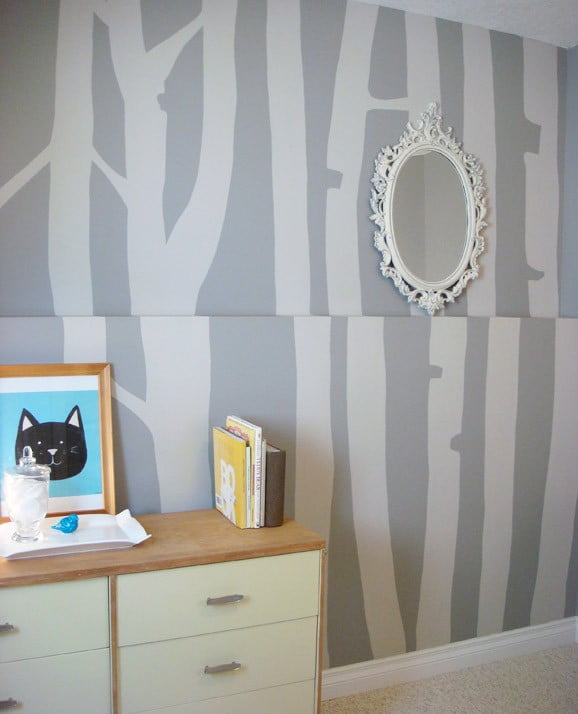
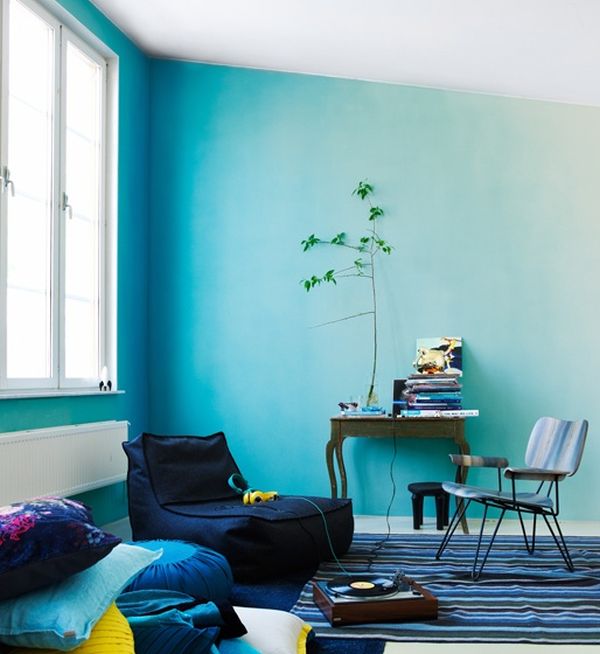


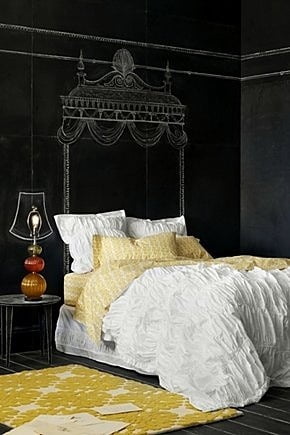

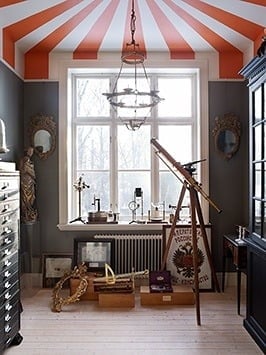
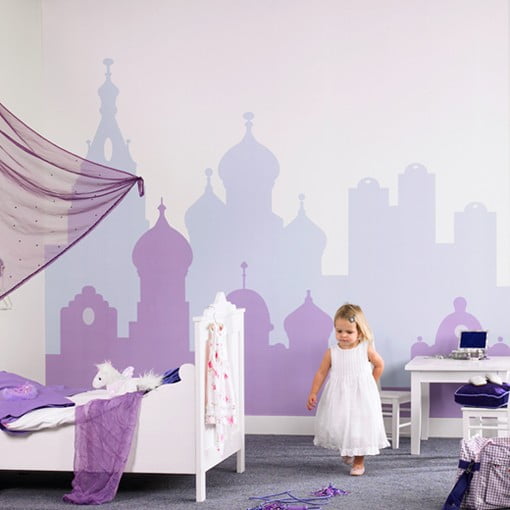
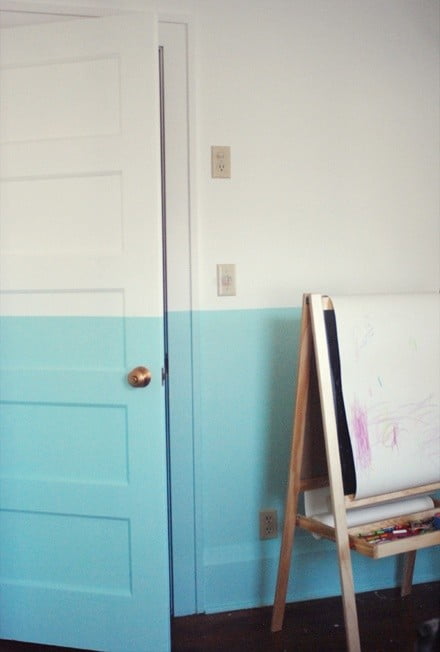

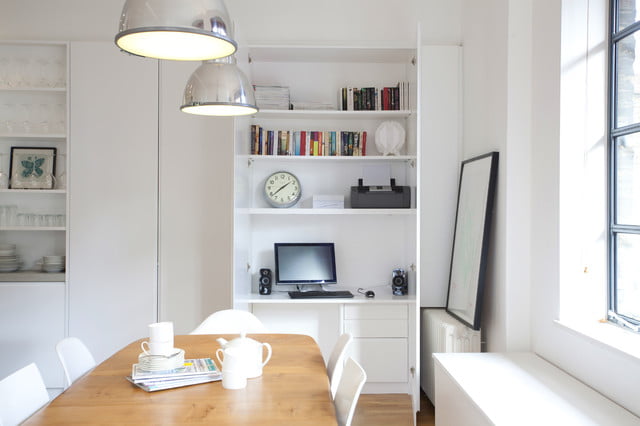

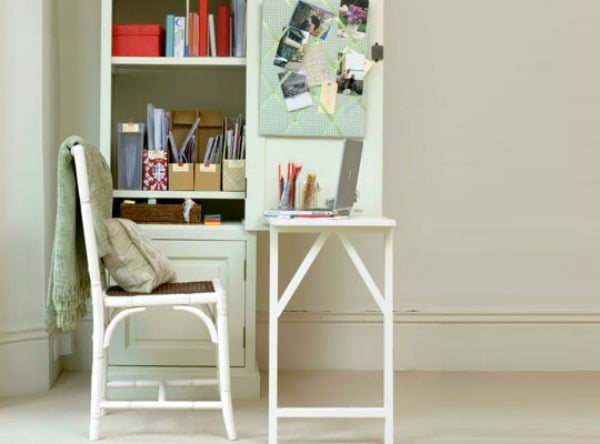
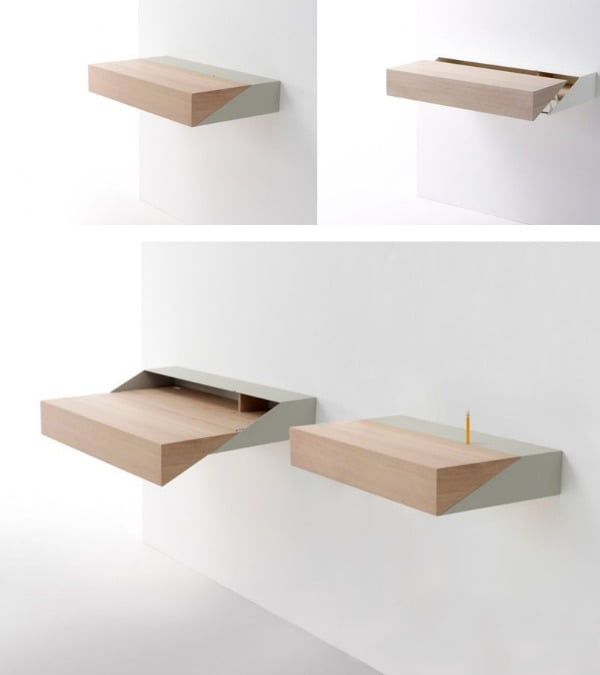
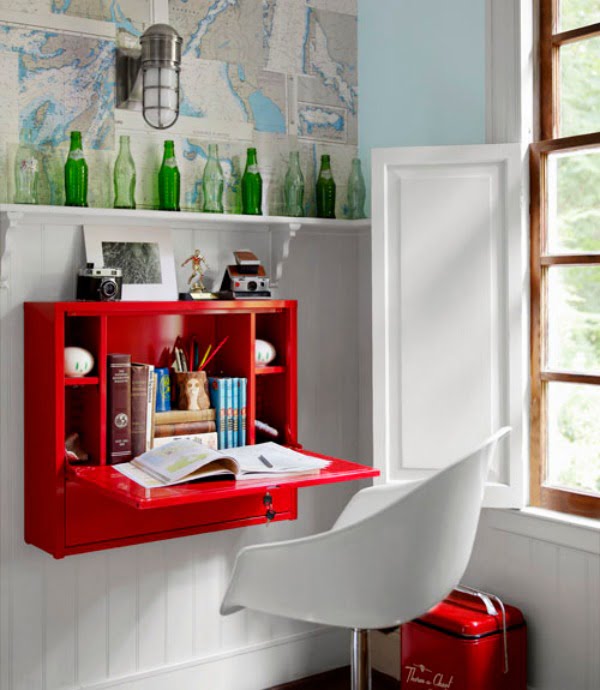
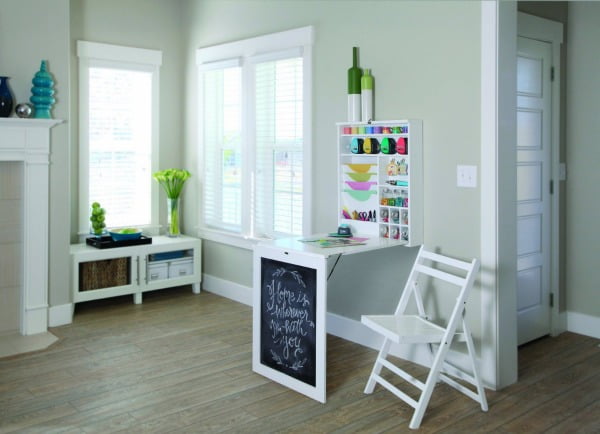
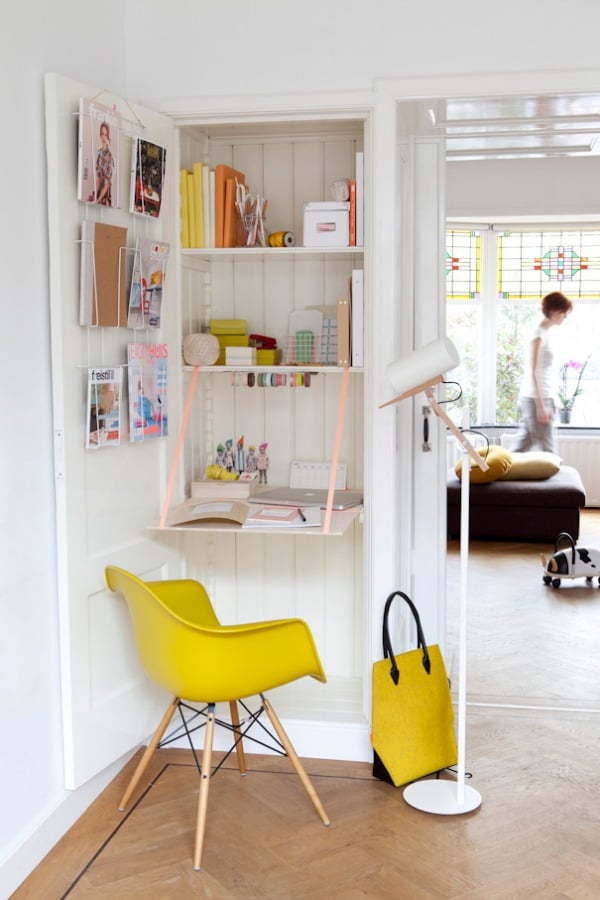
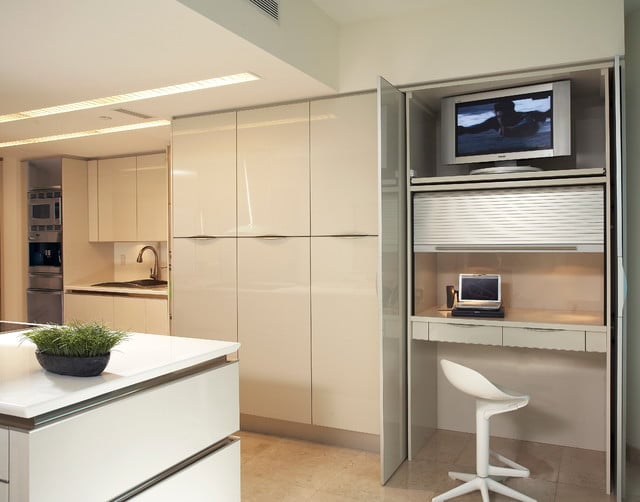

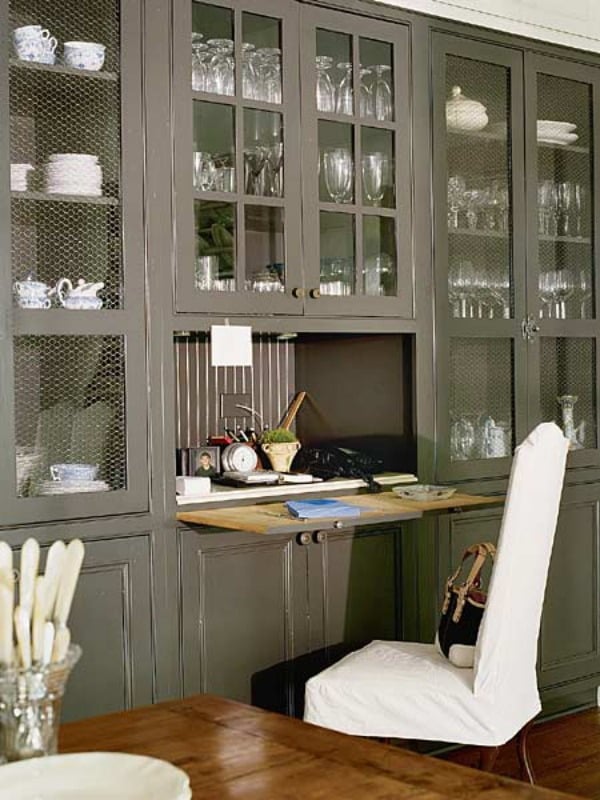
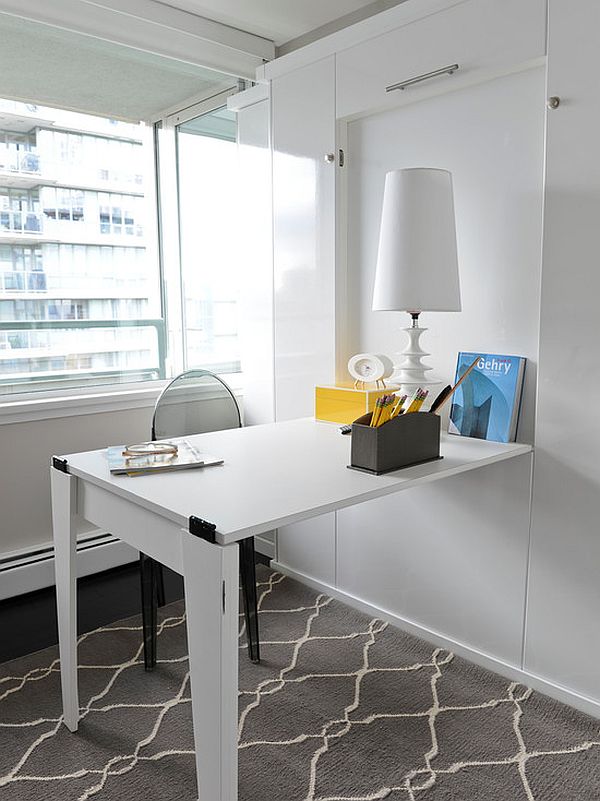

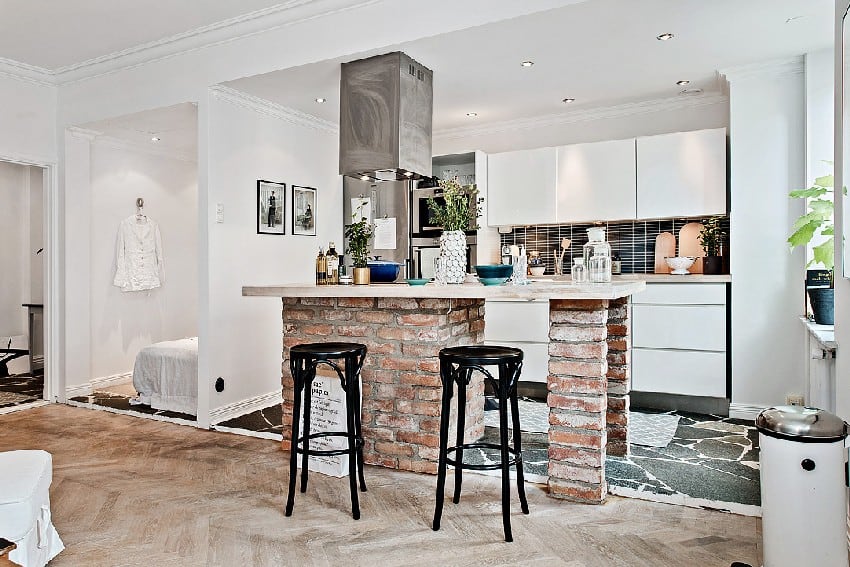
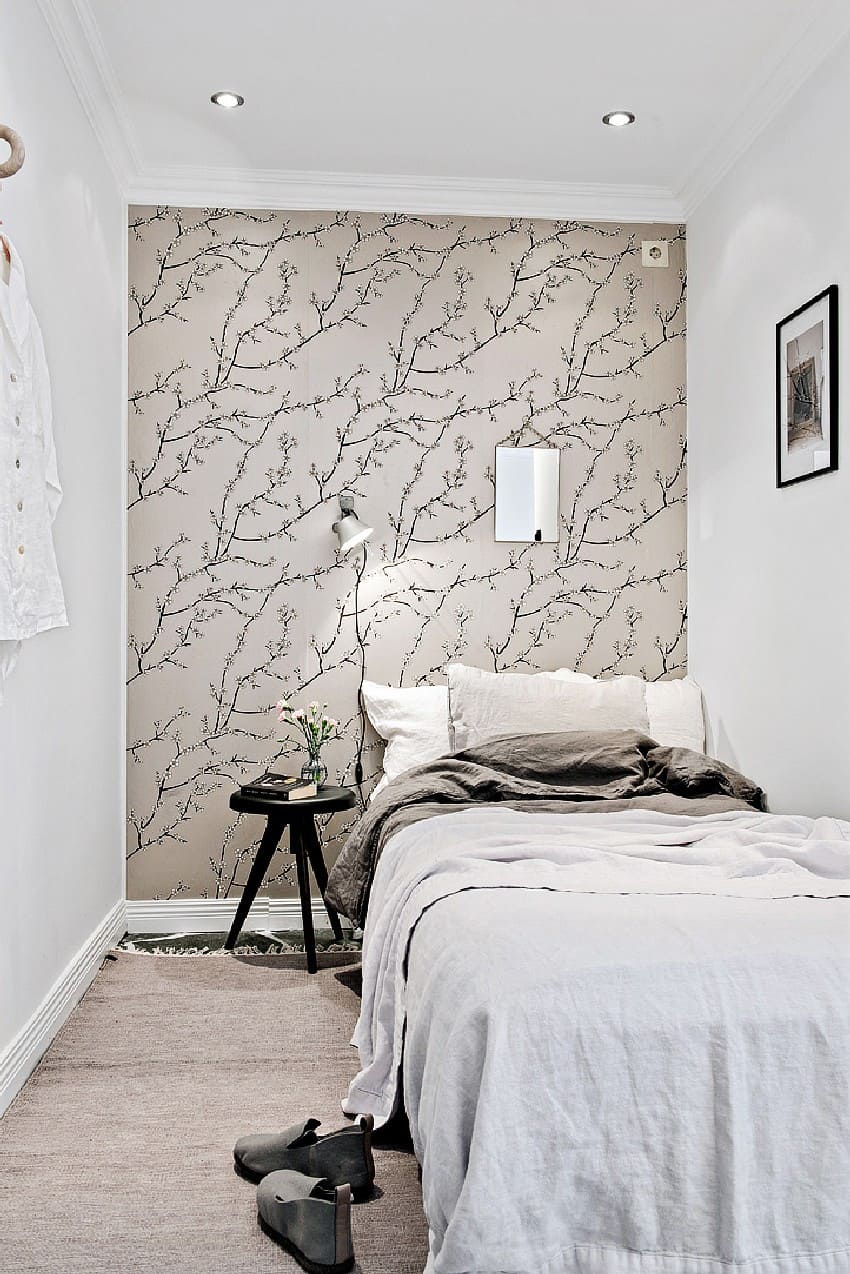
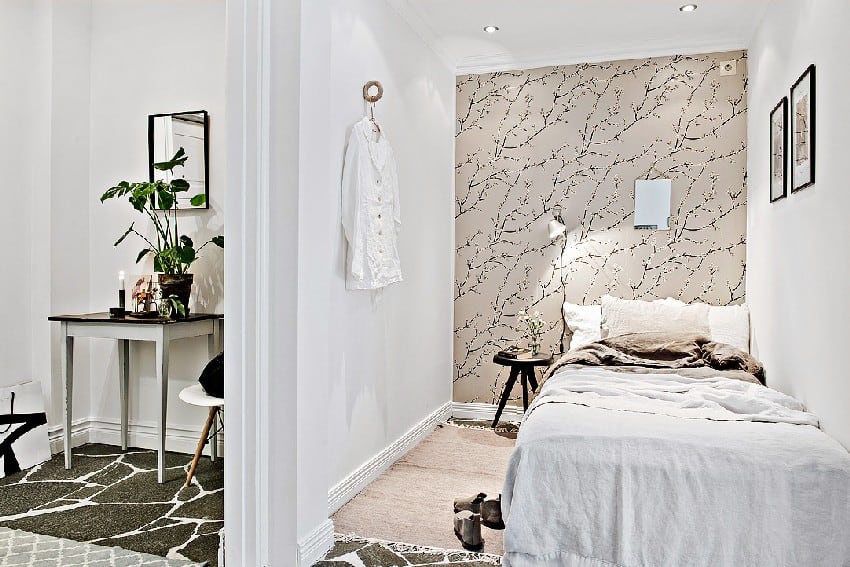

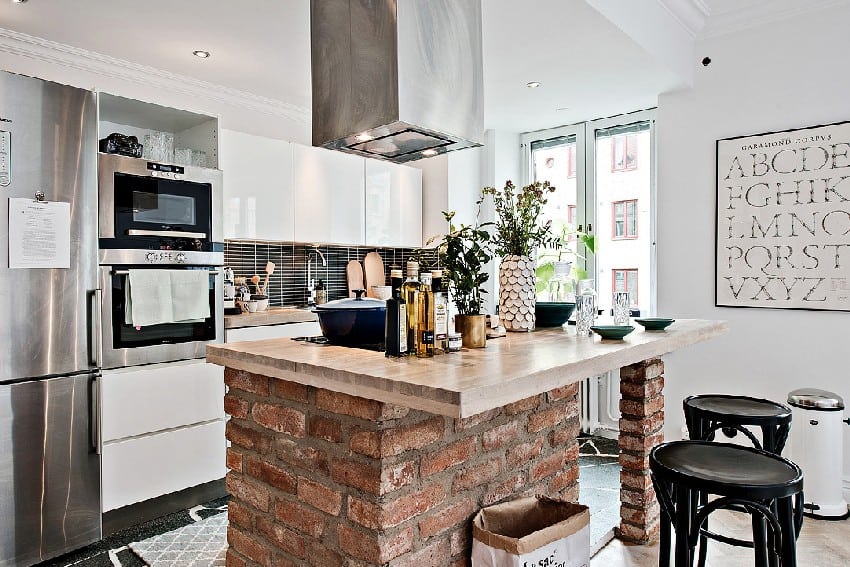
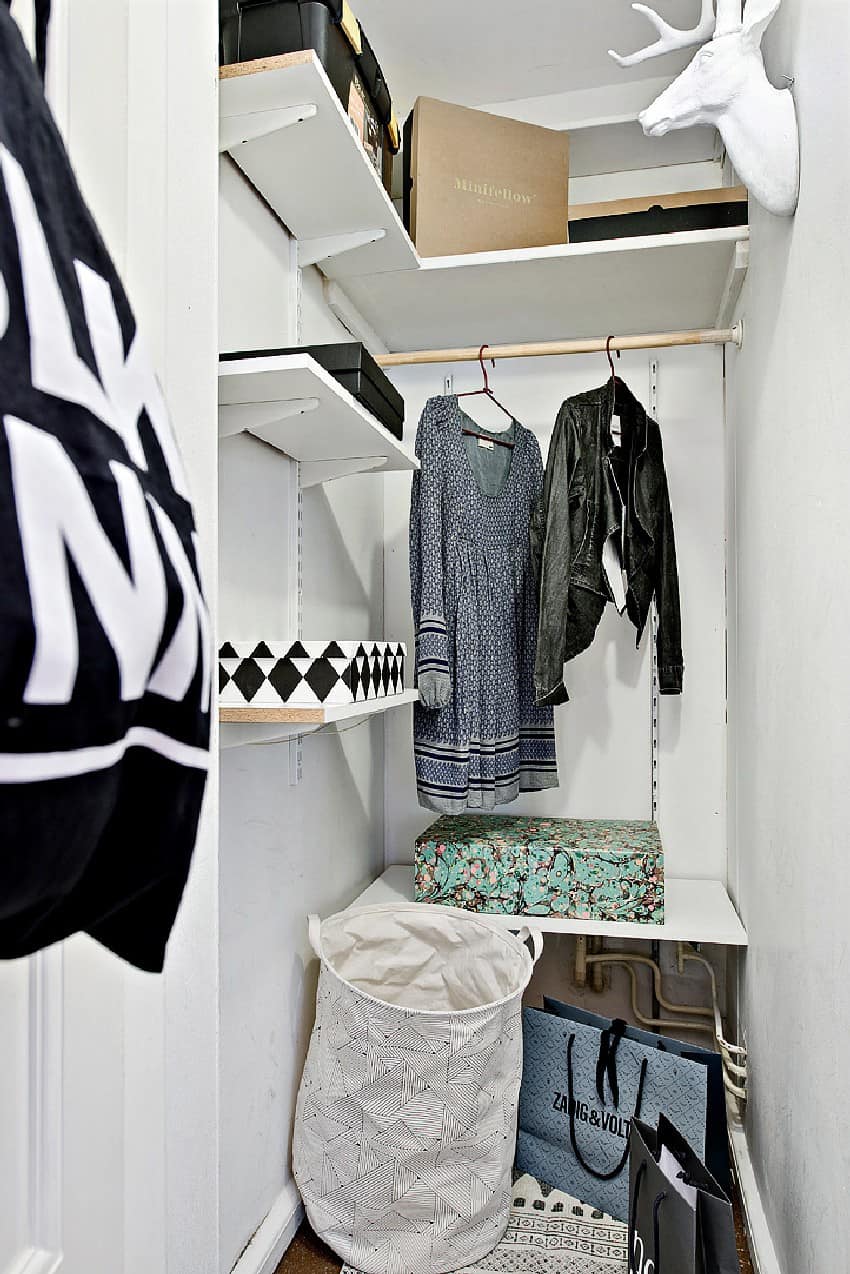
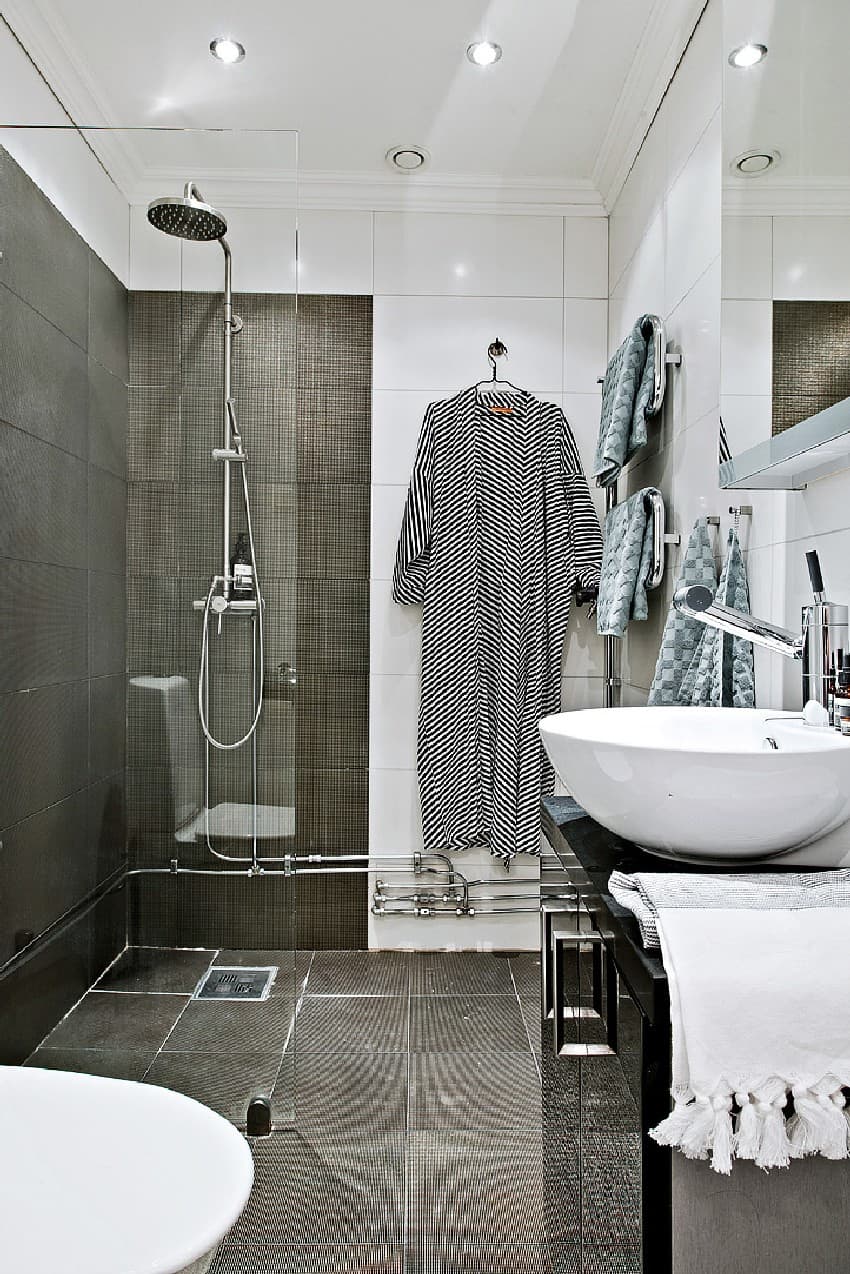
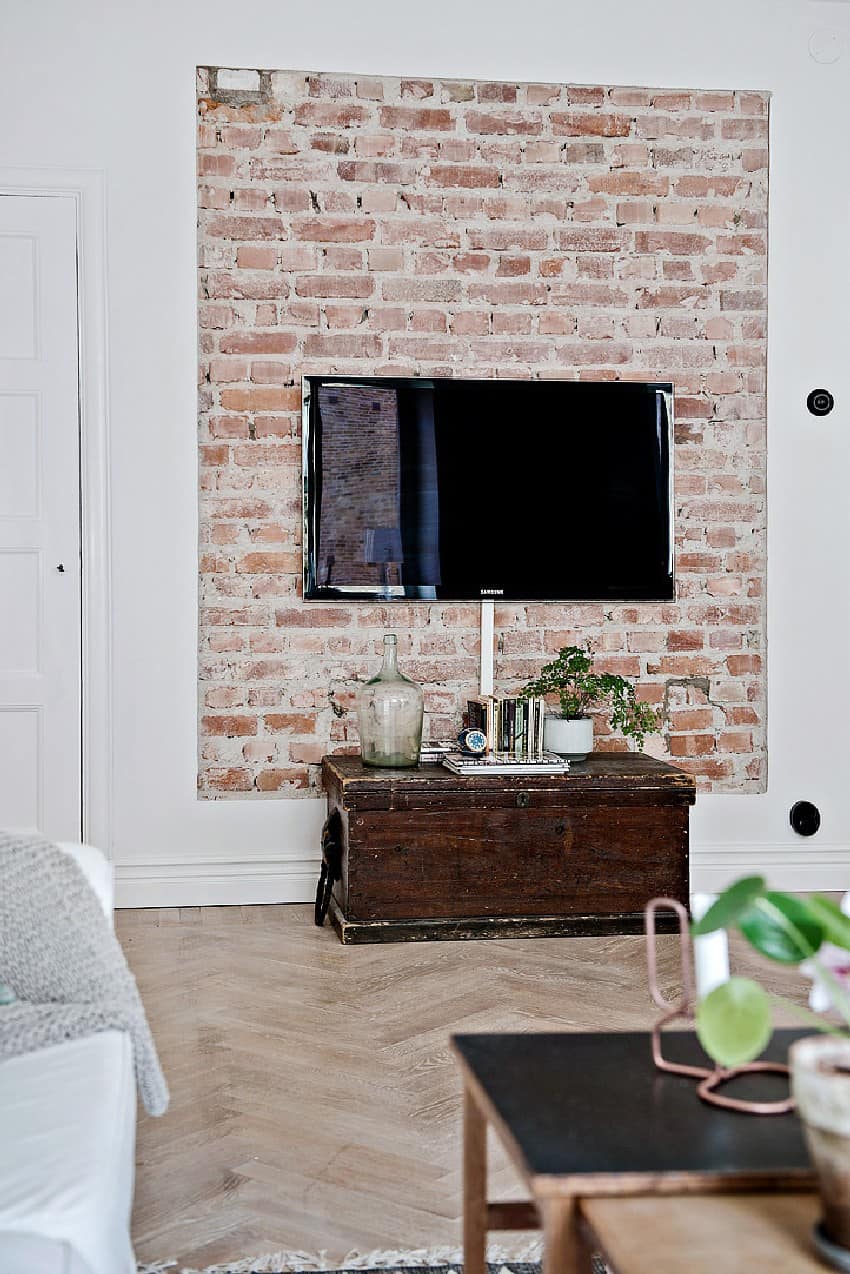
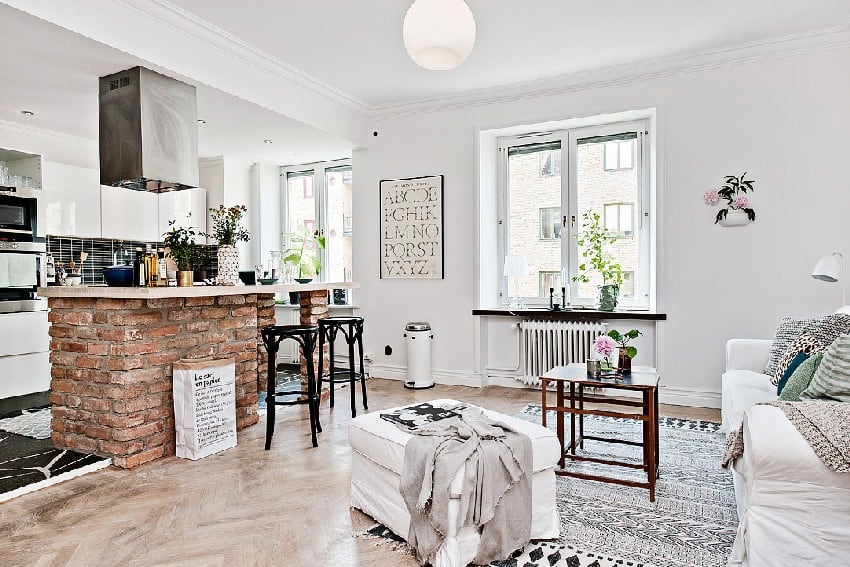
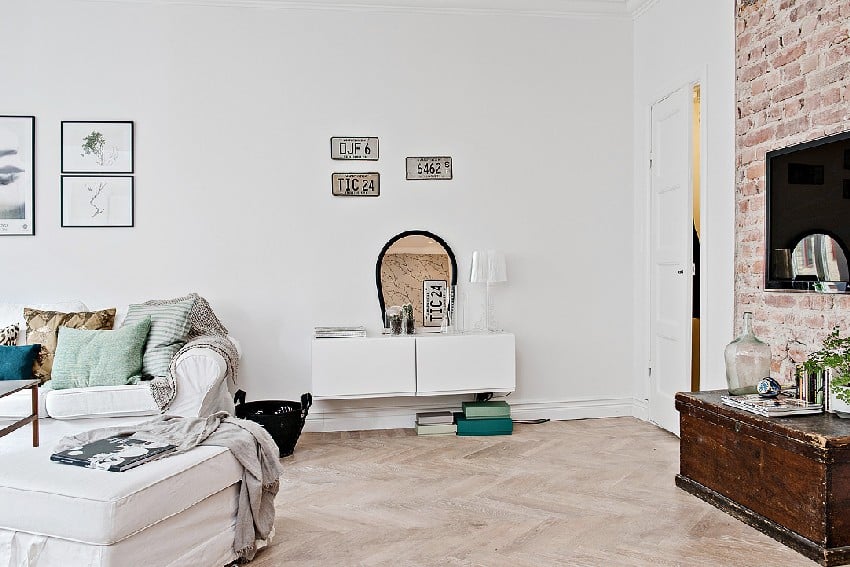
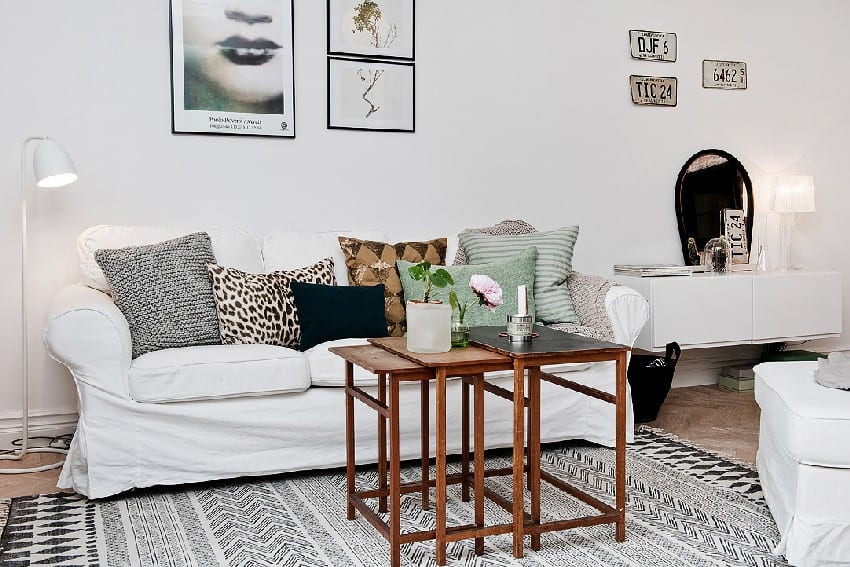
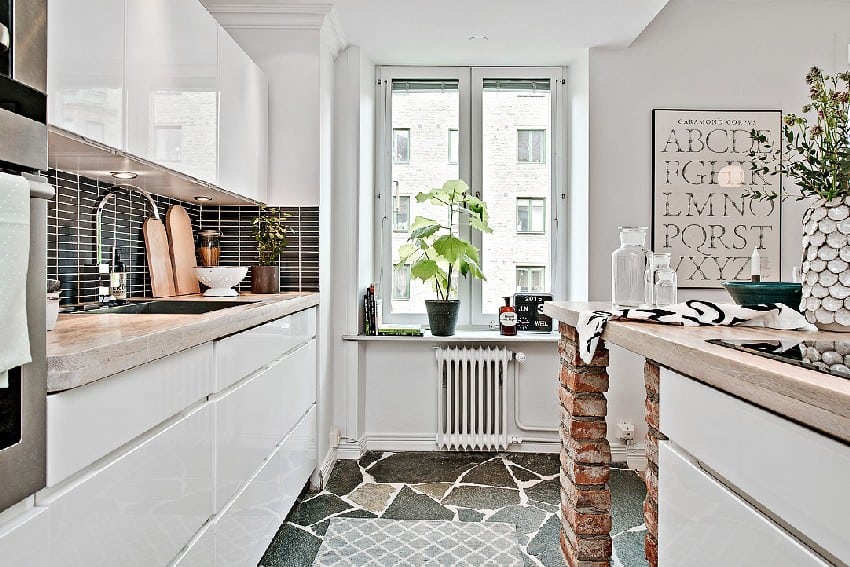
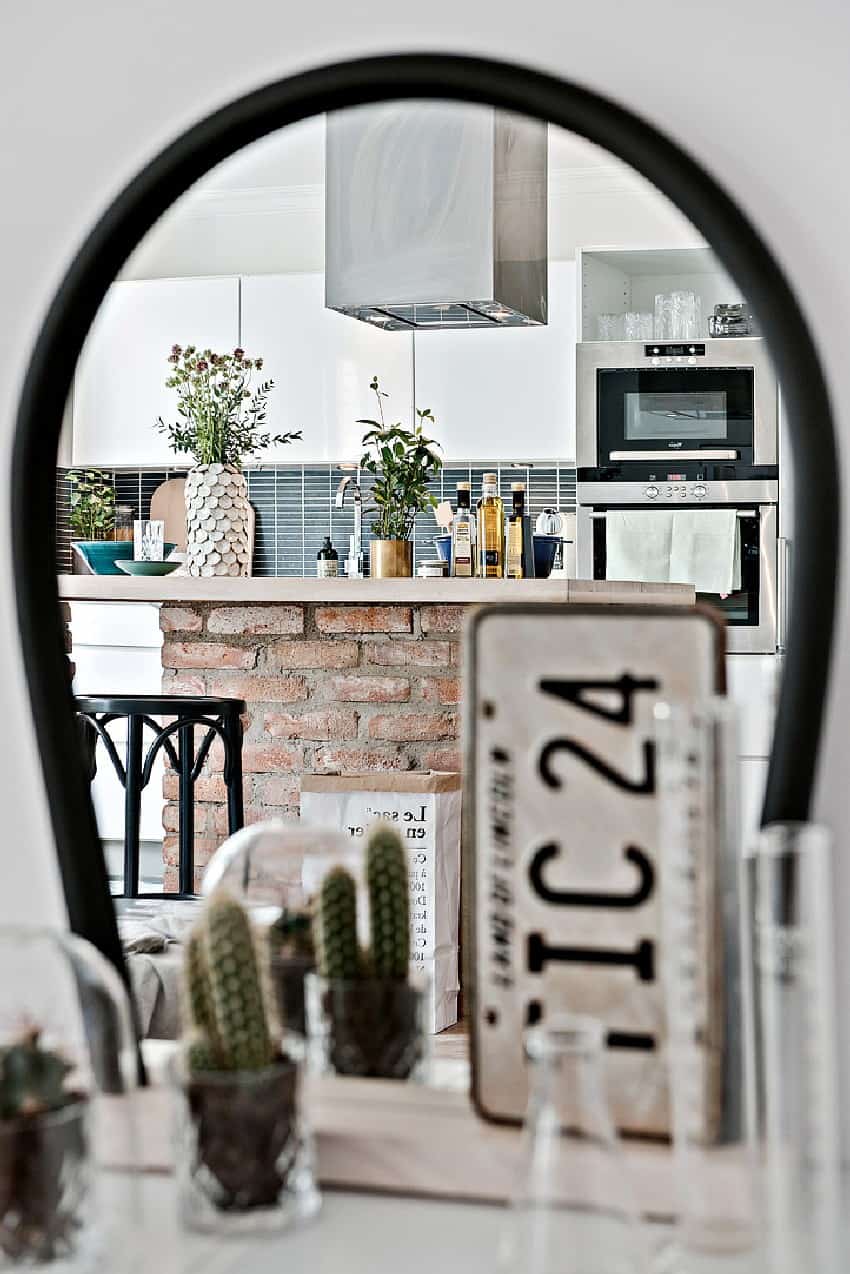
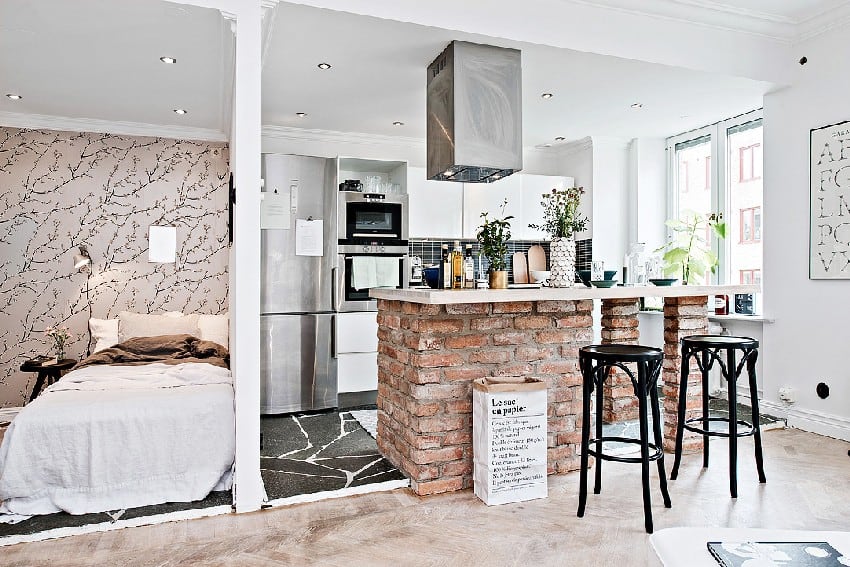

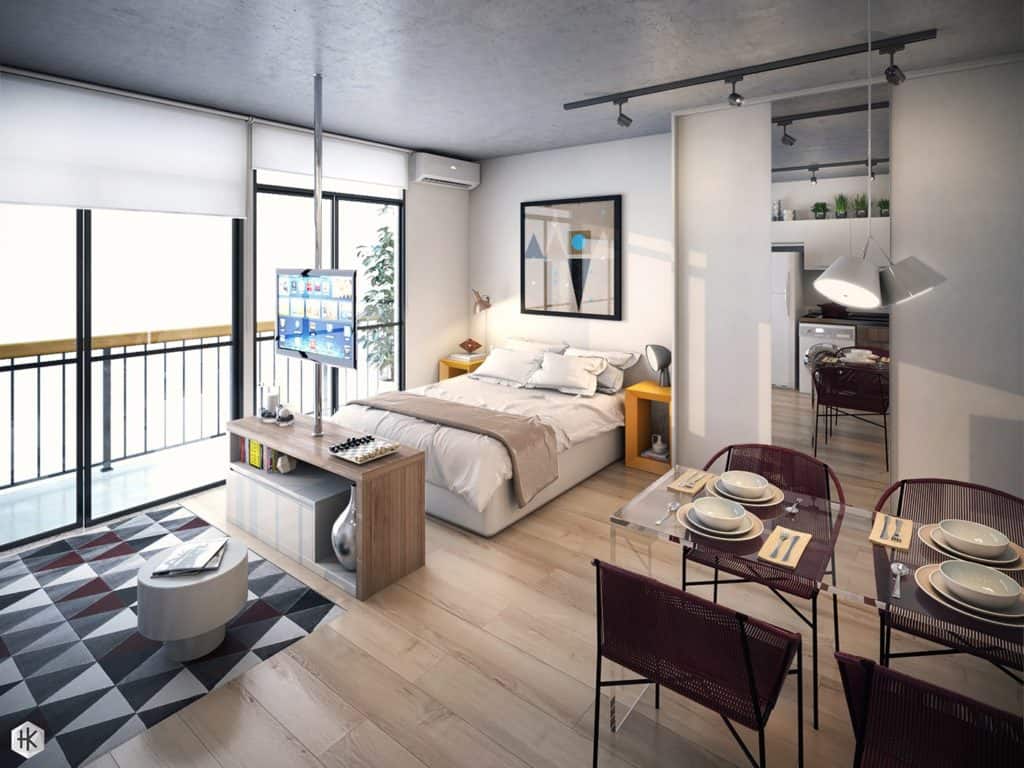

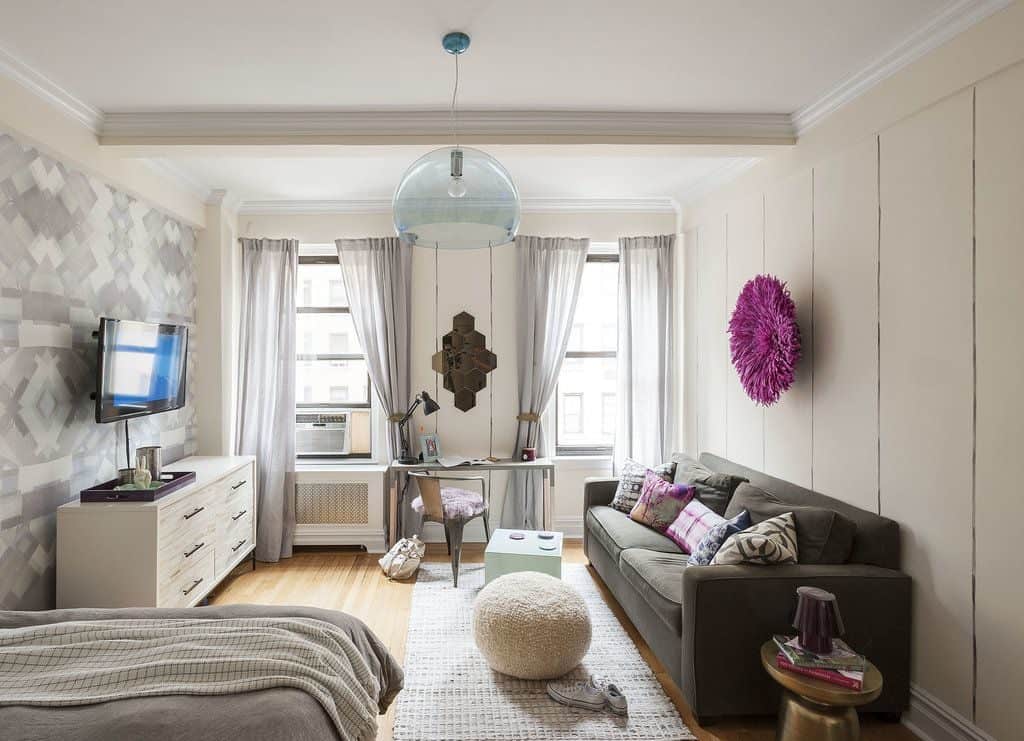
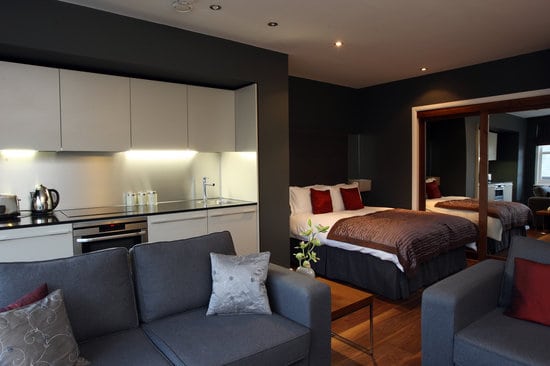
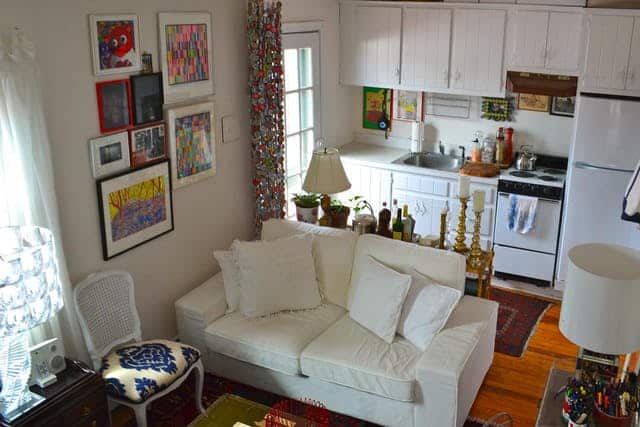
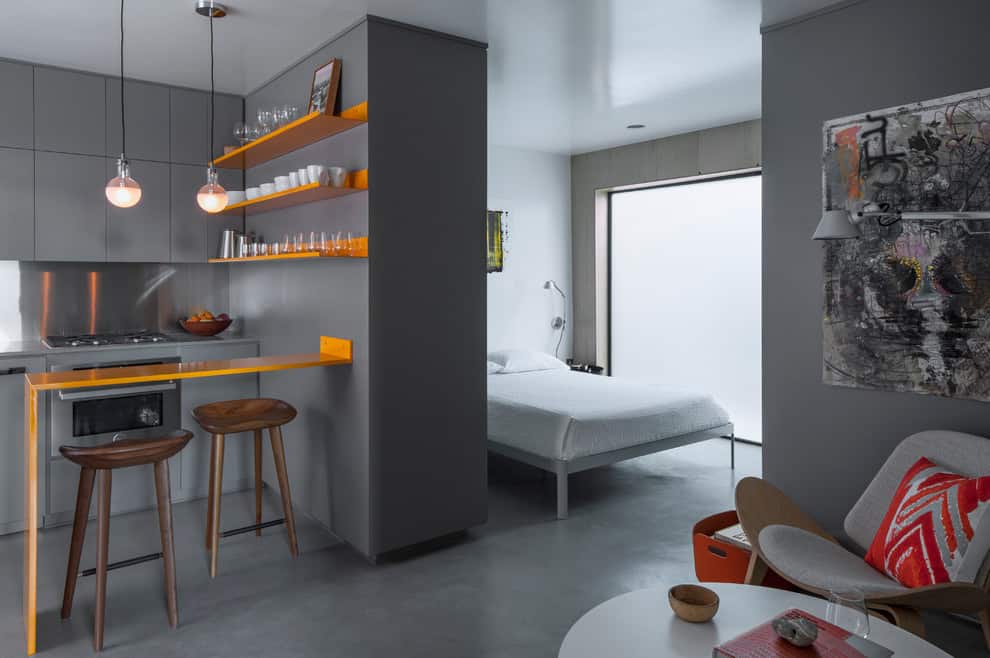
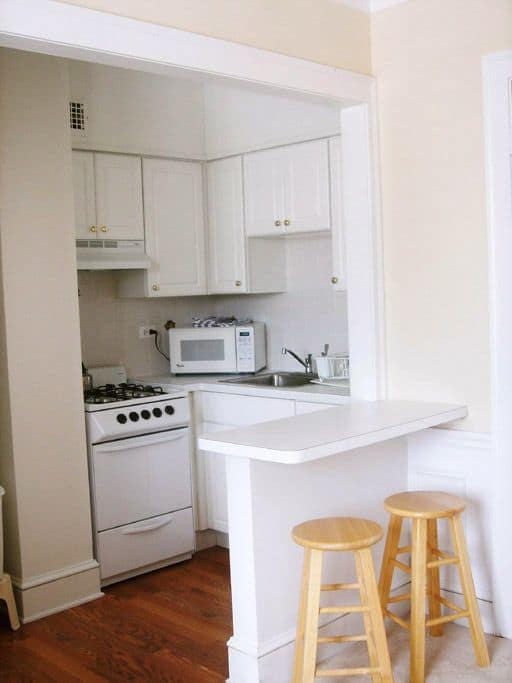
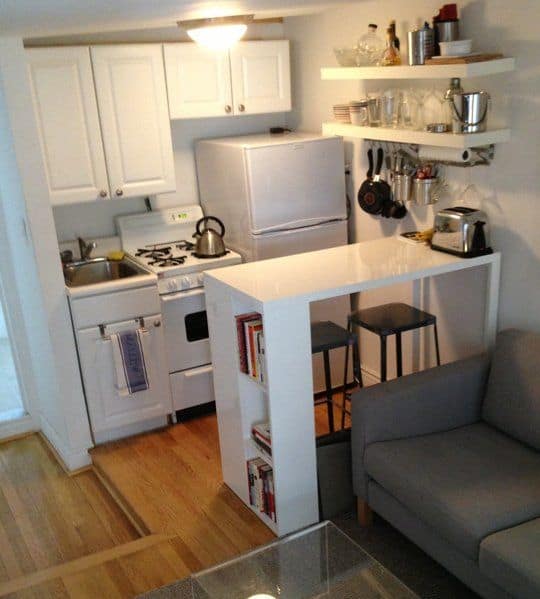
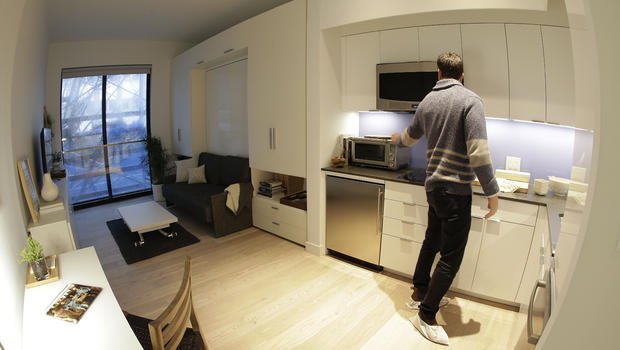


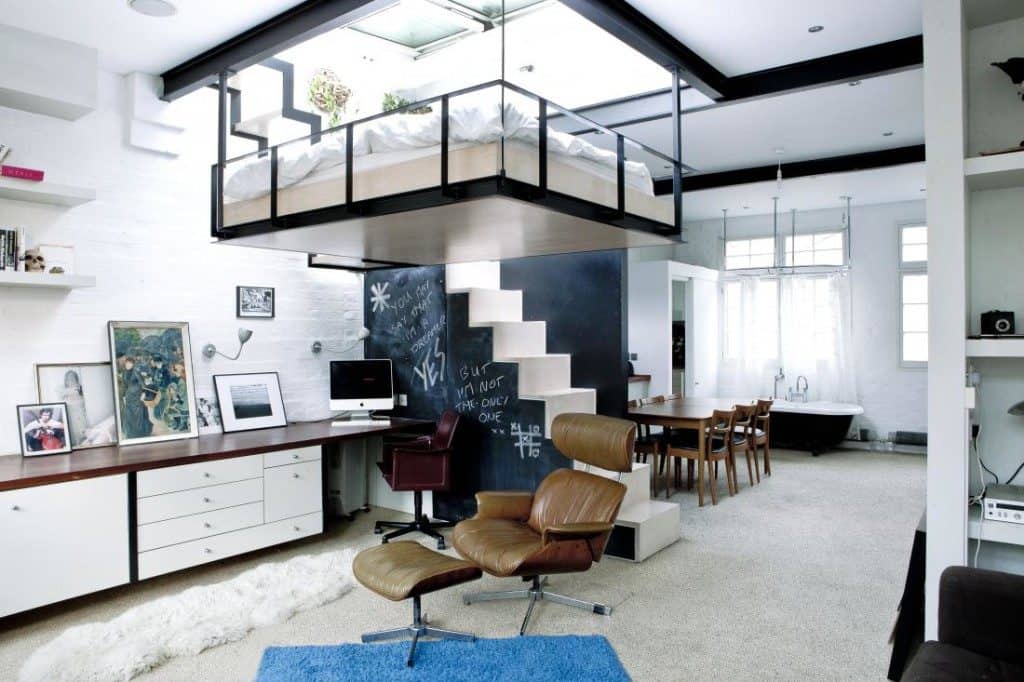
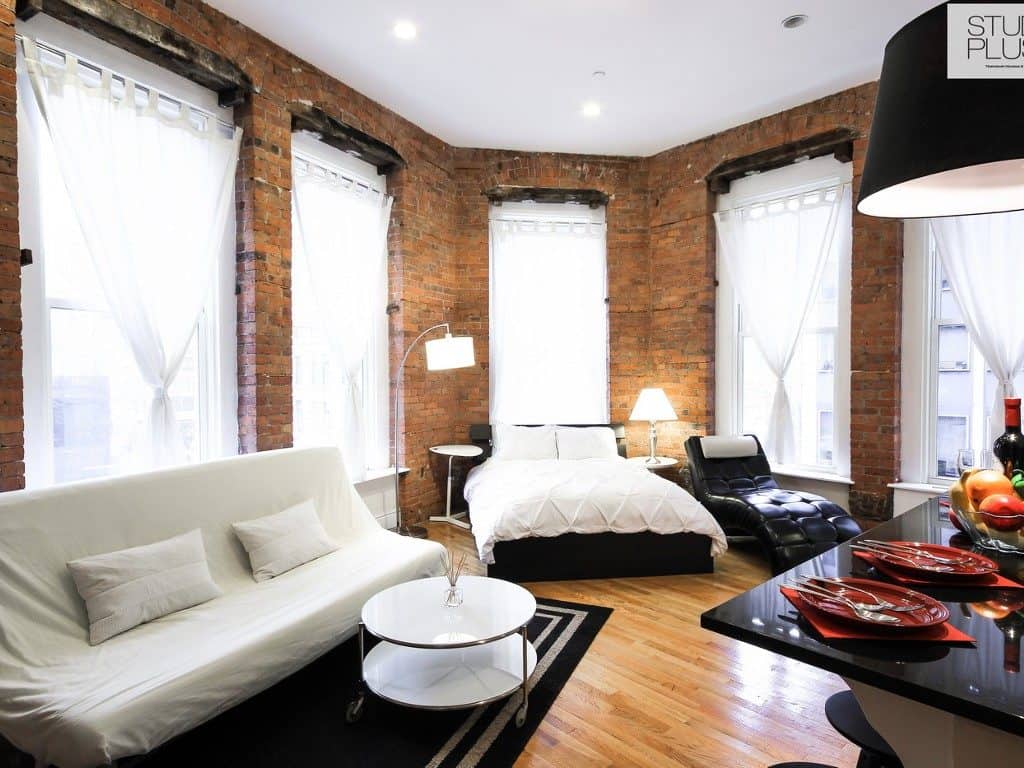
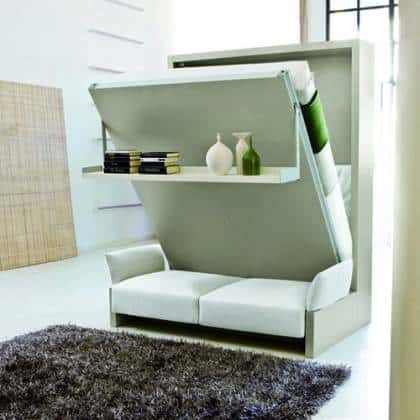
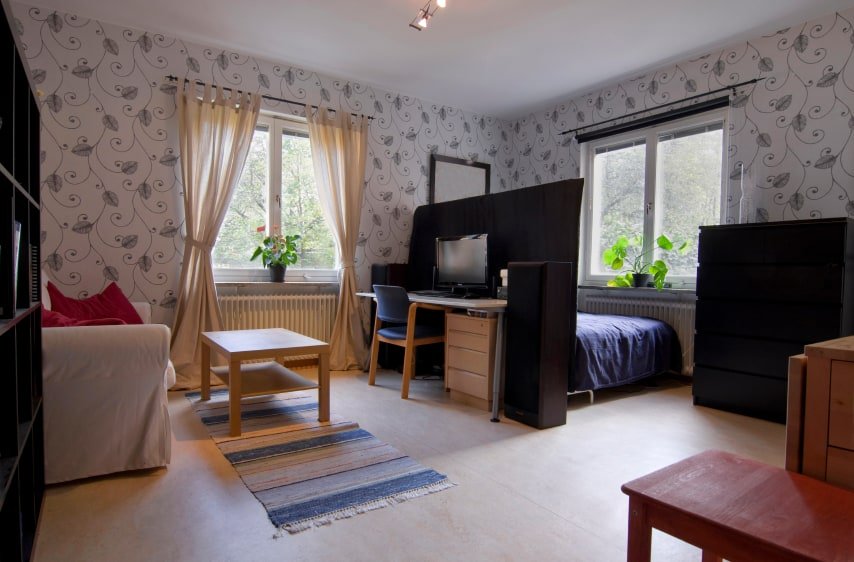
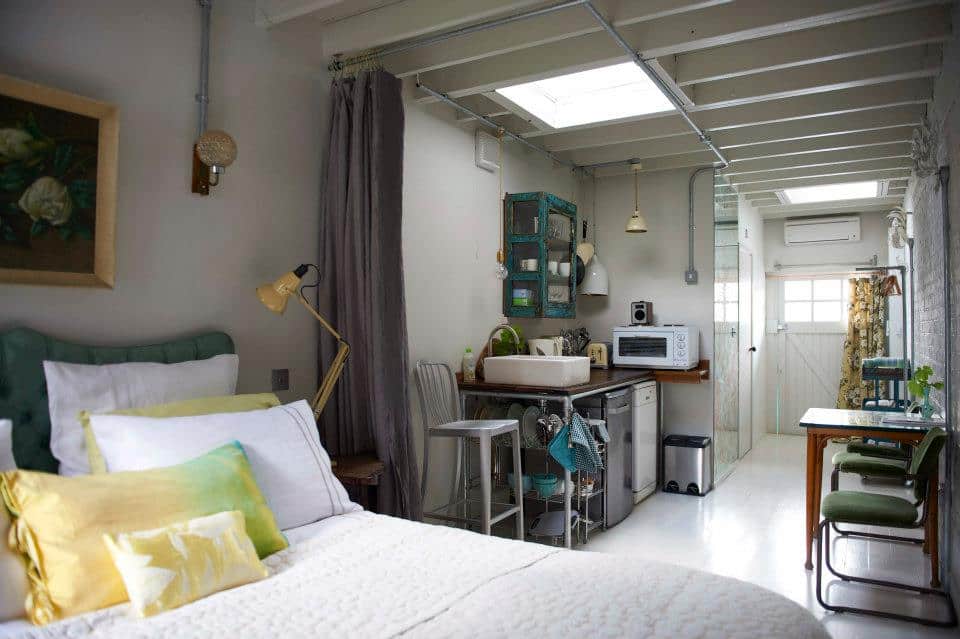

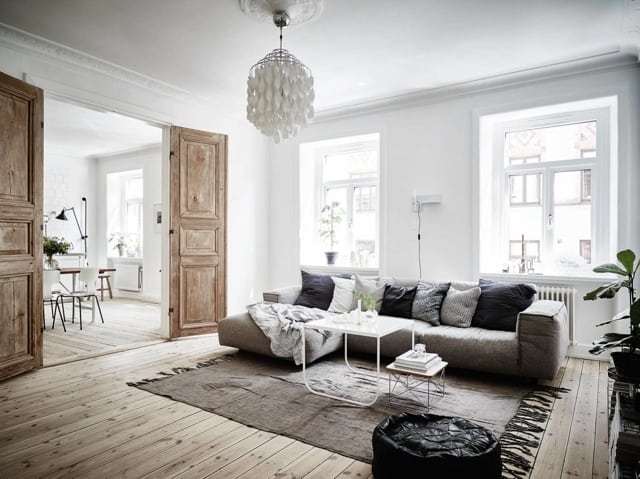
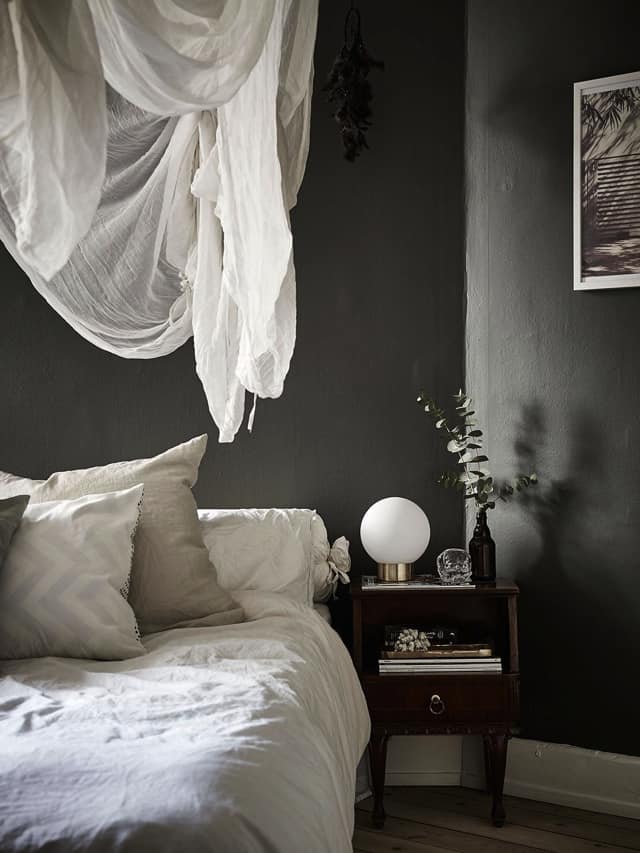
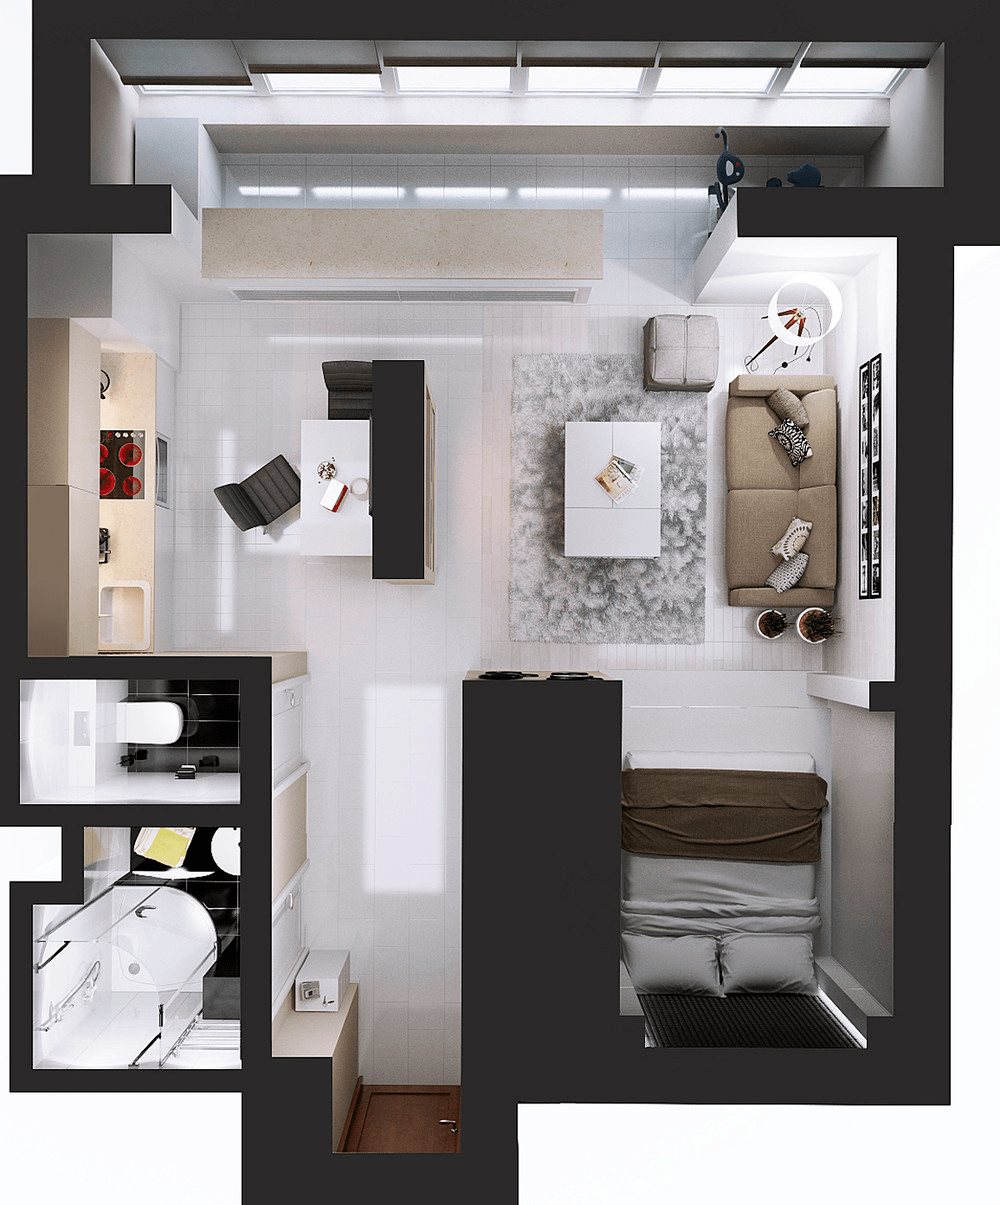
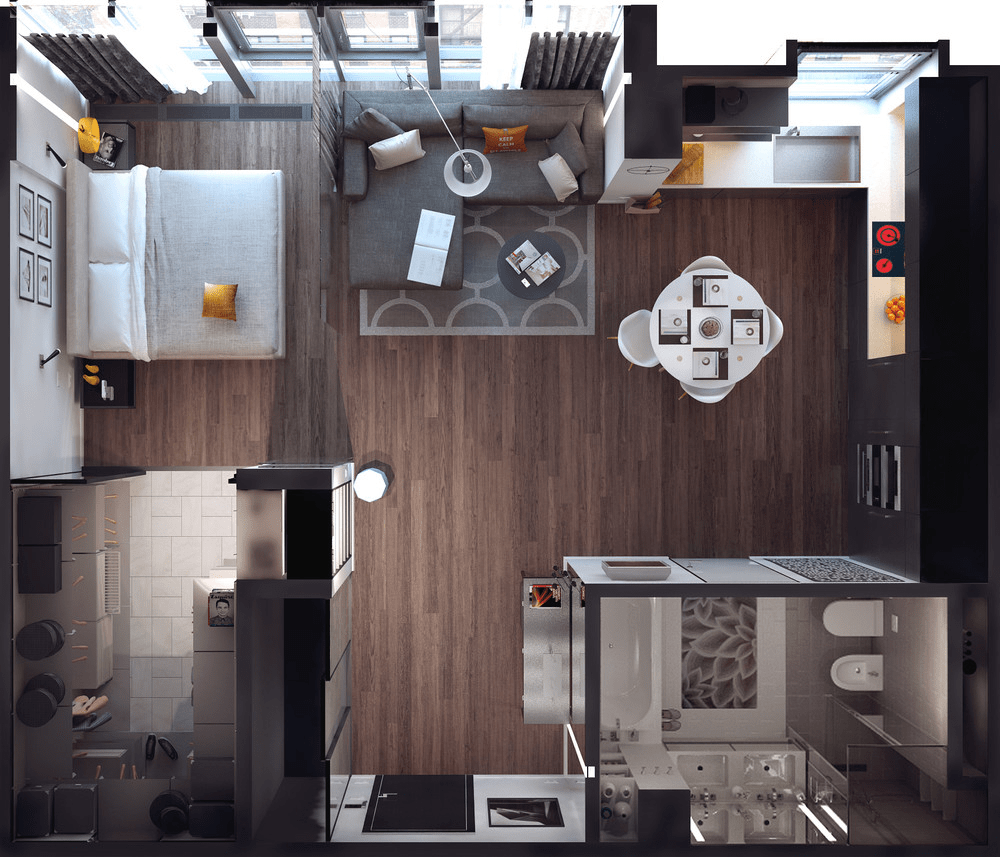
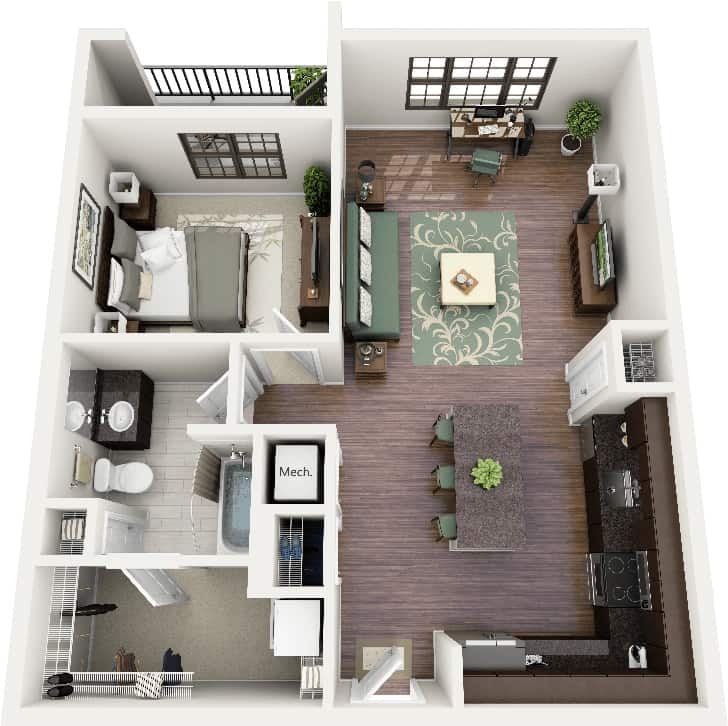


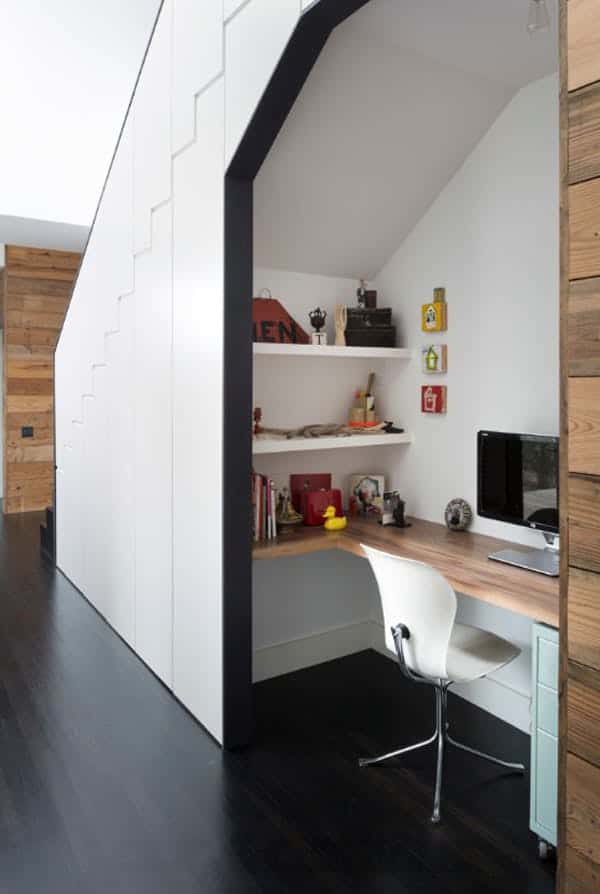
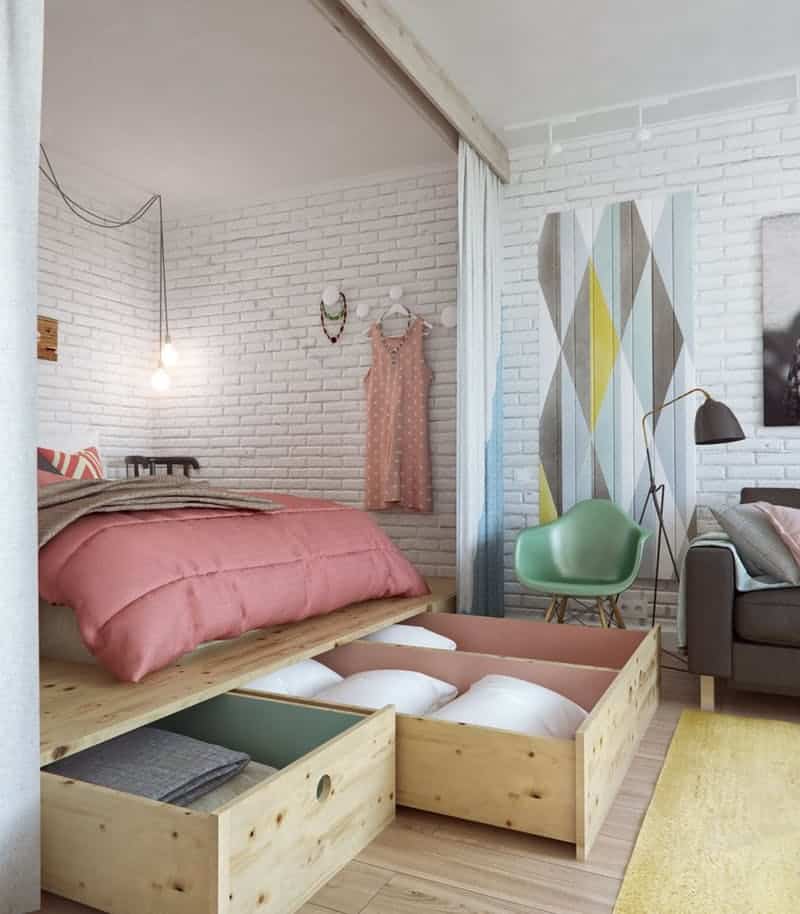
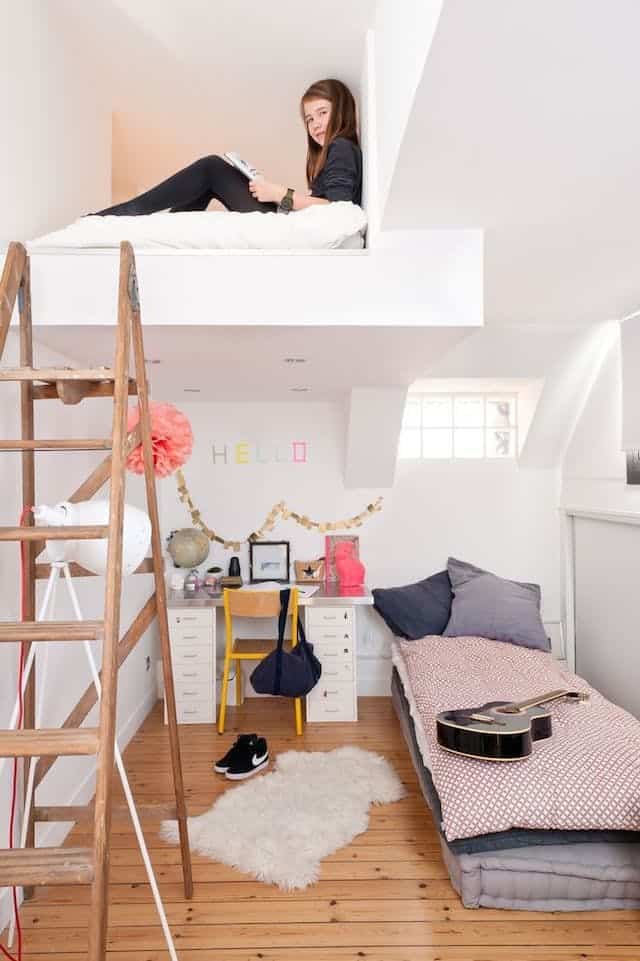
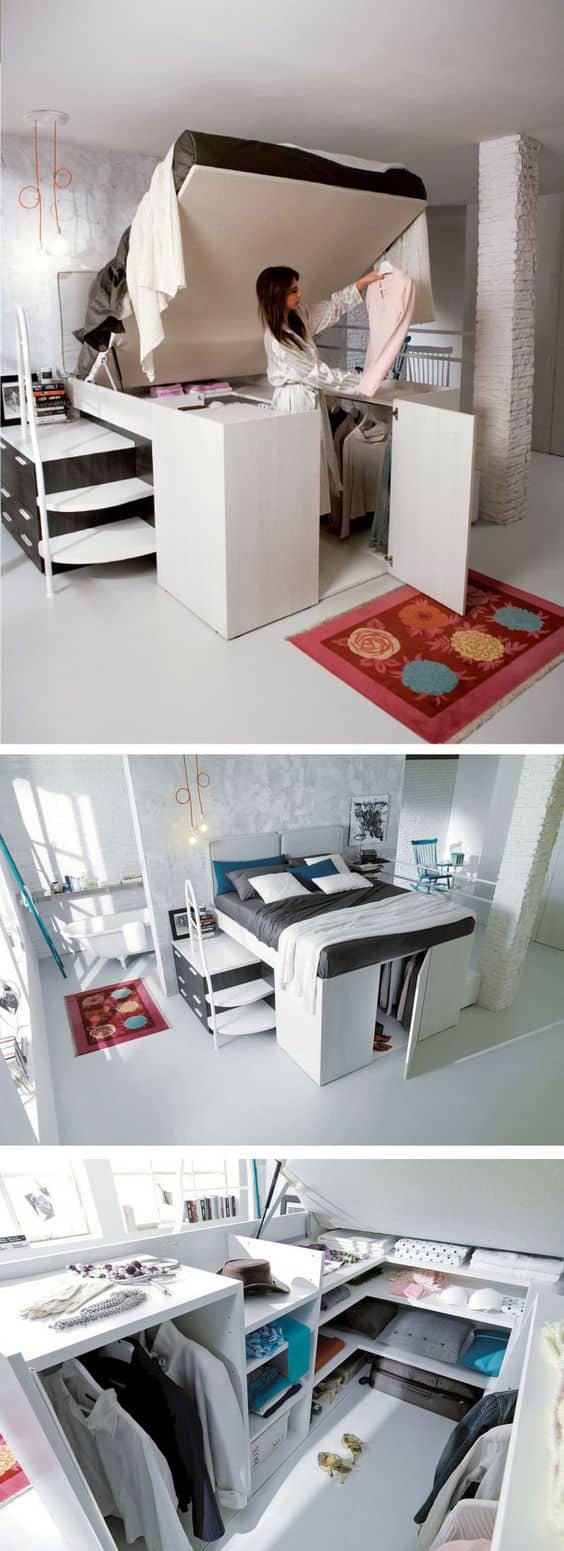
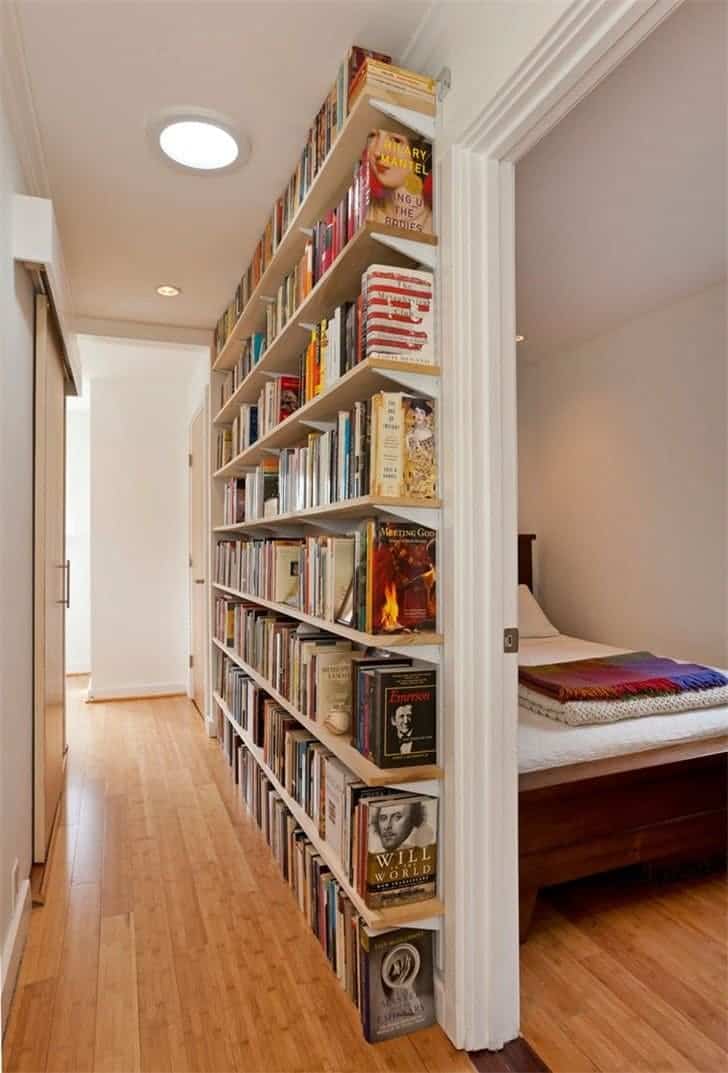
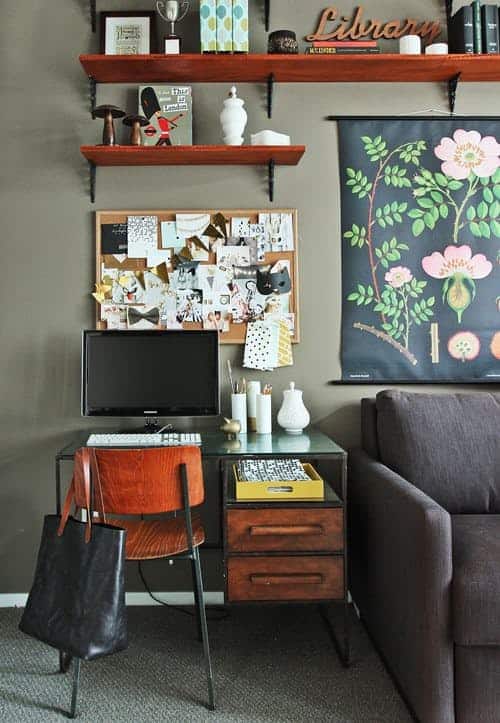
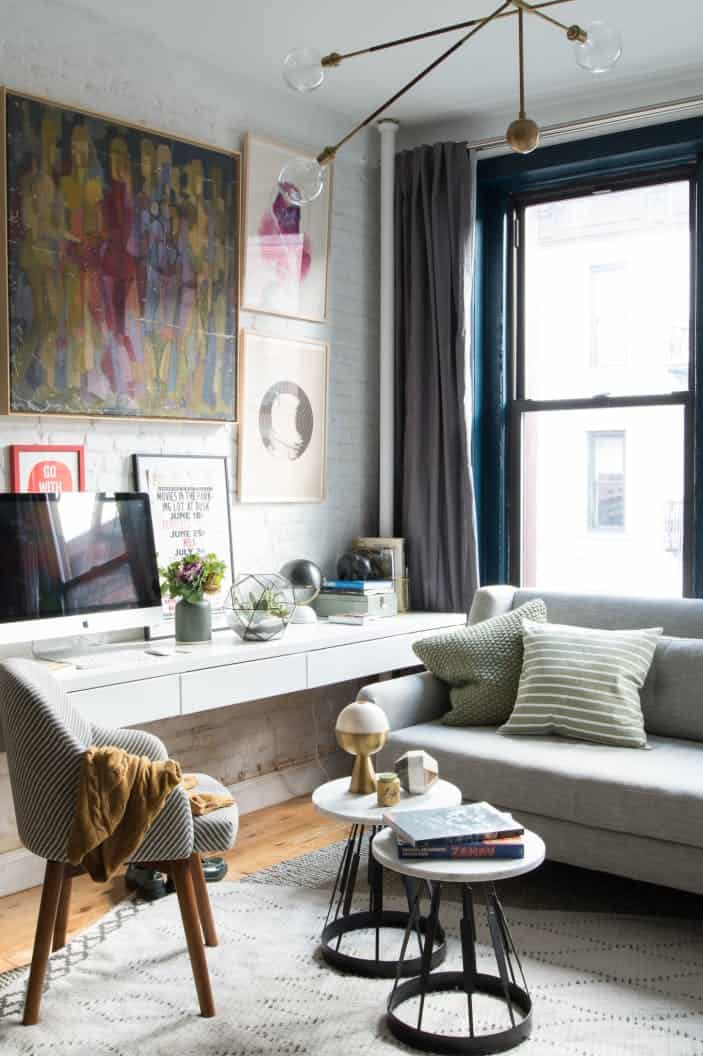
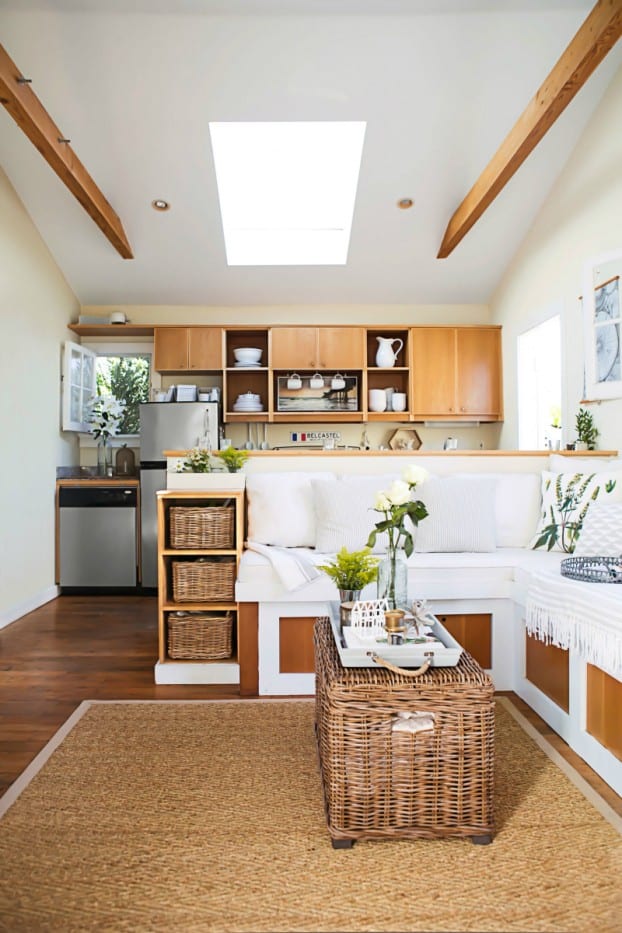
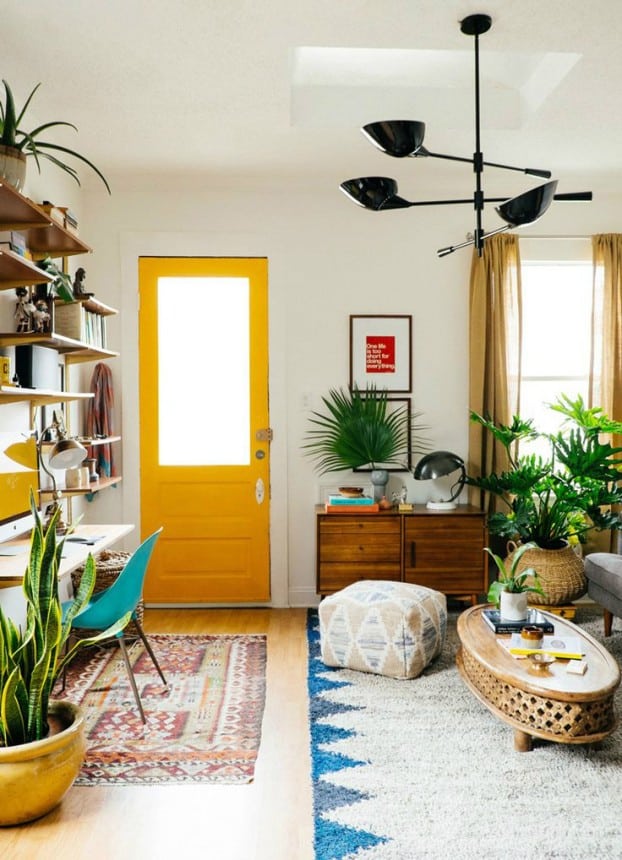
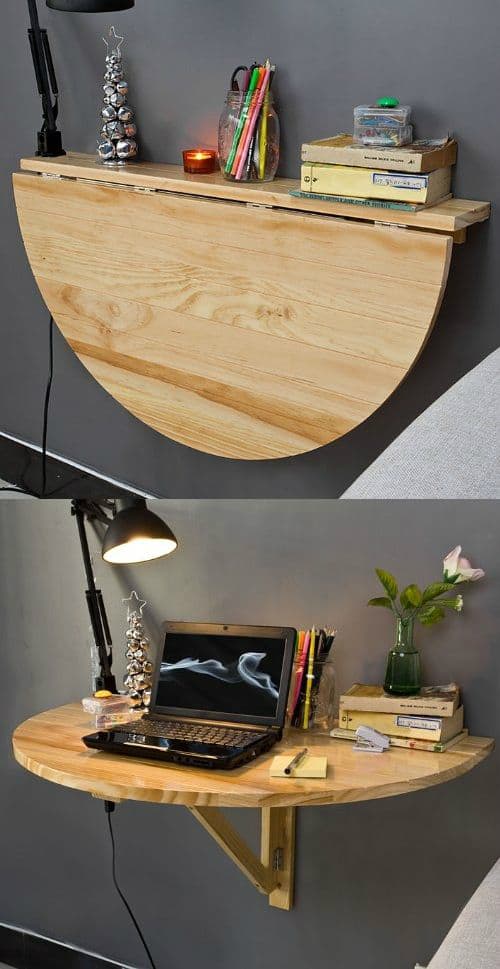
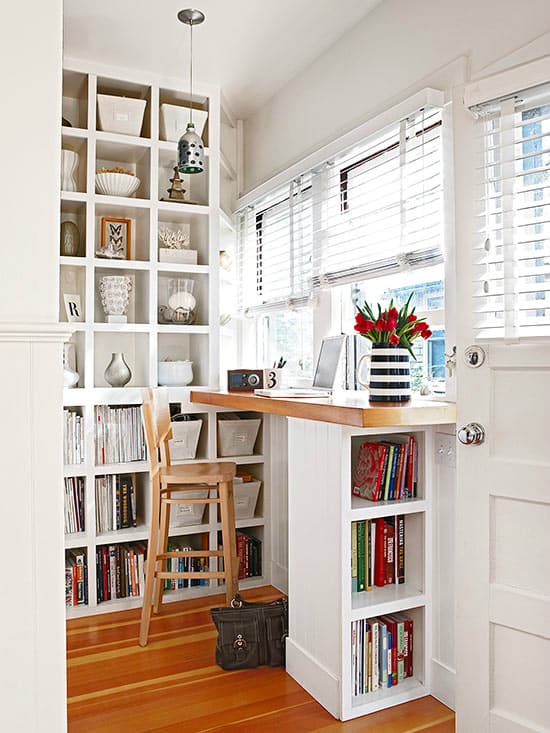
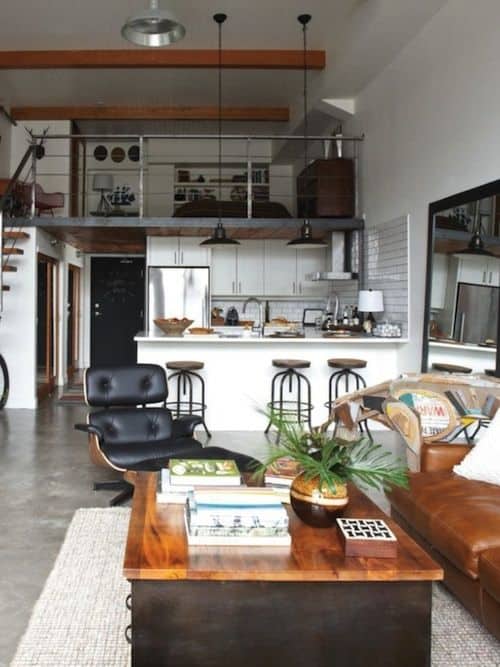
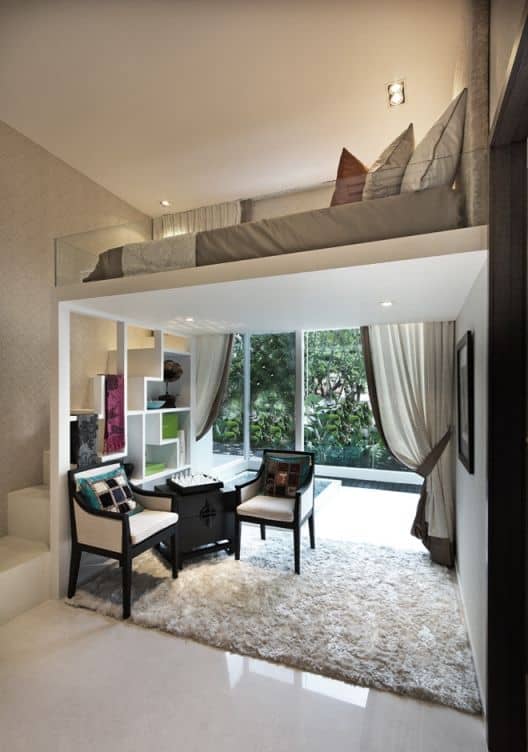
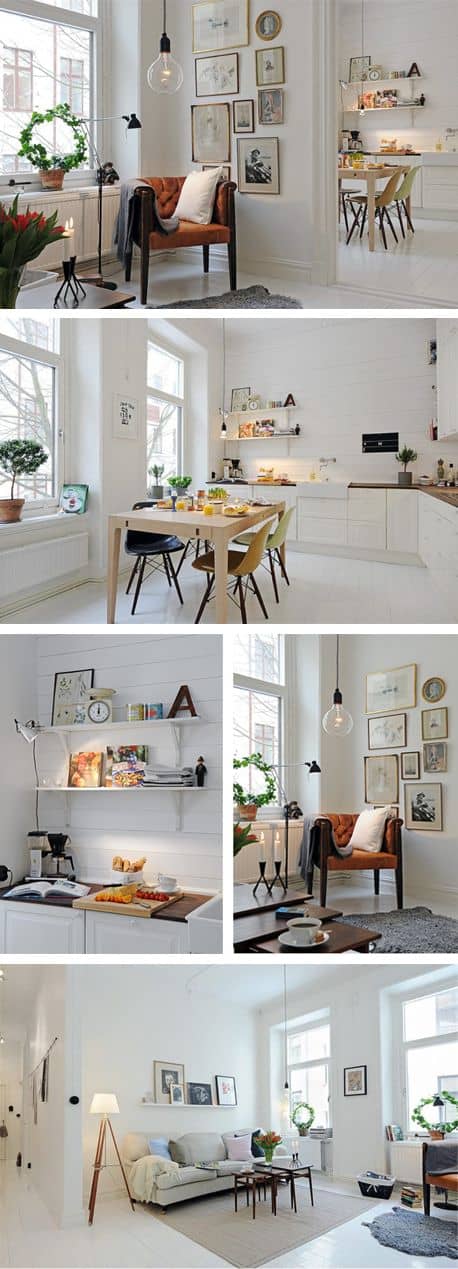
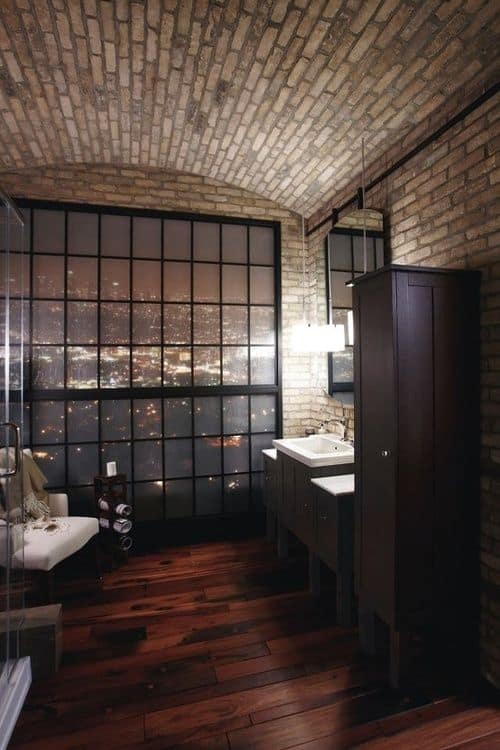

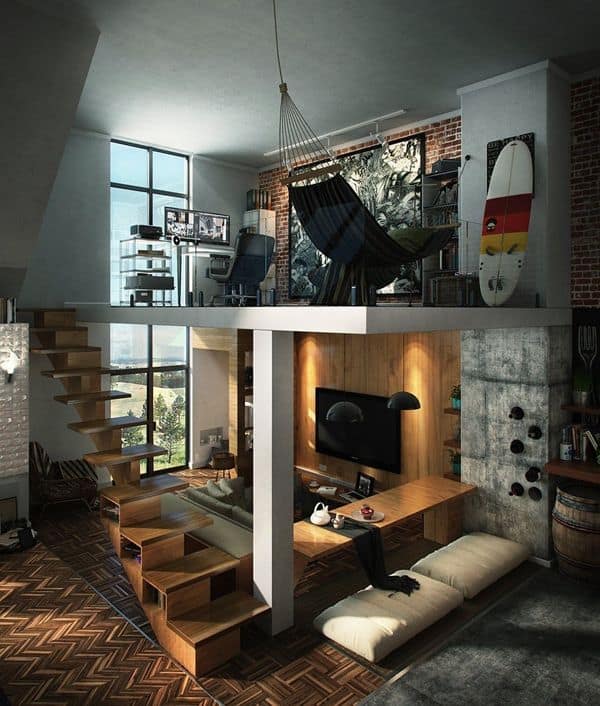
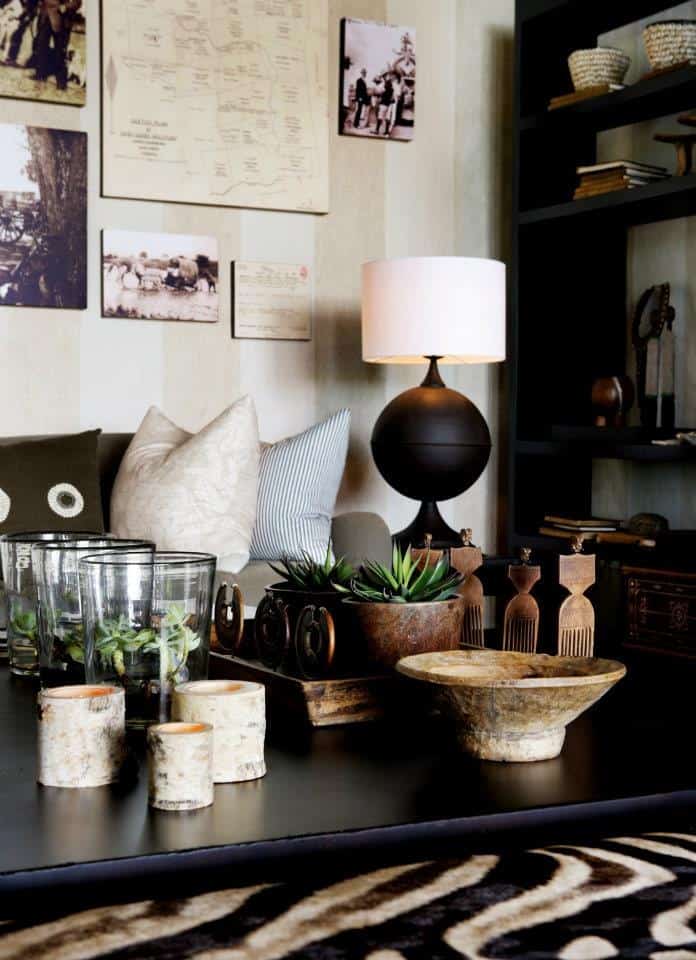
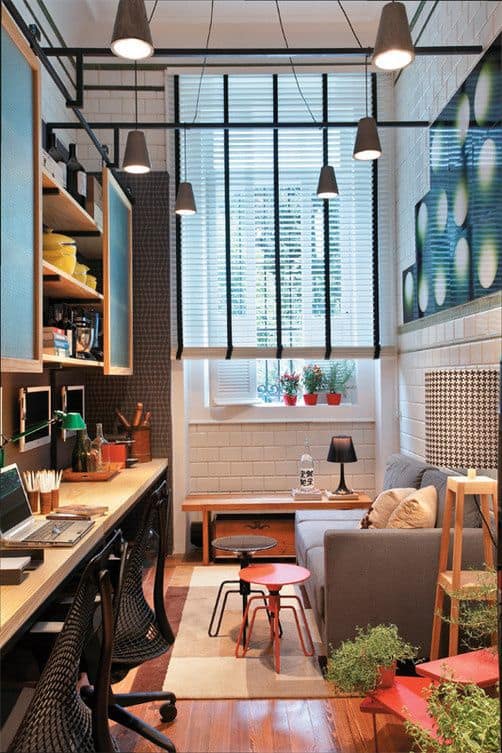
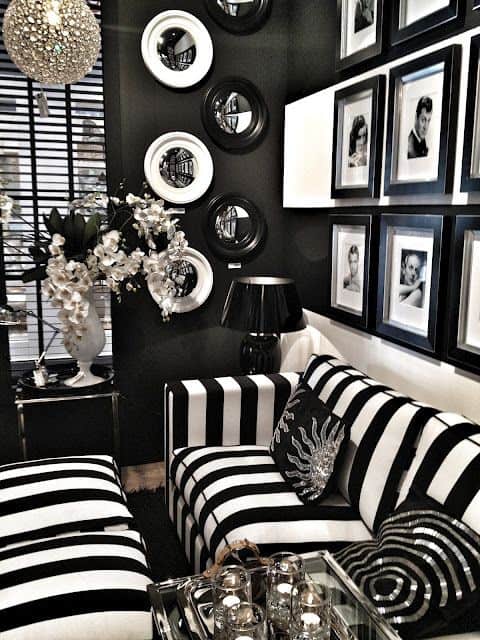
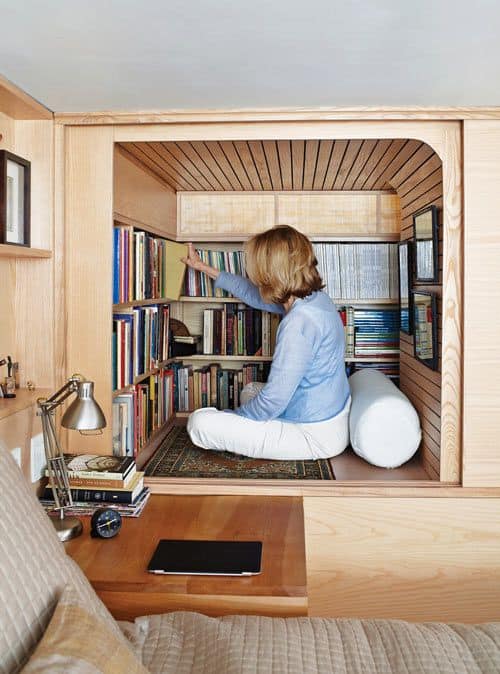
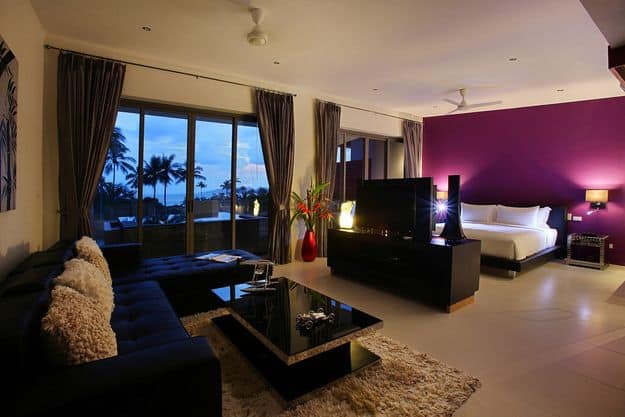
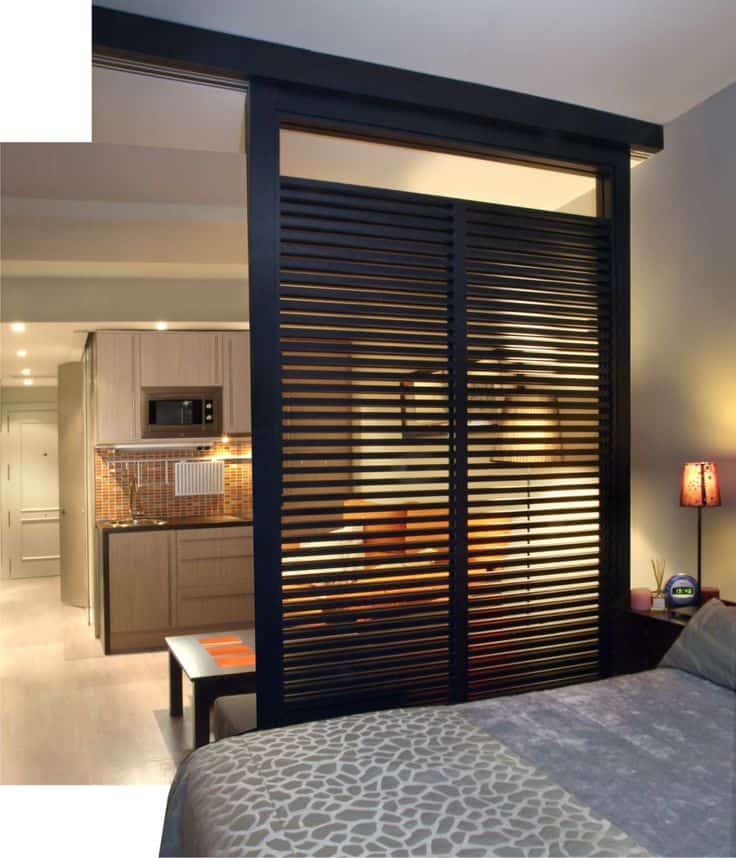
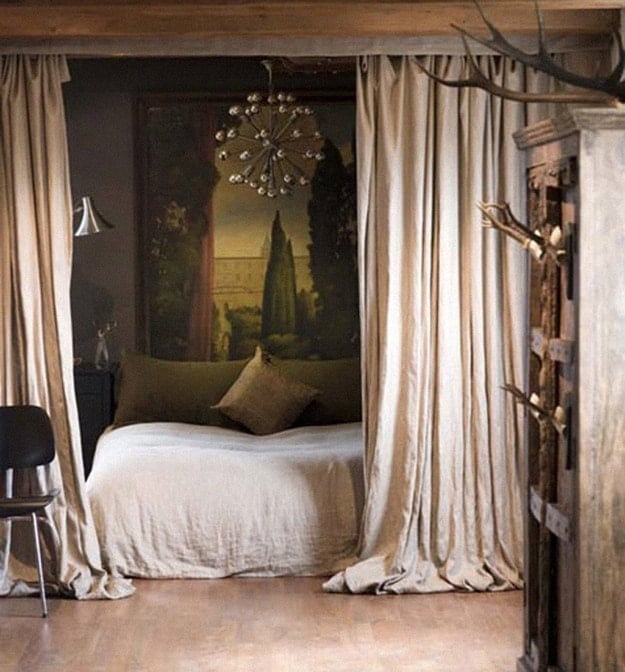
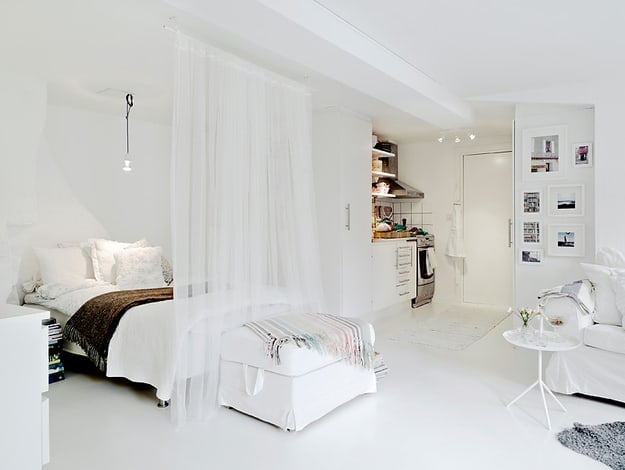
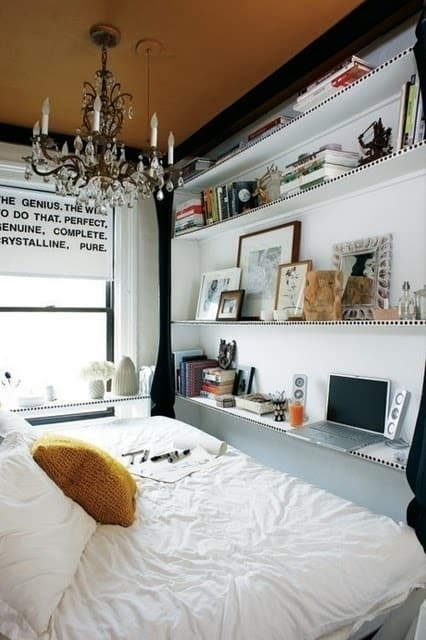
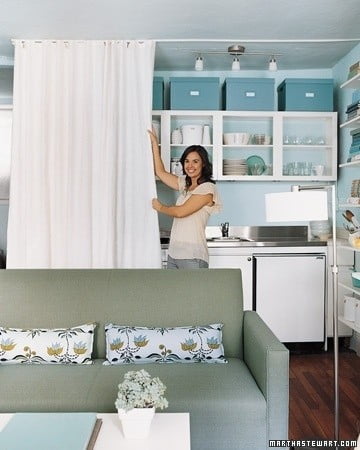
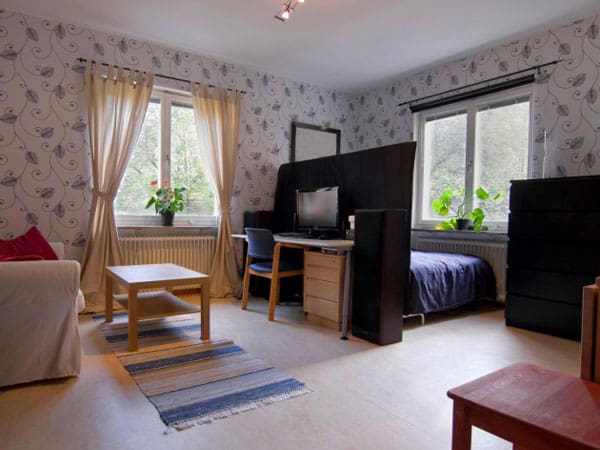
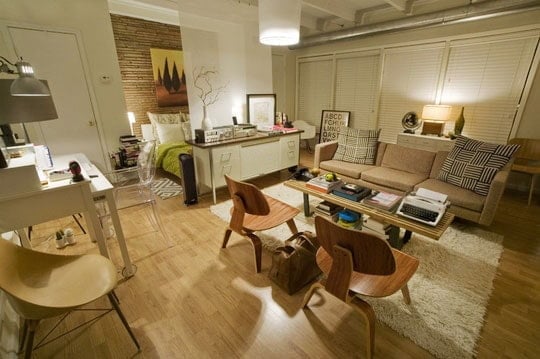

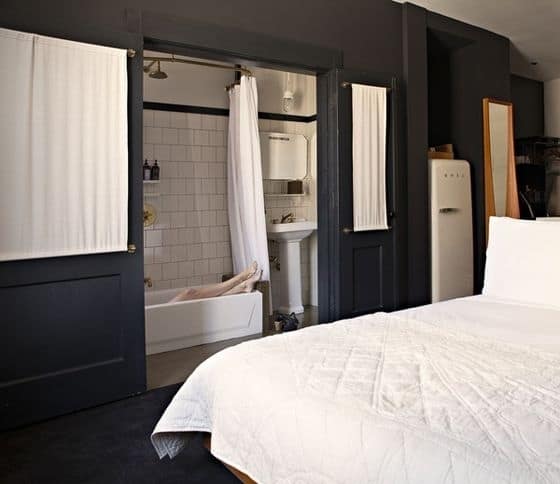
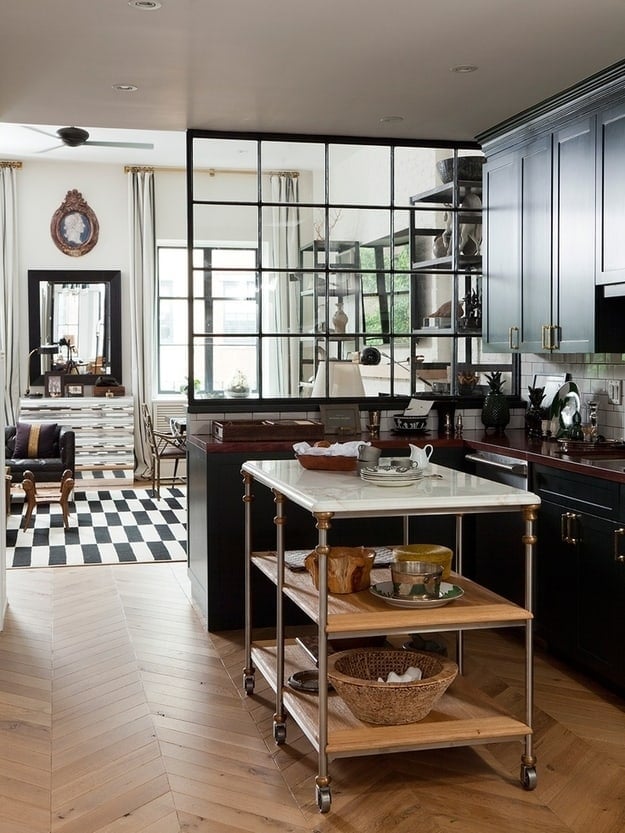
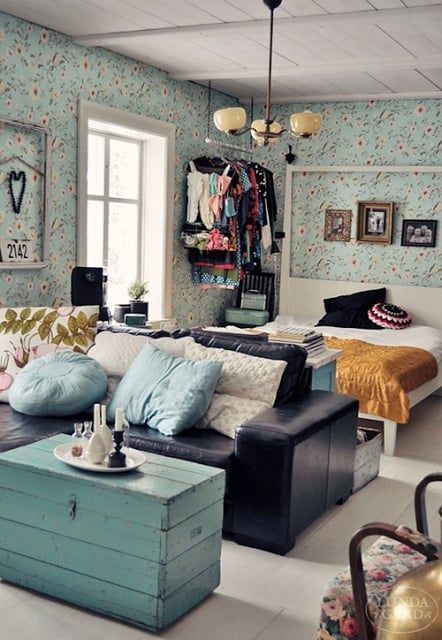
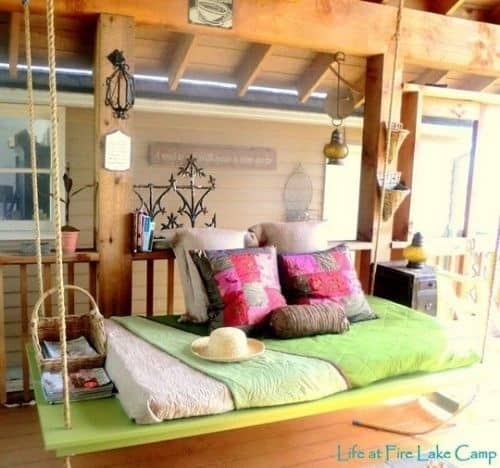
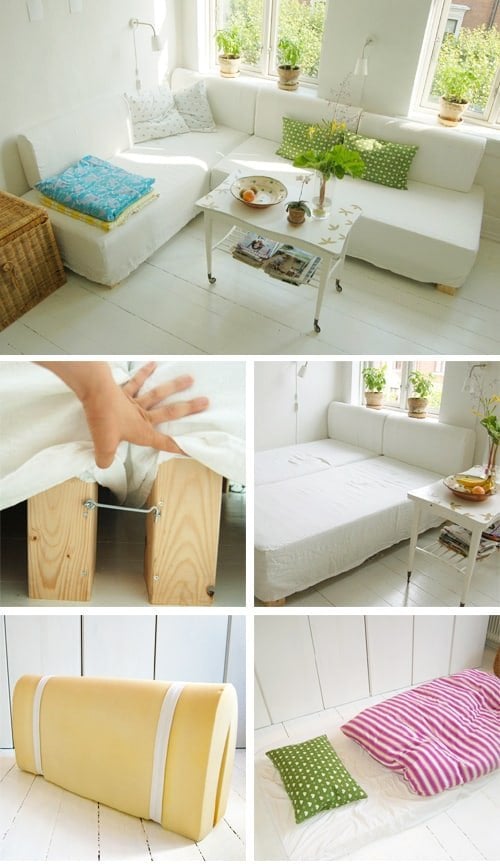
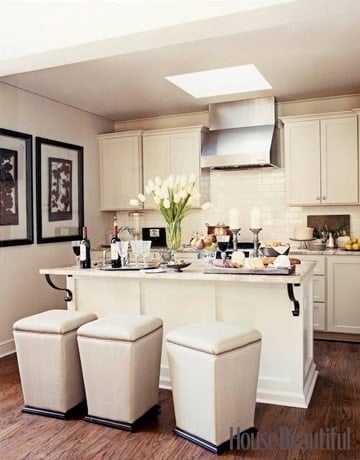
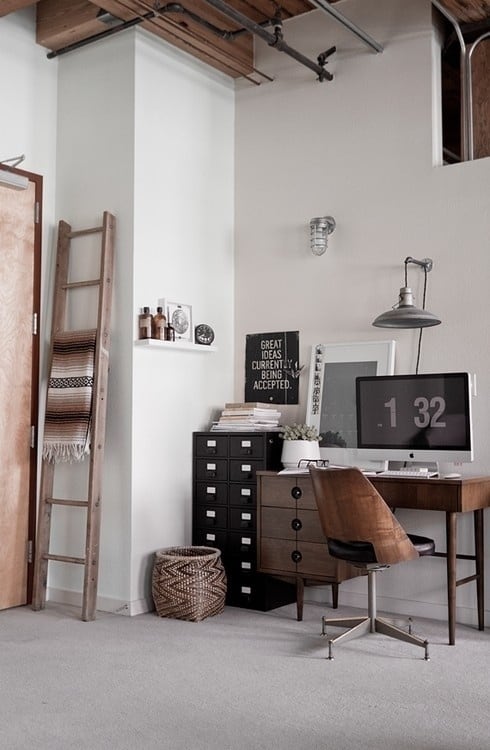

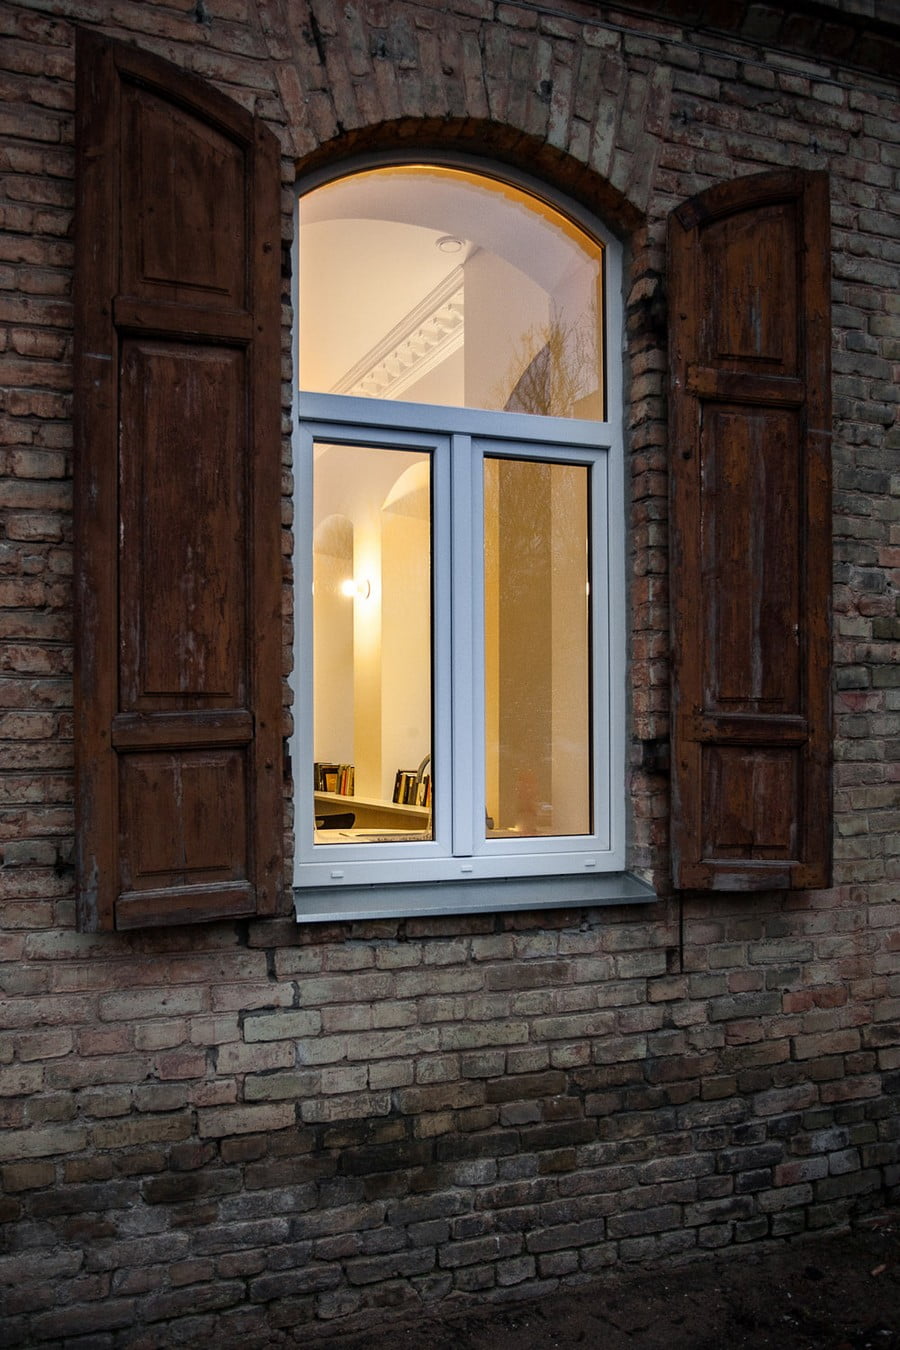
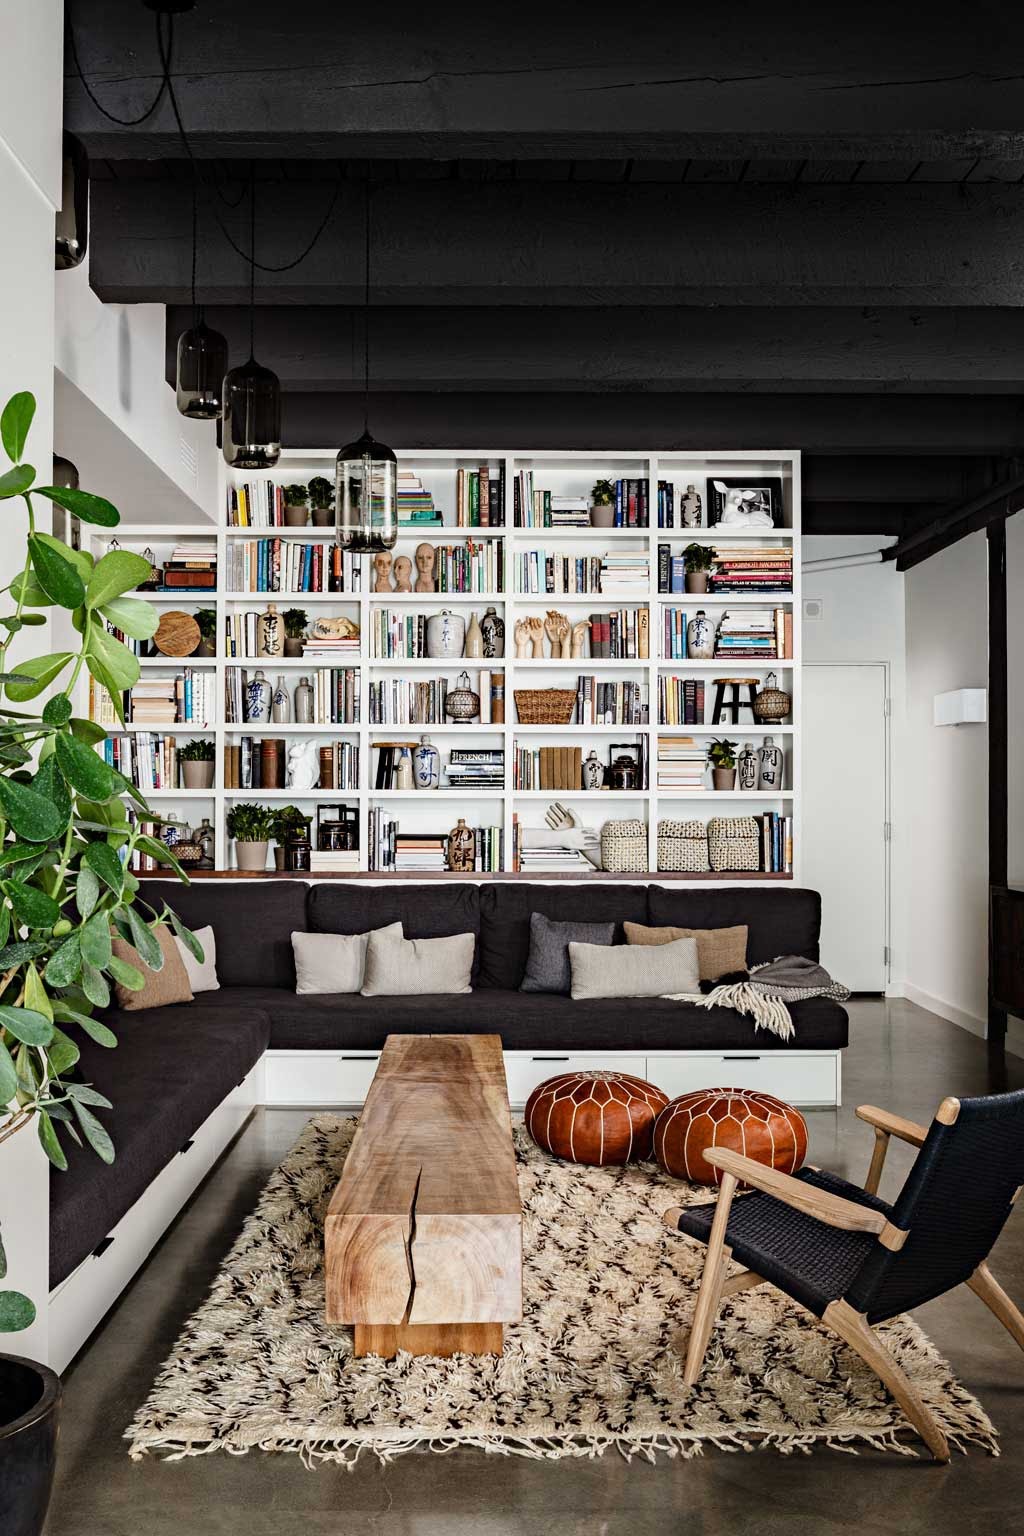


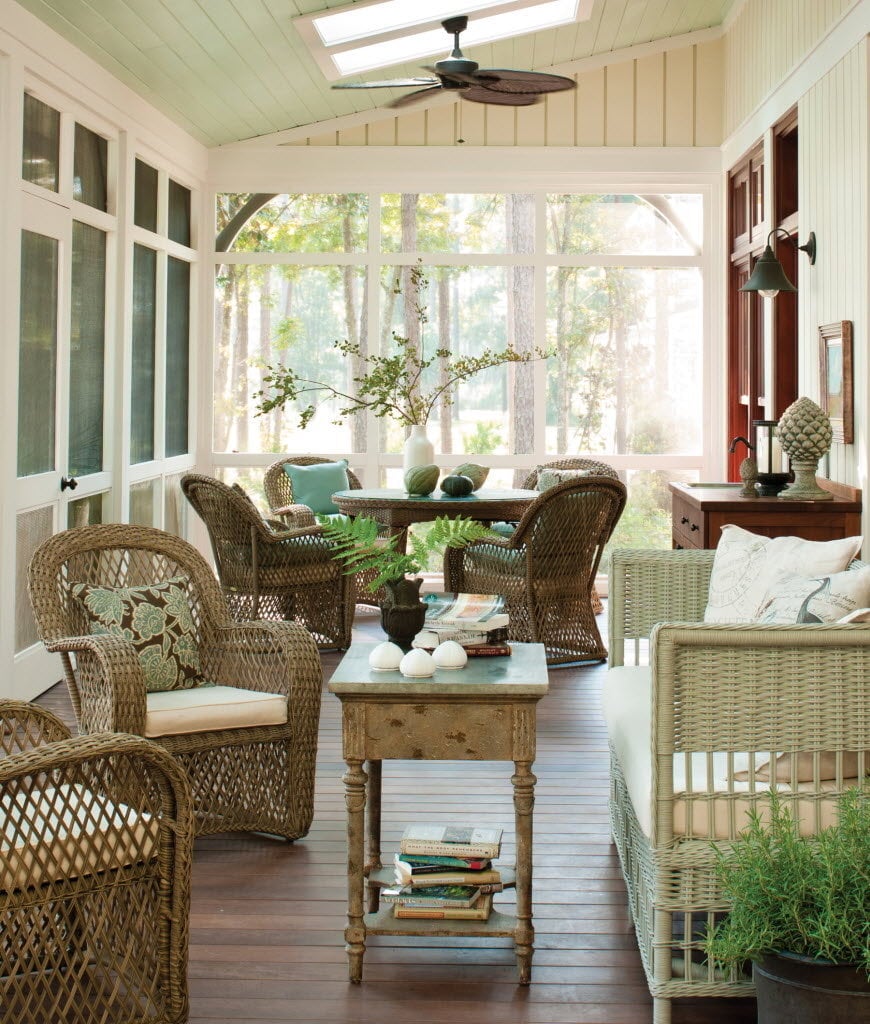
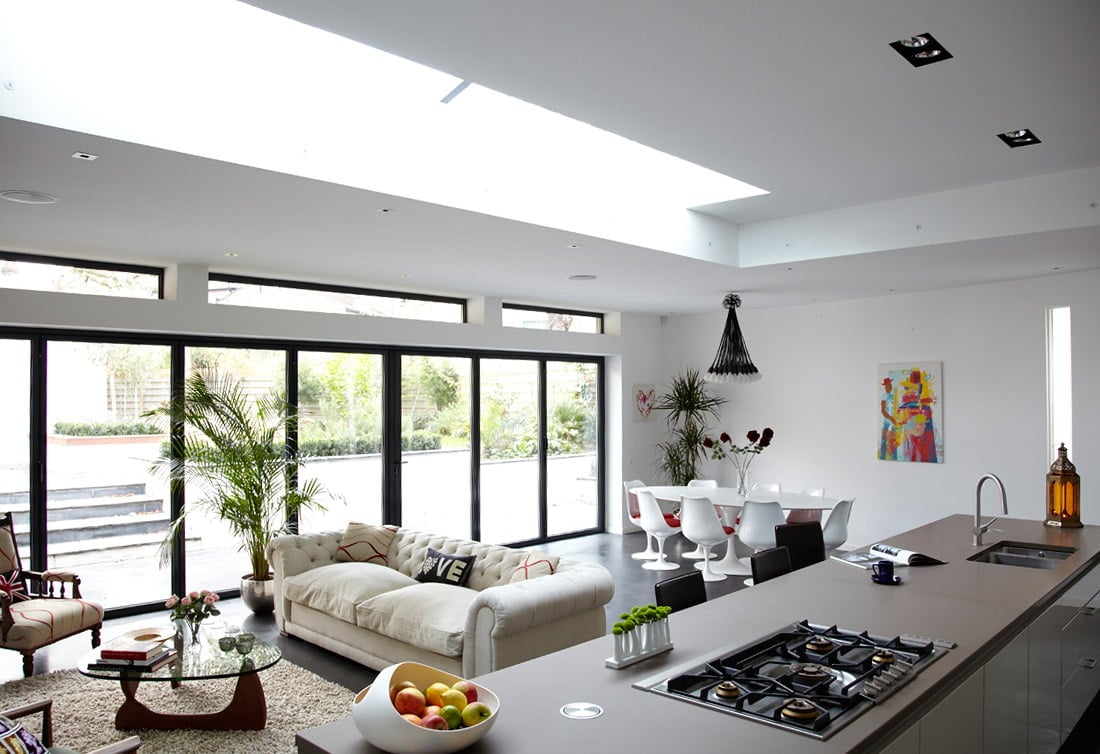
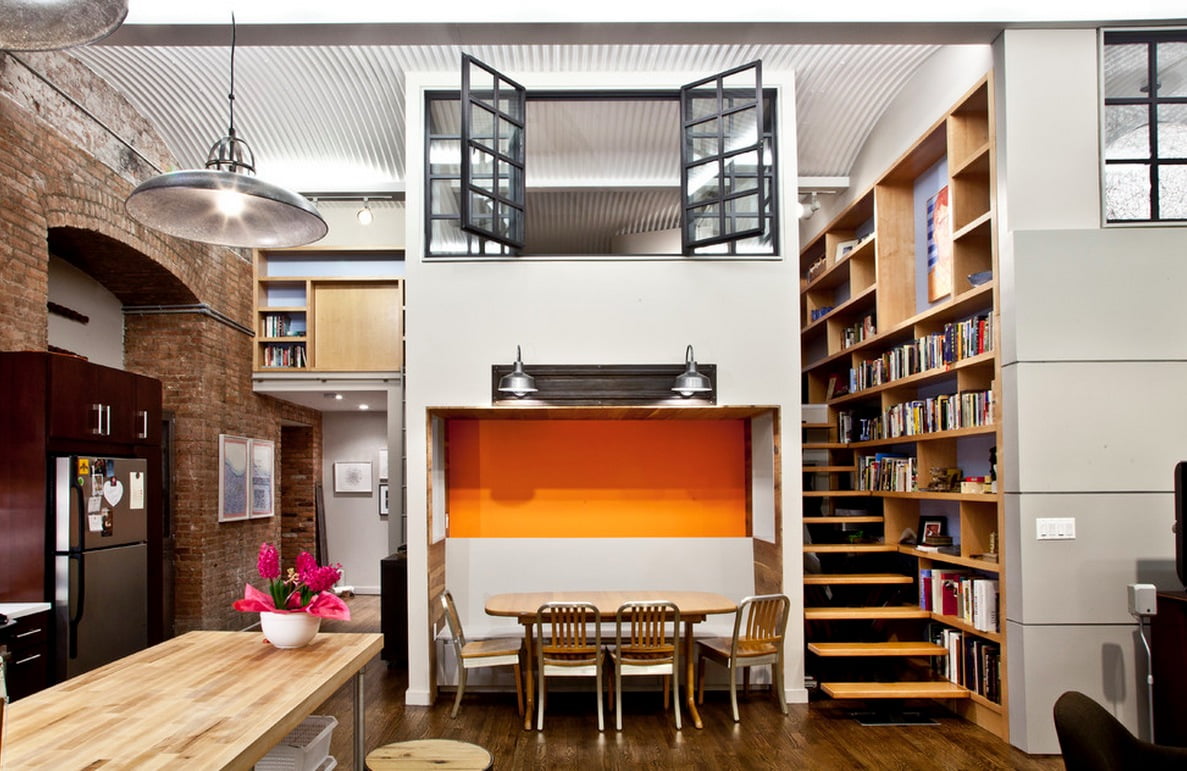
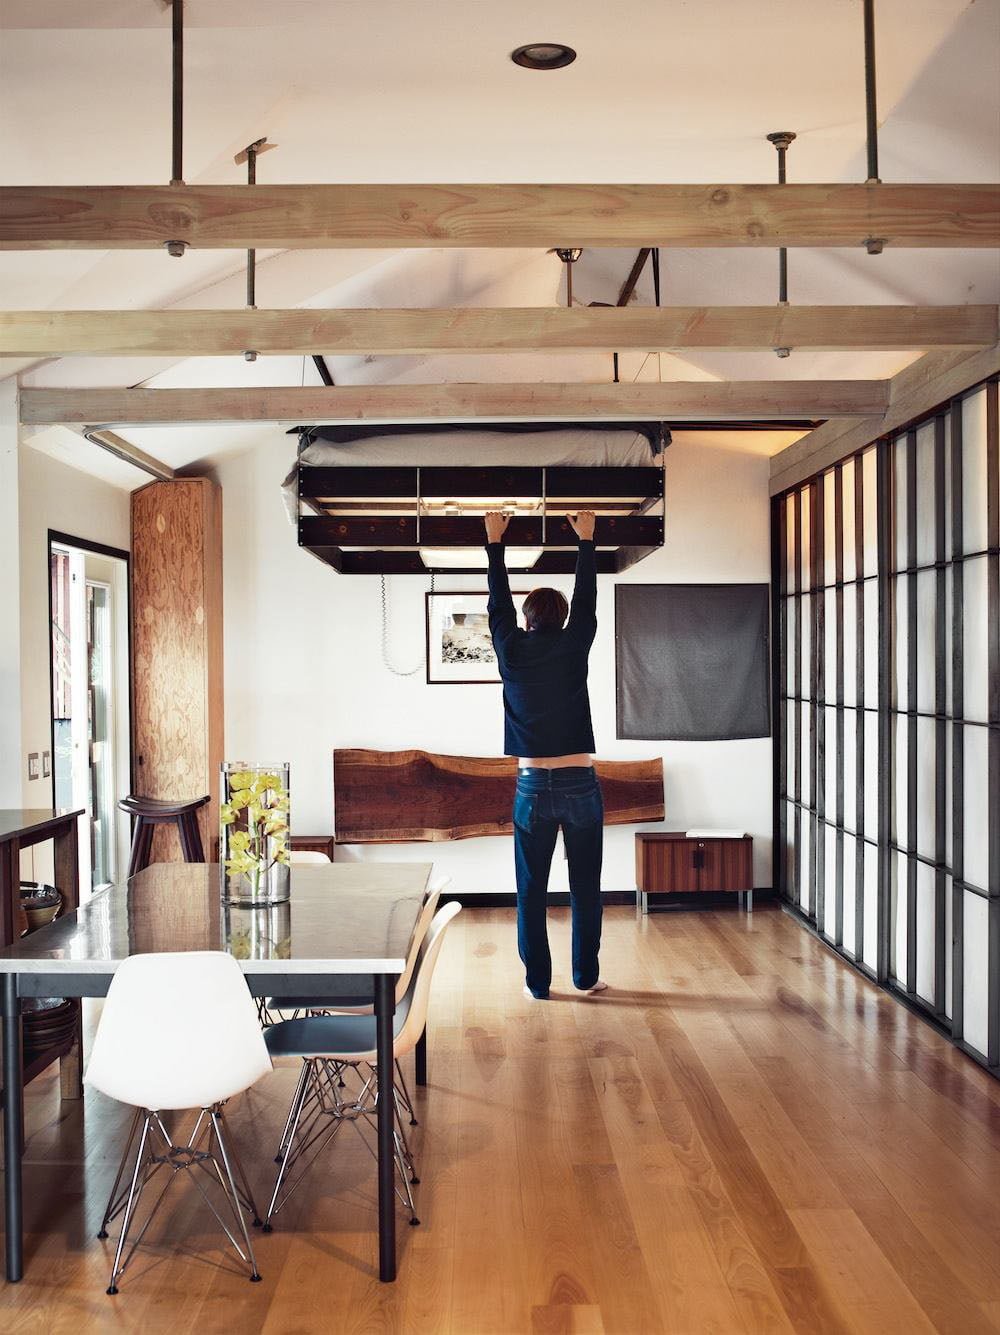
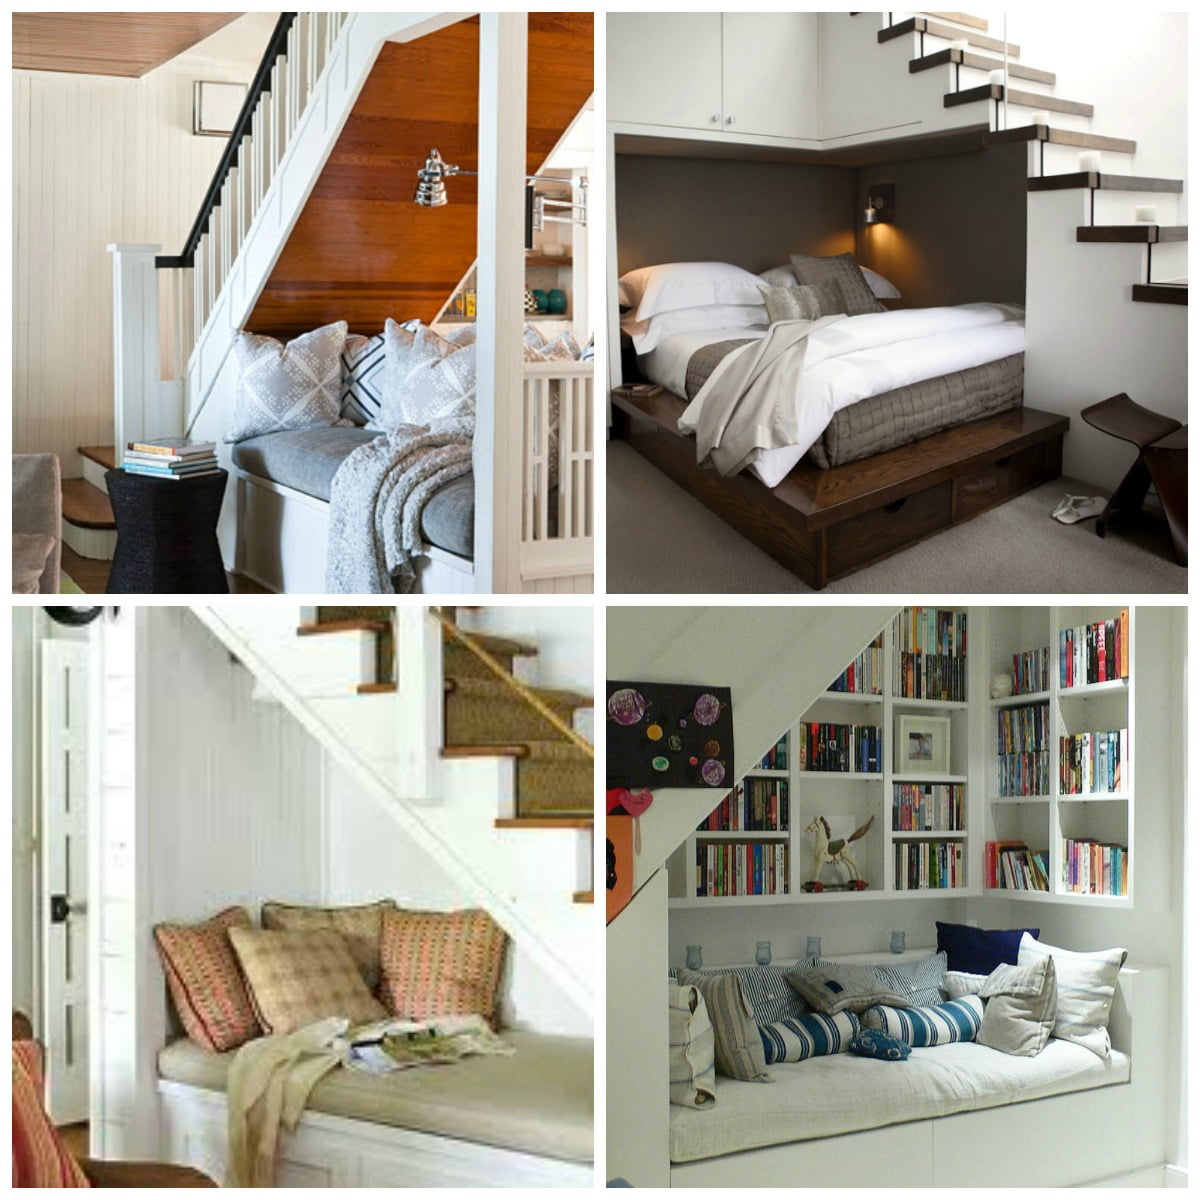
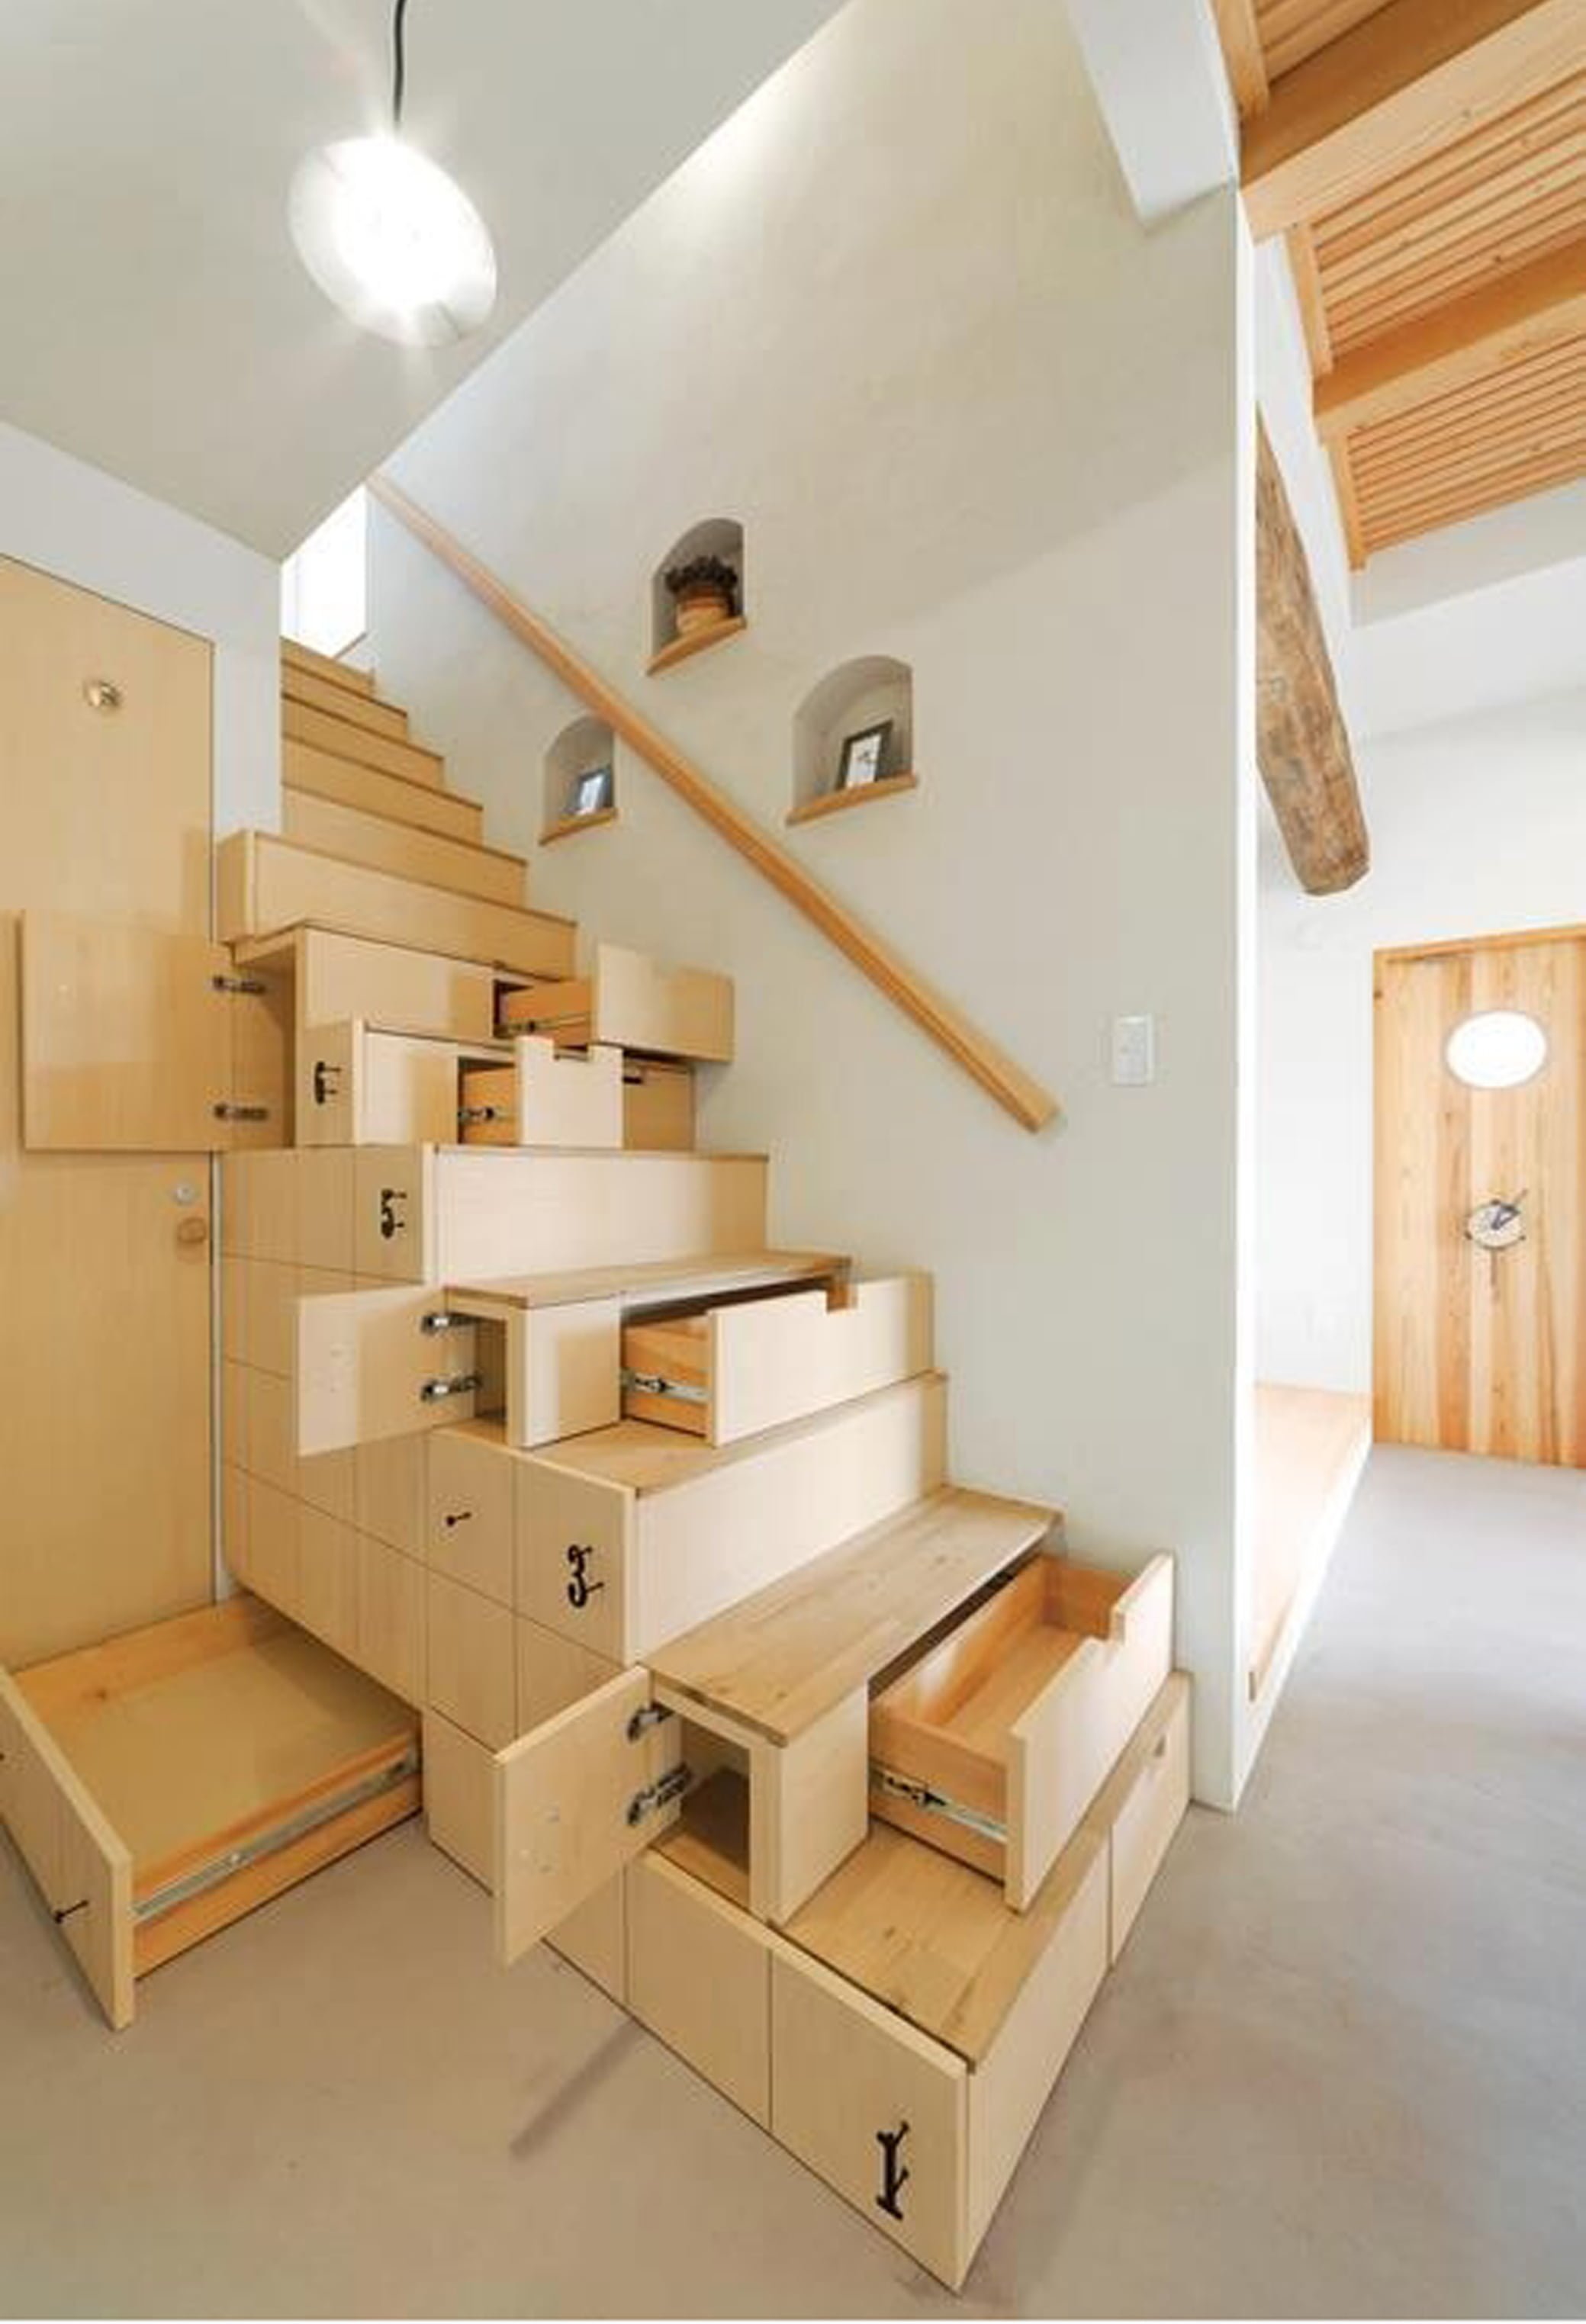
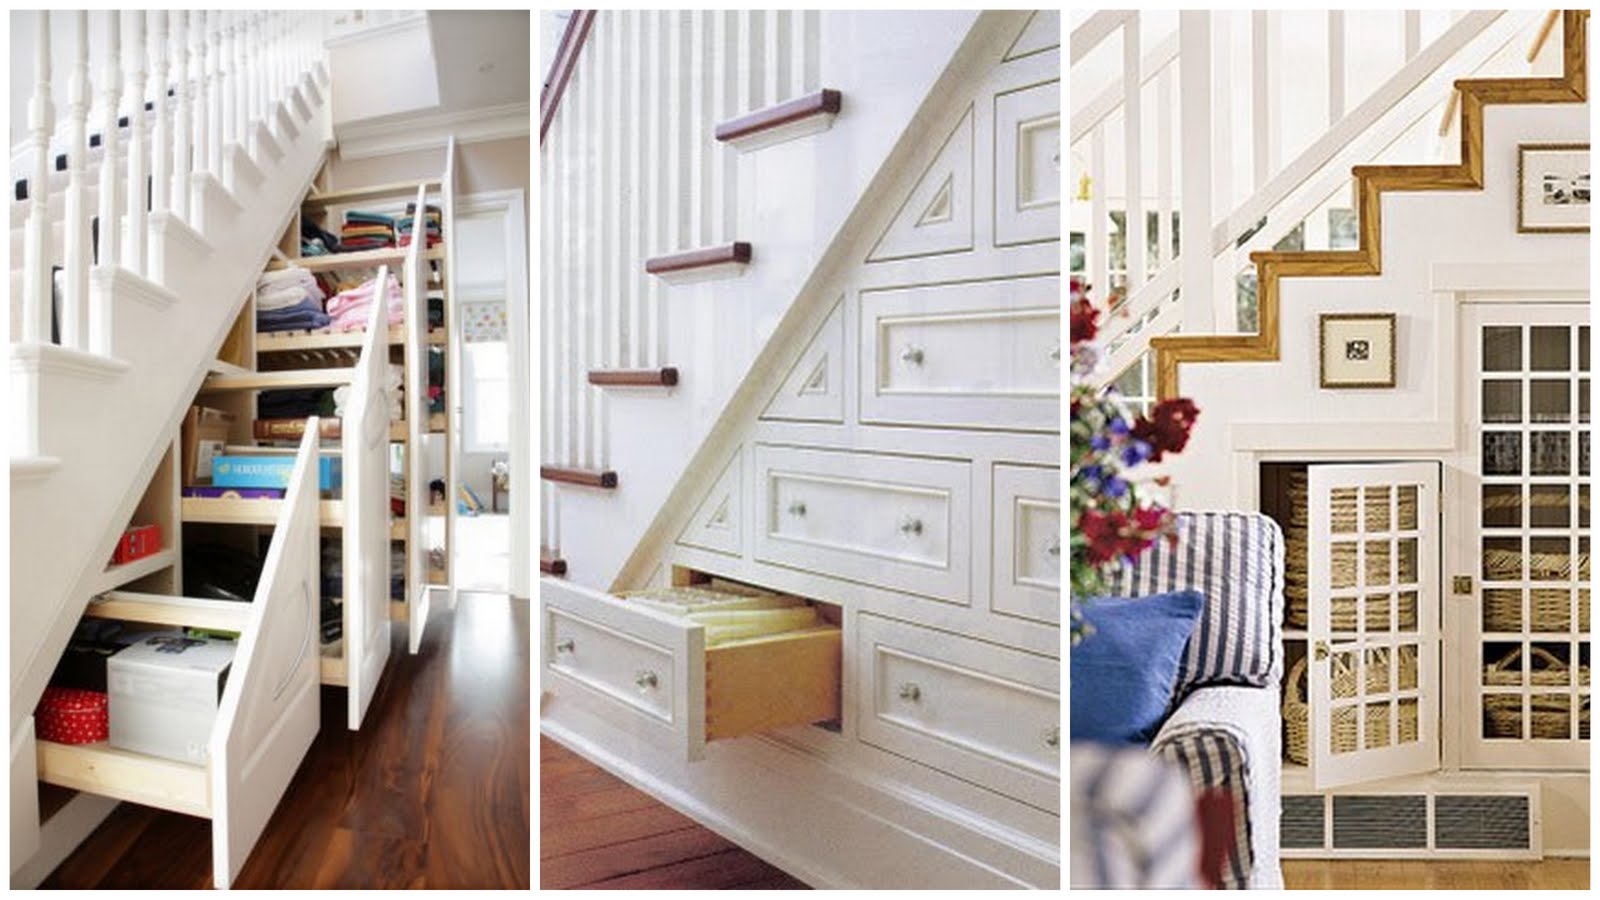

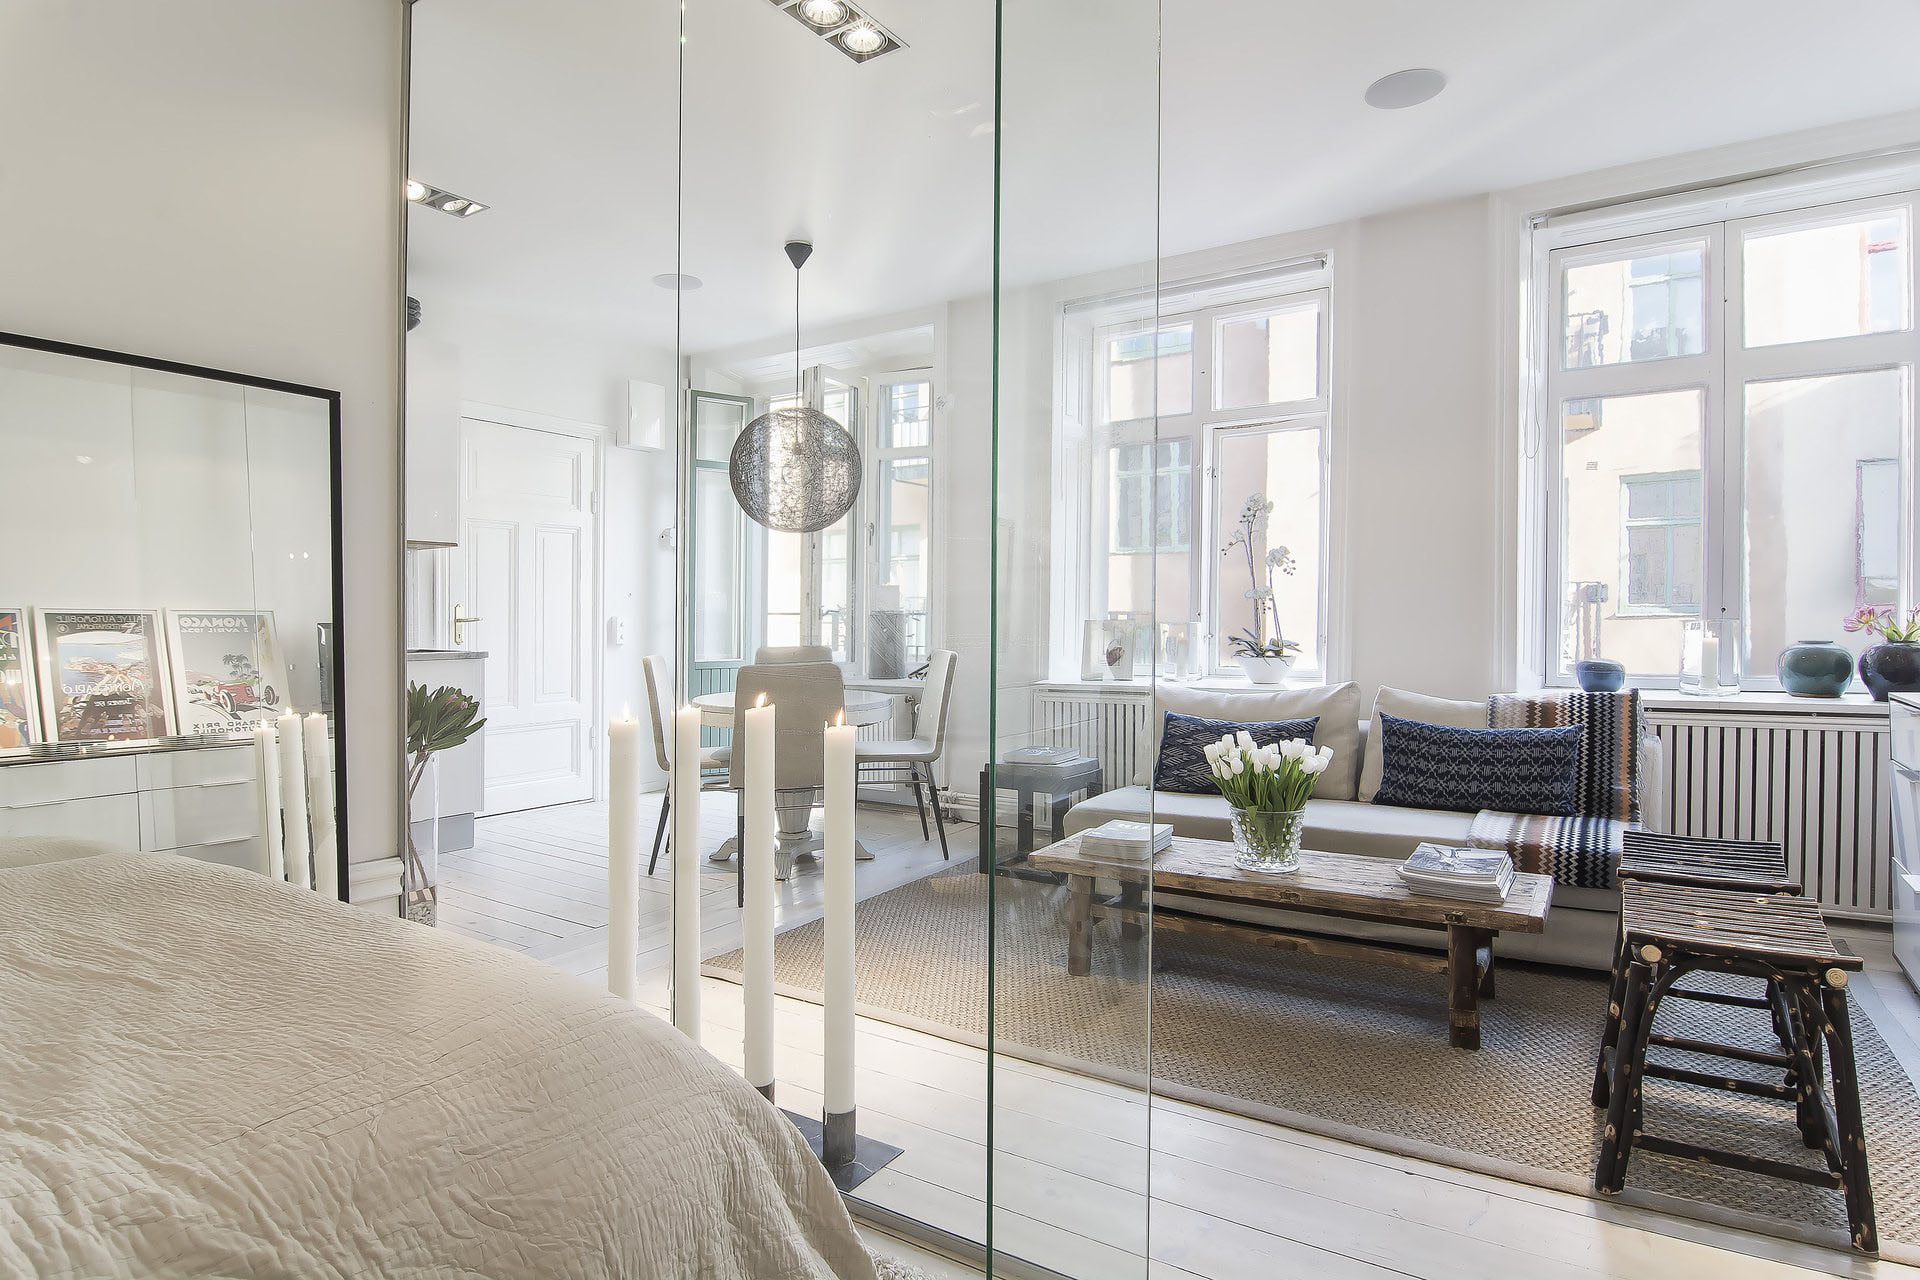
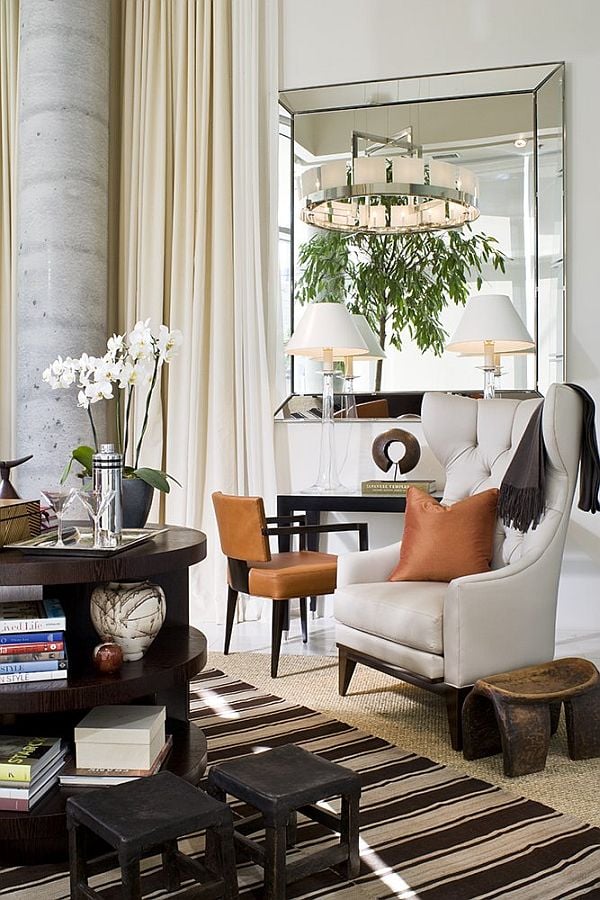
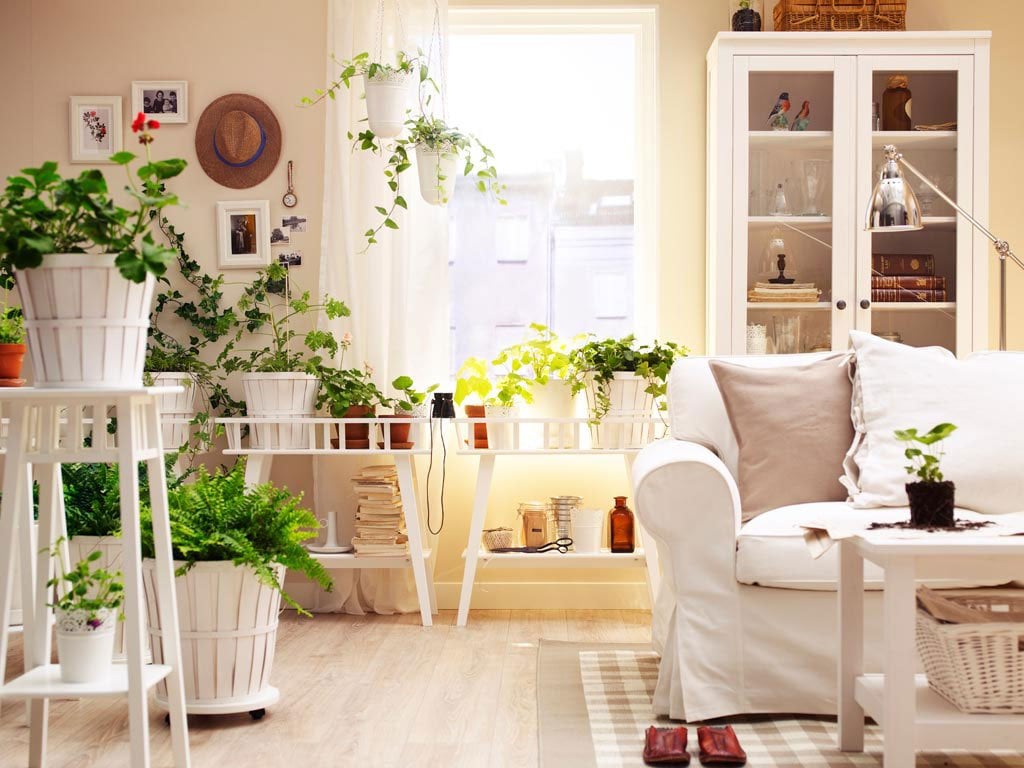

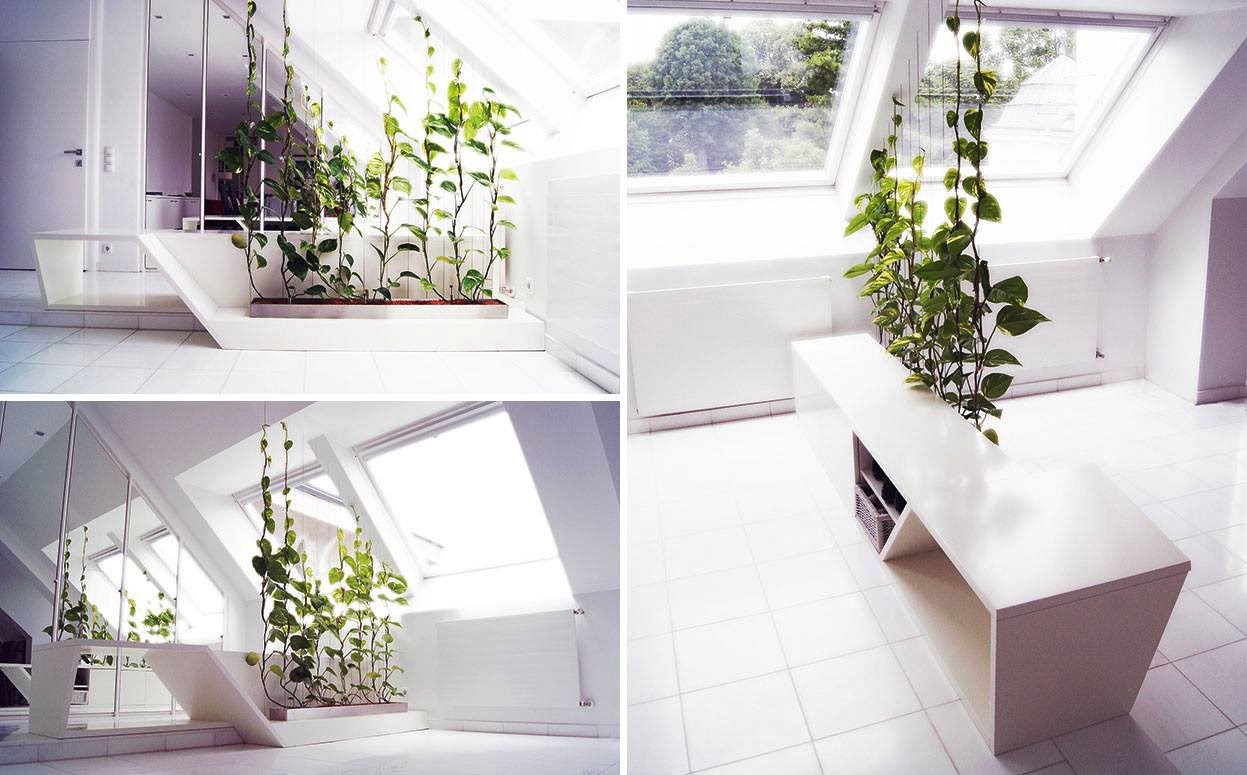
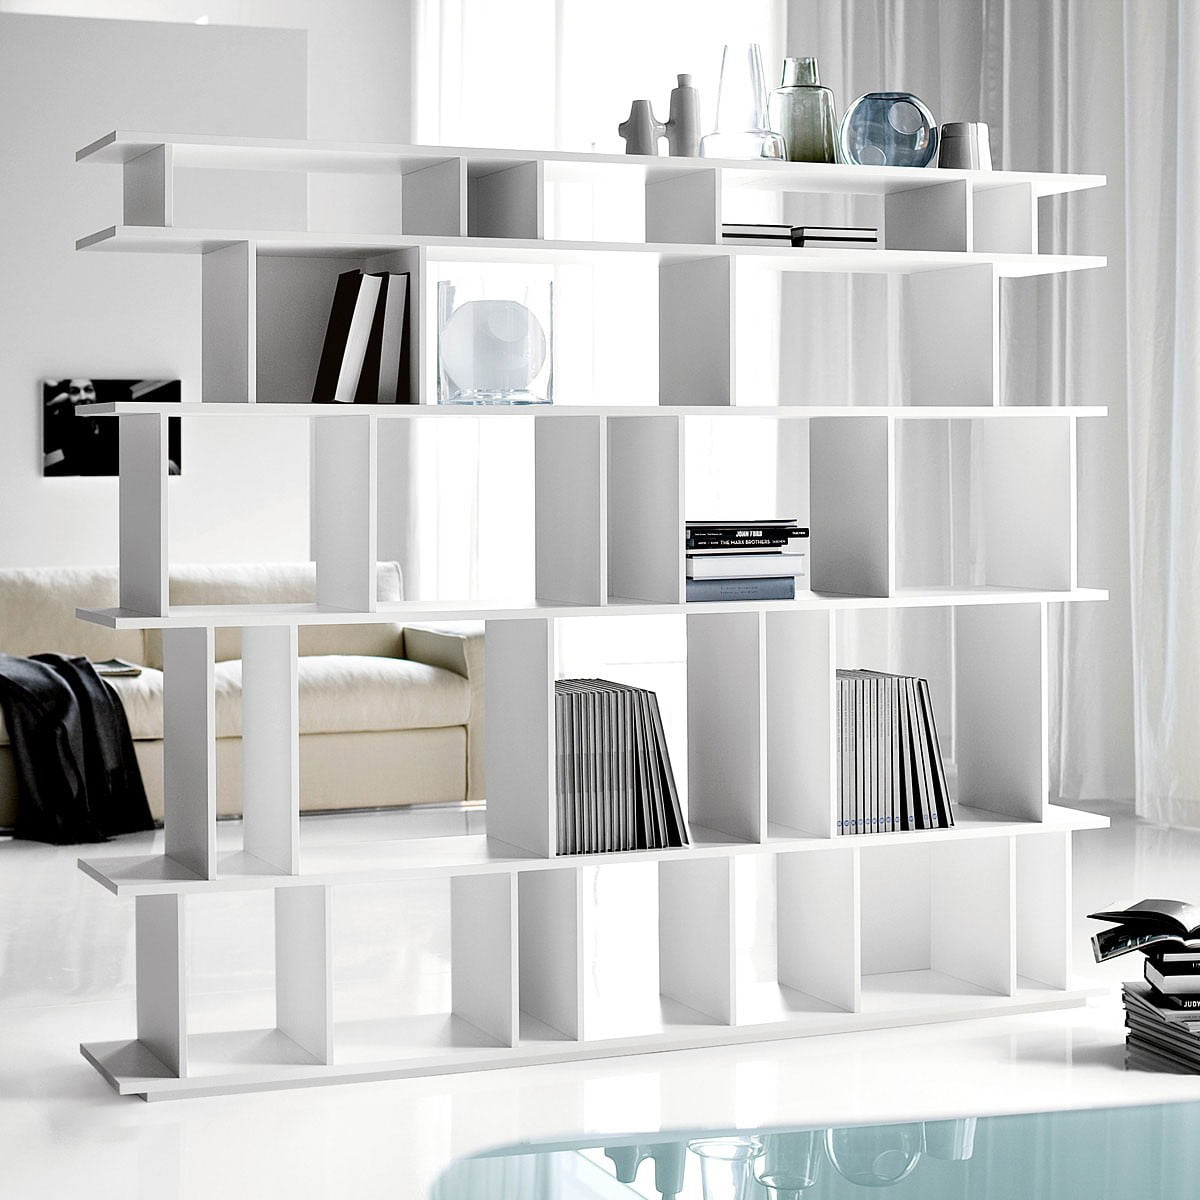

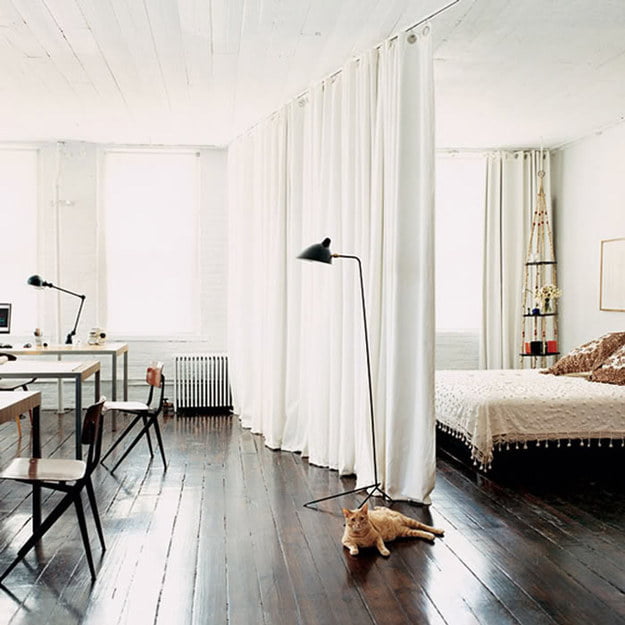
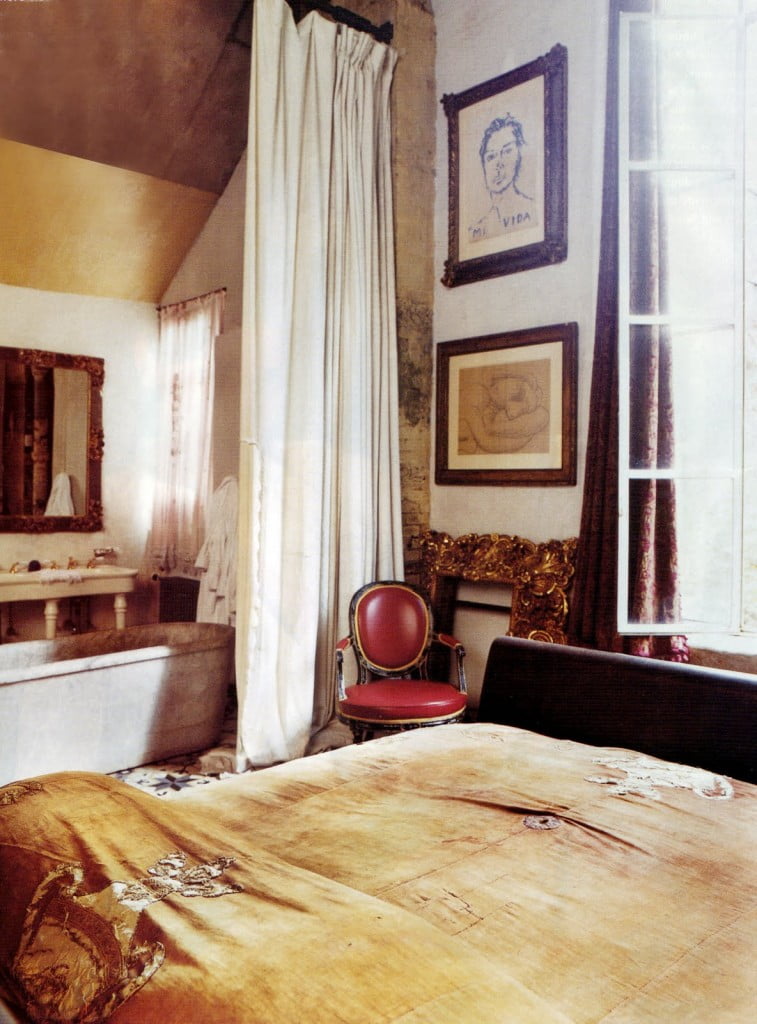
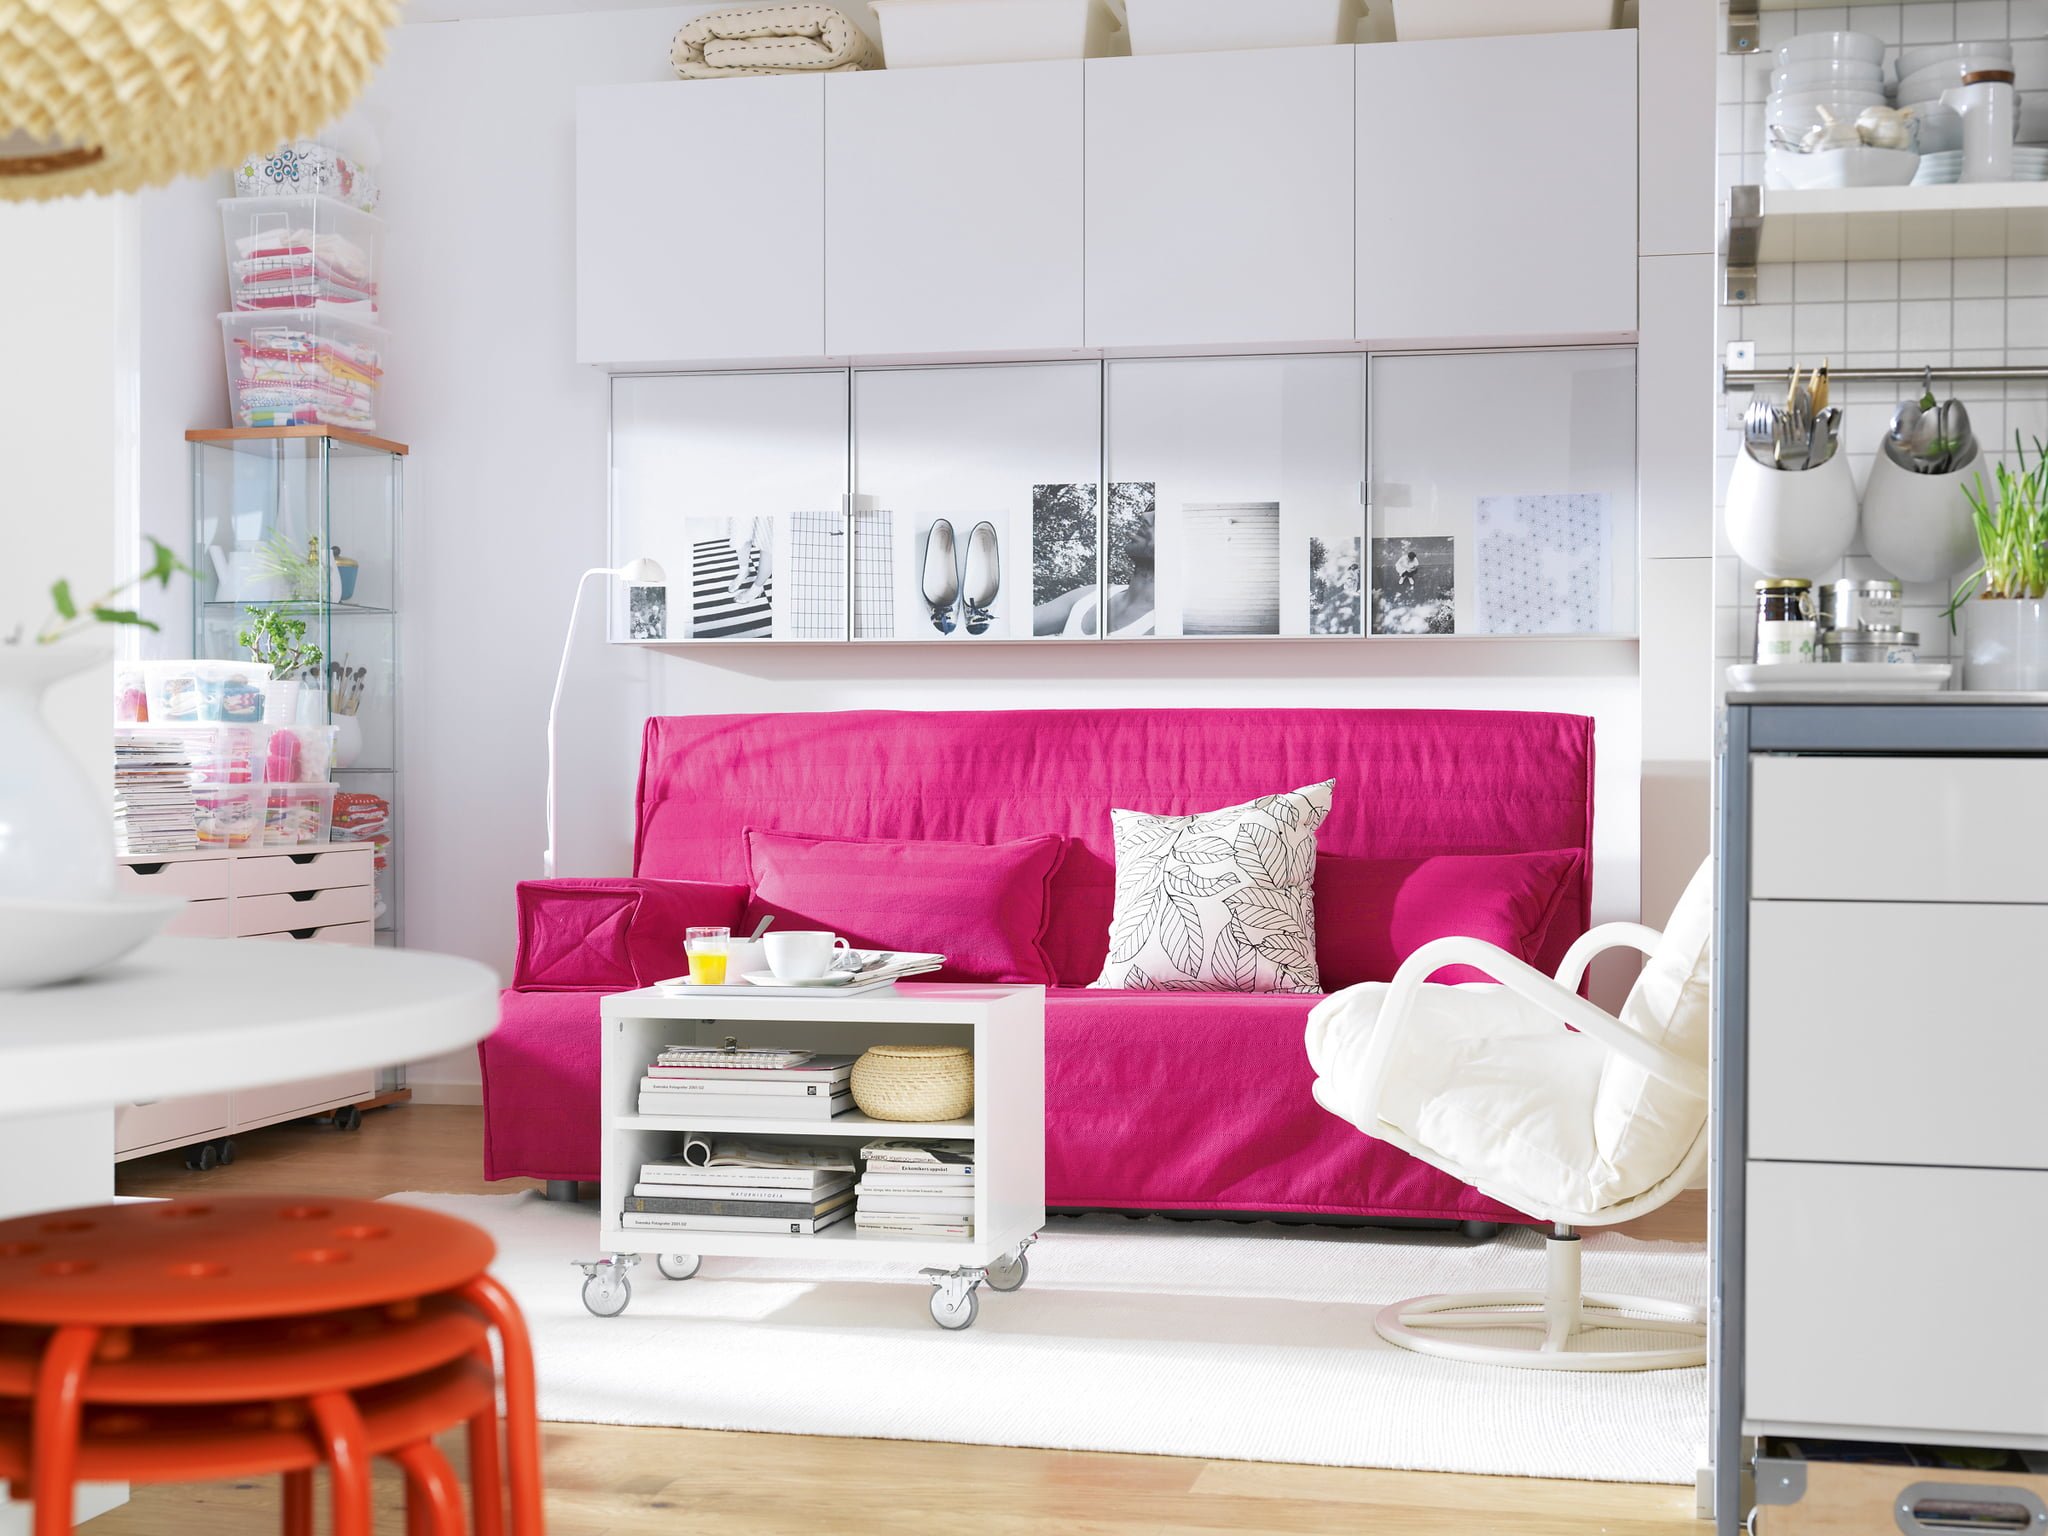
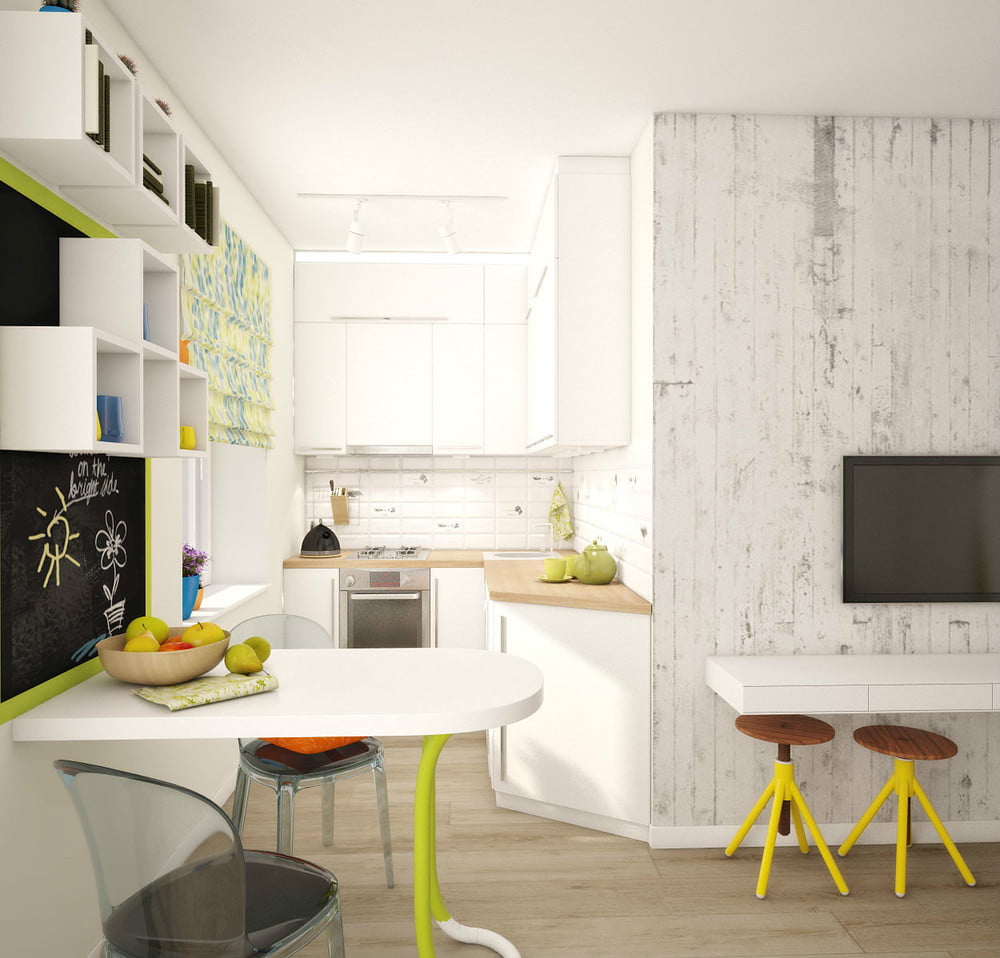

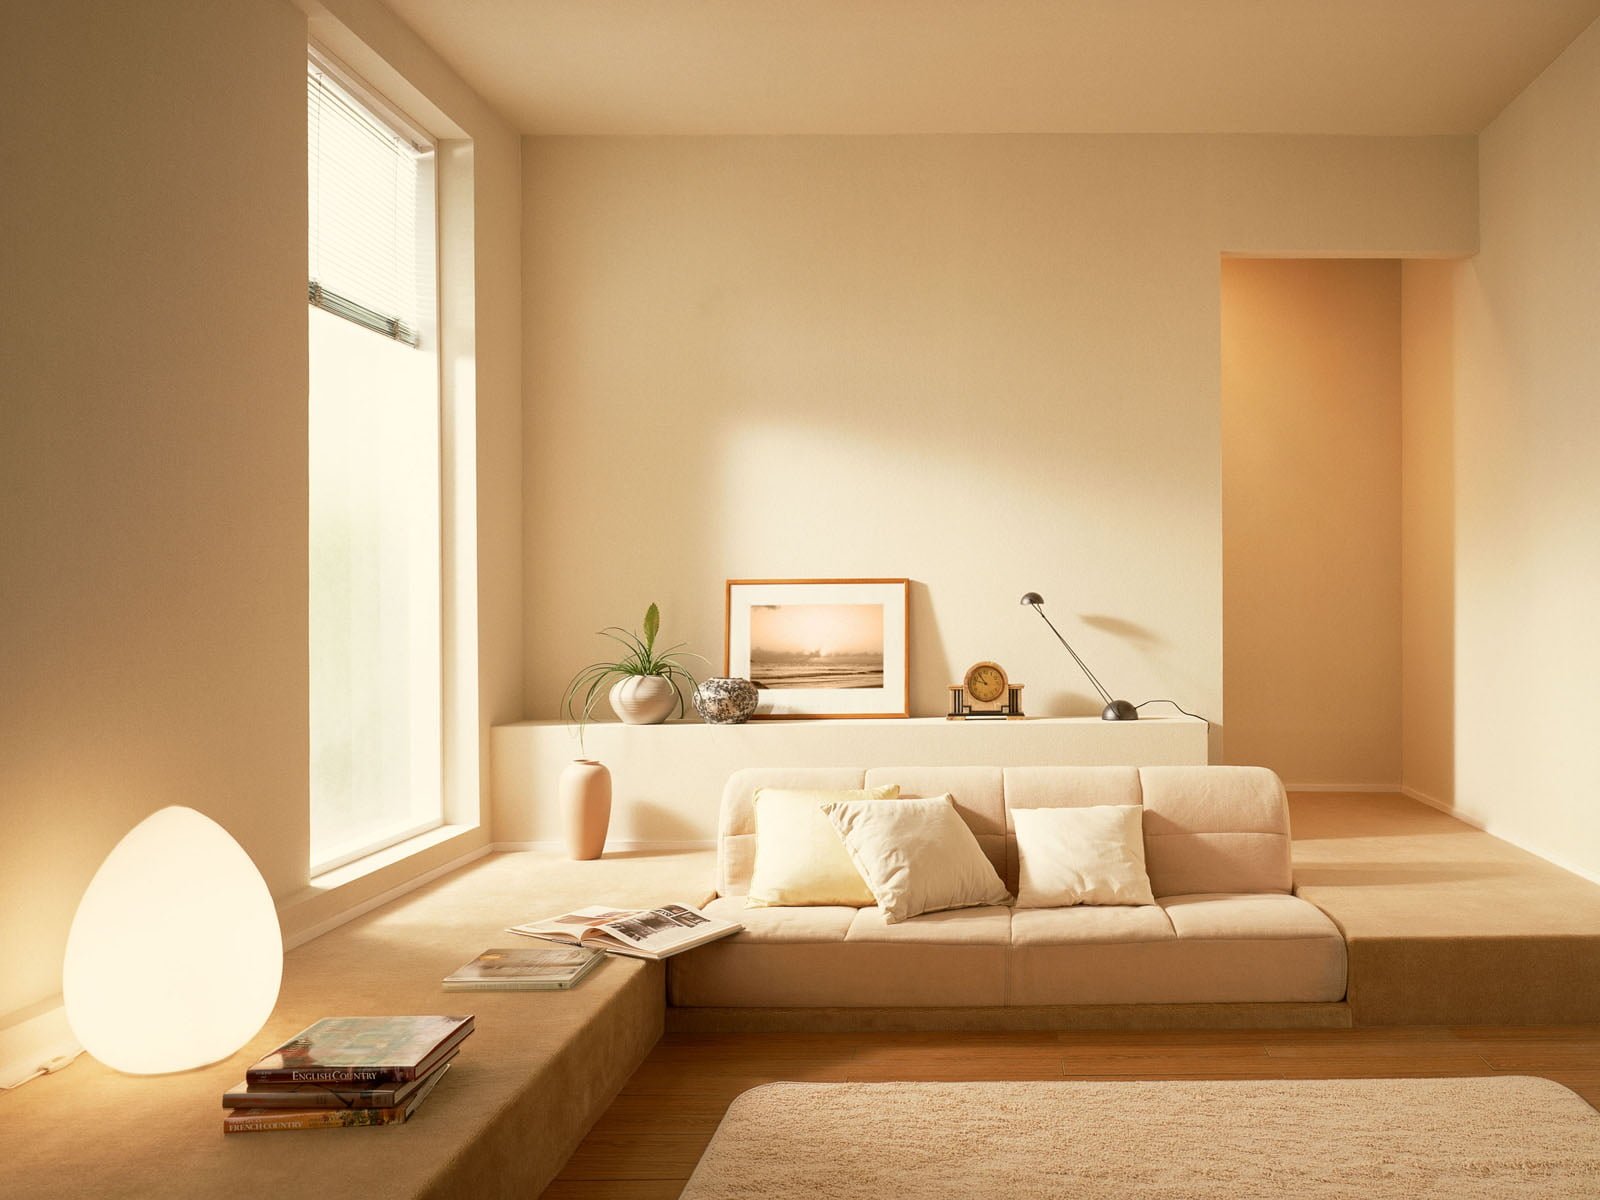
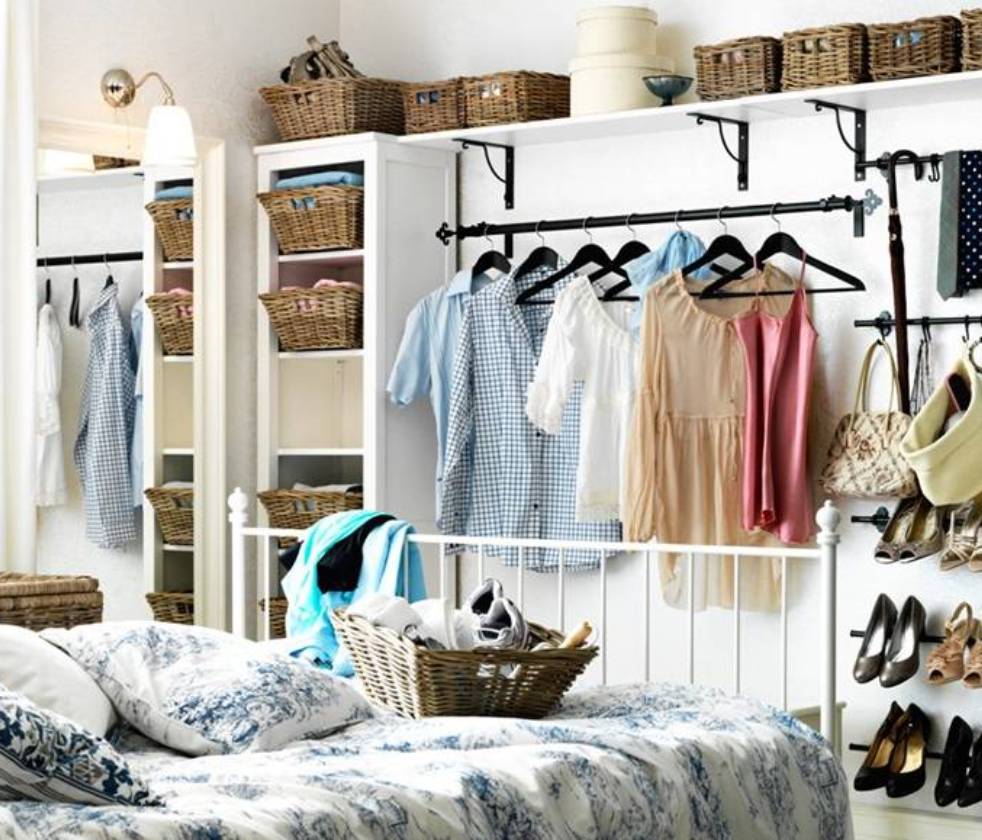
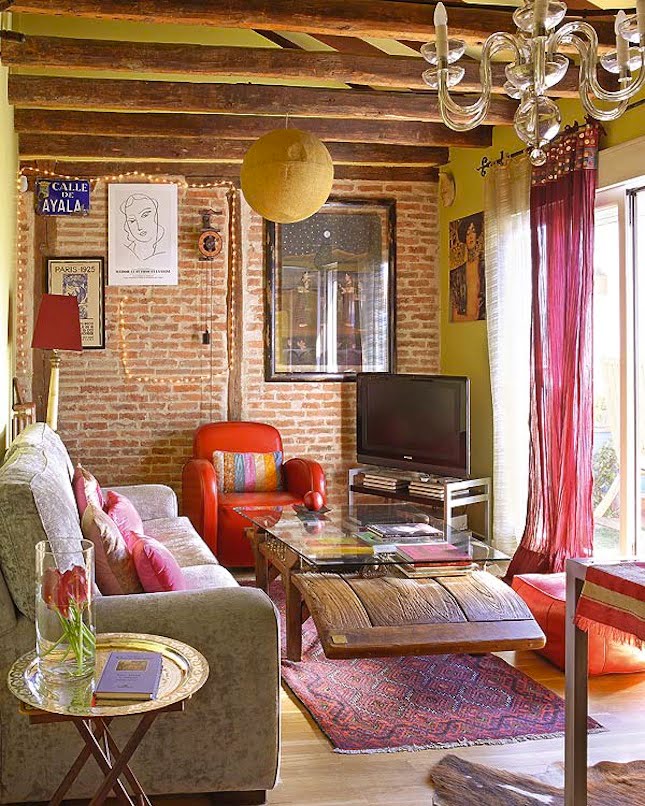
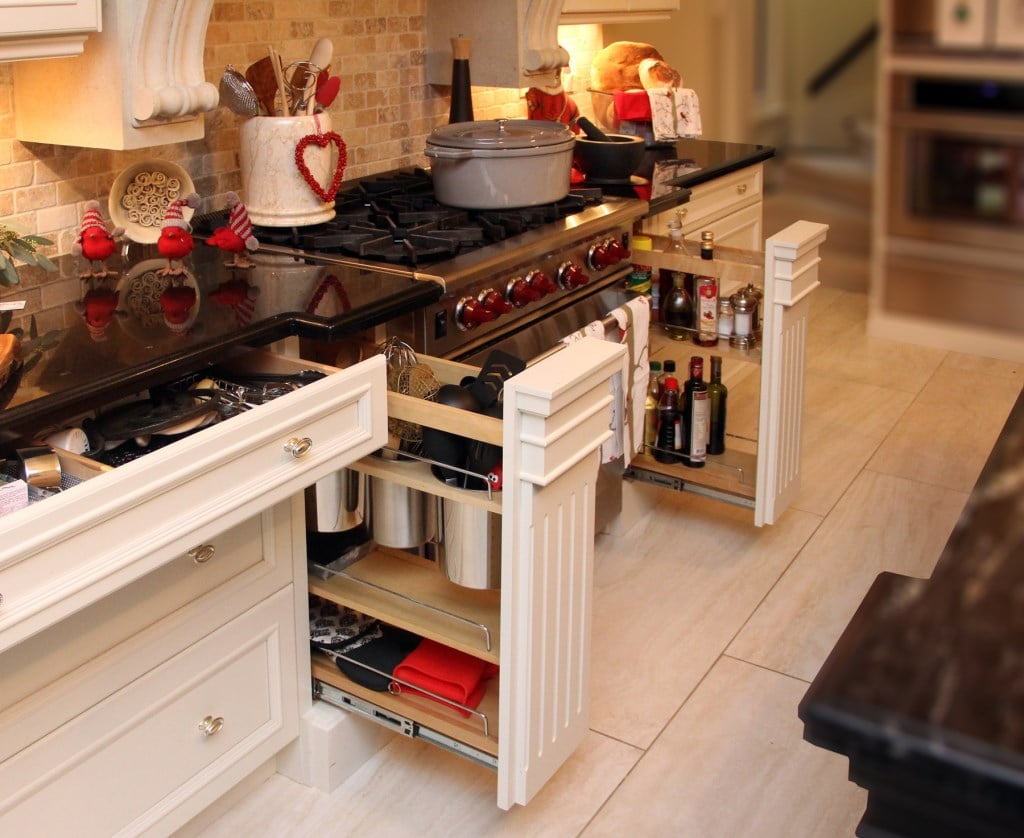
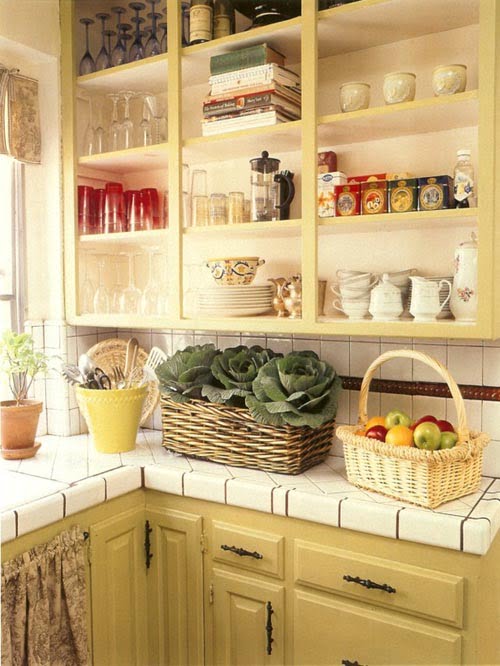

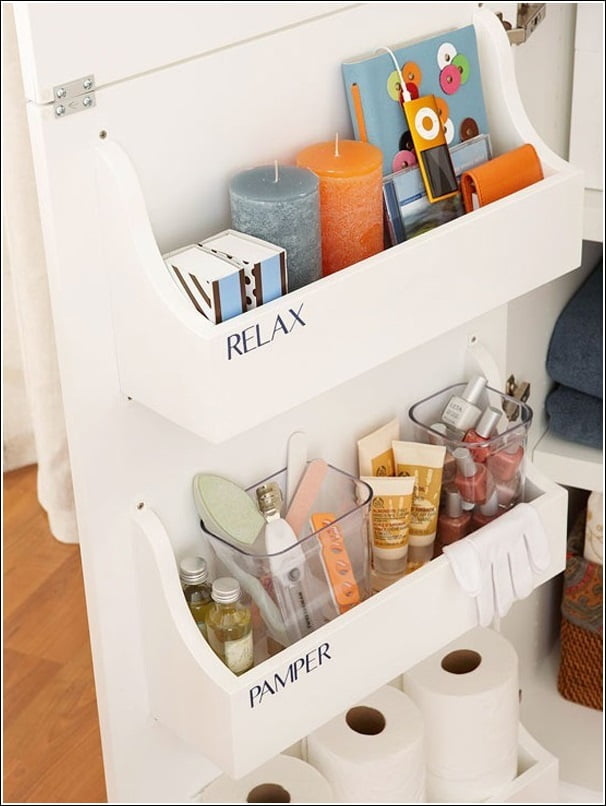
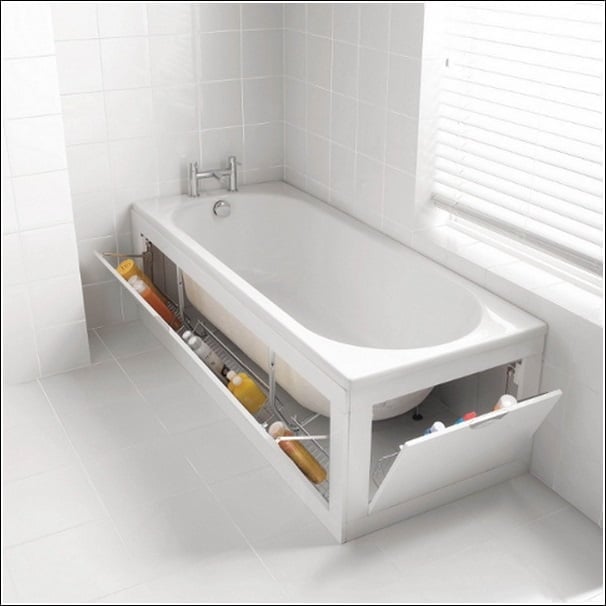

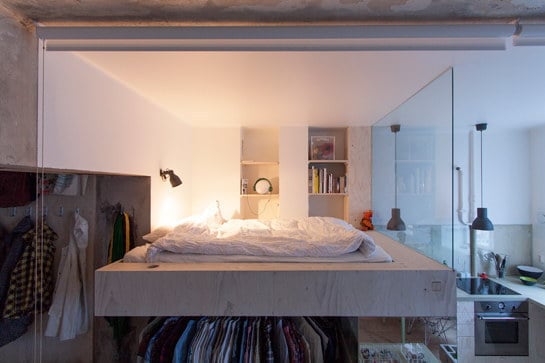
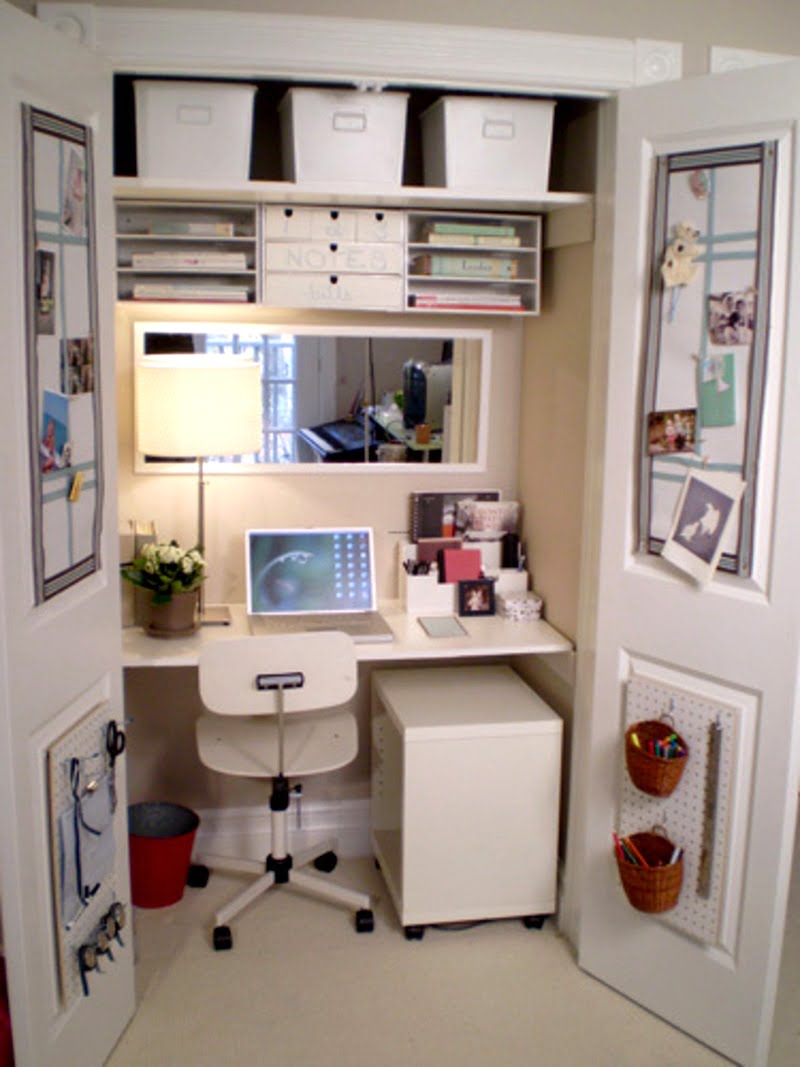
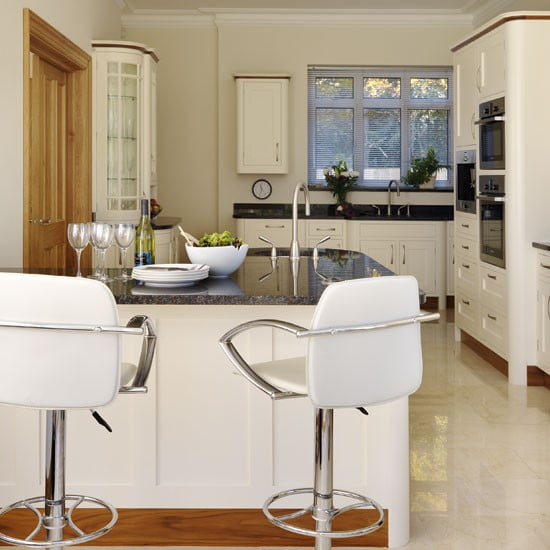
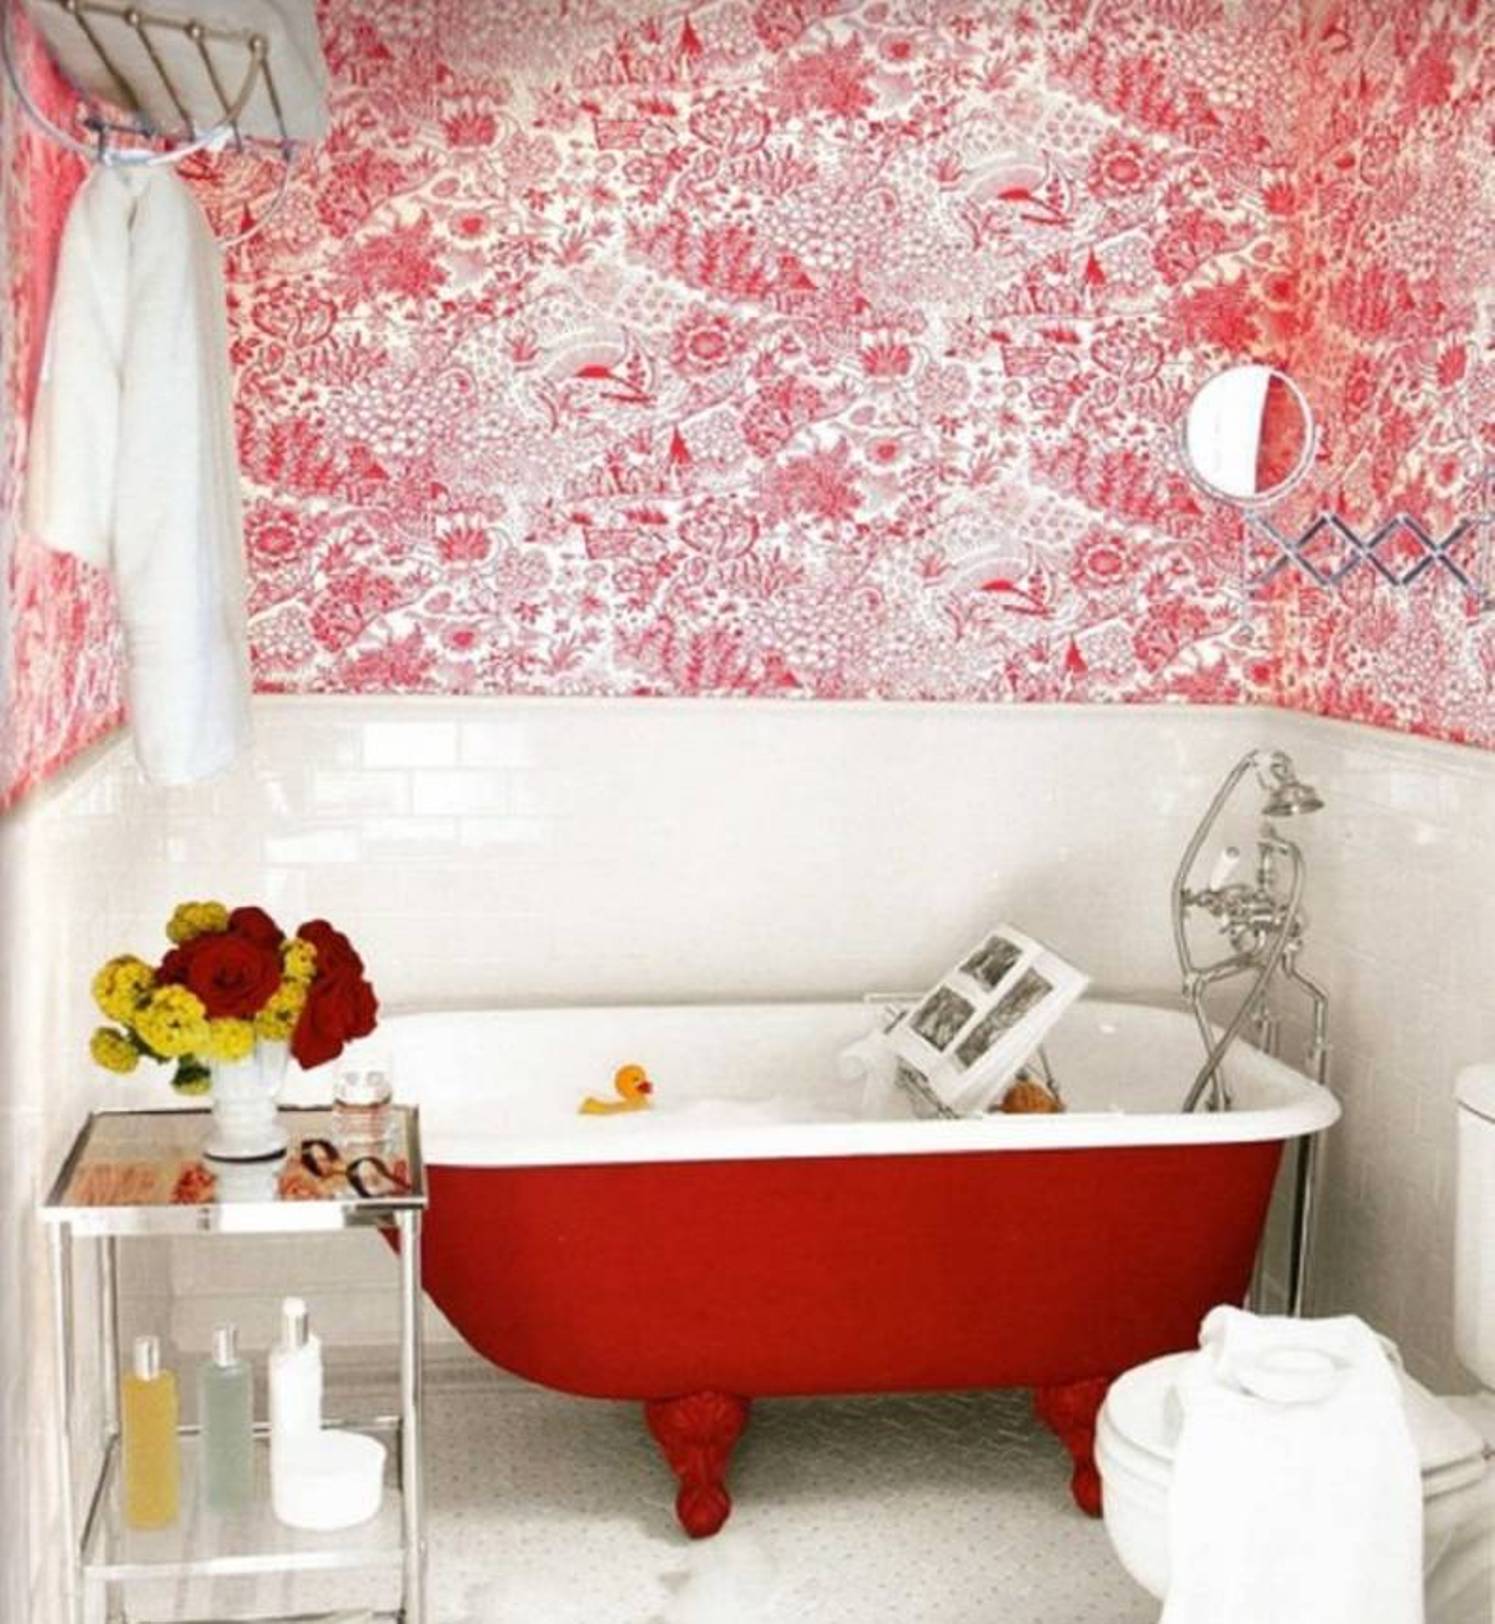
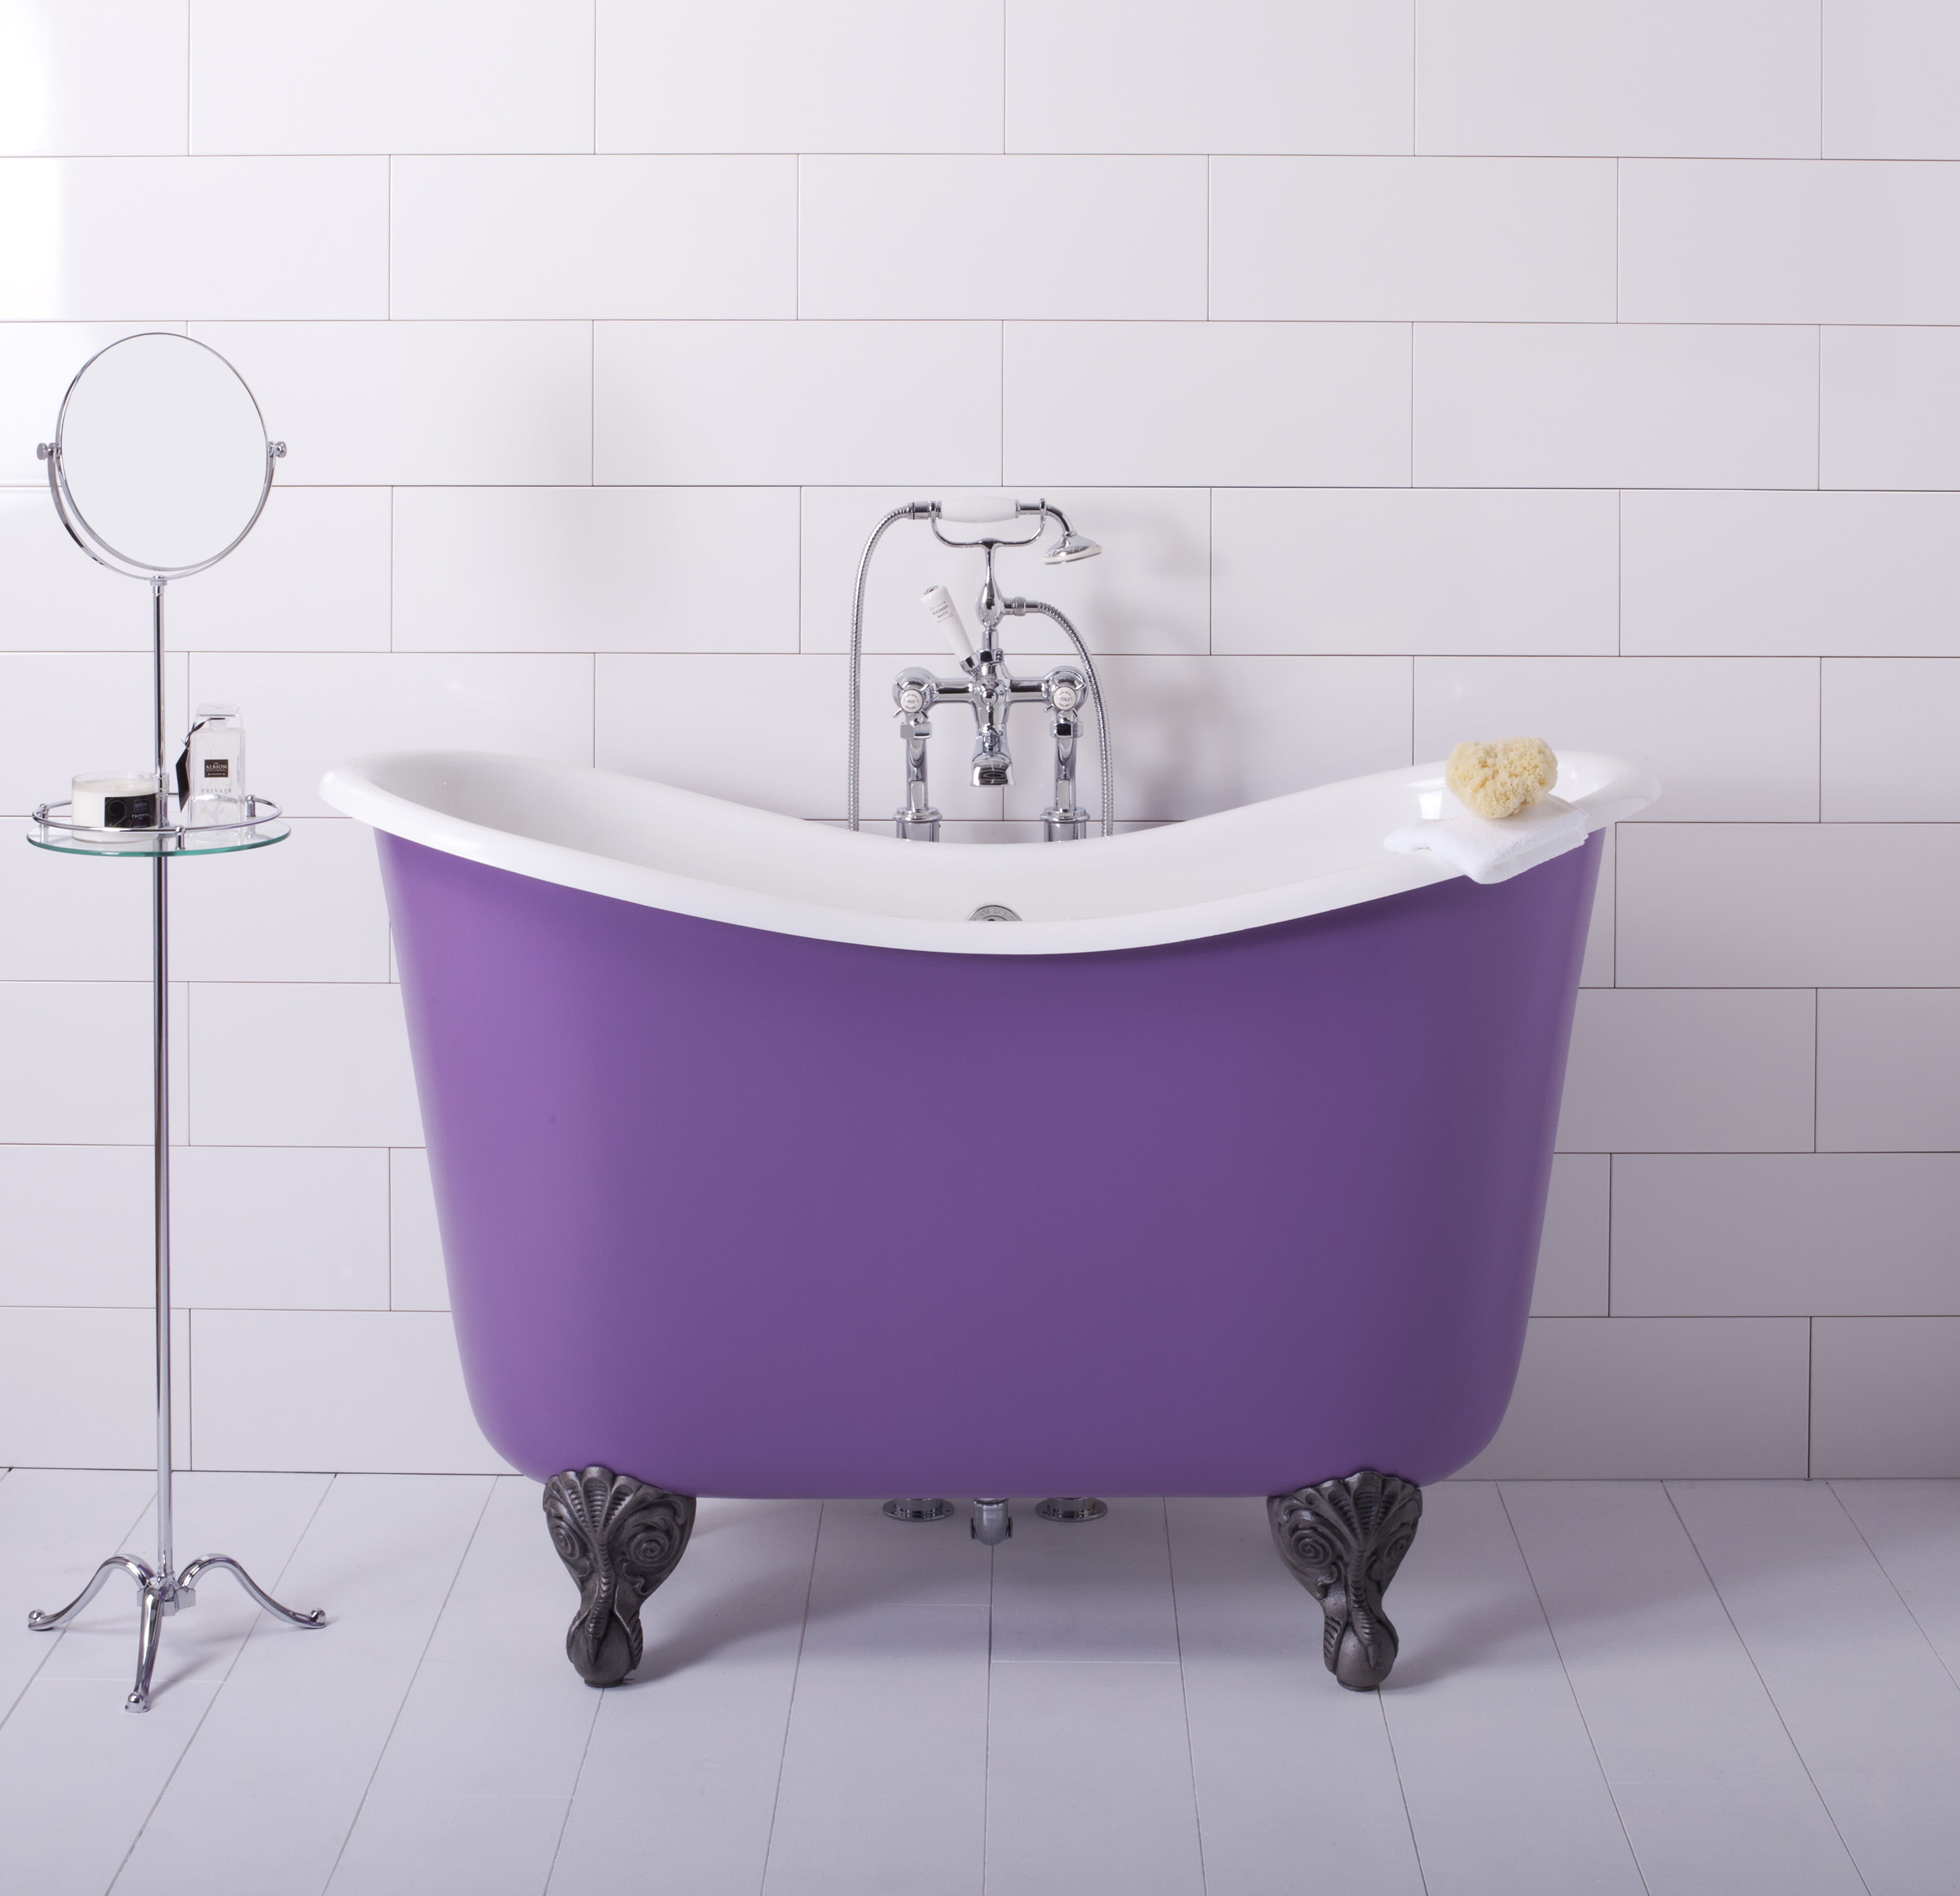
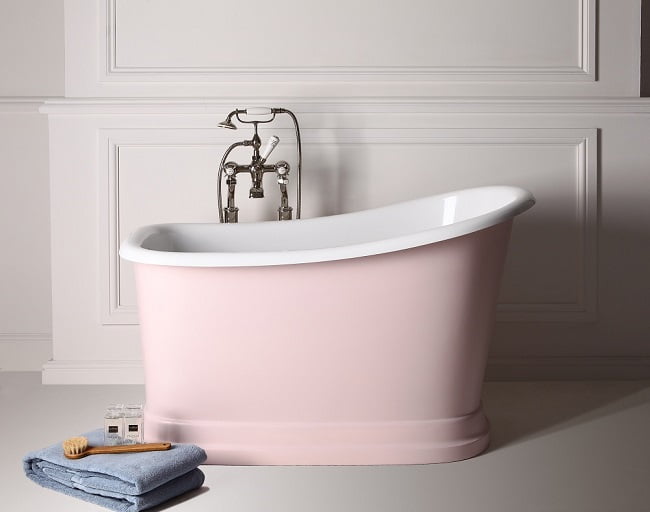
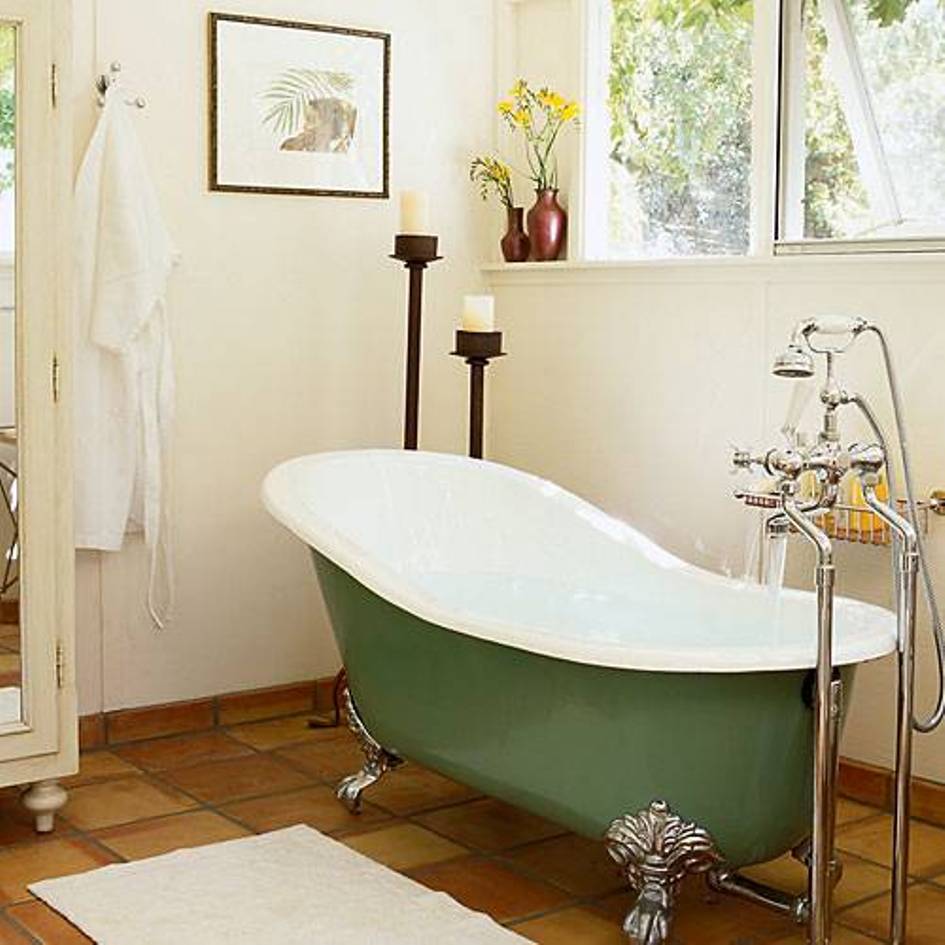
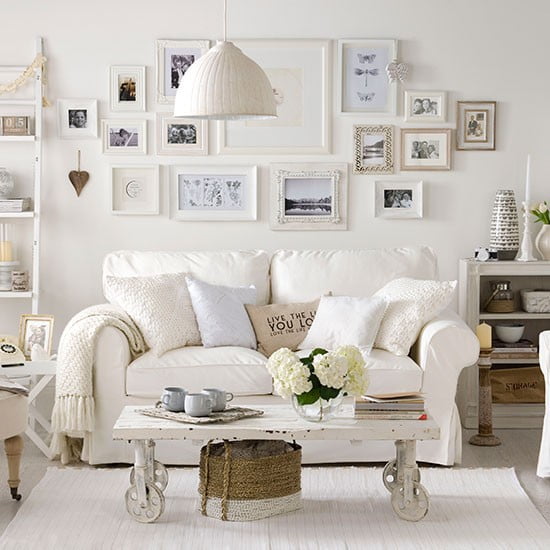
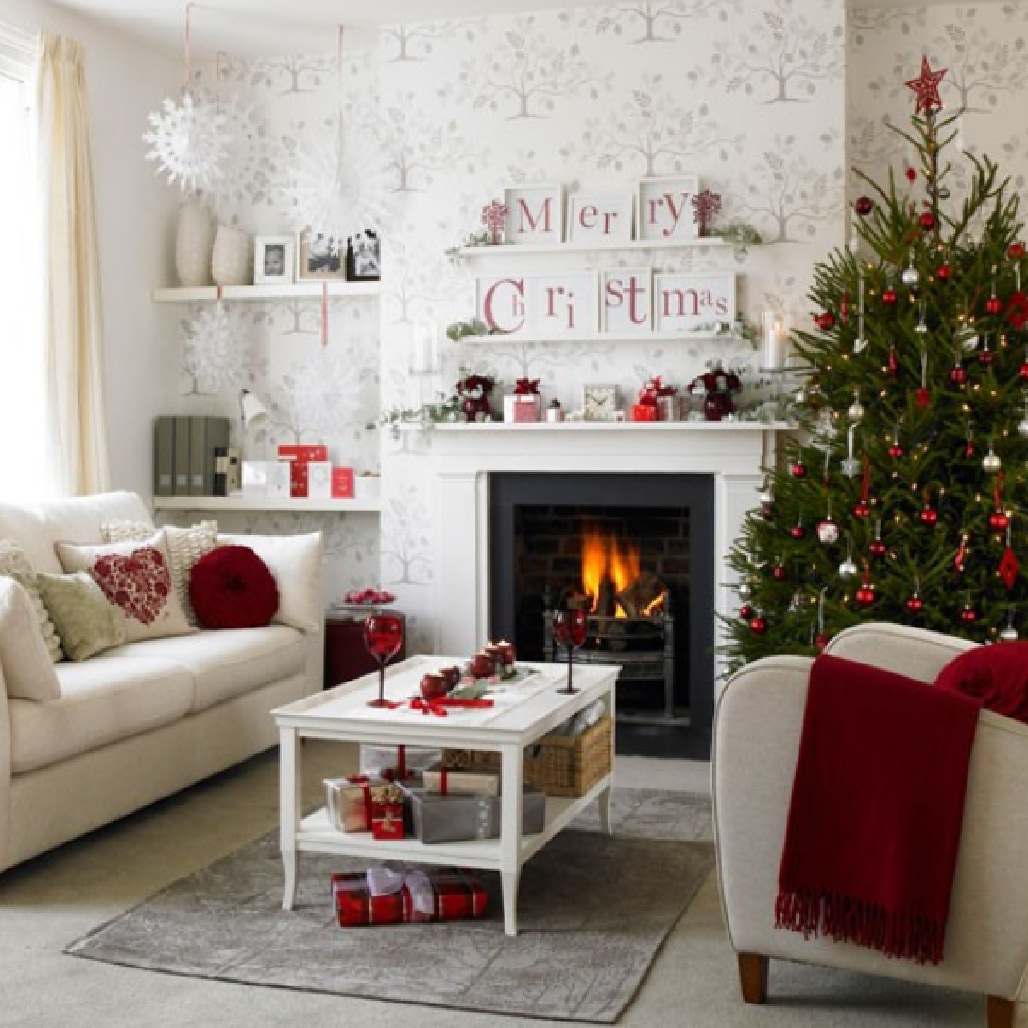
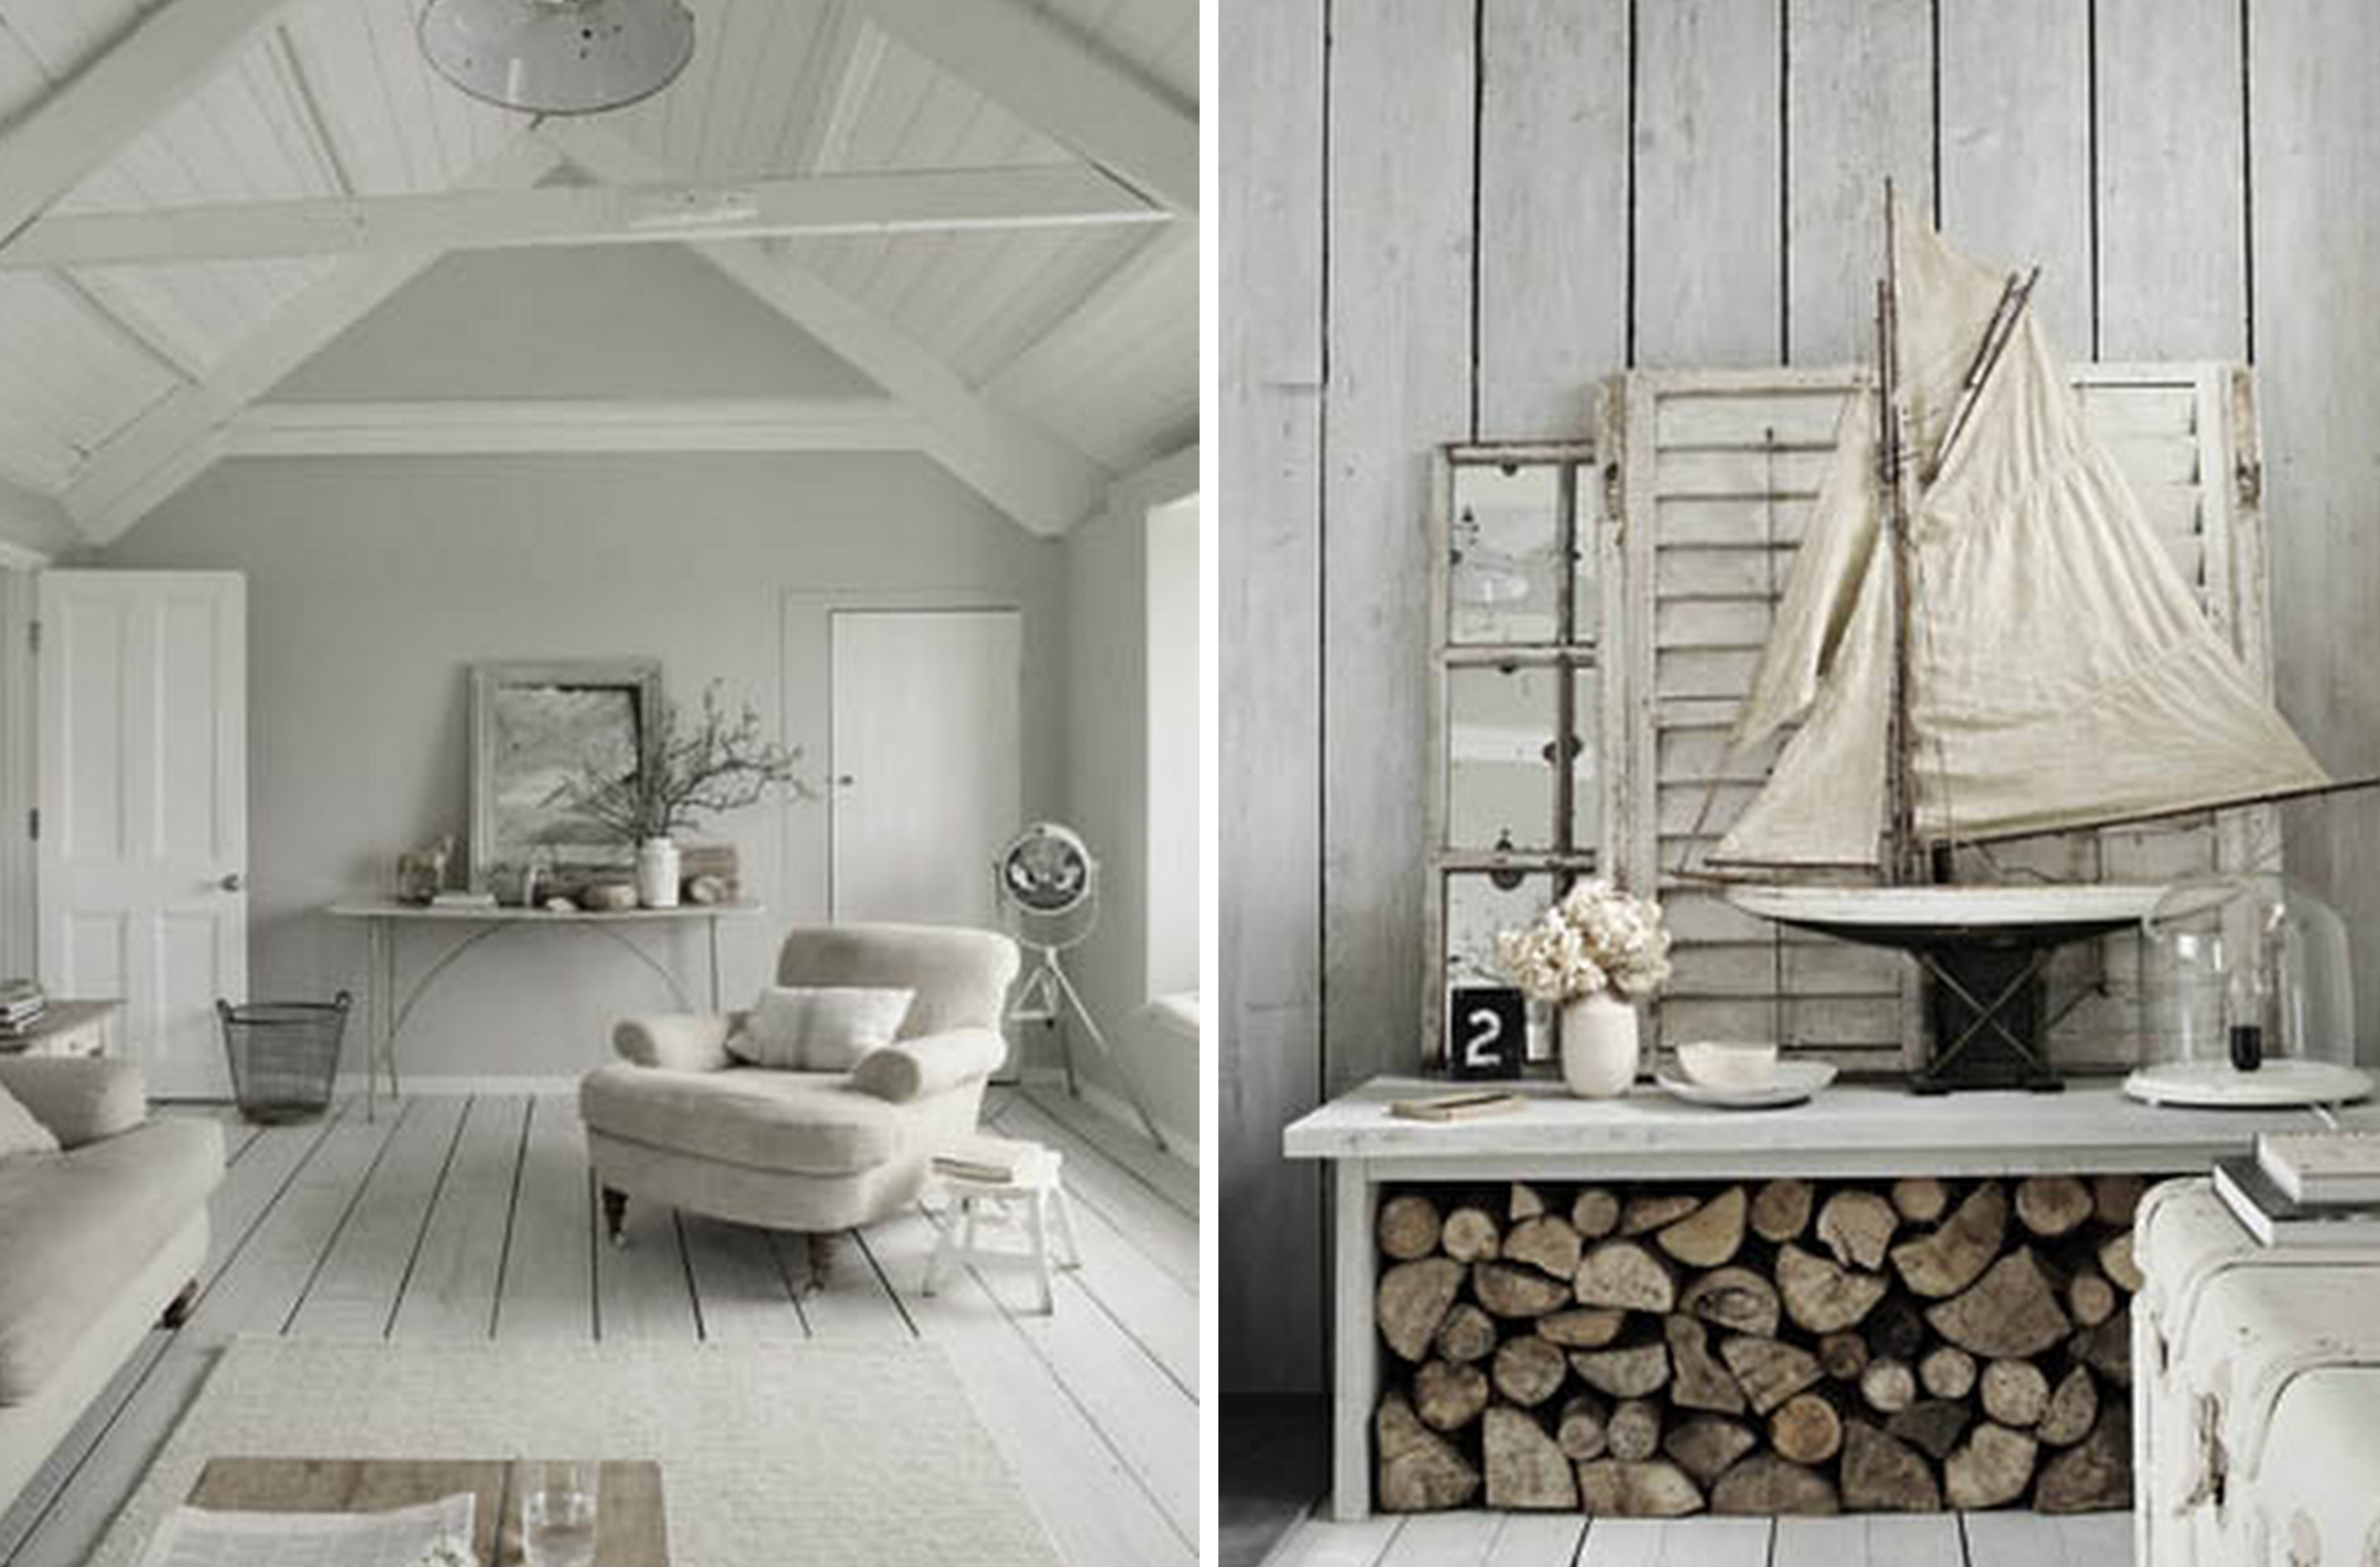

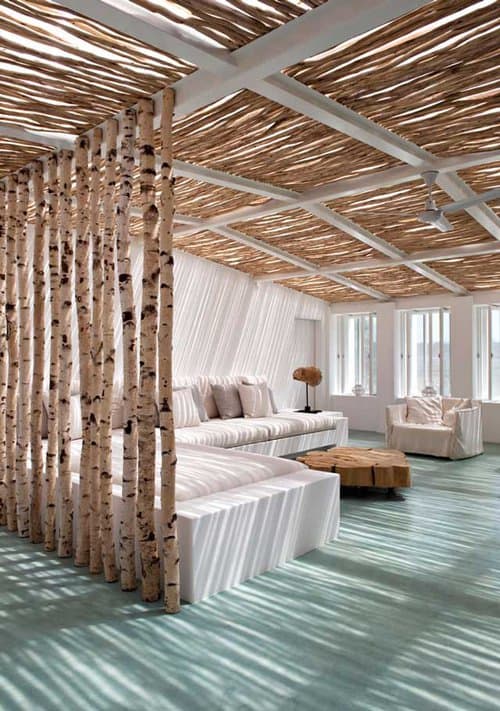
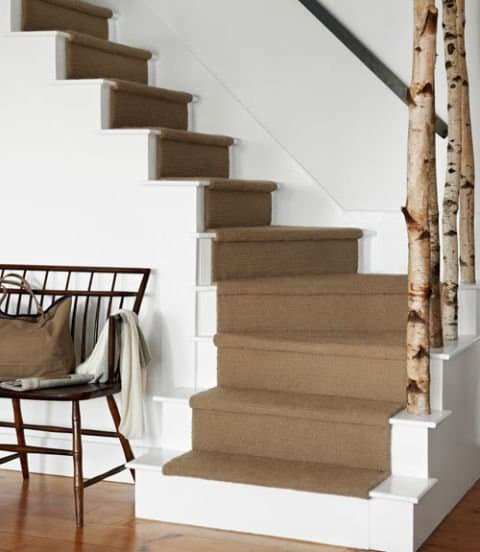

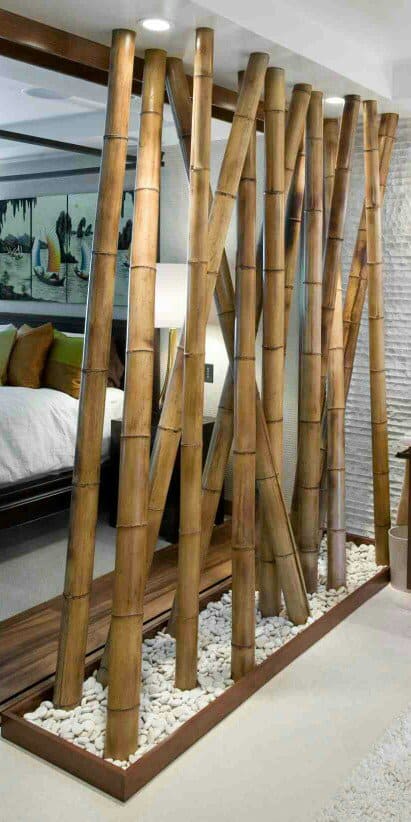
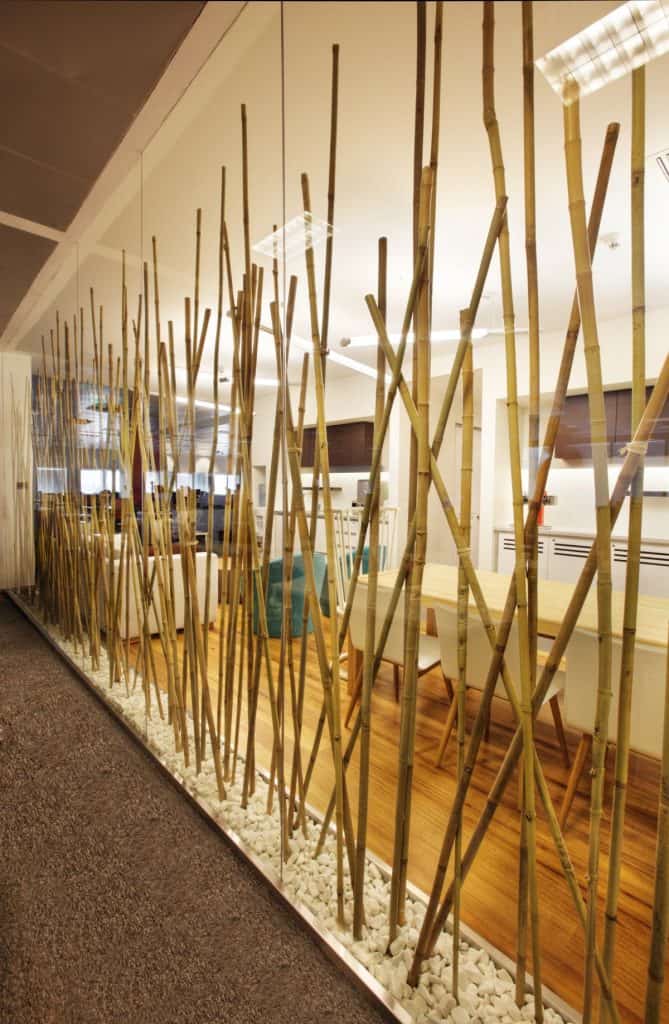
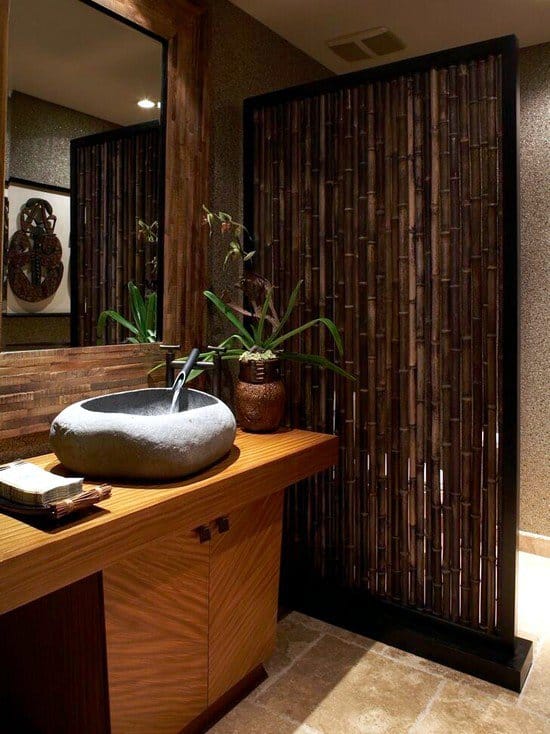
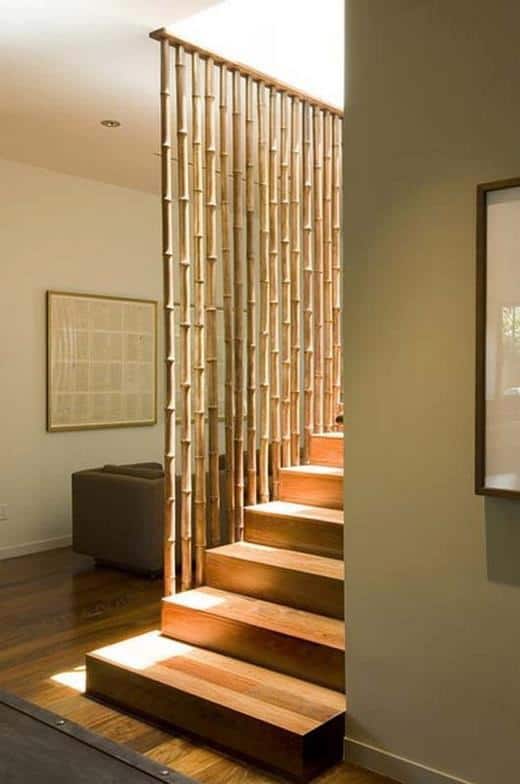
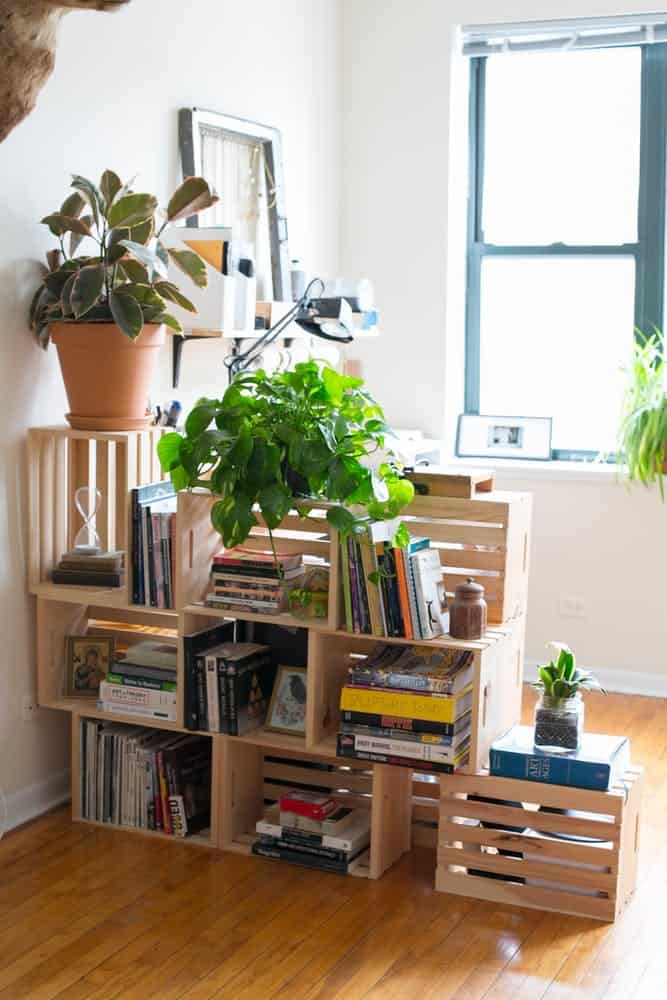
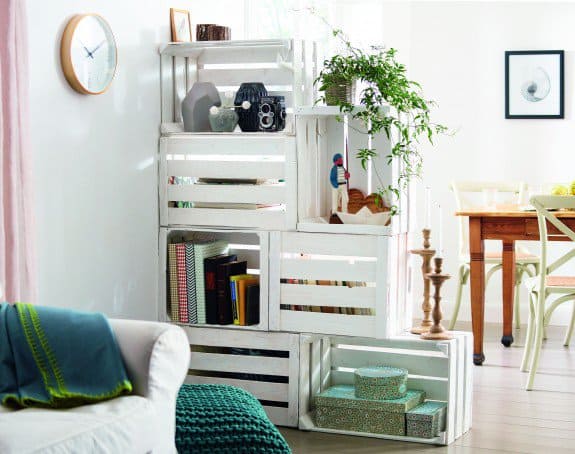

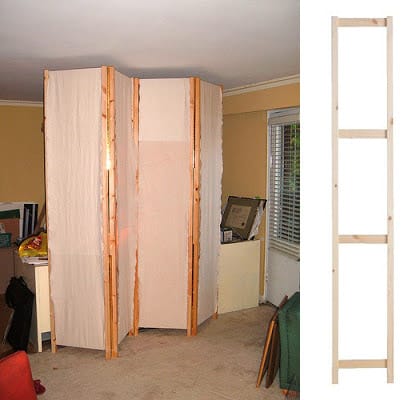
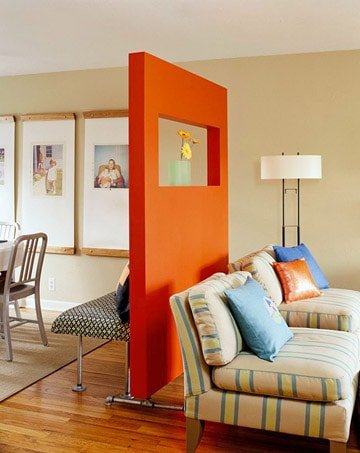
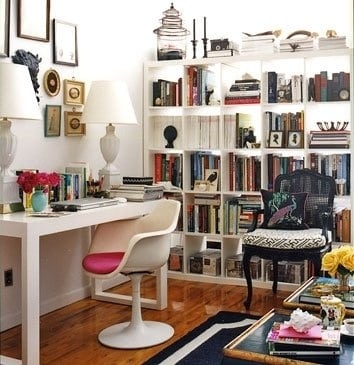
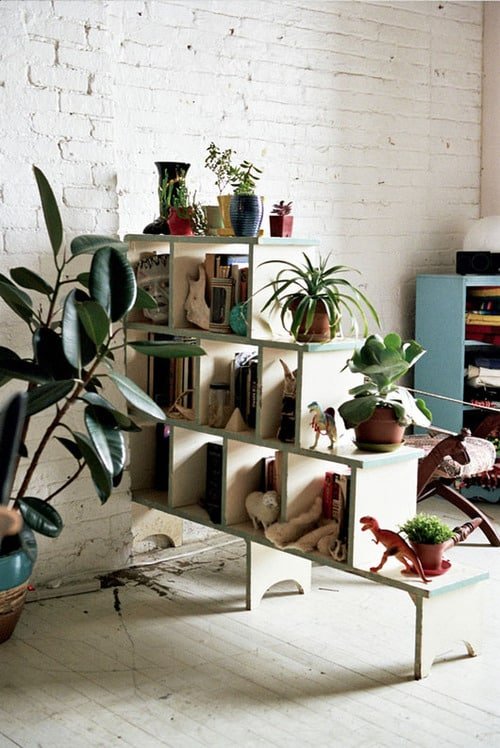
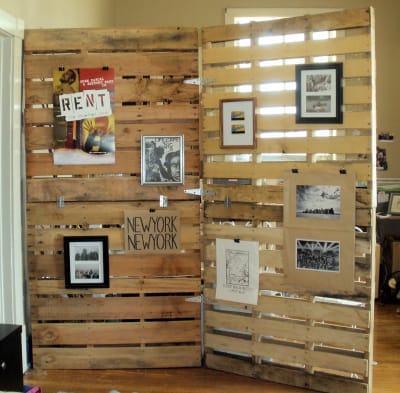


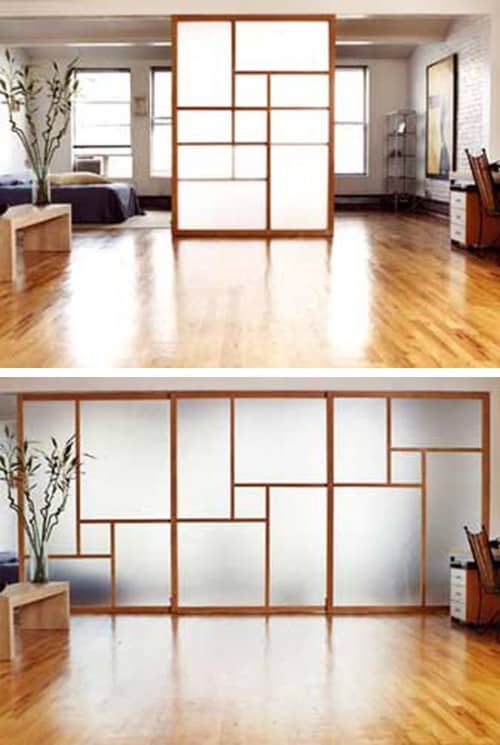
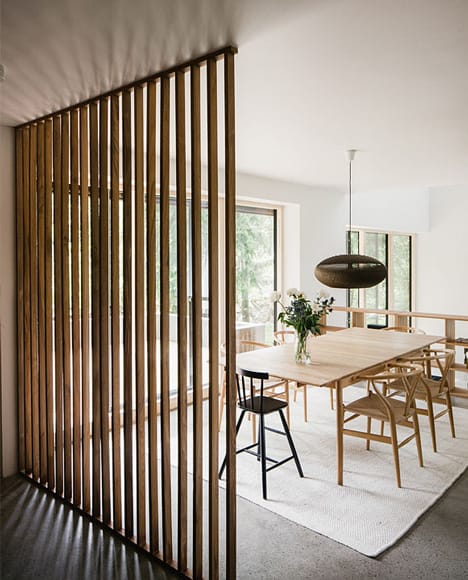
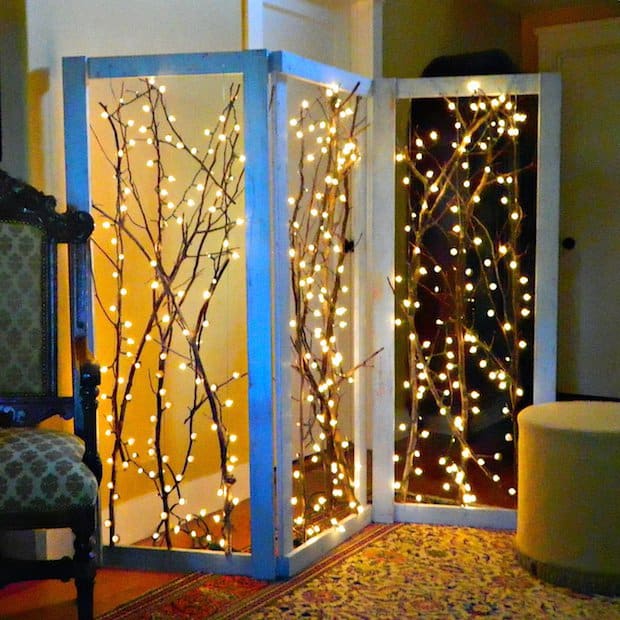
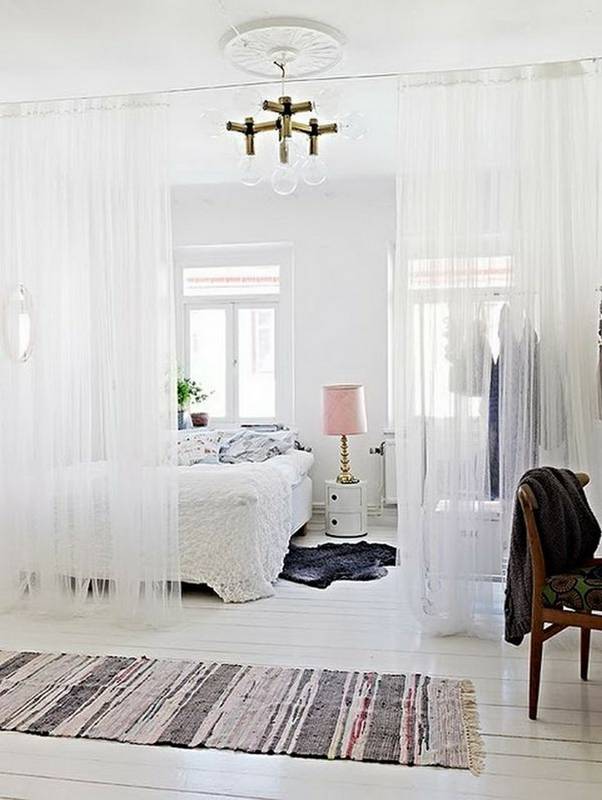
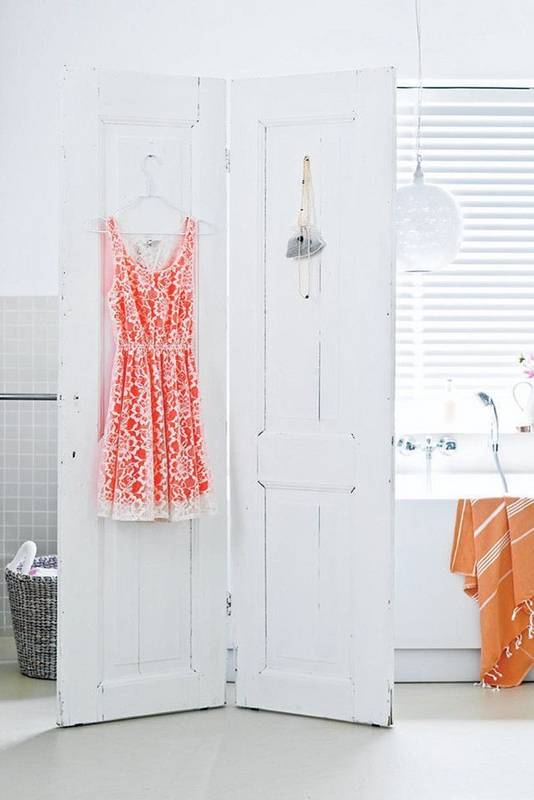
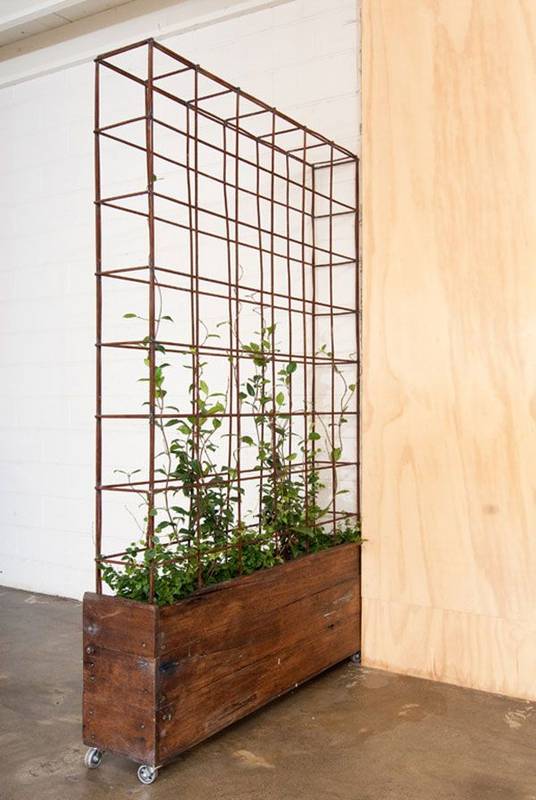
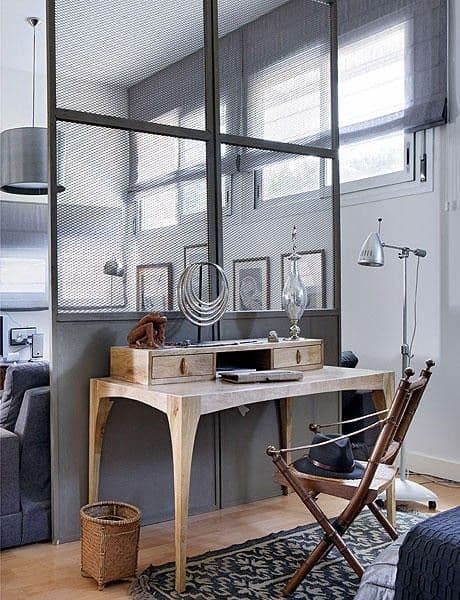
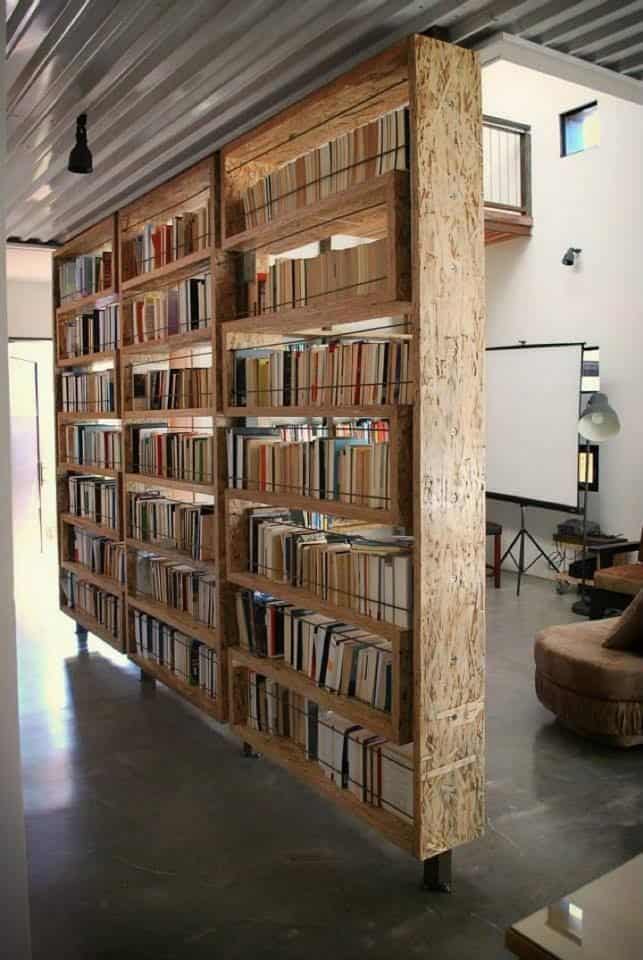
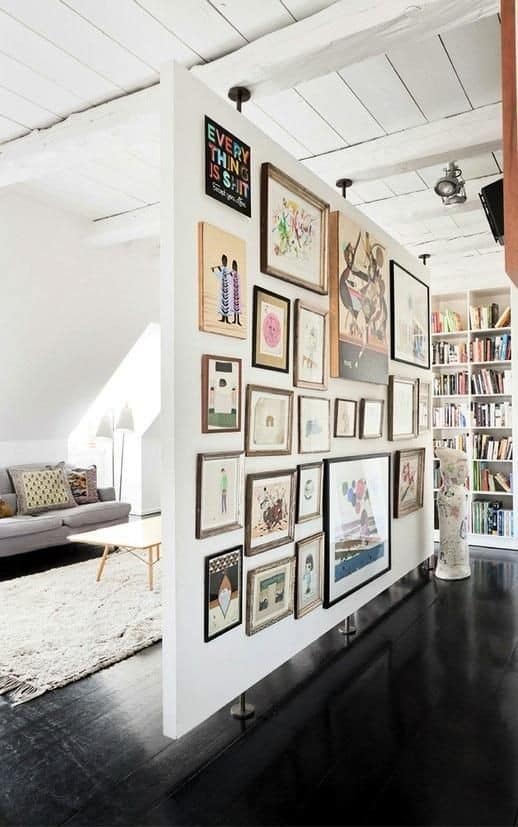

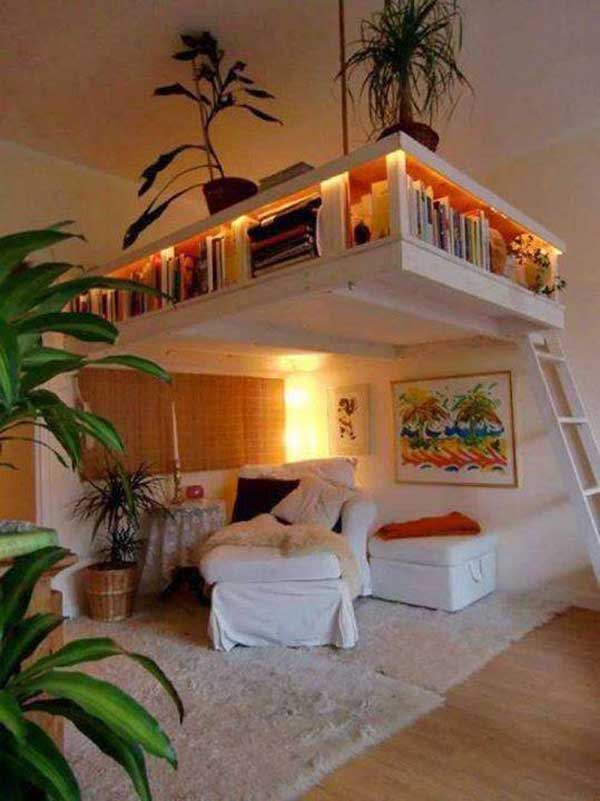
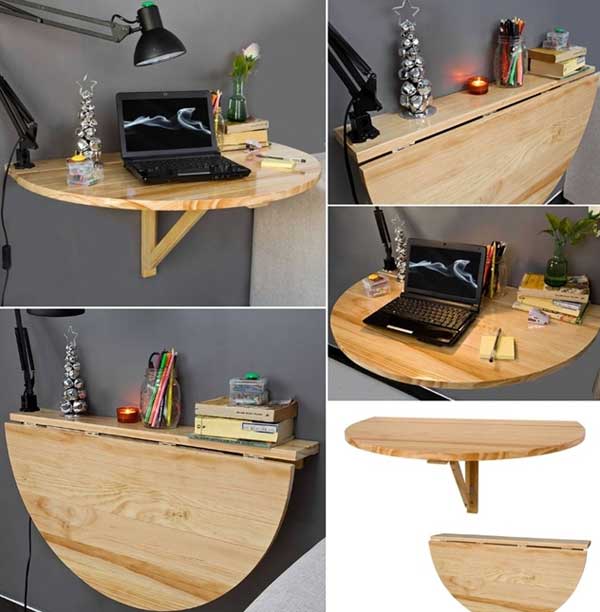
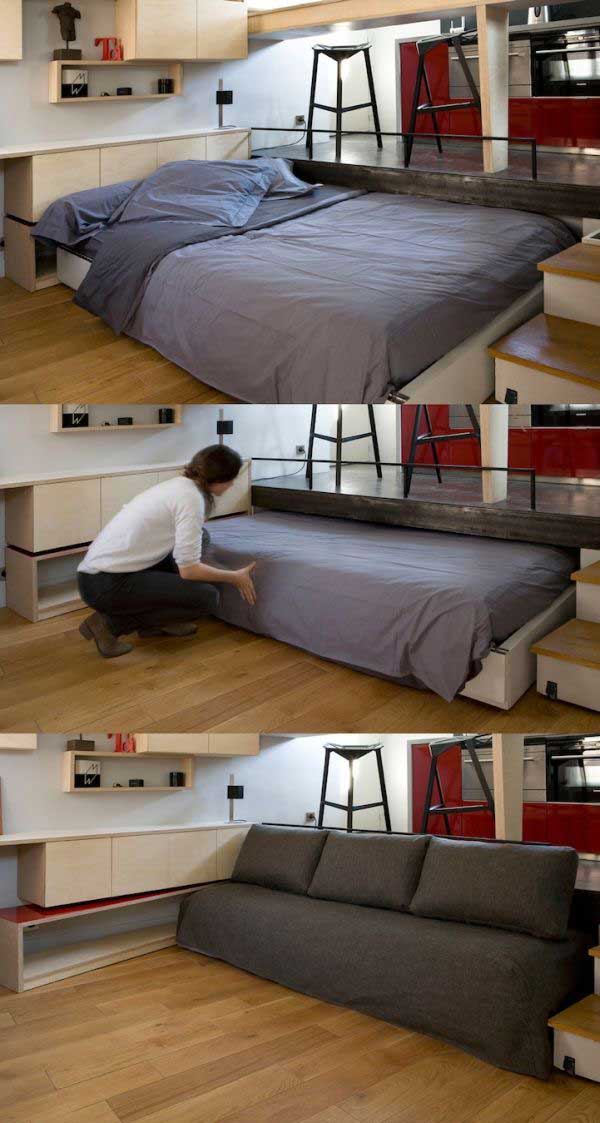
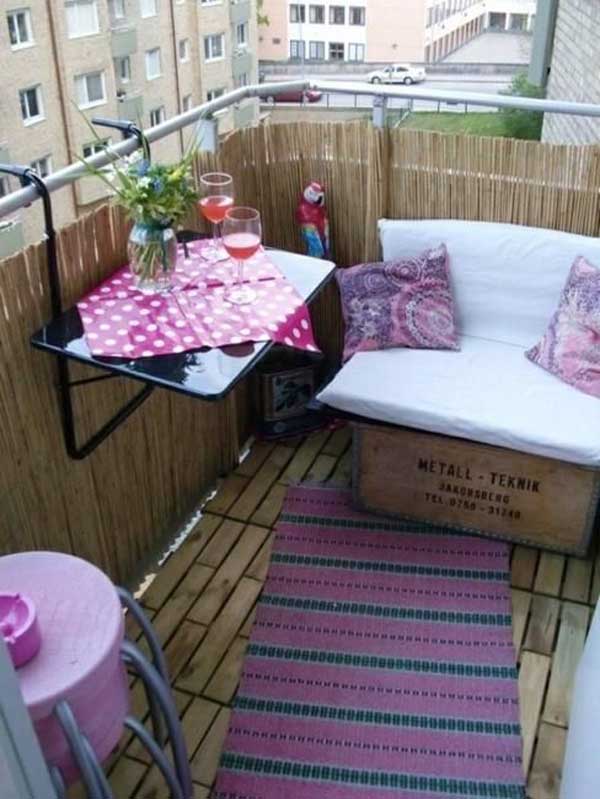

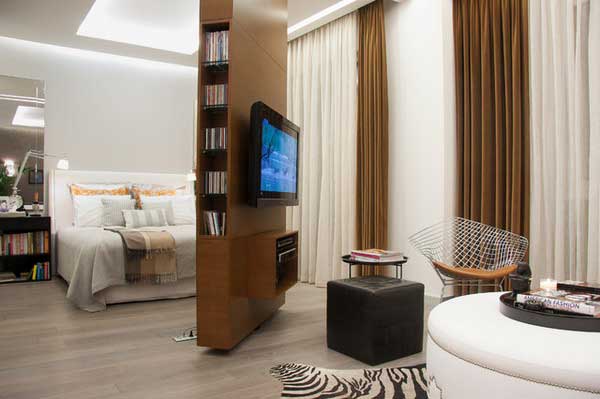
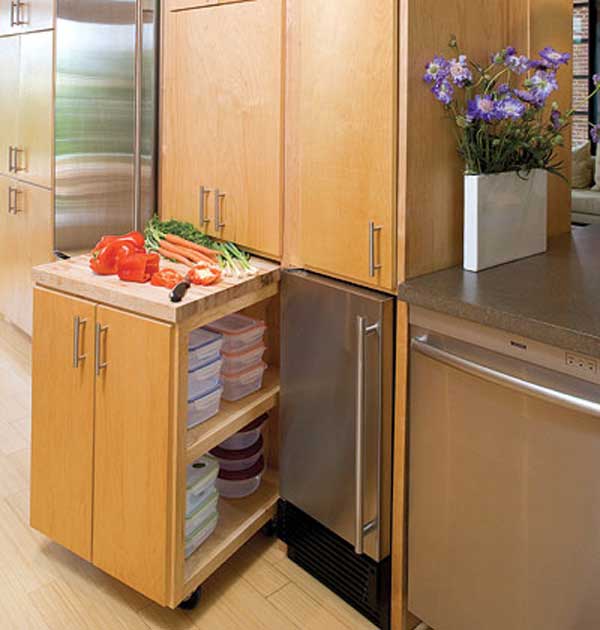
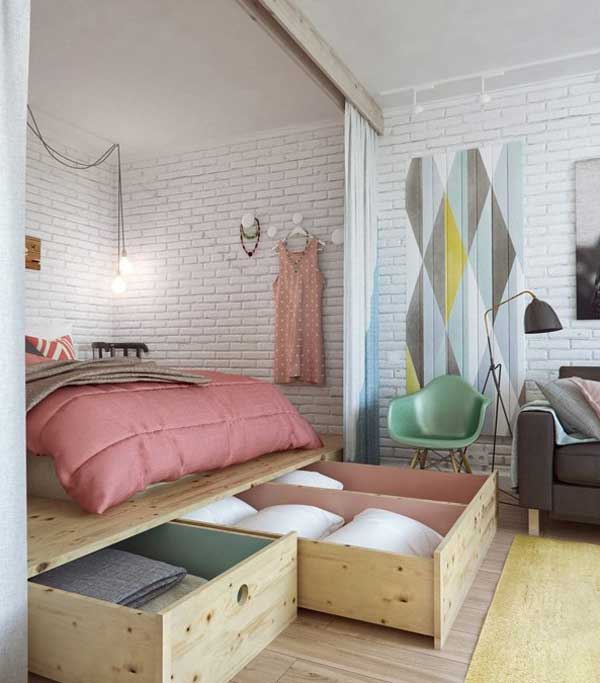
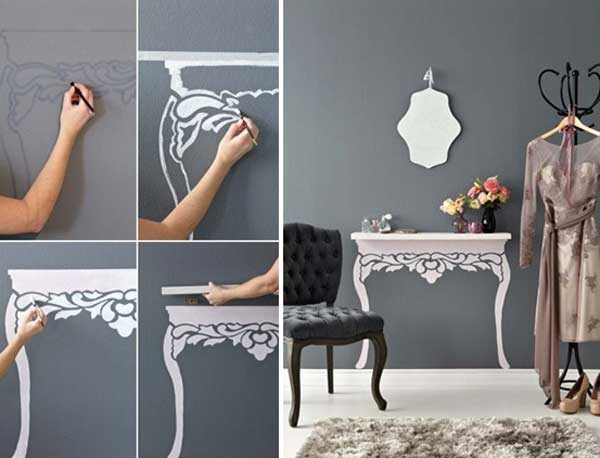
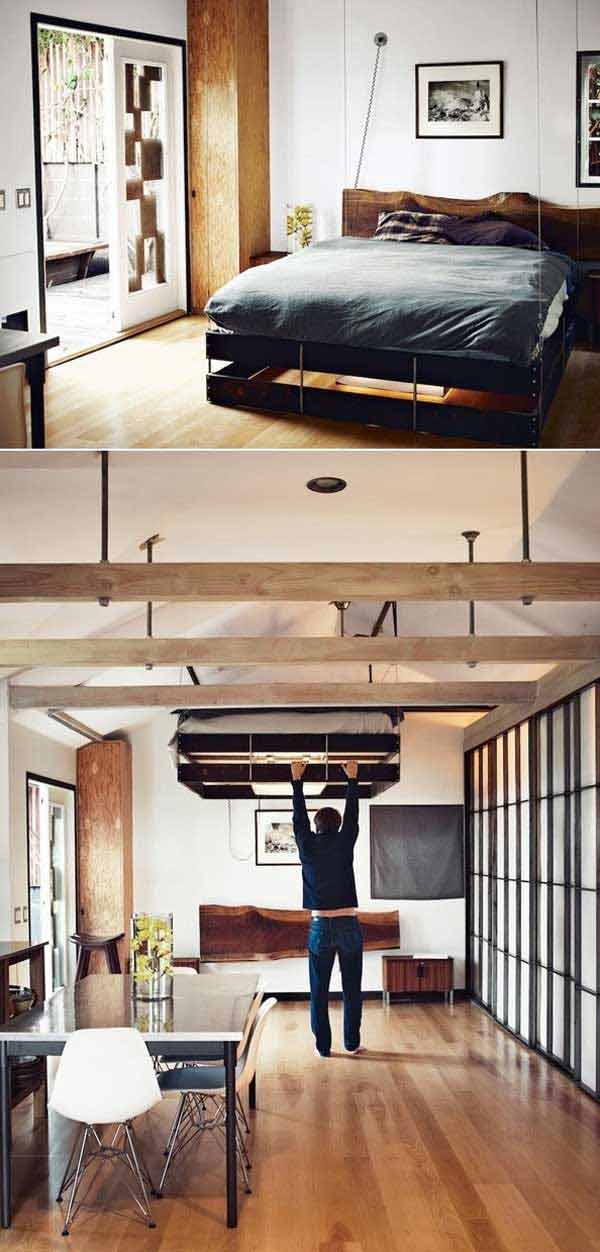
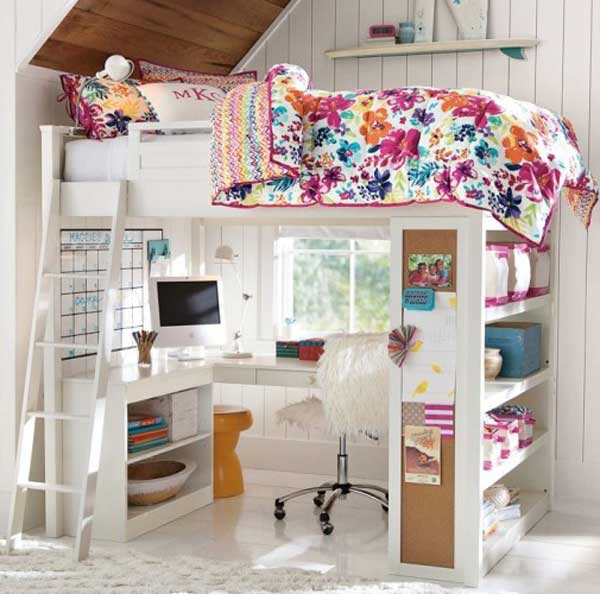

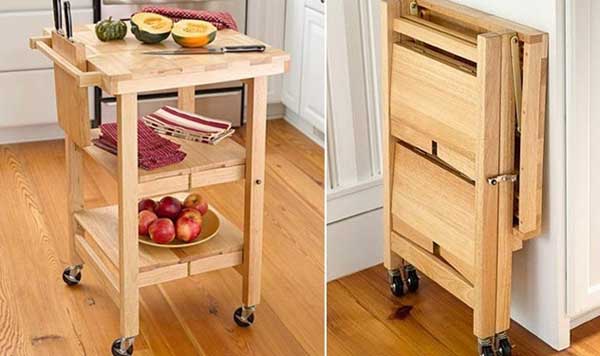
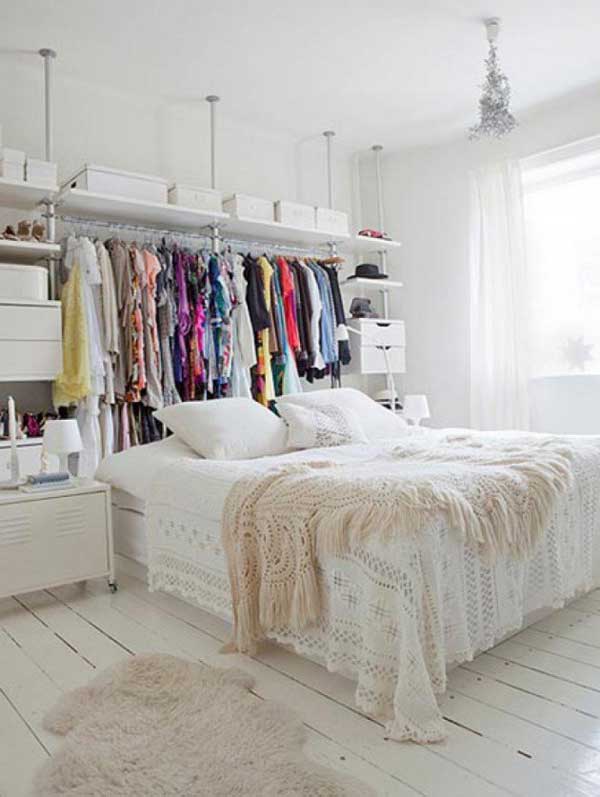
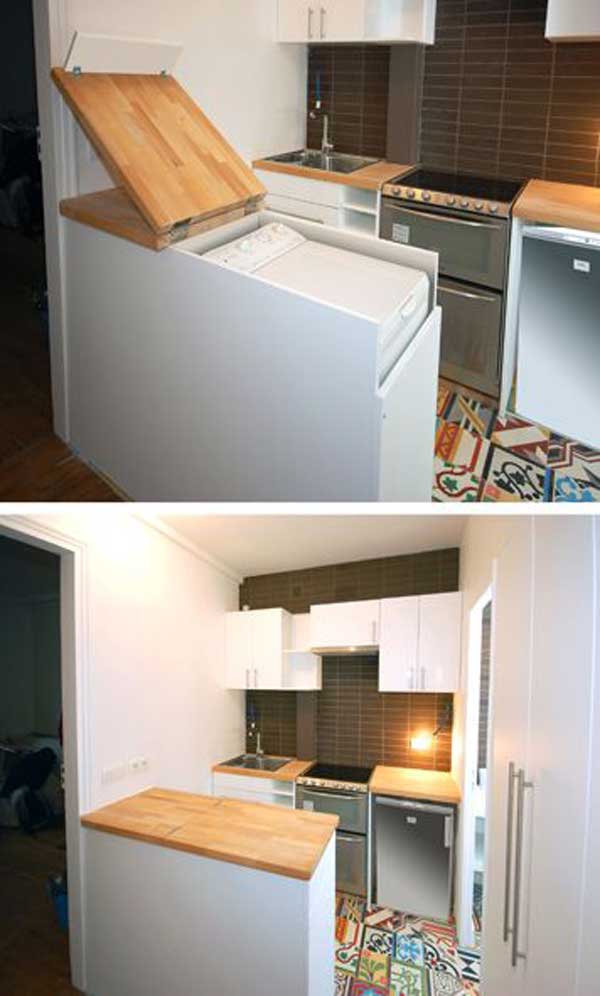
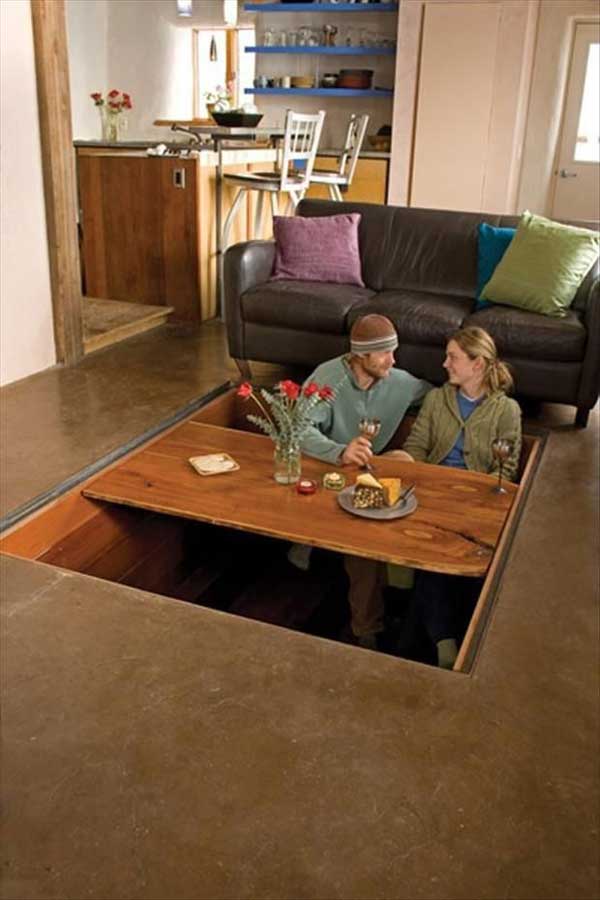
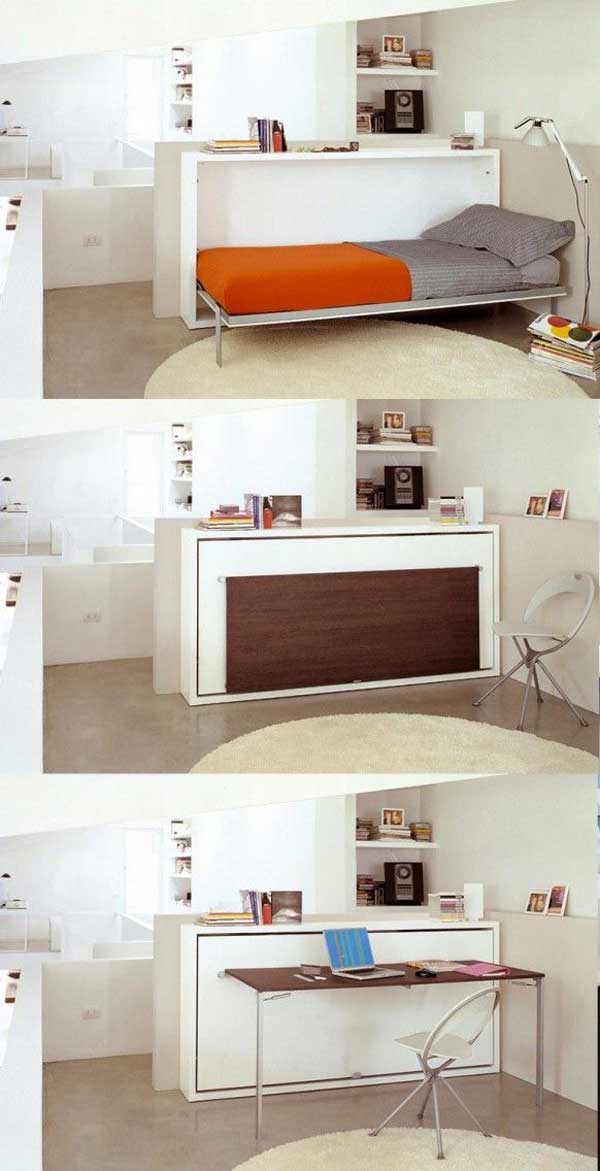
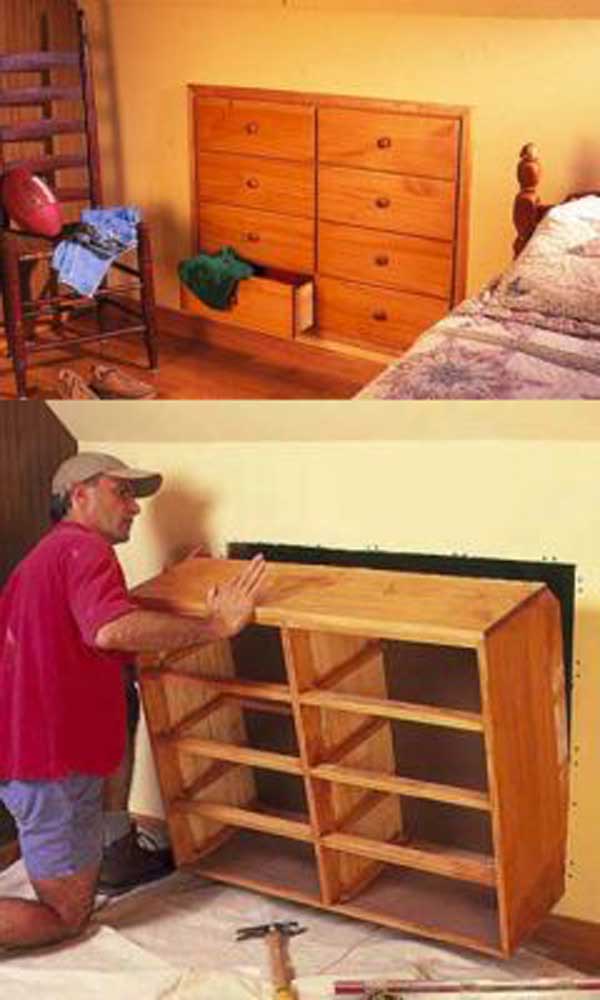
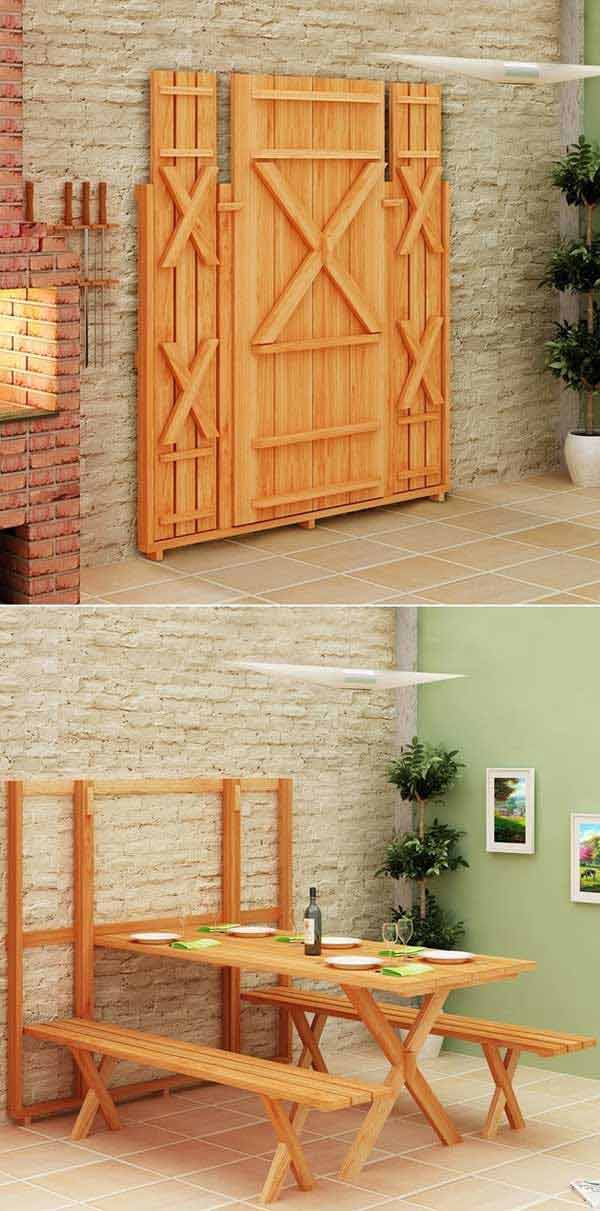
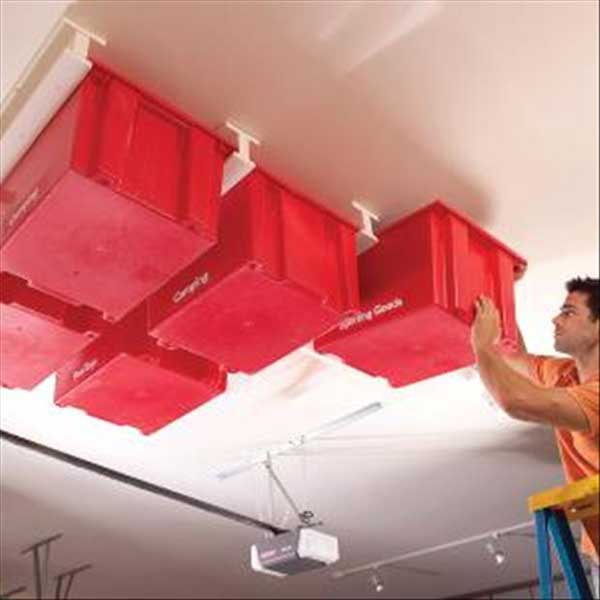
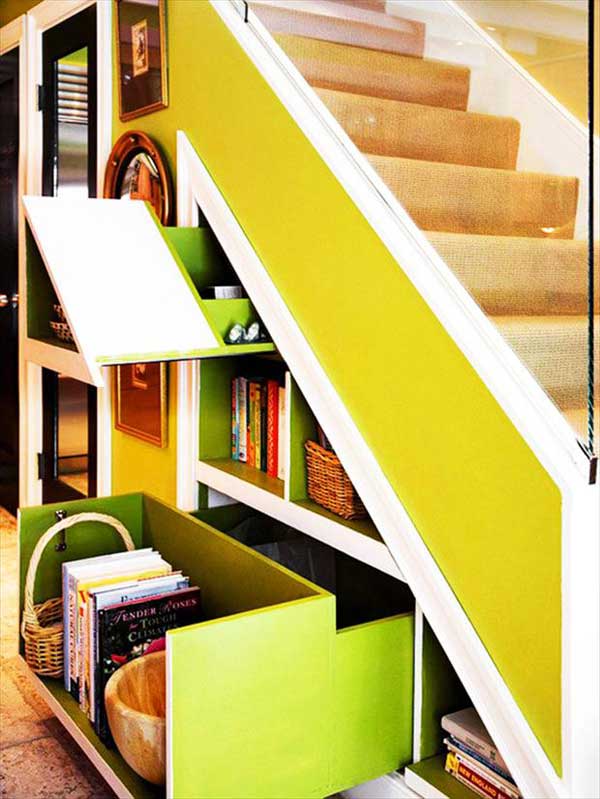
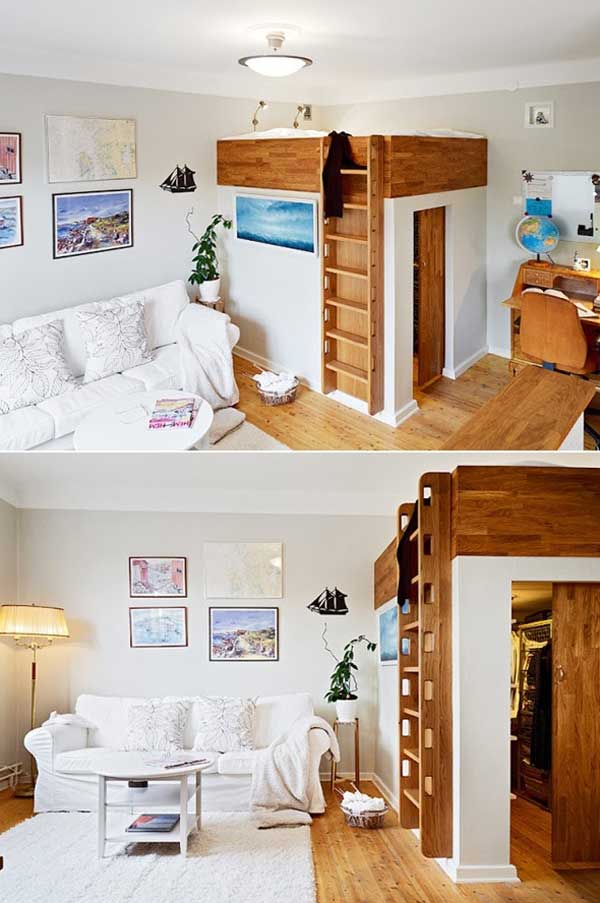


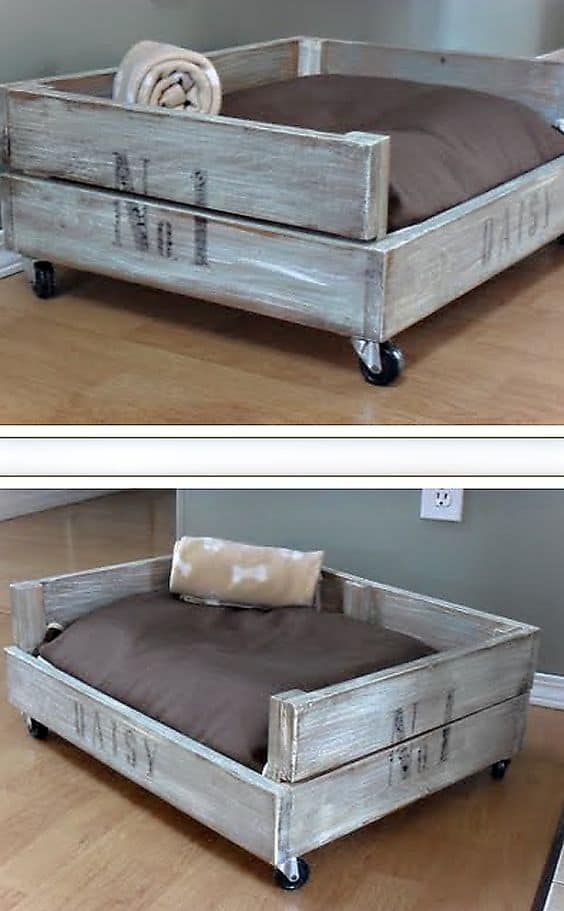


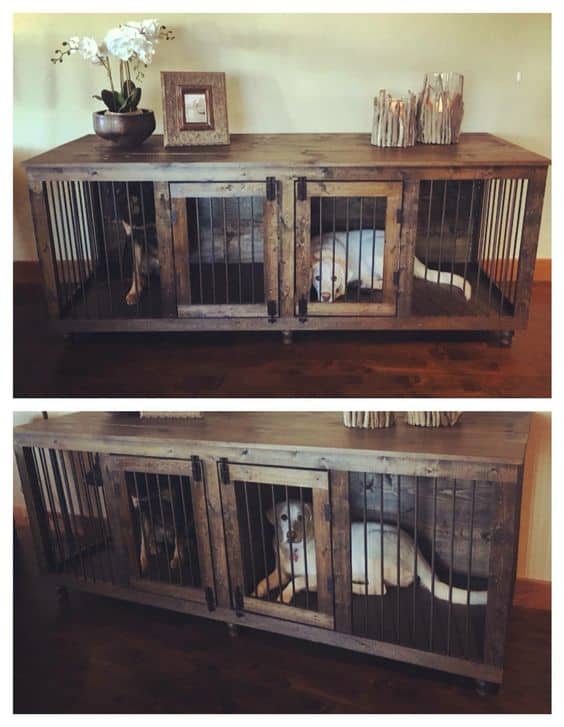
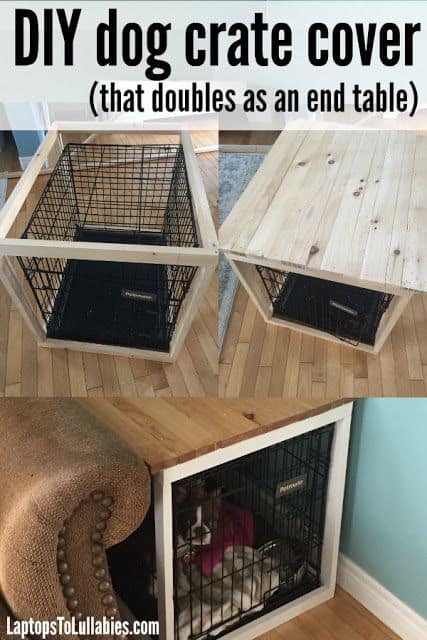
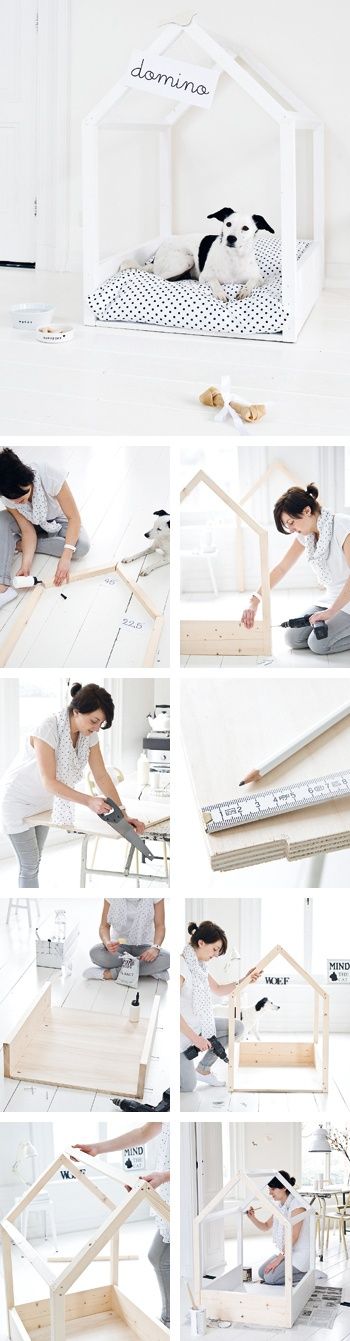

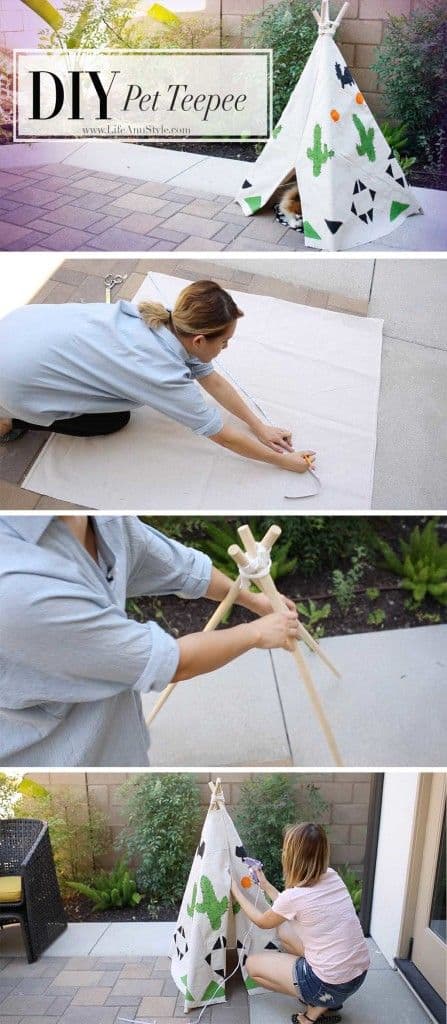
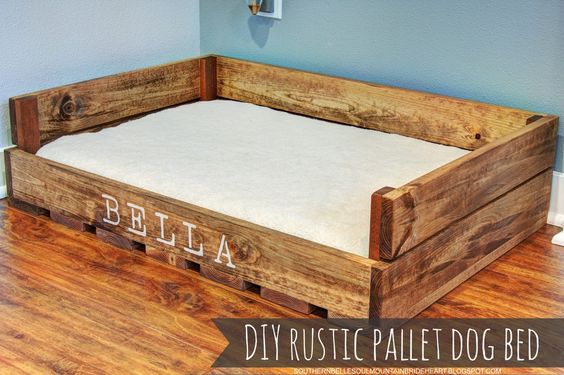

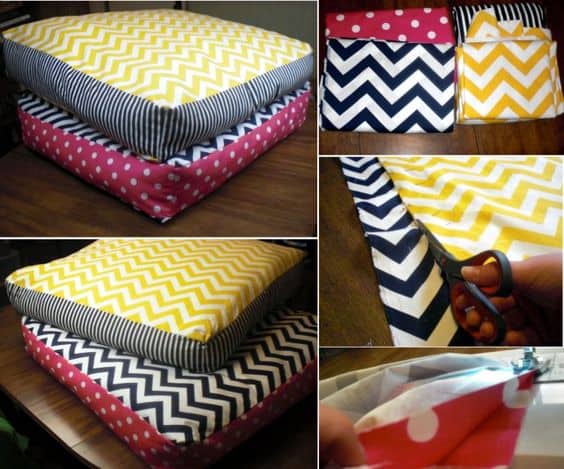


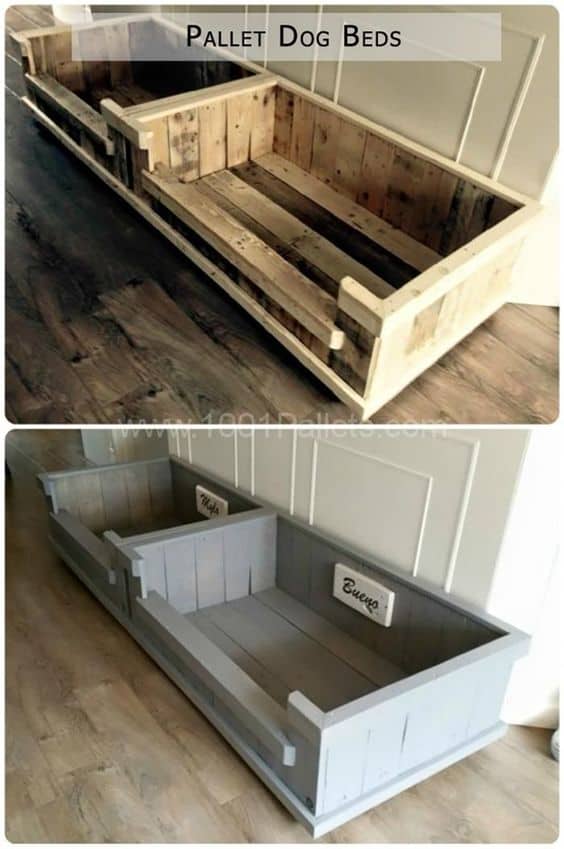


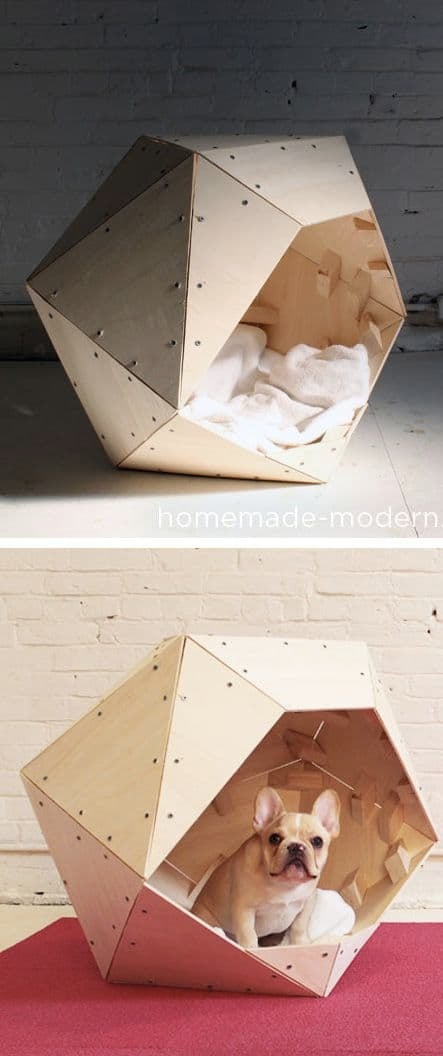
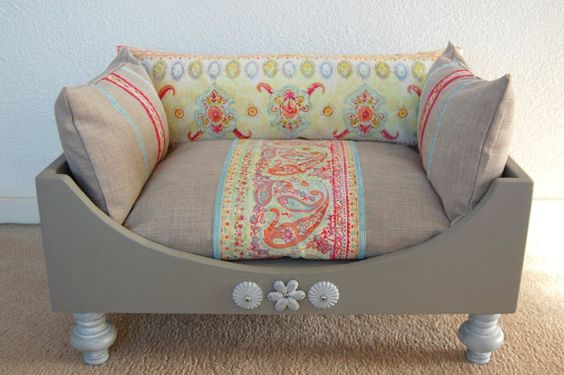


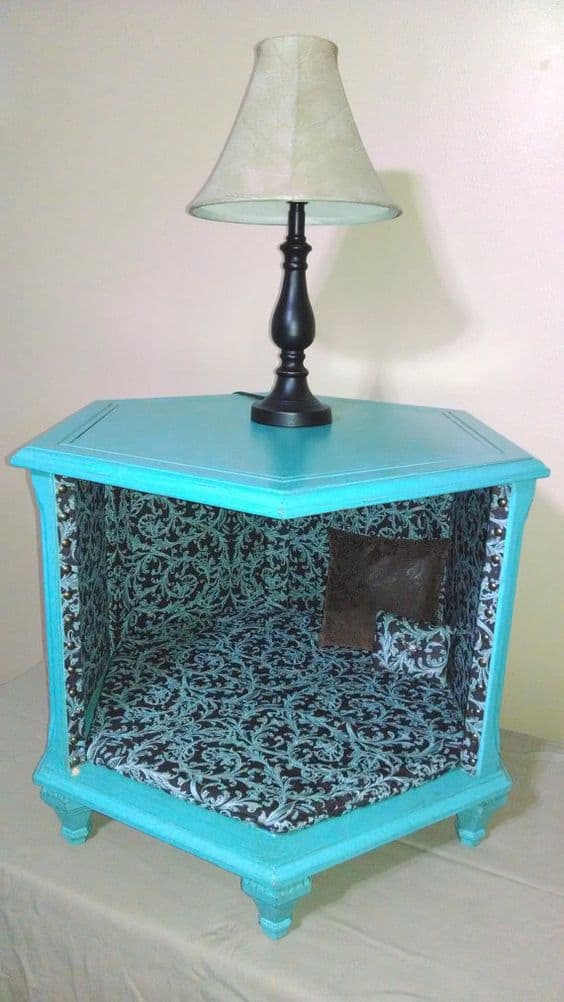

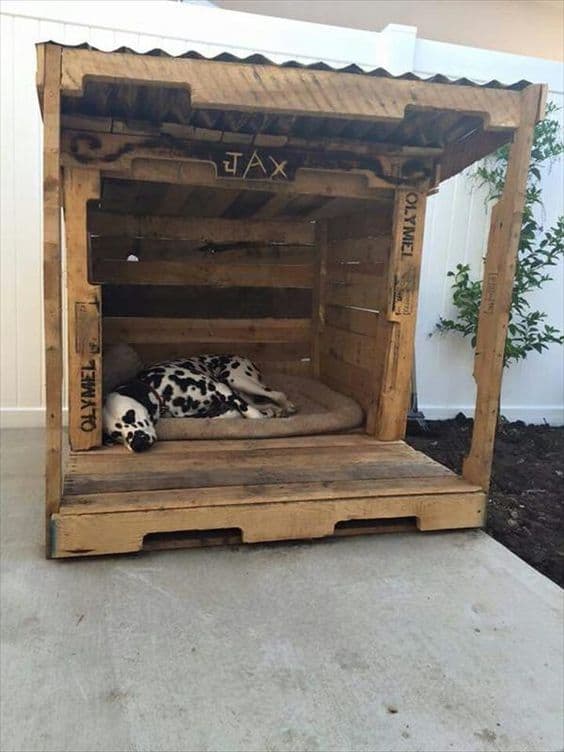
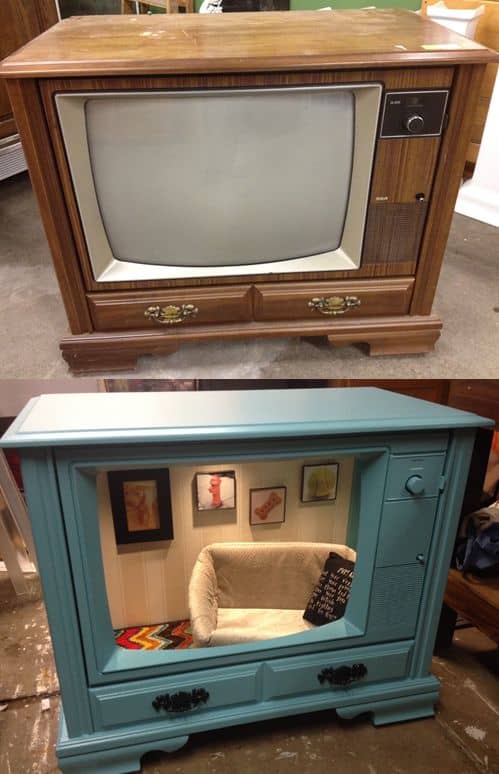


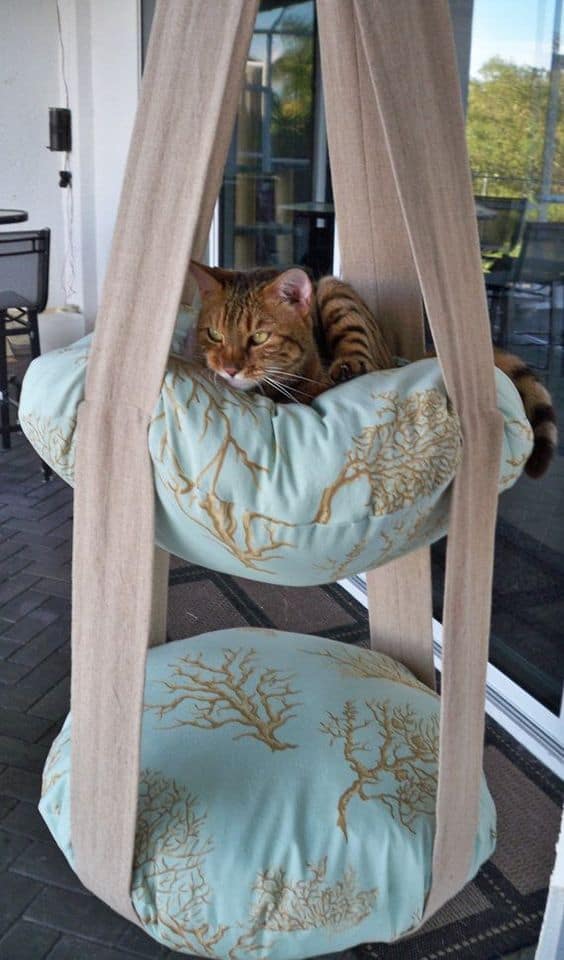
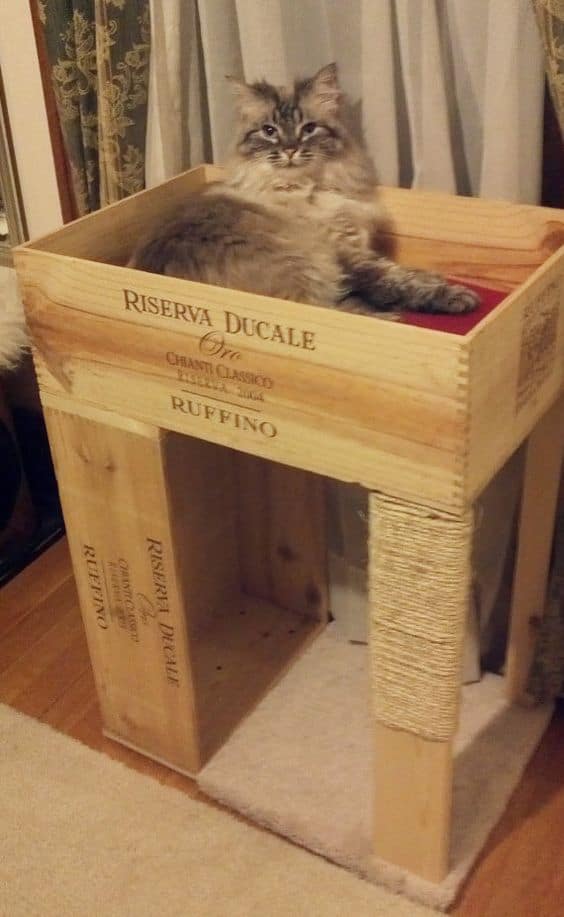

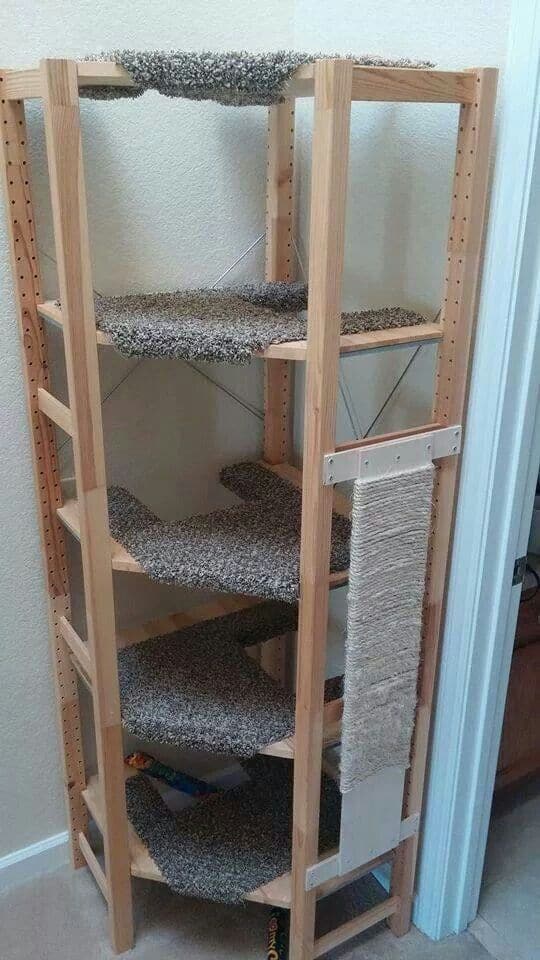
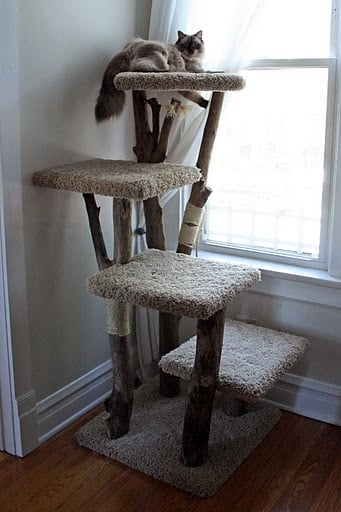

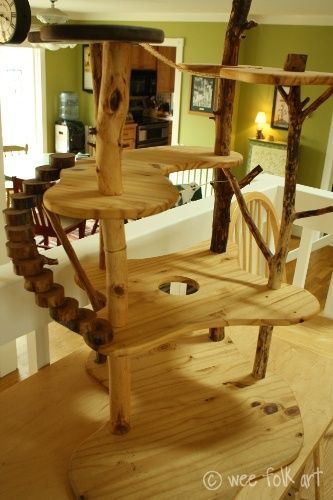
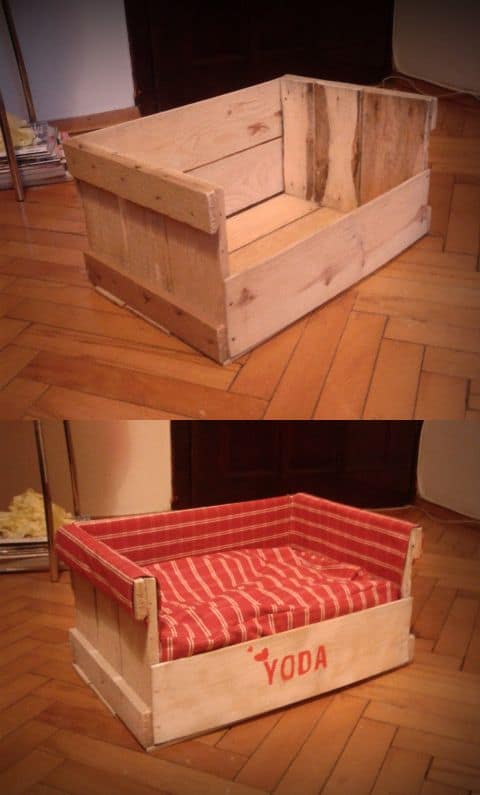

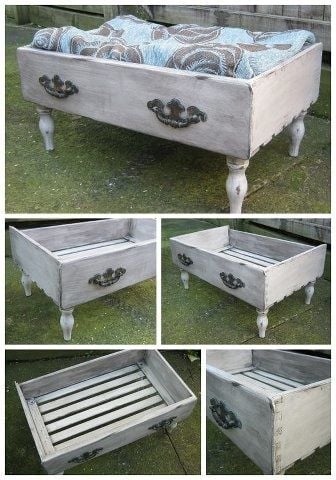
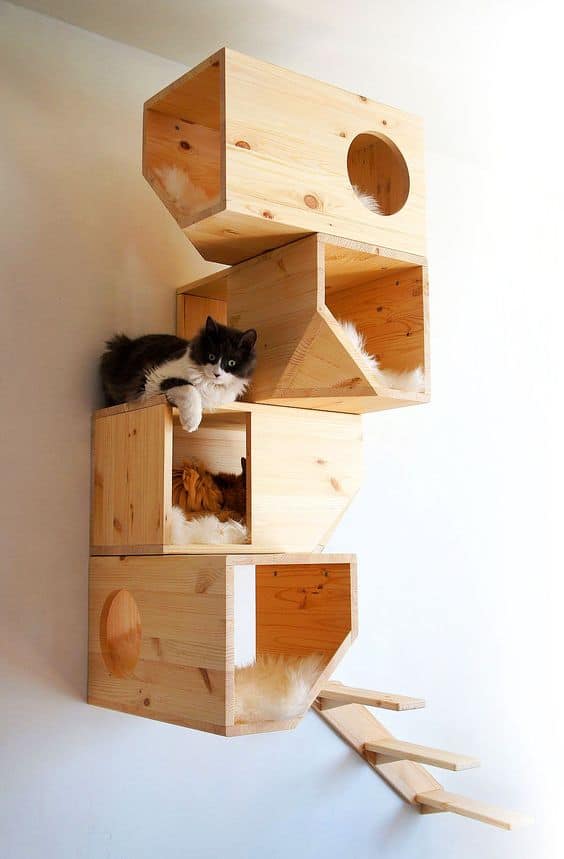
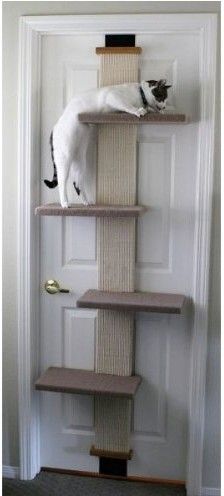


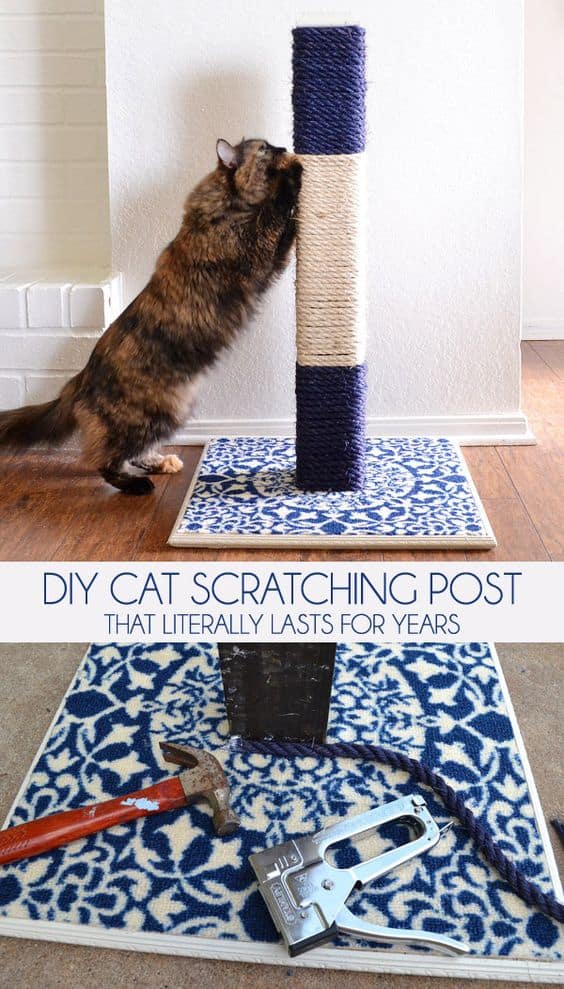
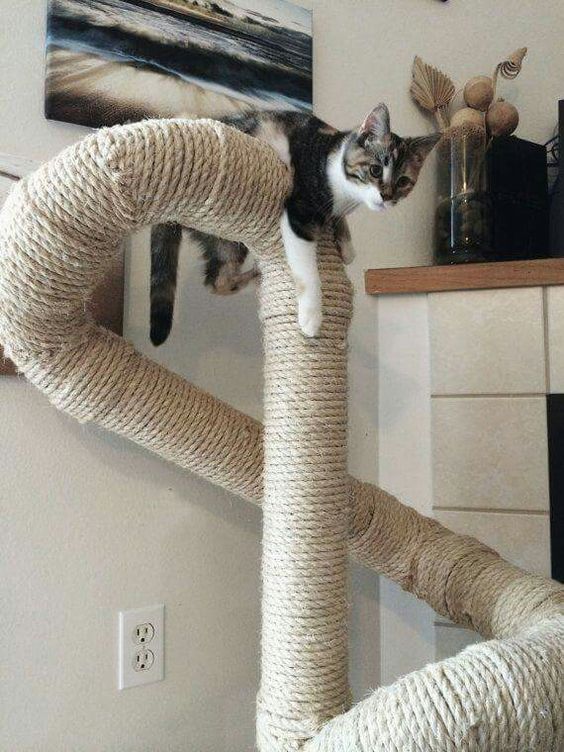
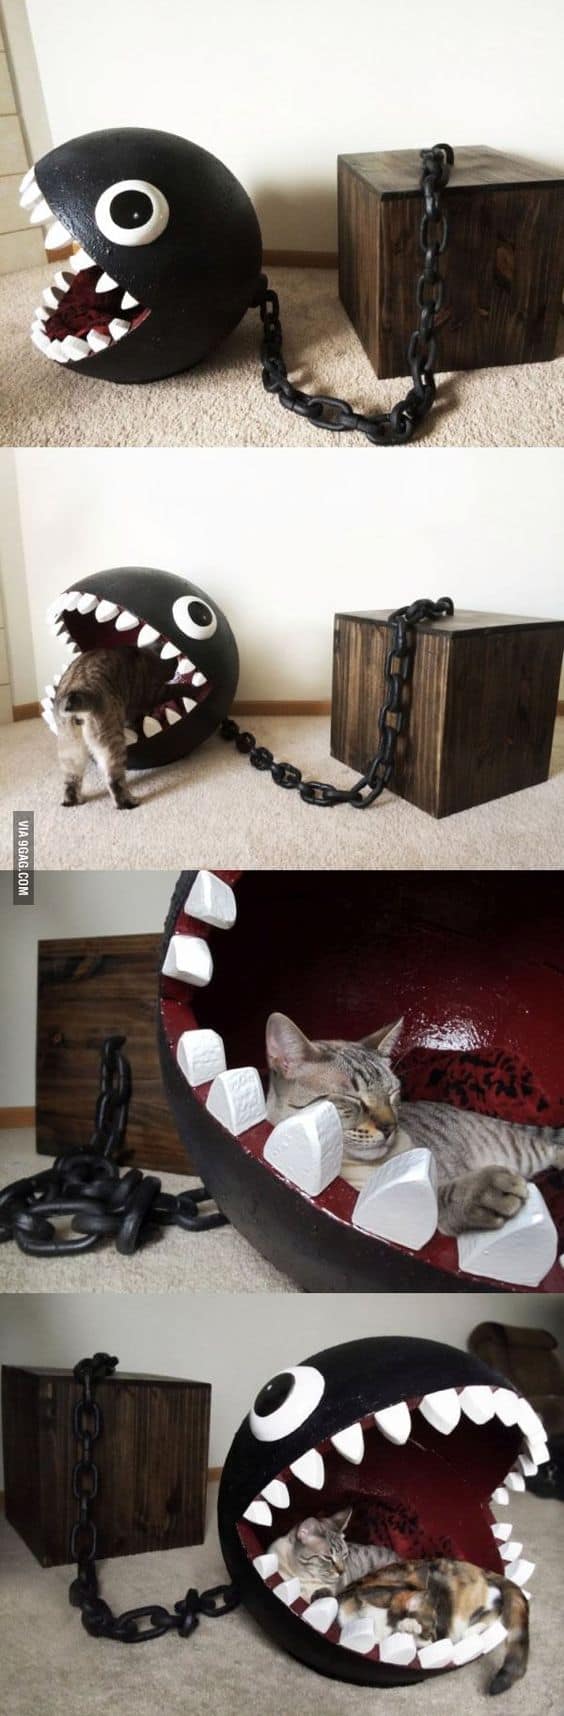
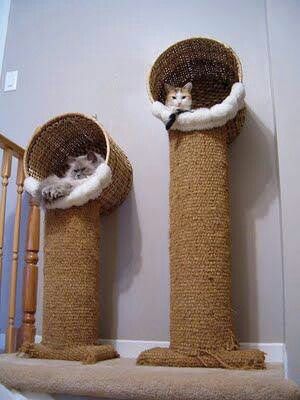

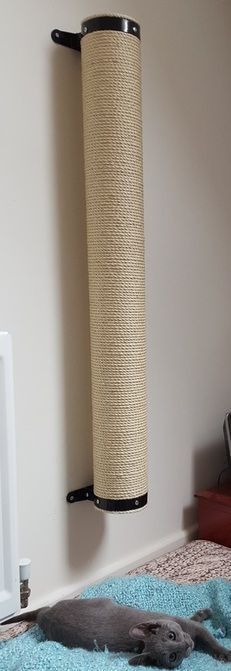

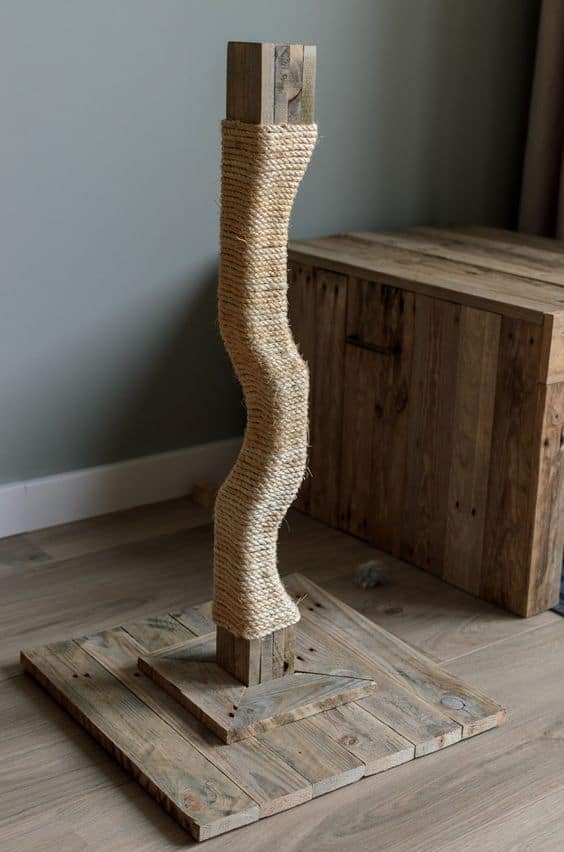
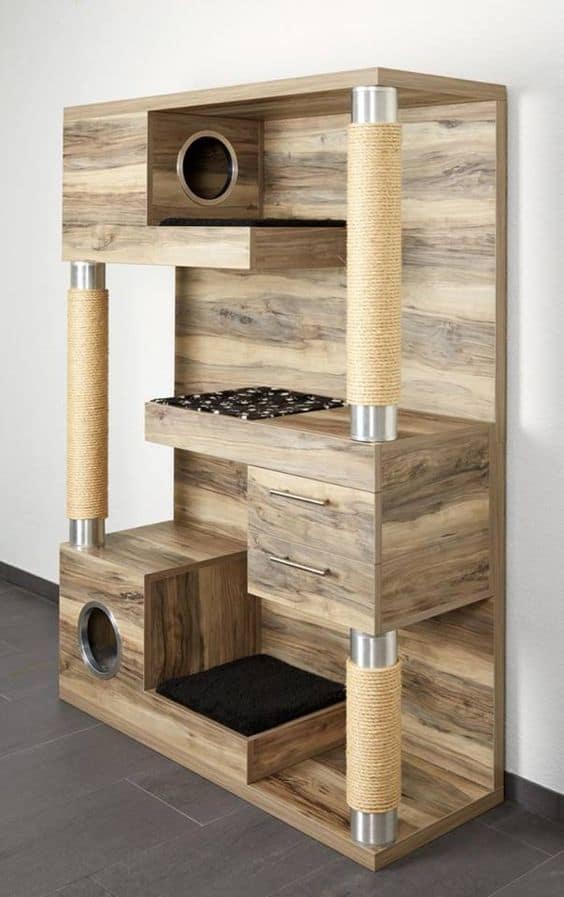


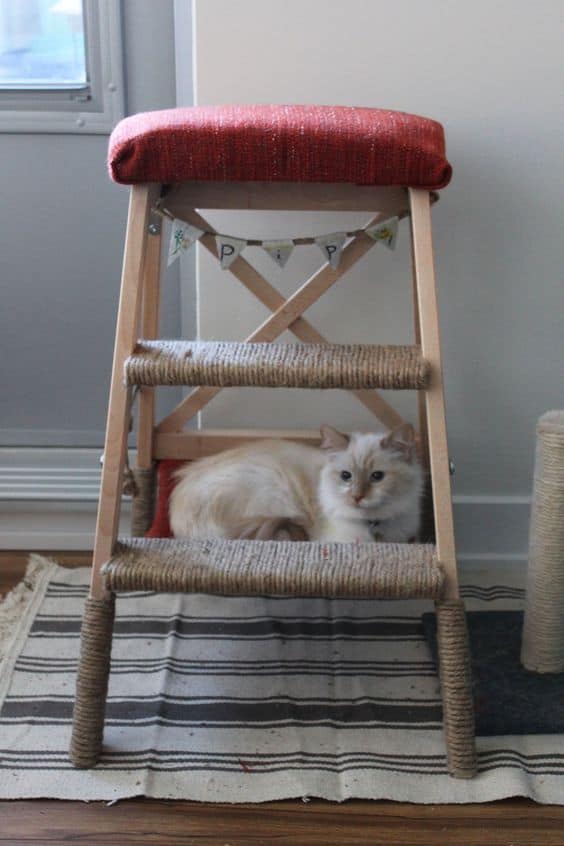
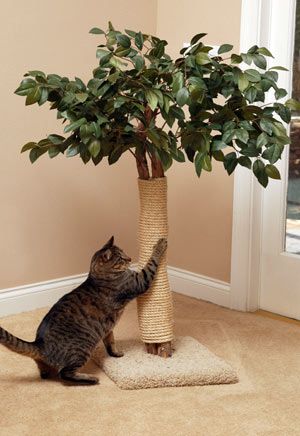
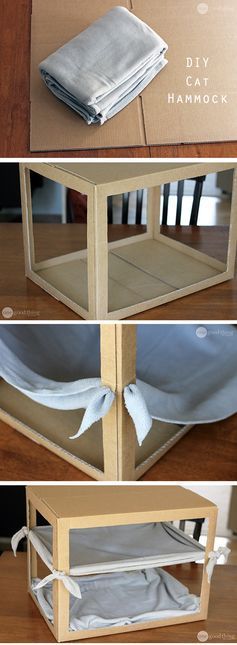
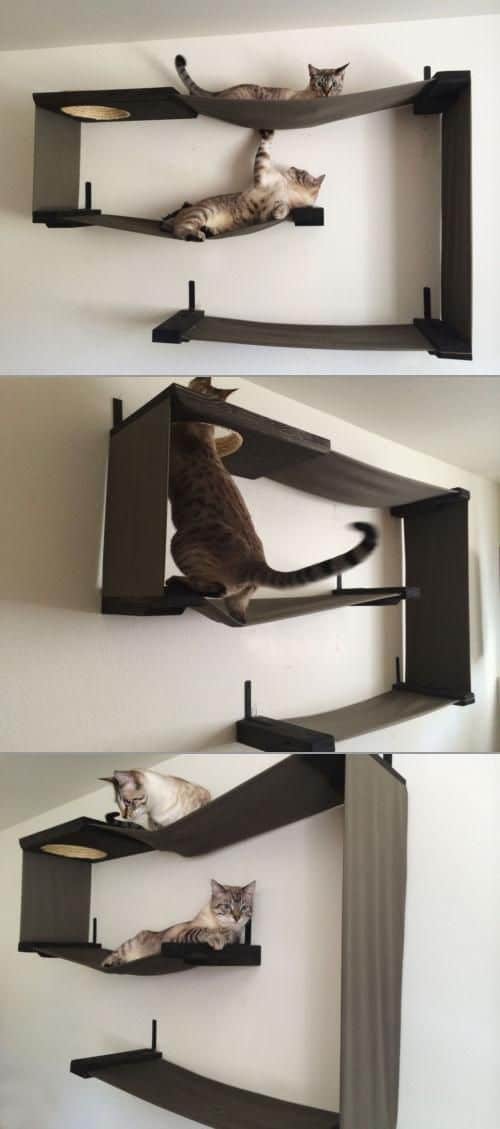


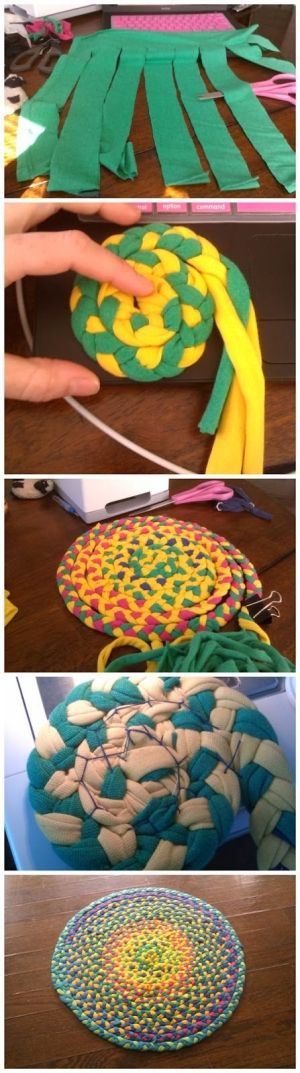
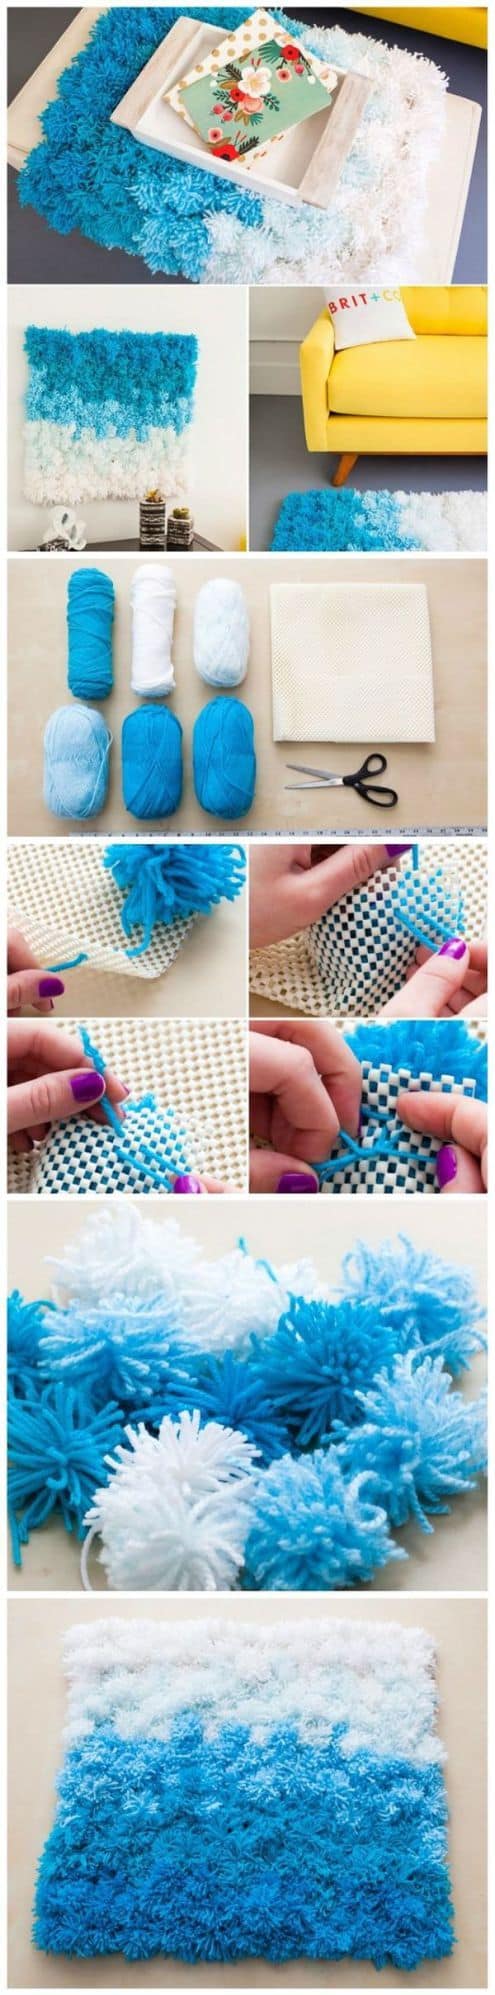


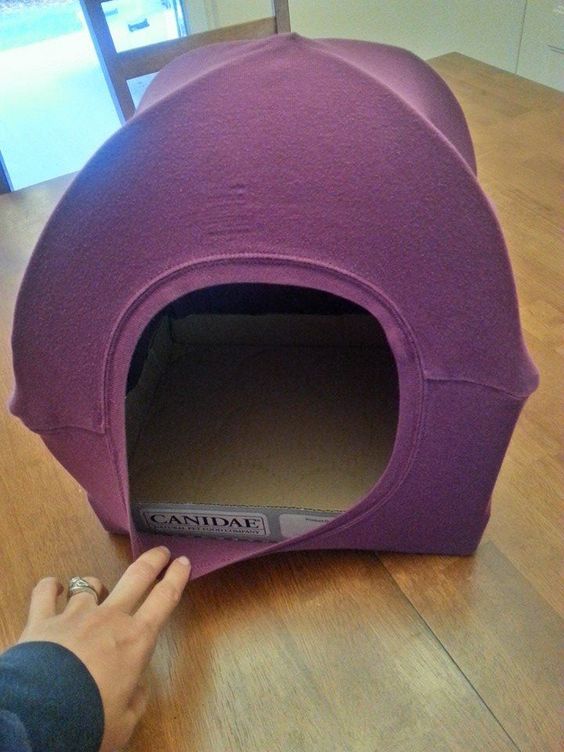

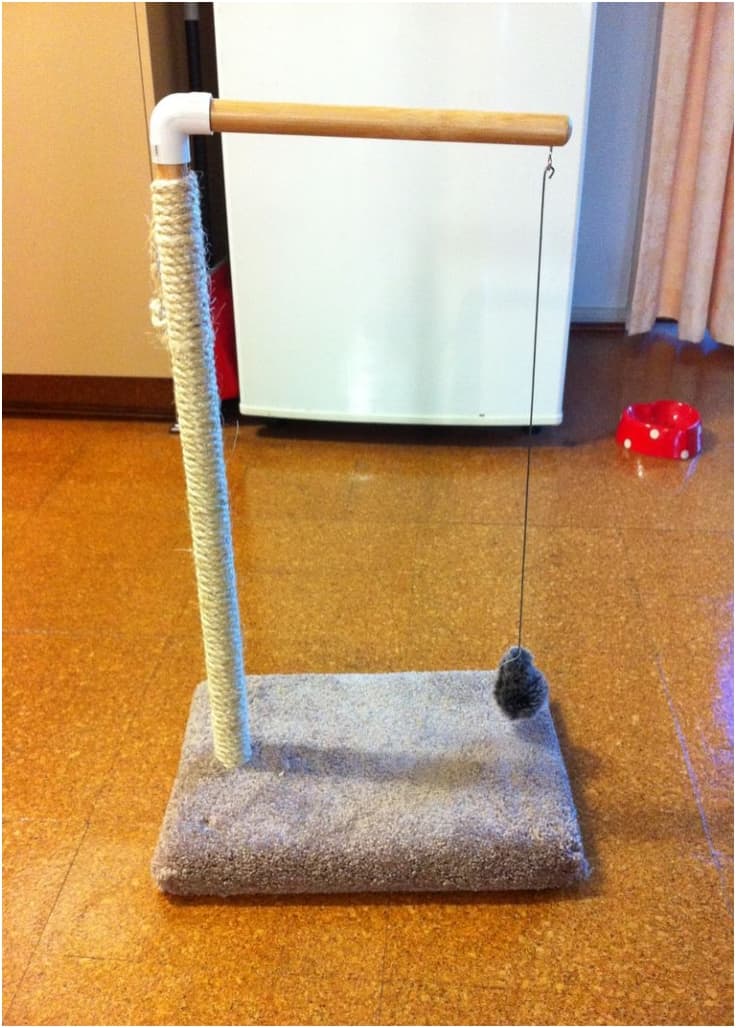


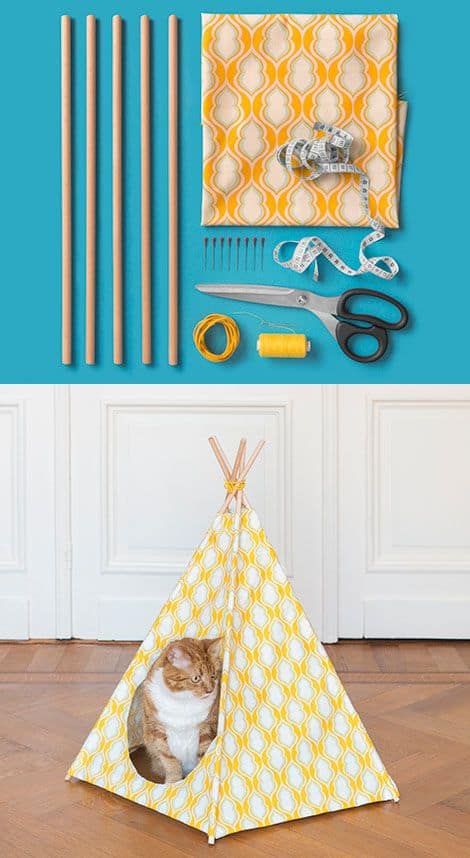
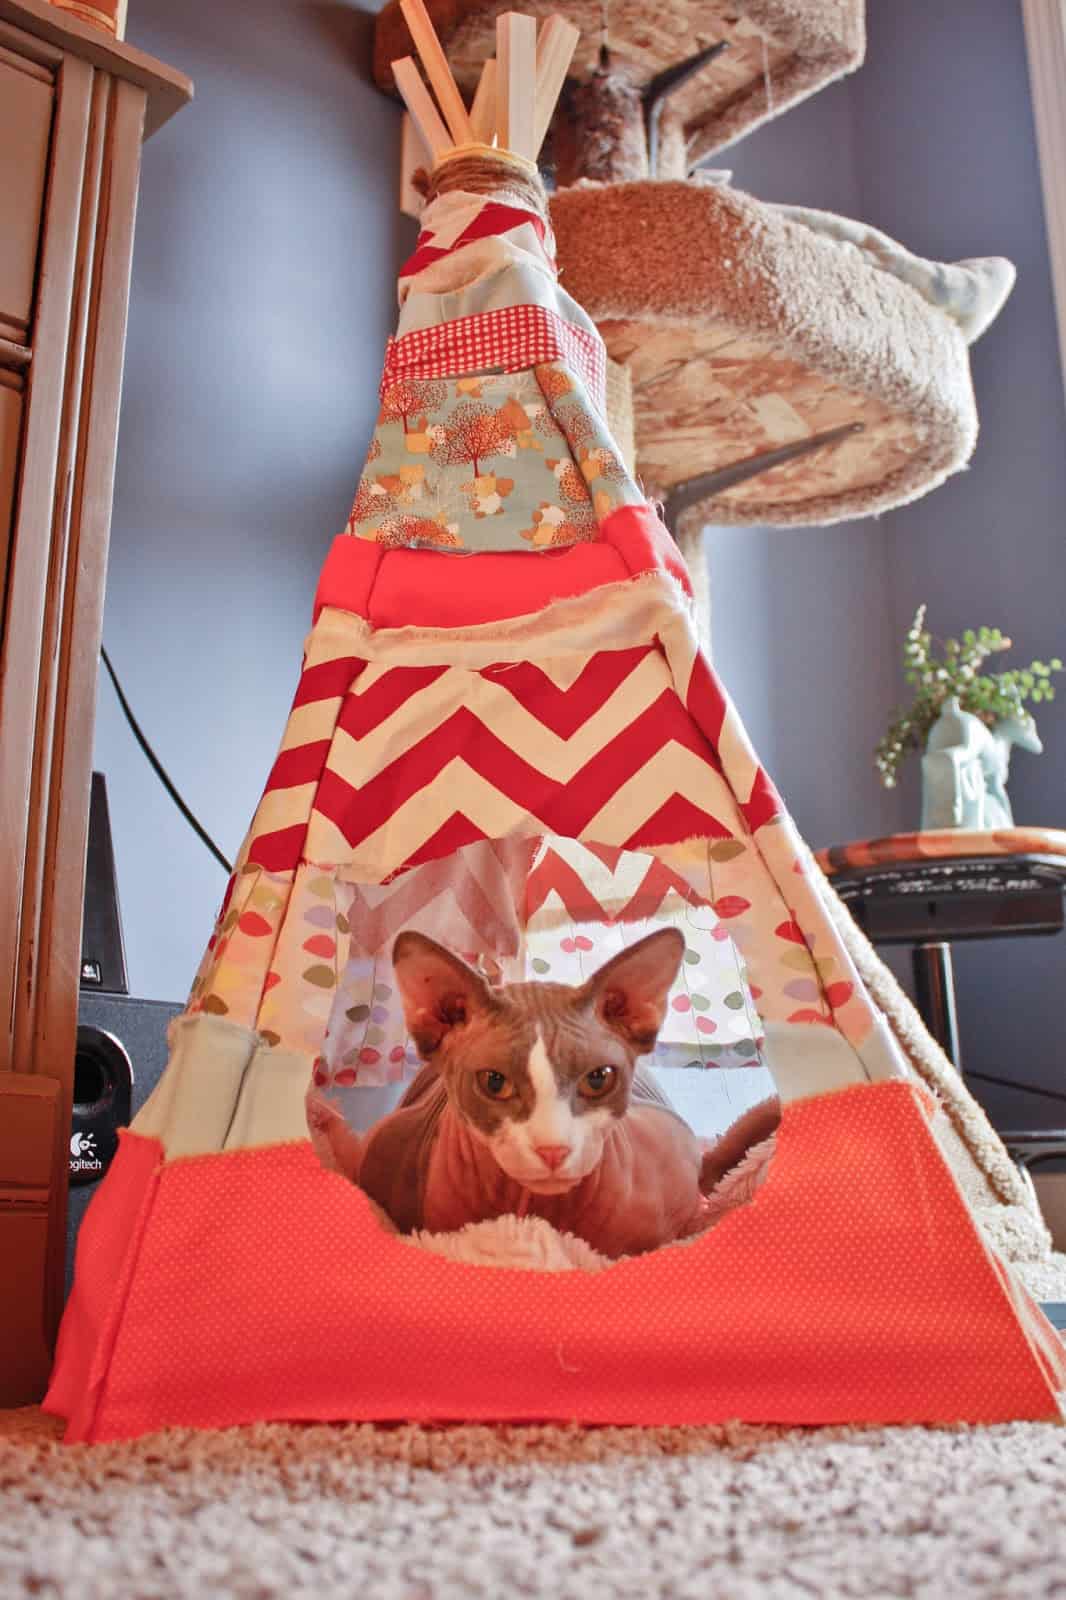


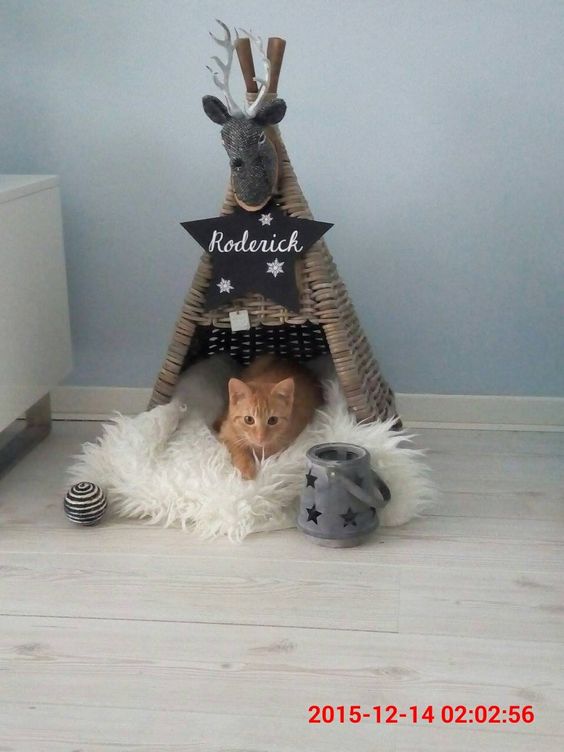
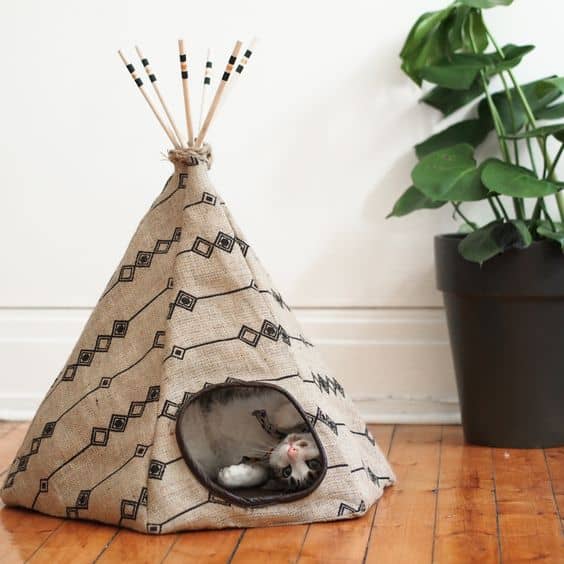

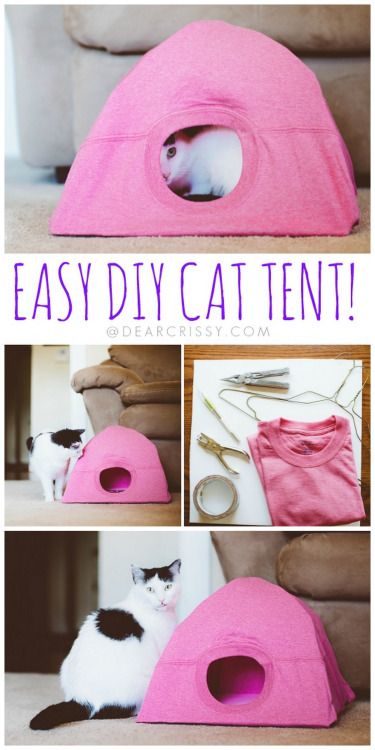
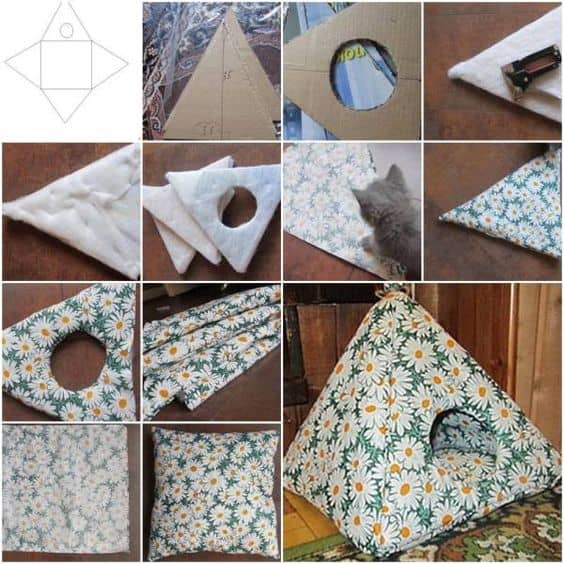
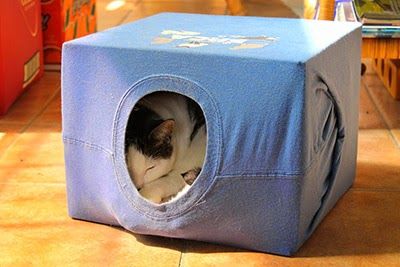
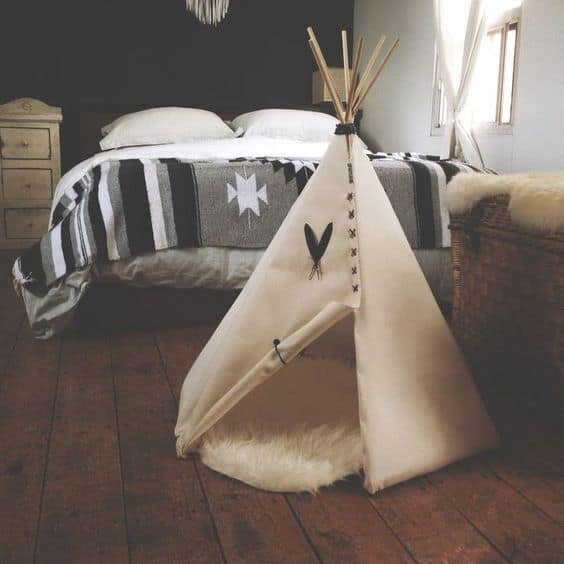
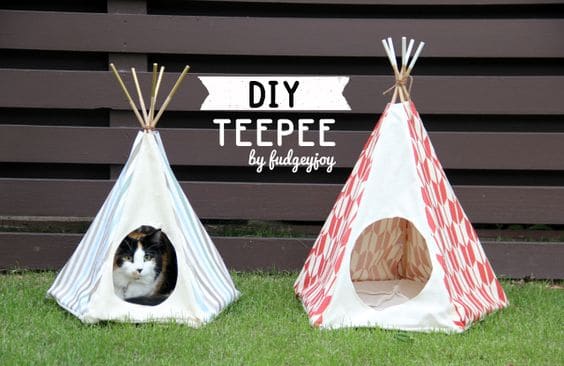
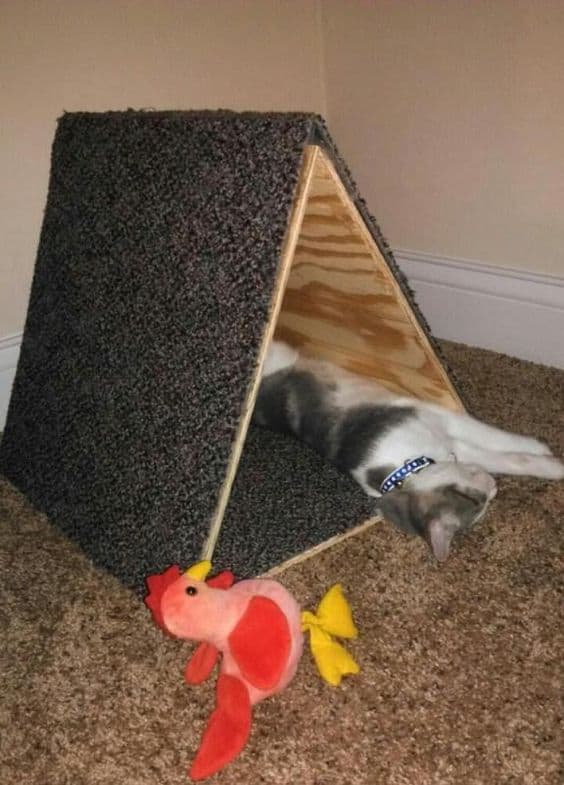
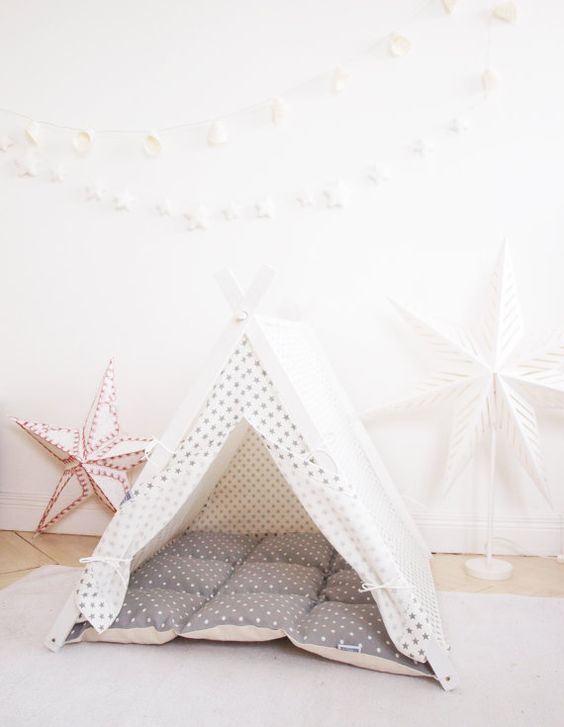


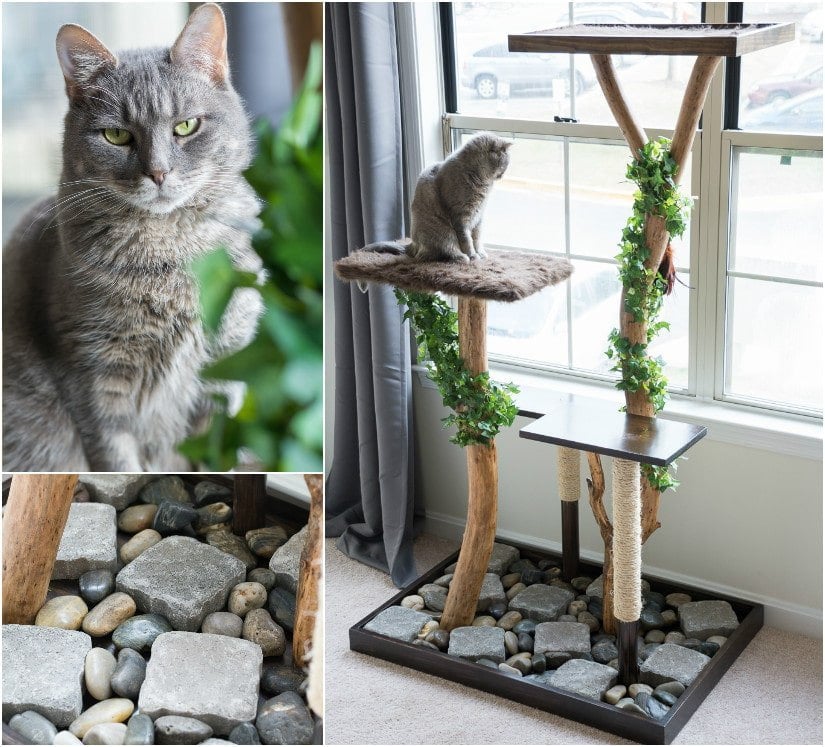

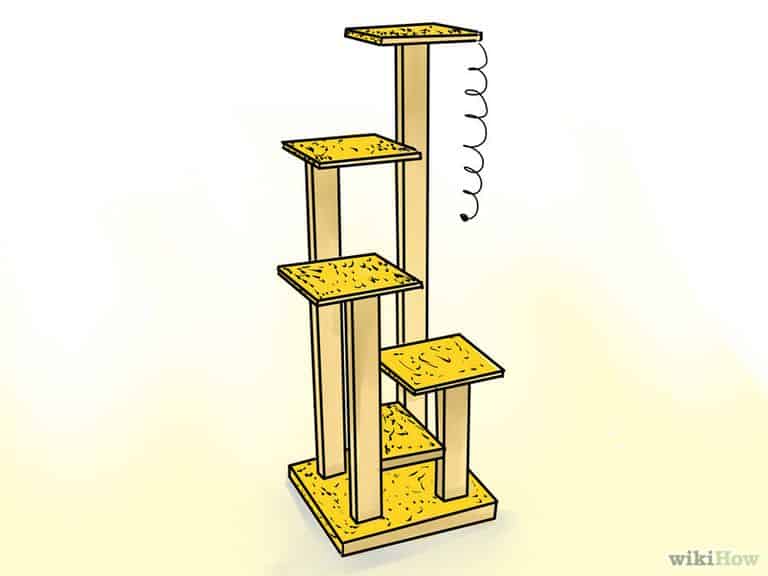


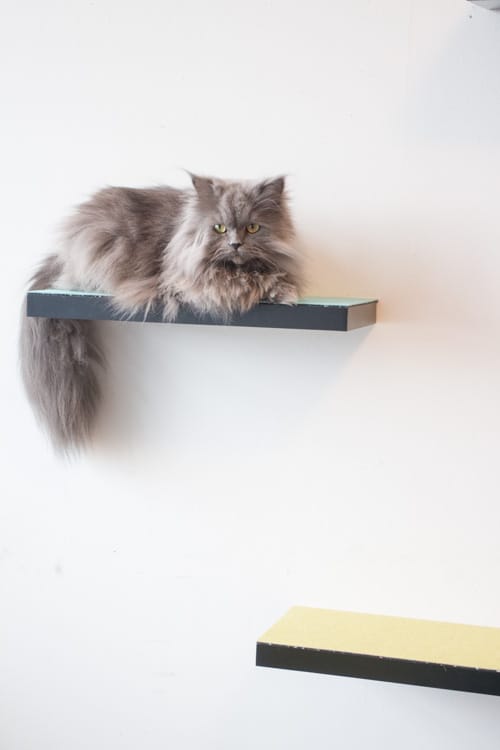
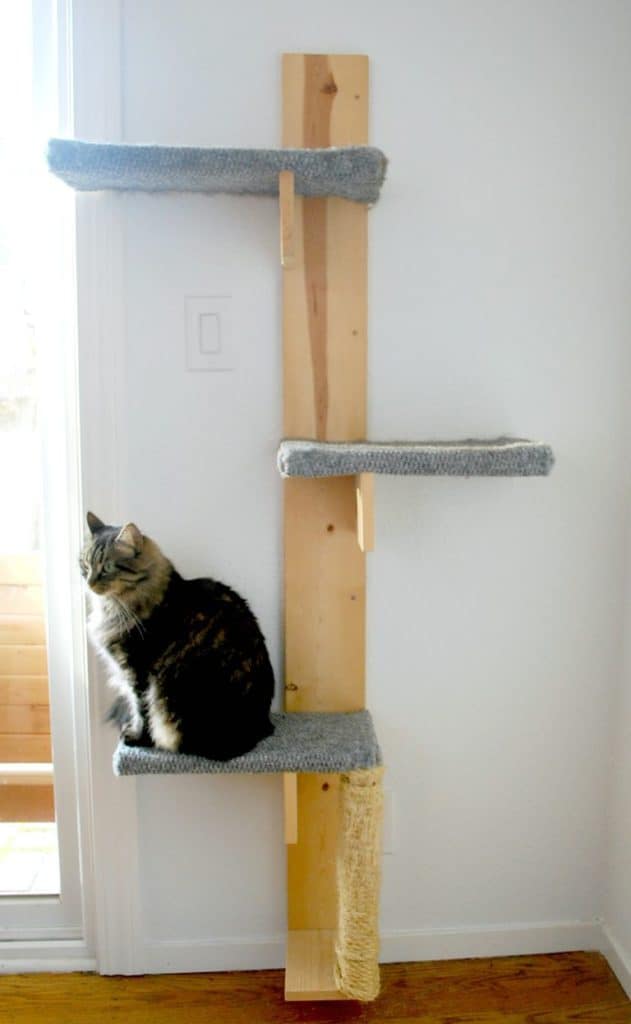
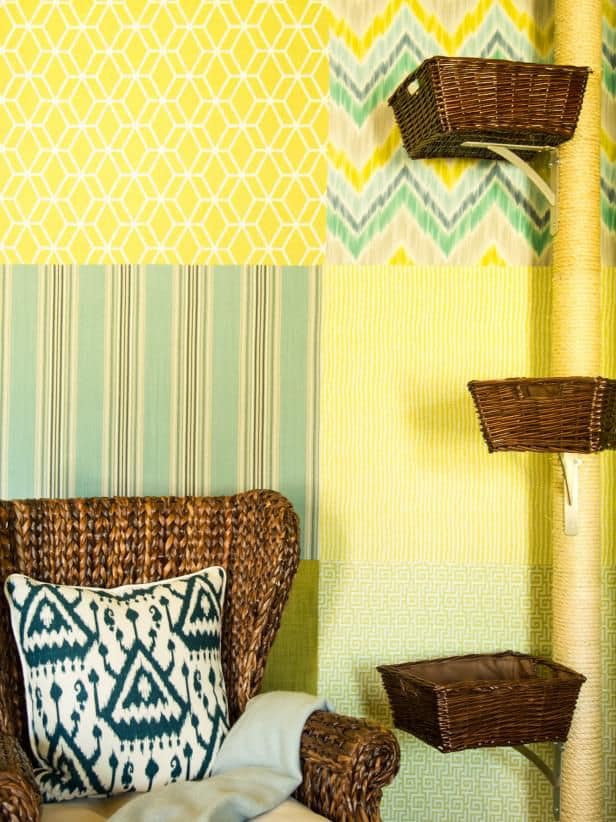
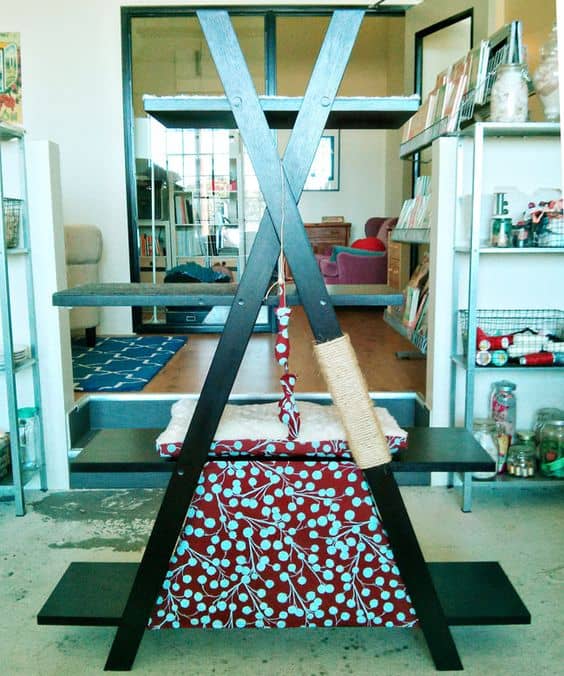
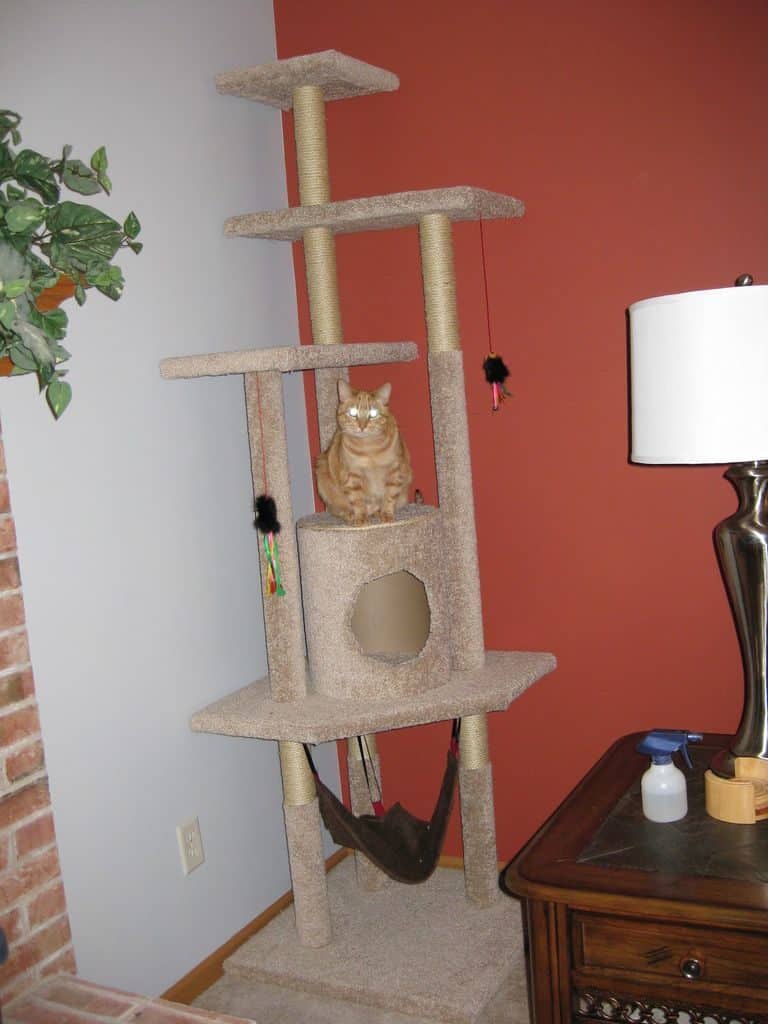
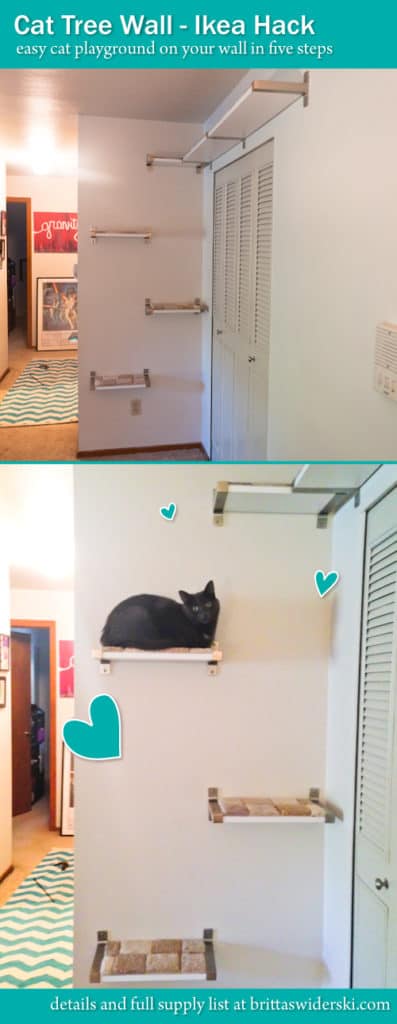
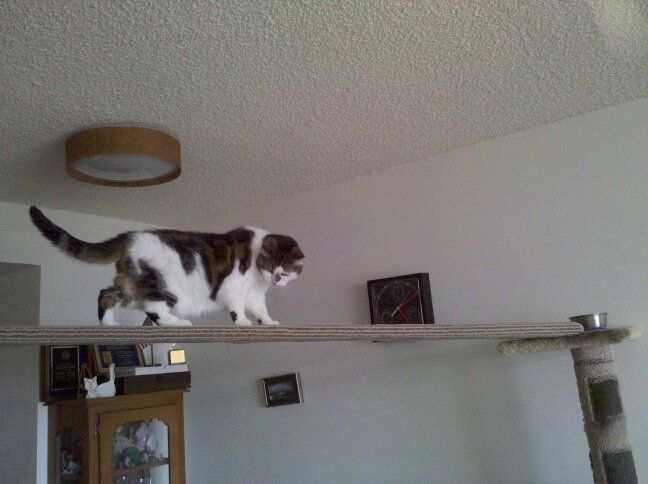
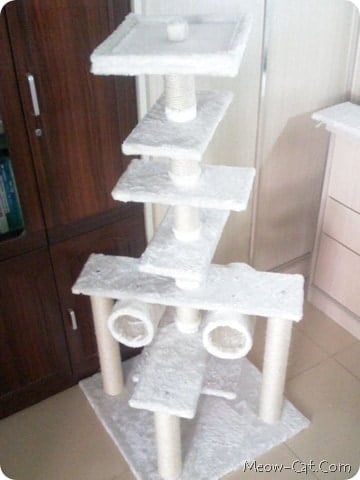
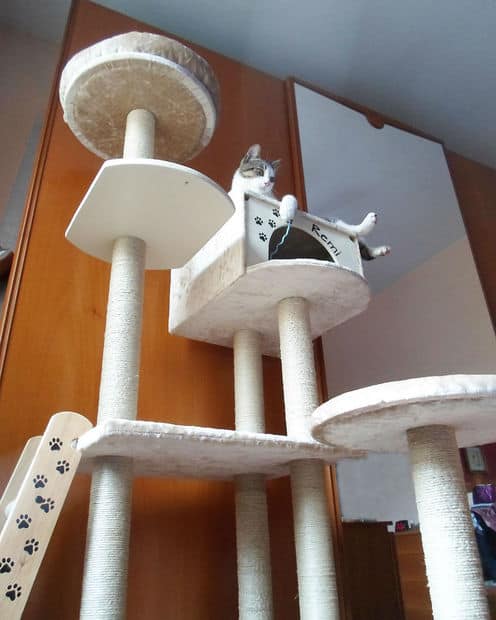
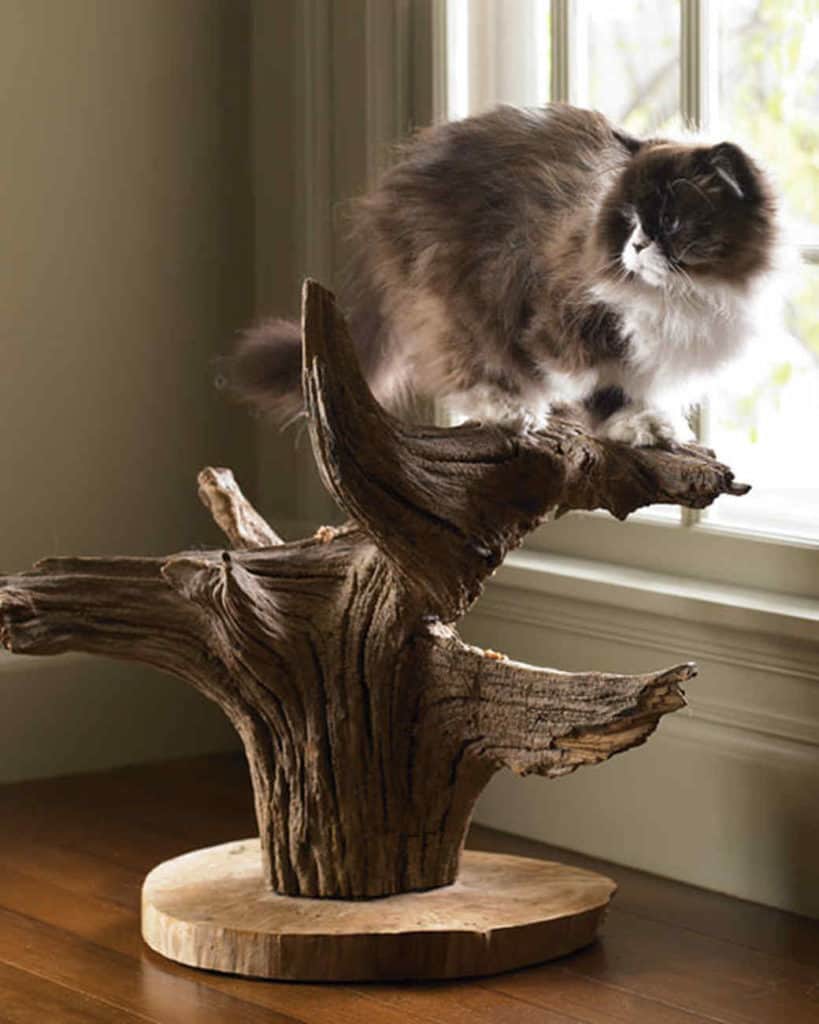
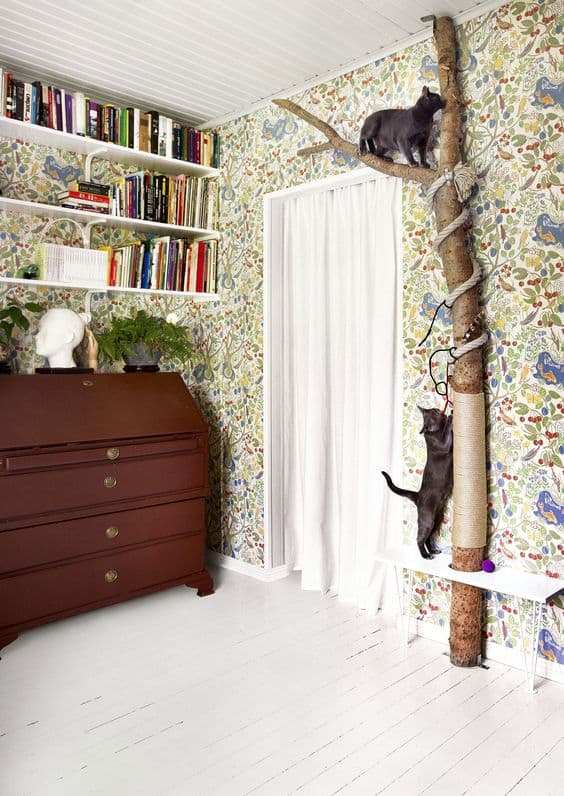

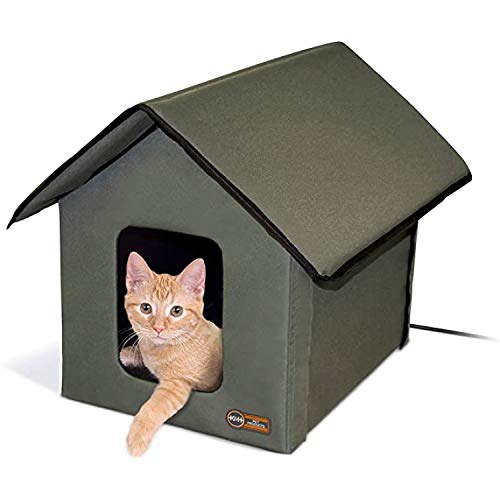


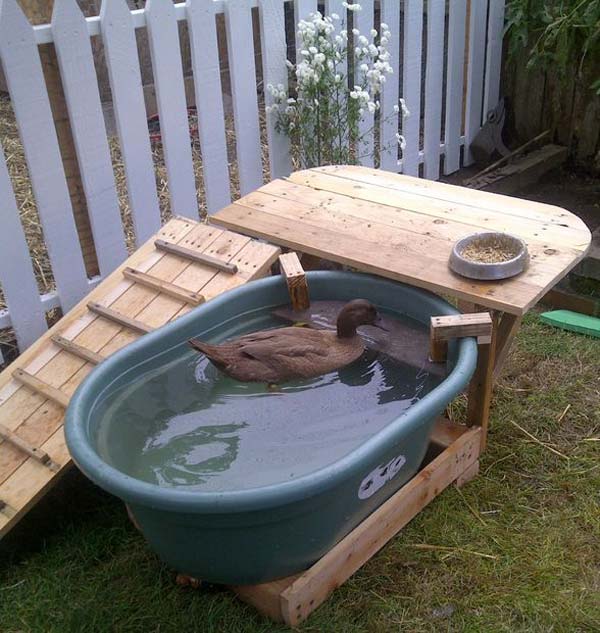

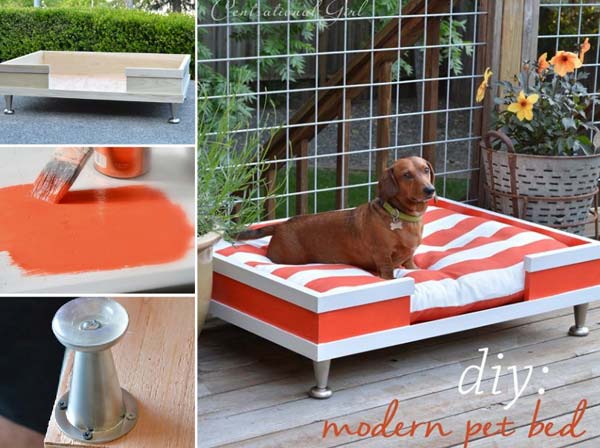


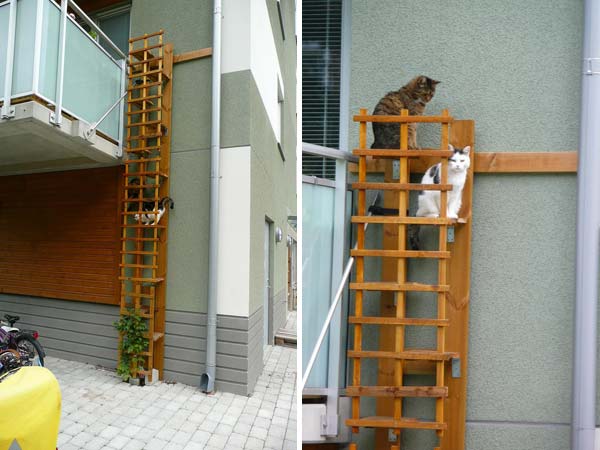


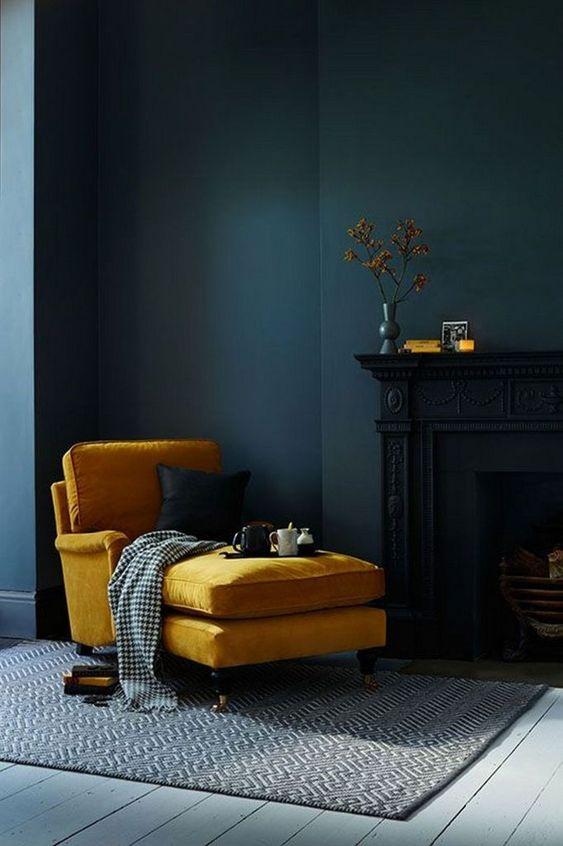
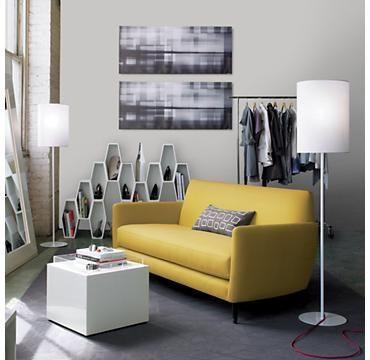

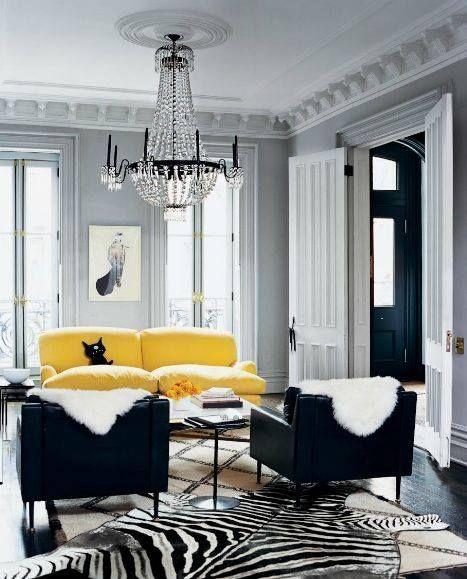
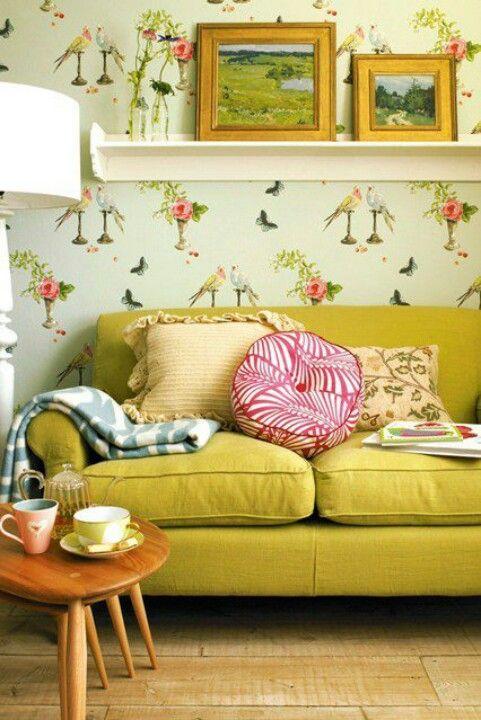
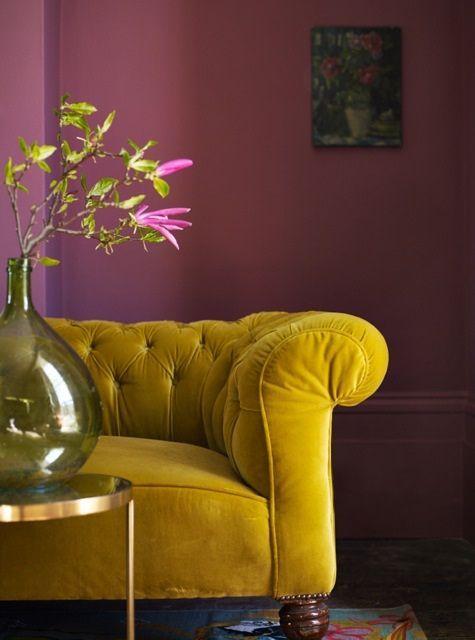
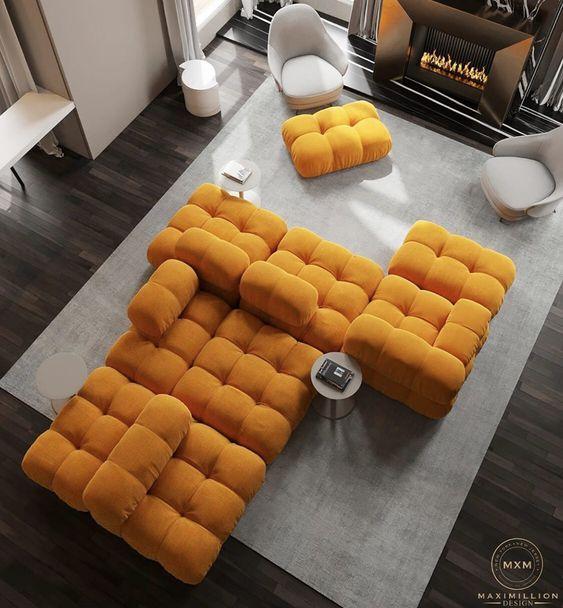
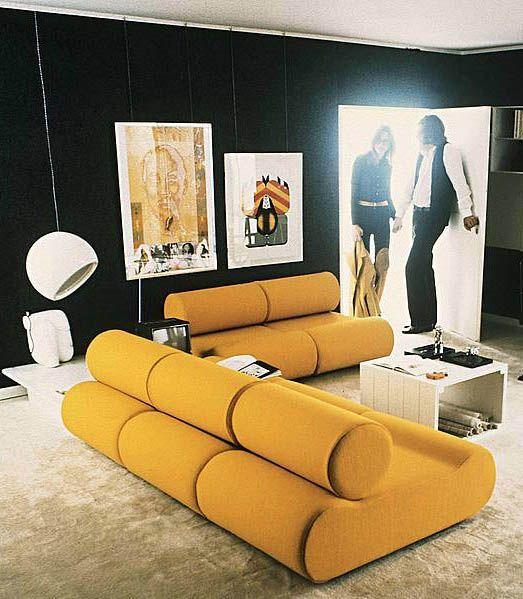
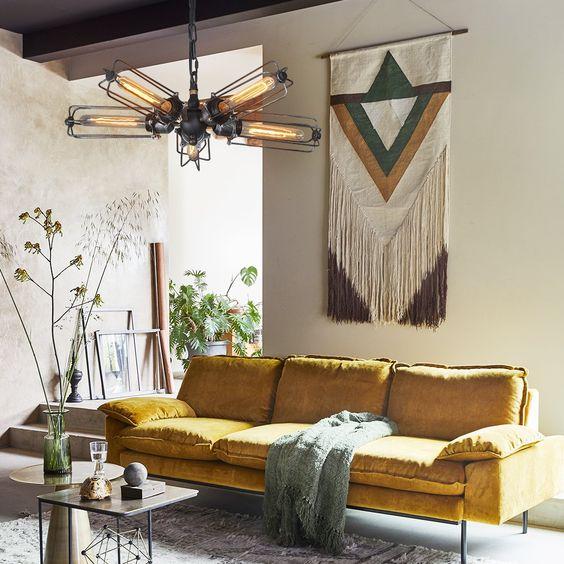
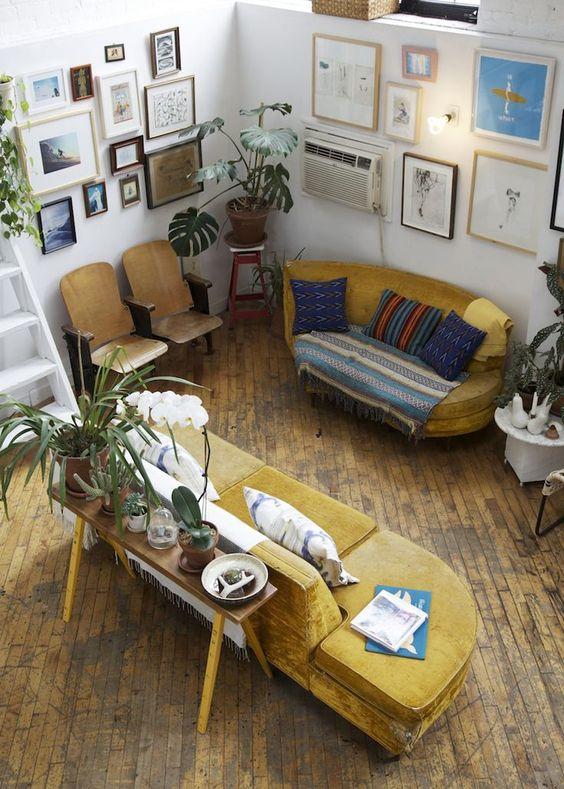
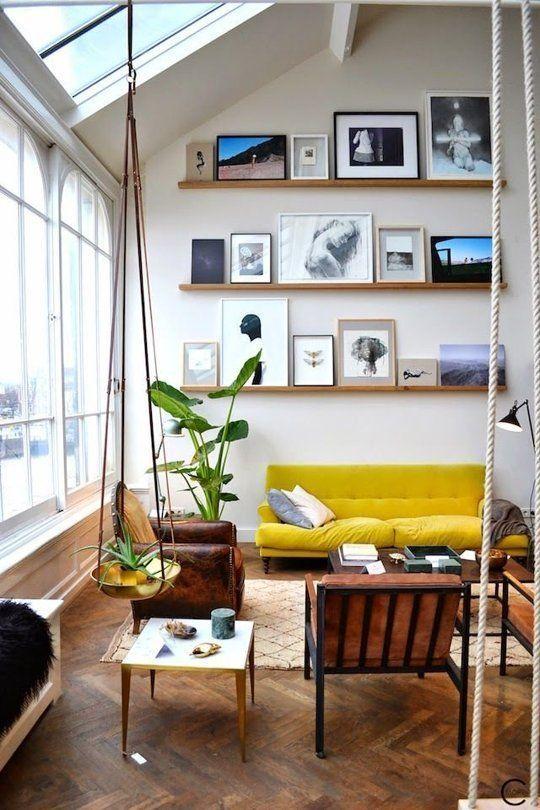
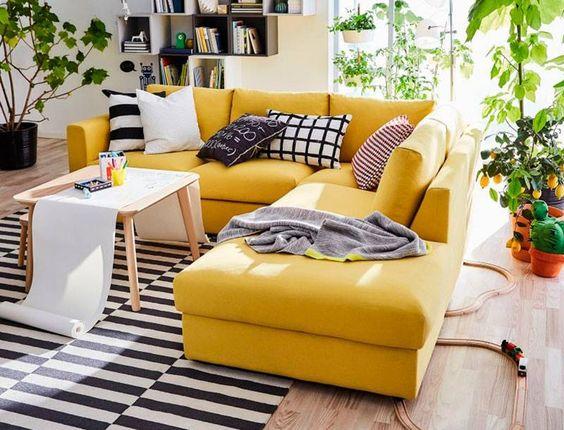
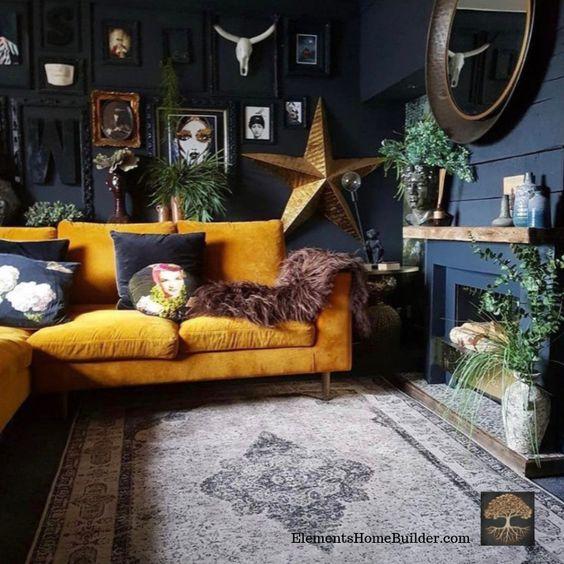
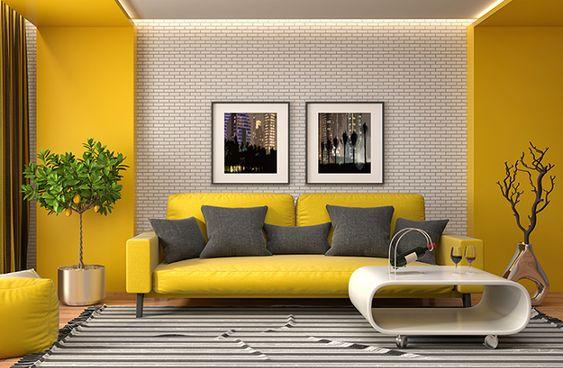
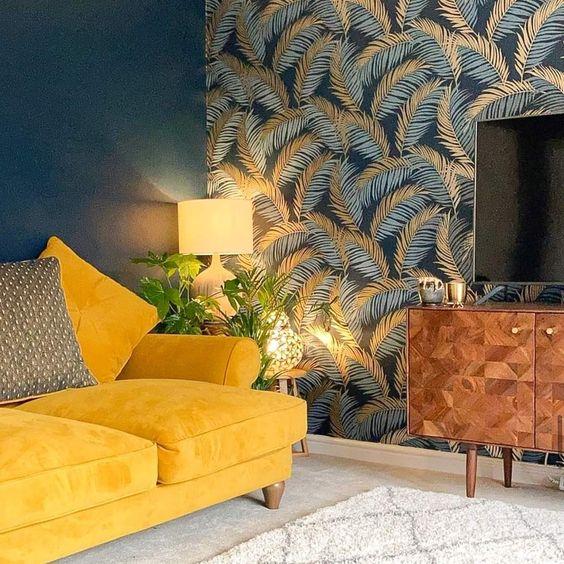
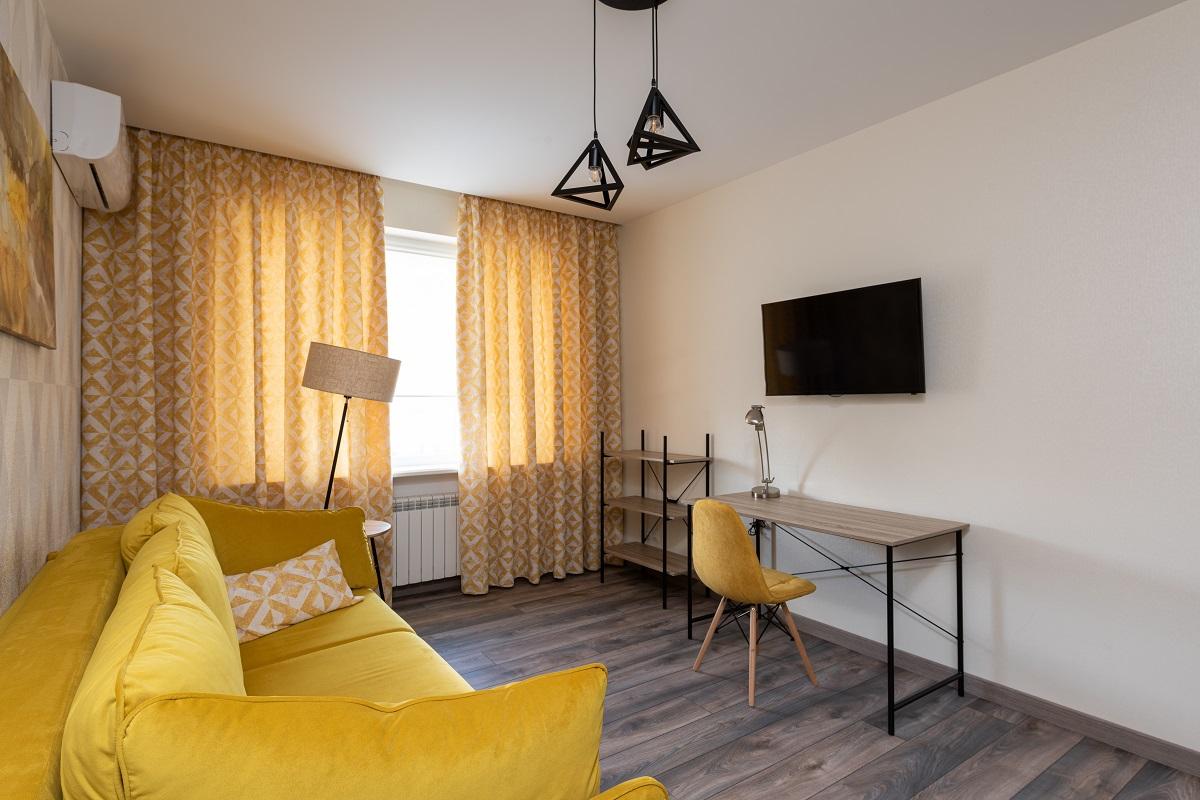

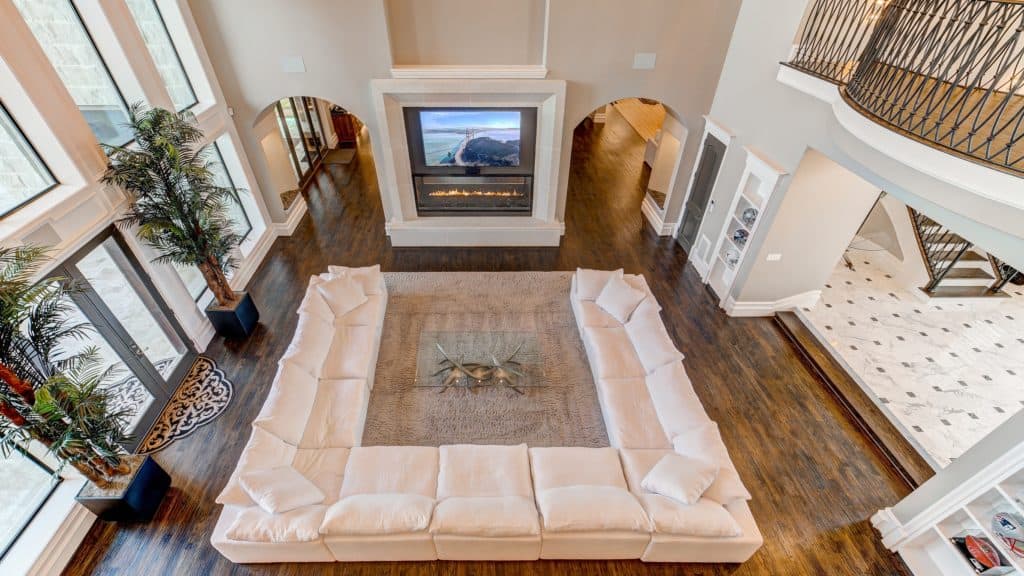
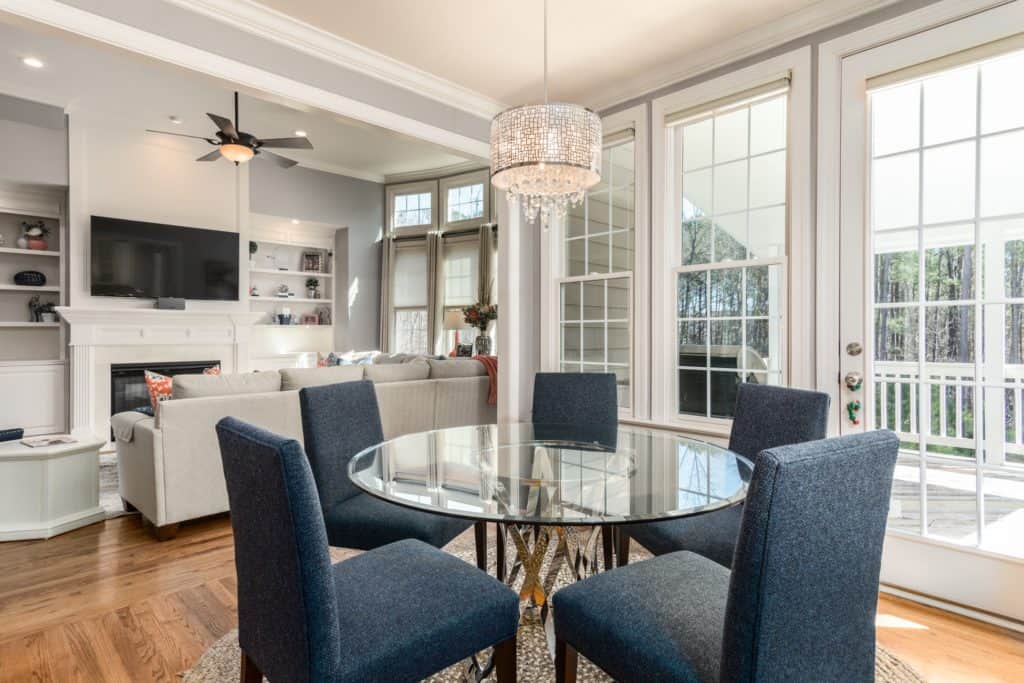
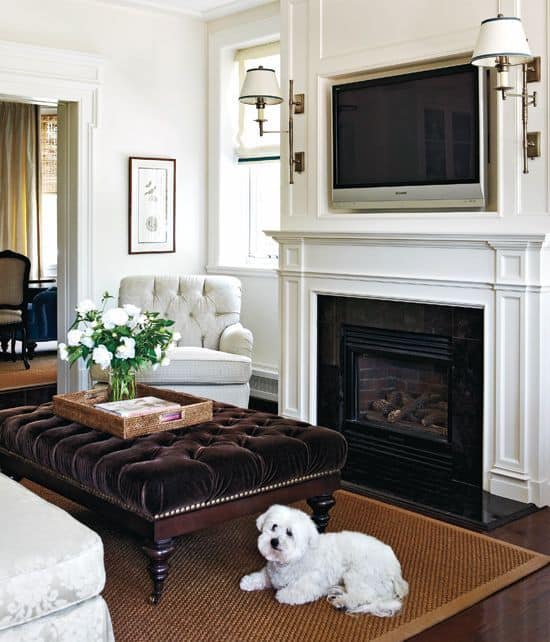
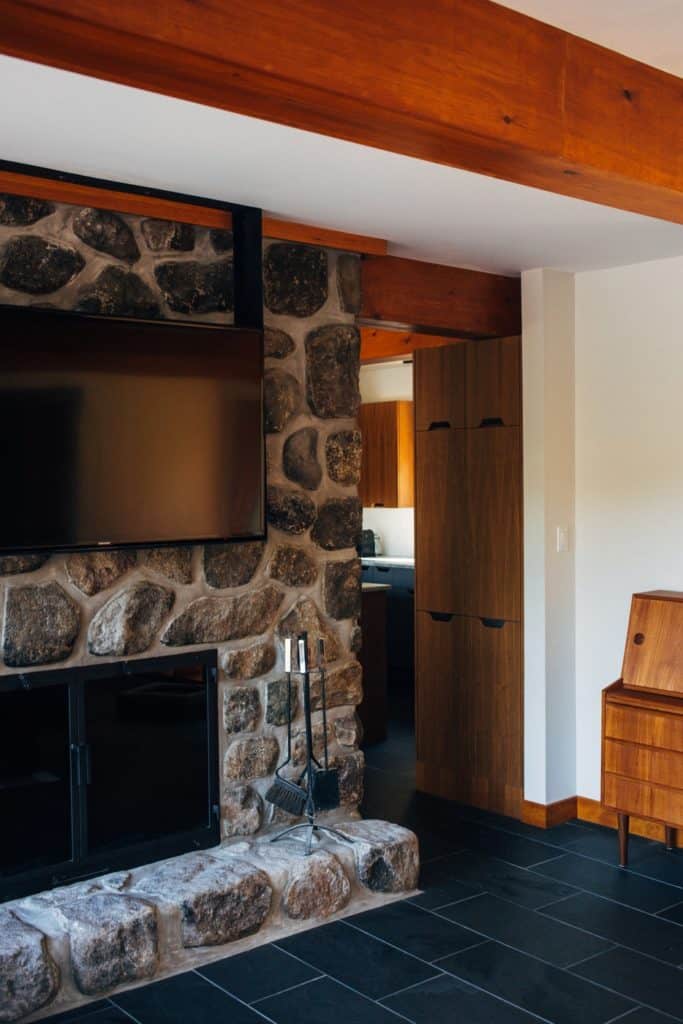


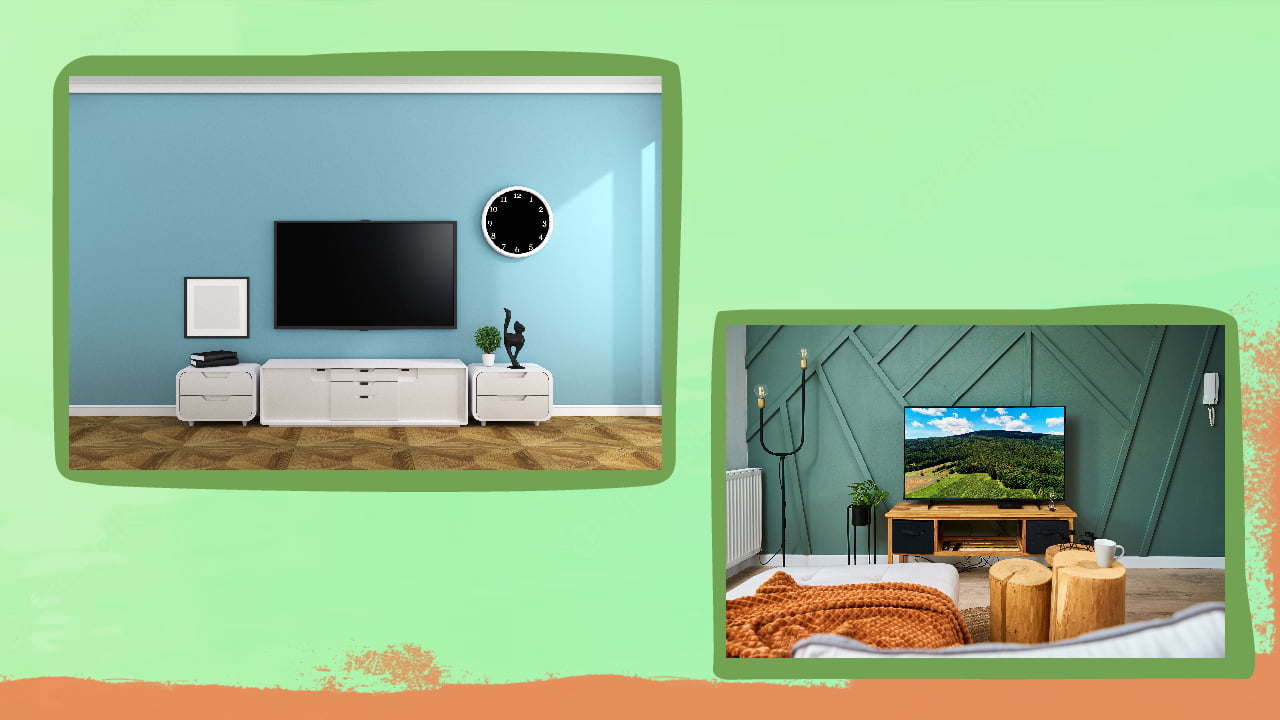

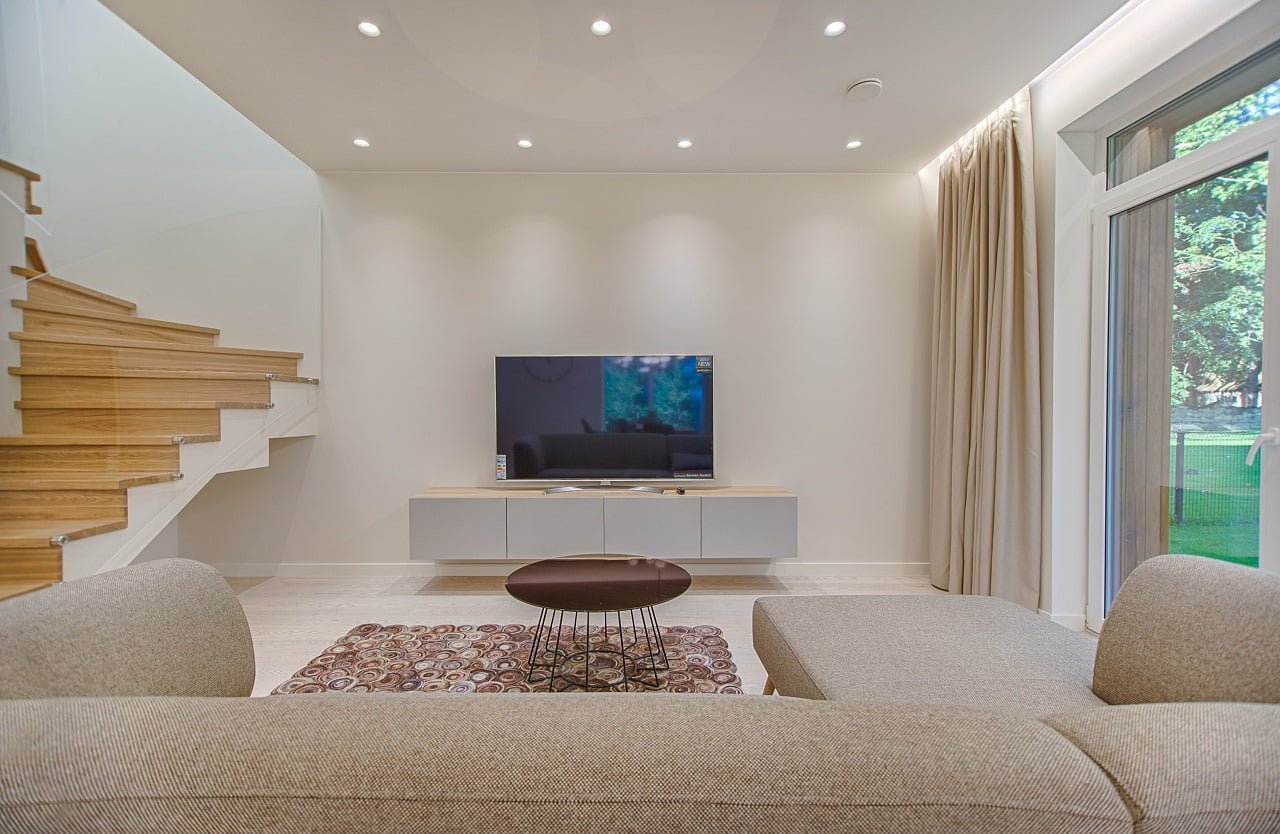
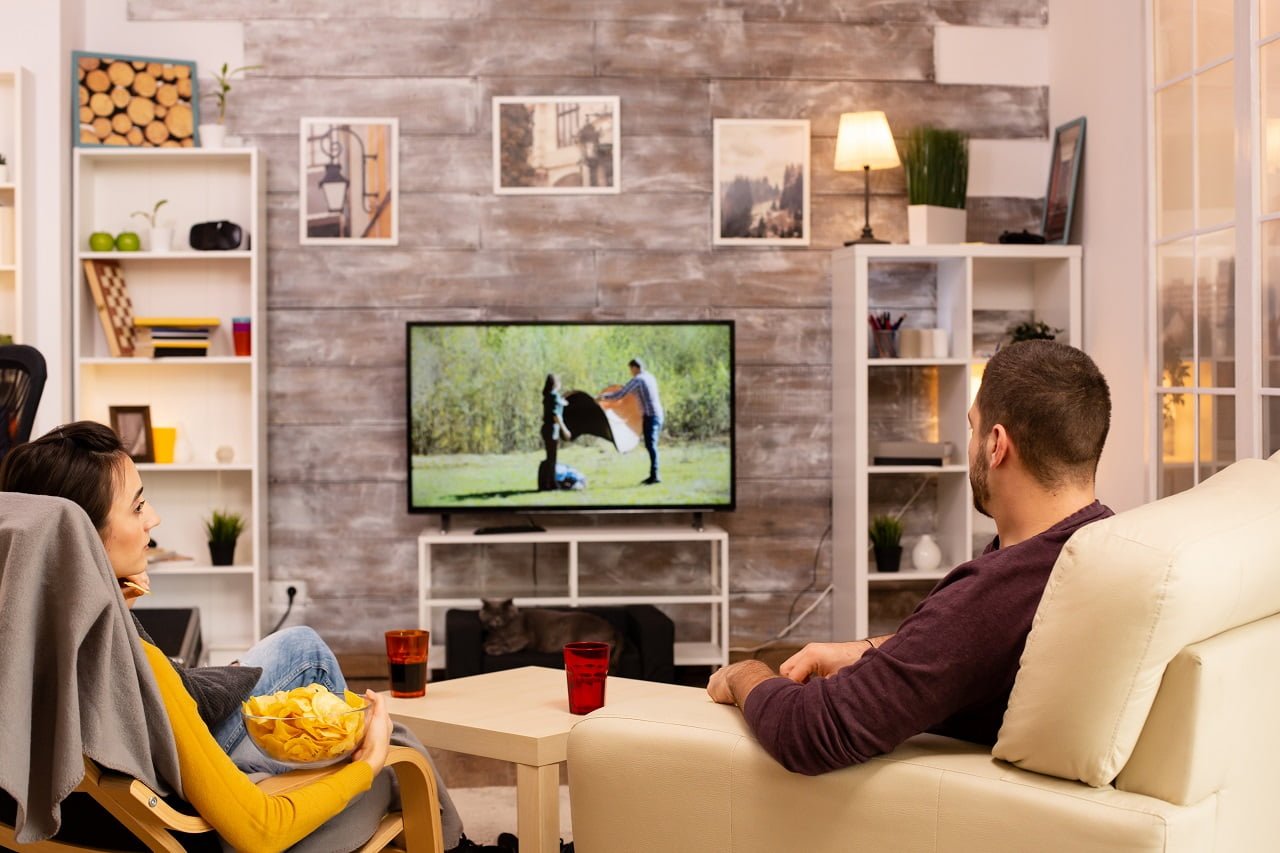
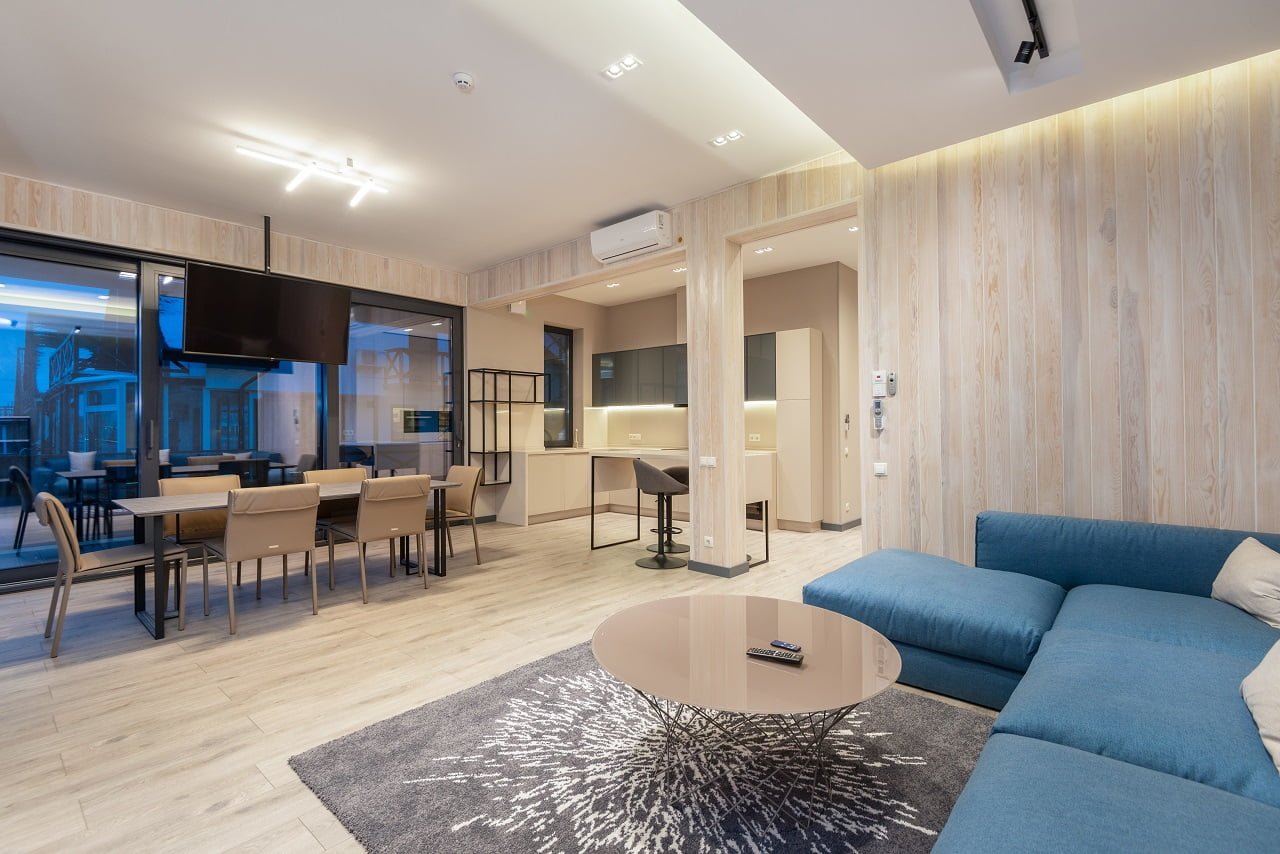
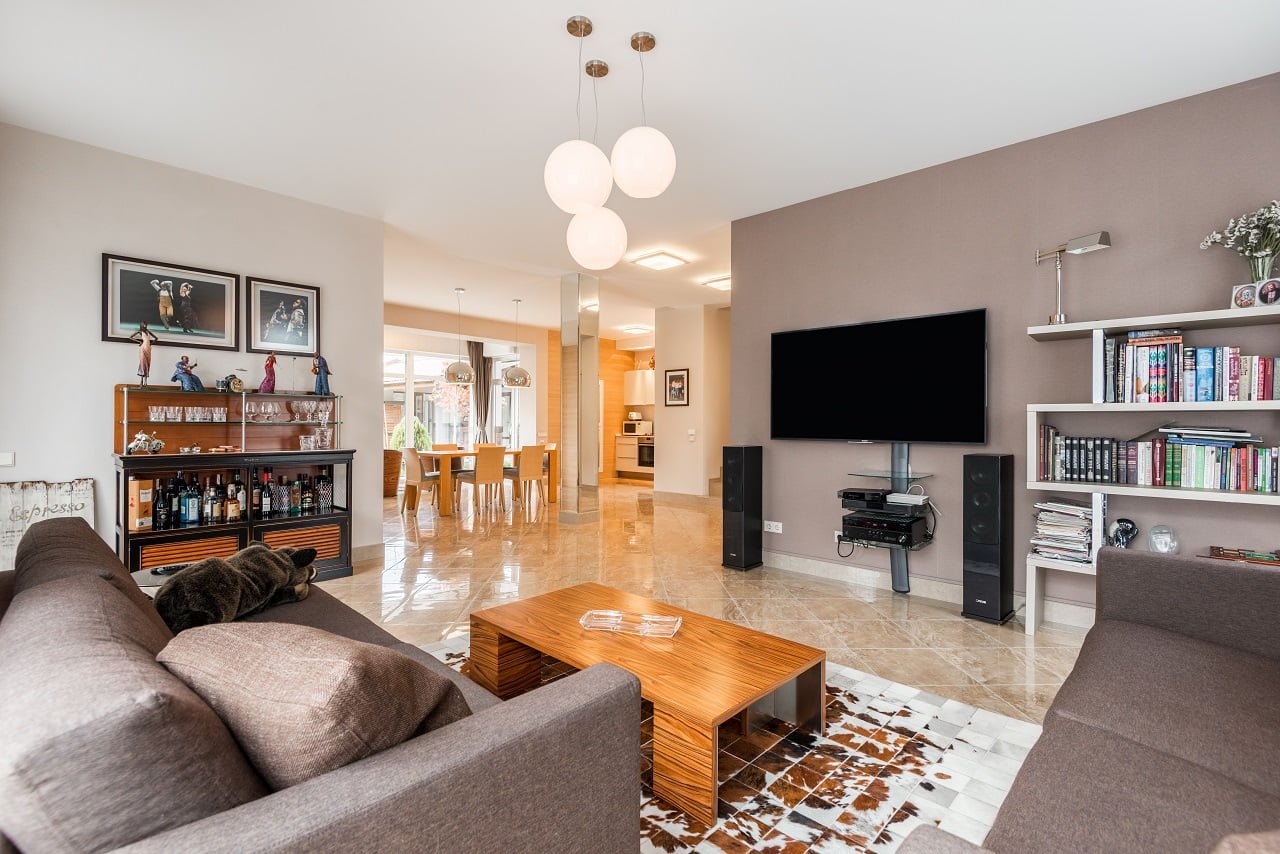
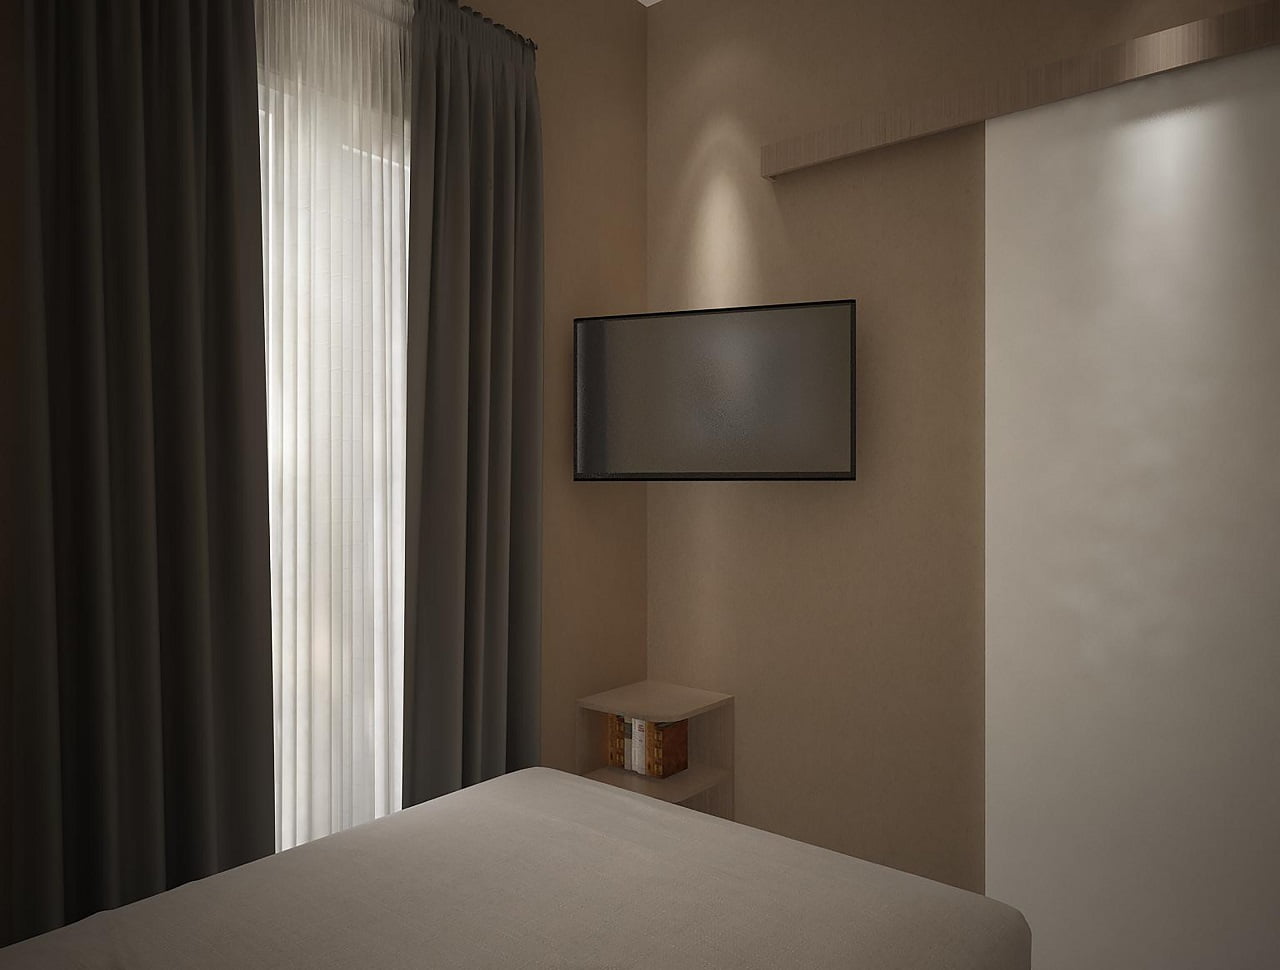
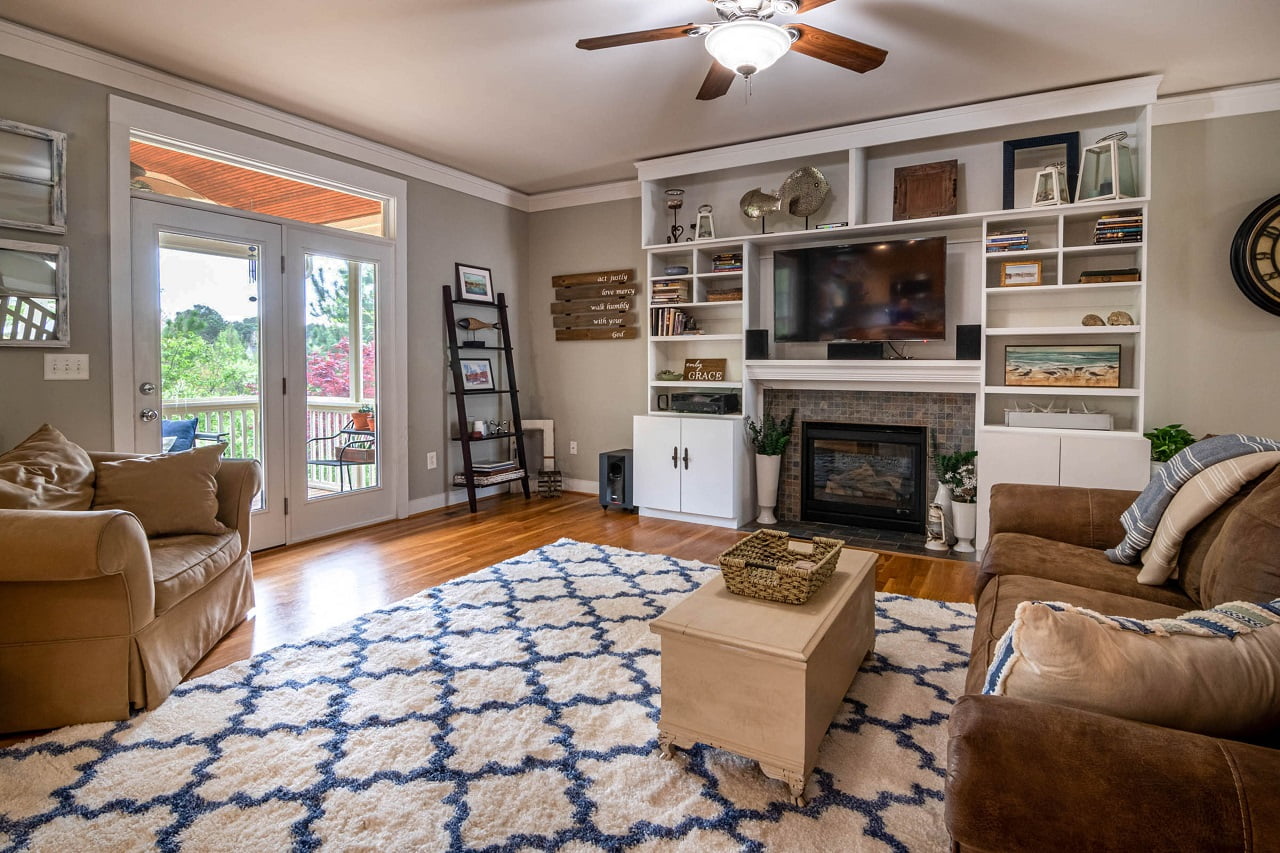
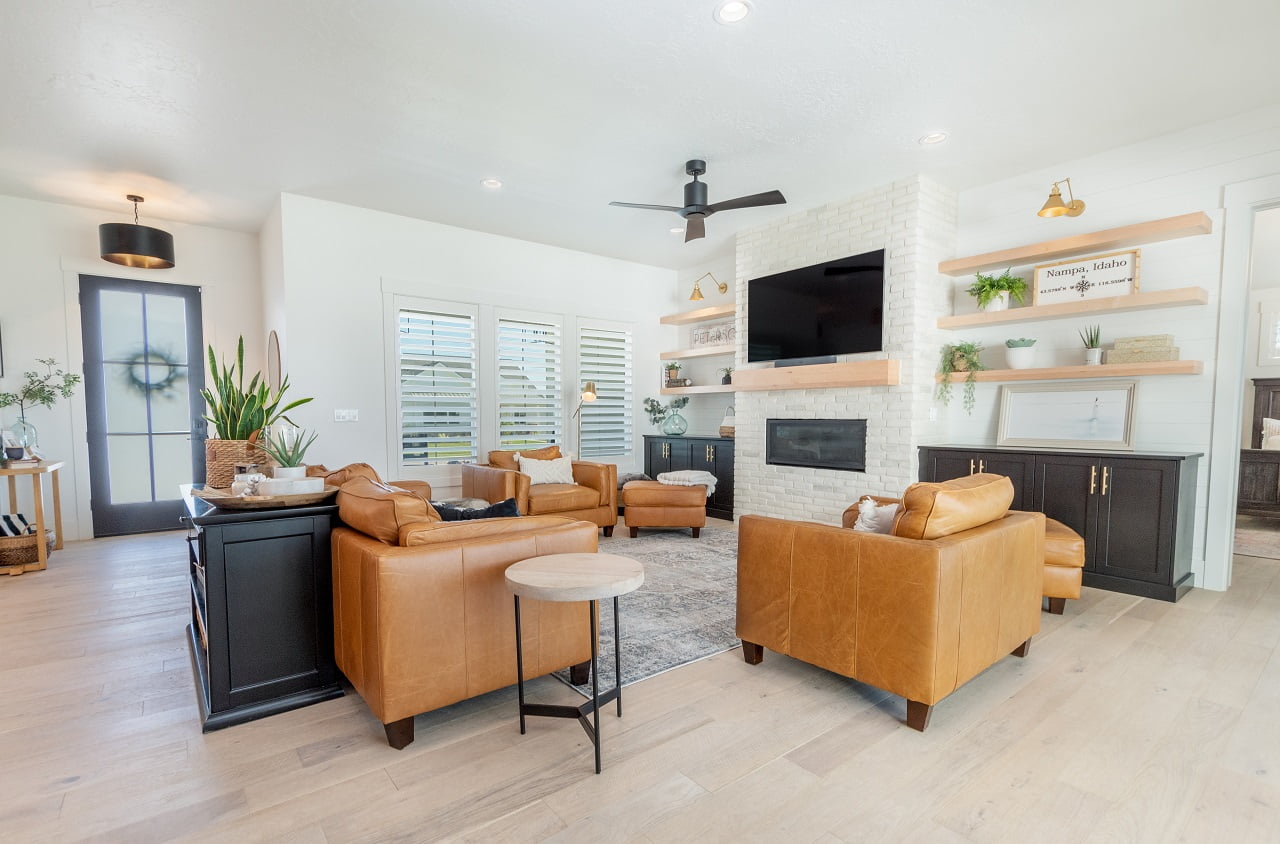
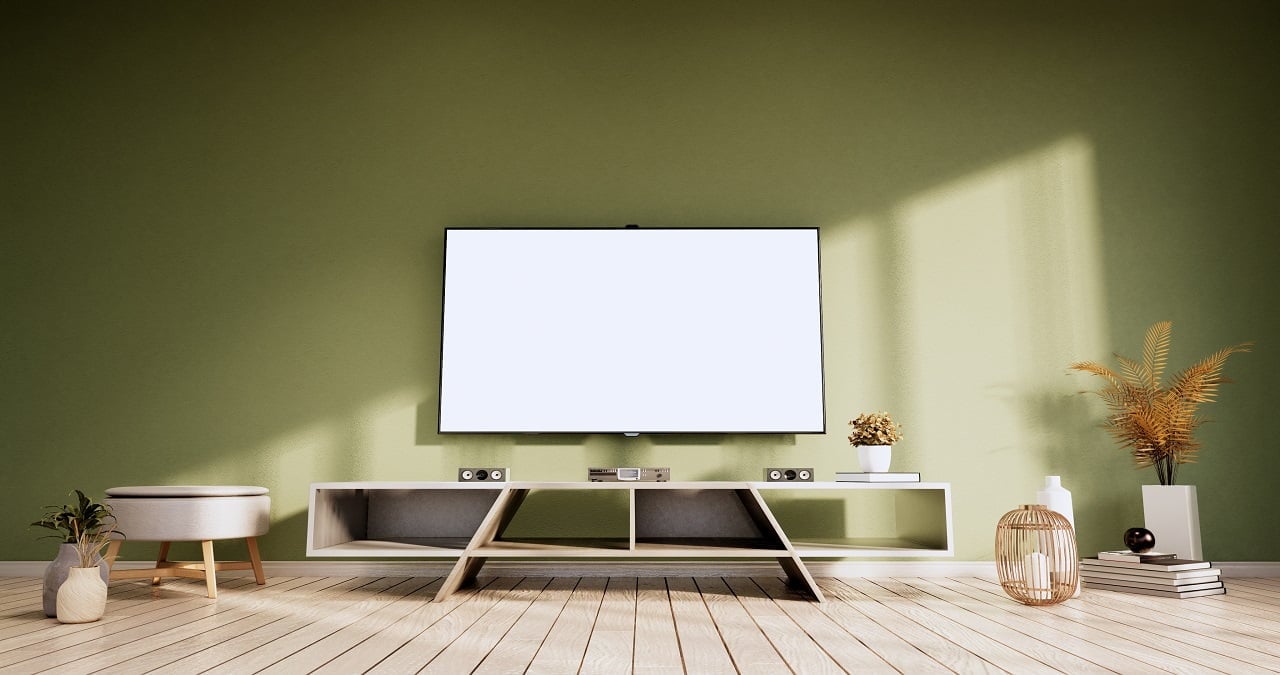
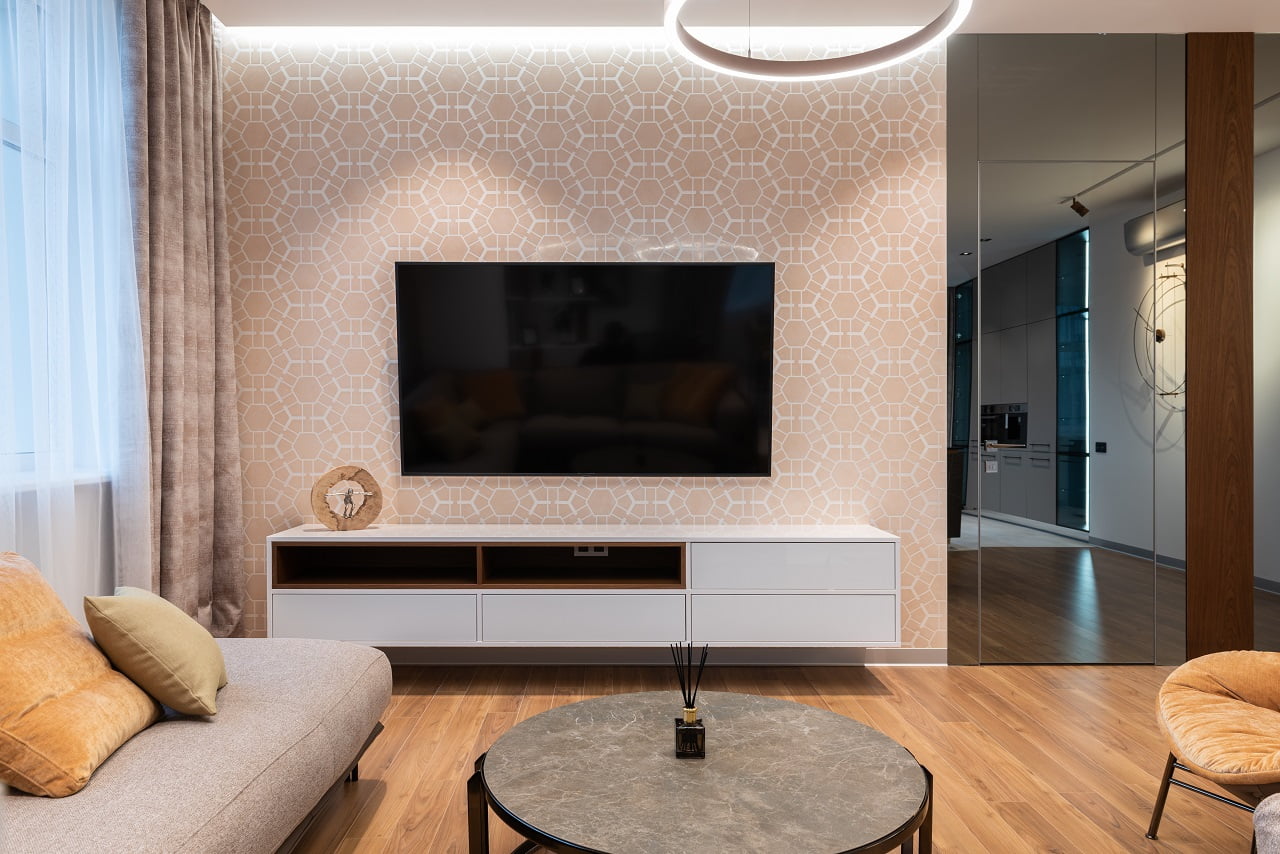
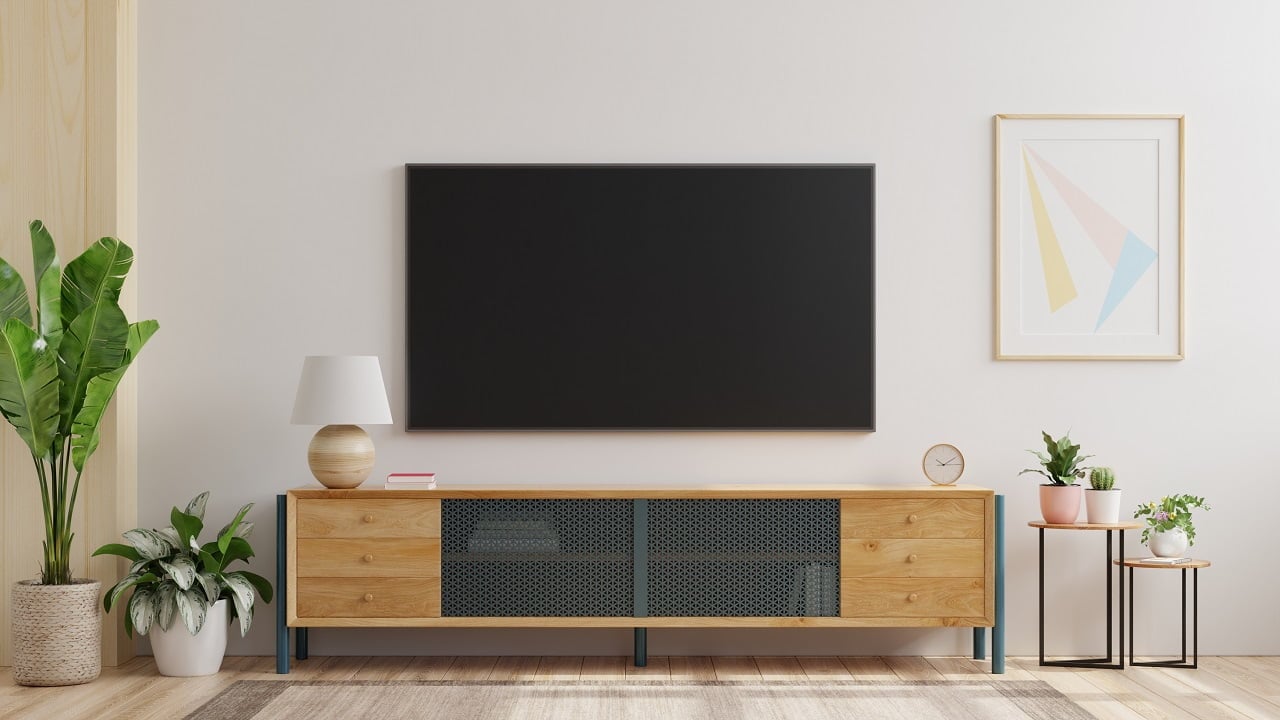
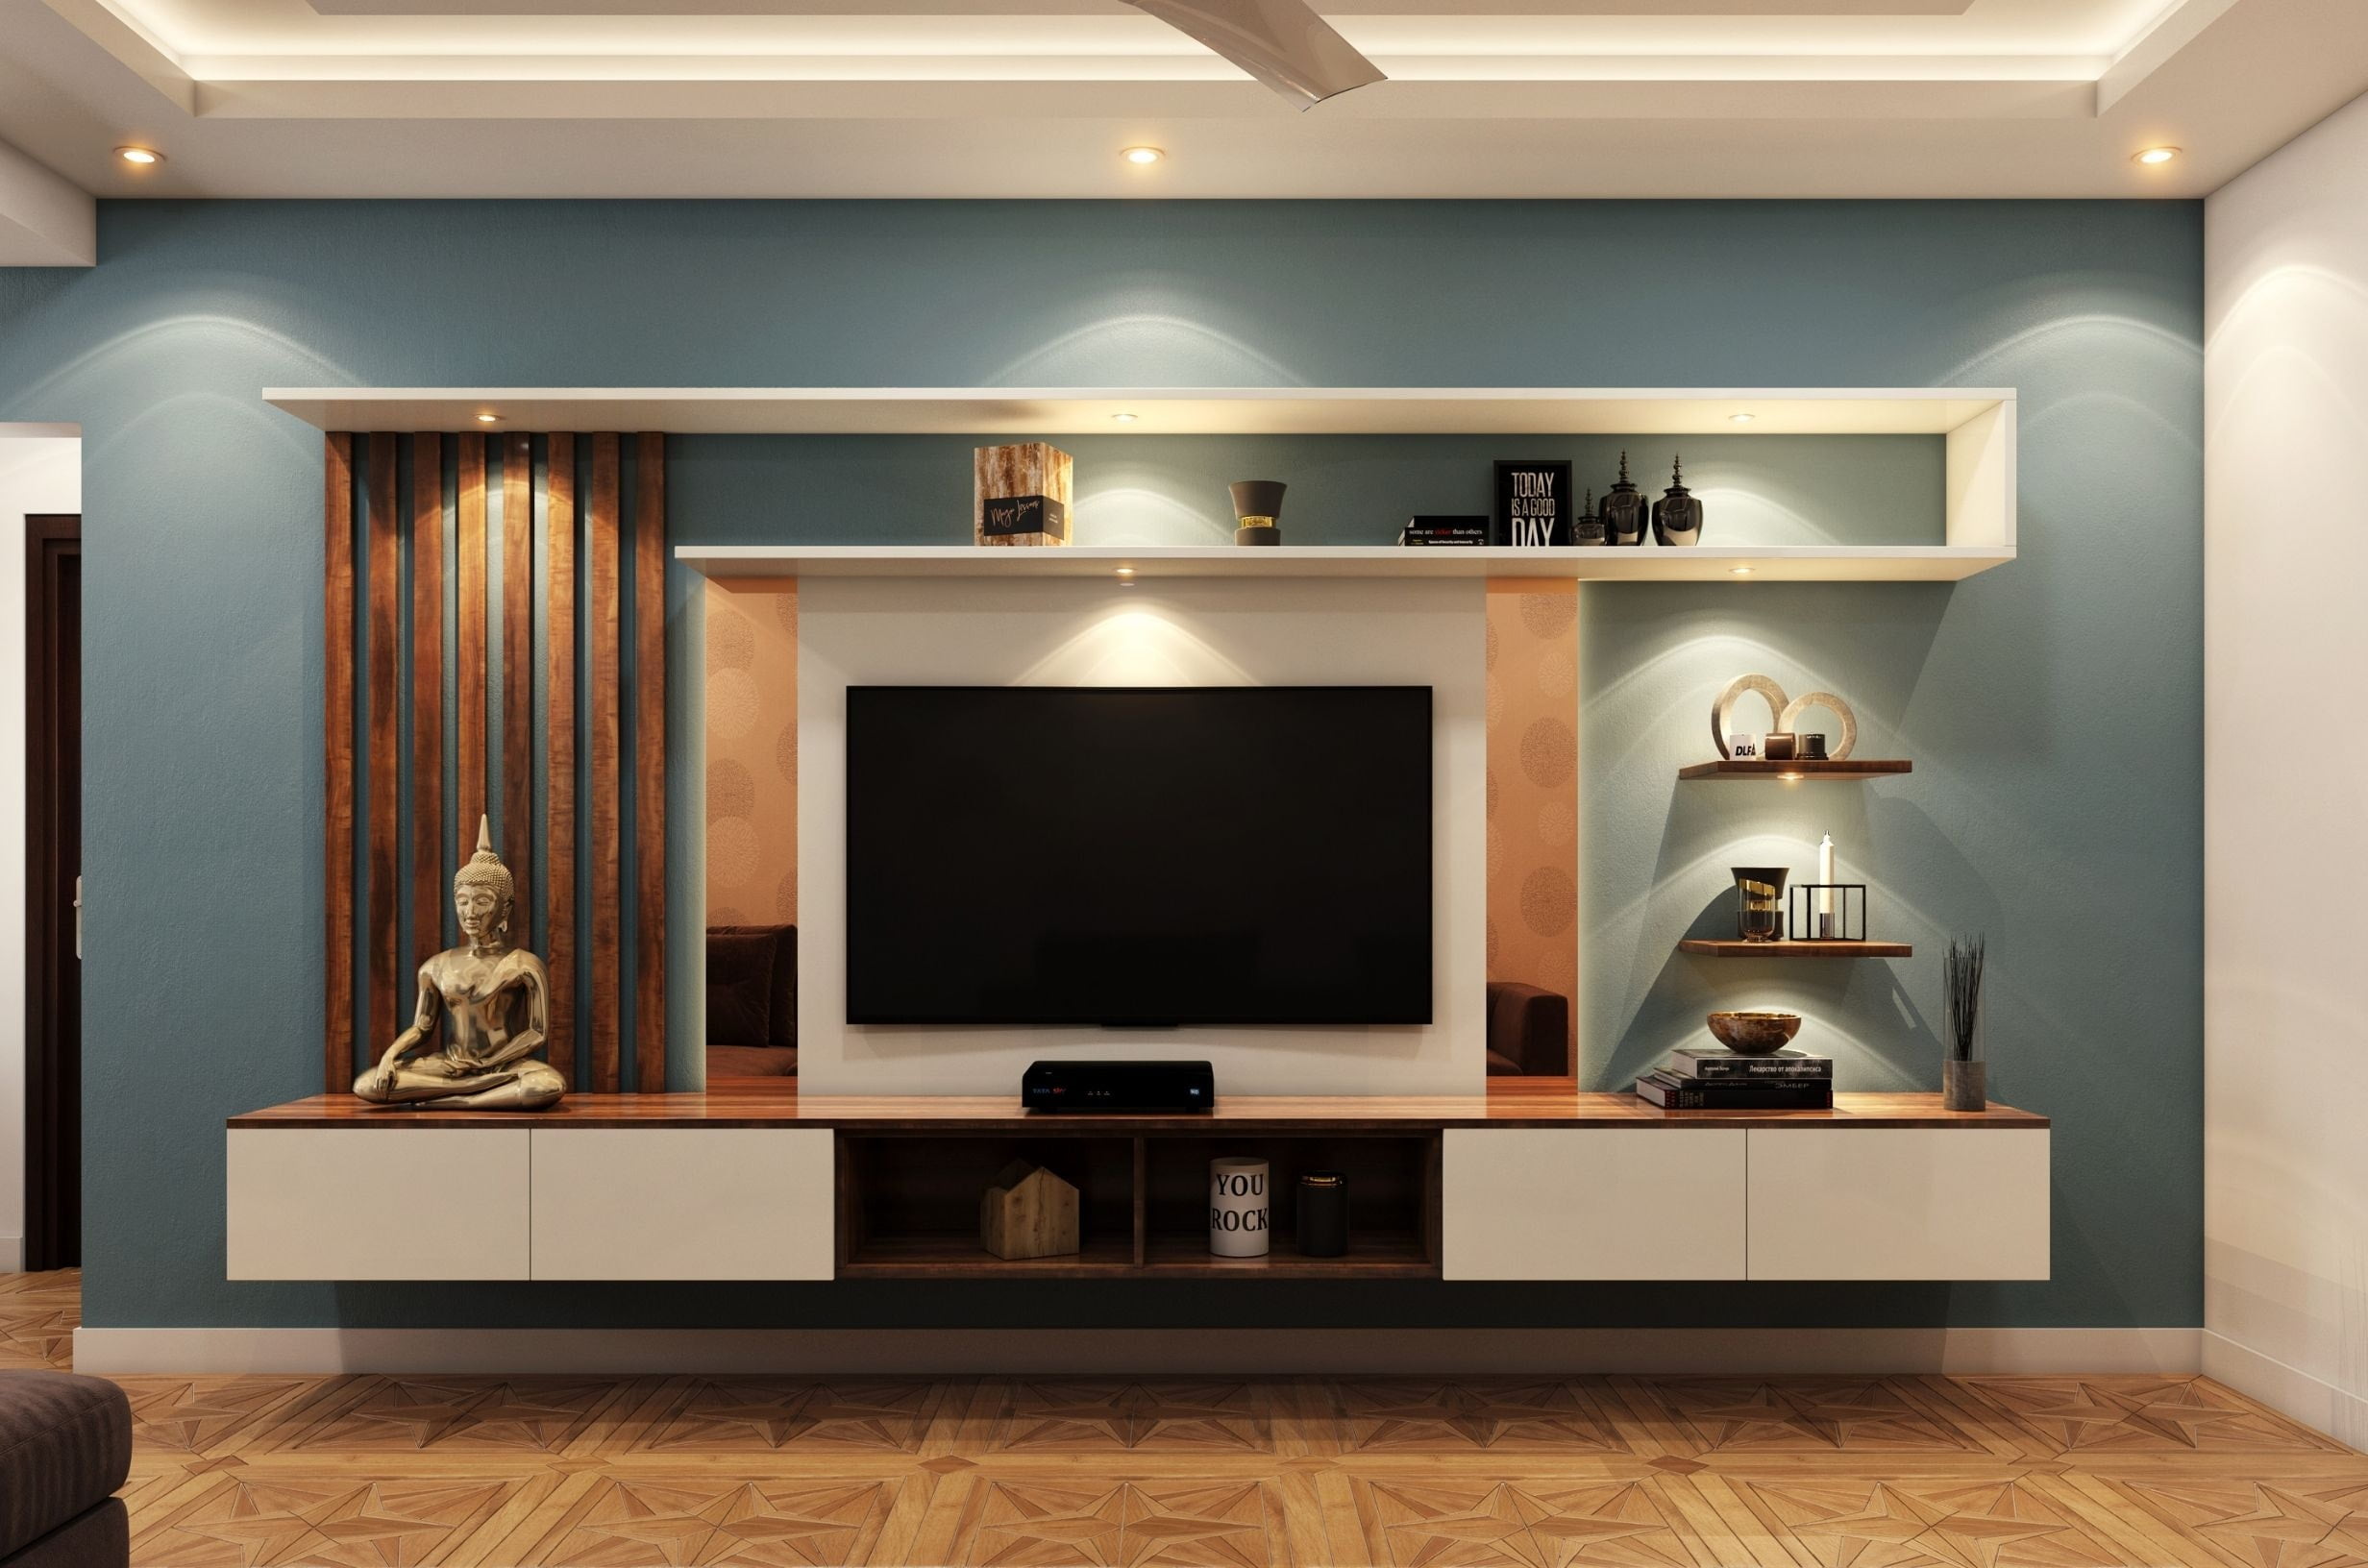
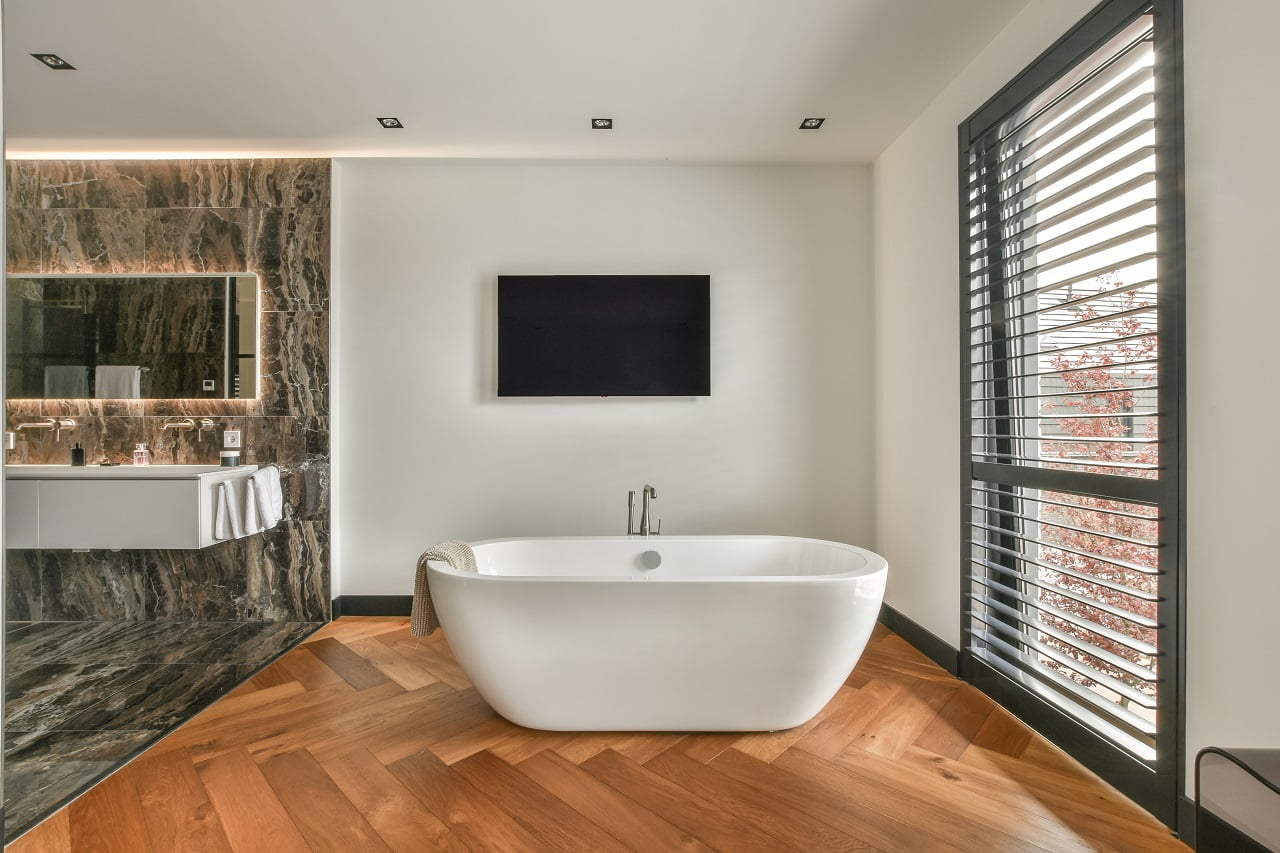
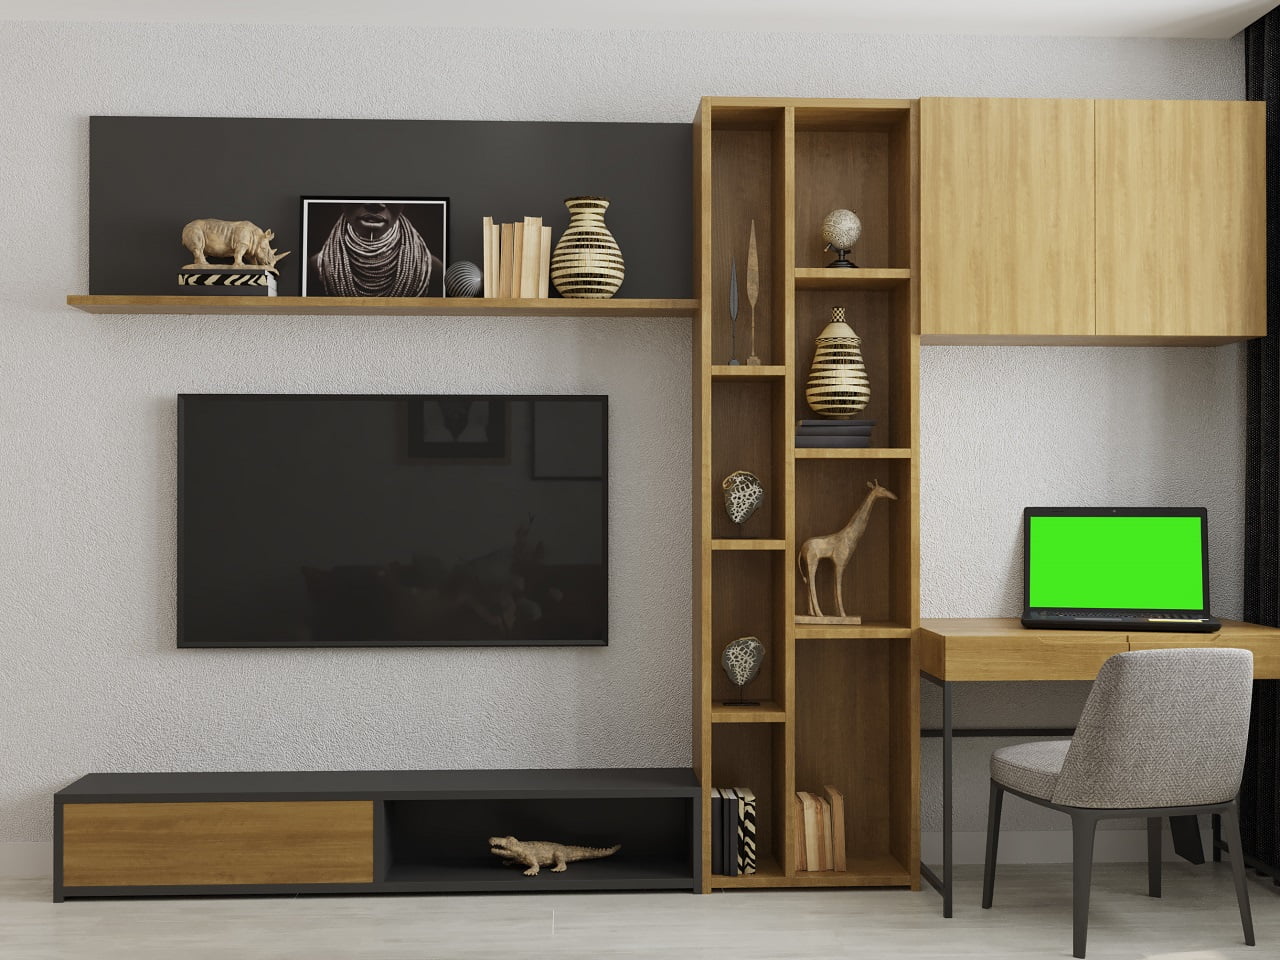
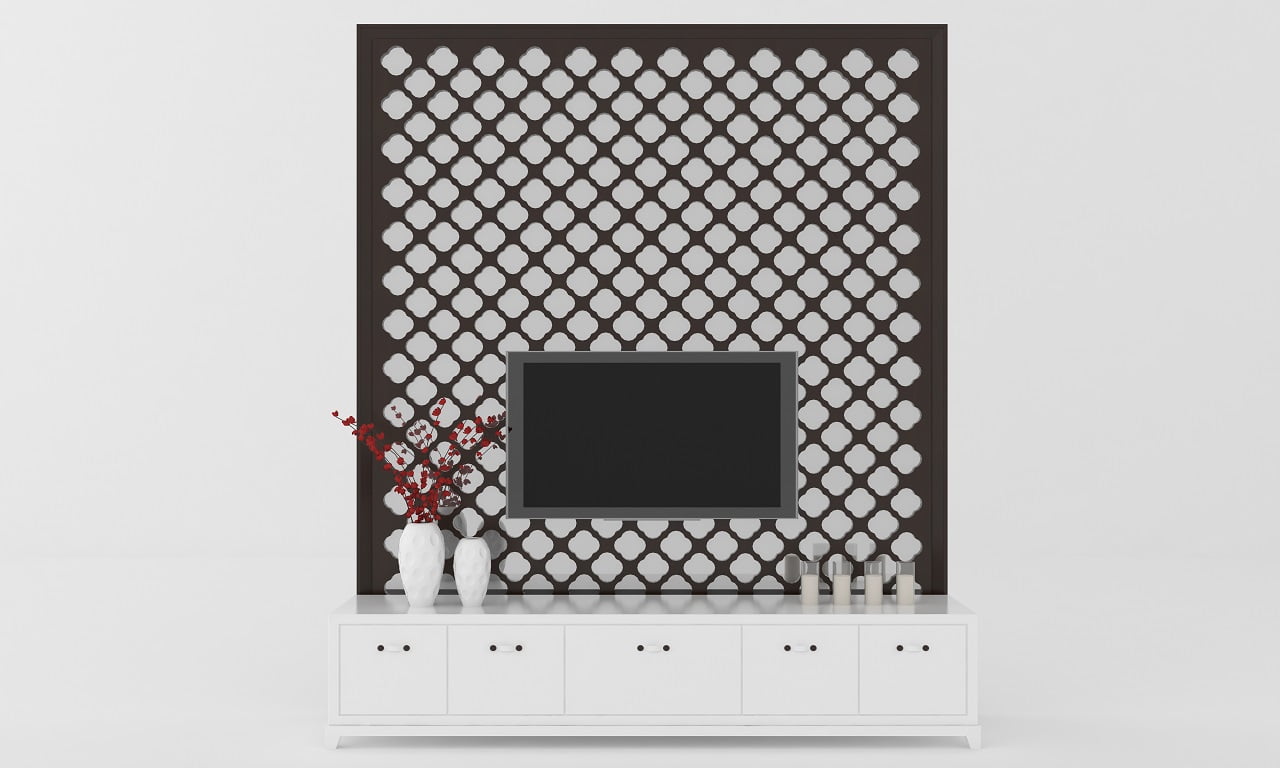
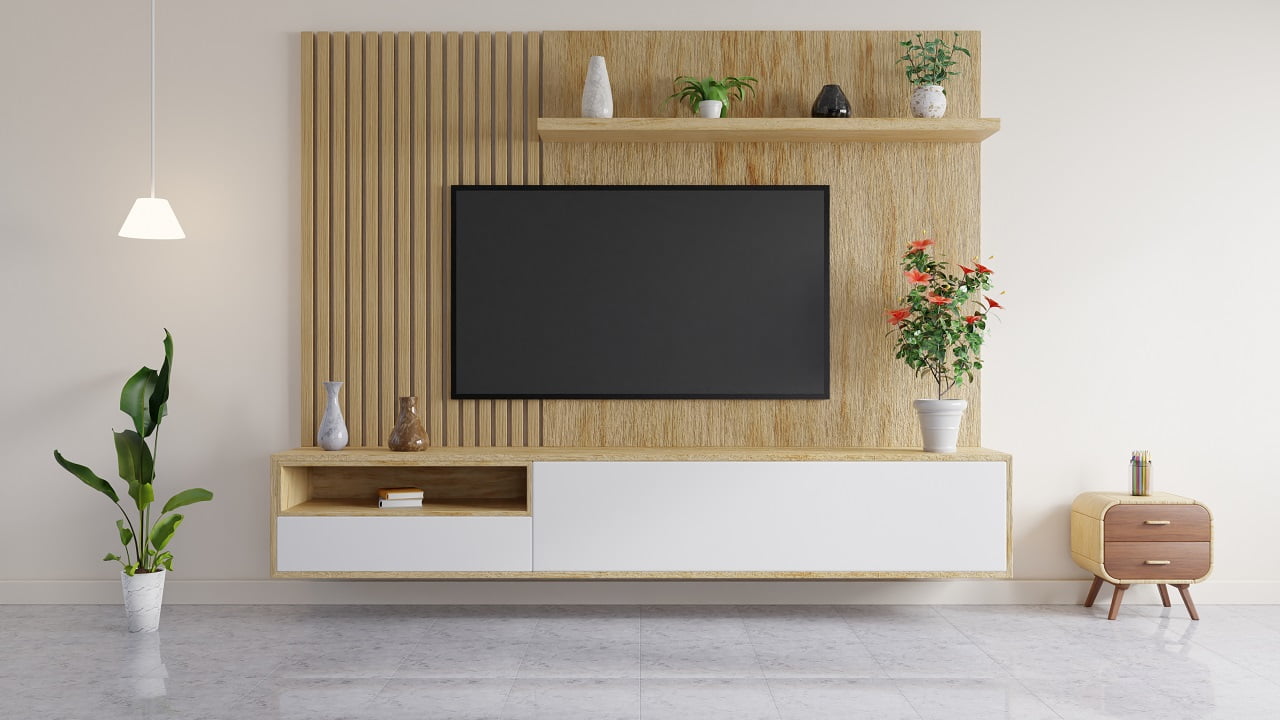

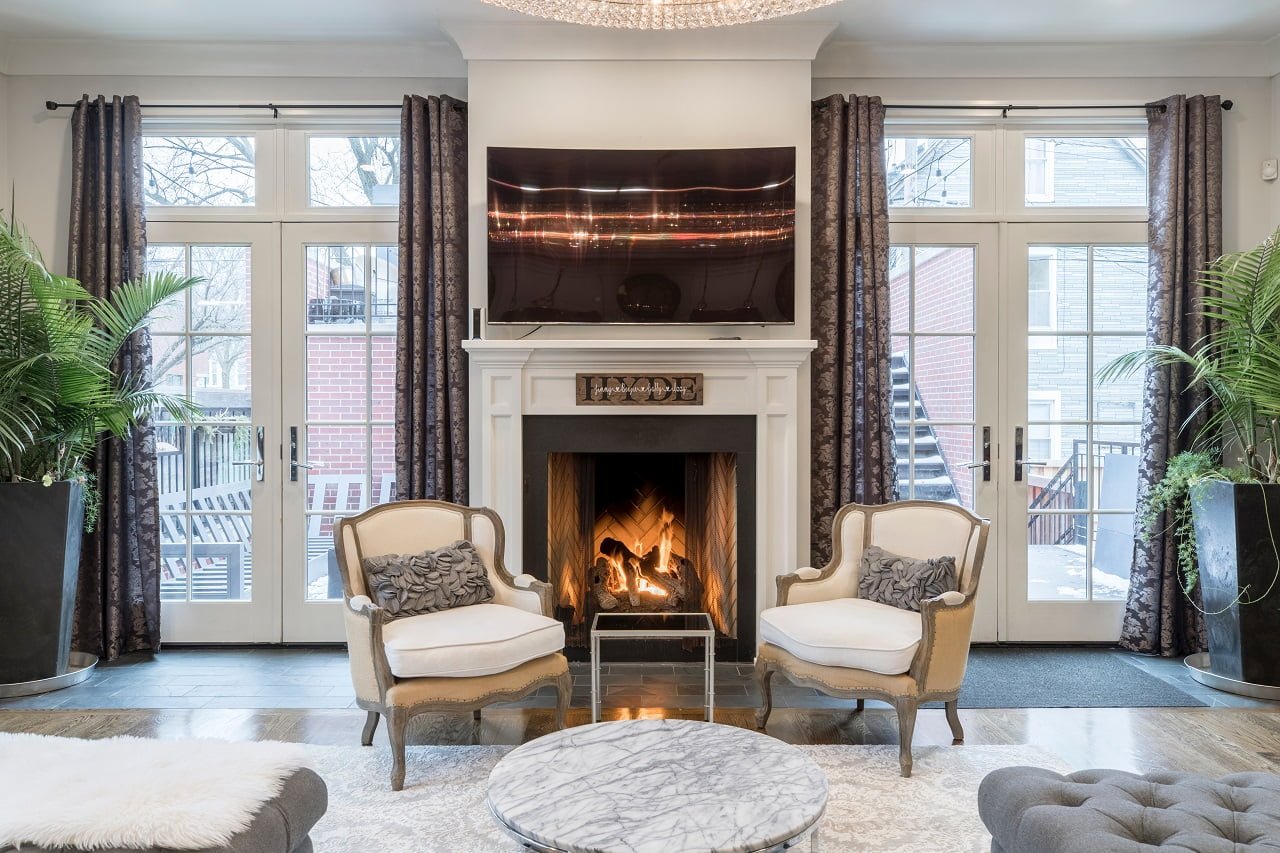

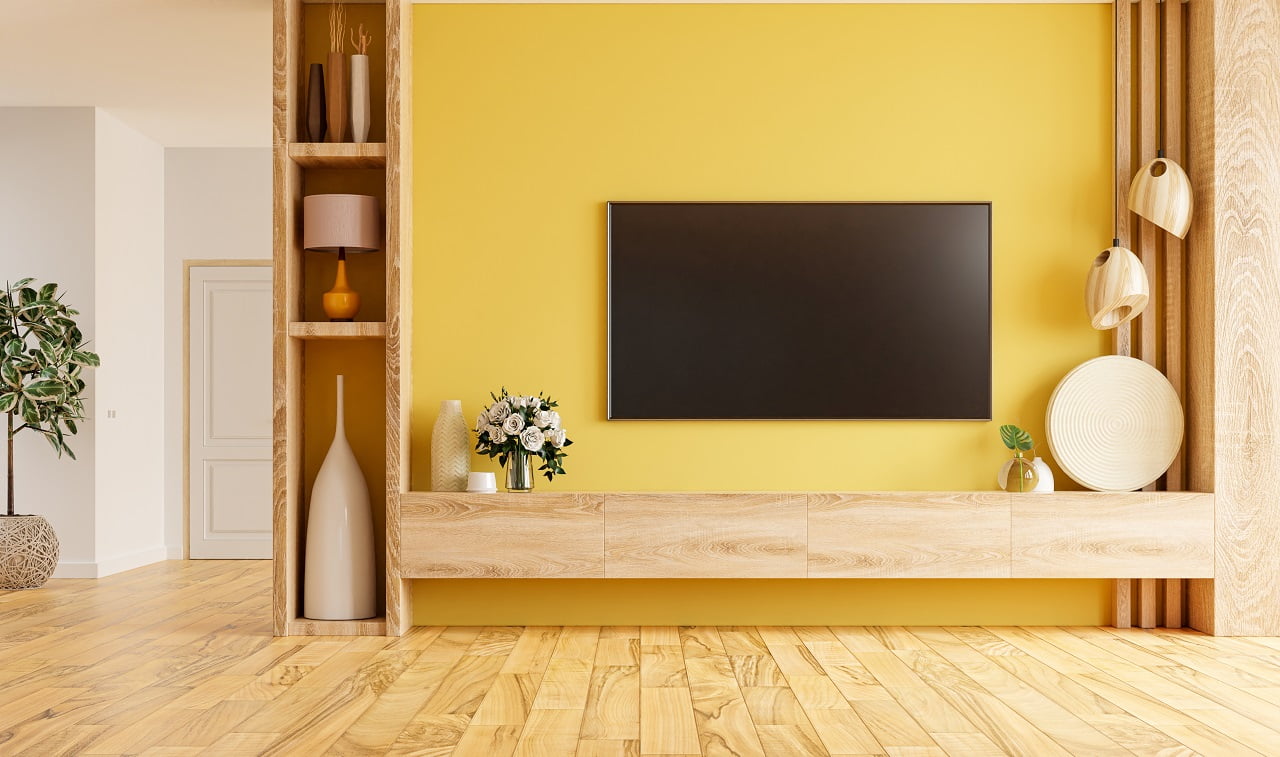
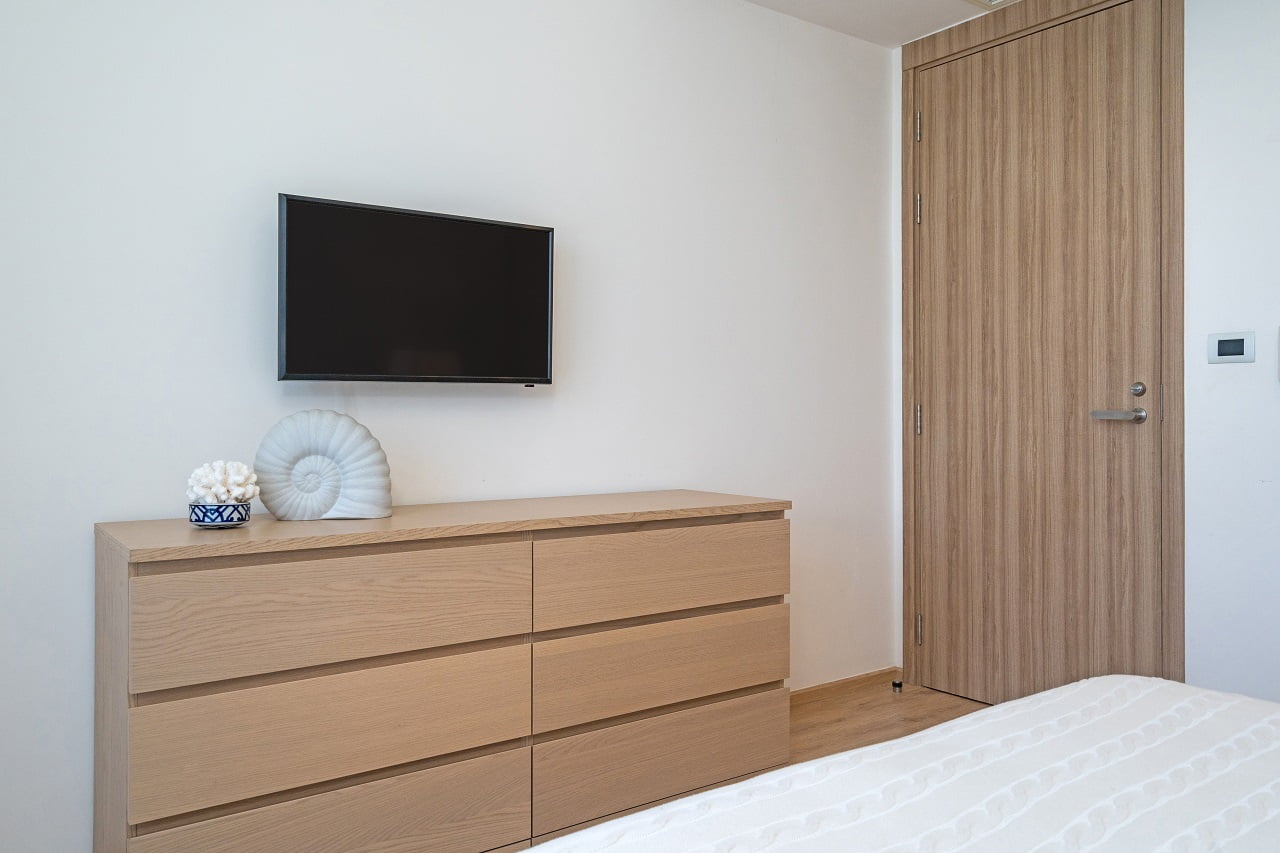
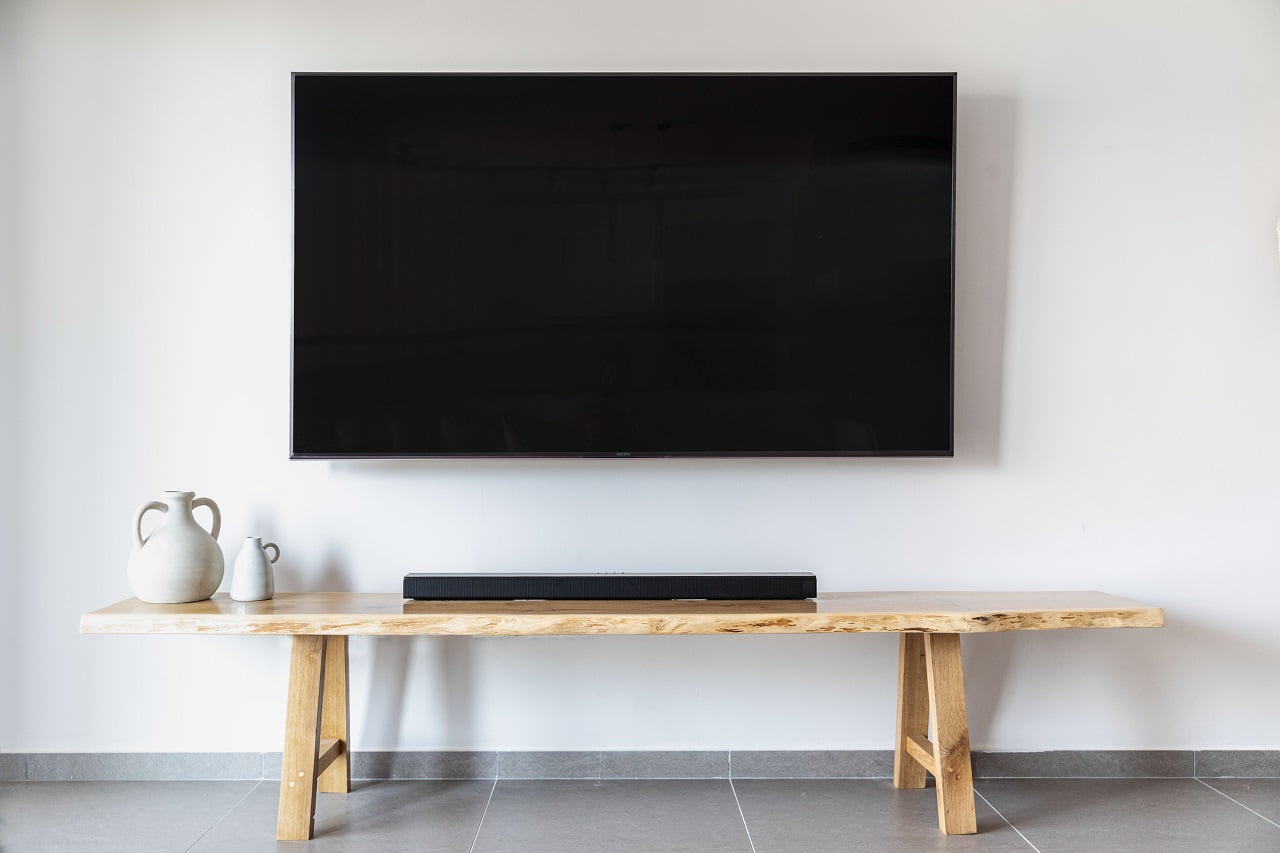
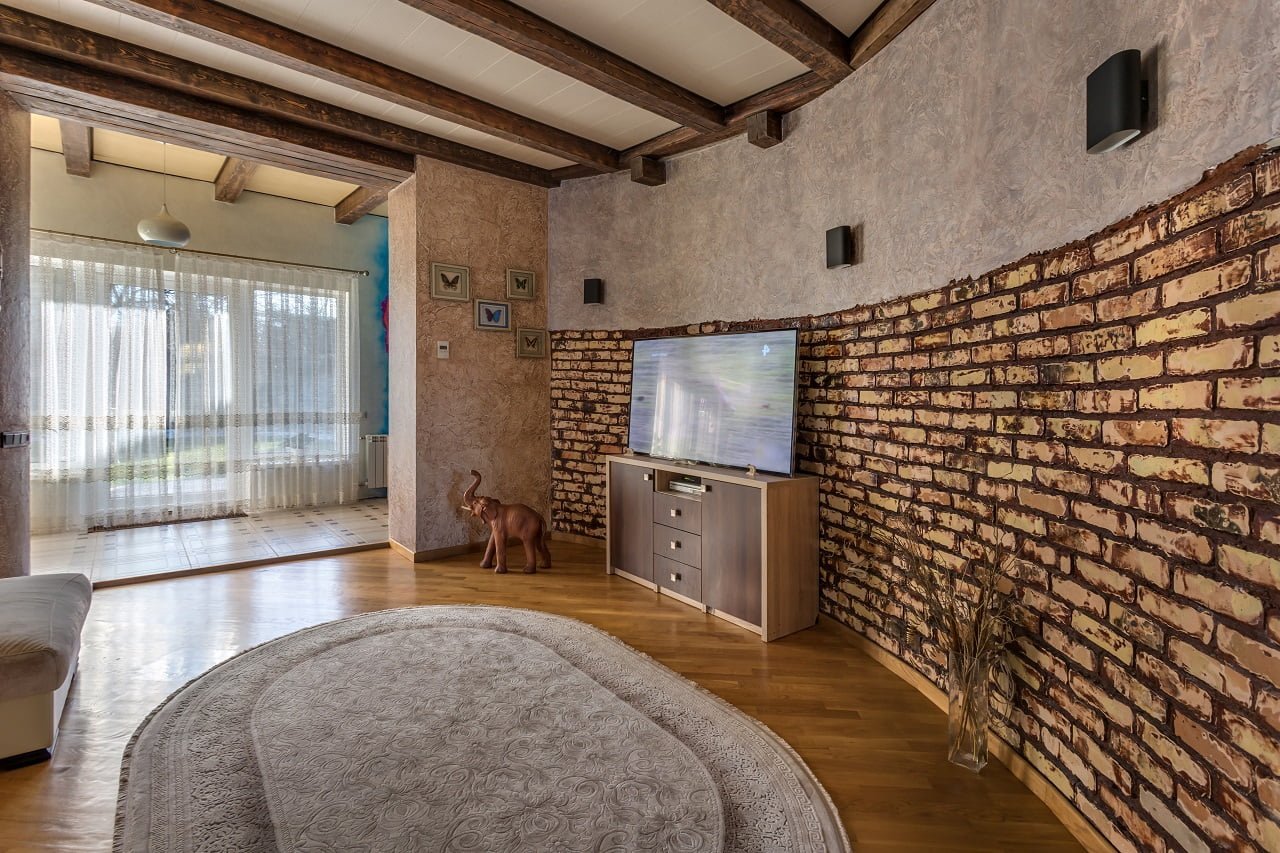
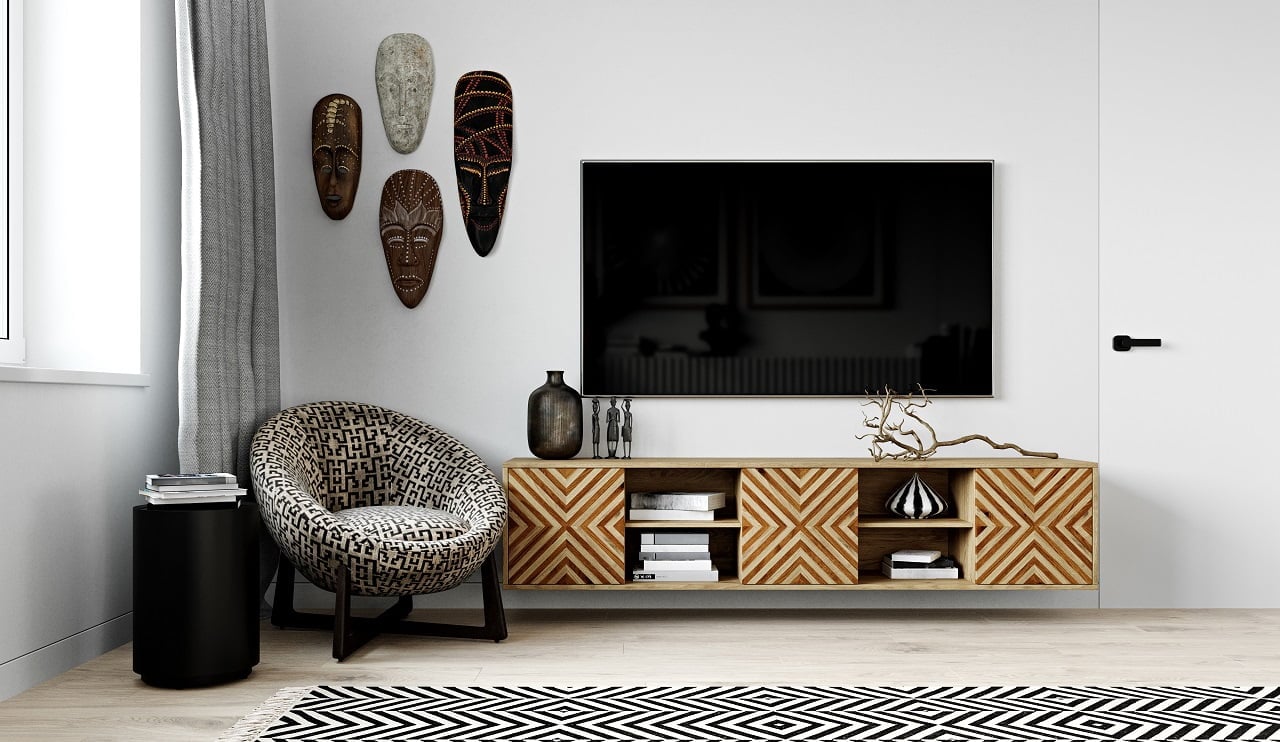
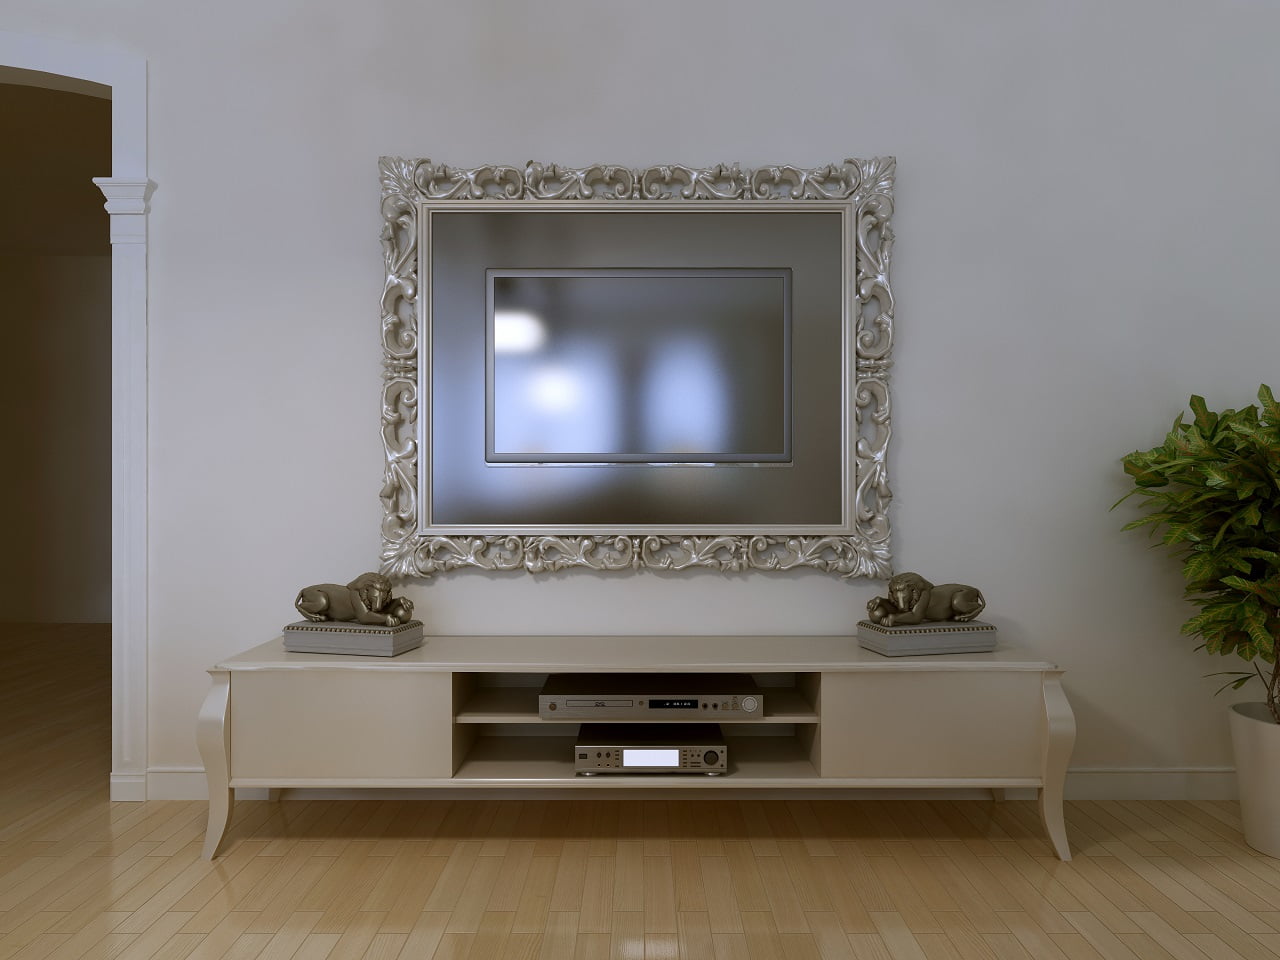

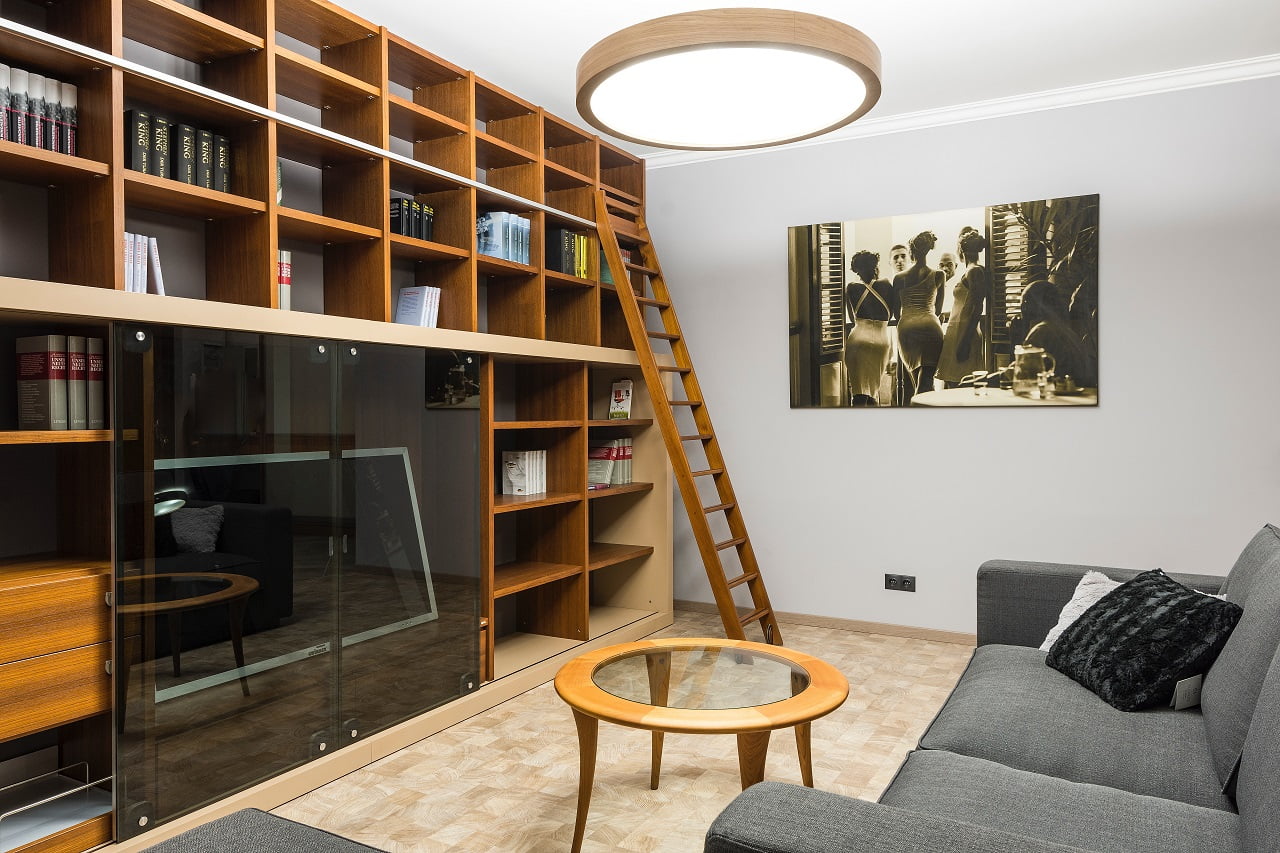
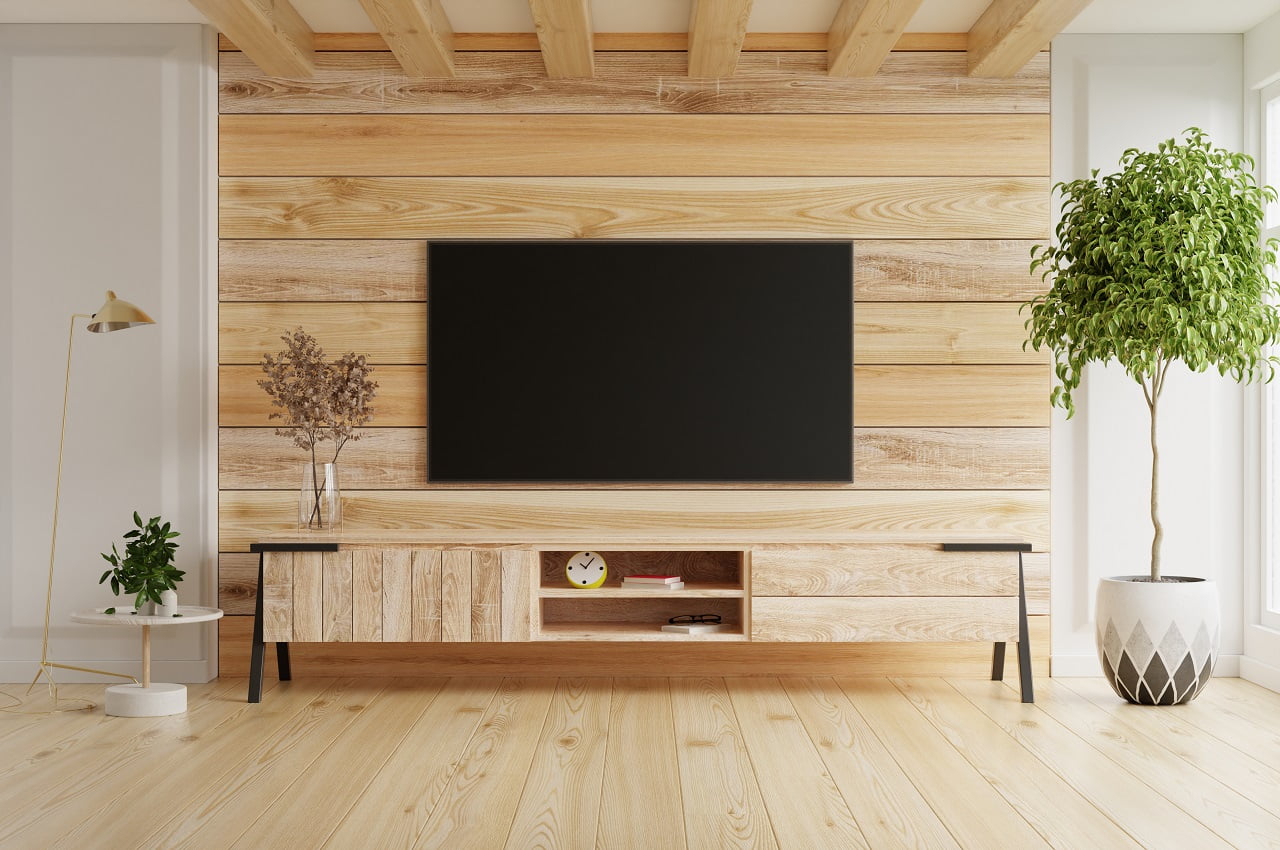

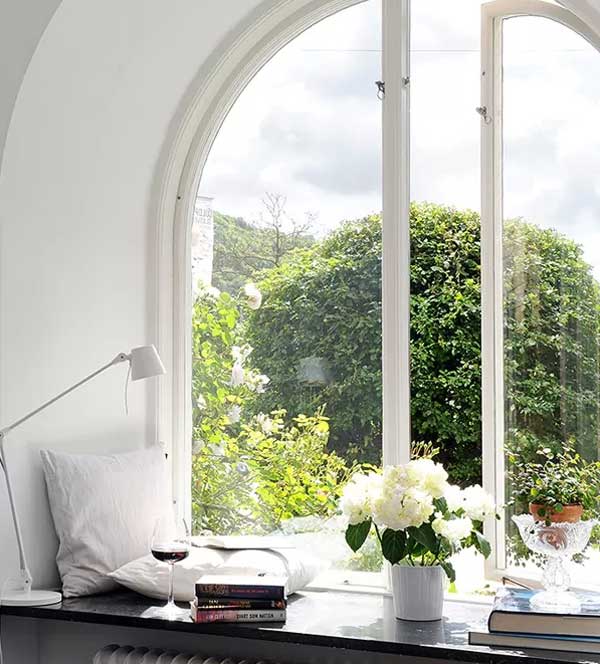
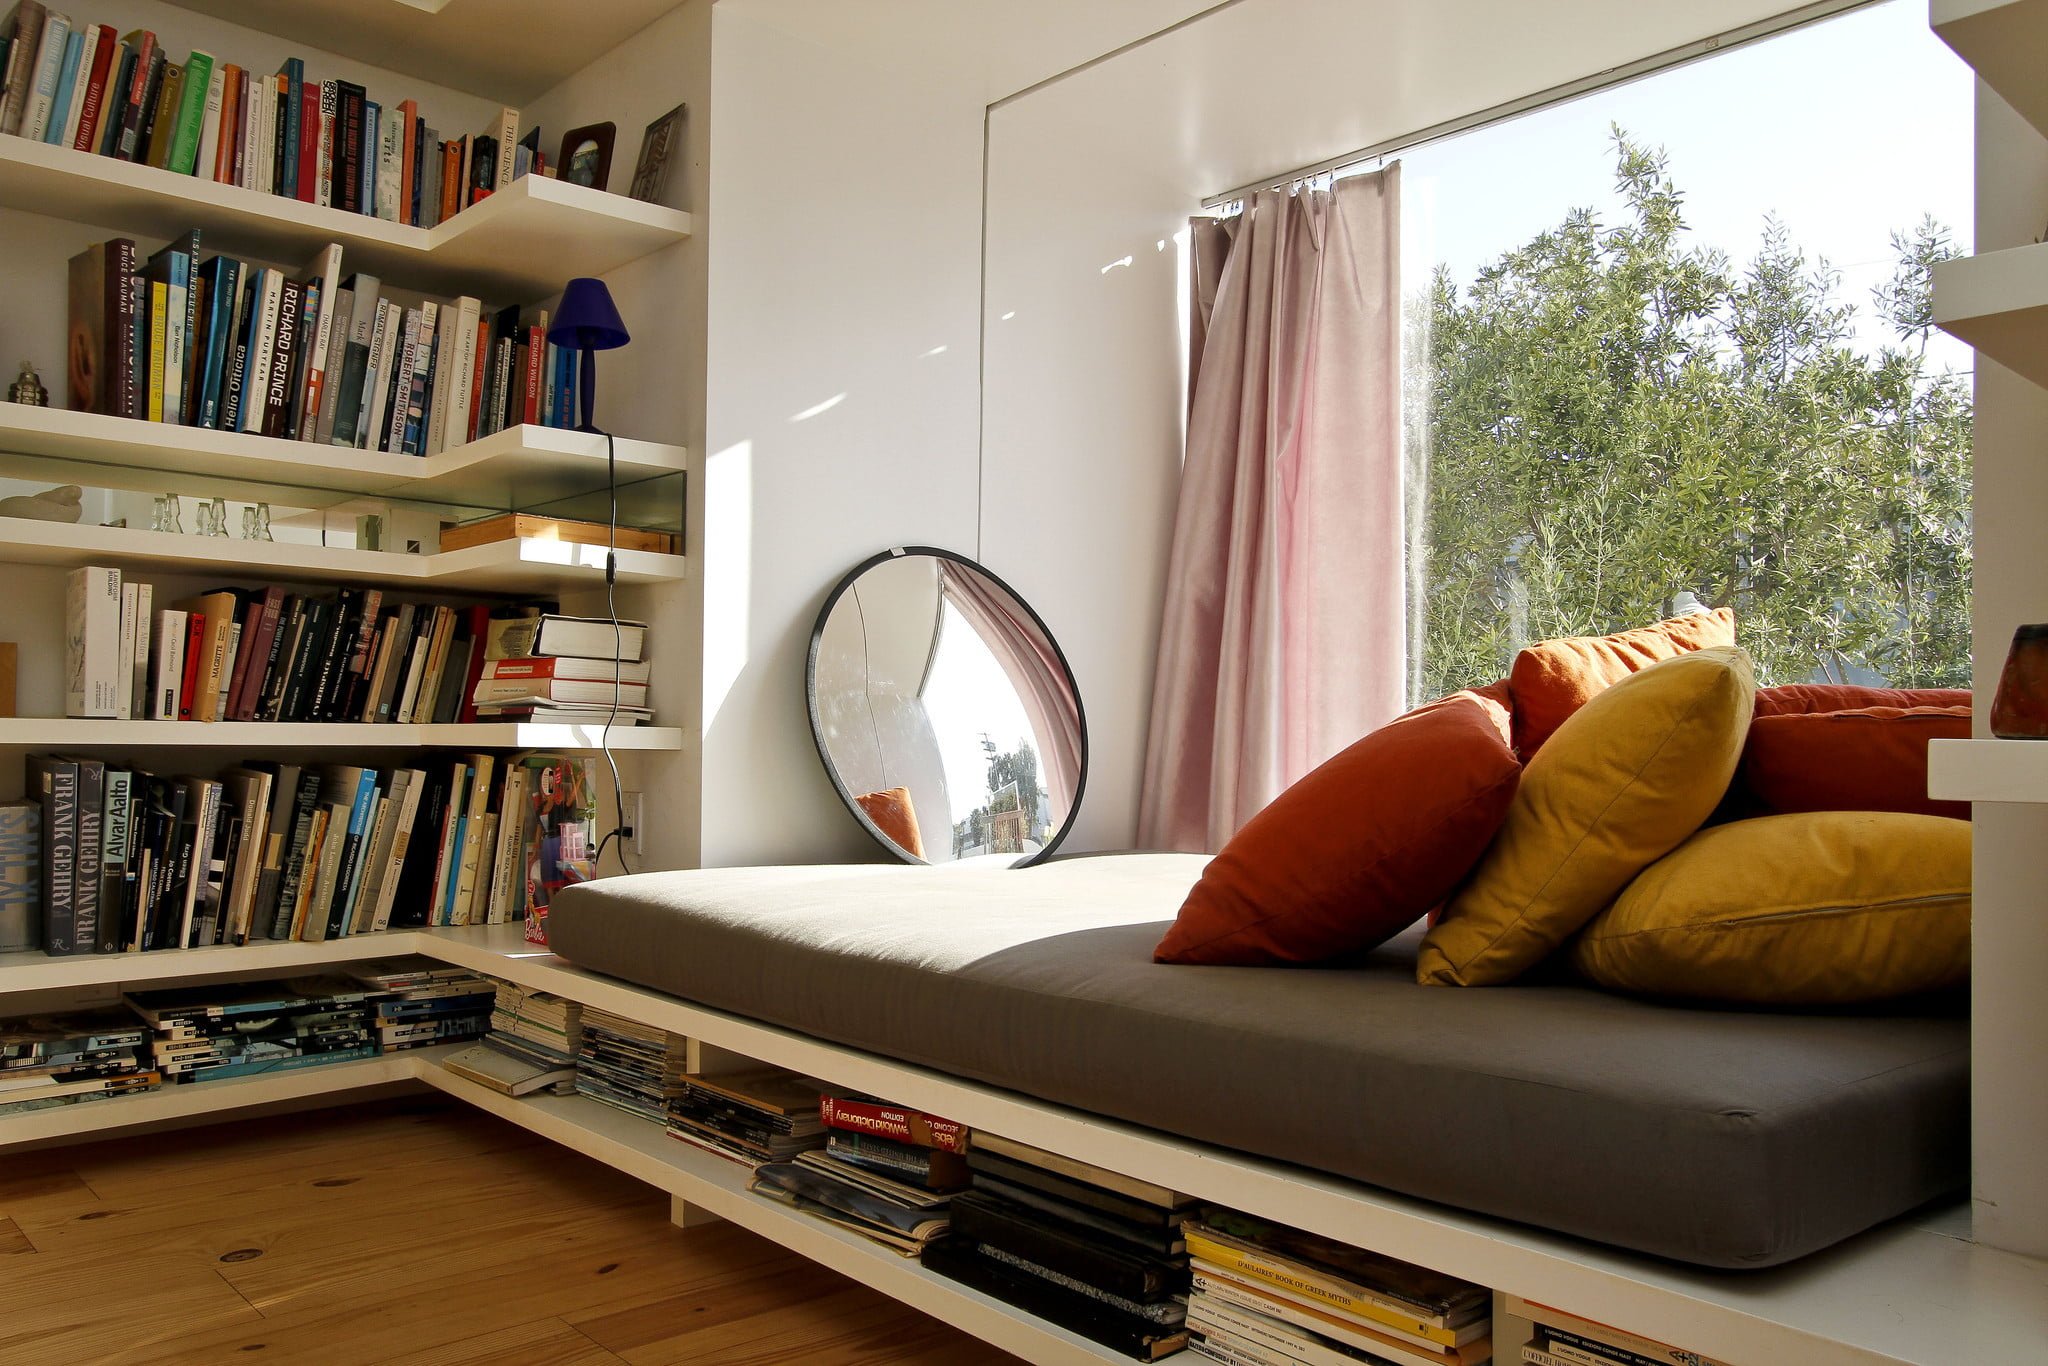
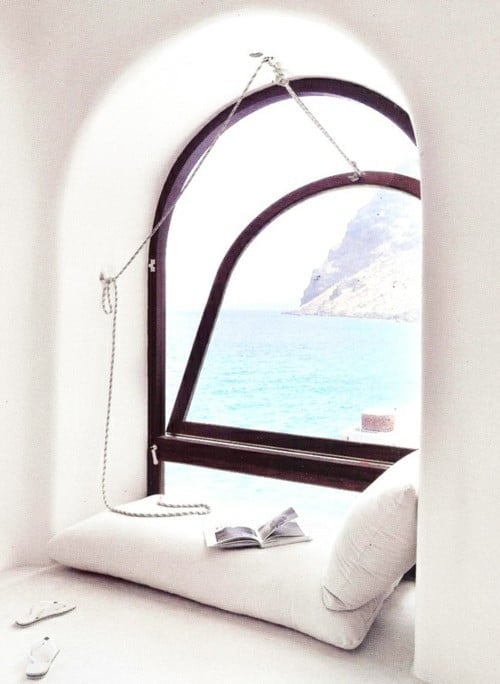
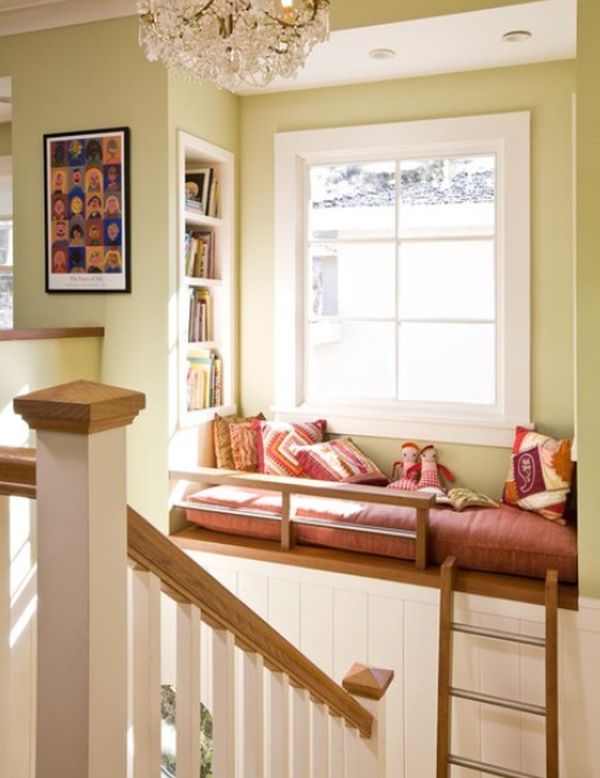
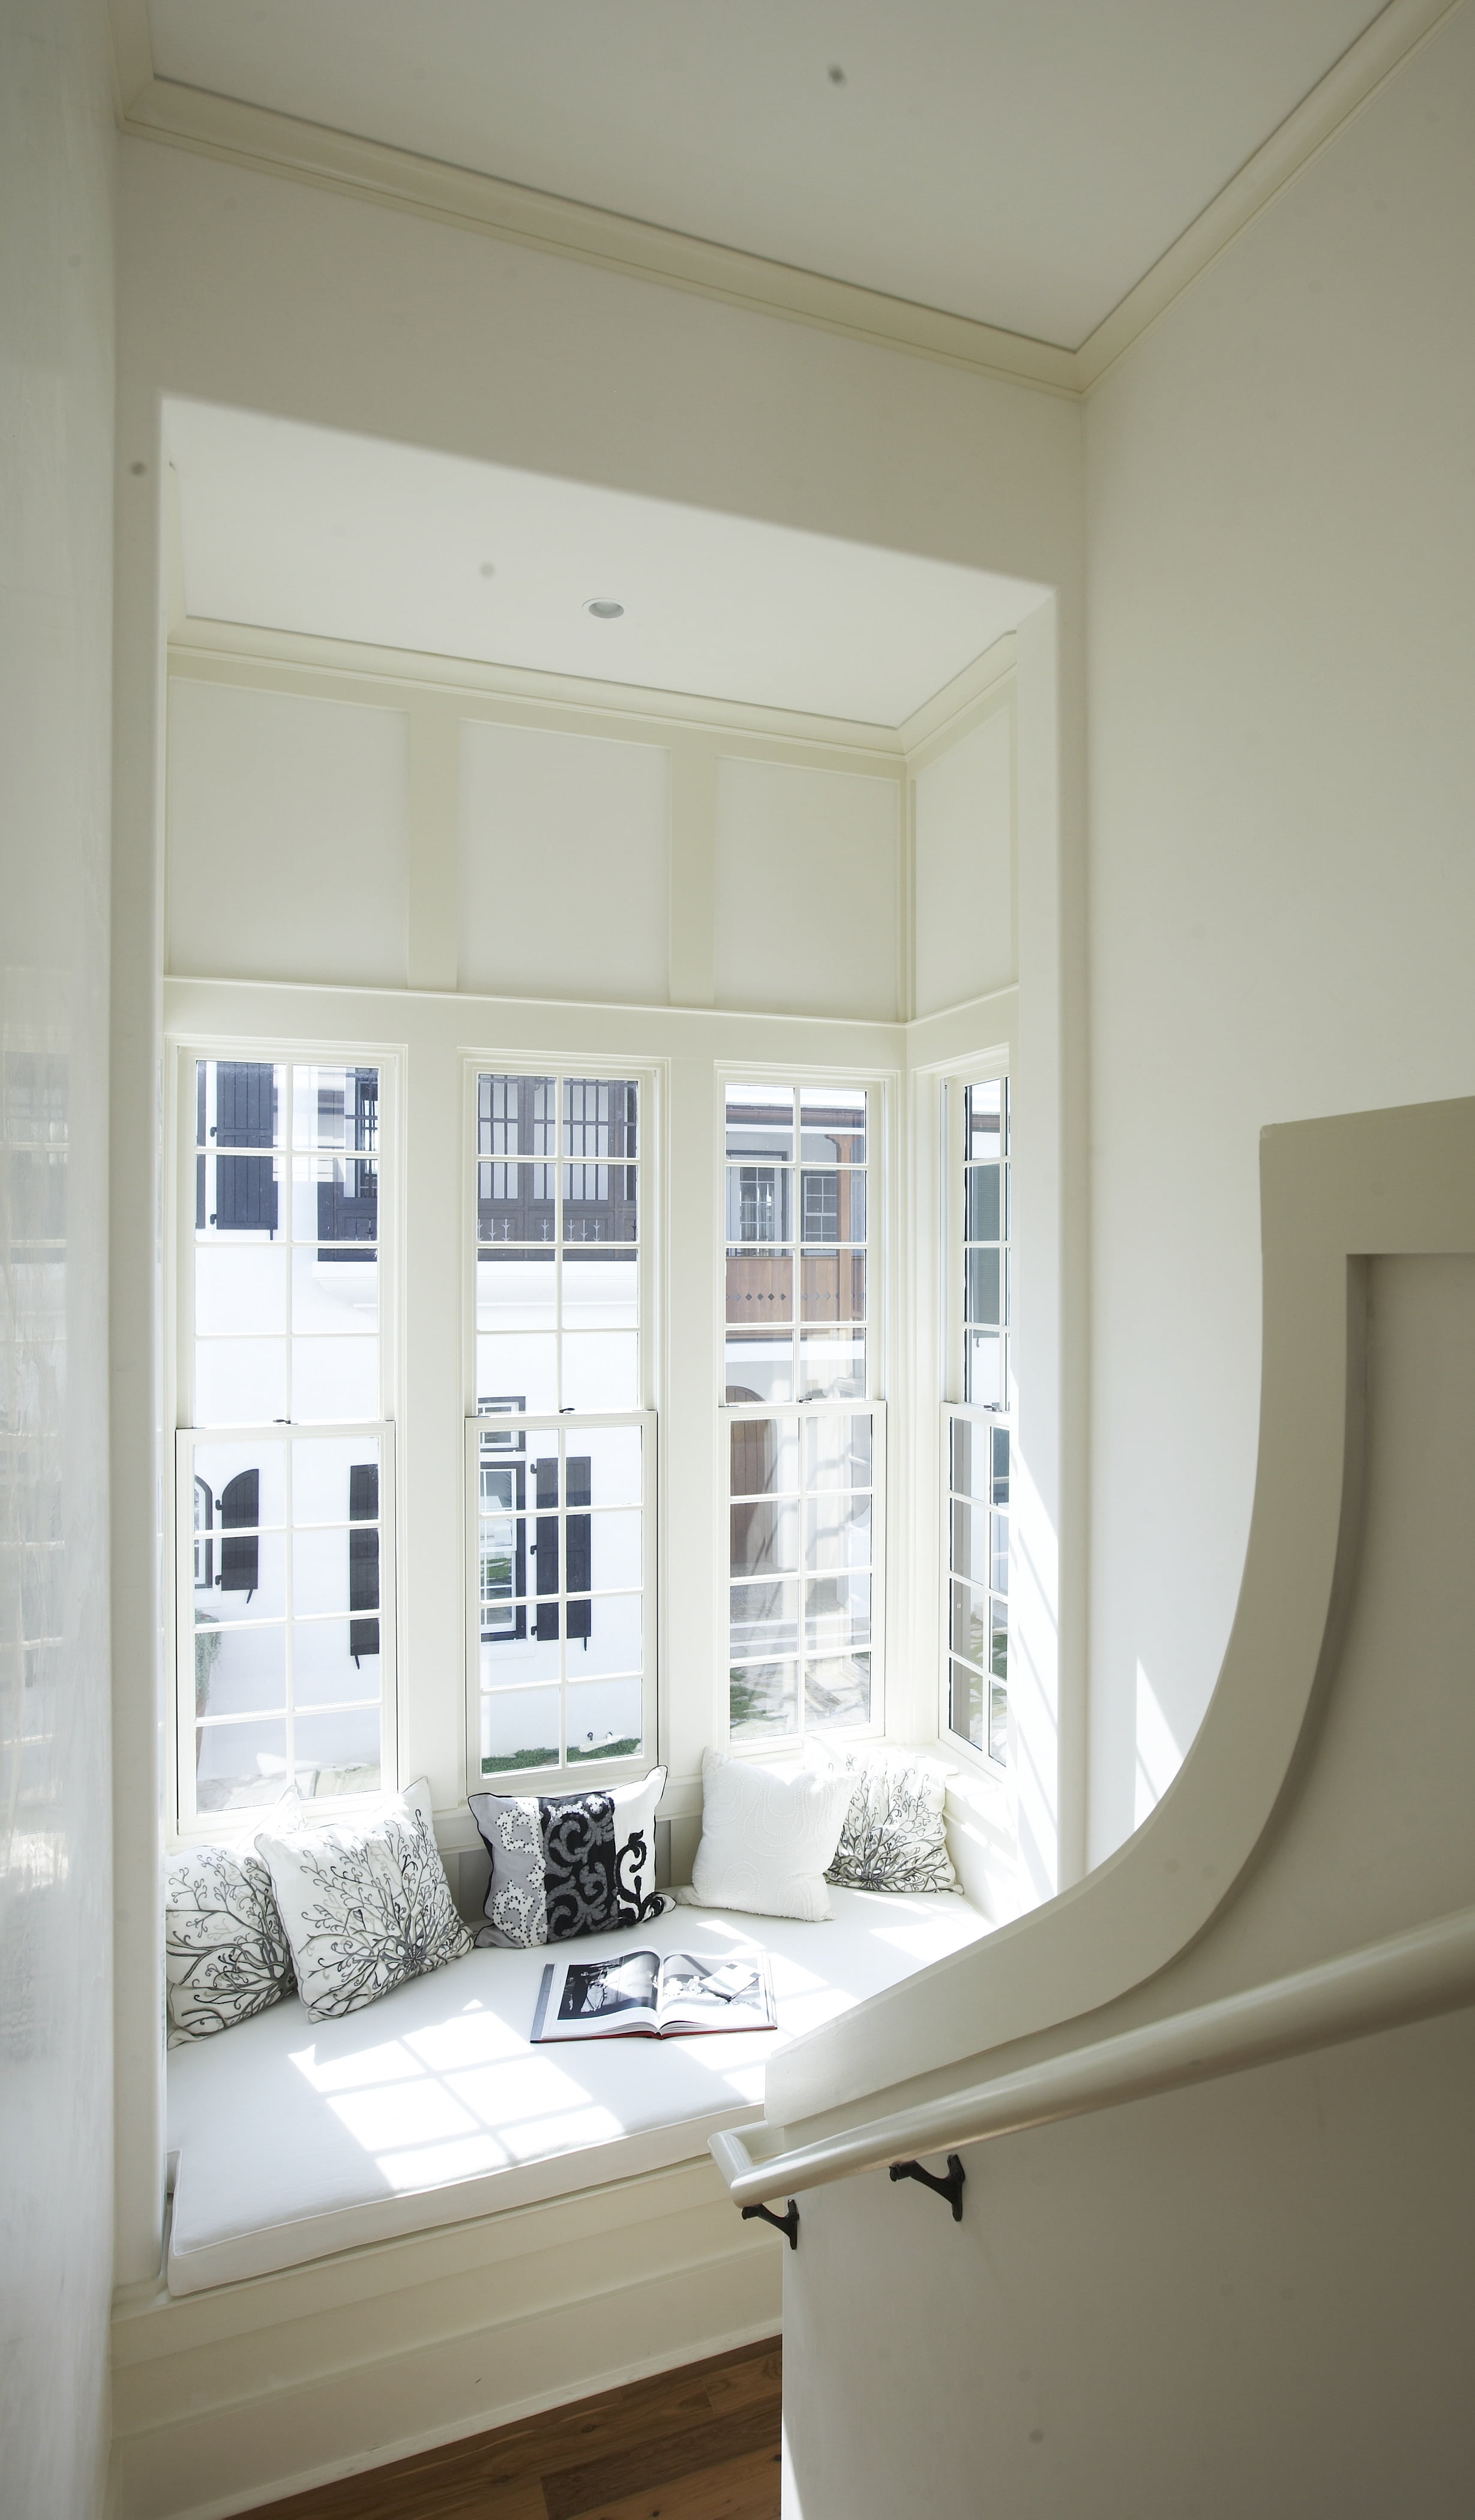
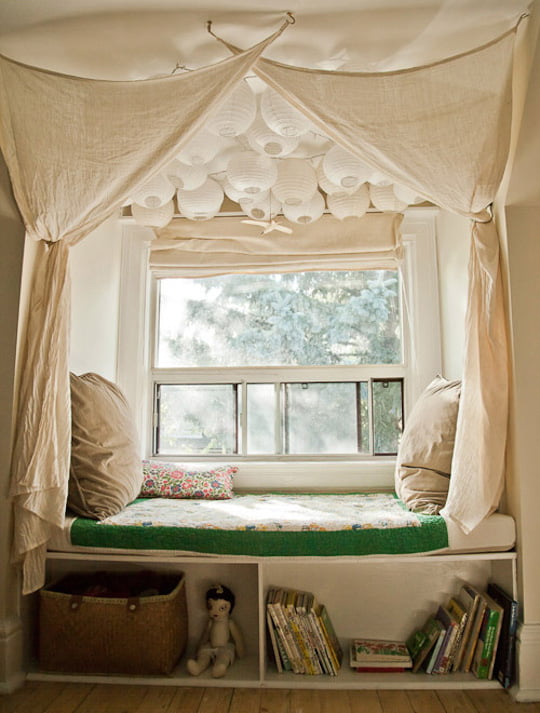
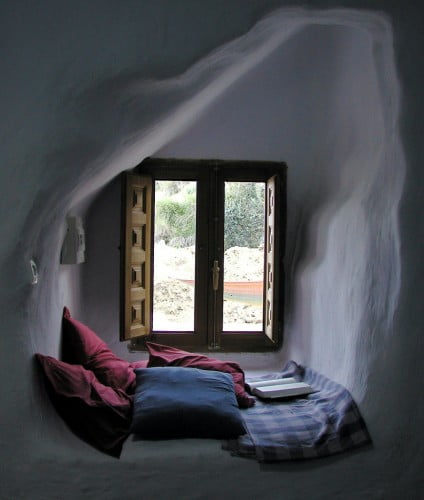
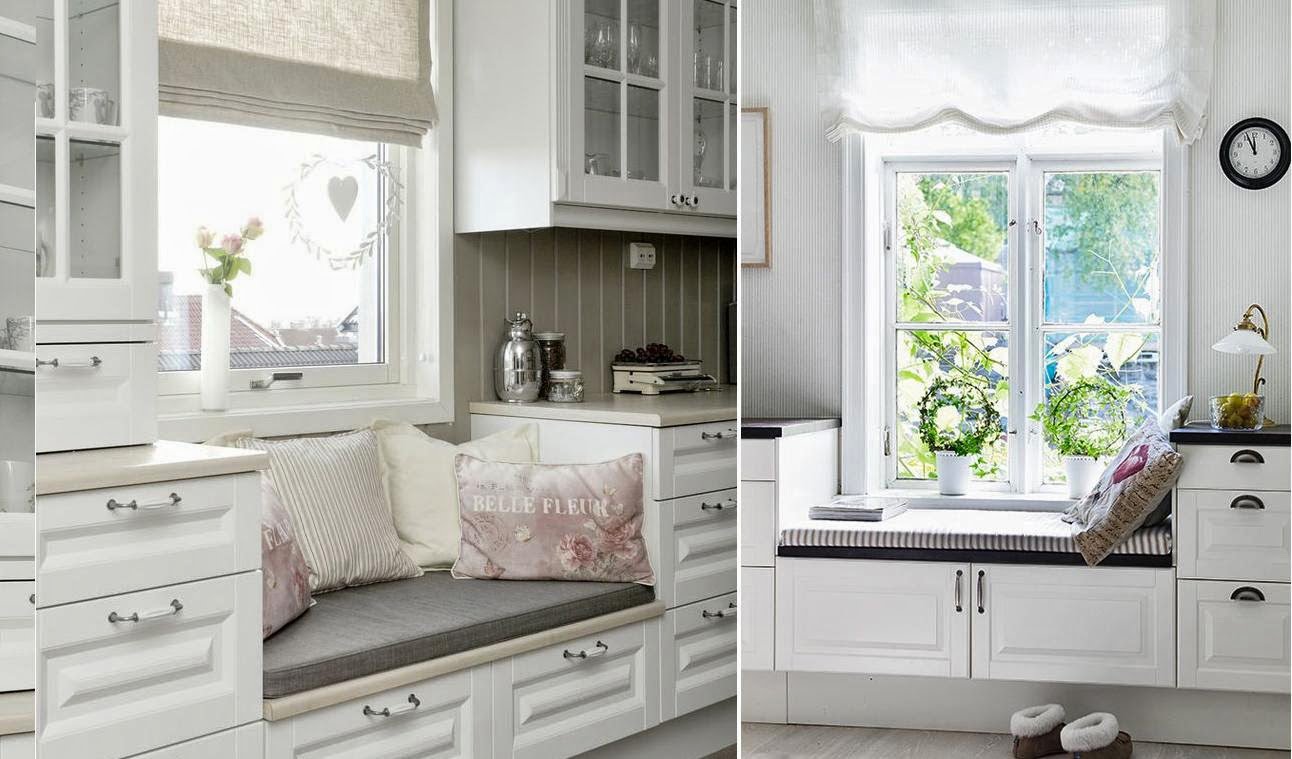

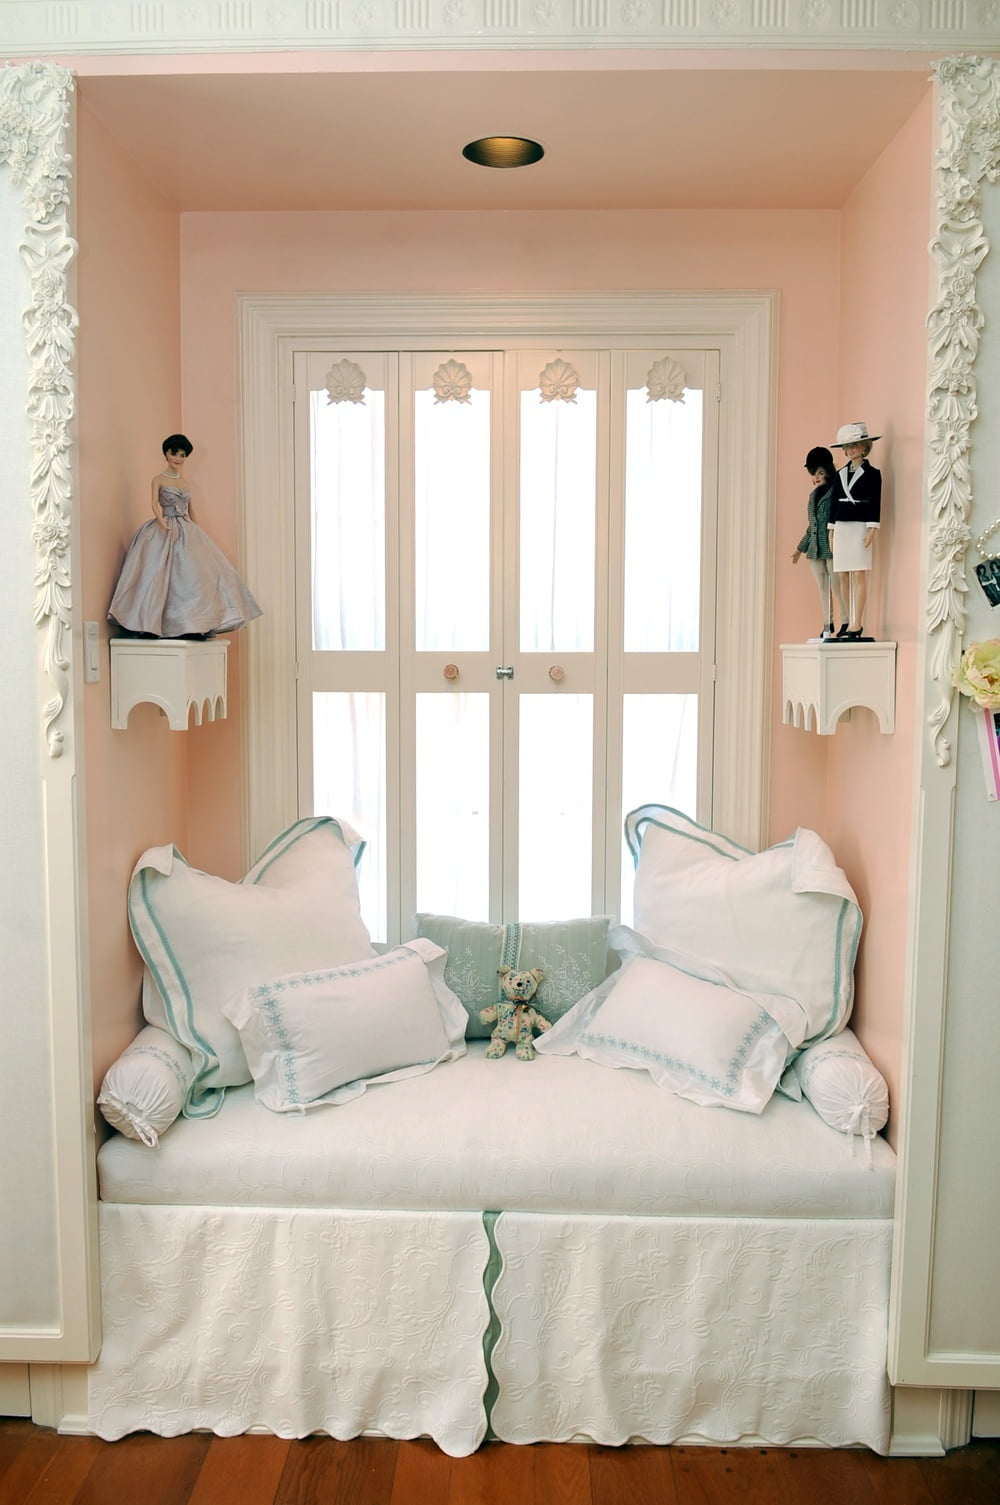
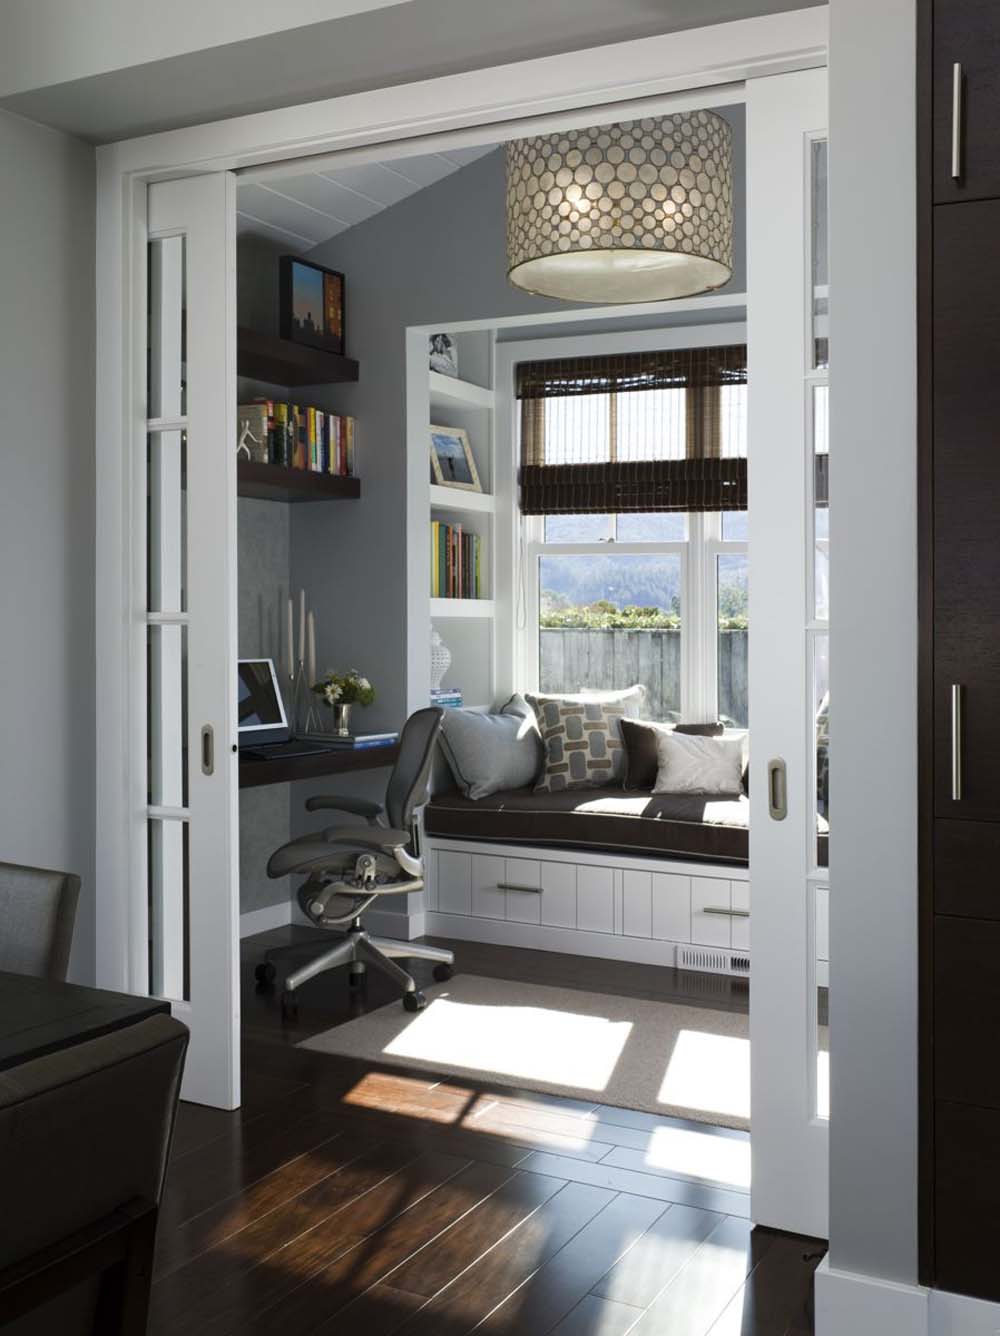
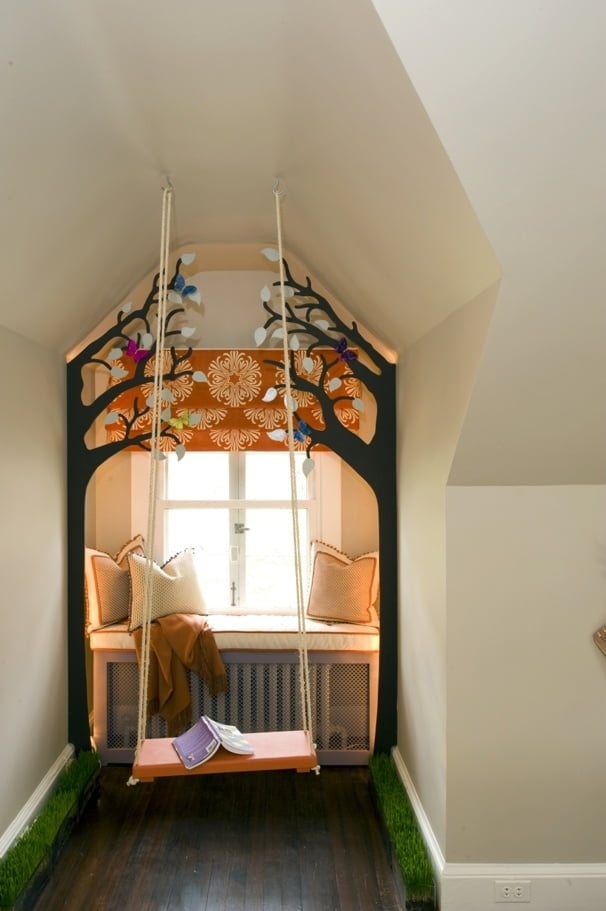
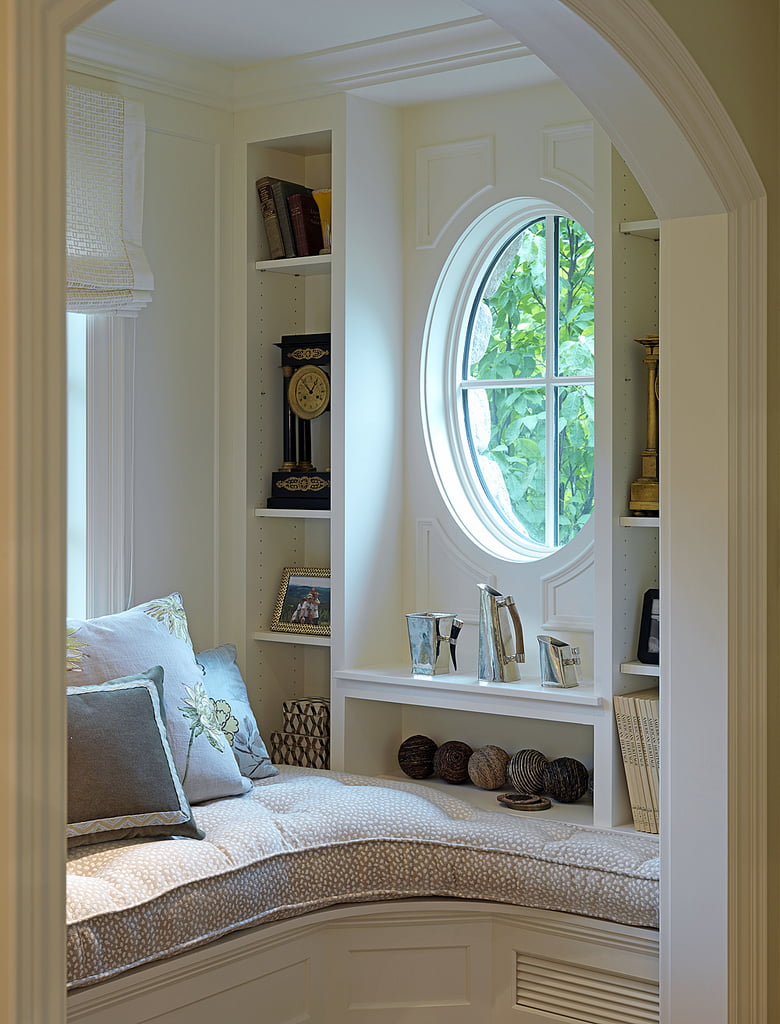
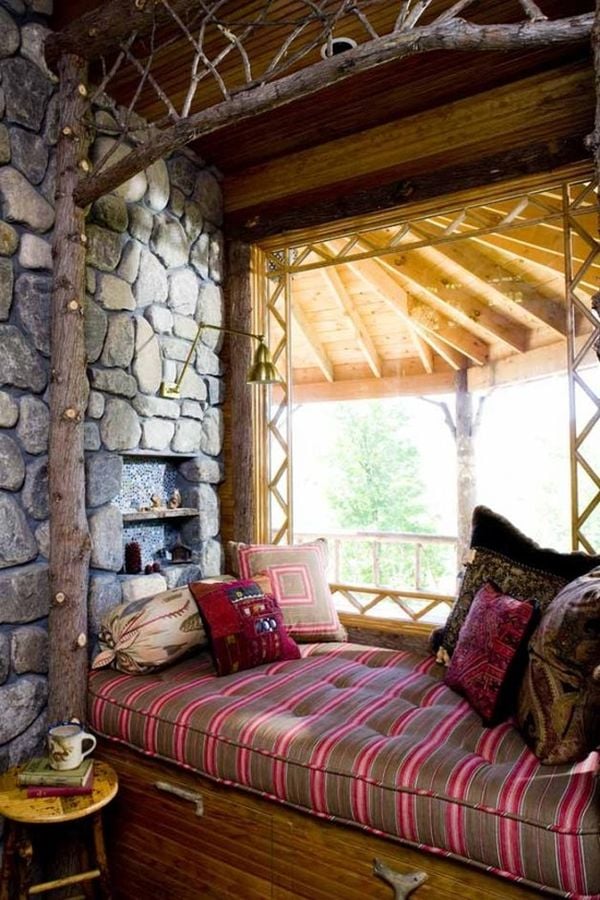
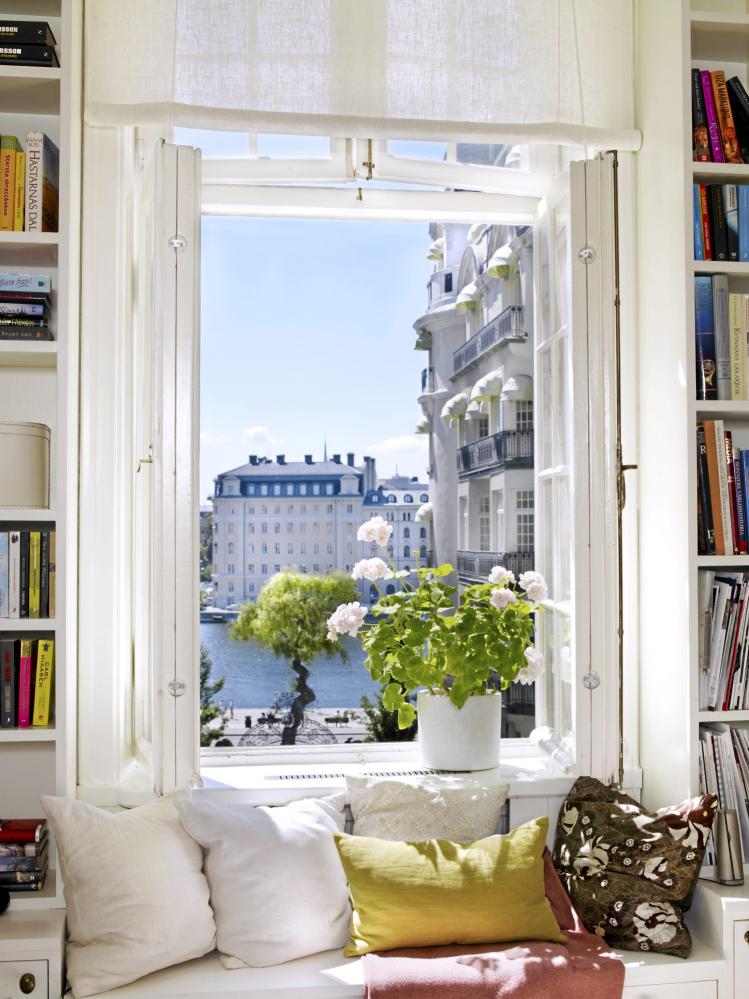
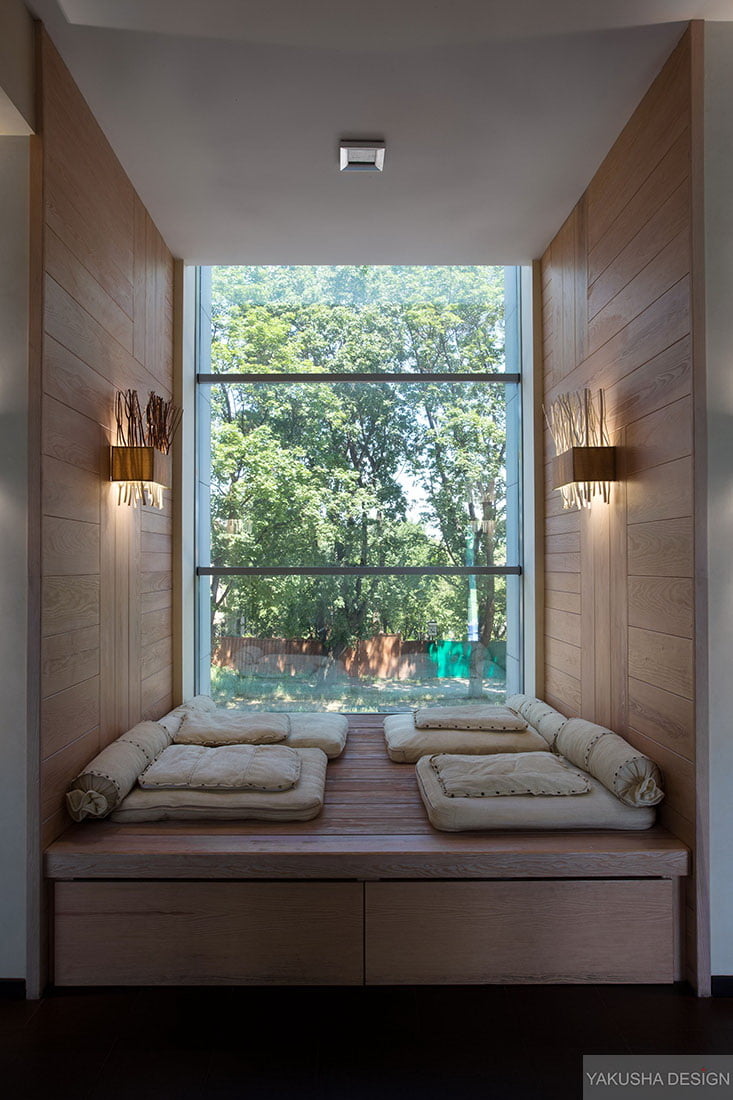
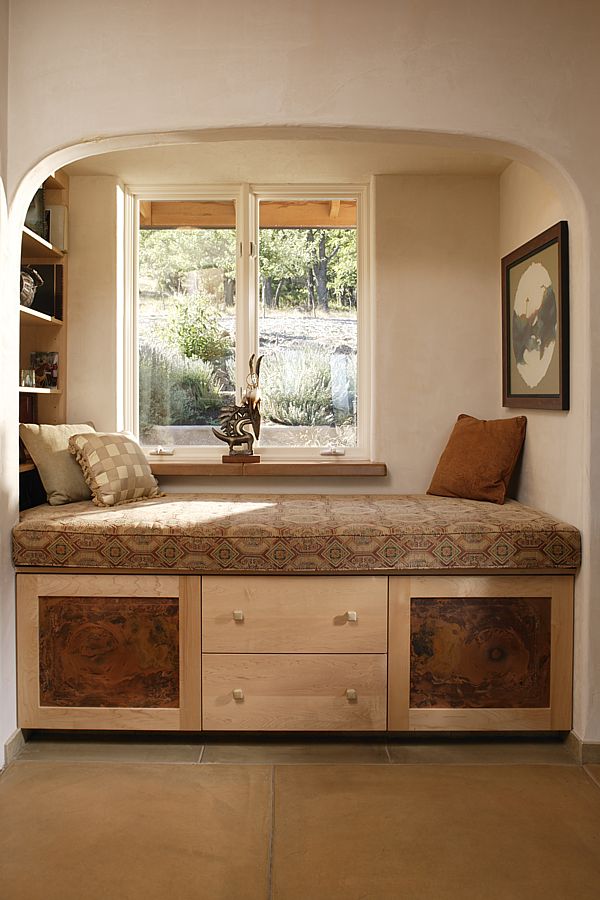
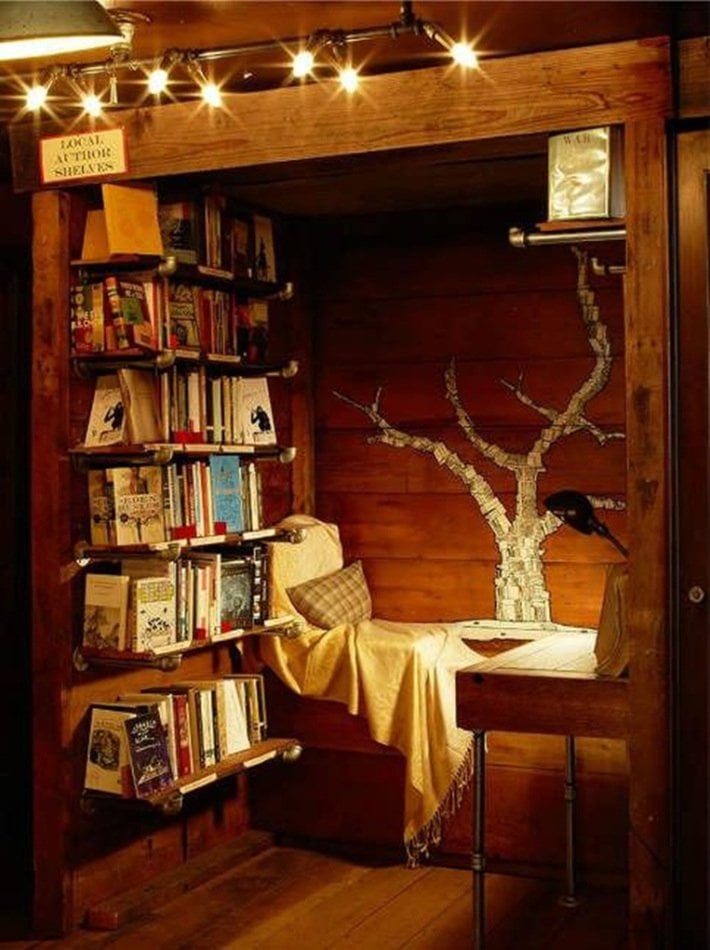
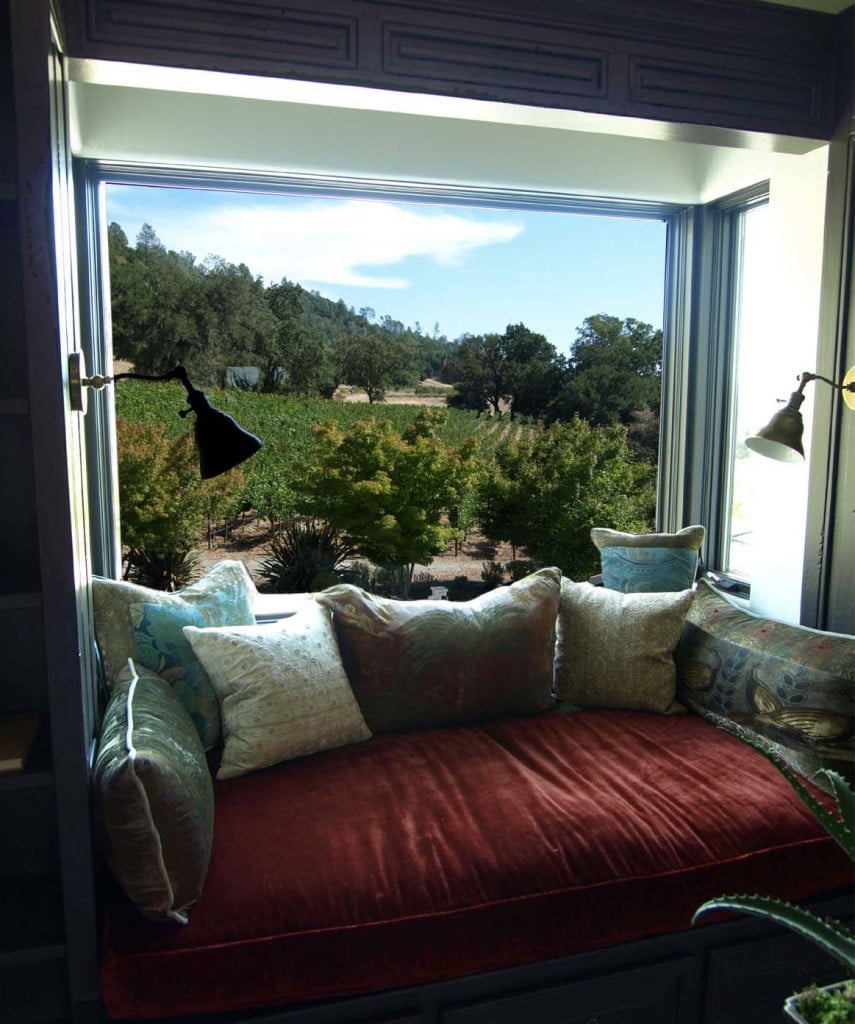
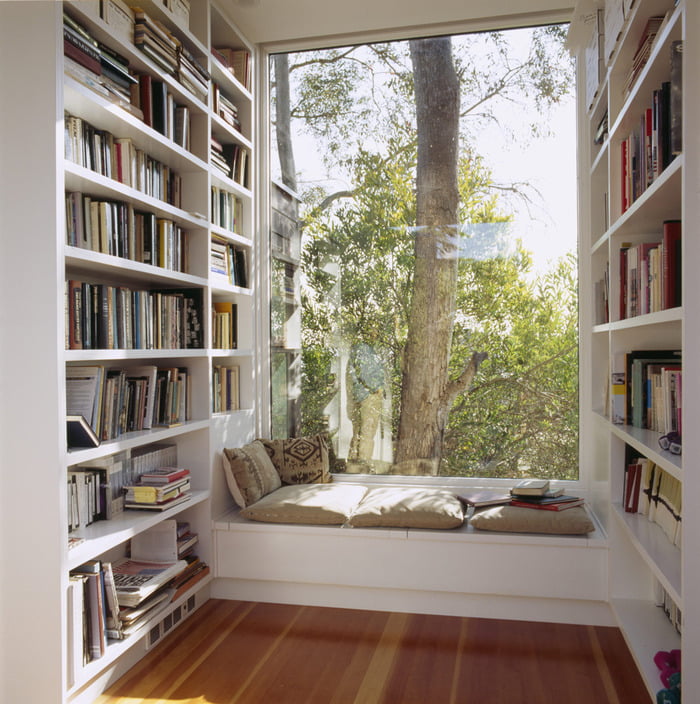
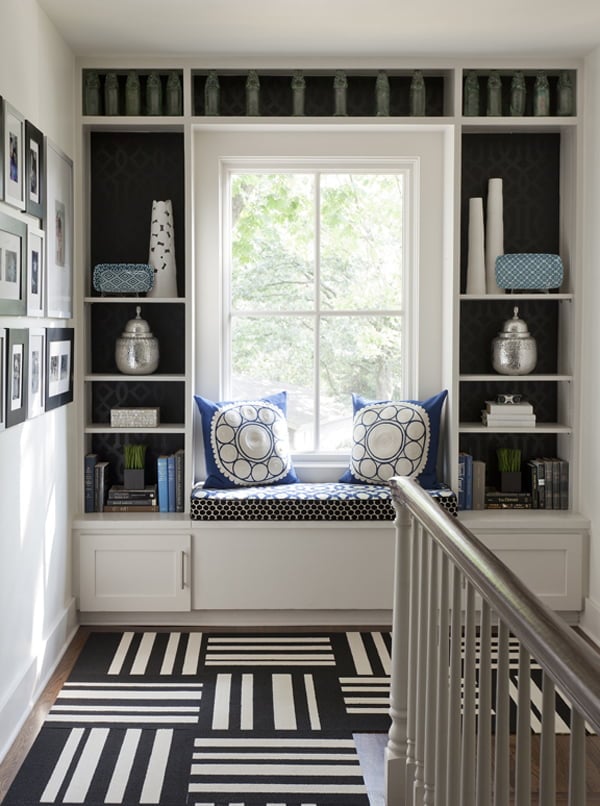
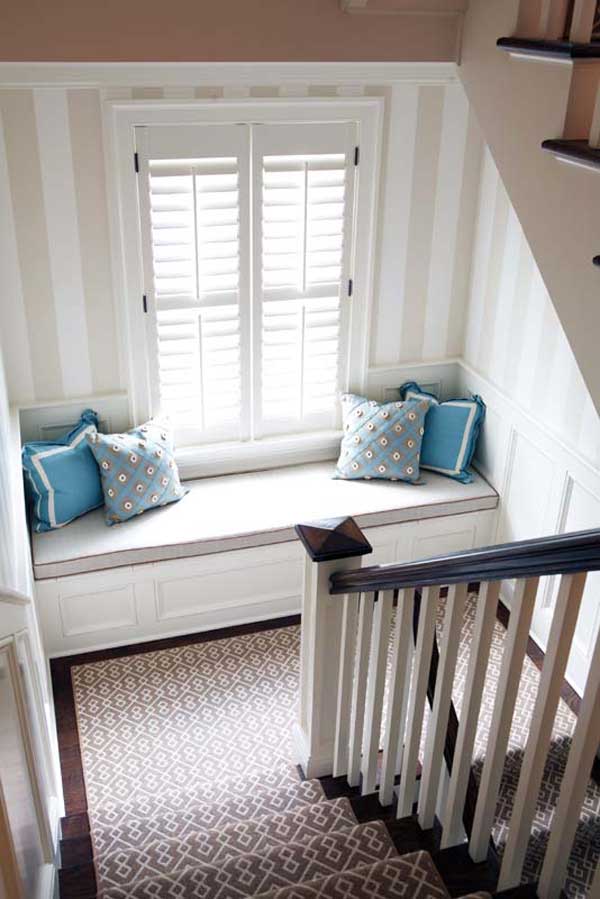
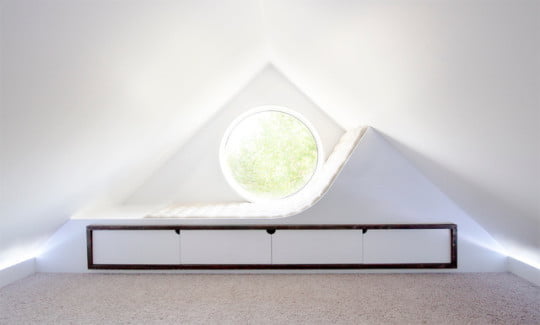
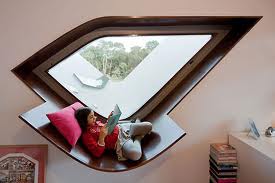
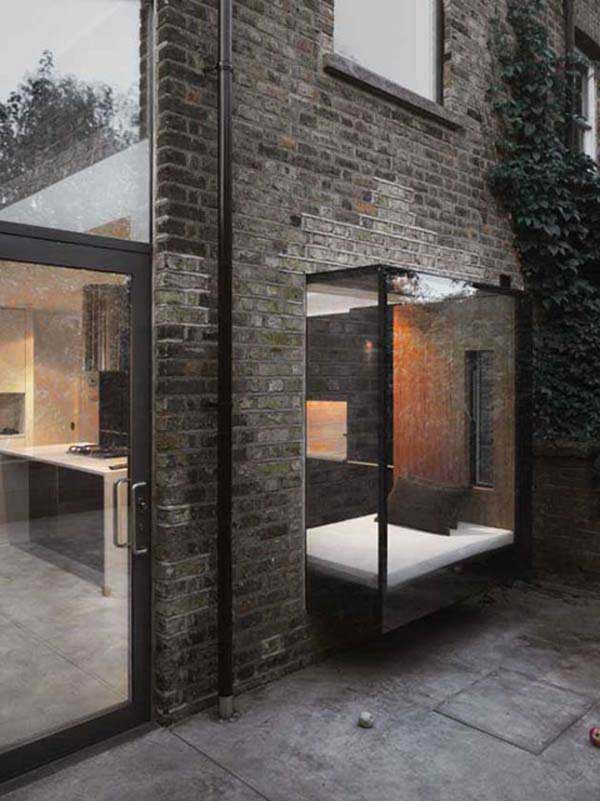
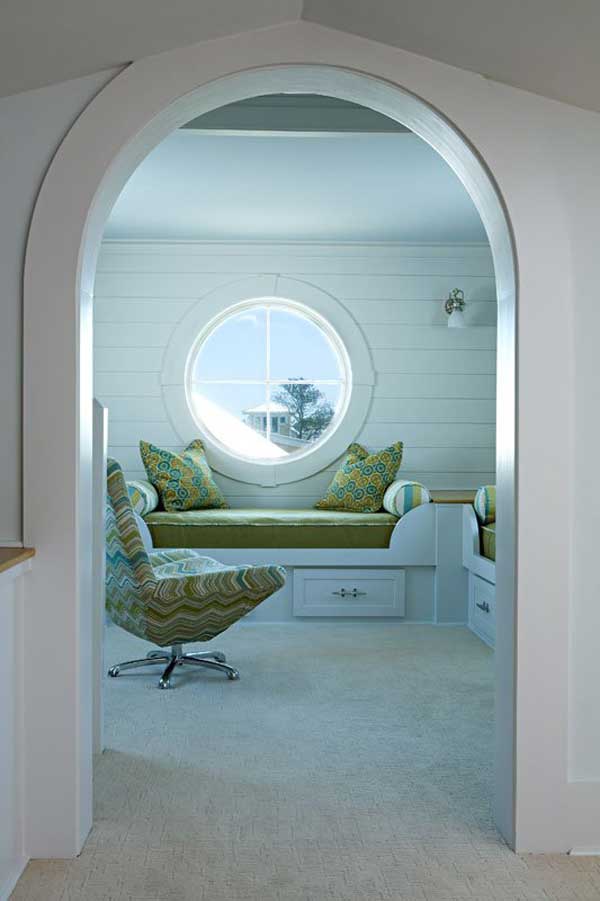
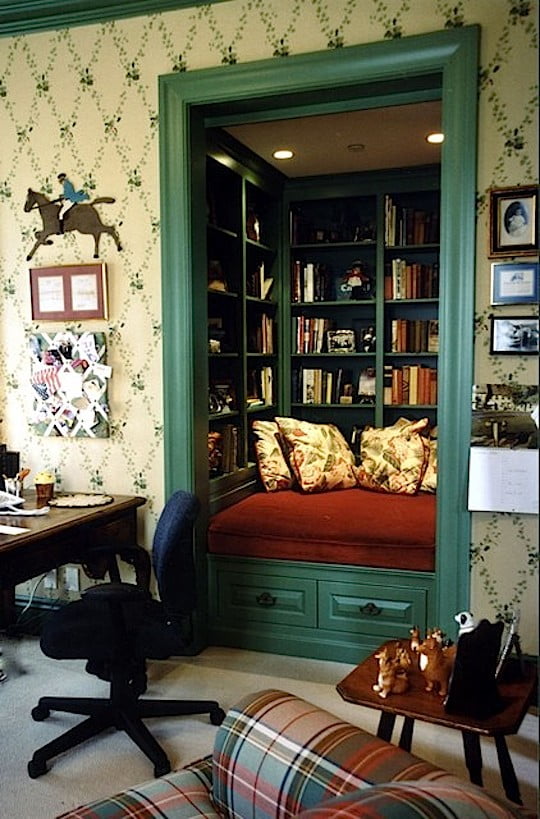

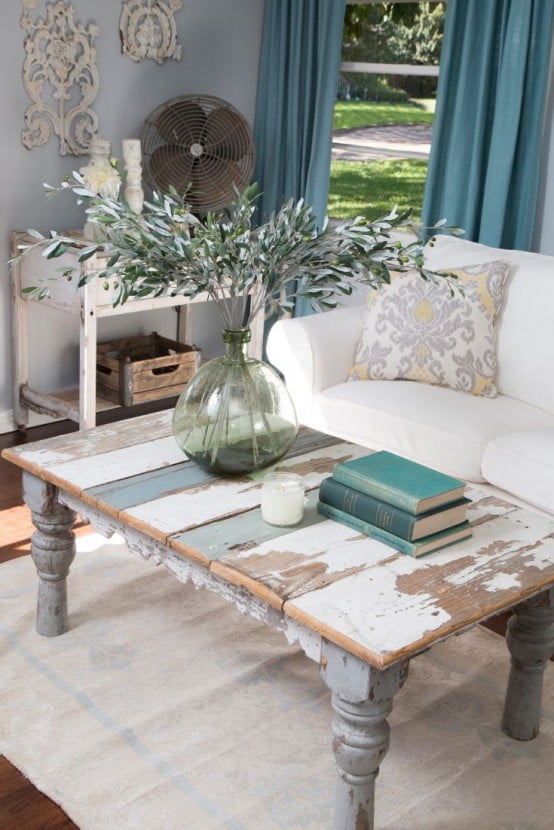

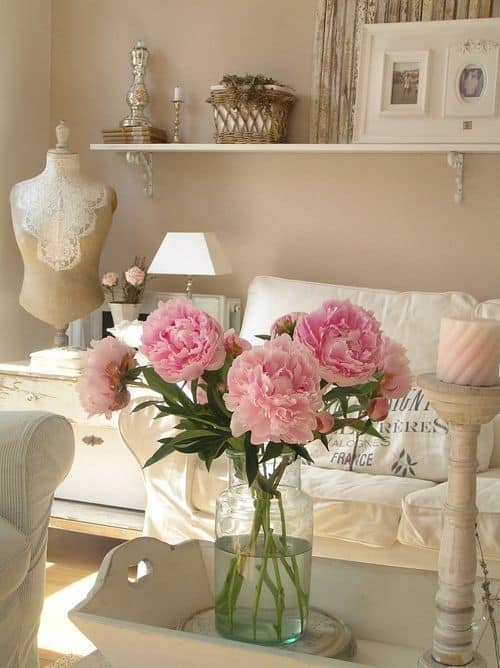
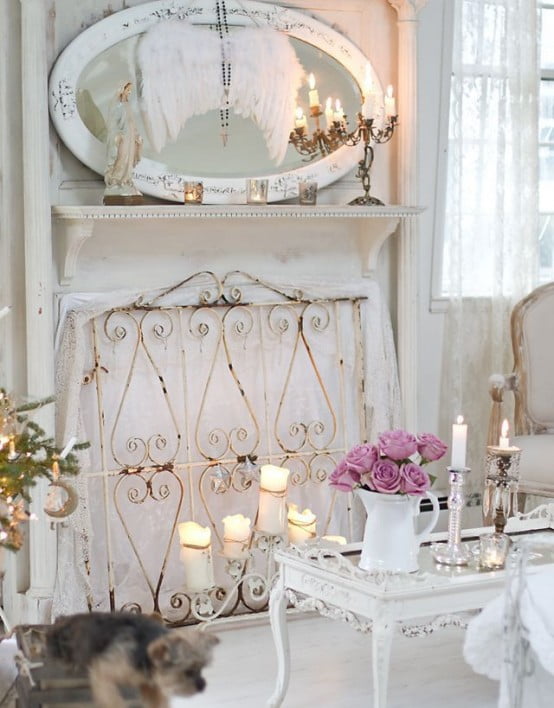
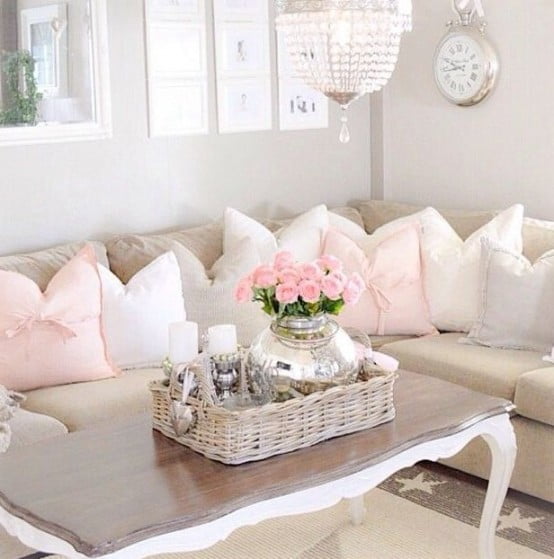

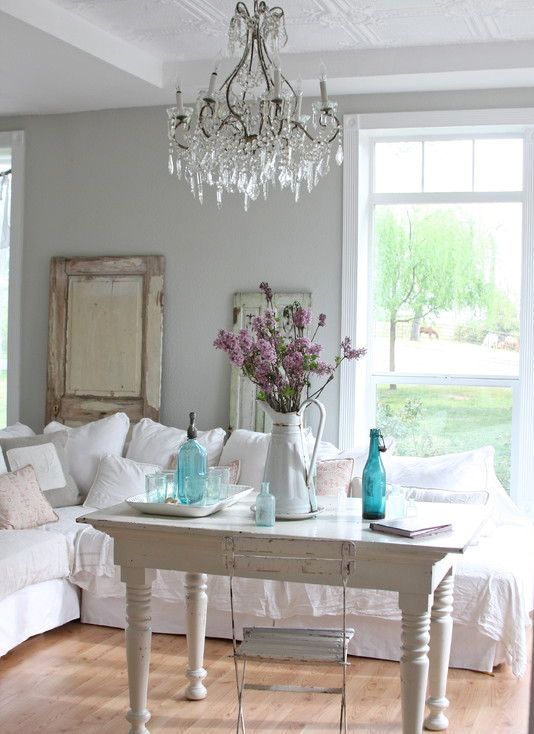
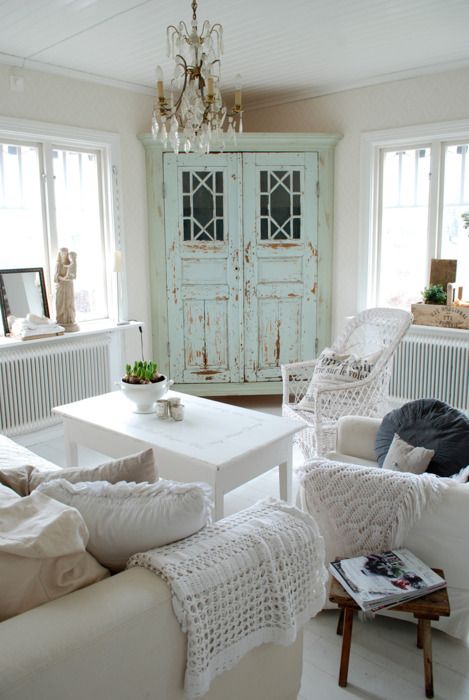
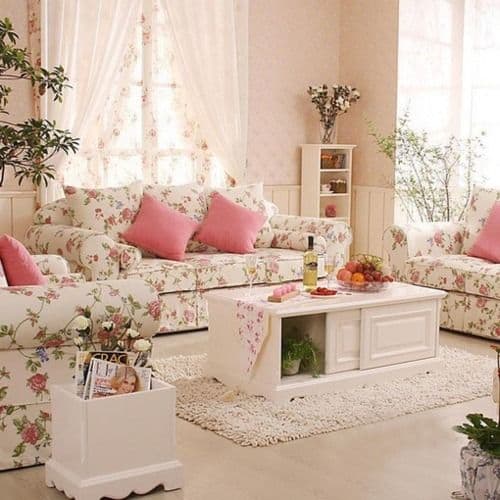
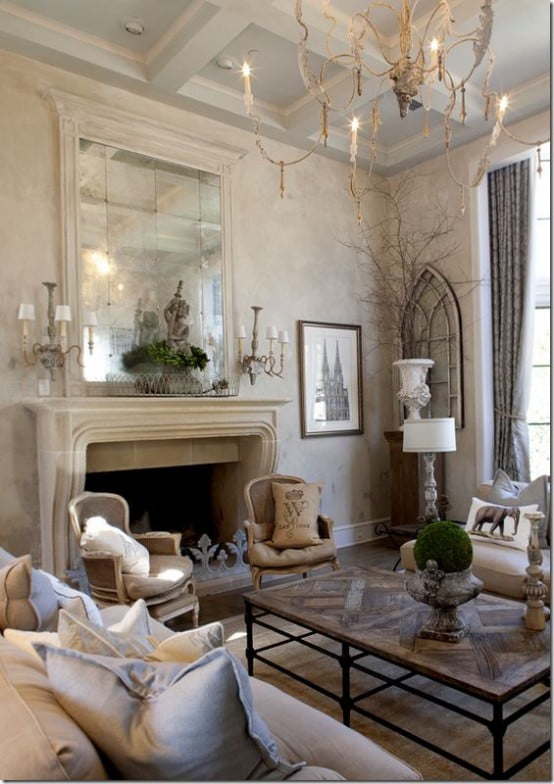
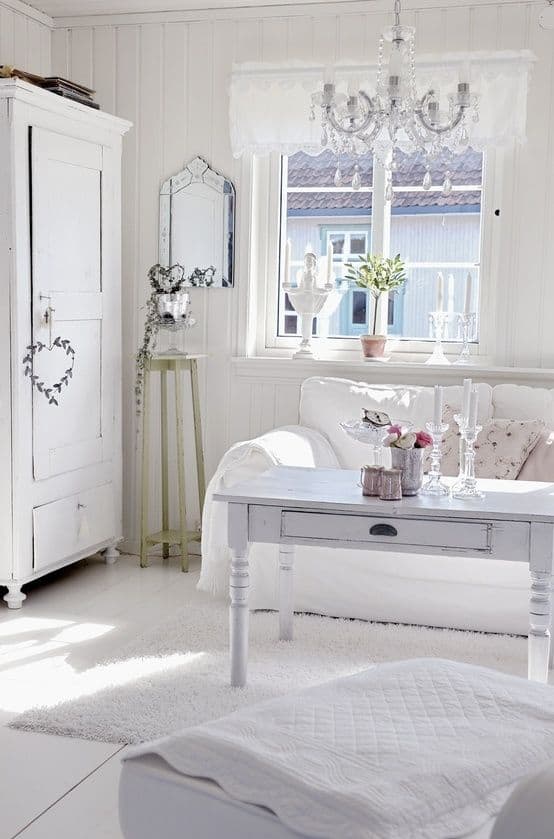
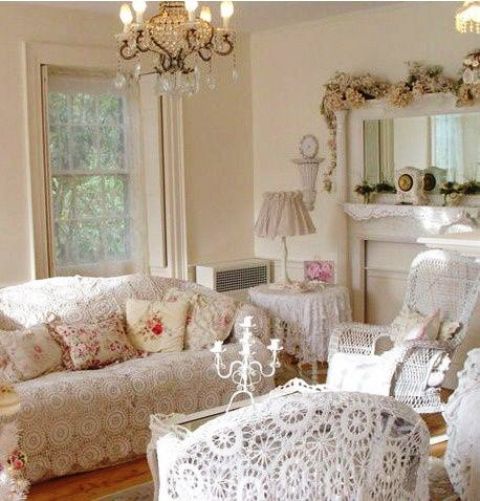
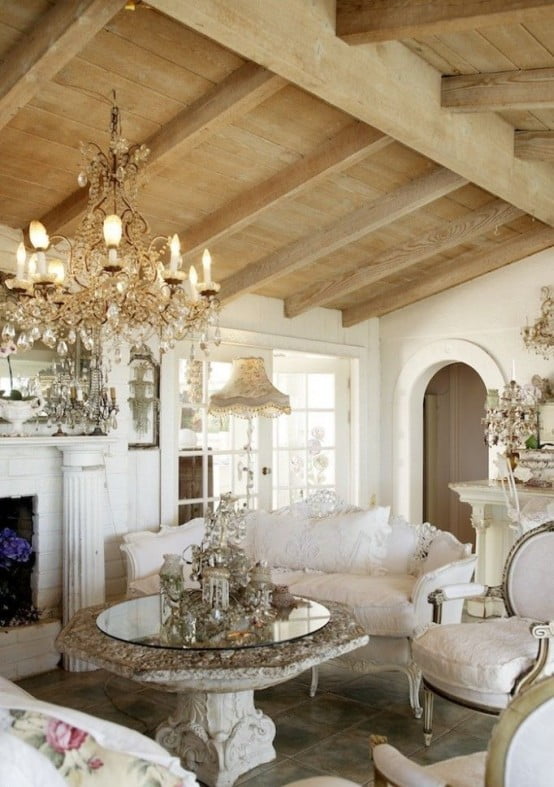
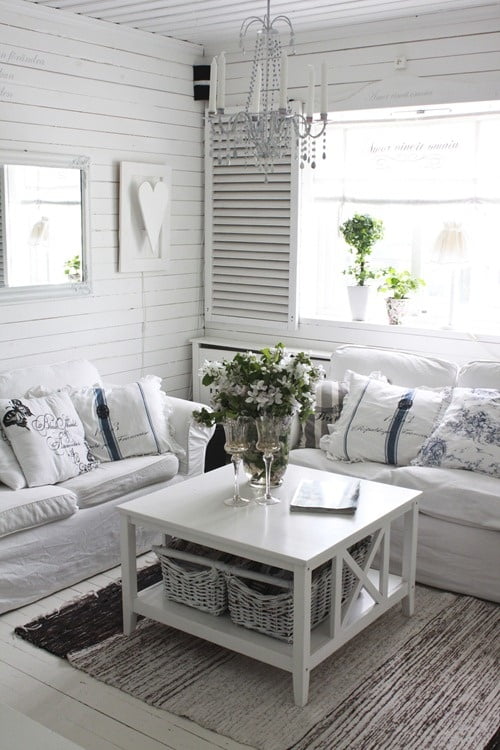
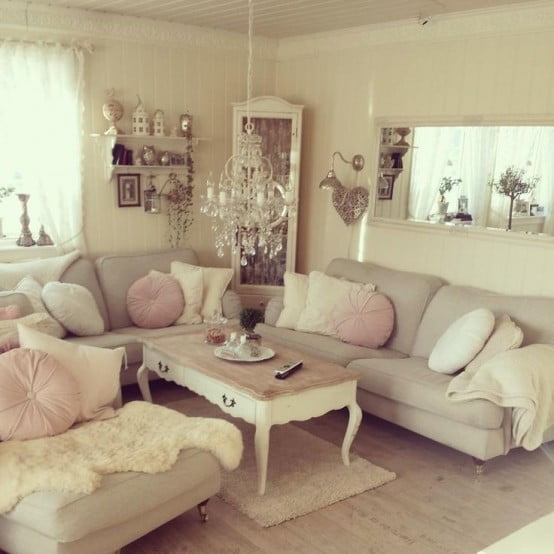
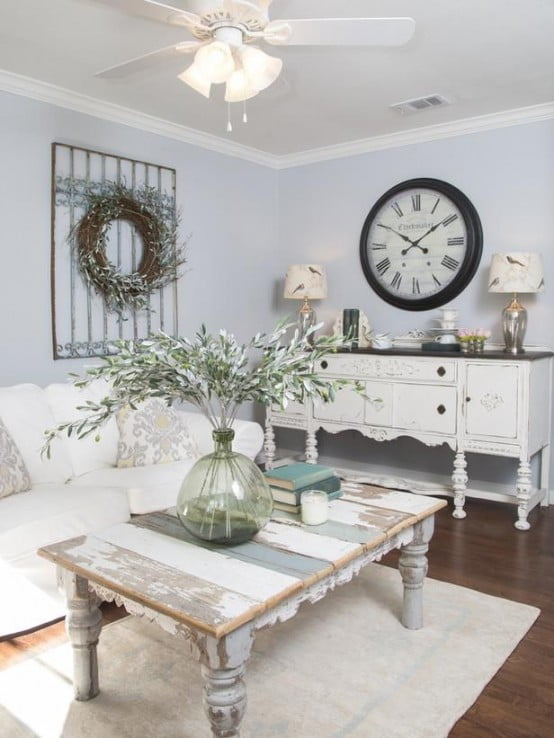
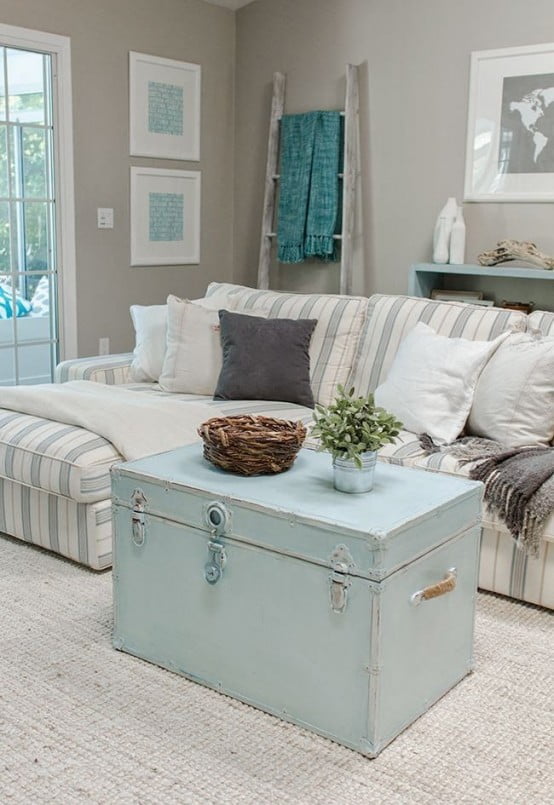


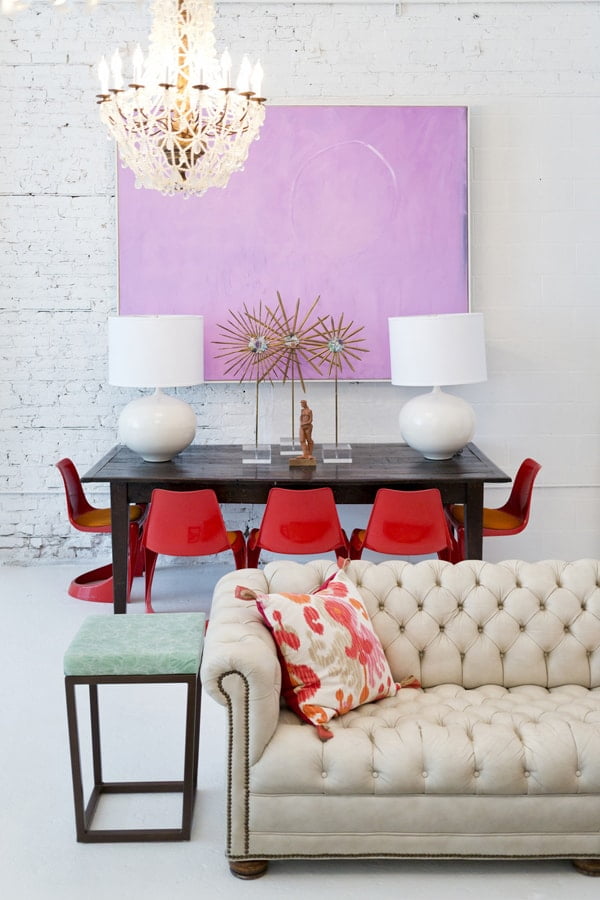
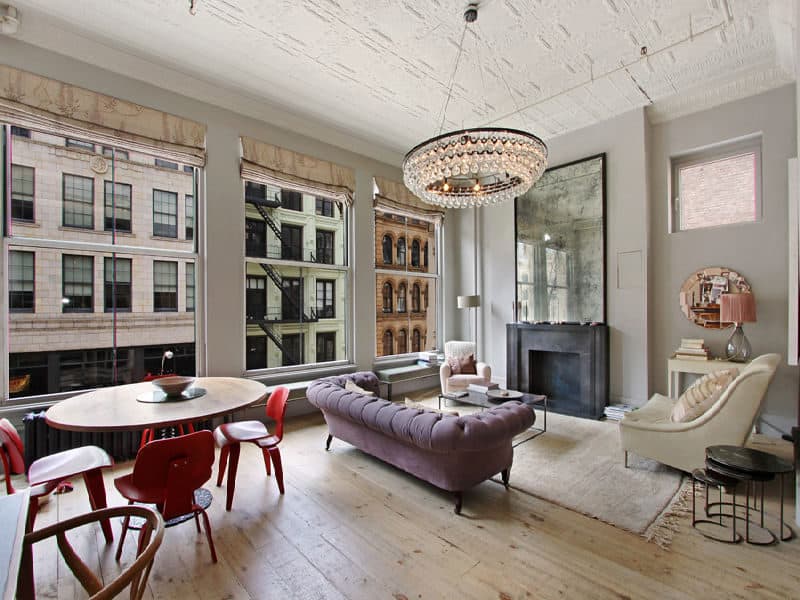
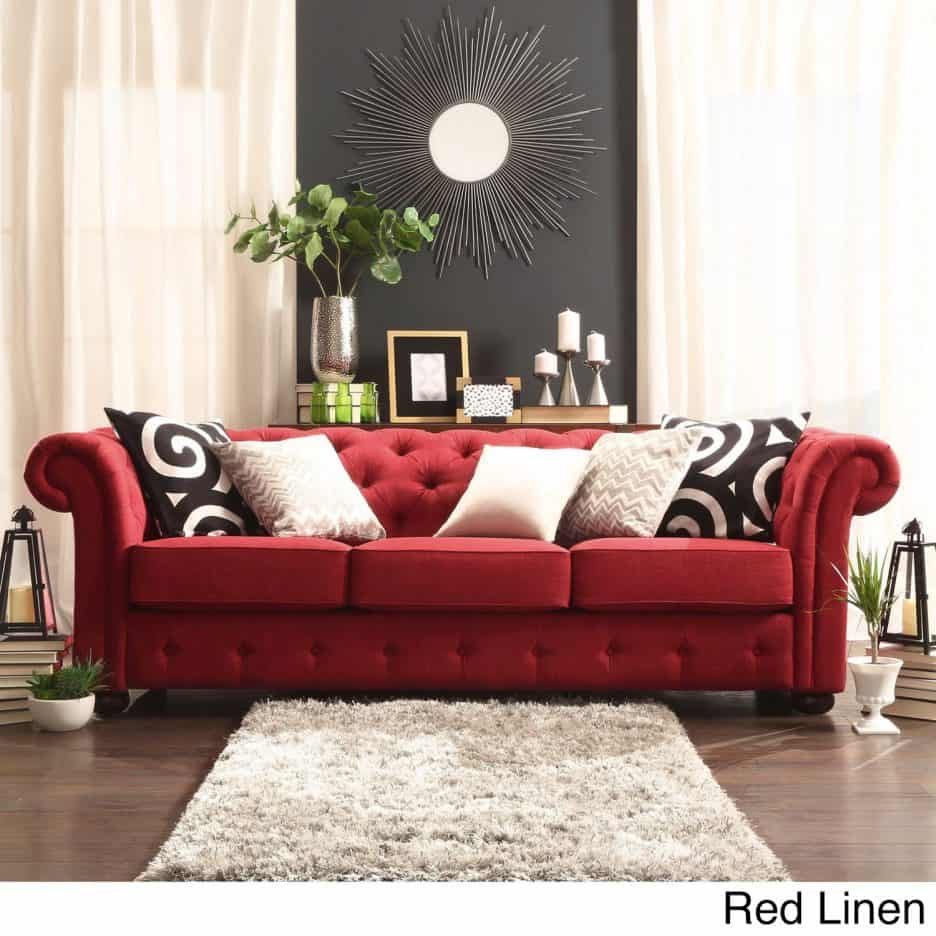

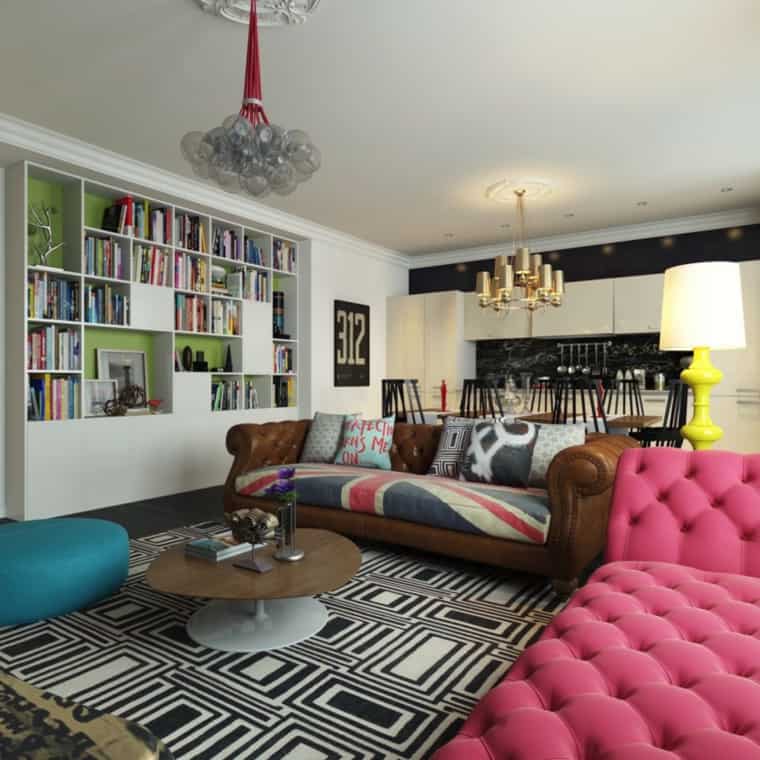
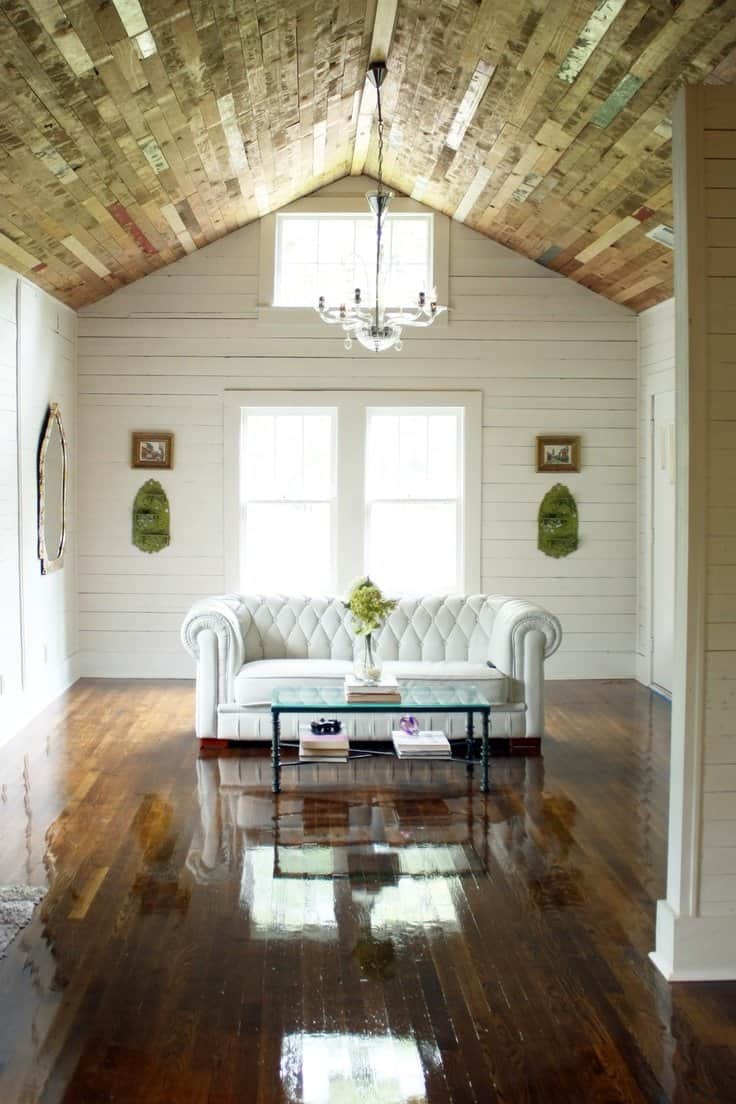
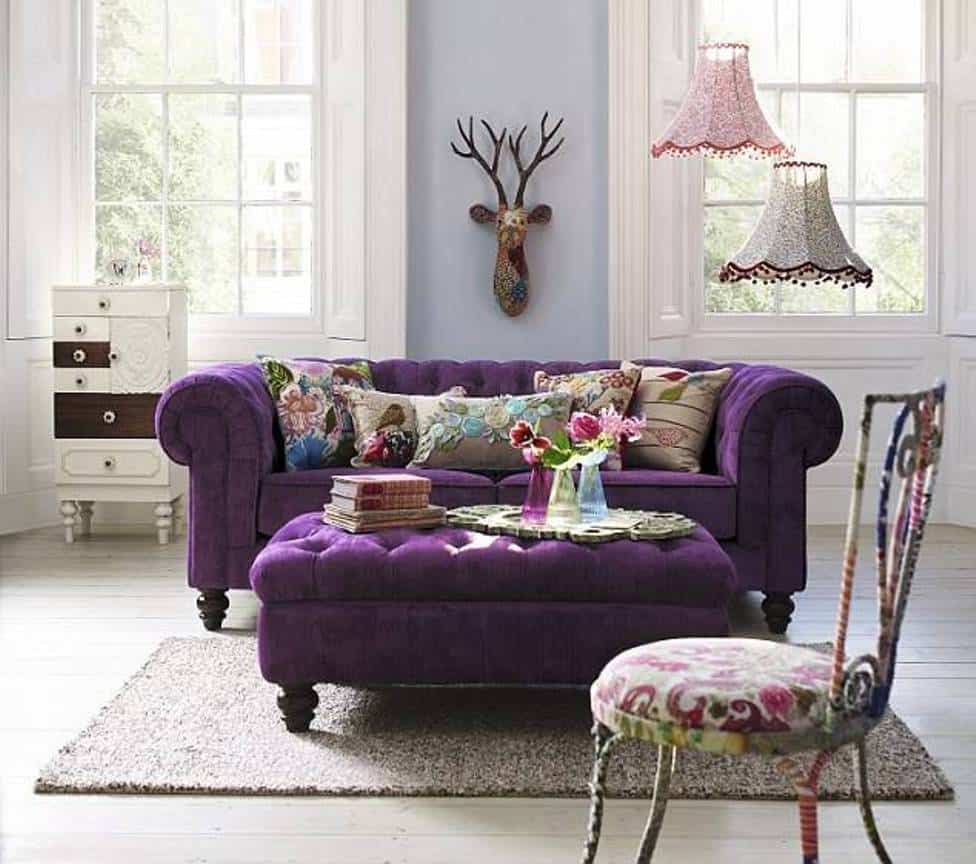
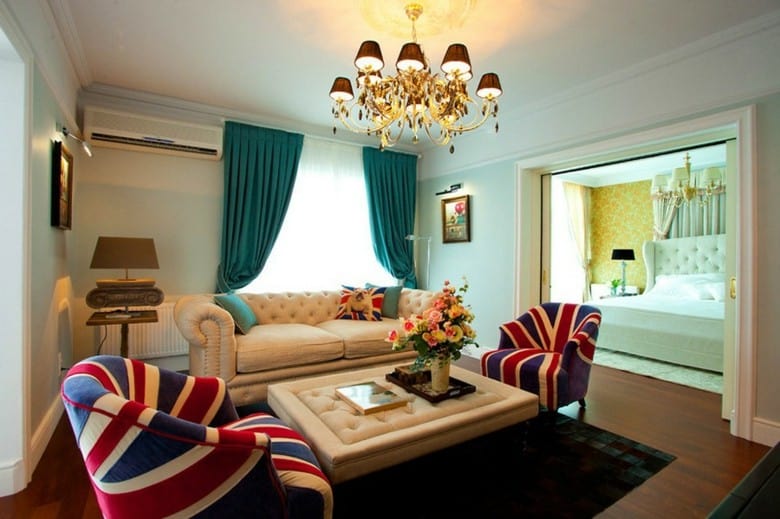
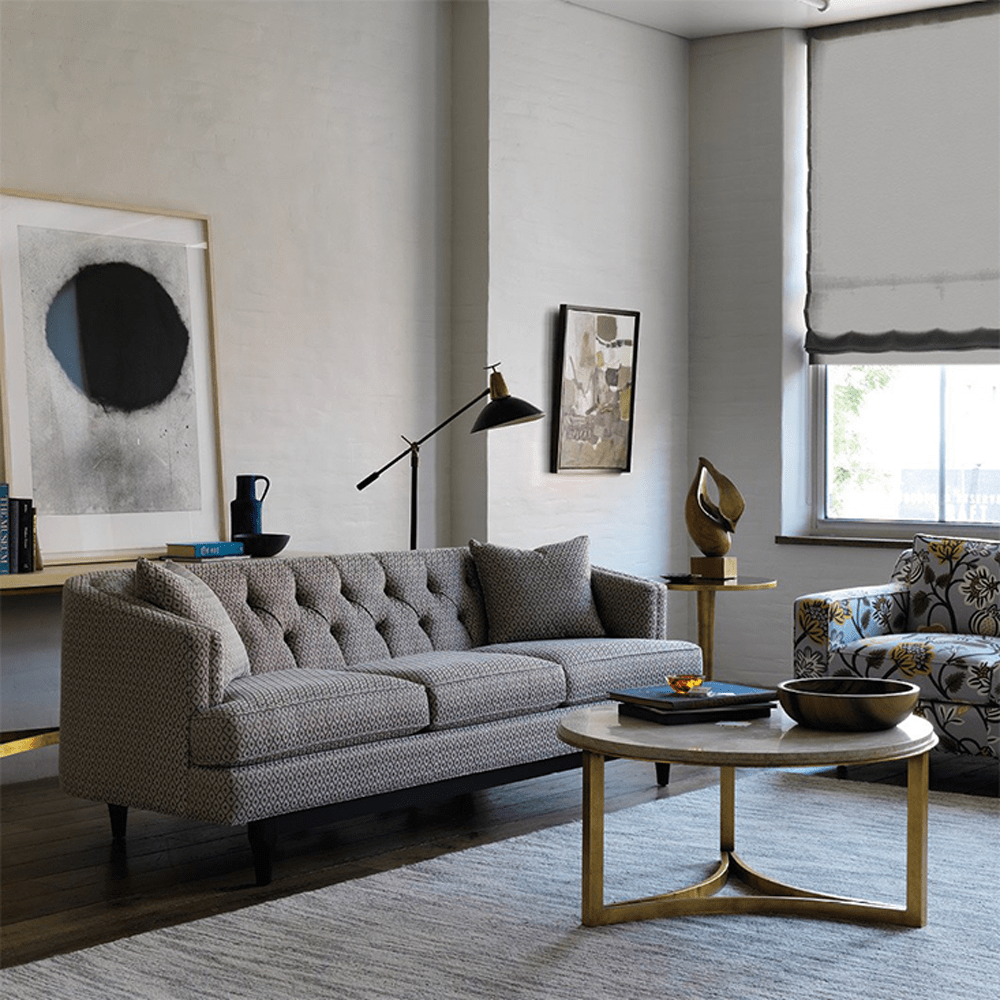

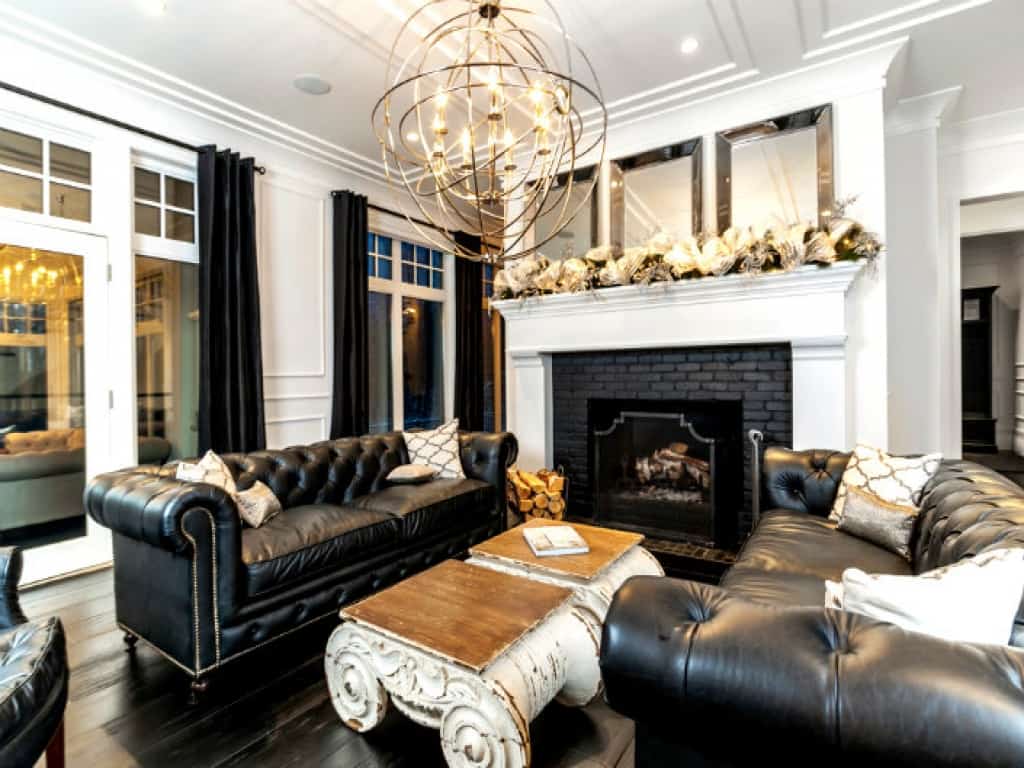
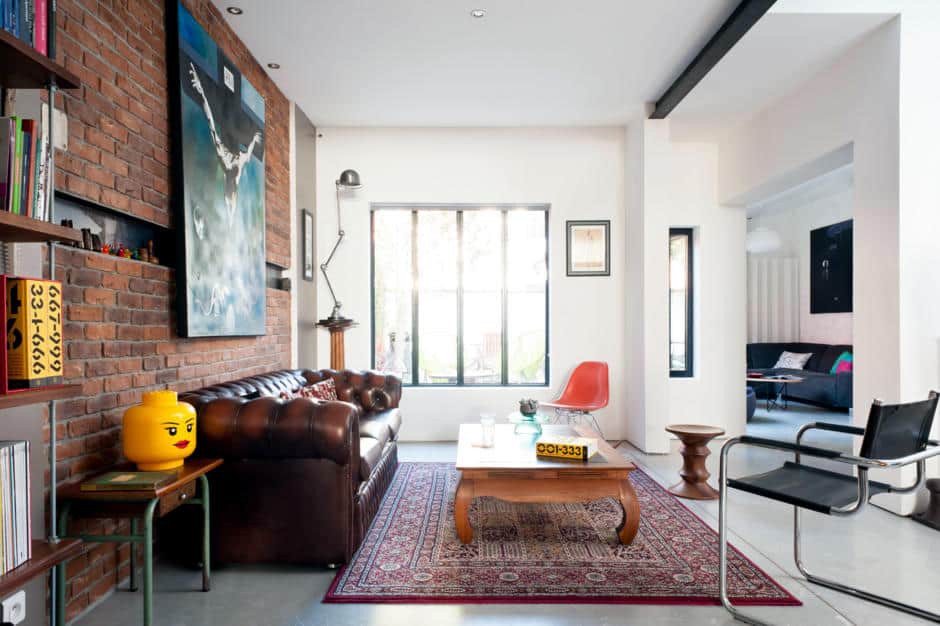
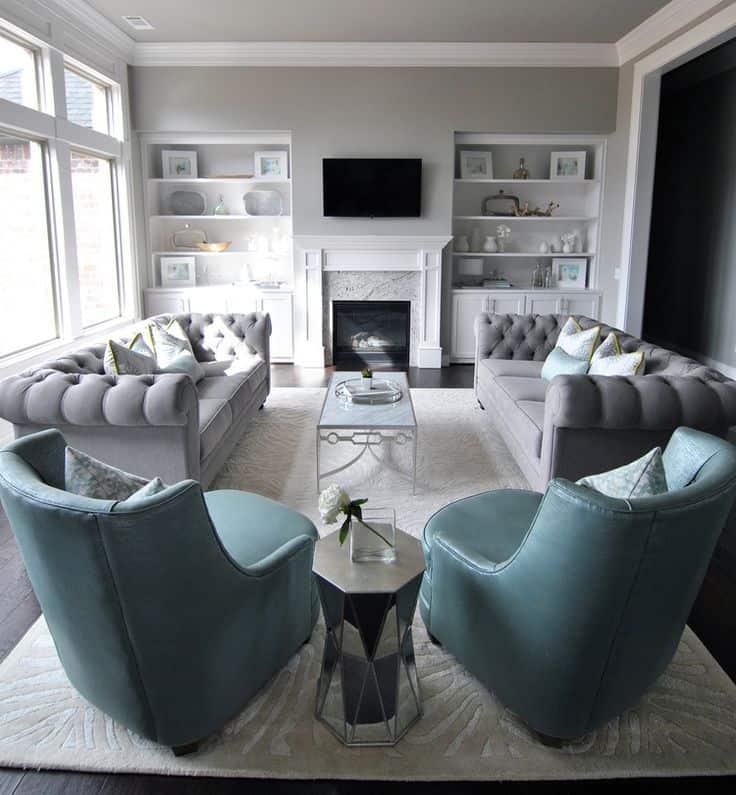
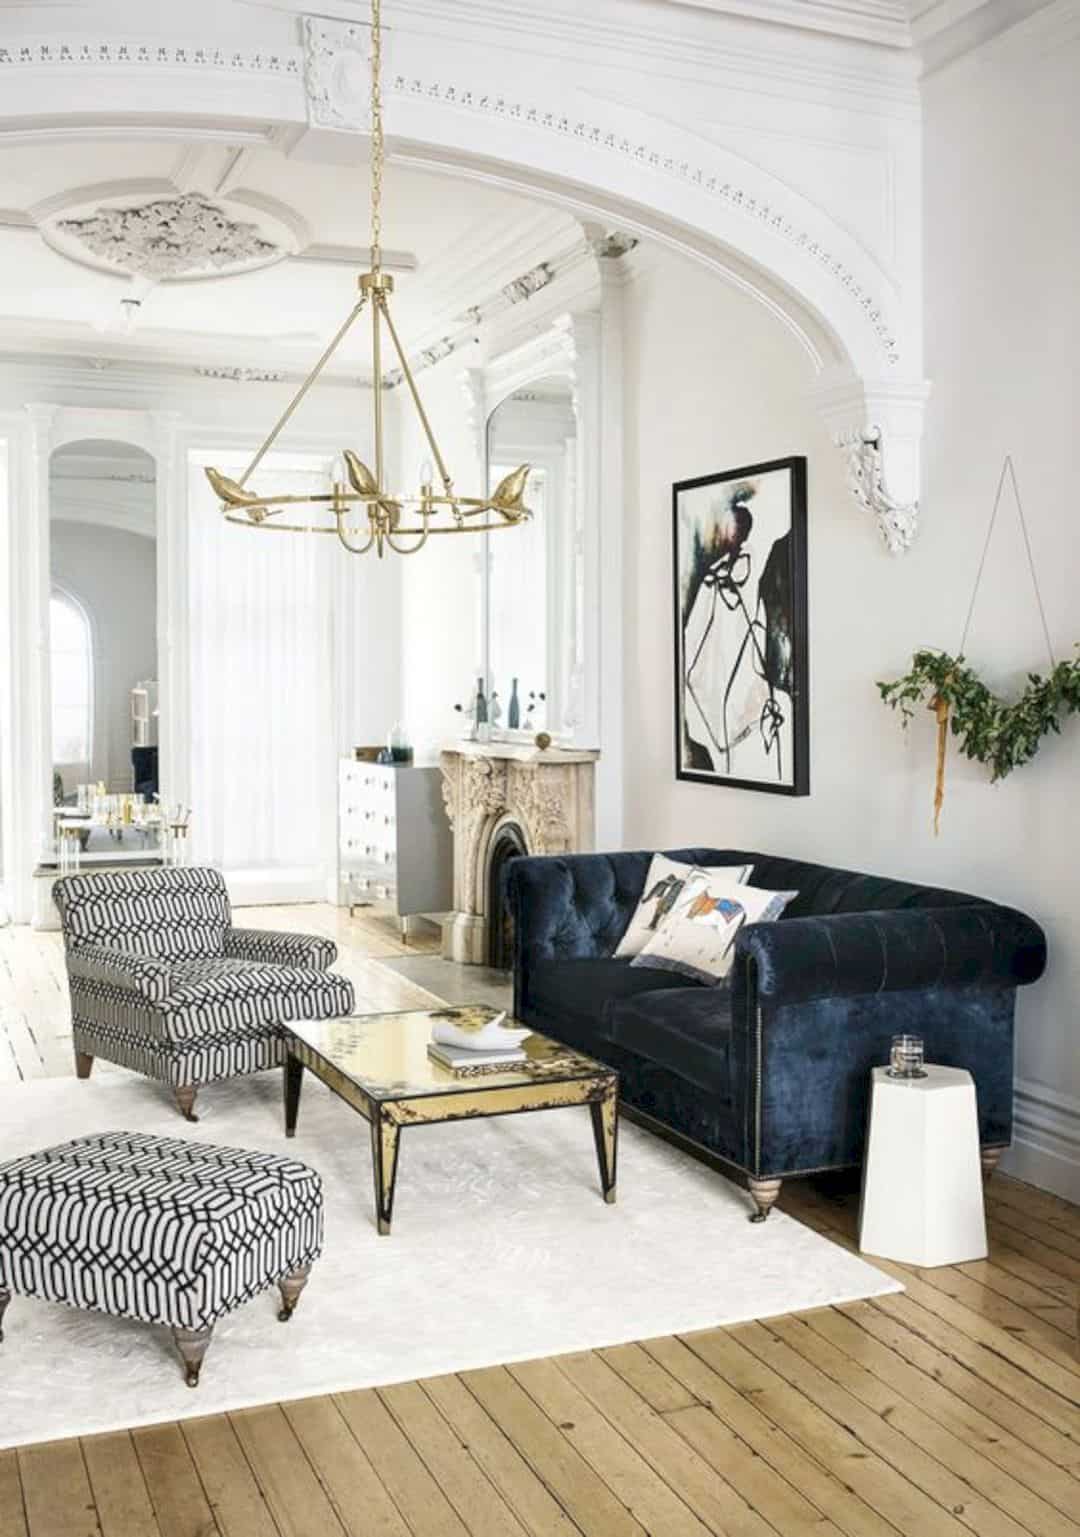
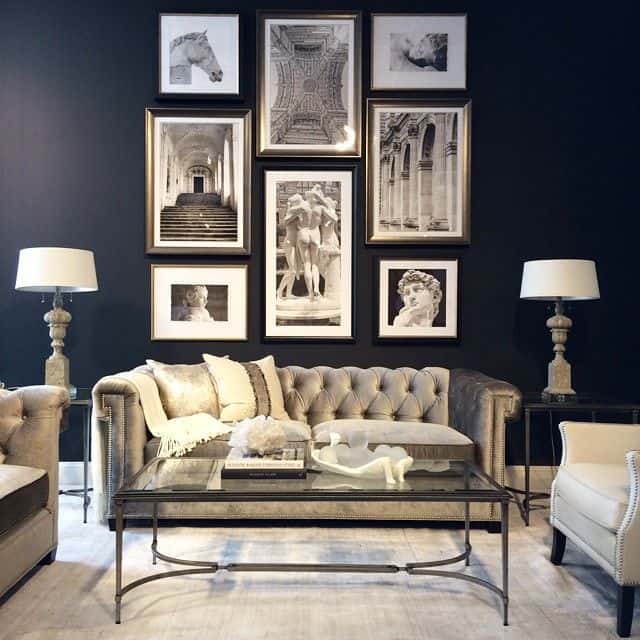
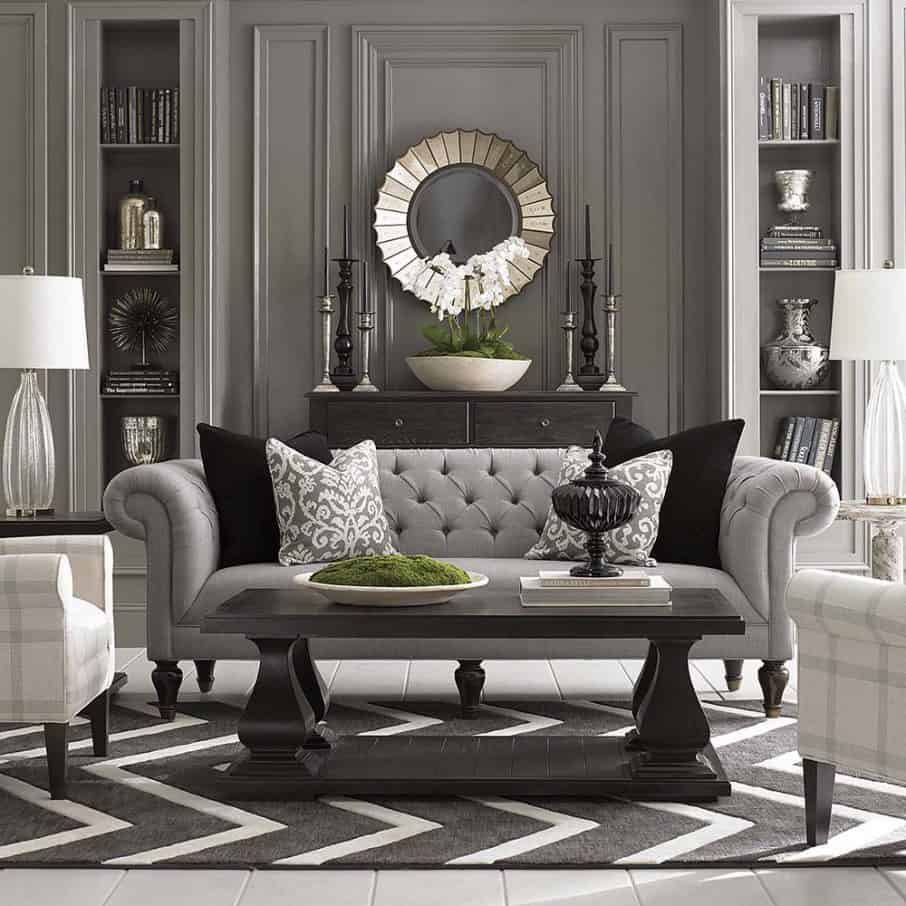
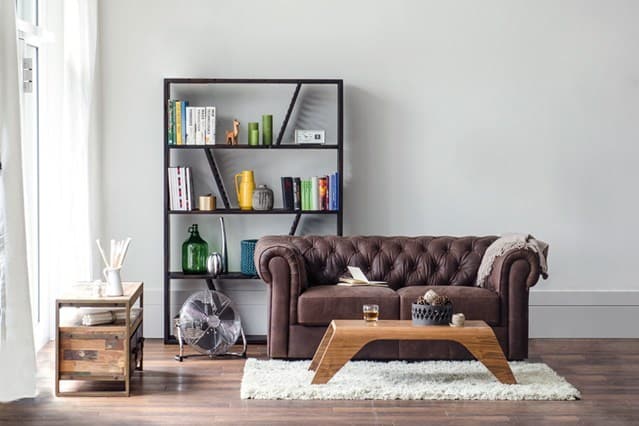
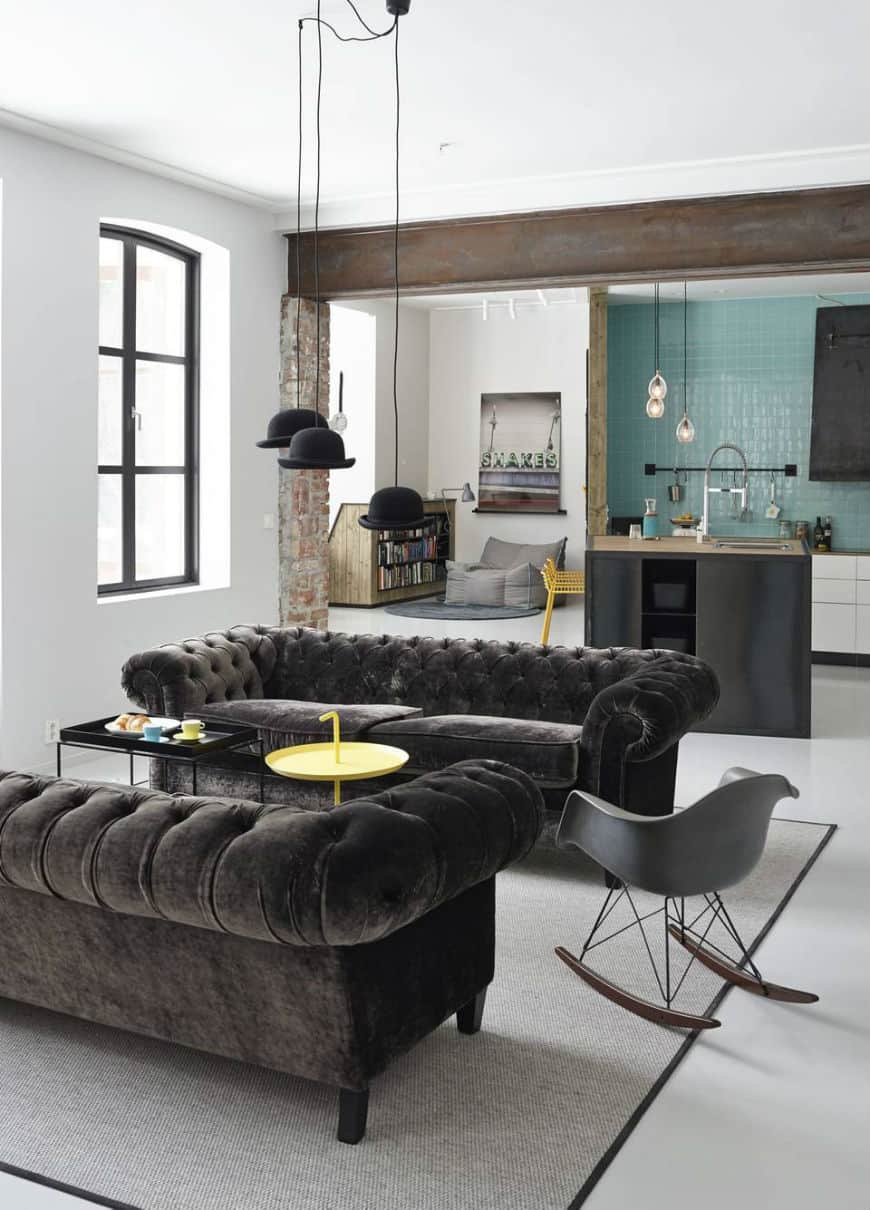
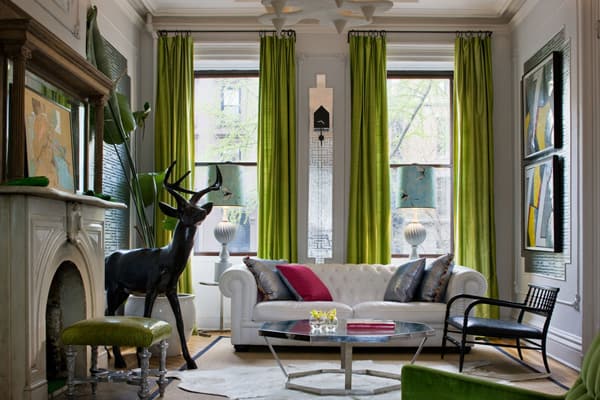

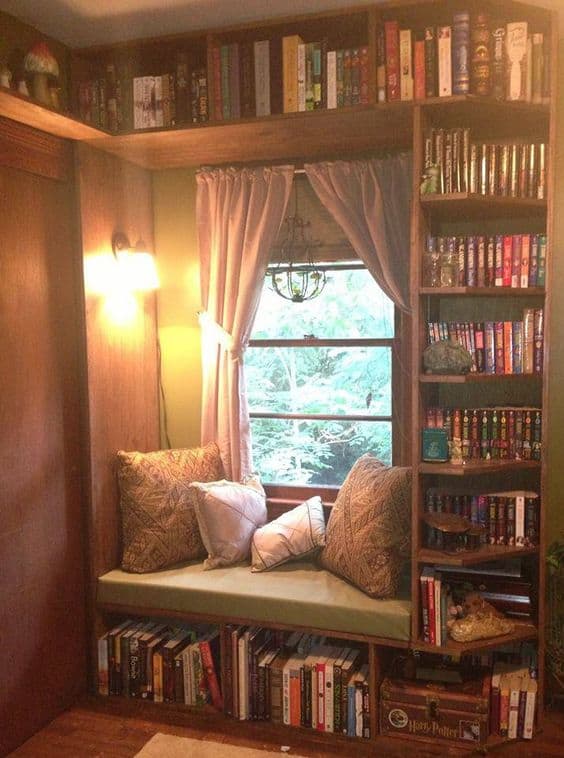
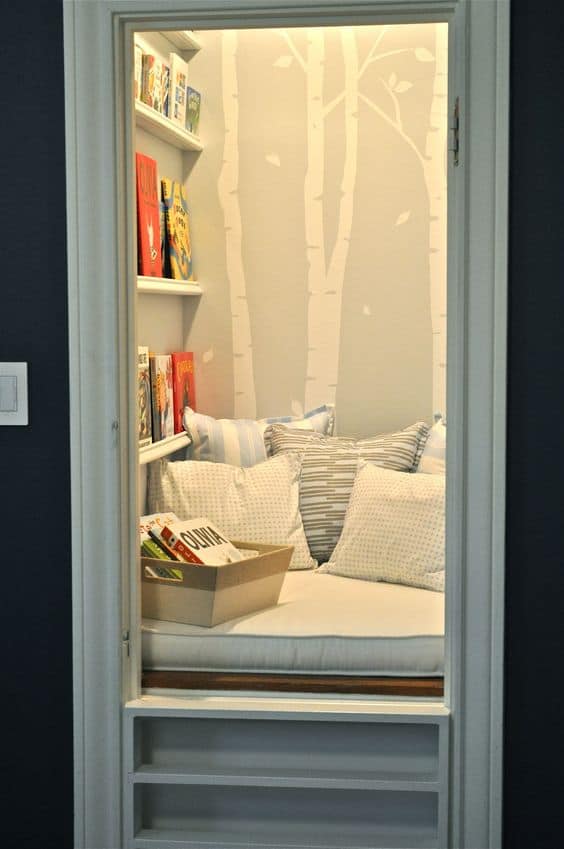
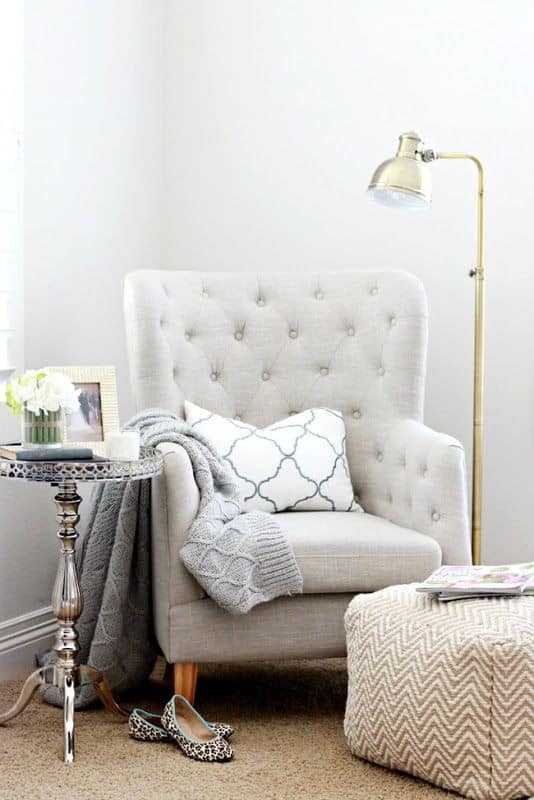
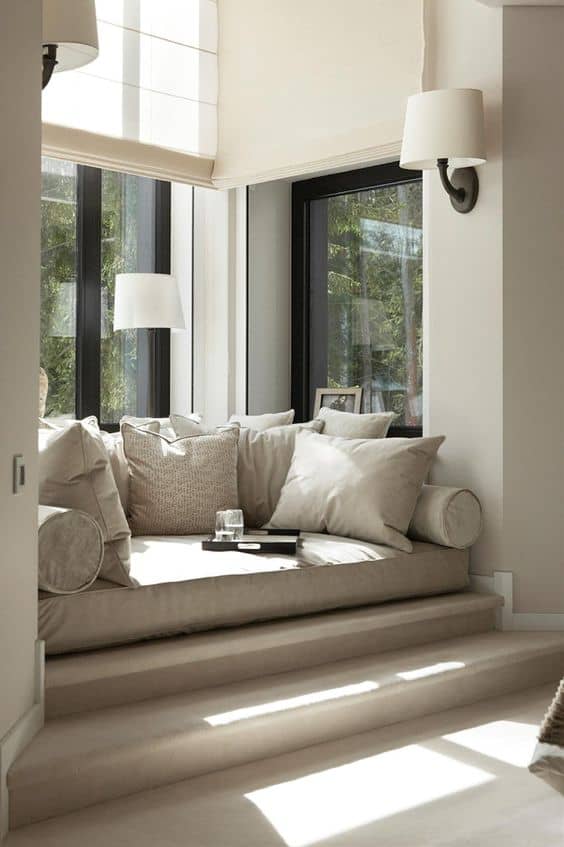
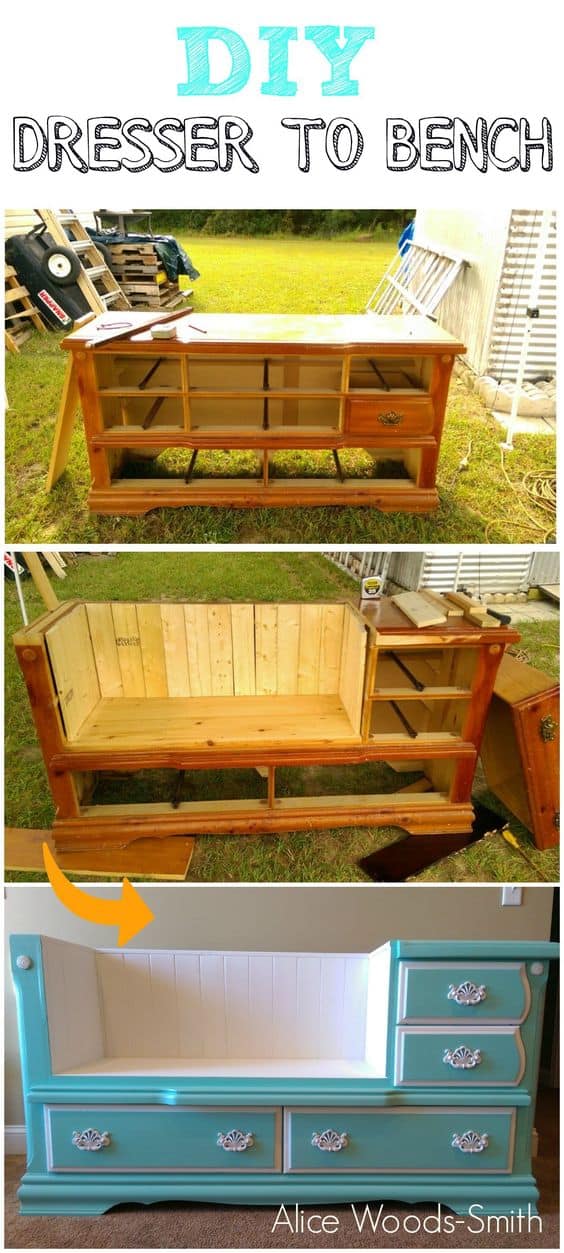
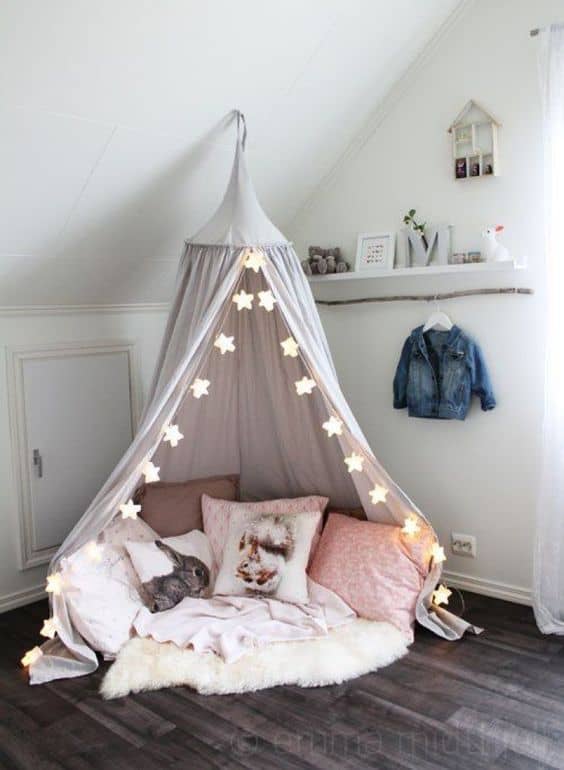
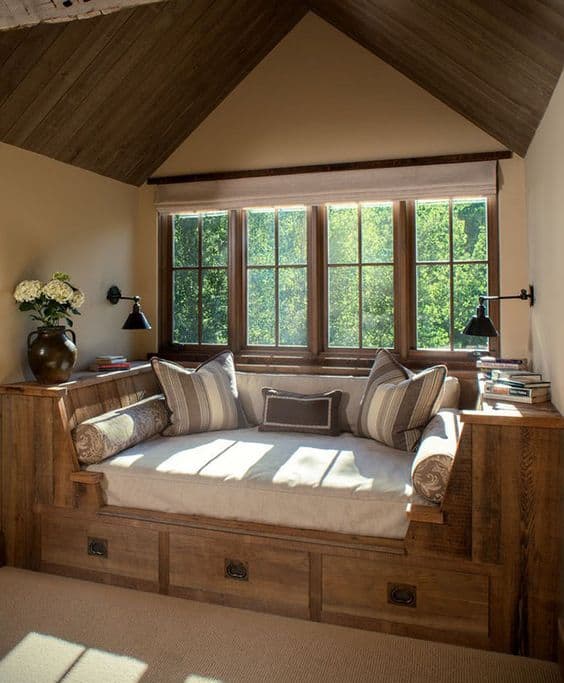
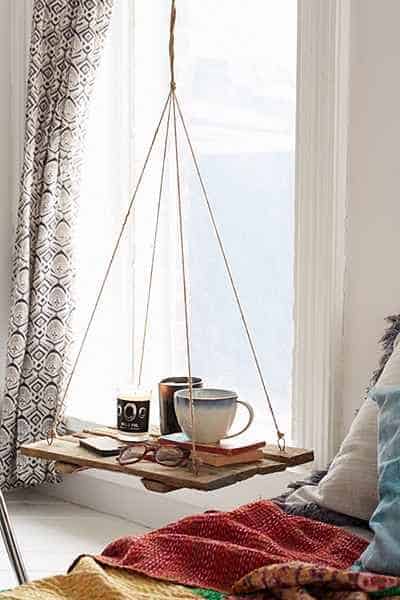
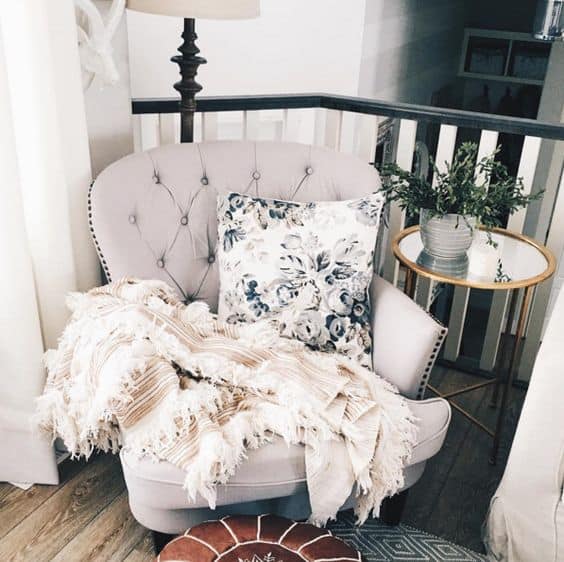

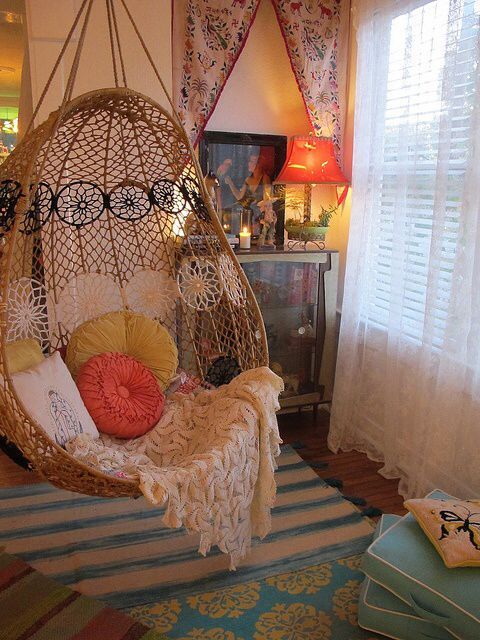
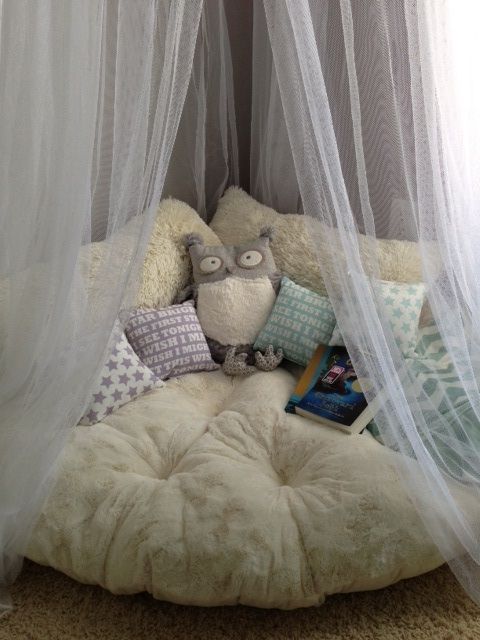

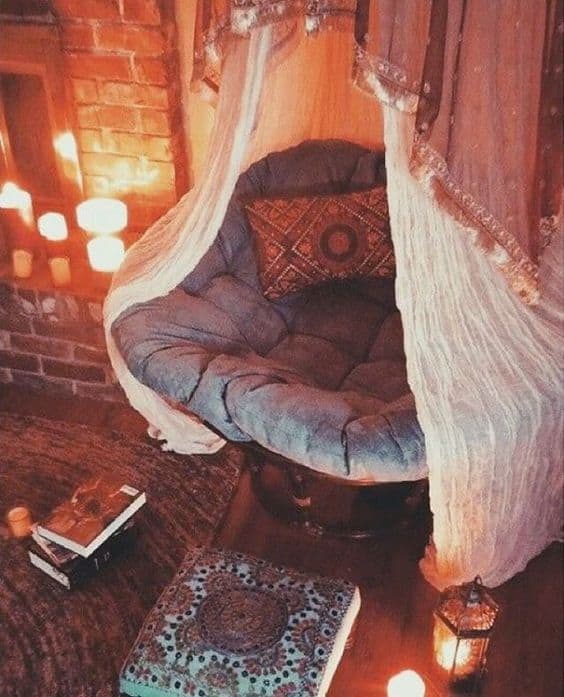
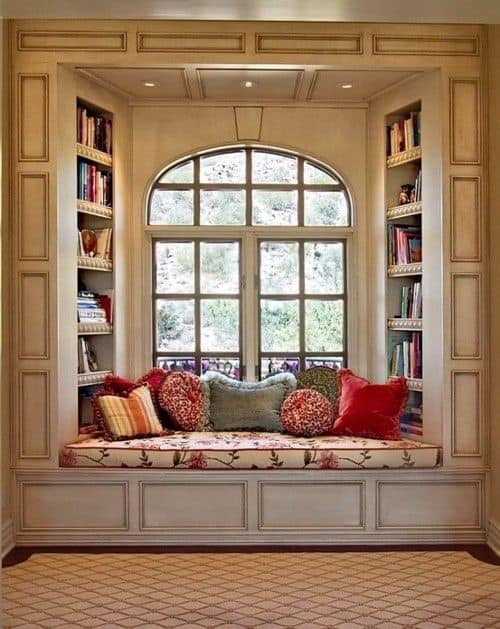
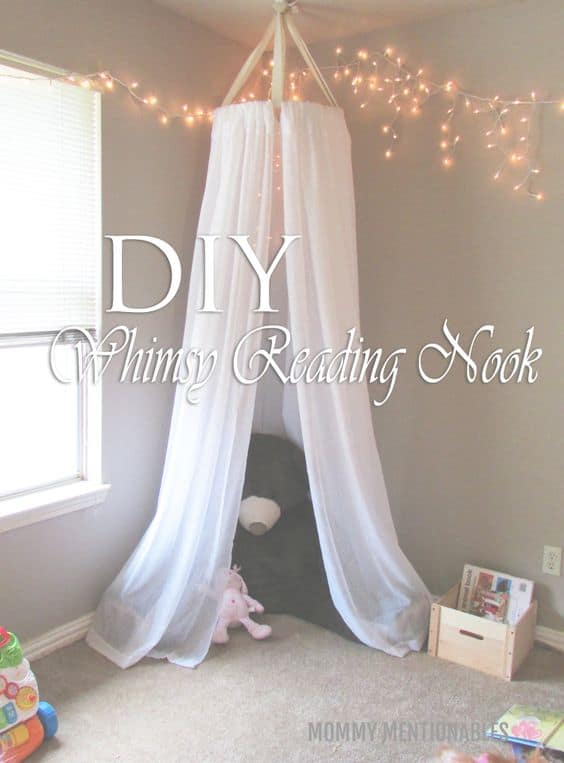
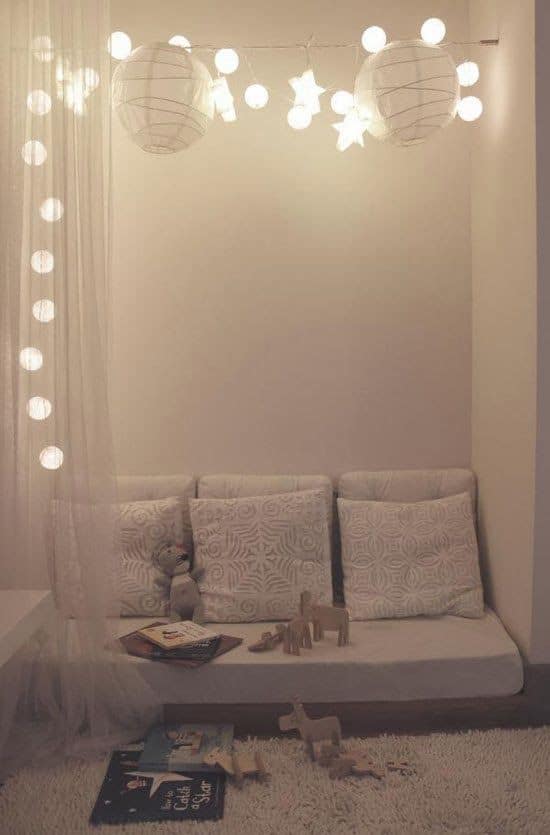
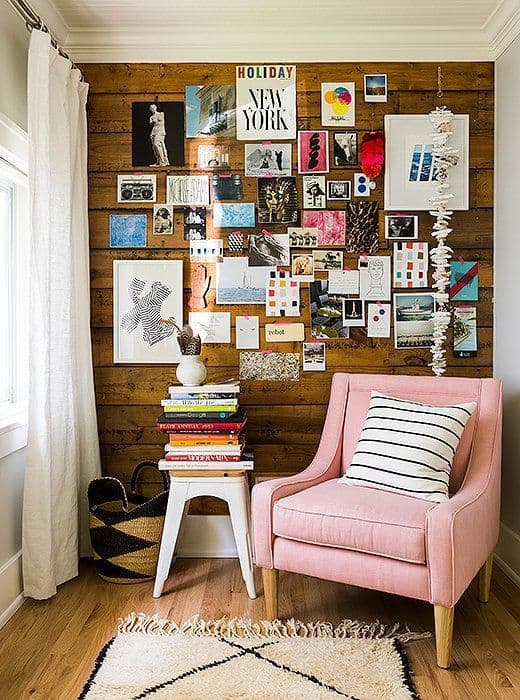 '
'
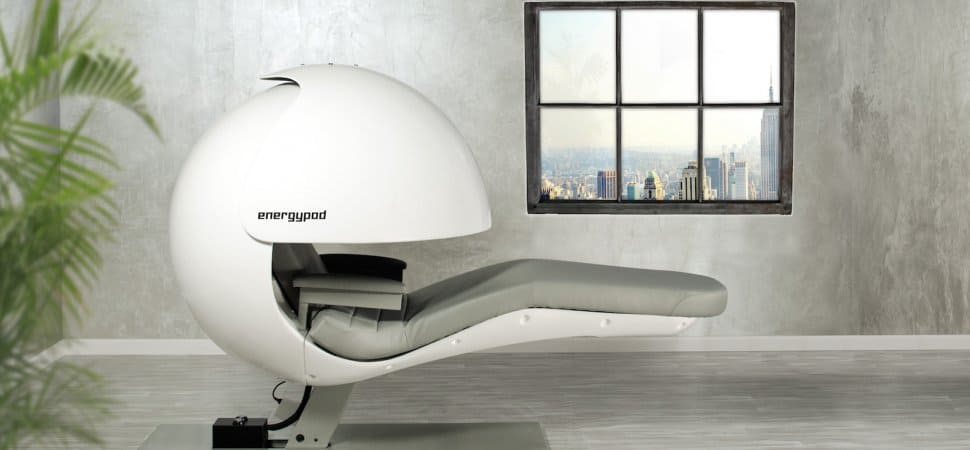


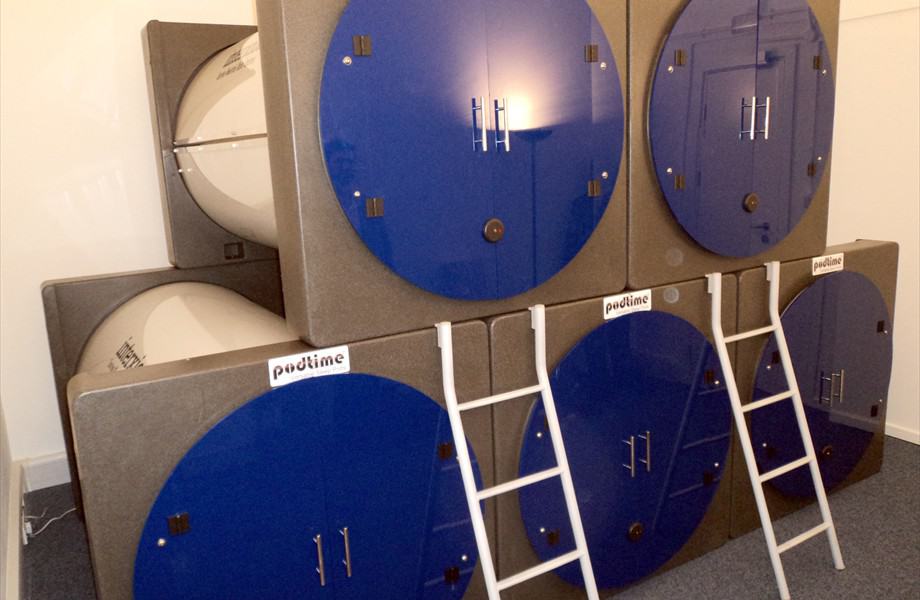
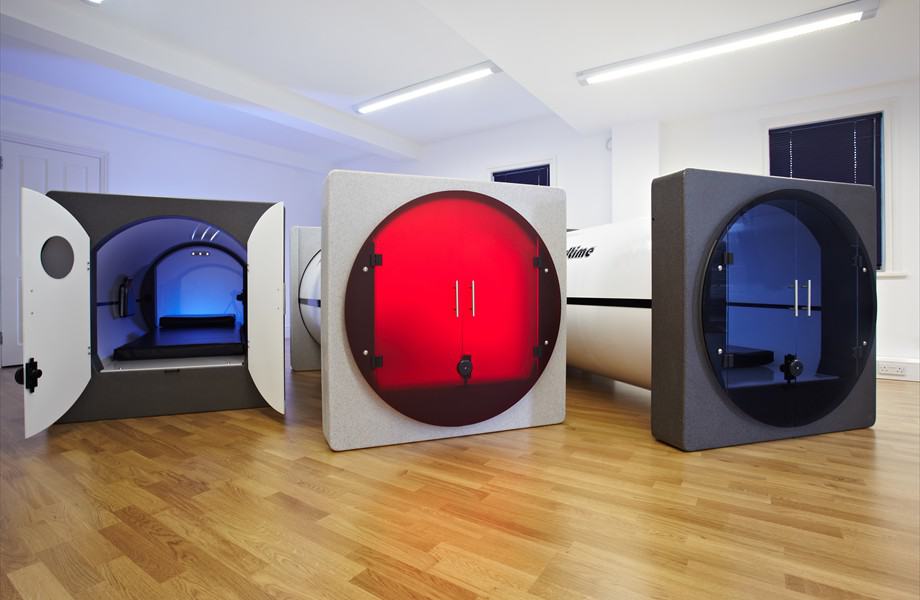


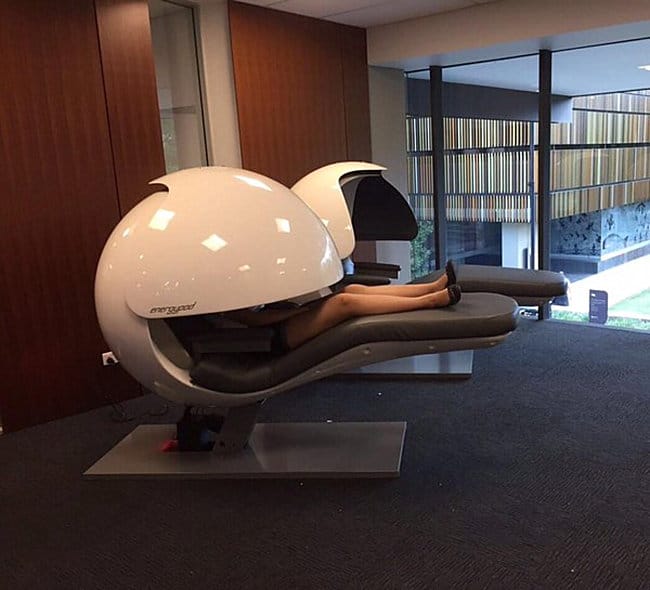


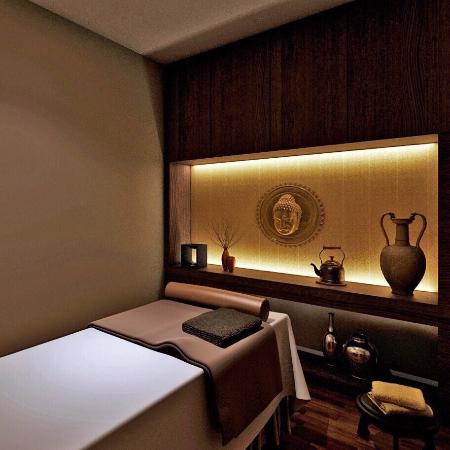


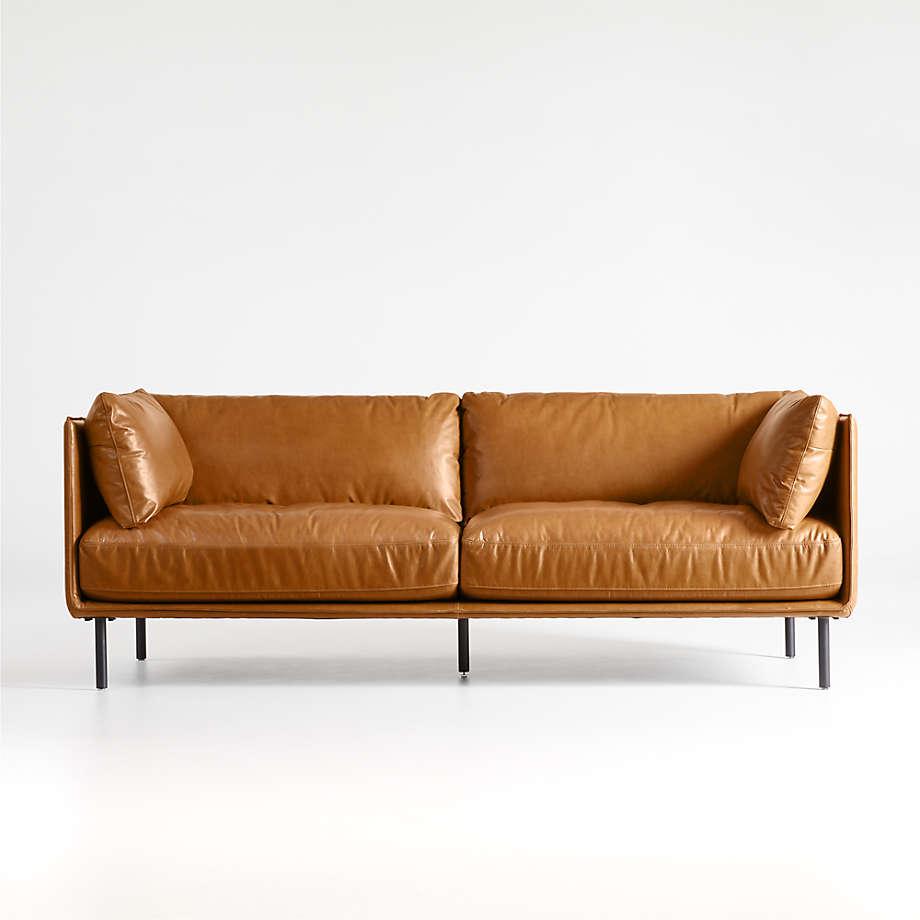
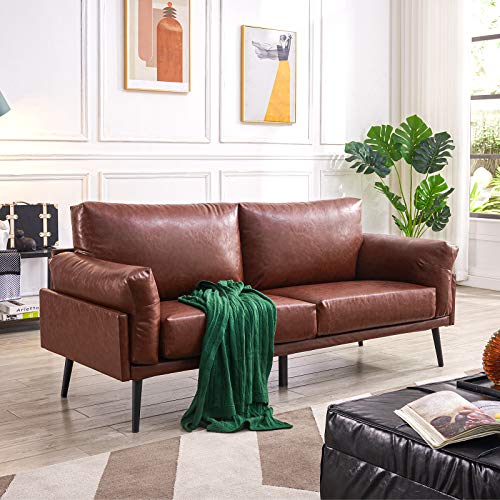

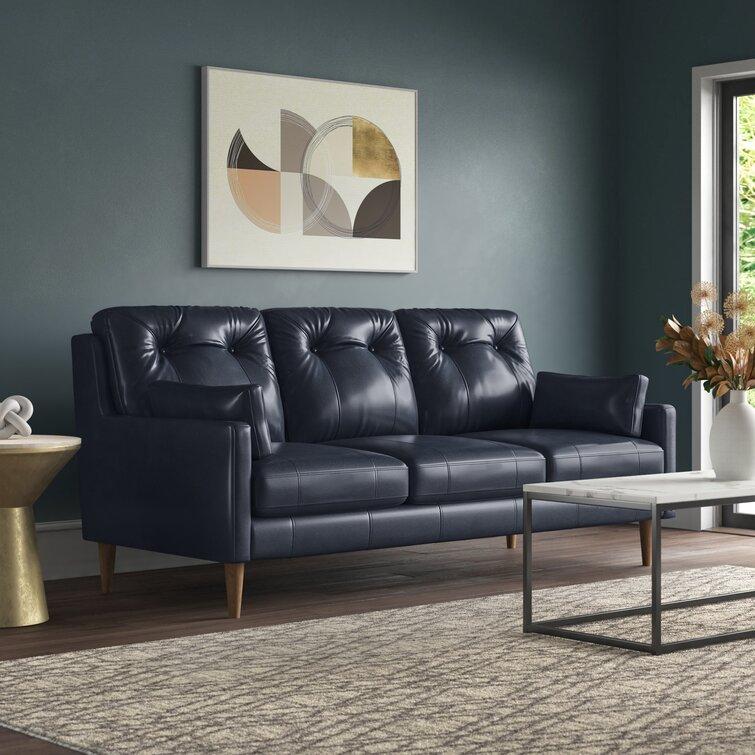
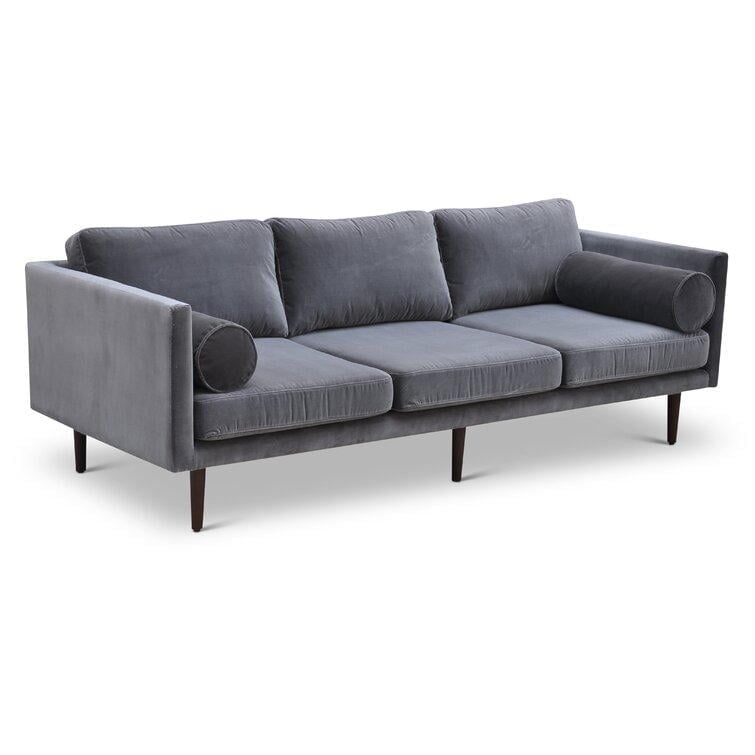
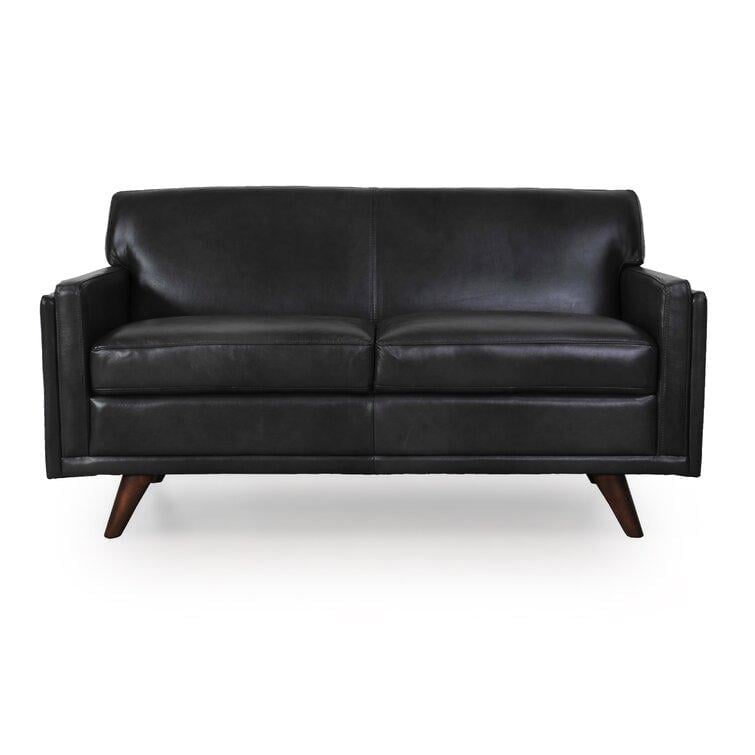
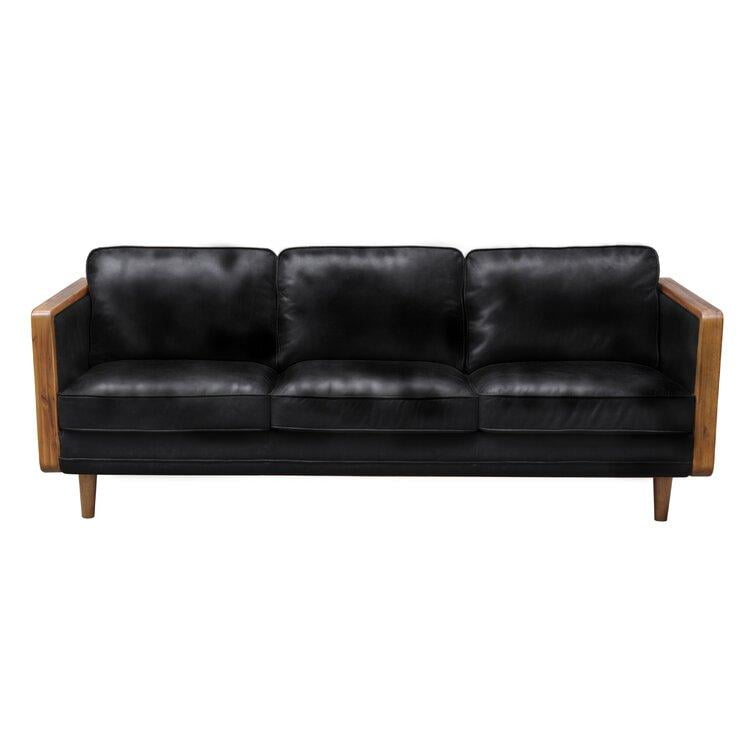
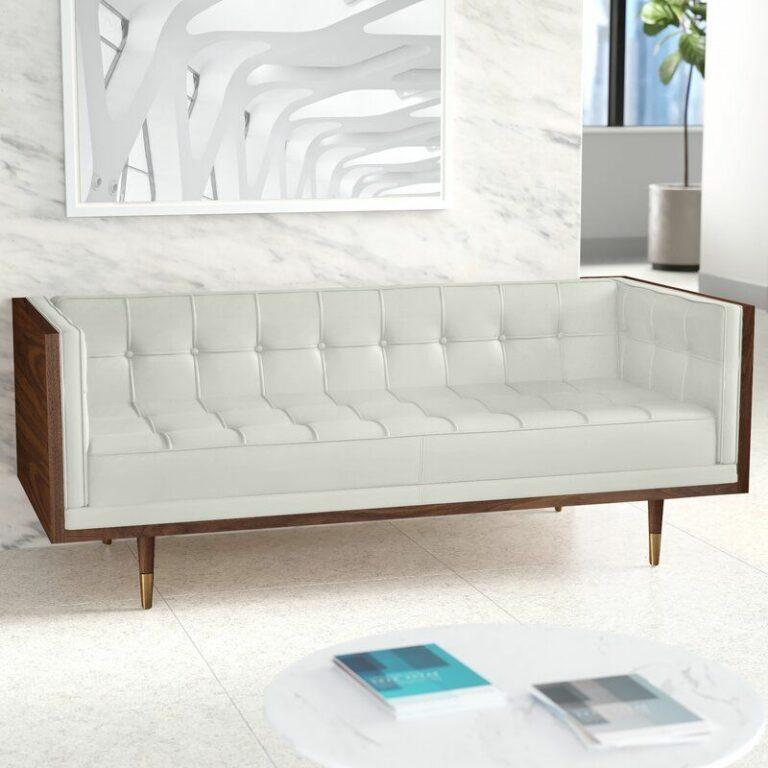
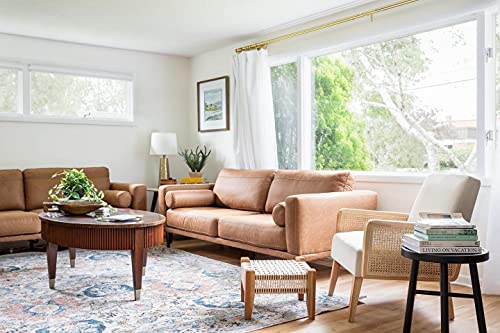
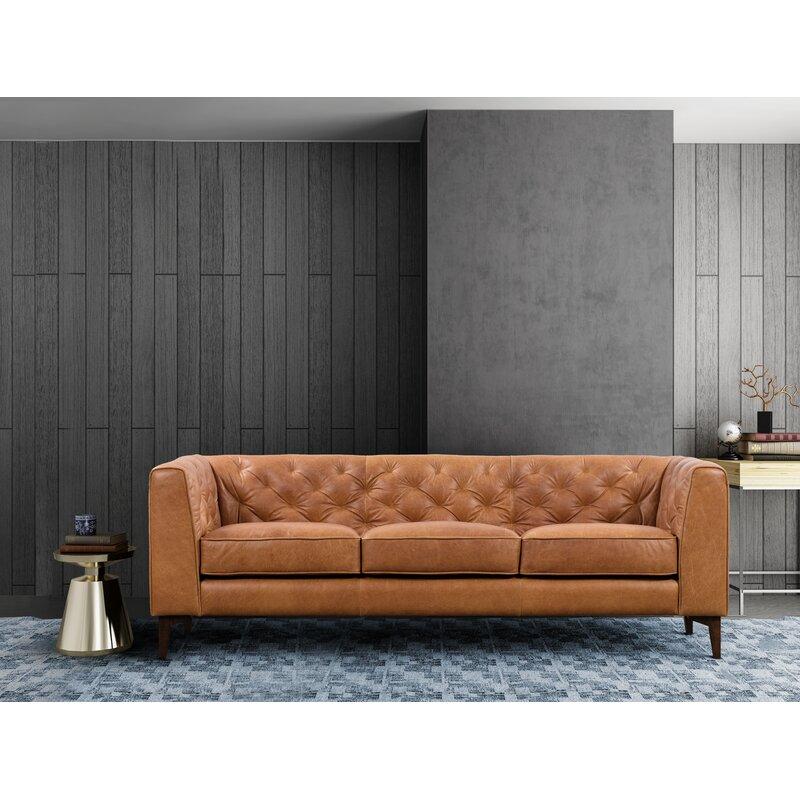

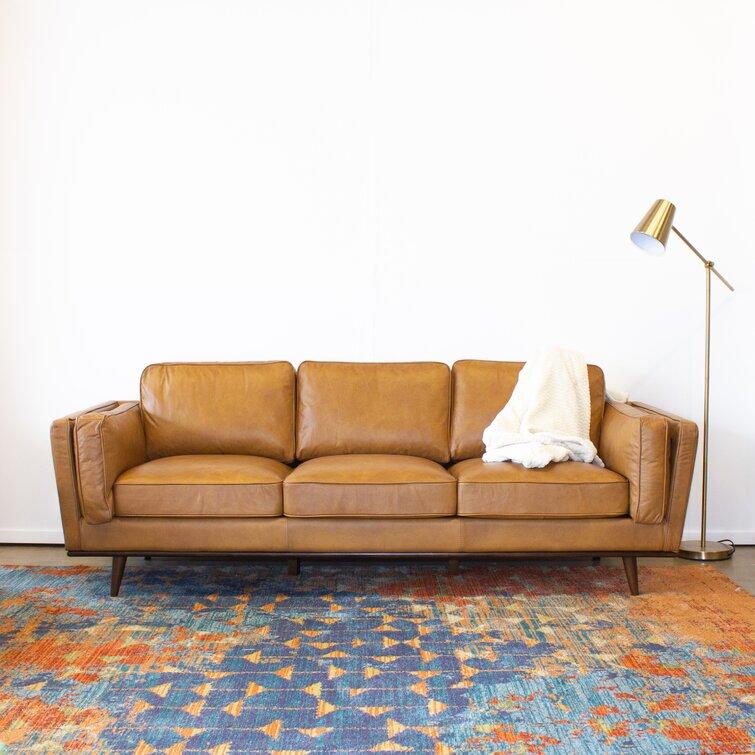
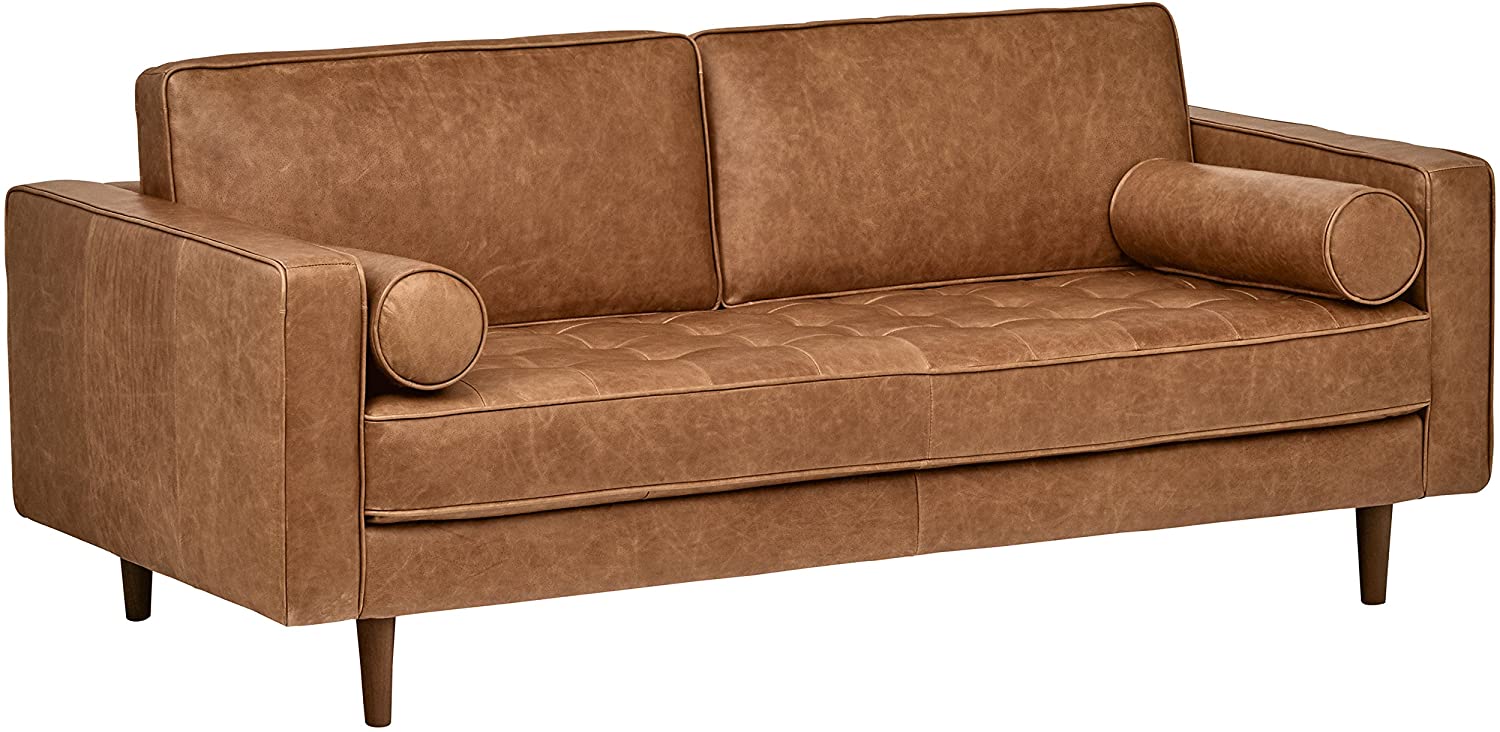
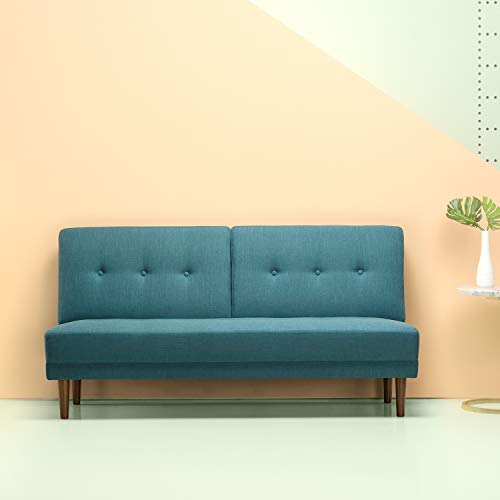

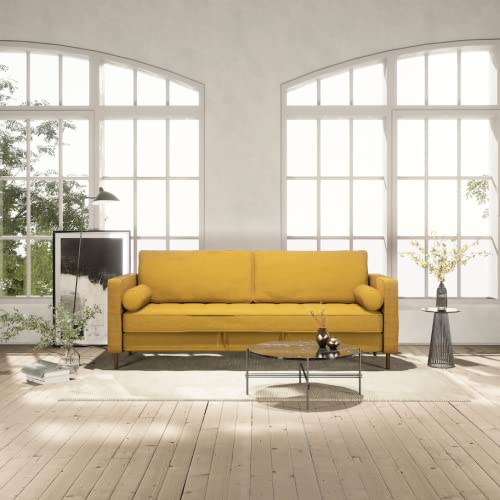
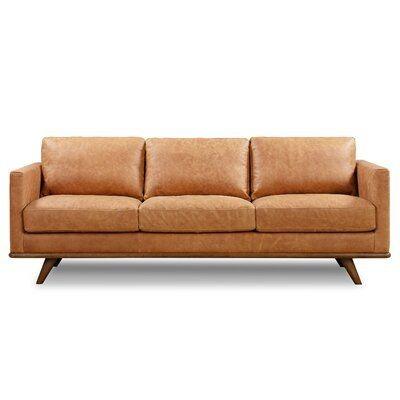
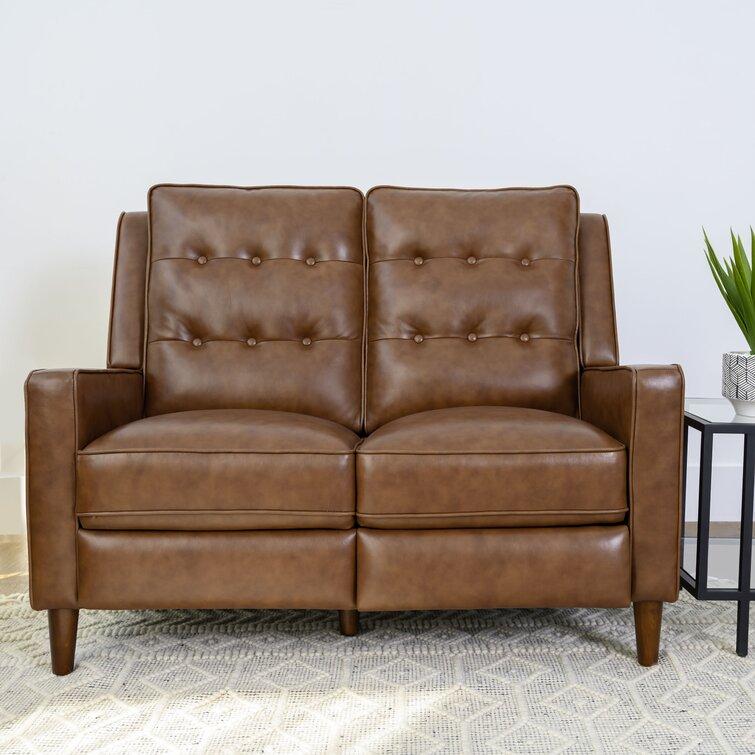
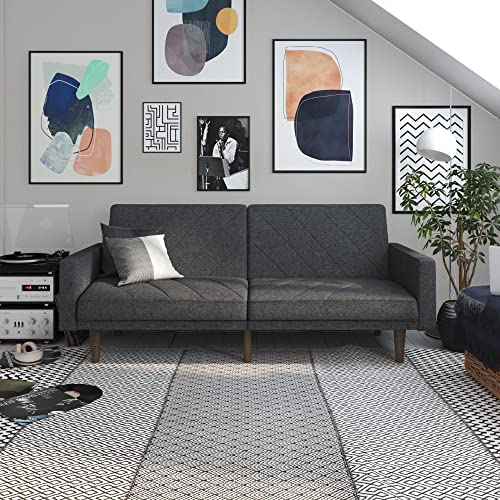
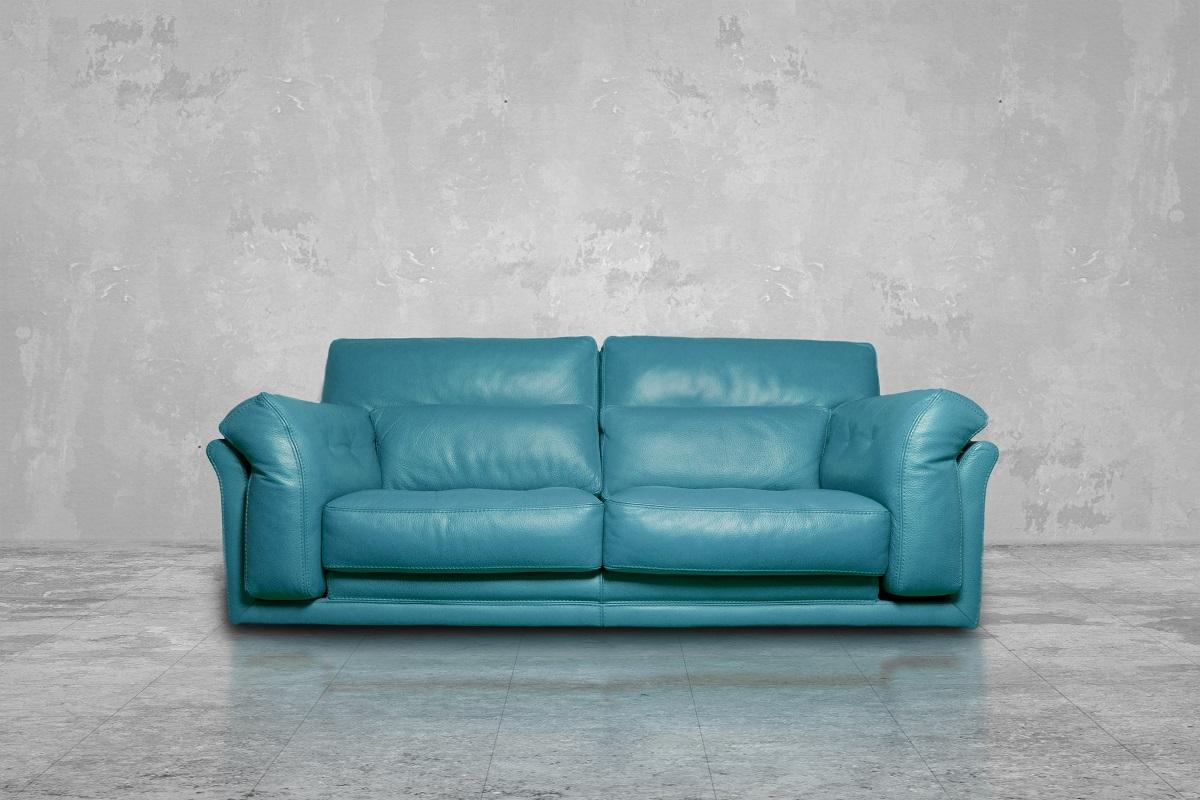

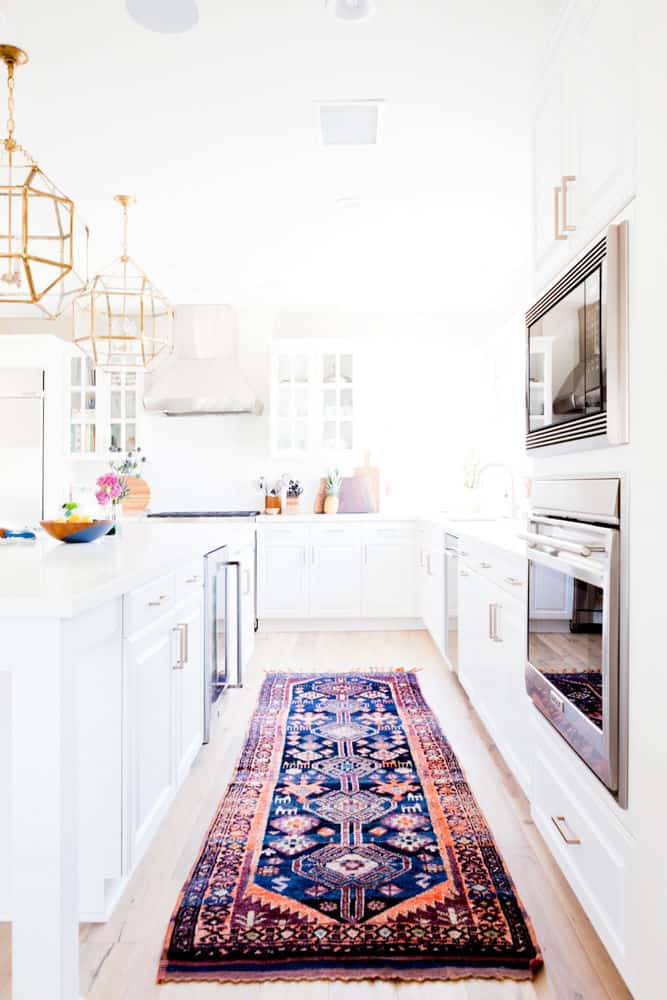
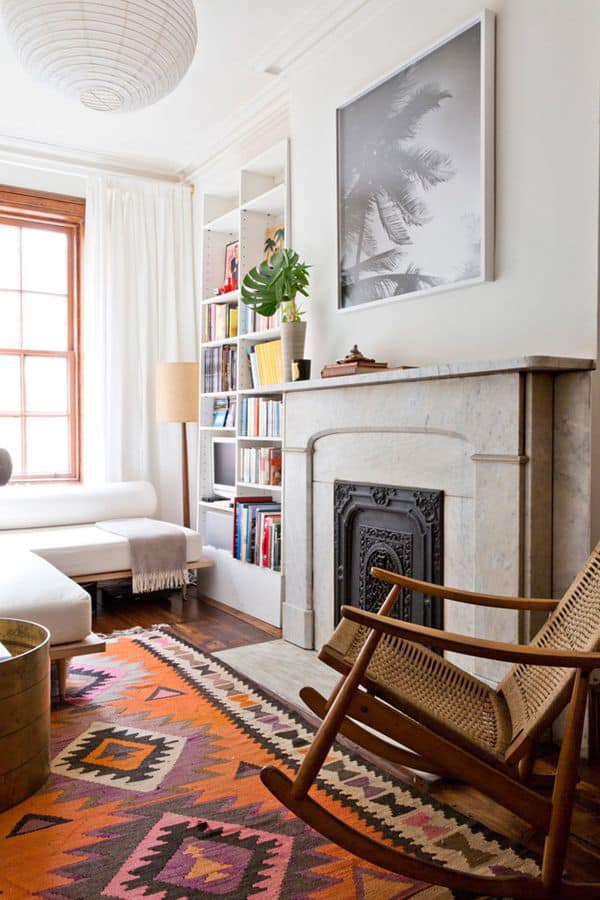
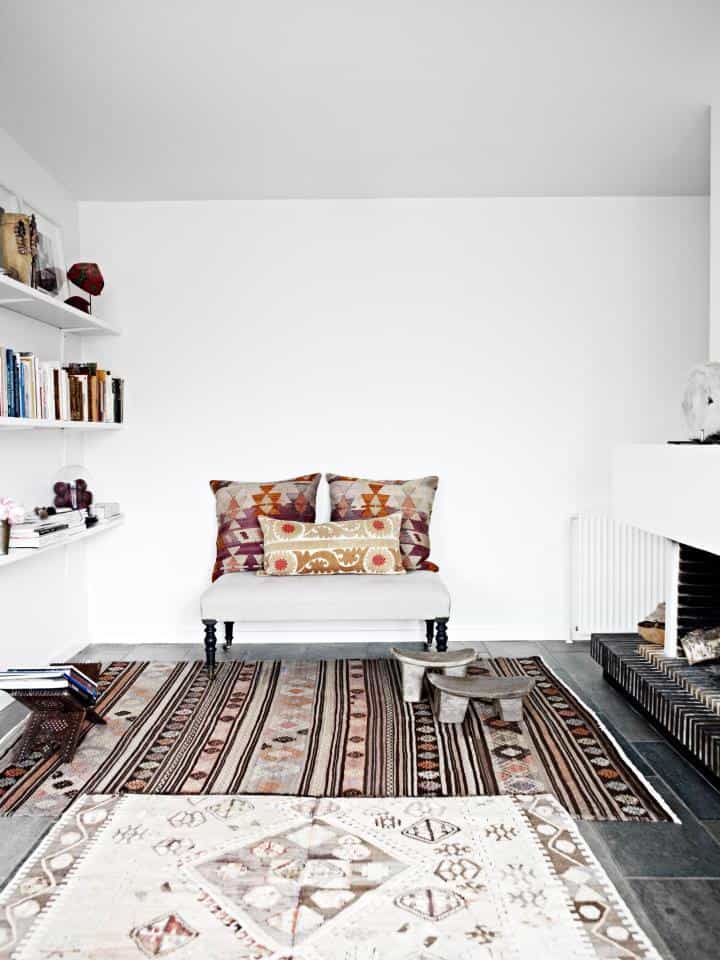
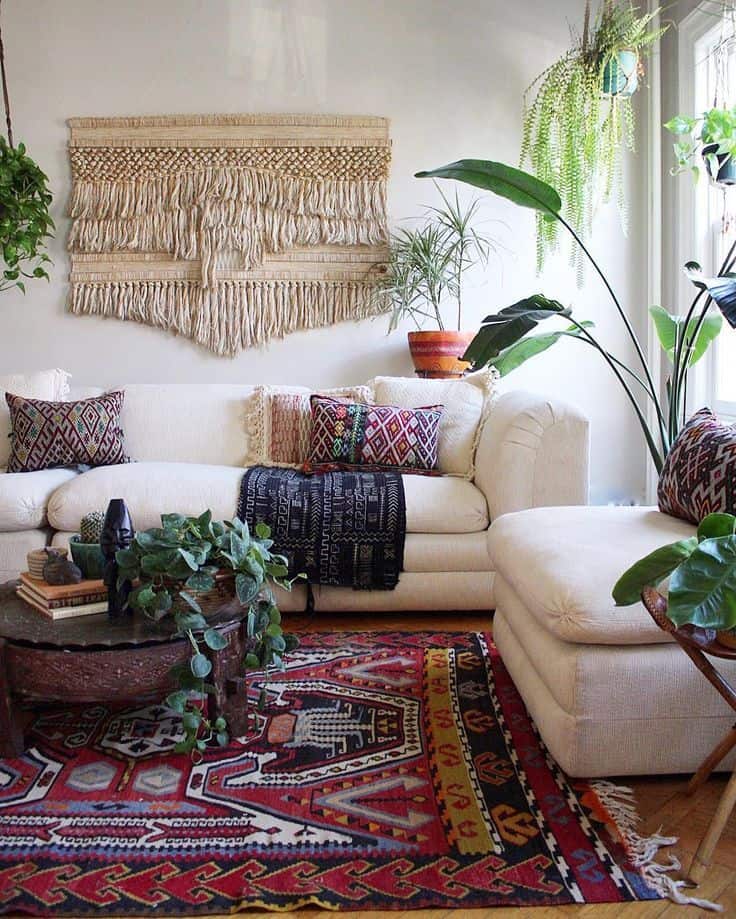
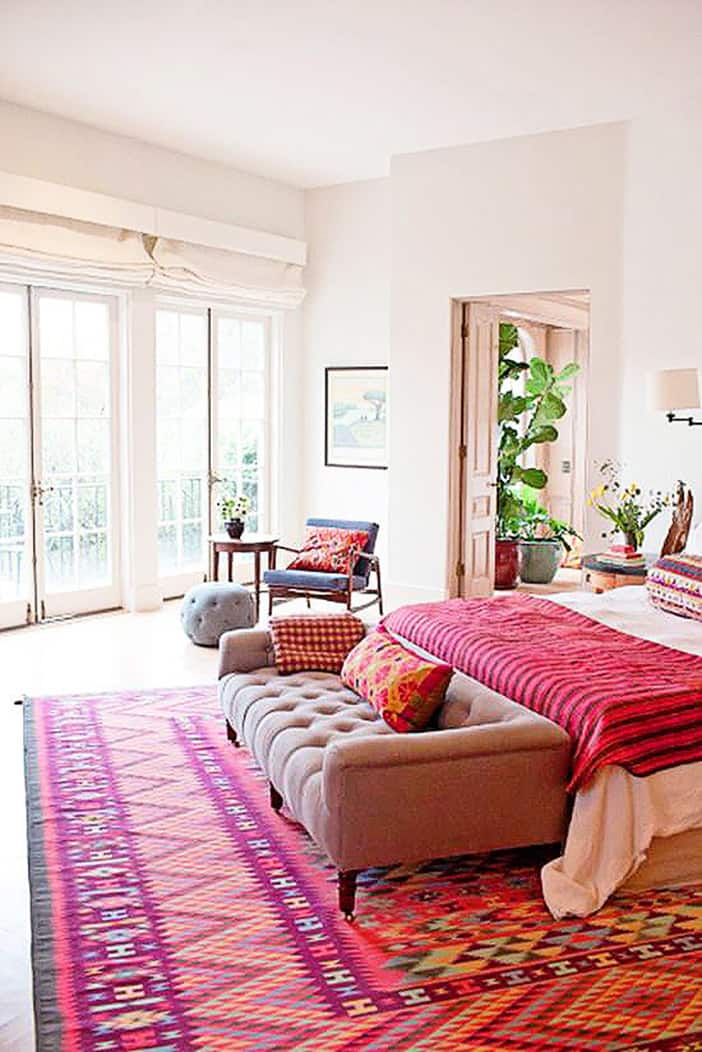
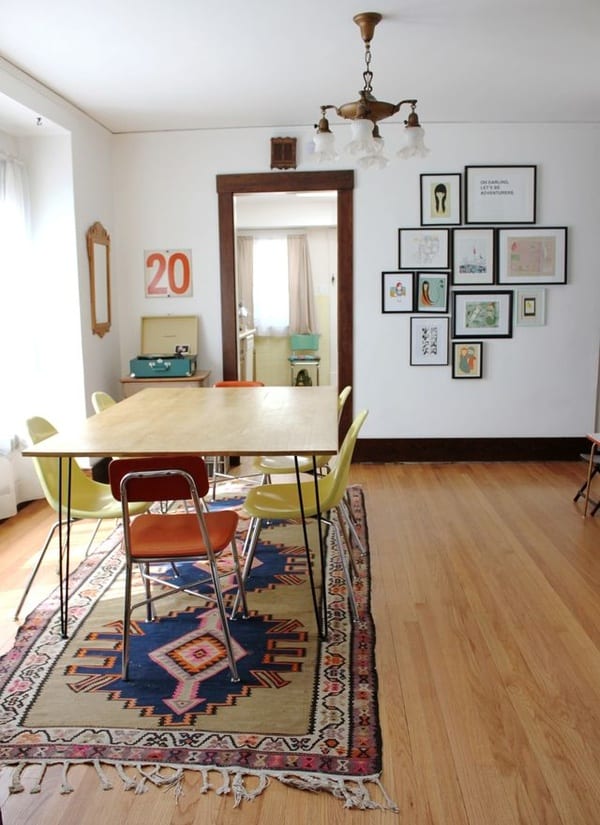

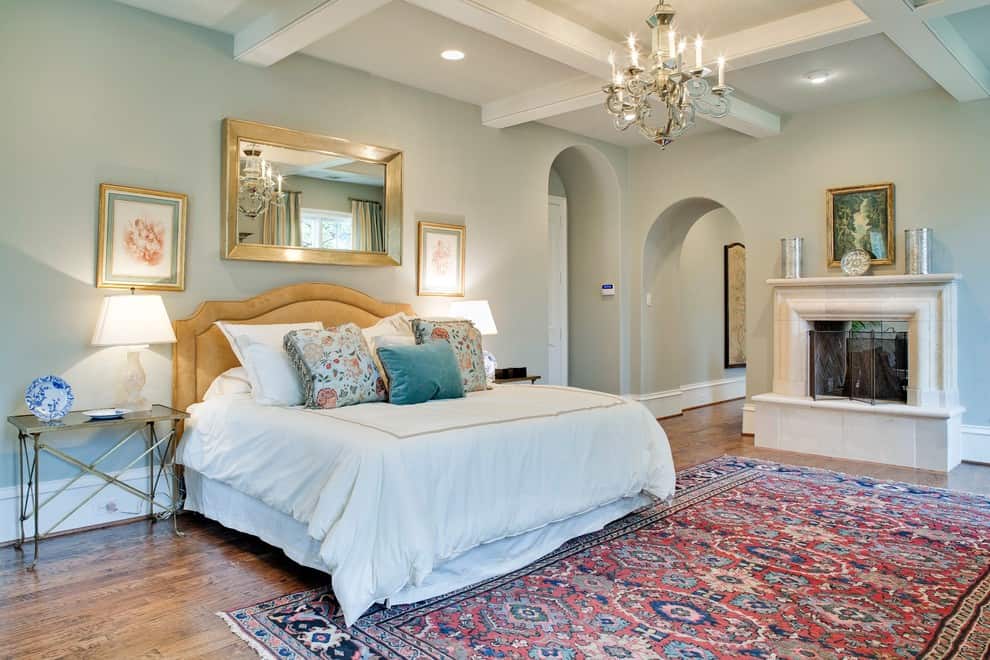
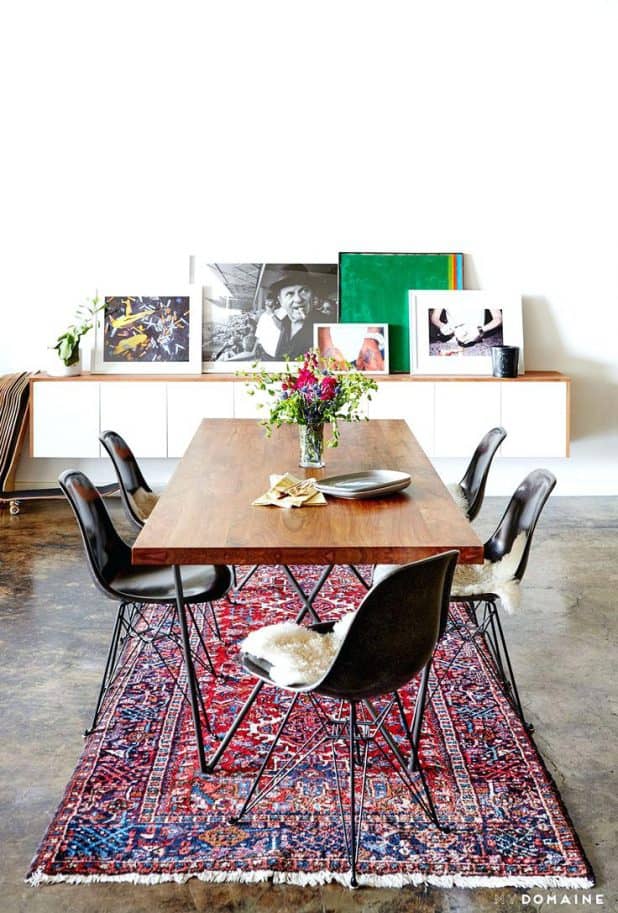
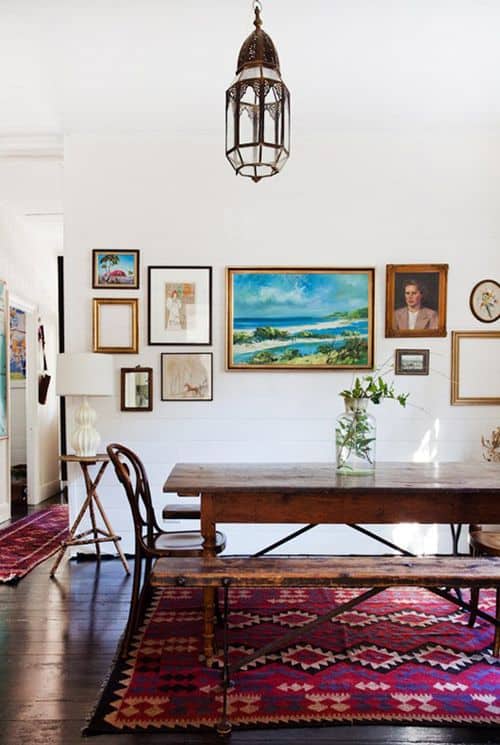
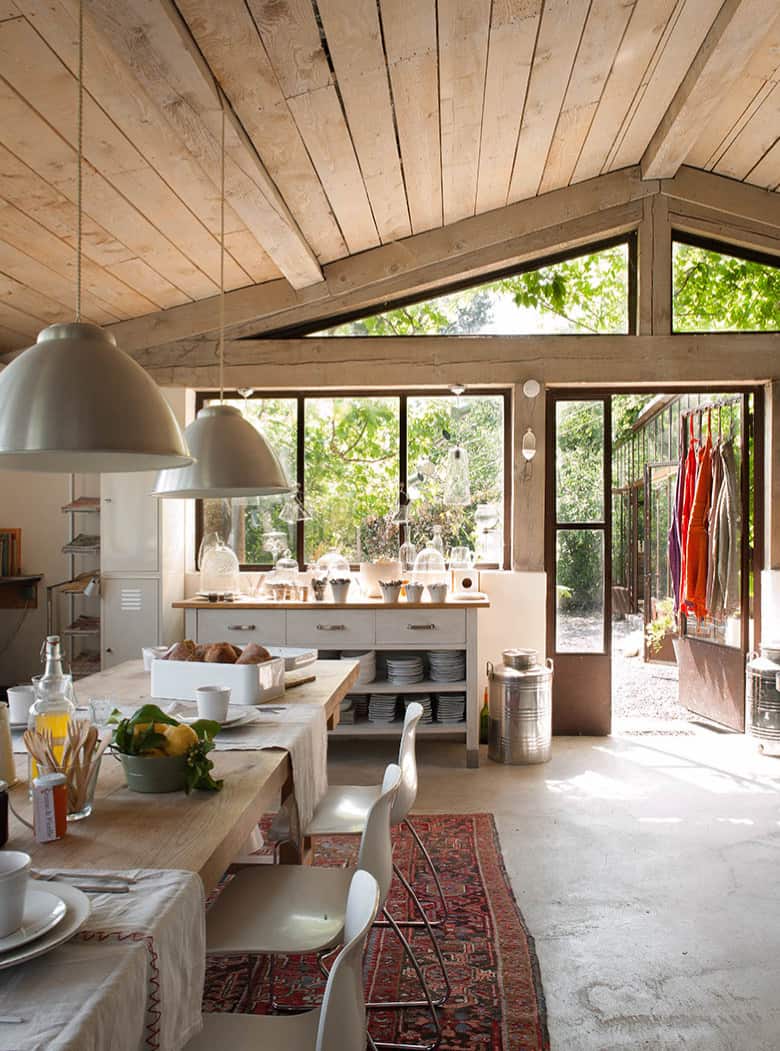

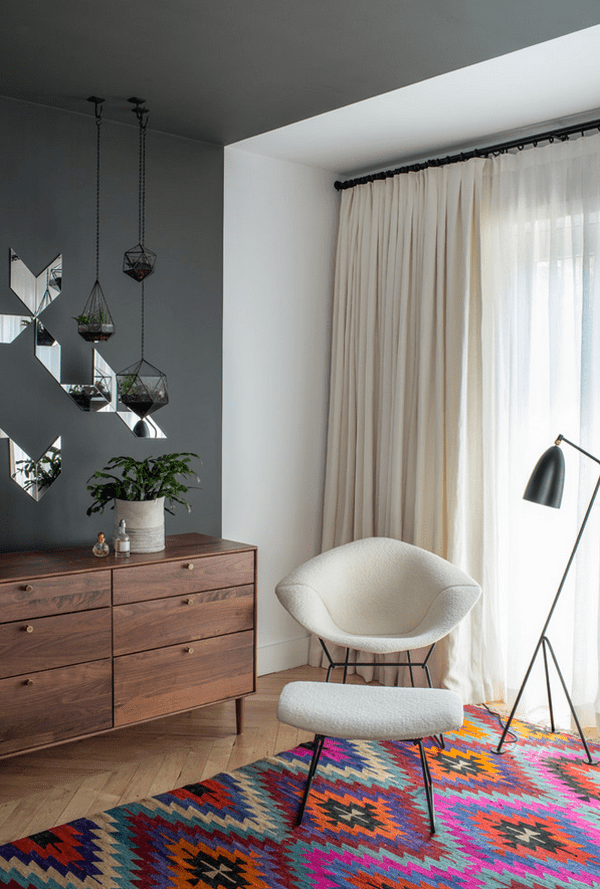
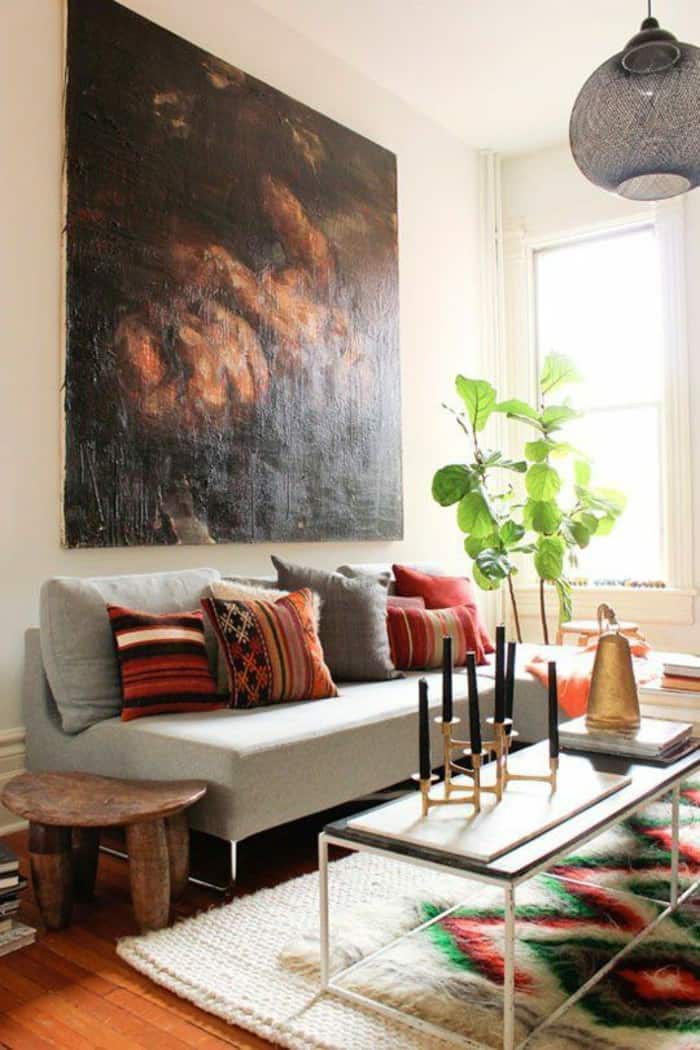
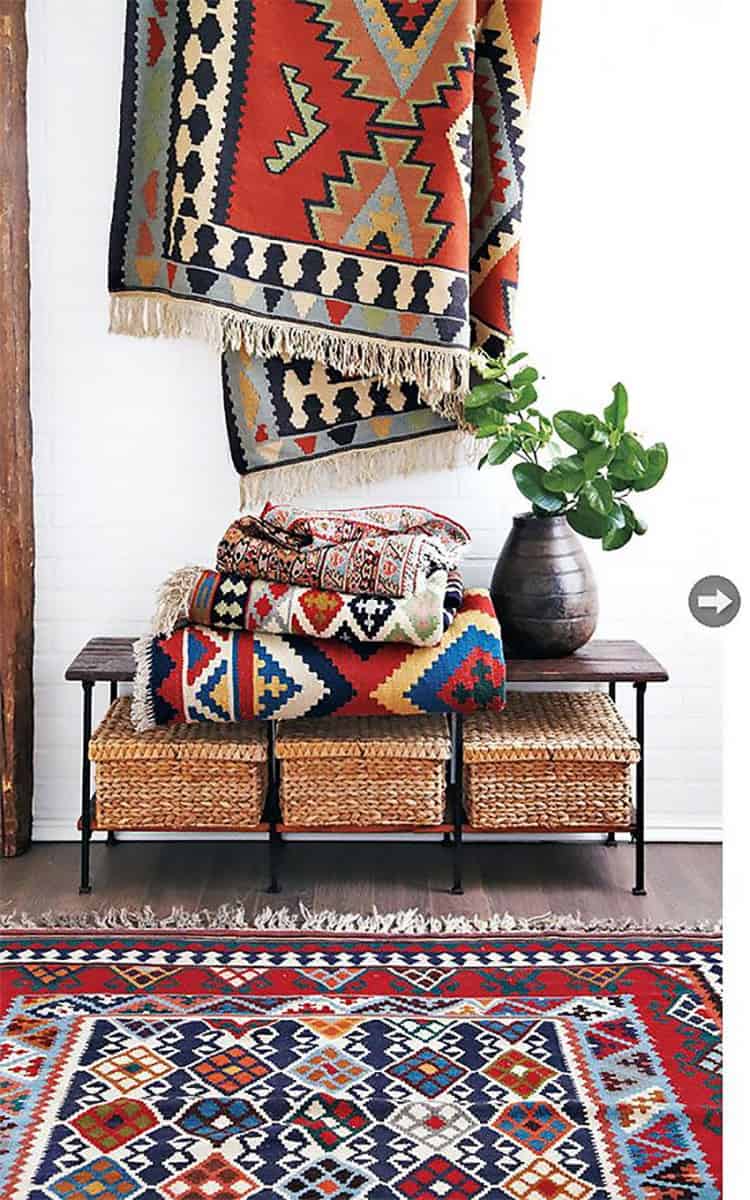
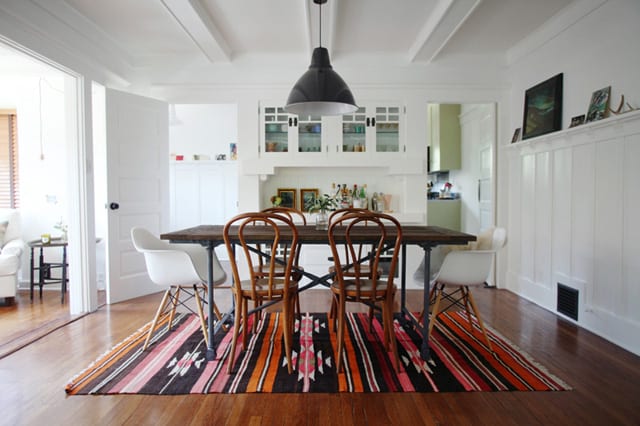
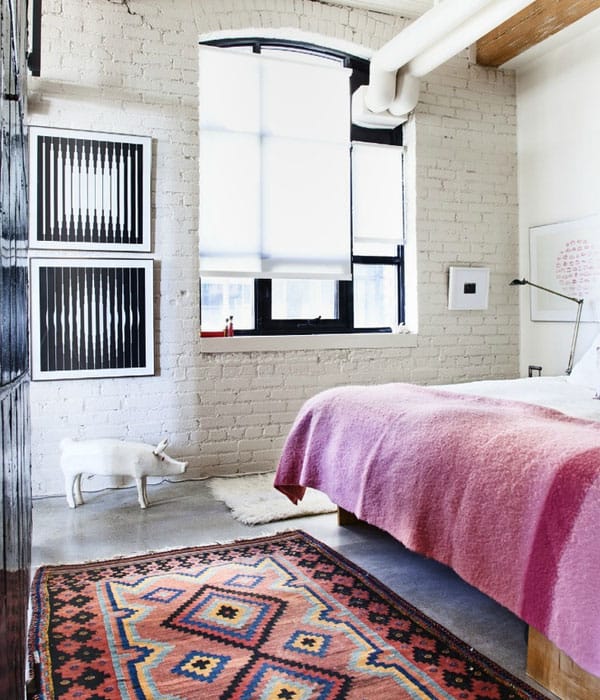
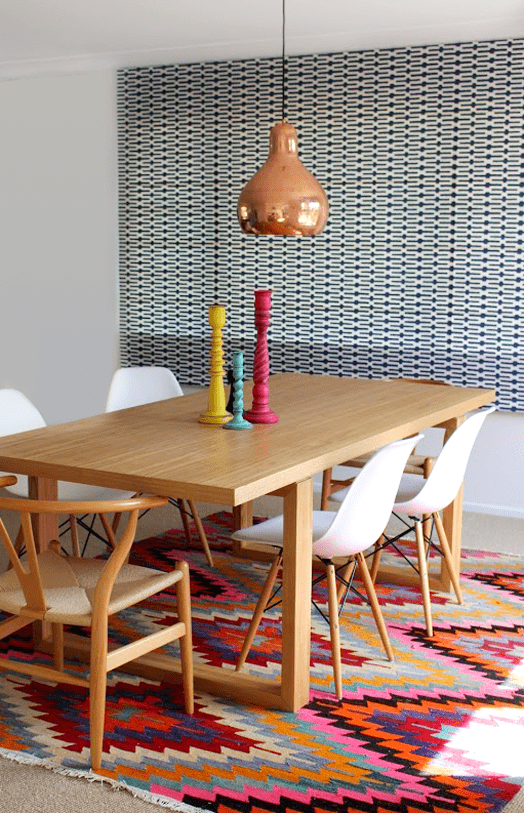
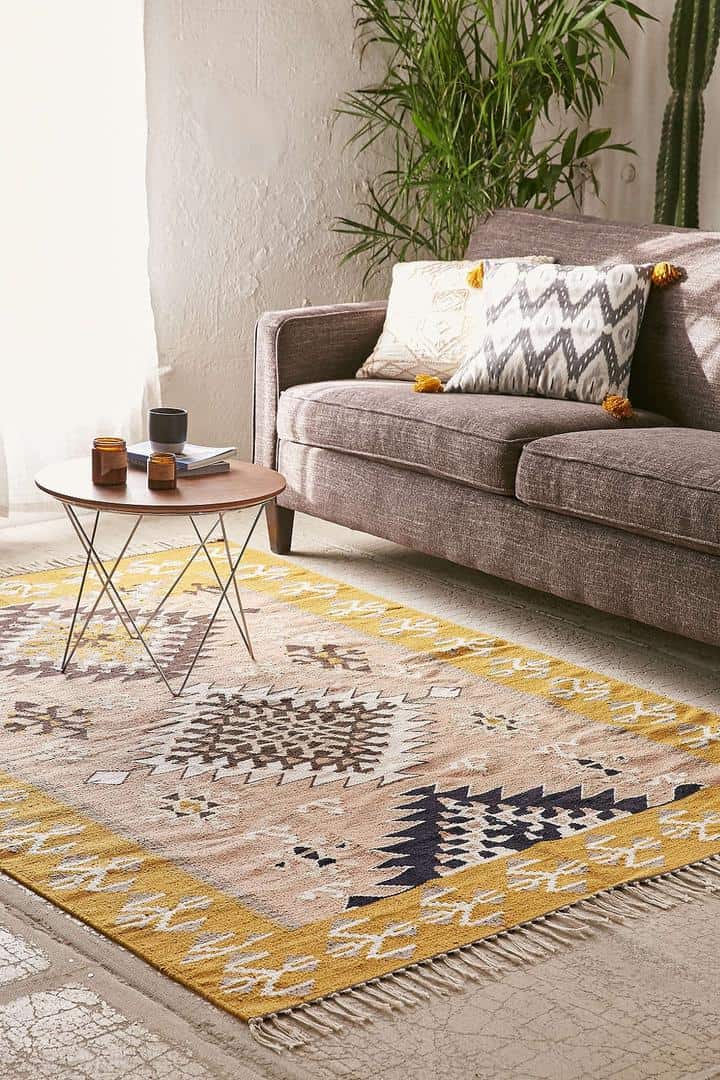
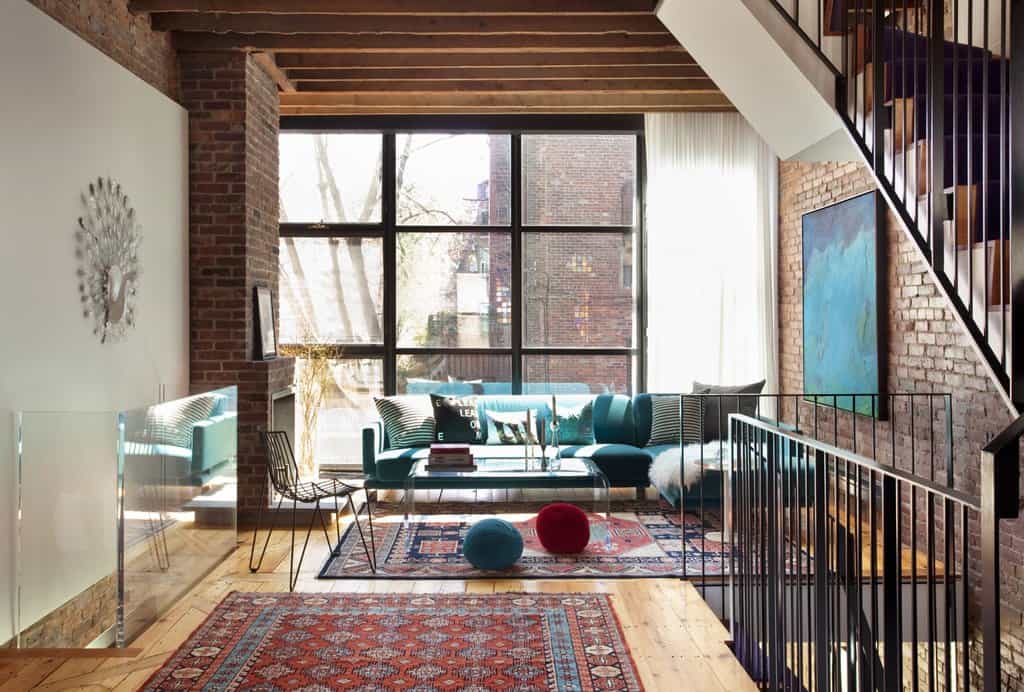


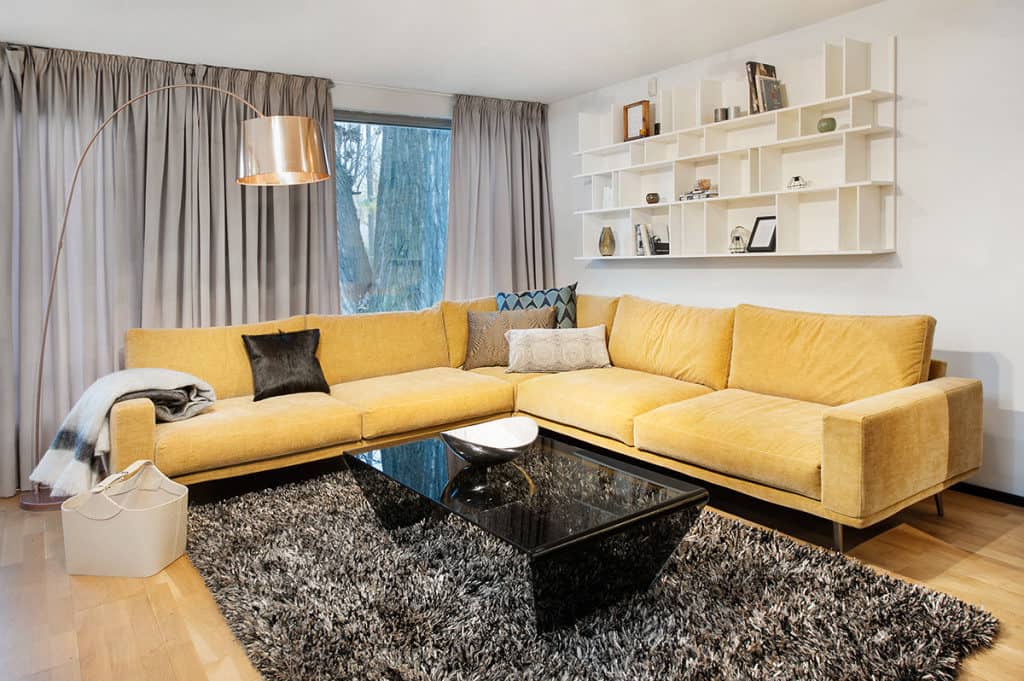
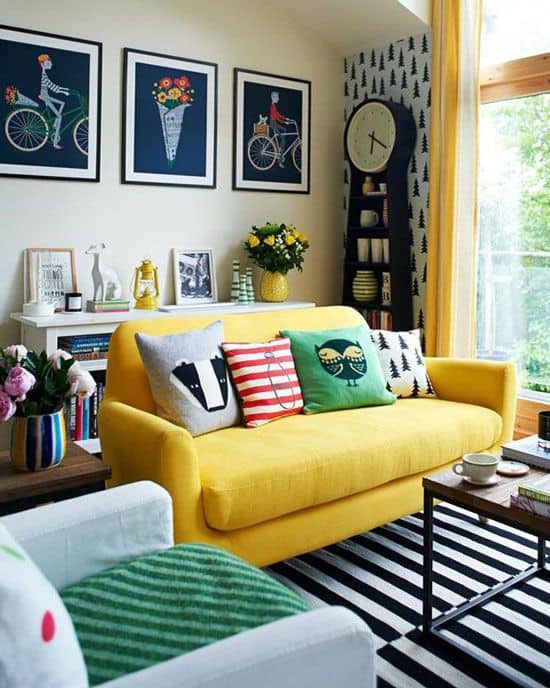
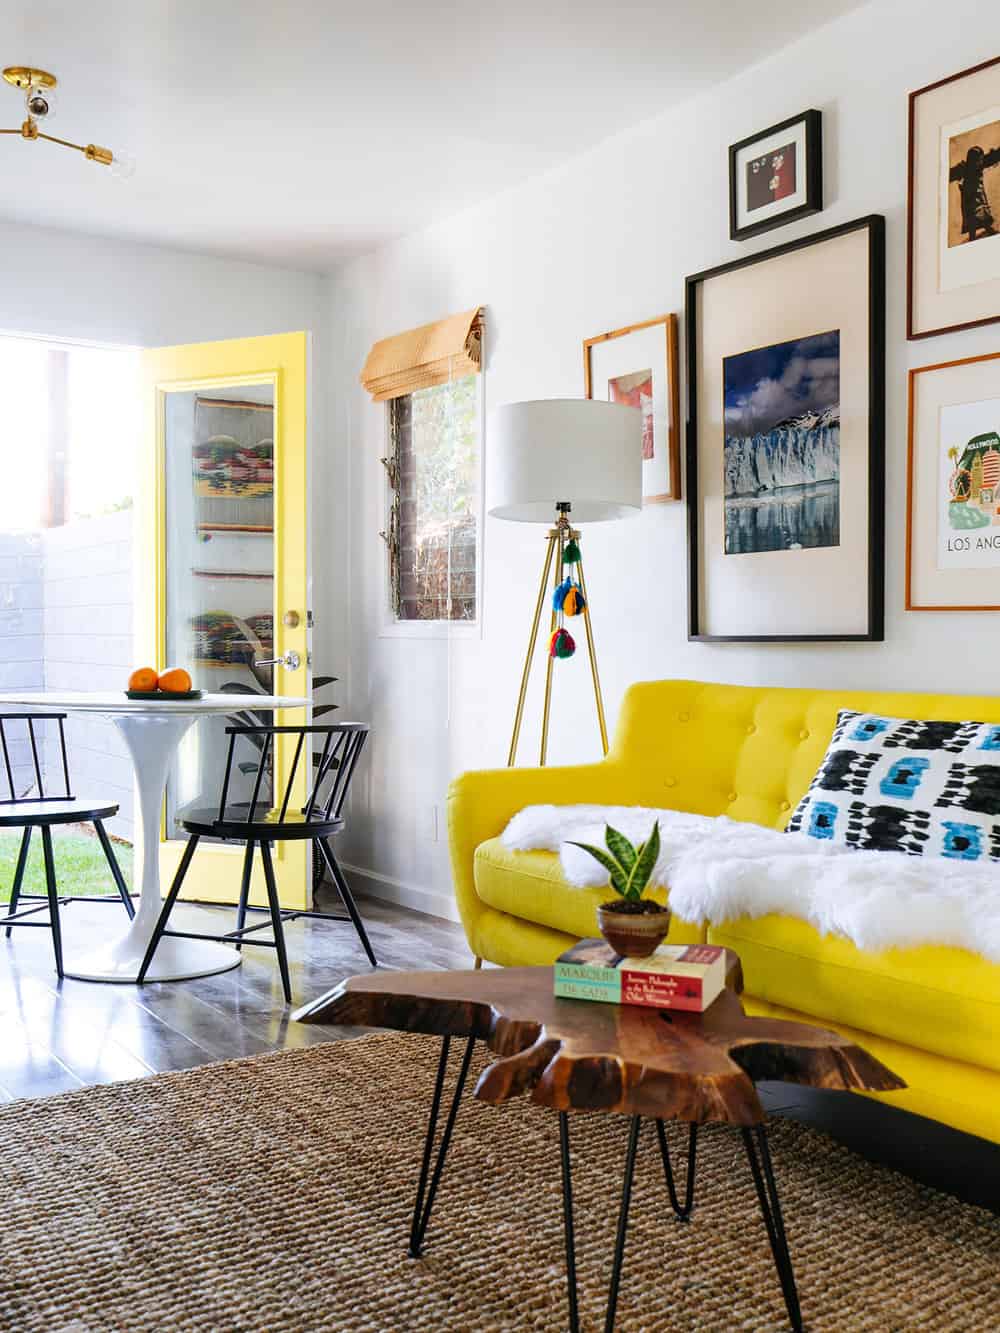
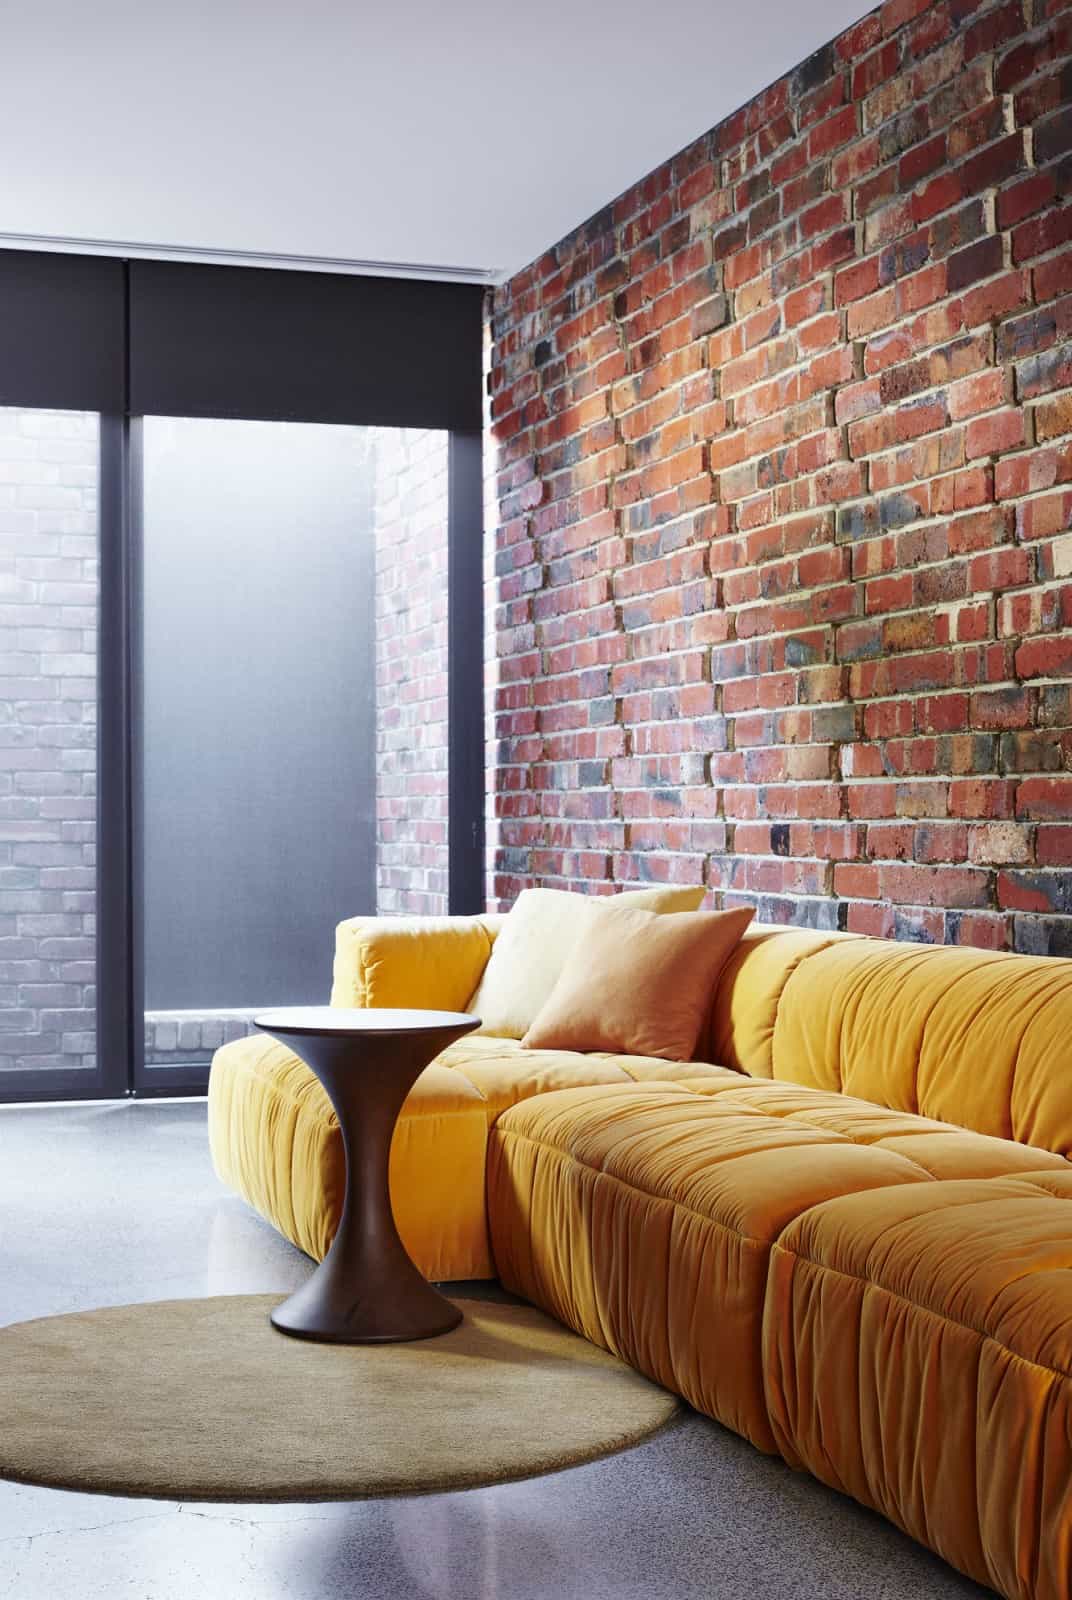
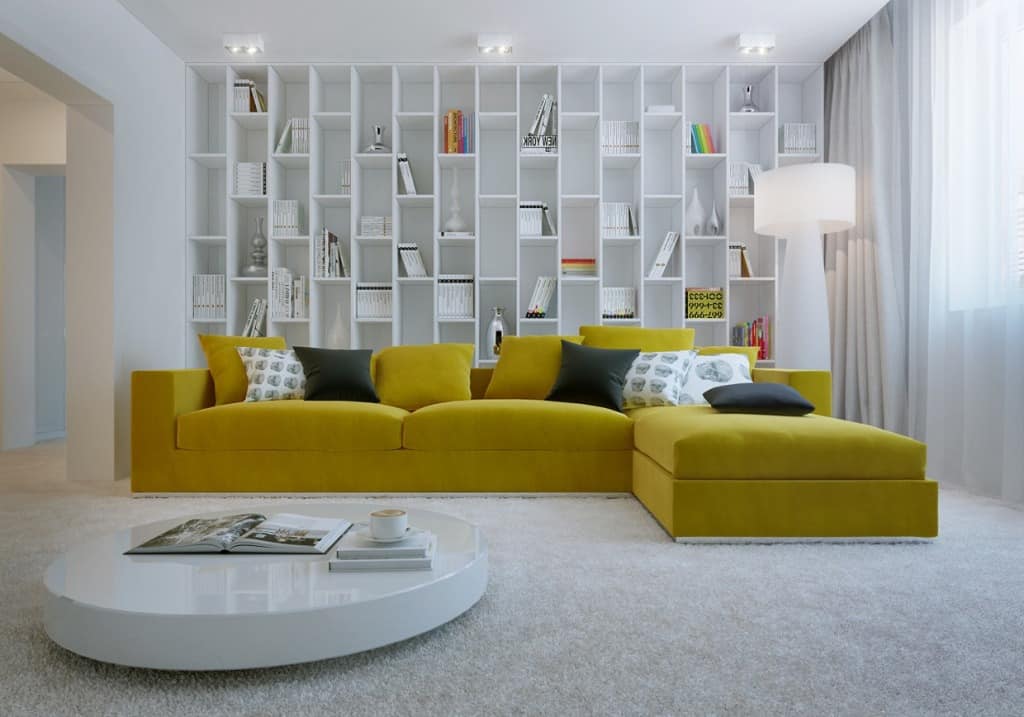
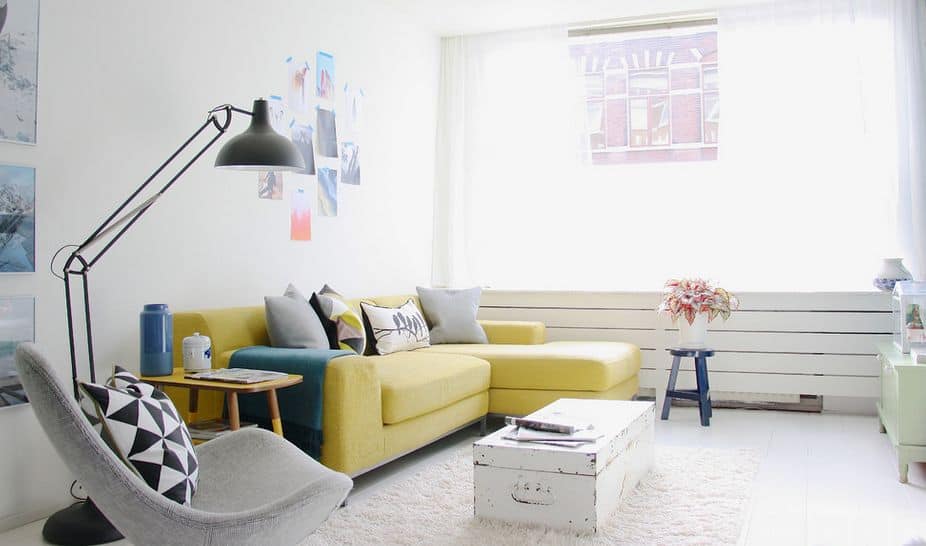
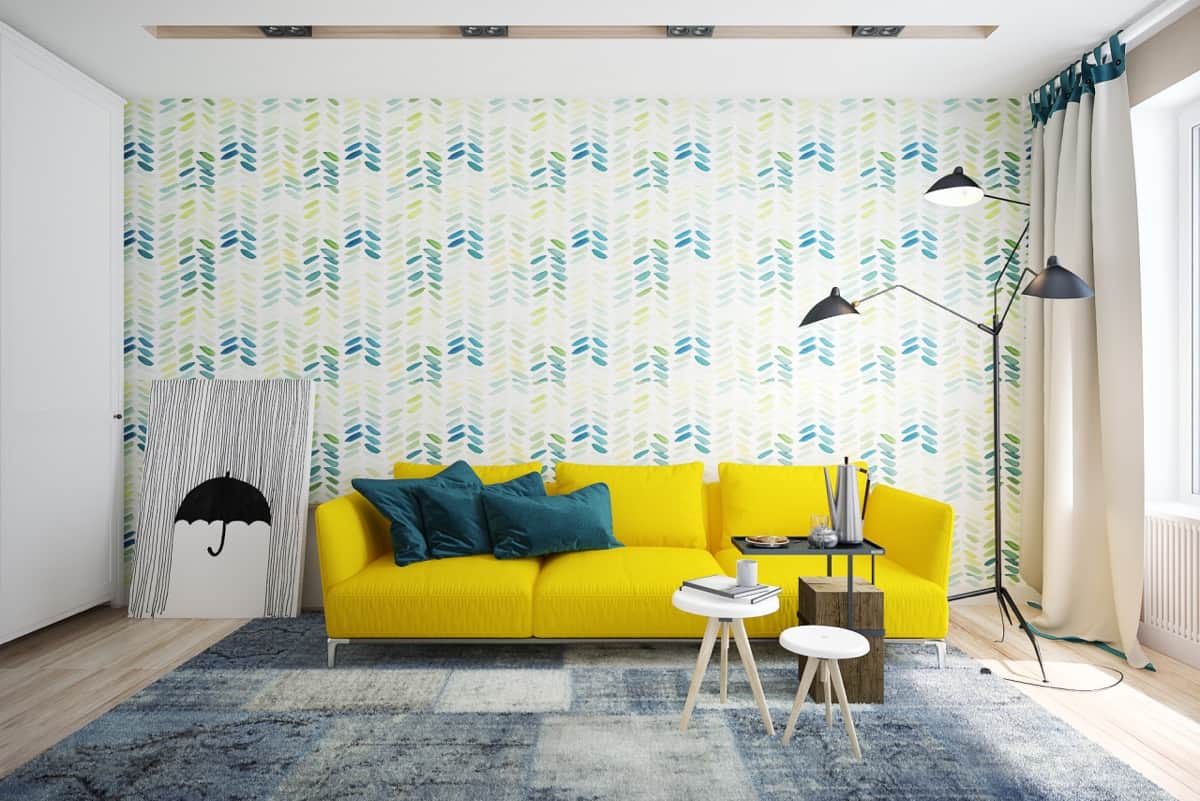
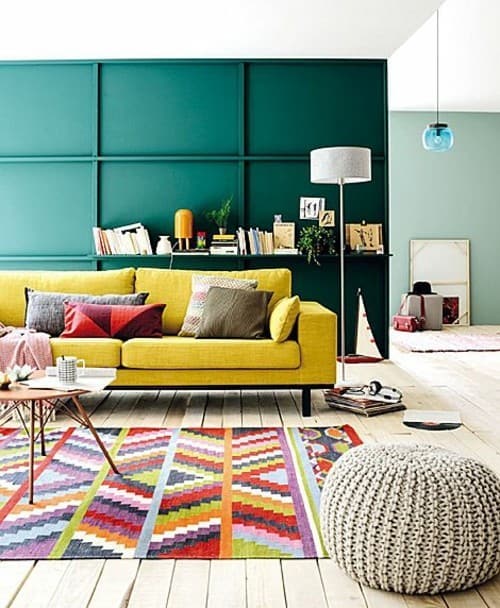
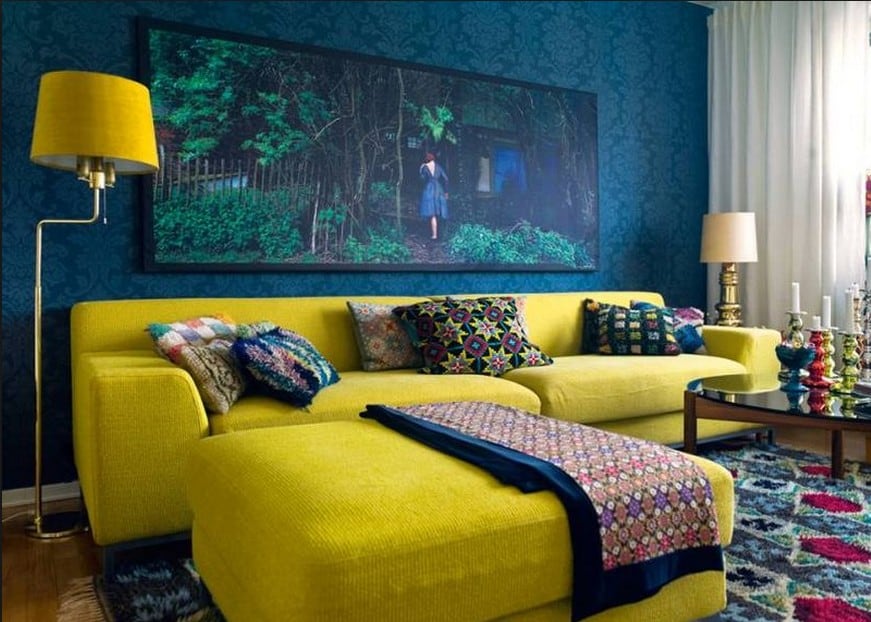


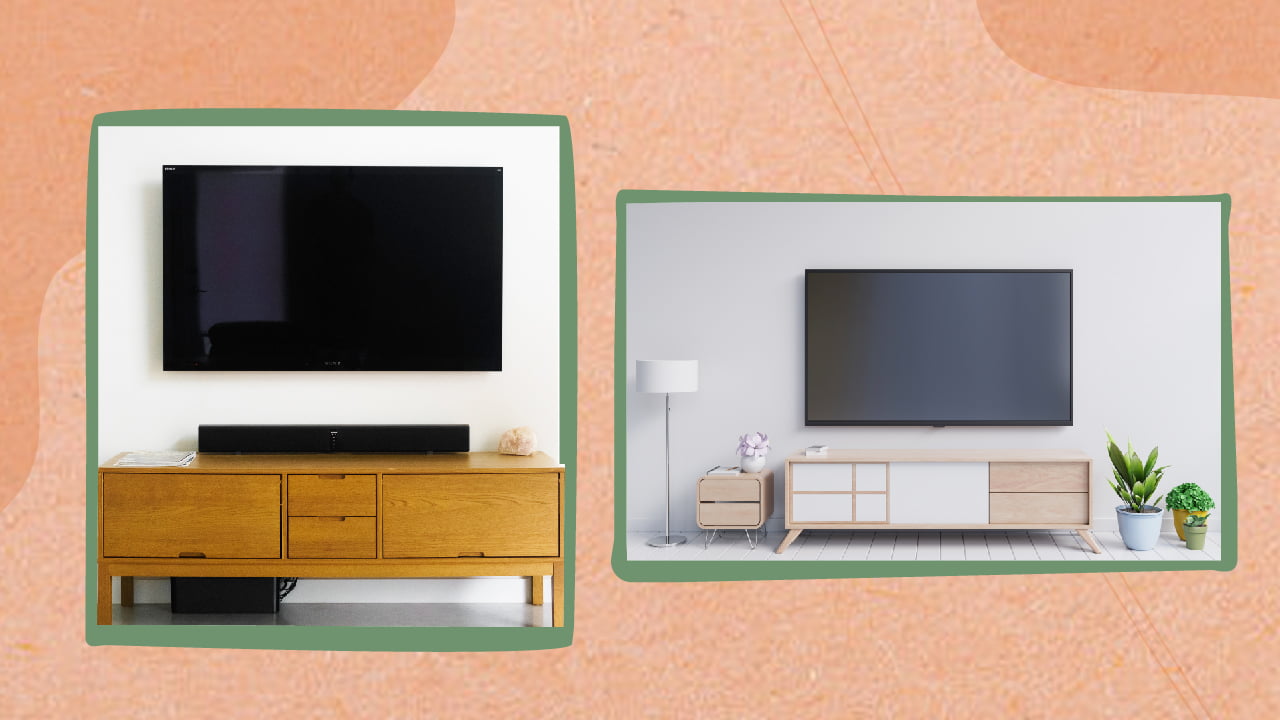


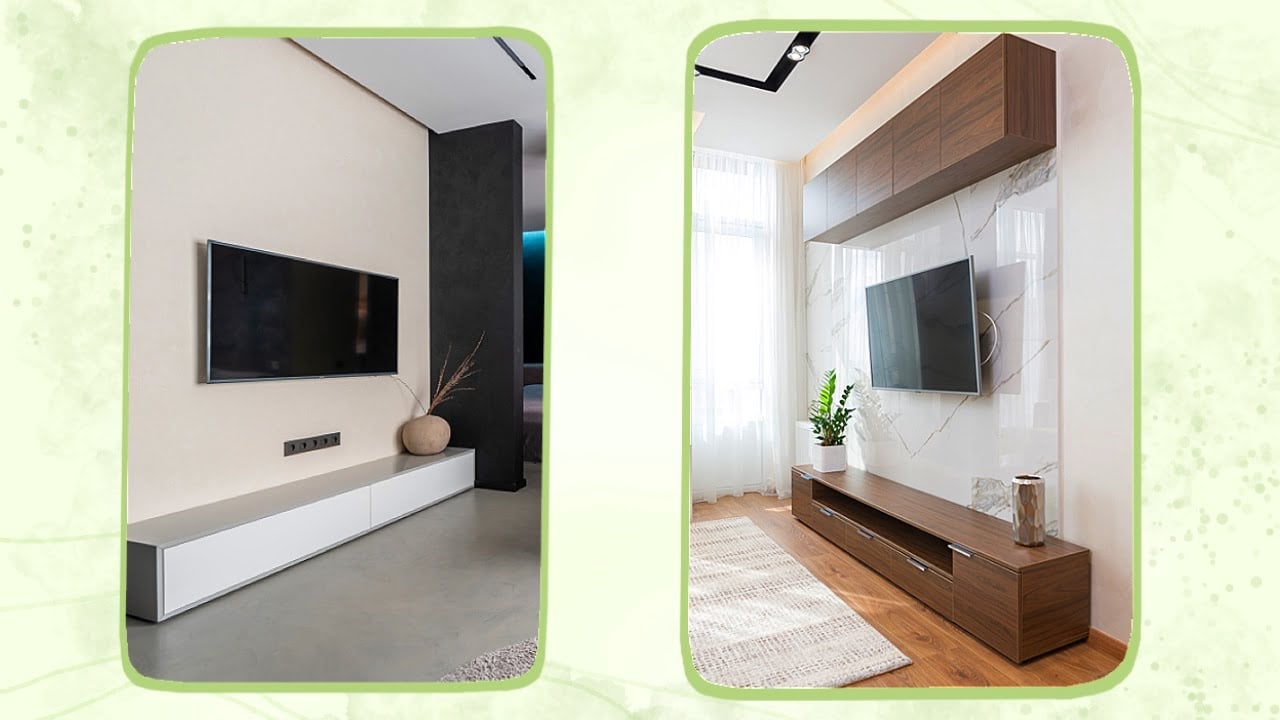


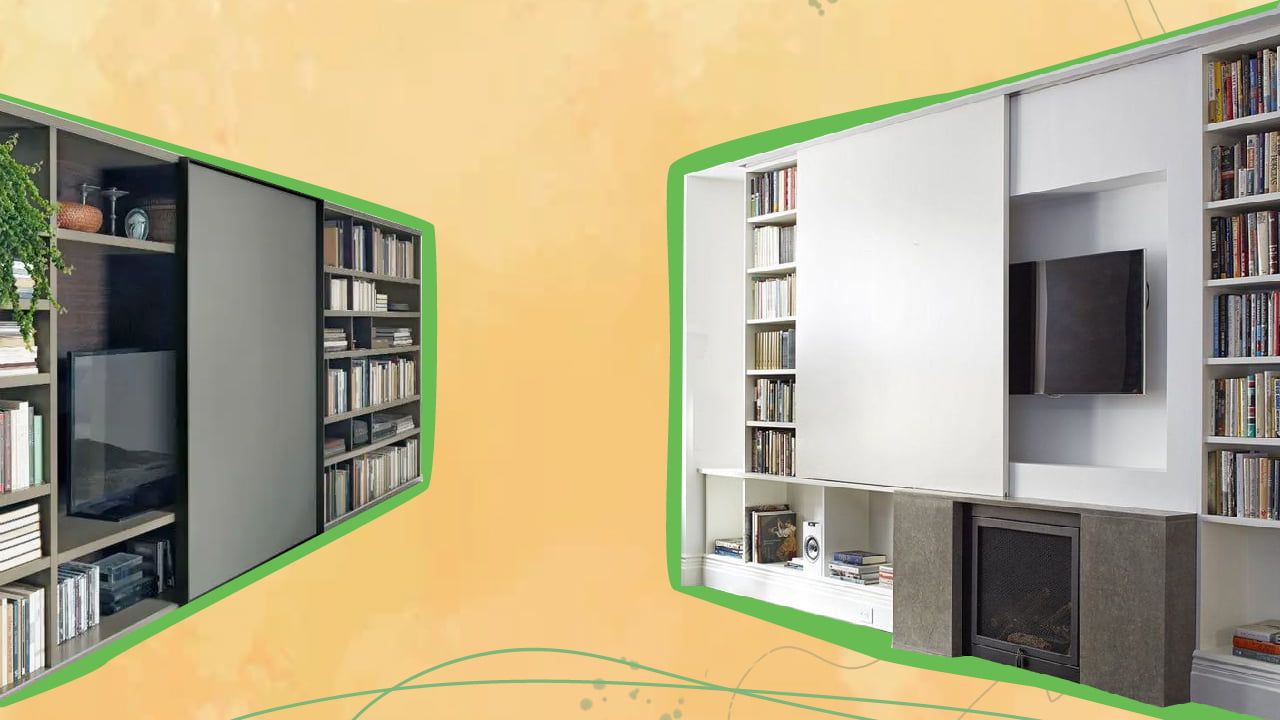


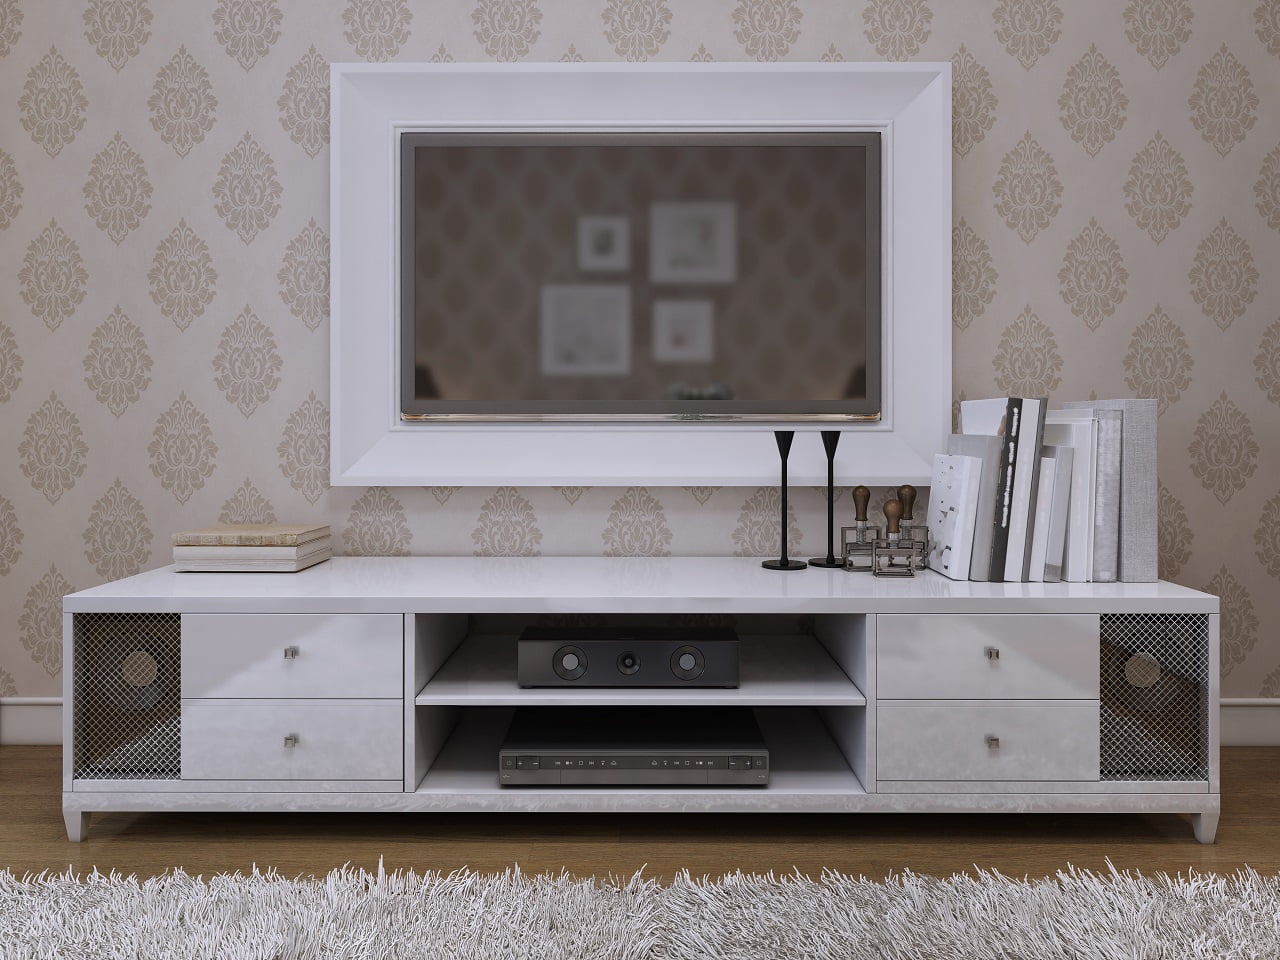
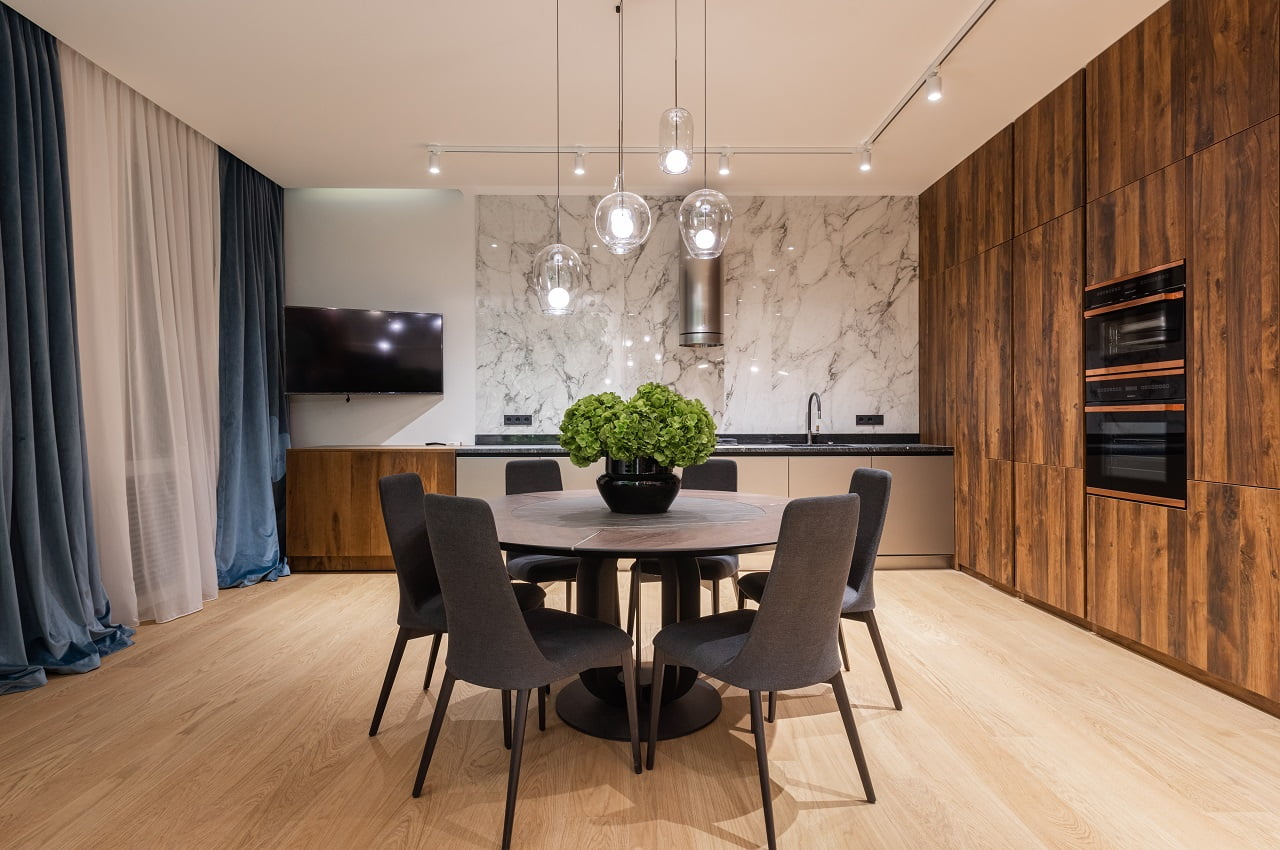

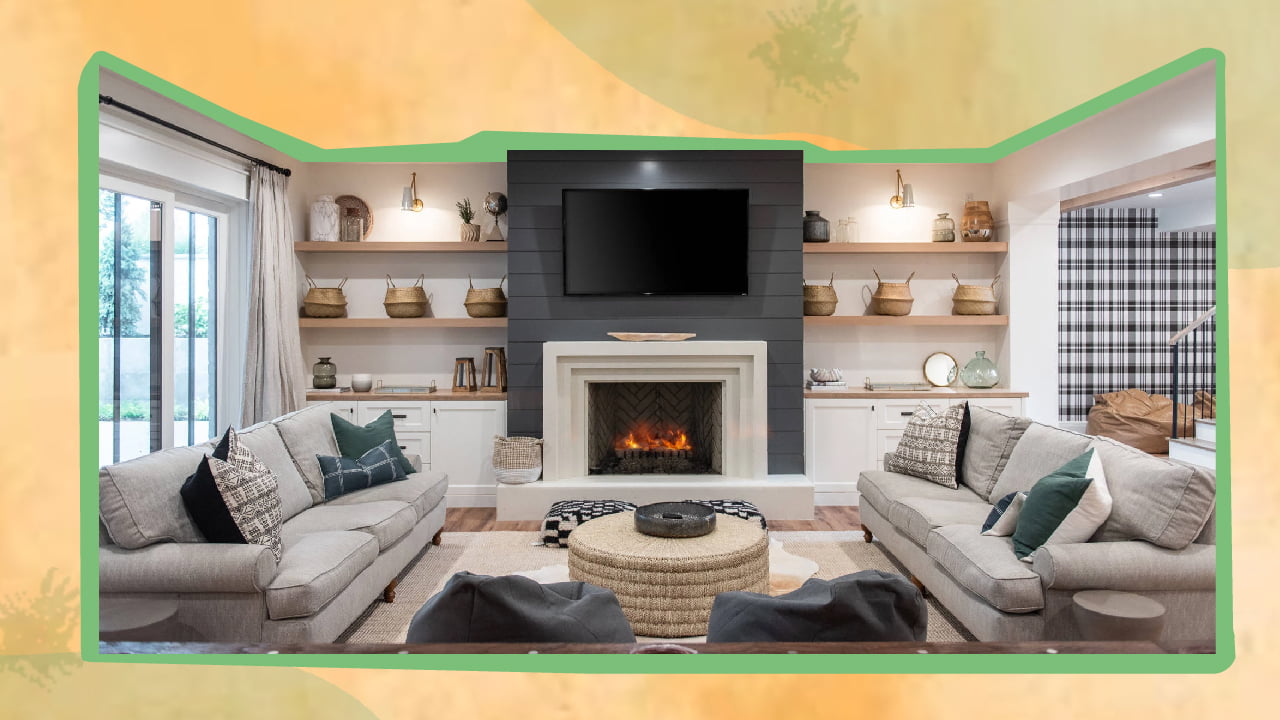
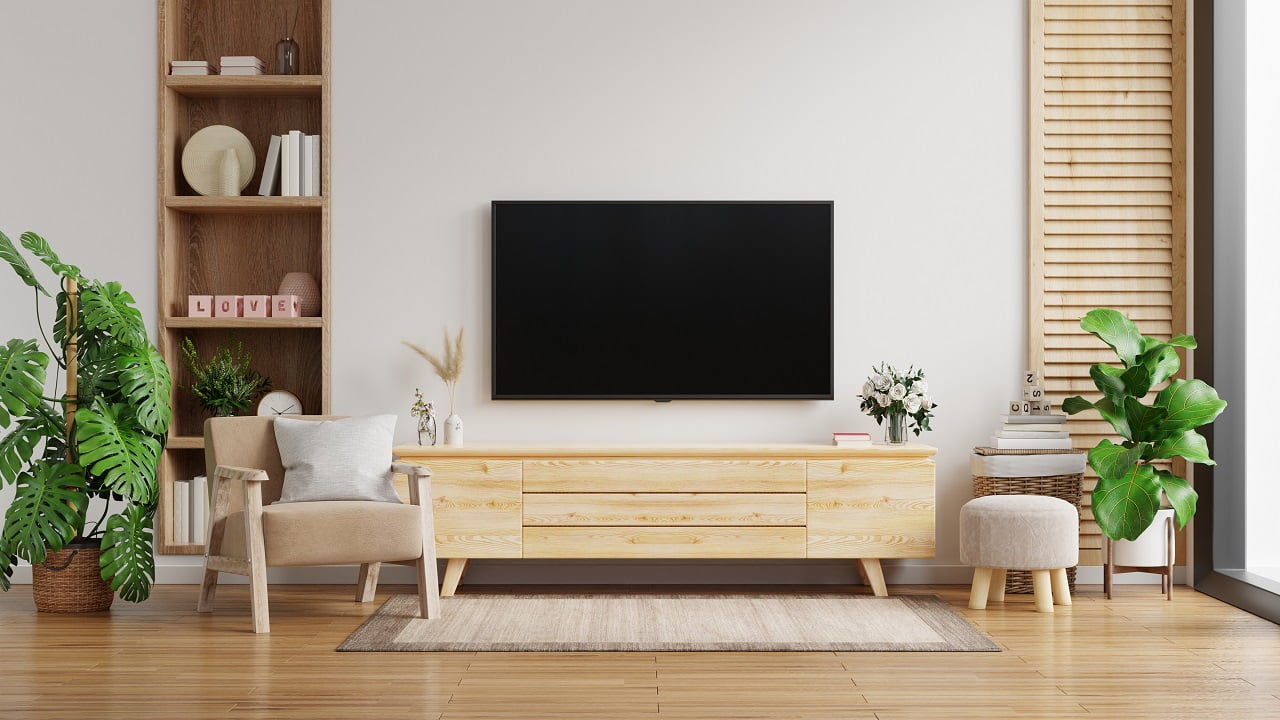
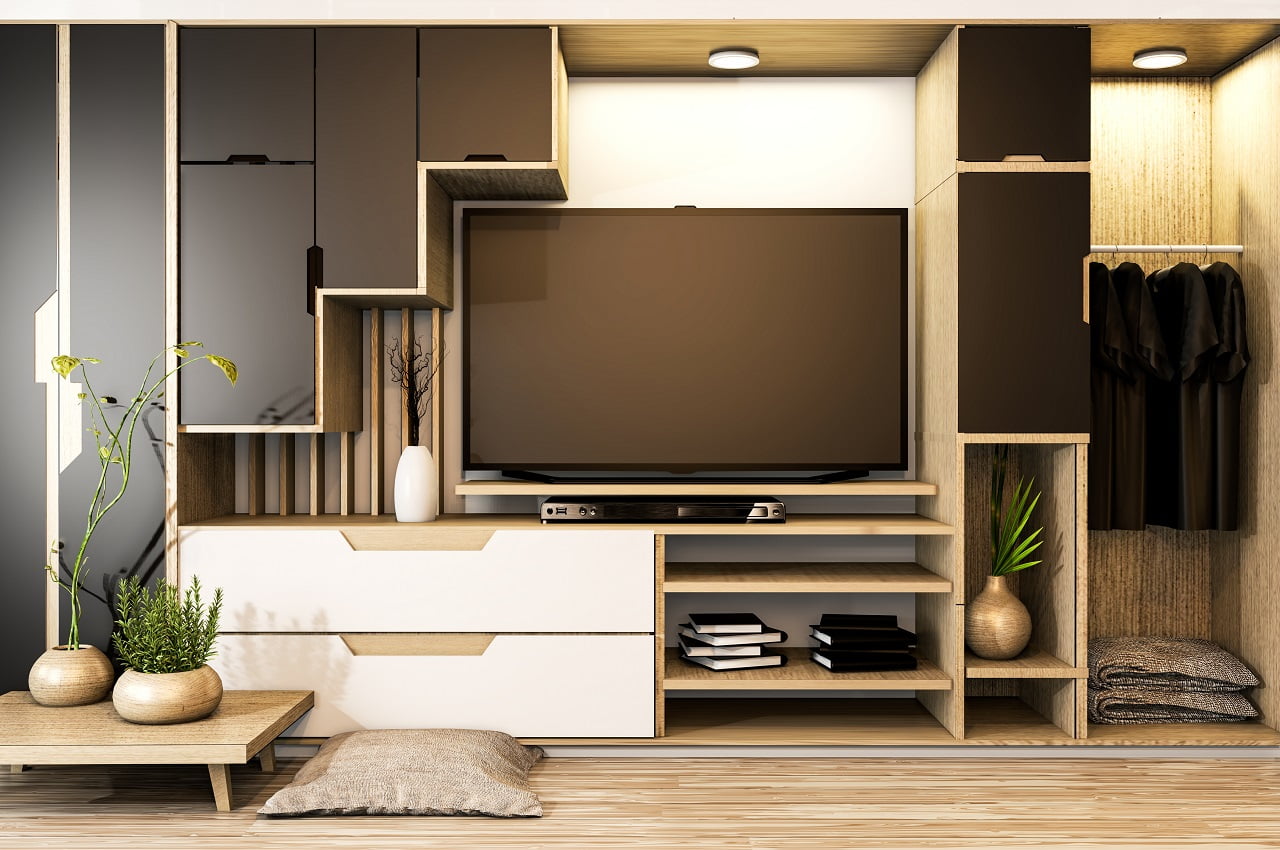


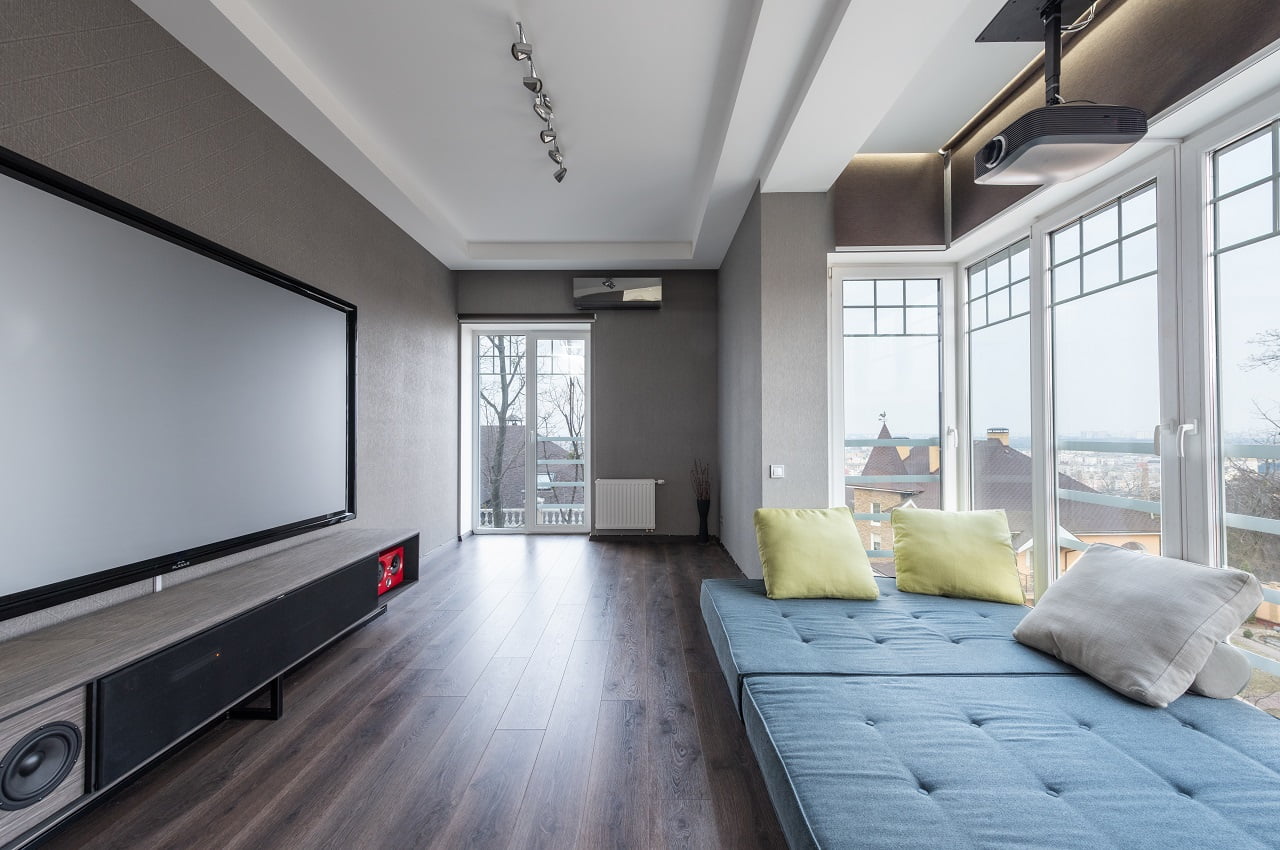
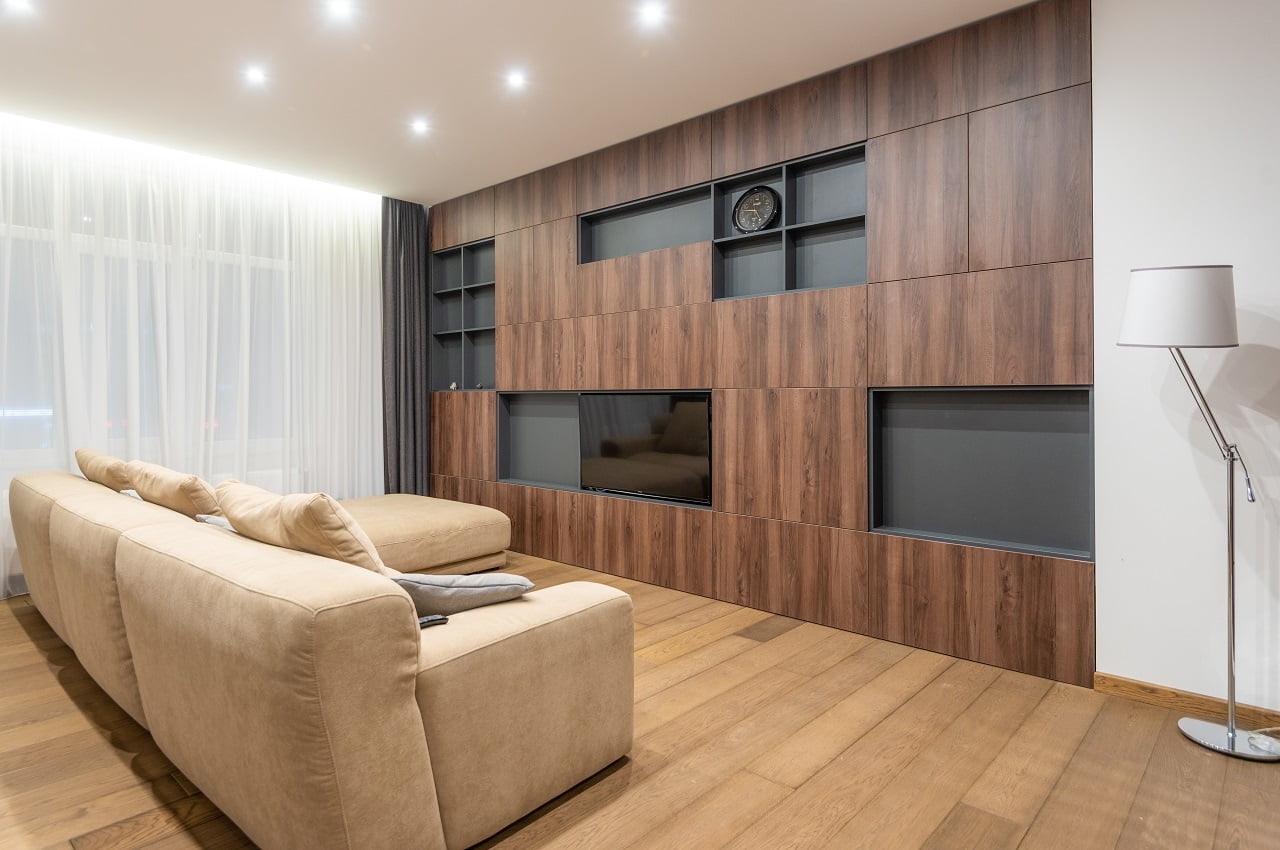

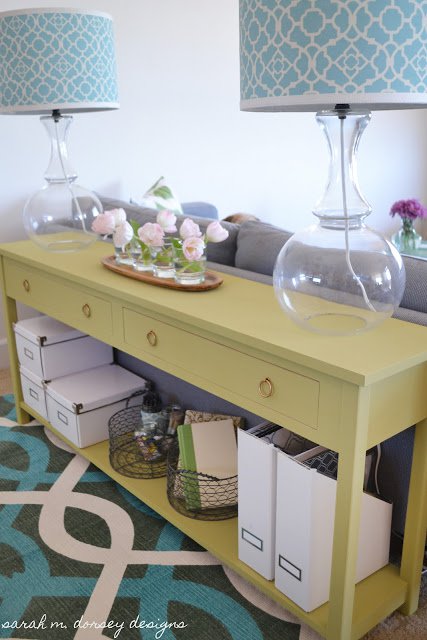
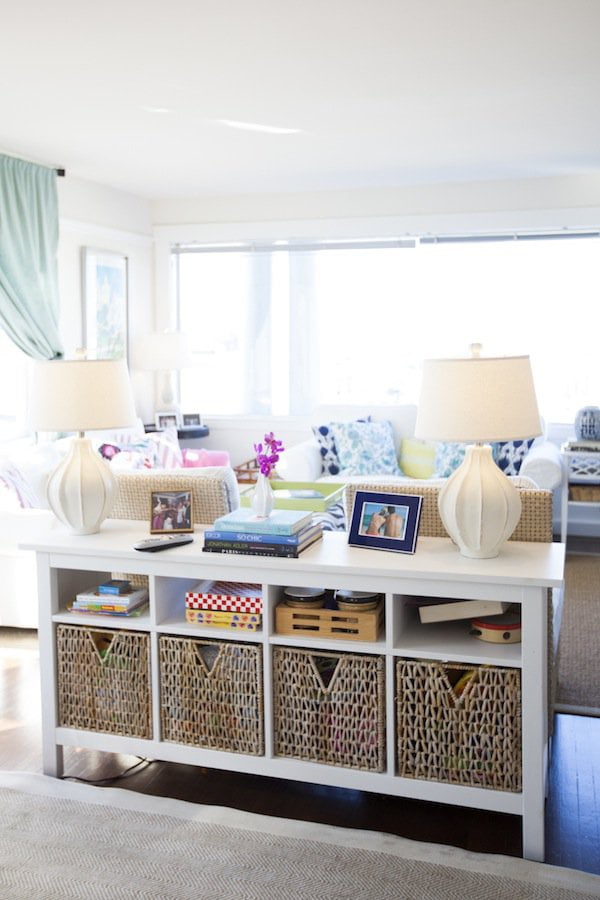
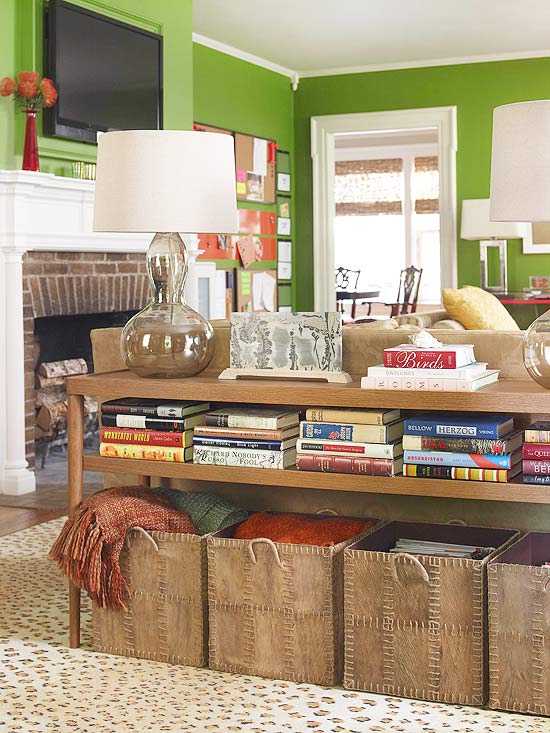
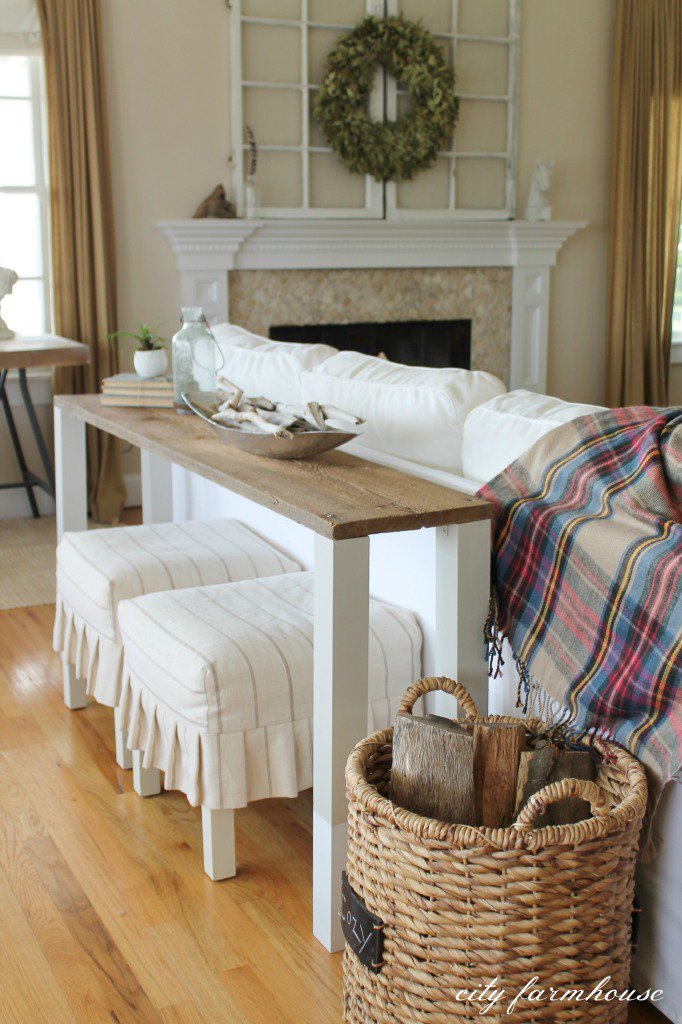
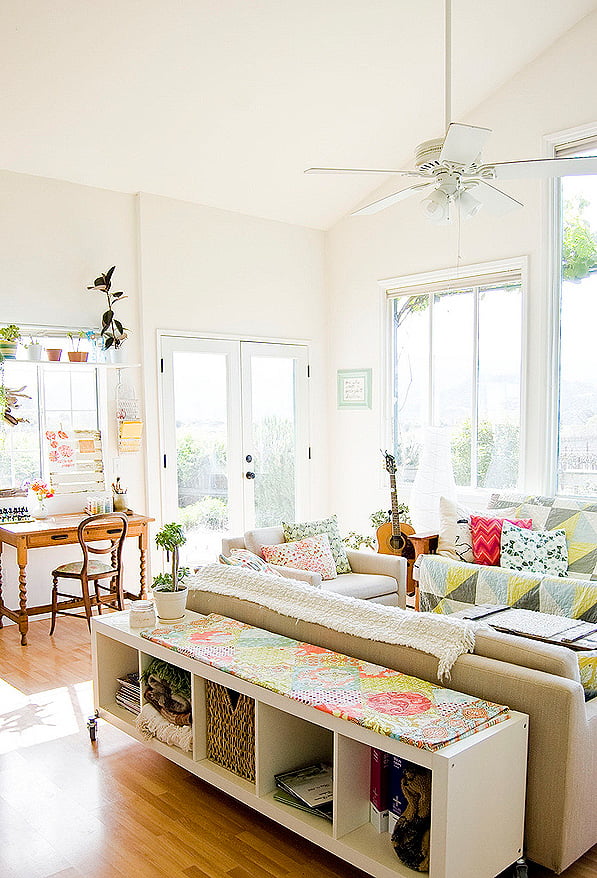
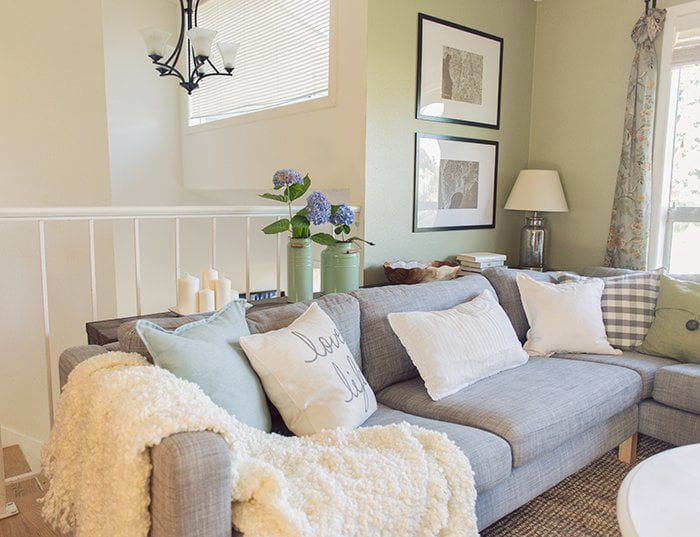
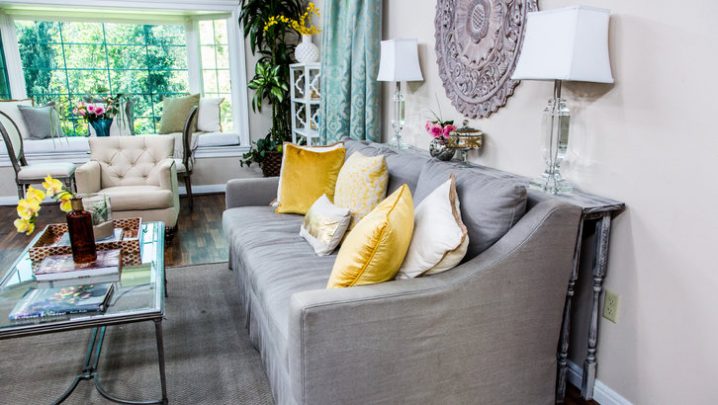
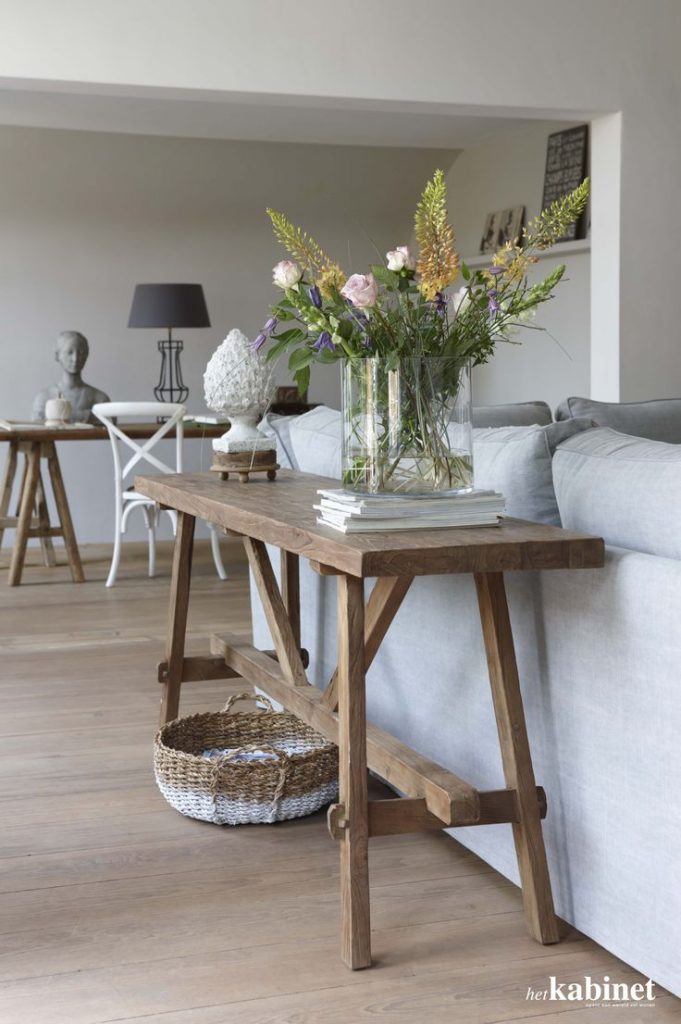

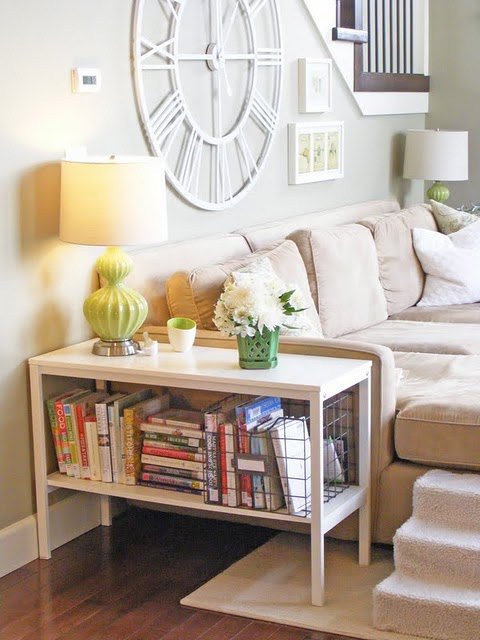
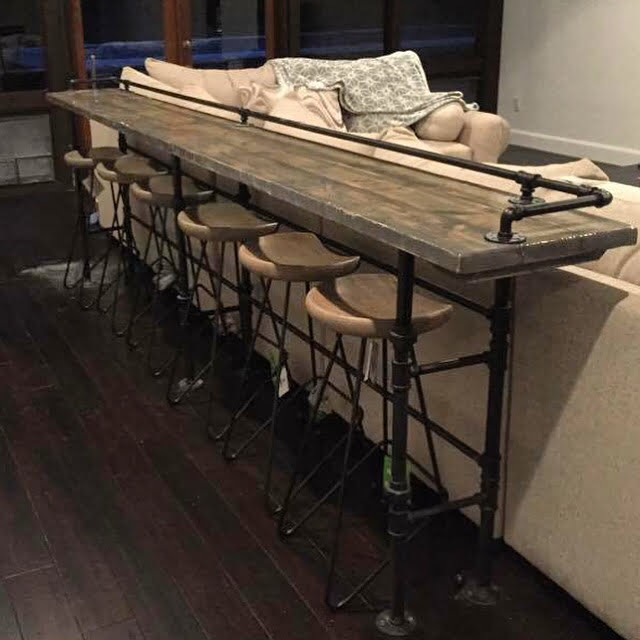
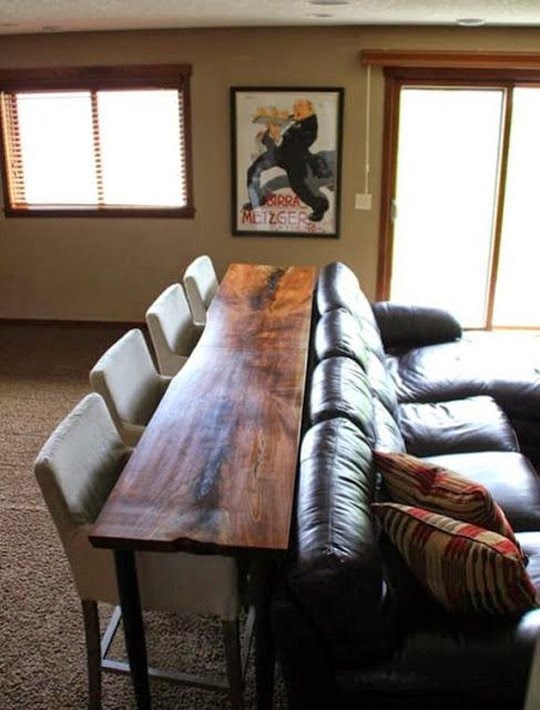
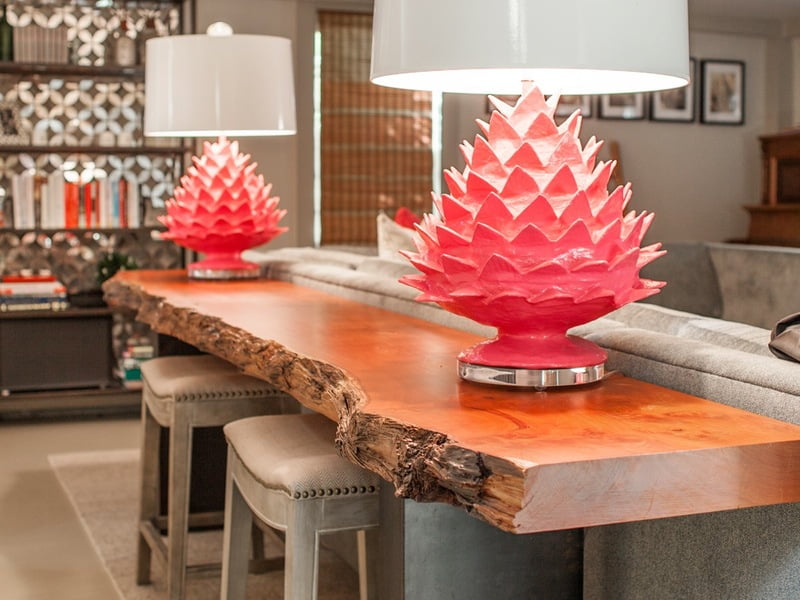
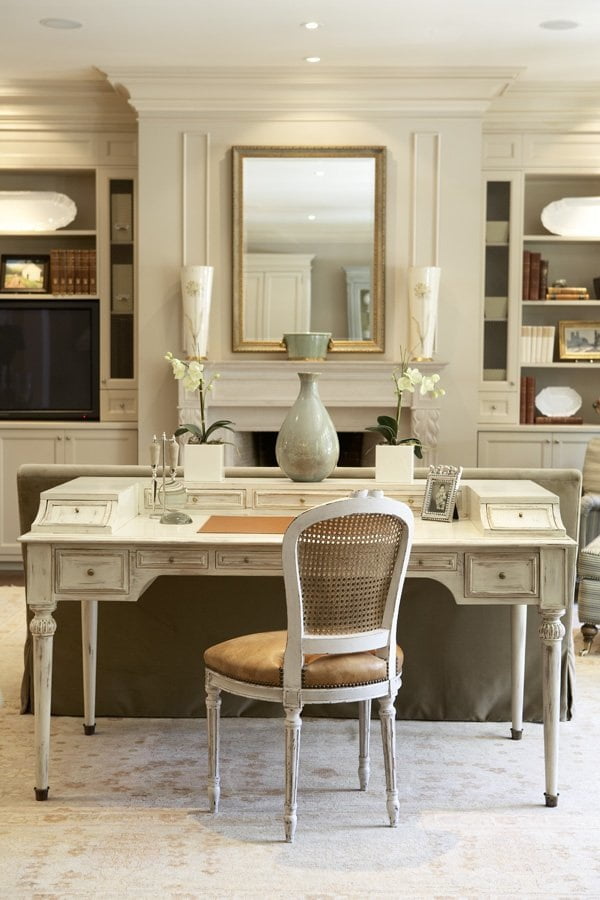
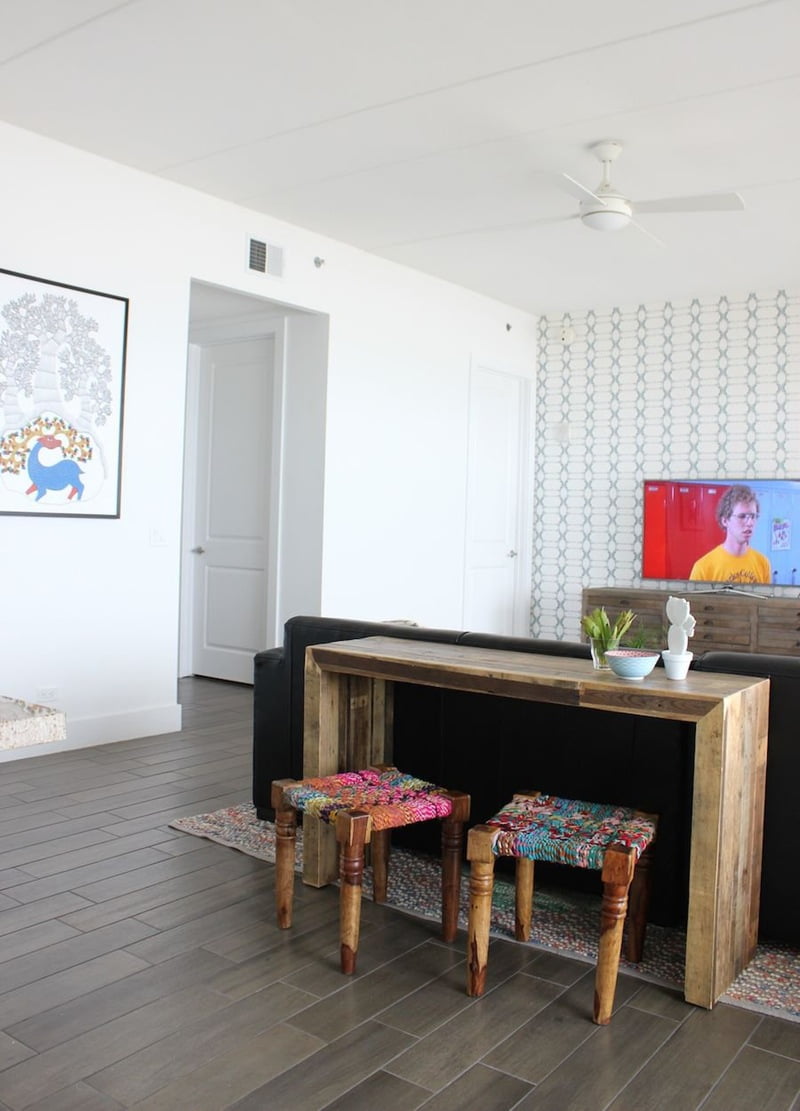
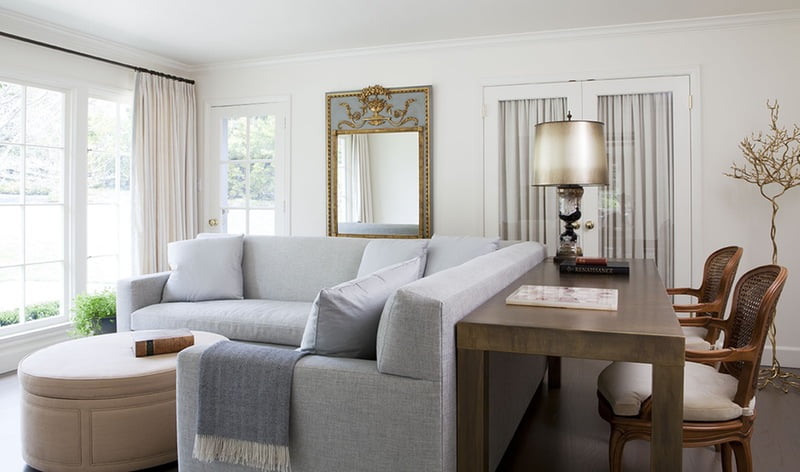
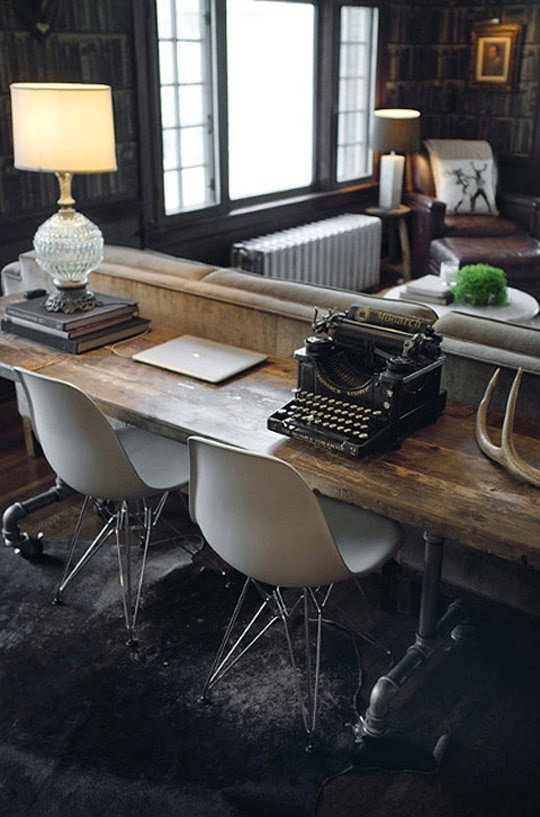

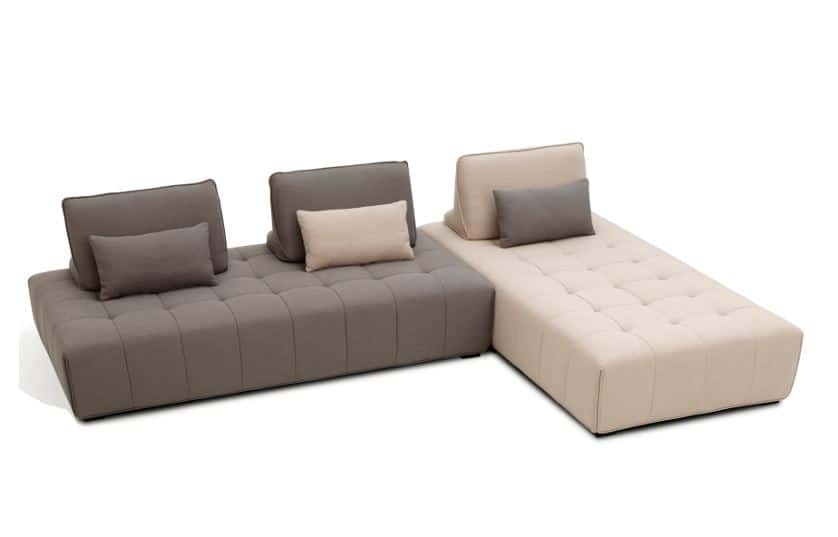
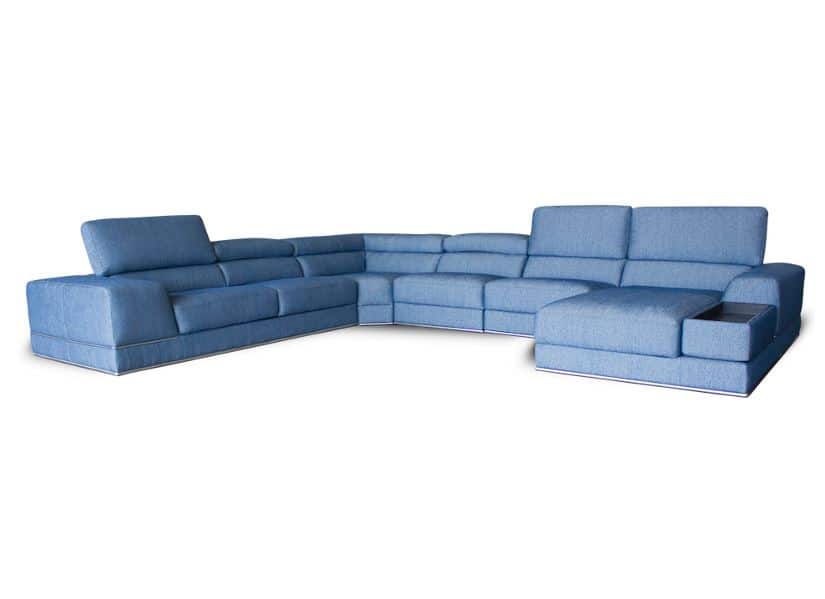
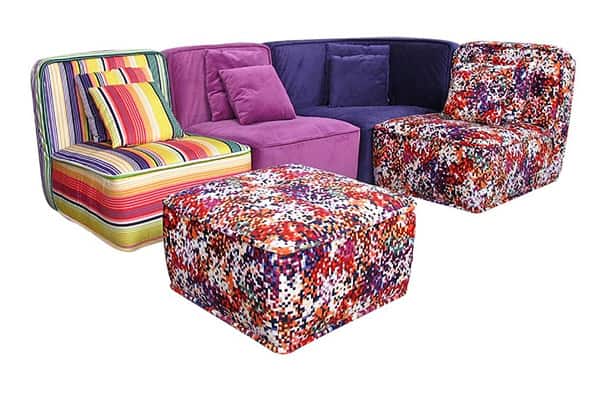
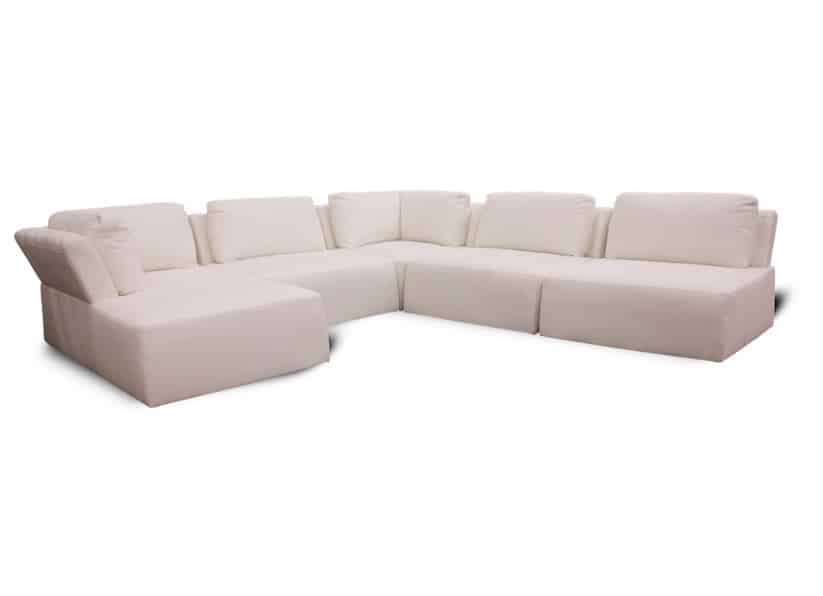
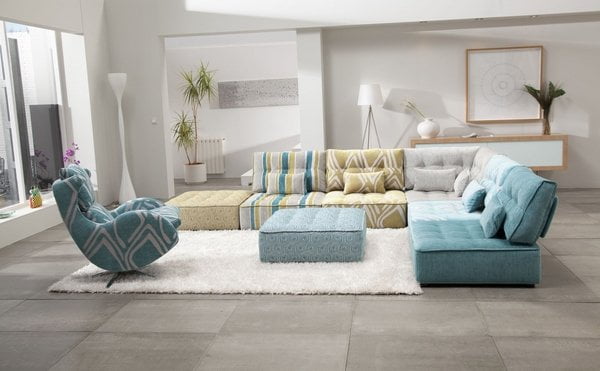
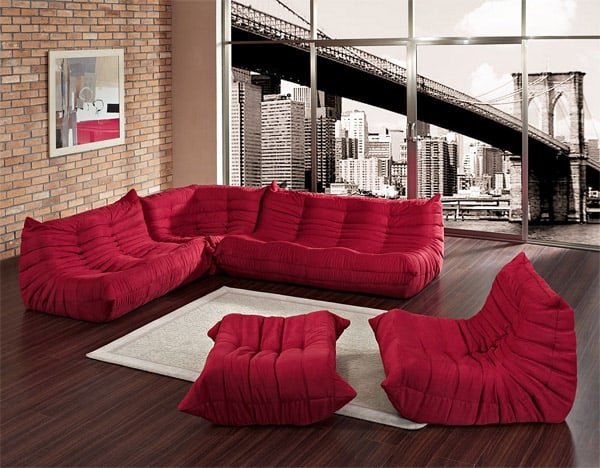
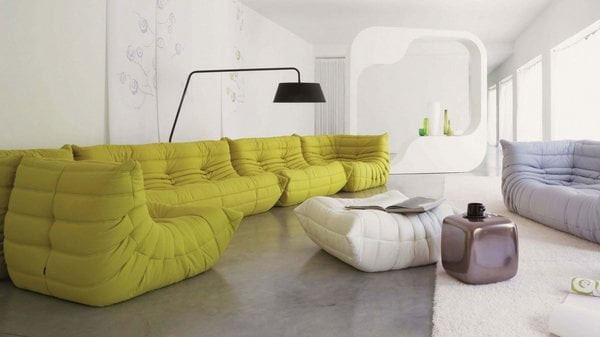
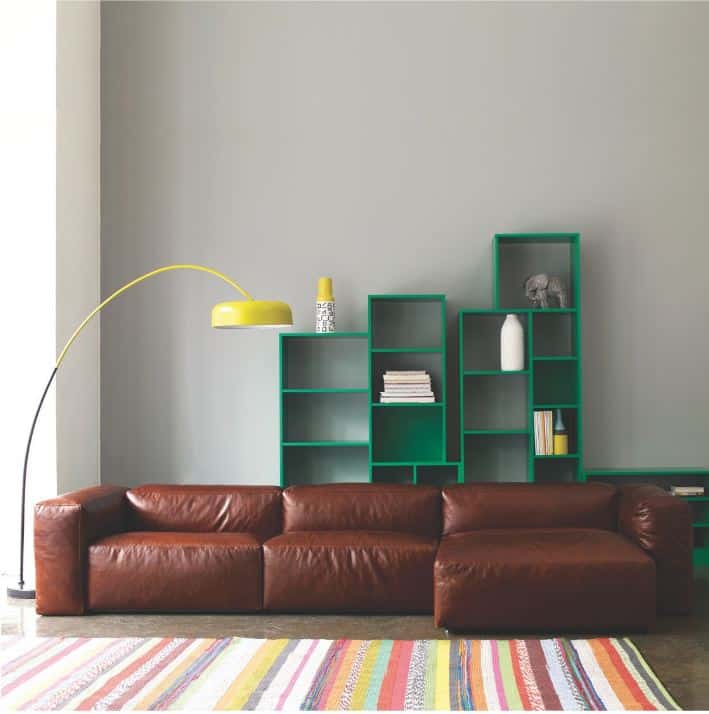

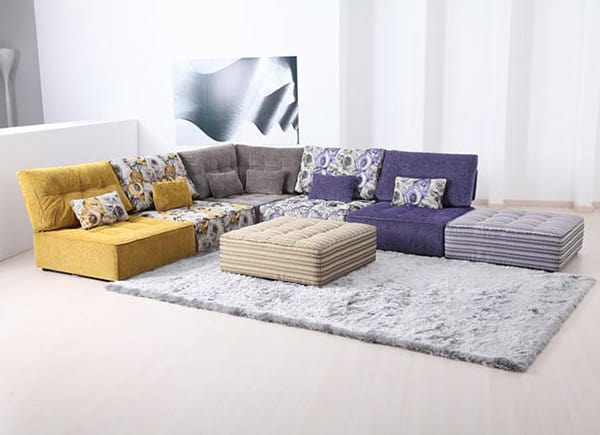
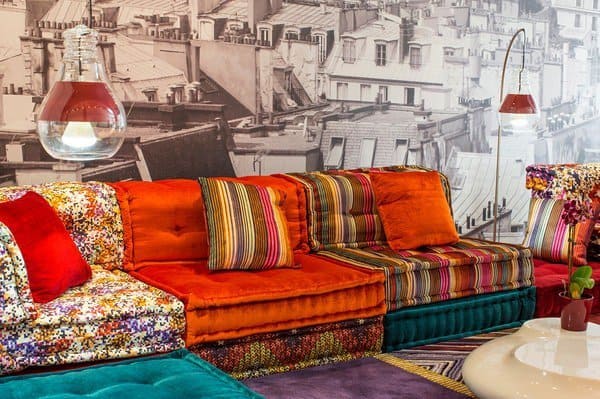
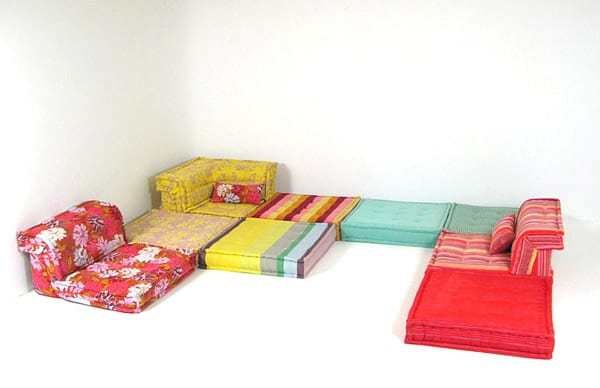
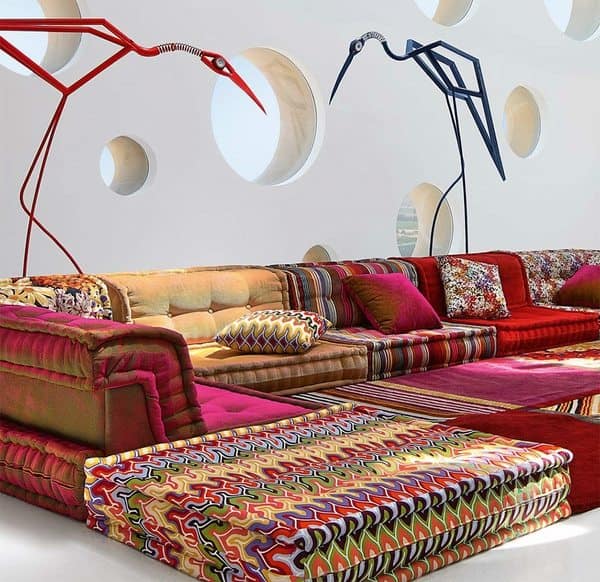
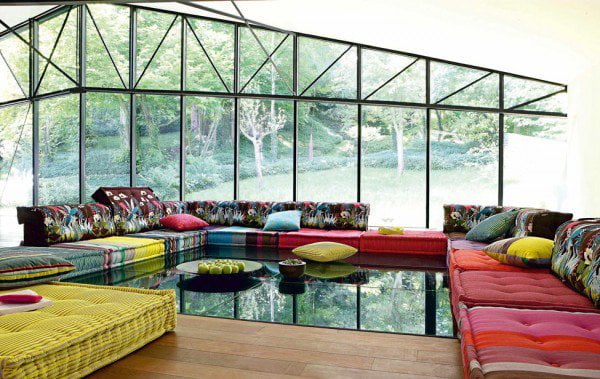
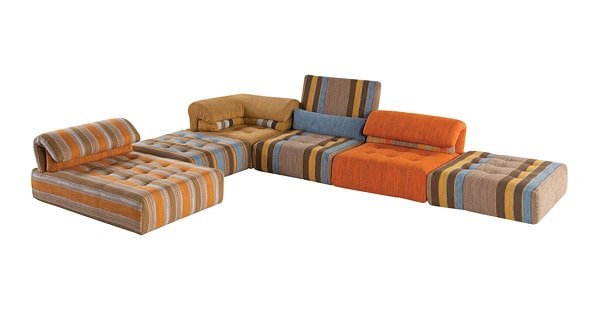
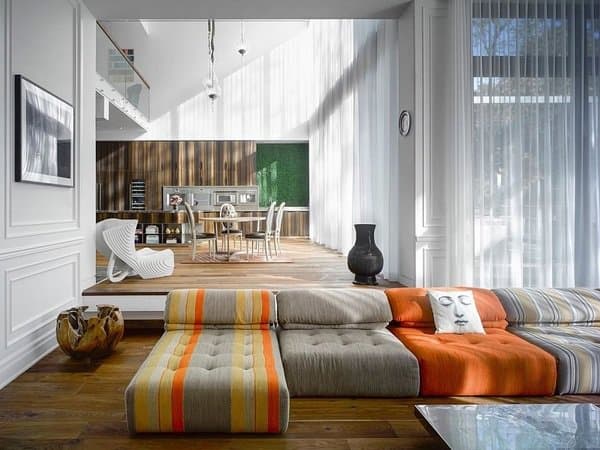
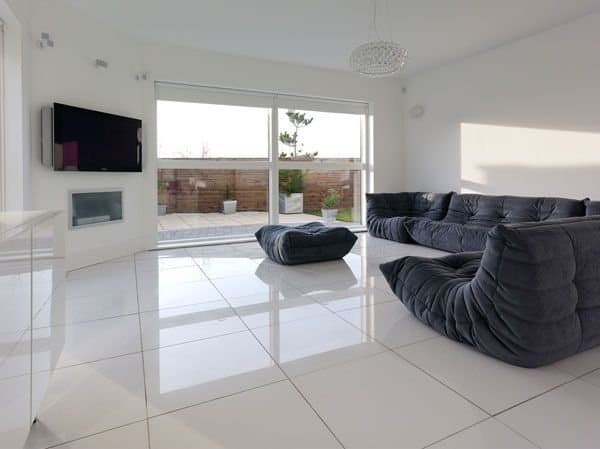
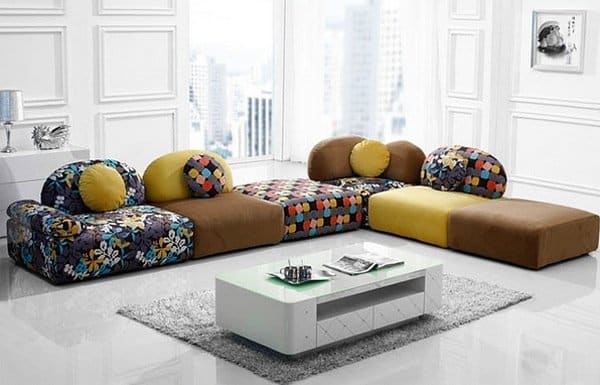

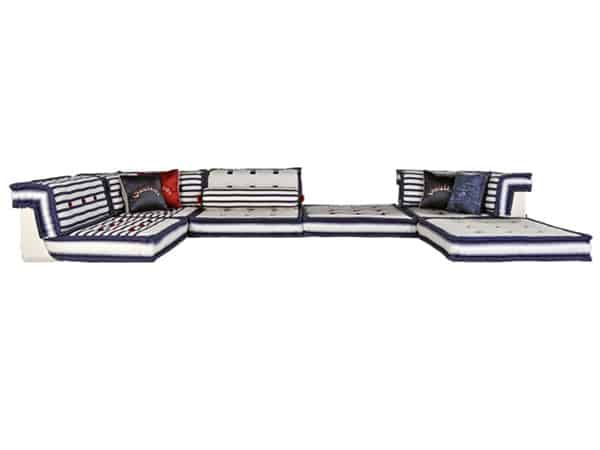
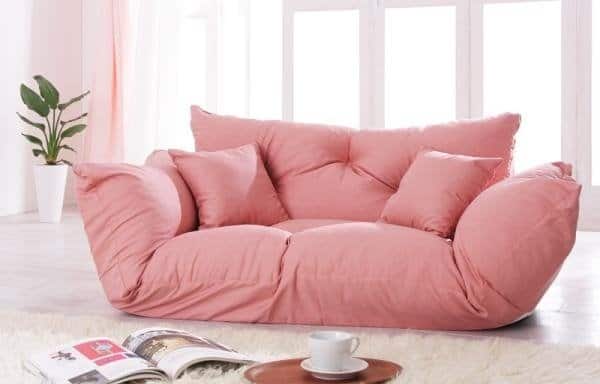
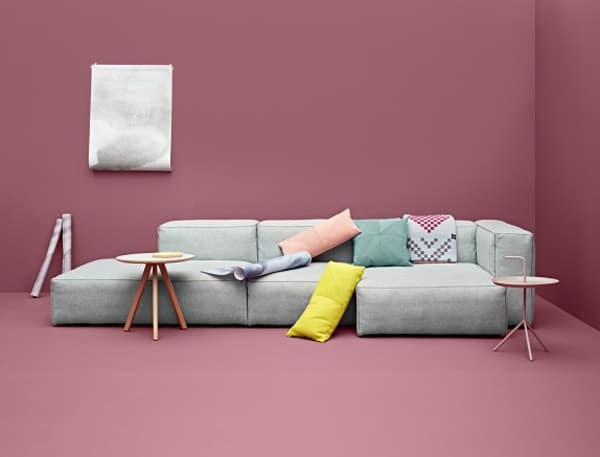

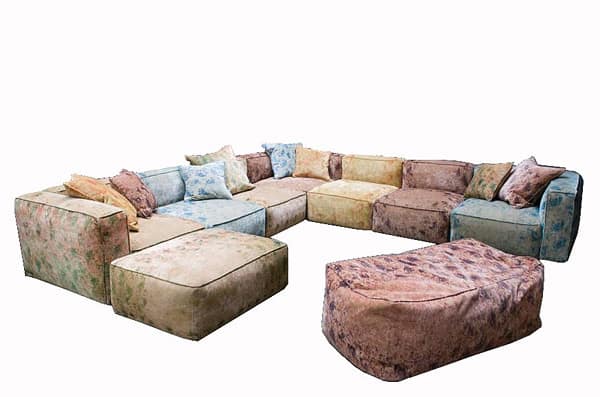
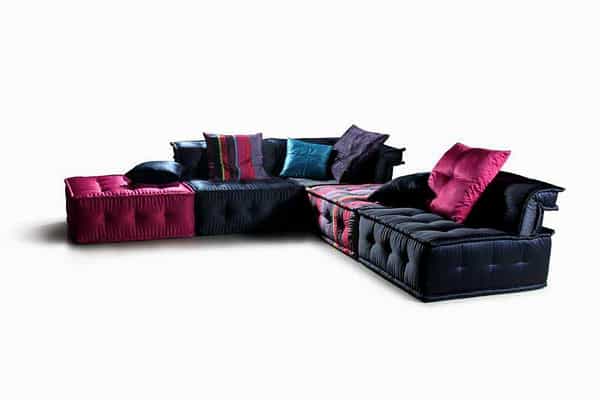
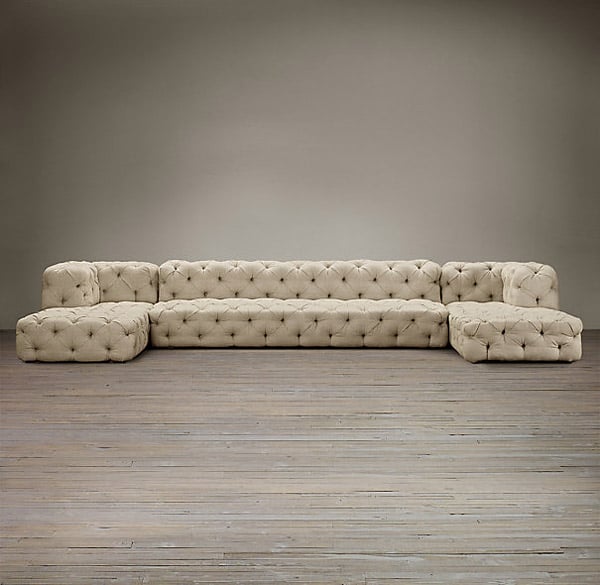 <
<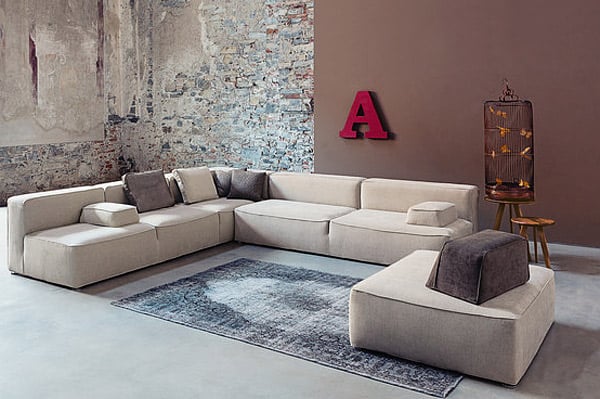
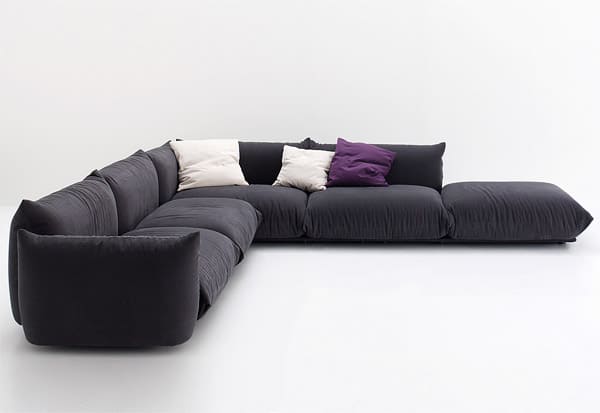
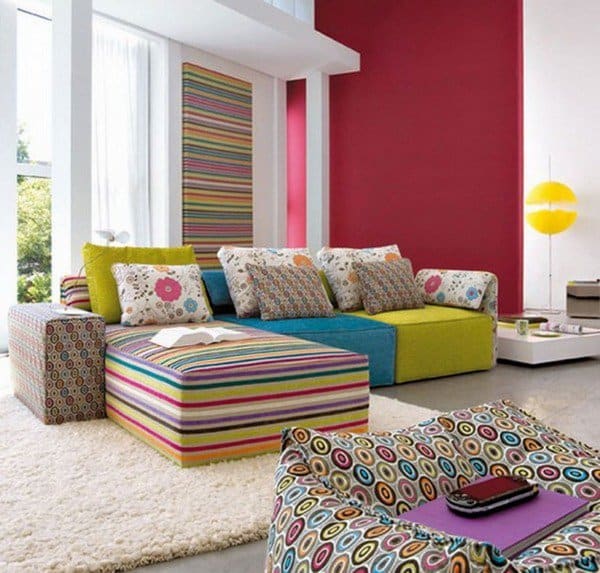
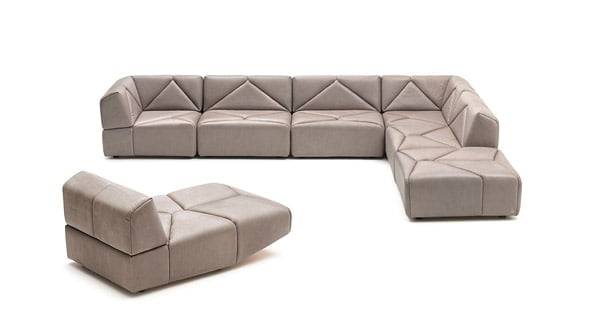
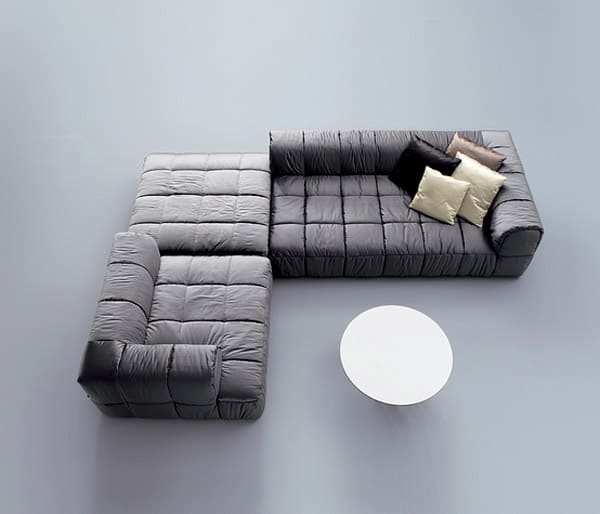
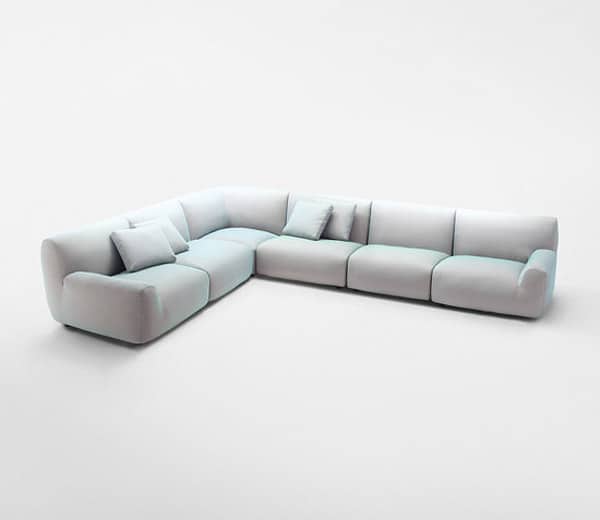
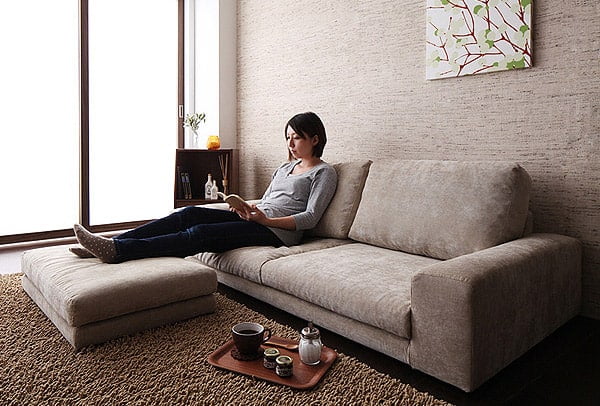

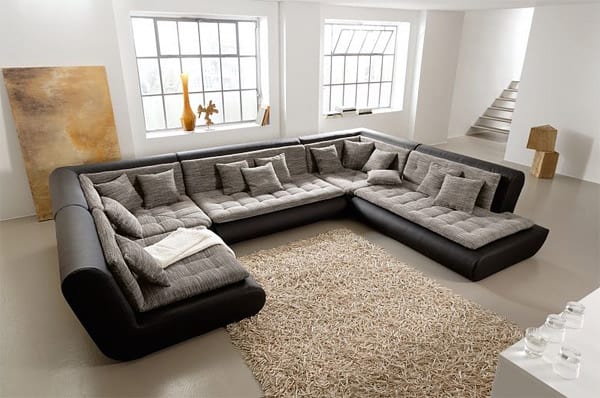
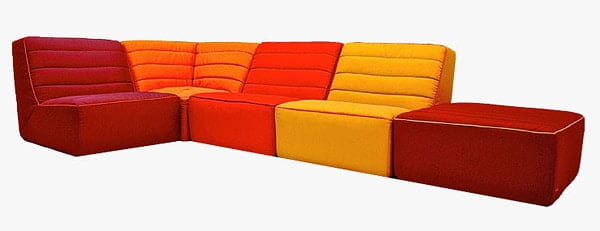
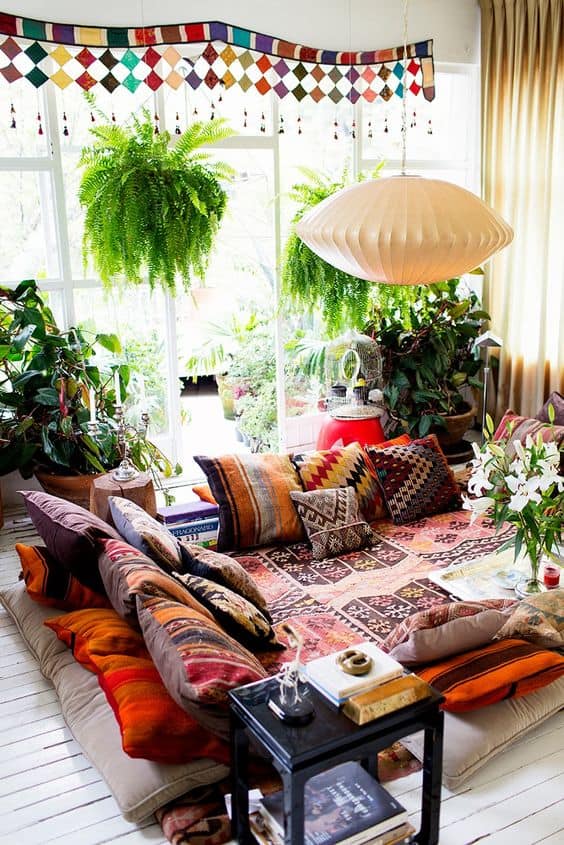


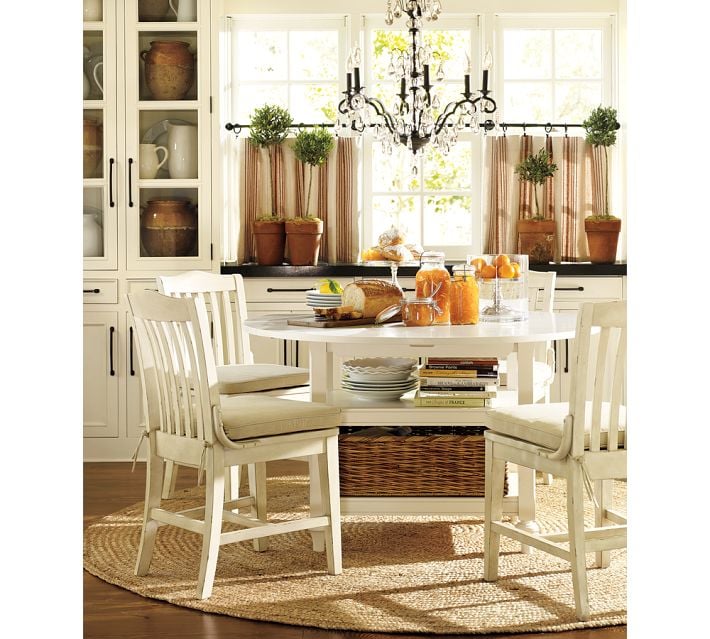
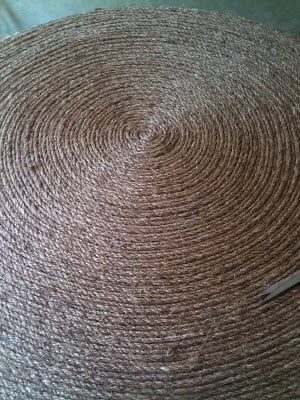
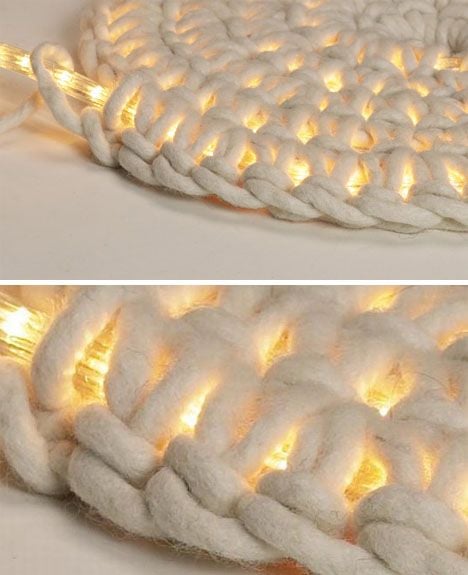
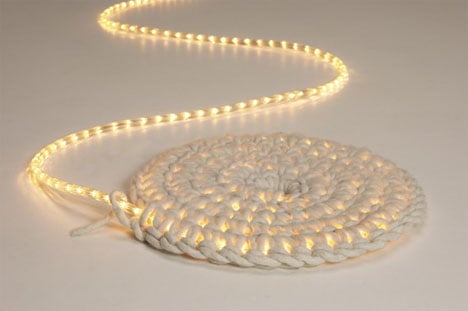
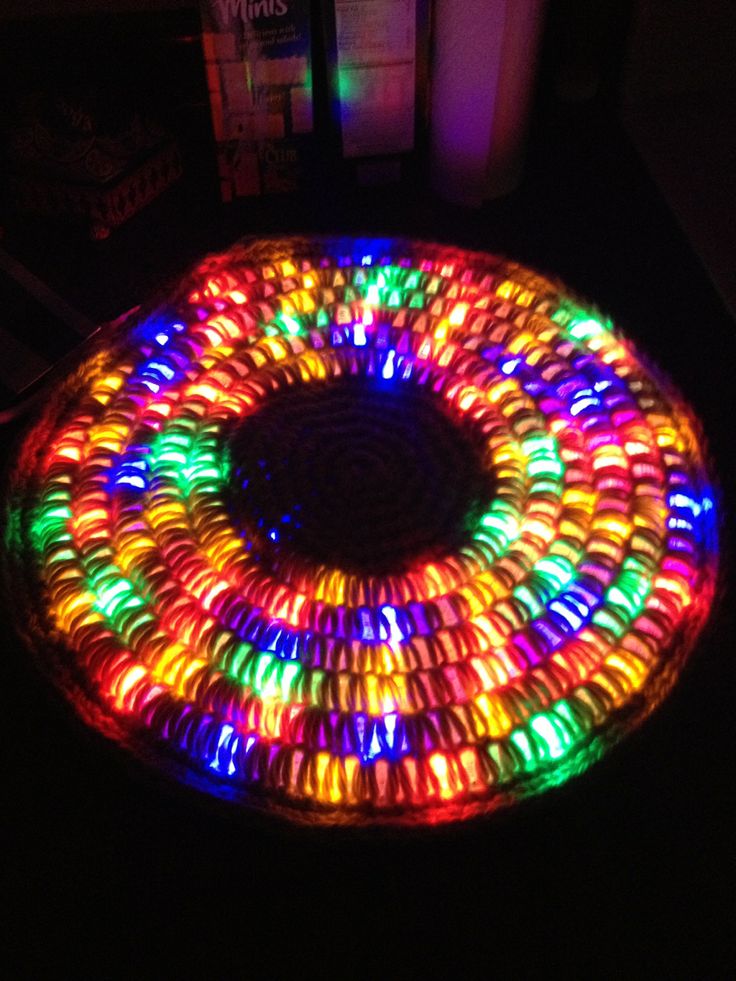

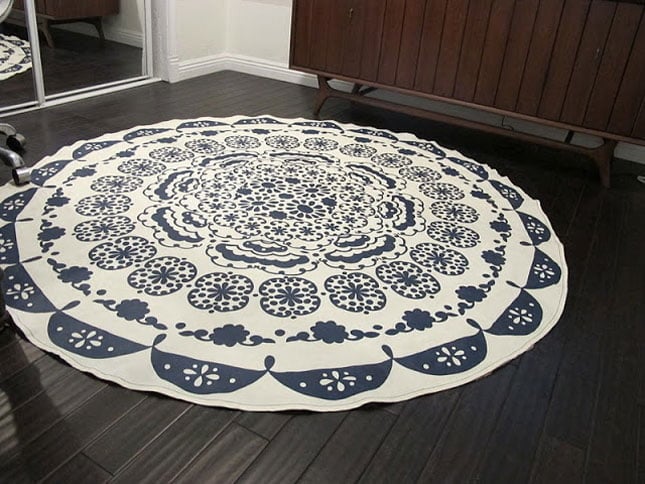
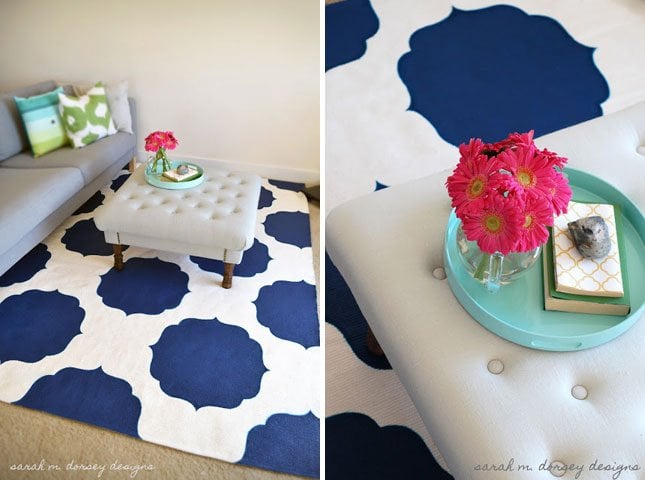
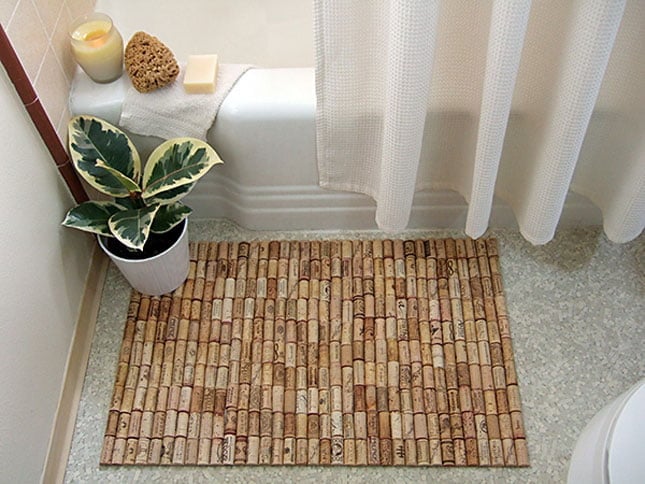


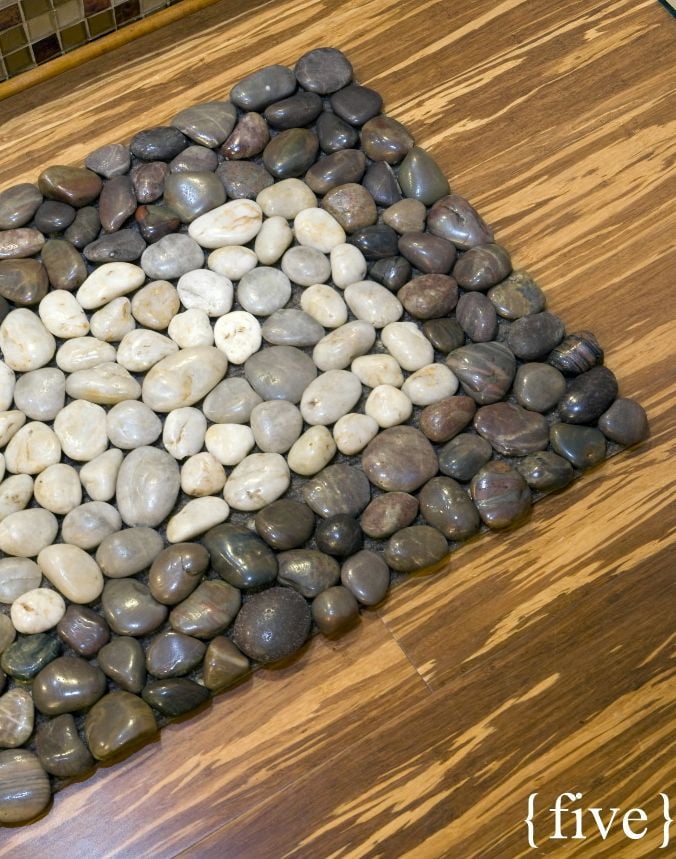

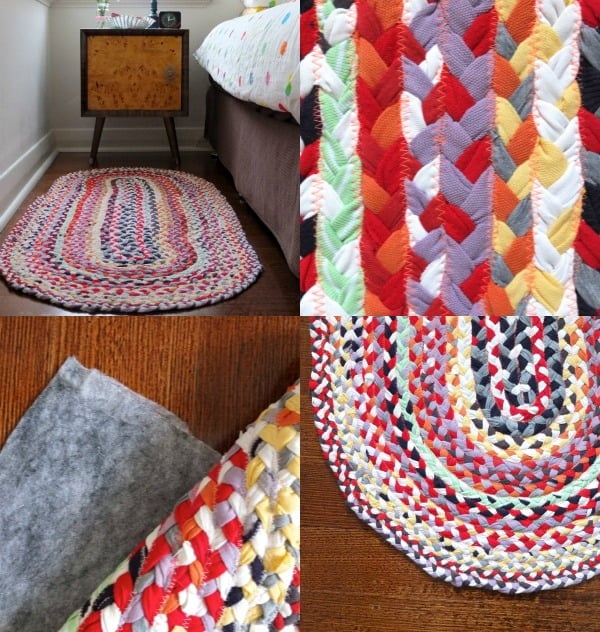


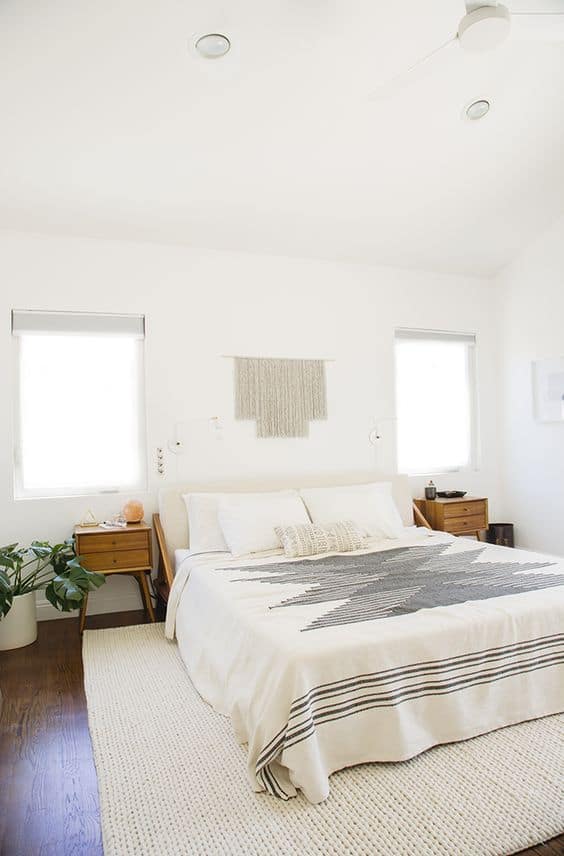
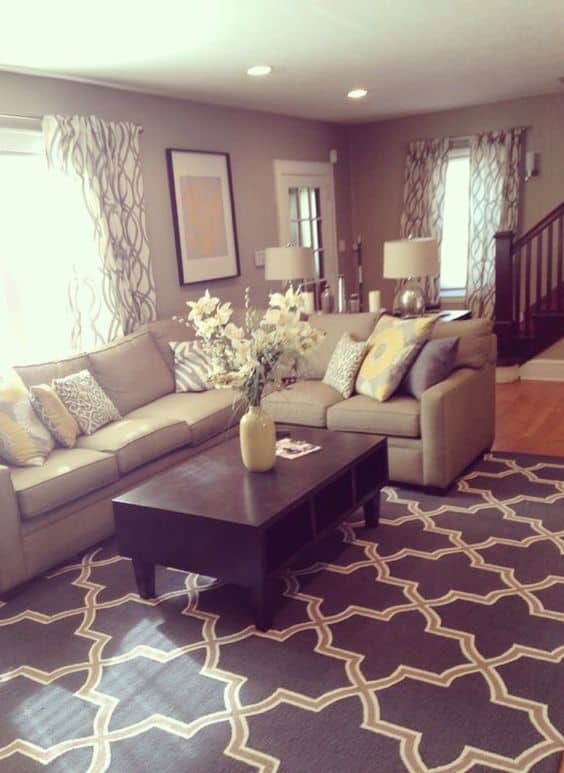
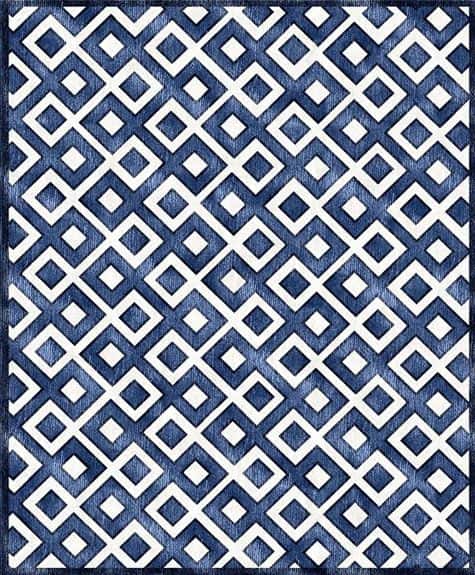
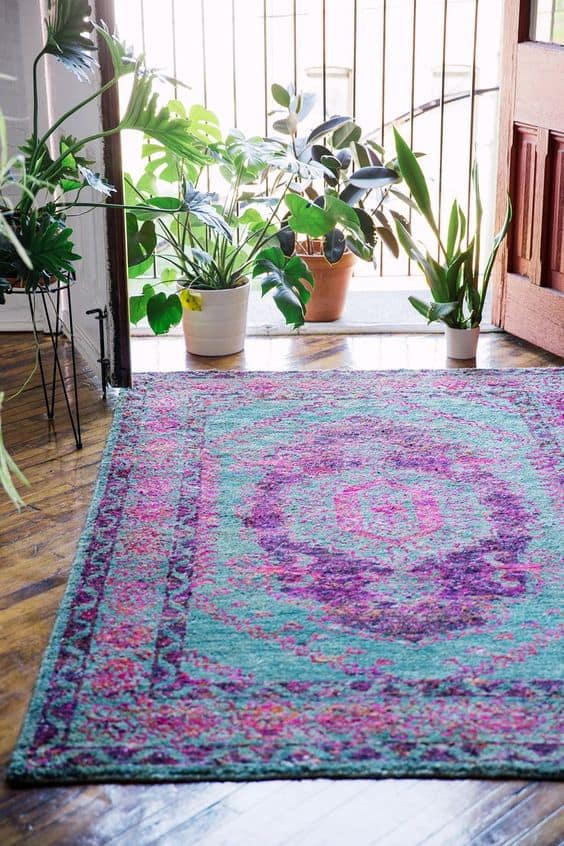
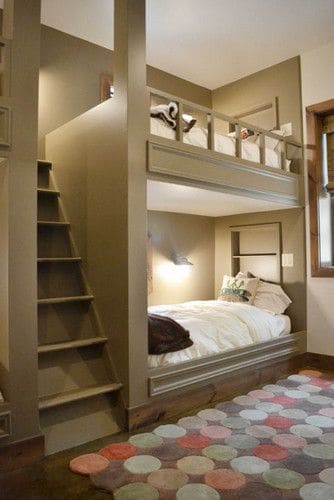
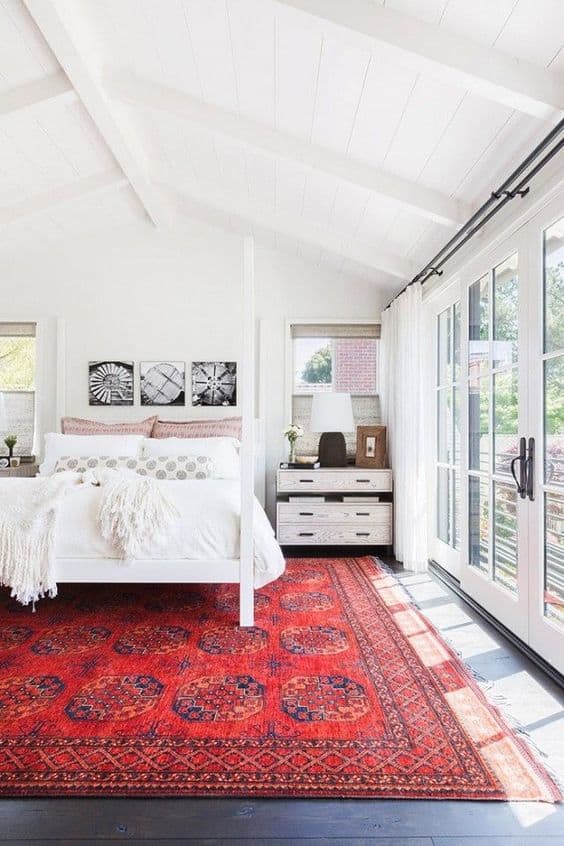
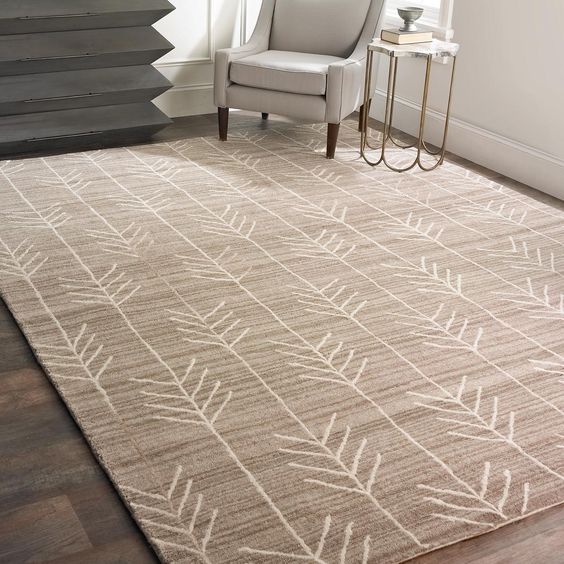

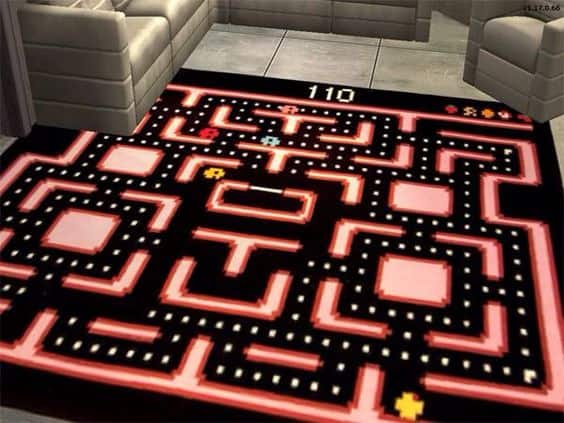

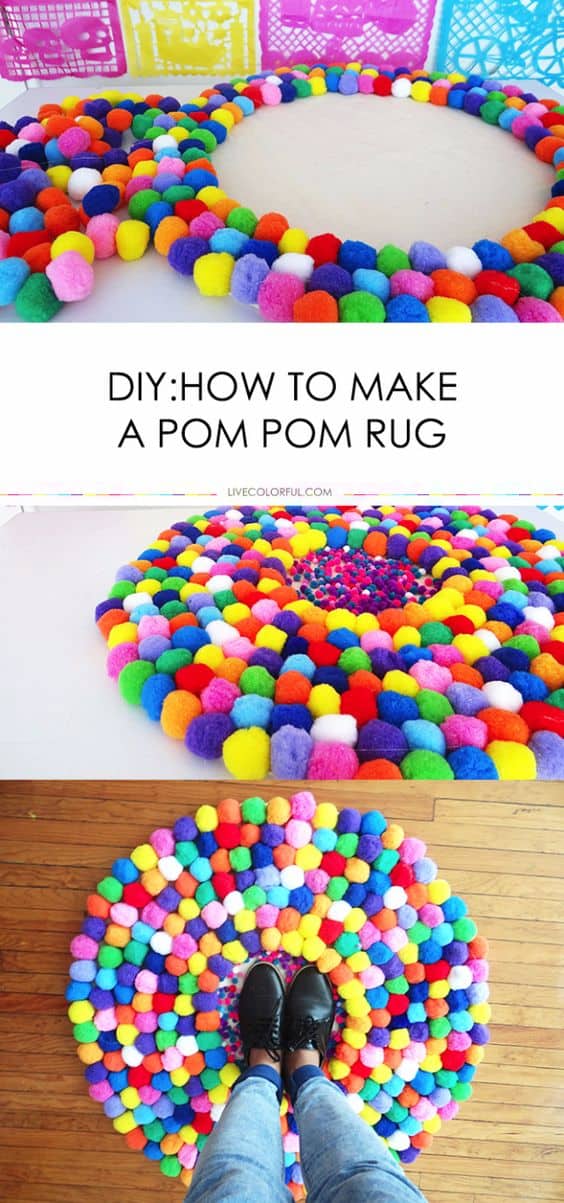
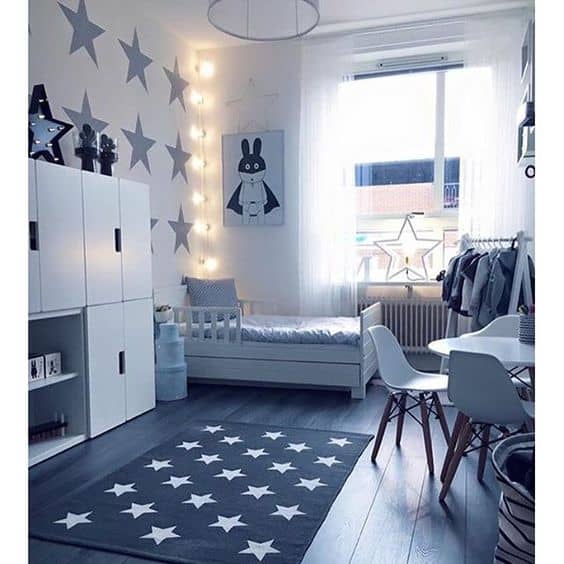
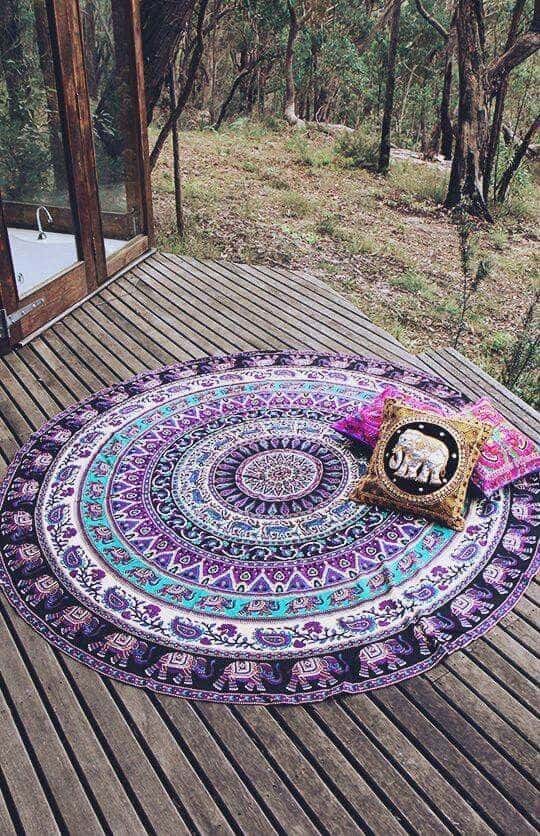

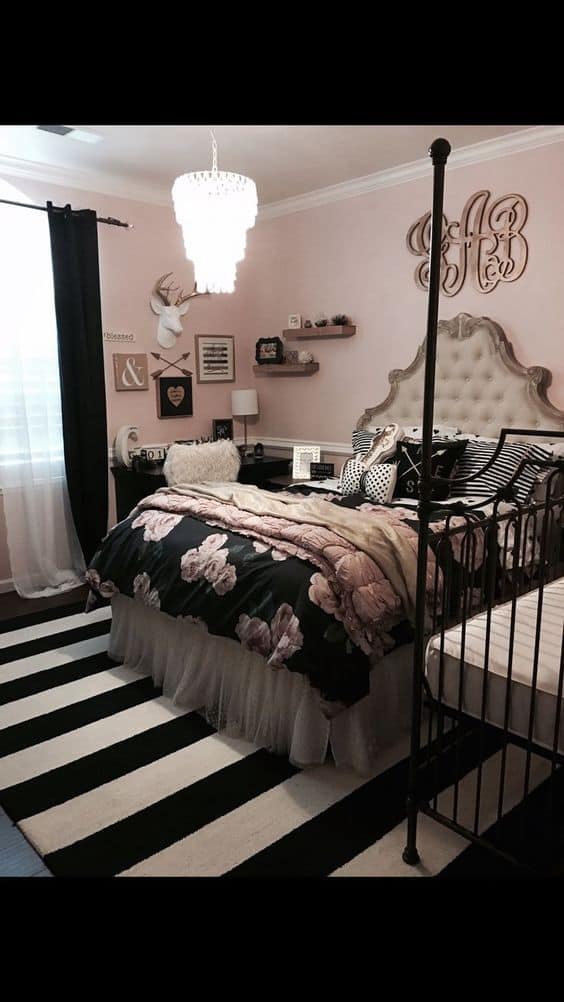
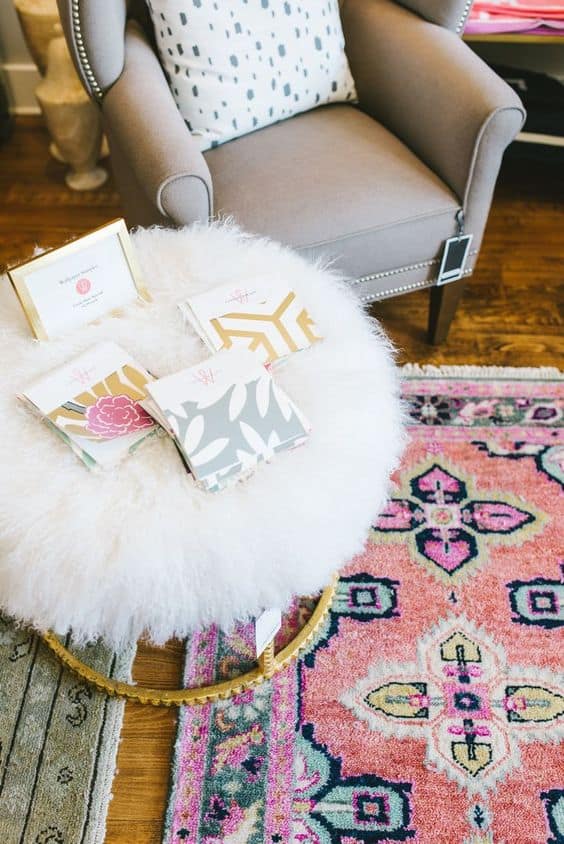


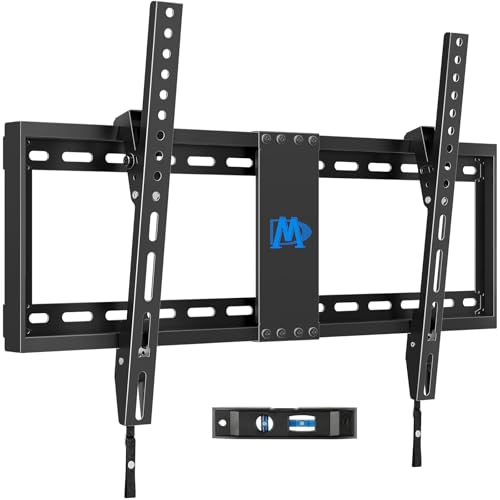


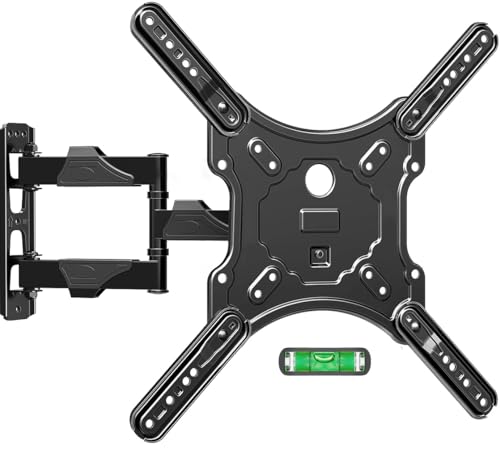
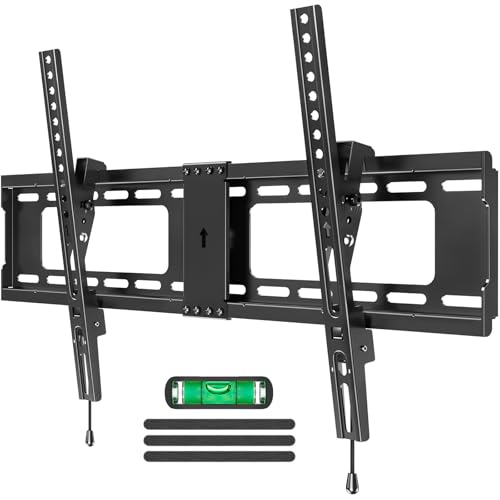


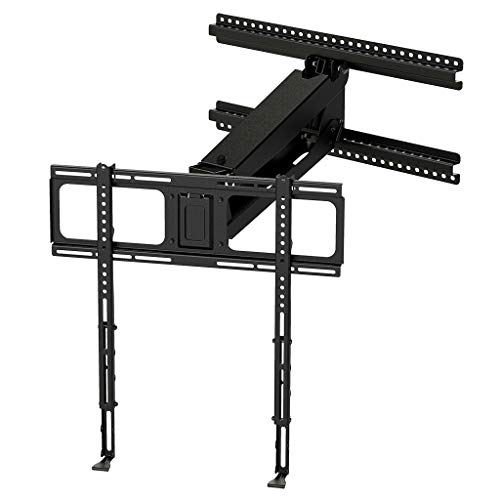
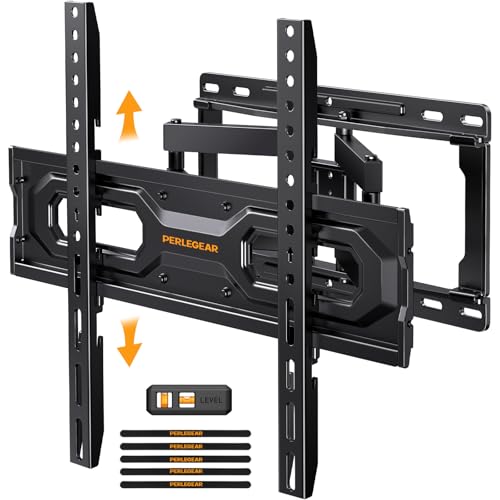


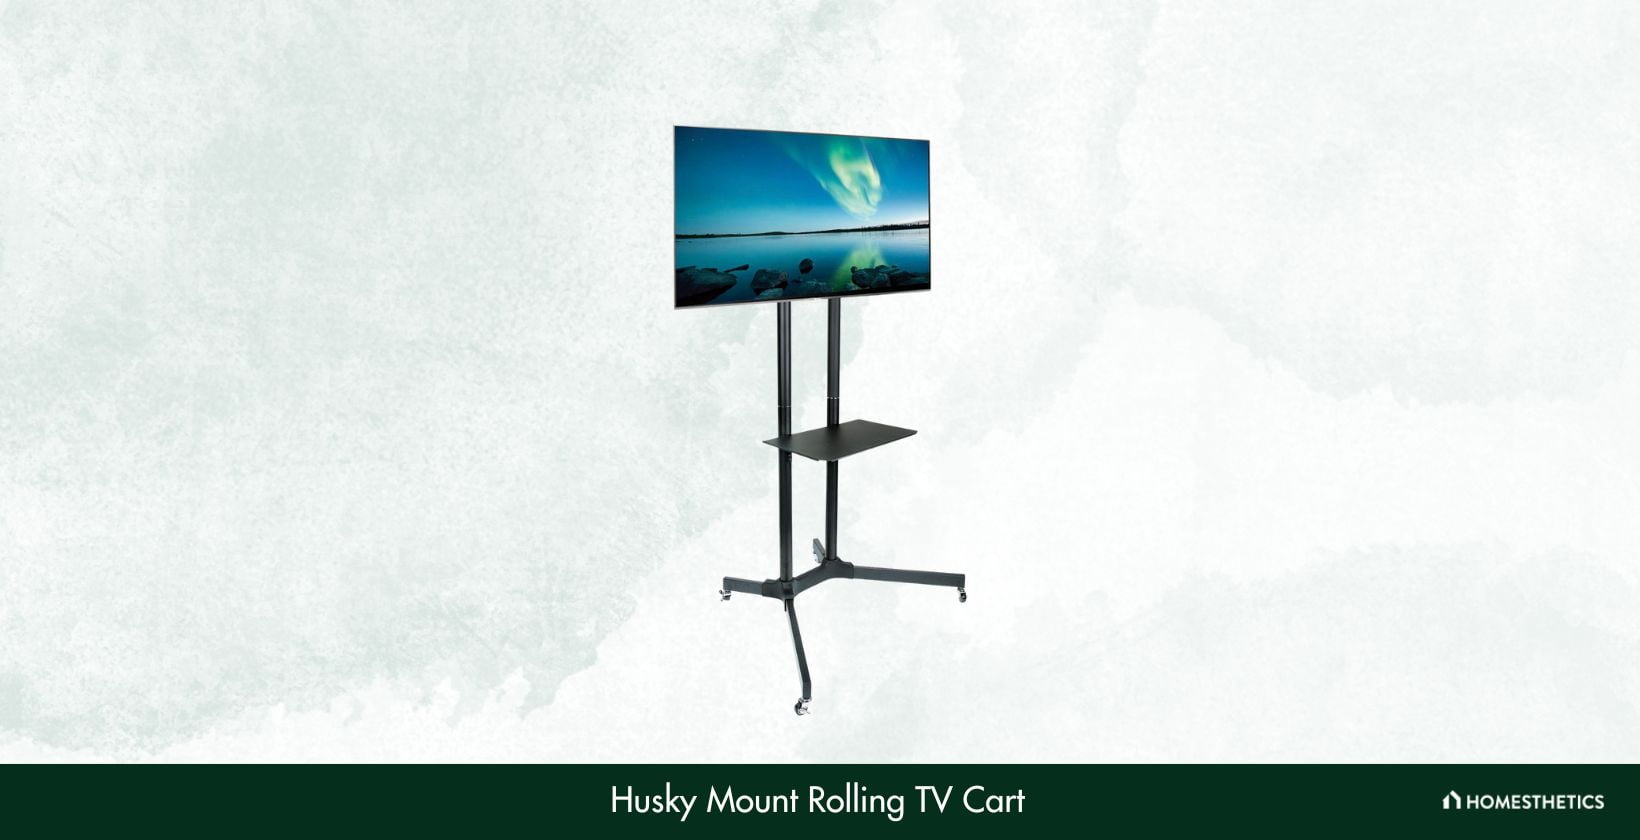
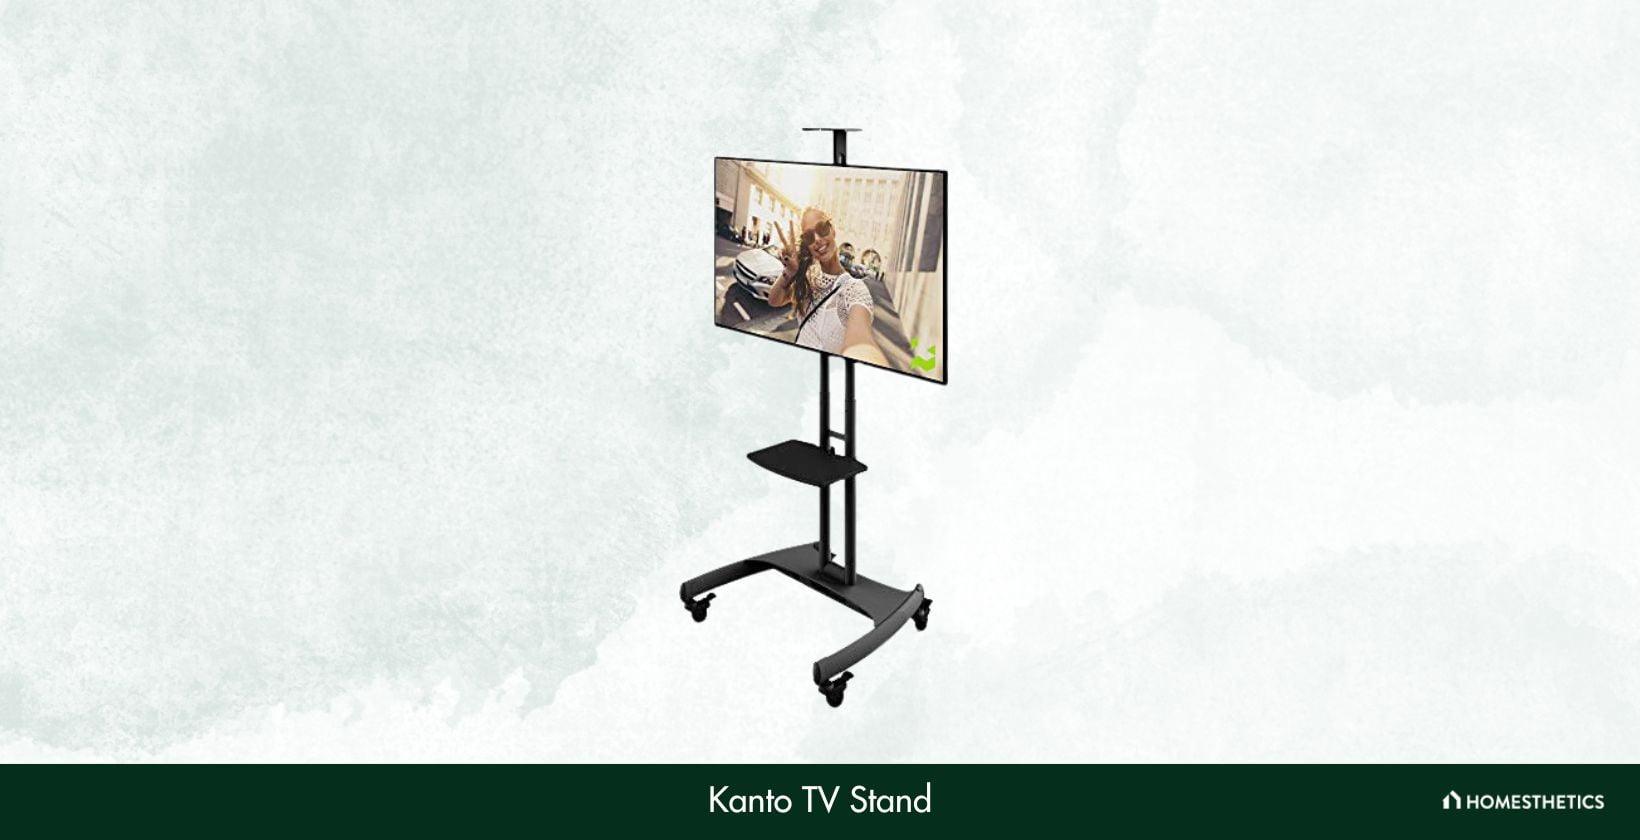


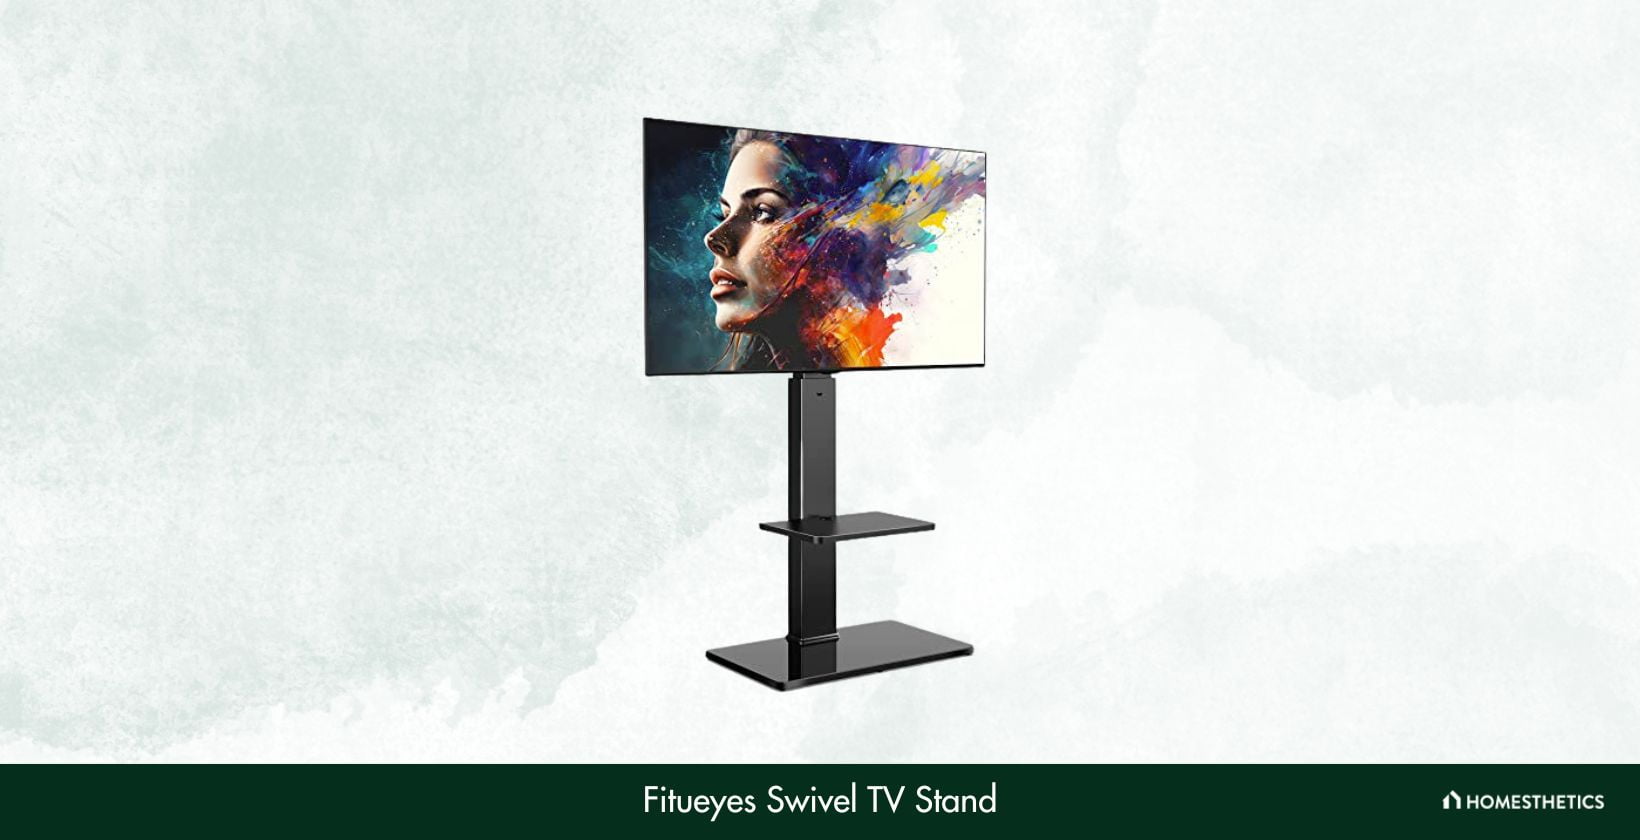


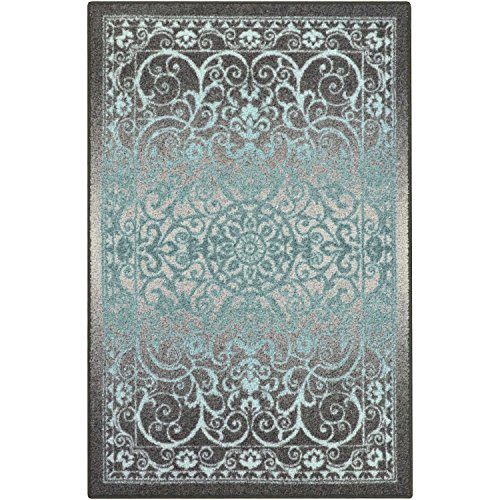
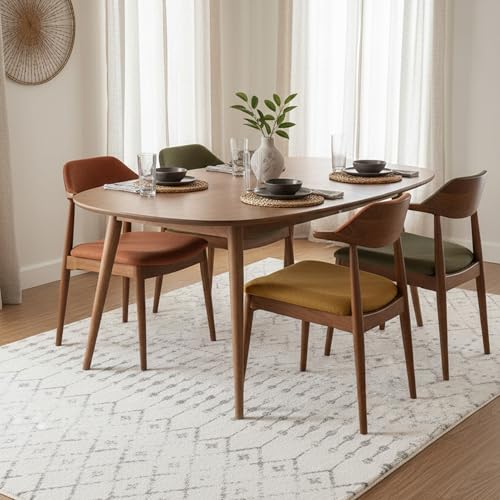

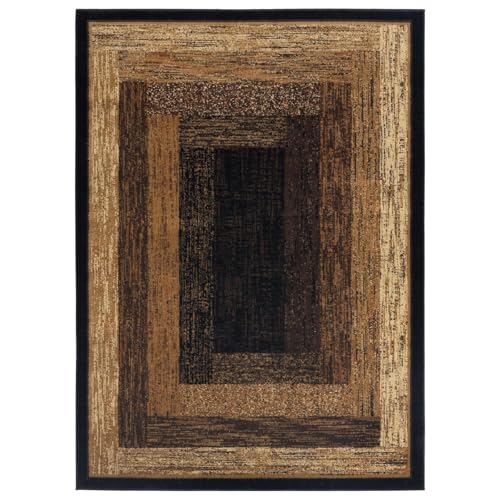
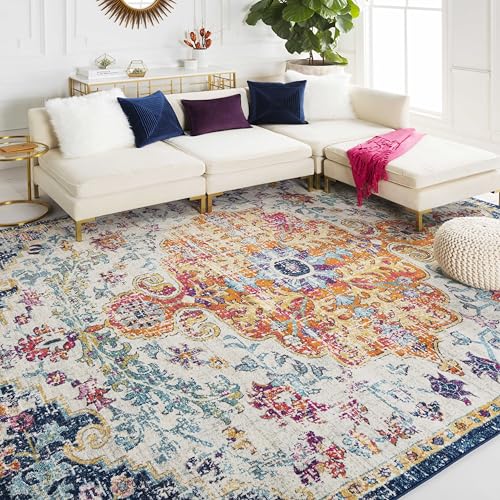

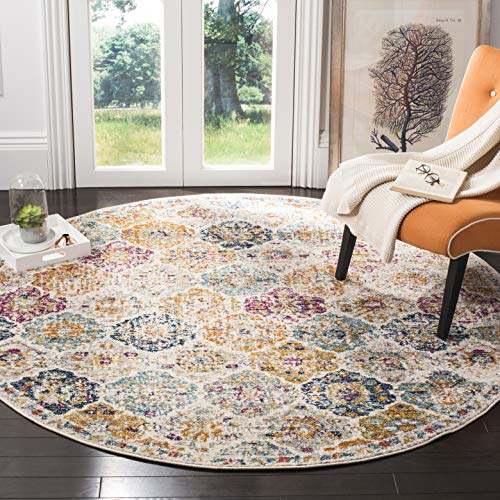
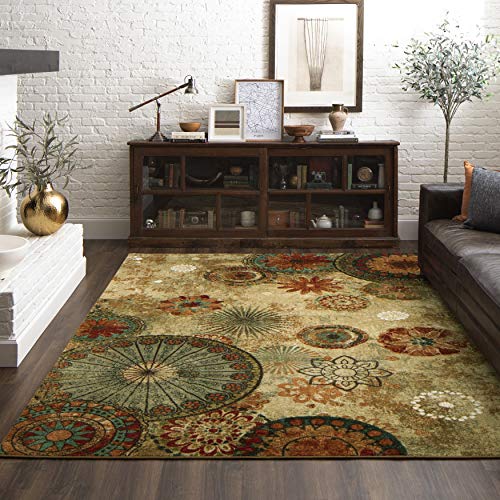
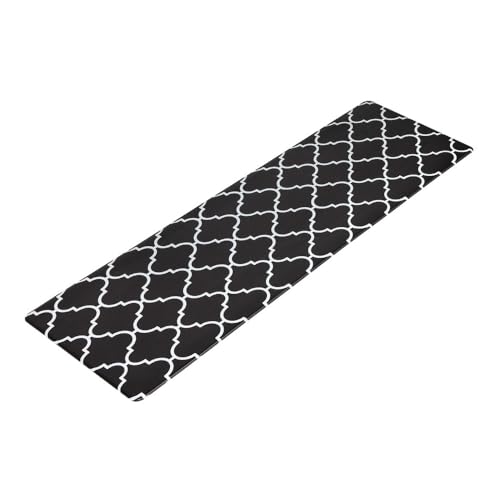
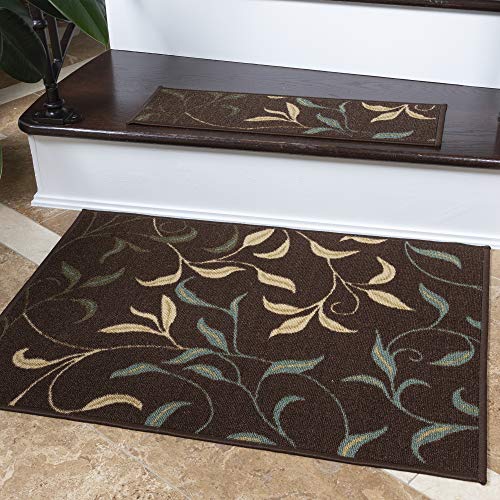
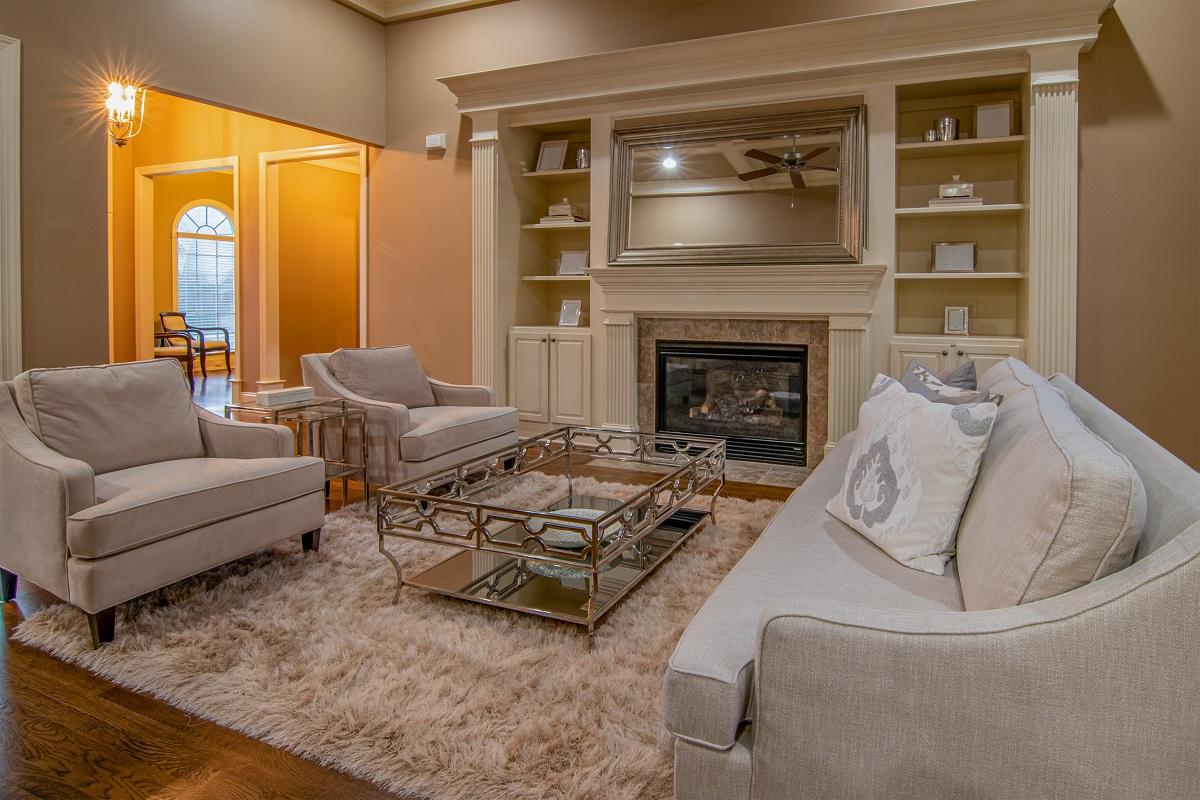
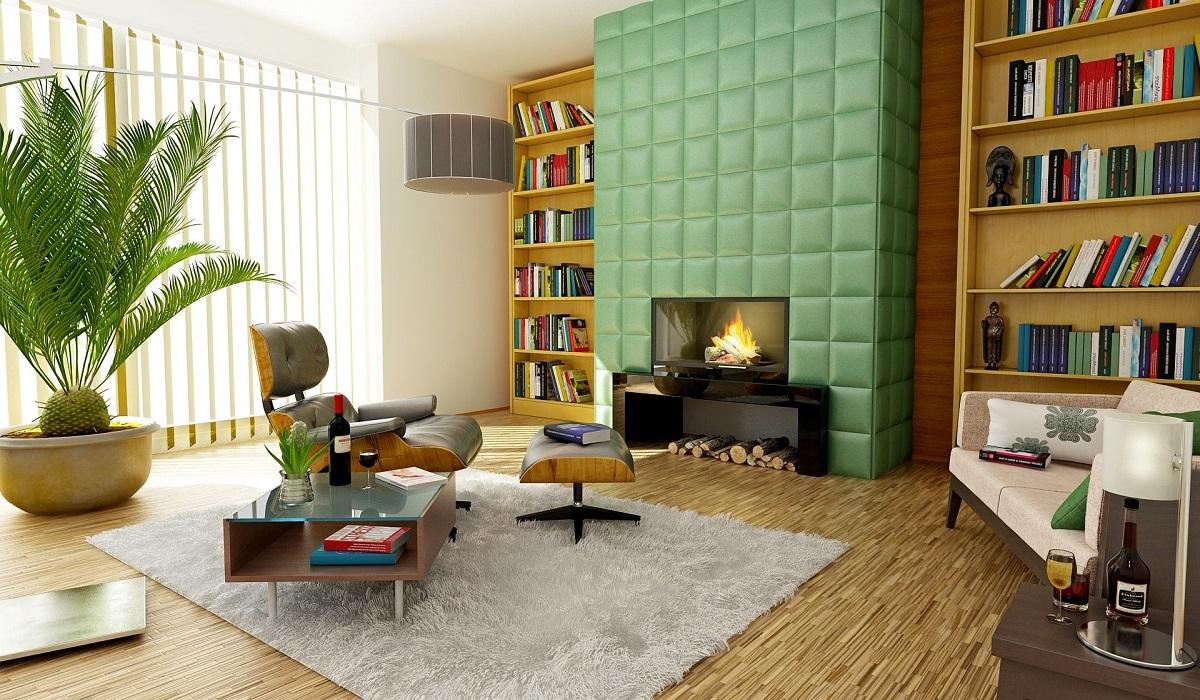

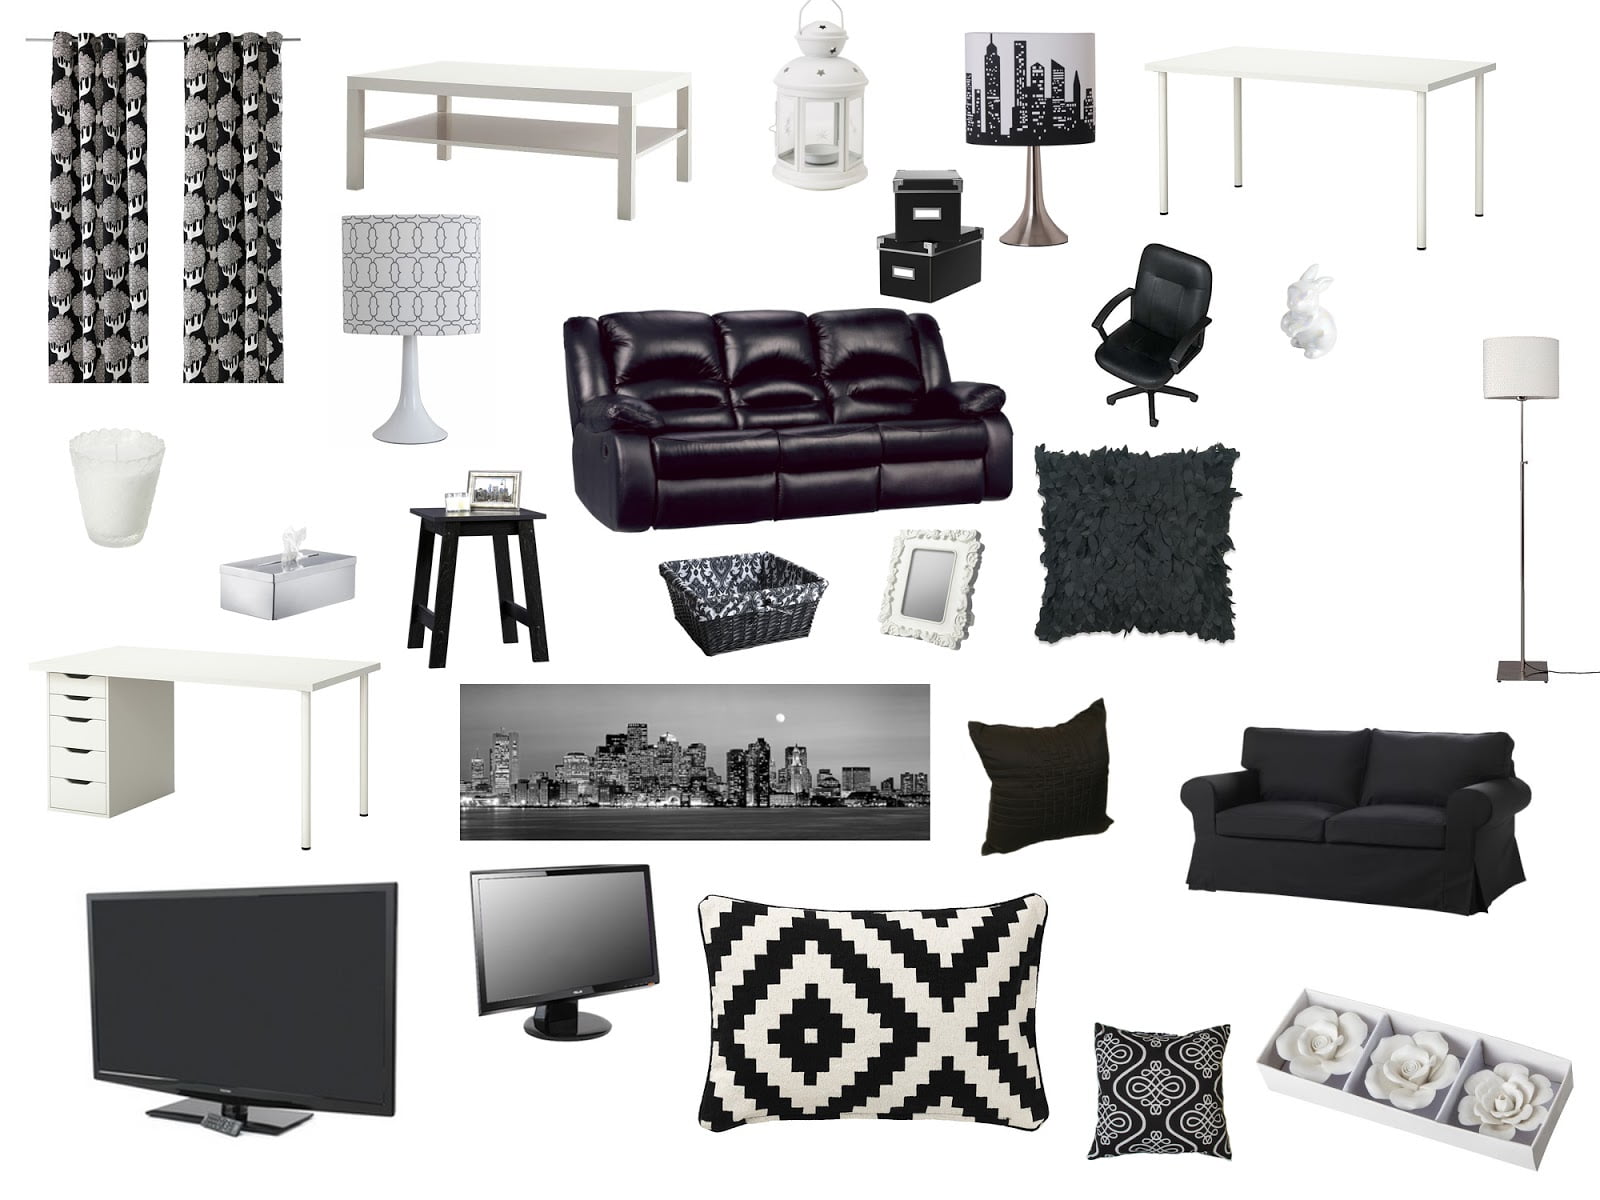
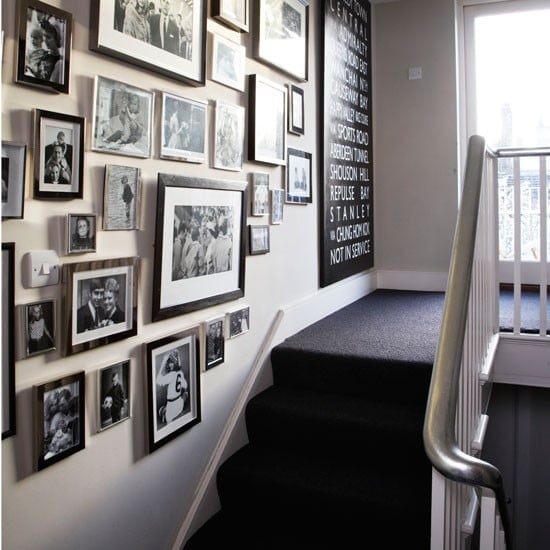

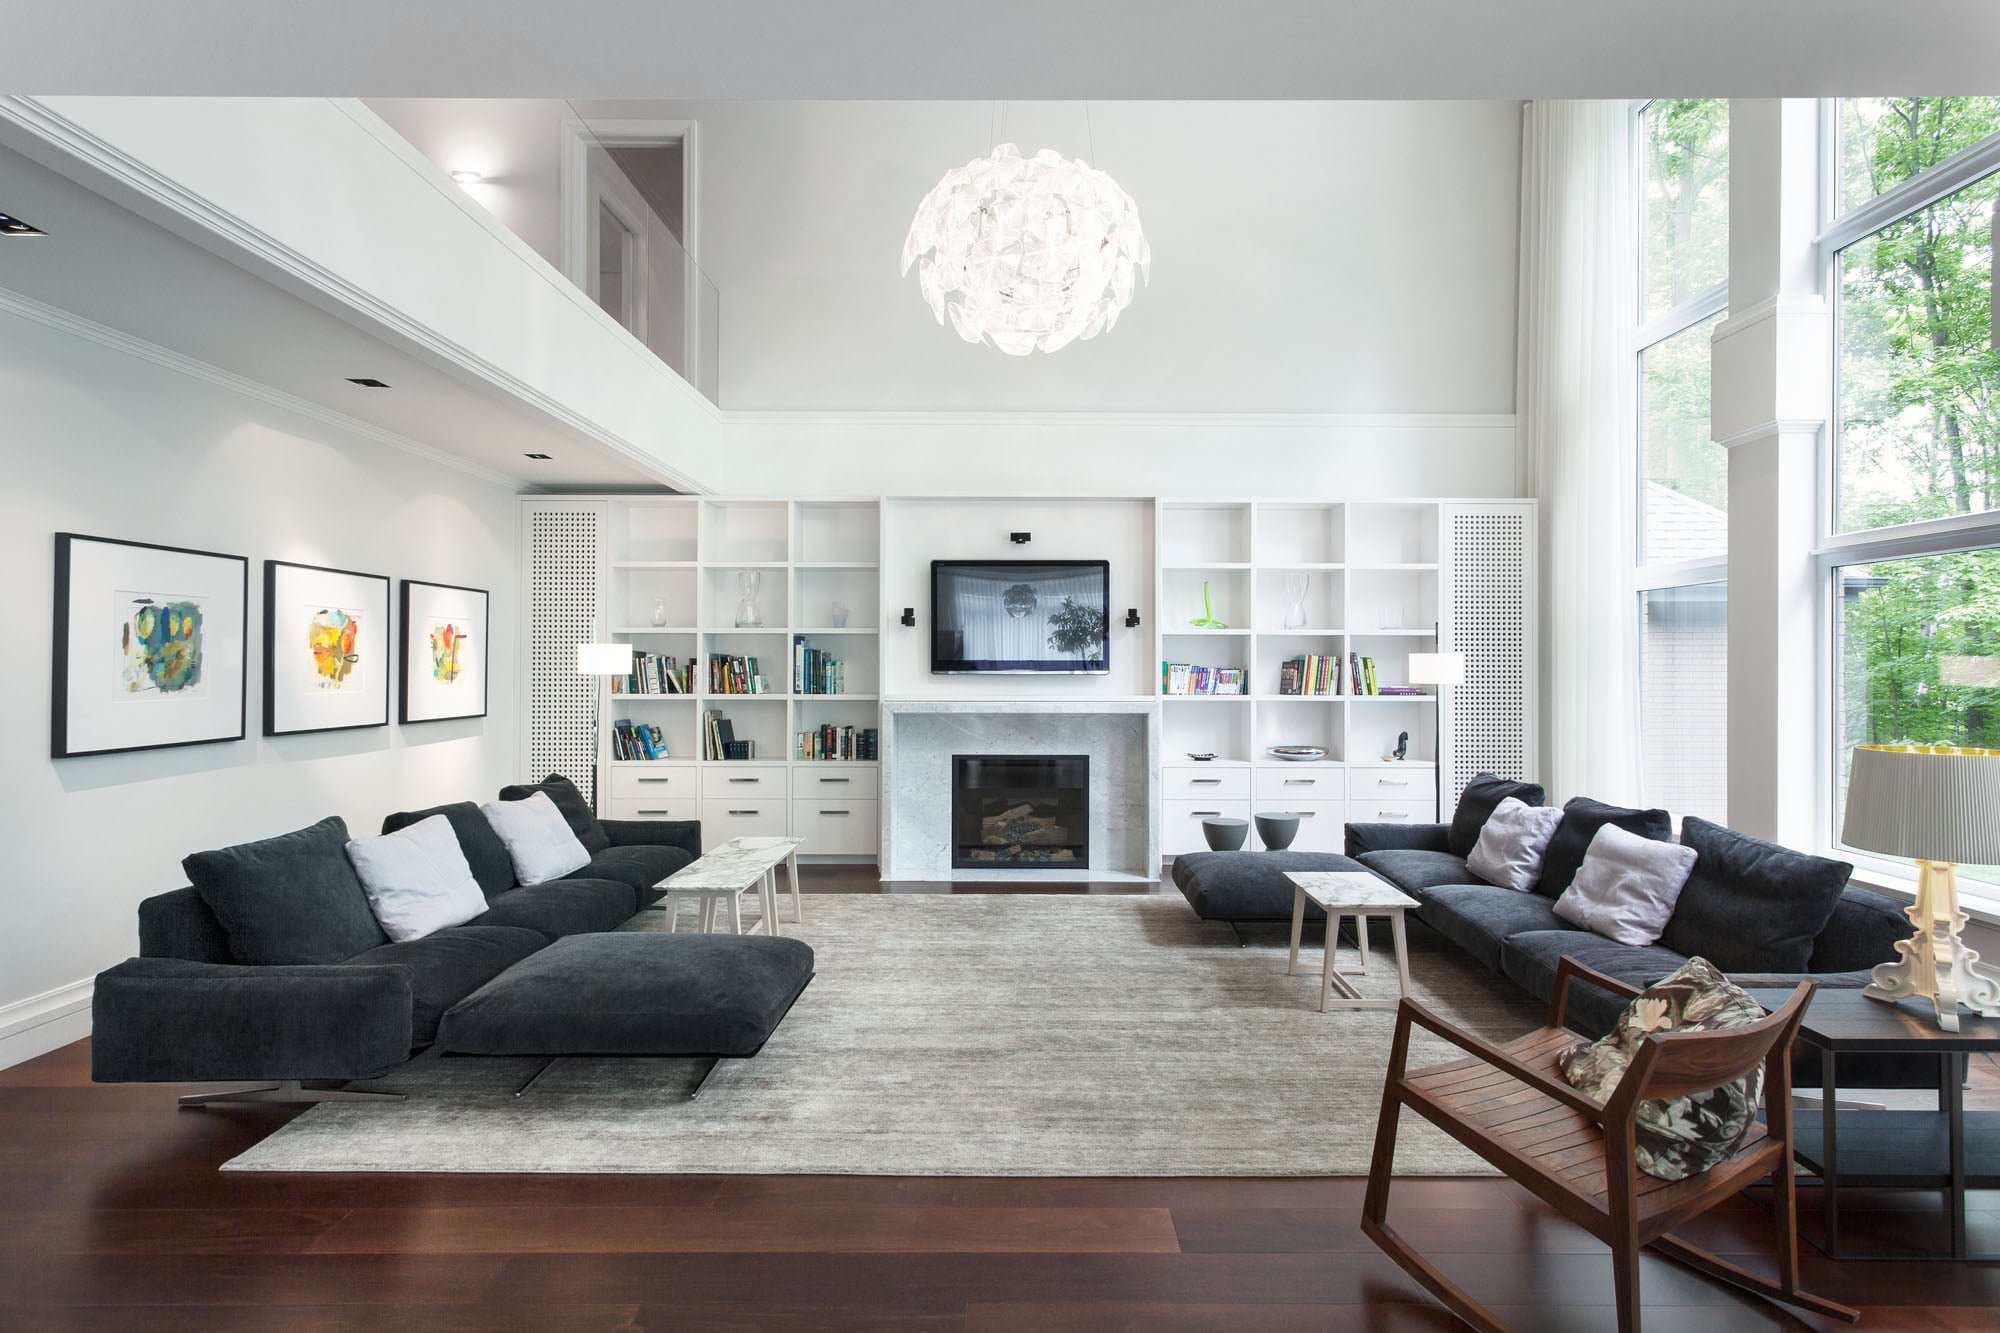
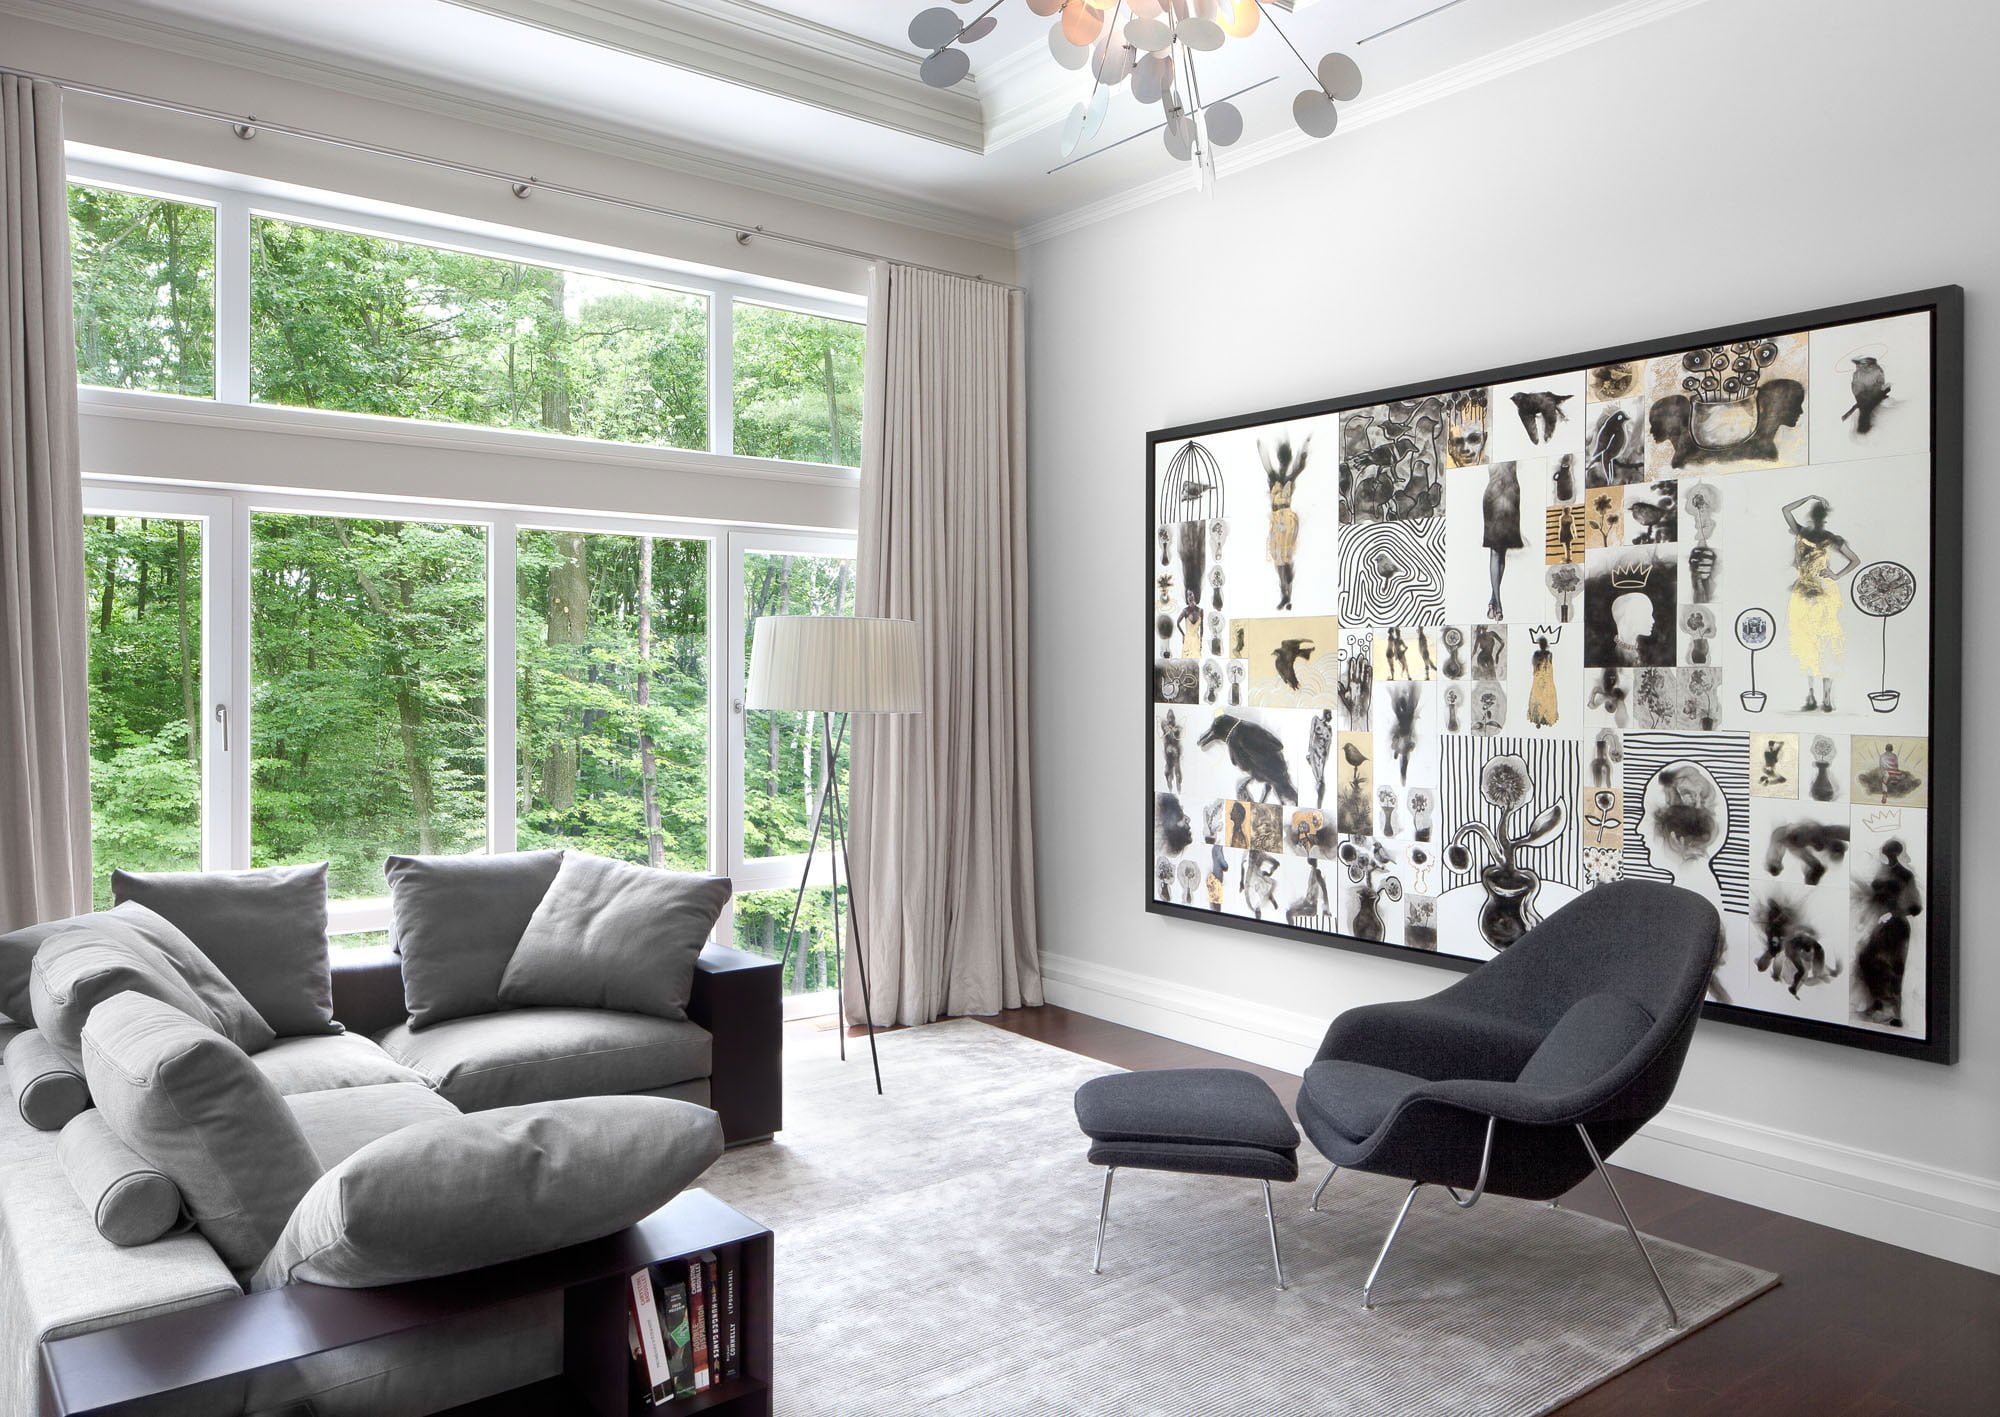
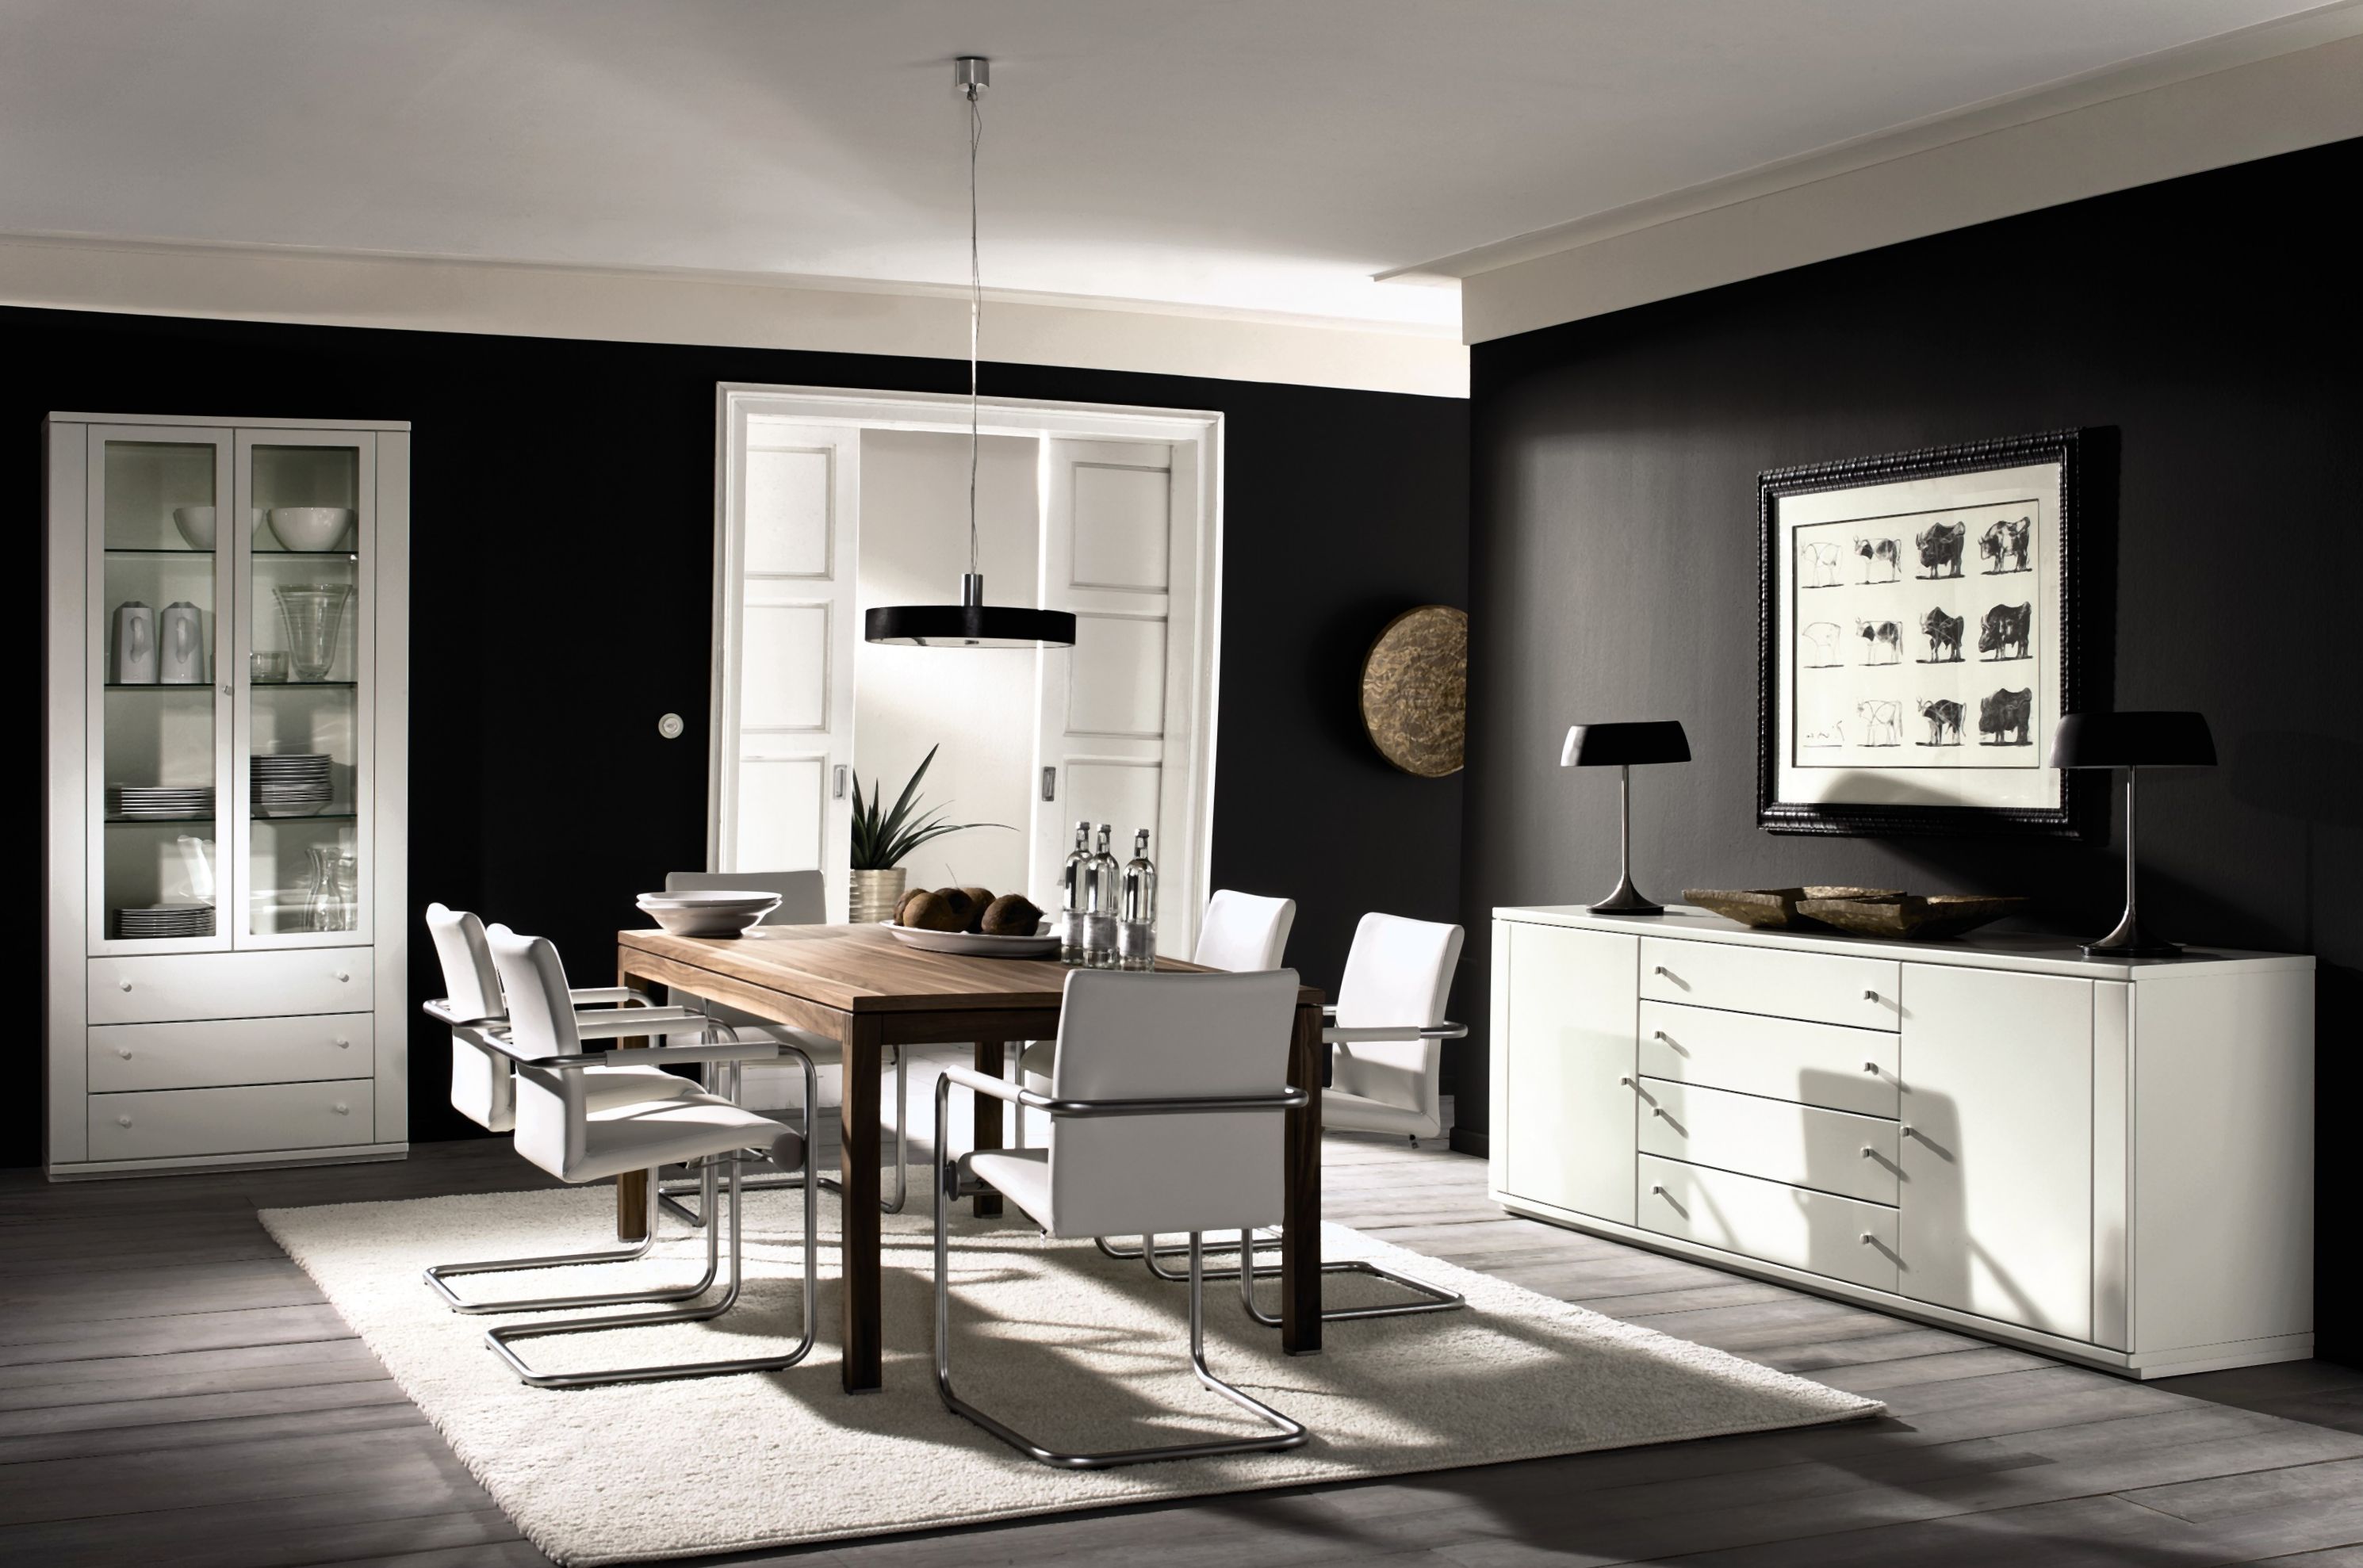
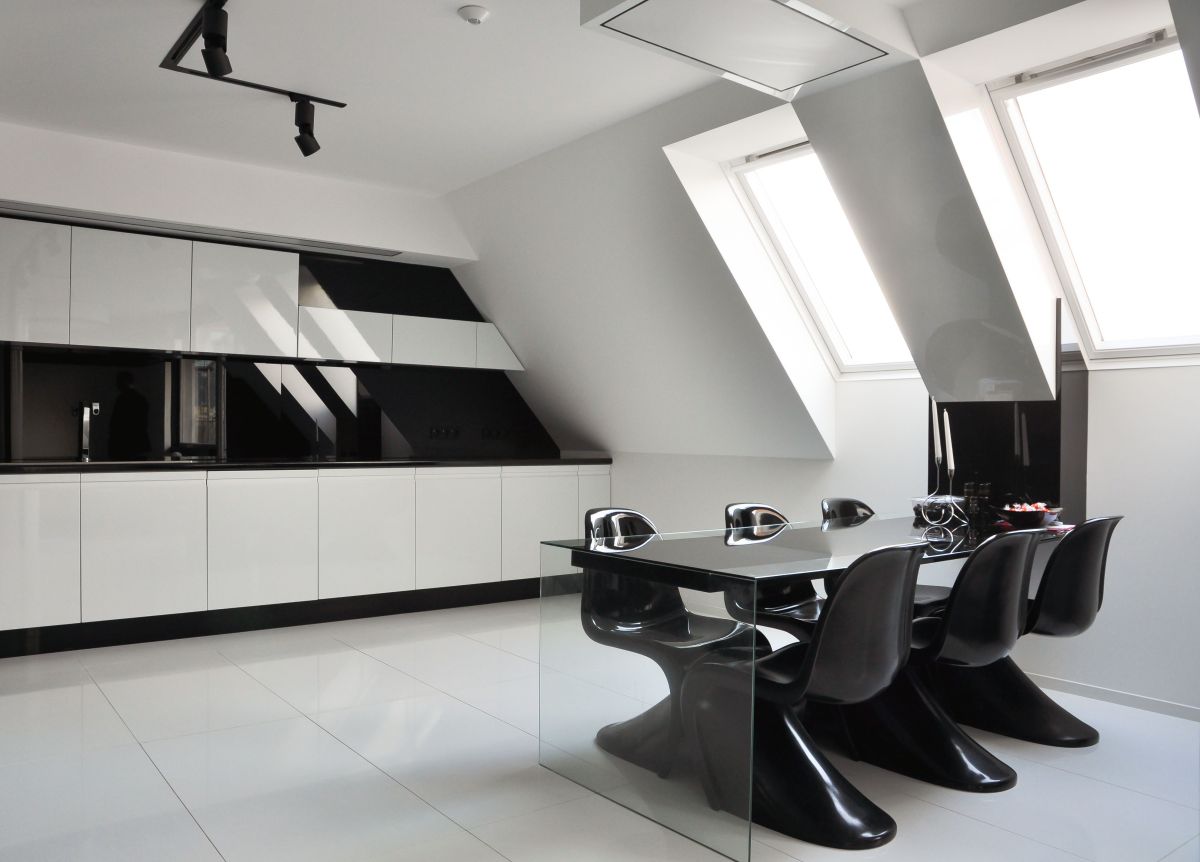
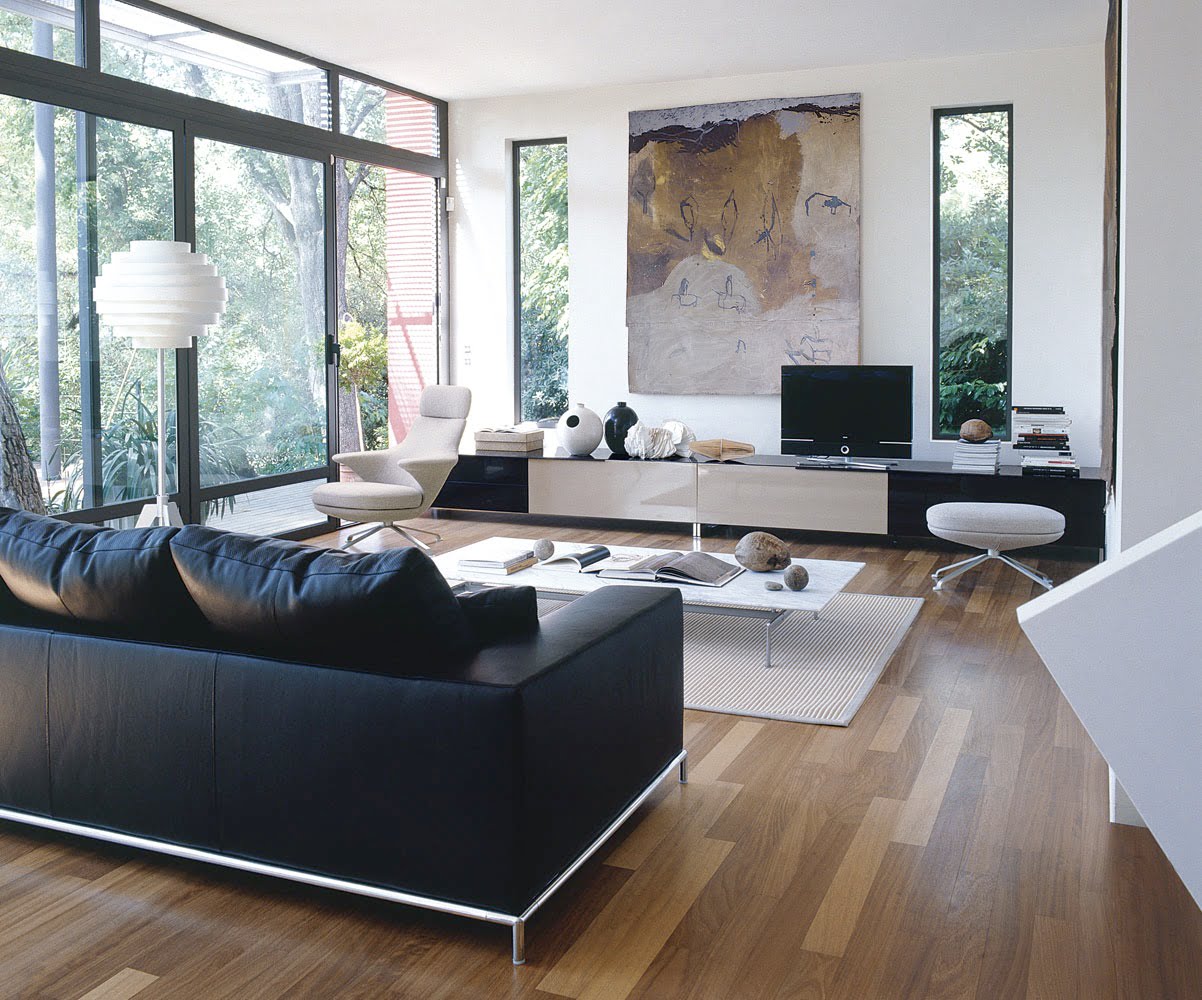
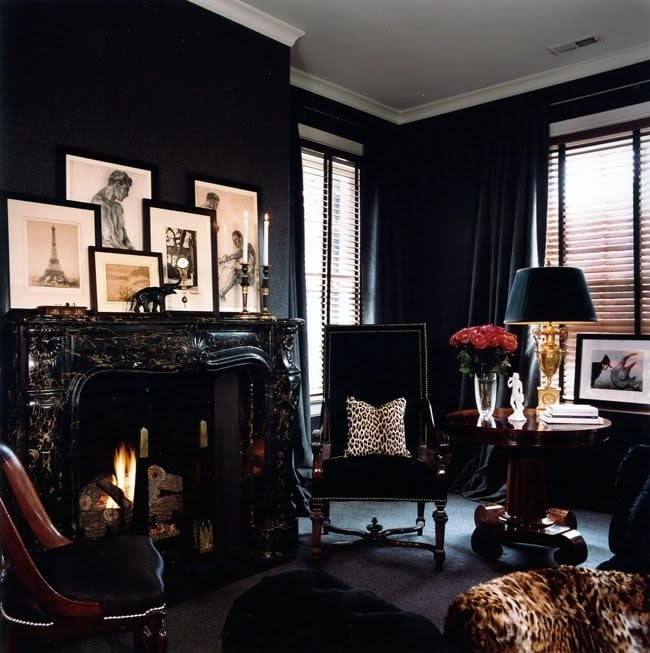
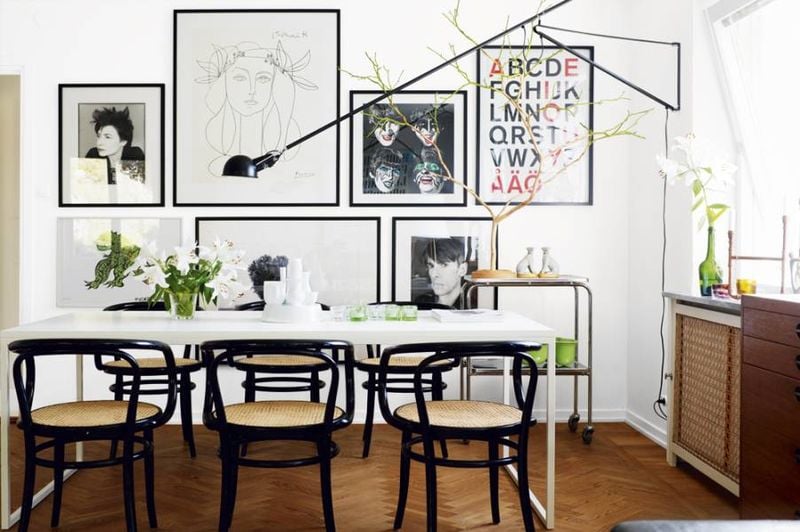
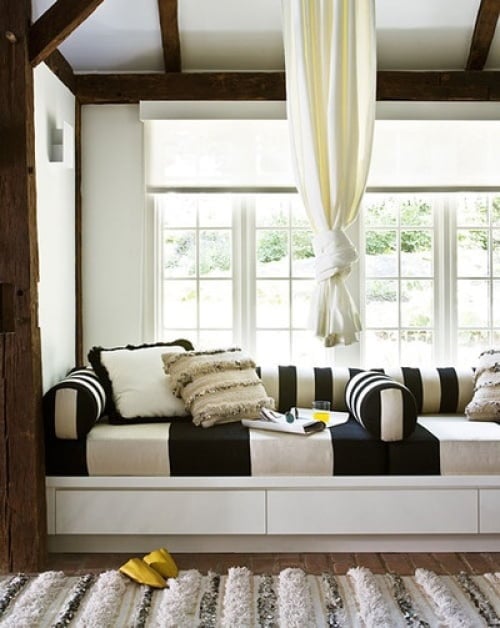
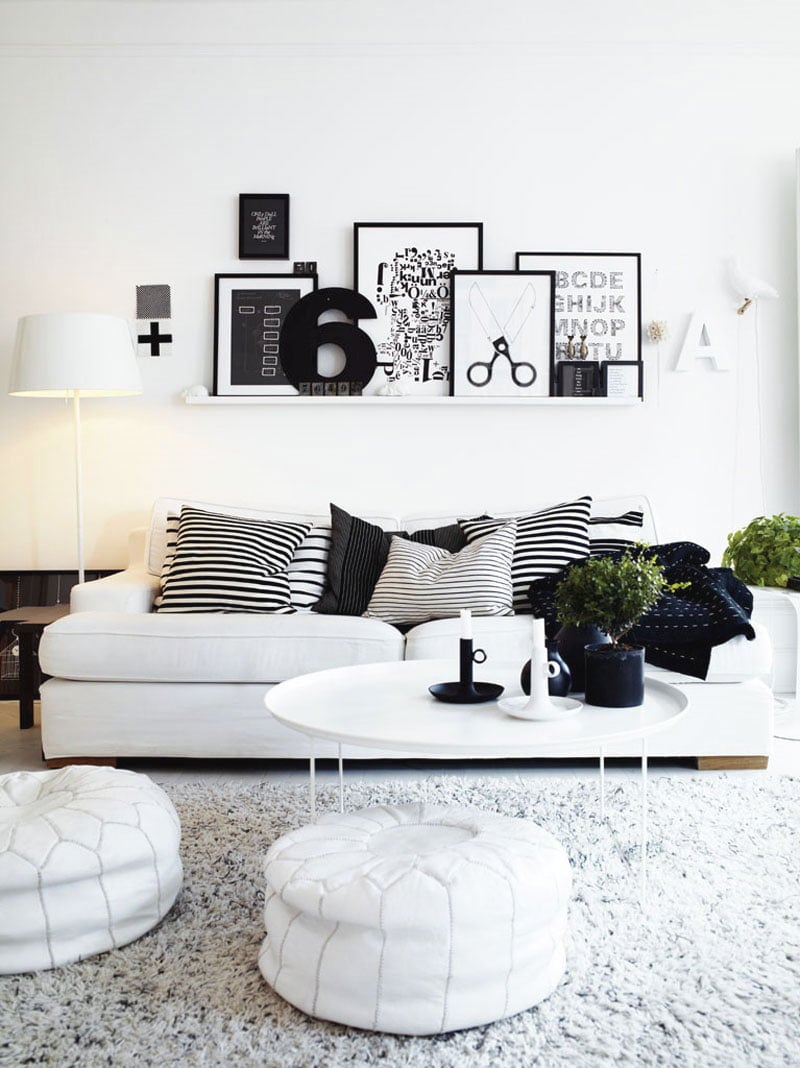
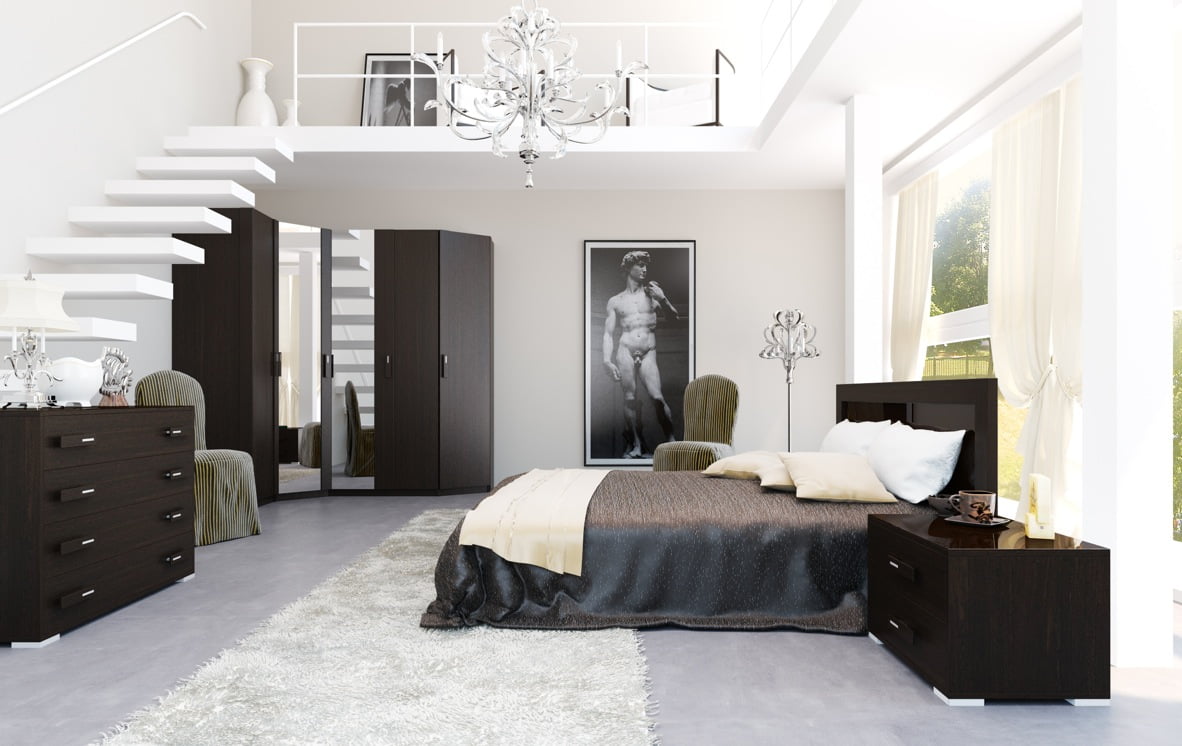
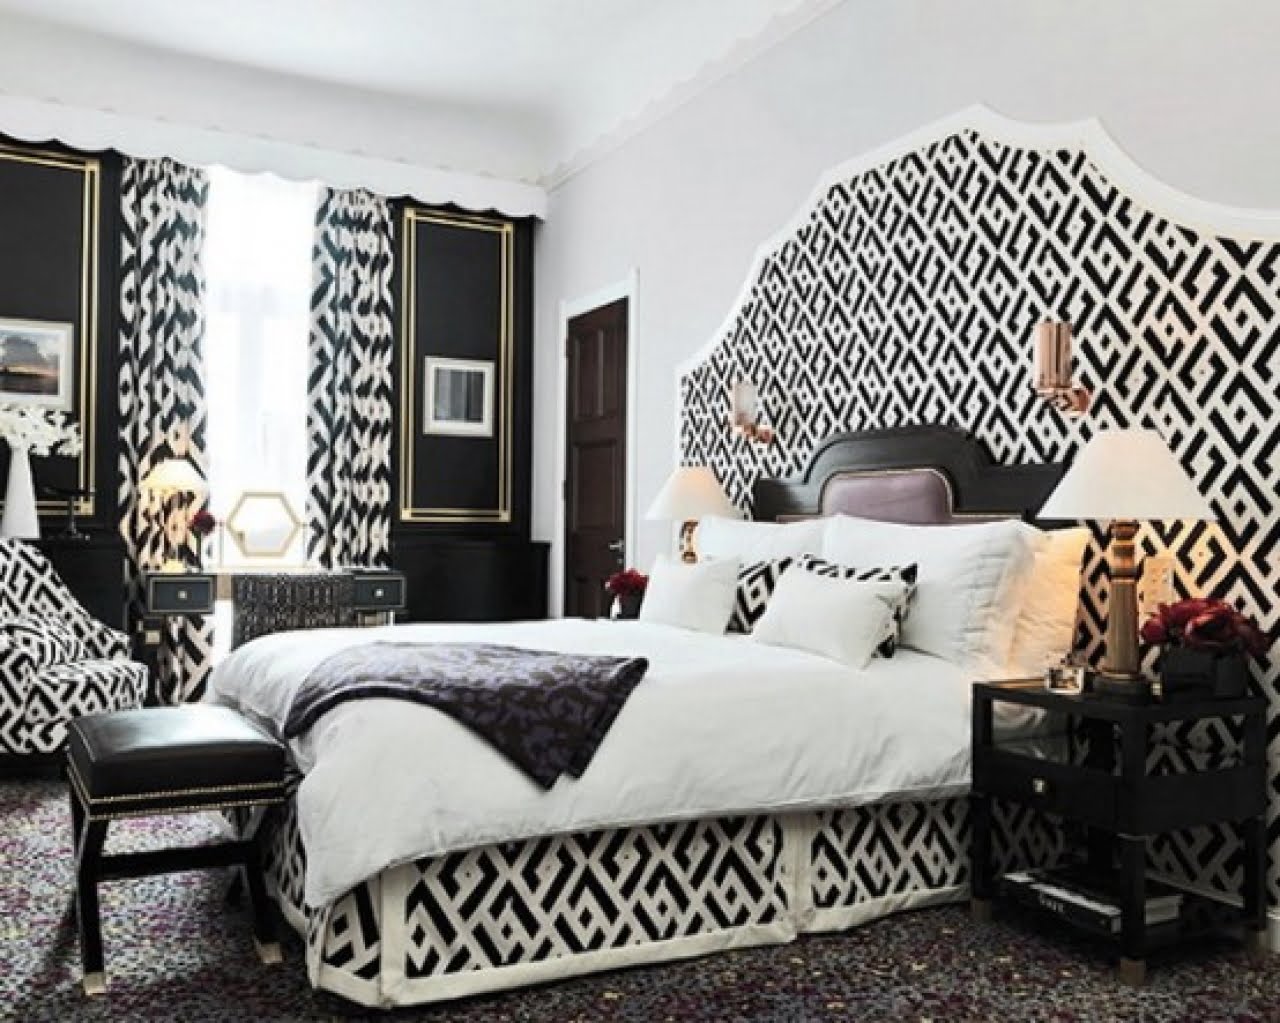
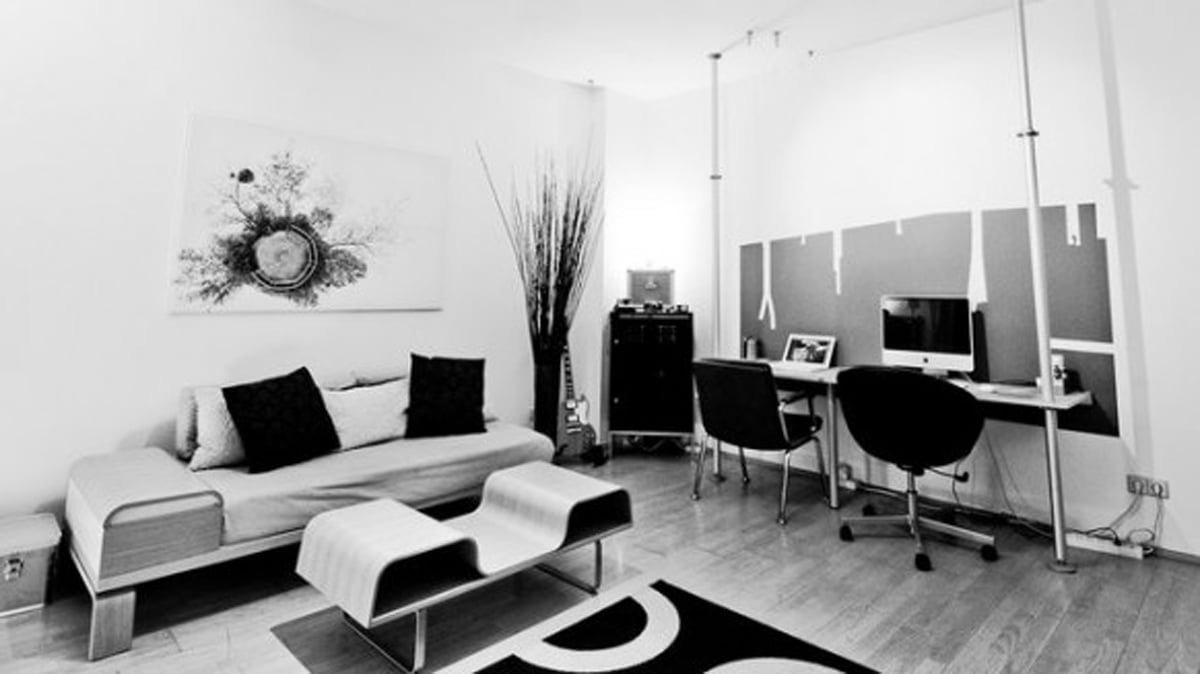
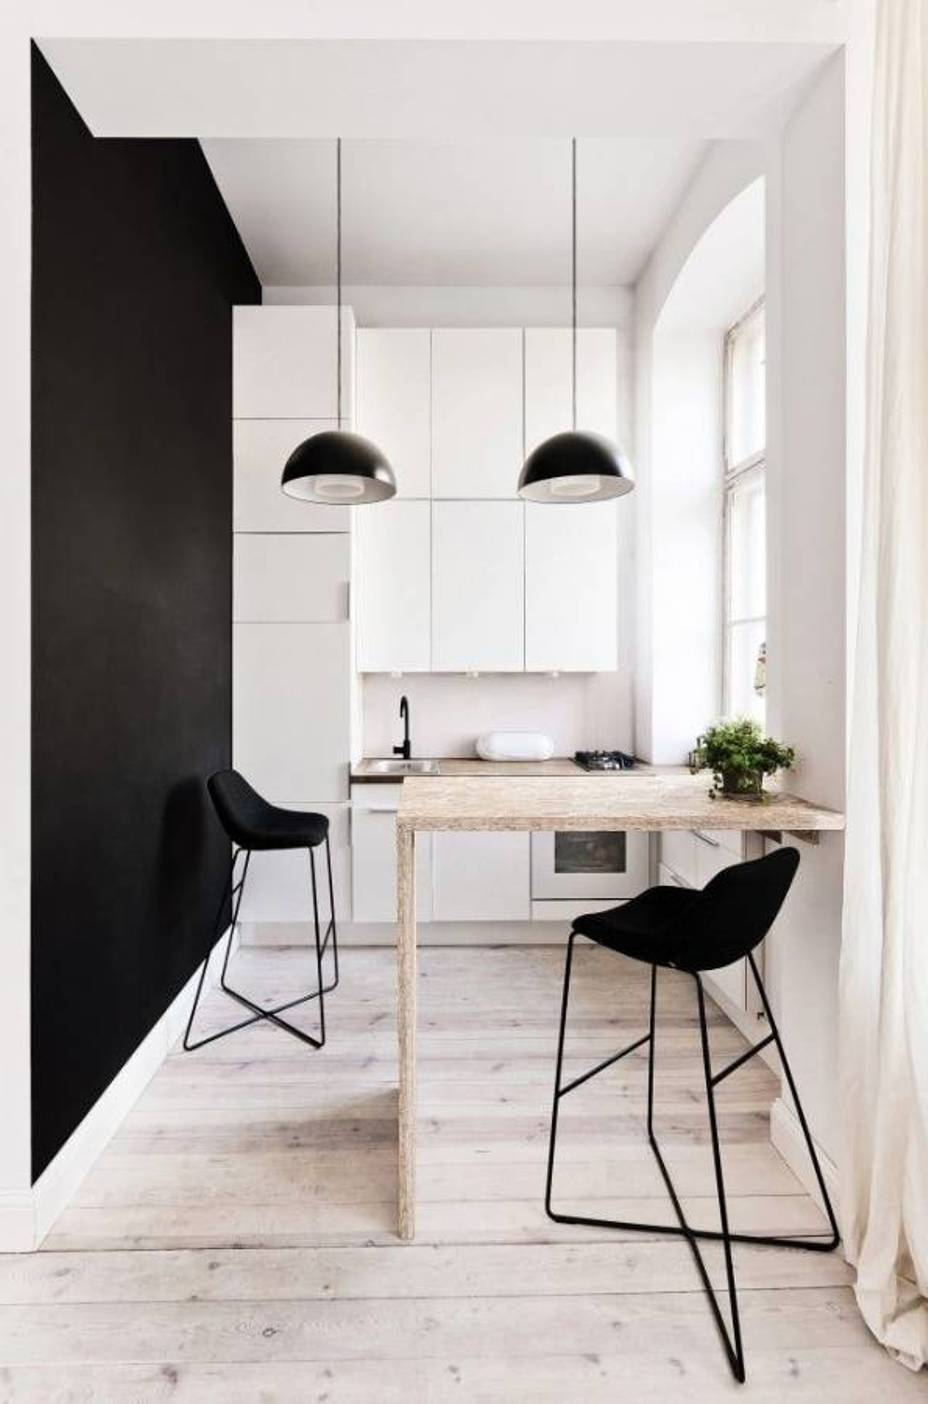
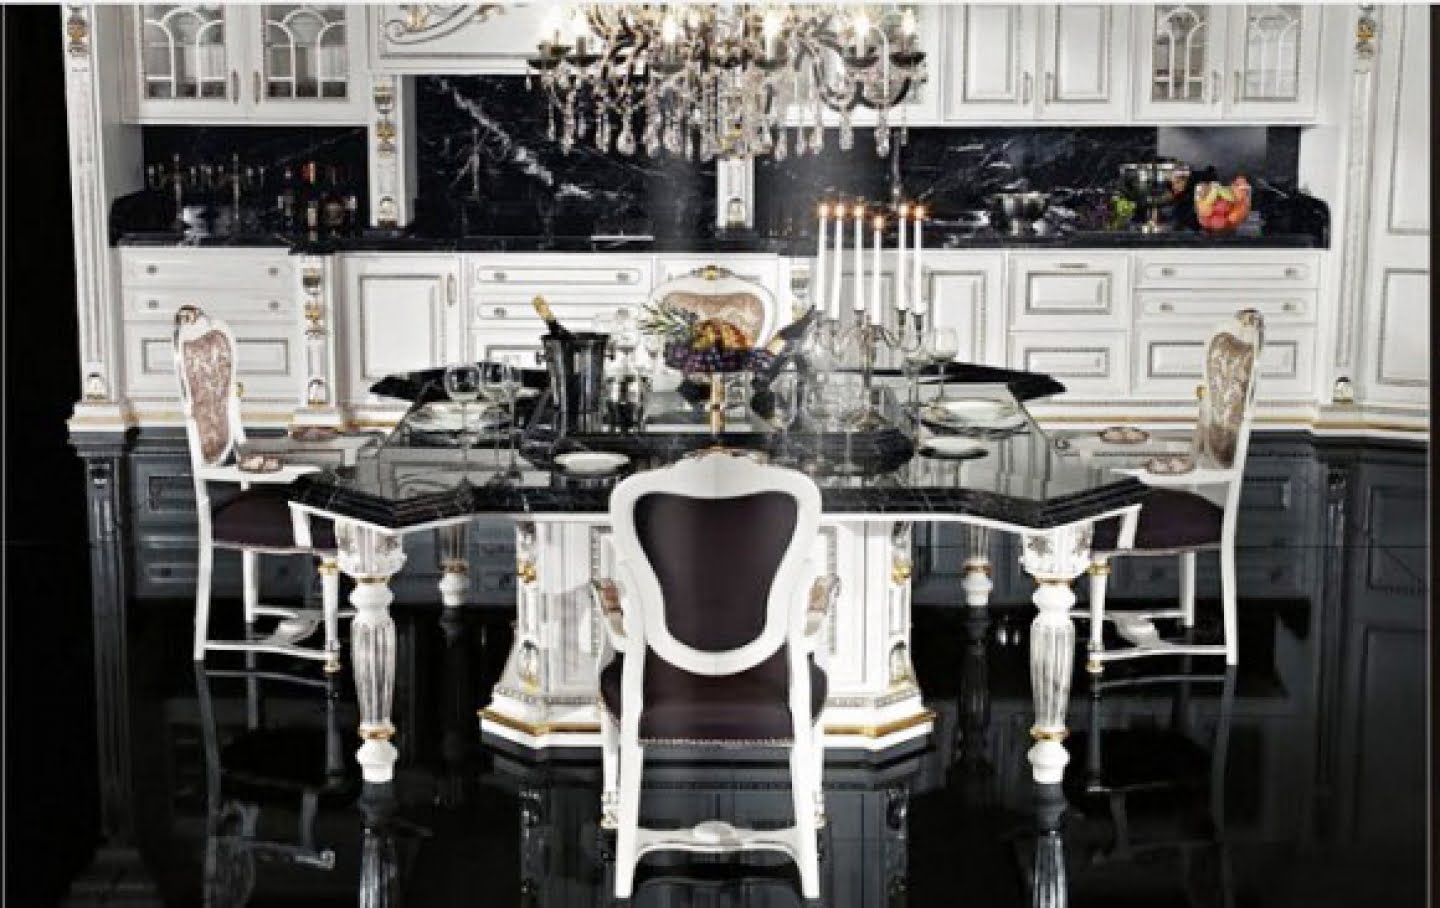
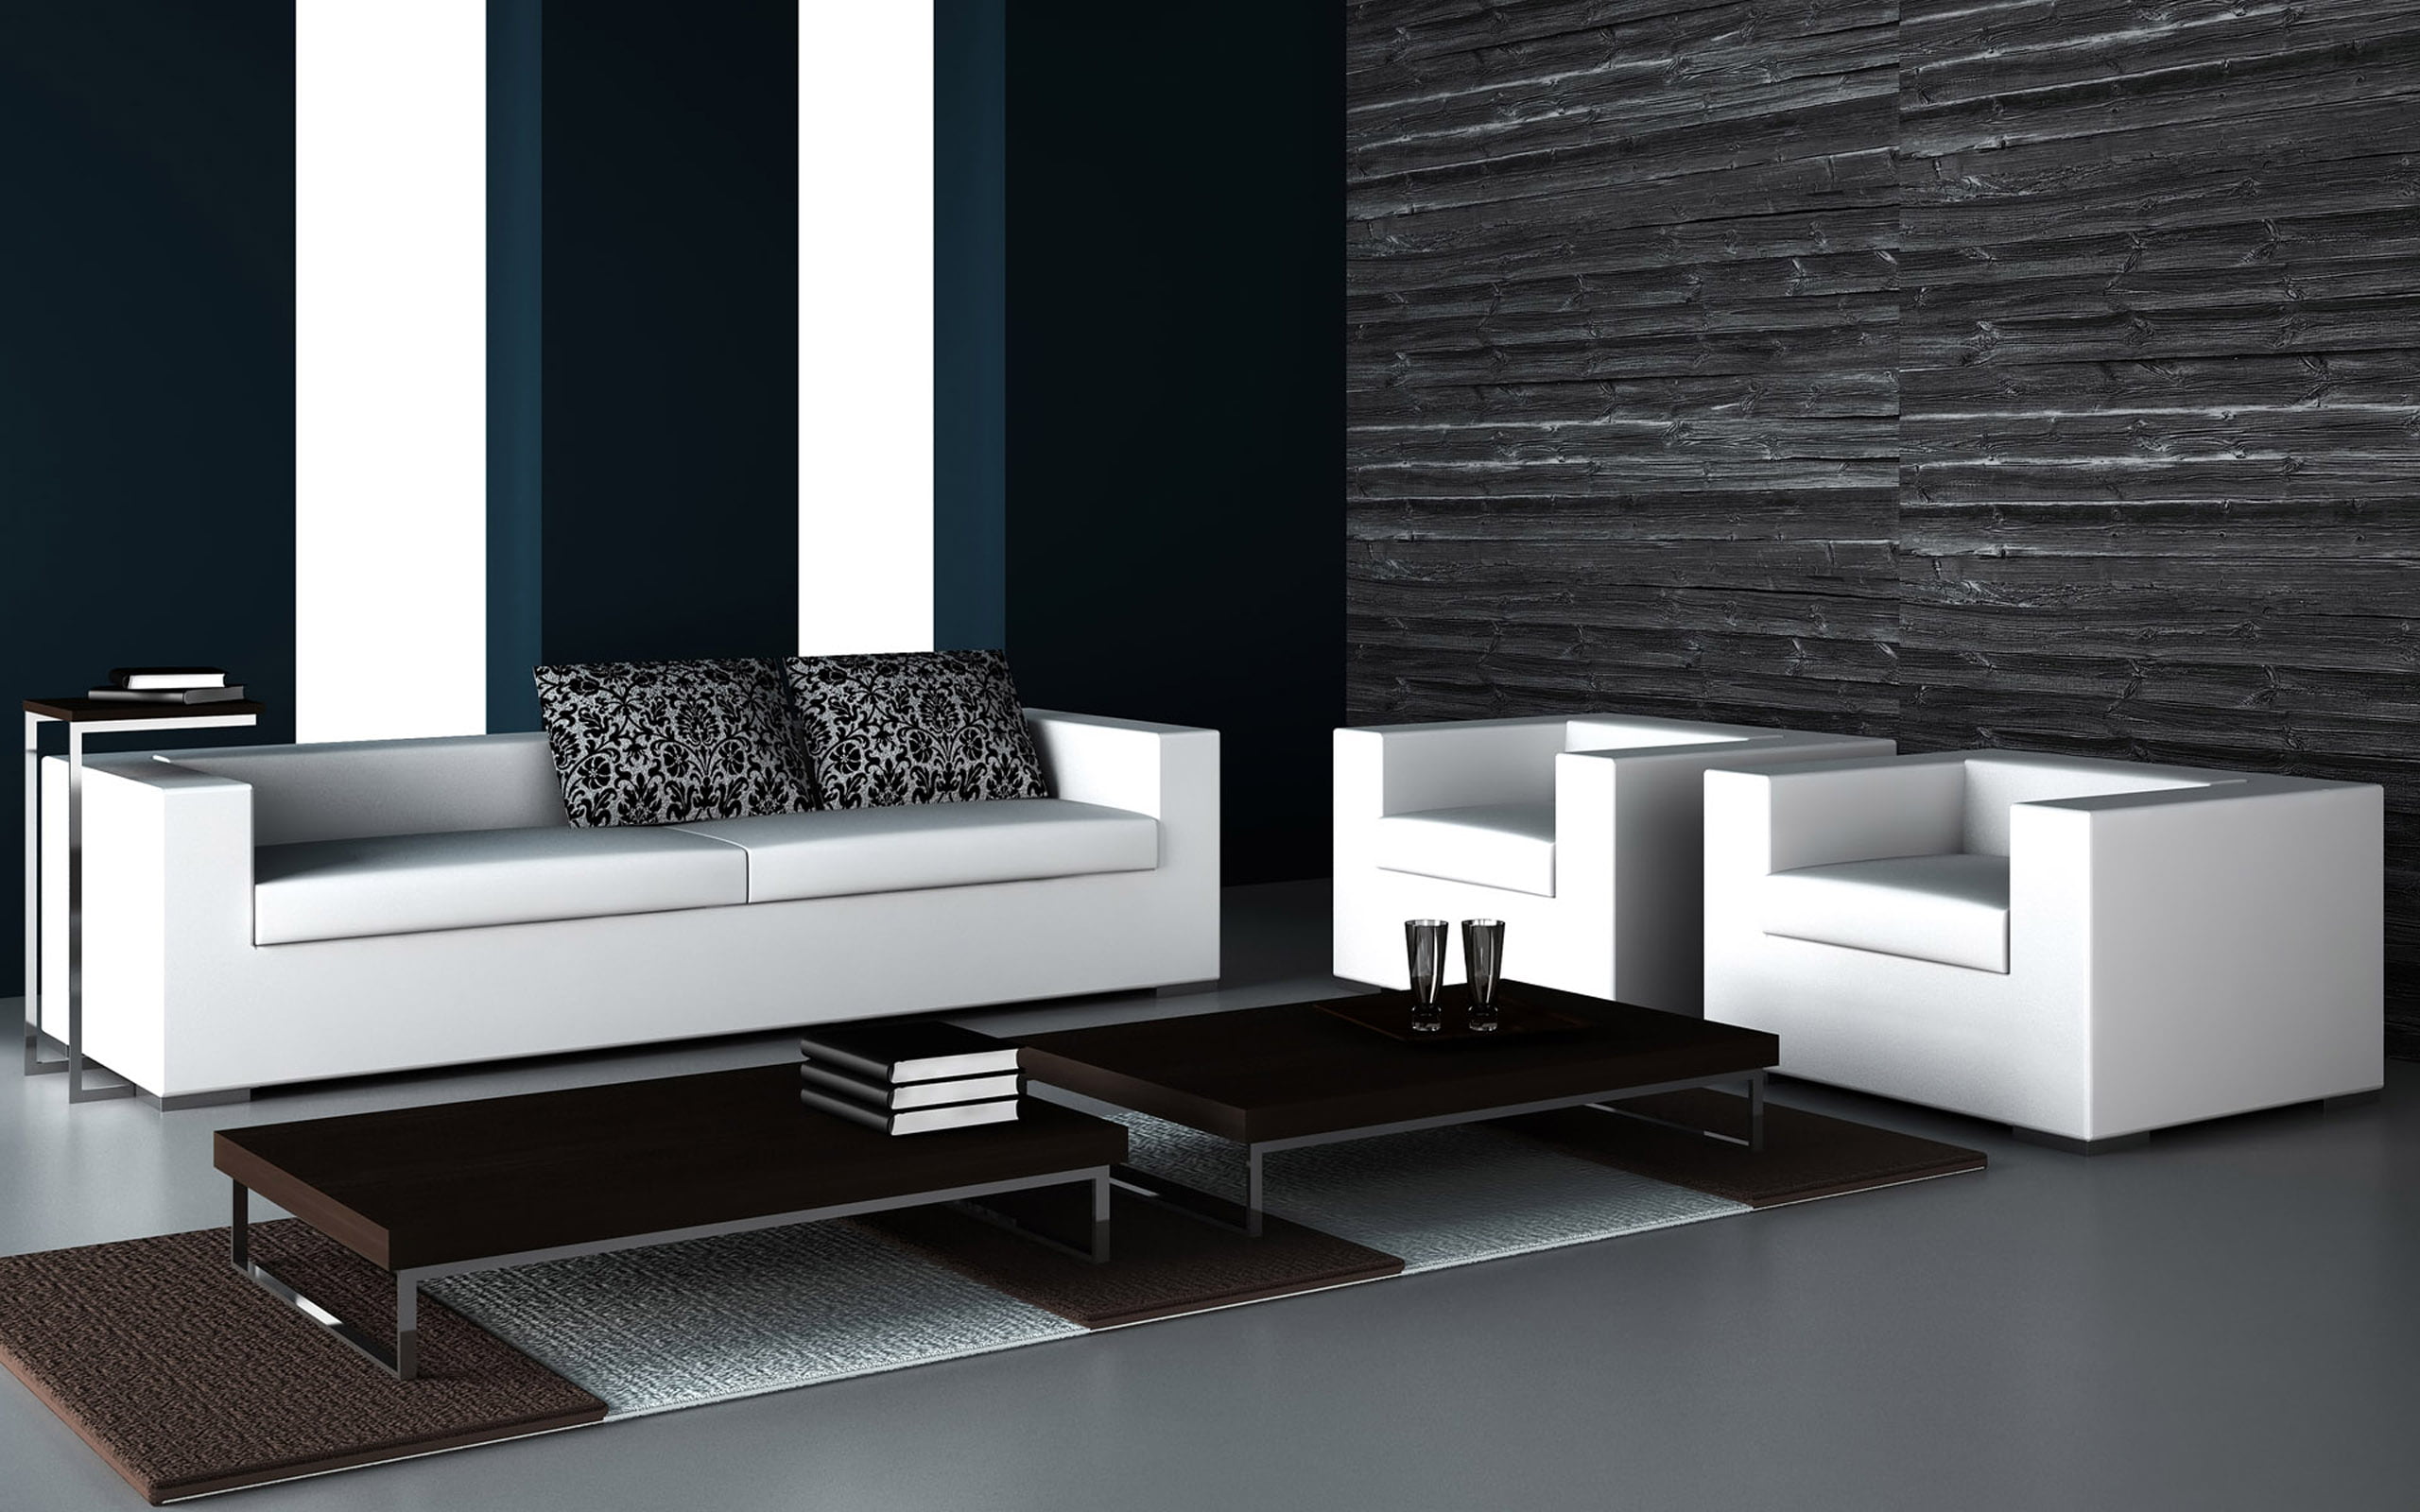
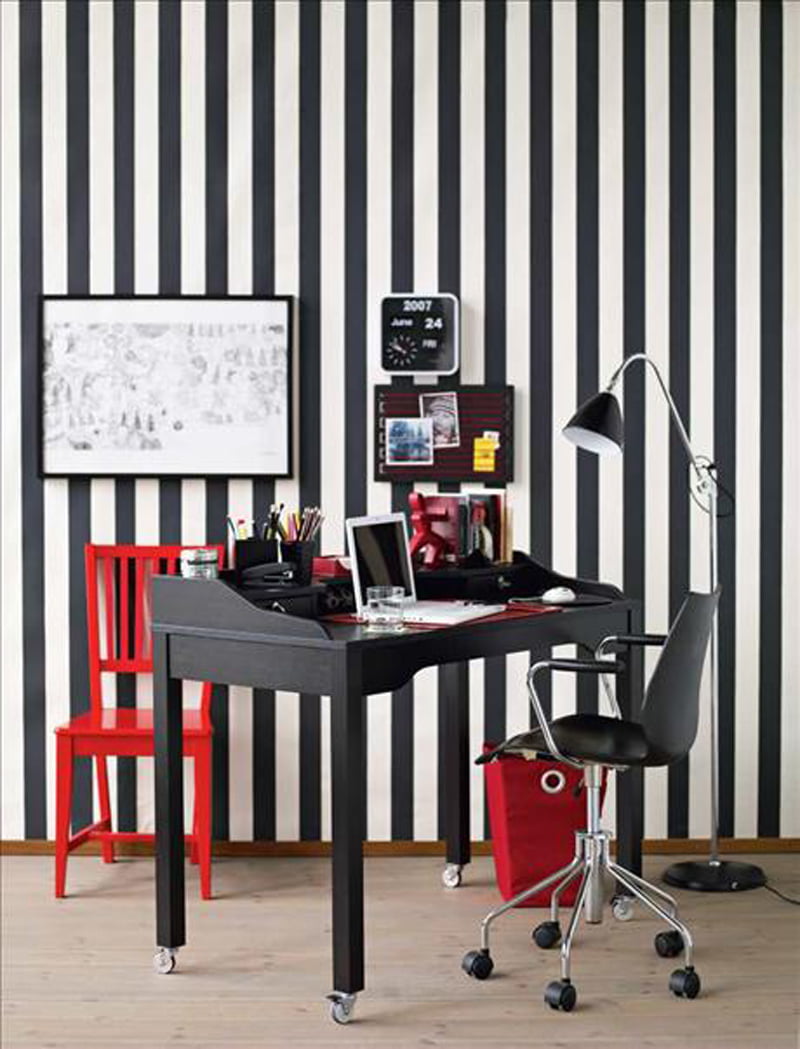
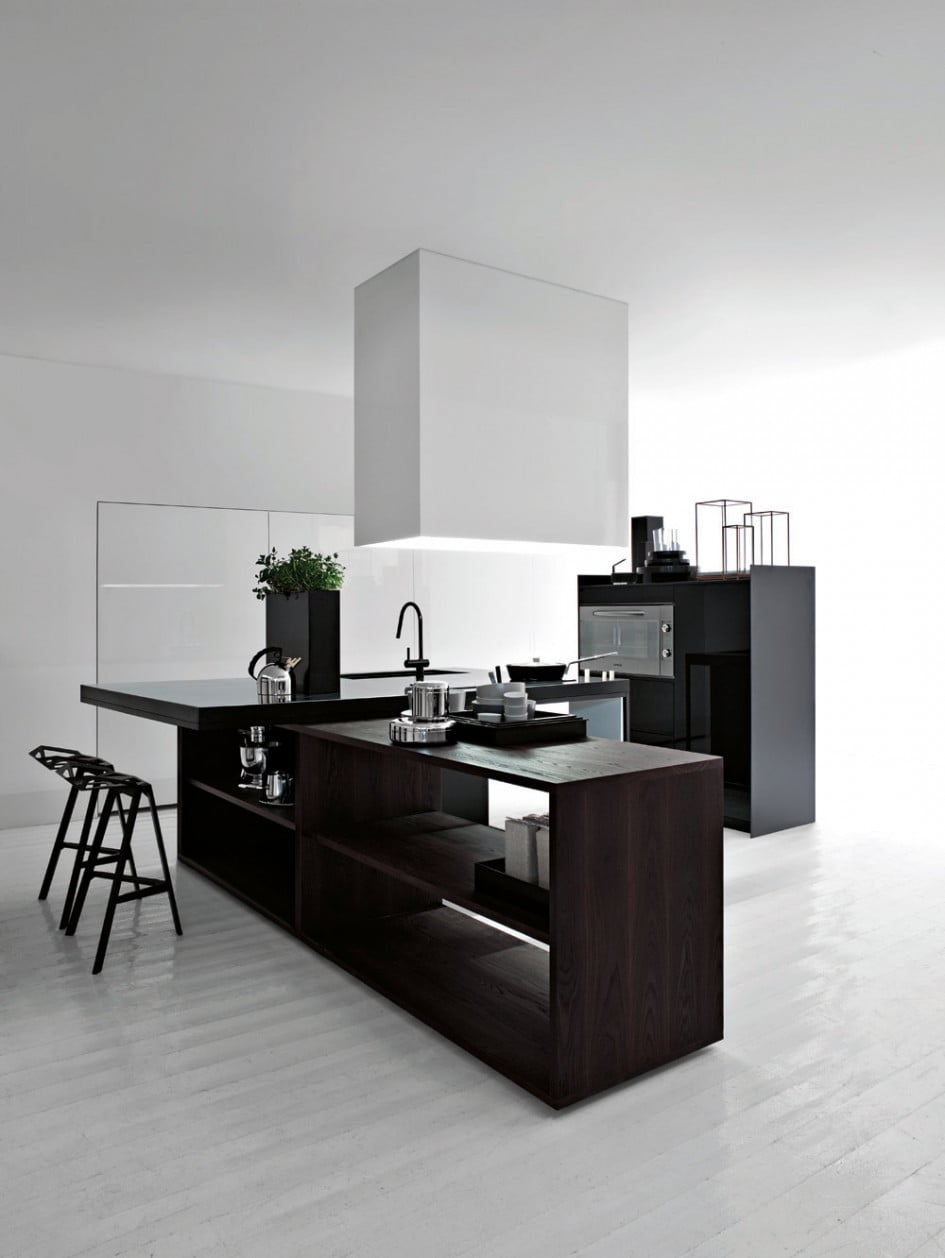
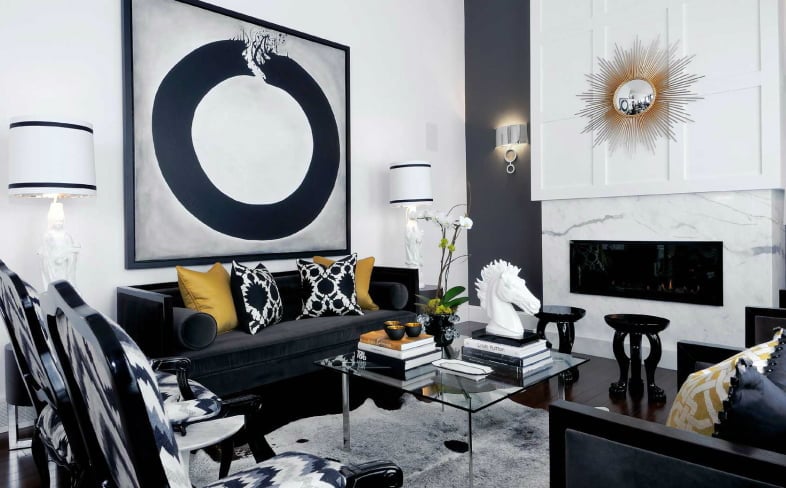

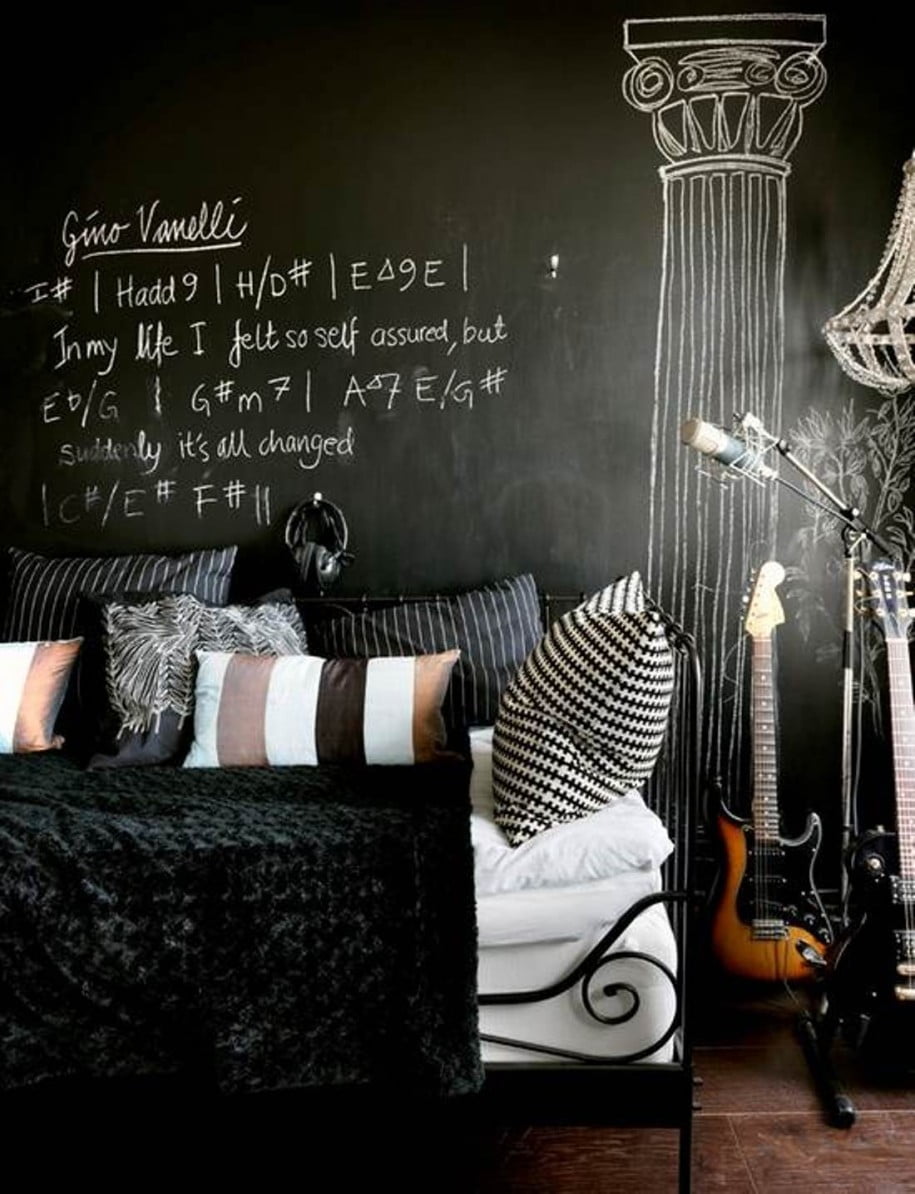
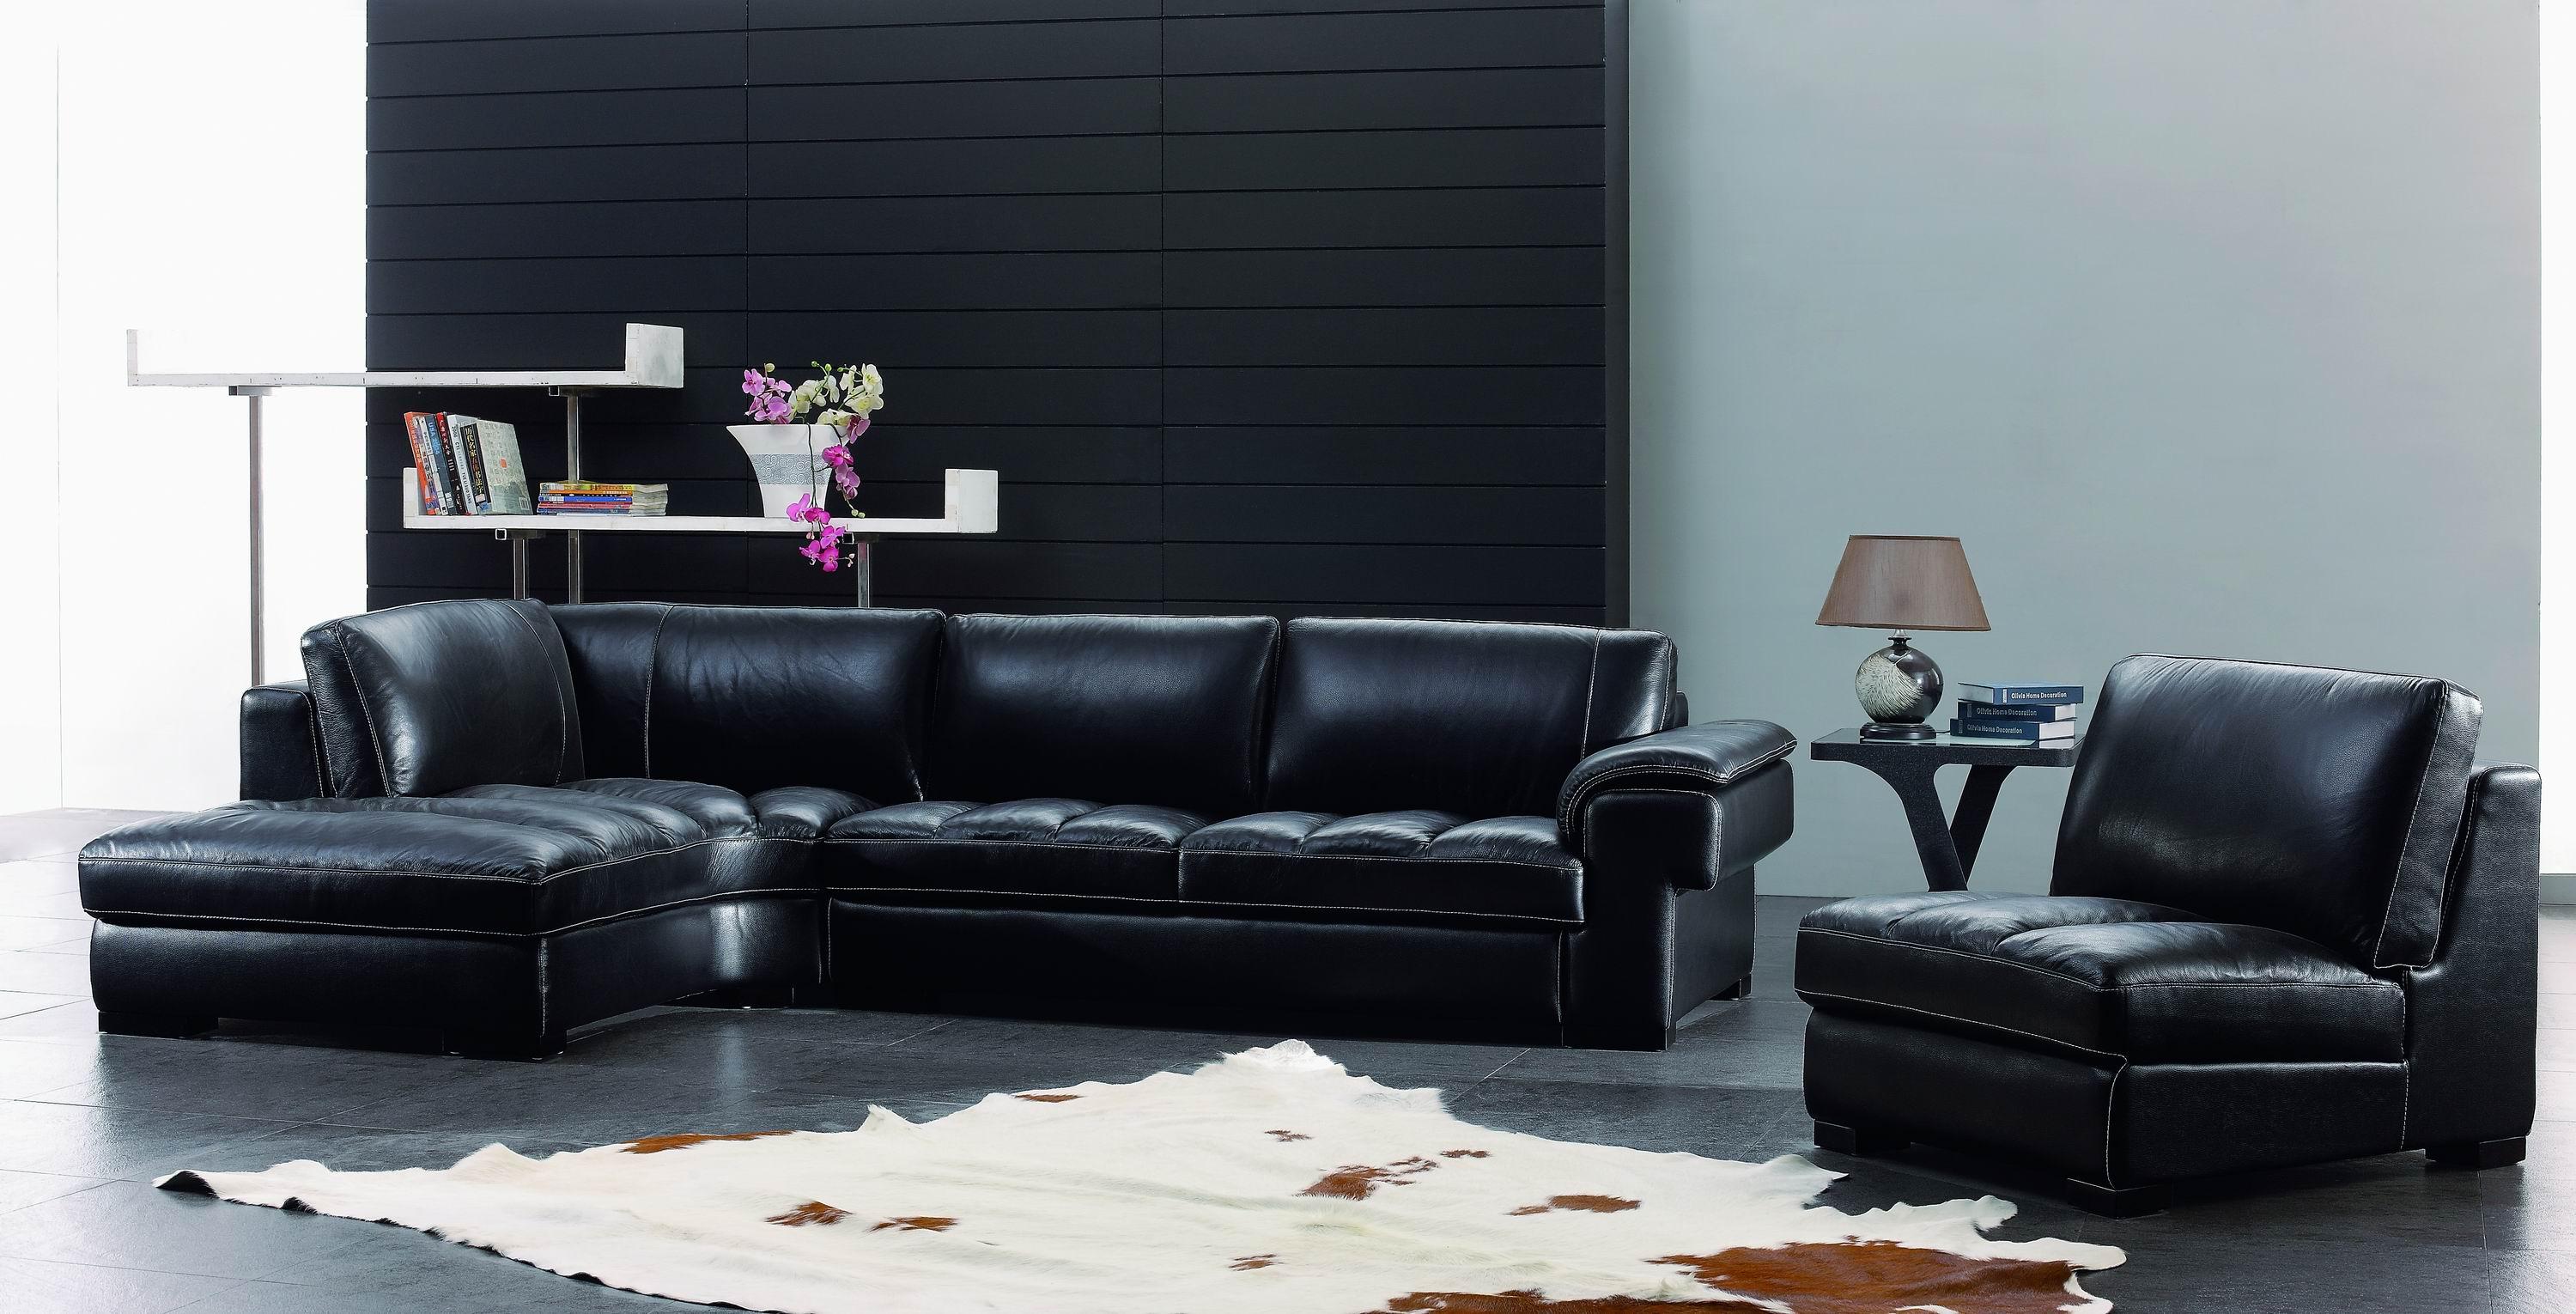
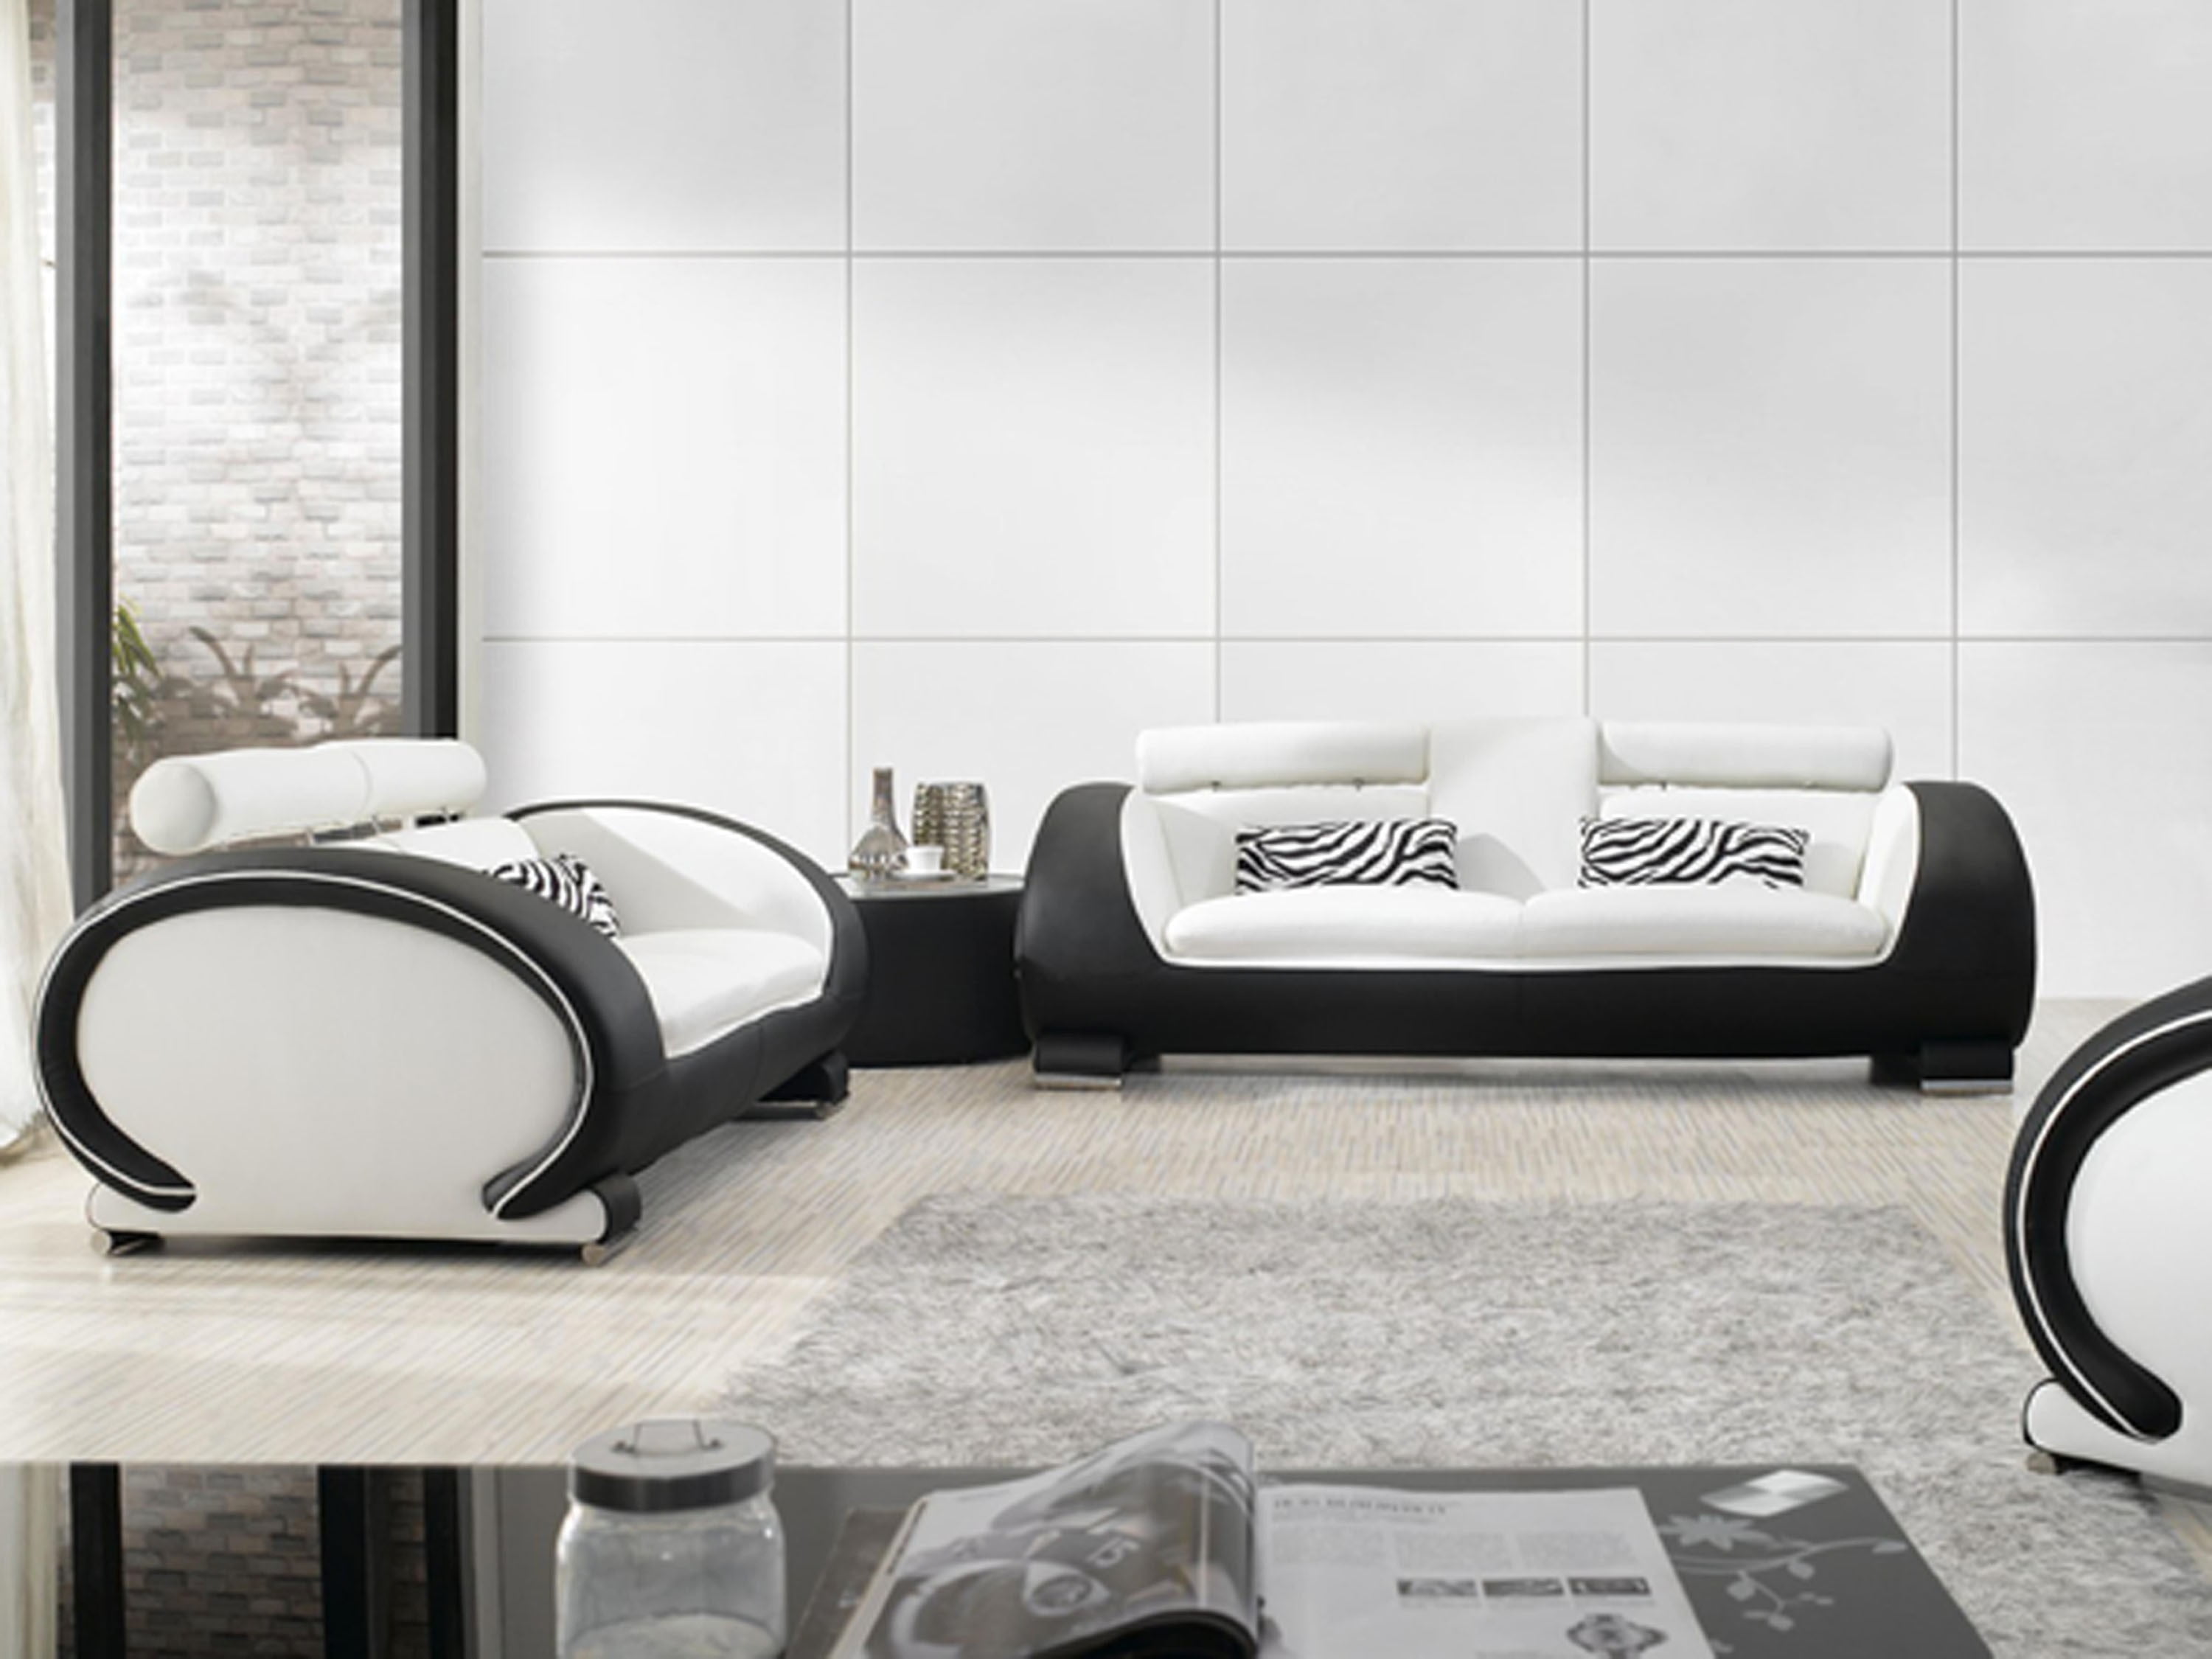


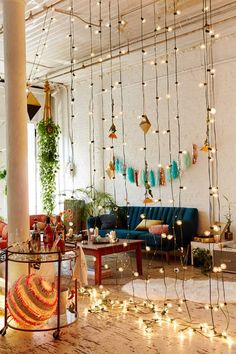
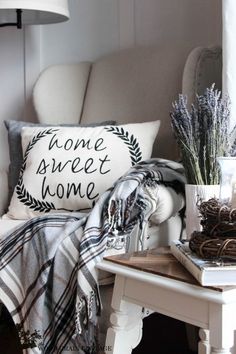


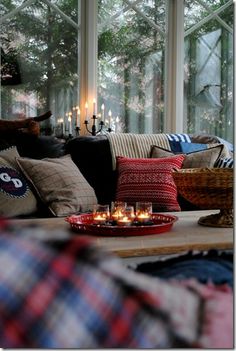


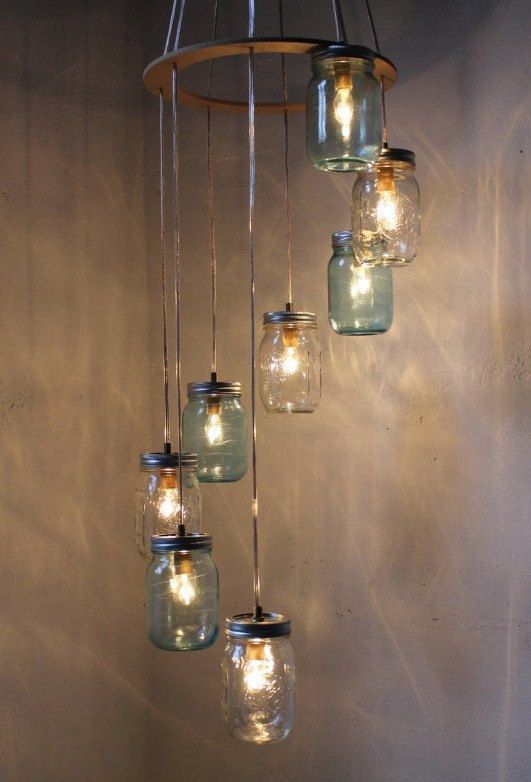


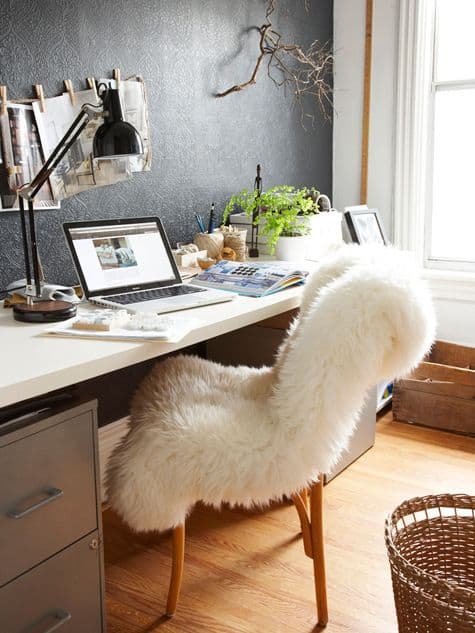
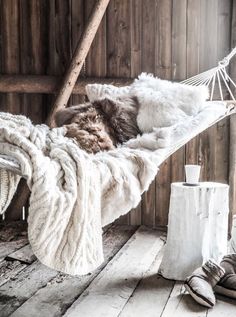

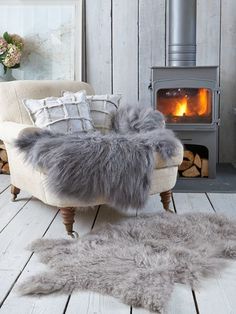
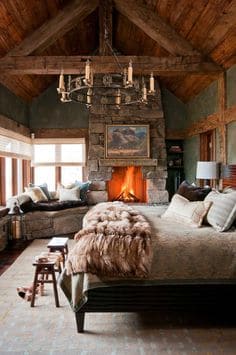

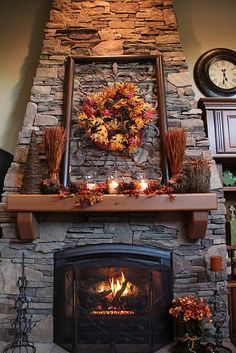

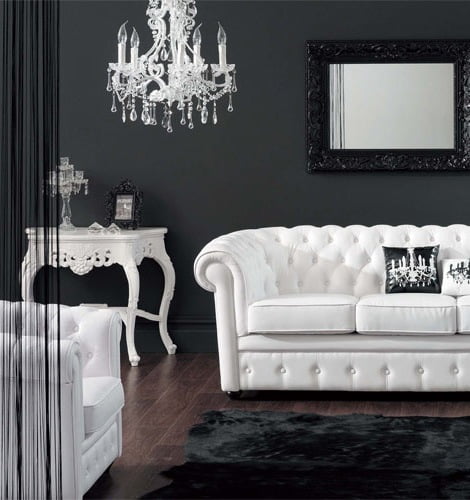
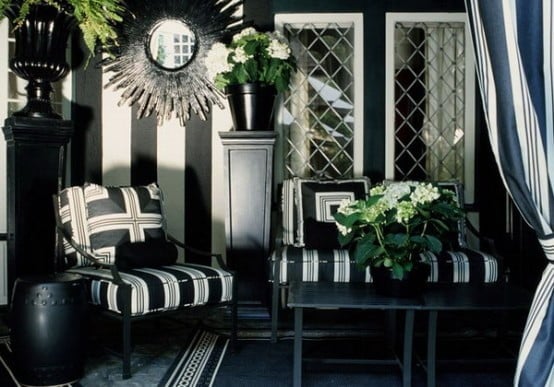
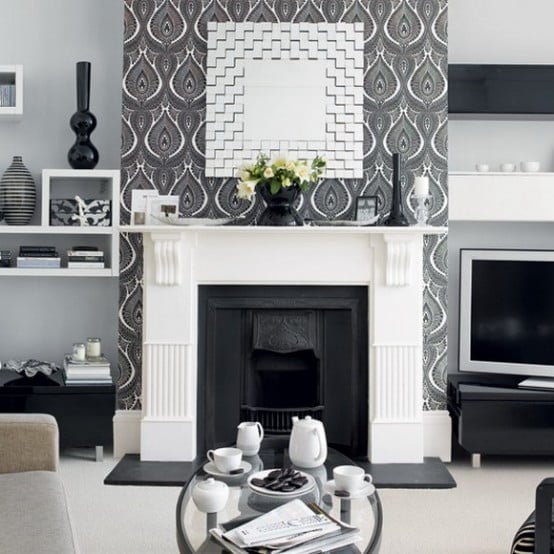
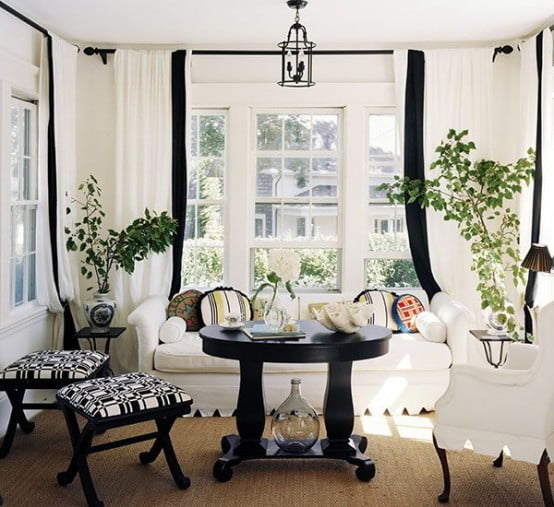
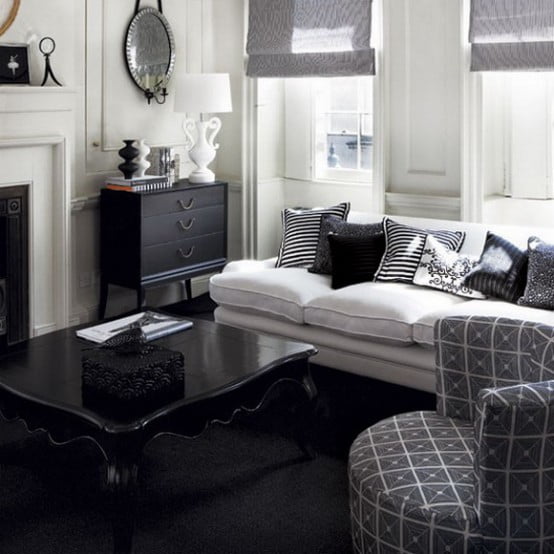
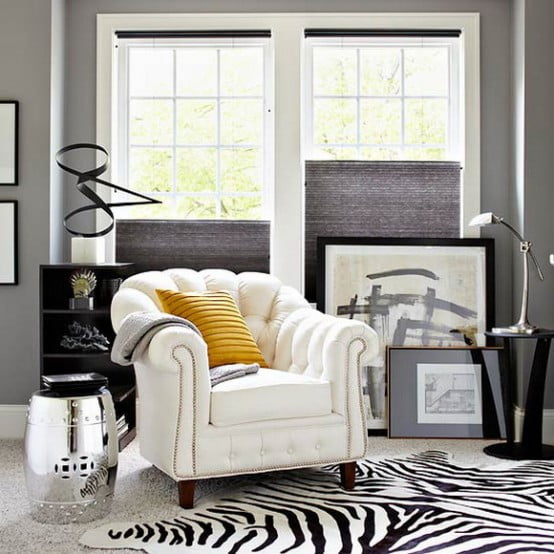
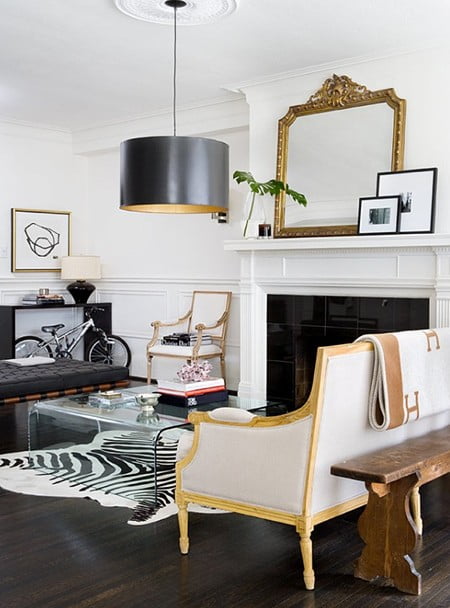
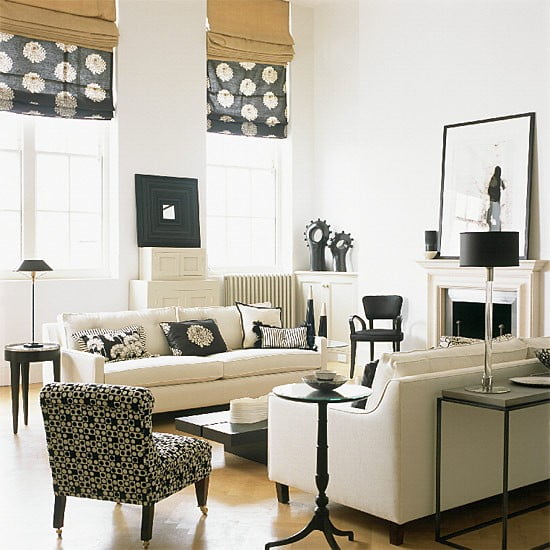


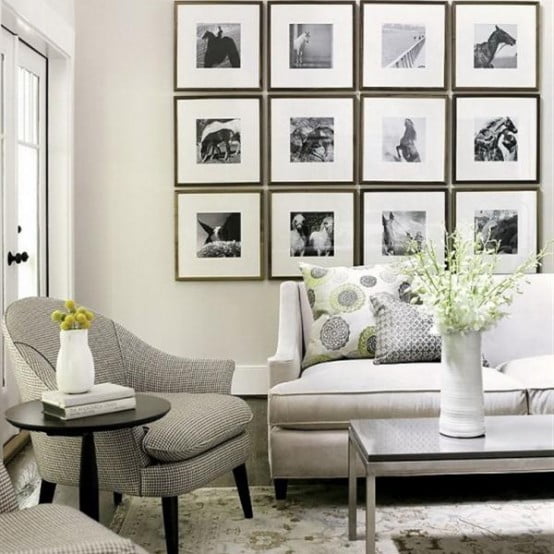
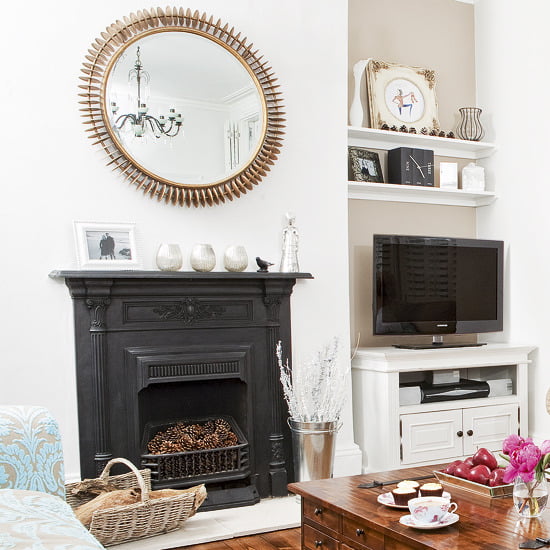
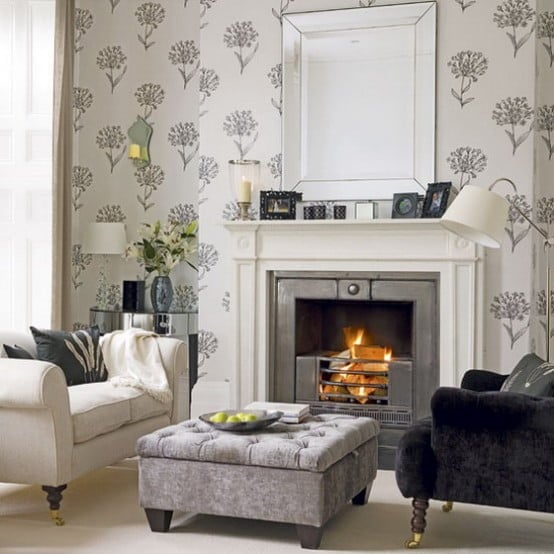
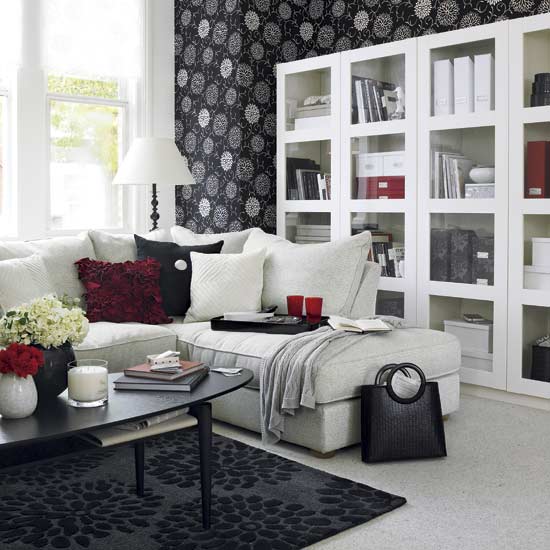
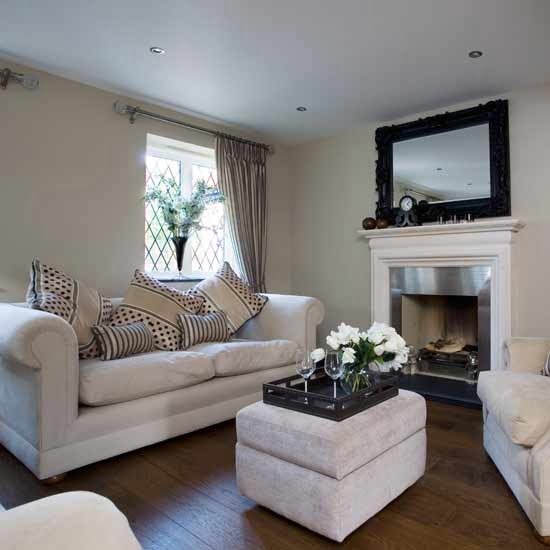
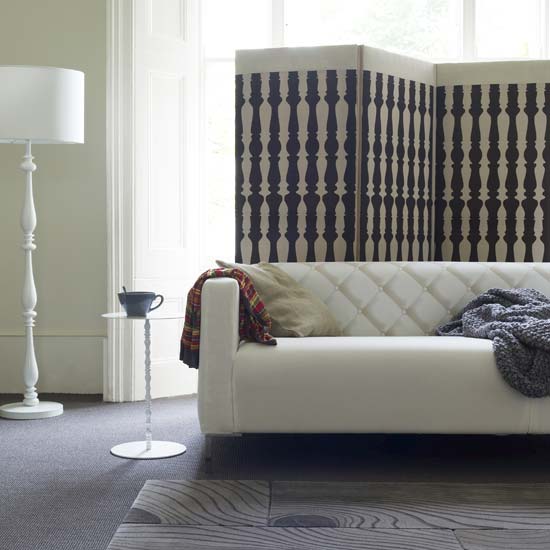
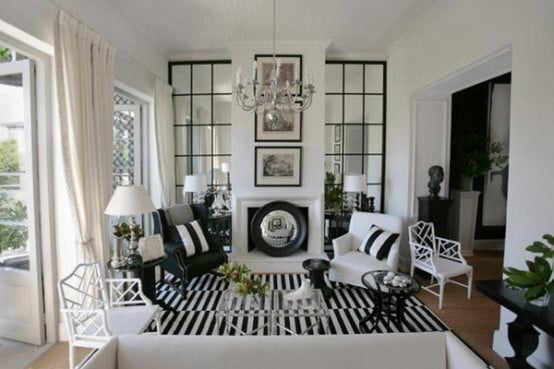
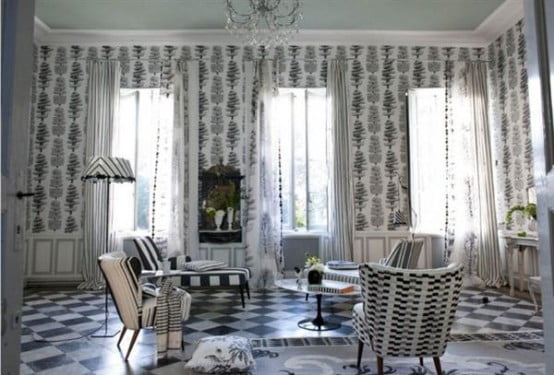
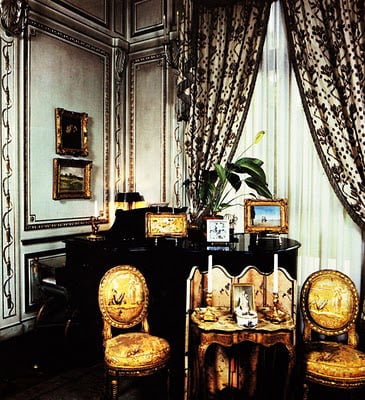
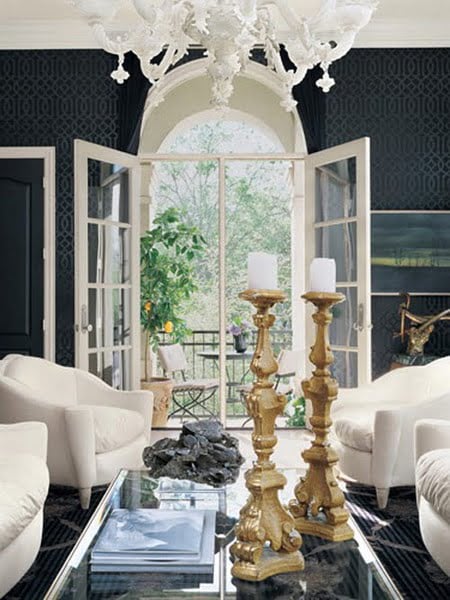

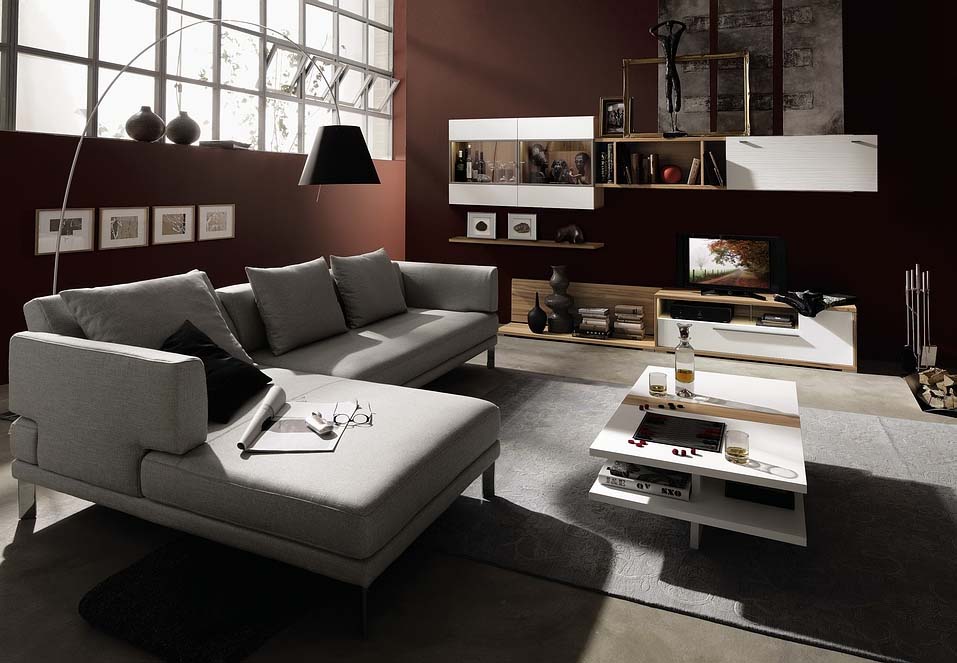
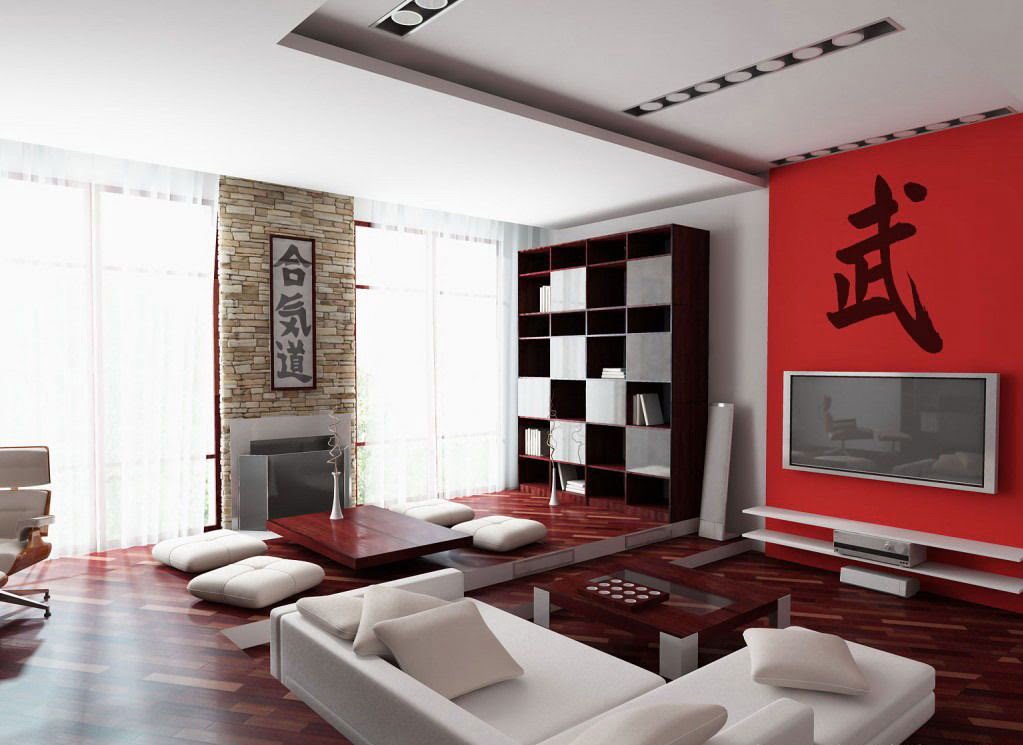
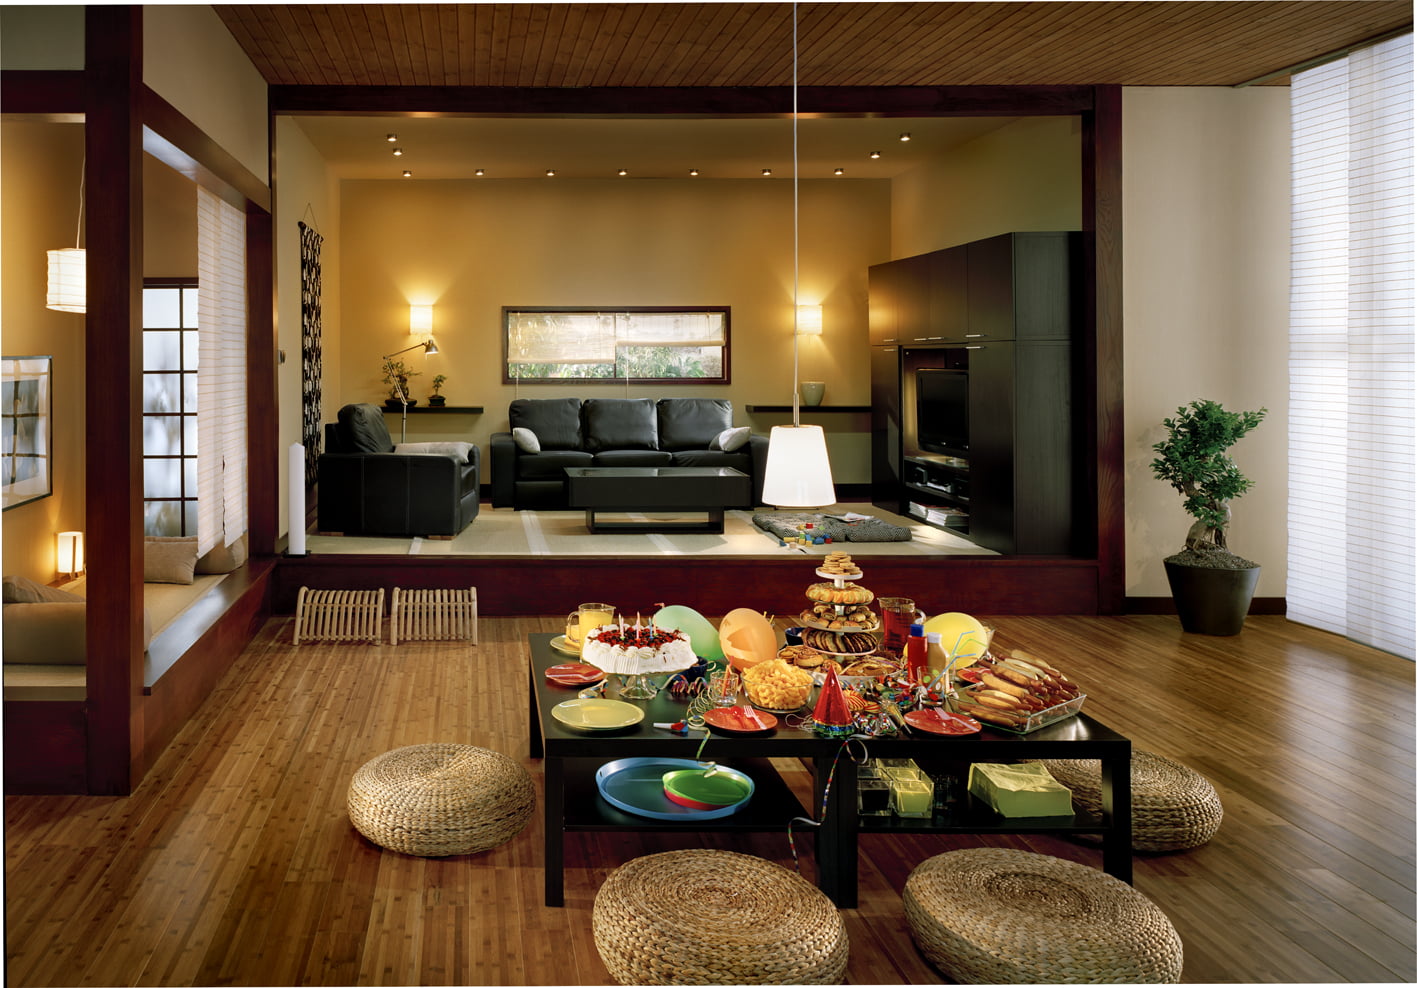
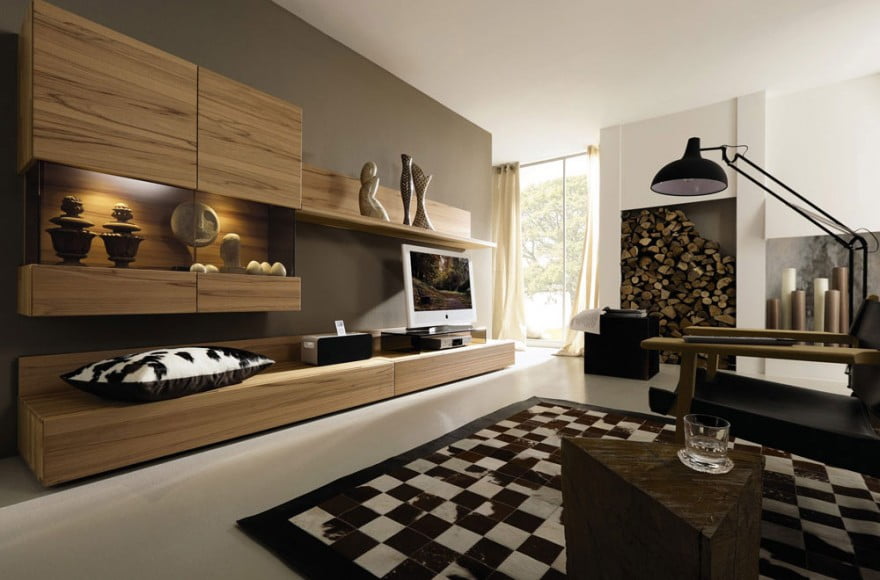
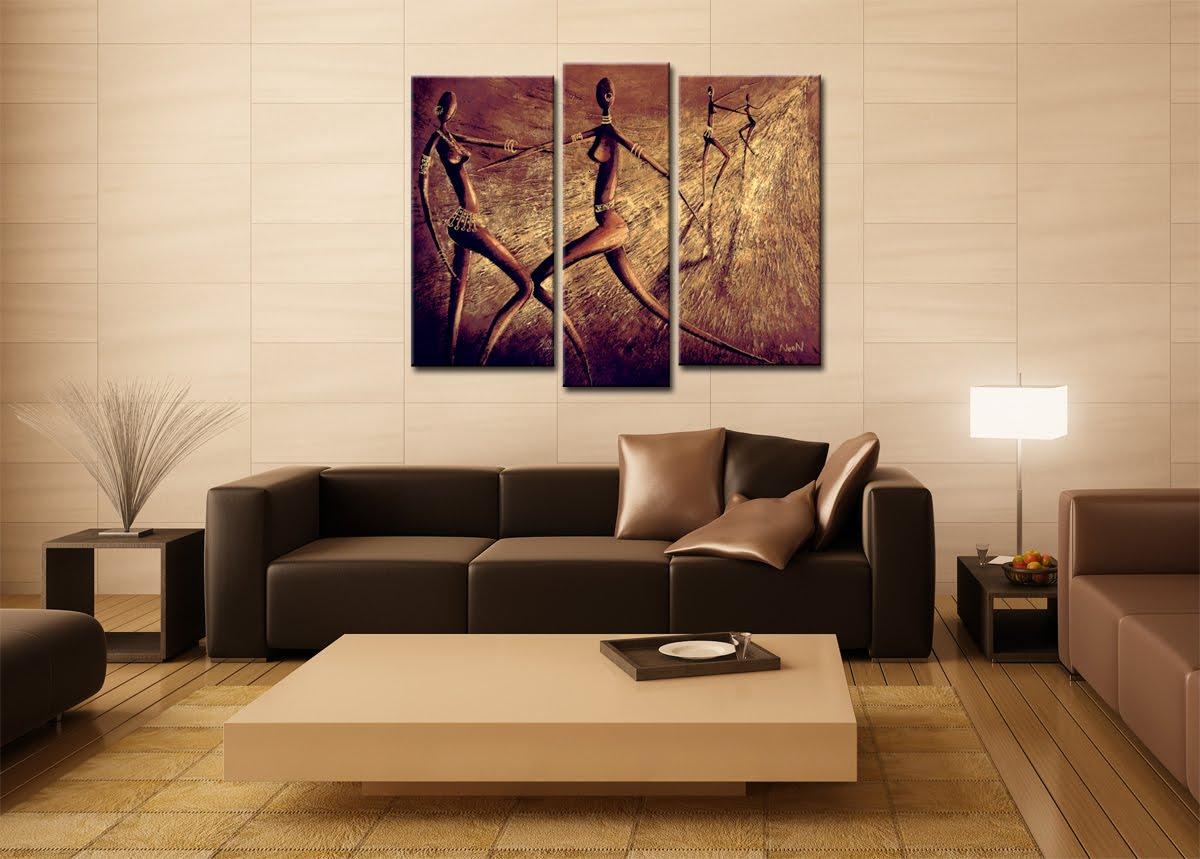
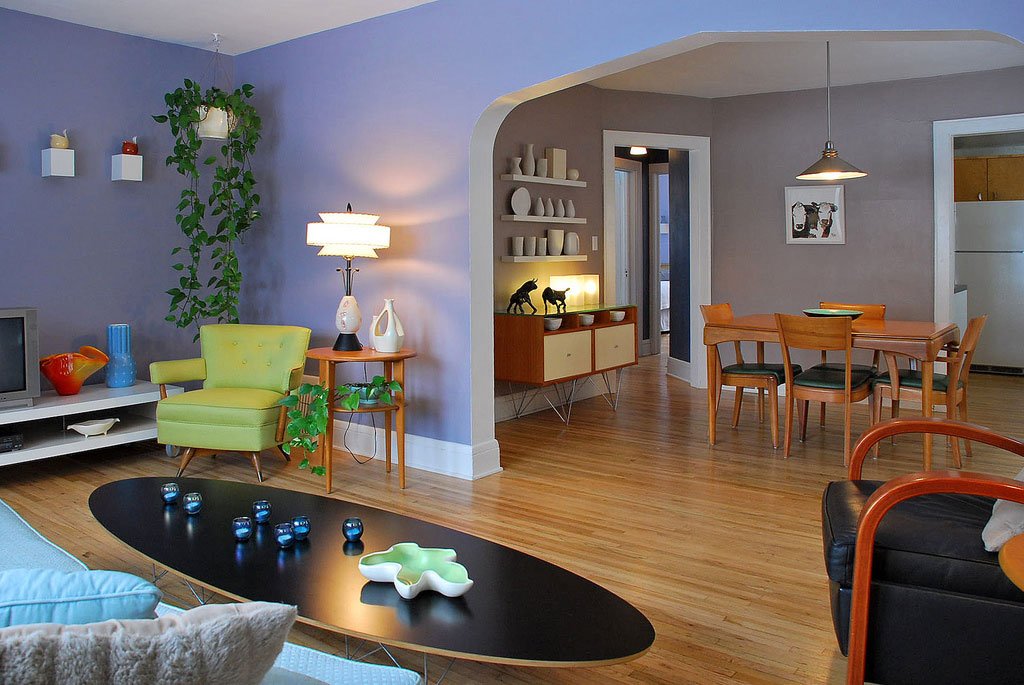
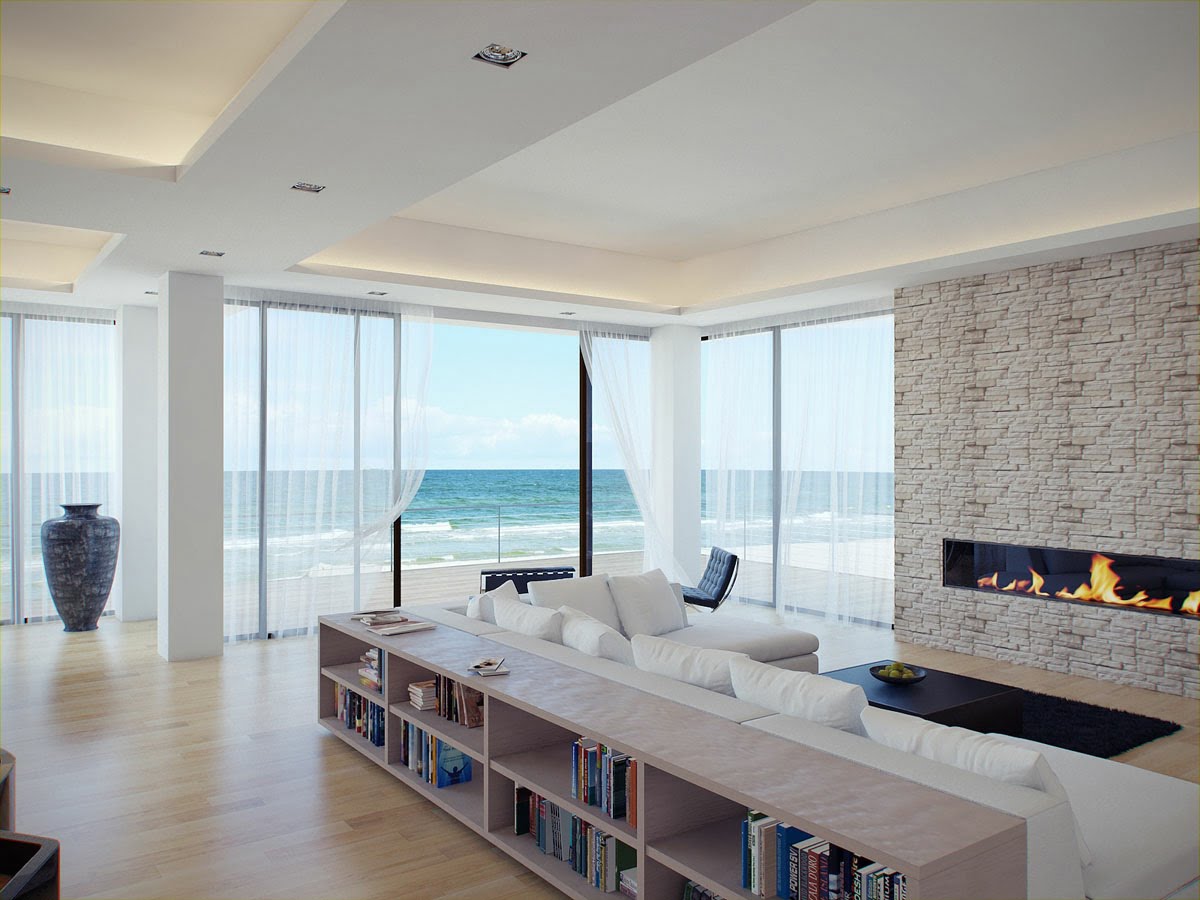
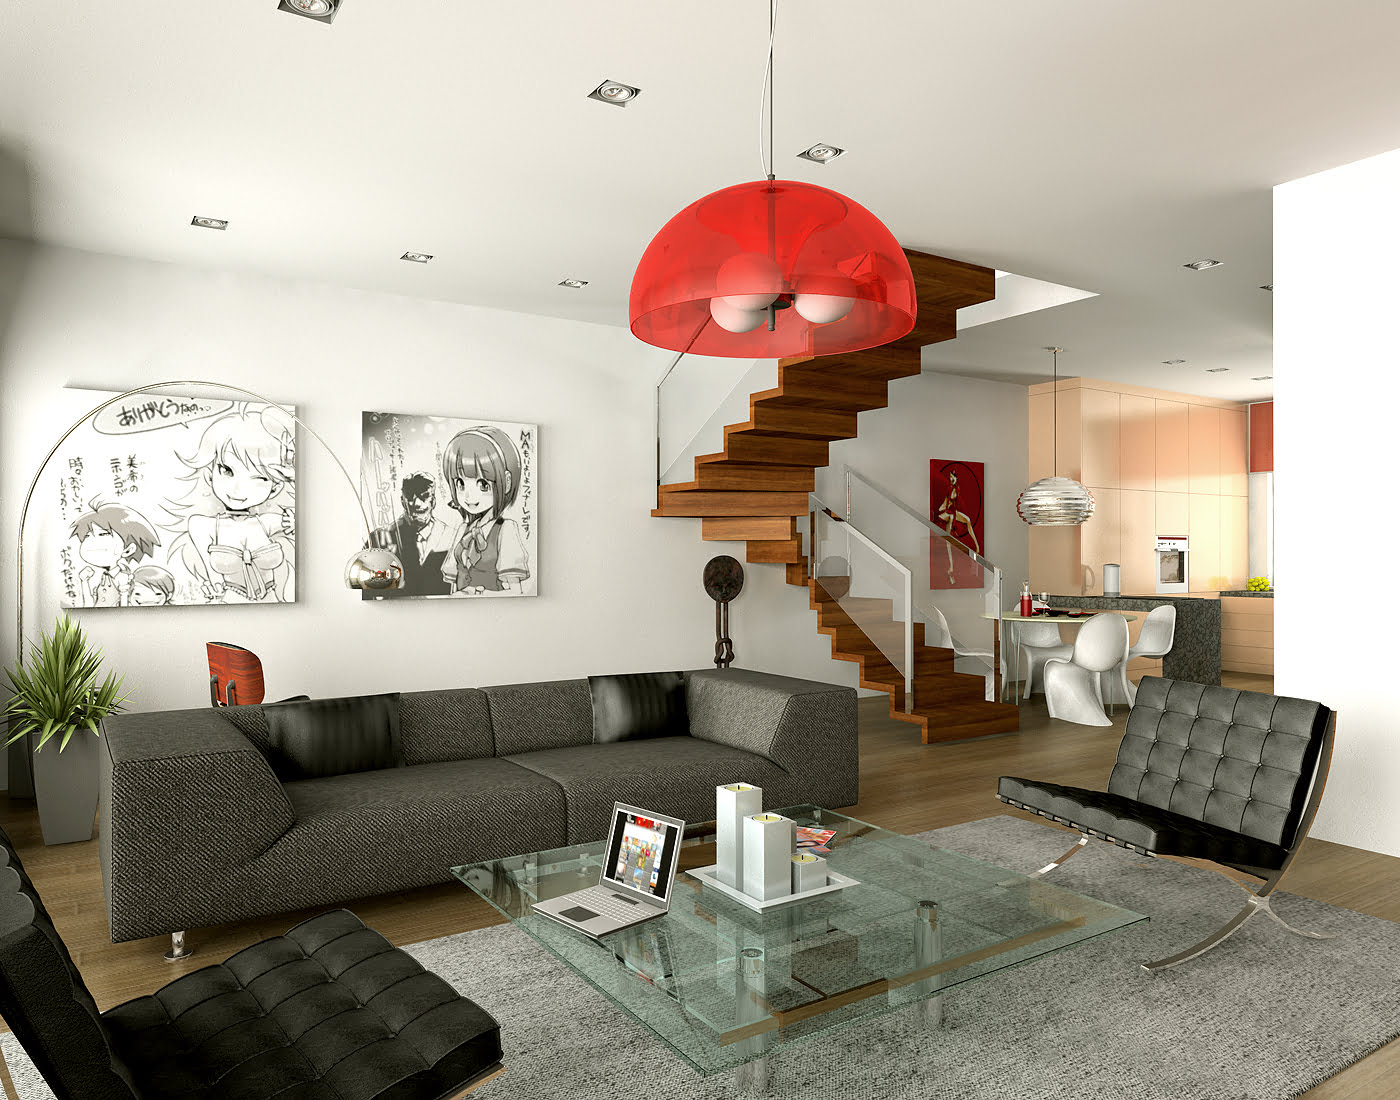
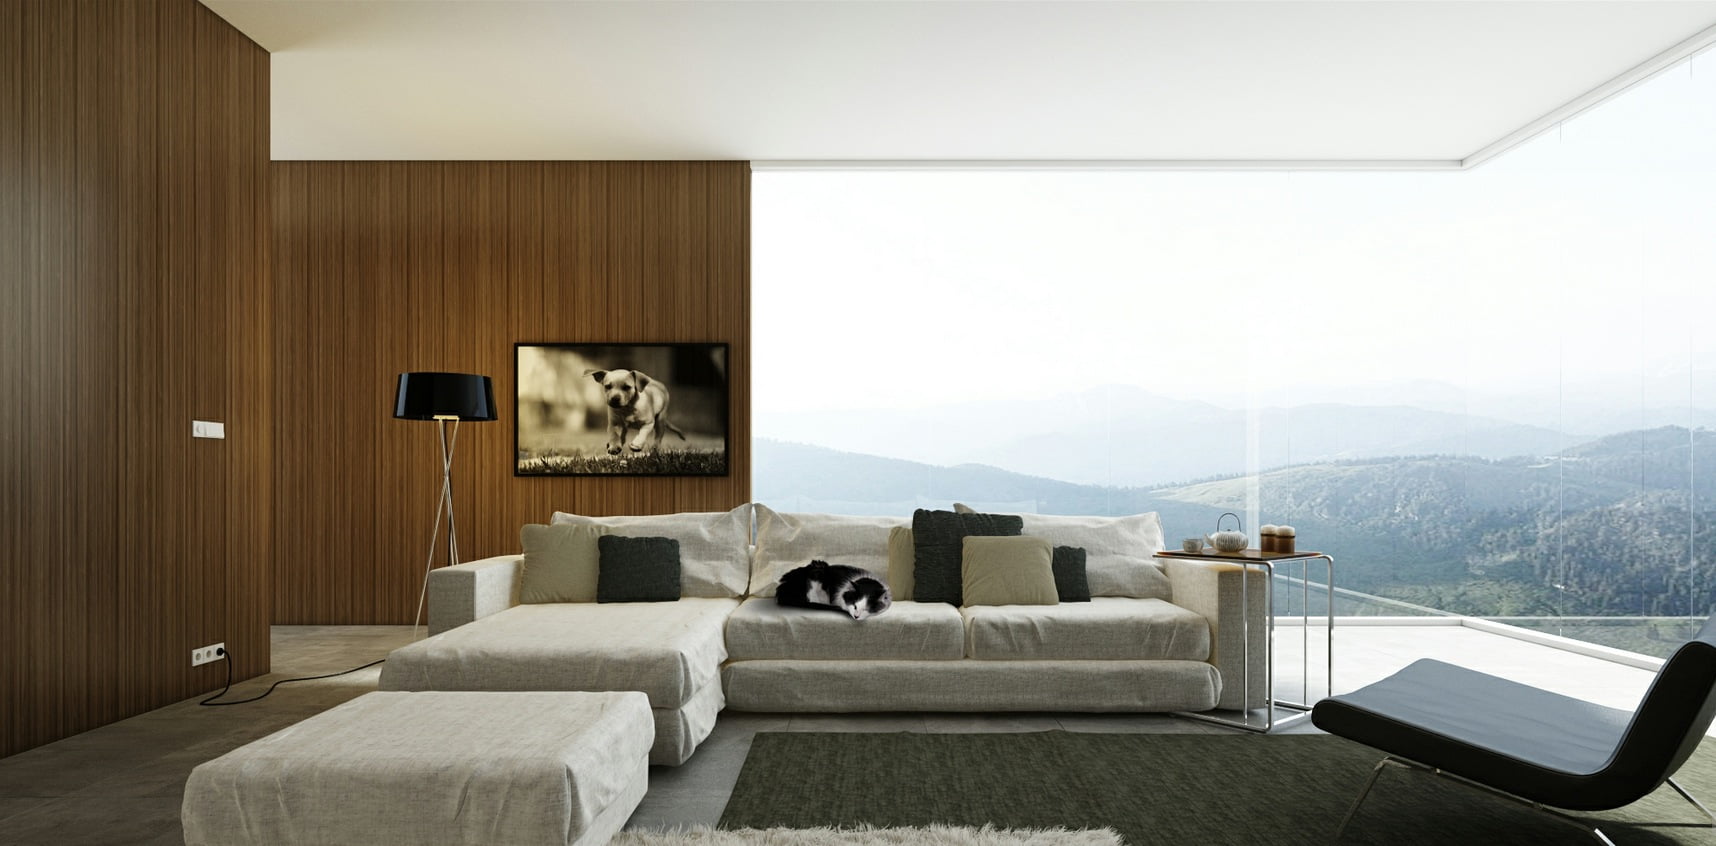

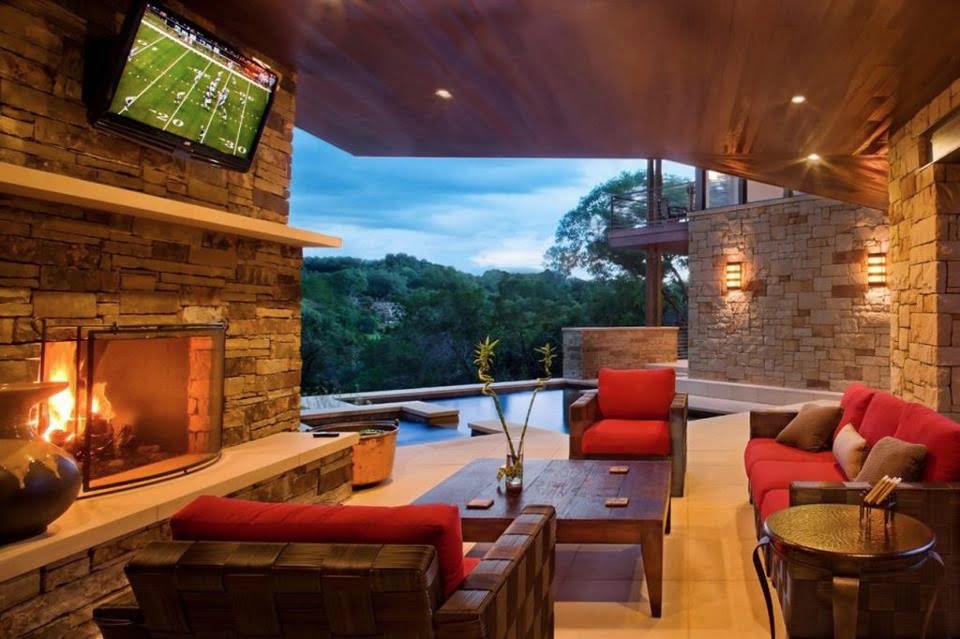

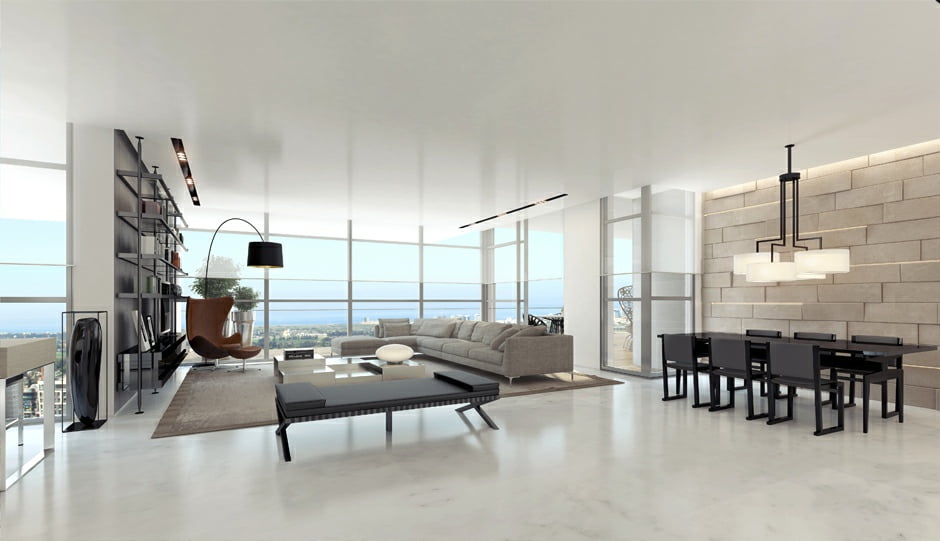
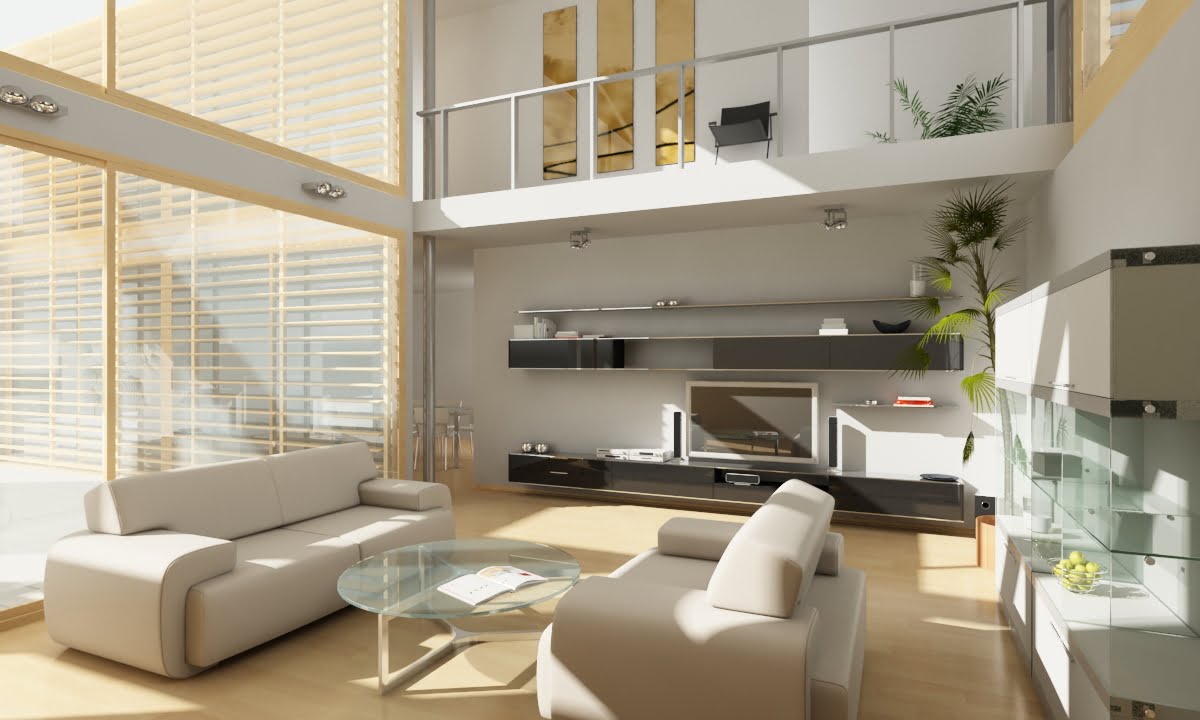


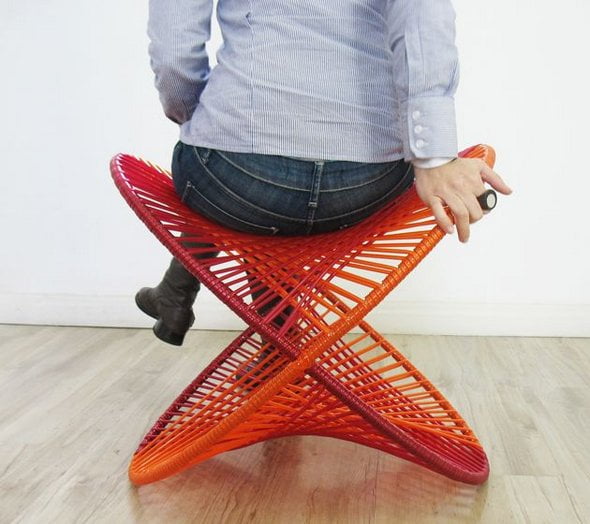


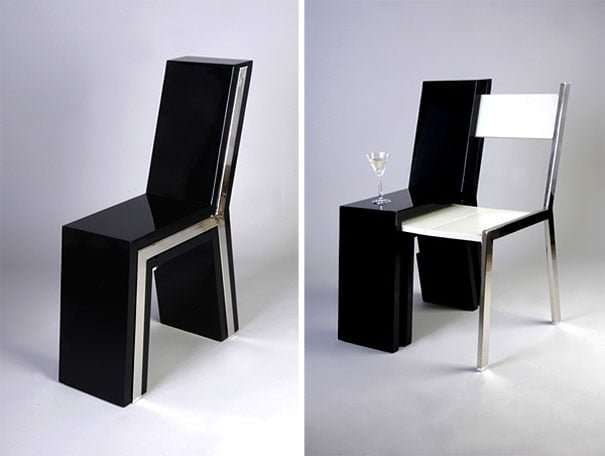
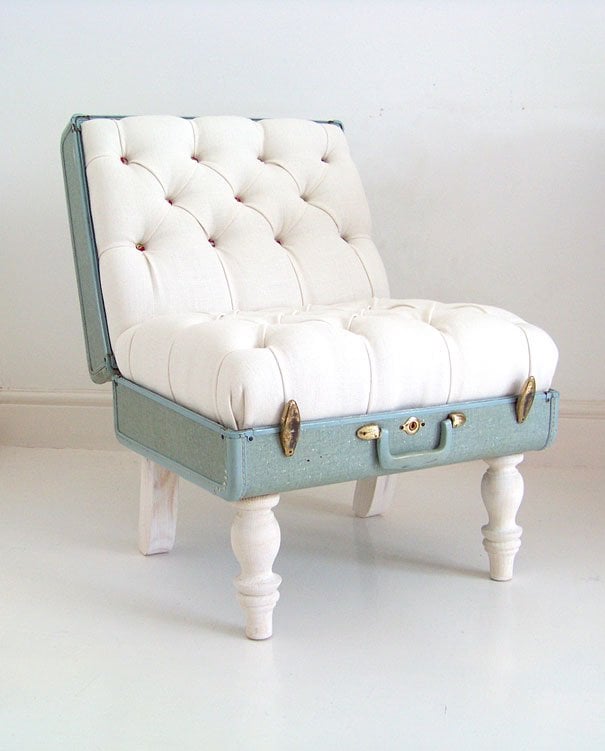
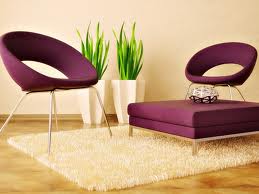
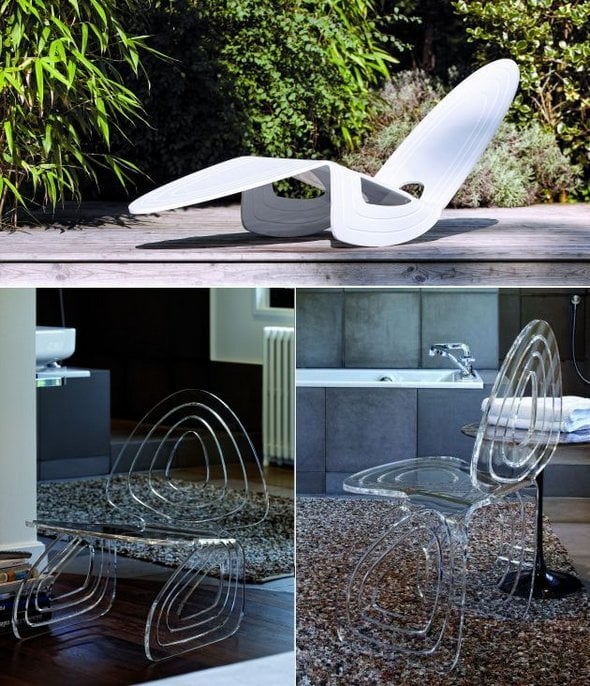


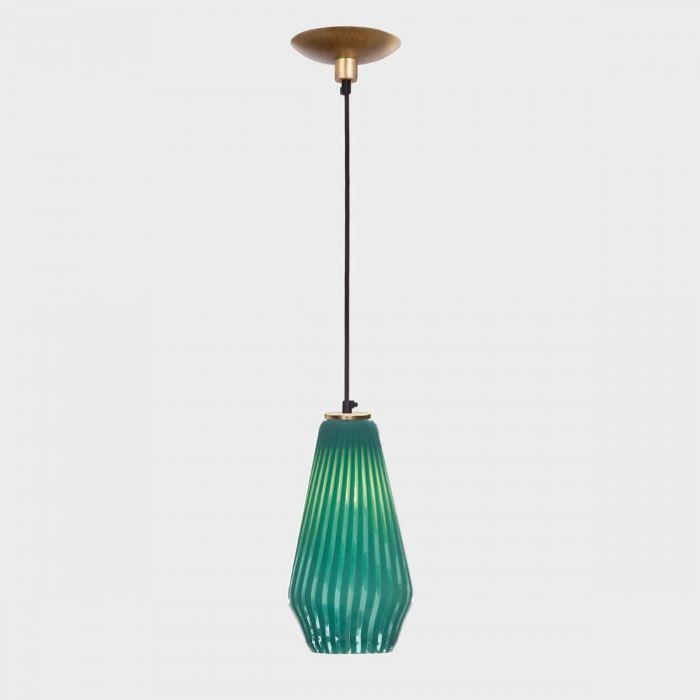


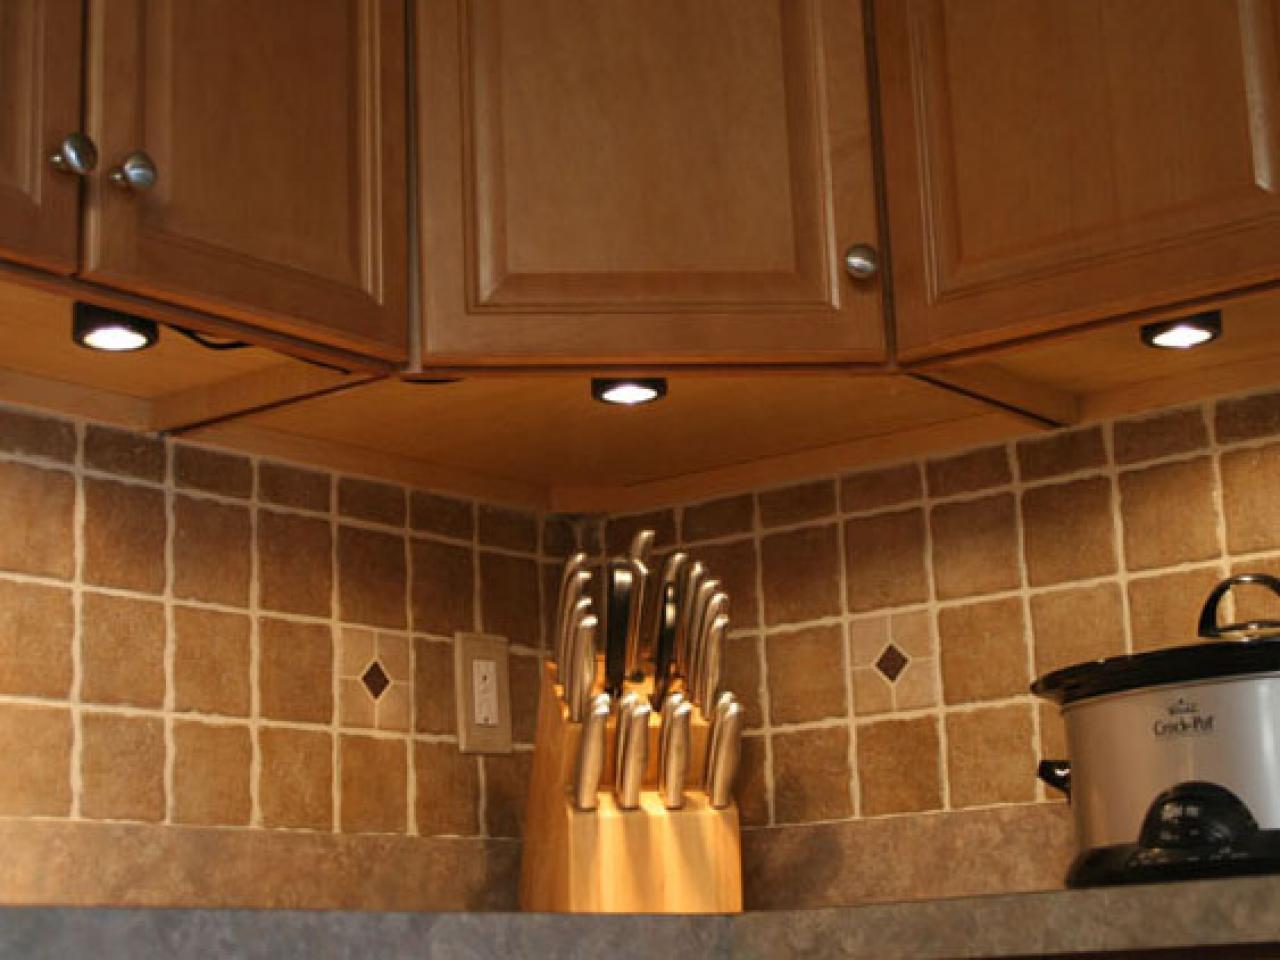

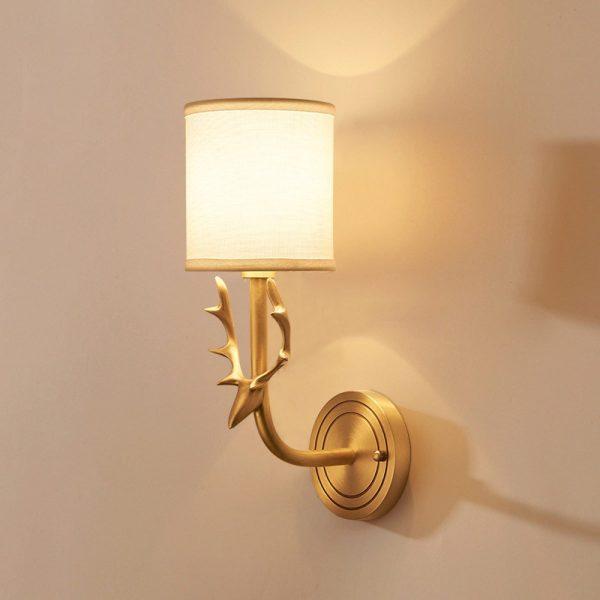
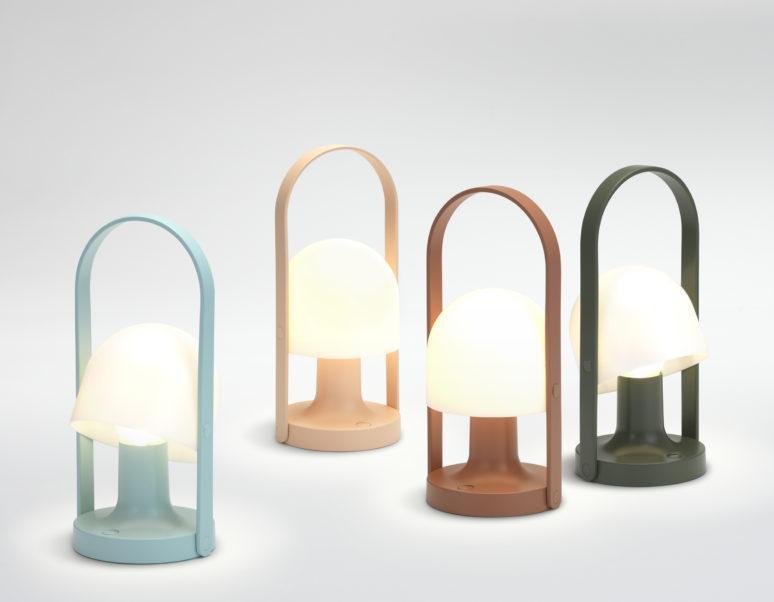
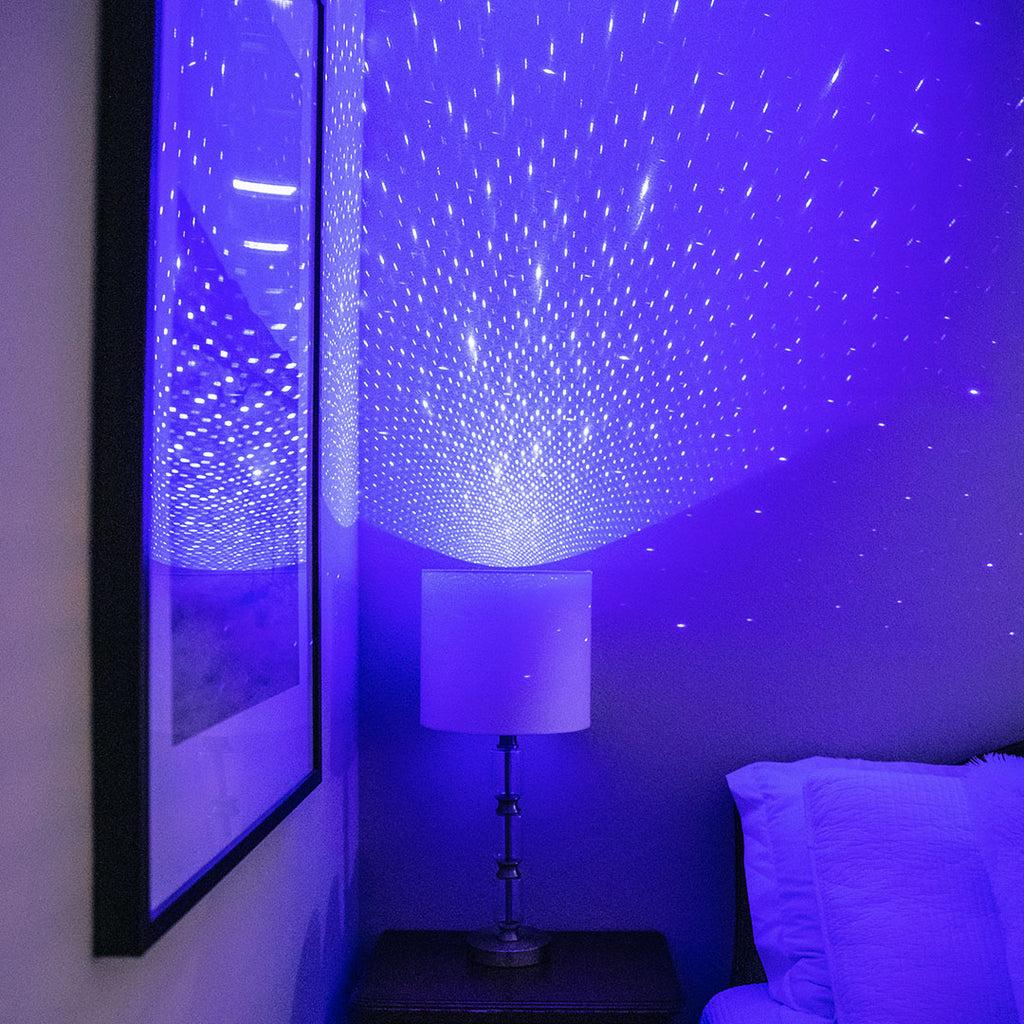
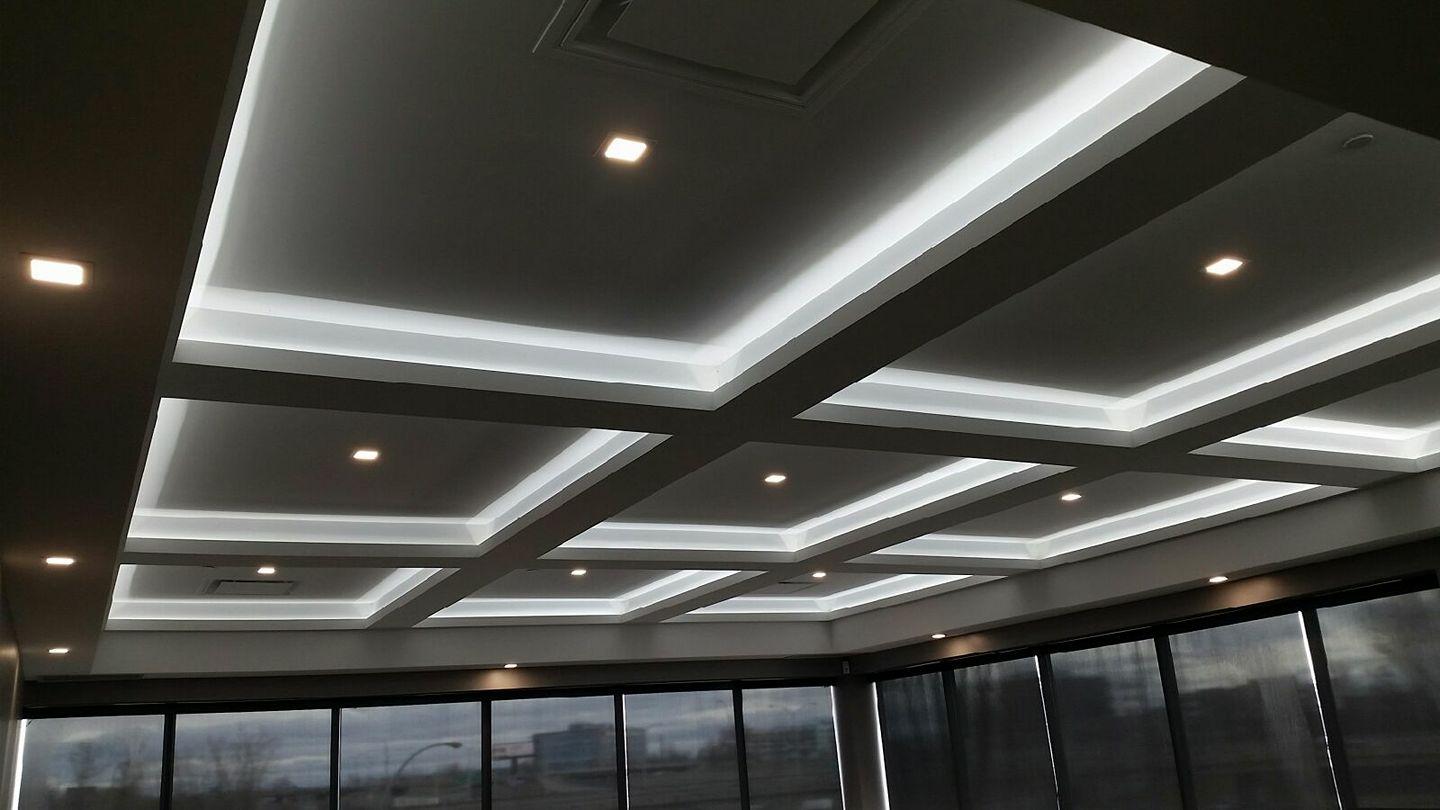
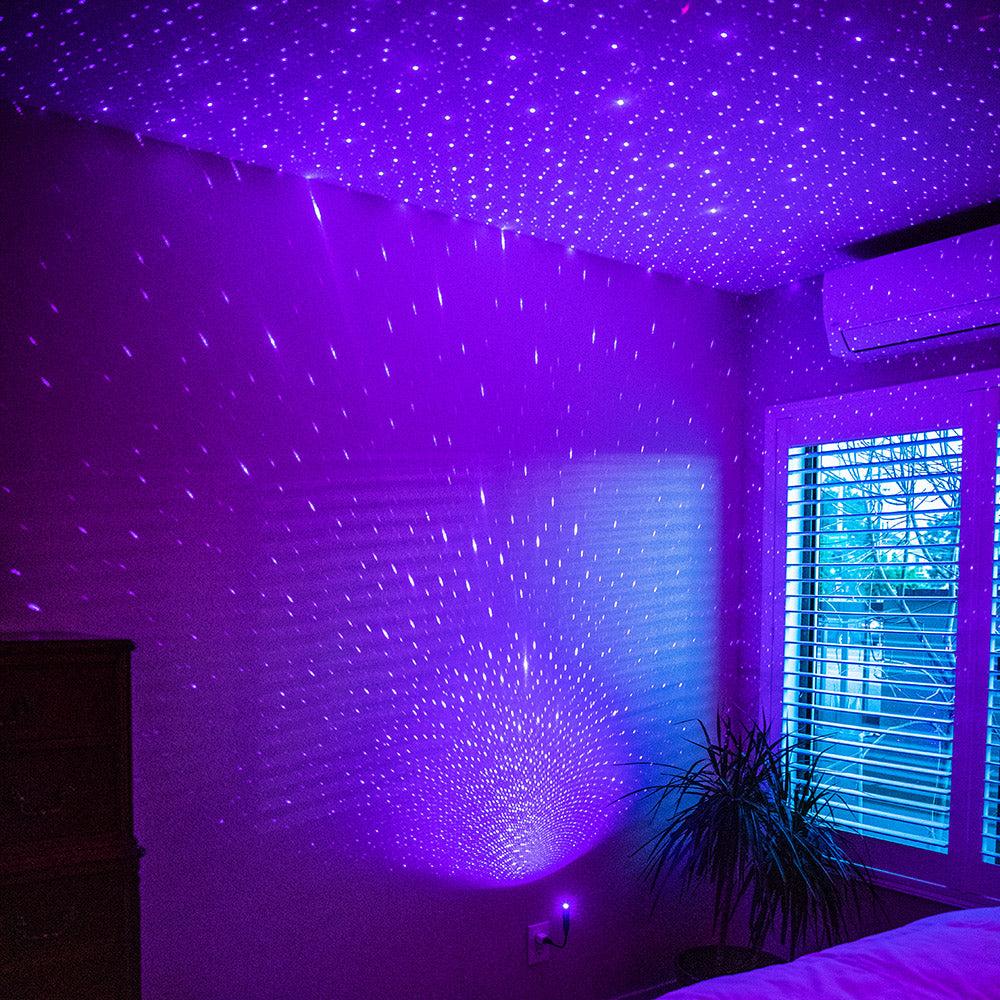


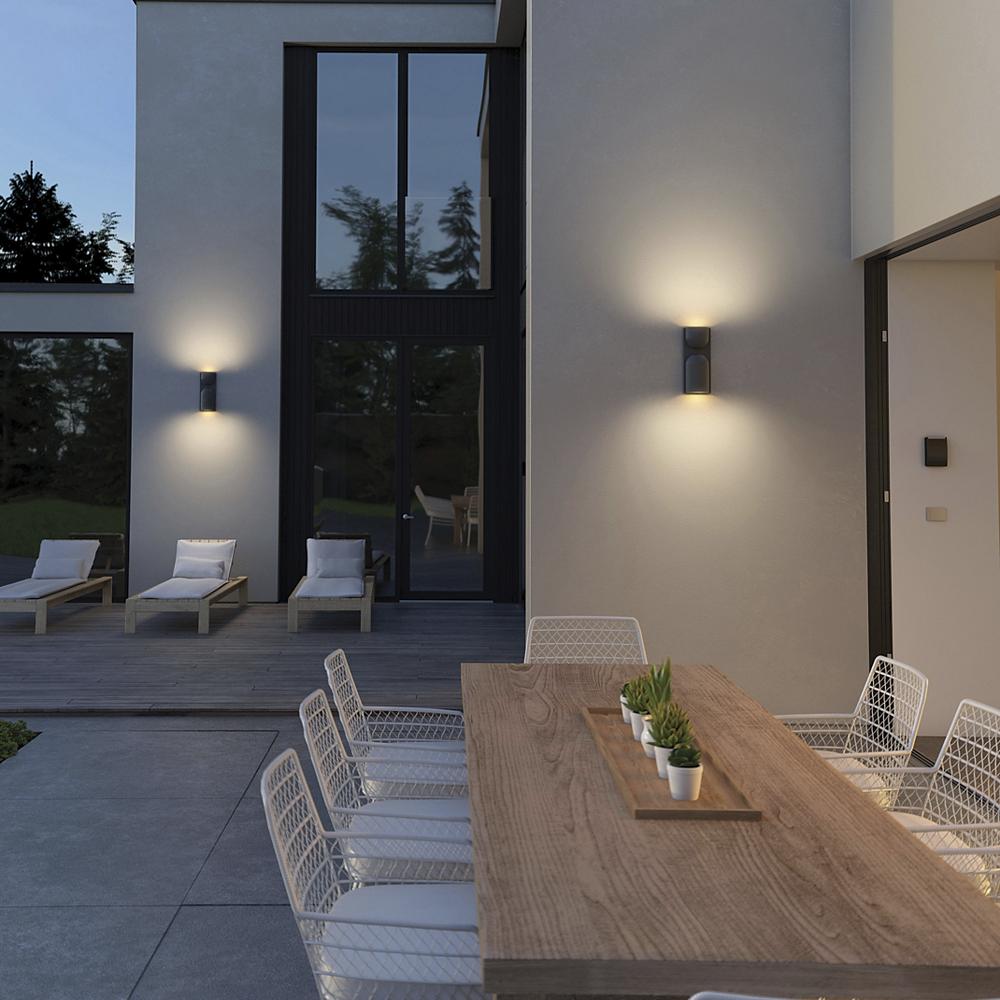
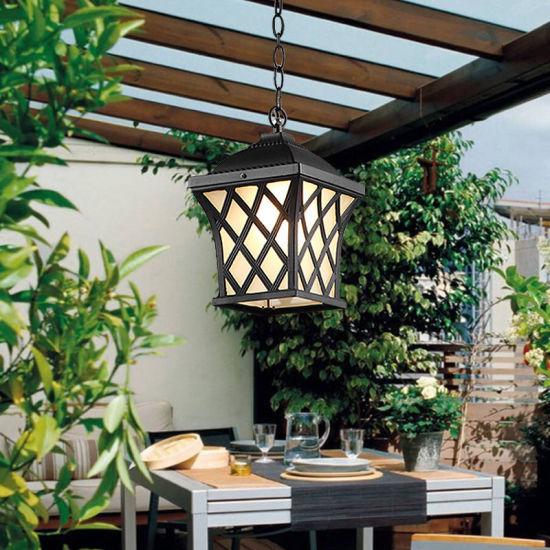
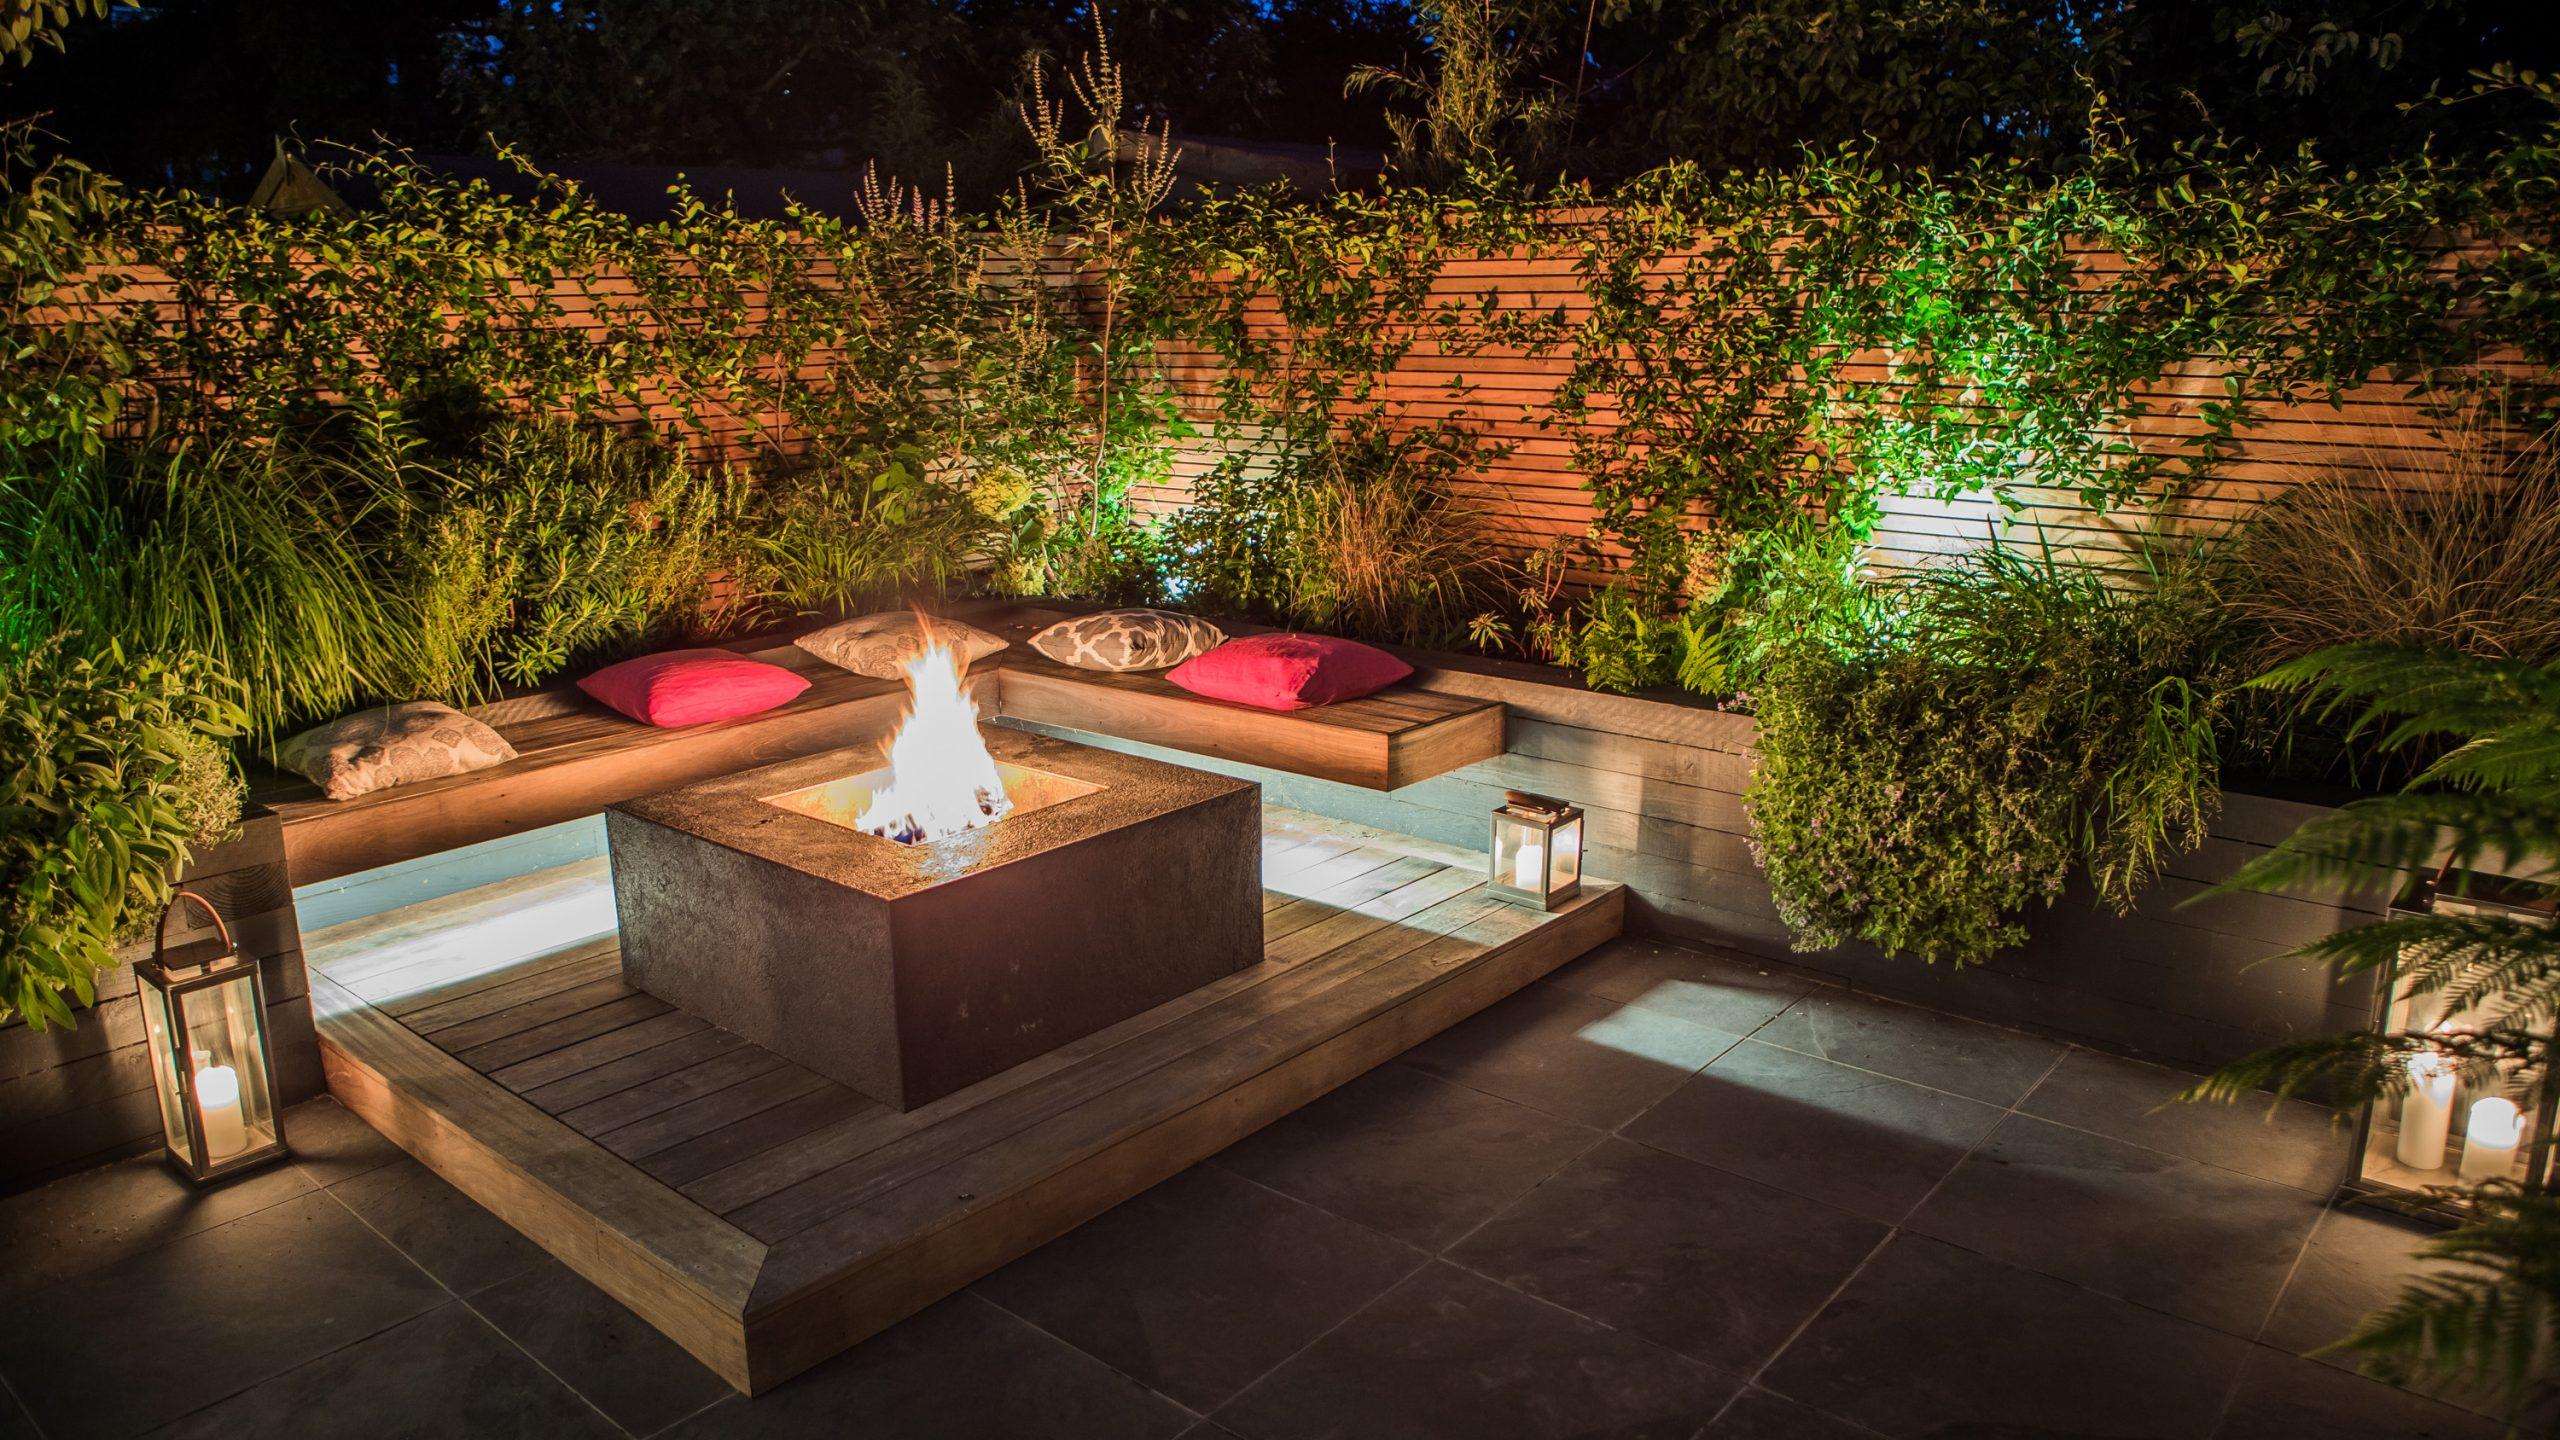
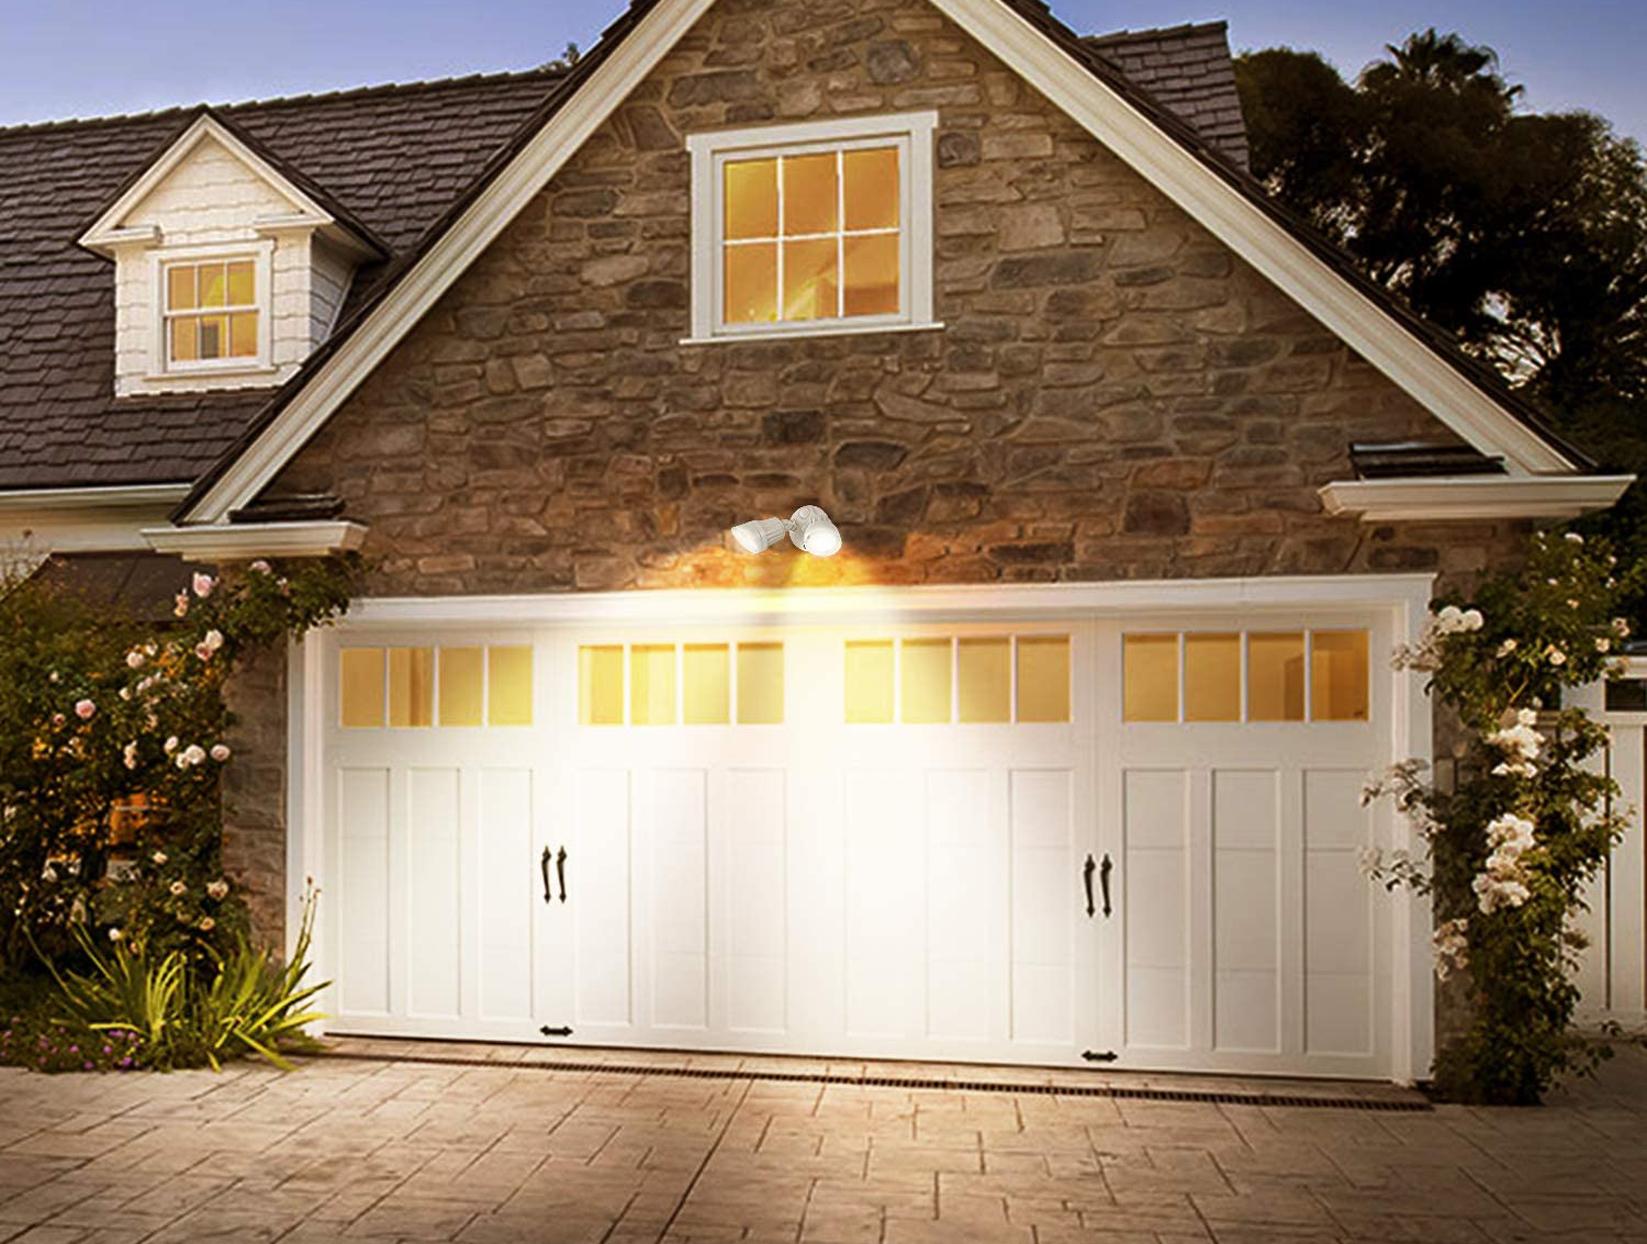
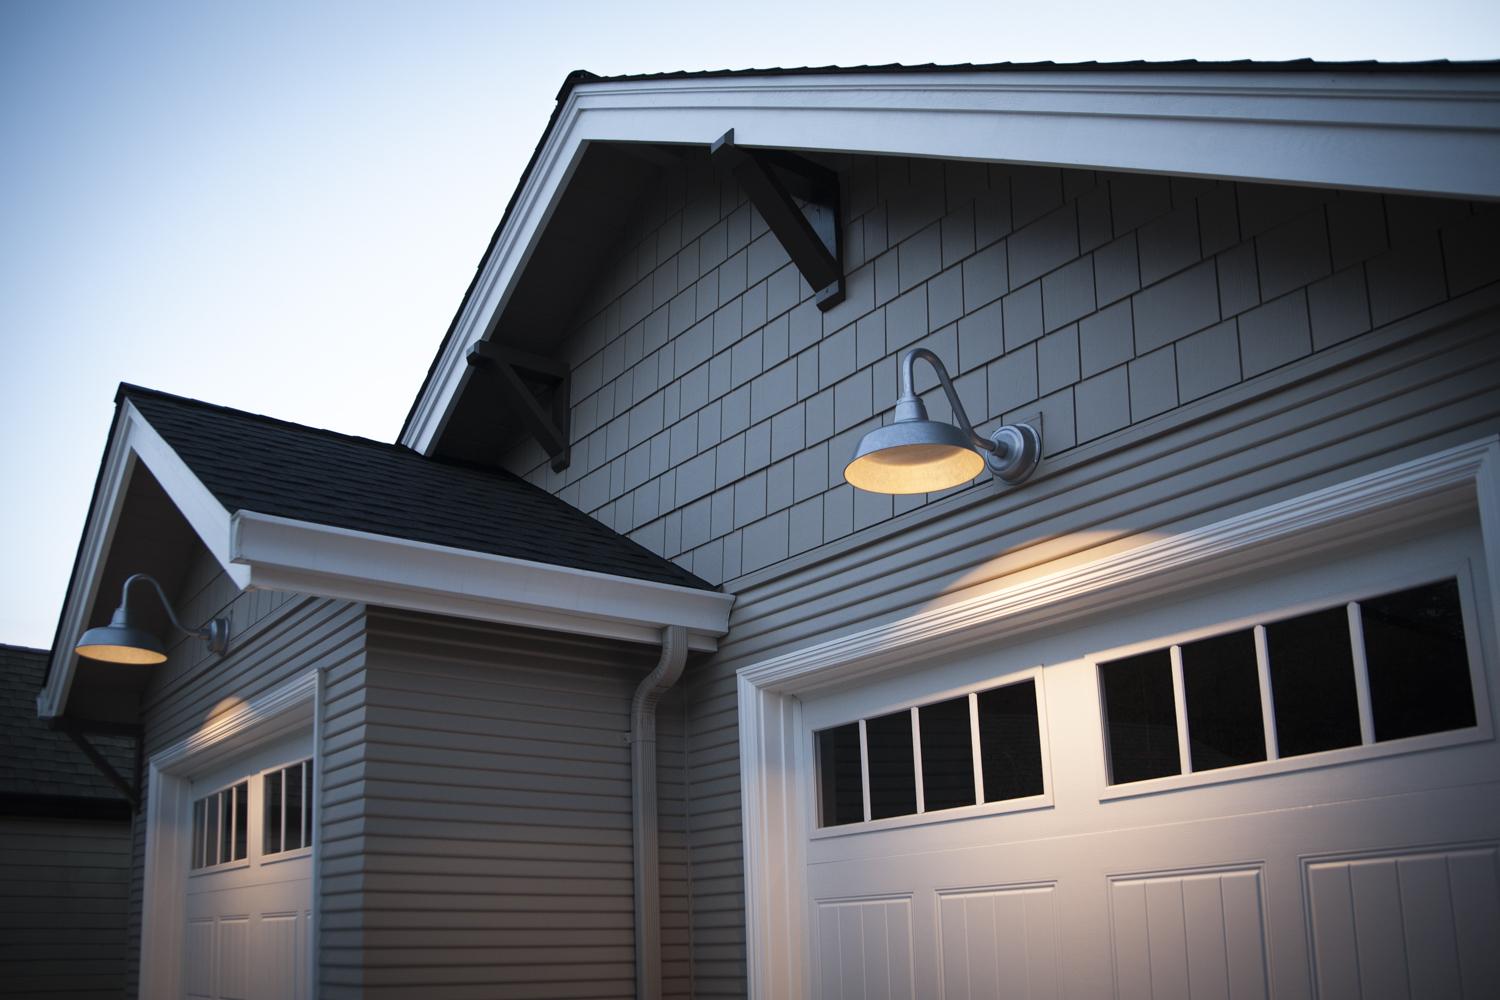


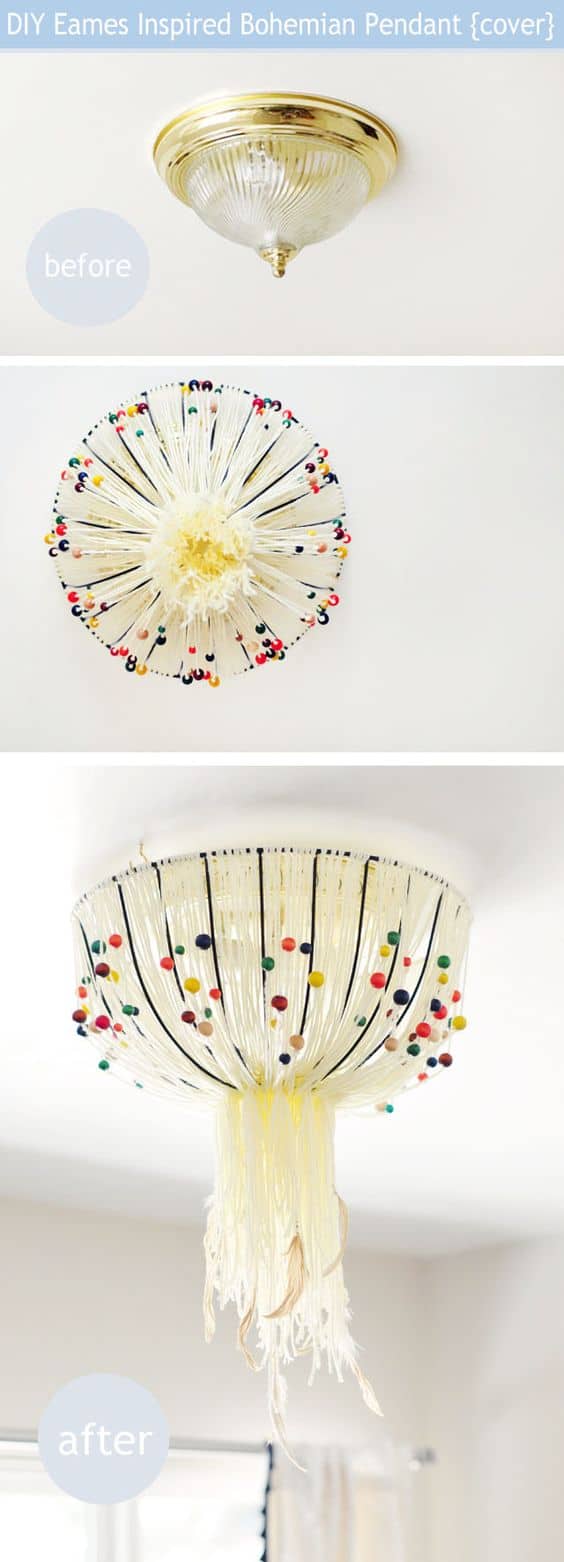


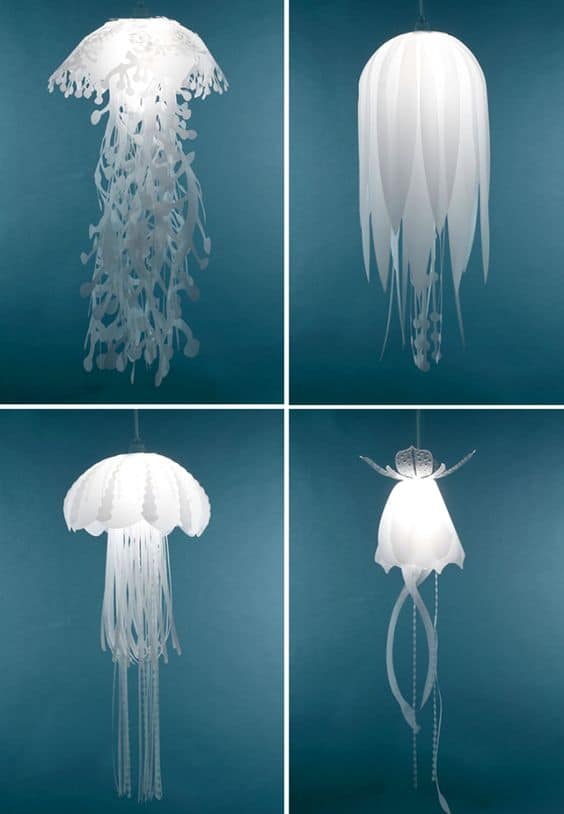
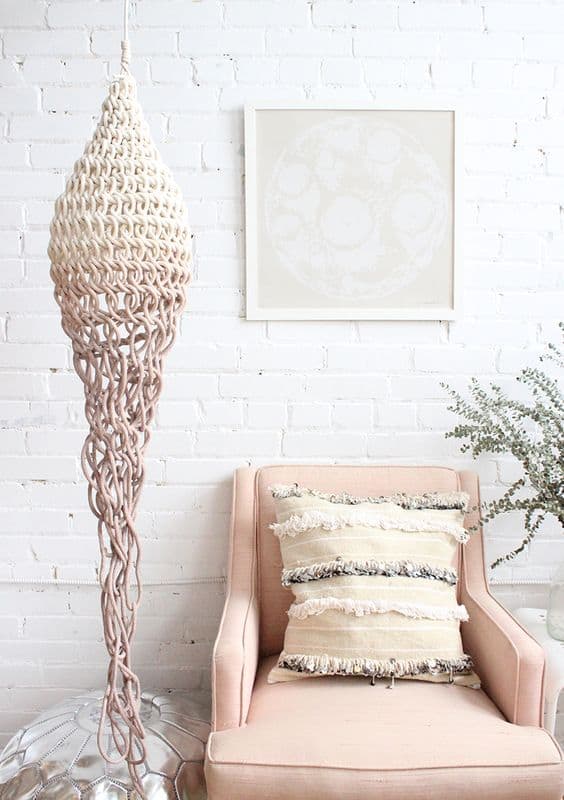
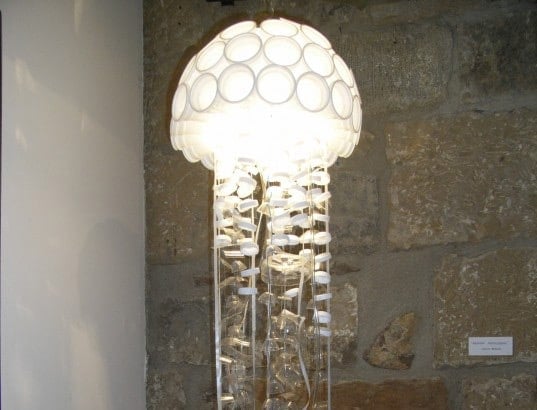
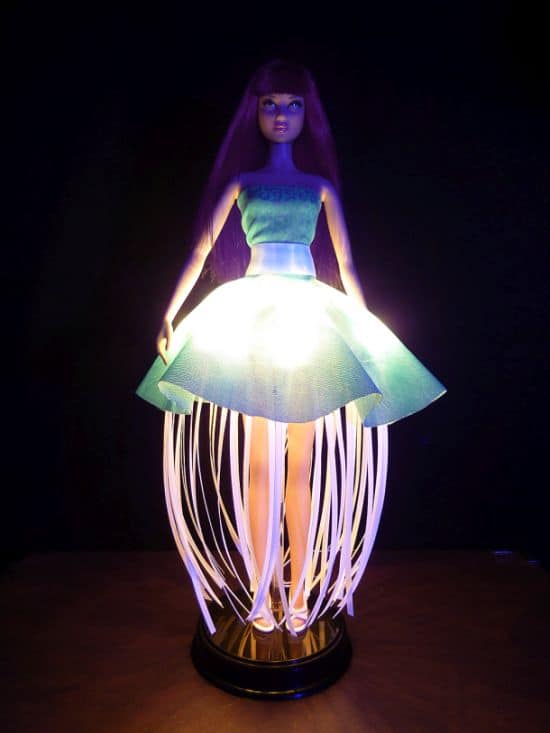
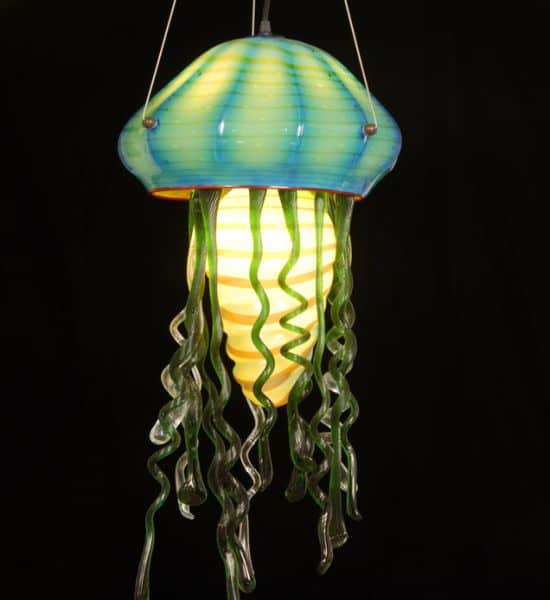


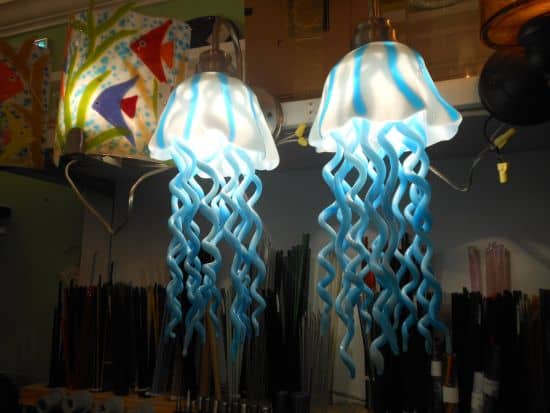


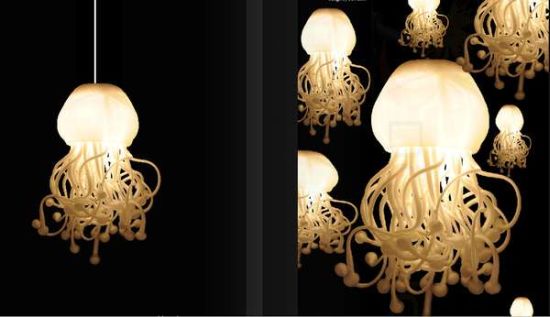


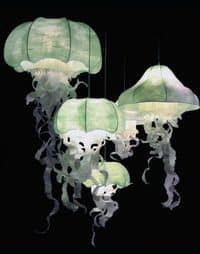


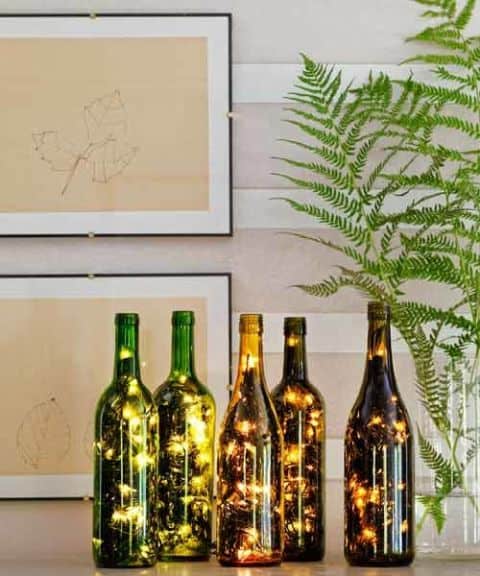
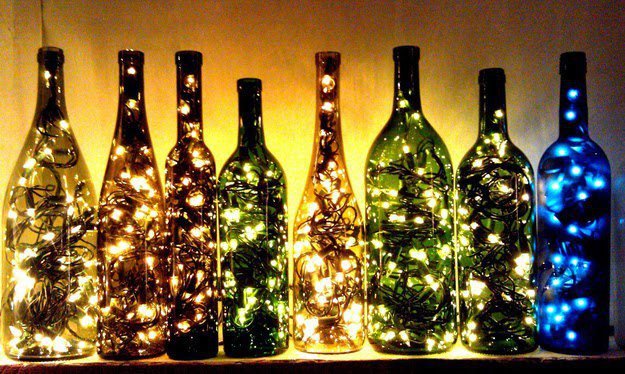

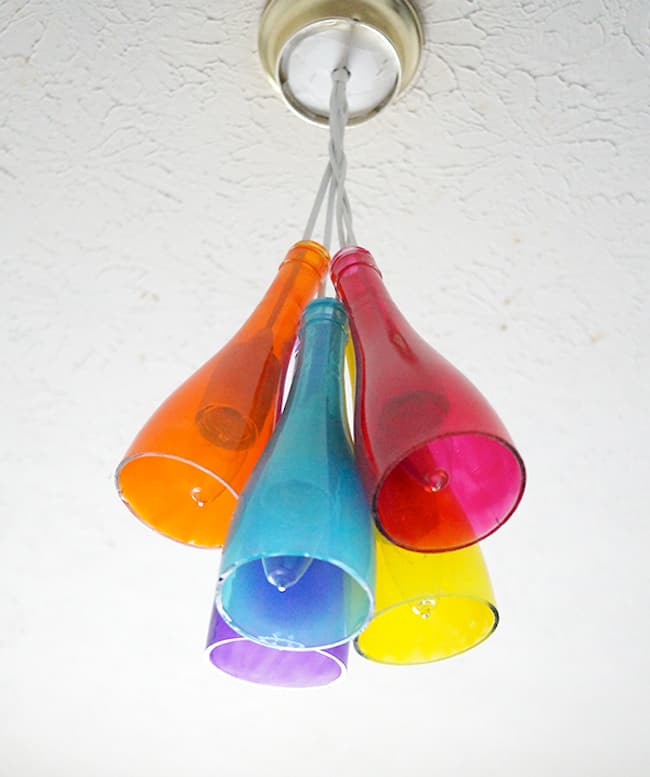
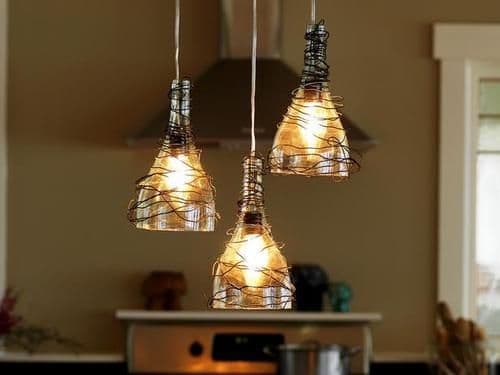
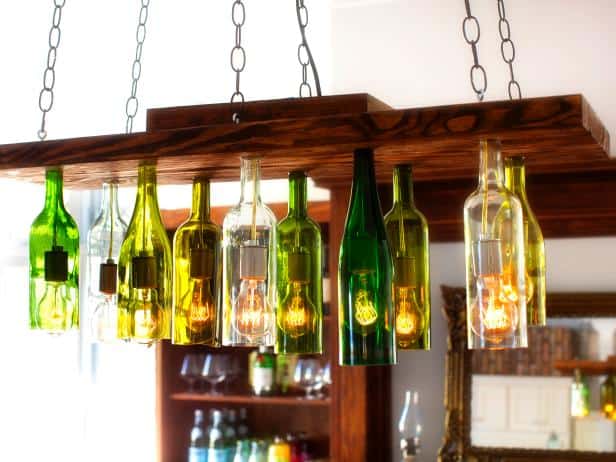

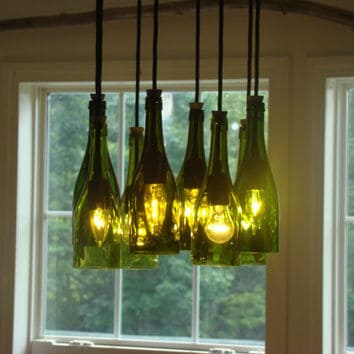
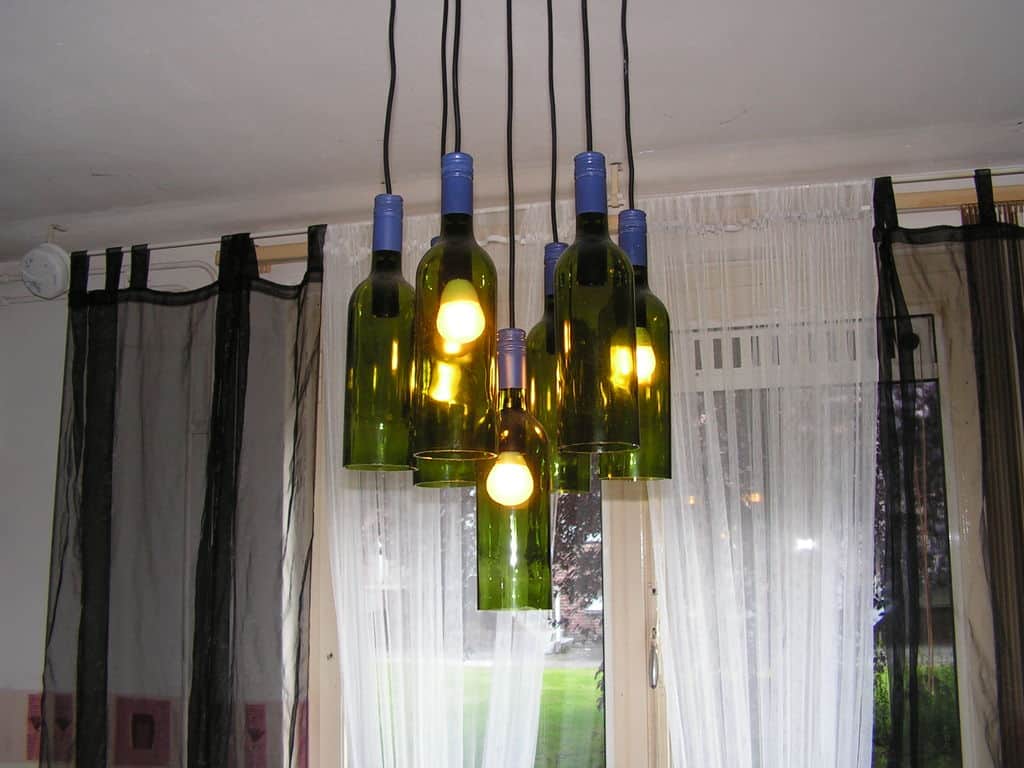
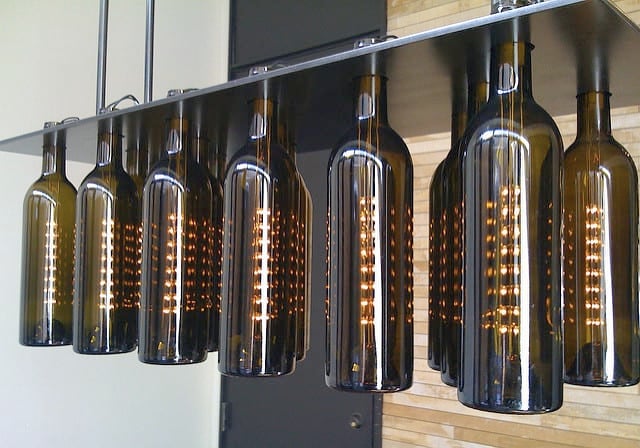


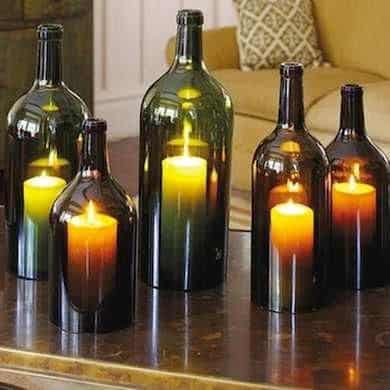
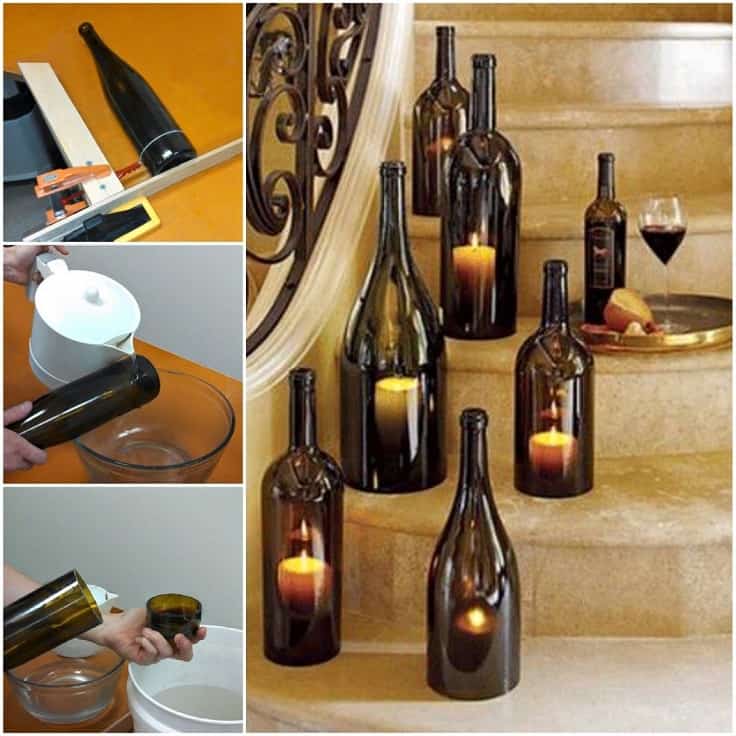

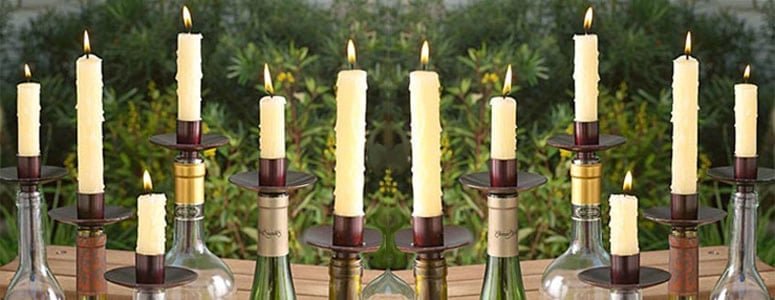
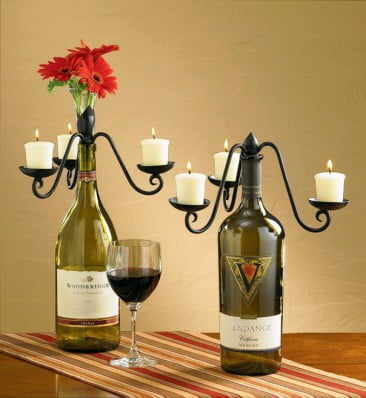
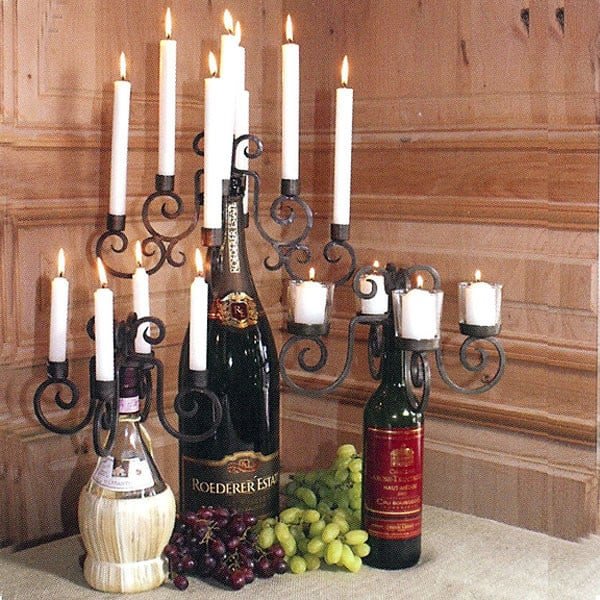
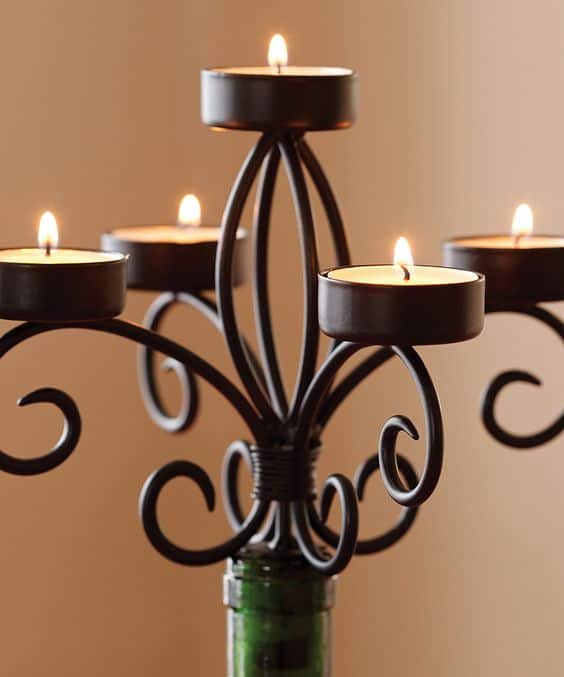


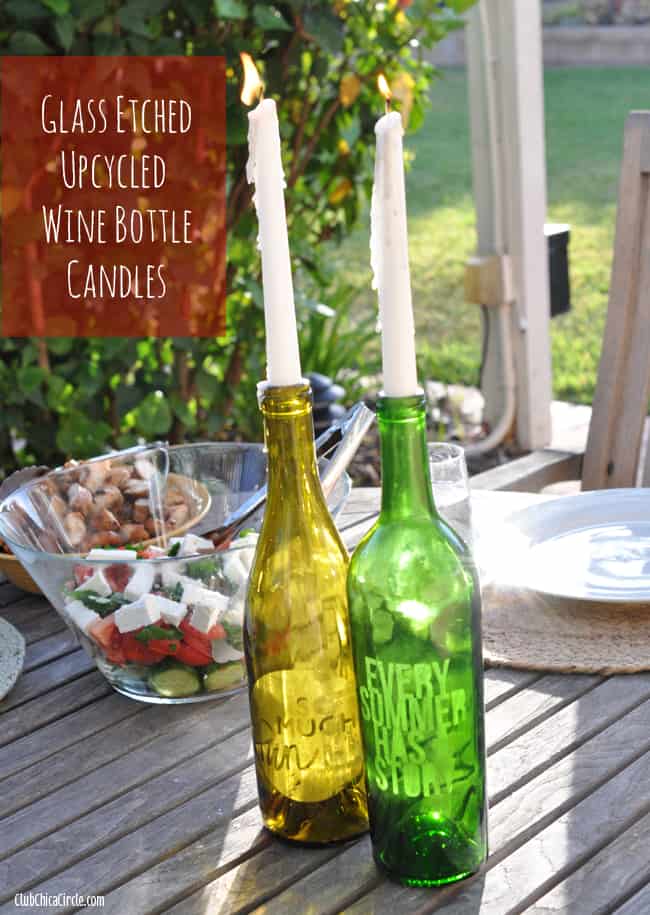


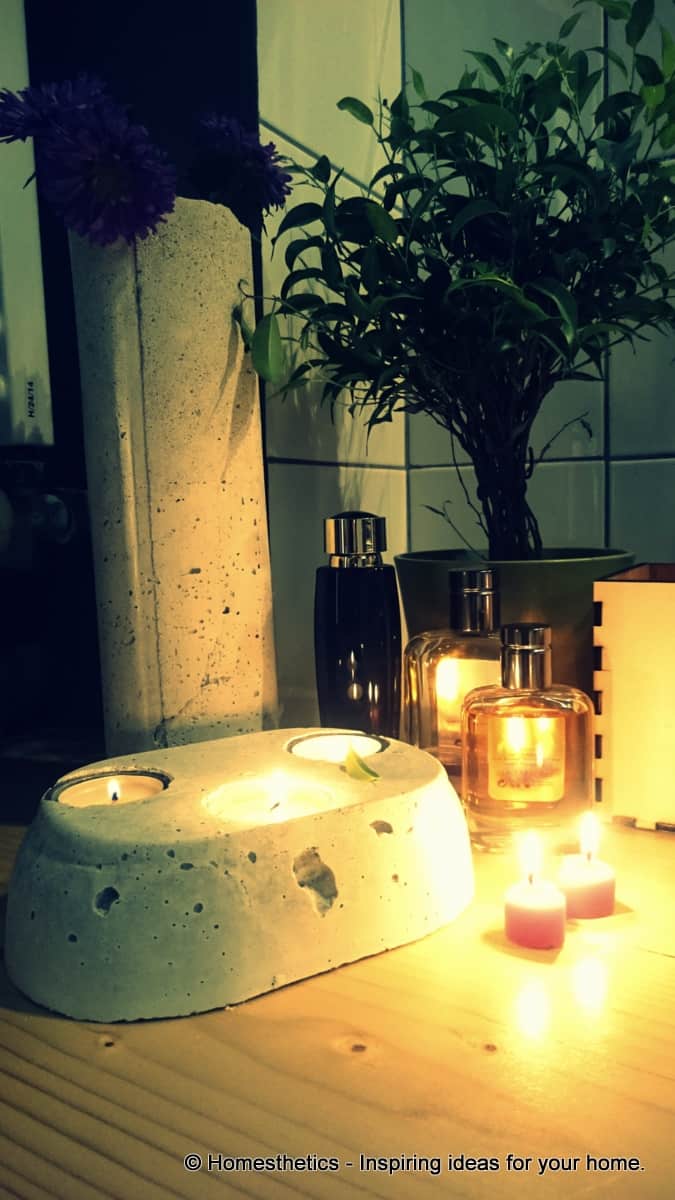
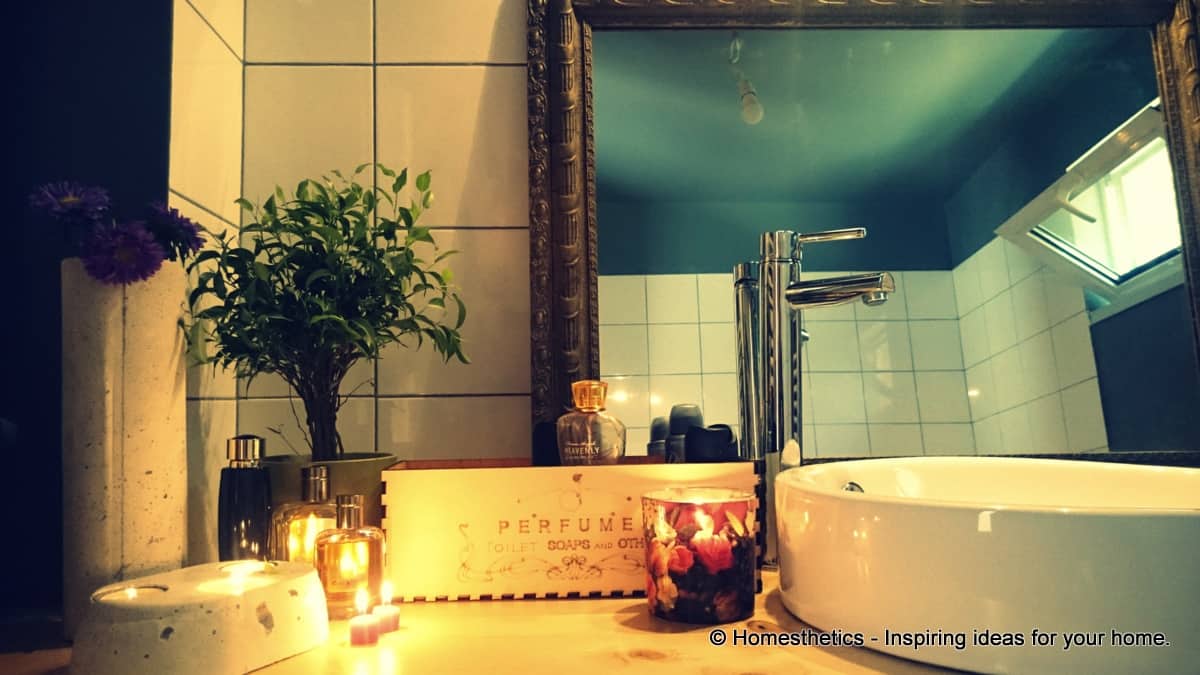


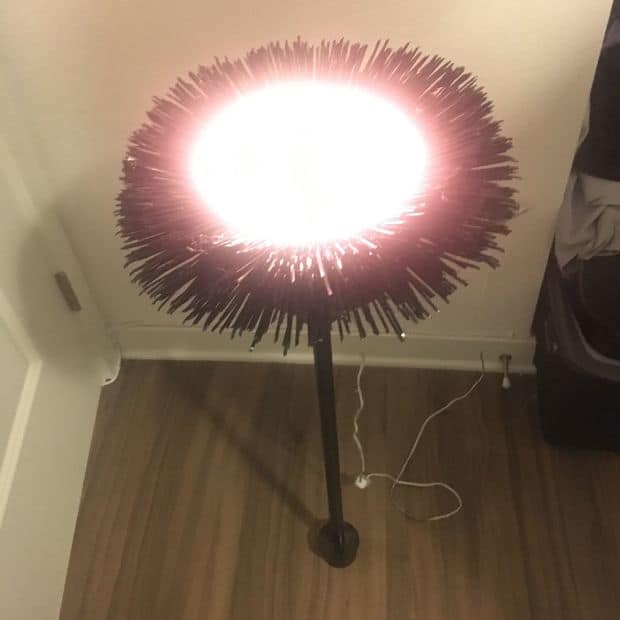


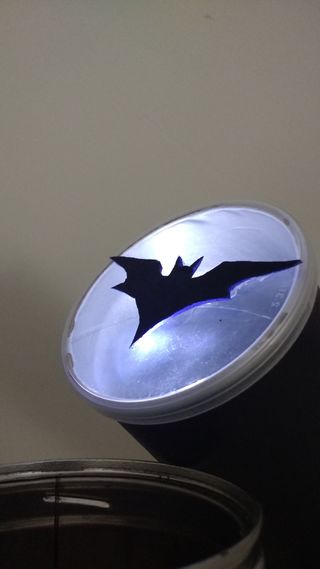
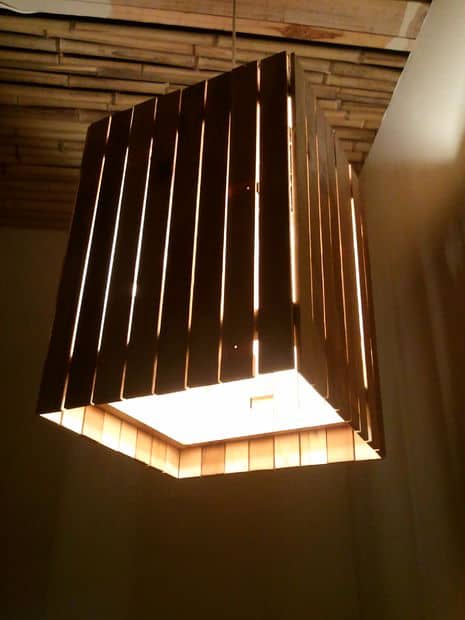
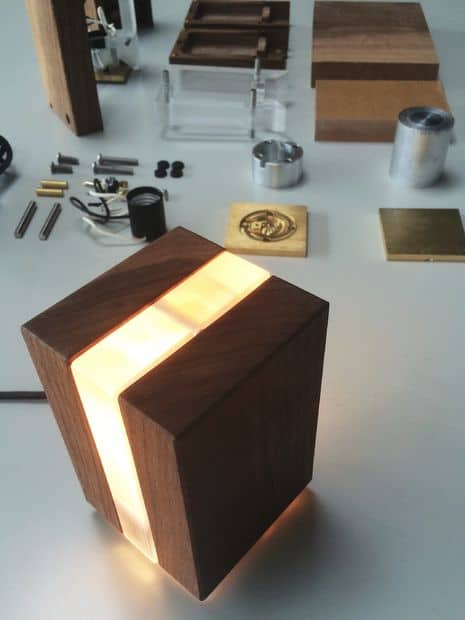
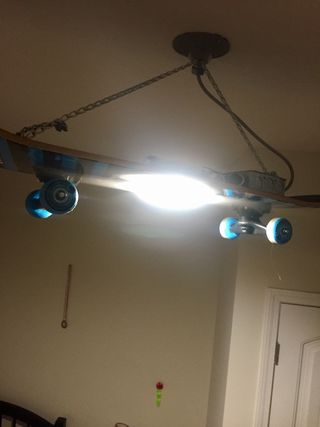
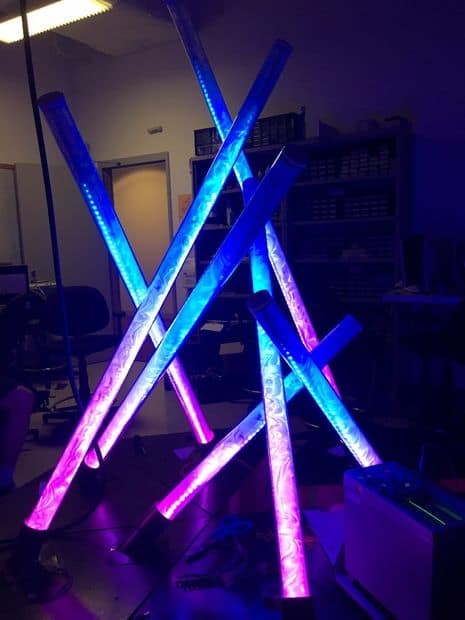
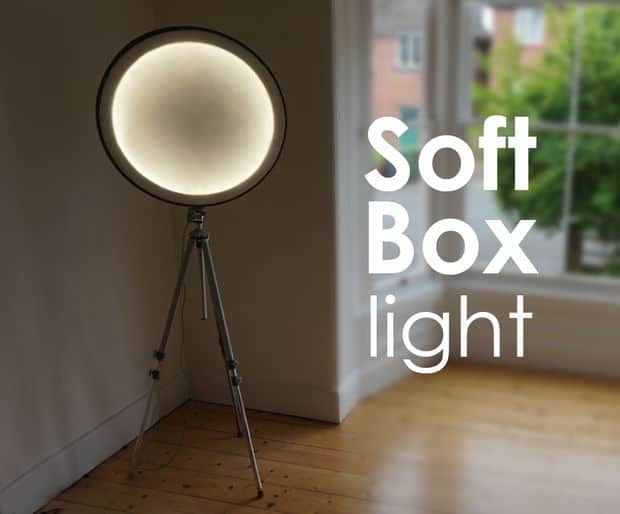
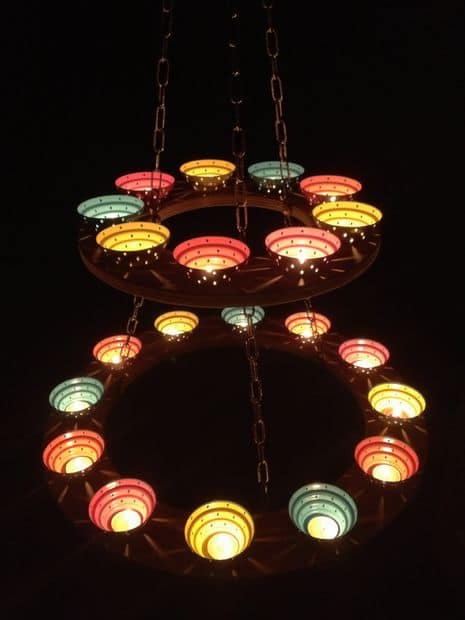
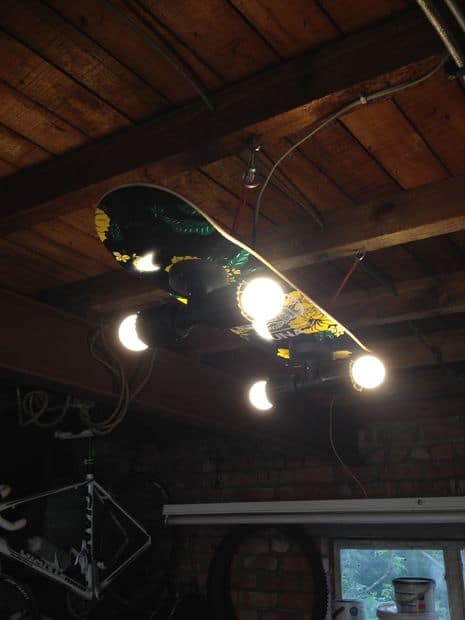
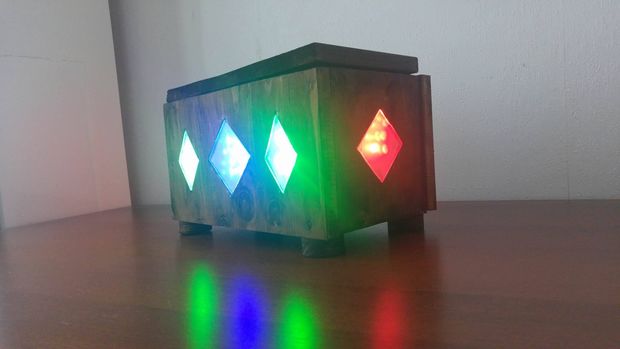
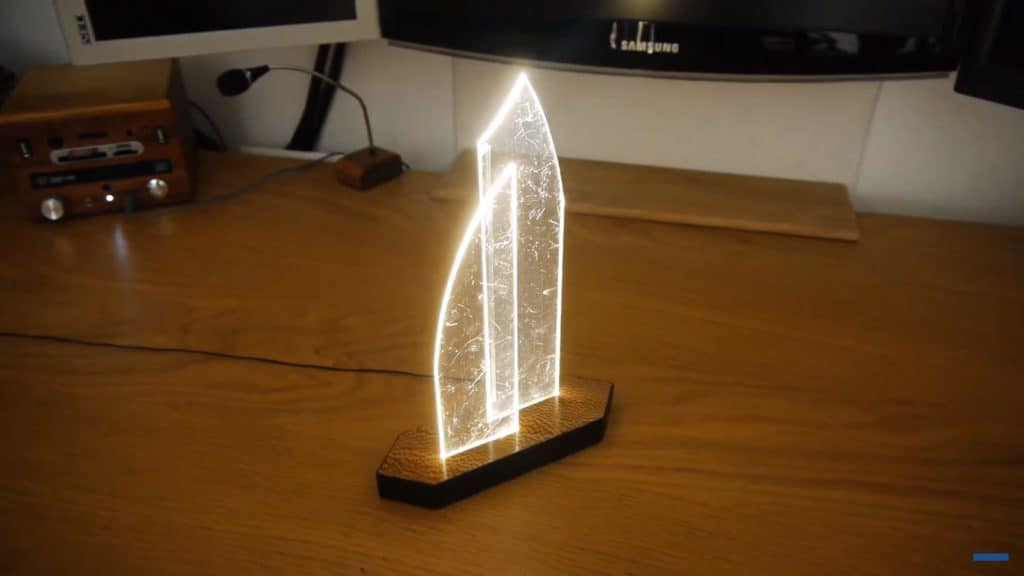


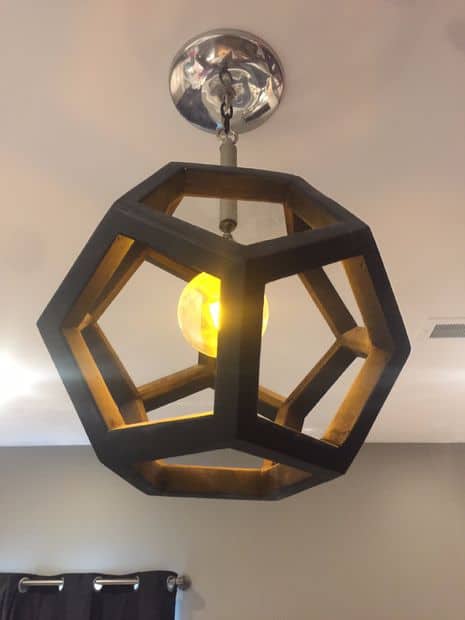
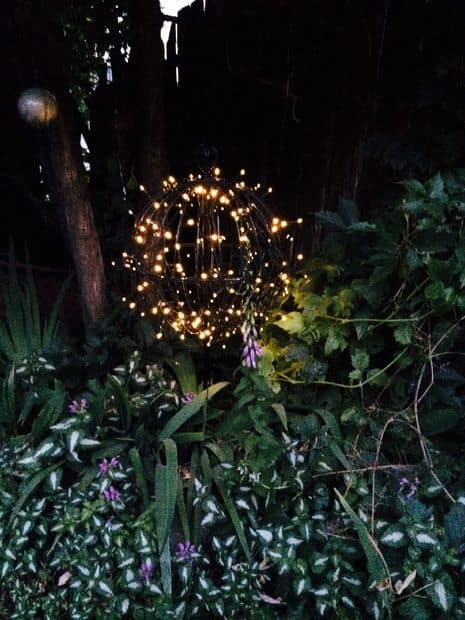


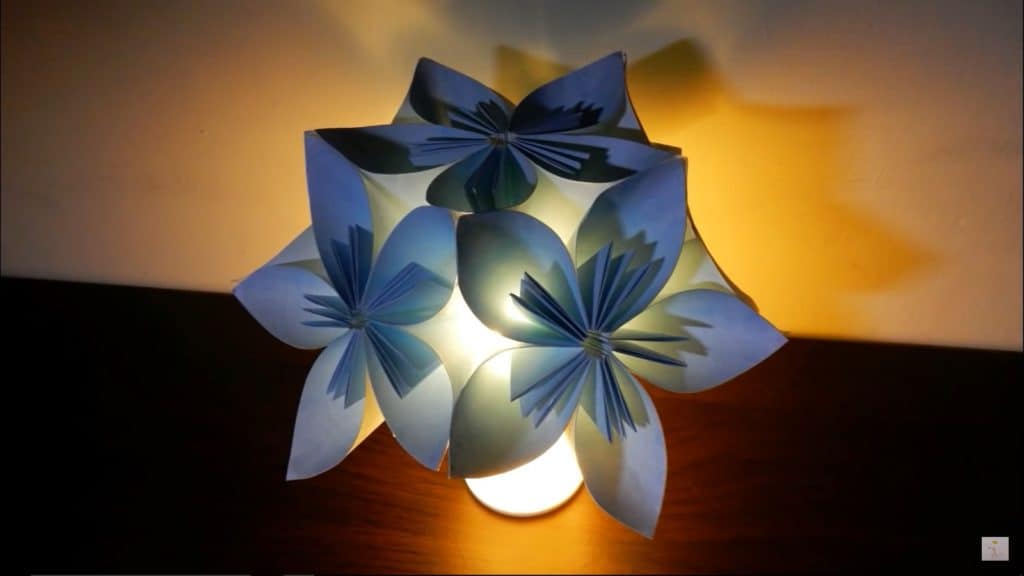


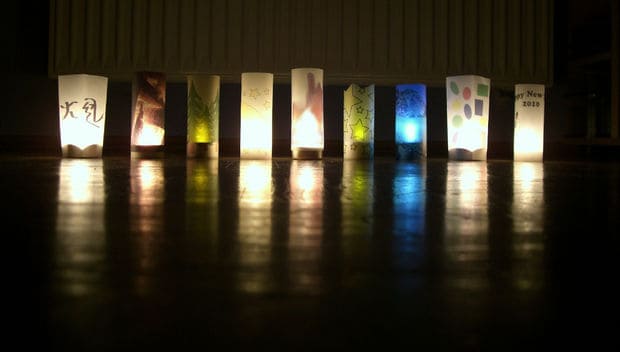


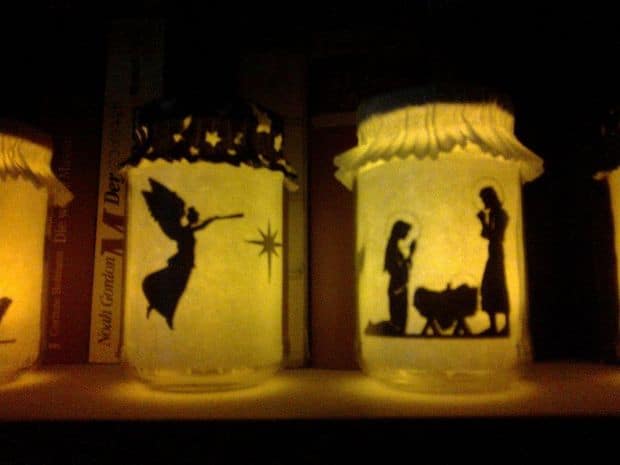

![Creative DIY Paper Lotus Candlestick Project [Video Included]](https://homesthetics.net/wp-content/uploads/2014/11/114.jpg "Creative DIY Paper Lotus Candlestick Project [Video Included]")
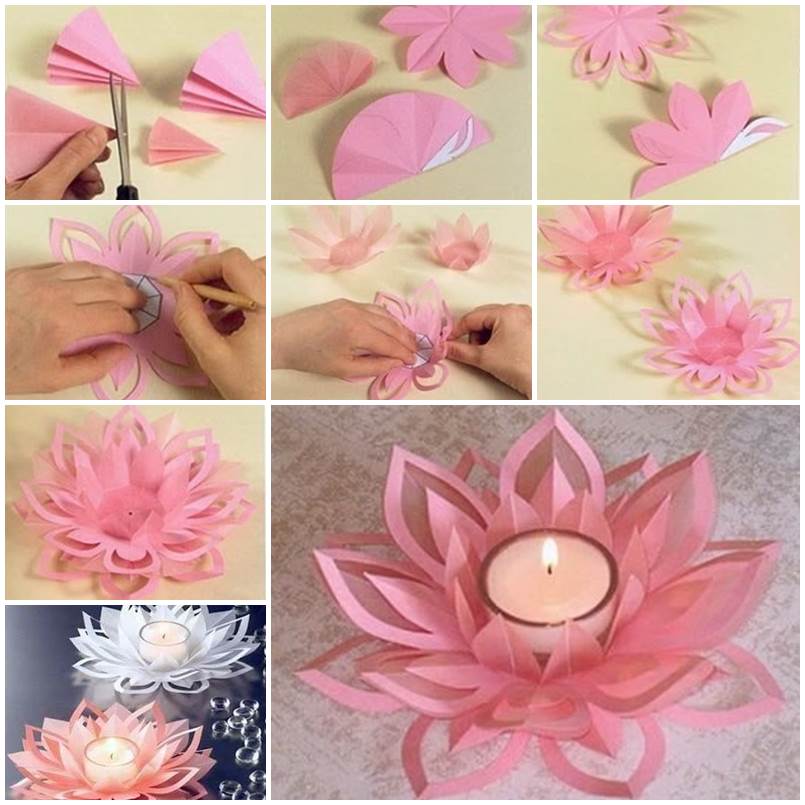


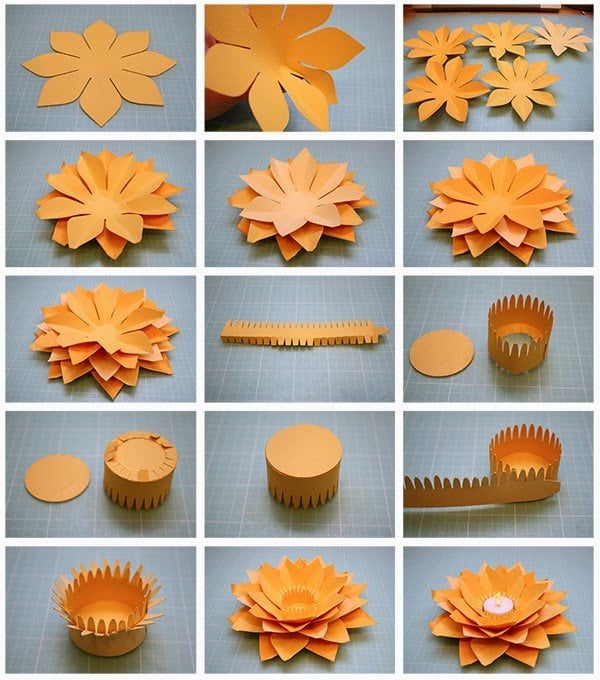
![9 Best DIY Pendant Lighting Kit to Consider [Buyer’s Guide]](https://homesthetics.net/wp-content/uploads/2023/10/Best-DIY-Pendant-Lighting-Kit.jpg "9 Best DIY Pendant Lighting Kit to Consider [Buyer's Guide]")

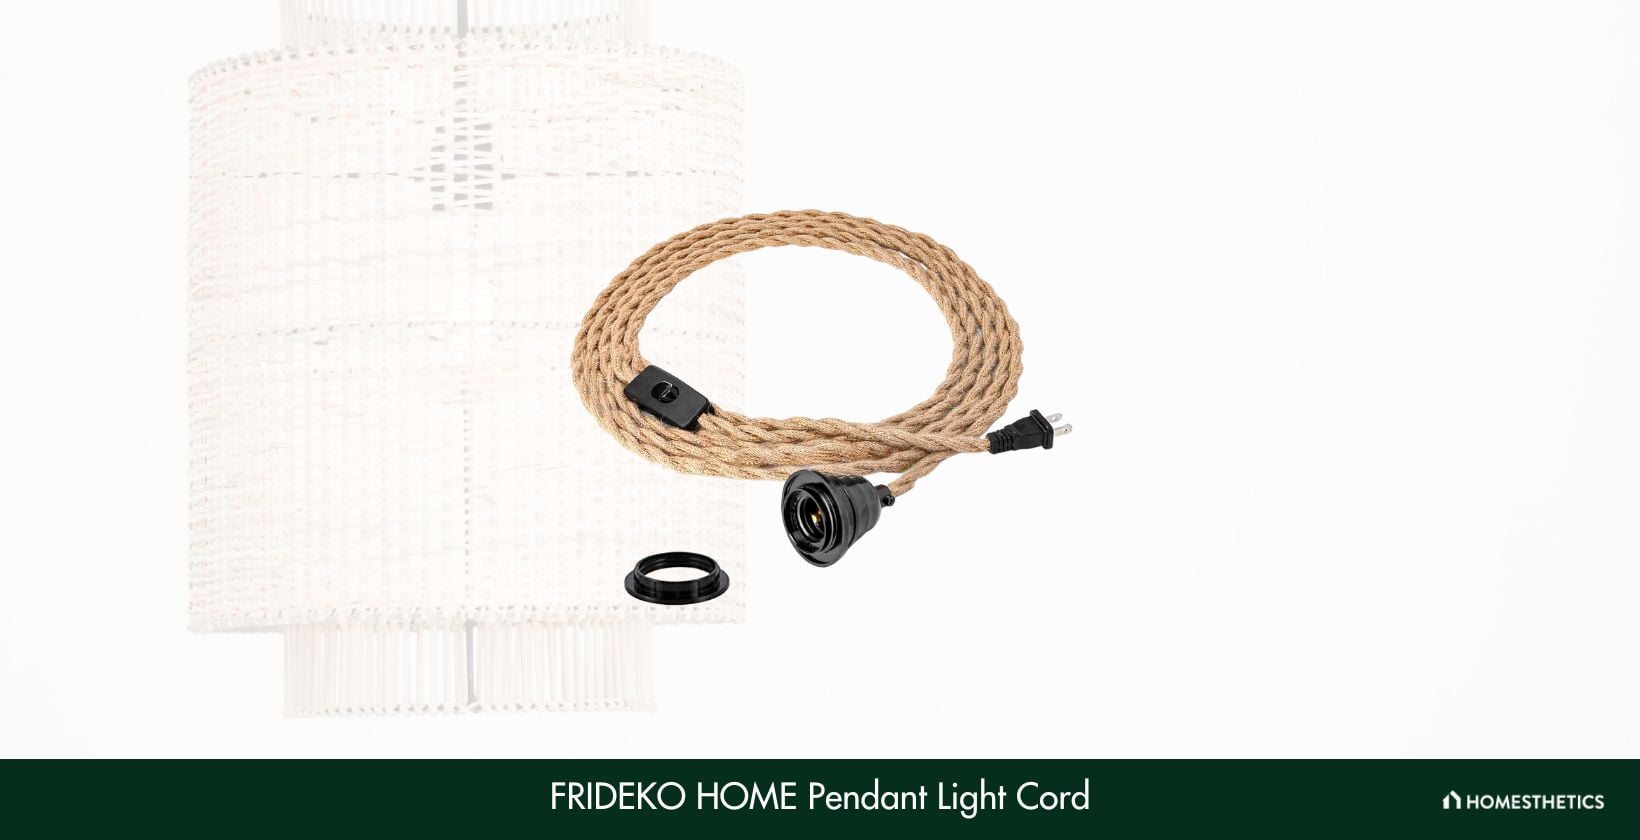
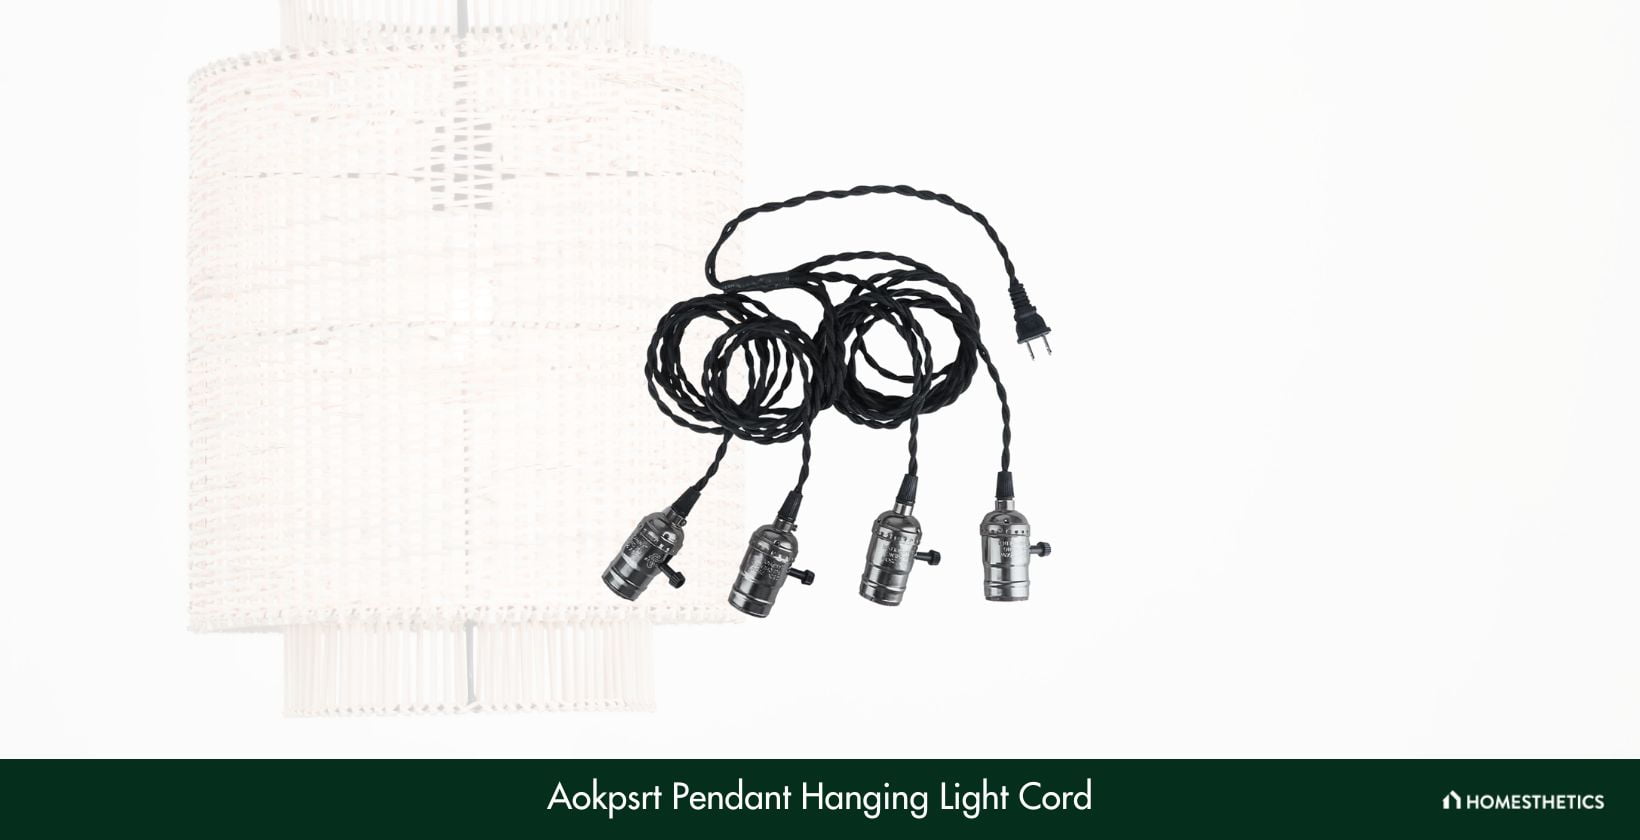
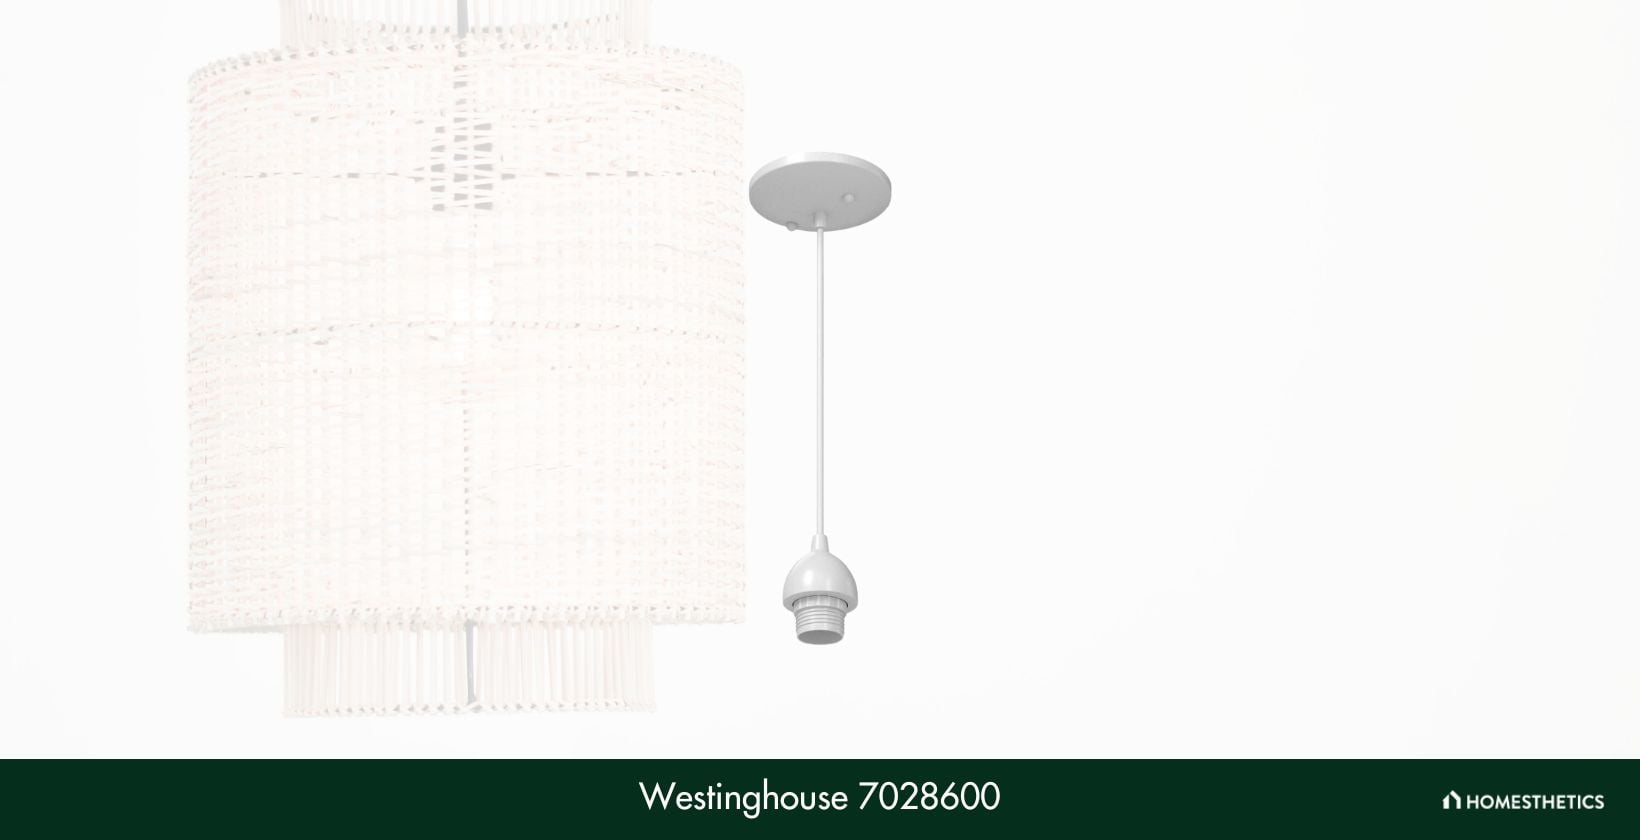
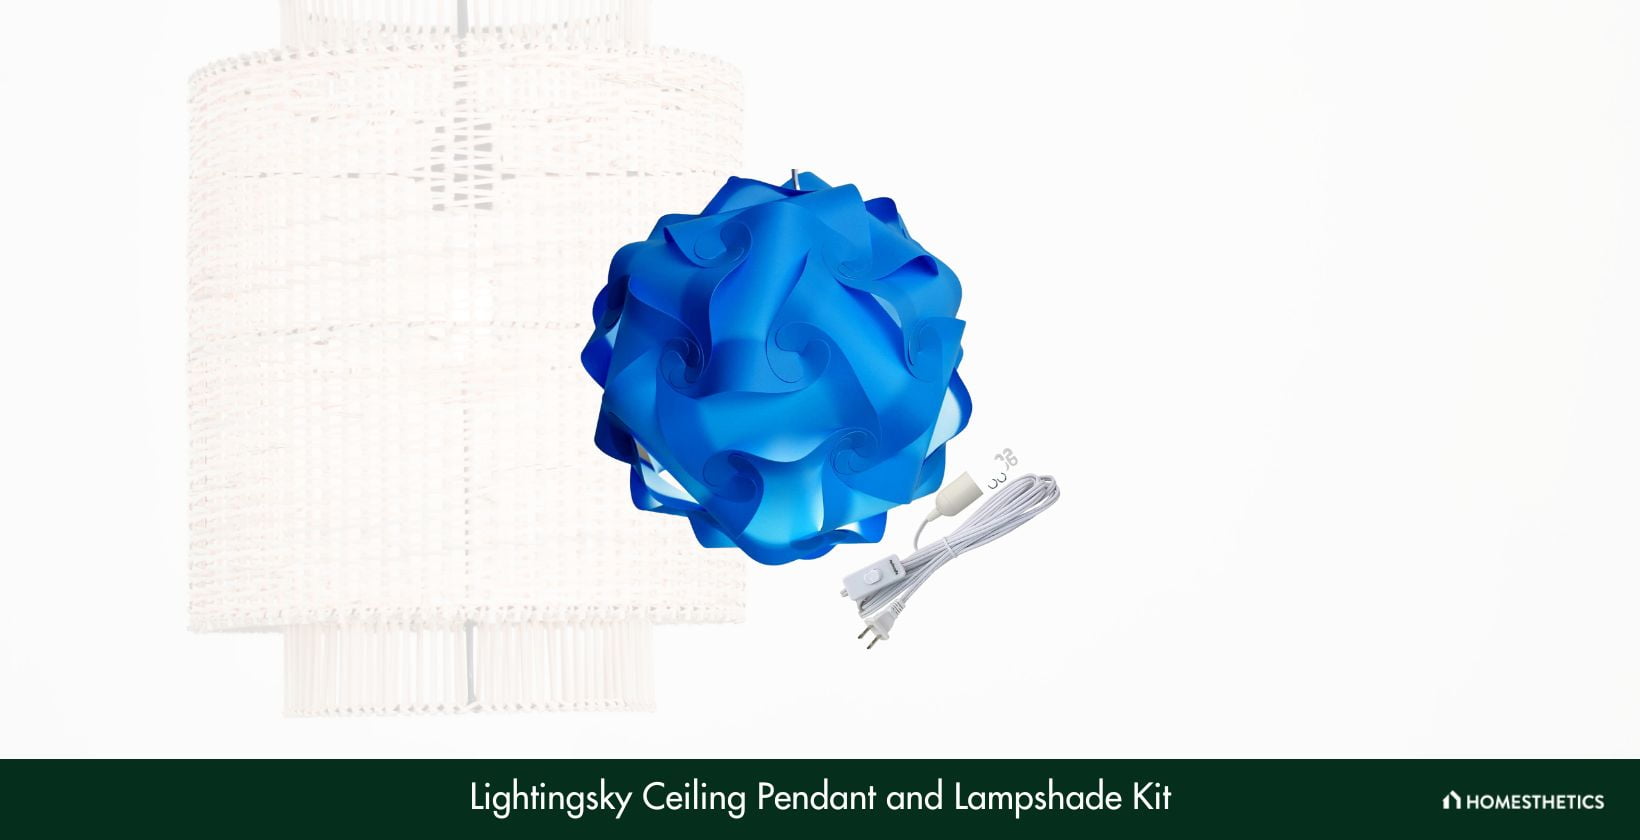

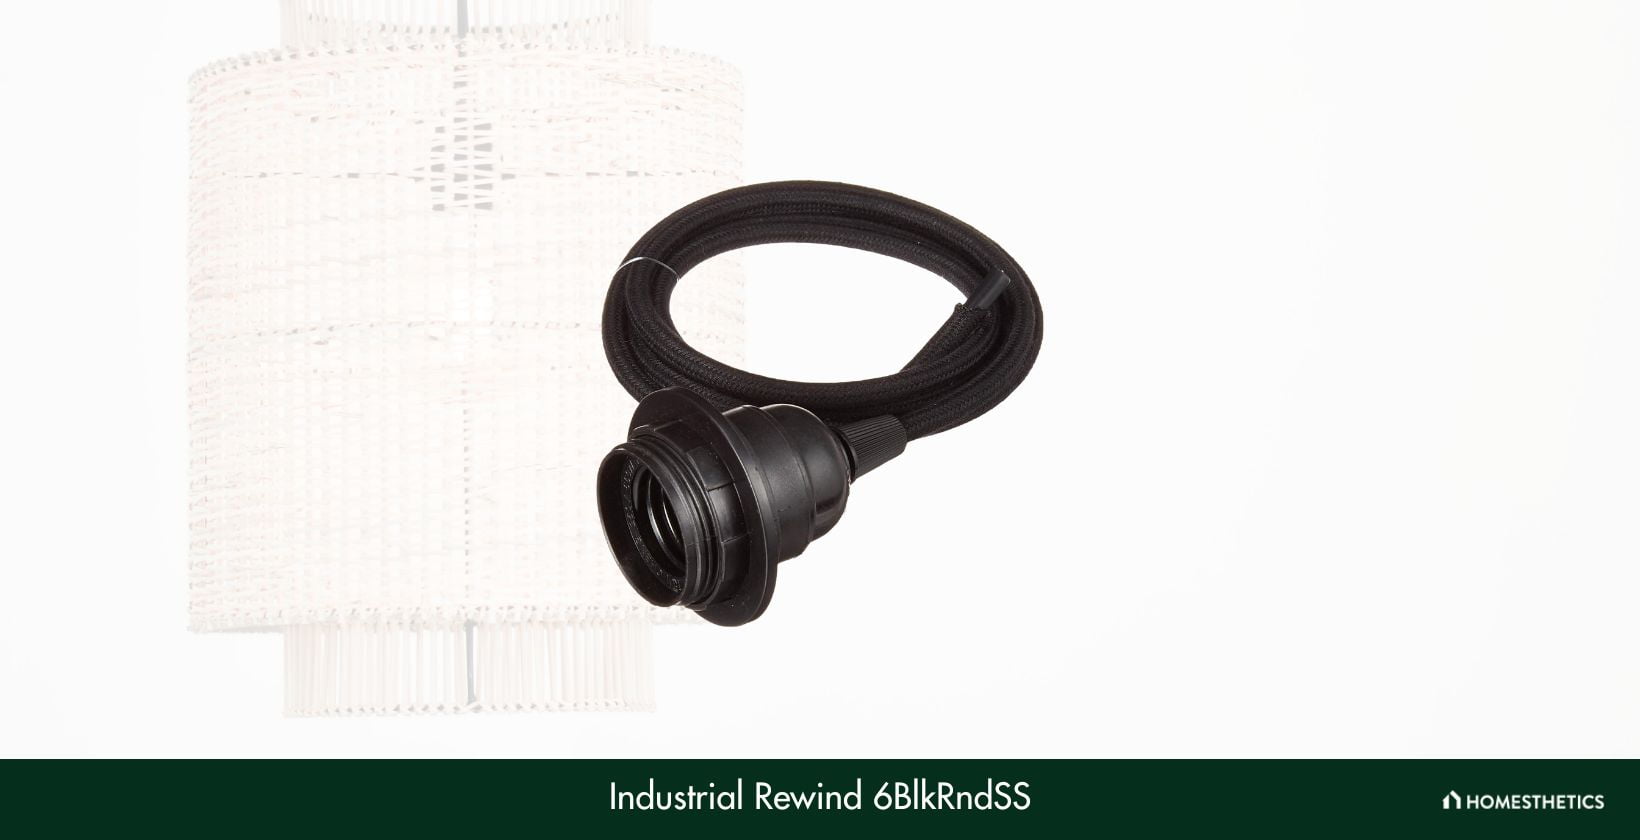

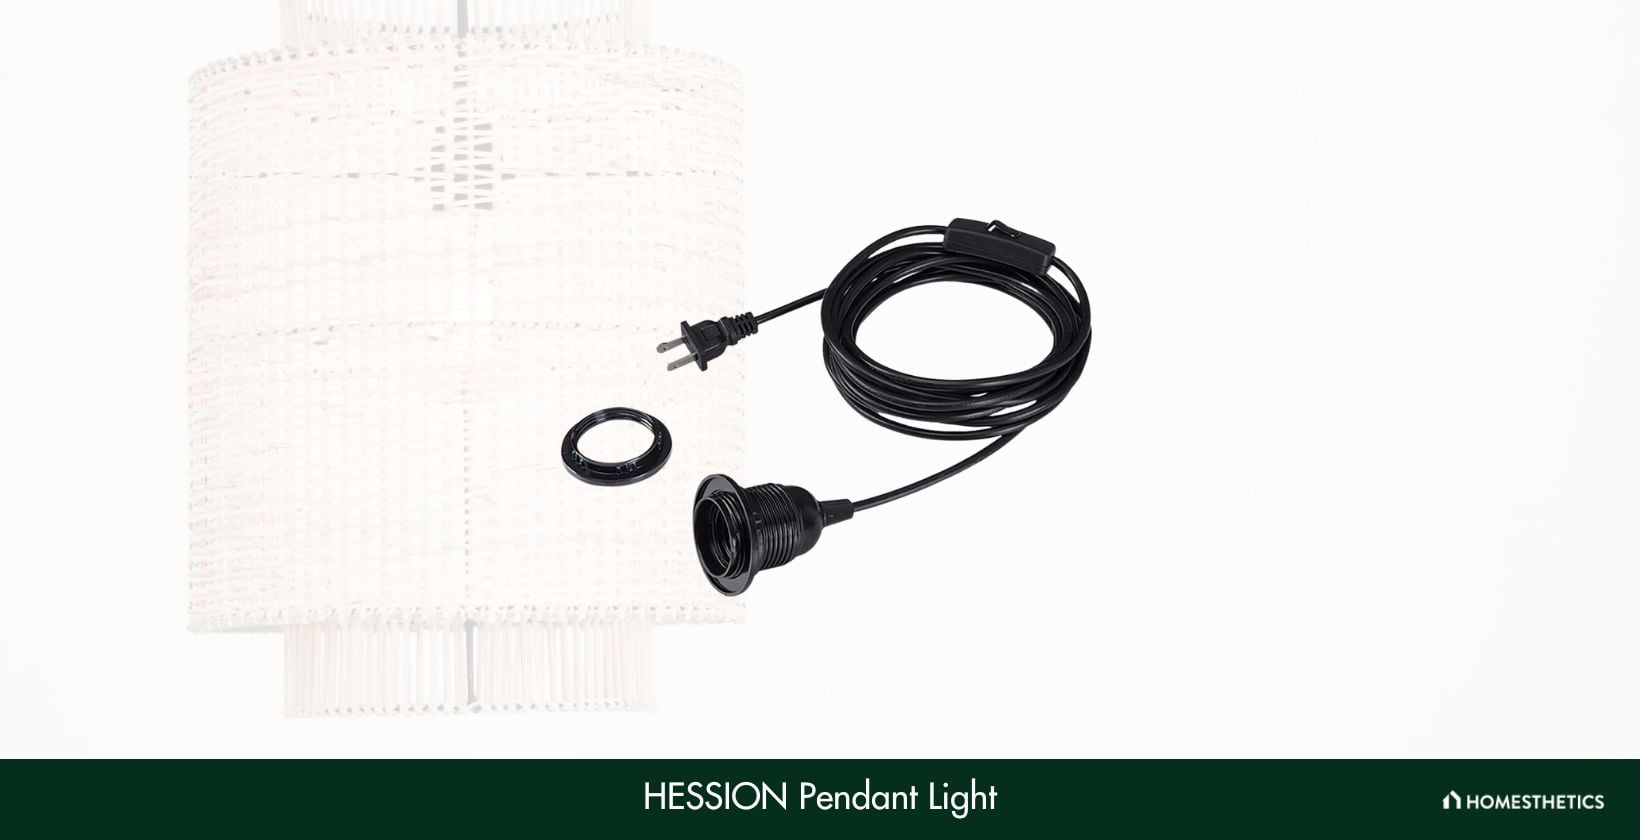

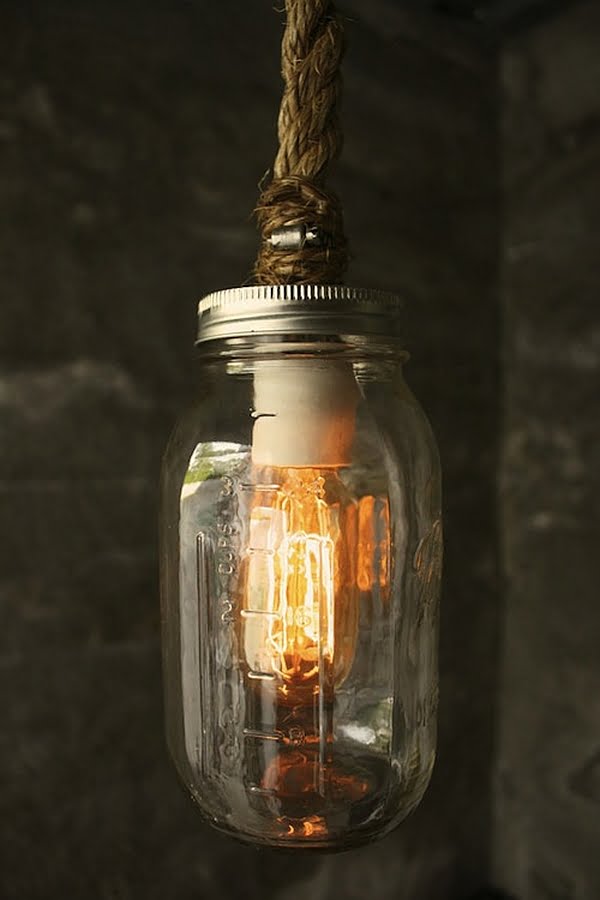
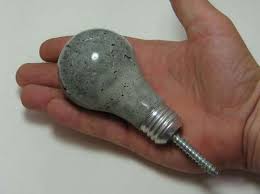
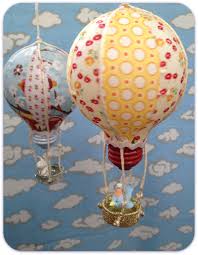
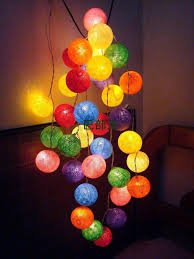


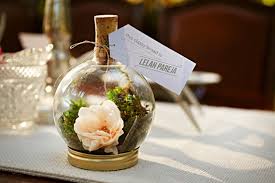


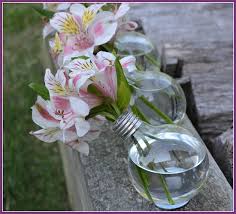
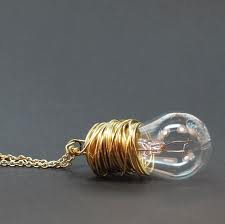

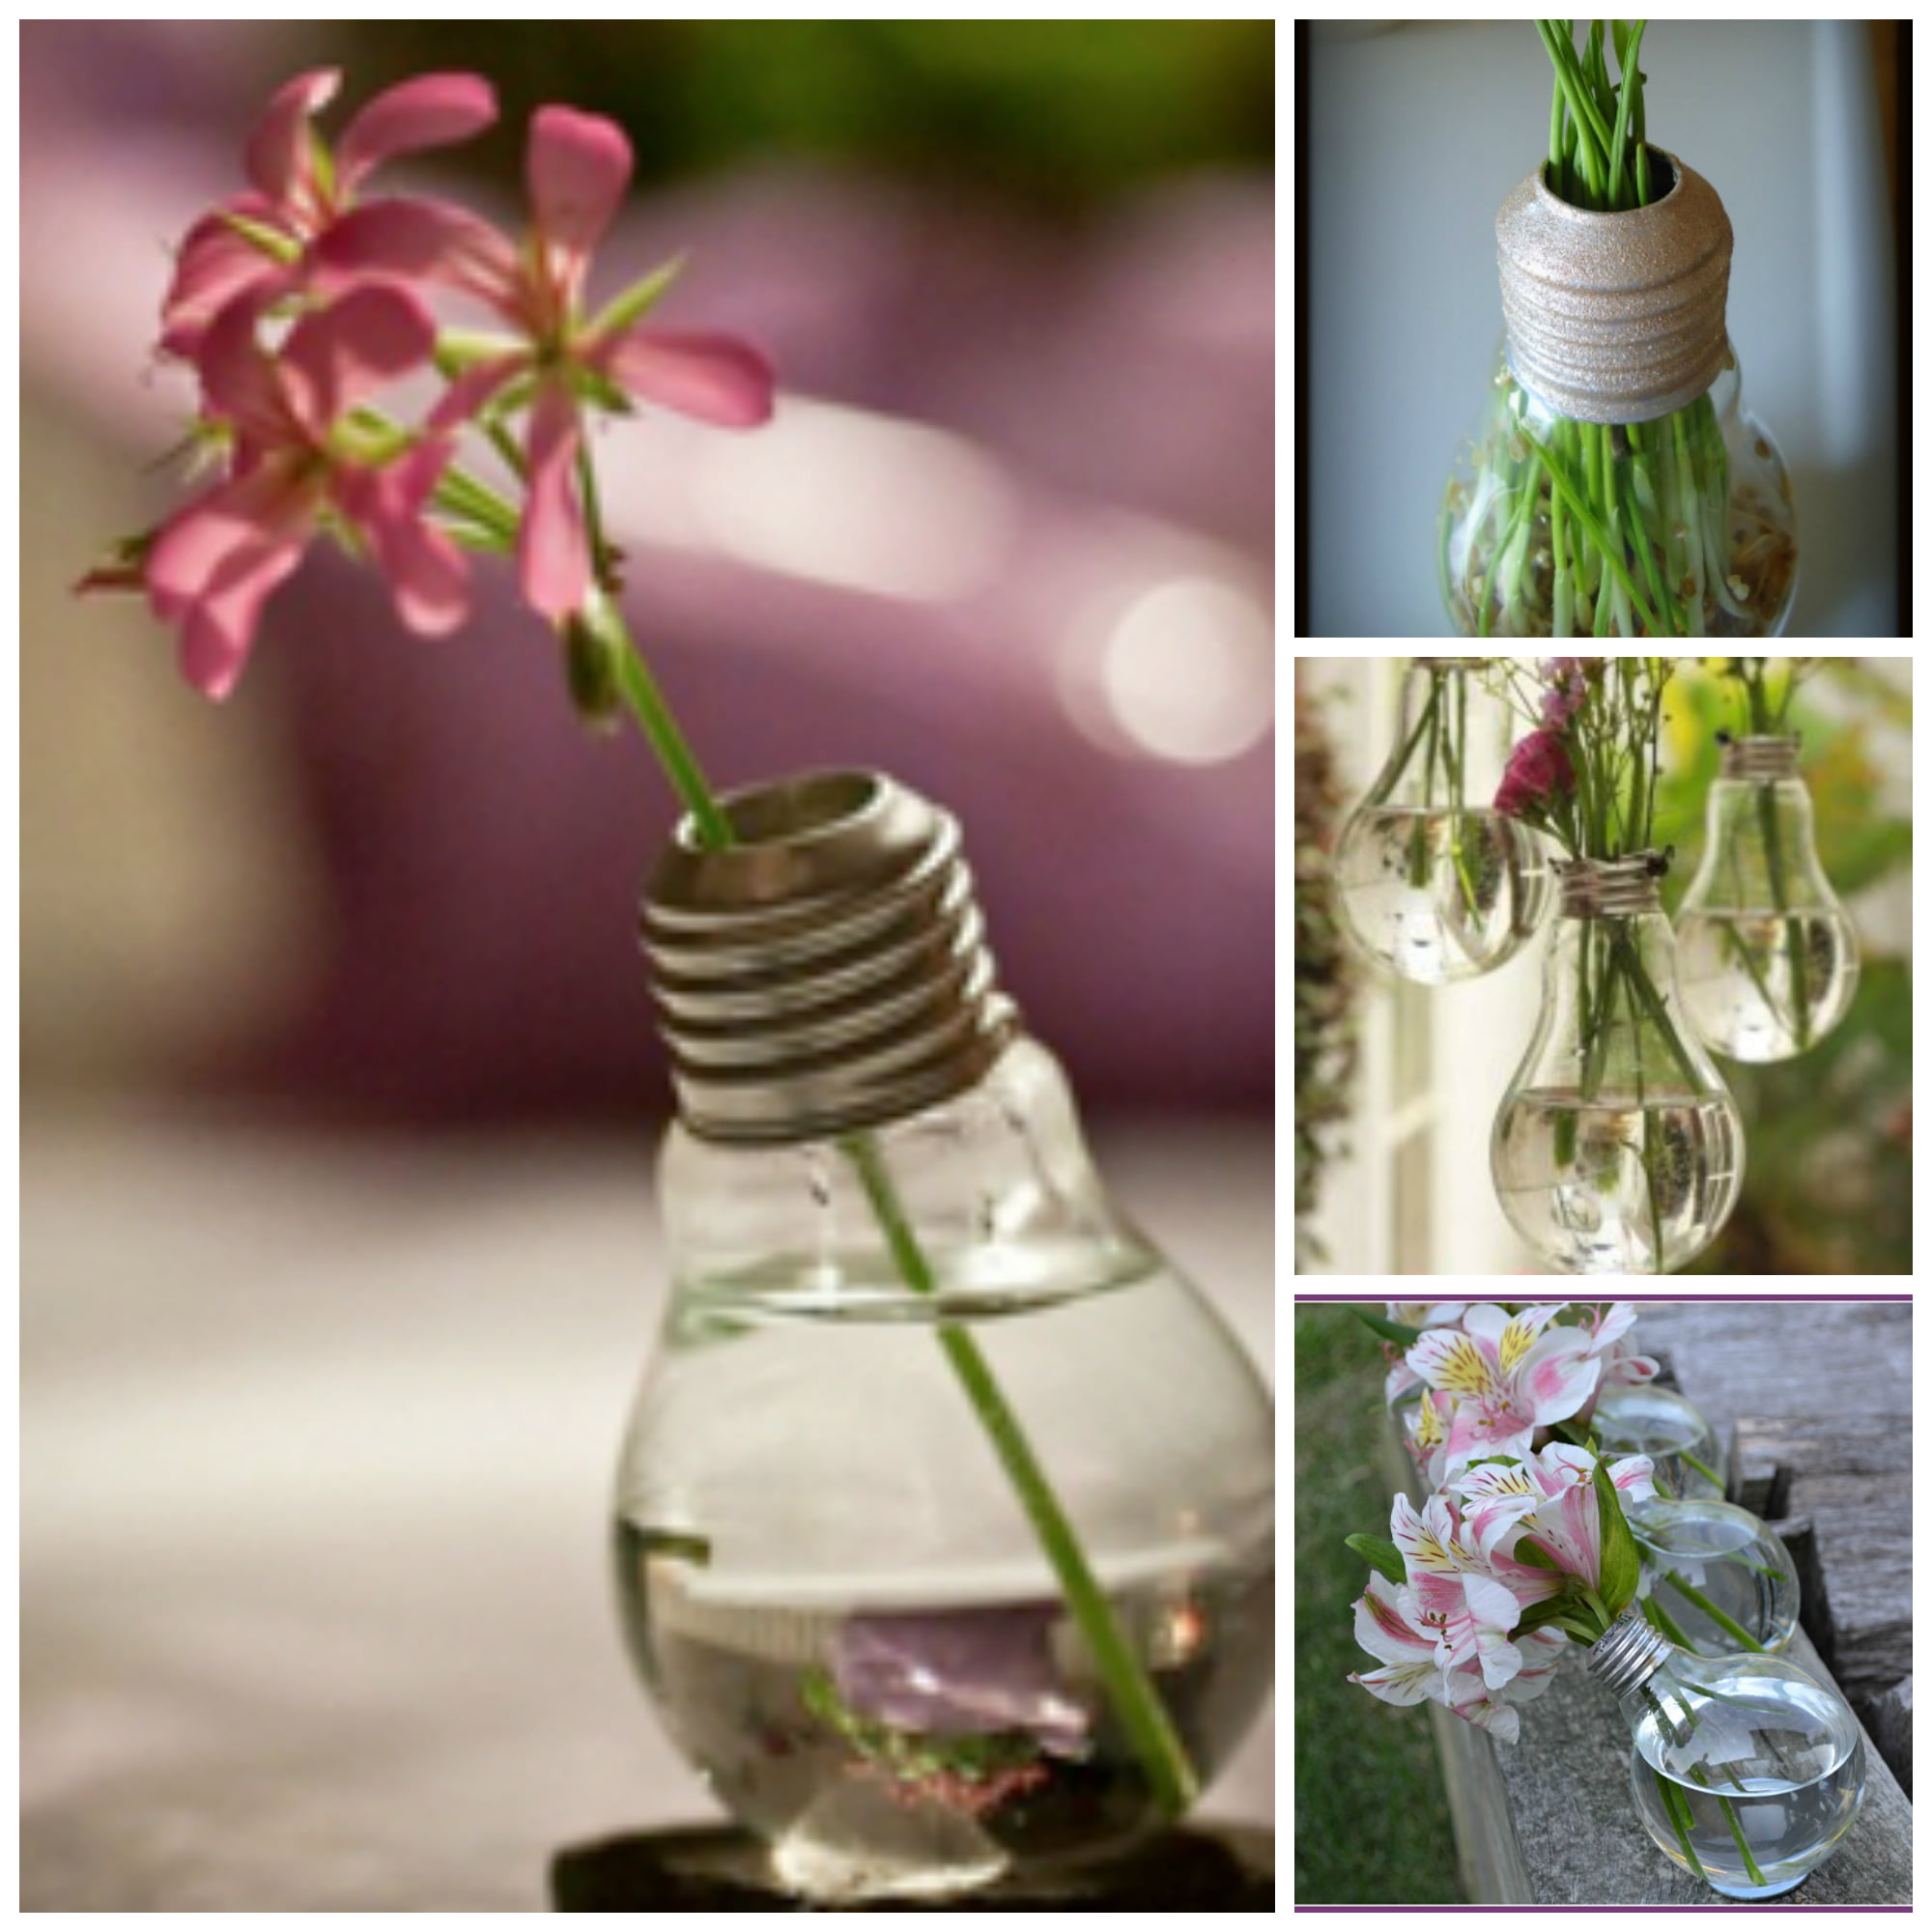


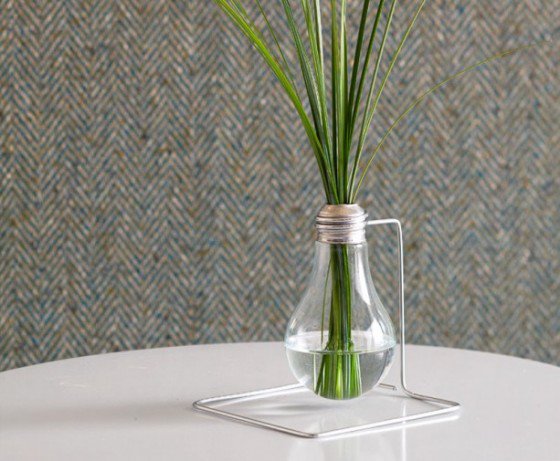
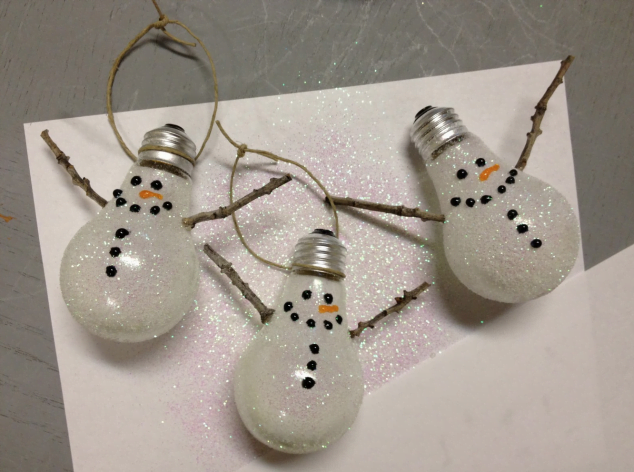


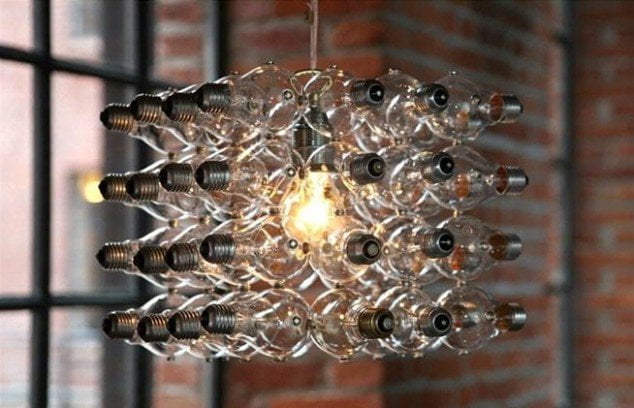
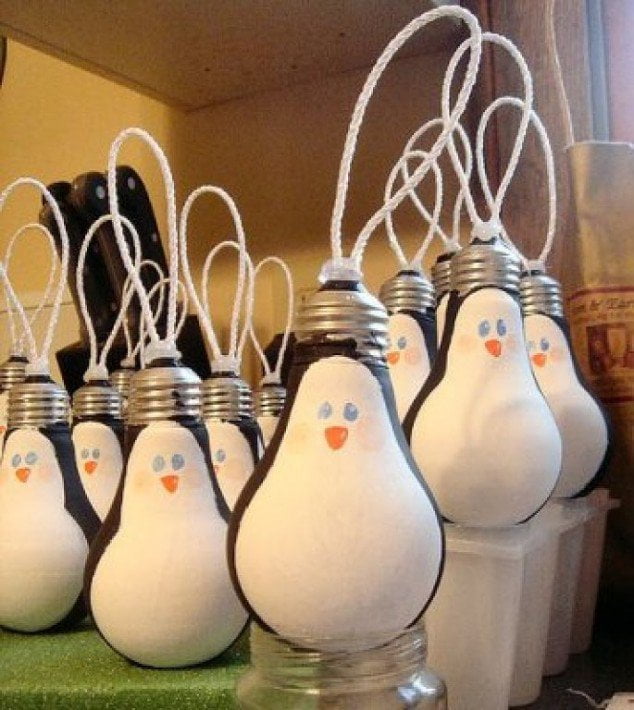

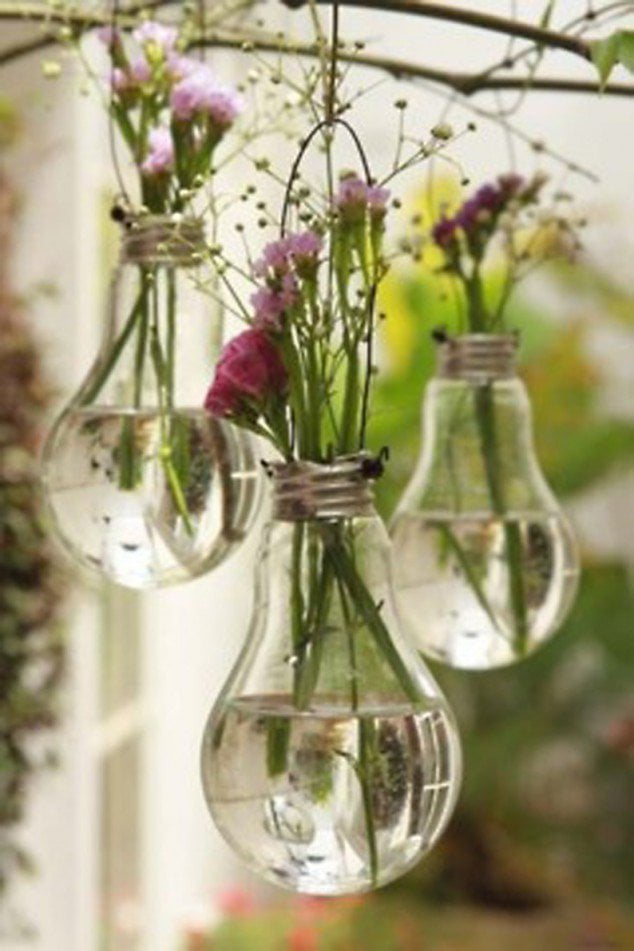


