Growing an avocado houseplant from an avocado seed is in theory a very simple task and an equally educative and fascinating DIY project that can be enjoyed and loved by the entire family. Seeing a plant growing and nurturing under your very eyes day by day offers you an extraordinary rewardful feeling. You have made the world just a little better now and you can spread this amazing project, share it with your friends and your loved ones and challenge them to grow their own, the one that grows the plant faster out of the seed will win. In just 9 steps you will learn how to grow an avocado houseplant from an avocado seed below, do your best and share the results with the rest of us so we can complete this article with the plant you`ve nurtured.
1. Eat an avocado and keep the seed. Wash it and by making use of three toothpicks suspend the broad end down over a bowl or glass filled with water. Make sure that an inch of the seed is immersed in water.
2. Take the glass and simply position it strategically in a place in which it will enjoy both direct sunlight and warmth. Make sure that your seed has that inch of water at all costs, replenish the water when needed. In just two to six weeks you should see some results as the roots and stem sprout will emerge.
3. Soon the stem will hit six -seven inches in length and it is now time to cut it a little back to three inches.
4. Roots will thicken and the steam will leaf again even more powerful now giving you enough signs that it's time to give it another little shelter. Plant it in rich humus soil in a pot with 10-1/2" diameter and leave half of the seed exposed. Basically that part that was immersed in water will now be in soil.
5. Make sure your plant is frequently watered and on occasion give it a deep soak to spoil it. The soil should be most at all times yet never saturated. If you see yellow leaves it is a sign of over-watering. Let the plant dry out a few days if this is the case.
6. Keep in mind that the more sunlight it receives the better.
7. If you reach a point in which the leaves are turning brown, being fried at the tips it is a clear sign that too much salt has been accumulated in the soil. Try to let the water run freely through the pot and carefully drain it for a while afterwards.
8. Your stem has now reached approximately 12 inches high. Great job so far. It is time to cut it back to ~6 inches to encourage the growth of new shoots.
9. Congratulations, you`ve made it ! A new plant is filtering oxygen now and makes the world a better place thanks to you. Keep in mind though that this experiment will not return your fruit in less than seven years. A avocado tree grown from a seed is entirely different from its parent and it takes 7-15 years to begin producing fruits. The known varieties that we usually purchase are grafted to preserve their varietal characteristics rather than being grown from a seed. You may be however the new owner of a a new extraordinary avocado fruit that no one in the world posses as every plant is unique so have patience and wait.
What do you think? We challenge you to use this small tutorial and grow your own avocado tree and share your results and the tutorial with the rest of the world. Be the change that you would like to see in the world and start by making this world a little greener from a simple seed!
Whether you're an avid gardener or have recently developed a green thumb, you must've dealt with annoying weeds. There is an effective way to fight them - landscape fabric.
While some gardeners prefer using chemical products and sprays to eliminate weeds, others might use weed picking tools for the job. However, if you're looking for a convenient and effective option to help you fight weeds, landscape fabric is a good choice.
The best thing about using this weed control method is that it is cost-effective and easy to install. Moreover, the fabric is breathable, allowing your beautiful garden to grow while effectively discouraging weed growth.
With several options of landscape fabric in the market, gardeners can choose according to their requirements. Whether you want woven or non-woven fabric depends on how you wish to grow your garden.
Now, let us tell you all about installing this effective weed barrier.
How To Install Landscape Fabric For Weed Control
What You Need
Landscape fabric
Garden hoe
Steel rake
Hammer
Utility knife
Landscape fabric staples
Plants (optional)
Mulch and other ground covers (also optional)
Step 1 - Start By Removing All Vegetation
The first thing you'll need to do is remove all forms of vegetation using a garden hoe or steel rake. Remove any plants, grass, and weeds along with their roots. Ensure that you dig deep enough to remove the roots - this is important, as you don't want to leave anything behind in the soil. Leaving any roots or small plants can cause them to grow over the landscape fabric.
You may also choose to kill the vegetation instead by using a broad-spectrum herbicide. Make sure to follow the manufacturer's instructions carefully when doing this. Also, keep yourself safe by wearing any protective gear you might need.
Step 2 - Clearing & Leveling The Soil
The next step is to clear the soil of any remaining roots, dead leaves, and debris. Use the steel garden rake (bow rake) to remove twigs, leaves, roots, stones, debris, and sharp objects from the soil. Throw away the collected rubbish material and level the soil using the rake.
Step 3 - Carefully Place The Landscape Fabric
Now comes one of the most important steps - cutting the landscape fabric to size. Lay down the landscape fabric parallel to the leveled soil and measure it carefully. Try and be as accurate as possible when doing this. Ensure that you cut enough landscape fabric to cover the area you have just leveled.
Use the utility knife to cut large pieces out, according to your measurements. It is practical to cut out slightly more fabric than your precise measurements, as you can always trim it later. However, cutting it too close to the measurements and then having less material to work with can be an issue.
You might require more than one row of landscape fabric. In this case, we suggest that you overlap the fabric by at least 6 inches (although the recommended overlapping is 3 inches).
Most landscape fabrics have two sides - one shiny and one dull. Ensure that you lay out the fabric on the soil with the right side up. Weigh down the fabric using stones or any other heavy object to get a precise measurement.
Step 4 - Securing The Landscape Fabric With Staples
Once you are satisfied with the measurements and layout, secure the landscape fabric using staples and a hammer. Drive each staple down into the ground about 10 feet apart, doing so along the edges and seams. Once this is complete, you can trim the fabric as needed for more accuracy.
Step 5 - Use Plants Through The Landscape Fabric (Optional)
Laying just the landscape fabric in your garden can look odd and out of place. This piece of fabric, though practical, can ruin the aesthetics of your garden.
To avoid that, you can choose to pot beautiful plants along the surface of the fabric. It helps to have an idea about where you want to plant them, what kind of plants to use, and how many you want. However, keep in mind - the fewer holes you make in the fabric, the better.
Taking the utility knife, make small, X-shaped incisions in the fabric. Ensure that the holes are not too large - just big enough to fit the root ball of the plant.
Have a tub or bucket beside you when you dig the soil, dumping it into the tub rather than on the surrounding fabric. Carefully place the plant in the hole, pouring soil around the root ball. Tamp the soil, remove any excess air, and lay the flaps around the plant's base snugly.
Step 6 - Add Mulch [Optional]
Simply scattering potted plants around the landscape fabric might look out of place. To cover the fabric and bring together the aesthetics of the garden, add mulch (or any other ground cover).
Make sure to add just about 2 inches of cover, and not more. You can also opt for natural mulch such as pine needles, wood chips, stone, rubble, etc. Spread it evenly, smoothing out the mulch with the rake. Do this carefully, so you don't puncture or tear the landscape fabric.
Things To Consider Before Buying Landscape Fabric
As with any product in the market, there are various types of landscape fabrics to choose from. Depending on your requirements, you can choose from woven and non-woven fabrics. Moreover, the appropriate material for an annual garden would be vastly different from what is appropriate for a desertscape or flower bed.
There are a few essential things you must consider before purchasing the right landscape fabric. From material to thickness, durability, and even cost, here are some factors you need to consider:
Woven Landscape Fabric
Woven landscape fabric or perforated fabric is made from natural materials like paper, burlap, or linen. They can also be made of manmade materials like polyester. These fabrics are made while keeping the 'movement of water' in mind. They are poros and breathable, allowing water to penetrate easily through them.
Woven fabrics are ideal for vegetable gardens or any soil which grows vegetation. The breathable material allows water to penetrate and soak the soil, thus encouraging plant growth.
This fabric also locks in the moisture from the soil, discouraging it from evaporating. It keeps the soil rich and moist, allowing the healthy growth of plants, vegetables, and grass. This makes woven fabric ideal for flower and vegetable beds growing in dry, arid climates.
Non-Woven Landscape Fabric
As opposed to woven fabrics, these landscape fabrics are designed to suffocate all kinds of growth and vegetables. Although they allow little breathability, it is not enough to encourage any sort of growth.
Non-woven landscape fabrics are typically made of polypropylene or polyester. It is mostly non-porous and doesn't allow the movement of water. It effectively eliminates the growth of weeds, but along with it, it also harms shrubs, plants, and the root system of trees.
This fabric is ideally used for stabilizing the soil behind paver patios, crushed stone walkways, or retaining walls.
UV Damage
You will also find various types of landscape fabrics that offer UV protection. Of course, there is an added cost to this.
Suppose you don't want to spend the extra money on 'UV protection,' good news! It is relatively straightforward to create your own DIY 'UV protection barrier.' Using 3 to 4 inches of mulch and other ground cover material will protect the landscape fabrics effectively.
Thickness Of The Material
Whether you opt for woven fabric or non-woven, there are varying levels of thickness offered by different manufacturers. Depending on how you plan on using the fabric, consider the thickness of the material before purchasing.
Although thicker landscape materials might cost more initially, it is also more durable, stable, and long-lasting. The thinner landscape fabrics are more affordable but are prone to tearing.
Consider the amount of foot traffic the fabric may eventually receive. If you plan on installing the fabric in an area where there will be constant walking, it is safer to opt for a thicker fabric.
How To Maintain Landscape Fabric
Landscape fabric is an effective and affordable method to control the growth of weed and stabilize the soil. Although it works perfectly fine on its own, most gardeners often opt for a ground covering, like using mulch, stones, or plants. This is done only for aesthetic and decorative purposes.
The fabric is breathable; however, it discourages weed seeds from germinating in the soil. Moreover, it ensures that any weeds that do happen to germinate do not push their way out (from the fabric) and ruin your garden. Many of these fabrics also prevent ants, insects, and other pests from destroying vegetation.
Here are a few tips that will help you maintain your landscape fabric.
Remove and Reorganize Mulch
If you decide to lay mulch over the fabric, you should be prepared to maintain it. The organic mulch will inevitably break down into the soil below. This supports the germination of grass and weed seeds. To prevent this from occurring, you need to replace and remove organic mulch periodically.
It helps to keenly observe the organic mulch, looking for signs of choked debris and soil. When you notice this, remove the mulch immediately and replace it with new organic material.
Clean & Maintain The Fabric
Conversely, if you decide not to cover the fabric with any material, there is a different kind of maintenance in order.
Soil, dust, dirt, and debris will inevitably fall onto the landscape fabric. Over time, it will get dirty. Moreover, if there is rain or snow, the fabric may face some damage. In these cases, it is imperative to clean the surface of the landscape fabric regularly.
Any soil or dust that blows over the fabric can support the germination of weed seeds. To prevent this, you need to clean the surface by dusting or sweeping the debris away. It goes without saying that you need to be careful not to tear or damage the fabric material.
Cleaning Stone Ground Covers
You may also opt for stone or rubble ground covers. While these instantly improve the aesthetics of the garden area, they also require periodic cleaning and maintenance.
When it comes to stone ground covers, raking them every once in a while is an excellent way to keep them clean. Hose them down with a garden hose every few weeks. You can always choose to replace the stone or rubble and lay completely new ones, adding a unique element to your garden.
Maintaining The Plants
Finally, if you decide to place plants intermittently (making holes in the landscape fabric and planting them), this is what you need to do.
The plants require water, sunlight, and food to thrive. Generally, people plant beautiful flowers and plants in the soil under the fabric for aesthetics. In order to maintain the aesthetics, you need to tend to the plants as you normally would.
It is important to keep a close eye on the plants, ensuring that they get enough water and food. Trimming and pruning will keep the plants looking beautiful, fresh, and vibrant.
Benefits Of Using Landscape Fabric
Weed Control
The primary reason to use landscape fabric is for weed control. As you might already know, weed growth is detrimental to the health of your plants. Weeds are capable of stealing nutrients from other plants. This causes your beautiful vegetation to become stunted and hungry for nutrients.
Installing landscape fabric ensures that small plants can thrive without weeds taking away their nutrition. Once these smaller plants grow large, their thick foliage does not allow sunlight to penetrate down to the soil, which the weeds require to grow.
It also helps your plants to bear more fruits, flowers, and vegetables, as the weeds do not eat away at their nutrients.
Erosion Control
Landscape fabric can do much more than control weed. It also controls the erosion of soil due to rain, snow, overwatering, or wind. The soil remains protected under the covering of the fabric. However, since the fabric is breathable, the plants and soil do not suffer underneath, receiving adequate amounts of water, sunlight, and food.
In places that receive large amounts of rainfall, soil erosion is extremely common. A lot of vital nutrients are also lost this way. Furthermore, soil erosion can damage your property. Laying landscape fabric under a layer of mulch can prevent this from occurring.
Environment-Friendly
If you want to maintain a beautiful garden, getting rid of weeds should be topping your priority list. Well, there are several ways to get rid of weeds. Applying chemical weed killers is one way. You can also manually pick out the weeds using various tools available in the market.
The problem with applying chemical weed killers is that you not only effectively kill the weeds but also harm the plants and soil. Moreover, the stronger a chemical weed killer is, the more it will damage its surroundings. Most of these weed killers are potent, toxic, and not environmentally friendly.
Opting for manual weed removers is an option; however, this can be laborious and time-consuming. Moreover, it does not eliminate weeds from growing back - only removes the ones which have already grown out.
Landscape fabric is the ideal solution to this problem. It is cost-effective, environmentally friendly, and lasts for months or even years.
Keeps Mulch In Place
The landscape fabric is an effective way of keeping mulch and other organic covering material from sinking into the soil. If you want to decorate your flower garden with stones, pebbles, or rubble, laying them on landscape fabric will keep them in place.
Furthermore, cleaning the mulch, stones, and rocks is much easier if the fabric is below it. It allows you to hose down the stones without allowing the dirt and dust to sink into the soil.
Helps The Soil Retain Moisture
If you live in a dry, arid climate, then dry soil can be a big problem. This kind of soil doesn't support the growth of various types of plants, flowers, and fruits. Extreme heat can also cause moisture from the soil to evaporate.
Landscape fabric is an easy and effective way to prevent that. Although the fabric is breathable and porous, it does not allow moisture to evaporate from the soil. This retained moisture keeps the soil moist, fertile and encourages healthy plant growth.
Easy To Install
As you might have noticed in our guide above, installing landscape fabric is relatively straightforward. Once you get the measurements correctly, all you need to do is cut, trim, and install the fabric over the soil. Of course, you can always get professional help for the same.
Final Words
Now that you know how to install landscape fabric, do you think you will get it for your garden?
Once you learn to install and maintain it (as we have illustrated in our guide above), landscape fabric can be a blessing in disguise. It is one of the most affordable, convenient, and long-term solutions you can opt for. Since it is environment-friendly, you don't need to worry about affecting the soil or plants around your garden.
With that, we have finally reached the end of our guide. Wish you good luck for installing landscape fabric in your garden!
There are plenty of us who have the tendency to save up on items every day, corks, plastic boxes, wine bottles, all of them cluttering up in our garage or closet with the hidden intent on our part to find someday a purpose for them. In most cases this will never happen but a creative imaginative DIY-er will find ingenious solutions for almost anything. Once in a while we enjoy a good glass of wine with friends and family and corks tend to be thrown away for having lost their primary purpose. Today we are proposing quite a fun idea: Ingenious Wine Cork Architectural Planters For Your Little Plants. You can actually nestle succulents and propagations in wine corks and even transform them into fridge magnets, bringing thus a little bit of greenery in a new unexplored territory. The cork itself, a knife, a magnet and a glue gun is all that is required for such a creative little craft. Cast a glance at our collection and next time you enjoy a bottle of wine think twice before throwing the cork away.
Ingenious Wine Cork Planters
Learn the step by step tutorial on how to make DIY WINE CORK PLANTERS
What do you think about the creative idea of recycling corks into planters? Which one is your favorite? We invite you to share your ideas freely in the comment section below.
If you always thought greenhouses are for professionals, we want you to think again.
The ever-increasing costs of food products around the world have virtually transformed homeowners into farmers. So, don’t be surprised the next time you see a greenhouse in someone's backyard!
Plus, greenhouse farming can be a cool upgrade to your gardening skills. But first-timers may face significant challenges while at it. And if you’re one such gardener with this thought in mind, you’re come to the right place.
To help you, here we are with a detailed guide on how to use a greenhouse. Without further ado, let’s begin!
Why Use A Greenhouse?
As clinical and scientific studies continue to prove the detrimental effects of chemicals and preservatives on the human body, homeowners are opting to grow their food. Besides boosting the immunity system, freshly grown vegetables and herbs add a distinct flavor that just can’t be matched with canned or frozen produce. And anything that’s easy on the pocket is bound to be a favorite!
Although you may think of simply going for a vegetable garden, having a greenhouse is much more beneficial. For one, it prevents seasonal or intermittent issues from hampering the plants throughout the growth cycle. Secondly, plants grown in a greenhouse are physically less demanding as they are mostly waist-high as opposed to low on the ground.
Apart from that, it helps in moisture retention while allowing the gardener to control the temperature if needed. The closed room like structure also keeps pests away from delicate plants, thereby resulting in a healthy growth cycle.
Now that you know about the advantages of a greenhouse, let’s dive deeper into the details of building and maintaining it.
Greenhouse Tips For Beginners
Starting Seeds
Before you can begin constructing a greenhouse, it’s essential to have a thorough understanding of the seeds that will grow inside. In this regard, starting seeds are usually planted in plain, level seeds trays, hydroponic trays, or plugin trays.
Furthermore, the preparation of different seeds depends on their specific needs. For instance, some seeds might have to be immersed overnight, stratified, and then planted in the trays.
Beyond that, there are some steps that you can undertake to ensure a proper starting seed process, which are:
Purchasing seeds from a credible source
Listing the types of plants you want to grow
Investing in good trays
Getting sterile soil to prevent pests, infections, and diseases
Regularly adding fertilizer to the soil
Watering as required
Checking if the climate is suitable for the plant
Ensuring proper sunlight
Other than that, it’s also important to identify labels and record the date of planting so that you can keep track of the growing cycle. Each seed packet comes with a germination rate through which you can calculate the number of seeds required to achieve the desired saplings.
Seed Type
Generally, there are two types of seeds that are selected for greenhouse gardening. Each comes with its own sets of pros and cons, and you can choose one (or both) according to your needs.
Hybrid Seeds
Also labeled as F-1 seeds by seed companies, hybrid seeds are pretty easy to buy - you can get them at almost any gardening store. These are used for crossbreeding similar plants, and growing them to be tall and healthy. However, their biggest advantage is that hybrid seeds aren’t quite affected by ecological stress, pests, and diseases.
Not only do these seeds have a consistent production, but they also facilitate early harvesting with improved yields. That said, there are a few downsides to consider. Firstly, their superior quality comes with a significantly expensive price tag. Moreover, the hybrid plants from these seeds don’t have a long shelf-life. And some people just don’t find them appetizing enough.
Heirloom Seeds
If you're all for tasty food on the table, then heirloom seeds are the way to go. This category had been specifically engineered for flavor and taste. But they are more than just that. For starters, the seeds produce genetic varieties, which are great for future cultivation. Unlike the hybrid variant, these are more stable and can be stored for up to a year.
Again, this variety is not free from limitations, either. You may not always find heirloom seeds in your nearest garden supply store. They don’t possess strong hybrid capabilities, and the cross-pollinated species will need to be separated.
Best Plants To Start With
Apart from choosing the seed type, you’d obviously want to decide the vegetable to grow. In this regard, here’s a list of some simple plants that are ideal to start with for you to garner significant working knowledge:
Mushroom
Garlic
Pea
Strawberry
Leafy vegetables like lettuce
Onion
Tomato
Potato
Radish
Sunflower
Seed Labels
Deciphering the label on the seed packet can also provide you with a lot of information. Especially for first-timers, they can get confused with the plethora of options on the market. Usually, you will find the following types:
Open-Pollinated
Also called true-to-type seeds produce true plants, meaning the saplings are related to their parent plant. This, in turn, helps in seed conservation.
Organic
Organic seeds are marked with USDA organic standards of that particular area or territory.
GMO
GMO (Genetically Modified Organisms) seeds are produced via cross genes from separate plant species. Unless labeled otherwise, any seed can be open-pollinated, GMO, hybrid, or heirloom.
Non-GMO
Non-GMO seeds are the ones that have been produced without the ‘recombinant DNA Technology’. Simply put, they are generated through random or specific pollination.
Hard Seeds
As the name suggests, hard seeds don’t generate readily due to the thick outer coating.
Dormant Seeds
Dormant seeds need pre-treatment or weathering to sprout quickly.
Percent Germination (Germ)
Germ is the count of how many seeds will sprout easily. It’s recommended to take note of the germ count so that you know how many seeds will produce the required number of plants.
Greenhouse Construction
As far as constructing a greenhouse is concerned, there are several ways to go about the job. While some hardware stores or nurseries sell pre-assembled greenhouses, others may offer a kit that’s best suited for DIY enthusiasts. Plus, they are also available online.
No matter which method you go for, the basic structure of the greenhouse should also remain the same. It generally looks like a small building with a roof, four walls, and a single entry/exit gate. While the core structure is made of metal or wood, the surrounding material can be a plastic sheeting or any other stuff that allows adequate light penetration and air circulation.
So that your greenhouse can promote a positive and productive growing season, here’s a checklist of the features that should be taken into account during the setup. Even if you plan to opt for a ready-made one, make sure it has:
Sufficient height to accommodate taller plants and the gardener
Space to install a heater, if necessary
Enough room to move around without damaging the plants
The material allows light but prevents the escape of heat and moisture
The location provides natural sunlight or shade as needed
Like the surrounding material, the shape or style of the greenhouse can also vary. Depending upon the available space, homeowners tend to go for either a freestanding or leaning structure. While the former correlates to a stand-alone greenhouse, leaning structures have only 3 walls, with the third one being an existing wall of the house.
Although they are a good option for backyards with less space, it’s worth mentioning that one wall will not receive any natural sunlight due to its non-penetrative nature. Hence, adjusting the conditions inside to suit the growing needs becomes all the more important.
Light Sources
Most plants require light for the overall development and photosynthesis process, but not every light works the same for every plant. Various factors like the plant species, the current season, and the amount of daylight achievable influence the type of light source needed by the greenhouse.
Moreover, the intensity and span of light can cause different reactions in different plants. However, the need for light increases with the development of plants and the subsequent growth of leaves. The wavelength of red and blue colored lights are widely used in photosynthesis, and can be easily identified in the light spectrum.
Sure, greenhouses can’t make the sunlight last forever. But thanks to their controllable environment, gardeners are free to use artificial or man-made light sources that mimic the diverse color range of natural lights.
In ideal conditions, the greenhouse should receive adequate sunlight for plant growth or germination, especially during the summer and spring seasons. But if your area doesn’t receive the required light, LED grow lights and fluorescent lamp strips will do the job.
Not only do these high output light systems sufficiently cover a large area, but they also offer the full light spectrum to aid photosynthesis. Plus, you can use them to boost the development of specific plants, if needed.
Other than that, such supplementing grow lights will also come in handy if you’re looking to target the late autumn or winter months for growing plants. Northern areas, in particular, receive weak natural light during the winter months, so consider investing in an energy-efficient light system.
Fluorescent lights can also promote targeted propagation or germination in greenhouses that receive no natural light at all. For smaller spaces or crops, you can opt for simple fluorescent light strips and hang them 3 to 7-inches above the plant.
Ventilation
Ensuring proper ventilation in summer is a task cut out. As the heat naturally creates convection currents, it does more than enough to maintain adequate fresh air circulation consistently. All you have to do is keep the wall and roof vents open to drive away hot air while pulling in cold air from outside.
Since winter months promote the growth of mold, it’s crucial not to lose focus on air circulation. In this regard, you can use oscillating fans throughout the season to make sure all the moisture is drained out. Beyond that, prevent over watering the plants at all costs.
Temperature Control
Without a second doubt, greenhouses provide for a controlled environment as opposed to open gardens. But temperature control still needs to be taken care of. Without proper temperature, the development process is likely to be hampered beyond repair. Long story short, don’t let the temperature run too high or fall too low during summers and winters, respectively.
Heating
First up, let’s talk about heating the greenhouse. For first-timers, we’d strongly recommend opting for electric heaters, which are easy to install, cost-effective, and have a wide range of use. A small 120-volt heater is ideal for a small greenhouse, while the larger ones may require a 240+ volt heater. Additionally, don’t miss out on a controllable waterproof thermostat.
Besides, you can also choose to have a gas heater. But unlike their electric counterparts, they are less economical and come with the hassle of added ventilation. Furthermore, you’d need to arrange for combustion and fume exhaustion supplies.
Programmable heaters that automatically turn on operation when the temperature drops below a certain point are a good means for propagating seeds or seedlings.
If being eco-friendly is at the top of your priority list, then you can explore the less energy-intensive options out there. For instance, some ventilation systems utilize the unwanted warm air from your home to maintain the desired temperature. In addition, there are other heat-absorbent elements like mats or rocks, which absorb heat during the day and release it uniformly at night.
A pro tip: if budget is a constraint, use a combination of heaters and heating-absorbing elements to keep the temperature consistent throughout the day.
Cooling
Moving on to the cooing aspect, the simplest way to keep a greenhouse from being overheated is by opening the sheds from time to time. Moreover, try to set the greenhouse in a location that provides sufficient shade, just as it allows for sunlight.
That said, it might be necessary to install an evaporative cooling cooler, especially for dryer areas like Arizona, Colorado, and California. Besides regulating the temperature, these machines also help in adequate moisture retention.
Watering
There’s no dearth of modern techniques and equipment for watering. But unless you understand the water requirement of the said plant, none of them will yield satisfactory results. On top of that, the temperature, humidity, and level of development also affect the water requirement.
A common mistake that first-timers make is to water the plants according to a fixed schedule, which often does more bad than good. For example, you may develop a habit of watering the seed every 10 days during winter. However, the frequency will invariably increase during summers. Failing to adapt to the situation can then lead to dead plants.
Similarly, certain alarming signs can warn you about inappropriate watering, including both under and over watering scenarios. Low shelf life, irregular drying, decreased root, or shoot growths can correlate to inadequate watering. If the compost appears too dry or flaky, it needs more water.
As a means of prevention, you can employ a drip irrigation system that regulates greater or smaller steam of water to pots or trays. Combining these systems with a water timer or drip gauge will lead to precise watering patterns.
Remember that it's the roots that trap moisture and not the leaves. Not only does sprinkling water on the leaves cause wastage, but it can also damage the plants in the long run. And overwatering happens when the soil is supplied with water faster than it can drain.
While moisture meters read the exact moisture present in the soil, you can also feel the soil to gauge the moisture content.
Pest Control
Despite having a closed and controlled environment, it’s not unusual for greenhouses to attract pests and consequent diseases. Many gardeners opt for installing insect screening equipment in all open areas like doorways, vents, and airways. But without identifying the pest and the related damages, choosing an appropriate pest control strategy will become a challenging task.
So, we’ve listed down the common pests and the threat they bring to the table.
Aphids
Starting with aphids, these delicately colored, soft-body organisms love feeding on the green leaves. Therefore, observe the bottom of the leaves to check for aphid groups. Careful pruning and regular cleanliness drives are great ways to stop them from munching on your beloved plants.
Bloodworms
Similar to roundworms, bloodworms also have an elongated shape. These limbless insects have well-defined brown heads but are red-bodied due to the presence of hemoglobin. In fact, this hemoglobin enables them to grow in water that has extremely low levels of saturated oxygen. Thus, maintaining a steady oxygen flow will keep the bloodworms at bay.
Snugs And Snails
Increased moisture level is an ideal situation to invite snugs and snails. You will generally spot them after sundown when the environment becomes somewhat cool. Ensure that your greenhouse is free from any plant waste like used rocks, bricks, uprooted leaves, stems, etc. that make for a favorable hiding spot.
Thrips
Varying in shades of brown to black, thrips can inflict damages that range from moderate to critical. Vent screens, regulation of weeds, and carefully examining new supplies are some of the effective ways to prevent thrip invasion.
Accessories
Apart from the more apparent accessories like containers, trays, fans, and coolers, there are several other accessories that can make your work easier. And although they may come across as enticing deals, not everything will be a fit for the greenhouse. In a nutshell, the requirement of an accessory will depend on the available space, and of course, the plant’s needs.
For example, some plants may need a slow and steady water supply, which is best achieved through a drip water irrigation system. Likewise, the need for mist systems, fans, or heaters largely depends on how much the environment is able to furnish for plant growth.
On that note, some accessories may be considered to be absolute necessities. A bench or shelf aids space organization, particularly for small greenhouses. While small fans can be used for targeted pest control by eliminating excessive dampness, larger fans help in air purification when coupled with proper ventilation systems.
Even a seemingly insignificant accessory like a thermometer can do wonders for plant development. Perhaps, it’s the best way to maintain precise temperatures that are suited for varied plant growth.
Lastly, regulating the intake of sunlight can be made easy with the application of shading. Besides preventing overheating, they act as filters for plants that don’t need a lot of sunlight to grow.
Some Common Mistakes To Avoid
Not to the point of repeating, but successful greenhouse gardening involves knowing what needs to be avoided. So, here’s a quick roundup of the mistakes that beginners are most likely to commit.
Not Maintaining The Temperature
The best way to ensure the full development of a plant is to adhere to the temperature needs. Even if you’ve planted the seed at the correct temperature, it’s not advisable to skip regular temperature checks, especially for delicate varieties. Use a basic or digital thermometer to assess both the temperature and humidity content.
Insufficient Humidity
While low humidity may dry out plants, making the greenhouse more humid will contribute to the mold and fungus growth. Instead of increasing the humidity at one-go, adopt misting techniques for a gradual increment.
Soil Recycling
Never use old potting soil as it has a high chance of carrying pests and diseases. In addition to applying nutrients and compost, try to go for a blended soil mixture for better results.
Improper Positioning
If there are a lot of trees near the greenhouse, the roots can suck moisture and nutrients from the greenhouse. Moreover, the overhead trees may dump leaves and twigs into the greenhouse, promoting the presence of pests. Likewise, too much shade can restrict sunlight from entering.
Conclusion
That’s that from us for today’s guide!
It was a tad lengthy because we didn’t want to miss out on any point. And honestly, we don’t want you to rush into the decision. Creating and maintaining a greenhouse is no child’s play, so you’d want to have all the necessary resources available in the vicinity.
On that note, it’s time for us to say goodbye. But before we leave, here’s another quick pro tip: spring is ideal for starting seeds, while summer is suitable to start growing flowers and small plants. On the other hand, fall is better for growing seasonal plants, and winter for cold-resistant varieties.
Hope our efforts have answered all the relevant queries. Signing off!
The distinctive aroma and powerful yet subtle flavor of cilantro make it a popular culinary herb.
It’s also one of the easiest plants to cultivate and harvest at home. In fact, growing these herbs indoors can be as successful as growing them in a garden, provided you give the plants extra care.
However, it’s quite natural for first-timers to make mistakes while planting cilantro in a pot. The most common mistake being - transplanting plants from the garden, which is a strict no!
To help you out, we’ve come forth with this guide on how to grow cilantro indoors easily.
Furthermore, we’ve provided a few tips for growing and harvesting cilantro and coriander seeds at home. But before that, we’ll address the popular debate on cilantro vs. coriander.
So, without further ado, let’s begin.
Cilantro Vs. Coriander
Cilantro is commonly used for cooking in Mexico, India, Spain, Africa, Russia, China, and other areas of Asia for many centuries now. Apart from its culinary uses, cilantro seeds are also known for their medicinal properties, especially for aiding in digestion and sleep.
But often, people tend to get confused between cilantro and coriander. Are they both the same?
Throughout North America, the stalks and leaves of the Coriandrum sativum plant are referred to as cilantro, while its dried seeds are known as coriander. However, in different parts of the world, the plant itself is called coriander, and the seeds are known as coriander seeds.
Should You Plant Cilantro Seeds or Plants?
The best way to grow cilantro indoors is by directly sowing the seeds in your garden as they germinate in about 7 to 10 days. You won’t need a headstart as it grows within no time. It’s also important to note that since cilantro develops a taproot, it doesn’t transplant well.
But if you can’t wait to harvest fresh cilantro leaves in late spring, start planting cilantro in peat pots so that they can be directly transplanted into your garden. Just make sure the plants are 3 to 4 inches apart.
Cultivating Cilantro Seeds & Plants
Before you begin cultivating cilantro, make sure you prepare the soil by adding compost and other organic matter to the planting area. Work it into the soil to a depth of at least 18 inches and rake the area to make it smooth.
Once that’s done, sow the cilantro seeds 6 to 8 inches apart in rows spaced about 1 foot apart and water the area. When the plants grow about 2 inches in height, feed them water-soluble fertilizers to enhance their overall growth.
And if you wish to get a steady supply of fresh leaves throughout the summer, sow the cilantro seeds successively every 2 to 3 weeks from the beginning of spring.
Tips To Grow Cilantro Indoors
Growing cilantro indoors is relatively easy, provided you know how to go about its cultivation process. On that note, we’ve come forth with a compiled list of tips and tricks to follow while sowing, cultivating, and growing cilantro or coriander indoors.
Use An Unglazed Terracotta Container
Unglazed terracotta containers allow moisture and air to pass through the plant roots, thereby facilitating their overall growth. Just make sure the container you use comes with plenty of drainage holes for the water to drain out.
Provide Additional Nutrients
It’s important to note that cilantro herbs, when planted indoors, require more nutrition since they come with limited root system ranges without access to sufficient soil nutrients. That’s why when planting cilantro indoors, ensure that the soil you use is a mixture of potting soil and sand to allow the free movement of water.
You may also add additional nutrients by using half concentrations of the fertilizers of liquid fish emulsion or any chemical formulation twice a week during its active growth period.
Water Your Cilantro Thoroughly
When growing cilantro indoors, thorough watering is more important than frequent watering. Always check the soil and only water the plants when the soil is dry to touch.
Furthermore, irrigate the cilantro herbs till the water comes out of the drainage holes of your terracotta container. You may use this technique as a guide to ensure that they’re being watered thoroughly.
Maximize Foliage
Your ultimate aim when growing cilantro indoors should be to maximize foliage. For this, pinch back the young plants up to an inch and snip off the top part of the main stem when you notice the development of flower buds or seed pods. This will redirect their energy back into leaf production, ensuring a fuller and bushier foliage.
Access To Sunlight
In order to grow cilantro indoors, you’ll have to make sure your plants have access to direct sunlight for at least four to five hours a day. However, you may also consider using a growing light to speed-up the overall growth process.
Prevent Plants Diseases
Cilantro is considered an insect repellent because of its strong scent, so it rarely has problems with insects or diseases. However, powdery mildew and leaf spot are the two diseases that may cause issues.
Small yellow spots on cilantro leaves occur due to excessive moisture and poor air circulation. To prevent them from turning into larger brown spots, make sure you grow them in well-drained soil that’s not overwatered. The soil should also be thinned out to ensure proper air circulation.
On the other hand, powdery mildew usually appears as a white powdery coating on the foliage, especially during hot and dry periods. You can prevent this from happening by ensuring adequate moisture to your cilantro plants. Also, make sure you avoid overcrowding.
Harvesting Cilantro Indoors
If you’re growing cilantro herbs at home, you also need to harvest them with utmost care. You may cut them at any time and use the upper and finely chopped leaves in cooking. But avoid using the mature, lower ferny-type leaves for the purpose.
You must also refrain from saving and drying them like other culinary herbs, as this will make the leaves lose their flavor. On the contrary, coriander seeds are easy to harvest on any dry day.
When you notice the seed pods turn brown or crack if pressed, cut the top of the stem. And make sure the pods are harvested before they begin releasing the seeds into your garden.
Once you’ve cut the stems, place the seed pods in a paper bag to prevent this. You may then finish the ripening process in a cool, dark, and ventilated place.
That said, we’d suggest not fertilizing your plants if you’re growing them for seeds as the added nutrients may delay flowering and the overall seed production.
Final Words
When planted indoors in a container with drainage holes, cilantro herbs will grow less abundantly than when planted outdoors in a garden. That’s why added attention and utmost care is crucial to enhance their overall growth.
And with a little bit of time and effort, you can rest assured that you’ll be rewarded with this aromatic and flavorful culinary herb all year round. All you need to do is make sure the plants get the right amount of sun exposure, nutrients, and moisture.
On that note, we have reached the end of our informative guide on growing cilantro indoors. Here’s hoping we were able to provide you with all the relevant information related to the topic.
There are some plants that are just easy and fun to care for. The Philodendron is one of them.
The word Philodendron comes from the Greek words philo, which means “love,” and dendron, which means “tree.” One of the most common and popular choices for a houseplant, the Philodendron is easy to nurture. These plants can grow to be relatively large, spreading their leaves wide and growing up to three feet.
If you plan on bringing one home, you'll need to know the right way to raise them. Well, in this guide, we will tell you everything you need to know about these beautiful plants. We will also give you some tips on how to care for them.
A plant that lets you know what it needs through the right signals is always easy to maintain. As a plant parent, you just need to know how to read these signals.
So, if you're ready, let's begin!
How To Raise A Philodendron
Types Of Philodendrons
There are two main types of philodendron house plants - Vining philodendrons and non-climbing philodendrons. As the name suggests, the first type of plant requires a supporting structure to climb up on. These plants will grow vertically on any structure they find.
As for the second type of Philodendron, they spread outwards as they grow. Typically, their width can be twice the size of the vining philodendron - thus, they require a lot of space to spread out and grow.
One of the most popular types of this plant is known as the Split Leaf Philodendron. Although this name is often used to describe the Swiss Cheese plant or the Monstera deliciosa, there are other types of Split Leaf as well.
It should be noted that though the Swiss Cheese plant is called a Split Leaf, it is not accurate. However, they are related.
The Lacy Tree Philodendron is another type, which is an upright vine with long, rope-like roots. The leaves of this plant are split into multiple sections. They have half-lobed leaves, which are their main attraction. This kind of Philodendron grows well outdoors in its natural habitat, but it is not a good indoor plant.
This plant species is popular due to its versatility, as it grows well in different conditions if taken care of. The Heartleaf Philodendron can be potted in hanging baskets, grown on green walls, and is essentially a climber plant.
With dark green foliage and heart-shaped leaves, this plant is a popular choice for indoor plant lovers. Due to its uniquely shaped leaves, it is also called the Sweetheart plant.
Although by the looks of the heart-shaped plant, it appears to be loving, this fussy plant does not love too much sunlight. This is something to keep in mind if you are planning on getting one for your home.
The Heartleaf Philodendron is a tough plant that can survive even with little care.
These sturdy climber plants can grow at a tremendous pace, reaching heights of up to 20 feet! The arrow-shaped leaves of this plant sport red or copper undersides and can grow 10 to 16 inches in length.
The plant gets its name from the reddish-purple leaves that it sports when young, slowly turning into shades of green as it ages. The Red-Leaf Philodendron requires medium sunlight to thrive.
Owing to its vibrantly colored leaves, it is a very common and popular type of house plant.
This plant species is relatively new in the market. It is a hybrid of Philodendron that is known for its fast-paced growth spurts. The main attraction of this species is its unique color - red leaves, which turn brown or maroonish as they age.
Once the plant turns into an adult, the leaves open up and turn green. However, there are traces of red along with the green leaves, giving it a unique aesthetic.
Another hybrid plant was created by combining the Philodendron scandens and Epipremnum species. This climbing variant is a popular choice as a tabletop plant due to its size and growth patterns.
The Philodendron 'Brasil' plant has thick, green foliage and grows well in hanging baskets. They look incredibly aesthetic, hanging from windows, patios, and porches. The mixture of light and deep green leaves gives it an attractive and striking appeal.
Also known as 'tree philodendron,' this is a species of plant called Philodendron bipinnatifidum. This plant has a unique appeal with large leaves that resemble fingers. These make for good floor plants and are a popular choice for indoor plants.
Requiring bright, indirect sunlight, the plant has a striking, aesthetic beauty inherent to it. No wonder it is so popular amongst plant lovers. You can choose to place them outside or near your front door, in the bedroom, bathroom floors, or window sills.
As the unique name suggests, this species of Philodendron features bright, orange leaves when it is young. However, as the plant matures, the orange leaves slowly turn green.
The plant's vivid color makes it a popular choice for homes, offices, and other buildings. Moreover, it is a low-maintenance plant and survives for years with little care and maintenance.
How To Care For A Philodendron?
One of the primary reasons why the Philodendron is so immensely popular as an indoor house plant is because of how low maintenance it is. In fact, this plant can quickly adapt to most indoor environments. There are just a few things to keep in mind caring for your Philodendron plant.
The best part about this plant is that it communicates with you in its own language. You just need to understand this special language.
Observe your plant minutely and check the details, like the leaves' color, spaces between them, etc. All these are signs of the plant communicating its needs with you.
Sunlight
This plant has a love-hate relationship with sunlight. While it requires an adequate amount of sunlight to survive, too much may harm the plant. So how do you understand what the right amount of sunlight is for your plant?
Take a look at the leaves. If the leaves are a dark green shade, then the plant can tolerate bright, indirect sunlight. Keep your plant near a window where it receives adequate sunlight throughout the day, but never directly.
If you notice the leaves are a solid green color, you may also place them indoors where they receive bright artificial light. This makes it a perfect plant for your office desk, bedroom, or even bathroom.
However, if you notice the leaves starting to turn yellow, then the plant is receiving too much sunlight - and not liking it. It is best to move the plant to a different location where it gets slightly lesser bright sunlight.
Finally, if you notice your plant becoming leggy or having several inches between its leaves, it may mean the opposite. This is a clear sign that your plant is not receiving adequate sunlight. It's time to move it to a brighter location.
Water
Your Philodendron does not require too much water, unlike other plants. In fact, overwatering can actually harm your plant. Be mindful of how much water you are giving.
When should you water your plant? Notice the top inch (2.5 cm) of the soil. This is the length between your index finger to the first knuckle. An excellent way to test the dryness of the soil is to insert your finger in and check the moisture level. If the soil feels moist, it isn't time for watering yet.
Another thing to keep an eye out for is droopy leaves. This might be a sign of too little water or overwatering. Once you put your plant on a consistent watering schedule, the droopy leaves will fix themselves very soon.
If the plant's leaves turn brown and fall off, it is a clear sign of underwatering, so you know what you need to do.
Temperature
Although this plant isn't too fussy, extreme temperature changes can affect it, just like most other plants. It is best to maintain an ideal temperature and environment for the Philodendron.
This refers to 65 – 78°F during the day and around 60°F at night.
Fertilizer
If you want your Philodendron to grow into a large, healthy plant, adding fertilizer may help. Fertilizers contain all the nutrients that the plant requires, which it may not be receiving otherwise.
Feeding the plant a balanced liquid foliage house plant fertilizer is a good idea. Every month during spring and summer, water the plant along with the fertilizer. Feeding it every six to eight weeks is the ideal option.
Notice your plant's leaves - if they are growing too slowly or not growing large in size, it is a clear sign. Your plant requires more macronutrients, which you can provide with the help of good fertilizers.
You should also notice the new leaves which the plant sprouts. If the leaves are pale instead of brightly colored, your plant needs fertilizers. Calcium and magnesium are two important macronutrients required by the Philodendron to grow.
Pests & Insects
Typically, the Philodendron does not attract pests and insects. That being said, certain pests like aphids and mealybugs might be found lurking around your plant.
Getting rid of them is relatively straightforward. Dip a cotton ball in some alcohol and wipe off the mealybugs with ease. To prevent the plant from attracting other insects, spray it with water and mild insecticidal soap. This can be done once in a while and doesn't require too much effort on your part.
Pruning
Like any other plant, your Philodendron also requires periodic pruning. The longer the vines get, the more water, nutrients, and fertilizer it requires. Caring for super large plants always requires more effort towards caring and maintenance.
If you are looking for a truly low-maintenance experience of raising a Philodendron, consider pruning it every once in a while. Moreover, periodic pruning will help you control any pest-related issues you might be facing.
Dust & Pollution
Even indoor plants can get dusty every once in a while. It is important to wipe away the dust, as it can clog the pores of your beautiful plant, making it difficult for them to breathe properly.
Using a damp cloth, wipe the leaves of the plant every once in a while. You don't need to do this too often - remember, this is a low-maintenance plant after all! That being said, wiping down its leaves every once in a while wipes away any dirt and dust on it, enhancing its visual appeal in your home.
Humidity
The Philodendron plant likes humidity. As such, it thrives in places with high humidity. So if you are bringing this plant pet to a location with high humidity, you don't need to worry.
In case you bring the plant to a place that experiences low humidity, your plant may suffer over time. To prevent this, consider misting the plant every once in a while with a spray bottle filled with water.
Although it will tolerate low humidity levels, misting it periodically will keep it bright, healthy, and happy.
Philodendron vs. Pothos, What Is The Difference?
The reason we mention this point is that these two plant species are confused by most people. Although they are extremely similar in terms of looks, they are two different plants altogether.
The Pothos plant falls under a genus called genus Epipremnum. Its leaves are slightly harder compared to the Philodendron. Furthermore, their stems are finer, compared to the rounded stems that are found in Philodendrons.
Are Philodendrons Poisonous?
In short - yes. These plants are toxic to both humans as well as pets. If you have pets or children at home, it is vital to keep these plants in a place that is away from reach, so they don't eat it accidentally.
Although these plants are a very popular choice for homeowners, it is important to consider their toxicity. In case you have cats at home, you need to keep your plants in a location where the cats cannot get to them.
Remember - cats are naturally curious creatures and are also good climbers. Keeping the plant on a window sill or tabletop might not be enough to keep your curious cats away from eating them.
These plants are known for trailing along with the floors and climbing over the edges of their containers. It is best to prune them to avoid this regularly. They should not be kept at an easy access point - for humans as well as their pets.
What Happens If You Eat A Philodendron Leaf?
Accidents can happen - maybe it happened to you, a child, or even a beloved pet. If anyone happens to ingest a Philodendron leaf by accident, the first symptom they would feel would be a burning sensation in their throat and on their lips.
Eventually, the lips and mouth, even the throat, might start to swell up. This can lead to a blocking of the airways, which can be fatal. It is imperative to take the person or pet to the nearest hospital to get them treated.
Other symptoms may include diarrhea and vomiting.
Keep in mind that it is easier for a child or an adult to vocalize their distress in case they have ingested this leaf. However, when it comes to pets, you need to observe them closely and look for symptoms.
You might notice vomiting and diarrhea in the pet as well. Keep a lookout for other symptoms such as dilated eyes, making crying sounds, or different sounds of distress. If you suspect that your pet has accidentally ingested a Philodendron leaf, take them to the nearest vet at the earliest.
Is The Philodendron Your Ideal Houseplant?
For most people, the answer would be yes. Philodendrons make excellent houseplants mainly due to how low-maintenance and adaptable they are. Moreover, these plants can adapt to various types of lighting and water conditions.
They require minimal care and attention. The fact that these plants communicate their needs and distress with you makes them even easier to care for. Look out for yellow or brown leaves, wilting leaves, dry soil, etc. These are clear signs of the plant requiring some attention and care.
Where Can You Place A Philodendron?
The best places to keep the plant are at your home office desks, bedrooms, office buildings, on the patio or deck, on window sills, and in the bathroom. Since they need bright but indirect sunlight, it is best not to place them outdoors in the garden.
Final Words
If you are considering adopting a new plant pet, the Philodendron can be the ideal option.
As we mentioned, these plants require minimal care and can thrive for several years. Although they survive better in warmer climates, they will grow even in winters. Some minimal amount of care and attention will keep these plants happy and healthy for years.
We hope our comprehensive guide helped you understand a bit more about these beautiful plants. Once you learn to appreciate their own unique language, you will find these plants becoming your best indoor buddies.
Owing to their distinct looks, Calathea plants are popular houseplants. If you're considering getting one, here are some care tips that can help them thrive.
This plant goes by several intriguing names - the Prayer Plant, Peacock Plant, Zebra Plant, and even Cathedral Plant. The Calathea plant is easy to spot - with its distinct green, red, and cream leaves dissected by white veins.
It’s a compact-sized indoor plant that thrives with indirect sunlight and periodic watering. Calathea can be slightly fussy and tricky to care for, but don't let that dissuade you. Once you know more about this plant and understand its needs, caring for it will be effortless.
With their beautiful, aesthetic appeal and ability to purify indoor air, these plants make the perfect plant pets for most people. Typically, they grow slowly, reaching just about 3 feet in height. So, if you're ready to know more about these wonderful plants, go through this detailed guide thoroughly.
Let us begin!
Calathea Plant Care 101
Caring For A Calathea Plant
Caring for these beautiful plants can give you a sense of fulfillment and richness. Keeping just a few essential factors in mind, you will be able to care for and raise these beautiful plants with striking looks and enrich the environment of your home. Here are a few important things to keep in mind when dealing with Calatheas.
Sunlight
The Zebra plant ideally thrives in a space that receives bright but indirect sunlight. This is one of the primary reasons why it makes such a good houseplant. You can decorate the Calathea in the bedroom, bathroom, living room, and it will do just fine, as long as it gets light.
That being said, this plant can also survive in low, indirect light. A shaded spot in a sunny room is the perfect environment for it.
Another important thing to keep in mind is that the Calathea thrives in medium to bright (and even low) sunlight; however, it doesn't do well in direct sunlight. Keeping your plant under direct sunlight will cause it to lose its wonderful coloring and slowly wilt.
Humidity
A Calathea plant prefers high humidity. There are several ingenious ways in which you can provide humidity to your water-hungry plant. However, if you live in a place that already has a high level of humidity, don't bother.
Place a humidifier in the room where you keep the Calathea - it will thank you for this! An alternative to buying a humidifier is to place the potted plant on top of a saucer filled with water and pebbles. The functionality of the pebbles is to provide a stable and slow flow of water to the plant through the pot.
Another cheap and easy alternative is to lightly mist the plant once every few days. You can change the frequency of doing this according to how much humidity you are facing and the plant's needs.
Temperature
The ideal temperature range for your beautiful Peacock plant is 65°F to 85°F or 18°C to 30°C. In case the temperature dips below 60°F, or 15°C, you will observe the plant reacting visibly to this change.
To maintain a stable temperature for it, try and keep the windows shut in cooler climates. Avoid allowing cold drafts to enter your home, or at least the room in which you keep the plant.
Water
Although this plant loves humidity, it isn't a huge fan of overwatering. The best rule to keep in mind is to keep the plant's soil moist but not soggy.
Ideally, you should water the plant once every 1 to 2 weeks. Allow the soil to half-dry in between watering sessions. You might have to water it with variable frequency depending on the situation (brighter light, less humidity, high temperatures, etc.)
To understand whether to water or not, insert your finger into the soil about 2.5cm down, and test the dryness of it. If the soil is moist, avoid watering the Calathea, as it will react negatively. However, if the soil is dry, feed it at room temperature, preferably with distilled water.
That being said, if feeding it distilled water is problematic, tap water will work just fine. Remember to let the water sit out overnight before feeding it. This small trick will ensure that the chlorine content in the water dissipates naturally and doesn't harm your plant.
If you are ever in doubt about how much you should water this plant, just remember one thing: It is better to underwater Calathea than overwater it.
Fertilizer
When it comes to using fertilizer for the Calathea, it isn't too fussy. You can opt for a liquid fertilizer diluted to just ½ strength. Feeding it this additional nourishment is only required during the growing season. You can entirely skip doing this during the fall and winter seasons.
An important tip - Water the plant well before fertilizing, diluting the strength of the fertilizer thoroughly. Otherwise, you risk burning the roots of the delicate Calathea.
You can opt for a multi-use marine fertilizer for the Calathea. These fertilizers are completely safe for the plant and pets, children, and your family. Moreover, it doesn't create unnecessary mineral buildup in the soil, which is vital for a plant.
This fertilizer is also eco-friendly, which makes it an ideal option for the environmentally conscious. However, you can also opt for other fertilizers. Ensure that you research them thoroughly, so it doesn't end up harming the Calathea.
Container & Soil
Coming to the soil type for this plant, you need to be mindful of what you use. Here, the Calathea can be slightly fussy again. It prefers well-draining soil that also has the inherent ability to retain water.
Look for a well-draining but the light potting mix for it. This ensures that the plant's roots remain moist, and it can seep water as and when it requires.
As for the container, it is best to get one with adequate draining holes. It ensures that the soil doesn't get too soggy or have stagnant water collecting in it. Furthermore, it encourages air circulation and ventilation for the plant.
You can also opt for a terrarium, as they add an aesthetic value to the room while acting as the ideal environment for a Calathea. If you are creative enough, you can try a DIY project to cut up a bottle or paint it. Place your Calathea plant in the DIY bottle for a perfect home.
Pruning
The maintenance of this plant is relatively straightforward and effortless. Since it is a slow-growing plant, it doesn't require excessive amounts of pruning. Simply trimming the stems and doing away with the dead and wilted leaves is enough.
When pruning the leaves, ensure to cut the leaf at its base, where the plant joins with the stalk. This gives the leaf a clean cut, adding aesthetic value. It makes the plant look more presentable, which is fantastic.
If you notice that there are yellowing or brown bits only on the leaf's edges, don't worry. You shouldn't cut the entire leaf away in this case. Simply trim the leaf with scissors or a small pruning tool along its natural edges and curves.
Another essential tool to keeping this plant looking fresh and healthy is to dust it regularly. Every once in a while, use a damp cloth to wipe the beautiful Zebra plant's leaves. It removes the fine layer of dust and pollution from its surface, allowing the plant to breathe easily.
Repotting
Not many people are aware of the fact that Calathea plants propagate through division. In fact, propagating the plant during its repotting is one of the best and most convenient ways of growing it.
Once every few years, repot your Calathea at the beginning of its growing season. Remember, you can use a diluted fertilizer during this time to ensure that it grows and matures well.
The compelling reason why you should divide and propagate the plant during repotting is that the process puts the plant under high stress. The more times you repot or divide the plant, the more stressed out it becomes, eventually refusing to grow well.
By dividing the plant during its repotting sessions, you put less stress on it in the long run. Observe the plant's roots, looking for the natural separation in them. Gently split the plant and repot it in its appropriate soil mix and container.
Why Should You Get A Calathea Plant?
Calathea plants are one of the most unique and aesthetic looking houseplants. They are immensely popular due to their peculiar looks. Moreover, they are relatively easy to care for - as long as you know their needs.
Aside from the apparent beauty that the plant adds to your home, there are several other benefits of choosing one for your home. A Calathea plant instantly brightens up any room it is kept in, owing to its bright, beautiful leaves with unique textures and patterns.
They don't require too much sunlight and can tolerate medium to low levels of light. This makes them apt for growing in almost any room of your home. Furthermore, they don't require too much watering or maintenance as well.
Moving over to the health benefits, this plant is known for its ability to purify indoor air. The leaves efficiently filter out pollutants, all the while increasing the level of oxygen in the house. They also boost the humidity content of a room.
Caring for plants and watching them grow is exceptionally fulfilling, even for the new plant parents. People experience a boost in serotonin levels with these wonderful plants around their homes.
Common Problems, Causes & How To Fix Them
In general, the Calathea plant is known for being low-maintenance. It doesn't beg for excessive amounts of attention and care, unlike many other houseplants. That being said, there are a few common signs and symptoms that let you know how the plant is feeling.
Here are the most common problems it faces, how to recognize them and fix them:
Wilting & Curling Leaves, Dry Potting Mix
Ideally, this plant has bright leaves with white veins running through its surface. The leaves can be found in various beautiful shades of red, green, and even pale shades. If you notice your plant's leaves starting to wilt or curl, it is a clear symptom of something. Observe the potting mix as well, whether it is dry or moist.
This is a common issue with Calathea plants, and it is caused due to underwatering it. We recommend watering the plant once every week for the next couple of weeks, or until you see the plant recover its coloring.
The dry potting mix is also a clear symptom of underwatering. Fortunately, this problem has an easy solution, so don't worry about it too much.
A Black Base & Yellow Leaves
The base of your Calathea plant should be bright green. Any other shade can be worrisome and must be looked into at the earliest. The same goes for its leaves. Although these plants are known to have pale leaves, if the majority of the plant is green and some leaves start to turn yellow, it is a symptom of overwatering.
Yellowing and wilting leaves can also be a symptom of excessive sunlight. However, it is relatively easy to fix this problem, with a little patience and effort.
Consider watering your plant just once in 2 weeks, or even lesser, depending on its requirements. If you keep the plant in a room where it receives too much bright, direct sunlight, move the plant to a shaded spot.
Remember that even though this plant likes sunlight, it only likes indirect light.
Leaf Spots
Another symptom to look out for is leaf spots. You may notice peculiar colored spots - pale shades of yellow or white, or even darker shades of brown and black. These leaf spots indicate a fungal infection. However, it may also indicate mineral buildup.
To remedy this problem, water your plant with distilled water only. Using tap water can be one of the primary issues that lead to mineral buildup. If you have no way of using distilled water, keep a glass of tap water out overnight, so the chlorine content dissipates naturally.
Feed water directly into the surrounding soil area to bring the natural, beautiful coloring back. It is best to keep the plant out of reach from children or pets.
Varieties Of Calathea Plants
If you have ever Googled "Calathea Plants," you would have been stunned to find several varieties of this plant. As a matter of fact, each variety comes with its unique textures, shape, designs, size, and color.
Curious to know a little more about this eye-catching plant? Here are some of its most popular varieties:
Pinstripe Calathea
One of the most popular Calathea varieties, this plant has stunning leaves that grow at least a foot long. However, the plant itself never grows beyond 2 feet, making it an ideal indoor houseplant.
The leaf features a beautiful deep shade of green, with white, pink, and emerald swirls forming a feather-like pattern on its surface.
Peacock Calathea
As the name suggests, this Calathea variety has foliage that looks as stunning as a peacock feather. With a reddish-purple or maroon underside, the leaves feature dark green and white patterns on their edges, top, and sides. This contrasting color scheme gives it a particularly striking appeal.
Each leaf is oval-shaped and grows up to 12-inches in length. The plant itself, however, reaches just 2 feet in total.
Rattlesnake Calathea
This variety of Calathea has massive leaves that can grow over 2 feet long. The plant doesn't grow beyond 2 feet, just like its other varieties. The excessively long leaves with the smaller body of the plant give it the appearance of rattlesnakes.
The leaves of this plant have intricate designs over its body. You will find them sporting various shades of green that overlap each other. The leaves are spotted with their iconic green dots all over.
With a unique, red underside and wavy-shaped leaves, this variety of Calathea is immensely popular. Proper care and maintenance will ensure that the plant retains its stunning color and patterns.
White Fusion Calathea
This particular variety of Calathea is slightly more finicky than its green counterparts. Due to its white coloring, it is unable to photosynthesize light as well as the others. If you decide to get one of these rare species in your home, you will need to provide it with adequate water, sunlight, and care to keep it thriving.
The White Fusion Calathea reaches only about 12-inches in height. It can be an excellent option for those looking for a more compact species to keep on their desks or in their offices.
Although this species requires more effort than the others, eventually, the effort is worth it. The White Fusion is one of the most popular and aesthetically striking species of Calathea.
Zebra Plant
Its name makes it quite clear to us how this variety of Calathea looks. With a dark green body and lighter, emerald-colored stripes, the plant species resembles a zebra. This evergreen perennial is one of the few species of Calatheas that reach 3 feet in height. The leaves, however, measure just 1 foot.
Conclusion
If you have been contemplating getting a houseplant, the Calathea might be the best one to start with.
With minimal effort and supervision, these plants can grow to look stunning, adding value to any room they are placed in. We hope this detailed guide helped you understand the specific needs of this plant better.
And with that, we are finally at the end of our guide. Wishing you all the best on your plant parenting journey.
The natural habitat has a tendency of slipping in into our concrete lives in one way or another despite our attempts to surround ourselves with artificial materials. Our roots and ancestry lead us back to the heaven nature offers and depicts and we slowly but steady start to re invite greenery indoors. Today we are talking about tips and tricks of growing olive trees indoors, a specimen that has gained huge popularity over the recent years do to its high dry air and soil tolerance and extreme adaptability to any home environment, making it a very beautiful and delicate house plant. In their natural habitat, the olive trees thrive at heights of 20 ft(6 m) but indoors space will limit yours at about 6ft tall(1.8 m), pruning keeping the plant under your control in a compact beautiful shape. The gray green leaves infuse a delicate Mediterranean atmosphere to your home, suitable to Scandinavian decors, modern ones or classical alike. Small white flowers will complete the perfect magic of the olive tree in summer, followed by its delicious fruit we all love so much and appreciate.
Guide To Growing Olive Trees Indoors
Pruning Tips and tricks
Maintaining your olive tree compact and perfectly arranged uses the pruning technique used in the maintaining of all fruit trees. You have to use a pair of sharp pruners to cut the stem at a 45° angle, 1/4-inch above a leaf node (where a leaf attaches to a stem). As a result, the tree will branch right below the cut, thus thickening the tree's crown.
Each spring new growth appears moment when you are supposed to prune the tree again to obtain a beautiful shape and keep the plant itself healthy.
Re-potting the plant should be done in spring season in pots that allow a proper drainage of the soil. Too much water in the soil will result in root rotting and plants dying.
Useful facts about olive trees
Origin: Mediterranean region
Height: the olive tree can reach up to 10 ft (3 m) when grown in a container. If you leave in an apartment you can opt for a dwarf variety that can reach up to 6 ft (1.8 m).Use the pruning technique to keep the tree's crown compact or opt to shape the olive tree drastically to obtain an olive bonsai.
Light: The olive tree prefers full sun so make sure to rotate the plant to obtain an even growth on each side and to allow the plant to get as much sun as possible all around.
Water: During spring season the olive tree is in the growth phase.Make sure you water thoroughly and allow the the top 5 cm of soil to dry out between watering. During the winter season when the plant stagnates and is dormant water rarely.
Humidity: The olive tree can resist very dry environments.
Temperature: Opt for an average to warm 65-75°F/18-24°C temperature. You can keep your tree under the summer sun without problems and It will tolerate a minimum of 40°F/4°C during winter.
Soil: You can choose a cactus soil mix which is high in sand, highly draining.
Fertilizer: Apply every 2 weeks in spring and summer with a balanced liquid fertilizer diluted by half.
Propagation: You can grow an olive tree from seeds or you can try to propagate through stem although it it fairly difficult. During spring take stem tip cuttings, dip cut end in hormone rooting powder and place in moist potting mix.
Now that we have found out a few tips and tricks on how to grow an olive tree indoors, lets delight our senses with the delicacy and splendor an olive tree brings in your abode. Enjoy!
An airy neutral interior design will accept and claim an olive tree beautifully.
Galvanized buckets and the olive green will make a wonderful contrast, delicate in its beauty.
Dark stained wood nestling life in this serene decor.
Pastel tones and old plants illustrations are completed with a wicker basket containing the delicate olive tree.
An olive tree placed near your bed will freshen up the atmosphere.
Dress up your olive tree pot in a white cloth sack.
A stone pot for a tiny bonsai olive tree.
An olive tree will complement a modern minimal approach to interior design.
Create a composition out of your relaxation spot by including an olive tree.
Neutral tones can be balanced with an olive tree tone.
Bring to life a dull corner.
An all black and white decor deserves a subtle color insertion.
Coppery or gold tones complement the olives.
Wicker, natural fibers, discreet gold hues and an olive tree to complete the design.
Green tones and grey hues match each other with grace.
The real Mediterranean vibe brought in a home.
Fresh Scandinavian interior decor hosting greenery and life.
Weathered wood with incredible texture loves the addition of delicate olive green.
Exposed concrete walls and floor allowing the furniture and decorations speak for themselves.
You could even create an olive corner with various sized plants.
Notice how beautiful the contrast between the stone pot and the olive tree leaves is.
Have we made you curious about this exotic plant? Feel free to share your thoughts in the comment section below.
Who does not love that fresh acidic smell a lemon exudes when squeezed or the lovely contrast of white, pure, delicate lemon flowers and the bright rich green of the lemon tree leaves? We use lemon all the time and we can usually buy them all year long from supermarkets but no store bought lemon can compare to having your very own lemon tree in your home. Besides its practical aspect of having lemon at your discretion, the lemon tree will fill your house with a gorgeous fresh smell and will add that perfect pop of color you long for. The guide of growing your own lemon tree out of store bought lemons is pretty easy, we have tried it ourselves a while back and now we are the proud owners of a beautiful lemon tree. The period of time before a lemon tree starts producing lemon can vary from 3 years to 5 or even 10 but in the end we assure you the wait was worth your while.
Things You Will Need
Seed-raising tray
Seed-raising mix
Knife
Bowl
Spray bottle
Plastic wrap
6-inch pots
Potting soil
Watering can or garden hose
Citrus plant food
1. Fill a seed-raising tray with moist, seed-raising mix up to three-quarter inches from the top. Tamp down the soil so it's firm in the tray.
.
2. Cut a lemon in half with a knife and remove the seeds. Rinse the seeds in a bowl of water to get rid of any pulp and sugar, because sugar left on the seed can trigger fungi, which can kill the seedlings.
3. Fill a bowl with water and soak the seeds in it for eight hours. Soaking the seeds prior to sowing them may help speed up germination.
4. Spread the lemon seeds evenly over the soil surface while they're still moist. Sprinkle a half-inch layer of seed-raising mix over the seeds and lightly tamp the soil. Avoid letting the seeds dry; the longer the seeds dry, the smaller the chance of germination.
.
5. Mist the soil surface with water and keep the soil moist throughout the germination period. Stretch plastic wrap over the tray to help promote soil moisture retention.
6. Place the tray in a warm area, at about 70 degrees Fahrenheit. Expect the lemon seeds to germinate in three to six weeks. Remove the plastic wrap after germination and place the tray near a sunny window, in indirect sunlight.
7. Fill 6-inch pots with moist, well-draining potting soil. Transplant one lemon seedling in the center of each pot at the same depth that it was planted in the seed-raising tray.
8. Place the pots in an area of 60 to 70 degrees Fahrenheit where they will get at least four hours of direct sunlight daily, such as a sunny windowsill or porch.
9. Cultivate the soil in a sunny area of the garden. Remove rocks and weeds and pulverize clumps. Transplant the seedlings in the garden when they're large enough to handle, after the last frost date. Plant them at the same depth that they were planted in the pots.
10. Trickle water onto the soil around the plants so it's slowly absorbed. Use a watering can or garden hose to deeply water the lemon plants so the moisture reaches the roots. Keep the soil consistently moist while the plants grow and establish. Water about twice a week and adjust your watering frequency after rainfall.
11. Fertilize the lemon plants with a citrus plant food or use a fertilizer with a nitrogen, phosphorous and potassium ratio of at least 2-1-1.
If you always thought greenhouses are for professionals, we want you to think again.
The ever-increasing costs of food products around the world have virtually transformed homeowners into farmers. So, don’t be surprised the next time you see a greenhouse in someone's backyard!
Plus, greenhouse farming can be a cool upgrade to your gardening skills. But first-timers may face significant challenges while at it. And if you’re one such gardener with this thought in mind, you’re come to the right place.
To help you, here we are with a detailed guide on how to use a greenhouse. Without further ado, let’s begin!
Why Use A Greenhouse?
As clinical and scientific studies continue to prove the detrimental effects of chemicals and preservatives on the human body, homeowners are opting to grow their food. Besides boosting the immunity system, freshly grown vegetables and herbs add a distinct flavor that just can’t be matched with canned or frozen produce. And anything that’s easy on the pocket is bound to be a favorite!
Although you may think of simply going for a vegetable garden, having a greenhouse is much more beneficial. For one, it prevents seasonal or intermittent issues from hampering the plants throughout the growth cycle. Secondly, plants grown in a greenhouse are physically less demanding as they are mostly waist-high as opposed to low on the ground.
Apart from that, it helps in moisture retention while allowing the gardener to control the temperature if needed. The closed room like structure also keeps pests away from delicate plants, thereby resulting in a healthy growth cycle.
Now that you know about the advantages of a greenhouse, let’s dive deeper into the details of building and maintaining it.
Greenhouse Tips For Beginners
Starting Seeds
Before you can begin constructing a greenhouse, it’s essential to have a thorough understanding of the seeds that will grow inside. In this regard, starting seeds are usually planted in plain, level seeds trays, hydroponic trays, or plugin trays.
Furthermore, the preparation of different seeds depends on their specific needs. For instance, some seeds might have to be immersed overnight, stratified, and then planted in the trays.
Beyond that, there are some steps that you can undertake to ensure a proper starting seed process, which are:
Purchasing seeds from a credible source
Listing the types of plants you want to grow
Investing in good trays
Getting sterile soil to prevent pests, infections, and diseases
Regularly adding fertilizer to the soil
Watering as required
Checking if the climate is suitable for the plant
Ensuring proper sunlight
Other than that, it’s also important to identify labels and record the date of planting so that you can keep track of the growing cycle. Each seed packet comes with a germination rate through which you can calculate the number of seeds required to achieve the desired saplings.
Seed Type
Generally, there are two types of seeds that are selected for greenhouse gardening. Each comes with its own sets of pros and cons, and you can choose one (or both) according to your needs.
Hybrid Seeds
Also labeled as F-1 seeds by seed companies, hybrid seeds are pretty easy to buy - you can get them at almost any gardening store. These are used for crossbreeding similar plants, and growing them to be tall and healthy. However, their biggest advantage is that hybrid seeds aren’t quite affected by ecological stress, pests, and diseases.
Not only do these seeds have a consistent production, but they also facilitate early harvesting with improved yields. That said, there are a few downsides to consider. Firstly, their superior quality comes with a significantly expensive price tag. Moreover, the hybrid plants from these seeds don’t have a long shelf-life. And some people just don’t find them appetizing enough.
Heirloom Seeds
If you're all for tasty food on the table, then heirloom seeds are the way to go. This category had been specifically engineered for flavor and taste. But they are more than just that. For starters, the seeds produce genetic varieties, which are great for future cultivation. Unlike the hybrid variant, these are more stable and can be stored for up to a year.
Again, this variety is not free from limitations, either. You may not always find heirloom seeds in your nearest garden supply store. They don’t possess strong hybrid capabilities, and the cross-pollinated species will need to be separated.
Best Plants To Start With
Apart from choosing the seed type, you’d obviously want to decide the vegetable to grow. In this regard, here’s a list of some simple plants that are ideal to start with for you to garner significant working knowledge:
Mushroom
Garlic
Pea
Strawberry
Leafy vegetables like lettuce
Onion
Tomato
Potato
Radish
Sunflower
Seed Labels
Deciphering the label on the seed packet can also provide you with a lot of information. Especially for first-timers, they can get confused with the plethora of options on the market. Usually, you will find the following types:
Open-Pollinated
Also called true-to-type seeds produce true plants, meaning the saplings are related to their parent plant. This, in turn, helps in seed conservation.
Organic
Organic seeds are marked with USDA organic standards of that particular area or territory.
GMO
GMO (Genetically Modified Organisms) seeds are produced via cross genes from separate plant species. Unless labeled otherwise, any seed can be open-pollinated, GMO, hybrid, or heirloom.
Non-GMO
Non-GMO seeds are the ones that have been produced without the ‘recombinant DNA Technology’. Simply put, they are generated through random or specific pollination.
Hard Seeds
As the name suggests, hard seeds don’t generate readily due to the thick outer coating.
Dormant Seeds
Dormant seeds need pre-treatment or weathering to sprout quickly.
Percent Germination (Germ)
Germ is the count of how many seeds will sprout easily. It’s recommended to take note of the germ count so that you know how many seeds will produce the required number of plants.
Greenhouse Construction
As far as constructing a greenhouse is concerned, there are several ways to go about the job. While some hardware stores or nurseries sell pre-assembled greenhouses, others may offer a kit that’s best suited for DIY enthusiasts. Plus, they are also available online.
No matter which method you go for, the basic structure of the greenhouse should also remain the same. It generally looks like a small building with a roof, four walls, and a single entry/exit gate. While the core structure is made of metal or wood, the surrounding material can be a plastic sheeting or any other stuff that allows adequate light penetration and air circulation.
So that your greenhouse can promote a positive and productive growing season, here’s a checklist of the features that should be taken into account during the setup. Even if you plan to opt for a ready-made one, make sure it has:
Sufficient height to accommodate taller plants and the gardener
Space to install a heater, if necessary
Enough room to move around without damaging the plants
The material allows light but prevents the escape of heat and moisture
The location provides natural sunlight or shade as needed
Like the surrounding material, the shape or style of the greenhouse can also vary. Depending upon the available space, homeowners tend to go for either a freestanding or leaning structure. While the former correlates to a stand-alone greenhouse, leaning structures have only 3 walls, with the third one being an existing wall of the house.
Although they are a good option for backyards with less space, it’s worth mentioning that one wall will not receive any natural sunlight due to its non-penetrative nature. Hence, adjusting the conditions inside to suit the growing needs becomes all the more important.
Light Sources
Most plants require light for the overall development and photosynthesis process, but not every light works the same for every plant. Various factors like the plant species, the current season, and the amount of daylight achievable influence the type of light source needed by the greenhouse.
Moreover, the intensity and span of light can cause different reactions in different plants. However, the need for light increases with the development of plants and the subsequent growth of leaves. The wavelength of red and blue colored lights are widely used in photosynthesis, and can be easily identified in the light spectrum.
Sure, greenhouses can’t make the sunlight last forever. But thanks to their controllable environment, gardeners are free to use artificial or man-made light sources that mimic the diverse color range of natural lights.
In ideal conditions, the greenhouse should receive adequate sunlight for plant growth or germination, especially during the summer and spring seasons. But if your area doesn’t receive the required light, LED grow lights and fluorescent lamp strips will do the job.
Not only do these high output light systems sufficiently cover a large area, but they also offer the full light spectrum to aid photosynthesis. Plus, you can use them to boost the development of specific plants, if needed.
Other than that, such supplementing grow lights will also come in handy if you’re looking to target the late autumn or winter months for growing plants. Northern areas, in particular, receive weak natural light during the winter months, so consider investing in an energy-efficient light system.
Fluorescent lights can also promote targeted propagation or germination in greenhouses that receive no natural light at all. For smaller spaces or crops, you can opt for simple fluorescent light strips and hang them 3 to 7-inches above the plant.
Ventilation
Ensuring proper ventilation in summer is a task cut out. As the heat naturally creates convection currents, it does more than enough to maintain adequate fresh air circulation consistently. All you have to do is keep the wall and roof vents open to drive away hot air while pulling in cold air from outside.
Since winter months promote the growth of mold, it’s crucial not to lose focus on air circulation. In this regard, you can use oscillating fans throughout the season to make sure all the moisture is drained out. Beyond that, prevent over watering the plants at all costs.
Temperature Control
Without a second doubt, greenhouses provide for a controlled environment as opposed to open gardens. But temperature control still needs to be taken care of. Without proper temperature, the development process is likely to be hampered beyond repair. Long story short, don’t let the temperature run too high or fall too low during summers and winters, respectively.
Heating
First up, let’s talk about heating the greenhouse. For first-timers, we’d strongly recommend opting for electric heaters, which are easy to install, cost-effective, and have a wide range of use. A small 120-volt heater is ideal for a small greenhouse, while the larger ones may require a 240+ volt heater. Additionally, don’t miss out on a controllable waterproof thermostat.
Besides, you can also choose to have a gas heater. But unlike their electric counterparts, they are less economical and come with the hassle of added ventilation. Furthermore, you’d need to arrange for combustion and fume exhaustion supplies.
Programmable heaters that automatically turn on operation when the temperature drops below a certain point are a good means for propagating seeds or seedlings.
If being eco-friendly is at the top of your priority list, then you can explore the less energy-intensive options out there. For instance, some ventilation systems utilize the unwanted warm air from your home to maintain the desired temperature. In addition, there are other heat-absorbent elements like mats or rocks, which absorb heat during the day and release it uniformly at night.
A pro tip: if budget is a constraint, use a combination of heaters and heating-absorbing elements to keep the temperature consistent throughout the day.
Cooling
Moving on to the cooing aspect, the simplest way to keep a greenhouse from being overheated is by opening the sheds from time to time. Moreover, try to set the greenhouse in a location that provides sufficient shade, just as it allows for sunlight.
That said, it might be necessary to install an evaporative cooling cooler, especially for dryer areas like Arizona, Colorado, and California. Besides regulating the temperature, these machines also help in adequate moisture retention.
Watering
There’s no dearth of modern techniques and equipment for watering. But unless you understand the water requirement of the said plant, none of them will yield satisfactory results. On top of that, the temperature, humidity, and level of development also affect the water requirement.
A common mistake that first-timers make is to water the plants according to a fixed schedule, which often does more bad than good. For example, you may develop a habit of watering the seed every 10 days during winter. However, the frequency will invariably increase during summers. Failing to adapt to the situation can then lead to dead plants.
Similarly, certain alarming signs can warn you about inappropriate watering, including both under and over watering scenarios. Low shelf life, irregular drying, decreased root, or shoot growths can correlate to inadequate watering. If the compost appears too dry or flaky, it needs more water.
As a means of prevention, you can employ a drip irrigation system that regulates greater or smaller steam of water to pots or trays. Combining these systems with a water timer or drip gauge will lead to precise watering patterns.
Remember that it's the roots that trap moisture and not the leaves. Not only does sprinkling water on the leaves cause wastage, but it can also damage the plants in the long run. And overwatering happens when the soil is supplied with water faster than it can drain.
While moisture meters read the exact moisture present in the soil, you can also feel the soil to gauge the moisture content.
Pest Control
Despite having a closed and controlled environment, it’s not unusual for greenhouses to attract pests and consequent diseases. Many gardeners opt for installing insect screening equipment in all open areas like doorways, vents, and airways. But without identifying the pest and the related damages, choosing an appropriate pest control strategy will become a challenging task.
So, we’ve listed down the common pests and the threat they bring to the table.
Aphids
Starting with aphids, these delicately colored, soft-body organisms love feeding on the green leaves. Therefore, observe the bottom of the leaves to check for aphid groups. Careful pruning and regular cleanliness drives are great ways to stop them from munching on your beloved plants.
Bloodworms
Similar to roundworms, bloodworms also have an elongated shape. These limbless insects have well-defined brown heads but are red-bodied due to the presence of hemoglobin. In fact, this hemoglobin enables them to grow in water that has extremely low levels of saturated oxygen. Thus, maintaining a steady oxygen flow will keep the bloodworms at bay.
Snugs And Snails
Increased moisture level is an ideal situation to invite snugs and snails. You will generally spot them after sundown when the environment becomes somewhat cool. Ensure that your greenhouse is free from any plant waste like used rocks, bricks, uprooted leaves, stems, etc. that make for a favorable hiding spot.
Thrips
Varying in shades of brown to black, thrips can inflict damages that range from moderate to critical. Vent screens, regulation of weeds, and carefully examining new supplies are some of the effective ways to prevent thrip invasion.
Accessories
Apart from the more apparent accessories like containers, trays, fans, and coolers, there are several other accessories that can make your work easier. And although they may come across as enticing deals, not everything will be a fit for the greenhouse. In a nutshell, the requirement of an accessory will depend on the available space, and of course, the plant’s needs.
For example, some plants may need a slow and steady water supply, which is best achieved through a drip water irrigation system. Likewise, the need for mist systems, fans, or heaters largely depends on how much the environment is able to furnish for plant growth.
On that note, some accessories may be considered to be absolute necessities. A bench or shelf aids space organization, particularly for small greenhouses. While small fans can be used for targeted pest control by eliminating excessive dampness, larger fans help in air purification when coupled with proper ventilation systems.
Even a seemingly insignificant accessory like a thermometer can do wonders for plant development. Perhaps, it’s the best way to maintain precise temperatures that are suited for varied plant growth.
Lastly, regulating the intake of sunlight can be made easy with the application of shading. Besides preventing overheating, they act as filters for plants that don’t need a lot of sunlight to grow.
Some Common Mistakes To Avoid
Not to the point of repeating, but successful greenhouse gardening involves knowing what needs to be avoided. So, here’s a quick roundup of the mistakes that beginners are most likely to commit.
Not Maintaining The Temperature
The best way to ensure the full development of a plant is to adhere to the temperature needs. Even if you’ve planted the seed at the correct temperature, it’s not advisable to skip regular temperature checks, especially for delicate varieties. Use a basic or digital thermometer to assess both the temperature and humidity content.
Insufficient Humidity
While low humidity may dry out plants, making the greenhouse more humid will contribute to the mold and fungus growth. Instead of increasing the humidity at one-go, adopt misting techniques for a gradual increment.
Soil Recycling
Never use old potting soil as it has a high chance of carrying pests and diseases. In addition to applying nutrients and compost, try to go for a blended soil mixture for better results.
Improper Positioning
If there are a lot of trees near the greenhouse, the roots can suck moisture and nutrients from the greenhouse. Moreover, the overhead trees may dump leaves and twigs into the greenhouse, promoting the presence of pests. Likewise, too much shade can restrict sunlight from entering.
Conclusion
That’s that from us for today’s guide!
It was a tad lengthy because we didn’t want to miss out on any point. And honestly, we don’t want you to rush into the decision. Creating and maintaining a greenhouse is no child’s play, so you’d want to have all the necessary resources available in the vicinity.
On that note, it’s time for us to say goodbye. But before we leave, here’s another quick pro tip: spring is ideal for starting seeds, while summer is suitable to start growing flowers and small plants. On the other hand, fall is better for growing seasonal plants, and winter for cold-resistant varieties.
Hope our efforts have answered all the relevant queries.
Now, you don't need to be a chemistry grad to understand the nature and properties of this compound. But a little insight will help you work in the right direction. As gardening enthusiasts, we all want our plants to thrive and attain optimal growth.
But some factors like poor magnesium or sulfur content in the soil, lack of nutrients, weeding, etc., can interfere in the growth stage of plants. That's where Epsom salt comes into the picture, its health-giving white crystals nurturing your plants with much-needed minerals.
Without further ado, let's learn more about this unique ingredient.
Epsom Salt For Greener Gardens
Epsom Salt - A Quick Break Down
Before we discuss the benefits of Epsom salt, let's talk a bit about its composition. This white substance is essentially a mineral compound that works as a superfood for plants and trees. Long story short, Epsom salt or Magnesium Sulphate (MgSO4) is a natural and non-toxic vitalizer that can enhance nutrient absorption and regulate enzymes in plants.
The compound was originally discovered in Epsom and is now a part of a healthy lifestyle for many. For instance, it can help people suffering from magnesium deficiencies and other ailments. However, in this guide, we'll be primarily focusing on its positive impact on plants.
Here, we’d like to mention that even though it looks very much like regular table salt, it does not consist of sodium chloride. In fact, table salt can harm plant life and have a range of other ill-effects.
Advantages Of Epsom Salt In Gardening
Boosts The Germination Process
Magnesium is a key mineral that promotes seed germination by providing nourishment and strengthening cells. During this nascent stage, seeds quickly lose sulfur, so it's important to supply them with the essential nutrients.
Mix a tablespoon of Epsom salt in 1 gallon of water and sprinkle the solution on the seed bed. Alternatively, you may add the salt directly to the soil before planting the seeds. If you're growing wildflowers or grass seeds, distribute 1 cup of Epsom salt every 100 sq ft.
Combine it with the soil and water the area generously. Top up the supply by pouring Epsom salt solution on the seedlings each month during the growth stage.
Helps Facilitate Transplant
Now, this is something most gardening enthusiasts are familiar with. Any plant, when taken out from its original location and replanted somewhere else, can undergo a shock. This is especially common when you remove overgrown plants from a pot and put them in the garden, yard, or a larger pot.
That said, transplant shock arises due to a disrupted root system and the subsequent failure in root integration. When a plant fails to establish itself, it gradually dies off due to a lack of nutrition and limited water intake. While most plants undergo this shock when replanting or repotting, the right care can help them acclimatize better and faster.
That's where Epsom salt comes in handy, as it helps plants absorb nutrients when they are replanted. Simply put some salt at the bottom of the hole dug for replanting, and you're good to go. Also, make sure to provide your plants with sufficient water and use Epsom salt-infused water for a few months to keep it healthy and thriving.
Supplements Nutrient Absorption
Based on scientific evidence, magnesium sulfate helps plants increase overall nutrient absorption, which in turn spurs timely growth. Basically, it supplements cell uptake of essential minerals like phosphorus, nitrogen, and sulfur.
These nutrients play a vital role in root growth as well as foliage density, and ideally, they should be present in soil from the get-go. However, sometimes nutrients can wash out or leach through the ground, thereby causing a deficit and impeding plant growth.
In such cases, we suggest adding Epsom salt as it rejuvenates the plants and provides them with the necessary minerals and vitamins.
Helps Produce Greener Leaves
Let's take a trip back to 5th-grade science and talk about the green pigment in plants - chlorophyll. Magnesium is a key mineral that produces chlorophyll needed for photosynthesis. This process is essential for the survival of plants wherein they capture light energy to convert CO2, water, and minerals into organic compounds (food source).
For this to happen, plants and trees largely depend on solar energy, the lack of which can cause yellowing of leaves and a general loss of vitality. Therefore, it's important for plants to receive sufficient sunlight and, at the same time, enough minerals so they can produce much-needed chlorophyll.
Prepare an Epsom salt solution by mixing one 1 tablespoon of the compound in 4 cups of water and spray it directly on the leaves to ensure better magnesium uptake.
Enhances Flavors
Epsom salt may not have the same atomic makeup as table salt, but it works as a flavor enhancer in fruit-bearing plants. Prepare a batch of MgSO4 solution by adding 1 tablespoon of the ingredient to 1 gallon of water.
Use it liberally during the growing season and apply it near the roots of trees for the best results. Alternatively, you may sprinkle the salt directly on the soil bed at least 3 times a year. So, whether you're growing nuts, grapes, berries, peppers, or tomatoes, Epsom salt treatment will provide you with flavor-infused fruits.
Repels Garden Pests
While Epsom salt is water-soluble, it's quite useful in drier climate areas where minerals are less likely to wash away. Therefore, if you live in such a place, you may distribute the salt across your garden area, especially around plant bases, to repel pests.
MgSO4 is much like Diatomaceous earth in nature, which makes it a natural pest deterrent. So, if you're worried about your plants being attacked by snails and slugs, this is one of the most inexpensive yet effective ways to deal with it.
Works As A Fertilizer
You'd be surprised to know that Epsom salt doubles as a fertilizer, especially if you're looking to increase the level of magnesium and sulfur in the soil. There are two ways to do this - you may either mix it with fertilizer and add it to the soil or water your plants with the MgSO4 solution.
The first method works well right after planting, whereas the latter can be used throughout the growth stage. Other than that, you may incorporate the salt into the soil around the plant base using the plant height as a yardstick for measuring the required amount of salt. To explain further, use a tablespoon of Epsom salt per 1 ft of the plant height.
This practice is especially effective in gardens and orchards, where you want a plentiful yield of fruits and flowers. While some plants can tolerate a dip in magnesium and sulfur levels, most cannot, and hence they begin to show signs of nutrient deficiency.
The most common symptom of magnesium deficiency is the yellowing of the leaves. More often than not, the leaf-edges turn yellow, and you can also find a yellow pattern in the center. On the other hand, lack of sulfur causes the yellowing and browning of newer leaves. Either of these anomalies can drastically impact bloom rate and impede growth.
Grows Lush Green Lawns
The lack of magnesium in your soil should not stop you from growing a lush green grass pad, and as such, Epsom salt will help you achieve your dream lawn. If you're not sure about how much salt you need to apply, then just follow the recommendation of the Epsom Salt Council.
According to them, 3 lbs of Epsom salt should be spread across an area of 1250 sq ft for the best results. After applying the salt, don't forget to water the area. However, make sure that the minerals do not wash away.
Works As A Foliar Spray
By now, you already know that plants can absorb magnesium through leaves. Meaning, you can use Epsom salt solution as a foliar spray to up the magnesium level in plants. This is a care measure that you may undertake throughout the plant's lifetime, thereby ensuring healthy growth and bountiful produce.
Besides, regular application of this foliar spray will help your plants hit growth milestones on time. To make the most out of your solution, mix 1tablespoon of salt to 1 gallon of water and spray it on blooming plants once every month. However, if your plants are prematurely yellowing, it's best to sprinkle the mix directly on the soil.
Nourishes Houseplants
Some houseplants get a bad rap for being too sensitive and dying early on despite sufficient care. If you're worried about the same outcome, use Epsom salt to boost their nutrition level. Since it's a pH neutral compound, MgSO4 is gentle on houseplants and can help them reach their full potential.
Mix 2 tablespoons of Epsom salt into 1 gallon of water and apply it directly on the leaves for higher mineral uptake. Or, depending on the plant height, you may add 1 tablespoon of salt per foot to the soil. Ideally, you should administer this mineral compound to your plants every month and note the difference in growth and foliage density.
Produces Gorgeous Roses
Epsom salt is a vitalizing agent that benefits both newly-planted and established rose plants. To get the most beautiful blooms, you must add the salt in the hole before planting the roses.
In the case of full-grown rose buses, use the Epsom salt solution, prepared in 1 tablespoon to 1-gallon ratio directly on the leaves. This application is strictly seasonal, so spray the plants once in spring when they start to flower.
Aids In Removing Tree Stumps
Depending on the thickness of the tree trunk, removing stumps can turn out to be a costly affair. So, if you don't want to spend several dollars in the stump removal process, use Epsom salt to do it yourself.
It may not be a conventional approach per se but a somewhat effective one that can simplify the process. For starters, you'll have to make multiple holes on the top of the stump using a ½-inch electric drill bit. Keep them a few inches apart and continue drilling till the holes reach half the depth of the tree stump.
After that, pour Epsom salt in the holes and add enough water to moisten the salt grains. Make sure not to saturate the salts. Once you're done with that, cover the tree stump with a waterproof material to keep out rain and moisture while it cures. Eventually, the MgSO4 will dehydrate the stump and kill the living cells.
When that happens, you can easily ax off most of the stump and dig up the entire root system underneath the soil.
Eradicates Weed
While MgSO4 nourishes all types of vegetation, it has proved to be an excellent weed eliminator when combined with other substances. Simply add 2 cups of Epsom salt and 1 cup of dish soap to 1 gallon of white vinegar.
Spray the mixture on weed-infested areas, and soon enough, the unwanted growth will start to wilt. However, if you want to stop them from reclaiming the soil, heat the solution, and then sprinkle it across the area. Doing so will attack the roots and prevent weeding in the long run.
How To Use Epsom Salt With Flowering Plants
Epsom salt is the key to fuller buds and perky blooms. So, if you want your flowering plants to reach their full potential, make sure to throw in some MgSO4 in the mix. More often than not, flowers experience magnesium deficiency during the blooming process.
Therefore, we recommend using a foliar spray or a watering solution regularly to lengthen the flowering cycle. Also, it helps plants to rebloom faster so you can enjoy plentiful blossoms throughout the season.
Besides, if you're growing continual bloomers, administering Epsom salt ensures richer green pigment and bigger crowns. As mentioned earlier, magnesium increases the production of chlorophyll in plants. As a result, the plants thrive, providing higher yields every flowering season.
For optimal use, follow this application technique: once a year, mix Epsom salt into the soil surrounding the flowering plant. Top it up with a batch of dissolved salts when the new vegetation crops up.
How To Use Epsom Salt With Vegetable Plants
In general, Epsom salt can benefit the majority of vegetable plants, but it particularly works wonders for tomatoes and peppers. This is mainly because both these plants are naturally deficient in magnesium.
In tomatoes, MgSO4 prevents rots, and that goes for squash varieties as well. Other than that, it enables plants to establish a deeper root system and produce a higher yield. Incorporate the salt into the soil while planting the veggies so they can access the necessary minerals from the get-go.
After that, keep spraying the plants with the salt solution every two weeks or so, to provide them with a consistent supply. You may also administer a foliar spray but be careful not to dampen the leaves too much.
Final Words
That's all, folks.
We hope this elaborate guide has been able to provide you with enough information on Epsom salt and its varied applications in gardening. But before you go ahead and buy your own supply of this nourishing compound, here's some advice.
When you're purchasing Epsom salt for your vegetation, buy only those brands which are rated as agriculture-grade. That said, agriculture grade MgSO4 is meant for outdoor and plant-use only and not suitable for human consumption.
In case you want to include this salt in your diet, buy something which is FDA and USP-approved and hence suitable for intake. Other than that, these salts have laxative properties, so be careful to avoid contamination, and keep the stuff away from pets.
Furthermore, make sure to wear protective gloves while preparing a salt solution or mixing it with soil. Since magnesium-sulfate can be absorbed through the skin, avoid contact at all costs. On that note, we'd like to take your leave.
Bye for now!
There is a certain charm about eating homegrown fruits and vegetables. Not only are they healthier than the options available in your local market, they can be flavorful too, especially when grown under the right conditions.
Now, extreme climatic conditions can destroy the growth of your fruits and veggies. And to get the best out of them, you need a controlled environment. And that is exactly where greenhouses step in.
In this article, we will talk about 72 unique DIY greenhouse plans which will help make the most out of your homegrown crops. So, read along to find out which greenhouse suits your needs the best.
You have seen many weird and amusing things on the Internet, but we bet you are flabbergasted by this incredible greenhouse made of plastic bottles. Using plastic bottles which are harmful to the environment, to build something environment-friendly is kind of ironic, isn’t it?
The trick to building this greenhouse is to construct the frames first. Once you are done with a frame for a single wall, cut off the bottoms of your plastic bottles and stack them on top of each other using a garden cane as support. Make sure you remove any labels and wash all the bottles before you stack them.
If you are interested in learning more about this wonderful DIY project, then follow the link mentioned below the illustration.
If the last DIY greenhouse project did not appeal to your tastes, then this simple DIY greenhouse might just do the trick. Moreover, we believe that gathering the supplies for this project will be easier than acquiring 1500 plastic bottles. However, the downside to building this greenhouse is that you need to have some familiarity with woodworking techniques.
All the materials required for this DIY project along with the detailed step-by-step instructions are mentioned in the link below the image. And we suggest you click on it if you are interested in learning more.
If you are looking to build a large greenhouse but do not want to spend thousands of dollars on it, then you surely need to check out this amazing DIY project. This greenhouse plan is specifically for a 12’x32’ hoop-style greenhouse. However, you can make some alterations to suit your needs.
To get started with this project, you will require (4) 2x6 – 16’, (2) 2×6 – 12’, and (14) 2×4 – 12’ green, treated wood pieces. In addition to that, you will also require (19) ¾” x 20’ white PVC pipe, (9) 10mm x 10’ rebar, (1) 20’x50’ roll of 6mm plastic, (1) Bundle of 50 4’ wood lathe, zip ties, nails or screws, metal banding, and finally, door hinges and handles. All the materials required for this project cost a shade under $ 400, and that is impressive for the size.
The creator of this project has gone into great depths to explain it, so we suggest you click on the link mentioned below the illustration to learn more.
Now, we understand that the last hoop style greenhouse project might be a little too large for most people. And if that is the case for you, then this greenhouse might just be perfect for your needs. Moreover, this DIY greenhouse project only costs $ 50 to build! Yes, that’s right!
The materials required for this project are similar to the last one, albeit more streamlined. If you are interested in learning more about the materials list and instructions for this project, then follow the link mentioned below the illustration.
5. Create This Incredibly Cool Geo Dome Greenhouse For Your Backyard
Take a look at this Geo Dome Greenhouse. Not only does it look incredibly cool, but it is also quite simple to create, as long as you are comfortable with some basic woodworking techniques.
To get started with this project, you will require untreated spruce lumber or Douglas Fir, screws, greenhouse plastic, hinges for the door and windows, and automatic window openers. In addition to that, you will also require measuring tape, pencil, level, utility knife, safety glasses, and hearing protection, drill, and last but not least, a radial arm saw, or dual bevel miter saw.
If you believe you can take on this DIY challenge, then we suggest you follow the link mentioned below the illustration to learn more.
6. Learn how to build a mini greenhouse using upcycled storm windows
If the previous greenhouse designs were too utilitarian for your taste, then this will surely pique your interest. Not only is incredibly easy to build, but it looks really cute, doesn’t it? Moreover, this project is only made of upcycled materials. In other words, it costs absolutely nothing!
For this incredibly cute DIY greenhouse, you will require three storm windows of the same size, scrap lumber and other materials like hinges, nails, and screws.
If you love this DIY idea, then we suggest you click on the link below the illustration to learn more.
7. Build A Sophisticated Greenhouse For Your Lawn
While this might be a DIY greenhouse project, it is one of the more complex ones featured on this list. In fact, to build this sophisticated greenhouse, you need to have some prowess in woodworking techniques. In case you are already comfortable with woodworking, then creating this DIY greenhouse will be a breeze.
For the outer frame, you will require 330ft (100 meters) of 1 1/2"x 3 1/2" (90 mm x 45 mm) treated, or natural decay-resistant wood for the frame, 10ft (3 meters) 3/4"x 7 1/2" (190 mm x 19 mm) treated board for the fascia and, 36ft (11 meters) of 4" x 4” (100 mm x 100 mm) treated wood for the base (sawn wood will also work). In addition to that, you will also require a sheet of 4ft x 8ft x 3/8" (1200 mm x 2400 mm x 10 mm) treated plywood for the gussets, 350sq ft (30sq m) ultra-violet-resistant polythene for the covering and miscellaneous items like nails, galvanized plates, strapping, hinges, and so forth.
The creator of this project has gone into great depths in explaining it, and we suggest you click on the link mentioned below the illustration to learn more.
Although the last project might have been for everyone, we believe that anyone can build this simple bamboo greenhouse. Moreover, the materials required for this project are not only simple but also quite inexpensive.
To get started with this wonderful DIY project, you will require bamboo poles measuring 2 ½ inches or 5 inches around and of varying lengths, a roll of heavy grade clear plastic sheeting, cement, stakes and twine, and heavy-duty Velcro strips. In addition to that, you will also need post digger, hacksaw, drill with a 0.5-inch drill bit, 0.5-inch nuts and bolts, and last but not least, a staple gun.
If you love this DIY idea, then follow the link mentioned below the illustration to learn more.
9. Learn How To Create A Durable and Functional Greenhouse
If you are up for a challenging DIY greenhouse, then this just might be it. Needless to say, this DIY project requires some familiarity with basic woodworking techniques, and it is certainly not for a beginner. However, if you manage to bring this idea to fruition, it will not only be durable enough to stand the test of time, but it will be quite functional as well.
For this DIY greenhouse project, you will require two 16’ pieces of 4” x 4” lumber, two 10’ pieces of 4” x 4” lumber, four 16’ pieces of 2” x 4” lumber, four 10’ pieces of 2” x 4” lumber, 46 8’ pieces of 2” x 4” lumber, one 16’ piece of 2” x 6” lumber, and three 8’ pieces of 2” x2” lumber. In addition to that, you will also require 500 pieces of 2 ½ inch screws, film, vent opener, thermostat outlet, and finally, hinges and latch.
If you believe that this DIY greenhouse project is right up your alley, then click on the link mentioned below the illustration to learn more.
While the DIY greenhouse made using storm windows might have been too small for your liking, this incredible greenhouse project can accommodate a lot more. Moreover, it is entirely made using upcycled materials.
To get started with this amazing DIY project, you will need multiple pairs of old windows (no need to collect windows of the same size), 2” x 4” lumbers for the studs, 4” x 4” lumbers for the corner posts, coated deck screws, and other miscellaneous items.
If you are interested in learning more about this wonderful DIY project, then follow the link mentioned below the illustration.
11. Learn How To Build An Amazing Barn-Style Greenhouse
Take a look at this Barn Greenhouse. It looks amazing, doesn’t it? However, we must say that this is not a simple DIY project by any means. In fact, it is one of the toughest projects featured till now. You will not only need to be proficient in woodworking techniques but also require great perseverance to execute this greenhouse idea. Moreover, the materials required for this project will be more expensive than the ones featured earlier.
If you are interested in learning more about this sophisticated barn greenhouse, then click on the link mentioned below the illustration.
12. Make An Instant Cloche To Protect Your Seedlings
If you are looking for an incredibly easy but functional greenhouse idea and do not care much for aesthetics, then you surely need to check out this simple greenhouse project. Moreover, this DIY greenhouse is extremely light on the wallet. In fact, you can complete the entire project using only upcycled materials.
To get started with this DIY project, you will require six small curved branches from a conifer tree, a clear plastic sheeting, a long straight piece of lumber, and a sharp cutting tool. That’s all!
If you think that this DIY idea is well-suited to your needs, then follow the link mentioned below the illustration to learn more.
Take a look at this whimsical greenhouse made of CD cases. It looks really cute, doesn’t it? However, due to its tiny size, this greenhouse is not meant for all. Then again, if you love the idea, you can make multiple greenhouses instead of just one.
To get started with this project, you will need old CD cases (40 to make a greenhouse with dimensions 11-inch x 18-inch x 20-inch), plastic glue (make sure it dries clear), painter’s tape, safety glasses, and a pair of tweezers. In addition to that, you will also require a craft knife, ruler, cutting board and a large flat surface.
If you are interested in learning more about this wonderful DIY project, then click on the link mentioned below the illustration.
14. Learn How To Build A Gabled Roof DIY Greenhouse
Now that you had your dose of simple and easy DIY projects, let us move on to something a bit more complex. Needless to say, you need to have some prowess in woodworking techniques to bring this DIY idea to fruition.
To get started with the base, you will require six 4-inch x 4-inch x 8 feet treated wood posts, two 15/32-inch x 4 feet x 8 feet plywood sheathing (you can also go for a thicker plywood), and 1lb of 3-inch galvanized decking screws. For the walls, you will need 22 – 2-inch x 4-inch x 8-inch treated framing lumber, 3lbs of 3.5-inch exterior decking screws. You will also need two 2-inch x 4-inch x 2 feet boards, one 2-inch x 4-inch x 8 feet board, nine 2-inch x 4-inch x 51-inch piece of lumber and 1lb of 2-inch decking screws for the roof.
The rest of the materials required for the floor, siding, and shelves, along with the detailed step-by-step instructions are mentioned in the link below the illustration, and we suggest you click on it if you love this DIY greenhouse idea.
Take a look at this Fold-Down DIY Greenhouse. It looks lovely, doesn’t it? Moreover, this is extremely simple to build, and if you follow the instructions properly, it should not take you more than a day or two to complete it. And if you already have pre-cut pipes, you can finish it in just two hours!
For this cool DIY greenhouse idea, you will require eight 1-inch x 10 feet PVC pipes, eight 1-inch elbow fittings, two 1-inch tee fittings, four 1.25-inch tee fittings, two 0.75-inch x 5 feet metal conduits, and a box of eight 0.75-inch lath washer head screws. In addition to that, you will also need two 0.25-inch x 3-inch bolts, 25 feet x 12 feet x 4 mm plastic sheeting, three 3 feet long coated light-duty utility chain, three spring links, and some other items.
If you love this wonderful DIY greenhouse idea, then we suggest you click on the link mentioned below the illustration for the detailed step-by-step instructions and the full materials list.
16. Build this beautiful cedar greenhouse for your plants
Who said that greenhouses could not be pretty? Just take a look at this amazing cedar greenhouse! Not only does it look really beautiful, but it is also quite functional. In fact, the angle wall windows which are made of a high-performance thermoplastic transmits up to 90% of visible light. It also filters out the harmful ultraviolet light.
This specific DIY greenhouse project can be built using a kit, and that makes things even more convenient. Needless to say, you might be able to salvage materials for a lesser cost if you are willing to put in that extra work.
If you are interested in learning more about this wonderful DIY project, then we suggest you follow the link mentioned below the illustration.
Just take a look at this amazing greenhouse project. It looks quite grand, doesn’t it? Surprisingly, this lovely project was made using free recuperated windows. In fact, the creator used 24 French windows of various ages and designs for this greenhouse.
This entire project only cost the 50 euros ($ 59) to build. However, the owner states that since he already had access to some of the materials required for this project, he did not have much to spend on other than some wooden supports, metal stakes, guttering, leaded lights, and the horticulture grade polyethylene for the roof. A more realistic budget for this project should be in the $ 100 to $ 150 ballpark range.
If you are interested in learning more about this amazing greenhouse idea, then follow the link mentioned below the illustration.
Not everyone requires a humongous greenhouse for their plants. Sometimes, a tiny greenhouse project such as this one will do a great job for a few seedlings or a small plant. Moreover, it is incredibly simple to make and will have almost no effect on your wallet.
To get started with this DIY greenhouse project, you will require cage wire (even chicken mesh wire will do), and plastic wrap. A lot of plastic wraps!
If you love this wonderful DIY greenhouse idea, then we suggest you click on the link mentioned below the illustration to learn more.
19. Learn How To Make A DIY Greenhouse Using A Trampoline
Take a look at this amazing greenhouse made out of a trampoline! Yes, a trampoline! Not only is it one of the simpler DIY greenhouse projects featured here, but it is also very inexpensive. In fact, the total cost of the materials required for this project only amounts to a shade under $ 100. That is quite impressive, isn’t it?
For this amazing DIY greenhouse project, you will require a trampoline frame, piping, wood, thermometers, red tape, plastic, and screws. That’s all!
If you are interested in learning more about this incredible DIY idea, then follow the link mentioned below the illustration.
20. Easy DIY bottle greenhouses for your seedlings
If you thought that the mini hothouse project was the simplest, then take a look at these DIY bottle greenhouses. Not only is it easy to make, but it truly costs nothing. Sure, this greenhouse project is not meant for every kind of plant. In fact, it can only support seedlings. However, it is surprisingly effective at increasing the temperature by about 10+ degrees Fahrenheit. And that is a great way to give warm season plants such as tomatoes, peppers, eggplants a significant head start.
Needless to say, the only materials required for this project are clear plastic bottles and a cutting tool. That’s all!
Although this project is pretty self-explanatory, we suggest you click on the link mentioned below the illustration to thank the creator of this wonderful DIY greenhouse project.
21. The UnBrella – A Simple and Portable Greenhouse Project
Take a look at this ingenious greenhouse project. Not only is it one of the simplest projects featured on this list, but it is also one of the most inexpensive. However, its simplicity is not the best part about it; that honor would have to go to its portability. Yes, this greenhouse is portable, and it features a sprinkler system! If that is not impressive, then we do not know what is.
To get started with this project, you will require a clear plastic umbrella, 6 ft - 3/8" clear plastic tubing, bubble level, garden hose adapter, and a 3/8" tubing to garden hose adapter. In addition to that, you will also need a 3/8" tubing T-adapter, 12 zip ties, and finally, a roll of plumber’s tape.
If you are interested in learning more about this wonderful greenhouse project, then we suggest you follow the link mentioned below the illustration.
22. Learn How To Build This Beautiful Octagonal Greenhouse
If you are tired of boring greenhouse designs, then you surely need to check out this amazing Octagonal Greenhouse. However, we must confess that this is not a simple project by any means. In fact, you need to be handy with woodworking tools to bring this greenhouse idea to fruition.
All the materials required for this greenhouse project along with the detailed step-by-step instructions are mentioned in the link below the illustration. And we suggest you click on it if you believe you can take on this DIY idea.
Although this tiny greenhouse is not meant for plants, it can make a substantial difference for your seeds. And, if that is what you are looking for, then you surely need to check out this DIY greenhouse project.
For this DIY idea, you will require cardboard or wood (the creator used cardboard cut by lasers), plastic for the windows, glue, and a cutting tool. In addition to that, you can use your favorite color of paint to make the greenhouse more attractive.
If you are interested in learning more about this simple greenhouse idea, then click on the link mentioned below the illustration.
24. Learn How To Make This Incredibly Cool Automated Greenhouse
If you are a tech-savvy person with a coding background, then this amazing Automated Greenhouse will definitely appeal to you. This greenhouse has multiple sensors to measure external temperature, ambient temperature, luminosity, and even the soil moisture! Moreover, the different components react according to the sensor readings to make this fully automatic. That is impressive to say the least!
If you are worried about coding this project from the ground up, then we must tell you that the creators of this project have been kind enough to provide all the code required for it. Moreover, they have listed all the materials required for this greenhouse. So, we suggest you click on the link mentioned below the illustration to learn everything you need to know about this brilliant DIY greenhouse idea.
We understand that the last project might have been for everyone, so we have followed it up with a simple countertop greenhouse that you can easily make with some basic woodworking knowledge. Needless to say, this tiny greenhouse is only meant for a small plant. However, you can make a few of these to accommodate multiple plants.
The creator of this project has done an excellent job in explaining it in great detail. And, we suggest you click on the link mentioned below the illustration to learn more. You will also find the full list of materials required for this greenhouse idea in the link.
26. Build an Upcycled Geodesic Dome For Less Than $ 20
Geodesic domes are always cool but what is even cooler is a geodesic dome made entirely using recycled materials. In fact, this greenhouse cost less than $ 20 to build! That is impressive to say the least!
If you love this DIY greenhouse idea, then we suggest you click on the link mentioned below the illustration to learn more. All the materials required for this project along with the detailed step-by-step instructions are mentioned there.
27. Beautiful Backyard Greenhouse Made From Reclaimed Windows
Take a look at this backyard greenhouse made from reclaimed windows. It looks amazing, doesn’t it? The trickiest part of this project is acquiring windows of the correct size. However, in case you are not after reclaimed windows, then that should not be a problem at all. On the other hand, if you are adept at woodworking, then you can also modify the structure to fit windows of different size.
The creator of this project has done an excellent job in explaining it in great detail, and we suggest you click on the link mentioned below the illustration to learn more.
Have you ever seen a modular greenhouse before? Well, feast your eyes on the ingenious Casa Verde Greenhouse Project! The best part of this project is the simplicity and it does not require any woodworking or complex coding skills.
To get started with this amazing greenhouse idea, you will need sheets of 2.5 mm Polystyrene (or any similar transparent plastic material like PVC, HDPE, and PMMA), 1 mm PVC sheet, 24 cm cable ties, and 58 cm (A + 2 cm) wooden poles. In addition to that, you will also require a cutter, hole punch, hand drill, ruler, protractor, and a pencil. All of the materials are easily available and quite inexpensive too.
If you are interested in learning more about this amazing DIY greenhouse project, then follow the link mentioned below the illustration.
29. Amazing Greenhouse Made From Upcycled Glass Jars
If you love upcycling, then you will surely appreciate this wonderful greenhouse idea made entirely out of glass jars and fence posts. Although this project is quite simple, acquiring hundreds of glass jars will be a tough task. But, it is nothing quite as complicated as building an automated greenhouse.
The creator of this project has gone into great depths to explain it, so we suggest you click on the link mentioned below the illustration to learn more about this fascinating greenhouse idea.
Here is another incredible DIY greenhouse project for coding geeks. However, if you are someone with basic computer knowledge, we believe you can execute this idea as the creator has done an excellent job in providing all the necessary instructions and code.
To get started with this DIY idea, you will require servo motors, push buttons, Raspberry Pi 3 Model B, a moisture sensor, temperature sensor, breadboard, universal power supply, transistors, resistors, MCP3008, LED, wires and ethernet cable. In addition to that, you will also require 5.2 V adapter, 8 GB Micro SD card, hinges, aluminum blind rivets, bright polystyrene plate, angle section, soldering tin, double-sided tape, pins, electrical heat shrink sleeve, cable ties and a box.
Finally, you will also need some tools like rivet pliers, multifunctional saw, drill diameter 1 mm, step drill 8 mm, tape measure, file, sandpaper, snap-off knife and last but not least, a soldering iron. Sure, the list of materials required for this project is one of the most complex featured here, but it is worth noting that all the items are easily available and will cost a shade under $ 200.
If you are interested in learning more about this amazing DIY greenhouse idea, then click on the link mentioned below the illustration.
31. Simple Greenhouse Made Using Reclaimed Windows
This DIY greenhouse is a simple but lovely project for environmentalists. In fact, it is completely made of upcycled materials and can house a medium-sized plant. In case, you have the need to store more plants greenhouse; you can make an elongated version of this structure using more windows of the same size. However, be sure to reinforce the structure so that it does not get knocked over by heavy winds.
For this DIY greenhouse idea, you will require four large windows of the same size, some reclaimed wood, hinges, nails, and screws. If you want to populate your greenhouse with small plants, then you can also fit shelves inside it.
The creator of this project has done an excellent job in explaining it, so we suggest you click on the link mentioned below the illustration to learn more.
32. Easy and Inexpensive DIY Greenhouse project for your tomato plants
If you are looking for a simple yet effective greenhouse construction for your tomato plants, then this idea might just be it. Not only is it light on the wallet, but it only takes a few minutes to complete a single greenhouse.
To get started with this DIY greenhouse idea, you will require a tomato pole, plastic foil, some 3D-printed parts or wooden parts of similar shape and size, plant pod, and last but not least, potted tomato plants.
You will find all the necessary details for this project in the link mentioned below the illustration. And we suggest you click on it if this greenhouse idea suits your needs.
33. Learn How To Build A Simple Portable Greenhouse In A Few Hours
If you love simple, portable greenhouse ideas, then you surely need to check out this amazing DIY project. However, we must tell you that this project is not meant for every kind of plant. In fact, it is only meant to give your seeds a head start.
For this DIY greenhouse project, you will require a large wooden box, a similarly sized sturdy piece of glass to cover the box and two large wood screws. In addition to that, you will also need four rubber O-rings matched to the size of the screws, six small wood screws, and a small piece of wood which is sized to the thickness of the glass. In case you want a more convenient method to move your portable greenhouse, you can also add 4 rotatable wheels to the bottom. For doing that, you will require 8 additional wood screws.
If you are interested in learning more about this DIY greenhouse idea, then click on the link mentioned below the illustration.
34. The Greenhouse with an automatic solar powered watering system
While the last few DIY greenhouse projects might have been quite simple, this one requires a fair amount of time and effort to bring to fruition. Before we proceed further, we must confess that this is not a greenhouse project from the ground up. Rather, it is a tutorial for building an automatic solar-powered greenhouse watering system.
To get started with this project, you will need a water butt, 12 V bilge pump, 12 V solenoid valve, 12 V programmable timer, 12 V solar panel, 12 V solar charge controller, and a 12 V battery. In addition to that, you will also require pipework, fittings, hose clips, and cable.
If you want to install an automatic solar powered greenhouse watering system for your greenhouse, then click on the link mentioned below the illustration to learn more.
35. The High-End Greenhouse Made Using Only Recycled Materials
Take a look at this amazing greenhouse project. However, it is not the design which stands out the most. That honor would have to go to the fact that this greenhouse is entirely made of recycled materials! In fact, this greenhouse was constructed out of salvaged materials from a renovation site. Now that is impressive to say the least.
If you are interested in learning more about this wonderful greenhouse idea, then we suggest you follow the link mentioned below the illustration.
36. Amazing Indoor Greenhouse With Touchscreen Controls
If you thought that the teched-out greenhouses featured earlier were cool, then wait till you check out this amazing Indoor Greenhouse with Touch Screen Controls. However, unlike the ones featured earlier, this is programmed for indoor use.
To get started with this amazing greenhouse idea, you will require a mini greenhouse (you can make one yourself or buy it online), Arduino mega, touchscreen (the creator used a 2.8-inch screen with the ili9341 chipset), NeoPixel strip, two 12 V motors, DHT22, two hygrometers, RTC, and a mesh heat pad from Adafruit. In addition to that, you will also need small PCB, four relays, two buck converters, two toggle switches, and 3 or 5 pole power distribution block.
However, that is not all; you will also need some extra items like 6 mm tubing, power barrel (male), water tray, housing case for greenhouse and touchscreen, mounting screws in M2 and M3 sizes and a power cable. Phew! That is a long list of materials! Then again, this is no ordinary greenhouse.
If you believe you can take on this epic DIY challenge, then click on the link mentioned below the illustration to learn more.
While the last greenhouse project was not meant for everyone, this one surely is. In fact, this is surely one of the simplest greenhouse projects featured here. Moreover, it costs practically nothing!
For this DIY greenhouse idea, you will require a large plastic jar, some rocks, and a nail or a drill. That’s all!
Although this greenhouse idea is pretty straightforward, we suggest you click on the link mentioned below the illustration to thank the creator.
38. Learn How To Build The SerreMatic, An Automated Greenhouse
There is nothing quite like building an automated greenhouse. Not only do you not have to worry about watering the plants ever again, but you can also program it to ensure that your plants automatically get enough light even on a dark and cloudy day.
Moreover, the moisture sensors combined with the irrigation system provide the plants with just enough water, and only when they require it. By doing so, you are saving a significant amount of water over an extended period.
If you are interested in learning more about this project, then click on the link mentioned below the illustration. You will find the detailed step-by-step instructions along with the full list of materials there.
Now, an automated greenhouse may not be for everyone, especially due to its tiny size. And if that is the case with you, then you should surely check out this spacious DIY greenhouse project. And the best part of this project is how detailed it is. In fact, the instructions do not just cover the construction of the greenhouse; it goes a step further by providing all the information you could need about the plants which are suitable for this greenhouse.
To get started with this project, you will need a multi-layer Co-Ex Polypropylene sheet, netted sheet, transparent sheet, mist sprinkler, 24 mist heads, aluminum extruded profile, and zig-zag wire. In addition to that, you will also require aluminum profiles for double spring locking, greenhouse film repair tape, 1.5 HP motor, A-shape stand, pots, hanging pots, fertilizers, large plastic 0.5-inch pipes, GI pipes, insecticides, and finally, a disc filter.
If you feel that this DIY greenhouse project is right up your alley, then follow the link mentioned below the illustration to learn more.
40. Incredibly Easy DIY Greenhouse Made From Coffee Stirrers
If the last couple of projects was a bit too complicated for your taste, then you surely need to check out this simple DIY greenhouse project. In fact, it will hardly take you an hour to complete. Moreover, the materials required for this idea are among the simplest featured on this list.
For this DIY greenhouse idea, you will require 30 wooden coffee stirrers, two A4 size sheets of cling film, marker pen, ruler, PVA craft glue, a cutting tool and kitchen clips. That’s all!
If you love this DIY idea, then be sure to click on the link mentioned below the illustration to learn more.
If you have a spacious, flat rooftop, then this DIY greenhouse project might just be perfect for you. The great thing about having a greenhouse on the rooftop is that it is likely to receive the maximum sunlight possible. Unless of course, you are surrounded by taller buildings on all sides.
To get started with this unique DIY greenhouse idea, you will require three 100-liter plastic boxes, 18 plastic pots, a 3m aluminum profile, five standards pieces of 2” x 4” wood, few thin strips of wood, and 14 small plastic containers. In addition to that, you will also need two 19-liter buckets, 6m x 6m UV coated greenhouse plastic, a small roll of annealed wire, three 120cm x 60 cm metal grids, vermiculite substrate and finally, hydroponic nutrients.
If you are interested in learning more about this wonderful DIY greenhouse project, then click on the link mentioned below the illustration.
42. Learn How To Make This Easy DIY Portable Can Greenhouse
Just take a look at this DIY greenhouse project. Not only is it completely portable, but it is incredibly simple to make. In fact, you can complete building this greenhouse in just a few hours. Moreover, if you use recycled materials, then it will hardly affect your wallet!
For this DIY greenhouse idea, you will require a large plastic can (preferably something which lets in light), transparent or semi-transparent UV coated plastic sheet, and four screws with four nuts. In addition to that, you will also require four tiny pieces of plywood, a bike tire’s inner tube, duct tape, and a slat which is as long as the plastic can.
If you love this DIY greenhouse idea, then follow the link mentioned below the illustration to learn more.
43. A Beautiful DIY Greenhouse Made Using Repurposed Windows
If you love DIY greenhouse projects made using repurposed windows, then you surely need to check out this lovely greenhouse. This is surely one of the most well-built greenhouses we have ever come across.
However, this is one of the more expensive projects featured on our list. In fact, the owner spent $ 1695 on materials and a shade over $ 2000 for labor costs. We believe that you can cut down on both these costs if you are planning on making the whole thing yourself. And, with a high level of upcycling, you can easily bring the total costs below $ 1000.
If you are interested in learning more about this wonderful DIY greenhouse project, then click on the link mentioned below the illustration.
44. Learn How To Build This Unique DIY Greenhouse With A Removable Top
Take a look at this unique DIY greenhouse project. The cool part of this greenhouse is that it features a hinged cover so that you can remove it when required. Moreover, it is quite simple to build, and it will hardly take you a day to complete.
To get started with this DIY greenhouse idea, you will require 2 x 6 pieces of redwood, 2 x 2 pieces for the cover frame, 2 x 4 pieces for corner bracing, wood screws, a 10 feet long 0.5-inch PVC pipe, pipe clamps, large weave wire mesh and chicken wire. In addition to that, you will also need zip ties, plastic sheeting, staples, two hinges, two eye hooks, and a 6 feet long chain cut into 3 feet pieces. As for the tools, you will need a miter saw, drill and a staple gun.
If you want the detailed step-by-step instructions for building this cool greenhouse, then click on the link mentioned below the illustration.
45. Build This Amazing DIY Fold-Up Greenhouse For Your Plants
If you thought that the last DIY greenhouse project was cool, then wait till you check out this amazing Fold-Up Greenhouse. Yes, you read that right! This greenhouse can be folded up and stored inside when you do not need it, especially during a harsh winter.
For this amazing DIY greenhouse project, you will require quite a few materials, more so than a standard wooden frame greenhouse. Then again, this is quite a unique greenhouse, and we believe that it is well worth the extra effort.
If you are interested in learning more about this wonderful DIY greenhouse idea, then click on the link mentioned below the illustration. The creator has done an amazing job with providing a detailed list of materials along with all the necessary instructions for building this greenhouse.
46. Simple But Lovely DIY Greenhouse Made From Repurposed Windows
You have already seen a few greenhouse projects made from repurposed windows. However, those were fairly large. Just take a look at this tiny greenhouse. It looks really cute, doesn’t it? Moreover, it is quite easy to build, and you can easily finish it during the weekend.
To get started with this beautiful DIY greenhouse project, you will need six wood-framed windows, 2x4 lumber for frame and table base, 4x4 lumber for table legs, 1x6 lumber for tabletop, self-tapping screws, and L brackets. In addition to that, you will also require sandpaper, carpenter’s wood glue, primer paint and wood stain, embellishments, and door hinges and handle.
Finally, you will also need some tools like a pocket hole system, electric drill, compound miter saw, and a carpenter square.
If you love this wonderful DIY project, then we suggest you follow the link mentioned below the illustration to learn more.
47. Learn How To Create An Amazing DIY Barn Greenhouse
You have seen barn houses before. But have you ever seen a barn greenhouse? Just take a look at the illustration below. While it may not be stunning, it surely has a unique and pragmatic design.
However, the most impressive part of this project is its simplicity. In fact, according to the creator of this DIY barn greenhouse, you can complete this entire project within a day. Needless to say, you need to be proficient with woodworking tools and have all the materials ready to pull this off.
If you are interested in learning more about this amazing DIY barn greenhouse, then click on the link mentioned below the illustration.
48. Build This Lovely DIY Greenhouse For Your Seedlings
Take a look at the greenhouse featured in the illustration below. It looks rather lovely, doesn’t it? If you look closely, the roof slope with a golden knob can fold down so that you can access the interior without any hassle.
However, this tiny greenhouse is only meant for your seedlings or small plants. And if this is exactly what you require, then click on the link mentioned below the illustration to learn more. The creator has gone into great depths to explain this DIY project. So, we suggest you check it out.
If you have some experience with woodworking, then you must be familiar with the YellaWood brand. They are quite famous for their high-quality lumber. Now, you might be wondering why are we talking about a lumber brand in our greenhouse article. Well, YellaWood has been kind enough to provide a detailed plan for creating a sturdy and functional greenhouse. Needless to say, you can purchase your lumber from a different brand or use your existing stock.
To get started with this project, you will require 26 pieces of 2” x 4” x 8’ lumber, eight pieces of 1” x 4” x 8’ lumber, and a 2” x 4” x ¾” exterior treated plywood. In addition to that, you will also need 30” x 80” hot-dip galvanized or vinyl door, ten pieces of 4’ x 8’ fiberglass panels, two hinges, a ¾” metal fasteners with neoprene washers, and nails.
If you believe that this DIY greenhouse project fits your needs, then click on the link mentioned below the illustration to learn more.
50. The Simple DIY Greenhouse By Black + Decker
If you always wanted to build a large greenhouse but could not do so because of the complexity, then you surely need to check out this wonderful Black + Decker DIY project. Not only does it look lovely, but you can also complete this project within a day.
For this lovely DIY greenhouse idea, you will require a 20’ x 50’ UV Coated roll of Polyethylene sheeting, 12 pieces of 24” No. 3 rebar, eight pieces of 8” timber screws, compactable or drainage gravel, excavation tools, reciprocating saw, and a large hammer. In addition to that, you will also need 3” deck screws, wire brads, brad nailer, scissors, utility knife, and last but not least, a tape measure.
Black + Decker has done an amazing job in explaining this DIY greenhouse project. And we suggest you check it out by clicking on the link mentioned below the illustration.
51. Build A Greenhouse Extension
Take a look at this greenhouse extending from the rear end of the cabin. It looks absolutely lovely, doesn’t it? Now, is this DIY greenhouse project as complicated as it looks? Yes and no. Sure, you will not be able to pull it off without some basic woodworking knowledge.
However, the creator of this project has done an amazing job in explaining all the nitty-gritty surrounding it. And so, we believe you should not have much of a problem in executing this wonderful greenhouse idea.
If you are interested in learning more about this DIY greenhouse project, then we suggest you click on the link mentioned below the illustration.
52. Learn How To Build An Insulated, Raised-Bed Greenhouse
Although this DIY raised bed greenhouse will never win an award for its aesthetics, it is utilitarian in every respect. When it comes to the difficulty of this project, it should be a piece of cake for those who have a basic understanding of woodworking.
To get started with this DIY greenhouse project, you will require three sheets of 2” x 4’ x 8’ hard insulated foam, six 4” x 4” x 8’ fence posts, two 2” x 6” x 10’ treated boards, two 2” x 4” x 10’ treated boards, eight 2” x 4” x 8’ treated boards, four 1” x 3” x 10’ treated boards, and 0.5” x 2’ x 2’ treated plywood.
In addition to that, you will also need four metal corner brackets for the door, two hinges, one 20’ x 24’ roll of 6 mm plastic, galvanized framing spikes, galvanized 1 5/8” screws, 4 yards of clay dirt, 2 yards of topsoil, and finally, 4 yards of gravel.
If you feel that this DIY greenhouse project fits your requirements, then follow the link mentioned below the illustration to learn more.
53. Create A Medium-Sized Greenhouse For Less Than $ 25
If you are on a tight budget but still want to build a moderately large greenhouse, then you surely need to check out this wonderful DIY greenhouse idea. Not only is it incredibly simple to make, but this entire project only costs a shade over $ 20. That is impressive to say the least.
For this DIY greenhouse project, you will require four sections of 0.5” PVC pipe, four 0.5” corner elbow connectors with three ports, four 0.5” adapters with connectors, and primer and PVC cement. In addition to that, you will also need scissors, long zip ties, hacksaw, and finally, 6’ x 6’ plastic sheeting.
If you love this DIY greenhouse idea, then be sure to click on the link mentioned below the illustration to learn more about it.
54. Make An Inexpensive Greenhouse With A Plastic Fruit Basket
Not always do we have the requirement for a large greenhouse. Sometimes, a small greenhouse like the one featured in the illustration below is more than enough, especially if you are only planting seedlings. And, if this is exactly what you require, then you should surely check out this simple but effective greenhouse project.
To get started with this DIY greenhouse idea, you will require a plastic fruit basket, plastic film, duct tape, plier, and a sharp knife. That’s it! This is surely one of the simplest lists of materials featured here.
If you are interested in learning more about this easy DIY greenhouse project, then follow the link mentioned below the illustration.
55. Learn how to build this tiny windowsill greenhouse using upcycled materials
If you thought that greenhouse projects could not get any simpler than the last one featured on our list, then wait till you check out this greenhouse idea. You can make this entire windowsill greenhouse using only upcycled materials. In other words, you will most likely not have to spend any money on this project. Moreover, you can complete this entire project within an hour.
For this simple DIY greenhouse project, you will require wooden skewers or twigs/sticks, a translucent bag or any kind of plastic sheeting, cutting tool, and glue or thread to tie everything together. Quite simple, right?
If this DIY greenhouse project appeals to your needs, then click on the link mentioned below the illustration to learn more.
56. Thumbelina – An Automated DIY Indoor Greenhouse
Now, we have featured quite a few automated indoor greenhouses. However, the biggest drawback for each of those greenhouses is clearly the tiny size. Most of them can only house a single small plant or a handful of seedlings. Enter Thumbelina – the largest automated DIY greenhouse featured here.
However, we must say that this is one of the more complex projects featured on our list. And if you have not delved into the world of electronic circuits before, then we suggest you look at some of the other greenhouse ideas features here.
If you believe you can take on this amazing DIY challenge, then be sure to click on the link mentioned below the illustration to learn more.
57. Learn How To Build This Simple DIY Cold Frame Using An Old Window
If you are looking for a small greenhouse for your seedlings which is aesthetically pleasing, then this might just be it. Not only does it look quite lovely, but it is also easy to build. In fact, you can complete this project within a few hours.
To get started with this DIY greenhouse project, you will require more pieces of 2” x 6” x 8’ cedar boards, two hinges, and two ¾” screws. This list of materials is to accommodate an old window with dimensions 32 ¼” x 30”.
As for the tools, you will require a miter saw, circular saw, Japanese dozuki saw, orbital sander or sandpaper, power drill, straight edge and pencil, clamps, tape measure, and last but not least, some safety equipment.
If this project fits your requirements, then go right ahead and click on the link mentioned below the illustration to learn more. Before we move on to the next item on our list, we must say that although this greenhouse is excellent as is, you can go a step further and make it more aesthetically pleasing by painting it.
58. Build A Small Greenhouse For Plantations On Euro Pallets
Take a look at this small greenhouse. It looks rather lovely, doesn’t it? Just like the last greenhouse idea, this is only meant for seedlings and small plants. And needless to say, this is one of the simpler builds featured on our list. In fact, you can easily complete this greenhouse over a weekend.
For this DIY greenhouse project, you will require two 32” pieces of wood, two 44” pieces of wood, four metallic angle brackets, one box of 4 x 30 mm (0.16” x 1.18”) screws, one 10 - 15 m long plastic tube, and plastic film.
If you are interested in learning more about this wonderful DIY greenhouse project, then we suggest you click on the link mentioned below the illustration.
59. A Sophisticated DIY Greenhouse With Solar Powered Ventilation
If you are looking to build a large and sophisticated greenhouse, then you surely need to check out this amazing project. Not only does it look contemporary, but it also has a few cool tricks up its sleeve. In fact, it has a hydroponic system along with solar powered ventilation. What is more impressive is the fact that this entire project cost less than $ 600 to build!
To get started with this brilliant DIY greenhouse idea, you will require a greenhouse kit. This greenhouse was built using a 10’ x 12’ greenhouse kit from harbor freight. However, you can purchase a similar greenhouse kit which best suits your needs.
The creator of this project has provided a detailed list of materials along with an exceptional guide for building this greenhouse. And we suggest you click on the link mentioned below the illustration to learn more about this fantastic greenhouse project.
60. Convert A Swamp Cooler Into A Hydroponic Rooftop Greenhouse
We bet you have not seen a greenhouse project like this before! And thanks to some creative individuals, you can now build a rooftop greenhouse using a swamp cooler. Although the illustration featured below makes this greenhouse seem quite unassuming, let us assure you that it is quite sophisticated. Even more so than the last project featured on our list.
For this amazing DIY greenhouse project, you will require a swamp cooler (you can buy a used one for cheap), some vinyl tubing, a rack to hold the plants, wood, screws, and some clear plastic. In addition to that, you will also need hydroponic supplies (net pots, substrate, and nutrients), and various hand tools (wrench, screwdriver, and a drill).
You can also take this project a step further with high-tech elements like a data logger, control system, lights, fan, and a heater.
Now, this is not a simple project by any means and if you believe you can bring this greenhouse idea to fruition, then click on the link mentioned below the illustration to learn more.
61. Learn How To Build A Poly Pipe Greenhouse And Shade House With Sprinkler System
If you are looking to build a simple but spacious greenhouse, then you surely need to check out this lovely DIY greenhouse project. The creator of this project has built it to serve two purposes. During an extreme summer, this structure can be converted to a shade house with a sprinkler system. And when the climate turns cold, it can be switched to a greenhouse. That makes it perfect for places with extreme weather conditions.
Since this is an article about greenhouses, we will only focus on that part. So, to get started with this DIY greenhouse idea, you will require ten 65” star pickets, 20 m of 2” green line rural grade poly, star picket post rammer, and 50 m roll of heavy duty builder’s plastic.
In case you are looking to install the sprinkler system, you will also need 30 m of 13 mm poly pipe, three pieces of 90° 13 mm corner connections, three pieces of ‘T’ 13 mm connections, and 20 full jet spray bits.
If you are interested in learning more about this excellent greenhouse project, then click on the link mentioned below the illustration.
You do not always need to spend extra cash on UV coated polyethylene sheets. Instead, you can cover your greenhouse structure with stretch film. And yes, this also works for medium to large-sized greenhouses as well. In fact, for a moderately large greenhouse like the one featured in the illustration below you will be spending less than $ 20 worth of stretch film.
To get started with this project, you will need wooden slats, cling film, nails, and adhesive tape. As for the size of the slats, it will depend on the size of the greenhouse structure.
For more details regarding this DIY greenhouse project, we suggest you click on the link mentioned below the illustration.
We are complete suckers for smart greenhouses. And so, here is yet another automated greenhouse project. What is impressive about this particular smart greenhouse is the fact that it can be monitored and controlled over the internet. Yes, you read that right. You can keep an eye on your plants even while sitting on the other side of the world.
Sure, this greenhouse is tiny, and it will not make much difference whether you monitor it or not. But, think about the implications. You can scale this greenhouse to a larger size to house multiple plants. It will surely be useful then. Needless to say, you need to be proficient with electronics and DIY projects to execute it to perfection.
For this incredible DIY greenhouse idea, you will require an Intel Galileo Gen 2, Arduino Uno, thermoelectric cooling device, water pump, a 15 W LED for the heater, two pieces of 1 W LED, a 16 GB microSD card, LDR, Relay 4 Channel, and LCD 20 x 4 along with LCD i2c module. As for the sensors, you will need a DHT22 sensor and a soil moisture sensor.
In addition to that, you will also need an RTC module, fan, 10k resistor, IC 74HC125, water pump, breadboard, wires, IP camera, home router, LAN cable, greenhouse box, and last but not least, an Internet connection. Sure, this is surely one of the longest lists featured here. But, no other greenhouse is as teched-out as this one.
The creator of this project has done an amazing job in providing all the necessary instructions. And so, we suggest you click on the link mentioned below the illustration to learn more.
Just take a look at the greenhouse featured in the illustration below. It is a thing of beauty, isn’t it? Moreover, this is a DIY project! Sure, you need to be adept at woodworking to bring this greenhouse idea to fruition. But the fact that you do not need to be a professional to build this structure is exciting nonetheless.
Before the creator of this project started working on this greenhouse, he explored the market to find out an approximate cost. And, would you believe it, all the estimates were north of $ 24,000. Sure enough, he decided against it and finished building this lovely greenhouse for less than $ 3,000. That is impressive to say the least.
If you love this DIY greenhouse idea, then click on the link mentioned below the illustration to learn more.
65. Make A Robust Greenhouse Which Can Withstand Extreme Weather Conditions
If you live in a cold place, up North, you surely need to check out this amazing greenhouse idea. This greenhouse is built to withstand heavy snowfall! Yes, that’s right! The gable roof-esque design makes it possible for the snow to slide down easily. Moreover, the structure is quite sturdy to withstand extreme weather conditions.
To get started with this project, you will need twelve pieces of 12’ x 2” x 4” wood, 6 mm plastic sheeting, plywood, screws, tie-wraps, and ¾” 40 PVC tubing. In addition to that, you will also require a 2 feet rebar, five pieces of 45-degree ¾” PVC connections, four metal fence posts, and last but not least, four 2 by 4 end brackets.
If you are interested in learning more about this wonderful greenhouse project, then follow the link mentioned below the illustration.
66. A Simple, Slim DIY Greenhouse For Your Backyard
If you are looking to build an easy, petite DIY greenhouse in your backyard, then this just might be it. This is an incredibly easy build and one that you can complete in a few hours.
For this simple DIY greenhouse project, you will need five pieces of ¾” x 10’ PVC pipes, eight pieces of ¾” elbows with a ½” to ¾” screw in slot, and eight ½” to ¾” connections. In addition to that, you will also require a roll of 3.5 mm clear plastic and last but not least, a roll of duct tape.
If you believe that this DIY greenhouse idea suits your requirements, then go right ahead and click on the link mentioned below the illustration.
67. Lovely Verandah Style Greenhouse Made From Recycled Materials
Take a look at this verandah style greenhouse. It looks quite lovely, doesn’t it? Although this is not a simple DIY project, we believe that you can do it if you have some experience with woodworking.
This greenhouse is mainly constructed using recycled materials, like wood-framed double-glazed French windows, wood from crates, old ship timbers and so on. And that makes it all the more impressive.
If you love this beautiful DIY greenhouse idea, then we suggest you click on the link mentioned below the illustration to learn more.
68. Upcycle Your Egg Cartons To Make A Greenhouse For Your Seeds
If you are looking for a simple DIY greenhouse idea for your seeds, then this just might be it. Not only is it incredibly easy to make, but it will hardly cost you any money.
To get started with this DIY greenhouse project, you will require a clear plastic egg carton, a budget cardboard egg carton, potting soil, and a pair of scissors. That’s it!
If this greenhouse idea is perfect for your needs, then we suggest you click on the link mentioned below the illustration to learn more.
69. Make An Indoor Greenhouse For Your Seedlings Which Is Cat-Proof
No matter how adorable cats are, their curiosity almost always results in something being broken. And that is why it is impossible to have a thriving indoor greenhouse and a cat living under the same roof. But, thanks to this ingenious solution, you can now make the impossible possible.
To get started with this simple DIY greenhouse idea, you will require a clean, empty 2-liter soda bottle without any labels, and knife and punching tool, a hammer, a small nail, fishing line, and a piece of cardboard.
If you are interested in learning more about this DIY greenhouse project, then follow the link mentioned below the illustration.
70. Learn How To Build A Greenhouse Using Wooden Crates
We love greenhouses which are made of recycled materials, and this is yet another project which features a high level of recycled materials. However, this is not a simple DIY idea, and you need some expertise with woodworking tools to bring it to fruition.
As for the materials required for this DIY greenhouse and the instructions, we suggest you click on the link mentioned below the illustration to learn more.
71. A Compact Greenhouse Made Using Reclaimed Windows
Just like automated greenhouses, we are complete suckers for DIY greenhouses made using reclaimed windows. So, here is one such wonderful DIY greenhouse project which is also quite simple to build.
The creator of this project has done an excellent job in providing all the necessary instructions for building it. And, we suggest you click on the link mentioned below the illustration to learn more.
72. A Greenhouse Which Is Also A Clubhouse And Yoga Hut
What better way to end our list than with this epic greenhouse project. Not only is it a functional greenhouse, but it also doubles up as a Yoga Hut and Clubhouse.
If you are interested in learning more about this lovely greenhouse project, then follow the link mentioned below the illustration.
So, which greenhouse idea did you like the best? If you are inspired to build your very own greenhouse, do share your story with us. We would love to hear from you.
Herbs & flowers have been around us for..well..ever and have played a major role in our surviving as a species. Unfortunately consumerism and globalization has made us forget the importance of green in our lives and their role in the survival of our planet. Global warming is the first step to destruction and it has been taken already. Signals of alarm have been sent for a while now and we at Homesthetics support green initiatives and invite you to take a stand and try to make a difference and a adopt a greener, healthier living style. Thus we bring you further on a few ideas in creating your very own personalized herbs & flower pots for your kitchen or backyard, trying to bring a little green life inside your home.
1.Glass bowls used as herbs & flower pots
Glass has been used as flower vases for ages and is was only naturally to use them as permanent flower pots also. Its transparency can transform the flower's roots into a little piece of art which develops and grows in time. Another advantage in using a glass bowl as a herb or flower pot is the fact that it can integrate in any interior design and give it a shiny beautiful touch.
Glass jar used as a flower pot
2.Wooden boxes as Herbs & Flower Pots
Wood is a very used material and its primary advantage is the fact that it can age beautifully, looking better and better in time. Its very easy to use and make a small wooden box or just use an old recycled one and transform into a flower pot. If the box is in good condition you can place the arrangement inside your home; if not it would integrate wonderfully into your garden.
Wooden box as a flower pot
3.Use recycled tin cans as Hebs & Flower Pots
Tin cans take a very long time to disintegrate and unfortunately most of us throw them away instead of recycling them. Try using them in a useful way; buy some colorful can sprays and just play with them. Its a fun activity and you can ask your kids to join you and create some unique pieces.
Tin cans recycled into colorful flower pots
4.Decorate old flower pots
Tired of old, water cracked ceramic flower pots? Try decorating them with strings of rough rope for a traditional effect or small pieces of wood. Another option is covering the pot with hand made mosaic. You can pick small rocks of different textures and colors and mix them to create a collage.
Flower pots covered in rough rope
Covered in small wooden pieces flower pots
Mosaic flower pots
5. Recycled plastic bottles as Herbs & Flower Pots
Plastic is our biggest enemy and keep in mind to not throw it away and recycle as much as possible. You can paint them or just let them transparent, cut or use an entire bottle, either way you can definitely use plastic bottles as flower pots.
Plastic bottles recycled into flower pots
6.Light bulbs as flower pots
Well, this is a very strange idea bur quite creative as well. Lighting bulbs are usually tossed away after they burn but using them as a small beautiful flower pot can be a very useful tip. Imagine placing several of these onto a glass table. The effect would be amazing with the flowers reflecting into 2 glass objects!
Lighting bulb used as a flower pot
7.Concrete Herbs & Flower Pots
Concrete is a more difficult material to work with but you can get creative with it and make really big flower pots for your backyard. You first have to make a mold into which you will pour the liquid concrete . You can make a mold with a model and make the flower pot more appealing. After the liquid has evaporated you are safe to remove the mold, but be careful not to crack the pot. For a seamless look try sandy it and make it smooth and neat.
Concrete flower pots for your backyard
8. Re-purpose objects as Herbs & Flower Pots
Watering cans can be used as more then their primary purpose. If you like the colorful metallic ones try placing them around the porch or garden with flowers, thus creating a fun, traditional feel.
Watering cans used as flower pots
9. Painting old Flower Pots
Ceramic is a great canvas for your creative ideas in matters of painting. The flower pots below are a wonderful example of artistic sense that could brighten up any room.
Hand painted colorful flower pots
10.Make a tiny flower pot
Tiny is cute, beautiful, fragile so tiny plant pots are a great idea for a small apartment, an ideea to bring a little green into you own home.Glass or ceramic, or even small concrete shaped pots, no matter what, they be used as a decorative item as well as a beautiful hand made gift.
Tiny Plant Pot
So, there you go! 10 Creative DIY Herbs & Flower Pots that you can make very easy and decorate in a fun way your backyard or home. You are invited to suggest more interesting ideas on how you can recycle and take a step into making our world a healthier happier place.
Struggling to keep pesky weeds at bay?
It’s high time you stop using harsh weed killers, as that can prove to be detrimental to the soil quality. That said, a weed barrier is a much better alternative. Indeed, the best-quality weed barriers are designed with high-quality fabrics to slow down or resist the growth of weeds.
Moreover, if you plan to remodel parts of the landscape, you can use these barriers as a protective base layer. Owing to such useful properties, these fabrics can keep your soil and plants protected throughout.
But then, we understand there are innumerable options to choose from, which can confuse anyone looking for a genuinely effective product. That’s why we’ve compiled this comprehensive review-based guide to help you out.
So without further ado, let’s get to the details.
Best Weed Barriers And Landscape Fabrics
With so many options available, it's essential to find the perfect barrier or fabric for your gardening needs. To help you with that, we have carefully compiled a selection of the best weed barriers and landscape fabrics to streamline your choice. So, without further ado, here's the list of the top 9 weed barriers and landscape fabrics for your consideration.
Premium weed barrier landscape fabric to make your life...
Super-easy to install and set up landscaping fabric to...
We kickstart our guide with this high-quality fabric that provides all-around protection to the garden soil against destructive natural elements. Measuring 3 feet long and 50 feet wide, this barrier is completely non-toxic and doesn’t affect the flow of water or air to the soil. Plus, it’s available in various sizes to suit your gardening needs.
Why Did We Like It?
First off, this fabric comes with a dual-layer combination of non-woven and woven material that’s needle-punched to facilitate optimal water and airflow. The strong build ensures complete protection against the toughest weeds while maintaining the soil moisture and preserving its value.
Moreover, the use of high-quality polypropylene material makes the barrier suitable for all seasons and prevents biodegradation in the long term. Weighing a mere 5 lbs., it’s also quite easy to cut and spread on the garden soil.
Speaking of its applicability, the barrier is suited for both in-ground gardens and raised beds. It even works wonderfully for all kinds of growers. And in case you aren’t satisfied with the purchase, you can request a refund within 30 days.
What Could’ve Been Better?
Packaging is one aspect that we felt could be improved, as quite a few customers reported that their packages came torn and crumpled in several places. This poses the risk of damage to the weed barrier while in transit, so make sure you check the product carefully when it arrives.
Pros
Ensures optimal water and airflow
Non-biodegradable
Universal applicability
30-day satisfaction guarantee
Cons
Poor packaging
Material: Polypropylene | Size (ft): 3 x 50 | UV Resistant: Yes | Permeability: permeable | Durability: 5 years |Installation Method: Easy to cut and install with scissors or a utility knife
DURABLE AND UV STABILISED: Our 100g/m² weed fabric is ideal...
If durability is your primary concern, this GardenMate landscape fabric will perhaps fit the bill. After all, it possesses the strength needed to deliver consistent protection against weeds for years to come. Another strong point is that it’s one of the most high-rated landscape fabrics we came across.
Why Did We Like It?
The best part of this fabric is that it’s tougher, thicker, and more tear-resistant than most options you’ll come across. In fact, the thickness of 3 oz./yd² is perfect for preventing the penetration of weeds, grasses, and unwanted herbs in the long term.
Coupled with its durability is its excellent permeability, which ensures your plants receive the required supply of air, water, and nutrients. Coming to the material used, this anti-weed fleece is composed of non-toxic polypropylene and doesn’t come with any plasticizers that might affect the soil quality. As such, it’s completely safe for use on any soil type.
Even the sun protection it provides is commendable, thanks to the efficient stabilization against UV light. That’s why you’re least likely to notice any biodegradation despite prolonged exposure to sunlight. Notably, this enhances the durability of the fabric further.
What Could’ve Been Better?
Owing to the ample thickness of this weed barrier, it’s slightly more difficult to cut than other thinner products. That’s why shaping the fabric for your garden might take a bit longer compared to the others. But performance-wise, we don’t have any complaints regarding this one.
Pros
Provides adequate weed resistance
Excellent permeability for nutrients
Provides adequate sun-protection
Safe for use on all soil types
Cons
Tougher to cut
Material: Microfiber, Fleece | Size (ft): 6 x 33 | UV Resistant: Yes | Permeability: non-permeable | Durability: 3-5 years |Installation Method: Comes with pegs for easy installation
Durable Weed Barrier: Heavy-duty 3.2 oz polypropylene fabric...
Versatile Ground Cover: Perfect for greenhouses, gardens,...
Up next is another dependable option that’s especially suitable for gardens experiencing higher temperatures. DeWitt is known for its range of superior-quality gardening essentials, and this product lives up to the brand's reputation. Measuring 4 feet wide and 300 feet long, it’s also 100% eco-friendly and quite cost-effective.
Why Did We Like It?
Firstly, this anti-weed fleece uses top-quality polypropylene that’s least likely to degrade due to sun exposure and offers the ultimate resistance against weeds.
Note here that the brand offers a five-year warranty for all its weed barriers to prove its confidence in each product. From our findings of weed barriers on the market, we’ve found very few options offering similar guarantees.
Added to this, its high-quality weave facilitates ideal permeability, allowing for the consistent flow of water and air to facilitate adequate nourishment. The weed barrier fabric is also tear-proof and puncture-resistant, which helps provide a more long-lasting performance than ordinary products.
Furthermore, we appreciate the yellow guide strips along the length of the barrier at every 12-inch distance as this facilitates easy alignment with the garden plants.
What Could’ve Been Better?
Like our previous recommendation, this barrier can be a tad difficult to cut, and the process might take quite a long time. Also, as you’ll need to cut more strips to cover a larger area, you may need to put in even more time and effort. However, we were glad that the barrier served its purpose quite well.
Pros
Offers excellent resistance to weeds
Comes with a five-year guarantee
Ideal nutrient permeability
Can be easily aligned with the plants
Cons
Can be difficult to cut
Material: Woven Polypropylene | Size (ft): 4 x 300 | UV Resistant: Yes | Permeability: permeable | Durability: 5 years |Installation Method: Easy to install with a utility knife and tape
Premium Weed Barrier Fabric for Long-Lasting Weed Control:...
Heavy-Duty & Durable Landscape Fabric for Tough Conditions:...
Want a more versatile landscape fabric for different parts of your outdoor space? Then look no further than this premium-quality barrier from Hoople. Thanks to its chemical-free composition and utility-based features, the barrier performs considerably well in protecting the soil from weeds. For more details about its features, move on to the next few sections.
Why Did We Like It?
The non-woven, high-density fabric of this landscape fleece is what impressed us the most, as it can effortlessly handle heavy loads on areas such as walkways. So, be it brick pavers, rocks, or large stones, you can keep them above the fabric without any worries.
At the same time, this landscape fabric can be the perfect anti-weed covering for your garden for keeping the surrounding ecosystem healthy. And no matter whether it’s a raised bed, a mulch layer, or a garden border, the fabric will be equally effective in its job.
Notably, the 2 to 3 times greater thickness than other products is an added advantage, as it helps block weeds more effectively and doesn’t wear out so easily.
Apart from that, it also maintains a proper nutrient supply to the soil through its standard-grade permeability, thereby keeping the plants nourished throughout. The fabric is even quite easy to install despite being made thicker than many other products.
What Could’ve Been Better?
A point of caution is that this weed barrier might drain water at a relatively slower pace, which implies the water will take slightly longer to reach the soil. That said, the water won’t collect in puddles, which can be a major inconvenience.
Pros
Can handle heavy loads effortlessly
Durable material
Provides adequate protection from weeds
Easy to install
Cons
Drains water slowly
Material: Non-woven Polypropylene | Size (ft): 3 x 180 | UV Resistant: Yes | Permeability: permeable | Durability: 3-5 years |Installation Method: Comes with pegs for easy installation
Provides A Barrier To Help Prevent Weeds In Your Mulch Or...
Perfect For Flower Beds, Paths And Walkways
Our next pick is this product from Scotts that makes for one of the most convenient anti-weed and anti-erosion fleeces on the market. Thanks to its toughness and standard-grade protective ability against weeds and natural elements, it can serve as a perfect cover for garden linings and landscapes.
Why Did We Like It?
Firstly, this medium-duty weed barrier is available in two sizes, viz. 4 feet by 200 feet and 4 feet by 250 feet, to fit the needs of different homeowners. And as both variants are pretty large, they can easily be used to cover the linings of both small and medium-sized gardens and landscapes.
Moving on, the water drainage ability of this barrier is also on point, thanks to the high permeability of the polypropylene material. The fabric is also adequately damage-resistant and holds up well under direct sunlight.
A significant advantage is its ease of use, as you can shape this fabric smoothly and quickly — no matter the number of pieces you need to cut. While the thickness of 0.16 oz./sq. ft. is enough to provide protection to the linings, it’s equally convenient to handle as it won’t unravel during use.
What Could’ve Been Better?
If you’re seeking a one-stop solution that can provide light to heavy-duty weed protection, this might not be the ideal option to go for. That said, it won’t be able to handle heavier rocks or pavers on areas such as walkways. However, we’d suggest this product to homeowners who only want to cover specific areas on their lawns or garden.
Pros
Available in two different sizes
Adequate thickness to protect linings
Easy to cut and use
Adequately damage-resistant
Cons
Not ideal for heavy-duty use
Material: Woven Polypropylene | Size (ft): 4 x 10 | UV Resistant: Yes | Permeability: non-permeable | Durability: 5 years |Installation Method: Easy to install with a utility knife or scissors
Conserving Soil Moisture-Water will penetrate the pores of...
Agtek is another popular name on the market for anti-weed fabrics as it offers a range of ultra-durable options with premium-grade features. And this is the one we found to be the most deserving for our list. Coming in several sizes, it has been highly appreciated by homeowners across the country.
Why Did We Like It?
Right off the bat, this weed barrier is composed of heavy-duty woven fabric free of chemicals that can effectively prevent the growth of weeds on any soil. Its toughness also provides the required protection from animals and birds in the long term.
Moreover, it can serve as an excellent underlayment fabric for walkways and sidewalks that have pavers and sharp stones, owing to its great intrinsic strength.
An added advantage is the greater thickness of 3.8 oz./sq. ft., which reduces the chances of major wear and tear. Another noteworthy feature is its ability to prevent soil erosion on sloped areas prone to being washed out from heavy rains.
We even found the water permeability of this fabric to be better than most other average options on the market. Lastly, the fabric is quite easy to cut and spread on the soil, owing to its balanced design.
What Could’ve Been Better?
The sun protection offered by this fabric is an area where we felt it lags behind other high-performing products. In fact, many customers pointed out that it wasn’t able to reduce the water evaporation from the plants during sunny afternoons.
Pros
Effective weed protection
Can be used on walkways and sidewalks
Greater thickness enhances durability
Better water permeability
Cons
Inadequate protection in direct sunlight
Material: Woven Polypropylene | Size (ft): 4 x 10 | UV Resistant: Yes | Permeability: permeable | Durability: 5 years |Installation Method: Easy to install with a utility knife or scissors
ENVIRONMENT-FRIENDLY LANDSCAPE FABRIC: You want your...
Another powerful option you can use to achieve a smooth, weed-free lawn is this one from FLARMOR, as it can do the job without any frills. Composed of a high-quality non-toxic fabric, it’s designed to offer all-around protection to the soil using a couple of utility-based features. So, let’s proceed to know more about the product.
Why Did We Like It?
The most noteworthy feature of this weed barrier is, of course, the use of an advanced WeedStop technology that helps slow down large weed growth on any landscape. Moreover, you can use this fabric with chippings, gravel, or stones without having to worry about any major wear and tear, thanks to its balanced thickness of 1.8 oz./sq. ft.
Such features reduce the need to monitor your garden or landscape frequently, ensuring easy and effective maintenance in the long term. Another advantage of opting for this fabric is that it comes in a needle-punched form to ensure consistent transmission of air and water.
Long story short, your plants stay well-nourished and protected throughout. We also found it quite easy to cut and highly flexible, facilitating hassle-free and convenient use anytime and anywhere.
What Could’ve Been Better?
Improper packaging is the only issue we found with this product, like one of our other recommendations. After all, several customers have reported that the package arrived torn and the anti-weed mat has creases on some portions. But most of them were satisfied with the performance it delivered.
Pros
Slows down growth of large weeds
Has multiple applications
Keeps plants well-nourished
Easy to cut and flexible
Cons
Might arrive with creases on some parts
Material: Woven Polypropylene | Size (ft): 6 x 300 | UV Resistant: Yes | Permeability: permeable | Durability: 3-5 years |Installation Method: Comes with pegs for easy installation
Durable PP Fabric: This 3.2 oz landscape weed barrier fabric...
High Permeability: Our heavy duty weed barrier is designed...
This premium-quality weed barrier has been praised by a large section of customers for its great weather resistance. Apart from that, it offers all the benefits that you desire from a good-quality protective cover for your landscape. The fabric is also available in a number of sizes to fit your gardening needs.
Why Did We Like It?
What we liked the most about this weed barrier was the excellent coverage provided by most of the variants available. Measuring between 250 to 330 ft long, these variants are capable of uniformly covering large gardens to protect them from disruption due to pesky weeds.
Coupled with the efficient coverage is the high quality of the fabric, which guards the soil against frequent erosion and suffers minimal wear and tear despite years of use. Moreover, it can be cut easily and is least likely to fray after being spread on the soil. Just make sure you secure the fabric using a few staples for more effective weed control.
Another great benefit of this barrier is its excellent permeability as it’s designed to allow water and air to pass through quickly. As such, your plants are sure to get the required nourishment on time. And you won’t also have to deal with water puddling on top of the fabric as with ordinary inferior-quality products.
What Could’ve Been Better?
Keep in mind that this fabric is much costlier than most other options we’ve discussed in our guide. So, if you’re on a tight budget, this might not be the ideal choice to go for. That said, the higher price is justified to some extent, considering the superior-grade protection offered by the product.
Pros
Large coverage
Excellent permeability
Prevents soil erosion
Highly durable
Cons
More expensive
Material: Woven Polypropylene | Size (ft): 6.5 x 330 | UV Resistant: Yes | Permeability: permeable | Durability: 5 years |Installation Method: Easy to install with a utility knife or scissors
Practical Weed Barrier - Becko US Weed Barrier Landscape...
Uv Resistant Technology - Processed with special anti-UV...
Before we end our list, we’d like to talk about another lesser-known yet dependable option to go for. Notably, those on the lookout for cost-effective yet long-lasting options will find this one to be an apt choice. It’s also pretty versatile and convenient, so you can use it to protect different parts of your outdoor space effortlessly.
Why Did We Like It?
Composed of a non-woven, hydrophilic fabric that enables easy transmission of air and water, the barrier helps keep the soil adequately moist throughout. This, in turn, helps combat soil erosion in the long term, making the soil stronger and more nourished.
Another strong point is the use of UV-resistant technology in making the barrier. This can effectively slow down the speed of degradation by offering adequate sun protection. Moreover, the fabric is lightweight and has a balanced thickness, which makes it simple to cut.
As mentioned earlier, its high versatility is another aspect that appealed to us. We found it capable of being used on any outdoor space, including courtyards, planting beds, and sidewalks. In fact, it can handle heavier stones, gravel, or pavers without suffering major wear and tear.
What Could’ve Been Better?
The only drawback of going for this option is that there’s no information on the warranty offered by the brand. As such, many customers might prefer other weed barriers with similar features that come with a clearly defined warranty period.
Pros
Good permeability
Helps combat soil erosion
Simple to cut
Highly versatile
Cons
No information on the warranty offered
Material: Woven Polypropylene | Size (ft): 4 x 100 | UV Resistant: Yes | Permeability: non-permeable | Durability: 3-5 years |Installation Method: Comes with pegs for easy installation
Best Weed Barriers And Landscape Fabrics Comparison Table
Buying Guide For The Best Weed Barriers And Landscape Fabric
Now that you’ve gone through all our recommendations, it’s time to choose the best weed barrier for your needs. And for that, you’ll need to know about some key factors that determine the performance of any weed barrier or landscape fabric. After all, making a hasty decision by just considering the specifications of some products is more likely to lead to an improper choice. So, here are the things you should keep in mind beforehand:
1. The surrounding temperature
The weed barrier you choose must be able to withstand the climate of the surroundings and provide adequate protection throughout. That’s why you must not forget to consider the surrounding temperature during the time you plan to use the barrier.
As such, if you’re based in a region with a dry and hot climate, you must look for a more UV-resistant product that can withstand higher temperatures efficiently. Note that ordinary weed barriers might crack or even break down if exposed to direct sunlight for extended periods.
2. Area of The Plot
The dimensions of the area to be covered are one of the most important factors when it comes to choosing a weed barrier. Remember that landscape fabrics are sold in rolls; hence you should check the length and width available before going ahead with the purchase.
Generally, a 30-foot roll is sufficient for those who want to prevent weeds from popping up along short paths. But if you plan to cover a larger area, you should look for longer rolls and broader widths. Notably, these are easier to install and are economical in most cases.
3. The Moisture Requirement Of The Plants
Firstly, rest assured that all the covers we’ve reviewed are designed to promote ideal water permeability. That said, some might be more permeable than others.
In case your garden has plants that require more water, such as lavender or strawberries, you’ll need a fabric that can absorb water faster. And if the option you choose isn’t so permeable, there will be pools of water left on the top fabric. Ultimately that will culminate in the plants not getting adequate water and wilting.
So, make sure you keep in mind the moisture requirement of the plants for which you’ll be using the barrier.
Weed Barriers And Landscape Fabrics FAQ's
What is the most suitable weed barrier for use under rocks?
If you’re planning to buy a weed barrier for rock landscaping, a non-woven product made of high-quality plastic will be the most suitable option.
Can I place a landscape fabric over weeds?
Yes, landscape fabrics can be used over weeds and still fetch good results. But it’s best to clear the place first, as the barrier might not be able to stop all weed growth and can be punctured by roots or sharp rocks.
Can weed barriers and landscape fabrics be used under mulch or rocks?
Yes, weed barriers and landscape fabrics can be used underneath mulch, rocks, or other decorative materials. Using these fabrics under such materials can help prevent weed growth, keep the decorative layer from sinking into the soil, and promote proper drainage.
Do weed barriers and landscape fabrics affect plant growth?
When properly installed, weed barriers and landscape fabrics should not negatively impact plant growth. They allow water, air, and nutrients to pass through while preventing weed growth. However, it is crucial to monitor and maintain the fabric to ensure it doesn’t become clogged with debris, which can restrict water and air flow to your plants.
Conclusion
So, that was all you had to know about the weed barriers and the most dependable products on the market right now. We hope you’ll now be able to make a wise decision based on your needs and preferences.
On that note, here’s a quick recap of our top picks from the list. The ECOgardener Premium Weed Barrier is the most suitable option for anyone looking to protect small to medium-sized gardens. After all, it offers the right balance of durability, coverage, and weed-resisting ability required for the purpose.
On the other hand, the GardenMate Weed Control Fabric is especially suitable for areas located in warmer regions as it offers exceptional UV resistance.
With that, we’ll call it a day. But stay tuned, as we’ll be back soon with more review-based guides. Till next time, take care!
Gardening involves taking care of several complex aspects, resulting in successful germination.
It would help if you were vigilant of various factors for your garden to flourish, and often you might have to tackle an issue before it even occurs. In that regard, pre-emergent herbicides prove incredibly useful, keeping your garden free from weeds and other unwanted growth all year round.
In some cases, gardeners tend to wait for weeds to appear before they spring into action. But a more effective solution would be to nip the problem in the bud. Additionally, pre-emergent herbicides have all the essential components to provide perfect growing conditions once the weed is removed.
However, the question is, how do you choose from the several options available out there? To help, we've narrowed down 10 quality products that are taking the market by storm. Plus, we've added a buyer's guide to answer any lingering doubts.
So, grab your protective gear, and let's begin.
Best Pre-Emergent Herbicide
Here's the list of the 10 best pre-emergent herbicides right now, along with a buyer's guide to help you choose the perfect one for your gardening needs.
One of our top recommendations is The Andersons Weed Control, and with good reason. It has all the relevant components, protecting against weeds and other harmful growth to keep your plants safe throughout the year. So, it has generated substantial buzz among buyers, leading to mostly positive reviews.
Designed to prevent weeds; will not aid in eliminating...
Contains 0.48% of the active ingredient prodiamine for...
Why Did We Like It?
When you choose to apply a pre-emergent herbicide, timing is everything because you need to kill the weeds before they grow. The best time to use this product would be in early spring or fall when weed growth flourishes. Subsequently, it stops unwanted growth and clears the path for fresh grass to appear.
We've seen it contains 0.48% prodiamine, which has several benefits but most of all it's highly versatile. It offers protection against more than 30 types of grass and broadleaf weeds to keep your garden healthy and is well supported by the DG Pro formula. Therefore, it contains more particles for every square inch of chemicals for better weed control.
Additionally, it doesn't harm your plants, making it a favorite among turf care professionals and gardening enthusiasts alike. You can use it in different conditions, allowing you to be proactive since it doesn't work if weed has already appeared.
What Could've Been Better?
If you aren't a regular gardener, the huge instruction sheet may seem overwhelming. The points aren't easily understandable, and the manufacturers should've taken more care to make it uncomplicated. Also, the letters are incredibly tiny, which isn't convenient.
Pros
Versatile
User-friendly
It doesn’t harm plants
More particles per square inch
Various sizes
Cons
Poor instructions
Active Ingredient: Prodiamine 0.48% | Dimensions: 17.5 x 12.5 x 5 inches | Weight: 18 pounds | Type: Pre-emergent | Safe for Plants: Yes
If you liked our earlier recommendation, then brace yourselves because the products keep getting better. Next up is the Tenacity Turf Herbicide, targeting a wide range of weeds for all-round coverage. While the bottle may be small, there can be no doubts about the potency on offer.
Tenacity is a systemic pre-emergence and post-emergence...
When applied as a pre-emergent, weeds absorb Tenacity during...
Why Did We Like It?
There are several fantastic features we need to cover, so let's get right into it. You'll be pleased to note that this is both a pre-emergent and post-emergent herbicide, offering complete performance. It works as a selective contact agent to control the growth of weeds and turf.
Now, if used as a pre-emergent herbicide, weeds that begin growing to absorb the mixture, which prevents them from spreading further. What's more, it kills a wide variety of pests from carpetweed, chickweed, clover, and crabgrass, thanks to the presence of 40% Mesotrione. However, it doesn't harm your plants, which bodes well for gardeners.
We loved that the designers included a syringe allowing you to measure the amount of solution needed. Hence, you can use it for a long time, even in extreme weather conditions, without any hassle.
What Could've Been Better?
Although the syringe makes measuring easier, it's challenging to use it in the bottle. But this is not a significant issue; you'll get the hang of it with time. Also, it'll be a while before you see noticeable results, meaning you need to have a lot of patience or opt for some other unit.
Pros
Versatile
Works as a post and pre-emergent herbicide
Affordable
User-friendly
Prevents growth of dandelion
Cons
Sticky syringe
It takes time to get results
Active Ingredient: Mesotrione 40% | Dimensions: 2 x 2.5 x 4.5 inches | Weight: 0.5 pounds | Type: Pre-emergent & Post-emergent | Safe for Plants: Yes
If your primary requirement is versatility, it's difficult to look past the Prodiamine Herbicide. You can use it in several spots to keep your property in prime condition, and it doesn't have any harmful effects, which will please you. No surprise that users have taken an active interest in what it offers.
FEATURES & BENEFITS: Excellent tank mix partner with...
Why Did We Like It?
We begin by discussing one of the most critical aspects of pre-emergent herbicides: the choice of ingredients. When the plan of action is to stop the weed from emerging, ingredients like 65% prodiamine prove useful. It keeps the plants safe while providing extensive coverage for the corners of the lawn.
You can control various types of harmful grass and broadleaf, making it an all-around unit for most situations. Even under unpredictable weather conditions, you won't have to worry about potency, highlighting its exceptional durability. We especially loved the flexibility it delivers, allowing you to use it in spring or fall for the best results.
It comes in a five-pound bottle, sufficient for most gardens, turf surfaces, or golf courses. Plus, it delivers outstanding protection against crabgrass throughout the year and kills bluegrass, knotweed, chickweed, and spurge.
What Could've Been Better?
There are a couple of issues with the herbicide; you'll notice the instructions don't specify the amount of water you need to use. Therefore, you might have problems using the spray, but you'll get better with practice. Additionally, it's available in a jug rather than a bag, which is a point of contention for some customers.
Pros
Flexible application
Can be used throughout the year
Versatile
Prevents chickweed
Affordable
Cons
Needs better instructions
It comes in a jug
Active Ingredient: Prodiamine 65% | Dimensions: 4.7 x 6.95 x 10.5 inches | Weight: 5 pounds | Type: Pre-emergent | Safe for Plants: Yes
The Compare-N-Save Weed Killer has many similarities with some of the other products available out there, but it stands out in durability. It can withstand various weather conditions, providing the best results throughout the year for you to keep the grass healthy. Rest assured, you'll get your money's worth.
The striking aspect of this herbicide is the range of choices - from quantity to components. Depending on the area you need to cover, the manufacturers have included three variations in quantity. Additionally, along with the weed killer, you get a bleach sprayer, making it a multi-purpose model suitable for numerous tasks.
It's completely rainproof, providing excellent protection, irrespective of the changing seasons. In that regard, the fast-action formula comes into effect by showing visible results within two to four days. Plus, it's highly potent, thanks to the use of 41% glyphosate to keep your garden free from all types of harmful growth.
It'll please you to note that you can cover a maximum area of 25,000 square feet as it comes in a ready-to-use spray bottle. This will help you reach all corners of the lawn without any hassle.
What Could've Been Better?
It's highly potent, so you need to be careful about the amount you choose to use. Along with weeds, it also clears out grass and plants, which isn't the ideal scenario. You need to carefully read the instructions to decide how much water needs to be added to dilute the mixture.
Pros
Various sizes
Includes bleach sprayer
Multi-purpose model
Fast-action formula
Affordable
Cons
May kill grass and plants
Active Ingredient: Glyphosate 41% | Dimensions: 4.25 x 7.5 x 11.88 inches | Weight: 9 pounds | Type: Non-selective | Safe for Plants: No
We're at the halfway point of our list, but there are several quality units we're yet to review. Our next recommendation is the RM43 Vegetation Control, delivering fantastic coverage, which makes it suitable for taking excellent care of your property. It has made some exciting upgrades which are sure to please you.
First and foremost, fantastic options play a crucial role in catering to various users. Based on the size of your garden, you can go for the maximum quantity of 2.5 gallons. Besides, to make work more manageable, RM43 has added a sprayer, bleach, and weed preventer.
It delivers consistent output throughout the year and prevents different types of weeds or harmful grass from interfering with germination. You get coverage of 43,243 square feet, and thanks to its incredible potency, it removes vegetation altogether. It's the ideal unit for keeping your garden clean, providing a refined look.
Other than that, it works well on gravel paths, driveways, parking areas, and on farms. The significant improvement is that it permits spot control of brush, vines, and weeds, highlighting exceptional user-friendliness.
What Could've Been Better?
It's priced higher than some of the other models, which is a letdown for prospective gardeners. We understand RM43 has kept the price higher because of the array of functions. But when it comes to quality, it's best not to compromise with the price, so hopefully, you don't have a tight budget.
Pros
Durable
Versatile
Total vegetation control
User-friendly
Numerous sizes
Cons
Costly
Active Ingredient: Glyphosate 43% | Dimensions: 6 x 9 x 14.38 inches | Weight: 25.1 pounds | Type: Non-selective | Safe for Plants: No
Scotts is a well-known brand among gardeners, thanks to its range of fantastic products, and Scotts Weed & Feed is no different. It delivers exceptional coverage while the powerful formula gets rid of unwanted growth reasonably quickly. We assure you won't be disappointed.
Scotts Turf Builder WinterGuard Fall Weed & Feed3 weed...
Fall weed and feed kills over 50 listed lawn weeds,...
Why Did We Like It?
Straight off the bat, the extensive coverage makes it stand out, allowing you to cover 15,000 square feet without any hassle. You can use it in most spaces with aplomb, thanks to its powerful formula, providing two times better dandelion and clover control. Therefore, it protects your lawn from various types of unwanted growth.
The significant addition is the weed grip technology, having several benefits. Once you spray it in all relevant areas, it grips onto the weeds in plain sight, but more importantly, it locates weeds you don't see. Therefore, it provides all-around coverage and clears the path for fresh grass to grow.
Additionally, it improves soil structure and supplies essential nutrients by going deep into the surface. The roots are made stronger, ensuring you have a beautiful lawn in different conditions, and it enhances the absorption properties of the soil.
What Could've Been Better?
You need to keep in mind a few things, and the foremost among them is that it requires a damp lawn for best results. Also, be careful about how much mixture you use because it tends to kill the grass in some cases. If you find the grass going brown, you've probably used too much.
Pros
Clears out dandelions
Protects against clover
Improves absorption
Strengthens roots
Allows passage of nutrients
Cons
May kill the grass
Requires a damp lawn
Active Ingredient: N/A | Dimensions: 17.5 x 3 x 12 inches | Weight: 14.3 pounds | Type: Selective | Safe for Plants: Yes
The Preen Weed Preventer has quickly climbed the charts to cement a place among the top products. With features like the flip-top applicator and its extensive coverage, you can get the desired results in most situations, endearing it to users. No wonder it has received a positive response.
When used as directed Preen Extended Control Weed Preventer...
Why Did We Like It?
Right away, you'll notice the many available sizes, corresponding to which the area of coverage varies as well. The smallest unit weighs 4.93 lbs and covers 805 square feet, while the largest unit weighs 21.45 lbs and can cover 3,500 square feet. So, it's highly versatile and delivers a potent output.
With just one application block, you can prevent weed growth for up to six months, making it convenient for use throughout the year. It checks the growth of over 600 perennials, groundcovers, shrubs, and trees to provide much-needed reliability in your gardening activities.
We especially liked the flip-top applicator cap, which adds to its user-friendliness. Plus, it can withstand various weather conditions, remaining unaffected in extreme heat and cold thanks to its high potency.
What Could've Been Better?
Like some of the other models, the application involves numerous steps, and you need to be vigilant so that you don't miss any. One of the essential steps is to apply water after spreading the solution; for this, you must know the appropriate amount. Too little or too much water may not deliver the required output.
Pros
Easy to use
Protects against 600 perennials
Versatile
Extensive coverage
Numerous sizes
Cons
Involves many steps
Active Ingredient: N/A | Dimensions: 4.75 x 8.5 x 11.5 inches | Weight: 4.93 pounds | Type: Pre-emergent | Safe for Plants: Yes
The Snapshot Herbicide has most bases covered, thereby topping rival brands. You get to use it for a long time on various types of weeds, making it one of the most versatile units going around. Rest assured, you'll get your money's worth.
Snapshot 2.5 boasts more control than any other pre-emergent...
Up to 6-8 months of control for 111 broadleaf and grassy...
Why Did We Like It?
If your primary concern is control, you'll like what Snapshot has lined up for you. One of the most significant assets of this herbicide is that it allows you to manage the quantity and potency of the solution. Therefore, your gardening activities become more manageable, giving it an edge over other models.
Another significant improvement is the incredible variety on offer, thanks to its exceptional durability. Since it lasts a long time, it protects against 111 broadleaf and grass weeds, keeping your lawn fresh all year round. All you need to do is to add 2.3-4lbs of the solution on an area of 1,000 square feet for the best results.
We suggest you spray the mixture before monsoon or irrigation and let the ingredients spring into action. Among the various components, the manufacturers have added isoxaben and trifluralin, which attacks the weed, making room for fresh grass to grow.
What Could've Been Better?
You need to get the amount right because it's highly potent and may end up killing quite a few shrubs. We received reports from users stating that along with weed, it also hurts individual plants if used in large quantities. So, we’d suggest you slowly increase the dosage.
Pros
Added control
Protects against 111 weeds
Great coverage
Weather-resistant
Lasts for 6-8 months
Cons
May kill certain shrubs
Active Ingredient: Isoxaben, Trifluralin | Dimensions: 15 x 4 x 26 inches | Weight: 50 pounds | Type: Pre-emergent | Safe for Plants: Yes
The Non-Ionic Surfactant has a wide range of functions, making it ideal for your gardening activities. Using the latest technology, it allows you to remove weeds and promotes healthier grass growth. But that's not the only good thing about it; read on to find out more.
Interestingly, it's a non-ionic surfactant that acts as a weed killer and maintains the garden in top condition. You can use it with several types of plants, making it suitable for numerous purposes, while the easy application makes it ideal for all age groups. You can reach all corners of the garden and spray the relevant areas quickly.
The solution consists of 80% active wetting blend technology, while the addition of ammonium sulfate is a masterstroke. It improves the absorption properties of plants, permitting your leafy friends to attain peak performance throughout the year. The affordable herbicide doesn't affect germination, so you're sure to be interested.
We must mention that it's alcohol-free, meaning it's non-flammable, and you'll remain safe at all times. Plus, it has outstanding durability to endure different weather conditions; neither rain nor sun will impact potency.
What Could've Been Better?
One issue is that it tends to clog the sprayers, which isn't an ideal scenario. We found that it might not break down as much, which is why it gets stuck in the pores of the sprayer. So, you'll need to spend some time freeing the sprayer of debris.
Pros
Alcohol-free
Non-flammable
Wide coverage
Efficient
Helps plant growth
Cons
Clogs the sprayer
Active Ingredient: Surfactant 80% | Dimensions: 4 x 1.5 x 6 inches | Weight: 1.04 pounds | Type: Non-ionic surfactant, wetter | Safe for Plants: Yes
The AgroSciences Herbicide is turning quite a few heads among prospective buyers, and a closer look reveals why. It has everything you could wish for, making it highly popular in the market. You can't go wrong, thanks to its incredible performance, allowing you to maintain the quality of your lawn.
Dimension specialty herbicide is the only preemergence...
t offers exceptional turf and ornamental safety on both...
Why Did We Like It?
Firstly, a lot of thought has gone into its choice of ingredients, which provides several advantages for your gardening needs. It keeps weed and other harmful growth in check while improving the absorption properties of the soil. Over time, it strengthens the roots by allowing nutrients and water to reach deep into the surface.
You'll be pleased to see it offers sufficient coverage, making it suitable for most lawns. Therefore, you can spray it on all corners of the garden for complete protection. In that regard, we suggest you use it during spring or fall when weed growth tends to be high.
What's more, it's very durable and can endure turbulent weather conditions without compromising on potency. Plus, the fast-action formula delivers quick results, clearing the path for fresh grass to grow.
What Could've Been Better?
For all that's good, the price is a cause of concern for most people. It isn't suitable if you've got a tight budget, meaning AgroSciences could lose a section of buyers. The first thing gardeners look at is the price, and considering the range of options, we won't be surprised if you choose a different option.
Pros
Easy to use
Extensive coverage
Promotes healthy grass growth
Improves absorption
Durable
Cons
Slightly expensive
Active Ingredient: Herbicide | Dimensions: 9.5 x 4.5 x 3 inches | Weight: 4.6 pounds | Type: Pre-emergent | Safe for Plants: Yes
Before we take your leave, it’s important that we discuss a couple of points to help you choose the right unit. A herbicide may seem like a bag of mixture waiting to be added to the soil but there’s a lot more to it than that. Therefore, we’ve listed down the following points, making it easier to pick a unit.
Durability
The herbicide must be durable to handle everyday elements and keep the plants well protected. You might encounter extreme heat, cold or wet conditions and neither should have a negative impact on the mixture. It must withstand various conditions for the best results.
Ease of Use
Furthermore, it must be easy to use because it’s not simply about adding herbicide to the soil. The instructions must clearly mention the amount of mixture you need, and the quantity of water required to dilute it. As a result, first-time users will not find their plants wilting away under excess herbicide usage.
Potency
Finally, adequate strength is essential to prevent weeds from growing in the first place. Also, you should be able to control the potency of the mixture, striking the right balance between too much and too less.
Pre-Emergent Herbicide FAQs
How does a pre-emergent herbicide work?
Pre-emergent herbicides work by creating a chemical barrier in the soil that prevents weed seeds from germinating. When applied properly, the herbicide forms a layer that inhibits the growth of weed seedlings, effectively reducing weed infestation in the treated area.
When should I apply a pre-emergent herbicide?
The timing of pre-emergent herbicide application is crucial for its effectiveness. It should be applied before weed seeds begin to germinate, typically in early spring or fall, depending on the specific weed species and geographic location. Consult the product label or refer to local gardening resources for the recommended application timing in your area.
Can I use a pre-emergent herbicide in my flower or vegetable garden?
Pre-emergent herbicides are generally not recommended for use in flower or vegetable gardens because they can also inhibit the germination of desirable plants. However, there are selective pre-emergent herbicides available that target specific weeds while being safe for certain types of ornamental plants or vegetables. Read the product label carefully and follow the instructions to ensure safe and effective use.
Is it safe to use pre-emergent herbicides around pets or children?
Pre-emergent herbicides, like any chemical product, should be used with caution. Follow the instructions and precautions provided by the manufacturer on the product label. Some pre-emergent herbicides may pose risks to pets or children, particularly if ingested or if they come into contact with the treated area before the product has dried. Take appropriate measures to ensure safety, such as keeping pets and children away from treated areas until the herbicide has dried.
Can pre-emergent herbicides harm other plants in my garden?
Pre-emergent herbicides are designed to target weed seeds and seedlings, but they can also affect the germination and growth of other plants if not used properly. Non-selective pre-emergent herbicides can inhibit the growth of desirable plants as well. Always read and follow the product label instructions carefully, paying attention to any precautions or recommendations for specific plants or areas of application.
Conclusion
Those were our picks for the best pre-emergent herbicides; hopefully, you've formed a better understanding of the product.
It's effortless to use; all you need to do is follow the instructions for the best results. Moreover, depending on your requirements, you can change the potency of the mixture while keeping your lawn or garden in excellent condition.
Before signing off, we've decided to assist you a bit more by narrowing down the top products into different categories. From the above 10 Best Pre-Emergent Herbicide Right Now, the top three expert recommendations are.
The Andersons Weed Control is an ideal option known for its versatile weed protection. Tenacity Turf Herbicide is a good choice offering complete performance and affordability and Prodiamine Herbicide, is the right choice for its versatility and extensive coverage.
These herbicides have received positive reviews and are effective in controlling a wide range of weeds, making them top contenders for maintaining a weed-free and healthy garden or lawn.
Do you want to make your neighbors envy your garden? Then try growing a few exotic orchids!
They make good houseplants, thanks to their vibrant flowers and splendid shapes. Now, there are different types of orchids, but the most common among them is the phalaenopsis orchid.
Anyhow, they are considered to be very hard to grow and even harder to maintain. You need to water them correctly and use the appropriate potting soil mix. The latter holds considerable importance because it provides nutrition and support to the plant, helping the flowers to bloom.
If you start looking, you will come across dozens of orchid soil mixes. So, to help you make the right choice, we have listed 8 of the best orchid potting mixes.
Without further ado, let’s dig in!
Best Potting Mix For Orchids
Whether you are a seasoned orchid enthusiast or a beginner, finding the right potting mix is essential for your plant's well-being. So, without further ado, here's the list of the 7best potting mixes for orchids to help you nurture and showcase the natural beauty of your orchid collection.
When it comes to soils and potting mixes for plants, very few brands can match the quality of Miracle-Gro. And that is why we have included their coarse blend orchid potting mix on our list. It is a high-quality potting soil that supports all types of orchid plants and ensures their fast growth.
Feeds up to six months, use when potting or repotting orchid...
Why Did We Like It?
As a relatively affordable potting mix, the Coarse blend orchid potting mix is a pretty great choice for your orchids. The coarse blending of the soil ensures that there is enough aeration available for the orchid’s roots. In addition, it allows for proper drainage, which is crucial for root growth and development.
Each unit contains 8 quarts of soil mix, which provides excellent value for money. It also includes traces of fertilizer that act as a food supply so your orchid can grow faster.
The soil mix has enough nutrients to feed your plant for 6 months. Moreover, it is pretty versatile, considering that it can be used for all types of epiphyte orchids, such as phalaenopsis, epidendrum, cattleya, and dendrobium.
What Could’ve Been Better?
The Miracle-Gro orchid potting mix is a pretty versatile and high-quality soil mix that you can use for your orchid plants. However, you should keep in mind that it is not entirely organic. As mentioned, it contains trace amounts of fertilizers to feed the plants.
Pros
Comes at a low price
Provides good aeration and drainage
Ensures fast growth and development of the plant
Can be used for potted and garden orchids
Cons
Not entirely organic
Composition: Coarse blend of fir bark, sphagnum moss, and perlite | Moisture Retention: Moderate to High | Drainage: Excellent | Nutrient Content: Contains fertilizer | Size: 8 quarts
Next, we have considered the 50000 better gro special orchid mix from the Sun Bulb brand. It is a popular potting mix for orchids formulated by a team of trained and specialized orchid growers. The formula can be used on most orchid types to promote growth.
MULTI-PURPOSE FORMULA FOR ALL EPIPHYTIC ORCHIDS: Specially...
OPTIMAL ROOT GROWTH AND DEVELOPMENT: A dynamic blend of...
Why Did We Like It?
This orchid soil mix is made of a dynamic combination of hardwood charcoal, western fir bark, and sponge rocks. It provides a highly nutritious soil medium that is suitable for the healthy growth of your orchids.
The hardwood charcoal and sponge rocks also ensure that the soil is adequately ventilated for the roots. They improve soil drainage and prevent the accumulation of excessive moisture so that the orchid roots have sufficient room to grow.
Furthermore, it is an excellent choice for both hobbyists and professional orchid growers due to its versatility. It can be used for a large number of epiphyte orchids like phalaenopsis, oncidiums, paphiopedilums, cattleyas, or dendrobiums. Moreover, the 4 quarts of soil mix are sufficient to cover a small or medium garden, providing good value for money.
What Could’ve Been Better?
Overall, this soil mix is an excellent choice due to its versatility and consistency. However, while using it, we noticed that it attracts pests and bugs. This can affect your plant’s growth, so we suggest that you use a suitable pesticide or a bug spray along with it.
Pros
Comprised of natural components
Provides good ventilation for the roots
Contains sufficient nutrients for rapid growth
Highly versatile
Cons
Can attract pests and bugs
Composition: Chunky mix of western fir bark, hardwood, charcoal, and sponge rock | Moisture Retention: Moderate to High | Drainage: Excellent | Nutrient Content: Contains fertilizer | Size: 4 quarts
As the name suggests, the all-natural orchid potting mix by Perfect Plants is composed of natural components. It is a hand-mixed soil that emulates the natural soil environment of phalaenopsis orchids, ensuring that they can grow and bloom quickly.
💓 ALL PURPOSE MIX — Made with Charcoal, Sponge Rock,...
🔗 ROOTS CAN CLIMB — Orchid Roots love to climb and...
Why Did We Like It?
This orchid potting mix is formulated with charcoal, pine bark, coconut chips, and sponge rock. All of these components are naturally sourced, which provides a conducive medium for the orchid to proliferate.
The presence of charcoal and coconut chips ensures that there is proper aeration and ventilation for the roots. It provides excellent drainage that prevents excessive moisture buildup in the roots. As a result, the roots can expand and climb quickly.
Each unit comes with 4 quarts of soil mix that is sufficient for a small or medium orchid garden. Furthermore, it comes packaged in a resealable, heavy-duty bag that preserves the quality of this mix. This also allows you to safely store the soil mix for later use.
What Could’ve Been Better?
Despite being made of high-quality natural components, this orchid potting mix lacks versatility. In other words, you can mainly use it for phalaenopsis orchids and small to medium gardens. It’s not ideal for larger gardens, and you may face difficulty in growing other types of orchids with it.
Pros
Provides natural soil conditions for quick growth
Has adequate drainage and ventilation
Allows orchid roots to expand and climb
Can be easily stored
Cons
It is not very versatile
Composition: Mix of medium-grade fir bark and coconut husk chips | Moisture Retention: Moderate | Drainage: Good | Nutrient Content: Contains slow-release fertilizer and beneficial microorganisms | Size: 4 quarts
RePotme is a renowned brand that produces high-quality garden supplies, especially for exotic houseplants. The Monterey dark imperial orchid potting mix is proof of the brand’s quality. It is handcrafted and mixed by professionals and contains all the necessary components for the healthy growth of your orchids.
The most prominent feature of this potting mix is that it is made from high-quality ingredients - hand-blended by experts. It contains all the nutrients necessary for the growth of the orchid plant. Therefore, it is a premium quality mix that can be used by both hobbyists and professionals.
It is suitable for phalaenopsis orchids, as its ingredients provide adequate natural aeration. This allows the roots to expand, which, in turn, accelerates the growth of the plant. Conversely, it prevents the roots from rotting by draining away excess moisture from the soil. The ingredients also minimize the growth of pathogens that can harm the roots.
Moreover, it is blended in small quantities to ensure the highest levels of quality. And it comes packaged in a resealable pouch that retains its freshness and quality for a long time.
What Could’ve Been Better?
Without a doubt, this soil mix by RePotme is of a premium quality that contains all the necessary components for growing healthy orchid plants. However, it comes in relatively small quantities, which is insufficient for large gardens. And if you want to purchase sufficient amounts, the price will be pretty high.
Pros
Hand mixing ensures the highest quality
Comes freshly packed in re-sealable pouches
Easy to store for a long time
Prevents the growth of pathogens and rotting of roots
Cons
Purchasing sufficient quantities can be expensive
Composition: Mixture of aged New Zealand Monterey pine bark and sphagnum moss | Moisture Retention: Moderate to High | Drainage: Excellent | Nutrient Content: Contains slow-release fertilizer and natural additives | Size: 2 quarts
Espoma is one of the leading names in manufacturing high-quality, organic garden supplies. With considerable experience in this market, this brand has carved a niche for itself. And the OR4 organic mix potting soil is a testament to this fact. It is an organic soil mix that provides optimal growth conditions for orchids.
This organic orchid potting mix contains aged pine bark, perlite, horticultural grade charcoal, limestone, and yucca extract. All of these ingredients are naturally sourced and aim to provide an ideal soil medium for the growth of orchids. Consequently, it can be used for all types of orchids, which makes it a highly versatile choice.
Besides, it provides good soil aeration and drainage so that the roots do not suffocate. The charcoal eliminates any salt and pathogens from the soil, which protects them from damage. Subsequently, the limestone helps in maintaining an optimal pH level that is suitable for rapid growth.
In addition, it comes with a proprietary myco-tone blend, which consists of 11 different mycorrhizal fungal strains. These beneficial fungal strains provide nutrition to the soil organically, thereby eliminating the need for artificial fertilizers.
What Could’ve Been Better?
The OR4 can be considered a premium potting soil mix, due to which it is relatively more expensive than most of our previous options. So, if you are on a tight budget, this might not be the most feasible option for you.
Pros
The soil mix is purely organic
It does not require any additional fertilizers
Highly versatile for growing different orchid types
Provides optimal soil conditions for a healthy orchid plant
Cons
Relatively expensive
Composition: Mixture of aged New Zealand Monterey pine bark and sphagnum moss | Moisture Retention: Moderate to High | Drainage: Excellent | Nutrient Content: Contains slow-release fertilizer and natural additives | Size: 2 quarts
For this review, we have the organic orchid potting mix, which is another all-natural soil mix from Perfect Plants. The quality of this soil mix demonstrates why Perfect Plants is one of the most recognizable brands in the market. It is entirely organic and is best suited for growing your orchids in indoor pots.
💓 ALL PURPOSE MIX — Made with Charcoal, Sponge Rock,...
🔗 ROOTS CAN CLIMB — Orchid Roots love to climb and...
Why Did We Like It?
This potting mix consists of four organic constituents, which are charcoal, pine barks, coconut chips, and perlite. There are no artificial ingredients or chemicals that can affect the plant’s health. Furthermore, these components make it usable for multiple orchid types, which improves its versatility.
Each unit contains 1 quart of soil mix, which makes it perfect for use in indoor orchid pots. The pine barks and coconut chips ensure sufficient aeration and drainage so that the roots have the room necessary to climb and grow. Conversely, charcoal eliminates any salts and prevents the growth of pathogens that can damage the root.
Furthermore, it is packaged in re-sealable, heavy-duty bags, which can retain the nutrients for a long time. It also makes it easy to store the soil mix for later use.
What Could’ve Been Better?
While it is excellent for potted orchid plants, it doesn’t contain sufficient soil mix for garden use. It only provides 1 quart of orchid soil mix, which will be inadequate if you have a large or medium garden. And to buy sufficient quantities, the costs may increase considerably.
Pros
Does not have any harmful chemicals or fertilizers
Great for indoor orchid pots
Has sufficient aeration and drainage
Can be used for all types of orchids
Cons
Not sufficient for use in large gardens
Composition: Mix of premium grade orchid bark, coconut coir, and charcoal | Moisture Retention: Moderate to High | Drainage: Excellent | Nutrient Content: Contains slow-release fertilizer and beneficial microorganisms | Size: 1, 4, and 8 quarts
Black Gold is a relatively smaller and lesser-known brand that manufactures horticultural supplies. However, their SunGro orchid mix is a pretty impressive soil mix that is ideal for indoor orchid plants. In addition, its ingredients make it suitable to be used for different types of orchids.
No products found.
Why Did We Like It?
We were pretty impressed by the quality and versatility of this soil mix. It comprises a wide range of all-natural ingredients, which can provide a perfect soil medium for your orchid. Besides, you can use it for most orchid types, and not just phalaenopsis orchids, which makes it quite versatile as well.
The bark and horticultural grade perlite helps to retain adequate water for the roots. Conversely, the cinders, pumice, and sphagnum peat moss help in draining excess water that prevents root rot. They also improve the aeration of the soil, which provides room for the roots to develop. And lastly, the added dolomite lime helps in maintaining a balanced pH level.
Furthermore, each unit contains 8 quarts of soil mix, which can be used for several orchid pots or even medium to large gardens. And you can also use it for both terrestrial and semi-terrestrial orchid plants.
What Could’ve Been Better?
While it does include all the necessary components to grow a healthy orchid plant, we found it to be quite dense because of this aspect. As a result, if used in small pots, it can sometimes retain excess water or hamper root growth, which can be counterproductive.
Pros
Highly versatile to use
Suitable for both terrestrial and semi-terrestrial plants
Provides good drainage and aeration
Helps to maintain the soil’s pH
Cons
Too dense, especially for small pots
Composition: Blend of Canadian sphagnum peat moss, bark, and perlite | Moisture Retention: Moderate to High | Drainage: Excellent | Nutrient Content: Contains slow-release fertilizer and natural additives | Size: 8 quarts
Blend of Canadian sphagnum peat moss, bark, and perlite
Moderate to High
Excellent
Contains slow-release fertilizer and natural additives
8 quarts
Buying Guide For The Best Potting Mix For Orchids
And that was our list of the top 8 potting mixes for orchids. Have you decided on which one you want to get for your orchids?
Choosing the most suitable potting mix for your orchid plants is not as simple as it seems. So, if you are still confused after going through our list, we completely understand. With so many options available on the market, it is easy to become overwhelmed. Besides, you need to take into account different factors before making your final purchase.
That is why we have prepared this brief buyer’s guide for you. It contains some of the critical factors that you should consider before you buy a potting mix for your orchid plants.
So, if you want to know what these factors are, read on.
Type Of Orchid
Before you buy an orchid soil mix, it is important to consider what type of orchid plants you have. Orchid plants have high diversity, due to which there are numerous types of orchids that exist, with the most common ones being phalaenopsis, cattleya, and dendrobium.
Each orchid type requires specific soil conditions to grow, without which they may wither or not bloom properly. That is why determining your orchid type is crucial before starting to look for a soil mix.
Aeration
Ample aeration is vital to ensure the growth of your orchid. It prevents the roots from suffocating and provides sufficient room for the roots to expand in the soil.
In their native habitats, orchid plants can grow best in slightly dry soil. This can be facilitated through proper aeration. Furthermore, orchid roots can sometimes remain exposed, and aerated soil aims to mimic that condition.
Materials such as perlite, charcoal, and tree bark facilitate aeration. So, you should look for these ingredients when choosing a potting mix.
Drainage
Besides aeration, adequate drainage is another essential factor to consider. It is vital for the development of the plant, as suitable amounts of water are necessary for its growth. However, excessive water can be detrimental to the plant, as it increases the soil moisture and suffocates the roots.
Therefore, it is important that the potting mix you choose has good drainage. It should be able to retain only the necessary amount of water while eliminating any excess. For this, you should look out for ingredients like perlite, charcoal, or sphagnum moss in the soil mix, as they help in drainage.
Ingredients
The right soil ingredients can make all the difference in the development of an orchid plant. So, you should make sure that the soil mix contains all the necessary ingredients for its proper growth.
Typically, most potting mixes come with ingredients such as charcoal, perlite, wood bark, or coconut husk. These help in the aeration and drainage of the soil. However, some potting mixes may include vermiculites, lava rocks, sphagnum moss, or fertilizers for better growth.
Potting Mix For Orchids FAQ's
Can I grow orchids on any soil?
The simple answer to that question would be no. Orchids are delicate tropical plants and, therefore, require the right soil conditions. So, when you are planting them, make sure you have the right potting mix and soil for orchids.
How often do you need to water orchids?
If you are using the right soil mix, you need to water your orchid plants once or twice a week.
How do you re-pot an orchid?
To re-pot an orchid, you need to wait till your orchid completes blooming. Then move your orchid to a pot with proper drainage, and make sure to use a similar soil and potting mix.
How often do you need to change your potting mix?
Typically, you should change the soil mix for your orchid at least once a year. This will ensure that your orchid has a constant supply of fresh nutrients. It also prevents the growth of pathogens and harmful fungus in the soil.
Conclusion
Orchids have stunning blooms, and their graceful shapes and radiance can brighten up any room or garden. But, beautiful as they are, they require constant attention and proper care, without which they can wither away.
Ensuring the right soil conditions for your orchid is of paramount importance and for that, you need the best potting mix for your orchid. And now that we have arrived at the end of this review-based guide, we sincerely hope that we have been able to help find the right potting medium.
But before we go, let us reiterate our favorites. The Miracle-Gro orchid potting mix coarse blend offers the best versatility at an affordable price, which makes it our top pick.
If you want a more affordable option with almost similar quality, then you can get the Sun Bulb BetterGrospecial orchid mix. Or, if you want an all-natural, organic option, then we recommend the Perfect Plants all-natural orchid potting mix.
With that out of the way, it is time for us to part. Take care!
Fallen leaves, twigs, and other debris contribute to an unhealthy ecosystem for the aquatic life of your pond.
What’s more? It creates a mess, compromising the beautiful landscape of your outdoor water garden. For these reasons and more, installing a pond skimmer is crucial to keep the value and appeal of your garden pond intact.
However, finding a unit that best meets your requirements isn’t as simple as it seems at first. Plus, the wide availability of options in the market makes this task all the more time-consuming and hectic. This is why we’ve gone ahead and shortlisted 9 top picks for you to consider.
Through this guide, we’ve provided detailed reviews for each of our recommendations. Furthermore, the buyer’s guide at the end of the article will help your decision-making.
So, without further ado, let’s dive straight into the reviews.
Best Pond Skimmers
Whether you have a small backyard pond or a large water feature, these pond skimmers are designed to efficiently skim and filter the water, ensuring a beautiful and thriving pond ecosystem. So, without further ado, here's the list of the 9 best Pond Skimmers.
Keep your flexible or preformed pond clean by skimming off debris before it sinks using this in-pond skimmer from Tetra Pond, a leading producer of innovative equipment and fish food for over 50 years. It acts as a pre-filter for your water pump, making the cleaning process hassle-free.
POND SKIMMER Removes debris from the water’s surface...
PRE-FILTER Helps protect your pond pump from clogging
Why Did We Like It?
You’ll have one less thing to worry about with the Tetra Pond Skimmer as it makes cleaning the pond convenient. It acts as a pre-filter when used with water garden pumps, skimming off debris from the water surface in the nick of time to prevent clogging.
The skimmer is also compatible with the Tetra Pond water filter, which, in turn, helps make your pond the focal point of any outdoor space. That’s not all; you’ll be pleased to know that the unit is relatively easy to install.
All you need to do is position the skimmer on your preformed or flexible pond shelf or block after connecting it to a suitable water pump. It draws water from the surface in order to clean it; later, it collects the debris, algae, and leaves in the basket and replaceable filter pad.
What Could’ve Been Better?
Truth be told, the Tetra Pond Skimmer is a reliable option that helps improve the life cycle of your water pump. However, we noticed that it lacked stability, making it prone to tipping over. To tackle this issue, Tetra Pond should focus on making its base a bit wider.
Pros
Protects the pump from clogging
Easy to install
Ensures efficient cleaning of the pond
Reliable option
Cons
Its base needs to be wider
Skimmer Type: In-Pond | Maximum Pond Size: Up to 500 - 1000 gallons | Flow Rate (GPH): 550 - 1,900 | Warranty: 2-year limited
Aquascape, a leading manufacturer of water features, pondless fountains, and pond products comes forth with an excellent product. The 43020 Signature Series 200 Skimmer from the brand ensures efficient mechanical filtration of your pond to maintain optimal water conditions, thanks to its rounded patented design.
Heavy-Duty, Freeze-Resistant Construction – Built from...
Why Did We Like It?
Constructed using professional-grade, UV-protected, high-density polyethylene, the rounded Aquasure 43020 Skimmer ensures maximum strength. So, rest assured that it won’t warp over time, unlike other, low-quality plastic filters. This is backed by a lifetime warranty, giving you peace of mind at the time of purchase.
We loved Aquascape’s patented and innovative skimmer design as it provides effective mechanical filtration that improves water quality, in turn, reducing the need for maintenance. You can easily install the skimmer, even in freeze-thaw conditions, in order to provide a protected location for the pump.
Furthermore, it includes all the required fittings and installation components for the purpose, including an optional filter brush cartridge. The leaf and debris net collects the unwanted debris and algae from the surface of the pond. On the other hand, you can utilize the filter brush cartridge in case additional filtration is needed.
What Could’ve Been Better?
First-timers may find the installation procedure a tad time-consuming, but it’s relatively simple once you start following the directions. That said, setting up the skimmer as per the given instructions is critical to avoid leakage issues, like the ones we, unfortunately, came across.
Pros
UV-protected and durable
Backed by a lifetime warranty
Includes necessary fittings and components
Efficient mechanical filtration
Cons
Leakage issues
Skimmer Type: In-Ground | Maximum Pond Size: Up to 200 square feet | Flow Rate (GPH): Up to 3,000 | Warranty: Lifetime limited
Since its foundation in 1949, OASE has managed to take inspiration from nature to develop innovative home water gardening tools and equipment like the Swimskim Floating Skimmer. It floats on the water surface of your pond, generating powerful suction in order to remove unwanted leaves and debris.
The easy-to-use SwimSkim is a powerful surface skimmer that...
The compact SwimSkim easily integrates into an existing...
Why Did We Like It?
The best part about setting up the OASE Swimskim on your pond’s surface is that it offers a strong suction without the need for a separate pump. Simply plug it in and drop it in your existing pond for it to float along the surface. You don’t even have to bother about making modifications or cutting into the pond liner for its installation.
What’s more, the powerful skimmer is capable of removing large amounts of debris, pollen, dust, and leaves from the pond within no time using its leaf basket. In addition to that, it increases water circulation and air injection to improve water quality.
The unique combination of cleaning and aeration is what impressed us from the get-go. It oxygenates the water of your pond, which, in turn, allows its marine life to flourish in a healthy ecosystem.
What Could’ve Been Better?
The only downside to using the OASE Swimskim Skimmer is that it requires regular cleaning because it gets clogged pretty easily. This can be a bit of a hassle owing to hectic schedules and busy lifestyles. Nonetheless, it helps keep your pond clean and aerated by adapting to different water levels.
Pros
Compact design
Perfect for retrofitting applications
Easy to install
Integrated aerator for oxygenation
Adapts to different water levels and conditions
Cons
Requires frequent cleaning due to clogging
Skimmer Type: Floating | Maximum Pond Size: Up to 270 square feet | Flow Rate (GPH): 580 | Warranty: 2-year limited
Next up on our list, we have the BF1250 pond filter and waterfall spillway from Waterscapes International, a brand dedicated to creating a wide variety of beautiful ponds and waterfalls. Available in three different size options, the two-in-one unit is perfect for small ponds and water gardens.
Each unit includes FIPT bulkhead fitting, media bag, filter...
Rugged high-density polyethylene shell warranted for life
Why Did We Like It?
Featuring a rugged, high-density polyethylene shell, the Waterscapes International BF1250 is a durable option to consider. It’s also backed by a lifetime warranty so you can rest assured of its efficiency and performance for the years to come.
Apart from ensuring reliability, the skimmer offers exceptional functionality. Not only does it filter the water of your pond by removing leaves and debris from its surface, but it also enhances the elegance of your backyard.
The waterfall spillway is available in three different size options for you to choose from. It can be easily installed in a small pond; just make sure the area beneath the overflow lip is sealed. In fact, the unit also comes with a filter pad, liner attachment flange, removable bottom grate, media bag, and bulkhead fittings, further adding to your convenience.
What Could’ve Been Better?
Without a doubt, the WaterscapeBF1250 is a value-for-money option that keeps your pond beautiful and clean. However, we find it imperative to mention its water leakage issues. Other than this, it doesn’t come with an adapter to help you connect it to the tubing.
Pros
Easy to install
Sturdy design
Features a waterfall spillway
Lifetime warranty on the enclosure
Perfect for small ponds and water gardens
Cons
Water leakage issues
Doesn’t include an adapter
Skimmer Type: In-Ground | Maximum Pond Size: Up to 1000 gallons | Flow Rate (GPH): 2,000 - 3,000 | Warranty: 1-year limited
Atlantic Water Gardens, a premium manufacturer of some of the finest water feature products in the United States, is here with just what you need for all your pond projects. On that note, we’re pleased to introduce you to the PS3900 pond skimmer designed to ensure maximized skimming efficiency.
Skimmers house and protect your pump and plumbing while...
Atlantic’s Pond Skimmers feature more size and filtration...
Why Did We Like It?
Thanks to its black anodized stainless steel construction, the PS3900 skimmer from Atlantic Water Gardens is known for its structural rigidity and incredible strength. Consequently, it eliminates the concerns related to warping and deformation over time for maximum longevity.
But that’s not all; the unit comes with multiple filtering options for versatile use. You can customize its filtration process by choosing between mats, nets, and brushes, depending on your pond’s requirements.
Once the required connections are made, it utilizes its superflow weir door to maximize skimming efficiency. The skimmer not only cleans surface debris from your pond at a lower operational cost but also houses and protects your pump from clogging. That said, we also liked its sturdy lid as it supports foot traffic and natural rock camouflage.
What Could’ve Been Better?
We did come across a significant issue while using the PS3900 skimmer from Atlantic Water Garden. In certain instances, the unit may trap fish along with the debris while filtering the pond water owing to the absence of an inlet screen. However, this can be avoided, provided you add a grate to block the weir opening.
Pros
Efficient skimming function
Incredible strength and rigidity
Multiple plumbing and filtration options
Versatile functionality
Cons
Fishes may enter the weir opening
Skimmer Type: In-Ground | Maximum Pond Size: Up to 200 square feet | Flow Rate (GPH): 3000 | Warranty: Lifetime limited
When it comes to skimmer filters, Aquascape is a brand we rely on, especially because of its sheer excellence and dedication to customer satisfaction. That’s why we had to introduce you to the Signature Series Skimmer Filter from the brand. Equipped with a commercial-grade faux rock lid, it blends perfectly with your outdoor landscape.
The Aquascape Signature Series 43021 Skimmer features a high-density polyethylene construction teamed with a rounded design to ensure maximum strength and rigidity. Being corrosion-resistant, it serves as a durable option, backed by a lifetime warranty from the brand itself.
Furthermore, the unit comes with a filter mat that helps remove smaller debris and particles from the water surface, which is then collected in its large-volume, rigid basket. Once installed, it removes unwanted leaves, algae, and residual food particles within no time, reducing the need for regular pond maintenance.
That said, for us, the highlight of this skimmer has to be its commercial-grade natural-looking faux rock lid. It resembles the textured feel and appearance of a real stone, seamlessly blending into the pond design and surrounding landscape. In fact, its lid also includes grooves to provide space for mulch and gravel.
What Could’ve Been Better?
Seeing its price, we expected Aquascape to provide all the necessary fittings required for the installation of the 43021 Signature Series Skimmer. But unfortunately, it didn’t stand out in this aspect, primarily because it didn’t include hose fittings to help make secure connections.
Pros
Rigid and high-density construction
Corrosion-resistant
Improves the quality of water
Commercial-grade faux rock lid
Efficient mechanical filtration
Cons
Doesn’t include hose fittings
Skimmer Type: In-Ground | Maximum Pond Size: Up to 400 square feet | Flow Rate (GPH): 4000 | Warranty: Lifetime limited
Waterscapes International is a popular and trustworthy name in the water gardening industry, which deals with the production of credible pond cleaning tools and equipment. And the PS4500 skimmer doesn’t fall behind in terms of performance and functionality. It prevents the loss of water by providing protective housing to your water pump.
Super Flow weir doors for maximum surface cleaning
Designed to be easily camouflaged with natural materials and...
Why Did We Like It?
Constructed using high-density polyethylene, the Waterscapes International PS4500 comes with structural rigidity that’s bound to last over the years. You won’t need to worry about getting it replaced anytime soon, making it a reliable option worth considering.
Apart from that, it’s designed to be easily camouflaged with plants and natural materials like rocks and stones. In other words, the skimmer, when installed, blends perfectly well with the outdoor landscape of your garden, completing its overall aesthetic appearance.
Equipped with a 9-inch weir door, the unit improves water flow in order to draw more debris and leaves from the water. The trapped debris is then collected in its rigid basket, which is relatively easy to use.
What’s more, is that it comes with a filter grate to support biological material and the filter pad. In turn, the skimmer purifies the pond water with beneficial bacteria for aquatic life to thrive.
What Could’ve Been Better?
To be honest, we weren’t entirely impressed by the build of its lid as it lacked sturdiness. It features a flimsy design and tends to lose shape pretty easily, so you won’t be able to place anything on top of it for concealment.
Pros
Ensures maximum surface cleaning
Camouflages easily with natural materials
Rugged, high-density polyethylene shell
Basket is easy to use
Improves water quality
Cons
Flimsy lid
Skimmer Type: In-Ground | Maximum Pond Size: Up to 600 square feet | Flow Rate (GPH): 2,000 - 4,000 | Warranty: 1-year limited
We’d now like to introduce you to the 14940172 Skimmer from Little Giant, a leading manufacturer of flexible landscape products designed using industry-leading technology. Featuring a circular design, the unit maximizes strength in order to ensure superior performance for the years to come.
APPLICATIONS: For ponds up to 10,000 gallons; ideal for koi...
PURPOSE: effectively skims pond surfaces of debris
Why Did We Like It?
Installing and owning a water garden is now easier than ever, provided you invest in the right landscape products, such as this skimmer from Little Giant. It features a sturdy design, thanks to its support edge and circular design.
The unit can easily handle large pumps, thereby improving water flow to capture leaves, fish food particles, and other debris with ease. For this, it utilizes its heavy-duty leaf net and easy-to-clean brushes, which, in turn, helps break up debris.
We were quite impressed with the overall design of the lockable skimmer. It restricts the flow of water for convenient cleaning and maintenance. Apart from that, it includes a sturdy lid that’s easily removable when needed while the inlet screen prevents frogs and fishes from entering.
What Could’ve Been Better?
You may find its installation process a tad difficult to understand as it’s quite different from the other options on the list. For this reason, we’d suggest following the directions provided in the manual carefully or seek help from a professional if you wish to save time.
Pros
Inlet screen prevents entry of aquatic life
Heavy-duty construction
Can handle large pumps with ease
Circular design with support edge
The lid is sturdy and easy to remove
Cons
Not easy to install
Skimmer Type: In-Ground | Maximum Pond Size: Up to 10,000 gallons | Flow Rate (GPH): Up to 5,000 | Warranty: 3-year limited on skimmer, 2-year limited on pump
For over 45 years, EasyPro has been dedicated to building quality water features and ponds to elevate the aesthetic appeal of your outdoor water gardens. This is why we decided to introduce you to the PS4E Eco-Series Prelude from the brand, a skimmer that reflects both innovation and quality.
Strong-ribbed design holds shape and allows backfill dirt to...
Each skimmer comes complete with molded debris basket,...
Why Did We Like It?
In our opinion, EcoPro PS4E is one of the most convenient options on our list. It supports home installation for cleaning and retrofitting applications, so there’s no need to dig or cut the liner using tools for the purpose. Simply place it on your pond’s existing shelf 10 inches deep to lower the need for regular maintenance.
Moreover, the skimmer comes with a complete kit comprising a molded debris basket, lid, and filter pad, thereby adding to your convenience. It utilizes the removable basket to trap leaves and other debris, while the polyethylene filter pad under the basket helps remove fine particles like dust and dirt.
You can easily hide the unit at the perimeter of your pond in order to give it a natural appearance. It blends well with the surroundings of your water garden, enhancing its overall feel and appearance. Furthermore, the skimmer features a strong ribbed design, allowing you to backfill soil to keep it in place.
What Could’ve Been Better?
The EcoPro PS4E is the perfect option to help keep your pond in shape, but we can’t say the same when it comes to protecting the water pump from clogging. This is because its divider fails to deliver in terms of sealing. It’s seemingly inefficient in blocking mud, soil, and debris from getting to the pump.
Pros
Easy home installation
Efficiently traps dirt, debris, dust, and leaves
Gives your pond a natural appearance
Strong ribbed design
Cons
Doesn’t prevent clogging of the pump
Skimmer Type: In-Ground | Maximum Pond Size: Up to 1000 gallons | Flow Rate (GPH): 1,800 | Warranty: 2-year limited on the skimmer, 1-year limited on pump
Now that we’ve come to the end of our list, were you able to shortlist some of the best options if not make a purchase? Well, you need not worry, even if you haven’t.
We understand that choosing the best pond skimmer from a hand-picked list of excellent options is easier said than done. This is because it’s not just about the product; your requirements also need to be taken into consideration.
For this reason, we’ve come forward with this comprehensive buyer’s guide, explaining a few critical points that need attention when buying a skimmer for your pond. Read on to know more…
Size
First things first, you’ll have to consider the size of the skimmer to match the volume of your pond. You can choose a compact option for small ponds, while large ponds will require an option with higher filtration capabilities.
Easy to Clean
Truth be told, hectic schedules lead to a lack of time. So, you’d definitely not want to spend the entire afternoon cleaning your pond skimmer, right?
Opting for a model that’s easy to clean will save time and prevent frustration. For this, we’d suggest going for a skimmer that comes with a removable basket and lid to help you remove the collected debris and leaves with ease.
Construction
Always opt for a rugged, high-density polyethylene pond skimmer, which will not rust, deform, warp, or bend over the years. With its increased strength and structural rigidity, you’ll be able to keep your pond clean and pristine at all times. Plus, a durable skimmer will help ensure your peace of mind during its purchase.
Pond Skimmer FAQ's
What is a pond skimmer?
A pond skimmer is a device used in ponds and water features to remove debris, leaves, and other floating contaminants from the water’s surface. It helps maintain water clarity and prevents organic matter from sinking and decaying at the bottom of the pond.
Why do I need a pond skimmer?
Pond skimmers are essential for maintaining a healthy and balanced pond ecosystem. They help prevent debris accumulation, which can lead to water quality issues, algae growth, and poor aesthetics. By removing surface contaminants, pond skimmers contribute to clearer water and a healthier environment for fish and plants.
Do pond skimmers require maintenance?
Yes, pond skimmers do require regular maintenance. The debris collected in the skimmer’s basket or net needs to be emptied periodically to prevent clogging and ensure optimal performance. Additionally, it’s important to clean or replace the filters as recommended by the manufacturer to maintain efficient filtration.
Can I use a pond skimmer with a waterfall or fountain feature?
Yes, pond skimmers can be used in conjunction with waterfall or fountain features. In fact, incorporating a pond skimmer in such setups helps maintain water clarity by removing debris before it reaches the cascading or spraying water.
Conclusion
Ideally, a pond skimmer is part of a filtration system that helps remove leaves and debris from the surface of a pond. It works with mechanical water pumps to improve the quality of water, allowing aquatic life to flourish.
So, if you wish to keep your pond clean and healthy at all times, a skimmer is a must-have. On that note, we come to the end of our comprehensive and informative guide. And here’s hoping we were able to provide the required insight on pond skimmers.
However, before concluding, we’d like to take you through a quick recap of our favorites from the list. Tetra Pond In-Pond Skimmer is the best pre-filter for your water pump. Aquascape 43020 Signature Series ensures efficient mechanical filtration, while OASE Swimskim is the most powerful skimmer on the list.
With this, we’ll now take your leave. Till next time!
Of the many things that go into taking care of a pet, the most important is providing an environment that is natural to it. Buying the appropriate food, providing them with quality water, and ensuring that they don’t feel away from home are some essential indicators of the right environment.
Like other animals and pets, the environment is especially important for fishes too. For fishes, a tank or a pond is their home, they are likely to spend their whole life there. Water is essential for the chances of fish's survival. Since a fish will spend its entire life in a water tank or a pond, cleaning it is a must.
Water filters are the best way to clean the water of all impurities and to maintain the health of any fish or plant that it contains. Since a water filter plays a crucial role in the safety and well-being of the features found in the pond, you need to find the best pond filter system for your pond or koi.
Best Pond Filter Systems
Here's the list of the 8 best pond filter systems to help you make an informed decision and ensure your pond remains a thriving haven for aquatic life.
1. [easyazon_link identifier="B0002APPUS" locale="US" tag="homesthetics0a-20" type="link" link_id="274238"]Tetra Pond Bio[/easyazon_link] - Best for Easy Algae Control
This filter has all the great features that most other pond filters possess. Adding to the product’s quality mechanism is the presence of the backflush valve which makes it easier for you to clean the filter.
The product uses both mechanical and biological filtration to clean the water of your pond. The UV clarifier assists the filter in getting control of the algae in the pond.
The filtration system has an impressive capacity of 1,500 gallons and can clear the water while getting rid of the waste without a problem.
The main problem with the filter, however, is that it does not come with a clear set of instructions. Especially in the case of the backflush valve. If this is the first time using one in a pond filtration system, you are in for a lot of mess because the instruction manual is not of much help.
Pros
Bio-active filter with unique open profiles provides for unrestricted water flow through a large surface area
Water passes through mechanical filtration, this helps in removing debris before UV clarification
Water also passes through a tube during UV clarification, this forces water to come in close contact with the UV rays
Cons
Owners have a lot of reservations about the backflush filter, many users claim that the system does not adequately clean the bio-active filter
The manufacturer also recommends the user to carry out the process of backflushing every week, this process can be very lengthy and strenuous
Capacity: 1,500 Gallons | Weight: 5.3 Pounds | UVC Clarification: Yes | Included Pump: No
2. [easyazon_link identifier="B00J767SJE" locale="US" tag="homesthetics0a-20" type="link" link_id="274239"]OASE BioSmart 5000[/easyazon_link] - Best for Beginners & Low Maintenance
If you are just starting out and fish farming is something relatively new to you, then this pond filtration system is the thing you need. Easy to understand and use there are a lot of beneficial features that you can expect from the pond filtration system.
Innovative Flow-Through filter design with biological and...
BioSmart 5000 is suitable for ponds up to 5,000 gallons...
Setup and maintenance are two of the things that users find challenging to keep up with. While most pond filtration systems are inconvenient, the BioSmart 5000 has a simple setup process and requires a minimal amount of maintenance.
The filtration system has a built-in cleaning mechanism that allows the user to use it for long periods without worrying about the hassle of cleaning it.
The pond filter can potentially filter medium to large-sized ponds and considering the affordable price it has, it is definitely well-equipped.
One negative aspect of the product is that it is unavailable to wider audiences currently as it is only shipped in the U.S. at the moment.
If you live outside the U.S., you are out of luck since you cannot use the pond filtration system.
Pros
Filter allows the users to have a low to moderate fish load in ponds up to 5000 gallons
Filtration has a temperature gauge that displays the water temperature in the pond
The filtration system comes with a pop-up button that lets you know when the filter needs cleaning
The built-in cleaning system eliminates the need to clean the filtration system manually
Since its creation pond owners have given positive reviews about the product
Cons
Some owners are not too satisfied with the outflow value of the pond
Owners have also purchased their own replacements and are recommending that others to do the same
Capacity: 5,000 Gallons | Weight: 14.33 Pounds | UVC Clarification: No | Included Pump: No
3. [easyazon_link identifier="B0083CMON8" locale="US" tag="homesthetics0a-20" type="link" link_id="274240"]Jebao CF-10 Pressured[/easyazon_link] - Best for Enhanced UV Penetration
This pressurized external filter is for ponds up to 1,500 gallons with plants only. If you have a goldfish in your pond circling around a few plants, then it can the Jebao CF-10 can filter up to 1,000 gallons. However, if you have a pond with a large fish such as the koi, then it can deliver up to 500 gallons for a pond.
Dual Filtration System to provide a Clearer and Healthier...
Cleans Ponds up to 1000 Gallons
The performance of the filtration system is further enhanced by the use of quartz glass by the manufacturer. While ordinary glass reduces the penetration of the UV light by 90%, Quartz glass ensures that most of the light reaches the life below the water.
The filter also successfully manages to keep the water as close as possible to the UV lamp while even slowing the flow of water as it passes through the clarifier. This further enhances the penetration of the light.
The well-designed purification system in the filter has an indicator responsible for signaling the need for cleaning.
Pros
Filter includes both bio-filtration and an integrated UV clarifier
Filter has an impressive capacity of 12,000 liters while holding a normal fish load
An indicator lets you know when the filter needs cleaning
Owners have developed a liking for the product
Cons
Some owners are complaining of the flow of sludge as they attach the backflush hose
Owners are suggesting their own workaround solutions
Capacity: 1,500 Gallons | Weight: 9.1 Pounds | UVC Clarification: Yes | Included Pump: No
4. [easyazon_link identifier="B0068MW50M" locale="US" tag="homesthetics0a-20" type="link" link_id="274241"]Pond Boss FM002P[/easyazon_link]
If you are looking for a submersible filtration system, then the FM002P from Pond Boss looks after your needs. The submersible filter combines mechanical and biological filtration for ponds up to 500 gallons. The filtration system which is both energy-efficient and eco-friendly has a sloping lid on the case that keeps the debris from accumulating on the top of the filter.
COMPACT FILTRATION SYSTEM – all-inclusive filtration...
CIRCULATES, FILTERS & AERATES WATER – 320 GPH energy...
The mechanical filtration system of the product consists of two pads; one is responsible for capturing larger particles while the other captures smaller, more minute particles.
The system of the sloping lid and the pads in the mechanical filtration reduce the required maintenance while increasing the longevity of the product. The kit also comes with a compatible fountain pump, a water spray nozzle, and a diverter that allows the user to create numerous water displays.
The easy-to-install filtration kit gets your pond up and running in a matter of minutes, while also providing you with an attractive fountain to look at.
Pros
The kit includes a filter that has mechanical and biological filtration along with numerous other features that make it worthwhile
The sloping lid and the pads are designed specifically to reduce the cost and effort of maintenance while improving longevity
Owners have shared some positive views regarding the energy-efficient kit
Cons
Some owners are complaining about the weight of the kit, owners claim that the light weight of the equipment causes it to float and jostle around water when the pump continues to work
Owners are suggesting putting rocks in the case of weighing down the kit
Capacity: 500 Gallons | Weight: 3.92 Pounds | UVC Clarification: No | Included Pump: Yes
The waterfall attaches itself to a submersible or external pump which helps in the creation of a 12” waterfall enough for ponds up to 1,000 gallons.
The product provides both mechanical and biological filtration, although the media that supplies biological filtration is not included with the pump.
No products found.
The filter helps you in choosing between lava rock or bio activators, both of which can be purchased separately. Although bio-activators are the talk of the town, today lava rocks are the more traditional choice.
Both filtration mechanisms help in improving the nitrogen cycle of the pond. As beneficial bacteria colonize both, it turns toxic nitrates harmful to the plant into nitrates that nourish the pond.
In addition to providing an attractive look and sound to your pond, waterfalls also aid in increasing the aeration of the water. Pumps need a flow rate of 500 gallons to 4,500 gallons per minute to create this waterfall.
The addition of a few rocks blends the easy-to-install system perfectly with the landscape.
Pros
The water filter is one of the few mechanisms that include both mechanical and biological filtration
The waterfall improves water aeration in your pond
The product uses either lava rocks or bio-activators for biological filtration
Cons
Media for biological filtration does not come with the pump, you need to purchase it separately
Owners are facing problems in connecting standard-size tubing to the filter
For ease of installation and to prevent leaking, don’t forget to purchase the correct size tubing from the manufacturer
Capacity: 1,000 Gallons | Weight: 0.2 Pounds | UVC Clarification: No | Included Pump: No
6. [easyazon_link identifier="B0024EE8US" locale="US" tag="homesthetics0a-20" type="link" link_id="274243"]TetraPond Filtration Foundation Kit[/easyazon_link]
This kit is one of the few filtration mechanisms that use a submersible pump and coarse and fine pads for mechanical filtration. The product is also known for using a fountain assembly with three heads to create three different fountain shapes while using a diverter valve and swivel adjuster to level the fountain heads.
COMPLETE SET: Includes water pump, filter and fountain with...
3 DISPLAY OPTIONS: Includes three different fountain...
A knob at the fountain controls the width of the fountain as the pump provides a flow rate of 325 gallons per hour. The flow rate is sufficient for ponds up to 250 gallons as you can choose a variety of fountain types from the list available. Fountains are also responsible for adding additional aeration to the water of your pond.
Pros
Product comes with a comprehensive kit complete with all the necessary components to add filtration and fountain to a small pond
Three fountain heads allow the user to vary the style of the pond
Fountain filter also helps in creating a variety of container ponds
Cons
Filter box tends to float; however, you can use rocks to weigh it down
Several owners are complaining of cracking parts and a pump that has stopped working
Capacity: 250 Gallons | Weight: 3.96 Pounds | UVC Clarification: No | Included Pump: Yes
PARTS INCLUDED: Coarse and fine foam pads, tubing and three...
The filter box also has sufficient room to add biofilters. The filter works perfectly with flow rates between 200 gallons per hour and 2000 gallons per hour. You can easily detach the filter from the tubing for removal from the pond for cleaning.
Pros
Filter comes with fittings suitable for various types of pumps
Filter can provide flow rates of 200 to 2000gallons per hour for ponds that have a minimum of 500gallons
Owners are claiming that the filter case has enough space for biological filtration
Cons
Filter only offers mechanical filtration
According to some owners, it is challenging to disconnect the filter from the tubing
Owners need rocks to keep the filter from floating
Capacity: 500 Gallons | Weight: 2 Pounds | UVC Clarification: No | Included Pump: No
Completing the list is the Grench Bio Pressure Filter. In addition to having great potential, the features of the filter make maintenance of the filter very convenient.
Biological and mechanical filter chambers for more efficient...
Simple quick handle cleaning system for easy maintenance (no...
Unlike other filtration systems, the Grench CPF-2500 simplifies cleaning with the help of a quick-handle cleaning system and numerous methods of filtration. The filter also has both mechanical and biological filter chambers that aid in extra filtration. This allows you to get double the amount of filtration for the price of one.
The filter is responsible for creating bacteria that get rid of ammonia and nitrite in the pond. With the removal of these harmful substances, your fish can now enjoy clear and healthy water. The filter can clean up to 900 gallons of water which includes a reasonable amount of koi in it. The filter can also clear 1,600 gallons in a decorative pond.
The filter, however, does not come with a pump, which means you have to pay an extra amount to add it to your filtration kit. If you want a filter that is ready to use instantly, this is not the filter that we recommend.
Pros
Filter comes with a dual filtration system
Given the size of the product, the filter has a functional filtering capacity
Cons
You will have to buy the pump separately
Capacity: 900 Gallons | Weight: 9.70 Pounds | UVC Clarification: Yes | Included Pump: No
Now that we have seen the best pond filters, it is essential to lay the guidelines for finding a pond filter that suits your needs the best.
For all pet-related items, you need to be very precise with your choice. Pets, unlike humans, cannot share or communicate their disapproval of a particular product. While other animals such as cats and dogs do drop hints, fishes have no means of communication. Therefore you need to be aware of pond filters that appear to be a good fit but are not.
Here are some of the crucial factors that you need to consider before choosing a pond filter.
Pond Size
First and foremost is the size of your pond. The size of the pond determines the type of pond filter you need.
Small ponds are generally 1000 gallons while medium ponds can hold water up to 2000 to 5000 gallons. Any pond that holds more water than 5000 gallons is large.
To find the proper size of the pond and eventually the water filter, you need to find the volume of the pond. The following formula helps you in doing so.
Volume= Length x Width x Height
Multiplying the length, width, and depth of the pond will give you the volume in the length of the pond. Let's assume by doing so you get an answer of 40m (cubed), to get the actual volume of water don't forget to convert the metric into liters.
Multiplying 40 by 1000 will give you the volume of the pond, which in this case is 40,000 liters.
However, this result is still not the actual representation of the volume of your pond, one crucial factor the simple formula does not include is the fish in the pond. According to experts you need to double the amount when you get fish and quadruple it in case you have koi fish.
Since koi fish produces more waste and has a weaker immune system than most, you need a filter that is strong enough to clean the water extremely well.
Types of Filter
The next thing that you need to look after is the type of filter you need. A filter depends directly on the size of the pond. The other factor that affects the type of filter you need is the electrical resources you have at your disposal.
An inline filter works on land and needs an electrical source nearby with which it can connect. If however, you feel that a filter on the outskirts of the pond will damage the serene view of the pond then you need a submersible filter. A submersible filter remains underwater and hidden and is generally quieter than the other forms of pond filters.
Amount of Fish
The density of the pond and the fish within will affect the performance of the filter. If you have a small pond that is home to a lot of fish, then you need an active filter.
Some filters use the help of modern technology to estimate the amount of fish they can handle. This is where your calculations and math need to be spot on. You need to ensure that the filtration system you get can face the challenge ahead.
UV Filter Option
Another important feature crucial to the type of pond filter you choose is UV lighting.
A filter that has UV lighting includes a fluorescent tube that shines UV light into your pond. The lighting helps the algae in the water to clump together, hence making it easier for the filter to catch it in the cartridges.
You can choose a filter that comes with the lighting or one with separate light attached to the main filter box.
These four factors, combined together, lay the foundation for some of the best pond filtration systems. When looking for any filter, these are the factors that should be in the back of your mind, which are detrimental to the health of a fish.
Pond Filter Systems FAQs
What is a pond filter system and why do I need one?
A pond filter system is a device that helps to keep your pond water clean and clear by removing debris, excess nutrients, and harmful substances. A filter system is essential in maintaining a healthy pond ecosystem and providing an excellent environment for your fish and plants to thrive.
How do I choose the right pond filter system for my pond?
When choosing a pond filter system, consider the size of your pond, the number of fish and plants, and your desired level of water clarity. Also, take note of the required maintenance and ease of use for each filter system.
You may want to consult a professional or do additional research on different filter systems to find the best option for your specific needs.
How often should I clean or maintain my pond filter system?
The frequency of cleaning and maintenance will depend on the specific filter system you have chosen. Some systems might have indicators or automatic cleaning features, while others might require manual cleaning.
Typically, you should clean your filter every few weeks, while performing more in-depth maintenance, such as replacing filter pads or bio-media, as recommended by the manufacturer.
Can I use multiple pond filter systems together?
Yes, using multiple pond filter systems can help you achieve better filtration and water quality. For example, you might pair a mechanical filter with a UV clarifier to remove both solid debris and suspended algae from the water.
Just ensure that the systems you choose are compatible and suitable for the size of your pond.
How do I know if my pond filter system is working effectively?
An effective pond filter system should result in clear and healthy water, with minimal debris, algae growth, and foul odors. It’s essential to regularly inspect your filter and diagnose any issues, such as reduced water flow or excessive filter buildup, that may impact filter performance.
Regular maintenance and timely cleaning can help ensure that your filter system is working effectively in keeping your pond clean and healthy.
What should I do if my pond filter system stops working or malfunctions?
If your pond filter system stops working or is not functioning properly, first troubleshoot the issue by checking for any obvious problems, such as clogged filter pads, disconnected hoses, or electrical issues. If you cannot resolve the problem yourself, consult the manufacturer’s guidelines or contact a professional for assistance.
In some cases, you may need to replace parts or the entire filter system to restore proper functionality.
Conclusion
Finding the perfect filtration system can be challenging for a user because of the information and the selection that goes into it. Researching the filters can take time, but it definitely is worth it. Doing so allows you to find the one that fits within your budget and is ideal for both you and your fish.
Ready to know the best options for you? Let's dive in!
The OASE BioSmart 5000 is an ideal option for those who are new to fish farming or have medium to large-sized ponds. With a built-in cleaning mechanism and minimal maintenance required, this pond filter lets you enjoy the beauty and benefits of your pond with ease.
Jebao CF-10 Pressured is a good option if you have a pond with plants and a moderate fish load, or if you value an integrated UV clarifier. The use of quartz glass ensures maximum UV light penetration, enhancing the performance of the filtration system.
And finally, the Tetra Pond Bio is the right choice for those looking for a pond filtration system that offers a powerful combination of mechanical and biological filtration and has an impressive capacity of 1,500 gallons. Although it has some issues with the instructions and backflush valve, it is still a highly efficient filter for the price point.
In the end, your decision should be based on your personal needs, preferences, and budget. Our aim is to provide you with a comprehensive understanding of each product so that you can make the most informed choice to cater to your unique pond requirements.
With any of these top three expert recommendations, you'll certainly improve the quality of your pond, ensuring a healthier and more vibrant ecosystem for your aquatic life.
Happy pond keeping!
Organic lawn fertilizer is the ideal choice for homeowners who want a lush, green yard without compromising soil health—or putting their pets at risk. Unlike synthetic products that can burn grass and harm ecosystems, the best organic lawn fertilizers are not only eco-friendly but also pet-safe, making them perfect for families with furry companions. These natural fertilizers improve soil structure, introduce beneficial microbes, and support better aeration and water drainage. Whether you’re a seasoned DIY gardener or just getting started, we’ve reviewed the top 8 organic lawn fertilizers to help you grow a thriving, chemical-free lawn that’s safe for everyone—pets included.
Best Organic Lawn Fertilizers
Here is the list of the 8 best organic lawn fertilizers that you can use to keep your yard healthy and looking vibrant.
The first on our list is a brilliant product that is suited for organic gardening. The Espoma EOSR30 Organic Summer Revitalizer offers a non-burning formula that will work wonderfully well on your lawns. They are cost-effective and will provide you with deep green grass. Read on to know all about its bells and whistles.
CONTAINS: Espoma Organic Lawn Food Summer Revitalizer is a...
FOR USE ON: Use for all lawns both cool and warm season...
Why Did We Like It?
First of all, the fertilizer mix is made of feather meal, iron oxide, poultry manure, and sulfur. These have bio-tone microbes and contain 2% non-staining iron. All of this together makes for the perfect formula that your soil needs. They work well in turning your yellow lawn green.
We were very happy to see that natural ingredients have been used to make the mix. There are no synthetic raw materials in it, and that makes it environmentally friendly. This is also a great use of natural wastes to provide nutrients to the soil.
Plus, the product weighs 30 lbs and covers an area of 5,000 square feet. That makes it suitable for both small and large lawns. You can store it in a cool, dark place in case you have a small lawn, and it will remain in good condition.
What Could've Been Better?
Yes, this product is very efficient, but it stinks too. The smell is overpowering, and you may not want to venture into your lawn for the first few days. But it works really well and will provide all the nutrients that your grass needs.
Pros
Turns yellow grass into green
Contains bio-tone microbes and iron
No synthetic elements
Makes grass green and healthy
Cons
Very smelly
Dimensions: 27" x 15" x 4" | Weight: 30lbs | NPK Ratio: 8-0-0 | Feeding Time: N/A | Coverage: 5000sq ft
If you are looking for a product that is easy to apply, The Andersons 7-1-2 Innova Premium Organic is a great choice. It has a low-dust formula that can be applied easily and is made for all kinds of grasses. We were very happy with the 100% plant-derived content of the pack.
OMRI-listed organic fertilizer safe for use around kids,...
100% plant-derived; does not contain biosolids, manure,...
Why Did We Like It?
This product has a lot of benefits. It is OMRI-listed and a USDA BioPreferred product and contains amino acids. The mix keeps the soil healthy and full of nutrients. It contains a lot of amino acids and a nitrogen release source.
The item supplied our grass with a lot of highly-digestible carbon, which helped in the growth of microbes. This enhanced the level of good bacteria, making the soil fertile and rich.
Because it does not contain sewage or manure, there is no smell. We were very happy with this as our kids could play in the yard the same day.
Another amazing benefit is that there is no risk of burning the turf even if you apply more than necessary. It is suitable for all weather conditions, and you can apply it throughout the year. There is no toxic element in it, and hence, you do not have to worry about the fertilizer mixing with a pond or well in the backyard.
What Could've Been Better?
While you will love the results, this product takes more time to work than its peers. In a month, we found that our grass is greener and thicker. But you will not see immediate results, and you will need to wait at least 3 weeks to see a difference. Be patient with it, and it will work well.
Pros
Stimulates healthy growth of plants
Can be applied in cold and hot weather
No issues with burning
Cons
It takes more time to work
Dimensions: 26.5" x 17.8" x 5.8" | Weight: 40lbs | NPK Ratio: 7-1-2 | Feeding Time: Every 6 Weeks | Coverage: 5600sq ft
Do you have pets in the house? The Espoma EOLB30 Organic Lawn Booster will help you get a clean lawn while being absolutely pet-friendly. You do not have to worry about your pets consuming any part of the mix as it does not contain anything toxic.
CONTAINS: Espoma Organic Spring Lawn Booster is a rich blend...
FOR USE ON: Use for all lawns both cool and warm season...
Why Did We Like It?
This contains a mixture of pasteurized poultry manure, feather meal, and gypsum, which together make for a great mix. It comes in a 30 lbs pack, which is sufficient for a 5,000 square feet area.
A great fact that we noticed is that nitrogen is released at a slower pace. It is 2.5 times slower than its peers, which is very beneficial for the soil. This ensures that there is a constant nitrogen supply for the soil. It makes the soil healthy and keeps it like that for weeks.
Secondly, it has calcium in it, which makes the soil healthier. It adds all the necessary ingredients without burning the ground. You can apply it without worrying about burning or promoting excess bacterial growth.
Overall, we found this to be a very efficient product. The 30 lbs pack will last you long in case of a small or medium-sized lawn.
What Could've Been Better?
The one issue we had with this product is that it does not prevent weeds from growing. That means you will have to clear the garden often to ensure that there are no weeds. This could be problematic for those leading a busy life.
Pros
Safe for pets and children
Releases nitrogen slowly, ensuring a better spread
Last for long
Has a great calcium content
Cons
Does not prevent weed growth
Dimensions: 24" x 13.25" x 6" | Weight: 30lbs | NPK Ratio: 8-0-0 | Feeding Time: Early Spring | Coverage: 5000sq ft
Up next is a top-quality product known for its organic formula, which can transform your garden altogether. The EON NATURAL Indoor Plant Food will provide you with sufficient nutrients for 6-12 months from a single bottle. We were very happy with the quantity and the quality received.
♻️ TRIPLE ACTION: The EON NATURAL Indoor Plant Food has...
💪 POWERFUL ORGANIC FORMULA: This liquid plant food has a...
Why Did We Like It?
This is an all-natural formula that contains 3% nitrogen, 1% phosphorus, and 2% potassium. It promotes healthy leaves and stronger root growth. The roots become fibrous and spread well in the soil while flowers thrive in it. You will be able to see a difference in the overall plant condition post-application.
Further, it is very easy to use. All you need to do is dilute 1 teaspoon of the mix with 2 cups of water. Then pour this water over the required area. Whenever you are watering the plants, use this formula, and you will be boosting growth and development.
Coming to the plants that thrive well with this formula, fig trees, orchids, succulents, rubber plants, red-edged dracaena, and aloe vera can be added to the list. You will see them grow faster, and the leaves look fresher. If you have plants that have begun to droop, use this to replenish them.
What Could've Been Better?
While we mentioned several plants that are compatible with this product, others will not accept this, and you might not see any changes. We would suggest applying it to a small area of your garden and checking it. If you see a change for good, then continue to spread it all around.
Pros
Contains nitrogen, potassium, and phosphorus
Easy to use and durable
Can last 6-12 months
Perfect for a large variety of trees and plants
Cons
May not work with all plants
Dimensions: 6.26" x 1.81" x 1.81" | Weight: 0.52lbs | NPK Ratio: 3-1-2 | Feeding Time: Each Watering | Coverage: N/A
Another brilliant product, the Gardener’s Supply Organic All-Purpose Fertilizer is absolutely natural and will give a lush green yard to boast about. We loved how quickly it worked, and our yard was surrounded by healthy plants, thanks to this.
Conditions soil for more vigorous root growth and improved...
Why Did We Like It?
One problem that often occurs with fertilizers is that they get absorbed by the soil and the excess washes off when you water your plants. This means that the effect lasts only for a short while, and you will have to reapply again frequently. With this product, you can rest assured that the formula is going to work for a long time.
This is because of the slow-releasing feature that ensures that it dissolves with the soil over time. It will keep releasing important nutrients in the soil and hence will ensure that your plants stay healthy for a long while.
Also, we were happy to see how well the roots developed over time. If you are using it for new plants, this will ensure that they grow well and the roots grip the soil in a very short time.
What Could've Been Better?
This one works very well, but we felt that they could make it odorless. The smell is strong and pungent, and you will not be able to walk in your yard for the first few days. The smell then diminishes and disappears over time. So, if you are planning a garden party, do not apply just before it.
Are your grasses going yellow or dying off? This is the potion that can revive a completely yellow patch of grassland and turn it into lush green again. The Simple Lawn Solutions Superior Lawn Food has some brilliant properties to boast of! Read on to know all about it.
15-0-15 Lawn Fertilizer To Promote Greening, Growth And Turf...
Can Be Used On All Grass Types: Lawn Fertilizer For Bermuda...
Why Did We Like It?
This product is made specially to address a common problem with gardens. If your lawn lacks potassium or nitrogen, then this is the right choice to make. Blended with both nitrogen and potassium, it is made to provide all kinds of nutrients and food to the soil and plant cells. This will make them stronger and healthier over time.
Also, it contains Humic/Fulvic acid, which is present in the soil. This helps plants transfer food to their leaves and cells. It conditions soil and makes it more fertile, too.
Another great benefit that we found is that it is suited for all kinds of grass. That means you can use it for Bermuda, Zoysia, Palmetto, and Bluegrass, to name a few. Kids and pets can easily play on it without you worrying about any kind of toxicity.
Overall, this item proved to be beneficial, and even our neighbors asked us about it. They were amazed by the complete transformation of our lawn.
What Could've Been Better?
The only problem we noticed with this product is that you have to mix it well with water before application. If you apply it in its concentrated form, there is a chance that it will burn out the grass. Hence, you should be very careful about it. We mixed a lot of it and kept it in a bottle so as not to make this mistake.
Pros
Has Humic/Fulvic acid for better plant growth
Made with high-quality feed-grade ingredients
Suitable for all grass types
Enhances growth
Cons
Overuse can burn the grass
Dimensions: 5.5" x 3" x 9" | Weight: 2lbs | NPK Ratio: 15-0-15 | Feeding Time: Once a Month or as Needed | Coverage: 3200sq ft
If you have pets who are constantly sniffing and eating on your lawn, then this can be a great choice. Like some of its peers, the Pet Safe Lawn 24-0-6 works very well with pets and will not cause any harm to them. What’s more! The grass grows quickly, and your garden will be covered by a green carpet.
First of all, it was very easy to apply. The product is available in granulated form, and it does not have any dust in it. The particles will fall into the soil directly and mix with it without any wastage. It also contains enough amounts of nitrogen and potassium, which work well for wilted plants and yellow grass. If your garden needs nutrition badly, this will provide it all.
Secondly, it dissolves very quickly, and the soil will be dry within an hour. Your pets can then run around on it easily. It enters the roots of plants immediately, and you can see how the leaves turn vibrant within days. They should be shining and have a beautiful dark green color.
Overall, we were impressed with the efficiency that it showed. One bag can easily cover an area of 5,000 square feet, and you can store it in case of small lawns. Keep it in a cool, dry place, and it should thrive for a long time.
What Could've Been Better?
Although it works very well in stimulating the growth of plants, it is not a herbicide and hence does not affect weeds at all. Weed will grow along with the grass, and you will have to remove it yourself. So, it is best to remove all weeds before applying this fertilizer.
Pros
Safe for humans, wildlife, and pets
Easy to apply
Available in granulated form
Works quickly
Cons
Does not prevent weed growth
Dimensions: 23" x 13" x 2" | Weight: 15.22lbs | NPK Ratio: 24-0-6 | Feeding Time: N/A | Coverage: 5000sq ft
Last but not least, is the Purely Organic Lawn Food lawn fertilizer. This includes a 25-pound bag filled with rich fertilizer that will ensure good soil and plant health. You can store it easily for a year and use it over time if you have a small lawn.
Promotes Lush Green Turf Grass. Will Not Burn Your Lawn.
Plant Based Formula with Distillers Grains & Soy. No Harsh...
Why Did We Like It?
This product has ample iron content that helps the roots develop without burning the lawn. The mix does not contain any harmful chemicals or manure. It is devoid of biosolids, which can stink. Hence, you are going to love this odorless formula. It will ensure that lush green turf replaces your patchy or bare lawn.
Many fertilizers need time to be soaked in, and hence, you cannot venture around the lawn within an hour or 2 of applying. But here, because of its organic and 100% natural formula, you do not have to restrict yourself, your pets, and your kids at all. They can immediately play on the lawn after application and will face no health issues.
Also, this 10-0-2 formula does not contain phosphorus. This meets the Town & Municipality Regulations that restrict the use of phosphorus. Hence, you can use it around water bodies easily.
What Could've Been Better?
The product works really well, but we would have been happier if the price were lower. It is on the expensive side, and if you have a large lawn, then it can exceed your budget. However, if you have the liberty to spend a little more, then we would recommend this product.
Pros
Promotes strong root systems
Odorless formula
No phosphorus
Free from harsh chemicals
Cons
Fairly Expensive
Dimensions: 15" x 3" x 20" | Weight: 25lbs | NPK Ratio: 10-0-2 | Feeding Time: About 4 Times a Year | Coverage: 5000sq ft
Now that you have gone through the top lawn fertilizers, you must have a clear idea as to what to expect. There are different kinds of mixes, and they come in different amounts. Now it can still be very confusing to choose one. To help you out, we have curated this buyer’s guide, which will help you make a choice. Read on to know all about it.
Material Used
One of the major considerations is the kind of materials that have been used for making the fertilizer. Now, generally, there are 2 kinds of materials. One mix contains bone meals and feathers, which work wonderfully for the soil.
There are other ingredients derived from animal manure and fish, which are very nutritious for the soil. But on the other hand, these smell a lot and could be a problem if you plan on hosting a party in your backyard soon.
Also, these are blood meals and hence can attract animals. Make sure you do not have a lot of rodents or other unwanted visitors before applying it.
That brings us to the next type of mix, which contains plant remains, seaweed, alfalfa meal, cottonseed meal, and microbes. These usually do not have any smell while providing all kinds of nutrients to the soil. If the smell is a problem, this is a great alternative.
Sometimes, some products may have a toxic element that may not work with pets and kids. So, ensure that your product is free of all toxins so that your pet does not fall sick upon consuming it.
Use Of Sewage Sludge
Earthworms, fungi, and bacteria, which are part of sewage sludge,e are positive additions to the soil, and they can improve the texture and composition. Roots grow better, and they are able to send food upwards to the leaves in an efficient manner thanks to the large amounts of minerals and nutrients.
You must have noticed that some of the fertilizers have a large number of biosolids. These bio-solids are nothing but sewage wastes. The wastes are collected, composted, and then treated. It is known to be biologically safe, but we would suggest not using it for growing food.
If you have a vegetable or fruit garden, then stay away from fertilizers with biosolids. They may have metal accumulation or hormones that should not enter edibles.
Presence of Phosphorus
Phosphorus is also beneficial and helps in promoting root and plant growth. It is that ingredient that makes plants grow faster. But it also has a major problem. We would advise not to use phosphorus if you have a water body beside it.
This is because it tends to mix with the water and cause algae to grow in it. Algae reduce the oxygen level of the water and make it unsuitable for living organisms like fish.
So, if your garden needs a dose of phosphorus, then apply it very carefully. Ensure that you do not add too much water to the garden so that none of it flows into the pond or river beside.
Granules v/s Liquid
Fertilizers are generally available in 2 forms, liquid and granular. The most common type is the granular one, which needs to be mixed with water and then applied. Some organic products can be applied directly to the soil, and you can sprinkle water over it. Liquid ones usually come in concentrated form. You will have to mix it with water and then sprinkle it over the entire area.
Coverage
Check for the area it can cover before purchasing fertilizer. Most packs can cover an area of 3,000-5,000 square feet at one time. If it covers a very small area, then you will have to buy it frequently, and that will be expensive. Hence, make a note of it beforehand.
Organic Lawn Fertilizers FAQs
Are organic lawn fertilizers as effective as synthetic ones?
Organic fertilizers are often considered just as effective as synthetic alternatives. However, they release nutrients more slowly, so it may take longer to see results. With continued use, organic fertilizers can improve soil structure and create a healthier environment for your lawn.
How do I choose the right organic lawn fertilizer for my needs?
Determine your soil’s nutrient needs by performing a soil test. Based on the results, select a fertilizer with the necessary nutrients (N-P-K ratio) and follow the manufacturer’s application recommendations.
Can I use an organic fertilizer on a new lawn?
Yes, organic fertilizers can be used to establish new lawns or overseed existing ones. They can encourage root growth and help create a healthy environment for your new lawn.
Can I use organic lawn fertilizers for other garden plants?
Some organic fertilizers may also be suitable for other garden plants. Check the product label for appropriate use and application instructions.
How do I store organic lawn fertilizers?
Store organic fertilizers in a cool, dry place, away from direct sunlight or moisture. Keep the package tightly sealed to maintain product quality.
Conclusion
As our gardens continue to be a crucial space for relaxation, enjoyment, and a connection to nature, providing proper nutrition to our lawns has become an essential part of preserving their beauty and health. Organic lawn fertilizers are not only eco-friendly and safe for our families and pets, but also nourish the soil and encourage the growth of lush green grass.
From the above 8 best organic lawn fertilizers, here are the top three expert recommendations:
The Espoma EOSR30 Organic Summer Revitalizer is an ideal option for those who want a top-performing organic fertilizer designed for organic gardening. Its non-burning formula and natural ingredients make it an environmentally friendly choice, while its ability to cover 5,000 square feet makes it suitable for both small and large lawns.
On the other hand, The Andersons 7-1-2 Innova Premium Organic is a good option for those who prioritize an easy, low-odor application. This OMRI-listed, USDA BioPreferred product contains amino acids, a nitrogen release source, and no sewage or manure, making it a great choice for those with kids and pets who want a high-quality product that is safe and effective.
Lastly, the Espoma EOLB30 Organic Lawn Booster is the right choice for pet owners, as it offers a clean, pet-friendly formula. This product’s slow-release nitrogen promotes consistent soil health, and its inclusion of calcium ensures a healthy, green lawn without the risk of burning or excess bacteria growth.
In summary, selecting the best organic fertilizer for your lawn is a crucial step in maintaining a healthy, vibrant outdoor space. By considering factors such as your lawn's size, desired application method, and safety for pets and children, these top three recommendations can help you nourish your lawn in an environmentally friendly way, ensuring that it thrives for years to come.
Gardening is an all-too-popular hobby that requires patience and skill. With online gardening stores growing in number, everyone has a chance to develop their green thumb.
As the world is becoming increasingly aware of the importance of nature, gardening, as a hobby, is making a huge comeback. In fact, people have been purchasing houseplants more often now, putting in the time and effort to care for them.
Do you have a little garden at your home, or are you looking to begin the journey now? Either way, we are here to help you in your quest. We have looked into some of the best online gardening stores and reviewed the top 36 for you.
Take a look at these online options and pick the right one for your needs. Whether you're looking for seedlings, accessories, tools, or other gardening-related items, you'll find them here.
So, without further ado, let's begin!
Best Online Gardening Stores
So, if you're ready to embark on your gardening journey or simply want to enhance your existing garden, here's the list of the 36 best online gardening stores to explore and find everything you need to nurture your green thumb.
With four decades of experience under their sleeve, Plow & Hearth, a Virginia-based company, is one of the most reputed online gardening stores you can trust.
If you take environmental conservation very seriously, you'll love Plow & Hearth for their fantastic initiative. The company has donated over three million trees to local forestry commissions (in Virginia).
Their online store is growing in popularity as more people share and review their excellent experience with them. The company sells everything - from pest control to bedding, gardening tools, and even outdoor fire pits!
They have put in immense hard work to create an intuitive website for their international customers. Moreover, their products are categorized based on a price range (and other filters), so you can stick to your budget while building a beautiful garden with their help.
A company's growth tells you everything you need to know about its popularity. Gardener's Supply Company was founded in the '80s and has turned into a booming online business in recent years. What began as a catalog mail-order company soon turned into an entirely employee-owned one.
This online gardening store sells everything a gardener could want - equipment and tools, gifts, plants, seedlings, and much more. But that's not all; every time you make a purchase from Gardener's Supply Company, you'll be filled with pride at the opportunity to support the less fortunate.
How? Well, this company donates 8% of its pre-tax profits to various gardening charities and organizations in the US.
Moreover, you'll find other great products like greenhouses, pond care items, irrigation systems, and more. Anything you'd need to set up a beautiful garden of your own, you can get at this online store.
Are you new to gardening? Worried about how to take care of your new plants? What if you had a comprehensive guide with detailed information and step by step instructions on how to grow and take care of plants?
This is precisely what Aerogarden offers through its website. Right off the bat, the interactive website design and informational guides help you get started. Moreover, the company offers various tools like grow lights and seed kits - perfect for creating an indoor garden.
You'll also notice a 'Deal of the Day section where you can take advantage of the various ongoing daily deals and purchase budget products. Buy a membership, become a part of the 'Grow Club, and get insider information on gardening products and more.
As the name suggests, this company began by building commercial greenhouses. Once it gained experience, the company spread its wings into the online business world.
On visiting the Greenhouse Megastore website, you will find every piece of equipment you might require for your greenhouse. Founded in 1993, the company has become popular as an online business that provides gardening tools to customers and is a leading supplier of greenhouses.
One of the best things about this online gardening store is its one-year unconditional guarantee on each product that is sold. Not just that, this company is known for its excellent customer support and knowledgeable staff. So, if you are just an amateur gardener and are looking for help, Greenhouse Megastore is a reliable online gardening store to visit.
If you haven't already guessed by the name, Seeds Now is an online gardening store where you can find almost any kind of seeds you need. Whether you're looking to grow a little zucchini garden, or you would instead grow strawberries or tomatoes from a bag (sounds fascinating, right?), it's all there on Seeds Now.
This little homegrown company has gained immense popularity over the years. This isn't merely because of their vast collection of seeds, but also their immaculate website design and customer service.
Were you looking for a storage vault to keep your plethora of seeds in? This company will give you one of those too! The best part - you can opt for a 'starter pack' to begin your journey with (which will cost you less than a dollar).
Are you looking for a company that you can trust with your eyes closed? What about one that has been up and running for 150 years?
Park Seed is one of the oldest (and largest) seed distributors in the US. It remained a strictly family-owned business right up until 2005, after which it is now a division of Jackson & Perkins Park Acquisitions.
Although the company still functions primarily as a mail-order business, they now have a growing online presence to add. Customers can order fertilizers, food trays, seeds and bulbs, and gardening tools.
Furthermore, there are numerous blog posts and informative articles to help you learn while you shop. But it doesn't end there - their customer service options include an online chat, eliminating lengthy and expensive telephone bills in return for guidance.
You might be wondering what Amazon is doing on this list. Isn't Amazon the go-to online store for clothes, accessories, gadgets, and everything in between? Well, it turns out that Amazon even has a gardening supplies section.
If you're interested, you could find some amazing gardening tools, books, and nutritional supplements sold by Amazon itself. However, you'll also find other small vendors using this online space to sell their gardening items (be it fertilizer, seeds, or gardening tools).
For those Amazon customers who have a Prime membership, you can avail of their free two-day shipping on hundreds of products. To top it off, the online 'department store' section essentially doubles as a comment and review section where you can read through other customers' purchases and learn from them.
Before you find the humor in the name, let us tell you why Burpee Seeds is an excellent online gardening store that is worth your time. Founded back in 1876 by Washington Atlee Burpee (yes, that's where the name of the company comes from), this company turned from a mail-order chicken company to a supplier of gardening paraphernalia.
Burpee's love for gardening took him to Europe in search of exotic seeds that would survive in the US climates. He developed research facilities and test farms and introduced several kinds of exotic seeds that the people of the US had never seen before.
By the 1900s, the company became a center of innovation, selling starter kits for new gardeners, hybrid vegetable varieties, and so much more. Now, their online business is booming, and you will find live plants, sprinkler systems, fertilizers, and a plethora of seeds to choose from.
If you're on a budget and are looking for unique gardening tools and supplies, you'll find an enormous collection at Overstock. Their online gardening store has been designed in an 'Amazon-style' layout, so you might find this to be familiar and comforting.
There are customer reviews and star ratings that are helpful, especially for new gardeners. Not just that, the website offers gardening tips, advice, guides, and blogs to help you find your gardening style.
This online store offers unique items that you might never have even heard of. But once you see the customer reviews and read about their functionality, you'll find yourself wanting to buy another one of their unique offerings.
This company has its grassroots (no puns intended) in California in the year 2009. The company would hand-pick live plants from various growers along the West Coast and provide them at competitive prices to Californian customers.
Soon, Plants Express became a top-rated online gardening store. They even teamed up with Home Depot for customers who wish to place their orders at the store (rather than on their website). This is pretty thoughtful, as many customers still aren't too comfortable with technology.
One of the most unique aspects of Plants Express is their 'themed packages.' This includes themes like 'cottage garden,' 'Mediterranean,' 'tropical,' and much more. These packages are helpful for new gardeners who are struggling to envision their landscape but are curious to try their hand at gardening nonetheless.
Don't be intimidated by the company name. Monster Gardens is an online gardening store that specializes in all kinds of hydroponic supplies. If you are getting started with creating a beautiful garden ecosystem in your home, you'll find every single supply you need on this website.
This company encourages amateur gardeners to nourish their green thumbs, providing customers with meters, testers, fans, additives, lighting, tens, and more. There is also an option of purchasing certain 'packages.' These contain everything you require to grow specific systems (an LED growing system will get you a tent, carbon filters, a fan, light hangers, and ducting).
The best part - they have their own YouTube channel where they explain the ins and outs of setting up a hydroponic system.
If you don't have the time, patience, or skill level required to grow plants from seeds, Bloomscape has the solution for you. This online store provides customers with houseplants and every plant accessory you may need to raise them.
Although you might feel that the variety of accessories is slightly limited, the company prides itself in providing top-quality products. Each houseplant has been carefully tended to and raised, and the accessories you can buy will ensure that your plant pet thrives under your care.
Their website has been designed for all kinds of customers - from avid gardeners to first-time plant parents. The easy categories like 'pet-friendly houseplants, easy-care houseplants,' etc., help you find the right plant for your requirements.
Family-owned and run businesses have a reputation for being customer-oriented and supremely caring. This is precisely what you can expect from JFH Horticulture Ltd. The company has been in business for over 40 years and has a strict motto of helping other plant lovers discover their love for gardening.
Their online presence has been growing steadily over the past couple of years. This company strives to provide its customers with the right tools they require for building their own home gardens. With nine family members working in the business, JFH has often started treating its customers like their extended family.
You will find a wide range of gardening products on their website, allowing you to build your plant ecosystem.
Wayside Gardens is relatively different and impressively unique compared to the other online stores on our list. This company was founded back in the 1920s and catered specifically to a particular, sophisticated clientele who did not mind splurging on their gardens. The company would grow and sell extremely rare and unusual plants and bulbs to their ever-growing, demanding clientele.
In 1975, the company was taken over by Park Seed, relocating to South Carolina in the process. Now, Wayside Gardens has an incredibly engaging online presence where it continues to cater to a specific clientele.
You cannot expect to find the most budget-friendly, cost-effective, or most extensive variety of plants and gardening tools here. However, what you can expect are high-quality products backed by their guarantee.
The next gardening supply store we have on our list is yet another business that has been running for over 130 years. This company based in Greendale had humble beginnings. They were well known for supplying a wide range of plants, berries, seeds, trees, shrubs, and gardening tools and supplies.
Their first-ever business catalog was published in 1910. Soon enough, they became one of the most reputed seeds and nursery companies in the US. The company prides itself on selling exclusive items that are available only on its website. Some of their special items include - Gurney's Perfect Pickle Hybrid Cucumber, Gurney Girl's Best Hybrid Tomato, and Gurney's Pride Improved Hybrid Zucchini, just to name a few.
Do you live outside the United States, or are you looking to gift plants to someone outside the country? Well, there aren't many nurseries that will provide you with this option. Plant America Nursery has its own 3,400-acre farm in Tennessee, where they grow their plants and supply them to customers.
The family-owned business now has over 900 varieties of plants, flowers, and shrubs that they've been steadily supplying to customers all over the country. Another fantastic initiative taken by them is donating plants to research universities.
Their website features a beautiful gallery filled with high-resolution pictures of all their products, namely plants, trees, and flowers. Moreover, you can shop on their website using categories, so you can find exactly what you need, whether it's fast-growing plants or evergreen flowers.
When you think of Home Depot, you don't instantly think of buying seeds, plants, or gardening supplies there, right? Well, it turns out that Home Depot has an enormous collection of plants, soil, gardening tools, seeds, bulbs, planters, and much more.
Visiting their online gardening store is an exciting and interesting experience. They have an intuitive website design that allows you to explore the various categories of plants and other gardening supplies according to your needs.
Furthermore, their online chat section offers excellent advice from experts for any queries you might have or if you need a helping hand. This is especially helpful for those customers who are wary of using online tools to buy plants and might require assistance.
Lowes is another giant company, just like Home Depot, and have been rivals for years; Lowes has finally given Home Depot a run for their money. This company has taken over the digital gardening store business by being a step ahead of Home Depot in certain aspects.
To begin with, Lowes offers an extremely comprehensive and detailed product selection section. Here, you will find a variety of plants, seeds, and other gardening supplies, complete with an in-depth description of what they are and how to use them.
That's not all. Lowes also sponsors several shows on HGTV (and other networks), where you'll find hundreds of exciting DIY projects and gardening information. Finally, most items have free shipping, which is a bonus!
As the name suggests, this company has been in business for over three decades, providing all types of garden supplies, tools, and other items to create a beautiful landscape in your backyard. With the ever-growing popularity of its business, the company recently decided to launch its online presence, which was warmly welcomed by loving customers.
One of the biggest takeaways from this online gardening store is their 100% guarantee on every product they offer. They provide contact information for customers to reach out in case they are dissatisfied with any product.
The online store offers high-quality gardening supplies and other products that can help you create an aesthetic and thriving landscape. This website has it all, from hydroponics to furniture, kitchen care items, and even informative posts and articles.
Bluestone Perennials began as a humble brick-and-mortar store back in 1972 in Ohio. This family-owned business took great care and pride in developing a unique gardening concept, instantly becoming a hit.
It all began when Richard Boonstra, his spouse, and two teenage children invested in their dream of using soilless mediums and plastic cell packs as a business concept. All it took was three years and intense hard work and dedication to make their vision a roaring business.
When you visit their website, you're likely to be blown away by its simplicity and aesthetics. With neatly divided categories for perennials, bulbs, shrubs, and alphabetical listing for plants, you'll soon find yourself drawn in and mesmerized by what they have to offer.
If you're still confused, use the 'plant finder' feature that will instantly help you decide the kind of plant you need for your personal garden.
Every plant lover isn't a natural-born gardener. In the same way, every avid gardener isn't always looking to buy new plants and supplies.
That's why Shop Terrain is such a great online gardening store - it has been designed for everyone. This website features excellent information and guides on gardening; however, it also focuses on other aspects of daily living and creating a beautiful home environment.
Head on over to the gifts section, and you'll find beautiful plants and flowers. They are categorized neatly, so you can find the right gift for their unique personality. Not just that, you might also be struck by a sudden creative bug, as their website features several inspiring ideas you can use.
A company that was born as a love child of Ray and Peg Prag on their honeymoon, Forest Farm had humble beginnings. What began as a tiny idea - using #10 cans and a couple of native species of plants soon turned into a booming business of supplying over 5000 species.
If you feel strongly about giving back to society, you will love the initiative taken by this company. Forest Farm works as a non-profit organization that donates the proceeds from its sales towards various art and nature programs.
Coming to the website, you'll find a broad variety of vegetables, flowers, plants, and trees to choose from. If you can't make up your mind about the right species to choose, don't worry. Use the 'plant finder' feature to find the right plant for your home.
The story behind this company is fascinating and worth learning about. David Salman, the founder, wanted to find eco-friendly plants that would tolerate harsh, dry, and hot climates. He was looking for an alternative to the typical cacti and rockscape that could be seen dominating the gardening style of his state.
He came up with the idea of cultivating plants that would soon become excellent budget-friendly and eco-friendly options, fit to thrive in dry climates. This business idea took the country by surprise, and soon, he was flooded with orders.
The company website provides a wealth of information on how to grow lush foliage, which requires less water. There are dedicated sections for gardening, lawn care, perennials and bulbs, seeds, and gardening supplies. The regular contests with amazing gifts and prizes cause customers to flock to the website often.
A family-owned business that started by only offering about 100 varieties of plants soon 'bloomed' into a giant, successful business known as Garden Crossings. Their website features an ever-growing array of plant species and a wealth of information on each of them.
The website offers a Container Designer Tool, which essentially helps you design hanging planters, architecturally designing displays, the landscape, etc. But if human interaction is what you are craving, then the owners and employees are always ready to jump in and guide you in choosing the right plant for your garden.
The owners are continually improving their website design and layout, as well as introducing more species of plants to their collections. Moreover, they have a dedicated section for gardening tools and supplies for avid gardeners.
Brent and Becky's Bulbs was founded in the 1900s by Brent's grandfather. It remained a family-owned business and grew exponentially as many members started actively working towards growing and developing different aspects of the business.
The family owns a 28-acre farm in Gloucester, where every photographer, writer, consultant, educator, and lecturer belongs to this family. Their website offers a comprehensive look into two distinct sections - spring planting and fall planting. You can explore the different sections to find the best seeds, bulbs, or perennials for your bulb garden according to your requirements.
Those looking for an online gardening store specializing in hydroponics will love everything that Cult Hydro has to offer. The website gives you in-depth information on what hydroponics is and how it is integrated into their business.
Essentially, you will learn how to grow plants without soil. The plants get their nutrients from water instead, enabling you to have a mess-free experience of raising plants. The online store features several top-quality types of equipment as well as seeds and plants.
Everything that you require to grow your hydroponics, you will find easily on this website. From rigging, and growing mediums to lights, fans, and tents. Moreover, the website offers discounts and extremely competitive prices that are sure to lure in more customers.
With a name as sweet as this one, we instantly had high hopes from the company known as Easy To Grow Bulbs. This company is also a family-owned and operated business; however, it is slightly different compared to the other stores on our list.
This company does not grow all its plants and flowers; instead, it spends time, energy, and concerted efforts into procuring some of the best bulbs from all over the globe. However, it doesn't stop there. They are also known for acquiring some of the most unique and fascinating gardening products that most people haven't set eyes on.
The company began in a small warehouse in California in 2004. It came to life as several growers, and gardeners from around the world united to market their unique products through Easy To Grow Bulbs.
Now, with a booming business and thriving website, you will find several other items, such as succulents, perennials, potted plants, and more.
Do you have trouble getting your indoor (or even outdoor) plants and flowers to thrive? Do you have reason to believe that they barely survive under your care? Well, Earth Box has created a solution for such frustrated gardeners looking for an easy way out.
This company was founded around the concept of finding container-growing systems that would thrive both indoors as well as outdoors. They have developed specific techniques that allow new gardeners to raise their plant pets without the constant fear of killing them.
If you don't have a particularly green thumb, then opting for self-watering, sustainable and easy-to-transport plants might be your best bet. With just a little more research and effort into probiotics, fertilizers, and bundles (all of which the site provides), you will develop into an avid gardener in no time.
The name 'Nature Hills' might give you certain ideas about what the company began as initially. Founded in 2001, this company started as a deciduous and coniferous tree nursery for its local geographic area. Over the past two decades, the business has grown to offer much more to its customers.
The website now offers a complete garden center with varieties of bulbs, plants, trees, and flowers. But it doesn't end there - their stellar customer service is often talked about, setting them apart from their competitors.
Nature Hills offers multiple mediums of getting in touch with their expert customer service team. Of course, you can always visit the 'growing zone' on their website to find the right kind of plants that are suited for your region. This works when you enter your zip code - the website automatically takes you to a page showing you the best options of plants for your area.
Blooming Bulb has its central hub in Michigan, where they primarily operate its businesses. However, the company is also known to source its products from vetted growers outside their area and ship them directly from these fields.
This business strategy turned out to be exceptionally cost-effective while earning them goodwill and trust from their customers.
Like many other websites on our list, Blooming Bulbs website also features a 'zone finder' option. This allows you to find the right plants that are best suited to grow in your local area and environment. Their comprehensive guides and in-depth knowledge make visiting their website an entire learning experience while you shop.
This online gardening store has everything you could possibly imagine in terms of seeds. From vegetable seeds to berries, herbs, grains, flowers, and even edible seeds, you will find the widest variety of offerings on this website.
The family-owned and operated business owns a 150-acre organic certified farm and is continually expanding its business. As you might have guessed from the name, this company specializes in potatoes. That being said, all their other products are fantastic and will give other companies a run for their money.
But it doesn't end there. The Irish Eyes Garden Seeds website also offers a variety of pest control supplies, gardening tools, and equipment, recipes, growing tips, and many more fascinating things.
Are you curious to know everything about indoor gardening? Maybe you plan to set up an indoor garden, or just a small setup of your favorite plants. Well, everything that you might need to set up your indoor plant haven is provided by the Growers House website.
This family-owned business is based in Tucson, where they have a brick and mortar booming business. However, to expand their reach, they have also set up an online store, allowing customers from far and wide to explore their exciting options.
Whether you are looking to set up an indoor hydroponic system or something simpler like a starter kit, you will find it all on this website. There is also a wealth of information on plants' various species, how to grow them, and other related information.
This company was founded in the late 1990s and began as a manufacturer and importer of home and garden specialty items. The founders took most of their inspiration from the garden fountains of Italy and the Mediterranean, and they brought back their wisdom to the US, thus, founding their company Garden Fountains.
If you are looking for starter kits or seeds and bulbs, this website probably won't offer you much. However, if you want to transform your current garden's aesthetics with beautiful decor and decorative pieces, this is the best place to look.
Many of the products available on the website are exclusively sourced for Garden Fountains. But, you will also find imports from several larger brands, giving you a reasonable selection and several dozen options.
If you have already set up your outdoor (or indoor) garden and are just looking for some of the best decorative pieces to add to it, DS Garden Shop is the ideal place to explore your options. This website offers a variety of beautiful garden additions - from busts, statues, pedestals, and even pots, and there is more than enough to explore.
That being said, if you find a great product but aren't entirely happy with its finish, DS Garden Shop gives you a chance to change the look! You can do this by opting for high gloss finishes, premium stains, and other great options to personalize your purchase.
The website is neatly organized, so you can search for something using their categories. Of course, if you have something specific in mind, you can search for it in their search box or contact them on their provided number or email support.
Are you looking for a reliable online gardening store where you can purchase high-quality gardening and warehousing tools? Fisher Blacksmithing is a company that you can trust. Each tool is hand-forged and created with the utmost care and dedication. Their tools feature walnut wood handles, giving each product hardiness, durability, and longevity.
Since every item on their website is handcrafted, you can expect to pay slightly higher rates than your go-to warehouse. However, you will be purchasing the best quality tools made by expert craftsmen. You also have the option of purchasing over the phone, if you prefer that over online purchasing.
Conclusion
And with that, it's a wrap! We have finally come to the end of our comprehensive list. The online gardening stores mentioned above are highly rated and have been in business for years, thanks to their top-quality products and excellent customer service.
If you are looking for some of the best gardening supplies, and plants, or just information to learn more about them, these websites are worth exploring. There is something on this list for everybody, so make sure to go through all the recommendations and pick the website of your choice.
If you have any queries or need more information, you can reach out to any of the websites or leave a comment below.
Has your lawn been taken over entirely by the unwanted growth of moss? Then it is probably time you got rid of them!
Moss can grow under most soil and environmental conditions, and this quality allows it to spread rapidly. Thus, if kept unchecked, it can overrun your garden or lawn within a matter of days.
How do you clear out moss from the lawn effectively? That is when moss killers come into the scene. These are chemical agents that can effectively kill off any unwanted moss growing on your lawn or prevent them from reappearing in the future.
Therefore, we have compiled a list of the 10 best lawn moss killers. There were numerous choices available, and we were able to finalize these 10 options through considerable research.
So, without wasting any more time, let’s get to it!
Best Moss Killers For Lawns
These products are carefully selected based on their efficacy, ease of use, and positive customer reviews. Say goodbye to unsightly moss patches and revive the green beauty of your lawn. So, without further ado, here's the list of the 10 best moss killers for lawns.
Scotts is a reliable and effective brand, especially when it comes to clearing your lawn of undesirable growth. That is why we have included the Scotts MossEx in our list. As a moss killer, it is a highly effective and safe option, as it does not kill any other plants on your lawn.
Scotts MossEx controls undesirable moss without harming your...
This moss killer contains nutrients to help develop thick,...
Why Did We Like It?
The Scotts MossEx is a pretty effective product for controlling the growth of moss on your lawn. It specifically targets the moss and leaves all of your other plants intact. This makes it a very worthwhile option, especially if you have a large number of plants on your lawn or garden.
It comes packaged in an 18.75-pound bag in the form of granules. These granules are relatively easy to use, even if you have little prior knowledge. And the pack is enough to cover a 5,000 square feet large area, so you can get excellent value for money by using it on your lawn.
In addition, the Scotts MossEx can provide nutrition to your grass or any other plants that you may have. Meaning, it not only removes moss from the lawn but also nourishes your existing plants, which thereby makes it a versatile option.
What Could’ve Been Better?
If you want an effective moss killer for your lawn, then MossEx is undoubtedly a wise choice. However, you may notice that the grass blades turn black after it has been applied, which can give rise to black patches on your lawn. Regardless, this a minor inconvenience as they can be removed by mowing.
Pros
Can be used for medium to large-sized lawns
It is pretty easy to use
Keeps other plants healthy
Provides excellent value for money
Cons
The grass blades turn black after application
Active Ingredient: Iron | Application Method: Granules | Coverage Area: Up to 5,000 sq. ft. | Rainfast: 6 hours | Reseeding Time: After 2 weeks | Usage Frequency: Every 2-4 months
Wet and Forget makes some pretty strong cleaners and disinfectants known for being highly versatile and safe to use. Likewise, the 800003 is also pretty versatile, considering that it can be used for killing moss and the stains it leaves behind.
Concentrate outdoor cleaner removes stains caused by moss,...
Dilute 1 part Outdoor to 5 parts water, apply with a garden...
Why Did We Like It?
The Wet and Forget 800003 comes in a 0.5-gallon container, in a highly concentrated form. So, you can subsequently dilute it with water and apply it to your lawn, garden, or patio. After dilution, you get roughly 3 gallons of moss killer. Using it is also pretty straightforward, and it can keep your surfaces clean for almost a year.
Its use, however, is not just limited to moss or moss stains. You can use it to remove algae, mold, mildew, and their corresponding stains as well. This aspect makes it quite versatile compared to other moss killers available on the market.
In addition to its versatility and effectiveness, the 800003 is quite safe to use and is pretty sustainable. Its pH value is similar to water; it’s non-acidic, does not contain any bleach or phosphates, and is non-caustic. Thus, it is relatively safe for both you and your plants.
What Could’ve Been Better?
The Wet And Forget 800003 is a pretty decent option when it comes to killing moss and removing its stains. However, such a degree of versatility and effectiveness is not cheap - it comes at a relatively higher price compared to some other moss killers.
Pros
Yields enough moss killer for extensive usage
It is highly versatile
Easy to use
Relatively safe and sustainable for plants
Cons
Relatively expensive
Active Ingredient: Octanoic Acid | Application Method: Liquid Spray | Coverage Area: Varies | Rainfast: No specified rainfast time | Reseeding Time: N/A | Usage Frequency: Apply as needed
For this review, we have another high-quality option from Scotts. The turf builder with moss control is a pretty commendable choice. As the name suggests, it helps build a lush turf for your lawn and simultaneously eliminates any moss that may grow on it.
Scotts Turf Builder with Moss Control kills moss without...
Added fertilizer thickens grass to fill in bare spots...
Why Did We Like It?
Let’s just be honest - very few moss killers can claim to have a coverage area as large as Scott's turf builder. With the capability to cover a whopping 10,000 square foot area, you can comfortably use it for considerably large lawns and on all grass types..
It comes with additional components that provide nutrition to the grass on your lawn. These components help the plant roots to absorb water and nutrients from the soil effectively. Furthermore, you can use it on bare spots, which will then eventually fill up with grass. So, you can use it to build a lawn full of thick, green grass.
Aside from its dual role as a moss killer and lawn builder, it is also quite easy and safe to use. It is potent enough to prevent the growth of mosses on your lawn for a long time, which provides even more value.
What Could’ve Been Better?
While this moss killer allows you to cover large lawns with relative ease, it can be superfluous for smaller lawns. So, if you have a small lawn, you should use it carefully and only in the required quantities. If you use it in excess, the lawn will become slimy, which can be counterproductive.
Pros
Great for large-sized lawns
Helps in the growth of grass on the lawn
Fills out blank spots on the lawn
Relatively safe and easy to use
Cons
Superfluous for smaller lawns
Active Ingredient: Iron | Application Method: Granules | Coverage Area: Up to 5,000 sq. ft. | Rainfast: 6 hours | Reseeding Time: After 2 weeks | Usage Frequency: Every 2-4 months
BioAdvanced is a renowned brand in the domain of pest and weed control. Its products are known for their effectiveness and versatility, and that is why we have included the 704710B in our list. It is a relatively popular moss killer that you can also use for killing other types of weeds.
LAWN MOSS KILLER: After spraying this roof cleaner, moss...
2-in-1 KILLER and CLEANER: Use this moss killer for lawns,...
Why Did We Like It?
This is a pretty impressive moss killer, thanks to its versatility. It contains a 2-in-1 formula that works very well in killing both moss and algae. In fact, we found that it can effectively kill other types of pesky weeds, such as mold, mildew, and lichen as well which makes it even more diverse in functionality..
The active ingredients of this moss killer are potassium soaps of fatty acids. Therefore, it is pretty effective in neutralizing weeds from different surfaces as well. So, besides your lawn and garden, you can use it on your patio, porch, driveway, or deck. In addition, it can protect these surfaces for quite a long time, ranging from several months to even a year.
Despite its potent chemical composition, it is entirely safe for your plants, which is excellent for the preservation and growth of your lawn or garden. It does not contain bleach, so you don’t need to worry about odors or stains.
What Could’ve Been Better?
The 704710B, without a doubt, is quite an effective option for getting rid of moss - that is, if you have a relatively smaller lawn or garden. But, if you have a medium or large lawn, you may find it to be highly inadequate since it has a coverage area of only 500 square feet.
Pros
Highly versatile in killing different types of weeds
Great for small lawns, decks, porches, patios, and so on
Provides adequate protection for a long time
Does not stain and is completely odorless
Cons
Cannot be used for medium or large lawns
Active Ingredient: Zinc Sulfate Monohydrate | Application Method: Concentrated Liquid | Coverage Area: Varies | Rainfast: 10-15 minutes | Reseeding Time: After 2 weeks | Usage Frequency: Apply as needed
When it comes to cleaners and disinfectants, only a few brands can compete with Wet And Forget. And that is why we were inclined to add the 805048 to our list. It is not only great at killing moss growing in your lawn but also removing any stains that they might leave behind.
No products found.
Why Did We Like It?
You will find that the Wet and Forget 805048 provides excellent value for your money. The 48 ounces of this moss killer is enough to cover an area of 2,000 square feet. In addition, it comes with a powerful spray that allows you to reach up to 30 feet. So, now you can easily kill mosses and remove their stains from those hard-to-reach areas.
It is pretty convenient to use as well since it does not require you to scrub manually after application. The dead moss and algae are automatically removed when it rains, so it cuts down on the labor.
What’s more, this moss killer comes with a potent yet bleach-free formula, which allows you to kill mold, lichen, and fungi alongside moss and algae. It is also non-acidic, which makes it completely safe for most plants, and it does not leave unsightly stains on any surface.
What Could’ve Been Better?
The Wet and Forget 805048 is a pretty great option for moss killing, except for one annoying aspect. While using it, you may notice that it leaves behind a thick and slimy soap-like residue. These can be difficult to remove from the lawn, and you may find it pretty bothersome.
Pros
Provides excellent value for money
Highly versatile
Hard to reach areas can be easily cleared
Requires minimal labor
Cons
Can sometimes leave behind a slimy soap-like residue
Active Ingredient: Alkyl Dimethyl Benzyl | Application Method: Concentrated Liquid | Coverage Area: Varies | Rainfast: No specified rainfast time | Reseeding Time: N/A | Usage Frequency: Apply as needed
Lilly Miller moss killers are quite reliable and effective in killing moss from lawns, despite being not as popular as some other bigger brands. Likewise, the 5601151 Moss Out is a pretty efficient moss killer from this brand. It is a granular moss killer that provides excellent value.
If you choose to buy this granular moss killer, you will find it to be highly cost-effective. For an affordable price, you get around 20 pounds of moss killer that can easily cover 5,000 square feet of lawn. So, it goes without saying that it is an excellent choice for medium to large lawns.
This lawn moss killer acts pretty fast, as it can kill most of the moss within hours of application. The dead moss will quickly become brown, after which you can safely dispose of them. In addition, it is quite effective in preventing any further moss growth.
Its chemical composition makes it quite potent for killing moss or any other weeds without harming your lawn. Furthermore, the iron sulfate in this moss killer thickens grass and makes it greener and more vibrant.
What Could’ve Been Better?
While this is a great option to kill moss from your lawn or garden, it struggles to clear out moss from harder surfaces. You may find that it is somewhat ineffective when applied on roofs, porches, walkways, patios, and so on. That reduces its versatility when compared to some of the other options on our list.
Pros
Helps in eliminating moss very quickly
Great for medium to large lawns
Promotes the growth of green and thick grass
Highly affordable price
Cons
Not very versatile
Active Ingredient: Ferrous Sulfate Monohydrate | Application Method: Granules | Coverage Area: Up to 5,000 sq. ft. | Rainfast: 24 hours | Reseeding Time: After 2 weeks | Usage Frequency: Every 2-4 months
Eco Garden Pro is a brand that is known for its range of environmentally sustainable horticultural supplies. And the weed and grass killer that we have considered for this review stays true to this aspect. It is made entirely from organic sources and is, therefore, extremely safe to use.
✔️ PET & KID SAFE HERBICIDE - Eco Garden Pro Weed Killer...
✔️ ORGANIC WEED KILLER - Formulated to KILL WEEDS AND...
Why Did We Like It?
If you’ve got a family with children and pets, then this is possibly the safest option that you can get. It contains natural white vinegar, organic rock salt, natural plant activator, and fermented co-factor, which not only kills moss but also eliminates other unwanted weeds.
Moreover, it acts pretty quickly, as you can get results within 24 hours of application. One gallon of this weed and grass killer is sufficient for an area of 1,200 square feet. And you can use it for gardens, lawns, concrete, mulch beds, and so on. Therefore, besides being safe and effective, it is pretty versatile as well.
The application of this weed and moss killer is fairly straightforward, thanks to its ready-to-use formula. So, you don’t need to worry about any additional preparations before applying it, which makes it quite convenient to use.
What Could’ve Been Better?
While it can be used to clear out moss and other weed from lawns, you should keep in mind that it can also remove grass. So, if you want to grow a lush and green lawn full of thick grass, you should opt for another option instead of this one.
Pros
Its fully organic composition makes it safe to use
Takes action very quickly
It is highly versatile
Applying it is simple and convenient
Cons
Not suitable for growing a grassy lawn
Active Ingredient: Glyphosate | Application Method: Concentrated Liquid | Coverage Area: Varies | Rainfast: 2 hours | Reseeding Time: After 7 days | Usage Frequency: Apply as needed
Bonide is a brand that has been around for quite some time. Throughout the years, they have built a reputation for providing reliable and effective pest control solutions, and the BND728 MossMax is also no exception. It is a worthy option if you want an easy and quick solution for removing moss.
FAST ACTING-Kills actively growing moss and algae within...
Why Did We Like It?
The BND728 MossMax is a pretty fast-acting moss and algae killer, as you can get results within hours of its application. On top of that, it comes in a ready-to-spray bottle with a powerful hose end. So, you do not require to take any additional steps before using it, which makes it highly convenient.
It contains a water-based formula, so its pH value is almost neutral. This prevents the soil from becoming more acidic, which helps in plant growth. Furthermore, it does not contain any unnecessary zinc or iron substances, which is favorable for growing a grassy lawn.
You can also use it for removing moss and algae from structural surfaces, such as concrete, roofs, patios, and decks, among others. It does not leave behind any stain on these surfaces, thereby making it highly versatile to use.
What Could’ve Been Better?
While it can easily be considered one of the best moss killers around, there is a minor issue that we observed while using it. It has a slight odor, mainly when you apply it in higher concentrations. This odor can persist for quite a while, which we found to be a considerable inconvenience.
Pros
Takes action pretty quickly
It is easy to apply
It has high levels of versatility
Promotes the growth of healthier and greener grass
Cons
Has a slight odor that persists for a while
Active Ingredient: Sulfur, Iron, Zinc | Application Method: Granules | Coverage Area: Up to 5,000 sq. ft. | Rainfast: 24 hours | Reseeding Time: After 2 weeks | Usage Frequency: Every 2-4 months
30 Seconds Cleaners have been able to build quite a reputation for themselves thanks to their highly effective cleaning solutions. The spray and walk away concentrate is based on a similar principle. In addition to being efficient, you will find it pretty convenient to use as well.
KILLS ORGANIC GROWTH ON YOUR OUTDOOR SURFACES WITH EASE: 30...
EASY DIY HOME IMPROVEMENT: No pressure washing, rinsing,...
Why Did We Like It?
This moss killer lives up to its name, as all you need to do is just spray it on your lawn and walk away. So, you do not need to scrub, rinse or wash the dead moss from your lawn, as they are automatically removed over time. Thus, if you choose this option, you can cut down on a lot of labor.
The solution lasts for quite a long time and prevents further growth of moss, algae lichen, and mold. It comes as a concentrate, which you can dilute with water to yield almost 6 gallons of moss-killer solution. You can then use this solution to cover an area of nearly 750 to 2,250 square feet.
It is also quite handy for use on different types of hard surfaces, such as brick, concrete, or asphalt. Moreover, it doesn’t have any bleach or phosphates, which gives it a neutral pH that prevents the soil from becoming acidic.
What Could’ve Been Better?
This moss killer concentrate is highly effective at clearing out weeds and moss completely. However, we noticed that it could affect other plants as well, which can become brown after they come into contact with it. So, you should use this carefully if you want to grow a grassy lawn or a garden.
Pros
Eliminates a lot of labor
Can be used on hard surfaces besides lawns and gardens
Lasts for a long time
Very convenient to apply
Cons
Not very safe for plants
Active Ingredient: Ammonium Nonanoate | Application Method: Concentrated Liquid | Coverage Area: Varies | Rainfast: No specified rainfast time | Reseeding Time: N/A | Usage Frequency: Apply as needed
The 11457 lawn moss control is a granular moss killer by the brand Jonathan Green, which produces different types of gardening supplies. It is a pretty effective moss killer for lawns that takes action very quickly after it has been applied.
CONTROLS & KILLS ALL MOSS - Lawn moss can be hurtful if left...
PREVENTS & TREATS - Once a lawn has a moss infestation, it...
Why Did We Like It?
You can use the 11457 lawn moss control for both normal and heavy moss infestations. For normal infestations, you can easily use it to cover roughly 5,000 square feet. But for heavy infestations, the coverage area is lower since it needs to be used in higher concentrations.
Once its mico-particle granules are applied throughout the lawn, it begins its actions within a few hours. On that note, the granules can spread uniformly across your lawn, which makes for an easy application.
This lawn moss killer uses almost 50% more active ingredients compared to other similar moss killers, which provides enhanced performance in controlling moss growth. While it does not impact other plants or grass, it prohibits their excessive growth. So, you don’t need to mow yours too frequently, which provides additional convenience.
What Could’ve Been Better?
The Jonathan Green 11457 is a pretty worthy option to remove or control moss infestation. However, it does not automatically remove moss from your lawn. So, if you do not want dead, blackened moss to accumulate on your lawn, you will need to rake them away manually.
Pros
Evenly spreads throughout the entire lawn
Has an enhanced performance due to more active ingredients
Starts acting very quickly
Eliminates the need for mowing your lawn
Cons
The moss needs to be manually removed once dead
Active Ingredient: Copper Sulfate Pentahydrate | Application Method: Granules | Coverage Area: Up to 5,000 sq. ft. | Rainfast: 24 hours | Reseeding Time: After 2 weeks | Usage Frequency: Every 2-4 months
And that was our list of the top 10 moss killers for the lawn. We hope that after going through the list, you have zeroed in on the one you want to buy.
However, if you are still in a pickle over what moss killer will be the best fit for your lawn, then we completely understand. With so many options available on the market, we admit that selecting the best one can be a little intimidating.
Besides, it’s not just the available choices that you need to worry about. To determine the best moss killer for your lawn, you need to evaluate how you want to use it first. Otherwise, you may end up buying a product that will be grossly inadequate.
Therefore, we have prepared this handy buyer’s guide for you so that you don’t end up regretting your decision after purchasing. It describes some of the most pertinent factors that you should consider before making the final purchase.
So, if you are eager to know what these factors are, keep reading below.
Lawn Size And Coverage Area
One of the foremost factors that you need to consider before buying a suitable moss killer is the size of your lawn. Different-sized lawns require different amounts of it to control any moss infestations effectively. So, if you make a purchase before determining the size of your lawn, you may end up with either too little or too much of it.
In this context, the coverage area of the moss killer is also crucially linked to the lawn size. The ones with higher coverage are best suited for medium or large-sized lawns. Conversely, the ones with a lower coverage are suitable for smaller lawns.
So, before you make the purchase, you should first determine whether your lawn is large, small, or medium in size. Then you should get the moss killer that has the optimal coverage area that suits your lawn.
Effectiveness
In order to provide value to your moss killer purchase, it should be potent enough to kill moss or any other annoying weeds. Furthermore, it should be able to do that without damaging other plants or leaving odd stains on any surface.
That is why the effectiveness of moss killers needs to be considered. If the solution isn’t potent enough, then you will find little use for it. Consequently, you may end up regretting your decision.
And so, before you buy, you should ensure that it’s effective enough to control any type of moss infestation on your lawn for a long time. It should also be efficient enough to complete this task without requiring it to be used in greater concentrations.
Composition
The composition of a moss-killer solution is a major determining factor for its effectiveness. In addition to that, the composition helps to ascertain the safety and sustainability of the moss killer.
If it is composed of highly potent substances, then it can successfully eliminate moss or any other weeds that might be infesting your lawn. So, you should go for an option that is composed of such potent substances to get the job done.
However, another thing you should keep in mind is the safety and sustainability of the moss killer. Typically, the ones composed of organic materials or the ones free from harmful substances like bleach and phosphates are the safest and most sustainable options. So, you should also check on this aspect before making the purchase.
Versatility
The versatility of your moss killer will determine its overall usefulness for clearing out the moss. It essentially implies how flexible the solution is, especially when you need to apply it to a wide range of scenarios.
Moss doesn’t just grow on the lawn, and you may often find them growing on your roof, walkways, fences, or other structural surfaces. Moreover, such an infestation may include a mix of different invasive weeds, such as algae, lichen, and mold, which are equally detrimental.
So, a moss killer that only works for lawns and is ineffective against anything but moss will provide little to your purchase. Thus, before you make the purchase, ensure that it is versatile enough to handle any type of invasive weeds besides moss across different surfaces.
Type
Primarily there are two types of moss killers that you can get. These are granular moss killers and liquid moss killers. Each one of these types has its own characteristics and usage scenarios that you should consider.
The granular ones often come in the form of dry, minuscule granules, which are absorbed into the soil. Suitable for low-growing moss, they are often applied with a spreader and give the best results when on lawns and gardens. In that regard, it does not absorb well on harder surfaces, and if you don’t use a spreader, the application may be uneven.
On the other hand, liquid solutions are often applied through spray hoses, and in most cases, you can use them on any type of surface. But you need to dilute them first since they often come as concentrates. So, if you get the dilution wrong, it may be ineffective in treating moss. Therefore, you need to decide what type of moss killer is best suited for your lawn.
Ease Of Use
When looking for a moss killer, make sure to check whether it is user-friendly or not. They may contain hazardous chemicals which need to be handled carefully. So, if it is not user-friendly, you may run into accidents.
Besides, there are certain guidelines and procedures you must follow to apply them to your lawn correctly. So, if the moss killer does not come with proper instructions to handle it or use it, you may find it a considerable challenge.
Therefore, before you buy, make sure that it comes with clear and precise instructions for its usage, storage, and handling. This will make it very convenient to use and thereby save you a lot of headaches.
Safety
We have already stated that moss killers comprise different potent substances that can kill moss. In many cases, these substances are very strong and are therefore not safe for children or pets. So, if you have them in your household, safety is a significant concern.
In addition, the substance should only kill moss while being safe enough for other plants on your lawn or garden. You wouldn’t want your other plants to die alongside the moss, as it will defeat its entire purpose.
Thus, before you decide on a particular option, make sure it is safe enough, not only for your family and pets but also for your plants. That way, you won’t need to worry about unnecessary accidents and can simultaneously develop your lawn.
Moss Killers For Lawns FAQ's
Can you use regular weed killers to eliminate moss ?
The simple answer to this question would be no. Moss is a type of plant that is quite different from your regular garden variety weeds. The physiology of moss renders most weed killers ineffective. Besides, many weed killers also consider grass to be a weed.
So, if you want to keep the grass on your lawn healthy and green, conventional weed killers are out of the question. Moss killers are manufactured so that they only target moss or other similar types of plants while leaving grass and other plants intact.
How long does a moss killer last after applying ?
Typically, most moss killers can last for several months to up to a year. However, it is also dependent on a variety of other factors, such as the amount of precipitation your lawn receives or the longevity of the constituents on the soil before they disappear.
For the former, there is nothing much you can do save to cover your lawn from precipitation to make it last longer. The latter depends on the quality of the moss killer, as potent constituents can last longer on the soil. In any case, most brands recommend that you re-apply moss killers once every 18 months to protect your lawn in the long term.
How quickly does a moss killer take action ?
Most moss killers today are composed of potent substances that take action within a few hours of application. However, in some cases, moss killers may take a while to kill the moss, so it would be best if you referred to the product details to ascertain its time of action. Regardless, once it takes action, the moss turns brown, so you can visually confirm it yourself.
What time is best suited for applying moss killers ?
While you can apply moss killer whenever it starts to spread on your lawn, the ideal time for applying it is during the late spring or early fall. During these seasons, the temperature is conducive to facilitating rapid action, and there is no risk of precipitation washing away the chemicals from the soil.
How do you stop moss from coming back ?
There are certain measures you can take to prevent moss growth in the future. You should break up compacted soil to improve soil drainage. This will strengthen the roots of grass and other plants, which, in turn, will prevent the growth of moss.
You can also reseed your lawn with grass seeds and supply sufficient nutrients to promote grass growth. This will fill out any blank spots and leave no room for the further growth of moss.
Conclusion
Unless you are a moss enthusiast, you should clear out any moss from the lawn as soon as possible. Once they start to spread, controlling them can become a nuisance.
You need a good enough moss killer to get rid of them, which is why we have prepared this informative review-based guide. And now that we have reached the end, we hope that this article has helped you.
But before saying our goodbyes, let us look at our top picks once more. The Scotts MossEx is both affordable and highly effective, making it our best choice overall.
If you want a more affordable option that is easy to use, then the Wet And Forgetshould be your pick. However, you should pick the Scotts Turf Builderif you have a large lawn since it has the highest coverage.
And now, it is time for us to part ways. Take care!
Fertilizing your lawn is essential for achieving dense, vibrant, and healthy grass—especially in climates where soil nutrients get quickly depleted or growing seasons are short. The best lawn fertilizers help restore nitrogen, phosphorus, and potassium levels while addressing seasonal needs like spring greening, summer stress, or fall root development. Whether you're maintaining cool-season turf, warm-season grasses, or a patchy residential yard, choosing the right fertilizer—organic or synthetic—can make the difference between thin, yellowing blades and a lush, thriving lawn.
Best Lawn Fertilizer Options
Here is the list of the 11 best lawn fertilizers that you can use to help ensure a healthy, green lawn.
If you are looking for the perfect fertilizer to provide intense nourishment to your lawn and also provide deep greening, Scotts 44611A is an impressive choice. Rest assured that every granule in the pack is 100% nutritious, and there are no fillers. See your garden flourish like never before in a very short span of time.
Scotts Green Max Lawn Food is a dual-action fertilizer and...
This lawn care product contains 5% iron, a micronutrient...
Why Did We Like It?
Time is always of the essence, and this item will make you see how your yard can be filled with lush green grass in just 3 days. This special formula not only provides deep conditioning to your lawn but is also designed not to stain concrete on the driveways or surfaces around your lawn.
Moreover, all thanks to the dual-action 2-in-1 formula, this product provides all the essential micro-nutrients to your soil. It contains more than 5.17% iron which keeps your plants super healthy. You won't get any filler, just pure plant nutrients.
Also, what's impressive about this item is that it is suitable for all kinds of grass and plants. You won't need to invest separately if you grow different patches in different areas of the lawn. All you have to do is follow the instructions on the package, and you're good to go.
What Could've Been Better?
Although we have nothing to complain about in terms of its effectiveness and timely performance, it does produce a weird stench. The smell is pretty strong, and we'd suggest that you don't plan a barbeque party in the yard right after you use this fertilizer.
Pros
High nutritional formula
Works very fast
Suitable for all grass types
Does not stain
Cons
Strong smell
Item Form: Granules | Dimensions: 24" x 3.5" x 15" | Weight: 33.33lbs | NPK Ratio: 27-0-2 | Coverage: 10,000sq ft
For the perfect formula that ensures that your plants get balanced food, Simple Lawn Solution Advanced 16-4-8 is an ideal choice! It packs four times the nitrogen and no added phosphorus. So, there’s no chance you can go wrong with a product like this.
Complete NPK Lawn Food: 16-4-8 is the perfect blend of key...
Contains High Quality Feed Grade Ingredients: Nourish your...
Why Did We Like It?
This perfect blend of micro-nutrients provides all essential food to your soil and makes sure that the plants grow properly. It contains liquid nutrients that are made of high-quality feed-grade ingredients that only provide the best to your soil.
Moreover, the easy-to-use design is a bonus. You can apply it on the grass and plants with much ease. It is quite concentrated, so you’d have to dilute it a little. After that, all you have to do is connect it to the hose, switch it on, and spray.
Furthermore, it is a huge convenience when you can apply this lawn fertilizer on various grass types. Zoysia, Bermuda, Centipede, or Bahia - name any, and you can apply it to the soil for healthy growth.
Also, coverage is pretty good, and one container of this fertilizer can easily cover up to 3,200 square feet of your lawn. Be it an old lawn or a newly seeded one, use this product to see a difference.
What Could've Been Better?
Although we have no complaints about the fertilizer's efficiency, we did face some trouble with the mechanism. The sprayer does get stuck sometimes, and you might have to empty the contents and fix it before you can use it again. However, for a quick fix, connect it to a hose instead.
Pros
Good design
Suitable for all grass types
Covers a wide lawn area
Provides premium nutrition to the soil
Cons
Sprayer doesn’t function well
Item Form: Liquid | Dimensions: 5.5" x 3" x 9" | Weight: 2.58lbs | NPK Ratio: 16-4-8 | Coverage: 3,200sq ft
If you are looking for a lawn fertilizer that provides the perfect amount of nutrition to promote lush green growth in your yard, the Miracle-Gro 1001834 is a good bet! To know the secret of getting a yard that’s an envy of the neighborhood, read on.
Encourages a soft green carpet of grass that will be the...
Why Did We Like It?
The best thing about this product is that it brings versatility to the table. We agree that buying a different product variety for different plants and grasses gets quite heavy on the pocket. This product takes away all such worries. You can use it to feed all grass types.
Moreover, this item scores high on efficiency too. The 5-pound container can easily cover a 7,200 sq. ft lawn. Now, that's good coverage, we’d say. Also, this product lasts quite long in the soil and will continue to provide nutrition to your lawn for more than 4 weeks. After that, you’d need to reapply.
Additionally, the kit comes with an added dispenser that makes application super smooth. No need to wear protective gloves. Attach the dispenser and apply the fertilizer to your soil.
Also, it is quite affordable and cost-effective. Now, that’s what we call a complete package!
What Could've Been Better?
Honestly, after using it for weeks, we can hardly point out any major defects with this item. However, do keep in mind that it is a synthetic fertilizer, and thus you must closely monitor the application. Over application might even kill your plants.
Pros
Very versatile
Provides nutrition for long
Comes with a detachable dispenser
Cost-effective option
Cons
Have to be cautious with the application
Item Form: Granules | Dimensions: 5" x 5.5" x 10" | Weight: 5lbs | NPK Ratio: 30-0-6 | Coverage: 7,200sq ft
This brand name is quite popular in the market, and there’s no chance that you’ll go wrong with their product, the Andersons PGF. You will get the combined goodness of top nutrition and a balanced, well-researched formula in one bag. This all-in-one professional-grade fertilizer is all that your yard needs to get rejuvenated.
Super-fine particles provide even distribution, with twice...
Quick- and slow-release nitrogen allows for immediate...
Why Did We Like It?
More granules don’t always necessarily ensure better grass growth in your lawn. What you need are granules that can penetrate well into the soil to ensure even distribution. This product perfectly fits that bill. It is super fine and thus gives you twice as much coverage per square foot of your lawn.
Moreover, its nutritional composition is top-notch, and this ensures that your plants get even growth. The lower nitrogen strength allows you to apply more particles to areas where greening is less, and the grass looks underwhelming. And you don’t have to worry about harming your plants.
Furthermore, it is a slow-release formula that feeds your yard for more than 8 weeks. As a result, you don’t have to worry about reapplication every other month. Apply it every two months, and watch your yard turn healthy and green.
Also, it contains humic and fulvic acid that provides deep nourishment to your soil and enables it to process and take in nutrients better.
What Could've Been Better?
No doubt, this is a brilliant product when it comes to efficient results. However, it is quite a pinch in the pocket. This is not a budget product, and it is even packaged as a premium one. So, if you have a big lawn and you’re on a budget, start with small patches.
Pros
Slow-release formula
Deep nourishment
Good coverage
Easy to apply
Cons
Costly
Item Form: Granules | Dimensions: 21.5" x 14.9" x 4.7" | Weight: 40lbs | NPK Ratio: 16-4-8 | Coverage: 11,100sq ft
If organic products are your jam, Milorganite 0636 is a very good bet. This brand has made quite a name for itself in the market, and there’s no way you’ll make a wrong call about its products. This is perfect for people who like using everything organic.
No products found.
Why Did We Like It?
This product is designed mainly for grass and thus is a perfect fit for rejuvenating all the dull patches in your yard. It contains a good amount of nitrogen that is quite crucial to healthy and steady grass growth. This 32-pound bag can easily be used on 2,500 sq. ft of your lawn.
Furthermore, it features a slow-release formula. This means that you don’t have to fertilize your soil very often to get good results. The NPK formula comes in a ratio of 6-4-0 and with high iron content is very important for a lush green yard.
Moreover, the fact that it is organic means that it is safe and environment-friendly. You don’t have to keep your kids and pets away from the yard after fertilizing it. Also, you don’t have to worry about surface runoffs. Even if it gets drained into a nearby waterbody, the fish’s lives won’t be endangered.
What Could've Been Better?
Be careful about the product if the budget is a constraint for you. The price is on the higher end. However, for a product as great as this, the price is pretty fine we’d say. Also, it does smell quite a bit and you should take that into consideration before applying it.
Pros
Has high iron content
Good coverage
No need to apply frequently
Environment-friendly
Cons
Has odor
Item Form: Granules | Dimensions: 17" x 5" x 23" | Weight: 32lbs | NPK Ratio: 6-4-0 | Coverage: 2,500sq ft
Next up on our list, we have Super Juice Lawn Fertilizer. This all-in-one fertilizer is a perfect match for all who are looking for a dry soluble mix that can effectively make the lawn lush green. This full-spectrum fertilizer is suitable for all types of lawns.
Designed to be used as a supplement to a fertilizer program
An all-in-one, complete, balanced, lawn fertilizer,...
Why Did We Like It?
With this product, you can turn unhealthy patches of your lawn into beautiful green carpets. It is an all-in-one mix and has 4% extra nitrogen to help boost grass growth. This extremely well-balanced formula comes as a dry mix, and all you have to do is simply add water to it.
Moreover, it is very easy to use this product. Dilute the formula in water and connect it to a hose to spray it easily and evenly in all areas of your lawn. No more worries about using your fertilizers economically. Because it is diluted, you can apply it to larger areas without the fear of it running out.
Furthermore, it is specifically designed to provide deep nourishment to your soil for a long duration. Its soluble form seeps deep into the soil and provides the ultimate nutrition that your yard needs. And in no time, you’ll see your lawn turning shiny and green like never before.
What Could've Been Better?
This feed is very powerful, and your lawn is undoubtedly going to look better than how it looked before the application. However, patience is the key here, and it might take some time before you can see the results. If you don’t see results fast, don’t keep applying as over-application may harm the plants.
Pros
Provides nourishment for long
Easy to apply
Extra iron for better growth
Long-term effect
Cons
Takes time to show results
Item Form: Granules | Dimensions: 16.1" x 11.3" x 3.78" | Weight: 13.6lbs | NPK Ratio: 14-2-4 | Coverage: 43,560sq ft
If you dislike the excessive growth that some fertilizers cause but want a good dose of nitrogen for your yard, Ironite 100519460 is a perfect choice. Its unique formula is designed, keeping in mind the needs of the soil. Only with a few applications, you’ll have a carpet that will make your neighbors green with envy.
To begin with, this fertilizer understands the true meaning of a balanced formula. It is not so rich in nitrogen that it makes your grass grow so vigorously that they look untamed. So, what you get is a super-rich green carpet without any excessive growth.
Moreover, it doesn’t only come with the right amount of nitrogen but also with a good proportion of iron. It is the iron content that helps grass absorb and use nutrients that are naturally present in the soil.
Additionally, this formula has been further enhanced by extra beneficial microbes and new and advanced soil technology that provides exceptional lawn care. You can use it in your yard and also on shrubs, vegetables, and trees alike. It is suited to enhance soil nutrients to provide faster and better growth to your greens.
What Could've Been Better?
This is not really a drawback but consider it more of a warning before you decide to use this product. It would be best if you are careful with the amount you choose to put in the soil. If you apply more, there’s a chance that the plants might get burnt from excess nutrition.
For year-round good and healthy lawn growth, Safer 9334 is the perfect bet. No matter what the season is, this item gives the boost that your lawn needs to survive all harsh weather conditions. With just 3 applications you can see a visible change in the quality of your lawn.
Revitalizes lawn to a thick turf by strengthening root...
Lawns will green up within 3 to 5 days
Why Did We Like It?
What we liked best is that this formula not only targets the soil but also the turf. This unique formula is directed toward turning your lawn healthy and green in a very small span of time. It helps promote better growth, develop a stronger root system, and prevent your lawn from thinning.
Moreover, this item helps to enrich the soil by providing nutrition to millions of microorganisms that are housed in it. These organisms are very crucial to help boost the natural growth of the root system. Without this product, the microorganisms wouldn't be able to absorb natural nutrition so effectively.
Health is wealth, and it stands true for your lawn too. The healthier your grass and soil become the better they can defend themselves against all forms of pest attacks, fungi, and other seasonal diseases. The added nutrition from this lawn fertilizer helps all essential microscopic organisms to thrive better and thereby ensures better lawn health.
What Could've Been Better?
We’ve tested this product for months and it is true that it promotes healthy lawn growth irrespective of seasonal changes. However, the application is a little difficult as it comes in dust form and you’ll have to immediately water the soil to prevent it from blowing. Moreover, it also releases a strange odor.
Pros
High-quality soil nutrition
Prevents diseases
Develops better root-system
Quick greening
Cons
Difficult to apply
Item Form: Granules | Dimensions: 15.38" x 12.63" x 7" | Weight: 20lbs | NPK Ratio: 9-0-2 | Coverage: 5,000sq ft
If you're on the lookout for a blend of premium fertilizers that promotes thick growth in your lawn, Pennington 100536576 is an impressive consideration. It comes with a combination of both fast-acting nitrogen and slow-release nitrogen. With the goodness of both, it is no surprise that this item made it to our list.
Be it dry summers or unpredictable rain during the monsoon, this item is designed to strengthen your grass against all seasonal upheavals. Whether it's the heat or draught, rest assured that this formula will help you maintain a healthy carpet of grass all year round.
Moreover, this product is highly infused with nitrogen. It contains fast-acting nitrogen that helps your plant to green up quickly in a span of a few days. It also has slow-release nitrogen that feeds your lawn for as long as three months. Thus, we can say that this product is almost twice as effective as its contemporaries.
Additionally, it is very easy to use this product. Often we face difficulty in storing the product once the seal is broken. But not with this one. It comes in a resealable package that can be sealed back after every application. It is airtight and doesn't dampen the product.
What Could've Been Better?
Although there's no complaint about the efficiency of the product, it sure did increase weed outgrowth in our lawn. If not supervised with caution, this product does enhance unwanted growth in different parts of the lawn. And this might take away all essential nutrients from your grass.
Pros
Easy to apply
Formula shows quick results
Suitable for all season
Can be used on all types of plant
Cons
Increases weed growth
Item Form: Granules | Dimensions: 4" x 11" x 16.75" | Weight: 14lbs | NPK Ratio: 30-0-4 | Coverage: 5,000sq ft
It is not true that the grass is always greener on the other side. With Pet Safe 24-0-6, you can also turn your lawn into a healthy, lush green carpet in no time. This super-efficient formula works wonders in turning your turf healthy and removes all patches.
It is quite impressive in the way it nourishes sparse, stained, and weedy lawns. Its unique advanced formula is specifically built to enhance soil growth. This item seeps deep into the soil and is designed to promote better growth for the root system.
Moreover, this formula is safe for kids and pets. If you're using this product, you don't need to worry about them playing in the yard after fertilizing it. Even if they touch it, it's not going to be a problem. However, to be safe, try to make sure that they don't put it in their mouths.
Also, it is convenient to use the product. It doesn't come in a powder form that can be easily blown away by the wind. All you have to do is to put it in the soil, water it, and you're good to go!
What Could've Been Better?
Although there's not much to complain about this product, it does smell bad after application. Make sure that you don't apply it right before a party in your yard. However, the stench doesn't stay for more than a day.
Pros
Easy to apply
Enhances growth in no time
Fast greening
Mild chemicals
Cons
Smells bad
Item Form: Granules | Dimensions: 23" x 13" x 2" | Weight: 15.22lbs | NPK Ratio: 24-0-6 | Coverage: 5,000sq ft
If you are planning to fertilize your yard when seeding, overseeding, or sodding, Jonathan Green 11540 is a perfect choice. It is a crucial time, and this is one of the best options that you can consider for your yard during the growing phase.
GREAT FOR SEEDING & SODDING - Green-Up Lawn Food for Seeding...
DEVELOPS DEEP & DENSE ROOTS - Our fertilizer has an analysis...
Why Did We Like It?
We understand how vital it is that the grass gets the best nutrition possible during the growing phase. This item is highly infused with phosphorus, and that enables the root system to grow stronger and healthier.
Moreover, this unique formula helps saplings to grow fast and also enables good greening. Thereby giving your lawn a lush green makeover. It also contains a good dose of slow-release nitrogen that ensures that your plants are fed well for a long time. You don't need to water your plants frequently.
Also, you can use it at any time of the year. This is not a seasonal fertilizer, and thus, you can apply it to the lawn any time you are seeding it. It will add extra nutrition to the seedling to grow faster and healthier.
What Could've Been Better?
There are not too many products that are as good as this one that you can use during the growing grass phase. However, it is quite pricey and if you're on a budget, consider fertilizing your yard in small patches instead of covering the entire lawn in one go.
Pros
Feeds grass for long
Easy application
Can be used all-year-round
Suitable for all grass types
Cons
Costly
Item Form: N/A | Dimensions: 12" x 8" x 2" | Weight: 4.5lbs | NPK Ratio: 12-18-8 | Coverage: 1,500sq ft
Now that you’ve gone through the product details, you must have a fair idea about their upsides and downsides. You must have also noticed that there’s a different range of features and elements that these products bring to the table.
Be it the nutritional composition, ease of application, or the kind of lawns these items are suited for, you’ve surely learned a great deal about lawn fertilizers. However, these pieces of information are not enough to make the best choice.
There’s a range of other factors that you’d need to take into consideration before deciding on getting your hands on a particular product.
So, without any further delay, let’s check them out.
Organic Or Synthetic?
Well, this is a never-ending battle, and we don’t think that there can be one answer to it. They are very distinct in almost every way you can imagine, apart from the fact that they both help you to turn the lawn into a lush green carpet.
Organic fertilizers come with their own set of pros and cons. They are environment-friendly, and your pets and kids are also very safe around them. However, you need to show patience for these fertilizers to work their magic into your lawns. They help your plants get stronger from within. But, yes, they are more of a pocket pinch than their synthetic counterparts.
On the other hand, synthetic fertilizers are water-soluble and chemically composed. They show results a lot faster. With the synthetic options, the chemical compositions are a lot more accurate.
However, they are not pets and kids friendly. And if they get washed away in a storm or by surface runoff, there’s always a chance that they will get deposited in some waterbody and have a detrimental effect on marine life.
So, as mentioned before, they both have their own set of good and bad. We’d suggest that you choose one depending on the requirements of your lawn. There’s no one-answer-fits-all to this rather difficult question.
Understand The Numbers
Before you select which NPK is best suited for the lawn, you have to understand how to read the packages. The NPK ratio shows the amount of nitrogen, phosphorus, and potassium that is present in the mix.
Nitrogen helps in greening, phosphorus promotes growth, and potassium guards against all disease-causing elements. It’s best to choose a fertilizer based on the kind of turf you have and the climatic conditions you live in.
Also, make sure that you read the package well before you buy. All that you need to know about the mix is clearly mentioned on the covers.
Lawn Fertilizers FAQs
What are the environmental impacts of using lawn fertilizers?
Improper use of lawn fertilizers can lead to nutrient runoff into local water bodies causing eutrophication. Always use fertilizers responsibly, adhering to recommended amounts and timing.
Can lawn fertilizers harm my pet?
Some lawn fertilizers can indeed harm your pet, particularly if ingested or if your pet comes into direct contact with it. Opt for pet-safe lawn fertilizers if pets frequent your lawn.
How much fertilizer does my lawn need?
The amount of fertilizer your lawn needs depends on your soil’s nutrient content and the type of grass you have. As a general rule, you should not apply more than 1 pound of nitrogen per 1,000 square feet per application.
How often should I fertilize my lawn?
Generally, lawns should be fertilized four times a year, but this can change depending on the type of grass and the climate. Some grass types may need fewer applications, while others may need more.
Can overfertilizing damage my lawn?
Yes, overfertilizing can cause damage. It can lead to rapid, unhealthy growth, burn the grass blades, and even build up a harmful level of salts in the soil.
Conclusion
By now, you must’ve realized that a healthy garden full of blooms always requires the added goodness of fertilizers. With constant use, you’ll see an overall improvement in soil quality and how firm and green your yard becomes.
Moving on, we’ll do a quick recap of our favorites for you. Taking into consideration the price and performance, Scotts 44611A is our overall favorite. If you’re looking for premium quality nutrition, Simple Lawn Solution Advanced 16-4-8 is a safe choice and well-trusted by many homeowners.
On the other hand, Miracle-Gro 1001834 is one of the most cost-effective options that provide long-term nutrition to your yard.
With that, it’s a wrap. Until next time, happy gardening!
Do you want to wake up to birds chirping outside your window? If you are enthusiastic about nature, it's time to take that extra step.
Bring home a beautiful feeder that will not only keep hummingbirds fed and happy but will also make them want to hang out in your garden. If you are a gardening enthusiast, you must already have a beautiful garden. Place a few feeders around it, and you can hear birds chirping all day long.
Now the problem is that there are multiple choices in the market, and selecting 1 becomes challenging. To make it easier for you, we have curated a detailed and comprehensive guide about the 7 best hummingbird feeders right now. The pros and cons have been mentioned too and will help you understand the product better.
So, without further ado, let's move on.
Best Hummingbird Feeders
Whether you're looking for durability, easy cleaning, or a specific design, we've got you covered. So, without further ado, here's the list of the 7 best Hummingbird Feeders that will enhance your bird-watching experience and bring joy to your outdoor space.
If you are looking for a feeder with 8 feeding ports, the Juegoal 12 oz Hanging Feeder will be an excellent choice. It can be hung anywhere around the house or on the terrace where birds come mostly. We were impressed by the simple design along with its brilliant efficiency.
Hummingbird Feeders: 12 ounce nectar capacity with 8 feeding...
Nectar Guard: In order not to pollute nectar by crawling...
Why Did We Like It?
First of all, we will mention the anti-polluting moat. This prevents insects and other pollen from falling or crawling into the nectar. The moat also keeps ants away.
This is accompanied by a Maggift cover, which is made of plastic and is easily removable. The cover has 8 openings on the sides for the birds to feed from. It can be taken out and cleaned while you can fill the feeder easily.
Further, the plastic body is lightweight and can be easily hung anywhere. A metal hook is also provided, which can be used to hang the feeder. Try to keep it away from beehives or trees as that attracts many insects. Although they cannot reach the feed, you do not want insects buzzing around.
Overall we found this to be very beneficial for us, and the bright orange shade looks good wherever you decide to place it.
What Could've Been Better?
Now we want to recommend that you clean the feeder regularly. This is because you will be putting sugar water or nectar in it, which could lead to mold. If you leave it for a week without cleaning, molds appear on the side, which would be very difficult to clean.
Cover is detachable
Can be cleaned easily
Comes with a built-in ant moat
Lightweight body
Mold problems can appear
Capacity: 12 fl oz | Material: Plastic | Feeder Type: Hanging | Perches: Yes | Cleaning System: Removable Base | Ant Guard: Yes
One of our top recommendations is the Best Home Products Autumn Impressions, which is a beautiful orange-yellow glass feeder. We loved the beautiful colors, and the light reflects from it, making it a decor element too. Hummingbirds are attracted to the yellow and red shades and will not miss this one!
To begin with, we found it to be big enough to hold a lot of nectar at one time. With dimensions of 10.47 x 6.77 x 6.61 inches, this product can feed a number of birds. There is enough space for the birds to hang out after having had their fill. We found that many of the birds stayed longer than usual on it.
Secondly, the holes are small and will prevent any big bird from feeding out of it. Also, smaller insects or animals without beaks will not be able to reach the liquid at all. This makes it perfect for hummingbirds. Bees cannot reach the nectar as they do not have beaks, and that saves you the trouble of warding them away.
Plus, we have to mention the shape of the feeder, which does not provide space for big birds to sit on it. Hence, they cannot take over the feeder, and hummingbirds will have access at all times.
What Could've Been Better?
We found that the bottom tray does not remain in place, and to deal with it, you can use a rubber band. The rubber band will hold it tight, and its seal will prevent any of the sugared water from leaking out.
Beautiful orange-yellow shades
Rubber seal prevents leakage
Nectar can be easily reached
The bottom part is slightly loose
Capacity: Not specified | Material: Glass, Iron | Feeder Type: Hanging | Perches: Yes | Cleaning System: Removable Base | Ant Guard: Yes
If you want a handmade product that is unique and is bound to stand out, the Grateful Gnome HB511 is going to be a great choice. It has double layers of glass to prevent any damage and is known to be very easy to assemble and clean. Read on to know about its other features.
Nature at Your Side: Our beautiful hand-blown glass feeder...
Hand-Crafted Glass: Each of our products is a unique,...
Why Did We Like It?
The body is made of premium quality thick glass, which has been hand-blown individually. The glass is strong and does not fade with time. Also, we loved how it was packed. There was padding on both sides to prevent the glass from facing any damage during transport.
Moving on to the capacity, it can hold 26 ounces of liquid at one time. This could last for a few days depending on the number of birds that feed from it. 4 flowering feed ports on the different sides ensure that 4 birds can feed together.
Lastly, we have to mention the customer service, which is very good. We were able to reach them every time we had a query, and they were very friendly and always ready to help.
What Could've Been Better?
We found that the cover needs regular cleaning. If you let the water stay for long, it will start rusting immediately. This could spoil the entire product, and hence you should take good care. In case it does rust, talk to customer care, and they might send you a replacement.
Premium quality thick glass is used
Easy to assemble
Every product is handmade
Purple-speckled mushroom color
Cover can get rusted if not cleaned regularly
Capacity: 26 fl oz | Material: Glass | Feeder Type: Hanging | Perches: Yes | Cleaning System: Removable Base | Ant Guard: Yes
Do you want a well-protected piece that will keep ants away while feeding the hummingbirds at the same time? The LUJII Hummingbird Feeder is a great option to choose. It looks beautiful when placed in the sun and works perfectly too.
ATTRACT MORE HUMMINGBIRDS: The bright color and style of the...
HANDMADE BLOWN GLASS: Each product is individually blown and...
Why Did We Like It?
First of all, we noticed that the bright shades are attracting a lot of hummingbirds to it. Try to keep it an open area where the light reflects off the body. There are 5 feeding stations, and 5 birds could be drinking at the same time. There is also space for them to rest comfortably while drinking.
The body of the product is made of 2 layers of glass to protect it from fading or damage. Each is individually made and hence, will not match the other.
It is also very easy to fill, as there is a wide mouth. You can fill it quickly, and the 2-part base will help you see when it needs refilling. We did not constantly have to open and check for the level of remaining liquid thanks to this.
Another great fact about this feeder is that you can use it as a candle holder or a vase when it's not the season for hummingbirds to come.
What Could've Been Better?
Make sure that you provide this item with enough support when you are filling it up completely. That is because it can become very heavy when the entire 40 ounces of liquid is filled. The S hook needs to be strong enough to be able to hold it, or you have to reduce the amount of liquid.
Easy to clean
Wide-mouthed reservoir for quick filling
2 layers of glass for extra protection
Hand-blown stained glass
Can be very heavy when full
Capacity: 36 fl oz | Material: Glass | Feeder Type: Hanging | Perches: Yes | Cleaning System: Removable Base | Ant Guard: Yes
Up next is a big product with a capacity of 38 ounces. The REZIPO Feeder With Perch is a great option and has the capacity to lift the entire ambiance of your porch. We loved the beautiful colors on its body.
EASY TO CLEAN: The clear glass makes seeing red hummingbird...
EASY TO FILL NECTAR: Clear glass, Wide-mouth reservoir and...
Why Did We Like It?
This is a beautiful and heavy glass feeder. One good part about the glass being heavy is that it will not move in the wind. The swinging is stopped making sure it does not bang against anything, and this allows the birds to eat in peace.
There are attached perches that allow the birds to stand. We found that they spent more time resting on the feeder than actually eating. Keep the feeder under a shade, and the birds will love to hang out longer.
Next, it is pretty easy to clean, and you will be able to assemble and disassemble in no time at all. Our kids could also do it with no issues. You will not have to worry about cleaning away ants because of the ant moat provided. Fix it in place and fill it up with oil.
What Could've Been Better?
The only issue with this product is that the rope that they provided was not helpful. We purchased a separate chain that could hold the weight of the glass body, and now it hangs outside our house perfectly well. We would recommend this to keep the feeder safe.
Sealing ring prevents leak prevention
Brushed copper glass
Ant moat is provided
The rope is not helpful
Capacity: 38 fl oz | Material: Glass | Feeder Type: Hanging | Perches: Yes | Cleaning System: Removable Base | Ant Guard: Yes
We are nearing the middle of this list, and it is time to introduce the Martha Stewart MTS-CBF1 Real Copper feeder. It is beautifully designed and looks like a wind chime. You are going to love the sleek surfaces and the efficiency that this provides.
This is a unique product made with real copper. There are 4 feeding ports on all sides and a large perching place. This is pretty wide, and the birds can sit on it easily after feeding. The sleek top is shaped like a hut roof and will protect the birds from rain and direct sunlight. Around 5-6 birds can stay here under protection.
Plus, the feeding tray is lipped. This prevents wastage and ensures every bit of the nectar is available to be eaten.
To top it all, there are drain holes around that keep the bird feeder dry. These will drain off any excess water or sugar liquid. It also prevents water spots and helps it remain clean for longer.
Also, since it is made of copper, the material prevents the sugared water from freezing inside in case of cold temperatures. While glass can crack in such temperatures, this one is not prone to cracking at all.
What Could've Been Better?
We found that hummingbirds had a difficult time figuring out the feeder in the beginning since it does not look like a flower. So, we placed some ornaments nearby, and then the birds started coming. If you have a similar problem, this is something you can try out too.
Prevents water from freezing
Protective roof for shade from sun and rain
Lipped feeding tray
Not noticeable for the birds initially
Capacity: 14 fl oz | Material: Glass, Copper | Feeder Type: Hanging and Stake-mounted | Perches: Yes | Cleaning System: Removable Base | Ant Guard: No
If you were looking for an inexpensive product that will do the work while not burning a hole in your pockets, this is a great option. The product is made entirely of plastic and has 4 feeding ports on its sides. It has a bright red feeding base with yellow flowers, which act as the feeding ports.
Holds 16oz. of hummingbird nectar in see through plastic...
Why Did We Like It?
This is one of the lightest products on this list, and that is because it is made of plastic. With a capacity of holding 16 oz of nectar, it works well and can be refilled once a week. The product comes with a hook that will help you attach it to a branch or a chain easily.
Adding on, since the body is absolutely transparent, we could see the level of liquid even from a distance. This made it easier for us to keep a tab on the level without having to open it up or go closer to it.
Plus, it is small in size and measures 6.5 x 6.1 x 1.5 inches. This makes it almost unnoticeable to humans, while the red color attracts birds. Overall, we found that it does a decent job of providing birds with the food they need.
What Could've Been Better?
Unlike glass or copper, this plastic feeder is flimsy and is difficult to clean. The sugared liquid sticks to the sides, and there is only a small opening that will allow you to clean. Also, we found that the liquid heats up when kept in the sun. The plastic is thin and does not protect the liquid from heat rays.
Can hold 16 oz of hummingbird nectar
Transparent plastic reservoir
Not expensive
Bright red attracts hummingbirds
Difficult to clean
Plastic is thin
Capacity: 16 fl oz | Material: Plastic | Feeder Type: Hanging | Perches: Yes | Cleaning System: Removable Base | Ant Guard: No
Now that you have a clear idea about the different types of feeders, we will move on to discussing certain points that will help you decide. You must have seen that there are many similarities among the types, but then each product is different. Make sure that you note down the following points and make an informed decision on the basis of it.
Leakage
It is essential that you prevent leakage at all costs. This not only saves a lot of nectar but also allows the birds to drink freely. Check if the ring on the bottom is tight or not. If it is slightly loose, use a rubber band to fix it. Make the feeder sway a little and see if it leaks. If it does, it is best to get it replaced. If not, then you have a great feeder for yourself.
Ant Moat
There is an ant moat that comes with most feeders. These prevent ants from reaching the nectar and are very important, especially if your area has a lot of them.
Also, make sure that the holes of the feeder are small, and larger birds cannot feed from it. If they do, then the feeder will be taken over, and the hummingbirds will not get a chance.
Capacity
Every feeder has varying capacities, and you need to select one which works for you. If you have lesser hummingbirds in your area, then a small one should suffice. On the other hand, if your area sees a lot of these birds, go for a bigger feeder. This will keep the birds happy, and you will not have to replace the syrup very often.
Number Of Feeding Ports
This is an important consideration when it comes to selecting feeders. You will have to decide on the number of feeding ports that the feeder should have before purchasing. Now, initially, you might think, the more the number, the better it is since it will be able to feed a larger number of birds at one time.
But remember that the birds may not want to share the food, and it might end up that only 1 bird feeds at a time. This would mean that it is better to buy feeders with fewer ports. We would suggest settling for a general number of 4-5 ports and seeing how it works.
Material Used
There are 3 common materials to make bird feeders, glass, plastic, and copper. Plastic options can be lightweight but are not very durable, and the sugar buildup can be very difficult to remove. But it is the cheapest option, and you can purchase it if you do not plan to use a feeder for long.
Coming to glass, it is thicker and sturdier than plastic, and most glass models look very attractive. These do not sway in the wind and stay in place, making it easier for the birds to feed.
Copper models are also similar but slightly less heavy. They work well, but sometimes birds might find it difficult to spot these. If you face something similar, add some artificial flower decorations around to lure the birds.
Visibility
Some feeders have a transparent body, and that makes it easier to see the level of liquid left inside the feeder. These are more efficient as you will not have to open the entire unit to check.
Semi-transparent ones need you to go near the feeder in order to check it, while the transparent ones can be viewed from a distance. Completely opaque bodies are difficult to handle and make the process of checking time-consuming. You will have to open the top to peek in and check the level of fluid inside.
Plastic v/s Metal Base
The 2 popular kinds of bases are plastic and metal. Plastic ones are lighter and not prone to rusting. But they are not sturdy and may not last for a long time. Also, you might see that they lose shape due to bigger birds trying to sit on them.
Metal ones are sturdy and will not lose shape with time. But these are prone to rust. It is best to wipe them with a cloth every day to prevent liquid from accumulating on them.
Hummingbird Feeders FAQ's
What is the best location to hang a hummingbird feeder?
The ideal location for hanging a hummingbird feeder is in a quiet and shaded area, away from direct sunlight. This helps to prevent the nectar from spoiling too quickly. It’s also recommended to hang the feeder at a height where it is easily visible and accessible for both the hummingbirds and for cleaning and refilling purposes.
What is the best nectar recipe for hummingbirds?
The most common recipe for hummingbird nectar is a mixture of four parts water to one part white granulated sugar. Boil the water to remove impurities, then stir in the sugar until it dissolves. Let the nectar cool before filling the feeder. Avoid using honey, artificial sweeteners, or red food coloring, as these can be harmful to hummingbirds.
How do I attract hummingbirds to my feeder?
To attract hummingbirds to your feeder, consider the following tips:
Place the feeder near flowers that hummingbirds are attracted to.
Keep the feeder clean and filled with fresh nectar.
Use feeders with bright colors or attractive designs.
Hang multiple feeders to accommodate more hummingbirds.
Provide perches or natural elements near the feeder for hummingbirds to rest.
What should I do if ants or bees are attracted to my feeder?
To deter ants, you can apply a thin layer of petroleum jelly or use an ant moat, which is a device filled with water that creates a barrier for ants. Bees can be deterred by choosing feeders with bee guards or using feeders with smaller feeding ports that are more difficult for bees to access.
When is the best time of year to put up a hummingbird feeder?
The timing for putting up a hummingbird feeder depends on your location and the migration patterns of hummingbirds in your area. In general, it’s best to put up the feeder a few weeks before the expected arrival of hummingbirds in your region. Research the migration patterns of hummingbirds specific to your area to determine the best time to set up the feeder.
How can I prevent the nectar from freezing in colder temperatures?
In colder climates, you can use a heated hummingbird feeder or wrap insulation around the feeder to prevent the nectar from freezing. Some feeders are designed with features to keep the nectar from freezing, such as built-in heaters or insulation. Additionally, you can bring the feeder indoors during freezing temperatures and put it back outside when it warms up.
Conclusion
Hummingbirds can be pretty dominant and may not be up for sharing the nectar. So, we would recommend having more than one feeder at different locations around the house. That would make sure that all the birds looking to feed get their fill.
With this, we come to the end of this comprehensive guide, and it is time to do a quick recap of our favorites. The Juegoal 12 oz Hanging Feeder is our favorite overall because of its lightweight design and efficiency. On the other hand, if you want a very sturdy product, the Grateful Gnome HB511 will fit you well.
Let us know your favorite in the comment section below. Happy shopping!
Do you wish to take control of your flowers and food’s growth? If so, then you should really think about buying some greenhouse plastic to begin building your agricultural haven. It has been found that a little over 1/3rd of modern households in the US are growing their own food now. This development has taken place because of something more complex and isn’t just a passing trend.
Growing plants at home allows these homeowners to save up on groceries while making healthier lifestyle choices. Some may even benefit from the beautifully therapeutic effects of gardening.
All of those people who don’t have enough space or land can even look into something that is known as vertical gardening. This has proven to be quite a terrific method of growing your own plants right at home and probably with the help of some great greenhouse plastic.
It may be your first time using greenhouse plastic, or you may have absolutely no idea what we’re talking about. Don’t worry – you have arrived at the perfect buyer’s guide. Here, we will be digging into everything you could possibly want to know about greenhouse plastic, before introducing you to 5 of the best greenhouse plastic products in the market.
Research has proven that growing your own produce has a lot of health benefits. At the very least, you will be boosting your daily moods while the increasing levels of Vitamin D in your body will lower your overall risks of developing dementia.
There is a whole lot more that goes into gardening. You need to discover this enjoyable activity and all the savory fresh produce that come from it.
Best Greenhouse Plastics
Here is the list of the 5 best greenhouse plastics that you can use to create the ideal growing environment for your plants.
1. [easyazon_link identifier="B00CTSAPQ0" locale="US" tag="homesthetics0a-20" type="link" link_id="274083"]Grower’s Solution Greenhouse Clear Plastic Film - The Best Greenhouse Plastic[/easyazon_link]
Grower’s Solution is a relatively new company because it was founded about a decade ago. Even though this may be the case, they have clearly captured the market with their selling proposition – agriculture. Due to the reason that they are a small-scale company, people often ask the question of whether they are good enough to meet specialist demands. To their surprise, however, the company has products that meet the exacting demands of the most professional customers. With just a few tweaks to their normal directions of usage, their products don’t only fulfill their promises but also follow through as the best greenhouse plastic providers in the market.
Among the biggest reasons why we think Grower’s Solution is the best is because of the materials they use. Their greenhouse plastic is made from polyethylene – which is known as the industry standard for their genre of products.
Other than meeting the industry’s demands, their greenhouse plastic can also be bought at a great 6 mils thick. We’re here to tell you that this thickness promises the best levels of durability along with great defenses against punctures with torsion strength.
As these products are durable, as proven by the thickness of their greenhouse plastic, Grower’s Solution also offers their customers a comfortable 4-year warranty.
Way past the qualities of materials used, this greenhouse plastic takes it one step forward by adding extra reinforcements so that you wouldn’t have anything to worry about. We’re talking about how their products are treated with protection against UV radiation.
How does this help, you say? Well, this treatment means that the greenhouse plastic won’t be degraded due to the direct sunlight it receives. They have also treated their products with special infrared additives. This means that your garden will be safe in every climate so as to deliver additional levels of warmth where the sudden cold could snap your plants.
Pros
Made of polyethylene
Treated for UV protection
4-year warranty
Guarantees 91% light transmission
Cons
Can only be found in 2 sizes
Material: Polyethylene | Thickness: 6mil | UV Protection: Yes | Size: 20ft x 25ft | Warranty: 4 Years
2. [easyazon_link identifier="B079VS7HDS" locale="US" tag="homesthetics0a-20" type="link" link_id="274084"]Ginegar Suncover Greenhouse Plastic Film - Best Budget Greenhouse Plastic[/easyazon_link]
No products found.
Suncover is a little different from the other companies on this list because of the fact that it isn’t its own organization in terms of autonomy. Suncover is actually a subsidiary brand under the umbrella of the Ginegar Corporation.
This doesn’t make much of a difference because Ginegar has spent years growing into a very well-known company in its industry due to its range of best greenhouse plastic products. This is because of the fact that Ginegar has managed to make a lot of agricultural cover products and they have been doing so for approximately half a century!
What’s more? This company, which is based in Israel, had a problem statement of coming up with products that could withstand the brutal heat in the Middle East. This little-known fact, however, isn’t their USP. Their best and most surprising offering for the market is the fact that they probably have the least expensive product on this list.
We’ve already discussed the fact that this product was designed in a region that is famously known for its brutal summers and harsh sunlight. This is why it shouldn’t be much of a surprise that the greenhouse plastic products from Suncover have very strong levels of protection.
As a matter of fact, this particular product offers levels of protection that may be missing from so many others. One such example is the fact that this product has been treated by UV protection – which is, again, not much of a surprise.
One of the unusual treatments of this product is that it is manufactured with anti-dust protection. This treatment is quite cutting edge as the greenhouse plastic cannot create static charges which are known to attract dust.
This product from Suncover uses materials that meet all the expected standards of the industry. One such example is that the greenhouse plastic has been made from polyurethane of 6 mils thick – which, as you already know, is the minimum standard. You can be sure that it won’t tear or puncture easily.
Suncover takes it one step further by including metallocene in the materials used for this product. This material is what would truly set this product from all the others as this is what helps this product to form more regular bonds. This would help consumers by making the greenhouse plastic much stronger distributing all its protective qualities much more efficiently across the product.
Pros
Least expensive products in our review
Made of polyethylene
Treated with UV protection
Diffusing light via its 6 mills thick plastic
4-year warranty
8 different sizes – all of which will have an anti-dust additive
Cons
Does not come in large sizes
More opaque as opposed to other products
Material: Polyethylene | Thickness: 6mil | UV Protection: Yes | Size: 14ft x 25ft | Warranty: 4 Years
3. [easyazon_link identifier="B014RJ42WG" locale="US" tag="homesthetics0a-20" type="link" link_id="274085"]Green-Tek GT4 Clear Greenhouse Film - Most Durable Greenhouse Plastic[/easyazon_link]
When we’re talking about greenhouse plastic or just about any constituent of your greenhouse – Green-Tek is a well-known player in the market. This company specializes in products that are focused on greenhouse products and it wouldn’t be much of a surprise that its greenhouse plastic is probably the most durable in the market.
The very first thing we would like to say here is that every quality standard that one would expect from greenhouse plastic products would be present here. This is because of the fact that this company has crossed all the T’s and dotted all the I’s in terms of meeting the industry standards.
Other than the minimum industry standards, this product has been rated at a light transmission of 92%. Due to this rating, users will find that their plants will not lose out on the elements that are halted by opaque plastics.
When it comes to thorough greenhouse plastic, no product will be as thorough as Green-Tek’s. This is because of the fact that they have more than 30 years of experience in their field and their products have functioned with the most efficiency and durability.
This company took it one step further by promising that their UV radiation treatment would provide protection that is about 33% better than their average competitors. What’s more? Their products have been rated to be 164% resistant as opposed to the probability of tearing polyethylene films.
Pros
14 different sizes for its 6 mills thick plastic
Treated with UV protection
More durable as opposed to the other products in the review
Made from polyethylene and offers a 4-year warranty
Cons
Cannot be found in larger sizes
Material: Polyethylene | Thickness: 6mil | UV Protection: Yes | Size: 32ft x 55ft | Warranty: 4 Years
4. [easyazon_link identifier="B06XPDLYK7" locale="US" tag="homesthetics0a-20" type="link" link_id="274088"]Agfabric 6Mil Plastic Greenhouse Film - Best All-Year Round Protection[/easyazon_link]
No products found.
Agfabric came up with their greenhouse films which are also called agricultural plastic or poly-film. These products were found to be ideal for both single or double-layered applications in greenhouses and were guaranteed uninterrupted usage for 5 years. That is definitely saying something!
This particular greenhouse plastic is a little different because of the fact that they use a high-grade raw material known as olefin. This makes them different from the rest due to the fact that they provide users with high transparency and low haze while providing users with high transmission rates and quite low rates of scattering.
While this product meets all its industry standards, it goes out of its way to use a drying treatment that works like an anti-fogging treatment. With the help of this treatment, users can completely eliminate the production of fog over their greenhouses.
What’s more? This product also uses a very rare organic insulation agent which is quite high-tech. With the help of this technology, all the infrared radiation is made to bounce back and keep out of the greenhouse and ensure optimal growth during the nighttime.
The USP of this product, however, is that it provides high natural yields, strong photosynthesis, and great light transmission performance throughout the year.
Pros
Uses greenhouse plastic that is 6 mils thick
Treated with UV protection
Anti-condensation treatment
Excellent light transmission
Cons
Chlorine released from PVC fittings or pipes in your greenhouse could fairly degrade the materials.
Plastic sheet can be easily punctured by sharp objects
Material: Polyolefin | Thickness: 6mil | UV Protection: Yes | Size: 20ft x 30ft | Warranty: 4 Years
5. [easyazon_link identifier="B077GQTQWL" locale="US" tag="homesthetics0a-20" type="link" link_id="274089"]ECOgardener Greenhouse Clear Plastic Film - Best Anti-Condensation[/easyazon_link]
GREENHOUSE – This seamless Poly is 6 mil (0.006 Inch)...
EXCELLENT LIGHT TRANSMISSION – To maximize the growing...
The Greenhouse Clear Plastic Film by ECOgardener meets the industry standard for 6 mil thickness and meets all the expectations of consumers for greenhouse applications. ECOgardener has been able to produce excellent light transmission via this product in order to maximize growing seasons for gardening enthusiasts and commercial users alike.
This greenhouse clear plastic film, like the others on this list, has also been UV stabilized and its UV treatment is quite suitable for uninterrupted usage for 4 years. Its specialty, however, is that it promises its users anti-condensation. This means that the material features a surface tension that will modify the limits of water droplets forming over inside it.
What’s more? This clear plastic film is quite heavy-duty which means that it will work perfectly for covered rows, garden cloches, cold frames, and polytunnels.
Condensation has always been a major issue for many greenhouses because it significantly impacts the transmission of light. That said, the anti-condensation treatment in this product limits the formation of water droplets in order to improve the transmission of light tenfold.
Pros
Widely used for fruits, flowers, and vegetables
Perfect conditions to grow and protect agricultural cultivations
Superior strength and clarity along with weather resistance
Can be used throughout the year
Product is also 6 mills thick
Cons
Product is fairly expensive
Material: Polyethylene | Thickness: 6mil | UV Protection: Yes | Size: 25ft x 10ft | Warranty: 4 Years
This factor may be more or less important depending on what you’re trying to grow. Generally, however, the thicker these products are, the better they are considered to be. This is because of the fact that thickness will play an important part in determining the product’s torsion strength along with so many other benefits.
Protections
Beyond thickness which simply represents durability, the very next thing you should look for is the specific protections these products are providing you with. Most of these protections are pretty standard and are available in most products while others are quite unique. Looking for protection against weather in specific regions or even expecting durability from products is great for making a choice.
UV Radiation
As you may have noticed above, this is among the most common things to look for while searching for the best greenhouse plastic. Even though greenhouse plastic isn’t exactly made for protection against UV rays, these invisible rays can really hurt your plants. Due to an excess, UV radiation can cause your plants to prematurely degrade along with the plastic itself.
Anti-Dust
This is yet another kind of protection that isn’t really that common in the greenhouse plastic products in the market. For those who need it, however, this extra level of protection can be a real lifesaver and these people should look for products that have that extra coating of ionized polyethylene. The positive charge in this extra coating helps to prevent any form of dust from clinging to it – which is often the case with other products.
Materials
If you make decisions based on product reviews then it would be quite forgivable because people believe greenhouse plastics are only made of polyethylene. While the best products are made from this material, another popular material used in these products is PVC which is also known as polyvinyl chloride. This material, however, is much less durable.
The only advantage of PVC is that it has the ability to directly adhere to PVC supports. So if you’re planning on using PVC supports, then you know what material to look for.
IR
At the other end of the spectrum, you should also know that some of these products can be found with additives to the original polyethylene formula. These additives allow for the greenhouse to trap infrared radiation in the greenhouse.
If you didn’t already know, infrared radiation has a lower frequency than light. This is why, in small quantities, you shouldn’t be worried about infrared radiation causing damage to your plants or the greenhouse plastic. On the contrary, these additives will allow the greenhouse to remain about 20% warmer than the actual environment on the outside.
Here, it is important for potential buyers to remember that IR should only be considered in colder areas to protect plants from snapping off. This also means that regions that get plenty of sunlight and heat don’t need to be worried about this kind of protection.
So there you have it, folks. Equipped with this buyer’s guide for the best greenhouse plastic products, you are ready to design your greenhouse.
Greenhouse Plastic FAQs
What Are Greenhouse Plastic Products?
Whenever we picture a greenhouse, we quickly begin imagining a lot of glass. If you wish to opt for greenhouse plastic, however, you will be in for a number of advantages – especially if you’re looking to build the greenhouse yourself. Plastic-based greenhouse structures are always lighter and much easier to build and maintain. You will also find that building greenhouses with greenhouse plastic is much cheaper to build.
Despite its self-explanatory name, there can be many different reasons and situations which could call for the use of greenhouse plastic films or sheets. Among the most common instances, is when these products are used to protect plants in nurseries or gardens. With the help of these products, plants are able to potentially benefit from advantages such as exposure to pure environments that may be restricted by unimpeded elements.
Greenhouse plastic keeps the heat and humidity inside the greenhouse in the exact same manner, as a glass frame should. If you opt for the right greenhouse plastic, then growing all assortments of plants and flowers will be like a walk in the park – even in the middle of the full blast of winter.
That said, you can’t just go out and buy any kind of plastic. These products may be more durable than normal plastic but regular plastic will fray over a short period of time. Any little cut on normal plastic will tear over time and eventually just ruin the environment in your greenhouse.
Greenhouse plastic, on the other hand, has been designed in a manner to hold up firmly against all kinds of weather while resisting punctures and tearing. These kinds of products are often knitted together instead of being produced as one whole solid sheet. This is one of the reasons why these products are so much more durable than ordinary plastic.
You’ll find that greenhouse plastic is very easy to wrap around a variety of shapes and sizes for greenhouses – which is also one of the most important considerations for the product you buy. Greenhouse plastic can also be framed around greenhouse vents, windows, and doors because they allow for very customizable designs.
Who Could Need Greenhouse Plastic?
In order to dig in deeper, we would say that greenhouse plastic products are used for a plethora of gardening projects. One example could be in the case of someone who wants a small garden for their backyard. With the help of greenhouse plastic products, these people will be able to experience similar benefits to those professionals who grow acres and acres of food every year.
To put it more simply – if you’re planning on growing something, then greenhouse plastic will be able to provide you with a list of benefits.
What Would Make A Greenhouse Plastic Product Good?
Naturally, the answer to this question will depend on the type of plants you are trying to grow in your garden. This part of choosing your product will play an important role in finding products that are specialized – but the best greenhouse plastic products are those that work in most situations. There might always be some type of plant that won’t be suitable for one particular product.
Before you go on ahead and decide to buy a greenhouse plastic product for your greenhouse project, you should first consider your local weather conditions. If your locality has wet winters but not much of hard frosts, then you need a lightweight product. Climates like these will allow for early seed starting.
If your local weather conditions are full of hard frosts, then you will definitely need thicker kinds of greenhouse plastic. That being said, greenhouses are used throughout the year – so it will be important to look for products that will last you much longer than the average winter.
How Should You Look for the Best Greenhouse Plastic?
Greenhouse plastic products were first introduced in the 60s but the industry has come a long way out since then. Many upgrades have been added in these products along with countless design possibility. That said, you need to consider the lifespan, thickness, condensation control, heat loss, heat gain, UV control, light diffusion, light transmission, and layers.
We completely understand that browsing through these seemingly similar products could be a confusing and difficult task. This is why we would like to spare you from all the trouble and do all the heavy lifting for you.
Our experts have compiled a list of the 7 best greenhouse plastic products along with highlighting what each of them specializes at. Once we have introduced you to these products, you can move on further to read our detailed buyer’s guide to determine what you need for your gardening needs.
Conclusion
Choosing the right greenhouse plastic is crucial for both professional growers and hobbyists alike. The ideal choice should offer the perfect balance of durability, UV protection, and light transmission to ensure a healthy and productive growing environment.
From the above 5 best greenhouse plastics, here are the top three expert recommendations:
The Grower’s Solution Greenhouse Clear Plastic Film is an ideal option for those looking for the best overall greenhouse plastic, as it is made from industry-standard polyethylene and offers a comfortable 4-year warranty. The added UV radiation protection ensures that your plants are safe and healthy.
For budget-conscious growers, Ginegar Suncover Greenhouse Plastic Film is a good option. Offering UV protection and meeting the industry standard of 6 mil thickness, this product provides excellent value while still ensuring great functionality.
If durability is the primary concern, the Green-Tek GT4 Clear Greenhouse Film is the right choice. With 92% light transmission and more than 30 years of industry experience, Green-Tek delivers a product that holds up against wear and tear to become one of the most long-lasting options available.
Ultimately, the best greenhouse plastic for you will be determined by the specific requirements of your growing environment and budget constraints. Regardless of which option you choose, investing in high-quality greenhouse plastic will pay dividends for the overall success of your growing endeavors.
Anything grown in a pot can give your house a little bit of greenery. But can you imagine the beauty a greenhouse and the best greenhouse plants can add to your homestead?
Well, I have always wanted to do something more to expand the green at my place. And when I came across this beautiful greenhouse home magazine once, I thought, why can’t I do that?
So, my folks and I began digging out for some ideas and started working on our greenhouse. Of course, it isn’t something too grand. Just a small one that would help us kick-start a self-sufficient lifestyle.
But the one question that kept me thinking was - what’s best for my greenhouse? Which plants are ideal, and which aren’t?
After a lot of reading and research, I had a list with me. And boy, they worked amazingly well with the greenhouse, we found the plans right here.
So, if you have a greenhouse and wondering the same, don't worry! Because I’m here to help you with that. And hope this list works for you the way it did for me.
1. Okra
Not a lot of people are aware, but Okra is one of the veggies that require heat. It might not be probably the first name that would cross my mind when I think of plants that love heat, but it grows well in hotter weather conditions. So it would be a great addition to your greenhouse.
Chilies love conditions that are warm. This makes it one of the ideal plants for growing in the greenhouse.
So, don’t worry about the kind of peppers; be it jalapenos, habaneros or any other kind, it works great for your greenhouse. Also, the warmer the temperature, the better your peppers grow (well, mostly).
via picsmaze.com
3. Raspberries
Berries aren’t often on the minds of people who have greenhouses. I mean, you could usually think of having a berry patch in the garden, but not growing them in the greenhouse.
I’d say, take the thought away and plant some Raspberries in your greenhouse without any inhibitions. All you have to do is give them the right amount of care, and they’ll grow wonderfully well.
I am a huge fan of herbs; I couldn’t imagine my greenhouse with any. So, when I began working out my list of plants, I started off with the herbs, and the first on my list was cilantro.
If you happen to love herbs as well, then you should think of planting some in your greenhouse.
5. Peaches
Fruit trees are a hit among people with greenhouses; there will be more people who grow fruit trees in the greenhouses than you think. And peach trees are not an exception to this.
Since you can control the temperature inside the greenhouse, you can be assured that your peach trees give fruits for the greater part of the year.
More peaches around the year? I’d say bring it on!
According to me, strawberries are the most famous of berries. I mean, they can be used in a variety of recipes - be it drinks or food.
And when I learned that they could be grown inside a greenhouse, I was delighted. They are extremely easy to grow when you take good care of the plants. Furthermore, you can just place them in little containers and move them around the greenhouse as and when you want.
via greenblender.com
7. Grapes
When you think of the plants that you can raise in a greenhouse, Grapes might not be the one to cross your mind. Because anyone with a little knowledge of growing plants would know that they’d need an arbor for them to grow in a trained manner.
But if you have a greenhouse that’s big enough and some patience and love for your plants, you can grow a few vines that would give sufficient produce for your family.
Another kind of fruit tree that grows well inside a greenhouse is the Orange. Like other plants, you don’t have to move them around as and when there’s a drop in temperature as they grow easier than most of the other greenhouse plants.
And if you are lucky enough, you might as well have oranges throughout the year. Well, here’s to more orange juice!
9. Lemons
I love how fruits from the citrus family have a variety of uses. They are one of the reasons why I got interested in gardening in the first place (citrus, along with the herbs).
I first began growing lemon plants indoors, but when we got a greenhouse, I immediately moved all these pots there. And I must say, I don’t regret making the decision, for they give a fantastic produce all year long.
When I first came across Swiss Chard, I was fascinated by how beautiful it looked. Since then, I began to grow it every year, especially the rainbow Swiss chard (you know how colorful it is).
Also, my mom was thrilled as she was finally able to feed my baby sister some nutrient-enriched greens, as she would complain less - thanks to the color.
And need I to mention how easy they are to grow in a greenhouse?
You can’t think of a household that doesn’t use tomatoes. They’re so versatile, as they can be eaten raw, and cooked, and are also used in drinks - both alcoholic and non-alcoholic. If it’s that common, why not grow it in our greenhouses?
They respond excellently to the heat and give you amazing products around the year. Just make sure you provide them with enough water and keep them away from the peppers because there might be a chance of cross-pollination.
Let me tell you this! You’ll never regret the decision to grow peppers in the greenhouse. They love the heat and chances are that you will always be lucky with the produce.
This is because the greenhouse provides them with more heat than what they would usually get outdoors.
The more the heat, the more peppers you have! Now that’s something awesome, right?
14. Cucumbers
Cucumbers are one of the vegetables that can be raised easily without a lot of fuss. And you don’t have to grow a lot of them for bigger produce.
This naturally makes them one of the ideal plants to grow inside a greenhouse, as long as you look after them so that they don’t take over the area.
When it comes to leafy greens, spinach is one thing that we love growing in the house. And since we reside in a place with warmer weather, I never had issues with growing them in my greenhouse, even during the comparatively colder months.
I’d say you don’t have to think about planting spinach in your greenhouse as its warmer conditions allow for a hearty harvest. And if you happen to live in colder regions, you know you can always control the temperature. Am I right?
via happydays-365.com
16. Microgreens
Microgreens are miniature or smaller versions of herbs, greens or veggies that are usually harvested when they’re around 2 inches tall. They can be used in salads or can be tossed around easily to make a quick meal that’s rich in nutrients.
Now, microgreens are also amazing with greenhouses. Not only do they grow quickly, but also they need less time than the other plants to get to the harvest.
via foodtolive.com
17. Leafy Greens
We all know how important it is to include leafy greens in our daily diet. So, I don’t think I need to emphasize the need to grow them in the greenhouses.
They don’t require much effort to grow. Furthermore, having them in your greenhouses will serve as a constant reminder to eat them as much as possible.
Now, I’ve already mentioned above that herbs are one of the reasons why I got into gardening in the first place. Be it basil, coriander, parsley, thyme, sage, or any other herb, they are all pretty easy to grow, and you don’t have to design a clear-cut gardening or farming strategy to have some nice herbs in the house.
Be it the kitchen, plants in the courtyard, or a garden, they grow anywhere without causing you much trouble. But growing them in the greenhouse can make it more satisfying, and also give you more produce than what you get in planters. So, why don’t you give it a try?
Also this way, you get to add some spice to your food as well as your life.
When I tell you that you can grow bamboo in your greenhouses, you might not be interested in thinking that they aren’t of much use. But trust me, they can be used in more ways than you think.
Also, they flourish quickly, and you don’t have to give them any extra attention as they usually grow by themselves.
I love mushrooms. I love how they add an amazing flavor and make anything seem like it's gourmet. Also, they are very easy to grow.
However, there’s one thing you must take care of - they can be harmful in case you don’t know what you’re doing.
But if you know how to do it right, you will not only be bestowed with enough mushrooms for your recipes; you can also make some extra cash on the side by selling them out.
21. Ginseng
Ginseng is a crop that’s famous around the world for its medicinal properties. You might have probably heard a lot of people speaking about ginseng tea and all the great things it can do to your body.
In addition to that, ginseng can also be an excellent crop to make some cash if you grow it in your homestead.
Greenhouses are great places to grow the crop as they give ginseng enough heat and perfect conditions to harvest well.
22. Garlic
Garlic is one of those things that can give your food an amazing flavor. And if you have some poultry around, then it also works great as a snack for your chickens.
Now, greenhouses are ideal places for you to grow garlic, as they can stay undisturbed that way and give you more produce.
23. Gazanias
A lot of people might not have heard of Gazanias, but these flowers look so much like daisies. And the best part is that they come in so many different colors.
In case you’re someone who likes to keep your house pretty with as many vibrant and gorgeous flowers as possible, then you might want to grow gazanias in your greenhouse too.
24. Coleus
Coleus is a beautiful perennial plant that is not only easy to propagate, but also adds a great look to your house without being hard on you.
If you’re tired of growing only veggies, fruits, and herbs, then this plant can be an excellent addition to your greenhouse to give it an awesome visual appeal.
25. Chrysanthemums
My mom loves chrysanthemums - how they grow in full bloom and how they are available in a variety of hues. She likes putting them up in a vase, or just in a shallow vessel filled with water.
So, when I came to know that they can be easily grown in the greenhouse, I immediately bought some and planted them to give her a surprise. And boy, she was elated!
Some of you might probably be confused as to what chrysanthemums are, but you might have heard of these beautiful fall flowers called ‘mums’! Yes, they are the same. And they fit amazingly well in your greenhouse.
26. Pansies
I like Pansies because they are one of those flowers that give away the onset of spring. They have this beautiful hue that not only adds color to your yard but also to your heart.
It is, of course, a great thing that pansies can be grown in the greenhouses because this way, you can feel the beauty of spring, way ahead of its time.
27. Poinsettias
Poinsettias are other beautiful plants that belong to the flowering family. You might have seen them being used in Christmas decorations.
These are some of the plants that can be grown in the greenhouse easily. What’s more, you can even earn some extra cash by selling it out during the holiday season.
But make sure you don’t grow them if you have cats around because Poinsettias can be harmful to them.
28. Ferns
One thing I love about these ornamental plants is how beautiful and simple they are. And when I learned that they could be grown in the greenhouse, I was delighted.
This way, I didn’t only get to have a beautiful greenhouse but also had a great option to choose from and place it in the vases, whenever I wanted to decorate my home.
29. Caladiums
Also referred to as ‘Elephant Ears’ owing to their shape, caladiums are great for decorating your home and also add some color to the greenhouse. They also work well with your flower arrangements.
The best part about these ornamental plants? They can be easily grown in your greenhouse without giving them a lot of attention.
30. Salvia
Whenever I see the gorgeous purple color of Salvia, I feel happy that I decided to grow them in my greenhouse. And why not? It gives out a beautiful feel of a meadow or a garden every time you look at it.
If you are looking for an elegant and luxurious addition to your greenhouse, then you might want to consider planting some Salvia.
31. Petunias
The one memory I have of petunias is how my mom used to decorate our house with them during the summers and springs of our childhood. I also faintly remember how my mom used to say that it’s much more cost-effective to grow them at home.
So, when we set up a greenhouse, I decided that I’d grow some petunias for myself and take a walk down memory lane, whenever I wanted.
32. Impatiens
Impatiens can be quite cute and colorful at the same time. The best part, you can grow them in your greenhouse whenever you want to give them a stroke of different colors.
What’s more, you can even use some of them to decorate your house whenever you desire, by simply placing a few of them in a planter or a vase.
33. Geraniums
These are another kind of flowering plants that can be a great addition to your greenhouse. However, they often require more time than other plants for a full bloom. And I believe that growing them in the greenhouse will give geraniums the time they require to grow.
34. Baby Carrots
With this, we are once again back to the food-based plants. Now, baby carrots are an amazing choice of plant to grow in a greenhouse, so long as you don’t place them in containers.
Containers are for full-grown carrots, which probably need a lot of depth to grow to their maturity. Baby carrots, on the other hand, don’t require these at all. So, just go ahead and plant a few of these in the greenhouse.
35. Pumpkins
I didn’t grow pumpkins in my greenhouse as it is a smaller one. But if you happen to have a larger greenhouse, then this might be an excellent choice of plant.
With ample space, time, and patience, you can grow your pumpkins.
Home-grown pumpkins for Halloween! Now, how does that sound to you?
36. Broccoli
I cannot probably explain in words how much I love Broccoli. There were days when I used to eat it every single day. And I honestly don’t get it when people say that they hate eating it. I mean, what’s not to like about them?
So, when I realized that I could grow broccoli in my greenhouse, I jumped in joy. And when we had our first product, my happiness knew no bounds. They grew so naturally, and the produce was much better than what I used to get in a garden bed.
37. Sweet Corn
I once saw a TV show where they grew Sweet Corn in a greenhouse, and it was breathtaking. So I decided to give it a try, and I must say, I am not disappointed.
Now, I don’t need to go out to the market whenever I crave corn on the cob or some corn cheese macaroni.
38. Leeks
Not only can you grow leeks in your greenhouse, but also help increase the overall harvesting period by controlling the temperature.
You can even go for a second planting in the greenhouse because it gives the necessary time for the plants to grow in isolation.
39. Onions
Growing onions in the greenhouse is a great idea as they get the right amount of temperature for growing and harvesting.
Furthermore, the greenhouse also gives your onion plants the required amount of time needed to grow to maturity,
40. Brussel Sprouts
Just like with leeks, a greenhouse can also help extend the growing season of Brussels sprouts. So, if you’re done with the first harvest and are aiming at a second planting in the fall, you can just grow these sprouts in the greenhouse and wait for them to mature. You won’t be disappointed.
41. Peas
When you think of a pea harvest, you usually picture a farm in your mind. That’s because most people usually grow peas on a farm.
But do you know that they can be raised in a greenhouse equally well? I know that you might probably be worried about the size of the harvest, but if you happen to have ample space in your greenhouse, then there’s nothing for you to worry about.
42. Cabbage
Generally, cabbages are grown in cold weather conditions. They can also be grown in warmer temperatures, but driving away all those bugs and insects can be a real pain, which you don’t have to bother about in colder seasons.
However, if you decide to grow cabbage inside your greenhouse, you can adjust the temperature, and even extend its growing season.
43. Melons
Be it watermelon, muskmelon, cantaloupe, or any other kind in the melon family; you can grow it in your greenhouse without any issues.
All you have to do is ensure that they don’t run over the area like creepers usually do. To avoid this, you can probably make use of a trellis and have an organized growth area for the melons.
44. French Beans
One thing I like about greenhouses is that they extend the harvests. This is the case with French Beans too. You can grow the crop for the second time and have more harvest than usual.
This works because planting these beans in the greenhouse will give you an earlier harvest than the one you would usually get on a standard farm.
45.Sweet Potatoes
Again, sweet potato isn’t necessarily a crop that comes to your mind when you talk about ‘heat-loving plants’. But then, they are amazing with the greenhouses, and planting sweet potatoes for harvest here will never give you regret.
Who wouldn’t want to have a stock of this amazing vegetable right at their home, given the number of ways it can be used in cooking?
46. Lettuce
I have been growing lettuce in my garden for a very long time. But once we set up our greenhouse, harvesting the plant became even easier.
Lettuce doesn’t require a lot of space really, and the greenhouse provides ideal conditions for the plant to grow without any hindrance. And what time of the year would be great for raising lettuce you may ask? Late summers would be perfect.
47. Eggplant
Eggplant is another tender crop that you can grow in your greenhouse during the summer months. You might not know it, but eggplants do love some heat.
The warmer conditions that greenhouses provide help you get a good harvest of eggplant for your household requirements.
So, if you are someone who is a huge fan of eggplant, you might want to try growing them in the greenhouse for a season and see how it goes.
48. Beets
I used to hate beets as a kid, but as time passed, I’ve grown to love them. Especially how they can be used in a variety of recipes - be it cooked food, salads, or juices.
One of these years, I tried growing beets in my greenhouse. I wasn’t sure of the results, but I must say, I was really surprised at the harvest. They grow fast. You can see them ready to be harvested within 60 days.
It initially grew to about 1.5 inches in diameter, which I usually find perfect for cooking. But then, I observed them growing much larger, as far as long as there was room for them to grow.
If you tend to use beets often in your household, then you should probably try planting them in your greenhouse.
49. Turnips
Now, turnips are another great crop to harvest in the greenhouse during the cold weather seasons. Since these are among the veggies that fail to pollinate in the harsh conditions of warmer seasons, you can try harvesting them in your greenhouse during the colder months.
The controlled temperature within will provide the ideal environment required for the crop to mature.
50. Radishes
Radishes can also work well in your greenhouse during the colder months if you can take proper care of them.
Usually, this vegetable needs to be planted in fertile and well-drained soil for it to grow successfully. So make sure the soil in the greenhouse meets these requirements.
You can also grow them like carrots by placing them in the containers until they grow to maturity.
51. Kale
Kale is one of the easiest plants that can be grown in a greenhouse without a lot of hassle. Like radishes and turnips, Kale can be harvested well in colder weather conditions where they are left to grow steadily.
And due to the extended harvesting characteristic of the greenhouses, you can grow Kale for the second time in a year, and believe me; it tastes completely different in the second harvest.
52. Watercress
You might not believe it when I tell you that you can grow watercress in a greenhouse. Hell, even I couldn’t believe it myself until I did it so myself.
But the truth is, watercress can be raised faster under glass than in the outdoors.
So, if you happen to be a fan of this aquatic plant that’s great for soups and salads, then you might want to grow it in your greenhouse.
53. Cauliflower
When I was on a diet, I replaced the usage of rice with cauliflower. It was then that I became a huge fan of this vegetable.
So, the last one on the list of greenhouse plants is cauliflower. You might probably be skeptical about planting it in your greenhouse, but they do just as well as other plants on the list.
All you have to do is ensure that you plant it during the colder months and control the temperature accordingly.
So finally, we’ve come to the end of the list, and you have 53 amazing plants to choose from for your greenhouse. Here’s hoping that you will have amazing luck with these as much as I did.
And in case you have anything else to add, something I missed or didn’t know, or something you want to share, do share your thoughts below.
See you soon!
Want to grow fresh produce in your garden but don't want to invest in an enormous greenhouse?
We know that building a greenhouse on your own can be pretty time-consuming. Not to mention the hassle of hiring a gardener if you don't get it right the first time.
So, instead of stressing over building a greenhouse, try purchasing a greenhouse kit online. Whether you need a petite greenhouse kit for indoors or a larger, sturdier option for building a vegetable garden, there is no shortage of options. So, today we're going to introduce you to the best greenhouse kits on the market.
Without further ado, let's get started!
From small compact designs to spacious structures, here's the list of the 9 best greenhouse kits to cater to your gardening needs and take your green thumb to new heights.
To begin with our list, we have a heavy-duty greenhouse kit by the brand Home Complete that is constructed out of steel and polyvinyl chloride. This all-season see-through greenhouse could be the perfect addition to your backyard garden. With no tools required to assemble it, you can start planting the day it is delivered.
8-SHELF GREENHOUSE KIT - The 8 greenhouse shelves provide...
INDOOR OR OUTDOOR - This portable greenhouse is ideal for...
Why Did We Like It?
Right off the bat, we liked the fact that this product could come into use throughout the seasons. We know several garden and plant enthusiasts who would love this walk-in greenhouse for this very reason. With this greenhouse, gardening fruits, seeds, vegetables, flowers, or herbs for everyday cooking will become much more convenient.
Moreover, this kit comes with all the parts required to set it up, which means you don't need any tools to install this greenhouse. The greenhouse kit comes with a steel frame and weather-resistant PVC cover and is ideal for growing plants. With a dimension of 56 inches in length, 56 inches in width, and 76 inches in height, there is ample space for you to fit in and water the plants.
Besides, this medium-sized greenhouse kit can be used indoors as well. In case you don't have a backyard, it will work equally well in backyard patios, garages, or even the basement. Equipped with eight durable shelves, you can place multiple plants in pots and spread them out as you like.
What Could've Been Better?
Greenhouse kits are ideal for temperature control and blocking harmful UV rays, and this model does just that. In fact, out of most backyard greenhouse kits, this one is much easier to assemble and comes with a set of rods, ropes, and anchors. We only wish this model was slightly bigger to hold more plants.
Pros
Useful indoors and outdoors
Easy assembly
All accessories are included
Protects from direct sunlight
Cons
On the smaller side
Size: Various sizes available | Frame Material: Steel | Cover Material: PVC | Ventilation: Yes | Shelving: Yes | Additional Features: Roll-up door, windows, anchor system
The next option is a tiny one for those of you wanting to set up an indoor garden. The Mini greenhouse kit by Gardman Store is one of the smallest options available on the market today. This four-tier greenhouse is compact, lightweight, and portable, and you can assemble it on your patio without using any tools.
Ideal for small backyards or homes where space is an issue;...
Gives seeds, seedlings, and young plants an early start
Why Did We Like It?
When we think of traditional greenhouses, a large green structure of plastic that you can walk into comes to mind! But not everyone has large spaces at home, so Gardman Store has developed a mini version that will fit in any house. In fact, the 27-inch long, 18-inch wide, and 63-inch high greenhouse is as small as a cupboard.
Let's say you have a small balcony, patio, or backyard that looks a bit bare, and you wish to stock it up with herb plants. That's when this model will come in handy, but that's not all this mini greenhouse kit can do. Before planting your young seedlings and plants in a bigger greenhouse, you can give them an early start indoors.
Also, the model comes with a clear polyethylene cover and roll-up style zippered door for quick access. And you will have no trouble assembling the pieces because the strong-fit tubular steel frame is light and needs no tools for installation.
What Could've Been Better?
With a few delicate plants, they require extra care during the growing season and need protection from cold weather and heavy snow. Until they are mature plants, you can allow the new plants to propagate in this mini greenhouse. On the downside, this model might be too small if you have many plants to grow at once.
Up next, we have a walk-in greenhouse kit by the brand Ohuhu which comes with roll-up doors for easy entry. Consisting of three tiers on two sides, this option should be good enough to hold more than a few potted plants. If you are looking for a larger greenhouse, consider this model for your backyard.
EXTEND YOUR GROWING SEASON YEAR-ROUND: Featuring a...
ULTIMATE ALL-WEATHER PROTECTION & CLIMATE CONTROL: Act as a...
Why Did We Like It?
Sometimes you need a larger greenhouse to hold all your delicate plants to prevent heating on hot summer days. This model by Ohuhu is by far one of the best options you can buy if you want to protect plants but also provide ventilation. Since this high-quality greenhouse kit has two side windows, there is a constant supply of fresh air for plants.
Additionally, it also has an observation window to monitor plants from the outside, something missing in most greenhouse kits. With 12 wired shelves and dimensions of 56 inches in length, 55 inches in width, and 76 inches in height, you can easily walk in to maintain the plants.
What Could've Been Better?
While we liked how spacious this option was and the rock-solid stability it provided, we felt it could improve on one aspect. The material might not be able to withstand very windy areas on open fields. So, if you live in an area particularly susceptible to storms, consider placing this greenhouse near the boundary walls to protect it.
The canopy-style portable greenhouse kit by Eagle Peak is pretty lightweight, weighing merely 35 pounds. Thus, if you need to change greenhouse locations often, this model might suit you. Available in four different sizes, this foldable greenhouse has a solid steel base that comes with an anchoring system to hold the structure in place.
PATENTED CENTER LOCK: Quick, easy setup. This pop up...
BUILT STRONGER FOR ALL SEASONS: Built with more steel than...
Why Did We Like It?
Firstly, we think people who need a lot of space for their precious growing plants will love this model. It is a large greenhouse that allows one to move around freely without feeling cramped in the area. The plants have ample space to grow in all directions, and you can even find a corner to store your gardening tools.
Since this portable greenhouse is spacious, it allows natural sunlight to fall upon the plants at certain times of the day. The PE protective cover keeps the plants safe from the harsh local climate.
Installation is a piece of cake that requires merely three simple steps - you set up the steel frame, lock the canopy, and adjust the angle. This gives you easy access through the door and helps the plants with the perfect coverage.
What Could've Been Better?
The good thing about this model is that once you have the frame installed, the setup is quite sturdy with a steel ceiling. It is rigid enough to withstand outdoor temperatures and protects plants from harsher climates. However, the steel frame requires some muscle to set up in the first place.
Pros
Breathable windows
A single-person set up
Reliable steel frame
Four sizes available
Cons
Frame may be heavy for some people
Size: Various sizes available | Frame Material: Steel | Cover Material: Polyethylene | Ventilation: Yes | Shelving: No | Additional Features: Zippered door, windows, UV protection
Yet, another large walk-in greenhouse we have is this superb model by the brand Quictent. This one is for those with a huge backyard or lawn space and can accommodate a greenhouse of such massive proportions. Despite being huge in size, the structure remains relatively light at 26 pounds.
Reinforced Mesh PE Cover--heavy duty 2 layers PE cover with...
Why Did We Like It?
What makes this model unique is its upgraded features of two mesh zipper doors and ten vents for airflow. Since the doors are wide, you can shut them off with a mesh door to prevent small animals from entering the greenhouse. The PE covers manage to keep the enclosure warm, yet the ten vents or windows support airflow.
Apart from that, the heavy-duty PE mesh cover has two layers of reinforced mesh, making it completely water-resistant. This layer is also UV resistant but allows for 85% of the light to fall through to nourish your plants. The layer prevents plant burn and helps young plants to grow in a safe and temperate environment.
Due to the powder-coated steel frame, you can expect the poles to keep the frame standing for a long time indeed. It consists of 10 bases and 20 stakes that stabilize the greenhouse while simultaneously keeping out the snow and wind.
What Could've Been Better?
Those who have already purchased this greenhouse kit claim that it turned out to be the best investment. And we agree that its size, strong frame, and mesh make it highly durable. All this at an affordable price too. But, extremely windy places will require more stones to keep the PE mesh in place.
SV Scool Value has developed a robust and stable walk-in greenhouse that stands firm with the support of steel pipes. With an eco-friendly PE cover, this model is an excellent choice for placing several small plants in the same greenhouse. This model would be ideal as a garden or outdoor greenhouse.
Keep Ideal Heat and Humidity: The 2 Windows and Roll-Up...
Large Space: Outdoor greenhouse on both sides with 3 tiers 8...
Why Did We Like It?
Larger greenhouses like this one are pretty convenient because one actually has space to walk into the water or fertilize plants. This option might be one of the best greenhouse kits to gift to someone because it is reliable and cost-effective. Place this affordable greenhouse next to your garden bed and promote delicate plant growth by moderating the temperature.
Also, the PE cover is odorless, non-toxic, and low-temperature resistant, so one can use it for several years to come. Moving on to shelf stability, it is interesting to see the addition of 16 clip-shelf fixers that prevent the shelf from wobbling. Speaking of which, the ground nails and ropes provide additional stability to the greenhouse cover and prevent it from blowing away in winds.
What Could've Been Better?
Since the PE material is resistant to corrosion, it makes for a much more durable alternative to PVC. Anyway, there were many complaints regarding this model, and most buyers were satisfied with its performance. But, a few complained of losing the greenhouse to strong wind.
Up until now, we explored the world of plastic covers in the form of PVC or PE, but there are other common types of greenhouses too. Palram greenhouse kits make polycarbonate greenhouses that are incredibly tough and resistant to outdoor climates. If you live in frigid conditions, you might want to look at this option.
TWO PANEL TYPES PROVIDE ULTIMATE BALANCED GROWING CONDITIONS...
STURDY THOUGHTFUL CONSTRUCTION WILL LAST A LIFETIME - Chosen...
Why Did We Like It?
When it comes to super-durable materials, it doesn't get better than walled polycarbonate panels. This material is virtually unbreakable and handles much more impact than a plastic cover ever could. It is no wonder that polycarbonate is a common sight in places with plenty of snowfall. In fact, the panels are capable of withstanding snow weight of 15 pounds per square foot.
Apart from that, these panels can diffuse the sunlight eliminating UV rays entirely from reaching the inside. And, despite UV protection and permitting diffused light into the greenhouse, the panels remain crystal clear in appearance. Once you purchase the kit, it comes with a rain gutter, an adjustable roof vent, and a lightweight aluminum frame.
What Could've Been Better?
There is no doubt that this polycarbonate greenhouse stands the test of time no matter the climate around it. But, we found a few shortfalls that we'd like to discuss. Firstly, the product is quite pricey, so it may not fit everybody's budget. Secondly, the customer service team usually took some time before responding.
Up next, we have a waterproof greenhouse-in-a-box by the brand ShelterLogic that is available in three sizes. This product is opaque or translucent and comes in all-white with roll-up side panels. Its triple-layered thick cover is ideal for keeping plants warm in cold seasons.
No products found.
Why Did We Like It?
To begin with, this walk-in greenhouse is ready to build right out of the box. With three layers of protection in the covers, this thick layer is absolutely waterproof and UV-treated. Since it was designed for plants, the covers exclusively block out harmful UV rays to help plants grow properly. As mentioned earlier, the roll-up panels along with half-moon screen vents improve indoor ventilation.
Additionally, it consists of patented metal ShelterLock steel stabilizers that add strength and stability to the structure. Besides, its powder-coated metal frame is resistant to chipping, peeling, corrosion, and rust. Included in the kit are 15-inch auger anchors for a secure base.
What Could've Been Better?
Certainly, this model had some brilliant qualities, making it fit for any large backyard. Its easy assembly is another point that customers seem to appreciate about this product. However, this model is quite bulky and heavy, so you may not be able to move it around often if you need to.
Pros
Promotes air circulation
Stable anchoring
Durable plant shelter
Protects against UV rays
Cons
Not portable
Size: Various sizes available | Frame Material: Steel | Cover Material: Polyethylene | Ventilation: Yes | Shelving: No | Additional Features: Zippered door, roll-up sides, UV treated
Lastly, we have a mesh-style greenhouse kit that is medium in size and has a total of four shelves. Try this greenhouse model if you are a garden enthusiast and wish to grow your favorite plants all year round. It is not very large, but big enough to walk into and care for your potted plants.
Beautify your Indoor Outdoor Landscape: The Ogrow portable...
Grow Healthy Plants: The walk-in greenhouse comes with a...
Why Did We Like It?
We selected this greenhouse kit as the final pick for this list for its simplicity. The design and structure are a perfect fit for a small backyard and garden, and its see-through design makes it easier for sunlight to reach the plants. At the same time, the mesh protects from harsh summer or afternoon heat that could damage plants.
With a frame made of heavy-duty powder-coated steel, the shelves are also strong enough to hold heavy potted plants. The kit also comes with a velcro hook and loop connection with ties to hold the greenhouse in place. Its assembly is also pretty easy and does not take much time due to its being lightweight.
What Could've Been Better?
This medium-sized greenhouse goes well on patios and can be placed in areas with full sunlight without fear of damaging plants. It does a great job of blocking sunlight, but not much can be said about its wind, rain, or snow-resisting features. A few customers noticed that the covers developed tears after heavy rain or gusty winds.
Pros
Protects against direct sunlight
Hooks and ropes provide stability
Big enough to walk in
Strong shelves can hold large plants
Cons
Mesh cover is not weather resistant
Size: Small to medium | Frame Material: Steel | Cover Material: PVC | Ventilation: Yes | Shelving: Yes | Additional Features: Zippered door, windows, roll-up design
Before you consider any other factor, take a look at the space you have for a new greenhouse. Whether you plan to install one in the garden, backyard, patio, or even indoors, you need to measure the area before buying anything. This will prevent silly mistakes like buying a very large greenhouse for a tiny backyard.
Alternatively, with a large and spacious area, it would not make sense to get a small greenhouse as the space will not be used effectively. If measuring does not give you a clear idea, mark the area with tape to get a visual representation of the area the greenhouse will cover.
2. Greenhouse Shape
While this might not be the most important factor, some people can be quite particular about the shape. On the market, you will find three shapes that are more common than others - the traditional, octagonal, and the lean-to style. Anyway, you should always compare the available space and judge which greenhouse shape will fit best.
3. Plant Growing Space
You may already have a list of flowers, vegetables, fruits, tubers, or herbs you want to grow in the brand-new greenhouse. But, what's more important is figuring out how many plants you wish to raise at a time.
In case you don't plan on growing too many, a 4x4 feet greenhouse could be enough. But, if you are sure about cultivating crops on a larger scale, a greenhouse of about 10x20 might be more fitting. Again, this will correspond with the space available for growing plants too.
4. Materials Used
Glass
Glass greenhouses look spectacular because you can see through them and observe the plants without stepping in. Also, it allows more sunlight to enter the greenhouse, thus making the interior warm and comfortable for plants. Apart from lasting a long time and having easily replaceable panels, they are also eco-friendly and do not contribute to pollution.
Polycarbonate
The strongest greenhouses are built of polycarbonate material, so it is no surprise that they are a popular option for building greenhouses. Glass will shatter upon impacts, such as the weight of heavy snow or a branch colliding due to strong winds. But polycarbonate material remains indestructible no matter the weather.
However, they are prone to scratches that do not disappear unless you replace the panels. Also, the material is not particularly good for the environment.
Wood
Wood is a lovely material to use for greenhouses because it can reinforce the natural aesthetic of your home and yard. Cedar, pine, maple, and oak and good choices for making the frame for your greenhouse. However, the problem with wood is that it is susceptible to rotting and insect infestations. You may have to purchase chemically treated wood to use for this purpose.
Metal
Most greenhouse kits will include metal frames instead of wood because they are far more durable and easy to install. Within the metal category, there is a range of options to choose from depending on the company. Steel and aluminum are the most popular among them all.
Even though they are cheaper and last longer than wood, you have to be careful to prevent them from developing rust.
5. Ventilation
Improper air circulation is a massive problem in bad greenhouses, and mismanaged ventilation can suffocate the plants to death. Most medium to large greenhouse covers will have at least one door and a couple of vents to allow constant air circulation.
Some massive greenhouses even install fans to force air indoors, but this might not be necessary on a residential plot.
Greenhouse Kits FAQ's
Why should I use a greenhouse kit?
Greenhouse kits offer numerous benefits, including extended growing seasons, protection from harsh weather conditions, control over temperature and humidity, and the ability to grow a wider variety of plants.
Can I assemble a greenhouse kit myself?
Yes, most greenhouse kits are designed for easy assembly and come with detailed instructions. However, the level of difficulty can vary depending on the kit. It is important to carefully follow the instructions and consider seeking assistance if needed.
Do greenhouse kits require any additional equipment or accessories?
Some greenhouse kits may require additional equipment such as heaters, fans, irrigation systems, and shelves. It is important to consider the specific needs of your plants and climate when choosing additional accessories.
Are there any maintenance requirements for greenhouse kits?
Yes, greenhouse kits require regular maintenance to ensure optimal performance. This may include cleaning the panels, checking for leaks, adjusting ventilation, and monitoring temperature and humidity levels.
Can greenhouse kits be customized or expanded?
Some greenhouse kits offer customization options or the ability to expand the structure in the future. However, it is important to check the specifications of the kit and consult with the manufacturer to determine the possibilities for customization and expansion.
Which Direction Should My Greenhouse Face ?
According to a rule, people living in the northern hemisphere should place the longer side of the greenhouse southwards. This isn’t set in stone; instead, it’s just the ideal direction for maximizing sunlight for your plants. Alternatively, people in the southern hemisphere should point the broader part of the greenhouse towards the north.
What Is The Perfect Greenhouse Size ?
As we mentioned earlier, greenhouse size will depend on the number of plants you wish to grow combined with the size of your backyard. Usually, people do not like to buy anything smaller than a 6-foot wide greenhouse because you can barely fit anything in there.
Conclusion
All in all, if you are keen on gardening organic produce for your family, a greenhouse is a must-have for the backyard. And the kits presented here should save you a lot of time and effort in building a new one. However, the question arises- which of these greenhouse kits should you select?
In our opinion, the most versatile option remains the Heavy Duty Greenhouse Kit by Home Complete. This easy-to-assemble option is sturdy and the perfect size for a small garden. Another convenient option is the Gardman Store Mini Greenhousewhich is ideal if you are looking for a smaller greenhouse. Either way, we hope this guide helps you select the best greenhouse for your home.
See you next time, bye!
Your gorgeous hydrangeas need food, water, and nutrients to thrive - just like you! So, what they need is good fertilizer.
When it comes to fertilizers, you will find plenty of options in the market. However, picking the right 'plant food' can be confusing. What kind of a nontoxic fertilizer should you buy? What is your budget? How do you optimally use it?
Moreover, you will come across several substandard products which might do more harm than good. So, how do you decide?
Well, we are here to guide you through the best options. After testing out a dozen of the top products, we have compiled a list of our top 9 recommendations. To make things easier for you, we have even included an informative buyer's guide after the reviews. Hopefully, it will help you make the right choice for your hydrangeas.
So, without further ado, let's get to the reviews, shall we?
Best Fertilizers For Hydrangeas
Whether you're a beginner or an experienced gardener, this list will provide you with valuable insights and recommendations to help your hydrangeas flourish to their fullest potential. So, without further ado, here's the list of the 8 Best Hydrangeas Fertilizers.
One of our top recommendations is the Miracle-Gro Tree & Shrub Plant Food Spikes. Feeding nutrients to your hydrangeas has never been easier. Simply drive the spikes into the ground, once every season, and that's it! You don't need to tamper with them after placing them on the ground.
LASTING COLOR: Miracle-Gro Tree & Shrub Plant Food Spikes...
PROVIDES NUTRITION: These easy-to-use outdoor tree food...
Why Did We Like It?
First and foremost, we liked how innovative the product design was. The fertilizer comes in the form of spikes, which you have to drive into the ground using some force. Once they are in, you can forget about them for the rest of the season. They will slowly do their job - feeding nutrients to your plants and enhancing their beauty.
Although you will get 12 spikes with each pack, they come with only one cap. You should be mindful of this as you need the cap to store the rest of the spikes carefully.
It is very easy to drive the spikes in after it has just rained. This makes the ground wet and soft, making it easier for the spikes to get pushed in. However, you can simply choose to wet the ground beforehand and then drive the spikes in. For best results, place the spikes about 3 feet apart.
What Could've Been Better?
We wish the manufacturer would have provided more than one cap for the spikes. Once you open the outer seal of the pack, the spikes eventually succumb to humidity and soften. To keep them intact, we had to place them in ziplock bags. You can even use them all together to avoid storage issues.
Pros
Does not require any maintenance
Ease of usability for most users
Promotes growth and vibrant color
Contains only natural ingredients
Cons
No inner seal to protect spikes during storage
NPK Ratio: 15-5-10 | Quantity: 12 Spikes/Pack | Fertilizer Type: Spikes | Application Method: Insert in the soil near plants | Duration of Nutrient Release: Up to 6 months | Organic/Natural: No | Target Plants: Trees and shrubs
For all those serious gardeners looking for an all-in-one solution, our next recommendation is a great option. This fertilizer comes in a granular composition with a unique resin coating. The coating controls the flow of nutrients. It allows plants to imbibe just the amount they need; when they need it.
Osmocote Smart-Release Plant Food Plus Indoor & Outdoor is...
This plant food feeds plants for up to 6 months with...
Why Did We Like It?
Compared to our previous recommendation, the method of application for this fertilizer is quite different. It comes in an easy-to-use granular form, which can be used just once in six months. Just a scoopful of it is enough for 4 square feet, limiting wastage.
The fertilizer is composed of 11 vital nutrients that help your hydrangeas thrive throughout the season. The unique semi-permeable resin coating is a fascinating feature that we liked. This coating controls the number of nutrients that are released into the soil. It allows your plants to soak in just the amount they need, without giving them an excess or deficit.
Moreover, the nutrients are released in varying amounts according to temperature changes. The higher the temperature, the more release there is. This ensures that there are more nutrients for your plants during the warmer, growing periods.
What Could've Been Better?
We loved the size and ease of use of the product; however, we had one complaint. Once the fertilizer dissolved into the soil, we were left with little plastic shells, which we had to pick out individually. This can be cumbersome and not a green initiative at all.
Pros
No-burn pledge ensures your plants aren’t damaged by excess fertilizer
Water permeable resin coating
Enhances growth and blooms of plants
Slow-release fertilizer
Cons
Nonbiodegradable plastic shells left behind
NPK Ratio: 15-9-12 | Quantity: 1, 2, 4.5 & 8 lbs | Fertilizer Type: Granular | Application Method: Incorporation into soil | Duration of Nutrient Release: Up to 6 months | Organic/Natural: No | Target Plants: All-purpose
Looking for a high-quality fertilizer for larger and heavier harvesting plants? Flower Fuel is a great option you can explore. A super-premium nutrient fertilizer; that helps your plant produce bigger blooms every season. With over 40 organic ingredients, it is an excellent choice for those looking for a heavier harvest with vivid, succulent flowers.
Flower Fuel is a 100% hydroponic-grade, soluble bloom...
Formulated to achieve larger, denser and heavier harvests....
Why Did We Like It?
What we liked most was the versatility of this fertilizer. You can use it alongside any base, including the popular 2-part and 3-part nutrients. Furthermore, it works excellently on any kind of soil as well as aeroponic or hydroponic systems and coco.
Produced with top-quality nutrients, organic compounds, hormones, vitamins, and amino acids, it is a super-premium product. It ensures that your plants produce a bigger and heavier harvest. Moreover, you only need to use 1/4th teaspoon per gallon, reducing any wastage.
The pack comes with a 1/4th teaspoon and 2.5 teaspoon scoop, so you don't need to use any approximations or guesses. Add the fertilizer along with absolutely any base to give you a significantly larger bloom and healthier-looking plants every season.
What Could've Been Better?
Overall, we were delighted with this product and would recommend it for larger blooms. However, we noticed that the pH content of the water was affected. It is not necessarily a bad thing, but just something to look out for when using it on your plants.
Pros
The versatility of use with any base
Requires very little per gallon of water
Dissolves entirely without any residue
Long-lasting product
Cons
Reduces the pH content of water slightly
NPK Ratio: 1-34-32 | Quantity: 0.5, 2.2, 11 & 44 lbs | Fertilizer Type: Water-soluble | Application Method: Dissolve in water | Duration of Nutrient Release: Quick-release | Organic/Natural: No | Target Plants: Flowering plants
Bone meal contains vital ingredients such as calcium, phosphorus, and organic nitrogen. These enhance the growth of your plants and encourage root strength. When this comes in an easy-to-use packaged fertilizer, you can be sure that it will be an excellent choice for your hydrangeas.
STRONGER ROOT DEVELOPMENT: Bone Meal is a natural source of...
ADD TO SOIL: Add to soil or potting mix during seed starting...
Why Did We Like It?
Although there are various options for soil additives and fertilizers in the market, only a few are genuinely organic. Burpee offers a 100% organic product that you can safely use in your home garden without fear. Completely biodegradable and OMRI listed, this product does not damage your plants or the environment.
We were impressed by how easy it was to use it. Sprinkle it over the soil and simply water your plants as you normally would. Of course, be sure to always wear protective gloves when handling any kind of fertilizer, for added protection.
Upon opening the bag, we noticed that the fertilizer has a strong, pungent odor. However, this quickly disappears once we add it to the soil, so it's not an issue! A 100% bone meal fertilizer, it is completely safe and works excellently on hydrangeas.
What Could've Been Better?
We have nothing negative to say about the product. However, we do have a bone to pick with the package itself. Once we opened the seal, there was no way to reseal it. This introduces moisture into the bag, which we didn't want. Transferring the contents to a zip lock bag is the only solution.
A slow-release formula that ensures your hydrangeas are well-fed for weeks. The spikes feed your blooms throughout the season. Moreover, their design allows the nutrients to reach right to the roots - where they need it the most. The design enables no mess, no smells, and no wasteful runoffs.
Package contains 10 flower fertilizer spikes and is produced...
Plant fertilizer is formulated with a 9-8-7 NPK to provide...
Why Did We Like It?
When it comes to ease of use and reduced wastage, we were impressed with this product. The spikes were the perfect size at 3 inches each. Gentle hammering or pushing was enough to place them into the soil without any difficulties. Of course, it is easier to do this after it has rained since the soil is much softer. You can also water the ground to make it moist and soft, then insert the spikes.
The slow-release formula worked excellently on hydrangeas. The nutrients were released over eight weeks, after which we could place another set of spikes. Just keep in mind; they are best placed after the blooms shed.
What impressed us the most was the waterproof and resealable bags. Unlike its other competitors, this manufacturer ensured that we don't have to transfer the spikes to a safely stored ziplock bag.
What Could've Been Better?
Since they do not contain an outer protective covering, they are prone to breaking. However, this can be avoided entirely if you ensure that your soil is moist enough to allow easy access for the spikes. In case you apply too much pressure on the spike on dry soil, it may break.
Pros
The resealable bag ensures safe storage
No waste, odors, or hazards
Pre-measured spikes ensure your plants get the appropriate amount of fertilizer
Feeds for a full season
Cons
The spikes may break with excess pressure
NPK Ratio: 9-8-7 | Quantity: 10 or 18 Spikes | Fertilizer Type: Spikes | Application Method: Insert in soil near plants | Duration of Nutrient Release: Up to 8 weeks | Organic/Natural: No | Target Plants: All-purpose
Are your beautiful hydrangeas suddenly losing their vibrant color? This product makes them bloom in vivid blue shades once again. The hydrangea pellets add natural minerals to the soil, making it more acidic. Easy to use pellet formula does not require any mixing. It naturally turns your hydrangeas blue without causing any damage.
Protect plants from insect damage with Systemic Houseplant...
Protection lasts for up to 8 weeks after application; the...
Why Did We Like It?
First, we were curious to try out this natural soil additive, which would turn our hydrangeas blue again. The formula was super easy to use. We simply had to add a scoopful to our soil and water the plants as usual.
The 90% elemental sulfur reacts with the soil bacteria, getting oxidized. This creates sulphuric acid, which naturally lowers the pH level of the soil. The acidic soil is great for acid-loving plants like hydrangeas, and we could see a difference in the blooms.
Furthermore, this process naturally changes the color of hydrangeas, giving them a vivid blue hue. If your hydrangeas are already blue, this natural additive enhances their color over time, making them brighter and fuller.
What Could've Been Better?
In some cases, we noticed that the hydrangeas turned purple or a lighter hue of blue. The color change occurs due to the pH level of the soil. The manufacturer should have mentioned that you need to work on keeping your soil acidic to get optimal results.
Pros
Naturally reduces the pH level of soil without toxins
Safe to use around pets
Easy-to-use pellet formula
Scooper included for accurate measurements
Cons
You need to work on keeping the soil acidic for the best results
NPK Ratio: N/A | Quantity: 0.5 lbs | Fertilizer Type: Liquid | Application Method: Mix with water and apply | Duration of Nutrient Release: Up to 8 weeks | Organic/Natural: No | Target Plants: All-purpose
We have almost come to the end of our list. One of our last recommendations is an all-natural plant food with bio-microbes. It works mainly on fussy or hard-to-take-care of plants. The natural fertilizer does not burn your plants, slowly releasing nutrients over a period of time.
THE ORIGINAL: Holly-tone is the original plant food for all...
FOR USE ON: Not just for Holly; Use Holly-tone organic...
Why Did We Like It?
Some plants are just harder to care for than others. Hydrangeas often require a lot of attention and care. They bloom well in acidic soil, along with good plant food and nutrition. This product was extremely easy to use. We just had to pour it over the soil, cover it, and water our plants.
In no time, we noticed that the pH level of the soil decreased naturally. This environment allows hydrangeas to thrive. Furthermore, the plant food was natural, with no chemical or toxic additives.
The slow-release formula ensures that your plants don't burn with an excess of nutrients. It allows the nutrients to organically seep through - as and when the plants require it.
To top it off, the releasable bag works great for storage after use. It does not allow moisture to damage the fertilizer.
What Could've Been Better?
Honestly, we had no complaints about this organic fertilizer. We liked how easy to use it was and did not harm our plants. However, we did notice a mild pungent smell from the bag and the product itself. Fortunately, the scent naturally dissipates into the air, which is good.
Pros
Slow-release nutrient formula
Requires very little product for good results
Resealable bag
Safe to use with a family of children and pets
Cons
Mild pungent odor
NPK Ratio: 4-3-4 | Quantity: 36 lbs | Fertilizer Type: Granular | Application Method: Sprinkle around plants | Duration of Nutrient Release: Up to 2 months | Organic/Natural: Yes | Target Plants: Holly and acid-loving plants
Our final recommendation for this list ends with Jack's Classic hydrangea fertilizer. You are bringing the highest-quality, water-solution fertilizer for your blooming hydrangeas. This product is fast working. However, it lasts for two weeks to a month before you need to feed more to your plants. Moreover, it is easy to use and requires no aftercare.
7-3-3 Analysis - Great for promoting lush leaves and enhance...
Many Ways to Feed - Hydrangea Blue can be used as a foliar...
Why Did We Like It?
Although hydrangeas come in a variety of shades, the blue ones look especially dazzling. This formula naturally enhances the blue hue in many blue and pink hydrangeas. It is easy to use and does not make a mess. You need to pour the formula near the roots for optimal results.
We liked how clear and concise the manufacturer's instructions were. For the first month, you need to feed this to your hydrangeas once every two weeks. However, after that, you can feed it just once a month. It is convenient and does not require much maintenance.
The formula is entirely water-soluble, leaving behind no waste or residue. However, it is safest to use it near the roots and not the leaves or flowers itself. It is also recommended to use the formula during early mornings or late evenings, avoiding the day's heat.
What Could've Been Better?
Overall, we liked the effectiveness of this fertilizer. However, the manufacturer states that pouring it directly on the leaves may cause damage to them. This is worrisome, and you need to take precautions when feeding the formula to your plants.
Pros
Clear, easy-to-follow instructions
No mess formula
Enhances the color of blue and pink hydrangeas
Does not require aftercare or maintenance
Cons
Carelessly pouring it on leaves may damage them
NPK Ratio: 7-3-3 | Quantity: 1.5 lbs | Fertilizer Type: Water-soluble | Application Method: Dissolve in water | Duration of Nutrient Release: Quick-release | Organic/Natural: No | Target Plants: All-purpose
Now that you have all the information you need on the nine best fertilizers for hydrangeas, you're almost ready. But not quite - there are still a few things you need to know. When purchasing a good fertilizer, there are a few factors you need to be aware of.
Below is a complete buyer's guide, which will give you advice on how you can find the right fertilizer for your plants. So without delaying any further, go through this guide and make the right choice for your hydrangeas.
Form & Structure
Fertilizers come in various forms - spikes, pellets, or liquid. Depending upon your plants' requirements and how you wish to feed them, you can choose from the following:
Pre-measured Spikes:
These are undoubtedly the easiest to use. Moreover, they reach directly to the roots, giving nutrition where the plants need it the most. Using them is easy - as long as you wet the soil beforehand. There is no aftercare either, which is convenient. However, be sure to choose one which is nontoxic and doesn't leave behind any residue.
Pellet Or Granular
When buying these fertilizers, it is essential to look at the manufacturer's instructions carefully. Most of these come with a scoop, so use it according to the instructions. Sprinkle the pellets around the plant and water as usual. In some cases, you may need to cover the pellets with some topsoil. If you want to avoid getting your hands dirty, use gloves - or opt for the spikes.
Acid Type
The number of nutrients and their ratio will determine how acidic or alkaline the soil becomes. Fertilizers containing a high amount of phosphate will have the most acidifying effect on the soil. Check this information carefully before you purchase your fertilizer.
NPK Ratio
The NPK ratio refers to the Nitrogen, Phosphorus, and Potassium Levels in a particular fertilizer. Each of these nutrients plays a different role in the feeding and development of your hydrangeas.
If your hydrangeas are yellowing, it is best to find a product with a higher level of Nitrogen. However, if your goal is to increase the number of blooms, opt for one with a higher phosphorus level. On the other hand, if root and stem health is your priority at the moment, go for one with a higher content of potassium.
Hydrangeas Fertilizers FAQ's
Why should I fertilize my hydrangeas?
Fertilizing hydrangeas provides them with essential nutrients that they may not receive from the soil alone. Proper fertilization promotes healthy growth, vibrant foliage, and abundant blooms. It helps maintain the pH balance of the soil and provides the necessary elements like nitrogen, phosphorus, and potassium for optimal plant development.
When is the best time to fertilize hydrangeas?
The best time to fertilize hydrangeas depends on the specific variety and your geographical location. In general, it is recommended to fertilize in early spring before new growth begins. However, certain varieties may benefit from additional applications throughout the growing season. Always check the instructions on the fertilizer package and follow the recommended timing.
Can I use general-purpose fertilizers for hydrangeas?
Yes, general-purpose fertilizers can be used for hydrangeas. However, it is important to ensure that the fertilizer contains the necessary nutrients and micronutrients required by hydrangeas. Look for formulations designed specifically for flowering plants or acid-loving plants, as hydrangeas prefer slightly acidic soil.
What nutrients are important for hydrangeas?
Hydrangeas require a balanced blend of nutrients, with an emphasis on phosphorus (P) for bloom production. Look for fertilizers with an NPK ratio that promotes flower development, such as 10-30-10 or 5-10-5. Additionally, micronutrients like iron, magnesium, and sulfur are also important for overall plant health.
How often should I fertilize my hydrangeas?
The frequency of fertilization depends on factors such as the soil quality, plant age, and the specific fertilizer used. As a general guideline, hydrangeas can be fertilized once in early spring and again in early summer. However, it is crucial to follow the instructions on the fertilizer package for the recommended application frequency.
Can I use organic fertilizers for hydrangeas?
Yes, organic fertilizers can be used for hydrangeas. They provide slow-release nutrients and improve soil health over time. Organic options include compost, well-rotted manure, and organic blends specifically formulated for flowering plants. Always choose organic fertilizers that are suitable for hydrangeas and follow the recommended application rates.
Can over-fertilizing harm my hydrangeas?
Yes, over-fertilizing can harm hydrangeas. Excessive amounts of fertilizer can cause salt buildup in the soil, leading to root burn and nutrient imbalances. This can result in leaf scorch, stunted growth, or even plant decline. It is essential to follow the recommended dosage instructions and avoid applying more fertilizer than necessary.
How long does it take to see results after fertilizing hydrangeas?
The time it takes to see results after fertilizing hydrangeas can vary depending on several factors, including the health of the plants, the soil condition, and the specific fertilizer used. Generally, you can expect to see improvements in plant growth and blooming within a few weeks to a couple of months after consistent and proper fertilization.
Conclusion
With this additional information in hand, we hope you have a better idea of what to look out for. However, before we sign off, let us do a quick recap of our findings.
Bonsai trees have come to our lives from China and Japan and the art of having, growing and grooming a bonsai art is one very difficult to learn.Their small size and interesting, contortion, unique shapes have always seemed appealing to us. A beautiful bonsai tree can fit any interior decor wonderfully, drawing attention to it and keeping the focus of the room there.Therefore, if you have in mind to buy a bonsai plant, keep in mind to offer it the right location in your home so it will not overwhelm the room, but improve the overall decor. Our article featured 6 of the most renowned and unique Bonsai trees in the world along with other 80 examples of pure beauty. Enjoy!
History of Bonsai in China
"Shallow basins or flattened bowls – “pen” or “pan” or “pun” – had been made out of earthenware in what we now call China since about 5,000 years ago. A thousand years later during the Chinese Bronze Age, these were among the chosen shapes to be recreated in bronze for religious and political ceremonial purposes. About 2,300 years ago, the Chinese Five Agents Theory (water, fire, wood, metal, and earth) spun off the idea of the potency of replicas in miniature. By recreating a mountain, for example, on a reduced scale, a student could focus on its magical properties and gain access to them. The further the reproduction was in size from the original, the more magically potent it was likely to be. Two hundred years later, importations of new aromatics and incenses took place under the Han Emperor because of newly opened trading with its neighbors. A new type of vessel was created, incense burners in the form of the mountain peaks which rose above the waves and symbolized the abodes of the Immortals, the then-popular idea of the mythic Islands of the Blessed. Primarily crafted out of bronze, ceramic or gilded bronze, some of these burners rested on small pen dishes to either catch hot embers or to hold a miniature symbolic ocean. The removable lids to these burners often were covered in stylized portrayals of legendary figures climbing the sides of forested hills. From the perforations in the lids the incense smoke arose out of the cave openings like the mystic vapors in the full-size mountains. It is thought that some later lids made out of stone may have been found with lichens or moss already attached – natural miniature landscapes.
From about the year 706 AD comes the tomb paintings for Crown Prince Zhang Huai which included depictions of two ladies-in-waiting offering miniature rockery landscapes with small plants in shallow dishes. By this time there were the earliest written descriptions of these pun wan – tray playthings. As the creation and care of these was somewhat already advanced, the maturation of the art had taken place (but its documentation has not yet been discovered by us).
The earliest collected and then containerized trees are believed to have been peculiarly-shaped and twisted specimens from the wilds. These were “sacred” as opposed to “profane” because the trees could not be used for any practical, ordinary purposes such as lumber. Their grotesque forms were reminiscent of yoga-type postures which repeatedly bent-back on themselves, re-circulating vital fluids and said to be the cause of long-life.
Over the centuries, different regional styles would be developed throughout the large country with its many varied landscapes; earthenware and ceramic containers would replace the porcelain ones displayed on wooden stands; and attempts would be made to shape the trees with bamboo frameworks or brass wire or lead strips. Many poets and writers each made at least one description of tree and/or mountainous miniature landscapes, and many painters included a dwarfed potted tree as a symbol of a cultivated man's lifestyle. After the 16th century these were called pun tsai or “tray planting.” The term pun ching ("tray landscape," now called penjing) didn't actually come into usage until the 17th century."
An 800 year-old Bonsai tree at Shunkaen, by Kunio Kobayashi
A remarkable tree which is well known for its extremely high age; the tree is reported to be over 800 years old, one of the most expensive bonsai trees! Its owner, master Kobayashi, is one of the most well known Bonsai artists in the world and has won the prestigious Prime Minister award in Japan 4 times. His nursery, ShunkaEn, is located in Tokyo and is open to visitors.
Goshin ("protector of the spirit") is a bonsai created by John Y. Naka. It is a forest planting of eleven Foemina Junipers, the earliest of which Naka began training into bonsai in 1948. Naka donated it to the National Bonsai Foundation in 1984, to be displayed at the United States National Arboretum; it has been there ever since.
This tree is an Azalea species of only 14 cm (5 inches) high. The picture is taken in late spring / early summer, the moment when Azalea trees bloom (shortly, but very vividly!). The tree is planted in a Japanese pot.
Walter Pall is a kind of bonsai rock-star among the culture’s enthusiasts. He has received several dozens national and international awards for his beautiful, dramatic bonsai. He has won the most prestigious Crespi Cup Award of Italy for his well known Rocky Mountain Juniper, and has come in among the top six, every time he has entered. He has also won second and third and other places places in the Gingko Cup Awards of the Belgium bonsai competition held every two years. The most controversial information about Walter pall is that, although world renown, he considers himself an amateur working professionally. That’s because he styles trees for his own amusement and not for commercial purposes. In time he managed to put together one of the most comprehensive bonsai collections around.
Walter Pall’s Crab Apple Tree
This is my personal favourite from Pall’s collection: an incredibly sweet 65 cm high apple tree. I have no idea how anyone that sees it live could resist not to taste those tiny apples, but I guess Mr. Pall keeps it in a safe place, away from leering guests. Fruit trees training is an ascending trend among bonsai growers. The fascinating part about it is that the fruits are indeed edible, especially those belonging to the citrus category. Common fruits that can be obtained in small size include: cherries, apples, lime, lemons, tangerine and figs. The bonsai fruit tree success strongly depends on meteorological and topographical factors, like humidity, temperature and soil.
Semi-cascade Juniper Bonsai
A Juniper bonsai collected, designed and developed by Harry Hirao and displayed at the National Bonsai and Penjing Mueseum at The United States National Arboretum. This very old, semi-cascade style bonsai was probably collected in the White Mountains of California. The shari (deadwood on the trunk) is very prominent on this bonsai, leaving only one stripe where the tree is connected between its leaves and the roots.
The esthetics behind this type of contorted and twisted trunk is called literati and it was influenced by the political and academic conditions in the Tang Dynasty period, when penjing was once widely practiced by the elites. Literati is a contemplative, lyrical style displaying tension (in the trunk) and release (in the cascading branches) like the universal law of Yin and Yang.
Kasokudo Bonsai Planter Inspired by the Automotive Industry
“Referencing speed forms and manufacturing processes used in transportation design, this piece juxtaposes movement applied to what is usually a static object.”
“The piece gives the impression of an accelerating form that effortlessly floats to house a bonsai tree, evoking a perfect balance of dynamic harmony. The latest manufacturing processes of the highly polished finishes of the planter and 3D-printed ‘mountains’ contrast to that of nature that usually takes many decades to grow, sculpt and form the gnarled bonsai forms. In all, a unique synthesis of cutting-edge precision with the imperfect beauty of nature.”
Air plant holders are extraordinary, low on maintenance, exotic, and stylish they can sculpt your space to your advantage, and unlike a regular plant, one could change the plant holder in a matter of seconds thus changing the atmosphere. Air plants can receive absolutely any form or structure as a support as they need no soil thus offering you limitless options, where a sea urchin can support an airy sea-inspired whimsical effect a pyramid geometric structure can complement the plant`s naturalness
A selection of exceptionally beautiful air plant holders follows, meant to emphasize the possibilities brought forward by this piece of organicity.
Diamond structure in gold sustains air plant
Simple elements have been used to sculpt the diamond shape yet the results are extraordinarily rewardful. The shape can be changed and the project can be scaled to your advantage, a sculptural installation can take shape.
A shiver of joy in color can be brought forward with a craft that can take minutes, teach your little one how things can be re-purposed for the better in an attempt to minimize our impact on the environment.
Build on the air plant`s extraordinary ability to live without soil and create a small planter by using a rock and small pieces of wire. The sensible design is nothing short of extraordinary.
Nature`s naturalness nestled in a shape that speaks of its extraordinary power can be a remarkable project. Numerous not so precious stones that look extraordinary can be used in this endeavor, pursue it.
via shopplanetblue.com
Sculpt a piece of art
Air plants can be nestled in any setting and as a result they can embrace the natural and unnatural alike, the sculptural piece gravitates around the air plant beautifully.
An old piece of furniture, an experienced item can now be enhanced by the natural environment, it can be refreshed swiftly.
Small boxes can contain or support your air plant collection; the wooden plank creates contrast with the wall whilst bringing forward great coziness, warmth and richness through texture.
An odd natural element can express solidarity with another. Here naturalness of the past, the dead, invites the naturalness of the future, greenery to take over, building on an already powerful, beautiful element, the spine.
via ranchoreubidoux.com
Flexible height in simple design
A piece of wire can be the natural support of any air plant holder, simply forget it to fit your needs.
The whisk is known to be a beautiful element on its own yet in the color above holding an air plant it transcended into something unique, really beautiful.
via upcycledfashion.com
Air plant holders shaped like pineapples
One could imagine where it all started from consider that the air plants above are a great fit for the pineapples envisioned. Imagine that instead of a pineapple you can create any other fruit, any other shape, limitless options.
Small copper elements are at everyone`s grasp and considering the small shape factor they are quite splendid. Copper can distract one`s attention rapidly the material itself being a a graphic point of interest.
Light wooden structures can build and emphasize the feeling of space in a setting rightfully proportioned. In the example above the balance is right, sturdy yet elegant.
Simple concrete too can nestle a beautiful setting, above the extraordinary volume greatly surprising. Notice how the bubbly texture of the concrete complements the wooden surface on which it resides.
via sunset.com
Sheer copper and concrete
Delicate, different, and remarkable the small piece of wall art above can now receive your design for your air plant.
Anything that can be considered graphic can receive an air plant, above pieces of a white PVC pipe have used string to create a sort of swing that carries greenery. Simple and efficient.
Macramé is the art of knotting rope. This trend originated in the 70’s and has evolved to be used in many different ways. One popular way is to tailor macramé plant hangers! If you are a plant lover and are looking for a way to spice up your home decor, you are going to love the way these hangers put your plants on display both indoors and outdoors.
Making these hangers can seem a bit challenging at first yet to help you learn the basic knots and patterns of macramé, FTD has put together a video tutorial that will go over the process in simple and easy steps. You are going to love the way your macramé plant hanger turns out! You can find the complete step-by-step guide here.
The spectacular balance between an envisioned craft design and the beautiful naturalness of a plant that needs nothing at all to thrive is extraordinary. How do you see the air plant holders above? We would love to hear from you in the comment section above!
The AeroGarden Bounty is among the most popular models from the brand, and why wouldn’t it be?
You’ll be surprised by the features and benefits it has to offer. But is it the right choice for you? Well, we’ve used this device for quite some time now, and there’s no doubt that it’s an upgrade from AeroGarden’s previous models.
It’s visibly larger with a lot more space to grow a variety of herbs, vegetables, and flowers. But besides its pros, there are a few downsides to using this unit for indoor gardening.
Then again, finding a perfect product is easier said than done. So, it’s always better to weigh the pros and cons of the unit before making a purchase. And that’s what we’re here to help you with.
Today, we’ve come forth with an in-depth review of the AeroGarden Bounty. Furthermore, we provide a buyer’s guide to help accelerate your decision-making.
Automatic timer makes sure the lights go on and off at...
Use this indoor garden to grow up to 9 different herbs,...
Why Buy This Product?
Have you ever heard of hydroponic gardens? Yes, the age-old concept of growing plants without soil. Inspired by this concept, AeroGarden introduces one of its largest units, “Bounty,” allowing you to grow a variety of vegetables, herbs, and flowers indoors, all at once. That’s not all; it offers many more features and benefits, which we’ll now discuss in detail.
Bright & Colored LED Lighting System
The AeroGarden Bounty uses a 45-Watt LED lighting system that’s more energy-efficient than fluorescent lights. It not only saves money but also ensures durability, making it a reliable option for the long-run. Plus, the LEDs are not as hot as other types of lights, so you need not worry about the tips of taller plants getting burnt.
What’s more, the lighting panel uses a combination of red, blue, and white LED lights to promote plant growth in different ways. It stimulates daylight using bright white light, while the blue LEDs help your plants grow bigger.
You also have the option of helping your plants bloom more flowers and fruits using the red LED lights. Rest assured, Bounty’s bright lighting system will promote five times faster growth than a traditional outdoor garden, even if it’s just used to sprout seeds.
Adjustable Arm
Another excellent aspect of the AeroGarden Bounty’s lighting system is that it comes with an arm that’s adjustable up to 24 inches. This gives your plants and herbs plenty of room to shoot straight up in order to mature and grow tall.
Touchscreen Control Panel
What we loved the most about this unit from AeroGarden is its helpful touchscreen control panel. This made it easy for us to set timers to make sure the lights went on and off exactly at the right time.
In addition, we were able to dim the grow lights at the touch of a button and check all our garden’s vitals, including the water level and the number of days till germination. The high-resolution digital display also provides lighted reminders, notifying you when it’s time to add more water or nutrients to the device.
Now, there’s no doubt that AeroGarden does all the work for you. But it also helps you learn about the gardening process by displaying valuable tips on the LCD.
Easy To Fill Water Bowl
Unlike other hydroponic systems, AeroGarden Bounty is a contained unit, so you definitely won’t be seeing the tangled plant roots. Instead, they’re concealed with a plastic bowl to make your space look neat and aesthetically appealing.
The removable bowl is like a reservoir capable of holding gallons of water, which should last for a while. We didn’t have to add more water to the device until after about two weeks of use. However, depending on the climatic conditions where you live, this duration might vary.
Even then, you need not worry since Bounty’s control panel lets you know when it’s time to water your plants. Once you’ve received the reminder, simply pour water into the bowl as required, and you’re good to go.
Vacation Mode
For a gardener, it’s never easy to go out of town without having someone to look after your plants. But with this hydroponic system, you don’t have to think twice. Your plants will continue to grow and thrive, even when you’re away for a few days. Just turn on the vacation mode and leave everything to AeroGarden.
Guaranteed Germination With Bigger and Better Yield
The highlight of the AeroGarden Bounty is that it comes with a gourmet herb seed kit, allowing you to start growing herbs instantly. It comprises nine seed pods, including Curly parsley and Italian parsley, mint, dill, Thai basil, Genovese basil, thyme, and chives. And the best part is that each seed pod is guaranteed to germinate.
If, by any chance, they fail to sprout, reach out to the brand, and get a replacement at no extra cost. Furthermore, AeroGarden offers over 70 varieties of seed pods ranging from lettuce and jalapeno peppers to flowers and vegetables. You can choose a free seed pod kit, depending on what you’d want to grow and harvest.
For those concerned about genetically-modified organisms (GMOs), every seed pod from AeroGarden is made from non-GMO seeds. They’re mostly organic and grow without the help of soil, so there’s no mess to deal with during plantation.
All you have to do is slip one of the spongy seed pods into the plastic holder and pop it into the slot. Each pod comes with little plastic domes that create a humid atmosphere for the seeds to germinate.
Once the seeds sprout and pop up through the hole, remove the plastic topper and paper cover to give them room to grow. That said, it’s obvious you’ll get bigger and better yields of produce from healthier plants.
Plus, the newly-designed grow deck of the AeroGarden Bounty offers ample room to grow up to nine plants. In other words, you get to grow a variety of flowers, herbs, and vegetables in a sleek and modern indoor garden that looks great in any room.
Seed Pods & Slots
The biggest benefit of using the bounty is the number of seed pod slots you get; nine to be precise. This is the most number of slots AeroGarden offers for its models, and each slot is perfectly sized to fit the seed pods. Plus, they’re spaced well for your herbs, veggies, and flowers to grow abundantly.
We were also impressed by AeroGarden’s seed pod kit. This is because it comprises seeds marked with different germinating times based on certain factors, including the seed-type, ambient temperatures, and of course, the light levels, intensity, and duration.
It manages the gardener’s expectation of seed germination so that they know about the optimum temperature requirement and when the plants need to be watered. For example, chives are expected to sprout within 8 to 12 days, while Italian parsley takes 12 to 14 days.
On the contrary, gourmet herbs germinate between 4 to 21 days, with dill taking the longest time. But irrespective of the growth cycle, AeroGarden should be kept away from furnaces, vents, window drafts, and other heat and cold sources.
Smart Gardening
AeroGarden comes forth with different versions of the Bounty model, such as the Bounty Elite Wi-Fi LED. As the name suggests, this unit is Wi-Fi-enabled and equipped with the latest technology that connects with your iPhone and Android device.
It can be controlled and monitored from the AeroGarden app or your Amazon Echo device. So, you get to check your indoor garden’s vitals or even turn its lights on or off from anywhere in the world (provided you have a stable WiFi connection).
One Year Warranty
You can invest in the AeroGarden Bounty without worrying about coming across a faulty device since it’s backed by a one year warranty from the date of original purchase. If, by any chance, you face issues related to the LED grow lights or the device itself, reach out to the company’s customer support team.
The brand promises to provide any replacement parts that you may need for free for the first year. You may also request return authorization if the unit is defective; AeroGarden will pay the return shipping costs.
Helpful Tips & Instructions
We liked the fact that the AeroGarden Bounty provides valuable gardening tips related to planting, germination, lighting, watering, nutrients, pruning, pollinating, and harvesting. Everything is well-illustrated and explained in layman’s terms to help beginners yield maximum produce.
In fact, even the seed pod kit comes with instructions describing proper garden tending. It provides tips on feeding your garden, planting the seed pod kit, and tips for ensuring great growth.
There’s another section on “Restarting Your AeroGarden” that you might find useful. It explains how to sanitize the garden before a crop is planted, reset the nutrient timer, and set the light hood to the lowest position. You’ll also be instructed about the proper planting of your seed pods.
What Could’ve Been Better?
Like any other product or device, the AeroGarden Bounty isn’t perfect. It comes with a few minor downsides, but they aren’t deal-breakers in any way, so you need not worry.
Coming to the device itself, although Bounty is a larger model, offering the highest number of slots compared to the others, there are a few plants you might want to avoid growing. For example, watermelon and zucchini need a lot of room to spread out, so it’s better they’re transplanted after their seeds germinate in the unit.
Furthermore, Aerogarden doesn’t turn back on automatically, so you have to be careful and alert, especially if your area is prone to power cuts. We also came across a faulty alarm, which, at times, failed to notify us when the water level had reached dangerous lows. But luckily, it didn’t end up costing us a plant or two.
AeroGarden should consider including a small window to show the water levels without compromising its sleek and modern design. Nonetheless, Bounty mostly comes with positive reviews from previous and current users. And aside from a few minor defects, annoyances, and general grievances, it’s a lifesaver for plant-lovers who don’t have the time to devote to gardening.
Pros
Easy to use and set up
Bright LED lighting system promotes faster plant growth
Capable of growing a variety of plants
Cordless extendable light arm
Water and plant food reminders
Cons
Not suitable for growing all types of plants
Alarms are at times faulty
Setting Up The Aerogarden Bounty
Now that you’ve weighed the pros and cons of the AeroGarden Bounty, let’s get to know more about its setup.
Well, let’s begin by saying that the unit comes with a well-written and illustrated quick setup guide, so you won’t be having any problem getting started. The guide provides five easy steps to power your AeroGarden and begin gardening.
We didn’t even have to perform all the steps, other than two, because the unit comes fully assembled. You only have to plug the light cord into the light hood and the power cord into the electric outlet.
Now, it’s obvious that plugging in the device will power up a bunch of stuff, but you won’t be able to set it up without touching the “Quick Plant” display button on the LCD control panel. Once you activate the function, the AeroGarden computer will guide you through the necessary steps to get you started.
You may also follow the instructions to program the WiFi system, provided the model is WiFi-enabled. After you’ve gone through every step and done everything that’s required, the only thing left to do is planting the seed pods.
Add water to the plastic bowl as recommended; fill the tube area up to the marked level of about 1.1 gallons. After this, you may insert the seed pods into their respective slots and add the liquid plant food (included with the AeroGarden Bounty seed pod kit) as per the instructions on the bottle.
Benefits Of AeroGarden (Hydroponic Grow Systems) Vs Outdoor Soil Growing
Before we compare the benefits of AeroGarden with those of outdoor soil gardening, let’s take a moment to highlight the notion of hydroponic gardening. Now, it may seem like a futuristic concept, but interestingly, hydroponic gardening has been around since the 17th century. And by the 19th century, crops were regularly grown without soil by German botanists.
Today, AeroGarden has automated indoor gardening taking inspiration from the age-old concept of growing plants without soil. But will it end up replacing outdoor gardening? That’s something that ought to be discussed and analyzed.
Let’s first take a look at the benefits hydroponic plant growing systems like the AeroGarden Bounty has to offer.
First things first, there’s no mess or dirt to deal with.
Plants grow five times faster in the AeroGarden Bounty than in conventional garden soil.
Hydroponic grow systems take up less space and generate a higher yield of different varieties per square foot.
These units utilize fast-acting liquid plant food that goes directly into the soil.
Notifies you when it’s time to add water or nutrients.
Ambient temperature and lighting intensity can be controlled and monitored from anywhere in the world for maximum plant health.
Even though hydroponic systems like AeroGarden have a lot to offer, for ardent gardeners, satisfaction isn’t achieved until they get their hands dirty by digging up soil and dirt. They love the feel of the soil and the fun tools needed to maintain the perfect outdoor garden.
Moreover, large hydroponic farms are quite expensive to buy and maintain. And although they ensure a higher yield per square foot, you won’t be able to grow herbs, vegetables, flowers, and other plants cost-effectively.
So, if you ask us, both hydroponic grow systems, and conventional outdoor gardens have their individual place. But you definitely can’t go wrong with the AeroGarden Bounty when growing fresh herbs and flowers indoors in modest quantities.
Preparing For The Next Plantation Phase
Suppose you’ve planted seed pods in AeroGarden’s 50-hole seed germinating grid. The seedlings have sprouted and are ready to be transplanted in your outdoor garden or fabric pots. And now you’re all set to plant fresh seed pods in your hydroponic system once again.
In that case, you need to prepare the AeroGarden for the new plantation phase. So, make sure you remove all the old seed pods and roots that were grown in the hydroponic water environment before starting the project.
You may try pulling out the used seed pods from the planter holes, but from experience, we can say that this is easier said than done. The roots tend to get intermeshed, making them difficult to extract.
We ended up opening the planter hole cover to find out the cause. The roots were completely matted, taking up the entire area of the water reservoir. That said, if you come across an issue like this, take a pair of bypass pruners and cut away all the roots from the cover.
Once that’s done, follow AeroGarden’s cleaning process to sanitize the water reservoir using a bleach or vinegar solution. After it’s thoroughly cleaned, feel free to plant your favorite herbs, vegetables, or flowers.
AeroGarden Bounty Buyer’s Guide
By now, we’re positive that you’re well versed with all that there’s to know about the AeroGarden Bounty. But is it the right pick? Well, this is a crucial decision that you eventually have to make.
Now, we understand that investing in a hydroponic device like this one requires a bit of thought. It’s not something you can buy overnight, only to regret the decision in the near-future when the seeds fail to germinate or when you realize indoor gardening isn’t your cup of tea.
That’s why we’ve carefully created this brief guide, explaining the factors that should be considered when buying an AeroGarden. Read on to know more…
Space
Remember, larger models like the Bounty can take up a lot of counter space. So, make sure you have ample space for keeping your hydroponic grow system. Also, ensure that you have at least 2 feet of clearance space above the unit as it comes with an adjustable light arm for your plants to grow smoothly.
Size Of Your Family
Most gardeners tend to ignore this factor while gardening or when buying a hydroponic growing unit for indoor use. Now, if you’re growing herbs, vegetables, or any other kind of organic produce just for yourself, the AeroGarden Bounty wouldn’t be a viable option.
This is because the unit is one of the largest models that comes with nine seed pods. As such, it ensures bigger yields of produce more than what’s required by you. You won’t know what to do with the extra and might end up giving them away.
To avoid wastage, it’s better to opt for a model like the AeroGarden Sprout, which is more than enough for a sole user. But then, you won’t get much variety as it’s only suitable for three seed pods.
On the contrary, for those hoping to grow sufficient tomatoes and lettuce almost every night for a family of three to four members, the Bounty is your best bet.
Do You Need Varieties?
Well, there’s no better option than the AeroGarden Bounty if you’re someone who wants to grow a variety of plants. It’s capable of holding up to nine seed pods, aiding the growth of herbs, lettuce, tomatoes, and other vegetables.
However, you can also choose to go for more than one AeroGarden to keep veggies and herbs separate if the price is not a concern.
Should You Opt For The Wi-Fi-Enabled Variant?
As we’ve mentioned earlier, AeroGarden offers different versions of the Bounty, and the Bounty Elite is a Wi-Fi-enabled unit that connects to iPhone and Android devices. Now, we feel that this variant is ideal for those who travel a lot. It helps you monitor and control the device from anywhere in the world using the AeroGarden app.
However, you’ll need to have access to a stable Wi-Fi connection to use the feature. And at times, the smartphone app fails to ensure consistency and reliability. So, you might not get timely notifications to water the plants or add nutrients.
It’s better to rely on the LCD screen; it provides the same alerts and notifications consistently. Furthermore, the AeroGarden Bounty comes with a vacation mode, which allows your plants to grow and thrive, even when you’re not in town.
To sum up, the LCD control panel works well, ensuring timely alerts, but the smartphone app needs work. So, in our opinion, there’s no hard and fast rule that you have to opt for the Wi-Fi-enabled variant. Choose a model as per your preference and requirements.
Customer Support Team
When buying an AeroGarden system, gain all the required information related to the brand’s customer support team, including the contact number and email id. You might have to reach out to them for questions, concerns, or issues related to the device, so keeping the relevant details in hand makes your job easier.
We found AeroGarden’s customer service relatively unresponsive on email. It’s better to opt for a live chat with a representative of the team. They’re prompt and provide replacements at no extra charge, if needed, after asking a few questions related to the issue and purchase time.
LED Grow Lights
The best part of the AeroGarden Bounty is that it comes with an LED lighting system and not fluorescent lights. As such, the lights are not very hot as other units, which often end up burning the tips of growing plants.
But make sure the hydroponic system isn’t too bright for your plants; keeping that in mind, it’s crucial to choose a spot in your home that doesn’t receive a lot of light from the sun. That said, you can always dim the device’s lights up to 30% with the touch of a button when required; another win-win for sure.
AeroGarden Bounty Verdict
Honestly, AeroGarden Bounty is worth the investment, despite having a few flaws. It’s no doubt one of the larger models out there with a few minor drawbacks, but it offers a variety of healthy plants and bigger yields of flavorful produce.
This automated indoor gardening system does all the hard work for you. Plus, it comes with a high-resolution touchscreen control panel, which lets you control and monitor its functions with ease.
So, go ahead and try it out, especially if you don’t have the time for traditional gardening. And let us know all about your experience in the comments section.
30 diy crafts filled with authenticity will follow after this short introduction. All of them exemplary though creativity and personality, all being the showcase of one household on one simple theme : DIY wind chimes.
You can use pretty much any mineral or metallic material in your household to create wind chimes and one of the most accessible one is found in glass bottles. Thanks to their shape, resilience and sound produced, glass bottles are one of the top choice resources for this craft; moreover their silhouette comes in handy offering you various design possibilities that can be translated to little to no effort. We have published diy glass bottle wind chime tutorial here and various others in the gallery below; pick your favorite and materialize it in your next DIY project.
#1 Airy Breezy Driftwood and Seashells Wind-chimes
Simple ideas are defined by authenticity and creativity. You can add a special sound to your household with a wind chime. Design and craft your piece by up-cycling as many elements as possible in the process proudly.
Taking care of a pet is definitely not easy yet always rewardful. We are responsible for absolutely anything that happens to them and while on food your veterinary will make sure that you purchase the best possible food, on home protection and safety it`s all up to you. With this thought in mind, we are going to present to you further on a couple of houseplants safe for cats and dogs meant to thrive in your interior design. This safety measure is sadly often overlooked, the reason for which we highly encourage you to pass this article to any cat and/or dog owner you know. All the plants showcased below are safe for both cats and dogs yet even certain non-toxic plants may have side effects if ingested. For breed detailed information we suggest you consult your local nursery or vet and take a look at this ASPCA website, it might be incredibly helpful.
Beautiful Houseplants Safe for Cats and Dogs
#1 The Spider Plant
This plant simply can`t pass unnoticed, it demands attention and it`s already present in many contemporary homes. The Spider Plant is characterized by long, spiky leaves with a dramatic effect that doesn't overwhelm the entire room. [from Inscribd]
Long Stripped Spider Plant Leaves
Showcased bellow the plant is elegantly placed on the fireplace. The spider plant is magnificent because it creates a volume through the cascades generated by the leaves, therefore being a great plant for hanging baskets. [photo by Holly Marder via Houzz]
Contemporary Interior Design with a Fireplace Nestling a Spider Plant
Spider plants thrive when placed next to a natural light source. Take note that this plant should dry out between waterings, which gives you a time advantage in maintenance, you have more time to remember to hydrate it! [from A Beautiful Mess]
Beautiful Swan Planter Holding a Spider Plant
#2 The Lemon Button Fern
Extraordinary thanks to small arching stems and button-like foliage, this piece of greenery works as the perfect accent piece for a shelf or tabletop. Another advantage is that it often levels out at a height of about one foot tall so you can easily predict the end result of your design. [from Exotic Angel Plants]
Potted Lemon Button Fern
Decor With Houseplants
With a curved and delicate form, the button fern becomes ideal for hanging baskets and terrace pots cascading over the rail. For a timeless design consider terracotta pots to complement this green dainty eye-catching plant. [fromBlue Pumilio]
Lemon Button Fern in a Pot
For the Lemon Button Fern a combination of low to medium light is ideal, regarding watering, you should consider keeping the soil moist without over-saturating the plant. [fromBianchi-Davis Greenhouses]
Terracotta Pot Containing a Lemon Button Fern
#3 The Areca Palm
With an image that recalls the tropical greenery the areca palm is one of the most graphic plants safe for cats and dogs. It`s simply beautiful and it can give any space that holiday vibe. [image from Fox Hill Nursery]
Potter Areca Palm Plants
Happily, this is a plant that can be showcased in a beautiful pride big pot. This big pot along with the Areca Plant can actually become a solid design object in your interior; consider using metallic chromed planters or retro colorful ones. You can ensure an instant focal point to the room in this manner. Greenery focal point, what can be better? [from Feels Like Home 2 Me]
Areca Palm in a Modern Living Room Decor
World-renowned for its air-purifying effects, the areca palm is fairly easy to care for as well. It important is not to over-water the plant, but you can hydrate it when the soil below the surface begins to feel dry, you will gain sometime during watering. In terms of lighting, a very comprehensive and helpful SFGate article had a suggestion of allowing your areca palm to gradually accommodate indoor lighting by first placing it outside in a part-shaded area. After a certain time, relocate it inside to its permanently bright location! [from Nimicoco]
Areca Plam Plant
#4 The Baby Rubber Plant
A plant that looks extraordinary in containers and glistens with style: the baby rubber plant is delicate, shiny, and bright, yet low-maintenance. The Baby Rubber Plant has waxy round leaves that provide that special sheen on a shape ideal for pretty much any pot. The photo presented below has appeared in A Beautiful Mess, which showcased a very useful collection of unique non-toxic houseplants. [from A Beautiful Mess]
Potted Baby Rubber Plant
The plant thrives with bright indirect light, be careful not to over-water because it`s rather easy.Let the soil dry out almost entirely before watering if you want a no-fuss plant. [from Plants Rescue]
Voluptous Green Baby Rubber Plant
#5 The Ponytail Palm
By far the most beautiful plant in our short list: the Ponytail palm has a wide base, a striking trunk, and a highly aesthetic display of long leaves that have ensured the plant`s funny name. [from My City Plants]
Magnificent Ponytail Palm from My City Plants
The ponytail plant is actually highly dramatic and it serves as a great centerpiece for modern living room designs and offices.[from WXY Studio]
Ponytail Palm in a Modern Living Room Design
The ponytail palm can thrive in bright light and it can be watered once every one to two weeks so we would categorize it as fairly light maintenance. You can display it alone or create an exotic tropical look with an entire row of palms. In the picture showcased below the plants are lightened from underneath for ambiance and granted natural light from the exterior through a skylight. Simple. Monumental. Beautiful.[from PB Builders]
Ponytails Palms Row in a Well-Lit Interior Through a Skylight
#6 The Prayer Plant
Last but certainly not least: the prayer plant grabs the attention with intricate colorful leaves that present a wide variety of green shades enhanced by pink detailing.[via A Beautiful Mess]
Prayer Plant in a Round White Pot
For the Prayer Plant medium lighting is recommended and it`s important to maintain the soil moist, never too wet. Direct light should be avoided as it will cause the leaves to fade. This post from Growing Wild Seeds explained a whole lot and has been extremely helpful in terms of prayer plant care. [from Growing Wild Seeds]
Vibrant Leaves of the Prayer Plant
We suggest you display the prayer plant in a simple pot that would not distract attention from the plant`s unforgettable leaves. The leaves are spectacular and you should enhance just that. [from Gardening Know How]
Vibrant and Beautiful Prayer Plant Leaf
I think this post should reach a handful of cat and dog lovers and we trust you dear loyal readers with that. Please share this post with your friends and feel free to comment in the section below on Facebook, Twitter, or G+!
The garden is finally starting to get the attention deserved with summer just around the corner and spring in all its splendors these days. DIY projects in this area are starting to feed the imagination of many gardeners, inspiring to recycle and up-cycle creatively in their own backyard landscape in a glance. Simple items can now be put to good use through inexpensive garden projects realized with clay pots or wine bottles, maybe even your own handmade pottery items sculped from modeling clay. You can create entire fairy tale setups with broken pots or a brand new miniature pond through multiple up-cycled items. All you need is ambition.
Collect the graphic items that you would like to transform, in this case clay pots and seek the suitable project for your small garden, from that to reality only time stands. Below you will find enough details for each idea through the link to materialize them happily with your loved ones.
Simple and Inexpensive Garden Projects
1. Transform a Cracked Clay Pot Into a Gnome House
We found the ideas showcased above insanely creative and purely joyful especially if realized with your little loved ones around you. These up-cycling ideas can easily become highly powerful and educative life lessons on responsibility and sustainability. We would love to hear your opinion on these garden projects realized with clay pots in the comment section below.
There is nothing we enjoy most than spending quality time in our garden these days. Breathing in the fresh air filled with wonderful smells of roses, wisteria and freshly cut grass we fill more alive and ourselves than in our busy hectic lives. Those rare moments when we find the time to let our worries go and actually enjoy nature are the best moments we have to learn to cherish with loved ones.
So today, as you have probably figured out, we have gathered a small collection of wonderful beautiful wooden planter ideas for your garden and patio to help you set up the right atmosphere and to really create that heavenly little place all of us should have at home. We chose wood because we consider it the most appropriate material to be used in a green corner, exuding warmth and coziness. It also serves as the perfect background standing out with simplicity while not overpowering the key element which is the greenery. Another wonderful advantage of using wood in planter projects is the fact that wood ages beautifully, looking even better with time and can be recycled constantly and transformed, never loosing its value or meaning.
The gallery below features lovely projects which use recycled pallets or old wooden crates to create incredible simple yet elegant and strikingly beautiful wooden planters which merge perfectly into any scenario. Left nude, raw, with its texture as a key element or painted in white pale pink tones to set a more vintage washed up mood, each and every one of the projects is unique and beautiful in its own way. We invite you to browse through the gallery below and to leave your valuable feedback and planter ideas at the end of this article. Enjoy!
Beautiful Wooden Planter Ideas
#1 Simple Cubical Wooden Planter
#2 Wooden Planters Realized From Pallets With Benches Included
We would love to hear your opinion on these beautiful wooden planter ideas. We have found them extraordinarily ingenious and when it comes to natural materials there are no limits. Choose your favorite craft and start your own diy project today.
The wonderful warm atmosphere exuded by the spring season draws us in, its allure encouraging every single one of us to set the indoors aside and to take a step into the ethereal beauty that is the garden. Spending time outdoors represents the ultimate method of relaxing the mind and easing the soul, surrounded by green lush vegetation and the delicate flaps of wings and thrills of birds. The backyard can become the perfect sport for relaxation and entertaining friends and family on warm spring evenings. You can set a wooden floating deck to serve as a basic ground for your dinner set or lounge area and build a fire pit to stay warm and enjoy even colder nights. Invest time in creating your furniture from recycled wooden palettes, thus taking the environment into consideration and saving up on money as well. In the end light is all that will bring everything together and transform the space into a complete design, filled with warmth and coziness. Create your own diy garden lanterns from scrap wood, tin cans, mason jars and observe how the atmosphere changes with nightfall. Find inspiration in the following gallery featuring 24 Unique Beautiful DIY Garden Lanterns.
24. the most delicate and BEAUTIFUL paper lanterns
How do you light your backyard for evening entertaining outdoors? Choose your favorite diy garden lantern and feel free to share your ideas in the comment section below.
The really simple addition able to transform your interior decor beyond belief is probably one of the most accessible as well: the indoor mini garden. Greenery comes in various packages, you can grow them from seeds on and document your story towards an airy, extraordinary decor.
Certain plants are recommended indoors but succulents from the cactus family are the superstars right now, small yet voluptuous looking the plants require low maintenance and they`re really easy to multiply, offering the inhabitant a chance to create small universes of greenery with little to no costs.
A gallery follows showcasing creative ways to realize your very own indoor garden, cast a glance, and pick your favorite!
#1 Simple geometric motifs can sustain greenery
A simple geometric motif can double as support for your existing and future flower pots. Let your decor evolve with greenery, at once.
#2 Take advantage of the sculptural nature of vegetation
The sculptural nature of roots and the complexity of nature is incomprehensible and beautiful, whether you`ve found a plant that can live in water or you`re just multiplying some of your existing species, take a moment and admire the green realm. Splendid.
Variety often emphasizes design, notice how different roots in different glass containers create an outstanding composition.
Succulents are all the rage right now and one could easily understand why. They require little to no maintenance and they offer an image that can`t be overlooked. Remarkable plants these succulents.
#10 Color and vegetation can transform your balcony beyond belief
There are simple solutions to transform your balcony into a really beautiful, pleasant space; the most beautiful settings do contain greenery and an airy, fresh atmosphere, put that on a white, stark background and add a little color through colored flower pots or simply, flowers, and you have the recipe to success.
Curtains or blinds are not the only privacy screen you can install on your window despite popular belief, choose one that offers your fresh air and an extraordinary focal point in your decor.
Greenery is something extraordinary, something worth cherishing, protecting, and worth nestling in our homes. Start slowly with a few plants, choose pet-safe low-maintenance plants, and let them embellish your decor.
What do you think? We would love to hear your opinion on these indoor mini gardens in the comment section below.
Most of us aren't lucky enough to own a large garden or backyard, thus making the displaying and adding of plants for shading, oxygen and decor very difficult. Planter stands come in to save the day, offering enough room for exposing various planter pots that will animate your yard. Finding the proper one can be tricky though and may cost you a few dollars, reason for which we have searched for cheap plant stand alternatives that can help you in this quest.
The possibilities are various, from cinder blocks that can be arranged in interesting compositions to recycled colorful furniture pieces and wooden ladders that hold and display your wonderful tiny plants.
Choose the best alternative for your and your home and leave your valuable feedback in the comment section placed at the end of the gallery.
Planter Stand Alternatives
1. use cinder blocks as a method of displaying flower pots
17. a flower bench can complete a corner of your garden
image via s91.photobucket.com
How do you display your plants in your backyard? Feel free to share your ideas and projects regarding planter stand alternatives in the comment section below.
The natural element surrounding us is a blessing. Greenery and vegetation are items heavily sought in contemporary settings regardless of scale; vertical green walls or potted plants are welcome in apartments and studios just as much as trees and climbing plants are welcome in gardens and parks today. After vegetation is adorn in the setting unexpected uninvited guests might arrive, the type of guests we all welcome with smiles : butterflies, squirrel and birds; these are here to emphasize your garden, to validate your green oasis and to sing for you in the morning joyfully.
The short curated list presented below presents little homes for the winged creatures, diy birdhouses created out of re-purposed elements, simple and easy to realized DIY projects that can be realized in 10 minutes, ones that would gift you days, months and years of pure joy.
1. Simple old teapots can become extraordinary shelters
You can realize these swiftly, the fast method requires only one nail. You can also paint them in vivid colors and transform the lid in petite birdbaths.
2. Light globes repurposed in a graphic garden composition
Highly graphic new homes for your future to be winged friends. Suspending them safely might be a challenge but a successful tutorial can be found below and the craft is surely rewardful.
3. Use Tin Cans to Create an entire birdie residential project
The creative craft below resembles a traffic light and it invites multiple families to use it as shelter. Tin cans are a great support for DIY birdhouses, get creative with yours.
4. Natural materials can shape extraordinary homes
Natural materials do make extraordinary homes, it is known. The tiny home ahead uses river rocks glued onto its facade for its protection while on top copper pennies are aging with it beautifully, resembling tiles, offering it a delicacy and great authenticity.
Everything can be helpful, the next project can use various structures as support; do what you can to invite nature in.
6. A sneak-peak into a mechanism of nature
Use a Plexiglas wall on the home and plant it in a manner that allows you to see how the nest progresses, how nature evolves around you beautifully. An extraordinary educative craft and one that will surely be remembered.
7. Build petite rustic-looking stone birdhouses
The craft provides an elegant approach that can withstand the elements greatly. Inexpensive and easy-realize beautiful craft that will surely invite the little ones into your garden.
A small residential project that uses soda cans to shelter the little creatures. Make sure you clean the aluminum cans extremely well, moreover, the home should be positioned in a shaded area otherwise the heat inside might become uncomfortable.
What do you think about these simple crafts? Are you ready to welcome these extraordinary guests to your garden? We would love to hear your thoughts on these DIY birdhouses in the comment section below.
Every house wife knows all too much about the woes of finding the right pot plant to edify the face of their home. Many flowers bloom according to the seasons, so if she desires to have real flowers, then she knows she has to go along with nature's path. Nothing looks more gorgeous than a hanging basket of flowers in front of any house. So now you have the right flowers or plants whatever suits your fancy, time to get something appropriate to place them in. You can buy flower baskets, buckets or simple improvise by using an old bucket nobody has use for. Here are 16 ideas on how you can use hanging flower pots, buckets or anything that you can get your hand on that would do the job.
#1 Old English style of hanging flower baskets to enhance your veranda
#16 if you don't trust yourself to take care of your flowers - plastic ones will do - these are real
The whole idea of hanging flowers is to enhance and beautify what ever area or canvas you wish. Hanging flower pots is an old English tradition is being continued today by many people. To ensure the healthy growth of your flowers, you will need to purchase the right manure and fertilizers. Remember to water them daily, and ensure that they are free from parasites and weeds. Avoid mixing them with other plants or flowers that will drown out the beauty. All that being said, now you can share your flower pot stories or ideas with us in the comment box below. Any advice for those wishing to go this way in edifying their home will greatly be appreciated.
If you're not the 'diy crafty person' then coming up with fun ideas for your kids to engage in during their spare time might seem a bit of a task. Kids love to act out in reality what they see on T.V, which is why constructing a fairy garden with them would be an adventure you both won't want to pass up. The best part is, there would be no need to spend a dime or go out of your way to accumulate the materials because everything would already be at your disposal.
The project itself takes little effort, that is if you're not planning to make a garden as seen in #11 picture of this article. Look around your home for simple unused items like a wheelbarrow, a bucket, box or plant pot. If you don't want to work within a confined space, then consider building a miniature wall or picket fence. Then again, a hammer, some nails and some small planks of wood can be just the thing you need on a tight budget.
When deciding on what the outline of your fairy garden should look like, consider the origin of these mythical creatures. It is said that in ancient times, these Fae were regarded as deities. With this in mind, a garden depicting a royal setting would seem well in place as would dressing up each doll to look like royalty. Nothing looks more beautiful than a terrarium with miniature furniture and plants looking like a magical world created and set aside from reality. Establishing this would requires patient and delicate hands, free time, but most all, a fun-loving passionate desire for creative innovations as such.
A fairy garden can be designed with a specific accessory as the center of attraction or it can be decorated with a myriad of tiny handmade or bought creations laid out beauteously with a color scheme and fanciful theme.Whatever your choice of gardens to design either for your kids or your own playful pleasure, with a little compromise and creativity, anything is possible. Allow these 16 do-it-yourself fairy garden ideas to resonate on your minds for the purpose of inspiration and information.
#1 Ponder on fabricating a quizzical ambiance in a plant pot with mix of yellow and lilac and a touch of pink and blue
Have you ever considered creating a fairy garden with or for your little one? Feel free to share your ideas an down projects with us in the comment section below.
Related Articles
There is nothing we love more than sitting in our small balcony taking in the fresh smell of rain surrounded by greenery and life. Small cement flower pots, old metallic bucket containing a pine tree and a corner full of herbs and spices rowing in a steady serene pace, all add up to transform any corner into a little piece of heaven. It is important to add your personal touch to your garden in order to really make it your own. Greens grow with love and care so make sure you make the time for their grooming.We have gathered a small collection of 16 Beautiful DIY Flower Pot Ideas That Add Life To Your Home. We invite you to give a short browse through the gallery below and to send us your own flower pots projects to add to our gallery.
1.Teacup gardens are so elegant and cute you will fall in love with them instantly
2. Transform old flower pots by adding a new layer of paint or by exercising your artsy talents on them
3. Cute egg holders holding succulents
4. DIY faux pumpkin flower pots
5. Adding moss to your flower pots will empower your small garden and make everything seem more natural and wild
6. You can even grow your celery at home
7. Eggshells are a great startup environment for tiny plants and seeds
8.We're not sure this combination can actually work but the concept of it is very beuatiful
9. Be playful and have fun with your flower pots designs and compositions
10. Rope adds elegance to nay vessel
11. Wine corks can also be put to good use
12. Create your own cement/concrete tiny flower pots
13. Vintage combination in a romantic composition of greens
14. Small details really do make a difference
15. Growing onions is a possibility
16. Add color to plain simple dull flower pots
What do you think about the small gallery featured above? How do you style your flower pots? We would love to hear your feedback in the comment section below.
Leaf by leaf flower by flower we sculpt the ambient in which we reside, the backyard and sanctuary in which we seek peace and calm. In your backyard you are the architect and the design handling nature in all its beauty to a state of equilibrium. Countless possible and infinite combinations cannot be defined nor followed as recipe towards a beautiful garden, seek inspiration and start planting, it will be one of the most rewardful activities you will ever do.
Cast a glance at the beautiful and attractive gardening design ideas showcased below and surge inspiration from the wonderful greenery setups tailored. We would love to hear your opinion in the comment section below.
Fairy Tale Gardening Design Ideas
#1 Beautiful Iron Forged Decoration Sheltering Three Different Planters
#15 Multiple Planters Nestling an Entire Bonsai Farm
Beautiful and attractive gardening ideas are born from creativity and experience more than anything else. The items surroundings are opening up endless possibilities for the creative mind; think twice before throwing something away and always donate or reuse the items that you`re no longer using.
The brilliance of a flower arrangement and the energy of the whole ought to be conserved as much as possible. The following article contains ideas to mend the drying process and emphasize your next event through simple solutions for the arrangement process and the flowers alike. Cast a glance over the flower arrangement tips and tricks that follow and feed your imagination.
1. The basics of floral arrangements
Bowls and wide vases alike are known for their capabilities of boosting floral arrangements yet the setup itself is often underestimated. The solutions are simple and a household trick would encourage the organizer to use scotch tape to create a grid to function as an organizing structure. It important is to have the bowl filled with water and the edges of the bowl or vase dry, the scotch should have the perfect grip on the surface, and no accidents should occur during special events.
In the same chain of thought, Budable produced a silicone mask that would top smaller vases to solve this problem on a larger scale. Aimed for big events yet infinitely efficient in small alike the Budable top is an option worth considering. Keep in mind that in this case too the edges should be clear and dry to the extreme to avoid unwanted occurrences. Special attention is to be paid to flowers with thorns as well as these can damage the silicone easily making it unusable, simply remove the thorns of a rose before placing it in the vase. The mask will also accommodate flowers that have been cut short easily, super functional, simple design.
3. Use the Easy Arranger Pack
The easy arranger is a metallic transparent solution that can be featured in simpler designs where sculptural flowers would not be harmed by the simple metallic margin on the vase. The Budable silicone solution might not be a great fit for three simple roses for example. The single slight disadvantage is that the water is harder to change than with Budable yet they serve different scenarios.
4. Customize your mason jar lids or use frog lids
Mason jars are used all around the world in hundreds of projects happily today and vases are one of the most common uses, featuring exemplary looks at little to no cost. The mason jar lids have been adapted to this use offering entertainers the chance to boost floral arrangements inexpensively at a large scale, today they`re entitled flower-frog lids. At a smaller scale, any lid can be adapted to emphasize the usage, get crafting, and beautify your arrangement in a matter of minutes.
5. Double vases setup ready to transform your event
Inserting a vase into a vase can be far more productive than one would imagine as it allows you to customize the outside container to a great extent. Natural elements such as limes, lemons, and oranges can be used for a fresh, extraordinary look while for a fall decor centerpiece leaves, acorns, rocks or your fall harvest can be nested. In this setting large flower arrangements are recommended to cover the edge and with the smaller vase in place, you will have an easier time designing the whole arrangement.
Invite graphic wide leaves such as Aspidistra to hide your stems and emphasize your arrangement. A very simple and beautiful look that can also be achieved with faux leaves, a highly graphic inexpensive solution.
Floating flowers are something different entirely and whether you are looking to change the setting in a special event or simply beautify your dinner setting, they`re worth considering. Happily, most flowers float very well by themselves but by using bubble skirts you will be able every flower in the perfect position; the trick will also make your extraordinary centerpiece last longer.
A flower tower can be constructed through the variation of different flower vases vertically and the craft can have extraordinary results. Use this in your backyard setting or on your patio to graphically display your address. Flowers and greenery emphasize every setting, embrace them.
Use a single flower nestled in a glass container as a showcase and change the scale of things. On the bottom rocks can be used to ground the design and create a slight contrast.
The floral arrangement sure carries weight but equally important is the recipient that carries it. Vase can be named everything that can hold water, from tin cans to large glasses and wine bottles you can use anything that fits your setting, adapt, and beautify your setting.
Time should be invested in a memorable floral arrangement well after the piece is finished as well. Numerous tricks can help one`s beauty last longer and we have curated a few of the most efficient ones. The real clear winner in this department is the fridge, every respectable flower shop is cold upon entering for a reason, storing the flowers in your fridge can almost double the time your arrangement can look fresh, simply do this at night.
The way the stem is cut is also important, a simple flower ought to have its stem cut at an angle to absorb water easier whereas a woody stem can be crushed with a hammer or rock to nourish itself easier, regardless, water should be changed as soon as it`s anything but crystal-clear. Several things can be added to the water to extend the life span of a flower ranging from one daily tablet of aspiring to bleach, vinegar, sugar, and even vodka; a few drops of vodka in each arrangement will kill the bacteria in the water so taking a moment and having drink with your plant can do more good than harm.
13. Transform a mundane flower into something memorable
The shape of the arrangement can make or break everything, airy the floral crown and create a volumetric presence to obtain a stunning look.
Instructions at Earnest Home
What do you think? What tips and tricks do you use with your flower arrangements? We would love to hear from you in the comment section below.
A pergola is not often defined despite its huge popularity, what is a pergola is common in landscaping and more importantly how is a pergola different from an arbor or car park one might find itself wondering. If you look for a fast answer, a pergola is a custom outdoor frame structure most commonly realized out of wood or metal. The structure beautifully emerging in your future landscape is based on posts covered with a roof or arch, it is envisioned to support vines. The top, roofing grid of the pergola can be left open or used as cover to shelter the individual from the elements. Built to add privacy and shade like a natural extension of the home with an outdoor sitting area, the pergola is most commonly attached to the home but it can be often found freestanding on open field, as a focal point in landscaping. The pergola offers privacy, obstructs unwanted views thanks to trellises and sculptural vines that shape the ensemble in pure beauty.
The pergola pronunciation is intuitive and simple : per`go`la . The origin of the word dates back to 1645-55 from the Italian, Latin word "pergula" - projecting roof, arbor.
Wooden pergola design painted in dark green nestling iron and marble dinning set, all emphasized by Wisteria vines.
The regular pergola is often confused with the following structures, these are terms that define either similar structures or relevant components to a pergola ensemble reason for which in the following rows their similarities and difference will be explained to avoid future misunderstandings and misuses of the terms. The terms in discussion are:
Arbors
Gazebos
Trellises
Lattice also known as “latticework”
Carports
Differences and similarities- Arbors and Pergolas
The most common misunderstanding is found between arbors and pergolas, two highly similar outdoor structures that are often confused. Arbors are commonly used structures that can be found in public parks and private gardens alike, these are often realized out of materials with high resilience like vinyl or coated metal to avoid their maintenance where pergolas are usually realized from wood. Arbors are freestanding, rare being the cases in which it is attached to a garden fence to serve as a gate, embellished in natural elements. The biggest difference between them is that arbors lack the beautiful architectural design features that define a pergola, moreover they do not serve a leisure role as an outdoor sitting area but as a graphic element that emphasizes the landscape through its presence, as an anchor for beautiful flowers and vines.
In contrast, pergolas are larger structures in all three dimensions and they`re customized to a certain extent to fit the requirements of the individual using it, pergolas can receive masonry columns for a beautiful renaissance monumental aspect and their top is often flat. The pergola dates back to the birth place of the Renaissance, Italy, where the term pergola firstly emerged describing masonry pergolas of great beauty. In contemporaneity the term pergola is often found describing ensambles realized in wood and iron more often then stone. Mixed pergolas with stone and wood, metal and wood can be found as well.
An outdoor extension for the indoor living space is the most common stance of the word pergola, when they`re freestanding, pergolas are used as dinning areas and outdoor enterntaining ensembles nestled between greenery or outdoor enterntaining features like fireplaces, swimming pools, outdoor cooking areas.
Landscape Architect, Cynthia Cash describes the deference between an arbor and a pergola below:
“The primary difference in an ‘arbor’ and a ‘pergola’ is that an arbor is a free-standing structure (also used to support vines), whereas a pergola is a long linear structure over a garden pathway.”
Gazebos and carports compared to pergolas
The beautiful and functional outdoor structure known as "gazebo" is often confused with pergolas as well. Gazebos are enclosed structures, they have a closed roof and unlike pergolas, they usually feature a round shape on a raised floor that protects the users fro, humidity in the rainy season, it is used for outdoor entertaining, usually as a dinning area, a very practical, neat outdoor structure..
The carport is the outdoor structure that resembles the common pergola the most, a high end car port can sometimes be better looking than a normal, common pergola, this happens because both ensembles share the same structure, the difference between them being on function and purpose rather than aspect. The carport is used to offer refuge to car in the alley where pergolas are used for entertainment, relaxation and comfort. The practical values of the carport cannot be compared with the leisure valences of the pergola in which memorable experiences are written in comfort and beauty. Both are commonly constructed out of wood and both serve as anchors for vegetation usually.
Rustic Gazebo ready to shelter an extraordinary dinning experience in complete privacy and full comfort.
trellises, LATTICEWORK,Vines & Pergolas in LANDSCAPING
The purpose of all these structures at the end of the days it to bring vegetation in the vertical plane, greenery that sculpts space and clothes the bare wooden structures transforming them completely. Common vines like Virginia Creeper, Hardy Kiwi, Wisteria, Bougainvillea, Hardy Kiwi, Dutchman`s Pipe are wrapping the structures around the world in sheer beauty, emphasizing their existence and beautifying the ensemble, adding visual comfort in most modern gardens.
The trellis is a small part of these ensembles, a framework that helps climbing roses, vines to grow. Trellises can be made out of wood, vinyl or metal and they`re confused with the word lattice thanks to the looks of the latter. Lattices have a crisscross or check-board pattern that troubles the eye, determining the confusion with trellises. Where trellises are freestanding pieces, lattice and latticework are mounted on the sides of a pergola or arbor, as anchors for the vines, easing the climbing of the plant up to the roof.
Wooden pergola design sheltering a sofa swing, latticework protects the sides from unwanted views.
Modern pergola offering shade by the pool, naturally extending living space outdoors.
Found onTitan Designs
Beautiful Mediterranean Pergola designs offering shade for a sitting area with expansive views.
Pergola ensemble with hammock and extraordinary expansive views.
Olive green pergola design with orange curtains ready to offer privacy to the individuals using it.
Outdoor bar area protected by white pergola design; industrial timeless bar chairs emphasizing the spatiality in which they reside.
Vinyl white pergola design offering a sitting area by the pool, protected and emphasized by greenery.
Living pergola design sculpting space around it, defining the space through greenery.
Custom metal pergola design nestled in greenery.
If a small pergola definition was to be sought the answer would describe the pergola as garden structure that sculpts a shaded sitting area, passageway or walkway used for leisure purposes; the garden structure described would be build by vertical posts and pillars that support cross beams along a constant width. In the ensemble latticework gracefully trains plants, vines to grow into the vertical plant, complementing the vertical layout with organicity, naturalness and sheer beauty, emphasizing the aesthetic values of the landscape and home, redefining the outdoor living spaces and inviting new protagonists, greenery, in a previously undiscovered territory. The comfort of the household is boosted thanks to the privacy added, shade provided and opportunities opened in sublime comfort.
Latticework and pergolas
The common pergola design includes posts, beams and latticework, simple and easy to realize at home with an extra hand. The common footprint measures 10 ft with, 10 ft depth and 8 ft height, the sides are usually covered with latticework, from time to time latticework being placed on the roof top as well. Redwood is used to reduce the maintenance and add longevity to the ensemble. To customize your pergola you can use any paint to either nestle the design in the overall decor or contrast it. Through a simple pergola you can earn shade, privacy and a great deal of comfort.
Columned pergolas
The beautiful mixture between materials has always been much appreciated when realized properly. In pergola designs too materials can be mixed to great results, columned pergolas for example are preserving the roots of the stone pergolas, ensembles that brought a monumental architectural presence into the setting to sculpts space, now beautifully combined with the more modern presence of the word pergola, wood. The instance in which Corinthian or Roman Style columns are tailored with wood are highly fortunate, these are today realized out of polyvinyl chloride, PVC, in which concrete is poured for stability and resilience. Traditional settings, Tuscan homes and various other eclectic scenarios use the visual impact of the column often obtaining great results.
Exemplary pergola design ideas with stone architectural columns and wooden roof top, ensemble wrapped around a superb fireplace, everything embraced by flowers, vines, greenery.
Pergola with Arches
A solution that denies the flat, regular plane on the roof top is the arch pergola. The curve resolved on the top of the posts reshapes space, simulating the sky vault on which flowers will be present. Iron and redwood are used to create the arches but today certain ready arches can be purchased, all weather resistant. With wooden arches you can also obtain a rustic look that adds warmth and an inviting allure.
Sculptural custom made arched pergola sheltering sitting area.
Japanese pergola
The Japanese garden inspires calms and serenity and is often the birth place of garden structures that vary from mini pond bridges to custom pergolas and arbors. Cedar and Redwood is used commonly used, occasionally painted red to serve as a garden centerpiece. Eclectic gardens inspired by the Japanese gardens often adopt pergolas as transitional items between different styled garden zones. Wisteria and rose flowers are the plants of choice in these setups.
CONTEMPORARY pergola designs
In contemporaneity pergolas are often designed with recycled plastics and vinyl as they reduce the maintenance of your ensemble to zero. The new pergola materials do not decay or rot nor do they need any painting like wood. It goes without saying that wood infuses different values in your scenery but if you`re short on time and you find yourself unable to spend it on maintenance, modern solutions are the way to go, they can be quite graphic.
Modern Metal pergola ensembles
A strong solid structure realized in metal can last an eternity. Use metal to you advance, copper will create a patina of green-mint, blue greens that no other material can replicate, metal can be shaped in various shapes and sizes so pick it up for custom setups. Curved or angular garden structures can also be realized with metal. Do not use rebar, it will rust swiftly. Coated metals are superb solutions with extraordinary resilience, they can take extraordinary shapes that will emphasize your garden for decades.
Living materials shaping structures
You can sculpt with living matter, you can use flexible shrubs, trees to sculpt your own structure. Tie and train the branches to embrace the modelling strong and unite them on the top to create a living ensemble. Bamboo is often used to serve as a pillar for the future living posts. This technique requires immense patience and dedication but the result is inexplicable beauty.
design tailored for your needs
Light or heavy, minimal or highly decorated, rustic or formal in design, your solution must require a perfect fit in your scenery. You simple need to realize something that will complete your garden setting at first glance. Plants and flowers must require thought just as much as the building material, the garden paths that lead to your pergola and the furniture enclosed in it. Pay great attention to details and you will obtain a design tailored to your needs that while emphasize your garden and offer you privacy and comfort.
ensure privacy and win comfort
More often than not pergola ensembles and trellises are installed to obtain privacy. The latticework on your pergola includes this statement and will offer privacy and shade through the presence of beautiful vines like wistera, grapes or whatever flamboyant climbers you choose to use. You pergola can lead the way in your design, serving as an example of sheer beauty; it can inspire future arbor and trellises installation beautifully tied by garden paths and flowers. The new setup can be brought by your outdoor fireplace or swimming pool as well, enhancing the entertaining area great deal.
If you choose to build your pergola at home as a do it yourself project, we applaud you, it is a course of action that many individuals take, it leads to great results. Keep in mind that safety comes first if you build at home, use safety equipment, read the instructions for the power tools used and cement mixture alike, nothing should be overlooked.
You`ll also need an extra set of hands, especially in the first part of the project, call a friend and make this project a really fun and constructive hang out.
If you choose to use pergola kits, research well, use kits on which you`ve found positive feedback; some kits might make your job harder than they should.
Take your time and build in your rhythm, you set the pace, you know the design you aim for. Ensure the proper result with patience.
Simple wooden pergola protecting an outdoor bed by the pool.
Found on SNOEI
Complete outdoor festive entertaining suite on terraced ground.
Two toned wooden textures providing an unique sitting area. Notice the metal barrels doubling as coffee tables; notice the pattern on the patio floor. Superb details on simple elements.
Minimalist metal pergola design with clear lines battling vegetation.
Found on Jacqueline Volker
Wooden corner pergola design offering a small refuge in the garden.
A garden, like a home, carries great importance. It helps us relief stress, it shares with us fresh air, privacy, comfort. If you are happy enough to call a small plot your own, make it worth it, enjoy every inch to the fullest, be sure you make the best out of it. We all have different needs, while one will require a swimming pool another might seek a vegetable garden. Meadow, vegetable garden or bachelor outdoor entertaining center, enjoy your garden, love it, appreciate it.
What is a pergola? What do you think? How do you use your garden? We would love to hear your valuable feedback on the subject in the comment section below.
If you think gardens are just for greens, then you may not be totally right!
And one of the things that you certainly don’t want to miss out on is a water feature. After all, who wouldn’t like coming back to the sound of trickling water after a long day at work? Besides, these structures invite several pollinators like birds and butterflies, which ultimately facilitate plant growth.
So, here we are with the 48 best water feature ideas that will turn your garden into your favorite zone. Whether you’re a DIY enthusiast or not, we’ve something for each requirement.
Now, let’s get started, shall we?
Best Water Feature Ideas
Mixed Metal Water Fountain
If you have got some leftover metal parts in your garage, then this first idea is just for you. Transform a humble metal tank into the showstopper of your backyard using some galvanized metal, washers, a low shutoff water pump, washers, and a tap.
Place your favorite greens inside the tank, and you’re done! For the finishing touch, bring in the old watering can.
Plant Pot Water Fountain
This simple structure consists of two plant pots, one smaller than the other. The bigger one forms the base, so throw in a large pail and cover it with a pot saucer. Add in some river stones above it and make way for the other pot. Don’t forget to seal any drainage holes. Lastly, drop a solar pump for water flow.
Galvanized Bucket Solar Fountain
Simplicity has its charm, and so does a plain galvanized bucket. Grab your favorite aquatic plants like cyperus involucratus (baby tut), taro, canna lily, Siberian iris, liriope, etc., while still planted in their respective containers; the roots will keep the water clean.
Then, put them in the bucket and fill water till you cover the roots. Finally, submerge a solar fountain pump.
Bubbling Water Fountain
Okay, now constructing this feature is likely to take quite a lot of time, so make sure you have enough on hand. Using a mortar mix, prepare two circular molds (the fountain) with a water inlet and a well-like base that’ll house the fountain pump. While we like the earthen look, you can paint the feature to amp up the setup.
Wooden Barrel Water Fountain
While taking a quick breather from DIY projects, let us introduce you to this classic wooden barrel-style water fountain. What we liked the most about it is the interiors are lined with a plastic coating to prevent any moisture or mold buildup. That said, you can always build one with any material of your choice, or even change the colors if you like.
Tiered Flower Pot Fountain
Remember the plant pot water fountain we talked about? Well, here’s a variation that you can try for larger backyards. This time, we got three PVC pots instead of two and drilled a hole in the bottom of the base pot to feed the plug through it. We also found that two-part epoxy putty works better to seal the drainage hole, especially for warmer areas.
Ceramic Cascade Birth Bath Fountain
Planning to get rid of that old ceramic tea set? You might want to wait till you see this next water fixture. Thanks to a concealed solar water pump, the mesmerizing water flow from one level to the other is a sight to behold. Plus, it can be the perfect holiday gift for friends or family.
Tiny Egg Fountain
A smaller alternative to the bubbling water fountain is this ceramic sphere fountain top, which is ideal for your patio or indoor garden. Here again, you can create the spheres, but we think you should get the pre-drilled ones at a nursery. Similarly, find a plastic tub that’s big enough to hold the spheres. Set it up with a fountain pump, and that’s about it.
Solar-On-Demand Fountain
Bring regality to your backyard with this weathered stone-finished water fountain. But there’s more than just looks that made us include it in the list. Not only can you switch it on and off with the press of a button, but the unit also stores solar energy for nighttime use. A full day of sun exposure equals six hours of charge.
Patio Water Wall
As they say, ‘Rome wasn’t built in a day’! Sure, this patio water wall won’t be among the quickest constructions but is worth the time and effort. If you can find a safe space, you can even place it in the garden, but we prefer the patio placement. After all, what is better than the serene sound of water to calm the senses?
Blue Planters Waterfall
Blue amidst green is quite a symbiotic relationship as each color helps the other to stand out. And the fun part about the design is that it houses some really simple and cheap materials to steer the water circulation. If you don’t find blue pots, buy plain terracotta pots and paint them before use. Sounds like a creative weekend activity for your kids, right?
Disappearing/Underground Water Fountain
Not in the mood for a prominent fountain structure? Then how about an underground installation? A decorative rock fountain that has just the water stream on display is a brilliant compromise between an open pool and a free-standing arrangement, but you may need extra help for the construction. And allow us to suggest a colored water stream for an added appeal.
Three-Tier Fountain
We thought recreating the tiered flower pot fountain for a bigger version would be a costly affair till we came across this structure. Just head to a thrift shop nearby and pick up some fixtures, spacers, and basins. The measurements and numbers will depend upon the desired height of the fountain. Finish off with a layer of paint, or keep the rustic charm as is.
Spring-Inspired Pond
If you’re looking to upgrade the walkway, then here’s a DIY water feature that may well be the perfect accent. Moreover, you can even recycle the existing slabs to support the pond, so that’s a win-win! Throw in whichever aquatic plant you like, or skip this step, but ensure water circulation to prevent building a mosquito breeding ground.
Tea Pot Fountain
There’s a high chance that this free-standing feature makes you say ‘how did I even build it’ after installation! An old iron teapot becomes the water source, while the water flows into the barrel base via a shallow bowl. Aside from being relatively simple to assemble, it can be easily put away when not in use.
Water Garden
We’re loving how this compact wooden garden has brought so much life to the space. Plus, building one such frame isn't a lot of hard work-just keep the right tools in the vicinity. However, ensure that you line the insides with a water sealant for durability. Furthermore, drill a couple of holes in the bottom for drainage if required.
Overflowing Ceramic Pot Fountain
If you’re fond of the rhythm of babbling water, we recommend this overflowing ceramic pot fountain. The water bubbles up from the spigot to create a dramatic effect, that honestly, we’re living for.
As the cool overflowing water hugs the outside surface before disappearing into the gravel reservoir below, let your fingers experience the soothing tactile pressure. Simply magical, we say!
Nested Ceramic Pot With Fountain
By placing a second, larger ceramic pot at the bottom, you can create a big ‘center of attraction’ piece, especially for larger spaces. Or, create a miniature version for your indoor garden. Throw in some river rocks to streamline the water flow.
Old Flower Pot Fountain
Loosely based around the ‘Leaning Tower of Pisa’, this structure is perhaps the best use of old terracotta pots that are about to be thrown away. Because of its angle, the river rocks are clearly visible even from a distance. But make sure that you seal any holes to prevent the water from flooding the ground.
Circular Water Wall
The appearance may tell you otherwise, but this circular water well is actually pretty sturdy, and you can make it even more stable by opting for thicker glass. Apart from that, you’ll need a fair bit of welding to secure the structure on the ground, so call in some professionals. Install a couple of landscape lights for that alluring effect.
Stacked Stones Fountain
For centuries, stone stacking has been known as an active form of meditation. But given the busy lives of people today, it may be a better idea to install this structure once and for all. The number of stones will depend on the desired height of the fountain, but make sure that all of them have flat surfaces to aid seamless stacking.
Watering Can Fountain
Nothing speaks of countryside vibes like this watering cans and galvanized tank fountain. Connect the three in a way so that water flows from one to another without exposing the pump or tubes. In that sense, the only prerequisite may be a fence or wall that can support the structure. A pro tip: use old metal hangers as the brackets.
Bamboo Trickling Waterfall Basin
Heavily inspired by Japanese gardens, the trickling waterfall basin uses a long length of bamboo supported by two narrower lengths, which help trickle the water down to a ceramic basin. In this particular instance, the white color represents the zen element, but you can also choose a darker color to create a beautiful contrast. The result? A corner you wouldn’t want to leave easily!
Pretty Little Pail Fountain
Try this super simple pail fountain to break the monotony of greens in your garden. It basically uses just one element- a pail. Add tons of gravel to fill the bucket to the point where only the stream is visible. The bits of sea glass bring a pop of color to the monotony of cream and gray.
Cascading Copper Wall Waterfall
If you grow too many colorful flowers in the garden, then this cascading copper wall waterfall is the perfect accent to provide visual balance. Grab a simple copper sheet and attach it to a box-like reservoir. We also suggest polishing the sheet before assembly for a smooth water flow.
Fun And Fancy Wheelbarrow Waterfall
Don’t we all have that first wheelbarrow, which is too close to disposing of? Well, by converting it into a funky waterfall, you can keep it as memorabilia of your initial gardening days. The tilted angle gives a feel as if it’s ‘building’ its reservoir. But a bit of illusion doesn’t hurt anybody!
Loop de Loo Waterfall Chain
Seasonal water features are a great way to save water without compromising on uniqueness. For example, this copper chain waterfall can be hung from the shade of the patio on rainy days. Likewise, multiple chains within a few inches of each other will create a uniform water flow.
Ceramic Urn Fountain
A ceramic urn fountain can be the perfect decor to make add a touch of elegance to those dull corners of the garden. Plus, you don’t need a lot of tools or equipment to make this. One thing to know- some people prefer planting the pot directly in the soil, so we think it’s better to add a liner in the hole for reinforced stability.
“Treasury Of Rocks” Pail Fountain
It’s safe to say that one of the most liked river-side views is that of the shining pebbles underneath clear water. And this fountain emulates that frame to a good extent. You can slightly modify it by adding or removing the metal containers. However, don’t skip a standout piece like the stunning blue bobble to create that dramatic statement.
Vineyard Inspired Barrel Fountain
The best way to show your love for wine is by dedicating a structure in the honor of your favorite wine brand. All you need is an old wine barrel that’ll serve as the reservoir cover when inverted. Bring the tube through the bottle to secure it firmly atop the base. Alternatively, you can use two or three bottles for a unique look.
“Water Tumbling Down The Wall” Feature
This fun yet attractive water feature can be thought of as an expanded version of the teapot fountain. Water starts flowing from the old watering can to the pipes to the downspout to the bucket. The latter is equipped with a spigot that ultimately lets the water into the galvanized washtub. Frankly, we can look at the water flow for hours and still won’t get bored!
Now, let’s take a look at some of the larger water features that can be included in your landscape.
Tall Stone Gateway Water Feature
Confused between a fountain and a pond? Don’t be anymore. This striking stone gateway water feature lets you have the best of both worlds. Get the natural sunlight to bounce off the fountain stream and meet the pond below for a mesmerizing view. Heads up: you’ll need plenty of time and work to get this one done, so plan well in advance.
Cascading Waterfall With Stairs
A cascading waterfall that runs over rocky steps makes for a sight to behold. You can surround it with a mix of plants and boulders, which will also double up as its boundary. That said, features like these require a lot of space. So, customizing it to fit smaller spaces may not be a bad idea.
Pond With Fish And Plants
As traditional as it may sound, the traditional charm of a fish pond remains an unmatched phenomenon. The secluded bench completes the harmony between everything that’s a part of this serene waterscape. Moreover, the plant reflections and tickling sound of water create a relaxing environment for the koi fishes. Just make sure to add them after you’re done with the rest.
Asian Style Water Garden
Water features don’t always have to be limited to the outdoors. For example, this garden pond draws inspiration from a combination of feng shui and bonsai art to extend its boundary to the transition area between the indoor-outdoor space. A couple of chairs here and a bean bag there will make you not want to leave this corner.
Water Garden With Wooden Bridge
With this setup, you can leave it to the onlookers to choose their respective points of focus. But whatever draws your attention, we bet you can’t ignore the tranquil connection between the water, rocks, bridges, and flowers. We love this flat-shaped bridge, but you can also opt for the conventional curved variant.
Natural Water Feature With Rock Edging
You don’t need fancy ornaments to accentuate a simple natural water body, as is evident from our next example. We’re really impressed with how the rock barrier adds depth to the pond by cutting between the green and the almost-green water. Another advantage is that you can start off with a smaller pond, and then expand it over time.
Crystal Waterfall On Brick Wall
Yes, we know, crystal waterfall sounds every bit fallacious, but it makes for an extremely unique view, nonetheless. The secret? basins with concealed LED lights. As the water falls from the wall, it reflects the light below, thereby giving a sparkling effect like that of crystals.
Water Feature With Spurting Jets
We usually think of water jets to be part of hot tubs, but not anymore. While the water jets here create a dome-like structure with the stream, you can alter the placements to replicate any shape you want. Accordingly, change the accents to things that best complement the resultant effect.
Multi-Layer Rock Garden
The versatility of multi-layer rock gardens makes them a suitable choice for both central and corner positions in your garden. As the cascading stream makes its way from one level to another, the oxygenated water enhances the positive vibes in the surrounding areas. And if quacking isn't an issue, feel free to bring in a couple of ducks.
Rain Shower Fountain
This rain shower fountain is your literal getaway to a rainy day! Use a pressure-treated lumber frame to build this gorgeous frame for anytime rain at the convenience of your backyard. Not only can you install a waterproof strip of LED lighting, but you can also customize the dimensions according to the size of your garden.
Looking Glass Water Feature
We’re in awe of how the glass ball looks as if it has risen from the water bed to show the future. While we feel that this plain transparent ball works the best for the cause, you can replace it with any other color or even shape.
Mini Oasis With Waterfall Feature
Rejuvenate your senses with the sound of trickling water by building a circular boundary made from rough-hewn stone. It uses a long ‘keystone’ to initiate the water flow that collects at the pond-like structure below. A mix of prostate and bright flowery plants like chrysanthemums, zinnias, lazy susans, etc. softens’ the rough edges of the stones.
Tornado Garden Fountain In Glass Container
Not many designs define ‘out-of-the-box’ thinking like this tornado-shaped waterfall. It sits inside a glass cylinder, which is in turn, surrounded by a circle containing contrasting pebbles. And as always, adding a few LED lights will let you enjoy the view even in the dark.
Spurting Face Water Feature
We bet this idea takes you back to the hit 90s show “Legends of the Hidden Temple'’. As talks about reviving it for a version with adult contestants doing the rounds, this spurting face water feature will become the highlight of your garden in no time. And may we strongly recommend installing a couple of red LED lights for the eyes.
Water Fountain With Regular Steps And Stones
If you’re into contemporary designs, then this modern water feature should be on your list of must-haves. It’s basically a combination of stones, decking, and water plants that come together for this classy waterscape. The only thing to consider- the price of assembling this one may be on the higher side.
Traditional Garden Design With Vases
Here’s a design that will double up as a water provider to birds. Equipped all the vases with a water fountain pump to accommodate more birds. Besides, you can turn it into a seasonal affair by activating the pumps only during summer.
Gazebo Water Feature
Is your backyard blessed with a pond and gazebo? Then how about creating a winding path adorned with stones and flowers that surrounds the pond and leads to the gazebo? The different textures and colors certainly come together for a gorgeous landscape.
Garden Filled Pond
Before we wrap up, here’s a simple yet elegant water feature idea that’ll save you a lot of money and time. Simply add in a lot of aquatic plants in the pond to create a colorful centerpiece. Besides, the roots of the plants will keep away mold formation on the water surface.
Bathtub Pond
To end the list with something simple, here’s a DIY plant-filled pond that’s perhaps the best way to recycle your old bathtub. By attaching a fountain pump, you can circulate the water or leave it stagnant. In the case of the latter, make sure you change the water regularly to keep it clean.
Final Thoughts
That’s all from us on the best water feature ideas.
Hopefully, we’ve brought enough options to the table for you to choose from. And now, we leave you to take the final pick. Almost all our recommendations can be customized to fit a given space, so that’s a bonus!
On that note, we’ll take your leave, but not without a quick pro tip: circulating water involves less maintenance. So, try to install a fountain pump in your structure.
Spring is just around the corner, and we can't wait to take a day off and simply relax in a hanging chair while listening to the songs of birds. But until then, we should prepare ourselves. With this in mind, we have searched for some creative DIY Hanging Chair Projects that you can complete just in time for those beautiful, warm, sunny days spent in the garden or on your porch. The following projects are also wonderful for indoor use, so you can swing away even during the remaining cold days of winter.
Rope is the essential material used here, along with wood and colorful, fun fabrics. Imagine how much your little girl would love a pink, fluffy hanging chair in her room! We are particularly fond of the pallet hanging chair designs, which recycle and repurpose old wood. You can get crafty and weave a macrame chair now. It might require some time investment, but the result is delicate, beautiful, and quite comfortable. Add a cozy warm blanket and a pillow, and you're all set for a good read.
Enjoy the Top 10 DIY Hanging Chair Projects and feel free to share your thoughts and projects in the comment section below.
We found that the GoSports Splash Pro Pool Volleyball Net comes at the top of the list because of its sturdy build and adjustability. Likewise, the Swimways Poolside Volleyball Setand Poolmaster Across In-Ground Pool Volleyball Net are viable options for children and adults.
The goal of buying the best pool volleyball nets is to have a fun and relaxed time in the pool. So, if you plan on spending some quality time with friends and family in the swimming pool of your backyard, you know what’s needed.
Setting up a pool volleyball net set is pretty simple, provided you follow the steps mentioned in the instruction manual. But finding one that meets your pool size requirements, allowing you to keep your loved ones entertained for hours together with a fun sport like volleyball, is no easy feat.
There are many options on the market, and finding a suitable pool volleyball set can take time and effort. So, we took the responsibility of seeing some of the best options and reviewing them for you. There is certainly one option in this list that would suit your needs.
POOL VOLLEYBALL: Splash into the ultimate pool day and play...
ADJUSTABLE NET: Splash Net PRO is compatible with virtually...
What we like
Easy to set up
Comes with two volleyballs
Sturdy and stays in place for long
Suitable for all pool sizes
What we don't like
Height of the volleyball net can’t be adjusted
When it comes to choosing the best pool volleyball nets, GoSports is a brand to take into consideration.
This pool volleyball net has sturdy bases that keep the net intact and uptight. Even after hours of splashing around in the swimming pool, the net won’t be tipping over. Engineered to withstand all the fun and frolic that comes with pool volleyball, this setup is perfect for a sunny day.
Moreover, the GoSports Volleyball Net is compatible with all kinds of inground pools, be it lap pools, rectangular, or even rounded pools. The net straps can be adjusted according to the pool size and can be extended up to 25 feet.
Coming to the other inclusions of the set, you get two volleyballs and a ball pump with inflation needles besides the volleyball net and posts.
The only issue is that you won’t be able to adjust the height of the volleyball net posts. This might make it difficult for children to play freely in this setup.
But overall, it is an ideal option for any adult pool party or just a casual day at the backyard with friends and family. You can either opt for the red or blue color variant, depending on your preferences.
Material: Plastic poles and nylon net | Packaging includes: Adjustable volleyball net with two side posts, two volleyballs, a ball pump with an inflation needle | Pool Compatibility: In-ground pools - lap pools, rectangular pools, rounded pools, etc. | Net Width: It can be extended up to 25 feet | Color: Blue or red
SUMMER FUN: Keep active this summer with the SwimWays...
DURABLE: This outdoor swimming pool game's durable 24 ft...
What we like
Easy to set up without any tools
Good for inground swimming pools
Fill-base for stability
High-quality build
What we don't like
Side posts may tip over if not filled
Here we have reviewed the pool volleyball net manufactured by SwimWays. The brand makes recreational water products for all age groups and it’s respected for its high quality pool volleyball equipment.
On that note, the SwimWays Poolside Volleyball Set has been specifically designed for inground pools. The pool volleyball net measures around 24 feet in width and fits seamlessly across all pool sizes and types.
Explicitly recommended for children aged six and above, the swimming pool volleyball setup is easy to assemble. It includes a volleyball, two heavy-duty side posts, a volleyball net, and an inflating needle. And no tools are required to put all the accessories together.
Overall, the product is a good choice, but the only thing that might be a problem is that the side posts are a bit lightweight. As a result, the entire setup might tip over frequently. But there’s a solution to this problem - all you have to do is fill both the heavy-duty side posts with either sand or water to keep the entire setup stable.
Material: Plastic | Packaging includes: Two heavy-duty side posts, a volleyball net with a ball, an inflation needle, and an instruction manual | Pool Compatibility: Suitable for most standard size in-ground pools | Net Width: It can be extended up to 24 feet | Color: Blue
Entire swimming pool game set that is epecially designed for...
Pool game bases can be filled with water or sand for...
What we like
Suitable for larger pools
Includes a deluxe water volleyball
Includes tall side polls (30 inches each)
Compatible in all kinds of settings
What we don't like
Setting up the volleyball net may be a bit time-consuming
Poolmaster has been a leading name since 1958, known to produce pool and spa products. Famous for its durability, high quality product line, and quick service, this brand also makes pool volleyball sets.
As such, this pool volleyball set, including a volleyball net, sturdy side posts, a ball, and an inflating needle, is designed for across-pool volleyball sports.
You can set it up anywhere, be it in your swimming pool, backyard, or any other surface. The pole is 30 inches in height, and the net size is 16 feet, extending up to 38 feet. So, it can fit in almost every kind of pool with perimeter decking. We’d recommend this one for pool parties, picnics, beach outings, or any other getaway.
The side posts of this pool volleyball set can be filled with sand or water for stability. Meaning, there’s no scope of it tipping over at any point during the game.
Overall, the product is ideal for children and adults who want to spend a fun summer afternoon playing volleyball in the comfort of their swimming pool. The only issue is that we noticed the caps for the poles were a bit too small and difficult to fit, which made the assembly process comparatively time-consuming.
Material: Nylon | Packaging includes: Volleyball net with 30-inch tall upright poles and two bases, a deluxe ball, and an inflating needle | Pool Compatibility: Suitable for larger pools with perimeter decking | Net Width: It can be extended up to 38 feet | Color: multicolor
The inflatable pool volleyball netmanufactured by Omotiya is a suitable lightweight and portable pool game setup option. While helping build hand-eye coordination, this pool volleyball set offers many advantages, which is why we have included it in our review list.
To begin, the volleyball net is made of high-quality ABS material, making it lightweight yet durable. It can be set up anywhere, be it swimming pools, your lawn, or beaches. Moreover, it comes with a six-gallon capacity water base that makes it all the more stable. You can fill this uniquely-designed base with water or sand to prevent the net from tipping while enjoying a pool game with your family.
The pool volleyball set is compatible with all kinds of inground pools, including rectangular pools, lap pools, and rounded pools. The sturdy net can be extended up to 16 feet, and the set comes with other accessories, including two colorful volleyballs, a pump with an inflation needle, and a sturdy net with two side posts.
One can easily clean the entire setup by spraying water on it. What’s more, the instruction manual provided with it makes the whole assembly process much easier and hassle-free. However, we felt that the expandable width of the net was not close to the previous three options on the list. This is a small pool volleyball netthat would be a better choice for a relatively smaller pool.
Material: High-quality ABS material | Packaging includes: Volleyball net with uptight poles and high-capacity bases, two colorful balls, a pump and with inflating needle | Pool Compatibility: Suitable for smaller in-ground pools (rectangular pools, rounded, and lap pools) | Net Width: It can be extended up to 16 feet | Color: Blue and yellow
The next option in our inflatable pool volleyball net sets list is the Kidditoy Pool Volleyball Set and Basketball Hoop. This option is suitable for inground pools and can be easily set up across any swimming pool irrespective of the shape and size.
This is a complete pool volleyball set, including an inflatable pool volleyball court, a basketball hoop, a volleyball, and a basketball. You can easily set them all up using the instruction manual that gives a pretty clear picture of the assembly. And the net has straps on both sides that will help you to adjust it according to your requirements.
Now’s when we’ll mention the floating weight bags of the Kidditoy Pool Volleyball Set. They act as anchors, similar to bricks and sand bags, thereby stabilizing the volleyball net to prevent it from tipping. Moreover, the net and other equipment are pretty sturdy because of the PVC material, which is 30 percent thicker than the others.
The brand’s excellent customer service can cater to your needs, listen to your complaints, and act accordingly. And while most other brands focus on volleyball sets and balls, Kidditoy has also added a basketball and a hoop. This makes this swimming pool volleyball set stand out from the other options on the list. The only complaint we have is related to the size of the volleyball that is included in the set - it’s a bit too large to play with.
Material: 0.3 mm PVC | Packaging includes: Volleyball net with two side posts, basketball hoop, two weight bags, a 21-inch inflatable volleyball, 13-inch basketball, and instruction manual | Pool Compatibility: Any small inground pool | Net Width: 125 inches | Color: Blue and orange
Regulation size set includes red/white/blue soft touch water...
Mounts directly to concrete surrounding your pool via two 2...
What we like
Sturdy aluminum posts
Can be adjusted according to the length of the pool
Won’t tip over
Quick set-up
What we don't like
Assembly can be a bit complicated for first-timers
The Dunn-Rite Deck Volley Water Game pool volleyball set comes with an adjustable net, side posts, and a ball. It consists of every accessory and hardware that you may need to arrange a pool party.
This net can easily fit into any inground pool, and its height and length can be easily adjusted according to the size of the pool. It can be set up within just a few minutes, provided you are well-acquainted with the steps and can extend up to 24 feet. And you need not worry about the volleyball net tipping over as it comes with sturdy aluminum posts and anchor caps.
As such the entire setup is sturdy and you won’t have to pause your fun. However, assembling all the accessories and hardware together can be a tad bit complicated for a first-timer.
Material: Powder-coated aluminum posts with brass anchors and nylon net straps | Packaging includes: Adjustable net, two aluminum posts, a volleyball, and other hardware for setting up the swimming pool volleyball set | Pool Compatibility: Compatible with any inground pool | Net Width: It can be extended up to 24 feet | Color: red, white, blue
Swimming Pool Volleyball Set Buying Guide
We know that purchasing the best pool volleyball nets is more challenging than it may sound. You need to buy a pool volleyball set that includes all the required accessories, is sturdy, and meets your pool size requirements, or you'll just be wasting money. Keeping that in mind, here are some essential factors to consider before buying a pool volleyball set.
1. Price
Customers often need clarification regarding what price they should pay to purchase a pool volleyball net set. It is advisable to shop for a pool volleyball set that is within a reasonable price range. Most of the brands available on the market are available in a diverse price range.
You may opt for a cheaper volleyball net that will last for a season or two, but a more expensive one (not too expensive though) will give a much better performance and last for many years.
2. Above Ground Vs. In-Ground Pool Volleyball Net
There are two types of swimming pools- above-ground and in-ground. While all the pool volleyball sets we have reviewed are for standard size in-ground pools, you can also set them up in an above-ground pool setting.
Just ensure that the net width is expandable enough to fit your pool size. And the volleyball net set should include heavy-duty posts with sturdy bases so that you can set them up even on the deck surrounding your swimming pool.
The fill-in bases will prevent the net from tipping over - so you're all set to have a fun, sunny day with your family and friends.
3. Ball
Make sure that the volleyball net set you choose to buy comes with a volleyball made of inflatable vinyl because it is more durable compared to other materials. It’s even better if the set includes a basketball and hoop along with other pool toys. These inclusions will only increase the fun.
4. Inflatable Vs. Non-Inflatable Pool Volleyball Set
You should choose an inflatable pool volleyball set if you're looking for a leisure volleyball game where mostly children are involved. However, if you're looking for a more serious and intense pool game, then a non-inflatable pool volleyball set is what you will require.
5. All-Weather Components
It is essential to check that all the equipment of your pool volleyball set is built with all-weather materials. Your pool volleyball set will be exposed to water, sunlight, sand, and other factors that might cause damage. Therefore, one should always ensure quality and durability before buying a volleyball set.
Top Swimming Pool Volleyball Set Final Verdict
Now that we have ended with the list of six best swimming pool volleyball sets, we hope you have found your match.
Before wrapping up, allow us to list our favorite products from the list. GoSports Splash Pro Pool Volleyball Net is one of our top recommendations owing to its sturdiness, adjustability, and brand value.
Sunsetter’s Premium Awnings are a reliable choice as a retractable premium awning. The designs are varied and appealing, and the awning is durable enough to offer protection against all kinds of weather.
A retractable overhang can transform a patio from being hot and uncomfortable to lounge in to be the perfect summer hangout spot.
It can create shade and comfort or allow the sun in with a simple press of a button. Several criteria dictate which retractable awning proves to be the best for your home. But, does the Sunsetter awning fit the bill for your home?
So, to see if it makes the cut, we’ve reviewed the Sunsetter awning.
Sunsetter Retractable Awning Review
Fabric: Solution-Dyed Acrylic
Sunsetter brings several solution-dyed acrylic fabric choices on the standard series, woven acrylic series, laminated series, and Sunbrella series. Solution-dried acrylic fabric retains its color and shape for longer than most other fabrics, making it the most preferred for awnings.
The Sunsetter awnings resist harmful UV rays by up to 98%, keep away mold and mildew along with being waterproof. This is due to the three-layered fabric, which consists of a protective coating on the top and bottom and a center layer of woven fabric.
As a result, the Sunsetter Awning will protect you from the weather, come heavy rain or high sun.
Build Quality: Highly Wind-Resistant And Well-Made
Sunsetter’s frames are made from reinforced metal that allows for mounting on most surfaces of your home. The sturdiness offered by its frame will give you the freedom to choose where you wish to install it, be it rooftops or walls.
All good awnings have a high resistance to winds, and Sunsetter is no different. Throughout the days we tested the awnings, we found that they showed no visible damage, even if they were extended during strong winds. It is advised to keep the contraption retracted during gusty winds, however, as they may damage the fabric.
The build quality of the awning is quite high, designed to be free of faults for years. You’ll find that even after repeated use, the retraction mechanism and the arms will see no problems during operation.
If you encounter any issues, the Sunsetter awnings are covered by a 10-year warranty to ensure your comfort for a long time.
Model Variety: Many To Choose From
Across Sunsetter’s range of awnings, there is a model for everyone’s needs. The standard awning extends out 8 feet from your house, or the XL variant 3 can extend up to 13 feet. Each model has a hand crank version, as well as a motorized variant. But wait, there’s more!
The Sunsetter PRO series is a top-of-the-line motorized awning that has a built-in solar screen to block up to 90% of the sun. You have the option of choosing the freestanding Oasis awning from the standard series as well.
Each of these models has a Platinum series variant, featuring state-of-the-art Performance Acrylic fabrics and Sunbrella performance fabric for more excellent protection. The Platinum variants have an optional semi-cassette that shields the awning from the elements when not in use.
Design Variety: Appealing Across The Range
The fabric color selection is vast, allowing you to match it with the color of your house. Additionally, Sunsetter offers you free swatches to see what strikes your fancy, along with two valence types. Across the four different types of patio awnings, you will surely find the one that suits your home the best.
From solid colors to patterns, we found the design variety to pass with flying colors.
Width: Wide Enough To Cover Any Patio
The manual and motorized awnings have different coverage areas, with the former ranging from eight to 18 feet in width. When it comes to the motorized versions, there are two variants to choose from: the standard and the XL models. The former ranges from eight to 18 feet in width, while the latter ranges from 14 to 20 feet.
Sunsetter awnings have ample coverage in both the manual and motorized versions, and if you have a particularly large patio or backyard, the XL model will serve you quite well.
Installation: Simple And Quick
You have the option of contacting a local dealer and having your awning installed, or you can do it yourself. The installation process is fairly straightforward, and the platinum series products can collapse into the housing once properly installed.
To install your Sunsetter awning, you only need a few simple tools to mount the brackets and fit the awning in. After this, simply plug the power cord in, and you’re ready to use it. If you have trouble with the process, Sunsetter provides you with detailed instructions through a helpline, an included DVD or on their website.
The Sunsetter products can be installed on a multitude of surfaces, such as wood, brick, aluminum, etc.
Retraction Mechanism: Smooth And Responsive
The Sunsetter awnings have motorized and manual retraction mechanisms. For this review, we tested both variants, in which the lateral arms open and close under the canopy.
Its motorized awnings are powered by a Somfy electric motor that promises to respond at the touch of its remote control. We found the operation of the motor to be relatively smooth during a testing period of several days, during which it showed no visible faults. The push-button remote control was surprisingly responsive, making the operation a delightful experience.
As for the manual version, it works with a hand crank which can be rotated to retract or extend the canopy. We did need to put in a little effort while extending it with the crank, but overall the operation remained as smooth as the motorized variant.
Sunsetter has designed the awnings to be highly adjustable, allowing you to adjust the front height as per your preference. You can move them to keep the harsh sun, heavy rain, or strong winds away and use the two arms independently for higher effectiveness.
Available Optional Accessories: Varied Enough To Cover All Bases
You would not expect awnings to have as many accessories, but Sunsetter has them. At night, you can add the Sunsetter dimming LED lights to keep using the awning through the evening. It can turn your patio into a superb outdoor living room all the while keeping the harsh weather at bay.
Furthermore, you can optionally add a protective aluminum hood to protect your awning fabric. The hood is designed to match the color of your fabric, completing its look and enhancing its aesthetic appeal as well.
As for other notable accessories, you can purchase patio lights, awning covers, cleaning kits, and mats to enhance your experience with the awning further. The sheer variety offered by Sunsetter when it comes to accessories is quite impressive.
Maintenance: Only Needs Periodic Cleaning
The Sunsetter fabric is easy to clean using a solution of mild soap and lukewarm water. Simply brush the dirt and grime off your awning and wash it afterward. Sunsetter has included a detailed cleaning guide as well, should you run into any trouble while cleaning it.
Price: Medium To High End
Sunsetter deck awnings are some of the most affordable awnings in the segment. The manual variant remains the lightest on your pocket, coming in a medium price range, while the motorized awning is more expensive.
Bottom line, Sunsetter awnings are some of the best on the market that most other brands would struggle to compete with.
Post-Purchase Support And Delivery: Limited Warranty And 24/7 Customer Support
Sunsetter awnings are shipped without any additional charges and have a 24/7 hotline available for customer service. The brand offers a 90-day money-back guarantee in addition to the 10-year limited warranty, which is a testament to the company’s faith in its product.
However, this is offset somewhat by Sunsetter’s lack of company installation services, which may cost extra if you have to hire a third-party service for it.
Competition: Sunsetter Vs RetractableAwnings.com
One of the most prominent names in the awnings category, other than Sunsetter, is Retractableawnings.com. The awnings from this company are also tried and tested to resist strong winds and have had their retraction mechanisms put through rigorous 80,000 open/close cycles. They are available in various widths up to 52 feet, along with a projection of up to 16 feet.
Retractableawnings.com products perform in a similar vein to their Sunsetter counterparts, with minor differences in responsiveness of the retraction mechanism. The fabric options are quite varied in both, and you will not be left wanting for more in either option. As such, this is a good alternative to Sunsetter awnings only if the latter isn’t available to you for any reason.
What We Like:
Wide selection of colors
Easy DIY installation
Five to 10-year warranties
Superb selection of widths
What We Do Not Like:
Sunsetter does not provide installation
Specs
Product Name: Sunsetter Retractable Awnings
Product Brand: Sunsetter
Awning Style: Lateral Arm
Method Of Operation: Manual hand crank / Remote control with manual override
Fabric: Solution-dyed woven acrylic
Material: High-quality aluminum
Available Awning Width: 8 ft. to 18 ft. for the manual variant
Warranty: 10-year limited warranty
Installation: DIY or by third-party service, installation DVD included
Sunsetter Retractable Awning Final Verdict
Sunsetter awnings are some of the best products in the retractable awnings category, boasting a great variety of fabrics and offering excellent protection with excellent build quality.
The retraction mechanism is highly responsive in both the motorized and the hand crank variants. And its durability ensures that the product will stand the test of time. No matter the variant you choose, you will be satisfied with what you get from the awning.
There is one minor caveat with Sunsetter’s products, which is the lack of manufacturer-included installation service. Even so, they are simple enough to install on your own or have a third-party service perform it for you. All in all, the product has impressed us on many levels.
Summer knocks on our windows, tries to lure us out of our offices, homes and shops outside where we would be able to enjoy the majestically nature in all its splendor. We have presented several methods on how you can enhance your connection with the exterior spaces and enjoy it and here today we have yet another idea : stylish and fashionable outdoor beds for the ultimate backyard lounge!
We are all in love with our beds, we know how comfortable and relaxing they are in the end of the day, it`s impossible not to appreciate a cozy and warm atmosphere, and brought to the exterior in a warm summer evening beds are becoming an extraordinary treat for any individual. This solution is extremely fashionable functional and comfortable, outdoor beds can be found in hundreds of shops, in different sizes and shapes that can be adapted for the tiniest spaces or positioned in the bigger backyard lounge.
Serene Deck Space Overlooking the Atlantic Ocean with a Impeccable Minimal Outdoor Bed by the Infinity Swimming Pool
by LKID Interior Designers & Decorators / Photography by Steve Passmore
Whether you would like to enhance and enjoy your spacious apartment balcony or to create the perfect cherry on your exclusive backyard lounge, the outdoor bed is opulent and indulgent at the same time, bending to you desires and offering the supreme relaxing spot. There are several outdoor beds out there, several are similar to regular beds but adapted to the exterior design whilst most are modifying the experience entirely to adapt it and make it as soft and smooth as possible in bigger dimensions meant to acommodate more people. The outdoor bed is meant to be shared with the loved ones and enjoyed to its full potential.
Spectacular Infinity Pool with Shattering Ocean Views and Outdoor Bed on the Deck
by Dan Forer, Photographer / Architecture by Mike de Hass
Beautiful Exclusive Hampton Outdoor Canopy Day Bed Envisioned by Forever Patio
by PatioProductions Furniture & Accessories
Breathtaking Minimalist Patio with Outdoor Bed Enjoying a Serene Landscape
Dinning Area Meant to Complement the Outdoor Bed on the Patio by the Swimming Pool
Luxurious Contemporary Pool Space With a Unique Outdoor Bed
by Kyle Lindsey Custom Homes
Simple Outdoor Canopy Bed That Can Be Relocated With Easy on the Patio or Swimming Pool
by Touzet Studio / Claudia Uribe Photography
Beautiful Pergola Design Sheltering a Suspended Outdoor Bed by the Swimming Pool
by BellaWood Builders
Serene Surrounding Around a Trending Hanging Outdoor Bed
by James Cloud, Miami
The Outdoor Beds- A Poolside Summer Delight
It is impossible not to notice the presence of outdoors bed in exotic luxurious tropical hotels and resorts, encouraging you to spend as much possible in the exterior as you can and enjoy the magnificent resort. This encouragement has the same effect at home as well, it`s meant to lure you out and enjoy your view, your backyard garden or swimming pool in the summer warmth. This outdoor will enhance your pool deck and backyard design in both aesthetics value as well as in functional ones.
Orange Outdoor Bed by The Swimming Pool Surrounded by a Lush Serene Landscaping
The Perfect Way to Take Advantage of a Lazy Summer Evening
by Island Stone
Beautiful Gazebo With an Outdoor Bed Next to the Infinity Swimming Pool
by Tropical Architecture Group
Even though it does not help in terms of comfort, is important to choose a color scheme and stick with it through out the entire design. It would be ideally to complement the landscape and home`s apparel if possible. To further accentuate this look or help the color pallet communicate with the ensemble color scheme you can use some chaise lounge chairs as transition items.
White Large Outdoor Beds Offering Ample Space to Rest Relax and Rejuvenate
Serene Circular Outdoor Bed in a Jaw-Dropping Landscape
by Escale Design
Outdoor Bed with Trendy Recliners for a Family Hangout by the Swimming Pool
by Urrutia Design
Beautiful Daybed with Canopy and Drapes Enhancing Privacya
by Bernard Andre Photography
Outdoor Bed by the Pool and Fireplace
Twin Outdoor Beds in Poolside Lounging Area
by Liquidscapes
Creativity Unraveled
Forms follows function in most cases but not in all truly. When you`re imagining a luxurious exotic location and one or two outdoor beds on the pool deck you`re instantly imagining a large canopy bed. While these are extraordinary, there are better alternatives for smaller spaces. Size is after all a very important aspect that must be considered at all times and you should not erase this comfortable idea of your mind just because you have a smaller balcony. Contemporary daybeds can be found with interesting shapes and sizes offering retractable shades to protect you.
You can even pick some trendy hanging outdoor bed to be sheltered under a shaded patio or beautiful pergola. A rather interesting huge chair or small outdoor bed for that matter we have featured previously on our website . Make no compromises! Enjoy your landscape, be outdoorsy!
Urban Patio a Stylish Contemporary Canopy Outdoor Bed
by Angel Mangarakov
Highly Geometric Clam Like Futuristic Outdoor Bed
by Contour Interior Design, LLC
Stylish White Outdoor Bed Protected by a Umbrella in Tropical Style
by A Pleno Sol
You should not stop with the outdoor bed if you`re planning extraordinary summer outdoors. Depending on how much space you have available you can consider an outdoor dinning space and an extraordinarycozy fireplace to keep you warm in the evening. Additional patio seating can be very useful and it can help you enhance the aesthetics values as well with a remarkable apparel.
If your space is limited do not worry, a few flower pots exuding aromas and some candles will give your retreat an extraordinary cozy and romantic atmosphere.
A sturdy Outdoor Bed Made Out Of Teakwood
Rooftop Deck/Sky Garden with Tweak wood Outdoor Bed Exuding Charm and Dinning Area
Impeccable Twin-Sized Outdoor Bed on the Deck
by flott home design
Simple Canopy Bed in the Backyard
by Adriana Aristizabal
Suspended Outdoor Daybed Enhancing a Tropical Patio
by MCM Design
Wrapped in Mistery
Whether you place it in a backyard, pool deck or lush vegetation garden, an outdoor canopy bed will exude a serene and relaxing vibe. You have to imagine that a little secluded little heaven will be emphasized by a natural canopy bed that would allow the individual to enjoy it perfectly. If crafted properly, a quality canopy bed can withstand a lifetime with proper care whilst offering privacy, relaxation and rejuvenation at the same time. In addition, a simple sculptural garden stool, a bench at the foot of the bed or a fashionable cool outdoor coffee table can help you paint an outstanding image.
Inserting an Bamboo Outdoor Bed in the Perfect Landscape
Perfect Cubic Outdoor Bed Complementing the Pool Deck
Luxurious Home Complemented by a Canopy Day Bed
by Turtle Beach Construction & Remodeling
A canopy bed can become a sculptural piece when animated by wind, the rigid structure contrasted by the organic textile flood by natural elements. Curved and organic patterns are highlighting the structure enhancing its apparel. In a natural background like a beach or garden with lush vegetation the canopy bed will instantly animate the scenery by becoming a focal point and enhancing the entire snapshot.
Simple Outdoor Bed by The Pool Deck
Sky Terrace With Canopy Daybed
by Susan Lachance Interior Design
Extraordinary Terrace Overlooking Bucharest With an Outdoor Bed and a Hammock
Outdoor beds are coming in a variety of shapes and sizes and despite popular belief they make a bigger impact in smaller balconies and patio. In a small backyard it instantly changes the decor and the whole picture anchoring in the space and defining it.It would be a great idea to decor everything in the same manner so choosing a dominant style from the very beginning is really important, Mediterranean or Asian design lines are popular in exotic luxurious designs.
Accessories, lighting fixtures and appliances, accent fabrics and pillows well help you highlighting the chosen design line.
Mediterranean Style Porch With a Cozy and Warm Outdoor Bed
by Elad Gonen
Small Outdoor Bed with Canopy Enhancing A Compact Modern Deck
by Busybee Design
Sculptural Outdoor Bed Under a Beautiful Pergola Design Creating a Romantic Setting
by ELEVATE interiors + design
Very similar to the bed in your bedroom the design can be however you want and there are not constraints in design. If you want to obtain the proper result you should start by analyzing your setup whether its a pool deck, terrace or backyard, the composition in which the outdoor bed is placed must be right. Identifying the proper color schemer dimension and design line may be tricky in a complex scenery and we strongly advise you to consider reaching out to a professional if you need too.
We would love to hear your opinion in the comment section bellow, on Facebook , Twitter or G+ regarding outdoor beds!
Minimalist Colorful Breezy Outdoor Daybed
Open Air Living in Bali Sheltering an Outdoor Bed
by Jeni Lee
Suspended Outdoor Bed Taking Advantage of Scenic Views and Tranquility
A Marvelous View To Be Enjoyed From The Outdoor Bed
Wondering how difficult it could be to find a patio table? Well, there are a lot of considerations one has to keep in mind.
Our understanding came when we were on the hunt to find that perfect table for our space. A lot of considerations found their way in as we surfed through thousands of reviews. There were details we never thought were vital until we actually began to use the products.
So to make life a little easier for our readers, here is a list of the ten best options for patio tables. We hope you find the one that fits your needs.
Listed below are the 5 best small patio tables with umbrella holes from our list:
PHI VILLA 32 in Cast Aluminum Patio Table. The PHI VILLA's table is a sturdy choice for both indoor and outdoor use, made of cast aluminum and showcasing weatherproof and rustproof properties, with a single shortfall being its non-foldability.
PHI VILLA 37" Outdoor Patio Table. This PHI VILLA patio table offers a large, 37-inch broad surface, ideal for accommodating multiple dishes. Despite being heavy and non-foldable, its bowed legs save space and it's easy to assemble.
LOKATSE HOME Patio Umbrella Side Table. The Lokatse Home table enhances aesthetics with its rhombic-shaped grid design, offering style, comfort, and rust resistance. One of its main pros is the large table space, while a slight con is the slightly complicated access to the table's bottom space.
VINGLI Outdoor Dining Table, 31.5" Round Patio. The Vingli Dining table stands out with its classy glass top and 5mm scratch-proof surface, which can hold up to 160 lbs. It is, however, slightly heavy, which may affect portability.
Giantex Patio Rattan Wicker Umbrella Side Table. The Giantex Patio table prioritizes the environment with its eco-friendly make from PE rattan material. It is lightweight and features a rust-free top and frame, but the assembly process can be a bit challenging.
Each table has been carefully selected based on its design, durability, size, and customer reviews. So, if you're ready to transform your outdoor space into a comfortable and shaded retreat, here's the list of the 6 best small patio tables with umbrella holes that will elevate your outdoor experience.
1. PHI VILLA 32 in Cast Aluminum Patio Table - Best for Weather Resistance
Are you looking for a patio table that you could use indoors as well as outdoors? This one was our go-to choice when we had the same requirements. Made of cast aluminum, this table was a very sturdy choice to make and was easily able to take ample weight.
We found PHI VILLA’s patio table to be an excellent choice for keeping outdoors as the surface is weatherproof and rustproof. There were instances when we had left the table outside in the rain for over two days, and at the end of it, the table was spotless with no sign of rust.
Additionally, this patio table is intricately designed, and we were delighted with the artistic expression that it exuded. The unique edged designs and minimalist legs made it a treat for the eyes. And on top of that, the tabletop looks rather lovely with its intricate carving and frosted surface.
In case you are planning to place the table inside, it would match beautifully with teak or dark-colored furniture. In an outdoor setting, you could match it with dark-colored grills or gates.
With a dimension of 32*32*29 inches, this table had enough space for a pile of books and a flower vase. It is also very sturdy, and we have used it as a leg rest too.
We thought this was a very sturdy option to select, but if you are looking at portability or moving and storing this table, it may be a problem as this table isn't foldable. This is one feature that we thought could have been added to the otherwise perfect patio table.
2. PHI VILLA 37" Outdoor Patio Table - Best Large Square Table
If you are looking for a metal square table, the Phi Villa patio table is a great choice to make. With an area of 37 inches, this table is broad and can be used to keep four dishes. We had a kid party at our place, and this table worked wonders as four kids could be seated at one table.
The simple and elegant feel of this table stole our hearts. Imagine sitting outdoors on a warm summer afternoon under an umbrella with this table holding a glass of juice and the book you are currently reading. This table exactly gave us that level of comfort.
The metal frame is e-coated and needs no special maintenance. It is rustproof and weather-resistant, too, which makes it a good option for outdoors. We especially loved the smooth metal finish and how it added an extra touch of perfection to our patio.
This table comes with bowed legs, which enables it to save space, and you could easily keep something underneath without any issues. Additionally, it was effortless to assemble, and we did it ourselves without any outside help.
Also, the umbrella hole is 1.57 inches, which fits almost every umbrella available in the market quite snugly.
This item exactly gave us what it promised, and we were completely satisfied. The only issue we found in this is the same as the issue we pointed out with the first model. The table is heavy and not foldable, thus making it difficult to store if needed.
What We Like
37 inches table area
Bowed legs save space
E-coated metal frame
Rust and weather-resistant
What We Don't Like
Not foldable
Material: Aluminum frame, Glass top | Shape: Square | Size: 37 x 37 x 28" | Weight Cap.: 150 lbs | Hole Size: 1.57"
3. LOKATSE HOME Patio Umbrella Side Table - Best Aesthetic Appeal
If you are looking for a table that will enhance the aesthetics of your patio, garden, or pool area, the Lokatse Home Patio table is an excellent choice to make. With a rhombic-shaped grid design, this table looks very different from the beginning three products and will surely leave your guests stunned.
We were looking for style and comfort together, and this gave a combination of both. With a sturdy steel frame, this product is rust-resistant. We placed it near our pool, and it often faces splashes of water when the kids come out of the pool. It has been months now, and we have not seen any rust on the product.
Additionally, it is large enough for four people to share the space. The hard surface is easily cleanable, and you do not need to be worried about occasional spills. Also marks left behind by mugs and plates can be wiped off easily and will not permanently stain the table.
Another feature we will talk about is the empty space below the table. There is a compartment between the grills that could be used to keep magazines in case you need to empty the table suddenly.
Since this table came with space below it, it could be used more efficiently if easy access was provided. A slit on top between the grills and the tabletop offers the only access currently, which is a bit of a hindrance to reach. Otherwise, we have no complaints about the product.
What We Like
Large table space
Rust-resistant
Stylish and has intricately designed grills
What We Don't Like
No easy access to the bottom space
Material: Steel frame, Glass top | Shape: Square | Size: 21.8 x 21.8 x 18.5" | Weight Cap.: 50 lbs | Hole Size: 1.57"
4. VINGLI Outdoor Dining Table, 31.5" Round Patio
If you want to add a classy touch to your patio, balcony, or backyard, the Vingli Dining table gives you the option of a patio table with a glass top. The glass makes the table look very attractive and adds to the minimal decor around it. Place chairs and add an umbrella, and you have the perfect sun-downer to enjoy.
Glass is always a preference when it comes to beautifying your backyard, and this is the reason why we chose the product. The glass used is tempered and 5 mm thick, which could easily hold up to 160 lbs, which is a lot. We had placed heavy casseroles on the tabletop without worrying about it breaking down.
Additionally, it has a tabletop space of 31.5 inches, which would suffice for four people comfortably. This table also comes with rubber gaskets below the table frame to prevent scratches.
To add to all these wonderful features, the glass table is designed to impress. We got this table before a party in our backyard, and we kept a white center mat on it with a flower vase. Tea and snacks could easily fit in with this setting, and our guests loved the look and feel of it.
We loved the glass surface and the extra touch it added to our decor, but we should tell you beforehand that the patio table is pretty heavy and not something you would want to move around often. If you're going to keep it in one place, then go for it without a second thought.
What We Like
5mm scratch-proof glass surface
31.5 inches of table space
Non-slip table legs
What We Don't Like
Relatively Heavy
Material: Steel frame, Glass top | Shape: Square | Size: 31.5 x 31.5 x 28.3" | Weight Cap.: 110 lbs | Hole Size: 1.8"
5. Giantex Patio Rattan Wicker Umbrella Side Table
If the environment concerns you a lot and you want to choose an eco-friendly product, the Giantex Patio Rattan Wicker Umbrella Side Table is something you can look at. Made with PE rattan material, this table will cater to all your needs without being a problem for the environment.
The best part about using rattan is that it is designed to be UV-resistant as well as water-resistant. We did not need to worry about it becoming brittle or coarse.
Also, white rattan is used for the sides, and this table comes with a steel frame and a metal tabletop. Here again, the metal is rust-free and provides a sturdy surface to place any kind of food and beverages.
Moving over to the table in general, unlike the previous model, this table is lightweight, and though one cannot fold it, it can easily be moved from place to place. Also, the square shape of the table enables four people to sit on four sides even though it has a smaller table space of 21.5 inches.
Coming to the umbrella hole is wide enough to hold any umbrella without the fear of it falling off or bending over.
It is a beautiful table to look at, but assembling it took us an ample amount of time. Though instructions are given, it is a little bit of a complicated process, and it would be great if you could get a professional to help. Once the setup is complete, you need not worry about anything else.
What We Like
Use of eco-friendly material
Lightweight
Rust-free metal top and frame
What We Don't Like
Difficult to assemble
Material: Steel frame, PE rattan wicker | Shape: Square | Size: 22 x 22 x 18.5" | Weight Cap.: 110 lbs | Hole Size: 1.6"
6. Flash Furniture 35.25" Round White Indoor-Outdoor Steel Patio Table
If you are looking to brighten up your patio space, this is the product to go with. The Flash Furniture 35.25" Round White Indoor-Outdoor Steel Patio Table has a very quaint look to it and comes with a rainflower printed top, which makes it all the more alluring.
If a patio table to keep outside your cafe or restaurant is on your mind, this pretty product will impress you. It is versatile and can be used to beautify any place you keep it.
Made with steel, you do not have to worry about the table breaking or catching rust as it is rust-resistant. We would still recommend you not to leave it outside during the rainy season to be on the safer side.
Moreover, if you are not looking to spend a lot on a table, this is a budget option to make. The price is comparatively lower than most of the products listed here, whereas it is one of the prettiest out of all of them.
To add to the features, the umbrella hole is wide enough to hold any type of umbrella, and the table is sturdy enough to not fall from the weight.
Though the product itself was satisfying, we faced a little issue with one of the legs. It would not touch the ground, and we had to place a 1-inch wooden block below to adjust it. We could have asked for a replacement, but we did not want to go through the lengthy process of waiting for a new one.
What is the Best Small Patio Table with an Umbrella Hole?
The table below provides a comparison of the Small Patio Table with Umbrella Hole specification, focusing on key attributes such as material, shape, size, weight capacity, and hole size.
Buying Guide For The Best Small Patio Tables With Umbrella Hole
Now that you are well aware of the different types of patio tables available take the next step and read through the guide where we have listed down the details which you should note down before proceeding. It may seem like an easy task, but buying the wrong table could cause a lot of problems later on.
Sizing
Measure the amount of space you have on your patio or balcony. You need to have an estimation of the empty space available before you decide on a product. This is crucial because if you buy one too big, then it would overpower the area and would become a hindrance for people to move around it. A smaller table will clearly not serve the purpose.
One rule we recommend living by is to allow 18 to 24 inches per place setting and 6 to 12 inches between the settings if you are buying more than one table. Also, remember to consider the amount of space needed by the chairs you will want to place around the table. Only considering the size of the table may be risky.
Usage
It is crucial to decide why you need a patio table. Determining the usage will help you determine the type of table you need. If you want a table to keep a lot of things or if you are looking at organizing dinners outdoors, you should opt for a table with a larger space. If aesthetics is on your mind, a glass table or a white one would add an extra touch to your area. A smaller table will be perfect for those who want one for personal use or those who mostly work from home and want a cozy corner outdoors.
Look and feel
Tables are available in many kinds of materials beginning from glass, and metal to resin. It is also essential to see the surroundings and make a decision based on what will match best. If your patio has white furniture, go for a white table to complement it, a black metal one will look like a misfit.
If you are into dark furniture, go with a darker shade of a light-colored table with dark-colored chairs. Mix and match with colors and opt for one that fits right in.
Safety
If you have kids or pets in the house, it is best not to go for a glass table as there are chances of it breaking or cracking. Also, do not opt for a table with sharp edges as kids might get hurt. A circular metal or resin product might be an excellent option to consider.
Can I use any umbrella with a small patio table with an umbrella hole?
Small patio tables with umbrella holes are designed to accommodate standard-sized patio umbrellas. Most tables feature a hole with a diameter that fits common umbrella sizes. However, it is still essential to check the dimensions of the umbrella hole and compare them to the size of your umbrella before making a purchase. Ensure that the umbrella pole fits securely in the hole to provide stability and support.
What materials are small patio tables with umbrella holes made of?
Small patio tables with umbrella holes are available in various materials, each offering its own set of advantages. Common materials include aluminum, steel, wood, wicker, and plastic. Aluminum and steel tables are durable and weather-resistant, while wood tables offer a natural aesthetic. Wicker tables provide a classic and stylish look, while plastic tables are lightweight and easy to clean. Choose a material that suits your preferences, desired level of maintenance, and the overall style of your outdoor space.
Can I use a small patio table with an umbrella hole indoors?
Small patio tables with umbrella holes are specifically designed for outdoor use. While you can use them indoors if you prefer, they are typically designed with weather-resistant materials that may not be ideal for indoor settings. Consider the design, style, and functionality of the table to ensure it complements your indoor space if you choose to use it indoors.
How do I choose the right size of small patio table with an umbrella hole?
When choosing the right size of a small patio table with an umbrella hole, consider the available space on your patio or outdoor area. Measure the area where you plan to place the table and ensure that there is enough room for both the table and the open umbrella. Additionally, consider the number of people you expect to accommodate and their seating requirements. Opt for a table size that allows comfortable seating and movement around the table when the umbrella is in place.
It is a tough choice to make as all of these products have their own sets of pros and cons. But overall, the Giantex Patio Rattan Wicker Umbrella Side Tableis our choice if you are looking for an eco-friendly product. Thinking about the environment is a significant thing to do today, and even for patio tables, we have an eco-friendly item listed.
Finally, we have come to the end of this guide. By now, you have a fair idea as to how to go about choosing and buying a patio table. We recommend you to look at the prices too before you decide as the price varies a lot from product to product.
That being our last suggestion, it is time to hit the shopping website and make a purchase. We hope you select something which fits all your needs.
The best retractable awnings for camper vans offer portable protection from sun, wind, and rain while creating a versatile outdoor space wherever you park. Built with lightweight but sturdy aluminum frames and weather-resistant fabrics, these awnings attach directly to your van—ideal for van lifers, overlanders, or campers seeking additional living or cooking space. Since camper vans are limited in square footage, a retractable awning functions as an instant roof extension, making it easier to enjoy meals, relax, or work outside in comfort. In this guide, we’ve reviewed the 9 top-rated camper van awnings, chosen for their durability, ease of installation, and all-weather performance. For even more options, check out our complete guide to the best retractable awnings.
The Yescom car side awning is an all-around product for van life. Its rooftop assembly provides 54 square feet of shade and protection from the sun, wind, and rain.
Besides, it is made with high-quality 420D Oxford fabric and has a 2000mm PU coating and UV 50+ protection to prevent sun damage. This water-resistant awning is made with a stable aluminum alloy structure, which also makes it rust-resistant and sturdy enough to stand on any ground.
Furthermore, the aluminum stands are telescoping legs with a twist lock design that can be extended or contracted easily. And I had no trouble setting it up and taking it down. The height of the awnings is adjustable from 59 inches to 85 inches (150 cm to 216 cm)
All installation hardware that comes with the package is made from high-quality 304 stainless steel.
An added bonus was the waterproof carry bag that I got along with the retractable campervan awning that allowed me to carry it on the vehicle's rooftop without any hassle. However, the corner joints are easily bendable, which can be a problem in inclement weather conditions.
The Danchel Outdoor car tent awning is one of the most affordable awnings for a smaller campervan, providing 32.5 square feet of shade.
Moreover, this camper van awning comes in various sizes that fit different camping vehicle roof rails. All of them are made of waterproof 420D Oxford fabric and are extremely portable, thanks to their sleek design. The frame is made of aluminum and has telescoping poles with a twist lock mechanism that locks the poles in place at a height ranging from 5.2 feet to 6.88 feet (160 cm to 210 cm).
These poles are rust-resistant and are designed in a way that allows for the saving of living space. With two setup mechanisms, a taller setup for well-ventilated areas, and an angled setup for rain, these affordable awnings can be used for any camping trip.
Another thing worth mentioning is the Danchel retractable awning was it's extension properties. The front slot and the side hooks of the camper van awning helped me attach an exterior canopy side wall for more shade and also protected me from the harsh winter winds.
Apart from that, the mounting process of this awning is fairly easy. It requires two people, and the awning comes with the required mounting parts such as stakes, guy lines or guy ropes, and a waterproof PVC carry bag. However, my roof rack needed more than the provided mounting tools, so I had to spend extra to purchase additional mounting tools.
The All-Top vehicle awning is made with various high-quality materials such as polyester, aluminum, polyurethane, and polyvinyl chloride. It provides an astounding 54 square feet of shade to shield from the sun and rain. The awning is also extremely versatile, with various size options that fit most standard roof racks. Its entire assembly can be packaged into a heavy-duty PVC bag and stored away.
This canopy awning is made up of 280 GSM polyester ripstop fabric with 10,000 mm PU coating UV50+ protection, and water-resistant materials. This retractable camper van awning offers aluminum poles that are coated with rust-preventive materials, which help the frame last longer and give it more operational life.
The installation is fairly simple, with the anodized metal telescoping legs that allow easy installation and take-down. This can largely be credited to the twist lock mechanism that provides a quick and easy setup.
Furthermore, this retractable awning has an adjustable height ranging from 4 feet to 7 feet. It comes with all the necessary mounting tools, including brackets, nails, nuts/bolts, winding or guy ropes, wrenches, a manual, and a storage bag. The installation process typically only takes a few minutes to complete.
A noticeable downside is that the tighteners for the poles did not function optimally. Trying to tighten them only resulted in my keeping on spinning the tightener over and over.
The best campervan awning that is a pretty good alternative to the ARB retractable awnings is the Danchel awning. This larger awning provides more shade (around 82 square feet) and comes in different sizes for multiple types of vehicles. The awning is very portable and is made with 420D Oxford waterproof fabric.
Plus, the frame consists of aluminum telescopic legs with a twist lock mechanism and a height range from 5.2 feet to 6.8 feet (160 cm to 210 cm). Thanks to its sleek horizontal and vertical poles, the product takes up minimal space to add extra floor space on the outside. The awning can be made taller or angled in a certain way, allowing rainwater to flow down rather than be collected on the roof campervan canopy.
As for the installation process, it’s pretty easy and can be done in less than 60 seconds, although it’s not really a one-person job. With a waterproof PVC bag, this can be the perfect awning to store and carry around. If spending quite a lot on an awning is not feasible for you, this particular awning can come to your rescue.
A noticeable con of this awning is that the twist lock mechanism appears flimsy. I noticed that the legs would not lock in place properly, which added to the installation time and effort.
The ARB retractable campervan awnings fall under the category of "more expensive yet worth the splurge" products. These well-built, high-quality awnings come in different sizes and types, providing ample shade. Besides, the ARB awning has an LED light strip with 1200 lumens that runs across its perimeter and comes with a digital dimmer switch that makes it the perfect option for night-time use.
This switch allowed me to control the color and lighting modes. The dimmer switch is also waterproof, and the LED strip avoids attracting bugs or other pests, so I could enjoy a peaceful time while camping.
The ARB awning is also waterproof and UV-protected, with durable and anti-wear points that set these campervan awnings above their competitors. It attaches to almost all vehicles and can be stored conveniently for easy use on arrival.
Moreover, it has a tough PU-coated 300 mm polycotton ripstop canvas that makes the roof fully waterproof. Likewise, the aluminum poles come with nylon cuff joints and include pegs and guide ropes. With adjustable height, this ARB awning took only 30 seconds to deploy fully, which is perfect for a hectic day or a busy night.
The only downside I faced with this product was very similar to the Rhino-Rack awnings. No mounting tools or materials were included, which resulted in me having to spend extra bucks to purchase them separately. It is also quite heavy when compared to other camper awnings. Considering this camper awning is quite expensive, mounting tools and materials could have been included.
The Rhino Rack batwing awning is by far the most durable one on our list. Since it is made with 210D ripstop polycotton canvas and 2000 mm PU coating, the water-resistant cover ensures optimum protection from direct sunlight and rain. This makes it a great option for frequent campers who camp in areas with dynamic weather conditions.
It provides 55.4 square feet of shade and can be installed in just a couple of minutes. With UV50+ protection and water water-resistant roof, this camper van awning can be a great addition to a camper van.
This product is one of the few best retractable awnings for windy areas, thanks to its durability. The pole frames of Rhino Rack's batwing awning are also lightweight and are made with rust-proof aluminum that can last a long time. Furthermore, a heavy-duty PVC aluminum bag is provided with the product so as to store it away securely after use.
The highlight of the product was that it's a one-person setup. I was able to set it up without any outside help or further instructions due to its relatively simple setup mechanism. But it doesn’t come with any mounting hardware.
Since this product lies on the steeper side of the price, it was a drawback that mounting tools were missing, and that I had to spend extra to purchase them separately.
Material: Aluminum | Size: 8.2 x 6.11' | Weight: 22 lbs | Fabric type: Polycotton canvas | Assembly Required: No
The Timber Ridge Retractable awning is one of the easiest awnings in terms of installation. In fact, it took me less than half an hour to finish setting up the awning and taking it down. Plus, it came with all the mounting parts that were necessary for the installation, along with detailed instructions.
It provides 53 square feet of instant shade and protects from the sun and rain. Like the other awnings, the Timber Ridge awning also comes in a waterproof PVC bag. Its shade cloth is made with robust fabric that is ripstop, combed cotton canvas.
The aluminum frame is quite durable, with a waterproof silver coating that keeps rust at bay and extends its lifespan.
An added feature is the adjustable height of 4 feet to 7 feet. It was also quite affordable and did not drain my pockets. However, a drawback is that the U-bolts accompanying the awning cannot be used to attach it to a round roof rack. Moreover, the awning is pretty heavy when compared to other vehicle awnings on the market.
The TangMiGe retractable vehicle awning is among the most versatile options on my list. This self-standing van awning fits most roof racks and roof bars, even a high-roof van. So, I did not have to worry about it fitting on my car roof rack.
These TangMiGe retractable awnings are made with 600D Oxford fabric with 10000 mm PU coating and UV50+ protection. They provide 54 square feet of shade and shield from sun and rain. The whole structure comes packed in a strong and durable PVC bag that is waterproof, ideal for van life.
Besides, their aluminum alloy frames are coated with a rust-preventing material that prolongs the product's life. These campervan awnings come with telescoping legs with a twist lock design that allows easy extension and contraction of the unit. With an adjustable height of 4 feet to 7 feet, these poles are specifically designed to provide extra room.
The taller setups allow more air ventilation, while the angled panels allow the rainwater to fall down rather than be collected on the fabric.
This product comes with all the necessary mounting tools, including brackets, nails, nuts/bolts, winding ropes, wrenches, a manual, and a storage bag. However, I had to keep bringing down the awning as it couldn’t withstand stronger winds.
The Vevor side door awning is a pretty good choice when it comes to retractable camper van awnings. This multifunction unit can easily be installed on most campervans, giving 53 square feet of shade. And the good news is it doesn’t burn a hole in your pocket, especially if you’ve budget constraints.
This sturdy water-resistant vehicle campervan awning offers considerable shade and sun protection. It is made with lightweight Oxford 420D fabric with a 2000 mm PU coating. Additionally, it has a UV-stabilized cover that offers sun protection of UV50+.
The Vevor awning rooftop support frame is made with durable aluminum alloy telescopic poles that can be extended and contracted quite quickly through a twist lock design. It is also convenient to be carried around and can be stored in a heavy-duty waterproof carry bag that is provided with the package.
Besides, this awning comes with mounting brackets, covers, nuts/bolts, tie-down guy ropes, and ground nails. So, setting it up on my van’s roof racks didn’t take me a lot of time.
However, I noticed that the awning can be quite shaky after installation, especially on uneven grounds or during heavy rain.
Manufacturers make retractable camping van awnings in various sizes, so make sure you pick one that’s suitable for the roof rack of your vehicle. Apart from fitting right, consider the floor space it would account for in the outdoor space.
Camper vans have various heights, so purchasing a non-adjustable retractable camper van awning was out of the question. Awnings with adjustable telescopic legs are the preferred type, considering they can be adjusted to multiple heights depending on the van and the terrain on which they will be placed.
Aside from that, there are drive-away awnings, which have a tent-like structure that is attached to the side doors of a camper van. They have an opening on one side, allowing easy passage from the van to the awning tents.
Though these drive-away awnings are quite similar to a tent, they are more expensive but will add extra space, flexibility, and storage space to the vehicle. Moreover, they offer considerable protection from natural elements and are pretty sturdy in design.
B. Mounting Process
Retractable awnings can be mounted in various ways, which is why the way I planned on mounting it was an important thing to consider. Certain camper van awnings can be permanently roof-mounted on the roof rack of the van, whereas others are portable awnings and can be moved around.
The retractable awnings that cannot be moved around need special adapters that can mount them onto the roof rack. However, most retractable awnings are made for convenient usage and are compatible with most roof racks with a no-tool setup.
Since there are various types of vans and camper van awnings available on the market, each of them has unique installation properties. Generally, camper van awnings are mounted to the side of your vehicle on the roof racks on top of the roof rail system.
In the case of a van without a roof rack or roof rail, these attachments are easily available on the market and can be purchased and attached before installing a retractable awning.
The attachment style will depend on what you need from the awnings. A more permanently mounted awning can be attached to the side of the vehicle if you don’t want the hassle of installing one for every trip.
However, for people who prefer a temporary fitting, installing the retractable awnings on the roof rack or roof rail is a better idea as they can be removed or detached easily.
An important thing to keep in mind is the use of space in the vehicle. Installing a retractable awning on the roof rack or roof rail often means that other things cannot be kept on these attachments. But fixing it to the side of the car allows the roof rack or roof rail to accommodate more items, such as solar panels, sporting equipment, and cargo boxes.
C. Set Up Time
Camping can be an extremely fun activity but spending a great amount of time just fixing the camper van awning is often frustrating. I generally prefer awnings that take little to no effort to set up with minimal manual labor.
Ideally, you should opt for awnings that have an easy setup process and require just one person rather than two to three people to set it up efficiently. But again, you may choose a heavier design if you can spare the time and effort to get that extra space of shade.
D. Weather Protection
I noticed that most high-quality retractable camper van awnings offer better weather protection properties, which is a crucial element in camper van awnings. UV protection and waterproofing were on top of my list.
However, this feature is subjective. To camp in placid areas with fewer chances of weather problems, basic sun protection is all that is needed. For windy areas, on the other hand, I resorted to a more well-built, heavy-duty material that could withstand all the elements without an issue. Based on my weather protection requirements, I picked the right camper van awning for me.
E. Budget
Camper van awnings can be quite expensive, with certain models costing up to thousands of dollars. However, you may well find a retractable awning that fits your camping vehicle without draining your pockets.
Most manufacturers have recently come up with various camper van awnings that are priced reasonably and still offer the same features as an expensive retractable camper van awning.
F. Compatible Accessories with the Awning
Though not a significant matter to consider, it still helps to elevate the awning. Some manufacturers enable the use of extra accessories like opaque walls, wind and water protection, and mosquito nets. Depending on the place I used the campervan awning, I got the necessary accessories to elevate my experience with the retractable camper van awning.
Can I install a retractable awning myself?
Many retractable awnings come with installation instructions and can be installed by individuals with basic DIY skills. However, for more complex or larger awnings, professional installation may be recommended.
How do I clean and maintain a retractable awning?
Regularly brush off debris and hose down the fabric. Use a mild soap solution for more thorough cleaning. Avoid using harsh chemicals or abrasive cleaners, as they can damage the fabric.
Are retractable awnings suitable for all camper van models?
Retractable awnings come in various sizes, so it's important to choose one that matches the dimensions of your camper van. Some manufacturers offer awnings designed for specific models.
Can a retractable awning withstand strong winds?
While retractable awnings are designed to handle light winds, it's best to retract them during heavy wind conditions. Some models have wind sensors that automatically retract the awning in strong gusts.
Can I leave a retractable awning out in the rain?
While most retractable awnings are water-resistant, they are not designed to handle heavy rain or storms. It's recommended to retract the awning during inclement weather to prevent damage.
Conclusion
It should come as no surprise that the ARB retractable awning is one of my top recommendations. Made with high-quality, durable fabric, this camper van awning is an ideal choice for various campsites.
Another product that I’d recommend is the Vevor car side awning. It is a more budget-friendly option that is easy to install and convenient to carry around. This awning also has long-lasting aluminum poles that are coated with rust-resistant materials.
And with that, it’s time for me to wrap up this extensive guide. See you next time!
Commonly people confuse patio pavers with pavements, and they couldn't be more wrong about that.
We understand this comes from the conception that pavers are merely concrete blocks one adds to the ground for a flatter surface. But, believe us when we say a paver patio can be much more than that.
A well-thought-out backyard has endless opportunities for building, creating, and beautifying. We'd like to highlight some ideas you can use to transform your yard into something out of a magazine cover!
Check out some beautiful paver patio ideas below.
1. Neutral Toned Gridded Paver Patio
Kicking off this list with the basics, we have a concrete or stone-gridded paver patio that is as simple as it gets. If you aren't into flashy ideas and all you want is a cozy backyard space for outdoor coffee breaks, go for a neutral-toned patio.
You can't go wrong with this regular grid consisting of rectangular gray slabs. This option will work well for people who already have an established garden with lush green surroundings. You can also add some seating, wooden tables, and sun umbrellas to complete the look.
2. Paver Patio With Steps
Adding a few steps in your backyard gives the space some dimension and sections off the seating area from the lawn. In this example, even flat stone pieces are used to build a mini elevated patio that leads down the steps to the garden. It also features a large pebble stone section to add visual appeal to the patio.
3. Light Up Your Paver Patio
We'll get right down to it. Paver patios with lighting are a patio owner’s favorite in our not-so-official poll! And we understand the obsession too well since it also serves a function apart from looking fabulous in your backyard.
Whether you have a narrow footpath or driveway, you could replace some of the cobblestones with flat lights, which will keep the path well-lit. Plus, most of the ground lights are pretty sturdy, and you can easily stand on them without breaking a thing.
4. Backyard Stone Paver Patio With Bar Area
If you already have trees in the backyard, try converting a corner tree as the base for a circular bar nook. Using natural stone with marble as the countertop will give you a permanent outdoor bar that will come in handy for house parties. Either install permanent high stools or get some light wooden chairs for friends and family to gather around.
5. Terraced Paver Patio
Adding elevations to the home may not be easy, but you can always add angles and layers to the backyard patio. Consider paver patio ideas that include stone or brick pavers in an ascending path leading to the pool, fireplace, or benches. With fresh grass, a lawn surrounding the paver makes for a stunning landscape.
6. Concrete Pavers With Pea Gravel
One of the most popular paver patio designs is a pure concrete paver in pale colors or grays with small gravel lining each block. While the individual paver can have the same depth as the pea gravel lining, you could also elevate the concrete portion for contrast.
Alternatively, using stone pavers in combination with gravel on the patio area is a splendid idea and enhances the outdoor space. Don't worry about getting things wrong or right with this combination because using different materials and exciting designs will only make the paver unique.
7. Patio Pavers With Curved Walls
Once the bricks are set in place, all that is left is to add furniture to the patio area. But, something better than placing wooden furniture would be permanent seating space using identical stone slabs. This can be achieved by adding curved walls in strategic places around the edges of the patio.
8. Flagstone Paver Patio With Outdoor Dining
Sometimes the weather is so good you'd rather brunch in the backyard. If you are lucky enough to live in such a pleasant climate, go for outdoor dining set up for weekend lunches. You can create this patio style by dividing the backyard into two sections- lawn and dining area.
In the dining area, install a permanent stone fixture that seats six to eight people and match that with wooden chairs.
9. Cobblestone Paver Patio With Seating Area
Nothing is cozier than spending a breezy evening by the fireplace in lounging chairs. Like this example, making the fireplace the center of attention works pretty well since you can arrange furniture around it. Unlike circular fire pits, this option is focused on building a rising structure for the fire made of brick or stone.
10. Zen Garden Paver Patio
Imagine a pristine garden with plenty of plants and grass surrounding you while you meditate. If you would like to recreate a Japanese-style garden patio, then look for ways to incorporate natural stone into the surroundings. While the ground will look best in neutral gray, you could add a low-rising stone wall and trees for privacy.
11. Combination Paver Patio
Can't decide on a single design to include in your paver patio? Well, there is no rule saying you cannot have it all. You could include two or three of your favorite patterns like bluestones, cobblestones, herringbone designs, and more in one space. If you mix these contrasting designs tastefully, it might turn out to be one of the more unique patios in your neighborhood!
12. Hopscotch Grid Paver Patio
If you are looking for interesting paver patio ideas for kids, consider a hopscotch grid pattern to up the fun element in the backyard. After all, simply because you are installing a new patio, it doesn't have to be plain or just like the neighbor's stone pavers. You could install only a few slabs that correlate with the game and hand-paint the numerals too.
13. Brick And Ashlar Paver Patio
Try something out of the ordinary by creating a backyard patio with brick and ashlar. The usual stone materials with accents of wood may be overused for some people. Thus, you can always experiment with paver patio designs for creating something that suits your taste.
Like this example, you could opt for a Hispanic-style yard that uses brick pavers with a pool, fountain, or firepit as a centerpiece. Actually, there are several styles and paver patio ideas to incorporate, like adding a low retaining wall for improved structure.
14. Concrete Paver Patio With Grass
While most concrete or stone pavers are laid down close to one another, it is not uncommon to space them out a bit. We already demonstrated this with the pea gravel example, but you could also do the same with grass for a natural touch. The best part about this is the patterns you can create from your imagination.
Besides, the slight partings with bright green grass or moss give any garden a modern, organic, and clean appearance.
15. Paver Patio With Pergola
Building a nook in your backyard or garden is possible with the combination of a circular paver patio with a pergola. These two structures will contribute to the spaciousness of the yard and give you room to lounge or host parties. Adding bluestone pavers to the landscape will enhance the space naturally.
Additionally, you could have a stone fire pit installed in the center of the circular paver patio. To accompany that, add a few cement benches for seating and encourage a gathering around the fireplace. Slatted pergolas will complement the patio and firepit incredibly well, and you could even have climbers on it.
16. Pool Surround Paver Patio
Already have a pool in the backyard? That means a lot of the patio space is already used up, and adding pavers may not be necessary unless you incorporate a classy stone paver surrounding your private pool. Not only will you get the look of paver patios, but it will make for a convenient place to sit while not in the water.
This relaxing spot will give you and your family a cozy gathering spot when meeting for outdoor dinners or barbeques.
17. Backyard Paver Patio With Grill
Hosting dinners and barbeque parties will be much easier with a permanent grill in the backyard. When it comes to incorporating paver patio ideas with other functions like outdoor cooking, the results are always immaculate. Mark a perimeter where the brick oven or barbeque grill will stand, and you could add countertops to match the stone pavers.
18. Flagstone Paver Patio With Slatted Roof
Usually, flagstone pavers make for a tidy-looking backyard patio. So, if the clean look with a slightly smoother landscape is what you are going for, then creating a covered flagstone patio would be perfect. A slatted roof or pergola made of wood will prevent excess heat during the afternoon. Strategically add seating in the shaded areas to get the best possible outdoor experience.
19. Herringbone Pattern Paver Patio
The herringbone patterns are simple to install, but they give the backyard an interesting design. If you are looking for paver patio ideas, try converting a section of the lawn with stone or bricks in herringbone style. If you have open spaces, the landscape can be evenly divided into separate walking and sitting areas.
20. Garden Path Paver
In some cases, you may not have enough space to install a complete set of patio pavers. Disappointing as it may seem, there is a way to arrange the landscaping to get a few stylish pavers in without using much space. When working with a small outdoor space, remember to remove the clutter like tables and chairs to make the area spacious.
Next, add stone or concrete pavers one after the other to create a path to the lawn, pool, or garden. Leaving some space between two pieces can add visual interest so you could opt for that as well.
21. Stone Paver With Outdoor Kitchen
Installing a grill could be fun, but a full-fledged outdoor kitchen would be even better. This means you could create a corner on the stone patio with countertops and a place to keep the oven. To match the ground pavers, it's possible to use the same stone material to build the countertops and place a microwave on top of it.
Additionally, having a permanent wooden roof will bring a cozy element and protect you from the sun while cooking.
How Much Does A 20x20 Paver Patio Cost?
Of course, patio pavers have a price range that ranges from low to high depending on the material type, size, and labor involved. However, per square foot of patio work will cost around $10 to $17. According to this estimate, a 20x20 paver patio should be $3,800 to $6,800 for a brick installation.
Note that the materials cost only $4 to $6 per square foot. The major chunk of the budget will be spent on labor charges which will be about $6 to $11 depending on design complexity.
What Is The Cheapest Paver For A Patio?
The absolute cheapest material available for paver patios is pea gravel. Even if you decide to fill up a large space to 200 square feet, pea gravel will not cost more than $250 to $380 to install. The fancier options or the colored ones will cost more.
However, if you don't like the idea of gravel-covered patio spaces, the second cheapest material, concrete, is always an option. Plain concrete slabs will be $3 to $10 per square foot for any yard. Again, the better the quality of the slabs, the pricier it gets.
What Should I Put Down Before Pavers?
Prepping the ground before adding a new layer of pavers is not only recommended, it is also necessary. When you pour sand on top, the soil must be free of rubble, tree stumps, or roots. For a backyard patio, leveling the ground manually should be good enough.
After you lay down the sand, use wooden or metal leveling boards to run along the area to get a smooth and even surface. It is only after this step that you can proceed with laying patio pavers in a style of your choice.
How Do You Spruce Up A Paver Patio?
If you are tired of how the patio looks, consider giving it a makeover to make the space more inviting. Firstly, clean up the stone or concrete slabs by removing moss, overgrown weeds, and grass. Then, sweep with a broom to get the smaller particles like dirt and dust out of the way.
From here, you have a few options, the first of which is to paint the slabs a different, fresh color. Applying a tint on old concrete pavers can transform the patio and also allows you to add patterns and designs. Alternatively, cover the old concrete layer with brick or stone without removing the bottom layer.
How To Build A Paver Patio On A Slope?
It's possible to build a patio on a slope if you use the correct techniques. Begin by marking the area that will turn out to be the final paver patio. Then, level the slope and make it as even as possible using strings and other flat equipment. Dig a solid trench within the assigned area and fill it up with gravel.
After leveling this layer, adding a retainer wall will stabilize the patio and give it a finished look. After this, backfill the retaining wall with gravel to further solidify the structure. Even out this layer, and you should have a paver patio ready on your slope.
How To Slope A Paver Patio Away From House?
Sloping a patio in any direction will require at least two inches of gravel on the elevated side. For adequate drainage, add one inch on the lower end for every four to six inches on the higher side. Keep in mind a slope in the patio surface is needed to allow water and runoff to drain away from the house foundation.
Ensure to level the gravel and slabs when you lay them down, and the slope is not more than 5% sloping downwards. Anything that slopes too deep will not be able to hold furniture without sliding.
How To Excavate For A Paver Patio?
Firstly, draw out the patio shape and size on the ground with masking tape. This area will need to be dug up to 8 inches to get the correct depth. Ideally, you should dig 10 inches extra around the actual patio size.
This will provide extra support to your structure once you place the brick or concrete slabs. Even if your patio is small, the dirt and mud that comes out from the excavation site will be sizable. So, arrange for pick-up trucks to collect the dirt and dump it at another location. After this, you are ready to prepare the base and lay out new bricks.
Patio Paver Ideas Conclusion
So, that was all we had for today's idea journal for fantastic paver patios. Whether you need to install a paver next week or sometime in the distant future, come back to this guide for a dose of inspiration. These options should be enough to help determine the style you'd like for the backyard.
Finally, remember that there is no correct or incorrect approach to paver patios. Most of it comes down to personal preference and the available space to work with.


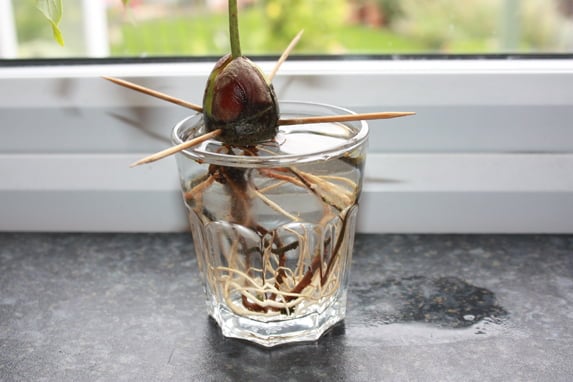
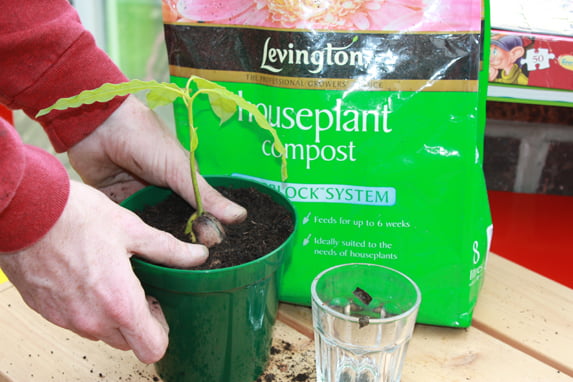
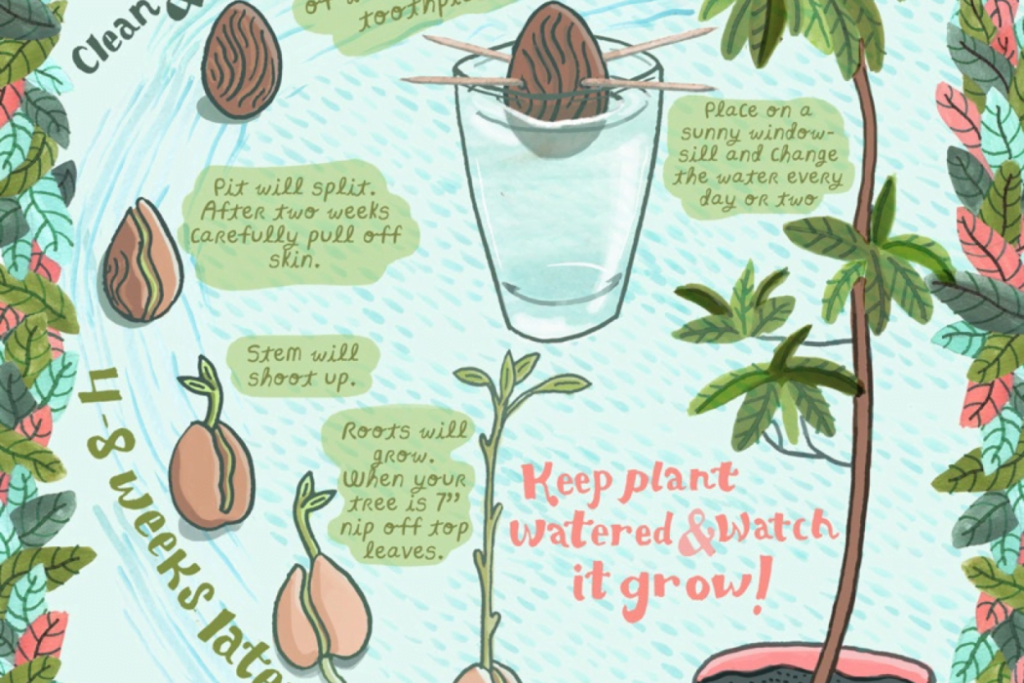
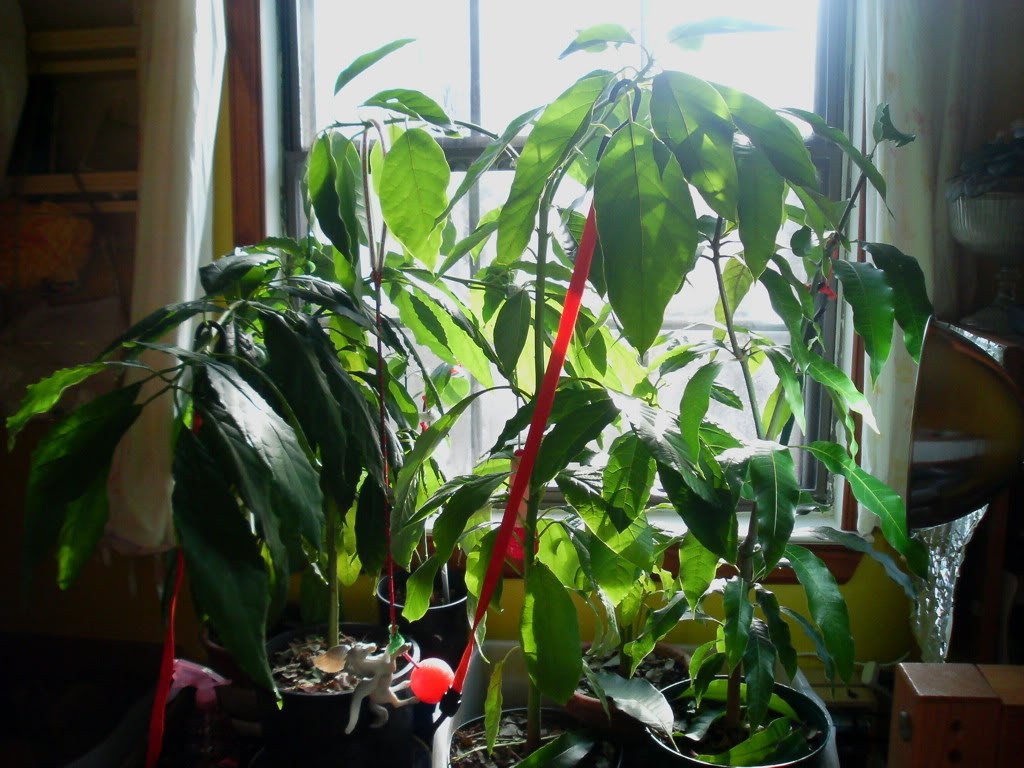

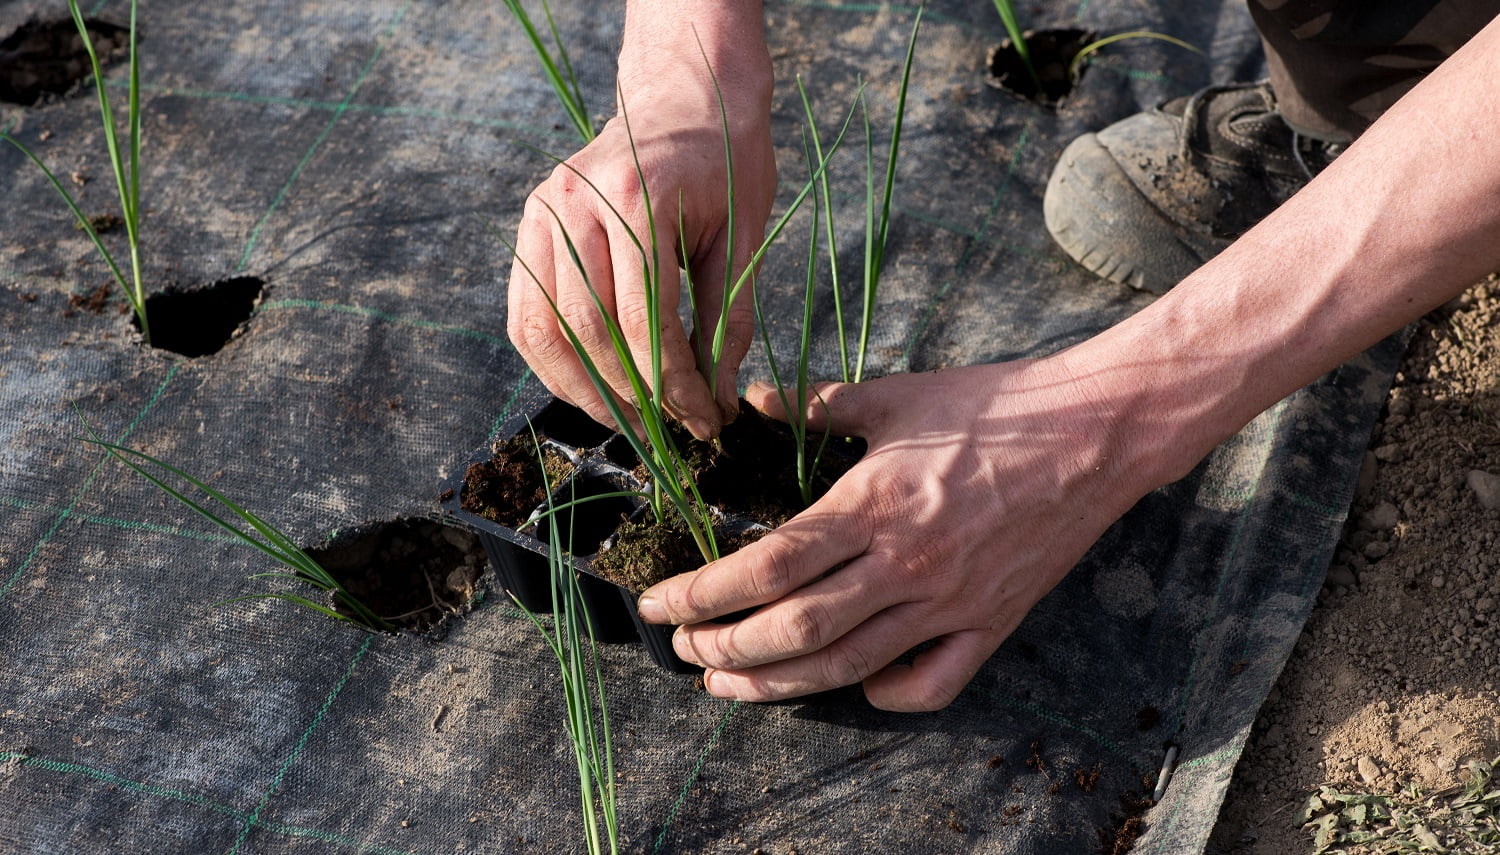
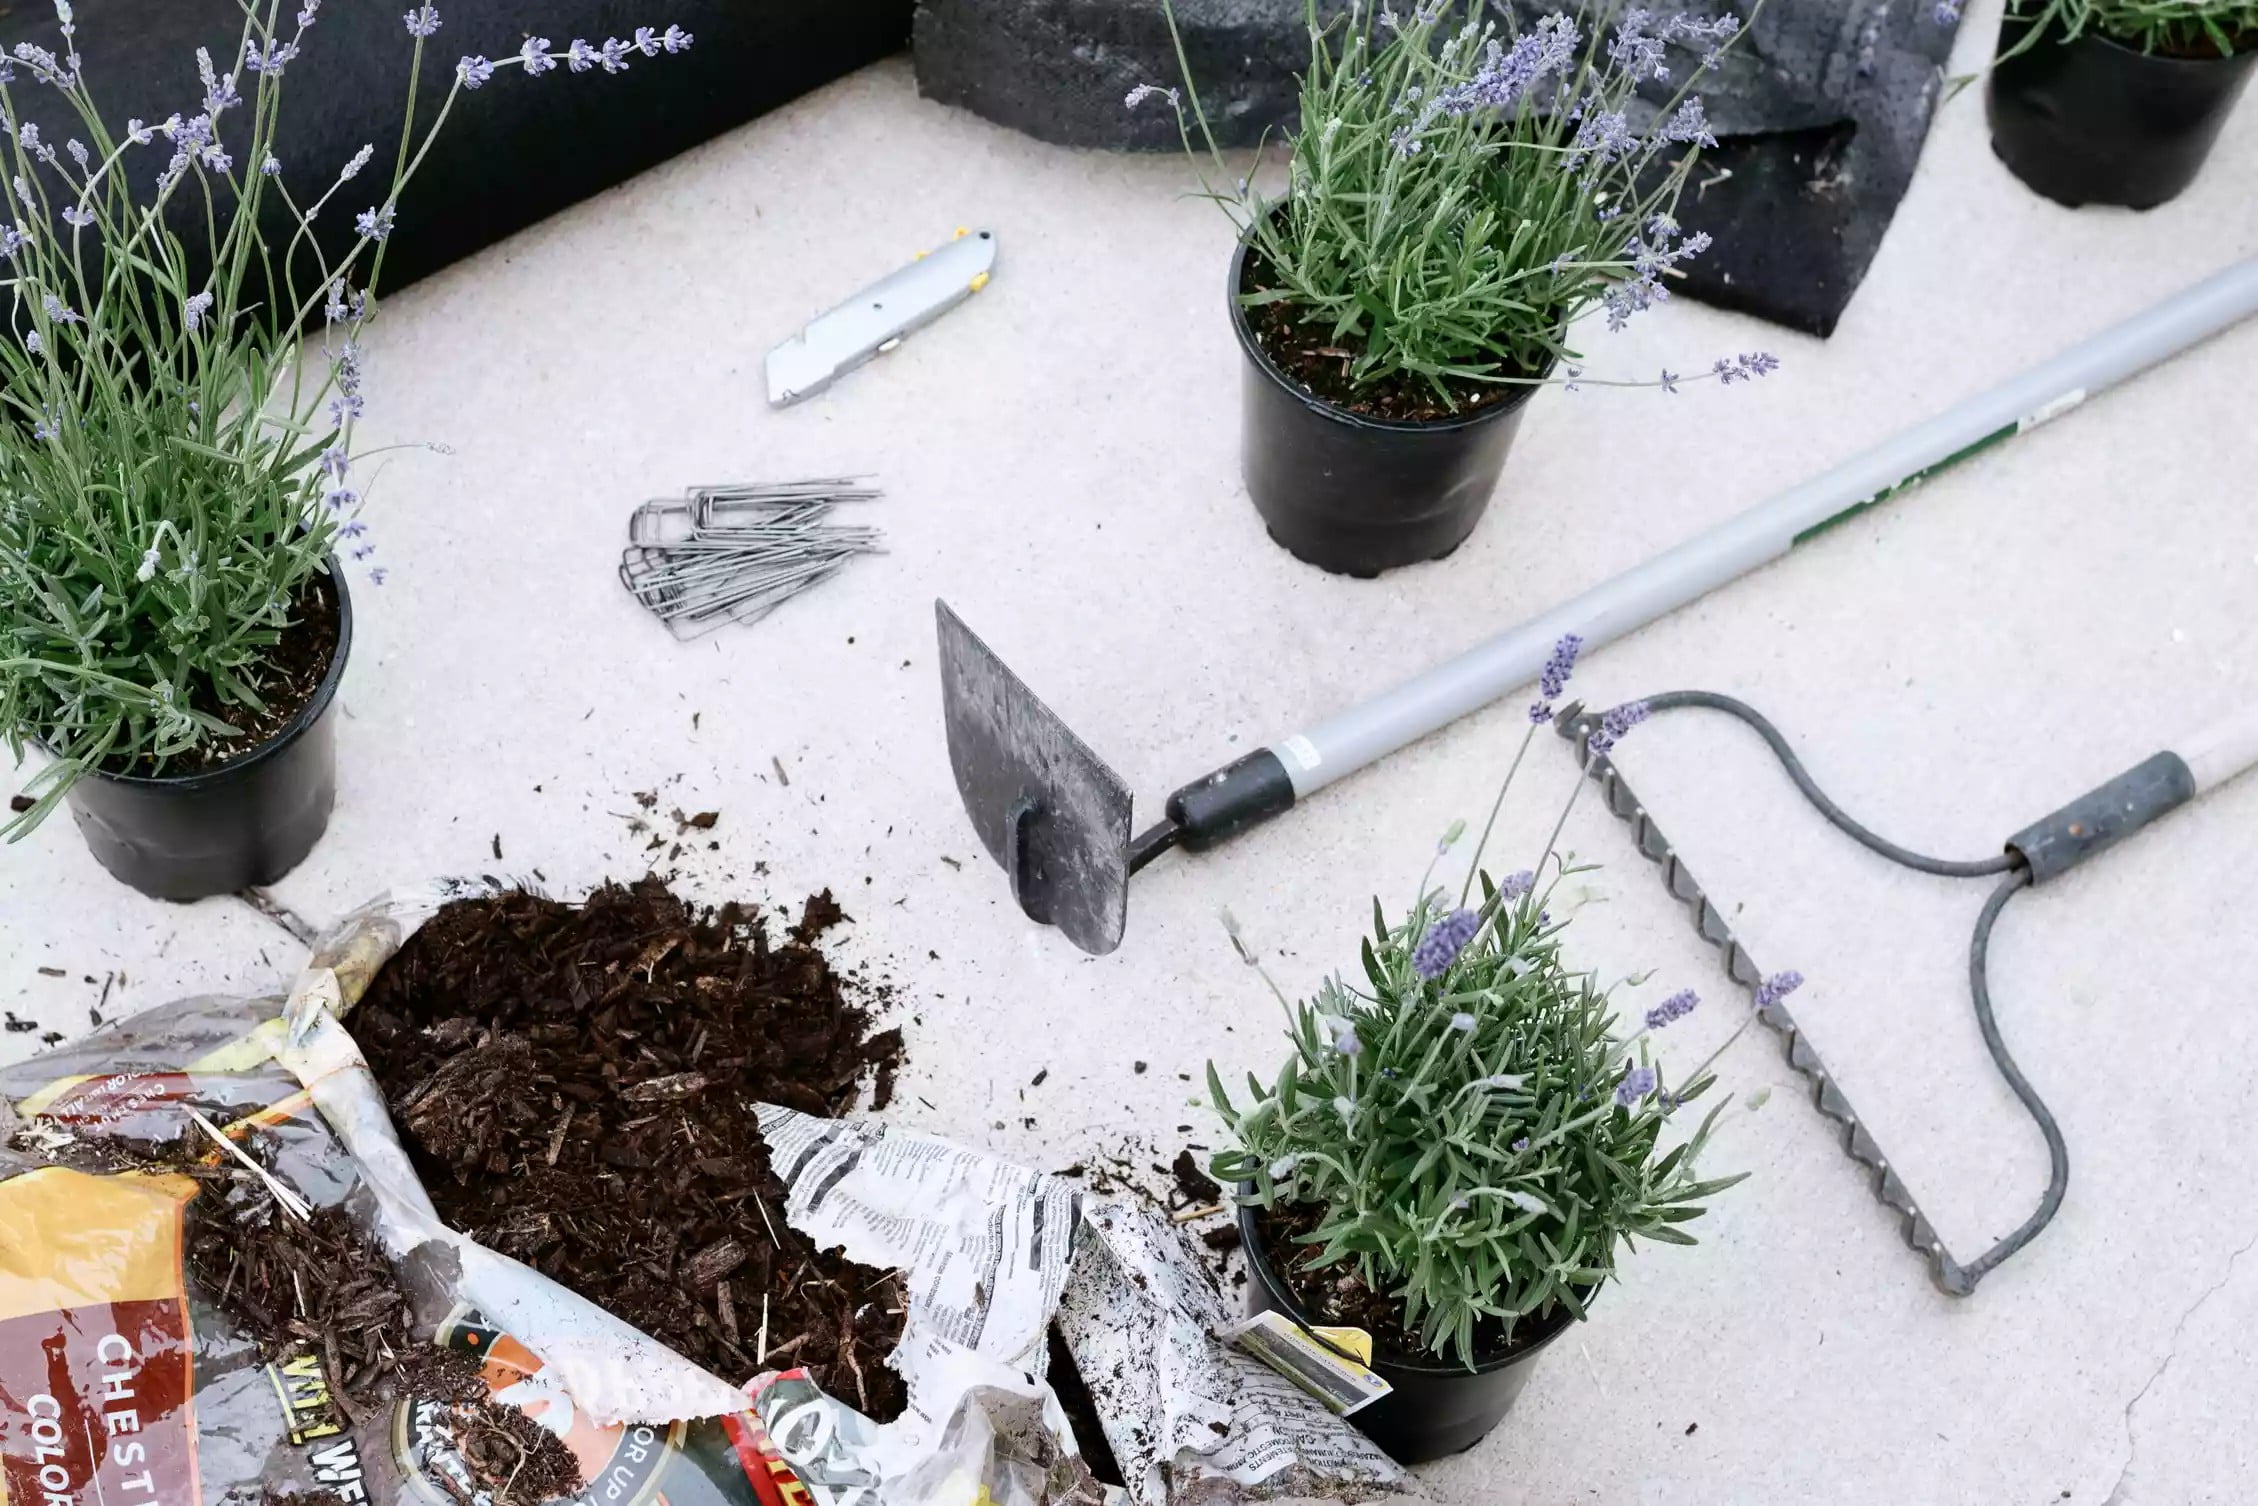
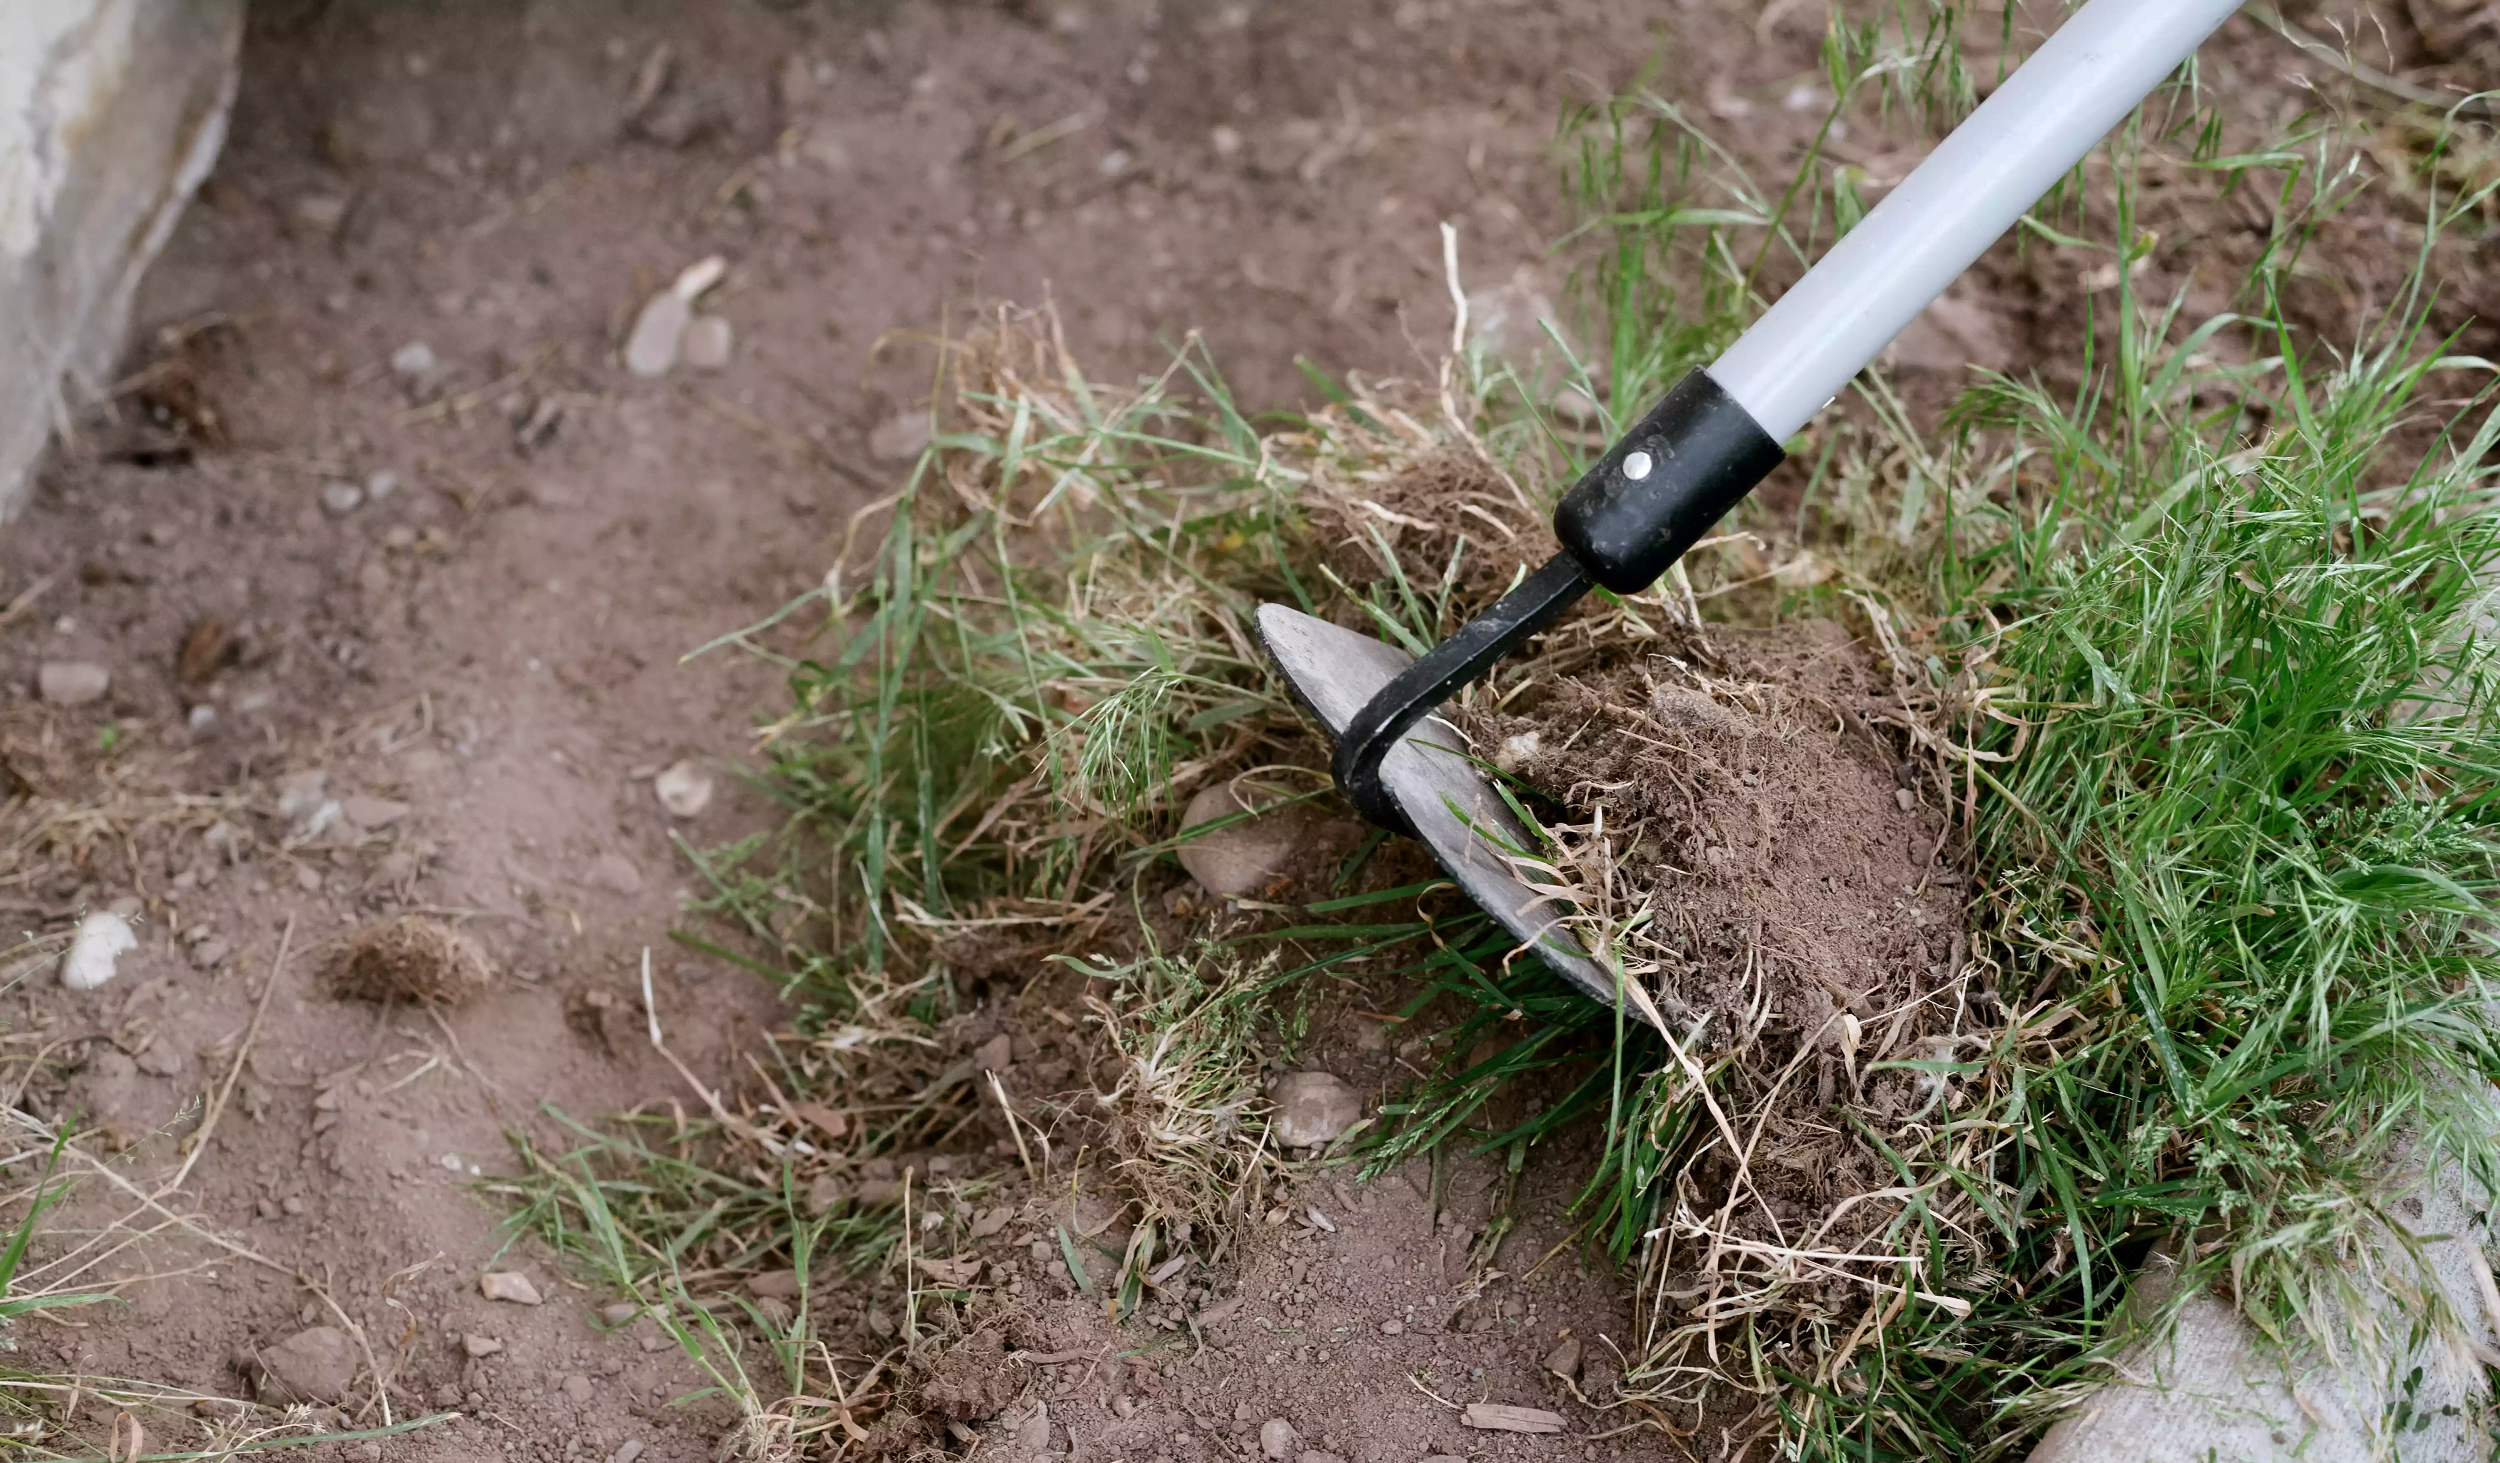
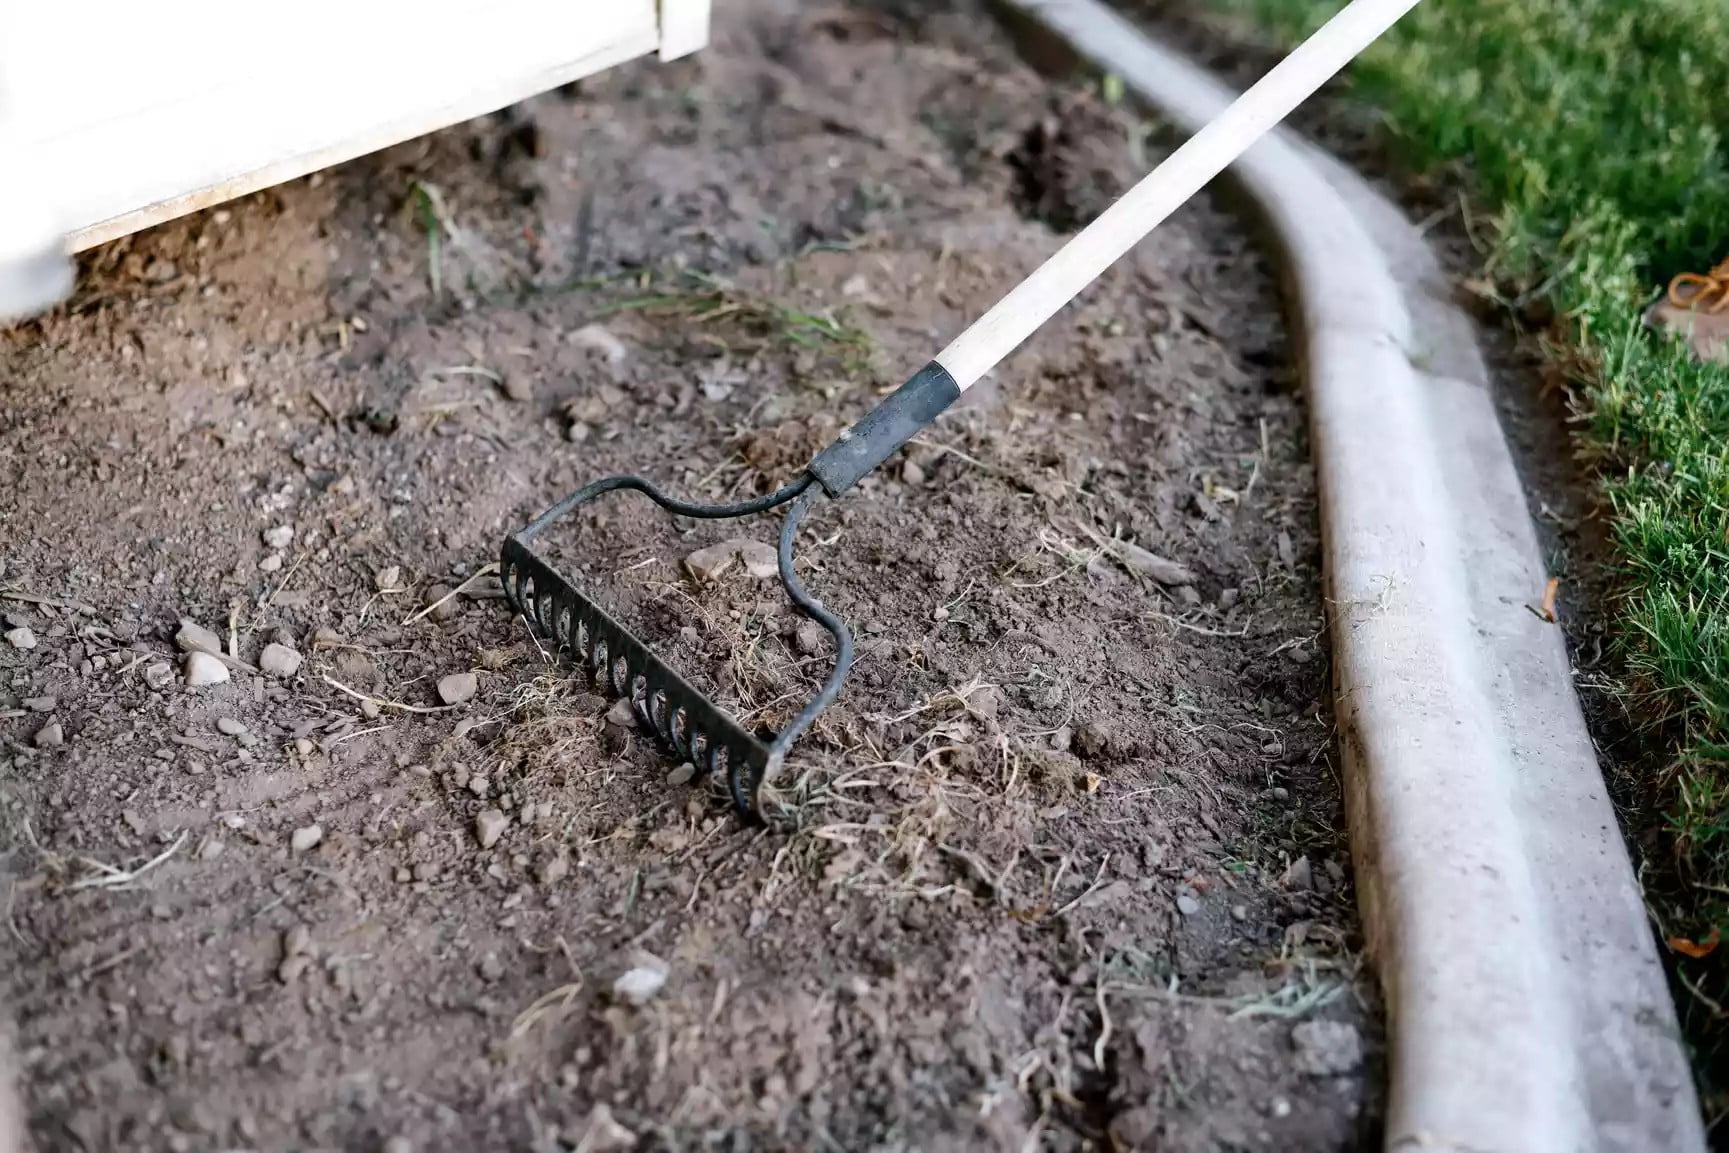
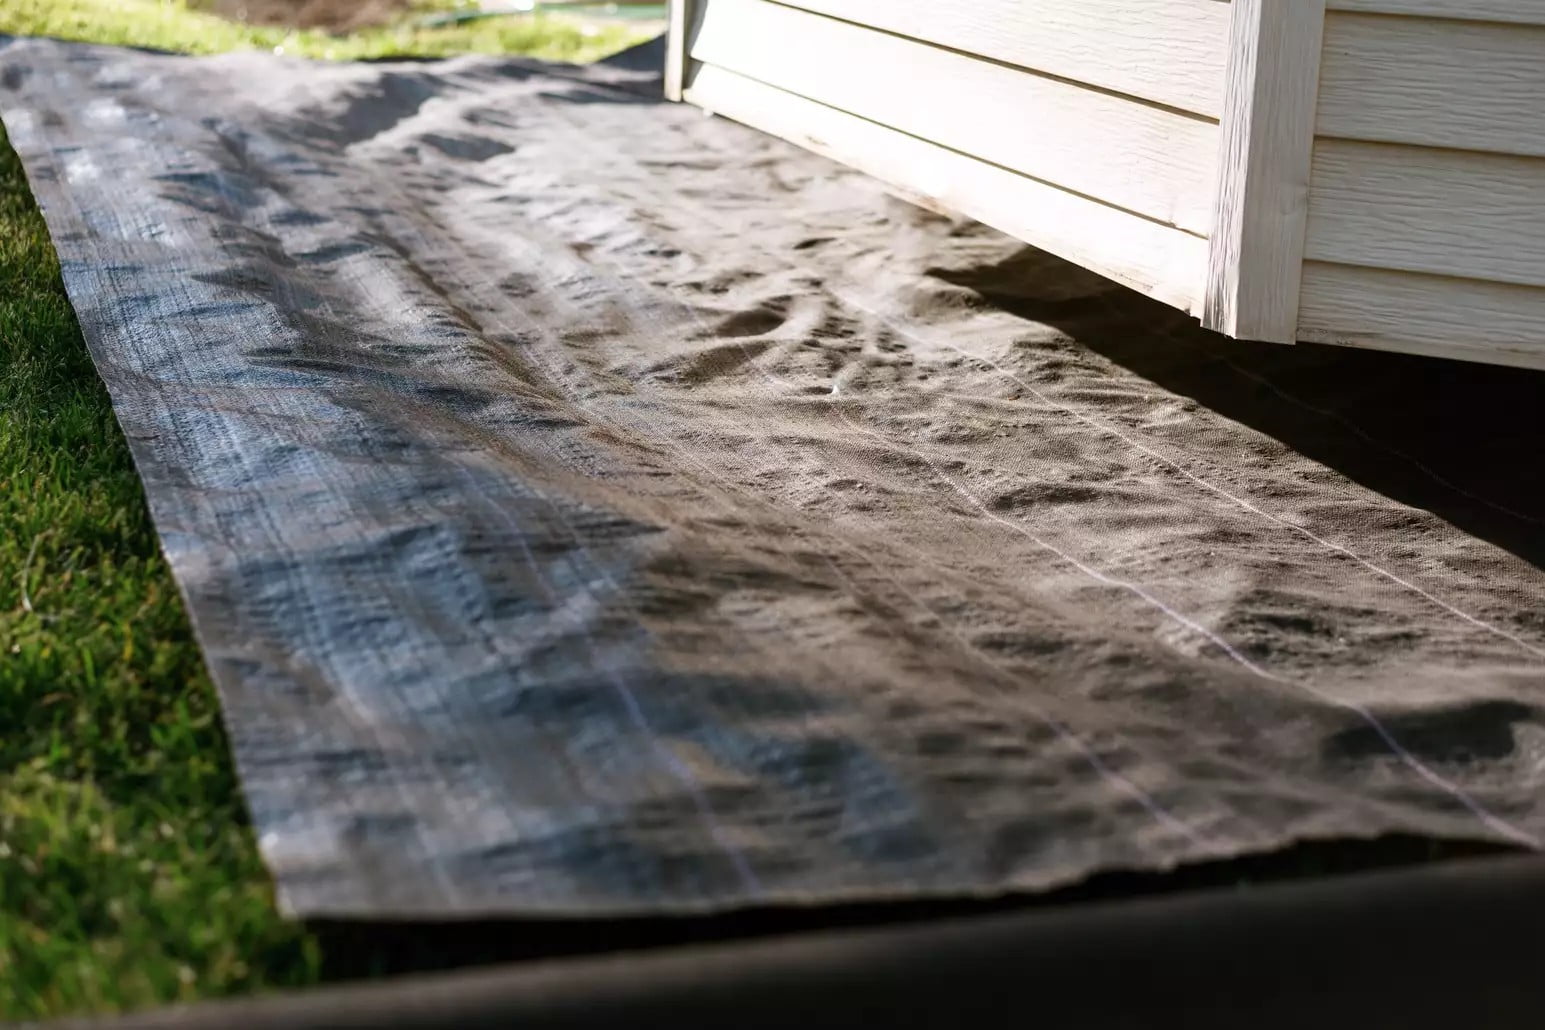

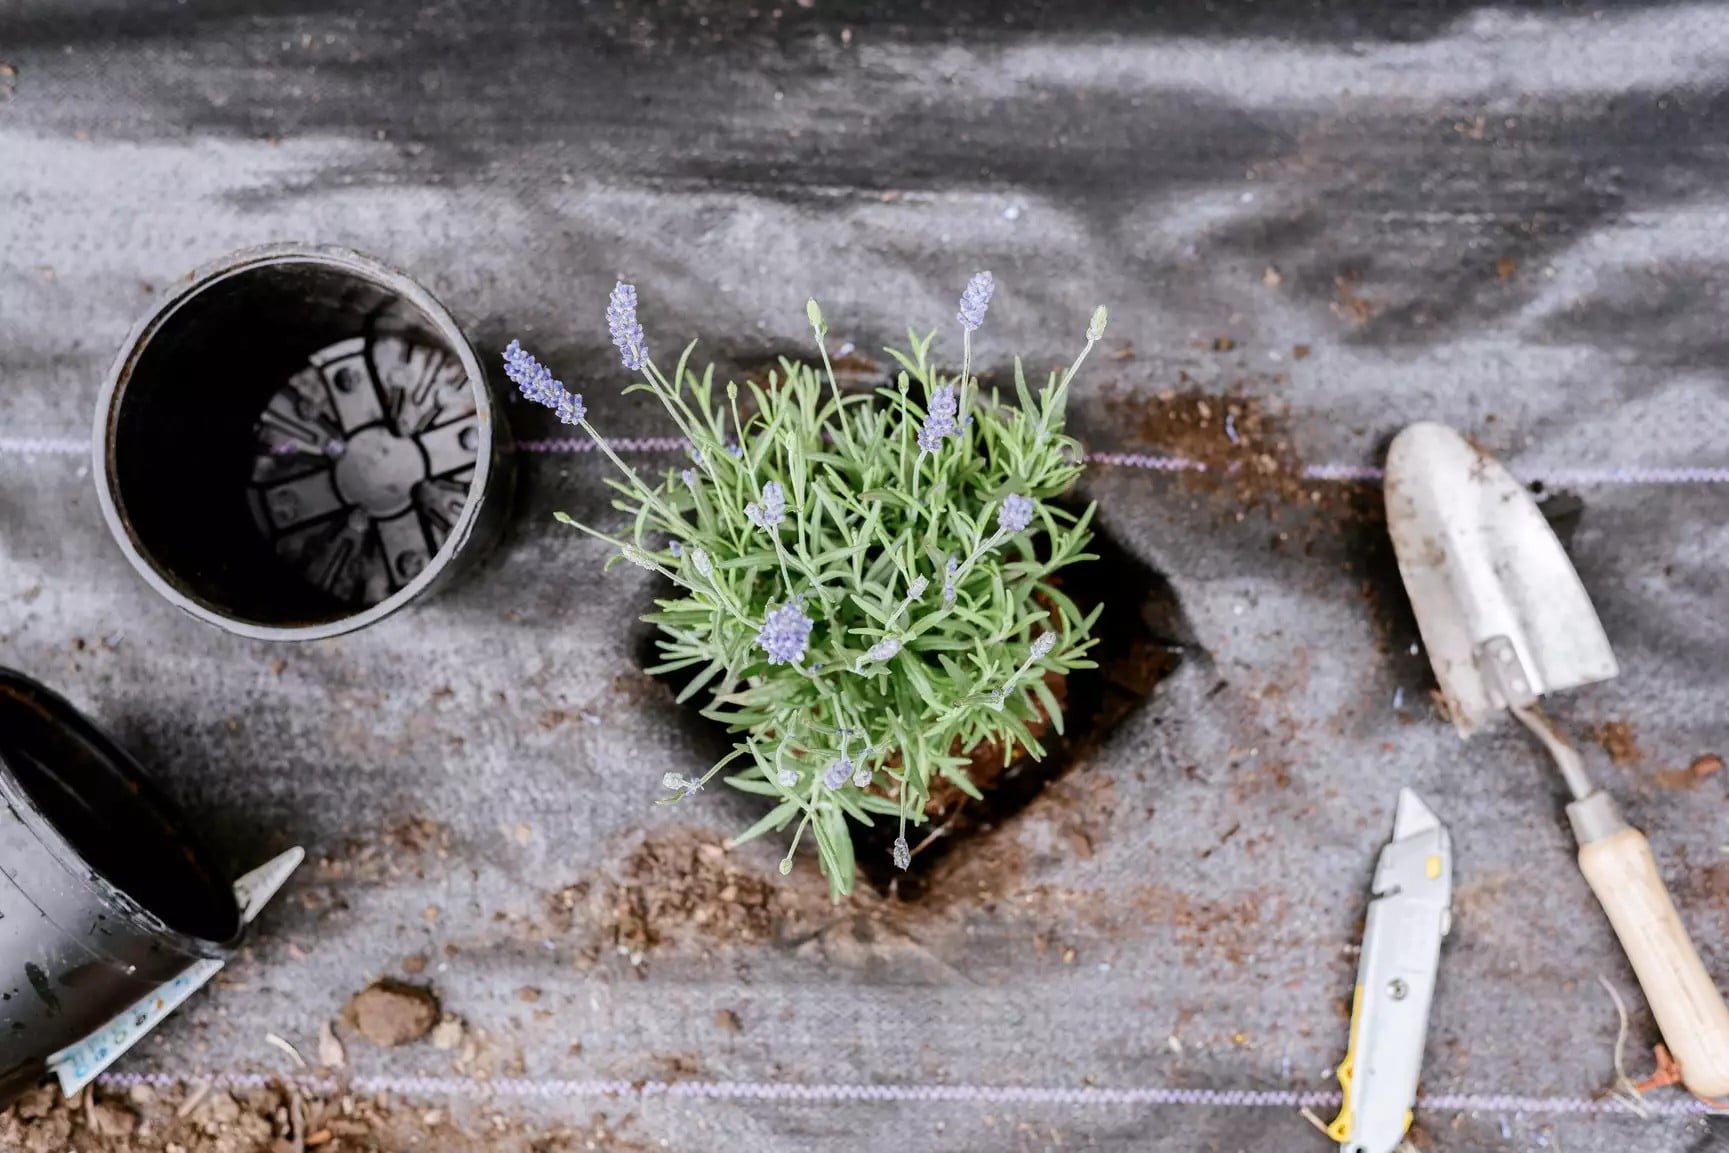
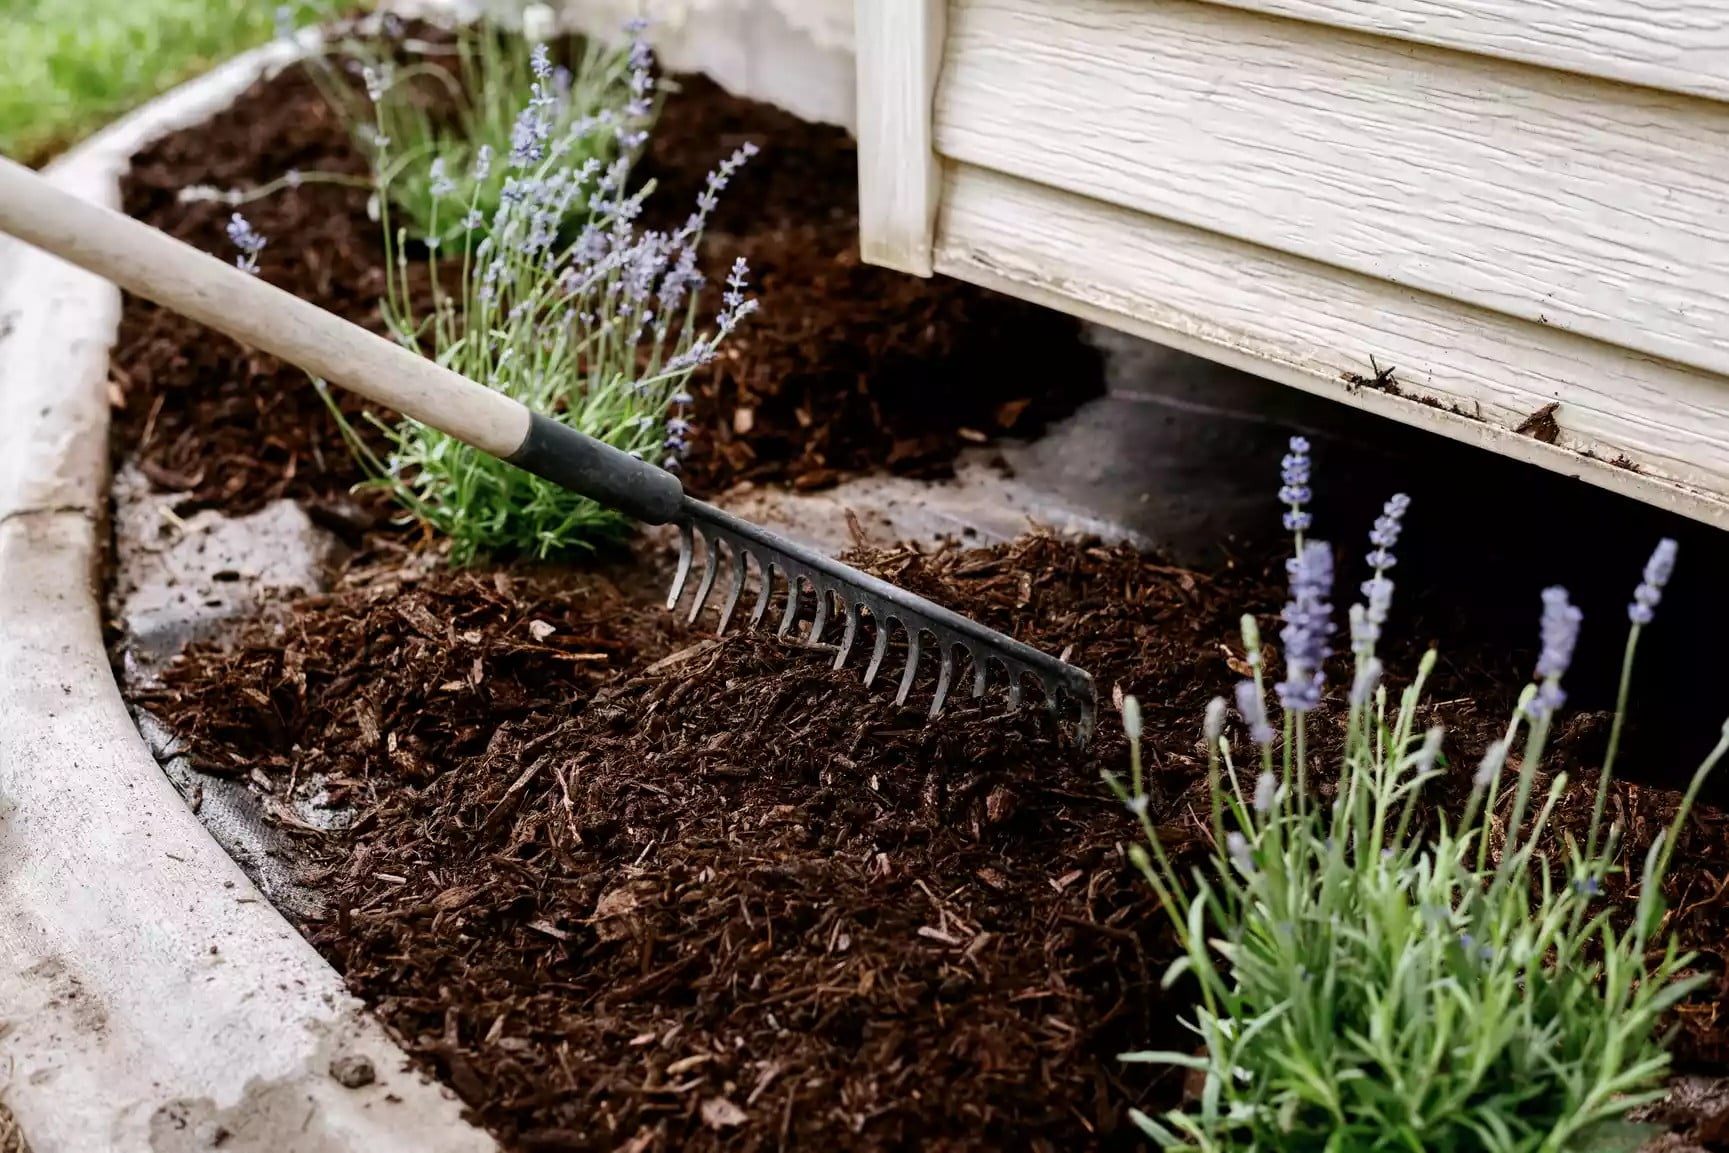
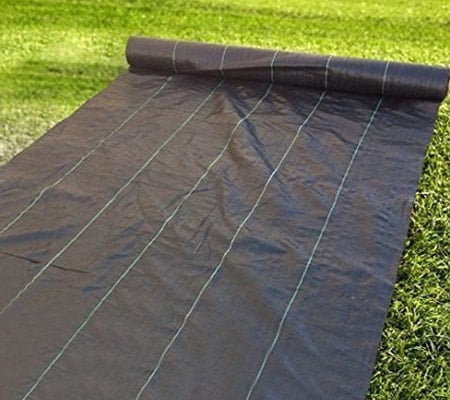
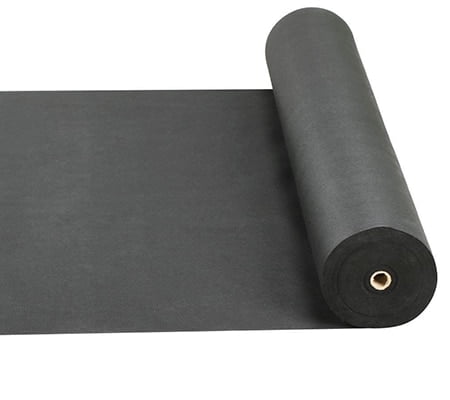

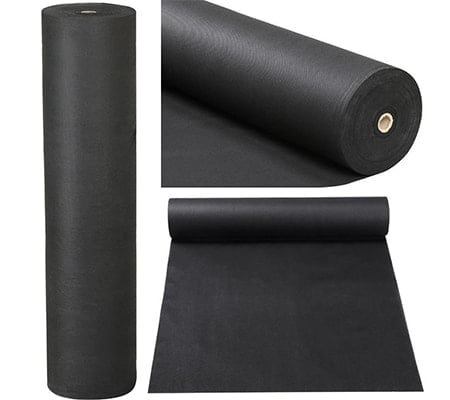


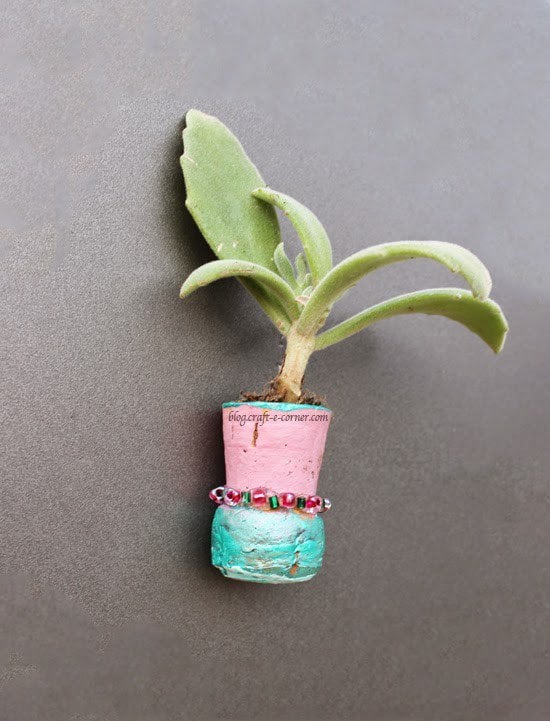
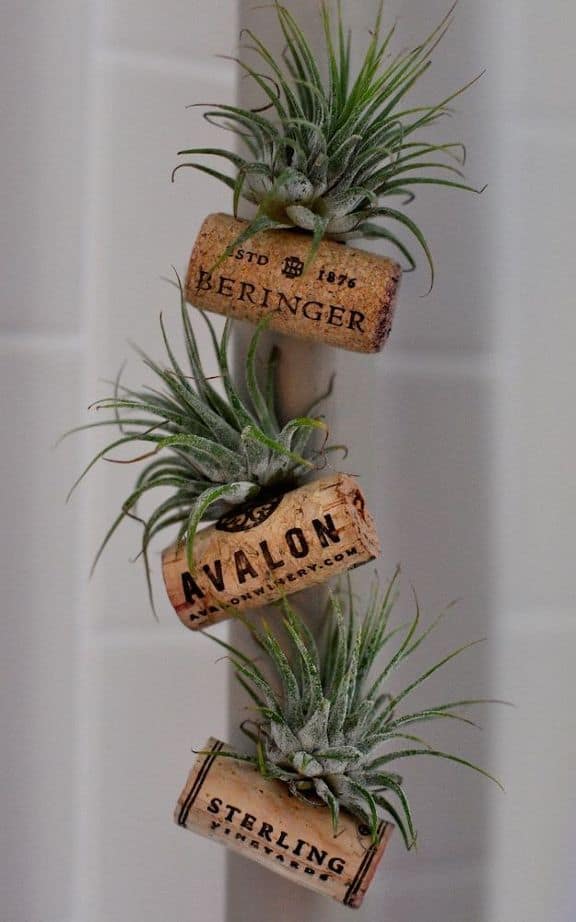
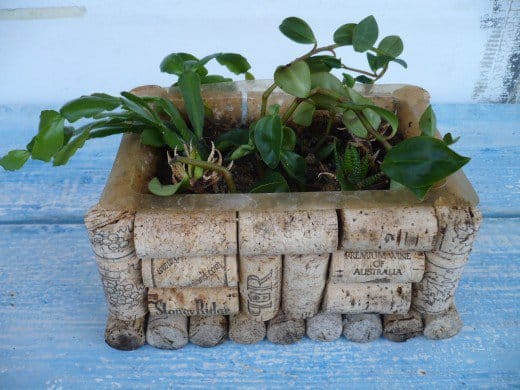
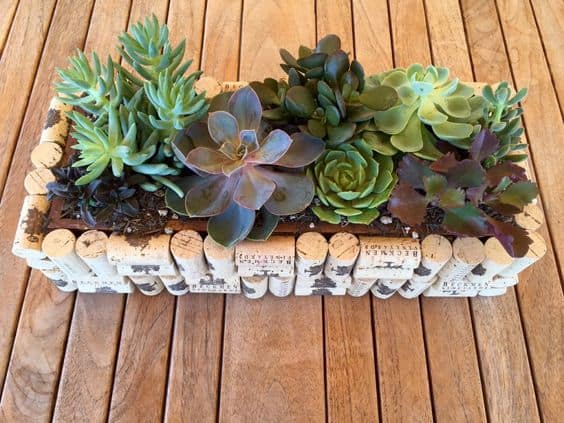
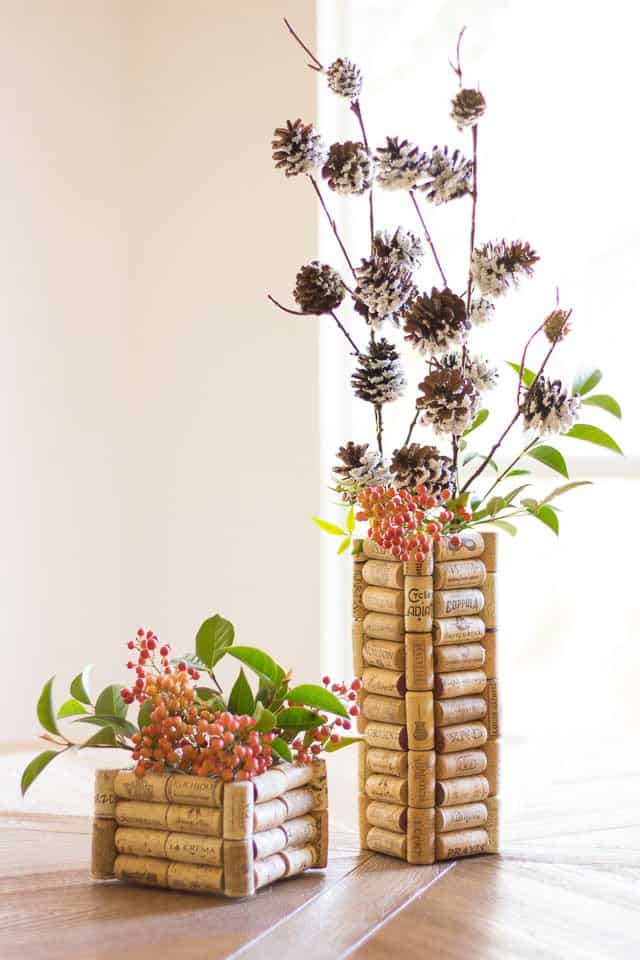

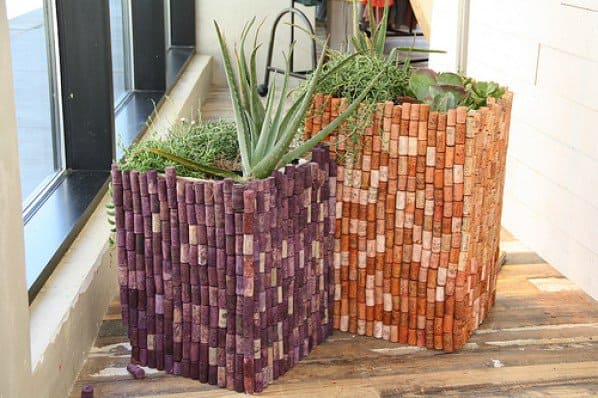
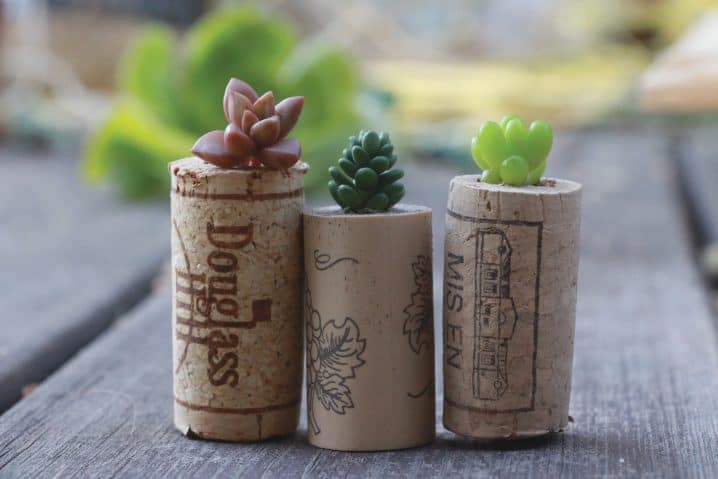
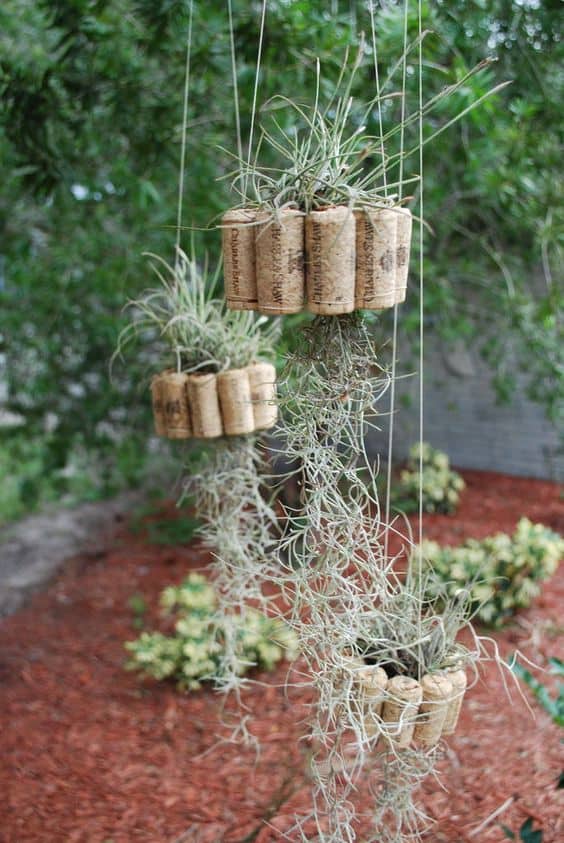

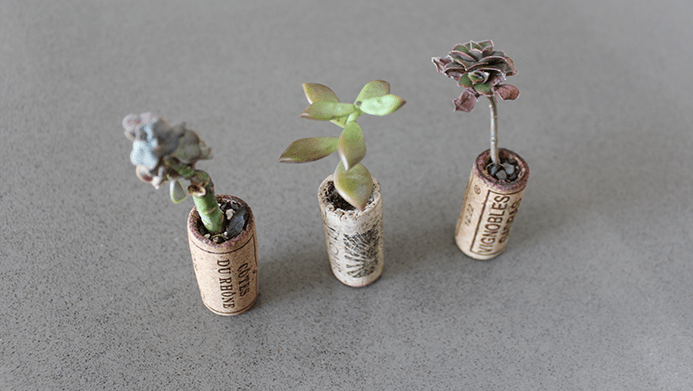
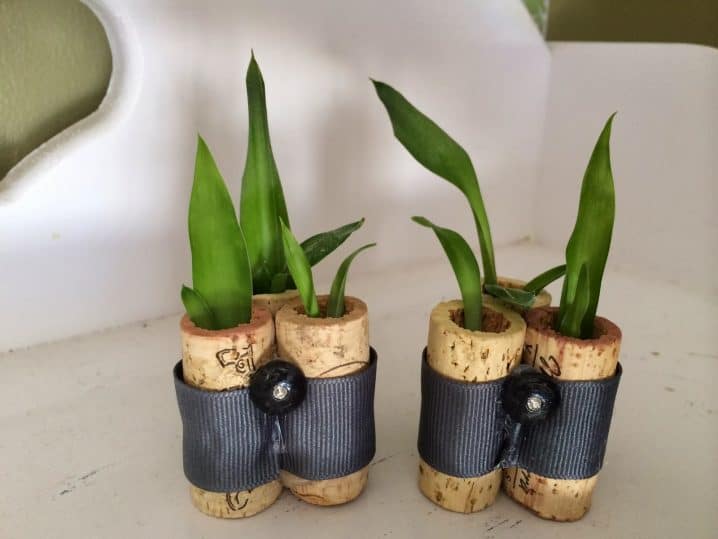
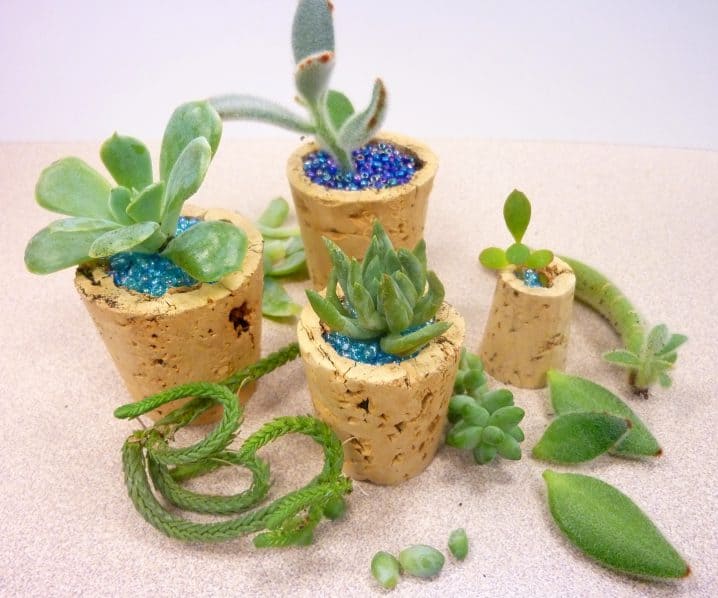
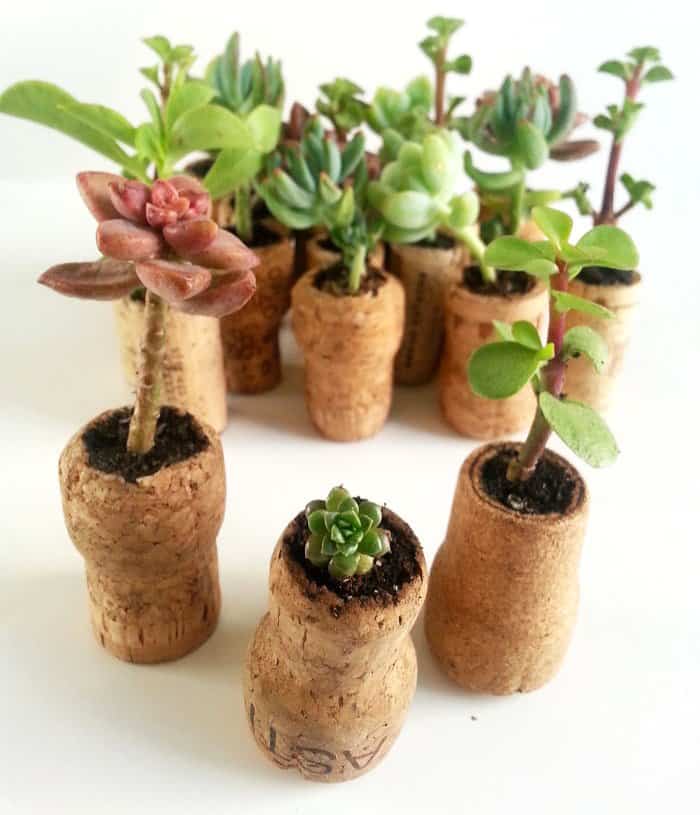


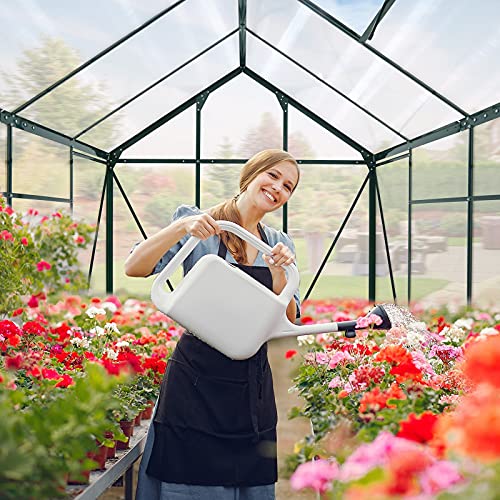
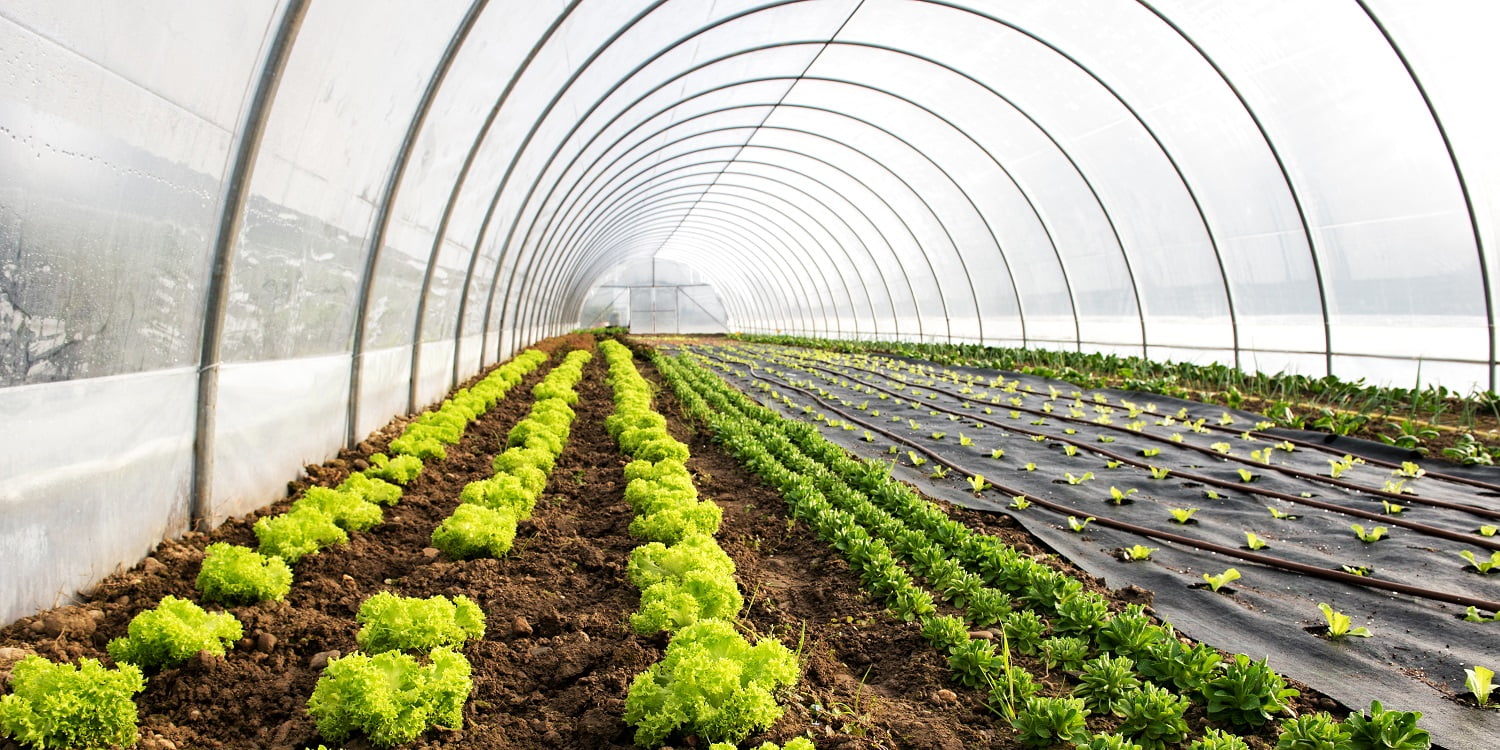
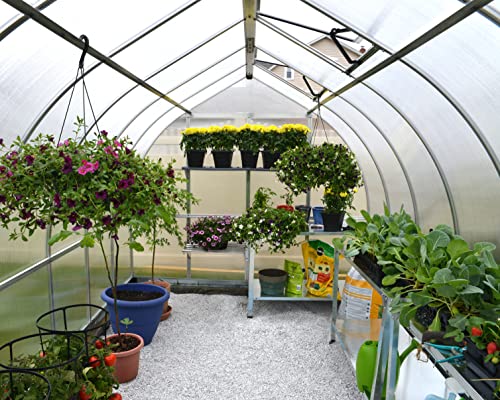
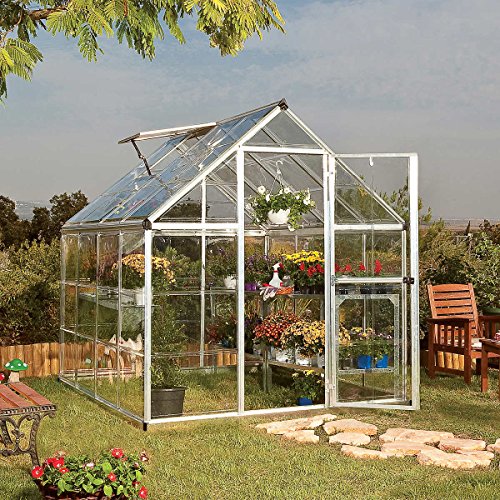
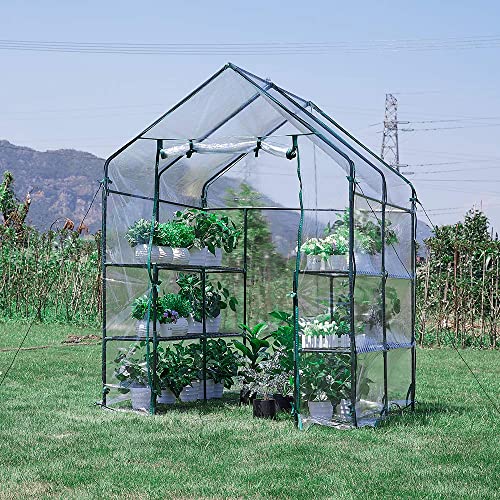

![How to Grow Cilantro Indoors Easily [Buyer’s Guide]](https://homesthetics.net/wp-content/uploads/2020/12/How-to-Grow-Cilantro-Indoors-Easily-1.jpg "How to Grow Cilantro Indoors Easily [Buyer’s Guide]")

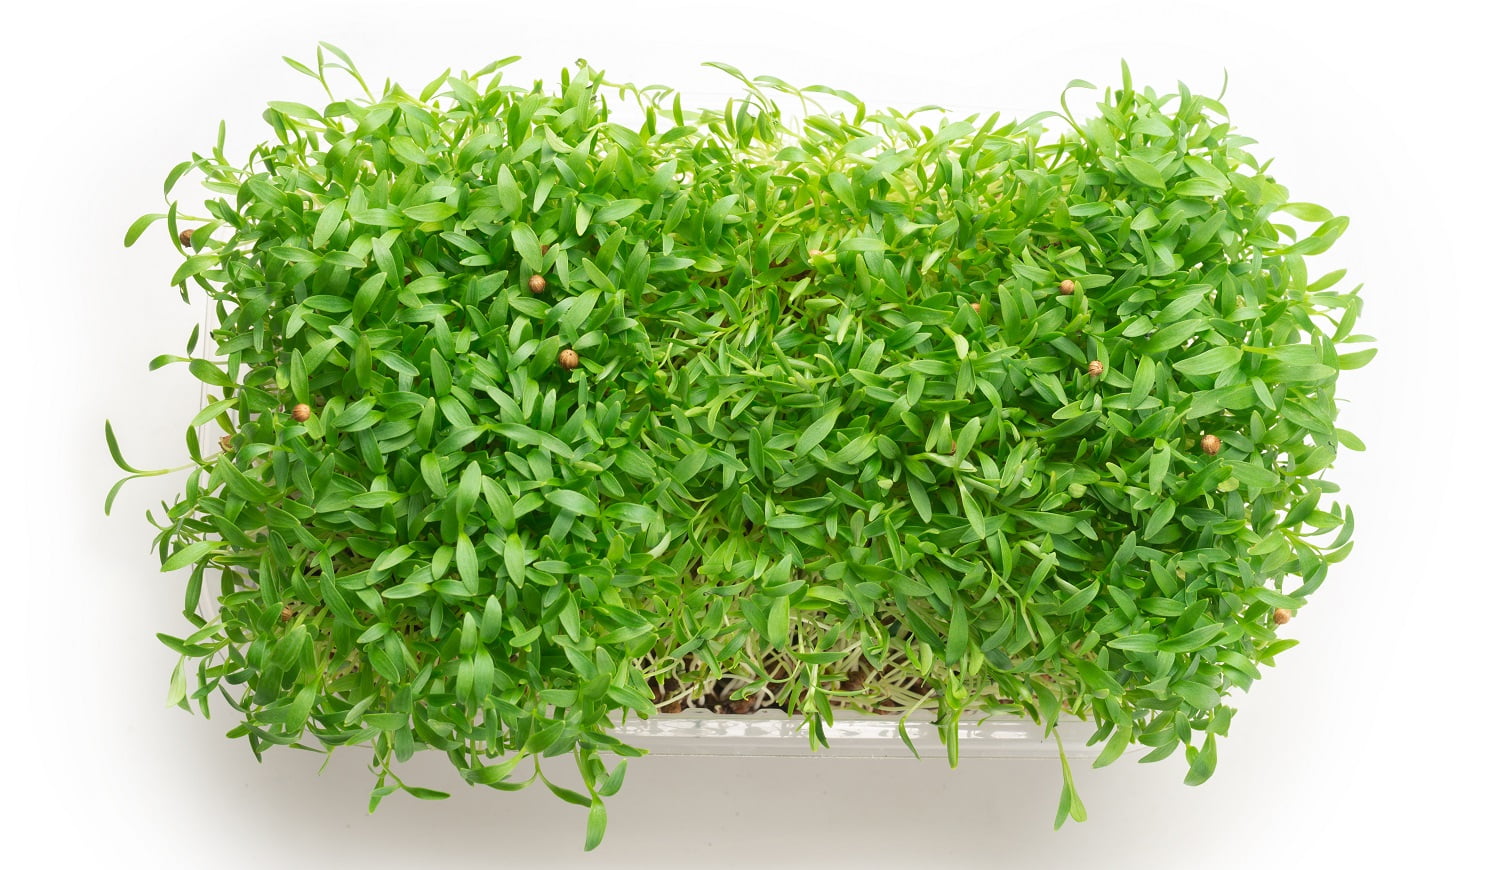


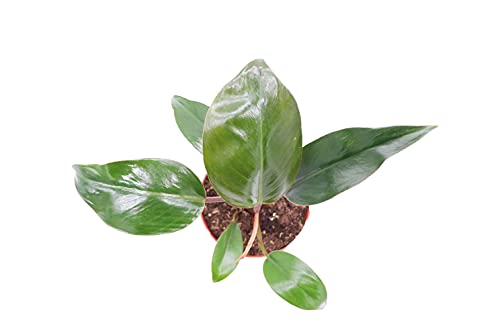
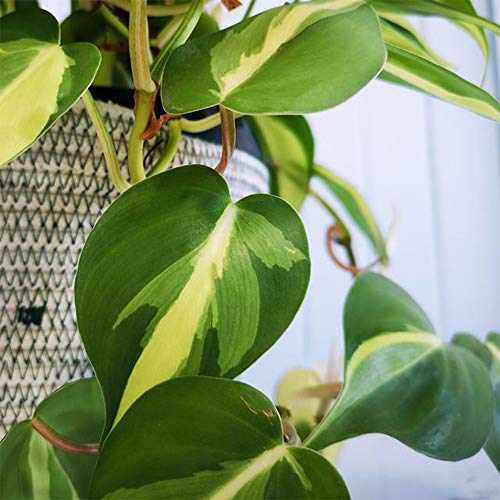
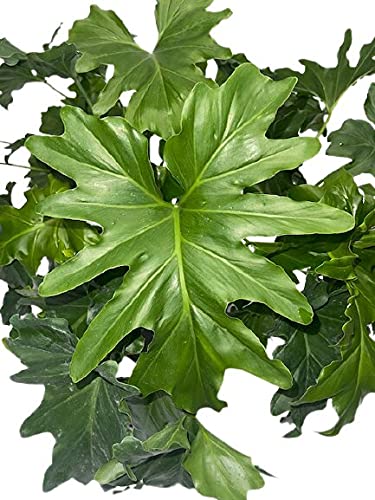
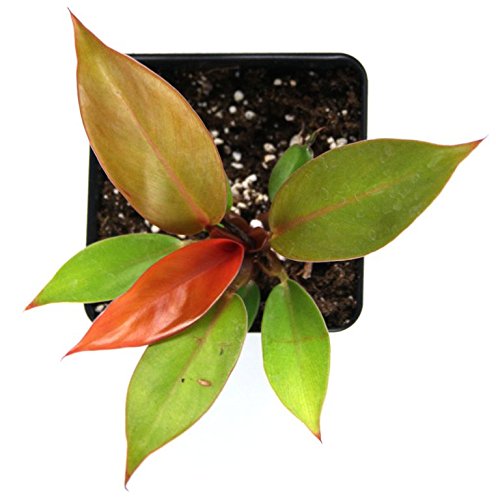


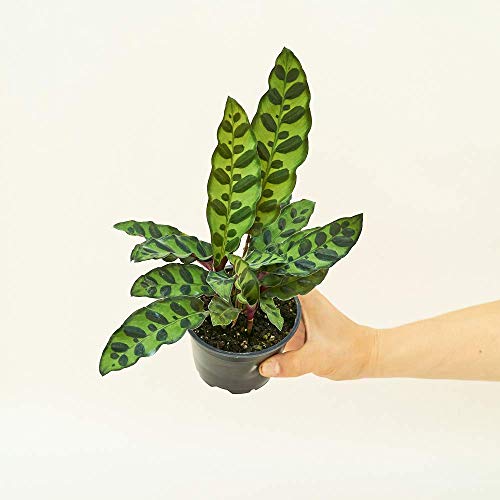


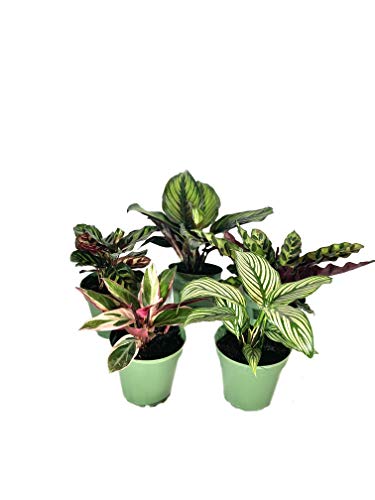

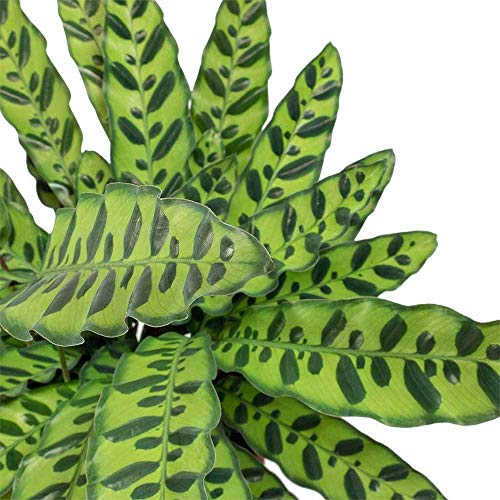

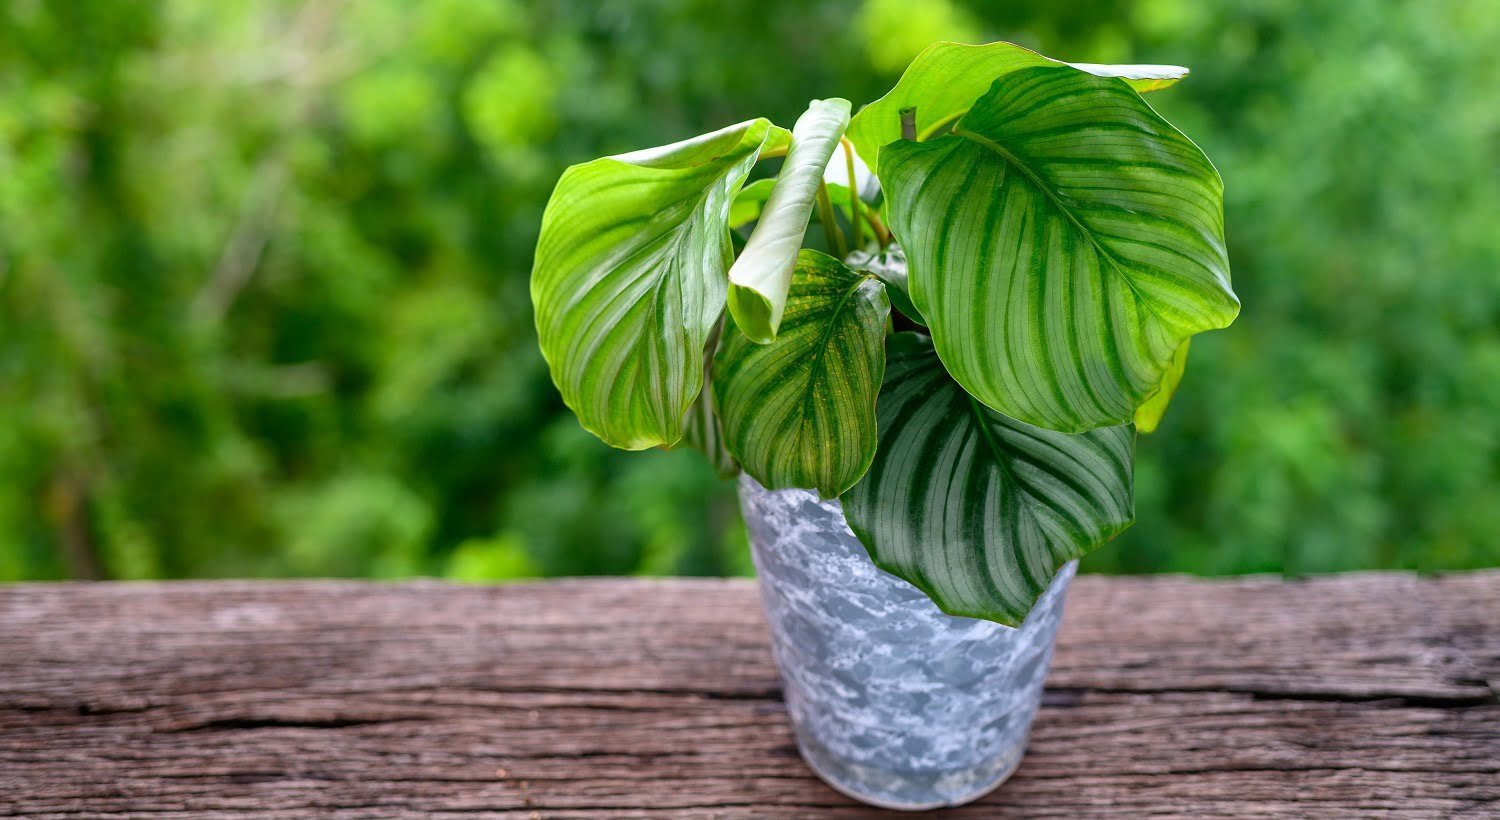

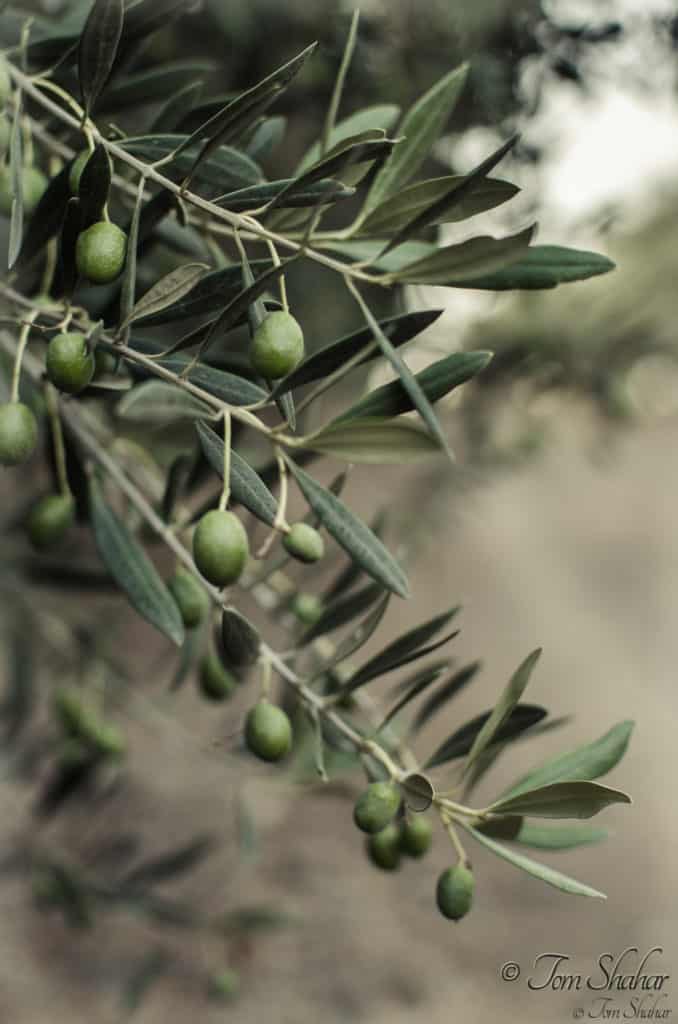
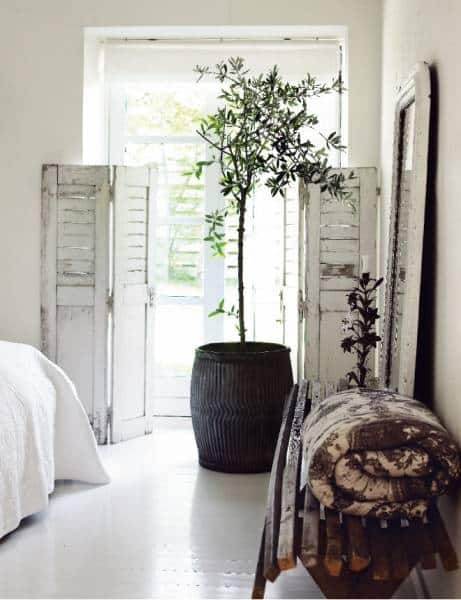
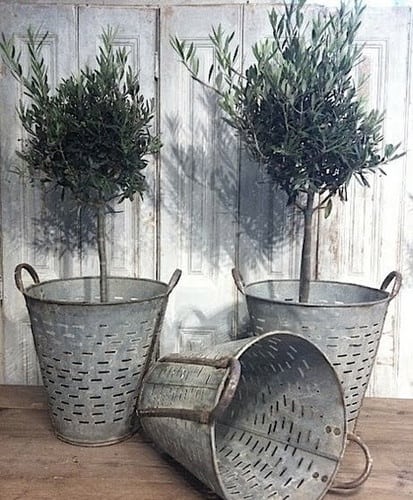

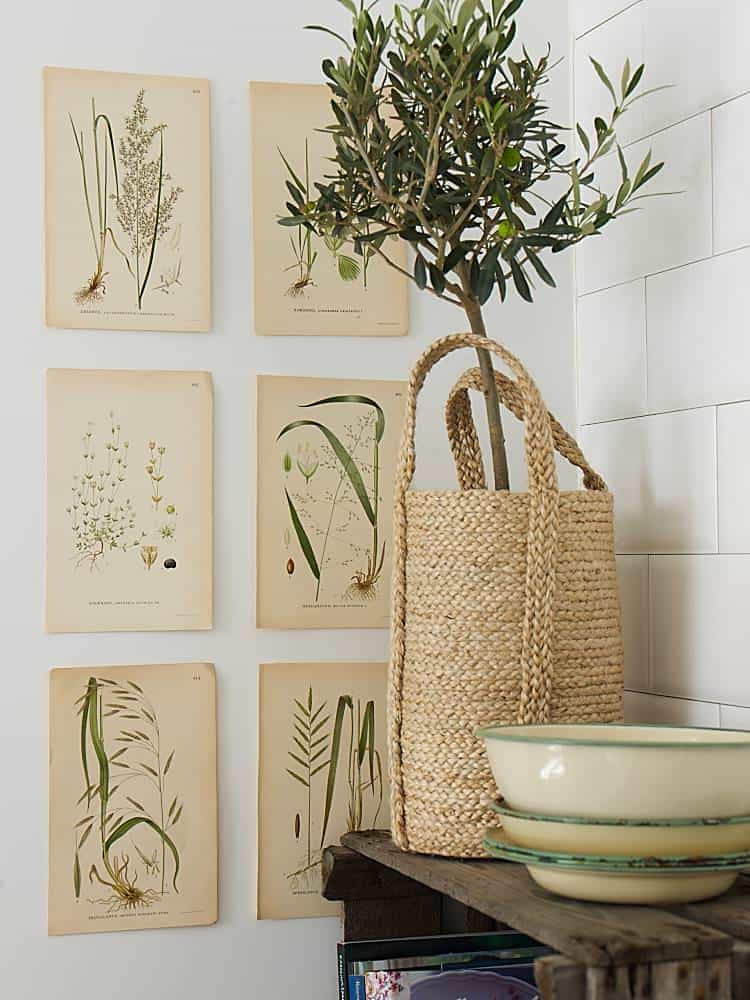
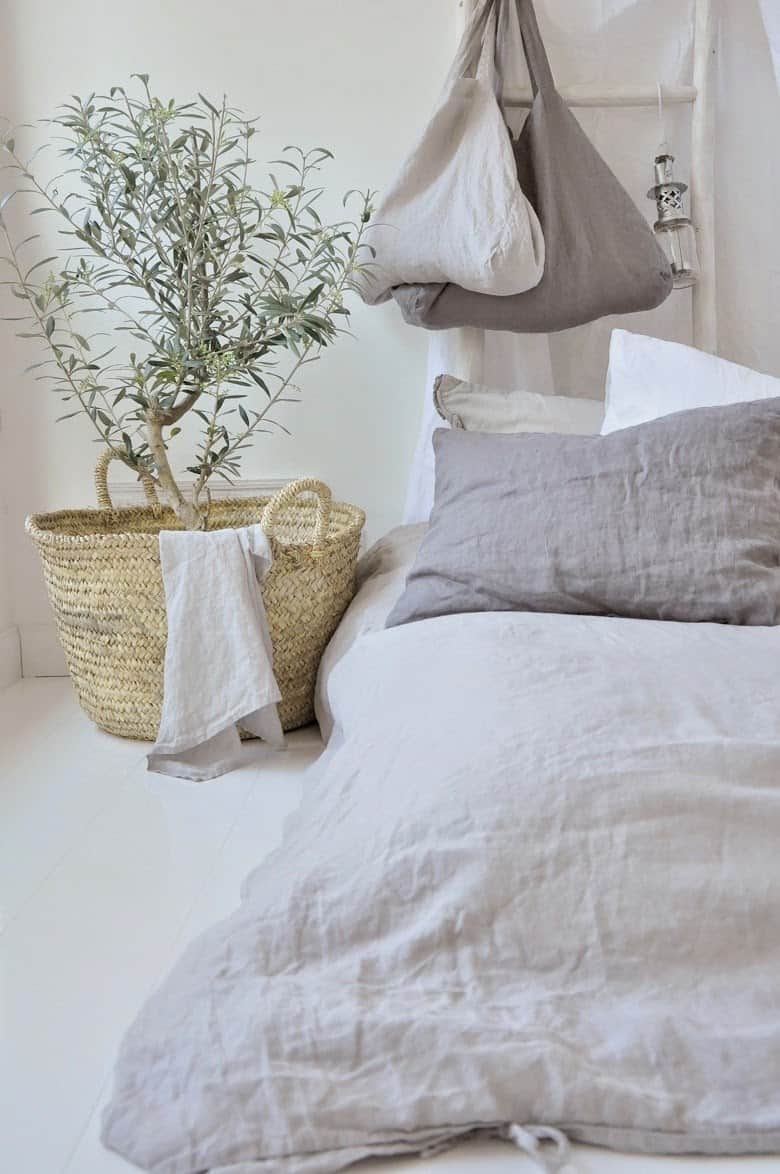
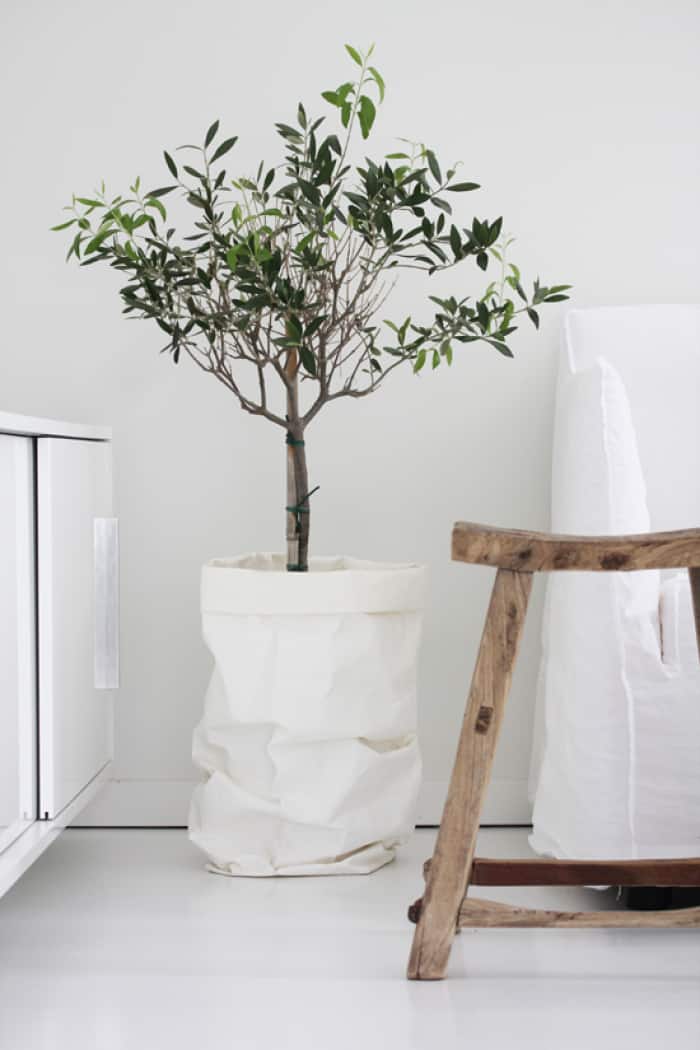
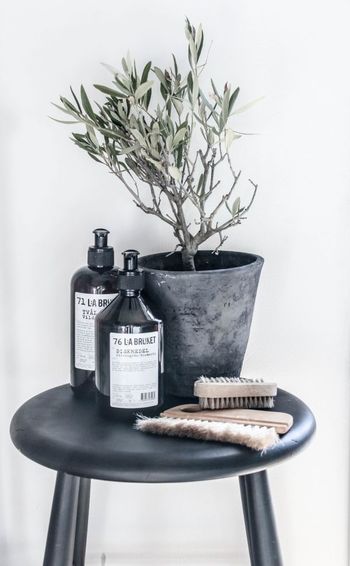
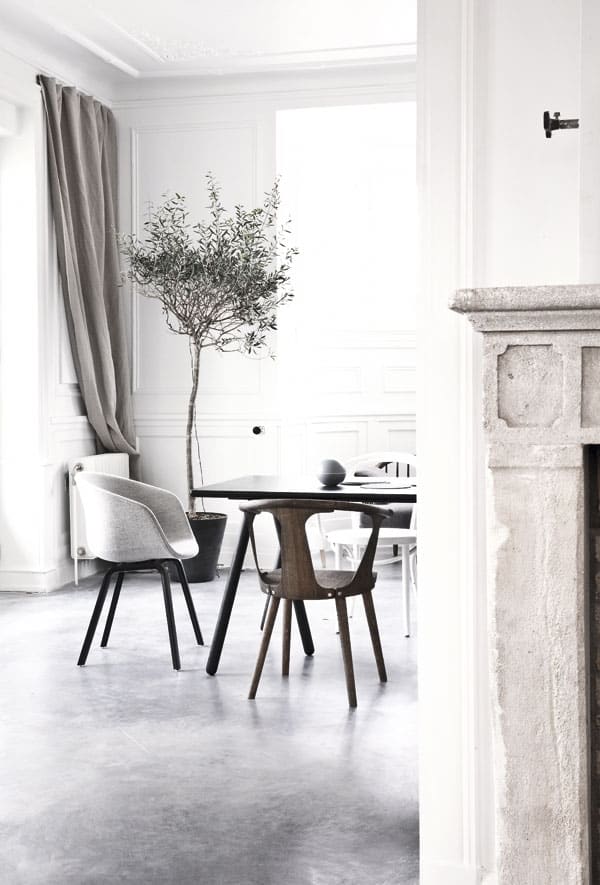
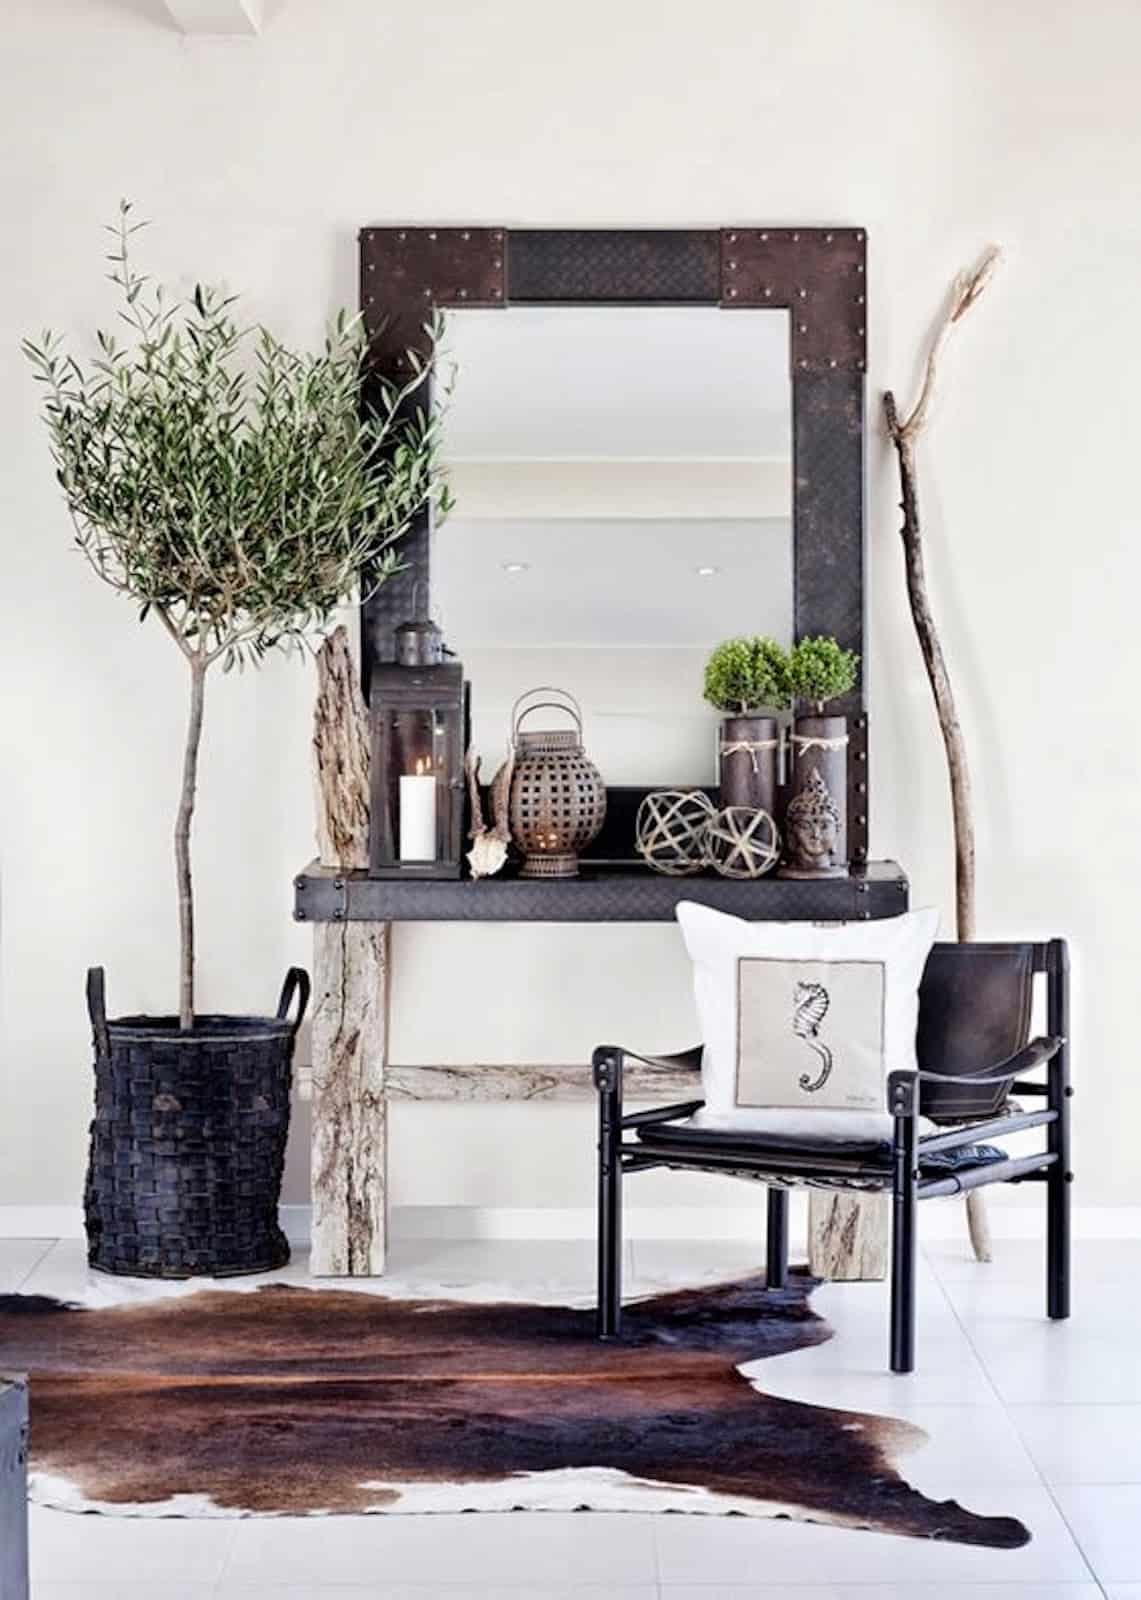

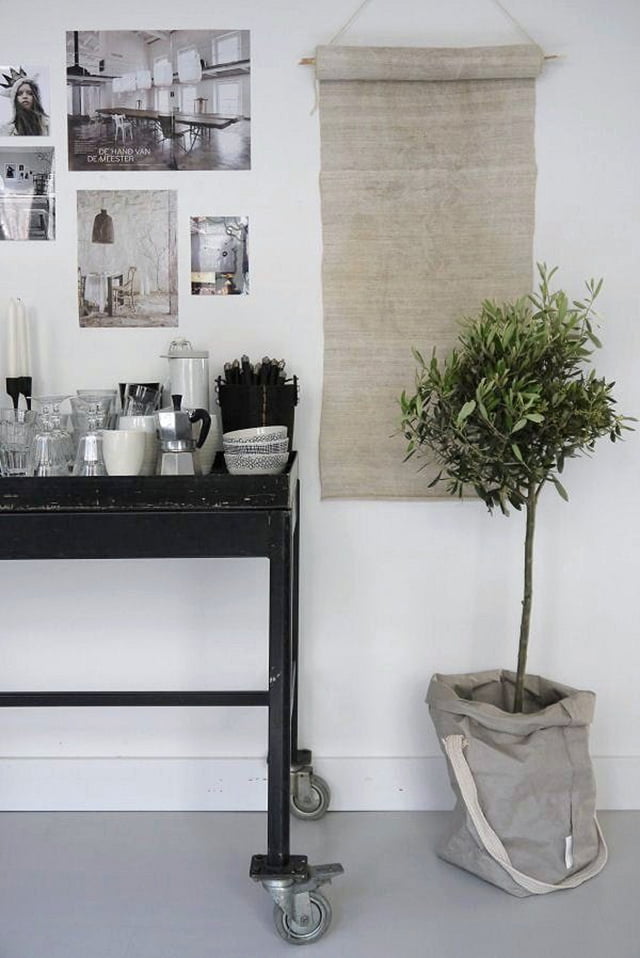


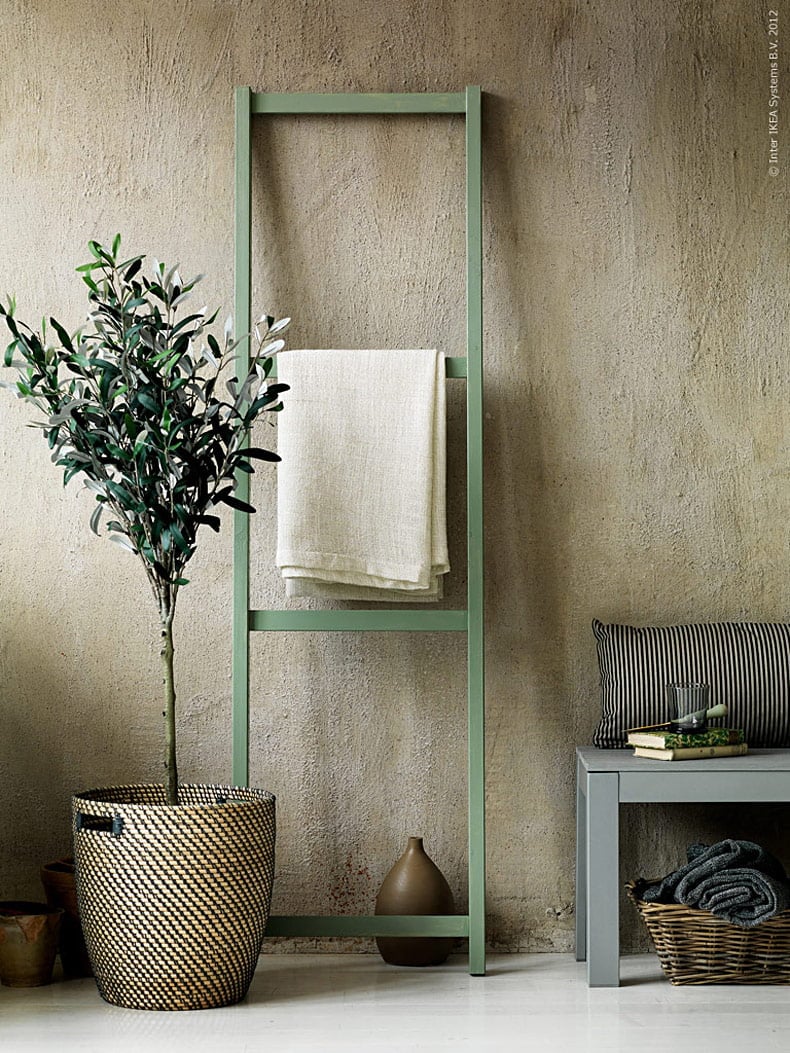

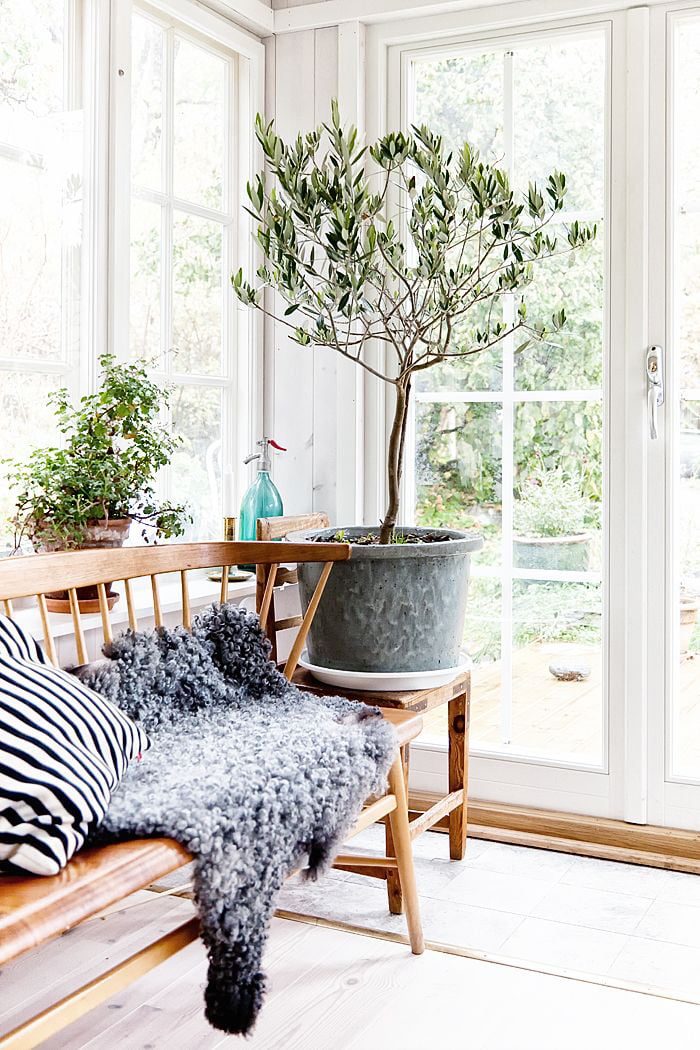
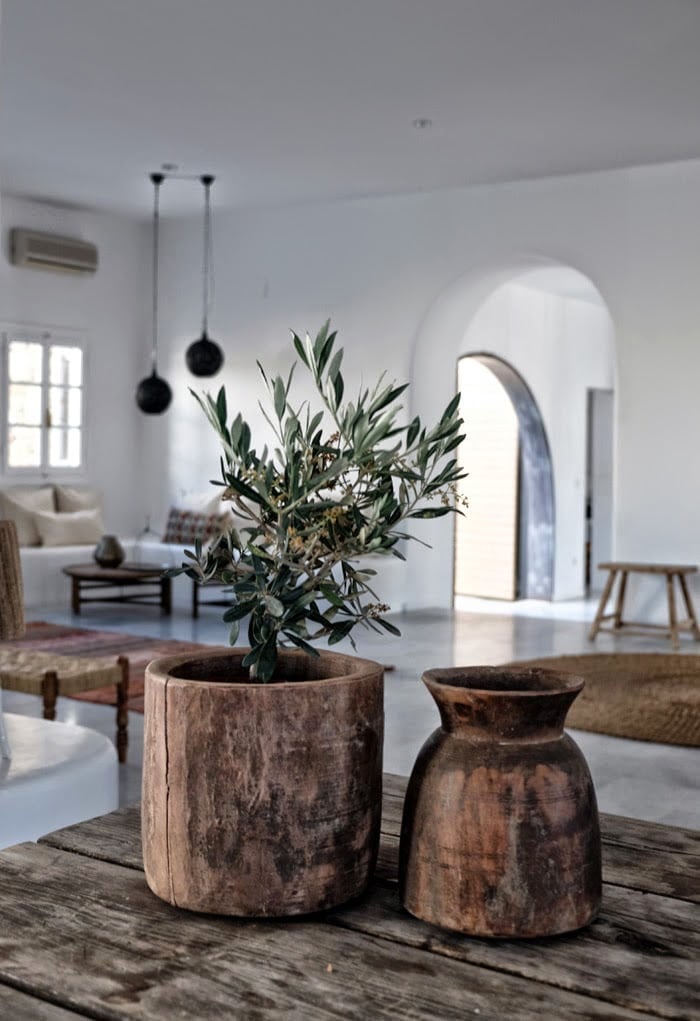
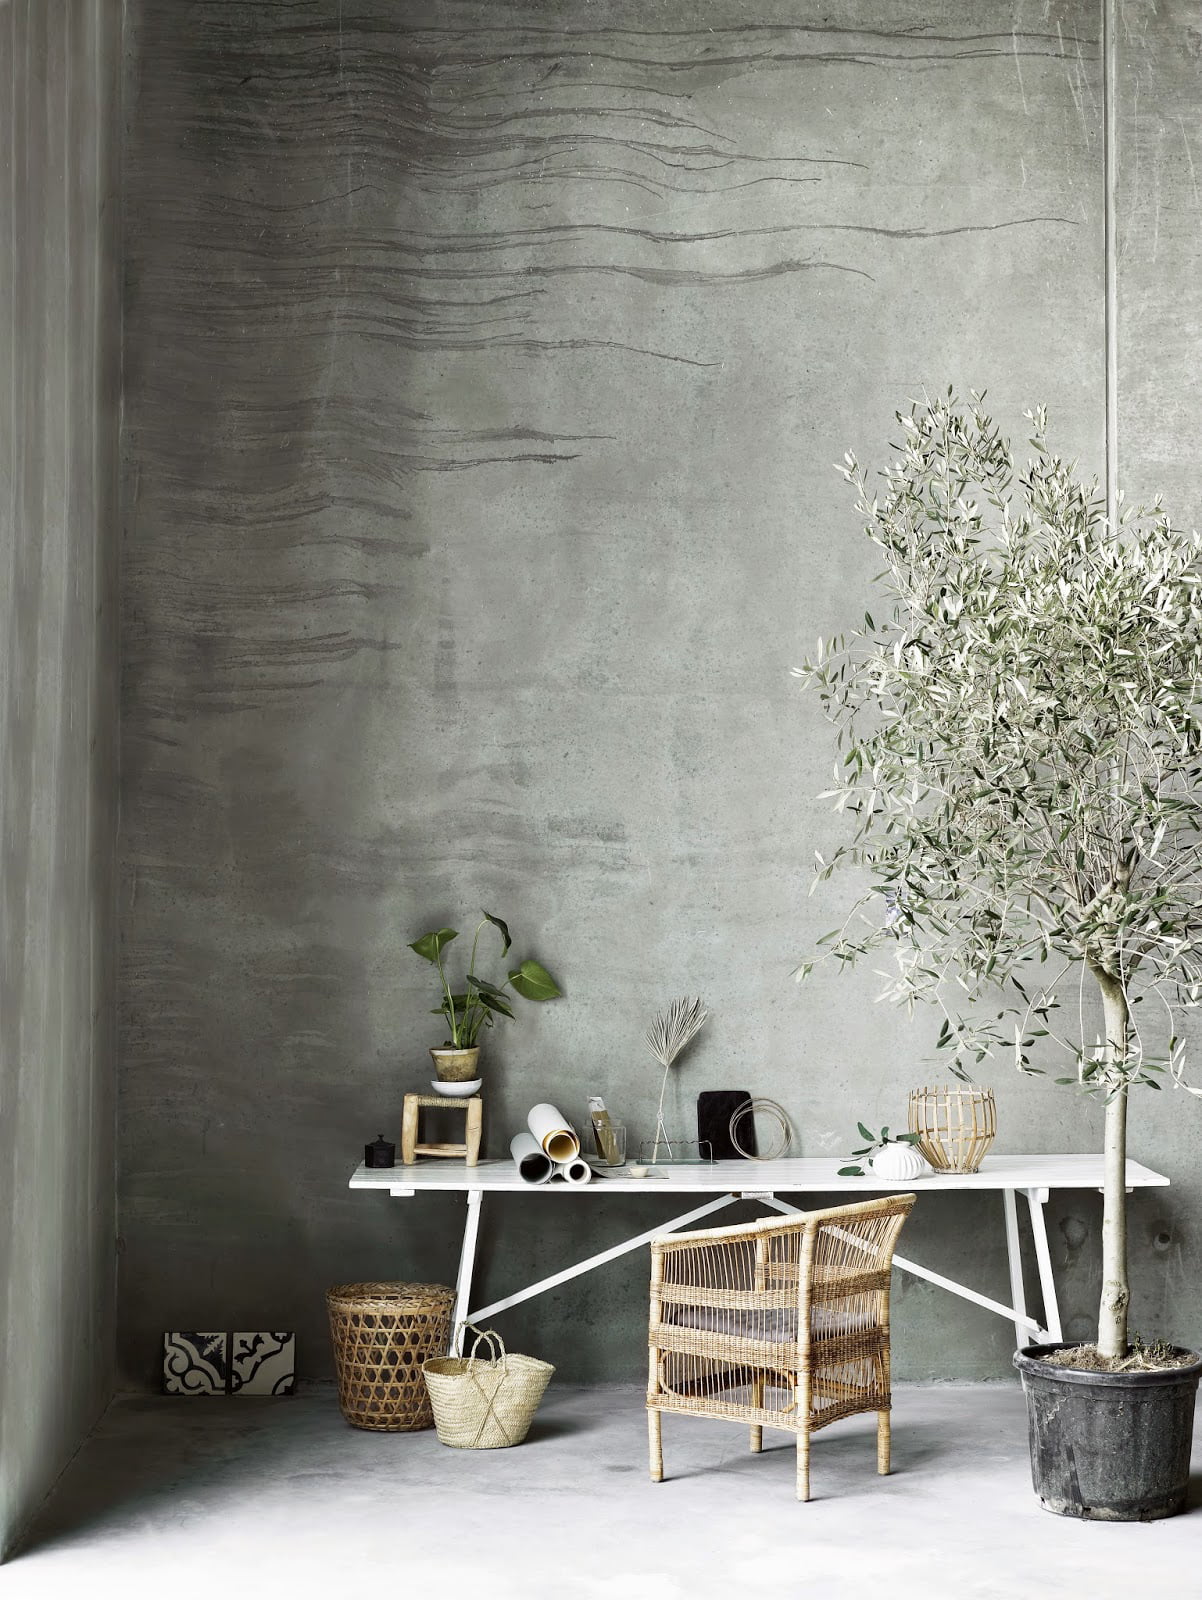
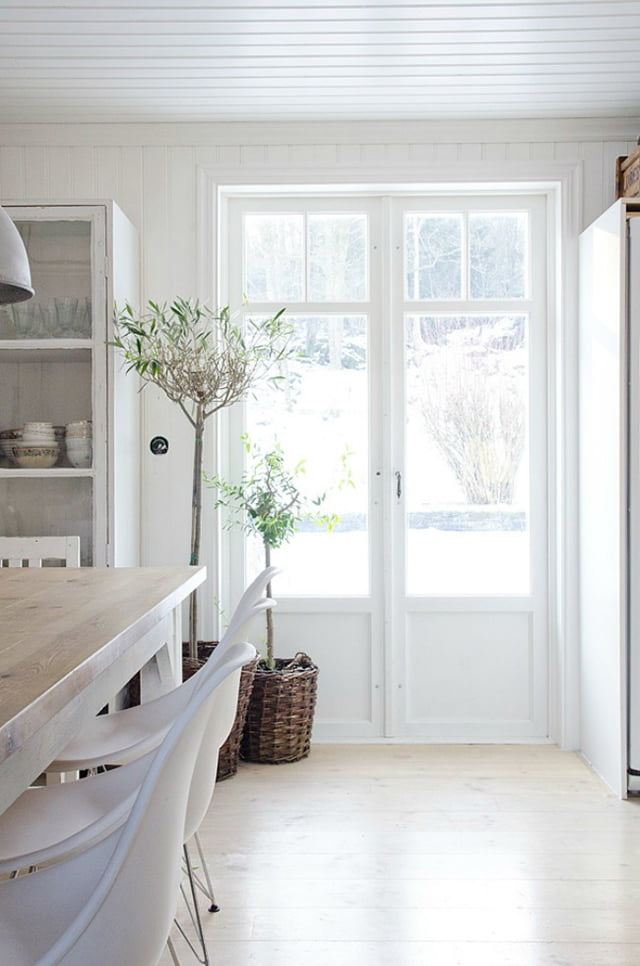


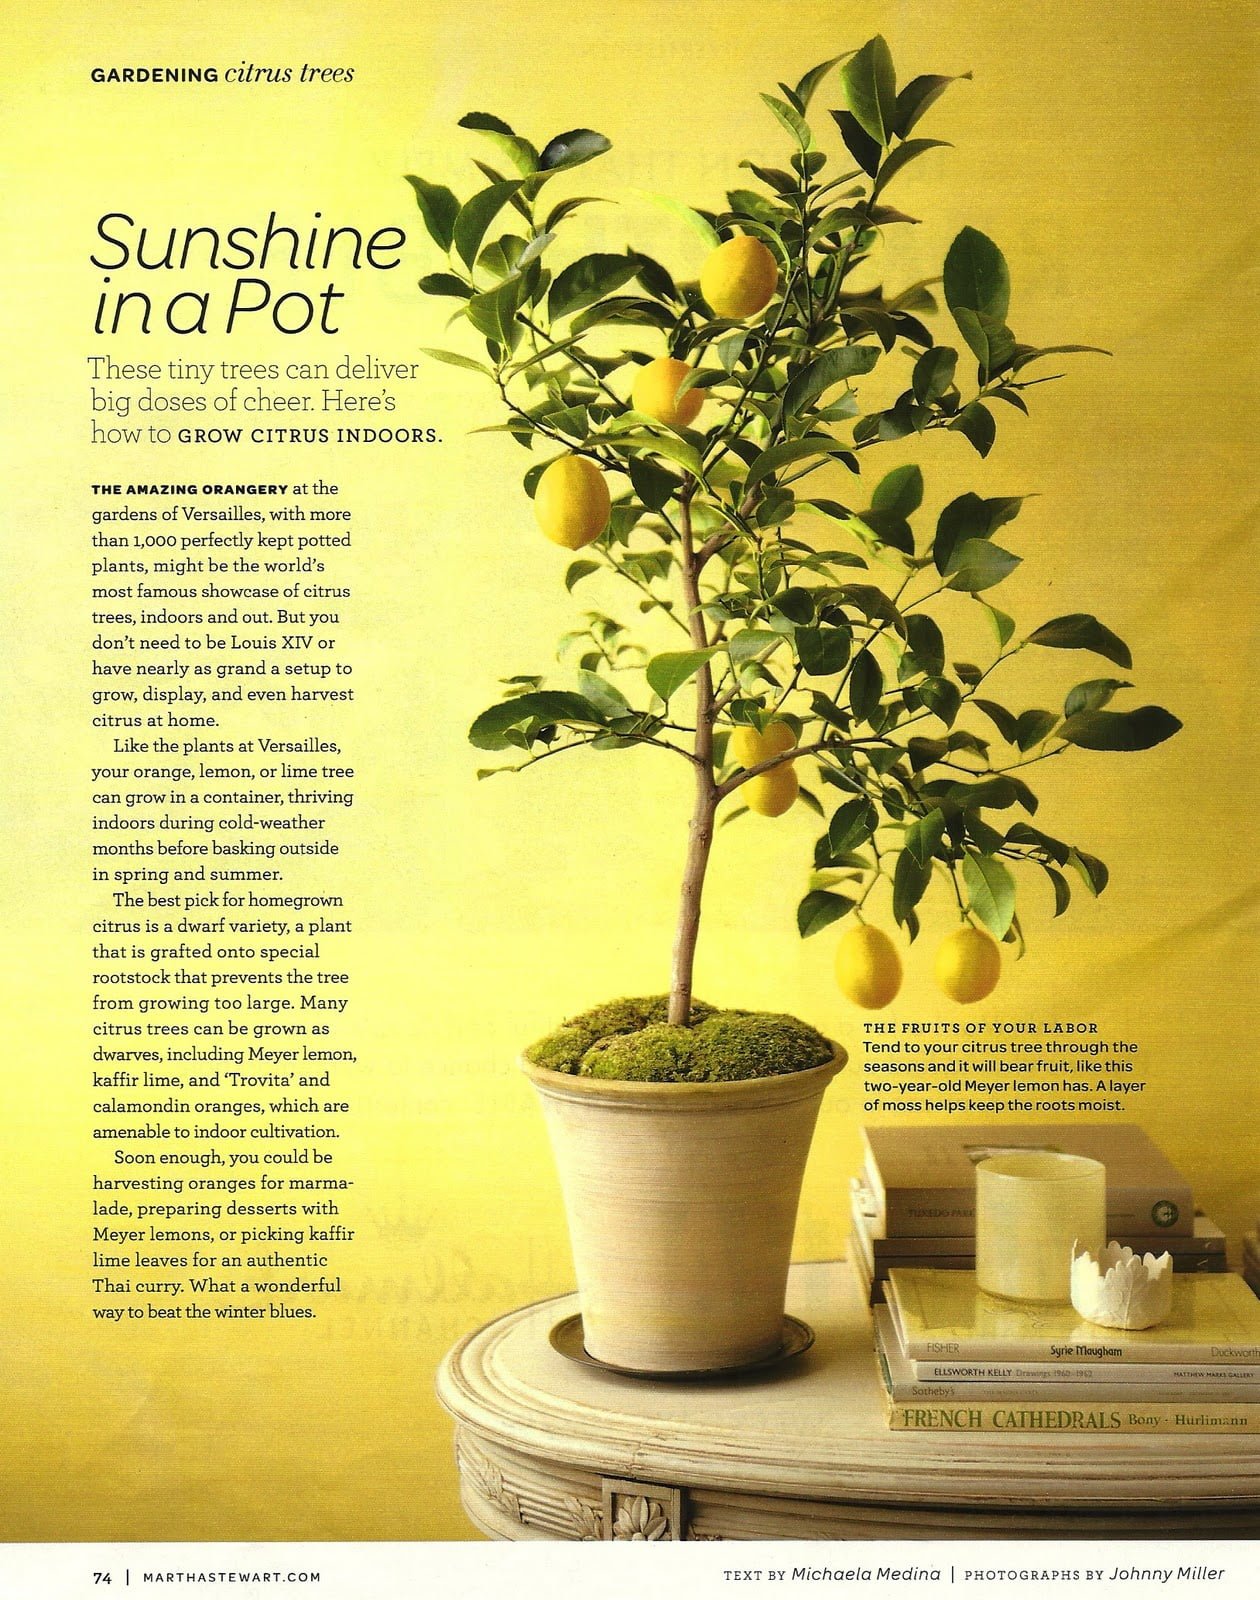
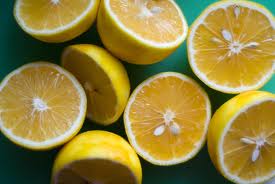
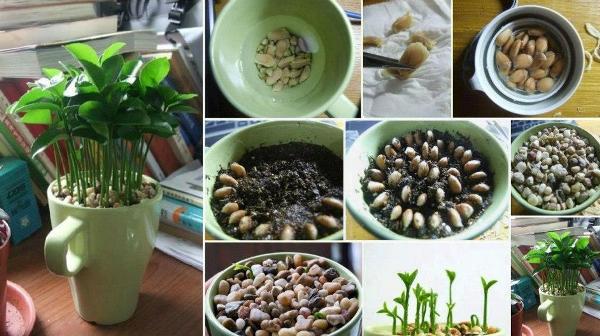

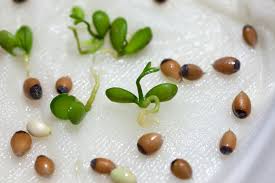

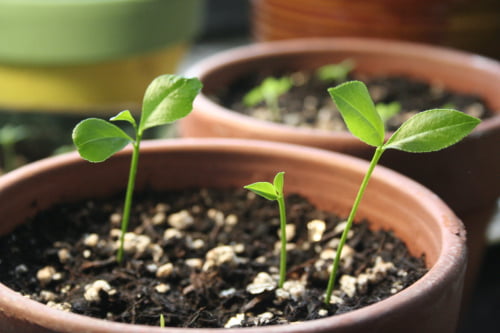

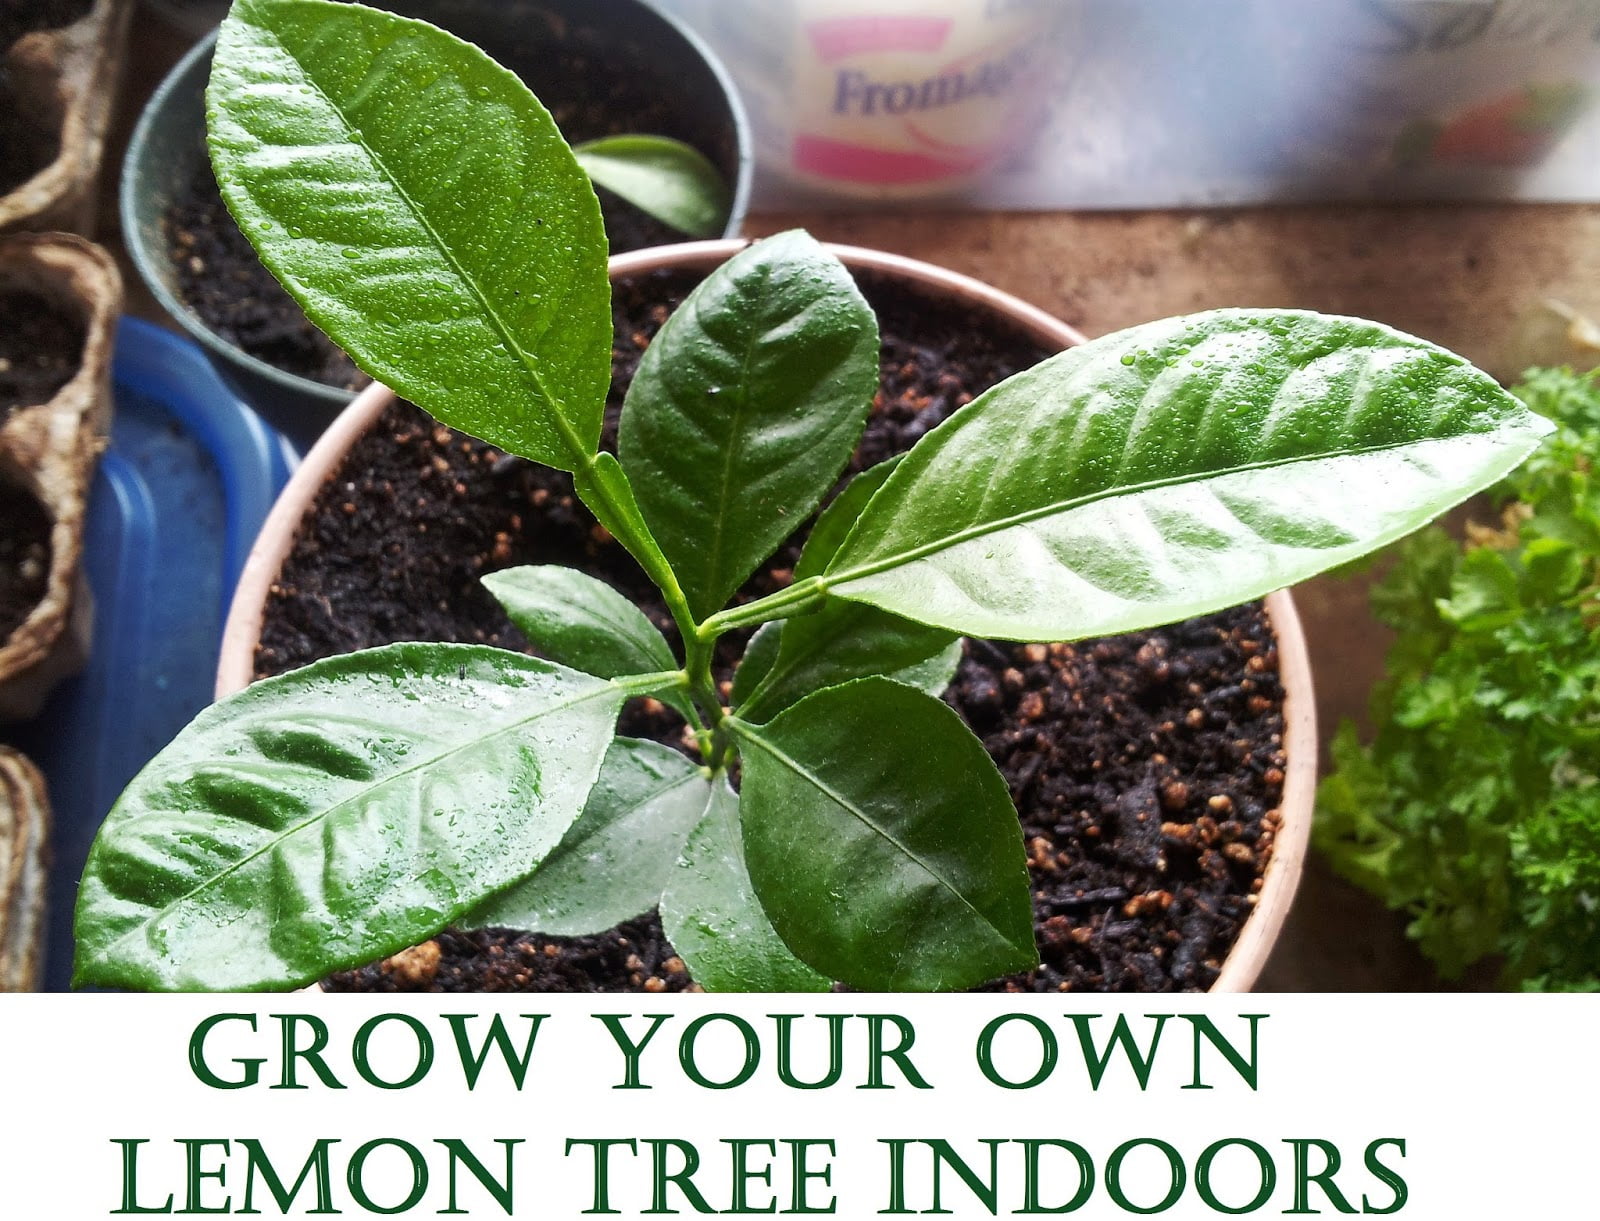
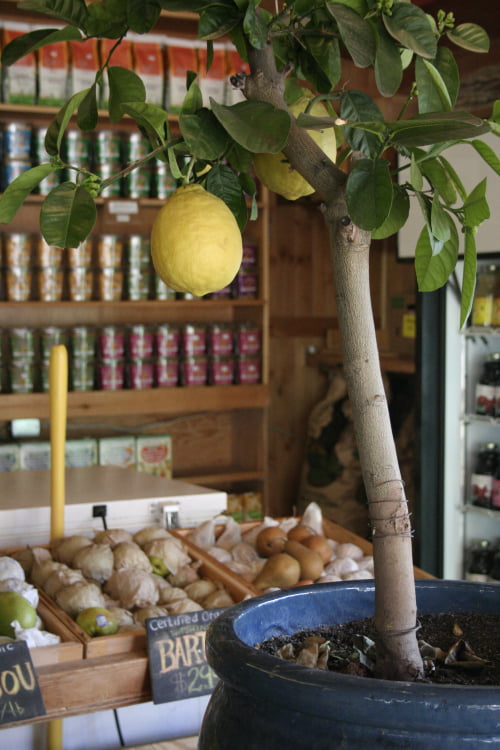

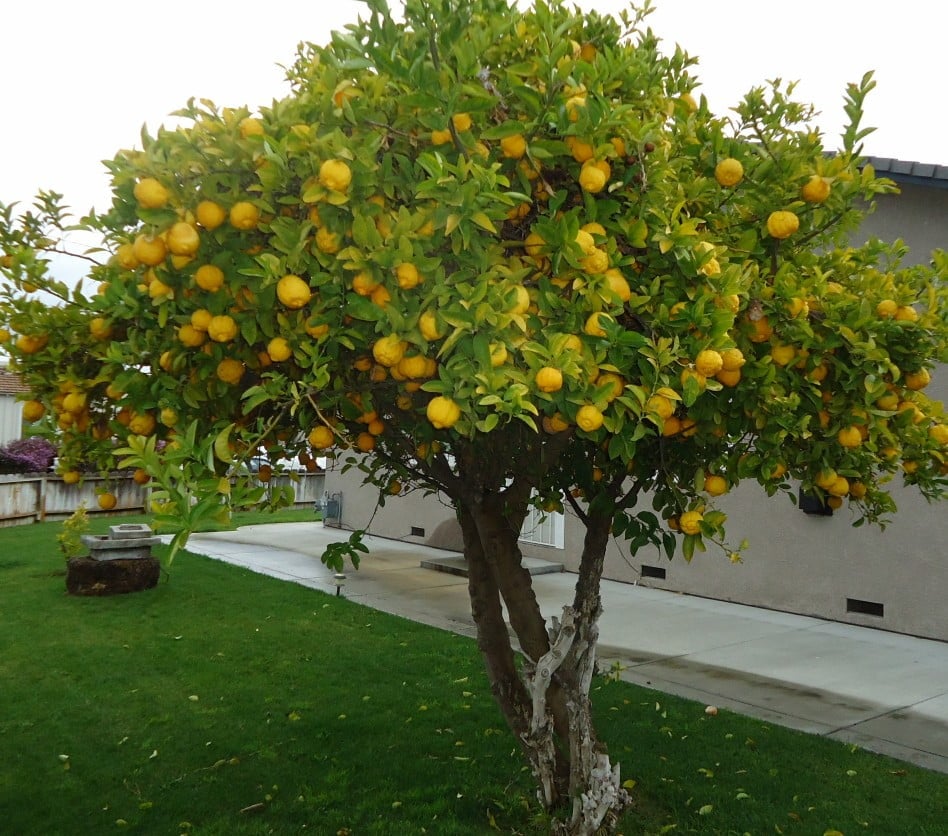
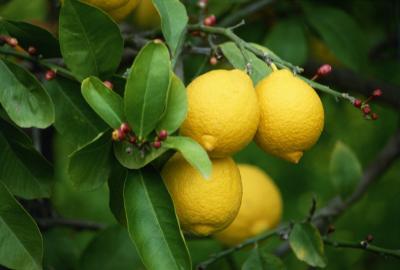


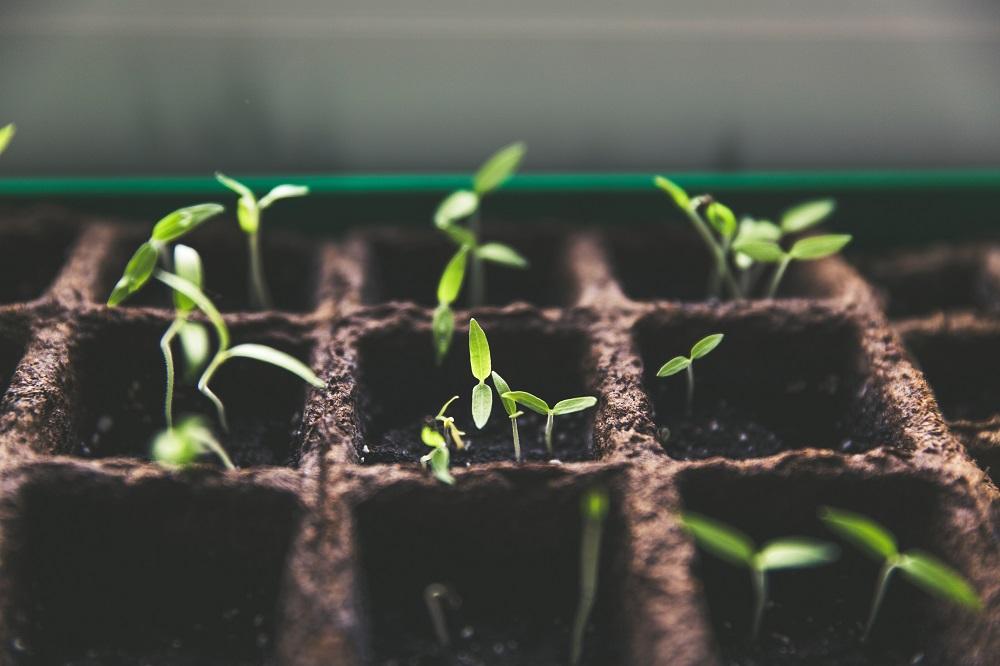


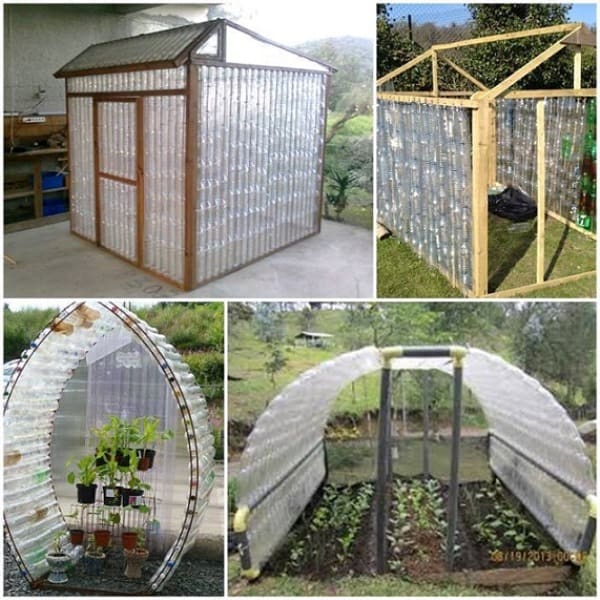
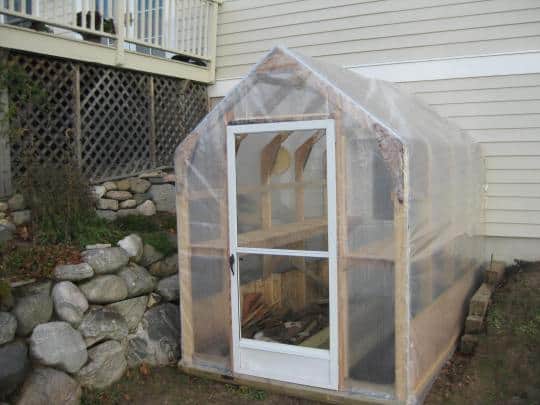
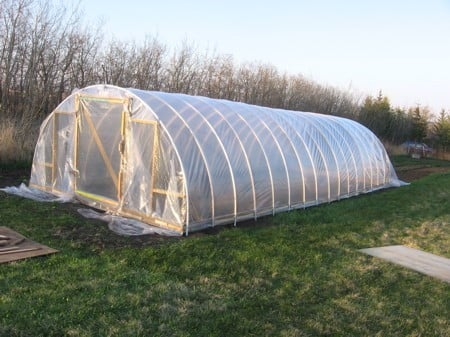

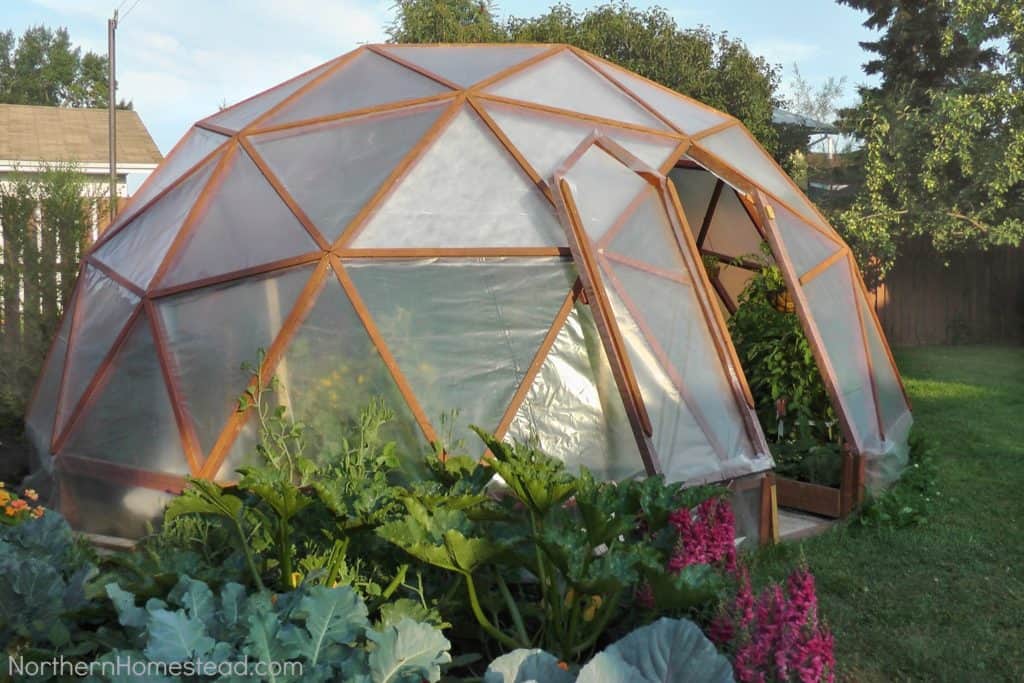
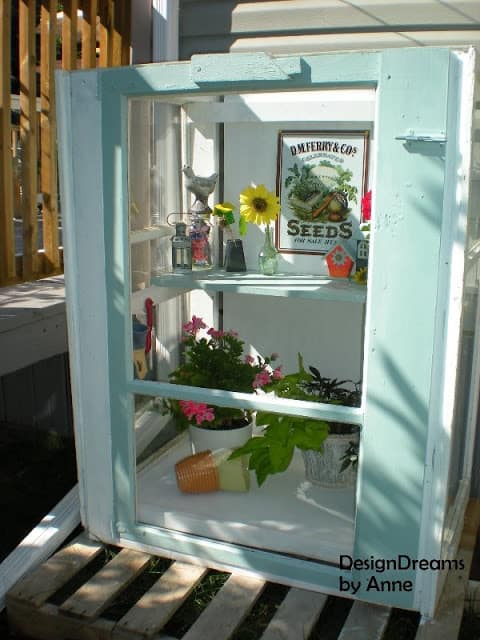

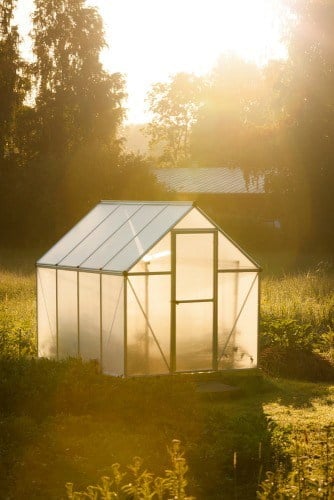
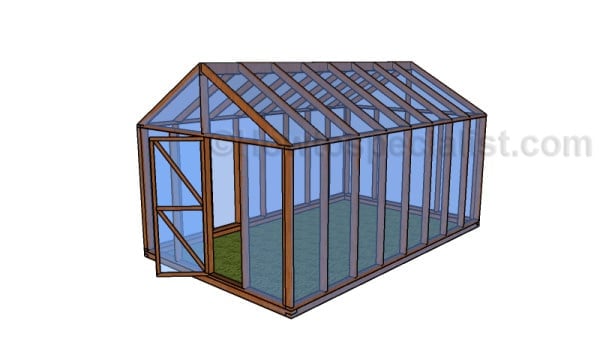
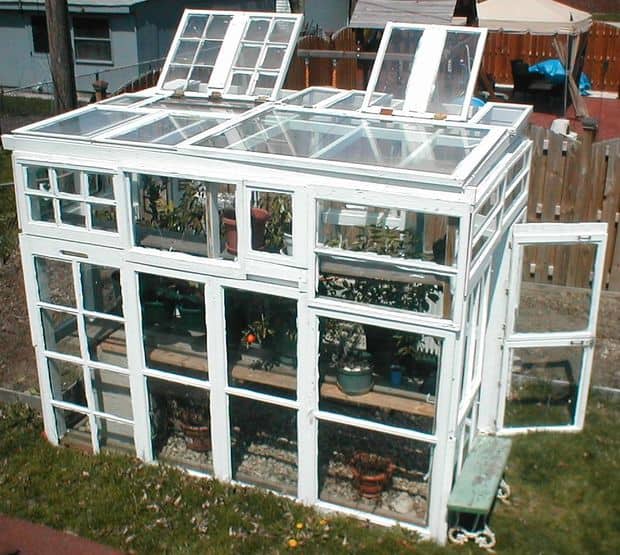
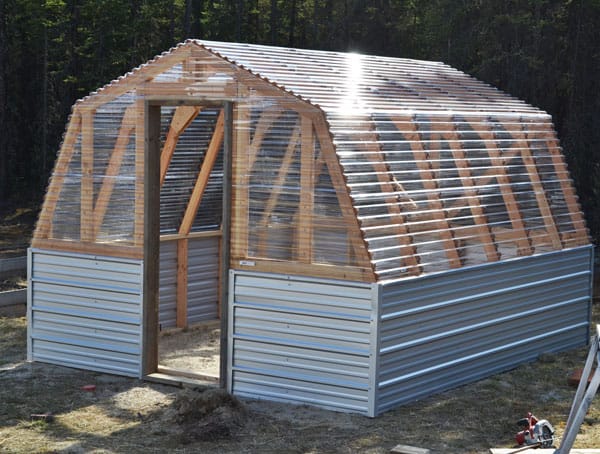
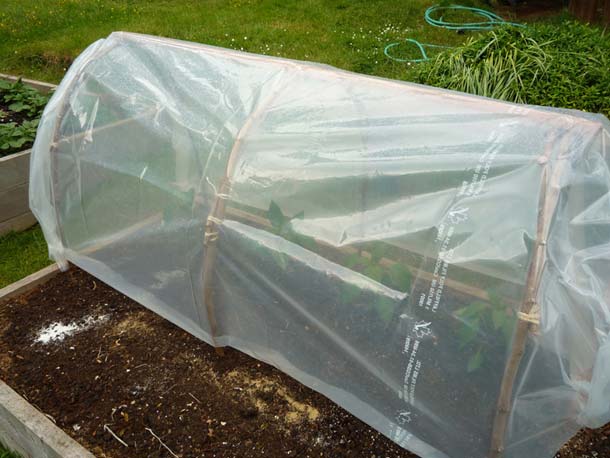

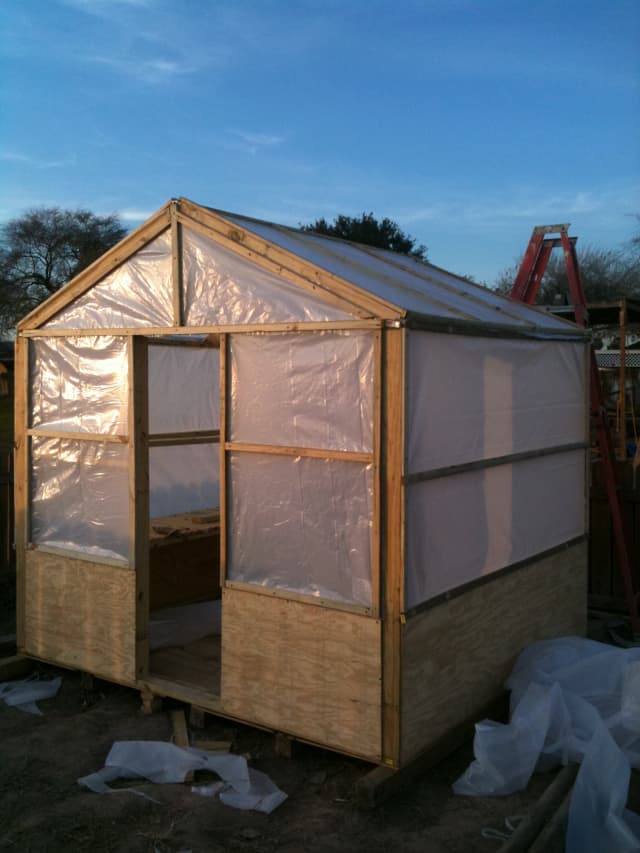
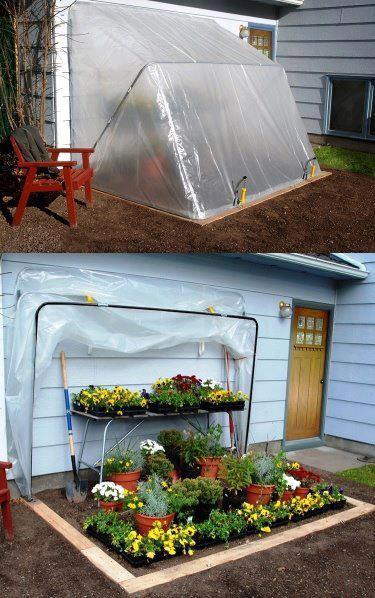

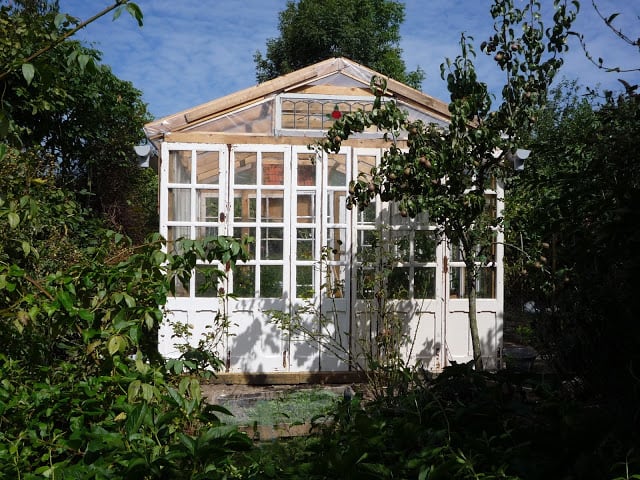

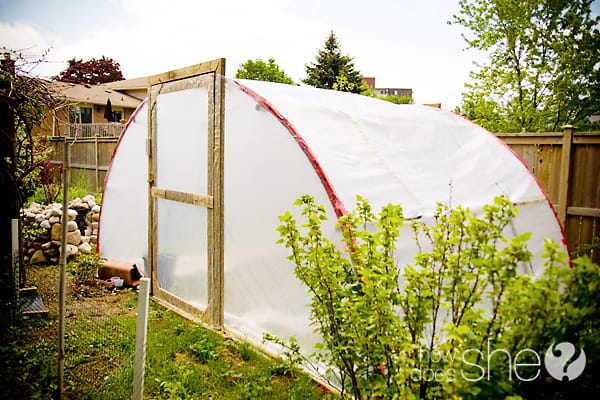

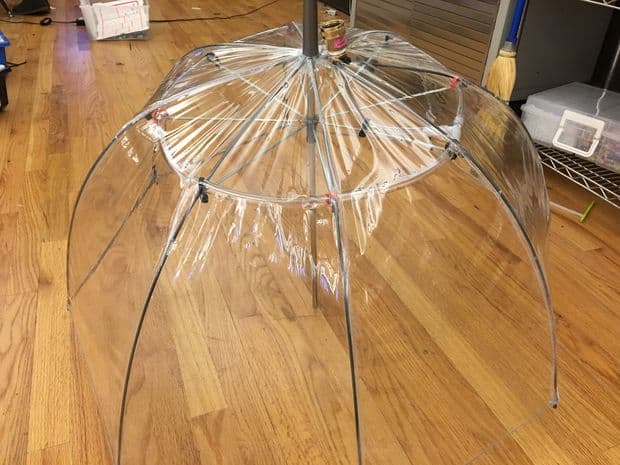
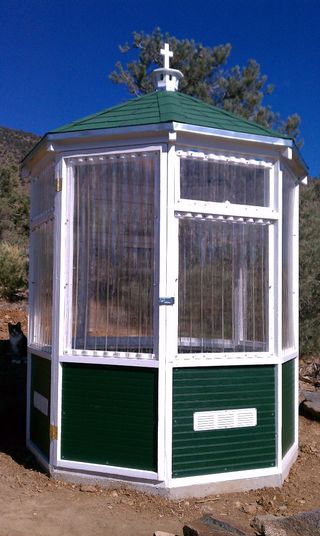
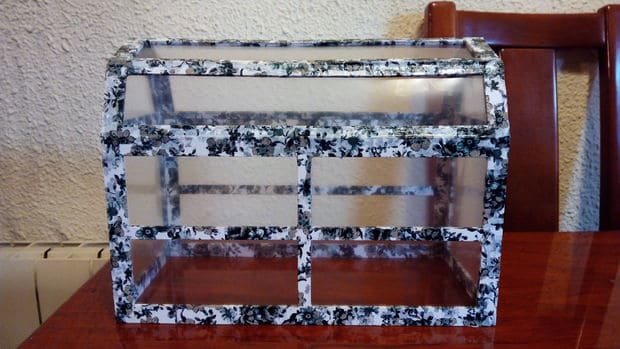
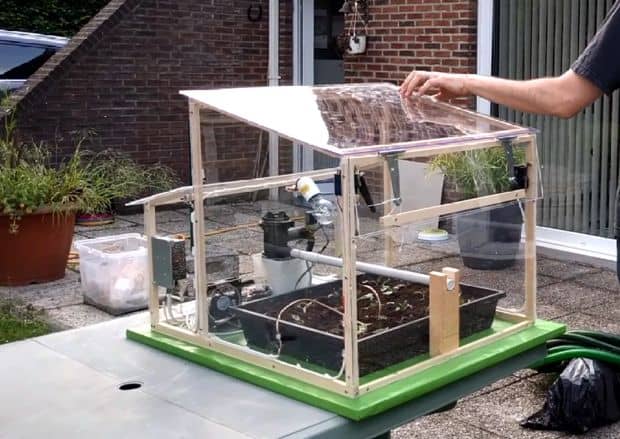
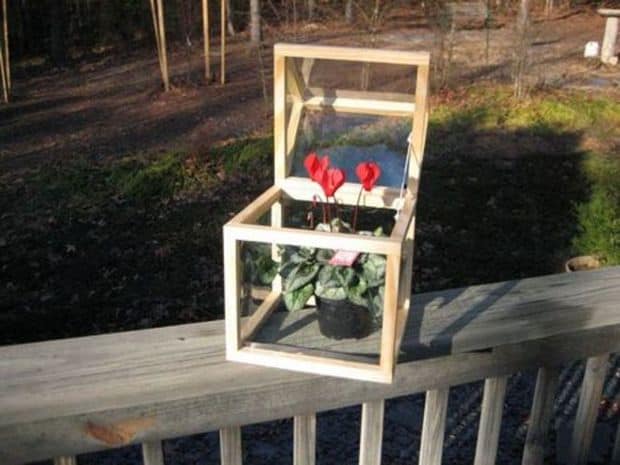

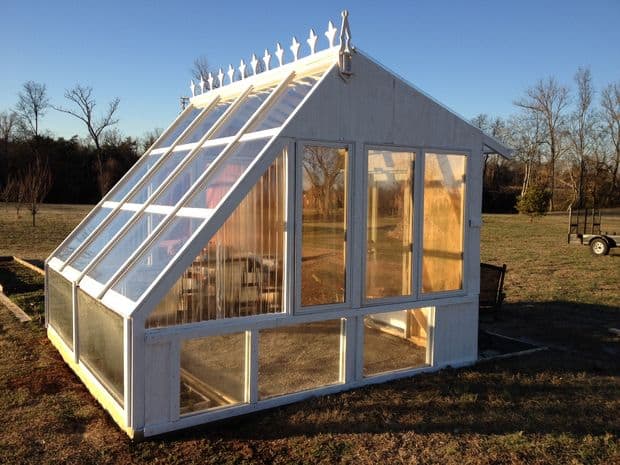


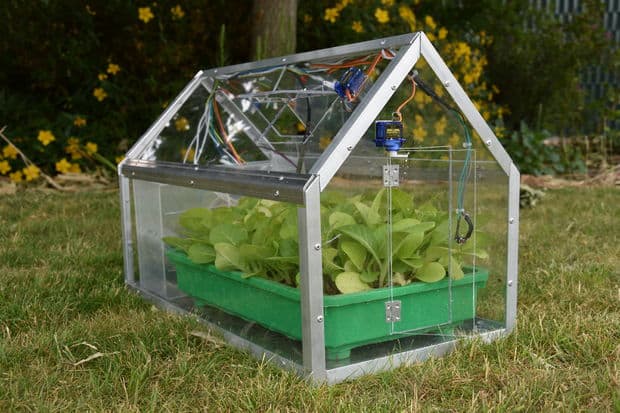
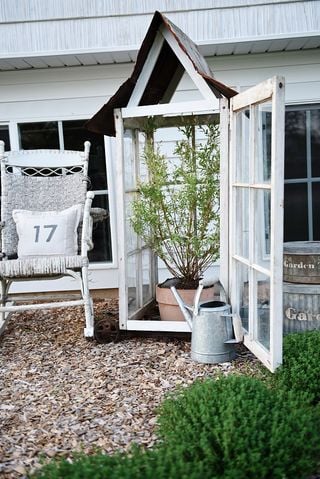

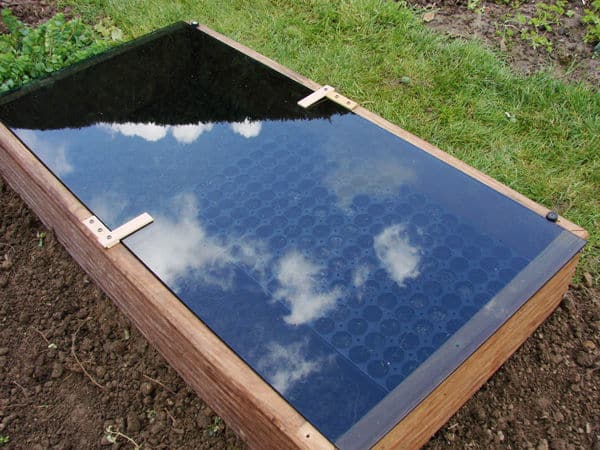

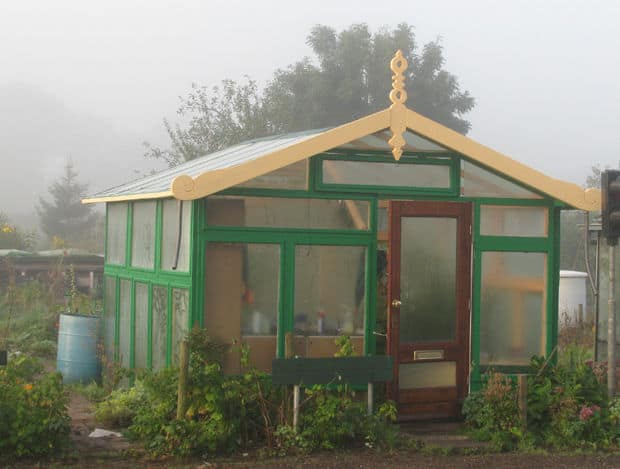
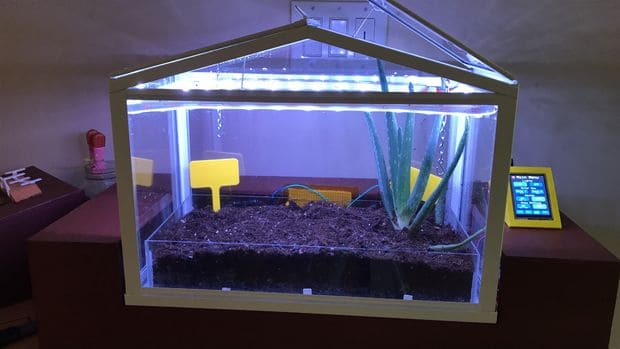
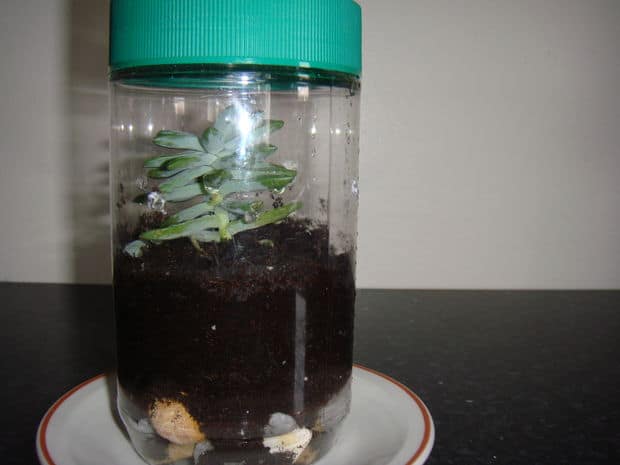
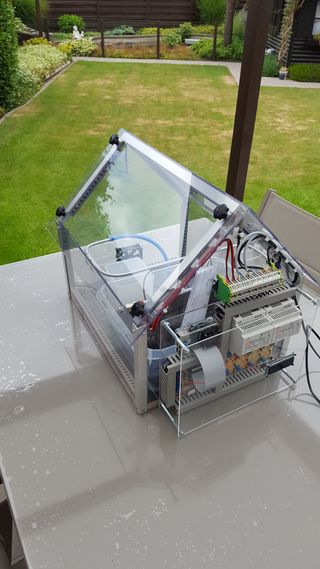
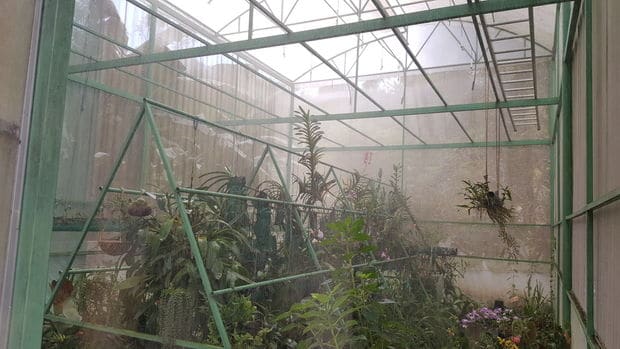
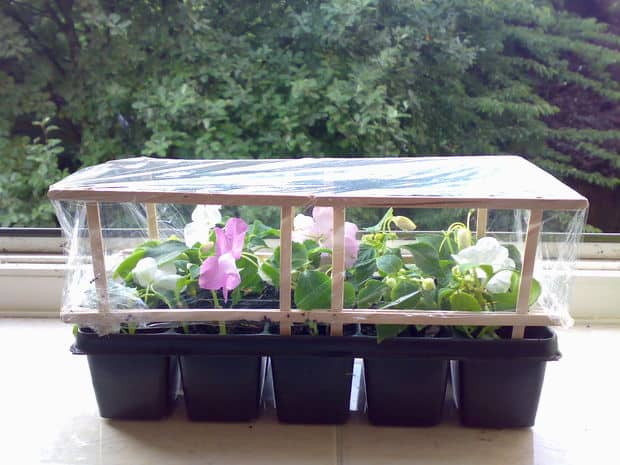
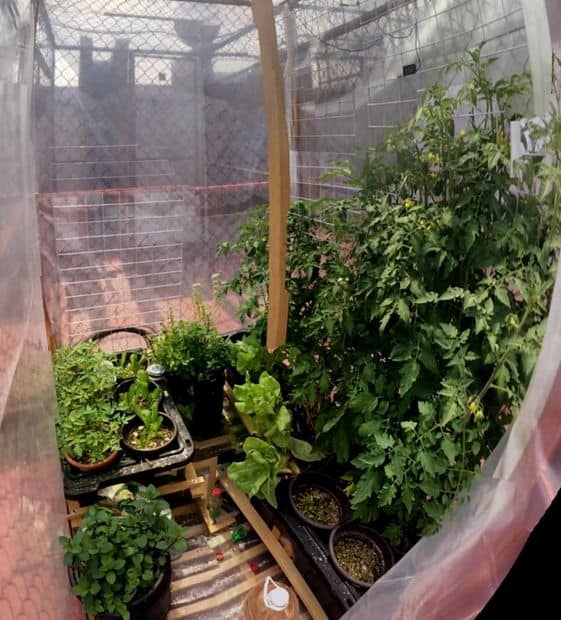
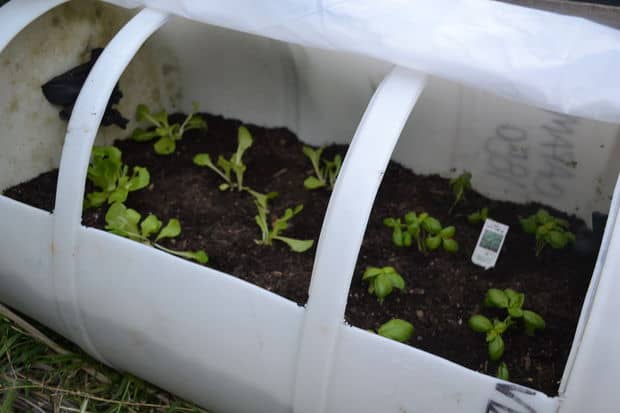
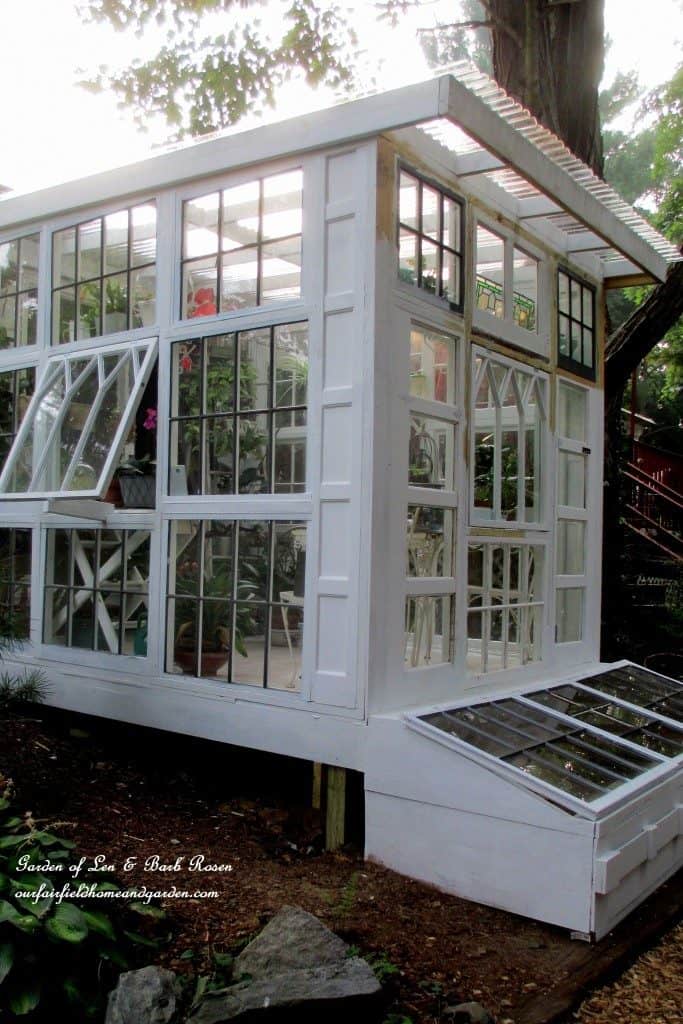
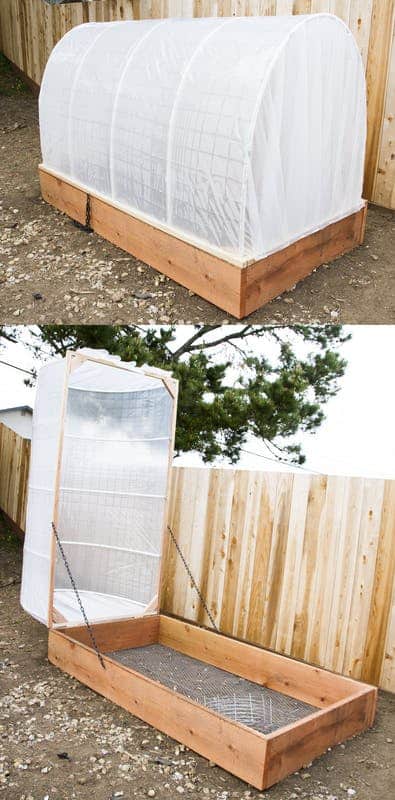
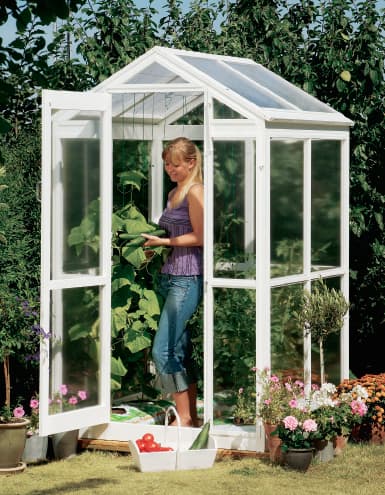
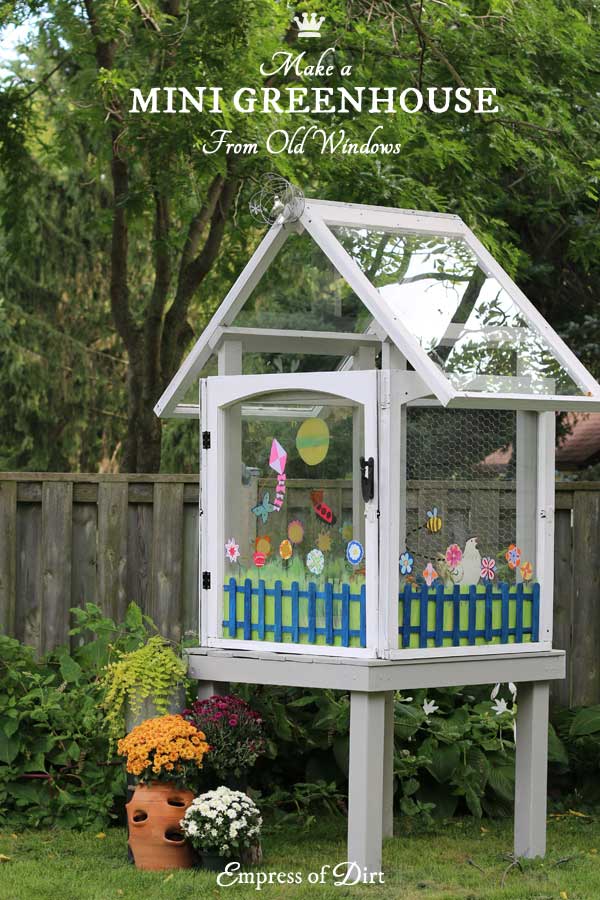
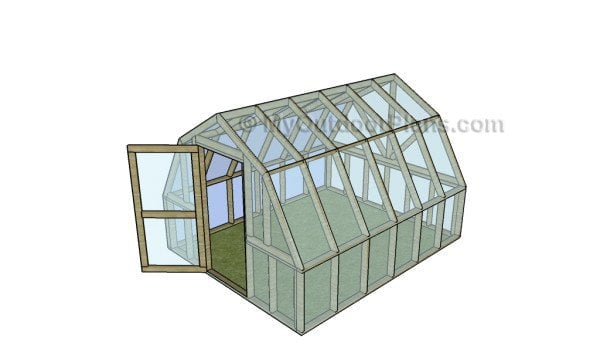
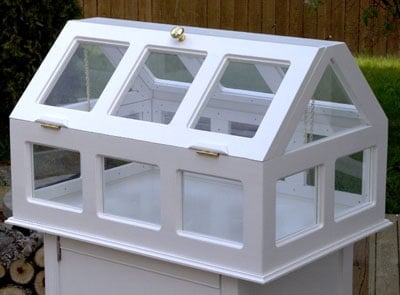
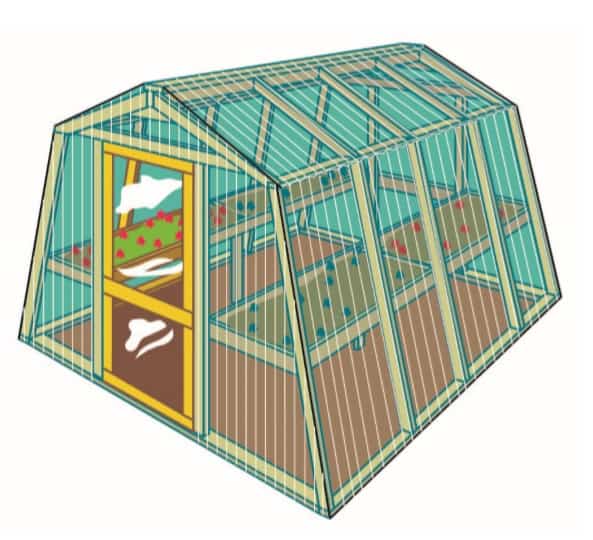
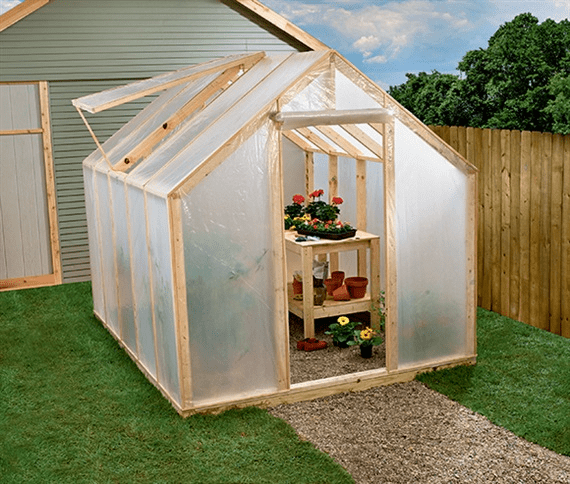
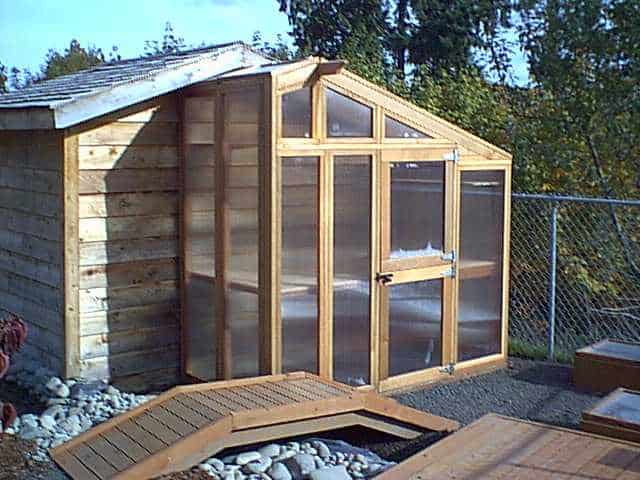
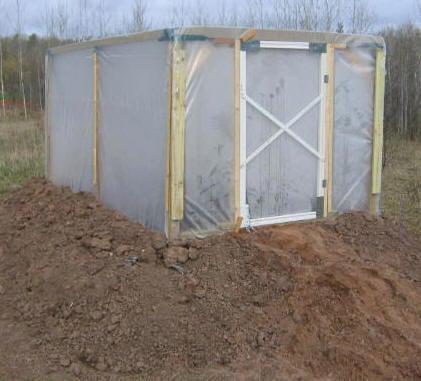
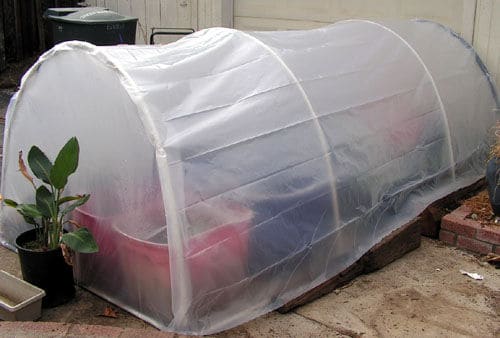
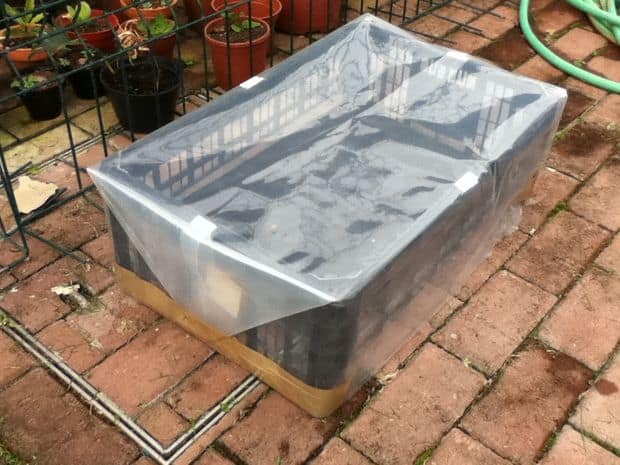
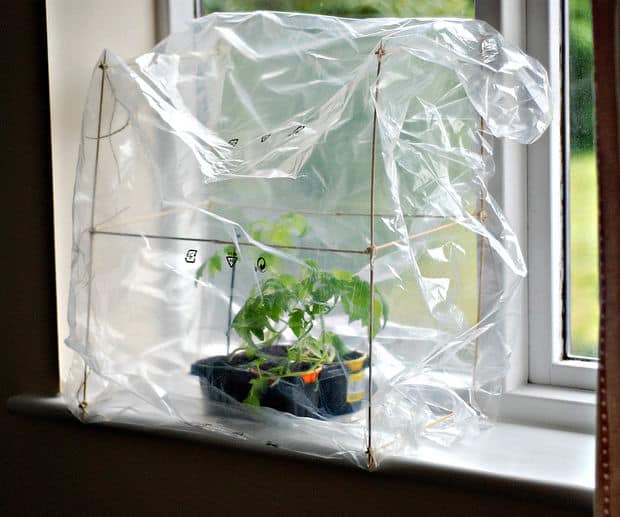
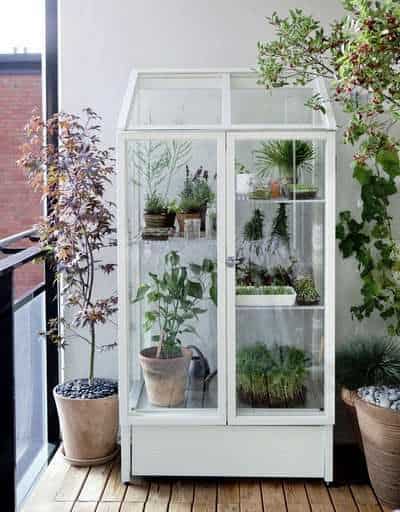

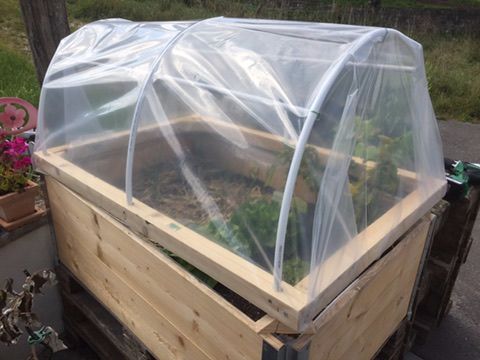
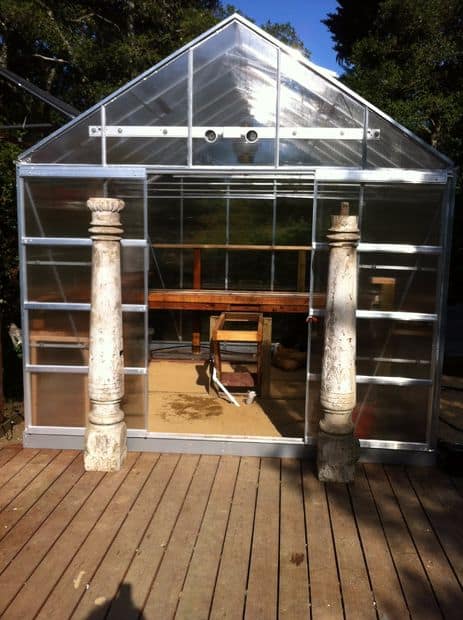
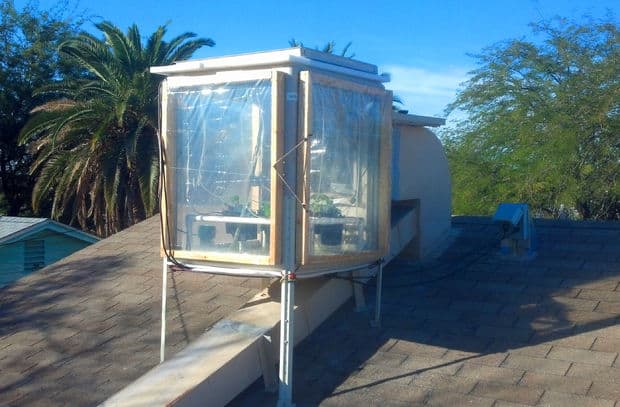

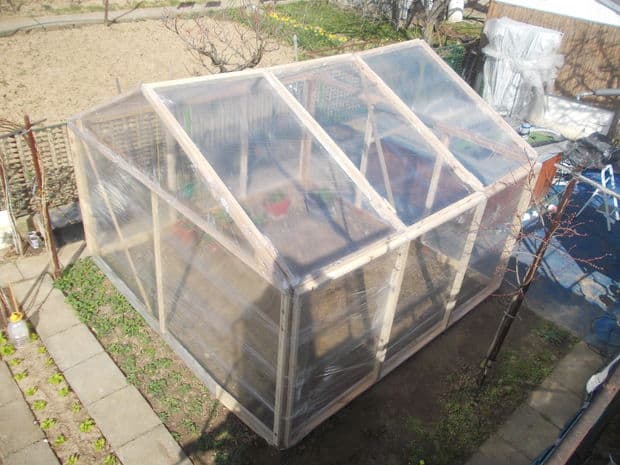
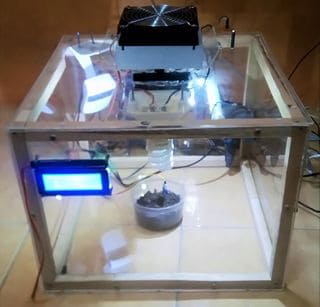
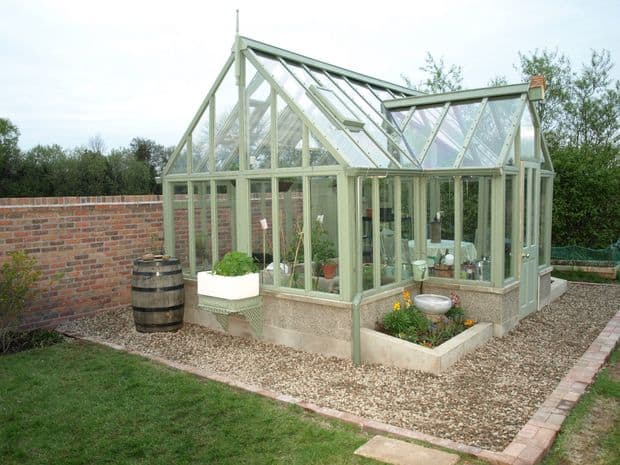
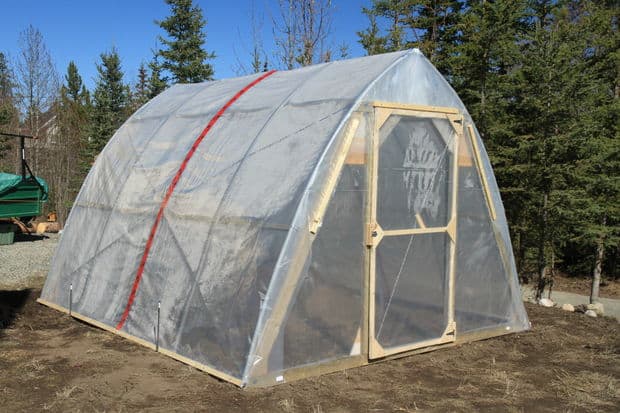
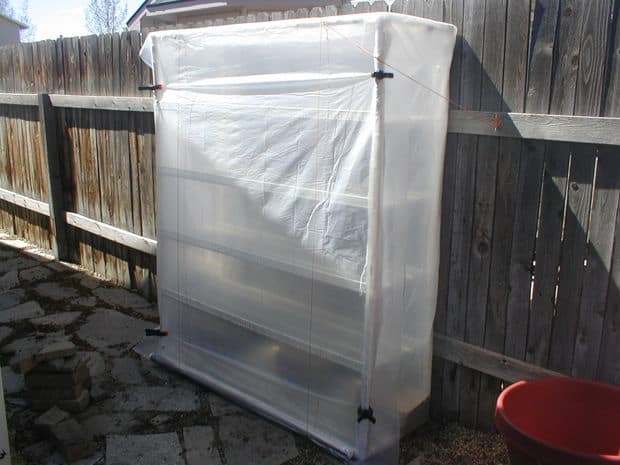
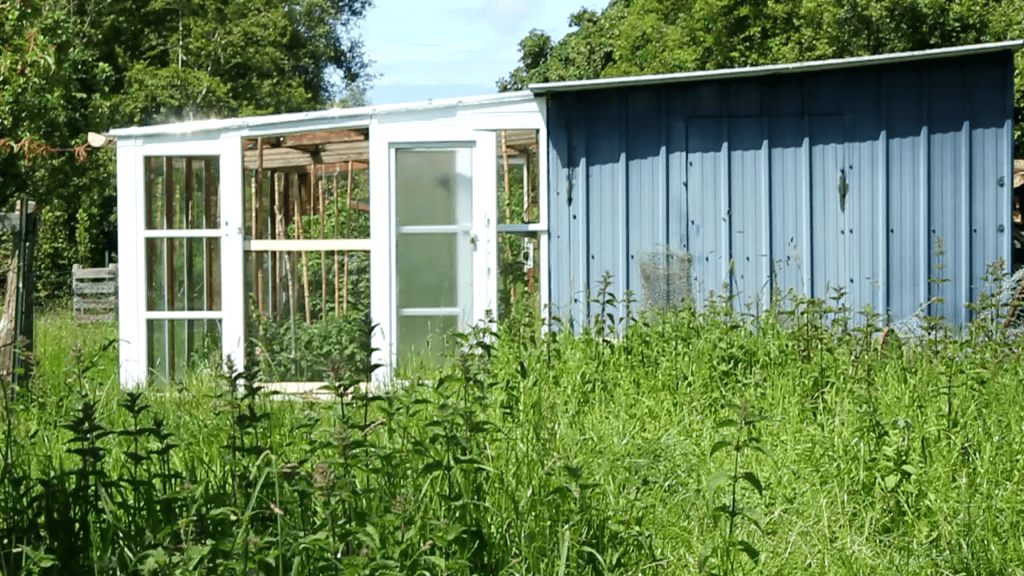
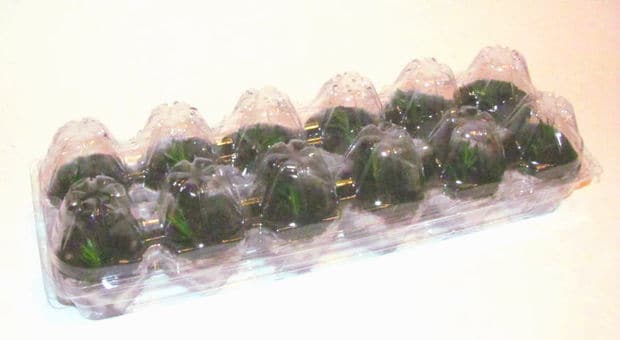
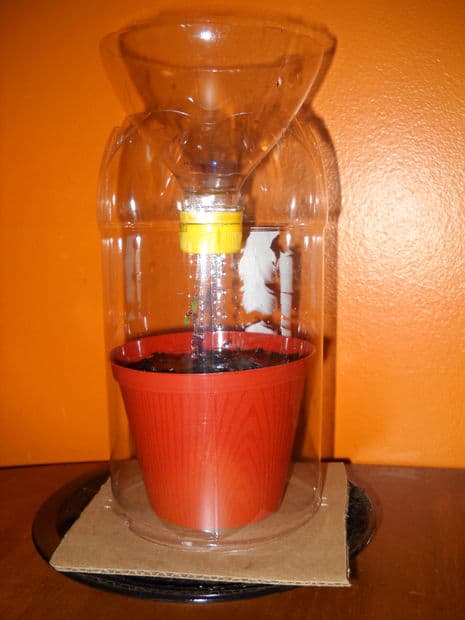
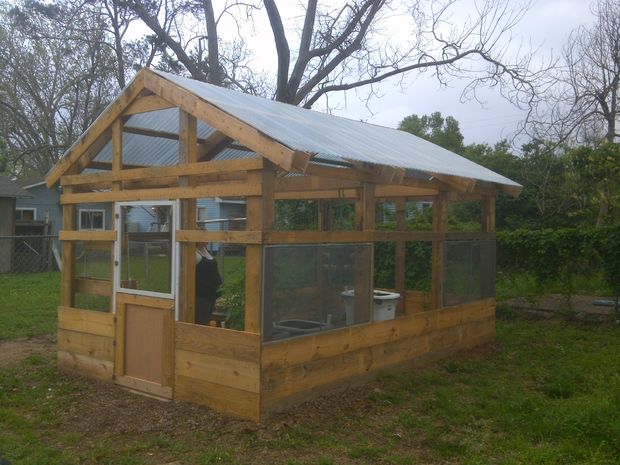
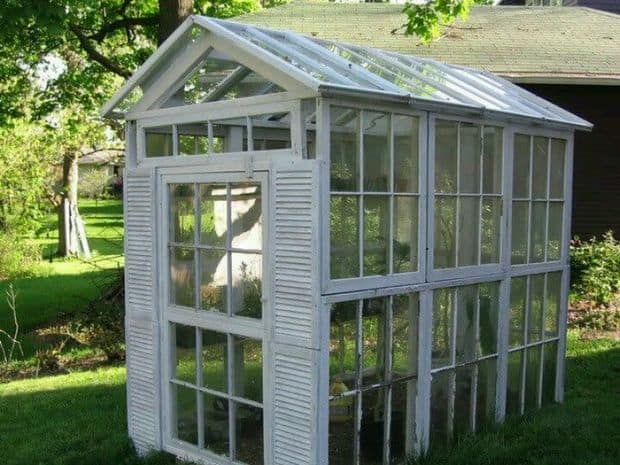


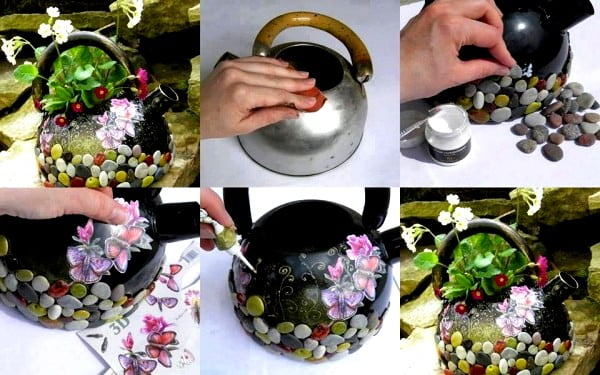
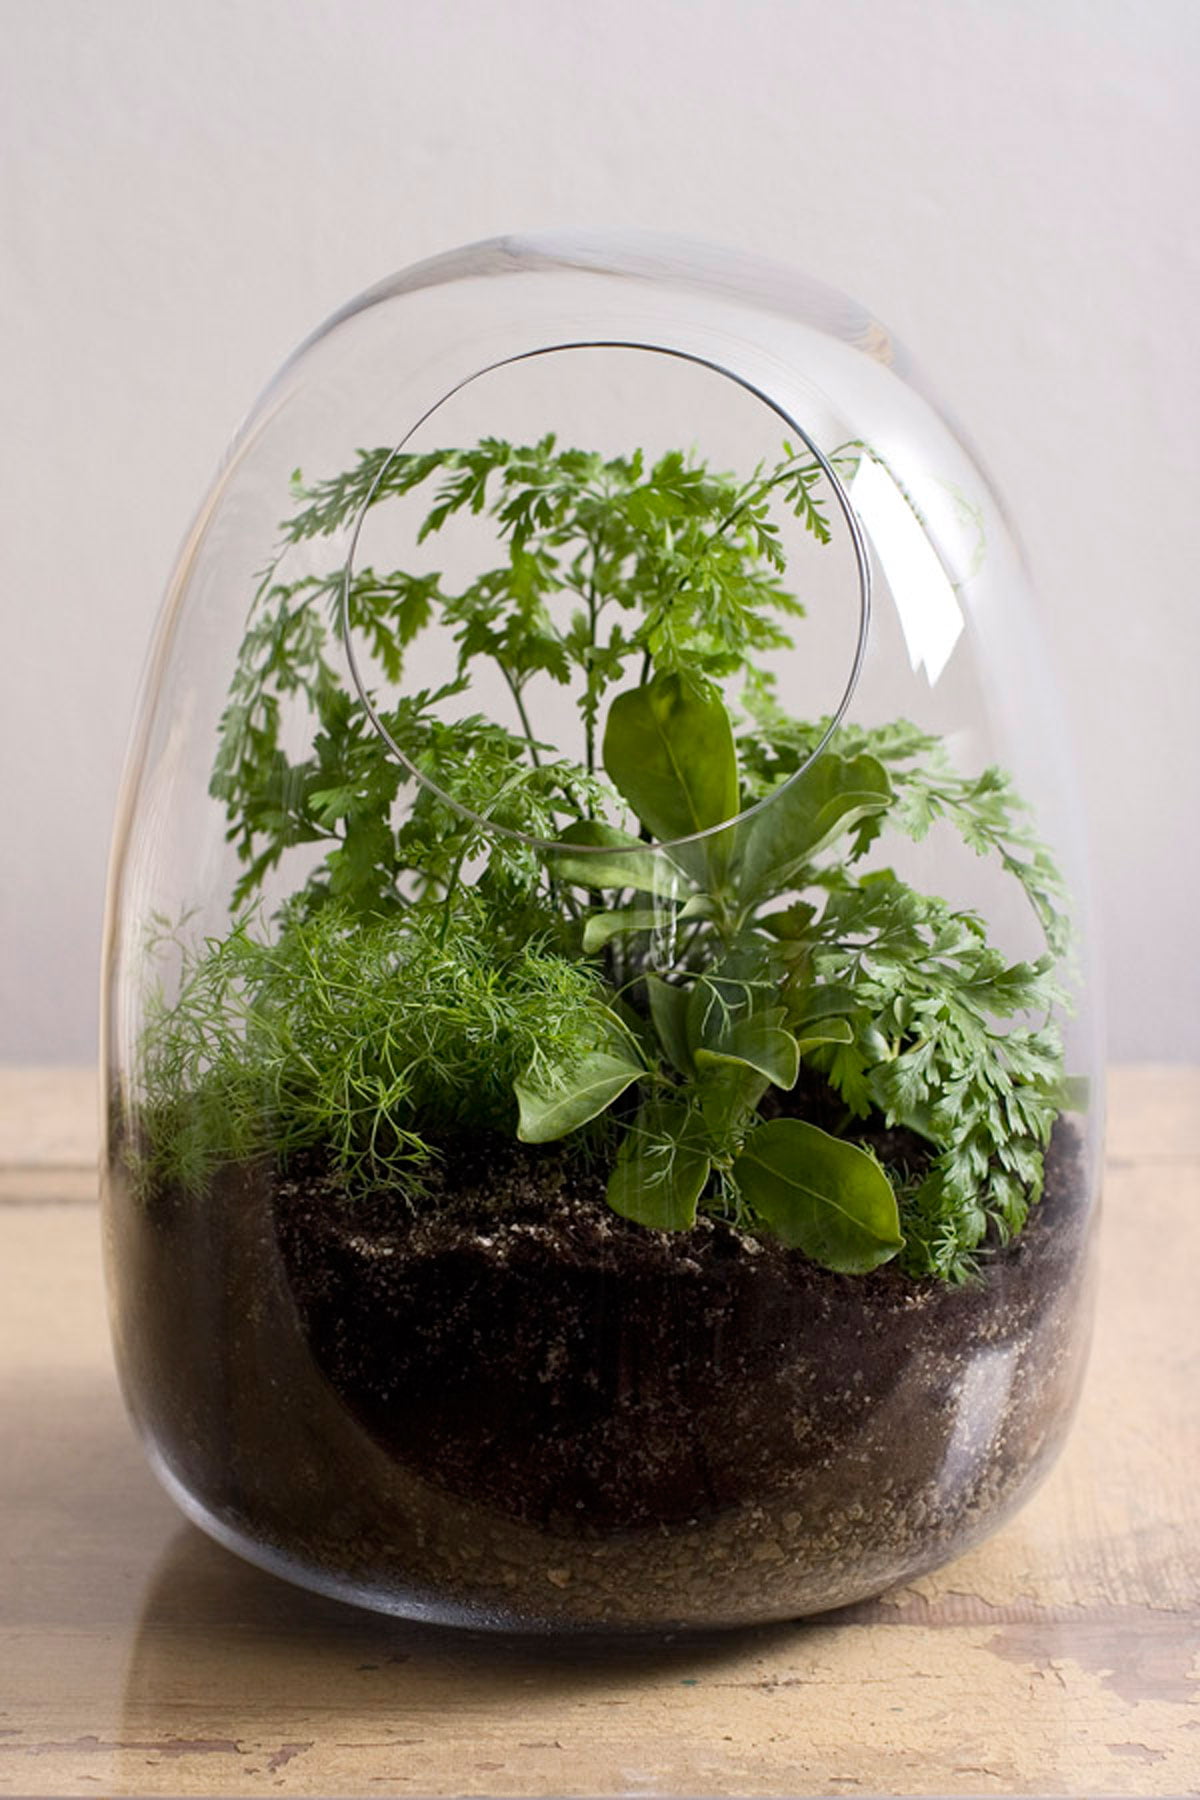
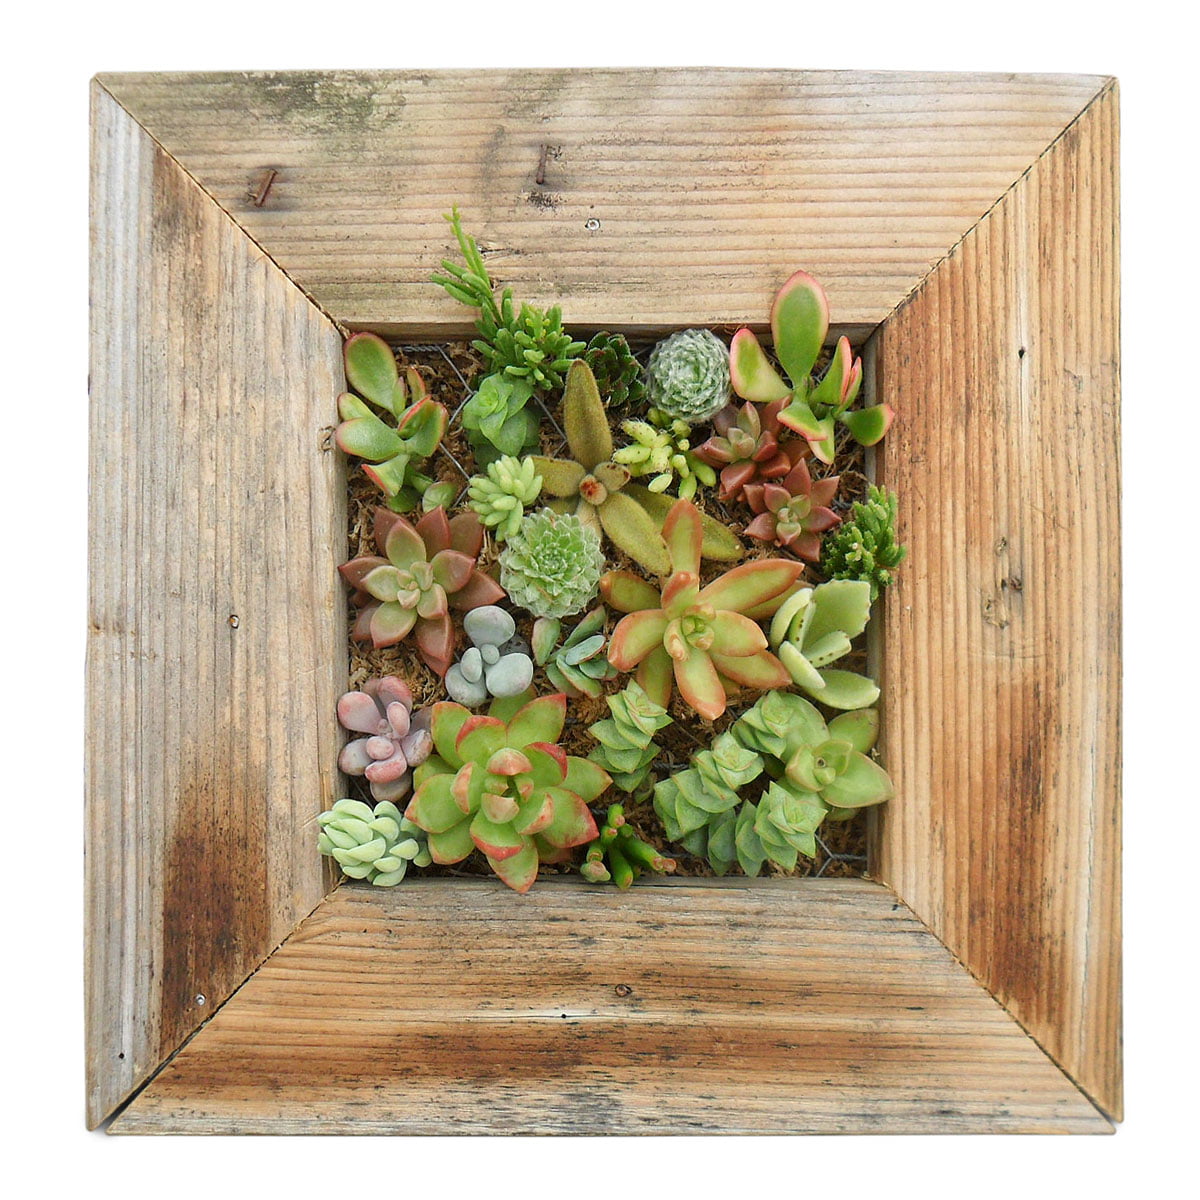

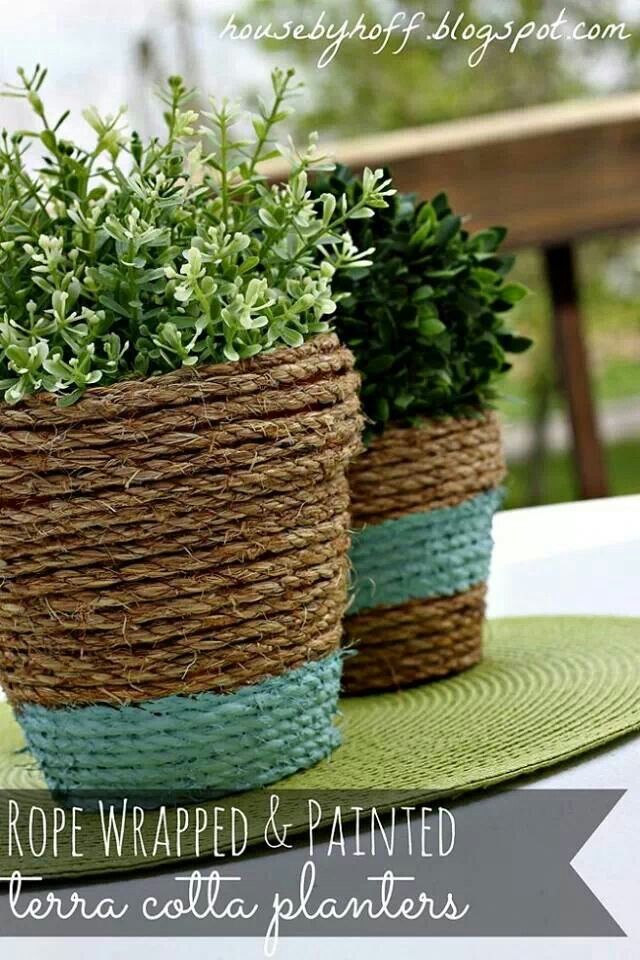
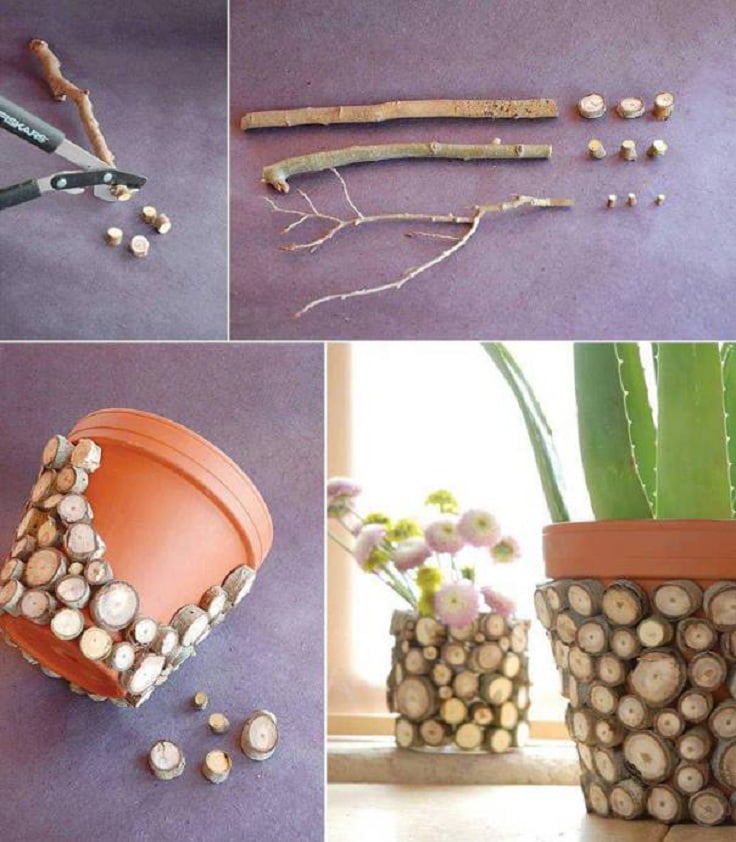

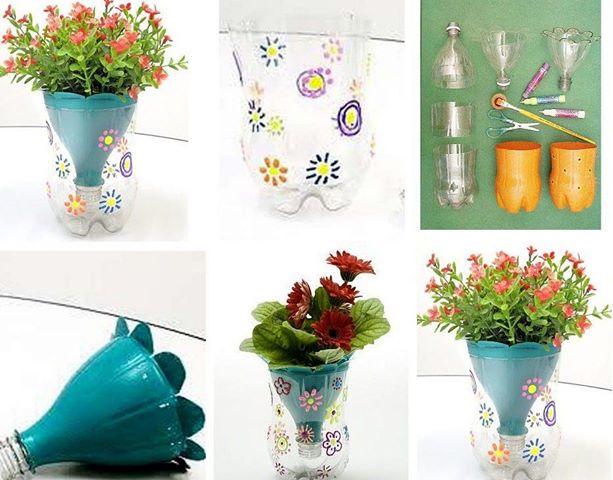
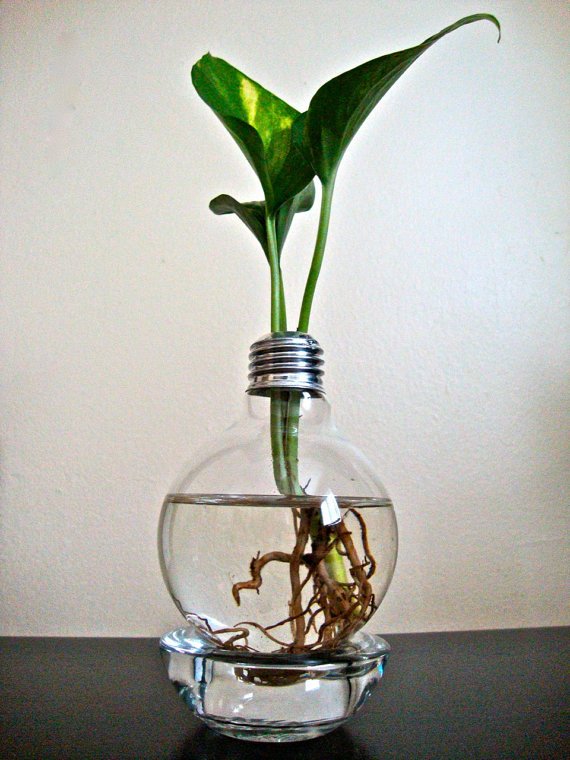

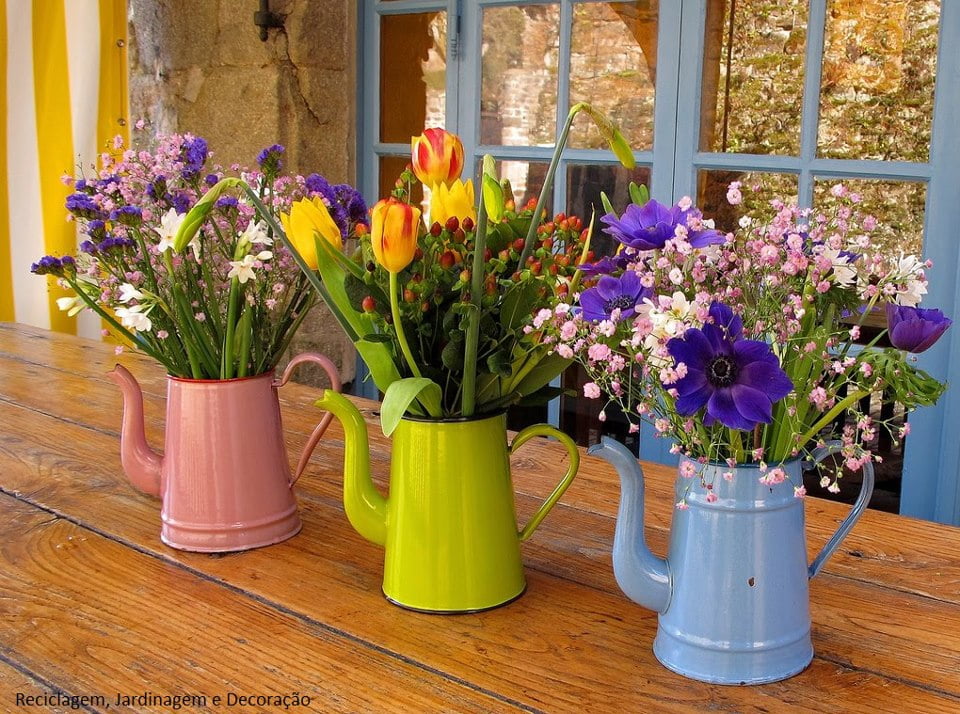

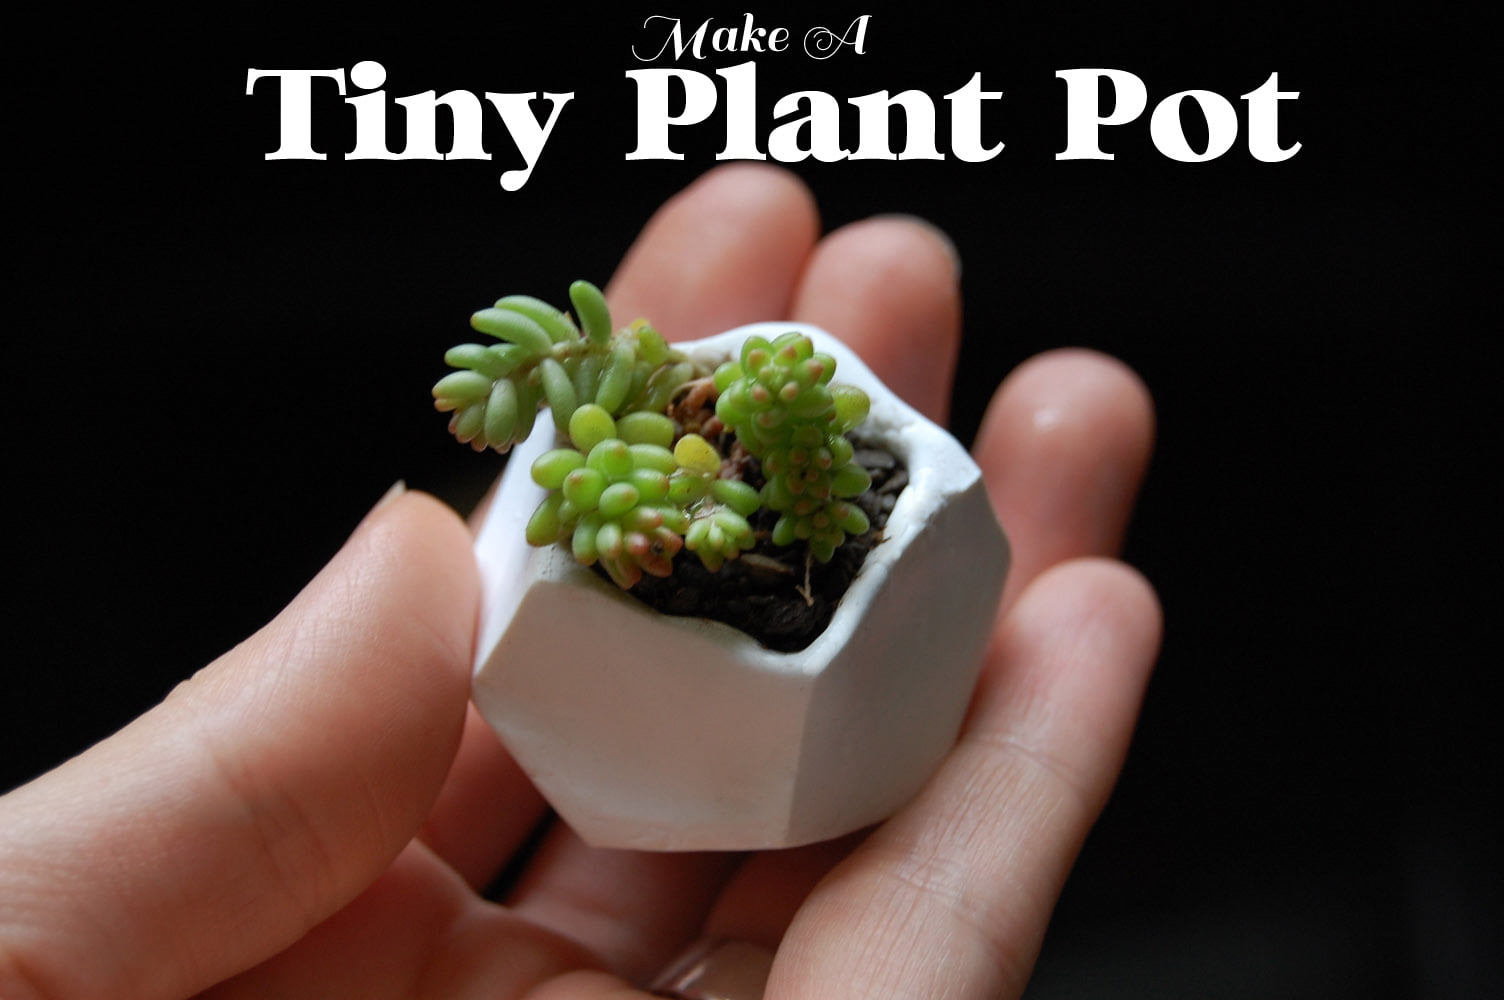

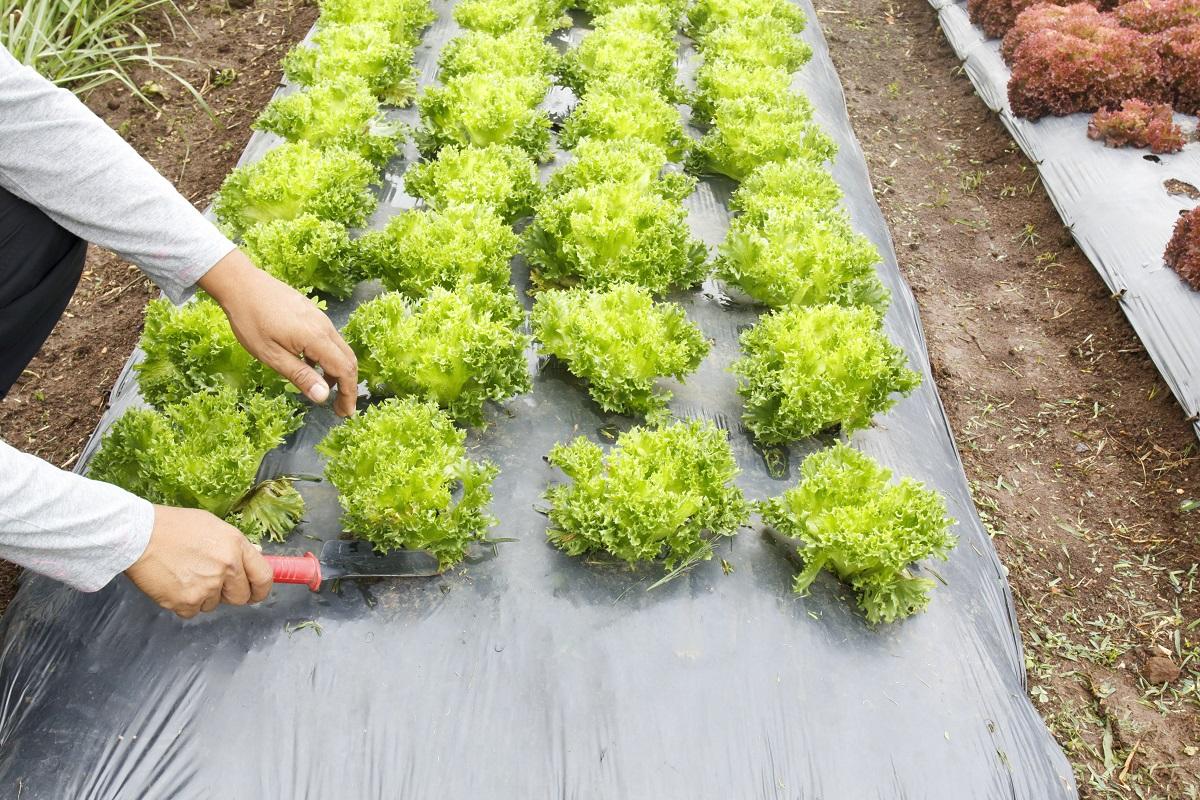

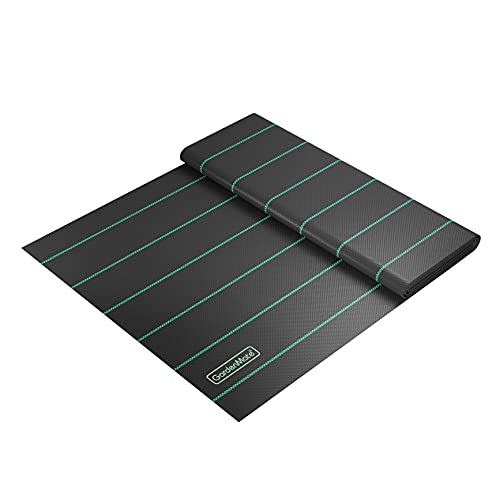

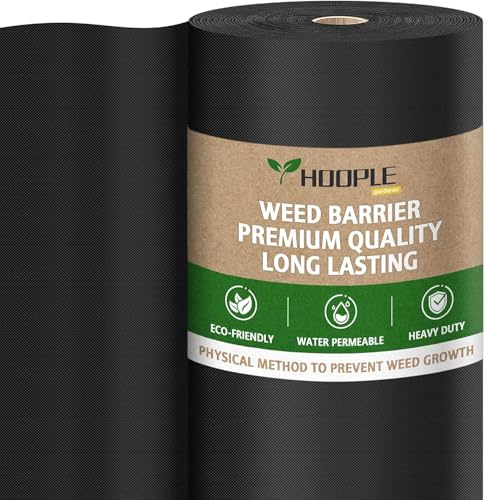


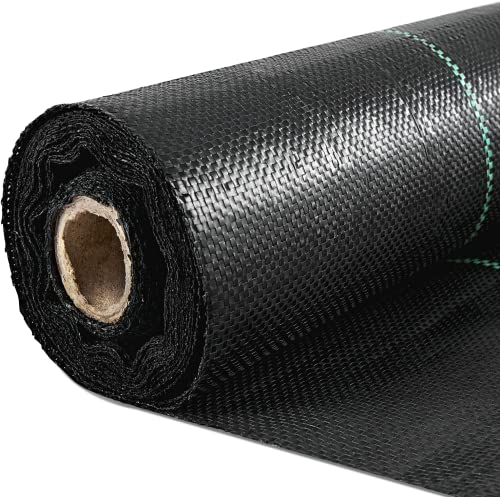
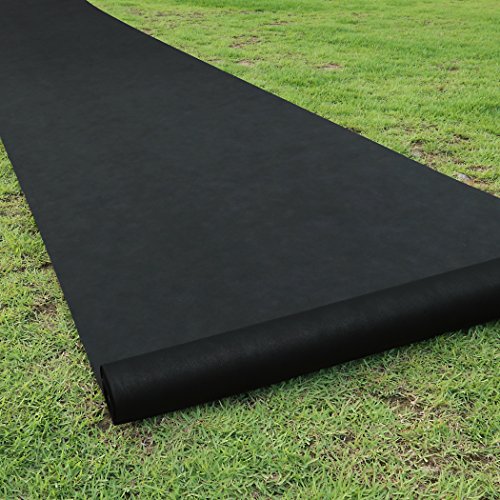
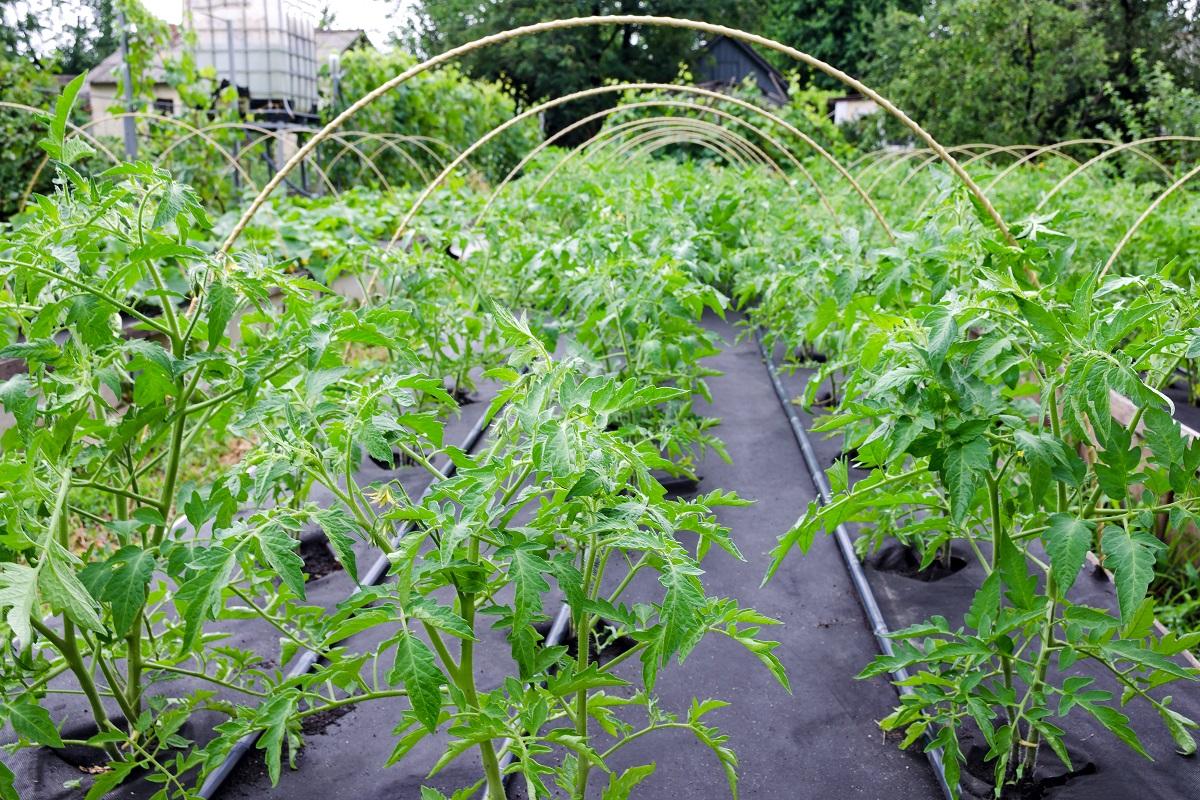


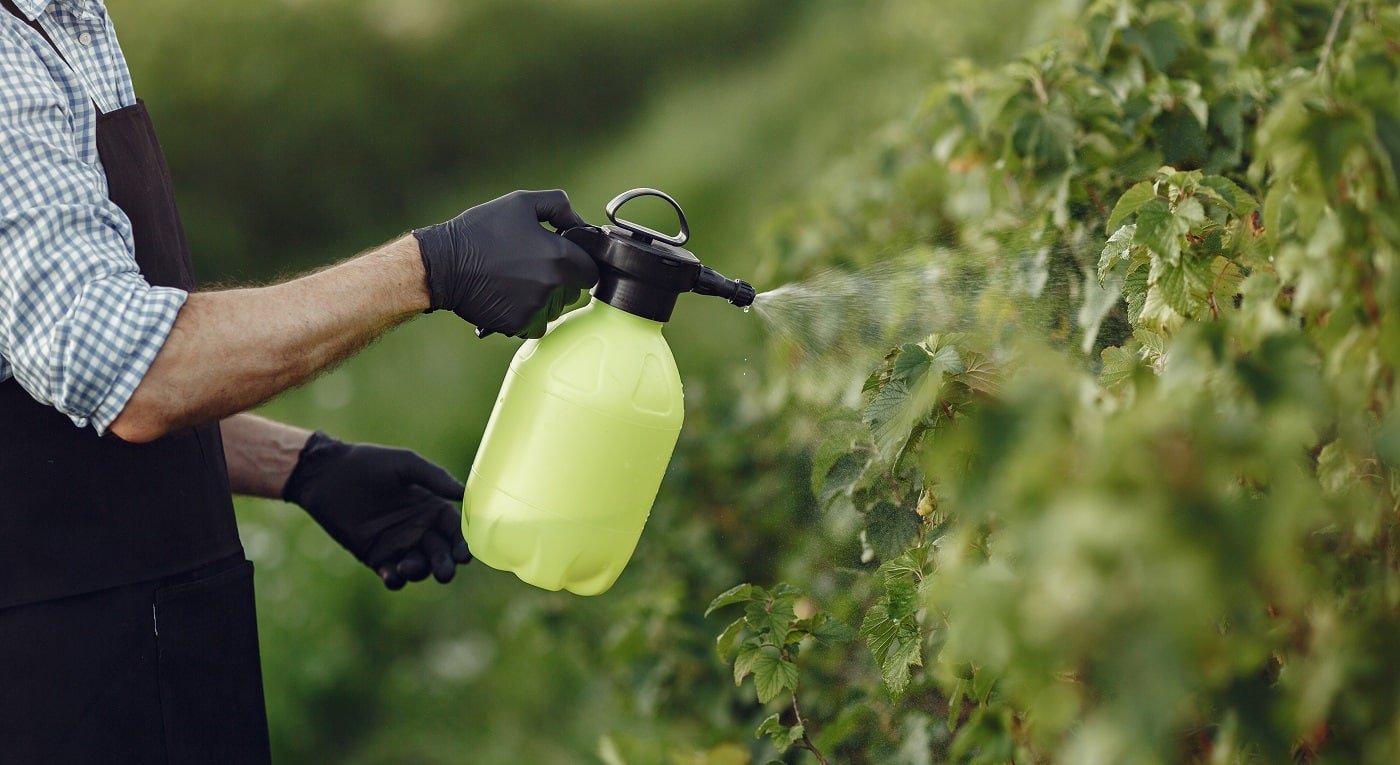

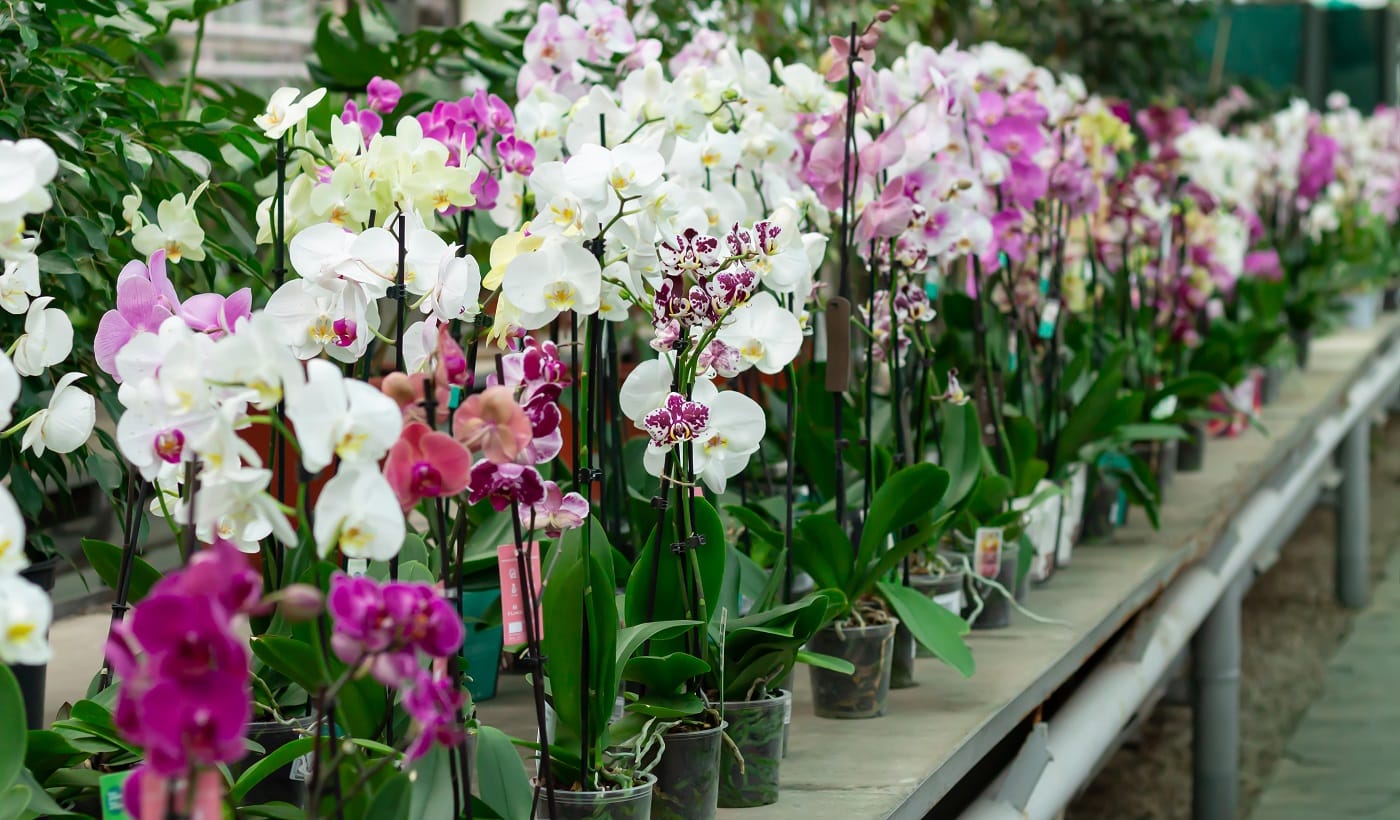


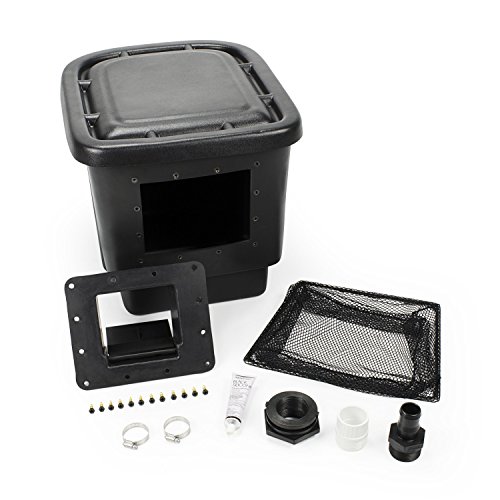

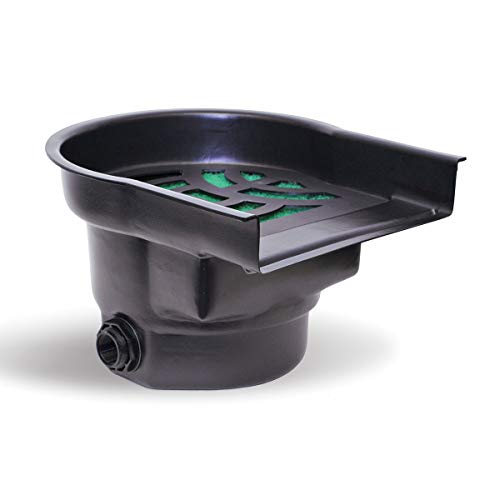

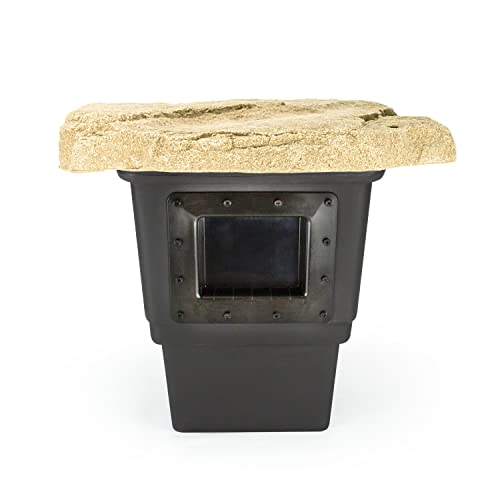
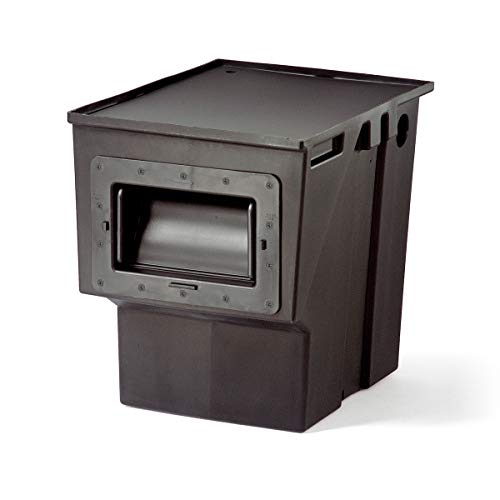

![8 Best Pond Filter Systems of 2024 [Reviewed & Buyer’s Guide]](https://homesthetics.net/wp-content/uploads/2019/08/water-pond-filteration-system.jpg "8 Best Pond Filter Systems of 2024 [Reviewed & Buyer's Guide]")


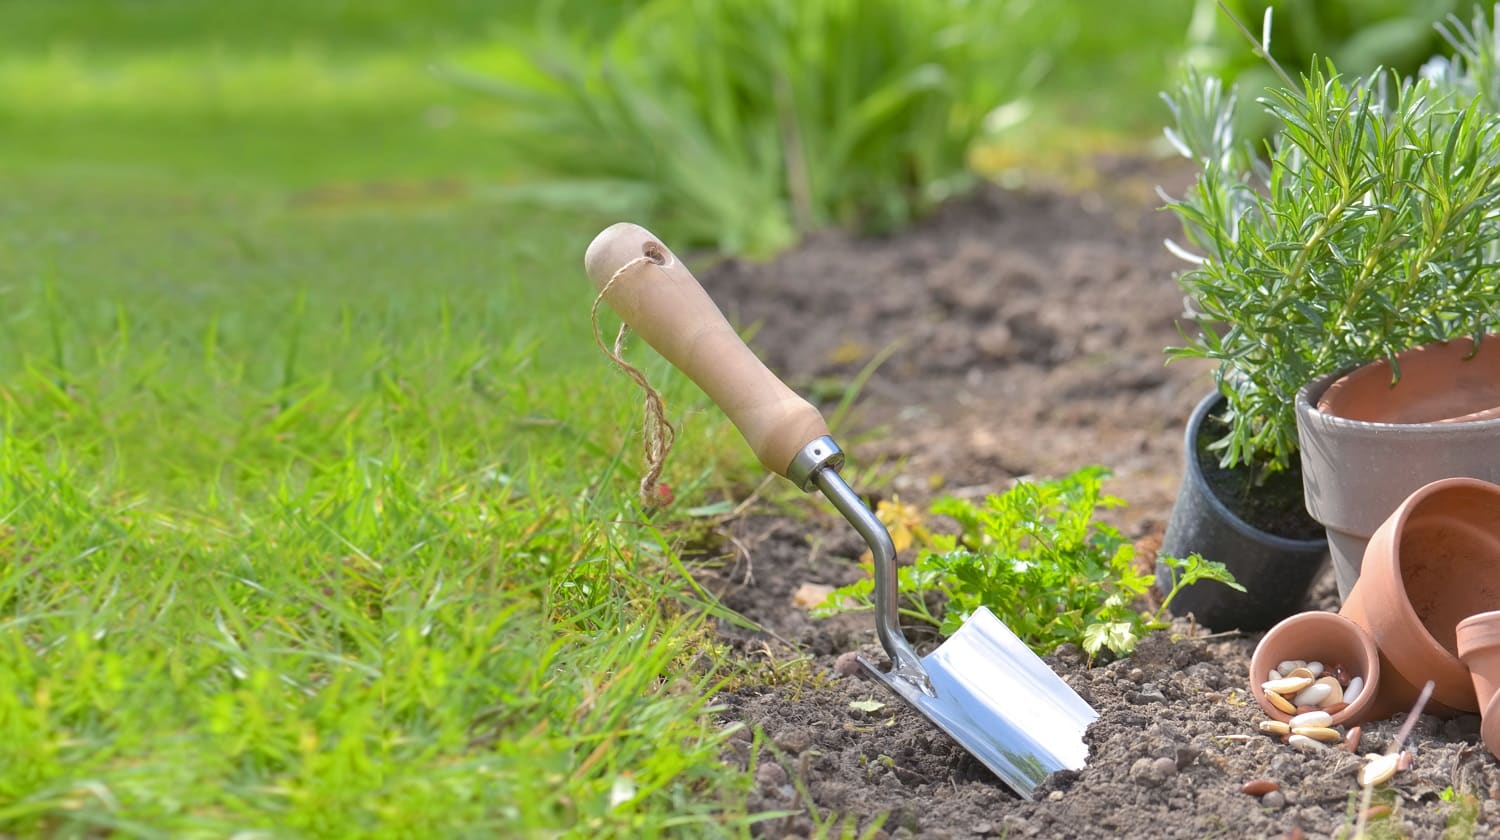


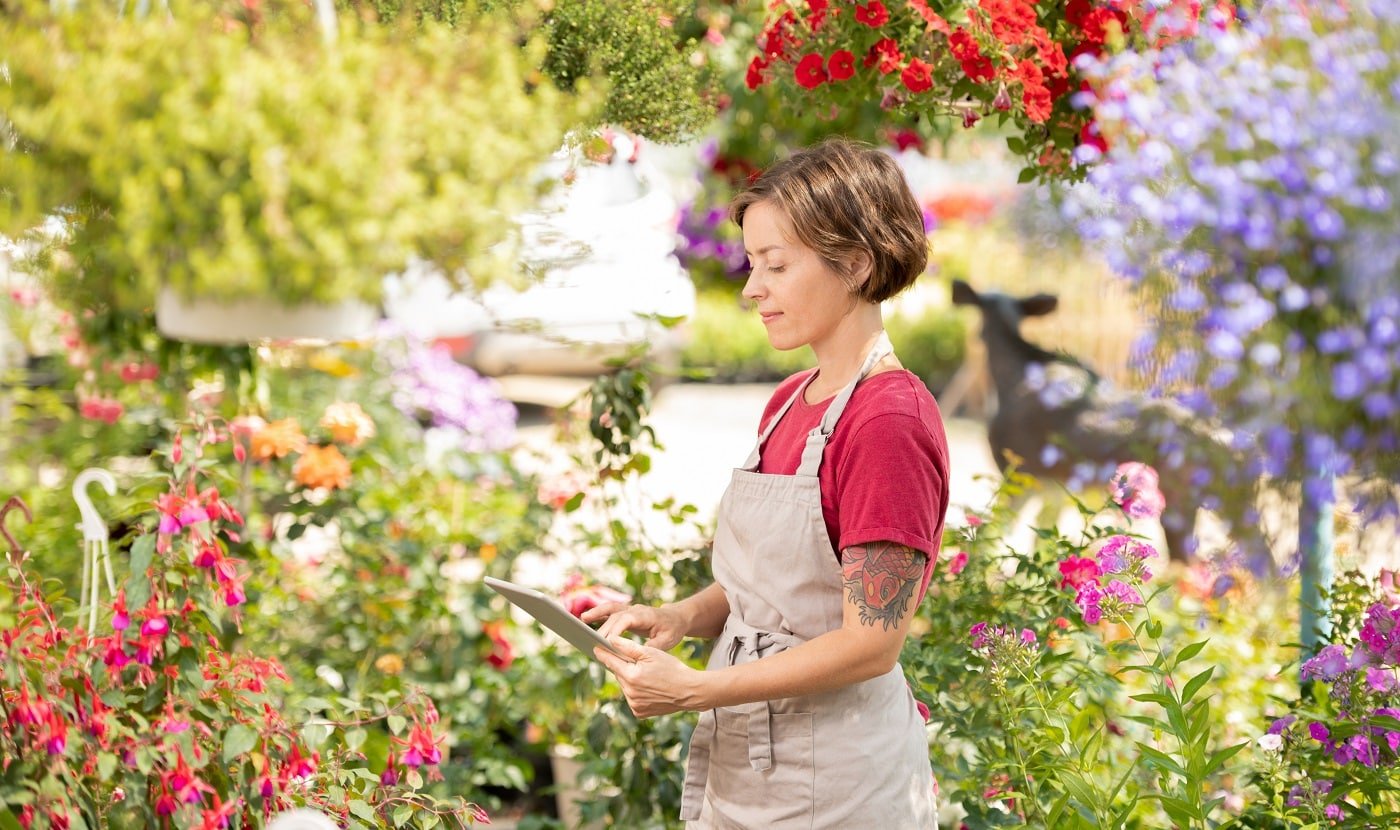

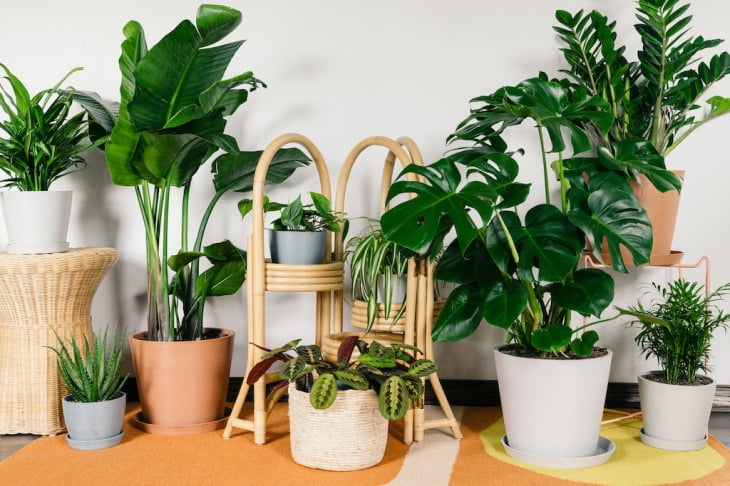

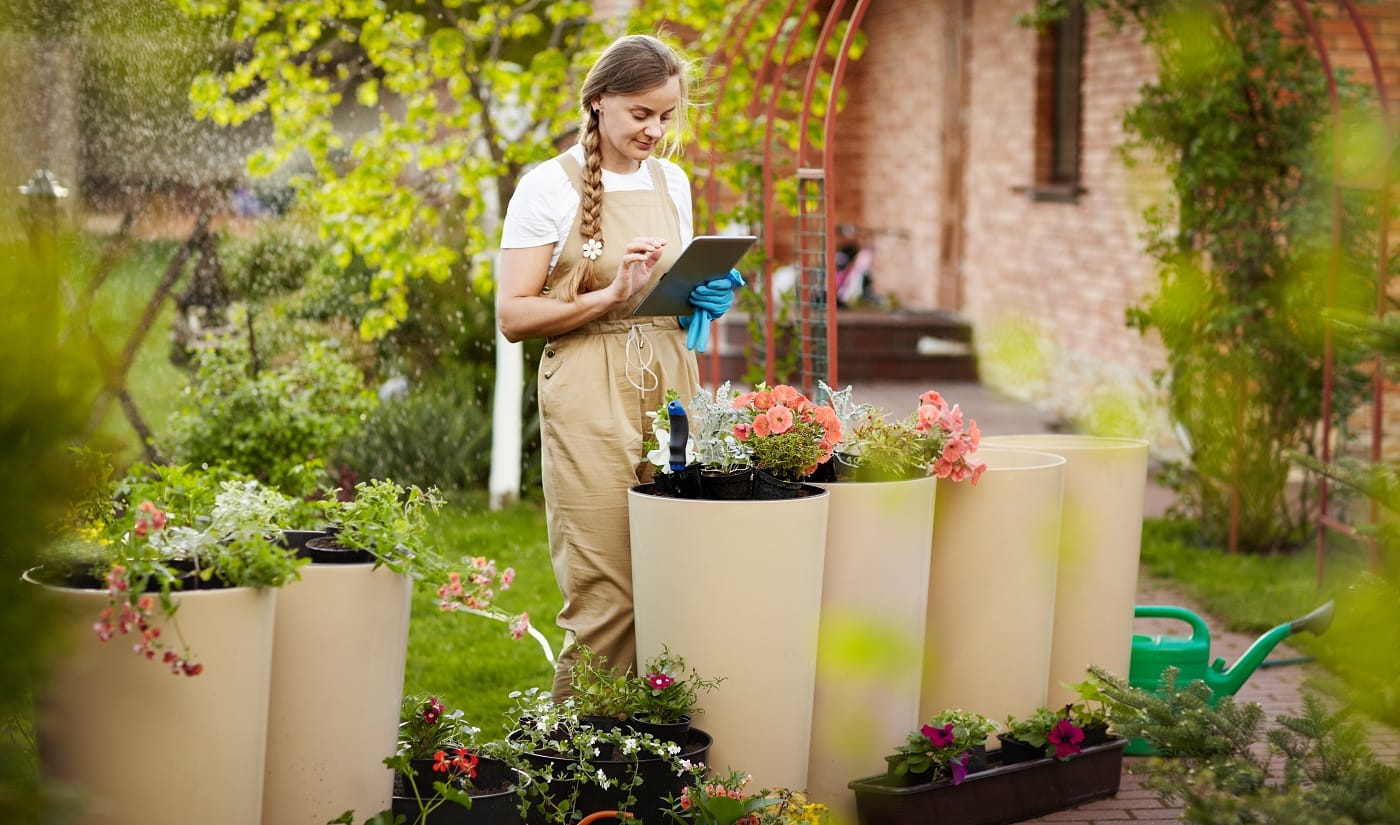


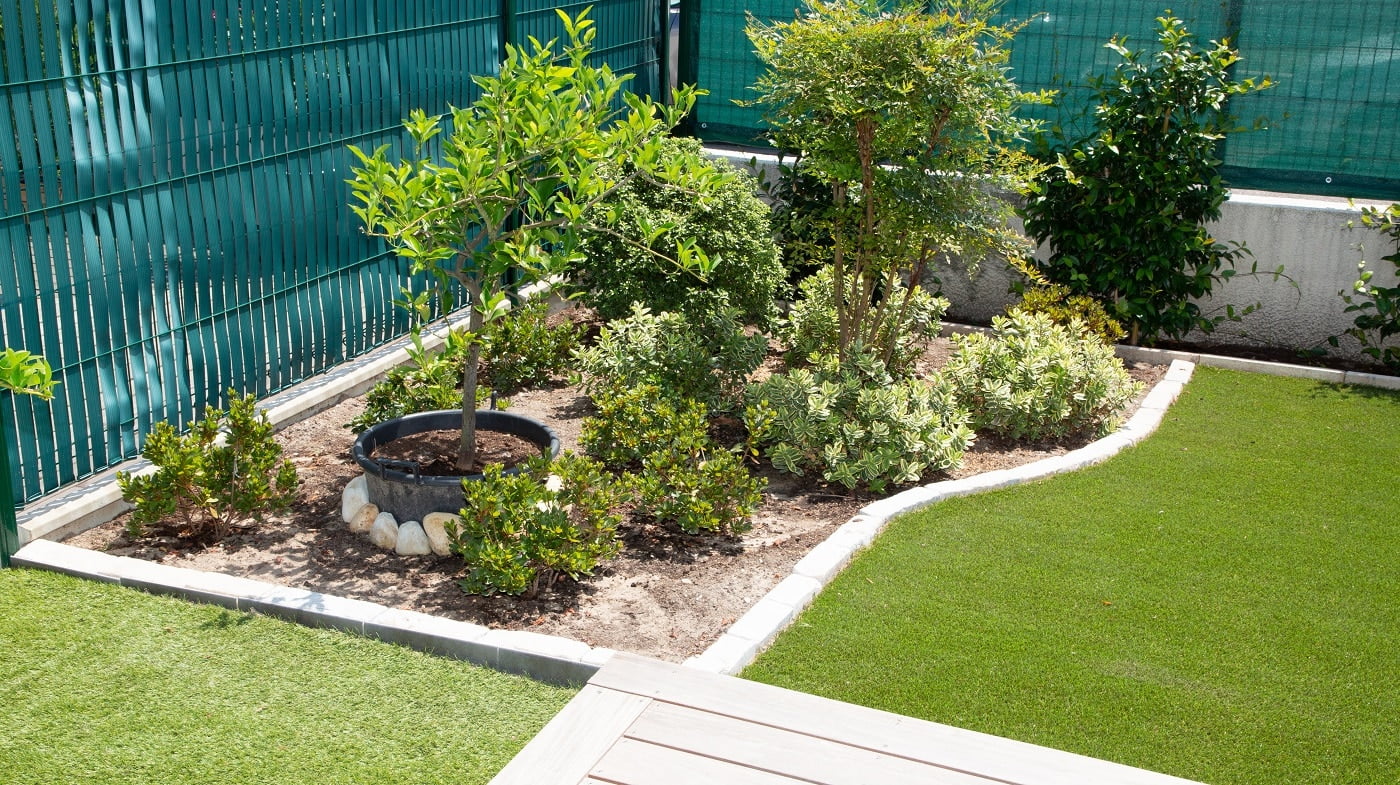


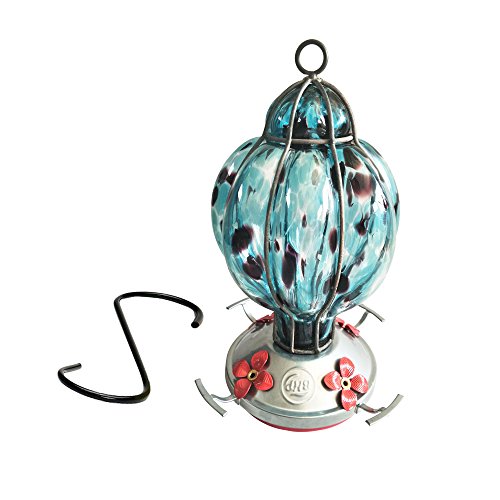

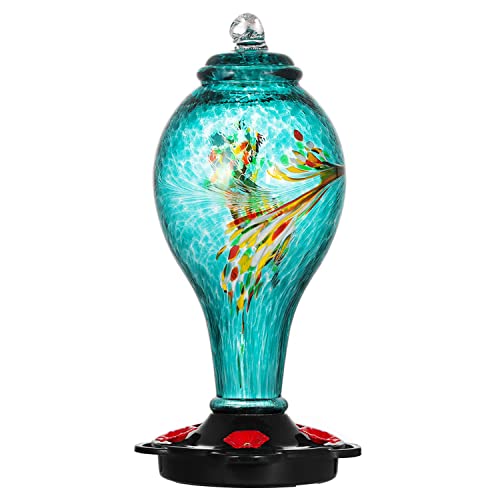


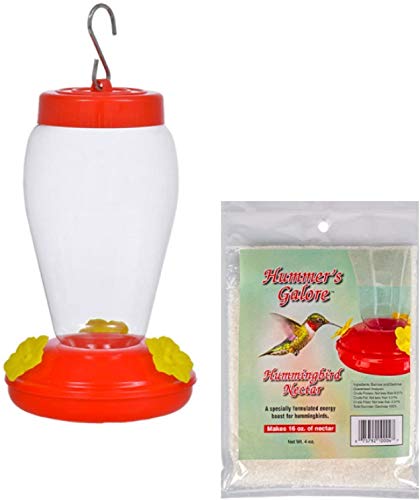

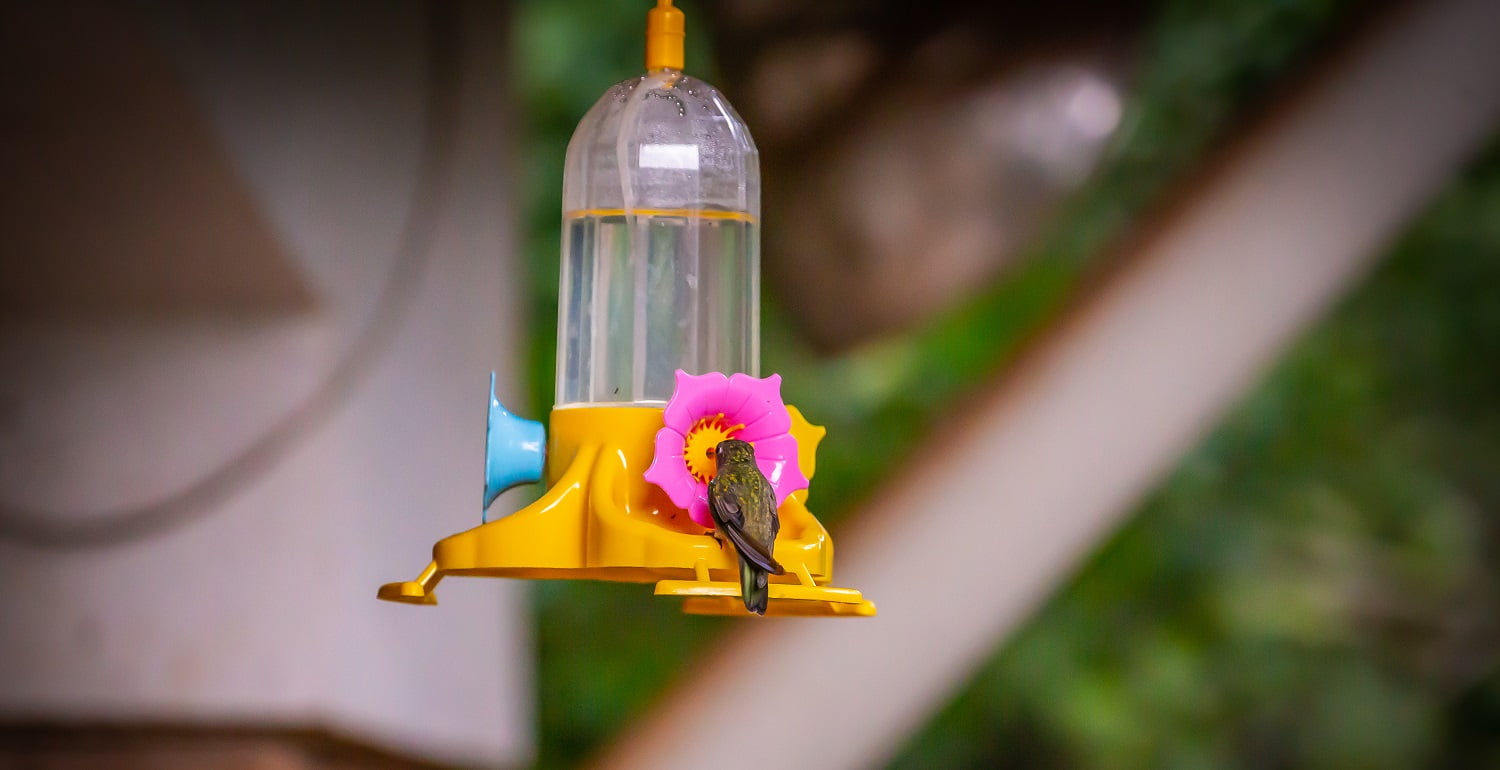

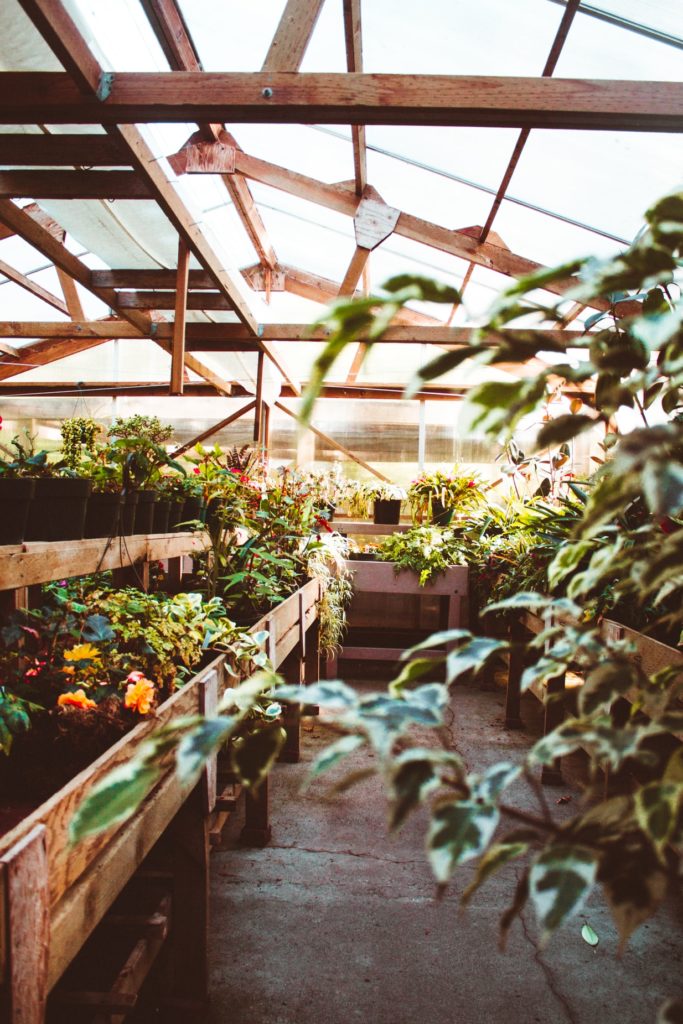
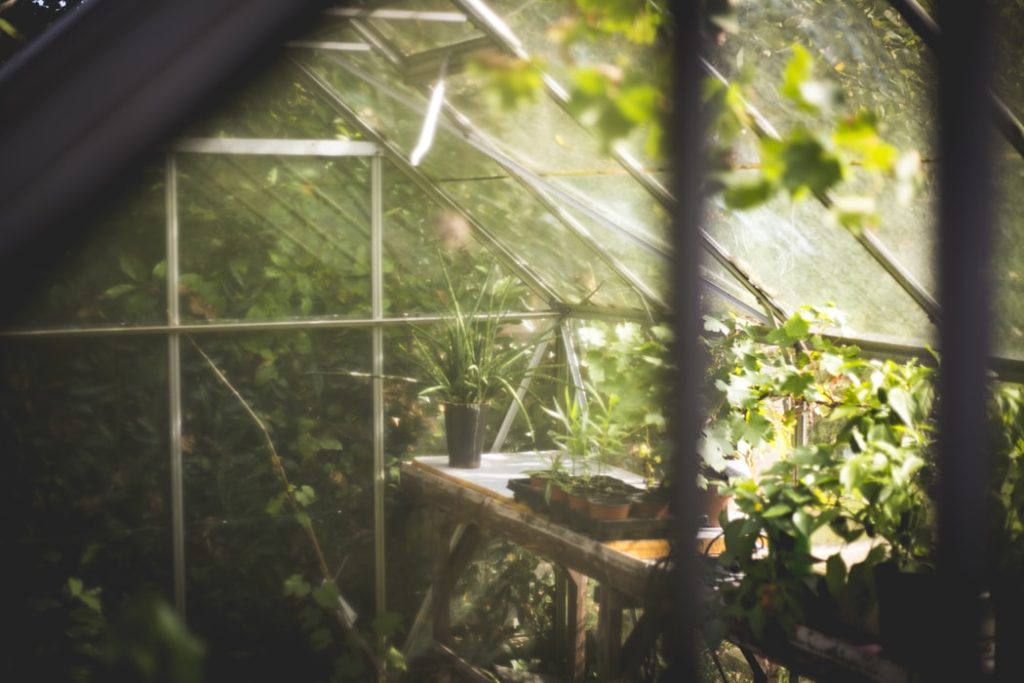
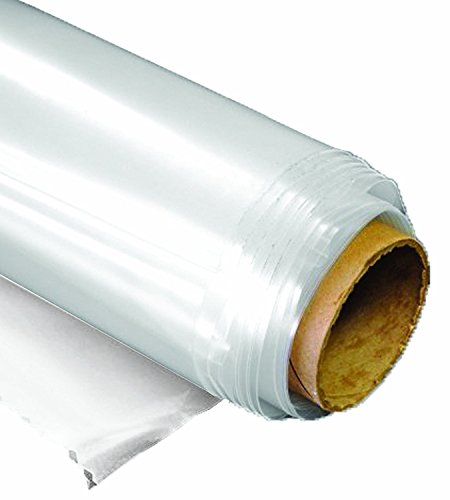

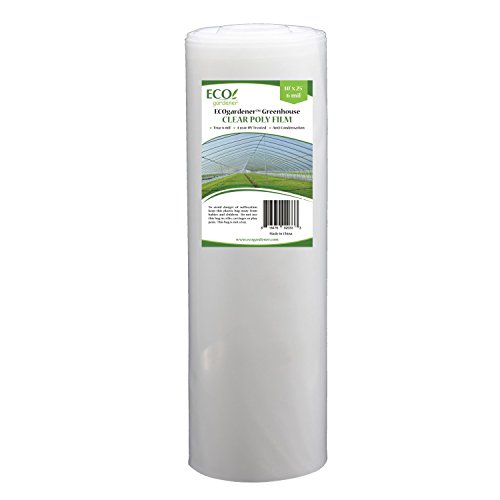


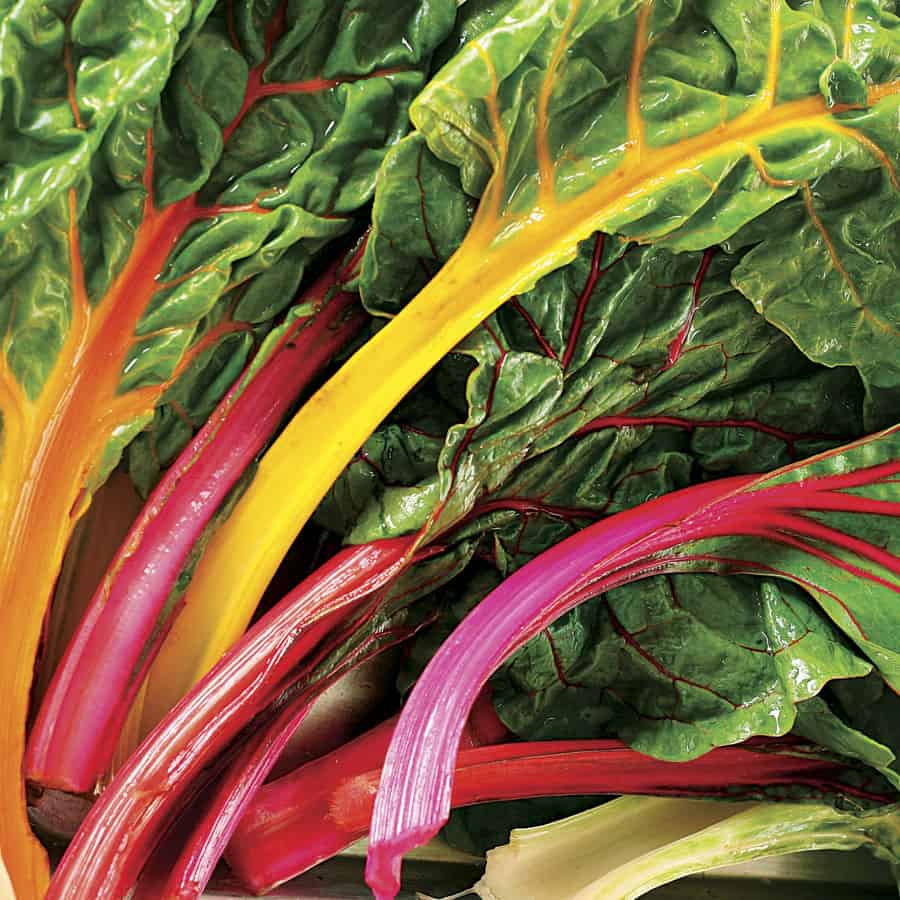
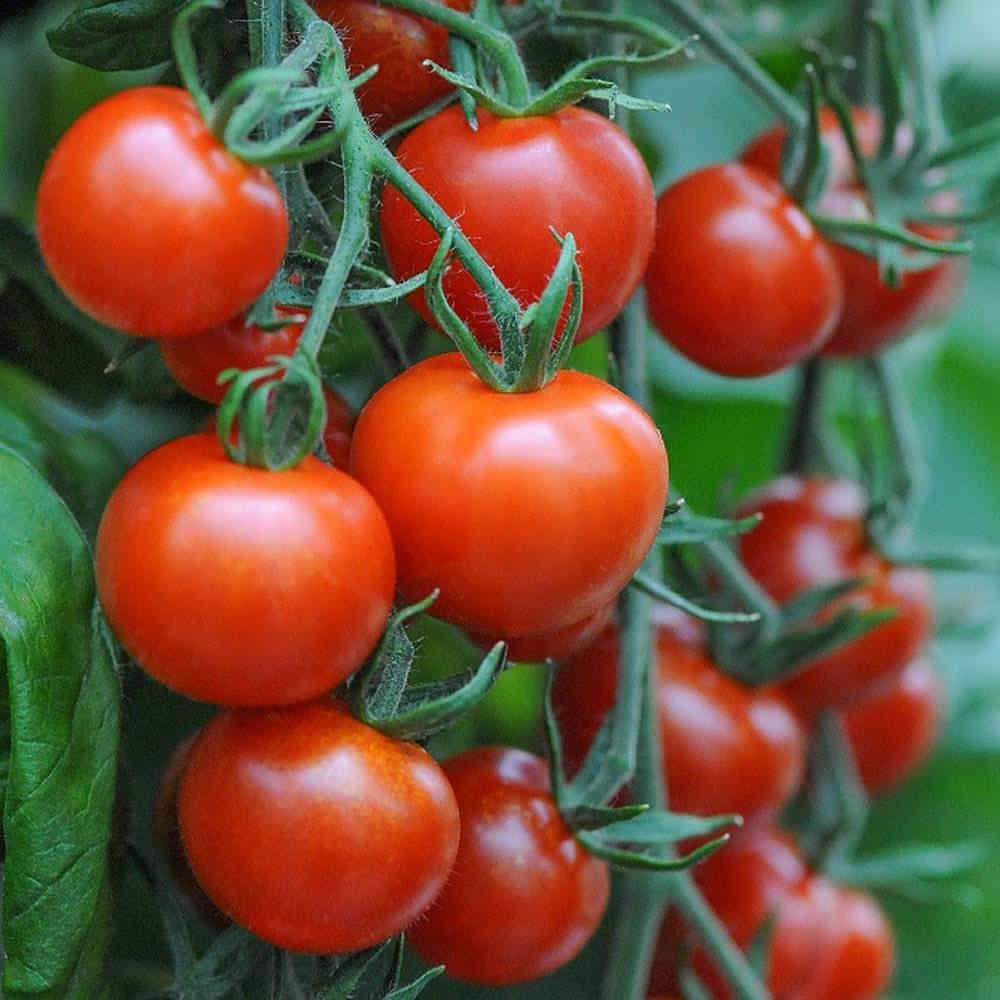
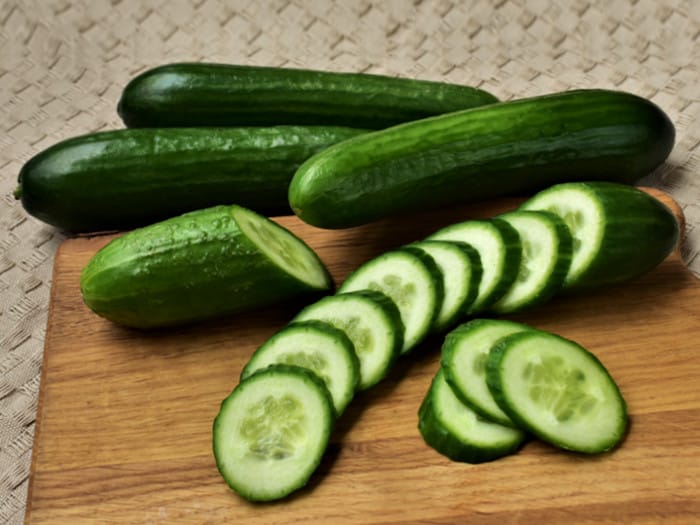


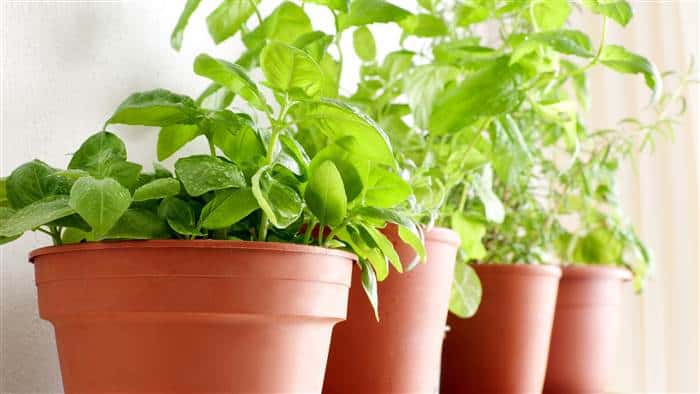


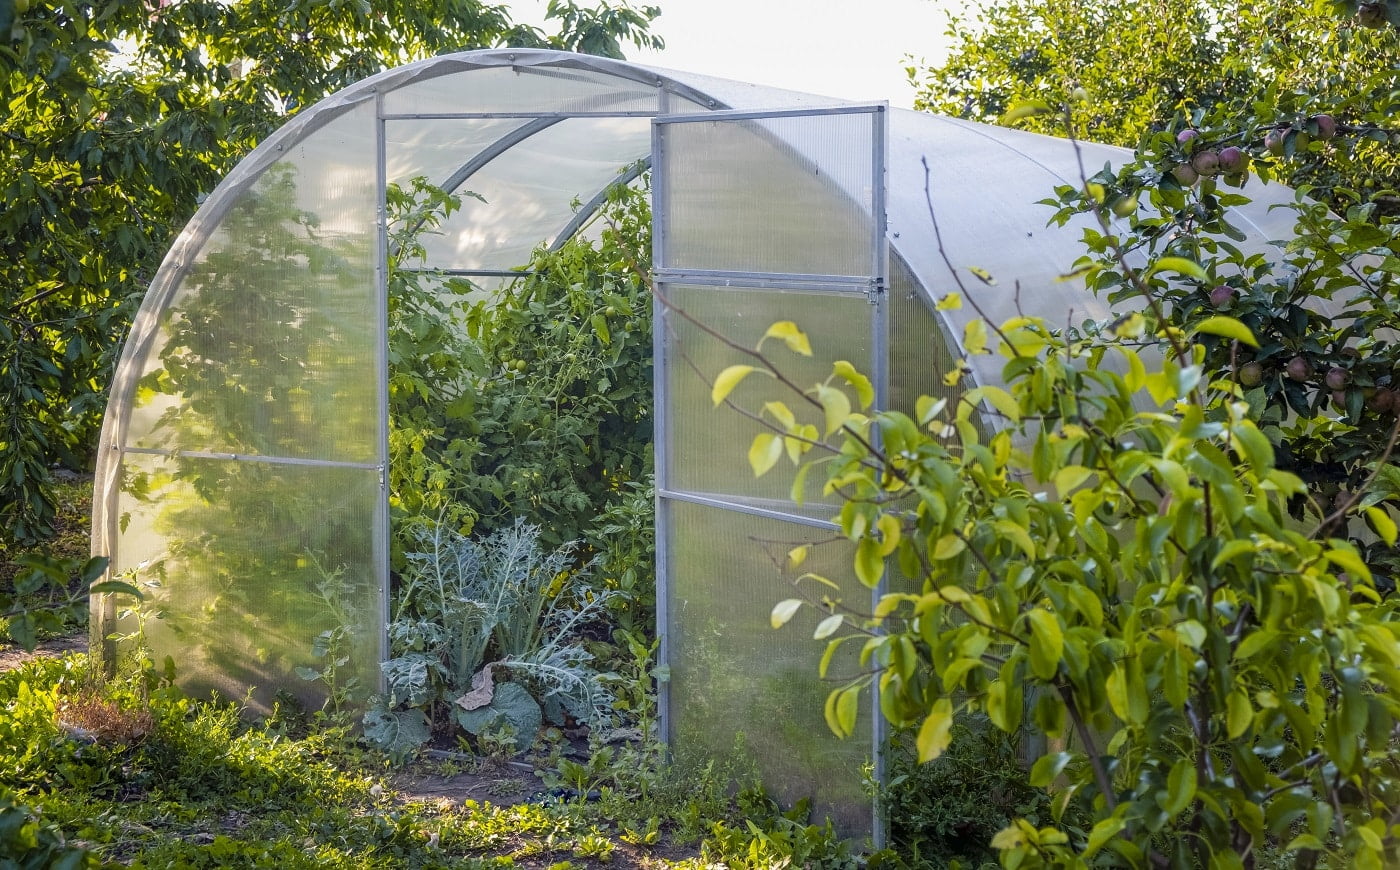
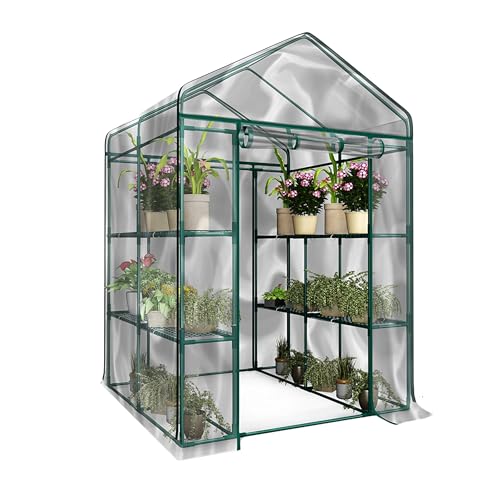
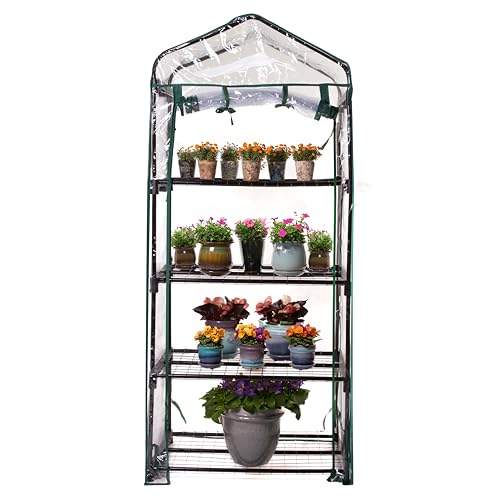


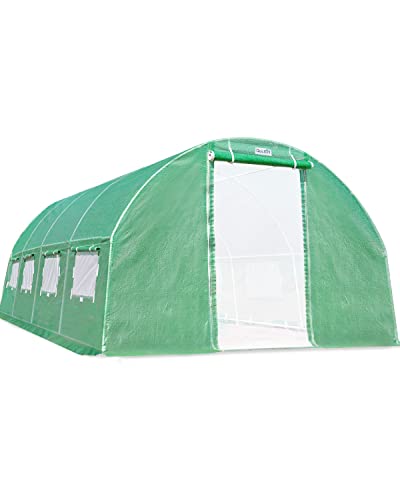
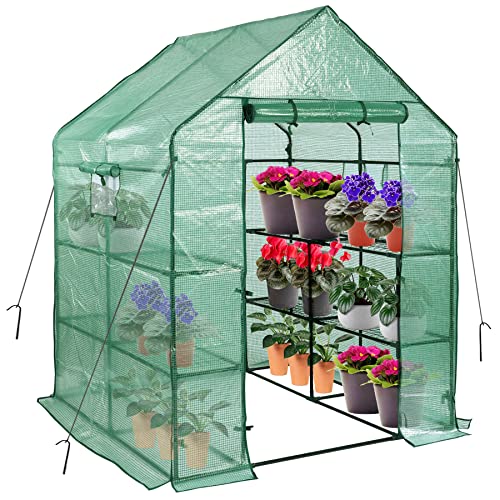

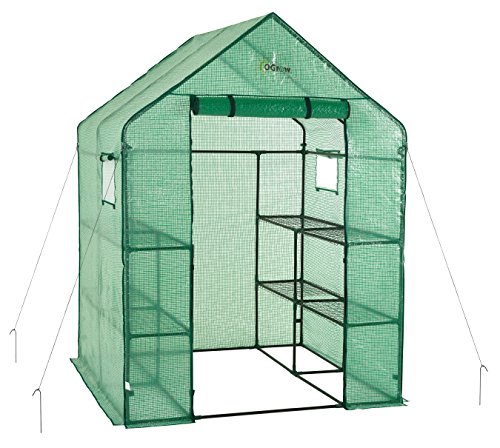
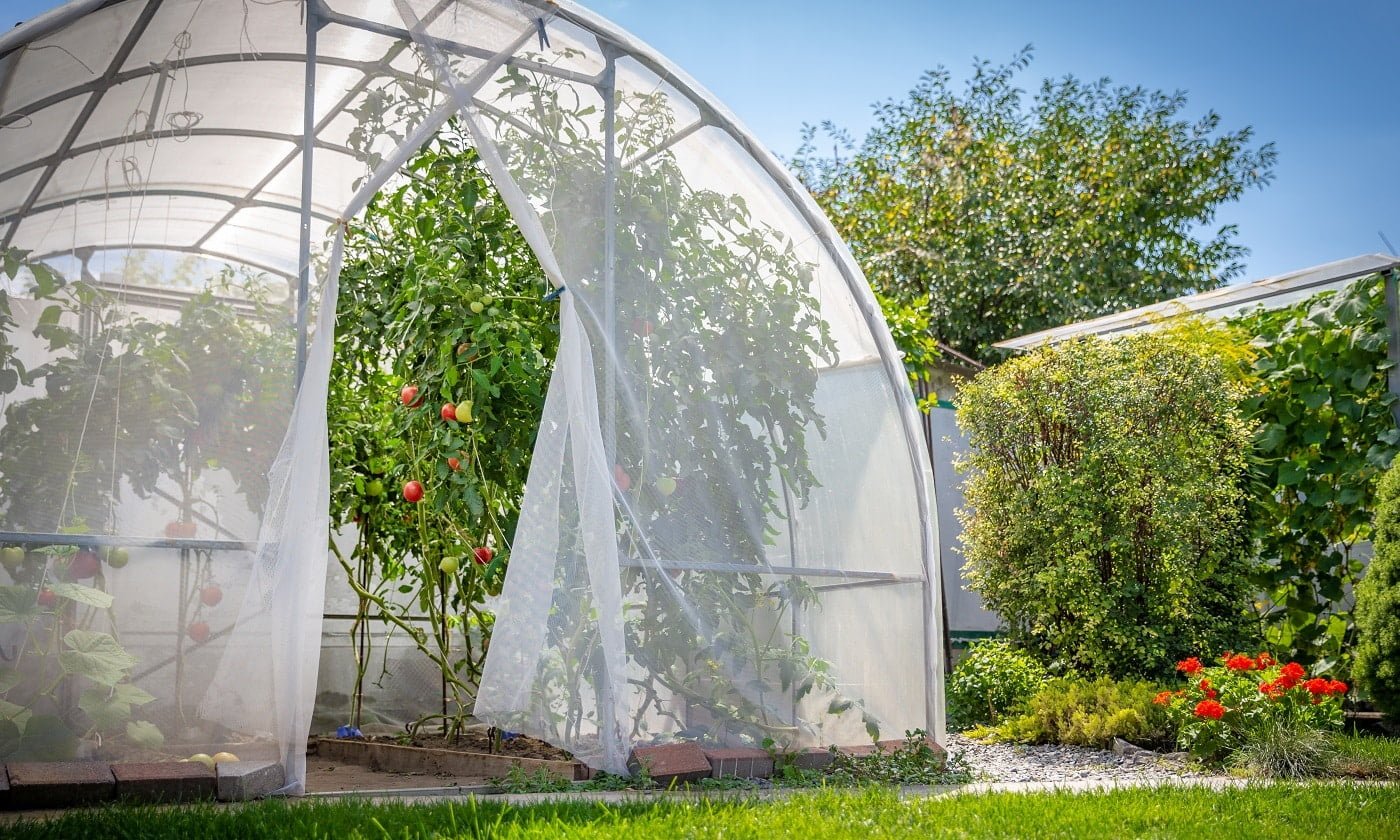

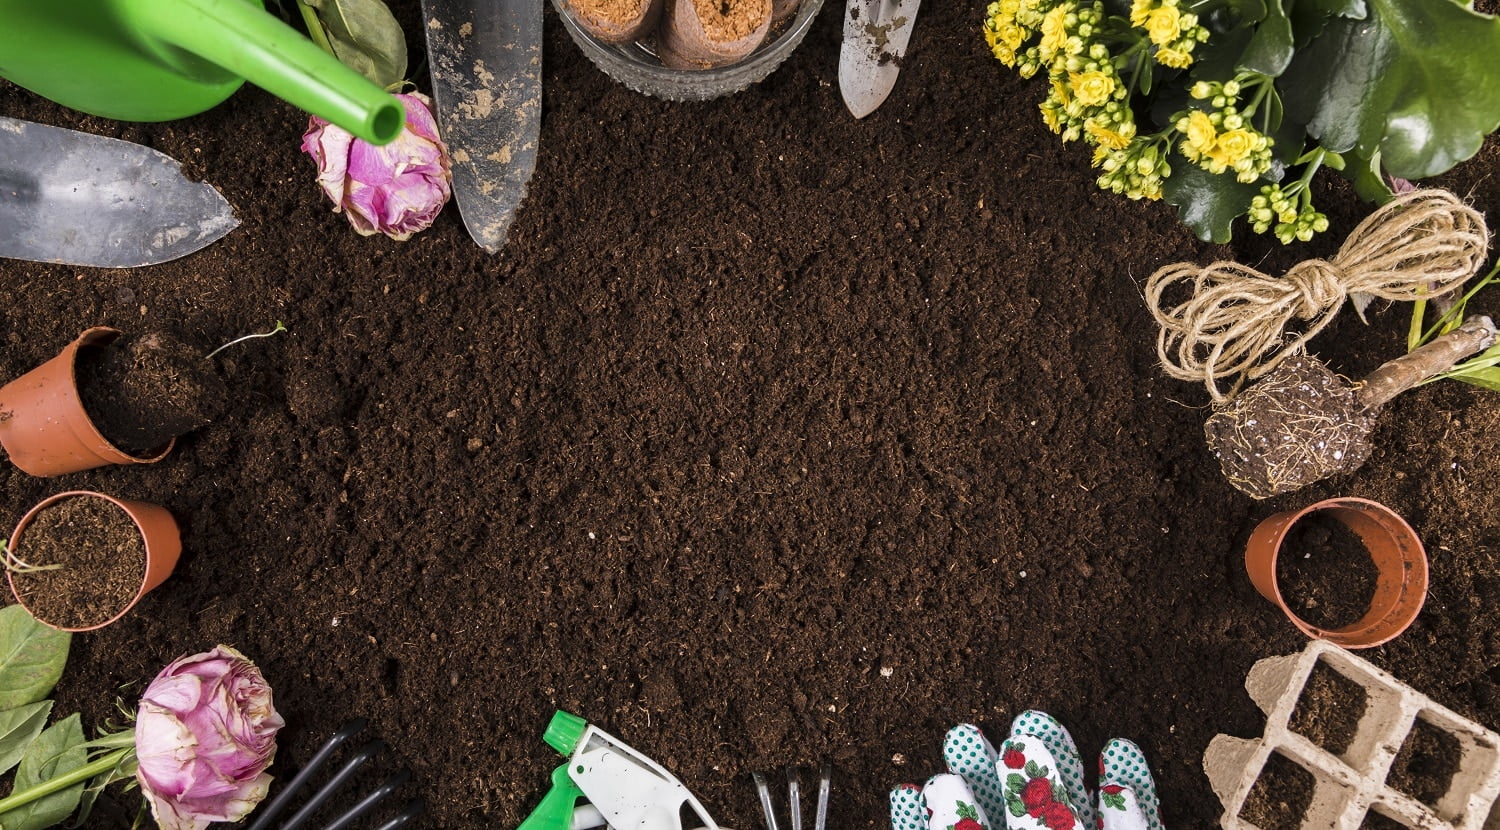
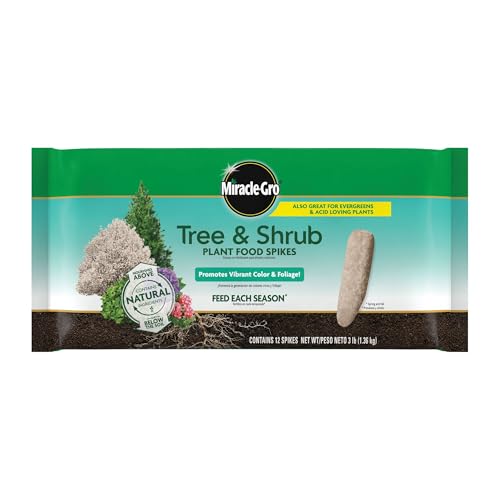


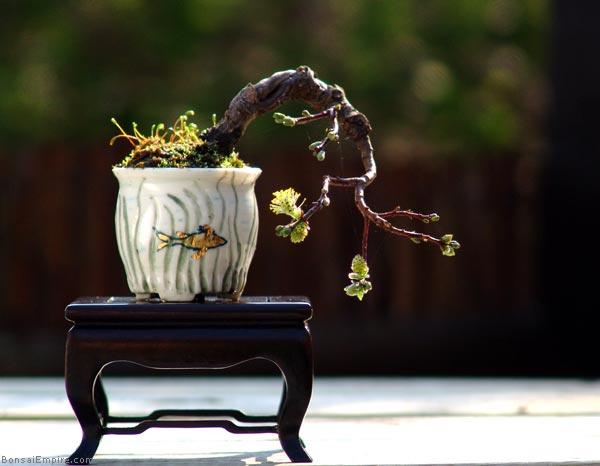
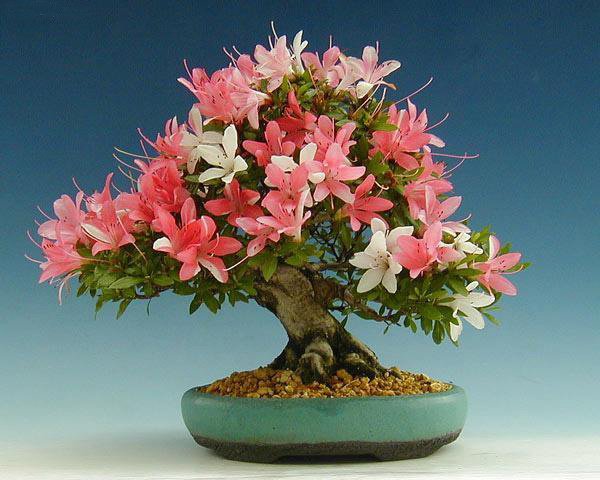


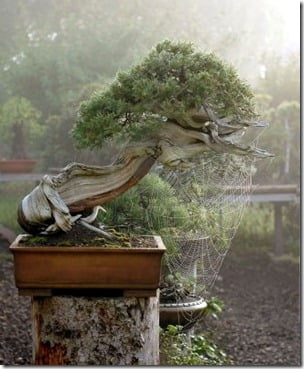

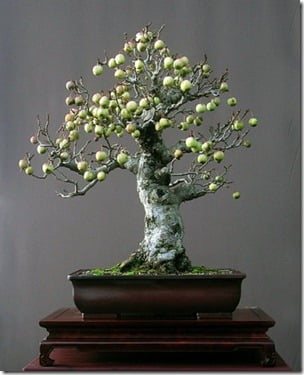


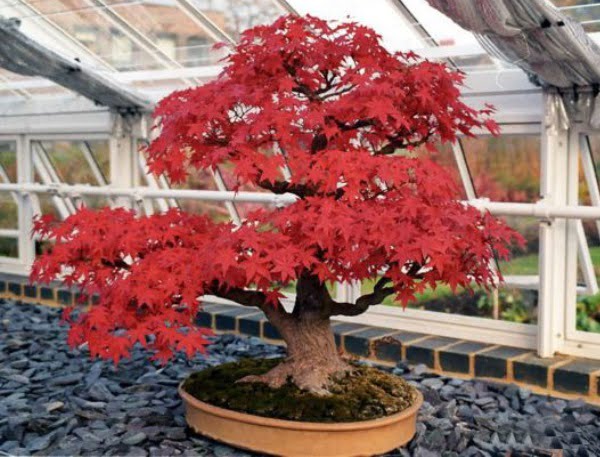


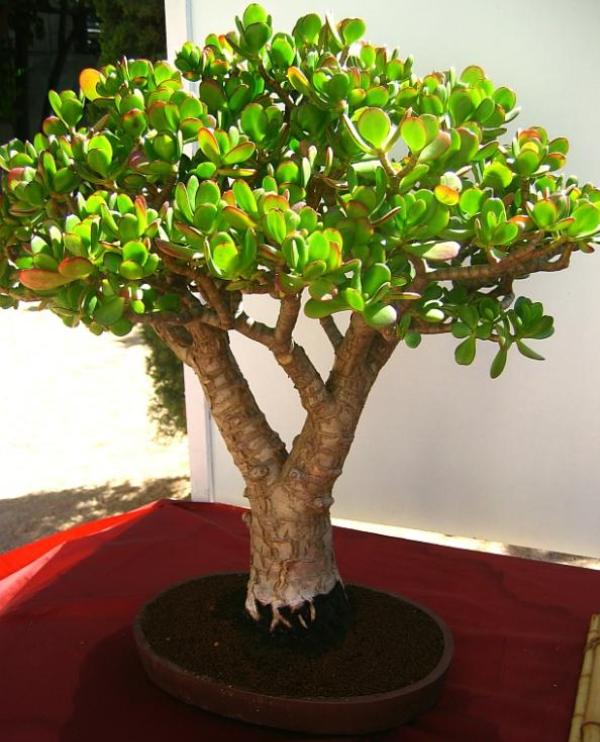
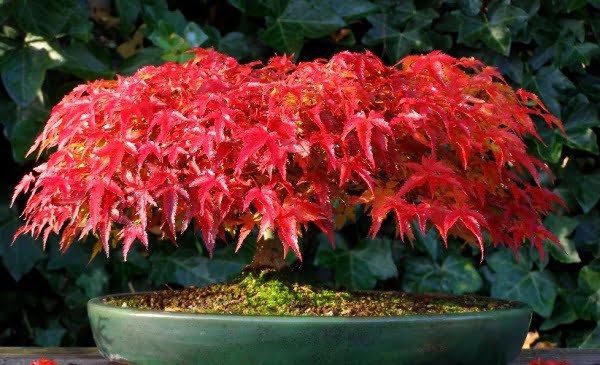
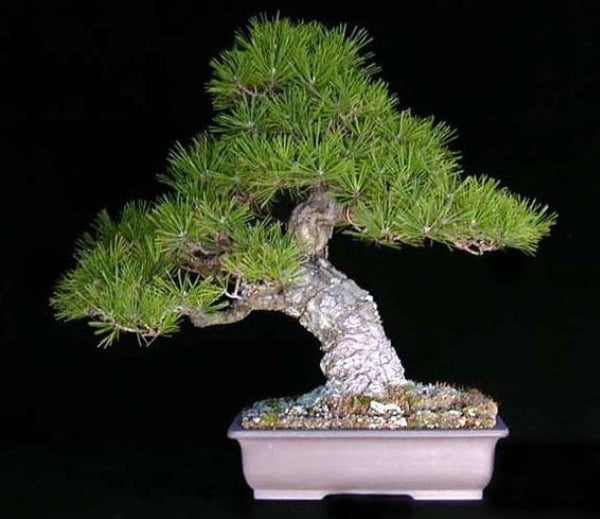
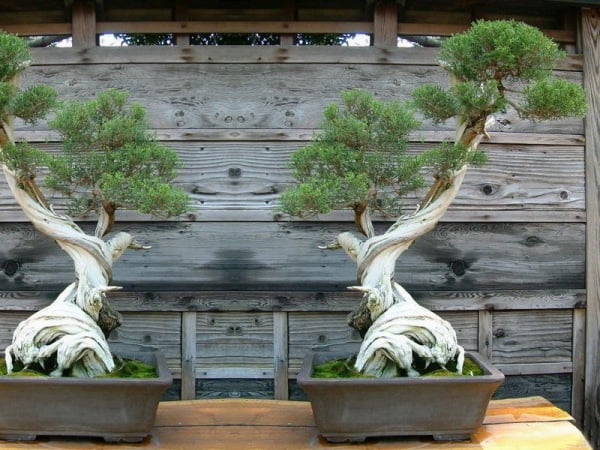


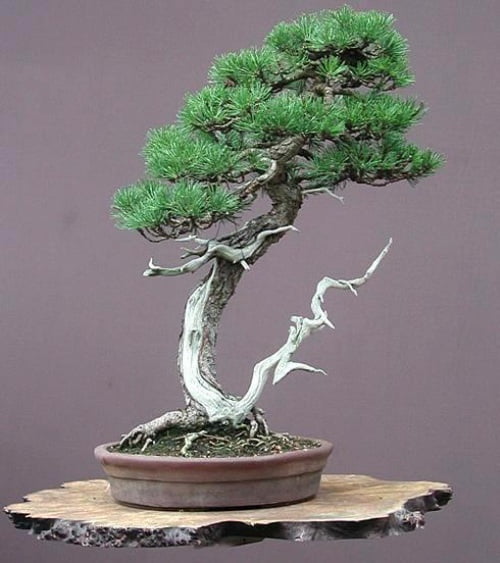
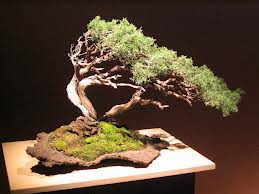
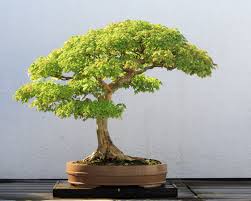


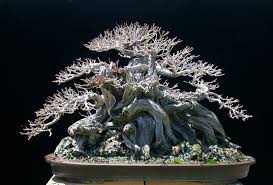

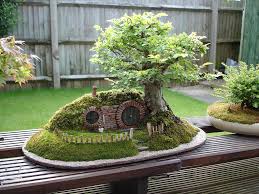
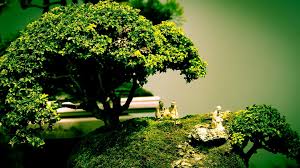
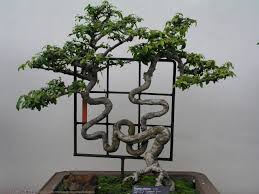

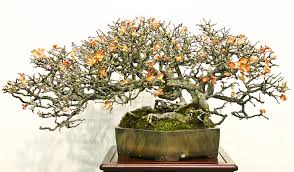

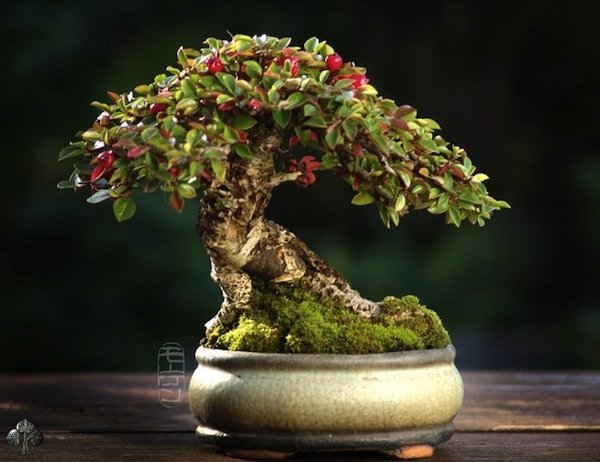


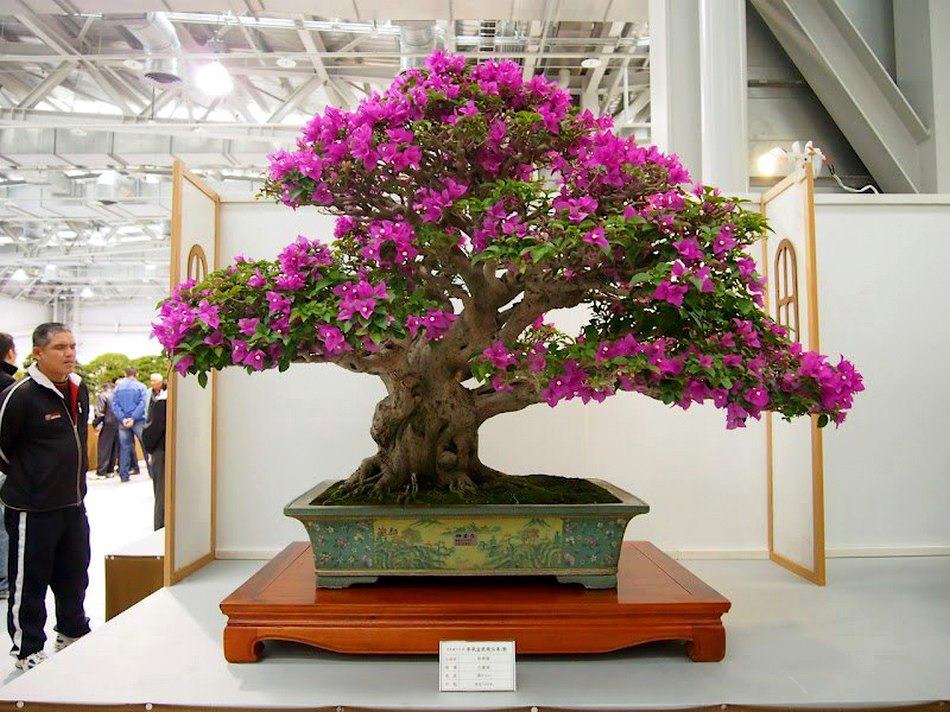


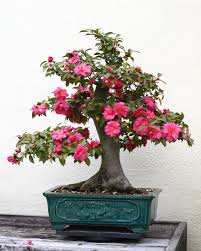


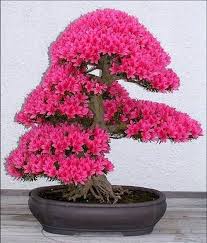

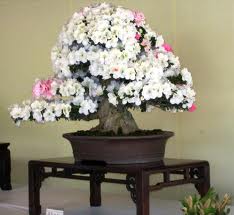
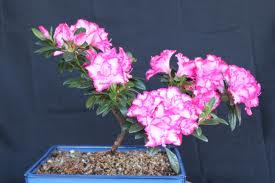
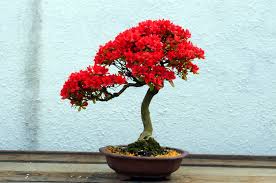
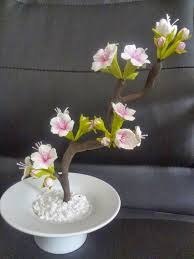
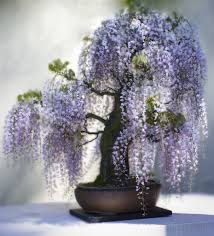

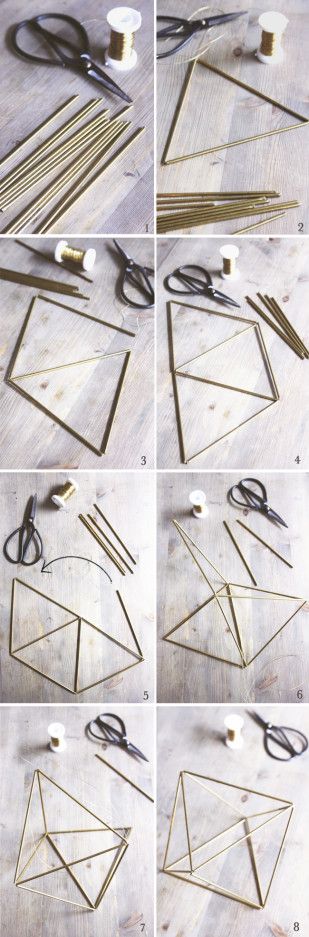
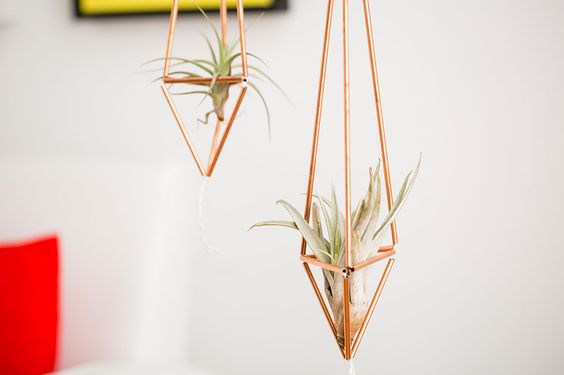
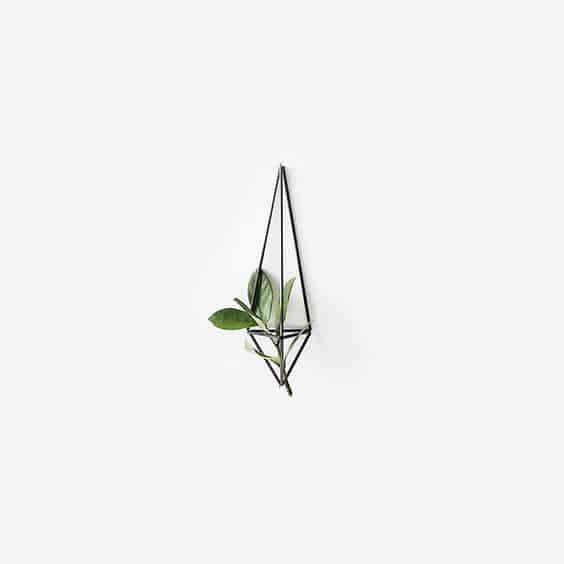
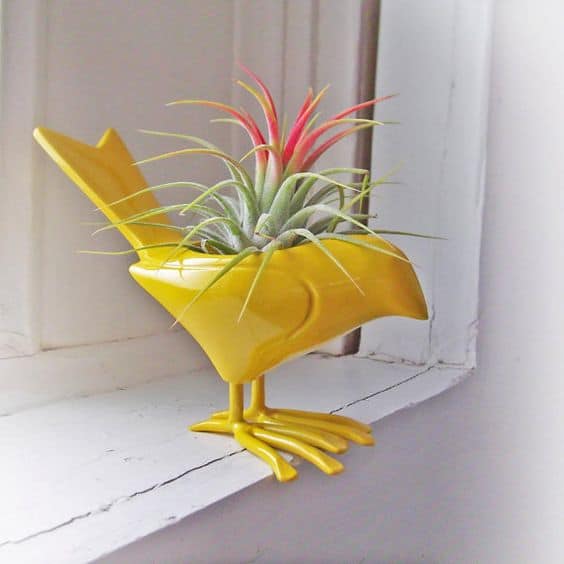
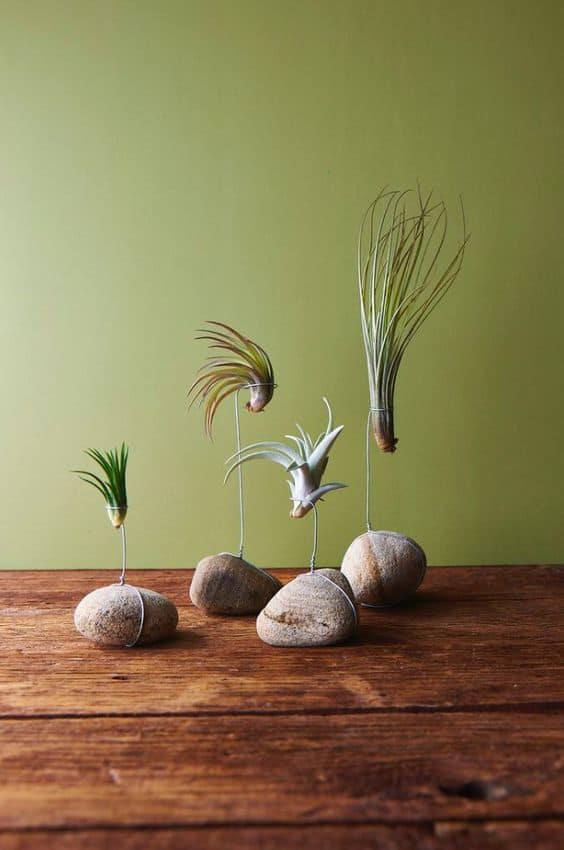
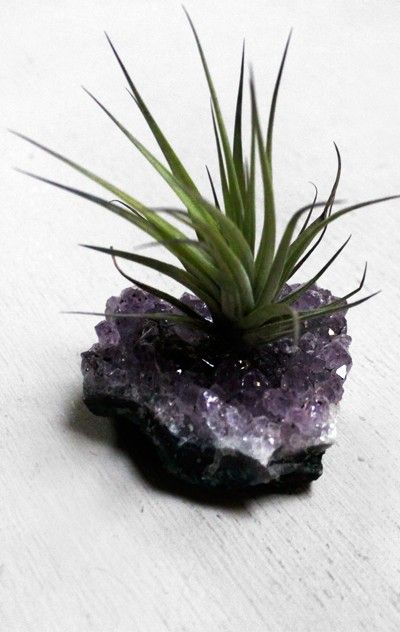
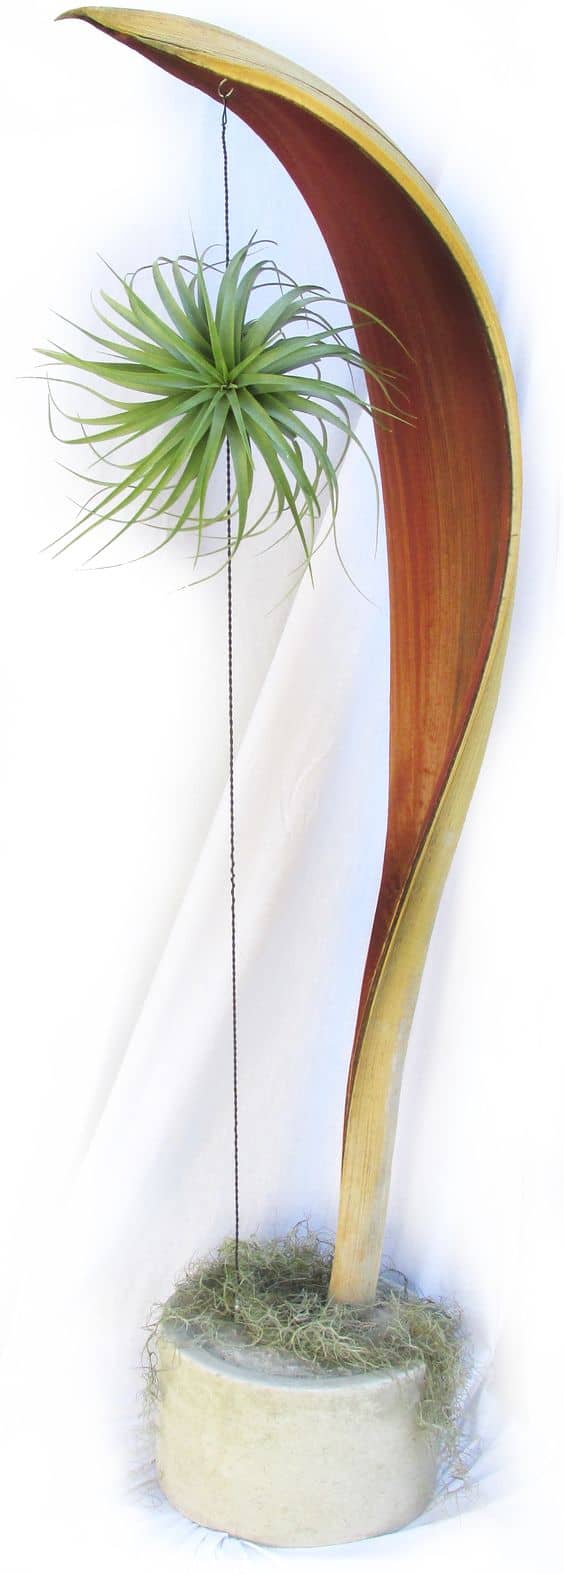
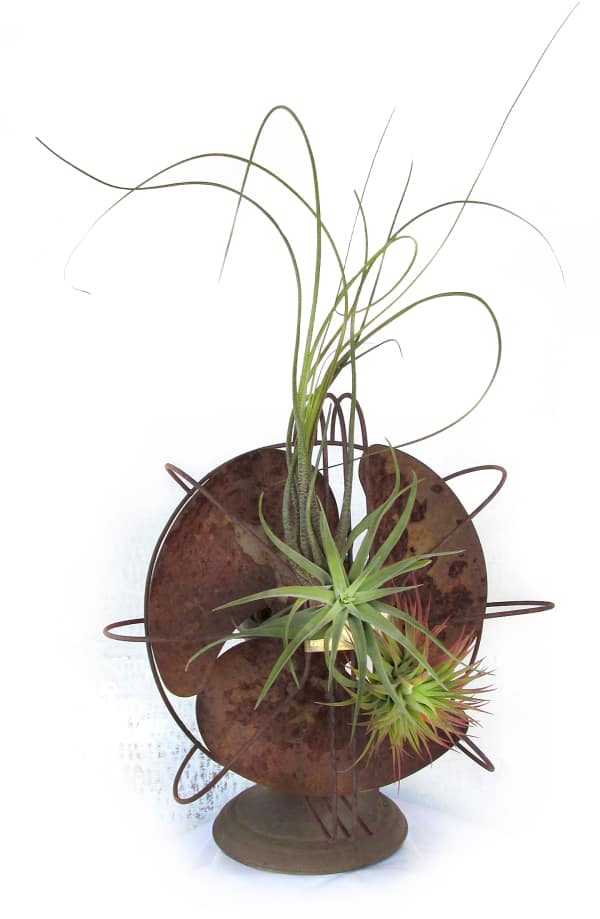
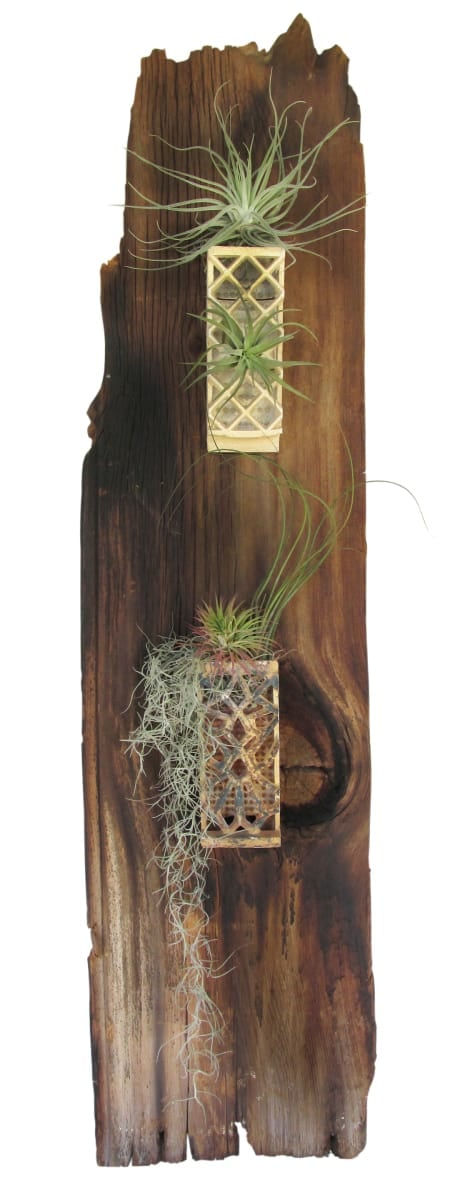

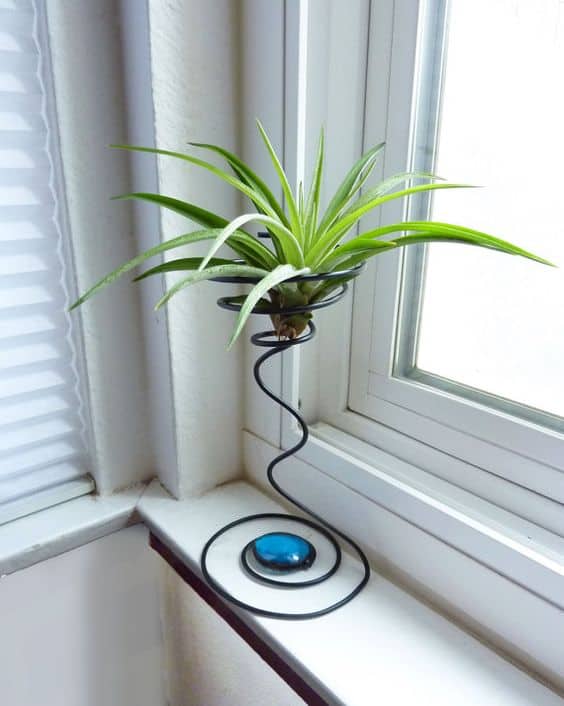
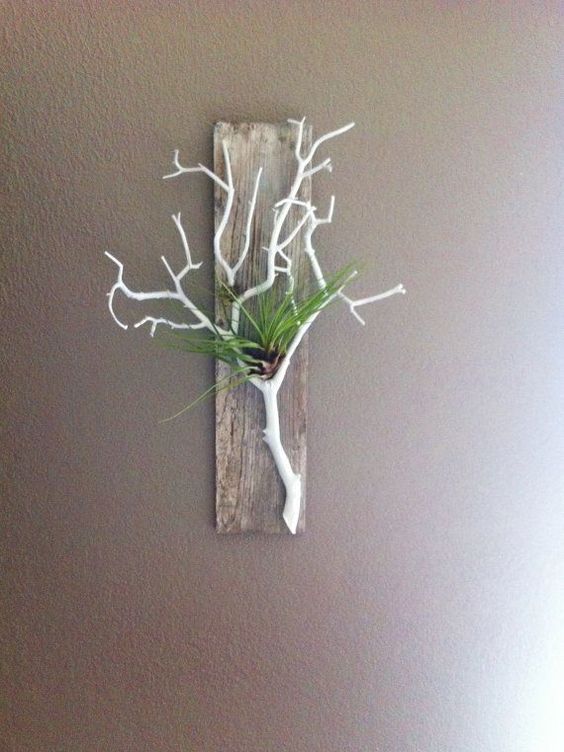
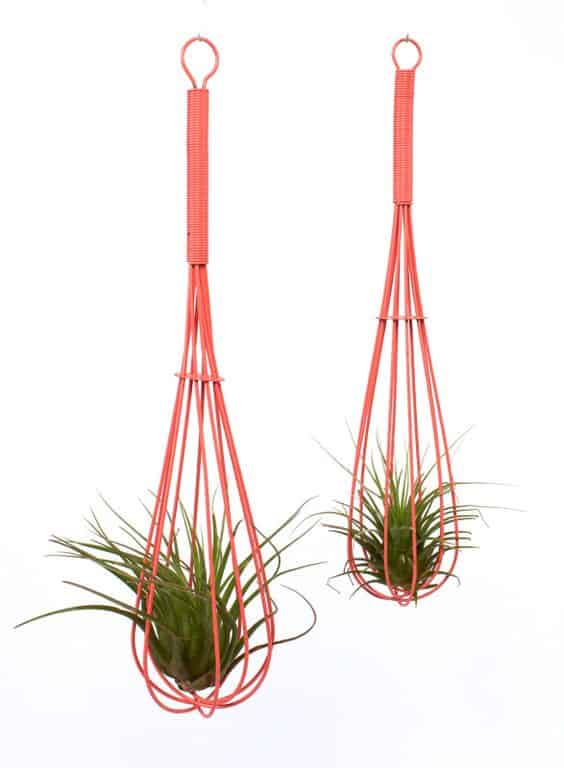


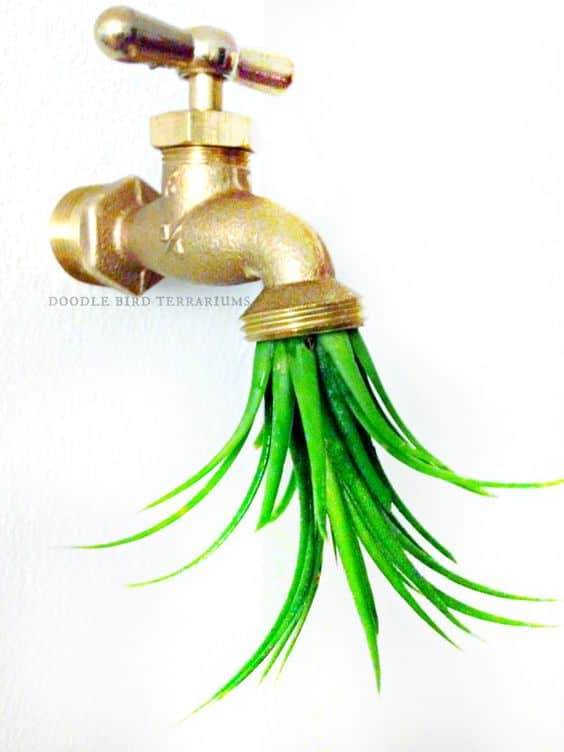
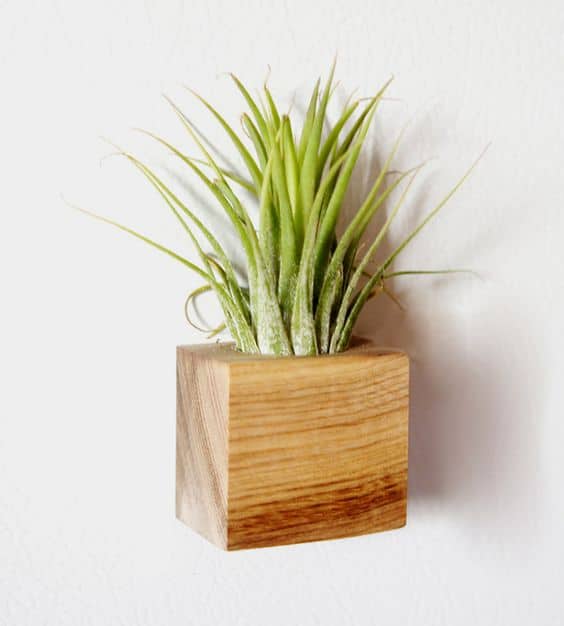
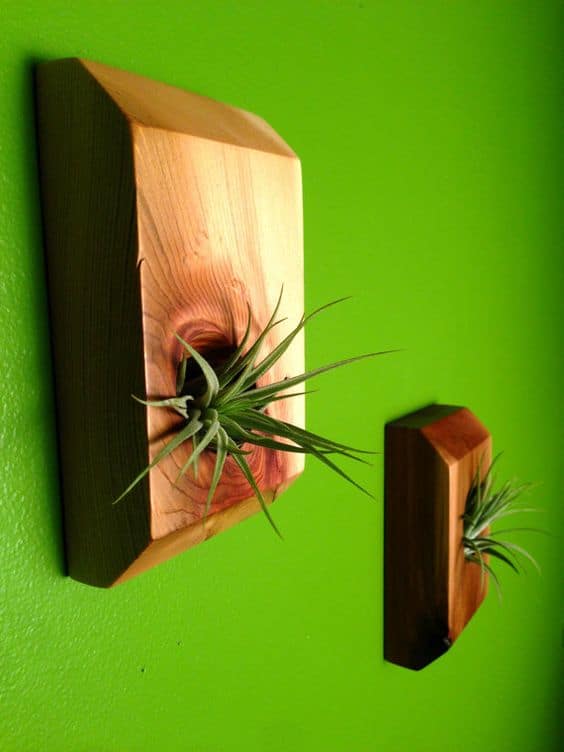
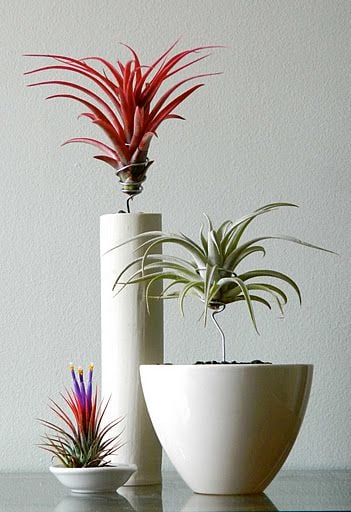
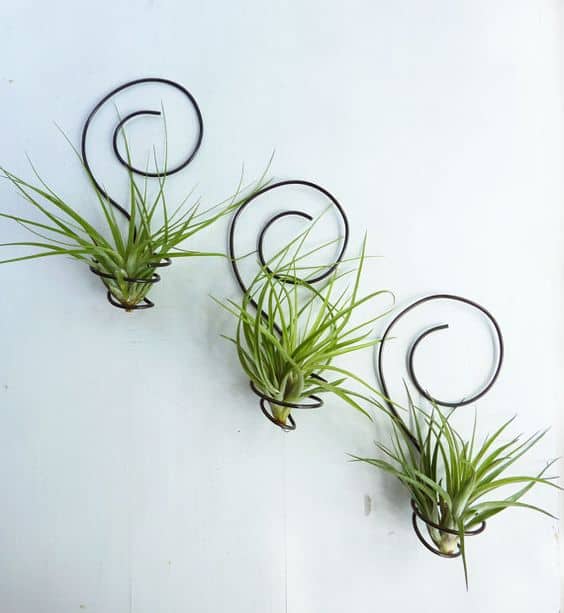
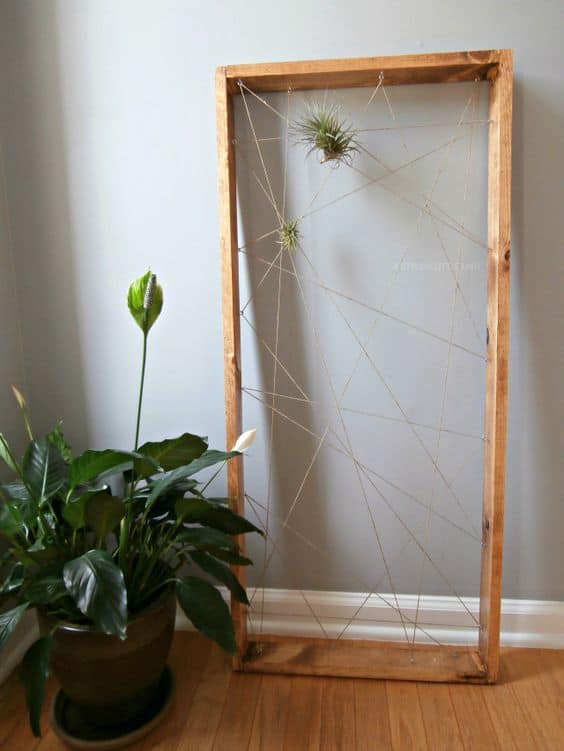
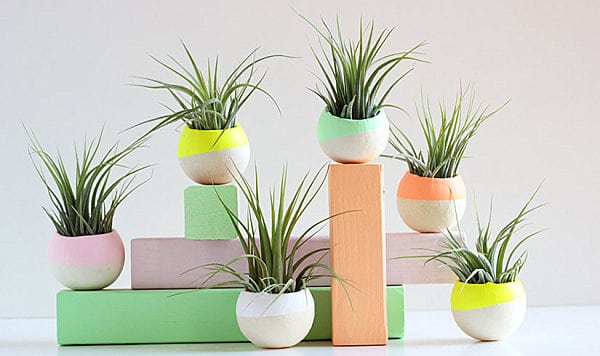


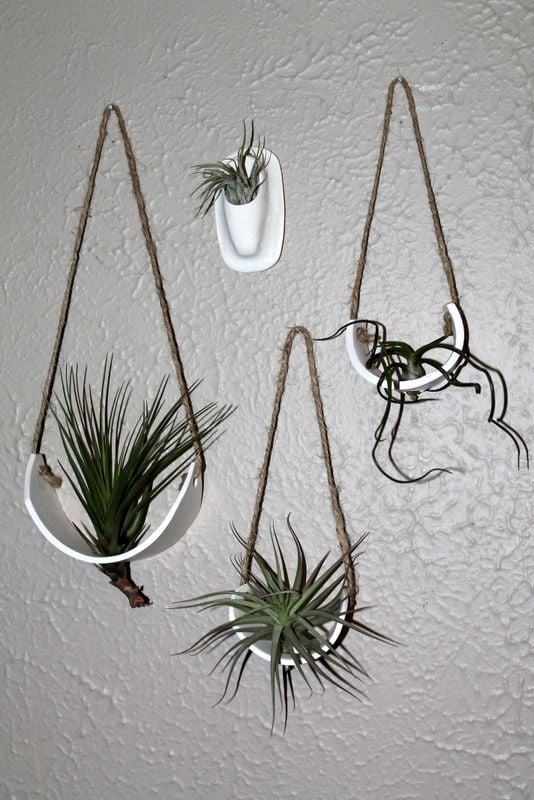
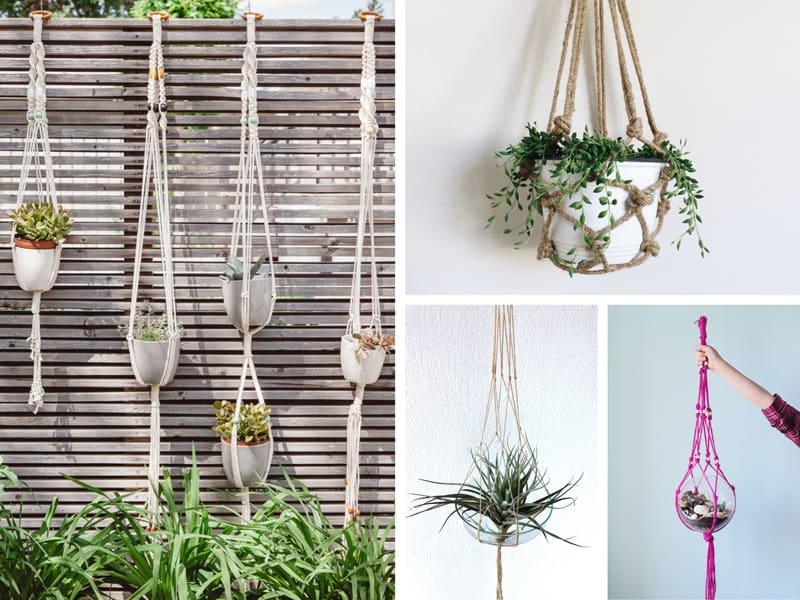

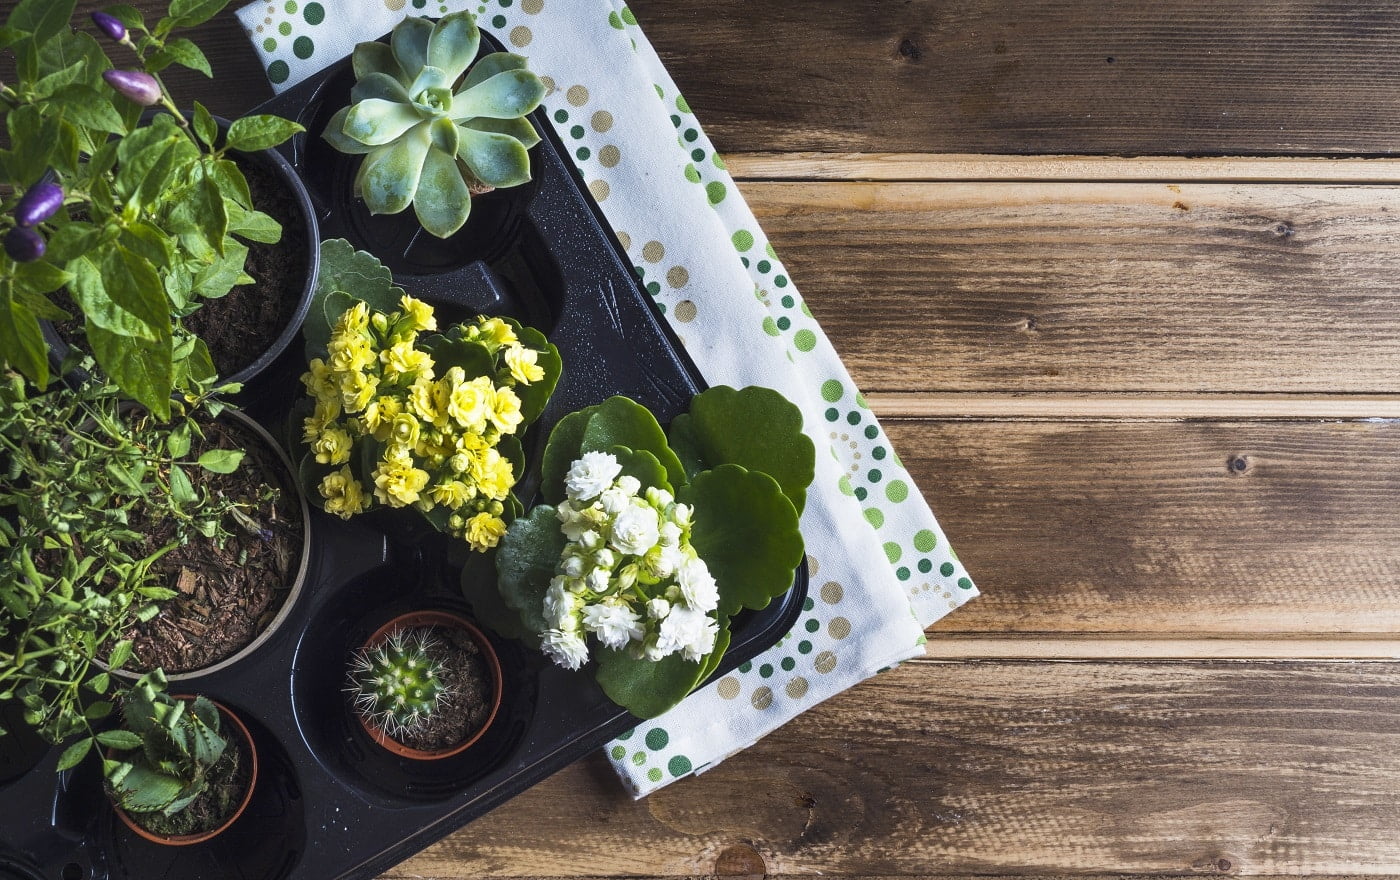

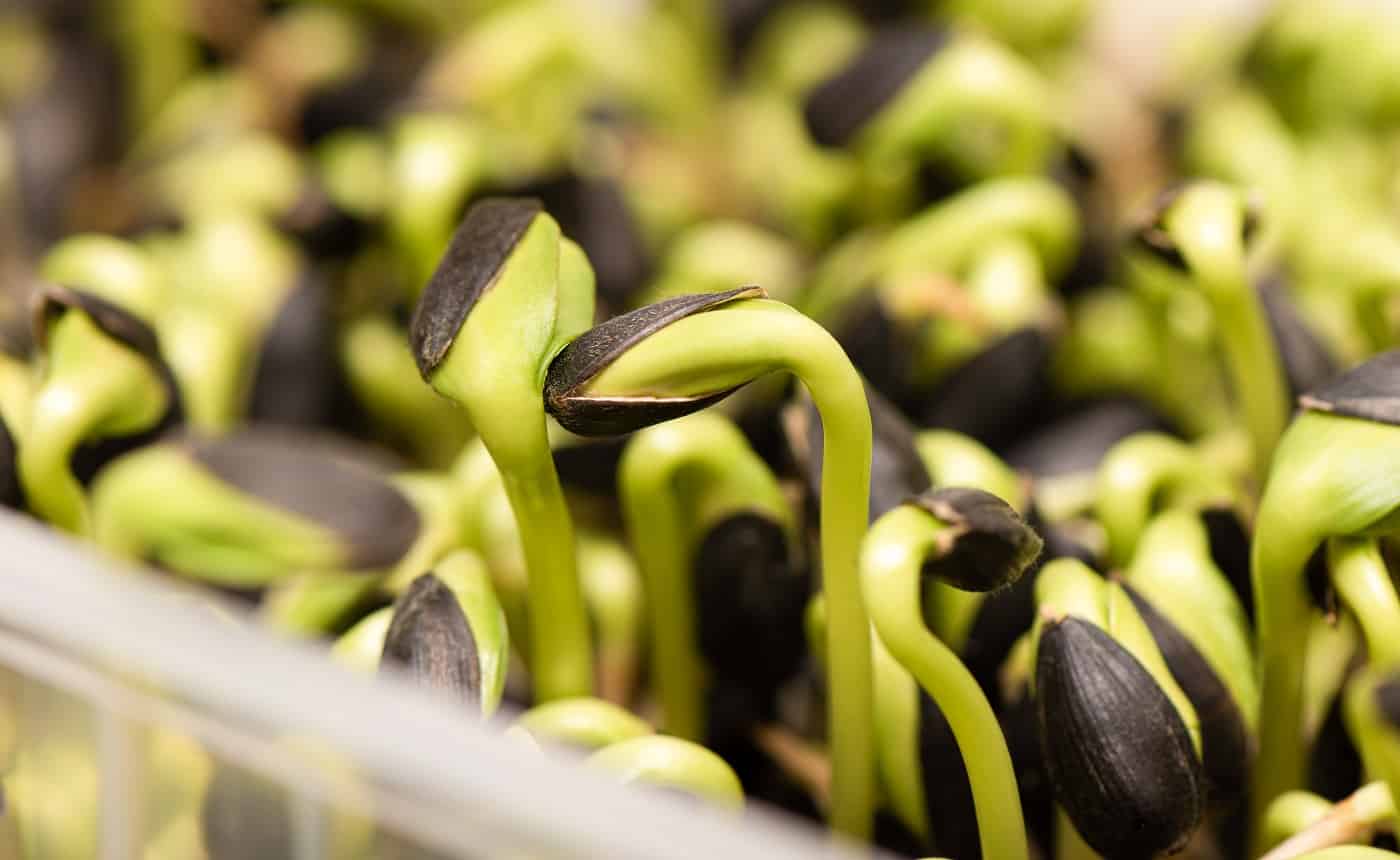


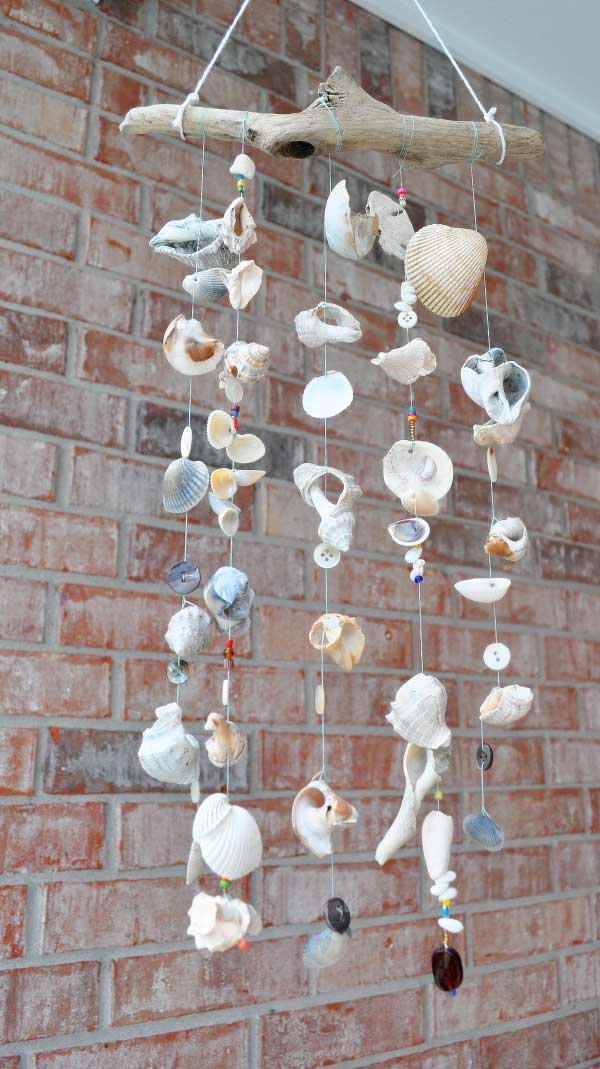
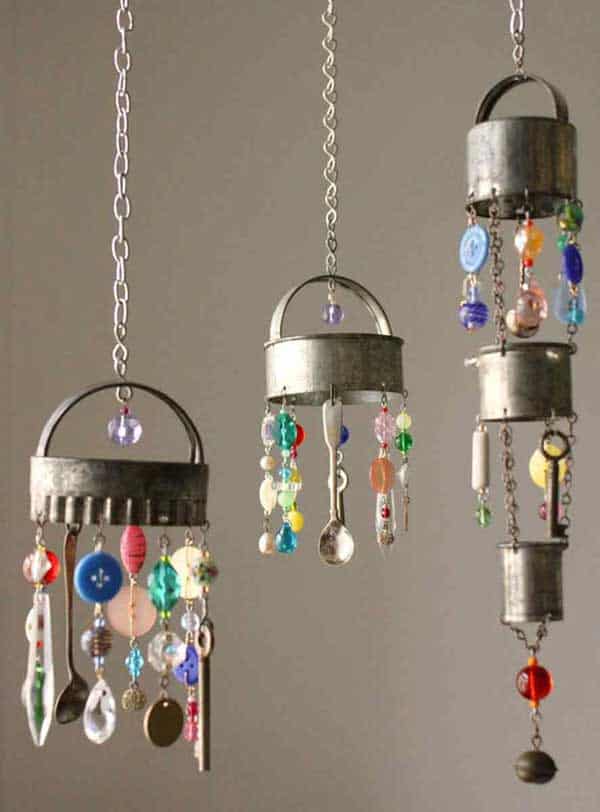
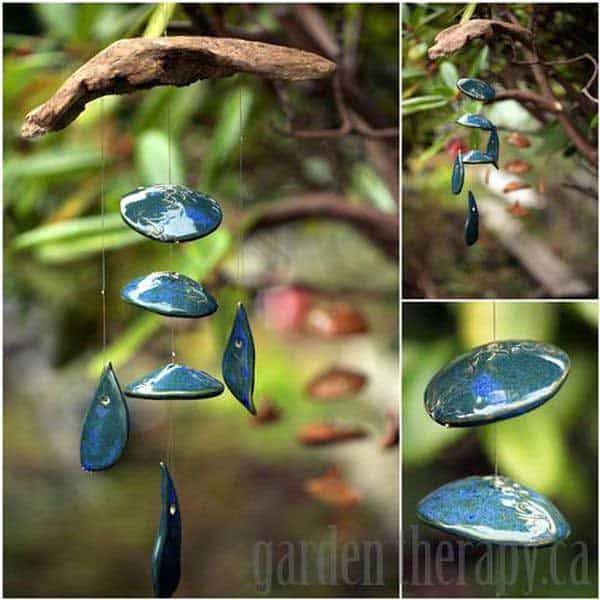
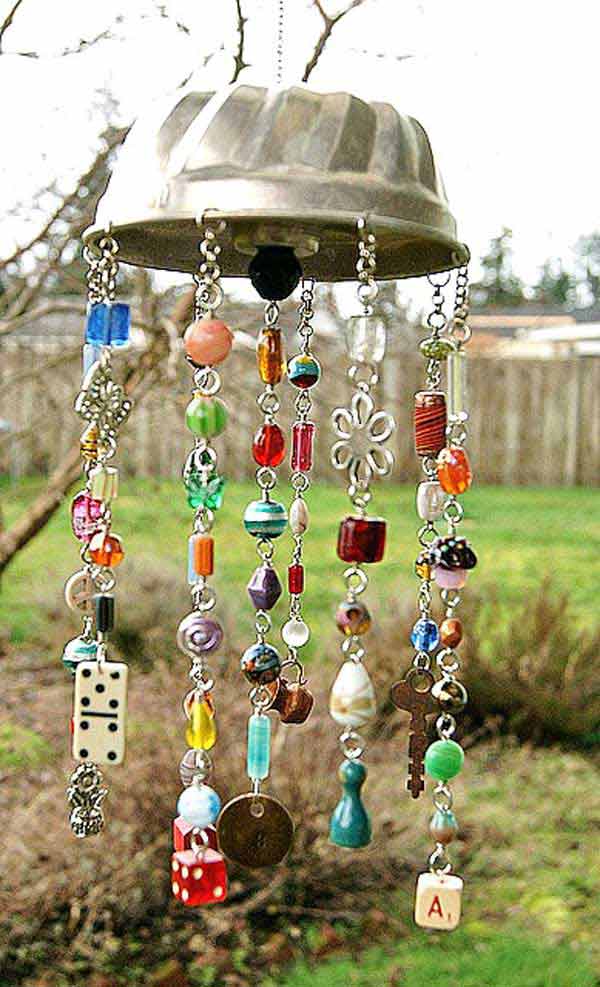
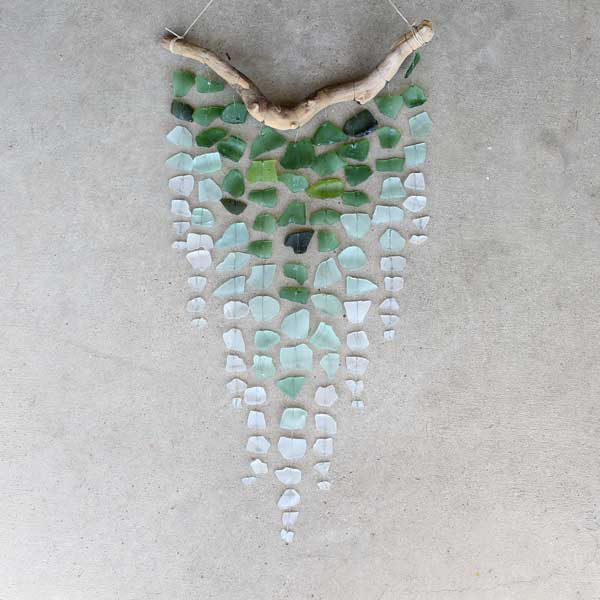
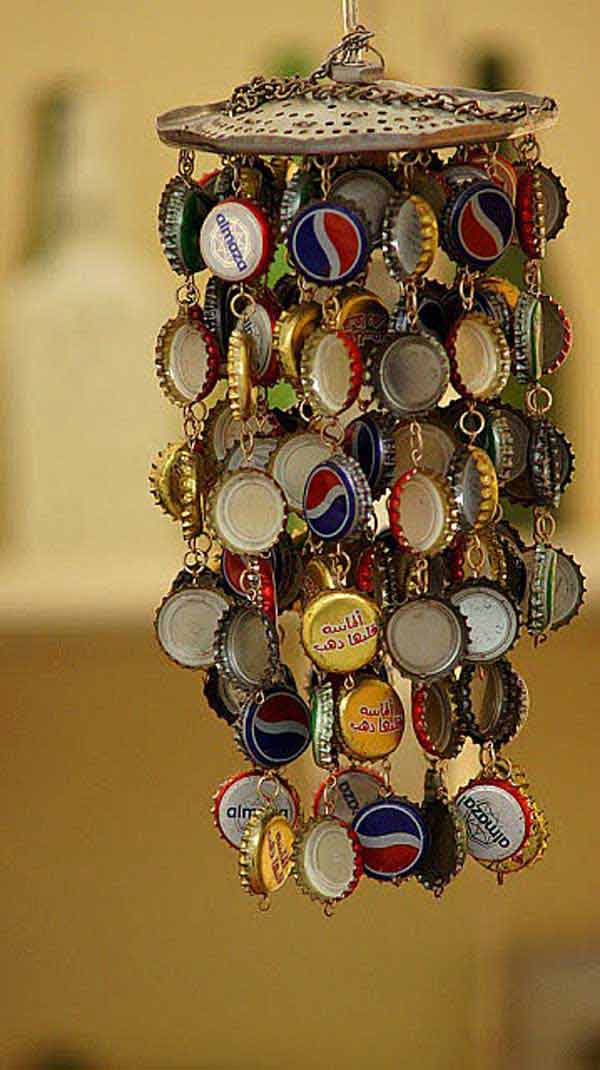

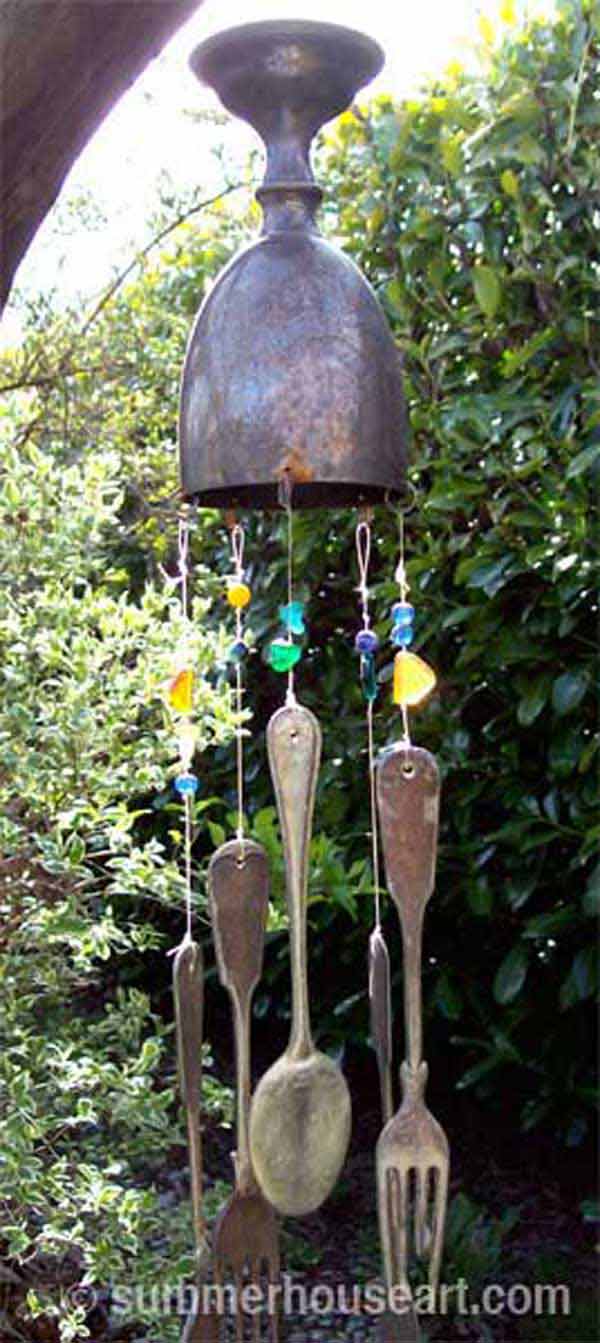
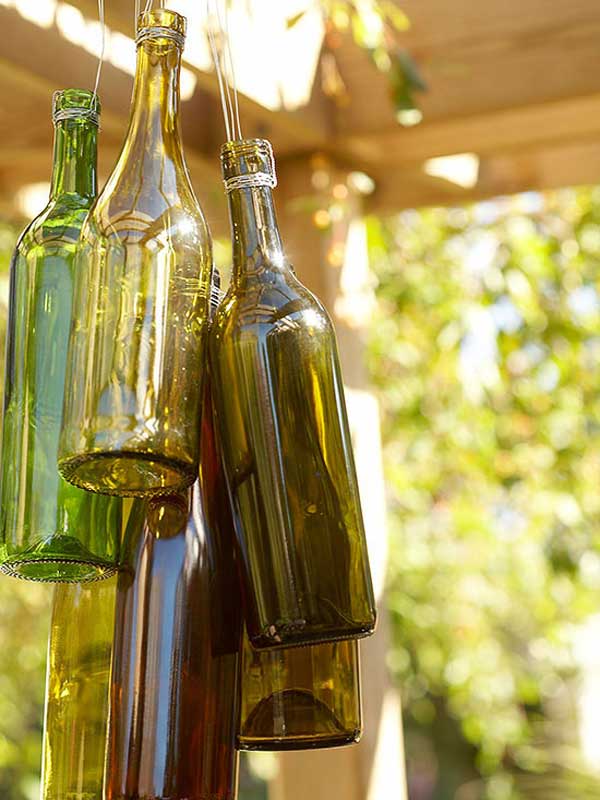
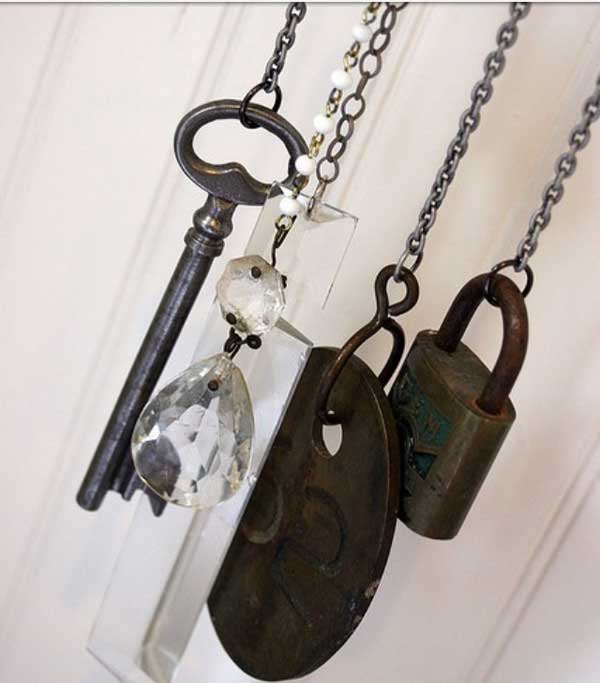
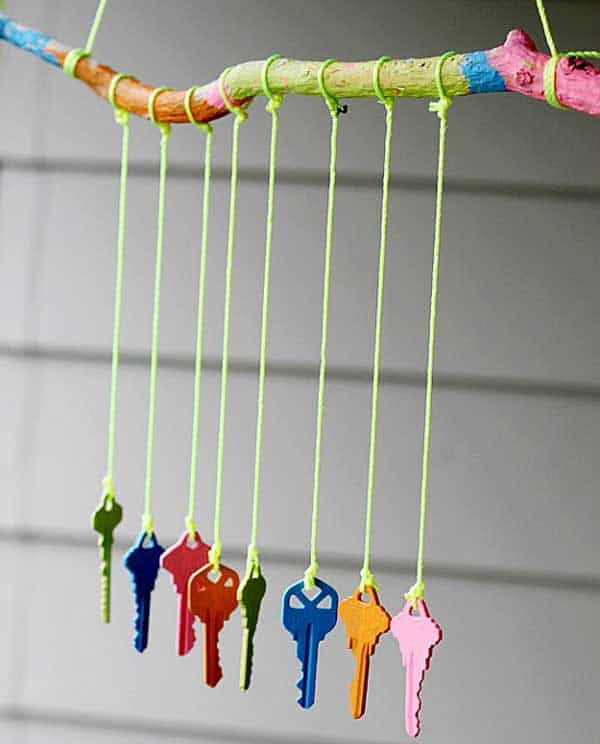
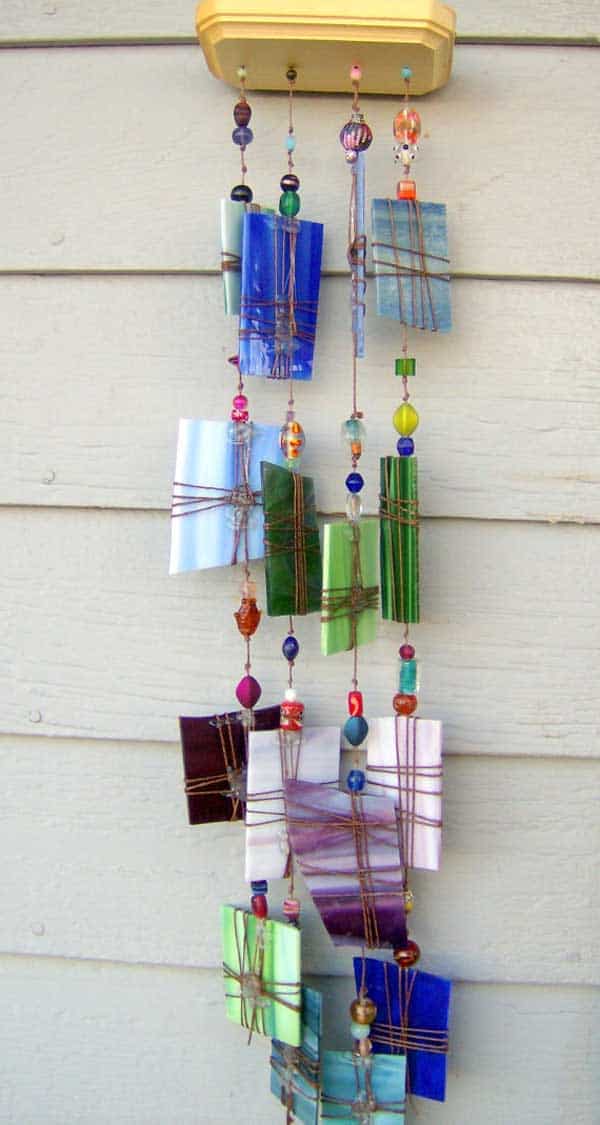

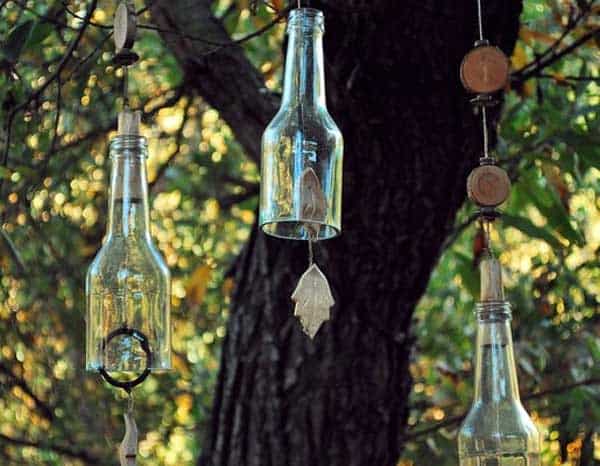
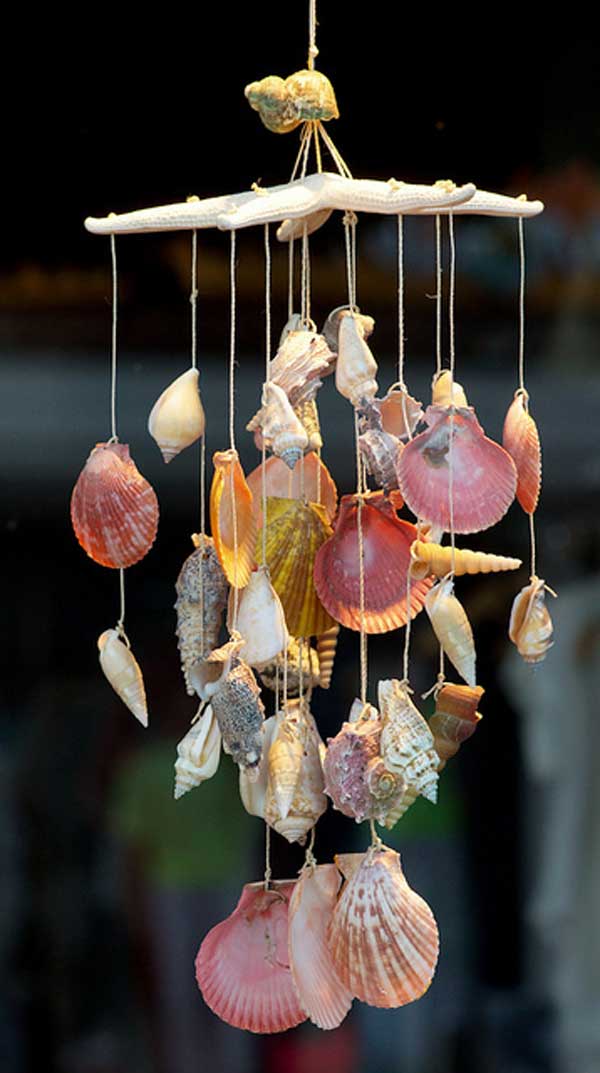

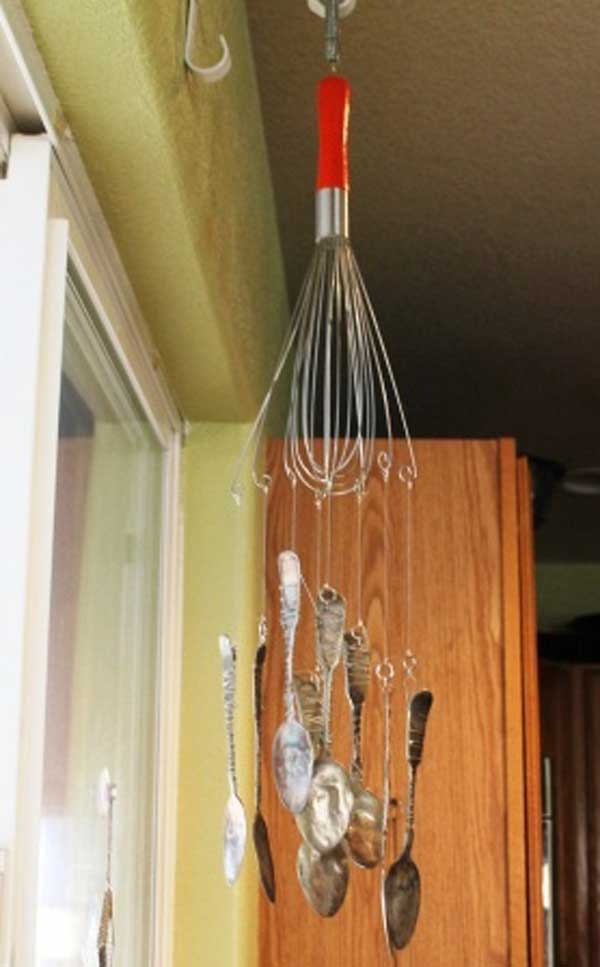
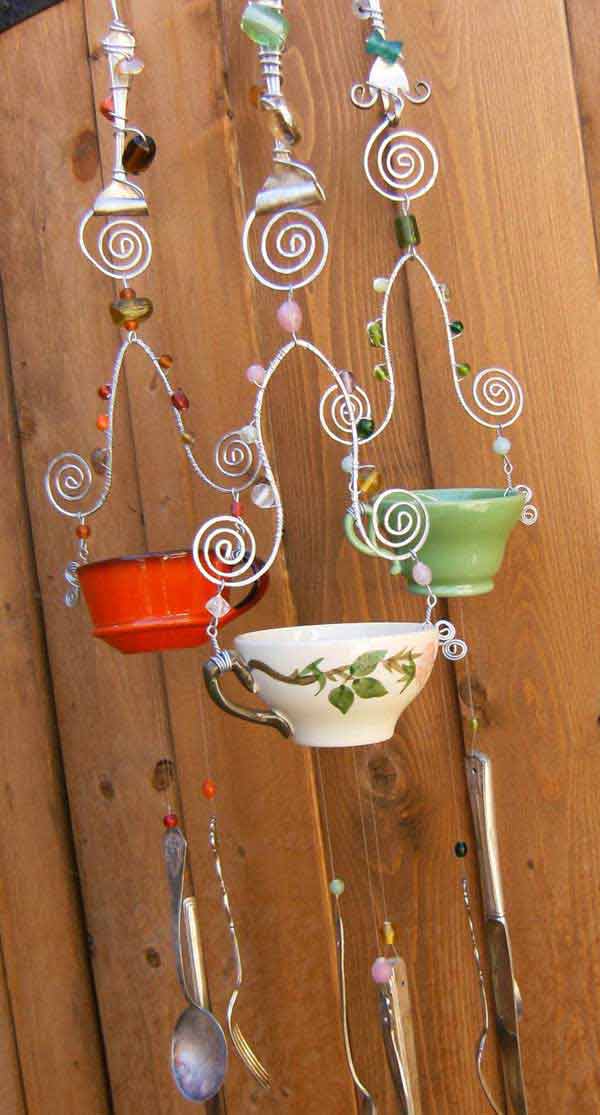
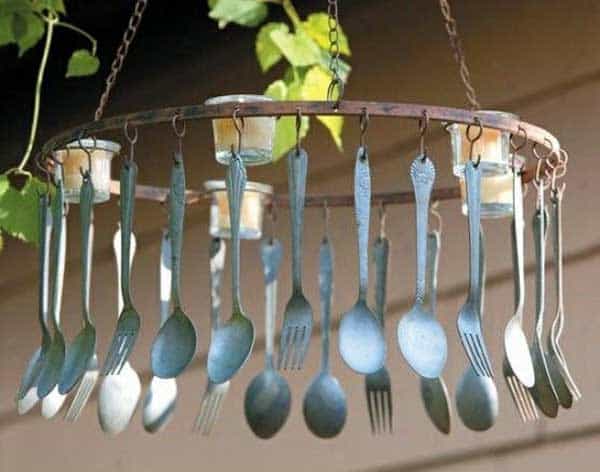
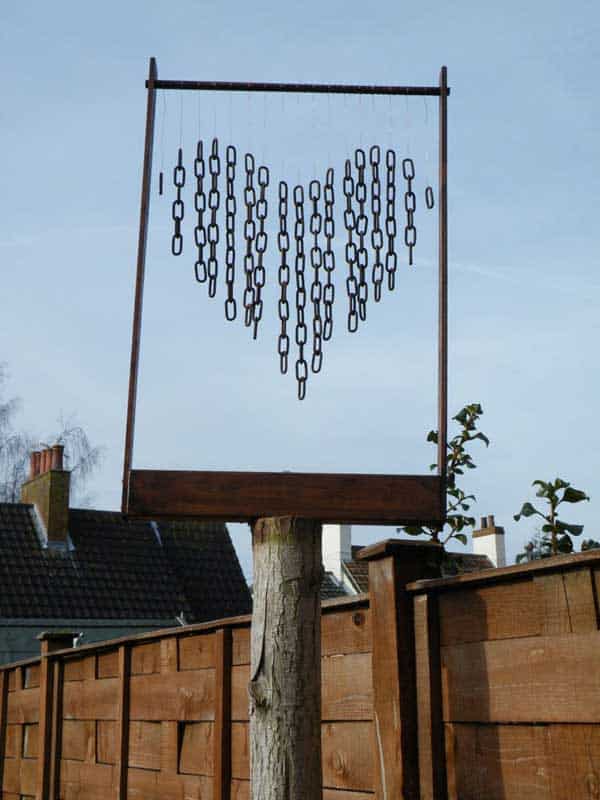
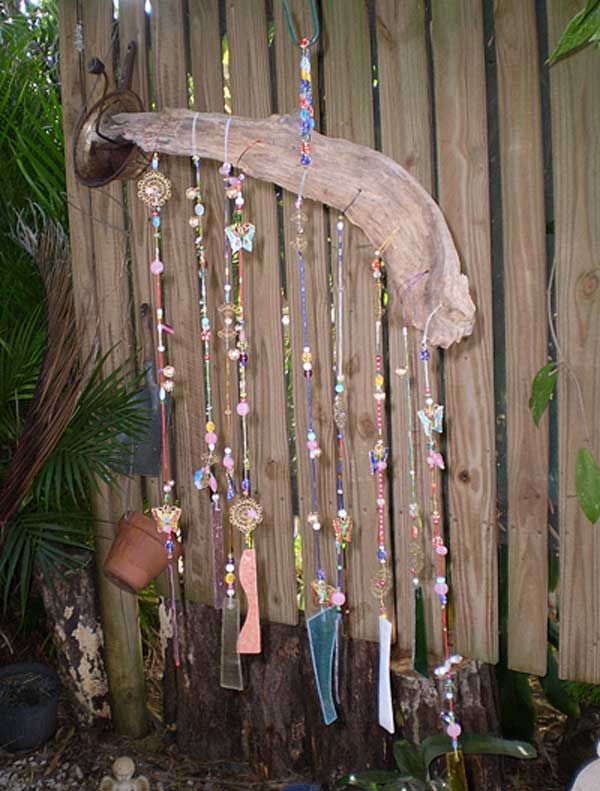
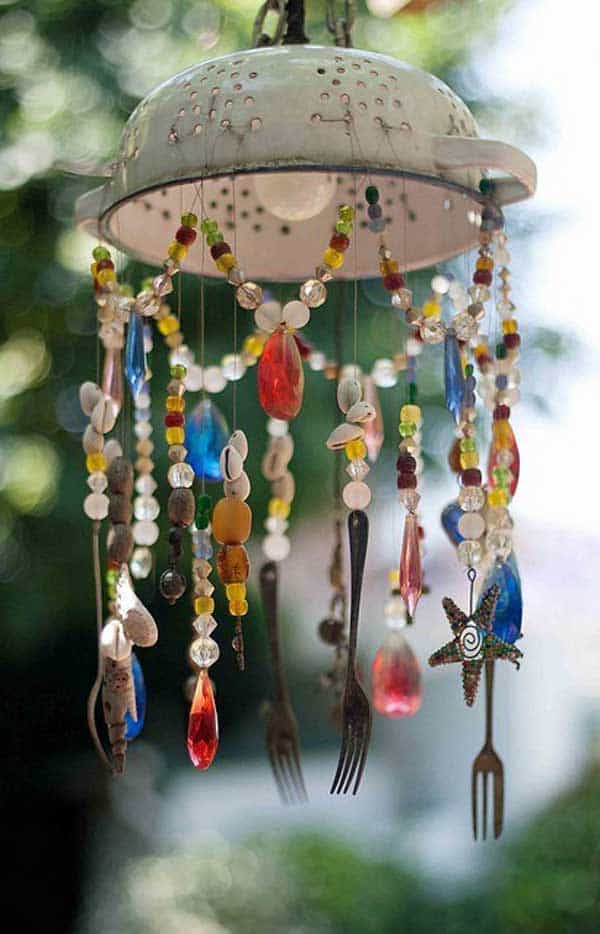
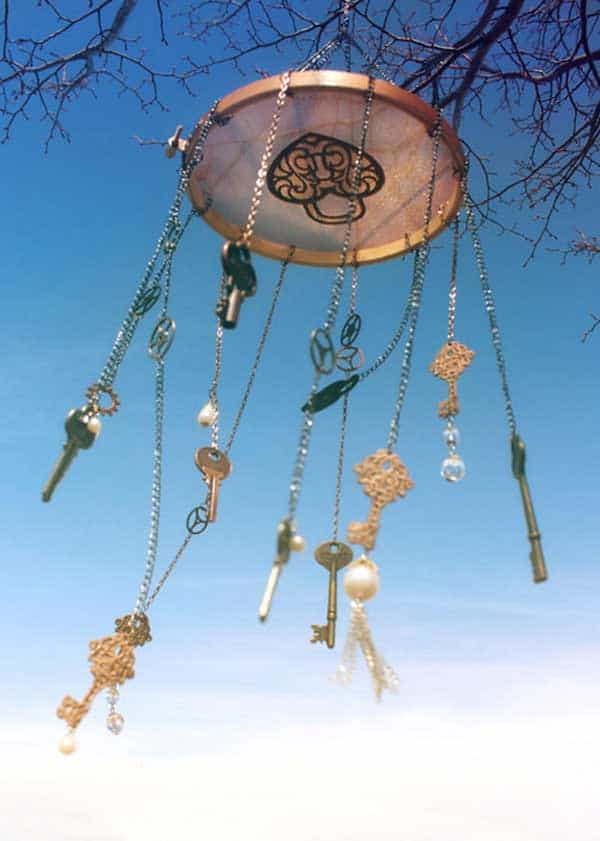
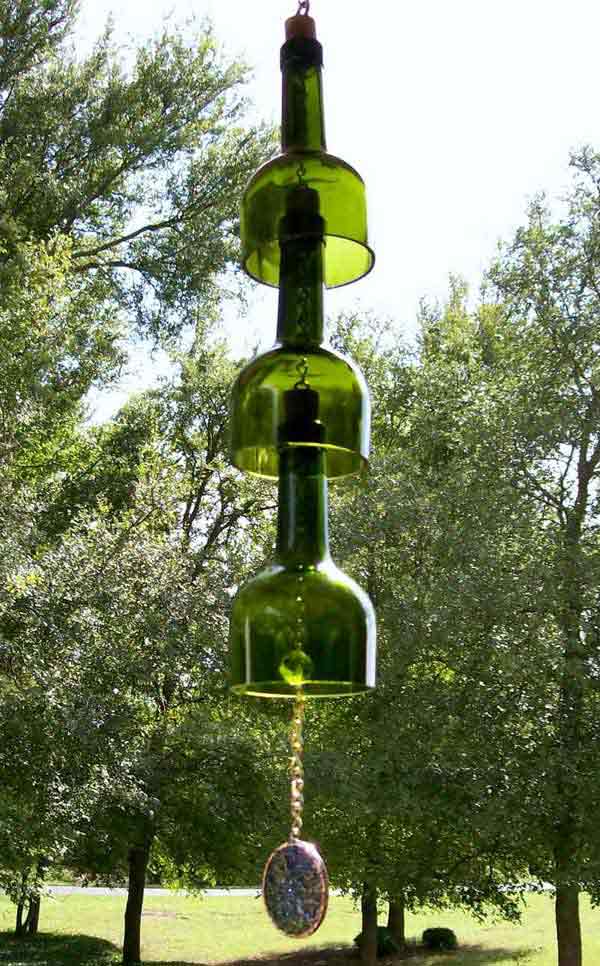

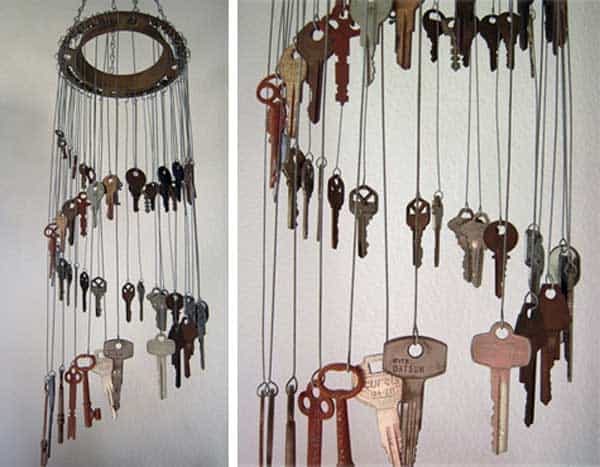
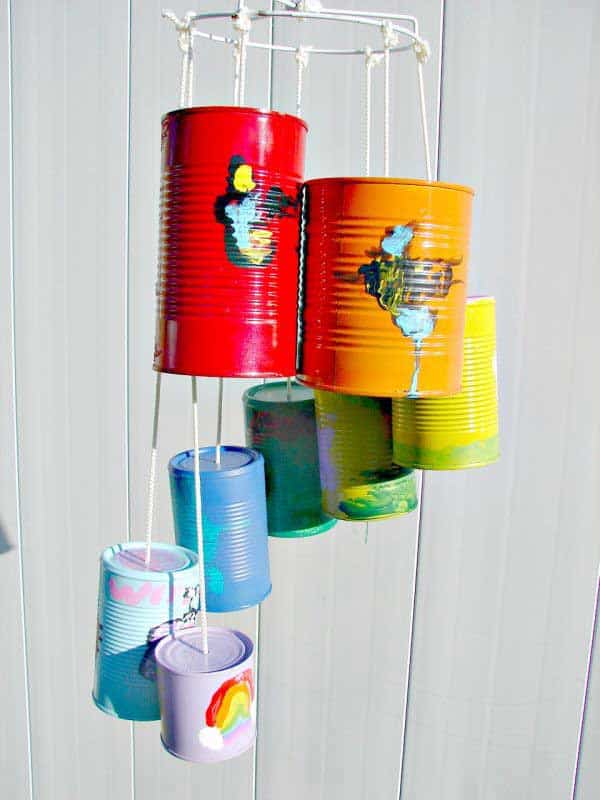

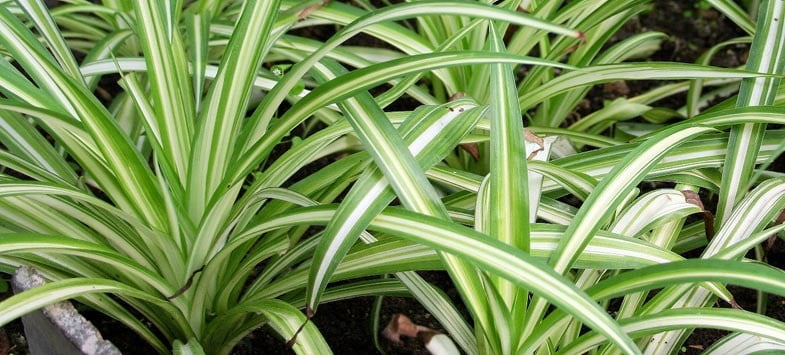

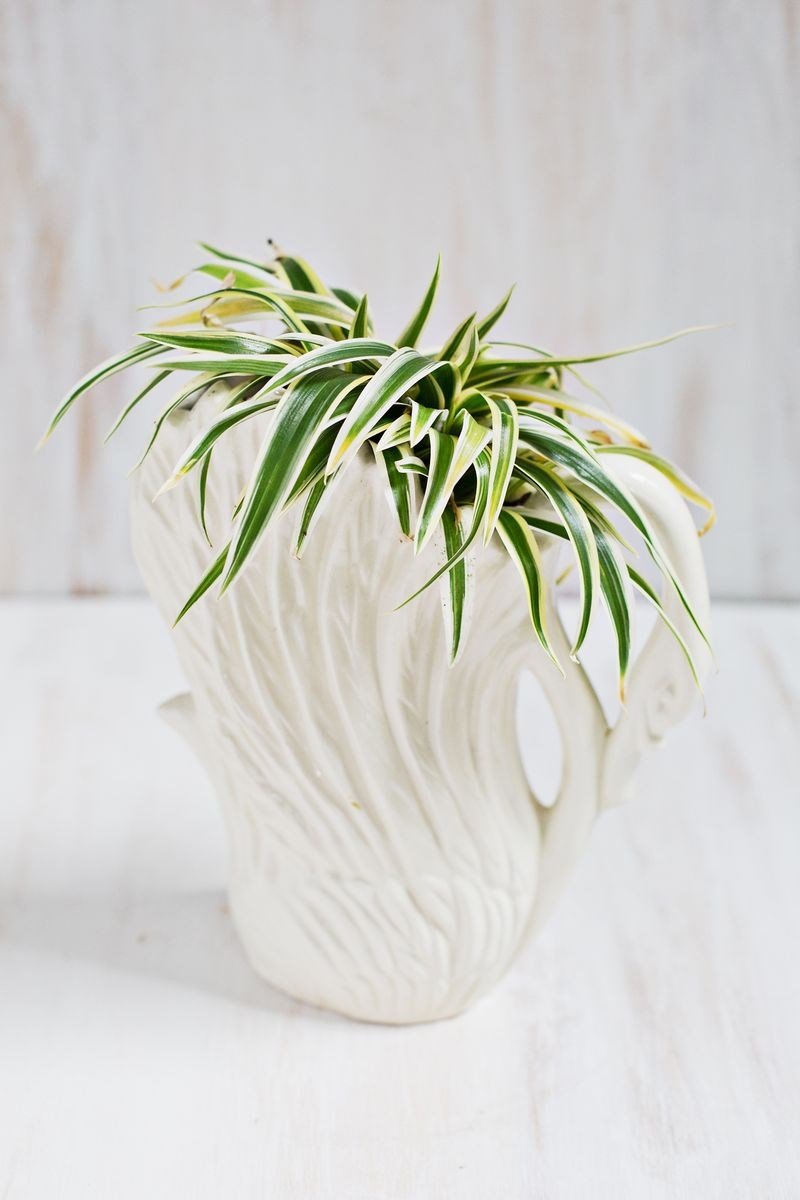
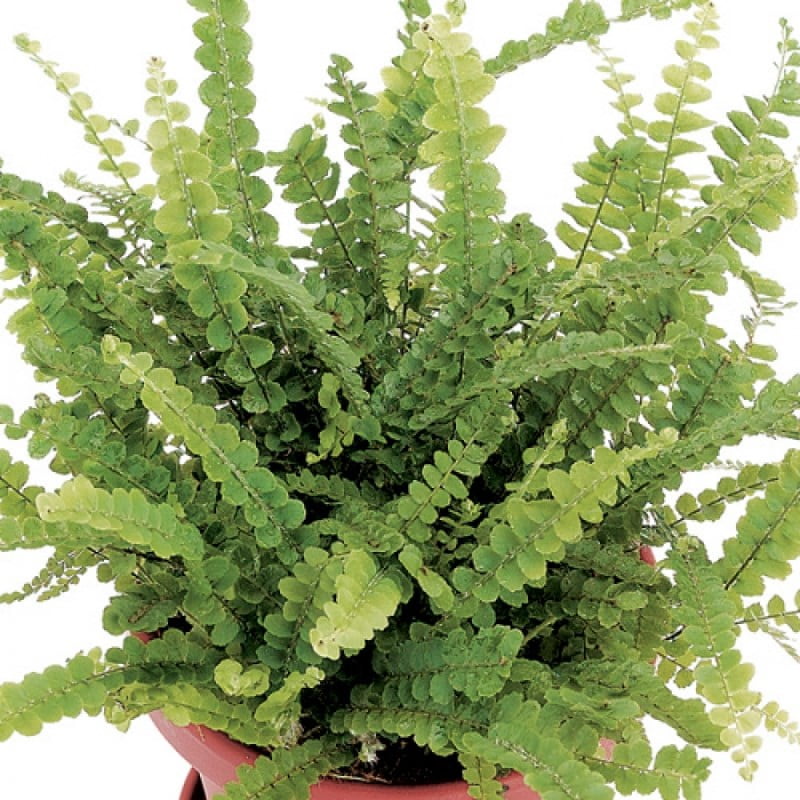
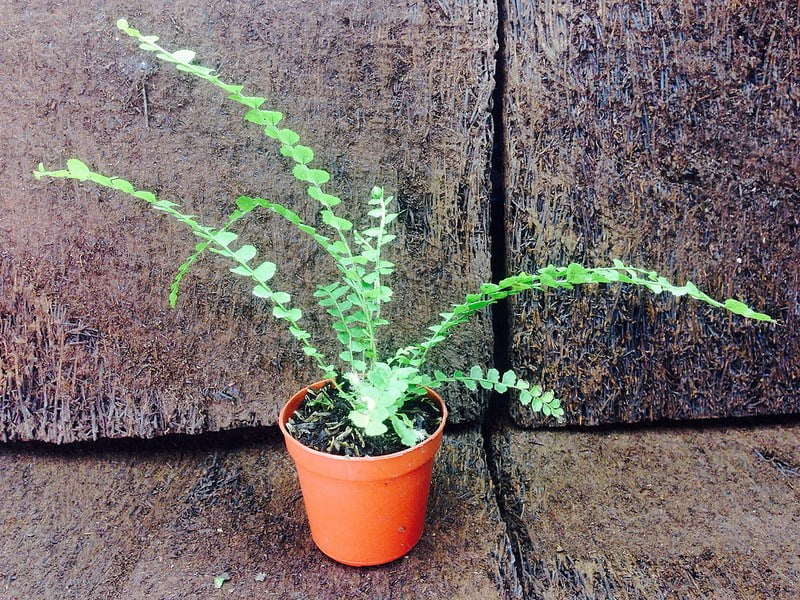
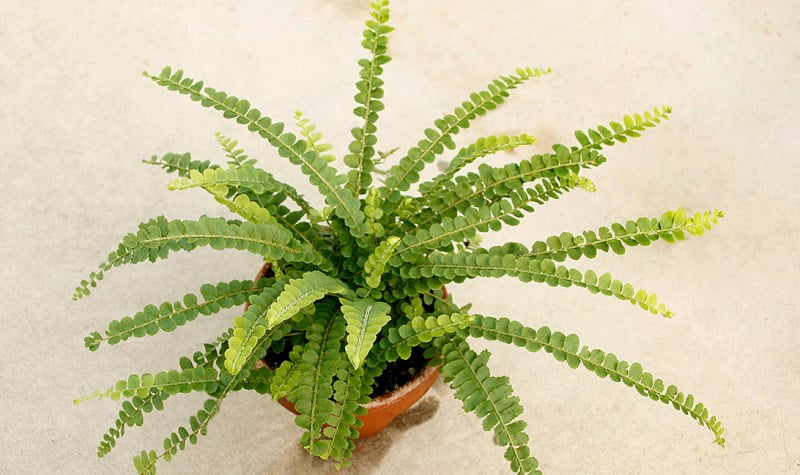
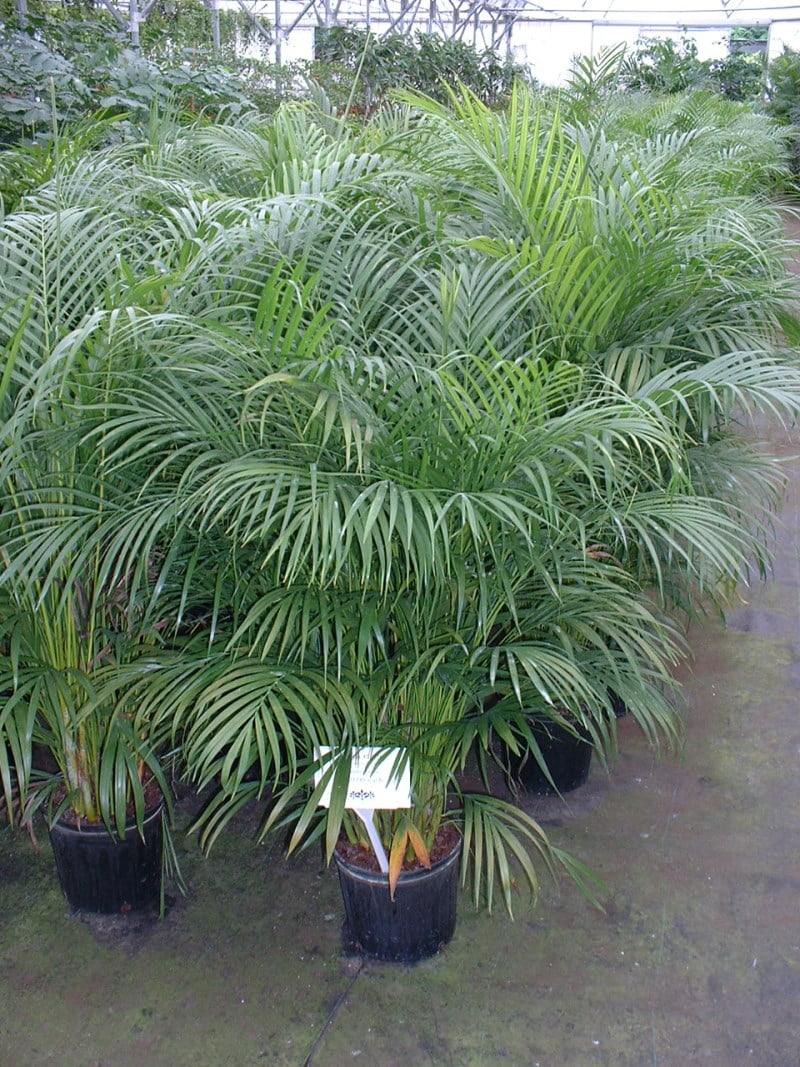

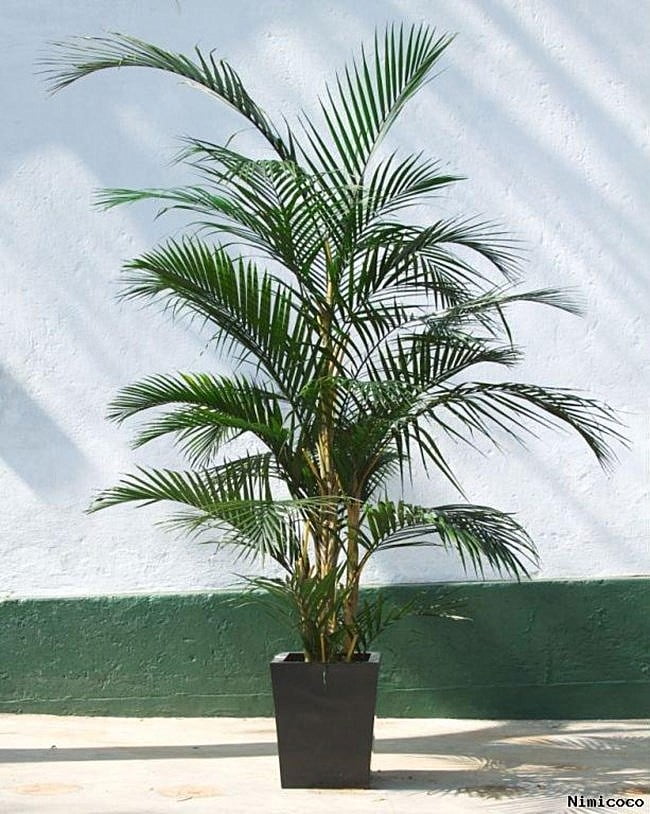
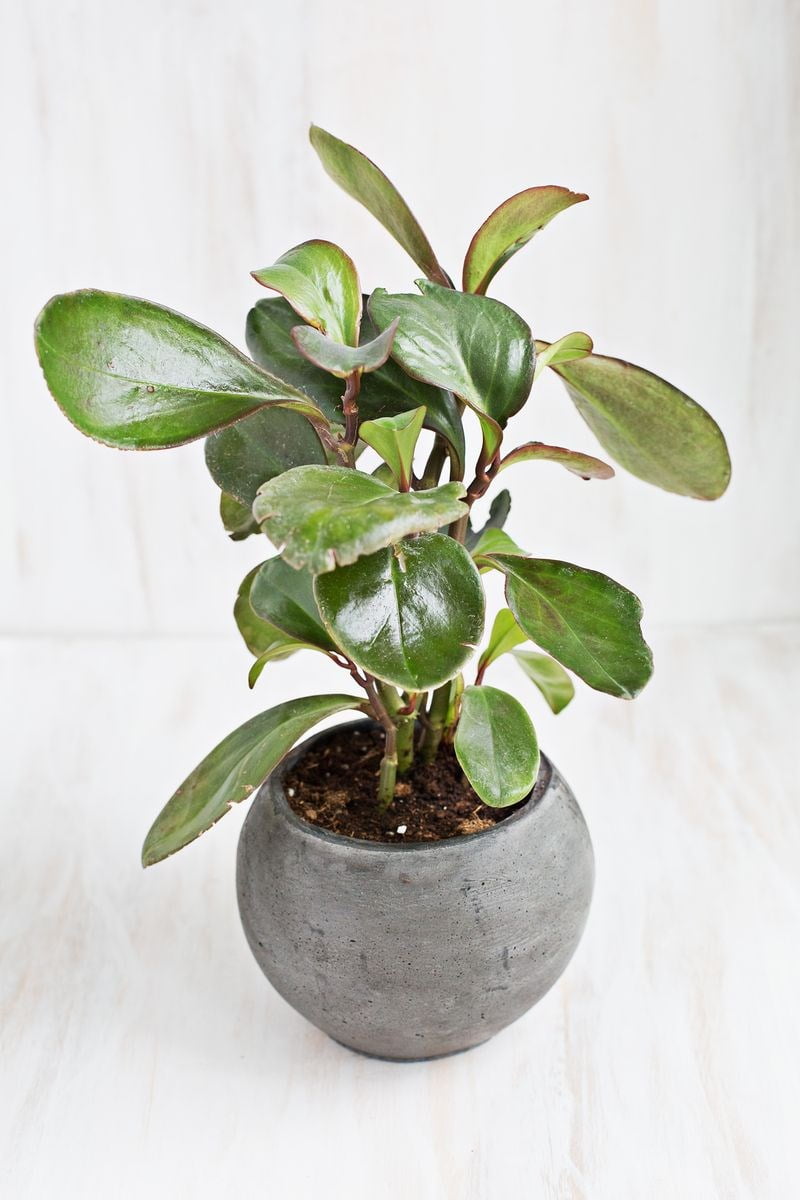
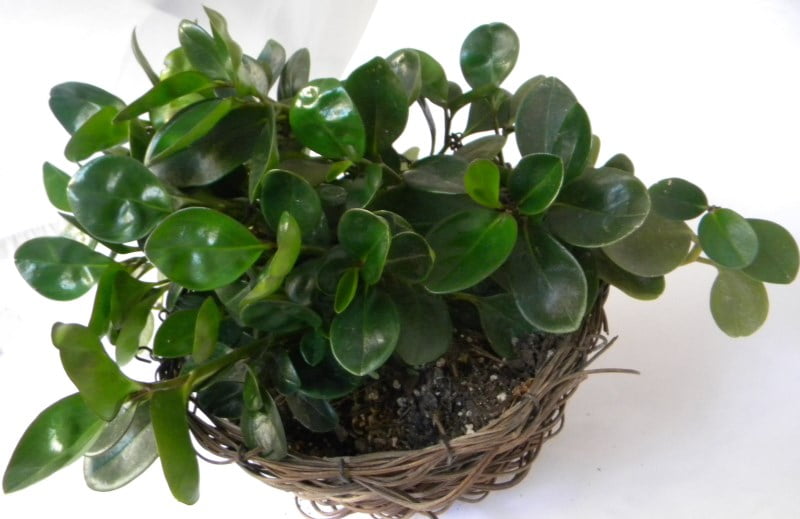


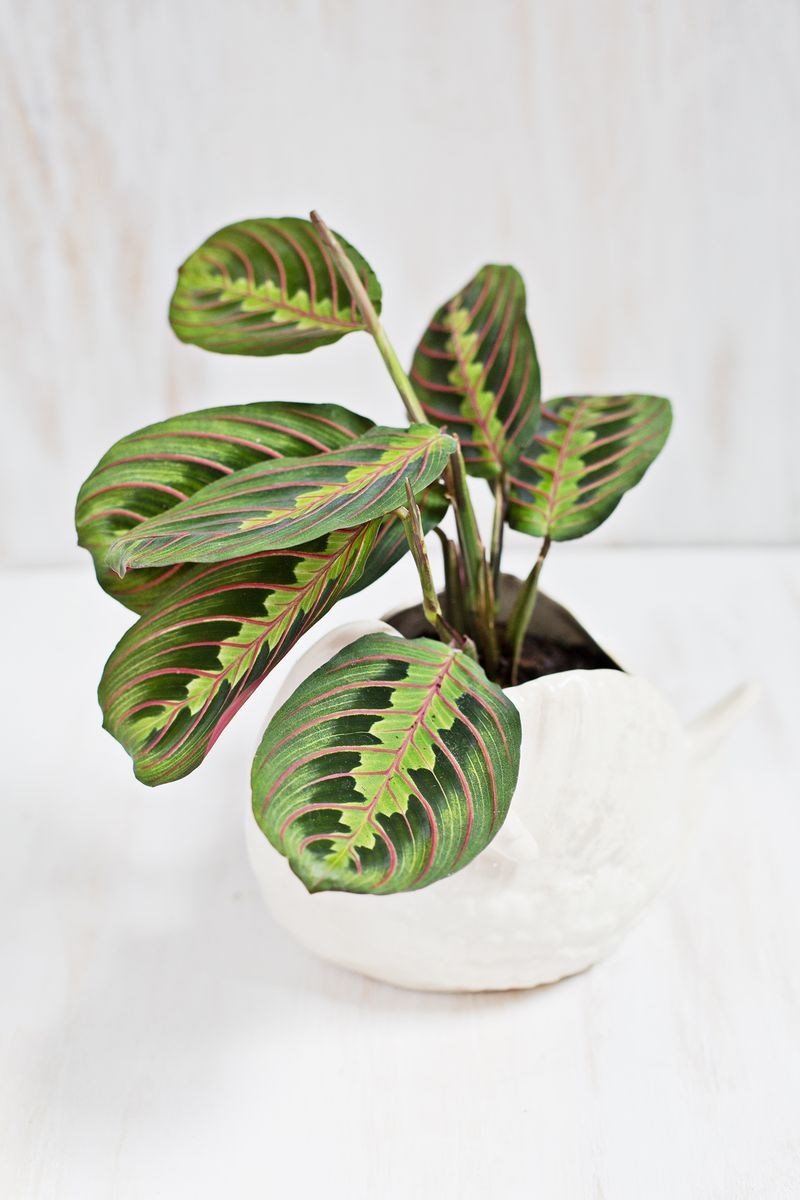
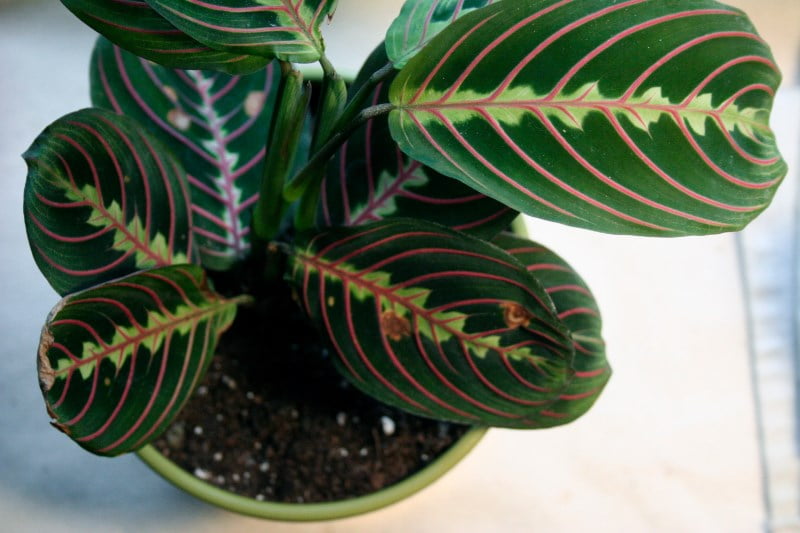
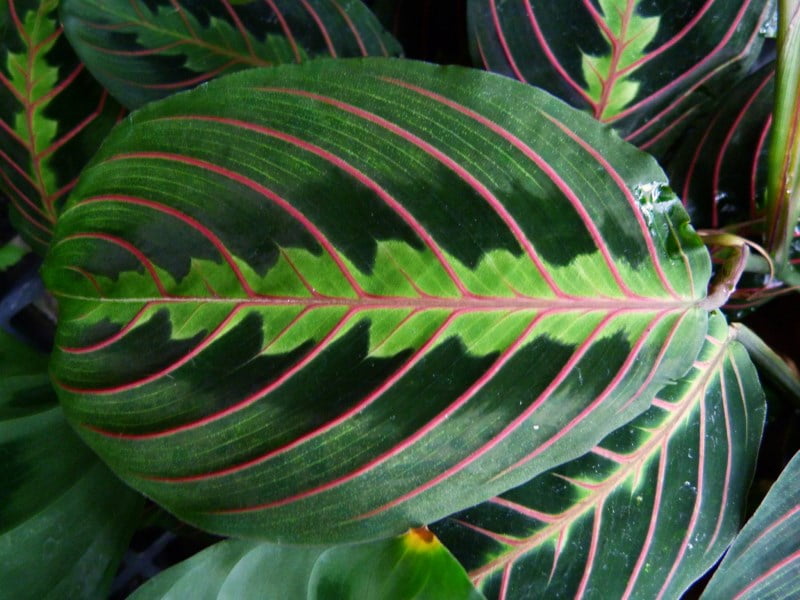

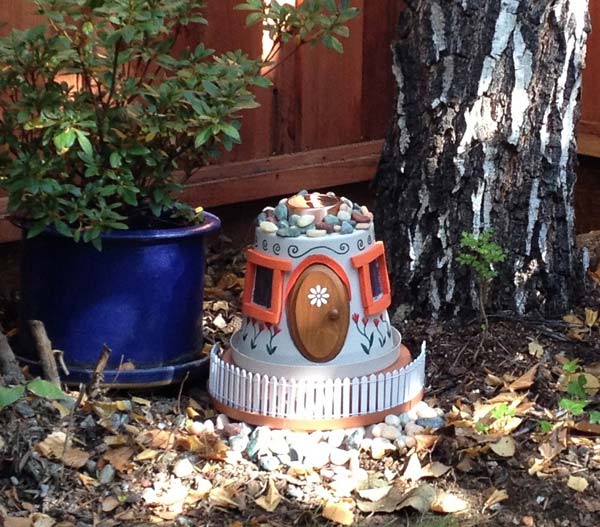
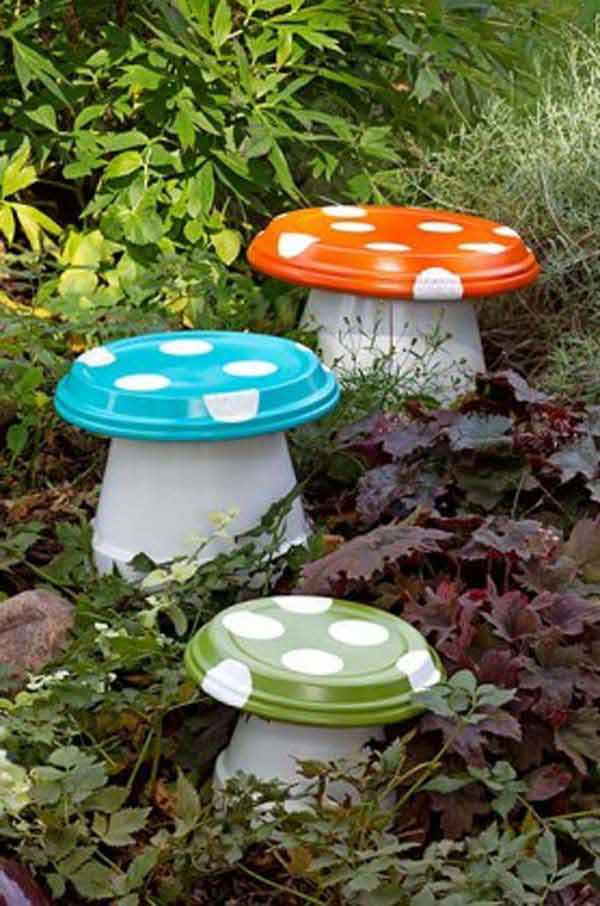
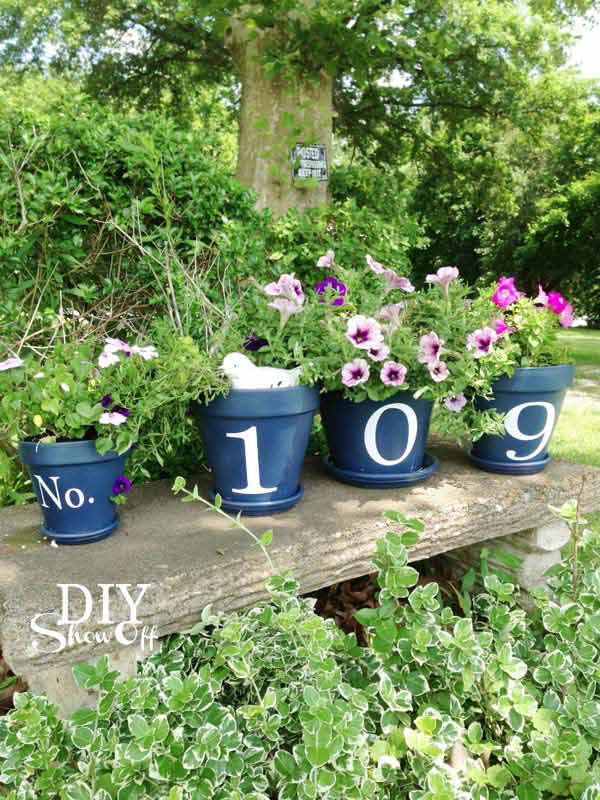
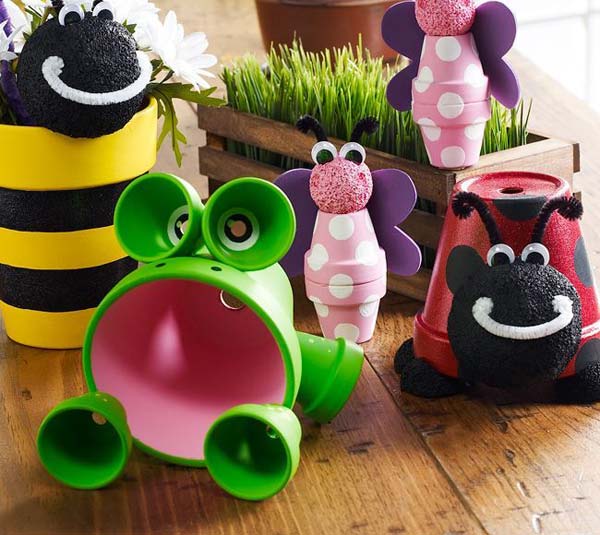
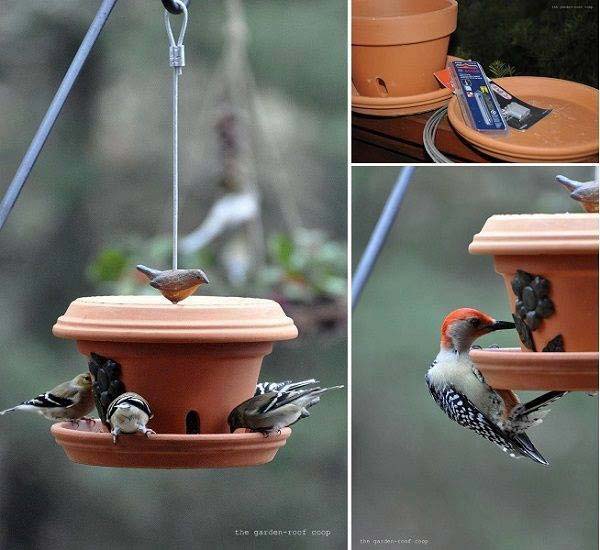
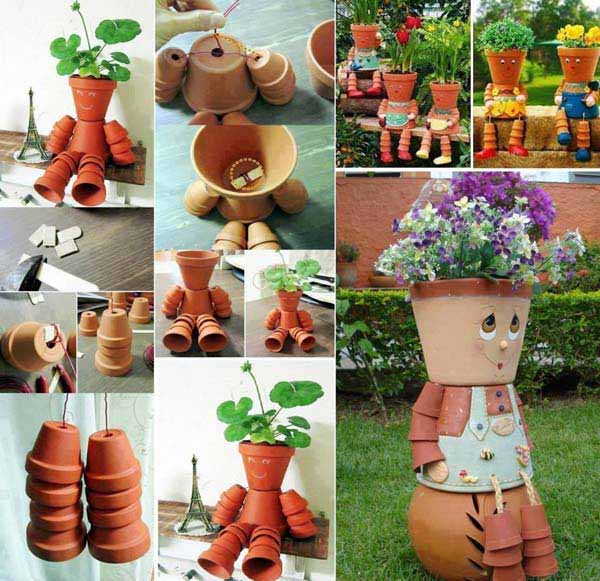
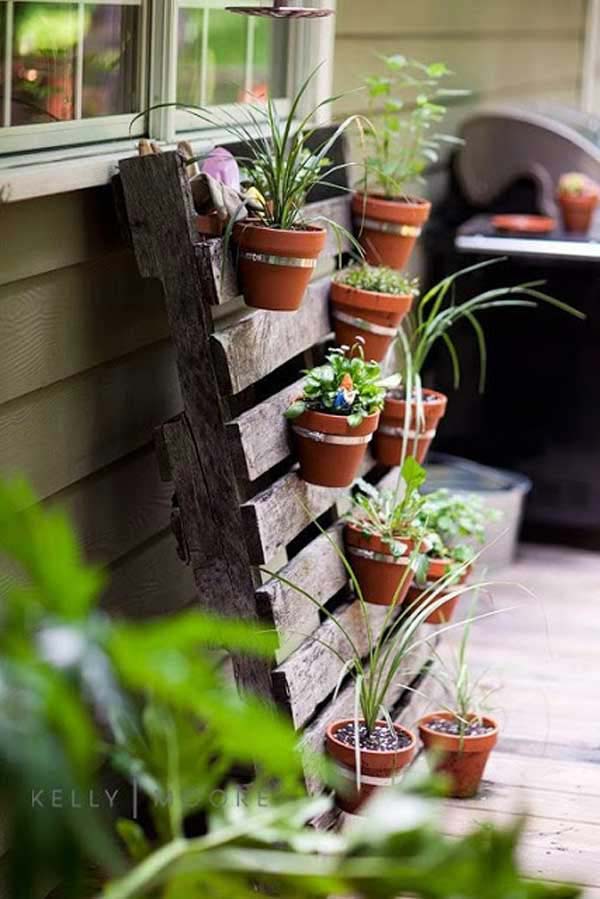

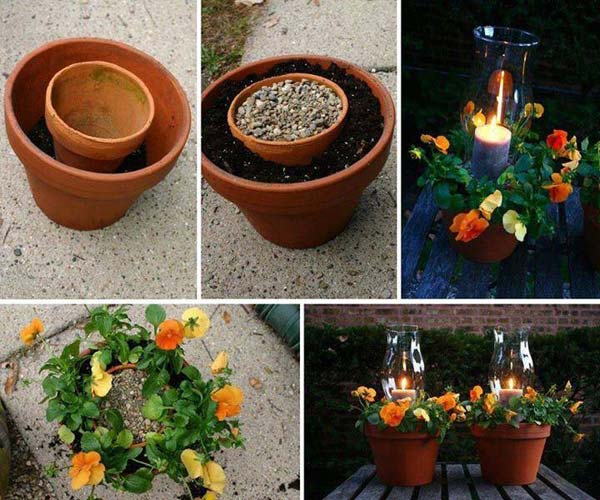
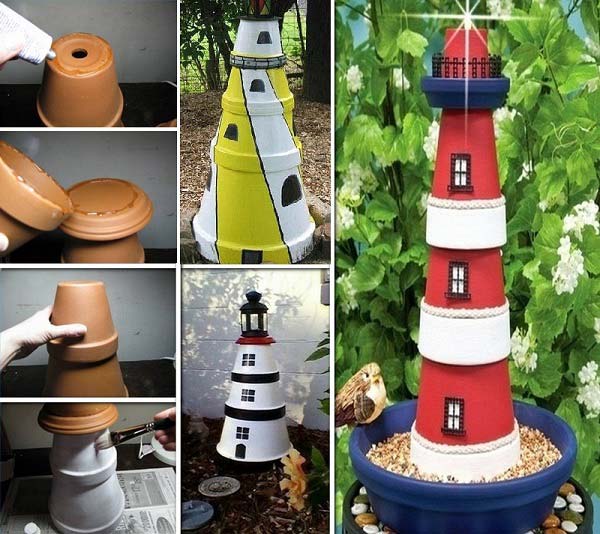
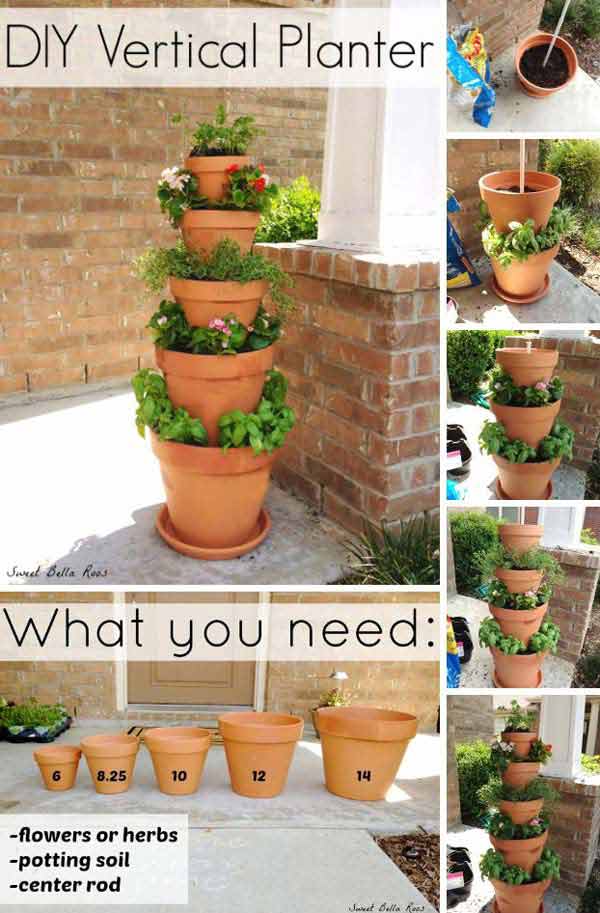

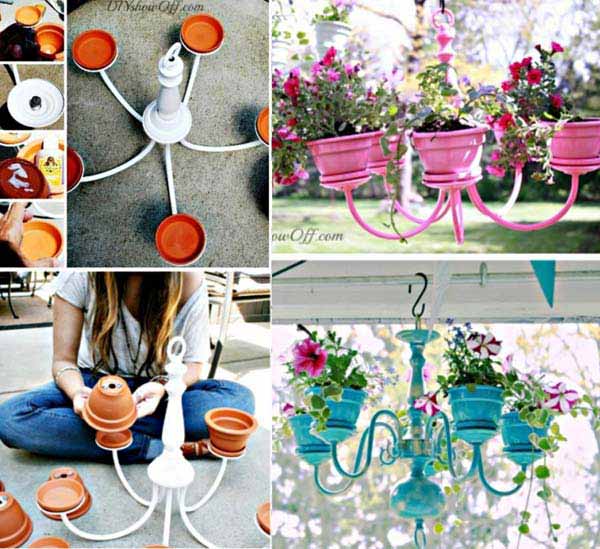
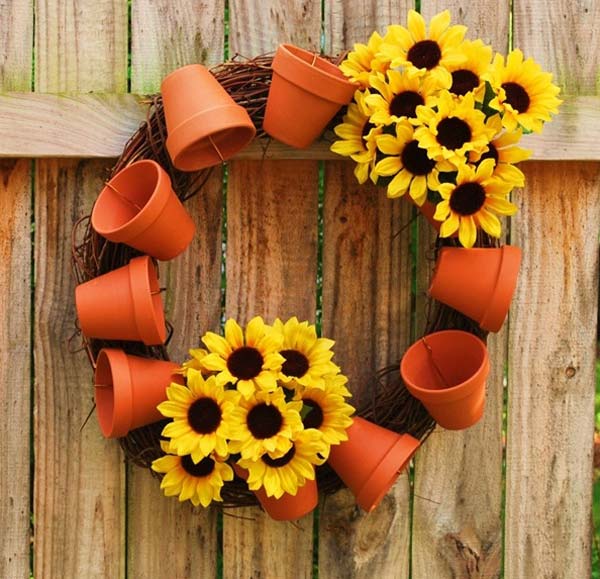

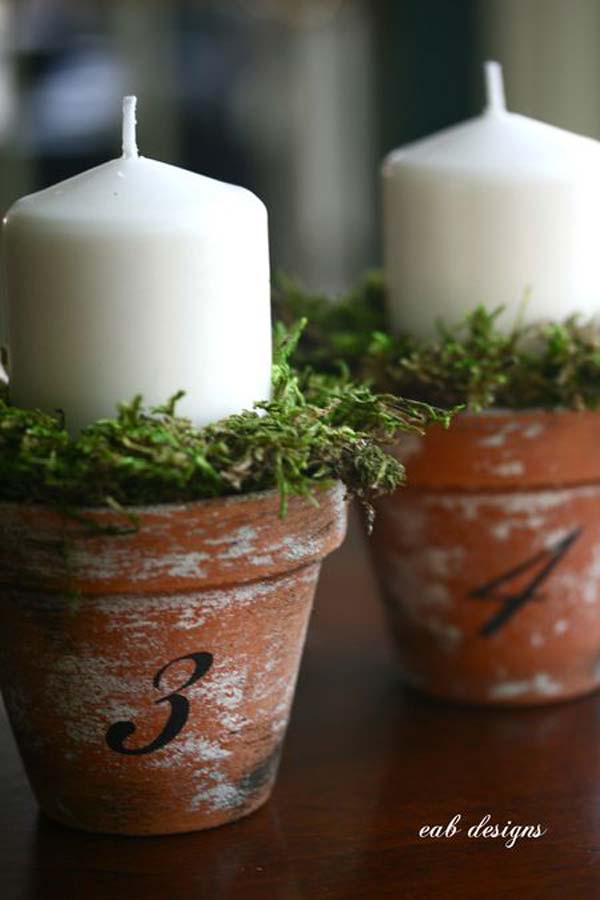
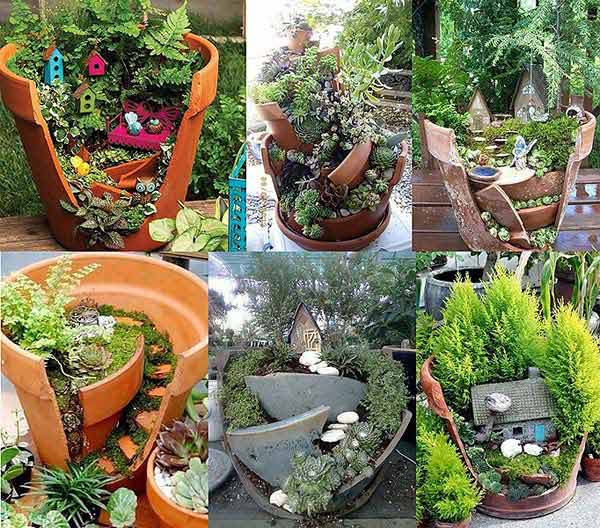
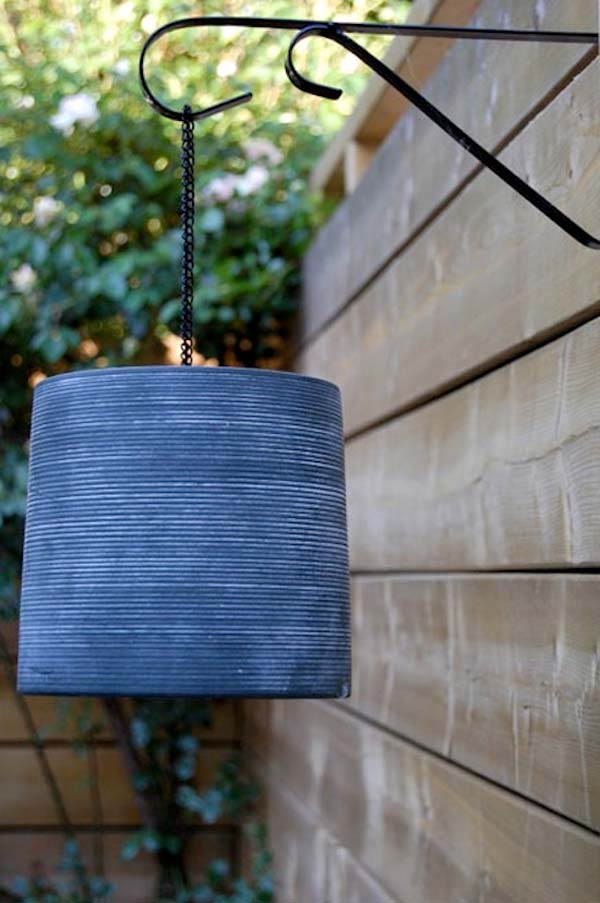
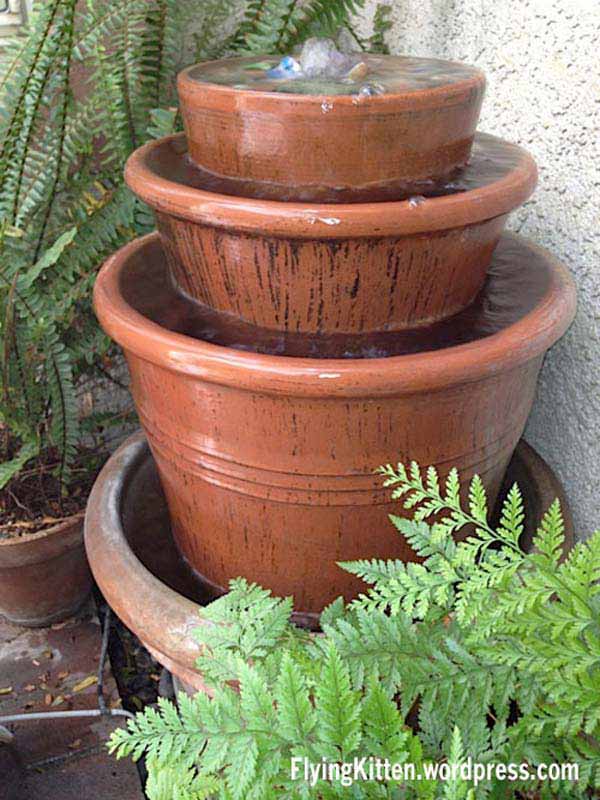
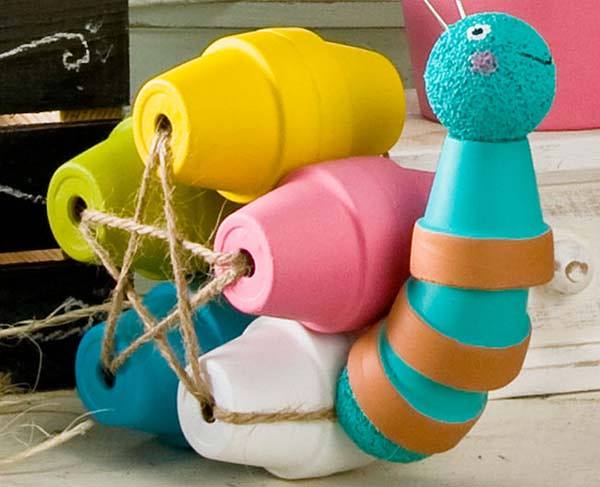

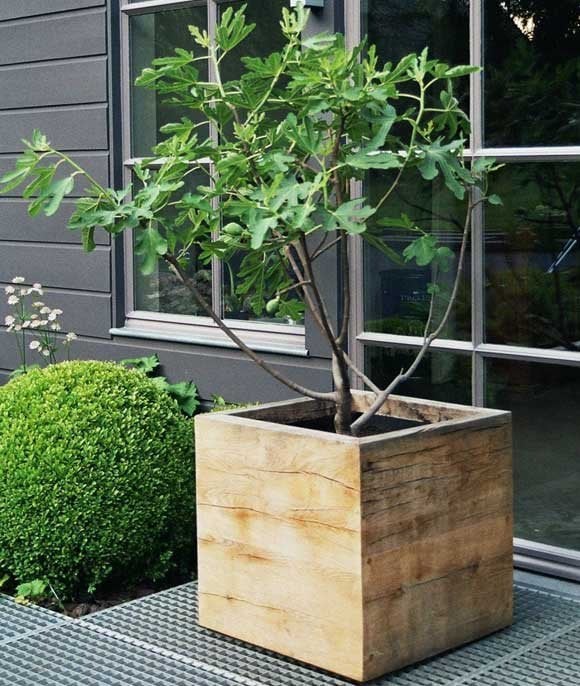


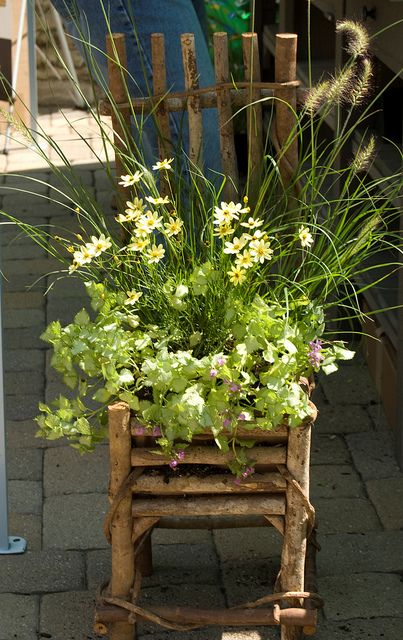
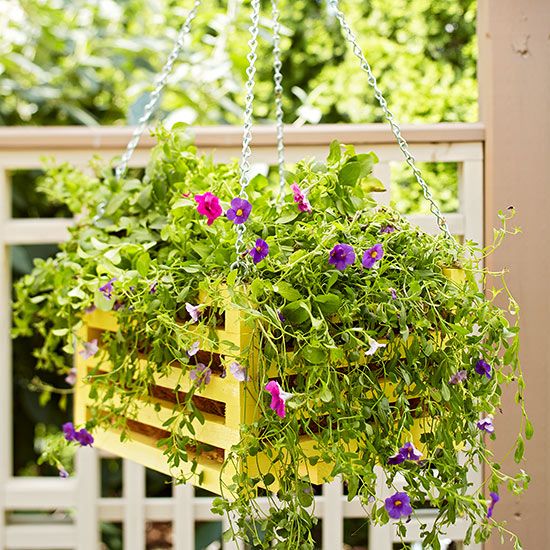
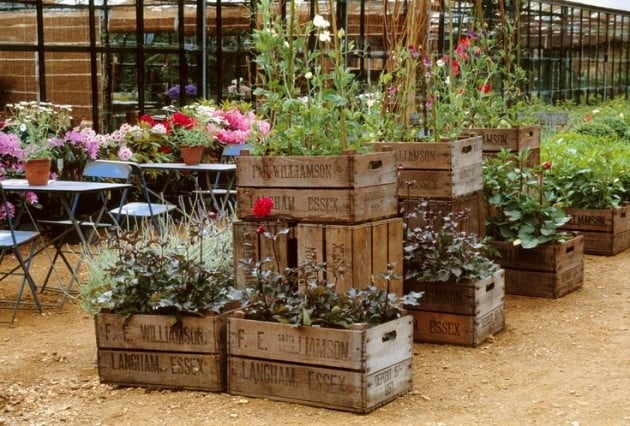
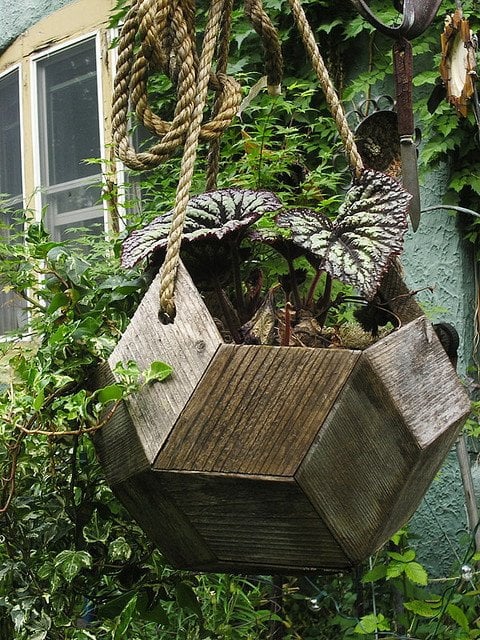
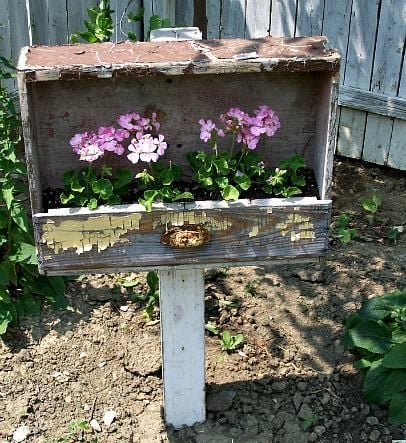
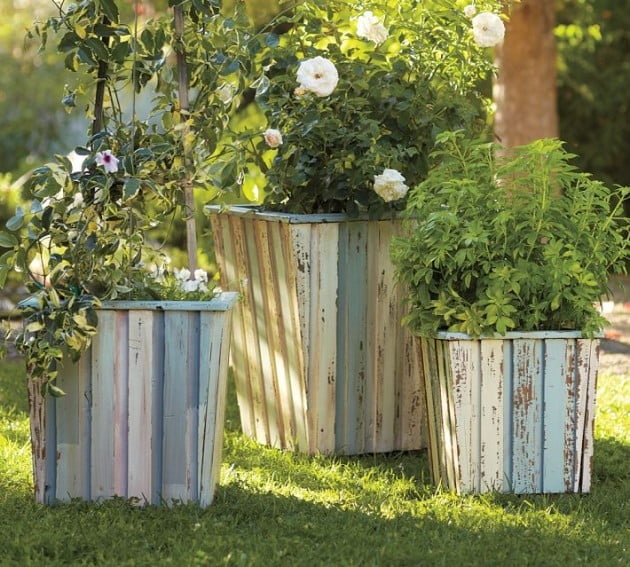
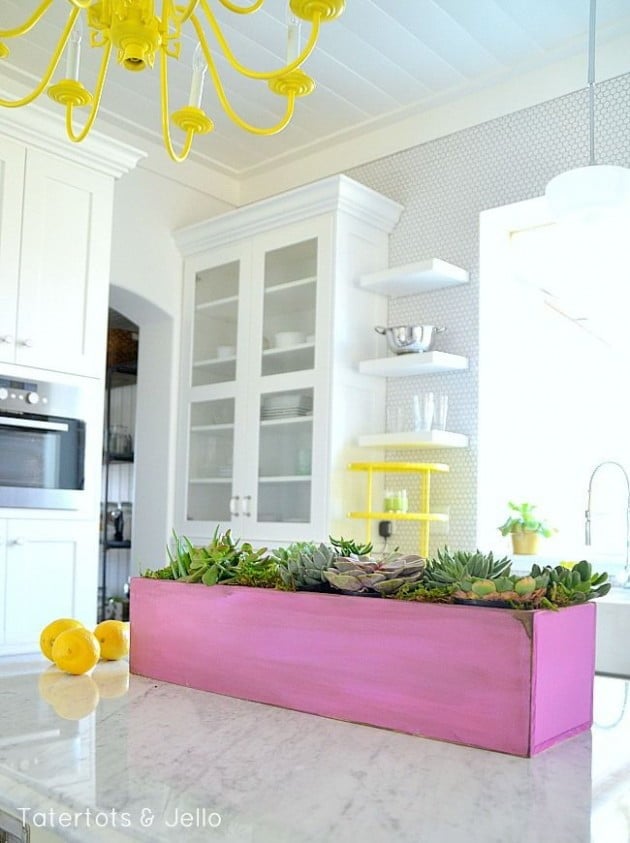
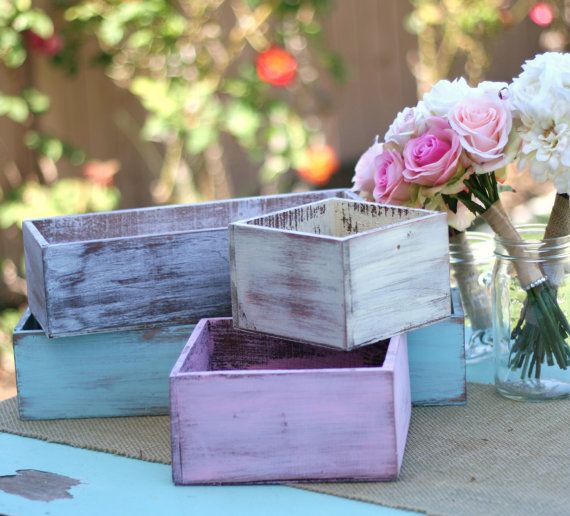
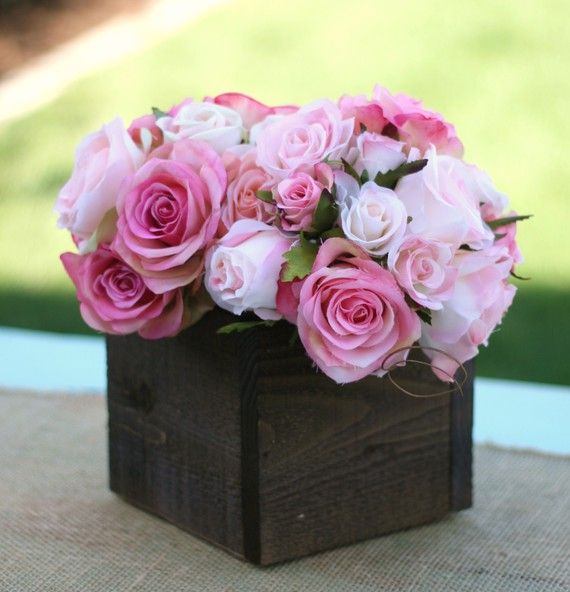
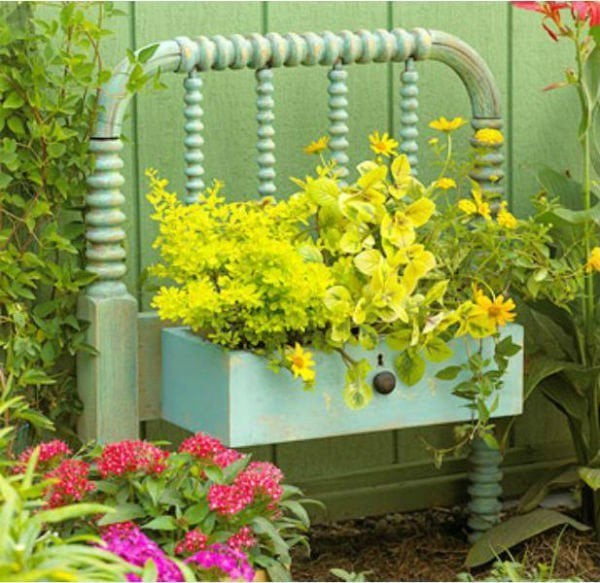
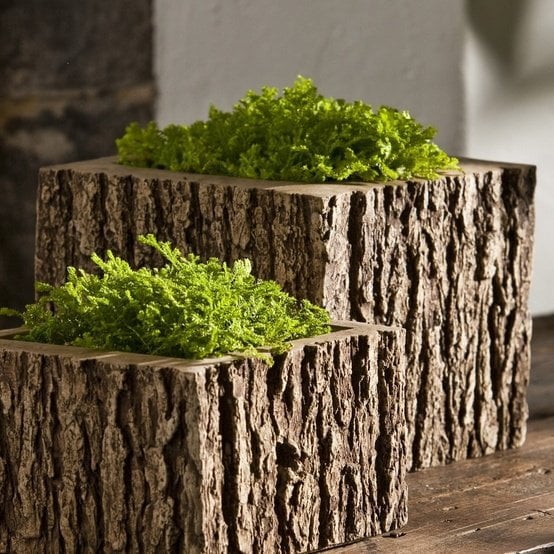
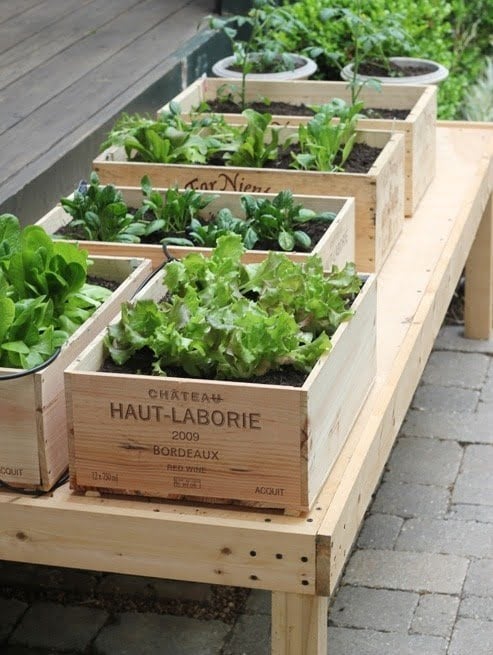

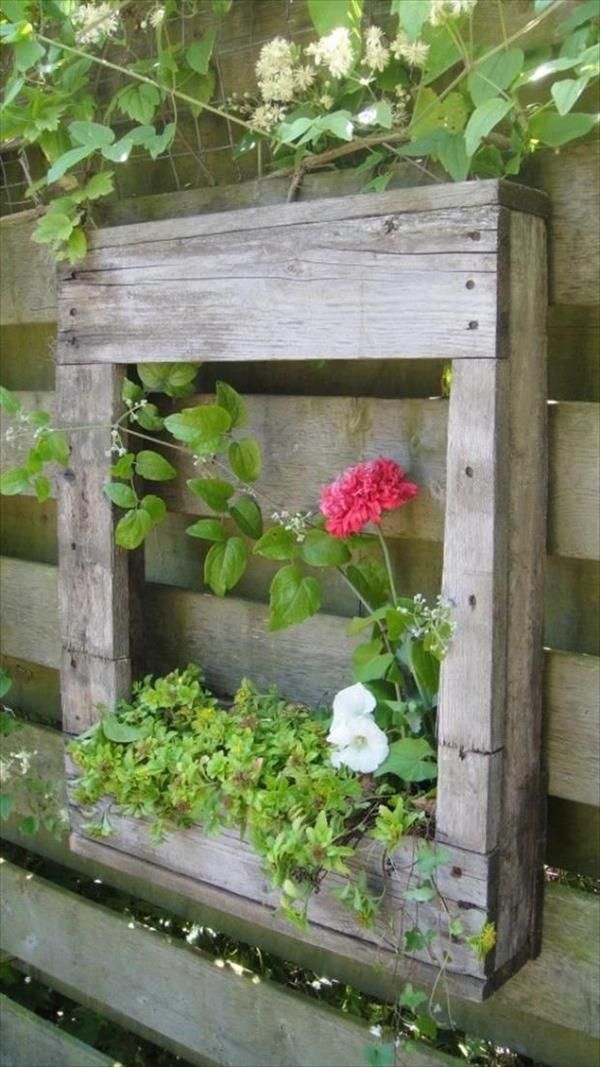
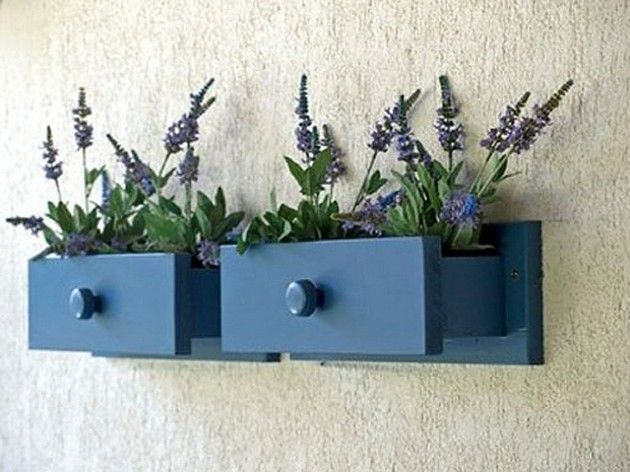
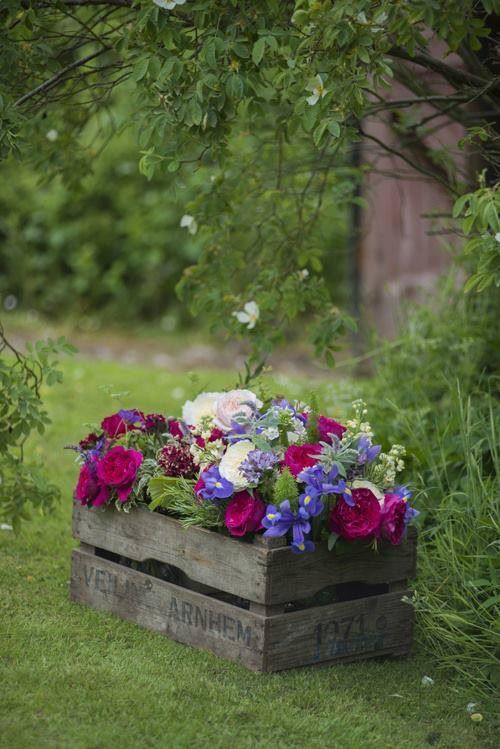
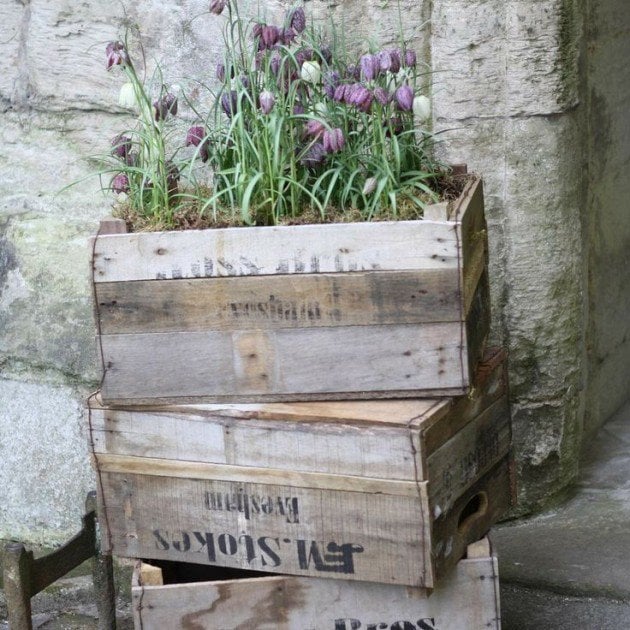
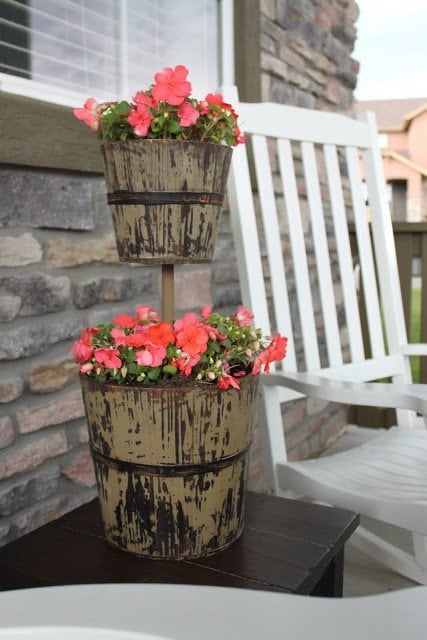
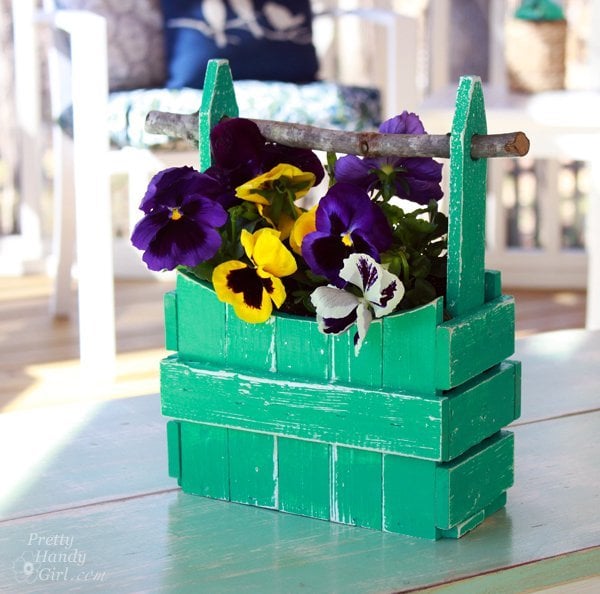
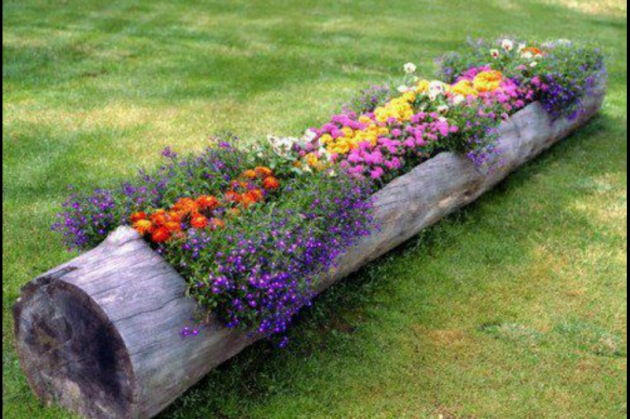
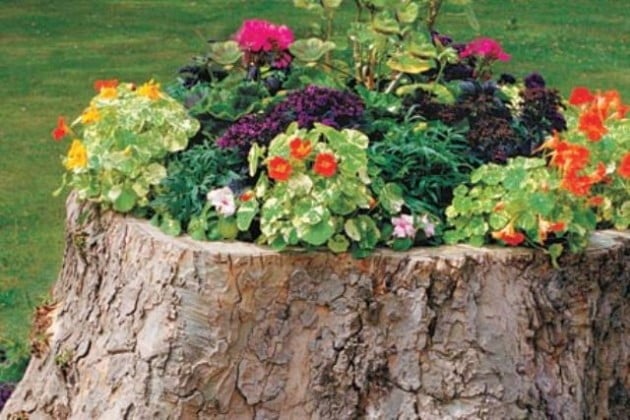


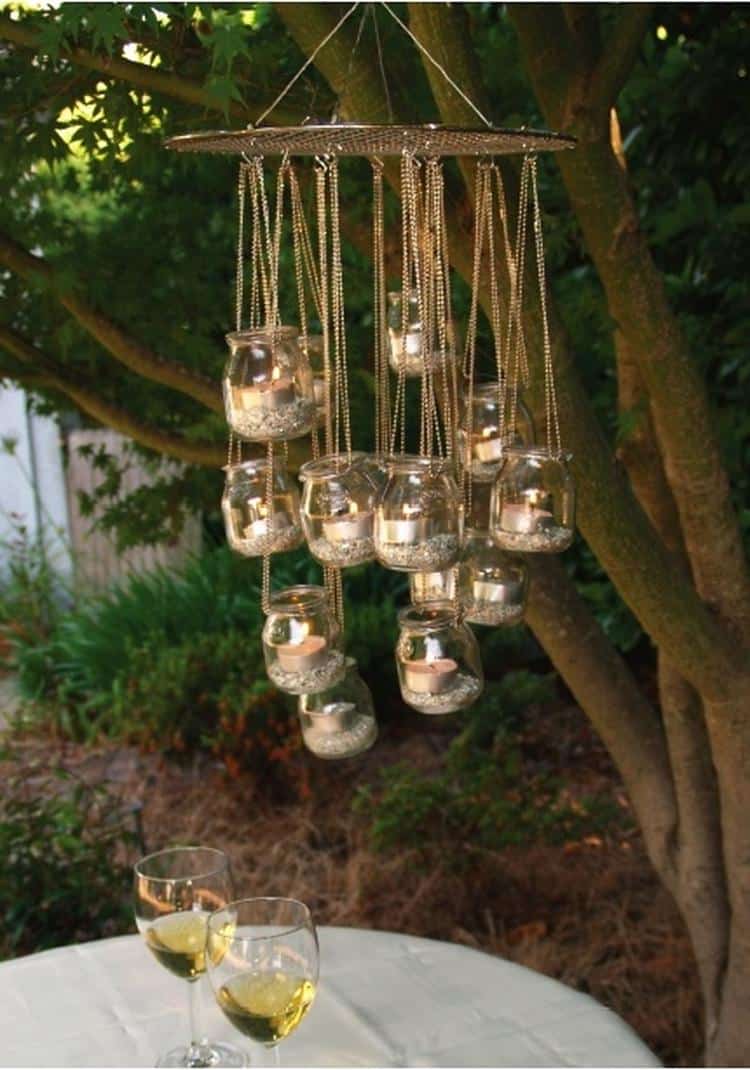
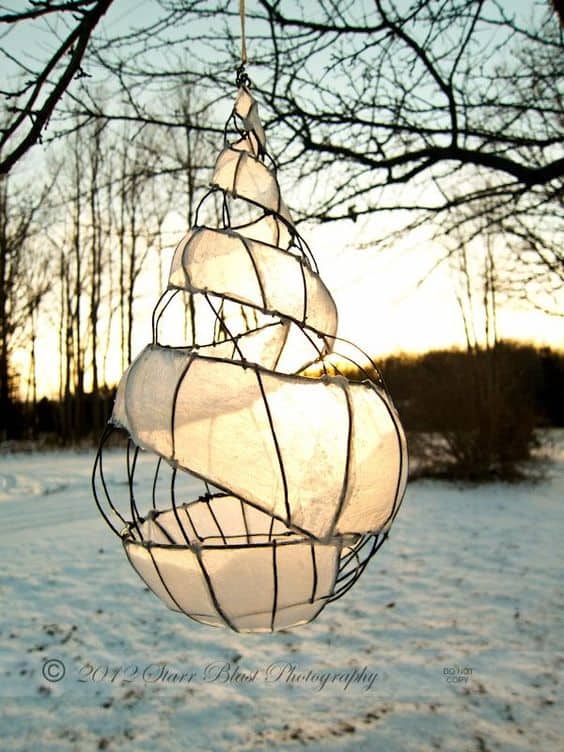


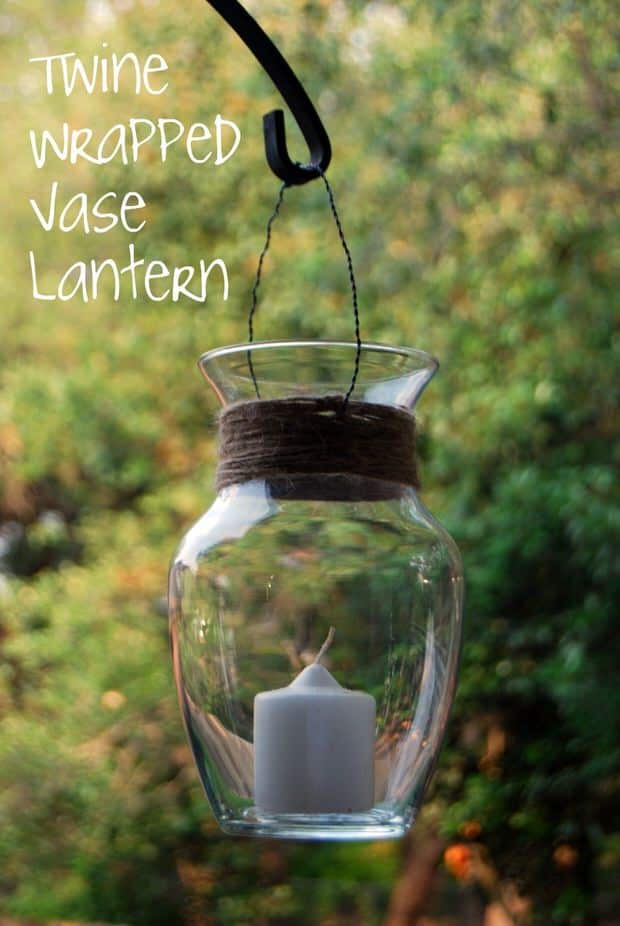
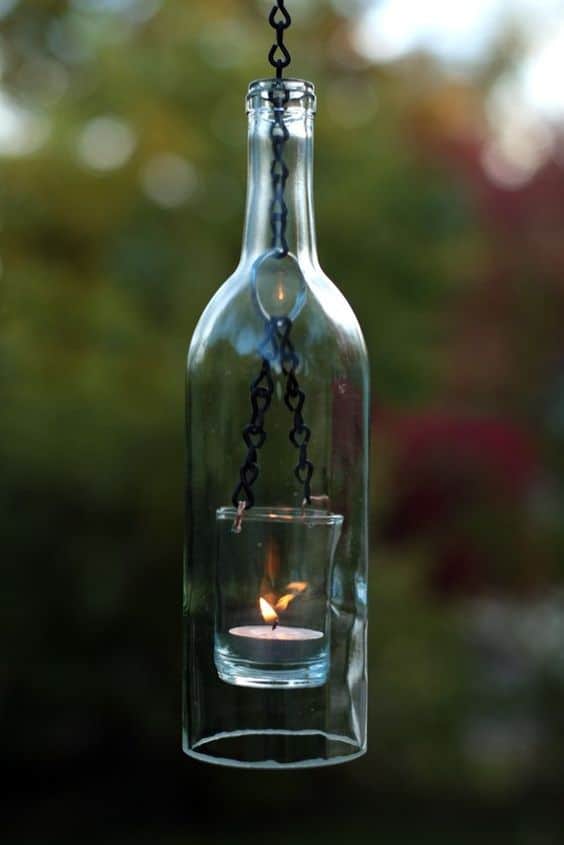


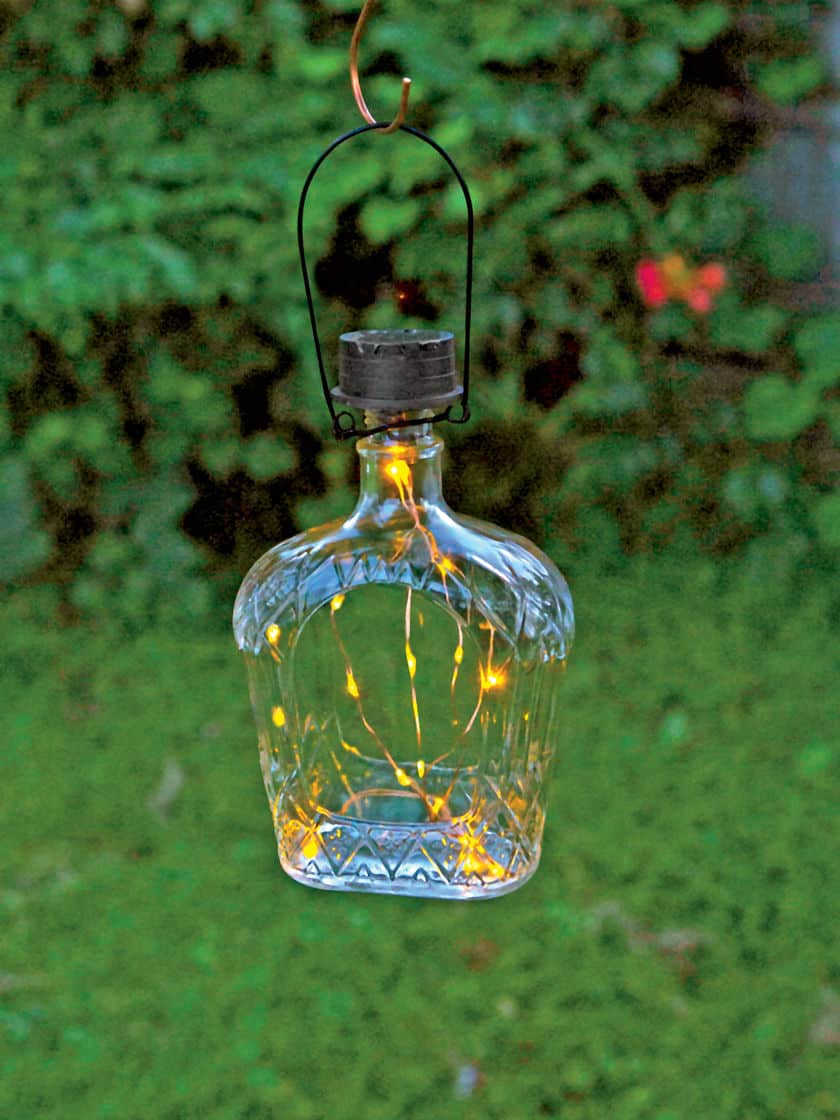

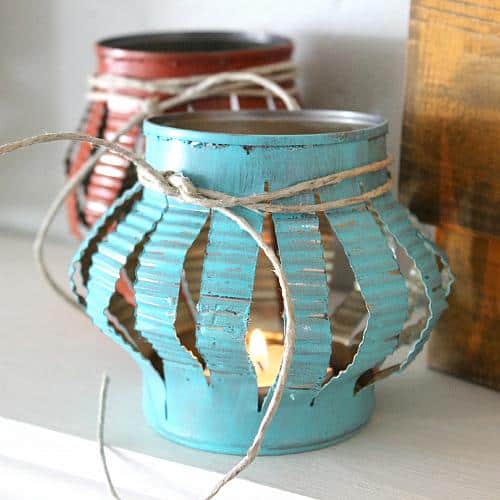
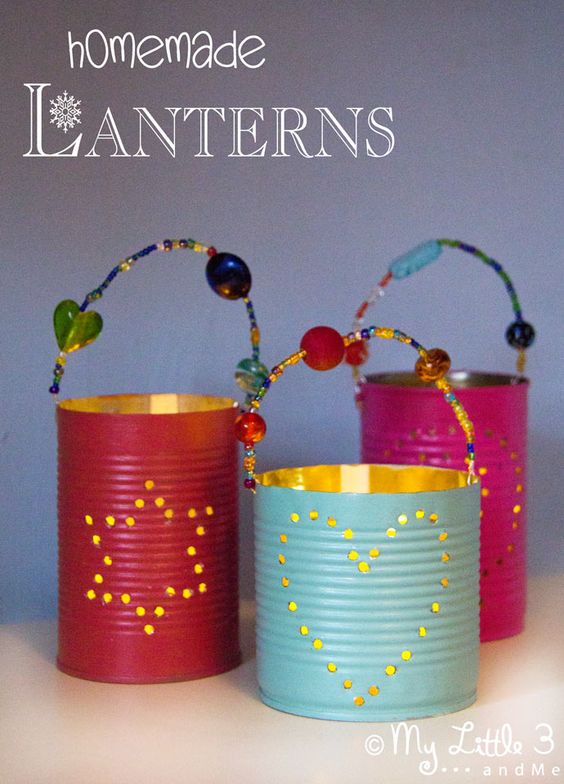


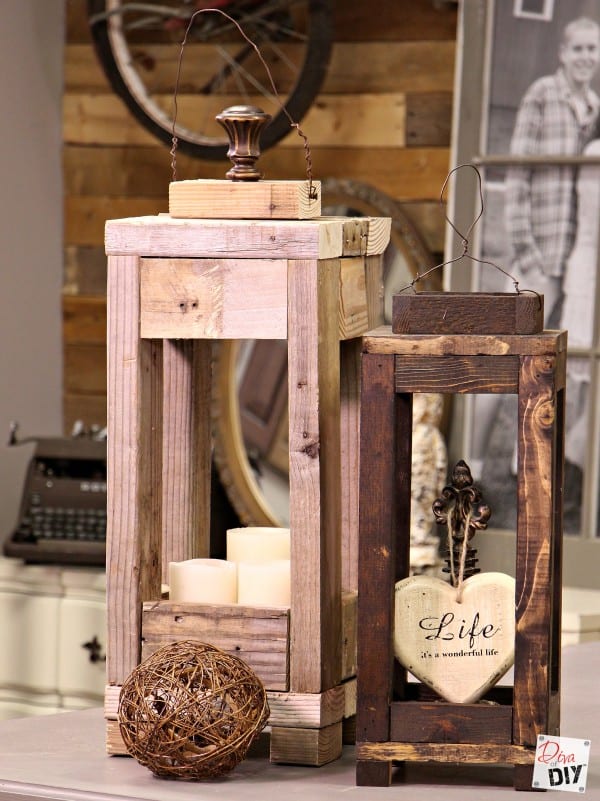
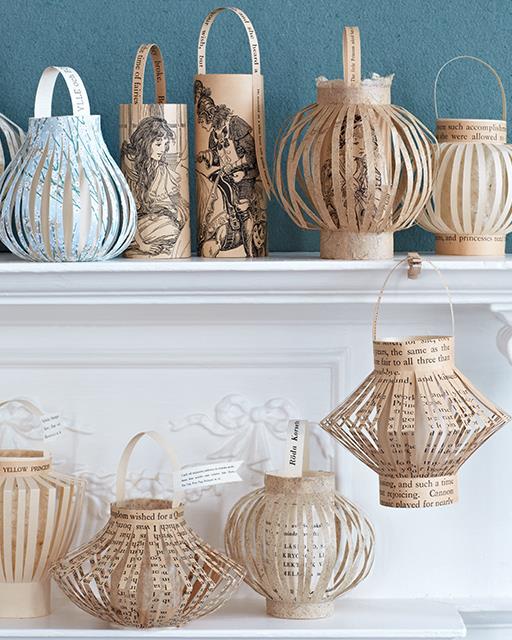

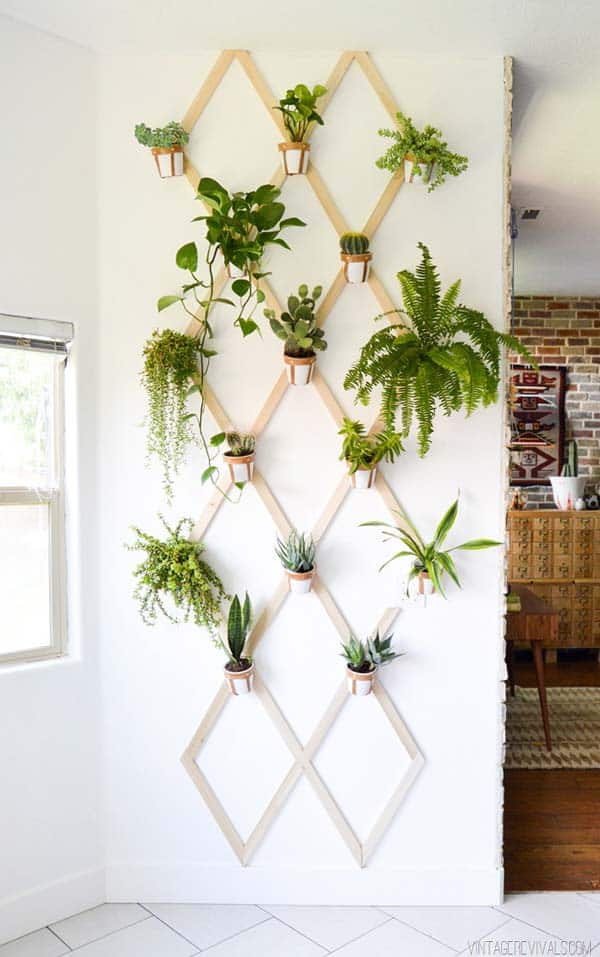
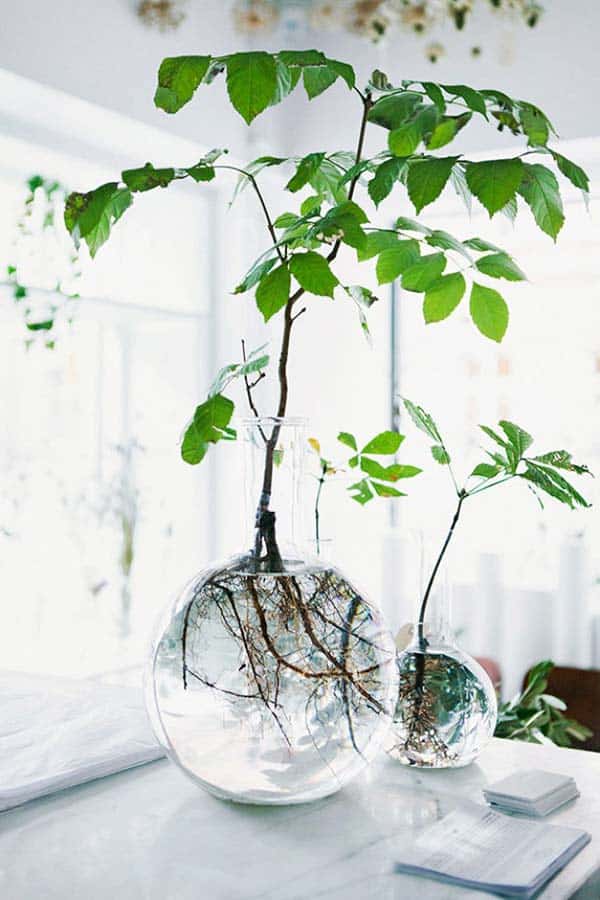
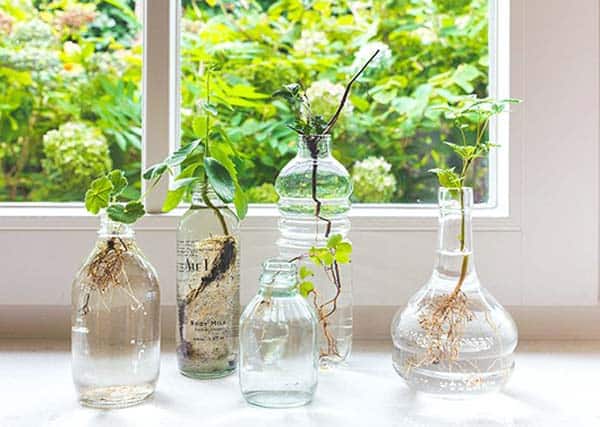
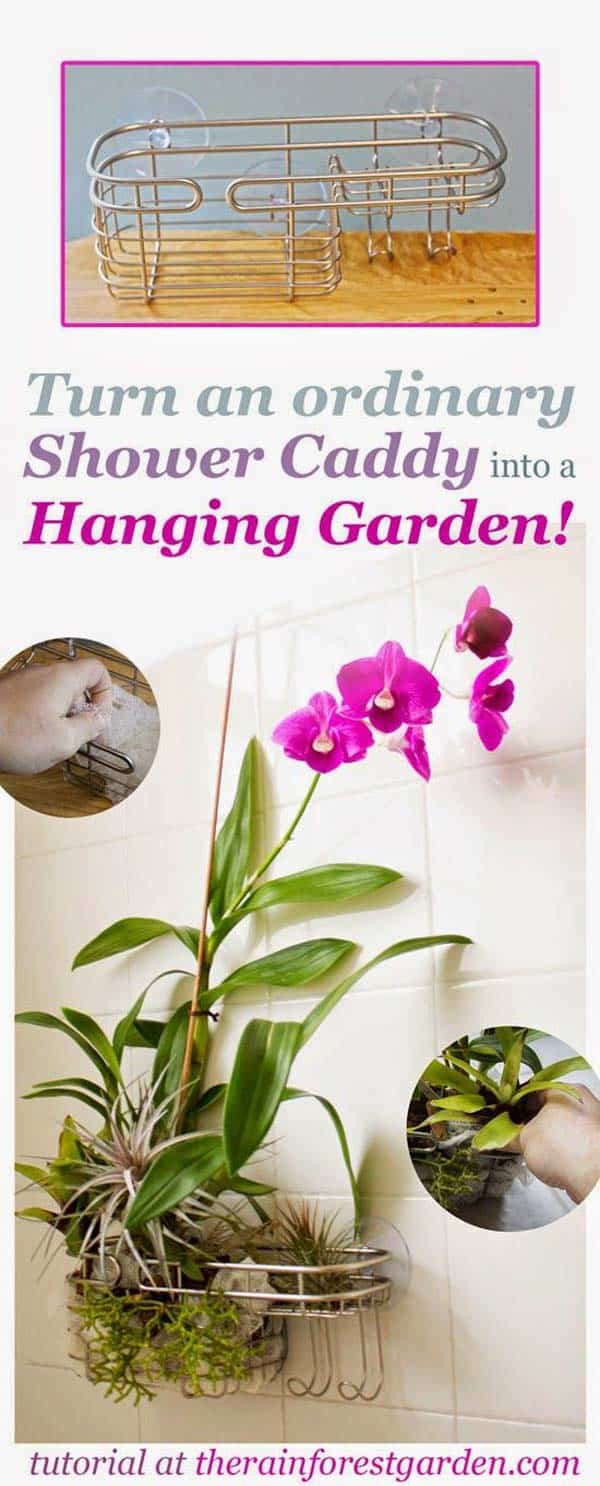
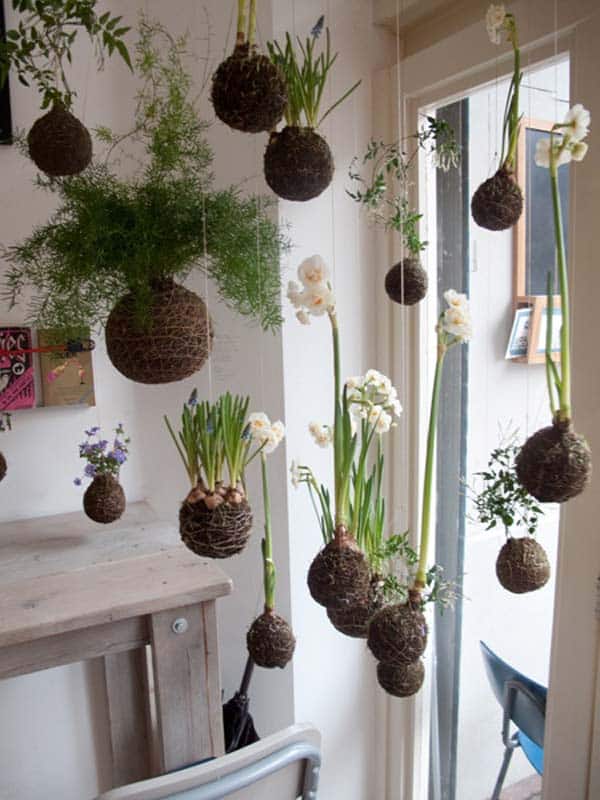
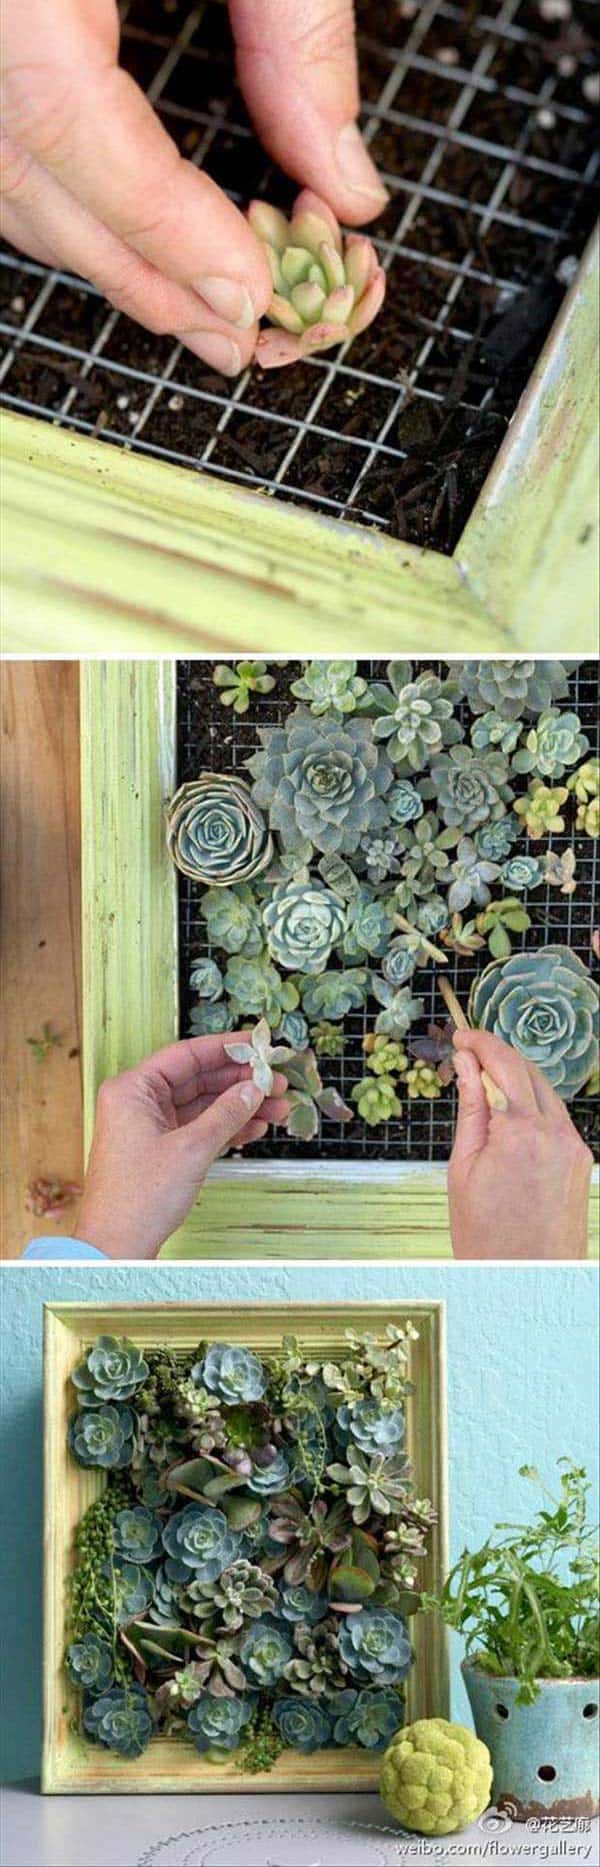
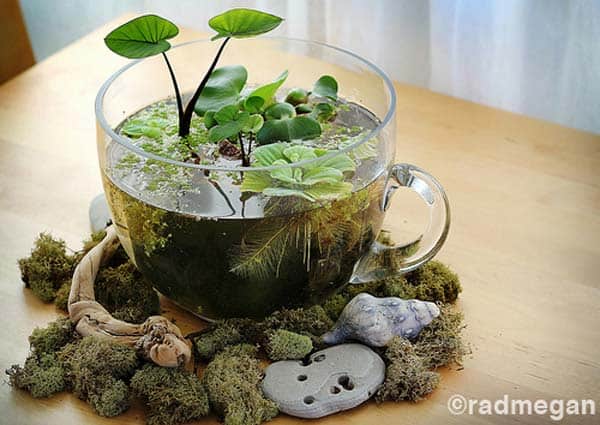
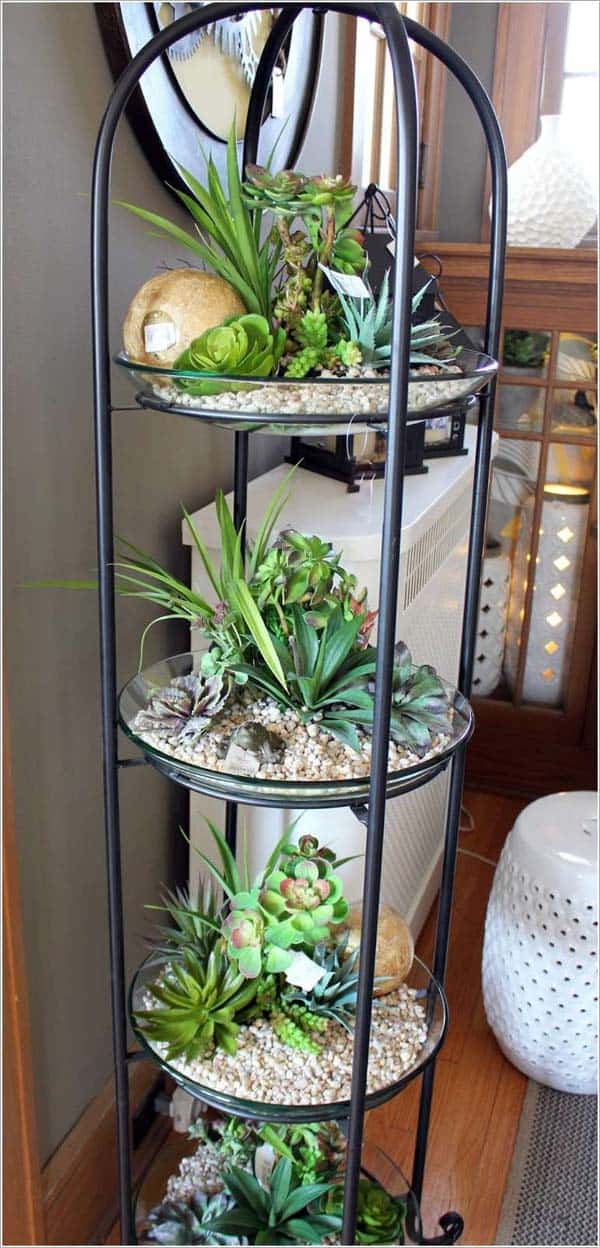
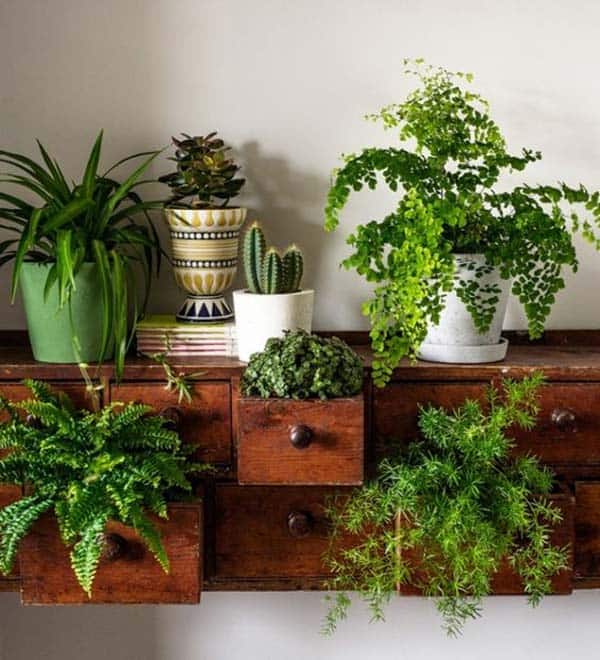
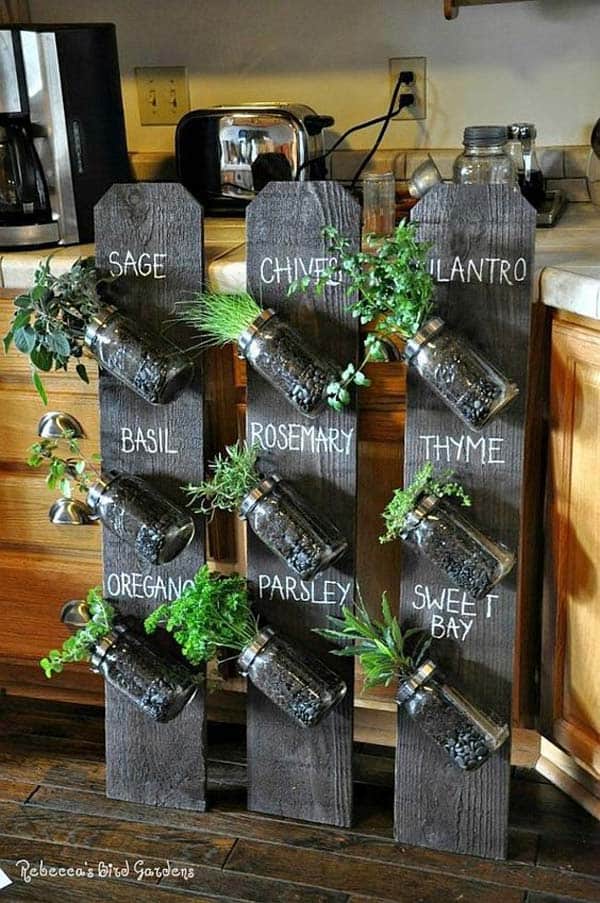
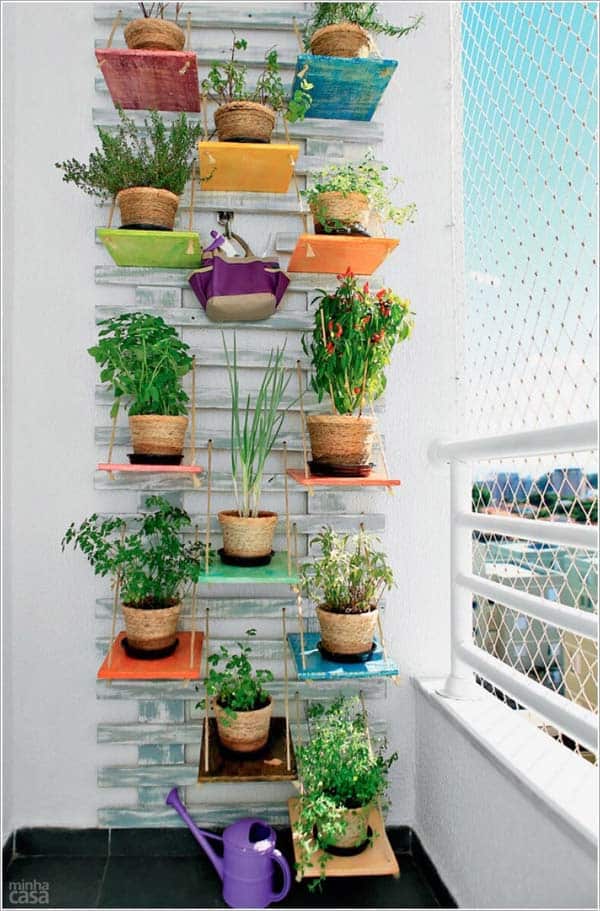

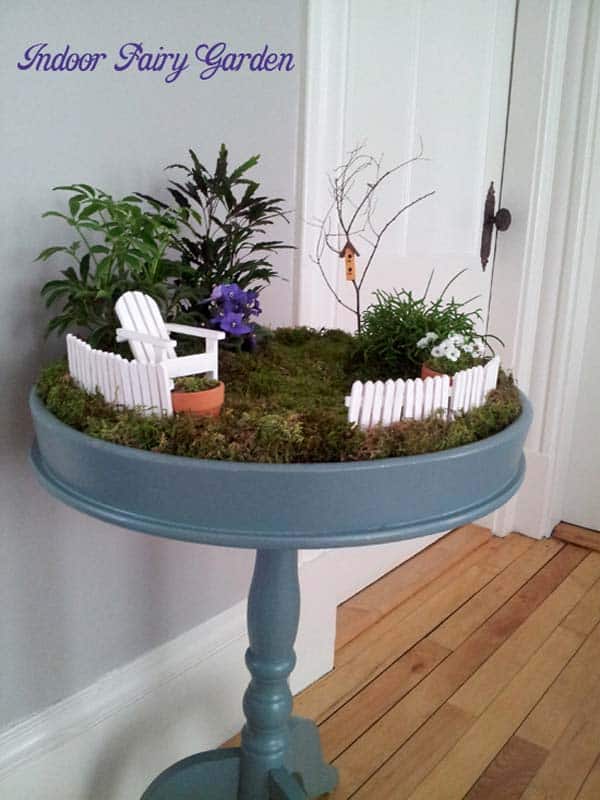
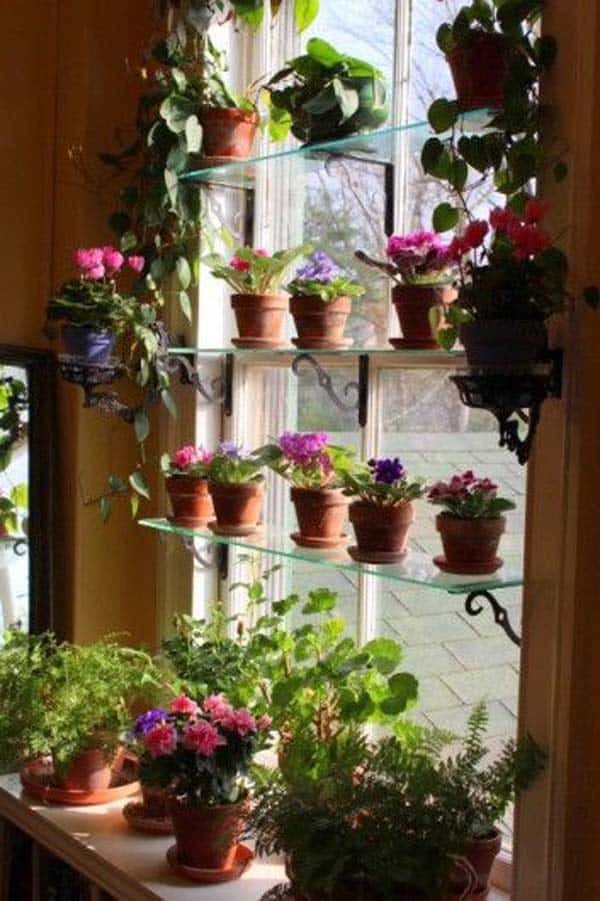
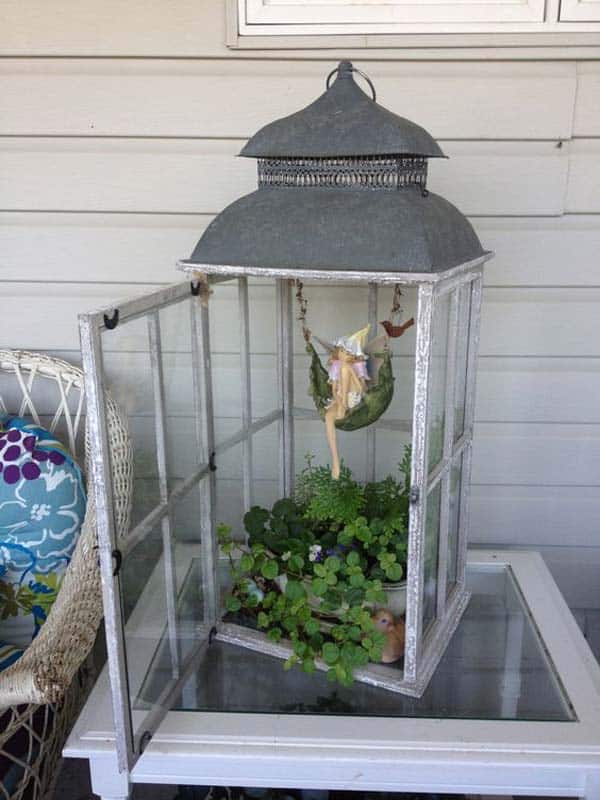
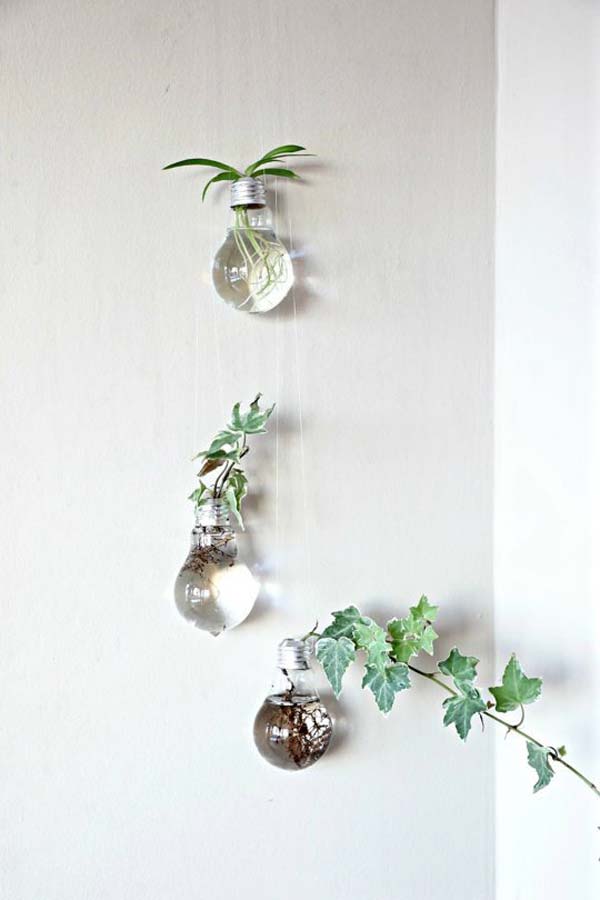
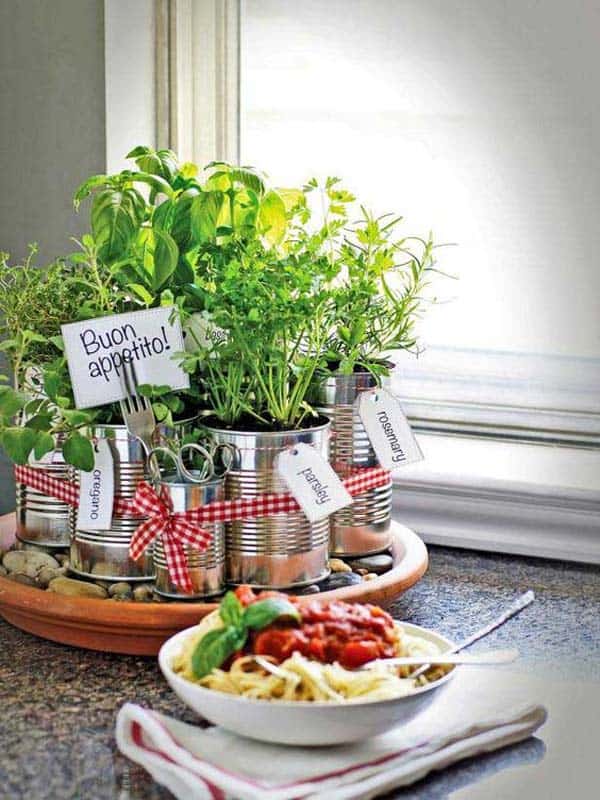
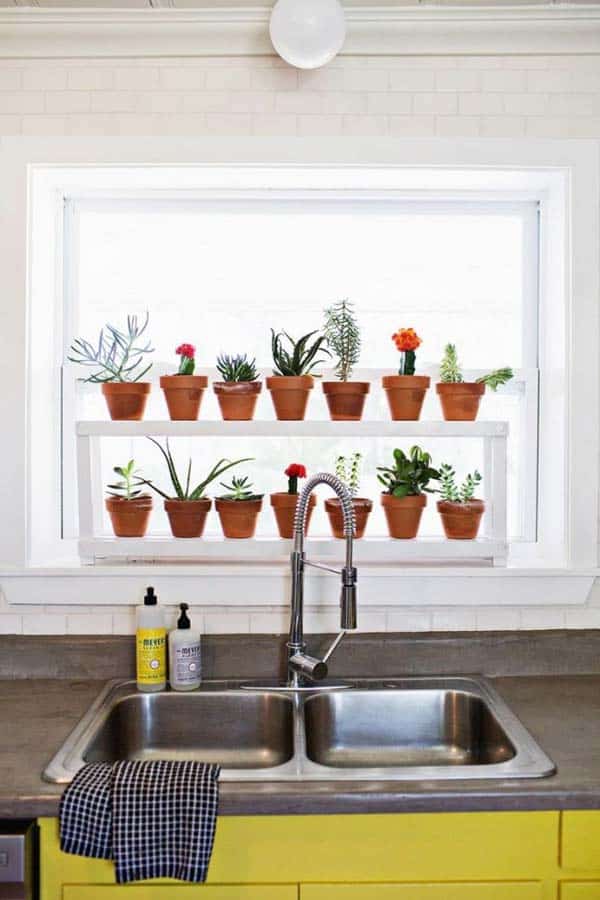
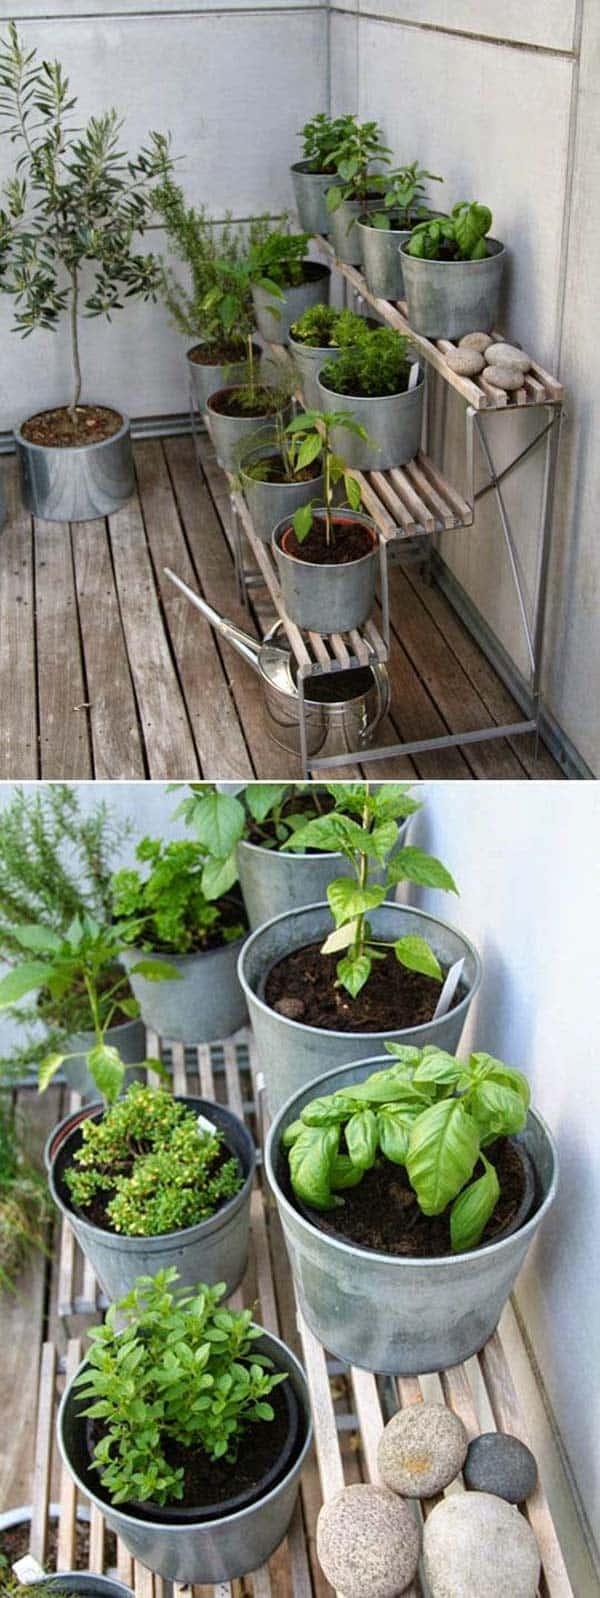
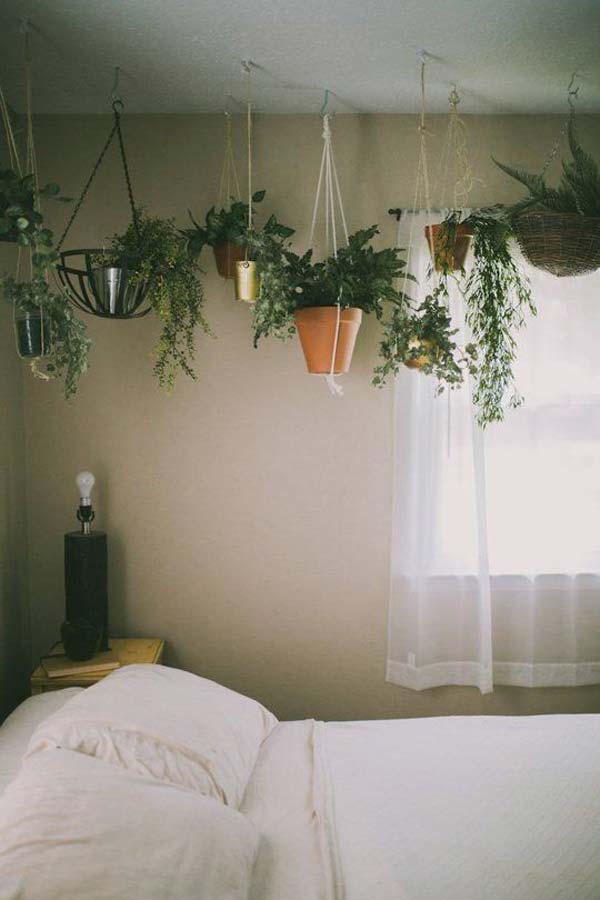
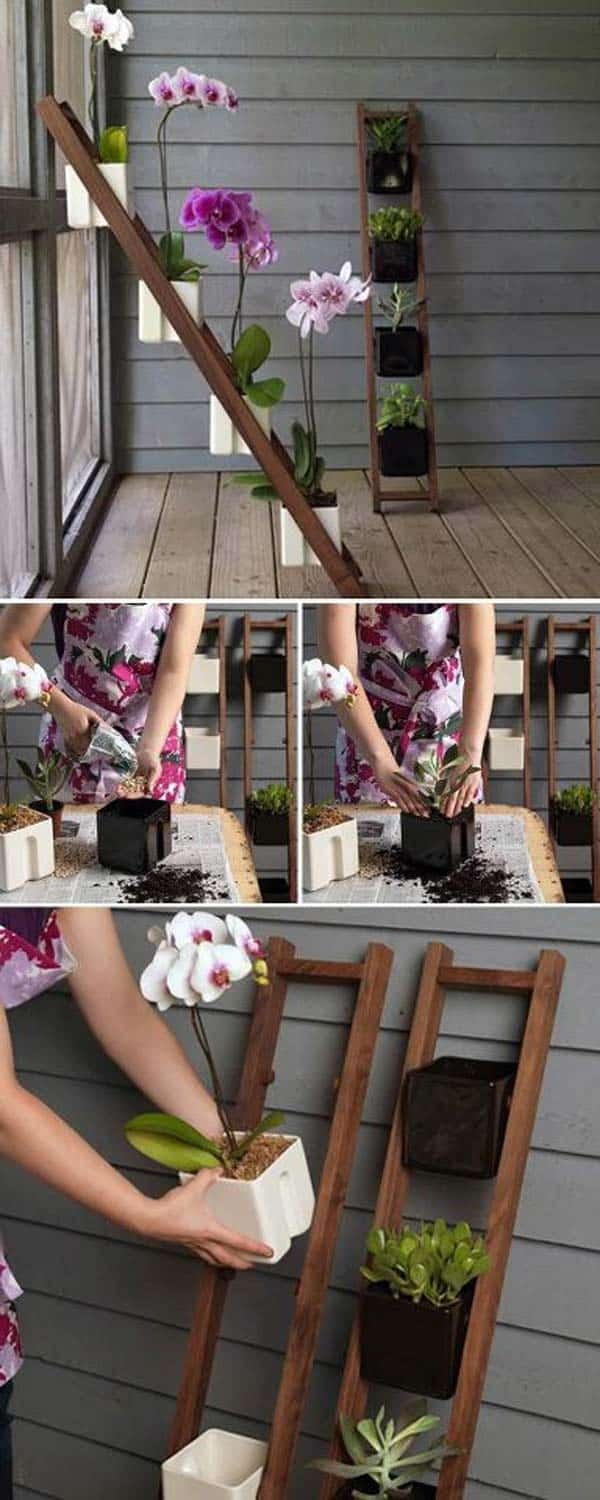
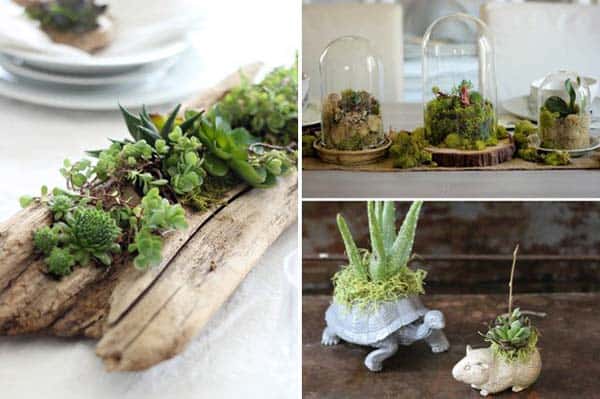

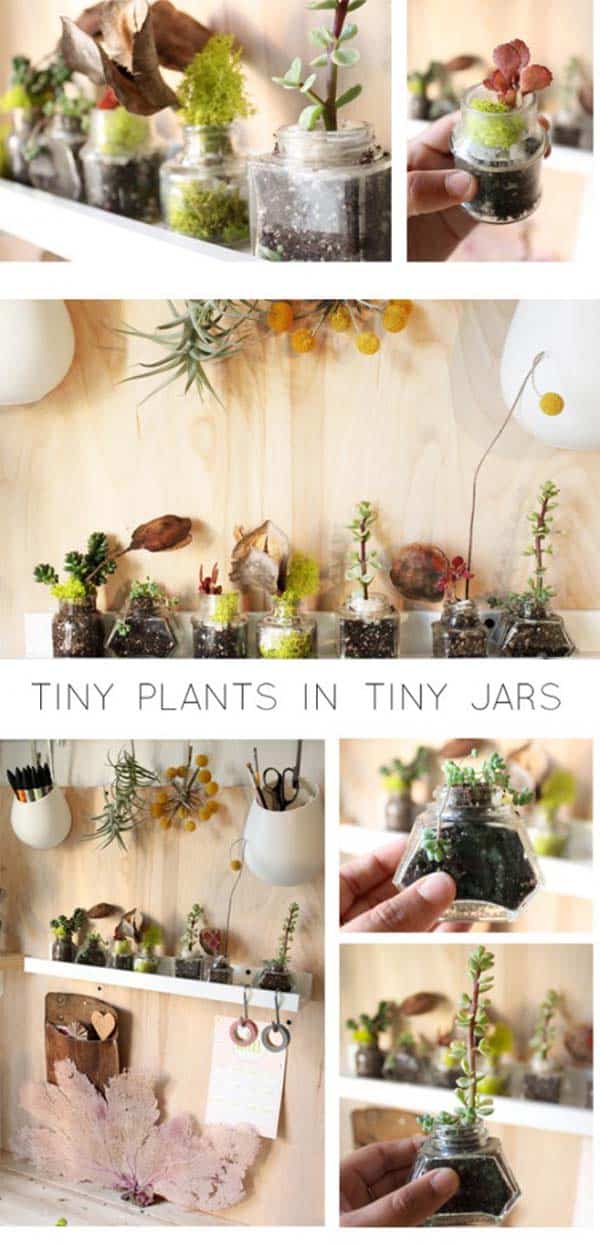
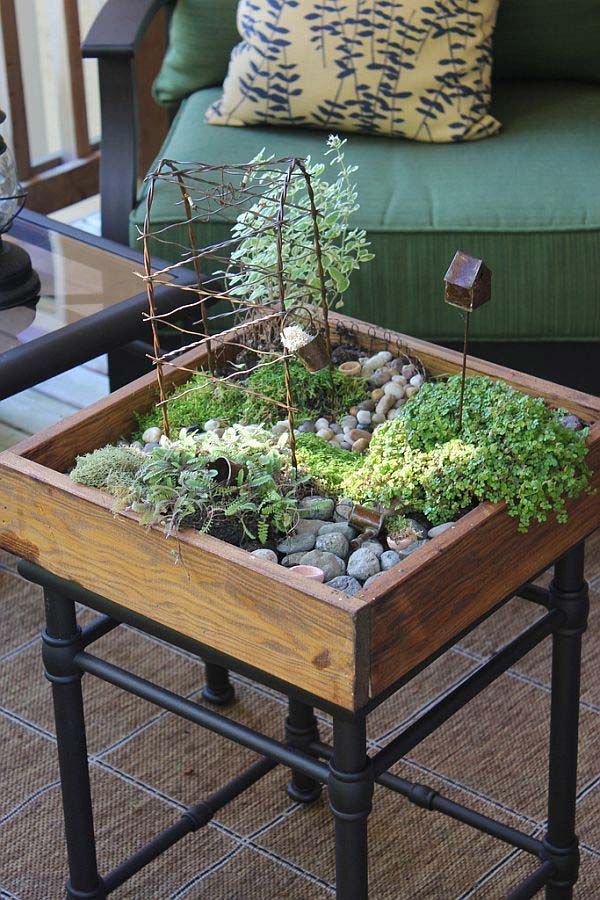

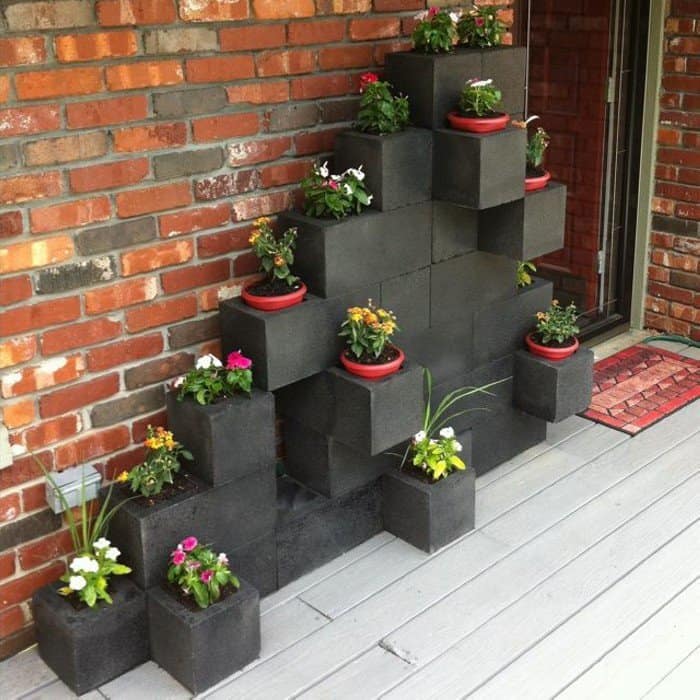
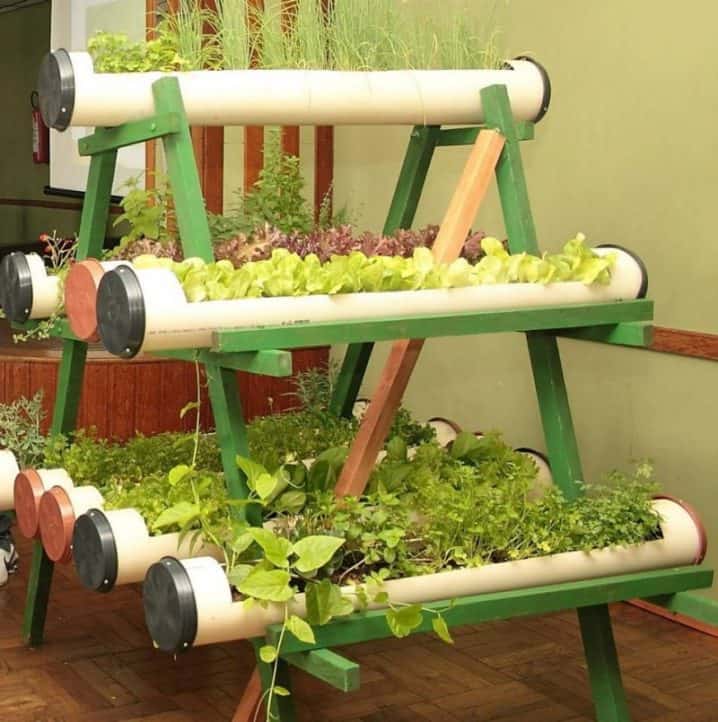

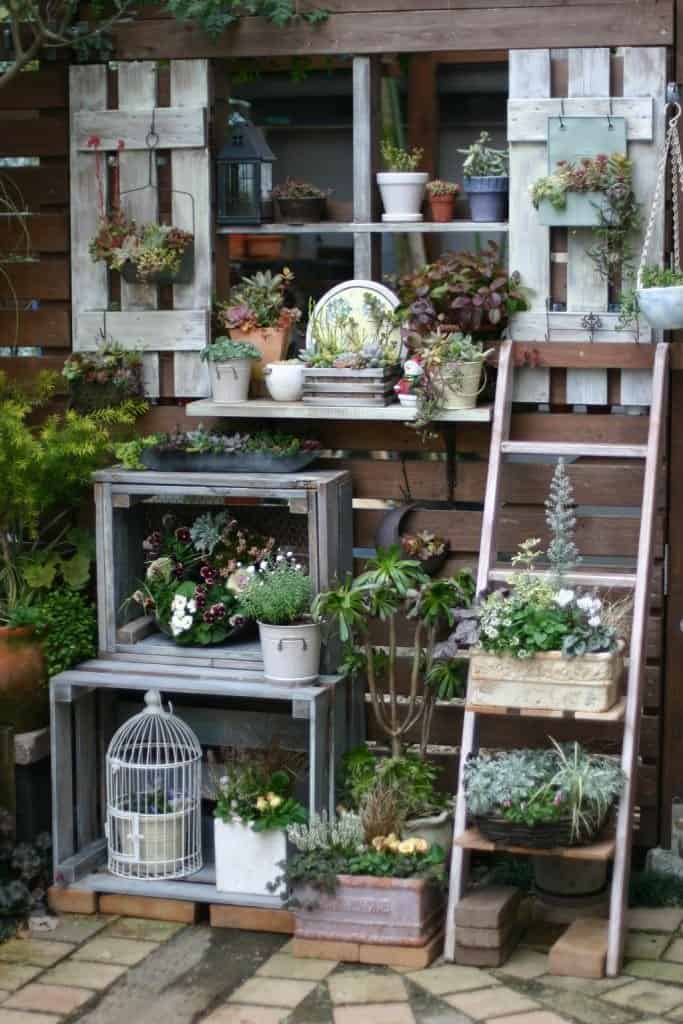
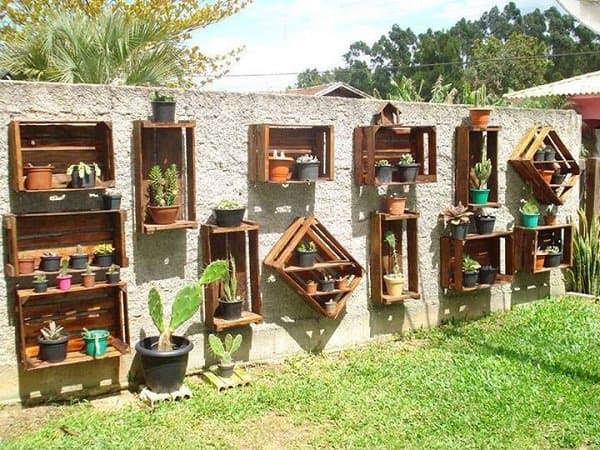
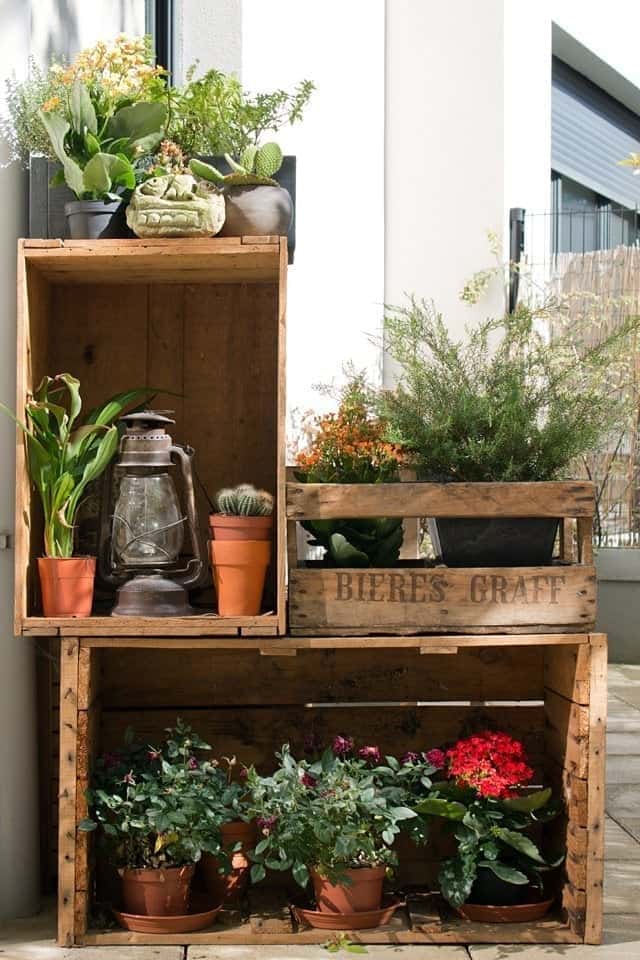
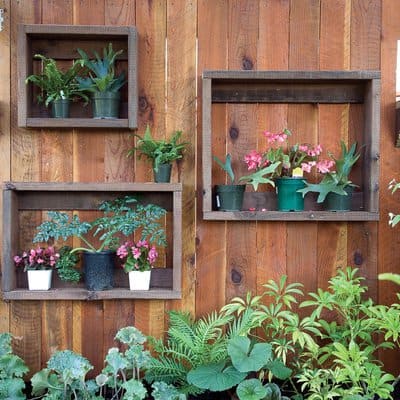
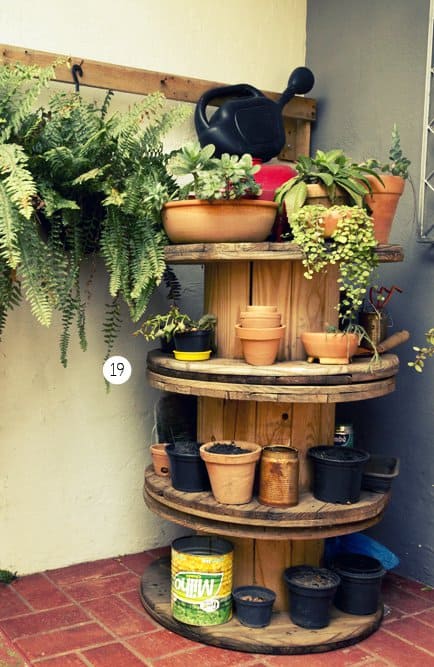

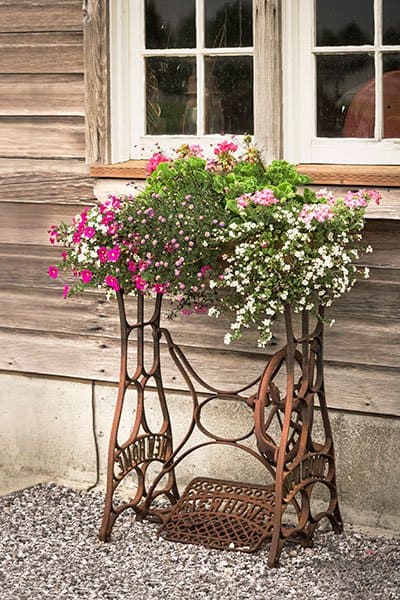
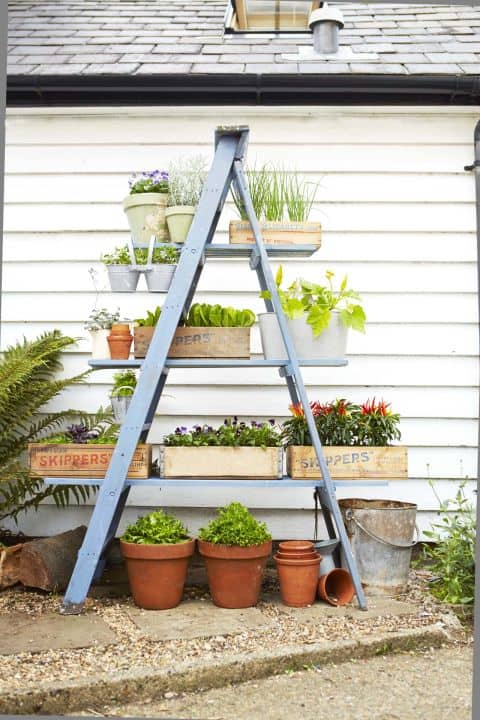
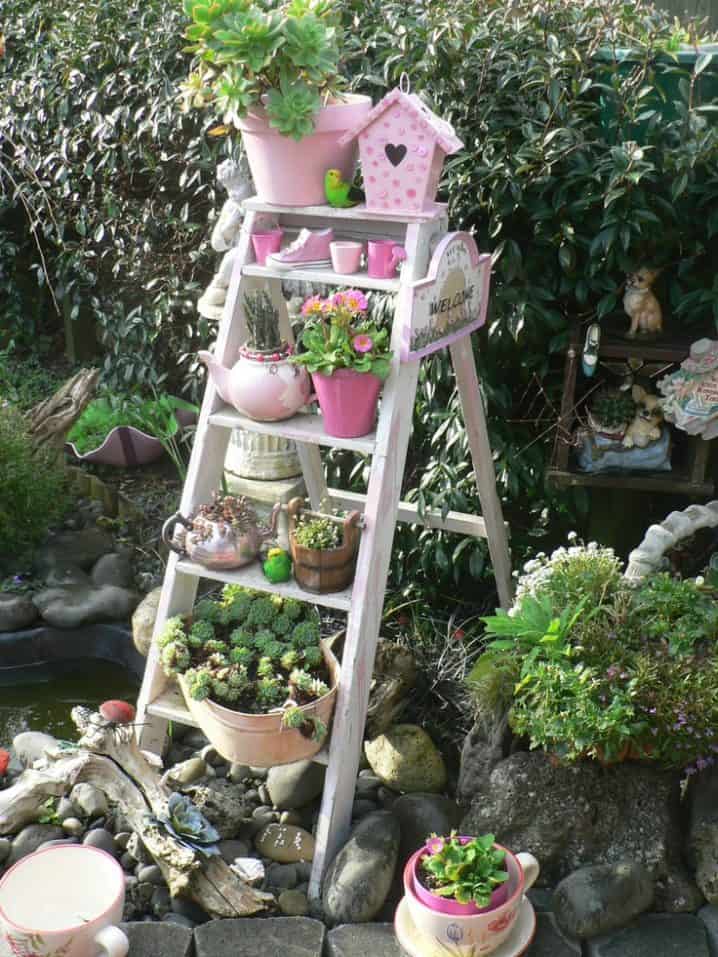
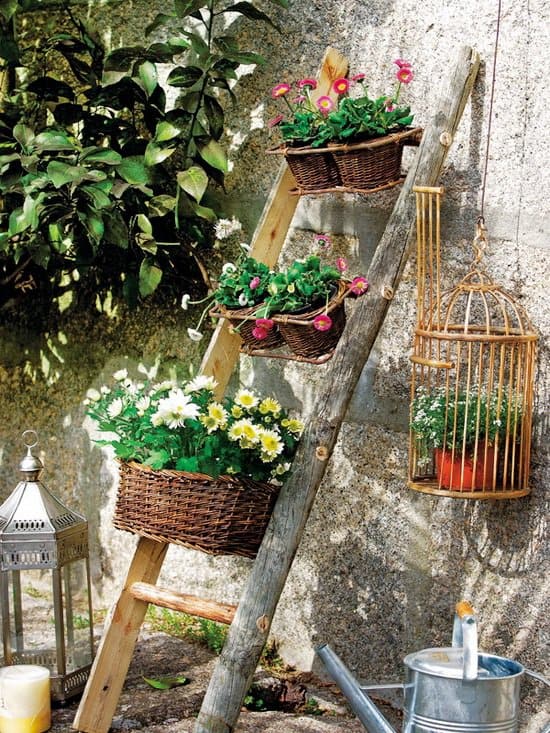

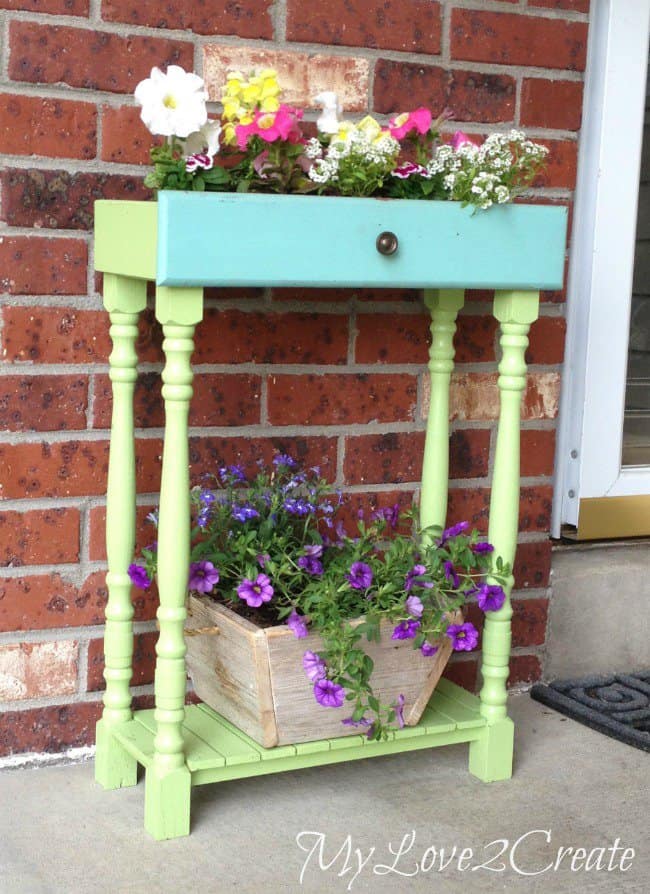
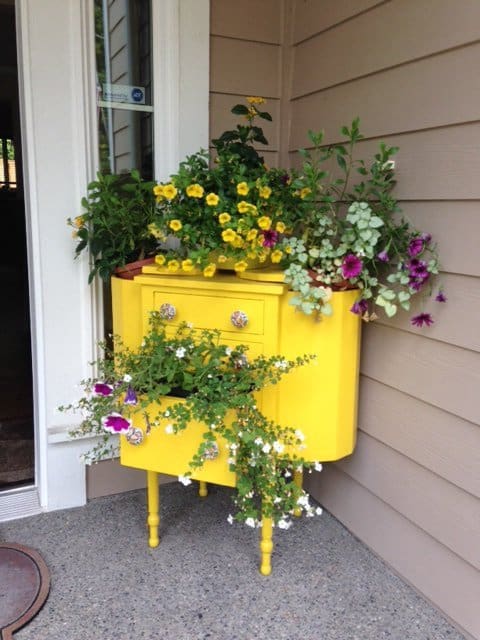
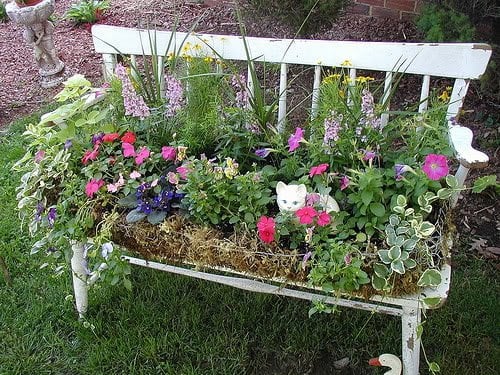

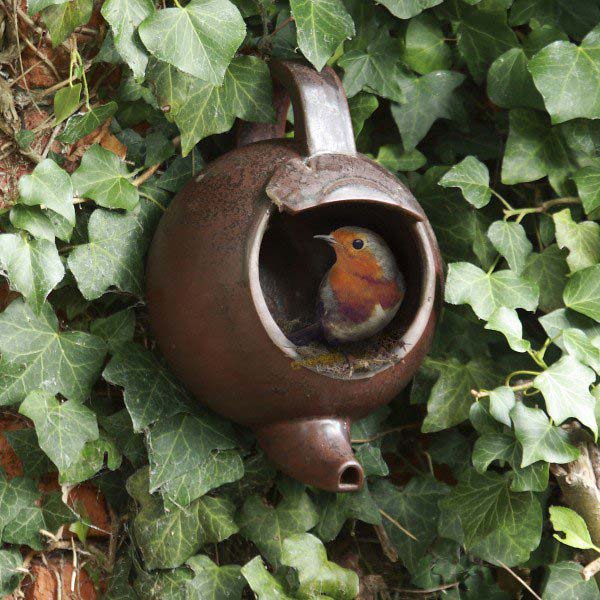

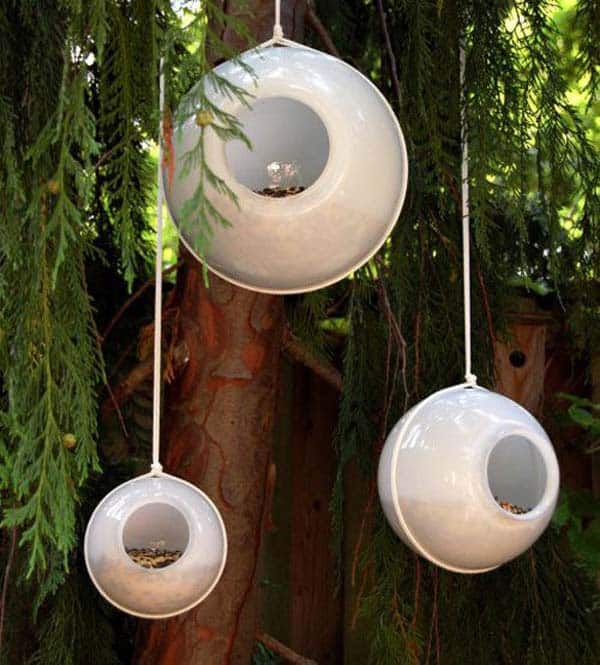
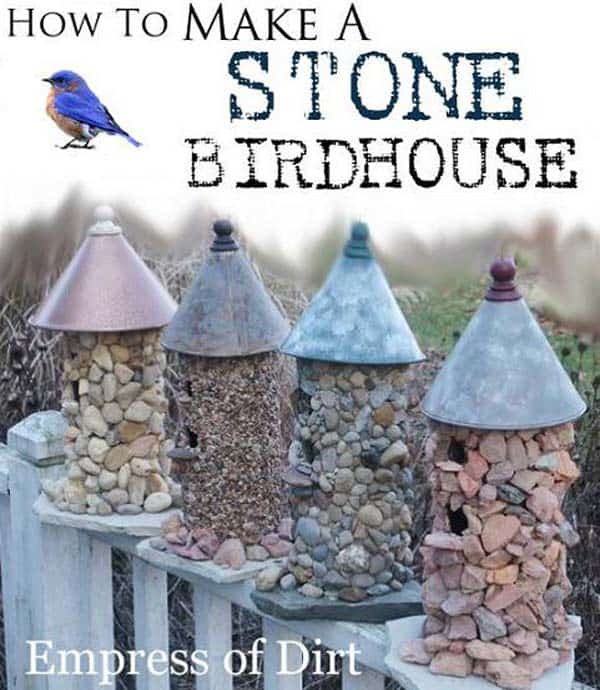
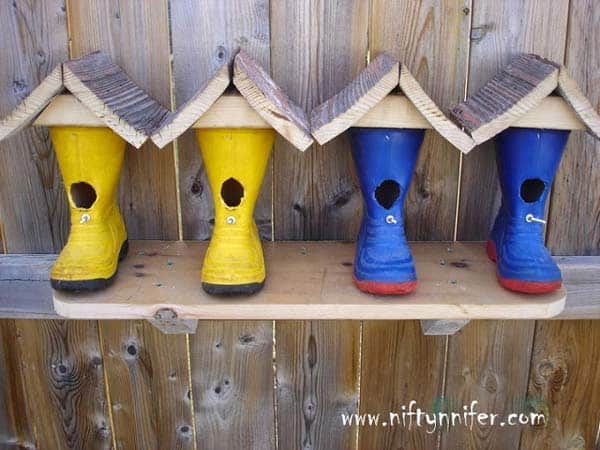
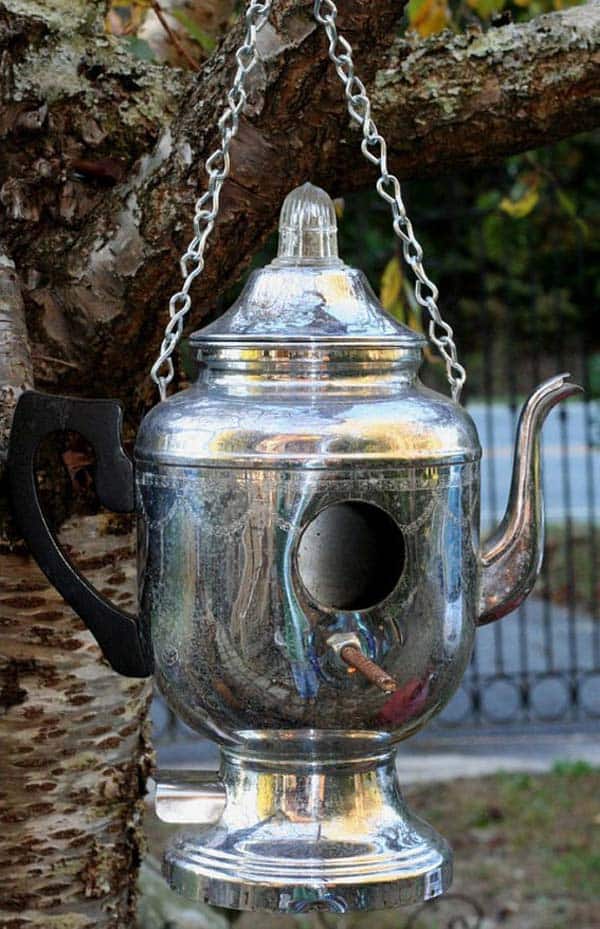
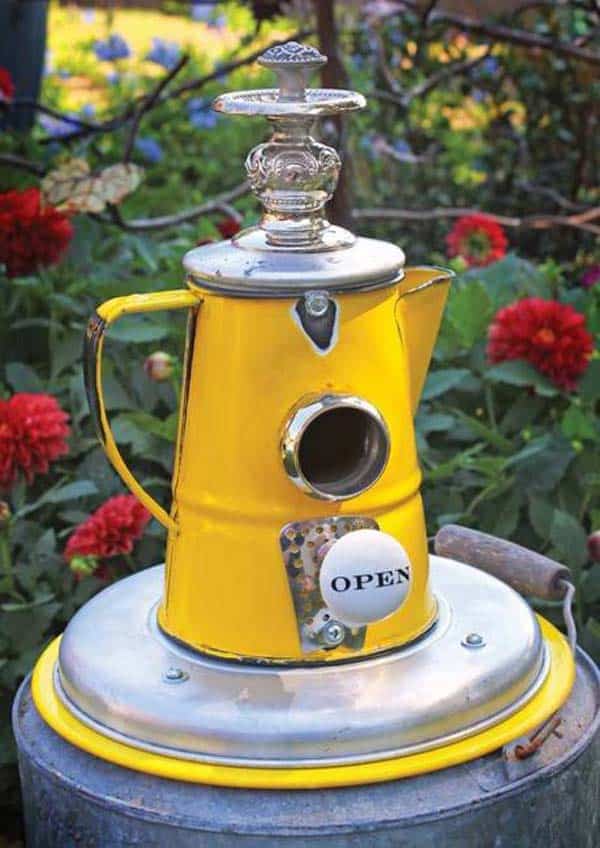
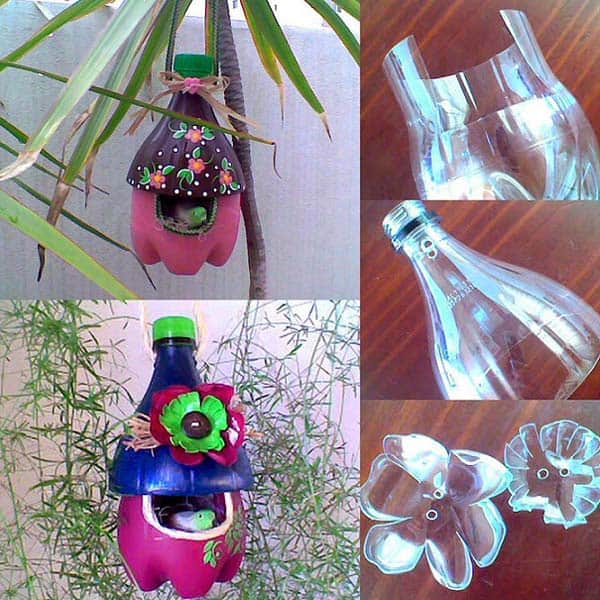
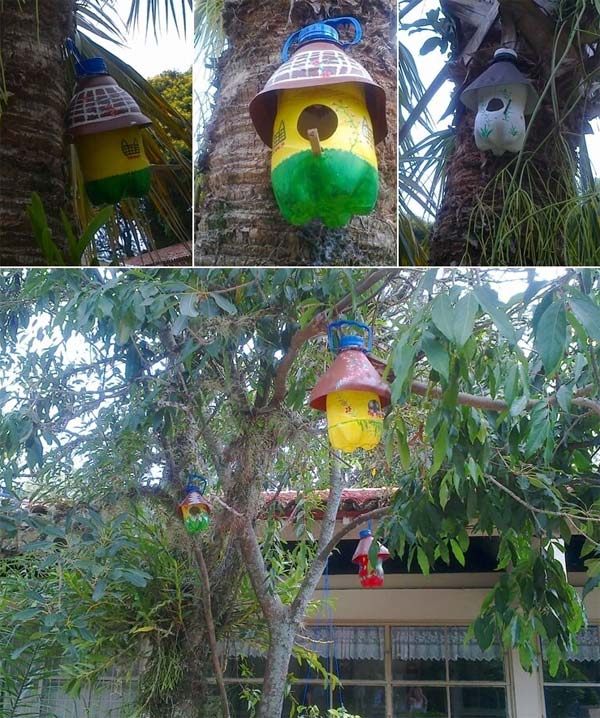
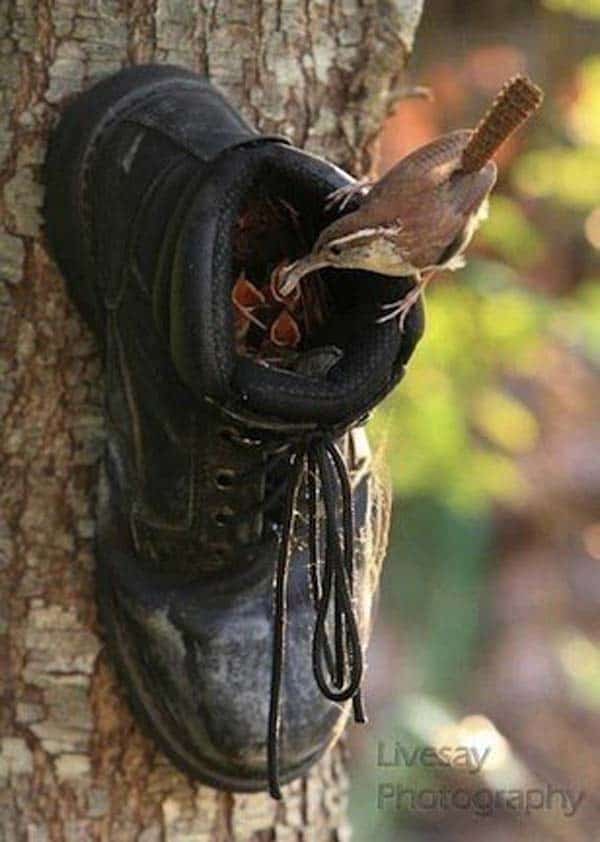
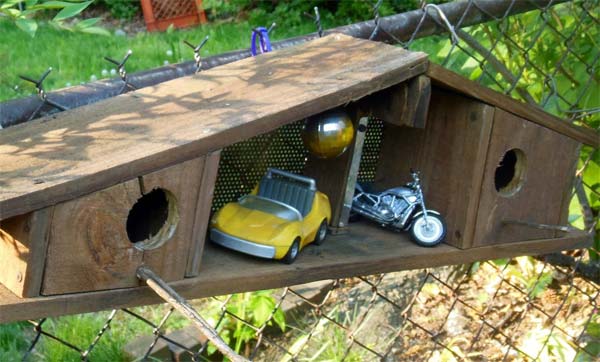
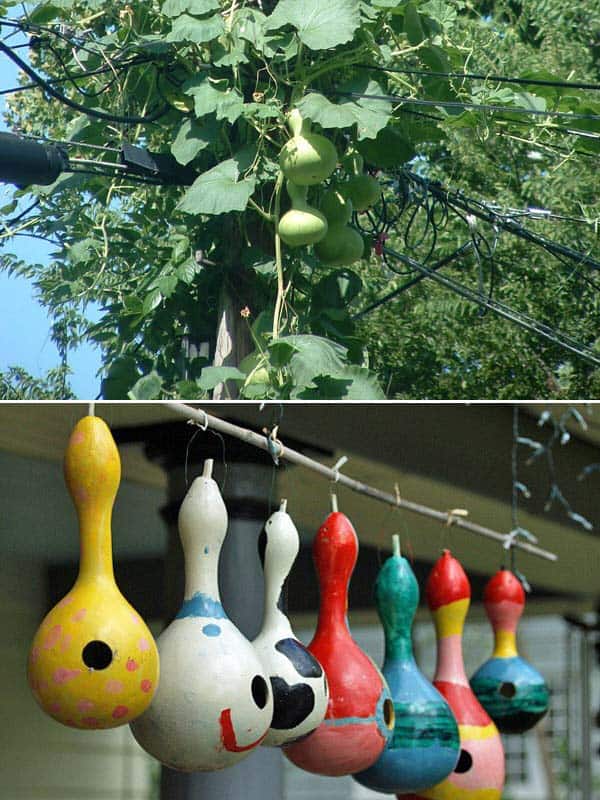
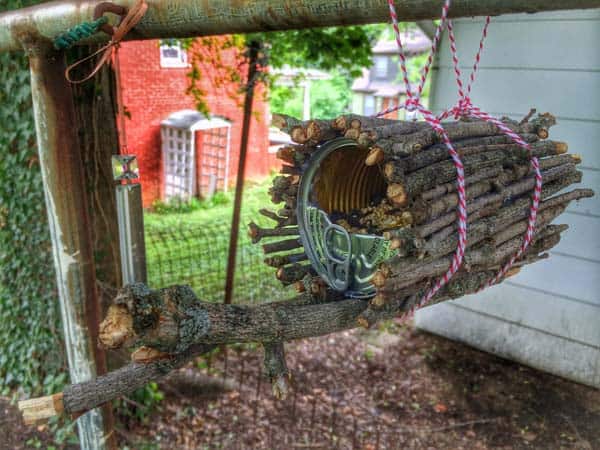
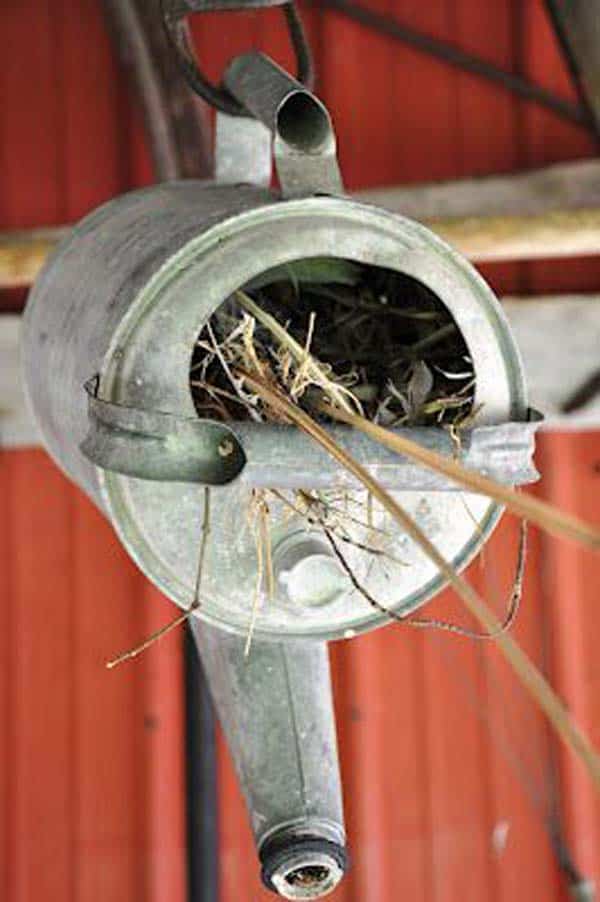
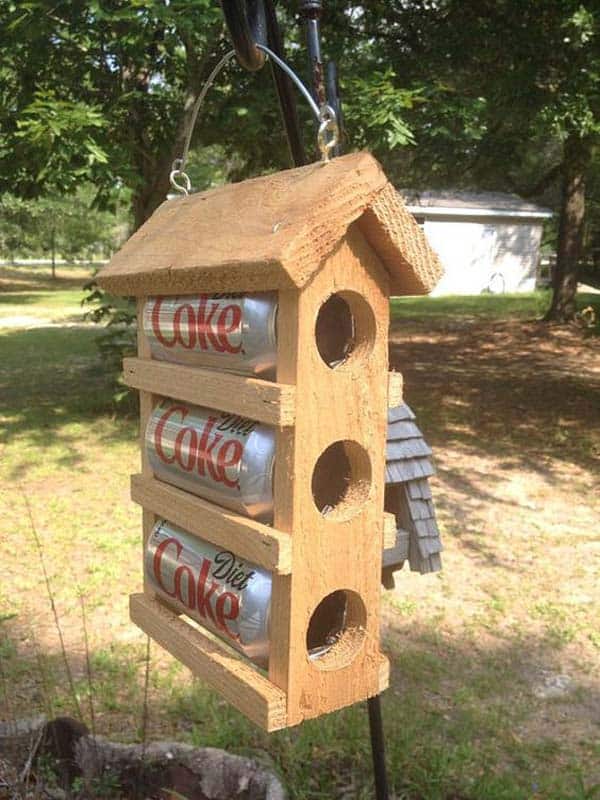


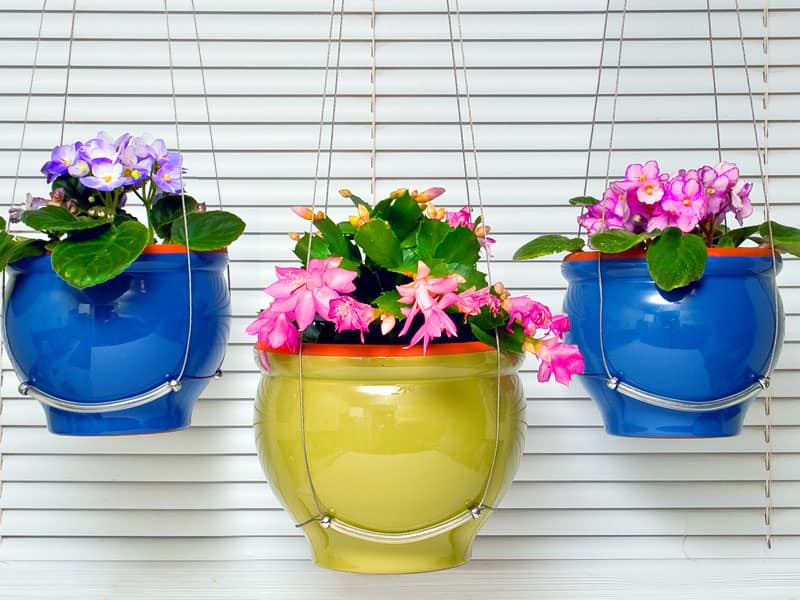
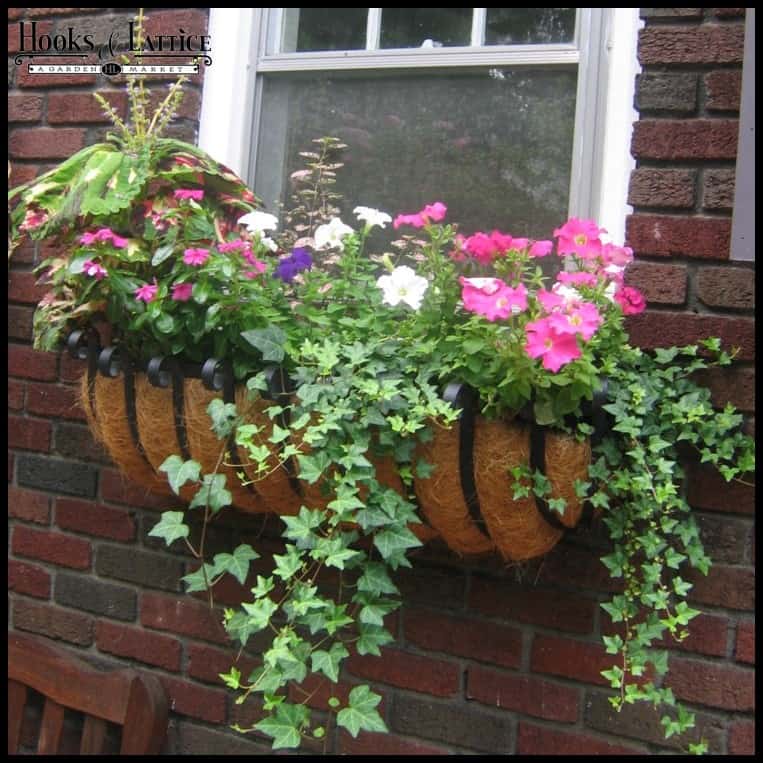
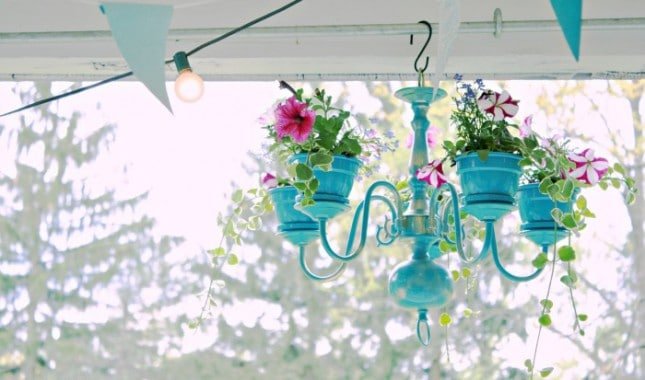
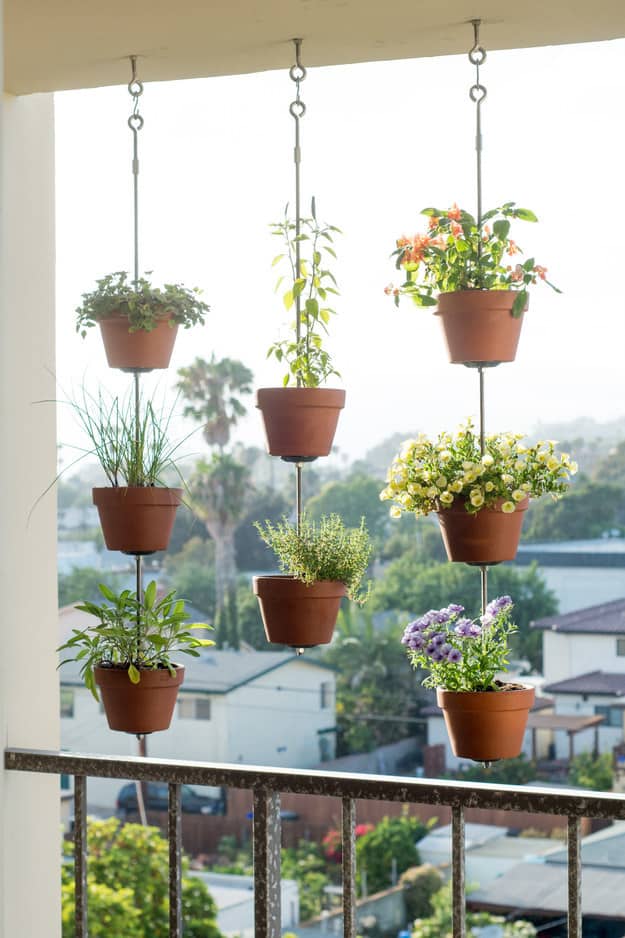
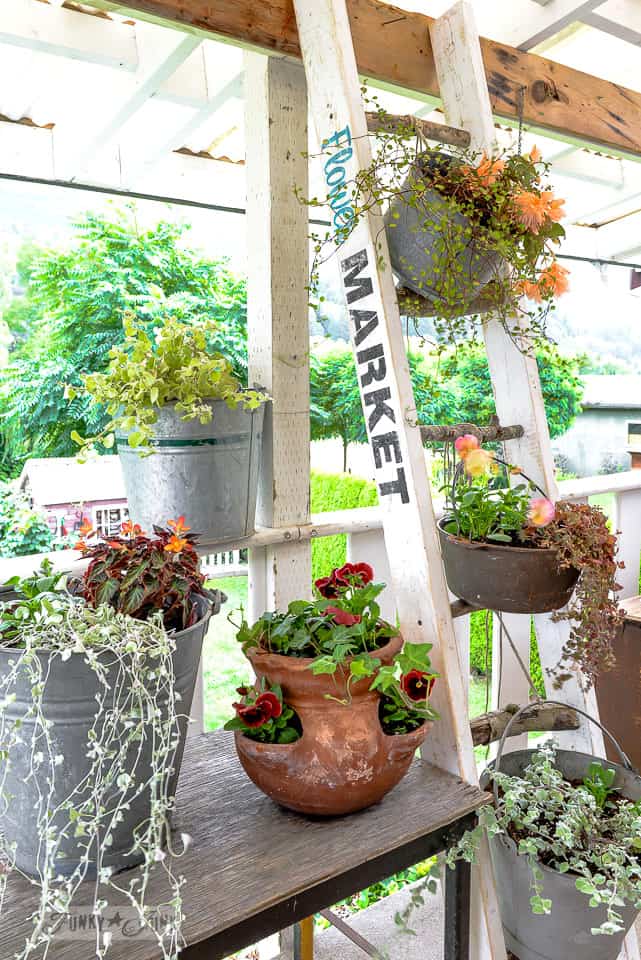
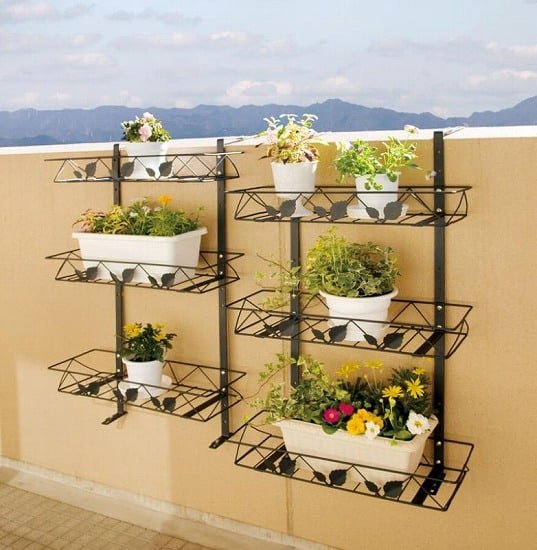

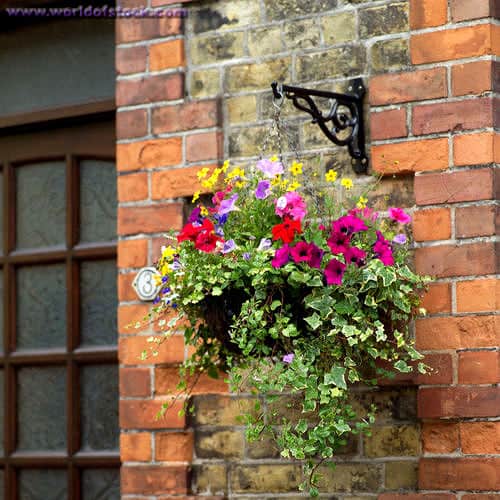
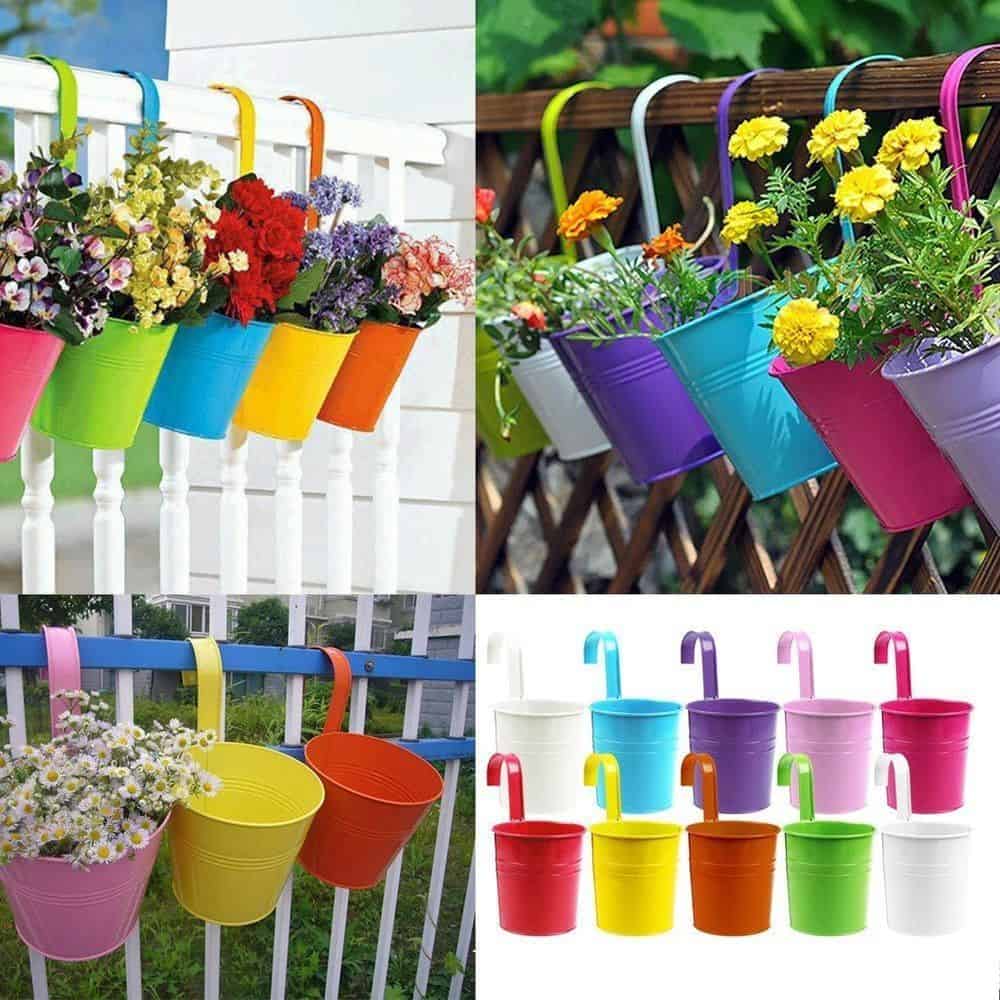

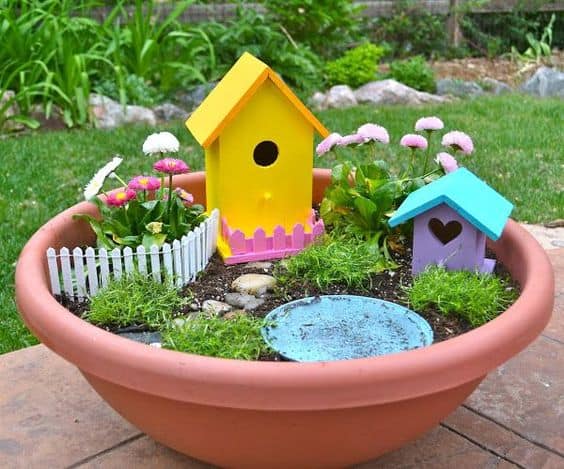
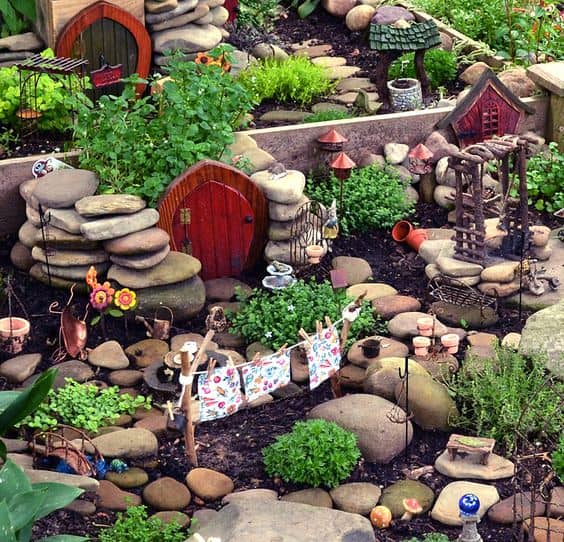
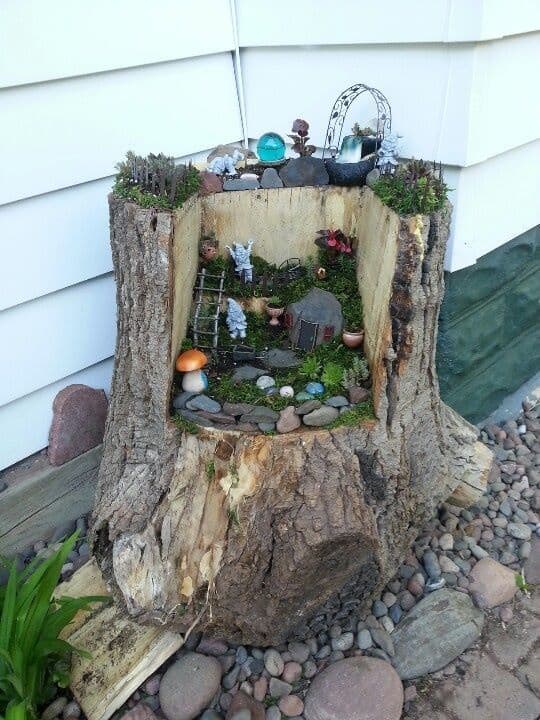
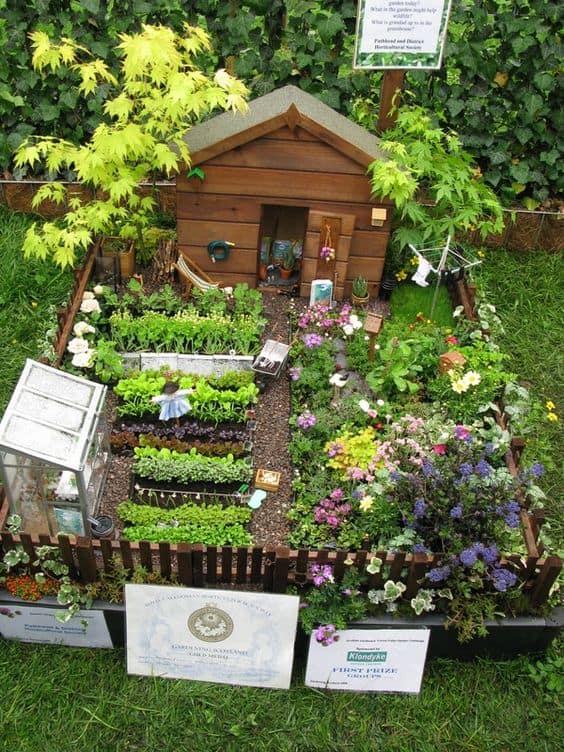
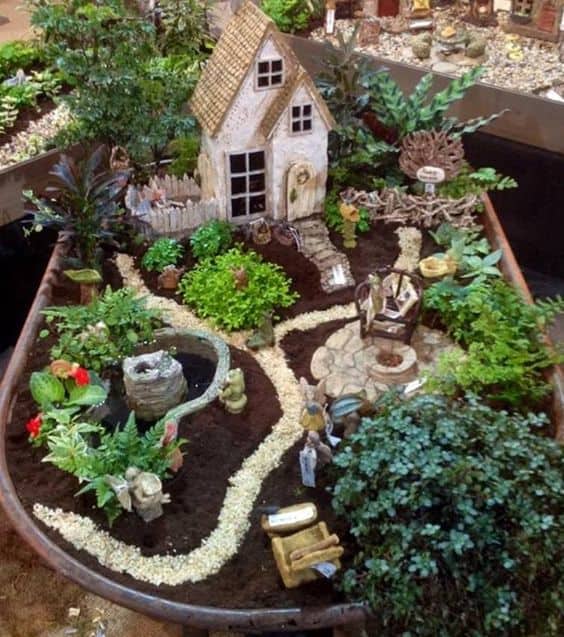
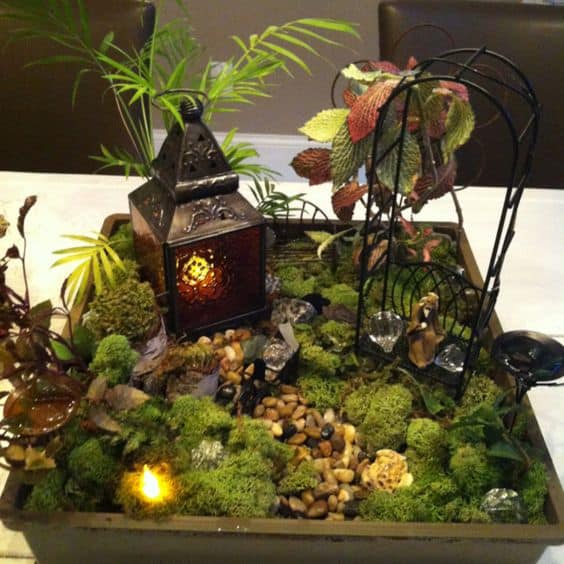

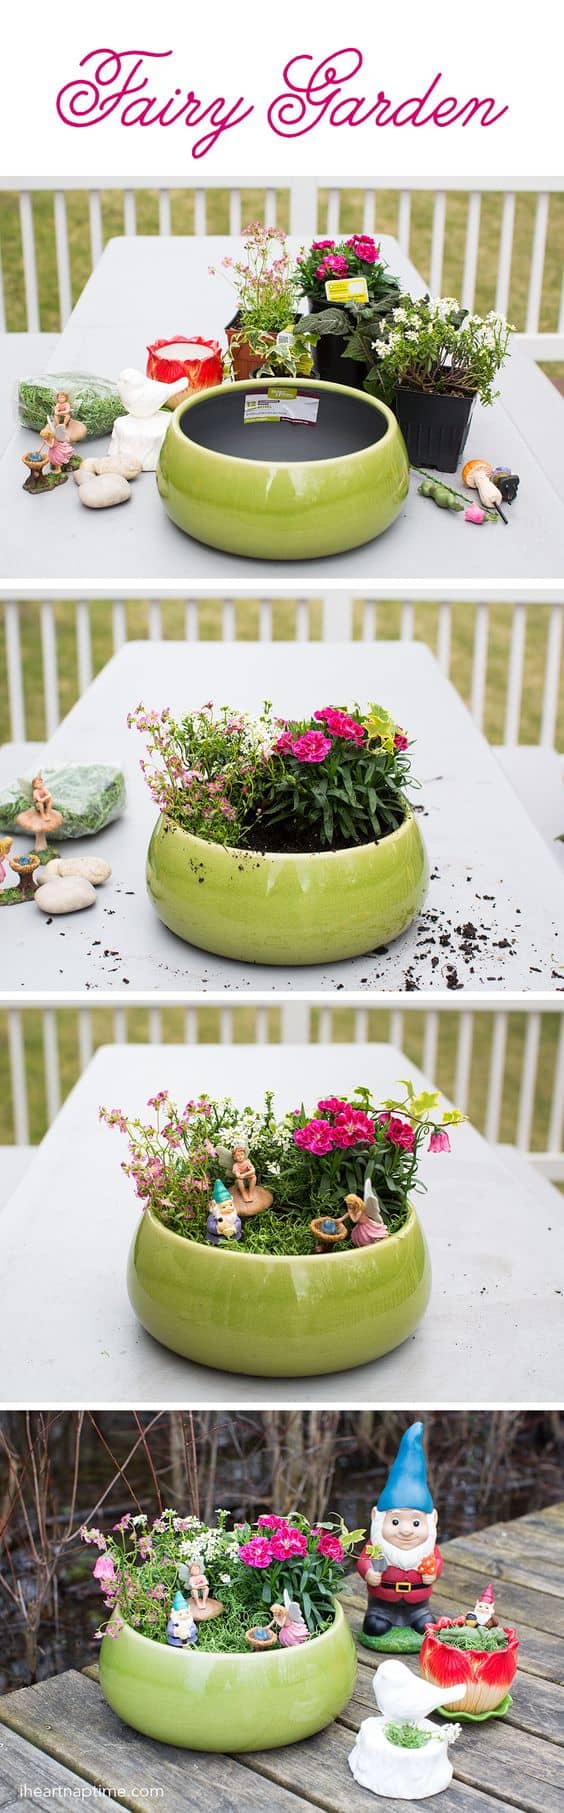
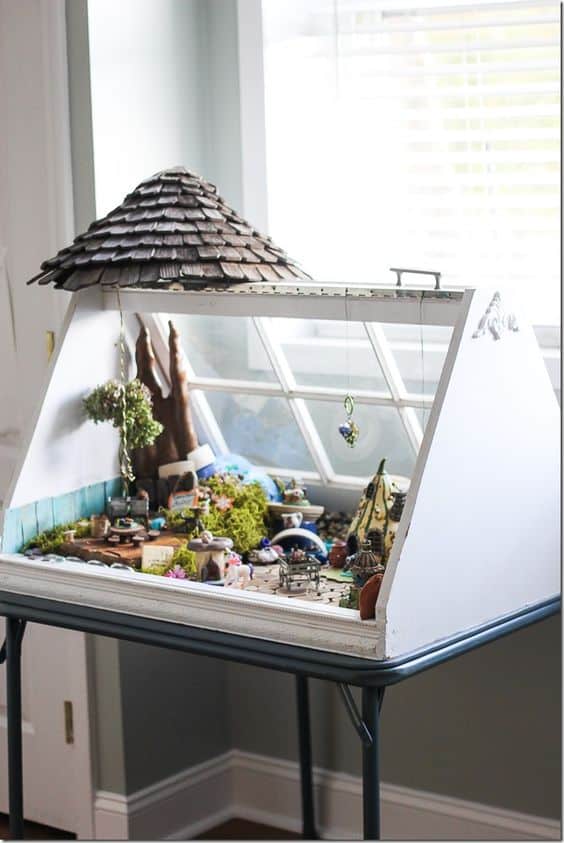
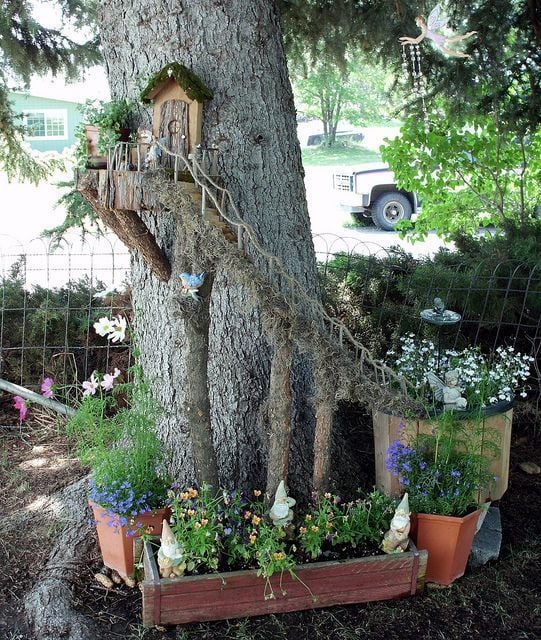
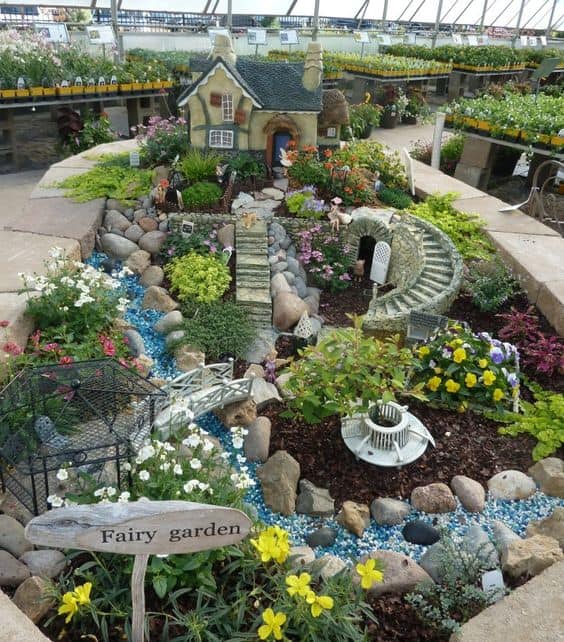

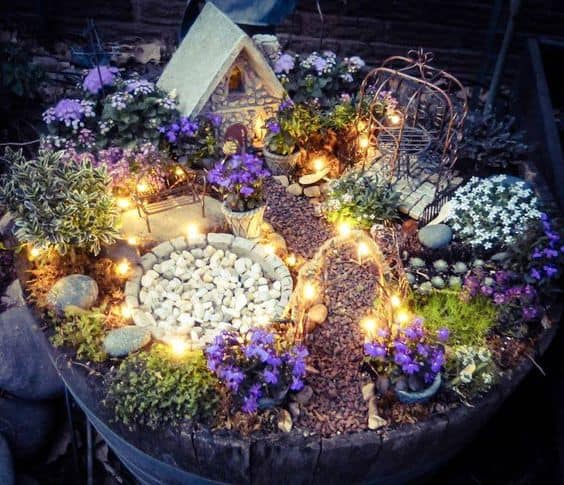

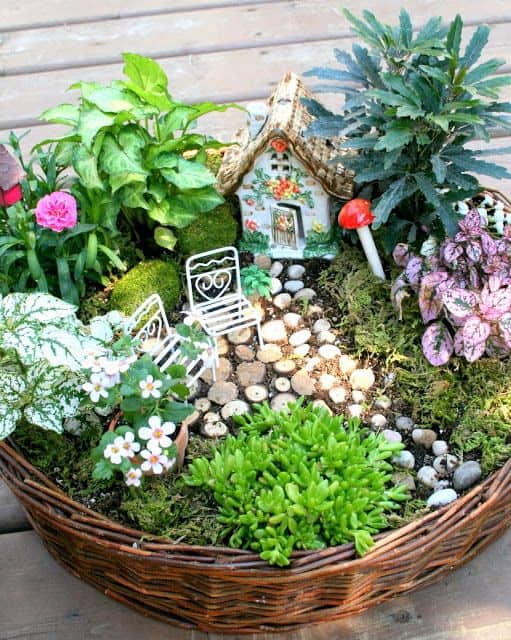
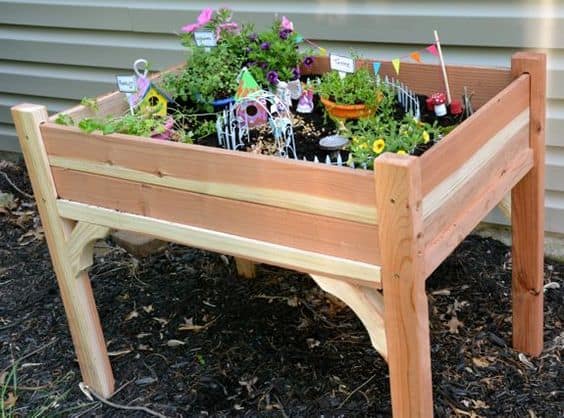

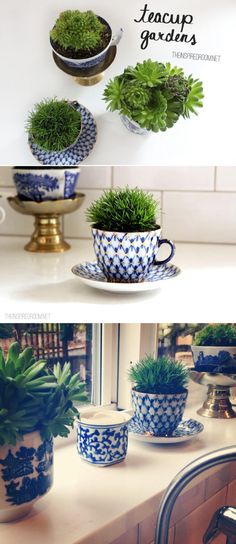
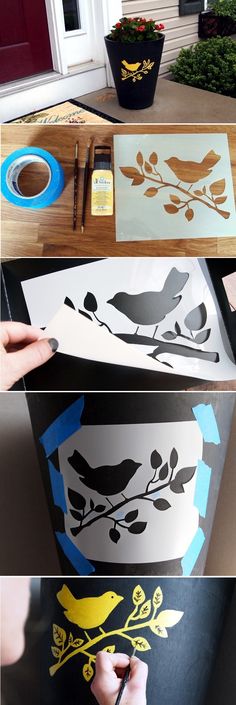
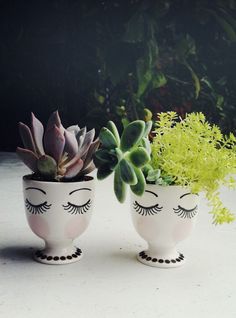
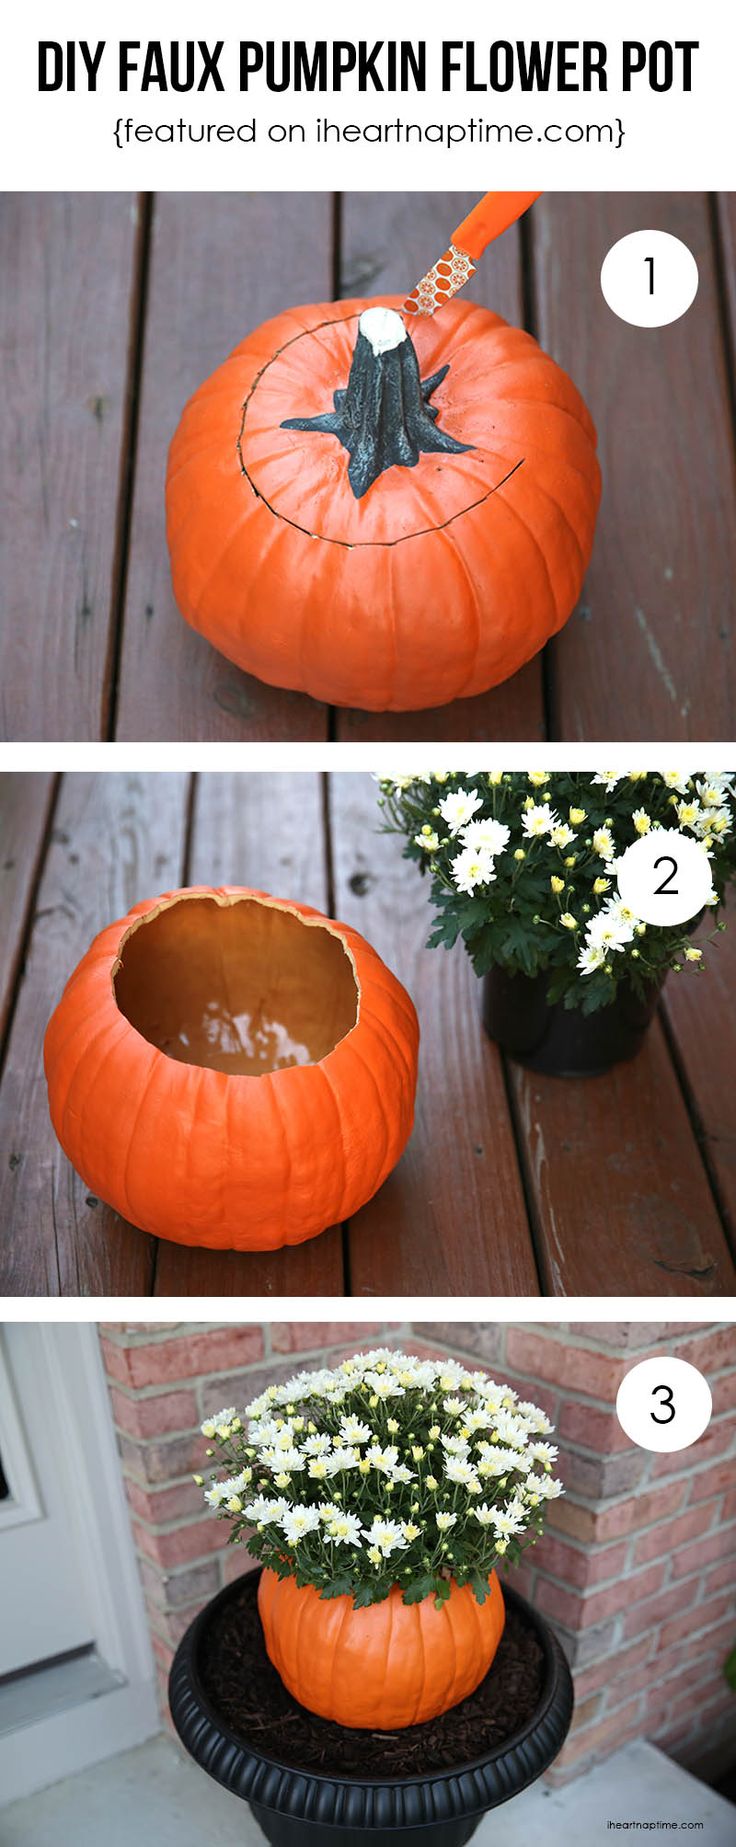
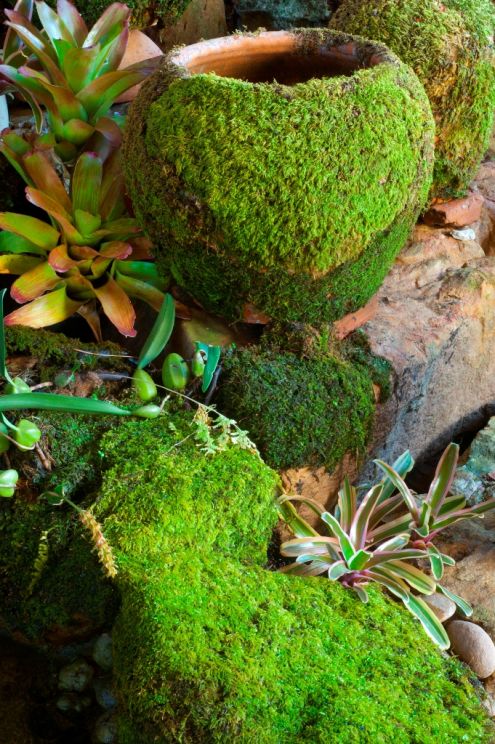
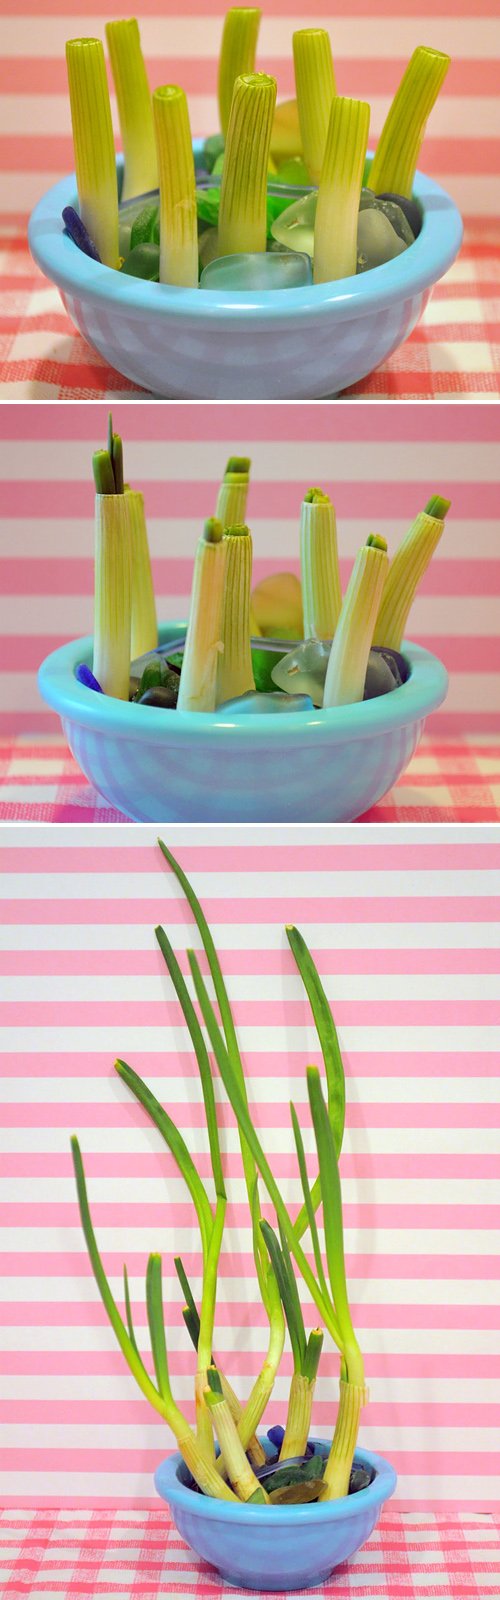
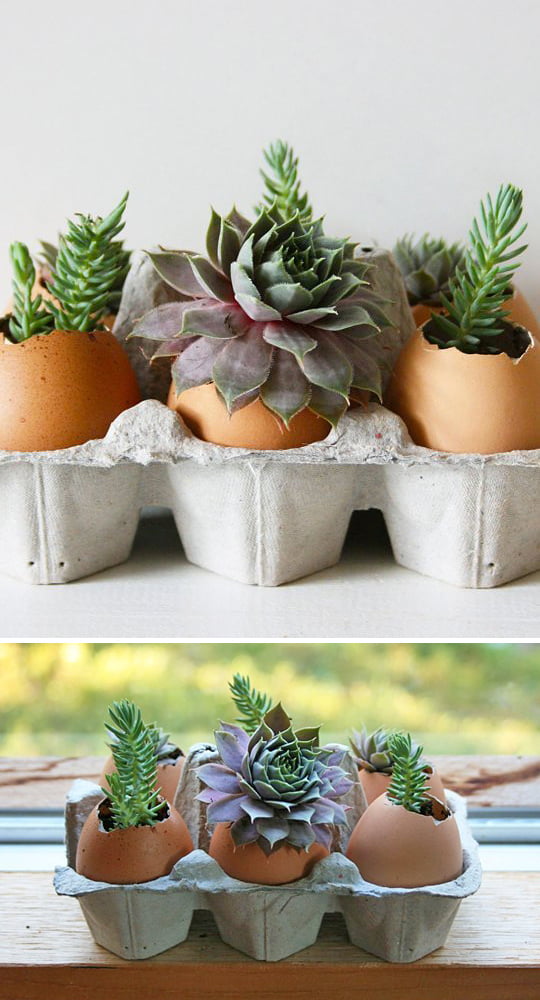
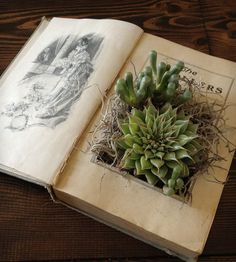


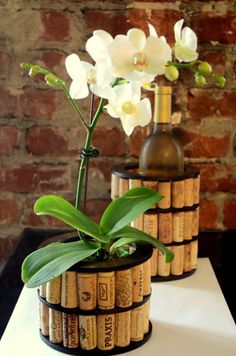
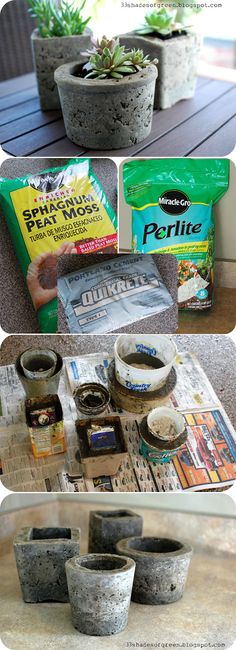
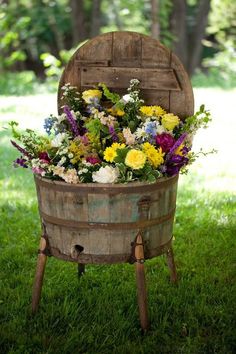
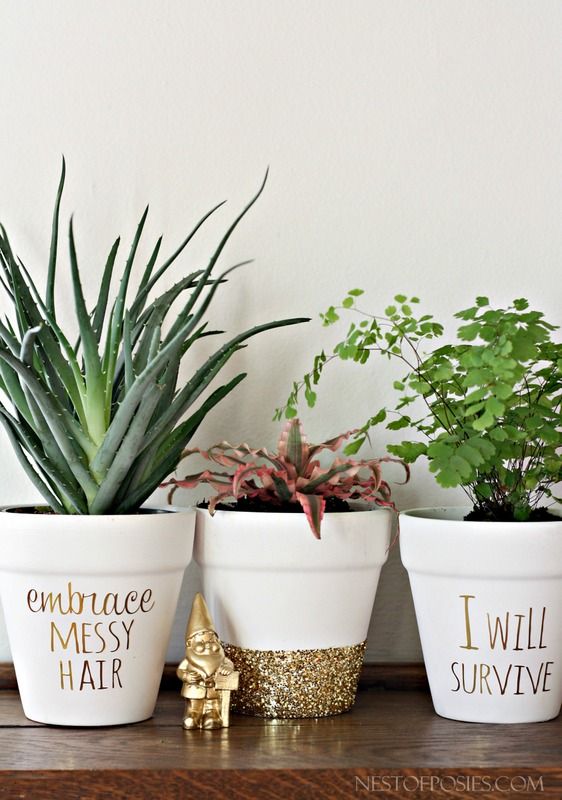
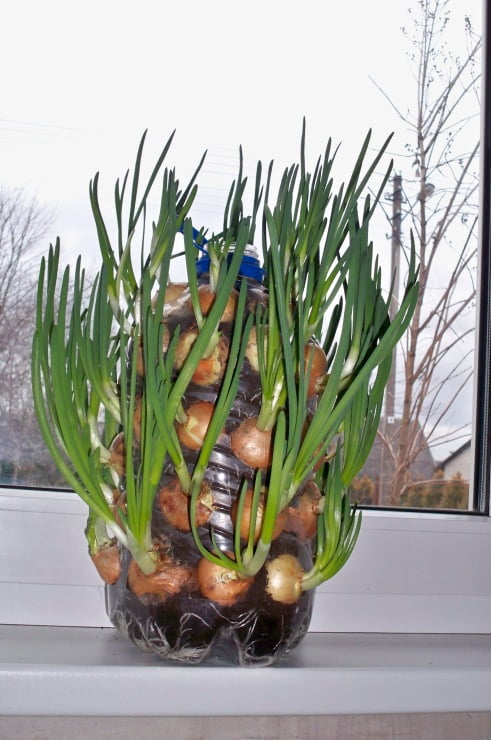
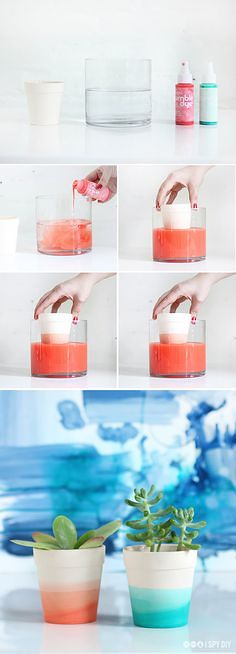

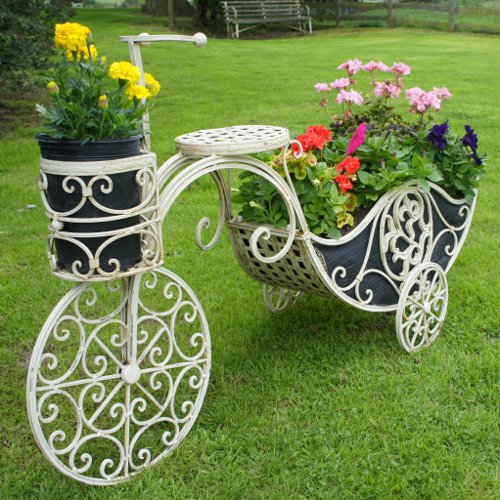
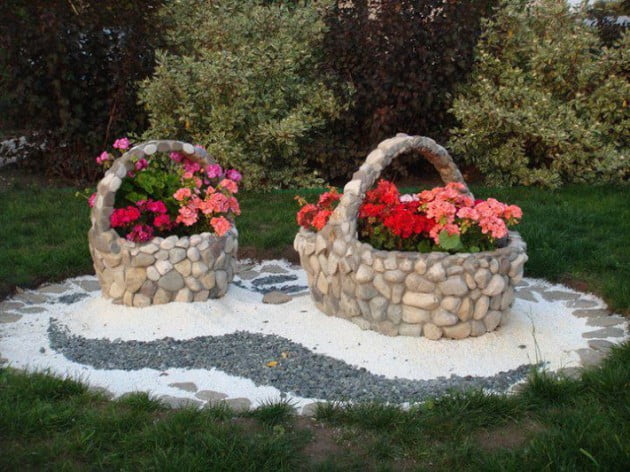

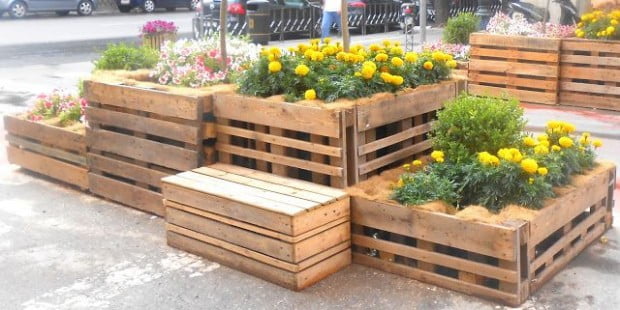
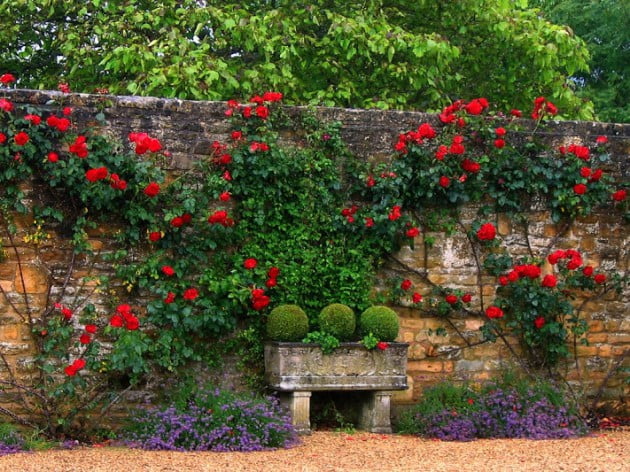
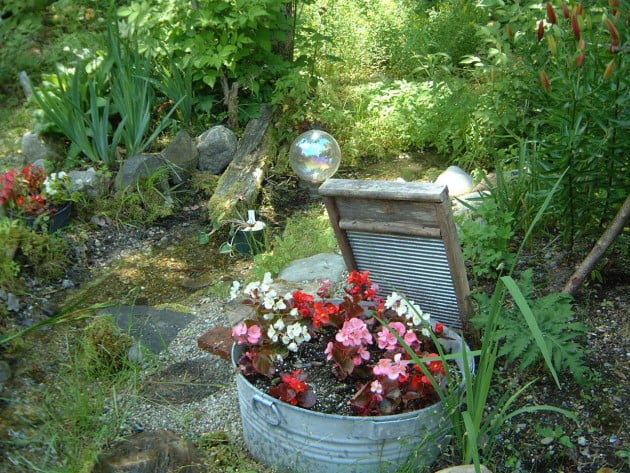
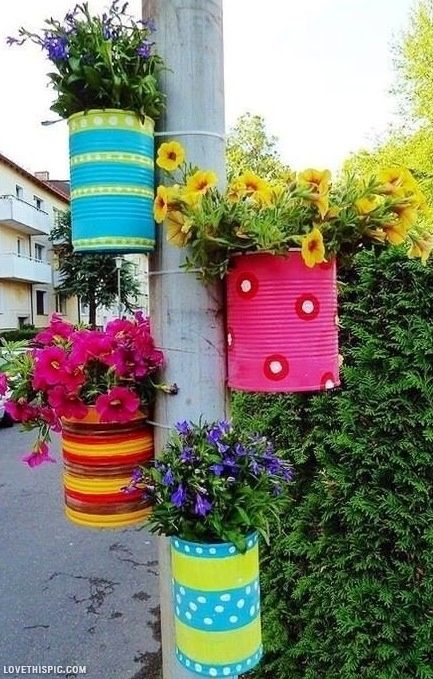
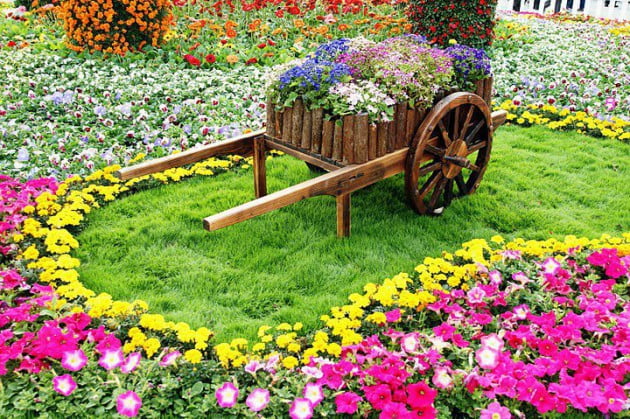
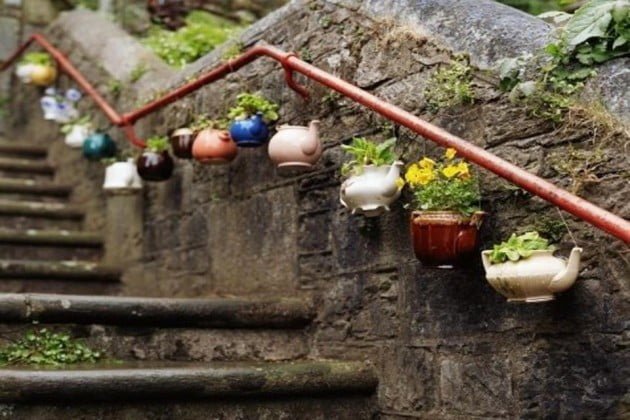

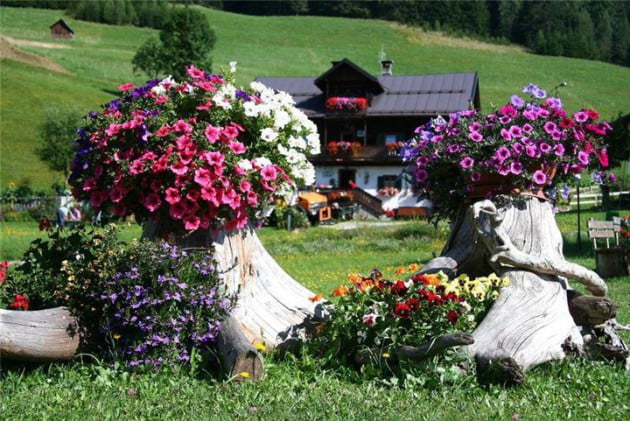
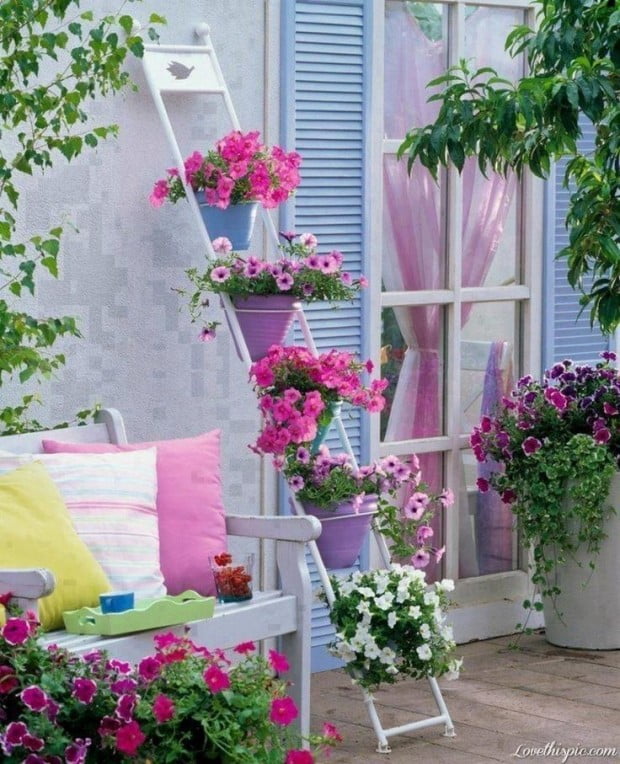
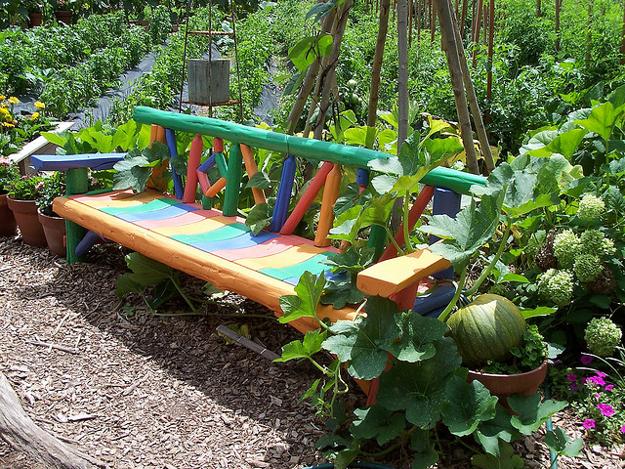

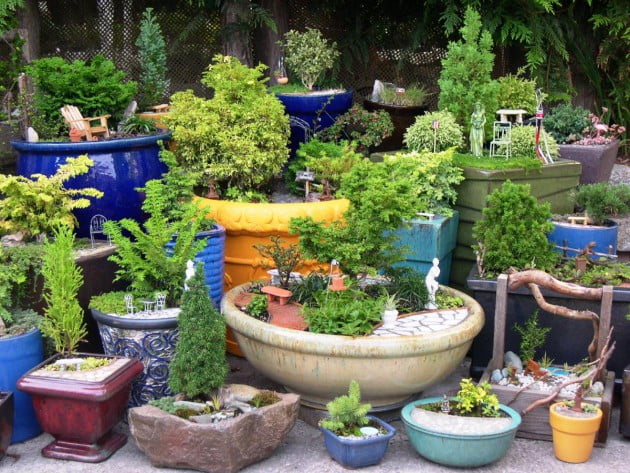


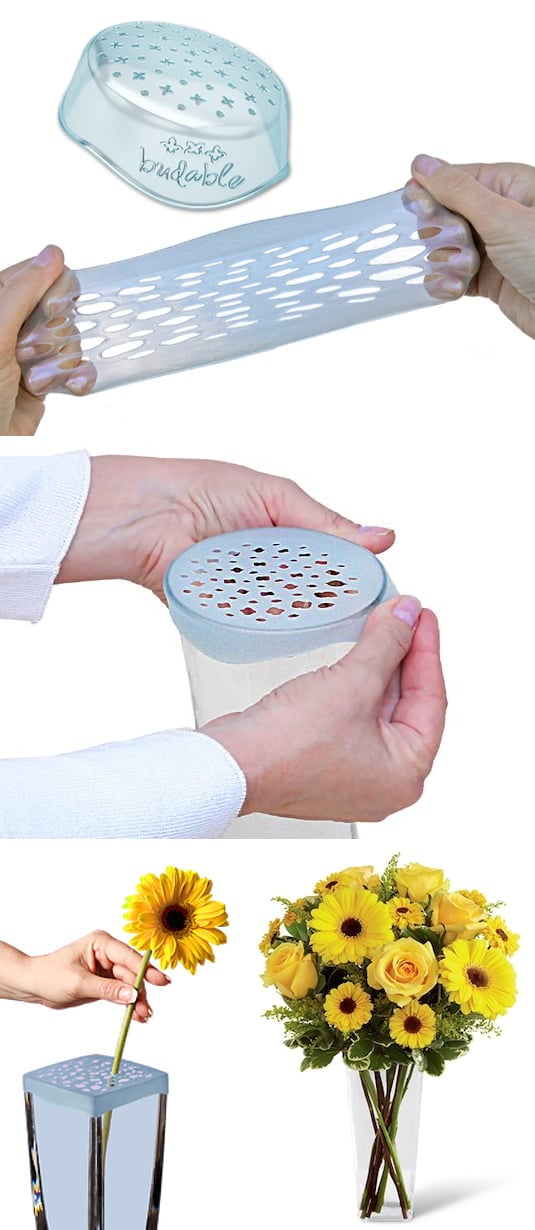
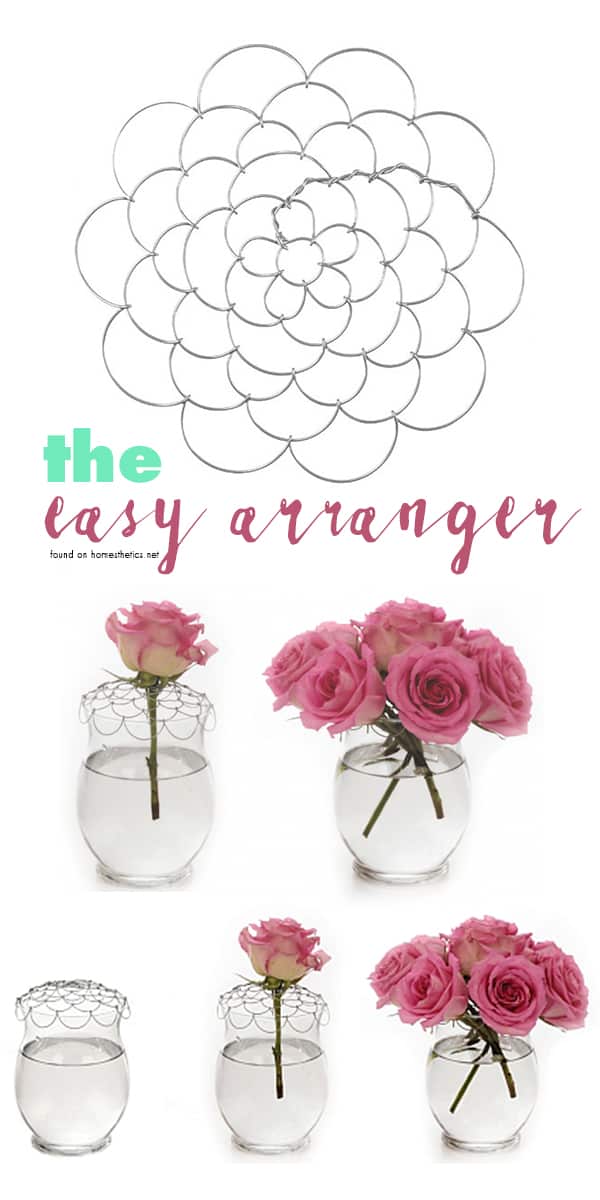
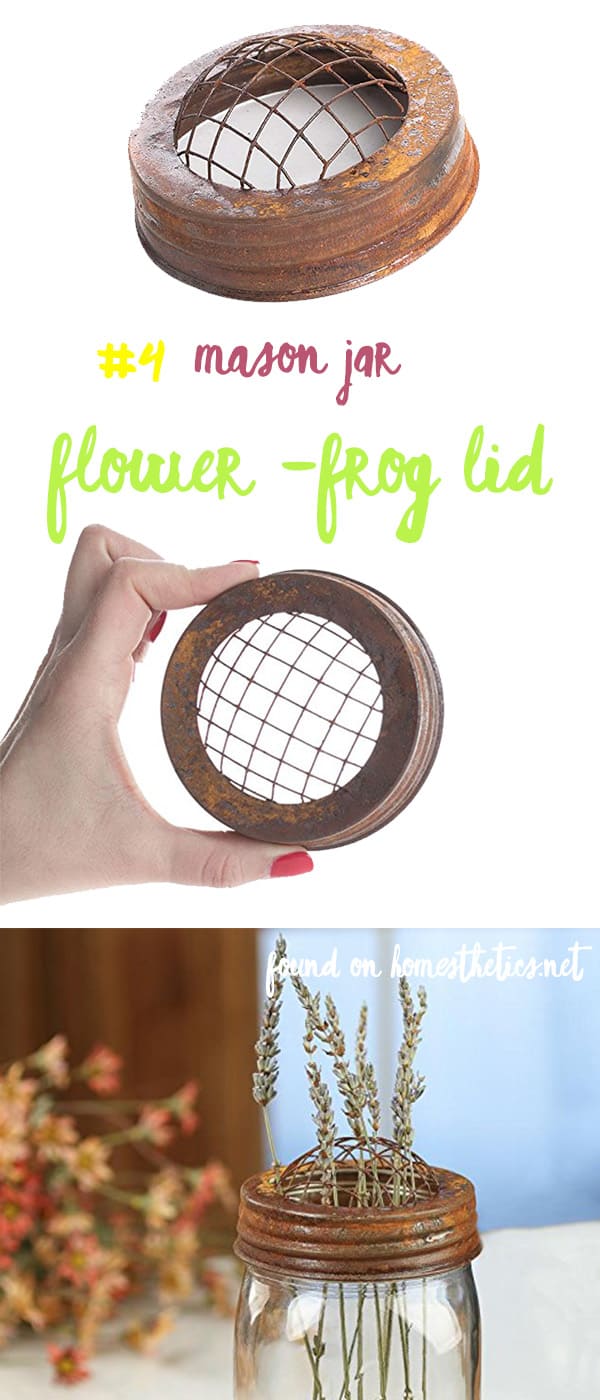


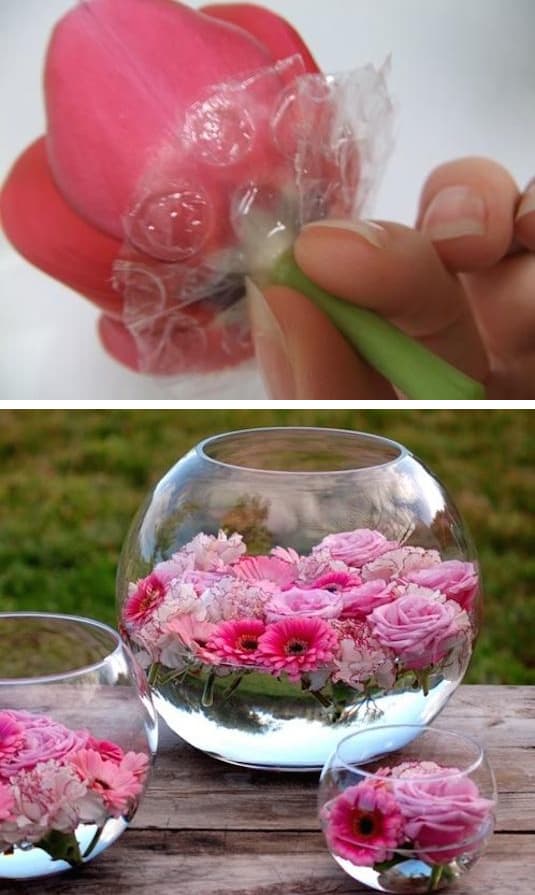
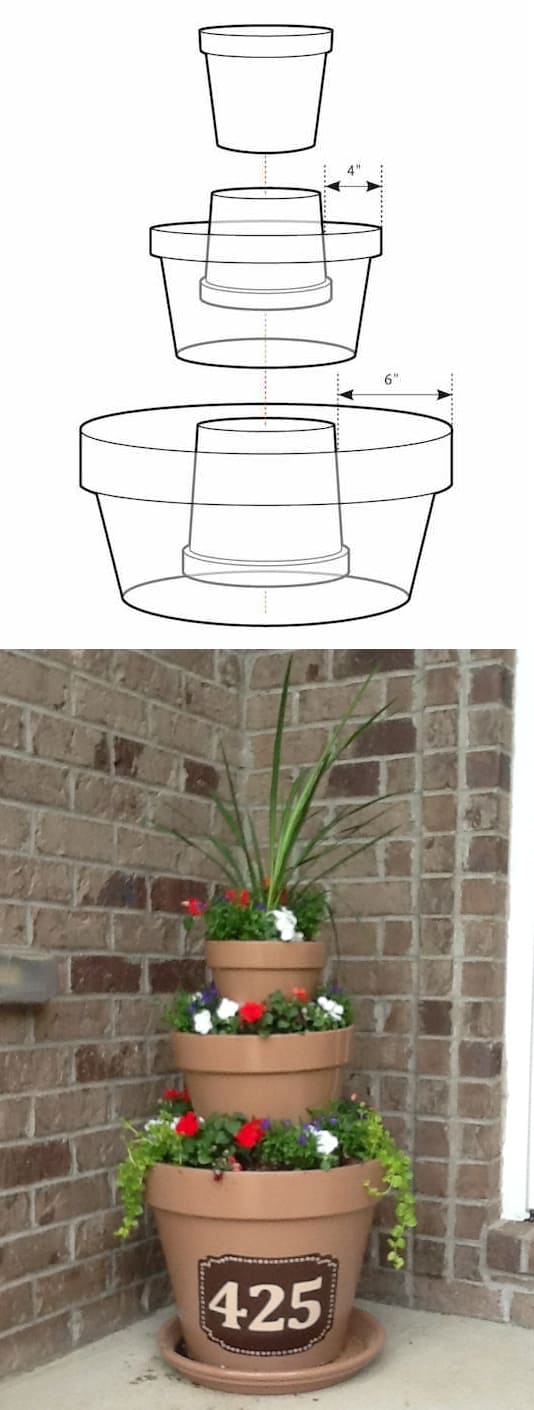
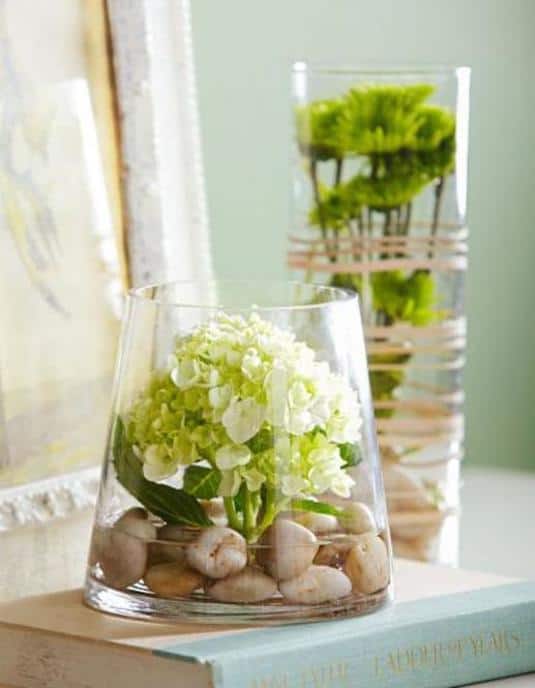
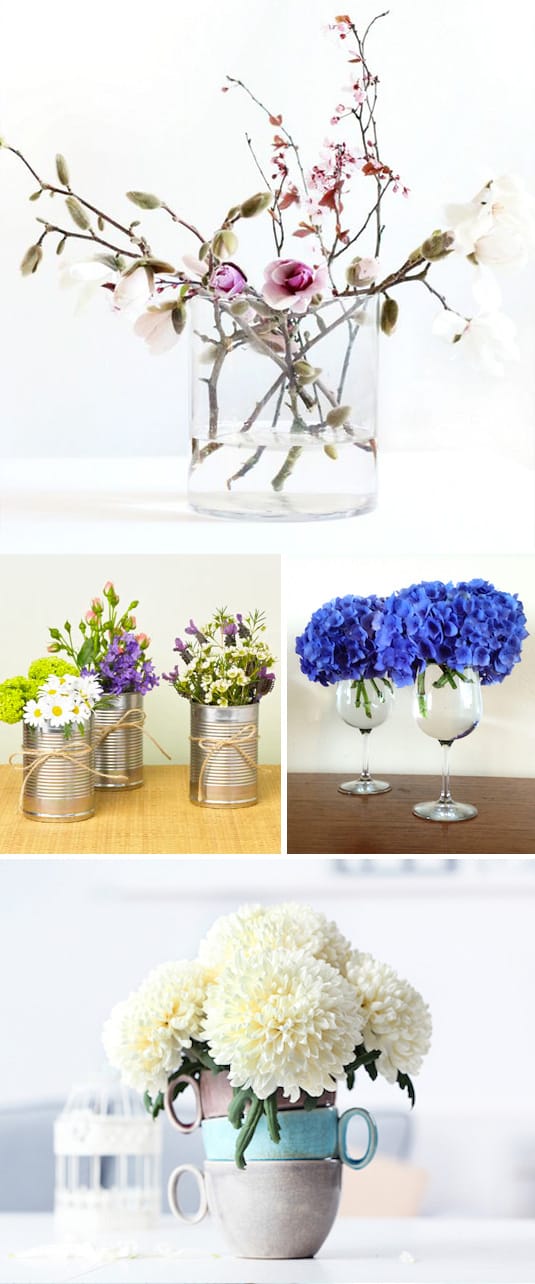
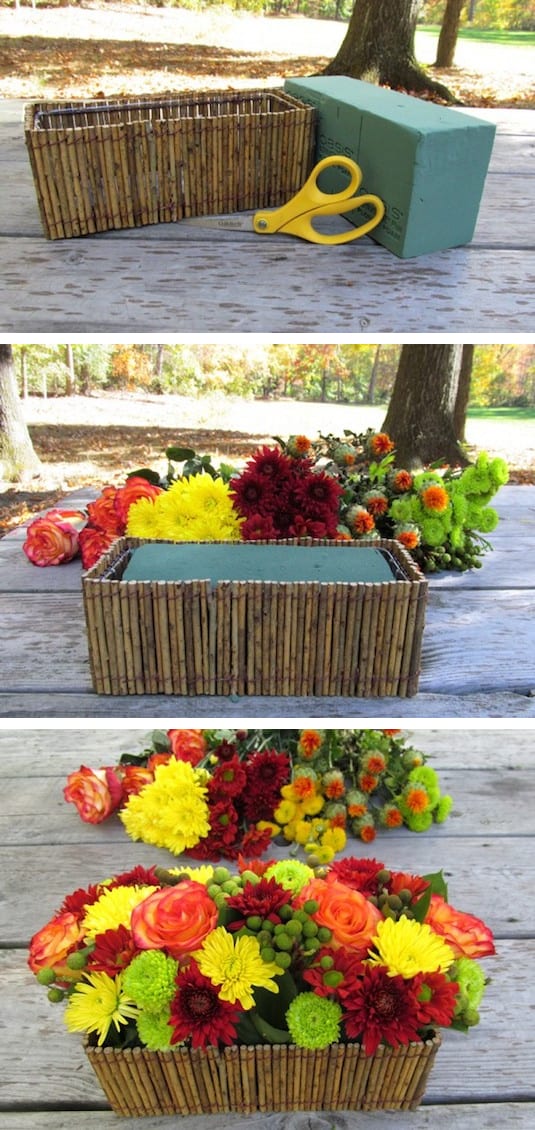
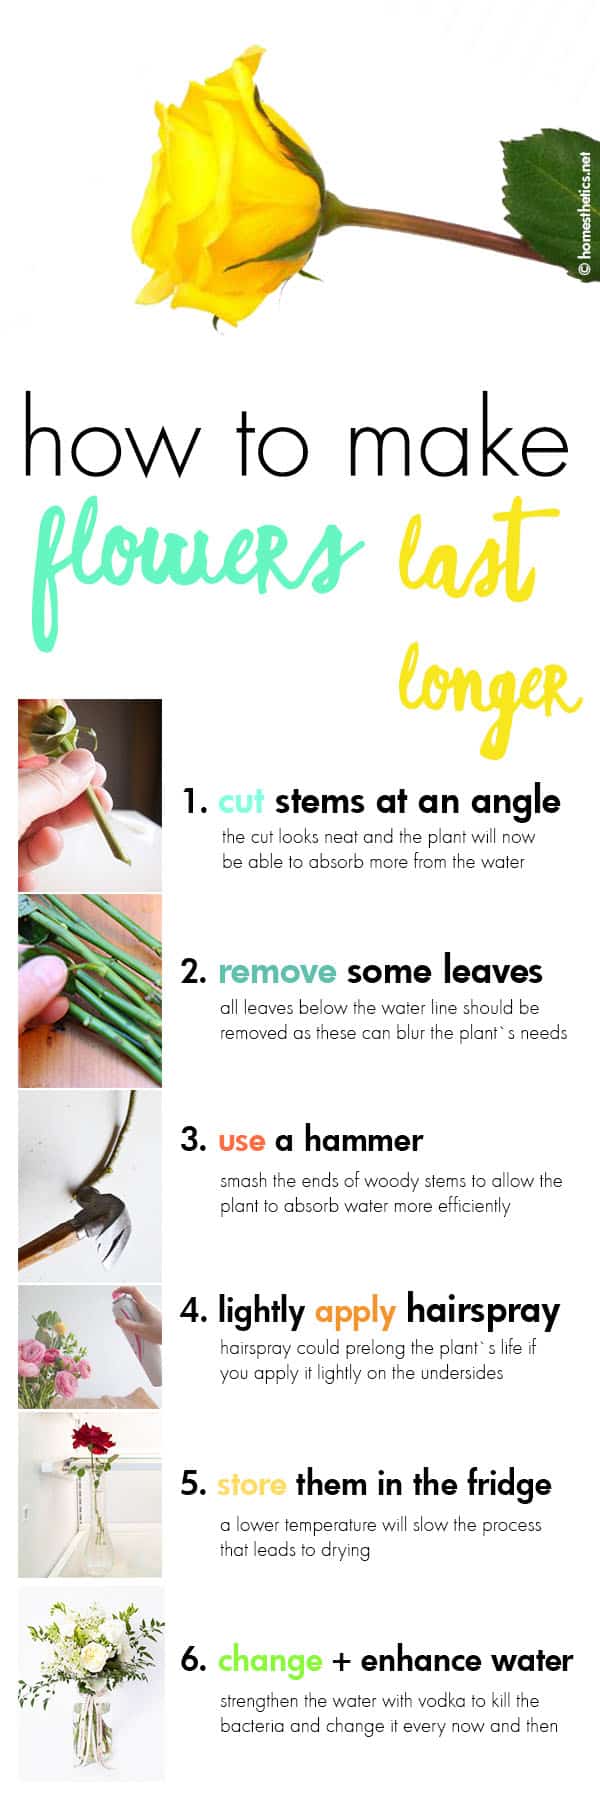


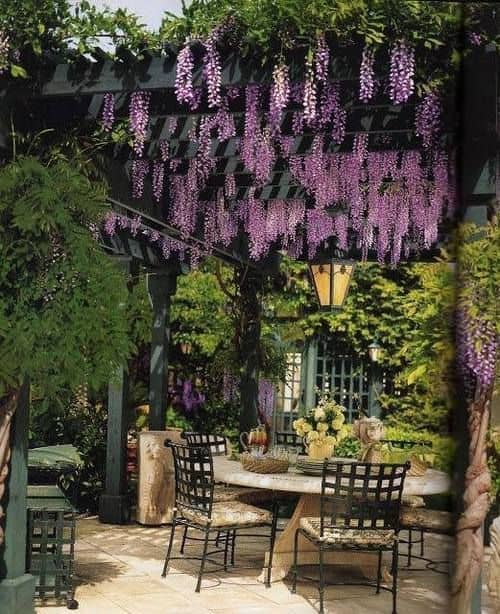
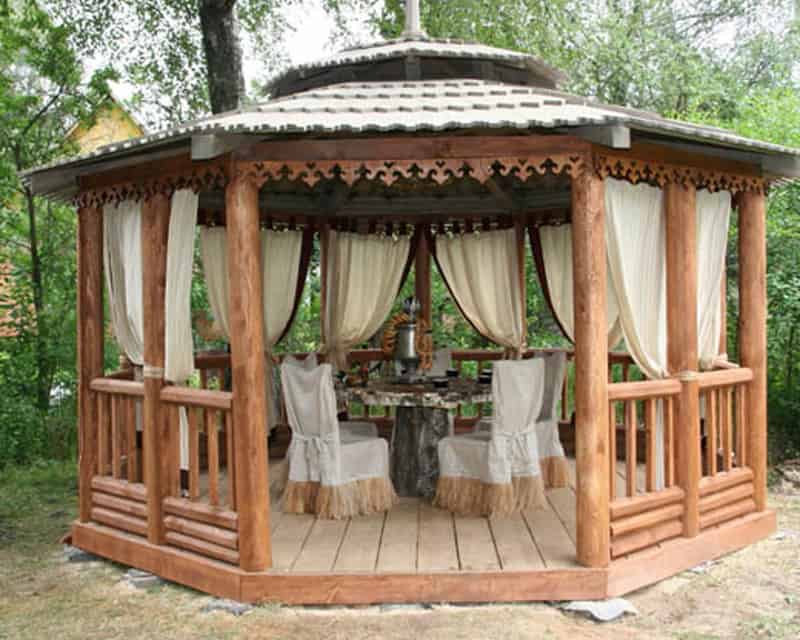
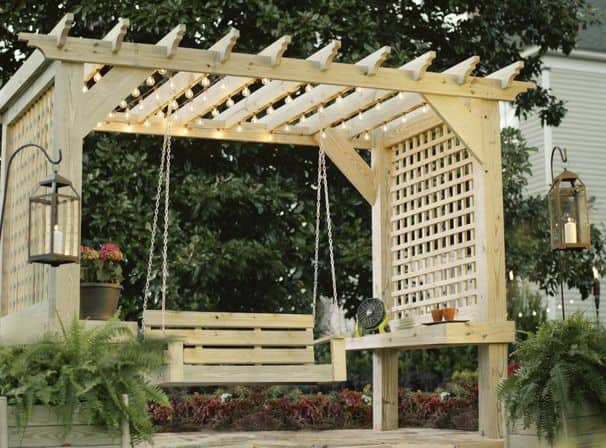


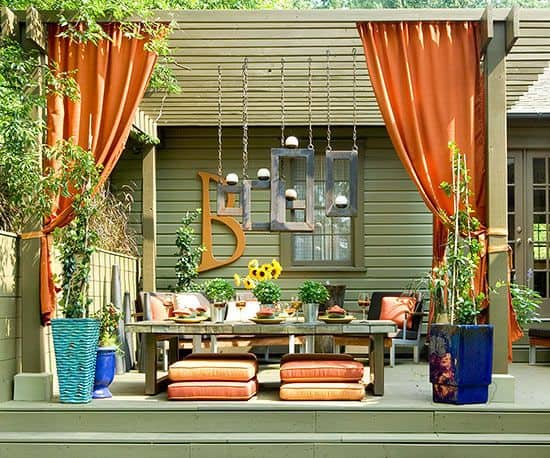
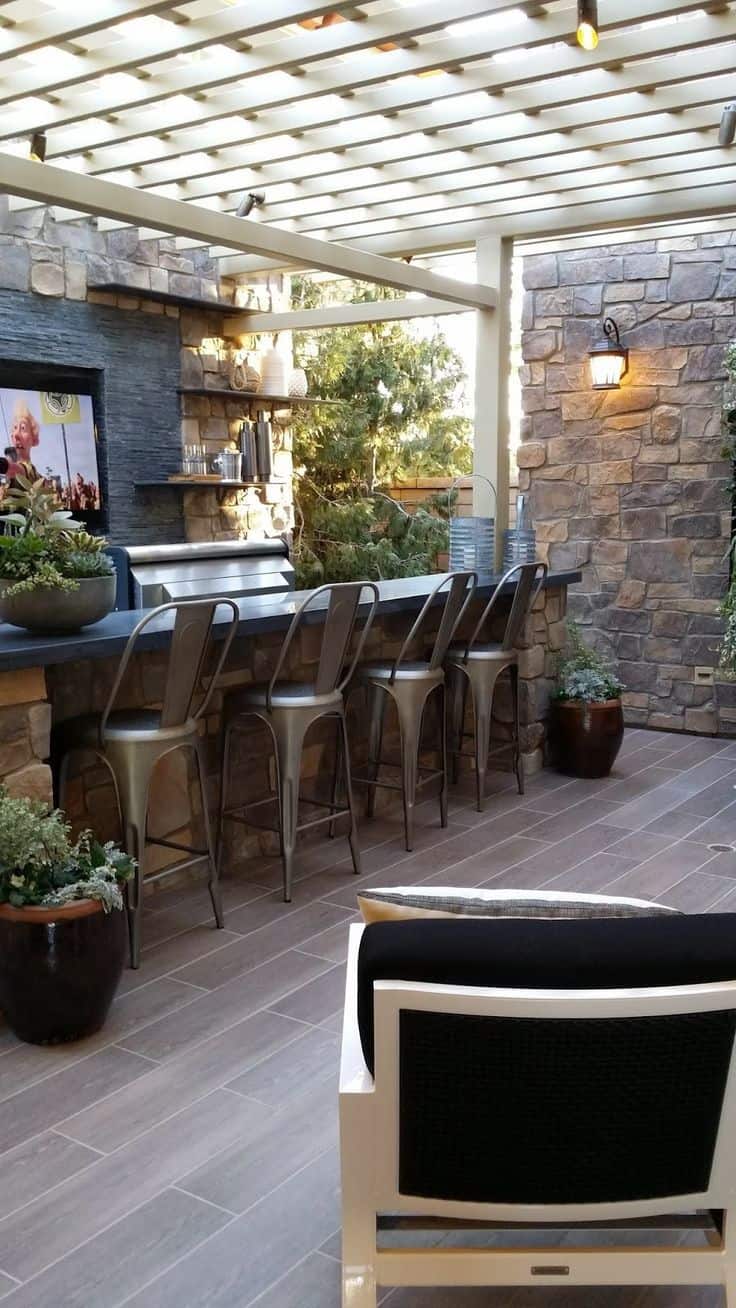
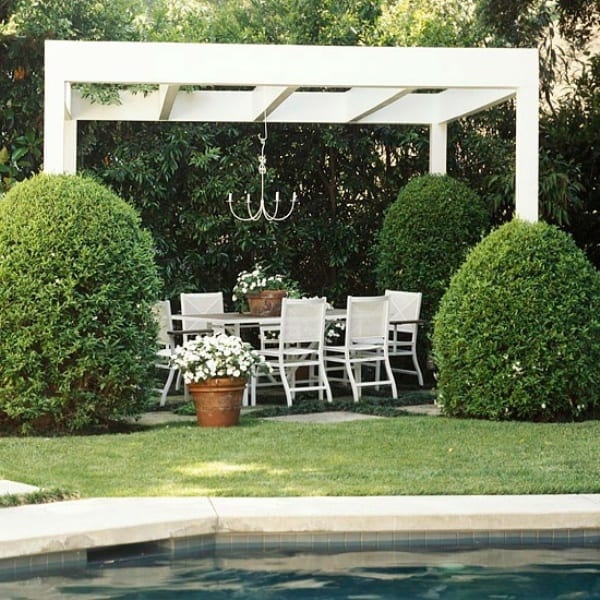
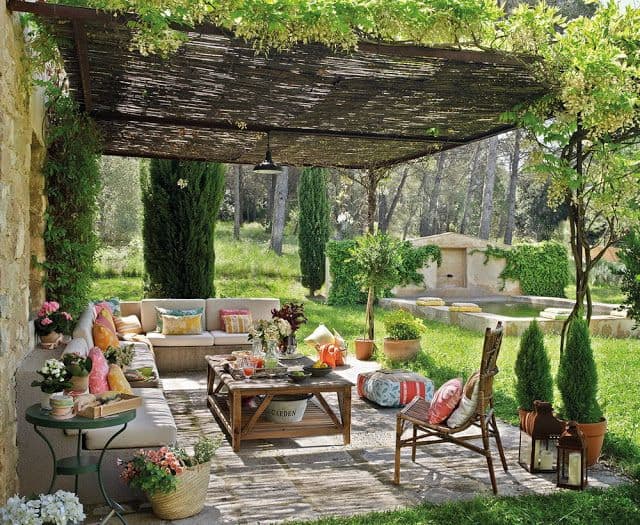
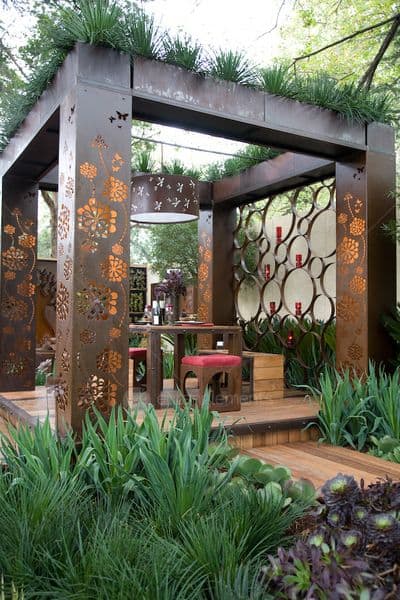
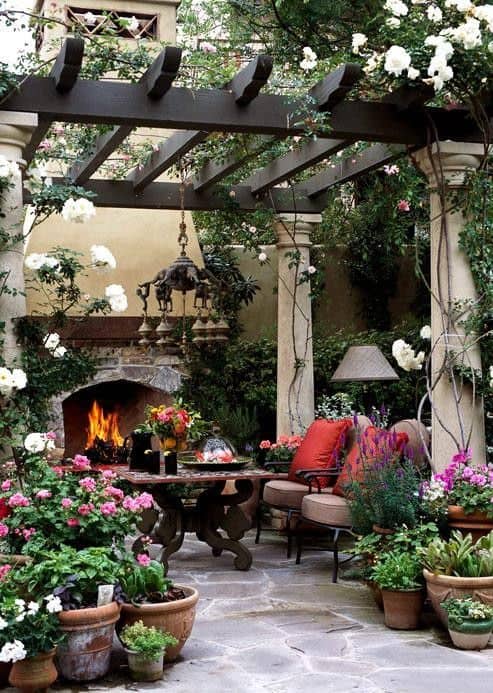
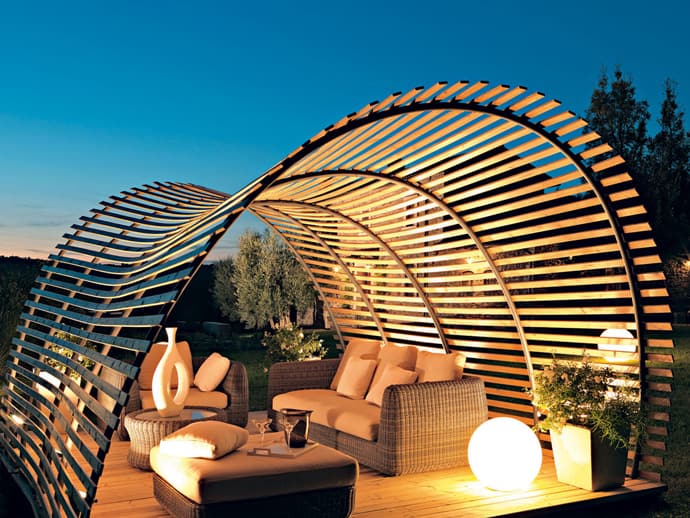
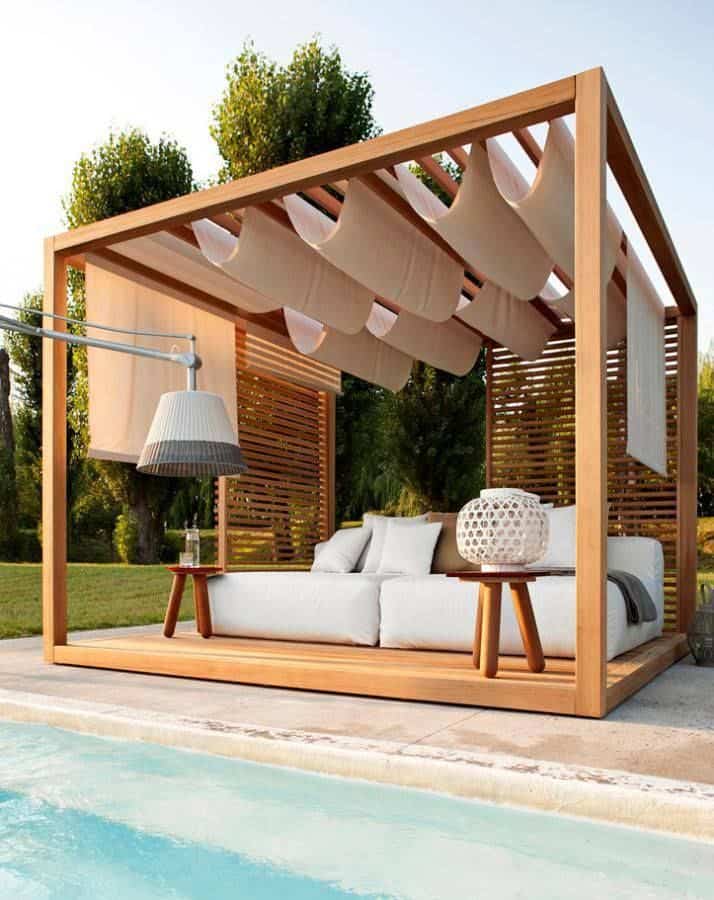
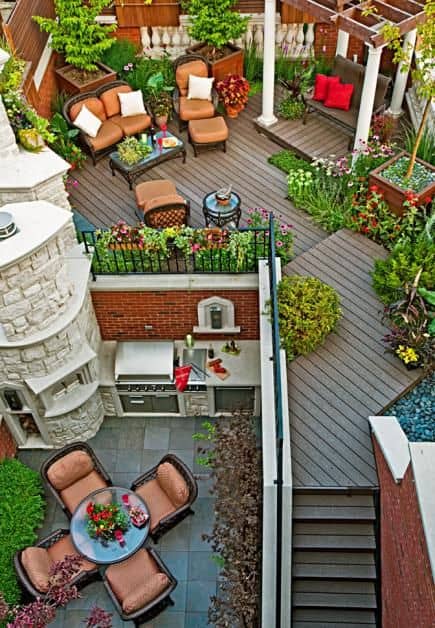
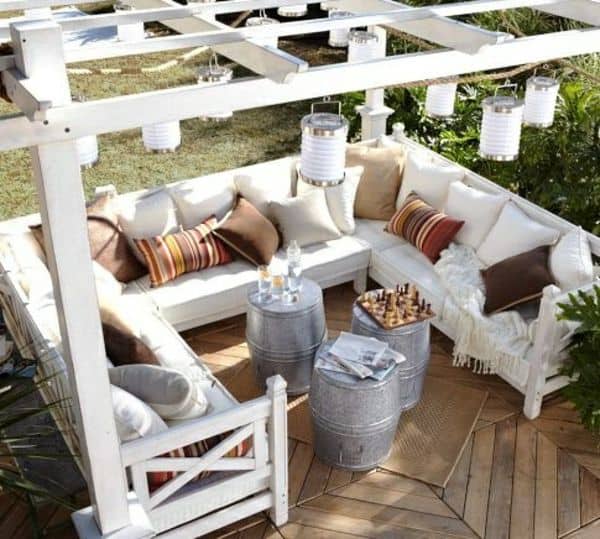
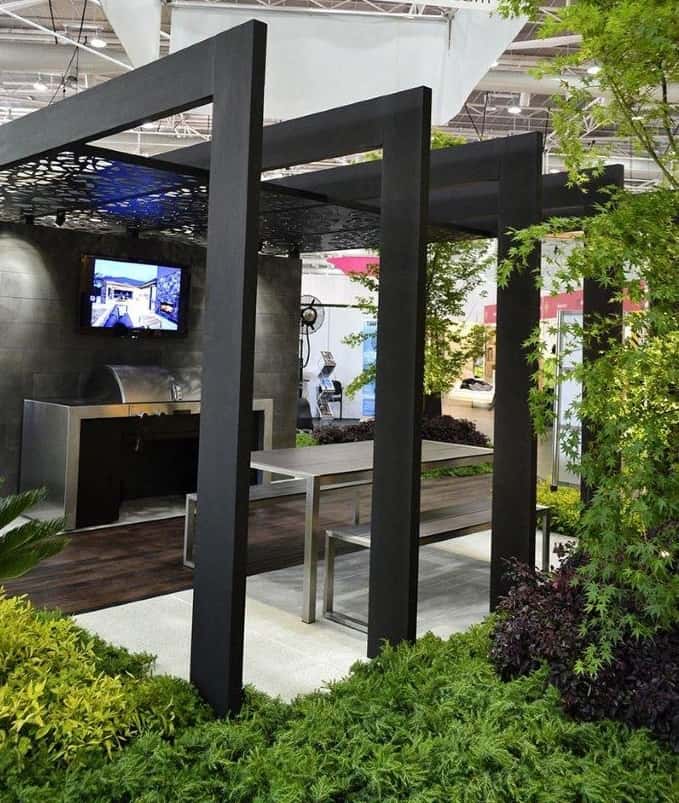
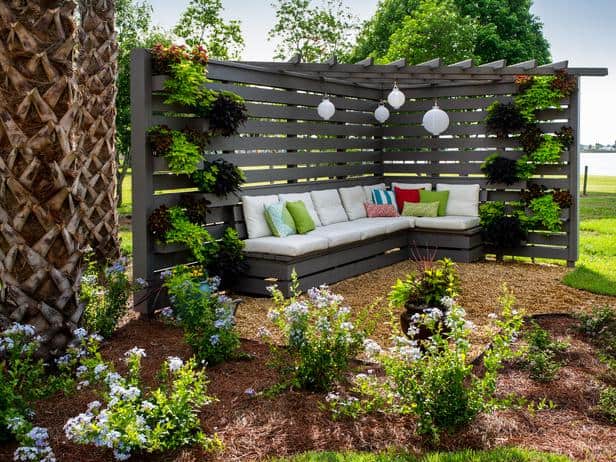
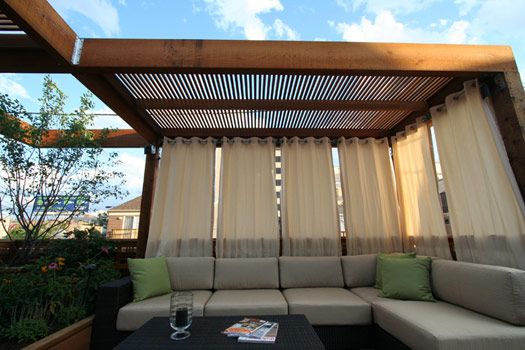
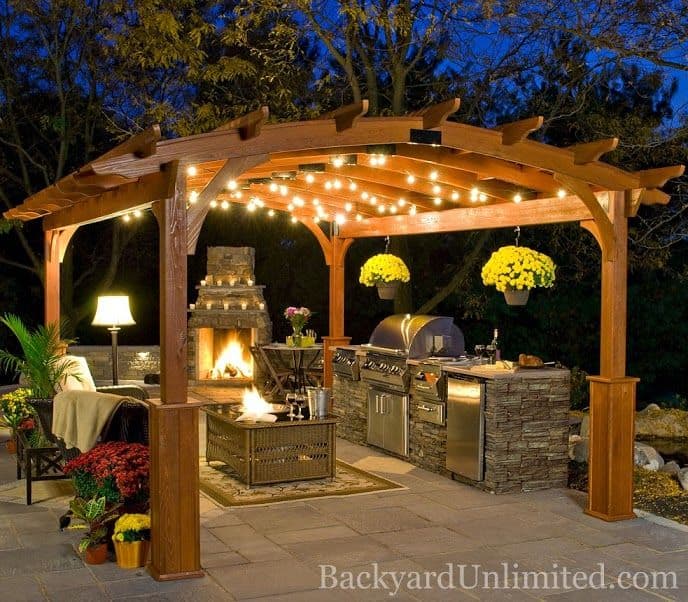
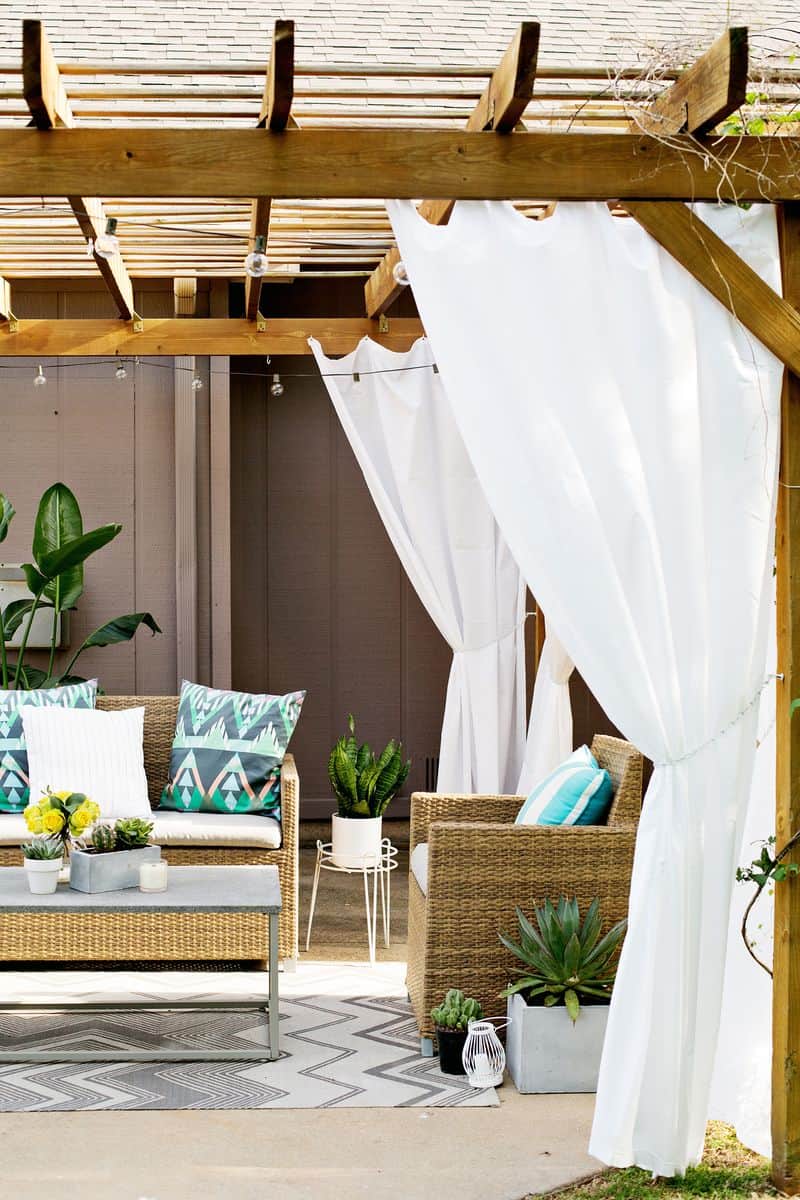
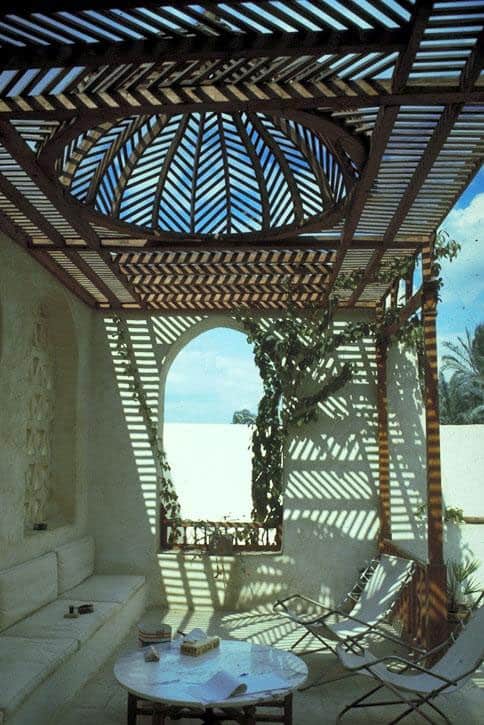
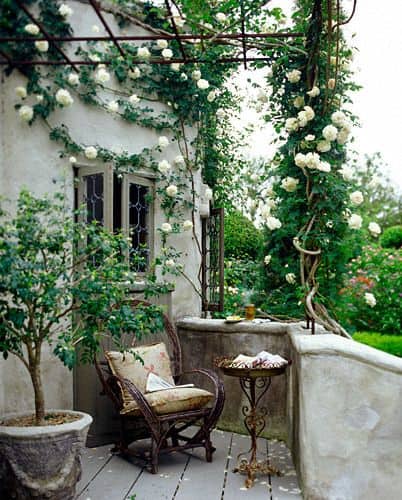


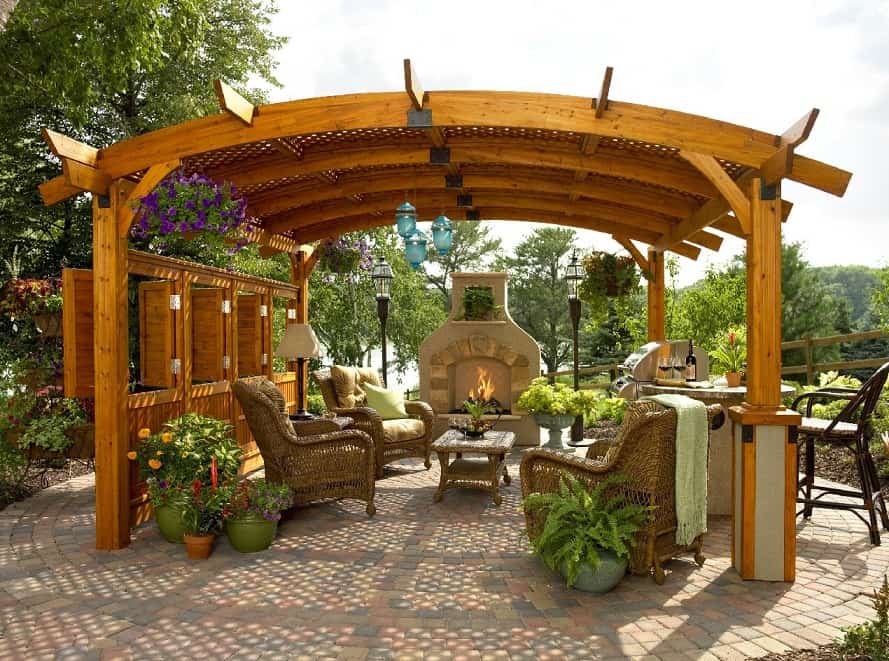
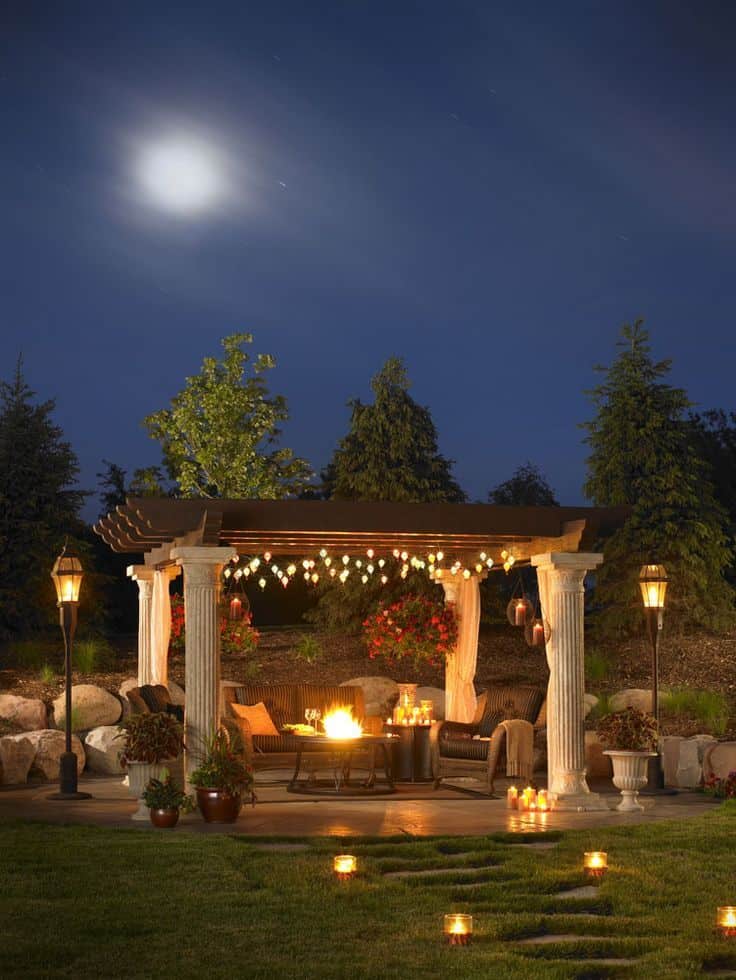
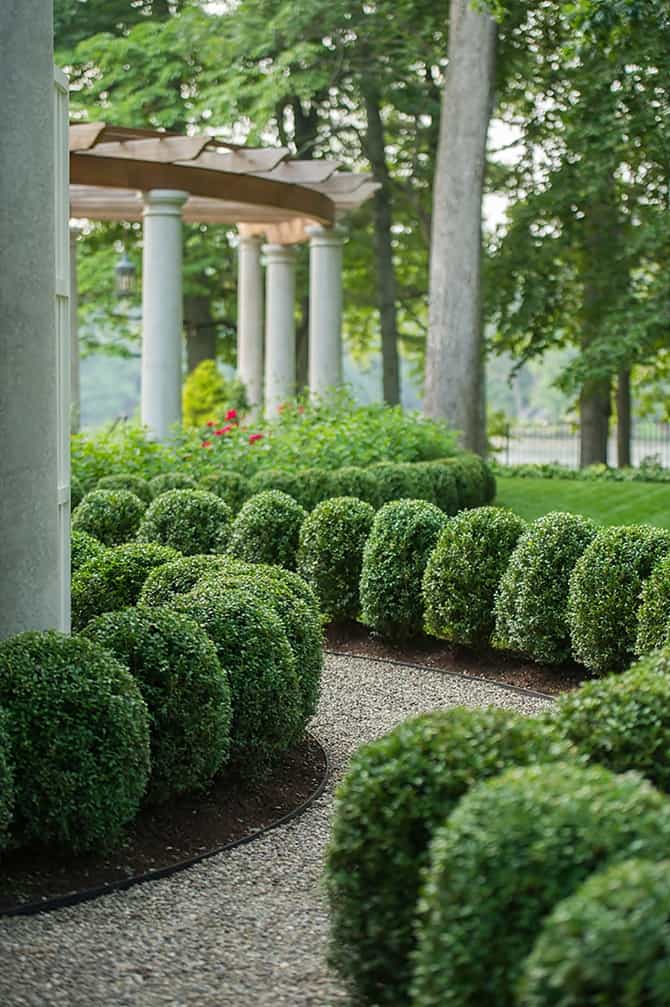
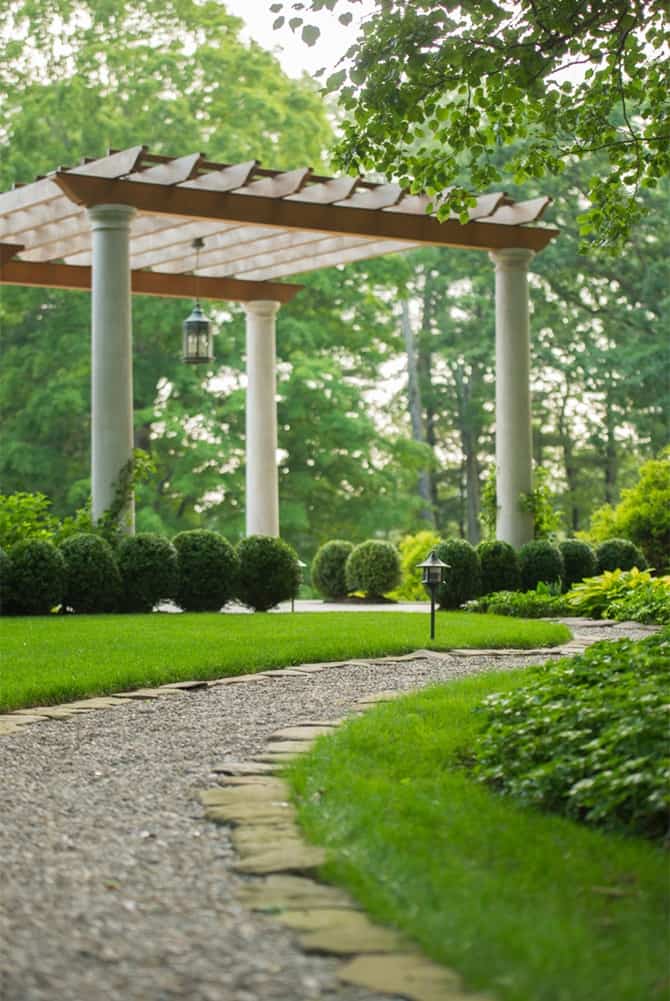
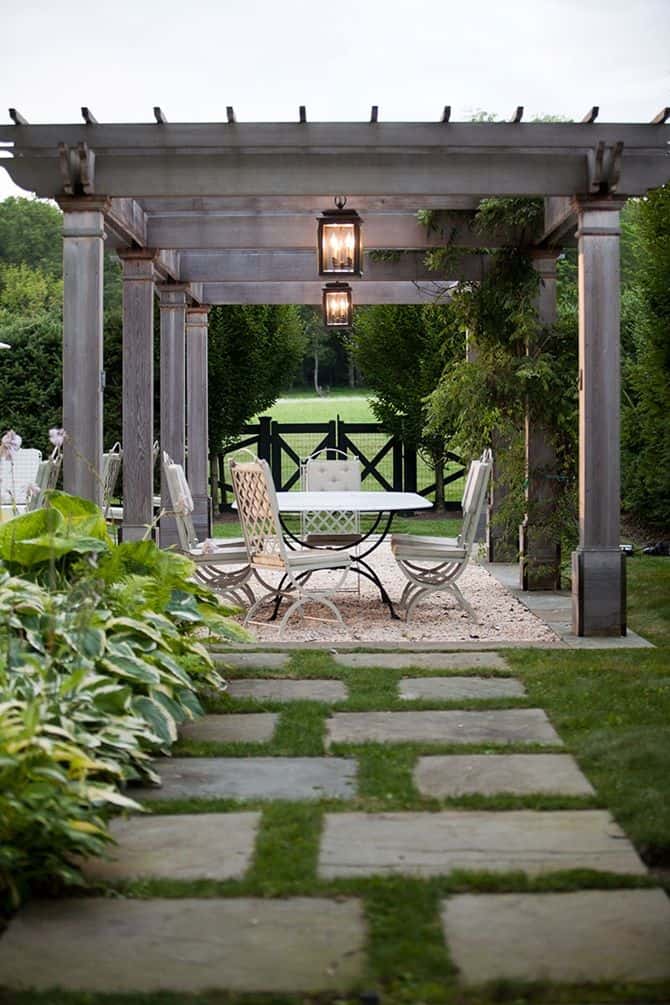
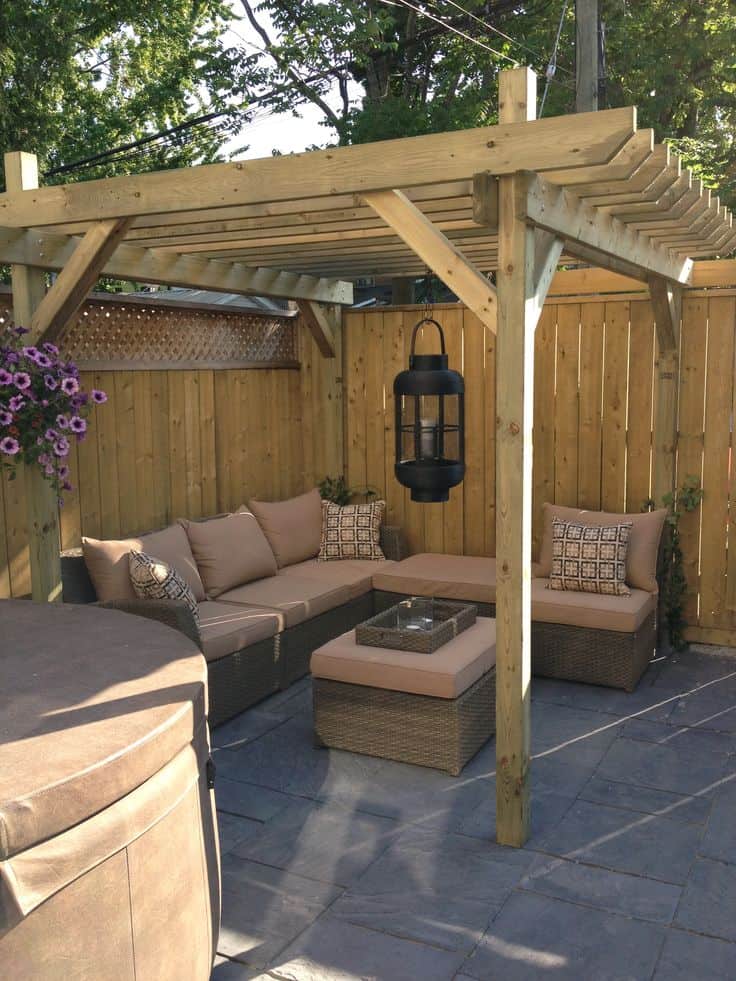
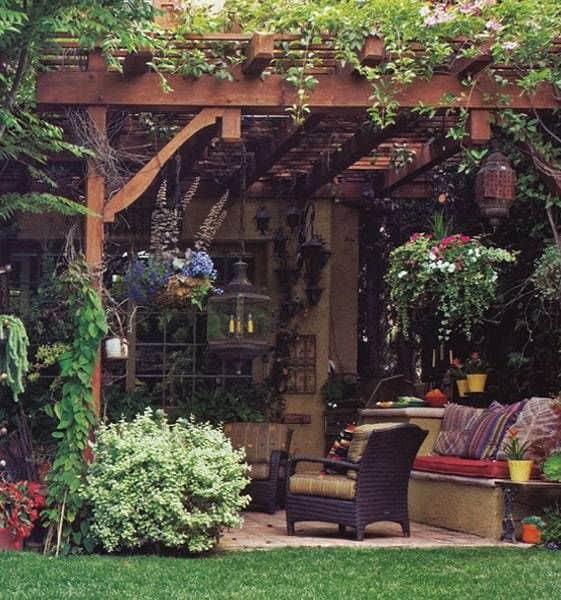
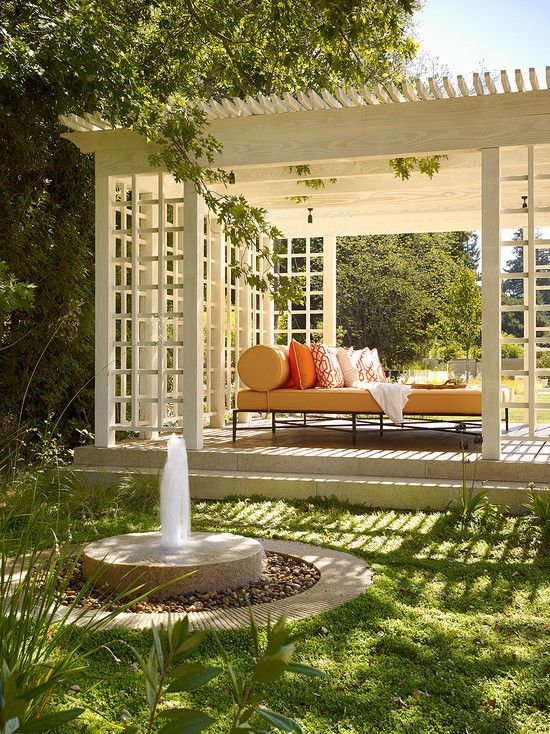


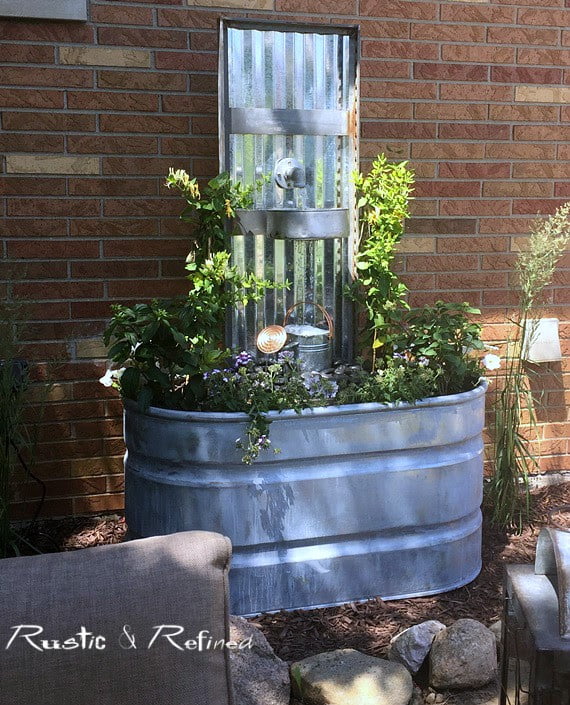
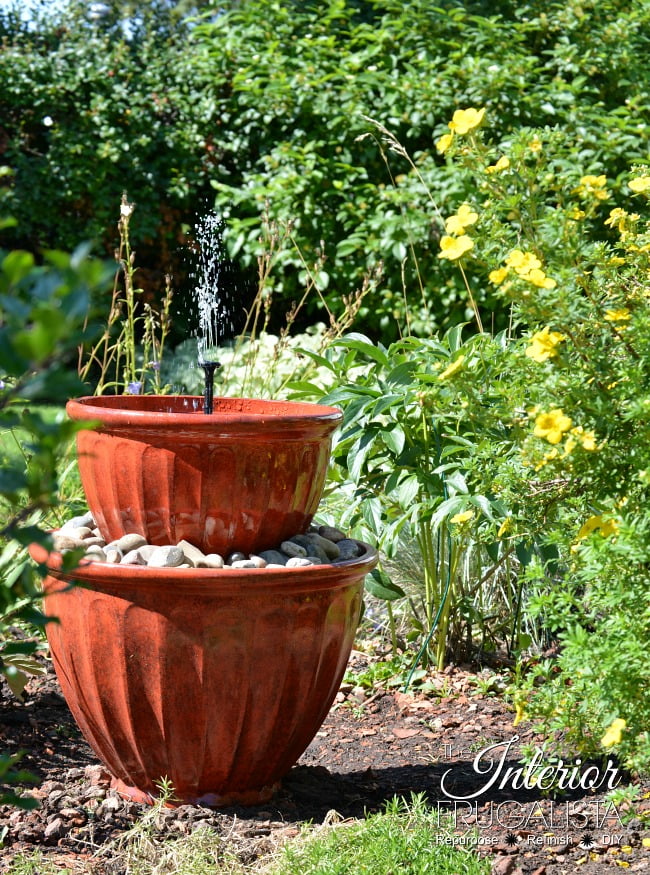
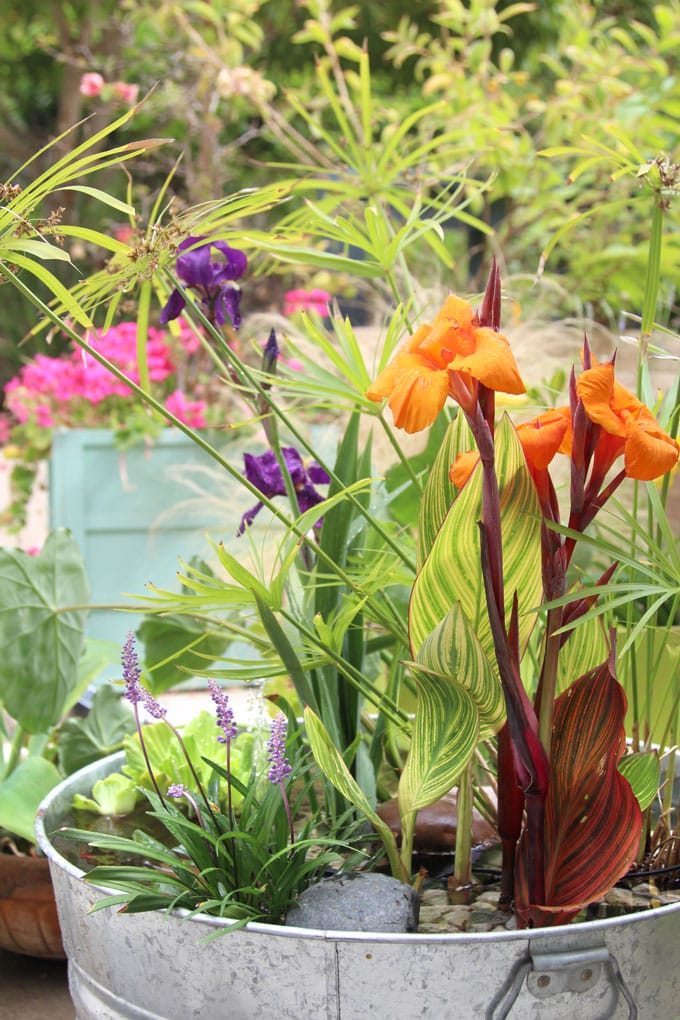

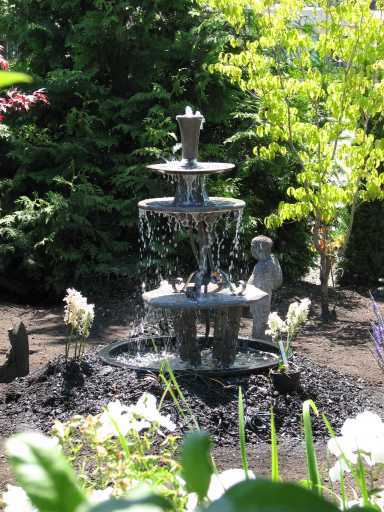
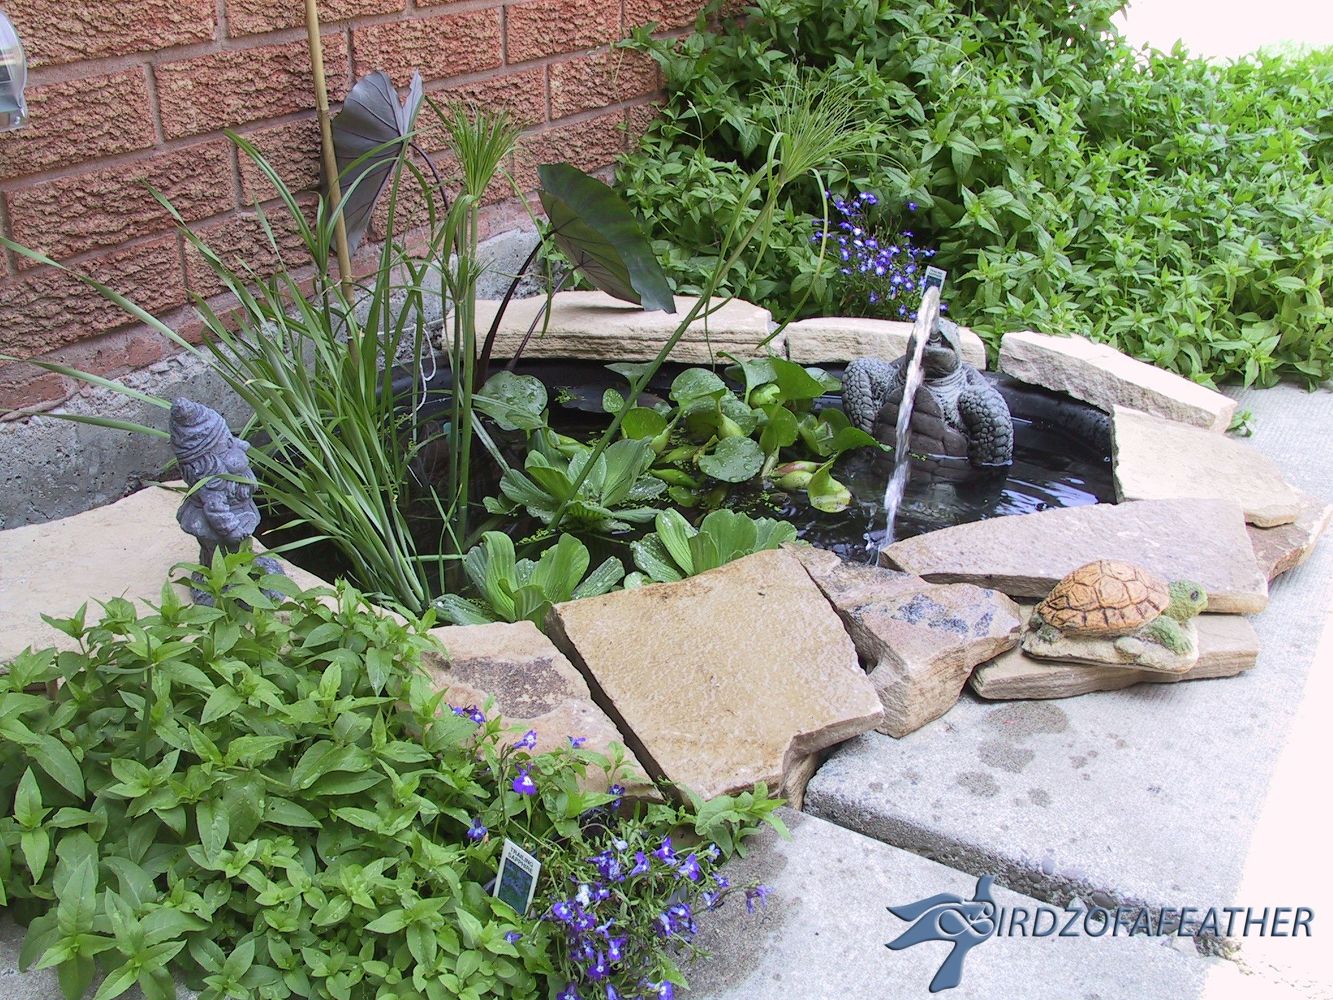
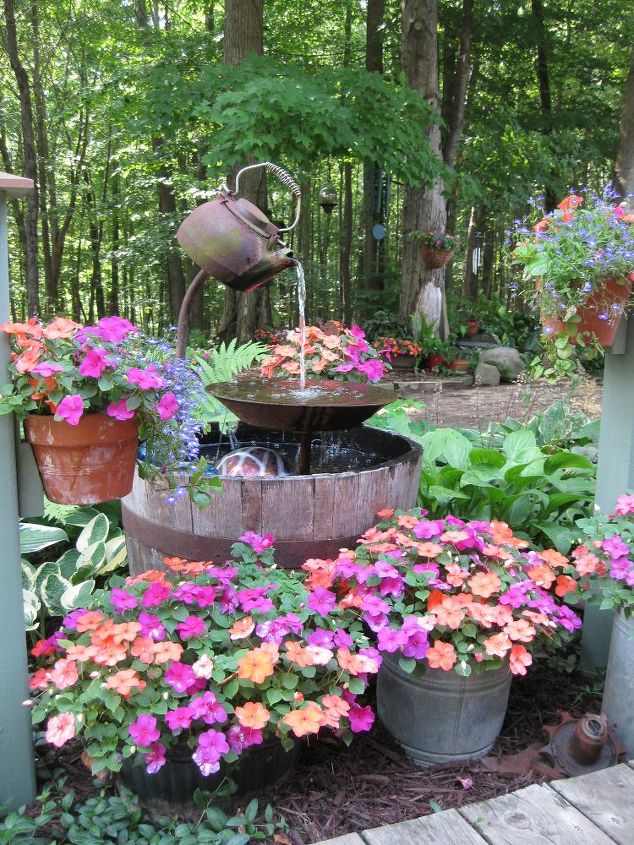

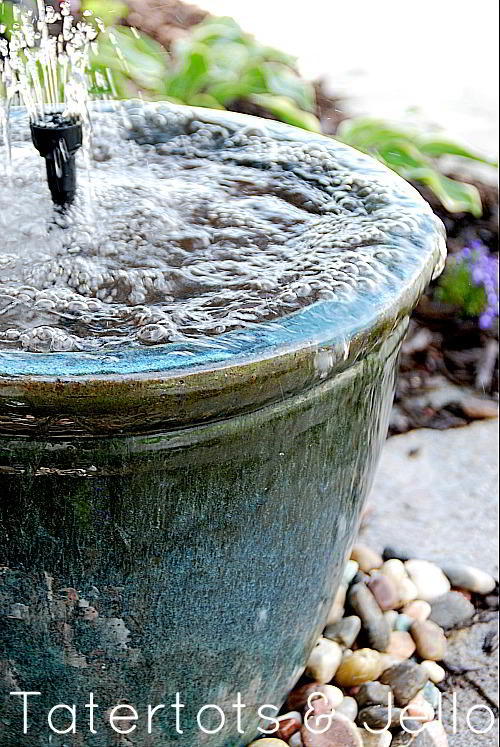
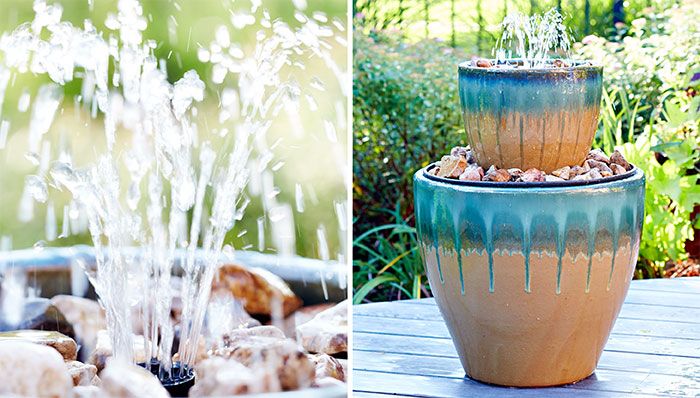
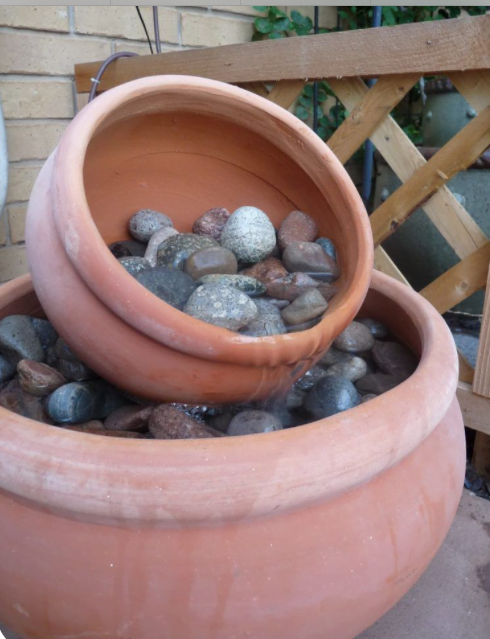
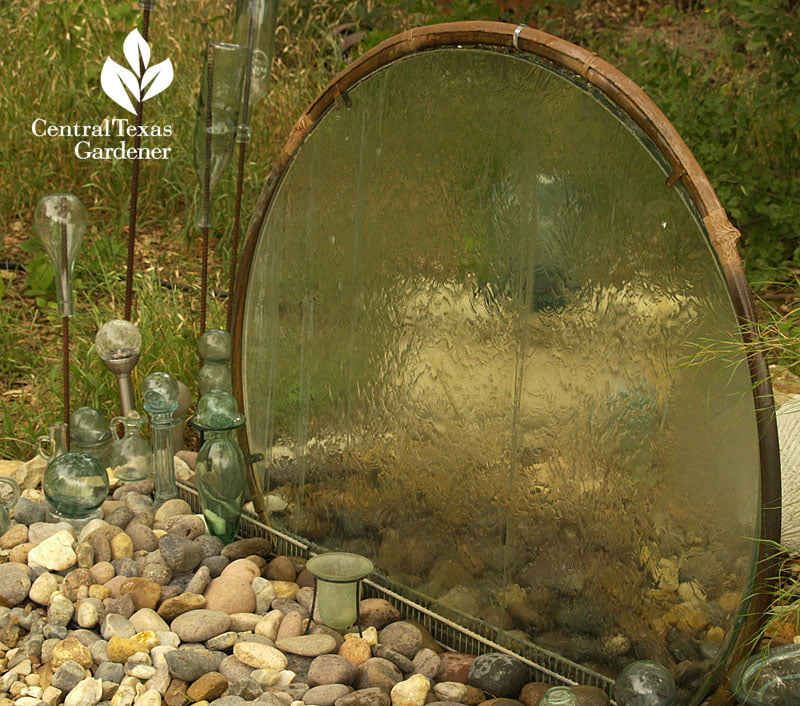
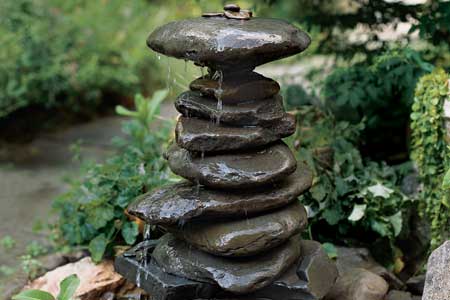
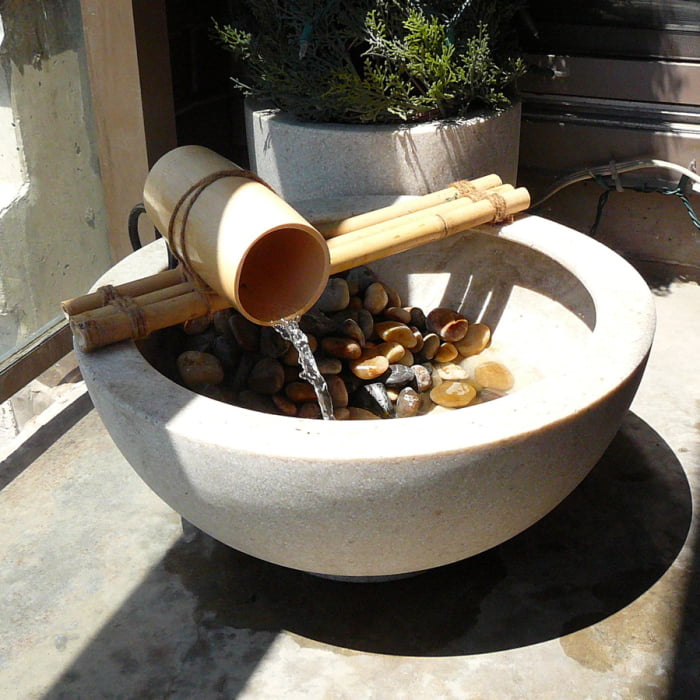
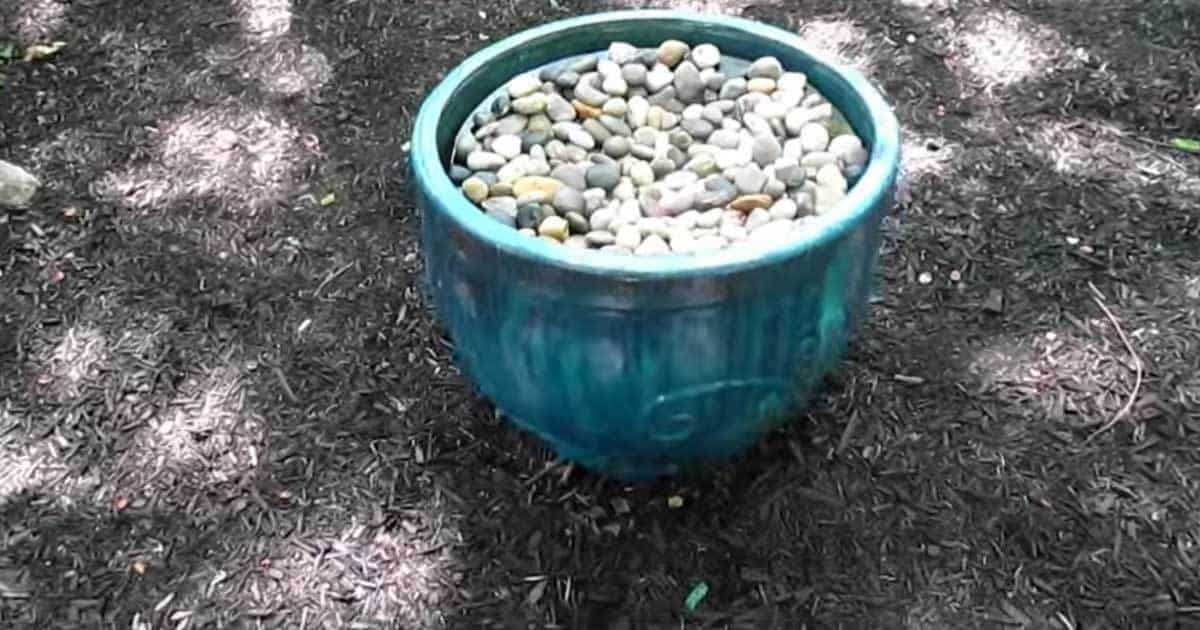
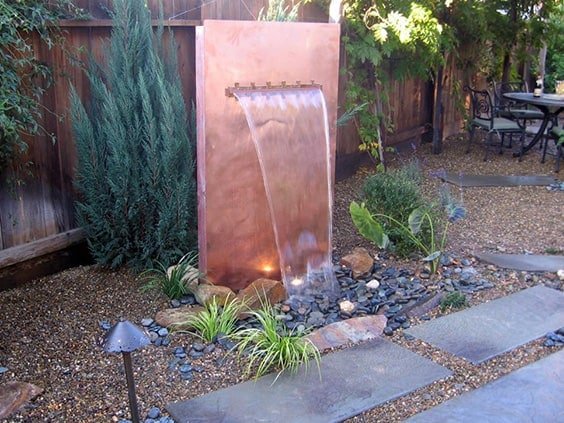
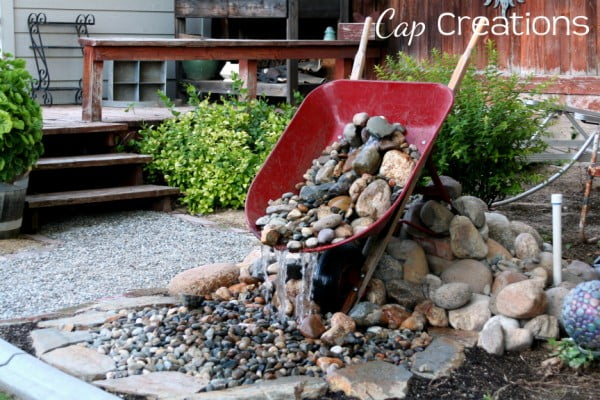
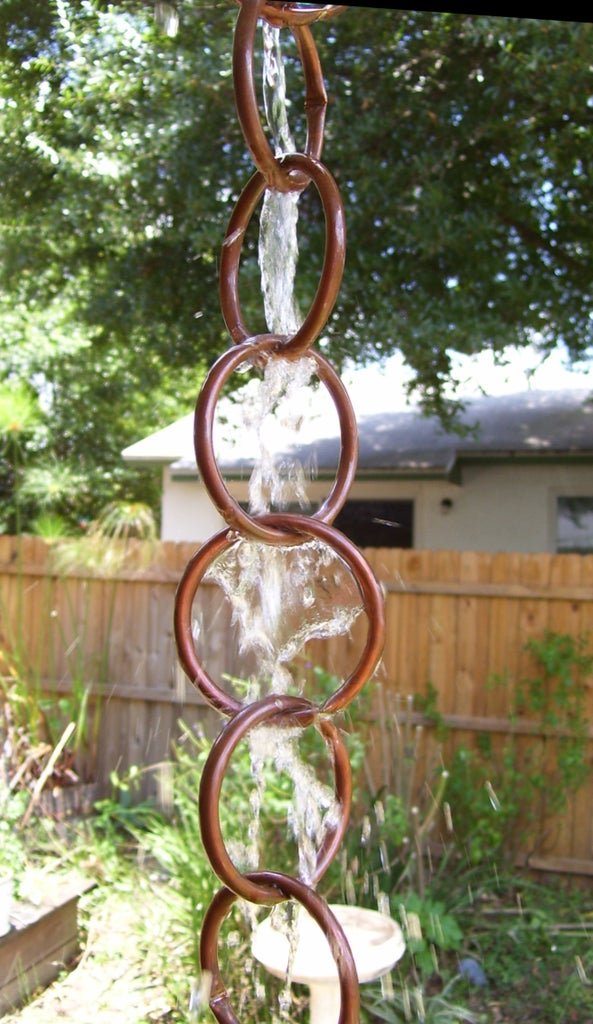

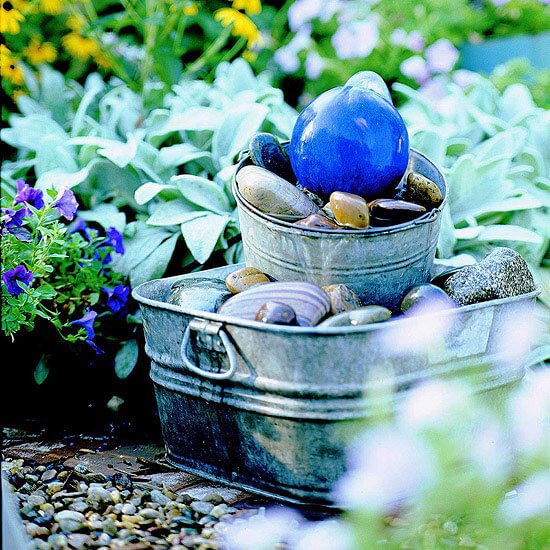
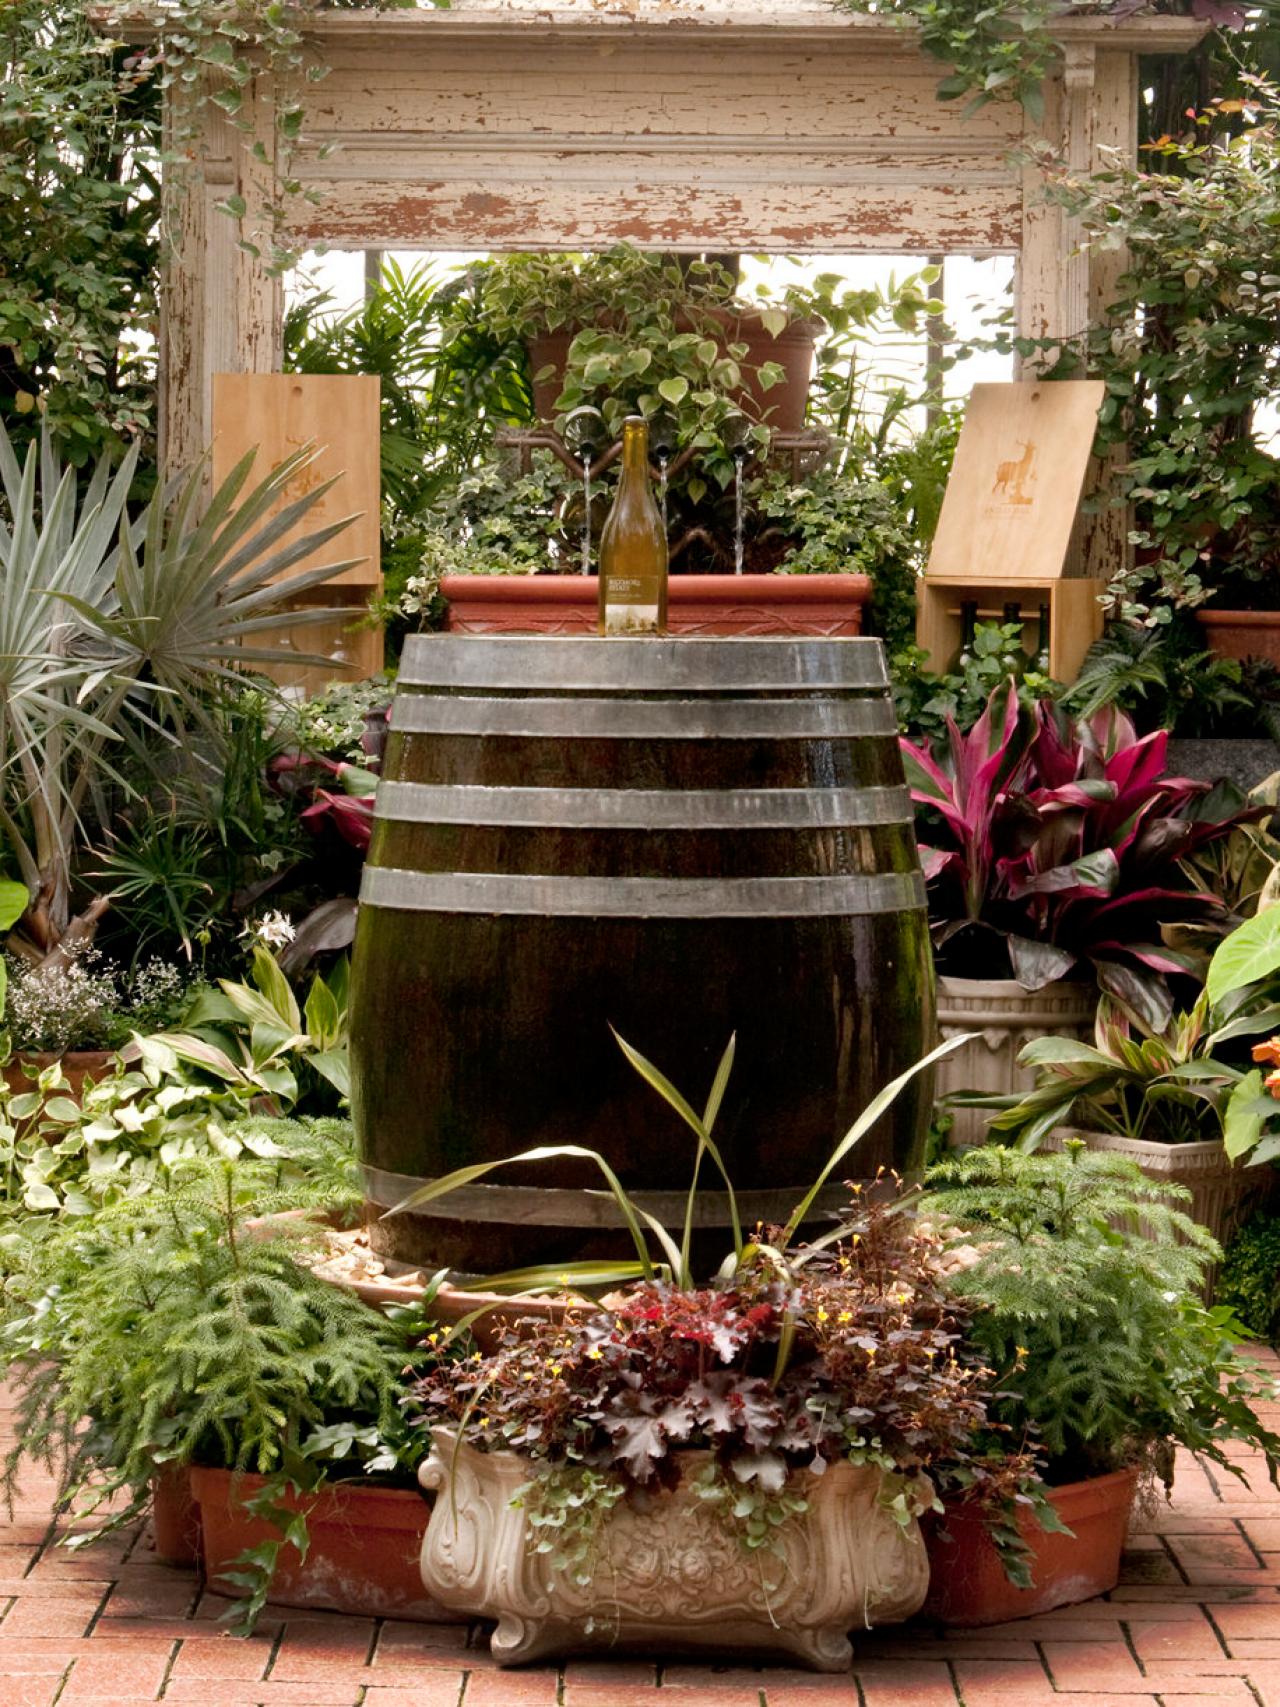
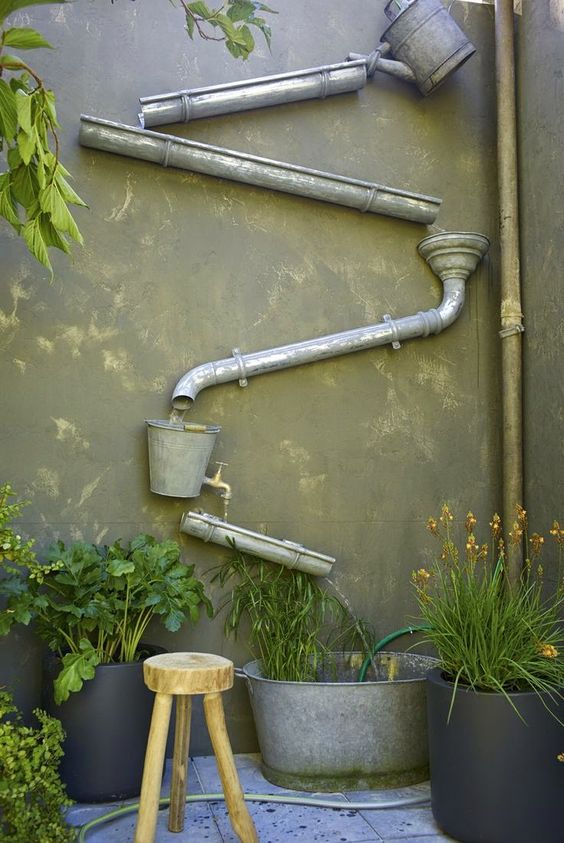
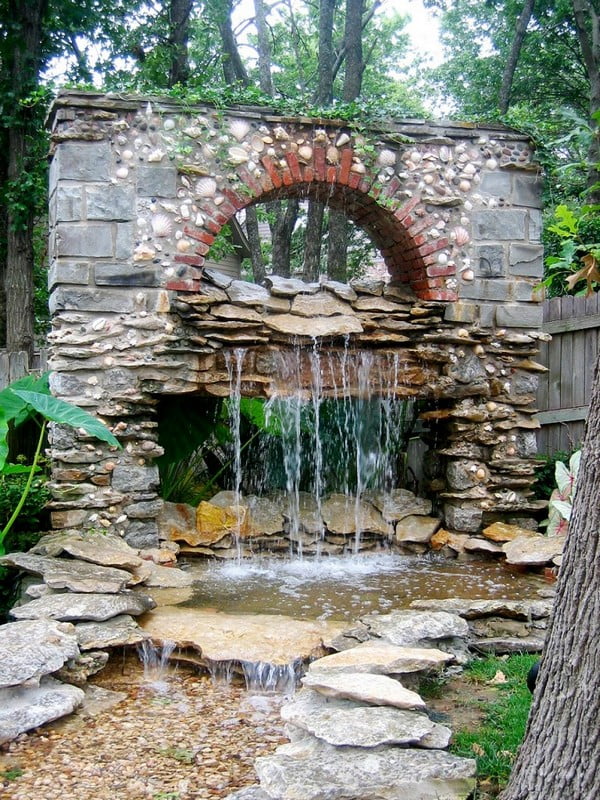
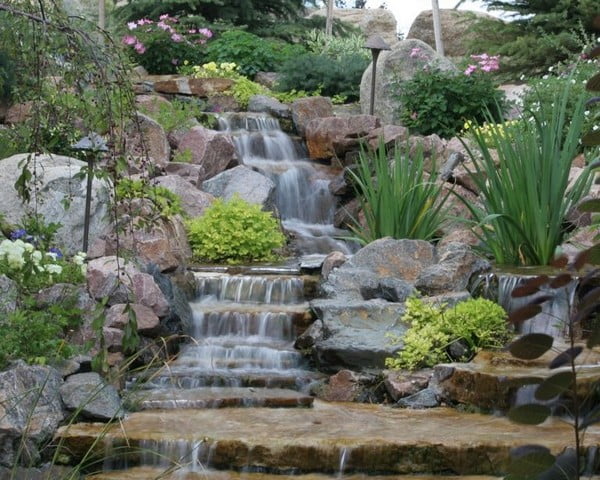
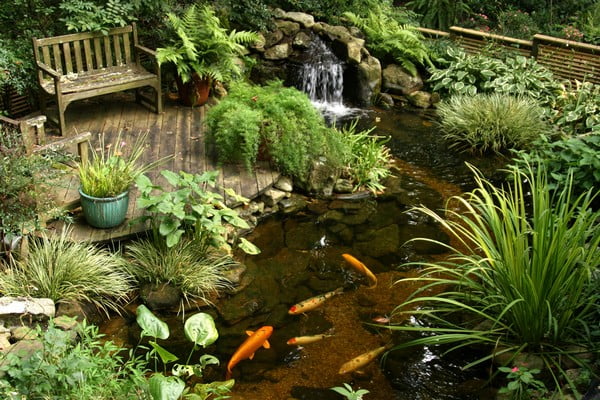
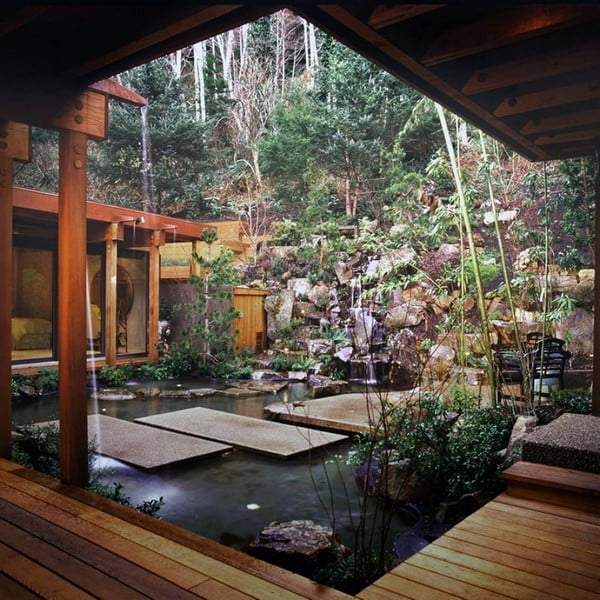
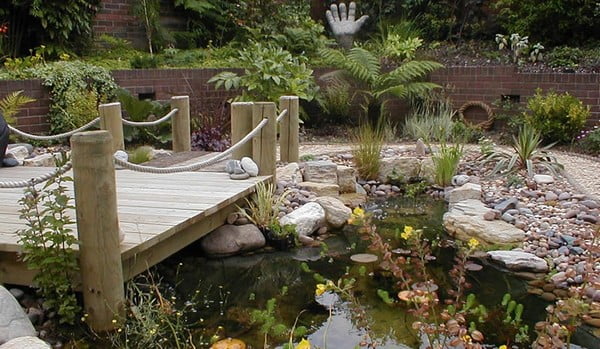
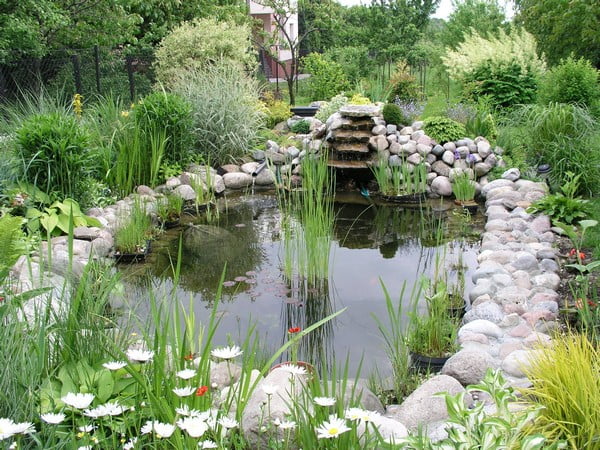
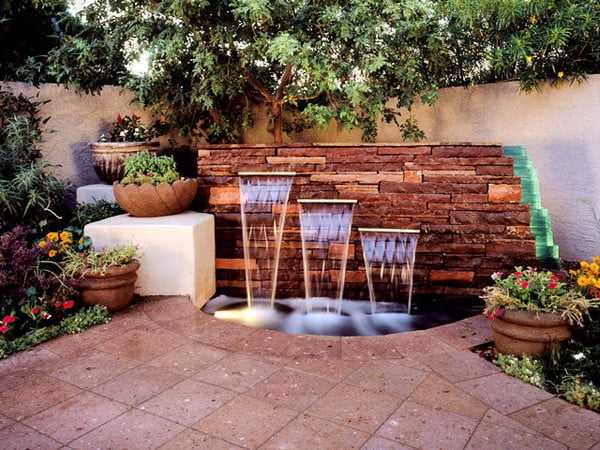
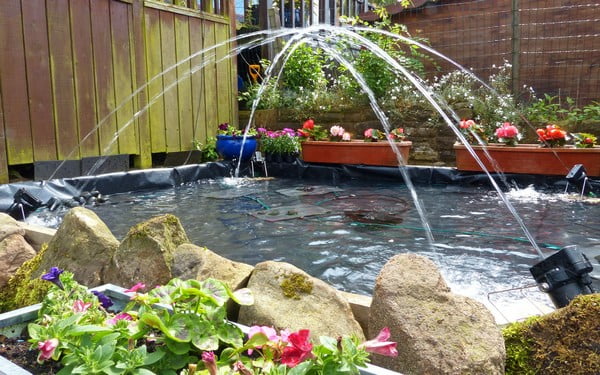
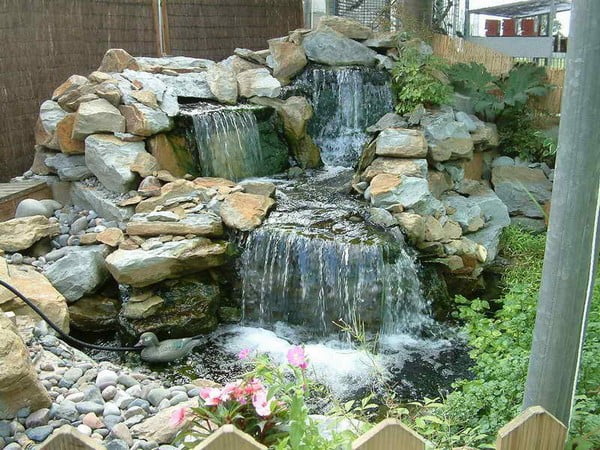
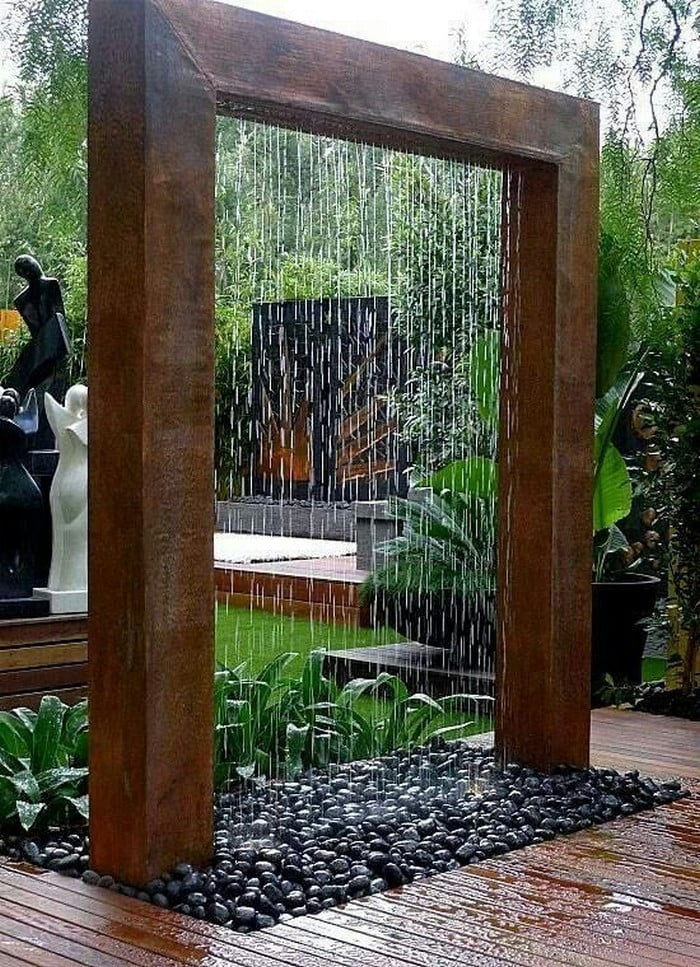
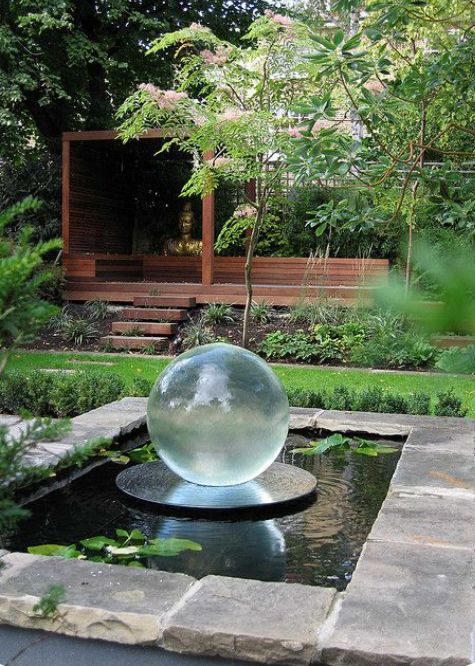
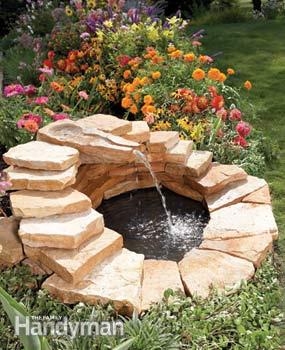

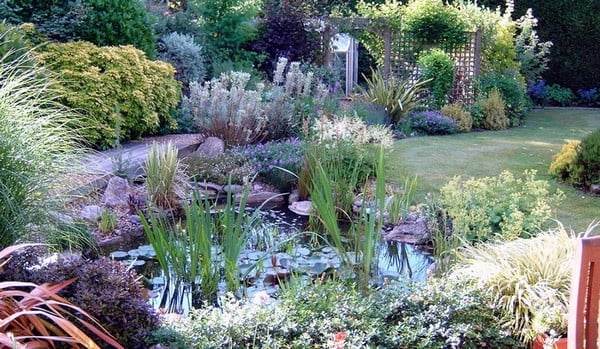
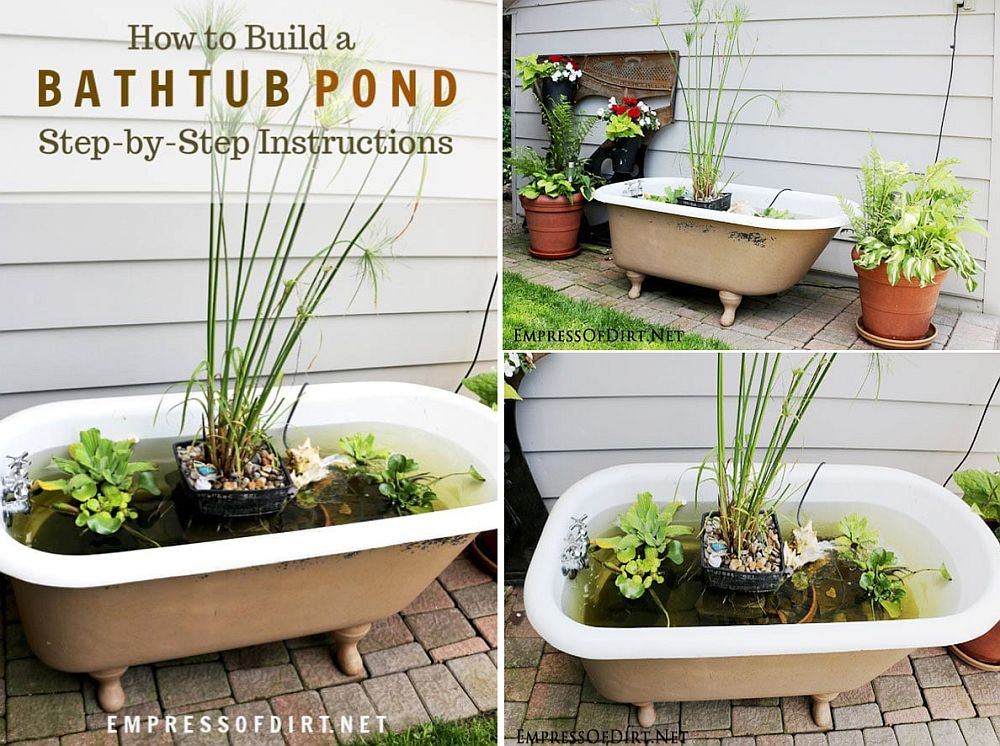


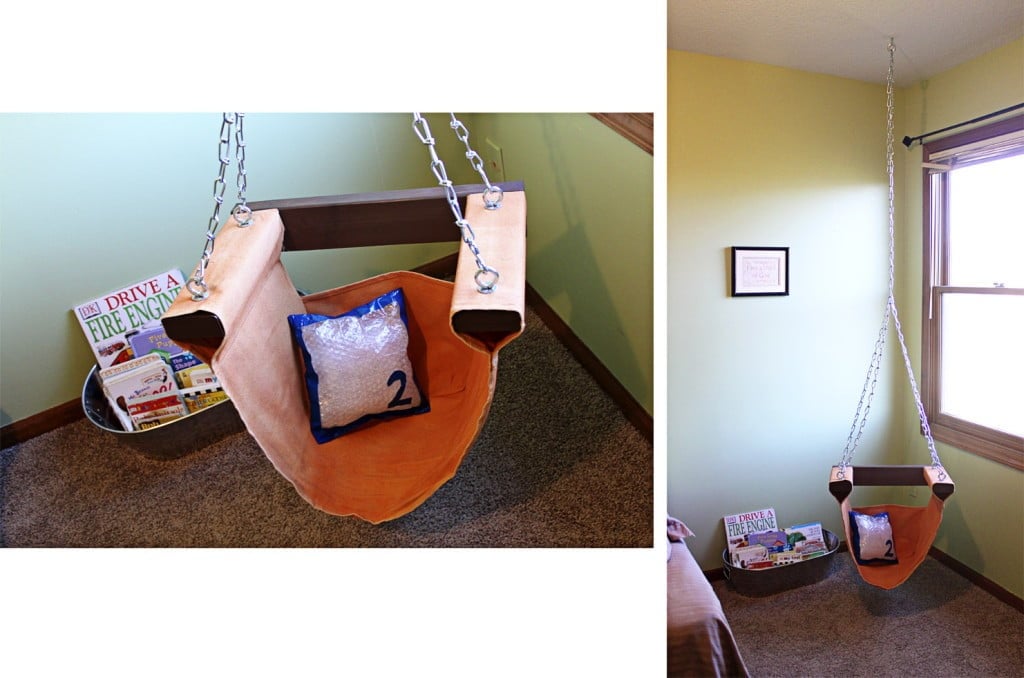
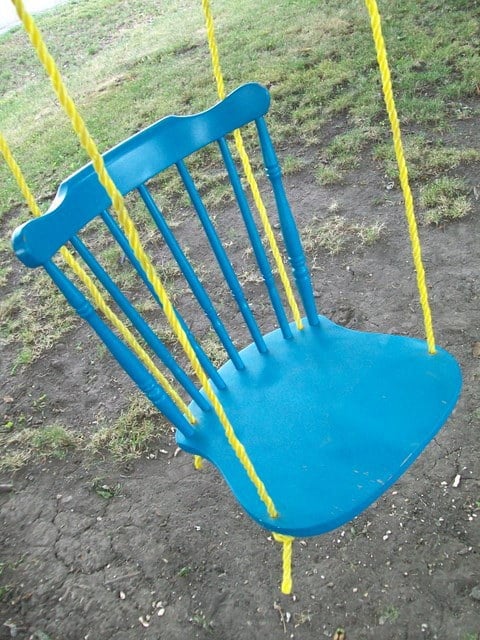
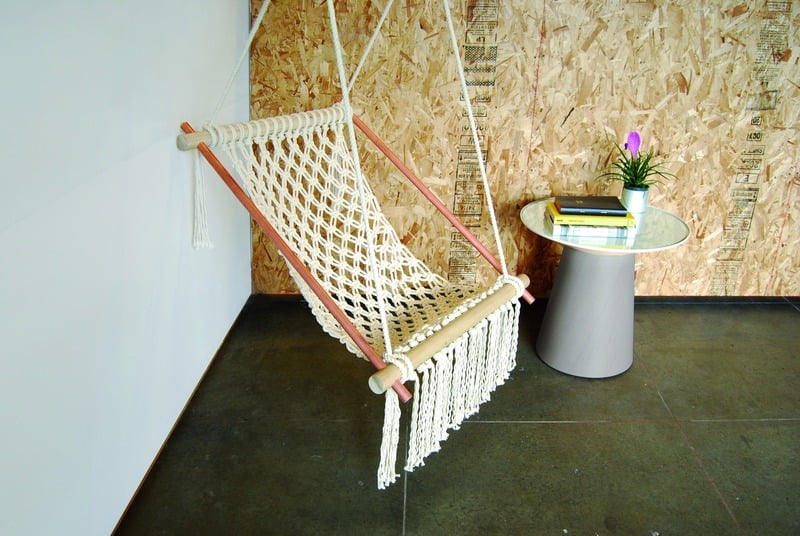
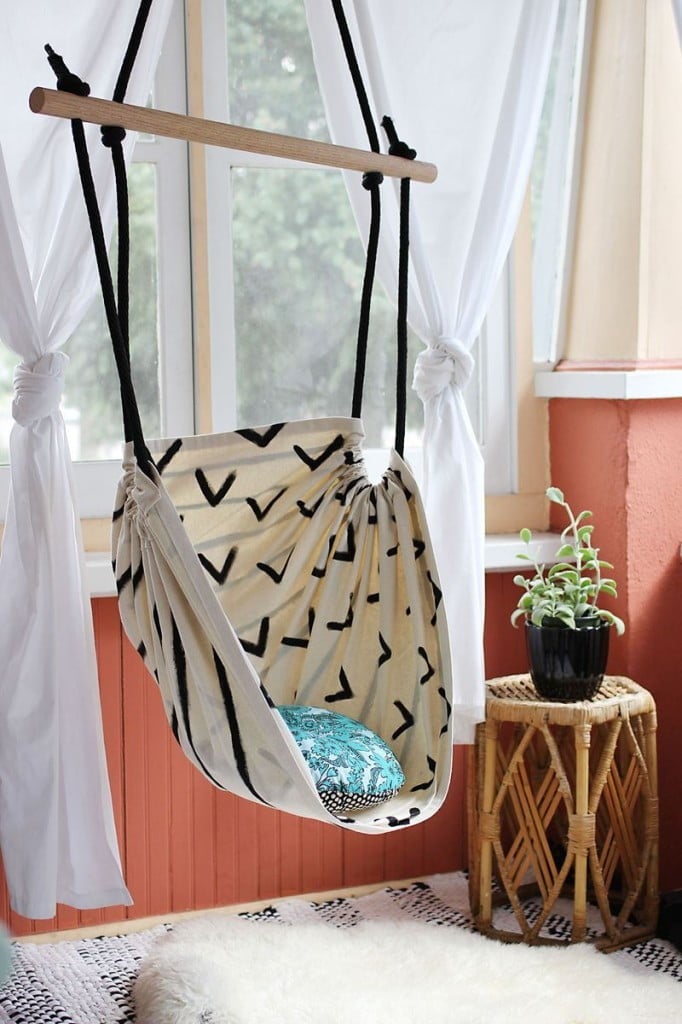
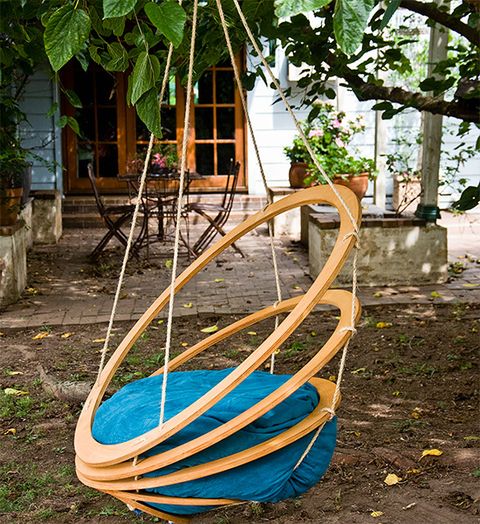
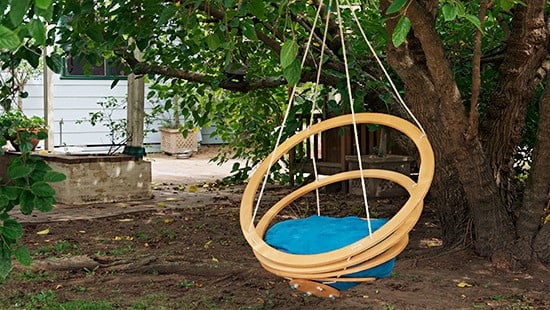
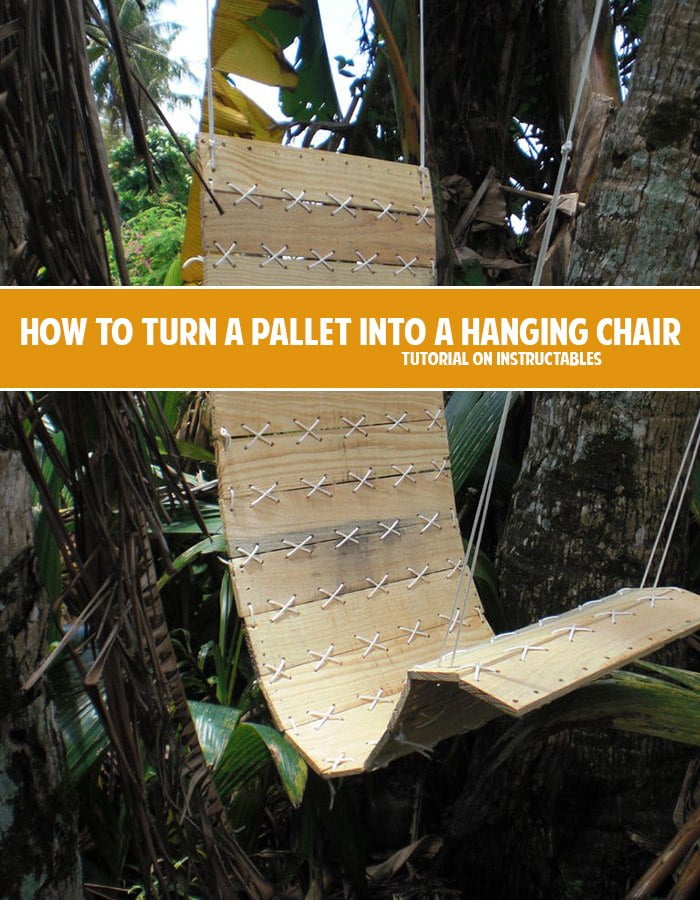
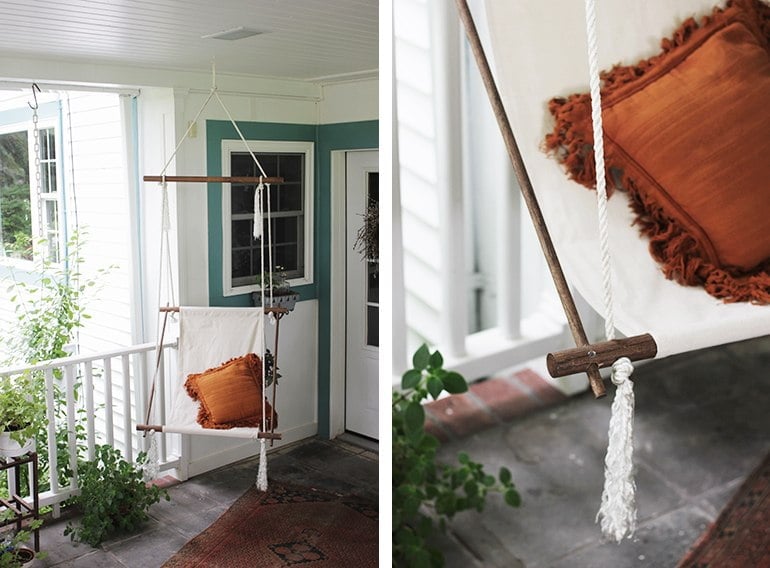
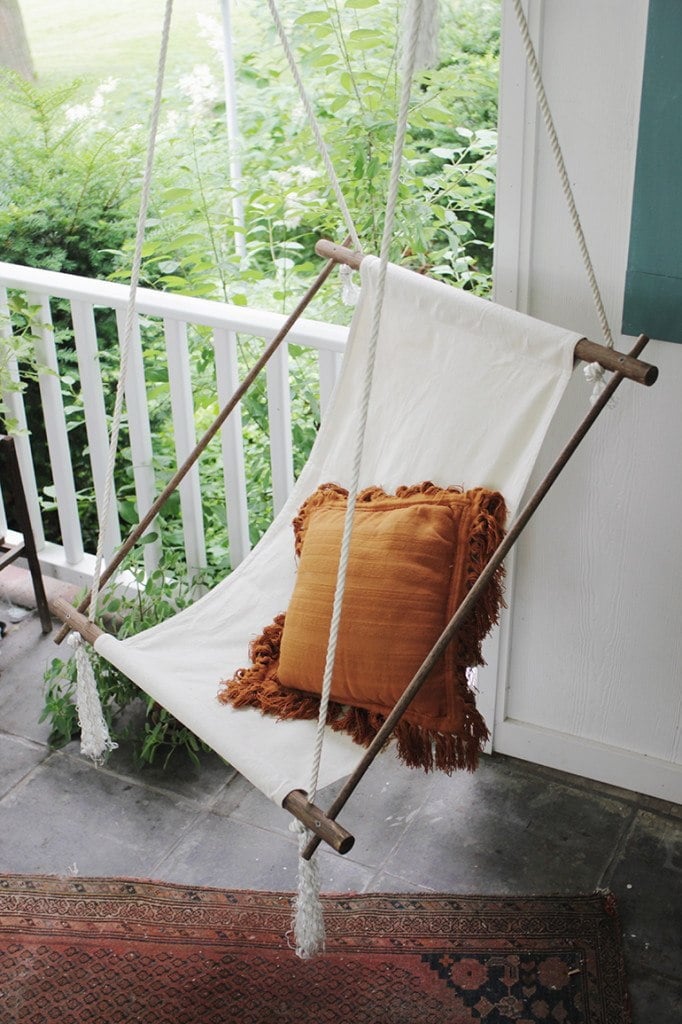
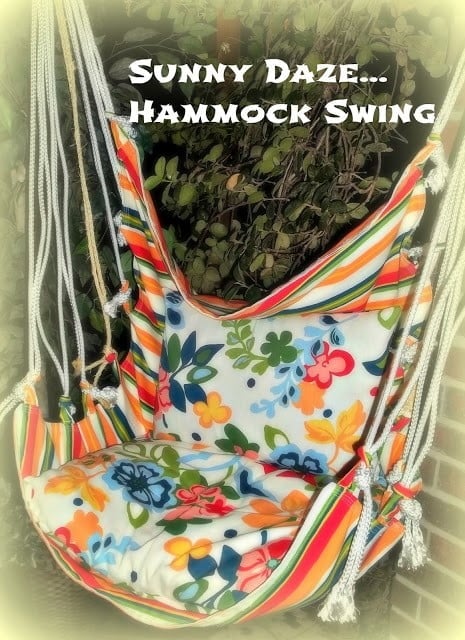


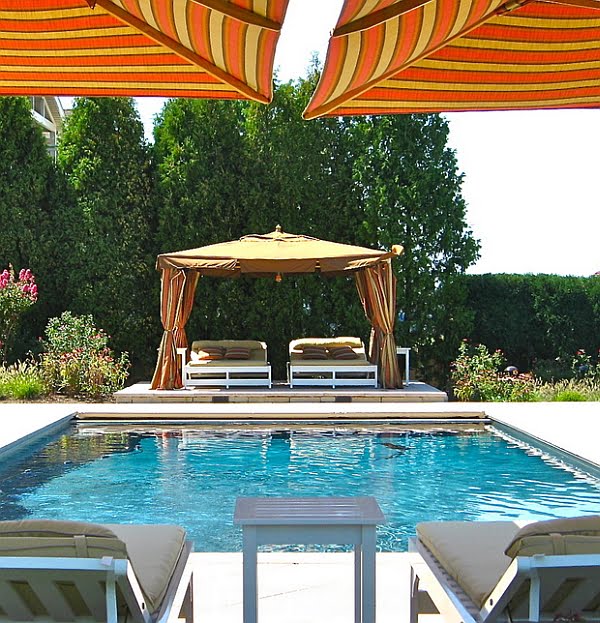
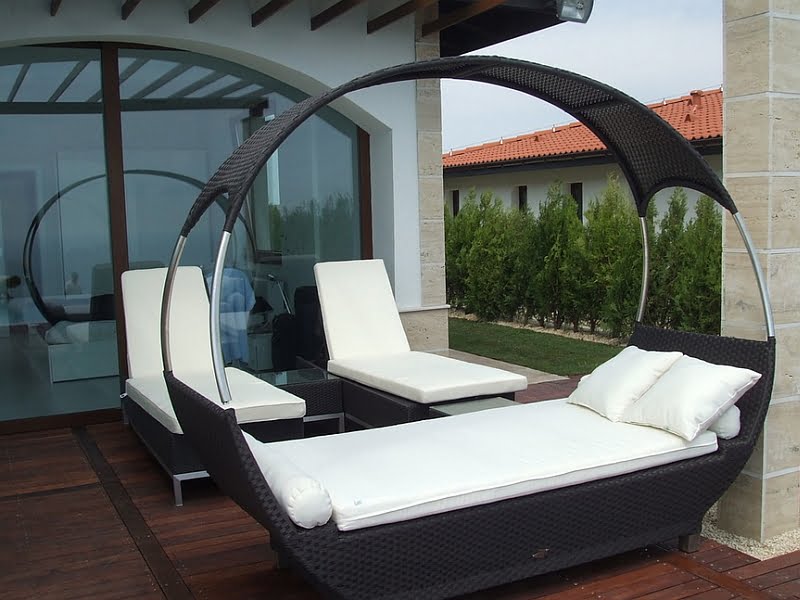

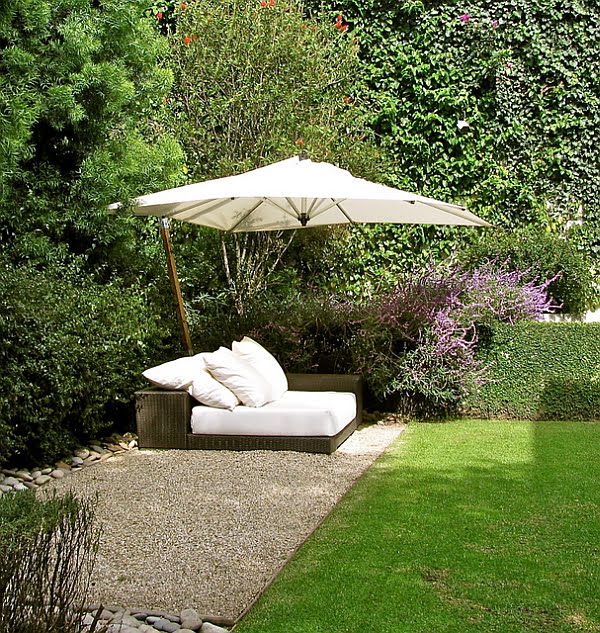


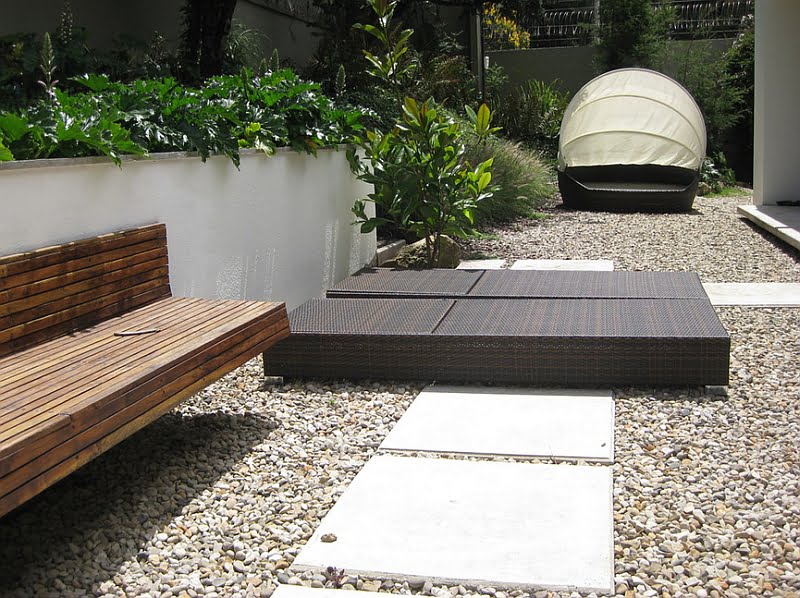
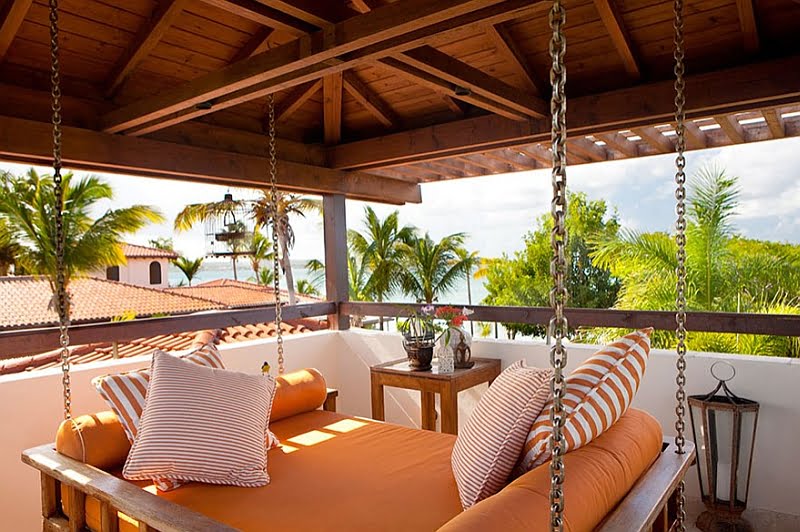
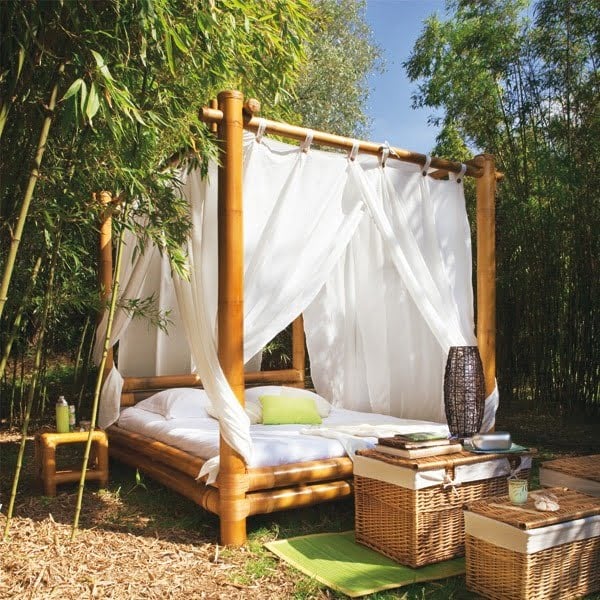


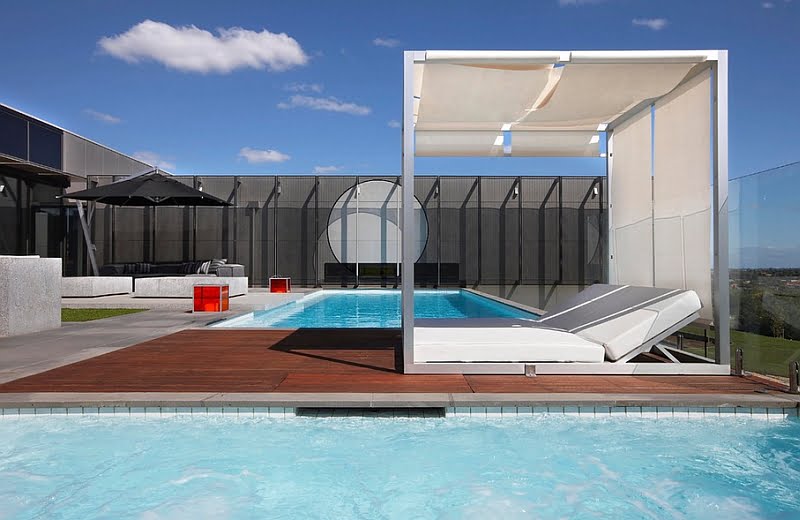


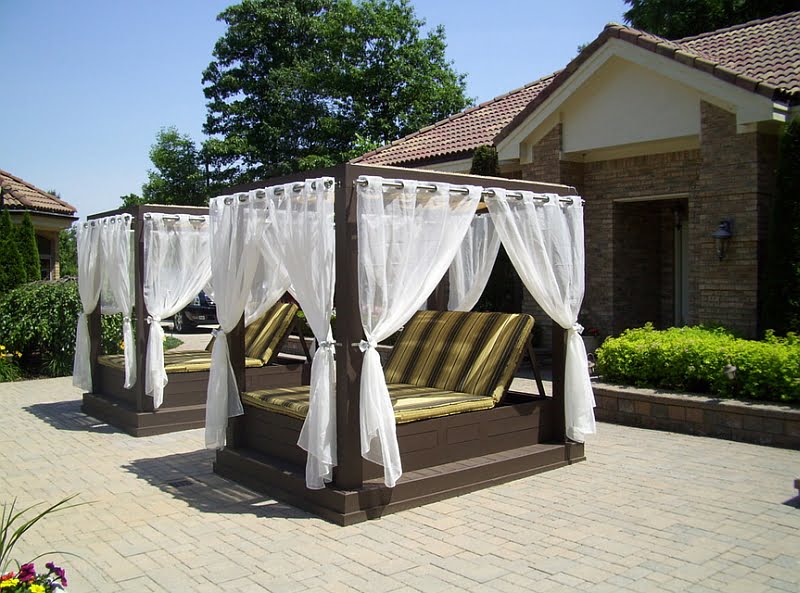

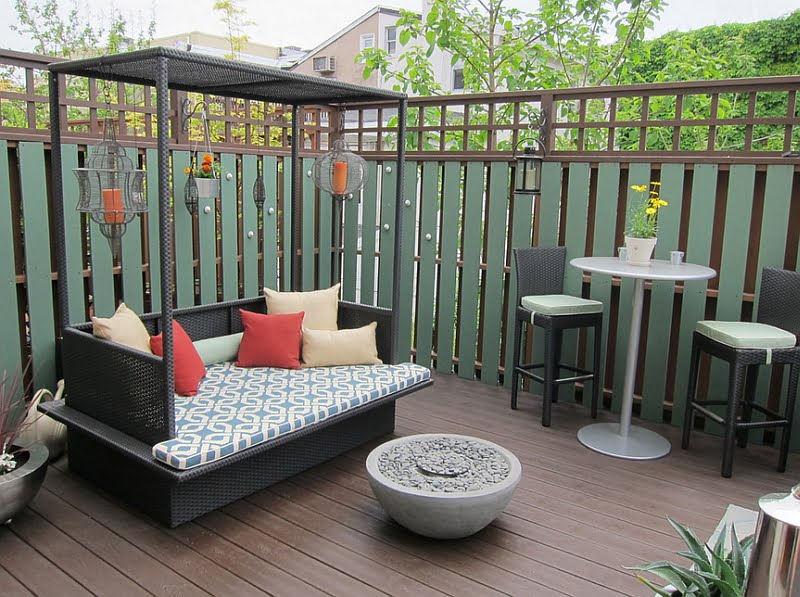
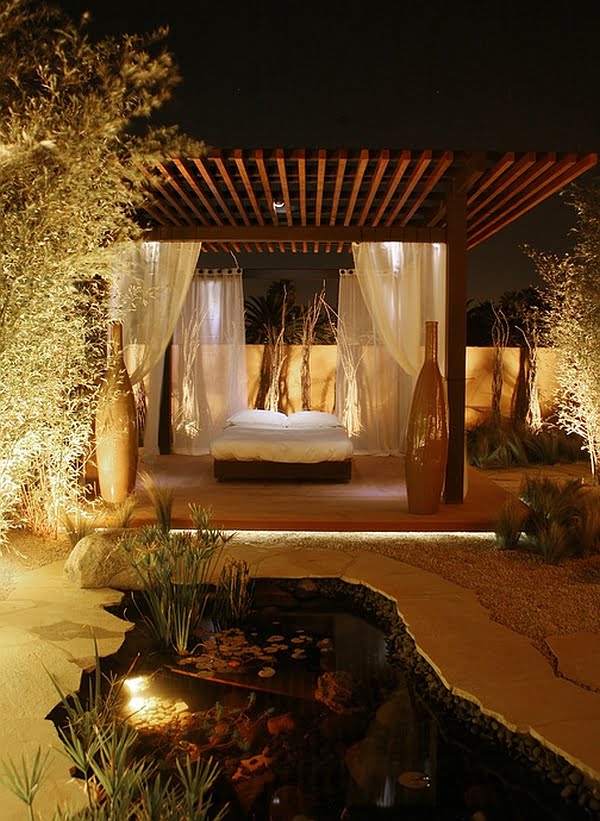
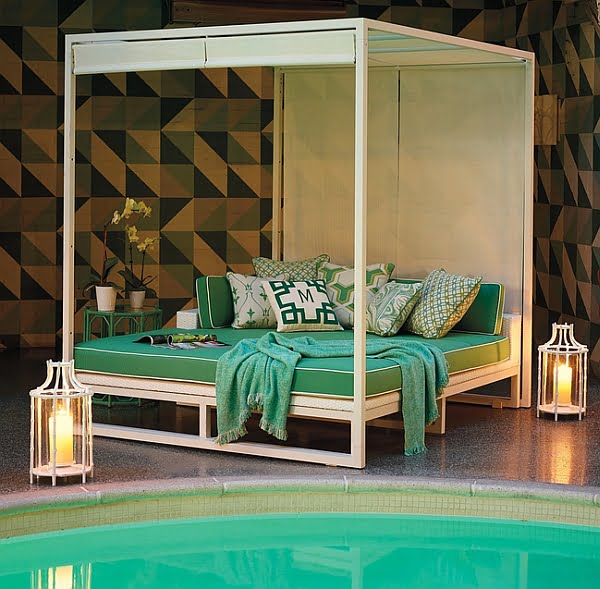

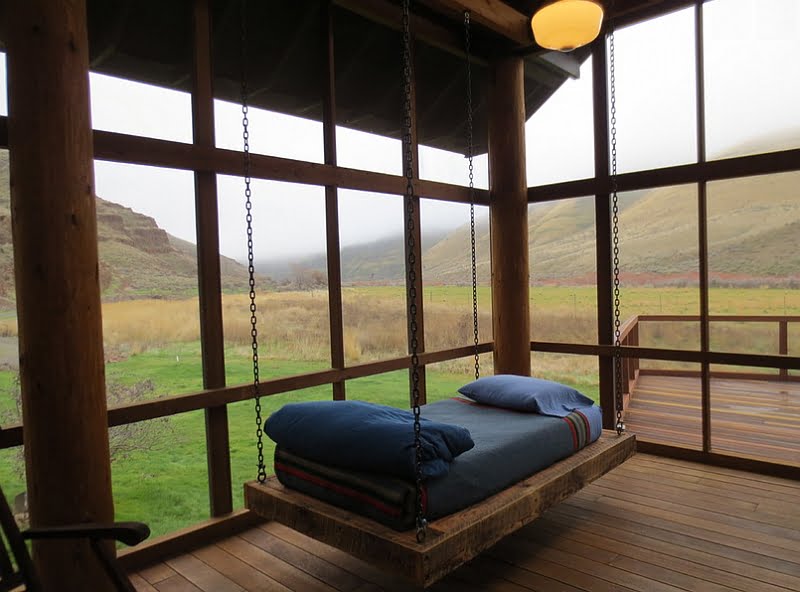
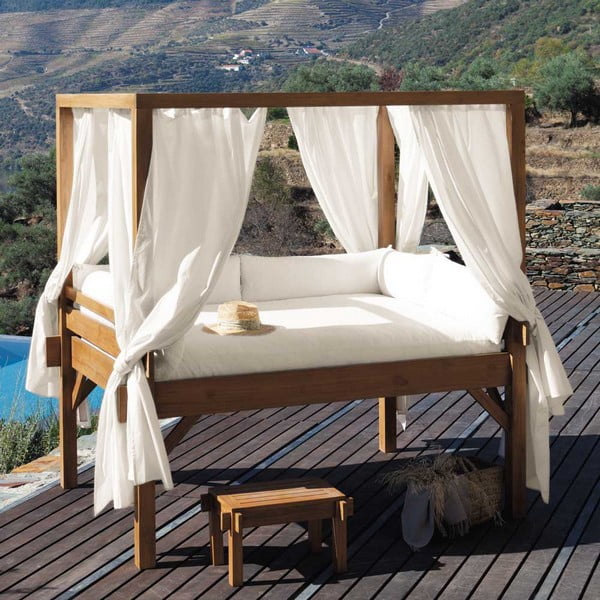


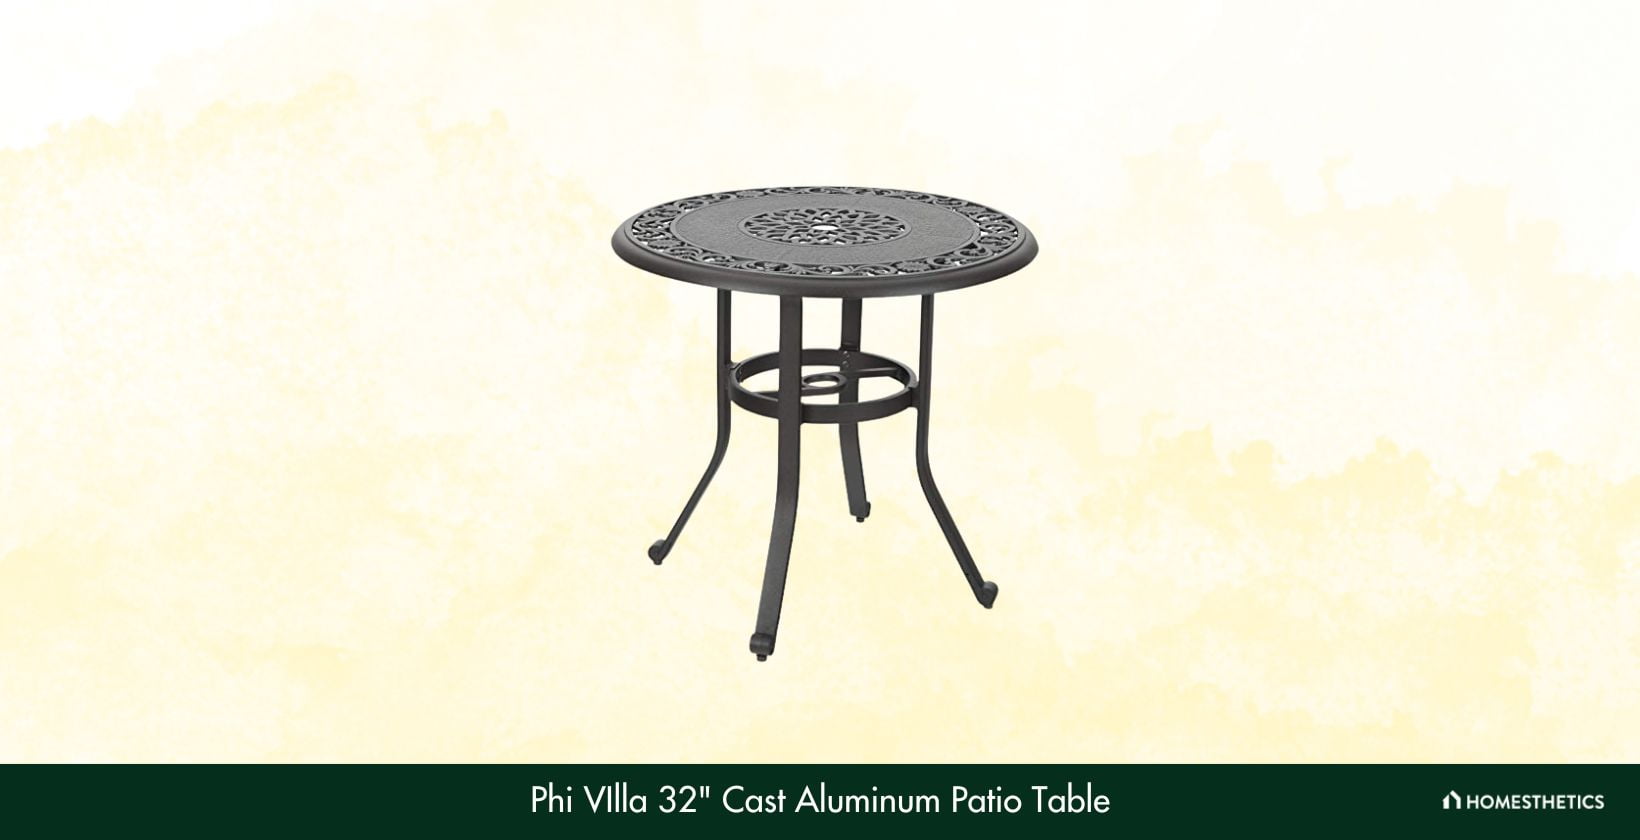
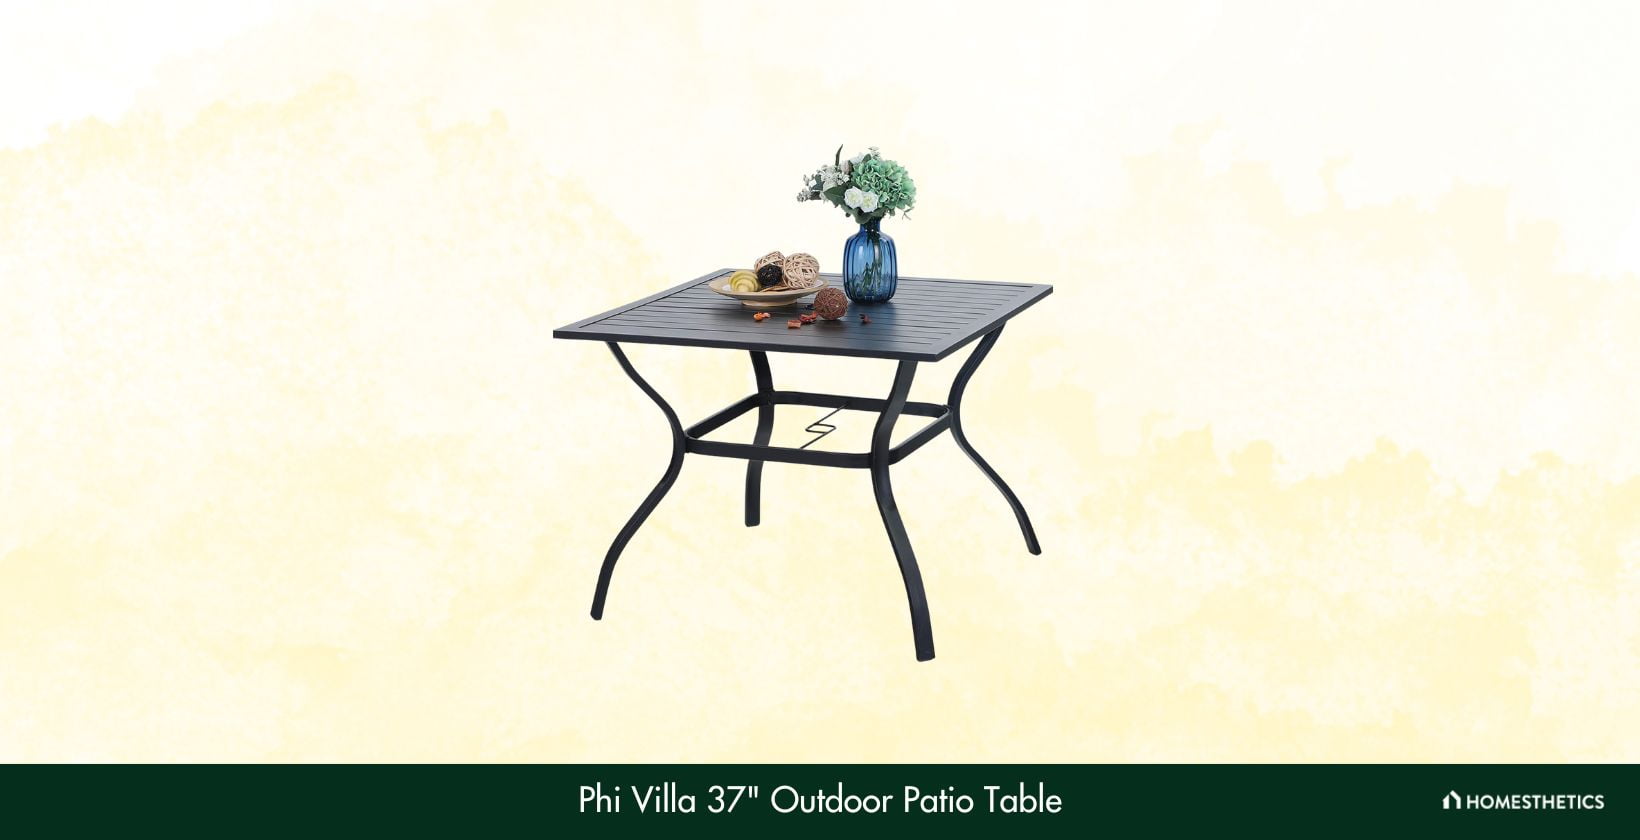
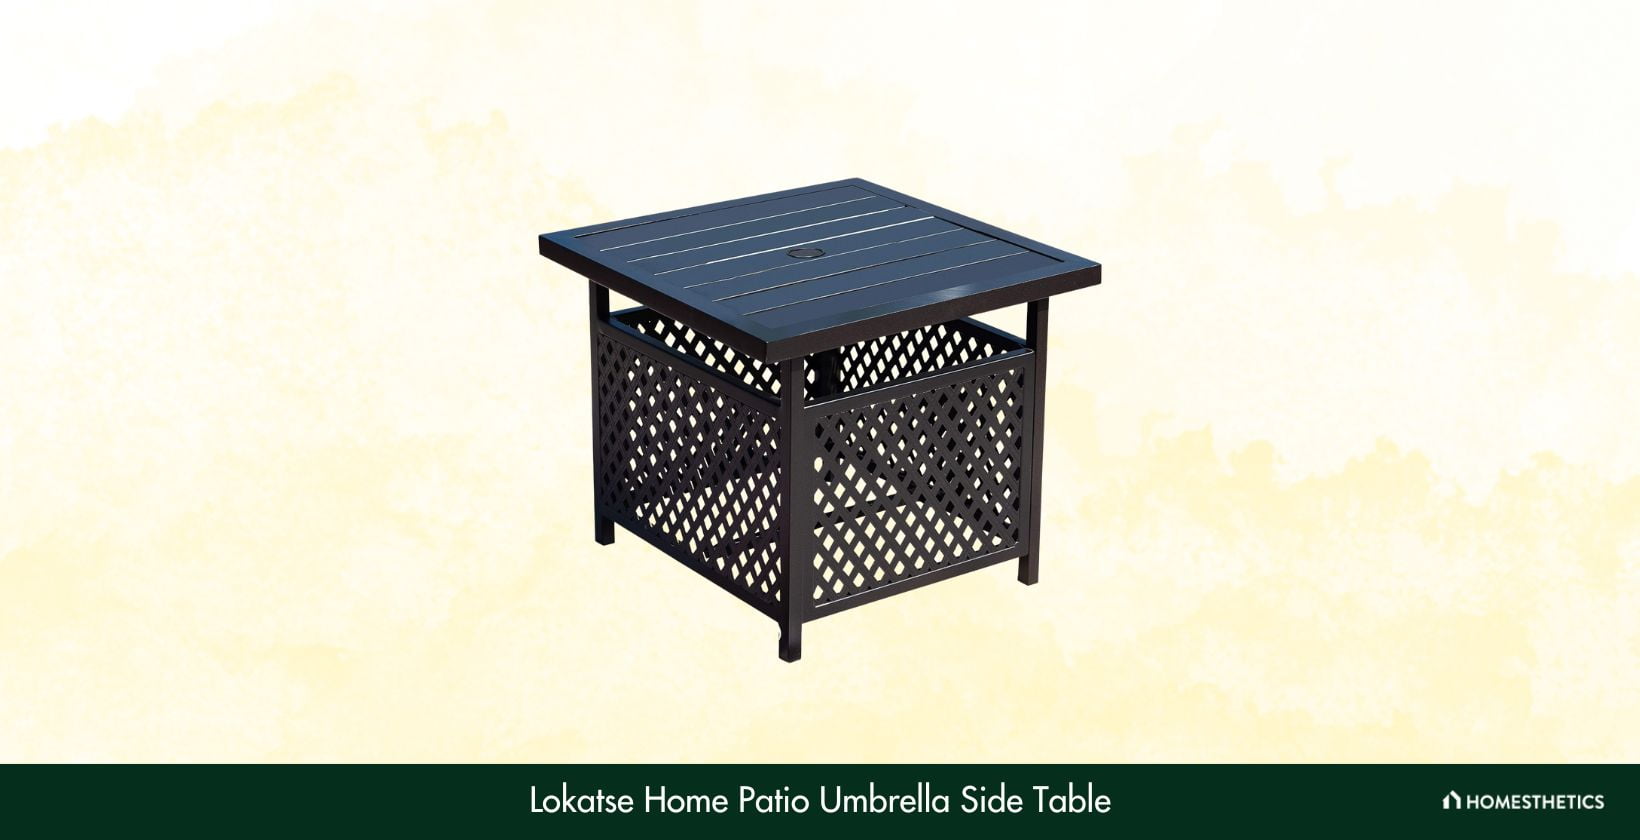


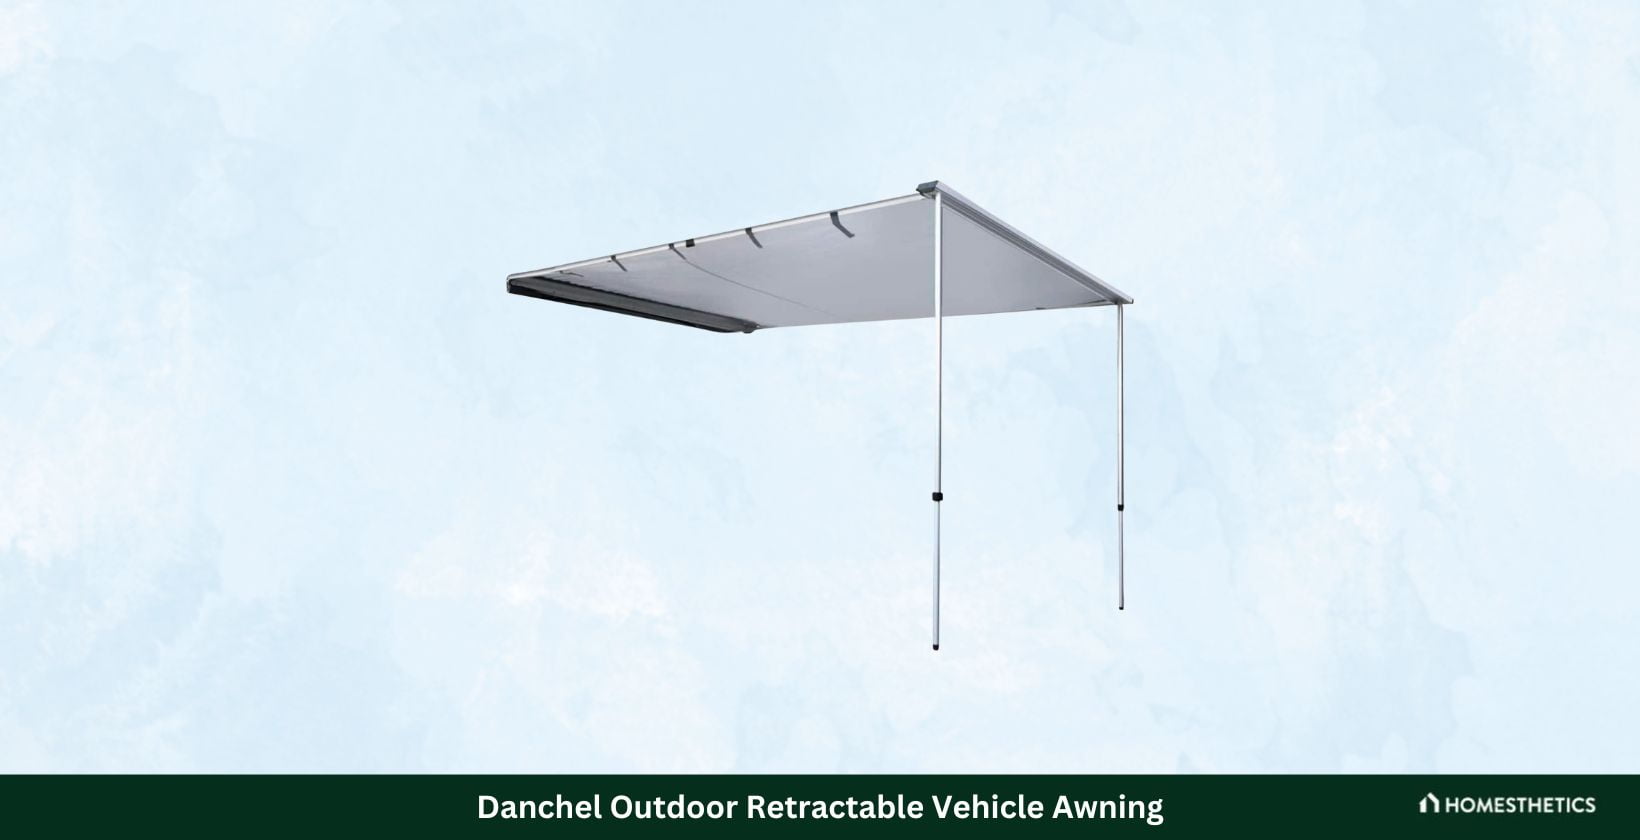
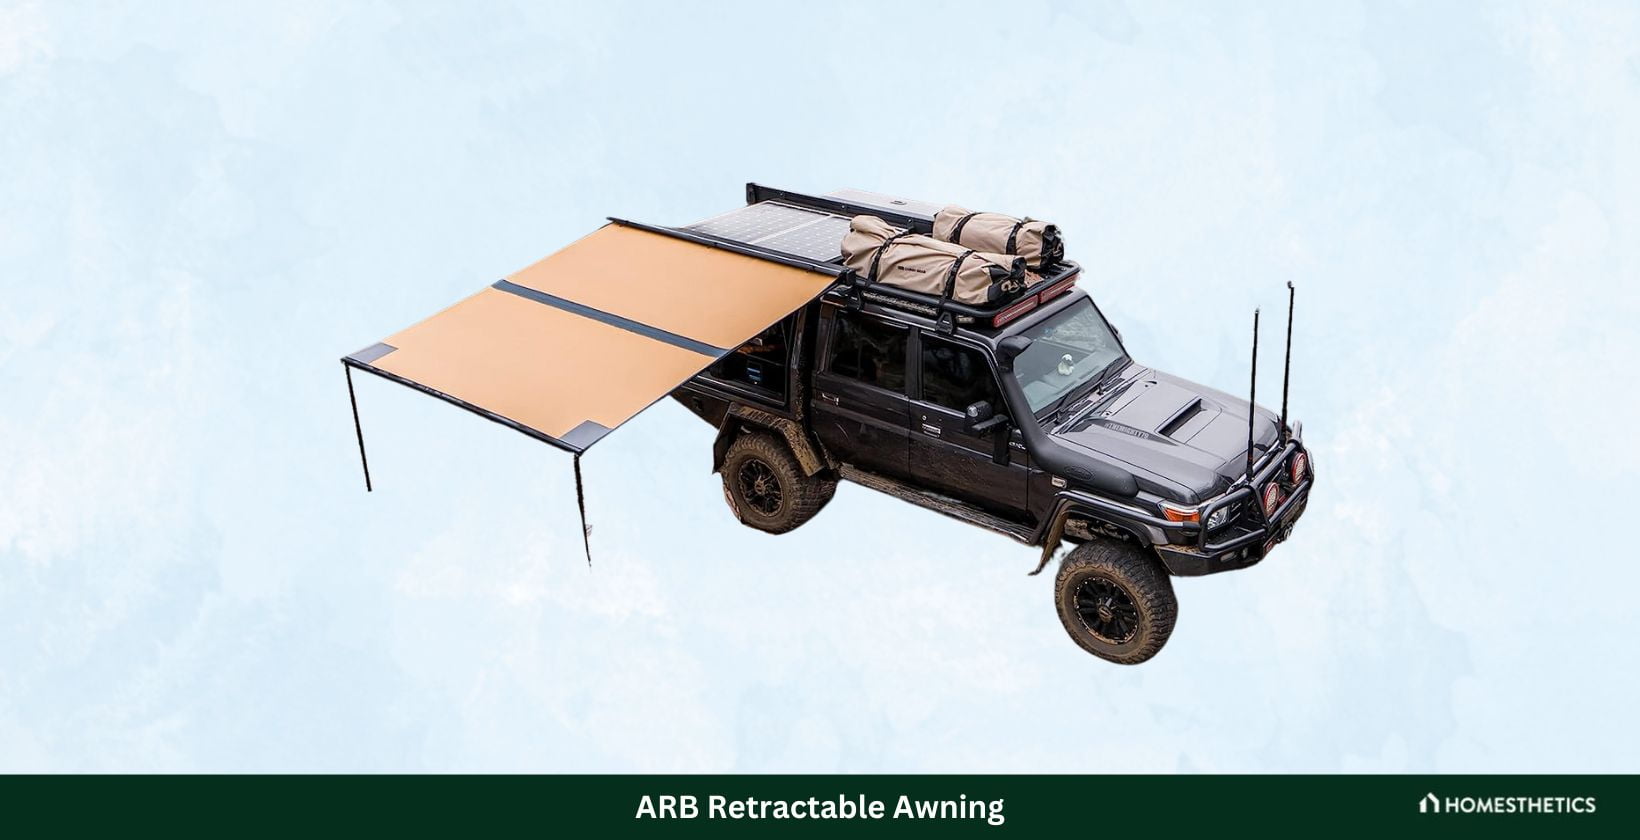
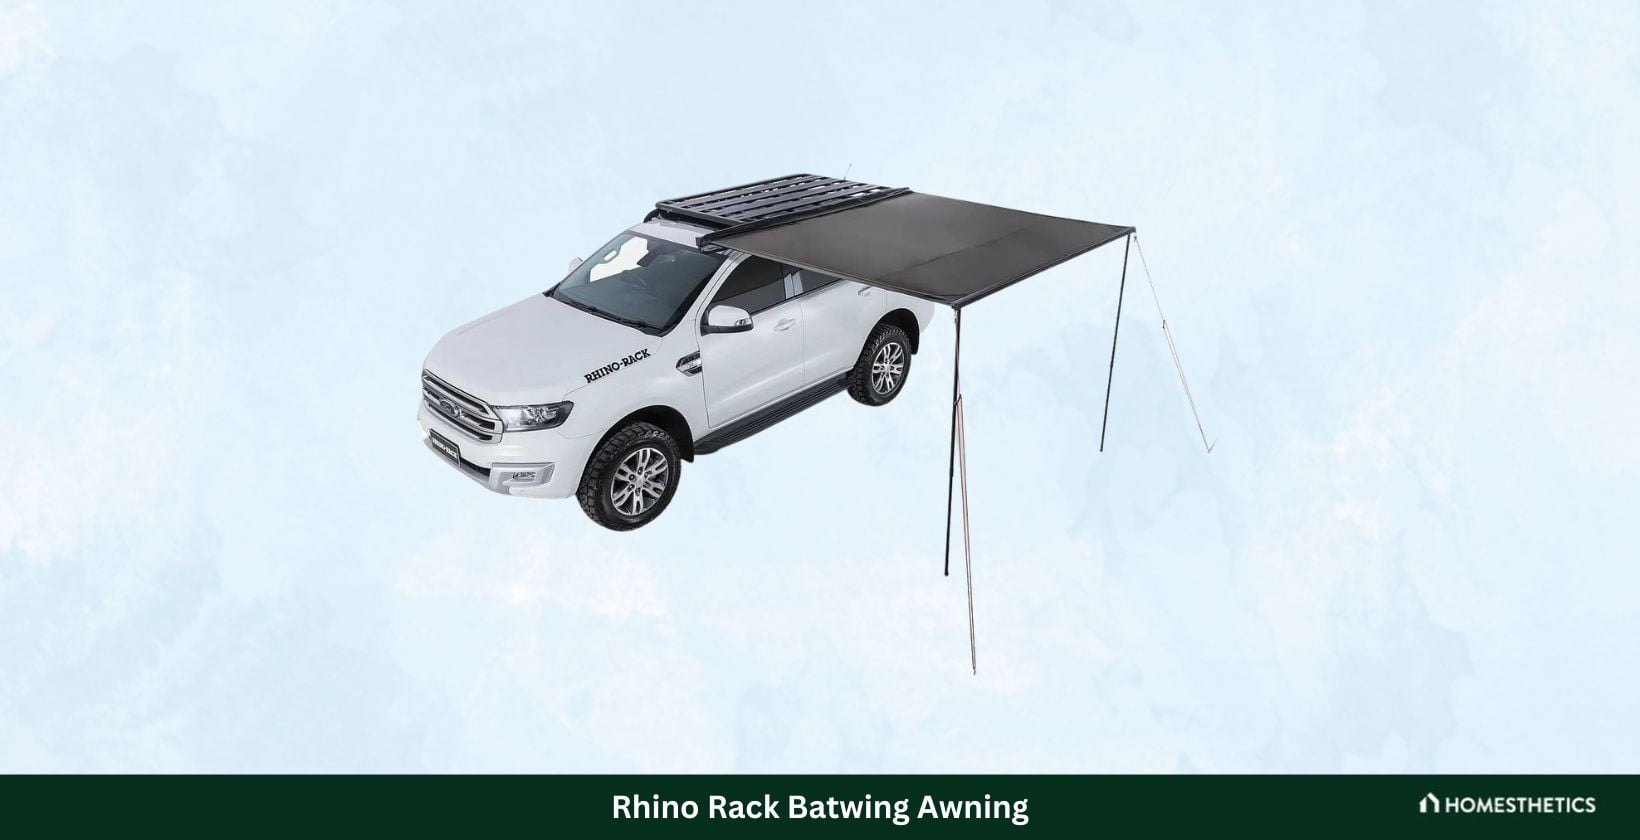

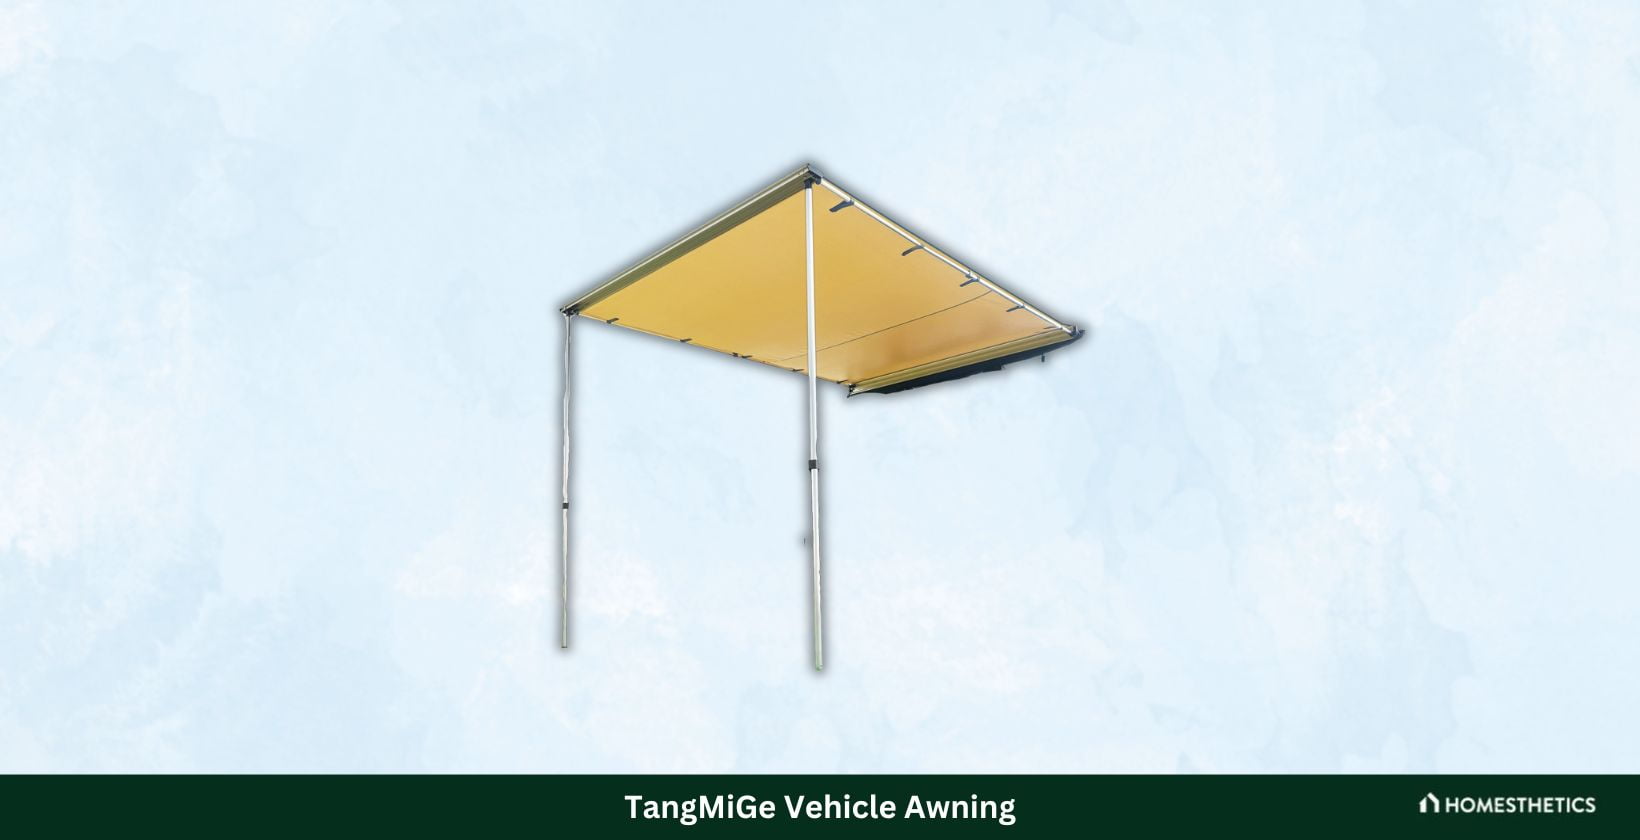

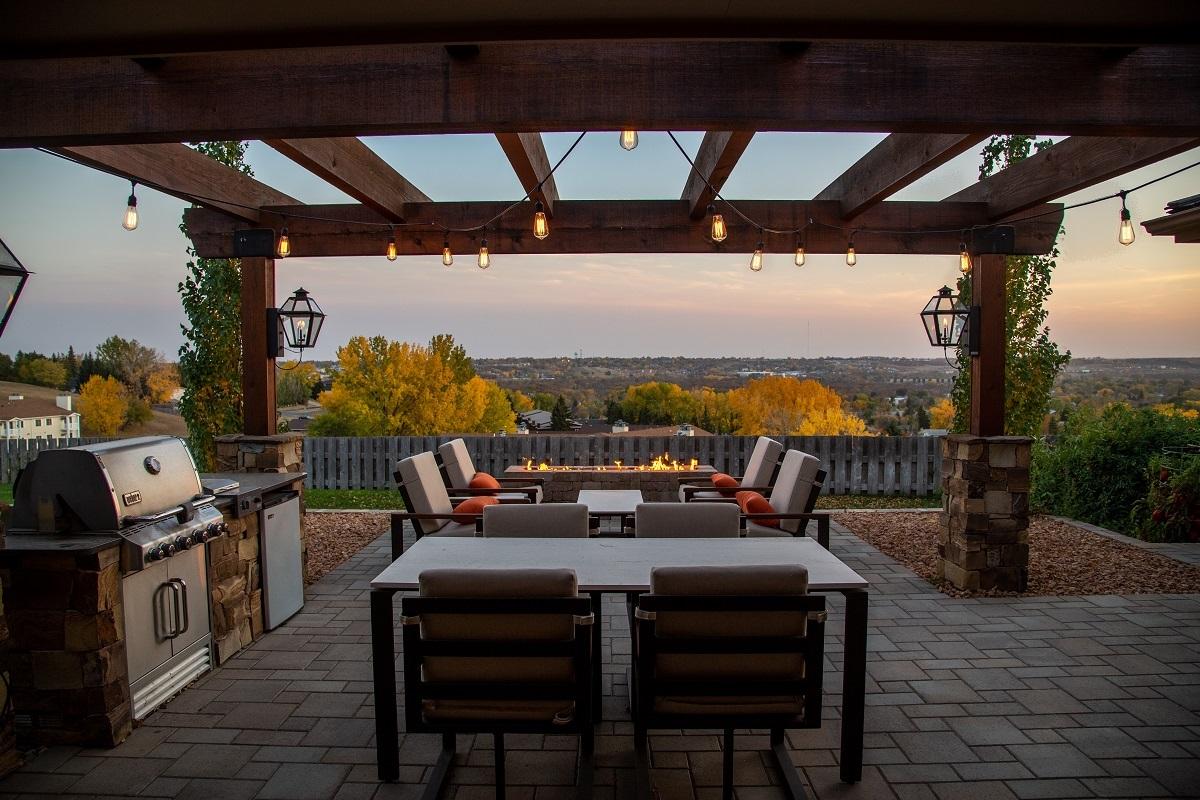
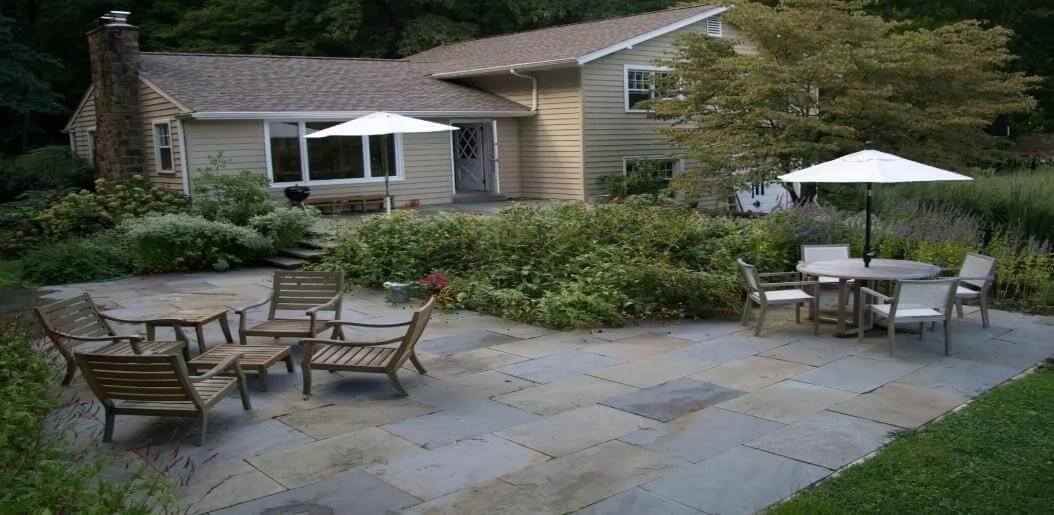
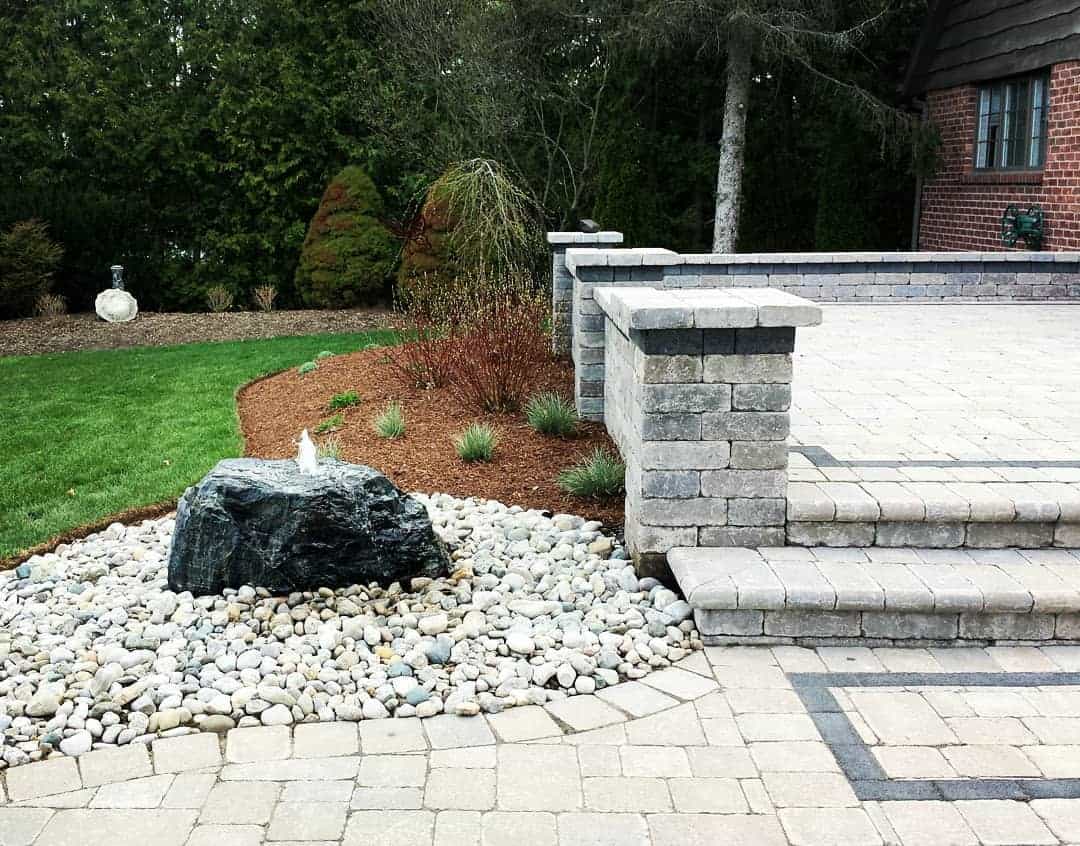
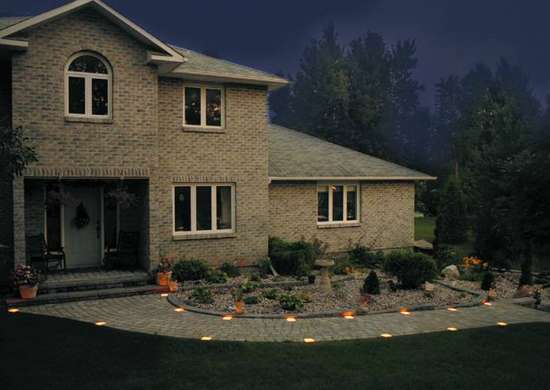

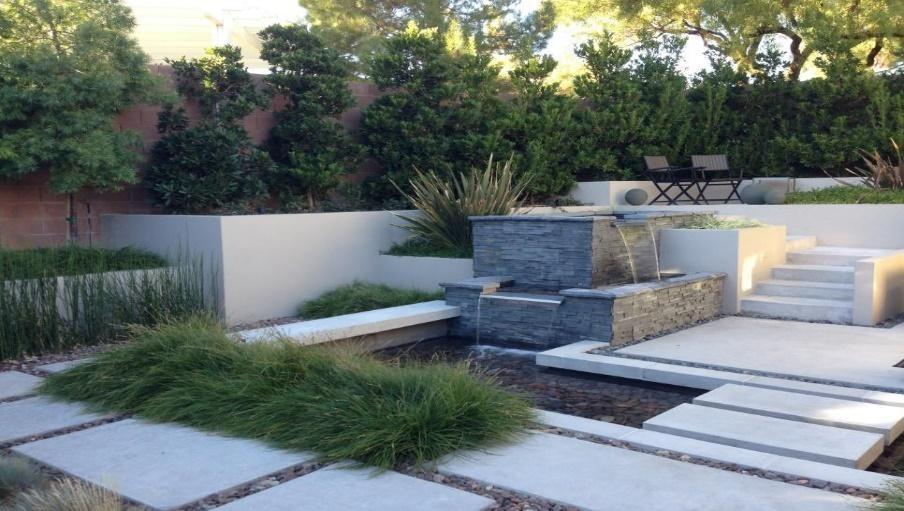
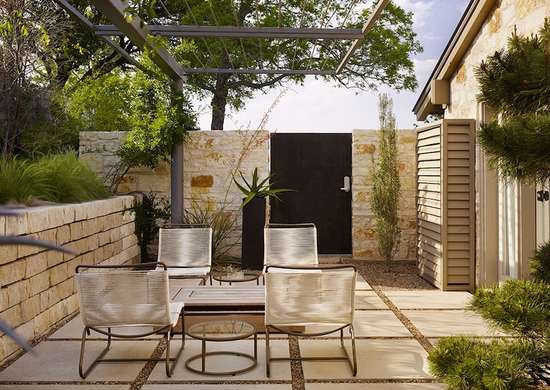
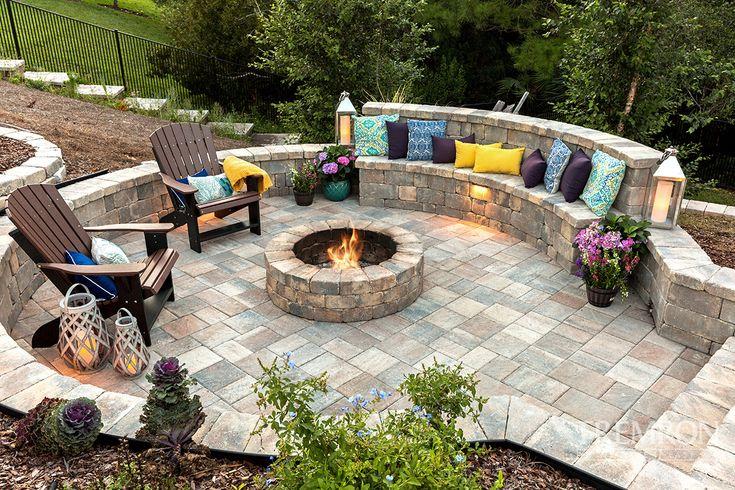
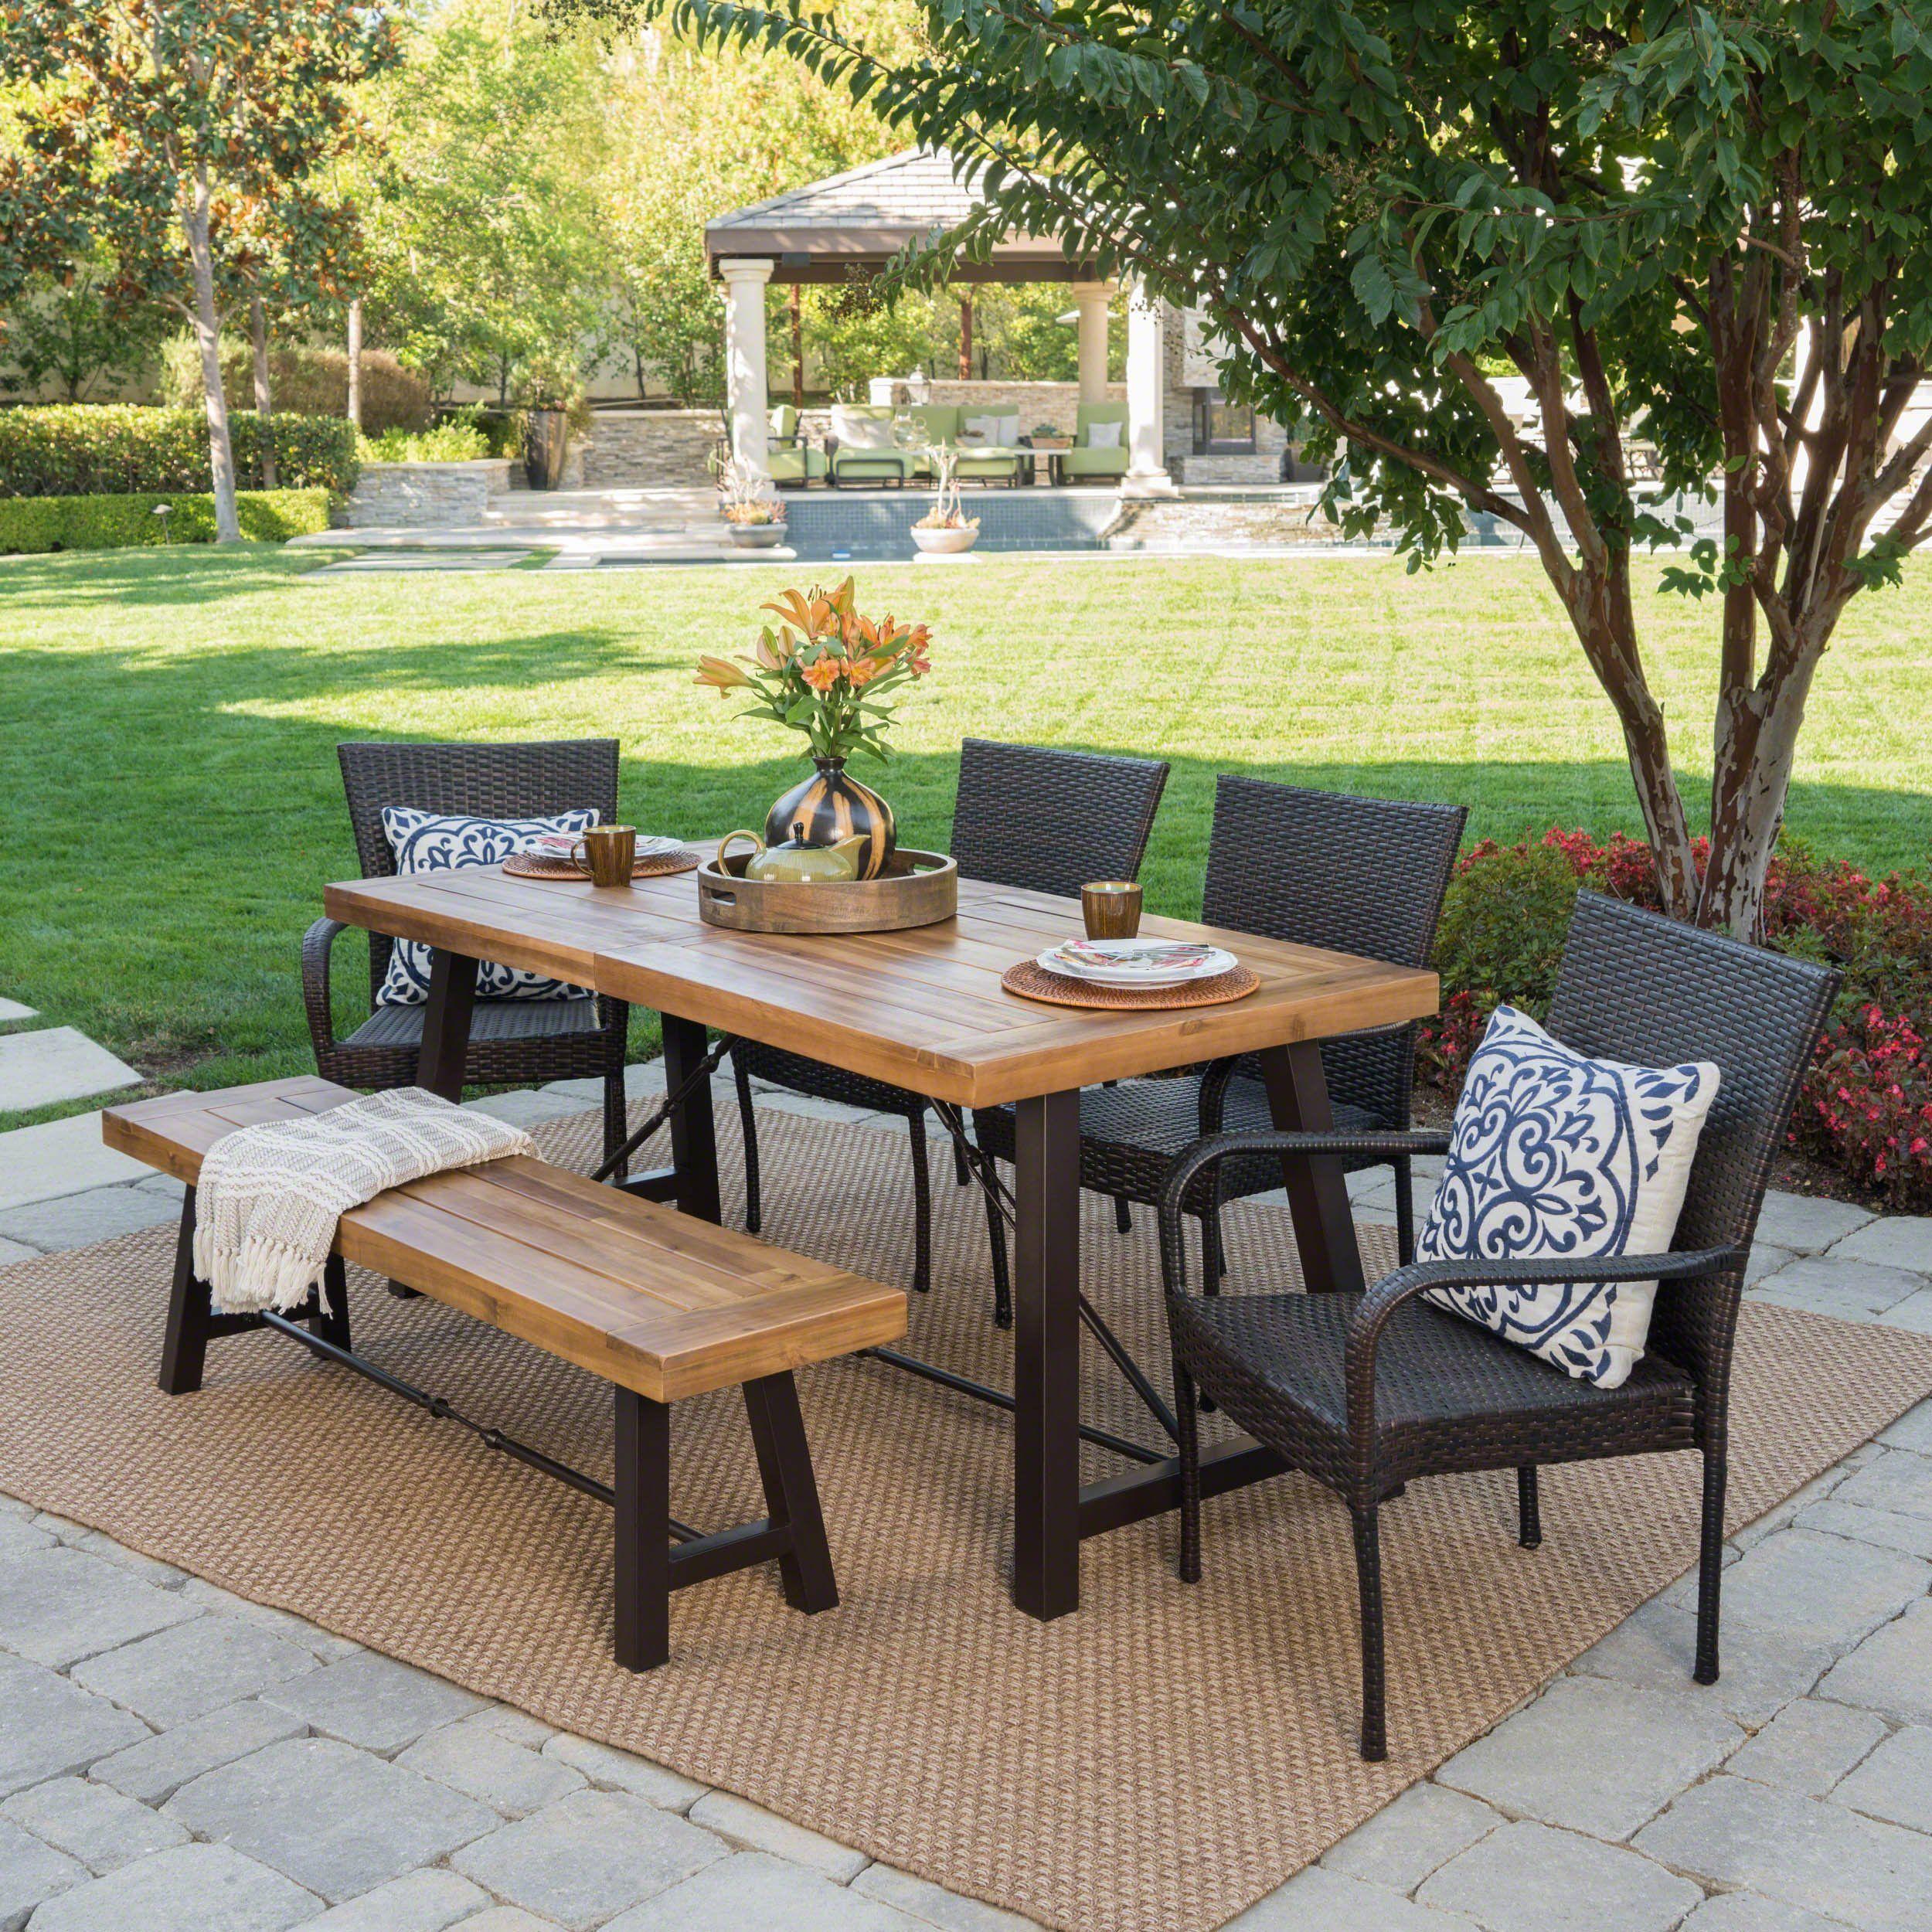

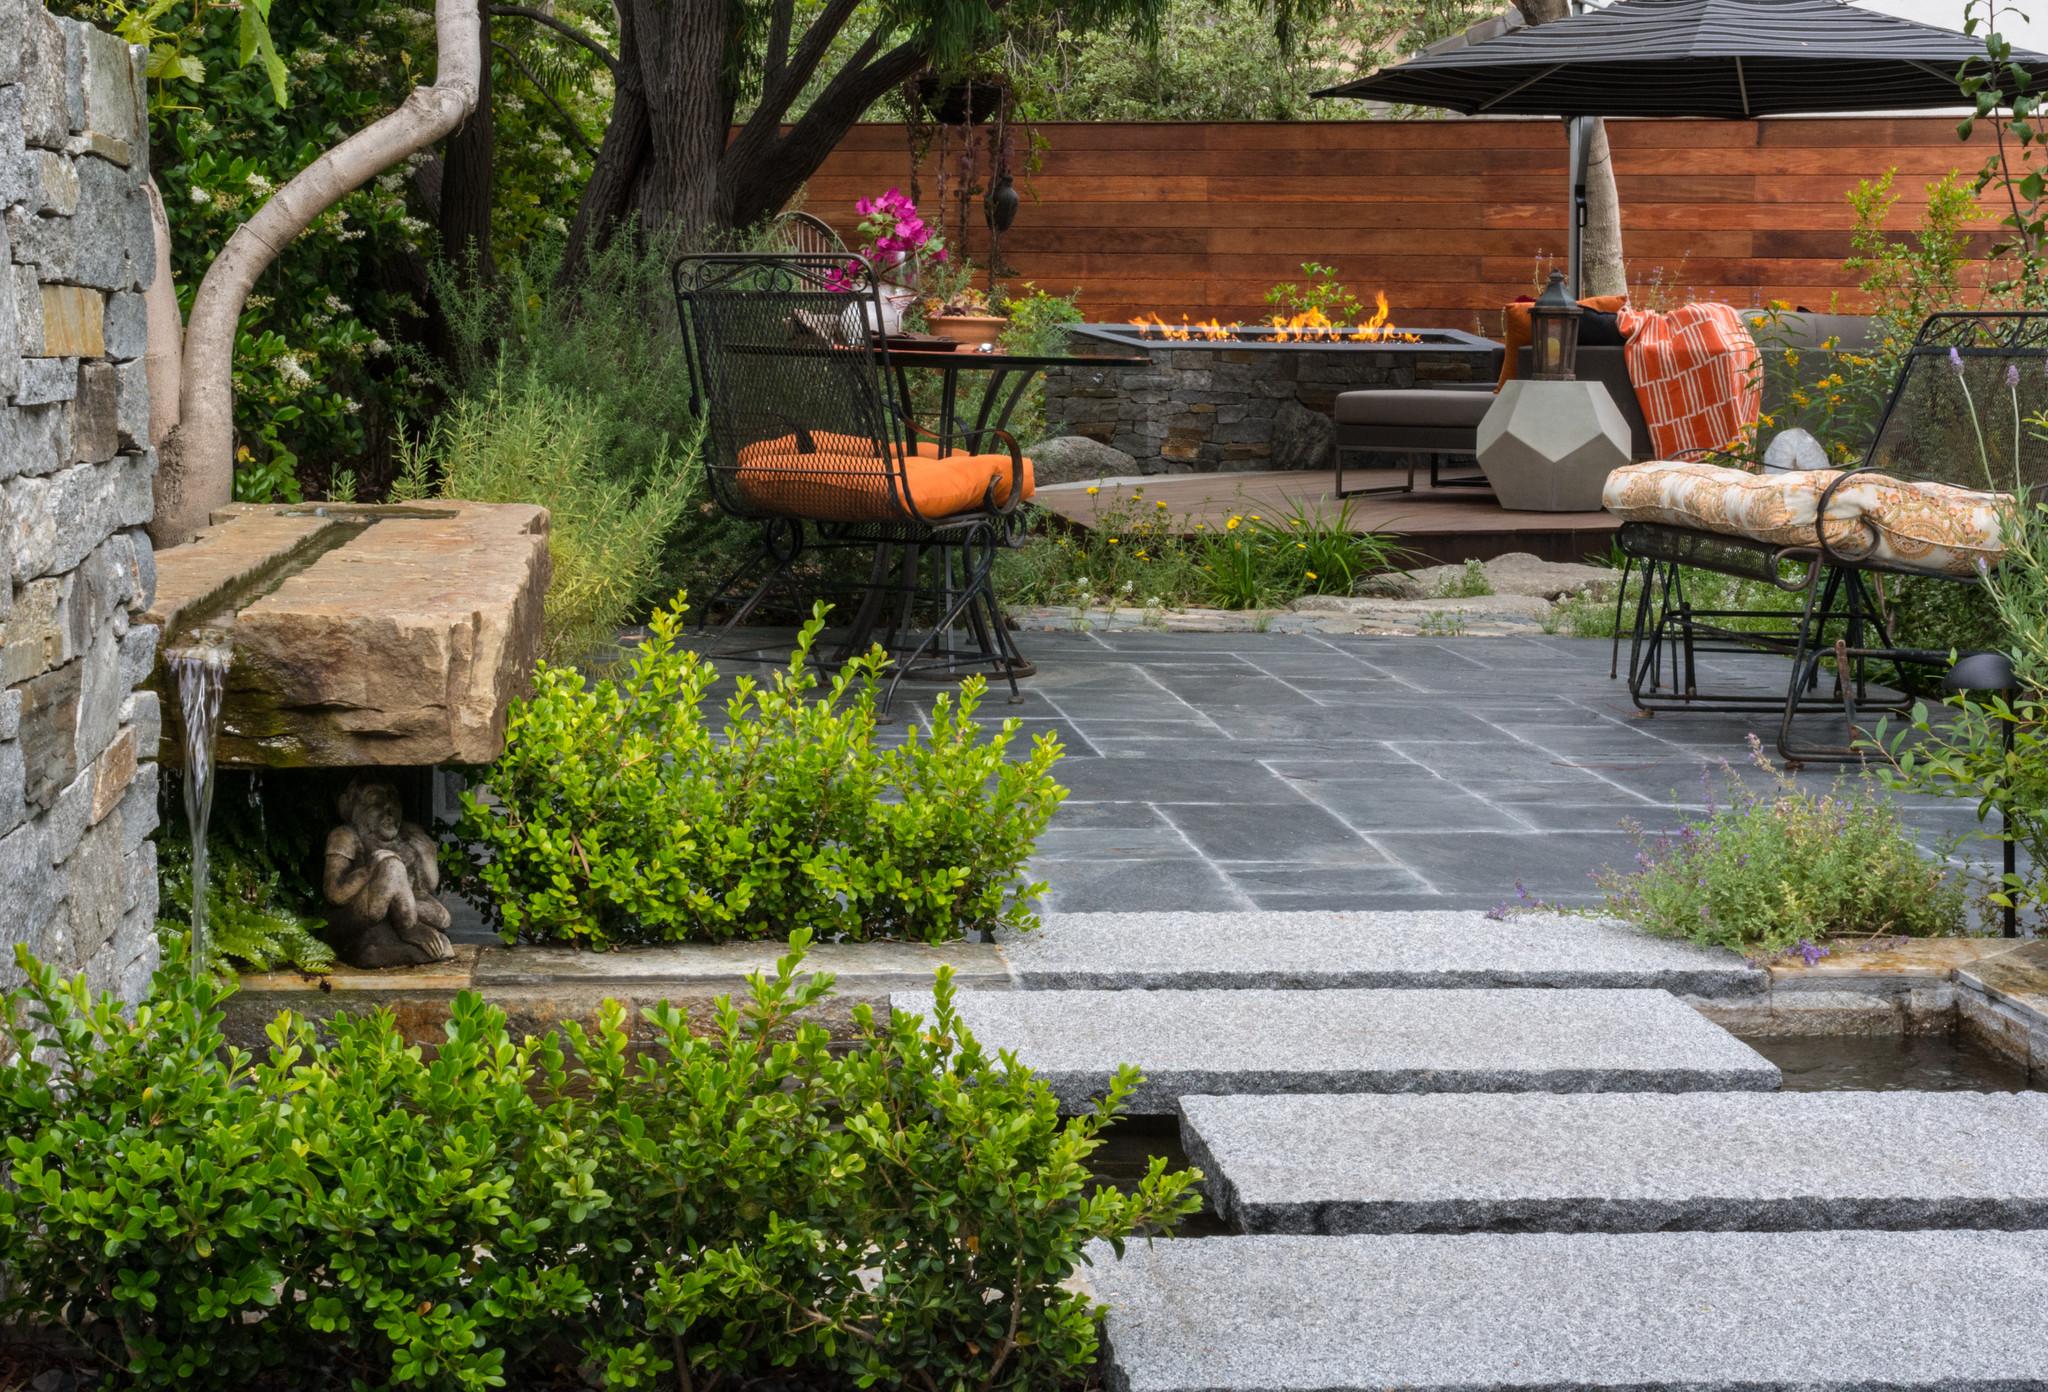
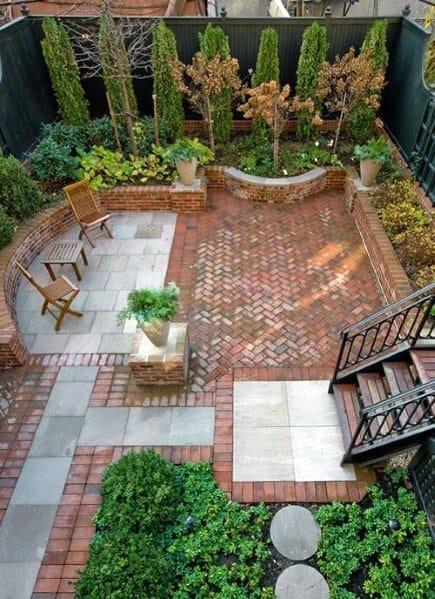
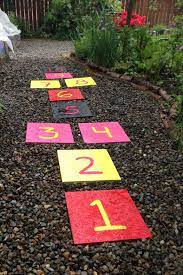
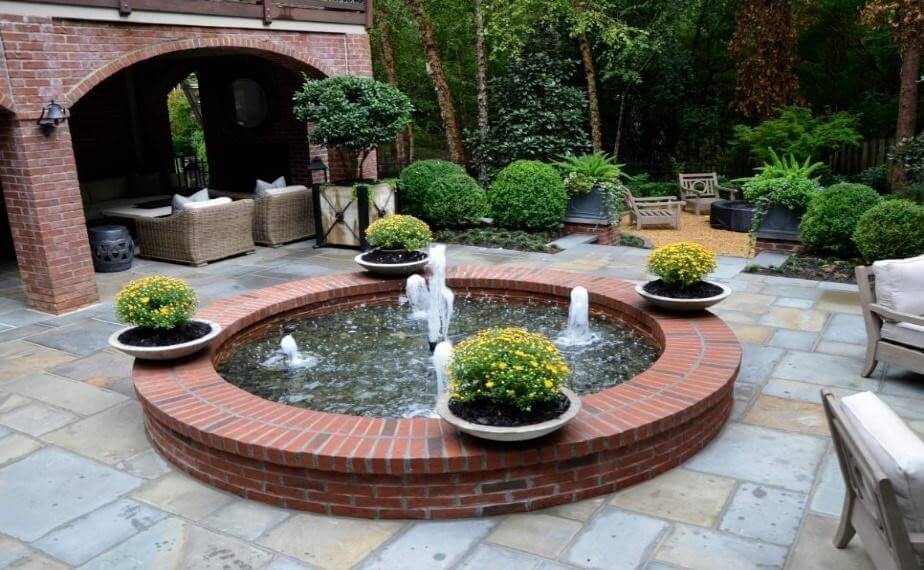
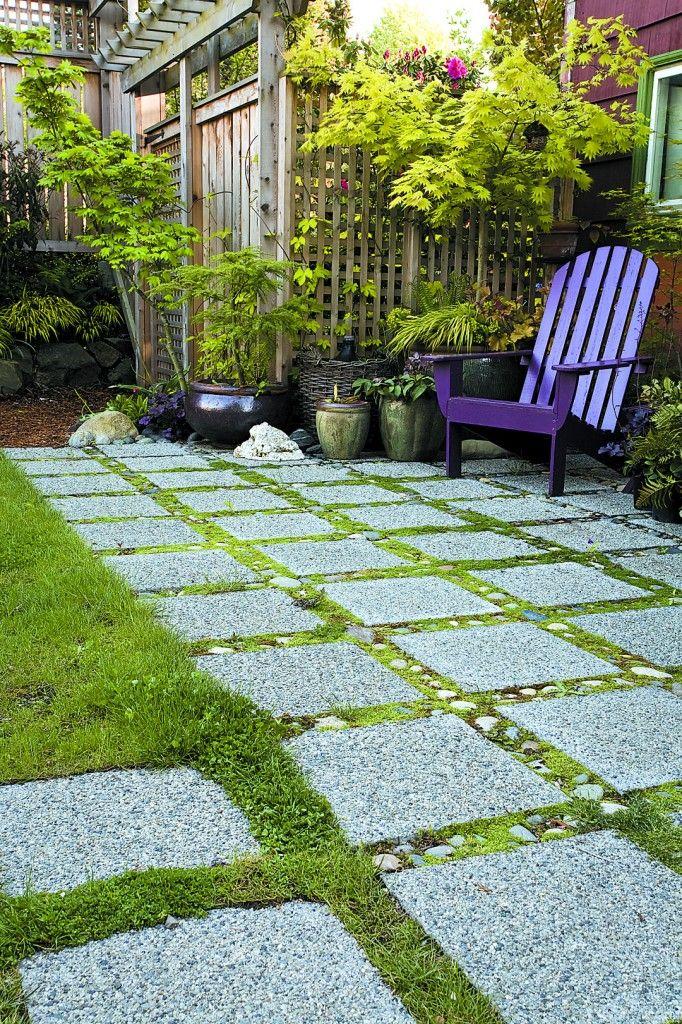
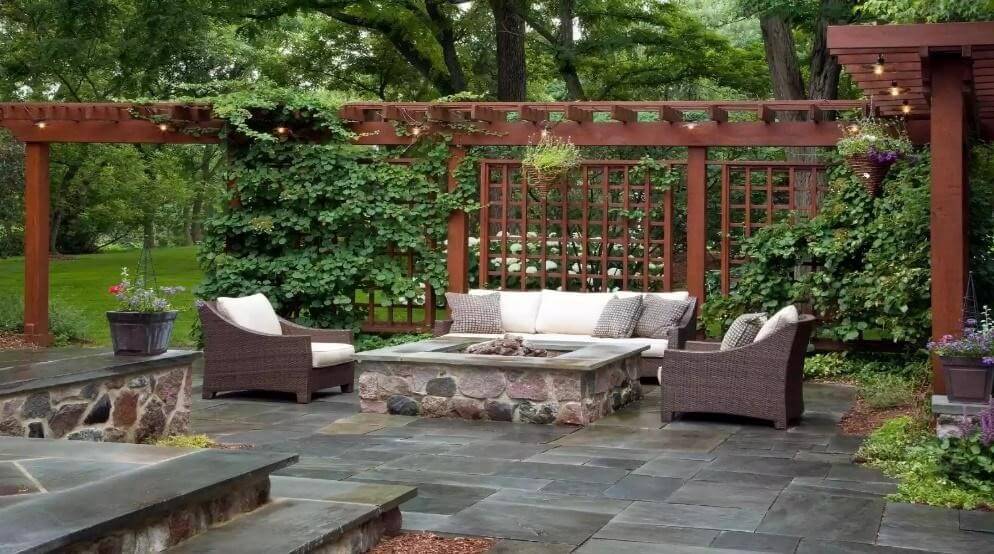
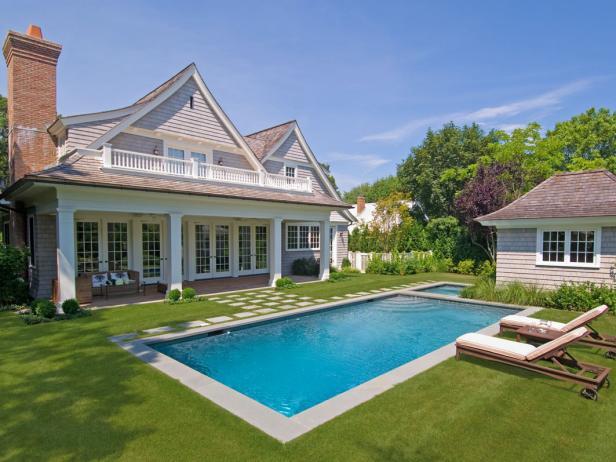
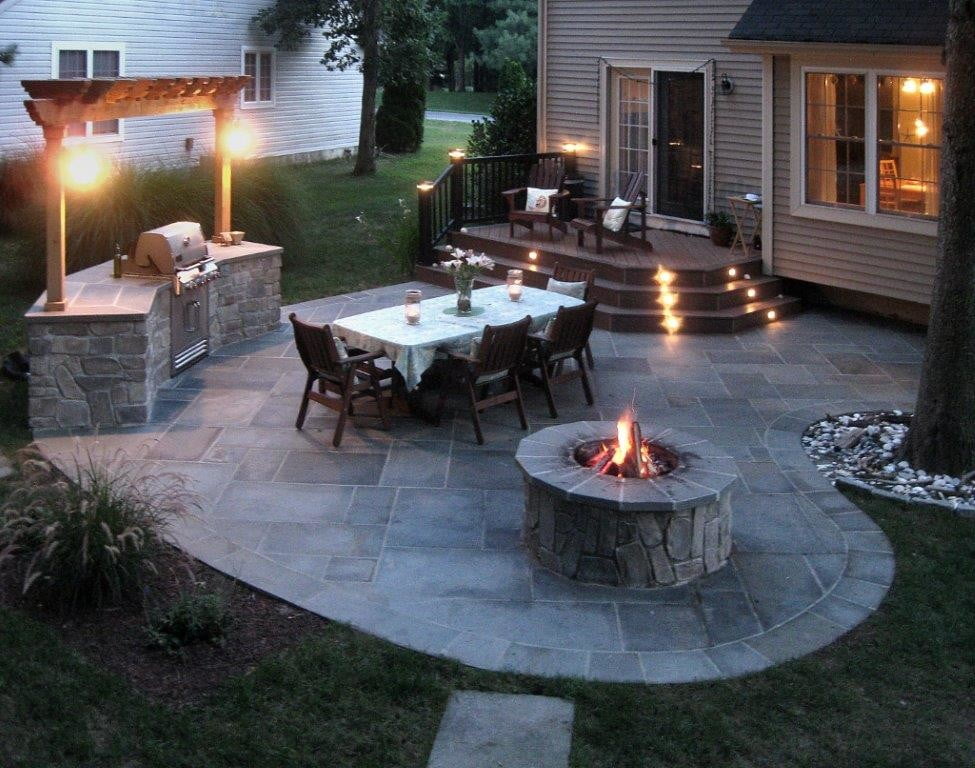

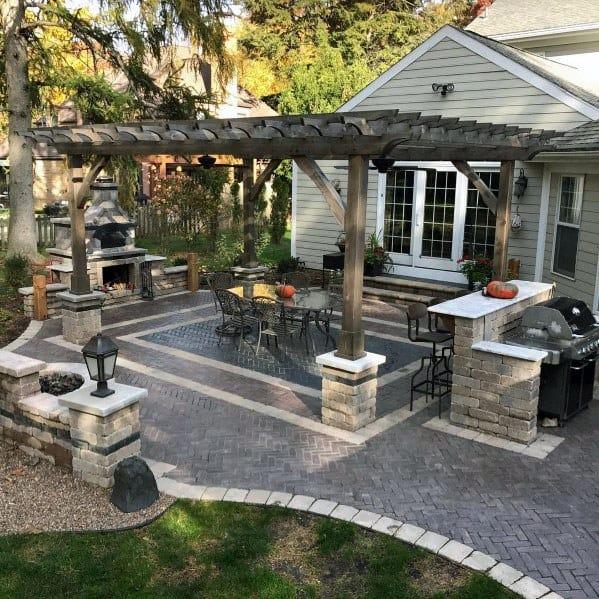
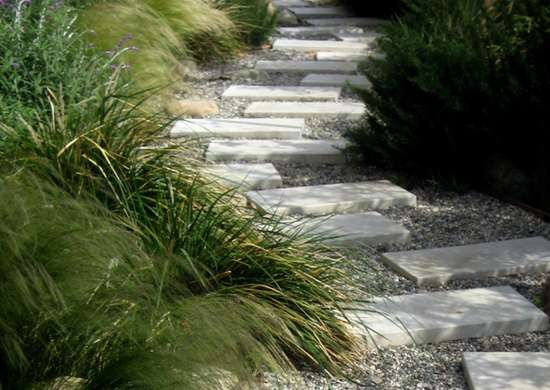
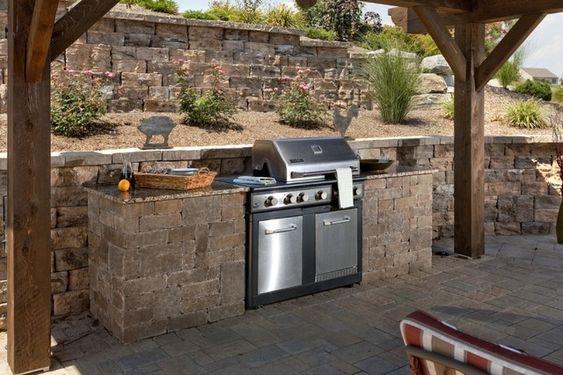