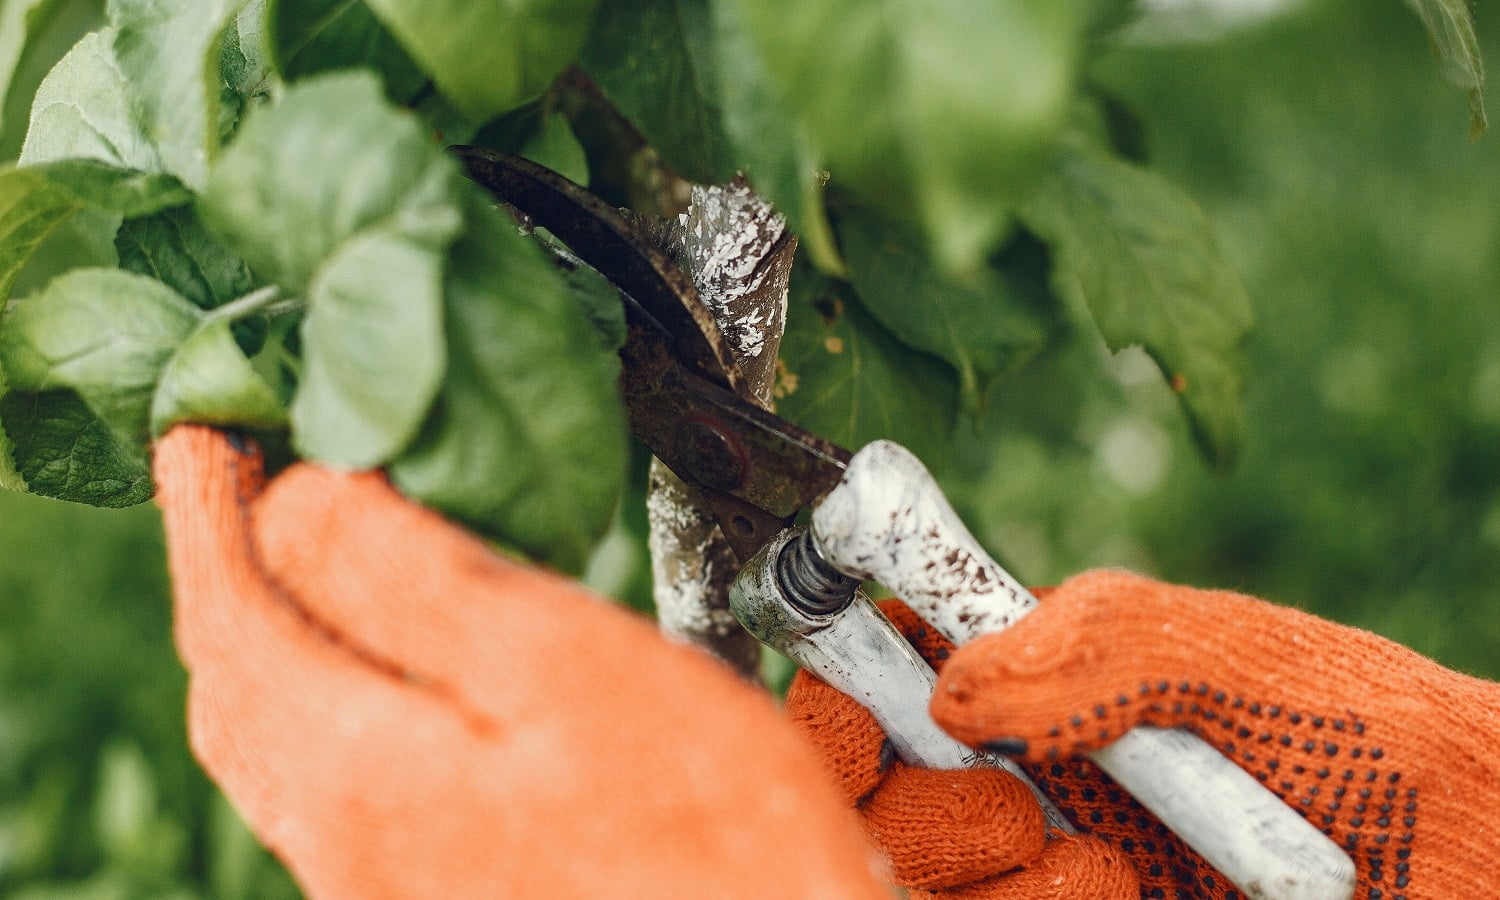
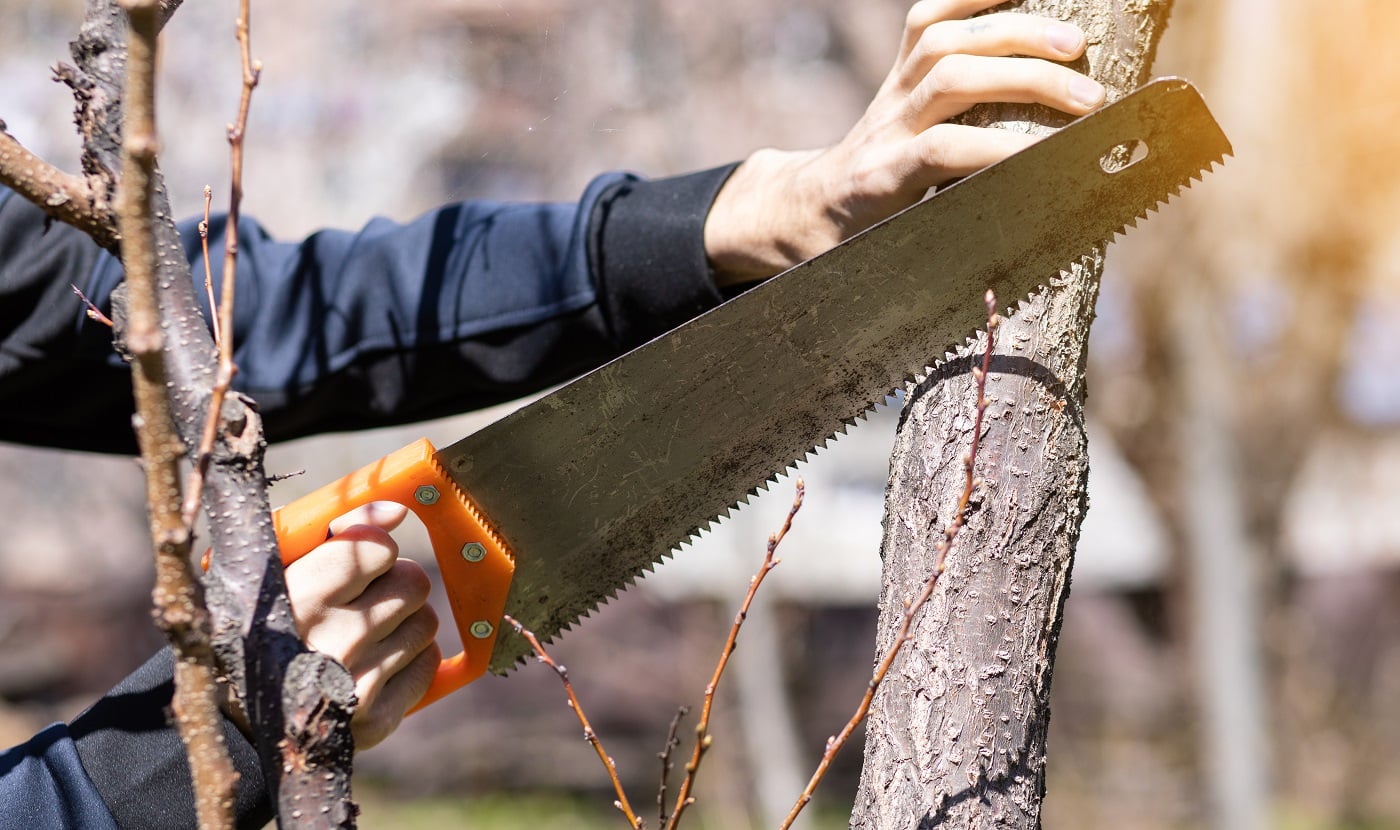
Of all the things you need to do to keep the garden in superb condition, this is perhaps the most important. It's vital to remove dead plant parts and allow your green friends to grow uninterrupted. And for this important task, you can use ratchet pruners.
These tools come with numerous innovations and upgrades to allow you to enjoy your gardening sessions. They are small and lightweight but pack a punch, allowing you to shape and cut as per your needs.
But the question is, how do you choose from the many options that are lining the market? We have formulated a list of the nine best products that are making all the right noise. We offer an in-depth analysis of these tools to clear your mind of all lingering doubts.
So, let's start, shall we?
Best Ratchet Pruner
So, whether you're a seasoned gardener or a beginner, here's the list of the 6 best ratchet pruners that will help you achieve precise and effortless cuts in your garden.
1. The Gardener's Friend Pruners - Best for Arthritis Patients
The Gardener's Friend Pruners is one of the top units going around and with valid reason. Apart from the usual properties, it has made some exciting upgrades, thereby endearing it to prospective buyers. No surprise then that it has generated substantial buzz, which has led to mostly positive reviews.

- Strength-Boosting Shears: boost your cutting power with...
- New and Improved: your favorite assistive clippers are now...
Why Did We Like It?
First and foremost, it comes with a three-stage ratchet action mechanism for added convenience, enabling you to work faster. You can make the cuts with considerably less effort while getting added leverage to prune your garden just as you want.
In that regard, the rubber grip comes in handy and ensures that you can work for long hours without feeling fatigued. It reduces strain on your arms and wrists, allowing even arthritic patients to do the pruning themselves.
But despite having substantial power, there's no compromise with precision, and you'll love how you're able to make small snips. You can effectively remove the dead and decaying plant parts without harming the main body.
Moreover, its lightweight nature makes it incredibly easy to use, and you won't have any problems getting the maximum output. Overall, it features an ergonomic design that is well complemented by the detachable oil sponge to make your gardening needs more manageable.
What Could've Been Better?
Initially, you're likely to have some difficulty with the lock and may not get the desired stability. It's not a significant problem and gets better over time as you're using it. Furthermore, if you like to wear gloves while working, you may not get a firm grip.
- Perfect for small snips
- Delicate cuts
- Easy to use
- Lightweight
- Ergonomic handle
- Issues with the lock
- Difficult to use with gloves
2. Gonicc Ratchet - Best for Power and Precision
The Gonicc Ratchet has all the functions to deliver much-needed versatility in your tasks. But there's no reason to worry as the flexible nature doesn't affect accuracy, which is sure to please many users. As a result, it's turning quite a few heads among customers, and we assure you you'll get fantastic output.
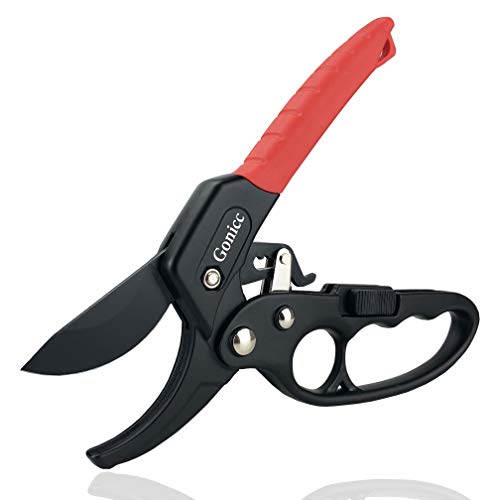
- Premium SK‑5 Steel Blades - Our garden shears feature...
- Heavy‑Duty Chrome Vanadium Handles - Constructed from...
Why Did We Like It?
Firstly, it comes with SK-5 steel construction, which is one of the most robust materials going around. Gonicc has paid a lot of attention to durability, which increases the model's longevity, and something that is seen regarding the chrome vanadium steel handle. It's designed to withstand external elements and deliver a powerful performance.
Likewise, it includes a safety lock providing you with the necessary stability to get accuracy in your work. It comes in handy to manage the incredible power you get with each cut, which is three times higher than other models. You can quickly complete your work while earning a precise output.
Meanwhile, it features an ergonomic design, ensuring you don't have trouble working for extended periods. It reduces the strain on your arms, thereby preventing injuries, and with the anti-slip grip, you get the necessary stability during operation. Even patients with arthritis can work with it without any difficulty.
What Could've Been Better?
Having used it ourselves, we can tell you we had problems closing it, which may prove to be an inconvenience. It does get better over time, but you'll have to apply more force to close it. Additionally, the slide lock isn't the best, and you may have trouble securing it at the desired point.
- Provides three times more power
- Ergonomic design
- Lightweight
- Anti-slip
- Precision performance
- Difficult to close
- Slide lock causes problems
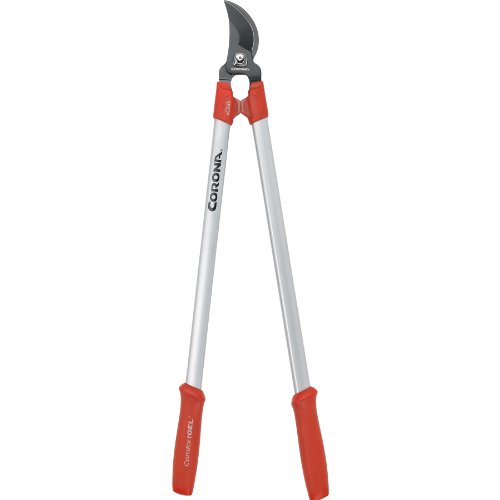
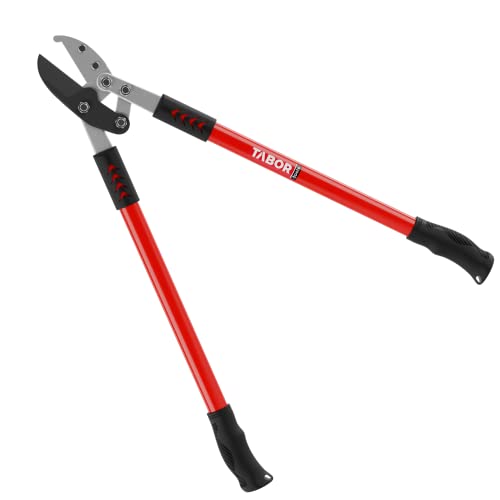
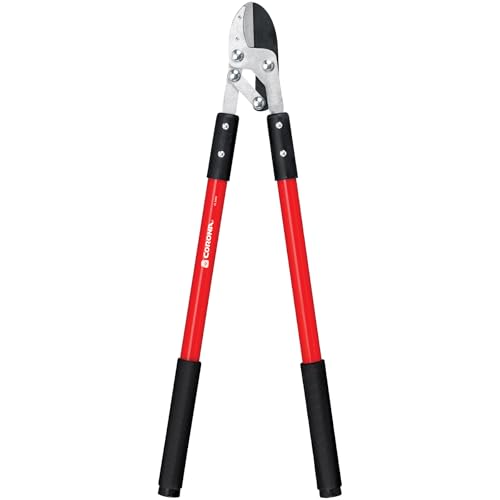
3. Corona Ratchet - Best for High Cutting Capacity
The Corona Ratchet may seem like an innocuous unit but don't be fooled as it comes with all the components to deliver a power-packed performance. With features like a high cutting capacity backed up by the safety lock, you can get excellent reliability in your tasks, thereby solving most of your problems.

- Powerful Ratcheting Cutting Action – Ratchet mechanism...
- 3/4-Inch Cut Capacity for Tough Growth – Designed to...
Why Did We Like It?
Right away, you'll notice the stainless-steel construction, which comes in handy to provide much-needed longevity. It can endure the demands of everyday use and produce consistent performance. You'll love the high cutting capacity of ¾-inch, which is ideal for making fast, clean cuts, and reduces the time needed to complete your work.
Furthermore, the blades have a non-stick coating, ensuring you get a seamless experience as it prevents plant sap and other dead materials from sticking to the edges. In that regard, the four-stage ratcheting action comes in handy and provides a powerful output.
To manage the power, you can use the non-slip grip, which has several benefits. It reduces fatigue and enables you to work for long hours while also affording necessary versatility. Finally, the safety lock makes the entire operation more manageable by rendering it more stable.
What Could've Been Better?
As per reports from users, it tends to lose its sharpness, which is a concern. You'll have to conduct regular maintenance to keep it in prime condition and provide the necessary edge to the blades. Besides, you won't get the best performance while using it on thicker branches, which acts as a deterrent.
- Delivers more power
- Versatile
- 4-stage ratcheting action
- Safety lock
- Stainless steel construction
- Needs sharpening
- Not ideal for thicker branches
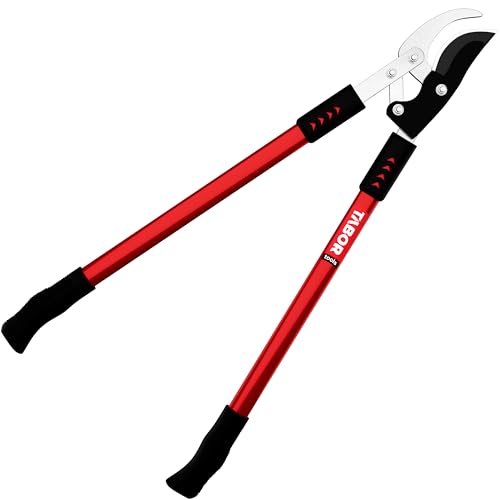
4. EX Kut Ratchet
We are at the halfway point of our list, but there are several quality tools we are yet to review. Our next recommendation for you is the EX Kut Ratchet, which considerably reduces the time you need to complete work. As a result, it's highly efficient and has ticked most of the right boxes.

- ✅ CUTS BRANCHES UP TO 1.5 INCHES – HEAVY-DUTY...
- ✅ RATCHETING POWER FOR LESS EFFORT – Say goodbye to hand...
Why Did We Like It?
First and foremost, it features a metal construction ideal for handling the wear and tear of everyday use. It offers fantastic reliability, which is further backed up by the SK 5 carbon steel blades, ensuring you get a potent performance without having to compromise on reliability.
Moreover, it's safe, thanks to the wrap-around knuckle protector helping to protect you from injuries. And speaking of safety, we have to mention the ergonomic design making it suitable for all types of people by reducing strain on your wrist and allowing even arthritic patients to do the pruning themselves.
Additionally, the blades have a unique contour that is well complemented by the replaceable nature. It helps you keep them in prime condition, ensuring the sharpness is retained for a long time to get the best results. You can get through your work quickly, which makes it incredibly user-friendly.
What Could've Been Better?
Like many tools you buy, it'll take you some time to get used to it. Although it's ready to use out of the box, you'll need to be patient and can't expect to get optimum results right from the word go. After a couple of days, you're likely to see an improvement and get a better feel for the unit.
- Replaceable blades
- Durable
- Safe
- Special blade contour
- Ergonomic handle
- Takes time to get used to it
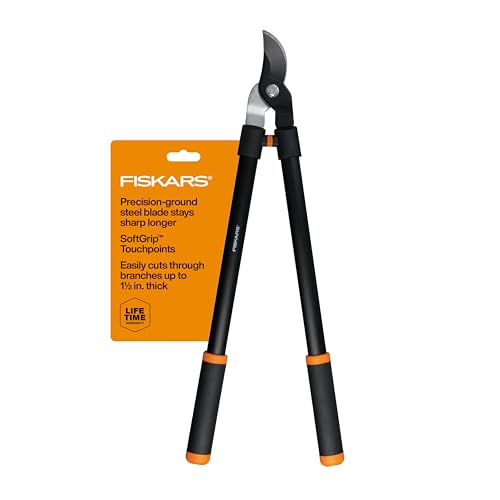
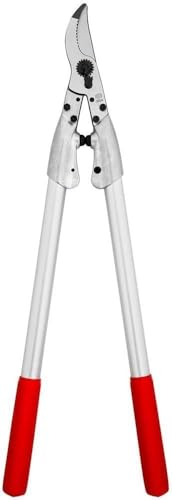
5. Fiskars Ratchet
The Fiskars Ratchet has made all right noise, thanks to features like the automatic ratchet mechanism and the durable construction. It delivers a high cutting ability making it an incredibly useful model that is generating quite the buzz. No surprise then that it has received a positive response.
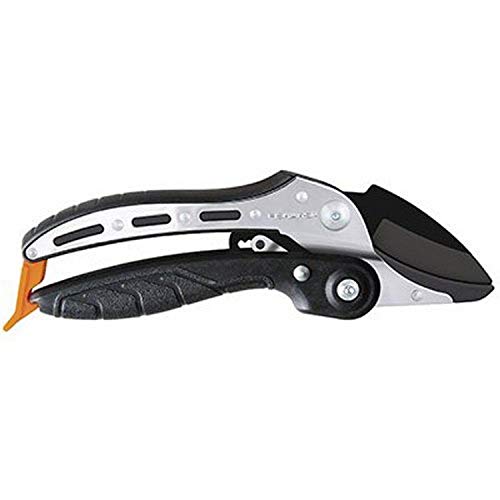
- Ideal for cutting tough stems and branches up to 3/4-inch...
- Ratchet design automatically compounds force with a series...
Why Did We Like It?
Straight off the bat, you get a terrific cutting capacity of ¾-inch, which is one of the highest going around. The incredible power is generated from the steel anvil blade, which delivers fast cuts and ensures you can quickly complete your work.
In that regard, the performance is further bolstered by the low friction coating, which allows you to get a smooth experience. So, you can work uninterrupted, and despite having substantial power, you get precision in your tasks, made possible by the automatic ratchet mechanism. It helps to reduce strain and ensures you can work for extended periods.
Moreover, it comes with a Dura Frame handle, which is highly comfortable, permitting it to perform best in most situations. You’ll love the steel exoskeleton, which makes it incredibly robust and enables the tool to withstand daily use. Consequently, you get exceptional reliability and don’t have to worry about it breaking down.
What Could’ve Been Better?
For all things good about it, some areas do need improvement. For instance, to use the lock, you need to apply more effort than usual, which isn’t the ideal scenario. So, remember to double-check if it’s latched on properly because occasionally it doesn’t close, which is a problem.
- Precision output
- Dura Frame Handle
- Steel exoskeleton
- Automatic ratchet mechanism
- Durable
- cons
- cons
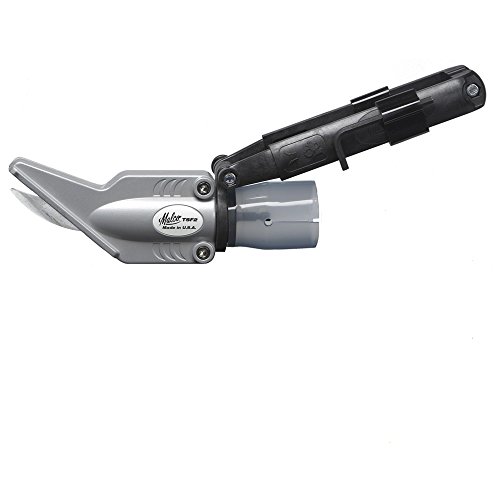
6. MLTOOLS Ratchet
The ML TOOLS Ratchet has the most bases covered due to the array of functions to deliver a cracking performance. Apart from the focus on power, MLTOOLS has ensured it’s safe, making it incredibly user-friendly. So, it has received mostly positive reviews, thanks to the consistent output.

- ★ Great ratcheting mechanism which help reduce wrist...
- ★ SK-5 High Carbon Steel Blade!
Why Did We Like It?
First and foremost, it comes with sturdy blades, thanks to the SK-5 steel construction, which ensures it can last a long time. It effectively handles everyday use and produces powerful performance, seen in the 1-inch cutting capacity.
In that regard, the ergonomic design comes in handy, enabling you to control the power while getting the necessary precision in your tasks. You can quickly complete your work, but there’s no reason to worry as the entire operation is safe, reducing the chances of injury.
However, the significant upgrade is the lightweight design despite having an aluminum body. It’s incredibly user-friendly and reduces the fatigue you experience even after working for extended periods.
Therefore, the chances of injury are lessened, allowing even arthritic patients to use the tool. It’s ready to be used out of the box and comes with all the components, so you don’t need to make any additional purchases.
What Could’ve Been Better?
Over time we have seen the unit may jam up, which will cause interruptions at work. It isn’t a big problem and involves a quick fix, so there’s no reason to worry. However, the main issue is with the unlock button, and it occasionally fails to deliver the desired stability on your tasks.
- Reduces injuries
- Lightweight
- Aluminum body
- Durable
- Fast
- Unlock button may be an issue
- Mechanism could jam
Best Ratchet Pruners Comparison Table
| Product | Cutting Capacity | Blade Material | Handle Material | Weight (ounces) | Locking Mechanism |
|---|---|---|---|---|---|
| The Gardener’s Friend Pruners | 1 | High Carbon | Aluminum | 9.6 | Yes |
| Gonicc Ratchet | 0.75 | SK-5 Steel | Aluminum | 8.1 | Yes |
| Corona Ratchet | 0.75 | Stainless Steel | Aluminum | 9.6 | Yes |
| EX Kut Ratchet | 1. 5 | SK-5 Steel | Aluminum | 8 | Yes |
| Fiskars Ratchet | 0.75 | Stainless Steel | FiberComp | 10.4 | Yes |
| MLTOOLS Ratchet | 1 | SK-5 Steel | Aluminum | 10.1 | Yes |
Buying Guide For The Best Ratchet Pruner
Before you venture into the market, we would like to give you a couple of pointers to help you pick the right unit. Ratchet pruners have many components that could make it difficult for you to distinguish between the top products and the merely good ones.
We are here to discuss the essential aspects based on which we have formulated our list. A piece of knowledge about these functions will place you in good stead and help you make an informed choice.
-
Durability
Your tool must be durable to handle the wear and tear of daily use. As a ratchet pruner, it will have to deal with cutting and shaping sturdy plant materials, among other things. It shouldn't be any surprise that only quality materials must be used for construction to ensure it doesn't break down.
Buying any tool is an investment, and you can't afford to spend resources to buy a new one ever so often. You must enjoy both the product and the components that come with it for a long time.
In that regard, the manufacturers cannot afford to make any compromises. So, having a steel or metal construction is of primary importance to deliver faultless output.
-
Ease of Use
Ratchet pruners come in various sizes to handle an array of tasks, but that shouldn't mean designers have to compromise with user-friendliness. The primary objective of any unit is to reduce your workload, and therefore you must be able to control it effectively to get the best results.
You should be able to adjust the components and the central unit, while the functions must be understandable, almost at a glance. You should know what each part does rather than pondering over how to get it right. Plus, the installation process and the disassembly must be written clearly to ensure it's uncomplicated.
There isn't any point in having many functions if the users find them challenging to use. Rather any good model must keep the basics right and then add the necessary features to deliver a better performance.
-
Power
Finally, you must have sufficient energy to make sure that you get through your work quickly. Shaping and removing plant materials is tedious, so you can't afford to go about it leisurely.
You have a lot of work to do, and your unit must be up to speed to ensure you get a cracking performance. More power doesn't always guarantee a better understanding, and you must have the ability to control the intensity you need on various tasks. As a result, your tool will be versatile, enabling you to handle small-scale and large-scale projects.
Some advantages of using ratchet pruners include: Ratchet pruners are generally suitable for a wide range of plants, including trees, shrubs, vines, and even some thicker-stemmed flowers. However, for very delicate or fine stems, a different type of pruning tool, such as bypass pruners, may be more appropriate. To maintain and clean your ratchet pruners: Yes, in many cases, you can replace the blades of ratchet pruners. Check the manufacturer’s instructions or contact the manufacturer directly to inquire about replacement blade availability and compatibility for your specific model.Ratchet Pruner FAQ's

Conclusion
We have reached the end of our guide, and hopefully, you've got a better idea regarding ratchet pruners.
These are nifty tools and are ideal for your gardening needs. The compact size makes them easy to handle, and you get incredible power to complete your work quickly. Moreover, it effectively disposes of dead plant parts, thereby allowing your garden to flourish.
But before signing off, we have decided to narrow down the top products into different categories to help you make an informed decision. You can opt for The Gardener's Friend Pruners for the best overall performance, while the Gardenite Ratchet provides fantastic durability.
And when it comes to power, there's none better than the Gonicc Ratchet. So, that's all for now. It's over to you to pick the unit most suited to your requirements. Remember everything we have talked about and have a clear idea of the features you need.
Until next time, Ciao!
Related Articles


![8 Best Paints For Closets of 2024 [Tested]](https://homesthetics.net/wp-content/uploads/2021/07/Best-Paints-For-Closets-of-2021-11.jpg "8 Best Paints For Closets of 2024 [Tested]")


![7 Best Gun Paints to Consider in 2024 [Reviews & Buyer’s Guide]](https://homesthetics.net/wp-content/uploads/2023/11/Best-Gun-Paints.jpeg "7 Best Gun Paints to Consider in 2024 [Reviews & Buyer's Guide]")


![6 Best Manual Pole Saw of 2024 [Reviewed & Buyer’s Guide]](https://homesthetics.net/wp-content/uploads/2021/06/Best-Manual-Pole-Saw-of-2021-01.jpg "6 Best Manual Pole Saw of 2024 [Reviewed & Buyer's Guide]")


![8 Best LVLP Spray Guns [Reviewed & Buyer’s Guide]](https://homesthetics.net/wp-content/uploads/2021/04/Best-LVLP-Spray-Gun-04.jpg "8 Best LVLP Spray Guns [Reviewed & Buyer's Guide]")


![10 Best Glues for Paper & Paper Mache of 2024 [Reviews & Buyer’s Guide]](https://homesthetics.net/wp-content/uploads/2023/09/Best-Glues-For-Paper-And-Paper-Mache-1.jpg "10 Best Glues for Paper & Paper Mache of 2024 [Reviews & Buyer's Guide]")


![5 Best Gas Hedge Trimmers of 2024 [Buyer’s Guide]](https://homesthetics.net/wp-content/uploads/2023/05/Best-Gas-Hedge-Trimmers-.jpg "5 Best Gas Hedge Trimmers of 2024 [Buyer's Guide]")


![4 Best Foam Gutter Guard of 2024 [Reviewed & Buyer’s Guide]](https://homesthetics.net/wp-content/uploads/2021/02/Best-Foam-Gutter-Guard-of-2020-01.jpg "4 Best Foam Gutter Guard of 2024 [Reviewed & Buyer's Guide]")


![10 Best Fertilizer For Blueberries [Reviewed & Buyer’s Guide]](https://homesthetics.net/wp-content/uploads/2020/12/Best-Fertilizer-for-Blueberries-Reviewed-001.jpg "10 Best Fertilizer For Blueberries [Reviewed & Buyer's Guide]")


![9 Best Exterior Wood Stains Today [Reviews & Buyer’s Guide]](https://homesthetics.net/wp-content/uploads/2021/04/Best-Exterior-Wood-Stains-Today-01.jpg "9 Best Exterior Wood Stains Today [Reviews & Buyer's Guide]")


![6 Best Electric Fence Chargers of 2024 [Buyer’s Guide and Reviews]](https://homesthetics.net/wp-content/uploads/2019/08/Best-Electric-Fence-Chargers-1.jpg "6 Best Electric Fence Chargers of 2024 [Buyer’s Guide and Reviews]")