X

Inspiring Ideas for Modern Home

Colored pencils are one of the mediums which children and professionals can use proficiently, shoulder to shoulder. 

The first thing worth mentioning is that they are also the easiest to use since they are portable and do not require preparation except for a quick sharpening, of course. 

While many out there may doubt the power of colored pencils still, good artists, however, create masterpieces through this medium. 

Therefore, if you’re a beginner inspired by colored pencil artworks, we recommend getting yourself started with these affordable, yet great quality pencils for practicing before proceeding to the high-end brands. These are also ideal if you are tied with a budget but still want good pencils for your drawings. 

Best Cheap Colored Pencils

Here is the list of the 9 best cheap colored pencils that provide great quality without breaking the bank.

1. Reeves Colored Pencils - Best for Beginners

Reeves Watercolor Pencil Set - Vibrant Colors for Beginners,...
  • SUPERIOR QUALITY PENCILS - Looking for the perfect set of...
  • 24 VIBRANT COLORS - Add water and release rainbows of...

Reeves colored pencils can be found in many well-known art stores. They deliver very good results and come at a very affordable price. 

Based on your requirements, you can find these pencils in three different sets of 36, 24, and 12. They also come in very simple and neat packaging which can be used by artists of any age. 

Experience 

We are surprised to find that these pencils are very smooth while applying - nearly as those expensive brands in the market. 

As a result of this feature, they become pretty easy to blend when we have to mix shades or layer them on our textured surface. The pigment firmly grabs onto the paper without flaking off after leaving the artwork untouched even for hours. 

The pencils also provide full coverage to every artwork and that’s something that exceeds our expectations from an inexpensive set. 

We would suggest this set for those who are still learning to blend with colored pencils, and they will work well for other basic purposes too. 

We can say that the only drawback with these pencils is that the number of colors is limited and that makes blending highly necessary if we want to create a desired shade outside their collection. 

But all in all, the pack is an ideal starting option or a gift for learners that comes at a very low price. 


Pros

  • The pencils deliver a smooth touch and a nice feel on the surface
  • They can be blended with ease on rough and textured surfaces
  • Great for achieving full coverage in drawings


Cons

  • Limited colors make blending necessary


Dimensions: 0.61" x 3.54" x 6.99" | Weight: 3.52 oz | Color: Multicolor | Blendable: Yes | No. of Pencils: 24

2. Studio Series Colored Pencil Set - Best Budget Option

Sale
Studio Series Colored Pencil Set (Set of 30)
  • 30 premium pencils in a spectrum of colors
  • They come ready to go with an included sharpener

The Studio Series Colored Pencil Set is made by a book publisher who is mostly known for his contribution to the adult coloring books collection with Doodle Design, Tropical Paradise, and more. 

The reason we included the set on this list is that it has most of the properties of good colored pencils, given that it comes from a manufacturer with much experience in coloring. 

Experience 

What we feel is worth mentioning first is how affordable this colored pencil set is. It's perfect for any artist with a highly restricted budget, or even better, for students who want to purchase art supplies from their own savings.

On top of this, the pack comes with a kneaded eraser and one good-quality sharpener, which we can say is free if compared to the overall price. Instead of having to choose from good brands and buy them separately, the ones included in the pack are more than enough to fulfill your needs. 

While the eraser may not be as good as those from higher-end brands, we find that it leaves patches of colors that are faintly visible and will disappear once covered with another shade. And personally, we find this additional feature to be good enough for something that technically came for free. 

However, they only have 30 shades in their color range for now, and this means we have to rely on blending to create the intended colors. 

But keeping that aside, the pencils blend very well on paper and deliver great results altogether. With the inclusion of an eraser and a sharpener, this is the perfect pack of colored pencils for learners and budgeted artists. 


Pros

  • This set contains colored pencils which blend pretty well on a paper surface
  • Very affordable, making these colored pencils accessible to anyone including students
  • It comes with an extra sharpener and an eraser


Cons

  • The number of colored pencils is limited only to 30 colors


Dimensions: 12.25" x 0.25" x 9.5" | Weight: 0.6 oz | Color: Multicolor | Blendable: Yes | No. of Pencils: 30

3. Prismacolor Scholar Colored Pencils and Sets - Best for Vibrant Artwork

Prismacolor Scholar Colored Pencils, Adult Coloring, 48 Pack
  • High-quality art pencils designed for beginning artists and...
  • Soft, smooth leads for superior blending and shading

Not everyone will expect to find the brand name Prismacolor on this list because of their price range but their particular Scholar Colored Pencils and Set is surprisingly affordable so we had to include it here. 

The set contains a total number of 48 different shades with which we can produce more colors while mixing. 

Experience 

The pigments from the Prismacolor colored pencils are very rich and vibrant and they can make your drawings appear almost natural to the observer’s eye.

Working with these pencils is easier than expected since we don’t have to stress on each stroke because the colors are already vivid, which means only a few light strokes on one area are more than enough to provide full coverage. 

The reason the pencils are rich in pigments is that they contain wax in their core and therefore, they are smooth to work with. At the same time, it does not take too much time or effort to blend the colors because of the waxy ingredients.

Although the pack is slightly costlier than the others on our list, we still think it’s a worthy investment considering the inexpensive price tag. 

All in all, this is the ideal setting for those who are looking for a well-known and reliable brand. 


Pros

  • Pencils blend really easily, and that is what most artists look for in a good set of colored pencils
  • They provide vibrant pigments without having to add too much pressure or spend too much time In the process


Cons

  • A little costly for artists who are strictly looking only for cheap pencils 


Dimensions: 8.25" x 4.75" x 0.75" | Weight: 11.4 oz | Color: Multicolor | Blendable: Yes | No. of Pencils: 48

4. Blick Studio Artists Colored Pencils

Blick is one of the most popular brand names which many artists turn to when it comes to purchasing art supplies.

When it comes to colored pencils, their Artists’ Colored Pencils are sure to live up to your expectations too.

Experience 

This widely known brand is famous for its high-quality products, and sure enough, its colored pencils are no exception.

First of all, this set is pretty cheap compared to the contents inside. It’s a good choice for anyone who seeks to experience professional quality products at the lowest price possible. 

They are also available in 5 different sets including packs of 72, 48, 36, 24, and 12. We think they have a good range of sizes which can fit many requirements including children, students, beginners, and even professionals. 

If you are new to this brand and want to check out the effects of these pencils, you can start with the pack that contains a minimum number of 12 pencils at a very low price. 

The best feature about the Blick sets is that each pencil is also available for individual purchase. So if one of them either breaks or finishes, we can easily buy a new one without having to waste money on a whole new set. Therefore, there is no need to worry about working with a larger artwork. 

Moreover, the casing is made from cedar wood which makes the pencil very comfortable to hold while working, and that will add to the improvement in your drawing. 

But we can say the price for purchasing individually can be too much for some artists.

Nonetheless, there is more to gain than lose with these pencils because the lead core is also just the right size (3.8mm) to create perfect drawing strokes. So these are the perfect pick for everyone, ranging from learners to experts who are on a restricted budget. 


Pros

  • Blick colored pencils are available in 5 different set sizes, aiming to meet most drawing needs
  • They are comfortable to hold which is good for producing amazing results 
  • These professional-grade pencils come at a very low price if bought as a set 
  • Each color is available for individual purchase 


Cons

  • The price of buying an individual colored pencil is expensive


Dimensions: N/A | Weight: N/A | Color: Multicolor | Blendable: Yes | No. of Pencils: 72

5. Prang Groove Triangular Colored Pencils

Prang (Dixon Ticonderoga Groove Slim Colored
  • Triangular shape with grooves promote proper grip, even...
  • Smooth core delivers vivid, blendable colors and soft...

Prang is well known for producing art supplies that are affordable for everyone. For many years, it has been serving artists with wallet-friendly materials. 

Their colored pencils are great for young artists who are getting themselves familiar with this line of artwork. 

Experience

The colored pencils by Prang are neither too expensive nor too cheap, they come in a medium price range. 

Because they are targeting mostly young artists and children who have a passion for art, the shape of the pencils is carved in a triangular barrel so they are easy to hold while at the same time, allowing the user to dominate their strokes and control the outcome of the drawing. 

One aspect of these pencils that stand out from the rest is their lead core size, which is 3.3mm small. It serves both as a benefit and a loss for the artist, depending on how you want to use it. 

You will achieve more precision when working with a 3.3mm lead and enhance those minor details or highlights. But when it comes to large projects, it takes a lot of time and patience to see visible effects. 

Note that sharpening the triangular pencils does not require you to use a knife or blade. Instead, just a regular mechanical sharpener will work fine. We do recommend using a sharpener because the casing is really tough. 

If you’re looking forward to doing small and simple artwork without spending too much time on it, these colored pencils would be the right choice. Keep in mind they need pressure for leaving vivid marks and lines. 


Pros

  • Prang colored pencils are shaped in a triangular barrel to ensure comfort and full control while working set sizes, aiming to meet most drawing needs
  • The pencils are great for working on fine lines and little details 


Cons

  • The lead core of the pencil is very thin for working on larger artwork 


Dimensions: ‎7" x 9" x 0.5" | Weight: ‎4.8 oz | Color: Multicolor | Blendable: Yes | No. of Pencils: 24

6. Artlicious Colored Pencils

Artlicious Colored Pencils, 50 Colored Pencils for Adult...
  • Complete Set - With 50 bright, bold drawing pencils to...
  • Strong Materials - Our premium adult coloring pencils are...

Artlicious is a brand that produces a lot of art supplies - from wet paints to multiple extras. And not to mention, they are all of the great quality too.

Since we are looking for colored pencils, expect to find one of the best quality at a very reasonable price from this name.

Experience

Despite being cheap, it took us by surprise when we compare it with the performance it delivers - it almost seems like a steal! 

Not only for this reason that we included this set on the list but also because it comes with a good-quality sharpener which saves us from spending more time and money in the search for one from a good brand. 

The pencils blend pretty well when mixed together and they offer opaque coverage after a few strokes or layerings. 

With 50 shades in the set, we find it to be a great deal given the very affordable price. Since they blend very well, we can mix two or more colors together if there is a shortage of one particular shade. 

One amazing aspect of the pencils is they don’t contain toxic chemicals or ingredients which means they are safe for kids to use as well. So, they would make a perfect gift set for your little one who shows a keen interest in colors. 

Another good feature we found with these pencils is that they have softcore lead. When it comes to sharpening, artists would take extra care of their soft leads by using either a knife or blade. But on the contrary, these pencils can be sharpened using both mechanical and electric sharpeners, and they still won’t damage the core. 

As far as we know, the only setback here would be the diameter of the core which is just 3.3mm. While we can achieve perfect strokes, this can also take a lot of time and energy when working on larger pieces. 


Pros

  • At a very low price, the pencils provide excellent performance 
  • Blending and mixing can be done easily with these colored pencils 
  • Since they are non-toxic, they are safe for children to use 
  • The soft lead core does not get damaged by either mechanical or electric sharpeners 


Cons

  • With a diameter of 3.3mm, it will be hard to create large drawings since it takes a longer time 


Dimensions: 7.25" x 0.7" x 7.75" | Weight: 11.5 oz | Color: Multicolor | Blendable: Yes | No. of Pencils: 50

7. Sargent Art Premium Colored Pencils

Sargent Art Premium Coloring Pencils, Pack of 50 Assorted...
  • Colored Pencils: Set of 50 neon colored pencils with 12...
  • Sharpened: Pencils come pre-sharpened for quick use right...

Here is another brand that offers 5 different set sizes of 52, 50, 36, 24, and 12 to ensure artists find the desired one for their drawing.

The 50-colored pencil set, for example, is one of the cheapest on the list. Sargent Art has done budget-conscious beginners and artists a great service for coming up with this set that can fit both budget and quality.

Experience

One might think that the fact that it's so cheap, the quality is definitely compromised. But before we go further, we would clarify that it is not.

Of course, they may not be as great as higher-end brands but they do deliver amazing results, nonetheless. They hold all the basic properties of good colored pencils for getting started. 

Because they are intended for beginners, the pencils are more than enough to fulfill this purpose. These are ideal for young artists and children to prepare themselves for a journey in this line of artwork. 

The size range is also highly admirable because then it prevents artists from getting the wrong set or colors which they probably do not intend to use. 

We would also recommend this pack for beginners who want to explore the world of drawings starting with a good set of colored pencils.


Pros

  • The pencils have most of the basic properties artists look for when getting started with this medium 
  • They are both beginner-friendly and easy to use
  • With a range of 5 different set sizes, artists can choose which one will best meet their requirements


Cons

  • Its properties suit beginners, but might not work for advanced artists or professionals


Dimensions: 8.11" x 7.56" x 0.71" | Weight: 10.2 oz | Color: Multicolor | Blendable: Yes | No. of Pencils: 50

8. Faber Castell Premium Color Pencils

If you’ve been around the world of art for some time, you’ll know that Faber-Castell is one of the most popular brands which deals with a variety of art supplies. 

When it comes to colored pencils, they also have a wide range of them, including their Premium Color pencils which we will review in a moment. 

And if you’re a beginner looking to find a trusted brand, we assure you that Faber-Castell is one of them. 

Experience

We find that the Faber-Castell Premium Color Pencil set is one of the best in terms of quality among affordable colored pencils. 

These particular pencils are ideal for intermediate or professional artists who are looking for affordable colored pencils with quality that’s enough to showcase their artwork. But that does not mean beginners should shy away from them as they can be good for learning how quality pencils work. 

No doubt, they are not the cheapest on the list but they are worth investing in if you want to get amazing display results. 

Similar to Prismacolor and Blick’s colored pencils, these are also very smooth and they make application very easy. Because of this, we don’t have to press too hard on the paper in order to achieve brilliant and colorful lines. Instead, just consistent light touches will do the work. 

And if you are looking for eco-friendly colored pencils, you’ll be glad to know the casing is made of 100% reforested wood, which means they have a lesser impact on our environment. 

We would recommend these for those who are conscious of the environment while still looking for good-quality pencils which are easily removable with kneaded erasers. 


Pros

  • These pencils are made from reforested wood, therefore, having a much lesser impact on our environment 
  • Soft and easy to work with, so you don’t need to put too much pressure on the application process 
  • Can be used by both learners and professionals


Cons

  • Might not fit the budget of some artists looking for cheaper options


Dimensions: ‎7.9" x 6.8" x 0.8" | Weight: N/A | Color: Multicolor | Blendable: Yes | No. of Pencils: 60

9. Castle Art Supplies Colored Pencils Set

Sale
Castle Art Supplies Colored Pencils Set | 120 Premium Soft...
  • MADE TO MAKE IT EASY Ultimate range of 120 pencils arranged...
  • SOFT YET DURABLE Latest advanced formulation by in-house...

Last on the list, we have these colored pencils by Castle Art Supplies, a band name that is known for producing a range of affordable art supplies. 

Likewise, the colored pencils also come at a very cheap price which is a pretty good deal compared to the number of 72 colors in the box. 

Experience 

Among all the other sets we mentioned, this one has got the most number of colored pencils which are available at a very low price. 

On top of that, the colors are all vibrant and rich in pigments, which makes this an even better deal. 

With that many colors, we are able to find a lot of shades, and this reduces the necessity to mix colors in order to find the perfect shade. 

The quality of these pencils is also not compromised as they can deliver amazing coverage with only a few strokes. The color sticks firmly to the paper, although they work better on a rough surface while producing natural pieces. 

For their price range, the pencils are almost as good as those from professional brands, ranging from the quality of the lead core to the comfortable grip. Moreover, each pencil has a number printed on the top to prevent the artist from confusing similar shades. 

Above all these, we feel that the box deserves its own attention as it is attractive and organized. It will make a perfect gift for someone who loves color 

We would say that the only drawback is that the case can consume a lot of space if you’re a traveling artist. 


Pros

  • Because the pencils are soft, they provide a smooth feel to your drawings 
  • They come in a very attractive box with a number of 72 different shades
  • The pigments are rich and they offer full coverage


Cons

  • The case may not consume too much space for the traveling artist


Dimensions: ‎14.29" x 7.48" x 1.34" | Weight: N/A | Color: Multicolor | Blendable: Yes | No. of Pencils: 120

Best Cheap Colored Pencils Comparison Table

Product Dimensions Weight Color Blendable No. of Pencils
Reeves Colored Pencils 0.61" x 3.54" x 6.99" 3.52 oz Multicolor Yes 24
Studio Series Colored Pencil Set 12.25" x 0.25" x 9.5" 0.6 oz Multicolor Yes 30
Prismacolor Scholar Colored Pencils 8.25" x 4.75" x 0.75" 11.4 oz Multicolor Yes 48
Blick Studio Artists Colored Pencils N/A N/A Multicolor Yes 72
Prang Colored Pencils ‎7" x 9" x 0.5" ‎4.8 oz Multicolor Yes 24
Artlicious Colored Pencils 7.25" x 0.7" x 7.75" 11.5 oz Multicolor Yes 50
Sargent Art Colored Pencils 8.11" x 7.56" x 0.71" 10.2 oz Multicolor Yes 50
Faber Castell Color Pencils ‎7.9" x 6.8" x 0.8" N/A Multicolor Yes 60
Castle Art Supplies Colored Pencils ‎14.29" x 7.48" x 1.34" N/A Multicolor Yes 120

Types of Colored Pencils

Wax-based colored pencils

Wax-based colored pencils are the most commonly used type of colored pencil, they have a wax core, which encases the colored pigment. The wax core is made from a combination of waxes, such as paraffin wax, carnauba wax, or other waxes.

Wax-based colored pencils have a high wax content and are easy to blend, making them ideal for creating smooth gradients and blending colors. Wax-based pencils produce a matte finish, which makes them well-suited for sketching and drawing.

Oil-based colored pencils

Oil-based colored pencils are another type of colored pencil, unlike wax-based pencils, oil-based pencils use an oil-based core instead of a wax-based one. This type of pencil has a higher pigment content and produces a more intense color.

Oil-based colored pencils are also more difficult to blend and create gradients with, as the oil-based core does not melt as easily as wax-based cores. Oil-based pencils are better suited for creating detailed, vibrant artwork, as they produce a glossy finish.

Buying Guide For The Best Cheap Colored Pencils

Color Variety

The number of colors available in a colored pencil set can greatly influence the decision of buying it. A wide range of hues, tints, and shades will allow a coloring artist to capture the desired range of tones and create a more vibrant and realistic end product.

Pigment Quality

The quality of the pigment used in colored pencils can make a huge difference in the vibrancy and longevity of the finished product. The high-quality pigment will look more vibrant and will be less prone to fading over time.

Lightfastness

Lightfastness is the ability of a colored pencil to resist fading when exposed to light. The higher the lightfastness, the more vibrant the colors will stay over time.

Durability

The durability of a colored pencil set is important for longevity. A set of pencils that is well constructed and features strong wood or metal casing will be less likely to break and last longer.

Blending Ability

A good colored pencil set should feature a variety of blending capabilities. Different types of pencils and different brands will have different levels of blending capabilities, so it is important to consider which type of pencils will be best suited for the desired effect.

Cheap Colored Pencils FAQs

  • What kind of quality can I expect from cheap colored pencils?

    While cheaper colored pencils may not provide the same vibrancy, lightfastness, or ability to blend as more expensive options, many affordable sets still offer reasonable quality. It’s essential to read reviews and do some research to find the best option within your budget.

  • Is it possible to find lightfast cheap colored pencils?

    While lightfastness is generally associated with more expensive colored pencils, several cheap options on the market have reasonable lightfast ratings. Look for pencils that specifically mention their lightfast properties and check user reviews to verify their performance.

  • Are cheap colored pencils suitable for blending and layering?

    Blending and layering abilities can vary among cheap colored pencils. Some may perform well, while others may be more challenging to blend or layer effectively. Experimenting with different techniques or using additional blending tools, like blending stumps, can help improve results.

  • How do cheap colored pencils differ from more expensive ones in terms of pigmentation?

    Generally, more expensive colored pencils have better pigmentation and color opacity, meaning that you can achieve stronger and richer colors with fewer strokes. Cheap colored pencils often require more layers and pressure to attain the same level of color saturation.

  • Conclusion

    Choosing the best cheap colored pencils can be a daunting task, but our thorough research and testing have provided great options for artists on a budget. These pencils perform well, offer a smooth touch, and are easy to blend, making them perfect for learners, students, and even professionals looking for affordable art supplies.

    From the above 9 best cheap colored pencils, here are the top three expert recommendations:

    The Reeves Colored Pencils deliver impressive results at an affordable price and are perfect for those still learning to blend or for basic purposes. With a smooth touch to the surface and great blending qualities, this pack is an ideal option for learners or as a gift.

    On the other hand, the Studio Series Colored Pencil Set offers excellent value for money and comes with an additional sharpener and eraser. This set is accessible to students and budgeted artists alike, making it a good option for those looking for a practical and complete pack.

    Lastly, the Prismacolor Scholar Colored Pencils and Sets may be slightly more expensive than other options on this list, but the rich pigments and easy blending make them well worth the investment. For those looking for a reliable and well-known brand, this set is the right choice.

    Remember, exploring your creativity doesn't have to be costly. With these affordable colored pencils, you can express your artistic vision while sticking to your budget. Happy coloring!

    Related Articles

    15 Best Electric Pencil Sharpeners

    11 Best Colored Pencils for Beginners & Professional Artists

    13 Best Sharpener For Colored Pencils

    11 Best Adult Coloring Books That Will Color Your Mood

    7 Best Electric Pencil Sharpener For Colored Pencils

    10 Best Paper For Colored Pencils

    Learn How to Shade With Colored Pencils Swiftly & Correctly

    12 Colored Pencil Tips & Tricks to Enhance Your Skill

    Learn How To Use Colored Pencils | 12 Brilliant Beginner Techniques

    6 Best Erasable Colored Pencils

    You Won’t Believe What Colored Pencils Are Made Of!

    10 Colored Pencil Techniques to Enhance Your Drawings Swiftly

    Learn How To Blend Colored Pencils Correctly Fast

    10 Best Derwent Gift Sets

    Repainting old furniture and decor pieces is hardly the latest renovation idea. But have you considered chalk paints for the touch-up job?

    If you've been thinking along those lines, you've come to the right place as we're here to share insights on the 9 best chalk paints of 2023. Chalk paints have recently become the talk of the town, as they are perfect for revamping accent pieces, coffee tables, and literally any surface that needs some color.

    Most chalk finishes can be applied on multiple surfaces, and that sure makes them cost-effective and versatile. All you must do is unleash the artist in you and go dabbing with the paintbrush.

    Without further ado, let's dive in.

    Best Chalk Paints 

    Close up photo of hight colorful chalks tower, isolated over white background

    Here's the list of the 9 best chalk paints of 2023, perfect for revamping your furniture and giving any surface a fresh, colorful makeover.

    1. Rust-Oleum Chalked Ultra Matte Paint - Best for Versatile Surfaces

    When it comes to chalk paints, Rust-Oleum is a brand to reckon with as it has some of the best products on the market. That being said, our second pick, the Chalked Ultra Matte Paint, is an excellent choice for touching up kitchen cabinets and other interior furnishings to create a warm, cozy look.

    Sale
    Rust-Oleum Chiffon Cream Chalked All-in-One Ultra Matte...
    • EASY TO USE, EVEN FOR BEGINNERS: Whether you’re new to DIY...
    • IDEAL FOR FURNITURE REFRESHES: Chalked is perfect for...

    Why Did We Like It?

    Want to give your kitchen a vintage spin without any ground-up renovation? Dab your cabinets with a coat of your favorite Rust-Oleum Chalked Ultra Matte paint, and get the smooth, matte finish without breaking the bank.

    We love that it works on nearly any surface, including wood, metal, ceramic, glass, and canvas, thereby creating a chic, elegant look with just one coat. Besides, these paints come in 30-ounce cans, offering coverage of up to 150 sq ft and with a dry time of 30 minutes.

    While one coat is sufficient for most applications, we suggest applying a topcoat to your kitchen cabinets and any pieces that receive a lot of traffic for improved durability. What impressed us the most is its adhesion, as the paint can be applied without sanding or priming - just what you want in chalk paint. 

    Other than that, if you're looking to create a distressed look, we suggest buying two contrasting colors for the desired effect.

    What Could've Been Better?

    We're delighted with the finish of the paint as it can truly transform any old cabinets, tabletops, and other surfaces in just one coat. However, in case you want to apply a top coat on certain surfaces, be careful while doing so since the paint can get smudged because of uneven brush strokes.


    Pros

    • Adheres to wood, metal, glass, ceramic, and canvas
    • Provides coverage of up to 150 sq ft
    • Does not require sanding or priming before the application
    • Can be used to create a distressed look


    Cons

    • Topcoat tends to get smudged


    Color: Chiffon Cream | Dimensions: ‎4.25" x 4.25" x 4.75" | Weight: ‎3.17 oz | Volume: ‎30 fl oz | Paint Type: ‎Acrylic | Suitable Surfaces: ‎Ceramic, Metal, Wood

    2. Retique It Chalk Finish Paint by Renaissance - Best for Comprehensive Kit

    The Retique It Chalk Finish Paint by Renaissance is delightfully comprehensive as it has everything you'll ever need to achieve a regal chalk finish. Placed third on our list, this kit is the perfect buy for busy homeowners looking for a product that comes with compatible applicators, thereby saving time and effort.

    Retique It Chalk Furniture Paint by Renaissance DIY, Wax...
    • GREAT RESULTS - Superior coverage, usually 1 to 2 coats with...
    • FURNITURE, CABINETS & MORE- Formulated specifically for...

    Why Did We Like It?

    Firstly, we're amazed by their extensive 40 colors line-up, allowing users to choose among different options, especially if you're planning to achieve a particular look. In addition to the 1 quart of paint, the kit features 13.5 fl oz clear wax, 4.2 fl oz dark wax, a 2" paintbrush, 1. 5" wax brush, and a 1" wax detail brush.

    So, get ready to channel your inner Picasso and create a vibrant look in the kitchen, living room, or dining space with this beautiful range of colors. What seals the deal is that the paints are eco-friendly and non-toxic with zero VOCs, which makes them safe for use even around children and pets. 

    Quality-wise we're happy with the neat and rich finish of this paint, offering good coverage in just 1-2 coats. All in all, we suggest getting this if you want to altogether avoid long and tiring sanding and priming sessions before the paint job.

    What Could've Been Better?

    The paint is thicker compared to other chalk paints and tends to clump a little unless you dilute it. But that's a minor quibble and not necessarily a big downer. Therefore, we suggest thinning it down before application so you can achieve a consistent finish and also get better coverage.


    Pros

    • Package includes 13.5 fl oz clear wax, 4.2 fl oz dark wax along with brushes
    • Eco-friendly paint; does not contain VOCs
    • Rich finish in just 1-2 coats
    • Safe to use around children and pets


    Cons

    • Paint is too thick and gets clumpy unless diluted


    Color: Alabaster 11 | Dimensions: 10" x 6" x 6" | Weight: 76.64 oz | Volume: ‎32 fl oz Paint, 13.5 fl oz Clear Wax, 4.2 fl oz Dark Wax | Paint Type: ‎Acrylic | Suitable Surfaces: Furniture

    3. Dixie Belle Paint Company Chalk Paint - Best for Minimal Prep Work

    We're halfway through our recommendations, and now is a good time to introduce the Dixie Belle Paint Company Chalk Paint. So if you have an elaborate restoration project in mind, we suggest going with our seventh option, as it requires minimal prep work and offers superior coverage. Also, compared to other brands at this price range, this unique chalk paint is ahead by a whole league.

    Dixie Belle Paint Company Chalk Finish Furniture Paint - Sea...
    • CHALK MINERAL PAINT – Sea Glass is a light green chalk...
    • CHIC FURNITURE PAINT – This versatile color will look...

    Why Did We Like It?

    Traditional paints require extensive prep work in the form of sanding, scraping, and priming, which is otherwise not only time-consuming tasks but also laborious. That's where the Dixie Belle Chalk Paint comes into the picture, making things much more convenient by eliminating all such preparatory sessions.

    Furthermore, we're in love with the flat, no-frills appearance of this paint, which adds a muted, sophisticated touch to interior decor and furnishings. Apart from that, we like that the product is gluten-free and non-toxic, without any VOCs, keeping your indoor environment unpolluted and safe. 

    Also, you can purchase colors in contrasting tones and create a distressed look on accent pieces and other standalone furniture. Besides, the paint is available in 8-ounce, 16-ounce, and 32-ounce sizes, allowing you to customize purchases as per requirements. Overall, it's a great product, especially if you're looking to save money while also spinning a fresh new look.

    What Could've Been Better?

    You must be wondering what could be wrong with this item, especially when we couldn't stop praising it. Well, there's no point sugarcoating here, but the paint takes a lot of time to dry compared to several other chalk paints. This becomes quite a hassle when you have hyperactive children or pets at home.


    Pros

    • Eliminates sanding, scraping, and priming
    • Gluten-free, non-toxic paint without any VOCs
    • Can be used to create a typical, distressed appearance
    • Affordable paint with superior coverage


    Cons

    • Paint takes a lot of time to dry


    Color: ‎Sea Glass | Dimensions: ‎3.94" x 3.7" x 3.35" | Weight: 25.76 oz | Volume: ‎‎16 fl oz | Paint Type: Chalk | Suitable Surfaces: Furniture, Glass

    4. KILZ 00004404 Interior Chalk Style Paint

    For our eighth spot, we've selected the KILZ 00004404 Interior Chalk Style Paint, ideal for upcycling existing furniture that has lost its sheen over time. However, this product is not only limited to repainting wood but also works on various other surfaces, adding a touch of grandeur with a luxurious finish.

    KILZ Chalk Style Paint, Interior, Ultra Flat, Swedish Blue,...
    • CHALK PAINT: Adds character and unique, distressed charm to...
    • ADVANCED FORMULA: This paint goes on smooth and thick, for...

    Why Did We Like It?

    As homeowners, sometimes we have single pieces of furniture or standalone decor items that look worse off for wear. Although repainting such items constitutes a small project, it's best not to skimp on quality and use something that won't even last a year.

    That's why we recommend this Kilz product as it can really charm up any old wooden furnishings. And if you've some leftover, you can use it on anything including cast stone, concrete, and properly prepared metal surfaces. Furthermore, it can even be applied over most existing finishes with little to no surface preparation. 

    What we like best is its thick consistency that imbibes character to any ordinary surface and creates a luxurious look. Also, it offers great coverage, so if you're buying just one can, it will cover 100 sq ft. Lastly, it's pretty low maintenance as you just have to occasionally wipe the painted surface with soap and water to redeem the effect for a long time.

    What Could've Been Better?

    We love how pigmented this paint is and especially like its performance in terms of coverage. However, we suggest not using a roller as an applicator as it may mark up the surface since the paint is too thick. You can try thinning it down, but that may somewhat diminish the final look.


    Pros

    • Ideal for small-scale home projects
    • Product is applicable to wood, cast stone, concrete, and metal
    • Can also be applied to existing finishes
    • Provides coverage of up to 100 sq ft


    Cons

    • Not suitable to apply with a roller


    Color: Authentic Navy | Dimensions: ‎4.4" x 4.4" x 4.9" | Weight: 47.36 oz | Volume: ‎‎32 fl oz | Paint Type: ‎Decorative | Suitable Surfaces: ‎Metal, Stone, Wood

    5. Krylon K04101000 Spray Paint

    Spray paints have been around for a while now, and nothing should be holding us back from using them on furnishings. It may not be among the conventional choices, but it sure saves a lot of time, which is otherwise spent on preparing a can of paint. So, here we present the Krylon K04101000 Spray Paint, as our ninth pick.

    Krylon K04101000 Spray Paint, 12 Ounce (Pack of 1), Classic...
    • Creates a smooth, ultra matte finish
    • Excellent adhesion & durability

    Why Did We Like It?

    Tired of lugging around a heavy can of paint just to get some touch-ups done here and there? This Krylon Spray paint is the lightweight, handy solution you need to finish repainting projects in a snap. Thanks to this compact spray canister, you can now achieve a chalk finish in no time, and that too without surface preparation.

    Like most high-quality chalk paints, there's no need for priming before applying this product, all you gotta do is aim and spray. Frankly, it doesn't get as simple as this, and we really appreciate the fact that it dries up in 25 minutes. Also, it creates the perfect ultra-matte look, adding a touch of pristine white, without a hint of streaking or run-ons. 

    Each unit can cover up to 25 sq ft and provides excellent adhesion and durability, at par with traditional chalk paints. So if you're looking to complete the paint job without breaking a sweat, this product is the best deal.

    What Could've Been Better?

    As you near the end of the can, the paint tends to get a little clogged and struggles to come out. We would have liked it better if the spray can dispensed smoothly till the end, instead of spurting blobs of paint. Nevertheless, it's still worth the time and money as you can wrap up the work real quick.


    Pros

    • Compact and lightweight spray can for easy application
    • Superior adhesion and durability
    • Creates an ultra-matte, perfect white finish
    • No streaking or run-ons on the surfaces


    Cons

    • Paint clogs at the bottom of the can


    Color: Classic White | Dimensions: ‎2.61" x 2.61" x 7.96" | Weight: 16 oz | Volume: ‎‎12 fl oz | Paint Type: Spray | Suitable Surfaces: Wicker, Plastic & Vinyl, Metal

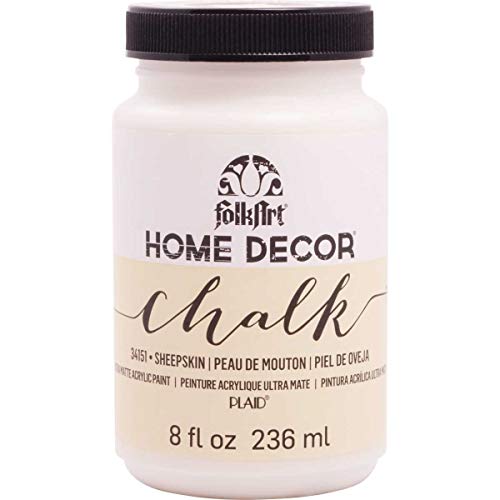
    6. FolkArt 34151 Home Decor Chalk Furniture & Craft Paint

    The FolkArt 34151 Home Decor Chalk Furniture & Craft Paint is an excellent choice for DIY-ers and craft enthusiasts, looking to make a vibrant splash. This line-up is available in multiple sizes and comprises a beautiful palette, offering rich and creamy colors that can add a gorgeous look to boring pieces of furniture.

    Sale
    FolkArt Home Decor Chalk Furniture & Craft Paint in Assorted...
    • VERSATILE SIZE - This unique chalk off-white acrylic paint...
    • ULTRA-MATTE FINISH - When dry this versatile white acrylic...

    Why Did We Like It?

    Despite being placed so low on our list, this Home Decor Chalk Paint is one of our favorites, primarily for its rich texture and consistency. We are very impressed with the durable matte finish that this paint provides, allowing users to apply it on high-traffic surfaces confidently.

    Apart from that, we really like the affordable price tag, as we believe there's no point in spending a ton on refurbishing projects. Besides, the product can be used on multiple surfaces, including wood, metal, ceramic, plaster, terracotta, and canvas, ensuring minimum wastage and leftovers. 

    Moreover, there's no need for stripping or priming before coating any surface as the paint can evenly spread without any smudges. Also, it's pretty easy to layer and great for creating a shabby chic distressed look on wooden pieces. Other than that, we like the use of water-based formula, since it makes things more manageable, enabling users to clean the surface with soap and water.

    What Could've Been Better?

    Literally nothing else other than the drying time. Some pieces and surfaces may need a second coat, but the drying between coats is quite long, and you have to wait for the first layer to bond properly. This is especially a hassle when you're trying to work with pets or children around.


    Pros

    • Affordable paint with a creamy matte finish
    • Durable product; ideal for high-traffic areas
    • Suitable for creating a shabby chic, distressed effect
    • Easy to clean with soap and water


    Cons

    • Long drying time in between coats


    Color: Sheepskin | Dimensions: ‎4.3" x 2.4" x 2.4" | Weight: 5.8 oz | Volume: ‎‎8 fl oz | Paint Type: Acrylic | Suitable Surfaces: Glass, Metal, Wood

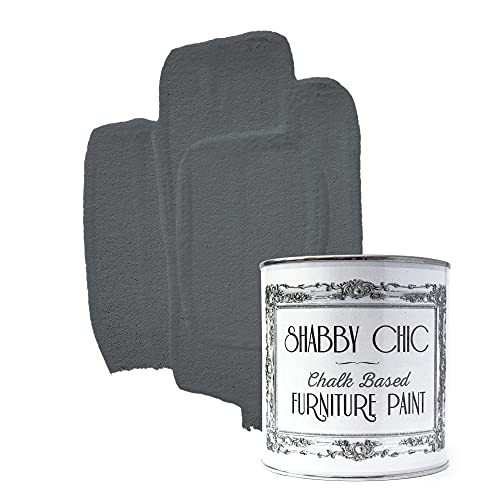
    7. Shabby Chic Chalk-Based Furniture Paint

    The Shabby Chic Furniture Paint is what you should get if you're looking to create a distressed look on a side table or any other decor piece for that matter. The item comes in 250ml cans, but you'll be surprised at the coverage it can provide. So if you want to get your money's worth, add this to your cart stat.

    Shabby Chic Chalk Furniture Paint: Luxurious Chalk Finish...
    • INTERIOR DESIGN: The term ‘shabby chic’ boasts ‘the...
    • A LITTLE GOES A LONG WAY: Great coverage saving you time and...

    Why Did We Like It?

    If you're looking to redecorate your coffee table or display cabinet, the Shabby Chic paint is the best suited for the purpose. All you have to do is get two contrasting colors and create a distressed effect to incorporate a vintage charm into the interiors.

    Plus, the paint consists of a richly pigmented formula, meaning you don't have to spend on a primer or get an undercoat. This is genuinely cost-saving as you can use the product on multiple surfaces, in case there's any leftover.

    Furthermore, you can apply it on different surfaces like wood, brick, stone, and plaster, although coverage depends on the porosity of the material. Other than that, you can use a brush or a roller to apply this, which makes things much simpler, especially if you're working on differently shaped surfaces.  

    Lastly, this water-based item is suitable for both indoor and outdoor use, so you can use it to repaint porch furniture or pots on the balcony as well.

    What Could've Been Better?

    Applying the paint is complicated if you're working on waxed surfaces, as in that case, you've to get rid of the layer using white spirit. Therefore, to ensure high adhesion, you must ascertain that the surface is free from oil, grease, or wax. If you're not sure, it's best to just clean the surface once before application.


    Pros

    • Affordable product for creating a distressed look
    • Works on wood, stone, brick, and plaster
    • Can be applied using a brush or a roller
    • Suitable for both indoor and outdoor use


    Cons

    • Difficult to apply on waxed surfaces


    Color: Anthracite | Dimensions: ‎5.39" x 5.31" x 5.24" | Weight: ‎15.5 oz | Volume: ‎‎8.45 fl oz | Paint Type: Chalk | Suitable Surfaces: Metal, Plastic, Stone, Wood

    8. Ronseal Chalky Furniture Paint

    Now that we've reached the end of our list, we would like to finish off with the Ronseal Chalky Furniture Paint. However, its bottom position is not a comment on its quality or coverage per se as we simply consider it to be the last of the best 9 performers.

    Sale
    Rust-Oleum Linen White Chalked All-in-One Ultra Matte Paint...
    • EASY TO USE, EVEN FOR BEGINNERS: Whether you’re new to DIY...
    • IDEAL FOR FURNITURE REFRESHES: Chalked is perfect for...

    Why Did We Like It?

    If you're looking for a no-nonsense product that will do the job as advertised, this Ronseal item is your best bet. For starters, some of us prefer a no-frills appearance on decor or furniture pieces as it exudes class and sophistication. And this product delivers exactly that with a flat matte finish that perfectly blends with the existing decor.

    Furthermore, this high-performance item protects the surface from regular wear and tear and does not rub off upon contact. This is a significant advantage, especially if you're working in a high-traffic area. Apart from that, we're very impressed with the color payoff, and most importantly, the shade you see is the shade you get.

    Meaning, unlike certain products, where customers always complain about receiving a slightly different color, this brand actually makes an effort to provide the exact shade. Lastly, if you're looking for an affordable, long-lasting solution to revamp old pieces, give this product a shot.

    What Could've Been Better?

    You must be wondering why we placed this item on the bottom despite such great qualities. Well, the only reason is that it contains sensitizing substances that may induce an allergic reaction among users. Therefore, if you intend to buy this, we suggest doing a swatch test first before beginning the project.


    Pros

    • Long-lasting product ideal for high-traffic areas
    • Does not rub off upon contact
    • Can protect surfaces from regular wear and tear
    • Customers receive the color as advertised


    Cons

    • The product can induce an allergic reaction


    Color: Linen White | Dimensions: ‎4.25" x 4.25" x 5" | Weight: ‎40 oz | Volume: ‎30 fl oz | Paint Type: Acrylic | Suitable Surfaces: Wood

    9. Chalky Chicks Chalk Finish Paint

    Upcycling furniture and decor pieces is a practical approach to reducing replacement costs and creating a brand-new look at the same time. That's why we suggest giving the Chalky Chicks Chalk Finish Paint a shot, to finish your projects in style. Also, if you're into craft and DIY activities, get your hands on this stat.

    Chalky Chicks 32 Fl Oz Matte DC Blue (Navy Blue) Chalk Paint...
    • SUPERIOR COVERAGE ON VARIOUS SURFACES: Dive into your next...
    • TRANSFORM FURNITURE AND HOME DECOR WITH EASE: Chalky Chicks...

    Why Did We Like It?

    What if you had chalk paint that could be applied on a sorry-looking sofa or couch, restoring it to its former glory? Well, that is no longer a theory as the Chalky Chicks paint can be even used on fabric, in addition to multiple other surfaces.

    To begin with, this high-quality chalk finish paint is available in a ready-mix formula, meaning there's no need to add water to get the consistency right. Furthermore, you can apply it to more or less everything, including raw wood, laminate, glass, resin, metal, brick, and cement, while achieving coverage of about 150 sq ft.

    Besides, if you want to decorate any surface with a spray-on effect, you can do so by loading the product in an HVLP paint sprayer. What we like best about this item is its ultra-low VOC content, keeping toxic fumes and substances to a minimum. So if you've children at home, we suggest using this product for a safer experience.

    What Could've Been Better?

    We are, for the most part, happy with this product, but the only thing that bothered us is the drying time and adherence. When applied on certain surfaces, the paint takes more time to adhere and may come off easily or get smudged. We would've liked it better if dried off faster and bonded quickly.


    Pros

    • Does not require water before application
    • Can be applied to raw wood, laminate, glass, and brick
    • Offers coverage of up to 150 sq ft
    • Low VOCs, suitable for use around children


    Cons

    • Paint takes time to adhere and dry


    Color: ‎DC Blue (Navy Blue) | Dimensions: ‎7.48" x 4.09" x 4.06" | Weight: 47.52 oz | Volume: ‎32 fl oz | Paint Type: Spray | Suitable Surfaces: Glass, Metal, Wood

    Best Chalk Paints Comparison Table

    Product Color Dimensions Weight Volume Paint Type Suitable Surfaces
    Rust-Oleum Chalked Ultra Matte Paint Chiffon Cream 4.25" x 4.25" x 4.75" 3.17 oz 30 fl oz Acrylic Ceramic, Metal, Wood
    Retique It Chalk Finish Paint by Renaissance Alabaster 11 10" x 6" x 6" 76.64 oz 32 fl oz Paint, 13.5 fl oz Clear Wax, 4.2 fl oz Dark Wax Acrylic Furniture
    Dixie Belle Paint Company Chalk Paint Sea Glass 3.94" x 3.7" x 3.35" 25.76 oz 16 fl oz Chalk Furniture, Glass
    KILZ 00004404 Interior Chalk Style Paint Authentic Navy 4.4" x 4.4" x 4.9" 47.36 oz 32 fl oz Decorative Metal, Stone, Wood
    Krylon K04101000 Spray Paint Classic White 2.61" x 2.61" x 7.96" 16 oz 12 fl oz Spray Wicker, Plastic & Vinyl, Metal
    FolkArt 34151 Home Decor Chalk Furniture & Craft Paint Sheepskin 4.3" x 2.4" x 2.4" 5.8 oz 8 fl oz Acrylic Glass, Metal, Wood
    Shabby Chic Chalk-Based Furniture Paint Anthracite ‎5.39" x 5.31" x 5.24" 15.5 oz 8.45 fl oz Chalk Metal, Plastic, Stone, Wood
    Ronseal Chalky Furniture Paint Linen White ‎4.25" x 4.25" x 5" ‎40 oz 30 fl oz Acrylic Wood
    Chalky Chicks Chalk Finish Paint DC Blue (Navy Blue) 7.48" x 4.09" x 4.06" 47.52 oz 32 fl oz Spray Glass, Metal, Wood

    Buying Guide For The Best Chalk Paint

    Now that you have all information on the 9 best chalk paints of 2023, you may still need a little more help to purchase the most suitable option. Believe it or not, there are more than a few considerations to make and to help you choose better, we've put together this summarized buyers' guide.

    So take a look at our points and find out what works best for you!

    Colors

    This may seem like a no-brainer, but the color you pick should go with the color scheme of the existing decor. But that doesn't mean you have to choose varieties of the same shade, because what ultimately brings out an accent piece or decor item is contrast.

    Therefore don't be shy to experiment with bolder hues as they're quite a in vogue, adding character to any surface. Conversely, you can even play with pastels and muted colors to bring a homely and cozy feel.

    Adhesive Qualities

    After deciding on the colors, you must focus on the adherence quality of the paint. Even though most high-quality chalk paints do not require sanding or priming, make sure to select paints that provide superior bonding across multiple surfaces.

    You don't want to purchase anything that chips off easily or cannot sustain normal wear and tear. This is especially important if you're applying the paint in high-traffic areas.

    Finish

    Another thing that you should look at is the finish of the chalk paint. While some colors have a flat matte finish that seamlessly integrates with the surface, others have a silky, rich effect, adding more sheen to a particular piece. Besides, the finish should ultimately enhance the aesthetics of your interiors, so choose wisely.

    Drying Time

    You do not want to wait hours for the paint to dry off, especially if you need to apply a topcoat. Make sure to buy something that dries quickly and is easy to apply, whether you're using a paintbrush, roller, or spray can.

    Chalk Paint FAQs

  • How is chalk paint different from regular paint?

    Chalk paint differs from regular paint in several ways. It has a thicker consistency, dries quickly, and typically requires little to no sanding or priming before application. Chalk paint also has a unique matte finish and can be easily distressed for a vintage or shabby-chic look.

  • Do I need to sand or prime before using chalk paint?

    One of the advantages of chalk paint is that it often eliminates the need for extensive sanding or priming. Many high-quality chalk paints have excellent adhesive properties and can be applied directly to surfaces without prior preparation. However, it’s always a good idea to clean the surface and ensure it is free from dust or debris before painting.

  • How long does chalk paint take to dry?

    Drying time can vary depending on the brand and environmental conditions, but generally, chalk paint dries relatively quickly. It can often dry to the touch within 30 minutes to an hour. However, it’s essential to note that the paint will continue to cure and harden over the next few days, so avoid heavy use or placing objects on the painted surface immediately after application.

  • Do I need to apply a topcoat over chalk paint?

    While not always necessary, applying a topcoat over chalk paint can provide added protection and durability to the painted surface, especially in high-traffic areas. A clear wax or polyurethane sealer is commonly used as a topcoat to seal and protect the chalk paint. It can also enhance the sheen or add a subtle shine to the finish.

  • Can I mix different colors of chalk paint?

    Yes, one of the advantages of chalk paint is its ability to be mixed and customized. You can create your own unique colors by combining different chalk paint shades. This allows for endless possibilities and the ability to match or complement your existing decor.

  • How do I clean and maintain chalk-painted surfaces?

    Chalk-painted surfaces are relatively easy to maintain. To clean the painted surface, use a soft, damp cloth or sponge and mild soap. Avoid using abrasive cleaners or scrub brushes that could damage the finish. Additionally, you can periodically reapply a thin coat of wax or a fresh topcoat to maintain the paint’s protection and appearance.

  • Color corrector strokes. Green peach yellow color correcting concealer cream smudge smear swatch sample. Makeup base creamy texture

    Conclusion

    Using chalk paints to refresh old decor pieces and furniture is not only economical but also aesthetically pleasing. But regardless of the brand or product you pick, make sure it streamlines the paint job and offers excellent coverage and stay. Long story short, you should be able to wrap up the project quickly and not slog for hours just prepping the surface.

    On that note, we've come to the end of our brief and informative guide, and we hope you could find the perfect option to zing up the interiors. But if you still need a nudge in the right direction, here's a quick round-off.

    The Rust-Oleum Chalked Ultra Matte Paint is an ideal option for versatile surfaces, offering a smooth, matte finish without the need for sanding or priming.

    On the other hand, the Retique It Chalk Finish Paint by Renaissance is a good choice for those looking for a comprehensive kit with a wide range of colors and compatible applicators.

    Finally, the Dixie Belle Paint Company Chalk Paint is the right choice for minimal prep work, providing superior coverage and a sophisticated appearance.

    Let us know in the comments section about your favorite pick from our lot.

    Till next time, keep adding color!

    Related Articles

    13 Best Paint for Furniture 

    13 Best Paints for Bathroom Ceilings 

    11 Best Paint Primers  

    13 Best Ceiling Paints  

    Gardening is all fun and games until you wake up to a humongous pile of shredded leaves in your backyard.

    Moreover, the leaves begin to shed a lot more frequently during the fall season, which makes yard cleaning an everyday task. Nonetheless, leaf mulchers and shredders always come in handy in ridding us of this stress without forcing us to put in extra hours.

    But, there are so many variants out there in the market that it becomes tough for a first-time buyer to know which product is the best. And that’s why we have handpicked 7 of the best leaf mulchers and shredders so that you can choose which one serves your needs correctly.

    So, let’s dive deep into the list!

    Best Leaf Mulchers & Shredders  

    Agricultural machinery, wood shredder chipper machine to remove

    Here's the list of the 7 best leaf mulchers & shredders, so you can easily choose the right one to tackle those piles of shredded leaves and make yard cleaning a breeze.

    1. WORX Trivac 3-in-1 Electric Blower/Mulcher/Vacuum - Best for Portability

    If you’re still not convinced by the Trivac Blower/Mulcher, here’s an even more compact and portable alternative- the WORX Trivac 3-in-1. Although there isn’t much difference between these two products, the 3-in-1 unit raises the bar even higher for portability with its carry-on bag feature. On that note, let’s check out why we liked it!

    WORX WG509 12 Amp Trivac, 3 in 1 Electric Leaf Blower, Leaf...
    • 3-IN-1 DESIGN: Leaf blower, mulcher, vacuum in one for...
    • POWERFUL AIRFLOW: Delivers 350 cfm and 210 mph for clearing...

    Why Did We Like It?

    The WORX Trivac series boasts multiple best-selling products, one of which is the popular Trivac 3-in-1 Electric Blower/Mulcher/Vacuum. If you’re searching for an inexpensive machine for everyday use, we cannot have a more appropriate recommendation than this unit. As for us, we became instant fans of its ultra-ergonomic design, which also features a shoulder strap feature for increased mobility.

    You can wear it as a bag and walk around while cleaning your garden or yard with only one hand. It’s incredibly lightweight, so we didn’t face any shoulder fatigue while carrying it around for a lengthy cleaning session. It offers an average mulch ratio, which suffices for small cleaning tasks. 

    Furthermore, its tube is specially designed at a curved angle, which helps it penetrate hard-to-reach bushes and drains to ease up your vacuuming jobs. The product also features soft-grip handles, which makes it comfortable for users of all reach lengths to use it. Overall, it may not qualify as an industrial-use product, but it rules when it comes to personal jobs.

    What Could’ve Been Better?

    The Trivac 3-in-1 turned out to be surprisingly loud, which is a significant disadvantage for a tool that you have to wear while working. Unlike the former Trivac mulcher, this unit doesn’t mulch the leaves straight into the garbage bin.


    Pros

    • Very lightweight and portable
    • Ergonomic design
    • Decent mulch ratio
    • Reasonable price tag


    Cons

    • Loud motor


    Mulch Ratio: Average | Dimensions: 20 x 15 x 9 inches | Weight: 11 pounds | Voltage: 120V | Portable Yes

    2. Earthwise GS7001515 15-Amp Electric Garden Chipper/Shredder - Best for Power

    Although Earthwise isn’t one of those names that we come across too often, its out-of-the-box innovations can surely give major brands stiff competition. Likewise, its GS7001515 unit comes with an advanced 15-amp motor that makes leaf mulching look like a cakewalk. However, this unit has a lot more to offer than that, so let’s check it out!

    Earthwise GS70015 15-Amp Garden Corded Electric Chipper,...
    • Powerful 15-amp motor shreds branches and sticks up to 1....
    • Chute and tamper tool to keep your hands free and safe from...

    Why Did We Like It?

    We were looking for a powerful-yet-affordable leaf mulcher when we came across the Earthwise GS7001515 unit. Surprisingly, this product seems to offer a lot more than what we pay for it. It beats most of the WORX leaf mulchers in terms of power and efficiency, and the credit goes to its long-lasting 15-amp electric motor. It offers a satisfying all-in-one mulching/vacuuming experience with its mobile dust collection bin.

    Similar to the WORK Trivac, this product is capable of transporting shredded leaves directly into its collection bin. Apart from leaves, you can also use this product to clean almost any kind of waste. However, the icing on the cake here is its 1.2-bushel bin, offering you enough space to mulch heaps of garbage at once, without consuming a lot of time. 

    This machine further makes an appropriate companion for composting jobs, because it can chip small tree branches and twigs too. We’re also a fan of its advanced safety features, including a leaf chute and tamper tool.

    If you’re new to mulching and shredding, you can prevent accidental hazards by using its overload protection feature. Not to forget, its sturdy rear wheels make it reasonably convenient to move around.

    What Could’ve Been Better?

    Although it can mulch small twigs, it would’ve been better if the product was capable of chipping large branches like the WORX models. Also, we personally find it a tad heavy for a medium-duty leaf mulcher. The manufacturers should further consider issuing a warranty period for this product too.


    Pros

    • Multi-functional leaf mulcher
    • Spacious disposal slot
    • Value-for-money product
    • Easy to use and store


    Cons

    • A little heavy


    Mulch Ratio: High | Dimensions: N/A | Weight: 29.8 pounds | Voltage: 120V | Portable No

    3. Worx Trivac Blower and Mulcher - Best for Convenient Disposal

    Globally established brand WORX Tools Co. has bagged another position on our list with the latest addition to its Trivac product range. It’s popular among DIY gardeners as an efficient leaf blower-cum-mulcher tool under a reasonable budget. If you’re trying to hit two birds with one stone, you should aim for this product. Let’s dive deep into its core features!

    Sale
    WORX WG512 12 Amp Trivac, 3 in 1 Electric Leaf Blower, Leaf...
    • TRIVAC 3-IN-1 DESIGN: Leaf blower, mulcher, vacuum in one...
    • POWERFUL AIRFLOW: Delivers 600 cfm for clearing large areas...

    Why Did We Like It?

    The Trivac range has undoubtedly redefined user convenience with such a vast palette of features that it offers without costing a fortune. It’s pretty impressive how this product can mulch the huge piles of leaves straight into your trash can while giving you 100% user control. Honestly, it feels like a mini-me version of the popular WORX 13 amp leaf shredder- only a lot lighter and quicker.

    It comes equipped with an adapter bag and an extended vacuum tube, which can be directly attached to the opening of your garbage bin. While being used, the machine automatically transports the mulched leaves into the garbage container through the tube. Not only does it save you plenty of time by disposing of the shredded garbage automatically, but it also leaves very little post-work cleaning work to do.

    Furthermore, you get a brand-new 26-gallon garbage bin with this machine, which saves you from buying a new bin if you don’t have one already. Also, its electric motor is specially engineered to produce very low noise levels, which was a much-needed upgrade since the loud WORX 13 amp unit.

    What Could’ve Been Better?

    We’re a little disappointed that the product doesn’t come with any warranty. Also, as we’ve said, it’s a compact mini-me version that may not deliver as much power as our other recommended leaf shredders. And on the flip side, it appears a little pricey for the product category it falls in.


    Pros

    • Extremely compact and lightweight
    • Transports mulched garbage into the bin
    • Quiet and smooth motor
    • Easy to use and carry


    Cons

    • Lacks power


    Mulch Ratio: Low | Dimensions: 35.5 x 10 x 14 inches | Weight: 8.6 pounds | Voltage: 120V | Portable No

    4. Toro 51621 UltraPlus Leaf Blower Vacuum Mulcher

    We’ve recently tested the 51621 UltraPlus, one of the best-selling leaf mulchers manufactured by international power tools brand, Toro co. All we have to say here is that if you’re not looking for a leaf mulcher that’ll cost a fortune, this product can be a smart short-term investment you can consider.

    Sale
    Toro 51621 UltraPlus Leaf Blower Vacuum, Variable-Speed (up...
    • Superior blowing and mulching proven by controlled...
    • Powerful up to 250 mph degree. 350 CFM blow mode and 410 CFM...

    Why Did We Like It?

    Some of us usually look for low-priced products that come in handy during seasonal yard cleaning, and the Toro leaf blower is a perfect option for those people. It’s probably the most inexpensive unit on our list, so you can always go for it if you’re running short of cash. Also, we found it pretty appropriate for beginners to use- that’s how easy it is to operate.

    The manufacturers haven’t compromised with the product efficiency for cost-cutting either, which is proven by its multifunctional usability. Although it’s a decent mulcher, it’s also pretty good at leaf-blowing and vacuuming yard waste.

    In fact, the manufacturers claim that this product can offer a 97% size reduction from leaf to mulch, which is pretty amazing. It also uses a dual metal propeller, which gives you finely shredded leaves every time. Also, this unit offers a maximum capacity of 410 CFM, when it comes to vacuuming.

    However, what we’ve liked the most here are its multiple speed modes. In other words, this product offers a high-speed mode for large-scale cleaning and a low-speed mode for small tasks, giving total control to the users. You can use it anyhow and anywhere you want because it’s also very lightweight and easy to carry around.

    What Could’ve Been Better?

    As we’ve mentioned before, there’s no guarantee that this product will last you for a long time. Considering that it’s manufactured in China and is available at a surprisingly low price, it may not even last for a few months. Neither could we find a lot of customer reviews for this product, which makes us seriously question its reliability. 


    Pros

    • Meager price
    • Lightweight frame
    • Can blow leaves at 250 mph
    • Suitable for beginners


    Cons

    • Not reliable


    Mulch Ratio: High | Dimensions: 45 x 9 x 14 inches | Weight: 8.9 pounds | Voltage: N/A | Portable Yes

    5. Flowtron LE-900 Electric Leaf Shredder

    Commonly known as “the ultimate mulcher” among professionals, the Flowtron LE-900 surely has a few heads turning with its top-notch power and performance. This product offers a huge variety of useful features in a lightweight and portable frame, which makes it an ideal household tool. Let’s find out more about this product!

    Flowtron Electric Leaf Mulcher & Shredder | Portable Garden...
    • ULTIMATE ELECTRIC LEAF EATER & COMPOSTER | No More Endless...
    • FLEXIBLE SETUP & COARSENESS SETTINGS | Multiple Methods for...

    Why Did We Like It?

    This product doesn’t miss out on a single useful feature that a leaf mulcher must have. If you’re stressed out by cleaning out your garden and porch daily, this is a quick purchase that you can consider to make your daily life a little more comfortable. Also, we’ve found several similarities between this unit and the WORK Travic product, the biggest of which is the direct garbage disposal feature. 

    Yes, the Flowtron allows you to dump the shredded leaves straight into a garbage bin too. In case you don’t have a bin, you can hang the mulcher on the included stand right above your compost pile for better results. However, it gets an advantage here, as it weighs around 17 lbs. Being a lightweight product, it’s a lot easier to carry around without stressing your arms. 

    Also, we’re a fan of its detachable air filter, which extends the longevity of its motor by minimizing dust and dirt. It mulches leaves swiftly and precisely like a ninja- all thanks to its authentic double-cutting line design. Noteworthy to mention, we were able to reduce 11 bags of leaves into a single bag of mulch, which shows that this unit offers a decent leaf-to-mulch ratio.

    What Could’ve Been Better?

    There’s honestly not much to complain about this product, except for how often the wire cutters need to be replaced. Also, we wish that it could be a little more compact because it can be a bit troublesome storing this equipment. And we’ve found most of the buyers complaining that the switches on some models tend to malfunction, which can be a manufacturing defect.


    Pros

    • Lightweight and portable
    • Decent mulch ratio
    • Reasonable price tag
    • Ergonomic design


    Cons

    • Storage issues


    Mulch Ratio: High | Dimensions: 23 x 19.5 x 19.5 inches | Weight: 17 pounds | Voltage: N/A | Portable Yes

    6. Black and Decker BV6000 High-Performance Blower/Vac/Mulcher

    Any conversation about high-performance power tools is always incomplete without a Black and Decker product. We were fortunate enough to have a hands-on experience of the much-talked-about BV6000 multifunctional mulcher/vac/blower; we can’t wait to share our experience!

    BLACK+DECKER Leaf Blower, Vacuum and Leaf Mulcher 3-in-1,...
    • HEAVY DUTY ELECTRIC BLOWER AND MULCHER - High-powered 12 amp...
    • 3 TOOLS IN 1 - Blower, vacuum, and mulcher keeps the yard...

    Why Did We Like It?

    B&D is one of those brands that don’t need any introduction when it comes to premium household tools. And its all-new 3-in-1 electric mulcher easily stands out as one of the best leaf mulchers, regardless of pricing categories. Despite being ridiculously inexpensive, it surpasses most of our recommended products in terms of the leaf-to-mulch ratio. Yes, its 16:1 mulch ratio is surprisingly too good for a product at this price bracket.

    Speaking of performance, the BV6000 features a 12 amp motor, which can be used both for blowing or vacuuming. Furthermore, it also works as a decent mulcher that can shred around 16 bags of leaves into one, giving a very close competition to the Super handy electric mulcher. 

    However, we’d say that it features the most efficient vacuum on our list, as it’s proven to operate 50% quieter than most of the leaf vacuums available in the market.

    Operating this device is easy as cake because it comes with fewer buttons. It features a large center button, which turns on the vacuum with a single click. We’re also pretty impressed by its ergonomic design and portable frame and would recommend it to any household owner looking for a quick fix to their yard-cleaning nightmares.

    What Could’ve Been Better?

    We’re a little upset that this product isn’t available as cordless, as the long wires can get in your way while working and cause an accidental hazard. And although it’s pretty good for small-duty jobs, it isn’t as powerful as the stationary products on our list. 

    Last but not least, we’ve noticed that the machine tends to get heavier while vacuuming leaves, which is a little inconvenient. 


    Pros

    • Speeds up to 250 mph
    • Low price tag
    • Ergonomic body
    • 12 amp motor


    Cons

    • Not powerful


    Mulch Ratio: High | Dimensions: 15.63 x 1 x 20.6 inches | Weight: 8.1 pounds | Voltage: 120V | Portable Yes

    7. WORX 13 Amp Electric Leaf Mulcher

    As we move on with our list, let’s have a quick peek at one of the most easy-to-use leaf shredders that we’ve tested recently. The 13 Amp electric leaf mulcher by Worx has been making waves in the market with its impressive 11:1 leaf-to-mulch ratio. Besides, it also makes an ideal companion for those who haven’t used this sort of equipment before.

    Sale
    Worx WG430 13 Amp Electric Leaf Mulcher
    • 53 GALLONS/MIN: That’s right, the 13.0 Amp motor mulches...
    • RIGHT INTO THE BAG: Disposes of leaves and debris into a bag...

    Why Did We Like It?

    First and foremost, big ups to Worx for packing such a vast array of features within this unit, making it one of the most powerful pieces of equipment in the gardening tools market. Apart from that, this product also features quite a compact and lightweight frame, which makes it easier to carry around and store. In case you’re having storage space issues in your garage, you can opt for this product with your eyes closed.

    Moving forward, we have to mention how strong its 13 amp motor is; it can mulch around 53 gallons of leaves within a minute. No matter how large the heap of leaves is, this product is guaranteed to clean every last bit within a few minutes. Now that’s fast!

    The Worx leaf shredder also comes with a leaf disposal bag for higher efficiency and is capable of reaching up to an 11:1 mulching ratio, which is quite impressive.

    This product is also quite user-friendly and features a singular button that shuts it down and turns it on with only one press. Also unlike the typical leaf mulchers, instead of using metal blades, this product is equipped with a heavy-duty grass trimmer line. Not only does it save this model from rust or dullness, but it also makes it a lot safer for the user.

    What Could’ve Been Better?

    Unfortunately, we’re a little annoyed by how the model produces unbearably loud noises while being used. And that’s why it’s best to use protection for your ears while operating this machine. Also, we’re not a fan of how this product relies on extension cords. But then again, electric machines are not all rainbows and butterflies.


    Pros

    • A compact and lightweight frame
    • 13 amp electric motor
    • Enhanced safety features
    • Easy shutdown button


    Cons

    • Noisy motor


    Mulch Ratio: Very High | Dimensions: 22.6 x 22.6 x 13.2 inches | Weight: 20 pounds | Voltage: N/A | Portable No

    Best Leaf Mulchers & Shredders Comparison Table

    Product Mulch Ratio Dimensions Weight Voltage Portable
    WORX Trivac 3-in-1 Electric Blower/Mulcher/Vacuum Average 20 x 15 x 9 inches 11 pounds 120V Yes
    Earthwise GS7001515 15-Amp Electric Garden Chipper/Shredder High N/A 29.8 pounds 120V No
    Worx Trivac Blower and Mulcher Low 35.5 x 10 x 14 inches 8.6 pounds 120V No
    Toro 51621 UltraPlus Leaf Blower Vacuum Mulcher High 45 x 9 x 14 inches 8.9 pounds N/A Yes
    Flowtron LE-900 Electric Leaf Shredder High 23 x 19.5 x 19.5 inches 17 pounds N/A Yes
    Black and Decker BV6000 High-Performance Blower/Vac/Mulcher High 15.63 x 1 x 20.6 inches 8.1 pounds 120V Yes
    WORX 13 Amp Electric Leaf Mulcher Very High 22.6 x 22.6 x 13.2 inches 20 pounds N/A No

    Buying Guide For The Best Leaf Mulcher & Shredder 

    Leaf mulchers and shredders aren’t something we buy every day. And most of us are unaware of the main features to evaluate before purchasing these products. On that note, we’ve enlisted some of the critical factors that you must cross-check before buying a leaf mulcher.

    Motor Efficiency

    The central aspect of any machine is its motor efficiency, without a doubt. Similarly, you must ensure that the motor is powerful enough to serve your needs. If you’re searching for a mulcher to finish personal jobs, a standard 12-amp engine may suffice.

    Safety Features

    These machines work with sharp blades, and some of these products are powered by electricity. With that being said, always check whether the product comes with sufficient safety features before buying. For instance, even an automatic shutdown feature can enhance product safety by several notches. 

    Storage

    Mind you, some of these products are large and stationary. It may be troublesome to store these products if you don’t have sufficient space in your garage/workspace. And in case you don’t, it’s wise to opt for a non-stationary/wearable leaf mulcher.

    Leaf To Mulch Ratio

    The higher the leaf-to-mulch ratio, the lesser time it would take to finish heavy-duty jobs. If any product offers a mulch ratio of less than 10:1, it shouldn’t be worth your investment or consideration.

    Environment-Friendliness

    Usually, gas/oil-powered leaf mulchers tend to have a higher environmental impact due to their powerful engines. Such high emissions aren’t suitable for the air we breathe in, and that’s why you should mainly opt for electric mulchers.

    Leaf Mulcher & Shredder FAQs

  • What is the motor efficiency I should look for in a leaf mulcher?

    The motor efficiency is a critical factor to consider when buying a leaf mulcher. For personal jobs, a standard 12-amp motor should be sufficient.

  • Are safety features important in leaf mulchers?

    Yes, safety features are essential in leaf mulchers, especially since they work with sharp blades and some are powered by electricity. Look for features like automatic shutdown to enhance product safety.

  • What should I consider regarding storage for leaf mulchers?

    If you have limited space in your garage or workspace, it’s wise to opt for a non-stationary or wearable leaf mulcher that is easier to store.

  • How important is the leaf-to-mulch ratio in a mulcher?

    The leaf-to-mulch ratio is important because it determines the time it takes to finish heavy-duty jobs. Look for a mulcher that offers a mulch ratio of at least 10:1 for efficient performance.

  • Conclusion

    Not only do leaf mulchers and shredders help you collect fallen leaves, but they also make disposing of the garbage easier by shredding it down into bits. So, if you have trees in your porch or backyard, a leaf mulcher/shredder makes for must-have equipment you should always keep within arm’s reach.

    On that note, we hope that you’ve enjoyed going through our 7 best leaf mulchers and shredders list.

    But before we sign off, let’s go for a quick recap. For portability, the WORX Trivac 3-in-1 Electric Blower/Mulcher/Vacuum is an ideal option with its lightweight design and carry-on bag feature. If power is your priority, the Earthwise GS7001515 15-Amp Electric Garden Chipper/Shredder is a good option, offering a strong motor and ample mulching capacity. And for convenient disposal, the Worx Trivac Blower and Mulcher is the right choice, mulching leaves directly into your trash can with ease.

    Say goodbye to the hassle of manual yard work and embrace the convenience and effectiveness of these top-rated tools.

    We’ll return soon with more useful product reviews, so stay connected!

    Related Articles

    8 Best Blowers For Drying Cars This Year

    10 Most Powerful Leaf Blowers to Consider 

    7 Best 21-inch Mulching Blade

    11 Best Compost Aerators Right Now

    Walking into a room that doesn’t feel warm and welcoming comes as no surprise, for many, home décor cannot be a priority, so dated and dark areas are common in such homes. Introducing the world of beautiful farmhouse table lamps, where style meets functionality to provide the perfect addition to your home decor.

    To improve the ambiance, you’ll find people generally suggesting you bring in more natural light through the windows, neutral color paint, or even modern furniture. 

    But we often forget to pay attention to the small details, which have a subtle way of making the biggest impression, and in our opinion, a decorative table lamp does just that!

    The entire look and feel of the room can be changed with the right lighting. If your room doesn’t have big windows, bringing in the power of natural light is not impossible, and it all comes down to selecting the right lamp design.

    So, without further ado, let’s get started!

    Best Farmhouse Table Lamps

    Here’s the list of the 5 best farmhouse table lamps that will add a touch of rustic charm and cozy ambiance to your living spaces.

    1. Signature Design by Ashley - Best for Vintage Charm

    Signature Design by Ashley Shavon Contemporary 27" Textured...
    • VERSATILE LIGHT: Set the scene for earthy elegance with this...
    • BEAUTIFUL CRAFTSMANSHIP: Made of ceramic with a textured...

    Farmhouse table lamp designs don’t get much more vintage than Ashley’s Signature Design lamp with its bronze finish and drum shape. It has a refreshing take on the glass that gives it a classy and expensive look that we see in old-time movies. 

    The bronze-finished metal on the base, fabric drum shade, and glass circular is very old-school and retro. You can easily redecorate any room by incorporating this farmhouse-style table lamp. It uses 150-watt or 25-watt max CFL, so you won’t find any challenges in setting up this piece. 

    You have to attach the lampshade to the base and get the light fixed before you enjoy unlimited hours of great lighting without straining your eyes. It looks like a conversation starter, and the overall quality is such that it will last you for years to come.

    Dimensions: 15.5" x 15.5" x 26.5" | Weight: 6 lbs | Power Source: Corded Electric | Wattage: 150W | Light Source Type: CFL

    2. Mair Poly Table Lamp by Ashley - Best for Effortless Style

    Signature Design by Ashley Mair Rustic Farmhouse Poly Table...
    • CASUAL TABLE LAMPS: Bring sophisticated beauty to any room...
    • BEAUTIFUL CRAFTSMANSHIP: 3-way switch lamps are made of...

    When you’re on the lookout for a stylish yet traditional table lamp, you can’t go wrong with the designs from Ashley furniture industries. The lamps are designed in a way that emulates sheer sophistication bundled with an effortless style. 

    It has a timeworn black finish, which is a unique pattern on a lampstand. Plus, it’s paired with a modified silhouette drum shade that perfectly complements the warm, charming glow of almost every color light. 

    Furthermore, it’s also known to be energy-efficient; this helps you balance out your utility bills. You don’t have to worry much about the assembly because attaching the lampshades won’t take much of your time. 

    The refined weather appearance will coordinate with any style of home décor. If you want a small table lamp in your room with a simple design, then feast your eyes on this model. 

    Dimensions: 14" x 14" x 29.25" | Weight: 10 lbs | Power Source: Corded Electric | Wattage: 150W | Light Source Type: CFL

    3. Murphy Rustic Industrial Accent Table Lamp - Best for Rustic Appeal

    Franklin Iron Works Murphy Rustic Industrial Accent Table...
    • 【Specifications】UL listed. 23" high overall. Base is 5...
    • 【Bedroom Ambiance】 Elevate your night stand with bedside...

    This rugged metal table lamp by Franklin Iron Works has a rustic allure that blends in with any style of home décor. The weathered bronze finish on the lampstand has been thoughtfully designed to emulate the traditional coal miner’s lantern. If you’re worried about the size, then rest easy because it comes in at 23 inches. 

    It also features a clear glass accent in the middle that helps enhance the overall design of this unit. Plus, the soothing neutral tone and oatmeal hue of the lamps' cylindrical shade helps to dim the light giving the room a cozier appeal. The shades are not huge; it has a nice size. 

    You’ll love the added flair and personality that is delivered by this lamp design. All in all, it’s a functional accessory that enhances the aesthetic quality of the room and provides the right amount of lighting.

    Dimensions: 13.98" x 13.98" x 22.99" | Weight: 4.84 lbs | Power Source: N/A | Wattage: 100W | Light Source Type: N/A

    4. Hobie Industrial Table Lamp

    Franklin Iron Works Hobie Industrial Table Lamp with...
    • UL listed. 27 1/2" high overall. Base is 7 1/2" wide. Shade...
    • Uses one maximum 150 watt standard-medium main bulb (not...

    This is another table lamp that is inspired by the workshop and industrial lighting. It has a perfect combination of elegantly classic and contemporary minimalist styles. The design is such that it can bring about balance in any setting while it adds personality to the room's ergonomic design. 

    The open, cage base design of the lampstand can hold a 4-watt LED Edison bulb that comes included with the set. While the top light needs to be purchased separately, and it uses a maximum of 150-watt standard-medium bulb. 

    Plus, operating this farmhouse table lamp is very simple because of the 4-way socket switch that allows you to switch on the top and bottom lights according to your preferences. It’s a value-added product considering the quality and design of this farmhouse table lamp.

    Dimensions: 16.49" x 16.49" x 27.51" | Weight: 9.7 lbs | Power Source: Corded Electric | Wattage: 150W | Light Source Type: LED

    5. Oneach Table Lamps

    Oneach 23.5 Inches Rustic Farmhouse Table Lamps Set of 2 for...
    • 【Perfect Choice】The side table lamps are handmade of top...
    • 【Rustic Table Lamps】Comes with 2 table lamps of rustic &...

    This set of table lamps is handcrafted with top-grade resins and fabric that enable it to complement any part of your house. The base of the lamp looks more like a fine artwork. With this piece, you’re getting not only a functional tool but also a decorative item that has a classy design.

    The fabric shade showcases the perfect blend of minimalism and functionality. You’ll have your room bathed in a soft ambient light that makes it more cozy and welcoming. 

    It’s a UL-certified table lamp, which ensures that you’re purchasing a safe and quality product. And it’s also covered with two years warranty. The price tag is pretty mid-range compared to the other products, and for its construction, this is a great bargain.

    Dimensions: 23.5" x 13" x 13" | Weight: ‎8.89 lbs | Power Source: Corded Electric | Wattage: 60W | Light Source Type: Type A Bulb/CFA

    Best Farmhouse Table Lamps Comparison Table

    Product Dimensions Weight Power Source Wattage Light Source Type
    Signature Design by Ashley 15.5" x 15.5" x 26.5" 6 lbs Corded Electric 150W CFL
    Mair Poly Table Lamp by Ashley 14" x 14" x 29.25" 10 lbs Corded Electric 150W CFL
    Murphy Rustic Industrial Accent Table Lamp 13.98" x 13.98" x 22.99" 4.84 lbs N/A 100W N/A
    Hobie Industrial Table Lamp 16.49" x 16.49" x 27.51" 9.7 lbs Corded Electric 150W LED
    Oneach Table Lamps ‎23.5" x 13" x 13" ‎8.89 lbs Corded Electric 60W Type A Bulb/CFA

    Buying Guide For The Best Farmhouse Table Lamp

    Choosing the perfect farmhouse table lamp can enhance the aesthetic appeal of your room while providing functional lighting. To help you make an informed decision, consider the following factors when purchasing a farmhouse table lamp.

    Style and Design

    Farmhouse table lamps often feature vintage or rustic elements. Look for lamps with bronze finishes, weathered appearances, and glass accents. Consider the shape, color, and finish of the lamp to ensure it complements your existing decor and adds a touch of farmhouse charm to your room.

    Features

    Determine the lighting requirements for your space. Some lamps offer adjustable lighting levels, allowing you to customize the ambiance. Check the maximum wattage the lamp can accommodate and make sure it meets your needs. Also, consider the type of bulb required and whether it is included with the lamp or needs to be purchased separately.

    Size and Proportions

    Measure the space where you plan to place the lamp to ensure it fits appropriately. Consider the lamp's height, width, and weight to ensure it is suitable for your intended location. Also, take into account the size and shape of the lampshade, as it can affect the overall look and lighting diffusion.

    Durability and Quality

    Look for lamps made from high-quality materials such as metal, resin, or wood to ensure longevity. Read customer reviews and ratings to gauge the lamp's reliability. Consider lamps from reputable brands known for their craftsmanship and attention to detail.

    Ease of Assembly

    Check if the lamp requires assembly and ensure it comes with clear instructions. Consider the ease of attaching the lampshade and accessing the light source for maintenance. Look for lamps with user-friendly features such as simple on/off switches or dimmable options.

    Price and Value

    Set a budget for your purchase and compare prices across different brands and models. Consider the overall value of the lamp, including its design, functionality, and durability. Read customer reviews to gauge whether the lamp provides good value for its price.

    Important Tip

    Look for lamps that come with warranty coverage to protect your investment and ensure peace of mind.

    Farmhouse Table Lamps FAQs

  • What is a farmhouse table lamp?

    A farmhouse table lamp is a type of table lamp that features vintage or rustic elements, often with bronze finishes, weathered appearances, and glass accents. It is designed to add a touch of farmhouse charm to a room’s decor while providing functional lighting.

  • How can a farmhouse table lamp enhance the ambiance of a room?

    A farmhouse table lamp can change the look and feel of a room by providing warm and inviting lighting. The vintage or rustic design elements add character and charm to the space, creating a cozy and welcoming atmosphere.

  • What are the key features to consider when buying a farmhouse table lamp?

    When purchasing a farmhouse table lamp, consider the style and design that complements your existing decor. Look for adjustable lighting levels, maximum wattage, and the type of bulb required. Also, consider the lamp’s size and proportions, durability and quality of materials, ease of assembly, and price.

  • Are farmhouse table lamps energy-efficient?

    Some farmhouse table lamps are designed to be energy-efficient, utilizing LED bulbs or accommodating energy-saving bulbs. It is recommended to check the product specifications or descriptions to determine the lamp’s energy efficiency features.

  • Can farmhouse table lamps be used with dimmer switches?

    Some farmhouse table lamps may be compatible with dimmer switches, allowing you to adjust the brightness and create different lighting atmospheres. Check the lamp’s product specifications or descriptions to see if it is compatible with dimmer switches.

  • Are there any safety considerations when using farmhouse table lamps?

    When using farmhouse table lamps, it is important to follow safety guidelines. Ensure the lamp is placed on a stable surface to prevent tipping. Use the appropriate wattage bulbs recommended by the manufacturer. Avoid placing flammable materials near the lamp, and always turn off the lamp when not in use or when leaving the room.

  • Conclusion

    As we come to the end of our exploration into the world of farmhouse table lamps, it's time to reveal the top three expert recommendations. From their unique designs to their functional features, they offer a blend of aesthetics and functionality that will elevate any farmhouse-themed space.

    For vintage charm and a touch of elegance, the Signature Design by Ashley is an ideal option with its bronze finish and classic drum shape.

    If you're seeking effortless style, the Mair Poly Table Lamp by Ashley is a good option, combining sophistication with a timeworn black finish.

    For those who appreciate the rustic appeal, the Murphy Rustic Industrial Accent Table Lamp is the right choice, featuring a weathered bronze finish and a clear glass accent for added flair

    Now that we’ve come to the end of our guide, we hope it has helped you find the farmhouse table lamp that fits your needs. 

    Till next time! 

    Related Articles

    5 Best T2000 Headlamps Today

    53 100% FREE DIY Farmhouse Table Plans for Your Rustic Dinning Room

    The best way to keep your cat away from the tree is to provide alternative climbing options like scratching posts and use deterrents like citrus spray. You can also cover the tree stand and hang ornaments out of your pet's reach. 

    The joy of decorating a Christmas tree with your loved ones is unmatched. Everyone enjoys placing the precious ornaments and Christmas lights as beautifully as possible on it. 

    But then your furry friend runs to your decorated tree and knocks down all the decorations. The constant stress of saving your cat from the Christmas tree (the tree can fall and cause injury to your pet!) and vice versa is something no one wants to deal with. 

    Unfortunately, the issue of cats wreaking havoc on Christmas trees is quite common. In this article, I will try to explain why keeping cats away from the Christmas trees is important and how one can do so easily. Let’s begin! 

    Why It's Important To Keep Your Cat Away From Christmas Trees

    Why It's Important To Keep Your Cat Away From Christmas Trees

    1. Choking Hazards

    The furries are not intelligent enough to differentiate food from decorations, so they may eat certain ornaments or tinsels. And since these decorations are not edible, your cats may end up choking. 

    This may lead to potential health hazards for your cats. As a result, you may need to rush to a veterinarian as soon as possible, which may ruin your Christmas season celebrations. Hence, it is important to learn how to cat-proof your Christmas tree. 

    2. Electrocution From Lights

    Christmas light wiring is an important component of Christmas decorations. However, if you don’t know how to cat-proof your Christmas trees, your cat might end up too close to an electrical wire. Being naturally curious creatures, your kitty might even start chewing on the electrical cords - putting themselves at risk of electrocution. 

    If your cat gets electrocuted, it might suffer from severe burns and require expensive treatment - not to mention how much your pet will suffer physically. Hence, to avoid a potentially hazardous accident like burns, keep your cats away from your new tree!

    3. Risk Of The Tree Falling Over

    If you have a Christmas tree with several decorations, your kitty will naturally be allured to it. The cat might jump on the tree trunk to play with the ornaments, making it fall over. And cat owners know most cats don't think twice before jumping on random surfaces.

    Tips For Keeping Cats Away From Christmas Trees

    1. Provide Alternative Climbing Options For Cats

    A common reason why cats climb trees is because they like to climb up an elevated perch. Hence, they run to sit on top of such trees. An effective way to cat-proof your Christmas tree is to provide your cat with an alternative climbing option. 

    Tip

    You can buy scratching posts or cat trees - keeping them in your house will probably distract your cat from the decorated Christmas tree.

    2. Use Deterrents

    If your cat is adamant about playing around your Christmas tree, no matter how many alternative options you provide, it is best to use a deterrent. For instance, you can use apple cider vinegar or a citrus spray bottle on your artificial tree. Since cats generally do not like citrus scents, doing so will probably kill their urge to play around in that space. 

    You can also stick double-sided tape on the floor near the Christmas tree or its lower branches for cat-proofing them. Since cats do not like the feeling of stickiness in their paws, learning how to cat-proof your trees this way will keep your cat away from the decorations. 

    3. Cover The Tree Stand

    The water in your real tree base stand might be causing your cats to play around it since they think of it as a new water source. To avoid this issue, the best way of cat-proofing your tree is to cover its stand, so your cat won't have access to the water. This way, it may lose interest in the real tree too. 

    You can cover the tree stand using aluminum foil or double-sided tape. Further, you may purchase a tree stand cover to avoid the hassles of unwrapping and wrapping covers every time you need to change the water of the tree stand water reservoir.   

    4. Avoid Using Tinsel Or Low-Hanging Ornaments

    If there’s a Christmas ornament lying within your cat’s reach, it will jump to play with it. Low-hanging ornaments and tinsels are most likely on your cat's radar since they are the most accessible decorations on your trees. 

    However, consuming them can lead to many health issues. Hence, it is best to hang your ornaments at a decent height where it is almost impossible for your cat to reach them. It would also help if you considered ditching the idea of using tinsels since they are easily accessible for curious cats.  

    5. Consider Using A Smaller Tree Or Securing The Tree To The Wall

    Huge trees attract cats because they have several branches to climb on. Hence, it is best to stick to a smaller artificial Christmas tree if you have a cat in your house. Such an alternative can be less tempting to your cat since it has fewer branches and thus, less scope for climbing. 

    Additionally, it would help if you considered securing your Christmas tree to the wall, ceiling or furniture. A secured, well-shaped artificial Christmas tree will not fall on the cat even when they try to climb it. 

    How To Train Your Cat To Stay Away From The Tree?

    1. Positive Reinforcements

    The best way to train any pet animal is to use positive reinforcement. Consider using this technique to teach your cat to stay away from the Christmas tree. It requires you to reward your pet with a treat whenever it follows your command to encourage good behavior. 

    Staying consistent with the positive reinforcement method is crucial. Hence, whenever your cat starts running off to the tree, ask it to stop. You can use words like "no" and "stop" to do so. Once your cat stops, you can reward it with its favorite treat.  

    2. Train Your Cat With An Undecorated Tree First

    To prepare your cat to behave properly around your decorated pine cones, train it to stay calm around an undecorated fake tree first. This would allow you to teach your cat to stay away from the tree without worrying about the possibility of it ingesting decorations. 

    Whenever your cat runs towards the tree, gently pick it up and redirect its attention to another toy. With time, your cat may develop the habit of staying away from the tree - and may not run towards it even after you decorate it with ornaments.

    Why do cats like to play with Christmas trees?

    Why do cats like to play with Christmas trees?

    Since cats are pretty playful, a Christmas tree might seem like an attractive toy to them. Additionally, if you flock to your Christmas trees, there is high chance that your cat gets attracted to the sparkly texture of the trees. 

    Another thing worth noting is that cats love exploring. Hence, if you place a huge tree in your house, they may see it as an opportunity to explore by climbing it. The scent of a fresh tree might also attract them. 

    What are some signs that my cat has been playing with the Christmas tree?

    If your cat decides that it wants to play with your Christmas tree, it might imply that it has been playing around with the decorations for a while now. Missing ornaments may also indicate that your cat has been hanging around your tree. 

    Other common signs that your cat has been playing with the Christmas tree include broken decorations and displaced branches of the tree. An unexplained scattering of tinsels might also indicate that your cat has been climbing up and down the tree behind your back. 

    Are there any natural deterrents that can keep cats away from the tree?

    The chemical substance in an artificial deterrent may cause harm to your cat's health, which is why it is best if you stick to natural alternatives to keep your cat away from the tree. Apart from citrus spray, you can go for options like apple-cider vinegar, lemon, and orange peel. You can spray or place the peels right below the tree, and their scent might prevent your cat from hanging around the Christmas tree. 

    Cats are also known to dislike the odors of essential oils, such as eucalyptus and citronella oil. Hence, you can use these types of oil at the base of your Christmas tree to keep your cats away. You may also use lavender oil for the same. 

    What are some safe alternatives to tinsel and other hazardous decorations?

    Tinsels may look beautiful on your Christmas trees but are unsafe for a pet (or even a child!). They can be quite hazardous if ingested and can cause stomach issues like gastrointestinal tract blockage or bowel obstruction. Hence, it is best to switch to safe alternatives like fabric garland ornaments for decoration. 

    You can get creative with such safe ornaments as well. For instance, you may make origami decorations using paper or stick with bunting made from fabric. You can also use dried lemons and orange peels to decorate your trees while simultaneously keeping your cat away since they dislike the smell of citrus. 

    Should I use a Christmas tree skirt to help keep my cat away?

    Cats hate putting their paws on aluminum foil surfaces. They find the creaking sounds and the texture of aluminum foil mats difficult to deal with, which is why they make the perfect Christmas tree skirts in this case. 

    To make such skirts, take a few aluminum foil sheets and tape them together. This quick fix will help keep your cat from playing around your trees and decorations while giving off a fancy look (if you get creative with designing the tree skirt). I’d definitely suggest placing it on the base of the tree. 

    What other tips for keeping my cat safe during the holiday season?

    An important tip for keeping your cat safe during the Christmas and holiday season is to ditch decorating your home with real mistletoes and hollies. Since such plants can be very harmful if ingested, it is best not to buy them in a home with pets (be it a cat or a dog). It would help if you switched to artificial plants instead. 

    While sharing your Christmas food with your cat may be tempting, it is important not to do so. Most Christmas treats like chocolates, alcohol, and nuts can harm a cat. Hence, it is best to keep them away from your Christmas meals. 

    How can I provide alternative forms of entertainment for my cat during the holidays?

    Holiday preparations and traditions can make you very busy, so you may not be able to give your cat the usual undivided attention. Hence, you must provide your pet with an alternative form of entertainment during this time, like puzzle feeders and interactive toys. 

    You can also give your cats window perches to stay stimulated and entertained. Providing them with a scratching post or cat tree is also a good idea, so they have something to climb on and thus, stay entertained. 

    Conclusion

    Christmas trees are beautiful, so cats are attracted to them as well. Hence, the best way to keep your cat away from the tree is to make it lose interest in playing with the decorations. You can use deterrents like citrus spray, essential oils, and so on for the same. 

    Further, it would help if you considered training your cats to stay away from the tree by using the method of positive reinforcement. However, it is worth noting that not all cats are the same, and some are more difficult to train than others. 

    Pick the solution that looks the most doable to you from above and protect your trees by learning how to cat-proof them! 

    Recycling Christmas lights and decorations is an important step towards reducing waste, and with electric lights, the idea is no different. They can be recycled and repurposed just like any other item. 

    Christmas lights are a beloved holiday tradition, adding a warm and festive glow to homes and streets during the holiday season. However, what many may not realize is that the widespread use of Christmas lights also contributes to a significant amount of trash each year. 

    Countless strings of broken, outdated, or unwanted Christmas lights end up in landfills, posing environmental challenges. In this article, you will find out the ways to recycle Christmas lights and reduce their impact on the environment. 

    Determine the Condition of Your Christmas Lights

    Determine the Condition of Your Christmas Lights

    Lights, camera, check! Before you bid farewell to your holiday adornments, it is crucial to perform a little inspection of their condition. Why, you ask? Because not all lights are created equal, and some may require attention before the recycling process.

    Based on my first-hand experience, I can say that recycling lights that are in good condition ensure that they can be repurposed. On the other hand, lights that are damaged or broken can potentially cause issues in the recycling process.

    Here are some flags to determine if you can consider the option of recycling your electric light strings or not:

    Green Flags Red Flags
    The holiday lights are made of glass and not plastic or polyvinyl chloride, which can be more difficult to recycle The old Christmas lights are made of non-recyclable materials
    They are not damaged or broken, as this can make it difficult to recycle safely The bulbs are still functional and can be reused or donated rather than recycled as municipal solid waste
    The old lights have an accepted type of bulb, such as incandescent, compact fluorescent (CFL), or light-emitting diode (LED) The holiday lights are heavily damaged or contaminated, such that the cost of recycling outweighs the environmental benefits
    The old holiday lights are not tangled or knotted with other materials The holiday lights are coated with paint, glue, or other substances that cannot be easily removed
    The recycling center or program in your area does accept Christmas lights and is equipped to recycle them properly The bulbs are specialty or unique types that cannot be processed by the available equipment and facilities

    Exploring Different Recycling Options

    Exploring Different Recycling Options

    My research indicates that there are several recycling options available to dispose of unwanted holiday lights in an environmentally responsible way.

    One option is to check with your hardware store. Some hardware stores like The Home Depot, Lowe's, Ace Hardware, and True Value accept lights in special recycling programs. Some organizations even offer mail-in programs where you can send in your old lights, and they will recycle Christmas lights for you.

    If you prefer to recycle your lights locally, you can look for a materials recovery facility or a local recycling center that accepts electronic waste.

    My findings show that many municipalities have designated drop-off locations for electronic items, and they may also have curbside pick-up programs for e-waste. Check with your city's landfill management or recycling agency for more information on available options in your area.

    If you're looking for a more charitable option, consider donating your unwanted lights to organizations like Toys for Tots, which may accept new or gently used lights as part of their toy donation programs during the Christmas and holiday season.

    Whichever option you choose, be sure to follow safety guidelines for handling electronics, as Christmas lights may contain hazardous materials like lead.

    Repurposing Lights With DIY Recycling Ideas

    Repurposing Lights With DIY Recycling Ideas

    Try these five DIY ideas using string lights that allow you to recycle old Christmas lights while creating a cozy and inviting atmosphere in your space.

    First up, you can repurpose your Christmas light strings with a DIY photo display. Attach the bulbs to a wooden frame or wire grid, and use mini clothespins to hang your favorite photos, postcards, or artwork. This unique and personalized photo frame can be hung on your wall, creating a warm and nostalgic ambiance.

    Next, you can consider making outdoor pathway lighting using recycled Christmas lights. Align the bulbs along a pathway or wrap them around trees. This not only creates a magical atmosphere for evening strolls or outdoor gatherings but also assures you of a nostalgic feeling every time you look at it.

    For a touch of elegance and functionality, repurpose your old Christmas lights with a DIY-lighted mirror. Wrap the bulbs around the border of a mirror to create a flattering look for your vanity or bathroom. It's a simple yet stylish addition that can elevate your beauty routine while giving new life to your Christmas tree lights.

    You can make a custom illuminated sign using your old holiday lights. Spell out words or create shapes on a wooden or metal frame using holiday string lights. For cozy and inviting outdoor lighting, you can also try DIY patio or balcony lighting.

    Last, but not the least, you can decorate your kids' room with holiday LEDs. You can wrap them around a bunk bed, a play tent, or a bookshelf to create a lighting element that your kids will love. It's a sure way to bring magic and joy to their space.

    Can I recycle Christmas light strings with my regular curbside recycling?

    Based on our observations, no. Christmas lights are considered e-waste and need special recycling. You may need to check with your local recycling centers for specific instructions. 

    Are there any safety precautions I should take when recycling broken lights?

    Yes, avoid placing broken lights in your recycling bin. Wrap them securely in packing material or place them in a sturdy box to prevent injuries. 

    Can I donate my old Christmas lights instead of recycling them?

    Absolutely! If they're still working, consider donating them to local charities or community programs. It's a great way to give back and help others light up their holidays. 

    Can LED Christmas lights be recycled? 

    Giving it a try showed me that, yes, LED lights can be recycled. But it's always a good idea to check with your local recycling program or center for specific instructions to ensure they're recycled properly. 

    What are some creative ways to reuse or repurpose old Christmas lights instead of recycling them?

    You can use them for decorative lighting in your home, garden, or patio or repurpose them for crafts. 

    Conclusion

    Christmas light recycling can help reduce the demand for raw materials, such as copper, and other valuable metals, which are used in the production of new holiday lights. This conserves natural resources and reduces the need for mining and extraction. 

    It will also set a positive example for others, encouraging them to adopt more sustainable waste disposal practices. 

    By recycling your Christmas lights through any of these ways, you can do your part to reduce electronic waste and prevent valuable materials from ending up in landfills. So, instead of adding to the trash pile, consider recycling your holiday lights and giving them a new lease on life while also supporting a greener and more sustainable holiday season. 

    The FINMOR stocking holder is constructed using high-quality metal that provides it with durability and a low-profile design that takes up very little space. Another option, the Iconikal stocking holder, comes with reinforced hooks and can be easily customized by painting. 

    Hanging stockings on Christmas Eve is one of the oldest Christmas traditions alive today. 

    But while finding the perfect stockings to hang is easy, putting them up can be a bit complicated. That's where stocking holders come in, which allow you to easily hang your stockings from the mantel or other surfaces. 

    In this guide, I've reviewed the best Christmas stocking holders currently available. So, let's take a look! 

    5 Best Stocking Holders

    1. FINMOR Stocking Holder - Best Mantel Stocking Holder

    This is one of the best stocking holders available and comes in a pack of four pieces. It is made of high-quality metal that does not bend and is durable enough to support all sorts of Christmas decorations.

    The metal stocking holder has a subtle finish that matches your mantel and has a smooth surface that makes it easy to attach other decorations. Aside from Christmas ornaments and decorations, this stocking holder can even support your shopping bag.

    It has a low-profile design that takes minimal space and allows you to display your stockings and other items easily. Also, the holder is easy to clip on and compatible with mantles of several different shapes and sizes.

    Color: Nickel | Material: Metal | Mounting Type: Desk mount | Maximum Recommended Load: 10 pounds

    2. Iconikal Stocking Holder - Most Customizable Option

    Another excellent metal stocking holder worth checking out is this one from Iconikal, which is shaped like a snowflake. It is constructed using thick, high-quality metal and has reinforced hooks, making it quite sturdy. Thus, it is easy to attach to any mantel, bookcase, or shelf for hanging normal-sized stockings.

    In addition, I like the design of this stocking holder, which allows it to be used for art projects besides decorative purposes. The holder looks great in almost any room and can help enhance its appearance. You can also paint and customize it as required to create the perfect décor for the holiday season. 

    As for its holding capacity, it can hold up to a maximum of two pounds, which means you can place lightweight items inside it easily. 

    Color: Chrome | Material: Metal | Mounting Type: Desk mount | Maximum Recommended Load: 2 pounds

    3. Komotu Christmas Stocking Holder - Best For Large Stockings

    If you're looking for an elaborately designed Christmas stocking holder with sturdy construction that will last long, this product from Komotu might be a great choice. Constructed using zinc alloy, this stocking holder is a durable option that is also resistant to rust and corrosion.

    It can be used to hang different Christmas decorations, including stockings, balls, lanterns, etc. In fact, you can even use it for other occasions, like Valentine's Day, Easter, Halloween, and New Year's Day.

    What I liked most about this stocking holder is that it has a rotatable disc at the top, which makes adjustments easy. Also, protective pads at the bottom prevent the holder from slipping off the mantel and other surfaces. At the same time, these pads help protect the mantel surface.

    Color: Silver | Material: Metal | Mounting Type: Desk mount | Maximum Recommended Load: 10 pounds

    4. ORIENTAL CHERRY Stocking Holder - Best Free-Standing Stocking Holder

    The next item I'll be reviewing is the ORIENTAL CHERRY Christmas stocking holder, a free-standing holder that does not need to be attached to your fireplace mantel. It comes with multicolored lights and artificial green vines, perfect for spreading holiday cheer.

    You can easily change the lights from a solid color to blinking ones, and the holder is battery-operated. It also features large letters spelling out the word joy at the top, which I found to be a nice touch. And there are five hooks arranged on the holder, making it great for hanging family stockings.

    Another noteworthy feature of this stocking holder is that it is very easy to assemble and disassemble. This means you do not need to waste time putting it together for the Christmas and holiday season.

    Color: Black | Material: Metal | Mounting Type: Desk mount | Maximum Recommended Load: 10 pounds

    5. CM Stocking Holder - Best Holder For Christmas Trees

    The CM stocking holder is also a great pick for the Christmas season, featuring a unique design that incorporates rubber bumpers and hard metal construction. There are four pieces in this stocking holder set, making it quite affordable.

    But what makes this stocking holder special is that you can even use it on your Christmas tree and for regular everyday use. The rubber bumpers on this tree stocking holder prevent it from slipping when attached to a hard, flat surface, keeping stockings and other decorations intact.

    Additionally, it has an amazing design that goes well with different types of décor and makes it a great gift. I would also like to point out that the hard metal construction of this stocking holder makes it an incredibly durable option.

    Color: Silver | Material: Metal | Mounting Type: Desk mount | Maximum Recommended Load: 10 pounds

    Quick Comparisons Of Top Stocking Holders

    Top Stocking Holders Color Material Mounting Type Maximum Recommended Load
    FINMOR Stocking Holder Nickel Metal Desk mount 10 lb.
    Iconikal Stocking Holder Chrome Metal Desk mount 2 lb.
    Komotu Christmas Stocking Holder Silver Metal Desk mount 10 lb.
    ORIENTAL CHERRY Stocking Holder Black Metal Desk mount 10 lb.
    CM Stocking Holder Silver Metal Desk mount 10 lb.

    Stocking Holder Buyer's Guide

    Now you know about the best Christmas stocking holders worth considering, it is time to look at the factors that should be considered when choosing between them. 

    1. Quality

    The quality of a stocking holder will depend on the materials used to manufacture it, and high-quality options will be made of premium materials. They will be more durable and last longer while also looking good. To know about the quality, go through customer reviews of the products before making a decision. 

    2. Installation Type

    Another factor to consider is how the stocking holder will be installed. The most common type of stocking holder is installed on the holiday mantel, though you can also find free-standing ones. Just ensure that the stocking holder you pick is stable and does not fall down easily once installed.

    3. Brand

    Going with a reputed brand may make it easier to find high-quality stocking holders that will provide a better experience than those from a relatively unknown brand. However, this is not always true, and you can find some excellent options from lesser-known brands with proper research. 

    4. Budget

    Your budget will determine which stocking holder to select, as both costly and affordable stocking holders are available on the market. The price will generally depend on the material, design, additional features, etc. 

    How much weight can stocking holders hold?

    The weight holding capacity of different stocking holders can vary significantly. Some holders can hold just two pounds or even less weight, while others can hold more than ten pounds. Generally, this is mentioned on the product page of the stocking holder.

    Are free-standing stocking holders better than mantel holders?

    Both free-standing stocking holders and mantel ones are good options and serve different purposes. Free-standing stocking holders are best for situations where you do not have a fireplace mantel or similar place for putting up your stockings. However, mantle stocking holders are more traditional and have a classic appearance. 

    What can you hang in a stocking holder?

    A stocking holder can be used to hang Christmas figurines, such as those of Santa Claus, reindeer, snowmen, etc. You can even hang a garland, wreath, or similar items from such holders. 

    How long do stocking holders last?

    When stored properly, stocking holders can last for quite a few years, and you can use the same holder multiple times. However, this will also depend on their build quality, and better-quality stocking holders will last longer.

    Can you put a stocking holder on your Christmas tree? 

    Some stocking holders can be attached to Christmas trees, but this is not true for all types of holders. You can find out whether this is possible by checking the product page and the customer reviews of the holder. 

    Verdict

    These stylish stocking holders are some of the best you can consider for the holiday season this year. They are impressive options available on the Amazon online store that will deliver a great experience and even help enhance your Christmas decoration.

    Before concluding this guide, I would like to share my favorites from the list. The FINMOR Christmas stocking holder has a low-profile design, durable construction, and is easy to install, making it a great choice. Another outstanding option is the Iconikal stocking holder, made from thick metal and featuring reinforced hooks that are incredibly durable and can also be customized.

    Choose a star stocking holder from my guide and experience the joy of opening gifts on Christmas morning!

    To maintain the freshness of holiday wreaths and greenery by storing them in a cool, sun-free spot in breathable containers. Avoid stacking or crushing the greenery to preserve its structure and extend the life of your holiday décor. 

    Are you tired of spending money on fresh wreaths and greenery every holiday season, only to have them dry out and wither away after a week? 

    It's a frustrating and all-too-common problem, but fear not! With a few expert tips and tricks, you can keep wreaths and greenery fresh looking, and vibrant all season long. So put down that wilted wreath and keep reading to learn the secrets of the pros. 

    How to Keep Wreaths and Greenery Fresh 

    Keep Wreaths and Greenery Fresh: Tips and Tricks

    First off, always start with fresh greenery. The freshest greenery can be found at a farmers market or even in your own backyard if you live in a cold climate. Look for greenery with firm, pliable stems and vibrant colors to ensure that it's fresh and healthy. 

    Now, before using the greenery to create wreaths or garlands, make sure to soak it in water overnight or for a few hours to hydrate it properly. Think of it as giving your greenery a good ol' hydrating spa treatment. And if you want to be extra kind, gently crush the cut ends of the stems to help the greenery absorb even more water. Voila! Your greenery is now feeling fresh and rejuvenated. 

    To keep your live greenery looking its best, it's important to keep it away from direct sunlight and heat sources like fireplaces or heating vents. Direct sunlight and heat can cause premature drying, which can make your greenery look dull and lifeless. It's like a sunburn for your greenery, and nobody likes a sunburn. So keep your greenery happy and healthy in a cool, shaded spot. 

    One of the best ways to keep your greenery fresh is by using a moisture sealant spray like Wilt-Pruf. This anti-transpirant spray helps to retain moisture in the foliage and keeps your greenery looking crisp and vibrant. For outdoor displays, it's essential to mist the greenery regularly with a misting or spray bottle to help it stay hydrated. You can also use an anti-desiccant spray to prevent your greenery from drying out. 

    Lastly, don't forget to use pine, cedar, other evergreens, and even berries to create beautiful arrangements for your holiday décor. Hang your fresh wreaths and garlands indoors or outdoors to add a festive touch to your home or office. 

    How to Properly Store Fresh Holiday Greenery

    How to Properly Store Fresh Holiday Greenery

    Now that you know how to keep your wreaths and greenery fresh during the holiday season, it's important to talk about how to store them properly. After all, you don't want to go through all that effort just to have your greenery wilt and dry out a few days later. 

    Finding the Perfect Storage Spot

    Step one: Find a top-secret hiding spot. I'm talking about a location that is cool, dark, and perfect for keeping your greenery fresh for longer. This will help slow the drying process and keep the greenery fresh. Think of it as your very own Greenery Fort Knox! 

    Bonus points if your hiding spot is pet-proof! We all know how much our furry friends love to munch on anything that resembles a tasty snack. But not this time! Keep your fresh Christmas greenery safe and sound from any four-legged intruders by finding a spot that is off-limits to your pets. 

    Use Breathable Containers for Storage

    Step two: Find a storage container with breathing holes - just like how we need fresh air, your greenery needs it too! Don't let your plants suffocate in a sealed container. By using a storage container with ventilation, your evergreen cuttings, spruce stems, and holly berries can thrive in a cool and fresh environment. 

    Proper storage is the first step to ensuring that your fresh garlands, live wreaths, and cedar boughs last the entire season, both for indoor and outdoor decorations. So don't just hang your fresh greens anywhere - find the perfect spot with as much water, cool temperatures, and daily misting as possible. 

    Don't Stack or Crush The Holiday Greenery

    Step three: Don't flatten your holiday greenery like a pancake - give it the love and care it deserves! Your fresh garlands, evergreen boughs, and juniper sprigs are not just decorations. They are living plants that need to maintain their shape and structure. 

    To prevent your fresh greenery from wilting and losing its shape, avoid stacking or crushing it. By giving your fresh greenery room to breathe and space to maintain its shape, you can ensure that your Christmas décor looks fresh and beautiful throughout the season. 

    Additional Tips and Tricks

    Additional Tips and Tricks

    1. Use Fresh Elements

    Consider using natural decorations like pinecones, magnolia leaves, cedar branches, or even fruit, like berries, to decorate your wreaths and garlands. These can add texture and perfume to your decorations while also helping to keep the greenery fresh. 

    2. Repurpose The Greenery

    After the holiday season is over, you can repurpose the greenery by using it in floral arrangements or as a natural decoration for your home. Just be sure to remove any dead or wilted leaves before using them. 

    3. Add a Few Drops of Essential Oils

    Adding essential oils like peppermint or eucalyptus to the greenery can help keep it smelling fresh and fragrant. 

    4. Hang Greenery Upside Down

    Hanging live greenery upside down can help them last longer by allowing the moisture to be distributed more evenly. 

    5. Consider Using Artificial Greenery

    If you want the look of fresh greenery without maintenance, consider using a mix of fresh and artificial greenery. This can give your decorations a more natural look while also making them easier to care for. 

    6. Use a Bleach Solution

    Mix a small amount of bleach with water and dip the ends of the greenery into the solution before attaching them to the wreath or garland. This will help kill any bacteria that can cause the greenery to wilt or decay. 

    7. Avoid Using Wire

    Using wire to attach greenery to wreaths or garlands can damage the stems and cause them to dry out more quickly. 

    8. Use Floral Foam

    If you're creating a wreath or centerpiece with fresh flowers, use floral foam to keep the flowers hydrated. Soak the foam in water for at least 30 minutes before use and keep it moist throughout the season. 

    9. Add Aspirin

    Crush a few aspirin tablets and mix them with water, then dip the ends of the greenery into the solution before attaching them to the wreath or fresh garland. The salicylic acid in aspirin can help keep the greenery fresh. 

    What are some natural ways to preserve fresh-cut greens and wreaths without using chemicals?

    Natural ways to preserve fresh greens include soaking them in water, misting them regularly, using anti-transpirant sprays or anti-desiccant, and keeping them away from direct sunlight and heat sources. 

    What are some ways to repurpose wreaths and greenery after the holiday season is over?

    After the Christmas and holiday season is over, wreaths and greenery can be repurposed as a decorative touch for the front door, porch, ribbon, garden, fireplace mantel, or as part of floral arrangements. They can also be used for floristry. 

    How long can wreaths and greenery typically last when properly cared for?

    The lifespan of wreaths and greenery depends on the specific type of plant and how well they are cared for. Typically, with proper care, they can last for several weeks outdoors and up to a month or more indoors.

    Can wreaths and fresh greenery be stored for future use? If so, what is the best way to store them?

    Yes, wreaths and fresh greenery can be stored for future use. It's best to store them in a cool, dry place, wrapped in paper, or stored in a container to prevent moisture loss. 

    What are some common mistakes people make when trying to keep wreaths and greenery fresh?

    Common mistakes people make when trying to keep wreaths and greenery fresh include exposing them to too much sunlight or heat, not watering or misting them regularly, and not properly pruning or trimming the plant stem and leaves. 

    What types of greenery are best for wreaths and garlands?

    Fir, cedrus, pine, and magnolia are popular choices for wreaths and garlands due to their durability and fragrance. Buxus, Tsuga, and other evergreens can also be used to add texture and variety to your holiday décor. 

    Conclusion

    There's nothing quite like the sight and smell of fresh wreaths and greenery to set the festive mood. And with these tips and tricks, you can make sure your decorations stay fresh and lively throughout the entire season. 

    Go ahead and add a few drops of essential oils, avoid using wire, mist regularly, and use a water-resistant sealant, among other tips. These simple but effective strategies will ensure your wreaths and greenery stay fresh, vibrant, and fragrant all season long. From the warm and cozy scent of peppermint to the refreshing aroma of eucalyptus, your decorations will bring joy and happiness to all who enter your home. 

    So, don't hesitate to give these tips a try and see the difference for yourself. 

    Pre-lit Christmas trees can be used outdoors, provided they are marked as outdoor-safe by the manufacturer. To protect them from weather damage and prolong their life, ensure they are adequately covered or sheltered from the elements. 

    Ah, the age-old question: can you put a pre-lit Christmas tree outside? As we approach the festive season, many of us are faced with the dilemma of whether to deck the halls indoors or bring the holiday cheer outside. 

    But let's be real, who doesn't love the idea of a dazzling pre-lit tree twinkling in their yard for all to see? Let's take a closer look at the pros and cons of this festive feat. 

    What is a Prelit Christmas Tree?

    What is a Prelit Christmas Tree?

    You see, a pre-lit Christmas tree is like a real tree but with a little extra holiday cheer built right in. A pre-lit outdoor Christmas tree is a modern marvel of holiday technology that comes equipped with built-in lights. These fake Christmas trees save you the hassle of stringing up lights yourself and provide an effortless way to add a little sparkle to your holiday décor.

    Unlike traditional Christmas trees, pre-lit trees come with a variety of lighting options, including LED and incandescent lights. Some pre-lit trees even come with different lighting modes, like twinkle or steady-on, to suit your decorating preferences.

    Can A Prelit Christmas Tree Be Placed Outside?

    The answer isn't as simple as a "yes" or "no." There are some factors you need to consider before making such a bold move.

    Firstly, you need to check if your pre-lit tree is certified for outdoor use. Most pre-lit artificial Christmas trees are designed for indoor use only, and placing them outside can lead to a disastrous combination of water and electricity. And we all know that water and electricity don't mix.

    Even if your pre-lit artificial Christmas tree is certified for outdoor use, you still need to protect it from the elements. Rain, wind, and snow can all wreak havoc on your tree's delicate electrical components, turning your once beautiful tree into a shocking hazard.

    The Arguments For and Against

    The Logistics of Outdoor Tree Placement

    The Logistics of Outdoor Tree Placement

    Consider the Weather

    When it comes to outdoor Christmas trees, the weather is a major factor to consider. If you live in an area with frequent rain or snow, it's important to take precautions to prevent your artificial Christmas tree from becoming a fire hazard.

    This is especially important if you have a pre-lit tree. To prevent short-circuiting, make sure to keep the cord covered and protected from the elements.

    Avoid Tripping Hazards

    Another important factor to consider is the location of your tree. Make sure to place it in a secure spot where it won't fall over or trip anyone walking by. If you have children or pets, make sure to keep the tree out of their reach to prevent any accidents.

    Choose the Right Location

    When it comes to placing an outdoor Christmas tree, location is everything. You want to make sure the tree is visible from the street but not in a spot where it will be easily blown over by strong winds. It's also important to consider the location of your front door, as you don't want your tree blocking the entrance to your home.

    Use Heavy Duty Ground Stakes

    To prevent your tree from blowing over in strong winds, it's important to use heavy-duty ground stakes to secure it to the ground. This will ensure that your tree stays in place, even during the windiest of days.

    Additional Tips for Safely Placing a Pre-lit Christmas Tree Outdoors

    • Make sure the fake tree is fully dry before placing it outside to avoid mold growth. 
    • Check the artificial tree for any damaged or burnt-out lights before placing it outside. 
    • Place the outdoor Christmas tree in an umbrella stand to provide extra stability. 
    • Use a tree skirt to protect the outdoor Christmas tree from moisture and dirt. 
    • Use decorative boxes to add extra weight to the tree base. 
    • Trim any branches that are blocking the view of the outdoor Christmas tree or creating a safety hazard. 
    • Use outdoor-rated extension cords to connect the lights on the outdoor Christmas tree to a power source. 
    • Check the cords and lights periodically to ensure they are still functioning properly. 

    By following these tips and tricks, you can enjoy a beautiful and safe outdoor Christmas tree that will bring joy and cheer to your home throughout the holiday season. 

    Can you leave an artificial Christmas tree out overnight?

    It's generally not recommended to leave a fake Christmas tree outside overnight, especially if it's not specifically designed for outdoor use. If you do decide to leave a fake tree outside, make sure it's covered with plastic store bags or some other type of protective covering to prevent damage. 

    Do pre-lit artificial Christmas trees need to be covered or protected from the elements when used outside?

    Yes, pre-lit Christmas trees should be covered or protected from the elements when used outside. The metal parts of the tree may rust or corrode if exposed to moisture. The lights may also blow out due to the cold weather. It's best to keep the outdoor Christmas tree on a covered porch or patio or in a spot that's sheltered from the wind and rain. 

    Can you use a fake Christmas tree outside in rainy or snowy conditions?

    Some fake Christmas trees may be able to withstand rainy or snowy conditions, but it's best to check the manufacturer's instructions before using one outdoors. If it is not an outdoor Christmas tree, it could become damaged or fade over time. 

    What kind of outdoor lighting is best for an outdoor Christmas tree?

    LED lights are generally the best choice for pre-lit Christmas trees used outdoors. They are energy efficient, long-lasting, and won't get as hot as traditional incandescent lights. 

    How long can a prelit Christmas tree be left outside?

    The length of time a prelit Christmas tree can be left outside depends on a variety of factors, including the type of Christmas tree, the weather conditions, and whether it is designed for outdoor use. 

    Are there any special maintenance requirements for pre-lit indoor trees used outside?

    Yes, regular maintenance, such as cleaning the branches and checking the lights, can help ensure that the Christmas tree stays in good condition throughout the festive season. 

    Conclusion

    Let's wrap up with some final thoughts on the burning question of whether it's safe to put a pre-lit Christmas tree outside. Drumroll, please... The decision is ultimately yours! You're the master of your own festive destiny. 

    But before you dive headfirst into your decorating plans, it's important to remember that with great power (i.e., the ability to put a pre-lit tree outside) comes great responsibility (i.e., ensuring it doesn't become a safety hazard). 

    So, let's get creative and find ways to minimize the risks. With some simple precautions, you can enjoy the twinkling lights and holiday cheer without worrying about any mishaps. Now go forth and decorate to your heart's content! 

    Already built up your game engine but have no game assets or sprites to work with? 

    Then we have just the perfect list of websites for you today, which house some of the most versatile and unique range of game images and models present on the internet. 

    When one is planning to create their very own indie game, developing the game engine itself is not all that difficult. Especially when compared to choosing and picking the right sprites and stock images that can go incredibly well with the narrative and gameplay. 

    And with so many game assets sites out there today, it can indeed be difficult to invest your time browsing through one and looking for particularly free and public domain images. 

    Featured Image | Creature Quest by West Studio & Heather Poon

    However, with our list today, we seek to solve this very problem that most beginner developers tend to face. 

    So, here is our top 7 list of the best websites for free game assets and sprites.

    Free Game Assets and Sprites Websites

    League of Legends by Riot Games Worldbuilding Team

    1. Itch.io

    A lot of beginners and amateur game developers today, have made the digital marketplace Itch.io their number-one go-to because of the variety and versatility of game sprites and assets that the site provides.

    However, most of their more premium content is not free to download, but the ones that are free are incredibly amazing, to begin with, and are capable of serving multiple purposes.

    Just make sure that when you’re browsing through their content, you filter the results based on what you need and what comes with and without a license. 

    Each of the game assets and sprites present on the website comes in different resolutions ranging from 8-bit to 16-bit, each with a different appearance and texture.

    There are 3D-rendered models as well which you can opt into if you’re looking to design a much more complex game.

    One amazing thing about Itch.io is the Itch community. They have a lot of members who are small-time indie game designers and have created a lot of games that are up for download on the website itself.

    Some of the games you need to pay for, while the others are absolutely free. You can install and play these games and get an idea about all the amazing things that you will be able to do with the game assets present on the website.

    This website is just perfect for beginner game designers and artists who are looking for some simple yet effective game sprites to work with.

    2. OpenGameArt

    Now, OpenGameArt is by far the largest game asset website today. It caters to the needs of both amateur and professional game designers alike and comes with a range of assets that will help you to design anything you want from scratch

    The best part about this website is that it was made solely for Creative Commons art, which means that every single sprite and game asset on it is free to use and download.

    In terms of licensing, most of the assets fall under the public domain; hence, you will be able to use them for a lot of commercial purposes as well without having to worry about credit. 

    Their game asset range consists of 2D along with a lot of 3D art. There are also smaller asset categories that have items like sound FX and background music, which can help you to add the final touches to your game design.

    There is one aspect of this website, which professionals absolutely love, and that is the concept art panel. There is this specific place in the website, which allows any artist to post their own concept art for free and is open to the wider public to view, share, and provide feedback.

    However, the website design and the filter bar are not that easy to use and take a rather long time to get the hang of. But once you do start getting used to it, you will definitely find their library to be absolutely amazing.

    3. GameDev Market

    The GameDev market is much like Itch.Io when it comes to its library and supports a mixture of free as well as premium game assets. 

    They also have a panel where artists are allowed to sell their games, as well as provide them to the public for free. 

    To be able to browse all the free content, you can look through the categories in the main menu, and use the convenient filter to search the ones which you need.

    This is what makes GameDev Market one of the easiest-to-use and beginner-friendly game asset websites today. The sidebar has all the categories listed carefully, so if you’re looking for some 2D art or sprites which are absolutely free, then all you need to do is to click on the right options.

    When it comes to the category of free character assets, the site provides a lot of easy downloadable links to help you out.

    Moreover, to make things even easier for the newer developer and artist, the asset pages apart from housing, the content zip file also has detailed information about what's inside it. It also catalogs as well as houses the download links of the software that are compatible with these assets, so that the newcomer doesn't have to worry about much.

    GameDev Market is just amazing when it comes to promoting indie game developers and indie concept artists. With the right marketing and game design, this website can indeed help you with making your own customer base as well as securing a decent side income.

    4. Game Art 2D 

    The Game Art 2D website has one of the biggest catalogs of 2D arts, assets, and sprites in the entire world.

    They have an incredible gallery of royalty-free game assets which is perfect for making both commercial as well as personal game projects and artworks, without having to worry about credits all that much.

    However, many of the assets do tend to come with a price tag on this website, and the content of free stuff is quite limited in comparison to some of the other websites out there.

    As the site mainly deals with having a vast library of 2D assets, the 3D and sound FX category suffers as a result, but there isn’t all that much to complain about here. 

    The quality of the assets is incredible, to say the least, and the wide range of versatile uses that they offer the designer is just amazing, making the website a must-visit for every game developer.

    The game sprites, like a lot of the conventional stock images, come in many styles ranging from your more popular sprites to tilesets to even some basic concept art.

    Though their collection of free downloads is rather small, there are still worth checking out, as you can really do a lot of amazing work with just the ones that they have.

    This site is not exactly capable of being a staple go-to for any designer, but its unique and trustworthy library does have a lot of assets that you can look into from time to time.

    5. CraftPix 

    CraftPix is a relatively newer website and features some of the most unique and craziest game assets and sprites that one can ask for. 

    It will allow you access to a lot of casino GUIs for making mobile games, as well as custom 2D backgrounds for side-scroller games. 

    As it caters to helping developers make games for various platforms, its library and asset formatting are quite versatile and sizeable. Hence, this website will not make you feel limited if you’re planning to do something different with the available assets. 

    But, what we love the most about CraftPix is that their asset list is constantly growing, and newer sprites and character designs are being added almost every day. Moreover, most of these game assets are added by the creators of the website themselves; this makes the forum highly personalized and well-maintained with a convenient search bar and filter.

    However, this doesn’t mean that the website is not open to others offering their very own sprite and model designs. CraftPrix is a fantastic platform to upload and share your own character images on and get a considerable customer base as well as a fan following. 

    The website is also an incredible indie game developer’s hub. The custom sprites and assets that are already present in their library are just perfect for making a lot of engaging and interactive side-scroller games. 

    So, when it comes to building recognition for your work and promoting premium assets as well as some high-quality freebies for some extra income, then this website is simply one of the best.

    6. Reddit/r/Game Assets 

    No matter what you’re looking for, Reddit will most probably have it. 

    It has a community for almost everything, so, it’s really not all that surprising that there are a lot of subreddit forums on art, digital painting, and innovative game assets. 

    However, we will not be asking you to scour through every Reddit forum to find the one that houses the best game sprites and character models. We have done the hard work for you and found that /r/GameAssets is going to be the best page for all game assets-related content.

    /r/GameAssets has an amazingly large library of curated free game assets from all across the web.

    There is no designated character model that you will not find here. From fanart to even cosplays to unique and creatively designed sprites, the forum has some of the best assets that the internet has ever come up with.

    However, the submissions are not exactly direct in this forum. It’s done through the inclusion of primary links, which leads to the main website from which you can very easily download the zip file.

    The community here is also not as big as some of the other websites out there, but even with just 9,500 subscribers, the users are much more active than most groups and provide links to fantastic 2D and 3D models every now and then.

    This might seem rather slow to the more active game developers, but if given the right time and patience, this forum can indeed provide you with some gems.

    7. Kenny.nl

    This Netherlands, based game asset website, has for some time now created some of the best RPG-themed character art and game sprite. 

    So, if you’re looking to create your own role-playing adventure, then this website is going to come incredibly handy in providing you with all the elements for your project.  

    They have some really cool free assets which have been made part of the public domain, and you are not going to have any problems with their licensing and crediting if you wish to use them for commercial purposes. 

    The site search bar and filter tools are also very easy to use, and you can browse through all the free game graphics sections by just selecting the category and then filtering out the themes and genres that you’re looking for.  

    Moreover, Kenny.nl also makes sound FX as well as game sources to help more beginner developers along to getting their first project up and running. 

    The site is very beautifully designed and is often frequented by indie game developers who are trying to achieve a wider customer and earn some money on the side by selling their games to the wider public.

    Conclusion

    Picking the perfect website that has the exact images that you are looking for in your game is not all that easy to achieve. But we hope that out of the seven that we have listed today, at least one out of them was able to provide you with what you wanted. 

    Till next time!

    Related Articles

    13 Websites With Copyright and Royalty Free Art  

    13 Legendary Free Game Engines for Beginners & Professionals

    11 Best 2D and 3D Game Design Godot Tutorials

    Best Free Aseprite Tutorials For Pixel Artists & Game Designers

    The mobile app Procreate is a creative application that has become a popular choice among digital artists.

    This is not just a drawing tool but will help to bring your tablet to life. The designs that were previously possible to be created only on the graphics monitor or the desktop computer can be made now on your iPad.

    There are some stunning third-party brush sets that you can download for Procreate which have been made by different creators. The brushes are designed in a unique way so they can emulate various media, such as pencils, inks, and paints. Few of the brush sets can be downloaded for free, while you have to purchase the brush packs which are of high quality.

    The wide range of available brushes makes it possible for you to create projects with different styles, strokes, textures, and forms. This guide will cover all the types of brushes which you need for sketching, drawing, lettering, painting, and more.

    Without further ado, let’s look into the list of the 80 best Procreate sets of brushes!

    Best Procreate Brushes

    Best Procreate Brushes

    1. Master Collection

    This comes in a set of 42 brushes and is suitable if you don’t like a mess while working (who does?). And you prefer the look of pastel and charcoal.

    1. Master Collection

    These paid brushes provide a dirty look to the pastel or charcoal which have been applied lightly. You can also find different textures of chalk. Moreover, these custom brushes give a shine to the heavily used pastels that give full coverage.

    Irrespective of your drawing style the brushes are perfect for use in illustration and concept art.

    2. 50 Watercolor Brushes

    If you want to have the same effect as watercolor techniques (Salting, drops, washes, sponging, and wet on wet) used in real-life, then get this set of 50 brushes.

    2. 50 Watercolor Brushes

    You can select different brushes to help you adjust the amount of water that is preferred in the brush. It will help you to control the texture of the brushes.

    The final texture can be further played with to adjust the level of opacity. There are a few brushes that can also emulate the look of watercolor on different kinds of paper, this is a paid brush set.

    3. George’s Procreate Megapack

    If you’re looking to try out different kinds of brushes for Procreate, then you should get this megapack of 450+ brushes.

    Will be a good investment if you love the look of traditional art mediums, and you want to try digital drawing. These brushes tend to closely imitate the look of physical art mediums like pastel, oil, graphite, paint, and ink.

    3. George’s Procreate Megapack

    With some practice, you have the chance to find the Apple Pencil to be a more comfortable option than the traditional mediums. They also tend to work in the same fashion.

    When you purchase this megapack, it also includes updates to the collection and brushes of artists. This gives you the privilege to work with top-quality and up-to-date brushes.

    4. Storybook Illustrator

    If you’re looking towards drawing different storybook illustrations, then purchasing this set of 20 brushes will be a great option.

    4. Storybook Illustrator

    This set includes all different types of brushes that you would require for illustration such as:

    • For subtle detailing, you have the super skinny brushes
    • For inking and drawing, you have pen-like brushes and the thinner pencils
    • For creating stunning backgrounds with highlights, shadows, and texture you have brushes with a thick texture
    • For painting hair, you have three custom brushes

    As you keep learning to use these brushes to your advantage, you’ll be to make some different strokes in your artwork.

    5. Bristle Brush Linen

    You can get this natural fiber brush to give an appearance of paint to your canvas. If you prefer the look of acrylic painting or oil, then get this brush to look at your work on Procreate.

    5. Bristle Brush Linen

    This brush is free of cost, and you can also get it by making a small donation.

    6. Nomad Pack

    Get this set of 10 Procreate brushes if you’re looking to create some stunning, painterly illustrations with different kinds of textures, from busy and scratchy to well-blended and smooth.

    6. Nomad Pack

    These brushes can appear like graphite and gouache as you can use it in different textures and sizes.

    7. Procreate Noize

    Get this set of 8 highly textured brushes for your digital painting to help you create some scratchy, fun, and gritty layers.

    7. Procreate Noize

    These eight brushes come in different textures; some appear like splatter spray paint while some appear like chalk. The set is suitable for illustration work or concept art when you want to create a texture of stone or concrete, or if you’re looking for softer shapes.

    8. Photoshop-Like Brush Pack

    If you have recently shifted from Photoshop to Procreate, then this set is perfect for you. The brushes available in this pack are similar to the ones in Photoshop so you can easily get adjusted to using them.

    8. Photoshop-Like Brush Pack

    You’ll get a few cool scatter brushes to give a unique detail to your artwork, as well as line brushes and primary markers with various textures. The artist also provides you with guidance on how the different brushes can be used.

    9. Big Pencil Set

    If you want to get into digital sketching, then this set of 30 brushes will be perfect for your use.

    9. Big Pencil Set

    This set is excellent for creating base sketches and for your sketching practice, as charcoal and graphite pencils can be used in different sizes.

    You can also use these brushes to create sketches with intricate details in a charcoal or graphite style.

    10. Hodge Podge

    Here you’ll get a set of 20 brushes for pencil drawing and inking, which makes it perfect for any artwork. This is a well-built set, as the different brushes can also be blended easily.

    10. Hodge Podge

    You can use them for your complete drawings, for the base sketches, or to add small details to your entire piece.

    11. Charcoal Shaders

    This set of 16 brushes has quite a competitive edge to them. It gives you the look of charcoal that is perfectly blended, which is challenging to get without getting your work smudged in real life.

    11. Charcoal Shaders

    If you like to blend your work, then you’ll love this set!

    12. Sketch Brushes

    Custom-designed for sketching, the brushes that are given in this set can be compared to just any number of pencils that are available in the standard drawing pack.

    12. Sketch Brushes

    The set also comes with brushes for adding an excess amount of pressure to create deep values and for cross-hatching with the Apple pencil.

    These brushes can help you improve your shading skills and to save time.

    13. Gouache Shader Brushes

    This mega pack of 68 gouache brushes has all that will be required by you to add perfect textures and details to your illustrations.

    13. Gouache Shader Brushes

    It allows you to select your level of opacity to create an acrylic look, dried gouache, or watercolor-like appearance. You can choose to create an entire illustration with just these brushes, or you can mix them with other mediums.

    14. The Painter’s MaxPack

    This natural media brushes come in a set of 15, which gives your work a traditional, artistic appearance that you’ll generally find in acrylic or oil paintings.

    14. The Painter’s MaxPack

    Besides, you’ll also get five smudge brushes for lifelike blending and for adding textures. These brushes can be used for creating broad strokes that will give your work full coverage. You can also add fine details to provide an edge of realism in your work.

    This set will be perfect for pastel artists and painters who are switching to Procreate.

    15. Matt’s Painting Set

    This basic set is made especially for painting with a gouache style. It will be perfect if you’re new to using the digital gouache style.

    15. Matt’s Painting Set

    It has ten brushes that will help you try different things like:

    • To apply color in large areas using different textures.
    • Use smaller brushes to add details.
    • Play with your brush strokes by using fun texture brushes.

    16. Oil Paint Pack

    The brushes give a unique look of an oil painting, that is completed with a characteristic of chunky blending and canvas texture that you’ll usually get with a palette knife or a paintbrush.

    16. Oil Paint Pack

    You also have the option to blend smoothly if that’s what you prefer. The pack contains different brushes which are similar to the traditional oil painting brushes and the ones used for different canvas textures.

    17. Portrait Brushes

    Learning to draw portraits accurately will require a reasonable amount of time, especially when you’re shifting from the traditional medium to digital art. But this set of 20 brushes will make your work a lot easier.

    17. Portrait Brushes

    By using these brushes, you can create the textures for the eyelashes, freckles, hair, and skin quite seamlessly. It also includes a few custom brushes for blocking and blending colors in your portraits.

    18. ProAirbrushers

    Airbrushing your illustration work will give it a smooth, soft, and smoky effect. You can try this set of custom-style brushes for creating a classical airbrushed look.

    18. ProAirbrushers

    You can use just this set of brushes to create a texture for your drawings, or you can mix it with other brushes.

    19. ProInker Procreate Megapack

    This massive pack of 130 brushes has been specially designed for inking purposes. Whether you’re a novice in illustration or a cartoonist and seasoned illustrator, you’ll get all that is required for blocking in and inking of color.

    19. ProInker Procreate Megapack

    When you get this pack, you can try exploring the brushes one at a time to understand the different line qualities and textures of them. Getting just this pack will be sufficient for your inking requirements.

    20. Real Chalks

    Out of all the premium packs, this is the most affordable one. It is perfect for charcoal, pastel, or chalk-style drawings. The textures of these brushes are fantastic as they add a lot of life to your pieces.

    20. Real Chalks

    From the set of 15 brushes, you can choose to recreate any texture that you can see in real-life chalk pastels.

    21. Cheap Fineliners

    If you like using pens with fine-tipped ink, then you’ll enjoy the fine liner brush, which emulates the design of the 0.6 technical pens.

    21. Cheap Fineliners

    If you're creating a piece of 300dpi or more substantial, then this detail brush will be perfect as it works best with documents of a high resolution.

    22. Ultimate Manga Brush Pack

    If you’re a fan of Manga, then you’ll love this pack, as it will help you create the dynamic-looking pages of Manga right from scratch.

    22. Ultimate Manga Brush Pack

    All of the brushes in this pack have been tailor-made for coloring, texturing, drawing, and inking traditional Manga. You’ll be getting brushes that mimic watercolor, graphite, and charcoal perfectly along with brushes that give a unique texture for foliage.

    23. Canvas X Pack

    If you’re a painter looking to get the same texture, layering effects, and brush strokes in Procreate, then this pack will be perfect for you. Just like oil paint, these 25 brushes also help you push and mix different colors on your canvas.

    23. Canvas X Pack

    You can choose to use dry brushes for a  dusty and lighter texture, or chunky strokes with brushes loaded with paint. This pack can be used for your complete painting, and it also comes with a pastel painting brush for creating the base sketches. By using this pack in your artwork, it gives your piece the appearance of traditional mediums.

    24. Texturizer Pro

    This pack of 52 brushes will help you add any texture that you want in your work with a spark of life that adds an extra dimension. The different textures available can be used for fur, wood, smoke, particles, denim, stone, cross-hatching, various dry brushes, and other surfaces which you can use in different manners.

    It will be a perfect package if you want to add just texture without having to draw everything by hand or for giving a touch of roughness to your piece.

    25. Multi-tonal Markers

    The 50 pieces of markers in this pack will make you feel like you’re working with natural material. There are different textures and marker ‘tips’ like a classic fine tip, chisel, or brush pen that you can experiment with within this pack.

    You can select the brushes that give perfect color coverage or the drier and inky markers, which are best for texture. There is a tutorial that comes with this pack along with a user guide of 17 pages on Procreate; highlighting the benefits for you to get this brush pack!

    26. Mid-century

    These 15 brushes have been made with a unique design for illustration work. It captures the mid-century aesthetics of American illustration.

    26. Mid-century

    The brushes can be used to give your work a retro and vintage finish. They are perfect for comics, logos, ads, and children’s book illustrations, while the possibilities have no limit. The entire appearance of your art can change by using just a few of these brushes. So, do give it a try!

    27. COPICat Markers

    Are you a fan of the alcohol art markers?

    If you love the radiance and opacity of the alcohol markers, then we’re sure you’ll love this set of 28 markers for your digital work.

    To help you get the authentic marker to look as it comes with a free tutorial. As you follow the tutorial and practice along, you’ll get better at using them for cartooning, illustrations, and whatever you want to create.

    Using markers might not always give you a smooth finish, but this set allows you to try out different levels of coverage and texture, which is an added benefit.

    These markers give your work a very realistic outlook, which makes it challenging to understand whether it's made from Copic markers or not.

    28. Halftone

    Do you want to recreate the look of any vintage superhero?

    Then you should give this set of 15 brushes a try! This pack comes with many brushes that have different dot patterns usually found in old comic books and a pair of inking brushes.

    28. Halftone

    You can play with bright colors if you want a punchy and classic appearance of a comic strip, or for a dark look, you can choose black, white, and gray tones. You can create an entire piece of work by just using these colors or, if you want different styles, then try mixing them with other brushes.

    29. Roller Ink

    This is an unusual set; it comes with ten stamp brushes and six roller brushes. If you want to give your piece a crisp monotype appearance, or grungy texture then getting this is a good option for you.

    29. Roller Ink

    Once you learn how to use them, you will be able to understand the range of variety available in these brushes. There are a few roller brushes that apply more ink, while some apply less, depending on the look you want to create.

    Using the stamp brushes makes the work appear like it has been made by applying ink with a monotyping technique, block, or sponge.

    30. Cross Hatching

    When you use a fine-tipped pen, and you opt for a dense texture, then cross-hatching by hand can consume a lot of your time.

    30. Cross Hatching

    By using these 15 brushes, you can make cross-hatching appear pretty straightforward. These brushes will help you to create scratchy shadows using different line qualities, textures, and styles for cross-hatching in your drawings.

    31. Inky Abstract

    If you want to make drawings using a mixed media style within a few seconds, then you’ll enjoy using this set of brushes.

    31. Inky Abstract

    This massive kit has 150 brushes, out of which 137 of them are stamp brushes. It will help you to quickly add whatever you want like different branches, paint splatters, branches, dashes, dots, swirls, scribbles, leaves, cross-hatching, and several others.

    32. Pencil + Inking + Painting

    This pack has been designed for comic book drawings, so it comes with a unique brush setting. Even though Procreate has several great brushes, it can get difficult to figure out the right settings for your work.

    32. Pencil + Inking + Painting

    If you like drawing cartoons or comics, you should get this artist’s set up to help you seamlessly draw, ink, and color. This will be a high starting point to work classically, while you can change the settings later in Procreate.

    33. Pencil & Charcoal Procreate Brushes

    This digital pack emulates the traditional drawing set, and it includes brushes for graphic pencils and traditional charcoal in Procreate.

    33. Pencil & Charcoal Procreate Brushes

    Using these brushes will help you avoid smudging, while you get the look of different types of charcoal and pencils for a realistic appearance. These brushes will be perfect if you want to create traditional-style charcoal and graphite drawings or add some real deep shades to your work.

    Getting this pack will help you to master different qualities and textures of charcoal, which might be tedious while using traditional charcoal.

    34. Hair Brushes

    Learning to draw hair can be time-consuming and difficult; even the artist who has mastered the art will tell you the same. But using these brushes can help you save time and make the process more straightforward.

    34. Hair Brushes

    This pack gives you the option to draw different types of hairstyles, while there are also brushes to help you add highlights or tendrils and make the drawing appear real. If you want curls, then there are brushes for that too! Getting this pack will fulfill your needs for hair rendering as you draw an animal, a wig, or a human.

    35. Skin Brushes

    This pack of 16 brushes will help you to make your portraits and to capture the different skin tones.

    35. Skin Brushes

    For creating smooth-looking skin, you can use high-quality brushes while for setting up a portrait opt for the essential brush. The pack also includes some special brushes to help you render the eyes and hair quickly.

    36. Eye Brushes

    Mastering the art of making portraits can get a little tricky, and making the eyes can get a bit difficult.

    36. Eye Brushes procreate

    Getting this pack will help you to render the eyes more easily and quickly. The different innovative stamp brushes will help you layer the iris within a few seconds. Eventually, you can explore the other brushes to add a spark of life to the eye by adding veins and eyeshadow.

    37. Fur Brush Set

    Learning to draw fur can be as tricky as drawing hair, but having good brushes will simplify the process. If you’re into drawing furry fantasy creatures or animals, then you should give this pack a try.

    37. Procreate Fur Brush Set

    This pack of 8 brushes is a stunning combination for drawing fur with a mix of lifelike fur and cartoony fur. It comes along with options for choosing a brush to create coarse fur, porous fur, thick fur, matted fur, messy fur, and brushes which help you add strands of hair to make the coat appear polished.

    38. Pixel Art Brushes

    This set of unique brushes focuses on creating pixelated drawings with the right geometry. The 20 brushes in this pack pair up with the shape tool in Procreate to help you draw perfect pixelated squares, triangles, and circles.

    38. Procreate Pixel Art Brushes

    The set also has pixel brushes with variations in opacity level, shading and blending brushes, and brushes for dirt, bricks, dots, and more. Overall, this helps you add a slight texture to your pixelated drawings.

    39. Light Effect Pack

    This single piece of light effect brush helps you to add an instant glow to your artwork. The possibilities of the way this brush can be used are endless, even though it might appear dull.

    39. Light Effect Pack

    This brush will help you add a bioluminescence effect to different environments and fantasy characters, and it also creates dramatic lighting in your work.

    Price: Free

    40. Simple Marker Set

    This is a small marker set with just three brushes which come in three variants. They have different ‘tips’ such as translucent flat tip, opaque flat tip, and round tip for creating layers that give the marker effect. It also helps you to create different types of line quality.

    40. Simple Marker Set Procreate

    As you get comfortable using this set, you can then get the larger packs of marker brushes, and mix them to create some fantastic pieces of art.

    41. Colored Pencil Box

    Just like the Prismacolors, which are high-quality color pencils, this set of 11 brushes also provides you with different textures similar to the traditional medium.

    Try these versatile brushes in your Procreate art to add some new and colorful lines.

    42. Prickly Pen Brushset

    This set of 3 brushes can blend with literally anything, and it appears just like a line made with a marker on a toothy page.

    42. Prickly Pen Brushset

    It comes in three different styles, such as:

    • Prickly
    • Pricklier
    • Prickliest

    You can select the type you want depending on the texture that you’re creating for your illustrations.

    43. Fude Brush

    If you’re a fan of the Tombow brush, then you’ll enjoy using this set. These brushes were created to work and look just like the Tombow brush pen. It is perfect for doodling and lettering, as they feel very flowy and smooth while it is being used.

    When you have this set in your toolbox, then your linework and doodling will turn out to be great.

    44. Splatter Brushes

    If you’re looking to create a piece of art with some fun messiness, then get this pack of 20 brushes which will help you get paint splatter marks with a realistic appearance.

    44. Splatter Brushes

    These brushes come in a variety of splatter densities, opacity, and sizes. Few of them tend to look like a spray bottle has been used to apply watered-down paint, while some of them are compressed and opaque speckles.

    Some of the brushes help to create a look as though you have applied paint using a dry brush and some appear like huge, loose droplets.

    Use these brushes to create a sense of movement in your illustrations.

    45. General Ink Splatter

    This set of 17 ink brushes will help you create some fun textures with different levels of splatter. You can draw backgrounds by using a few of the ink wash brushes and create fine lines with the pair of ink drawing brushes.

    45. General Ink Splatter Procreate

    These brushes help you to make perfect ink artwork as you can also use them to add a messy or drippy quality to your illustrations, drawings, and paintings.

    46. DevBrush

    It is a set of 11 tailor-made pastel, pencil, marker, and ink brushes. It will help you create some fantastic calligraphy or other artworks that you want to make; stylistic scrawling or print lettering for logos, comics, and anything else which you can make digitally.

    46. DevBrush

    The brushes are sensitive to tilt, and they are super flowy so that you can manipulate the lines quickly. It can also be used for sketching, doodling, or drawing.

    If you’re new to using Procreate, then this might not be the most feasible option for you as the price is slightly on the heavier side.

    47. The Procreate Paint Box

    By using this brush pack, you can get any paint texture or brush stroke. This pack has several brushes for smudging, dry brushing paint, applying solid colors, and literally everything that you will require to work as a master in Procreate.

    47. The Procreate Paint Box

    You can also use them in your illustration to create a fuzzy and soft look.

    48. Real Oils

    This set of 18 brushes is tilt and pressure-sensitive, so you can use them as a real brush to help you get the same design just like the ones in real life.

    The brushes come in different shapes and are generally used for oil painting. You can also have a variety of textures by selecting smooth, dry, or wet paints.

    When you use these brushes, the canvas also tends to shine to look at a realistic painting. It is an excellent option for digital painters shifting from an oil background.

    Price: $9

    49. Smudge Brushes

    Blending and smudging comprise a large part of creating beautiful artwork, irrespective of whether you’re using traditional mediums or Procreate.

    This comes in a set of 18 brushes which is perfect for smudging, blending, and creating pieces with smudgy textures. Using these brushes can alter the mood of the entire piece by changing the look of the color gradients.

    50. Nautika

    You can get this fantastic pack of art markers, water brushes, and ink; it will be of great use to illustrators. You can use them for your illustration work or for designing different characters and creatures.

    50. Nautika PROCREATE BRUSHES

    These marker brushes emulate different ink saturation levels and marker tips. The other brushes mimic textures like dry water brush effects, salting with watercolor, and sponging.

    You will also get a variety of fine pens which can be used for any sketching or drawing that you would want to do digitally.

    51. Stippling

    This pack has ten custom-designed shadings, and stippling brushes can be used to add shadows and grainy textures to your work. This list includes brushes that have different densities and grain qualities which can be used for every design.

    51. Stippling BRushes Procreate

    You can try these brushes to add a faraway, distressed, or faded look to your different illustrations. You can also use them to add stars to your night sky.

    52. 150+ Paint Bundle

    This massive bundle comes with brushes for graphite, paint, marker, ink, pencil, and every material that you can think is included. You get the option of several painting brushes and around 50 colors to select from the set.

    As you download this, you’ll also get different texture brushes to choose from according to your preference, which will help you to apply paint using various thicknesses and styles.

    There are plenty of opportunities waiting for you as you get this bundle.

    53. Chanelle Chanelle Free Pack

    If you get this free set of 3 simple brushes, then you will probably feel like using this set every time you’re creating art on Procreate.

    53. Chanelle Chanelle Free Pack

    This pack comes with a dense grain pencil, a grain pencil, and a Copic marker. It is a fantastic mix to help you unleash your creative power. This basic set is a good option for you when you're a beginner, or you are looking towards branching out from the default settings  Procreate.

    54. Splash Vol. 1

    This set of 48 media brushes will give your work a watery finish, by making it appear like there is a splash of water and give it a watercolor effect. These features go beyond the tools that are available on Procreate.

    54. Splash Vol. 1

    It is a free pack, but donating will help you to fund the brush projects in the future.

    55. Neon Brush Kit

    This brush kit by Milo Garret is ideal for helping you create neon signs which appear like it has been handwritten in real life. Using these brushes will help to give your work a stunning glowing appearance. In this set, you’ll get around 12 brushes for neon writing, along with a brush to create effects and three light pen brushes to add life to your artwork.

    55. Neon Brush Kit

    The list doesn’t end there as you get a bonus of 19 ready-to-use background images.

    56. Procreate Lettering and Paint Brushes

    The collection by Studio Burg is a fantastic package, as it offers a selection of brushes that will help you with your basic graphic design and illustration requirements.

    To help you select your desired signature, this pack also comes with a pencil, pen, and paintbrushes.

    57. Texturific Bundle

    This texturific bundle by Lisa Bardot has 14 pastels, 14 liners, and 30 shaders. The different textures in these brushes will help you create different art styles and effects without needing to use a traditional pen and paper.

    57. Texturific Bundle

    All of the 58 brushes in this set are made with different varieties of high-resolution, texture sources, and they are also pressure sensitive.

    58. Comic Ink Brush Set

    This set is perfect if you’re into comic illustration. When you get this pack, it will be an ideal addition to your collection of creating illustrations on Procreate; it includes the SFX additions and inking brushes from the ’50s. Mark has created this set to pay tribute to Will Elder the reputed comic book illustrator of American origin.

    59. Flat Brushes

    This collection of brushes has been inspired by the old faithful of the artist Ian Bernard. Once you get this set, you’ll feel like using them every time you start lettering. The brushes have varying textures which give your work a textured or a solid finish depending on the look you want to create.

    59. Flat Brushes

    60. Flora: Vegetation brushes

    The vegetation brush set by Matthew Baldwin will help you to instantly set the scene right and create a painterly effect, which will make your job as a concept artist much more comfortable. Baldwin has ensured that these brushes can help you to get any type and style of stroke, which usually concept artists try to master all the time. 60. Flora: Vegetation brushes procreate

    61. Dearest Dotty

    There are a plethora of free brushes for Procreate which is available on the website of designer Missy Meyer. The brushes are perfect for helping you create a graphic script. This dearest dotty set has a unique retro vibe which gives a touch of versatility to your lettering work.

    61. Dearest Dotty

    62. Brushes and foil textures

    This pack created by Summit Avenue has 12 confetti brushes along with 24 glitter and foil textures, which helps to give a touch of sparkle to your designs. Using this set will help you design different wedding invites and event flyers.

    63. Nitty Gritty

    The Nitty Gritty Set of texture brushes by Jammie Bartlett is going to be a brilliant selection to help you add an aging effect instantly and give a fine gritty texture to your pieces.

    63. Nitty Gritty

    64. Vintage Engraving

    This MilksKS brush set will help you to create the look of the black and white classic engraving. Using this pack of brushes, you will be able to add a delicate touch to your design project or illustration. You can combine a few of the brushes to create a cross-hatching effect with a vintage look while you pick a clean-cut style.

    64. Vintage Engraving

    65. Bistro Marker

    By using this set, you can create different designs of hand lettering, the form and style appear perfect, and you wouldn’t require any further illustrations. This bistro marker by Leftyscript is going to be an amazing freebie pen that will help you capture different type-faces of hand-written styles.

    66. iPad Lettering Set

    This set has three essential freebie brushes such as the round-edge calligraphy brush, the rough-edge calligraphy brush, and the original calligraphy brush. The brushes from this set will help you to get down to the basics and will help you to create some simple and beautiful designs. 66. iPad Lettering Set

    67. Shape and Ornament Brushes

    This Procreate brush kit by Nicole Mauloni, who is a reputed calligraphy artist, has over 100 brushes. Getting this set will you to decorate your digital calligraphy works as you can also create different design stamps with various shapes, flourishes and motifs.

    67. Shape and Ornament Brushes

    68. Brush Tiger, Lion, Leopard, and Jaguar

    The brush pack by Studio FabianFischer has four brushes for Procreate which are feline-named textured for hand lettering. All of the brushes are pressure-sensitive and will help to give your work a realistic edge.

    68. Brush Tiger, Lion, Leopard, and Jaguar

    69. Chalk Letterer Box

    This brush set by Guerilla Craft will help you create different chalked masterpieces on your digital iPad. This pack will help you avoid dusty hands, and you can select from the different varieties of chalk such as round chalk, loose chalk, wet chalk, flat chalk, smudge chalk, and more.

    70. Rad & Happy

    Tara, who is the founder of Rad & Happy, has made these brushes for making different lettering designs, and you can download them for free.

    70. Rad & Happy Procreate Brushes

    71. Thin Ink

    The ‘ Thin Ink’ brushes by Sasha Hickson are famous for making modern and quirky designs. They can easily emulate the thin and thick strokes and help you add feminine flourishes quickly to your designs.

    71. Thin Ink Procreate Brushes

    72. Fat Ink

    If you’re looking for bold brushes which will help your lettering to pop off and stand out then get this pack. This set by Sarahtype comes with a super smooth brush which will help to create a sense of contrast between the thin and thick strokes in your work.

    72. Fat Ink nrushes

    73. Dry Marker

    If you love the effortless look of a dry marker, then you’ll enjoy using this Ben Ralec’s collection of 15 varieties of marker pens that you can select from. This set also has an original calligraphy brush that will help you in creating your calligraphy designs.

    73. Dry Marker

    74. Matty B’s Hatch Effects

    This Matty B’s brush pack is suitable for the professional or budding illustrator. You have options for scribbles, dots, lines, marks, and more.

    74. Matty B’s Hatch Effects

    75. Blackletter

    This extensive brush set produced by calligraphy artist Jake Rainis, who is Boston-based has researched different sets that are available on the market to create this collection.

    76. Nikko’s Brushes

    Nikolai Lockertsen is a highly reputed Procreate digital artist, who has made his favorite set of 5 brushes available for you to download. There are some unique designs that you can create using this set of brushes.

    77. Lettering Brush Pack

    This set of 14 custom lettering brushes by Ryan Hamrick will help you to create some high-end, lettering work like a professional on your iPad. The collection has been entirely curated by Hamrick, and these brushes have several uses.

    77. Lettering Brush Pack

    78. The Parchment Pen

    This brush is similar to the quill of the 18th century and its quite sensitive to pressure, which makes it an excellent option for calligraphy. You can also this brush for making your grey and black line drawings.

    78. The Parchment Pen

    79. Sketch and Ink

    This is a small package of ink brushes by Dizzy Tara which has board marking brushes and different ink-shaped pens. You can use this pack of inky brushes for your sketching.

    80. Whiskers

    This brush by Inky Hand is a fantastic tiny brush, which is a perfect choice for helping you create scratchy effects and unique hand designs. This brush will be suitable to create rough sketches and to add a slight touch of originality to your artwork.

    You can find this brush pack here.

    Price: Free

    Conclusion

    Each of these brushes can help you create some amazing artwork on paid your tablet. Don’t overlook any of these precious tools, as you try finding the right brushes which will help to make your overall work become simpler. You might need to go through them again, to get your hands on the perfect set.

    Keep conquering the field of art!

    Related Articles

    53 Best Medibang & FireAlpaca Brushes & Textures For Digital Artists

    25 Best Free GIMP Brushes for Drawing & Painting Digitally

    20 Free FireAlpaca Brushes for Digital Painting & Drawing

    21 Best Manga Studio & Clip Studio Paint Brushes [Free Download]

    Best Free Aseprite Tutorials For Pixel Artists & Game Designers

    21 Best Paint Tool SAI Brushes and Textures 

    Speed Paintings 101 |What It Is, Tips, Tricks, Tools & Video Tutorials

    54 Best Photoshop Brushes | Best Drawing & Painting Brush Packs

    14 Amazing Free Krita Brushes and Brush Packs for Digital Art

    11 Best Color Theory Books for Artists Everywhere

    13 Websites With Copyright and Royalty Free Art to Consider

    Types of Digital Art Right Now Explained

    25 Best Concept Art Books for Artists Everywhere

    8 Best Cartooning Books For Artists Today

    5 Types of Concept Art to Consider Today

    10 Epic Tips & Tricks for Concept Art Portfolios Today

    51 Enigmatic Forest Concept Art That Will Amaze You

    67 Surreal Castle Concept Art Depictions to Surge Inspiration From

    16 Best Pixel Art Programs and Software | All OS

    If you're wondering how long your artificial Christmas tree will last, there are several factors to consider. The quality, storage conditions, and usage can all affect its lifespan. While some Christmas trees can last for decades with proper care, others may only last a few years.

    The Christmas and holiday season is upon us, and for many, that means decking the halls with a Christmas tree. While there's nothing quite like the smell of fresh pine needles, artificial trees are preferred for cost savings and convenience.

    However, one question that often comes up is how long these fake trees can last. Discover the factors that can impact the lifespan of an artificial Christmas tree and make it last for years of festivities.

    Factors that Make or Break the Lifespan of Your Artificial Christmas Tree

    Let's talk about everyone's favorite holiday decoration - the Christmas tree! Specifically, the artificial ones that we all love to put up year after year. But how long do they actually last, you ask? Well, that depends on a few factors, so let's understand.

    First off, the quality of materials used to make the fake tree can have a big impact on its lifespan. So if you opt for a cheaper fake tree made from lower-quality materials, you may not get as many years of use out of it as you would with a more expensive, higher-quality fake tree. It's all about finding that sweet spot between cost and quality.

    Another important factor is how frequently you use the tree and how you store it when it's not in use. If you're putting it up and taking it down every year, it's going to endure more wear and tear than if you leave it up all year round. And if you're not storing it properly - say, just throwing it in a damp basement or attic - that can also impact its lifespan. So be sure to take good care of your tree when it's not in use!

    Finally, environmental factors like humidity and temperature can also play a role in how long your artificial tree lasts. If you live in a hot, humid climate, for example, your fake tree may not fare as well as it would in a cooler, drier environment. But don't worry too much about this one - as long as you're not subjecting your fake tree to extreme conditions, it should be just fine.

    Average Lifespan of Artificial Christmas Trees

    Artificial Christmas trees can last for many years, with the American Christmas Tree Association stating that they can typically last up to ten years or more. However, this lifespan can depend on several factors, including the quality of the tree, how well it's maintained, and how often it's used.

    Proper maintenance is crucial in extending the lifespan of an artificial tree. It's important to store the tree in a dry place, preferably in a specialized storage bag or box, to prevent moisture and damage from pests. Avoiding overloading the tree with heavy decorations or ornaments can also prevent damage to the branches, leading to a longer lifespan.

    In addition, the frequency of use can impact the lifespan of an artificial tree. Using the tree excessively, such as leaving it up for extended periods or exposing it to harsh weather conditions, can lead to wear and tear and shorten its lifespan.

    Another factor that can impact the lifespan of a fake Christmas tree is the number of branch tips or "needles" it has. A fresh tree with a higher number of branch tips will generally look fuller and more realistic, but it may also be more prone to damage if it's not properly maintained. The weight of ornaments and decorations can weigh down the branches, causing them to break or bend over time.

    Some artificial trees come pre-lit with incandescent bulbs, while others may require separate strings of lights. A pre-lit tree may be more convenient to set up and use, but the lights can also be a factor in the tree's lifespan. If the lights are not replaceable or repairable, the tree may need to be discarded once the lights burn out, reducing its overall lifespan.

    Real Christmas Trees Or Artificial Christmas Trees

    Real Christmas Trees Or Artificial Christmas Trees

    A real Christmas tree has a much shorter lifespan than an artificial one, typically lasting only a few weeks before it begins to shed needles and dry out. Additionally, real Christmas trees require regular watering and can be a fire hazard if they're not properly cared for.

    When deciding whether to purchase a real or artificial tree, it's important to consider cost, environmental factors, and your personal preference.

    Artificial Christmas trees can be a more eco-friendly option if they're used for several years, reducing the demand for real trees and supporting the local economy. But when it comes to environmental factors, the choice between real Christmas trees and artificial trees is not always clear-cut.

    A real Christmas tree can be sourced from Christmas tree farms or harvested from the wild. These real trees are typically grown in these Christmas tree farms several years before they are harvested. While real Christmas trees are biodegradable and can be recycled or repurposed after use, they do require resources such as water and transportation to grow and distribute.

    Artificial Christmas trees, while reusable, are often made from non-biodegradable materials and may have been produced and shipped from overseas, contributing to carbon emissions.

    Ultimately, the right choice of real or artificial will depend on your individual needs and priorities. By carefully considering the important factors and maintaining your live Christmas tree well, you can enjoy a beautiful and festive holiday season with the perfect tree for your home.

    Is It Time to Bid Farewell to Your Artificial Christmas Tree?

    Your Christmas tree has been a part of your holiday memories for years. But how do you know when it's time to retire your artificial tree and get a new one? Here are some tips to help you decide if it's time to say goodbye to your trusty holiday décor and shop for a new one.

    Signs That Your Artificial Tree Is Past its Prime

    • A lot of branches are missing, and it's starting to look sparse
    • The tree is discolored, faded, or has an odd smell
    • The needles are falling off, or the branches are drooping
    • The tree is lopsided and can't stand up straight
    • The lights or other decorations won't stay on or work

    Why You Should Replace Your Damaged Tree

    Damaged or degraded Christmas trees can pose a serious fire hazard, and they can also be a breeding ground for mold and mildew, which can be dangerous to your health. Additionally, older artificial trees may contain harmful chemicals or lead.

    Artificial trees are a type of plastic, and as such, they can take hundreds of years to decompose in landfills. This means that when you throw away your old tree, it will be sitting in a landfill for a long time, releasing harmful chemicals into the environment. By disposing of your old artificial tree responsibly, you're not only protecting your family's health and safety, but you're also doing your part to protect the environment.

    Ultimately, the decision of whether to replace your artificial tree is a personal one, based on your own preferences and budget. However, if your tree is showing signs of wear and tear or is more than six years old, it's probably time to start shopping for a new one. By choosing a high-quality tree and taking good care of it, you can enjoy many years of holiday cheer and create lasting memories with your family.

    Maintaining Your Artificial Christmas Tree to Maximize Lifespan

    Maintaining Your Artificial Christmas Tree to Maximize Lifespan

    When it comes to maintaining your artificial tree, there are a few tips you can follow to maximize its lifespan. Whether you're a fan of fake trees or prefer the real evergreen, proper storage and maintenance can help ensure your tree stays in good condition for years to come.

    Storage and Maintenance

    First and foremost, it's important to store your tree properly. Many artificial trees come with their own storage bag or box, which can be useful for keeping the tree free from dust and moisture. If your tree doesn't come with a storage solution, you can purchase a storage bag or box separately. Make sure to disassemble the tree and pack it away neatly to avoid any damage.

    When it's time to set up your tree for the Christmas and holiday season, take care when unpacking and assembling it. Be sure to follow the manufacturer's instructions carefully to avoid any mishaps or damage to the tree. It's also a good idea to check the tree for any wear and tear before setting it up, as this can help you address any potential issues before they become more serious.

    Getting the Most Out of Your Artificial Christmas Tree

    Once your Christmas tree is set up and decorated, there are a few things you can do to get the most out of it. For example, you can try using fewer lights or decorations to help reduce wear and tear on the tree. This can help extend its lifespan and keep it looking fresh and vibrant year after year.

    With a little bit of fluffing, preserving, and decorating, you can transform your Christmas tree into a picture-perfect centerpiece that will impress all of your guests.

    Fluffing - Your Tree's Ticket to Fullness

    Fluffing is done not to let your tree look like it's been squished in a box for the past year, and it's an essential part of decorating a beautiful and full-looking Christmas tree. And if you've just unboxed your tree, you'll definitely want to make sure that every branch is fluffed and styled to perfection.

    • Start at the bottom of the tree and work your way up to ensure that every branch is fluffed
    • Don't forget to fluff the inner branches, as they can add depth and dimension to the tree
    • Consider using a steamer to gently soften and fluff the branches
    • Use a mirror to check for any gaps or bare spots that need attention
    • Use wire to shape and position branches as needed

    Preserving - Making Your Tree Last Through the Season

    There's nothing worse than a droopy, dried-out Christmas tree before the season is even over. Luckily, there are plenty of tips and tricks for keeping your tree healthy:

    • Keep your tree away from direct sunlight and heat sources, such as fireplaces and heaters
    • Use LED lights instead of incandescent lights to reduce the amount of heat generated
    • Clean your tree with a soft-bristled brush or cloth to remove dust and debris
    • Use a light mist to help remove any remaining dust and give the tree a fresh appearance
    • Consider using a tree deodorizer to keep your tree smelling fresh and clean
    • Avoid using harsh cleaning chemicals as they can damage the material and color

    Decorating - Adding the Final Touches to Your Christmas Tree

    Decorating your Christmas tree gives it the personality and character that reflects your style and taste. Here are some tips to help you add the final touches to your tree without compromising its shape and structure:

    • Choose lightweight decorations that won't weigh down the branches
    • Consider using ribbon or tinsel instead of heavy garlands
    • Hang smaller decorations towards the tips of the branches to create depth and dimension
    • Avoid overloading any one area of the tree to prevent it from looking unbalanced
    • Use battery-operated lights to reduce heat and prolong the life of your tree
    • Add a tree topper that is lightweight and easy to secure to the tree

    Your Christmas tree deserves some love, and with a little bit of fluffing, preserving, and decorating, you can turn it into a picture-perfect showstopper that will make all of your neighbors jealous. With these tips, your Christmas tree will be the belle of the ball and last many holiday seasons with ease.

    Can an artificial Christmas tree be repaired or refurbished to extend its lifespan?

    Yes, an artificial tree can be repaired or refurbished to extend its lifespan. Depending on the type of damage, you can replace individual branches or parts, add Christmas lights or decorations, or even spray paint the tree to give it a fresh look. 

    How do you properly store an artificial tree to ensure its longevity?

    To properly store an artificial Christmas tree, disassemble it carefully and place it in a storage bag or container designed for the purpose. Keep the tree in a cool, dry place and avoid storing it in areas with high humidity or extreme temperatures. Proper storage will help prevent damage to the tree and ensure its longevity. 

    Are there any maintenance tips for reusing a single Christmas tree over the years?

    Yes, there are several maintenance tips for reusing a single artificial Christmas tree over the years. These include dusting the tree regularly, fluffing and shaping the branches, and using a tree storage bag or container when not in use. Additionally, it's important to inspect the tree each year before use and replace any damaged or missing parts. 

    Are there any environmental benefits to using artificial trees instead of real Christmas trees?

    There are some environmental benefits to using an artificial Christmas tree instead of a real Christians tree. Since artificial trees can be reused for many years, they can reduce the demand for real trees and help conserve natural resources. However, it's important to consider the environmental impact of the manufacturing and disposal of artificial trees. 

    What are some common materials used to make artificial Christmas trees, and how do they impact their lifespan?

    The artificial Christmas tree industry uses materials like PVC, PE, and metal to make Christmas trees. PVC is the most common material used for the needles, while metal is used for the frame and branches. 

    Are there any special considerations for pre-lit Christmas trees in terms of longevity?

    Yes, there are some special considerations for pre-lit trees in terms of longevity. It's important to inspect the Christmas lights each year before use and replace any burned-out bulbs or damaged wiring. 

    Final Thoughts

    Now you know that your artificial Christmas tree can last for many years if you take good care of it. With a little TLC and a touch of creativity, your tree can be the star of your holiday celebrations for seasons to come. Who knows, maybe your tree will become a family heirloom, passed down from generation to generation. 

    So go ahead, give your tree a hug, and tell it how much you appreciate its everlasting beauty. A little glitter and a few quirky ornaments can make even the oldest tree sparkle like new. Remember, a well-preserved tree is a happy tree, and a happy tree is a happy you! 

    Artificial Christmas trees accumulate dust from being on display or after being kept in storage. Whenever you notice that the artificial tree is too dusty for hanging decorations, it would be best to clean it with a vacuum or clean cloth. 

    Using an artificial Christmas tree for the holidays is advantageous, considering such trees are reusable. This isn’t possible with a real tree, which you must dispose safely. 

    But be cautious as you inspect attached lights on a pre-lit tree and make sure to wipe individual branches, stems, and the foot with a drip-dry, soft cloth or a fiber duster. Also, begin cleaning at the top of the tree using a vacuum furniture brush having a bristle or crevice adapter. 

    What You'll Require

    Equipment/Tools

    • A sizable fiberglass washbasin, bathtub, or tub
    • Nozzle for a sprayer on a garden hose
    • Shop-vac
    • Portable hair dryer
    • A hose adapter
    • Old sheet or a blanket
    • Large plastic container for trash
    • Spray bottle
    • Dishwashing liquid or a mild cleanser
    • Microfiber cloth
    • A static-charged brush
    • Salt

    Preparation On How To Clean An Artificial Christmas Tree

    Preparation On How To Clean An Artificial Christmas Tree

    1. Take The Tree Out Of The Package

    Firmly put the base together after taking the tree out of the package. As you clean each component, stretch out the limbs to be attached to the tree. You should also spread a sheet across the floor around the tree to capture any falling debris. 

    2. On The Branch, Try Out Your Hoover

    Test a spot at the very root of the tree using a furniture bristle brush attachment. Your vacuum should quickly remove the dirt on the limbs without damaging the tree. 

    3. Start Vacuuming

    Use a vacuum brush to carefully suck dust off the tree's branches and trunk as you work your way down, starting at the top. But avoid cleaning artificial Christmas trees with the hose. 

     4. Wash With Warm Water

    Avoid harsh substances that could harm your tree, and fill a container with warm water and gentle dish soap. To prevent the cloth from getting tangled in the limbs, safely clean the tree with a delicate dish or dust rag. Moreover, if your tree has lights integrated into it, make sure to unplug them. 

    5. Clean The Stem And The Branches

    In soapy water, dunk your cloth and thoroughly wring it out before working your way up the tree, carefully cleaning it with the rag. To stop wet dust from getting stuck on other areas of the tree, frequently wipe your rag. 

    6. Get The Space Around The Tree Clean

    To remove any dust that might have landed on the floor, vacuum the area close to the tree. 

    7. Remove The Grime

    The edges of your dust sheet should be folded toward the middle. This will create a bag to help you carry the sheet without letting the dirt leak. Then dump the contents of the sheet in the trash by taking it outside. 

    8. Decorate Your Tree

    Put your ornaments and textile on the tree but before connecting the light bulb, check the tree to be sure all the limbs are dry after cleaning. 

    Cleaning Methods For Artificial Christmas Trees

    Cleaning Methods For Artificial Christmas Trees

    1. Utilize A Cleaner

    Different types of dusters exist on the market, such as conventional comfortable cotton cloths, microfiber cloths, puffy dusters with handles, and more. 

    Whichever you choose will depend on factors, such as the dimension of the plant. A small, delicate tree may benefit from a soft cloth that is easy to control, while a larger tree may benefit from an extended duster on a pole. 

    Starting from the top and working your way down is a good cleaning strategy. However, it's important to note that when you clean higher up, some of the dust may settle on lower surfaces that you've already cleaned. To avoid this, it's recommended to use a duster that is appropriate for the job, so take into account the size of the area to be cleaned and the amount of dust present. 

    Additionally, it's important to clean the outer area of various surfaces as well, especially if they are frequently exposed to dust and dirt. This could include windows, doors, and outdoor furniture. 

    2. Utilize A Brush

    Use a standard paintbrush or an anti-static cleaning brush. Commence at the highest point and go down, cleaning as you would with a duster. 

    For example, you could use a four-inch paint brush for bigger leaves, like those on a cheddar plant, while an artist's brush is ideal for reaching small spaces. 

    3. Clean The Artificial Tree With A Handheld Vacuum

    You can quickly vacuum the dirty particles off your plant if your hand vacuum has a fabric option and a soft brush attachment. Avoid damaging the tree by using the wrong attachment instrument or choosing high suction power. 

    Although you might feel uneasy using an upright vacuum on the leaves of a plant, using it on the central stem or trunk could have excellent results. 

    4. Use A Hair Dryer

    This can work, but remember that all you do is remove the grit stuck on the tree. To prevent plant dust from penetrating the carpet deeply, you may even have to vacuum afterward. 

    Plus, if you have hardwood surfaces, dust or mop them after cleaning the plant. And focus briefly on only a single region of the tree with the hairdryer in a relaxed setting. 

    Using bursts of compressed air would be an alternative and helpful on smaller, more delicate plants. Your keyboard cleaner, which comes in a can with an adjustable straw should work, in such instances. 

    5. Apply A Wet Towel

    Again, you can disinfect a fake plant with a damp towel by beginning at the top and moving down leaf by leaf. Before cleaning, make sure the cloth is colorfast and dry it with a previous tea cloth or paper towel. 

    Even if you don't use a damp cloth to clean the entire tree, it can help to clean specific areas that require extra care. After that, you can take advantage of a leaf blower to clean the rest of the tree. 

    6. Remove Any Grime Or Residue From The Tree

    Excess water can harm fabrics, leading to color fading and shape loss in leaves or petals. Take extreme caution when using freshwater to rinse a fake plant even if it is waterproof. 

    It would be best to give the tree several light showers or one heavy burst of water. Carefully wrap the pot to keep the water out before you use the faucet to clean the tree in a refreshing, gentle setting. 

    Immersing the tree in a container, basin, or bathtub is not recommended because there's no assurance your fake plant will make it through the wash cycle. Some plants, perhaps succulents or those made of material comparable to it, might be able to withstand it but silk won't, becoming stained or destroyed. 

    7. Cleaning And Upkeep

    Make sure to position your tree away from excessive moisture or direct sunlight, keeping it in a dry and cool area. To avoid dust buildup, give the tree a light dusting at least once weekly while on display. You may utilize a dry, clean towel or a duster made of dense fibers but exercise caution as you maneuver around the lights. 

    Can I clean my artificial Christmas tree with water?

    Yes, you can clean your artificial Christmas tree with water but make sure to remove all the lights and ornaments from the branches. 

    How do I remove dust from my artificial Christmas tree?

    Utilize a vacuum, which involves cleaning each area separately and is best used when your artificial tree is exceptionally dusty. Please move your vacuum cleaner nozzle over each limb, using the lowest setting, and vacuum from the inside towards the outside. 

    How do I clean sticky or greasy spots on my artificial Christmas tree?

    Spray a small amount of soapy water on a specific section of the artificial tree. Wait for 30 seconds and then use a clean white cloth to wipe the area. If any color comes off, avoid using water to clean the tree and instead opt for dry cleaning. But when there’s no fading, you can use soapy water on the stained area to clean it. 

    Can I use cleaning products on my artificial Christmas tree?

    Yes, you can use cleaning products on an artificial Christmas tree. 

    How do I store my artificial Christmas tree after cleaning?

    Put your artificial tree within its storage container or a box after cleaning. Wrapping your tree in white, clean paper before storing it in the basement is an additional step you can take to keep it clean. 

    Tip

    Start by dusting all the branches and needles using a feather duster or a soft-bristled brush. Use a vacuum cleaner with a brush attachment to remove any dirt, dust, or debris accumulated on the tree. Mix a mild cleaning solution of water and dish soap in a spray bottle for a deeper clean, and lightly mist the tree. Allow the tree to air dry completely before storing it for the following year. 

    Conclusion

    It's important to take your time and ask for help if needed when putting up an artificial Christmas tree. Rather than using real trees, it's best to clean the area before setting up the artificial tree. And often a quick vacuum is all that's needed before storing the tree after the holiday season. 

    If you're looking for an affordable and convenient storage option for your fake Christmas tree, consider using large cardboard cylinders commonly available in concrete forms. To store the tree, attach a rope to the tree's base and carefully insert it into the tube. Finally, secure the edges with tape and plastic bags to keep them safe. 

    Properly storing an artificial Christmas tree can extend its lifespan by several years, allowing it to last several holiday seasons. Based on tree orientation, size, and decoration options, artificial Christmas trees can be stored in upright storage bags, tree bags, plastic wraps or boxes. 

    If you ask me, artificial Christmas trees are low-maintenance counterparts to real ones, bringing many benefits over a real tree. 

    Despite the relatively higher upfront price, you will recoup your investment in the artificial tree over time by storing it properly. As such, in the long run, artificial trees end up being more cost-effective than real ones, making them preferable overall. 

    So, I’ve created this guide for you to extend the artificial tree’s life for as long as possible. Feel free to follow along these steps! 

    Why Store A Christmas Tree?

    Why To Store Artificial Christmas Tree?

    In the modern age, where our fast-paced professional lives take up most of our time, convenience is paramount. After all, maintaining a Christmas tree until the next holiday season isn’t always possible, which is where artificial trees come in.

    One of the most significant benefits of keeping an artificial Christmas tree is that it can be stored away neatly in a corner of your house. You can keep it in your closet, where the artificial tree will remain in tip-top shape until the holiday season arrives again.

    With regular trees, this simply isn’t possible, as they would perish very quickly. Moreover, regular trees take up a lot of space, something that is completely avoided by artificial trees.

    Another primary benefit of artificial trees is that they can be used year after year without requiring maintenance. With them, you don’t need to brush leaf blades off the ground, trim them to keep in good shape, or keep them as a permanent fixture at your home.

    Many people like me are also allergic to Christmas trees, which is caused by the mold that grows on the tree. Artificial trees have no chance of aggravating allergies, making them great for those suffering from seasonal allergies.

    Year after year, your artificial tree will look as good as new, provided that you’ve stored it properly. In fact, if you do so, a good artificial Christmas tree can last up to a decade, which saves money in the long run and is convenient as well.

    Cleaning The Tree For Storage

    Cleaning The Tree For Storage

    Most people need a new artificial Christmas tree after a couple of years, which can be quite costly if purchased frequently enough. The main reason for this is that the tree is not cleaned before storage to ensure it endures the remainder of the year.

    So, at the end of the holiday season, you can start by taking all the decorations down and cleaning the artificial Christmas tree thoroughly. Additionally, you may want to make sure that you have a storage spot for all the lights, ornaments, garlands, wreaths, and other decorative pieces. They can take up a significant amount of space, too.

    Using some warm water mixed with a small amount of dish soap, wipe the stained areas of the tree down. You can use a spray bottle and a brush or soft cloth for this as well.

    Once you’ve cleaned the tree, allow it to dry completely before storing it. Lingering moisture can damage the tree in storage, after all, drastically reducing its lifespan.

    Tip

    Before you begin cleaning the artificial Christmas tree thoroughly, consider using a brush or vacuum on low settings to dust it off properly. And to make sure that the tree can handle the vacuuming power, you may test it on the small tree sections at its base.

    Options To Store Artificial Christmas Tree

    Options To Store Artificial Christmas Tree

    For the tree to remain in pristine condition, you’ll need to store it in a cool, dry place. The tree needs to be kept safe from the sun, as prolonged exposure to solar heat can discolor or even melt it. And as mentioned earlier, the tree needs to be kept away from moisture.

    So, attics and garages make for poor storage spaces for artificial trees. The attic can become quite hot during the summer due to solar exposure, while garages may accumulate moisture during the rainy season. That leaves out the closet, which may very well be the best storage space for artificial trees.

    But the storage space alone won’t keep your tree safe and in a displayable condition. For this, you’ll need a proper means of long-term storage.

    Some of the storage options are as follows:

    1. Upright Storage Bags

    If you have the space for it, then an upright storage bag may be the best option for you. While more expensive than some of the other options, a good-quality upright bag simplifies the storage process.

    When you need to have your tree stored upright, simply slide the bag over it from the top and zip it up. And to unpack it, simply undo the zip, and the tree will be ready to be decorated.

    Upright Christmas tree storage bags are especially helpful if your artificial tree is delicate or requires a specific kind of care. The tree remains motionless and untouched by external elements, and it can be transported easily in its stand.

    2. Christmas Tree Bags

    Christmas tree storage bags are some of the most popular options for storing artificial trees as they can easily store them in a compact package. Typically in a box-like shape, these tree bags are easy to carry thanks to the included handles and wheels.

    The primary objective of these polyester or canvas tree bags is to keep the tree safe from external elements like humidity, heat, and pests. And the Christmas tree storage bags successfully achieve this, allowing you to take apart the tree for storage and reassemble it when Christmas rolls around.

    Artificial trees slide into these bags horizontally once disassembled. They remain free of musty smell and any visible damage after storing them and leaving them undisturbed for the rest of the year.

    The only real hassle with Christmas tree storage bags is having to assemble or disassemble them during on- and off-season. This is something that upright bags circumvent completely, making these just slightly less effective.

    On the other hand, Christmas tree storage bags are also more affordable than upright bags and take up less space. So, choosing between the two depends on what you need from the bag.

    3. Plastic Wrap

    You can simply use plastic wrap to store the tree. Plastic is moisture-resistant and durable by nature, making it suitable for larger trees particularly. And for this, you must make sure to compress all the branches carefully without putting any strain on them.

    Like upright bags, plastic-wrapped trees don’t require the tree to be taken apart to store away. Once wrapped, simply tie a cord or a ribbon around the branches to secure them properly, and your tree is ready to be stored away.

    A flaw that plastic wrap does share with upright bags is the storage space it needs, as it does very little to compress the tree. So, if you have the space for it, plastic wrap may very well be a cost-effective and hassle-free way of storing your Christmas tree.

    Tip

    Plastic wrap is particularly useful for flocked trees, which can lose their visual appeal if clumps of artificial snowfall off from external activity.

    4. Boxes

    Consider cardboard boxes to be the last resort when storing your Christmas tree.

    They offer neither good protection from external elements like heat, pests, or moisture nor do they take up less space than solutions like tree bags. For everything that they are capable of doing, an alternative method can do better.

    Moreover, a cardboard box may crush the lights, cause the flocking to fall off, or leave the trunk pole peeking out from a hole. Due to the way, cardboard boxes are constructed, they are simply not very effective at their job.

    On the flip side, hard boxes are better at storing trees than cardboard. They lack all the flaws mentioned above while being sturdy and reliable enough to be used for storage.

    You may consider hard plastic boxes to be a sibling to the Christmas tree storage bags mentioned earlier. These make storage quite simple and make for one of the best options to store your artificial Christmas tree. And with features like sealable lids and wheels, you won’t find any trouble during transport either.

    Storage Tips

    Here are a few small tidbits that you should be mindful of when storing your artificial Christmas tree. These are simple storage solutions that don’t usually require extensive planning, allowing you to adapt as you proceed to store the tree. 

    • Keep the tree safely in a dry area, away from sunlight or moisture 
    • Label the Christmas tree storage bag or box when storing it away in your closet 
    • Remember to store the ornaments in a safe place, preferably close to the tree 
    • Consider using a dedicated box for Christmas tree decorations 
    • If you move frequently, consider using a rolling tree stand for upright tree bags 
    • Use some sodium bicarbonate in the Christmas tree storage bag to prevent foul smells 

    When should I take down my artificial Christmas tree?

    The answer to this question depends entirely on you. Some say that it’s bad luck to take down a Christmas tree before January 6th, while others do it as soon as the New Year arrives. 

    From a practical standpoint, you may want to take it down sometime in January to preserve the good looks of your artificial Christmas tree. The festivities slow down during the month, which can be a good time to wind down the celebrations. 

    How do I disassemble my artificial Christmas tree?

    Most artificial trees share a disassembly process. Once you have taken off all the decorations and cleaned the faux tree, take apart each branch and pack them up separately. You must take care to keep them in a duffel bag so that you don’t lose them anytime soon. 

    After this, you can disassemble its trunk and begin storing it in a tree bag or box. This can depend on the model as well, so be sure to refer to the instructions manual for any model-specific quirks. 

    Can I store my artificial Christmas tree outside?

    Storing your artificial tree in a shed or outdoors is a bad idea as exposure to sun can quickly discolor or damage it. The best place to store your tree is in a basement closet or a dedicated storage room. 

    How long can I store my artificial Christmas tree?

    When stored properly, artificial Christmas trees can last up to 10 years. This longevity is what gives faux trees a leg up on real trees, giving you plenty of value for the extra upfront cash you spend. 

    Conclusion

    Christmas trees represent delight in the Christmas and holiday season, and by preserving them, you will be carrying the holiday spirit forward each year. Needless to say, it’s important to keep them safe so that they last for several holiday seasons ahead. 

    There are plenty of considerations surrounding the storage of an artificial Christmas tree, but the storage process itself remains fairly simple across the board. Whether you need to take the tree apart or not depends entirely on the type of storage used and the space you have. 

    At the end of the day, choosing a storage option is a matter of what you need out of it. If you need the tree to be ready for display, you can go for an upright bag. Otherwise, a tree bag or box will serve you equally as well. 

    To shape an artificial Christmas tree, you’ll need to gather the equipment and prepare the workplace first. Then, start shaping the main and side branches, spread the branches from the center and move outward and bend them accordingly. Trim any odd branches, check the lights and decorations, and you will be done. 

    A lot of people nowadays use artificial trees over real Christmas trees, thanks to their convenience. 

    However, after unboxing an artificial tree, you might have noticed that its leaves and overall shape look a bit flattened. This is usually done for packaging convenience, and it means that you will need to shape the tree to make it look natural. 

    But if you don’t know how to shape artificial Christmas trees, then no need to worry. In this guide, I have discussed how you can shape and fluff an artificial Christmas tree easily. So, dive in! 

    The Basics Of Shaping An Artificial Christmas Tree

    The Basics Of Shaping An Artificial Christmas Tree

    Let’s be honest - it is near impossible to imagine a Christmas without the proper Christmas décor. And the lovely Christmas tree is the most recognizable décor for the holiday season.

    Unfortunately, growing a natural Christmas tree is a hectic task. There are a lot of things that you need to consider, such as soil quality, climate, and so on. Besides, you cannot move a real tree that easily.

    That is why artificial Christmas trees are so popular these days. Not only do they look similar to real Christmas trees, but they can also be moved around easily. On top of that, you can customize different aspects of the tree, such as its shape and size, for instance. In fact, you can even purchase a pre-lit tree that comes with different decorations already attached to it.

    However, before you can put your tree on display for everyone to see, you will need to shape it up. After all, it is a fake tree, and unlike a natural tree, it won’t get a natural shape unless you fluff it manually.

    Luckily, fluffing an artificial tree is not a very difficult task, and once you complete it, it becomes almost indistinguishable from the real thing. On that note, if you are a bit creative, you can turn the shaping process into a fun holiday activity for everyone to enjoy before the actual festivities begin!

    Things You’ll Need For Shaping An Artificial Christmas Tree

    Before you get started, it is important to gather the necessary equipment and supplies beforehand. That way, you can complete the process without any hassles or interruptions. Below is a list of all the things you will need for this task.

    • Gloves
    • Scissors
    • Brushes
    • A hair dryer or a steamer
    • Dustpans
    • A step-stool or a ladder

    As you can see, you don’t need a lot of expensive equipment and supplies to accomplish this task. In that context, if you are using a pre-lit tree, you might want to get some extra equipment, such as a wiring kit, wires, and spare bulbs. Likewise, I would suggest that you wear a long-sleeved top to prevent your arms from getting scratched by the tree branches.

    Steps For Shaping An Artificial Christmas Tree

    Steps For Shaping An Artificial Christmas Tree

    Once you have gathered your gear, it is time to begin shaping the tree. For this purpose, you can follow the steps I have described below. 

    Step 1: Prepare The Working Area

    First, you will need to prepare the working space so that you can get the job done neatly and efficiently. See to it that the space around the tree is clean and organized. 

    Get rid of any unwanted items, and make sure that you can easily sweep or vacuum the place after you are done. Believe me - this will make the clean-up a lot less problematic. Moreover, if you have any pets, such as cats, you will need to keep them away from the tree during this time. 

    Step 2: Start Shaping The Bottom Branches

    In this step, you will need to shape the branches near the bottom section of your artificial tree and then gradually work your way up from there. This method will allow you to see what you are working on, and it will help cover every branch of the tree. 

    Step 3: Spread The Fronds And Tips Of Each Branch

    As you move up the tree, you need to ensure that the tip and fronds of each branch have been properly spread out with a brush. Just give the branches a gentle shake, and then fan out the leafy portions. Then, move the tips to the sides of the top so that the branches resemble a peacock’s fanned tail. 

    Make sure to follow this process for all the remaining branches. If you have a tall tree, though, you should fan the branches out before attaching them to the central pole to make the process easier. 

    Step 4: Pull Out The Side Branches

    Next, it is time to spread out the side branches present on the tree. These branches make the tree look fuller while simultaneously helping to cover up the central pole. 

    However, these side branches are not present on every branch of the tree. In order to shape them, you can shake them gently and fan out the leafy portions at different angles, just like you did before. 

    Step 5: Fluff From The Inside

    Now that the basic fluffing is complete, you will need to start the next step, which is to fluff all the branches from the inside. This will help to spread the branches even more and make the foliage look natural. 

    Get your hands inside each branch, and ruffle them from the inside. Make sure to move outward slowly to spread the branches uniformly. You can even use a steamer or a hair dryer to spread out the branches. Same as before, you need to start from the lower section and steadily move toward the top. 

    Step 6: Shape The Top Of The Tree

    After you are done with the lower branches, you can get on a step stool and shape the branches present near the top using a similar technique as above. 

    If you have a really tall tree of over seven feet in height, you can use a ladder instead of a step stool to reach the top potion. You should use a ladder that has a secure base or have someone hold the base of the ladder. If you are not careful here, you might fall and injure yourself. 

    Step 7: Bend The Branches

    In this step, you will need to bend the branches to give your artificial tree a more authentic appearance. Typically, an artificial Christmas tree has all the branches swept at an upward angle. So, you can bend some of them at a different angle to make the tree look realistic. Besides, it can be useful to cover up the central pole and get rid of any shape imperfections. 

    Warning

    Do not bend the branches too much during this step, or they may break and ruin your whole tree. Just bend them slightly so that they do not look out of place on the tree. Furthermore, make sure to vary the angle at which you bend each branch for the best results. 

    Step 8: Cut Off Any Odd Branches

    Next, using the scissors, you need to cut off any branches that are too long or oddly placed. These branches will protrude from the tree in an awkward manner, which means that they shouldn’t be too difficult to identify. Likewise, you can trim the foliage of the other branches to maintain uniformity. 

    Step 9: Take A Break And Check Your Work

    Here, you need to take a step back and evaluate the work that you have done so far. This is crucial since it helps you to assess the tree from different angles and identify any issues. In case you notice any problems, you can take care of them to ensure uniformity in the tree. 

    Step 10: Check The Lights And Accessories

    If you have a pre-lit or pre-decorated Christmas tree, you will need to complete this step. Here, you have to ensure that all the lights and extra ornaments in the tree are working as expected. If you notice any defects, you can swap out the problematic component with a spare part. 

    Tips And Tricks For Shaping An Artificial Christmas Tree

    Tips And Tricks For Shaping An Artificial Christmas Tree

    Below, I have mentioned some handy tips and tricks for shaping and fluffing an artificial Christmas tree. If you follow them, you can complete the task quickly and with better results. 

    • Consult the photo of your tree and its manual (if included) before shaping it 
    • Try to involve your family and friends to make it more enjoyable 
    • Make sure to purchase a tree that has easily adjustable branches 
    • Use extra decorations to fill gaps and cover up the main stem 
    • Always wear gloves on both hands when shaping the tree 

    How Long Does It Take To Shape An Artificial Christmas Tree?

    On average, it will take around an hour to shape your artificial Christmas tree. But it may take you longer if you have a bigger tree. And if you take frequent breaks in between to inspect your work, it will naturally take you a long time to finish the job. 

    Similarly, if you have a pre-lit tree, it might take you a while to inspect all the bulbs. On that note, adding extra ornaments and decorations will take a fair amount of time as well. 

    How Do I Store An Artificial Christmas Tree After Shaping It?

    Once the festivities are done, it is a good idea to store your artificial Christmas tree till the next Christmas. However, you do not need to stuff it back into the packaging. That will flatten the leaves, which means that you’ll have to shape the tree again the next time. 

    Instead, you can use a dedicated tree storage bag to store it. Such bags will protect the tree from dust and sun damage and retain its shape for a long time. 

    How Often Do I Need To Shape My Artificial Christmas Tree?

    You need to shape your artificial tree only once before the Christmas festivities begin. And if you use your tree carefully, you won’t need to go through this process again for the rest of the season. 

    That said, if you have pets and children in your household, their shenanigans can cause the tree to become untidy and out of shape. Naturally, you will have to shape it again after a few days. 

    Conclusion

    So, that is how you can shape your newly-bought artificial Christmas tree. Now that you know, the process seems quite straightforward, doesn’t it? 

    I mean, all you need to do is gather a few supplies and get started. After a preliminary shaping process, you can fluff it from the center to give it a natural feel. 

    Also, starting from the bottom will allow you to complete the process smoothly. Subsequently, trim any outlying branches, and check the lights and decorations, and your tree will be good to go! 

    In any case, now it is time for me to wrap it up. Enjoy your holidays, folks! 

    Clip Studio Paint, or Manga Studio as it was known earlier, remains a preferred tool of many Manga and Anime designers. If you haven’t used it yet, you should try it as soon as you can - simply because it’s one of the most useful tools out there and thanks to a wonderful community you can find the best manga studio & clip studio paint brushes free of charge.

    This software has proved to be a wonderful companion to all digital artists who work on animations or integrate animated components into their work. The brush functionality is one of the most flexible ones amongst software you can get today.

    While there are a number of paid brush sets available for use, many people have been kind enough to make their implementations available to the general public for free.

    Today, we’ll get to know about 21 of the best free brushes you can get for Manga Studio online.

    Let’s get to the first brush set!

    Best Manga Studio Clip & Studio Paint Brushes

    21 Best Manga Studio & Clip Studio Paint Brushes [Free Download]

    1. Brush Set bymartinacecilia

    This brush set on DeviantArt by user martinacecilia is one of the best ones we could find for Manga Studio, which still works well with Clip Studio Paint. These clip studio paint brushes give you a wonderful feeling like you’re painting with oil colors, which is especially useful for people who are frequent digital painters.

    This set of brushes gives you the classic Manga Studio feels - while this doesn’t offer you anything beyond the basic designs, it does that pretty well. It comes highly recommended from the designer community as well; simply because they’re easy to use and offer a wide variety of patterns and finishes.

    Solid brushes, as well as some which emulate “hairy” brushes, are just some of the brushes this pack features. Even if you’re just beginning with digital art, you should give this set of brushes a try. You will be surprised how these brushes just “do” what you want them to do.

    2. My Current Clip Studio Paint Brushes by iridescentdelirium

    This set of brushes gives you a number of basic tools which you can use to design complex characters, environments, and objects. Hence, you should give this brush set a chance if you’re looking for something to either get started with or to fine-tune your brushes to get more control over the scene.

    This brush set delivers on both varieties as well as offering a fair amount of control over the drawing. You get a number of brushes such as a Variable Rectangle, a Variable Sponge, and a Variable Ink Smudge - these are all pretty self-explanatory in their use. The Cel tool helps you to give your detailing chops regardless of the size of your brushes.

    Also, if you want to go for a more paintbrush-like feel, the Digi Bristles tool on this brush set will do the job perfectly well. Further, there’s another tool that you may like - Ink Paint 8, which gives you a starry, speckled finish for those days when you just need to get a night scene done. Hence, these brushes work well for almost any scenario - give these a shot!

    3. SerketStalker’s Assorted Brushes

    If you’re someone who just wants one brush set to cover as much ground as possible, here’s your best shot. SerketStalker has uploaded this vast, comprehensive brush set which includes a few speed painting brushes which are useful in almost any scenario when deadlines approach or you have other things to attend to.

    3. SerketStalker’s Assorted Brushes

    This brush set gives you small brushes, brushes shaped like crystals, a number of spray-like and dot-like brushes as well as certain complex patterns such as flowers. There are 18 of these brushes in particular, but the great thing here is that they’re all useful in their own right. For the average artist who works in multiple areas, these brushes cover a lot of ground.

    One more point - you should usually have some idea about using Clip Studio Paint before you end up using this set. It can get a bit tricky and technical at times, and some prior experience with the default brush set is very helpful for gaining mastery of the brushes in this set.

    4. Gouache Brushes

    These Gouache Brushes will be of immense use to the artists who are already used to painting with Gouache as a medium. Thus, these brushes are perfect who intend to transition from traditional to digital painting, as well as those who want to get started with a new set of brushes. The brushes have a fair bit of variety in width and work well with mice or styluses.

    When someone is transitioning from traditional media to digital media, especially as an artist, the biggest complaint is that it doesn’t “feel” the same way - and this is generally a valid criticism. However, there’s no reason why you can’t get to work on digital media with brushes like this even if you don’t have too much experience working on screens.

    There are 10 brushes in this pack, with the most possible finishes that gouache can give you whilst painting.

    5. TheInkyWay Brushes

    TheInkyWay gives you a number of brushes that can do calligraphy. Not only that, they can do them very well. Part of the overall experience of designing on Manga Studio/Clip Studio Paint is creating written art as well, which includes calligraphy. These clip studio paint brushes are one of the best ones we could find which do calligraphy in as varied a fashion as these do.

    The brush gives you a wonderful way of interacting with the screen via text. Calligraphy is one of the cornerstones of manga and a lot of digital art, especially comics. The range of brushes in this set is astonishing - we’ve never seen as wide a collection of calligraphy brushes as this for free. However, it also has a number of other brushes as well for general drawing use.

    Many of the brushes on this set can be anti-aliased in order to render it better. You can also use the pencil, the repeating pattern brushes, as well as use 1, 2, and 3-point perspective with this set.

    6. Dry Brushes

    Keeping in line with the Gouache brushes above, the same designer went ahead and published this free dry brush pack. It carries many of the same aspects of the Gouache brushes which we reviewed earlier, only it’s much closer to dry brushes rather than gouache painting. Dry brushes have a certain distinct finish to them which Gouache brushes or other brushes can’t give.

    This set of brushes gives you a lot of mobility and flexibility in what you’re drawing. Dry brushes are a wonderful method for painting scenery right from scratch. This is generally avoided by digital artists since digital art is compiled from a number of sources and not necessarily drawn from scratch. Hence, these brushes make life easier.

    However, they are kind of loose when compared to regular brushes you see for Clip Studio Paint which are used to draw a number of environments, objects, and characters. There’s a wide variety of natural-looking brushes on offer in this pack, some of which rival paid brush implementations as well!

    7. BrotherBaston Brush Pack

    Variety is the spice of life, and there is a lot of variety in this set of brushes. This set gives you all of the brushes you can think of, including cloud brushes, pencil based brushes, you can also choose between a variety of flat brushes. These are perfect for making artwork such as digital illustrations and are also useful while working on digital paintings.

    These brushes are some of the best you can fit Clip Studio Paint with, simply because of how many brushes and settings you can change easily. You can change the opacity, the sizes, and the shapes on the fly, making sure you can get the finest of details just right based on your preferences.

    There’s one caveat - these brushes are generally used only by experts since they require a fair amount of effort to get the hang of. Beginners are, however, requested to try this brush pack as well since it gives you a lot of brushes and it’s worth learning how to use them, even if the learning curve is somewhat high for beginners.

    8. Porforever Custom Brushes

    Custom brushes are a far cry away from the generic brush packs which can give you variety, but not specificity. These brushes come in a pack with cloud brushes, some nature brushes as well, and a bunch of custom shapes which you are unlikely to find in any other brush pack on the internet. These brushes are super high quality and give you a very easy experience.

    Generally, one expects brushes found on the internet, that too for free, to be very difficult to use since Clip Studio Paint didn’t officially make these. There are a number of clip studio paint brushes in this set which are truly unique, including bubbles, thorns, flowers, candy patterns, stars of course as well as special designs which are repeated in patterns.

    You also get a few chaotic patterns that you generally don’t get elsewhere. Also, you obtain a number of eccentric yet well-designed fish patterns. This kind of quirkiness is largely the domain of independent designers who make stuff for themselves and end up publishing it. While you may find better quality brushes that are paid for, you cannot get such uniqueness in design.

    9. Side Pencil Brush

    Some brushes find themselves being used very frequently, while others give you the option of being used only if you really want to use them on special occasions. This side pencil brush has just one job: to help you make the digital equivalent of a side pencil sketch. While it does only one function, it does the job very well.

    There are few other brushes that can pull off the side pencil as well as this particular brush can. A few brush packs can come close to this brush, but don’t have an easy-going feel. This brush is highly recommended by digital artists and painters alike. This brush gets flattened with tilting, a wonderful feature you usually don’t see in brushes.

    Hence, this brush makes a lot of sense if you’re into using pencils and pencil brushes.

    10. Loose Inkers

    These brushes are the only free set we could find which can handle digital inking just as well as the professional paid sets of brushes. Digital inking is a wonderful skill that you can learn - it’s helpful particularly when you are into digital illustrations or tattoo design. Tattoo design, when digitally done, can help you give a wonderful touch to your designs.

    While digital inking does not nearly have the same feel as doing it on a piece of paper or better yet, on the skin, it does help you get an idea of what it really would look like. Furthermore, you get the feeling of an actual ink design. This particular set of brushes gives you a feeling as similar to actual inking as you can.

    Hence, go for this set of brushes if you’re into inks, even though no set of brushes really comes close to actual inking on the Clip Studio Paint.

    11. Essential CSP by hattersarts

    The Essential CSP set by hattersarts gives anyone who takes this brush set a huge advantage in terms of getting started with Clip Studio Paint. This set gives you textured or smooth sketch brushes, then the flat brush which is wonderful. Couple this with all the other brushes you get with this set, and you have a wonderful starter pack that will teach you a lot about CSP.

    This CSP set gives you a wonderful kickstart when it comes to drawing as a beginner using Clip Studio Paint. The Essential CSP doesn’t give you a whole lot of brushes, but the ones which it does have will prime you with the basics well enough to give you a great start in digital artistry. However, it doesn’t mean that professionals can’t be helped by this brush set.

    This brush set, courtesy of hattersarts, lets you explore Clip Studio Back inside and out, so you gain a whole lot of expertise with this brush set.

    12. Free Sample Pack

    They say one-size-fits-all doesn’t exist - however, this one set will give you a whole lot of brushes that are usable at all stages of learning how to design. They also give you a number of varied brushes, including simple shaded brushes, rectangular brushes, circular brushes as well as the ubiquitous line brush.

    This brush set will give you the best possible drawing experience you can possibly have on the Clip Studio Paint - and imagine, this is just the free sample of the actual brush set! You have enough variety to get started on almost any kind of design that you may have in mind, and especially beginners will have a field day with this set of brushes.

    13. Brush Set for Clip Studio Paint by Typesprite

    There are only a few brushes that pull off the fantasy-themed look well, however, this is one of the few free brush sets for Clip Studio Paint. This is one of those essential brushes which you absolutely have to have as a digital artist working in the fantasy domain. The fine spray, the marker, the soft texture, and the other brushes really make it invaluable for working with CSP.

    This brush set doesn’t come with a lot of brushes but be assured that the quality of brushes that you get with this set is surely among the best you see on this list. Why’s that? Each and every one of the brushes in this set is crucial to drawing almost any character, object, or environment you can think of.

    The brushes make it incredibly easy to conjure up the images that you have in your mind right onto the drawing area. Angular ink is another brush that makes life much easier if you’re switching over from traditional painting to digital media. Hence, you should definitely give these brushes a try, whether you’re a beginner or a professional.

    14. CSP Brush Pack #1 by Yetten

    When it comes to learning new software for animation, graphic designing, or even manga drawing, having the right set of brushes at your disposal is key to grasping the various facets of the platform.

    And the DeviantArt user Yetten knows the very issues that artists face when mastering CSP.

    Yetten has created its very own brush pack set to use for the CSP platform, which is one of the more user-friendly sets out there. This set is a very basic one and comes with a set of handy and easy-to-use brushes to make patterns such as markings as well as some foliage designs.

    The pack might seem small at first, but it’s surprisingly versatile and every user can find something useful here that they can add to their art piece. This set will help you get a proper grasp of the platform along with its tools.

    15. CSP Brush Pack #2 by Yetten 

    The second brush set from Yetten is a bit more catered to fit the needs of the more advanced CSP users. It’s a much more enhanced version of the previous pack and comes with additional features which adept CSP users will find helpful when working on their next art project.

    The pack contains a lot of foliage brushes mixed in with a bit of spackle brush sets as well as brushes that are perfect for making certain designs like forests as well as custom tree tops.

    On first thought, these improved and additional sets may not sound much or even as versatile, but you will be surprised by the various amount of patterns that you can get out of them.

    They even have a lot of textures for each brush along with certain cloud brushes, making it one of the more popular packs out there.

    16. Manga Studio 5 brushes by Shrineheart

    This is a much older set and comes with 14 Manga Studio 5 brushes which are just perfect for making background themes and various outline patterns.

    Though these brushes were primarily made for the previous versions of Clip Studio Paint, it works perfectly on the newest version as well, without any glitches or bugs.

    Now, what makes these brushes perfect for setting a particular theme is that each of the 14 models represents a particular theme. They consist of simple cloud blending brushes, as well as patchy charcoal-style brushes along with glitchy pixel-y brushes, which are rarely ever found inside most free brush packs.

    Some of the pixel brush designs borrow their design inspirations from Minecraft, making them quite versatile in their approach to what you can ultimately make out of these sets.

    17. Custom Brush pack from Elisven

    The custom brush pack set from Elisven is just amazing when it comes to creating some of the most unique color art pieces in CSP.

    Elisven has designed the brushes to fit a variety of painting styles, hence, it comes with a handy pack of brushes that is versatile enough to fit into any project or theme.

    The pack boasts a couple of concept brushes along with brushes that deal primarily with the texturing of the stroke and varies greatly in terms of quality and clarity.

    There are a few organic brushes thrown into the mix as well, which are ideal for making a lot of landscape and nature-themed art pieces.

    In total, there are 6 brushes in the set, which might seem rather small, but their versatility more than makes up for it. These brushes cater to the needs of professionals and amateurs equally well.

    18. Mama Madzia brush set from MagdaPROski 

    The Mama madzia custom set from MagdaProski is going to be one of our favorite custom CSP brush packs.

    The brushes included in the pack are just top-tier and boast incredibly high-quality strokes which will help you to focus on painting and making intricate art pieces.

    The DeviantArt user MagdaProski makes this free-to-download pack rather unique by including particular brushes like oil brushes, textured brushes, wet and dry stroke mixes as well as ‘hairy’ brushes.

    The so-called ‘hairy’ brushes are amazing when it comes to making particular animal features such as fur and human hair and beard. None of the brushes are all that hard to grasp, so it can be easily used by both amateurs and adept CSP users.

    The brushes also come with their very own tutorial, on the main DA page of the creator. So feel free to grab it and give it a try.

    19. The Blue and Red Pencil brushes by SerketXXL

    Using red and blue color pencils to mark sketches or even practice drawing, has become a very popular and traditional trend among artists.

    SerketXXL now makes it possible to do the very same on the digital platform of CSP, along with helping you to add a bit more color to your art projects as well.

    Now, just two pencil brushes included in the set might not seem like much at all, but what grants these brushes their fantastic versatility and a spot on our list is the various textures that both these brushes come with.

    From looking like pencil sketches to thicker paint strokes, the textures on them are just amazing and you can get a lot of use out of them and make both simple and complex art pieces.

    20. DV Brush Set by Darkodev 

    The DV brush set by Darkodev contains one of the highest amounts of brush styles on our list today. The whole pack comes with over 100 different styles, so you know that you will have the exact type of brushes that you’re looking for in this set.

    It’s quite surprising to know that a free-to-download brush pack has so many different varieties and styles inside it. Darkodev includes a lot of stylistic models inside the pack, like weather brushes, custom textures, as well as many ‘basic’ brushes which most artists use almost daily.

    So from amateur-friendly to more complex brushes, this pack has something to offer for every CSP user.

    If you feel like doing some landscape painting or making animal fur, dinosaur scales, or even intricate meadow scenes, these brushes are bound to have you covered.

    21. CSP Brush pack from DAUB 

    This is a very simple brush pack from the DA user DAUB. They are ideal for short, regular projects as these brushes are quite easy to use, without boasting many intricacies in their stroke texture or tool functions.

    The pack has 20 brushes inside it that work perfectly well with both Manga Studio 5 and CSP and are fantastic for getting the newer user thoroughly oriented in either of the platforms.

    21. CSP Brush pack from DAUB 

    Additionally, DAUB includes some extra textures into the pack, so that you can alter some of the stroke patterns of the brushes and ultimately change the final laydown to suit your theme and match the style that you’re looking for.

    The various styles and textures include watercolors, oil paints, pencil sketches as well as ink.

    It’s the perfect artist’s brush set, for those who are looking for some unique brush styles to add to their next art project.

    Conclusion

    This brings us to the end of the top 21 brushes you have available for free for the Clip Studio Paint or Manga Studio as known earlier. These brushes are all different in their own ways, but they all give you the same high-quality experience. Best of all is the fact that you get all of these from the community, free of charge.

    Clip Studio Paint is a wonderful piece of software that you can use to create some absolutely stunning visuals and designs. These brushes represent only a small part of the totality of brushes you can find online - however, these are some of the best today. Have fun trying them out and inching closer to being a better digital artist!

    Related Articles

    14 Amazing Free Krita Brushes and Brush Packs for Digital Art

    20 Free FireAlpaca Brushes for Digital Painting & Drawing

    Flocking a Christmas tree is a great way to add a snowy, wintery touch to your holiday decorations. Today, I'll take you through the process of flocking, so that you can create your own winter wonderland this holiday season. 

    Get ready to add some extra sparkle to your holiday décor with flocked Christmas trees! Flocking adds layers of artificial snow to your tree, creating a stunning white Christmas effect. Not only does flocking make your Christmas tree look like it's been freshly dusted with real snow, but it also provides a host of benefits. 

    You will discover just how easy it is to create a beautiful and unique centerpiece for your holiday festivities by flocking. So, let’s not wait and learn how to flock to a Christmas tree! 

    Finding the Perfect Flocking Material for Your Tree

    Finding the Perfect Flocking Material for Your Tree

    Now that you're ready to give your Christmas tree a cozy and wintery look, it's time to choose the perfect flocking material! 

    You'll find a variety of flocking options available in the market, including spray bottle flocking, powder flocking, and even pre-flocked artificial Christmas trees. Each of these options has its own advantages and disadvantages, so it's essential to consider what factors will work best for you and your tree.

    Choosing the right flocking material is an important step in creating the perfect white Christmas look for your Christmas tree. When considering the size and type of your tree, think about how much flocking material you will need to achieve the desired effect. 

    Larger trees will require more flocking material than mini trees, and certain types of pre-lit Christmas trees may hold the flocking material better than others. 

    In terms of personal preferences for the finished look, consider what type of snow-covered effect you want for your tree. Some flocking materials create a light dusting of snow, while others create a heavy, frosted look. 

    Additionally, some flocking materials come in different colors, allowing you to customize the look of your tree. You can even mix and match different types of flocking materials to create a unique look that will make your tree stand out.

    Safety is also a crucial factor to consider, as some flocking materials may contain chemicals or other materials that can be harmful if ingested or inhaled. If you have young children or pets like cats in your home, it's especially important to choose a flocking material that is safe for them. 

    Preparing the Entire Tree for Flocking

    Preparing the Entire Tree for Flocking

    Before knowing how to flock to a Christmas tree, there are a few important steps you'll need to take to ensure that the process goes smoothly and safely.

    A. Cleaning And Prepping The Tree

    The first step is to clean and prep your tree. Start by giving it a thorough shake to remove any loose needles and debris. Next, use a clean drop cloth or brush and gently wipe down each branch and remove any dirt or dust that may be clinging to the needles.

    If you're using a farm-fresh tree from a Christmas tree cultivation farm, wash it with soap and allow it to sit in a basement for a few days before flocking it to avoid any potential issues with moisture. Flocking a tree that is still too moist can result in the flocking material clumping and not adhering properly to the branches.

    B. Protecting the Area Where You'll Be Flocking

    When flocking your tree, make sure to protect the area where you'll be working. Flocking materials can be messy and difficult to clean up, so you'll want to take steps to prevent any damage to your floors or furniture.

    Lay down a drop cloth or plastic sheeting underneath your tree to catch any excess flocking material that falls off during the process. You may also want to consider placing the entire tree in a large cardboard box or plastic tub to contain the flocking material and make the drop cloth removal and cleanup easier. 

    Additionally, be mindful of nearby objects and furniture that could be damaged by the flocking material, and cover them with additional drop cloth or plastic sheeting as needed.

    C. Choosing the Right Location

    Once you have chosen the perfect flocking material for your tree, be sure to find the right location to do the flocking. Ideally, you'll want to work in a well-ventilated space with enough room to accommodate your tree and flocking materials.

    If you’re planning to flock your tree indoors, make sure the space is protected from the flocking material. You can cover the floors and surrounding furniture with plastic sheeting or old newspapers to avoid any potential damage. It's also a good idea to wear old clothes that you don't mind getting dirty, as the flocking material can be quite messy.

    D. Safety Considerations

    When flocking your tree, it's vital to take the necessary safety precautions to protect yourself and others in your home. Wear gloves and a face mask to avoid inhaling or ingesting any of the flocking material. 

    It is important to wear goggles, gloves, and protective clothing to avoid any harm caused by the flocking material.

    Make sure to read and follow the instructions on the flocking material carefully, and avoid using any materials that contain harmful chemicals. Additionally, make sure to work in a well-ventilated area to minimize the risk of inhaling any harmful particles.

    Applying the Flocking Material: Let's Get Flocking!

    Applying the Flocking Material: Let's Get Flocking!

    Now that your tree is prepped and ready, it's time to add some snow! Applying the flocking material is the most exciting part of the process, but it requires some patience and attention to detail to achieve the perfect look.

    A. Mixing and Applying the Flocking Material

    Start by mixing your flocking material according to the manufacturer's instructions, make sure to sift it through a sieve to ensure that it's clump-free. Some materials may require mixing with water, while others are ready to use straight out of the container. 

    Once the flocking material is mixed, it's time to apply it to your tree. Sieving the snow powder before mixing it with adhesive and applying it using pressure-sensitive adhesive is crucial to ensure that the flocking is even and doesn't clump together.

    One popular method is to use a flocking spray bottle to apply the flocking material in a fine mist, working in small sections and using a sweeping motion to distribute the material evenly. Alternatively, you can use a flocking gun or shaker to apply the material.

    B. Techniques for Achieving the Desired Look

    To achieve the perfect winter wonderland look, it's essential to pay attention to the details. Take the time to fluff out the branches and apply the flocking material evenly to create a natural-looking snow effect.

    Experiment with different application techniques to achieve the desired level of coverage and texture. To flock a wreath or textile, follow the same do-it-yourself process used for Christmas trees, adjusting the amount of flocking material as needed. For a heavier snowfall effect, consider adding more flocking material or layering multiple coats. 

    C. Timing is Everything

    You need to time your flocking process carefully to ensure that the flocking material has enough time to dry before you decorate your tree. 

    It is also essential to let the tree dry for at least 24 hours on a tarpaulin to prevent any damage to the surrounding area. But depending on the type of material and the amount applied, it can take a few more hours or even days for the flocking to dry completely. 

    Be patient and resist the urge to touch or move the tree while the flocking is drying, as this can cause the material to flake off.

    D. Dealing with Mistakes and Touch-ups

    Even with the best preparation and techniques, mistakes can happen when flocking your tree. If you notice any areas that need touch-ups or corrections, you can use a small paintbrush or spray bottle to add extra flocking material. 

    Take care not to overdo it, as adding too much flocking can make your tree look unnatural and clumpy. If you're unsure about how to make touch-ups, you can also refer to online tutorials or consult with a professional.

    E. Cleaning Up, Disposal, and Maintenance

    After the flocking is dry, carefully remove the drop cloths and dispose of any excess flocking material. Use a vacuum or broom to sweep up any remaining flocking material from the floor or surrounding area.

    While flocking can help protect your tree from drying out, do continue caring for your tree throughout the holiday season. Keep your tree watered and avoid exposing it to sunlight or heat sources that might cause the flocking material to melt or fade.

    Safety Considerations

    As with any Do-it-Yourself project, safety is essential when flocking your tree. Wear gloves and a dust mask when handling the flocking material to avoid skin irritation or inhaling particles. Keep the flocking material away from open flames or heat sources, as some materials may be flammable. 

    Allowing the Flocked Tree to Dry

    All right then! Once you're done applying the flocking material, it's time to let it dry properly. The amount of time it takes for the flocking to dry depends on the type of material you use and the humidity of your environment. Typically, it takes around 24-48 hours for the flocking to dry and set fully.

    But hey, don't just leave your tree to dry without taking some precautions to ensure it dries properly. Here are some tips to help:

    • Make sure your tree is in a well-ventilated area. Proper ventilation will help the flocking dry faster and more evenly.
    • Keep your tree away from radiators, fireplaces, or other heat sources to avoid damaging your tree or starting a fire.
    • Avoid touching the flocking while it's still wet. Flocking can be delicate while it's drying, so be careful not to disturb it.
    • If you need to move the tree, try to do it as gently as possible to avoid damaging the flocking.

    As with every step in this process, safety is always a top priority. Now, go ahead and let your tree dry completely before moving on to the next step. The wait will be worth it when you see your beautifully flocked Christmas tree!

    Decorating Your Flocked Christmas Tree

    Now that you've successfully flocked your Christmas tree, it's time to add the finishing touches! Decorating a flocked artificial Christmas tree can be a little different than decorating a traditional tree, so you need to keep a few things in mind.

    When it comes to decorating your flocked tree, less is often more. The flocking material already adds a lot of texture and interest to the tree, so you don't want to overwhelm it with too many ornaments.

    Consider using a mix of textures and finishes to add depth and dimension to the tree. Christmas tree lights, matte and shiny ornaments all look great on a flocked tree. You can also add some natural elements, such as pine cones or berries, to play up the winter wonderland theme.

    When it comes to placing the ornaments, start with the larger ones first and work your way down to the smaller ones. This will help you balance the tree and ensure that the ornaments are evenly distributed. 

    With these tips and ideas, you're sure to have a stunning and unique flocked Christmas tree that will be the centerpiece of your holiday décor. So go ahead and let your creativity shine!

    Maintenance and Storage

    As the holiday season winds down, it will be time to start thinking about how to care for and store your flocked Christmas tree. But to ensure your flocked tree stays beautiful throughout the holiday season, it's essential to give it proper care. 

    Regularly misting the flocking material with water can help keep it from shedding or becoming too dry. It's also a good idea to keep an eye on any lights or ornaments that may be weighing down branches and causing them to sag.

    Carefully remove all ornaments, lights, and any other decorations. Make sure the tree is completely dry before disassembling it, as mold can develop in a damp tree. Gently fold the branches and pack them away in a storage bag or box. 

    If your pre-lit tree has a stand, it's best to store it separately to avoid any damage to the flocking material.

    Safety considerations are just as important during storage as they are during the flocking process. Always handle your flocked artificial Christmas tree with care, and avoid dragging it or bending branches too harshly. With these tips in mind, you can enjoy your flocked tree for many holiday seasons to come.

    Can I flock to an artificial tree?

    Yes, you can flock to an artificial Christmas tree. In fact, flocking a fake Christmas tree can make it look more like a real tree and add a touch of holiday magic to your décor. 

    What is the best way to apply flocking material to a Christmas tree?

    The best way to apply flocking material to a tree is to use a flocking gun or flocking spray bottle. Apply the flocking material in thin, even layers, making sure to cover all parts of the tree. 

    How long does the flocking material take to dry?

    The flocking material can take anywhere from several hours to a full day to dry completely. It's essential to allow enough time for the flocking material to dry before decorating your tree. 

    Can I use a hair dryer to speed up the drying process?

    While a hair dryer may help speed up the drying process, it's not recommended. Using a hair dryer can cause the flocking material to clump and may result in an uneven finish. 

    How do I maintain the flocking on my tree?

    To maintain the flocking on your tree, avoid touching it or brushing against it too much. To clean the tree, use a soft-bristled brush or duster and remove any dust or debris gently. 

    Can I flock to a Christmas tree that has already been decorated?

    While it is possible to flock to a Christmas tree that has already been decorated, it may be challenging to achieve an even finish. That’s why it’s better to flock to your tree before decorating it. 

    How do I store a fake tree after the holidays?

    When storing flocked trees after the holidays, wrap them in a plastic bag or cover them with a sheet to protect them from dust and debris. Store the flocked Christmas tree in a cool, dry place away from direct sunlight or moisture. 

    Final Thoughts

    Flocking a Christmas tree is a fun and easy DIY project that can give your holiday décor a touch of magic and whimsy. By following the steps outlined in this guide, you now know how to flock to a Christmas tree. I hope you can create a stunning snow-covered tree that will be the centerpiece of your festive celebrations. 

    Just remember to choose the right flocking material, prepare your flocked Christmas tree properly, and take the necessary safety precautions to ensure a successful and safe flocking process. And if you’re still unsure about how to flock a Christmas tree, I recommend going through the above process again. 

    I hope this guide has inspired you to try flocking your own Christmas tree this year! Share photos of your flocked Christmas trees and inspire others to create their own winter wonderlands at home. Happy flocking! 

    Learning how to draw poses is one of the key skills artists must possess, whether digital or traditional. Hence, knowing where to derive some inspiration becomes a fundamental task for any artist.

    Traditionally, this inspiration has come from live figure sessions - but inspiration does not necessarily strike at the same moment as you might be at those sessions. Further, you may need to draw some figures which aren’t derivable from live figure sessions.

    Hence, to take back control, it’s best to keep gesture poses in your hands by either keeping pose photos on your computer or using online resources in order to achieve the same.

    Today, we walk you through the latter process of using online pose reference photo websites which give you access to the best quality material. We feature the 7 best resources you can find online today; let’s begin with the reviews!

    Best Drawing Pose Reference Photo Sites

    1. Line of Action

    Line of Action is one of the websites which gives you access to some of the highest-quality pose and figure content you can get. You get access to photos of animals, human figures, and faces are available as well. Their figure drawing tool is one of the best you can find out there.
    Line of Action
    The figure drawing tool gives you the option of having either semi-nude, fully nude, or fully clothed figure models as per your need. After this, you can decide the sex of the desired figure as well as the duration of the models - and you’re off to work!

    Options similar to what you find on Quickposes are also useful for quick drawings, but also for longer studies. Now, while the duration can be set anywhere between 30 seconds to 5 minutes, as leading figures point out, short gestures and longer poses are both equally important and hence need to be practiced equally.

    While there is no non-timed option on the poses, you can set the timer to 99999 seconds to have access to the pose for as long as it’s possible. The website is neatly partitioned into different areas for each subject, so you can focus on different kinds of subjects on your own time.

    One of the best features is that you can see the work of other artists, so you can get some direction in case you ever get stuck while drawing while looking at poses.

    2. Quickposes

    Quickposes is one of the oldest and most wonderful pose-drawing websites you can find out there. It is less a helping website and more of a system that slowly helps you get better at drawing poses and figures. They have a timed web app where you can queue up your desired set of photos with a time slot of your choice, and get to drawing!

    Quickposes

    You can set timers for poses from 30 seconds to 90 seconds. You can also design sessions where you focus on some parts of poses which you feel you’re not as confident doing with custom time slots.

    However, if you so choose, you can let the poses be decided by the website randomly just to see how well you can do with unfamiliar or unknown poses. For the reference images flashing, you can choose between:

    • The type of poses; the website has a huge variety of these
    • The gender of the model
    • Clothed/semi-nude/fully-nude
    • Portrait/landscape/90-degree rotation

    One of the best things about this website is that you can see all the pose photos independently and download those photos whenever you want to practice by yourself, offline. Most websites don’t have downloadable images - this is one of the few which does. These are a few reasons why this website remains so popular to date.

    3. SenshiStock Sketch

    Different from the other websites we have reviewed so far, this website is completely community-run. All of the images on the website are licensed under Creative Commons and hence are available for free! There are plenty of community-sourced gesture images you can use for free, and most of the images come from DeviantArt.

    SenshiStock Sketch

    There are many different gestures you can choose from. However, what if you want to have timed and structured practice? The SenshiShock Sketch website gives you the opportunity to do exactly that - it’s a very well-structured website that gives you a number of options.

    You can also use your mobile devices (devices such as the iPad Pro and Note 9, especially) to draw as well!

    You will notice one major difference between the usual pose web apps and this one. While this gives you the timer like other apps, the photographs are curated by means of tags.

    These tags give you photos that belong to different categories as per your intended types of figures to practice.

    It’s very easy to get started, though the UI feels a little clunky and unintuitive at first - it gives you an easy way to practice, much easier in the long run than most other competing platforms. The best part is that their website is optimized for all platforms and makes for some great figure-drawing exercises.

    4. SketchDaily Gesture Tool

    Some community efforts take a very different approach towards helping out their own - and an example is this. This particular tool comes as a community project from the Reddit “SketchDaily” subreddit community. A few of these people decided that what they needed was an easy-to-use and intuitive online tool that could handle much of their design needs.

    SketchDaily Gesture Tool

    At reddit.com/r/SketchDaily, you’re forced to face the unknown as compared to most other apps which gives you a fine-tuned degree of control. This makes it perfect for those who are looking for something challenging.

    The online tool, however, is much more flexible. You get to choose your intended poses from among human gesture poses, human body parts, or animal photos. You also decide how long each photo stays on the screen, like most other tools.

    Unlike most other tools, this one is absolutely free, with a decently large repository of images with a variety of different poses and figures. You can also tune those settings on the go, should you get tired of your current setup while sketching.

    You can leverage the fact that this is a community-built tool in a number of ways. First off, there’s the comprehensive software support - since this has been built by this community, it’s quite easy to find solutions to problems.

    The small caveat this website has is that even though it comes from the community, the number of images and the variety of poses is lesser compared to many other sources we have listed today. Furthermore, some of the other sources have better curation of resources than this tool.

    This tool makes a lot of sense for people who are just starting out and want to get a taste of what figure drawing feels like when you have digital references.

    5. Proko Poses

    Proko is something of a deity in the figure-drawing arena. He has a wonderful sketching course that teaches you how to sketch like a professional which is available online. The real kicker here is the fact that you can access some of the most useful learning materials for free on the Proko Poses website.

    Proko Poses

    The newsletter will give you a number of insights on how to be a better artist, hence it’s beneficial to subscribe to the newsletter regardless of the free images you get.

    When you sign up for the Proko Poses newsletter, you instantly receive a set of high-quality images that you can use for figure drawing practice. If you want to see how to utilize these photos to the maximum possible extent, make sure to check out Proko’s free playlist on figure drawing.

    The best part about these photos is definitely the resolution you get. You can easily get a very high-quality, high-definition set of figure-drawing images. There is one caveat, however - you get only a very limited number of images to work with. For more of the same kind of images, you should get the (paid) image packs.

    One of his general packs features around 300-400 photos, but some of the recent packs are more comprehensive and feature over 1500 of the highest quality, most detailed pose photographs with some rarer parts of the body on them.

    6. Pinterest

    While this may seem like generic advice at first, Pinterest does have a large repository of figure drawing pose reference photographs. However, it’s not as easy as simply searching for photos on Pinterest with this tagline - there are more photos on Pinterest than one can count.

    Pinterest

    Further, the origins of these images are sometimes suspect as they may have been taken without the necessary permissions, but they’re available anyway. Hence, it makes sense for beginners to stick to more trustworthy and structured sources of images on websites that preferably have some features related to figure drawing.

    At the same time, you should also know that the variety of images on Pinterest is immense. It’s clearly a much larger repository of images than any of the websites listed above. However, finding images is a very problematic and time-taking proposition on Pinterest. It’s like finding a needle in a haystack but is worth the trouble in quite a few cases.

    For the professionals who’ve got their timing down, heading to Pinterest and using that as a figure drawing reference happens to be a pretty hard task to pull off.

    However, there are some features unique to Pinterest that make it a credible alternative to other websites. First, you can create your own private boards for your specialized figure drawing references that cover either different techniques, objects, body parts, and much more.

    Then, Pinterest has one of the largest selections you can think of. While creating your own board is very time-consuming, you can easily take a peek at how people have designed theirs. This way, you can easily create a board by taking some much-needed inspiration from people who’ve been using Pinterest for a long time.

    What to look for in a figure drawing website 

    These seven websites are not the only ones that are available on the market today - even among those which offer a free tier or are free, these rule the roost. What connects all of them despite their apparent differences is the fact that you can easily get to work on them, and they’re highly customizable.

    Going for websites that allow downloading is always a good bet, especially if you can get to the point where seeing sources that you aren’t familiar with is not a challenge anymore.

    Another problem that plagues many websites is the user interface. If the websites do not offer a reasonably easy and fluid interface, it becomes hard to look at pictures you want to take inspiration from after a while.

    Conclusion

    Figure drawing is a skill that accumulates after much effort. It is the end product of countless hours of toil, getting stuck, redoing your sketches, taking a better look at the subject (if possible) - rinse and repeat. Hence it becomes essential to have good quality resources to practice figure drawing.

    The ubiquity of the internet is immense. Being the behemoth it is, everything you need or want is available after a few clicks from the website of your choice. Figure drawing, once an arduous process with lots of waiting and luck involved, has become much easier than anyone would’ve imagined.

    Hence, don’t waste time - pick a website and get to work! Have fun painting!

    Related Articles

    111 Best, Fun, and Cool Things to Draw

    5 Best Hand Drawing Reference Photo Sources

    49 Super Cool Things To Draw On A Whiteboard


    There are basically two dates for when you can take your Christmas tree down. According to Christian tradition, you can take the tree down on the twelfth day of Christmas, that is, 12 days after Christmas. On the other hand, the new and secular tradition is to take the tree down after New Year’s. 

    Every year Christmas decorations and Christmas trees are put up. And every year, the same question crosses our minds: when is it the right time to take a Christmas tree down? 

    Tradition dictates that the Christmas decorations and the tree should be taken down on the twelfth night of Christmas, that is, January 5 or January 6, also known as the Feast of Epiphany. However, many people also tend to take down the tree after New Year’s. 

    You definitely don’t want to run the risk of encountering the Ghost of Christmas Past, so read ahead to find out when you should take down your Christmas tree. 

    The 12 Days Of Christmas Tradition

    The 12 Days Of Christmas Tradition

    Christian theology observes a period of 12 days after Christmas, known as the 12 days of Christmas. It is the period of time from the birth of Jesus Christ to the visit of the Magi, also known as the three wise men. 

    The Christian Tradition Of Taking Down The Tree By Epiphany (January 6)

    The Christian Tradition Of Taking Down The Tree By Epiphany (January 6)

    Obviously, there can be no universal agreement on this tantalizing question. But there is a general opinion on when you can leave Christmas decorations and the tree up. 

    Most people tend to take down their Christmas tree and holiday decorations around January 5 or January 6. This is because that is the twelfth night of Christmas. 

    This is in accordance with the Christian tradition. January 6, or the Feast of Epiphany, marked the visit of the Magi, the three wise men, to baby Jesus in Bethlehem and the baptism of baby Jesus. 

    There is also some debate on the date marking the Feast of Epiphany. Some Western churches like the Roman Catholics, the Lutherans, and the Anglicans, observe the Feast of Epiphany on January 6. On the other hand, several Eastern Orthodox churches believe the Feast of Epiphany to fall on January 19 and Christmas Eve to fall on January 6. 

    The Church of England observed the twelfth night on January 5. However, some others celebrate the 6th of January as the twelfth night since they count the 12 days after Christmas day. This is why there is confusion on what is the correct date. 

    The Secular Tradition Of New Year’s Day

    The Secular Tradition Of New Year’s Day

    This secular tradition is lesser known than the 12 days of Christmas tradition. Many people believe that leaving the Christmas tree and Christmas decorations up for too long might bring bad luck. This is why they don’t want to start the new year celebration with the decorations of the previous year. You can also call this a superstitious tradition. 

    Factors To Consider When Deciding When To Take Your Christmas Tree Down

    1. Personal preference

    Ultimately, it all comes down to your personal preference. The date depends on the ease of keeping up the tree and the decorations. If the cheery brightness of the Christmas lights is hiking up your energy bills, it might be better for you to take down your Christmas decorations and tree as soon as possible. 

    1. Superstitions and beliefs

    Superstitions and beliefs are a part of the package during the Christmas celebrations. Deciding when to take down your Christmas decorations and Christmas tree boils down to your superstitions and beliefs. For instance, many believe against carrying the decorations into the new year to avoid bad luck. So, you would fare better by taking down the tree and decorations on New Year’s Eve. 

    As for your beliefs, you can always follow the old Bethlehem tradition. If you believe in the story of the three wise men, you should follow the twelfth-night tradition. It will help reaffirm your beliefs and also keep you connected to your religion. 

    1. Practical considerations

    No matter how beautiful your Christmas trees and decorations might be, you will have to take them down after a point. This is because they might sometimes act as a safety hazard. You might trip over the decorations, some kid might swallow the small decorations, start a fire, etc. 

    Tips For Disposing Of Your Tree

    You can reuse the holiday décor, but you cannot reuse a real Christmas tree. So, here are some ecological ways you can dispose of your Christmas tree. 

    1. Recycling options

    Some cities offer locations where you can drop off your Christmas trees after taking them down. Some of it might get ground up and then used as mulch on city lands. They are sometimes also just collected and dropped off at the nearest landfill. There, they can decompose and break down slowly over time. You can browse the Internet for recycling options near you. 

    1. Composting options

    Any used Christmas tree can be used as compost to improve the fertility of the soil. Note that the technique for composting remains the same as for any other compost. This compost can then be used to fertilize crops or vegetable gardens. 

    Many cities set up these composting services to get compost in large quantities. Just look around on the Internet to find such a service near you. 

    1. Disposal options for artificial Christmas trees

    Unlike a real Christmas tree, you can actually reuse an artificial Christmas tree. So, why dispose of it in the first place? Take the more eco-friendly way, and store it securely. Use some zip ties or fishing lines to tie the tree in place. Store it away safely in a tree bag to reuse it again next year in all its glory. 

    How long can I keep a Christmas tree up without it becoming a fire hazard?

    Technically, a Christmas tree is always a fire hazard for your house. However, you can safely keep it up for about 4 weeks, provided you keep watering it during that time frame. 

    How can I make sure my Christmas tree stays fresh as long as possible?

    Taking proper care of your tree is essential to make sure it lasts the entire holiday season. 

    • Make a clean, straight cut across the bottom of the tree 
    • Keep the tree in water 
    • Keep the tree in a cool place 
    • Opt for LED lights for less heat 

    What are some creative ways to repurpose a Christmas tree?

    You can actually use your tree in many creative ways after the festive season is over. 

    • Use the branches to make a wreath 
    • Cut the trunk into small pieces and use it around your garden 
    • Use the branches to make a bird feeder 
    • Use it as compost 
    • Use it as firewood 
    • Replant it in your garden 

    How do I store the Christmas tree decorations?

    Decorating your tree with ornaments, stockings, lights, etc., is part of the Christmas traditions. Here are some tips on how to store those decorations after you take the Christmas tree down: 

    • Wrap the fragile items in bubble wrap for protection 
    • Wrap the lights around cardboard to avoid entanglement 
    • Put all in cardboard boxes and label them accordingly 

    What is epiphany?

    Epiphany, also known as the Three Kings Day, marks the official end of the holiday season, dated January 6th every year. It signifies the ancient Christian feast day, celebrating the baptism of Jesus Christ and the arrival of the Magi. Celebrations take place across the world in the form of special services in accordance with the Christian calendar. 

    Conclusion

    Thus, there is no right or wrong answer for when to take down your Christmas decorations and tree. It all comes down to your personal preferences and beliefs. If you follow Christian traditions, it is best to take your tree down on the twelfth day of Christmas. Or, you can just take it down before the new year begins to avoid any bad luck that may come your way. 

    Whenever you take down the tree, the important thing is to spend your Christmas in peace with your loved ones.  So, whether it’s New Year’s Eve or the twelfth night, make sure to have a jolly good Christmas season before you take your tree down. 

    Storing icicle lights in a light box with compartments is the best way to ensure the lights are stored tangle-free for the next holiday season. Putting the wrapped lights in a Ziploc bag or bubble wrap will further keep them protected. 

    Icicle lights, a frugal alternative to the customary nubby Christmas string lights, are among the more tasteful iterations of holiday decorations. 

    Though modest, each bulb in icicle lighting lasts about 75,000 hours– that’s beyond 3,000 days! You can reuse them year after year by storing them properly, but because they are tangle-prone, many find storing icicle lights challenging. 

    Nevertheless, here are tangle-free tips and tricks for storing icicle Christmas lights. Keep reading, then! 

    Best Way To Store Icicle Lights For Christmas

    These dangling, versatile icicle lights, when installed on a Christmas tree or other areas of the home, lend a wintery theme to the Christmas décor without overwhelming it. And because they last for a good number of years, storing them properly will allow you to use them in Christmas decorations without buying new ones. 

    1. Prepare The Lights For Storage

    1. Prepare The Lights For Storage

    Icicle Christmas lights feature lengthy cords and are delicate in nature, which is why they get tangled very easily. Storing them in a tangled condition will render the lights useless, so detangling them is necessary.

    To detangle the icicle Christmas lights, take a small segment of the tangled lights and unravel it slowly and carefully, twisting and turning the wire around a book, tabletop, or other flat surfaces. 

    While detangling, keep the tension on the strands and let the ends of the wire hang off the edge, so they don’t get tangled again. Also, keep an eye out for the bulbs to ensure they don’t crack or break in the process. 

    As soon as you’re done with one section, proceed to the other section and untangle the strands in the same manner. Be sure to straighten out the strands in the same direction; otherwise, the lights will tangle again. Occasionally, hold the light strings up to check if they are crooked or aligned in a straight line. 

    Then, remove debris and dirt by scrubbing them with soapy water using a toothbrush. After a while, rinse off the lights with water and wipe them dry with paper towels or clothing, which will make them as good as new. 

    Tip

    Don’t forget to inspect each and every bulb by holding it up in the light to see if there is any physical damage. And test the functionality of the string lights by plugging them into an electrical outlet.

    2. Choose The Right Storage Container

    2. Choose The Right Storage Container

    Store icicle lights in a plastic storage container after taking them off the Christmas tree. However, that isn’t the only way to store your Christmas lights and there are several other containers that can be used as storage bins for icicle lights. 

    In regards to icicle light storage, containers that come with spools are my go-to pick because they prevent the lights from getting entangled, no matter how long they are stored. Such containers are available online but be sure to go for high-quality boxes that come with a dozen set-and-store fasteners. That’s because such a storage bin prevents light strings from turning into perilous knots and keeps them tied up in neat loops. 

    Another viable option for storing Christmas lights is to use PVC piping. All you need to do is wrap the light strings around the pipe, secure them with an elastic band, cable tie or a zip tie, and that’s it. 

    Or perhaps, simply use the original box to store icicle lights, as it keeps them protected. 

    Tips For Selecting The Right Size And Material For The Container

    • Consider the space where you’ll store the lights
    • Choose a container that is large enough to hold the strings of Christmas lights
    • Go for boxes made of heavy-duty polyester, preferably 600D
    • Boxes with acid-free lining are a bonus
    • Make sure the walls are sturdy
    • An easy-access zipper and reinforced handles are a must-have
    • Choose a storage box that comes with an ID window

    Labeling The Storage Container For Easy Identification

    Labeling the Christmas light storage container is important if you don’t wish to spend countless hours searching for them the next holiday season. Writing directly on the plastic box, using masking tape and printable labels– I tried almost everything, but nothing worked. 

    So, here’s a new solution to labeling the storage box of the icicle lights: creating a name tag. 

    Only 3 things are needed to label the box which is used to store Christmas lights, and they are:

    • Binder clips
    • Badge holders
    • Zip ties

    Here’s how to create a label for your Christmas light storage box:

    • Write “Christmas light” on a piece of paper
    • Using a utility knife, cut it to the size of the holder
    • Insert a zip tie and secure it properly
    • Squeeze the binder clip to take off its handles
    • Insert it inside the zip tie loop and reattach the handles
    • Clip the badge to the cover of the container

    3. Coiling And Wrapping The Lights

    3. Coiling And Wrapping The Lights

    Prior to storing, you’ll have to wrap the lights around a reel or a bobbin to make sure they do not get entangled in storage. Here’s how to coil and wrap the lights like an extension cord so that they remain tangle free. 

    Step 1

    Place the light in the storage container. Take one end, and start wrapping it around the cardboard from the bottom up in a winding motion. 

    Step 2

    Use your hand to create a neat and tidy circle and continue wrapping them like you’d coil long extension cords until you reach the other end. 

    Step 3

    After the lights are wrapped around the storage box or tube, take a rubber band or two and tie it around the coiled lights to secure them. 

    4. Storing The Lights In A Safe Place

    After wrapping and coiling, you’ll have to store the Christmas lights in a safe place so that they are in a usable condition next year. 

    The best areas to store your Christmas lights are away from sunlight in a cool, dry space, such as closets, attics, garages, or waterproof garden sheds. Whichever place you decide to store the light, make sure the roof isn’t prone to leaking; otherwise, water will damage the lights. 

    Prior to storing Christmas lights, wrap the lights in bubble wrap or add a few packets of desiccant within the box. Then shut the lid and store it wherever you intend to. 

    For extra protection against pests, dust, and moisture, wrap the lights in a tissue paper or paper towel. You can even use Ziploc bags to prevent mice from chewing the strings. 

    Tips For Maintaining Christmas Lights

    • Dispose of broken or damaged bulbs 
    • Use wooden ladders instead of metal ones 
    • Replace broken or burnt light bulbs 
    • Use a light tester to check each incandescent light bulb 
    • Hang them on a clothes hanger to prevent them from entangling. 

    How long can I store icicle lights?

    With proper maintenance, you can store icicle lights for about 4 to 6 years. However, in the meantime, don’t forget to replace broken or damaged bulbs. 

    How do I know if my icicle lights are no longer safe to use?

    It’s best to dispose of your icicle lights whenever the wires turn brittle or are exposed because then the bulbs become unsafe for use. 

    Can I store icicle lights outdoors, or should they always be stored indoors?

    Icicle lights will be usable the next Christmas and holiday season only if you store them indoors away from the heat source. Exposure to the rays of the sun, water, or other elements can damage them, rendering them useless. 

    Conclusion

    Like Christmas trees, icicle lights are integral to Christmas festivities. 

    From the fence and the front porch to the tree, icicle lights are versatile and make the festive season bright and merry. Once purchased, they can last for a long time– the only thing you have to do is store them properly to reap their benefits for years. 

    Cleaning dust, debris, and other impurities from the lights are essential. Thereafter, coil the lights around a cardboard or tube and put them in a box, and store it in a cool place. 

    Remember, excess heat and water can damage the lights, so take extra care when it comes to storing them. Hopefully, you learned a thing or two about storing icicle lights to celebrate a merry Christmas! 

    Your Christmas lights may malfunction due to several reasons, including loose connection, broken sockets or fuse, or burnt bulbs. These problems can be easily resolved by checking the connection and replacing the faulty parts, and you can prevent them from occurring again by following some precautions. 

    Finding out the exact issue with an electric light string can be incredibly frustrating and annoying, especially when you’re in the holiday spirit. 

    Burnt-out holiday lights are quite easy to fix if you know what exactly went wrong - yes, even the cheaper ones. They require minimal time and investment, and the simplest fix can help you avoid accidents this Christmas and holiday season. 

    So, here’s a step-by-step guide on repairing Christmas lights quickly and efficiently by identifying the right issue. Keep in mind that these steps will also help you fix your outdoor lights for Christmas. 

    How To Fix Christmas Lights: A Step-by-Step Guide

    Tools and Materials Needed

    • Bulb or voltage tester
    • Replacement for faulty Christmas light bulb
    • Replacement Fuse (electrical)
    • Wire cutters
    • Diagonal pliers
    • Small, flat screwdriver

    A bulb or voltage tester is a tool used to check if electricity is properly flowing through a socket, plug-in (computing), and even in incandescent light bulbs. If the voltage tester doesn’t respond, it denotes faulty electrical wiring, a broken socket, or a bad bulb. Wire cutters and pliers will be required to repair Christmas lights, especially for fixing the electrical connection or the circuit breaker box. 

    Finding the Problem In String Lights

    Finding the Problem In String Lights
    © Homesthetics | http://homesthetics.net/

    String lights aren’t the most durable holiday lights since various malfunctions can occur throughout the entire string. But our informational guide will help you identify the possible issues to fix your light strings quickly. 

    1. Check If The Power Source Has Electric Current

    Among the various issues that can make LED string lights faulty, improper electrical current flow sits at the top of the list. If you have attached the light string to the electrical connector, and it's still not working, check if there’s power in the AC power plugs and sockets. 

    You can do this using voltage testers or a pen tester. Are you scared to try these tools? Simply plug in a functional light string to check if it's working. 

    If the string of Christmas lights isn’t working or the test light doesn’t respond, go to the breaker box to repair the shunt. 

    2. Check Your Christmas Light Fuses

    The next thing you should check regarding your Christmas light is the possibility of a bad fuse. Most strings of lights have two tiny fuses on each light, which are usually present behind the small sliding door in the Christmas light plug. If you find that they’re popped, then you’ve got to figure out how to repair the fuse. 

    3. Check For Bare Wires And Burnt Out Bulbs

    If you see that the light strand is not working even after switching out the fuses, there’s either a faulty bulb or an internal break in the wires. You have to be extremely careful when dealing with wires, but changing the problem bulb is comparatively easy. We’ll explain the process in greater detail in the next section. 

    Troubleshooting Your Christmas Light

    Troubleshooting Your Christmas Light
    © Homesthetics | http://homesthetics.net/

    Before you enthusiastically work on your outdoor light ideas or decorate your Christmas tree, it’s important to check for any faults and troubleshoot them to prevent any accidents. Based on the different problems we’ve discussed in the previous sections, here are the steps to troubleshoot them: 

    1. Change The Bad Bulb

    Identifying the faulty bulb can be really tricky, given there are quite a few of them. Light testers are very handy in this case - or you may simply plug in the Christmas light set into the outlet and see which ones aren’t working. Most string lights require every bulb to function for electricity to run through its entire length, so even one bad bulb may cause significant problems. 

    Sometimes, gently tightening the bulb’s socket secures the loose connection, but if that doesn’t work, you must replace the bad bulb. To do that, unplug your Christmas light, remove the bad bulb, and replace it with a new bulb with the same voltage, design, and size. When you get the new bulb back in its place, you’ll successfully establish the electrical connection again. 

    Tip

    While replacing the incandescent light bulb, look at the two wires at the base, and ensure they’re in their place and not touching each other. 

    2. Change The Fuse

    If your string of lights won’t turn on at all, then you’re with a malfunctioning fuse. Simply slide back the plastic cover on the plug to access the male end of the fuse. Then, carefully remove the fuse using a screwdriver and replace it with a new fuse, and you’re good to go! 

    3. Don’t Let Your Outlet Overload

    A common reason your string of lights flickers or won’t stay on is the heavy wattage demand on a single electrical outlet. If this is your case, you should consider dividing the light string among two or three outlets. Another way to prevent overwhelming wattage demand on a single outlet is by purchasing a twist-on wire connector or splitter which helps evenly distribute current flow. 

    Moreover, you can purchase light strings with a voltage requirement less than that of your outlet. To learn the capacity of the outlet, go to the breaker box and find the amp value shown - and, ideally, you should purchase lights. Alternatively, you can use solar-powered Christmas lights to prevent overloading and bulb burns. 

    4. Repair the Shunt

    Every Christmas light has sockets that contain something called a ‘shunt.’ The shunt (electrical) maintains the current flow, especially during bulb burns. But when it malfunctions, entire sections of a Christmas light turn dark even if you replace one bulb. You’ll need a shunt repairer or kit to troubleshoot this problem. 

    Tips for Preventing Future Problems
    © Homesthetics | http://homesthetics.net/

    Tips for Preventing Future Problems

    1. Take Down Your Christmas Lights Carefully

    An inexpensive holiday light set isn’t the most durable decorative alternative, so it’s important to handle them with care. Don’t pull the lights too hard since it can lead to broken bulbs, wiring, or socket, making the entire string malfunction. When you’ve taken down the lights, plug them into the outlet again to ensure they still work. 

    2. Store Them Properly

    A common mistake many consumers make is throwing away the containers or boxes the Christmas light originally came in. This makes storing them properly a tedious job. Moreover, you must not entangle the light strands into tight balls since detangling them will be very frustrating, especially if you’re about to fix Christmas lights. 

    Loosely bunch them up, making sure the light bulbs don’t clash with each other - this will make the decorating process a lot easier for your next holiday season. 

    3. Upgrade Your Christmas Lights

    On average, a Christmas light lasts up to three holiday seasons, sometimes even less, so you can't always fix them. To ensure your Christmas spirit lasts longer, consider switching to LED lights. LED (Light-emitting diode) also use significantly less electricity and are much safer to handle than traditional light strings. 

    4. Drape/Attach the String Lights Properly

    Draping the string lights on a Christmas tree is harmless and easy, but you must be careful while attaching them to the wall or siding. Use plastic light hangers for this purpose instead of staplers since the metal can break or fray the wires, which can permanently damage your holiday lights. 

    Why won't my Christmas lights turn on?

    If your Christmas lights don’t turn on at all, then there must be a problem with the fuse, shunt, or outlet. For a faulty fuse, access the male end of the light plug, and replace it with a new one. 

    Got a broken shunt? Purchase a shunt repairing kit and follow the manual to fix it. Moreover, you can try distributing your string lights among two or more electrical outlets to prevent overloading a single one. 

    How can I tell if a bulb is burnt out?

    A light bulb in the string might not work due to a number of reasons - it can be a loose electrical connection, improper plugging, or, most commonly, a burnt bulb. To check if a bulb is burnt, carefully look at the filament connecting the negative to the positive contact, which is held by a glass mount. 

    If you see the filament is not taut but rather loose and burnt, you have the classic case of a burnt bulb. 

    Can I replace individual bulbs on my Christmas lights?

    Of course. We’ve covered the ways to replace individual light bulbs further up in our article. Many string lights don’t light up all the way if even one bulb is malfunctioning, so it becomes imperative to change individual light bulbs in some cases. 

    What is the best way to store Christmas lights to prevent damage?

    The best way to increase the longevity of your string lights is by storing them properly. And this includes storing them in their designated packaging boxes, not bundling them up into tight balls, and keeping them away from moisture. Remember to clean them after you take them off your tree or walls to prevent debris buildup within the wires and fuses. 

    Can I use LED bulbs to replace traditional incandescent bulbs on my Christmas lighting?

    LED bulbs are a much more popular alternative to traditional bulbs due to their durability and energy-saving properties. Switching out the old bulbs with LED ones from your Christmas lights is a smart move, especially if you don’t want high energy bills to dampen the holiday mood. 

    Moreover, they are much safer to use and usually don’t cause accidents, such as electrical fires. You can also purchase a new string of LED lights with an insulator (electricity)  if you’re worried about other electrical risks. 

    Is it safe to use Christmas lights that have a frayed cord?

    No, you shouldn’t use Christmas lights with frayed cords - they will expose you to higher chances of electrocution or, worse, electrical fires. If you can’t fix the frayed cord, it’s best to replace the entire light string with a new one. They aren’t that expensive anyway, and you’d rather not set your house on fire. 

    What should I do if my Christmas lights get wet or are exposed to moisture?

    Ideally, you must keep your Christmas lights away from any water source, but accidents do happen, and the string lights may be exposed to moisture. In this case, you must ensure it’s unplugged and then wipe away the moisture with a microfiber cloth. You can also let the cord dry in the sun - but if it gets too hot, the entire string light might malfunction. 

    To Sum It Up

    Many people lose a lot of money by throwing out their Christmas lights when they find they aren’t working. As you’ve read in this article, there are various ways you can revive a faulty Christmas light by changing the bulbs and fuses or reconnecting some wires. Moreover, we’ve curated some tips and tricks for handling your holiday lights to ensure they last long. 

    However, if you’re having persistent issues with your power supply or electrical outlets, we recommend calling an electrician to resolve the issue at its root. 

    That being said, we’ll be signing off for now. If you liked reading this informational guide, check out our article, 'Best Christmas Net Lights.’

    Until next time, goodbye! 

    Some popular outdoor Christmas light ideas include using fairy lights around trees, hanging lighted wreaths on the door, and adding electric festive figures to the yard. Considering your budget and the overall look you want, you can experiment with a plethora of outdoor lighting options. 

    Nothing gives me as much joy as the sparkle of outdoor Christmas lights. 

    From classic white string lights to colorful candy cane lights - the possibilities for outdoor Christmas lights ideas are endless. You can go traditional with free-standing festive figures or try a modern twist with minimal, monochromatic outdoor Christmas lights. 

    That said, in this article, I’ll be sharing some of the most enchanting outdoor Christmas light ideas that you can try out in the next holiday season. So, grab a cup of hot cocoa and get ready to spread some festive cheer! 

    27 Outdoor Christmas Lights Ideas

    1. Invite Santa, His Reindeer, Or A Snowman!

    1. Invite Santa, His Reindeer, Or A Snowman!

    What’s a better way to ring in the festive season than to have Santa and his sleigh right in your yard? 

    In this particular outdoor setup, you can see a stag with Santa’s sleigh decked up with gifts. Place it on your porch to welcome guests, or move it to the roof to save some outdoor space. Alternatively, you can choose other free-standing festive figures and storybook elements to narrate different sections of the Bible. Regardless, your outdoor lighting setup will be a sight to behold!

    2. Welcome The Christmas Cheer With Icicle Lights

    2. Welcome The Christmas Cheer With Icicle Lights

    When used right, frosted icicle lights can make the perfect Christmas décor. You can give your home a wintry feel this holiday season by placing icicle lights along the rooftop. This will make them stand out beautifully against the dark sky.

    You can take this idea up a notch by incorporating the same color of lights into your trees. Simply follow the branches of the trees to achieve a wintery look. The effect is simple, refreshing, and uncluttered, yet it exudes an incredibly festive vibe.

    3. Add A Whimsical Touch With Lanterns

    3. Add A Whimsical Touch With Lanterns

    You can add a whimsical Christmas touch to your porch by filling old lanterns with white or yellow fairy lights. Then you can drape some string lights around the lantern and leave some on the floor for an effortlessly aesthetic vibe. 

    4. Embrace The Festive Feel With Colored Lights

    4. Embrace The Festive Feel With Colored Lights

    Don’t be afraid to go overboard with colors. After all, ‘tis the season to be jolly! So, whether it’s your yard, the front door, or the entire house - deck it up with multicolored lights. 

    A few colorful Christmas lights scattered around can create a joyful atmosphere and a kid-friendly vibe, emanating a constant and vibrant gleam, which is ideal for the festive season. You can select a traditional red and green color combination or go for color-changing fairy lights to make a bigger impression.

    5. Transform Your Porch Into A Winter Wonderland

    5. Transform Your Porch Into A Winter Wonderland

    If you think adding color lights all over the house is too much for your taste, try adorning the front porch only. For instance, this ornamental round side porch looks no less than a winter wonderland with twinkling lights all over the Christmas tree and the balustrade. So simple, yet so stunning!

    6. Sprinkle Some Starlight

    6. Sprinkle Some Starlight

    Not everyone has the budget to buy extravagant outdoor lights, and that’s okay - your house can still make heads turn, just like this Scandinavian-inspired Christmas porch. Simply make some paper lanterns in the shape of stars and snowflakes - this can be a fun activity for the kids too.

    Once the DIY paper lanterns are ready, insert bulb lights inside and hang them on the ceiling. 

    7. Make It Moody

    7. Make It Moody

    If you dig the moody vibe, try using white lights or white bulbs with lush wreaths, mistletoes, and plants all around the doorway. Not only is this one of the easiest outdoor Christmas light ideas, but it is also a unique and minimal way to embrace the holiday spirit.

    8. Deck The Porch Columns

    8. Deck The Porch Columns

    Here is another Christmas décor idea for those who like to keep things simple. Just wrap each column with chunky green garlands, complete with big red bows and Christmas lighting. Keep everything else as it is and simply turn on the usual lights on the porch. You could also use some light strings indoors to give a sneak peek through the doors and windows. 

    And this entire setup will look even better if your porch or yard is covered with sparkling white snow!

    9. Add A Twinkling Door Wreath

    9. Add A Twinkling Door Wreath

    Next, I have another effortless DIY Christmas project for you and your little ones. Take some pre-lit Christmas wreaths or garlands and a red bow. I suggest using three wreaths, like the aforementioned picture. Assemble them together and place the bow in the middle so that it reflects the warm white light from the wreaths and the rest of the décor.

    Consider placing this three-ring wreath on your front door and add two mini Christmas trees on each side. This outdoor Christmas lighting setup is sure to add a festive glow to the front porch without occupying much outdoor space.

    10. Keep It Simple

    10. Keep It Simple

    If your house features a sloping roof, or you’ve got a 60s-inspired A-frame cabin, why not transform it into a life-sized gingerbread house nestled in the woods? Adorn the roofline and the path leading to the house with large bulb lights spaced at intervals, creating a striking visual effect with a simple, uncluttered approach. 

    11. Light Up The Outdoor Christmas Tree

    11. Light Up The Outdoor Christmas Tree

    If you are blessed with a vast front yard with an evergreen tree, consider adding a Christmas tree embellished with gleaming ornaments and colorful lights. This approach is an excellent and fun way to extend holiday wishes to visitors, especially if your house is situated far back from the road.

    12. Carve Out Your House With Rope Lights

    12. Carve Out Your House With Rope Lights

    Have you ever considered using the nighttime darkness to your benefit when decorating your home? Try utilizing conventional multi-colored rope lights to create an outline of your home. Just make sure to follow each corner of the house precisely using the rope lights.

    13. Brighten Your Home With a Christmas Light Projector

    13. Brighten Your Home With a Christmas Light Projector

    Welcome the Christmas spirit throughout your home by using an LED light projector. You can select from various displays, such as Santa Claus sneaking in, twinkling lights, snowflakes, and falling snow effects. 

    The most significant advantage of this type of Christmas lighting is that it eliminates the need to climb up ladders and untangle string lights. However, when purchasing a projector, ensure that it has display modes, brightness, and adequate coverage area. Additionally, verify that the projector is water-resistant and suitable for outdoor use.

    14. Go All Out With Christmas Lights

    14. Go All Out With Christmas Lights

    This is an advanced technique that demands some commitment, but the outcome is incredibly stunning! 

    Essentially, you're using lights like paint and creating color blocks on your house. Start by collecting lights in various colors and arranging them. Adorn your walls with red lights, line your windows with green lights, and embellish your roof with white lights for a complete Christmas transformation.

    15. Wrap Christmas Lights On Tree Trunks

    15. Wrap Christmas Lights On Tree Trunks

    Do you have large trees all over your front yard? Try covering the tree trunks with string lights of the same color. Doing so creates the impression of pillars, which is quite clever if you ask me! 

    Tip

    The essential aspect of this idea is to leave the leaves and branches without any decorations. This way, the trees will appear as if they stop in the air, giving them the appearance of pillars.

    16. Light Up The Front Yard

    16. Light Up The Front Yard

    If your house is situated far from the road, you can use a string of lights to wrap some greenery or a mailbox on the front lawn. It’ll serve as a visual connection to the primary light display at the front of your home.

    17. Spell It Out

    17. Spell It Out

    You must have seen those light letters influencers use in their rooms, often spelling out their names. Well, you can shift them outdoors to spell out words like “joy,” “Xmas,” “merry,” and more. I think this simple outdoor Christmas light idea is effective yet gorgeous in spreading the warmth of the Christmas season to neighbors and passersby.

    For a more subtle look, you can opt for smaller alphabet decorations to hang on your Christmas tree. Within a few minutes, you’ll have the cutest Christmas tree in town!

    18. Add More Sparkle With Extra String Lights

    18. Add More Sparkle With Extra String Lights

    If you’ve got some extra string lights left, consider including topiary in your outdoor Christmas light ideas. To achieve a modern and stylish look, you can use blue-white string lights to accentuate sleek shapes like cones, spheres, etc. However, if you prefer a more playful and whimsical feel, use the twinkle setting.

    19. Don’t Forget The Fence

    19. Don’t Forget The Fence

    If you want to stand out in the next Christmas and holiday season, consider recreating this outdoor lighting setup. Rather than focusing on the yard or the porch, you can choose the fence as the focal point of the outdoor Christmas lights. 

    Embellish it with a lighted garland, complete with red bows and ribbons. You could also define the roofline with white string lights to add depth to the overall display. 

    20. Frame Your Windows With Extravagant Lights

    20. Frame Your Windows With Extravagant Lights

    Want to outdo mall light shows this Christmas? Well, use the power of festive lights to create innovative and unique frames for your windows. Purchase malleable string lights and wall clips, then outline the shape on your wall and fasten the lights in place using the clips.

    Tip

    It is best to use separate light strings for each window, so measure the required length before ordering them. 

    21. Create A White Christmas Vibe

    21. Create A White Christmas Vibe

    If you live in an area where it seldom snows, you might need to think outside the box to experience a white Christmas. 

    Well, this lighting setup is ideal for a wraparound porch. All you have to do is adorn your bushes, stair rails, pillars, and roofline with sparkling white Christmas lights. Even without any additional decorations, this pure white theme evokes the feel of snow in the hottest of locations.

    22. Enhance The Roofline

    22. Enhance The Roofline

    Make use of lighting to accentuate your home’s exterior, such as this cottage with a slanted roofline illuminated with enchanting white lights. This stunning yet simple outdoor Christmas lighting adds depth to your front yard on gloomy winter evenings.

    23. Add A Warm Touch With Candles

    23. Add A Warm Touch With Candles

    Even if you use electric Christmas lights, keep some candles on hand for when you want a more intimate atmosphere or to share a drink without the jarring bright lights. For instance, you can keep the LED candles under your bench or place them along the handrail.

    Or simply light a candle in the middle of your porch table for a candlelit Christmas ambiance.

    24. Trim Your Bushes And Light ‘Em Up!

    24. Trim Your Bushes And Light ‘Em Up!

    When it comes to incorporating Christmas into your home décor in a modern and refreshing way, here's a unique idea for your front yard. If you have many bushes, consider trimming them into spherical shapes to create a floating effect. 

    Next, adorn them with mini lights in white, green, and red colors for a fresh take on traditional Christmas decorations. This idea is particularly suitable for those looking to add a trendy touch to their home’s exterior.

    25. Bask In The Golden Glow

    25. Bask In The Golden Glow

    This Christmas light idea is perfect if you’re got a bright red or green door. Or, you can paint your door for a fun, festive touch!

    Then add some golden ball ornaments on potted Christmas trees and deck up the surrounding areas with warm string lights. Doing so will result in a soft and inviting glow that epitomizes the classic appeal of the holiday season. 

    Lastly, you can add a lighted garland on the front door to add a timeless charm to the overall look.

    26. Create A Firework Scene With Starburst Lights

    26. Create A Firework Scene With Starburst Lights

    Using fireworks can be a hassle, but modern Christmas enthusiasts have found an alternative solution! 

    How about purchasing some starburst lights, which provide the appearance of a continuous firework display without any of the noise and smoke? They make for a stunning addition to a large light display or can be used alone to create a more otherworldly atmosphere.

    27. Cover Large Spaces With Net Lights

    27. Cover Large Spaces With Net Lights

    If the thought of wrapping individual string lights around large surfaces like walls, hedges, and railings stresses you out, consider using a net version instead. This will not only save you time but also ensure that the lights are evenly distributed, resulting in a stunning and visually appealing backdrop.

    However, when covering a large area, decide the overall vibe you want to go for. That said, cool-toned lights in white or blue colors will create a frosty winter wonderland effect. On the other hand, warm-toned outdoor lights will complement traditional decorations and create a cozy ambiance. 

    Given below are just a few of the most popular types of outdoor Christmas lights available: 

    • String lights are the most common type of outdoor Christmas lights, consisting of a string of bulbs that can be wrapped around trees, bushes, and other outdoor features. 
    • Net lights are a mesh of lights that can be easily draped over bushes or hedges to create a uniform look. 
    • Icicle lights are designed to mimic the appearance of hanging icicles and are often hung from rooflines or eaves. 
    • LED lights are energy-efficient and long-lasting, making them a popular choice for outdoor Christmas displays. 
    • Battery-operated lights are convenient for outdoor displays that are far from electrical outlets and do not require any wiring or extension cords. 

    Are LED lights better for outdoor use than traditional incandescent bulbs?

    Yes, LED lights are more energy-efficient, which means they use less electricity to produce the same amount of light as incandescent bulbs. They also have a longer lifespan and are more durable, making them more suitable for outdoor use. 

    Moreover, LED lights emit less heat than incandescent bulbs, reducing the risk of fire hazards. And the fact that LEDs are available in a variety of colors makes them all the more convenient for outdoor Christmas displays. 

    What are some safety tips to keep in mind when hanging outdoor Christmas lights?

    • Use Outdoor-rated Lights

    Ensure that the lights you use are rated for outdoor use and are properly insulated to protect against environmental elements. 

    • Inspect The Lights

    Before hanging the lights, inspect them carefully to make sure there are no damaged wires or broken bulbs. Discard any damaged lights. 

    • Use Proper Extension Cords

    Use extension cords rated for outdoor use, featuring the appropriate length for your needs. Do not use indoor extension cords for outdoor lighting. 

    • Avoid Overloading Outlets

    Do not plug too many lights into a single outlet or extension cord, as this can create a fire hazard. Use multiple outlets and extension cords as needed. 

    • Use A Ladder Safely

    When hanging lights on tall trees or the roof, use a sturdy ladder that is positioned on a level surface. Do not stand on the top rungs of the ladder, and have someone hold the base for added stability. 

    • Turn Off The Lights When Not In Use

    Turn off the lights when you are not at home or when you go to bed at night to reduce the risk of fire. 

    • Keep Electric Decorations Away From Power Lines

    Do not hang decorations near power lines or other electrical equipment, as this can be dangerous. 

    Conclusion

    And those were all the outdoor Christmas light ideas I had for you. I hope this guide will be helpful for those who want to make their home shine this holiday season!

    Whether you're decorating a small front porch or a sprawling backyard, there's a way to add a festive touch to your abode. So, put on some Christmas songs, and get ready to jazz up your home with outdoor Christmas lights!

    The Nite Ize multi-tool keychain comes out on the top of this list because of its multi-functionality and compact nature. In third place is the adorable mini waffle maker with its small and tasty waffles. Another great option is the Hyeta hydration water bottle with its inspirational hydration quotes and timings mentioned. 

    Let’s be honest. The perfect gift doesn’t always have to be an expensive one. The best gift is one that is a thoughtful gift and one that will make the other person feel loved and special. You can totally get gifts for under $10 that the other person will love. 

    So, here is a list of 11 inexpensive gifts for when you’re on a budget. 

    Top Gifts Under $10

    1. Nite Ize DoohicKey Keychain Multi-Tool - Best For Hikers

    Keychains are the best inexpensive gifts to give someone. This Nite Ize keychain has multiple tools built into it, including a bottle opener, a box cutter, 3 wrench sizes, a metric ruler, a standard ruler, and a flathead screwdriver. You can clip this multi-functional keychain to your bag strap or any other convenient loops or hooks. 

    Moreover, the keychain is very compact in size, making it travel-friendly. You also don’t need to worry about the durable steel construction getting stuck in the airport TSA line. This keychain is airport and travel-friendly! 

    All in all, this is a pretty great gift for anyone. It has a lot of functionality and can also be used on hikes and adventurous trips. 

    Color: Black | Material: Synthetic | Item Weight: 0.352 ounces

    2. Letmy Tactical Flashlight - Best For Adventurous People

    This is no ordinary flashlight. The Letmy tactical flashlight can give a maximum output of 300 Lumens and is 30% brighter than ordinary flashlights. This mini LED torch can produce an intense beam of light up to 600 feet. This makes it great for anyone who likes to go hiking, fishing, or go on spontaneous adventurous trips. 

    With so much light intensity, the torch is only 3.6 inches in length. So, it can easily fit in the palm of your hand. You can also easily fit it inside a pocket or clip it onto a belt loop. Additionally, it has three light modes: high, low, and strobe. 

    Moreover, the torch is made from extremely durable military-grade aluminum alloy and steel, with a hard anodized finish. This makes the torch surface anti-abrasive, drop-resistant, and waterproof. 

    The package also comes with a quick guide to help you know more about the torch and its batteries. 

    Power Source: Battery-powered | Material: Aluminum | Light Source Type: LED

    3. Dash Mini Waffle Maker - Best For Foodies

    Who doesn’t love waffles? And who doesn’t love mini versions of everyday things? Combine the two, and you get this adorable Dash mini waffle maker. You can even make hash browns, waffled cookies, and biscuit pizzas. Thus, this is an excellent addition to the kitchen for someone with a sweet tooth. 

    The mini waffle maker has a 4-inch cooking surface, giving out single-serve pieces every time. So, it is a great Christmas gift as it emits the perfect cozy vibe. Additionally, you can also give this as the perfect housewarming gift. 

    All you need to do is plug the waffle maker in, and the delicious waffles will start to cook in no time. The dual non-stick surfaces will provide an even and consistent cook, giving you tasty golden waffles each time. 

    Moreover, the package also includes a mini recipe guide to help that one friend who has no clue about cooking or baking. 

    Wattage: 350 W | Voltage: 120 V | Color: Aqua, Red, White

    4. Hyeta Water Bottle - Best For Hydration Lovers

    With the amount of time we spend on self-care and skin care products, I think we can all agree we forget to hydrate our bodies regularly. A handy water bottle can help with forgetting to drink water. This is where the Hyeta 32 oz water bottle comes in. 

    This cool-colored water bottle is illustrated with motivational quotes and times to drink. You can easily measure your daily water intake and keep yourself hydrated. The water bottle also comes with a straw, making the drinking process more fun. Hence, you can keep it on your work or school desk and sip away all day long.  

    Additionally, the flip-top lid includes a durable lock, which makes the bottle anti-dust and anti-leak. The bottle is made of BPA and toxin-free plastic. It is also resistant to fall and does not break easily. 

    So, this is a great holiday gift for your friends and family who really need to up their water intake. You can also give it to kids to get them into the habit of drinking water regularly. 

    Capacity: 1000 milliliters | Material: Plastic | Color: Ombre design

    5. Lavender Essential Oil Roll-On - Best For Self-Care Hobbyists

    Beauty and self-care gifts are some of the best presents you can give to someone. This aromatherapy roll-on is made from USDA-certified organic lavender essential oil. Lavender essential oil is one of the most popular essential oils used around the globe. So, if you had to choose one essential oil, it has to be lavender because of its ancient healing properties. 

    This oil can be used both cosmetically and therapeutically for deep healing and calming reasons. Just rubbing some of the oil on your temples and wrists will help calm your mind and body. 

    The built-in stainless steel rollerball allows for precise and controlled dispensing to any specific part of the body, while the premium amber glass bottle provides the best UV protection to help maintain the oil’s composition and prevent oxidation. 

    But enough about the chemistry of it all. The roll-on bottle is very travel-friendly, being small enough to fit in any bag and pass through airport security with ease. You don’t have to worry about any spills during storage, either!

    So, this is a great gift for your friends and family. It will be like an amazing smell and an easy-to-carry stress reliever for anyone! 

    Scent: Lavender | Volume: 10 milliliters | Item Weight: 1.25 ounces

    6. Paper Mate Flair Felt Tip Pens - Best For Calligraphy

    These felt tip pens are a great gift for the holidays for that friend or family member who loves to draw and create art. Felt tip pens are the kings of the stationery world, with stationery lovers boasting huge collections of them. So, this is a great gift for someone artsy.

    The pens are smear and fade-resistant. So, you don’t have to worry about any smudges ruining a precious drawing. Additionally, the water-based ink will not bleed through your paper, while the paint guard prevents the tip from fraying. 

    You can get these soft felt tip pens in varying numbers but the one under $10 contains 12 different colors, namely: black, blue, green, lilac, lime, magenta, pink, purple, red, sky blue, tangerine, and yellow. 

    Point Type: Medium (0.7 mm) | Number Of Colors: 16 | Bleeding: No

    7. UCreate Poly Cover Sketchbook - Best For Artists

    A sketchbook is a perfect gift for someone who loves painting, drawing, or artsy writing. This UCreate polycover sketchbook has a weight of 70 lbs with a durable black and white poly cover. 

    The spiral-bound spine and the perforated pages will make it easy to take out your masterpieces after you have finished painting them. Thus, this is the perfect sketchbook for beginners and intermediate artists. 

    Even though the paper isn’t thick enough, artists can still use this sketchbook for their rough sketches or to practice different art techniques. Either way, you will be giving them something they can get a lot of use out of. 

    Sheet Size: 12 x 9 inches | Sheet Count: 75 | Paperweight: 70 lb.

    8. Bonve Pet LED Strip Lights - Best Trendy Gift

    If you have been anywhere near Instagram or TikTok for the past year, you must have seen LED strip lights featured almost everywhere. With these, you can light up any room in a variety of colors to get a cool and stylish effect. 

    The Bonve Pet LED lights are very easy to install, you just need to tear off the tape, and the strong adhesive will stick to any clean, dry, and flat surface in just seconds. The three colors displayed by these lights are red, blue, and green. 

    You can actually control the strip lights with a stable Bluetooth connection app and a 44 keys IR remote. Additionally, you can program the lights to change according to any music playing. Imagine the lights changing at every beat drop of your favorite song. Now that’s a great Christmas gift to give to someone. 

    Moreover, you can set the LED lights to switch on/off automatically at the chosen date and time. 

    Length Of Roll: 32.8 feet | Light Colors: RGB | Voltage: 24 V

    9. Freshcut Paper Pop-Up Cards - Best For Flower-Lovers

    Do you remember the cute pop-up cards you used to make in your craft classes when you were in school? Well, FYI, they can serve as extremely cute gifts as well! Buy these special cards from Freshcut Paper that pop up with a beautiful bouquet every time you open them. 

    Whether it’s Christmas, a birthday, or you just feel very affectionate, these pop-up bouquets of flowers will brighten up any day. A blank notecard is also included with the card, so you can write any personal message if you wish to. You also get an envelope ready to mail anywhere in the United States. 

    The high-quality paper, the vivid colors, and the whimsical designs will surely amaze anyone who receives this beautiful gift. Additionally, the card is made from 100% recyclable paper. 

    Card Dimensions: 12 x 10.5 inches | Color: Lillies and Lupines | Number Of Cards: One

    10. Amazon Basics Sketch And Drawing Art Pencil Kit - Best For Beginner Artists

    Another artist gift for you! This Amazon Basics sketch and drawing art pencil kit is perfect for any amateur or intermediate artist. The kit consists of six pencils (H, 2H, B, 2B, 3B, and HB), three charcoal pencils (hard, medium, and soft), and four compressed sketch sticks (2 charcoal and 2 conte.)

    The kit also includes 1 regular eraser, 1 kneaded eraser, 1 dual-barrel sharpener, and 1 blender/smudge stick. So, any artist can draw out their masterpieces using this simple art kit. 

    Due to its simplicity and variety, this art pencil kit is perfect for artists of all skill levels. Whether it’s a friend just getting into the world of art or someone who is already extremely experienced, any artist can get a lot of use out of this kit. 

    Pencil Type: Graphite | Number Of Pencils: 6 | Number Of Erasers: 2

    11. Suck UK Drumstick Ballpoint Pens - Best For Music Lovers

    Do you know anyone who has an annoying habit of tapping their pen on the table while they’re working? Well, you can turn the habit into more annoying by giving them these drumstick ballpoint pens. 

    These drumsticks will make even the most boring homework or work assignments interesting and fun. If you have a younger niece or nephew, these pens would be the perfect Christmas present for them. Although, their parents might not be too grateful towards you after. 

    Moreover, even fidgety friends and colleagues will appreciate this musical gift. Turn your notepad into a drum pad and your pen into a drumstick, and tap your work away in harmony!

    Item Material: Wood | Colors: Blue or Black | Number Of Pens: 2

    Buying Guide For Perfect Gifts Under $10

    The Christmas and holiday season visits you every year, but you might not have enough money to buy everyone in your life expensive gifts every year. But do only expensive gifts show that you care about someone? Not at all!

    Giving good gifts is a matter of knowing the person well and catering to their preferences. Then, the price tag does not matter. A beeswax lip balm for someone with dry lips and a honey body lotion for someone addicted to skincare. This is how you get the perfect gift for someone. 

    To help you figure out your inexpensive gift list, here is a handy guide to help you out with your holiday shopping. 

    1. Personal Touch

    The best thing about giving a gift to someone is making the gift personalized. That shows that you really know the other person and are considerate about their interests. Why give a general gift when you can actually focus on the person’s interests and make them feel cared for? 

    For instance, any person into skincare would love some chamomile deep cleansing cream or some coconut foot cream. Someone who is facing anxiety issues would definitely appreciate a one-minute gratitude journal to jot down their thoughts. A freelance writer would love a mouse pad or a laptop cover. 

    Other fun options for personalized gifts are a jade roller, a gua sha set for a home spa, a makeup bag, a keychain, a luxury candle, a dog food bowl, etc. By now, I am sure you get the point, which is to personalize the gift. This way, you’ll be able to get fabulous gifts for everyone on your list without emptying out your wallet. 

    2. Usefulness

    Another important thing about a gift is its usefulness or utility. This literally means that the gift must be somewhat useful to the recipient to make it worthwhile. Just because you’re giving someone a $10 gift doesn’t mean the gift has to be completely useless. 

    The best gifts are the ones that are fun and useful at the same time, like adorable Christmas mugs, quirky keychains, soap bark products, some hand salve, teapots for tea lovers, coffee makers for coffee lovers, and fandom sketchbooks. You can find your own unique combination of fun and utility to cater to each person’s interests. 

    3. Quality

    I know you might be thinking that gifts under $10 cannot be high quality. But that is just a false assumption. If you buy gifts that are normally very expensive but are available for under $10, that gift obviously won’t be of high quality. 

    Instead, go for products that are normally available under $10, like keychains, creams, or a puzzle. This way, you can rest assured that the product you are buying is of good quality. 

    I am sure you imagine the embarrassment when the gift you gave someone turns out to be even just a bit flimsy. So, ensure high quality within your set budget. 

    4. Setting

    The setting is an important factor to take into consideration while choosing the perfect gift for someone. For instance, white elephant exchange parties or Yankee swaps are quite popular around the holiday season. Since these events are characterized by unique gag gifts and quirky prank gifts, you need to keep that in mind while going gift shopping. 

    The scenario completely changes when it's a family Christmas party or a friend’s party. Then, you actually need to buy a gift that is thoughtful and useful. Or, you can always give a prank gift to someone you have a great rapport with! 

    How do I get a high-quality gift for under $10?

    Quality is the biggest issue when it comes to buying inexpensive gifts. But this issue can easily be solved by choosing the gift correctly. You need to go for gifts that are normally available in this price range. That way, you can be sure that your gift is of high quality. 

    High-end designer leather bags are not usually available under $10, so if you find one within that price, you will obviously know that it is of low quality. But keychains, art kits, and sketchbooks can be found within this budget. 

    So, choosing the right product will ensure high quality. 

    Is $10 a small budget for a Christmas gift?

    Not at all! As I have explained throughout this article, it is the thought that counts. You can buy the best brand dress you can get with all its high prices, but what if the color is the person’s least favorite? That would just show a lack of thoughtfulness on your part. 

    On the other hand, getting an inexpensive yet high-quality gift for someone that is of their favorite color would come off as so much more caring and affectionate. So, if you know the person, you can get the best gift for them for under $10. 

    Some great gift options are inexpensive jewelry, silicone muffin makers, face creams, funky glasses, a lavish bath bomb, cat clothes for someone with a kitten, salt and pepper shakers, a decorated mug, a new toy, a potted plant, etc. 

    Are $10 gifts good options for stocking stuffers?

    In my opinion, $10 gifts might be too expensive to be used as stocking stuffers. Stocking stuffers are supposed to be very cheap and small. So, if you are out to save money, you can just buy $5 stocking stuffers. 

    Or, if you would like to spend your money, go ahead and get the $10 stocking stuffers. There’s no rule anyway! 

    Verdict

    The Nite Ize Multi-tool keychain is one of the best options for Christmas gifts because of its functionality and compact nature. Hikers and travelers will recognize the importance of this handy tool. 

    Another fun option for a great gift is the Dash mini waffle maker. I mean, It’s waffles! Need I say more? And the Hyeta hydration water bottle is just another great option to help inculcate healthy habits with a splash of cool colors. 

    Thus, I hope this article helped you believe you can buy great gifts under $10 as well. Have a great time gift shopping this holiday season! 

    Nobody likes a messy or cluttered room, it's a fact. If you wish to keep things organized or at least hidden from view – having storage cabinets in your home is essential.

    Out of all the types of storage cabinets in the market, the plastic kind is known to be the most common thanks to its affordability and weather resistance. Some prefer these because the best plastic storage cabinets are quite durable and come with a list of very useful features such as adjustable shelves and stacking systems that can be very versatile.

    If any of the above sounds like what you’re looking for, then you should read through our reviews for the best plastic storage cabinets for 2023!

    Best Plastic Storage Cabinets

    Here's the list of the 5 best plastic storage cabinets for all your organizational needs.

    1. Sterilite 4-Shelf Cabinet - Best for Adjustable Storage Options

    This product from our list of best plastic storage cabinets is manufactured in America and consists of a total of 4 shelf spaces. The height of these shelves can be adjusted to your requirements while the product itself promises the best durability.

    Sale
    Sterilite 4 Shelf Cabinet, Lockable Utility Storage w/...
    • DIMENSIONS: Exterior measures 25 5/8" x 18 7/8" x 69 3/8",...
    • VERSATILE: Whether in garages, basements, or throughout the...

    The Sterilite 4 Shelf Cabinet has been constructed in a manner that its doors can be opened easily while they can shut quite tightly. You will also be offered the option to lock your cabinet doors with the help of padlocks while the handles are made of pure titanium.

    If you get yourself this product, you will find that its installation is entirely stress-free and will consume very less time. The product will also ensure that you have a lot of space to store away your belongings or even arrange them in a fashion your find best.


    Pros

    • Doors open easily and close securely
    • Padlock-compatible for extra security
    • Easy and quick installation process
    • Ample storage space with 4 shelves
    • Easy to set up 


    Cons

    • Padlocks for added security are not included


    Dimensions: 25.62"W x 18.87"D x 69.37"H | Weight: 39.5 lbs | No. of Shelves/Drawers: 4 shelves | Weight Capacity: 40 lbs per shelf | Lock Option: Yes

    2. Homak 12-Drawer Parts Organizer - Best for Office Organization

    Now that we’re entering the greats of our list of best plastic storage cabinets, we’d like to introduce you to the Homak 12-Drawer Parts Organizer. This product has been constructed using hard plastic and it consists of 12 robust drawers. 8 of these drawers are small while the 4 below are larger.

    Homak 12-Drawer Parts Organizer, Black, HA01012001
    • Great for organizing small hardware accessories in the shop...
    • 8 small drawers 2-1/8 W x 5-3/8 L/D x 1-1/2 H inches and 4...

    This storage cabinet’s compact construction ensures that a lot of your belongings are stored away in a smart solution that can be employed in any corner of your home or office. The best reason to get yourself this product would be for official documents or archives as the transparent plastic drawers can help you locate things very easily.

    What’s more? The organizer itself is quite lightweight, cheap, and requires no maintenance!


    Pros

    • Offers 12 drawers with different sizes for versatile use
    • Transparent drawers for easy item identification
    • Lightweight and easy to move
    • Budget-friendly and low maintenance
    • Easy to set up 


    Cons

    • Not suitable for storing heavy or bulky items


    Dimensions: 10.5"W x 6.25"D x 9.5"H | Weight: 4 lbs | No. of Shelves/Drawers: 12 drawers | Weight Capacity: N/A | Lock Option: No

    3. Rubbermaid Double-Door Storage Cabinet - Best for Garage & Workshop Storage

    Yet another great product from our list of best plastic storage cabinets, the Rubbermaid is a storage cabinet with double doors that have been manufactured using sturdy plastic. Due to the quality of this product, it has been well-matched for use in your garage, basement, or even workshop.

    Rubbermaid Freestanding Storage Cabinet with Doors 18"D x...
    • TOUGH AND DURABLE: Resin construction is durable and tough...
    • STURDY DESIGN: Unique, snap together cabinet design combines...

    If you get yourself this product, you can fluently fix it anywhere without the need for utensils. Even the plastic surface of this product makes sure that it does not get damaged because of dust or rust corrosion.

    This particular plastic storage cabinet can hold a maximum weight of about 336 lbs – which means you can store a wide range of heavy materials here without any problem. Even if you are concerned about the safety of these items, you should know that Rubbermaid offers you the option to lock the cabinet doors.

    The shelves of this product have been fixed inside the cabinet itself and you’ll find that one of the shelves will be aerated while the other ones will be made of concrete.


    Pros

    • Sturdy and high-quality plastic construction
    • Maximum weight capacity of 336 lbs
    • Tool-free assembly
    • Door locking option
    • Easy to set up 


    Cons

    • Fixed shelves limit customization possibilities


    Dimensions: 36"W x 18"D x 37"H | Weight: 28 lbs | No. of Shelves/Drawers: 2 shelves/drawers | Weight Capacity: 336 lbs | Lock Option: Yes

    4. Kousi Large Cube Plastic Storage Cabinet

    Looking for a stylish and efficient storage solution? The KOUSI Large Cube Plastic Storage Cabinet may be the perfect fit for your needs. Known for its attractive design and user-friendly features, it brings both aesthetics and practicality to your space.

    KOUSI Large Cube Storage - 14"x18" Depth (8 Cubes) Shelves...
    • 【LARGE & MULTI-USE STORAGE】 A total size of 28" x 18" x...

    One of the things that initially caught our eye about the KOUSI storage cabinet was its attractive design. Stylish and elegant, it's a beautiful addition to any room. But looks aren't everything, and thankfully, this storage cabinet delivers on other fronts as well. The installation process is a breeze, thanks to an accompanying video that makes it simple to put together, even for first-timers.

    Now let's talk about functionality. The soft, ergonomic handle allows users to effortlessly open and close the cabinet, making it a pleasure to use. Furthermore, the interior shelves are made of strong stainless steel, capable of holding up to 22 pounds each, ensuring durability and stability.

    This combination of pleasing aesthetics, user-friendliness, and sturdiness truly sets it apart from its competitors.


    Pros

    • Attractive, elegant design
    • Easy installation process with supporting video
    • Soft, ergonomic handle for easy access
    • Durable stainless steel interior shelves
    • Easy to set up 


    Cons

    • Plastic material may not be as sturdy as wood


    Dimensions: 56"W x 18"D x 14"H | Weight: 17.66 lbs | No. of Shelves/Drawers: 12 shelves | Weight Capacity: 22 lbs per shelf | Lock Option: No

    5. Nafenai Plastic Storage Cabinet

    Nafenai Plastic Storage Cabinet is a versatile and stylish storage solution that makes a great addition to any home. This cabinet set comes in two fun and unique colors, offering a combination of various drawer sizes for all of your storage needs, while its high-grade plastic makes it easy to clean and maintain.

    Nafenai Plastic Drawers Dresser,Storage Cabinet with 6...
    • SPACIOUS STORAGE DRAWERS:Overall dimension:23.62"W x 15.74"D...
    • STURDINESS PLASTIC DRESSERS:Made of high grade PP plastic,...

    One of the main reasons we loved this Nafenai Plastic Storage Cabinet is its spacious storage drawers. These drawers come in multiple sizes, allowing you to efficiently organize your belongings however you see fit. Besides the multi-purpose design, the options of two fun colors – blue and pink – bring an element of liveliness and personal touch to your space.

    Its use of high-quality plastic not only gives the cabinet a sturdy structure but also makes it extremely low maintenance.

    So you can spend less time on upkeep and more time enjoying the benefits it brings.


    Pros

    • Versatile storage options with multiple drawer sizes
    • Available in two fun and unique color choices
    • High-quality plastic construction for easy maintenance
    • Provides a personal touch to space
    • Easy to set up 


    Cons

    • Vibrant color options may not suit all design preferences


    Dimensions: 24"W x 15"D x 39"H | Weight: 22 lbs | No. of Shelves/Drawers: 4 drawers | Weight Capacity: 33 lbs per drawer | Lock Option: No

    Best Plastic Storage Cabinets Comparison Table

    Product Dimensions Weight No. of Shelves/Drawers Weight Capacity Lock Option
    Sterilite 4-Shelf Cabinet 25.62"W x 18.87"D x 69.37"H 39.5 lbs 4 shelves 40 lbs per shelf Yes
    Homak 12-Drawer Parts Organizer 10.5"W x 6.25"D x 9.5"H 4 lbs 12 drawers N/A No
    Rubbermaid Double-Door Storage Cabinet 36"W x 18"D x 37"H 28 lbs 2 shelves/drawers 336 lbs Yes
    Kousi Large Cube Plastic Storage Cabinet 56"W x 18"D x 14"H 17.66 lbs 12 shelves 22 lbs per shelf No
    Nafenai Plastic Storage Cabinet 24"W x 15"D x 39"H 22 lbs 4 drawers 33 lbs per drawer No

    Buying Guide For The Best Plastic Storage Cabinet

    When shopping for the best plastic storage cabinets, it is important to consider certain factors that could have an impact on your overall satisfaction with the product. In this comprehensive buying guide, we will highlight a few key aspects to take into account before purchasing a plastic storage cabinet.

    Material Quality

    The durability and longevity of a storage cabinet rely heavily on the quality of the material used in its construction. Ensure that the product is constructed from high-quality, heavy-duty plastic capable of withstanding daily use, as well as potential exposure to harsh weather conditions if meant for outdoor use.

    Size and Storage Capacity

    Before purchasing a storage cabinet, it's crucial to determine the amount of storage space needed, as well as the dimensions of the area where it will be placed. Remember to consider the size and quantity of the items you plan to store, and make sure the cabinet you choose is able to accommodate them appropriately.

    Design and Functionality

    The design of the storage cabinet should not only be aesthetically pleasing but also highly functional. Aim for a product that offers adjustable shelves, multiple compartments, or drawer combinations to maximize the organization of your items. In addition, ease of access, such as ergonomic handles and easy-to-open doors, is important for overall user satisfaction.

    Assembly and Installation

    Consider the complexity of the assembly and installation process when choosing a storage cabinet. Opt for a product that comes with clear instructions or an installation video, and ensure that the assembly process is manageable for you.

    Maintenance and Cleaning

    Lastly, factor in the effort needed to maintain the storage cabinet. Products made from high-grade plastic typically require little maintenance and are easy to clean. To save time and effort, opt for a storage cabinet that is simple to keep in good condition.

    Remember, investing in a high-quality, functional, and aesthetically pleasing plastic storage cabinet can not only enhance the organization and efficiency of your space but also improve its overall appearance.

    Keep these factors in mind to find the storage solution that will best serve your needs.

    Plastic Storage Cabinets FAQs

  • Are plastic storage cabinets durable and sturdy enough for long-term use?

    Yes, plastic storage cabinets are generally durable and sturdy enough for long-term use. They are constructed from high-quality plastic materials that resist wear and tear and protect your stored items.

    However, the durability may vary depending on the specific model and the weight of the items you plan to store.

  • Can I adjust the shelves in a plastic storage cabinet?

    Some plastic storage cabinets offer adjustable shelves, while others come with fixed shelves. It would be best to check the product description or user manual to confirm whether the shelves in the cabinet you are considering can be adjusted to your requirements.

  • Are plastic storage cabinets easy to clean and maintain?

    Yes, plastic storage cabinets are generally low-maintenance and easy to clean. To clean them, simply wipe the surfaces with a damp cloth and mild soap. Their plastic construction means they won’t rust or corrode like metal cabinets, making them ideal for long-term use.

  • Are these cabinets suitable for heavy items?

    Plastic storage cabinets are generally designed to hold a range of light to moderately heavy items. However, their weight capacity varies depending on the specific model. It’s essential to check the maximum weight limit of the cabinet you’re considering and ensure it can accommodate the weight of your stored items.

  • Can I lock my plastic storage cabinet for added security?

    Some plastic storage cabinets come with the option to lock the cabinet doors with padlocks or built-in locks for added security. Check the product description to see if the specific cabinet model you’re considering offers locking features.

  • How easy is it to assemble a plastic storage cabinet?
  • Conclusion

    Before you go out to buy any of the above best plastic storage cabinets, you should truly understand your purpose of use. If you wish to store items as you would in a drawer, then tower storage cabinets are going to be a great option.

    If, however, you wish to store outdoor items such as long-handled tools, then you should think about the dimensions of storage cabinets. There are many types of plastic storage cabinets out there, and your requirements will help you get yourself the best ones.

    For a spacious storage option that's both practical and customizable, the Sterilite 4-Shelf Cabinet is an ideal option.

    If you're seeking a compact choice for small spaces and love transparent drawers for quick access, the Homak 12-Drawer Parts Organizer is a good option.

    For people needing a heavy-duty storage cabinet with a high weight capacity, the Rubbermaid Double-Door Storage Cabinet is the right choice.

    An artificial Christmas tree is made of plastics, like PVC or PE, which makes them low maintenance compared to live trees. But they are non-biodegradable and have a much higher carbon footprint, so disposing of them is much more challenging. 

    Were you late in visiting the tree farm and failed to get a real Christmas tree to surprise the kids? In such a situation, you probably brought home a synthetic tree that costs less and lasts longer. 

    Seems like a fantastic deal, right? But disposing of used artificial trees is challenging, as their plastic construction is a health risk. Read my guide to stay safe during the holiday season and dispose of artificial Christmas tree properly. 

    Determining The Type Of Artificial Tree

    Determining The Type Of Artificial Tree
    © Homesthetics | http://homesthetics.net/

    To dispose of a fake Christmas tree, it would be wise to know about the type and material of your artificial Christmas tree. Here is a list of the most popular artificial Christmas trees that people have - 

    A. Different Types Of Artificial Trees

    • Unlit fake Christmas trees
    • Pre-lit Christmas tree
    • Realistic Christmas tree
    • Fiber optic Christmas tree
    • Pop-up Christmas tree
    • Slim Christmas tree
    • Outdoor artificial Christmas tree
    • Half Christmas tree
    • Blossom artificial trees
    • Color Christmas tree

    B. How To Identify The Type Of Tree

    Although several artificial trees look similar to a real Christmas tree, most options are available in 2 branch types - hinged and hook-in. An old artificial Christmas tree with a hinged branch is easier to assemble because they have fewer parts and permanently affixed branches.

    Meanwhile, an artificial tree with hook-in branches has each part attached to a particular point on the central pole of the tree. These faux trees aren’t available in a pre-lit model and take much longer to set up, which could be an added hassle during the holiday season. But they cost less than other artificial trees.

    Other than this, a major part of distinguishing an artificial Christmas tree depends on the material. Usually, artificial trees are either made of PVC (polyvinyl chloride) or PE, a type of plastic. However, the appearance of Christmas trees varies based on your preferred material.

    Manufacturers use wires to attach PVC needles to an artificial tree, while PE trees are fabricated, so the needles and branches are similar to real Christmas trees. Moreover, if the tips of the branches are sculpted, they look like Evergreen trees.

    One of the best things you can do with your old artificial tree is to donate it to local organizations to spread joy during the holiday season or repurpose it. Contact some nursing homes or thrift stores to see if they require Christmas trees. But remove all non-permanent attachments like tinsel, ornaments, and lights before handing over the tree.

    You can even repurpose Christmas trees if you are good at DIY tasks. People who want to get creative can cut, shape, or bend real and artificial trees into a garland or decorative wreaths. Plus, homeowners can reuse the fake tree, with some effort, as a holder for napkin rings or as a table centerpiece.

    Tip

    Remove all light strings from the tree before cutting it, and ensure not to damage any electrical wires. You can search online or research creative projects for more inspiration on repurposing used artificial trees.

    Recycle An Artificial Christmas Tree

    Christmas tree recycling only applies to real or live Christmas trees because artificial Christmas trees are made of plastics, like PVC. Plastics aren’t environment-friendly, and your local waste collection company will confirm that they don’t break down in a landfill, unlike a real tree. 

    Moreover, many artificial trees aren’t accepted in most recycling centers because the decorative fibers added to such trees are glued or fixed to the metal frame. So, how will you enjoy the Christmas spirit when your local recycling center doesn’t accept your old artificial tree since it will lead to environmental issues?

    Instead of being heartbroken, you can look for special recycling programs to accept your old tree. Such organizations possess the latest tools and accept flocked trees, turning them into mulch or other reusable materials.

    Thus, you can avoid the damaging effects of a landfill and enjoy the holiday spirit with a clear conscience.

    Dispose Of Artificial Christmas Trees
    © Homesthetics | http://homesthetics.net/

    Dispose Of Artificial Christmas Trees

    Disposing of an old Christmas tree is more challenging than collecting live trees from yard waste. Most people use these trees because artificial trees last longer and are also low maintenance compared to live trees, but there are fewer disposal options.

    1. Curbside Collection

    One of the most popular methods to dispose of an artificial tree is to place it outside your apartment building for curbside collection. Many cities or local recycling centers often accept old fake trees as general household waste, offering curbside pickup for an eco-friendly solution.

    But even if your trees are made of metal or plastic, you must break them down into smaller pieces. This means using wire cutters to remove the needles, Christmas lights, and other decorations or waiting for bulk pickup day to remove old trees.

    2. Drop-Off Location

    There are a few other ideas, such as free drop-off locations where you can leave an old tree in the United States after the Christmas and holiday season. Some of these include the following -

    • Charity shops or senior centers
    • Regional landfills
    • Home improvement services
    • Government organizations
    • Municipal solid waste programs

    3. Dumpster

    You can dispose of a flocked tree in a dumpster by treating it as regular trash but not as yard waste. Instead of the local landfill, place the tree in the dumpster in front of the apartment by breaking it down into smaller pieces to fit into the waste container.

    However, it would be wise to check with the local waste management company or landlord to see if they collect trees that are made of plastic. People living in large housing complexes can also rent a roll-off dumpster or inquire with home improvement services to dump their synthetic trees.

    Are there any environmental concerns associated with disposing of an artificial Christmas tree?

    An artificial Christmas tree can harm the environment in a few ways, but the most frightening aspect is they are made of chemicals or PVC. Such materials are normally harmful to both people and the environment, but even more so because they are non-biodegradable and add to the carbon footprint. 

    Can I compost my artificial Christmas tree?

    Since an artificial tree is made of plastic, it’s not possible to compost or recycle them. You can only compost a real or live tree by reducing such trees to mulch. 

    Are there any laws or regulations regarding the disposal of artificial Christmas trees?

    Different cities have different laws regarding the disposal of artificial Christmas trees in the United States. Usually, government officials ask people not to store the tree in the garage or basement for next year, even if it’s in good shape. 

    But if you don’t want to dump the tree in a landfill, it would be best to get it incinerated. Also, the appropriate time for disposing of such trees is within a month, and during the holiday season, many agencies provide same-day pickup. 

    Most importantly, never burn artificial Christmas trees yourself since they are a fire hazard, and the flames can get out of control. 

    What is the best way to dispose of an artificial Christmas tree in my area?

    The best way to dispose of an artificial Christmas tree is to contact your local waste collection service. You can also use social media sites like Facebook to know how other people remove their used artificial trees. 

    An easy technique is placing the tree in a dumpster or contacting a business with a large dumpster by chopping the tree into small pieces. I have also seen people disassemble various parts of the tree and put them into the trash can, which might take several weeks. 

    Or, like me, you can arrange for a bulk item pickup and place the tree on the curb. 

    Conclusion

    Don’t just place the old tree near the trash bin and consider it job done. Whether you have a real or artificial Christmas tree, it’s essential to dispose of it properly to reduce environmental impact and guarantee safety. 

    Christmas trees are a fire hazard; the longer you keep them in your home, the greater the chance of an accident. Instead, a tree donation to a charity is better to help other people enjoy the holidays, or contact a professional agency to dump it carefully. 

    You should also adhere to the regulations in your area when disposing of Christmas trees, so contact government agencies or your building manager to know more. 

    Aire Serv is a leading AC installation company that offers services in 42 states, provides phone and online appointment scheduling, and offers free heat gain and loss evaluations. Another company, American Residential Services, LLP, provides the widest range of services and third-party financing.

    Summer is fast approaching, and you may be planning to replace your old air conditioning unit with a new one.

    In that case, the first thing to do is to find the best AC installation companies in the area. But with so many options to choose from, it can be quite challenging to determine which one to go with.

    That's where this guide on the best AC installation companies can help you out.

    How To Choose The Best AC Installation Company?

    How To Choose The Best AC Installation Company

    When you're planning to get a new air conditioner installed at home, finding the right installation company is one of the most important decisions. And you need to look at several aspects, such as services offered, products available, and customer support post-installation, when making this decision.

    Putting in the time and effort to find the right company will ensure you have the best experience and help avoid a lot of hassle in the future. Here, I've mentioned some factors that should be considered when selecting an air conditioning company.

    1. Scheduling And Service Area

    Generally, there are two options when it comes to AC installation service. You can either find contractors who work locally and provide service to select towns or bigger companies that offer nationwide services. For any specific city, local air conditioning contractors are better suited since they have limited products, services, staff, and availability.

    However, selecting a well-known AC installation company might be a better option if you have an extremely busy schedule. They cater to a larger area, have a bigger staff made up of experienced HVAC technicians, and are generally more easily available.

    Some AC installation companies are also willing to visit locations outside their service area for an extra fee. In such cases, you should ask them how the total price will be calculated before making a decision.

    Also, the installation or repair service depends upon how the AC installation company schedules appointments, as some companies require on-site consultation. In such cases, you will have to make more than a single appointment. Additionally, while the majority of companies allow making appointments over the phone, some offer the facility of online scheduling.

    2. Emergency Services

    If your air conditioner breaks down in the middle of summer, finding a reliable AC installation and repair company that offers emergency services becomes necessary. And doing so quickly is crucial since, in some cases, extremely high temperatures may pose health risks.

    Having a dependable air conditioner repair or replacement company on-call can help you avoid such situations. But I would like to point out that companies providing emergency services generally charge an emergency fee for them. So, it is a good idea to find out about the cost breakdown before hiring an air conditioning service company.

    3. Brands Offered

    Most AC installation companies offer several brands, but these can vary considerably from one company to the next. If you plan to purchase from a different brand, it is generally treated as a special order and leads to an increase in the installation cost. Small air conditioning contractors usually have a limited stock of AC units you can purchase immediately.

    Alternatively, some AC installation companies deal in specific brands for which they provide installation and maintenance services. I also suggest checking with the company you plan to hire if any restrictions prohibit other technicians from performing repair and maintenance activities.

    Since the AC brand plays such an important part in the selection of the installation company, make sure to research different brands and products properly. For this purpose, the suggestions and expertise of an AC professional might come in handy.

    4. Insurance And Licensing

    Before hiring a professional to install your air conditioning system, make sure to check that they are properly insured, certified, and trained as required by the law. States like Wyoming do not have any insurance or licensing requirements for AC installers, while others, like California, require contractors to take various licensing examinations.

    Apart from these legal requirements, a company that imparts further training and provides additional certifications to its technicians can be relied upon to deliver good service.

    5. Guarantee

    One of the most important factors to consider when searching for AC installation companies is the guarantee offered on the service provided. The best AC installation companies provide a guarantee on the repairs or services performed. But this generally differs from the manufacturer's warranty, which covers your AC unit.

    The guarantee provided by installation and maintenance companies usually covers improper installations, faulty wiring, and similar issues. You should try to find out all you can about the guarantee provided by the installation company, which will help avoid making multiple payments for the same thing.

    6. Customer Support

    Businesses operating in the service industry should have customer support as their topmost priority. In the case of AC installation companies, this means that the company should provide complete information regarding products, services, pricing, insurance, licensing, and other aspects. If it fails to do so, you will not be able to determine whether that business is reliable or not.

    In such instances, selecting a different company that can provide the required information might be a more sensible choice. Most leading AC installation companies have a dedicated customer support team that is often not found in the case of smaller contractors.

    This team can help with all your queries, guide you through the appointment booking process, and clear any doubts regarding various aspects of the process. Additionally, they can provide much-needed support in case of emergencies.

    Now that you know what factors to consider when searching for the best AC installation companies, let us look at the top options.

    6 Best AC Installation Companies

    6 Best AC Installation Companies

    1. Aire Serv - Best Overall

    Aire Serv is among the most well-known heating and air conditioning companies operating in the United States. Established in 1992, the company caters to customers throughout the nation and even in Canada.

    It has more than 200 franchise locations spread across the two nations and provides a wide range of commercial and residential heating and cooling services. These include installations, repairs, maintenance, and replacements.

    Apart from that, Aire Serv provides air conditioners from almost all the major brands, such as Coleman, Armstrong Air, American Standard, etc. The company also has a team of expert HVAC technicians that are fully certified and well-trained to provide all types of AC installation services. And they can work with different types of air conditioning systems.

    So, whether you have a central air conditioning system, wall, and window AC units, or even a ductless mini-split AC, there won't be any problem. But the most important reason I recommend this company is that it provides evaluations regarding heat gain and loss, which can help determine the energy efficiency of your home.

    The emergency services are also quick and responsive, and the company provides full information regarding the pricing before any work is started. On top of that, you do not need to pay extra for hiring them on a holiday or a weekend or even for overtime.

    As for the technicians, they arrive properly uniformed and also send you a text before their visit. Then, there are various guarantees, such as the Performance and Satisfaction Guarantee, which ensure that the highest quality standards will be maintained.

    That being said, you should remember that Aire Serv offers a warranty for only 60 days, which is a bit less compared to what other companies offer.

    Availability: 42 states | Appointment Scheduling: Phone, online | Emergency Services: Yes | Guarantee: 60 days | Customer Support: Phone

    2. American Residential Services, LLC - Maximum Service Offerings

    American Residential Services, LLC was established in 1975 in Memphis, Tennessee, and currently offers services in over 20 states. Unlike some of the other AC installation companies, American Residential Services, or ARS, offers a wide selection of home improvement solutions, not just AC installations and repairs.

    These include plumbing, electrical, smart technologies, insulation, and other services. In fact, the company only started offering air conditioning installation and maintenance services in 1998 but has now become a leader in the industry.

    ARS can also help you select the best cooling system for your home, which can be very helpful when getting an air conditioning system for the first time. Another advantage of selecting this company is that it offers upfront pricing, making it easy to know about the breakdown of the total cost.

    What's more, you can finance the cost of repairs, installations, or other activities by any third-party lender. Many AC installation companies do not provide this facility, which is why I find ARS a better option in this respect.

    As for the installation procedure, the company employs licensed and experienced professionals. They are familiar with most brands and can install and replace almost any type of AC unit and cooling system. And on all AC installation services, you get an Exceptional Service Guarantee that lasts for a year.

    If you are unhappy with the service provided, the company will try to remedy it within the guarantee period. In case it fails to do so, it will refund 100% of the price charged for the installation. You can schedule appointments online or through the phone, and ARS also provides a free estimate for installations and offers 24/7 emergency services.

    Availability: 22 states | Appointment Scheduling: Phone, online | Emergency Services: Yes | Guarantee: 1 year | Customer Support: Phone, live chat

    3. One Hour Heating And Air Conditioning - Best For Same-Day Installation

    Different AC installation companies have varying USPs, and the USP for the One Hour Heating And Air Conditioning Company is delivering prompt service. The company strives to set itself apart by providing same-day services, whether you require the installation of a new HVAC system or emergency repairs.

    And if it fails to deliver the services within the stipulated time, customers do not need to make any payments. For people with a very busy schedule, the same-day services of One Hour Heating and Air Conditioning can be the ideal option for getting an AC unit installed.

    Additionally, all air conditioning technicians hired by the company are selected only after they pass drug tests and background checks. This helps eliminate any worries that you might have regarding the quality of the services offered.

    Speaking of the services, you get all the standard services that the best AC installation companies offer. These include installing the air conditioning system, repairs, heating, and indoor air quality control.

    The pricing policy of the company is also great, and One Hour Heating And Air Conditioning has transparent pricing without any hidden charges. And as for the warranty, you get a two-year warranty on labor and materials, besides the manufacturer's warranty on the AC unit.

    Customer service can be contacted online or over the phone, and you can even sign up for the Home Comfort Club annual maintenance program to get discounts. Appointments can similarly be booked online or by phone, though I should let you know that navigating the website using a mobile phone or tablet is not an enjoyable experience.

    Also, while the company does not provide service to all the states in the country, it can provide assistance if you are located close to a serviceable location.

    Availability: 41 states | Appointment Scheduling: Phone, online | Emergency Services: Yes | Guarantee: 2-year warranty | Customer Support: Email, phone

    4. Dr. Energy Saver - Most Eco-Friendly Option

    Dr. Energy Saver is an AC installation company that has built its reputation by focusing on energy efficiency. Ensuring that your AC unit is installed in the most efficient manner possible is of utmost importance for the company. To do that, it conducts home energy audits to find problems resulting in high energy bills.

    While the company has its branches in 25 states, the scheduling, services offered, and customer support can vary depending on the location. The reason is that Dr. Energy Saver operates as a dealership, so branches in different locations tend to vary in how they operate.

    Also, this air conditioner installation and repair business caters mostly to the eastern states of the United States. This means you may not find any branches in states like Washington and Oregon, which are located on the western side.

    Aside from that, Dr. Energy Service is known for its wide selection of heating and cooling services for residential properties, which include installation, repairs, maintenance, whole-home insulation, and energy audits. Other services include ductwork and window and door work, which can make your air conditioning more effective.

    If you opt for the energy audit, the company can recommend the most suitable air conditioning upgrades, more efficient insulation, and other solutions that can help ensure efficient energy use. Some branches also offer emergency services, but the warranty terms and conditions can vary by location.

    So, if you're planning to hire this company to get a new AC unit installed or fixed, I would suggest checking with the local branch first. Another way to find out about the services that Dr. Energy Service offers in the area is to visit the website and fill out the provided form. This can also help you get a free estimate.

    Availability: 25 states | Appointment Scheduling: Location dependent | Emergency Services: Location dependent | Guarantee: Depends on the service | Customer Support: Location dependent

    5. The Home Depot - Best For Window AC Installation

    The Home Depot is best known for being the largest home improvement retail service in the world and operates over 2300 stores in the US, Mexico, and Canada. But the business does not limit itself to selling home improvement tools and hardware, and its HVAC services are also quite remarkable, especially when it comes to window AC installations.

    To get a new AC unit installed, simply visit the website and select the unit you want, and click on the button provided for installation services. Once the order is confirmed, you will get a call from an installation professional within one business day, who will schedule an appointment for the installation.

    The Home Depot works with local contractors through partnerships to provide air conditioner installation, repair, and maintenance services. This means that you can rest assured that the professional will be familiar with most makes and models available in the area and can deliver quality service.

    Also, since the company operates across three countries, you can find its branches in all 50 states, including Alaska and Hawaii, and it offers both in-home and virtual consultations. For the installation, the professional will remove the old air conditioner (if any) and check that the new AC unit is properly secured and completely weatherproof.

    Moreover, The Home Depot provides flexible financing options, including both interest-free short payment periods and longer 120-month periods. You also get upfront pricing, a one-year warranty on the AC unit, and a 90-day one on tune-ups and repairs.

    I would like to point out that most locations also offer emergency services, but not all of them. So, make sure to check with your nearby branch to know whether such a service is available or not.

    Availability: 50 states | Appointment Scheduling: Online | Emergency Services: Location dependent | Guarantee: 1 year on installations, 90 days on labor | Customer Support: Phone

    6. TemperaturePro - Best For Commercial Installations

    The above-mentioned options are great if you need to get an air conditioner installed at home, but when it comes to commercial requirements, I would recommend TemperaturePro. This company was founded in 1986 in Cherry Hill, New Jersey, to provide installation and repair services for HVAC systems.

    TemperaturePro provides a wide range of HVAC services for commercial establishments across various sectors, including education, healthcare, retail, etc. The services include air conditioner installations, repairs, maintenance, and others. In addition, the company offers preventive programs to ensure your AC unit continues functioning properly for the long term.

    To provide such services, TemperaturePro has a team of fully certified HVAC technicians with several years of experience. The professionals are also certified with the North American Technician Excellence (NATE), so you can count on a good experience.

    Another thing that helps this company maintain its reputation as a leading air conditioner installation company is that it works with several manufacturers, including Goodman, Lennox, and Honeywell. And it offers several online tools that make the customer experience better. These include tracking tools, online chat, and more.

    When you schedule an appointment, the installation professional will visit the site and conduct an evaluation of the property and the air conditioning requirements. Once done, the company can send you a quote along with recommendations for the property.

    You can even get a free estimate by contacting the nearby TemperaturePro branch. Additionally, 24/7 emergency services are available, and the company offers various financing options while also allowing monthly payments.

    However, the business does not provide clear information regarding the warranty offered since the website only mentions a standard factory or manufacturing warranty. And this warranty may not be available at all locations.

    Availability: 19 states | Appointment Scheduling: Phone | Emergency Services: Yes | Guarantee: Varies by location | Customer Support: Phone, online

    image here

    Quick Comparisons Of The Top AC Installation Companies

    Top AC Installation Companies Availability Appointment Scheduling Emergency Services Guarantee Customer Support
    Aire Serv 42 states Phone, online Yes 60 days Phone
    American Residential Services, LLC 22 states Phone, online Yes 1 year Phone, live chat
    One Hour Heating And Air Conditioning 41 states Phone, online Yes 2-year warranty Email, phone
    Dr. Energy Saver 25 states Location dependent Location dependent Depends on the service Location dependent
    The Home Depot 50 states Online Location dependent 1 year on installations, 90 days on labor Phone
    TemperaturePro 19 states Phone Yes Varies by location Phone, online

    Selecting The Best AC Installation Companies - The Methodology Used

    To determine which companies offer the best AC installation, maintenance, and repair services, I had to research numerous businesses in the industry. Since this was a very long list, it was important to eliminate businesses that were not worth considering, for which certain factors had to be taken into account.

    Some of these included the reputation of the company, residential and commercial services offered, brands offered, customer satisfaction, etc. Considering these factors allowed me to make the list more manageable and begin the next phase of the process. In this, I looked at the procedure followed by the remaining companies for installing AC units, repairing them, and providing maintenance.

    This also covered the service area in which the services were offered since a company that does not operate in many locations is not suitable for most customers. In the end, the businesses offering all these services in a wider area were included in this list.

    Each of the selected companies specializes in a certain area. For instance, American Residential Services, LLP offers the widest selection of services, while TemperaturePro offers the best services for commercial establishments.

    Similarly, for customers who want sustainable options, Dr. Energy Saver is the ideal choice, while The Home Depot is great if you want to get window AC units installed. Here are some of the parameters that I considered when finalizing the list:

    • Availability in different states
    • Emergency services
    • Warranty period
    • Appointment scheduling options
    • Customer service
    • Available financing options
    • Other services offered

    What Is The Cost Of An AC Installation?

    There are no standard charges when it comes to getting air conditioners installed in residential or commercial properties. In most cases, the price depends on the type and size of the air conditioning unit that needs to be installed. The installation cost can range from $3,800 to $7,900, with the average cost being around $5,800.

    For instance, if you plan to get a window unit installed, which is usually smaller, the installation process will be less labor intensive, and therefore, the cost will be less. On the other hand, getting a central heating and AC unit installed can cost you thousands of dollars.

    But other factors, such as the brand of the product and the location of the property, can also affect it. And the size of the building in which it has to be installed plays a major role in determining the cost.

    The capacity of an air conditioning unit is measured in British Thermal Units or BTUs. One square foot of area requires about 18 BTUs for effective cooling, and air conditioners with a higher capacity tend to be more expensive. So, a bigger house will require a larger and more powerful HVAC system, and you need to pay more for cooling.

    To find out the exact cost of AC installation, I recommend contacting the installation company and getting an accurate quote from them.

    Tip

    When hiring an AC installation company, considering your budget is among the most important things. But even more than that, it is important to find a company that can provide reliable service. Going with a cheap contractor can lead to problems later on if the air conditioner is not installed properly.

    And when asking for a quote, try to get a complete breakdown of the total cost before making a final decision. This can help avoid hidden charges that can increase the price of installation.

    Services Provided By AC Installation Companies

    AC installation companies generally provide a wide range of services related to installing, repairing, and maintaining HVAC systems. Services included in installation generally involve installing new plumbing, ductwork, or electrical fixtures required for the air conditioning unit and the unit itself.

    Depending on the company, it can provide installation services for different types of air conditioners, such as a central AC system, ductless mini split air conditioners, windows ACs, and others.

    Then there are repair services, which involve diagnosing problems with the AC system, repairing parts and components that are malfunctioning, and performing replacements of such parts if required. Finally, the HVAC technicians perform inspections, cleaning, and tune-ups under the maintenance services offered by AC installation companies to keep the system running optimally.

    Besides these, AC installation companies often offer emergency services, which can be especially beneficial if your air conditioner breaks down suddenly and requires quick repairs. In such cases, companies usually send a technician within a few hours who can perform an inspection to identify the issue and resolve it.

    Such 24/7 services can also be very useful if there are other issues with your AC system, such as strange noises, unusual smells, or water leaks near the unit.

    Benefits Of Hiring A Good AC Installation Company

    If your old air conditioner is malfunctioning, waiting to get it repaired or replaced will only make the problem worse. Similarly, if the unit is due for maintenance, I suggest calling up a professional AC maintenance company as soon as possible. Timely maintenance can help prevent and resolve problems that may be caused by clogged filters, dust, and dirt.

    Delaying the maintenance or waiting to get a faulty air conditioner replaced can lead to various problems. Firstly, old air conditioners that are not operating properly usually consume more energy, leading to higher power bills. Additionally, such units reduce the air quality, which can be a potential health hazard.

    By hiring a reputed AC installation and repair company in time, you can get the issues affecting the air conditioner looked at. Properly trained HVAC professionals can perform repairs, undertake regular maintenance activities, and replace faulty air conditioners efficiently.

    Thus, you can enjoy the benefits of improved air quality, greater energy savings, and maximum comfort.

    Best AC Installation Companies

    Conclusion

    Finding the right AC installation company can take considerable time and effort. But hopefully, with the options I've mentioned in this guide, you will find the process a bit simpler. The first thing to do is to check which of these businesses offers services at your location.

    Then, select from the ones in the area and try to obtain quotes from them. I would also recommend going through their website to gather all the required information and checking out customer reviews. And when making price comparisons, consider additional factors, like emergency services, warranties offered, and customer services.

    This will help you select the most suitable option.

    The best air conditioner brands have achieved their position because of tried-and-true quality, outstanding customer service, and durable products. Frigidaire is one such brand that has been providing reliable ACs and compact comfort for decades. If you're looking for an affordable option, American Standard delivers tough, long-lasting ACs that function quickly and efficiently.

    When you're looking for the best air conditioner, you usually look up individual products first and feel confused. This is because the models are just reflections of their brand, and factoring that into your decision from the start will help you make better choices.

    So, if you're going back and forth between your central air conditioner options and wondering which one suits you better, pause for a while and look at the bigger picture. You need good features, but you also need a brand you can depend upon.

    Thus, I've curated a list of the best air conditioning brands and provided explanations to help you see my reasoning. Let’s begin!

    Common Factors In The Best Air Conditioning Brands

    Common Factors In The Best Air Conditioning Brands

    While reading this article, you might have doubts about the criteria I considered to include a brand on this list. To answer your query, there are sure signs of a good brand that I've learned to recognize over the years. I've described some of them below and explained why I trust this judgment. I hope this information helps you make better decisions, too. 

    1. Customer Service

    You may not consider it at the time of purchase, but customer service is the most crucial factor when choosing an air conditioning brand. 

    An air conditioner is a long commitment, and you're bound to encounter some problems along the way. So, you need a brand that you can trust with consistent servicing, repairs, and honest communication. Furthermore, malfunctioning central air conditioning units can be dangerous. You will spend a lot of time with it in a small, enclosed space. Thus, you should ensure that any health or fire hazards will be addressed immediately.

    However, it's more than just repairs. A company with helpful and swift customer service is a company that values you, and you can trust that they put the same efforts into their product quality. Thus, investing in such an air conditioner will help you maintain it for years.

    2. Additional Services Provided

    You should choose an air conditioning brand that delivers the product most suited to your needs, but you should also consider some extra services. For example, perfectly functional central air conditioning units will be frustrating to install if the dealers don't provide help. On the other hand, if you choose the right HVAC (Heating, Ventilation, and Air Conditioning) company, their staff will deliver the air conditioning system to your home and set it up in your room within a few hours.

    Similarly, you'd prefer calling experienced professionals for repair and servicing instead of looking for a local electrician who may not know your central air conditioner. It's not only easier to contact the brand's dedicated electricians, but it's also safer and quicker than the other options.

    3. Warranty

    When choosing a central air conditioner, you should always opt for a warranty of 1 year or more. However, there's more to it than the numbers on individual products. To shop smart, you'll need to find the trends in the product warranties of each brand.

    No HVAC business wants to lose money by promising a warranty for attic HVAC units likely to require frequent repair or replacement. Thus, it makes sense that a brand consistently providing more extended warranties for its central air conditioners has confidence in their durability and functionality. Similarly, it's best to avoid air conditioner sellers that don't bother with good warranties. 

    Also, the best tip I can give you is to pay attention to the fine print on the warranty. A central air conditioner can have different warranties for regular functions, installation, and parts. Thus, don't be amazed by big numbers, and choose wisely.

    4. Brand Popularity

    The brand's popularity is significant, but I'm not telling you to pick the ones trending at the moment blindly. Instead, you should consider the factors that turn a brand into a household name.

    Firstly, these brands were usually established years ago, and they have stood the test of time. This has also helped them gain experience. Thus, you can have a fair amount of trust in their portable and central air conditioners.

    Secondly, brands are only popular when customers are satisfied with their products for a long time. There are always those viral brands that seem to spread everywhere overnight. However, they fizzle out when the hype dies and customers start finding product defects.

    Therefore, maintaining consistent trust in the market signifies durability, high performance, and top quality. Also, these big brands have a reputation to uphold, which makes them highly attuned to your needs as a customer. You can depend on them for authentic window air conditioners, smooth installation, and easy servicing.

    5. Your Budget

    Your budget influences the air conditioner's specifications, quality, and additional features. Most importantly, having a good idea of your budget will help you choose a suitable brand.

    Brands generally price their air conditioners based on the quality they provide, their post-purchase services, and their position in the market. Thus, you're likely to find the air conditioner you want within your budget if you shop around and critically compare the options. However, your budget should always be realistic because going cheap might get you into problems in the future.

    For example, suppose you're considering 2 central air conditioners with similar features, but one is costlier with a 5-star energy efficiency rating, and the other is cheap but not energy star certified. So, even though you may think you're saving money by choosing the cheaper option, it'll actually weigh heavier on your electricity bill. On the other hand, the 5-star air conditioner will make up the price difference in a few months and save you some more. 

    Thus, have a fixed budget to keep yourself in check, but also have an open mind and analyze your options with a long-term mindset. Now, you can match this budget with the average prices of each brand and choose accordingly.

    6. Customer Satisfaction And Reviews

    This one's a no-brainer: you obviously need to know what previous customers have experienced. However, there are some ways to improve how you process reviews.

    If you pick a well-known brand, you'll probably be overwhelmed by thousands of reviews, ranging from reverent appreciation to 3-page essays insulting everything from the products to the customer service. You need to filter through this noise by sticking to what you care about and disregarding the rest.

    For example, suppose you're looking for simple central air conditioning units with manual controls. In that case, a negative review complaining about the lack of a remote shouldn't be a problem for you. Similarly, another user might be praising an air conditioner's heating mode. But if you're in an area with mild winters, you'll only need the cooling function, so you shouldn't be swayed by the features that do not matter.

    Another thing to remember is that anger will always be a stronger motivator for reviewers than comfort. Picture this - your air conditioner is running perfectly, and you're cool and relaxed in your bed. In contrast, now imagine that your air conditioner has had a sudden failure and the customer helpline numbers were busy. In which case would you have a sudden burst of energy to leave a long online review about your experience? For most people, it's the negative one.

    Thus, take all negative reviews with a grain of salt, and consider whether it's a general problem or a complaint about a hyper-specific situation. But it doesn't mean you should take all positive reviews at face value. Generally, it's a good practice to be wary of reviews that appear repetitively throughout the product page and use your gut instincts to judge all positive comments.

    7 Best Air Conditioner Brands

    Best Air Conditioner Brands

    1. Frigidaire - Best Well-Known And Reliable AC Brand

    Frigidaire is an air conditioner and refrigerator brand under the home appliance manufacturer Electrolux, and it was originally named the Guardian Frigerator Company. It's one of the widely recognized names in the cooling and air conditioning industry. In fact, most Americans in the 1990s used the name Frigidaire to refer to any refrigerator.

    Thus, it has decades of popularity and customer trust. However, its expertise lies not just in home air conditioners but also vehicular systems. Frigidaire has been one of the top suppliers of inbuilt air conditioners for cars ranging from Rolls-Royces to Jaguars.

    Additionally, it strives for the maximum Seasonal Energy Efficiency Ratio in its appliances. In fact, it produced the first split air conditioner with a Seasonal Energy Efficiency Ratio as high as 25.5.

    Nowadays, Frigidaire outsources the manufacturing processes to Nortek Global HVAC and thoroughly tests every AC unit to maintain its standards. They use a test named Demand flow to check the efficiency of every air conditioner, eliminating the need for human testers to go through every single machine.

    Additionally, Frigidaire is a suitable option if you're looking for a reliable air conditioner within your budget. Although it has fewer choices regarding air conditioner models, the features are helpful, and you can easily find what you're looking for in its catalog. Moreover, each product line has specifications fine-tuned to customers' needs over the years.

    However, if you're opting for a Frigidaire air conditioner, remember that they're generally noisier than their alternatives. The noise can be anywhere from 57 to 70 decibels, depending on the model, which is around the level of a crowd or a busy highway. But if you usually don't notice the sounds after a while, you'll find no issue with your air conditioner.

    Typical Warranty: 10-year parts warranty and comfort pledge | Customer Service: Mostly responsive and speedy | Market Expertise: 105 years | Additional Services: Installation, servicing, out-of-warranty repair

    2. Lennox - Best Energy-Efficient AC Brand

    Dave Lennox founded this company in 1895, and it later evolved to be known as Lennox International Inc. It's based in Texas and conducts HVAC business around the world.

    I'm including it on my list for its many benefits, the primary one being the high efficiency of the Lennox air conditioners. This is achieved through superior quality products and a range of power-saving options. For example, you can switch your air conditioner's energy source from your building's wiring to the gas, and vice versa. This'll help you pick the option that saves you the most on monthly bills. 

    Also, the air conditioners have thermostats and intelligent options that will control your room temperature while preventing wastefulness. They'll measure your temperature and only cool and warm you as much as you require, cutting down on unnecessary spending.

    Additionally, Lennox provides more options for you with their 3 air conditioner ranges named Merit, Elite, and Dave Lennox Signature Collection. Of these, Merit is the most affordable, while the Signature Collection has 10-year warranties and higher prices. Elite is the middle ground, with a delicate balance between prices and efficient features. Also, because of the eco-friendliness, you can choose a Lennox product that qualifies for deductions from your tax.

    Lennox even offers quick and safe installation services for a fee. This installation charge is the reason the prices of most of their air conditioners are unpredictable. However, you'll be benefited from investing in this service. Lennox provides experienced mechanics who can install your air conditioner with more ease and efficiency than any other professionals, and you can contact them if you encounter any issues.

    Thus, overall, Lennox lies on the high end of air conditioner costs, but it provides quality and services to match. If you can fit it into your budget, it's a suitable choice that you won't regret.

    Typical Warranty: 5 years for Merit and Elite, 10 for Signature | Customer Service: Some quality reduction in the last two years | Market Expertise: 128 years | Additional Services: Installation, annual servicing

    3. American Standard - Best Features From An Affordable AC Brand

    American Standard is an affordable, convenient HVAC brand providing durable central air conditioning units and reliable services. It was established 130 years ago, making it one of the oldest brands in the HVAC industry.

    It's an ideal brand if you live in a harsh area with extreme weather. American Standard conducts extensive tests to ensure its products are durable against physical impact, heavy rain, thunderstorms, scorching summers, and hail. Thus, you can go for it if you're in an area with frequent tornado possibilities or unforgiving sun.

    However, its warranties are tricky. You get two types of warranties: One for the essential parts and another for the scroll compressor. The basic parts warranty is fair, and you can replace failing parts in reasonable scenarios. However, most other HVAC companies provide more extended scroll compressor warranties than American Standard, so you should exercise caution and consider if you can keep it safe after the warranties expire.

    It also includes innovative home automation options in its AC systems. Installing the American Standard Home mobile app allows you to connect to your central AC system and thermostat anywhere, anytime. Thus, you can control the temperature even when you lose your remote, accidentally damage it, or are too busy with work to look for it. Additionally, you can turn the AC on while returning from work, and it'll cool the space for your arrival.

    Furthermore, it offers ACs in 3 series. The Silver air conditioners are single-stage, and they are the most affordable. Moving up, the Gold series has two-stage ACs with energy efficiency. Finally, Platinum is the most premium tier and has an AccuComfort feature. Thus, your Platinum AC can save on your energy bill by adjusting the heating and cooling to use the least power.

    Typical Warranty: Basic (5-year) or Extended (10-year) | Customer Service: Streamlined and courteous | Market Expertise: 130 years | Additional Services: Installation, care & repair

    4. Coleman - Best Low-Noise AC Brand

    Coleman has been operating since 1958, and it's known for its sleek ACs with exemplary warranties. Its compact designs are suitable for small rooms, dorms, or offices. The ACs work fast with minimum noise, and you'll be satisfied with their functioning for years.

    However, most Coleman ACs aren't ideal for those who need smart features and high-technology controls. The most advanced features here are an intelligent thermostat and energy-efficient control, but it's a solid option if you care about affordability and durability more than smart features.

    Further, Coleman provides reliable warranties. For most of their ACs, you'll have a 10-year warranty and free servicing for the first year. Also, some of their products have a lifetime compressor warranty. However, it's important to note that the warranties are only valid if you register your AC system within 3 months of installing it. Additionally, because of the money-back guarantee, you get a refund if your AC fails to work even after repairs.

    I also need to mention that you can only get the money-back guarantee if you get your AC installed by Coleman's mechanics.

    What's more, it saves you more in the long run. Because of the energy efficiency, its ACs may qualify for tax cuts, depending on your chosen model. Coleman also provides financing through Synchrony Financial and Fortiva Retail Credit. Thus, it's clear that the HVAC company designed its products with accessibility and comfort in mind.

    At 53 decibels, Coleman ACs are some of the quietest ones on the market. That's about the noise level you'd expect in a library! So, you can work or sleep peacefully without even noticing it.

    Also, its pricing is suited to your specific needs. The AC has a basic price, but a technician can also visit your work or living space to give you a more accurate quote. It's based on your installation requirements, area, and more.

    Typical Warranty: 10 years | Customer Service: Helpful | Market Expertise: 123 years | Additional Services: Annual tuneup, installation

    5. Carrier - Best Options Provided By An AC Brand

    Willis Carrier, the inventor of the modern air conditioner, founded the Carrier Global Corporation in 1915. These days, it's based in Florida, United States, and distributes heaters and ventilators along with its original line of the HVAC system.

    According to customers, Carrier is a generally expensive HVAC brand, but its reliable engineering and market leader position make it worthwhile. 

    Out of all the air conditioner brands on my list, this has exceptional noise levels and energy-efficient systems. The sound is as quiet as 51 decibels, while the highest Seasonal Energy Efficiency Ratio that it can reach is around 26. Thus, you can go for Carrier units if you don't mind investing in a suitable AC from an experienced brand.

    What's more, its ACs are divided into various categories that'll streamline your choice. Its comfort series values affordability above all else so that you might find a good deal in your range. Moving to a higher tier, the Performance air conditioning has suitable features and durability at a reasonable rate. Finally, the Infinity series has the best ACs of the brand, with the quietest performance and highest energy conservation rates.

    Furthermore, the Infinity air conditioning has variable compressor speeds that can run on an inverter. Thus, they have a high degree of consistency, and you'll enjoy a comfortable atmosphere in your room without sudden cold or warm periods. 

    To make things better, Carrier products have guaranteed refunds for one year if you're dissatisfied with their functioning. However, this is only applicable if Carrier authorizes the HVAC contractor that sold you the AC, and you should ensure this before making a decision.

    Finally, the one thing some customers found lacking in this brand was the warranty. With Carrier's expertise and promises, its 10-year warranty may seem below average to a few. Also, this doesn't include the refrigerant fluid, extra parts, or tune-ups. Thus, it's only suitable for those who are okay with being responsible for most of the AC's technical maintenance after installation.

    Typical Warranty: 10 years on functional parts only | Customer Service: Responsive | Market Expertise: 108 years | Additional Services: Installation

    6. Trane - Best Corrosion-Resistant AC Brand

    Trane's operations began in 1885 under James Trane and his son. Aside from the HVAC system, it also supplies management systems for your apartment and office.

    In 1984, American Standard purchased A-Trane. However, they are still making products under separate brand names. Since the AC systems are manufactured in similar warehouses, most customers report similar features, with minute differences in the outward appearance, warranty, and prices.

    Like most HVAC companies, Trane has 3 series of air conditioners arranged in ascending order of features and cost. The XL air conditioning is budget-friendly and has minimal features. However, if you have a restricted budget, it's best not to go for the XL products. According to most reviews, it's because you can get the exact specifications at even lower budgets from other air conditioner brands.

    However, the XR and XV series make Trane stand out in the market as a supplier of reliable air conditioning. XR air conditioning has the most efficient features within a reasonably priced catalog. Also, the XV series has high efficiency that'll actually cost you less by saving your electricity bill over the years.

    What's more, these two series have air conditioners with a Spine Fin Coil. If you don't know, this coil is more durable than its alternatives because its aluminum constituent is resistant to wear and tear. Further, it's engineered to cool your home or office with speed and power optimization.

    Adding to the advantages, Trane provides good warranties. It has a 10-year part warranty, and choosing the most suitable AC units can get you a 12-year warranty on the compressor. So, if your air conditioner parts fail before their time due to defects, the company takes responsibility and replaces them for free. 

    However, there's a catch, and I'll help you be wary of a mistake many previous customers made. You should remember to register your AC unit within 2 months of buying it. Otherwise, the warranty reduces to 5 years.

    Typical Warranty: 10 years + extended warranty on compressor | Customer Service: Difficult to reach | Market Expertise: 138 years | Additional Services: Installation, parts replacement

    7. Rheem - Best Budget-Friendly Smart AC Brand

    Rheem is well-known among homeowners for offering intelligent features and Wi-Fi smart home control at competitive rates. Founded in 1925 and situated in the HVAC industry in the 1950s, it provides reliable and high-quality air conditioners on a budget.

    Also, Rheem is one of the HVAC companies striving to reduce their carbon footprint on the planet. Currently, it aims to half its greenhouse gas emissions and eliminate its waste by its centenary in 2025. Furthermore, it's creating an energy-efficient line of the HVAC system that cuts the overall footprint into half its current value. You can invest in Rheem Manufacturing Company if you want to support a future-oriented brand striving to protect our planet.

    Although, I must note that Rheem's affordable rates come with some stipulations. Since the parts are on the cheaper side, they're more likely to fail because of extreme climate or overuse. And when they fail, the repair costs are so high that it would be wiser to buy a new AC unit at that point.

    Another fallacy many users commit is cutting down on central AC installation costs by hiring locally. Since Rheem doesn't require internally certified mechanics to install your air conditioner, you can opt for cheaper, external options. However, if your technician isn't perfect, it'll lead to more repair needs in the future, thus costing you more.

    After reading this far, you're probably curious about Rheem's warranty. It's pretty standard and reasonable, with 10-year parts warranties on most AC units and 5-year assurances on a select few. Also, you can replace your central air conditioning with a new HVAC system free of charge, but only if your situation falls into specific categories that make the failures entirely dependent on the company's faults. 

    Overall, Rheem produces suitable middle-range air conditioners compatible with Alexa voice control and EcoNet Thermostats.

    Typical Warranty: 5 or 10 years | Customer Service: Quick and helpful | Market Expertise: 98 years | Additional Services: Optional installation, repairs

    Features To Look Out For In The Best AC Brands

    Quick Comparisons Of The Top AC Brands

    Top AC Brands Typical Warranty Customer Service Market Expertise Additional Services
    Frigidaire 10 years parts and comfort warranty Mostly responsive and speedy 105 years Installation, servicing, out-of-warranty repair
    Lennox 5 years for Merit and Elite, 10 years for Signature Some quality reduction in the last two years 128 years Installation, annual servicing
    American Standard Basic (5 years) or Extended (10 years) Streamlined and courteous 130 years Installation, care & repair
    Coleman 10 years Helpful 123 years Annual tuneup, installation
    Carrier 10 years on functional parts only Responsive 108 years Installation
    Trane 10 years + extended warranty on compressor Difficult to reach 138 years Installation, parts replacement
    Rheem 5 or 10 years Quick and helpful 98 years Optional installation, repairs

    Features To Look Out For In The Best AC Brands

    When choosing an AC brand, some additional features can help you decide. Apart from the brand's product quality, customer service, insurance, and warranty contract, you should also be on the lookout for extra features that make your AC more convenient and safe. I've listed some possible attractions below.

    1. Anti-Bacterial Filters

    Of late, people have grown more aware of the invisible contaminants surrounding us. Although perfectly filtering air conditioners are yet to be invented, you can start taking disease and infection prevention measures today by investing in an AC with anti-bacterial filters.

    These filters have fine meshes that prevent several small particles from entering your house. This includes bacteria, airborne animal waste, and pollen allergens. Thus, you'll stay safer with minimum changes in your AC maintenance routine.

    Therefore, look for air conditioner brands that provide this filter because it signifies a consideration for the customer's safety.

    2. Dehumidifier

    Have you ever dealt with one of those days when the air moisture is just intolerable? It makes you feel sweaty and uncomfortable, and it ruins your hair. However, you worry that turning on your cooling AC will only worsen things.

    For these situations, a dehumidifier is your buddy. It has a chemical called a desiccant that slowly absorbs the moisture from your room until you're relaxed. So, when you compare the features of two HVAC brands, look for a company that builds dehumidifiers into their central air conditioners. It'll bring you more value for your money and make your AC unit function in more than one weather condition. 

    3. Heating Mode

    Maybe you're moving to a new part of the country with scorching summers, and you're not concerned with anything beyond immediate relief from the heat. Despite this, you should try to think about other times of the year. Usually, places with unbearable summer heat are far inland, and they also have extreme winters. Thus, if you don't play smart now, you'll need a new heat pump in a few months.

    Some air conditioner brands have started including heaters in their ACs to combat this issue. Of course, not all AC units from a brand will have central heating. It depends on many factors, including the AC size, budget, and brand expertise. 

    However, you should look for a brand supplying inbuilt heaters and make the additional investment. Look at it this way: you're getting an AC and a central furnace in one.

    4. Auto Clean

    Are you stressing about the cleaning frequency of your AC? If you live alone or are busy most of the day, regularly cleaning your AC on your own can be challenging. However, most people also shy away from hiring external cleaners so frequently.

    When you choose a brand offering auto-cleaning central air conditioners, you reduce the time you spend obsessing about your AC's current filter state and cleaning it by hand. This smart system uses a timer and sensors near the filter to know when it should take some auto-cleaning measures. 

    Of course, this cleaning won't be perfect, and the AC will require a manual cleanup eventually. However, the frequency is significantly reduced, and the filters will stay clean and safe for much longer after every wash.

    Benefits Of Choosing The Best Air Conditioner Brand

    After reading the factors to consider and additional features, you're probably aware of some ways you can benefit by taking some time to choose the most suitable AC company. From my experience, here are a few surprising ways my life improved when I chose the right brand. They may help you decide or convince you to adjust your requirements.

    Benefit 1:

    You can dial customer service if you notice your central air conditioning system having an issue. They'll respond immediately, and you'll have a mechanic at your doorstep the next day. No more long waits as your requests get pushed around from person to person! 

    Benefit 2:

    Sometimes, it's unavoidable to have some manufacturing defects in your AC unit. However, you need not panic about the wasted money. The brand will immediately replace the malfunctioning parts or even the whole AC unit if the fault lies on its side.

    Benefit 3:

    You can buy an AC once, use it and carry it with you when you transfer to new areas. It will last for years and become your constant companion.

    Benefit 4:

    When the tornado sirens start wailing, you can focus on the safety of yourself and your loved ones while staying stress-free about how well your central air conditioning system will put up with the weather.

    Benefit 5:

    Energy star, energy efficiency, and SEER ratings are hard to conceptualize from a homeowner's perspective. However, you'll understand its efficient energy use when you notice significant reductions in your energy consumption over the months.

    Benefit 6:

    If you want a face-to-face conversation with a representative, you'll usually find a physical outlet near you because the brand is well-known.

    Tip

    When choosing an AC brand and analyzing customer satisfaction online, pay more attention to the reviews that include an image. It's a small addition that lends a lot of credibility to the claim and experience of a faceless review.

    Best Air Conditioner Brands Conclusion

    Conclusion

    And now we're at the end of my list of the best air conditioner brands. I hope you found this guide helpful and thorough.

    As you can see in the list, some of these air conditioner brands are quite similar, while others couldn't be more drastically different. From specifications, options, and manufacturing plants to the external look and affordability, the major AC brands are constantly competing and conversing with each other.

    Thus, you should know what you're looking for and stick to it, even when facing dazzling features or disappointing but cheap options. There is no ultimate best brand on this list, which all comes down to how you think you'll fare with their products.

    Thus, maintain a reasonable budget, think critically, and choose the best AC brand for your home.

    Finally, I want to mention some HVAC  brands that are my personal favorites. Frigidaire is a widely known name that offers security and reliability. True to this, their products are sturdy and efficient.

    I favor American Standard for a budget buy because of its commitment to weather resistance. Also, its energy efficiency and smart control are commendable.

    The LG 11,500 BTU through-the-wall air conditioner edges over the others because it cools a room quicker, thanks to the turbo fan and dehumidifier. Options from Koldfront and Whirlpool are also dependable because of their multiple fan speeds.

    Rising temperatures and high humidity levels make summers unbearable, and without an air conditioner, keeping yourself cool in the heatwave is nearly impossible. Now choosing an air conditioner may seem easy, but believe me, it isn’t because of the numerous factors that need to be considered.

    To save you from the hassle, I’ve put together a list of the 7 best through-the-wall air conditioners.

    Best Through-The-Wall Air Conditioning Units

    Here is the list of the 7 best through-the-wall air conditioners that you can use to comfortably cool your living space.

    1. LG Through-The-Wall Air Conditioner - Best With 3 Cooling Speeds
    LG 11,800 BTU Through the Wall Air Conditioner, 115V, Cools...
    • Energy Efficient R-32 Refrigerant: With an energy efficiency...
    • Wall Mounted AC Unit: This 11,800 BTU ac wall unit is suited...

    This LG 11,500 BTU air conditioner is sturdily built and weighs around 80 pounds. Upon unboxing, I found the brand sends all accessories one would need to install this unit– AC power plugs and sockets, a mesh filter, and a trim kit. The box also contained a remote control, an installation instruction manual, and a 1-year warranty card. 

    After skimming through the instructions, I started the installation – preparing the wall sleeve, inserting the unit, and attaching the ground wire. In less than 60 minutes, the air conditioner was ready for use, so installation won’t be much of a chore if you’re into DIYs. 

    Like installation, maintenance is also easy-peasy– simply wash the filter occasionally to ensure the unit functions efficiently. 

    Moving on, this AC unit has a cooling power of 11,500 BTU, so it works well in rooms up to 530 square feet. Further, this through-the-wall air conditioner is equipped with a turbo fan, which is why it cools a room within 30 minutes. 

    What I liked about this air conditioning unit is that it allows users to customize the cooling experience, thanks to the 3 cooling speeds. And like most window air conditioners, this unit also features 3 pre-programmed timers that add to the user’s convenience. 

    Settings can be tweaked either by using the digital control panel or the remote control supplied in the package. Outfitted with a zero ozone depletion potential (ODP) R-32 refrigerant, this in-wall air conditioner has a combined energy efficiency rating of 10.6. Likewise, its seasonal energy efficiency ratio is 13, which is decent. 

    Though not an Energy Star-certified unit, it still comes with an energy saver mode to reduce electricity consumption. 

    This air conditioning unit can be used as a dehumidifier in spaces with high humidity, as its dry mode reduces moisture levels well. Moreover, its auto restart feature is a thoughtful addition by the brand, because of which the unit restarts itself automatically after a power outage. 

    Cooling Power: 11,500 British Thermal Units | Seasonal Energy Efficiency Ratio: 13 | Floor Area: 530 Square Feet | Volts: 115 Volts

    2. Koldfront Through-The-Wall Air Conditioner - Best With 4-Way Air Directional Louvers

    No products found.

    Lighter than the LG air conditioner, the Koldfront through-the-wall unit is usable all year round, even in cold weather because of its heating capabilities. Alongside 8,000 BTU of cooling power, this air conditioning unit comes with 4,000 BTU heating capacity. 

    Weighing around 66.6 pounds, this through-the-wall air conditioner boasts a lightweight design. And since it’s finished in white, it blends well with modern and traditional decor, adding elegance to the space. 

    On the front, it has a digital control panel in the top-right corner, next to which are air louvers. And beneath the two sits lie the air filter, which is easy to maintain, as you can wash it yourself. 

    Similar to other wall AC units, the digital panel features buttons for most settings. Besides the power on/off button, it has the sleep mode, energy saver, and fan speed button. Even the temperature can be increased or decreased via the control panel, while the backlight in the digital panel makes it easy to see the temperature in the dark. 

    While testing the remote control, I found it was quite intuitive and responded quickly to the user’s command. I pressed the sleep button from the bed, and the AC immediately switched to sleep mode. What’s even better is that it can be used from any corner of a 350 square feet room. 

    What sets it apart from other wall-mounted air conditioners is its air louvers, which can be adjusted in 4 directions. Now speaking of the performance, this wall-mounted air conditioner cools small to medium-sized rooms efficiently. Thanks, to the 3 fan speeds, you can create a cozy and comfortable space by adjusting the fan setting. 

    Plus, installing this unit isn’t troublesome if you already have sleeved installed on the walls. However, if the sleeves aren’t installed, make sure you order them because the brand doesn’t supply them. Not to forget, this air conditioning unit is sold in 4 sizes, so pick accordingly.

    Cooling Power: 8,000 British Thermal Units | Seasonal Energy Efficiency Ratio: 9.6 | Floor Area: 350 Square Feet | Volts: 115 Volts

    3. Whirlpool Through-The-Wall Air Conditioner - Best Air Conditioning Unit With Heating Feature

    Whirlpool WHAT101-HAW 10,000 230V Wall Air Conditioner and...
    • EXCEPTIONAL COOLING AND HEATING: This powerful through the...
    • COOLING AND HEATING FLEXIBILITY: With 8-way directional...

    This air conditioner has made its way onto my list because it serves as a cooling and electric heating system. Boasting a cooling capacity of 10,000 BTU, this packaged terminal air conditioner is suitable for a space of 450 square feet. Bedroom, living room, or dining room– you can install this unit anywhere you want. 

    Even the heating capacity of this wall air conditioner is 10,000 BTU. In overly cold climates, it can be used as a supplemental heating solution. 

    Like most air conditioners, this unit by Whirlpool allows users to improve indoor comfort, thanks to the 3 cooling fan speeds. Between high, medium, and low, you can adjust to whichever setting you feel is best to lower the temperature of the indoor air. 

    On this unit, there are 4 adjustable modes– auto, fan, dry, and cool mode. Switching to cool mode will cool a room, whereas the fan mode circulates air throughout the space. 

    Setting the AC to dry mode reduces moisture levels in a space, so it can be installed in your basement too. Meanwhile, the air conditioner sets the temperature by detecting the room temperature if switched to auto mode. 

    The customization options are further completed by an integrated, 24-hour programmable timer, which helps users manage the active time of their unit. Although onboard electronic controls are easy to use, it comes with a remote control, which adds to the convenience.

    This Energy Star-certified AC has a SEER of 9.7 and lowers energy consumption if switched to eco or sleep mode. Both modes ensure you have a comfortable sleeping experience while saving on electricity bills. 

    I must also mention its louvers can be adjusted in 8 directions. 

    Cooling Power: 10,000 British Thermal Units | Seasonal Energy Efficiency Ratio: 9.7 | Floor Area: 450 Square Feet | Volts: 230 Volts

    4. Koldfront Through-The-Wall Air Conditioner - Best UL-Certified Air Conditioning Unit

    Koldfront WTC14001WSLV 14000 BTU 208/230V Through the Wall...
    • Cooling and Heating: Offers 14,000 BTU cooling and 10,600...
    • Fan Speeds and Operation Modes: Features three fan speeds...

    Although the Koldfront 8,000 BTU air conditioner ticked off all the boxes, including efficiency and longevity, it couldn’t be used in large spaces because of its cooling capacity. 

    So, when it was time to install an air conditioner in my living room, I ordered this 14,000 BTU air conditioner from Koldfront. Right out of the box, I liked the compact design of this unit, although it’s slightly heavier than the 8,000 units. 

    Thanks to the white coating, it adds a touch of class to whichever space you install it in. 

    On the front part are the air filter, air louvers, and a digital control panel. Starting with air louvers, they can be adjusted manually without a remote control to whichever direction you want the air to flow. Next is the digital panel that is equipped with buttons for almost all settings, from the power button to the mode button. 

    Like most through-the-wall air conditioners, I found that taking off the filter and removing dirt, pet dander, and other impurities was quite easy. All you need is a mild detergent and lukewarm water to clean the filter, and that’s it! Therefore, cleaning the filter isn’t a time-consuming task. 

    While the settings can be adjusted via the control panel, the supplied remote control makes it easy for users to control the unit without having to get up. Even when the room is dimly lit, you can increase the temperature or switch between modes easily using the remote control, thanks to the backlight in the LCD.  

    Instead of ozone-depleting refrigerant, it features R-410A refrigerant, which doesn’t contain chlorine or bromine. So, this AC won’t contribute as much to environmental damage as other air conditioners. 

    With a cooling capacity of 10,000 BTU, it has a heating capacity of 10,600. Therefore, it can be used as a supplemental heating solution during cold winter months. That isn’t all; it works as a dehumidifier too. 

    Koldfront air conditioners are usually integrated with energy saver mode and sleep mode, and this unit is no exception. That means it keeps you cozy without increasing your electricity bills. 

    And if safety is your top priority, you’ll be pleased to learn that this wall-mounted air conditioner is UL-certified.

    Cooling Power: 14,000 British Thermal Units | Seasonal Energy Efficiency Ratio: 9.3 | Floor Area: 700 Square Feet | Volts: 230 Volts

    5. AMANA Through-The-Wall Air Conditioner - Best High Energy Efficiency Unit

    The AMANA through-the-wall air conditioner caught my attention because of its unique design. 

    Boasting a compact body, this wall-mounted air conditioner is slightly slanted at the top, where the air louvers and the control panel sit. While the air louvers supply cool air to the room, the control panel allows users to make adjustments as per their preferences. On the front rests the air filter that purifies indoor air by trapping all kinds of impurities.

    Sporting a white profile, this AC seamlessly blends with all kinds of decors and adds charm to the space because of its vintage design. 

    This AC, however, hasn’t earned a spot on my list only because of its aesthetics. Even when it comes to functionality, this unit lived up to its claims. 

    Where most wall and window air conditioners are integrated with 3 modes, this wall-mounted air conditioner has 4 modes– fan, energy saver, cool and heat mode. 

    Setting the unit to the cool mode will cool a space of 550 square feet well, whereas the fan mode will only circulate air within a space. While the cool mode cools a room, the heating function makes the space snug in winter. Therefore, it’s among those few air conditioners that are usable throughout the year.  

    Designed to save power, the energy saver feature is further supplemented by sleep mode. Energy saver mode only saves power, but the sleep mode adjusts the humidity and temperature while reducing energy consumption for a comfortable sleeping experience. 

    What separates it from other through-the-wall air conditioners is its high SEER of 14.00.  

    Quite similar to other air conditioners, this air conditioner comes with 3 fan speeds. Once the room is cooled at high speed, you can switch to medium or low speed to maintain the temperature. 

    AMANA has designed the unit to be user-friendly, and the addition of the remote control testifies to that. Much like the control panel, the remote control has buttons to adjust each and every setting. Not only can you turn the wall air conditioner on/off, but you can also switch modes and fan speeds from a distance with ease. 

    Last but not least, it’s covered with a limited 1-year warranty. 

    Cooling Power: 12,000 British Thermal Units | Seasonal Energy Efficiency Ratio: 14 | Floor Area: 550 Square Feet | Volts: 120 Volts

    6. Friedrich WallMaster Smart Through-the-Wall Air Conditioner - Best With Integrated Wi-Fi Unit

    Slightly different from other through-the-wall air conditioners in design, the Friedrich WallMaster Smart Through-The-Wall Air Conditioner is built to last for years to come. Thanks to the impact-resistant front cover, this wall air conditioner won’t get damaged easily. 

    Relying on R-410A refrigerant, this air conditioner is integrated with almost all features found in other air conditioning units. Like, its fan speed can be customized between low, medium, and high. Furthermore, a 24-hour timer makes it easy to set the number of hours you want the device to operate. 

    But it differs from others in regard to the air louvers– they can be adjusted individually in the direction where the cold air is needed. It also comes with a smart fan to auto-adjust the fan speed in order to maintain a consistent temperature. 

    Besides the control panel, this wall-mounted air conditioner can be controlled in 2 ways– the remote control and your smartphone. 

    As it’s a Wi-Fi-integrated unit, you can control it via the FriedrichConnect mobile app. Download it, pair the unit, and tweak the settings via voice commands. What’s even better is you can invite other family members to manage the unit, so whoever uses it can adjust it as needed. 

    Adding to the ease of use is the check filter reminder, as the filter light illuminates every time the filter gets dirty. So, whenever the light blinks, remove the filter and wash it to clean the impurities from it.  

    Much like other WallMaster models by the brand, this wall-mounted air conditioner is engineered with Quietmaster technology, so it’s quieter than most other units I’ve tried to date. In addition, this vibration-isolating unit comes with dense blower insulation that blocks outdoor noise from entering the space. 

    The environmental impact of this AC is relatively lower than the traditional wall air conditioners, and its Energy Star certificate testifies to the same. 

    Since this wall air conditioner mounts flush to the exterior wall, installing it yourself would be dangerous. Novices shouldn’t try to install the AC themselves because even the slightest mistake can damage the unit. 

    All in all, this wall air conditioner with a cooling capacity of 15,400 BTU is a reliable option for spaces up to 700 square feet. 

    Cooling Power: 15,400 British Thermal Units | Seasonal Energy Efficiency Ratio: 9.4 | Floor Area: 700 Square Feet | Volts: 230 Volts

    7. Impecca Through-The-Wall Air Conditioner - Best Dripless Technology Unit

    Impecca 230V Electronic Controlled Through The Wall Air...
    • Enjoy comfortable noise levels with our preferred units'...
    • LED display clean filter indicator 24 hour timer

    Engineered with dripless technology, the Impecca wall air conditioner is one of the most low-maintenance units on my list. That’s because it evaporates and expels moisture from the exhaust hose or duct (flow), just like portable air conditioners. 

    At first glance, this wall air conditioner appeared to be a unit from the nineties; even the remote control is slightly different compared to the present-day devices. People who want to add a classic touch to their interior decor should consider adding this air conditioner to their room because of its vintage design. 

    This 14,000 BTU through-the-wall air conditioner, with the help of energy-efficient technology, cools a room of 700 square feet quickly and efficiently. 

    Whether you’re sitting on the extreme left or right, its 4-way air louvers can direct the airflow to wherever you set it– up, down, left, or right. Auto, cool and dry– this through-the-wall air conditioner offers 3 cooling modes

    Even the fan speed is customizable, as you can choose between auto, low, medium, and high. 

    Moving forward, a control panel is equipped on the anterior of this wall air conditioner towards the top-right corner. It contains buttons for, more or less, every setting. Like, you can switch modes, and fan speeds, increase or decrease temperature and adjust other settings with the touch of a button. 

    There’s even a check filter indicator on the panel so that you can keep tabs on it and clean the filter when needed. Upon switching to the energy saver and sleep mode, this air conditioner consumes less energy without compromising on the cooling experience. 

    As you’d expect, the package includes a remote control to modify the settings from a distance. 

    Programming the unit to turn on/off at a certain time is also possible with this wall air conditioner because of the 24-hour programmable timer. And if there’s a power outage, the unit restarts automatically when power is restored. So, if that happens at night, you won’t wake up drenched in sweat, as the unit will restart itself once the power is restored. 

    Though equipped with a powerful compressor, it is a reasonably quiet unit. Meaning it doesn’t produce a loud noise while running, which is impressive.

    Cooling Power: 14,000 British Thermal Units | Seasonal Energy Efficiency Ratio: 13 | Floor Area: 750 Square Feet | Volts: 230 Volts

    Quick Comparison Of Through-The-Wall ACs

    Through-the-Wall ACs Cooling Power SEER Floor Area Voltages
    LG Through-The-Wall AC 11,500 BTU 13 530 sq. ft. 115V
    Koldfront 8,000 BTU Through-The-Wall AC 8,000 BTU 9.6 350 sq. ft. 115V
    Frigidaire Through-The-Wall AC 12,000 BTU 11 550 sq. ft. 230V
    Whirlpool Through-The-Wall AC 10,000 BTU 9.7 450 sq. ft. 230V
    Emerson Quiet Kool Smart Through-The-Wall AC 10,000 BTU 10.7 450 sq. ft. 115V
    Koldfront 14,000 BTU Through-The-Wall AC 14,000 BTU 9.3 700 sq. ft. 230V
    AMANA Through-The-Wall AC 12,000 BTU 14 550 sq. ft. 120V
    Friedrich WallMaster Smart Through-The-Wall AC 15,400 BTU 9.4 700 sq. ft. 230V
    Impecca Through-The-Wall AC 14,000 BTU 13 750 sq. ft. 230V

    Buying Guide For The Best Through-The-Wall Air Conditioner

    Learning about the best through-the-wall air conditioners certainly helps individuals shortlist those that would be a worthy addition to their space. However, deciding which one to order from among them on the basis of pros and cons isn’t simply enough knowledge. 

    There are quite a few factors that individuals need to take into account when ordering an air conditioner for their residential or commercial space. In this section, I’ll walk you through some important factors which, if kept in mind, can help you make a sound decision. 

    Without further ado, let’s check them out!

    Cooling Capacity

    So, among all factors, what’s most important is the cooling capacity of the air conditioner. 

    Now, the cooling capacity of heating, ventilating, and air conditioning systems is measured in BTUs (British Thermal Units). Basically, this tells you the amount of heat the air conditioner can eliminate from the indoor air. Taking that into account, the higher the BTUs, the more efficiently the unit will cool the room. 

    Through-the-wall air conditioners are supplied in varying cooling capacities, from 8,000 BTUs to 15,000 BTUs. Figuring out which unit out of them will cool your space efficiently is slightly tricky, especially if you’re using an AC for the first time. 

    However, I’ll simplify it for you: measure the square feet of the space where you intend and multiply it by 20. The answer you get by multiplying the square feet by 20 is the number of BTUs you need to lower the temperature of the room. 

    Anyone who isn’t confident in their mathematical skills can search for BTU calculators and use them to ascertain which air conditioner you should go for. 

    Remember, a unit with too high a cooling capacity will cool a space quickly without any dehumidification, whereas one with a low cooling capacity will not cool it at all. So, measure the space properly before you order a unit for your space. 

    Efficient Energy Use Or Energy Efficiency

    For homeowners, energy conservation is a priority; you must always look for through-the-wall air conditioners that are energy efficient. 

    Keep in mind not all units available on the market are energy efficient, so you need to be careful when shopping for one. Almost all units come with an energy efficiency rating (EER), which gives users a picture of how much energy the wall air conditioner is likely to consume while running. 

    Generally, the energy consumption is affected by the cooling capacity of the unit. Therefore, the higher the cooling capacity, the more electricity the unit will consume. Like, a wall air conditioner of 18,000 BTUs will require a lot more energy than wall air conditioners with an 8,000 BTU capacity. 

    One of the easiest ways to ascertain energy efficiency is to divide the watt of the units by their BTUs. You can do this for all kinds of units– be it through the wall or window air conditioners. 

    As a rule of thumb: the higher the energy efficiency rating, the less energy the air conditioners use. 

    Almost all through-the-wall air conditioners have an energy efficiency rating between 9 and 11, with a few scoring as high as 14. Definitely, the wall air conditioners with a high EER will cost more than those with a low EER. But that’s a one-time cost, and you’ll save a considerable chunk every year on utility bills. 

    Along with the EER, don’t forget to check the Energy Star rating to see if it’s certified for energy efficiency. Although there are options with 1 or 2 stars, going for a unit with a 5 Energy Star rating will be the best bet. 

    Energy Star-rated wall air conditioners consume about 15% to 30% less energy than units that aren’t certified. Hence, opting for an Energy Star-rated unit will be a wise decision. 

    Noise Level

    Much like a window air conditioner, a through-the-wall air conditioner is equipped with a compressor and an air handler. The former generates cold air, while the latter blows it into the room with the help of a large fan. 

    Because of this dual design, through-the-wall air conditioners are noisier than central air conditioners, whose air handler is hidden in the attic, and the compressor is outside. 

    Unlike a central air conditioner, a through-the-wall air conditioner is installed in a room where individuals work, relax or sleep. Therefore, going for a wall air conditioner whose noise output is low will create a comfortable environment. 

    Most through-the-wall air conditioners produce about 61 dB of noise while running, whereas some models produce as low as 50 dB even at the highest settings. Furthermore, a few brands engineer their wall air conditioners with Quietsmart technology, further dampening noise. 

    If you’re among those who like working in a quiet space, don’t forget to check the noise output of the wall air conditioner at both low and high settings. 

    Heating Function

    A handful of brands integrate their through-the-wall air conditioner with a heating element. 

    One of the significant benefits of going for such units is that you need not spend extra money on a heating system. And in places with overly cold climates, these can be used as a supplemental heating solution along with a heater.  

    A through-the-wall air conditioner that plugs into a 115-Volt electrical outlet will have a heating capacity of about 5,100 BTUs. Such heating output will warm a space of 144 square feet excellently. 

    Meanwhile, through-the-wall air conditioners that rely on a 230-Volt outlet can heat a large space because of their high heating output, i.e., 10,600 BTUs. Precisely, such an air conditioner will heat a 500 square feet space perfectly. 

    Note that this heating function is meant to be used in conjunction with a heater or a furnace. 

    Therefore, if you reside in a city where the winters are harsh, a through-the-wall air conditioner with a heating function will be an excellent choice. But if you live in places with an idyllic climate all year round, the heating function won’t serve its purpose. In that case, you should go for units with air conditioning technology and save money. 

    Input Requirement

    The input requirement of a through-the-wall air conditioner is generally indicated in Volts. 

    Every household, except for a few, is equipped with a standard electrical outlet of 115 Volts. The majority of air conditioners supplied on the market are compatible with 115-Volt electrical outlets. 

    But, air conditioners with a high cooling capacity require a 230-Volt electrical outlet to operate. So, if you decide to go for units of high capacity, you will have to call an electrician for electrical wiring. 

    Installation

    Now, most people don’t pay attention to the installation of the unit, but it’s one of the most important factors that one must consider. 

    To begin with, not all wall air conditioners are easy to install because they are too heavy to handle or don’t come with clear instructions to mount the unit. Now, either way, hiring professionals is considered to be a safe solution lest you want your unit to get damaged. 

    But often, most units come with detailed instructions and each and every accessory from sleeve to fasteners. Therefore, the installation wouldn’t be a challenge when it comes to such units. 

    When ordering an AC, go through customer reviews to learn how easy or difficult it is to install the unit. 

    Maintenance

    How well you maintain the unit decides the efficiency and longevity of the air conditioner. 

    Considering that, no one would want to go for a unit that requires frequent maintenance. Modern-day through-the-wall air conditioners come with washable and reusable filters. So, when they get dirty, you can always take them off, remove dirt and dust by washing them and put it back in place.

    Through-The-Wall Air Conditioner FAQs

  • What are the advantages of using a through-the-wall air conditioner over other types of air conditioners?

    There are several advantages of using a through-the-wall air conditioner, and they are as follows:

    1. Better Cooling Capacity

    Compared to window units, through-the-wall air conditioners cool a space better and more efficiently because of higher BTUs. Additionally, they are equipped with large fans, which supply cool air to space quicker than window ACs. 

    2. Does Not Block The View

    Window AC units expel heat from the room via the exhaust hose that passes through the window, thereby blocking the view. 

    Conversely, a through-the-wall air conditioner exhausts humidity or warm air from the space through the hose in the walls. Unlike the window unit, it’s not installed in windows but on walls in a pre-set sleeve. Therefore, through-the-wall air conditioners do not block the view. 

    3. Easy On The Pockets

    When compared to other air conditioners on the market, through-the-wall units are relatively inexpensive. You can even get energy-efficient units with high cooling capacity at an affordable price. Therefore, you won’t have to spend a huge chunk on upgrading to a through-the-wall air conditioner. 

  • How do I properly maintain and clean my through-the-wall air conditioner?

    Maintaining a through-the-wall AC unit is fairly easy. 

    As far as the air filter is concerned, you can wash it with mild soap and lukewarm water to remove all the impurities. Then wipe it with a clean, dry cloth before installing it back in place. 

    To clear the gunk from the evaporator coils, apply mild detergent and water on them and wipe it with a clean cloth. 

    Once in a while, you should wipe the exterior of the cabinet with a slightly wet cloth. Never attempt to clean the entire unit yourself, as you may damage components like the heat pump. Also, schedule a professional once or twice a year for maintenance and routine inspection to ensure components like the capacitor are working fine. 

  • Conclusion

    Through-the-wall air conditioners are cost-effective alternatives to central and window AC units. Because they are mounted on the wall, they do not occupy any floor space, like portable air conditioners. 

    With the 7 best through-the-wall air conditioners at your disposal, have you decided which one to get from Amazon for your home? If not, let me help you decide by sharing my top picks. 

    Without a doubt, the LG Through-The-Wall Air Conditioner takes the crown because of its quick cooling capacity and ability to reduce moisture levels in a space. The Koldfront Through-The-Wall Air Conditioner is a close second because of the 4-way adjustable air louvers, easy-to-clean filters, and 2-year warranty.

    Doing groceries is fun until you are left with the dilemma of stacking them in the fridge, almost like you are stacking stones with fear that one wrong move and everything will fall apart.

    Worry not; upright freezers are becoming popular because of how many items you can put into one freezer.

    If you're like me, who constantly runs out of space for my frozen foods, then an upright freezer might be the one to solve your storage space problems.

    The only problem is which upright freezer is the best for you. Why? As you can see, thousands of upright freezers are on the market today, and choosing one can be challenging.

    Fortunately, I have done the hardest part of trimming down your choices to 9 of the best upright freezers today.

    What Are the 9 Best Upright Freezers You Can Buy?

    These are simply the best upright freezers on the market today.

    They are all packed with convenient features that will make your life easier, and there is nothing to worry about having limited space.

    1. Best Overall: Frigidaire FFFU16F2VV 28" Upright Freezer

    The Frigidaire Brand has given us the best upright freezers in recent years.

    This upright freezer, courtesy of Frigidaire, is made to keep your fruits, foods, and veggies frozen for longer periods while having plenty of extra storage space for additional items.

    This upright freezer features EvenTemp technology that allows cold air to circulate evenly inside while reducing warm spots and keeping uniform temperature across all door shelves.

    Most upright freezers don't have features like this, and it is a sight for new eyes knowing some of these features make the upright freezer purchase all worthwhile.

    Overall, I'm impressed with the capacity of this upright freezer.

    It has four freezer shelves, and while the upright freezer capacity is smaller than others, the internal layout's orientation is more than enough to keep your food frozen longer than expected.

    Size: 29 x 27.75 x 67.75 inches | Capacity: 15.5 cubic feet | Product Weight: 143 pounds | Frost Type: Frost-free | Control Type: Electronic temperature control

    2. Best Value: Insignia 17 Cu. Ft. Frost-Free Upright Convertible Freezer

    The Insignia Frost-Free Upright Convertible Freezer is not your average upright freezer, as it's equipped with convertible features perfect for homes with small spaces.

    In addition, it can handle any ambient temperature range between 5 to 109 degrees and regulate internal temperature with just a simple knob. I find this the best upright freezer for families on a budget.

    It doesn't cost that much but packs the necessary features you want to keep your frozen fruits and food longer than usual.

    The only problem with this upright freezer is you have to manually defrost it by simply unplugging the freezer. While I don't consider this a major drawback.

    Size: 22.4 x 21.7 x 56.3 inches | Capacity: 7 cubic feet | Product Weight: 191.8 pounds | Frost Type: Manual defrost | Control Type: Mechanical

    3. Best Budget: Midea MRU03M2ABB Upright Freezer

    Don't let the size of this upright freezer fool you; despite its size, its food storage capacity is more than enough for a family of four. This is the best upright freezer if you need extra freezer space.

    What I love about this product is despite its size, the internal layout makes it easy for me to store my food and frozen fruit without problems. It's wallet-friendly, and its 3 cubic feet capacity doesn't feel like it.

    It feels this isn't a compact upright freezer. Despite putting all my groceries inside, I was shocked at how much storage space was left for me. It also has a reversible door for added convenience.

    Size: 21.3 x 22.7 x 34.9 inches | Capacity: 3.0 cubic feet | Product Weight: 57.2 pounds | Frost Type: Manual | Control Type: Mechanical

    4. Best Frost-Free Freezer: GE 17.3 cu. Ft. Frost-Free Upright Freezer

    GE's 17.3 Cubic Feet Upright Freezer ranks on top of the upper echelon in storing your meat, ice cream, and frozen fruit on a whole new level.

    It comes with fixed shelves at the top, two adjustable wire shelves at the middle part, and two deep drawers that are great for storing food.

    Other features making this upright freezer convenient are its easy-to-use temperature control panel, LED lighting, and a lockable freezer door to keep your kids from accessing the inside.

    Overall, its large capacity creates more floor space for your entire home while keeping your frozen veggies and fruits frozen longer than expected.

    Its consistent internal temperature range and circulating cold air should avoid food waste.

    Size: 32 x 64 x 31 inches | Capacity: 17.3 cubic feet | Product Weight: 195 pounds | Frost Type: Frost-free | Control Type: Electronic

    5. Best Energy Efficiency: GE Garage Ready 21.3 Cu. Ft. Frost-Free Upright Freezer

    Energy efficiency is often the major factor when making money splurges, as it can save you money in the long run. Since upright freezers are plugged in 24/7, you'd want an energy-efficient upright freezer.

    Look no further than the GE Garage Ready Frost-Free Upright Freeze, as this will be more than enough to hold loads of food, veggies, and fruits while keeping electricity consumption to a minimum.

    Another feature that makes this one of the best upright freezers on the market today is it can handle ambient temperatures in your garage, making it a good addition, especially if you find yourself working longer.

    Lastly, it has an audible temperature alarm, a lock with a key, and slide-out freezer bins. The electronic temperature control allows controlling temperature inside without releasing cold air, which is impressive.

    Size: 31.3 x 32.8 x 76.5 inches | Capacity: 21.3 cubic feet | Product Weight: 215 pounds | Frost Type: Frost-free | Control Type: Digital

    6. Best for Small Spaces: Frigidaire Upright Freezer Platinum Design Series

    Frigidaire Upright Freezer, 6.5 cu. ft., Deep Freeze, Vinyl...
    • AMPLE STORAGE CAPACITY: Easily store backup meats, frozen...
    • SPACE-SAVING DESIGN: The flush back design and recessed...

    If you're cramped up on floor space and are looking for the right upright freezer on the market, look at the Frigidaire Upright Freezer Platinum design series.

    It's the best upright freezer for homeowners with less floor space and looking for a reliable upright to store their food. This upright freezer has reversible door features, which makes it more impressive.

    The sleek and elegant design makes you think this upright freezer is worth a premium, but thankfully it's not. It's the best upright freezer for compact space while packing several features that are icings on the cake.

    Its sliding storage basket and LED lighting make it visible in the darkest environment. Superb performance, and you can feel the cold air circulating inside.

    Size: 21.26 x 22.24 x 55.91 inches | Capacity: 6.5 cubic feet | Product Weight: 93.8 pounds | Frost Type: Manual defrost | Control Type: Mechanical

    7. Best Large Capacity: GE FUF14DLRWW Garage Ready 14.1 Cu. Ft. Upright Freezer

    The GE FUF14DLRWW Garage Ready is one of my top nine picks because it serves its purpose extremely well. For one, it has a ton of storage space for the price, and the product is also Energy-star certified.

    Another feature that makes this upright freezer impressive is its clever storage orientation. It locks your frozen food up securely while accessing other snacks, foods, and beverages.

    This model is also garage-ready, as it can withstand temperatures from 0 to 100 Fahrenheit with no problems.

    It also has a turbo freeze setting, lock, and key, and it is power outage safe as it can hold frozen food for 48 hours.

    Size: 62 x 28 x 32 inches | Capacity: 14.1 cubic feet | Product Weight: 168 pounds | Frost Type: Frost-free upright freezer | Control Type: Electronic

    8. Best Compact: Insignia NS-UZ7WH0 7 Cu. Ft. Upright Freezer

    This upright freezer, courtesy of Insignia, is a great addition if you want to squeeze more freezer space for some of your frozen goods, fruits, and veggies.

    While it has a small capacity, this model makes up for it with its internal design. It has reversible door features that are great for families having cramped spaces.

    Controlling the internal temperature is quick and easy with a simple knob, and the cool air radiates throughout the entire freezer inside. This model is also noted for being garage-friendly.

    The only downside I found with this upright freezer courtesy of Insignia is you have to unplug the upright freezer to manually defrost the entire thing, which I feel is quite a bummer.

    Size: 22.4 x 21.7 x 56.3 inches | Capacity: 7 cubic feet | Product Weight: 99.2 pounds | Frost Type: Manual | Control Type: Mechanical

    9. Best Splurge: Whirlpool WSZ57L18DM 17.7 cu. Ft. SideKicks Frost Free Upright Freezer

    If you have all the money looking for an amazing upright frost-free freezer, the Whirlpool WSZ57L18DM 17.7 cu. Ft. SideKicks might just be up to the challenge of becoming one.

    What I love about this product is its thoughtful design; it has a shallow depth and a wider opening giving you easy access to frozen foods and goodies.

    It can also operate under extreme temperatures from 0 to 110 Fahrenheit, making it a great garage freezer for anyone. Its compressor constantly bombards cool air inside to ensure a uniform temperature.

    Lastly, it can trap cold air inside for up to two days to ensure your food doesn't go to waste. The auto-close door functions and door alarm are like the cherry on top for this great upright freezer.

    Size: 33 x 72 x 28 inches | Capacity: 20 cubic feet | Product Weight: N/A | Frost Type: Frost-free | Control Type: N/A

    Quick Comparison Of The Top Upright Freezers

    Upright Freezers Size Capacity Product Weight Frost Type Control Type
    Frigidaire Upright Freezer 29 x 27.75 x 67.75 inches 15.5 cubic feet 143 pounds Frost-free Electronic
    Insignia Frost-Free Upright Convertible Freezer 22.4 x 21.7 x 56.3 inches 7 cubic feet 191.8 pounds Manual defrost Mechanical
    Midea Upright Freezer 21.3 x 22.7 x 34.9 inches 3.0 cubic feet 57.2 pounds Manual Mechanical
    GE Frost-Free Upright Freezer 32 x 64 x 31 inches 17.3 cubic feet 195 pounds Frost-free Electronic
    GE Garage Ready Frost-Free Upright Freezer 31.3 x 32.8 x 76.5 inches 21.3 cubic feet 215 pounds Frost-free Digital
    Frigidaire Upright Freezer Platinum Design Series 21.26 x 22.24 x 55.91 inches 6.5 cubic feet 93.8 pounds Manual defrost Mechanical
    GE Garage Ready Upright Freezer 62 x 28 x 32 inches 14.1 cubic feet 168 pounds Frost-free upright freezer Electronic
    Insignia Upright Freezer 22.4 x 21.7 x 56.3 inches 7 cubic feet 99.2 pounds Manual Mechanical
    Gladiator Upright Rolling Garage Freezer 30 x 72 x 32 inches 17.8 cubic feet N/A Frost-free Electronic
    Whirlpool SideKicks Frost Free Upright Freezer 33 x 72 x 28 inches 20 cubic feet N/A Frost-free N/A

    What Should You Look For in an Upright Freezer?

    Before you go to your local store and make your purchase, there are some things you need to consider when looking for the right upright freezer.

    Capacity

    The capacity of an upright freezer is often measured in cubic feet, which means the higher the number goes, the higher the freezer's capacity.

    However, as the capacity increase, so does the price. So, I recommend you weigh everything out, as you can only go as far as your money goes.

    The average capacity of most freezers is around 16 cubic feet, and anything above that is more than enough to keep foods frozen for your entire family.

    But if you have a bigger family, you can always opt for a much larger capacity to accommodate every piece of grocery you have.

    If you don't need a bigger capacity, you might want to opt for mini freezers.

    Temperature Control

    Temperature control is a major factor when choosing the best upright freezer.

    In most freezers today, the interior temperature can range from -10 to 10 degrees Fahrenheit, which is more than enough to store food for long periods of time.

    To get the best upright freezer possible, consider what type of food you will store to ensure it never goes to waste and prevents untimely spoilage.

    Defrosting

    There are two types of defrosting, manual and automatic. A manual defrosting freezer means ice and frost will slowly build up over time, and the only way to defrost is by manually unplugging the cord.

    This part usually takes time as you need more time to melt the ice away before returning your goods.

    On the other hand, an automatic upright freezer doesn't have to go through this routine. Instead, the upright freeze regulates itself to ensure foods and goodies remain frozen without frost buildup.

    While most automatic upright freezers are pricier than manual-defrosting freezers, nothing beats the convenience it brings you and your family.

    Frost in your freezer? You might want to learn the signs and symptoms!

    Energy Efficiency

    Freezers will run 24/7, so having an energy-star certified freezer is a surefire way to keep electrical costs to a minimum.

    An upright freezer that has energy-star certification uses energy efficiently while still operating at normal settings.

    Additionally, airtight insulation and doors will keep cold air inside, allowing the freezer to keep the whole foods and goodies frozen longer while using less energy.

    Additional Features

    Some additional features can help make your life easier when storing food.

    Door Safety Lock

    Whenever you have kids at home, it is important to have upright freezers with door-safety lock features. Kids are always curious and often wonder what's inside the fridge.

    To avoid this problem, it is better to be safe than sorry, which is why it is highly recommended to have door safety locks rather than nothing at all.

    Ice Maker

    Upright freezers with ice makers are a plus. Nobody wants to sip room-temperature water when everything is hot during the summer.

    While this is optional, having an ice maker will do wonders, especially during summertime. Most of the time, these freezers have this feature already installed.

    Touch Screen

    Most of the time, upright freezers with touchscreen features are already at premium prices. While this feature can be enticing, I find it not useful enough for that added price.

    Upright freezers still work the same way with freezes having a touchscreen. They can keep your food frozen for long periods without this additional miscellaneous feature that only adds to the cost.

    Wheels

    Having built-in caster wheels can make your life easier when moving your freezer from one location to another. Fortunately, most freezers today are equipped with this kind of feature.

    However, you must check if they are installed to ensure you can smoothly change your freezer's location.

    Shelves

    Having more than five door shelves is a plus if you're looking for an upright freezer. Remember, you need an upright freezer to accommodate frozen fruits, veggies, and foods.

    The higher the number of shelves, the more it can accommodate. The same goes for having more than five door bins; having more than five spacious door bins is advantageous for you.

    Again, this depends on how much stuff you will put inside your upright freezer.

    Interior Lights

    Having interior lights is a bonus. This feature is helpful whenever you crave that ice cream or smoothie late at night. It keeps every stored food visible within your grasp.

    Thankfully, most freezers today have built-in interior lights that make your life easier when trying to find your stored food in the dark.

    Upright Freezers FAQs

  • If you have additional questions regarding upright freezers, you might find some answers below.

  • How Do You Do Temperature Control in an Upright Freezer?

    Temperature controlling is usually done by either a single push-button or a temperature control knob.

  • How to Avoid Freezer Burn?

    Freezer burn happens when stored foods are exposed to cold air, causing them to lose moisture. To avoid this problem, the best solution is to keep your stored food in airtight bags or containers.

  • What Is Better, a Chest Freezer or an Upright Freezer?

    For me, personally, it is just a matter of personal preference. It also depends on the intended use of the freezer. The only difference I can see from these freezers is how you open them.

    Chest freezers mostly lay flat on the ground and can be opened from the top, whereas upright freezers can be opened on different sides.

    For chest freezers, you might want to take a look at this if you plan on buying a chest freezer.

  • Conclusion

    There are a lot of brands selling dedicated freezers to many consumers. Some of these reputable brands include Frigidaire, GE, Magic Chef, and Whirlpool, to name a few.

    Regardless of which one you choose, what I've listed on top should serve its purpose of keeping your stored foods frozen for longer periods of time without fear of spoilage.

    This article about the best upright freezers should give you plenty of options to add to your home. If you're planning to opt for a refrigerator, you might want to take a look at the best refrigerators.

    A chest freezer can be an excellent investment for those who need extra storage space for frozen foods. 

    Whether you're a large family or someone who likes to stock up on bulk items, a chest freezer can provide you with the added space you need. 

    In this article, I'll look at the best chest freezers on the market, their features, and what to consider when choosing one. 

    I'll discuss different sizes, energy efficiency, temperature control, and capacity to help you make an informed decision. 

    Best Chest Freezers

    A chest freezer is designed to provide additional frozen food storage space or keep food cold.

    Here are my top picks for the best chest freezers on the market right now!

    1. Best Budget: Midea Chest Freezer

    Midea MRC070S0AWW Chest Freezer, 7.0 Cubic Feet, White
    • Mechanical Control with Adjustable Thermostat from -12 to...
    • Contains 1 Hanging Wire Storage Basket

    This 7-cubic-foot model from Midea might be worth considering if you're searching for an affordable chest freezer for small spaces.

    The chest freezer includes a removable wire storage basket to help keep frozen foods organized and handy. Sadly, the limited number of bulk storage baskets limits the number of frozen goods you can place in this compact freezer.

    Additionally, the chest freezer offers an external dial temperature control, allowing users to change the temperature without opening the freezer and letting cold air escape.

    However, you must manually defrost this chest freezer, which can be time-consuming and inconvenient.

    In addition, this Midea Chest Freezer has no interior light, making it difficult to see what's inside in low lighting.

    When I trialed this product, I noticed the freezer also contains hinges that can hold the door open at 45 and 75-degree angles, allowing easy access to the contents without holding the door open.

    Purchase it now on Amazon!

    Size: 32.1 x 21.7 x 33.5 inches | Capacity: 7 cubic feet | Temperature Range: -11.2 to 10.4 degrees Fahrenheit | Annual Energy Consumption: 250-kilowatt hours | Product Weight: 66.2 pounds

    2. Best Portable: ICECO Portable Refrigerator

    ICECO JP40 Portable Refrigerator Fridge Freezer, 12V Cooler...
    • ※ 【FREE PARTS】- Insulated Protective Cover & 12...
    • ※ 【MAX & ECO MODE】- Eco mode is the function which can...

    For individuals who need to transfer frozen goods or keep them frozen while they are away from home, the ICECO portable refrigerator freezer offers the perfect answer.

    The ICECO is a portable freezer. Its sturdy handle and wheels allow you to move it around easily, making it one of the best portable freezers.

    Despite being a portable refrigerator, the ICECO JP40 has a large capacity of 40 liters, enough to hold up to 60 cans of soda or beer.

    With a weight of 38.8 pounds, the ICECO JP40 Portable Freezer is lighter than some other portable refrigerators, which may make it more convenient to transport.

    The ICECO is an energy-efficient, high-performance compressor that can run on a 12/24V DC power source. It also has an Eco mode that can help save power.

    This device has an adjustable temperature range between -7 and 50 degrees Fahrenheit for frozen and chilled goods. But this is not just your typical refrigerator.

    After conducting experiments with it, I found the following:

    • If you select the ECO mode, the compressor will use less energy and won't turn on until the interior temperature has climbed by 6 to 9 degrees from the set point.
    • If you select MAX, the device will cool down more quickly. Each model comes with 12/24 DC and 110- to 240-volt AC cables, enabling use in homes and cars.

    Purchase it now on Amazon!

    Size: 23 x 14 x 18 inches | Capacity: 1.4 cubic feet | Temperature Range: -7 and 50 degrees Fahrenheit | Annual Energy Consumption: N/A | Product Weight: 38.8 pounds

    3. Best for Garages: GE Garage Ready Chest Freezer

    GE FCM16DLWW 65 Inch Portable Chest Compact Freezer with...
    • Width: 65" Height: 33.375" Depth: 28.5"
    • Type: Portable

    Are you trying to find the best chest freezer for a garage? Think about the 15.7 cubic foot Garage Ready chest freezer from GE.

    The GE Garage Ready Freezer can be used to store and arrange frozen meats, ice cream, and other items inside the 15.7 cubic-foot capacity and four sliding storage baskets.

    It comes equipped with multiple sliding bulk storage baskets for easy access to frozen items.

    My findings showed that users could use a second-level rail to position one to two removable wire baskets at various heights. The power-on indicator light allows users to know if the freezer is running.

    Moreover, it includes GE's Power Outage Guarantee, which ensures that the inside temperature will remain below freezing for at least 48 hours during a power outage.

    This could be a hassle for some, but it is worth noting that it doesn't have an automatic defrost feature, so you'll need to defrost the deep freezer periodically.

    By alerting users if the freezer's temperature starts to rise, the temperature alarm can help prevent food waste. Also, the safety lock and key feature enable users to secure their food.

    Purchase it now on Amazon!

    Size: 33 x 65 x 28.5 inches | Capacity: 15.7 cubic feet | Temperature Range: -10 to 15 degrees Fahrenheit | Annual Energy Consumption: N/A | Product Weight: 190 pounds

    4. Best for Efficiency: Northair Chest Freezer

    Northair Chest Freezer - 3.5 Cu Ft with 2 Removable Baskets...
    • PERFECTLY QUIET - Unlike other chest freezers, the Northair...
    • OPTIMAL STORAGE - At 3.5 Cubic Feet, the Northair Chest...

    With this Northair 3.5 cubic foot chest freezer, you may save your utility bills. This small device helps users save money by using as little as 0.45 kWh of energy every 24 hours.

    The Northair Chest Freezer - 3.5 Cu Ft is Energy Star rated. This translates to lower energy bills and a more environmentally friendly appliance.

    Additionally, as per my expertise, the soft-close lid mechanism and silent compressor technology maintain a low noise so users won't disturb the rest of the house.

    Other freezer features include the external adjustable front temperature controls and auto-hold hinges. However, unlike most chest freezers, this freezer has no alarm to alert you if the temperature rises above a certain level.

    Purchase it now on Amazon!

    Size: 21 x 22 x 31 inches | Capacity: 3.5 cubic feet | Temperature Range: -4 to 6.8 degrees Fahrenheit | Annual Energy Consumption: 165-kilowatt hours | Product Weight: 50.7 pounds

    5. Best Splurge: KoolMore Chest Freezer

    KoolMore SCF-16C Chest Freezer, 16 cu. ft, White
    • All-Purpose Deep Freezer Chest – Ideal for storing meats,...
    • Consistent Cabinet Temperatures – Utilizing a 1/5 hp...

    The KoolMore chest freezer is nice if money is no object. It's a powerful machine with the features you wish more home appliances had.

    The freezer features a sleek, modern design with a stainless steel exterior that looks great in any kitchen.

    This freezer has two sliding clear glass doors rather than a hinged top. When combined with bright LED lighting, you'll always be able to see inside without opening the doors.

    Based on my observations, I can easily move this big, strong unit when cleaning the floors because it has optional casters. It is also simple to drain extra water when defrosting.

    Being an expensive freezer, the KoolMore 16-Cubic-Foot Chest Freezer is a high-end appliance with a luxury price tag, making it less accessible than many chest freezers.

    Purchase it now on Amazon!

    Size: 61 x 30 x 33 inches | Capacity: 16 cubic feet | Temperature Range: -8 to 0 degrees Fahrenheit | Annual Energy Consumption: 692-kilowatt hours | Product Weight: 165 pounds

    Quick Comparison Of Top Chest Freezers

    Top Chest Freezers Size Capacity Temperature Range Annual Energy Consumption Product Weight
    Frigidaire Chest Freezer 34 x 56 x 32 inches 14.8 cubic feet -10 to 10 degrees Fahrenheit 296-kilowatt hours 137 pounds
    Midea Chest Freezer 32.1 x 21.7 x 33.5 inches 7 cubic feet -11.2 to 10.4 degrees Fahrenheit 250-kilowatt hours 66.2 pounds
    hOmeLabs Chest Freezer 25 x 21.85 x 33.5 inches 5 cubic feet 10.4 to 0.4 degrees Fahrenheit 218-kilowatt hours 57.5 pounds
    ICECO Portable Refrigerator 23 x 14 x 18 inches 1.4 cubic feet -7 and 50 degrees Fahrenheit N/A 38.8 pounds
    GE Garage Ready Chest Freezer 33 x 65 x 28.5 inches 15.7 cubic feet -10 to 15 degrees Fahrenheit N/A 190 pounds
    Northair Chest Freezer 21 x 22 x 31 inches 3.5 cubic feet -4 to 6.8 degrees Fahrenheit 165-kilowatt hours 50.7 pounds
    KoolMore Chest Freezer 61 x 30 x 33 inches 16 cubic feet -8 to 0 degrees Fahrenheit 692-kilowatt hours 165 pounds

    What Should You Look For in Chest Freezers?

    When shopping for a chest freezer, there are a few key factors to consider:

    • First, you should think about the size of the freezer you need. Choosing a size that will fit the available space and meet your storage needs is important.
    • Second, you should consider efficiency. Look for models with an Energy Star rating, which indicates that they are energy efficient, even during a power outage

    Some models also feature frost-free technology, preventing frost and ice buildup, making maintenance much more manageable, and keeping food frozen without the freezer burn.

    Consider the storage size and features. Some freezers come with hanging baskets or storage baskets for extra freezer space.

    Some may even have a temperature alarm for when the internal temperature gets too hot or if too much cold air is escaping the chest freezer.

    Chest Freezers vs Upright Freezers

    Chest freezers and upright freezers are both standalone appliances designed for long-term storage of frozen food, but they have some key differences:

    • Storage size: Chest freezers tend to have a larger storage size than upright freezers. This is because they are designed with an open storage area.
    • Footprint: Chest freezers have a smaller footprint than upright freezers with the same storage capacity. This means that they take up less floor space.
    • Organization: Upright freezers come with shelving and compartments that make them easy to organize. Chest freezers require more effort to organize and access items.
    • Cooling: Chest freezers are better at cooling goods as they are deep freezers. Cold air sinks to the bottom, keeping food cooler than an upright freezer.

    Chest Freezer FAQs

  • Need to know more about buying a chest freezer? Here are the most frequently asked questions.

  • What Is the Difference Between Mini Freezers, Upright Freezers, and Refrigerators?

    The main difference between a mini freezer, an upright freezer, and a refrigerator is their size and purpose.

    A mini freezer is a compact unit designed to fit on a countertop or in a small space and is typically used to store a small number of frozen foods.

    An upright freezer is larger than a mini freezer and is designed to stand upright, with shelves and compartments for easy organization of frozen foods.

    On the other hand, a refrigerator is designed primarily for storing perishable food items such as fruits, vegetables, and dairy products at a temperature above freezing.

    Check out the Best Mini Freezers, Best Upright Freezers, and Best Refrigerators for more reference!

  • How to Deal With Frost in Your Freezer?

    To deal with frost in your freezer, you should first unplug the freezer and remove all of the food. Then, use a plastic scraper to remove the frost from the walls and shelves carefully.

    Once you have removed as much of the frost as possible, use a damp cloth or sponge to clean the freezer’s interior. Be sure to dry the interior completely before plugging it back in.

    For an in-depth guide, check out this guide on dealing with Frost in Your Freezer.

  • Is a Chest Freezer Worth Buying?

    Yes, a chest freezer can be worth buying if you need additional freezer storage space or want to save money by buying bulk and freezing food.

    Chest freezers can also be more energy efficient than upright freezers, and they can keep food frozen for longer periods in the event of a power outage.

    However, it’s important to consider the cost of the freezer and any additional energy costs before making a purchase and whether you have the space to accommodate it.

  • Summary

    Here's a summary of my top picks when choosing a chest freezer.

    Conclusion

    Choosing the best chest freezer requires consideration of several factors, such as size, energy efficiency, price, and features.

    It's important to assess your freezer storage needs and available space to select a chest freezer with adequate capacity.

    Researching various brands and models, reading customer reviews, and comparing prices can help you choose the best chest freezer for your home.

    The Hessaire MC37M Evaporative Cooler is the best evaporative cooler if you are looking for a portable, compact and powerful unit. The second best option you can find is COSTWAY 3-in-1 Portable Air Conditioner, having 10000 BTU, a remote and an LCD panel.

    Evaporative coolers, also known as swamp coolers, are a cost-effective and eco-friendly way to cool your home or office. They work by evaporating water to cool the air, rather than using refrigerants.

    Using the best evaporative cooler will help you stay comfortable in dry climates since they are suitable for industrial and residential purposes. But there are several options available on the market and I have shortlisted the top 10 products to help you choose the best portable evaporative air coolers.

    Best Evaporative Coolers

    Here is the list of the 10 best evaporative coolers that you can use to keep your home comfortable and cool during the hot summer months.

    1. Hessaire MC37M Evaporative Cooler: Best With Air Swing Delivery System

    Hessaire MC37M 3100CFM Evaporative Cooler
    • Experience Superior Cooling: Embrace the evaporative air...
    • Transform Your Living Space: Adapt to any environment with...

    This portable, indoor evaporative cooler is designed for industrial and residential use in warehouses, construction sites, outdoor shops, restaurants, patios, porches, garages, workshops, camping, and tailgating. It can effectively cool large spaces with a coverage area of up to 950 square feet. 

    The fan has a height of 37 inches, a width of 17 inches, and a depth of 25 inches. It weighs 40 lbs and has an operating weight of 131 lbs. Moreover, it comes with four heavy-duty locking casters, which make it easy to move the unit from one location to another easily.  

    You will find a water reservoir capacity of 10.3 gallons and a water level indicator, making it easy to monitor the water level. Thanks to the continuous fill option you can attach a household hose with the included float adaptor, eliminating the need to watch and fill the water tank manually.

    The fan utilizes 3-sided, rigid, high-density cooling pads for increased evaporative surface area, producing cooler air. It has a maximum CFM of 3,100 and a maximum noise level of 59 dB. To use the fan effectively, place it in front of an open window or door while keeping another one open for air to exhaust from the room. Also, run the fan on FAN ONLY mode for 30 minutes daily to dry the filter.

    Voltage: 115 volts | Wattage: 250 watts | Warranty: 1 year | Air Flow Capacity: 3,100 CFM

    2. COSTWAY Portable Air Conditioner: Best With Wide-Angle Oscillation

    COSTWAY Portable Air Conditioner 10000BTU, Dehumidifier,...
    • 【3-in-1 Multifunctional Design:】This air conditioner...
    • 【Powerful Cooling & Wide-angle Oscillation:】This...

    The 3-in-1 Multifunctional Air Conditioner is the perfect solution for cooling your home or office since it has a premium fan and dehumidifier, equipped with four modes and two-speed adjustments to meet your needs. Moreover, the easy-to-use LCD panel allows for effortless operation and monitoring. 

    This air cooler boasts a powerful cooling system with 10,000 BTU, while it can swing horizontally up to 65° (automatically) and vertically up to 100° (manually adjusted), making it perfect for most spaces. Its 4 four universal casters and built-in handle also ensure easy mobility and versatility to cool any area you choose.
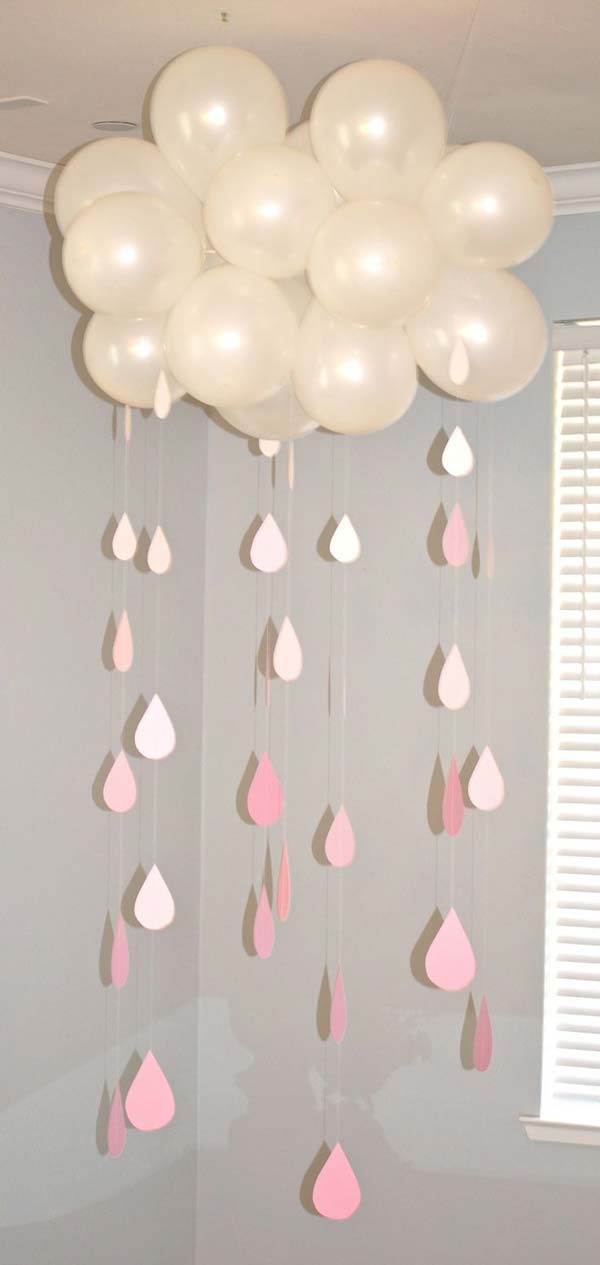
    I found it has a 24h timer function that provides flexibility to fit your schedule. And this air cooler operates quietly, producing 55 dB of noise, which makes it ideal for use during sleep or rest. Plus, the sleep mode can automatically adjust the fan speed to prevent overexposure to cold air. 

    This air cooler comes equipped with a remote control that can operate the device from a distance of up to 16 feet, making it extremely convenient for the user. Additionally, the cooler includes an overload protection feature that ensures safe operation by preventing damage from overvoltage. The device also features a built-in handle for easy carrying.

    Voltage: 120 volts | Wattage: 1020 watts | Warranty: 1 year | Air Flow Capacity: 320 CFM

    3. The VAGKRI Portable Evaporative Cooler: Best With Three Possible Cooling Processes

    Evaporative Cooler, VAGKRI 2100CFM Air Cooler,...
    • 3-in-1 Evaporative Air Cooler: VAGKRI cooling fan offers 3...
    • Powerful 3X Evaporative Cooling: VAGKRI air cooler features...

    The VAGKRI Portable Evaporative Cooler is an appliance that combines the features of a fan, humidifier, and air cooler, to create a comfortable environment. It features three different cooling models, allowing you to choose between air, water, or ice cooling to suit your preference. 

    This air cooler can deliver cool air quickly and efficiently with its powerful fan motors and 3-sided intake panels. It also comes equipped with an ice compartment, which makes it an excellent choice for extreme heat. 

    Plus, the evaporative cooler is designed to cover larger spaces with 120° oscillation and 700 square feet of coverage. It produces 2,100 cubic feet of cold air a minute, making it suitable for use in various environments, including homes, offices, and other commercial spaces.

    You will love the 8-gallon water tank, providing hours of cooling without frequent refills, while you can also manually add water from the top or attach a garden hose for uninterrupted cooling. The appliance is equipped with an electronic control panel that is user-friendly. And the full-function remote control guarantees further convenience, making it possible to adjust the settings from a distance.

    Voltage: 115 volts | Wattage: 105 watts | Warranty: 1 year limited warranty | Air Flow Capacity: 2100 CFM

    4. Dreo Evaporative Air Cooler: Best With Reusable Ice Boxes

    Sale
    Dreo Evaporative Air Cooler, 40” Cooling Fan with 80°...
    • Voice Control: Delivering comfort at your command; Alexa and...
    • Less Noise, Exceptional Rest: Enjoy a fresh, comfortable,...

    The Dreo Evaporative Air Cooler provides a cool lake breeze during hot and dry summer days and nights with its 80-degree wide-angle oscillation, which covers a large area. You can enjoy the cool breeze from up to 20 feet away using the remote. 

    It is a versatile appliance that can function as a fan and a humidifier, perfect for arid regions, as it cools rooms using less energy and adds humidity. Additionally, the quiet sleep mode and three fan speeds allow for custom comfort. 

    With its all-in-one touch panel, you can easily customize your cooling experience because it offers a full range of functions, including humidifying, oscillation, fan speed, and timer settings. The water level indicator and alert even allow you to check the water level quickly without pulling the tank out. 

    Moreover, the low water alert blinks when it's time to add water, so you'll never have to worry about forgetting to fill it up. The 1.06-gallon large water tank can run for up to 8 hours, keeping your room cool and moist overnight. 

    This Air Cooler comes with reusable ice boxes that you can freeze and put into the tank to maximize cooling. However, it's important to note that you should use a soft cloth or gloves to move the ice boxes and avoid touching them with your hands to prevent frostbite.  

    Voltage: 120 volts | Wattage: 50 watts | Warranty: 1 year | Air Flow Capacity: 212 CFM

    5. MEPTY Evaporative Cooler: Best With Continuous Auto Fill Feature 

    MEPTY 4800 CFM Portable Swamp Cooler, Evaporative Air Cooler...
    • FAST EXCELLENT COOLING: The air cooler features 3...
    • SUPER AIR VOLUME with LESS ENERGY: Not let the normal swamp...

    With three high-density evaporative cooling pads and powerful fan motors, this air cooler produces cold air quickly and efficiently. The included ice packs enhance the cooling effect, making it ideal for use in large spaces of up to 900 square feet. 

    Unlike traditional tower fans, this air cooler blasts air at 3531 CFM using less energy. Wider oscillation ensures that the cold air is distributed evenly throughout the space, making it an excellent alternative to air conditioners. 

    It features a sizable 10.6-gallon water tank to keep the evaporative cooling fan working for more hours. Low-Max water line helps you monitor the water level for timely refills, and a drainage port at the bottom makes maintenance more convenient. 

    The top-refilled design makes refilling the water tank a breeze without needing a hose or bending over. Additionally, with four rolling casters, this portable evaporative cooler can be moved easily to any space, making it perfect for use in backyards, garages, or gyms. 

    Voltage: 115 volts | Wattage: 80 watts | Warranty: 5-year limited warranty | Air Flow Capacity: 3531 CFM

    6. Portacool Jetstream 230: Best In Class Warranty 

    Portacool PACJS2301A1 Jetstream 230 Portable Evaporative...
    • STAY COOL & COMFORTABLE: The Portacool Jetstream 230...
    • PROVIDES COOLING THROUGH EVAPORATION: Portacool's...

    The Portacool PACJS2301A1 Jetstream 230 Portable Evaporative Cooler is a versatile and efficient cooling solution, thanks to its compact design and powerful cooling capabilities. One of the critical features of this evaporative cooler is the Kuul Comfort MicroTech evaporative media, made in the USA exclusively for Portacool products. This high-quality media ensures optimal cooling performance and is designed to last for many years of use. 

    It also comes equipped with oscillating louvers, which help to cool a larger area more effectively. Additionally, the sizable two-inch drain makes cleaning and maintenance easy and efficient. 

    This cooler features a liquid level indicator with an automatic pump shut-off to protect your investment for added convenience. And with its durable construction and Portacool Protect lifetime warranty, you can trust that this product will provide reliable cooling comfort for years to come. The warranty is applicable on the housing against manufacturing defects, while it has a 3-year warranty on all electrical components, 

    Voltage: 110 volts | Wattage: 158 watts | Warranty: 3 years on electrical components; Lifetime on housing | Air Flow Capacity: 3600 CFM

    7. Evapolar EvaSMART Personal Evaporative Air Cooler: Best With Environment-Friendly Technology

    Evapolar EvaSMART Personal Evaporative Air Cooler,...
    • EvaSMART air cooler CREATES YOUR OWN COOL PERSONAL CLIMATE...
    • FOR PERSONAL USE - Cools the area in front of the device up...

    EvaSMART air cooler is a portable and efficient device that uses natural evaporative technology to create a cool personal climate. This 3-in-1 device cools, humidifies, and cleans the air of dust particles to make your living space healthier. It's perfect for personal use as it cools an area of up to 2.5 - 3.5 sq m, making it suitable for use on a desk, couch, or bed. 

    This device is operated via a mobile application and can be connected to various Smart Home assistants like Amazon Alexa with voice commands. It has an LED display that shows the temperature of both incoming and outgoing air, and you can choose from various light colors for your water tank lighting to suit your mood. 

    I found it was easy to install; you just need to pour water in the tank, plug it in, set the Wifi on, and enjoy. The working principle of the EvaSMART is based on natural water evaporation technology, making it the most efficient evaporative air cooler of its type. It takes hot air and makes it cool and moist even in dry climates. 

    However, it's not recommended to use it when the humidity is higher than 70% in your room. EvaSMART is also environmentally friendly due to its low power consumption and innovative, fully-inorganic, biodegradable material inside the EvaBreezeTM. 

    Not to forget, each easily replaceable cartridge lasts 3-6 months, depending on use and air and water quality.

    Voltage: 110 volts | Wattage: 12 watts | Warranty: 1 year | Air Flow Capacity: 87 CFM

    8. Hessaire 5,300 CFM Evaporative Cooler: Best With Extensive ASDS Coverage

    Hessaire MC61M 5,300 CFM 3-Speed Portable Evaporative Cooler
    • Experience Superior Cooling: Embrace the evaporative air...
    • Transform Your Living Space: Adapt to any environment with...

    The Hessaire 5,300 CFM Evaporative Cooler is a compact and aesthetically pleasing cooling device that delivers exceptional performance, surpassing larger coolers in terms of cooling ability. It achieves this by expanding its air-intake areas and using hi-density XeL50 rigid media comprising three panels instead of one on most mobile coolers. 

    This design provides more air-intake area, reduces pre-rotation of the air to the prop, and lowers static pressure, allowing for more efficient air delivery. The hi-density XeL50 media also provides 80% more evaporation surface than regular density media, translating into higher evaporation efficiency and cooler temperatures. 

    It is important to note that this unit is not an air conditioner, which makes it an energy-efficient alternative that saves on electricity costs. It is best used in dry climates or open spaces, and it is recommended to leave windows and doors open to limit the rise of humidity and promote better air ventilation in the room. 

    This Portable Evaporative Air Cooler is made of durable polypropylene material and comes in a sleek grey color. Its compact form factor makes it ideal for personal use, and it has a 14.6-gallon reservoir capacity and can cover an area of up to 1600 square feet. The cooler is lightweight at 56 pounds, making it easy to move around as needed. It has a button control system and three different speeds, allowing easy adjustments according to your needs.

    The cooler operates quietly with a sound level of 63 dB and has a wattage of 430, making it an energy-efficient option. It runs on a standard 115-volt power source and comes with a one-year warranty from the manufacturer. 

    Voltage: 115 volts | Wattage: 500 watts | Warranty: 1 year | Air Flow Capacity: 5300 CFM

    9. Big Ass Fans Cool-Space 400: Best With Large Water Tank Capacity

    Big Ass Fans - Cool-Space 400 - Portable Evaporative Swamp...
    • Efficient Cooling for Workspaces: Cool-Space 400 Evaporative...
    • Generous Water Capacity: Utilize a standard garden hose for...

    The Cool-Space 400 Evaporative Cooler is a powerful and efficient solution for cooling your space without needing costly traditional A/C. Depending on your location's ambient temperature and humidity, this cooler can cool air up to 33 degrees, thanks to its 36-inch fan and 6,400-9,700 cfm output.

    Equipped with a large 46-gallon tank, the Cool-Space 400 can run for up to 10 hours without being connected to a water source, offering maximum portability for immediate spot-cooling. The cooler's low water indicator also ensures you're always aware of the water level.

    The 8-inch thick cooling media is the industry's most influential and longest-lasting, treated with a thermosetting resin to resist algae growth and withstand frequent cleaning. Its design prevents dirt and other particles from penetrating the substrate, ensuring it stays effective for longer. 

    Cool-Space's variable-speed controls make maintaining the perfect temperature for your space as simple as turning a dial, with virtually silent direct-drive motors delivering precise cooling. The motors are designed for both power and efficiency, helping to keep your space comfortable while keeping running costs low.  

    Voltage: 120 volts | Wattage: 60W | Warranty: 5-year manufacturer warranty | Air Flow Capacity: 9700 CFM

    10. Honeywell 525 CFM: Best With Ice Compartment

    Honeywell Indoor Portable Evaporative Air Cooler for Living...
    • Powerful Air Cooler: Indoor evaporative air cooler or swamp...
    • Convenient Placement: Super low power consumption 288W &...

    The Honeywell Evaporative Cooler is an excellent solution for hot and dry climates in the southwest and Midwest regions of the US. It provides powerful 525 CFM airflow, perfect for spot-cooling small to medium spaces such as living rooms, bedrooms, dens, covered patios, and garages. It has a low power consumption of only 288 watts. 

    This evaporative cooler has several features, including a carbon dust air filter and remote control. low water alarm, energy-saving timer, adjustable humidification dial, and an ice compartment.

    In addition to cooling, this air cooler can also be used as a humidifier during winter months, providing a moist, cool breeze to cool you down. However, it's important to note that this is not an air conditioner and should not be expected to cool as efficiently as a refrigerated AC. Its tank is detachable for easy maintenance.

    The Honeywell 525 CFM Indoor Portable Evaporative Air Cooler has a freestanding design and a reservoir capacity of 7.9 gallons. It is made of durable plastic and comes in a sleek gray color. Its floor area coverage of 320 square feet makes it perfect for personal use in residential spaces.

    Voltage: 120 volts | Wattage: 288 watts | Warranty: 1 year on parts and labor | Air Flow Capacity: 525 CFM

    Quick Comparisons Of Top Evaporative Coolers

    Evaporative Coolers Voltage Wattage Warranty Air Flow Capacity
    Hessaire MC37M Evaporative Cooler 115 volts 250 watts 1 year 3100 CFM
    COSTWAY Portable Air Conditioner 120 volts 1020 watts 1 year 320 CFM
    VAGKRI Portable Evaporative Cooler 115 volts 105 watts 1 year limited warranty 2100 CFM
    Dreo Evaporative Air Cooler 120 volts 50 watts 1 year 212 CFM
    MEPTY 3531 CFM Evaporative Cooler 115 volts 200 watts 5-year limited warranty 3531 CFM
    Portacool PACJS2301A1 Jetstream 230 110 volts 158 watts 3 years on electrical components; Lifetime on housing 3600 CFM
    Evapolar EvaSMART Personal Evaporative Air Cooler 110 volts 12 watts 1 year 87 CFM
    Hessaire Evaporative Cooler 115 volts 500 watts 1 year 5300 CFM
    Big Ass Fans Cool-Space 400 120 volts 60 watts 5-year manufacturer warranty 9700 CFM
    Honeywell 525 CFM 120 volts 288 watts 1 year on parts and labor 525 CFM

    Buying Guide For The Best Evaporative Cooler

    Cooling Capacity

    When selecting a cooling unit, it's important to consider the size of the area you want to cool. Choose a unit with appropriate CFM (cubic feet per minute) for the space you want to cool. A unit with insufficient cooling capacity will not be able to effectively cool the area, while a unit with excessive cooling capacity will be wasteful and inefficient.

    Water Tank Capacity

    If one wishes to avoid frequent refilling of the cooler's water receptacle, it is imperative to opt for a model with a larger water tank capacity. By doing so, the cooling process may persist for a longer duration without necessitating the replenishment of the tank. Nonetheless, it is essential to acknowledge that a larger tank capacity may also result in a heavier and more unwieldy unit.

    Airflow Direction

    Different coolers are designed to provide airflow in different directions. Some models allow for vertical airflow, while others provide horizontal airflow. Consider the layout of your space and your desired cooling pattern to choose a unit that can provide airflow in your desired direction.

    Noise Level

    If you plan to use your cooler in a home or workplace, it's important to consider the noise level of the unit. Some coolers can be quite loud, which can be disruptive to those around you. Look for models with low noise levels to ensure a comfortable and peaceful environment.

    Energy Efficiency

    It is an important consideration when choosing a cooler. Choose a model with a higher SEER (Seasonal Energy Efficiency Ratio) rating for better energy efficiency. This will help you save money on energy bills and reduce your carbon footprint.

    Maintenance

    Maintenance is an important consideration when choosing a cooler. Look for units with easy-to-clean filters and minimal maintenance requirements to save time and effort. Regular cleaning and maintenance will ensure that your cooler performs at its best and has a longer lifespan.

    Warranty

    A warranty is important for protection against defects and other issues. Consider an extended warranty period for added peace of mind. This will ensure that you can get repairs or replacements if anything goes wrong with your cooler within the warranty period. Be sure to read the terms and conditions of the warranty carefully to ensure that you understand what is covered.

    Evaporative Cooler FAQs

  • What is an evaporative cooler?

    An evaporative cooler, also known as a swamp cooler, is an air conditioning unit that uses water evaporation to cool and humidify the air.

  • How does an evaporative cooler work?

    An evaporative cooler draws dry and hot air through moistened pads or media, which evaporates the water and cools the air. The cooled air is then circulated throughout the space.  

  • What are the different types of evaporative coolers?

    The different types of evaporative coolers include portable, window-mounted, ducted, and direct evaporative coolers. 

  • How do I choose the right size of an evaporative cooler for my home or office?

    The right size of an evaporative cooler depends on the size of the space to be cooled. You should consult the manufacturer’s recommendations or consult with an HVAC professional. 

  • How often should I clean and maintain my evaporative cooler?

    You should clean and maintain your evaporative cooler at least once a year or more if you use it frequently. This includes changing the pads or media, cleaning the water reservoir, and checking the pump and fan.

  • How much water and electricity does an evaporative cooler consume?

    The water consumption of an evaporative cooler varies depending on the size and usage but typically ranges from 3-15 gallons per day. The electricity consumption is also relatively low compared to traditional air conditioning units.

  • How does an evaporative cooler compare to other air conditioners?

    Evaporative coolers are typically less expensive and more energy efficient than traditional air conditioning units. However, they are less effective in humid climates.

  • Can I use an evaporative cooler in a humid environment?

    Evaporative coolers are not effective in humid environments because the air is already saturated with moisture, so the water in the pads or media cannot evaporate and cool the air.  

  • How long does an evaporative cooler typically last?

    An evaporative cooler lifespan depends on the unit’s quality and how well it is maintained, but they typically last 10-20 years. 

  • What are some popular brands of evaporative coolers?

    Popular brands of evaporative coolers include Honeywell, Hessaire, Breezair, and Champion 

  • Conclusion

    After further analysis, I believe that the Hessaire MC37M Evaporative Cooler is the best evaporative air cooler for those needing exceptional performance from a compact unit. Its features, such as the Air Swing Delivery System, provide maximum coverage and is ideal for outdoor cooling. 

    The second best option that stands out in the list is the COSTWAY Portable Air Conditioner, which is equipped with a built-in handle and 4 universal casters. You can try out these options to remain cool and calm during the summers or conduct your own research after reading the buyer’s guide and FAQs.

    Electric kettles boil water, producing a hissing as the water vapor bubbles. Unfortunately, it's not the most pleasant sound in the world!

    Thankfully, there are many ways to reduce the sound produced by your nifty electric kettles, including using a tea cozy, removing limescale buildup, and more.

    Let's learn all you need to know about electric kettles making noise and how to make them quieter.

    How Loud Can an Electric Kettle Be?

    How Loud Can an Electric Kettle Be
    © Homesthetics - Monica Hewitt

    We've tested and collected customer experiences on various electric kettles. We discovered that the quietest electric kettle was 79 dB, and the loudest was 95 dB.

    For reference, normal human speech is only at 60 to 65 dB. This means the hissing of these kettles can disturb a conversation.

    Vacuum cleaners produce sound at around 83 dB while lawnmowers at 90 dB.

    It is advisable to avoid extended or repeated exposure to loud noise above 85 dB as this can cause hearing loss.

    So if you like having multiple cups of tea daily, go for quiet kettles with safety features like the auto shut-off feature and boil-dry protection.

    This keeps the kettle from boiling and making loud noises when the liquid does not cover a certain water gauge. Kettles make more noise when there is less water.

    What Are 6 Ways to Make an Electric Kettle Quieter?

    Is your electric kettle causing too much noise in the kitchen or office pantry? Keep it on the down low with these effective methods:

    Method 1: Buy a Quiet Kettle

    If you're still about to buy an electric kettle, quiet ones are the best way.

    Those designed with boil-dry protection and a larger electric heating element produce a lower noise level.

    This works by dispersing the heat more evenly by reducing the drastic temperature difference between the colder water in the kettle and the pocket of expanded water.

    Cavitation is reduced and, therefore, lessens the amount of noise made.

    Method 2: Using A Tea Cosy

    An older tea cozy is hand-knitted, while a modern one would have padded components that can be regularly washed.

    Besides keeping a teapot warm, a tea cozy helps keep a kettle quieter. When a tea cosy is placed on the kettle, the sounds are muffled as your water boils.

    Wool is used in making these beautiful tea cozies. They come in very unique and colorful designs too.

    But more importantly, this thick material is the culprit that reduces heat transfer and absorbs the energy of sound waves that keep the kettle quiet.

    Method 3: Soundproofing with Rubberized Undercoating Spray

    A rubberized undercoating spray is more often used for cars. They prevent rust and dampen noise caused by road traffic.

    When used on a kettle, it has similar benefits. It protects the kitchen tool from dirt and dust. At the same time, it makes it quieter too.

    When soundproofing with a can of rubberized undercoating spray, avoid the holes and wires of your electric kettle.

    Method 4: Add Extra Padding

    Try lifting your electric kettle off your countertop surface while boiling. If the noise reduces, then you have an agitation concern.

    This means that the boiling noise is amplified by reflecting vibrations from where the kettle rests.

    Adding extra padding like sound-deadening mats is a good idea to prevent this from happening. Put the extra padding underneath your kettle. This should effectively dampen any vibration.

    Method 5: Remove Limescale Buildup with a Limescale Solution

    Boiling water evaporates and turns to steam as you heat it. But only plain water turns to gas. Some minerals like calcium build up in hard-to-reach places as you heat water.

    This buildup of calcium carbonate, also known as limestone, is around the electric kettle's heating element. This can have a metallic after-taste to it once in contact with water.

    The tough deposit of calcium carbonate also reduces the surface area at which water heats, thus increasing cavitation and noise.

    Removing the limescale is not so easy. You can't simply scrub it off with dish soap. To remove the build-up, you need to do a descaling.

    De-scaling is a citric acid rinse, lemon juice rinse, or vinegar rinse. You will get the same result either way. Try it out!

    Vinegar Rinse

    1. Prepare equal parts of vinegar and plain water. Pour it into the electric kettle and sit for at least an hour.
    2. Turn the kettle on and heat the mixture. This will dissolve the limescale completely.
    3. Lastly, pour out the mixture and rinse the kettle thoroughly. Washing with dish soap helps too.

    Citric Acid Rinse

    1. Add one teaspoon of citric acid to 100ml of water and pour the mixture into the kettle.
    2. Once it is heated, let it sit for about 10 minutes.
    3. Rinse off with dish soap.

    Lemon Juice Rinse

    1. Add one teaspoon of lemon juice to water, pour into the kettle, and let it sit for an hour, just as you would in a vinegar rinse.
    2. Heat the mixture to remove the limescale.
    3. Please dispose of the lemon juice mixture and make sure it is clean. This should leave a nice fragrant scent in your electric kettle.

    Method 6: Switch To a Stainless Steel or Glass Kettle

    If you've tried and tested all the methods yet are unsatisfied, you might consider switching to stainless steel or glass kettles. These have a more quiet state.

    Go for those with double-wall designs, cool-touch exteriors, and non-slip handles.

    What Are Things to Remember on How an Electric Kettle Works?

    To use an average kettle, you fill it with water and place it on top of a stove's burner. Gas or electricity then transfers heat energy to the bottom and, to a lesser extent, the sides of a kettle.

    A modern kettle replaces the stovetop with an electric element inside its base. This heating element receives a strong current causing the hot water surrounding it to heat up quickly.

    This heat transfers to the water molecules through convection and conduction, causing the water to be agitated. This works as warmer water heats up at the bottom of the kettle, then passes through the cold water on its way to the top surface.

    As warm things rise, it loses their heat to their surrounding water. This causes a bubble of hot water.

    The bubble is a pocket of empty space created within the water produced in cavitation. At this point, the hissing is caused by the water vapor bubbles popping.

    If you want to know more about kettles, check out how kettles work! You may also check out "Do Kettles Boil at Different Temperatures?" for a more nuanced guide on kettles!

    What Are Good Quiet Kettles to Buy in the Market Right Now?

    Check out this article on the Best Electric Kettles. If you want the quietest ones on the market, here are 3 options to consider:

    Russell Hobbs Electric Cafe Kettle 1.0L 7410JP

    Russell Hobbs Electric Cafe Kettle 1.0L 7410JP
    • Body size:Width 25.5 × depth 13 × height 22cm / Weight:...

    The Russell Hobbs electric kettle has rapid boil technology, promising to boil hot water in just 45 seconds. This saves up to 66% of energy!

    But the best part of this kettle is its excellent quiet operation, given its boil-dry protection.

    Secura The Original Stainless Steel Double Wall Electric Water Kettle 1.8 Quart

    Secura Original Stainless Steel Double Wall Electric Water...
    • Comes with 100% stainless steel interior. Water level lines...
    • Cordless design allows for easy filling, traveling and...

    This electric kettle is made of 100% stainless steel. We like it for its double-wall feature, assuring hissing noise is kept to a minimum.

    It's one of the safest kettles you can find too. There is no plastic contact with hot or boiling water. Plus, it has a BPA-free cool touch exterior and no scalding hazard.

    Hamilton Beach Glass Electric Tea Kettle

    Hamilton Beach Glass Electric Tea Kettle, Water Boiler &...
    • Fast Boil with 1500 Watts. This electric kettle boils up to...
    • Durable Glass Carafe with BPA-free Interior. The 1 liter...

    We love the Hamilton Beach electric kettle for its quiet operation. Its durable glass carafe with a BPA-free interior keeps vibrations low when the water starts to boil.

    Plus, it has a built-in mesh filter to prevent any limescale from developing, which could cause more noise.

    Why Kettles Make Noise Conclusion
    © Homesthetics - Monica Hewitt

    Conclusion

    Yes, heating with electric kettles can cause some noise. But it's not too bad. We like tea cosy as it keeps your teapot warm and your kettle quiet.

    Plus, there are a lot of methods to dampen the hissing created when your hot water boils, and vapor enters the air. Give them a try to see if your electric kettle works!

    Is your mini freezer dispensing discolored ice cubes? Maybe you also notice the water pressure from the dispenser slowing down.

    These are just a few signs that it's time for a new refrigerator water filter.

    Read through the article to learn how to swap the water filter with a new cartridge, regardless of the kind of refrigerator filter you have.

    How to Change a Refrigerator Water Filter in 6 Easy Steps

    How to Change a Refrigerator Water Filter in 6 Easy Steps
    © Homesthetics - Monica Hewitt

    Below is a general step-by-step on how to change your old filter:

    Step 1: Locate the Fridge Water Filter and Replacement Type

    The water filter is normally found at the bottom grille, but you can find some on the left side or upper right corner of the refrigerator interior.

    If it's inside the refrigerator, you must pull open the filter door with a small lever.

    You should ideally do this before buying a new filter so you can compare your old one.

    Step 2: Remove the Old Water Filter Cover From Refrigerator

    If there's a water filter cover, then remove it. How you do it is pretty intuitive.

    Some covers just twist off, others have tabs you need to squeeze, and others have an eject button.

    Step 3: Remove the Spent Filter

    How you remove the refrigerator filter depends on the model of your refrigerator.

    You might have to swing the old cartridge from the water filter slot first. Then you'll either have to pull it out of the housing or twist it counterclockwise before pulling.

    You'll have to be especially careful here since you don't want to break any plastic parts.

    There may be some residual water in the filter, so have something to help with any spills.

    Step 4: Install the New Filter

    Remove the protective coverings from the O-rings. But make sure the rings are still in place after removing those protective coverings from the O-rings.

    You can install it the same way you removed it. So, if you had to twist it off, twist the cap clockwise back.

    You must screw some filters into a filter cap before pushing and locking it in place.

    Step 5: Properly Flush the New Filter

    To properly flush the new filter, get a bucket (or other large, sturdy container that can hold four gallons of water) and place it under the dispenser.

    Hold the dispenser pad down for five seconds, then release it for five seconds. Keep repeating this until the water starts flowing.

    When it starts flowing, hold down the pad until you have dispensed two to four gallons of water. Don't drink this. However, you can use it for other things, like watering plants.

    Step 6: Reset the Water Dispenser After Installation of the New Fridge Water Filter

    Depending on the model of your refrigerator, you'll have to reset the dispenser after you properly flush the new filter.

    Check the manual if you need to do this since not all water dispensers have this feature.

    If it does, you'll likely have to press a reset button for this one. You might find this in a control panel in the refrigerator compartment.

    How to Change These Different Refrigerator Water Filters?
    © Homesthetics - Monica Hewitt

    How to Change These Different Refrigerator Water Filters?

    There are many kinds of refrigerator water filters, so we've listed down a quick and more specific how-to for other models:

    Twist-On Refrigerator Water Filter

    This kind of refrigerator filter is pretty easy to replace, especially if you know which way to turn it.

    1. Look for a plastic filter cover and open the panel by pressing or pulling the locking tab on one end. Be ready with a towel in case there are drips.
    2. Twist the filter counterclockwise until it stops turning. Then, pull the filter straight back.
    3. Ensure the ridges align on the new filter and the slots on the mounting point, then simply push it into place.
    4. Twist the refrigerator filter clockwise to lock it into place. Replace the water filter cover panel.
    5. Reset the dispenser. Then, let the water dispenser run for up to five minutes to remove air and flush the filter.

    Push-In Fridge Water Filter

    This kind of filter is also quick and easy to replace.

    1. Look for a plastic water filter cover and open the panel by pressing or pulling the locking filter tab on one end. Be ready with a towel in case there are drips.
    2. Depending on the model of your refrigerator, press the button by the water filter or push the filter towards the mount until it clicks. Remove it by pulling it straight out of the mount.
    3. Remove the filter cap and protective coverings on the new filter.
    4. Make sure the filter is properly aligned with the mount opening, and push the filter with a little extra power until it clicks into place. If it has a directional arrow, it might be pointing upward.
    5. Push the filter door closed.
    6. Reset the dispenser. Then, let the water dispenser run for up to five minutes to remove air and flush the filter.

    Water Filter on the Bottom of the Fridge

    Some manufacturers put the filter at the base grille, so it's accessible without opening the refrigerator. It might also be more convenient compared to looking for the filter door in the refrigerator interior.

    1. Find the filter door cover at the base grille. Be ready with a towel in case there are drips.
    2. Twist the filter cap or knob counterclockwise until the handle is in a vertical position. Alternatively, press the eject button.
    3. Hold the filter and pull forward towards you to remove it.
    4. Remove the protective coverings from the O-rings. But ensure the rings are still in place after removing those protective coverings from the O-rings.
    5. Put the old filter's cap on the new filter.
    6. Insert, then twist the filter and cap clockwise until it stops turning. Or, push with a little extra power until the eject button pops.
    7. Reset the dispenser. Then, let the water dispenser run for up to five minutes to remove air and flush the filter.

    Inline Water Filter

    An inline filter isn't the standard anymore since they're used by older fridges. Changing them requires more effort.

    1. Turn off the water supply in the house. Unplug your refrigerator and pull it away from the wall.
    2. Find the filter and be ready with a towel in case there are drips.
    3. Open the water-line connectors on each end of the filter using pliers. You'll either have to pinch or twist them open. Remove the water lines and filter housing.
    4. Attach the new filter and housing to the water lines. The filter might have a directional arrow that tells you which side goes into the filter slot. Typically the arrow should be pointing upward.
    5. Turn the water back on and plug the refrigerator back in.
    6. Run the dispenser for a few minutes to flush the new filter and check for water line leaks.
    7. Push the refrigerator back in place.

    What Is a Refrigerator Water Filter and How Does It Work?

    As the name implies, a refrigerator water filter is a built-in filter in the refrigerator that filters water.

    This removes contaminants and other impurities in the water by forcing the water through the filter material with activated carbon.

    The carbon pulls the dirt and debris from the water, leaving you with fresh-tasting water.

    Depending on the model of your refrigerator, the filter can reduce contaminants like lead and pesticides. You can check the product details to see what it can remove.

    Why Should Always Change Your Refrigerator Water Filter?

    You have to change the fridge water filter regularly to keep its ability to clean water properly. This also increases the efficiency of your refrigerator.

    Even though your water looks fine, it's likely not healthy if you haven't changed the filter for a long time.

    Furthermore, municipally treated water can still contain water-borne materials. Not to mention the water can pick up contaminants in the pipes even after treatment.

    What Happens if You Don’t Change Your Refrigerator Water Filter?

    Suppose you don't regularly replace the filter. In that case, even the best refrigerators will end up clogged with so many contaminants that they might not properly dispense water or fill the ice maker anymore.

    If it still dispenses water, it might contain unwanted and unhealthy things since the filter can't absorb anymore.

    Refrigerator Water Filter FAQs

  • There might seem to be a lot of things that go into water filter replacement — from making sure the O-rings stay in place to ensuring the new filter doesn’t leak.

    Below are a few questions that can help you understand the importance of changing refrigerator water filters more:

  • Can You Drink Water Right After Changing the Fridge Filter?

    No, you must flush the new filter with up to four gallons of water first.

    This ensures that any leftover debris that the old filter couldn’t get rid of can be removed first.

  • Do You Have to Turn the Water off to Change a Refrigerator Filter?

    Unless you have an inline filter, you don’t have to turn off the water to change the filter.

    New fridges have an auto shut-off that activates when you remove the filter.

  • How Long Does a Refrigerator Water Filter Last?

    Refrigerator filters last about six months before you need to replace them.

    The exact duration depends on things like water quality, plumbing, and how often you use the filter.

    If you haven’t reached six months and you already see signs of a bad filter, it’s better to get a replacement filter immediately.

  • How Much Water Do I Need to Run After Changing My Refrigerator Filter?

    You should generally run water for a few minutes, equaling around four gallons of water. Instead of drinking that, use it for other things like washing the car or doing laundry.

  • How Do You Know if Your Refrigerator Water Filter Is Bad?

    Some signs that tell you it’s time for a refrigerator water filter replacement include the following:

    • Slight discoloration in the water or ice cubes
    • An off-taste or smell in the water or ice cubes
    • Depending on your fridge’s model, an indicator light tells you to change the filter
    • Low or slowing water pressure from the dispenser
  • Changing a Refrigerator Water Filter Conclusion
    © Homesthetics - Monica Hewitt

    Conclusion

    A refrigerator's water filter helps reduce impurities in your drinking water, so it keeps tasting fresh. Replacing it is easy — you won't even need to call for support service!

    There are several kinds of filters, so check which kind of filter cartridge you have before getting a replacement.

    Some areas you may find it in are the base grille or in the upper right corner of the fridge compartment.

    Remember to replace the old filter with a new cartridge every six months — or whenever you notice signs of a dirty filter.

    Have a nasty, smelly fridge? Not sure where the smell is coming from or how to get rid of it?

    Placing sodium bicarbonate, more commonly known as baking soda, in the refrigerator can help absorb smells and get rid of the foul odor that spoiled food and gunk can bring.

    Even the best refrigerator cannot smell good forever if you don't add an effective odor neutralizer like baking soda every once in a while.

    In this guide, we'll discuss the benefits of putting baking soda in the fridge, how to do it, and other alternatives if you don't have any baking soda.

    Using Baking Soda In The Fridge To Eliminate Odors

    Using Baking Soda In The Fridge To Eliminate Odors
    © Homesthetics - Monica Hewitt

    In this section, we'll be discussing how keeping baking soda in the fridge can help reduce fridge funk, as well as the best ways to implement it.

    How To Use Baking Soda Boxes For Fridge Smells

    How To Use Baking Soda Boxes For Fridge Smells

    Source: YouTube

    There is no complicated process for you to neutralize odors. All you need to do is get a box of baking soda and place it in an area inside your fridge where the odor is coming from.

    Placing just one box of baking soda in the fridge will help a lot with reducing the odor, but you should also leave different amounts in specific problem areas to make it more effective.

    How Much Baking Soda Should I Put In The Fridge?

    Different situations and parts of the refrigerator require you to put various amounts of baking soda to absorb odors better.

    Baking Soda in Crisper Drawers

    If you're planning to put baking soda in your fridge, specifically inside crisper bins, you should sprinkle the surface area with some baking soda and cover it with a folded paper towel.

    You should replace the baking soda in the exposed area of your refrigerator every three months or less, depending on how often the odd smells return.

    Baking Soda vs. Fridge Stains

    Sodium bicarbonate has the added benefit of being good at removing stains from any surface area. All you need to do is mix the baking soda with water to form a paste.

    Then, you'll need to use an old toothbrush to spread the paste and remove the stain. You can use this on fish tanks, airtight containers, a bowl, and of course, the refrigerator.

    Baking Soda vs. Tough Fridge Odors

    If the smelly molecules and weird odors persist, you should flush the whole fridge with a baking soda solution. To make this, use a 1:1 ratio of baking soda and water.

    If the smelly particles are really strong, use at least a cup of baking soda when making the solution.

    Can I Put Baking Soda In The Freezer?

    Can I Put Baking Soda In The Freezer?

    Source: Arm and Hammer

    Yes, you can put it in the freezer because it maintains the same ability to neutralize bad smells in the freezer as when used in the fridge.

    There are many baking soda products specifically made for use in the freezer, which is an excellent pick-up if you own a mini freezer at home.

    Why Baking Soda Works

    Most of the bad scents or weird odors you find in your fridge arise when bacteria feed on old or expired food particles or decomposing foods.

    This releases butyric acid, which is where the acidic smell and weird odors come from. While you cannot prevent food from eventually going rancid, there is a way to keep the odors out completely.

    Why Baking Soda Works

    Source: The Kitchn

    Baking soda works by placing an open box, open bowls, or an open container of it inside the fridge. This interacts with the smells created by old food particles.

    Leaving this in the fridge for a few hours turns the acidic and strong alkaline molecules into neutral-smelling sodium salts.

    Sodium bicarbonate is attracted to both acidic and weak base particles. This, along with its wide availability, makes it the ideal scent absorber to keep in your refrigerator.

    What Are Other Uses Of Baking Soda In The Kitchen?

    Baking soda is a great way to keep your freezer and fridge clean and not just smell good. You can use a solution with a 1:1 baking soda-to-water ratio to scrub the inside clean.

    The fact that it leaves a neutral smell means it won't affect the taste of any foods you cook and store inside your fridge once you've cleaned it.

    Baking soda, lemon with sponge and towel for effective and safe house cleaning. What Are Other Uses Of Baking Soda In The Kitchen?

    Source: Live Science

    This is usually combined with white vinegar when stains are incredibly persistent, creating the best multipurpose cleaning solution.

    You can easily keep this at room temperature, so storing it anywhere at home isn't a hassle.

    Odor-Eliminating Alternatives

    Here are some natural products that are great alternatives to baking soda if you don't have any on hand or prefer to use something different for your fridge.

    • Coffee grounds - leave a mild coffee scent
    • Vinegar - can only use white vinegar, has a pungent smell of its own
    • Activated charcoal - used in pet shops and litter boxes to absorb animal scents, harder to find

    Coffee grounds, vinegar, and activated charcoal have a few caveats and unique features that might make them more suited or unsuitable for your needs.

    They could be better or worse, but if you use them, you can store them next to a bowl of food in the fridge or an open container on the top shelf, depending on what you prefer.

    Baking Soda In The Refrigerator FAQs

  • Now that you know more about how placing a box of baking soda in the fridge can help keep your food in the fridge smelling fresh, you might have some more questions.

    We’ve answered the most commonly asked ones below.

  • How Do I Clean the Fridge with Baking Soda and Vinegar?

    First, open up a box of baking soda and fill a container with water. Put equal amounts of both and mix. The objective is to create a solution to use in the fridge.

    When you’ve mixed these together, get a toothbrush (or any bigger brush for larger surface area portions) and spread the solution by brushing it around.

    Once you’re finished brushing it and spreading the solution, flush it out using water. Wipe down and let the inside dry before putting any stored foods back inside.

    Warning: If your fridge has a refrigerator water dispenser, make sure to only clean that with a damp towel. You might damage it with baking soda.

  • Is Hydrogen Peroxide a Good Alternative for Cleaning?

    Hydrogen peroxide is a potent chemical agent used to clean more stubborn stains. It’s excellent for cleaning heavily stained baking sheets or dirty, rusted cast iron kitchenware.

    However, it may not be the best option to use inside your fridge, yielding its own hazards when mixed with your food. Stick to baking soda for cleaning your fridge.

  • Baking Soda in the Refrigerator Final Verdict
    © Homesthetics - Monica Hewitt

    Final Verdict: Can A Box Of Baking Soda Eliminate Bad Smells?

    Yes, a box of sodium bicarbonate, also known as baking soda, will eliminate odors when put inside a fridge. Just make sure you place the right amounts depending on the location.

    Keeping your full-size or counter-depth refrigerator clean and smelling good is one of the best ways to try out many recipes and store them safely for later consumption.

    One of the reasons artists prefer to use watercolor is its transparency, by using high-quality watercolor paint one could create depth through the use of glass objects and their reflections. 

    However, this can make painting clear and reflective objects like glass quite tricky, very different from painting grass with watercolors. Many watercolor artists often challenge themselves to paint transparent objects in a photorealistic manner for an extra edge and to convey a sign of expertise. 

    So, how to paint glass with watercolor sound impossible to achieve? Don't worry, as we have come up with some basic steps and tips that will help to make the painting process a tad simpler regardless of whether you use watercolor pads or watercolor paints in tubes. Remember to practice before beginning to paint, as replicating the right shapes is the first step toward capturing the reflectivity of glass. 

    So, without further ado, let's get started! 

    How To Paint Glass With Watercolor

    Watercolor set of bottle wine vintage style with glasses with red and white drinks . How To Paint Glass With Watercolor .

    Materials Required To Paint Clear Glass

    Before you can begin the process of painting, it's important to gather all the art supplies. Here are some of the things you'll need: 

    • Some fine watercolor brushes 
    • Masking fluid 
    • Watercolor paints 
    • Watercolor paper 
    • Graphite pencil 
    • Eraser
    • Two containers with water 

    You should also print out a photo of a glass object that you'd like to draw. It's best to start with an object that has been placed in front of a white background. Make sure to study it for a while to note how light interacts with glass, creating highlights and shadows. Some artists like to think of these areas as jigsaw puzzles that need to be arranged in the right manner. 

    Another thing we would like to point out is the importance of having a color palette dominated by grays and blues. Even though we perceive glass as colorless, mixing grays, blues, and the occasional white will help the painting process. 

    Steps To Paint Glass With Watercolor

    1. Make The Drawing

    As we have stated already, one of the most important steps in painting realistic glass objects is to create a good outline. With the help of your reference photo, make a fine representation of the object on watercolor paper. Remember to be light-handed with the pencil, as deep impressions look bad when applying watercolor paints. 

    While sketching, don't forget to add the thickness of the glass as it helps the object stand out from the background. Through the sketch, you must mark the shapes with hard-line edges. In turn, this will help you divide the drawing into areas that can be easily filled with colors. Pay extra attention to adding the small curved lines present in a glass, representing the distortions. 

    2. Apply Masking Fluid

    One of the easiest tricks used by watercolor artists is to place masking fluid in places of highlights and reflections. Having said that, some people prefer to directly start with a watery light gray paint and place it in the dark areas of the drawing. 

    You can easily figure out the light and dark areas using a nine-value scale. Use the values 0-1 for highlights and 8-9 for dark areas usually seen in the thick edges of the glass. 

    3. Applying the First Wash

    Let the masking fluid dry completely and wet the paper with a wash of clean water. Mix a bluish-gray paint, and use a thin brush to add the form shadow and the cast shadow of the glass while the paper is wet. 

    4. Applying Second Wash

    After the first wash has dried, start the paint by darkening the cast shadow. Next, use a wash of light warm gray to highlight the color of the glass. Also, add a warm yellow-gray wash in the foreground to signify the light source. 

    5. Paint The Background

    If your glass is placed against a colored background, it's time to add that color to your painting. Any shade of blue usually works well when painting water or glass. Remember that you'll need to use a similar color while adding the areas with distortions to the glass. 

    6. Add The Midtones To The Glass

    You might have noticed distortions while looking through a glass, which usually takes place due to refraction. Remember the curved lines you drew at the beginning? Take a similar color to the background and apply it to the mid-tones, which would help the object look cohesive with the settings. 

    7. Add Another Layer Of Distortions

    This time you should take a darker shade of the color used in the mid-tones and add them to areas with a value of 6-7. Let this dry, and then darken up the color a bit more to paint areas with a value of 8-9. At this point, your glass would appear three-dimensional. 

    We want to point out that beginners often forget to add colors to the bottom of a glass. Don't repeat the mistake, as the thick bottom of the glass often demands some of the darkest tones. 

    8. Fixing The Reflections

    Start this step by removing the masking fluid once the last layer of paint has dried. If some of the reflections seem too bright, you can apply a wash of light bluish-gray paint to tone them down. 

    How To Paint Glass With Watercolor

    Tip

    When painting glass with watercolor, it's also important to consider your left hand. Holding the glass in your left hand lets you observe how light interacts with the surface and use this information when painting. This can help you capture the unique qualities of glass, such as reflections and refractions, and make your painting more convincing.

    FAQs Related To Painting Glass With Watercolor

  • How can I achieve a convincing illusion of three-dimensionality when painting glass with watercolor techniques?

    Use light washes to portray the transparency of the glass, and gradually build up the darker tones to create the illusion of volume.

  • How can I avoid making the glass in my artwork look too flat or glossy?

    Vary the intensity of the colors and use dry brush techniques to create texture and subtle variations on the surface of the glass.

  • Can I use masking fluid to paint glass with watercolor techniques?

    Yes, you can use masking fluid to preserve areas of white paper or to create crisp edges when painting glass with watercolor.

  • What should I do if I make a mistake while painting glass with watercolor techniques?

    Try to lift the paint with a damp brush or sponge. If that doesn’t work, let the paint dry completely and gently scrape it off with a blade. Alternatively, you could incorporate the mistake into your composition.

  • What are some tips for creating a composition that features glass objects using watercolor techniques?

    Experiment with different lighting conditions and angles to capture the reflections and distortions in the glass. Consider the placement of the objects with one another and the background.

  • Are there any special considerations when painting stained glass with watercolor techniques?

    Consider the colors and patterns of the stained glass and use them as inspiration for your painting. Notice how light passes through the glass and creates colorful shadows on surrounding surfaces.

  • Paint Glass With Watercolor Final Words

    With that, we have come to the end of this guide. You must have noticed that we haven't gone too deep into the process. That's because the crux of the technique lies in figuring out the shapes made by the distortions. 

    If you're still confused about starting to paint glass with watercolor, first try observing how light interacts with transparent objects. You can even begin by creating some rough sketches of glass objects and the shapes made on them by different angles of illumination. 

    Also, definitely try the color mixes on a piece of scratch paper before applying them to your painting. And bear in mind that it's best to work from light to dark when working with watercolor. If you would like to experience different materials when painting with watercolors, you can also use watercolors on wood, certainly a fun experience!

    Until next time, goodbye, and take care!

    PS: If you are looking to paint on glass, and create glass ornaments, glass bottle centerpieces, custom mugs for your friends, or even plates for decor you can find the best paints for glass here.

    It goes without saying that the baby shower party is a very important yet expensive event, full of happiness and joy. A simple calm day at the end of a tumultuous journey in which the entire family is embarked. For these joyful moments we have curated a list of 22 insanely creative low costs DIY decorating ideas for your baby shower party; you will find here simple decorations infused with creativity, ornaments realized by DIY enthusiasts in no time.

    Few of these can be realized with a pair of scissors and colored papers only, some are using balloons creatively while a few require the attention of the entire guest list. Cast a glance at the gallery and surge inspiration from the design that appeals to you the most.

    Creative Low Cost DIY Decorating Ideas

    #1 Colorful Drops of Water Showering the Baby Presents Beautifully From a Cloud

    22 Insanely Cretive Low Cost DIY Decorating Ideas For Your Baby Shower Party homesthetics decor ideas (1)

    via etsy.com

    #2 Diapers Creatively Stacked Into a Mini Figure

    22 Insanely Cretive Low Cost DIY Decorating Ideas For Your Baby Shower Party homesthetics decor ideas (2)

    via pinterest.com

    #3 Sensible and Intimate Teal and Pink Decoration Ensemble For The DIY Enthusiasts

    22 Insanely Cretive Low Cost DIY Decorating Ideas For Your Baby Shower Party homesthetics decor ideas (3)

    via catchmyparty.com

    #4 Balloons Assembling a Shower Curtain Creatively

    22 Insanely Cretive Low Cost DIY Decorating Ideas For Your Baby Shower Party homesthetics decor ideas (4)

    via simplybrittany.com

    #5 Baby Shower Diaper Wreath

    22 Insanely Cretive Low Cost DIY Decorating Ideas For Your Baby Shower Party homesthetics decor ideas (5)

    22 Insanely Cretive Low Cost DIY Decorating Ideas For Your Baby Shower Party homesthetics decor ideas (6)

    Tutorial @ imperfecthomemaking.com

    #6 Super Cute Small Clothes Showcased For The Party

    22 Insanely Cretive Low Cost DIY Decorating Ideas For Your Baby Shower Party homesthetics decor ideas (7)

    via ezzly.hubpages.com

    #7 Balloons and Colored Paper Used Creatively

    22 Insanely Cretive Low Cost DIY Decorating Ideas For Your Baby Shower Party homesthetics decor ideas (8)

    via: em-il-ie.com

    #8 Extremely Cute Balloon Pacifiers Filled With Smaller Balloons

    22 Insanely Cretive Low Cost DIY Decorating Ideas For Your Baby Shower Party homesthetics decor ideas (9)

    via prazdnikof.kiev.ua

    #9 Colorful Shower Composition With Balloons and Crepe Paper

    22 Insanely Cretive Low Cost DIY Decorating Ideas For Your Baby Shower Party homesthetics decor ideas (10)

    via mywisemom.com

    #10 Timeless Vintage Themed Baby Shower Décor

    22 Insanely Cretive Low Cost DIY Decorating Ideas For Your Baby Shower Party homesthetics decor ideas (11)

    via koyalwholesale.com

    #11 Mint Green and Pink Dotted In a Creative Welcome Message

    22 Insanely Cretive Low Cost DIY Decorating Ideas For Your Baby Shower Party homesthetics decor ideas (12)

    via etsy.com

    #12 Umbrella Protecting The Gifts From Paper Water Drops

    22 Insanely Cretive Low Cost DIY Decorating Ideas For Your Baby Shower Party homesthetics decor ideas (13)

    via fakecrab.blogspot.com

    #13 Flower Diaper Bouquet

    22 Insanely Cretive Low Cost DIY Decorating Ideas For Your Baby Shower Party homesthetics decor ideas (14)

    Tutorial @ frugalfanatic.com

    #14 Colorful Decorations for a Joyful Baby Shower Party

    22 Insanely Cretive Low Cost DIY Decorating Ideas For Your Baby Shower Party homesthetics decor ideas (15)

    via foundrentals.com

    #15 Gifts Can and Should Wear Ornaments as Well

    22 Insanely Cretive Low Cost DIY Decorating Ideas For Your Baby Shower Party homesthetics decor ideas (16)

    via honeydewevents.wordpress.com

    #16 Small Baby Socks Clothesline

    22 Insanely Cretive Low Cost DIY Decorating Ideas For Your Baby Shower Party homesthetics decor ideas (17)

    via interiorr-design.blogspot.com

    #17 Diapers and Paper Flower Centerpiece

    22 Insanely Cretive Low Cost DIY Decorating Ideas For Your Baby Shower Party homesthetics decor ideas (18)

    via chaimommas.com

    #18 Pink Water Drops and White Balloons in Creative Ornament

    22 Insanely Cretive Low Cost DIY Decorating Ideas For Your Baby Shower Party homesthetics decor ideas (19)

    via polishedeventdesign.com

    #19 Simple to Realize Pom Pom Decorations

    22 Insanely Cretive Low Cost DIY Decorating Ideas For Your Baby Shower Party homesthetics decor ideas (20)

    via muslinandmerlot.blogspot.ie

    #20 Tiny Tiny Footprint Banner

    22 Insanely Cretive Low Cost DIY Decorating Ideas For Your Baby Shower Party homesthetics decor ideas (21)

    via etsy.com

    #21  Small Clothes on Clothesline in Vintage Decor

    22 Insanely Cretive Low Cost DIY Decorating Ideas For Your Baby Shower Party homesthetics decor ideas (22)

    via diyshowoff.com

    #22 Multiple Colorful Elements in a Real Special Organization

    22 Insanely Cretive Low Cost DIY Decorating Ideas For Your Baby Shower Party homesthetics decor ideas (23)

    via frostedpetticoatblog.com

    We would love to hear your opinion on these simply extraordinary crafts in the comment section below. This is a very special moment that will mark the end of one short journey and beginning of an endless joyful one full of happiness.

    Related Article

    57 Tea Party Decoration Ideas for a Delightful Event

    In the constantly changing and raging rental market, finding the right apartment for your needs, budget, and taste has become quite difficult. Keeping up with trends is another issue young people usually want to take into consideration. Location is crucial as well as internal layout and available space and possibilities of organizing that space in a functional and aesthetically pleasing manner.

    A common misunderstanding appears in this context, the difference between a studio apartment and one bedroom, regarding the issue of footprint and, implicit, budget. Both of the options are highly sought for youngsters and young starting families, thus a clarification of the two terms is in order for an acknowledged purchase or documentation.

    What Is The Difference Between Studio Apartment and One Bedroom-homesthetics (1)

    Although the difference is one that most consider quite small and mundane, these interchangeable types of apartments have one vital distinction. A one-bedroom apartment or a single as it is most often referred to consists of a living room, a kitchen, a bathroom, and a separate bedroom, with or without a balcony or terrace. The space allocated to this type of apartment varies from zone to zone and extra features will add more to the necessary budget for renting or purchase of such a space. As design is concerned, here the possibilities are endless, depending on personal taste and chosen style.

    What Is The Difference Between Studio Apartment and One Bedroom-homesthetics (3)

    A light Scandinavian theme can fit even the smallest one-bedroom, allowing natural light to flow in and visually connect and amplify the spaces.

    What Is The Difference Between Studio Apartment and One Bedroom-homesthetics (2)

    A studio apartment whatsoever is composed of a single large room with an open kitchen and an enclosed bathroom. It is a single unit, with an open plan layout where the entire daily activities are accommodated: living, dining, cooking, studying, and sleeping. This is usually considered a disadvantage, making renting fees smaller than the ones allocated to a one-bedroom and the inhabitants are usually students or single individuals who spend most of their time at the office and make use of the studio for sleeping arrangements alone. The advantage of a studio apartment lies in the versatility it offers in terms of available organizational possibilities and design options. Partitions are often used, in the form of actual walls that divide the space, usually the bedroom area for intimacy or as transparent movable walls made from almost anything from wood, glass, rope, or even rice paper with an Asian inspiration. Storage space issues might occur, although when confronted with a smaller space people usually tend to be more careful about the tendency of overcrowding the space, limiting their purchases, and investing in smart creative, usually hidden, storage options. There is also the option of a large studio, usually found on the upper floors of apartment buildings, with rather high price tags and an overall worn-out, industrial-style appeal, preferred by local artists and designers. Such a space will most definitely increase the monthly bills in comparison with the simple, classical, one-room studio apartment and whereas the one-bedroom offers you more space and made a tad more comfortable, a studio apartment comes cheaper.

    What Is The Difference Between Studio Apartment and One Bedroom-homesthetics (2)

    When the layout allows it, one can fit both a bed and a couch in a studio apartment. The kitchen area can be left open to communicate visually with the living area created.

    What Is The Difference Between Studio Apartment and One Bedroom-homesthetics (1)

    A glass partition can define the bedroom space as a physical and mental limit although not a visible one. The above example features an enclosed closet space and an open kitchen in direct relation to the dining and living space.

    In the context of acoustics, one-bedroom apartments often provide better sound insulation compared to studio apartments, as the separate bedroom is enclosed by walls. Conversely, studio apartments have an open-plan layout, causing the sound to travel more freely between areas like the living room, kitchen, and sleeping space.

    To improve acoustics and mitigate noise disturbances in small apartments, here are three non-invasive, rental-appropriate solutions:

    1. Acoustic Panels: Decorative, lightweight panels that absorb sound and prevent echoes. Available in various designs and materials, like foam or fabric.

    2. Soft Furnishings: Rugs, curtains, and upholstered furniture to reduce noise and improve overall comfort. A thick area rug can minimize footsteps noise and act as a floor insulator.

    3. Modular Room Dividers: As discussed in our 30 Room Dividers Perfect for a Studio Apartment article, certain room dividers can help diffuse sound and serve as visual barriers between functional areas.

    homesthetics.ney difference between studio apartment and one bedroom

    Considering the above-mentioned difference which of the two, studio apartments or one-bedroom would you choose if you were to purchase one? Feel free to share your input in the comment section below.

    Related Articles

    29 Brilliant Easy-to-Build DIY Platform Bed

    33 Simply Brilliant Cheap DIY Nightstand Ideas


    Having the best refrigerator or freezer doesn't always have to be about having a lot of space - it's about being smart and creative with your storage.

    To help you maximize your storage and make sure everything looks neat, organized, and easily accessible, here are some fridge organization ideas to consider.

    Refrigerator Organization Ideas for a Tidier and More Functional Fridge

    Refrigerator Organization Ideas for a Tidier and More Functional Fridge
    © Homesthetics - Monica Hewitt

    Keeping your fridge organized is easy as long as you know where to start. 

    With the help of a few refrigerator organization ideas, you'll have a picture-perfect fridge right after.

    1. Store Items in Clear Containers

    Refrigerator organization is made easy with the use of clear containers! Not only can you easily identify what's inside, but it also helps preserve food's freshness.

    All you need to do is place items in these and voila - you're done!

    No need to open lids or remove from the fridge; all that needs to be done is viewing from outside.

    What could be easier?

    Plus, all those containers on the top shelf keep everything in plain sight - no more hunting around for something specific.

    2. Use Reusable Storage Bags

    Are you looking for a convenient way to store foods safely in the freezer? Try out reusable silicone storage bags!

    Not only can you avoid bulky packaging, but these are ideal solutions for freezing meat, veggies, and leftovers.

    All you need to do is fill up the bag with your desired food items and seal it tightly before storing it in your fridge drawers.

    When finished, just wash and dry them so they are ready to be used again.

    Start replacing traditional methods of storage with more efficient ones that provide great convenience.

    3. Remove Food Items From Their Original Box

    Your cake and pizza boxes are taking up a lot of room on your refrigerator's top shelf. Worse, it blocks you from accessing all other items because of their size. 

    Consider removing them from the original box and transferring it to containers instead. This is a very straightforward fridge organization tip you need to remember.

    We highly recommend this tip, especially if you only have a few slices of cake or pizza left. 

    4. Keep Items You’re Constantly Grabbing Close

    Make sure to put your most used items at the front of your fridge so you can easily pull them out. 

    You don't have to worry about digging around for them, considering the number of times you need to use them. You can even put a lazy susan for more convenience. 

    Placing it on your door compartments will also help, especially for soda cans, salad dressings, and milk! 

    5. Separate Foodstuffs by Type

    Always organize your fridge based on the food type. As much as possible, you want to separate your raw meat from the leafy greens to prevent contamination. 

    Doing this also ensures that your fridge drawers stay organized at all times. It gives you easy access to your ingredients without too much effort! 

    Make sure to use drawer organizers or storage containers. Having a separate drawer for each food item helps you sort better.

    6. Create Zones for Different Food Groups

    If you've got a large refrigerator, creating a zone for each food type is one of the first few things you can do. 

    This fun activity ensures all your drawer space is properly utilized. We recommend creating five zones in your fridge, which we've listed below. 

    Fruits and Veggies

    Fruits and veggies should be placed in a crisper drawer to maintain their freshness. 

    If you don't have crisper drawers, you can store them in the bottom shelf drawers of your fridge. Just make sure to wrap it in a clean plastic bag or container. 

    Leftovers

    Put your leftovers on the upper shelves of your refrigerator, or at least at eye level. This ensures you remember all about them and don't end up with a lot of food waste. 

    We usually forget about our leftovers, especially those piled at the back of the fridge. 

    Meat

    You must always store meat on the lowest shelf of your refrigerator or in the freezer. The goal is to prevent any of its liquids from contaminating other foods. 

    Ensure all your meats are stored in storage containers and stored properly in the fridge. 

    Condiments

    You can store condiments on shelves of your refrigerator door. Since they don't expire easily, placing them in the warm part of the fridge is okay. 

    You can put your favorite condiments like hot sauce, maple syrup, salad dressing, and all other extra condiments in one place. 

    Drinks

    You should place drinks in either the most accessible or coldest portion of your refrigerator. If you always want cold drinks, keep them on the bottom shelf. 

    But if you're after accessibility, you can store your drinks in the fridge door or on the middle shelves. 

    7. Learn How to Store Produce and Herbs

    If you are fond of storing fresh herbs and produce, you should know how to store them properly. This helps you keep them fresh at all times! 

    We recommend wrapping your herbs in beeswax wrap or paper towels to keep them fresh. You can also place them inside mason jars if they're already dry. 

    We recommend putting your produce inside a plastic wrap and storing them inside your fridge's crisper drawers. 

    8. Adjust the Shelving According to Your Needs

    We all have different needs and uses for our fridges. Make sure to devise a plan to help you maximize its use!

    Here are some of our favorite ideas we'd love to share. 

    Divide Bigger Areas Into Smaller Parts

    Utilize all the vertical space in your fridge, especially if it's big. Divide it into smaller parts to ensure every space is used accordingly. 

    You can use fridge organization bins or drawer dividers to help you get started. You can also put on a lazy susan if you want!

    Consider Two-Tier Organizers

    Two-tier organizers are a lifesaver because it lets us utilize the vertical space inside our fridge. 

    It's perfect for storing all our canned drinks in one area, ensuring they don't look cluttered. This gives us more space for other food items!

    Try Narrow Fridge Bins

    We love fridge bins because of how good they look inside our fridge. Everything looks much more organized when you use storage bins. 

    You can categorize nearly everything, such as bell peppers, eggs, and drinks. 

    Get Stackable Drawers

    There are a bunch of stackable bins out there that are a perfect solution for fridge organization ideas. You can pile them on each other and use all the space. 

    We love stackable drawers because we can have a full fridge! Your refrigerator can look like a picture from an Architectural Digest magazine.

    9. Place Nearly-Expired Food at the Front of the Fridge

    Always check the expiration date of your food items. As much as possible, items close to expiration must be placed in the front

    This ensures you consume them and don't end up with a ton of waste. You can do this to your highly perishable items like sour cream and other dairy products. 

    You can put all your other items at the back of the fridge, especially if their expiry is still very far away. 

    10. Label Everything

    Labeling is one of our favorite refrigerator organization ideas out there. It's a fun activity that requires little effort

    We recommend using a label maker, so all your labels look the same. You can be as creative as you want with them! Using dry markers works just as well. 

    This will make your fridge easier to navigate without all the effort. You can even label the contents of your kitchen cabinets if you want! 

    11. Use Shelf Liners

    If you aren't using shelf liners for your fridge bins yet, you're missing out on a lot. It's one of the things you can use to keep a well-organized fridge. 

    We love how shelf liners keep all liquids and dirt away from the bottom of our shelves. All we have to do is slide them out of place and rinse! 

    It also ensures that the bottom of our shelf doesn't get damaged and scratched quickly, thanks to its toughness. 

    12. Keep Your Refrigerator Smelling Fresh

    Finally, ensure your fridge always smells fresh no matter how much and what you put in it. You don't want the smell to overwhelm you when you open your fridge door. 

    To fight against any nasty smells, we've listed some of our favorite tips you can try out. 

    Clean Your Fridge

    Make sure to establish a cleaning schedule for your fridge. This ensures you are on top of your refrigerator organization and only retain the essential items. 

    Wipe down your fridge using warm and soapy water. Be thorough with it by making sure you wipe all the fridge shelves. Do the same for the outside of your fridge, including the refrigerator door. 

    Pay Attention to the Temperature

    Ensure your refrigerator is running based on the recommended temperature setting by the manufacturer. 

    Keep your fridge in a low humidity setting to keep your produce fresh. It also helps chill your water bottles and deli meat while they're not in use. 

    Store Food Properly

    We can't emphasize enough how important it is to know how to store your food properly. 

    There's no hard and fast rule to it, as long as you ensure you don't contaminate your food from one item to another. 

    Throw Out Rotten Food

    One of the major reasons your fridge could smell bad is because there is rotten food inside. Always list down the expiration dates to prevent this from happening! 

    A great refrigerator organization tip is to clear out your bins and shelves of any unused and expired items. 

    Use Natural Deodorizer

    Natural deodorizers are one of the best ways to eliminate any nasty smell inside your fridge. You'll have a fresh-smelling fridge each time!

    Natural deodorizers ensure you don't put harmful chemicals inside your fridge that can contaminate your food. Here are some of our favorite deodorizers you can use:

    • Baking soda
    • Charcoal
    • Coffee beans
    • Lemon
    • Vinegar

    How Often Should I Clean the Fridge?

    Having a set schedule for cleaning your refrigerator helps keep it organized for the long haul

    Note

    The same applies to mini freezers.


    It's ideal to do a thorough deep-clean of your fridge every three to four months.

    The exact timeline really depends on what you are using your fridge for.

    If you're storing meats and other foods that easily spoil, then more frequent cleanings may be necessary in order to eliminate any potential bacteria or germs buildup.

    But if you mostly use it just to store containers, boxes, and such as milk cartons and frozen pizzas, then less regular scrubbing will probably suffice.

    Here are some tips on how best to cleanse your fridge.

    Tip 1: Stick to a Regular Cleaning Routine

    For a truly clean refrigerator, consistency is key. Setting a regular cleaning schedule and sticking to it can ensure your fridge is always in tip-top shape.

    Tip 2: Address Every Element of the Fridge

    From the shelves to the drawers and even the storage bin, make sure you are thorough in your approach. 

    Note

    Start with the upper shelf, followed by the drawer dividers.

    Don’t forget about wiping down the exterior of your fridge including its door and backside. Always be mindful when moving a refrigerator - safety first!

    Make sure one shelf is NOT left unattended.

    Tip 3: Reach for an All-Natural Cleaner

    When you clean your whole fridge, using an all-natural cleaner will guarantee that no harmful chemicals will come into contact with your food.

    Tip 4: Take Care of Spills Right Away

    If any messes or spills occur in the bins while stocking or reorganizing in the fridge alertly take care of them as soon as possible before they become solidified or dried up.

    Refrigerator organization ideas Conclusion
    © Homesthetics - Monica Hewitt

    Conclusion

    Now that you know the different refrigerator organization ideas, what else are you waiting for? It's time to get started to have your own organized fridge. 

    You don't have to worry about not having enough storage inside your refrigerator anymore. More importantly, you don't need to be a professional organizer. 

    We hope you enjoyed this article. Let us know below which of the fridge organization ideas we've mentioned is your favorite! 

    You can also check out the different freezer organization ideas in case your freezer also needs some organizing. 

    If you're looking to personally add an ice maker to your freezer, it can seem like a daunting task.

    But with the right steps and tools, it's doable!

    In this article, we'll walk you through the process. With a simple plug and pull of the necessary components, you're sure to enjoy ice-cold drinks all year round.

    Let's begin!

    How to Accomplish an Ice Maker Installation in 10 Steps

    How to Accomplish an Ice Maker Installation in 10 Steps
    © Homesthetics - Monica Hewitt

    Most modern refrigerators come with pre-installed ice makers, but you can purchase a kit from any home improvement store if yours doesn't come with an automatic ice maker.

    With some plumbing and electrical know-how, you can easily install the ice maker and enjoy its convenience!

    What You Need

    To install an ice maker in your freezer, ready the following items:

    • Ice maker kit
    • Power drill
    • 1/4-inch nut driver
    • Screwdriver
    • Adjustable wrench
    • Measuring tape
    • Pliers

    Step 1. Prepare the Area

    Before starting the installation, ensure that the refrigerator frame and the back wall where you will install the ice maker are clear and clean.

    Clear out any items from the freezer compartment and clean the area around the tube opening where it will be installed.

    Step 2. Gather the Necessary Materials

    Secure all the necessary materials, such as the ice maker kit, power drill, nut driver, screwdriver, adjustable wrench, measuring tape, and pliers.

    Select a kit that is compatible with your refrigerator model*. Make sure to choose one specifically designed for your refrigerator brand and model.

    Check the instruction manual in the ice maker kit to ensure you have all the necessary parts.

    Note

    The model number can usually be found in the user manual for your freezer or on the manufacturer's website.

    Step 3. Turn Off the Power and Water Supply

    Cut the electrical connection of the refrigerator before starting the installation process. This is for safety purposes to avoid any electrical hazards.

    Before installation, turn off the water supply to the freezer and refrigerator. This can be done by turning a water valve under the sink or near the main water supply line.

    If you're unsure which valve to turn off, deactivate the whole house water supply to be safe.

    Step 4. Install the Ice Maker

    Begin by locating the water inlet valve and the mounting holes.

    It is typically on the back of the refrigerator, near the bottom. It should have a small plastic or copper tube that runs from the water valve to the refrigerator.

    (You may need to mount it in a lower position of the refrigerator if it's a bottom freezer type.)

    Take the mounting screws included in the kit and attach them to mounting holes in the freezer wall. Use the nut driver to tighten them enough to hold them in place.

    Step 5. Connect the Water Supply

    Next, you will need to connect the water supply. This involves attaching the water supply line to the water inlet valve at the back of the refrigerator.

    Take the compression nut and sleeve from the kit and slide them over the water supply line. Then, insert the line into the valve and tighten the nut using the adjustable wrench.

    Alternatively, saddle valves can tap into the cold water pipe under the sink or near the refrigerator. Follow the instructions in the kit to attach the water supply line to the valve.

    Be sure to use a nut driver to tighten the compression fitting on the water valve, but don't over-tighten it, as this can damage the fitting.

    Step 6: Run the Water Line

    To run the water line, you must drill a hole in the side of the cabinet or the floor behind the refrigerator. This is so the water inlet tube can go through the correct "wall."

    Measure the distance from the valve to the hole and add a few extra inches for slack. Cut the tubing to the appropriate length and attach it to the valve using compression fittings.

    Pull the tubing through the hole and connect it to the ice maker using the compression nut and sleeve.

    Attach the water inlet tube to the back of the refrigerator by inserting it into the tube opening and securing it with a compression nut. Next, wiring harnesses need to be attached.

    Connect the wiring harness with caution! Plug the wiring harness from the ice maker assembly into the wire harness opening on the back of the refrigerator.

    If your refrigerator doesn't have an opening for a wiring harness, you may need to remove the plastic cover to access the wiring.

    Step 7: Attach the Fill Tube

    Attach the fill tube to the back of the ice maker. Use pliers to adjust the tube to the proper height and secure it with the mounting screws.

    Make sure the water inlet tube is inserted into the fill cup and that it is properly aligned.

    Step 8: Connect the Power Cord

    Plug the ice maker's power cord into an electrical or wall outlet.

    Make sure the electrical connection is grounded correctly and that it is not damaged.

    Step 9: Turn on the Water Supply

    Turn on the water supply valve and check for leaks.

    If you notice any leaks, tighten the connections or adjust the tubing until the leaks stop.

    Step 10: Level the Ice Maker

    Finally, level the ice maker using the leveling bracket included in the kit. Adjust the bracket until level, and secure it with the mounting screws.

    Fill the fill cup with water to test. Wait a few hours to see if the ice maker produces ice cubes. If it does, you have successfully installed it.

    What Are Ice Makers?
    © Homesthetics - Monica Hewitt

    What Are Ice Makers?

    Ice makers are devices installed in a freezer to produce ice automatically.

    They are connected to the water supply line through a water inlet valve, usually located behind the refrigerator.

    The ice maker consists of a fill tube, an inlet tube, and a valve controlling the water flow.

    The installation involves mounting screws to secure it to the freezer wall and connecting the water supply line to the inlet tube using a compression nut.

    Once installed, it automatically fills the tray with water and freezes it, creating ice that can be accessed through the refrigerator pull.

    Why Should You Install an Ice Maker Kit in Your Refrigerator?

    If you choose to install this device, it can offer lots of benefits which include:

    • It provides a convenient and reliable source of ice that can be accessed from the refrigerator pull without having to refill trays constantly.
    • It also frees up freezer compartment space that these trays would otherwise take up.
    • It is connected directly to the water supply line, so there's no need to constantly refill a water source.

    We think it's a great addition to current refrigerators and makes entertaining guests a breeze.

    If you need reliable recommendations for the best refrigerators and the best mini freezers, hit the links!

    What Are Good Ice Maker Kits to Get?

    When it comes to adding an ice maker to your freezer, the right gear can make all the difference!

    There are many factors to consider, from selecting the appropriate tube and pipe sizes to finding the proper pull, hole, and plug placement.

    We'll break down a quick guide on choosing the perfect ice maker for your needs.

    Selecting an Ice Maker

    Keep these in mind when making your purchase decision:

    • Compatibility with your freezer or refrigerator. Ensure your freezer or refrigerator is compatible with the device.
    • Freezer size. Consider the size of your freezer compartment to determine if it will fit.
    • Production capacity: Check the production capacity to see if it can meet your needs.
    • Water connection. Look at how it connects to the water supply line, whether through a saddle valve, water inlet tube, or water line.
    • Mounting materials. Verify that it comes with all necessary mounting screws, plastic plugs, etc., and is secured with a hygienic plastic cover.
    • Ease of installation. Consider how easy it is to install and whether special tools, such as compression fittings or a leveling bracket, are needed or included.
    • Water supply valve or water valve. Ensure that a water supply valve or a water valve can access a cold water pipe.
    • Fill tube. Check if it comes with a fill tube to deliver water.

    How Much Does It Cost to Hook up an Ice Maker on a Refrigerator?

    Generally, the cost to install a basic ice maker ranges from $150 to $500, but it can vary depending on several factors, such as:

    • The device's price can depend on the brand and model chosen.
    • The overall cost can be higher if the necessary water line and supply line are not already in place.
    • In some cases, to install, it may be necessary to purchase additional mounting screws, a leveling bracket, and a water inlet to accommodate the device.

    It's important to factor in any required tubing, line, and plug costs.

    Remember that you may need to drill holes into your cabinetry to install the ice-making device.

    Need help maintaining or troubleshooting your refrigerator setup? Check out these helpful guides: How to Fix a Refrigerator Light That Won't Come On | Baking Soda in the Refrigerator

    Install An Ice Maker In A Refrigerator FAQs

  • You can easily enjoy cold beverages with just the plug and a pull of an automatic ice-making device! Here’s more information regarding installations:

  • Can I Add an Ice Maker to My Refrigerator?

    To determine if you can add one to your refrigerator, you need to check its compatibility with your water line, tubing, leveling bracket, appropriate holes and valve, and freezer space.

    If these features are present, installing an ice maker is possible.

    However, it may not be the best option if your refrigerator lacks these components. We recommend consulting the manufacturer’s guidelines or seeking professional advice!

  • Do You Need a Plumber to Install a Fridge With Ice Maker?

    It depends on your experience and comfort level with plumbing.

    It’s essential to ensure the tube, hole, pipe, and plug connections are secure to prevent leaks. You may not need a plumber if you feel confident in your ability to do this.

    However, if you’re unsure about the process or encounter any difficulties, hiring a plumber is best to avoid potential damage to the freezer or the water line.

  • How to Install an Ice Maker in a Refrigerator Conclusion
    © Homesthetics - Monica Hewitt

    Conclusion

    In conclusion, installing an ice maker in your freezer may seem daunting, but it's a simple process you can do!

    By following the steps outlined in this article and having the right tools and materials on hand, you can easily plug in your ice maker and enjoy refreshing ice in no time.

    Remember to take safety precautions and double-check your work to ensure everything is installed correctly.

    With a little effort, you'll have a functioning ice maker to make your life more convenient and enjoyable!

    Your refrigerator is a reliable and hard-run home appliance that can cause a disaster if it breaks down. Your food could go bad, and the repair bills can skyrocket depending on the issue.

    There is another way: you repairing refrigerator yourself! Many fridge issues can be fixed at home without calling a handyman.

    Our quick guide to DIY refrigerator repair can help you save money by fixing your refrigerator. All you need are a few tools and some free time.

    What Are the Issues Refrigerators Face, and How Do You Fix Them?

    What Are the Issues Refrigerators Face, and How Do You Fix Them?
    © Homesthetics - Monica Hewitt

    Now we'll cover how to repair a refrigerator without calling for the nearest handyman. Here is how to fix some of the most common refrigerator problems.

    Important!

    Before fixing anything, ensure your refrigerator is unplugged, and its capacitor is fully discharged. Check "How do I Discharge the Capacitor?" below for your own safety.

    Grab Your Tools

    Before we get to the refrigerator repair, you'll need the right tools. Grab these tools before you start.

    • Hair dryer
    • Flat-head or Phillips Head Screwdriver
    • Vacuum
    • Level
    • Brush
    • Putty Knife

    1. Refrigerator Is Leaking

    If you've got a leaking refrigerator, you can narrow your diagnosis to a few pesky parts. Let's start with the drain pan.

    Drain Pan

    Your fridge may leak onto your kitchen floor, making a big mess. Your fridge's drain pan (located at the bottom) is designed to catch this water, but it may have started overflowing.

    Carefully remove it and remove any collected water, then mix up a quick cleaning solution with warm water and mild soap. Wash the drain pan with soapy water.

    Remember to use a soft cloth for this stage. If your drain pan smells off, use bleach and warm water in a 1:10 ratio.

    Once you've finished cleaning, return the drain pan properly. If the drain pan's rusty or cracked, replace it.

    Door Gaskets

    Your fridge's door gaskets help create a seal that keeps the cold and warm air in, but old gaskets can leak.

    Go over your refrigerator doors for any leaks and dripping water. Once you've found a soggy gasket, clean the area around it and leave it be.

    You can also check if your door gaskets are working by slipping a dollar bill between the gasket and the fridge door, leaving a corner sticking out. Try pulling the bill out.

    If you feel resistance as you pull, then your gaskets are fine. However, if the bill falls out and the gaskets leak, replace your fridge's door gaskets.

    Avoid buying a universal gasket, and give the new gasket time to adjust to your fridge's door frame. Remember to test your freezer door gaskets too.

    Tip

    You can help your gasket conform to the fridge door frame with petroleum jelly. Massage it onto the gasket for better sealing.

    Will It Drain?

    Now it's time to inspect your defrost drain. Depending on your fridge's model, you may have to remove the back cover panel to get at it.

    Once exposed, use a hair dryer or hot water to melt any visible obstructions and ice pieces, then soak up the excess water with a sponge.

    Get a tube that fits neatly into the refrigerator drain and blow out any remaining bits and pieces.

    If none of the solutions above work tackle water leaks with this guide on how to fix leaking fridges.

    2. Refrigerator Is Too Loud

    It's normal for a perfectly-functional refrigerator to make noise while it's on, especially a very low hum. But if the noise starts getting irritating, it's time for refrigerator repair.

    Buzzing Noises

    You may notice your refrigerator buzzing at regular intervals. This is likely the ice maker filling up the ice tray with water.

    However, your refrigerator's ice maker may buzz because it's disconnected from the water supply.

    In that case, ensure you unplug the fridge first, then check the supply valve leading to the fridge. You'll likely find it underneath the kitchen sink.

    If your fridge has been removed from the water supply line, reconnect it.

    Reconnect the water line to the fridge and plug the fridge back in. Note that this cleaning trick can also be used for fridges with water dispensers.

    It’s Not Level

    Refrigerators are heavy appliances and can become uneven over time. This won't typically be an issue until you hear the compressor motor humming while the refrigerator is running.

    Remove the cover panel at the bottom of your fridge's legs if you hear that humming. Test whether the legs can be tightened manually, but you'll likely need a screwdriver or wrench.

    Check the screws on your fridge's legs and grab the matching same screwdriver to tighten them. Typically, turning the screws holding the legs clockwise will raise the refrigerator.

    Turning them counterclockwise will lower the fridge. As an additional test, open your refrigerator door and tighten the screws until the refrigerator door swings shut on its own.

    Grab your level and place it on the fridge to check its level.

    Dampen It

    An even fridge won't hum too loudly because the floor will dampen the noises, but an uneven fridge will freely transmit its humming.

    If your fridge is level but still humming up a storm, pick up some anti-vibration pads for its feet. Grab a friend to tilt the fridge slightly while you install the pads, and be careful.

    You can also purchase a thick foam mat and slip it underneath your fridge to soundproof it.

    Faulty Evaporator Fan

    Now it's time to check your freezer compartment. If you open it and hear strange noises, your evaporator fan motor is likely the culprit.

    Clear your freezer until the evaporator fan is visible, and unscrew it from its mounting bracket. Tighten the grommets and see if that stops the noise.

    If your evaporator fan motor is still noisy, it may be time for a new fan. Repeat the previous procedure and unscrew the old fan, then replace it.

    Busted Condenser Fan Motor

    Most refrigerators have a condenser fan, but it's not a given, so check your manufacturer's manual for more details on your refrigerator.

    Remove your fridge's rear access panel and get the vacuum. Give the condenser fan and motor a good once-over with the vacuum.

    Ensure the fan blades are undamaged and clean them out if so.

    Broken Compressor Motor

    In the worst-case scenario, a broken compressor motor is the cause of those nasty fridge noises.

    Replacing the part isn't worth it unless your fridge is still within the warranty period because of how vital the compressor is to a fridge's structure.

    Purchasing and installing a new compressor may match or exceed the price of a new fridge, especially if your model is 10 or more years old.

    Review the functional components, like the freezer and water dispenser, and whether you can salvage them. Otherwise, all we can suggest is getting a new refrigerator.

    3. Refrigerator or Freezer Is Not Cold Enough

    If your refrigerator isn't cooling properly, don't panic yet! Your area may have experienced a power outage, giving you a bad case of melted ice cream.

    Ensure your fridge is plugged in first. If your fridge's power cord has any signs of damage, unplug it and prepare to move your refrigerator's contents.

    Once that's done, it's time to check the fridge interior and condenser coils.

    Check Refrigerator Box

    We're not talking about the box your fridge came in, but the refrigerator's interior. This is a simpler fix, so we recommend doing this first.

    Some of the larger containers or items in your fridge can block the flow of cold air between your freezer and refrigerator.

    Most refrigerators are designed with hard-to-block air vents, but it still happens. Clear your fridge's air vents for better airflow.

    Condenser Coils

    Your condenser coils help provide the cold air and coolant that keeps your food fresh, but they can get clogged with dust and grime.

    Condenser coils typically look like large copper wires and are located either at the refrigerator's bottom, top, or back.

    Dirty condenser coils are inefficient and can hamper your fridge's interior temperatures. Unplug your refrigerator and vacuum around the coils.

    You want more airflow, but be careful while vacuuming; a broken condenser coil will require a professional's help!

    If you can reach them, regularly dust your condenser coils with a stiff brush to keep them at peak efficiency.

    4. Refrigerator Is Too Cold or Freezes Over

    Sometimes your refrigerator works too well, and ice buildup forms around your fridge door. Before trying any of these methods out, check the thermostat first.

    Someone may have accidentally changed the refrigerator temperature settings. Check the back of the freezer compartment for the thermostat and ensure it's working.

    Time for a New Thermostat

    However, if the thermostat is set to the correct temperature settings but isn't working, it's time to replace it.

    New thermostat installation is an advanced repair method, so we only recommend it if you've had previous experience fixing your refrigerator.

    1. Ensure your refrigerator is unplugged and the capacitor is discharged, then open the freezer's cooling compartment. You'll also have to get through a few assembly covers.
    2. Carefully remove the assembly cover; mind the wires attached to the refrigerator!
    3. Once you see the plastic capillary tube, you're looking at the thermostat. Take a photo of the wiring arrangement for the reassembly later.
    4. Pull the tube and wires out, and install the new thermostat. Remember to replace the one green ground wire, orange wire, and 2 black wires.
    5. Reassemble the unit. Don't forget the capillary tube and screws!

    Note

    Above is a sample wiring arrangement. Your thermostat's wiring may be different.

    Busted Damper

    Once you've unplugged the fridge, look between the cooling compartment and freezer for your refrigerator's damper. A stuck damper may cause your freezer issues.

    If you can move the damper, try to close it. Some refrigerators have automatic dampers, which can be removed, tested, or replaced if needed.

    5. Icemaker Issues

    Your refrigerator or freezer likely has a convenient ice maker, which can cause various issues. Here's how to get that ice maker up and to run again.

    No Ice

    If your icemaker's completely unproductive, you may have accidentally turned it off.

    Check whether the ice sensor arm is in the "off" position and flip it on to get some refreshing ice again.

    Strange Looking Ice Cubes

    Now you're sure the ice maker is on, but what if it's only making small misshapen cubes? It's time to check the inlet tubes behind the ice maker for blockages or frozen chunks of ice.

    Once you find any, use a hair dryer to melt any ice buildup. You'll know you've melted all the ice when the tube stops dripping water.

    Carefully reconnect the tubes and turn the ice maker on again.

    How Do I Discharge the Capacitor?
    © Homesthetics - Monica Hewitt

    How Do I Discharge the Capacitor?

    Before you can repair anything, you'll need to unplug your fridge and ensure it's safe to disassemble; for that, you'll need to discharge the fridge's capacitor.

    This step is necessary to ensure you aren't shocked by the fridge's capacitor.

    Check the manufacturer's manual for how to disassemble your fridge, and get the following tools:

    • 2 screwdrivers
    • 2 jumper cables with alligator clips
    • 1 20,000 ohms, 2-watt resistor.

    Connect one clip to one end of the resistor wire and the other end to a screwdriver, and repeat with the other screwdriver.

    Leave the capacitor on the ground and hold each screwdriver by its insulated handles.

    Hold each screwdriver to one terminal on the capacitor for a few seconds, then disassemble the refrigerator. You may need a putty knife to expose some interior components.

    What Should You Do if a Refrigerator Repair Goes Wrong?

    So your refrigerator repair didn't work? Don't worry, because you've still got options! Check whether you're still within your fridge's warranty period.

    If you are, then see if you can get a one-for-one replacement refrigerator. If this happens again, you may also want a backup mini-freezer to help you salvage more food.

    Check your current unit for the model number and order a replacement. Otherwise, you'll have to eat the expense and buy a new refrigerator.

    Once that's over, remember to take better care of your refrigerator. Knowing how to repair it is one thing, but regular maintenance can save you the trouble of repairing it!

    Repairing Refrigerators FAQs

  • Learn more about refrigerator repair here!

  • Can I Fix a Refrigerator Myself?

    Refrigerator repair is doable, even if the cause is a failure. If your refrigerator is older, it’ll likely be easier to repair yourself.

    That’s because the basic elements of a fridge are simpler to repair or replace, like the door gaskets. Likewise, a minor leak won’t give you much trouble.

    However, if your smart fridge has a malfunctioning touchscreen, get ready for a major expense because you’ll need to call a repairman or contact your fridge’s manufacturer.

  • What Is the Most Common Cause of Refrigerator Failure?

    Two of the most common refrigerator problems are overstuffing and compressor failure. All refrigerators have a maximum capacity for food, and going over this capacity can harm your fridge.

    Refer to your owner’s manual for your fridge’s capacity in cubic feet, and remember to include the weight of your containers.

    Then there’s the fridge compressor, which pumps refrigerant throughout the system. Compressors can overheat and fail, especially if your refrigerator is over 10 years old.

  • What’s the First Thing to Check When the Refrigerator Stops Working?

    Some refrigerator issues are easy to spot, like if the whole unit suddenly stops working. Immediately check the power cord and ensure it’s fully plugged into the outlet.

    Inspect it for signs of visible damage, like severe kinks in the cord or exposed wire. If your refrigerator cord is damaged, leave it unplugged and order a replacement.

    In the meantime, move your perishable food items to a cooler and preserve them with some ice packs. Test the fridge’s outlet with another appliance in case the outlet is at fault.

  • DIY Guide to Repairing Refrigerators Conclusion
    © Homesthetics - Monica Hewitt

    Conclusion

    The only sounds you should hear from your fridge are the ice clattering from your ice maker and a soft humming. Anything else is a cause for concern.

    Fortunately, these DIY refrigerator repair tips should be able to handle most issues you run into and keep your food items nice and fresh.

    Contact a repairman if your fridge issues require disassembling the unit or replacing the compressor. Contact the professionals; don't risk your fridge!

    We've all experienced food spoilage in our refrigerators, no matter how careful we were. One of the most significant downsides of that is even when we remove the spoiled food, the stench still lingers.

    Worse still is that the odor left by expired food accumulates, so the longer you leave spoilage in the fridge, the more it'll start to smell.

    So how do you get rid of this stench, you may ask? Well, we present tips and tricks on removing those foul refrigerator odors to help you consume food that's fresh and keep your fridge smelling as it should.

    Getting Rid of Refrigerator Smells: 6 Sure-Fire Ways to Eliminate Odors

    Getting Rid of Refrigerator Smells
    © Homesthetics - Monica Hewitt

    Luckily for you, removing odors from your refrigerator and freezer is easy and doable. It doesn't require intense chemicals and can be done with natural products.

    Cleaning your fridge is quite a hassle for the first-timer, but over time you'll learn more conventional cleaning techniques.

    May this also serve as a reminder to assess your fridge weekly.

    Note

    If you're looking to upgrade your fridge to one with longer-lasting freshness, here's a ranking of the best refrigerators in the market.

    What You'll Need to Remove Refrigerator Odors

    Here are some key items you'll need to remove that foul-smelling odor from your fridge.

    1. Deodorizer

    These are essential when eliminating foul odors. They vary from baking soda to activated charcoal to coffee grounds.

    There are a lot of household items that can be used as deodorizers as long as you follow the specific instructions to do so.

    2. Sheet tray

    Having a container where you can put deodorizers in the fridge is a great way to eliminate the odors in your fridge effectively.

    You can use a cookie tray or a small bowl and perch it on the fridge's top shelf for maximum effect. Just remember to keep the door shut when doing so.

    3. Cloth or Sponge

    A damp sponge or a cleaning cloth is necessary when cleaning out your fridge. How else would you clean your fridge without a cloth or a sponge?

    4. Dish Soap

    Use soapy water to rinse away food residue and odor-causing bacteria. Also, avoid using hot water when cleaning glass shelves as they might break from the sudden temperature change.

    Steps to Remove Refrigerator Smells

    Now that you have what you need, here are steps that you should take when cleaning your refrigerator.

    Note

    These steps also work with your mini-freezer. Speaking of mini-freezers, here are the best mini-freezers on the market right now!

    1. Remove and Clean the Drip Pan

    The first step will be to remove the drip pan, which is a tray found in most refrigerators that collects the condensation your refrigerator makes when it's being used.

    Leaving an uncleaned drip pan can result in a puddle of foul-smelling water and may cause mold to form in your fridge.

    If you follow the manufacturer's instructions, then you should be able to remove the kick plate and rinse and clean it with a sponge and dish soap.

    2. Remove the Contents of the Fridge

    This step is obvious; you can't have anything in your fridge while cleaning it. Move your food out of the fridge, and if you have a second refrigerator available, then move it there.

    If you're looking for a new fridge, then we suggest a counter-depth refrigerator. Consider the pros and cons of a counter-depth refrigerator before buying one.

    3. Wipe the Fridge

    Wiping down the fridge and the shelves with a damp cloth will help relieve the refrigerator of food particles and foul odors.

    Be sure to use dish soap to remove those odor-causing bacteria found on the shelves, crisper drawers, and the door.

    4. Neutralize the Bad Smells

    You can use a variety of methods when getting rid of foul odors. You can use a bleach solution, vinegar solution, baking soda, coffee grounds, or activated charcoal.

    Make sure to have the door closed and keep it in the refrigerator overnight when doing this to keep your fridge smelling fresh.

    Bonus Tip

    You can use cotton balls soaked in vanilla extract, leaving a pleasant scent in your refrigerator.

    What Causes Fridge Odors?

    So what causes this foul fridge smell anyway? Well, when food starts to expire, it'll start to emit this funky odor that we perceive as foul.

    It'll start circulating the fridge walls and can stick to them, but once there are too many foul smells, then it'll keep circulating through the air inside the closed doors of the fridge until you open it.

    This can accumulate over time, so once you smell something pungent in the air, it's probably a sign to clean your fridge.

    What Materials Absorb Odors?

    With this knowledge about eliminating bad refrigerator smells, what are the best materials and ingredients you can use to absorb these bad smells?

    Here is a list of the best ingredients that you can use as an odor eliminator.

    1. Baking Soda

    Baking Soda

    Baking soda is a great ingredient to neutralize odors.

    You can spread the baking soda on a cookie sheet, or you can make a baking soda solution by mixing a gallon of warm water and a cup of baking soda.

    For further understanding, this is what happens when you put baking soda in the refrigerator.

    2. Vinegar

    Vinegar

    Source: Waltermart

    Vinegar is another alternative if you don't have baking soda. Simply mix a 50/50 solution of vinegar and water and put it in a spray bottle.

    3. Fresh Coffee Grounds

    Fresh Coffee Grounds

    Source: GrowVeg

    Coffee grounds are great when trying to get rid of the lingering foul odor smell. Simply leaving it in the fridge will best neutralize the smelly fridge odors.

    They are the most natural odor absorbers and leave a strong coffee smell instead.

    4. Activated Charcoal

    Activated Charcoal

    Source: Good Housekeeping

    Activated charcoal acts as a deodorizer and is very effective when trying to get rid of unpleasant smells from your fridge.

    The activated carbon in the charcoal acts like a sponge that absorbs the foul stench lingering in the air.

    You can make loose activated charcoal packets by putting them in cloth bags or a clean sock.

    How to Prevent Odors from Developing

    1. Store Your Goods Properly

    Food can get rotten faster if you don't store it properly. So use airtight containers to ensure your food can last longer in the fridge.

    2. Keep Tabs on Your Food

    When we have a lot of stored goods in our fridge, we forget that it even exists, and eventually, they will go past their expiration date.

    Label and date leftovers so that you won't forget that you need to consume the food before its expiration date.

    3. Set at the Proper Temperature

    Temperature plays a big role in the development of mold and bacteria growth. The optimal temperature to inhibit bacterial growth is around 37°F for fridges and 0°F for freezers.

    Remove Refrigerator Odor FAQs

  • Here are some frequently asked questions you may like to know when it comes to fridge cleaning.

  • How Do Deodorizers Work?

    Deodorizers work by taking the smelly molecules and changing their molecular structure, turning them into a substance that leaves no smell.

  • What’s Better, Baking Soda or Activated Charcoal?

    Baking soda is great because it is affordable and can be found in every kitchen. It changes the odor molecules into an odor-free state and is commonly used as a personal deodorant.

    Activated charcoal works best as it absorbs the foul odor as long as you spread it, utilizing a huge surface area.

    Both are great options, but if you’re on a budget, then your best bet is baking soda. But if you have money to spend, then pick the charcoal.

  • Remove Refrigerator Odors Conclusion
    © Homesthetics - Monica Hewitt

    Conclusion

    A clean refrigerator creates a healthy family and tasty food. Be sure to clean your fridge regularly to avoid the contamination of products inside your refrigerator.

    Hopefully, this handy guide has informed you about the tools and materials you need to use to clean your fridge.

    New York - an urban jungle brimming with life, color, and energy, is constantly evolving and presenting a dynamic landscape for artists to capture.

    From the iconic yellow cabs to the glittering skyscrapers, every corner of New York is a sight to behold. So, it’s no surprise that the diverse neighborhoods, rich history, and classic landmarks of NYC have inspired artists for ages, wouldn't that make it an extraordinary watercolor plein air painting?

    You are right!

    That said, among all other mediums, I believe the unique vibrancy of watercolors is ideal for capturing the essence of the city that never sleeps. In this step-by-step guide, I’ll take you through everything you need to know to create a stunning watercolor painting of the bustling streets in NYC in a simple, and beginner-friendly guide.

    So, grab your watercolors and brushes, and let’s get artsy!

    How To Paint New York In Watercolor


    First things first - you must have a set of watercolor paints and watercolor brushes that are comfortable enough for you to use throughout the process. You obviously don’t need to splurge on expensive art supplies, but it definitely helps to find something that works for you. Also, note that unlike some of my previous works, this painting requires quite a lot of colors, so I recommend investing in a set of at least 12 colors, you can learn more about the types of watercolor paints here but don't forget to mix colors to discover new shades and colors as you paint.

    That said, here’s a list of equipment I’ll be using for today’s artwork:

    Paint: Daniel Smith George Politis MA Set 1 6x5 | Paper: Saunders Waterford Watercolor Paper - White, 300gsm | Brush: Princeton Aqua Elite Professional 4 Piece Set 4850

    Step 1 - Sketch The Busy Street

    Sketch The Busy Street
    © Homesthetics - Dylla Setyadji

    As always, I’ll start today’s painting with a rough sketch. I’ll lightly sketch two cabs as the main subject of my composition. Notice how I’m adding details in the first step already? Well, that’s because, considering how busy the streets of NYC are, I think it’ll be best to draw every little detail right away. This will make coloring easier and prevent mistakes in the later steps. 

    Sketch The Busy Street
    © Homesthetics - Dylla Setyadji

    However, there’s no right or wrong way to sketch. I’m making it detailed today, but usually when I’m making natural landscapes, I stick to the basics and add details later. So, you can proceed according to your expertise and comfort level.

    Step 2 - Paint The Sky

    Paint The Sky
    © Homesthetics - Dylla Setyadji

    Before you paint, always remember to start with the largest area with no details in between. As such, I’ll start by painting the sky. Since it’s the first layer, I’ll use just a light flush of blue and keep the brush wet enough for the paint to spread seamlessly. But make sure the brush is not dripping wet unless you want the colors to bleed and the paper to tear, even with the proper watercolor paper.

    Just be slow and careful, and paint very lightly. You can always darken certain parts later. This will help you achieve a more realistic and lifelike look.

    Step 3 - Paint The Cabs

    Paint The Cabs
    © Homesthetics - Dylla Setyadji

    Coming to the star of the show - NYC’s signature yellow cabs! 

    Start with a light yellow layer and paint both the cabs, leaving the windows and headlights. Again, you can always build up the saturation later, so paint with very little pressure. Otherwise, you might end up painting over smaller areas that aren’t supposed to be yellow!

    Paint The Cabs
    © Homesthetics - Dylla Setyadji

    Similarly, paint the windows and tires too. I’m using brown, but you can opt for gray, black, or blue. Here, too, you can begin painting roughly and add more color later. As you can see, I’ve left some portions blank to mimic the effect of shiny mirrors reflecting the city lights. 

    Step 4 - Add Details

    Add Details
    © Homesthetics - Dylla Setyadji

    Now, switch to a smaller brush for the finer details, like the grille, bumper, headlights, etc. In this step, make sure your brush is not as wet as it was in the previous steps. This is because you’d want to paint more precisely now, and a dripping brush will only make things messy.

    Again, I’m using brown for a muted effect, but you can always use black or make the parts of the cab more realistic with metallic colors. Basically, feel free to experiment!

    With the same brush, I’ll also add some colorful details on the top of each cab. 

    Add Details
    © Homesthetics - Dylla Setyadji

    Thereafter, you can proceed to add some shading to the cab. Doing so will create more depth and dimension. Here, all you need to do is swipe a single line wherever you want the shadows to fall, and it’ll instantly bring your painting to life!

    Step 5 - Paint The Buildings

    Paint The Buildings
    © Homesthetics - Dylla Setyadji

    Next, I’ll paint the skyscrapers that make NYC dazzle from miles away. I’m going back to the thick brush I used for painting the first layer. 

    First, I’ll use gray and lightly paint the building in the center. Similarly, I’ll use other muted shades like lavender and brown for the rest of the buildings. I’d like to reiterate that you need not make any details right now. Simply block the general colors of each building to get the overall color scheme right.

    Step 6 - Add Windows And Other Details

    Add Windows And Other Details
    © Homesthetics - Dylla Setyadji

    Once the first layer of the building is completely dry, I’ll paint tiny windows, doors, and other architectural features on each. I’m experimenting with various shapes to add a bit of variety. 

    As you can see, I'm adding small horizontal windows to the gray building, while the lavender building is full of vertical windows. For the last building, I’m going to add some stripes, giving it a modern, curved look. 

    Add Windows And Other Details
    © Homesthetics - Dylla Setyadji

    So, you see, I’m simply adding different types of patterns to the buildings to make each of them look unique and stunning - just how it is in NYC!

    Step 7 - Paint The Billboard

    Paint The Billboard
    © Homesthetics - Dylla Setyadji

    Since the billboard has a lot of different details, I’ll continue using the thin brush to paint it, despite it being the first layer. Here, I’ll go all out with vibrant colors like green, blue, purple, red, and yellow. I’m adding various patterns to some parts and keeping the rest simple with just some swipes of paint. 

    Alternatively, you can add logos of popular brands or product pictures on the billboard. Or how about adding your own name instead of signing at the bottom of the painting? Well, the sky’s the limit when it comes to art, so don’t be afraid to paint what your heart pleases.

    Step 8 - Add Details To The Billboard

    Add Details To The Billboard
    © Homesthetics - Dylla Setyadji

    Now, I’m not an expert on billboards, so I definitely don’t know what I’m painting here! I’m simply relying on my memory and adding little details here and there to make the painting look more realistic. You could even check reference pictures on the internet to create a more accurate cityscape. 

    But for the purpose of this easy-to-follow guide, I’m not focusing on perfection. As long as it looks like a billboard, I’m good!

    Step 9 - Paint The Road

    Paint The Road
    © Homesthetics - Dylla Setyadji

    Of course, no cityscape is complete without the road, so I’m simply painting it with some brown watercolor. Again, you can use black, gray, or any suitable color. You could even paint a zebra crossing if you’re feeling creative!

    Step 10 - Add Finishing Touches

    Add Finishing Touches
    © Homesthetics - Dylla Setyadji

    Lastly, I’ll make a lamp post by the sidewalk, illuminating the already-glimmering streets of New York. And with that final touch - my rendition of NYC’s vivacious streets is ready. I can already hear the heavy traffic and smell some freshly baked bagels with cream cheese! 

    Add Finishing Touches
    © Homesthetics - Dylla Setyadji

    You could add more details to the composition, like some people crossing the road or an airplane far away in the sky. Simply continue to refine the painting, adding details and adjusting colors as needed until you are happy with the overall composition.

    Or, you could take a completely different route and paint the city in the evening or at night. For the former, I recommend changing the color of the sky to orange or pink and using muted colors for the rest of the composition for a mellow “evening” vibe. 

    On the other hand, the night scene in New York is absolutely fantastic. So, I recommend adding lots of lights all around the street and keeping the background pitch dark for a stunning contrast.

    Once the painting is complete, allow it to dry completely. I suggest adding a protective varnish or frame if it meets your expectations. If not, remember that painting is a process of trial and error. So, don't get discouraged if something doesn't turn out quite right. Just keep practicing and experimenting until you find what works best for you.

    Sum it up
    © Homesthetics - Dylla Setyadji

    To Sum Up

    Before I sign off, I want to encourage beginners to use a reference picture of New York. Besides checking the main subject and colors, pay attention to the direction of light in the reference image. This will help you create realistic shadows and highlights.

    Choosing the right materials can also help make the process a lot smoother and more rewarding. However, don’t be afraid to make mistakes! Trust the process, and don’t worry too much about the outcome, do exercise with other watercolor guides: How to Paint Amsterdam with Watercolor and How to Paint Berlin with Watercolor are great tutorials to try!

    With practice, patience, and perseverance, you'll soon be able to capture the vibrant energy and character of New York City in your watercolor paintings.

    A Pioneer mini-split heat pump costs more than a window air conditioner or portable unit, allowing you to alter the temperature in each room. But opt for a wall unit delivering high energy efficiency for a more budget-friendly option.

    Choosing a suitable air conditioner for your home that offers effective cooling but doesn’t incur high energy bills can be confusing. Moreover, you can’t afford to spend frequently on repairs and must opt for a reliable model backed by a warranty.

    When facing the same dilemma, I spent a bit more and got a Pioneer mini split unit. Today I will explain what it has to offer.

    Overview Of Pioneer Mini Split

    Overview Of Pioneer Mini Split

    As far as air conditioner brands go, Parker Davis HVAC Systems are among the most popular. Founded in 1995, the company is well-known for manufacturing high-quality heating, air conditioning, and cooling equipment that proves energy-efficient.

    One such unit is the Pioneer Mini Split system, available in three models -

    • Ductless 
    • Multi-zone mini split system
    • With duct

    Among these, the ducted model has 2 further variations, including a central split and ceiling concealed system. And within these 2 models, you will find six cooling capacity options, ranging from 9,000 to 48,000 British Thermal Units(BTU). These products even have a Seasonal Energy Efficiency Ratio(SEER) number, complete with an Inverter++ of 230V. 

    The multi-zone mini split system can be further classified into dual, triple, quad, and quid zone models with 4 cooling capacity options. You can choose any model with a cooling capacity ranging from 9,000 to 24,000 BTU, featuring an outdoor and indoor unit as component choices.

    Apart from these options, the ductless mini split system has 5-mounting variations, namely -

    • Ceiling cassette 
    • Wall-mounted WYT
    • Floor mounted
    • Wall mounted WYS
    • Floor-ceiling mounted

    Together, these ductless units have 7 cooling capacity options, starting from 9,000 BTU and going up to 48,000 BTU. You can choose from 2 SEER options - Inverter+ and Inverter++, available at 115V and 230V. 

    Along with these features and upgrades, every Pioneer Mini Split system comes with -

    • An indoor unit
    • An outdoor unit
    • Flare connection leak guard sealer
    • Wireless remote control

    Benefits Of The Pioneer Mini Split Unit

    After telling you about the different mini-split systems available, let me shortlist certain benefits of any Pioneer system.

    1. Environment-Friendly

    One of the best features of Pioneer mini splits is their eco-friendly performance, and they are more eco-friendly than other mini split systems or a window air conditioner. This is because they run on the R-410A refrigerant that doesn’t lead to ozone depletion while decreasing UV radiations on the Earth’s surface.

    2. Remote Control And Leak Detector

    Two of the most important accessories of the Pioneer mini split system are the inclusion of a remote and leak detector. You will find that these mini-split systems consist of a wire control and front desk feature complete with an infrared remote to turn on/off the air conditioner even from a distance.

    They also come with a refrigerant leak detector that automatically prevents leaks after discovering a leakage. This reduces the chances of damage and keeps the condenser safe.

    3. Anti-Cold Air Function

    The anti-cold air function of the Pioneer mini split system works well with several Pioneer mini splits equipped with different seer and mounting options. As a result, finding a suitable AC for your requirements becomes easier. 

    Disadvantages Of The Pioneer Mini Split System

    The price is one of the few downsides of the Pioneer mini split system. They cost more than other brands or window units, especially considering the installation charges. These units can only be installed by a professional due to their slightly complicated assembly instructions. 

    So, people on a tight budget would invariably think twice before bringing one of these mini-splits home. 

    Pioneer Mini Split Review: Overview Of Features

    Pioneer Mini Split Review: Overview Of Features

    To better explain the effectiveness and shortcomings of a Pioneer mini split system, I have narrowed down the essential aspects and looked at each point in detail.

    1. Energy Efficiency

    Any Pioneer HVAC system or mini split system guarantees efficient energy use with a high SEER rating of 16 to 19.5 and a high-quality compressor. Thanks to this rating, you can determine how much energy the unit will consume to manage your electricity expense better.

    The Pioneer mini split system also has a high energy efficiency ratio of 19. 

    2. Performance

    If you have a large room ranging between 200 and 500 square feet, opt for the mini split system with a 12,000 BTU pump. This will guarantee effective cooling and optimum performance with heating, ventilation, and air conditioning or dehumidification. 

    3. Durability

    One of the best parts about Pioneer mini split units is their high durability. The brand has used only the best parts to manufacture all components, including the outdoor unit, remote control, installation kit, and ductless inside unit. 

    4. Filtration

    Like most mini split models from Pioneer, the filters are easy to maintain as they are removable and washable. When you clean the filters after regular use, they prevent dust particles from hampering the longevity of the unit. Moreover, you can enjoy better performance with the turbo mode, provided you choose the right filter, as several options are available.

    5. Price 

    The cost of a Pioneer unit varies depending on the model you want to use. Mini split systems with a duct cost between $1,268 and $3,998, whereas the ductless models are priced around $798-$4,288. 

    The least costly option is multi-zone mini split units ranging from $298 to $778. However, you will have to pay more for additional accessories, like -

    • Optional filters
    • Condensate drain hose extension
    • Convertor adapters
    • Flare connection leak guard sealer
    • Programmable thermostat
    • Replacement remote controls
    • Wrapping tape
    • Piping kits
    • Drain hose extension

    The price for these upgrades varies from $0.99 to $134.99.

    6. Maintenance

    To keep the mini split system in top condition and ensure it performs at optimum capacity to deliver effective cooling, it’s essential to invest in proper maintenance and care of the unit. The first thing I do before cleaning mini-split systems is shut down the power and disconnect them from the circuit. 

    This reduces the chances of accidents, allowing me to check the vents for dust and debris. Cleaning the vents properly is important to prevent bacteria, germs, and allergens from breeding within the unit and affecting the air quality. 

    I also use a disinfectant kit with the air conditioner to guarantee healthy air circulates throughout the room. Along with that, always use a clean and damp cloth to wipe the outdoor window unit and filters. While cleaning them, check whether the filters and outdoor vents appear frayed or damaged to opt for timely repairs or replacements.

    Apart from these components, the pipes gather a lot of dust and dirt debris that you can remove with a commercial disinfectant. Use a clean cloth to remove all impurities and prevent blockages, mold, and mildew from the condensing unit. 

    Most importantly, keep all household furniture away from the line of the air vents for uninterrupted airflow. Do the same for the outdoor unit, installing it away from outdoor furniture for the best results.

    7. Installation

    Only an HVAC professional and technician can install your preferred mini split wall unit because the steps are complicated. DIY enthusiasts with knowledge of using an installation kit may be tempted to assemble the unit, but it would be wise not to. 

    From experience, I can tell you that following instructions is challenging, and improper assembly increases the chances of damage. Tech support will tell you only a licensed professional can check whether the indoor and outdoor units have the same capacity, voltage, and efficiency.

    Most importantly, always take professional assistance to identify the right location for installing the mini split system. This should ideally be some spot with proper air circulation, a firm base, and smooth drainage. As a rule, find a spot away from direct sunlight, obstructions, flammable items, and heat.

    8. Additional Benefits

    The brand provides a 5-year warranty for all its mini split systems, ensuring you can repair a unit without spending a fortune. Note that the warranty is active from the day of the installation and applies to commercial and residential air conditioning systems. I checked the brand website and found the warranty covers -

    • Diagnosis 
    • Removal 
    • Installation 
    • Repair and replacements
    • Costs of all supplies and materials required

    9. Value For Money

    All things considered, and after reading through the above factors, you can rest assured that Pioneer mini split systems are worth the investment. Although you might have to spend a bit extra compared to other window units, the high SEER rating, powerful cooling, variable speed mode, and positive reviews from other consumers make it worthwhile.

    Pioneer Mini-Split AC FAQs

  • How long do pioneer mini split systems last?

    There is no definite answer regarding how long a pioneer mini split system might last. But with proper care and reliable use, these systems can last for 10-15 years.

  • Does a mini split system run all the time?

    It’s important to ensure that a mini split system runs all the time because it uses less energy and maintains a consistent temperature, in such instances. Most importantly, there’s no need to turn the units on/off or adjust the temperature when you’re not at home, like with a central cooling and heating system having a thermostat.

  • Are pioneer mini split systems loud?

    Pioneer mini split models are among the quietest units available on the market, with an average noise emission of 32 decibels.

  • How much power does a pioneer mini split system use?

    On average a pioneer mini split system uses 600 watts of power. Some owners have noticed that the running cost of their units is less than 600 watts and around 560 watts. But this mostly depends on a person’s cooling needs and the same system may require 800 watts of power for effective cooling.

  • Why does my mini split system keep turning off?

    If your mini split system keeps turning off, there’s a problem with the unit. They are designed to run 24/7 but if the compressor excessively overheats, ductless mini split systems may shut off frequently. In some cases, older compressors are susceptible to breaking down and you will have to switch to a modern compressor to use the air conditioner at optimum capacity.

  • Pioneer Mini Split Conclusion

    Conclusion

    The Pioneer mini split is the best option for people looking for a high-quality unit that reduces environmental impact. You can also choose from numerous products based on the size of the apartment, energy-efficient performance, and your specific requirements.

    Moreover, with multi-zone systems, you can raise or lower the temperature in every room easily for greater versatility. These units are a fantastic alternative for other high-end air conditioners without compromising performance.

    And positive reviews from happy customers vouch for the same, so don’t hesitate to try them out!

    Related Articles

    10 Best Dual-Hose Portable Air Conditioners

    Best Portable Air Conditioner and Heater Combos

    How To Hide Your [AC] Air Conditioner Unit

    13 Quietest Portable Air Conditioners

    9 Best Ventless Portable Air Conditioners

    Zero Breeze Mark II Portable Air Conditioner

    How To Clean Air Conditioner Coils Properly

    Shinco YPL3-10C Reviewed

    Zero Breeze Mark II Portable Air Conditioner

    Coway AP-1512HH Mighty Air Purifier

    Can You Recharge A Window Air Conditioner

    SilverOnyx Air Purifier Review

    9 Best Personal Air Purifiers

    One of the most sought-after units available out there is the DeLonghi America PACAN120EW air conditioner. Although, this is a discontinued product, no longer available on the market.

    But is the hype surrounding this unit justified? This is one of the many questions we'll answer today, ensuring that you have all the facts to decide for yourself. 

    It's true that the designers have added several quality functions, making this model a top choice for most people. For instance, it comes with an innovative whisper mode for noise reduction, a user-friendly interface, and a powerful filter for removing impurities. 

    However, that's not to say it doesn't need improvement. So, we've tried to highlight all these aspects in our guide, discussing why it's popular, while highlighting the areas that could be concerning for potential buyers. 

    We've also broken down this guide into different sections; all you need to do is note these points for future reference. Without further ado, let's begin. 

    DeLonghi America PACAN120EW Review

    Heating cooling system isometric icons set of different elements in flat style isolated vector illustration

    De'Longhi PACAN120EW 3-in-1 Portable Air Conditioner,...
    • POWERFUL YET QUIET: Cool rooms up to 450 square feet in...
    • SAVE ENERGY, COOL THE ROOM YOU’RE IN: By cooling only the...

    Why Buy This Product? 

    We'll begin by discussing the positive features of this model, making it stand out in the market. For your benefit, we've narrowed down the essential attributes in a point format to ensure a better understanding. 

    1. Powerful Cooling Capacity

    The most striking aspect of this unit is its powerful cooling capacity, giving it an edge over other models. You'll see it has a total capacity of 12,000 BTU, one of the highest going around. So, let's take a closer look at how it manages to cool the air. 

    We found that this device captures moisture from the air and recirculates it back to cool your office or home. To do so, it dehumidifies and cools the air simultaneously by removing 54.95 pints of moisture daily. As a result, this air conditioner is suitable for places with humid climates. 

    1. Dehumidifier

    Now, users may choose to operate only the dehumidifier, having several benefits. When used without air-cooling, this machine removes more moisture, around 86.65 pints of moisture-laden air daily. Hence, it makes your home more inhabitable throughout the changing seasons, making you feel comfortable.

    1. BioSilver Air Filter

    Another fantastic upgrade is the inclusion of a BioSilver air filter. This ensures that the DeLonghi America PACAN120EW removes bacteria, dust and traps pollen along with moisture. As a result, the air inside your home will be cool and clean, meaning it's perfect for users who have dust allergies and breathing issues. 

    1. User-friendly

    The designers have included a remote control for managing its different functions. This proves particularly useful for both youngsters and older people, meaning they won't have to walk to the unit. Instead, they can operate the air conditioner by adjusting the temperature, power, and dust removal function from any convenient spot.

    1. Portable

    We loved the inclusion of castor wheels, meaning you can position it in any suitable spot. In that regard, its lightweight design proves useful as you don't need to use much energy to push it around. Plus, these castor wheels are durable and they won't wear out after regular use. 

    1. Energy-Efficient

    A significant advantage of using the DeLonghi America PACAN120EW is its energy efficiency. You can control the power without compromising on performance, thereby keeping electricity consumption to a minimum. Hence, it delivers a longer runtime without any hassle. 

    1. Window Venting Kit

    Other than that, the engineers have also included a window venting kit for easy installation in most standard windows. It comes with the necessary instructions, allowing you to assemble the components in the correct order. Once fitted, you can consistently maintain the indoor conditions of your room. 

    Additionally, you can make customizations, which highlights its efficiency, making this unit suitable for most homes. 

    1. Whisper Mode

    Now, it's well-established that most air conditioners produce a sound when turned on. So, the engineers of the DeLonghi America PACAN120EW have developed a whisper mode, ensuring that there's no irritating sound. 

    Overall, even when used at full blast, this model has a low decibel rating of 53. Additionally, the whisper mode reduces noise emission by half. But how exactly does it work? 

    You can activate the whisper mode at the touch of a button, which changes the fan's settings for more efficient output. In spite of that, this air condition manages to remove a large amount of air, comparable to a high-fan setting, with reduced noise emission. 

    We must mention that you shouldn't start the device in this mode. Instead, for the best results, allow it to cool the room to the desired temperature before switching to the whisper mode. 

    1. Temperature Indicator

    Users will love its display screen as the designers have used three colors to highlight the different settings. Apart from looking attractive, all colors have a specific purpose, delivering the best user experience. Therefore, when you set the desired room temperature, it displays the setting in one color. 

    As the room temperature comes down, approaching the desired value, a second light pops up, highlighting its progress. Finally, when your room is at the correct temperature, a third light helps display the results. In this way, you remain informed about the performance while it ensures easy viewing from across the room. 

    1. Real Feel

    We must now discuss its real feel function, delivering the best indoor conditions. It helps balance the ideal humidity level with your desired temperature setting, meaning you won't feel uncomfortable in any room. 

    This feature comes in handy throughout the year and helps first-time users find the right setting. Long story short, if you're unsure about the cooling capacity value for any room, enable the real feel function for the ideal atmospheric conditions.  

    1. Sturdiness

    Finally, this is a durable unit capable of delivering long-lasting performance. We assure you it will be worth the investment, allowing users to enjoy its reliable output in all conditions. 

    What Could've Been Better? 

    Now, it's time to look at the areas which need improvement. Firstly, some users have felt that the price of the DeLonghi America PACAN120EW is a bit steep, leading to second thoughts about the purchase. Having said that, you must realize that this is a quality unit, and you need to have a flexible budget for buying top products. 

    Other than that, it's slightly bulky, which is an inconvenience. While you won't face difficulty moving it across the floor, it can be tiring to take this air conditioner upstairs or downstairs. Therefore, if you're looking for a lightweight model, it would be best to consider other options. 

    Moreover, if you have horizontal windows, it might be difficult to install this unit; you’ll need to talk to the supplier before making a decision. While it fits into vertical windows without any hassle, modifications are a must to mount it on horizontal windows. 


    Pros

    • Cooling capacity of 12,000 BTU
    • Whisper mode for greater comfort
    • User-friendly interface complete with remote control
    • BioSilver air filter for removing impurities
    • Temperature indicator with triple color display


    Cons

    • May not fit in vertical windows
    • Slightly pricey


    DeLonghi America PACAN120EW Buyer's Guide

    It's time to progress to our buyer's guide, where we'll be discussing other important factors you need to consider before making the purchase. Although we've covered most of the attributes in the previous two sections, you can note the following points for better understanding. 

    1. Versatility

    Before buying an air conditioner, you need to look at its versatility. Due to rising temperatures and global warming, the best models no longer focus on just cooling but improve the quality of life. Be it summer, winter, or monsoon, your air conditioner must be capable of dealing with the changing seasons while proving eco-friendly. 

    1. Price

    Another essential factor for buyers is the price, and you need to be flexible with your budget to make the correct purchase. Premium-quality units usually cost more due to their all-round coverage and better functions. 

    It would be best to spend a few extra bucks and not compromise on performance. Buying an air conditioner is an investment and choosing a slightly pricey yet reliable model ensures that it delivers consistent output for a long time. 

    1. Ease Of Use

    Modern air conditioners must be user-friendly for older people and youngsters to understand the functions. We've seen how the DeLonghi America PACAN120EW has an uncomplicated interface to help users manage its different features. 

    Moreover, the designers must detail all the instructions clearly with the help of diagrams so that you can operate it without any hassle. 

    1. Durability

    Lastly, irrespective of your choice, an air conditioner must be durable to withstand regular use. It takes time to lower indoor temperatures in extreme heat while the components must hold up well for long-lasting performance. In that regard, the designers need to remember that air conditioners must be capable of consistent cooling. 

    Fortunately, the DeLonghi America PACAN120EW has the necessary sturdiness, guaranteeing reliable output. It won't wear out easily, plus its innovative filter mechanism helps lower maintenance. 

    Conditioner icon set. Isometric set of conditioner vector icons for web design isolated on white background

    DeLonghi America PACAN120EW Verdict

    That's all there is to know about the DeLonghi America PACAN120EW; hopefully, you can now reach a decision. 

    Given its many exciting features, you'll have a fantastic experience using this model. It's modern, stylish, and comes with all the relevant functions for the best results. 

    Although you'll need to spend slightly more, its quality performance makes it worth the purchase. It's time now to take your leave, but we'll be back with more exciting product reviews. 

    Until then, enjoy the coolness and fresh air produced by this powerful air conditioner! 

    Related Articles

    Best Portable Air Conditioner and Heater Combos

    How To Hide Your [AC] Air Conditioner Unit?

    13 Quietest Portable Air Conditioners

    10 Best Dual Hose Portable Air Conditioners

    9 Best Ventless Portable Air Conditioner

    Zero Breeze Mark II Portable Air Conditioner

    How To Clean Air Conditioner Coils Properly

    Plugging a jug of water into an electrical energy source sounds like a recipe for disaster, but somehow, electric kettles do it safely!

    If you've ever wondered how an electric kettle works, this article is for you!

    We'll review some of the essential information you need to know and compare it to other common types of kettles available in the market.

    Let's get started!

    How Does an Electric Kettle Work?

    How Does an Electric Kettle Work
    © Homesthetics - Monica Hewitt

    Electric kettles work by using electricity to heat water through a heating element, with the temperature of the water being controlled by a variable resistor inside the kettle.

    This electrical current heats up the water inside the kettle through a concealed heating element inside, usually at the bottom of the kettle.

    Note

    This heating element is made up of a thick metal coil that has electrical resistance. This electrical resistance turns electrical energy into heat energy.

    When you plug in the kettle and switch it on, electricity flows into it and through the heating element. As it heats up, it transfers the heat to the water.

    Once the water reaches the desired temperature, the resistor turns off the power supply to the heating element, preventing the water from boiling over or causing any damage to the kettle.

    How Long Does an Electric Kettle Take To Boil Water?

    It typically takes an electric kettle between 3 and 5 minutes to boil water. This can vary depending on the kettle's power, water amount, and starting temperature.

    For example, a 1.5-liter kettle with a power rating of 1500 watts can boil water at full capacity in around 3-4 minutes.

    However, if you fill the kettle with only a small amount of water, say 250 ml, it will boil faster because there is less water to heat up, and less heat energy is needed.

    Similarly, if you start with cold water from the tap, it will take longer to boil than if you use hot water from the tap.

    This is because the heating element has to raise the water temperature from the initial temperature to the boiling point of 100°C (which is always the same temperature).

    Once the water reaches the boiling point, it will continue to boil until it evaporates or the kettle is switched off if it has no auto-shut-off function.

    How Does an Electric Kettle Boil Water So Fast?

    Boiling water with electric kettles is fast because of their efficient heating process.

    When you turn on an electric kettle, a large electric current flows through the thick coil inside the kettle.

    The coil is usually in direct contact with the water. This can significantly save energy and allows efficient heat transfer to the water.

    Unlike traditional stovetop kettles that rely on an open fire to heat water, an electric kettle rapidly warms water because little to no heat is wasted.

    The placement of the heating element inside the electric kettle is specifically designed to heat water quickly and efficiently, which means water boils faster than other methods.

    This process is much faster than other methods because the heating element is in direct contact with the water.

    As the water warms up, the heat passes evenly throughout the water, allowing the entire water volume to heat up simultaneously.

    How Does an Electric Kettle Switch off Automatically?

    An electric kettle can switch off automatically thanks to an automatic shut-off feature built into the thermostat. This turns off the kettle when the water reaches a specific temperature.

    When you turn on an electric kettle and add water inside, the heating element begins to warm the water.

    As the water temperature rises, the thermostat detects when it has reached the right temperature or when the water boiled, and any additional heating is unnecessary.

    Once the water has reached that point, the thermostat stops heating it further, and the kettle switches off automatically.

    This is an important safety feature that helps prevent the kettle from overheating or boiling dry, which can cause damage to the kettle or even create a fire hazard.

    How Do You Maintain Electric Kettles?

    To maintain an electric kettle, it's important to keep the entire unit clean and free from buildup that can affect its performance.

    One of the main things to remember when maintaining electric kettles is that the heat brings mineral deposits that can accumulate inside the kettle.

    This can affect the taste of your water and even damage the electrical appliance over time.

    We recommend cleaning it regularly using a solution of water and vinegar or a specialized descaling solution.

    It's also essential to clean the exterior of the kettle, including the handle and spout. Use a damp cloth to wipe down the exterior of the kettle and dry it thoroughly.

    Make sure to follow the manufacturer's instructions for using and maintaining it, as this can help prolong the life of electric kettles and ensure that it continues functioning properly for years to come.

    Is your electric kettle switch not working? Hit the link to try and make your kettle work again!

    What Are Different Modern Electric Kettles You Can Get?

    Because there are so many appliance versions (not to mention industrial capacity steam kettles) used when heating water, let's briefly go over the most common ones:

    Stovetop Kettles

    Unlike electric kettles, stovetop kettles use heat from a gas or electric stove to warm the water inside. When the water reaches boiling point, steam pressure builds up inside.

    Though it lacks direct contact with heat sources that make electric kettles work faster, a traditional kettle is simple and can surely get the job done.

    SUSTEAS Stove Top Kettle - Best Stovetop Kettle

    Sale
    SUSTEAS Stove Top Whistling Tea Kettle - Food Grade...
    • COOL HANDLE | PUSH BOTTON MECHANISM - Ergonomically designed...
    • PERFECT WHISTLING SOUND | LARGE CAPACITY - Make tea for your...

    The SUSTEAS Stove Top traditional kettle is a classic and reliable option for boiling water on a gas stove or other heat source (apart from electricity, of course!).

    This SUSTEAS kettle stands out thanks to its durable, rust-resistant stainless steel construction and easy-to-use handle and spout.

    You can drink coffee and tea with a stylish kettle to match!

    Electric Kettles

    As we've covered above, electrical energy travels through kettles' heating elements, saving energy and expediting the boiling process.

    Cuisinart Perfectemp Kettle - Best Electric Kettle

    Sale
    Cuisinart 1.7-Liter Stainless Steel Cordless Electric Kettle...
    • 1500 watts for fast heat-up and 1.7-liter capacity
    • 6 preset heat settings (160°F for delicate teas, 175°F for...

    The Cuisinart Perfectemp Electric Kettle excels in the heating process, as it utilizes advanced heating technology to quickly and efficiently heat water.

    We particularly enjoy its Keep Warm function and blue LED indicators that keep you informed and in control.

    The sleek stainless steel design, automatic shut-off, and non-slip cool touch handle add to its overall convenience and safety, making it the best electric kettle on the market.

    Check out our list of the best electric kettles for more top-notch options!

    Automatic Tea Kettles

    How does an electric tea kettle work? Generally, they heat water to a certain temperature and then automatically infuse tea leaves in the water for the desired amount of time.

    The included infuser in tea kettles allows loose-leaf tea to be used, producing a better taste and aroma than traditional tea bags.

    Viante Hot Tea Maker Electric Glass Kettle - Best Automatic Tea Kettle

    Sale
    Vianté Electric Kettle With Infuser For Loose Leaf. Hot Tea...
    • A Connoisseur’s Kettle – Archive the pinnacle of...
    • For leaves or Beans – Use your electric tea kettle with...

    The Viante Hot Tea Maker Electric Glass Kettle is an automatic tea kettle that simplifies the tea-making process. Its glass design allows you to see the water level and tea leaves.

    We love that it has a keep-warm function to maintain hot water as needed. It offers plenty of advanced features and has overwhelmingly positive customer reviews.

    Whistling Kettles

    Whistling kettles use a steam tube that carries steam from the boiling water up to the spout, creating a whistling sound when the kettle boils.

    In short, it's a kettle fitted with a steam tube that creates a loud and clear whistle, making it easy to know when your water is ready.

    To learn more about this whistling sound, check out our article on why kettles make noise.

    Mr. Coffee Flintshire Whistling Tea Kettle - Best Whistling Kettle

    Sale
    Mr. Coffee Flintshire Stainless Steel Whistling Tea Kettle,...
    • Solid stainless steel constructed 1.75-Quart teakettle
    • Whistling teakettle alerts when water is boiling recommend...

    The Mr. Coffee Flintshire Stainless Steel Whistling Tea Kettle is a classic yet stylish addition to any kitchen.

    The stainless steel construction ensures durability and longevity, while the large capacity allows you to boil enough water for multiple cups of tea or coffee.

    With its sleek design and reliable performance, the Mr. Coffee Flintshire Whistling Tea Kettle is an excellent choice for any tea lover!

    Working Of Kettles FAQs

  • Now that we’ve answered the question How does an electric kettle work, let’s discuss if they’re actually energy-saving:

  • Do Electric Kettles Consume a Lot of Electricity?

    The amount of electricity an electric kettle consumes depends on its wattage, but it typically ranges from 1200 to 3000 watts.

    Heating an entire kettle will not take up more energy than is required, and its auto shut-off function can stop electricity flowing into the heating element when it’s no longer needed.

    Electric kettles are designed to be energy-efficient, and the heating element heats the water quickly and efficiently. This means they only need to be on for a short period.

  • How Kettles Work Conclusion
    © Homesthetics - Monica Hewitt

    Conclusion

    In summary, an electric kettle works by utilizing its heating element, which converts electrical energy into heat, then distributes it quickly and evenly across the water.

    They often have a built-in thermostat that can automatically shut the appliance off at the optimum temperature for additional safety.

    Though stovetop kettles are perfectly fine, you can't get more efficient than an electric kettle these days!

    Discover the different types of painting techniques that have captured the imagination of famous artists and art lovers alike throughout history. From abstract painting to realistic to miniature painting, read about the unique characteristics of each genre.

    Welcome to the colorful world of art! From the delicate brushstrokes of watercolor to the bold and vibrant hues of acrylic, paintings have the ability to evoke emotions and capture moments in time. At least, I, for one, am always enchanted by a good painting!

    Whether you're an art enthusiast or a curious newbie, today I will take you on a journey through various painting techniques and styles. Who knows? You may discover a whole new world of artistic possibilities!

    Timeless Beauty of Classic Masterpieces

    Ah, classic masterpieces! These painting styles have stood the test of time and continue to captivate audiences even today.

    1. Baroque

    Baroque

    This art style emerged in the 17th century and is characterized by dramatic lighting, vivid colors, and ornate details. Baroque artists sought to convey intense emotion and movement, often depicting religious or historical scenes.

    One of the most well-known Baroque artists is Gian Lorenzo Bernini, a famous artist of sculpture and architecture. His works, such as The Ecstasy of Saint Teresa, showcase the Baroque painting style with their intricate details and dramatic poses.

    Overall, the Baroque style represented a departure from the restrained classicism of the Renaissance. Its emphasis on emotion and movement paved the way for the expressive painting styles that followed.

    2. Byzantine

    Byzantine

    Byzantine art is a unique blend of Greek, Roman, and Christian traditions, resulting in a distinctive art style that was both spiritual and worldly. One of the hallmarks of Byzantine art is the use of icons, which were paintings of religious figures meant to be used for devotional purposes. These icons were often adorned with gold leaf and precious stones, giving them a sense of otherworldliness.

    But Byzantine art wasn't just limited to icons - it also included mosaics, frescoes, and illuminated manuscripts. These works were often commissioned by the wealthy and powerful, who wanted to show off their purity and wealth. 

    And while Byzantine art may seem ornate and intricate, it was also highly symbolic, with each element carefully chosen to convey a particular meaning.

    3. Renaissance Art Style

    Renaissance Art Style

    Speaking of the Renaissance, this period from the 14th to 17th centuries marked a resurgence of classical ideals and artistic innovation. Famous artists such as Leonardo da Vinci and Michelangelo produced some of the most iconic works of all time during this era. Renaissance art is characterized by its realism, perspective, and attention to detail.

    Renaissance art was not only limited to paintings but also included sculpture, architecture, and other painting mediums. It reflected a renewed interest in the classical past, as well as a focus on humanism and individualism. 

    One of the most famous works of Renaissance art is Leonardo da Vinci's Mona Lisa, known for its enigmatic smile and use of sfumato, a technique that creates a soft, smoky effect. 

    4. Rococo

    Rococo

    Rococo art is known for its extravagant style and delicate details, often featuring pastel colors and intricate designs. It starkly contrasts the more subdued nature of watercolor paintings, which rely on the transparency of pigments to create a soft, dreamy effect on the canvas.

    However, despite these differences, there is a certain charm to be found in combining these two painting styles. Imagine a rococo-inspired portrait painting with delicate watercolor washes highlighting the subject's features. 

    Or perhaps a landscape painting with a rococo-inspired border, painted in watercolor hues to create a sense of depth and texture. The possibilities are endless for combining different art styles and techniques. Experimenting with different painting mediums is a great way to explore the boundaries of what's possible in art.

    If you're looking for a lighthearted escape from the seriousness of other art movements, Rococo might be just what you need! 

    5. Romanticism

    Romanticism

    Romanticism was a reaction to the rationalism of the Enlightenment. This 19th-century painting style emphasized emotion, individualism, and imagination. Romantic paintings often featured sublime landscapes and historical or mythological scenes.

    Romanticism was a period of rebellion against the prevailing social norms of the time, and artists sought to break free from the strict conventions of academic art. They celebrated nature, often depicting it in all its grandeur and beauty, and embraced the individual spirit over conformity.

    One of the most iconic Romantic artists is Eugene Delacroix, whose works such as Liberty Leading the People and The Death of Sardanapalus convey a sense of emotional intensity and passion. His use of bold colors and dynamic compositions capture the essence of Romanticism.

    6. Trompe-l'œil

    Trompe-l'œil

    Trompe-l'œil is a French term meaning "deceive the eye," and that's exactly what this art style aims to do. Trompe-l'œil paintings are so realistic that they appear three-dimensional or even real. This painting style has been used throughout history to create optical illusions and trick the viewer's perception.

    Trompe-l'œil paintings often feature everyday objects, such as a letter or a book, as if they were sitting right in front of you. Some famous artists have even taken it a step further, creating entire rooms or scenes that look like you could walk right into them. The level of detail and precision required to create a convincing trompe-l'œil painting style is truly remarkable.

    This painting technique has been popular throughout history, particularly in the Baroque and Renaissance periods. Even today, trompe-l'œil can be found in modern arts and advertising. It's an art style that truly captures the imagination and challenges our perceptions of reality.

    7. Gothic Art

    Gothic art emerged in the late Middle Ages and is characterized by its ornate, decorative style. Gothic paintings often feature religious subjects and were used to convey a sense of awe and reverence. The intricate details and towering structures of Gothic architecture are also reflected in the style's paintings. Gothic art is a fascinating and dramatic style that has captured people's imaginations for centuries. 

    One of the most striking features of this art form is its intricate and delicate details, which are often enhanced by the use of bright colors and elaborate patterns. Gothic art was also used to tell stories, particularly religious ones. Many Gothic paintings depict scenes from the Bible or the lives of saints.

    Overall, Gothic art is a striking and powerful style that has impacted the art world. Its influence can be seen in many different art styles, and its legacy continues.

    These classic masterpieces are a testament to the enduring power of art and the creativity of the human mind.

    From Chaos to Precision: Modern Styles in Painting

    Let's dive into the world of modern painting movements! From the colorful chaos of Fauvism to the mathematical precision of Geometric Abstraction, there's a painting style for everyone to create art, appreciate and enjoy.

    8. Abstract Expressionism

    Abstract Expressionism

    First up on our list of modern movements in painting technique is Abstract Expressionism. This art style emerged in the 1940s in the United States and quickly became one of the most influential art movements of the 20th century.

    Abstract Expressionist paintings are characterized by their large size, bold colors, and spontaneous brushwork. The famous artists who created these works sought to convey emotion and to feel through their art rather than depict recognizable objects or scenes.

    Some famous Abstract Expressionist painters include Jackson Pollock, Mark Rothko, and Willem de Kooning. Their works are still highly prized by collectors today and can be seen in museums worldwide.

    9. Cubism

    Cubism

    Next is Cubism, which developed in the early 20th century in France. This movement is known for its use of geometric shapes and the fragmentation of form.

    Cubist painters sought to depict the world from multiple viewpoints rather than a single, fixed perspective. This resulted in works that appear almost abstract at first glance but, upon closer inspection, reveal recognizable objects and scenes.

    Pablo Picasso and Georges Braque are two of the most famous Cubist painters. Their works continue to inspire artists today and can be seen in many major museums.

    10. Dadaism

    Dadaism

    Welcome to the chaotic and irreverent world of Dadaism! This movement emerged in the early 20th century as a response to the horrors of World War I. It rejected traditional artistic conventions to embrace randomness, absurdity, and nonsense.

    Dada artists sought to undermine the seriousness of the art world by creating intentionally nonsensical pieces, often incorporating everyday objects or even garbage into their works. Some of the most famous Dada works include Marcel Duchamp's "Fountain," which was simply a urinal turned upside down and signed with a fake name, and Hannah Höch's photomontages, which blended images from popular culture into surrealist collages.

    11. Fauvism

    Fauvism

    Fauvism was a French painting style that emerged in the early 20th century and is characterized by its use of intense, saturated hues and its rejection of traditional representational techniques. Fauvist artists aimed to capture the emotional impact of color rather than realistic depictions of the world around them.

    One of the defining characteristics of Fauvism is its use of vibrant watercolors. Famous artists like André Derain and Henri Matisse often used watercolor oil paints to create bold and expressive works that capture the intensity of their subjects. 

    For example, Derain's "The Dance" features bright oranges, pinks, and yellows in a fierce depiction of a dance scene. At the same time, Matisse's "Joy of Life" portrays a group of nude figures in a lush, colorful landscape painting using vivid watercolor washes. 

    These works showcase the unique ability of watercolors to convey emotion through color and brushwork, which made them a natural fit for the Fauvist movement.

    12. Geometric Abstraction

    Geometric Abstraction

    Looking for something a bit more cerebral? Then you might enjoy the clean lines and mathematical precision of Geometric Abstraction. This style, which emerged in the early 20th century, was characterized by its use of simple geometric shapes and its rejection of figurative art.

    Geometric Abstraction artists aimed to create a sense of order and structure through their works, often using precise, repetitive patterns and shapes to achieve this effect. 

    Some of the most famous Geometric Abstraction pieces include Kazimir Malevich's "Black Square," which is simply a black square on a white background, and Piet Mondrian's "Composition II in Red, Blue, and Yellow," which features bold, primary colors arranged in a grid-like pattern.

    13. Minimalism

    Minimalism

    Less is more, as they say, and that's certainly the case with Minimalism. This movement, which emerged in the mid-20th century, is characterized by its use of simple, stripped-down forms and its rejection of ornamentation and excess.

    Minimalist artists aimed to create works that were as basic and essential as possible, often using industrial materials and emphasizing the physicality of the artwork itself.

    Some of the most famous Minimalist pieces include Donald Judd's untitled boxes, which are rectangular metal or plexiglass forms, and Dan Flavin's fluorescent light installations, which use light as the medium for the artwork.

    14. Neo-Expressionism

    Neo-Expressionism

    Finally, if you're looking for something with a bit more emotional punch, then Neo-Expressionism might be up your alley. This movement, which emerged in the 1980s, was a reaction against the cool, detached aesthetics of Minimalism and other modernist painting styles.

    Neo-Expressionist artists aimed to create works that were raw, visceral, and emotionally charged, often using intense colors and thick, gestural brushstrokes. Some of the most famous Neo-Expressionist pieces include Jean-Michel Basquiat's graffiti-inspired paintings, which blend street art with fine art, and Anselm Kiefer's massive, layered canvases, which explore themes of history and memory.

    So there you have it, folks - a quick tour of some of the most exciting modern painting movements! Whether you prefer the emotional punch of Neo-Expressionism or the clean lines of Minimalism, these painting styles continue to inspire and captivate artists and art lovers worldwide.

    Realism and Beyond

    The world of art is vast and varied, with countless painting styles and movements that have emerged throughout history. Each movement has its unique characteristics and techniques and has been shaped by the social, cultural, and political forces of its time.

    15. American Impressionism

    American Impressionism

    One of the most prominent movements in the late 19th century, American Impressionism, was heavily influenced by the French Impressionist movement. American artists who Impressionism inspired aimed to capture the essence of a moment in time through the use of light and color. 

    They often depict scenes from everyday life, such as landscapes, urban settings, and leisure activities. One of the most notable American Impressionists is Mary Cassatt, who is well-known for her delicate and intimate portraits of women and children.

    Another famous American Impressionist is Childe Hassam, who was known for his vibrant and colorful paintings of New York City, capturing the bustling energy of the city in a way that was both lively and captivating.

    16. Tonalism

    Tonalism

    Tonalism is an American art style that emerged in the late 19th century. This movement is about creating art emphasizing color and light to create a mood or atmosphere.

    Tonalists often depicted landscapes, focusing on the mood and emotion that the scene evokes rather than the specific details of the scene. Tonalism is known for its muted colors and hazy, atmospheric quality. 

    Some of the most well-known Tonalists include James McNeill Whistler, who created many paintings of the Thames River in London, and George Inness, who created many paintings of the American landscape.

    17. Social Realism

    Social Realism

    Social Realism is an art movement that emerged in the 1930s. This movement is all about creating art that reflects the social and political realities of the time. Social Realists often depicted everyday people, including the working class and marginalized communities.

    Social Realism often deals with issues of poverty, inequality, and injustice. Some of the most well-known Social Realists include Diego Rivera, who created many murals that depicted the struggles of the working class, and Ben Shahn, who created many paintings that addressed issues of social and political justice.

    Through their powerful and thought-provoking works, Social Realists sought to shed light on the harsh realities of society and inspire change toward a more just and equitable world.

    18. Pointillism

    Pointillism

    Pointillism is an art movement that emerged in the late 19th century. This movement is about creating paintings using small dots of color that blend together to create a larger image.

    Pointillists use precise brushwork and attention to detail to create paintings that are incredibly detailed and vibrant. Pointillists often depicted everyday scenes like landscapes, cityscapes, and portraits.

    One of the most well-known Pointillists is Georges Seurat, who created many paintings using this technique, including his famous work "A Sunday Afternoon on the Island of La Grande Jatte." Pointillism produces paintings that are both dynamic and captivating, with a luminous quality that is unmatched by other techniques.

    19. Hyperrealism

    Hyperrealism

    Hyperrealism is all about creating paintings that look almost like photographs. Hyperrealists use precise brushwork and attention to detail to create paintings that are so realistic they can be mistaken for photographs. 

    Hyperrealism often depicts everyday scenes like cityscapes, still life paintings, and portraits. A prominent Hyperrealist is Audrey Flack, who is known for her incredibly detailed still-life paintings that are created by painting layer upon layer of paint to create a sense of depth and texture.

    Hyperrealism requires a high level of technical skill and a keen eye for detail. Hyperrealists often spend countless hours studying their subjects, photographing, and making sketches before beginning their paintings. The resulting works are often larger than life and create a sense of wonder and amazement in viewers who may question whether they are looking at a painting or a photograph. 

    20. Regionalism

    Regionalism

    Regionalism is an American art movement that emerged in the 1930s. This movement is about creating art that reflects the cultural traditions and values of specific regions within the United States. 

    Regionalists often depicted rural life, including landscapes, people, and animals. Some of the most famous Regionalists include Grant Wood, known for his iconic painting "American Gothic," and Thomas Hart Benton, who created many paintings of the American Midwest.

    By emphasizing the importance of regional identity and culture, Regionalists helped to establish a sense of national pride and unity during a time of significant change in America. Today, Regionalism remains an integral part of American art history, serving as a reminder of the rich diversity and complexity of American culture.

    21. Contemporary Realism

    Contemporary Realism

    Contemporary Realism refers to the art movement that emerged in the late 20th century and is still prevalent today. This movement is all about creating art that truly represents the world around us. 

    Contemporary Realists use precise brushwork and attention to detail to create paintings that look almost like photographs. You'll often find them painting everyday scenes like cityscapes, still lifes, and portraits. 

    A prominent Contemporary Realist is Chuck Close, who is known for his massive portraits that are created by meticulously painting individual squares to create a larger image.

    22. Early American Folk Art

    Early American Folk Art

    Early American Folk Art is a type of painting technique that emerged in the late 18th and early 19th centuries. This art was created by everyday people who didn't have formal art training. Instead, they used their unique painting styles and techniques to create arts that reflected their everyday lives. 

    Early American Folk Art often depicts everyday scenes like farm life, rural landscapes, and portraits of family members. One of the most well-known Early American Folk Artists is Edward Hicks, who created many paintings of animals, including his famous "Peaceable Kingdom" series.

    Each painting style and movement has its unique story to tell, and through the work of talented artists, we can glimpse into the past and understand the world from their perspective. By studying and appreciating these painting styles, you can gain a greater understanding and appreciation of the diverse and rich history of painting.

    Artistic Traditions in Various Cultures

    Famous artists often utilize different tools and techniques to achieve their desired effects. For example, some painters use a palette knife for more precise lines and texture. Others may use a heat gun to create intricate designs in sandpainting or to speed up the drying process of their work. 

    In addition, some painters may use a varnish or emulsion to add a glossy finish to their paintings, while others may focus on waterproofing their work to preserve it for a longer period.

    In terms of materials, painters have used a variety of substances throughout history. Milk, for instance, has been used in casein paint, a type of paint that dries quickly and produces vibrant colors. 

    Graphite, on the other hand, is a common material used in pencil drawings and can be manipulated to create various shades of gray. Textiles have also been used in painting, such as silk in Chinese art, to add texture and depth to works.

    Furthermore, different regions and cultures have their unique traditions and styles of painting. Japanese painting, for example, often incorporates calligraphy and gesture, while East Asian art may focus on the concept of balance and harmony. The Netherlands, on the other hand, has a rich history in figure painting, while Paris has been a hub for modern art and innovation.

    Visual Art Forms

    Visual art has always been a captivating and inspiring medium for people, with each form showcasing the artist's unique vision and creativity. From bold acrylic paintings to delicate ink drawings, every artwork has its charm.

    Watercolor has been a favorite medium for many famous artists throughout history. So, grab your paintbrush and immerse yourself in the world of watercolor!

    23. Acrylic Paints

    Acrylic Paints

    Acrylic painting is a famous painting technique that uses water-soluble acrylic paints. Acrylics can be used on various surfaces, including canvas, paper, wood, and even metal.

    One of the reasons why acrylic painting medium is so popular is because of the range of effects it can create. From bold and bright colors to subtle and muted tones, acrylic paint can create various textures and finishes. 

    Acrylic paint can be diluted with water to create a watercolor-like effect, or it can be layered to create a thick and textured surface. With its versatility, fast-drying properties, and easy cleanup, acrylic painting is a perfect choice for creating beautiful and long-lasting artwork.

    24. Charcoal Drawing

    Charcoal Drawing

    Charcoal drawing is a traditional technique that uses charcoal sticks to create dark, smudgy lines. This technique is perfect for creating atmospheric pieces of art that evoke a sense of mystery and emotion.

    Charcoal drawing is also known for its versatility, allowing artists to create various effects by varying the pressure and texture of the charcoal on the surface. It's an excellent technique for capturing the mood and tone of a subject, mainly when working with subjects like portraits, landscapes, and still life. 

    Artists often favor charcoal for its ability to create dramatic contrast and depth, and its forgiving nature allows for corrections and adjustments to be made easily. Whether you're a beginner or an experienced artist, charcoal drawing is a skill worth mastering.

    25. Egg Tempera Paintings

    Egg Tempera Paintings

    Egg tempera paintings are a fascinating technique used for centuries to create stunning works of art. It's known for its unique texture and luminous finish, which makes it a popular choice for artists who want to create works of art with a timeless feel.

    One of the most distinctive features of egg tempera painting medium is using egg yolk as a pigment binder. This gives the painting a rich, creamy texture that's hard to achieve with other types of painting. In addition, egg tempera dries quickly, which allows artists to create intricate details and fine lines with precision.

    26. Watercolor Painting

    Watercolor Painting

    Watercolor painting is a beautiful medium that offers a lot of creative freedom to artists. With their unique properties, watercolors can create various effects, from delicate washes to bold, vibrant colors. This versatility makes it a popular choice for artists who enjoy experimenting with different techniques and styles.

    The watercolor painting medium also offers a lot of room for experimentation and creativity. Because the paint is water-soluble, it can be used in various ways, from thin washes to thick, opaque layers. Artists can also use various tools, such as brushes, sponges, and even salt, to create unique textures and effects.

    Overall, watercolor painting is a wonderful medium that offers a lot of creative possibilities to artists. Whether you're a beginner or an experienced artist, there is always something new to learn and explore with watercolors. So why not give it a try and see what beautiful creations you can come up with?

    27. Encaustic Painting Style

    Encaustic Painting Style

    Encaustic painting is an incredibly versatile medium that allows artists to experiment with various textures and colors to create unique works of art. 

    The encaustic painting technique involves mixing pigments with melted beeswax and then applying the mixture to a surface, typically a wooden panel painting. The wax is then heated and fused onto the surface, creating a durable, long-lasting encaustic painting.

    One of the advantages of encaustic painting is that the wax can be layered and built up to create a rich, textured surface with depth and dimension. The hot wax painting can also be carved and manipulated with tools to create intricate designs and patterns. Encaustic painting allows artists to create various effects and explore techniques to achieve their desired results.

    28. Fresco Painting Medium 

    Fresco Painting Medium

    This ancient technique has been around for centuries and is still used today by many artists. So, what exactly is fresco painting? Well, it's a form of painting where pigment is applied to wet plaster on a wall or ceiling, creating a stunning mural lasting hundreds of years.

    One of the most impressive things about the fresco painting technique is how it captures light and color. The wet plaster absorbs the pigment, making the colors part of the wall. This creates a unique depth and richness that can't be achieved with other painting techniques. 

    Another fascinating aspect of the fresco painting technique is the history behind it. This technique was used by the ancient Egyptians, Greeks, and Romans and was later revived during the Italian Renaissance. Many of the most famous frescoes in the world can be found in churches and cathedrals throughout Europe. 

    29. Gouache Painting Medium 

    Gouache Painting Medium

    Gouache painting is a medium that is often overlooked, but it definitely deserves some attention. It is a type of opaque watercolor used by artists for centuries. 

    One of the unique qualities of gouache is its versatility. It can be used for various applications, from illustration and design work to fine abstract art. Gouache paintings have a distinctive look that sets them apart from other painting mediums. 

    The opaque nature of the paint means that the artist can paint light colors over dark without needing multiple layers. This makes gouache painting a great choice for creating vibrant, colorful compositions.

    30. Ink Wash Painting 

    Ink Wash Painting

    Ink Wash Painting is one of the oldest and most versatile forms of artistic expression out there. It involves using various tools to create lines and shapes with ink on a surface, such as paper or canvas. The beauty of ink drawing lies in its simplicity and ability to convey various emotions and moods.

    Many artists work exclusively with ink, while others use it as a starting point before moving on to other painting mediums. Some artists combine ink with watercolors or oil paints to create stunning mixed-media pieces.

    Ink drawing is a fantastic way to experiment with different techniques and styles, and it's accessible to artists of all levels. So why not grab your pen or brush and start creating your own ink masterpieces today?

    31. Oil Painting

    Oil Painting

    The oil painting technique is a timeless and beloved form of the abstract art medium that has been around for centuries. It's a medium that allows for incredible depth, texture, and richness of color. The process of oil painting involves mixing pigments with oil, usually linseed oil, to create a paint that can be applied to a canvas or other surface.

    But, as with any art form, the oil painting technique takes time and practice to master. From choosing the right brushes and oil paints to understanding color theory and composition, there are many elements to consider. However, the beauty of oil painting lies in the process itself. The tactile experience of mixing colors and applying paint to a surface can be both meditative and exhilarating.

    32. Pastel Painting Technique 

    Pastel Painting Technique

    One of the most appealing aspects of a pastel painting is its ability to capture the softness and delicacy of subjects such as flowers and landscapes. Pastel paintings have a distinctive, powdery texture that gives them a unique visual appeal. They are also known for their ability to create vibrant, luminous colors that can bring a painting to life.

    However, pastel painting can be challenging, as it requires a delicate touch and a great deal of patience. Pastels are a dry medium, and unlike paint, they cannot be mixed on the canvas. Additionally, the powdery texture of pastels can make them difficult to control, so it takes skill and practice to master this medium.

    Despite the challenges, pastel painting remains a famous and beloved medium among artists and art enthusiasts alike. It offers a unique and expressive way to capture the beauty of the world around us, and its versatility allows for a wide range of painting styles and techniques.

    Visual art forms are a beautiful and dynamic way for artists to express their creativity and share their unique perspectives with the world. No matter the medium, each piece tells a story and invites the viewer to connect with the artist and their message. So, grab your brushes and let your imagination run wild!

    Futuristic Flair

    As the world becomes increasingly complex and technology advances, artists have embraced futuristic themes in their work. From the streets to the galleries, there is a growing fascination with the possibilities of the future.

    33. Graffiti Art

    Graffiti Art

    A graffiti artist does more than just spray-painting random words or images on walls. It's an art form that's been around for decades, and it's only getting better. The vibrant colors and intricate designs are a feast for the eyes, and they have the power to transform dull, drab buildings into works of art.

    One of the most exciting things about graffiti art is its temporary nature. You never know when or where the next masterpiece will appear. It could be on a busy street corner or tucked away in a hidden alley. Either way, the thrill of discovering a new piece of graffiti art is like finding a hidden treasure.

    In short, graffiti art is more than just a bunch of words and images on a wall. It's a dynamic and evolving art form that has captured the imagination of graffiti artists and art lovers alike. So next time you're out and about, keep your eyes peeled for a piece of graffiti art. Who knows what you might discover?

    34. Afrofuturism

    Afrofuturism

    Afrofuturism is an exciting artistic movement that combines elements of science fiction, fantasy, and Afrocentricity. It's a celebration of African culture and identity while also exploring the future of black people in the world. Think of it like an imaginative blend of Sun Ra, Octavia Butler, and George Clinton, with a healthy dose of funk and soul thrown in for good measure

    One of the coolest things about Afrofuturism is how it uses science fiction and fantasy to imagine new possibilities for black people. In a world where black people are often portrayed as marginalized or oppressed, Afrofuturism creates a space where black people can be powerful, creative, and visionary. It's a way to dream of a future where black people are at the forefront of innovation and progress.

    35. Street Art

    Street Art

    Street art is a form of creative expression that takes art from the confines of a gallery and puts it on the streets. It's an art form that thrives in public spaces and encourages artists to create pieces that speak to the community. Whether it's a giant mural or a small sticker, street art is an important part of modern culture.

    Another great thing about street art is that it's often created by anonymous artists. This anonymity adds an air of mystery and intrigue to the art form, making it even more fascinating to observe. It's also a way for artists to escape the traditional art world, which can be exclusive and limiting.

    Whether it's through the raw energy of graffiti, the thought-provoking messages of street art or the Afrofuturist visions of black artists, the theme of the future has inspired a wide range of artistic expressions. As we continue to look to the horizon, we can expect to see even more exciting and innovative creations that push the boundaries of what we thought was possible.

    Diverse World of Painting: Styles, Techniques, and Influential Artists
    © Homesthetics - Dylla Setyadji

    Diverse World of Painting: Styles, Techniques, and Influential Artists

    Various types of painting include ink wash painting, Chinese painting, cave painting, spray, fresco-secco, portrait miniature, en plein air, mixed media, and Western painting. These styles utilize a range of materials, such as aerosol, chalk, vellum, resin, and vitreous enamel paint. Famous artists use different techniques, including chiaroscuro, texture mapping, and drip painting, to achieve their desired effect.

    Painters throughout history, including Michelangelo, Rembrandt, Claude Monet, Vincent van Gogh, Salvador Dalí, Caravaggio, Johannes Vermeer, Wassily Kandinsky, Andrea Mantegna, Edvard Munch, Sistine Chapel, Andy Warhol, have contributed to the diverse world of painting.

    Different cultures, such as Japan, Italy, China, and Greece, have their own unique artistic traditions, including calligraphy, Veduta, Warli, and Madhubani art. In contemporary times, technology has revolutionized the art universe with the use of computer programs, water-miscible oil paint, and aerosol spray dispensers. Painting can be a powerful form of expression, conveying messages, allegories, and emotions.

    FAQs Related To Types of Painting

  • What is expressionism in painting?

    Expressionism is a modernist movement in art that originated in Germany in the early 20th century. It’s characterized by bold colors, exaggerated forms, and emotional intensity, with the aim of expressing the artist’s inner feelings and experiences.

  • How do artists use space in their paintings?

    Artists use space in their paintings to create a sense of depth, perspective, and composition. 

  • What materials and techniques are used in traditional Indian painting?

    Traditional Indian painting uses a variety of materials, including natural dyes, minerals, and precious stones, as well as traditional tools such as bamboo pens and brushes made from animal hair. 

  • What distinguishes photorealism from other painting styles?

    Photorealism is a painting style that seeks to replicate a photograph in exact detail, often with the aim of challenging our perceptions of reality. It’s characterized by hyper-realistic detail and precise attention to lighting and shadow.

  • How does the use of beeswax impact the texture and appearance of a painting?

    When mixed with pigment, beeswax can create a rich, textured surface that is both translucent and opaque. It can be used to create a variety of effects, including depth, luminosity, and a sense of movement in hot wax painting.

  • What are some techniques for achieving the desired effect with oil painting?

    Techniques for achieving a desired effect with oil painting include layering, blending, glazing, impasto, and scumbling. Each technique can create a unique effect, depending on the artist’s intention.

  • What are some benefits and challenges associated with digital painting compared to traditional painting techniques?

    The benefits of digital painting include greater flexibility, faster workflow, and easier editing capabilities. Challenges include the need for specialized software and hardware, as well as a potential loss of tactile experience.

  • How does an artist's chosen style impact the way they approach a painting?

    An artist’s chosen style can impact everything from their subject matter and color palette to their brushwork and composition. It can also influence their conceptual art approach and the message they are trying to convey through their work.

  • How do art movements emerge and evolve over time?

    Art movements emerge and evolve over time as artists respond to the cultural, political, and social climate of their time. Factors that contribute to their popularity and longevity include their influence on subsequent generations of artists and their ongoing relevance to contemporary issues.

  • What distinguishes pop art from other styles of contemporary art?

    Pop art or digital art is characterized by its use of popular culture imagery, such as advertising, comic books, and mass-produced goods. It often employs bright, bold colors and a sense of irony or satire.

  • How do different types of painting strokes contribute to the overall look and feel of a painting?

    Different types of painting strokes, such as short or long, thick or thin, can create different textures, tones, and moods in a painting. For example, short, choppy strokes can convey a sense of energy and movement, while long, flowing strokes can create a more serene or peaceful atmosphere. 

  • How is linseed oil paint used in oil painting, and what are some alternative binders that artists may use?

    Linseed oil paint is a common binder used in oil painting to mix with pigments and create paint that can be applied to a canvas. It dries slowly and allows for the blending and layering of colors. Some alternative binders that artists may use include walnut oil paint, poppy seed oil paint, and safflower oil paint, which have different drying times and properties.

  • How do artists create the illusion of three-dimensional space on a two-dimensional surface?

    Overlapping objects in a painting can create a sense of foreground and background while varying the scale of objects can create a sense of distance. Perspective can create the illusion of depth by drawing lines that converge towards a vanishing point. Shading and lighting can also be used to create a sense of form and volume in a painting.

  • Painting Final Thoughts
    © Homesthetics - Dylla Setyadji

    Final Thoughts

    So, there you have it - a colorful exploration of some of the many types of painting out there! From the bold, bright hues of expressionism to the delicate lines of miniature painting, the world of painting art is a vast and varied one.

    Whether you're an artist yourself or simply an appreciator of the arts, I hope this overview has inspired you to explore new styles and techniques or to simply enjoy the beauty of the paintings around you.

    And with new technologies and materials constantly being developed, the world of paintings is sure to continue evolving and expanding in exciting ways. So pick up a brush, choose your colors, and let your creativity flow.

    The best TV mounting height and viewing angle depend on several factors, which can vary considerably from one case to the next. These factors include the TV size, viewing distance, clearance required, and location, among others.

    Having the best TV-watching experience does not depend just on the quality of your TV.

    There are other factors at play as well, and these include the height at which the TV is mounted and its viewing angles. Unsurprisingly, many people find it immensely confusing to determine the proper height at which the TV should be mounted for the best viewing experience.

    This guide aims to help solve the problem by answering that question.

    Factors Determining The Optimal Mounting Height For Your TV

    Factors Determining The Optimal Mounting Height For Your TV

    It is crucial to determine the right height for mounting your television before starting to drill. Not doing so can lead to wastage of resources and time and also cause damage to your walls.

    Aside from that, positioning the TV at an improper height can lead to discomfort while watching and will require removal and reinstallation, resulting in a lot of hassle. That is why you need to keep in mind a few factors when mounting the TV.

    1. TV Size

    When planning to mount your flat screen TV on the wall, the first thing to do is to measure its size. This size will determine how high it should be and will also help you get an idea of how much space it will require. Additionally, such information will be useful in case additional accessories need to be installed.

    When taking measurements, make sure to measure the distance between the TV center to the floor. Also, the TV size is always measured diagonally, not horizontally or vertically. To help you out, I’ve mentioned some of the common distances ideal for different-sized TVs here.   

    In the case of 42-inch TVs, there should be a distance of 56 inches between the floor and the TV center. Similarly, 55-inch TVs should be mounted at a distance of 61 inches, while 65-inch ones should be mounted at a distance of 65 inches. Finally, 70-inch TVs should be mounted at a distance of 67 inches from the TV center to the floor.  

    2. Viewing Distance

    The optimal viewing distance will closely depend on the TV size. Ideally, this distance should not be so much that the details are lost, nor should it be so less that it requires straining your neck. A larger distance between the viewer and the TV can result in a less enjoyable experience, while a smaller one can cause headaches.

    Also, the viewing distance or VD will be affected by the optimal height, which will depend to a large extent on personal preference. You can divide the TV size (in inches) by 0.55 to know the optimal viewing distance. 

    Alternatively, you can use the following formula - (VD)=TVS*1.67. For instance, if you have a 55-inch TV, the optimal viewing distance will be 55*1.67, which will be 92 inches. 

    3. Viewing Angle

    Another essential factor to keep in mind when mounting your TV is the viewing angle and eye level. This has to be calculated from the sitting position in which you are going to watch TV. Absolute precision is not required, but try to get a general idea of the location where the TV should be mounted to provide a great viewing experience without causing any pain.

    If you want to be sure, follow the guidelines laid down by the Society of Motion Picture and Television Engineers (SMPTE). According to this, the viewing angle should not exceed 30 degrees. That being said, the maximum that the majority of people incline their heads when watching TV is between 10 and 15 degrees.

    4. Individual Height  

    Individual Height is another factor to keep in mind when mounting your TV. And this problem becomes more complicated as the number of people watching increases. This is because people with different heights may find different viewing heights and distances comfortable. So, there is no standard solution that can fit everybody’s needs.   

    In such cases, you should think of the people who will be watching the TV and mount the TV accordingly. This will require measuring the ELH, which is the distance between the floor and your eyes while watching TV and is measured in inches.

    Measure the distance from the average eye level to the floor while sitting. This will ensure that the TV should be comfortable for the maximum number of people. 

    5. Hanging Height And Location

    The TV hanging height will also be determined by its location and will, in turn, determine its viewing angle. For instance, if the TV is to be mounted in a game room, there will most likely be a laid-back couch that will decide the optimal viewing height and viewing distance.

    This will require considering the reclining angle or RA, which depends on your sitting position. Normally, when a person is sitting straight and watching TV, their torso forms a 90-degree angle with the floor, and the RA is zero.

    But when you recline, the RA changes and has to be measured from the vertical angle. If you tend to recline more, the TV mounting height will need to be higher. And as mentioned, the maximum reclining angle lies between 10 and 15 degrees. 

    Additionally, different rooms will have seating options with varying heights. For instance, in the case of an open floor plan, there may be bar stools or a low chair or sofa. These may make it difficult to determine the best height for mounting your flat-screen TV.  

    In such cases, the best approach is to take the average of all sitting heights or the most used height when calculating the distance to the TV screen. Alternatively, if it is located in a home gym or game room, where most people watch TV standing up, I suggest using the average standing height when taking measurements.  

    6. Other Factors

    There are some other factors that can determine the TV mounting height as well. For instance, a structural element, appliance, or furniture might prevent mounting the TV at the optimal viewing height. If that is the case, position the TV close to the viewing level while leaving space between the TV and the obstruction.

    Such obstructions may include an entertainment center or shelves, in which case you should leave around four to six inches of space. And if you have children, it is a good idea to mount the TV at such a height that it is unreachable. 

    Some people also like to mount the TV over the fireplace, in which case, you need to install non-combustible barriers between the TV and the fireplace. This will protect the TV screen from damage caused by heat. Additionally, for such installations, I would advise checking the building regulations before installing the TV.  

    Determining The Ideal Viewing Angle

    When mounting your TV, try to get the TV screen perpendicular to the eye level of the people watching it. That said, newer TVs come with high refresh rates, wider viewing angles, and greater clarity that allow more freedom so far as viewing angles are concerned. 

    So, even if you have the TV screen set at more than 25 degrees horizontally, you can still get a good experience while watching. It is more important to try and reduce glare while maximizing viewing comfort than focusing on the viewing angle itself.

    Steps To Determine The Ideal TV Mounting Height

    Steps To Determine The Ideal TV Mounting Height

    Before mounting your flat-screen TV, I recommend consulting with other household members to ensure that everyone gets the best experience while watching TV. You can use paper and a tape measure to mark the area where the TV will be mounted and ask the other household members to take a look. This will help ensure that it is the right spot for TV mounting. 

    Make sure you have all the necessary tools and the proper mount kit for the process before starting. Then, follow these steps to determine the ideal TV mounting height. 

    1. Attaching The Mounting Arms

    First, you will need to screw the vertical brackets or mounting arms included in the mounting kit to the TV back. Once each bracket is attached, secure it to the wall plate in the same manner as when completing the assembly. 

    2. Taking Measurements

    After the adjustable brackets have been secured to the wall plate, you need to measure the height of the mounting center up the wall. Take these measurements from three horizontal spots, and mark each spot using a pencil. This will indicate the point where the TV centerline will rest. 

    3. Determining The Top And Bottom Markings

    Once you know where the TV centerline will lie, divide the TV height by two. Then, take a measurement of this distance and use a pencil to mark it over the center counting mark. This point will be the place where the TV top will lie against the wall. 

    Repeat the process for the TV bottom as well. 

    4. Creating Markings

    The next step will involve creating an outline of the shape of your TV on the wall. You can use painter’s tape for the purpose and also make similar markings around the corners of the mounting plate.   

    5. Final Steps

    Finally, use a level to check the outlines and ensure that it is the ideal TV mount height before starting the drilling process. 

    Calculating The Mounting Height Using A Mathematical Formula

    Calculating The Mounting Height Using A Mathematical Formula

    Another way to determine the optimal TV height at which you should mount your TV is by using a mathematical formula. The formula is (TVMH) =0.22*VD+ELH. When using this formula, it is assumed that a reclining angle of 12.5 degrees exists.  

    To determine the height between the TV bottom and the floor, you need to measure the TV height before dividing it by two. Then, subtract this number from the result obtained by using the formula. 

    Or you could use another formula to calculate the screen height, which is TVMH=tan(RA)*VD+ELH. In this case, if the tan(RA) is zero, the reclining angle is absent, and you are sitting straight. So, the TV mounting height (TVMH) will be the same as the eye level height (ELH).   

    TV Mounting - Tools Required

    Mounting your flat-screen TV may seem challenging, but using the right tools can help simplify the process considerably. That said, keep in mind that some tools are indispensable when you need to mount a TV, while others are only required to make the job easier.

    The tools you will use to mount a TV include:

    • Power drill
    • Stud finder
    • Screws
    • Wall mount
    • Level checker
    • Hammer drill

    Need For Additional Mounting Hardware

    When considering the height at which you will mount your flat screen TV, make sure that the maximum amount viewers need to tilt their heads is 35 degrees. According to the Society of Motion Picture and Television Engineers, this is the maximum amount of tilt that allows comfortable viewing. 

    In cases where your flat-screen TV is mounted at eye level, this is easy, but when it is mounted at a significant height, it can cause neck strain. To avoid that from happening, you can lower the top of the flat-screen television, but it will require specialized wall mounts. 

    Instead of a standard stationary low-profile wall mount, you can use a tilting wall mount or a full-motion wall mount. A tilting wall mount can be adjusted vertically, while a full-motion one can be adjusted in different directions. 

    Whichever type of TV mount you choose, it should be suitable for the TV size and weight and should be easily attachable to your wall. Different types of walls, like plaster and lath walls, stud walls and block walls, require different mounts. 

    Benefits Of A TV Mount  

    A TV mount can make it easier to mount your flat-screen TV with a flat panel display to the wall and helps improve the viewing experience. It also offers other benefits, such as:

    1. Helps Save Space

    A TV mount can help you save a lot of space, which would otherwise be occupied by a table for keeping the TV. This means you can use the space below the TV in other, more productive ways. 

    2. Is Economical

    Compared to a TV table, a wall mount is more economical, and you can even get different types of mounts. Thus, a TV mount is a good option if you want to save money. 

    3. Better Utility

    In some situations, it is not possible to use a table for keeping the TV, such as when the TV has to be situated near a fireplace. TV mounts solve this problem by allowing you to mount the TV above the fireplace. 

    Things To Keep In Mind

    1. Keep The Middle Third As The Focus 

    People usually focus on the middle third portion when they watch TV. That is why it should also be the area you should keep in mind when determining factors like viewing angles and viewing distance. And it is why I advise keeping the center of the TV as the point from where to estimate a comfortable viewing level. 

    2. Learn About The VESA Compatibility Of Your TV

    Some TV manufacturers provide VESA mounting holes at the TV bottom, while others provide them in the center. Knowing the type of mounts your TV supports can make the mounting process significantly easier. 

    3. Consider The TV Weight

    TVs can be incredibly heavy, and in many cases, it may not be possible to mount them to regular drywall using standard screws. You may need to screw into the wall studs to ensure proper support and prevent the TV from falling.

    Tip

    If you’re unsure about the proper height and angle for mounting your TV, I would advise calling up a professional mounting service. Such services can help determine the proper height and angle and help select the most suitable mount and additional hardware needed for the job. 

    Alternatively, you can get an adjustable mount that allows adjustments later after the TV has been mounted. 

    Best Viewing Angle And Height To Mount Your TV Final Thoughts

    Conclusion

    Determining the right height and angle to ensure the best TV viewing experience can be a bit challenging. However, it is possible to mount your TV as required by taking proper measurements, using the right hardware and tools, and investing adequate time.

    While keeping in mind the factors mentioned above is important, it is also a good idea to plan for the future. This is especially vital if you plan to mount additional equipment on the same wall, such as a music system. Moreover, a well-placed TV mount can improve acoustics significantly by ensuring that the speakers are positioned optimally for an enhanced audio experience. Proper placement helps in directing sound waves toward the listener and mitigating distortions, thus providing an immersive audiovisual experience.

    Considering the future and potential equipment additions will save you a lot of hassle in the long term and ensure the best viewing and listening experience in your home.

    Spanish-style houses seem to be one of those architectural trends that never grow old.

    With the rising popularity of owning a quaint home among celebrities, more people are thinking of buying Spanish-style properties. These small yet elegant properties don't just have a unique style but also represent a part of American history.

    You can find these houses in different parts of the USA, mainly concentrated in areas like California, New Mexico, Arizona, and Florida, showing the influences of prominent Spanish rule. Many listings in these areas can actually lead you to a sweet deal on a Spanish-style home.

    That's why it's essential to know as much as possible about the design elements and trends associated with Spanish-style homes to buy or design a suitable house. We have created a guide to help you out, which is essentially a crash course on these beautiful properties.

    What Is A Spanish Style Home

    History Of Spanish-Style Homes

    History Of Spanish Style Homes

    While the earliest history of building Spanish-style homes began with the Spanish colonial era, most of the houses date back to the early 20th century. In fact, the 19th century was a crucial time when Spanish-style homes and buildings were seen more prominently.

    Coming to the more modern take on the style, it gained prominence with the Panama-California Exposition that took place in San Diego between 1915 and 1917. The New York-based architect Bertram Grosvenor Goodhue was given the job of designing the exposition, and Carleton Winslow was to assist him with it.

    Goodhue really wanted to make a difference with what he created and chose to go with an urban Spanish Baroque style that would immediately attract people. Rich Mexican and Spanish Churrigueresque decorations were added to the mix along with elements of Islamic and Persian styles seen in Moorish Revival architecture.

    That's why the Spanish homes found since then have mostly been a blend of styles and can't be put into separate boxes dealing with architectural trends. The trend started by Goodhue was to be known as the Spanish Colonial Revival. It left San Diego with some iconic landmarks like the Giralda Tower, the Mexico City Metropolitan Cathedral, as well as the Cathedral of Our Lady of the Assumption in Oaxaca.

    This trend of the Spanish Colonial Revival would eventually pick up pace in the southwestern states of the USA and give rise to several properties. They might not be as grand as the designs of Goodhue, but these Spanish-style houses were often built with a blend of Spanish, Mediterranean, and South American design elements.

    And, due to the touch of a bit of modernism, or the addition of a second story, the style came to be known as Spanish Eclectic.

    Characteristics Of Spanish-Style Homes

    Spanish-style homes often have their unique touch added by a designer. At the same time, there are still some characteristics that bind it to its origins. These are often the telltale signs that dictate if a house has been made with a Spanish influence, so let's have a look at some of them.

    A. Exterior Characteristics

    What stands out in a Spanish-style home is its exterior. The beautiful yet earthy additions of either the stucco or wrought iron detailing can help a house look unique compared to others in the neighborhood. Also, some Spanish-style houses, particularly the Mission Style or Churrigueresque properties, are more ornate than usual homes.

    1. Stucco Walls

    Stucco Walls

    One of the typical characteristics that Spanish-style homes share is the use of stucco on the thick walls. This traditional mix of lime, sand, and water helps to add texture to the exterior walls, and people like to keep the natural color of stucco or paint it white.

    Other than for decorative reasons, stucco was used to prevent the house from getting too hot during the summer months. Hence, it is used in Spanish-style homes for practical purposes while adding a rustic look.

    2. Roof Tiles

    Typical Canary style holiday apartments and tropical plants. Roof Tiles

    Spanish-style homes look incomplete without the use of the iconic red roof tiles. They can either be laid flat or hipped based on the design of the roof. And the tiles definitely help to add more character to the house by contrasting with the white stucco walls.

    These tiles are usually made with terracotta and have an "S" or barrel shape. Apart from being an eco-friendly roofing option, terracotta tiles have long been used to line roofs for keeping the house cooler during hot days.

    Use of these tiles can often be found in the Spanish-style homes of California and Florida. On top of that, these tiles may last for a long time and need little to no maintenance when installed properly.

    Although typically red, more modern-style Spanish homes can have colorful tiles on the roof.

    3. Stone And Brick

    Old village with barrels with plants and flowers in the street, Sequeros, Salamanca. Stone And Brick

    Apart from the use of stucco, stones or bricks can be used in Spanish-style homes, particularly those having a more Mission Revival approach. A stone path is often added to these homes to give them a more luxurious yet unpolished look.

    You may find these brick or stone paths in the inner courtyard or driveway of the homes. In Mission Style homes, you may even find the exterior walls featuring carved stonework, similar to that used in churches built by the Spanish settlers.

    4. Wood Support Beams

    Taos Pueblo in New Mexico, USA. Wood Support Beams

    On having a look at traditional Spanish or Pueblo-style homes, you'll find wooden beams jutting out of the walls. This was due to the use of wood to hold up the weight of adobe or mud bricks used in making the homes. These days, the wooden beams you see in Spanish-style homes tend to be more decorative than functional, enhancing the look of plain stucco walls.

    5. Wonderful Arches

    Patio with flower pots and stairs to arcades with arched doors. Cordova. Wonderful Arches

    Another common characteristic of homes made in the Spanish revival architecture style is the use of arches. These can be clean, defined arches or more subtle ones, as seen in Mediterranean-style homes. If there's enough space, designers may even think about building an arcade - a pathway of arches.

    Apart from the typical gates or entrances, the arch might also be added to windows or even as small details to the walls, such as gable vents. You should note that arches weren't really incorporated into the traditional Spanish homes, as earlier people preferred small square windows to ward off the wind.

    However, the addition of arches in modern homes, especially in Spanish Eclectic style homes, can make the building look impressive and welcoming.

    6. Asymmetrical Design

    Asymmetrical Design. Scenic alley with traditional Spanish white houses in the old town area of Albaicin, Granada, Andalusia, Spain

    A stark difference between the usual modern homes and the Spanish-style homes would be in the layout. Spanish homes have an asymmetrical design with prominent cross-gables and side wings, while some have a distinct L-shape.

    Along with the basic asymmetrical layout, these houses also tend to have multi-level roofs. Rounded parapets and turrets might be added to the roofs for extra design elements. And though not common in Spanish Revival or Eclectic styles, tower-like chimneys can be seen in some homes.

    Overall, you can never expect two Spanish-style homes to have the same design. There are some instances, like in the Monterey style homes, where the design is more symmetrical and similar to that of the English Colonial-style houses.

    7. Courtyards

    Courtyards. Beautiful courtyard with water fountains inside the Alcazaba in the city of Malaga, Andalusia. Spain. Medieval fortress in arabic style

    There's no doubt that Spanish-style homes are far more welcoming, especially because of the greenery and the presence of a courtyard.

    Instead of the usual lawn or backyard, a Spanish home would have an outdoor or interior courtyard. Plus, in warmer areas like California or Florida, adding more drought-tolerant plants like cacti or succulents is the norm.

    Landscaping is crucial to add a touch of greenery to these homes, which helps the earthy tones of stucco or stones to pop even further. On top of that, if there's a bit more space, Spanish houses may even have small fountains or reflecting pools. They are the perfect location for idling away your summer holidays when the temperatures are soaring.

    8. Minimal Ornamentation

    Minimal Ornamentation. Cozy beautiful streets. Andalusia, Spain

    One more noticeable thing about the exteriors of Spanish-style homes is the presence of little to no ornamentation. The design includes slimmer trims, and when there is a bit of ornamentation, it's usually to highlight the arches. Some homes have wrought iron accents, such as moderately ornate window grills, gates, or simple wall fixtures.

    B. Interior Characteristics

    Just like the exterior of a Spanish-style house, the design elements of the interior are subdued and more laid-back. You can even see the continuing aspects that bind the interior to the exterior, such as the wooden beams or the arch pathways. Here are some of the common characteristics in the interiors of Spanish-style homes:

    1. Indoor Stucco

    Indoor Stucco

    Similar to the exterior of a Spanish-style home, you can find stucco on the interior walls. It might be a bit smoothed down compared to the outside, but the earthy tone of the walls does stand out. The best part is that the stucco creates a blank canvas for the entire room, letting you add any décor pieces irrespective of their color.

    2. Exposed Beams

    Exposed Beams

    On visiting a Spanish-style mansion or even a small home, you'll most likely find high ceilings supported by exposed wooden beams. In a modern Spanish home, it is decorative in nature, with the dark wooden texture adding to the earthy or more natural quality of the property. Furthermore, the unified color of these exposed wooden beams creates uniformity between the different rooms.

    3. Patterned Tiles


    Patterned Tiles

    Usually found in Mediterranean-style homes, the patterned or decorative tiles have also become a staple in the interiors of Spanish-style architecture. These elaborate tiles help to add the much-needed color into a space that's mostly brown-white owing to the use of stucco and heavy wooden pieces.

    Some of the common use of decorative tiles include in the risers of a staircase, accents on the walls, or even on the floors if you're feeling adventurous. The use of Mexican hand-painted ceramic tiles can add a bit more pizzazz due to the blue, green, and yellow colors.

    4. Elaborate Fireplaces

    Elaborate Fireplaces. Beautifully decorated fireplace with fire in it in the living room

    Seen commonly in Spanish colonial homes as well as other Spanish-style homes are elaborate fireplaces. This help to add a focal point to the otherwise plain living area. Often the mantel is quite elaborate and even touches the ceiling. The fun fact is that many people are keeping to choosing these spectacular fireplaces while adding modern elements to other parts of their houses.

    5. Wrought Iron

    Vintage lantern and beautiful twisted wrought iron balconies on the facade of an old house of a European city.

    Wrought iron has become an inseparable part of this architectural style, most often seen in the Spanish eclectic style homes. The heavy and dark features of wrought iron pieces stand out among the stucco walls, especially when used as light fixtures. Other than that, wrought iron goes really well with traditional wooden pieces of furniture, which have been stained to be a dark brown color.

    6. Wooden Furniture

    Wooden Furniture

    When it comes to Spanish-style homes, another décor element is the use of heavy wooden furniture. These pieces usually complement the wooden support beams present in the ceilings. The furniture usually has a rich brown color, with intricate carvings, and may call back to the Spanish Baroque elements. It's like the furniture itself adds details that might be otherwise missing in the simple home of stucco walls.

    Along with the furniture, you'll also find the use of wood in the case of cabinetry throughout the homes. This is true for Spanish Eclectic style homes and more traditional Spanish colonial architecture.

    7. Proper Window Coverings

    Proper Window Coverings

    As you might know by now, Spanish-style homes are usually present in states known for hot summers. It also means that the days are going to be quite bright, so the windows need to have substantial drapery to limit the rooms from getting too hot. This is especially true for Spanish Eclectic style homes where arched glass windows have replaced the small windows of Spanish colonial or revival houses.

    You can also use the drapes to add complementing color to the rooms if selecting rich shades of red, blue, yellow, and orange. Some even use floor-to-ceiling drapes in neutral shades with proper liners to stop the heat from entering the rooms through the windows.

    Different Types Of Spanish-Style Homes

    We have already talked about the Spanish style being more of an umbrella term to define various blended architectural elements. Hence, we thought that it would be better to shed light on some of the styles that have been popular over the years while building Spanish homes.

    1. Mission Revival

    Mission Revival

    Mission Revival is a style where the homes are similar to that of the Spanish churches built by the Spanish missions. These homes have a relatively simple façade adorned by arched entrances, low roofs, and at times bell towers. Most of them also make use of classic stucco walls and Spanish tiles.

    Quite popular in California, the Mission Revival style was used for residential and public buildings. Buildings of this style were specially built between 1890-1915. Some instances of Mission Revival buildings include the Mission Inn of Southern California and the Louis P. and Clara K. Best Residence and Auto House in Davenport, Iowa. Another beautiful home in this style is the Henry Bond Fargo House of Illinois with its stone carved façade.

    2. Pueblo Revival

    Taos, USA - July 27, 2008: Ranchos de Taos in New Mexico. Pueblo belonging to a Tiwa-speaking Native American tribe of Pueblo people.

    Pueblo Revival is inspired by the living spaces that used to be designed by Puebloans, a native tribe of the Southwestern United States. Like, natural elements like stucco and heavy rounded wood beams known as "vigas" were used to build these homes during the 1920s to 1930s.

    These homes usually have flat roofs covered in Spanish-style tiles and walled courtyards or patios. The Pueblo Revival homes often had a red earthen façade compared to the other Spanish styles. La Fonda on the Plaza, a historic Santa Fe hotel, is a notable Pueblo Revival building.

    3. Monterey

    Typical suburban street, residential district, detached houses or single-family homes, road in Carmel city, Monterey, California generic architecture, USA. Neighborhood real estate property in suburb.

    The Spanish-style homes of Monterey, California, are said to be unique as they are inspired by the blended style of Thomas O. Larkin. This man started building his homes in 1835, which was way before the Spanish Revival architecture.

    What makes the buildings stand out is the design aspects lent from French, Spanish, and English styles of architecture. Hence, in Monterey-style homes, you find flat roofs with adobe walls with spectacular upper and lower balconies. The exteriors are also symmetrical as opposed to the usual Spanish-style homes.

    Currently, the Larkin House and the José Castro House are great examples of this architectural style.

    4. Floridian

    Floridian

    As you can understand, the Floridian architecture style is specific to the state, and it has some key differences, especially in the form of the design elements. In place of the more subdued and plain adobe or stucco walls, homes from the Florida Renaissance borrowed from Moorish and Spanish Baroque styles. You can often find geometric windows, ornate columns, and heavily decorated facades in these buildings.

    5. Spanish Eclectic

    Spanish Eclectic

    You'll find that most newly built Spanish-style homes may have a blend of Spanish elements taken from the above-mentioned architectural styles. Along with that, modern elements can be built to create a unique place, such as a featureful office space or a game room that deviates from traditional Spanish-style homes.

    These homes also tend to have a split level or added balconies to make them stand out. Hence, to make it less confusing, this blending of style and addition of modern elements is called the term "Spanish Eclectic."

    Spanish Style Home FAQs

    Q1. What is a Spanish-style house called?

    Spanish-style houses can be called by various names such as Pueblo, Monterey, Mission style, Moorish, and Spanish Revival, based on their architectural style and influences. You may even hear people refer to them as Mediterranean-style homes because of the similar construction with additional French or Italian architectural influences. 

    To simplify the answer and avoid confusion, you can just refer to them as Spanish-style homes. More people have started to term the style as "Spanish Eclectic" to honor the distinct qualities of each building, especially the inclusion of modern touch.   

    Q2. What makes a Spanish-style home?

    A Spanish-style home is made when the different defining Spanish characteristics are added to make a space. The common among these is the red roof tiles, stones, white stucco walls, courtyards, and homes with lots of arches. 

    One can make a Spanish-style home either based on the Revival movements, which somewhat closely follow the traditional elements. They may even create a new Spanish home in the eclectic style by blending the traditional with the modern. 

    However, what truly makes a Spanish home is its earthy tones and cozy environment created with the use of natural materials. 

    Q3. What do Spanish homes look like?

    Spanish-style homes stand out due to the unique characteristics like terracotta tiled roofs, courtyards, visible stucco sidings, and the presence of arches in the design. Most of them are single-story homes with an asymmetrical shape and cross-gables or side wings. And, the houses might have a hipped or a flat roof with parapets. 

    Often little to no embellishments are present on the exterior of a building, but you may find some detailing around the arches. However, some homes have details added by finely crafted wrought iron, especially on windows, stair railings, and gates. Some homes even have exposed wooden support beams and small windows to mimic the look of traditional Spanish homes. 

    Overall, the aim behind adding these features is to create a warm and earthy space with the influence of natural elements, making landscaping an integral part of any Spanish-style home. 

    Q4. What is a Pueblo-style home?

    A Pueblo-style home is usually designed according to the styles followed in Pueblo Revival architecture. Similar to Spanish-style homes, natural materials like adobe (sun-dried mud), stucco, and stones are preferred to create the homes. 

    The Pueblo-style homes were primarily built in New Mexico and Arizona during the early 20th century. Inspiration was mainly taken from the traditional multifamily mud homes built by the Pueblo Indians. It is also said to have drawn influence from the Spanish Mission and Territorial Styles. 

    Like the Spanish houses, the Pueblo Revival homes are built using heavy wood components in the form of doors, ceiling beams, and posts. However, a slightly different characteristic is the inclusion of square windows and rounded exteriors. 

    Q5. How to modernize a Spanish-style home? 

    The sky's the limit when it comes to modernizing a Spanish-style home. One of the best parts is that the Spanish Eclectic style of building homes has incorporated both modern and traditional elements of Spanish architecture. 

    A common way to modernize these homes is to start with the kitchen by opening it even further to make it spacious. You can add islands like modern homes or the required appliances to make the space more useful. 

    Another way to add a modern touch would be to use more minimalistic furniture in the space of the heavy wooden ones. Many people also like to replace the small windows with bigger glass windows while creating natural arches commonly used in Spanish architecture

    However, our most adventurous way of modernizing Spanish-inspired homes is through the bathroom. Adding colors like black or gray can change up the look and make it look starkly different from the rest of your home. You may even use marble in the bathroom or build a walk-in shower to change the traditional approach 

    Q6. How to decorate a Spanish-style home? 

    Decorating Spanish-style homes isn't that hard as you can make it easy with only earthy tones. When choosing drapes and other fabrics for the house, try out colors like brown, yellow, blue, red, or orange. We especially feel that Spanish home décor looks spectacular with the use of natural fabrics like cotton or linen. 

    Another popular aspect of Spanish-style homes is the use of wrought iron. Apart from the usual fittings used in a home, you can even get wrought iron pieces to add a highlight to spaces. These may be in the likes of wrought iron candelabra, small knick-knacks, or even elaborate artwork. 

    Moreover, the use of a traditional rug with colors like red, green, or blue can complement the floor tiles and the white stucco walls. You can even choose to decorate rooms around the theme of the rugs to make the space more cohesive. Lastly, try to focus on lighting the rooms, and we recommend adding at least a couple of pendant lights around the home.

    Modern high-rise residential building in the Spanish style against the blue sky.

    Final Words

    That's everything we had to tell you about Spanish-style homes. We hope the information will help you decide on either decorating or owning one of the lovely properties.

    You can easily tweak the décor of the average home to include some of the elements seen in various Spanish architectural movements. And remember to have fun, as there are no restraints for using only specific elements.

    With that, it's time for you to go and check out Spanish-style homes!

    What Is A Quonset Hut Home

    What Is A Victorian House

    What Is the Craftsman House Style & Why It’s Popular Today

    35+ Different Types of Houses

    23 Hip Roof Types & Styles

    Mobile Home Skirting

    Homes can almost be considered living entities, as they change and evolve depending upon the owners’ needs and preferences. 

    And like living entities, they can get old and outdated, both in appearance and functionality. When that happens, the biggest question that homeowners are faced with is whether to make changes to the existing setup and renovate it or opt for an-all new construction. 

    Since this question involves a huge amount of expense, both in monetary terms and in terms of the time and effort involved, it requires serious consideration. And finding the correct answer requires taking into account several factors that can vary from case to case. That’s why we’ve decided to help you out by comparing the advantages and disadvantages of renovation vs. new construction. 

    So, make sure to read until the end before making a decision!

    Renovation Vs New Construction

    Renovation Vs New Construction

    Understanding The Concepts Of Renovation And Construction

    For making a comparison between renovation and construction, it is essential to understand what both these terms mean. 

    New Construction

    New Construction

    Source Unknown

    Building a new custom home is a project that is generally larger in scope than renovation. It involves close collaboration between the homeowner and the construction team, including the architect, interior designer, and builder. Additionally, various factors such as the construction process, the architectural style, the location of the house, and many others will require careful consideration and planning by the team. 

    Since the entire structure will be constructed from scratch, new construction will require more resources, time, and effort than a renovation project. However, there are certain advantages that this method offers, which we shall be looking at now.

    Benefits Of A New Construction

    1. Warranty And Maintenance Advantages

    Warranty And Maintenance Advantages

    A newly constructed house is made up of all new building materials, with several of them offering some warranty. This helps eliminate any worries associated with damage, as the construction company is bound to cover damages on materials that come with warranties. Additionally, new houses require minimal repairs, thereby reducing the need for maintenance. 

    2. Suitable For Different Types of Lifestyles

    Since you have complete creative control over the construction of a new house, there is the option of designing it to meet a particular lifestyle. For instance, homeowners looking to adopt an eco-friendly lifestyle can choose to use sustainable materials in the construction process and design an environmentally efficient home. 

    A custom home design can help you take advantage of modern technological advancements to ensure a more comfortable and convenient life. For instance, you can use a modern electrical system to handle today’s appliances and devices, such as smart devices. Similarly, the latest innovations in plumbing and other fixtures can be incorporated into the home construction process. 

    4. More Design Options

    More Design Options

    Source Unknown

    With custom home construction, you are not limited by existing layout and space requirements and can take advantage of various architectural designs for the building. The house can even have custom features to improve functionality and appearance.

    5. Greater Control

    Since you are not restricted by the layout and other requirements when building a new custom home, there is greater control over the entire process. It means you can customize every aspect of the new home, such as the floor plan, the design, and other factors. 

    For instance, you may want to incorporate modern design ideas that can involve use of fixtures such as modern lighting or plumbing. In the case of a renovation, these will have to be restricted according to the existing setup, but there are no such restrictions in the case of a new construction. 

    Renovation

    Renovation

    Source Unknown

    Renovation involves alterations to your current home and can be undertaken for the whole house or a specific area or room. In this case, all decisions need to be taken while considering the design and layout requirements already in place. These may include the size of the house or room, materials used in its construction, lighting and other fixtures, etc.

    The aim of the renovation is to improve the aesthetics and functionality of an area instead of completely breaking down the old home to create something new. It is generally a more cost-effective solution that can be completed more conveniently than constructing a new space. 

    There are also some other advantages of a renovated home, which we’ve mentioned below. 

    Benefits Of A Home Renovation

    1. Retain A House Full Of Memories

    Retain A House Full Of Memories

    Source Unknown

    Our houses are generally places with lots of cherished memories, and building a new custom house involves letting go of them as the existing structure needs to be demolished. This is not the case with a remodeling project, where the layout and space of the existing house remain intact. Hence, you can enjoy the convenience of modern facilities in the same familiar space. 

    2. Extend The Life Of The Structure

    Source Unknown

    Renovating your existing home can help extend its life and make it last longer while also helping improve its appearance. Essentially, it can help turn the clock back on its age, without involving the effort required in completely rebuilding the structure. 

    3. May Not Always Require You To Move

    May Not Always Require You To Move

    Source Unknown

    Renovation may be undertaken for the entire home or a certain area or room. For small-scale renovations, such as for a specific area, you may not need to move and can continue using the house while the renovation is being undertaken. 

    4. Allow Making Modifications And Updates

    A home remodeling is the perfect opportunity to update your home using the latest technologies to make it environmentally friendly and energy-efficient. Other modern devices and facilities can also be incorporated into the design to improve convenience and ensure greater comfort. 

    Factors To Consider When Deciding Whether To Renovate Or To Build New

    Here are some factors to consider when deciding on renovating your existing home vs. building a new custom home. Since the requirements of every individual and family are different, considering these factors will make it easy to determine which method would suit your unique situation. 

    1. The Duration Of Use 

    The Duration Of Use

    Source Unknown

    If you’re planning to use the house for the long term and then sell it, building a custom home from scratch makes sense financially. That’s because all materials and fixtures are completely new and will last for a long time. Some materials, such as the exterior paint, may even last up to 7 years, while others, such as shingles, can last up to 20 years.

    This means that even if you plan to sell the house several years into the future, it’s value will still be high.

    On the other hand, if you do not plan to sell the house, getting it renovated might be a better option. You can make changes to certain areas or even the house, modifying it according to changing needs, such as including safety features for children or adding areas like guest rooms.   

    2. The Expenditure Involved

    One of the most important factors to consider is the amount of money you are willing to spend on the specific project. While both a home remodel and building a new custom home involve significant investment, a remodeling project is a more cost-effective option, especially for those on a limited budget.

    On the other hand, if you are able and willing to invest a considerable amount of money, building a new custom home is a great choice. The first step will involve demolishing the existing structure and clearing the land, after which construction on the new building will start. 

    3. The Living Requirements

    A major advantage of opting for the remodeling route is that the house can still be used while being renovated. It can be more convenient and help save on costs, and in some cases, it may be the only option. However, when living within a construction zone, there will always be safety concerns to keep in mind, especially if there are children or pets. 

    On the other hand, for new home construction, you will need to make alternative living arrangements until the house gets built. It will generally involve a higher amount of expenditure. 

    4. The House Conditions

    The House Conditions

    Source Unknown

    According to industry experts, any house must meet certain conditions for a successful remodeling. For instance, if the improvements you wish are incompatible with the existing structure and design, building a custom home might be the only option. Similarly, the foundation of the building may be bad, and you may need to jack the house before remodeling it. In such a case also, building a new house might be better. 

    5. Zoning Restrictions

    Building codes and zoning restrictions also have to be kept in mind, depending on the size, type, and location of the building. These restrictions will determine whether you can remodel or build a new house in most cases. For instance, such restrictions may prohibit tearing down a small house and constructing a huge mansion in its place. Additionally, new construction homes may have height restrictions, limiting them to one or two stories. 

    In some areas, laws prohibit rental properties, which will prevent you from building a carriage house for renters. 

    6. Other Factors

    Source Unknown

    Individual factors such as the location, access to the original building plans, history of previous renovations, and use of any hazardous materials should also be taken into account. Aside from that, you must consider future maintenance, as in the case of renovated buildings, parts that are not renovated will require greater maintenance.

    For building a new custom home, factors such as the local building codes, the environment and weather, and various neighborhood restrictions need to be considered. You will also need to check the availability of various materials and labor before your dream home can be built.

    Above all, consider the main purpose for which the house needs to be remodeled or rebuilt from a clean slate before making a final decision. Do keep in mind that your house plans or boutique home plans may involve redesigning the space for greater safety in case there are children. Or you may be wanting to increase the value of the house with plans to sell it in the future. Similarly, there might be other reasons for rebuilding a completely new one from scratch. 

    Renovation Vs New Construction Frequently Asked Questions

    What Is The First Thing To Do When Renovating A House?

    Usually, the first step in any renovation project is to assess the property and develop a plan that points out the main objective of the project. This includes creating an outline of the activities that need to be undertaken and the sketches or blueprints of the completed project. Assessment of the property will help you determine how viable the project is. 

    Which Room Should You Renovate First?

    The answer to this question depends on how you plan to undertake the renovation project. If you want to renovate the house on your own, then it may be a good idea to start from the room that is furthest from the entry door. On the other hand, if the renovation is being done by professionals, they will decide where to start the project from after considering factors such as efficiency and convenience of working. 

    How Do I Prepare For A Renovation?

    There are quite a few methods that you can use to prepare for a renovation, first of which is decluttering the area that is going to be renovated. Remove all the furniture, lights, and other items that you do not need during the renovation and store them somewhere.

    Another step that you can take is to cover all the remaining items to protect them from dust and paint. 

    What Is The Golden Rule In Construction?

    In the construction industry, the Golden Rule states that “whoever has the gold, makes the rules.” Simply put, this means that the project owner states the rules that should be followed during the construction project. While theoretically it is a non-negotiable rule, in reality, contractors and architects may have opportunities to negotiate with the project manager or other senior personnel involved in the project. 

    What Are The Five Parts Of The Principles Of Construction?

    The five parts of the principles of construction have been established to ensure that any construction is completed in the safest, most efficient, and economical manner. They include aesthetics, economy, safety, speed, and environmental protection.

    In many cases, it is not possible to ensure compliance with all these principles. But those working in the industry must strive to meet as many of them as possible to ensure a well-balanced construction. 

    Renovation Vs New Construction

    Renovation Vs New Construction Final Words

    Whether you are building a custom home or going for a whole house remodel, the most important step is the planning process. 

    While both have their advantages and disadvantages, considering the various key factors mentioned above can help you make the right decision. Factors such as the time frame, property taxes, and other considerations can be very important in helping you decide which method to choose. 

    So, make sure to do proper research before proceeding. Until next time!

    "How does a refrigerator work?" is often a question one would ask yourself out of curiosity.

    "Where does the chill of a fridge come from?" or "What exactly is a gas compressor?" you would think and wonder.

    This guide here will help you understand the cyclical nature that all refrigerators and freezers go through to maintain the cold.

    Refrigerator Function: How Does a Refrigerator Work?

    Refrigerator Function: How Does a Refrigerator Work?
    © Homesthetics - Monica Hewitt

    A refrigerator or fridge works by venting heat out of the machine to keep the food fresh at a colder temperature via a closed system.

    This cycle begins and ends with the refrigerant traveling through the coils inside the fridge, separating cold and hot air by exhausting the heat away from the contents.

    The Refrigeration Cycle: Step-by-Step

    The Refrigeration Cycle: Step-by-Step
    © Homesthetics - Moumita Das

    The refrigeration cycle or the vapor compression system begins with a fluid called refrigerant and is generalized as the following steps.

    1. Refrigerant Compressed:
      The cooling process begins in the processor as refrigerant vapor or cool gas is drawn into the compressor.
      While in the compressor, the vapor is compressed and sent out into higher temperature and pressure, the compressed gas now being hot.
    2. Hot Air Pushed Out:
      As the compressor pushes the vapor into the condenser coils outside the refrigerator via high pressure, the compressor exchanges heat with the room's cold air.
      The warmed refrigerant gas is a byproduct of the refrigerator. This is then exhausted by the vents from the back of the fridge.
    3. Refrigerant Becomes a Liquid:
      The hot gas from the condenser coils meets with the cooler air temperature in the kitchen, producing a liquid refrigerant.
    4. Refrigerant Flows Into Evaporator Coils:
      The high-pressure or compressed fluid refrigerant is compressed as it enters the evaporator coils inside most refrigerators through the expansion valve.
    5. Heat Is Absorbed:
      The refrigerant liquid absorbs heat inside the fridge, cooling the air along with the insides of the refrigerator at around negative 25 degrees Fahrenheit.
      The refrigerant evaporates into a cold gas and flows in.
    6. Refrigerant Evaporates:
      A refrigerant gas is created from the coolant liquid's evaporation and flows back into the compressor.
    7. Cycle Repeats:
      The refrigeration cycle is sealed as the refrigerant gas is led back to the compressor, beginning anew whenever you power up the machine.
      This repetition keeps the refrigerator in a constant loop of cold air as the cycle begins again continuously as long as there's electricity.

    Why Does Cooling Take Time?

    Why Does Cooling Take Time?

    Source: clearwaycommunitysolar

    The cooling process would take time due to thermodynamics, wherein you can't create energy out of anything and would need energy from other forms.

    This fact goes against the idea of cooling your kitchen with the refrigerator door open. A refrigerator takes heat away from the chiller cabinet with the cooling liquid.

    This results in the liquid being pumped outside the cabinet and releasing heat in equal amounts as what went in. The cycle repeats with fluid back to the compressor and heated air.

    Following the law of energy conversion, it takes so long to cool or freeze food as they contain a lot of water. A small amount contains a lot of molecules, whose energy depends on whether they're hot or cold

    Hence, it would take a couple of minutes to either heat or cool water as there needs to be energy to remove or create heat — so it's not that your freezer or refrigerators are weak.

    The amount of energy needed to change water to a higher temperature would need 4200 joules for every kilogram per degree at their specific heat capacity.

    A refrigerator's freezer can remove heat at 100 watts or 100 joules per second, meaning it would take 42 seconds to cool water. The same principle applies to food too.

    Why Is Electricity Needed for Refrigerators?

    Why Is Electricity Needed for Refrigerators?

    A refrigerator works through electricity and the second law of thermodynamics — which states that heat always moves faster from hotter to colder regions.

    All the while, energy or the flow of heat would never move in the opposite direction, unless through a powerful external force.

    Fridges transfer heat from colder regions to hotter ones.

    As such, this heat flow would require electricity to eventually cool the fridge's contents, so the internal temperature remains cold compared to the surroundings.

    Also, gasses heat up when compressed and cool down as they expand, such as with a warm bicycle pump on a tire or how cool perfume feels when applied.

    The US Energy Information Administration states that refrigerators and other in-home appliances use 7% of all domestic electricity — the same as television but half as air conditioning, which is 17%.

    All the applications also follow the same working principle all refrigerators do.

    What Are the Different Parts of a Refrigerator?

    What Are the Different Parts of a Refrigerator?
    © Homesthetics - Moumita Das

    The best kind of refrigerator and the best kind of mini-freezer would have the following high-quality parts in high-quality.

    Together, these create the right mechanical refrigeration and chemical reactions:

    Thermal Expansion Valve

    The thermal expansion valve or flow control device controls the flow of liquid refrigerant or coolant into the evaporator coils inside the machine.

    The mechanism is small and just as sensitive to temperature changes within a refrigerant.

    Compressor

    A compressor has a motor that sucks up the coolant in the evaporator and then compresses it into a cylinder to make high-pressure gas.

    The compressor is the beginning and the end of the cycle. It maintains the refrigerator's cold temperature as the compressor starts and renews the cycle by sucking in gas to compress.

    Evaporator

    This machine consists of multiple tubes with fin sets made of highly thermal conductive metals to remove heat inside. After absorbing heat, it's blown through a fan.

    This heat exchanges partially absorbed heat from items inside the fridge as it cools the gaseous refrigerant, and the liquid turns into refrigerant vapor.

    Condenser

    The condenser consists of externally finned tubes found at the back of the fridge as the cycle helps the liquefaction of the gaseous refrigerant by absorbing heat and expelling it outside.

    The condenser coils or thin radiator pipes remove the heat of refrigerant gas. As the temperature drops, the cool vapor condenses back into liquid form, acting as a heat exchanger.

    Capillary Tube

    A capillary tube is one of the most simple refrigerant meters used not only on a refrigerator but also in air-conditioning despite only being coiled copper.

    It works because whenever the refrigerant leaves, the condenser enters the small hole of the capillary, and the higher pressure drops are guided into the evaporator to turn into gas.

    In a sense, the capillary acts as a pipe.

    Refrigerants

    Also known as coolant, this liquid pushes the cycle into its loops. It's also a chemical that develops, alternating between states as hot gas and cool liquid.

    During the 20th century, fluorocarbons, CFCS, and other gases such as propane and carbon dioxide were counted as refrigerants.

    However, nowadays, they are replaced by more environmentally friendly refrigerants, ammonia, R-290, R-600A, etc.

    The History of Refrigerators

    The History of Refrigerators

    Source: lovetoknow

    Now that you understand how a refrigerator works, you should also understand the steps that lead to the earliest form of refrigerator technology in food preservation.

    Cooling Before Refrigerators

    Before electricity and modern refrigerators, people used anything with colder temperatures to preserve fresh food — such as using cold water from local rivers and lakes.

    The alternative would have been storing the food within basements, cellars, or pits, and ice boxes filled with ice or snow with straw, seaweed, or sawdust.

    Iceboxes resembling modern fridges were especially popular during the 19th century. These were made of insulated metal or wood with a tray or compartment.

    The tray or compartment was meant to hold ice blocks to chill the whole apparatus, with the ice blocks delivered to each house with an icebox.

    The Invention of Refrigerators

    The invention of the modern fridges led to the Scottish physician William Cullen having an idea regarding the cooling effect in 1748.

    Cullen realized that the aftermath of liquid becoming gas or vapor left a cooling byproduct, but the physician did nothing with his discovery.

    However, in 1834, American engineer and physicist Jacob Perkings invented the first vapor compression system, wherein a fluid is compressed and expanded by differing pressure.

    This process was done within a cycle that Perkins further systematized, leading the American to be known as the Father of the Refrigerator.

    The refrigerator was further refined by American physicist Fred W. Wolf in 1913. He created the first one powered by electricity with a refrigeration unit on top of an icebox.

    Later, William C. Durant created the first home fridge with a compressor unit. This was mass-produced in 1918 and was put to use in more industries of the 20th century

    Types of Refrigerators

    Types of Refrigerators

    Source: pinterest.com

    Although there is a great variety of fridges, most still follow the same inner workings and closed cooling cycle system.

    Most refrigerators nowadays have a frozen storage space or a freezer compartment, following a similar freezing cyclic process. Their presence and location divide fridges into various types.

    These types of refrigerators include:

    • Top-freezer fridges
    • Side-by-side fridges
    • Bottom-freezer fridges
    • French door fridges
    • Counter-depth fridges
    • Mini-fridges

    Refrigerator Working FAQs

  • Although you now know how the refrigeration cycle works, there are still things you would need to know to keep your refrigerator working and how the cycle helps.

  • What Is a Refrigerator's Ideal Temperature?

    The ideal temperature for a typical refrigerator would be around the low temperature of 35-38 degrees Fahrenheit to keep more forms of food fresh.

  • Why Does Frost Form in a Refrigerator?

    Frost forms in your refrigerator due to how water vapor hits the cold coils.

    The vapor first condenses into cold water, and as it makes contact with the coils, it freezes into a layer of frost.

  • How Do I Get Rid of an Odor in My Refrigerator?

    If the go-to answer of baking soda fails, a method requiring a more hands-on approach may be necessary.

    You can also check how to clean out your refrigerator in online communities and other articles. For one, it might even be due to your water filter.

    You can also call a professional should the problem remain, since the stench may have penetrated the insulation.

    If you’d like to try to get rid of the odor yourself, here’s what you can do:

    • Remove all items.
    • Throw away any spoiled foods and check especially any canned food and liquid.
    • Clean and remove any detachable glass attachments
    • Wash the door gasket with a mild detergent and rinse thoroughly.
    • In the event of stubborn odors, you can spread boxes of baking soda onto cookie sheets at the top and bottom of the fridge.
  • Why Is the Back of a Refrigerator Painted Black?

    The back of your fridge and all the external refrigeration coils are painted black because the color absorbs heat very well and radiates them off.

  • Can I Recycle My Old Refrigerator?

    Yes, you can recycle your old refrigerator as a common fridge is made of 95% recyclable materials.

  • How Does a Refrigerator Work Conclusion
    © Homesthetics - Monica Hewitt

    Conclusion

    A refrigerator operates via the exchange of heat and cold around the home appliance available around it to keep your food fresh.

    Your food is fresh for days longer as the cold around it halts decay and sometimes extends its shelf life for several days or even weeks.

    Zero Breeze Mark 2 is a portable AC unit made with innovative technology that doesn’t require AC power plugs and sockets for charging. Besides its ergonomic design and built-in compressor, this portable air conditioner stands out for its ability to harness solar power.

    This battery-powered air conditioner from Zero Breeze has taken the air conditioning market by storm with its built-in mini compressor that removes the hassle of adding water or ice. Marketed by IndieGoGo, Zero Breeze Mark 2 became incredibly popular due to its energy efficiency claims, as it consumes very little power to produce cold air.

    However, since this off-the-grid air conditioning unit isn’t available in usual outlets, many people are on the hunt for a detailed review of the product to make an informed decision. And here I’m with it!

    Zero Breeze Mark 2 Review

    1. Design

    Many air conditioning brands have attempted to design an ergonomic AC unit with a portable battery that eliminates the need for an electric wall outlet. These portable AC units include BougeRV, amongst others, which are ideal for RVs and campers. However, these aren’t as efficient and energy-saving for long-term use in high temperatures.

    After looking for an ergonomic AC unit for my motorhome for a long time, I finally discovered Zero Breeze, who has come up with a functional design and powerful battery that is minimalist and lightweight. 

    Their latest model, Mark II, has a handle with a comfortable grip and easily accessible controls, including modes, speeds, and power on/off; however, the major theme of this design is its ‘one-button access’. This means that you can turn on the device, lock the battery attached, and install and dissemble the drain hose, all with a single button.

    Moreover, unlike traditional portable ACs, the Zero Breeze Mark 2 is a lightweight unit measuring only 11 inches long and 10 inches wide, so it’s easy to carry and pack - perfect for camping and tents. Adding on to that, it is splash-resistant because of its built-in IPX4 protection.

    2. Battery Life

    Considering the battery life of a portable air conditioner as expensive as Mark II is very important. According to Zero Breeze, the average battery life of the portable AC unit at the highest setting is five hours. Although some reviews mention that it actually lasts for 3 hours, the lower settings can actually extend the battery life to five hours, if you don’t run the portable AC continuously but with intervals.

    Powered by a removable 24-volt lithium-ion battery, this Zero Breeze AC has a battery twice the size of its previous model. It easily connects to the portable AC, but you need to tether it to a USB adapter. 

    Warning

    I recommend against keeping it running for a long time, as it can lead to overheating and damage. Plus, buying a replacement lithium polymer battery will cost you a fortune!

    3. Charging Time

    One of the major selling points of Zero Breeze Mark II is its 3 to 5 hours of charging time, which is quite nominal when it comes to battery-operated devices. Of course, since it has a chargeable battery, you’d need to charge it eventually whenever the battery is low. 

    If you prefer uninterrupted cooling, this portable air conditioner also allows you to operate it while attached to a wall outlet. This is especially beneficial during the summers when there is excess hot air build-up in your living space.

    There’s also the option of car charging, but from my personal experience, the whole process takes a lot longer than using an AC adapter.

    4. Performance

    Unlike other portable air conditioners, the Zero Breeze Mark 2 has a built-in micro compressor that can efficiently regulate temperature and distribute cold air up to 40 ft. This portable AC has enough cooling capacity to reduce ambient temperature by 30 degrees to combat heat. Moreover, you can easily carry it to different rooms and corners while attached to the electrical outlet as it weighs less than 20 pounds. 

    However, the Zero Breeze Mark 2 is not a smart air conditioner that connects to Google Assistant or Amazon Alexa for remote control. But, despite not having smart controls, the AC produces very low noise due to its speed condenser.

    5. Filtration

    Like every other air conditioner, the Zero Breeze Mark 2 has a venting hose that helps drain water and refrigerant without making a mess. These portable air conditioners also produce hot air through their heat exhaust system during cooling, so it’s best to keep the hose where it can safely exhaust the heat. 

    But sometimes, the vents might be blocked with dirt or grease, so keep an eye out and use a cleaning brush to remove the build-up. Overall, the Zero Breeze Mark 2 has a good filtration system to maintain a cooler environment.

    6. Energy Efficiency

    As I already stated before, these battery-powered devices can run for 3 to 5 hours, depending on usage, and require 5 to 6 hours to charge fully. What’s more, this AC unit is one of the very few products I’ve come across that can harness power from solar panels - no wonder it’s popular among campers!

    With this innovative solar power feature, this portable AC takes efficient energy use to the next level. You can buy a connected wire to support the panels and harness battery power even when there’s no electricity. Plus, it features a sleep mode for saving energy when it has reached the ideal temperature.

    7. Cooling Power

    Even though it’s portable and doesn’t require a power source, the Zero Breeze Mark II isn’t designed to cool the entire house. But, Mark II’s 2,300 BTU cooling power can produce enough cool air for small spaces like vehicles (RVs and motorhomes), boats, a small tent, or a compact room.

    Its cooling effect may seem insignificant compared to 8,000 or 12,000 BTU units, but this unit can be very effective for spaces measuring up to 120 square feet. So, despite being able to perform better in small spaces, the Mark II unit can lower the temperature of a space by 30 degrees in ten minutes! 

    This is a good upgrade from the Mark I model which has a capacity of 1,000 BTU-not enough to cool even small rooms. 

    8. EER Rating And Voltage

    You might be worried about the electricity consumption of a battery-operated AC unit like this, but it only uses 240 Watts of power. To operate the Zero Breeze Mark II, you’ll need a 24V AC or DC jack output to power the 10-amps unit.

    Furthermore, Mark II has an impressive EER rating of 9.6, which is higher than most portable air conditioners in the market. On top of that, battery-operated devices are usually more energy efficient, and this coupled with the EER rating will help you save money long-term.

    9. Noise Levels And Weight

    You wouldn’t want portable units that make a significant amount of noise and disrupt the natural tranquility of your surroundings - be it camping in the woods or relaxing at home. Zero Breeze kept this requirement in mind while designing their Mark II, as it has a sound output of only  52 dB. This noise level is similar to that of a standard refrigerator, so you’re sure to get both peace and cooling. 

    However, even such low noise may seem unbearable if you’re huddling in a small tent in the woods. Thankfully, Mark II has a sleep mode that is super quiet and perfect for sleeping and nighttime.

    As already mentioned, the Zero Breeze Mark II is a lightweight unit despite having a hefty battery with high energy. The brand has tackled the weight issue by using lithium-ion batteries, which support most of its body weight.

    10. Resilience 

    The exterior of this AC unit is durable enough to come in handy in camping adventures, and its solar panel features allow you to use it without electricity. It’s also quite lightweight and doesn’t take up too much space, so you can easily carry it around in your car or RV.

    Moreover, it doesn’t require frequent upkeep like adding water or changing filters, which is something you must do for all portable ACs. However, you must ensure you have a working power adapter and that the exhaust and drain hoses are installed properly.

    11. Dump Protection

    In cases where the outdoor environment isn’t conducive to dumping the air conditioning waste, the unit will turn itself off to prevent any damage to the internal components. If this happens, you would need to drain the pipe and place the hose in an area where it can dump the waste. However, if there’s no obstruction for drainage, Mark II will work just fine.

    12. Dual-Hose Dissipation Pipe

    Zero Breeze’s Mark II has a unique feature for transferring heat from an interior, enclosed space to the outdoors. It is essentially a dual-house dissipation pipe that works like a mini air exchanger and helps the portable AC cool a space more efficiently. This is one of the reasons why Mark II stands out for its quality and innovation. 

    13. Price And Availability

    Of course, with such advanced features and convenient controls, it’s no surprise that Zero Breeze Mark II is expensive. However, the pricing of this product is a bit complicated, so you’d need thorough research to help you come to a decision. I’ll walk you through the different prices to eliminate the ordeal of looking up the product.

    Zero Breeze Mark II is available in four configurations, with the starting price being around a thousand dollars - however, this package excludes everything but the battery. The complete Mark II kit, including the DC charger, has a higher price tag; however, paying a little extra will get you a complete kit with two batteries. With two lithium-ion polymer batteries, you’ll get up to 6 to 10 hours of run time, even when set at the highest speed.

    Further, if you want a separate battery in case of any damage or just want to be on the safe side, it’ll cost a few hundred dollars. I’d recommend not buying a battery separately, as it costs almost half the price of the system itself. The brand also has other high-end items that are compatible with Mark II, such as an AC/DC adapter and a 12V to 24V inverter.

    Currently, the Zero Breeze Mark II is only sold on its official website and Tredless, so you won’t find it on popular shopping sites like Amazon or in local stores.

    Available Modes: Cool, Super Cold, Fan (four levels), Sleep | Wind Speed: 4 kmh | Noise Level: 52 dB | Cooling Capacity: 2300 BTU | Weight: 16.5 lb. (including package) | Dimensions: 20″L x 10″W x 11″H

    Verdict

    Sure enough, all portable air conditioners with built-in compressors cost a fortune compared to traditional units. A thousand dollars is a heavy investment, given all the additional accessories you’ll need to buy to get the best out of Mark II. However, it is the only available battery-operated system that can cool a 100 square feet area by 30 degrees in a few minutes.

    If you need an air conditioning unit for small spaces like boats, RVs, and motorhomes operating in humid, warm locations, you should consider the Zero Breeze Mark II. Its lightweight, portable, and easy-to-use system and one-year warranty compensate for its price and make it a better option than other comparable alternatives.

    That’s all on the latest Zero Breeze Mark II. If you like this informational article, I suggest reading my article on efficiency tips for air conditioners.

    Until next time, goodbye!

    Related Articles

    10 Best Dual-Hose Portable Air Conditioners

    Best Portable Air Conditioner and Heater Combos

    9 Best Battery-Powered AC Units

    How To Hide Your [AC] Air Conditioner Unit?

    13 Quietest Portable Air Conditioners

    9 Best Ventless Portable Air Conditioners

    Zero Breeze Mark II Portable Air Conditioner

    How To Clean Air Conditioner Coils Properly

    Shinco YPL3-10C Reviewed

    Coway AP-1512HH Mighty Air Purifier

    Can You Recharge A Window Air Conditioner?

    SilverOnyx Air Purifier

    After comparing the products, the Midea Duo smart HE air conditioner stays at the top with its variable-speed inverter technology. A close second is the Tosot quiet portable air conditioner featuring a new X fan technology for efficient cooling.

    As important as air conditioners are, they can end up costing a significant amount to function. An easy way to reduce power consumption and stay cool simultaneously is to cool down a single room instead of the entire house. And portable air conditioners are ideal for this, so we've compiled a list of the 9 most popular and quiet portable air conditioners.

    9 Best Quietest Portable Air Conditioners

    1. Best For Allergen Prevention: SereneLife SLPAC8 Portable Air Conditioner

    Sale
    3-in-1 Portable Air Conditioner with Built-in Dehumidifier...
    • HANDY AND PORTABLE: The SereneLife Portable Air Conditioner...
    • THREE OPERATING MODES: The compact floor AC indoor cooler...

    The SereneLife Quiet portable air conditioner is a lightweight and handy device that can be used to cool your living room, garage, office space, etc. To improve portability, the air conditioner has four wheels on each side of the portable AC that allows easy movement. 

    It features three different operating modes - cooling, dehumidifier, and a fan. So, for those extra hot days, you can enjoy the cooling effect of the portable AC in the most efficient manner.

    The air conditioner also comprises an automatic swing mode along with a moving wind vent that enables maximum air circulation. Additionally, the swinging motion dissipates air in all directions, so you get a better cooling experience. 

    As for the controls, it has a digital remote with a touch button control panel to access the fan speed settings, power, sleep mode, timer, and temperature controls easily. Furthermore, the remote enables you to change the temperature unit from Celsius to Fahrenheit, based on your preference. 

    However, what makes this portable AC popular is that it's a quiet portable air conditioner with noise levels less than 55-57 dB. This ensures it’s ideal for use in confined spaces, such as bedrooms or dorm rooms where sound can travel quite quickly. This is despite the air conditioner having a cooling capacity of 8,000 BTU (British Thermal Units), as it doesn’t have loud compressors and guarantees undisturbed sleep. 

    It also acts as a purifier and keeps your home relatively safe from allergens such as dust mites, mold, and mildew. This is because allergens like mold thrive on moisture, and the inbuilt dehumidifier of the portable AC removes all excess moisture from the room. 

    Capacity: 1,800 cubic feet | Noise Levels: 55 dB | Cooling Power: 8000 BTU | Number Of Speeds: 3

    2. Best For Smaller Spaces: Shinco Portable Air Conditioner

    Shinco 8,000 BTU Portable Air Conditioner, AC Unit with...
    • 【OUTSTANDING COOLING ABILITY】- Shinco powerful ac unit...
    • 【3-in-1 FUNCTION】- This portable ac unit is designed...

    The Shinco small Portable air conditioner is an 8,000 BTU device that is designed to cool smaller spaces with minimal noise. Ideally, this air conditioner can cool a 200 square feet room quickly. Initially, set the portable AC in cooling mode, and once it's cold enough, switch it to fan mode. This will keep the temperature regulated throughout so you can sleep comfortably. 

    It is also multifunctional, with three modes to choose from - cooler, fan, and dehumidifier. For further customization, the device has two-speed settings that can be set according to your preferences. Additionally, it comes with a 19.2 liters dehumidifying capacity as well as a bucketless, self-evaporating operation, allowing you to enjoy a clean, cool, and dry living space. 

    The controls of the Shinco Quiet portable air conditioners are pretty straightforward. They feature an LED display with easy-to-use icons that allows you to alter the cooling effect and fan speed. You even get a full-featured remote along with the portable AC for easy operation, and if you plan on using it during the night, you can set the timer to 24 hours. 

    With a noise level of 55 dB, this quiet portable air conditioner allows you to stay cool and wake up well-rested. Plus, installation is fairly simple, and you receive a window AC mount kit along with the product. Just place the air conditioner in your desired area and attach the 59-inch hose as well as the adjustable window air conditioner brackets. Once plugged in, turn the portable AC on to enjoy instant cooling! 

    Capacity: 200 square feet | Noise Levels: 55 dB | Cooling Power: 8000 BTU | Number Of Speeds: 2

    3. Best Wi-Fi Enabled AC: Midea Duo Smart HE Air Conditioner

    Midea Duo 14,000 BTU (12,000 BTU SACC) High Efficiency...
    • INNOVATIVE DUO HOSE DESIGN - Midea's industry-first dual...
    • INVERTER TECHNOLOGY - Engineered with the variable-speed...

    The Midea Duo Smart HE portable air conditioner is the company's first hose-in-hose design allowing the unit to intake and expel the outdoor air. This functional unit can deliver balanced air circulation inside the house to prevent cold air from escaping through gaps near the windows and doors. 

    Additionally, the Midea air conditioner is equipped with variable-speed inverter technology, which can cool your room with more energy efficiency than standard portable air conditioners. This allows for 40% less energy consumption as compared to other air conditioning systems. 

    Engineered with a Duo hose design and optimized air duct system, the Midea air conditioning unit can instantly cool down the room. Its modern technology guarantees a cooling rate that is twice as fast as traditional or window air conditioners on the market. 

    I feel it is by far the quietest portable air conditioner among the ones on the list with a noise level of 42dB. This library-like silence allows you to sleep comfortably without being disturbed by loud compressor noises. 

    The controls are pretty simple and extremely convenient. You receive a remote control along with the product that enables you to adjust temperature settings and cooling modes from any corner of the room. 

    Further enhancing convenience is the voice control system of the air conditioner. Since the portable AC unit is Wi-Fi enabled, you can connect it to any home assistant, such as Google Home or Alexa. Once connected, simply use your smartphone to access the device and adjust the controls even when you're not home. 

    Capacity: 6 cubic feet | Noise Levels: 42 dB | Cooling Power: 14000 BTU | Number Of Speeds: 2

    4. Best Multifunctional AC: DeLonghi Portable Air Conditioner

    De'Longhi Black Portable Air Cooler with Remote Control and...
    • 3-in-1 Unit Delivers a Precise, Targeted Cool.wattage : 1345...
    • COOLS EXTRA LARGE ROOMS. Supplies 14000 (ASHRAE)/8600 (SACC)...

    The De'Longhi quiet portable air conditioners can efficiently and evenly cool down most large rooms up to 700 square feet. These portable air conditioners are built to last and offer maximum comfort at minimum energy consumption. They also feature a 4-in-one setup with a portable air conditioner, heater, dehumidifier, and fan. 

    This heater is quite powerful and can be used during the colder months to keep the room warm. So, you get to use the quiet portable AC unit all year round through various seasons, making it a worthy investment. 

    Additionally, this portable air conditioner has an auto-adjust feature that keeps the room temperature comfortable based on the humidity levels. It enables the unit to save up to 30% more energy, which makes it an efficient product. 

    The DeLonghi quiet portable air conditioner functions with minimal noise at sound levels of 53dB, allowing you to sleep comfortably without disruptions. Its ArticWhisperExtreme uses the latest technology to minimize portable AC sounds by up to 50%, even at maximum fan speeds. 

    Furthermore, the quiet portable AC unit comprises a washable dust filter screen that can be detached from the portable AC unit and cleaned. Simply keep it under a running faucet or use a handheld vacuum to clean it. But be sure to dry the filter completely before using it as moisture can lead to mold and mildew growth. 

    And for even airflow, these quiet portable air conditioners feature motorized louvers that swing depending on the cooling mode. This dissipates hot or cool air to each corner of the room and keeps the temperature even throughout. 

    Capacity: 700 square feet | Noise Levels: 53 dB | Cooling Power: 14000 BTU | Number Of Speeds: 1

    5. Best Dehumidification: Tosot Quiet Portable AC Unit

    TOSOT 8,000 BTU(ASHRAE) 5,000 BTU (DOE) Portable Air...
    • Powerful Cooling: Cool spaces up to 300 square feet with an...
    • 1 Product, 3 Uses: This is not only a Portable AC but also a...

    The Tosot portable air conditioner is a powerful device that can cool an area of up to 300 square feet, making it ideal for bedrooms, office spaces, living rooms, etc. This 8000 BTU device is a 3-in-1 unit that comprises an air conditioner, fan, and dehumidifier. The dehumidifier has a capacity of 2.3 pints of water per hour, thus keeping your home much cooler. 

    This device is designed to function with minimal sounds with noise levels as low as 49 dB, making these portable models the second quietest portable air conditioners on the list. Additionally, the portable AC unit entails a sleep function that can optimize the room temperature during the night so you don't wake up feeling uncomfortable. And if lights are a distraction for you, you can turn on the sleep mode which will automatically turn off all the lights on the device. 

    As for installation, the process is fairly simple. You can use both horizontal or vertical windows to install the portable air conditioner and refer to the installation manual in case of doubts. Typically, the installation process of this unit takes less than 15 minutes and does not require mounting hardware or tools. Furthermore, the exhaust hose length can be extended from 11.8 inches to a maximum of 58.8 inches. 

    The portable air conditioner also features a new X-Fan technology. When activated, the X-Fab will reduce the spinning rate of the fan while keeping it spinning consistently. This process dries up the residual water in the air conditioning unit and air exhaust hose to keep the system functioning optimally. The X-Fan is also designed to be silent, so you don't get disturbed by the noise, even if the fan is cleaning itself up. 

    Capacity: 300 square feet | Noise Levels: 49 dB | Cooling Power: 14000 BTU | Number Of Speeds: 1

    6. Best For Larger Rooms: SereneLife Portable Air Conditioner

    SereneLife Small Air Conditioner Portable 10,000 BTU with...
    • HANDY AND PORTABLE: The Serene Life Portable Air Conditioner...
    • BUILT-IN DEHUMIDIFIER: you don’t only get the cooling...

    The SereneLife portable air conditioner has a sleek, modern, and compact design that can be moved around easily. It comes with a set of wheels on each end of the device, making the portability aspect much smoother. This powerful device can be used for cooling rooms that are larger like living rooms, garages, or office spaces. 

    Apart from the cooling effect, the device also offers dehumidification properties that efficiently maintain the humidity levels in your room. The lower the humidity levels, the higher the cooling capacity. 

    Furthermore, the SereneLife portable air conditioner comes with four operating modes; cooling, heating, dehumidifier, and fan. You can set the cooling effect based on your preference to enjoy personalized comfort. Along with the cooling modes, the portable AC unit comprises an automatic swing mode with a moving wind vent. This enhances the airflow quality and dissipates air in all directions. The even distribution of cold wind results in your overall room temperature being regulated and comfortable.

    The controls are designed to be convenient and the portable air conditioners come with a remote. Featuring a touch control panel that includes power, mode, timer, temperature, and fan settings, the device is made more accessible. It also features a unit selector that you can use to change to Celsius or Fahrenheit based on your preference. 

    Since this portable air conditioner comes with an inbuilt heater, it can be used all year round with a heating capacity of 9000 BTU. The dehumidifier has a capacity of 15 liters per hour and keeps the room free of excess moisture. Furthermore, the operating noise of this unit is only 52-56dB, making it an ideal product to cool areas like bedrooms and dorm rooms. 

    Capacity: 2800 cubic feet | Noise Levels: 52 - 56 dB | Cooling Power: 12000 BTU | Number Of Speeds: 3

    7. Best For Improved Airflow: Airo Comfort Portable Air Conditioner

    Sale
    Portable Air Conditioners 8,000 BTU AIRO COMFORT, AC Unit...
    • Powerful & Efficient Air Conditioner - Keep your room, home,...
    • Simple and Easy to Use - Our innovative Air Conditioning...

    The Airo comfort is a powerful yet functional portable air conditioner that can keep your living room, bedroom, apartment, or office cool throughout the summer. This 8000 BTU quiet portable AC is a compact yet robust system that is ideal for cooling in smaller rooms up to 200 square feet. Additionally, its intuitive functions are easy-to-use and offer a user-friendly interface. 

    The LED display is quite clear and can be turned on or off depending on the time it's being used. A Digital Touch button accompanies the LED display and can easily adjust the mode, timer, speed, and power functions. 

    Equipped with Airos comfort technology, this quiet portable AC keeps constantly moving to cool your home and regulate the room's temperature. It features oscillating vents that direct the airflow in different directions based on how you set it. This allows better airflow quality and even distribution of cool air throughout the room. It also comprises a powerful internal system that acts as a purifier and purifies the air that passes through it. 

    This multifunctional system is a 3-in-1 unit and comprises a dehumidifier, fan, and cooling device. This ensures that the air in the room is humidity-free and set at a comfortable temperature. 

    The installation process is also relatively simple, and all needed accessories are included in the packaging. You also get clear instructions with drawings on what you need to do and how to do it. Additionally, the device is also portable and has wheels on all four ends for better movement. This allows you to slide the device to another space effortlessly once you're done using it. 

    Capacity: 200 square feet | Noise Levels: 52 dB | Cooling Power: 8000 BTU | Number Of Speeds: 3

    8. Best Easy Controls: Dreo TwinCool Portable Air Conditioner

    Dreo TwinCool 12000 BTU Smart Inverter Portable Air...
    • Dual Hose, Double Effect: The hose-in-hose innovation...
    • Customize Your Comfort: With 5 powerful modes...

    The Dreo portable air conditioner features a dual hose (hose-in-hose) innovation that promotes better air circulation. It does this by locking the cold wind in and pushing the hot air out. The device has a high cooling capacity of 12000 BTU and blows cold air at massive distances that can reach as far as 28 feet. This makes it ideal for cooling large spaces up to 450 square feet like garages, living rooms, office spaces, etc. 

    These dual-hose air conditioners have five impressive, powerful cooling modes (cool, fan, auto, humidify, and sleep) that can be used based on your needs. It also features a 60 - 86 degrees Fahrenheit temperature range that allows for more customization and personalized comfort. The touch of a button can access all these features on the portable unit or the remote that comes with it. 

    Dreo believes in feeling more and hearing less, which is why this air conditioner is one of the quietest portable air conditioners. With noise output levels as low as 42dB, you can enjoy your peace of mind day and night. This feature also makes this portable air conditioning unit ideal for nighttime usage, as it won't cause any disruption to your sleep. 

    Unlike central air conditioning, the Dreo quiet portable AC unit functions at variable speeds along with the dual hose unit design to save up to 40% on energy bills and consumption. This energy-efficient system is also easy to install on any type of window, whether slide or double-hung. 

    Capacity: 6.14 cubic centimeters | Noise Levels: 43 dB | Cooling Power: 12000 BTU | Number Of Speeds: 1

    9. Best For Portability: ZAFRO Portable Air Conditioner

    ZAFRO 8,000 BTU Portable Air Conditioners, Air Conditioners...
    • 【8,000 BTU Powerful Cooling & Energy-saving】- ZAFRO...
    • 【3-in-1 Modes & Easy to Operate】- Our air conditioner...

    The ZAFRO portable air conditioner is a relatively portable device that has a cooling capacity of 8000 BTU. Ideally, this device is meant to cool smaller floor spaces up to 250 square feet, such as bedrooms, dorm rooms, RVs, etc. 

    The air conditioner entails three functionality settings that can be used based on your preferences. These settings are designed to meet the cooling and ventilation needs without consuming excessive amounts of energy. To further heighten comfort, the air conditioner comes with a remote that can adjust the modes, power functions, temperature, speed settings, etc. This allows you to conveniently adjust your device's settings without having to get up from your comfort zone. 

    Furthermore, the portable air conditioner is engineered to function with little to no noise output, and its noise levels can go as low as 54 dB. This makes it ideal for bedrooms as it won't disrupt sleep due to loud compressor noises or other portable AC sounds. 

    Additionally, the air filters of this air conditioner can be removed and washed. So, you can get several cycles of use before you will have to replace the filter. Make sure that you clean the filter every once in a while. 

    Simply place the filter beneath a running faucet or use a handheld vacuum to remove the dirt. Before you put the filter back into the portable air conditioner, ensure it is fully dry. If there is moisture on the filter, it can promote the growth and buildup of mold and mildew.

    Capacity: 250 square feet | Noise Levels: 54 dB | Cooling Power: 8000 BTU | Number Of Speeds: 3

    Quick Comparisons Of Quiet Portable ACs

    Portable ACs Capacity Noise Levels Cooling Power Number Of Speeds
    SereneLife SLPAC8 Portable Air Conditioner 1800 cubic feet 55dB 8000 BTU 3
    Shinco Portable Air Conditioner 200 square feet 55dB 8000 BTU 2
    Midea Duo Smart HE Air Conditioner 6 cubic feet 42dB 14000 BTU 2
    DeLonghi Portable Air Conditioner 700 square feet 53dB 14000 BTU 1
    Tosot Quiet Portable Air Conditioner 300 square feet 49dB 14000 BTU 1
    SereneLife Portable Air Conditioner 2800 cubic feet 52 - 56 dB 12000 BTU 3
    Airo Comfort Portable Air Conditioner 200 square feet 52dB 8000 BTU 3
    Dreo TwinCool Portable Air Conditioner 6.14 cubic centimeters 43dB 12000 BTU 1
    ZAFRO Portable Air Conditioner 250 square feet 54dB 8000 BTU 3

    Quietest Portable Air Conditioner Buying Guide

    The amount of noise output an air conditioner has is just one part of an entire list of factors that make the device worth using. There are other factors that need to be taken into account when choosing portable air conditioners. These factors include: 

    1. Noise levels

    Typically, portable air conditioners make higher noise output than the market decibel rates when running on medium or high mode. If you need a quiet portable air conditioner that has a consistent noise level, opting for a unit with a noise level of 60 dB or less will help. 

    60dB is generally as loud as a normal conversation between two people. For better comparison, 50dB is about as loud as rainfall outside the window, and 40 dB is similar to whispering or the output of an average refrigerator heat pump. 

    2. Low Airflow

    Apart from compressor sounds, an air conditioner makes a swirling sound when the air passes through the device. This is why higher speed settings increase the noise levels of the air conditioner. The higher the airflow, the more prominent the sounds are.

    Additionally, bigger AC units such as 14000 BTU portable units are much louder in comparison to smaller units such as the 8000 BTU portable air conditioners. The reason is that a bigger unit, such as the 14000 BTU one, will have to generate a higher airflow rate. Keeping other factors aside, reducing the speed or level of airflow can most certainly help quiet down any HVAC device or portable air conditioning unit.

    Based on airflow, portable air conditioners can be categorized into two types:

    • High airflow, moderately cold
    • Low airflow, cool air

    The high airflow, moderately cold portable air conditioners cool the room by providing larger quantities of moderately cool air. These portable air conditioners can usually be quite loud (60dB or higher).

    The low airflow, cool air portable air conditioners push out colder air in lesser quantities. Since the airflow is minimal, the noise generated from the device is lower.

    3. Type Of Compressor

    For most portable air conditioners, there are two kinds of compressors; A Rotary compressor and an Inverter compressor. 

    A rotary compressor can be commonly found in refrigerators and is a turn-on-off compressor. This essentially means that the compressor will have a set temperature that it is required to maintain. When the room temperature exceeds the set number, the portable units automatically turn on, bring the temperature down, and turn off. 

    When these rotary compressors kick in, they make a loud sound that can be startling if not used to. These high-pitched sounds are enough to wake someone up from sleep. 

    On the other hand, an inverter compressor has a variable-frequency drive (varying input voltage and frequency) that controls the inverter compressor's speed. This then modulates the cooling capacity much more efficiently. 

    For instance, if there is a set room temperature the AC units have to follow, they will keep delivering cooling power that maintains the temperature. They may swing back and forth slightly but do so very silently. Since these compressors are always functioning, no sudden, loud sound is caused. 

    4. Check the Specification Sheet

    All portable units come with a specification sheet, but most times, it does not mention the unit's noise levels. 

    However, finding the noise level of an air conditioning unit is not a complicated task. Once you get the decibel rating, check what category it falls under. Generally, these are the categories mentioned in the specification sheets. 

    Noise Level Category
    51 dB Low
    59 dB Mid
    60 dB + High

    Try to opt for a device that has a decibel rating under 55 dB for the best performance. 

    5. BTU, Size, EER Rating

    Apart from being silent, the portable air conditioner should also be functional in all aspects. This is where the rest of the cooling metrics for the AC units come in. 

    The first and foremost is the cooling capacity meter, the British Thermal Unit (BTU). Opting for a bigger unit, even though you don't need it, can result in more noise generated from the device. This is because bigger units have higher airflow, and when paired with a smaller space, the noise becomes all the more apparent. 

    Ideally, a 10,000 BTU unit is sufficient to cool down 500 square feet of living space. 

    The second most important metric to consider is the EER or Energy Efficiency Ratio. If the rating is above 8.5, the device is energy-efficient and will enable you to save up on energy consumption. 

    An example of an air conditioner with a higher EER rating is the Honeywell air conditioner with a rating of 11.67. 

    Lastly, the size of the portable AC units also matters. Getting heavy AC units would be impractical if you plan on moving or storing your air conditioner away after use. Similarly, the weight will not be a major concern if you need a portable unit that provides sufficient cooling and doesn't need to be moved around as much. 

    Verdict

    After extensive research, I can confidently say that the Midea Duo Smart HE is an ideal choice for efficient cooling. The device features variable-speed inverter technology, which can improve its energy efficiency more than standard air conditioners on the market.

    A close alternative to the Midea Duo air conditioner is the Tosot air conditioner. This multifunctional unit is designed to function with minimal sounds less than 49dB and the device comes with impressive smart features that enhance user comfort and satisfaction.

    I hope this article helped you pick an efficient and quietest portable air conditioner. Until next time!

    Related Articles

    10 Best Dual-Hose Portable Air Conditioners

    Best Portable Air Conditioner and Heater Combos

    How To Hide Your [AC] Air Conditioner Unit?

    9 Best Personal Air Purifiers