An outward-swinging electric gate is not a common sight. However, electric gates can open outwards under limited conditions. Keeping that in mind, a driveway gate is an excellent way to add value and style to a property.
Electric sliding gate openersgive the home a luxurious look. However, when starting with a driveway gate, many people have questions about its installation.
One such question is, can the automatic gate open outwards? Though a rare occurrence, the answer is yes. Some driveway swing gates can open outwards in specific conditions.
Let’s take a look at a few of these conditions.
When Can Gates Swing Outwards
There are various reasons why people may opt for an outward swinging gate, or maybe it’s just sheer curiosity about all the available options. Irrespective of what the reason can be, mentioned below are the instances where it is acceptable, or even necessary, to have the gate swinging outward.
1. Length Of The Driveway
If a homeowner prefers to have a gate that swings outward and they have a driveway that is long enough, there will not be any issue in doing so. To measure if my driveway was long enough for an outward swinging gate, I ensured the gate had enough room to swing without being blocked by any roads.
Tip
Do consider the length of the driveway, so cars can give the gate space to open without any hassle.
2. Barriers
A gate that swings inward requires a lot of space. It should be able to open fully without being blocked by or colliding with any necessities in the yard. For homes that lack the space inside to have gates open inwards, installing an outward swinging gate might be more of a necessity.
3. Upwards Sloping Driveway
I have noticed that some homeowners have driveways that slope upwards. Though not a common sight in developed cities, upwards-sloping driveways are more functional in mountainous regions. If the driveway is slanting upwards within the property, an automatic gate that opens inward will end up colliding with the ground and will only open partially.
Considering the slope is not as intense, a gate with a slight rise on taller hinges can be opted for. This will not necessarily pose an issue to any cars or vehicles. However, it will not be efficient in keeping small pets or even curious children in since they can easily crawl beneath the taller gate.
A commonly used fix to this issue is to use a sliding gate instead of a swinging one though sliding gates require more room to move around within the fence.
4. Oddly Shaped Boundary
If an area has a boundary fence angled at 45 degrees inwards, a gate that swings inwards can be blocked by the fence. This is another event where an outwards swinging gate is acceptable if not necessary.
5. A Curved Driveway
Some homeowners have a driveway that swerves inwards right inside the gate. When this curved driveway is paired with an inward swinging gate, it can cut across the entirety of the driveway. An outward swinging gate will be ideal for such situations.
An Alternative Option
If neither an inward nor an outward swinging gate is feasible, a good alternative that can be considered is the gate doors that slide open rather than swing open. A sliding gate can significantly decrease the amount of space that needs to be left out to accommodate the gate. This is because slide gates move along a fixed section of track in your fence.
Though much more expensive than traditional swing gates, it offers more security for the home and looks visually pleasing on the property.
Factors To Consider For An Outward Swinging Gate
I was surprised to know that you couldn’t just walk to a store and purchase an outward swinging gate to install on the property. However, there were several factors that needed to be considered. The factors are as follows:
1. The City Council
Prior to installing the outdoor opening gate, I had to ensure that I checked all the council rules in my locality pertaining to property boundaries and swing gates that open onto public land.
I was able to find some information online. However, a call or an in-person meeting may be necessary to get hold of more information or a clearer picture.
2. The Actuator And Arm
An actuator is a mechanical device used to open the swing gates remotely. It makes use of power to push the swing arm so that it can open the gate by pulling and pushing it close when necessary.
Typically, the actuators and arms are located inside the swing gate to eliminate tampering or unauthorized access. In most cases, if the electric gates open outward, the actuator and arm can be exposed. There is also a major risk of the device scraping the vehicle as it passes through.
The most crucial factor that I had to consider when installing an outward-opening swing gate is the potential foot traffic outside the gate. It would be impractical to have an outward opening gate if there is no extra space between the footwalk and the gate.
If pedestrians walking through will experience difficulties when the gate opens, it can be quite troublesome for both parties. It is best to have a professional inspect the driveway and install an outward opening gate if necessary space is available.
Can Electric Gates Open Outwards Conclusion
Ultimately, an inward swinging gate or an outward one is nothing but a matter of preference. These gates are a great option if there are no laws pertaining to outward opening gates or if the driveway is large enough. However, it is imperative that the homeowner take necessary measures before installing an outward swinging gate to avoid any trouble later on.
If you enjoyed this informative guide, I suggest checking out my other articles, like my recent piece, “How to apply polymeric sand.”
Building or setting up vehicle sensors for automatic gate openers is easier than it seems. With various accessories available with the sensor kit, all you need are some PVC pipes, a shovel, or an auger, and you’re good to go! Proper placement of the sensor and transmitter is also crucial to the building process.
Investing in the best sliding gate openersadds a lot of convenience to your property, along with a touch of extravagant elegance. And in today’s tech-driven lifestyle, many homeowners are making the most of it by installing sensors on both single and dual gates.
That said, a driveway vehicle sensor forms the core of an automatic gate. So, in today’s guide, I’ll be explaining my foolproof method of building a sensor to open your gate automatically.
Types Of Automatic Gate Sensors
Before getting to the method, you must invest in a high-quality wireless vehicle sensor for your gate. Depending on the design of your gate, you can choose from below:
1. Optical Sensors/Motion Detectors
These are the most common types of sensors, as they detect motion using an antenna. Although they are highly effective and convenient, the only gripe I have is that these sensors detect motion only. So, if you have a visitor standing still outside, the gate may not open.
2. Active Infrared Sensors
This type of sensor consists of a transmitter and two or more receiver chips featuring high-performance optics. As such, these sensors are ideal for protection against cutting or crushing edges in different types of doors.
3. Passive Infrared Movement Sensors
These sensors recognize the infrared image within the set range. And when the image changes, the sensor triggers the gate to automatically open. Notably, these automatic sensors are highly precise and compact.
4. Pressure Sensors
Despite being the first sensors developed for automatic entry, the sensors are widely used to date. They detect changes in pressure (weight) around a specific area around the gate.
When the set weight limit is increased, the sensor triggers the gate opener and keeps the gate open until the person or vehicle passes through. Hence, these gate sensors are excellent for allowing guests to move swiftly without accidents (like “closing in” on a person).
5. Radar Movement Sensors
Radar movement sensors can detect individuals in a specific area. They can even sense through materials like plastic, plaster, wood, and more. However, they cannot identify stationary objects.
Considering all of these types of sensors, I recommend trying out the Mighty Mule FM138 or FM130 Driveway Vehicle Sensor to open your gate automatically. Both of these devices are easy to install and can be used on both single and dual gates. You even get to choose from wired and wireless options of the same product. Plus, the brand offers a 12-month warranty to back your purchase.
How To Install A Sensor For Automatic Gate Openers
Now that you have chosen the right wired or wireless vehicle sensor for your gate opener, it’s time to install it. So, let’s get started with the easy DIY installation process:
Step 1
Start by finding the right placement for the sensor and transmitter module. The distance of both these devices from the gate will depend on the product you choose. However, the Mighty Mule driveway vehicle sensor recommended above will require the sensor to be placed within a range of 2 ft. and the transmitter within 100 ft.
Tip
Ensure that you install the sensor away from general moving traffic (not directed toward your property), power transformers, power lines, underground gas lines, and telephone lines.
Step 2
Now, dig a 1-ft deep hole for the sensor. It should measure at least 2 feet lengthwise and almost parallel to the driveway. Follow up by digging a trench for the sensor cable all the way to where you plan to install the transmitter module. Note that the trench should be at least 6 feet deep to prevent damage from lawn aerators and other similar equipment.
Step 3
Next, place the sensor in the hole and the cable in the trench. If you’re left with extra cable, you can coil it up the mounting post. Then assemble the post by connecting the two long pieces with a coupler.
Tip
Do not bury anything before testing the transmitter module.
Step 4
Run the sensor cable through the mounting post and plug it into the transmitter module. I recommend leaving two inches of the cable to avoid damage if the transmitter is removed.
Step 5
Attach the mounting pole and transmitter module. Thereafter, you may or may not require a “receiver,” depending on the product you choose. Hence, I recommend checking the manufacturer’s instructions for further pairings.
Lastly, test the driveway vehicle sensor and if everything works correctly, bury all the parts.
Vehicle Sensor For Automatic Gate Opener Final Words
Before I sign off, here’s another piece of advice - for convenience, you can use standard car batteries for gate openers. However, the batteries should not be less than 50 volts, as they may not be strong enough to trigger the sensors.
A standard 12-volt marine or car battery is good for most gate-opening systems. However, depending on components like solar panels or a motion detector, many people use a deep-cycle battery for higher power.
Installing a gate opener requires adding an energy source. In fact, the best electric sliding gate openers can fully function with a standard 12-volt rechargeable car or marine-type battery with six regular cells.
However, before choosing your battery, consider which connection or energy outlet you wish to use. A standard AC outlet or solar applications can help charge the gate opener and the motion sensor, if any.
Potential Problems Of Using A Standard 12-Volt Battery
Standard battery-operated gate openers like the Mighty Mule gate opener function pretty well on an average car or large marine battery. It works especially well if the solar panel receives enough sunlight during the day. However, adding a motion sensor flood light to my opener has disrupted its energy source.
Although my battery seemed to have enough juice, adding just a small light led to a large drop in voltage. Hence, I resorted to checking the water level in each battery cell to see if there is adequate power. Next, I checked whether the solar charger was producing the required energy by observing the voltmeter.
However, both the water level and the solar panel were functioning properly. After some online research, I found that many people face this problem. Some even report audible beeping when they add lighting, and I believe the problem lies in the low energy capacity of the battery.
What Battery Should You Use For A Remote Gate Opener?
Getting a new battery and a larger panel is fine and all, but how do electric sliding gates work? Electric sliding gates are automatic swing gates that utilize a battery-operated system and/or solar panel to produce energy for mobility. This energy then helps the gates pull the wheels on the fixed track.
Using a standard 12-volt battery is often sufficient, but there’s always a chance that you may face the above problems. Or, your sun panel may not receive enough sunshine on cloudy days. Either way, a failed battery in the sliding gate may cause substantial security threats.
In this case, I think the best idea is to replace your standard battery with a marine deep-cycle battery. This is because, unlike regular ones, deep-cycle batteries draw down the charge evenly without causing any drop in surface charge.
Tip
After replacing the battery, hook it up with an AC battery charger that connects to 12-volt LED lights and a digital voltmeter. Also, I recommend buying a sliding gate with a built-in shunt relay or charging control to prevent a high-voltage drop.
Standard Car Battery For Gate Opener Final Thoughts
From my experience, deep-cycle batteries are much more beneficial in providing energy to gate openers. They can sufficiently power automatic electric sliding gates and utilize higher levels of solar energy.
For gate openers that do not have too many features, a standard starting battery is adequate. Moreover, an average starting battery can work wonders if you have a larger solar cell with connected regulators that receive regular sunshine.
However, you should carefully consider your requirements before choosing a battery. I hope this discussion helps you tackle problems regarding sliding gate openers.
Electric sliding gates are operated with the help of remote controls. When you press the button on the remote control, the access control system initiates the gate opener motor to open or close the gates. These gates usually operate over a track, but the design of the track may change based on the type.
Homeowners these days prefer electric sliding gate openers over conventional driveway gates. And with the benefits they offer, it is clear to see why that is the case.
Despite their surging popularity, though, a large number of users do not know how sliding gates work. This makes it difficult to troubleshoot any problem (related to their working mechanism) that one might encounter.
That’s why I have made this guide for all those curious folks out there. If you are one of them, then dive in!
How Does An Electric Sliding Gate Work?
As you can guess from the name, an electric sliding gate comes with an in-built electric motor that helps to operate the gate. It does not require any manual effort, which is why it is also known as an automatic gate. All you need to do is press the button on the remote control, and the sliding gate motor will open or close the gate accordingly.
That was, of course, the simplest explanation of how automatic gates work. Now, I’ll explain their operation in greater detail for those who want to know more. These gates come with an access control system that is programmed into the gate motors. This is the primary element that helps with gate automation. When you press the button on the remote, it signals the motor to open or close the gate.
Conventionally, the gates are placed on top of a sliding track. A set of roller guides or wheels are placed on the bottom of each gate, which helps to slide it along the track when the motor is activated.
That said, the mode of operation may change slightly with the gate’s design, but the fundamental principle remains the same.
On that note, modern automated gates come with a range of additional convenience and security features. For instance, they may come with motion sensors, Wi-Fi connectivity, or voice controls so that you can operate them with little effort.
They can also be programmed to provide pedestrian access, which means that you can use them as the main gate instead of a driveway gate. Apart from that, they may come with cameras and alarms to enhance security.
What Are The Different Types Of Electric Sliding Gates?
Broadly speaking, there are three primary types of sliding gates available today. I have discussed each of them below:
1. Tracked Sliding Gates
Tracked sliding gates are the simplest and most common type of automatic gate system used on properties. It runs over a single metal track embedded in the ground. Now, the motor is generally placed beside the gate post. However, many homeowners today are opting for underground motors to save space and keep it protected from rain and storms.
Warning
In case you plan to install an underground motor, make sure that it comes with a powerful remote control or good Wi-Fi connectivity. If it doesn’t, you will not be able to operate the motor under the ground.
2. Telescopic Sliding Gates
Telescoping gates consist of multiple segments that stack in front of each other when the gate opens. Such a design is well-suited for homes that do not have a lot of space for a conventional sliding gate. They can be operated by standard electric motors, similar to tracked sliding gates.
With that being said, the installation process is a bit complicated since you need to lay a separate track for each segment. Likewise, the drive cables from the motor need to be separately installed on every gate segment.
3. Cantilever Sliding Gates
Cantilever gates operate a bit differently compared to tracked or telescopic sliding gates. This type of gate comes with no embedded tracks on the ground, which means that Cantilever sliding gates remain suspended in the air. Instead, there is a tubular track fitted on the lower side of the gate, which slides over mounted roller wheels on the gate posts.
The cantilever system is worth considering if the ground below the gate is uneven for laying tracks. Additionally, these gates are relatively longer than the previous two types due to the added counterbalance mechanism. This makes them an ideal choice for industrial or commercial buildings.
However, the caveat is that the posts need to be much stronger, or else the gates might fall. That’s because the posts hold the entire weight of the gate, as well as the post-mounted rollers.
Benefits Of Using Automated Sliding Gates
Compared to traditional gates, automated sliding gates are a lot more convenient to use. Besides that, there are several other benefits to these gates, as I have outlined below.
1. Relatively Durable
Automated sliding gates are designed to be highly durable. Therefore, they can withstand most weather conditions or impact damages without any issues. Also, the materials used for building the gate and the motors are resistant to rust and corrosion, which further enhances durability.
2. Added Security
Most automatic sliding gates these days come with advanced features, such as motion sensors, alarms, and other anti-tamper mechanisms. This will discourage trespassers and burglars from manipulating or tampering with the gate, which will improve the security of your home and make your life easier.
3. Increased Safety
As I have already mentioned, a typical automated sliding gate comes with motion sensors. These sensors can detect the proximity, speed, and distance of incoming objects. On top of that, there are strong brakes on the roller guides. So, if any person or vehicle comes too close or touches the gate, it will stop moving immediately to avoid any accidents.
4. Energy-Efficient
The motors that are used in these automated sliding gates are designed to be highly energy-efficient. That way, you won’t have to worry about increased energy bills from using your gate.
As a matter of fact, the gate opener system operates entirely on battery. This means that it won’t have any major impact on your electricity usage, except for when you will need to charge the battery. And if the gate has solar charging capabilities, it will charge on its own when the sun is out, which makes it even more convenient.
In that context, you might ask - “can I use a standard car battery for gate openers?” Well, you absolutely can! Of course, you need to ensure that the car battery has enough energy left in it to power the opener mechanism. After all, you wouldn’t want the battery to run out when the gate is only partially open.
How Do Electric Sliding Gates Work Final Words
Electric sliding gates are definitely worth it, especially if you want the added security and convenience they offer. That is why they have become so popular these days.
You can get an automatic swing gate for your driveway, too, as it operates using a similar system. The only difference is that the gates swing open instead of sliding to the sides.
Whichever you choose, you can get the new gates installed with the help of a professional. That will ensure you do not encounter any issues related to the gate after a few days of usage.
Sliding gates provide the required security to your house. However, the efficiency of sliding gates can take a hit if proper lubrication is not done. In addition, adding an antenna and improving the battery backup system will enable the gate to function smoothly.
The automatic gate mechanism undoubtedly improves security and safeguards the property from intruders, thieves, or crooks. Therefore, it’s important to do everything possible to maximize its performance.
This article will explain how you can increase the efficiency of your automated gate system. I will further help you increase the security of your sliding gate with a few additional tips. So, scroll down!
Some Tips To Increase The Efficiency Of A Sliding Gate
1. Maintain Proper Lubrication
Most gate specialists recommend that the automated gate system should be properly lubricated every six months.
Moreover, debris, branches, rain, or harsh weather conditions may cause damage to sections of the automatic gate system. These factors can impair their functionality and lead to serious mishaps. That said, there aren't many moving components to lubricate, so the process is simple.
Tip
Inspect the chain, pulley, hinges, and screws every few months, and apply a few drops of oil to keep everything functioning smoothly and effectively. A properly lubricated automatic gate system operates flawlessly, with no unpleasant noises or flaws.
2. Consider Adding A Better Antenna
An average antenna of an automated gate system comes with a range of 100 to 150 feet. But you could opt for a high-gain antenna that can help you increase the range of your automatic gate technology. This will help you open or close the gate as and when required, even from a greater distance.
It is especially useful for homeowners that have longer roads on their property. Furthermore, an upgraded antenna improves the performance and lifespan of the gate system, especially when dealing with lower signals in your location.
3. Consider Installing A Backup Battery
Coping with an automatic gate mechanism during a power outage may give any homeowner nightmares. Many experienced specialists advise using a backup battery to avoid any unpleasant scenarios.
This ensures that the gate will continue to work even if the power goes out. Most replacement batteries provide a few hundred open-shut cycles, which are generally sufficient to carry you through until the power comes back.
4. Consider Incorporating A High-Speed Motor
High-speed motors, a relatively new addition to the market, may considerably improve the effectiveness of your gate, making shutting and reopening much faster. The longer it is open, the more vulnerable the property becomes. Just make sure you considerhow many amps are required for the sliding gate opener - the higher the amp rating, the higher the efficiency of the gate.
5. Controls For Internal Gates
Depending on how electric sliding gates work, many automatic gate solutions have an extra interior gate control - another useful addition. It allows you to improve the operation and administration of the gate for the privacy of your home.
For example, you may update to a smart gate and illumination controller. The technology will allow you to alter the configurations from inside and establish automated timers for specific times and days for simpler network access. You will also receive warnings of potential system failures.
Some Tips To Increase The Security Of A Sliding Gate
1. Remote Control
Choose remote access technology to get all the benefits of an automatic sliding gate. Remote access transforms automatic gates by allowing you to operate them from the convenience of your automobile or home. You are not required to expose yourself when closing or opening the gate. A smartphone with a remote access function improves security by allowing remote property surveillance.
2. Surveillance Using A Video Camera
Surveillance cameras are quite effective for increasing home security. With a surveillance camera installed, you can observe all that happens around your home's main entrance. The most popular automated gates on the market are adaptable to integrate security cameras for continuous property monitoring.
3. System Of Advanced Locking
An innovative electronic lock system is useful for improving house security. You might use an electronic key scanner for your automatic gate to allow seamless admission while maintaining strict security requirements.
How To Increase The Efficiency Of A Sliding Gate Final Words
There is no question that automated gates have several advantages. They are practical, may add a sense of elegance to your house, and can help boost security. So, if security is your primary concern, I’d definitely say that an automated sliding gateway may be worth the expense.
It may also come with additional security features like cameras and alarms to dissuade robbers. All you have to do is follow the suggestions mentioned above to ensure that the automatic gates operate efficiently.
A sliding gate opener is a specially designed motor that automatically enables the user to operate sliding gates. It can be operated electrically via a switch or any other control system. Typically, a sliding gate opener uses around 10 amps to function.
Thebest electric sliding gate openerscan add convenience and security to any property, from individual family homes and gated communities to commercial settings.
However, each type of gate opener requires a specific amount of AMP in order to function without any issues. I have compiled a summarized article that takes a look at the right amount of AMP a sliding gate opener would need. Let's dive in.
How Does An Electric Gate Work?
As the name suggests, an electric gate works on a motor, possibly AC or DC. This motor rotates through an oil-cooled reduction gearbox, thus giving energy to the cog, which in turn moves the gate on a steel rack. The gear rotates onto a shaft attached to the drive, which pulls the arm that is attached to the sliding gate via a joint.
How Are Electric Gates Powered?
Electric gates usually have gate motors that are powered with either 24V DC or 230 V DC. They require a mains power supply that is suitable as well as a safe wiring system into the gates control panel.
The factors determining which gate motor system is ideal for a particular installation depend heavily on the scale as well as the usage of the system. Typically, automated gates use the 230V AC mains supply in a residential environment.
On average, an electric gate can open and close at least 15 to 20 times a day. This is why gate motor systems require a power of at least 24V and a transformer which helps eliminate the pressure of providing excess power from the mains.
Most low-voltage systems are much safer in terms of daily use and come along with the option for a battery backup. The battery backup enables the gate motor systems to work efficiently for a couple of cycles in the event of a mains supply failure.
These gate systems are also an ideal option for any commercial setting where consumers come and go on a daily basis.
How Much Amp Does A Sliding Gate Motor Use?
Sliding electric gates on standby will consume up to 100 watts of electricity a day on average. While they're active, these gates can use up to 700 watts of electricity. However, the number of times these gates will consume higher electricity while being used is limited.
This is because, on average, the gate opening and closing cycle will only last about 20 seconds in every direction. Though average domestic electric gates open and close around 15 times a day, homeowners that go for a holiday or are away from their homes use the gates less.
All in all, I have noticed that electric gates will not be an expensive addition to your power bill. You are highly unlikely to experience an increase in your electricity bill by installing these gates.
What Wire Size Is Required For A Gate Opener?
I recommend using 16 gauge, multi-stranded, direct burial low voltage, dual conductor wires for an electric gate opener. They can connect with either the AC-powered transformer or the solar panel that is further connected to the control board of the gate opener.
How To Manually Open A Swinging Electric Gate?
To manually open a swinging electric gate, the following steps are to be done:
Start by undoing the bolt that is located underneath the gate motors and loosen it up with the spanner provided. This will place the motor in a neutral setting. To open the gate without electricity, you will have to push the arm at the joints down after loosening the bolt. Now, you will be able to open the electric gate manually without using any electricity.
Tip
To use the electric gate as you normally would, place the de-positioned arm back into its original position and tighten the loose bolts.
How To Manually Operate A Sliding Electric Gate Motor?
If there is no electricity, all you have to do is enter the key that is provided and open the door on the gate motor. This will enable you to operate your sliding electric gate manually. To open or close the gate, simply slide it in the desired direction. In order to place the gate back in its original composition, close the door on the gate motor.
This will allow the user to make use of the gate as intended once the electricity is back on and the gates have access to the power supply. Manually operating an electric gate is also needed when the remote doesn't work. So, learning how to program sliding gate remotecan be beneficial.
Can A 15 Amp Breaker Be Used Instead Of A 20 Amp Breaker For The Sliding Door?
Typically, the size of the breaker used depends heavily on the size of the wire used to connect the electric gates to the power supply. If the gate requirements call for a 20 AMP minimum, it is better that you follow the instructions.
This is because failing to heed the instructions can cause a voltage drop within your gate. A 15 AMP circuit is typically made of a smaller wire than a 20 AMP circuit. The smaller wire can cause severe voltage drop under heavy loads, which can then lead to the gate motors overheating.
In case of unspecified breakers, you can install any AMP that works for your gate. However, if specific numbers are mentioned in the instructions, it is best to follow them. For example; for a 20A circuit, you would need to use a 12-gauge wire. If the gates are meant to be used for longer periods of time, you may even have to go up to a 10-gauge or an 8-gauge wire.
How Many Amps For A Sliding Gate Opener Conclusion
Having a reliable sliding electric gate motor is important. But knowing the specifics about your gate opener andhow to increase the efficiency of a sliding gateis equally crucial. This will help you prevent any voltage or overheating problems from arising in the future.
I hope this article helped you better understand your gate opener and how much power or AMP it uses. Though it may seem complicated at first to figure out exactly how much power your electric gate opener uses, it is pretty easy once you get the hang of it.
Until next time!
Programming a sliding gate remote involves turning on the programming mode, selecting radio channels on the gate operator, and pressing desired buttons on the remote. Multiple remote controls can be programmed at once, and some transmitters allow the copying of the code between identical models.
Electric sliding gate operatorscan be a convenient addition to your home, removing the hassle of pushing the gate open when you need to leave.
I believe that a programmable remote control makes automated sliding gates even better. Most gate operators can be controlled using a programmable handheld transmitter, allowing you to remotely use the sliding gate opener.
Here is my guide to program your sliding gate remote control and make your gate-opening experience even smoother.
3 Steps To Program Sliding Gate Remote Control
Before you program a handheld controller to control the sliding gate, you need to provide it with access to the gate operator. Fortunately, the process is quite easy and can be done within minutes.
1. Turn On The Programming Mode On The Gate Operator
Sliding gate operators often come with a built-in radio receiver, which can provide direct access to the controller. You can activate the programming mode by pressing the programming button located inside the casing of the gate operator. This button is also known as the ‘learn’ button in some brands.
Certain gate operators include a light to indicate the successful activation of the programming mode. If your gate operator includes one, it will light up once you’ve pressed the button.
2. Pick Radio Channel On The Gate Operator
You can press the programming button to choose the desired radio channel on the operator. It’s worth noting that you need to provide the operator with a transmission command within about half a minute of pressing the button. If the operator doesn’t receive one, it will switch back to normal mode.
Tip
Radio channels determine what action your gate operators perform. Some channels define the opening, stopping, and closing actions in what is known as a ‘pulse’ mode, while others signal any one of the three.
3. Programme The Button On Your Remote Controller
This step involves assigning functions described in the previous step to the desired buttons on your controller. Press the chosen button on the controller until the light indicating the specified radio channel blinks.
If successful, your remote controller will now be able to perform the specified function with the press of a button. But if it has failed for any reason, you can repeat the process to make sure that the remote has been successfully programmed.
You can repeat this process to assign more functions to your remote controller. Once you’ve programmed the remote control, don’t forget to try opening the gate with it and make use of the amps in the sliding gate opener.
Adding Extra Remote Control
Sliding gates often support multiple remote controllers to maximize the ease of operation from a distance. Some operators allow up to 25 remote controllers to be programmed for remote operation.
The steps to add an extra remote control are broadly the same as listed above. That said, you can copy the programming of one remote to another through the radio if you don’t want to go through the aforementioned steps again.
To copy the code of your gate remote, hold down a button on the already-programmed remote and press a chosen button on the new control. You will see an LED light flash on the new remote, and once it stops flashing, the programming has been copied successfully.
Continue to repeat the process until you’ve copied all the buttons onto the new remote, and that is about all there is to it.
Tip
There are a couple of conditions to copy remote programming successfully. First, you must place both controllers in the immediate vicinity of each other. And second, both remote controller models must be identical, meaning that the programming process cannot be universally copied.
While it doesn’t happen too often, there will be times when the sliding gate remote control simply doesn’t work. If this occurs, you can try a few things before looking into replacing the remote controller.
1. Drained or Defective Batteries
The first thing to check for when your remote control stops working is the battery compartment. Chances are, the batteries are either defective or drained completely, causing the remote to not function. The fix is typically as simple as replacing them.
2. Programming Issues
Another possibility for your remote control not working properly is that it was either not programmed properly or facing an issue with it. Regardless, you can fix the problem by reprogramming the remote and ensuring that you didn’t miss any steps during the process.
3. Signal Interference
Signal interference is one of the most common culprits causing your remote control to not work. This can be caused by nearby electrical appliances or faulty electrical devices.
Should you encounter such an event, try turning off any appliances that may be close by and check if the remote works. And if the remote starts working again, consider contacting an electrician or a serviceperson to check on the faulty appliance.
Another potential cause for signal interference may be caused by strong radio signals in your area. This is particularly prevalent in areas close to a radio station, airport, military base, or a flight path. If you live in such an area, consider looking into a special antenna and receiver to fix the problem.
4. Check The Gate
The remote being faulty is a higher possibility than the gate facing issues, but the latter remains a possibility nonetheless. Check if your sliding gate works properly with the operator or not through manual operation. If it doesn’t, then it may be time to contact a professional to fix the problem.
How To Program Sliding Gate Remote Conclusion
Using a remote to operate the sliding gate adds a layer of convenience to the way you move in and out of your home. And since sliding gates are not bound to any model-specific controller, you can use multiple remotes of different brands to operate them.
Something worth noting is that, if needed, you can remove a programmed remote control from the memory of your gate operator. This can be useful if your gate operator doesn’t support many controllers at once and you need to make room for a new one.
And that’s about all there is to programming sliding gate remote controls. Be sure to refer to the manufacturer’s instructions if you face a hiccup, and the programming process will go smoothly.
You can easily paint particle board surfaces by choosing the right kind of paint depending on the type of particle board furniture. Just make sure you prep the surface using fine grit sandpaper and applying an oil-based primer. And let the paint dry before applying an additional coat.
Though particle board furniture may not be sturdy enough to stand the test of time, you can easily use screws for particle board to keep it steady. And if you have a bookcase, a bedside table, or a chest of drawers showing signs of wear, you can opt to paint particle board furniture.
A coat or two of paint not only covers the scratches but it can also increase the longevity (both in terms of functionality and appeal) to a certain extent. So, yes you can and should paint particle board furnishings!
And I will help you go about the painting process with this detailed guide on the things to consider before painting and the steps involved.
What Is A Particle Board?
In simple words, particle board is a modern substitute for traditional wood-based furniture. Particle board panels are created by combining wood byproducts, primarily sawdust, with polycarbonate epoxy adhesives and pressing them into large pieces.
In fact, it is one of the least expensive woods available, making it a favorite among individuals looking to save money. However, these panels are typically painted with plastic veneer when used for furniture to make it last for a longer time and prevent any damages.
And plastic veneers can easily get scuffed, flaked, or scratched with excessive use. Moisture may also cause swelling in the core particleboard. Despite all these disadvantages, particle boards are extensively used nowadays to make various furniture pieces.
Particle board is available in several grades to cater to individuals who want enhanced toughness, longevity, pricing, and attractive appearance for DIY projects.
Just make sure you consider the total weight the particle board can hold before you consider purchasing it to make a particular furniture piece. This will help determine the structural integrity of the final product and its overall longevity.
Advantages Of Using Particle Board
Particle board has a number of advantages:
It is less expensive than chipboard or other kinds of wood
Has a higher density and uniformity than other wood furniture
It can be cut and shaped into a wide range of sizes and forms
Simple to work with and is available at any local hardware store
Different Types Of Particle Board
Several particle boards are developed to satisfy the demands of various applications in different industries. Chipboard is made from very small splinters of wood, whereas oriented strand board (OSB) is made from considerably bigger strands or flakes of wood.
Since particle boards may be produced as dense, large, and heavy as you like, the options are unlimited. However, most producers have a few varieties of particle board prepared to go right off the shelf, so let's look at these!
1. Laminated Particle Board
In a laminated particle board, the surface of the board is covered with a laminated sheet to protect it from environmental impacts like water, heat, and other conditions. These types of laminate surfaces are used where robust materials are required, like roofs of auditoriums and internal space of speakers.
Laminated particle boards are easy to clean, sturdy, and require little to no maintenance. Therefore, they are a good choice for commercial environments and work great as a long-term investment.
2. Single Layer Particle Board
Whenever you walk into a local hardware store to buy a particle board, the first thing you'll be offered as an option is a single-layer particle board. This board is the simplest and is made from same-sized wood filings to keep the surface consistent and sturdy.
Single layer particle board is resistant to the consequences of dampness or direct exposure to water due to the addition of veneer and laminate, but it isn't waterproof. As a result, a single-layered particle board is only suitable for internal usage, as prolonged exposure to the weather will cause this board to deteriorate, rot, and crack.
3. Veneered Particle Board
A veneered particle board is any particle board with a veneer coating applied to its surfaces. And for the unversed, veneer is a thin covering of wood bonded to the top of engineered wood to make it look like a solid wood panel.
You can choose from various kinds of veneer available on the market, most of which are derived directly from the source it resembles. For instance, the walnut veneer is directly sourced from walnut wood and is slightly more expensive than oak wood veneer.
That said, keep in mind that wood veneer is cheaper than solid wood.
4. Multi-Layered Particle Board
A multi-layered particle board comprises three layers, and as the name suggests, these boards are strong, durable, and can easily resist damage. Near the surface areas of the board, the wood particles are closely packed to increase smoothness and strength as compared to the interior parts of the board.
The tiny wood particles that make up the board's opposing sides boost resistance to water, temperature, pressure, and scratches. And due to the presence of extra resin and smaller wood particles, these boards are much easier to paint as compared to others.
5. Cement Bonded Particle Board
Cement-bonded particle boards are by far the most unique boards I’ve come across. Made from an extraordinary combination of magnesium-based cement and wood particles, these boards are inexpensive and sturdy. And they are extremely effective as construction materials.
This type of particle board is resistant to moisture, impact, abrasive wear, fire hazards, and insect damage. As such, the flexible and durable product is used to build walls, roofs, carpets, and even furnishings. While sixty percent of this board consists of magnesium-based cement, the other forty percent consists of water and wood-based particles.
6. Graded Density Particle Board
Graded-density particle boards and multi-layered particle boards are the same. However, the only difference is how these two different boards are used. In graded-density particle boards, thick wood shavings are compressed and shaped between two fine boards that form the surface of the particle boards.
Due to the durability and longevity of these boards, they are most used in furnishings like particle board cabinets, spice racks, serving trays and many more utility-oriented objects. These types of boards can be easily sealed and painted without any hassle.
7. Melamine Particle Board
Melamine particle boards are like ready-to-use boards, available in various colors, patterns, shapes, and sizes. These boards have the inherent quality of being scratch and water-resistant.
The particle board features decorative sheets spread over the surface in the same manner as veneer. And the wood granules have been glued using a mixture of melamine-urea, epoxy, wax emulsion, and formaldehyde to guarantee that the board is robust and moisture-resistant.
Can You Paint Particle Board Furniture?
You can easily apply any color to the particle board and change its look according to your preference. However, you must take care of certain things, like choosing the right paint and making the surface smooth so that paint sticks to it properly.
Since particle boards are more porous than other materials, they soak paint a lot faster. Therefore you might have to apply several coats of paint to improve its texture and look.
Tip
Always sand the surface and apply an oil-based primer before painting particle board furniture, so the paint looks as good as new.
Is Painting Particle Board A Good Idea?
Painting particle board furniture is a good idea as the oil-based paint protects it from any environmental damage like rain, heat, abrasion, or other hazards. Moreover, painting particle board gives the furniture a new, improvised look.
However, it’s very important to choose the right kind of paint. Some coatings may not cling properly to the particle board or offer enough protection. So, before undertaking any painting project, it’s always a good idea to contact an expert.
Things To Consider Before Painting A Particle Board
1. Choose The Right Kind Of Paint
Before you begin painting, you must choose the right paint that gives your particle board furniture a smooth and glossy finish. Not all kinds of paints are suitable to paint particleboard furniture. It is essential to choose a paint that easily covers hard surfaces. These paints are more resistant to chipping and scratches and give superior overall coverage.
2. Prepare A Smooth Surface
Before you begin the paint job, it's essential to prepare the entire surface of the particle board. For this, you'll have to use fine grit sandpaper to smoothen the rough edges and uneven surface.
You should then apply a coat of primer to hide any stains or imperfections. I know it can be tempting to skip this step if you plan on using chalk paint. But resist the urge!
3. Use Multiple Coats Of Paint
When painting particle board furniture, it's very important to use multiple coats of paint to make the surface look smooth and even. This way, the paint will last for a longer duration and won't chip off easily.
4. Let It Dry Off Completely
After applying the first coat of paint, let the coat dry completely. Once you feel that the first coat is done, proceed with the second coat. This process might take a long time, so you must be patient.
Tip
Always remember that at least two coats of paint are required to make the particle board look as good as new.
5. Enjoy Your Hard Work
Once you're done with the painting process, sit back and relax. Wait for your oil-based paints to dry off completely, and your particle board furniture will be ready to look all new.
Which Paints May Be Used On A Particle Board?
If you’re looking for paint that will give your particle board furniture a high gloss finish, you should go for latex paints. These kinds of paints will give the best kind of coverage and durability.
You can also use oil-based paint, but it might not stick to the particle board properly, and the final product might not be very satisfactory. In addition, if the particle board is dark in color, you should apply a primer so that your fresh color stands out properly. And you might have to use a bold paint color for painting the particle board.
How To Paint A Particle Board?
1. Start With Repairing The Damage
You will only achieve the best results from painting your particle board when you repair all the damages before coating it with your desired color. There are three kinds of damage that you need to take care of.
A. Water Damages
Some particle board furniture is not laminated but painted. Due to this, when they are constantly exposed to extreme weather conditions, bubbles, and permanent stains might change the look of the particle board furniture. In extreme cases, the particle board might even soften and crack.
To repair such damages, you must scrape out the portion which water logging has affected the most using a sharp razor. Once you're done, you can easily fill up those areas with wood shavings and smoothen them out with grit sandpaper.
B. Chips And Scratches
Particle boards are not very durable or sturdy. They can easily crack, chip, or scratch. So, use putty or wood shavings to fill the area if you see any such damage on the particle board. Then use a putty knife to smoothen out the area. Lastly, sand the surface of the particle board and make it look as good as new.
C. Veneer Damages
The plastic veneer stuck to the particle board with the help of glue eventually loosens, and the edges separate from the board. However, you can easily solve this problem through contact cement. All you need to do is use a putty knife and lift the edges. Then scrape off the dried glue and wood particles.
Apply a small coating of contact cement to the particle board surface and the veneer's bottom surface. Using a roller or a piece of wood, press the plastic veneer into the particleboard core. The veneer should adhere strongly.
2. Smoothen The Surface Of The Particle Board
After you've repaired the particle board, it's time to sand the surface to remove all the unevenness. If the surface of the particle board has a glossy finish laminated surface, then the paint might not stick properly.
However, when you sand a particle board, it can easily absorb the paint. Always remember to do this step properly; otherwise, the paint might start chipping off. To remove any previous finish, lacquer, or gloss, sand the entire object using fine-grit sandpaper or a sanding block. The idea is not to sand away the veneer but rather to scratch the top and give it "teeth" that will aid in the adhesion of the paint layer.
3. Prepare And Apply The Right Primer
If you pick the right kind of primer, then you can save yourself from the hassle of putting in several coats of paint. You can use a gray primer if the particle board is dark in color and a white primer in case the particle board is light in color. The primer helps the particle board to absorb the paint and prevents the chipping of the paint.
Though you may apply the primer with a roller, a thin layer applied with a paintbrush will guarantee that it goes into every crack. Allow the primer to dry for 24 hours and then lightly sand the surface once again.
4. Sand The Primer Layer
Lightly sanding the particle board before painting will ensure that the top coat sticks to the surface. You should then remove any dust and debris with a lint-free cloth after sanding.
5. Start Applying The Paint
Once the primer is completely dry, start painting the particle board furniture. You can use a roller brush to paint the particle board. The advantage of using a roller brush is that it gives a smooth finish, doesn’t show the brush pattern, and, lastly, you can avoid paint drips that might destroy your hard work.
While painting, keep an eye out for paint drips and clean them away with a brush before the paint dries. Depending on the color, one application may be sufficient to meet the surfaces. However, the greatest results are frequently obtained by applying two or three layers of paint in fine, consistent layers.
If you need to apply another layer, wait until the previous one is dried before applying the next. A gentle sanding between applications can improve adherence.
Tip
A gloss or high-gloss texture is frequently preferred when painting furniture. Gloss paints are simpler to clean and prevent staining.
Some Additional Tips And Tricks To Paint Your Particle Board Furniture
If you're repainting over a darker shade, use a white or light-colored primer first
When using a paint sprayer, keep the can upright and spray in a back and forth motion
Begin by applying light layers of paint, allowing each coat to dry thoroughly before adding another
To produce the greatest results, use a high-quality paintbrush or roller developed to use with latex paints
Remove any paint drops or spills as soon as possible, before they dry
Can You Paint Particle Board Final Words
Particle boards make fantastic furniture, especially on a tight budget. And painting particle board surfaces is the best approach to refurbish particleboard furniture. Just keep the procedure in mind and proceed slowly with it.
If you’ve found this article insightful and are interested in knowing about screen printing, then my article on, “Can a circut machine screen print?” may interest you.
Usually, products made of particle boards can hold up to 45 lbs. However, the integrity of particle boards largely depends on the manufacturer, the materials used in construction, how and where they are used, etc.
Particle boards are used as lightweight household solutions, but it is often difficult to find the best screws for a particle boardand determine how much weight it can hold.
Surprisingly, despite being less durable than medium density fiberboard, when used in combination with other solid wood products, particle boards can hold a lot of weight. So, here’s a breakdown of how much weight this affordable yet functional engineered wood product can hold…
What Is A Particle Board?
Particle board is a low-density fiberboard or chipboard, mostly used in making doors, false ceilings, parquet floorings, and flat pack furniture like kitchen cabinets, bookshelves, etc. It is made of waste wood chips, sawmill shavings, and sawdust. These wooden parts are bound together with Urea Formaldehyde or any other synthetic resin or binder.
Types Of Particle Boards
1. Cement-bonded Particle Board
This type of particle board contains 60% of portland or magnesium-based cement. Then the waste wood chips and wood fibers make up 20% of the composition, with the rest being water.
As a result, this type of particleboard is highly moisture-resistant, making it suitable for constructing walls, floorings, and ceilings. This material also repels fire, rot, and termites, so it is a versatile material for making furniture products.
2. Laminated Particle Board
This particle board features a layer of thin laminate sheet, making it more durable and visually appealing.
3. Melamine Particle Board
The surface of this particle board boasts a mixture of melamine and decor paper. And the construction of this wooden product includes wax emulsion and melamine-urea formaldehyde resin. Thanks to these materials, melamine particle boards resist water damage and scratches.
Plus, it is available in various attractive colors and textures, making it the top pick for furniture, wardrobes, wall paneling, etc.
4. Veneered Particle Board
As the name suggests, this variant of particleboard has a thin layer of wood veneer attached to the surface. One of its biggest advantages is its durability against warping, compared to other types of particle boards.
5. Single-Layer Particle Board
When same-sized wood particles are pressed together such that they form a flat surface, they form a single-layer particle board. While they are water-resistant, they are not completely waterproof. However, the flat surface can be plastic laminated or veneered to enhance its durability.
6. Graded-Density Particle Board
This type of particle board is made of thin layers of fine wood particles and coarse wood fibers. It can be used to make wooden furniture and cabinets.
7. Three-Layer Particle Board
Particle boards containing layers of highly dense wood particles and large wood particles form this three-layer variant. They contain generous amounts of resin and feature a smooth surface, ideal for painting.
How Much Weight Can Particle Boards Hold?
To understand this more deeply, know that a particle board has a Modulus of Rupture (MOR) value ranging from 16-22 MPa. MOR determines the bending strength of materials, with the value of the particle board being equivalent to 224 kg/cm². Hence, a regular particle board desk can hold approximately 32 lbs.
However, when mixed with other wood products like medium density fiberboard (MDF) and plywood, particle boards may support up to 45 lbs.
As such, MDF can hold approximately 80-300 lbs per square foot depending on the quality of screws used. Similarly, ½-inch plywood can hold up to 35 lbs while the same material of 1-inch thickness can support up to 164 lbs.
Basically, the strength of the final structure depends on its thickness and the manufacturer as well. So, even though particle boards are more affordable than other materials, they are not always inferior.
Does Particle Board Break Easily?
Unfortunately, yes. Since particle boards are made of wood composite held together with resin, they cannot support heavy loads. The lack of a wood grain structure also lowers its strength.
Another major flaw of particle boards is their inability to resist scratches. Even the edges and corners of any product made of particle wood can get scratched and end up getting rough.
Not to forget, finding suitable screws for particle boards is a Herculean task due to the low integrity of the board. As such, specialized fasteners like chipboard screws are one of the few types of screws that can be used on a particleboard product.
Last but not the least, water damage is the most common culprit behind easily breakable particle boards. So, if you live in an extremely humid environment, you may notice particle board products losing their integrity and functionality sooner than, say, MDF boards.
How Long Can Particle Board Last?
Flat pack furniture made of particle board may not last more than a year. However, if manufactured well, they may last for upto five years. Not to forget, the durability of the product will also depend on how you use it.
Warning
Always check for warranties when buying particle board products. Most of those sold online do not have any form of warranty at all, so you must stay cautious.
How To Make Particle Boards More Durable?
Since moisture and humidity are major deterrents to the integrity of particle boards, you must avoid these two factors to ensure they last long. I recommend using suitable sealants (consult the manufacturer for this) around the edges and the surface of the particleboard product.
Framing or bracing the product with aluminum can also help increase its durability. Other products that can be helpful in this regard are plain lacquers and sanding sealers. Alternatively, you can laminate the particle board for more protection.
Tip
Try stacking two or more particle boards together, or use them in conjunction with plywood and MDF boards for additional support.
How To Repair Peeling Veneer On Particle Board Cabinets
Start by holding back the peeling laminate with a pair of pliers and then apply contact cement. I suggest using a paintbrush to do so.
Warning
Ensure that you apply the cement on the particle board and not on the peeling laminate. Wait for the cement to dry completely before pressing the peeling laminate back to its position, or else your efforts will go in vain.
I further recommend using a J roller to ensure all the peeling portions are back in place.
Method 2
If the peeling occurs in difficult parts, wherein you’re unable to clamp them together, try using a spray adhesive. Just pull the peels apart, spray the adhesive, and press them all together. Again, use a J roller to ensure a smooth surface.
Method 3
If the peeling laminate is too damaged and cannot stick to the particle board, no matter how hard you try, it’s best to get rid of it. You can loosen the glue with a heat gun and carefully remove the damaged pieces. Thereafter, you can follow the first method to add a new lamination.
Method 4
Dry the wet particle board with a hair dryer. Once completely dry, use medium grit sandpaper to sand the particle board. You may use finer grit sandpaper towards the end of the sanding process.
Thereafter, wipe off the dust and let the particle board dry again. You can use an electric dryer or let it dry naturally.
Finally, apply a waterproofing agent and let it dry.
What Is Particle Board Good For?
1. Cheaper Than Medium Density Fiberboard, Plywood, And More
Considering the low integrity of particle boards, you may be wondering if they are even worth it in the first place. Well, they are ideal for constructing versatile work surfaces, especially for homeowners on a budget. In fact, they are often used as cheaper alternatives to plywood and MDF to reduce construction costs.
2. Lightweight And Convenient
Products made of particle board are lightweight, making them easy to move around. So, if you do not have the means to move around heavy household items, it is best to opt for particle board.
3. Smooth Surface With A Stylish Look
Particle boards can lend a minimal and tidy look to your space. And with the large variety of colors and textures available out there, you won’t have to spend a lot for a stylish household environment.
4. Eco-friendly
Interestingly, particle boards are much better for the environment since they are made of composite material and waste wood. So, when you purchase a particle board, you are less likely to cause any felling.
How Much Weight Can Particle Board Hold Conclusion
Although particle boards cannot hold heavy items, they are widely used in flooring, wall paneling, and even in the commercial industry. Hence, with proper care, well-manufactured particle boards may last longer. Just ensure you do not keep them exposed to moisture and humidity, and you’re good to go!
If you found this article informative, I recommend checking my guide on “can you paint particle board?” And with that, I’ll be signing off for the day.
Until next time!
Peeling veneer on cabinets is fairly common, but fixing them is pretty simple. The most common way to fix a peeling veneer is by gluing it down or using adhesive. However, for severely damaged cabinets, the entire veneer has to be replaced.
Particle board cabinets are cost-effective alternatives to hardwood cabinets. They offer multiple colors and designs that greatly complement any room. But cabinets that do not utilize high-quality veneers and the best screws for particle board often start peeling when exposed to extreme conditions like high humidity and rough use.
To help you fix your particle board cabinet to achieve optimal utility, I have curated a step-by-step guide on repairing peeling veneers.
What Is Veneer?
In woodworking and home furniture, a veneer is a thin layer of wood or bark that is glued to the surface of particleboard cabinets. Veneers can be made from either real wood or wood filler, typically used to imitate the smoother finish of real wood furnishings. Carpenters glue them to the cabinet doors and panels.
Providing a natural wooden aesthetic to your cabinet space, veneers are a suitable alternative to real wood usage. Reconstituted wood veneers can especially protect endangered wood species while offering superior texture and color.
However, installing veneers requires more skill than simply laminating cabinets.
How To Repair Peeling Veneer On Particle Board Cabinets
Peeling veneers do not necessarily require professional carpenters to fix them. I have repaired many cabinets with damaged veneers, and they all look as good as new. So, don’t throw out your perfectly functional kitchen cabinets yet! Follow these steps instead.
Things You Will Need To Fix Damaged Veneer
Putty knife
Paint primer
Sandpaper
Measuring tape
Veneer adhesive or wood glue
Ruler or straight edges
Paint
Disposable brush
Contact cement
Wood veneer or laminate veneer pieces
Woodworker’s clamps
Soft cloth or rag
Depending on the extent of veneer damage, I suggest using one of these four methods:
1. Glue Down Peeling Veneer
Step 1
Using a set of pliers, peel back the laminate or veneer layer. File down the wood underneath with sandpaper to create a smooth surface. You can also use a putty knife to scrape away any old cement.
Tip
Do not peel or remove any excess length of the veneer. Stop pulling when you feel a little resistance to the existing adhesive.
Step 2
When the area is sanded and prepared, apply contact cement on the particle board and under the old veneer. You can use a disposable paintbrush for smoother application.
However, I suggest not using a foam brush with contact cement since it leads to uneven and patchy cementing. Moreover, ensure that the laminate piece or veneer does not touch the board until it dries.
Tip
Remember to apply contact cement on the edges of the particle board to prevent more peeling.
Step 3
Once the contact cement has dried, gently press the two surfaces together. Do this carefully since misalignment or bubbles are common during this step. I suggest holding them in place for an hour to ensure better attachment.
Place the attached work between two scrap board pieces and use a woodworker’s clamp to hold it down.
Step 4
Remove the excess contact cement with your fingers or a knife. If that doesn’t work, you can use a pencil eraser to make it pill.
Tip
Use a j-roller to confirm if the entire length of the particle board is covered with cement.
2. Use Spray Adhesive
Even though clamping the particle board down after cementing is essential, it is often not possible. Using clamps can be challenging for certain parts, like a cabinet door. In these cases, a spray adhesive is ideal for applying wood glue underneath the peeling section and then putting them together. Employ a j-roller for neat application.
3. Replace The Veneer Or Peeling Laminate
When the particle board is not in good shape, it may not be lucrative to repair the peeling veneer. In this situation, replacing the veneer or laminate is the best choice.
Step 1
Melt the existing glue to loosen the peeling pieces using a heat gun. Then, gently peel the veneer from the particle board. For difficult pieces, use a sharp utility knife to remove them.
Step 2
Clean the area with a damp cloth to remove excess dirt or debris. Then, measure how much replacement veneer you need and cut them into pieces. I recommend using a circular saw to chop the new veneer for better precision–they can be easily available in hardware stores. For more insights into cutting tools, read my article titled “How To Cut Particle Board.”
Tip
Don’t worry if you cut slightly larger pieces since you will sand them anyway.
Step 3
Apply contact cement on the new veneer and the particle board. Once the cement is dry, glue them together by using a clamp to hold down the cabinet door.
Step 4
Trim off any excess new veneer, and smooth out the edges of the cabinet door with sandpaper. I always clean all the veneer surfaces with a damp cloth before applying a coat of paint.
4. Repairing Veneers With Water Damage
If your cabinet veneer has water damage, you must add a few steps before using the previous methods.
Step 1
First, ensure that the wet particle boards are dry. Use an air dryer until there is no wetness at all. When they are dry, use a grit sandpaper for sanding the surface. Sanding these areas can help remove excess wet spots and give you a smoother surface to work on.
Step 2
Wipe the dust off the surface and proceed to dry it again. Then, apply a thin layer of waterproofing agent before gluing or replacing the veneer.
Should You Replace Or Repair Peeling Veneer?
When the veneer on the cabinets peels due to excess heat or moisture, a simple repair is appropriate, especially in cases of localized damage. Follow the first and second methods to repair small, limited damage.
For larger areas of veneer damage, too, repairing can be cost-effective. However, it might not appear as smooth as professional repairs. Follow the third method for an extensively peeling veneer.
If the peeling is not localized and is spread across multiple cabinets in a particular area, calling a professional is essential. Upon inspection, they will either tell you to replace your cabinets or let them initiate a veneer replacement project. You can choose whichever option is affordable to you.
Tips To Maintain Veneer And Prevent Peeling
Taking proper care of your furniture coatings ensures greater longevity. Here are a few steps you can take to prevent peeling and damage to your particle board cabinets.
1. Regular Cleaning
Always use a sponge or soft cloth and a mild soap-water solution to clean the surface
Avoid applying too much pressure and excessive scrubbing
For cleaning stains, use diluted household cleaners without adhesives
Do not scrub surfaces to remove grease, and use a lukewarm solution instead
2. Disinfecting Surfaces
Remove dirt and grease from the cabinet surface
Before using a disinfecting solution to the entire surface, apply it to a small area for a patch test
If it does not do any harm, you can proceed with the disinfection process
Lastly, avoid keeping veneer cabinets in excessively hot and humid conditions.
Repair Peeling Veneer On Particle Board Cabinets Final Thoughts
While fixing a patchy veneer is pretty simple, severe cases like water infiltration or veneer rotting may require professional help. This kind of damage requires more factory-level measuring, cutting, and pasting. To achieve a better finish and durability, I suggest hiring a professional carpenter or company in such cases.
If you’re repairing it yourself, I recommend following some safety measures. These include working in a well-ventilated area, especially while using contact cement. Also, if the damaged veneer is on a cabinet door, remove and fix it in an open space such as a garage.
That’s all about repairing peeling veneer on particleboard cabinets. I hope my step-by-step guide helps you fix your kitchen cabinets without any hassle. If you like such informational guides or manuals, check out my article “How Much Weight Can Particle Board Hold?”
Until next time, stay safe!
Particle board is a versatile material used to make various home furnishings and kitchen cabinets. It can be cut using several tools, such as a jigsaw, circular saw, table saw, utility knife, etc.
I had a couple of particle boards andscrews for particle board lying around in my garage, mainly because I didn't know how to use them, let alone cutting the boards correctly.
I realized that many people had the same dilemma as I did. So, with a little bit of research and some help from my DIY enthusiast friends, I have compiled this comprehensive guide on how to cut a particle board. Without further ado, let's dive in!
What Is A Particle Board?
A particle board is a utility material that can often be seen sandwiched between wood or even plastic veneers. It is used for building cabinets, countertops, shelving, and other home furnishings on a budget.
When compared with other engineered wood boards (like plywood, oriented strand board, and medium-density fibreboard) used for interior construction and cabinetry, it is the least expensive option. However, it is also comparatively the most fragile and least dense.
When it comes to cutting particleboard, it can be done just like one would cut any other type of wooden boards, be it natural or engineered. But the procedure and the right blade that is to be used heavily depends on the quality of the cut that the user desires to achieve.
Although the particleboard chipping out can be a slight problem, it will not matter if the work is being done quickly and on a fully functional project, like building concrete forms.
The desired outcome should influence the tools and techniques that are used to build the cabinets or shelves. Here is more information on the most effective ways I managed to cut particle boards.
How To Cut A Particle Board
1. Cutting Particle Board On A Tablesaw
A particle board comes in sheets that are 4 feet wide with varying thicknesses. The thickness can be 8 or 10 feet long, so if you want to rip a particle board sheet on a table saw, you need to provide it with ample support on its outfeed side. In the event that you don't have somebody to catch the particleboard, you can substitute it with a sawhorse that is placed 2 or 3 feet behind the table saw.
I noticed that I had to add a few extra boards to the top to allow it to flush with the table saw. Particleboard is much more flexible than other wooden boards like plywood, oriented strand board, or medium-density fibreboard. So, I had to be careful to keep the end of the board from falling lower than the table saw.
Otherwise, it would end up allowing the middle to flex upwards beyond the reach of the blade, making the cutting process a lot harder.
For a precise clean cut, it is necessary to remember two things: using a table saw blade with at least 80 teeth can help cut particle boards effortlessly, and to always cut the sheet with the good side facing upwards. When I experienced vibrations that caused chipping while cutting the sheet, I installed a zero-clearance throat plate insert on my table saw that allowed me to reduce the vibrations significantly.
These throat plates can be purchased at any home improvement store. However, I preferred to make my own. I did this by cutting a piece of plywood that would fit inside the table saw throat and screwing it in place with the table saw blade kept lowered. Then I turned on the saw, raised the blade, and allowed the blade to cut through the recently installed insert.
When using a Kreg screw for particle board, be very careful while driving it in. If the clutch is set too high, the screw will continue to drive and come out on the other side of the board.
2. Circular Saw Cutting Techniques
When cutting particle boards that are used for forming concrete, choosing a circular saw will be more suitable. It is much smoother to cut with and does not pose much of a dust problem, as particleboards do not create as much dust as medium-density fiberboards.
Start by drawing a line along the area you need to cut and use a circular saw along with a utility blade to cut the particle boards more precisely.
However, when using circular saws, there are chances that the edges of the particleboard sheet may chip. To avoid this problem, use different blades that enable smooth cutting and refine your cutting techniques.
With this cutting method, the entire particle board sheet needs to be supported, preferably on a 2x4-sized surface, where it is laid out on its edge. Typically, I use a blade with 60 teeth or more, though the more teeth, the better. Turn the particle board sheet over so the cut is made from the back of the board.
The problem of the sheet chipping out usually arises from the side that is being cut, so turning the board over can help protect the board's good side. If the cutting line is not satisfactory, use a utility knife to score the cut line on the better side before turning the sheet over and cutting it with the circular saw.
3. Cutting Curves In A Particle Board With A Jigsaw
Since particleboards are not as dense as other wooden boards, it is relatively easy to cut in curves using a jigsaw. However, the quality of the blade being used to cut the board significantly determines the quality of the result.
When I'm in a hurry and the quality of the cut does not matter as much, I use a 6 TPI (teeth per inch) jigsaw blade, which gets the job done easily. But at times when quality is of concern, blades with a higher TPI will ensure a clean, precise cut.
Note
Do not choose a jigsaw blade that has very high TPI, as it may cut too slowly and end up burning the wood in the process.
The maximum I would opt for is a 20 TPI blade and keep the saw foot in contact with the surface at all times to reduce any vibrations. Cutting curves from the back of the particle board sheet neither reduces chipping nor is a practical strategy.
As such, the best way to achieve a clean cut line on the sheet is to apply some masking tape on the sheet, mark the cut line on the tape, and then cut through the masking tape. If a large hole needs to be drilled with a spade bit or a hole saw, laying tape is a foolproof way to ensure a clean outcome.
4. Using A Miter Saw
A miter saw is much more precise than a circular saw or jigsaw. It is used to cut through smaller pieces of particle board sheets and when there is a need for angled cuts. This saw requires a blade with at least 80 teeth count and is carbide tipped.
Miter saws are much smaller in size when compared to their table saw counterparts. And this size factor will allow you to make more different cuts from different angles as you move the saw around easily. Table saws and circular saws, on the other hand, mainly help in making straight cuts.
The most important aspect of a miter saw is using the right blade to cut the particle board. Blades with a good number of teeth and carbide tips usually give the best cuts. And the better the blade quality, the better the end result.
5. Cutting With The Dremel Tool
Dremel tools are ideal for people who need creative freedom when cutting particle boards. They are typically used for smaller jobs such as polishing, sanding or grinding. But certain Dremel tools can be used for carving and engraving on wood. Some examples are the saber saw and moto-saw tools.
However, a Dremel tool is not ideal for cutting a particle board into larger pieces. The most important factors you need to keep in mind when using a Dremel tool to cut a particle board are the tool's speed and the blade type being used for cutting.
For example, the moto-saw tool has a reciprocal action that garners enough speed to cut through thinner sections of a particle board effectively. I use this tool mainly to engrave on the sheet or when I wish to be creative with the particle boards edges.
Additionally, dremel tools give the user the ability to smoothen out any chips or splinters on the edge of the particle board. This chipping or splinters are usually the result of using a circular saw or table saw to cut larger sections, especially when cutting particle boards for furniture.
However, like any power saw or utility knife, a dremel tool cannot cut through a particle board on the first pass, more so when the board is thicker. The first pass should be done with the right amount of pressure to lightly score the topmost layer of the board. A second pass is what will ensure a cleaner cut and smooth finish.
6. Cutting Particle Board With A Hand Saw
A garage that does not have a hand saw is a rare sight. But the main question is, can a hand saw cut through a particle board? Typically, a hand saw is not the first choice when it comes to tools for cutting a particle board. This is because the cuts will generally be quite jagged or splinter excessively, and straight cuts will be out of the question.
Long story short, a hand saw does not possess the required power and speed to cut through the particle board seamlessly. But if the result or the appearance of the particle board is not of concern, a hand saw can be used to cut it effectively. Keep in mind to sharpen the teeth of the handsaw so as to prevent the intensity of the tear-out.
Protective Measures And Equipment
A particle board comprises sawmill shavings, wood chips, and sawdust. These components make the particle board sheet more prone to chipping and splitting when it is being cut. Hence, taking precautions and wearing safety gear before cutting a particle board sheet is important.
The matter that is released from the particle board when it is being cut can be a safety concern. These tiny wood particles can be very harmful and irritating to the eyes and the lungs if inhaled. So, protect yourself by wearing shatter-resistant eye protection when cutting a particle board. Moreover, there are safety glasses that come with side shields which provide a lot more protection when compared to regular safety goggles.
To protect your lungs, consider wearing a tight-fitting ND95 dust mask that helps prevent any wood chips or particles from being inhaled. Make sure the mask fits snugly around the nose and mouth in order to ensure that wood particles do not seep through.
Last but not least, make sure to protect your hands. Since a particle board can chip and splint when cutting, wearing thick, cut-resistant gloves or thick leather gloves can protect the hands from any possible injury.
Depending on the type of method you use to cut the particle board, use the necessary ear protection. Since table saw, circular saw and other types of power saw produce a lot of noise, they can lead to the damage of unprotected ear drums. Wearing earmuffs or snug-fitting earplugs can block some of the noise and give the ears the protection they need.
How To Cut Particle Board Conclusion
A particle board is an extremely versatile material and can be cut in various ways, to make furniture, cabinets etc. However, some particle boards will have the problem of peeling veneers. In such cases, knowing how to repair peeling veneer on particle board cabinets will be helpful.
A simple method to do so is using contact cement on the veneer and particle board, attach the two, and smooth out any air bubble with a hand or J-roller. You can also trim any excess veneer off the edges.
An impact sprinkler is a great irrigation system that is ideal for watering large areas of land, like your yard or lawn. You can install it on your own by digging the land and using tools like power trenchers and pipe-pulling machines.
So, you are planning to get an impact sprinkler for low pressure for watering your garden or lawn? I understand that it’s only natural for you to assume that the installation would be a hectic affair. However, you will be surprised to know that you can do it easily with the help of some power tools.
So, today, I will tell you all about how to install an impact sprinkler- right from marking the area to testing it before use.
8 Steps For Installing An Impact Sprinkler
1. Marking The Area
Start by placing wooden stakes or small flag poles at every location where you plan to install a sprinkler head. A piece of string can be used to mark the area where the pipe will be placed. However, before you start digging, it is important to know about the location of all the gas pipelines and other power lines to avoid digging into these installations.
2. Digging The Trench
Once the area has been marked, start digging trenches where the heads will be placed. The typical depth for a trench is between 6 and 12 inches. In case the trench is to be dug at a walkway, a DIY high water pressure device can be used to efficiently dig a hole through it.
For this, get a PVC pipe that is lengthy enough to fit underneath the walkway, install a slip-female thread adapter at one end of this pipe and connect it to a hose. Connect a slip-male thread adapter on the opposite end of the pipe and proceed to connect a jet spray nozzle. You can easily find one at any home improvement or garden retail store.
Once you’ve located the area for the impact device, you can dig trenches to the walk on either side of the location. Then, you can turn the water on and start working your way through the trench.
Tip
It can get quite messy and muddy to work with water for long, so turn off the water every now and then to let the ground soak the moisture.
To make things easier, I purchased a power trencher and a pipe-pulling machine for the Poly Pipe, which helped me bury it without damaging my lawn. If you also plan to do so, make sure you leave enough space between the valves on the manifold so that you can detach or replace them when needed.
3. Providing Water Supply
Once all trenches are dug up, you can provide the water supply for the sprinklers. Manufacturers like Rain Bird can help you determine a suitable water connection according to the location of the sprinklers, but make sure you keep up with the local regulations.
4. Assembling The Pipes
Begin by assembling the valve manifold and connecting the back-flow preventer if needed. You will find PVC pipes in various diameters as well as wall thicknesses. Typically, using a bigger diameter PVC pipe can elongate the life span of the sprinkler and make it more durable.
For colder climates, you can install a Poly Pipe by digging up a trench, placing the Poly Pipe, and sliding Poly pipe clamps over the coupling to tighten the connections.
A Poly Pipe is more malleable and much less prone to damage or getting affected by freezing temperatures. However, dealers like Rain Bird suggest refraining from using Poly Pipes for mainline connections.
Another viable option is PVC cement, which is usually applied inside the sprinkler fitting and on the pipe’s exterior. Once the cement is applied, quickly insert the pipe completely, and turn it around to spread the cement. Make sure to hold it inside for a couple of seconds.
5. Testing The Pipes
Test the pipes by running water through them and flushing the system. Control the valves manually to clear the system by opening each valve individually, filling the pipe, and then closing the supply. Be sure to do this with each individual valve.
6. Mounting The Sprinklers
After the pipes are set, mount the sprinkler head using a core tool. If the pipe hole needs to be expanded, heating the ends will do the job. Cover the dug hole with soil once the sprinkler head is in position, and make sure to cover until the hole is level with the ground.
Note
The sprinkler’s protective cap must be in place during the mounting process and tightly secured.
7. Cleaning The Sprinkler
Once you install the impact sprinkler on the ground, use water to flush away any dirt on the sprinkler. Pour water on the soil that was used to fill up the distance. This will further strengthen the soil covering the body of the sprinkler.
8. Testing The Sprinklers
It is essential to test the sprinklers before starting to use them to reduce the chances of any issues arising in the future. Simply turn on the water supply and inspect each sprinkler closely to see if it’s functioning efficiently. Check the head of the sprinkler to see if there are any leaks or loose connections, and tighten them if there are any.
How To Install An Impact Sprinkler Conclusion
Though impact sprinklers are functional devices, the type of sprinkler you need depends on your home. For instance, a rotor might fit your needs much better than an impact sprinkler.
A rotor is a sprinkler device that shoots out single or multiple streams of water in circular motion and is usually opted for irrigating larger areas. You can do a comparison of impact sprinkler vs rotor to find which type best suits your needs.
If you have enjoyed reading this guide, you can check out my other article titled “how to cut particle board?” See you next time!
Why spend time and money heating an entire room when you can get your blanket to reach an optimum temperature?
Yes, with wireless heating and cooling devices, you now have the luxury of turning the bed toasty warm or breezy cold, any way you want. These devices even let you and your partner enjoy personal temperature preferences when sleeping on the same bed.
Today, we are reviewing the BedJet V3 Wireless, a device that has gained popularity soon after its release. It has received a significant upgrade since the V2 model, and in this guide we are talking about all the pros (and cons) that this product puts on the table.
We have included a buyer’s guide at the end of the review to help you understand the functioning of the device better. There’s also an FAQ section that’s sure to clear any doubts you might feel while reading the review.
So, without any further delay, let’s dive right in!
Sleep better with on-demand cooling, warming and sweat...
Powered ventilation cooling rapidly wicks body heat and...
Why Buy This Product?
BedJet V3 Wireless has garnered an extensive customer base over a very short time, and honestly, we are not surprised. With the kind of features and facilities it provides, it is no wonder that it has impressed many.
However, if you are new to this or heard about it from a friend, let us take you through the best of this product. Under this section, we will take a look at its bright sides, starting with…
Base Unit
Unlike other standard products, this one will not give you a hard time when it comes to the base unit. It is less than 6 inches and compatible with all types of beds. The only thing required here is a 3.5-inch rail clearance for it to function optimally.
Moreover, cleaning the unit is super simple. If you have pets, you will often find their hair and other dust particles accumulating near the device. All you have to do is vacuum the unit regularly, and there will be no clogging to disrupt the airflow.
Additionally, it is also very easy to plug the unit into the wall as the power cord is significantly long. You would not require an extension cord for this. However, in case the power outlet is far from your bed, you can buy a hose extension separately.
Flexible Mount
What's best about the brace is that it is foam-padded, which means fewer chances of slippage. Once you install it between the bed platform and the box spring, there will be no chance of it slipping out of place.
Honestly, even after we changed the sheets a few times and slept on the bed for consecutive nights, it did not move or shift at all. Also, to add more comfort, there are adjustable clips that allow you to modify the height in order to direct the air nozzle in the desired location.
Sheet Security
What good is a bed warmer if it gets displaced every time you turn around? With this item, you will have to face no such worries.
The nozzle is designed in a way that even when the sheet moves with you, the functioning is not rendered useless. Now, you may think, how is that possible!
Well, it is the clamping system that keeps everything in place. It holds the air hose grip perfectly to ensure that your sheets stay in the correct position, irrespective of how you move when sleeping.
The clamp is not extremely tight but makes sure that your sheet is in place and does not come off easily.
Remote And App
For this device, you do not have to take the pain of connecting to Bluetooth every time you want to manage something. With the help of a simple remote control, you can manage all your operations.
The remote is very quick to connect to the control panel, and you will also find it very easy to set it up as it comes with a clear set of instructions. The remote allows you to adjust the blower's strength, set a timer, enhance or decrease the cooling, and so on.
The best thing is that the settings are customizable and save your favorite features so that you do not have to keep waking up throughout the night.
Moreover, you can install the V3 app on your cell phone in case you do not want to use the remote. Your folks can also have it installed on their phones and access the controls as and when needed. The best part? It works on both Android and iOS platforms.
Strength Control Feature
The remote allows you to control the fan strength and temperature of the device completely. The remote's display clearly shows the temperature, and you can adjust it according to your convenience.
One word of advice: this item works best with temperature settings that are below 80 degrees Fahrenheit. So, it is a good idea that you set the temperature within this range to make sure that you enjoy the best cooling and heating effect.
Also, the remote shows an ideal temperature that would work best with the ambient surroundings.
Aromatherapy
We were very impressed by this thoughtful addition! You get a bag full of small foam rectangles attached with wire clips.
These foams are extremely beneficial and used for aromatherapy. What you need to do is sprinkle a few drops of your preferred essential oil on the foam squares, secure it to the nozzle and let the beauty of diffusion work its wonders.
It's an excellent opportunity to personalize your sleeping experience and relax as you unwind after a long day.
Dual Temperature
When sleeping with your partner on the same bed, it is not always the case that both of you find the same temperature comforting. Many couples have varied preferences when it comes to the heating and cooling experience.
This device gives you the opportunity of enjoying different temperatures on the same bed with its Dual Zone feature. However, you would have to buy an additional AirComforter sheet to enjoy this facility.
It comes with a kit that includes 2 base units, 2 sets of hoses and nozzles, and even 2 remote controls! In short, you get to enjoy the benefits of 2 devices in 1. You have to hook the 2 systems to the base unit and switch on the Dual Zone switch. This will reduce the power consumption so that the circuit does not get overloaded.
A point of caution, this feature is only limited to king and queen-sized beds. So, make sure that you measure the bed size correctly before you decide to invest in this product.
Sound Level
Unlike most heating and cooling devices, this one hardly makes any sound.
Right after installation, when switching it on for the first time, you will experience some noise because the fan is set to turbo mode by default. At this point, the fan speed is set to the highest when it comes from the factory.
Most of the time, you won't need the fan speed to be that high. When you do, you just have to endure the noise for a little while. At a standard cooling level, the units make about 38 decibels of sound, which is slightly louder than a mellow whisper.
Put simply, the noise at any point is not unbearable or enough to disrupt your sleep. It is a very typical white noise often produced by machines. And some people find the soft buzz quite relaxing.
Sleeping Experience
Honestly, this unit has something for every user. The experience is completely customizable, and all you need to do is just adjust the controls on the remote or on your smartphone to have an enjoyable experience.
It offers great versatility when it comes to the modes and settings. This enables you to tailor the temperature controls to feel as comfortable as possible when you retire for the night.
For example, some users do not like the fan speed so high that it makes the air flow directly over their body. If that's the case with you, consider reducing the fan speed. This would decrease the airflow speed and also eliminate the white noise that's generally present at a higher speed.
Be it a cold crisp bed or a warm cozy one that you crave, BedJet V3 Wireless can make all of it possible!
Trial Period, Warranty, And Returns
When buying a product, knowing about the warranty and return policies are very crucial. A good after-sales service is always a big plus.
With this product, you get a 2 year warranty and can get it replaced in case you face quality issues or the device has some manufacturing defect. You can also avail the easy 60-day trial period. And in case the cooling does not feel efficient to you, all you have to do is return it.
No questions asked! The company fills in for your return shipping cost, and you also get a full refund against the product. Given all this, even if you have some doubts, there's no reason not to try it!
What Could've Been Better?
Although BedJet V3 Wireless has significantly improved our sleep quality and put our sleeping cycle on track, like every other thing, it is not devoid of some shortcomings.
Though electricity consumption is quite moderate, the device itself is quite heavy on the pocket. You might have to budget and plan properly to manage money in order to buy this device. It becomes more of a pocket pinch if opting for the dual-zone feature for you and your partner.
It is true that it is a great feature, almost like having two units in one device. However, the price goes up considerably higher, and that might feel like a problem to some.
Furthermore, some people complain about the plugs and the long hose. The device needs to be plugged into the power source, and if you are lucky and have the socket near to your bed, it gets wholly concealed.
However, if your power source is far from the bed, you have to use an extension cord. And the chances are high that the cord will be visible, running across the floor.
This might dampen the beauty of your room and is also a little dangerous if you have kids or pets in the house. The chances of them tripping and falling will be high.
Pros
Heats and cools very quickly
App allows you to customize
Good customer service
Aromatherapy feature for better sleep
Cons
Price is a little on the higher end
BedJet V3 Buyer's Guide
Now that you know a little better about the features of BedJet V3 Wireless, were you able to decide if it's going to be a good buy?
Well, we understand that reaching this conclusion is a little challenging. Knowing just about the goods and bad is not enough to decide.
So, we have designed this buyer's guide to help you understand the things that you should look out for when buying wireless heating/cooling climate controls for the bed. This consideration will help you make a wiser and better choice!
Let's take a look at what they are.
Safety
It goes without saying that, like any other electronic appliance, this also calls for some safety measures from your end.
In the same manner, you would not drop a cellphone in a bathtub; avoid getting water to touch the live wires of the heating/cooling device on your bed. This will prevent you from facing potential shock hazards.
There's always a user manual waiting for you to read it! We suggest that you go through the safety measures carefully, especially if there’s a young one at home. This will ensure that you and your kids are entirely safe.
Easy To Use
Unless you are a tech-wizard, we recommend that you go for products that are easy to set up and simple to use.
Setting up Bluetooth connections, for example, might seem difficult to some. In that case, go for a unit that has both Bluetooth and a wireless remote control facility. Remote controllers are comparatively simpler to use and do not require any prior technical knowledge.
Also, we recommend that you talk to the seller or watch tutorial videos to figure out if the installation process is too difficult for you. If that's the case, you can always call a technician for help. This effectively cuts down the amount of time needed to set up the system.
Controls
Different homes have different needs! So, it is very crucial that you identify your needs before deciding which system to go for.
Some families might not need both heating or cooling, and some may require a dual temperature regulation system. At the same time, some may prefer timer settings in order to have an undisrupted sleep at night.
The requirements are often quite different, and depending on your family setup and preferences, decide on a device that can fulfil those purposes. All these specifications are clearly mentioned in the packages. So, make sure that you read the details carefully before buying.
Advanced Technology
We are living in a time when technology has achieved remarkable feats. So, why not make the most of it?
As we mentioned before, wireless heating and cooling devices mostly come with Bluetooth and remote controls. However, it is you who has to set the modes and the functions to the optimum level.
Now, that's okay during the day when you are indulging in a quick nap or lazing in bed watching your favorite TV show. But, we do not think it's a good idea at night to constantly keep waking up to make your bed comfortable.
To avoid such sticky situations, we recommend that you opt for devices that let you customize the temperature settings beforehand. This would enable you to schedule sleep and make temperature adjustments prior to calling it a night.
BedJet V3 wireless has a Biorhythm Technology that makes it possible to set different heating and cooling profiles throughout the night!
Maintenance
Keeping your device in the best shape is very important, and to ensure that you must go for one that can be maintained with ease.
Some devices can be emptied and cleaned every alternate month to remove moldy water. We recommend that you use distilled water for the process if you choose such a device. There are a few other devices that come with self-cleaning features.
While others, like the BedJet controller, come with a washable air filter. This catches all the dust and animal fur and is very easy to clean. All that you need to do is pop the filter out of the device and wash it under the sink.
Controllers, Hoses, And Other Add-Ons
Note that most controllers are around 10 to 15 lbs. in weight and can be easily stored under your bed if the height is sufficient. This saves you from storing troubles. However, if you are using a bed that is low in height, your controller might be visible.
If you are an aesthete, it would be helpful to know that BedJet V3 wireless has a long hose that joins the controller and the bed. In case you want to conceal the hose, you can make arrangements before buying.
Coming to add-ons, one of the most popular ones is the cloud sheet that you can buy separately for BedJet. This sheet holds the air and makes circulation better. It is best suited for couples who want different temperature controls on different sides of the bed.
If you are thinking of utilizing the Dual Zone feature, this is a must-buy.
BedJet V3 FAQ
How Does The BedJet System Work?
BedJet is best known for its healing and cooling climate control system that makes sleeping in your bed extremely comfortable by making the temperature optimum. The machine blows a gentle gust of air onto your bedding to provide instant heating and cooling comfort.
The best part about it is that it works with all sizes of beds and with all types of mattresses. So, you do not have to change the existing bedding if you want to install this item. The item is designed in a way to be installed under your bed or at the foot of the couch.
This ensures that all electrical controls are safely kept out of your bed to prevent any form of shock hazards. Also, you can wirelessly connect multiple devices to operate the item through Bluetooth or simply use the remote control to adjust the controls.
Is BedJet Safe For Pets?
If your furry friends have a habit of sleeping with you on the bed, there’s no problem. BedJet is absolutely safe in terms of temperature controls. Just as it keeps you comfortable while sleeping at night, it will keep your pets comfortable too.
However, a little word of caution, just make sure that they do not block the air nozzle while sleeping as that would block the smooth functioning of the device. Also, try and avoid using essential oils for aromatherapy because some pets might be allergic to them.
We advise that you speak with your vet to get better clarity on that.
Will The Device Work With Adjustable Beds?
Definitely it will!
But for that, you might have to tweak a few things here and there during installation. To start with, you will need to put the base unit a little far from the nozzle. This is because it will give enough space to the air hose to expand and contract as needed.
There’s also higher flexibility for the hose to keep the nozzle in the right place as the foot of your bed becomes adjustable and keeps changing in size.
The manufacturer suggests that you keep an eye under the bed when you are adjusting the size to make sure that the device is functioning properly. In case you cannot make it work, you can always use the 60-days guarantee and return the item.
Does Bedjet Help Save On Bills?
Absolutely! Why spend electricity on turning the whole house hot or cold when all you care about is the temperature of your sheets?
BedJet allows you to save a considerable amount of power that you would have otherwise spent on setting the whole house to a desirable temperature. It allows you to moderate how the bed feels and helps customize it to the perfect temperature that you find right for sleeping.
Going by the data shared by the Department of Energy, we can assure that every time you reduce the temperature on the thermostat, you save an extra 4% on the utility bills.
What Is The Power requirement Of The System?
When using the device in cooling mode, every unit draws around 50 watts. In the heating mode, it draws energy ranging from 150 – 1500 watts depending on what degree you set it on.
At the highest power, the turbo setting gets switched on but can run only for 10 minutes. This is to ensure that too much electricity is not consumed at a go. However, the heat is more than sufficient within 5 minutes, you will find your bed toasty warm! It would feel like your bedding is right out of the dryer.
In general, if you want to reduce the power consumption, you can always set it on ‘Low Power’ mode and limit the turbo heating capacity to 800 watts. This wattage can be easily handled by a regular 15A AC circuit.
In case you are using a dual-zone system, make sure that you switch the ‘Low Power’ mode for both the units to make sure that the combined energy consumption does not cross 1500 watts.
For a simple calculation, we can say that if you use the cooling mode every night, you won’t end up spending more than one dollar a month on electricity for this. And for heating mode, you would have to spend a few more dollars.
BedJet 3 Verdict
That's all for today, folks! Now we have reached the end of this comprehensive guide on BedJet V3 Wireless.
We hope you had as much fun going through the guide as we did while compiling all the little details about this item. The BedJet is a great consideration if you want to save on electricity and smartly heat/cool your bed at night instead of moderating the temperature of the entire house.
It allows you to enjoy customization to a great degree and enjoy uninterrupted sleep during the night. Also, it is an excellent choice if you have a partner and require different temperature settings for each.
With that, it's a wrap! We promise to be back soon with more such exciting reads. Let us know what you liked best about the BedJet 3 Wireless in the comments section below.
If you are one of the few that invest his time into a mesmerizing backyard garden you will surely love this extraordinary selection of DIY Pebble Paths. 15 magical paths have been hand picked, each better than the one before, each more detailed and more spectacular than the other one. These designs have been born through a lot of work, a whole lot of time and attention to details.
Each of these pieces should serve you well, feeding your imagination and encouraging you to start your own DIY pebble path project into your own garden. The designs showcased below have been created by using river stones carefully categorized into colors and sizes. You can only imagine the amount of work invested into such a grand design. It is only natural though to increase the aesthetic values of the nature you shelter in your backyard as much as possible so it`s always worth the effort.
What do you think about these fascinating DIY Pebble Paths? Would you invest the time and effort into a DIY project that would have this at the end? We would love to hear your opinion in the comment section below.
On the journey of finding the most attractive backyard landscaping ideas, we have come across these awesome fresh modern and rustic fire pits, that are the ultimate addition to your backyard landscaping design. We hope they bring warmth and comfort to your home. We have previously featured on our website an article that explains the details adding such an item to your backyard: Backyard Landscaping Ideas-Attractive Fire Pit Designs.
The studio is like a place of worship for an artist. It is the home of an artist’s creative prowess. What are the essential materials that complete a studio?
As painting materials can differ slightly based on the type of paint in question, we want to list out all the acrylic painting materials needed in the studio. Acrylic paint is being used extensively by artists – beginners as well as professionals.
We have included ten of the most important materials that you would want to have in your studio. We have also explained the importance, uses, and benefits of each of these materials to give you a complete picture of an ideal studio, complete with acrylic painting materials.
Acrylic Painting Materials
We wanted to list out not only the commonly used elements that are essential for the very act of painting but also some other things that can make your life in the studio much more comfortable and hassle-free. Read on to know what we think are necessary materials for acrylic painting:
As a general rule of thumb, it is vital that you first understand what your short-term goal is.
People who are experts or experienced professionals in the field will want to display their paintings at exhibitions or local galleries to sell them. People who are new to the field or casual hobbyists will not have their paintings displayed before a large audience and will not be making money from it.
How is that important? Your studio will differ substantially depending on whether you are a beginner or a professional. Likewise, the materials you need in the studio will also vary.
A list of essential materials for acrylic painting will include paint! But what kind of paint should you keep in your studio? There are hundreds of varieties of acrylic paint with different prices available in the market.
While it is preferable to buy top-notch artist-grade paint, it is not the ideal option for everyone.
It does not require rocket science to understand that any professional or expert artist will not want to compromise on any of their painting materials. If you idolize Picasso or have an audience that scrutinizes every brush stroke, every dash of color that you put on a canvas, then you should not go for anything less than best-in-industry artist-grade acrylic paints.
Go for Inexpensive Brushes Initially
Paints and paintbrushes are like bread and butter for artists. No matter what type of an artist you are, how much experience you have in the art, what kind of art you create – you will need paint and brushes. Having addressed the first half of those prerequisites already, it is time to talk about paintbrushes.
All types of brushes are available in the market – varying thickness, bristle softness, length and more. And depending on the effect you are trying to achieve on the canvas, you will likely be using a wide range of paintbrushes over time. But how do you stock up brushes in your studio? How much should you ideally spend on this material?
Everything has its pros and cons. The quick-dry characteristic of acrylic paints makes it appealing to a lot of new and young artists as it saves substantial time. However, the same wreaks havoc on paintbrushes. Unlike oil paint which can take multiple days to dry completely, acrylic paint dries in less than an hour.
Buying starter packs of brushes and reasonable yet efficient alternatives to high priced premium paintbrushes will save you a lot of money. If your favorite brush gets ruined and you know you did not spend a fortune on it, it gets easier to throw it away. When you get used to acrylic paint, you can switch to costlier brushes without a frown.
Keep Rugs or Blankets
Not only does acrylic paint dry fast, but it is also nearly permanent. It will not take a lot of effort to find a lot of videos of artists trying to remove hardened acrylic paint from their clothes or studio carpet. You might face a situation where you have spilled some paint accidentally, and it just won’t go away.
This one is more of a precautionary material, and though you do not need it to be able to carry out your painting work, it is an effective way of maintaining your studio. You should have a rug or a blanket on the studio floor at all times. It is all about protecting your surroundings.
We are not saying that it is impossible to get rid of acrylic paint stains from your studio floor, but it is rewarding to have preventive measures that ultimately allow you to focus on painting rather than cleaning.
Another benefit you can derive from having rugs or blankets on the floor is the added comfort when you have to work through a time-taking, detailed painting. We would recommend you to cover other surrounding surfaces as well with blankets and not just the studio floor. It takes only one slip of your wrist to spill paint away from the canvas and on to some other surface.
Using old papers on the floor is an alternative approach that solves the said concern if you are comfortable with the occasional crunch when you walk around the studio.
Gone are the days when paintings were restricted to paper. If anything, modern art has taught us to have an open mind. Artists use all kinds of surfaces today to bring their paintings to life. That’s where acrylic paint is an artist’s go-to option – it can adhere to nearly any surface.
Whether you are painting on metal, wood, plastic, cardboard, glass, or any other unconventional surface, you can safely use acrylic paints. Of course, you can use acrylic paint on the conventional cotton and linen canvases as well.
An important point we ought to mention is that no matter what surface you plan to use and stock up in your studio, you would want to get some acrylic gesso get some acrylic gesso too. One of the most common problems artists face is that the paint surface absorbs acrylic paint way too quickly.
Adding many layers of paint is often detrimental to the final piece of art and creating a complete masterpiece becomes a daunting challenge if the paint surface has absorption and tooth issues. Gesso works as a primer and applying coats of it to the surface improves the absorption and overall texture.
So, you need to choose the right paint surface for your short-term painting endeavors and have a considerable amount of acrylic gesso in your studio. Do not be miserly when applying gesso, as two to three layers are frequently used.
If you do a survey and ask artists to name the top three must-have materials in a studio, you will probably hear paint palette more than once. A proper paint palette is needed to be able to mix different acrylic paint colors. Any artist can vouch for the fact that improperly mixed paints often lead to disastrous results on the canvas.
How do you selectthe perfect paint palette to go with acrylic paints? There is a ton of different palettes available in the market. Unlike watercolor that can be easily mixed on nearly all types of palettes, acrylic colors blend best on a specific kind of palette.
We recommend you to opt for a flat-surface glass palette. We have learned from experience that acrylic paint mixes seamlessly on a glass surface and gives you the texture and color that you are looking for. Save yourself the trouble of mixing paints repeatedly to get that perfect finish by trying a glass palette.
Along with a glass palette, we recommend the use of palette knives instead of paintbrushes for mixing colors. Paintbrush bristles are capable of holding a significant amount of paint and mixing two colors with a brush needs expert hands. A safer and more convenient option for any artist is to use palette knives to get the exact color they are looking for.
One of the perks of using a glass palette and palette knives for mixing acrylic paints is the easy clean-up. You can scrape the palette surface with a razor to get rid of all the color, clean it with a damp cloth, and you are ready to go again!
Cleaning Tools
Cleanliness inspires creativity! Who likes working with dirty, paint-stained materials? A list of important acrylic painting materials that you need in the studio will be incomplete without some cleaning tools to help keep the studio and other materials in pristine condition.
When it comes to cleaning a mess or removing a wrong stroke of the brush, using acrylic paints proves to be a blessing in disguise. You do not have to use harsh materials like turpentine or mineral spirits. A simple cloth rag is enough to clean acrylic paint.
The high absorption of cloth or other natural fabrics allows them to be effective cleaning tools for removing acrylic paint from any surface. We would recommend using any fabric instead of paper towels or spirits.
A recurring and significant challenge faced by artists in the studio is cleaning and maintenance of paintbrushes. We mentioned earlier that you would end up ruining a few paintbrushes initially. But to ensure that it does not happen in the long run, you need to have a plan of action for preserving the useful life of fine paintbrushes.
We recommend keeping a couple of jars of water in the studio to employ what we call the “Double Rinse System.” Water is the best cleaning medium for acrylic paints, and you should have two jars of water to give your paintbrushes an initial rinse and a second rinse. It ensures that there is no dried up paint at the base of the bristles.
It is imperative that you use these cleaning techniques regularly to prolong the life of your painting materials and keep your studio looking neat. Your paintbrushes will thank you for the better care and serve you for a long time!
Easel
One of the essential tools used by artists all over the world is an easel. Every artist likely started with painting on a flat surface like a table. As artists got better at their art and their paintings got more intricate, a table was just not enough to get the job done. Painting on a flat surface can skew your perspective, and if you sit for long hours with your head bent down, it gets highly uncomfortable.
That is where an easel comes into the picture. It is the perfect alternative to flat-surface painting, allowing for greater convenience and accuracy. There is an easel that will perfectly meet your requirements – whether you prefer to stand or sit while painting.
If you are buying your first easel, you need to choose one of three broad classifications:
Frame Easel
Table Top Easel
Portable Easel
Tabletop easels work great for artists who want to sit down and paint. If you are working on a detailed piece of art that will take hours to finish, you would want to be seated through the entire process and use a tabletop easel for best results.
The majority of artists prefers frame easels due to their versatile utility. Some of the options have a collapsible design, which is perfect for artists painting in a small space. Frame easels can be adjusted to fit surfaces of varying size and have a sturdy base.
Portable easels are ideal for artists who appreciate the design of frame easels but like to paint outdoors or travel and paint.
Painting without an easel is like boxing without gloves – inconvenient and unprofessional!
Underdrawings Materials
A painting takes much more effort than we realize. There are more layers to a work of art than meets the eye. Most people who have never painted only perceive the final look. Artists know and understand that there is much more to any painting than the finishing touch of colors.
Keeping that in mind, the studio needs to have some underdrawings materials. Underdrawing is the preliminary sketch or outline made as a guide. It gets covered with layers of paint, so it is not visible to the spectator. It is an indispensable part of the entire process, especially for beginners.
Some experienced artists do not rely on underdrawings while painting. Some artists prefer to first have an initial sketch, given the opaque and permanent nature of acrylic paints. You would not want to skip underdrawing only to find that you made an error and wasted the surface.
So what are the best underdrawing materials to be used with acrylic paint? We strongly recommend using either graphite or charcoal. Both these materials have their pros and cons but serve as useful underdrawing materials.
In case you decide to go for charcoal, do not forget to use a fixative before applying the first layer of paint or wash. A fixative, as the name suggests, fixes the charcoal on the surface and prevents it from mixing with the acrylic colors and adding a dark tone to your painting.
Just because the underdrawing is not visible in the finished painting does not mean that it is not a vital part of the art creation process. Keeping underwriting materials in the studio is always a good idea!
Flow Improvers
Like everything, the quick-dry feature of acrylic paint has its positive as well as negative traits. While some artists use acrylic only for its rapid dry time, it is not always desirable. If you are working on a medium or large scale art piece, you may want the paint to be wet for a longer time.
Flow improvers come in handy when you want to alter the quick-dry feature of acrylics. As the name suggests, they improve the flow of paint on the surface and help it glide smoothly. If you were to use raw paint, it would dry too soon. Using a flow improver lets you catch your breath instead of feeling rushed.
Flow improvers work with acrylic paints just the way linseed oil works with oil paints. Some flow improvers available in the market come in a concentrated form, and you need to mix it with water in a 1:1 ratio.
It would be inaccurate to say that a flow improver is of use to every artist. Anybody working on small scale paintings can efficiently finish them with raw acrylic paints. But it will not hurt to keep it in the studio and give it a try. In our opinion, flow improvers make the entire process of using acrylic paints more relaxed.
There are a few products that work as flow improvers and retarders for acrylic paint. Retarders slow the drying time and help in blending colors or layering highlights in a painting.
Varnish
At the end of the list is a material that you will need when you have completed a painting. Creating a masterpiece is commendable, but you must do the needful to preserve it. Varnishing your painting is like the final seal to complete the process.
There is a wide array of varnishes available in the market for acrylics. Irrespective of the finish you are looking for – full gloss, matte, or a combination of the two – you can find a varnish that will add the finishing touch to your painting.
Again, this is not one of those materials needed by every artist. If you are a hobbyist or a beginner whose painting will not be seen by people at large, you do not need to preserve it by applying coats of varnish. However, if you will be displaying your painting before an audience, you should varnish it.
As you venture further into the journey of becoming a professional artist, you will find materials like flow improvers and varnishes to be advantageous in adding a certain X-factor to your work. Although varnish is not likely to be found in every studio, keeping it handy and experimenting with it will only help you learn and grow as an artist.
Most of the varnishes available in the market form durable, transparent films on your painting when dry. They are known to have resistance to water, abrasion, chemicals, and ultraviolet radiation. You should use a high-quality varnish to provide long-lasting protection to your piece of art.
Final Thoughts
It is important to mention that any form of creative art is time-taking and challenging to master. When it comes to painting, there is a learning curve. Only consistent practice and experience help an artist go from amateur to expert.
The materials play a vital role in providing tools for the creation of awe-inspiring art. Choosing the wrong materials or not having the required elements in your studio may render the entire art creation process unproductive.
The materials you keep in the studio undoubtedly make a difference in the long run.
I recently found myself in a dilemma when I had to paint a couple of t-shirts as gifts for my friends.
I usually paint with acrylic paints, and I had a lot of different colors stacked in my cupboard. But to paint on t-shirts, I had to buy brand new fabric paints and in huge numbers as well for a punctual job.
I was wondering that if in any way I would be able to re-use my acrylic paints for the job. The goal was to minimize the number of fabric paints I’d have to buy for the job.
Luckily, there’s a way to do it. And today, I am going to show you how.
Can You Use Acrylic Paint on T-Shirts and Fabric?
The short answer is yes. The trick is simple. You’ll have to prepare a mix to use acrylic paint on fabric.
In the medium the key is a special fabric medium, you need the fabric medium, a solution by Martha Stewart, honestly, a solution that simply works.
To prepare the solution, mix 1-part fabric medium with ]2-parts of the acrylic paint of the color you want.
The fabric medium mixes with the paint with ease. The solution may be a little thinner, but it doesn’t dilute the paint in any way.
Now, there are certain caveats of the trick that you have to keep in mind.
First, the solution will be of a thinner consistency than before. So, if the job is on a thin piece of cloth, then you’ll have to cautious about the surface you want to paint on. The color may seep through and get on the surface below it. Use some old newspapers for the purpose for an easy fix.
Obviously, wash the piece of cloth and dry it before painting. The solution doesn’t sit well with dirt and stains.
Now after the painting job is done, let it dry. You’ll have to put the t-shirt under the heating process to make the color permanent. One easy way is to use an iron for the job.
Once the paint is dry, put a stray piece of cloth on the painted section. Make sure that it’s clean and dry. Now iron over that piece of fabric. It’s necessary because otherwise, the paint may chip and get on the hot iron.
Another way to do it is to turn the t-shirt inside out and then iron it. But be cautious of what you are using as the ironing board. The paint may get on the surface if you are not careful enough.
When ironing, make sure that the iron is continuously moving and not stuck in one place. Also, if you want to avoid the hassle, you can also just put the fabric in the dryer for an hour. It should do the trick as well.
Final Words
That’ll be all. The trick is laid out, and now it’s time for you to get crafty!
Remember that it’s 1:2 ratios. The paint will be thinner so be careful while painting and make sure it doesn’t seep through.
Also, be careful while ironing and drying up the cloth.
And with that, I hope this guide was helpful to you and happy painting!
Out of all surfaces, paper is one of them. Painting on paper with acrylics has always been the most preferred method by artists to produce great and elegant paintings.
But not just any paper will do. There are specific things about paper you need to consider for using acrylic paints. Let’s take a quick look at those!
Painting on Paper with Acrylics
How do I know which is a good paper for painting with acrylic?
First of all, the quality of paper can be either high or low. Mostly, you can tell which paper is of good quality by looking at its price. However, that isn’t enough if you want paper to paint on.
What makes the paper good for painting with acrylics depends on the following characteristics:
Durability. Before purchasing that paper, get to know if it is durable or not. The durability of the paper relies on whether it can handle a few things - applying a lot of watery paint, scraping, erasing and other harsher methods.
To know this, you can either raise queries about it or find out what the paper is made of. Wood-based papers lack durability while papers made of linen and cotton are stronger and can endure so much more work. Check out the label to know this.
Acid-free papers. A paper that contains no acid tends to last longer than that which is not acid-free. Not only that, but acid-free papers do not turn yellow or get discolored easily. The quality of the paper stays the same for years to come.
On the labeling, they will likely mention that the paper is acid-free. If not, check for one that is pH neutral.
Heavyweight. Paper which is thick and heavyweight does not wrinkle easily when you use a lot of acrylic paint. Normally, regular papers will start to crumble at the touch of liquid. On the other hand, high-quality papers are made to be thick enough to absorb paint and inks without wrinkling.
The thickness of a paper is indicated by gsm [grams per square meter]. The best paper thickness for water-based painting should be either 300 gsm or more.
Enough tooth. The tooth of the paper means its texture. Smooth-surfaced papers have lesser tooth while rough-surfaced papers have more tooth.
There is a common misconception that smoother papers provide a better painting surface. That is true when you have to work with fine details.
But we are talking about water-based acrylic paints which work better on absorbent papers. And rough-surfaced papers do just that.
Therefore, you will require papers with more tooth to produce great paintings.
Prime those papers. Papers which are acid-free are already primed for protection against degradation. In that case, you can go ahead and paint directly on the paper without further concerns.
However, if the paper is not primed, we recommend you use a primer first to apply on the surface that you will be working on.
Some primers have chemicals and acids in them so you have to make sure that you get one which does not contain any acid for the sake of the paper’s durability.
What we would suggest is to use primers such as gesso which is specifically made for acrylic paints.
And that is it! Those are all the main characteristics of a good paper for acrylic painting that you need to know.
Paper Recommendations for Acrylic
If you’re having a hard time finding the right paper for acrylic painting, we are more than glad to take this time and help out with that.
Below are few of the best high-quality papers artists must discover for using acrylic paints:
Prized Paper - The long fibers in Arches natural white 100%...
Superior Strength - A cylinder mold process distributes...
This paper which is made of 100% cotton pulps makes really sound support for acrylic painting.
It is also very versatile in the sense that you can get a bundle of these and use them for other artworks as well. It’s ideal for artists who produce diverse artworks. You can get them in three different preferences: hot press, cold press and rough. So really, there’s no doubt you’ll find one that suits your requirements perfectly.
Another good thing about this paper is that you can choose the thickness according to your requirements.
What we love about this paper is that it can hold a high amount of paint application without bleeding.
Moreover, the texture is just about right to reveal the beauty of the painting.
Heavyweight, textured paper that stays flat and will not...
Sized to provide the ideal level of absorbency for aqueous...
This heavyweight paper is originally made by the French company known as Canson. It comes in a very thick format, which is 400 gsm. And it’s perfect for acrylic painting.
It truly holds and shows detailed work done with acrylic paint that is mixed with a thickening medium.
For this, many artists are starting to prefer acrylic papers for using acrylic paints specifically.
The best part about this paper is that it holds acrylic paint successfully without bleeding or any other generic paint issues.
Linen finish allows for optimum acrylic paint creations
Another paper that is pretty thick (400 gsm) is the Strathmore 400 Series Acrylic Pad. it is a heavyweight paper that receives paints beautifully and securely.
The finishing is done using linen while the cream color sets it apart from the white-colored papers.
It works pretty well with freestyle paintings and even with fine details art.
The paper has a rough-textured surface with more than enough tooth that’s suitable for any type of acrylic painting.
Since it is a pad, it becomes very easy to take care of and carrying around. You can either use it as a practicing paper or a surface for professional paintings. The sheets can also be torn off separately for framing or adding to an art-collecting book.
This paper pad is ideal for artists who are on the go.
A much thinner and lightweight paper is the Strathmore 300 series. This paper is 187 gsm and what it does is imitate the same texture as that of a canvas.
This one comes in a pad too. And you get to choose different sizes of pads.
It does accept any form of paint but because this is a lightweight painting paper, you will need to apply a coat of gesso primer before you start working on it. This will instantly make the paper sturdy and suitable for acrylic and watercolor painting.
However, this is more convenient for artists who like to travel and for those who are practicing and making their way to betterment.
Heavyweight Smooth Bristol paper for fine detail work
Ideal for pen, ink, mechanical drawing, air brush, and...
Again, this is another paper that comes in a pad of 15 sheets. It is also ideal for traveling artists.
The paper is quite thick and is considered to be a heavyweight painting paper.
Its distinct feature is that it has a smooth painting surface.
So if you are looking for a thick paper that you can work with great details, this paper is best for you.
It accepts any kind of paint and color variants but it really produces great results when used with acrylic paints.
The pages are also tearable so if you have to keep them or sell them, this will serve you right.
5 Paper-Like Surfaces to Consider
While using high-quality paper is good for acrylic painting, there are times when paper cannot handle everything. There is only a certain limit of how much a paper can take in.
When the paint becomes too watery or when you have to mix a thickening medium to your acrylic paints, that’s when you have to realize that it’s too much for your paper to bear.
Besides that, there are those times in an artist’s world where creativity takes over and they want to experiment painting on other similar surfaces, apart from the paper itself.
This is why today, we’ll also be showing you 5 paper-like surfaces and paper alternatives that you can work on.
Paper-like surfaces are one of the top choices because they provide more texture, hence, adding more sophistication and value to the painting.
Also, painting on paper-like surfaces consumes lesser amount of both time and color; unlike working on surfaces such as wood, canvas, etc. Simply put, acrylic paint works wonders on such surfaces!
Drawing or cartridge papers are those textured papers which are rough. They are commonly used for painting/drawing/sketching and also for making sturdy envelopes.
So you get the picture; these are tough papers, ideal for rougher projects.
Of course, these fall within the ‘standard papers’ category but you can get them at different gsms or lbs. The more the gsm or thickness is, the more the paper will endure acrylic paints.
So, we recommend you get the ones that are higher than 400 gsm because otherwise, you will have to prime them first.
Most drawing/cartridge papers are age-resistant due to the fact that they are acid-free and are pH neutral. They also make your drawings appear very vibrant. This makes drawing papers suitable to use for paintings that you want to last for a very long time.
Synthetic Paper
This one is generally made to be a watercolor paper but it works like magic with acrylic paints as well.
It is called ‘synthetic paper’ because it is totally made of polypropylene. However, it holds similar traits to that of other high-quality papers made from cotton and linen fibers.
Somehow, the price is not very wallet-friendly. It can cost around $5 per paper. This can work for some artists who want to sell high-quality paintings while it may not be ideal for artists who are on a budget.
However, what’s good about it is that it does not buckle nor tear easily like any regular paper would, especially at the touch of liquid. So this makes it ideal for watercolor and acrylic paintings.
Moreover, this paper is acid-free. And that prevents it from yellowing or aging too soon, therefore, longevity and durability are assured.
Some synthetic papers come in a roll while some come in the form of sheets and pads. If you are a beginner, you might want to use the ones that come in sheets or pads because it’s easier for you to work on them than on those which come in rolls.
Cardboard
Now, we have this next option that costs almost no money at all while still expanding creativity levels for amazing paintings. And that is using the cardboard!
First of all, since cardboard is not made for painting purposes, you have to prep your cardboard before you go ahead with the painting.
What you can do is select a fresh cardboard from any packaging and trim it down to your preferred frame size.
To make sure your painting comes out beautifully, you would need to prime both the surfaces of the cardboard with gesso in order to make it stay firm and sturdy like a hardboard.
This is because cardboard does not accept paint as well as papers do. It is bare with no coating. The way you work on a cardboard is similar to the way you would work with wood. So priming is a must. Leave it till it’s dry and then start the painting process!
Being free of cost also means being flexible for any experiment. So, as we have mentioned, you are free to use your creativity as you like to work on this surface.
Heavy Watercolor Paper
Heavy watercolor papers are specially designed to endure a lot of watercolor works. And since acrylic paints are also water-based, they will come out really well on these types of papers.
This one is another paper that comes in different gsms and lbs. Of course, you have to select the thickness of the paper according to the type of painting you will be working on. Heavier the color works, thicker the paper.
Without question, this paper’s absorbency is extraordinary. This is because of the texture of the surface alone.
It has got a lot of tooth on its surface which makes the paper highly capable of holding paint in its place.
What is much more remarkable is that even with so much absorbency, it still does not bleed on the other side like a regular paper would do. That too, not a single coat of primer is needed. Your paint will spread throughout the surface fluently.
Watercolor papers can come in two different qualities: for artists and for students.
An artist’s quality paper or an archival paper can accept any paint very well and the price is a bit higher. But it gives out exceptional results.
Meanwhile, a beginner’s quality paper is good for practice and comes at a much lower price. It does not, however, hold paints for long.
That is why we would recommend you aim for the artist’s quality paper if you are planning to sell your work or if you just want your painting to last. Otherwise, the student’s paper will be of really good help if you’re still learning.
Acrylic Paper
Finally, there are the acrylic papers that only a few people know, as of yet.
That’s because they are hard to find at local stores and are available only on certain online selling platforms.
These have been specifically made for artists who are fond of using acrylic paints. And since acrylic paints are the most popular paints (as we can say) for paintings, these papers are also currently on the rise for artists globally, aiming to fulfill acrylic painting purposes.
Most acrylic papers are made to be acid-free but just in case they are not, you can always prime them first before using. Either way, acrylic papers accept acrylic paints more successfully because they are specifically designed for these paints.
They come at really affordable prices to target every artist. And not only that, they include all the necessary features of a high-quality paper for using acrylic paints.
The most common acrylic papers right now that artists are talking about on online art communities are the Canson Acrylic Paper Pads which you can get from online art suppliers.
A final word
Remember that selecting the right paper will make your work look very professional and extraordinary. It all depends on the quality and features of the paper you choose.
So we have now come to the end of this post and we sincerely hope that you’ve found this article helpful in finding the right paper support for painting with acrylic colors.
We also hope to see you again next time. All the best!
"Hessian/ˈhɛsi.ən/, or burlap in the US and Canada is a woven fabric usually made from skin of the jute plantor sisal fibres, or may be combined with other vegetable fibres to make rope, nets, and similar products." What has been been a plain boring material used mainly for creating storage sacks for grains has nowadays become one of the most used material in home decor. Its natural cozy feel integrates perfectly into any household, managing to sweeten and warm cold modern abodes whilst adding elegance and class to others. Most people associate the classical burlap with the rustic vibe but its warm hues and aesthetics encourage its usage more and more every single day.
Natural fibers can be successfully used in autumn decorating projects where the fall harvest becomes the main focus of most households. In association with the classical pumpkins and pine cones, acorns and corn the burlap fiber creates the perfect display of nature's gifts in elegant yet cozy creative displays spread around the house in the form of welcoming wreaths, dinner table decorations and so much more. Its usage though can be extended all year long from the upcoming winter holidays where burlap or jute can play a vital role int he creation of cozy Christmas tree garlands and table runner to the springtime revival where flower pots are dressed up in a new natural cloth that unifies your green corner and softens the decor. With these creative ideas in mind we invite you to cast a glance at the gallery below and choose from the 34 Insanely Beautiful Burlap Decor Ideas For Cozy Households displayed your favorite DIY project.We also recommend you to give a closer look to other similar ideas revolving jute or burlap in the following articles:
What is you take on using eco friendly natural fibers in our households? We would love to hear your ideas in the comment section below.
Color runs our lives into happiness, joy, into a positive state of mind that we all admire directly or indirectly. Color runs the show and we are one of its main protagonists through out crafting endeavors, manipulating perception happily with simple means, with extraordinary results. A show of color resides in the gallery below as well, a gallery that illustrates colorful crafts for teens, crafts that could emphasize one's decor, be granted as thoughtful diy gifts or simply created for amusement and fun.
The rewarding do it yourself projects use a variety of materials like paint, glue, strings, thumbtacks and even wadding to create brilliant elements, tailor to your style. All the crafts have their tutorials by their side, ready to aid you in your crafting endeavors, ready to make a great item out of nothing: the beauty of DIY.
Cast a glance and surge inspiration, we would love to hear your valuable feedback on the subject in the comment section below.
1. build an epic nebula jar
A small portion of the universe, a glimpse of color that many would appreciate as a gift.
The process is really simple and the density of the strings can sculpt a great gradient that will particularize your wall art piece a great deal. Feel free to experiment with multiple colors in the same wall art piece.
Source Unknown
3. create a colorful charging pouch
A charging pouch can aid you when the socket is at an unusual height or you simply want to avoid placing your phone on the floor or surrounding furniture. Use salvaged textiles from your home and bring your own twist to the craft.
4. use brilliant diy painted feathers in your decor
Few feathers in the craft stores can be called unique; finding the perfect feather for your own dream catcher surely ain`t an easy task while tailoring your own is. Choose your color palette and start experimenting with it on natural feathers, the craft is extremely rewardful and easy to control.
5. use safety needles and beads to shape a bracelet
A simple idea that could make a great diy gift. Feel free to play with color on the bracelet a great deal.
Rolled magazines and newspapers are required for this DIY project and the result is extraordinary fascinating. The tutorial above exemplifies everything smoothly through a photo tutorial and the craft itself costs are little to nothing, depending on what your DIY studio already contains.
Crayon wall art can be a highly educative craft worth realizing with your little ones, it boosts a great deal of color and it only comes at the expense of a pack of crayons.
An up-cycling craft that surely deserves attention as it can become a whole lot with so less, boosting color texture and pattern from an element you would have discarded years ago.
33. customize a flower pot with a marbled nail polish look
A super simple craft able to differentiate your pots from the others, a craft that can help you integrate multiple flower pots in your design line`s color easily whilst being able to call each flower and flower pot unique.
The crafts showcased above are the results of imagination and creativity and they encapsulate passion for life, for color, for crafting. What do you think about these colorful crafts for teens? We would love to hear your opinion on the subject in the comment section below.
Day dreaming is called. We do it often and often it contains the social nucleus of our home: our lovely kitchen. After publishing 38 Smart and Ingenious DIY Hacks Tips & Tricks to Improve Your Kitchen, small and effective tricks for the supreme room, today, we are going to showcase no less than 32 Super Neat and Inexpensive Rustic Kitchen Islands.
Sublime sensible ideas all gathered in one place.
You will notice that each kitchen island presented below has been treated in a very special manner, each one is emphasizing the interior decor through its presence whether it blends in or it contrasts somehow. Surge inspiration from the priceless gallery below and leave your valuable feedback in the comment section below.
32 Super Neat and Inexpensive Rustic Kitchen Islands to Materialize
In 1850 companies such as Hemingray, Bookfield and Whitall Tatum started producing glass insulators for telegraph lines, telephone and power transmission lines later on. Their sole purpose was to insulate the wire from the wood, reason for which materials such as glass, porcelain or composite polymer materials had been chosen. An electrical insulator is a material whose internal electric charges do not flow freely, and therefore make it nearly impossible to conduct an electric current under the influence of an electric field. This contrasts with other materials, semiconductors and conductors, which conduct electric current more easily. The property that distinguishes an insulator is its resistivity; insulators have higher resistivity than semiconductors or conductors.
Today technology has evolved and the old glass insulators has been reduced to crafting projects and decoration crafts. For the avid DIYer, they represent the perfect materials for candle holders ideas, succulent planters, garden lamps and so on. They can be found in a variety of glass tones, all delicate and beautiful in a vintage way. We have gathered a selection of over 30 delicate projects that repurpose old glass insulators. Enjoy!
Delicate Projects That Repurpose Old Glass Insulators
If you really want to make sure that your home is one of a kind you should definitely tailor your own solutions, to make sure that everything is fitting to your taste and lifestyle like a glove. In the backyard landscape in particular a dozen diy projects with low budgets can be materialized with ease, emphasizing your supreme relaxation spot for this summer. Following this chain of thought we have curated 29 super cool diy reclaimed wood projects meant to help you in this endeavor.
Choose your favorite DIY project from the ones showcased below and start hunting for wood. To complement your backyard you can also create a small diy tire water pond, an outdoord diy pizza oven, a luxurious diy fire pit and some unique garden walkways to sculpt your small green oasis.
1.Transform a Tree Stump Into a Natural Wooden Planter
via goodideasforyou.com
2.Crack Logs and Light them Up In a a Beautiful Dramatic Manner
29. Simple Mundane Geometric Paths Sculpted By Greenery
We would love to hear you opinion on these super cool diy reclaimed wood projects. Each and everyone is able to change your backyard landscape in a breathtaking manner and we would love to hear which from the ones showcased above would be first on your list. Craft away!
In a world lead by consumerism, by organized chaos and rush, lead by worthless pieces of papers printed with green ink, in this world we are slowly destroying everything that surrounds us, slow and steady we exploit any resource possible, let it be human or mineral, we make sure that our descendants will live in a world without substance and that they will never know what wild meant.
In this world some of us are still trying to change a little something, there are thousands of bloggers and artists militating for sustainable green causes and happily some of them are heard, from time to time, a little square meter in this amazing planet is saved, whilst thousands other are being drained out of life.
We`re all drinking a beer from time to time, a bottle of wine, a gin or whisky to calm and soothe our nerves. The point is that a glass bottle thrown away without thinking NEVER decomposes, the glass, in the happiest scenario decomposes in a million years, so imagine our beers thrown around us, staying there for a million years, making a statement for our presence on this breathtaking planet. I`m sure that many of you are thinking that no one cares about a glass bottle thrown behind a block, reason for which I`m here to ask you, what if all those bottles thrown without thinking would relocate on your beach in Bahamas, Malibu or Cape Town? How you would feel about it? Why we can not cherish every corner ?
In the end of this small moral lesson we are offering some alternatives, here applied on wine bottles, creative ideas meant to inspire you, to help you create wine bottle art, whisky bottle art, gin bottle art and so on depending on what you are " collecting". You can use them as creative decorative objects, personalizing your interior to the fullest, you can slice the bottle neck into rings that will become the components of a wind chime. Adding light can help a lot, the bottles becoming real pieces of art when lighten, sculptural objects and beautiful shapes animated by light. You can also use a glass cutter to make some angled cuts into another bottle and create a beautiful vase . It`s true that you might need some tools to manipulate such strong materials, a tile cutter can be useful, a stained-glass saw or a diamond bladed saw for cutting glass maybe even a power drill with a glass cutting tip.
We suggest you to work with caution, all the materials and tools involved are rather special and it would be a shame for something unfortunate to occur. We invite you to share with us other recycle ideas and help us promote the green sustainable attitude.
What do you think about the creative gallery above? Time and love have been invested into the crafts showcased and we would love to hear your opinion on them. What crafts do you pursue at the moment?
The bathroom can be the place of supreme relaxation, the space in which you soothe your nerves at the end of a very long day, an important room that we visit before we go to sleep and as soon as we wake up, a room that should be looked far beyond its practicality a great deal. To emphasize the endless opportunities of a bathroom that can and should transcend its functional values, a list of beautiful diy bathroom pallet projects has been constructed, these vary from various storage options up to wall treatments and recipients able to contain greenery, each and everyone managing to introduce a rustic feel, coziness and warmth.
Pallets are a resource that we can all access to little to no costs, cast a glance over the curated list and choose how you are to influence your charming bathroom, how you are to make it different.
DIY Bathroom Pallet Projects
1. create a wood wall out of salvaged wood
Salvage different types of wood and get crafting, the pallet wood wall will bring in an extraordinary feel.
2. upcycle a pallet into a neat storage piece
3. use wood to shape an outdoor shower with ease
An outdoor summer is a great way to enjoy the hot summer. Through salvaged pallet wood one could construct a neat L shaped item that would emphasize the experience.
4. transform a galvanized bucket into a sink through pallet wood
5. tailor an epic wooden pallet vanity cabinet
A minimal sculptural white element on a cozy wood vanity cabinet can reside beautifully.
6. transform a wooden pallet into a mason jar storage unit
Mason jars and wooden pallets go along beautifully in both practicality and aesthetics.
Certain pallet woods can be transformed in a couple of minutes in a towel rack, a curtain rod can bring a graphic presence in the craft and certain items can be stored on top of it.
18. create minimal rustic wooden shelving
Open shelving is emphasizing the feeling of spaces; realized right it can bring coziness and warmth in through the wooden textures.
19. create a laundry station out of wooden pallets
Laundry units can make the washing experience seamless, make sure you have things properly organized and you`ll avoid the sorting that usually precedes the machine loading.
20. use mason jars and pallets to organize things THOROUGHLY
Glass and wooden textures go a long way, up-cycle pallets and mason jars into brilliant organizers. Tailor your own storage solutions.
21. nestle a sculptural sink on salvaged wood and make a vanity cabinet
A wooden vanity cabinet can support and emphasize a sculptural position that would be taken by the sink itself or the faucet.
26. outdoor shower - play arena tailored with wood
The real playground is shaped by the imagination of the little one, aid him in this endeavor and help him nurture his imagination with ease through simple crafts. A chalkboard outside, a small fence and a summer outdoor shower that has a petite control at his level might be great elements. Feel free to add that tree house or outdoor pallet room and always be ready to play outdoors like you`re four years old all over again.
27. mirror unit with practical tall thin storage back
DIY bathroom pallet projects are a common subject in the DIY communities, the great valences of wood and its inexpensive nature do create a great combination.
What do you think? We would love to hear your opinion on the subject in the comment section below.
It is time to enjoy the summer at its best. It is time to spend time outdoors, enjoy our newspaper in the fresh morning air combined with the extraordinary scent of coffee or lemonade. It is time to enjoy the warm summer evenings with your friends and family and entertaining comfortably. 26 of The Worlds Best Outside Seating Ideas Design by Up-Cycling Items in DIY Projects have been showcased underneath, each and everyone more creative than the others, each and everyone filled with the loved infused by its maker.
You can take your old sofa, old bench or swinging chairs and make them the focus of your next DIY project. Out of all your old items you can create something new, refreshed, something that still seems familiar yet not old nor boring. Cast a glance at the gallery below and select your next craft!
1. Colorful Tires Transformed Into a New Retro Lounge Area
What do you think about the gallery showcased above? We would love to hear what items in your household you are going to use in your next DIY project ! Craft away !
Your garden is supposed to be your little oasis where you can relax and forget everything about the daily stress, disconnect and just enjoy the time spent with your loved ones. Many backyard designs though lack that sense of coziness and personality a garden made by yourself offers. Ideas on how to improve your backyard landscape are endless but even small, easy, one day projects can do the trick and really make a difference. Small ponds, bird feeders, organic paths, swings all add up to that perfect scenario you can dare to dream to. The following 25 Easy DIY Garden Projects offer you some creative ideas that should not be difficult to realize for anyone.
1. Use a bird cage as a plant holder as well
2. DIY unusual planters
3. Teach your kid to make bumblebees for your flower garden
4. Make a wooden path in your garden
5. Plant flowers in old tree trunks
6. Use old bricks and glass to make small solarium for your greens
19. Make a checkered pattern with pavement and grass
20. DIY different unusual garden paths
21. Make a small pond for your porch
22. Or a stone garden
23. Concrete a boot as a flower pot
24. Fill the air with wind chimes sounds
25. Make a bird house
Pill bottles are something that we encounter at one point in our lives for one reason or another and at that point one enthusiast may notice that he stumbled across a fine recipient that should not be simply discarded. The landfill would have no use for such an item where your household could put it to good use in one way or another.
The gallery that follows contains no less than 18 ingenious pill bottle crafts meant to help you reuse and up-cycle the containers to you advantage, take a moment and cast a glance, you`ll surely find a pocket idea for the new recipient.
1. construct a tiny survival kit
Small enough to find space in your backpack while hiking and useful enough to be worth the effort of jamming little things in a little container, this tiny pill bottle survival kit is a great match for the adventure seeker.
via survivalathome.com
2. create extraordinary potion bottles for halloween
On Halloween things are reinvented, mundane items become the extraordinary, a simple bottle can become a potion bottle, a function that does great justice to the modern equivalent, the pill bottle.
A sewing kit can be as beautiful as you envision it and the Tuscan Rose surely raised the bar high, surge inspiration and create your travel emergency sewing kit.
The simple pill boxes can be gift boxes for small gifts during Christmas or extraordinary treasure chest during the Easter Hunt, get creative with textiles, paper and Mod Podge!
Simple, yet extraordinary practical and functional, the ideas showcased above ought to come in handy yet many more uses for these containers are yet to surface. How are you using yours? We would love to hear from you in the comment section below.
Attic spaces are wonderful realms filled with authenticity and character, a small world in which everything changes, everything becomes cozier, warmer, smaller and far more interesting. It would be sad for a such a fascinating space to remain unused, untouched . A selection of beautiful, spectacular design ideas for unused attic space has been curated to showcase how special these items can become, how surreal the reality can become in such a common space.
A well designed attic can really change the image of the entire home, remodel your attic as an escape, leisure space or as a complement to your home by transforming it into storage, a bathroom and even kitchen interior design; can be beautifully nestled in an attic. Cast a glance at the gallery below and feed your imagination; we would love to hear your ideas in comment section below.
#1 beautiful window seat in attic space breathing light
via vickys-home.blogspot.de
#2 attic space transformed into superb children bedroom
#23 tiny home beautifully SHELTERING design and functionality in small spaces
via marianneevennou.blogspot.fr
What do you think about these spectacular design ideas for unused attic spaces? We would love to hear how you would take action with your attic space in the comment section below.
Plastic bottles and glass bottles alike are leaving the environment in thousands of years if thrown away, never fully decomposing without harming the environment a great deal. Raising awareness and reaching sustainable standards is a responsibility for each user and we are strongly encouraging you to recycle everything you can, everything humanly possible. The second best option is upcycling, basically reusing items into creative diy projects. You can find a dozen projects on glass bottles here and in this article you will discover 23 insanely creative ways to recycle plastic bottles into diy projects creatively, we should actively contribute to clean the environment in our path and happily plastic bottles and wine bottles can materialize extraordinary diy projects thanks to their enhanced durability and sculptural shapes.
Cast a glance at the selection underneath and feed your imagination.
Despite being extremely loved people all around the world aquariums are not that present in home landscapes and small gardens in general. If you throw a look at the effect that these ensembles can have when nestled in greenery you will freeze, mesmerized by the amount of vibe, life and calm infused. Along small ponds, swimming pools, water fountains, waterfalls and lush vegetation a small backyard aquarium can really put the cherry on the cake in a glance.
Aquariums will also bring tranquility along with color and sound into your backyard beautifying your small garden from all possible directions with no disadvantage. All you need to worry about is occasional systems maintenance, for all the rest there are automated systems today. Sit back and enjoy your drop of heaven.
1.Small Fish Pool With Transparent Wall Spreading Color
We would love to hear your valuable feedback on these small garden ideas containing improvised backyard aquariums. We have found them different, simple and easy to realize yet sublime and extremely powerful.
Known to be a beautiful constant in any design line, chalkboard is used to revamp interior designs worldwide in a heartbeat, it takes minutes to apply yet its beautiful aesthetic value will hold for years. A selection of beautiful ways to use chalkboard paint on kitchen has been curated to prove this point, a black background in colorful kitchen brings forward diversity, density and delicate, delightful, divine textures, colors. An entire universe, in your kitchen, on a blank canvas.
Chalkboard recalls many memories, being often used in vintage decors used in movie settings or theater setups. Today, happily, you can add chalkboard on almost any surface furniture, walls, flooring, wine bottles and of-course, mason jars. These new chalkboard surfaces can now be used to nestle your beautiful hand-written indications: reminders, shopping lists, important recipes or simply decor.
A beautiful white handwriting on a blank canvas can instantly add a sensible design line to your interior decor, it can welcome guests in the hallway with coziness and warmth, it can encourage early birds in the breakfast zones or simply redesign your cabinet doors or old fridge. A lot can be done with a simple chalkboard paint, cast a glance below and surge inspiration from the showcased gallery.
#21 Small decor items like welcome signs can be realized in 30 minutes with chalkboard
You can actually paint the entire counter with high quality chalkboard, transforming this surface into something extremely practical and personal.
What do you think about these beautiful ways to use chalkboard paint on a kitchen? We would love to hear your opinion on the subject in the comment section below.
A simple Google search can find you thousands of sources of used pallets and a trip to your local home improvement store will most likely be a successful one. Today, the wooden pallets are properly the most common item used in outdoors recycling projects that vary from sofas and armchairs to vertical gardens and small tool sheds. Indoors smart recycled pallets have gained ground with each day as well, the great quality of natural wood at a small or nonexistent price being a triumphant factor in the recycling process making the pallet viable for different organizational ensembles, small desks or inexpensive graphic beds and many many other high quality diy projects.
We are thrilled to say that Homesthetics is being host to innovative recycling ideas everyday, massively improving our library with curated data all around the web everyday. Today`s article features 21 smart pallet diy projects that we have found simply inspiring; craft away!
Recycled Pallet Crafts
#1 Vertical Garden Planter
#2 Wooden Pallets Storage Box
#3 DIY Wall Art Deer Head Silhouette
#4 DIY Wall Art Showcasing Your Favorite Trip
#5 Small Key Storage
#6 Great Small Wooden Stair Fence
#7 Insanely Useful Storage Options Realized Out of Recycled Pallets
#8 Wooden Pallet Bathroom Storage Ensemble
#9 Small Hallway Entry Side Table
#10 Vertical Planters and Patio Flower Pots
#11 Recycled Wooden Pallets Swing
#12 Pallet Wall Art Craft That Uses Shape Tape
#13 Sustainable Christmas Tree Option
#14 Garage or Shed Organizer
#15 Graphic Vintage DIY Headboard
#16 Kitchen Vertical Storage
#17 Creative Vintage Looking Light Fixtures
#18 Garage or Workshop Organizer
#19 Small Patio Swing
#20 Scandinavian Like Patio Welcome Sign
#21 Dart Wooden Pallet Organizer Protecting Your Walls
We would love to hear your valuable feedback in the comment section below. More articles containing recycled pallets inspiration can be found below :
Natural wood is an extraordinary material, full of substance, personality, identity and warmth at the same time. From time to time we stumble into pieces of wood in different shapes that we overlook, quite often on pieces of used wood, wooden pallets or wooden crates. From these pieces beautiful furniture can be realized, especially from upcycled pallets in which the wood is already processed a little. Upcycled pallets are extremely useful because they have standard sizes as well, giving us the opportunity to use them as modules and repetitive items in ensemble with ease. Further on wooden pallets, new or salvaged from shipyards, buildings, barns or factories have been recycled into beautiful furniture worth consider.
Creative Ideas on Beautiful Furniture Made Out of Recycled Pallets
Extremely Graphic Lunar Shaped Baby Bed
Vertical Backyard Organizer
Bring Greenery Inside With a Winter Potted Garden
Shabby Chic Wooden Pallets Patio Furniture
Recycled Wooden Pallets Sheltering Greenery
Vertical Garden on Top of an Outdoor Bar Made From Recycled Pallets
Outdoor Wooden Box With Protective Role Made From Recycled Pallets
Colored Outdoor Pallet Garden Furniture
Wooden Pallets Organizers on Wheels
Small Fortress Made From Wooden Pallets
Superb Playground in Wood
Raw Irregular Wooden Stools
Simple Wooden Box
Nautical Themed Porch Swing
Square Side Table and Coffee Table From Wooden Pallets
A selection of items in our household do carry substance even after becoming unusable, futile. These items can be appreciated for their looks, for their age or for the good materials contained. They`re different, rare, maybe even unique. Tool boxes are such an item and so are chicken feeders, rain gutters and galvanized buckets can be helpful too, our backyard contains such items, items that at some point we are to repurpose for the better.
In the following rows we have curated a list that encapsulates diy chicken feeder re-purposing ideas to realize, they`re all creative and graphic and we would love to hear your thoughts on the subject in the comment section below.
Cleanse the bird-feeder and use it to proudly display family photos, it might become the most beautiful display thanks to its vintage vibe.
via lifemadelovely.com
Use a bird-feeder to organize kitchen utensils swiftly and free of costs.
Use various recipients to obtain a new focal point in your garden, chicken feeders make great flower pots.
via fresheggsdaily.com
Your new backyard bar can reside on an old chicken feeder. The epic ensemble will now bust a really cozy, rustic vibe that can be further embellished with greenery, vegetation.
Source Unknown.
A metal centerpiece can be realized from chicken feeders, caring an immense amount of flowers, immense beauty.
A really beautiful way to store your indispensable cooking supplies. Find the balance between beautiful vintage and rustic vintage and obtain just the right look.
Simple elements should never be dismissed or discarded. If the item doesn`t fit your decor, ask around, family and friends might have a use for the item. Recycling and up-cycling are utterly important and having an item with memory reused in your household is special, beautiful.
What do you think? We would love hear your opinion on the subject in the comment section below.
Cement and concrete has been with us since Roman times and the Brutalist current really put the raw concrete wall on the spot. But only recently concrete objects like furniture design, lamps, flower pots, candle holders and other similar decorations have taken off and have secured a place in the contemporary interior design lines. Clean, sharp lines, bold shapes or just simple ones reflect the object itself, not covering it into an appealing wrap. Its textured, rough materiality is the one that empowers the product and gives it an attractive appeal. And while laying a concrete wall is a difficult job, suitable for professionals, small cute fun DIY cement projects are easy and approachable for every member of your family. The best part is that even if you ruin a piece or item or it does not come out quite the way you wanted, you can always make a new one quite easy and fast. And they may represent beautiful gifts as well, with some personal touches such as lace printing, fingerprinting or sculpting initials on the raw concrete. The possibilities are numerous and the results depend only on you and on the degree of roughness or finesse you want the texture to have. we hope the collection below will inspire you to try and take a chance at making these simple DIY cement projects.
1. DIY Cement Candle Holders
2. DIY Cement Projects- Cement Flower Pots
3. DIY Concrete Planter
4. DIY Concrete Coffee and Side Table
5. DIY Concrete Stool
6. Concrete Coffee Table
7. DIY Cement Clock
8. DIY Cement Cellphone Holder
9. Concrete Drink Cooler on Rolls
10. DIY Small Concrete Fire Pit
11. DIY Cement Bookends
12. DIY Cement Magnetic Letters
13. DIY Cement Deer Head Sculpture
14. DIY Cement Lamp
15. DIY Round Cement Candle Holders
16. DIY Cement Projects- Christmas Decorations
17. DIY Cement Pen and Pencil Holders
18. DIY Concrete Table Cloth Clippers
19. DIY Concrete Hanging Lamp
20. Cement Magnetic Eggs
Summer is known to be the perfect season for weddings as it unveils beautiful setups locked throughout the year offering us thousands of locations to choose from, thousands of flowers and scents to work with. Summer is known to be the perfect season as it offers us the opportunity to have our wedding outdoors in the immense beauty of greenery at the sounds of crickets nestled between fresh grass scents underneath the moon. In this romantic scenery romantic outdoor bar wedding ideas or summer wedding centerpiece ideas really catch on, particularly through freshness and naturalness.
Simple elements are able to set the design theme with ease outdoors where ambient light can sculpt greenery and highlight the coziness and sensibility of the wooden texture in elegant setups that seem torn from fairy tales. Cast a glance at the gallery below and pick the centerpiece that will beautify your event.
Summer Wedding Centerpiece Ideas
#1 Airy Transparent Decor Focused on Beautiful and Sensible Flower Centerpieces
Outdoor weddings are a highly discussed subject thanks to their immense beauty and simply breathtaking possibilities. Pick your favorite wedding centerpiece from the selection showcased and share your valuable feedback in the comment section below.
Storage space is something that we all desire and search, follow and target, everyday. In small spaces in particular is hard to obtain a clutter free home and prevent chaos in all its shapes. If you are happy enough to be the user of a big kitchen things change though, you get to store the most important items properly. We need our supplies and kitchen utensils airy, organized to feel the dimenssion of space properly in a dense living room.
In the gallery below we will present you a few Ergonomic Kitchen Islands Designs Featuring Open Shelving, examples of how a regular kitchen island can become a functional storage item through the use of open shelves. By exposing and extending the space used by your kitchen island you get to showcase items able to extend the aesthetic values of your kitchen through their presence; fruits can present both shape and color in your interior without cluttering your space with texture or density. Cast a glance at the gallery below and find a solution that fits your space .
Ergonomic Kitchen Islands With Open Shelving
#1 Use the extension of kitchen isle as a transition towards your living room
#18 Superb kitchen island extension showcasing graphic kitchen items
What do you think about these ergonomic kitchen designs featuring open shelving? We would love to hear your opinion in the comment section below.
If you have replaced your old windows with new ones, then you are probably left with the old windows wondering what to do with them and where to put them. Here, I'm going to save you from that troubles, and will show you 17 Useful Ways To Repurpose Old Windows in your home.
They can be reused functionally and you will be glad that you saved them, they are all easy to do DIY projects that can emphasize your space through memory, age, nobility, a splendid presence that previously guarded your shelter. Scroll down through the photos below and check them all out!
If you want an enormous mirror in your home that is original in style, we suggest you to put together several window frames and will the places for glass with mirror. The result will be fantastic!
If you desperately need a cool pin board for your desk, here is how you can make it by recycling both old windows and wine corks. How do you like the idea?
What do you say about turning the old window into a clothes hanger? You don't need much skills to make this project. All you have to do is to add hooks to it.
Keep yourselves in track of all the events that you have to attend by creating the idea below!
Source
Which one of the ideas made the biggest impression on you? How are you going to reuse old windows? We would love to hear from you in the comment section below !
Probably the fastest way to improve your interior design in a superb timeless manner is by introducing new textures. Simple and magnificent ways to beautify your house hold have been showcased below, all based on the legendary natural wooden texture. Wooden textures add coziness and warmth along with depth in any decor, easily complementing plane simple interiors.
Wood DIY Projects can include wood and mason jars lamps, salvaged wood diy headboard, industrial wooden chandeliers or vintage benches. It is worth mentioning that from branches, twigs and stumps up to salvaged wood and wooden beams the wooden textures are transforming interior design lines throughout the world.
#1 Sculptural Wooden Roots and Monumental Wooden Beam DIY Headboard
#2 Simple Glass Bottle Industrial Chandelier Near a Wooden Wall
#3 Simple Industrial Wooden Chandelier
#4 Barn Wood in Metal Frame Composing a Beautiful Industrial Bench
#5 Mason Jar Vintage Industrial Lighting
#6 Sculptural Barn Wood Dinning Table
#7 Vintage Attic Space Sculpted and Enhanced by Wood
#8 Steampunk Industrial Barn Wood Desk
#9 Beautiful Wooden Beams Bar and Salvaged Wood Ceiling
#14 Intimate Vintage Touch in a Simple Interior Design
#15 Salvaged Wood Used in an Industrial Chandelier
#16 Wooden Stump Carved to Shelter Wine Bottles
#17 Eclectic Industrial Interior Design Beautified by Diversity
What do you think about the selection showcased above? We would love to hear your opinion in the comment section below on the effects of wood in interior design. How do you use wood in your interior design?
If you're not the 'diy crafty person' then coming up with fun ideas for your kids to engage in during their spare time might seem a bit of a task. Kids love to act out in reality what they see on T.V, which is why constructing a fairy garden with them would be an adventure you both won't want to pass up. The best part is, there would be no need to spend a dime or go out of your way to accumulate the materials because everything would already be at your disposal.
The project itself takes little effort, that is if you're not planning to make a garden as seen in #11 picture of this article. Look around your home for simple unused items like a wheelbarrow, a bucket, box or plant pot. If you don't want to work within a confined space, then consider building a miniature wall or picket fence. Then again, a hammer, some nails and some small planks of wood can be just the thing you need on a tight budget.
When deciding on what the outline of your fairy garden should look like, consider the origin of these mythical creatures. It is said that in ancient times, these Fae were regarded as deities. With this in mind, a garden depicting a royal setting would seem well in place as would dressing up each doll to look like royalty. Nothing looks more beautiful than a terrarium with miniature furniture and plants looking like a magical world created and set aside from reality. Establishing this would requires patient and delicate hands, free time, but most all, a fun-loving passionate desire for creative innovations as such.
A fairy garden can be designed with a specific accessory as the center of attraction or it can be decorated with a myriad of tiny handmade or bought creations laid out beauteously with a color scheme and fanciful theme.Whatever your choice of gardens to design either for your kids or your own playful pleasure, with a little compromise and creativity, anything is possible. Allow these 16 do-it-yourself fairy garden ideas to resonate on your minds for the purpose of inspiration and information.
#1 Ponder on fabricating a quizzical ambiance in a plant pot with mix of yellow and lilac and a touch of pink and blue
Have you ever considered creating a fairy garden with or for your little one? Feel free to share your ideas an down projects with us in the comment section below.
Related Articles
3D Paper Art, Origami paper art or Kirigami paper art are three highly fascinating techniques that have evolved non stop since they first appeared. We can thank Japan for the paper, it originated there over a thousands years ago. Imagining just folded paper art, complex paper cutting or simply book curving is wrong as this segment of art has many other tehcniques and pieces of art created in various ways, the opportunities beeing almost endless.
Many intricate paper designs have been hosted by museums and international exhaubitious throughout the world this enaging more and more individuals to follow this fascinating art as a way of expressing themselves .
Further on 15 artists have been showcased, each with their individual design line and techniques. We invite you to throw a look and tell us which you like better.
Creative Examples of 3D Paper Art
Examples of 3DPaper Art by Cheong-ah Hwang
Examples of 3DPaper Art Sculptures by Eric Joisel
Examples of 3D Paper Art Sculptures by Peter Callesen
Having an air purifier at home can keep your family and yourself safe from all the allergens and germs in the air, which can lead to various diseases and health conditions. For those of you who have started searching for and comparing air purifiers to choose the best one for your needs, you might have come across the name GermGuardian.
Manufactured by Guardian Technologies, GermGuardian’s top-of-the-line air purifiers are known for their incredible performance and durability.
Guardian Technologies is a company based in Euclid, Ohio. The company has received several awards over the years from Weatherhead School of Management, Ernst & Young Global and EDGE for its innovative approach to providing its customers with solutions for their everyday needs.
The manufacturer is one of the most renowned producers of ingenious and high quality appliances that deal with health and wellness. Among the most popular products made by Guardian Technologies is the air purifier.
While there are plenty of air purifiers out there with different features, their basic function remains the same. An air purifying unit comes with a one-speed or multi-speed fan. This fan is responsible for drawing in dirty air from the room it is in through the inlet on the machine.
As air passes through the air purifier’s filters, its particles and contaminants get trapped inside the machine. Thereafter, clean air is redistributed into the air through the outlet on the machine.
Some air purifiers offer various kinds of particle-destroying technologies like ionizers or UV-C lights that help clean air particles more rigorously as they pass through the machine before they are redistributed.
GermGuardian Elite 4-in-1 AC5350W Vs GermGuardian 3-in-1 AC5250PT
HEPA Filter Air Purifier: Equipped with a protective HEPA...
Clean, Fresh Air: A must-have air cleaner for homes,...
One basic thing to understand is that the larger a room is, the more difficult it is to control the air quality circulating in the room. Luckily, that is something you do not need to worry about if you have either the GermGuardian Elite 4-in-1 (AC5350W) or the GermGuardian 3-in-1 (AC5250PT). Both of these air purifiers are tall units, but they have manageable weights, which makes them easy to move around whenever you need to.
Both these GermGuardian models have decent clean air delivery rates and feature variable fan speeds. The GermGuardian Elite 4-in-1 AC5350W and the GermGuardian 3-in-1 AC5250PT are able to handle the workload required for cleaning large indoor spaces. At the same time, their ability to distribute clean air in spacious settings does not make them wasteful in terms of energy consumption. They require very little electrical energy to operate.
Each of the two models relies on a triple-filter system that removes harmful and irritating contaminants from the air. The 3-in1 model contains a special Pet Pure HEPA filter for animal fur. The Elite 4-in-1 and the 3-in-1 contain UV-C light bulbs, which give them extra germ-killing ability.
It is incredibly easy to control the UV-C light, the timer, the fan speed and everything else regarding the operations of both these models because of the digital control panels on the top of the units. The long lifespan of the filters in both of these models is also an attractive factor. The cherry on top is that Guardian Technologies also gives a generous manufacturer’s warranty on both these products.
Size and Placement
The major difference that you will find between the GermGuardian Elite 4-in-1and the GermGuardian 3-in-1 is in their color and shape. Of course, there are minor differences between the units other than their physical appearances. The Elite model has a rectangular shape, which is more like a white tower. In stark contrast, the 3-in-1 is a tower but black in color with a more oval-like shape embellished with a chrome chevron.
Both the GermGuardian Elite 4-in-1and the GermGuardian 3-in-1models are 28 inches tall. The Elite 4-in-1 has a length and depth of 6.7 inches by 9 inches while the 3-in-1 model measures at 6.1 inches by 9.5 inches. The Elite 4-in-1 is heavier than the 3-in-1, but it is only a minor difference with their weight being 11.25 pounds and 10.5 pounds, respectively.
You can use both of these comfortably in large rooms. They have 6 foot long power cords, which allow you plenty of room to move them around, based on their relative distance from the wall outlet. Moving both of the machines around is easy due to their light weight.
Filters
Guardian Technologies went all out with both the GermGuardian Elite 4-in-1and the GermGuardian 3-in-1 . Both units have three major air filters. The purifiers contain a pre-filter responsible for keeping large dust, coarse particles and hair from even entering the machine and disrupting its operations. The filter is covered with a layer of activated carbon that eliminates smoke, food and pet odor as well.
Both of these filters also contain the HEPA filter. This filter traps 99.97% of germs and allergens in the air, which are as small as 0.3 microns. The HEPA filter in the 3-in-1 unit is a Pet Pure HEPA filter that is infused with an antimicrobial material. This stops mildew, bacteria and mold from accumulating on the filter.
As effective and lasting as the air filters on both these purifiers are, their owners should make it a point to replace the product filters after every 6 to 9 months to make sure that they keep performing at their best. Each of the purifiers has a filter change indicator that can alert you to replace the filters.
Replacing filters is a simple matter of removing the back panel with a push of a button and accessing the filters to swap them out. It is as simple as that.
Extras
While the air filters in both the air purifier models by Guardian Technologies will clear the air properly for you, the company went a step beyond by introducing some bonus features for both of the air purifiers.
Both the GermGuardian Elite 4-in-1 and the GermGuardian 3-in-1 have 5-watt UV-C light bulbs. These UV-C lights interact with a titanium dioxide photocatalyst in the machines to break down the viruses and bacteria right down to the molecular level, so that they are completely destroyed as they enter the air purifier.
The timers on both the purifiers allow you to limit the use of the UV-C light filters to 8 hours per day so that you can cut down on the energy consumed. Setting timing for the UV-C light filter or simply turning it on and off is a simple matter of pressing the appropriate option right next to the digital display screen on top of the air purifiers.
Fan and Efficiency
The thing that makes the filtration and purification system of both the GermGuardian Elite 4-in-1 and the GermGuardian 3-in-1 so efficient is the five-speed fan you will find in both models.
The fan in the Elite 4-in-1 model uses just 56 watts of power while the 3-in-1 one uses 62 watts. Their low energy consumption means your energy bill will never spike up because of the air purifiers. In order to give you more peace of mind for their longevity, Guardian Technologies gives you a 5-year limited warranty on both the models.
If you have taken a look at the CADR numbers for both the GermGuardian Elite 4-in-1 (AC5350W) and the GermGuardian 3-in-1 (AC5250PT), you might have noticed that the 4-in-1 has lower CARD numbers than the 3-in-1 model.
For the 3-in-1 model, the dust CADR is 139 cfm [cubic feet per minute], the pollen CADR is 149 cfm and the smoke CADR is 125 cfm. For the Elite 4-in-1 model, the dust is 122 cfm, pollen is at 130cfm and smoke is at 111 cfm.
Both of These are Excellent Air Purifiers
Picking between these two brilliant products can be a nearly impossible task, considering how similar the two of them are. Both of them have an activated carbon-layered pre-filter and a UV-C light.
The GermGuardian Elite 4-in-1 and 3-in-1 have lengthy warranty periods, programmable timers and five-speed fan settings. They have long cords and digital displays, which makes them look a lot more expensive than they are.
Both the GermGuardian Elites are similar in size. The Elite 4-in-1 model has a rectangular shape and it comes in both black and white colors. The 3-in-1 model comes only in black. That being said, when it comes to long-term consumption, the Elite 4-in-1 uses slightly less energy than the 3-in-1 model.
Regardless of which GermGuardian air purifier model you choose, your investment will be quite rewarding for you and your family.
Himalayan salt has multiple benefits and uses, from cooking to salt lamps, inhalers, detox bath to a salt sole. Since it is an expensive product which is mined only from certain parts of the world, specifically Pakistan, it is naturally a little pricey. In the same context, you would like to know, how long does this Himalayan salt last and if it has an expiry date. Well, we're going to answer your query now.
PURE & NATURAL: This rock salt lamp is hand-carved from...
ADJUSTABLE LIGHTING: The dimmer switch allows you to adjust...
Facts and Figures
Since salt is a mineral, whether it is mined or produced from the sea, it is always found in a crystalline form. After various processes, we find the commercially available salt. The same applies to the Himalayan pink salt too. This salt takes decades and years to form the crystalline form, and its longevity is around 250 million years. Hence, it could be expected that the Himalayan salt too will last for ages, provided it is stored away from heat, moisture, and damage.
This applies for the very famous, Himalayan Salt Lamp too. Yes, when you turn the lamp on the heat makes the salt lamp sweat and absorb and release moisture, but this does not mean that the salt lamp is shrinking. It is merely going through the process of hygroscopy. This often poses to be a concern for a lot of people. Unless you drop and break your salt lamp, it is not getting spoilt. Also, you should keep it away from the reach of children and pets, as they tend to break them or accidentally drop it in water.
Caring for your Himalayan salt
Just like any other salt, it is important to keep salt away from heat and moisture, in a cool and dry place. The Himalayan salt lamp to needs to be taken care of. While it is normal for your salt lamp to ‘sweat,' you should also keep it free of dust and keep it on for a considerable amount of time for the moisture to dry up.
Be extremely careful with the lamp and make sure that it is kept away from edges and sharp objects so that it does not break or chip off. Children should be encouraged to not play with it or even touch it since it is an electrical appliance. If there is any abnormality with the electrical wiring, you should immediately ask for an electricians opinion or replace the bulb.
The salt (also the lamp) should be kept away from any water source, if it is kept outdoors, make sure that it does not get wet by rains, snow or any other water source. You could get rid of the dust by wiping it with a moist cloth, moist not damp, and dry it immediately.
While not in use, the salt should be kept away from humid places and preferably in an airtight container. In case of a lamp, you can zip lock it and keep it safe. Salt blocks have a different way of being cared for. It may be used for cooking and grilling. Hence its care is different. The heating should be done following instruction, with a lot of care, it should be tempered before using it. Always make sure to not pour oil on it, or it may turn rancid. Make sure that it is entirely dried off before cooking on it again and invest in good quality salt; it makes a difference!
Longevity of your Himalayan salt
As stated earlier, whether it is for cooking, consumption, lamp, or any other form, the Himalayan salt lamp can last for decades if it is original and taken proper care of.
If the salt or slat block is frequently used, obviously it will get over fast, but otherwise, this salt lasts for ages.
Understand the product you purchase and how to take care of it. Read the instruction manual carefully and make sure it is always kept away from moisture. Keep your salt in a clean and tidy place, preferably in airtight conditions.
Prevent your children and pets not to touch it and to keep it in a safe place where it would not chip, crack or break.
Conclusion
Himalayan salt is a small but significant investment to make, and will positively affect your lifestyle, provided it is original and is appropriately used.
Located in New Mexico, Country Club Residence sits heavily on its own private golf. Heavily because this particular modern mansion overlooks the surroundings with a bold attitude claimed by the tough marble used to cover itself, the bold angles and height at which it resides.
We like to call it a dream home with attitude, the L-shaped, common shape for such mansions, is used here to take advantage of the light and ambiance of a south orientation, giving the inner home warmth and animating the interiors through the huge glazed windows with shadows and light.
This project has been envisioned by Migdal Arquitectos and despite the bold bulky silhouette, the interior tries to be as breezy and as transparent as possible in order to focus the viewers attention to the breathtaking surroundings, the cliff view mansion with a golf course behind it uses big glass surfaces to create smooth transition between interior -exterior and public - private . Even though the house does not claim any sustainable features the focus towards the surroundings and natural light is much appreciated and we would like to hear your opinion about it.
READ NEXT Water Cleaning Station Converted in a Striking Modern Mansion
How would you like to add a sleek and elegant kitchen faucet to your kitchen? Sounds good, right! The K-596-VS will give you just that.
It is one of the latest offerings by Kohler and can enhance the look and aesthetics of your space immediately. That’s not all; this one ranks high when it comes to convenience and durability. Once you have it placed in the house, rest assured that it will serve you for years to come.
Moreover, you can move the faucet head easily, clearing up space for larger utensils in the sink. We were very impressed by the kind of value that is added along with the impeccable design.
Moving on, we will talk about its features and the pros and cons in the following sections. This is then followed by a buyer’s guide, which will help you in making a decision. So, get your favorite beverage and read on to know all about them.
PULL DOWN FAUCET: Sweep Spray faucet creates a wide,...
THREE FUNCTION PULL DOWN SPRAYHEAD FAUCET: With...
We have listed the features here for your benefit. Read on to know them all!
Durability
We had no questions about the durability of this product after having seen it for the first time. It is constructed entirely out of premium metal, so it will be able to survive for years without corroding, even after being in constant contact with liquids all day.
Next, it has a valve that is made of ceramic, and it prevents cases of corrosion inside. Now, corrosion is a problem that is related mainly to faucets, but rest assured that you will not be bothered by it.
Moreover, it has a very protective finish and will resist corrosion. You do not have to worry about rusting, too, thanks to this layer. The brand claims that it will look new for years to come.
What we would recommend here is to keep cleaning the surface to enhance its durability and prevent minerals from building up. It is equipped with the MasterClean™ technology, which will aid you in the process.
Convenience
One of the most important features here is the convenience that is offered. This is a pull-down faucet that can be handled easily. You can work with one hand and use the other to hold kitchen utensils and work with them.
Next, the neck can be rotated in all directions, and you can move it at 360 degrees while working. This way, you can use the entire sink space when needed. It will also help you keep large utensils or cookware without the faucet interfering.
Moreover, we were impressed with its excellent ergonomics, and its implemented ProMotion® technology. It has a braided hose and a swiveling ball joint, which makes it flexible, allowing continuous smooth movement.
Another feature that increases convenience is the DockNetik® magnetic docking system. This will lock the position of the spray head after you have set it. So, the position stays even when you are not using it till you make an effort to change it.
Moving on, it has a temperature memory feature to ensure that the faucet remembers your preferred temperature. This will let you turn it on later to get water of the same temperature that you had obtained earlier.
Multi-Function Spray Head
You will love its 3-function spray head that helps in making its cleaning and entire operation process versatile. There is a sweep-spray option that will leave a powerful stream to help in handling a large amount of grease or resist stains on plates.
Then there is the stream option, which is slower and works with less force. This is perfect for easy and moderate cleaning needs. If you want to shift to a stronger flow, there is a button that needs to be pressed. The water force is then increased by 30 percent. We also loved the ease of access, and you can easily shift among modes.
What’s more, this even comes with sculpted buttons that can be used with soapy and wet hands. You do not have to wash your hands every time before touching the buttons.
Finish
This is indeed a very elegant and beautiful product that has 3 premium finishes to choose from. You can choose among matte black, vibrant stainless, and polished chrome. None of them tarnishes easily, and the sophisticated finish lasts for years to come.
Simply select one on the basis of your kitchen décor, and you will easily add to the overall ambiance. For example, if most of your cookware is made of stainless steel, go for the polished chrome, and it will fit into the kitchen just right.
Moving on, it does not take up too much space, thanks to its design. We were very happy about its compact size, which allows it to fit into narrow spaces.
On the other hand, if you have a minimalist kitchen, then the matte black finish will look good. It is stylish and will fit right in with solid colors.
Installation
When it comes to installation, there are generally 3 ways of doing it. Thankfully this supports both 3-hole and single-hole configurations. It will easily blend well with most kitchens, and the pack comes with all the supplies needed.
There are rings and lines already provided in the pack, so you can hope for a smooth process without the need for professional help. If you have prior experience, choose the DIY route!
What Could've Been Better?
Some customers report that they have faced issues with leakage over time. However, this item is backed by a limited lifetime warranty and comes with excellent customer support. So, if you face any issues, rest assured that the brand will help you solve them.
Next, the product is not fit for low spaces as it has a considerable height. Measure the space that is available first and compare it with the size; if it fits, only then proceed to purchasing it.
In case the space is low, and you are using the sweep-spray mode, water might get spilled as it is very strong. This happens, especially if you have a small basin, but don't worry; you will get the hang of it over time. Once you do, this same feature will help you clean dishes quickly.
Pros
Single and 3-hole configuration
Equipped with MasterClean™ technology
Resistant to rusting and corrosion
3-function spray head
Strong metallic body
Cons
Issues with leakage
Not fit for low spaces
Kohler K-596-VS Buyer’s Guide
In this section, we will discuss some of the requirements that you should check for before purchasing. Make a note of this before proceeding, and you should face no issues.
Flexibility
Kitchens will see utensils and cookware of different sizes. And sometimes, the faucet may act as a hindrance and reduce space. Now, if you can turn the faucet head up to 360 degrees, then it can be moved out of the way when needed. This will allow you more flexibility, and you can work with ease.
Temperature
Gone are the days when you would only get cold water from your kitchen tap. Now in most cases, the water will be temperature controlled. Check if the faucet remembers the temperature and water flows at this same temperature even when turned on later.
Resistance
Since faucets are going to see a lot of water, it is important that the material used should be resistant to rust and corrosion. If that is not the case, you can get contaminated water that touches the rusted interiors before falling out.
The outer surface could also look old and dull. But with a proper metal finish and ceramic valve, you can get clean water at all times. Remember to check the description carefully before purchasing.
Spray Patterns
Some utensils can be delicate and would need a moderate or light flow of water, while some stains might require a lot of water force. A good product should be able to offer you both at the same time. You should have an option to shift between them when needed. Also, the shifting process should be easy. A simple button works great in this case.
Kohler K-596-VS Verdict
If you were looking for the ultimate faucet that ranks high in style, durability, and convenience, then you have finally found a match. The Kohler K-596-VS offers the perfect combination of features and will look beautiful.
Just ensure that it is installed well. If you have no experience with installation, it is best to get professionals for the task. But if you have worked with faucets before, you may immediately start the process as all the parts are provided.
With this, we will take your leave. Let us know if you have any further queries in the comment section below.
Mix white vinegar, water, and baking soda in the ratio 1:2:0.5 by volume. Use a good quality clean cloth or brush to apply it to the affected areas. Scrub in a circular motion. Repeat if required. Wipe dry and let air-dry. This method is very effective for highly affected walls like painted cement walls or walls with wooden paneling.
It is a type of cleaning sponge or brush that can wipe off stains when rubbed against it. The top layer, when saturated with removed stain, can be sliced off, exposing a clear surface to erase the stains again.
This method is ideal for cleaning of paints that cannot be dampened or any other material that cannot stand harsh chemicals, for instance- porcelain, glass panes, reactive metals, etc.
This method is very effective but has a high potential of leading to chemical hazards. It should be carried out by professionals. Harsh chemicals such as ammonia, bleaching powder, Trisodium Phosphate are a few examples.
This should be done in a well-ventilated room with proper skill and precautions. It is ideal for heavy-duty stained places like toilets and old smoking areas.
PART 2 | Painting for Future Stain Prevention
After removing stains from walls, it requires painting for future prevention and increasing aesthetics. Here are a few steps you need to follow before, during, and after painting the walls.
Paint-proof floors, furniture, and objects you don’t want to be painted.
Ventilate the rooms well as paint smokes can be a health hazard.
Prepare the walls for painted with a last dry brush or removal of any old wallpaper or unwanted coverings.
Keep all equipment for painting handy such as primer, paints, brushes, etc.
Apply an odour masking, non-water based primer before painting.
Apply at least two coats of paint after letting each coat dry.
Provide extreme versatility and simplifies your cleaning...
Each swipe removes more grime than the leading all-purpose...
I am a cleanliness freak. However, I am not an ardent fan of hazardous chemical cleaners. Earlier I used spray degreasers and chemicals like TSP. On the lookout for a comparatively fuss free and preferably a dry cleaning alternative, I came to know about this product.
Ever since, this has been my best choice and cleaning mate! It comes is a foam and rubber based bar. You need to simply rub it against a stain like an eraser. It does require me to apply a bit of pressure but it’s worth the labor.
I generally scrub off or slice off the upper part once it has done its bit and there, I have a new, clean surface to work with! It can be used to remove stains of lead, smoke, paint, grease, etc.
Our leather recliner had gotten dull over time. A little rubbing of this product all over and voila, I had a good as new furniture. Being cheaply priced, it is something you can use on a daily basis! If you have a four year old and sketch pen and marker marks haunt you everywhere, this is going to be your BFF!
USED BY PROFESSIONALS - Trusted by industry professionals,...
We recently bought an apartment; very spacious and at quite a cheap price! However, there were two rooms full of nicotine stains as the earlier tenants were chain smokers. After extensive study, I found out Trisodium Phosphate is a great nicotine stain remover and I ordered this product.
It’s in powder form and needs to be diluted in water. Two teaspoons of the product in a litre of water is all you need. For added fragrance, we added two tablespoons of liquid soap. This procedure, even if very efficient, calls for utter precaution. Goggles, gloves and masks are a must.
Keep a first aid kit handy. The rooms we were working in were well-ventilated. Coming to the price, it found it moderately priced, as you need to use it sparingly. Coming to its working, a 10 feet by 12 feet room took mere half an hour to get squeaky clean.
It is also a great way to prepare walls for painting. We use it to shine up the kitchen and bathroom floors, sinks and what not. It’s a great efficient product which needs a bit of extra caution. I would fully recommend it.
Bar Keepers Friend Cookware Cleanser & Polish is a stainless...
Remove stains, tarnish, rust & lime
The metal shower in our bathroom had got clogged with calcium and iron deposits making the shower sessions not so enjoyable. I bought this product with quite a bit of hope as well as reluctance. Hope because of the hundreds of positive reviews the product has and reluctance as nothing seemed to work in the past. It took a single application and duration of five minutes to bring back the shower to life! The chemical [oxalic acid] is quite potent and I would suggest using good quality gloves. This product brings out the chemist in you!
Not only does it work on an array of material types (porcelain, glass, different metals and even rocks), you can also dilute it to suit your need. The price is also great for the quantity you get. This is also because you need a little amount to serve your purpose.
Still, do your work in an airy room with not so prolonged sessions. It’s a great way to squeak-up your tainted sinks, vessels and equipment and give a makeover to your house on a budget. It truly lives up to its name.
Works on silicone caulk, adhesive, sealants, tree sap, wet...
Professional grade cleaner removes sticky, gooey, gummy...
Our house looked as if it was hit with an attack of measles! It was my daughter’s 5th birthday and I was left with a house full of adhesive residues from the decorations. Being a working woman, I needed something handy, efficient and fuss free. A colleague suggested this product and within no time, it was in my hands (great delivery I must mention)! I allotted a whole day for cleaning but it was done in just half of the time. This cleaner is gel based which doesn’t let it drip. The spray applies only concentrated on the messes and you can immediately wipe it off with a cotton towel.
It doesn’t hamper the paint underneath or the material. The only negative to this product is its potency. Unlike other instant soap based degreasers, which can be used by children, this being industrial grade, should be used only by adults with proper precautions.
Later, I consistently use it to degrease my kitchen walls. It works wonders on oil, sap, tar, glue, soot, asphalt, wax, etc. Using it gives a feel of giving a fresh paint to your house.
Wood Cleaner for Wood Tables, Cabinets, Doors, and More
Contained 98% Naturally Derived Ingredients*
Wooden furniture makes houses look so much more appealing! My husband and I are dig wooden finish furniture [even if not completely wooden inside] and our home’s décor reflects that conspicuously and grandly. For decades, we have been using this trusted and time-tested product to maintain our wooden assets. It is a 98% natural oil derivative with no harmful chemical fragrances. We use it on a monthly basis. It gives not only a natural shine but also a natural fragrance which is so homely. Soak a clean cloth with this product and polish the surface for a few minutes and they are good as new! This product is ammonia and bleach free and hence, does not alter the coloration of the wood.
It can be used on any type of wooden product (finished or unfinished) and on any color of wood (rosewood, sandalwood, oak, etc.). I got a great deal at the time of purchasing it and stocked up for a year’s supply! This product is phosphate free and biodegradable and lets you do your bit of duty for the environment.
No wonder it has been around for a century and well-accepted in all households.
Well, that concludes our guide on how to remove nicotine stains off walls. What are you going to try first: follow the DIY method or buy a quality nicotine stain remover? Whatever you do, let us know in the comments section below.
Envisioned byRobert M. Gurney the Nevis Pool and Garden Pavilion are breathtaking examples of backyard landscaping ideas and of the attention that we should pay to our green spaces, these extensions being located in Washington DC. Being located in a neighborhood at the border of Washington DC, this suburban site offers the owner the advantage of being adjacent to woodlands. Surrounded by nature, trees and small mesmerizing manicured gardens, new swimming pools and stone walls, new paths and trees,structured planting, all these being elements that are anchoring a new design and a breathtaking landscape into the site.
The small pavilion contains a stainless steal kitchen with seating components along with an adjacent living space bound to a modern fireplace that becomes the center of the ensemble. The new pavilion is meant to provide shelter from all natural elements whilst making a statement for the breathtaking backyard landscaping, a natural organic view for the native natural surroundings.
Earlier today we have published Fairytale Bedroom Interior Designs for Kids story in which the child was the protagonist of his own little story in his own little universe. In this article we are showing you another alternative, a cheaper and more effective dream. Building a small room in his own little bedroom by materializing a small tent. Such solutions are highly versatile because they can easily fit pretty much any bedroom interior design, saving up space for other activities. Please do not make the mistake of building a sleeping tent for you child, such solutions should be very carefully put to practice from ventilation to mattress and sleeping position. These small tents can become a very special retreat for your child a place in which he can play, hide secrets and day dream .
Same creative attitude should be adopted here as well we reckon. A tent built by your child or at least bought with him along, will definitely be more fascinating and fulfilling. Play along with their dreams and try to materialize them, make little rooms in the tent if you have the space. The kid will assign functions and activities to each one, like that he will start to develop his organization skills. The more you think about it the faster you realize how such scenarios are helpful to shape and orientate your child to the right path. Colorful accents will emphasize joy and determinate creativity along with a little mystery. We are inviting you to create their universe and if possible, take an important role in it.
Nothing says home like a comfortable kitchen room. The smell, the familiarity, and the warmth – both physical and metaphorical – makes you feel safe, and right at home. A kitchen deserves a lot more than just a few cabinets, cookware, and amenities. Cooking in a plain kitchen can feel pretty exhausting and boring. But if the kitchen is spacious and easily accessible, cooking can rapidly become fun and quick.
Modular kitchens have been quite a rising trend among city dwellers. The polished metal surfaces, shiny lights and high- tech new appliances, are in much demand. But if the modern look doesn’t suit your needs, and if you’re looking for something old, homely, and comfortable, French Country Kitchens are just for you!
Let us go through the characteristics of a French Country Kitchen that you need to look out for while you’re designing yours !
Related articles
13 Best Farmhouse Sinks of 2022 Reviewed
Awe-Inspiring French Country Kitchen
Natural Materials
If you observe clearly, every countryside kitchen décor uses the three main materials for the basic cabinet and counter construction, be it French or English. These materials are obviously wood, stone and brick.
The wood is the chief material used for the cabinets and the counter. It can also be used to make false ceiling beams too. Stone and brick are mostly used for walls and chimneys. The counter-tops, the kitchen island and the background tiles will mostly be polished stones, cut to dimensions of your kitchen. These materials will add to the earthy nature of the interior, and insulate the kitchen for extra protection.
Crown Molding Frames
Crown molded frames have been widely used in European décor since centuries. Ornately carved designs, which look straight but are laterally curved and stylish, look amazing on the borders of walls, floors and furniture alike.
The curves of the crown molding add a three dimensional depth to a monochrome piece of wooden plank. When you’re designing a French country kitchen, most cabinets and counters are going to be monochromatic. The crown molding makes sure that the play of light and shadows makes your simple kitchen look rich, giving a subtle flow to the straight cut edges and corners.
Floorboards
Flooring makes up an immensely important part of any room. It keeps a control on the temperature regulation, insulation from electric wires, and the plumbing of the room. In a kitchen, these things need to be taken into serious consideration. For instance, if you spill a liquid, it should be easy to clean without having the liquid run off in a sloping direction. You obviously cannot use any tiles that will conduct electricity as it can cause harmful shocks and injuries.
Flagstones and Terracotta tiles are commonly used for French kitchen flooring. Checkerboard look for the kitchen is quite trendy and can be incorporated in a kitchen with modern or contrasting themes. You might wonder if wooden floorboards could be used. Well, they can be used for sure, but you’ll have to make sure they don’t swell up during rains.
Kitchen Islands
The traditional French etiquette of dining and cooking for multiple members of the family has been kept alive with the introduction of kitchen islands. If the kitchens were big enough, almost every French household would incorporate kitchen islands in their homes.
It’s easy for more people to cook with an extra counter available to work. On the other hand, people can huddle around the kitchen during a party or a family gathering. Large kitchen islands can have built in sinks or garbage bins, if there’s excess space to spare.
Fireplace Reminiscent Décor
Fireplaces introduce a very domestic and dreamy feel to the room by default. Cooking can feel very boring if you’re in the kitchen alone. This feeling can be overcome by decorating your kitchen similar to the design of the fireplace.
Traditional French households consider the history of family gatherings on a cold night around the fireplace. They recreate this kind of feeling with old style stoves, stone and brick walls, archways on the doors, and hoods above the stoves.
French cottages have slanting wooden roofs fixed on strong wooden beams. Most cottages don’t bother covering these beams up, giving a very raw yet natural look to the rooms. French kitchens have a similar ceiling with exposed wooden beams.
You could incorporate this pretty characteristic of old French cottages in your kitchen, since it will make the room look aesthetically old and unique. You could even fix small chandeliers or iron lanterns from these beams to make your kitchen look more welcoming to guests.
Large Windows
French architecture fancies building large windows to allow maximum natural light to illuminate the rooms. It proves most convenient in kitchens, where a lot of light is needed. Sunlight also adds natural warmth to the room, while sterilizing pathogens.
Building large windows will make sure you can exploit all these advantages. It will also give you an idea to design your kitchen cabinets similar to it. Also check out the fabrics and colors you can use for the curtains to cover these windows.
Soft Color Palette
Earthy colors and tones are an important characteristic of an ethnic French country kitchen. They resemble the muted hues of provincial landscape colors. Creamy, soft and pale colors are most preferable in such kitchens. If you don’t mind adding colors which differ from shades of white or cream, you could definitely go for diluted shades of pastel colors such as pink, sky blue, lavender, olive, and much more.
These colors can be used in different shades for the walls, ceilings and furniture surfaces. Soft colors are known to induce a sense of natural warmth and comfort to the room, and make the room look spacious.
Now if you do plan to get an island constructed in the centre of your kitchen, you can try to highlight it using one easy trick. Using a contrasting color to the rest of the cabinets will make your kitchen island stand out. Make sure that the colors used are similarly earthy and soft, not bright.
You could get a darker hue of a different pastel color painted on your kitchen island. Using similarly darker polished stone on your island counter-top will add more charm to it. If you don’t want to change the color palette of your cabinets, you can add contrast to the kitchen by using darker curtains for the windows. There are no boundaries to experimenting with color combinations for your French kitchen.
The wooden cabinets can be carved with designs inspired by nature. The side edges can be designed ornately with delicate vines and floral carvings. Or you could go for a minimalist approach and get pillars carved out on the edges.
Cabinets can have beautifully carved crowns with similar designs. These curves add to the charm of the kitchen, while making it seem obviously inspired by earthly things. You’ll also be able to control the injuries that happen on the impact with sharp edges.
Beadboard Linings
Beadboards, better known as “tongue and groove” panels, can be used easily for decorative and lining purposes. Use them on vertical surfaces or ceilings, they’re sure to catch everyone’s eye.
Using them as internal lining surfaces for kitchen cabinets, island surfaces, splash-back can give extra depth to the furniture. You can try using contrast colors to add to the look of the kitchen. They are easy to clean too, so you don’t have to worry about accumulation of mold.
Adding a bit of character to simple wooden cabinets will definitely make your kitchen look more inviting. So instead of keeping your cabinet surfaces simply polished and flat, adding details to them like your normal living room or bedroom furniture, will make your kitchen look beautiful.
Simple detailing like an internal margin on the surface of the trolleys and drawers, or curved door designs will make your simple cabinetry look like a pretty showcase. You can display your best sets of crockery in these cupboards, with glass panes allowing it to be shown off to your guests. Look at small bookcase in the picture. You can certainly keep your collection of recipe books there.
Modern Twist
French country designs are quite flexible when it comes to timely modifications. You can give your antique kitchen a modern twist by using some bold color combinations and designs. Modern kitchen equipment would allow you to blend wood and stone with modern metal.
For instance, suppose you go with grey hues for the cabinets, you could get matte finished steel for your chimney. Or a darker colored polished wood for the central island, like the one shown in this picture. Discuss more possibilities of new styles and colors with your interior decorator to get a brilliant fusion of old and modern look for your kitchen.
Farmhouse [Apron] Style Sink
Most French country kitchens will usually have a farmhouse sink, otherwise known as an apron sink. It’s quite convenient to use, with no cabinet or counter-top in between. It’s also deeper, so the water doesn’t splash all over. Using white or cream colored porcelain will suit any light colored theme from the kitchen walls.
Iron Details
Wrought iron is the most preferable metal used in French country kitchens, for small metal detailing like handlebars, locks, drawer handles, lighting fixtures and faucets. Iron takes a long time to heat up and cool down, so its temperature is usually regulated during extreme climates. It also adds a rustic vintage look to the plain muted colored background.
Accessories in the kitchen are also made with the help of wrought iron. Lanterns and lamps hanging around the room, and cookware hanger racks, look medieval and beautiful. The iron can also be used in modern design of an old country kitchen, but people prefer using other metals as steel and copper for their affordability and durability.
Lantern Style Lighting
An easy way to add to the brilliance of your old kitchen is to allow a play of light and shadows. The lighting effects make up the most of visual beauty of any room. Candle lights or warm yellow lights set up in old lanterns are sure to dazzle and mesmerize anyone who enters your kitchen.
You can set up vintage hanging lanterns on the counters and kitchen island. Due to the rustic look of wrought iron or brass, the décor looks especially aesthetic, giving you an illusion of working around in some palace kitchen. Like the colors make the room look bigger, the light fills up this space with a warm comforting substance.
Stove hoods are an important part of any kitchen, especially country kitchens where people tried to keep smoke under control. So it makes most sense to have a hood above the stove that matches your interior design and color schemes.
Hoods can be bought online or built separately. Stone hood leading up to a brick chimney will look aesthetically antique. If you’re looking for something easier to uninstall and reinstall for cleaning purposes, you could look for an antique metal hood, made of copper or iron. It will certainly bring a lot of freshness to your vision as well as the air in the room.
Water Faucet over Stove
Traditional French used to have water taps [faucets] fixed above the stove. Since then, this old style stove has disappeared from modern kitchens. It’s quite useful to have a water tap like this one installed above your stove, especially when you’re cooking in quite a hurry.
Adding this tiny detail to your traditional country style kitchen will make it look very charming while preserving the authenticity of a French country kitchen. You can even have vintage stoves fixed in your kitchen to add to the look. Discuss this with your interior decorator for sure.
Open Shelves
Country kitchens in France use simple techniques to store their cookware. Although cabinets are quite common, the traditional country kitchen will have a series of narrow and open shelves over the worktop, above the splash-backs.
Therefore, if you don’t want cabinets over the counters, you could definitely try this idea. Covering them up with skirts or curtains would keep the cookware out of sight and make the simple shelves look pretty. Keeping them open can give a very rustic look to it.
Hanging Cookware
One of the commonest sights you will see in French kitchens, are the pots and pans hanging from a rack. Soup pots and frying pans are often used to cook French cuisine, so this cookware needs to be placed in a very handy place. What best way to keep pots and pans than to hang them by small hooks on the racks?
Wrought iron or metal is frequently used to make these racks, so you could replicate hangers like them in your old themed kitchen. If you are going with a modern look, you could definitely use wooden suspenders or steel ones to match your décor. You could fix the racks on the wall or hang them in the middle of the room, as shown in the picture.
Pots are a staple of the countryside, wherever you go in the world. They are earthy by default and add to the charm of the country decor, while also authenticating their usage in a way having them in an ultra modern lifestyle wouldn’t. Moreover, French pottery is delightfully colorful. From the greens to the yellows, and variants of blue, scarlet and brown, you are never short of the vibrancy they bring to the setting.
As mentioned before, they actually are more than just decorative pieces. Either rustic or porcelain or both types of bowls and plates can be used to have meals from. However, you can use the earthenware for more than just that. You can use them while you cook and to store the very many ingredients in your kitchen that won’t be refrigerated.
Organic Straw Accessories
The allure of wood is as old as recorded civilization but one that never ceases to amaze the beholder. It not only adds character and wisdom to its surroundings, but also feels homely. Adding stuff made of wicker, wood and straw will increase the appeal of your kitchen. From iconic wicker baskets to wooden bowls and chopping boards, the options are plenty.
A straw bag is a beautiful accessory to carry with you when you go grocery shopping and sits prettily in the kitchen when not used. Plus, wicker and straw decorations, from vases to shelves, add to the charm of your French kitchen. Wicker stools and seats are wonderful additions to consider as well.
Splashbacks
Splash-backs are patterned tiles fitted on the walls behind the counters. As the name suggests, it saves the actual wall from being spoilt by soups, batters and curries. Stone or Terracotta tiles are preferred to give the splash-backs an earthen and irregular handmade look.
Marble could be used too, if you have a bigger budget. But its maintenance can prove difficult as acids can react with it, leaving behind ugly permanent stains. You can instead use tiles made out of different stones, with patterns and designs on them.
Wooden planks, splash-back tiles, counter-tops and island top come with a lot of natural textures and patterns. Wood used for the exposed ceiling beams can give a natural look with its original wooden textures. If you want to avoid using paints on the exterior of cabinets, you can use faint colored wooden planks with textures.
The tiles made from natural stones come with naturally present patterns. Splash-back tiles can add a contrast to the kitchen counter-tops with incorporation of different colors and patterns. If you have matching colors for counters and island, you can use similar textured and polished stone for the counter-tops. Polished and sealed concrete, with additional color, can complement the splash-back tiles really well.
Fabrics
Fabrics bring definition to a kitchen. Curtains are necessary in a traditional house. Any house feels a lot less occupied and haunts with its starkness if it doesn’t have curtains. Plus, fabric curtains bring more calm to your kitchen by absorbing noises and regulating temperatures by keeping them favorable for your kitchen. Their design adds a little more definition to the kitchen with their flowing nature, contrasting the straight cut and flat counter-tops and cabinets.
Tablecloths, small towels, cushions, and other small fabric additions with traditional and exquisite French prints are a necessity. Chartreuse and lavender work best as color variants for the fabric in your kitchen, as they are bold yet soothing to look at and even stand the test of time once they start wearing off.
Seating
French country kitchens have high kitchen islands, so most of them use high chairs or bar stools for seating. If you’re going for a completely organic look, you could go for fancy wooden chairs with straw seats or similar wooden stools. Arrangement of wrought iron garden chairs around the kitchen tables is a traditional practice among countryside French households. Another economic and common practice is to reuse an old chair by introducing a slip-covering or cushions.
This is another part of the kitchen, where you can experiment with contrasting colors. Painting the straw chairs with muted hues of a primary color, or using fabrics for slipcovers and cushions, will certainly add a bold splash of color and softness to the hard furniture.
Skirted Cabinetry
In typical French country kitchens, it is more or less traditional to cover cabinets under counter with soft fabric curtains. For example, covering the underside of sink using a fabric is preferred over a wooden door. The skirting is also quite common on kitchen islands. It adds an extra soft texture to the otherwise wooden built of the interiors.
The skirts should follow similar color theme as the walls, they may even the curtains on your windows. They allow the air ventilation to keep the cabinets mold-free. So if you’re aiming to design a French kitchen in a cottage, it won’t look out of place, and it won’t cause plumbing issues either. However, if you plan to replicate it in an urban house, you could attach the skirts over the sink cabinet too.
Wall Color Washing
Color washing walls with subtle colors or colors that stand out yet are not too striking is a good replacement for more ancient facade, which won’t go well if you have a more modern furniture or finishing. You won’t have to leave any wall without cabinets, empty or unpainted.
Giving your steel appliances a makeover with warm, country colors or appealing designs using removable wallpapers will hide the oddity of the steely look in your otherwise traditional kitchen. It seems like a great place to start blending the antique with the modern.
So, did the idea of getting a French country kitchen made, appeal to you? Did you find these points helpful to put your idea into motion? They are sure to make you confident enough to execute a traditional French kitchen in your urban homes. Thus, designing your own kitchen in a French countryside style is not impossible at all.
If you have any new ideas related to traditional kitchen designing, don’t forget to share them here. Bon chance!
All images on this website are property of their respective owners.
The image of a simple shower head planted on a wall was not an image that one would have pursued a while back; today, things are different, the walk-in shower is a new symbol for the modern bathroom. Having a walk-in shower comes with great advantages and disadvantages and in the article that follows we are to surface the information you`ll need to decide whether this type of shower will fit in your bathroom.
The advantages of a walk-in shower
The walk in shower surely has advantages, to each and everyone these may be relevant or may not, cast a glance:
The Walk-In shower is most often than not realized from glass, the minimalist design emphasizes the feeling of space, declutters the design and allows the space to breathe. Depending on the position of the shower, the glass enclosure can become a focal point, a statement for your interior design.
A simple walk-in shower does not feature moving parts and it presents little to no chances of breaking, making the ensemble safer as a whole.
Curtains are not a common presence in the modern, clutter free look, the walk-in shower is definitely not a choice a that shy person would make yet curtains can be featured, allowing the individual to personalize the space a great deal, with each curtain one being able to change the bathroom greatly whilst adding the privacy that one family member might need.
In theory the walk-in shower is far easier to clean, the surfaces are flat, there are few places in which dirt and grime can gather and the metal pieces are a little more protected, being on a different height. A glass enclosure might require higher maintenance yet the process remains simpler and as a result one still could argue that the walk-in shower is far easier on maintenance than a regular setup.
The walk-in shower solution can be installed in multiple setups, it can be the main item of a transformation, one source of water and a drainage solution can inexpensively become a walk in shower if an additional shower is needed in your home.
Last but certainly not least, the biggest advantage of the walk in shower is that it is easier to use. In most cases there is no level difference on the floor thus making the usage of the shower more accessible for elderly users and disabled people, additional safety bars can be installed with ease in any walk-in shower greatly enhancing safety.
THE disADVANTAGES OF A WALK-IN SHOWER
A walk-in shower should be build with great care, the surface should be sloped right to ensure proper drainage as it can easily create a slipping hazard. Water reaches the bathroom floor easier and without anti-slipping solutions this shower solution can be more dangerous.
In an open walk-in shower the air is free to circulate in the bathroom, changing the experience of showering a great deal. If you want to contain the humidity and hot air around you make sure you enclose your shower somehow.
The price can also be seen as a huge disadvantage as the walk-in showers can be far more expensive than traditional designs, complex hidden drainage systems and great amounts of high quality glass complicating the bill. In the long run replacing a piece for a walk-in shower may be expensive business.
A selection of extraordinary walk in showers has been discovered on the world wide web and we have curated through Pinterest what we have considered extraordinary for this article, feed your imagination.
WALK-IN SHOWER Designs
Green mint, white and glass.
Glass and taupe make a great combination for a modern interior. One could feature both a bathtub and walk-in shower in your bathroom.
An impeccable look can be achieved through marble and glass.
An intermediary wall can contain glass not to block light in the bathroom.
What do you think about the designs and ideas illustrated? We would love to hear your opinion on the subject in the comment section below.
You have probably been mesmerized by rainbow roses already, they are simply fascinating, shattering beautifully and organic, natural. In this short step by step DIY Project we will try to show you how we've created our own multi colored roses.
If you think that the rose is the supreme gift you will find these ideas interesting, at least. Most of us thought that these roses are some sort of engineering genetic bred things but happily, this is not the case, you can create your own, in the comfort of your own home. Even though it is not possible to grow rainbow roses in your backyard garden, coloring them with the technique showcased below is still extremely graphic and fitted for a gift.
DIY Rainbow Roses
The process is simple, clear, extraordinary beautiful. Basically you are changing the color by making use of its transportation system. The xylem tubes of the roses stem surges water to maintain itself, therefore sending water and nutrients to the leaves and petals of the flowers. If the stem of a rose would be submerged in a colored water, this color would be transported, pumped up into the flowers as well. The water contained by the petals is eventually evaporated but the color remains there; in this manner, color will beautify the rose. This happens because the outer layer of a white rose petal is transparent and will embrace the color that we feed.
Multi-Colored Roses or Single Colored Green or Blue Roses?
It is important to know that you are using the same technique for both multi colored roses, single colored blue roses, purple or blue roses, or any other mixture. It is also important to know that you will not get petals with different colors entirely. The solution applied in this exercise is composed of a few simple steps: splitting the end part of the rose`s stem and feeding it different colors to color it naturally in a magnificent multicolored rainbow rose.
DIY Rainbow Roses - Step by Step Process
STEP 1
Pick up a fresh and beautiful white rose from your garden with a stem of 8 -9 inches or so. If you do not have a white rose in the backyard purchase one from a flower shop.
STEP 2
This process is based on colored water. We need water soluble colors. Start with four colors. These should be highly different from each other if you want to be effective, a highly contrasting value would enhance the natural gradients formed between petals. Try not to use orange with red, blue with indigo, orange with yellow. Try high contrast combinations such as yellow, purple, grey and blue or red, blue,green yellow or violet,yellow, blue.
Feel free to experiment with just one color as well, the results can be magnificent.
STEP 3
Make use of four recipients filled with water to add the colors chosen. Mix the ingredients and drops of colors until the water becomes opaque, dense. Here, these four recipients will serve as host to four different colors, you can use them for more processes.
STEP 4
No is the time to split the end of the severed stem into four, preferably equal, segments. Use a scalpel or the sharp blade of a knife to cut lengthwise almost 6 inches.
STEP 5
You have four recipients filled with color and four stem segments. Each split stem should be dipped into a different recipient and the roses should somehow stand erect, offer it support to ensure this.
STEP 6
Simply wait. In the next 24 you will see the magic happen. Record the transformation of your simple white rose and take pictures,it is extremely fascinating. In the end you can hold the ends by using some scotch tape, adhesive tape.
Relevant Points
Pay attention to these simple steps to avoid failure.
Use only white roses.
The colors must be water soluble.
The colored water mixture must be perfect. Mix it properly.
Pay attention to your own hands when splitting the stem.
Roses are sensible, try not to maintain them in direct sunlight or the petals will drop at a simple touch.
We invite you to use this guide and create a ton of rainbow roses, share this with your friends and learn them to embrace color. Offer your loved ones and memorize their surprised faces in unique pictures. We would love to hear your opinion in the comment section below on these colored roses.

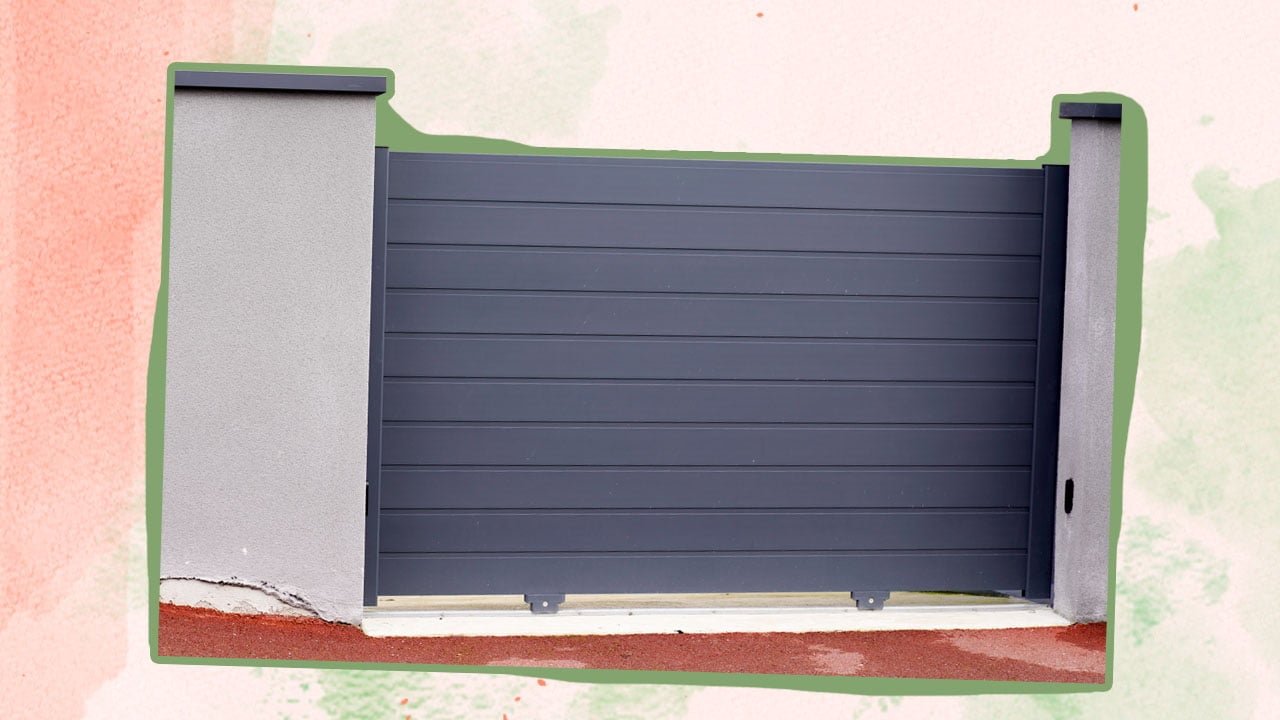
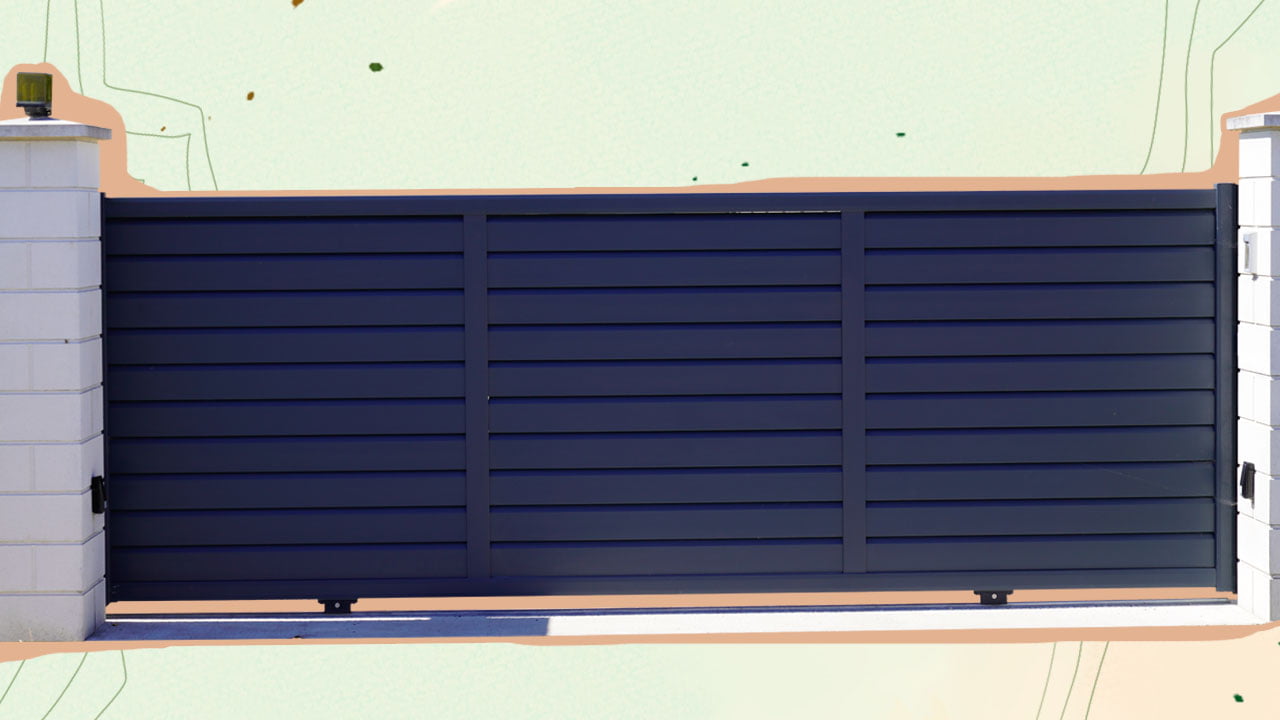

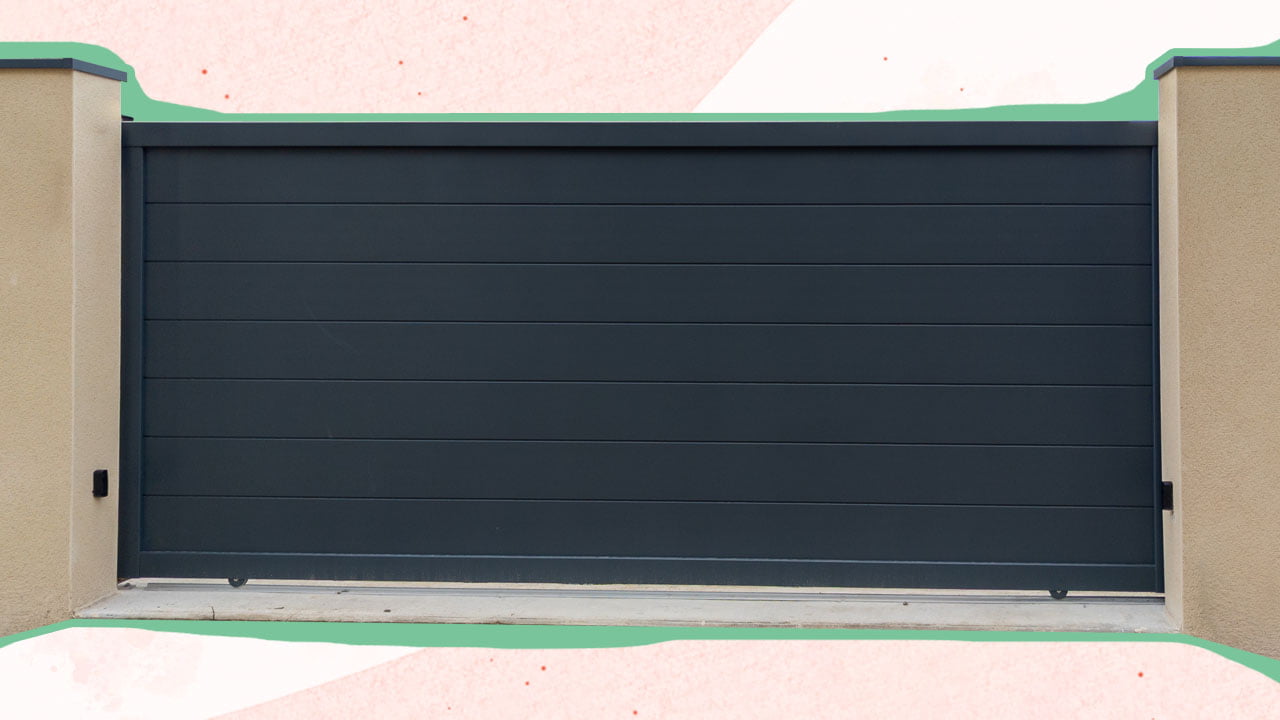
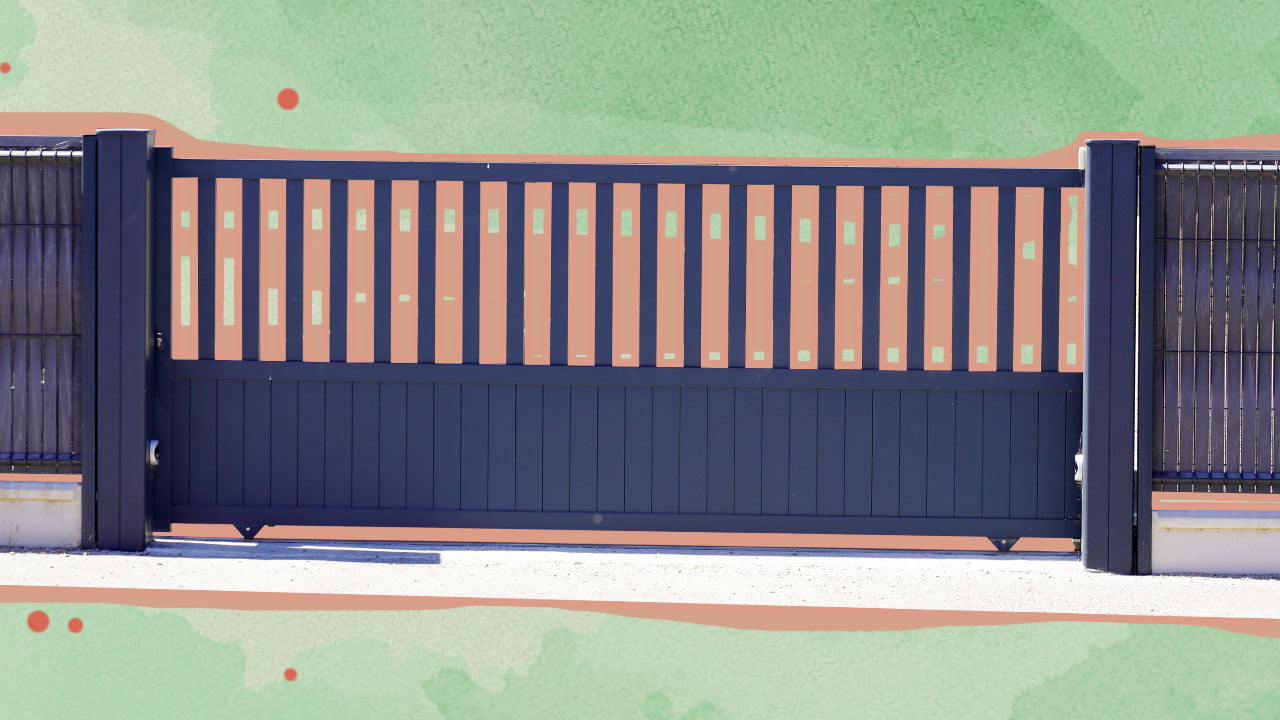


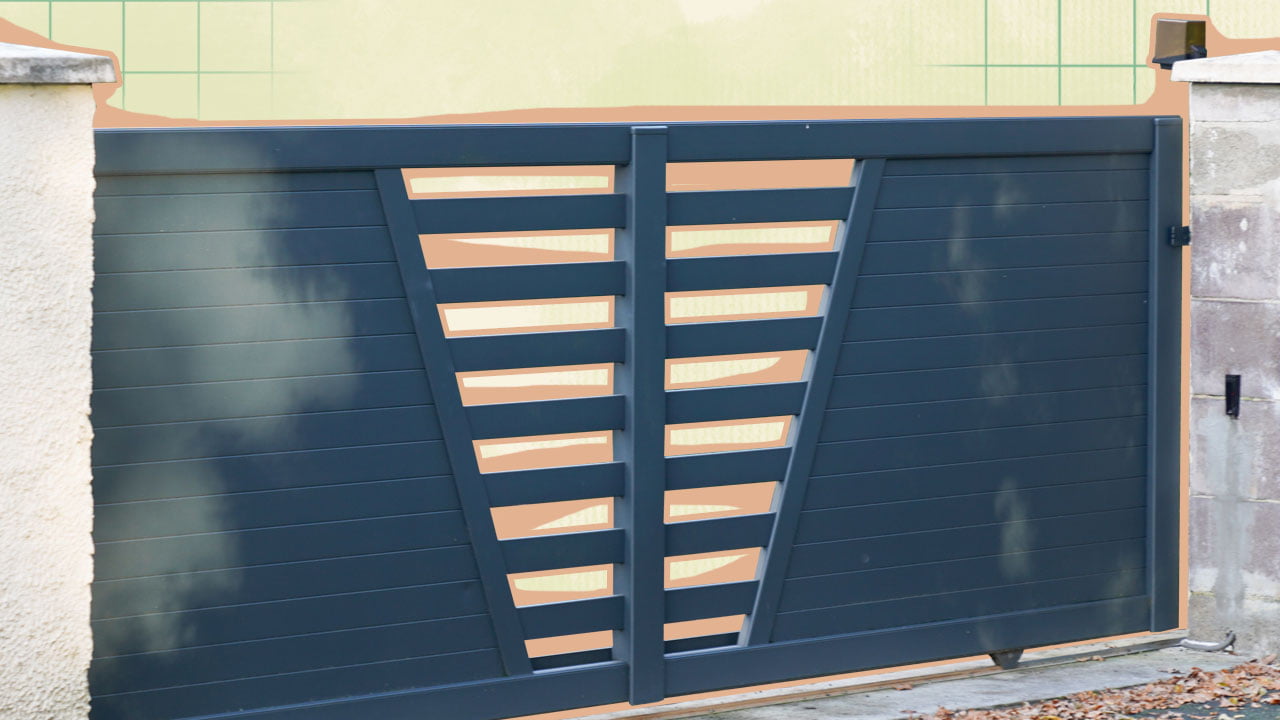

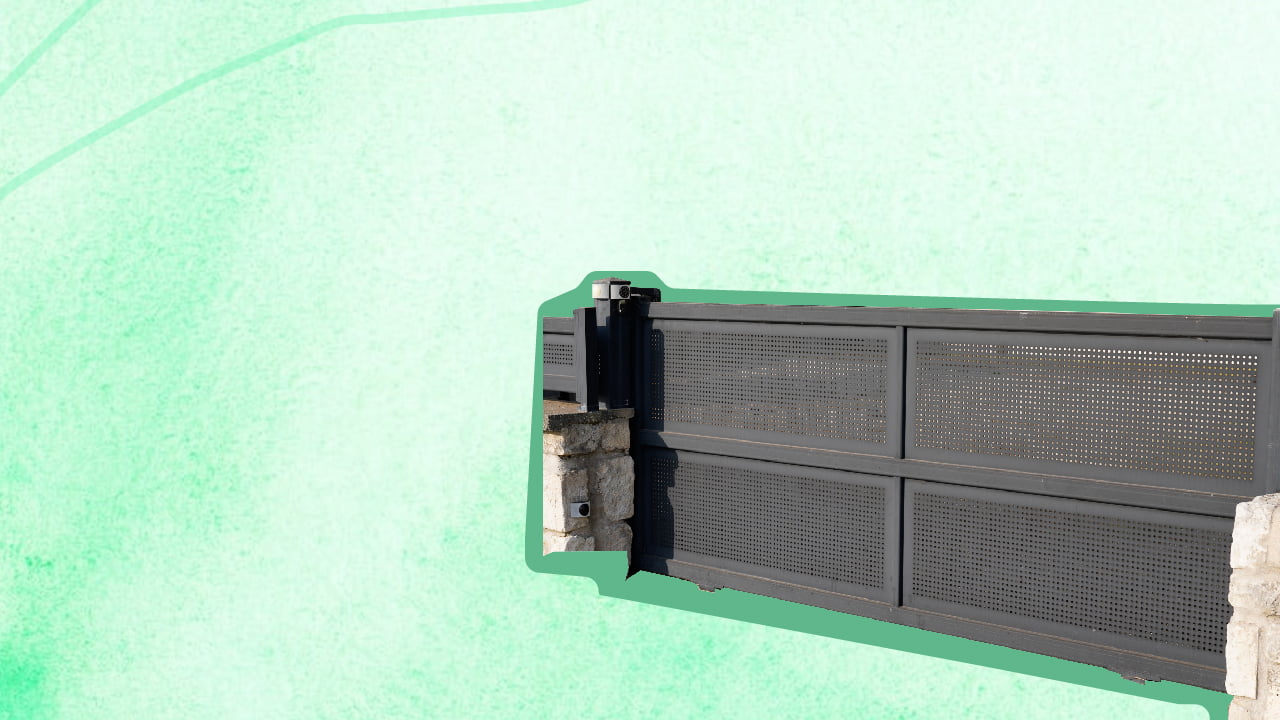


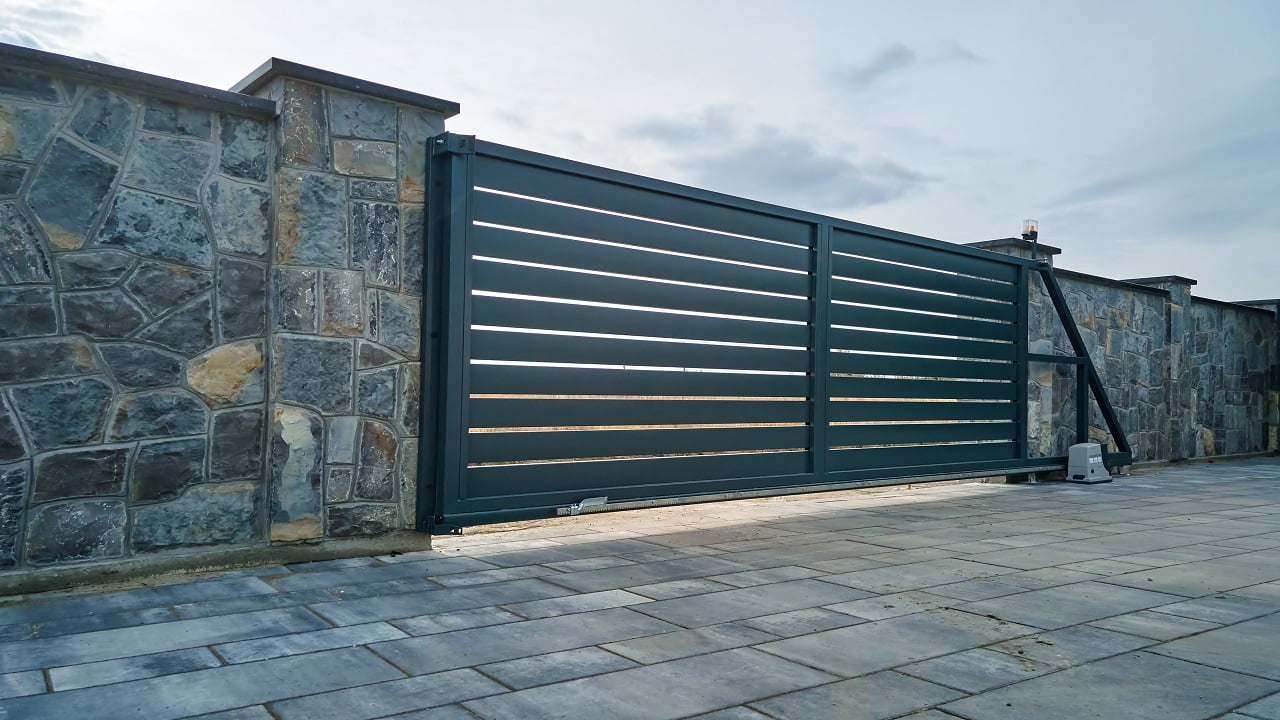


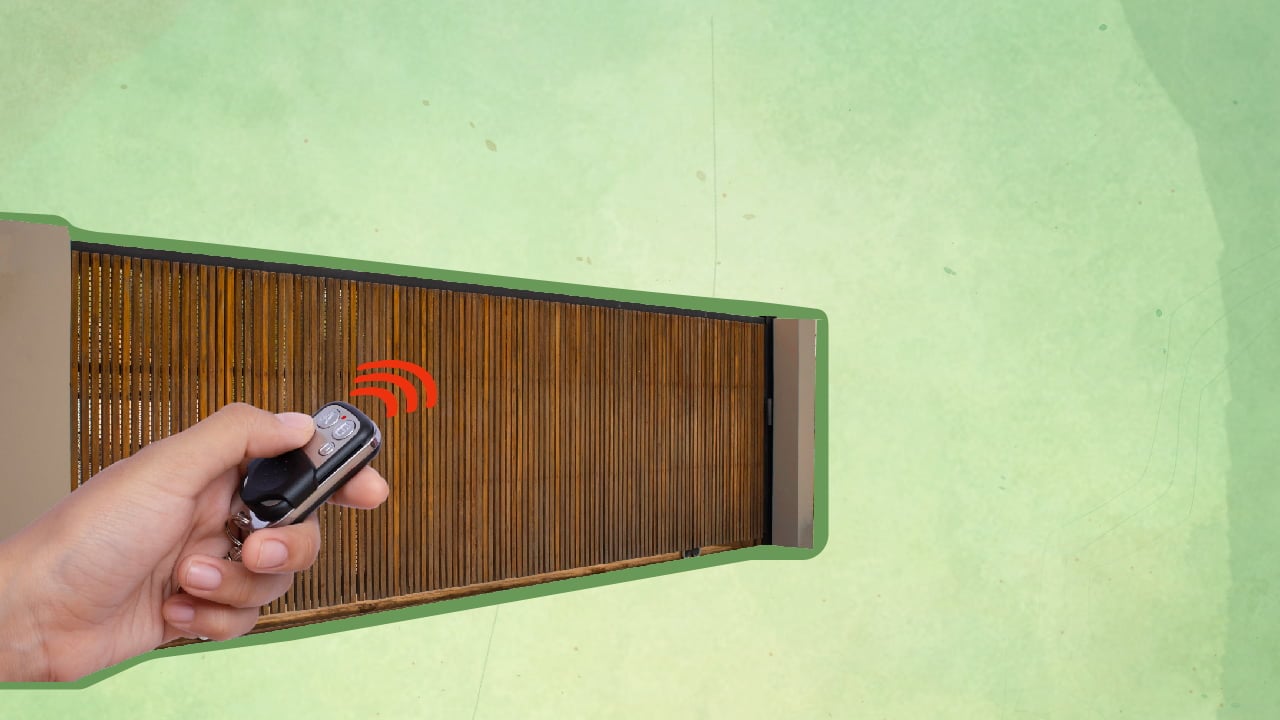


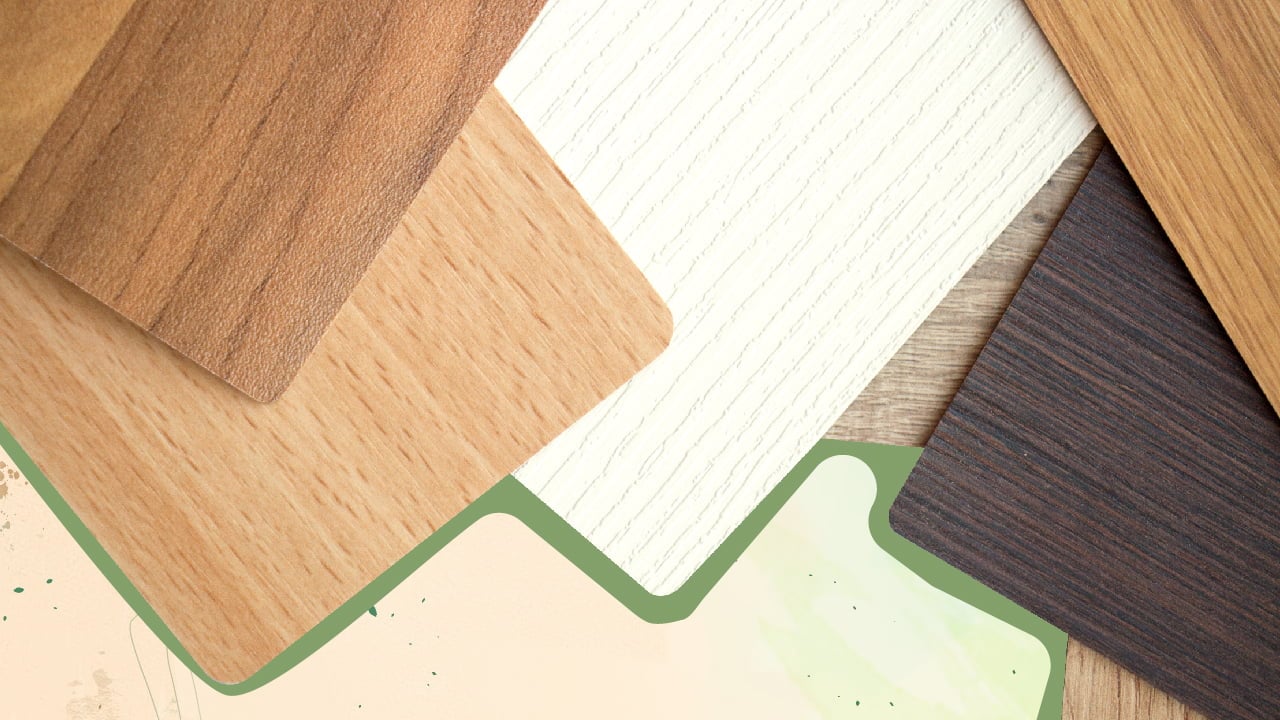

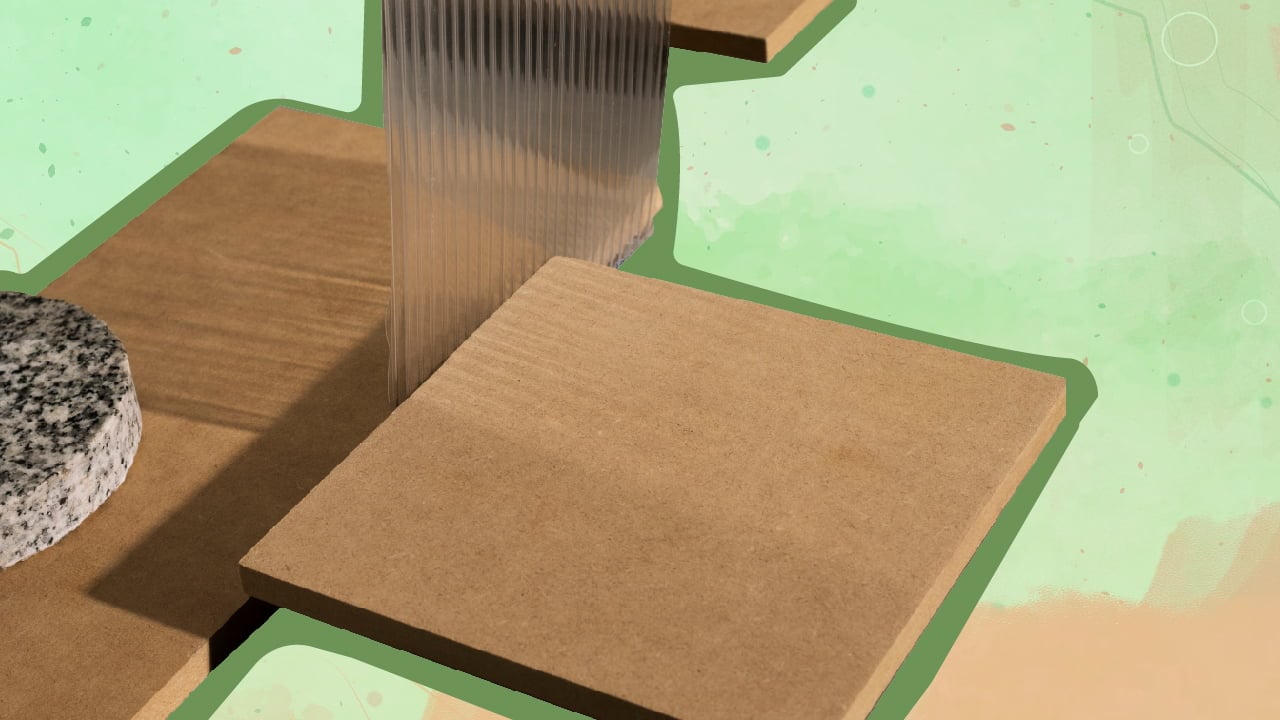


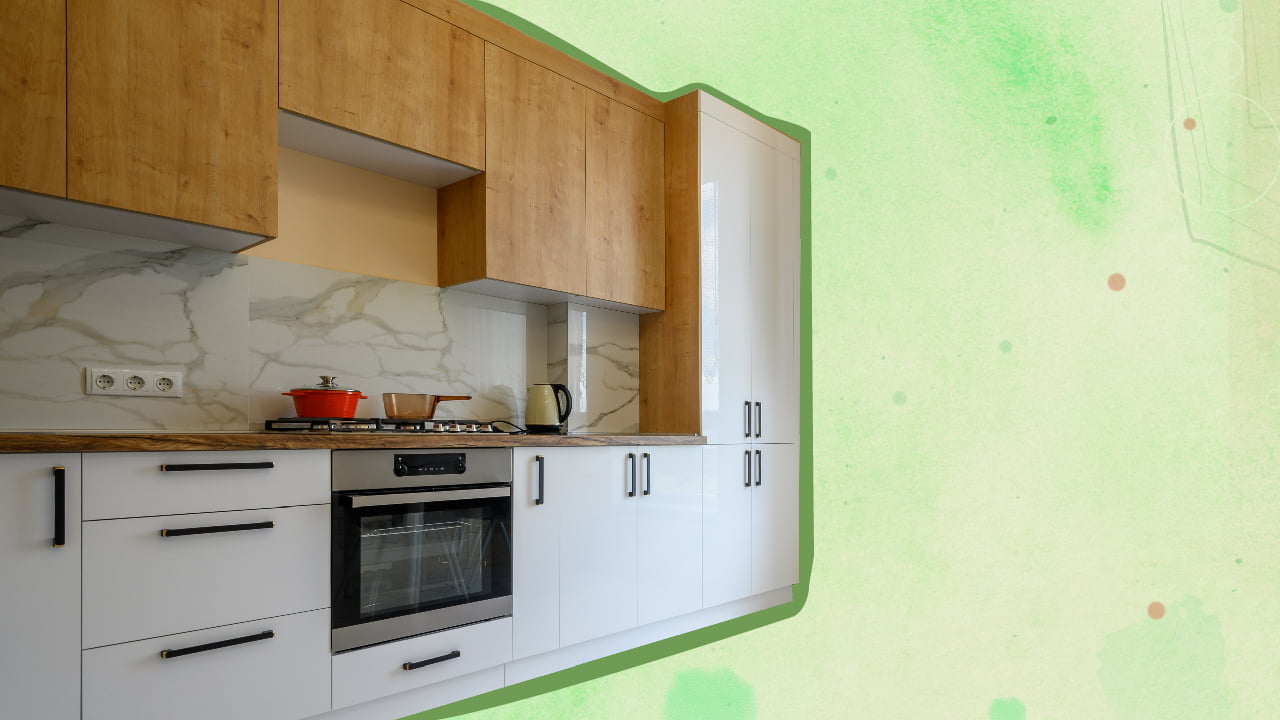


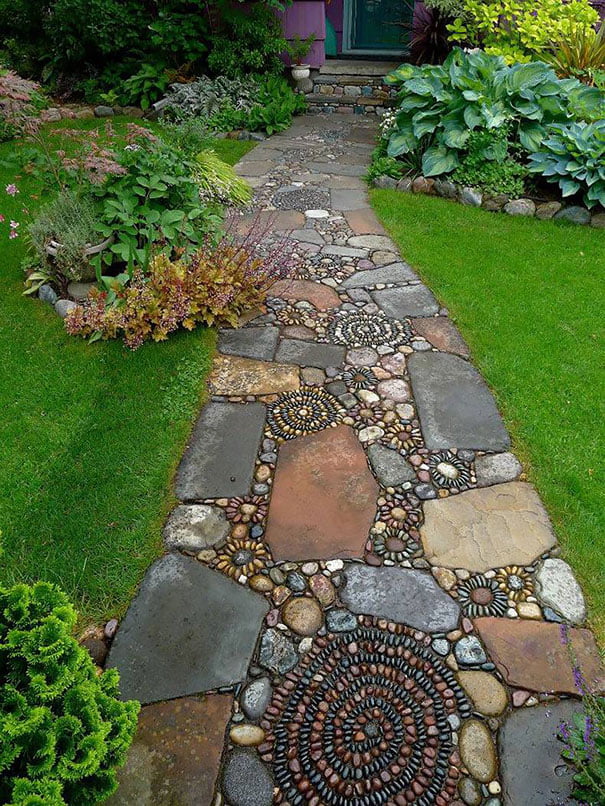
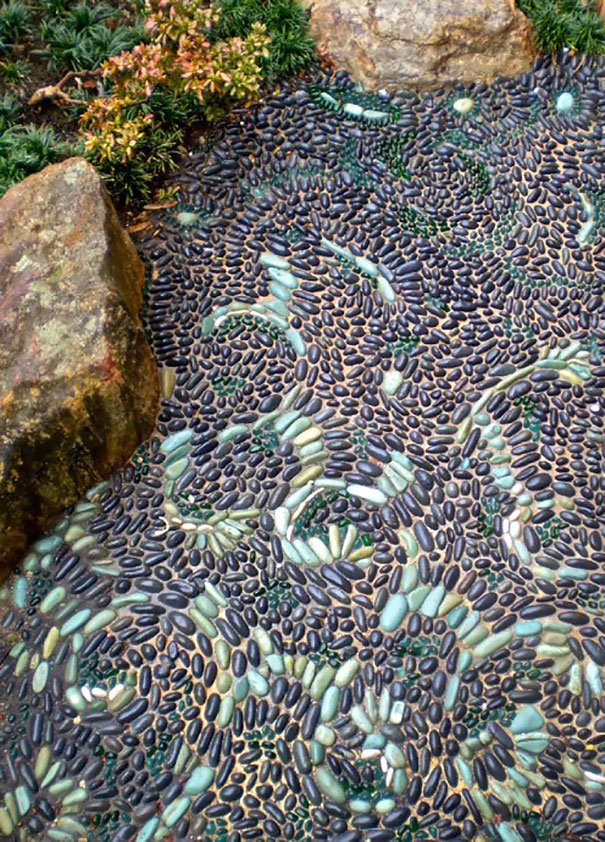
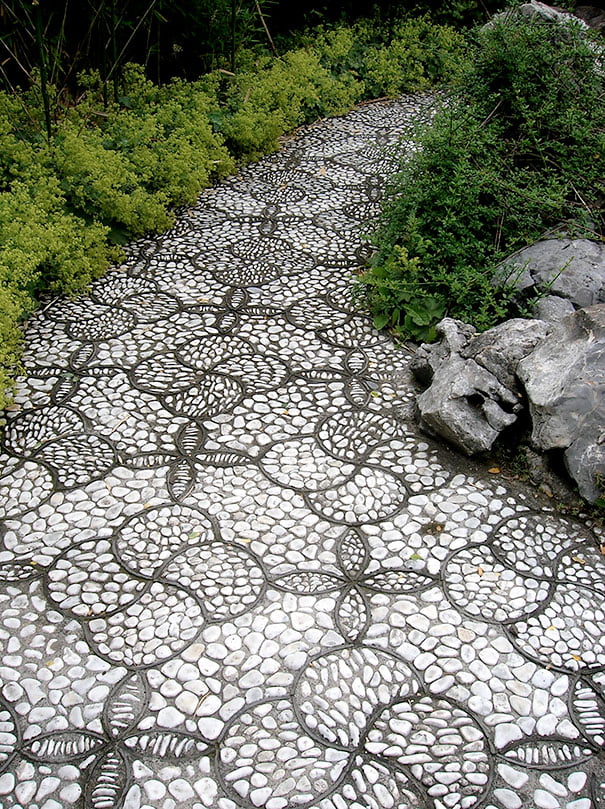
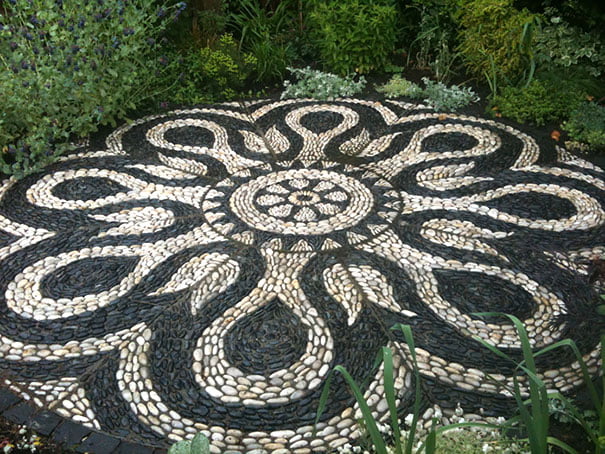


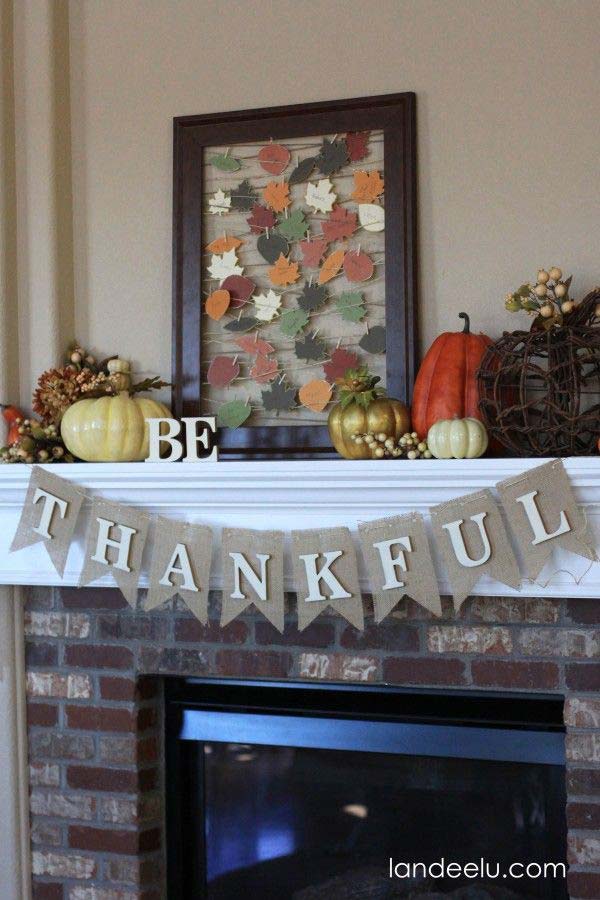
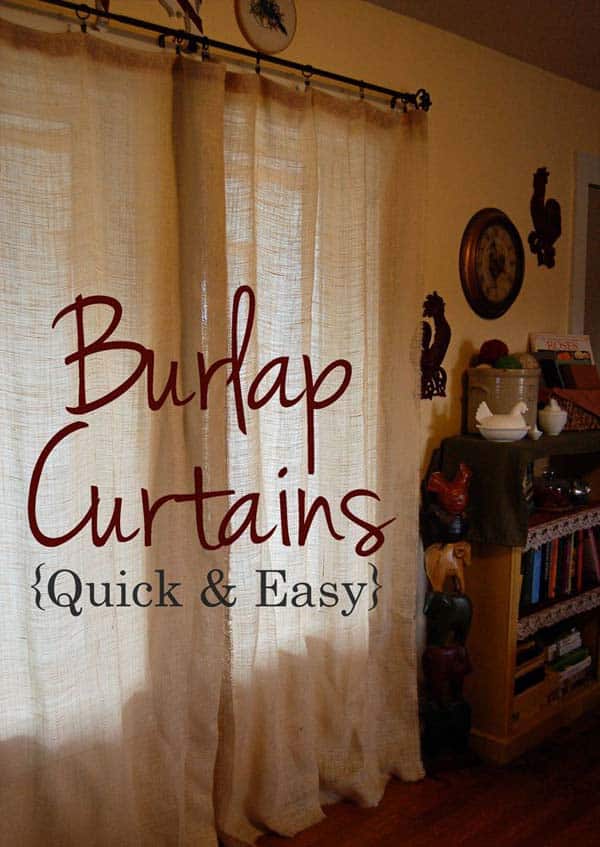
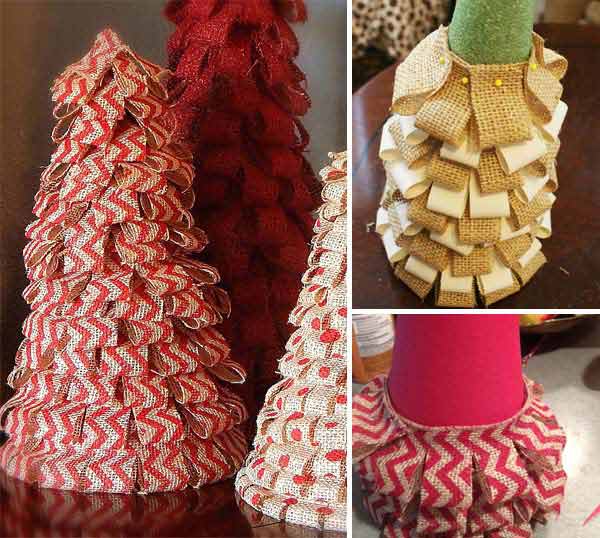
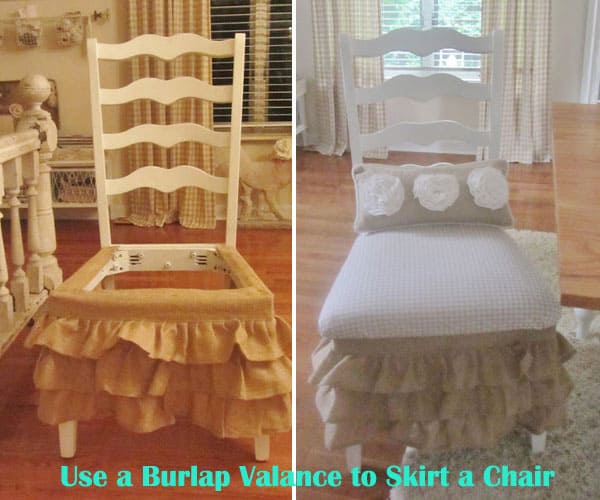


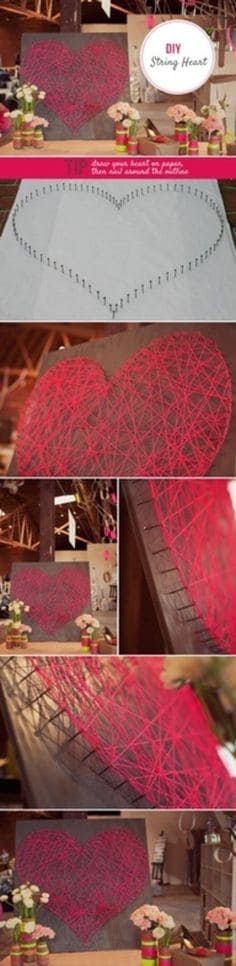
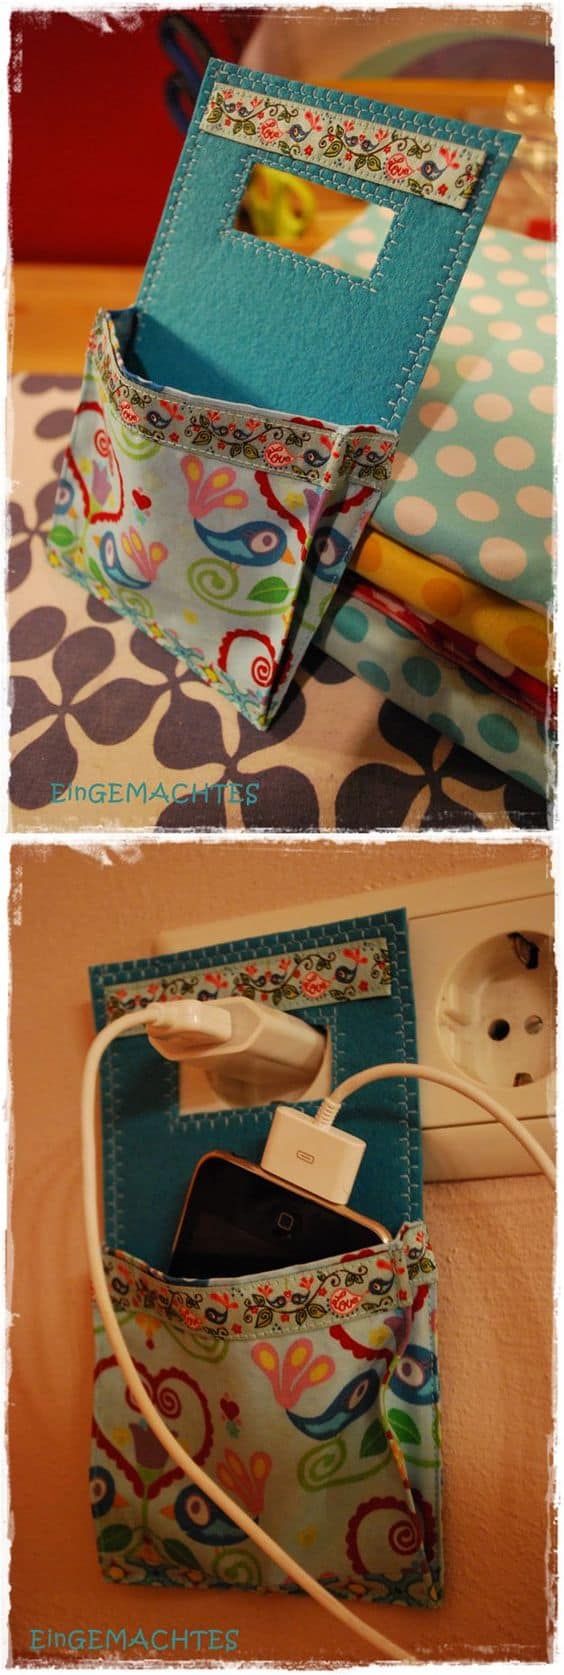


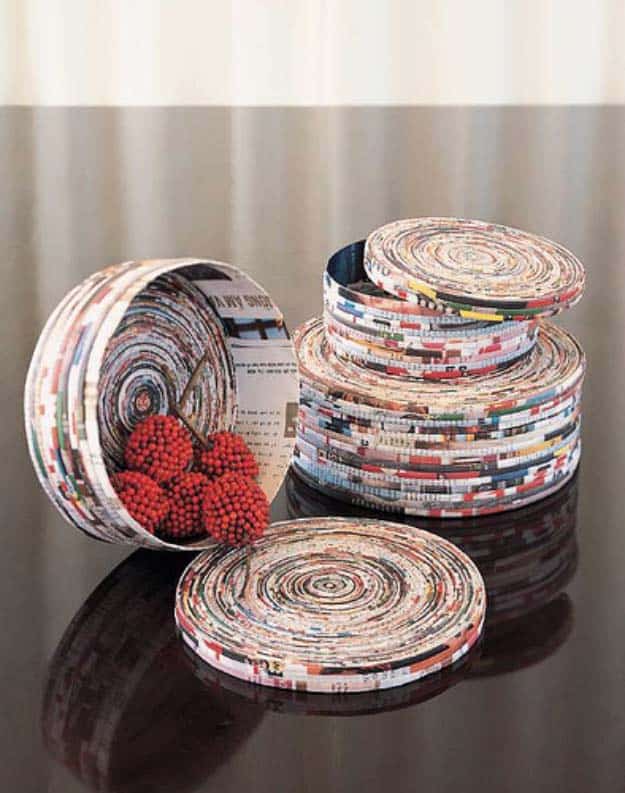

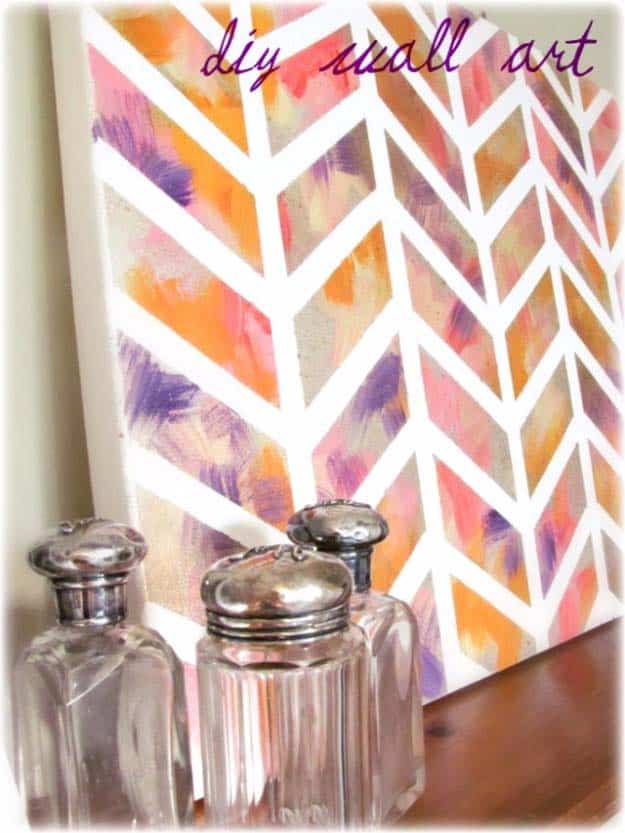


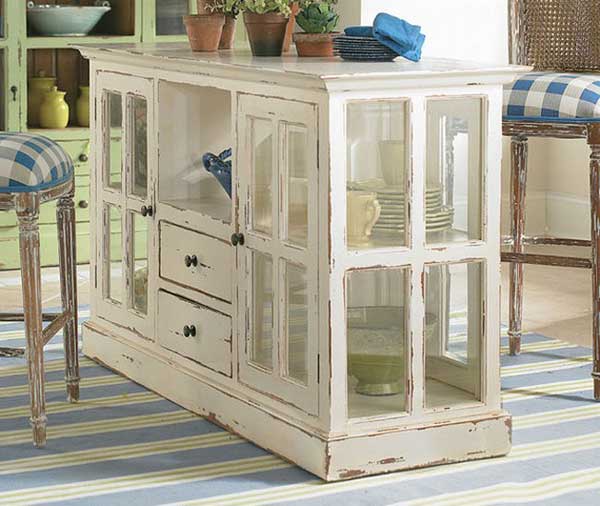

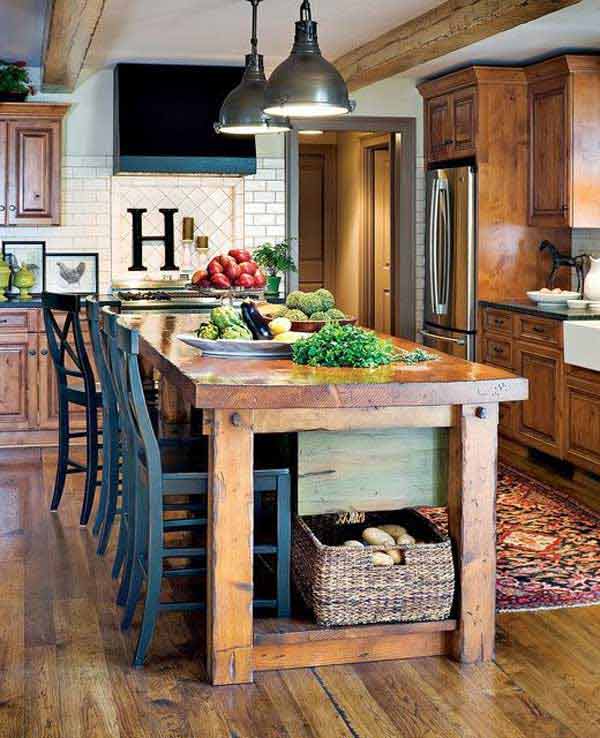
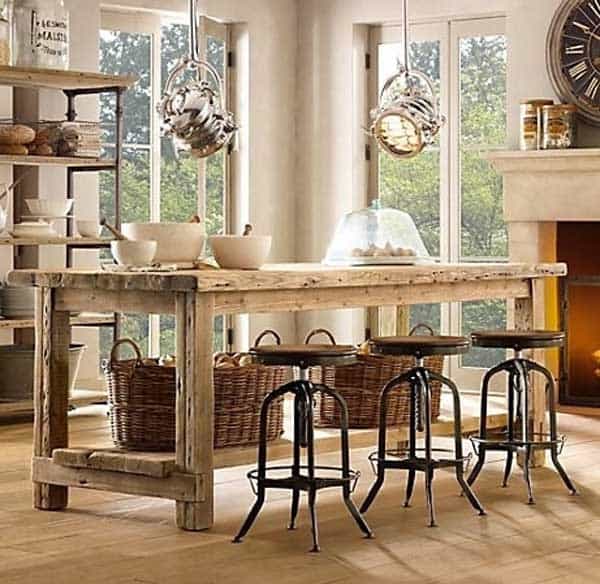
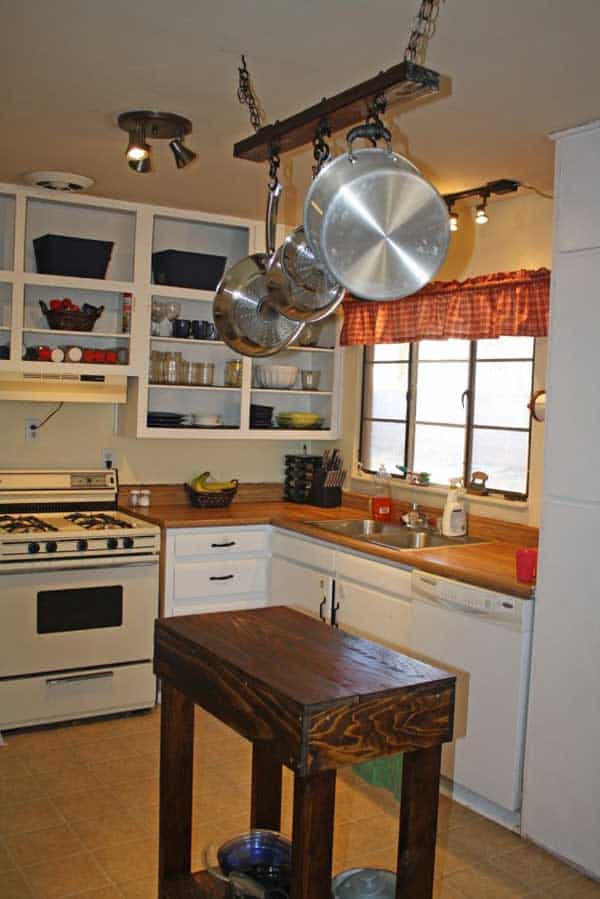
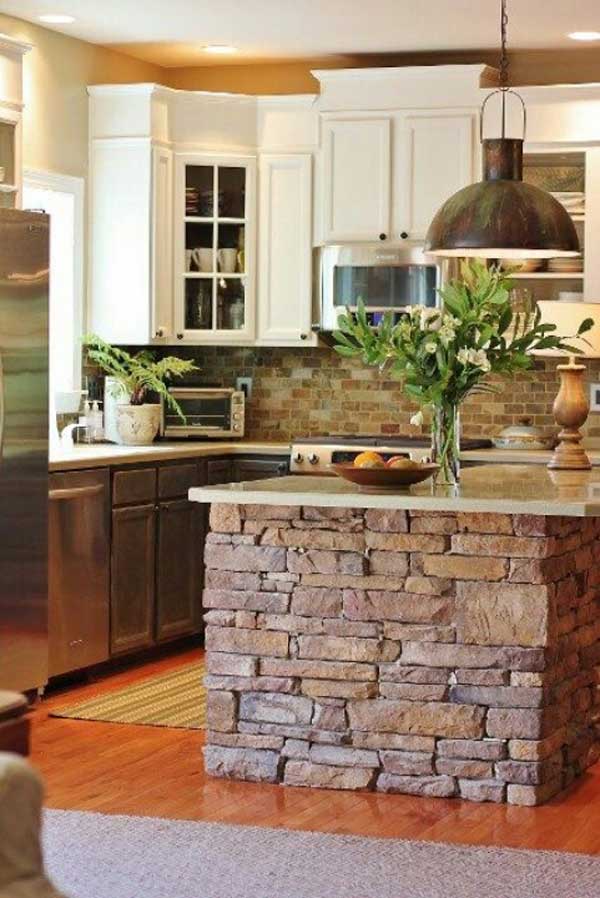
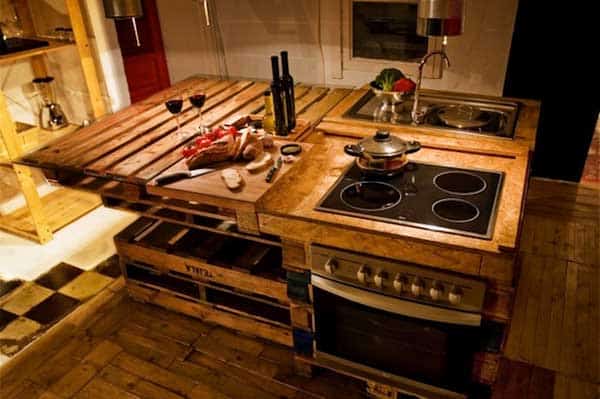
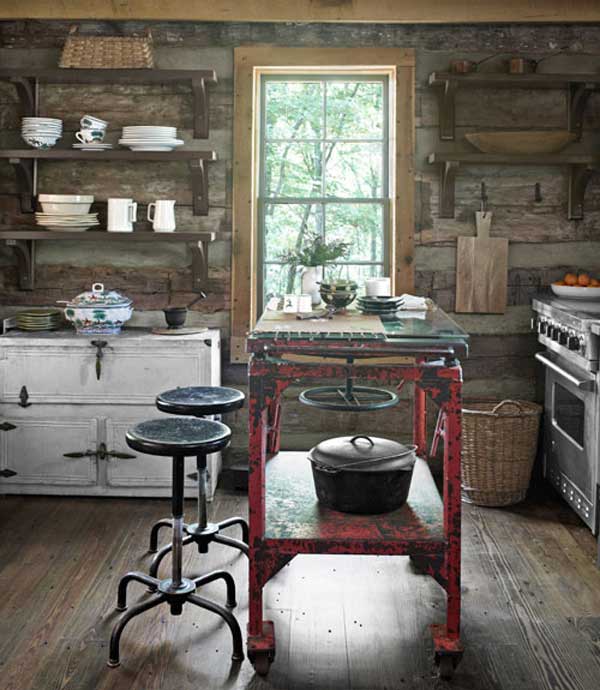

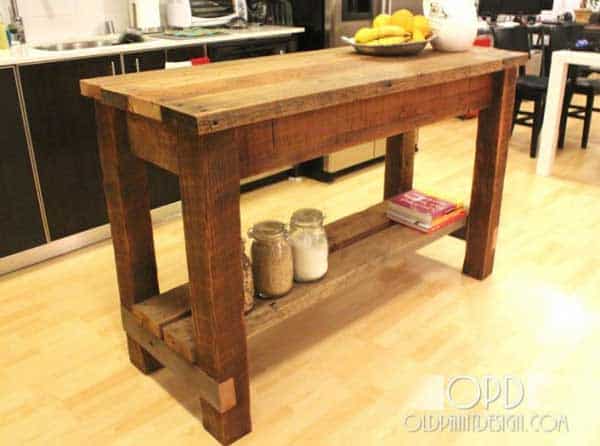

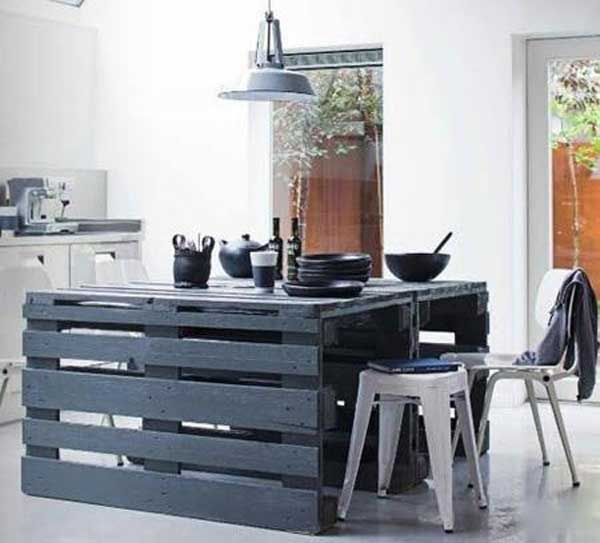
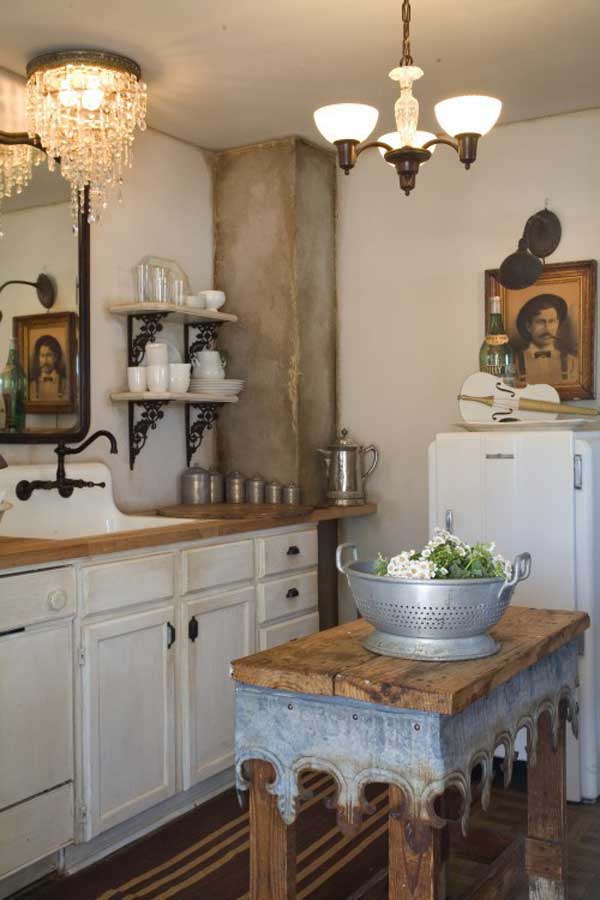
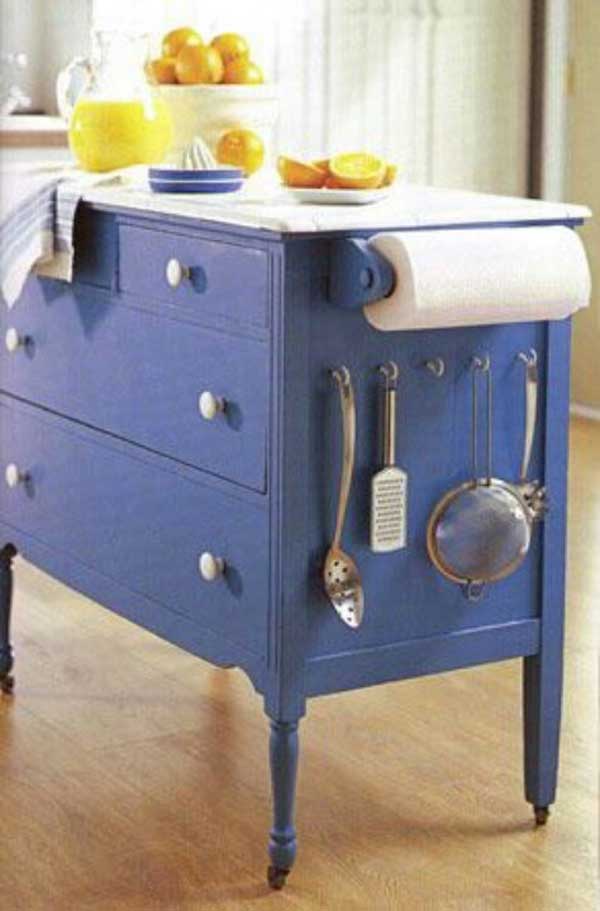
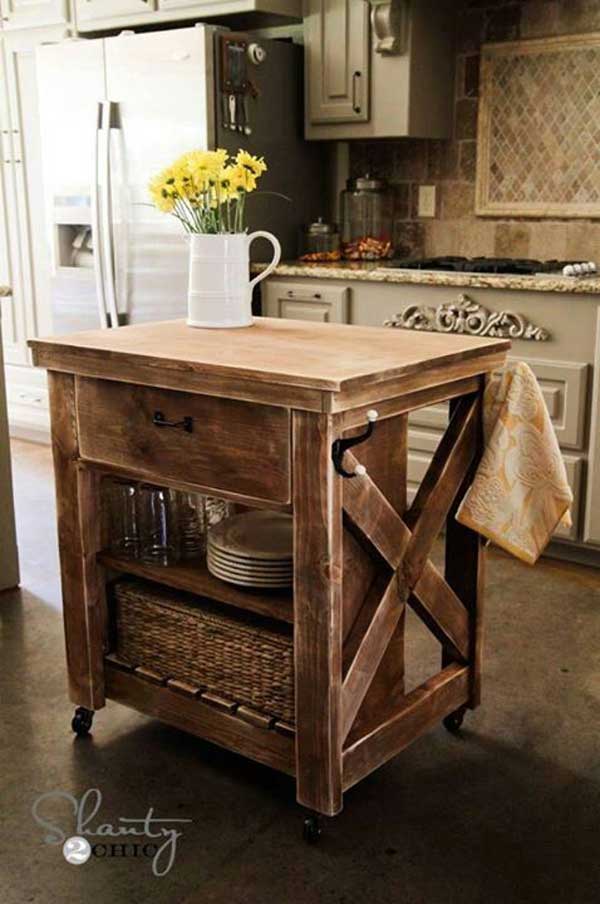
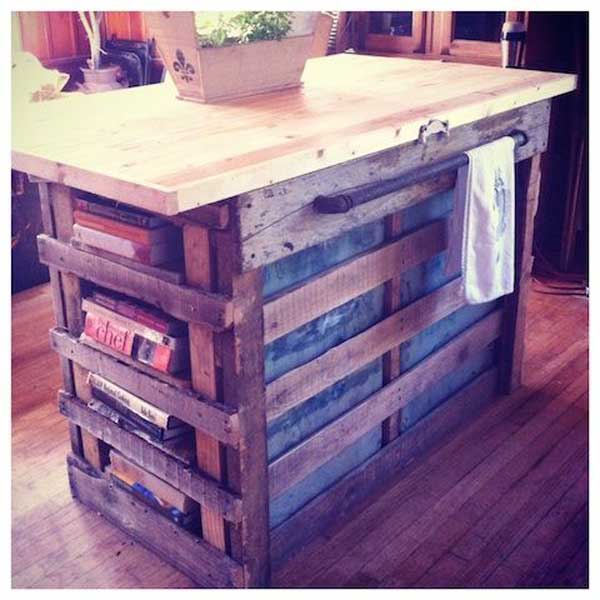

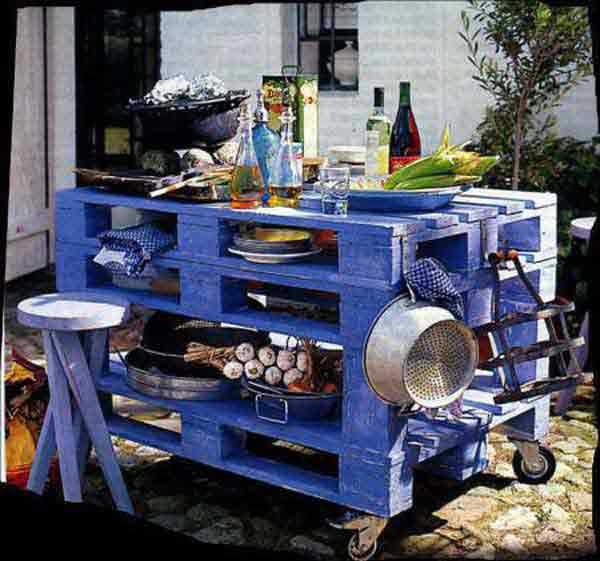
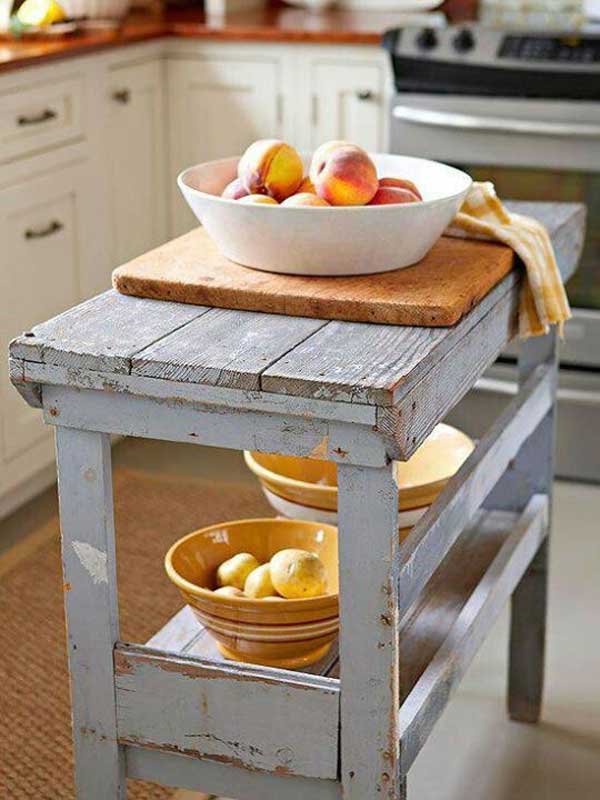
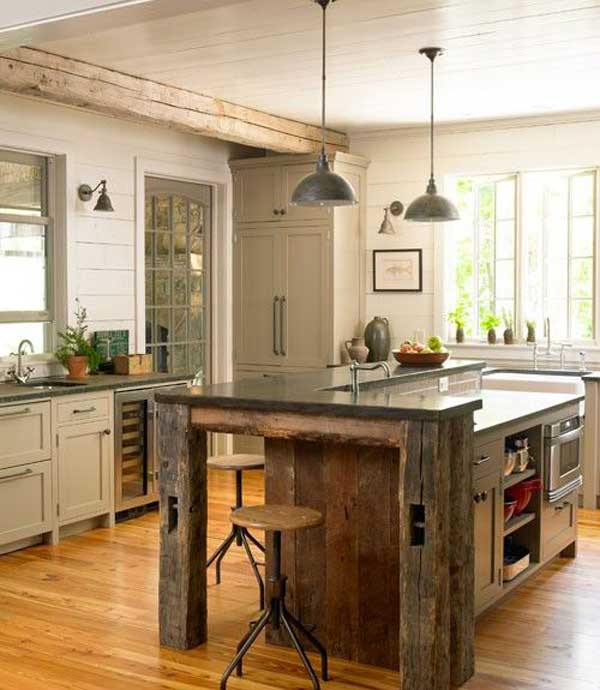


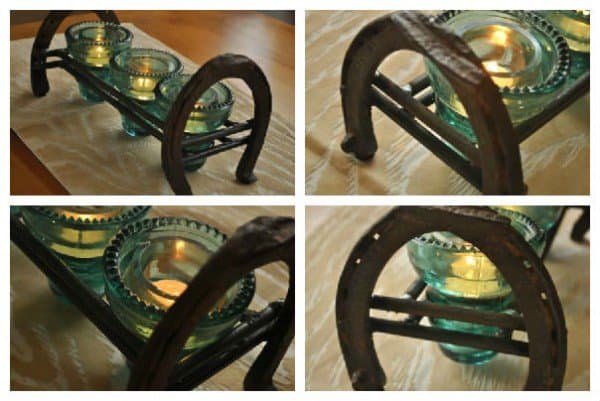
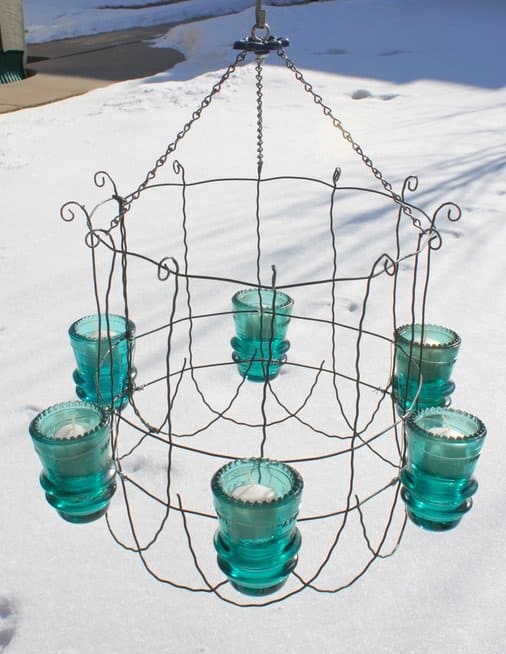
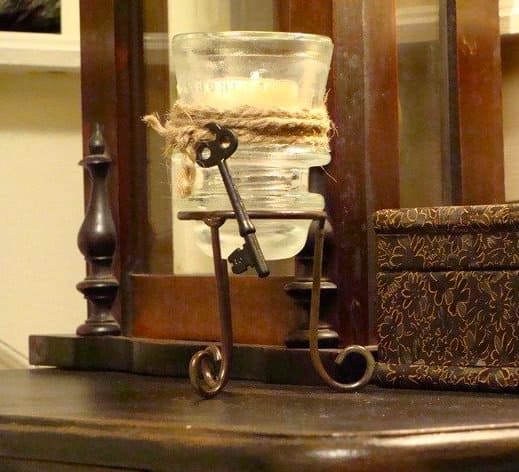
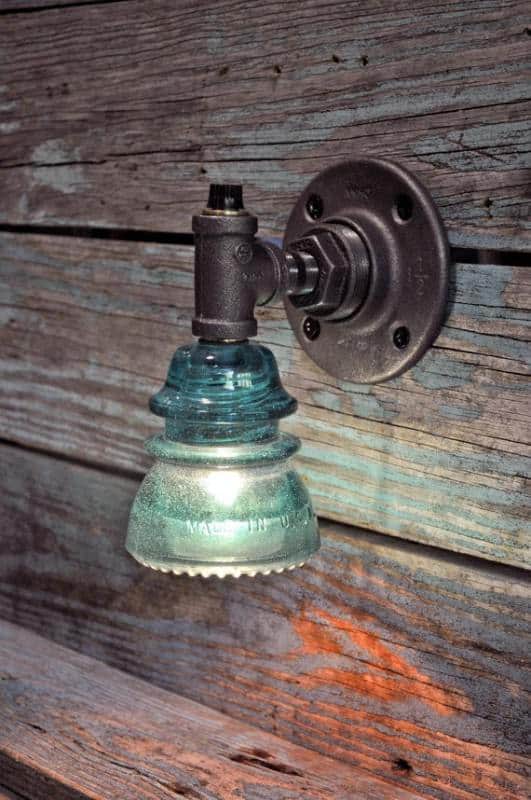


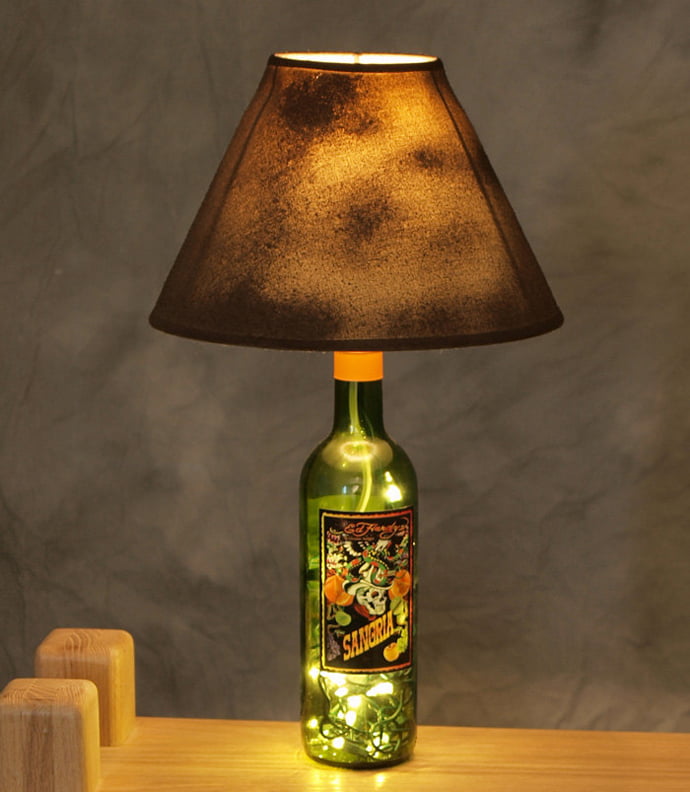
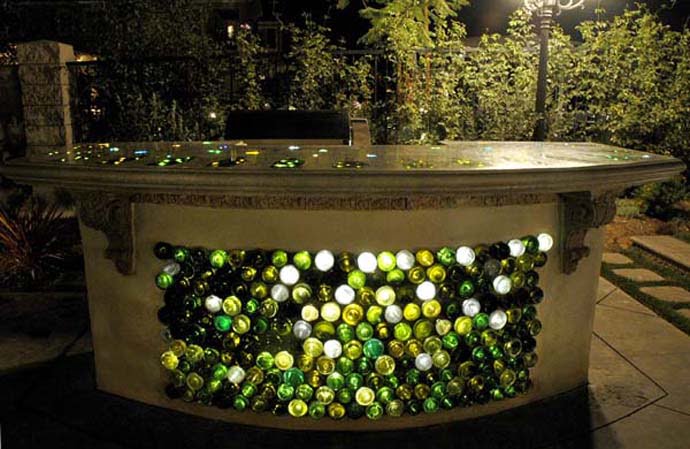
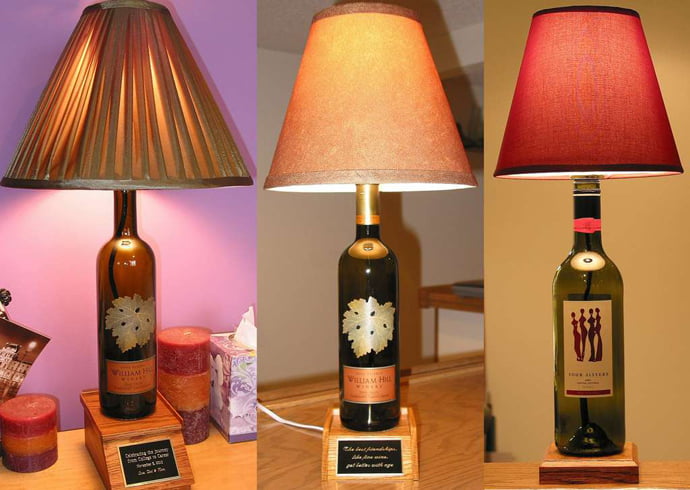

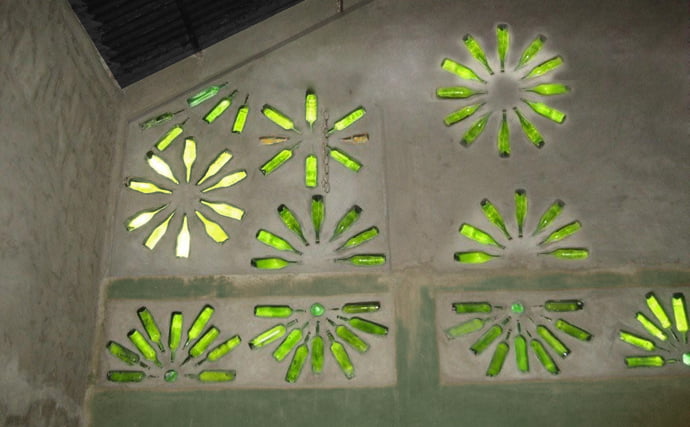


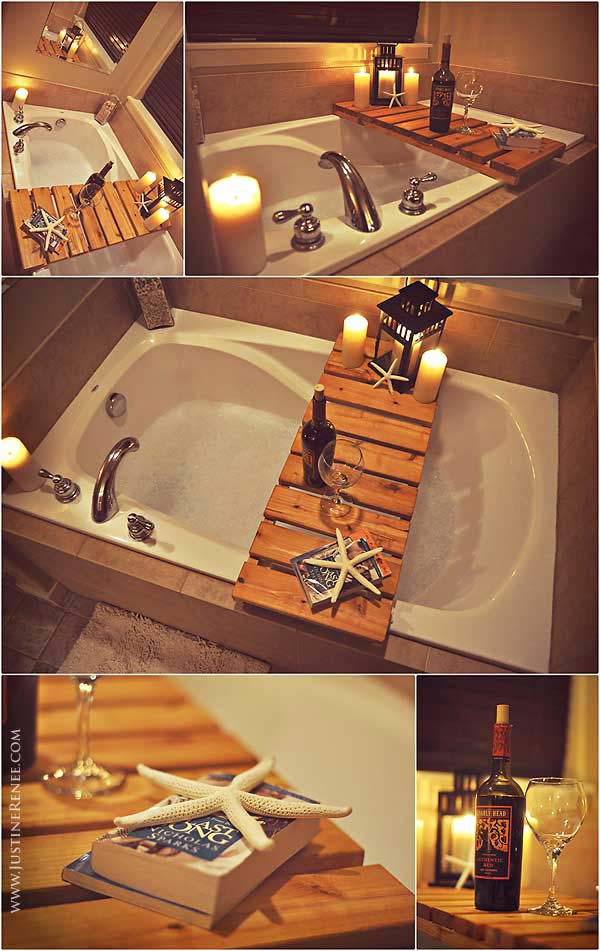
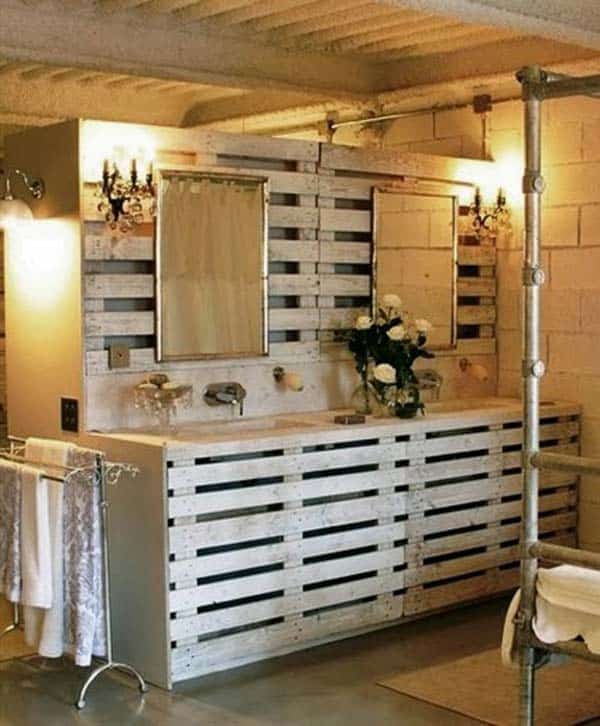
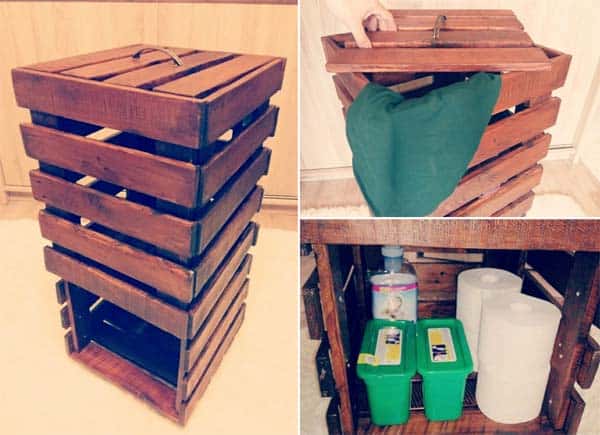
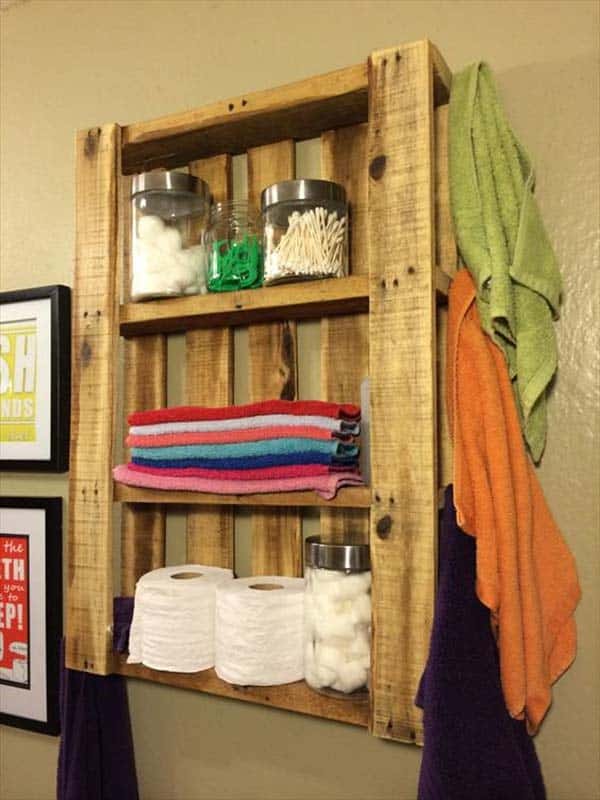
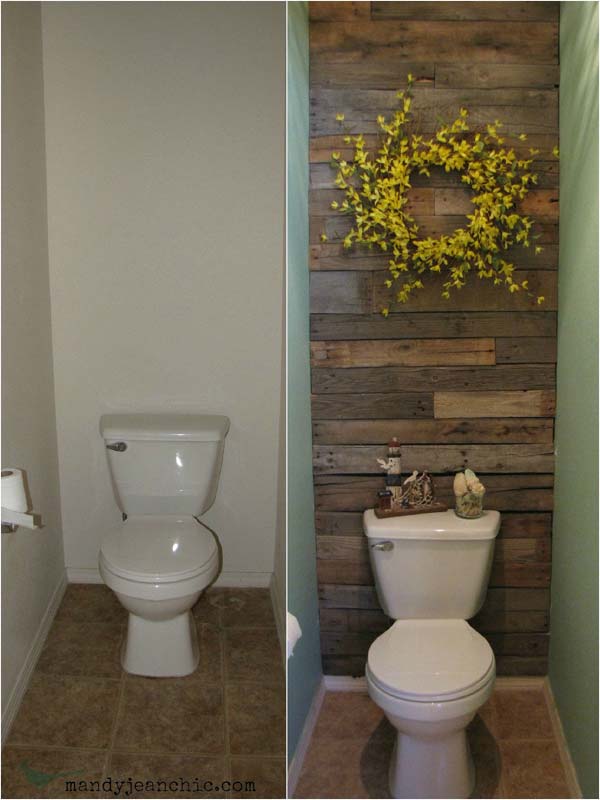
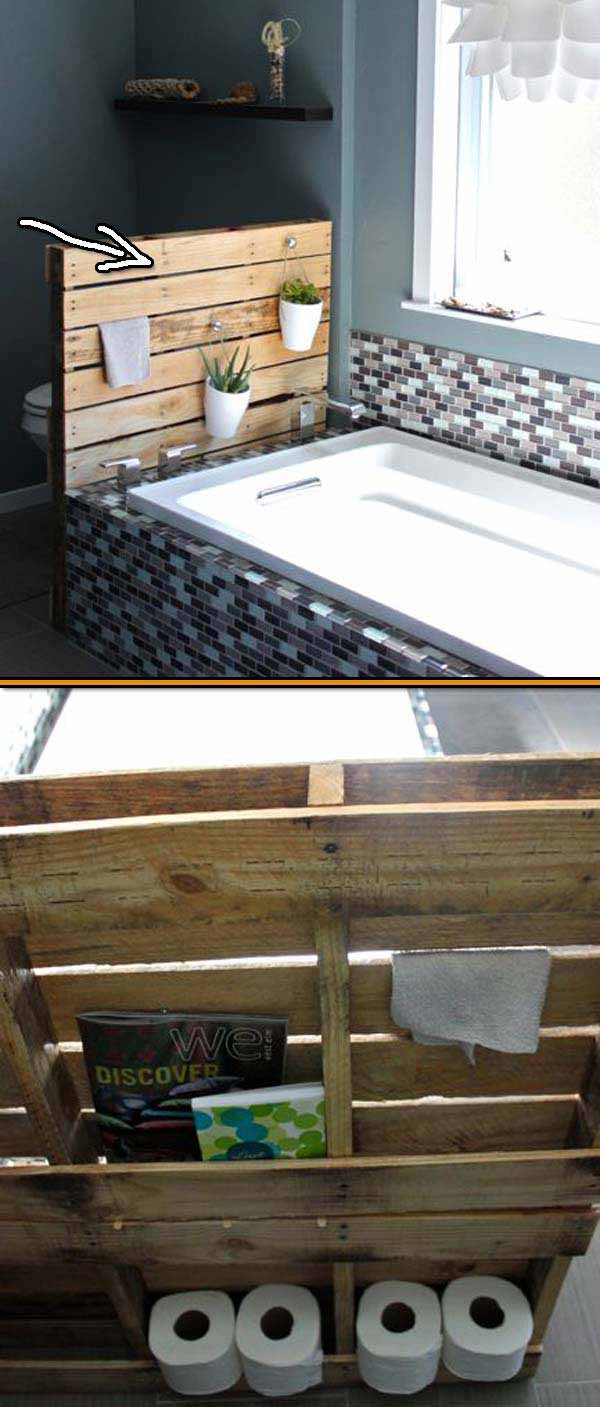
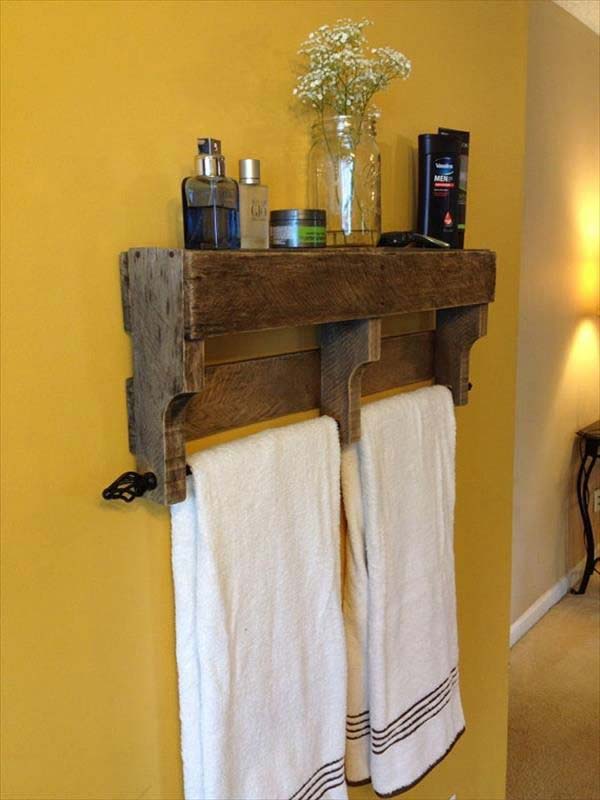
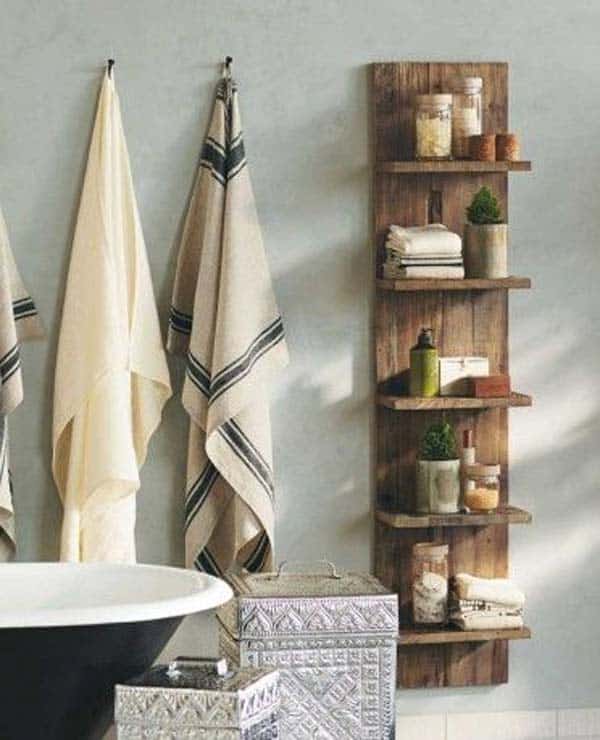


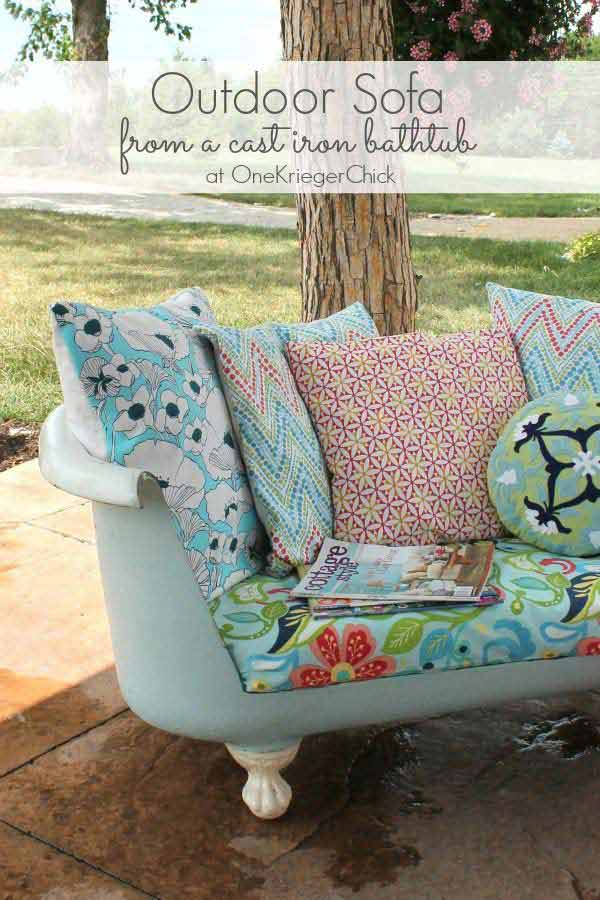
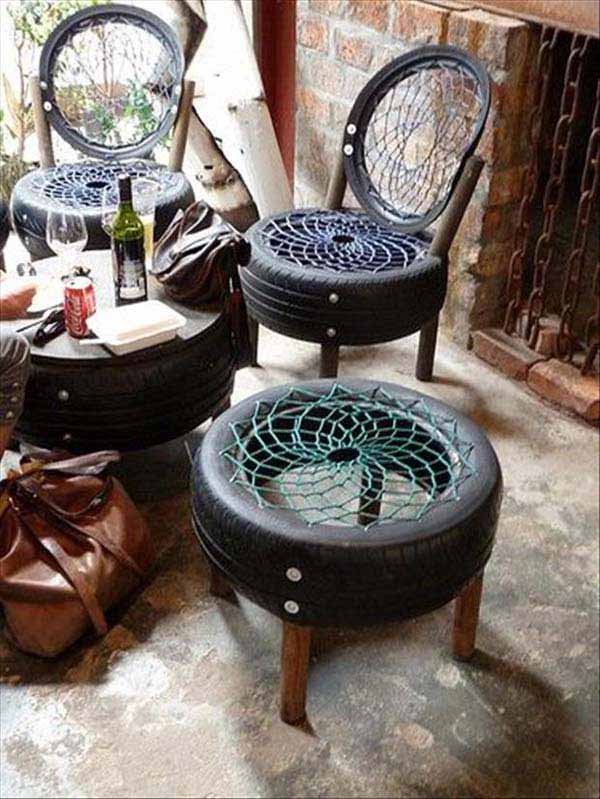
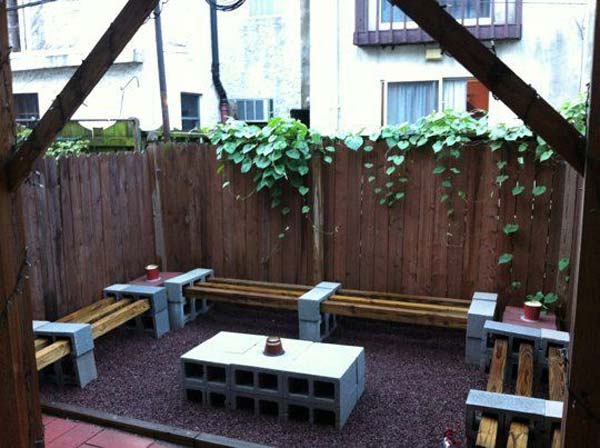
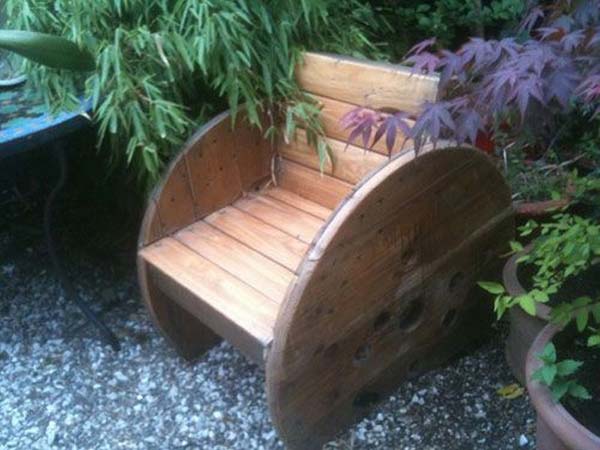
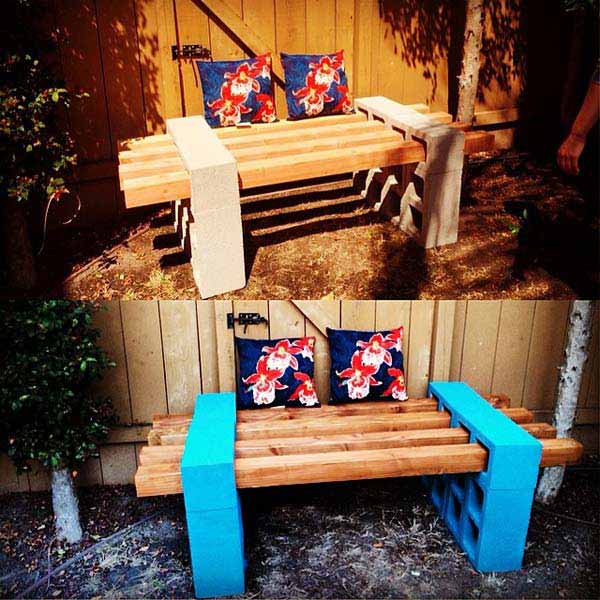
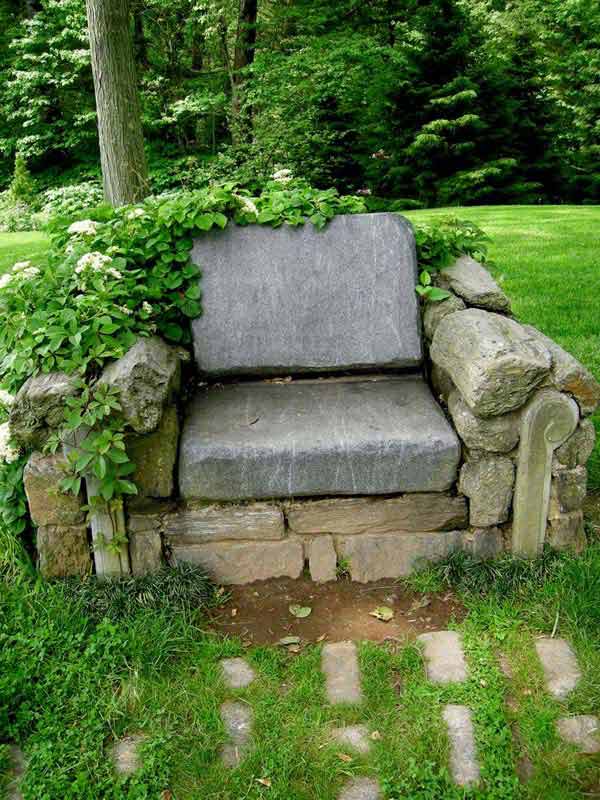
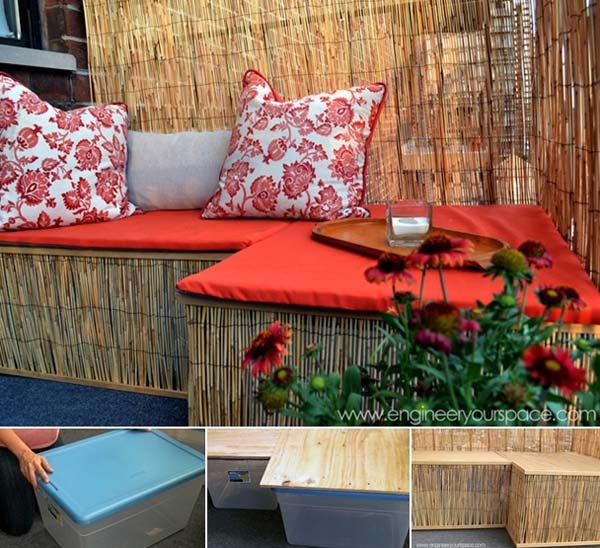

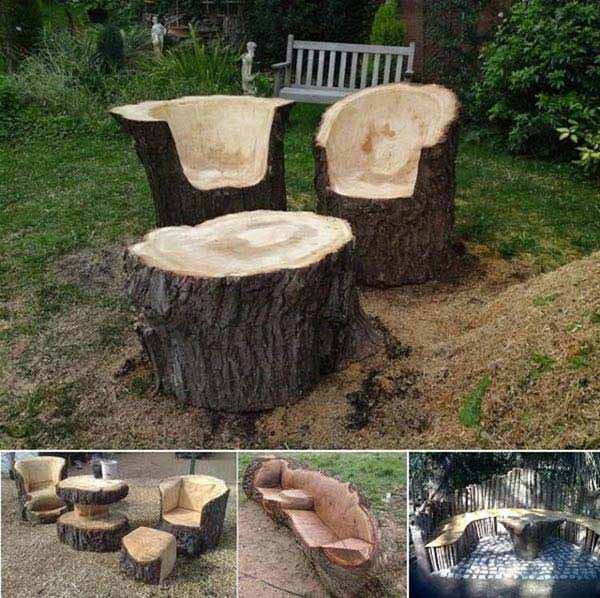


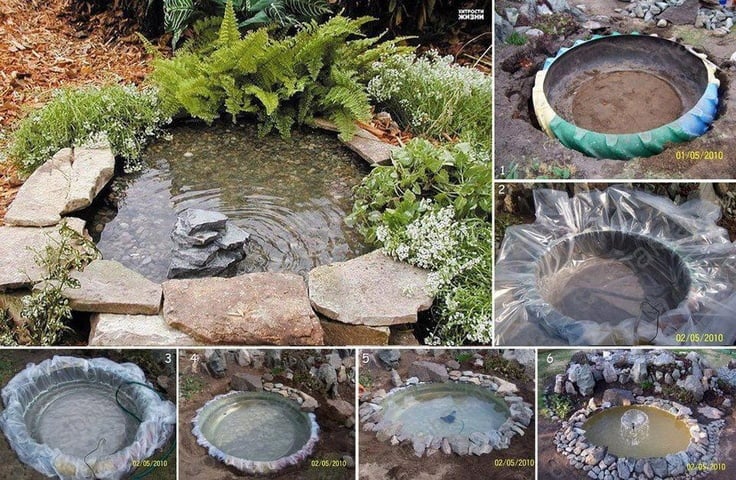


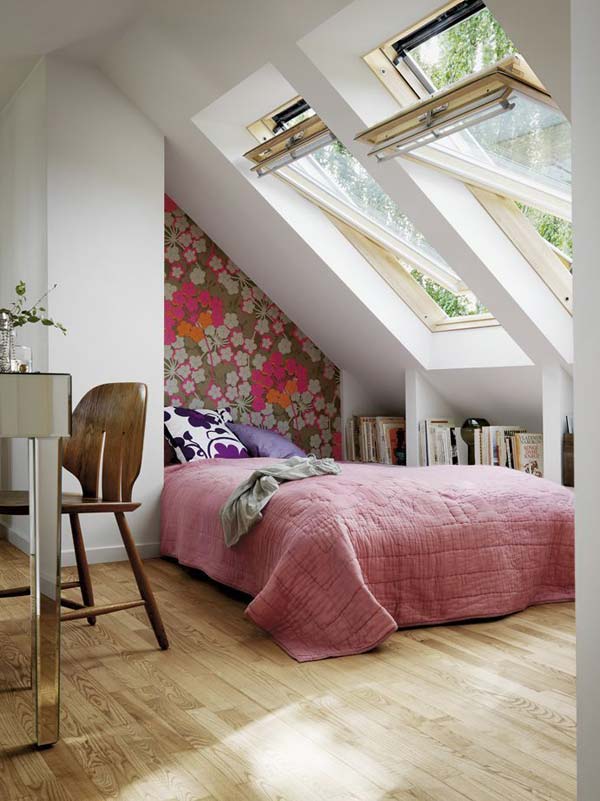
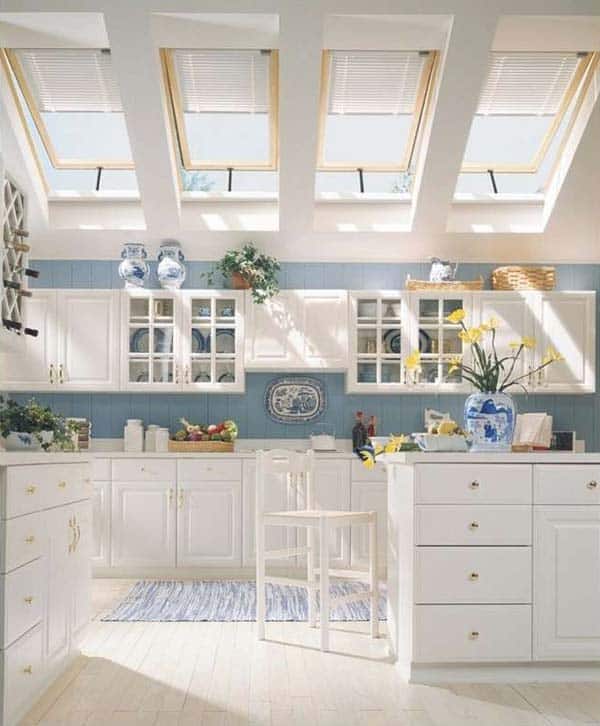
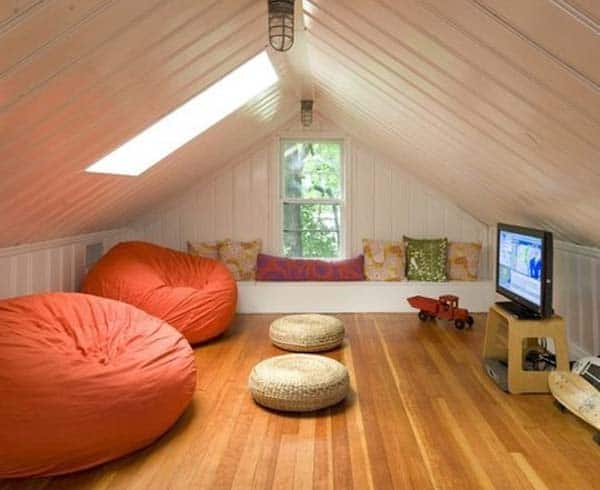

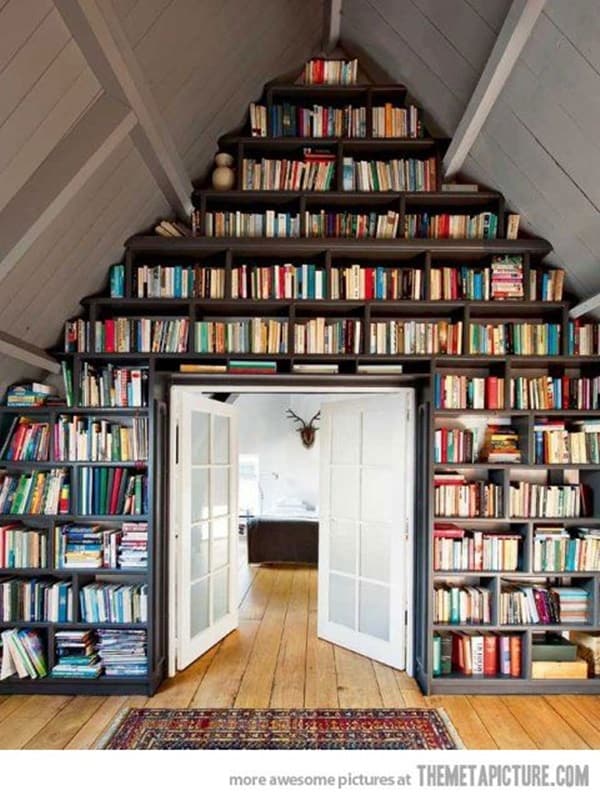


![21+ Small Garden Ideas That Will Beautify Your Green World [Backyard Aquariums Included]outdoor fish ponds homesthetics (2)](https://homesthetics.net/wp-content/uploads/2015/04/21-Small-Garden-Ideas-That-Will-Beautify-Your-Green-World-Backyard-Aquariums-Includedoutdoor-fish-ponds-homesthetics-2.jpg)
![21+ Small Garden Ideas That Will Beautify Your Green World [Backyard Aquariums Included]outdoor fish ponds homesthetics (1)](https://homesthetics.net/wp-content/uploads/2015/04/21-Small-Garden-Ideas-That-Will-Beautify-Your-Green-World-Backyard-Aquariums-Includedoutdoor-fish-ponds-homesthetics-1.jpg)
![21+ Small Garden Ideas That Will Beautify Your Green World [Backyard Aquariums Included]outdoor fish ponds homesthetics (3)](https://homesthetics.net/wp-content/uploads/2015/04/21-Small-Garden-Ideas-That-Will-Beautify-Your-Green-World-Backyard-Aquariums-Includedoutdoor-fish-ponds-homesthetics-3.jpg)
![21+ Small Garden Ideas That Will Beautify Your Green World [Backyard Aquariums Included]outdoor fish ponds homesthetics (4)](https://homesthetics.net/wp-content/uploads/2015/04/21-Small-Garden-Ideas-That-Will-Beautify-Your-Green-World-Backyard-Aquariums-Includedoutdoor-fish-ponds-homesthetics-4.jpg)
![21+ Small Garden Ideas That Will Beautify Your Green World [Backyard Aquariums Included]outdoor fish ponds homesthetics (5)](https://homesthetics.net/wp-content/uploads/2015/04/21-Small-Garden-Ideas-That-Will-Beautify-Your-Green-World-Backyard-Aquariums-Includedoutdoor-fish-ponds-homesthetics-5.jpg)
![21+ Small Garden Ideas That Will Beautify Your Green World [Backyard Aquariums Included]outdoor fish ponds homesthetics (6)](https://homesthetics.net/wp-content/uploads/2015/04/21-Small-Garden-Ideas-That-Will-Beautify-Your-Green-World-Backyard-Aquariums-Includedoutdoor-fish-ponds-homesthetics-6.jpg)
![21+ Small Garden Ideas That Will Beautify Your Green World [Backyard Aquariums Included]outdoor fish ponds homesthetics (7)](https://homesthetics.net/wp-content/uploads/2015/04/21-Small-Garden-Ideas-That-Will-Beautify-Your-Green-World-Backyard-Aquariums-Includedoutdoor-fish-ponds-homesthetics-7.jpg)
![21+ Small Garden Ideas That Will Beautify Your Green World [Backyard Aquariums Included]outdoor fish ponds homesthetics (8)](https://homesthetics.net/wp-content/uploads/2015/04/21-Small-Garden-Ideas-That-Will-Beautify-Your-Green-World-Backyard-Aquariums-Includedoutdoor-fish-ponds-homesthetics-8.jpg)
![21+ Small Garden Ideas That Will Beautify Your Green World [Backyard Aquariums Included]outdoor fish ponds homesthetics (9)](https://homesthetics.net/wp-content/uploads/2015/04/21-Small-Garden-Ideas-That-Will-Beautify-Your-Green-World-Backyard-Aquariums-Includedoutdoor-fish-ponds-homesthetics-9.jpg)
![21+ Small Garden Ideas That Will Beautify Your Green World [Backyard Aquariums Included]outdoor fish ponds homesthetics (10)](https://homesthetics.net/wp-content/uploads/2015/04/21-Small-Garden-Ideas-That-Will-Beautify-Your-Green-World-Backyard-Aquariums-Includedoutdoor-fish-ponds-homesthetics-10.jpg)
![21+ Small Garden Ideas That Will Beautify Your Green World [Backyard Aquariums Included]outdoor fish ponds homesthetics (15)](https://homesthetics.net/wp-content/uploads/2015/04/21-Small-Garden-Ideas-That-Will-Beautify-Your-Green-World-Backyard-Aquariums-Includedoutdoor-fish-ponds-homesthetics-15.jpg)

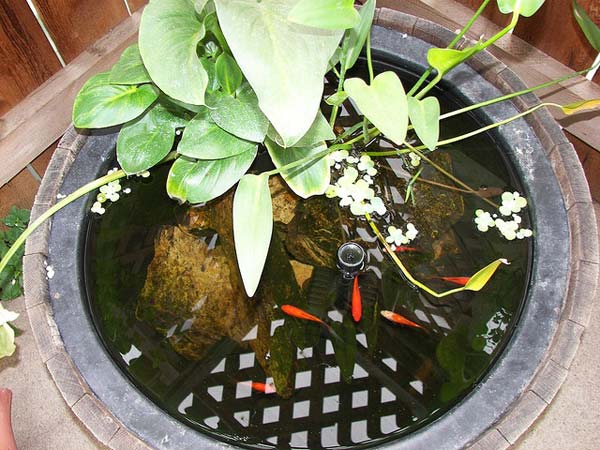

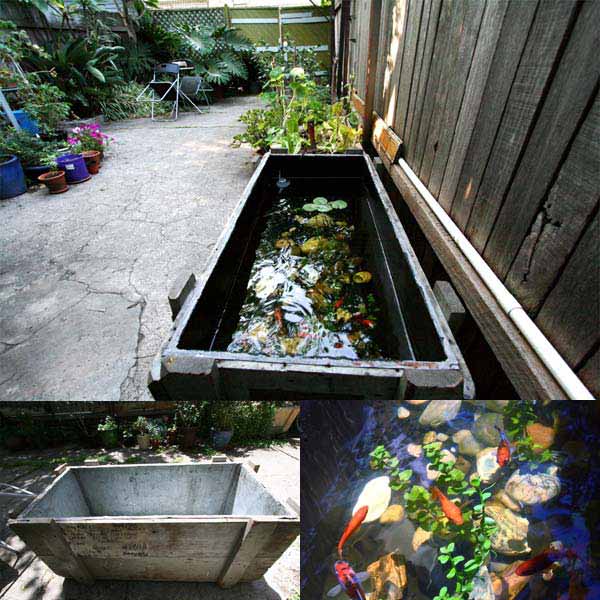
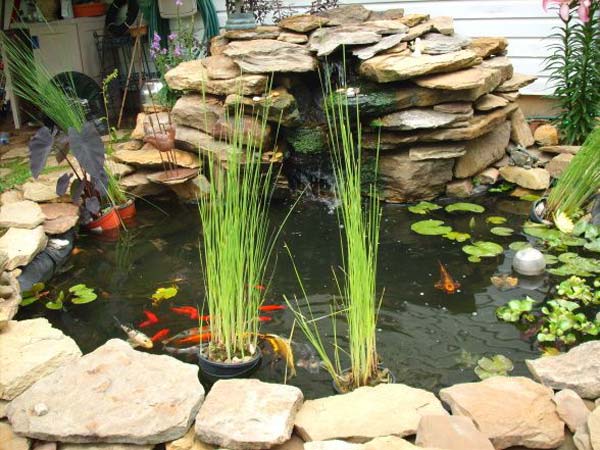
![21+ Small Garden Ideas That Will Beautify Your Green World [Backyard Aquariums Included]outdoor fish ponds homesthetics (22)](https://homesthetics.net/wp-content/uploads/2015/04/21-Small-Garden-Ideas-That-Will-Beautify-Your-Green-World-Backyard-Aquariums-Includedoutdoor-fish-ponds-homesthetics-22.jpg)

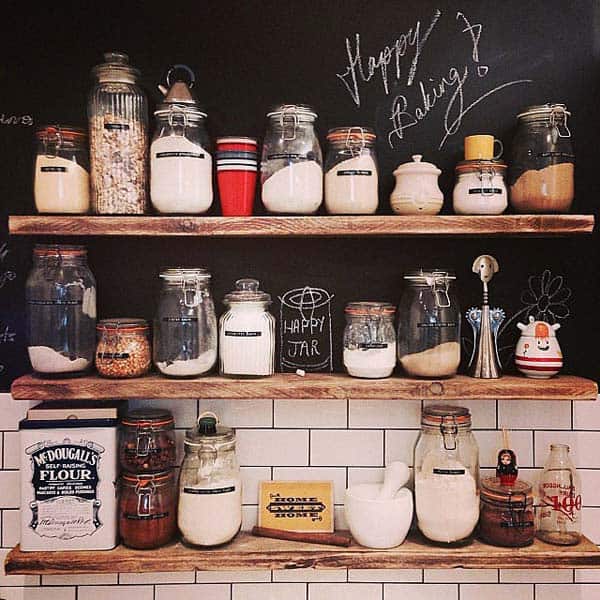
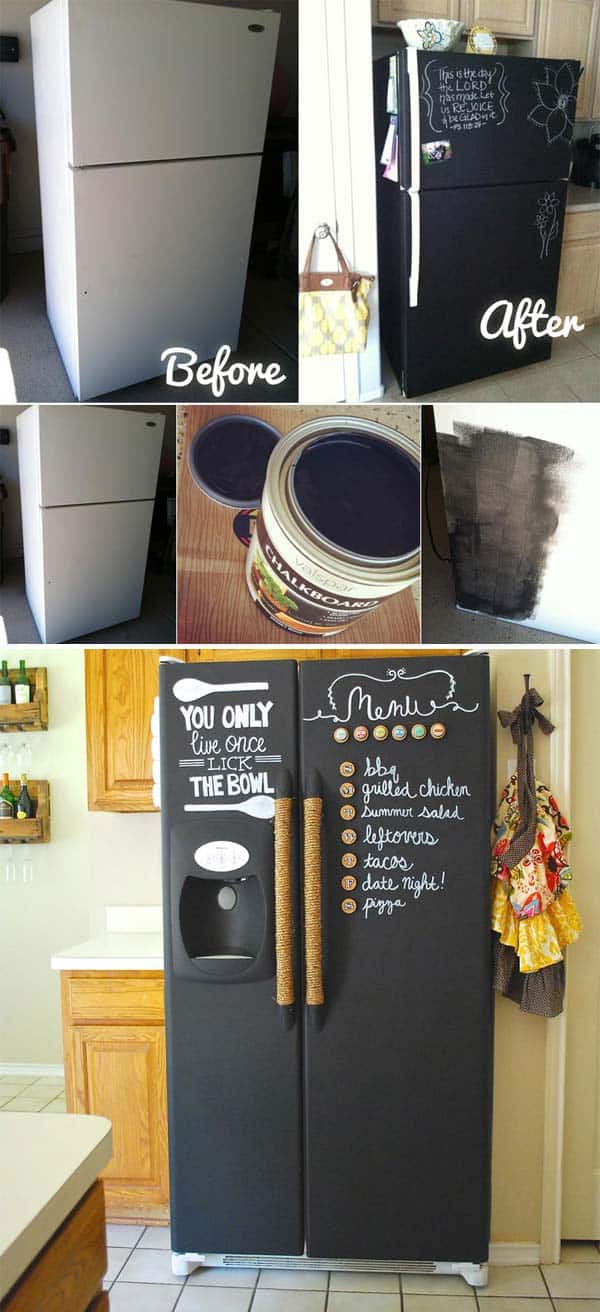
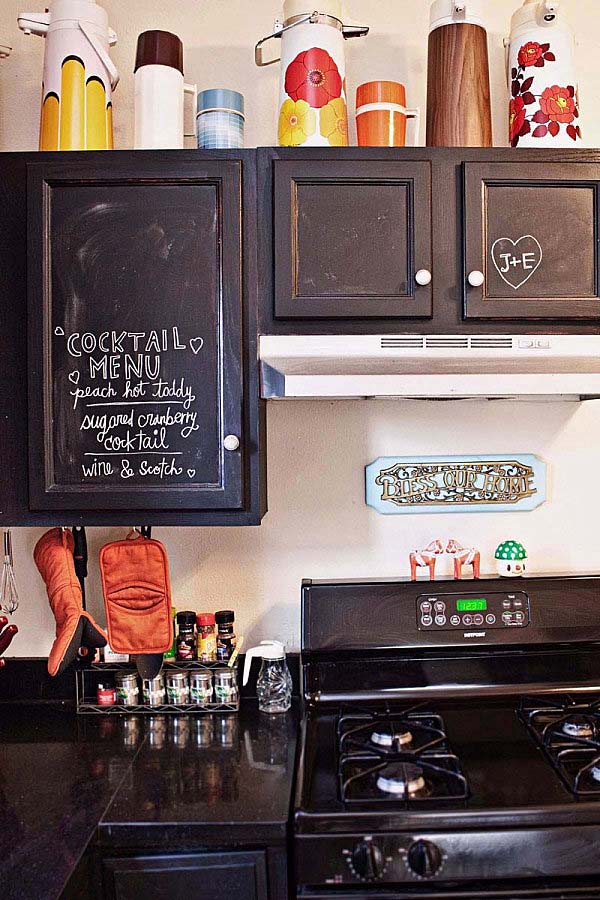
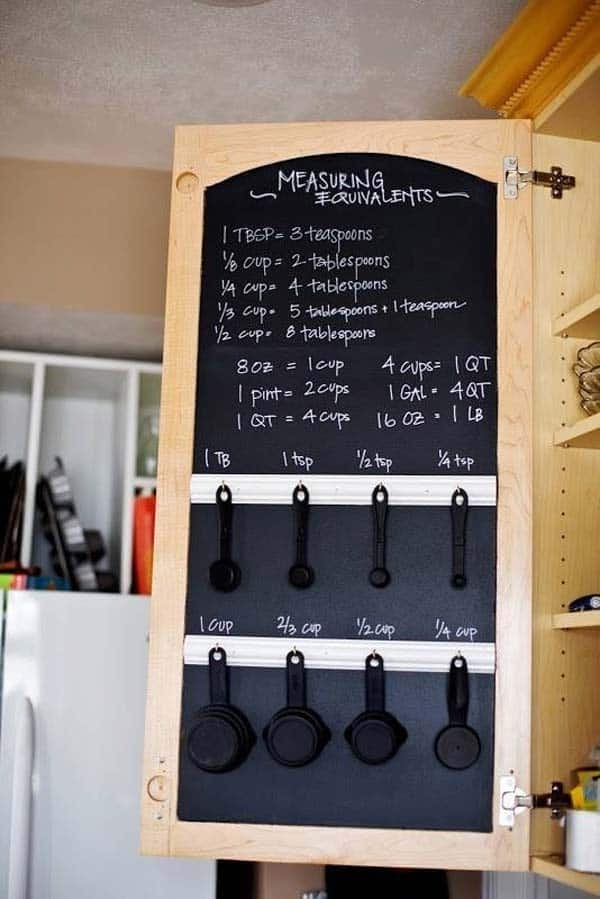
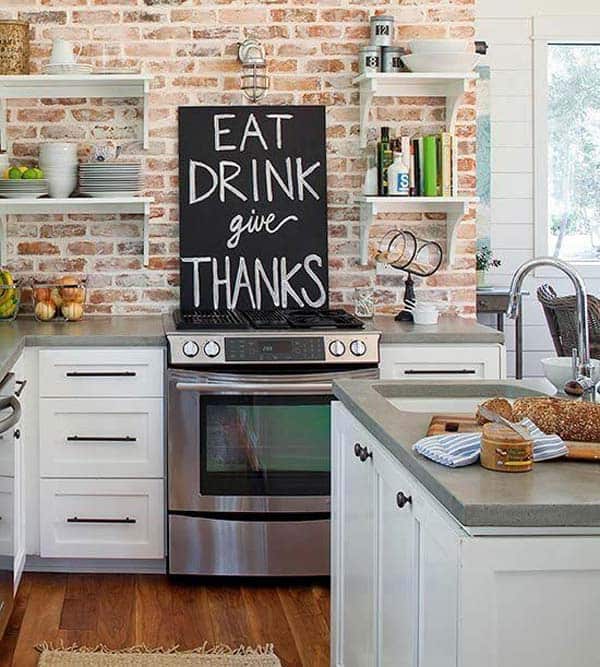


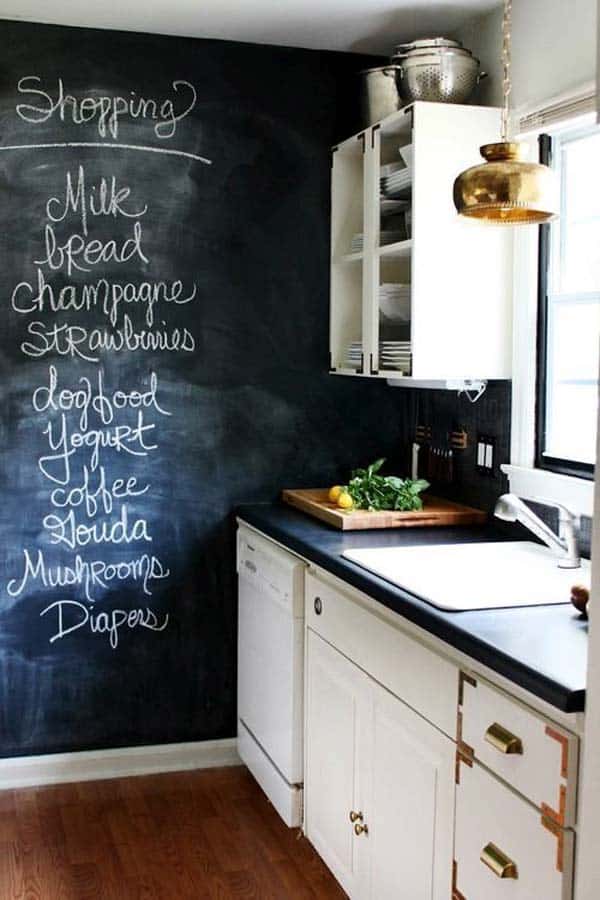
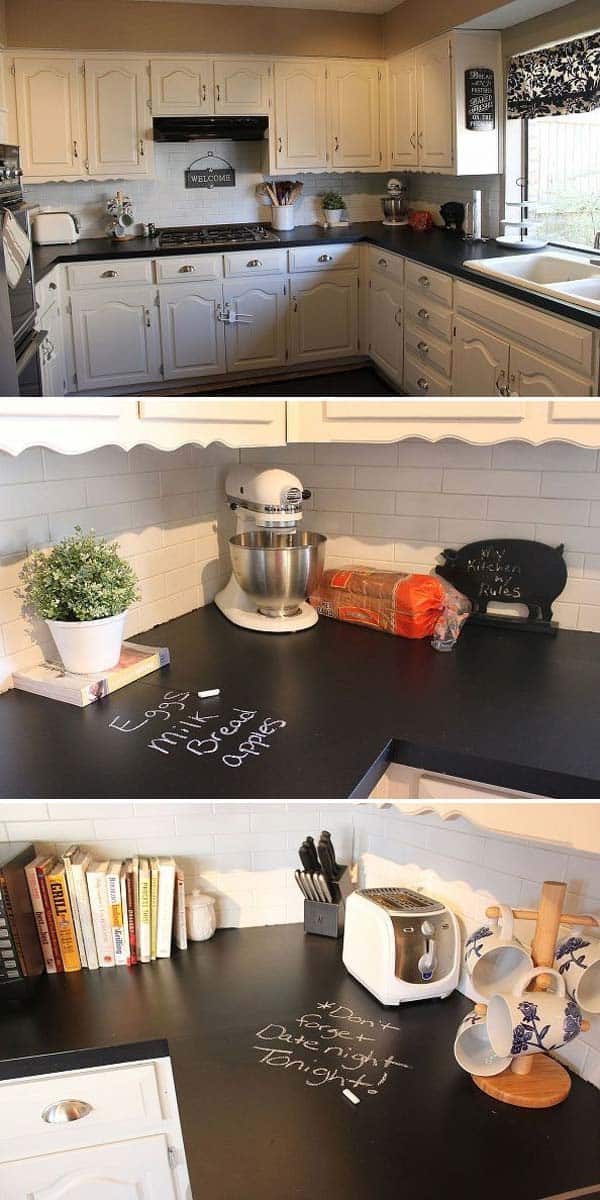

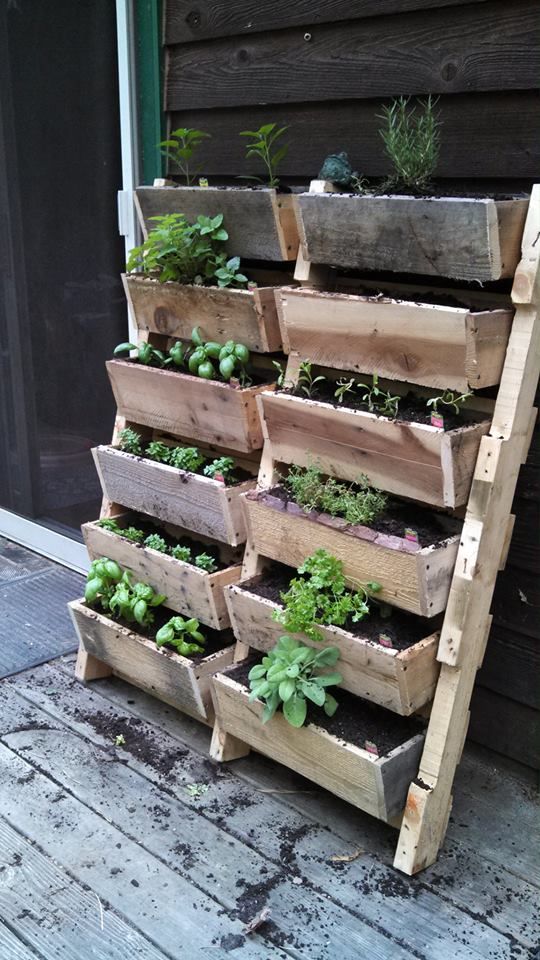
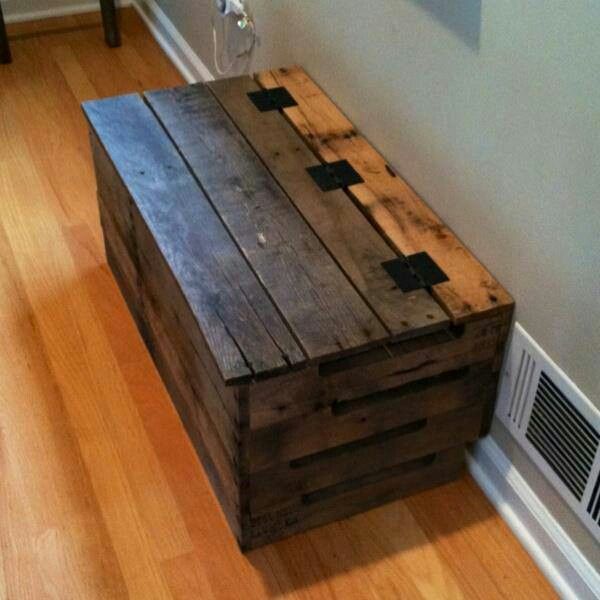


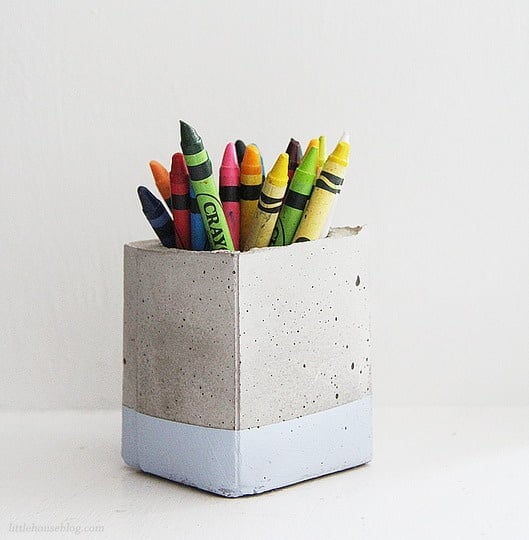

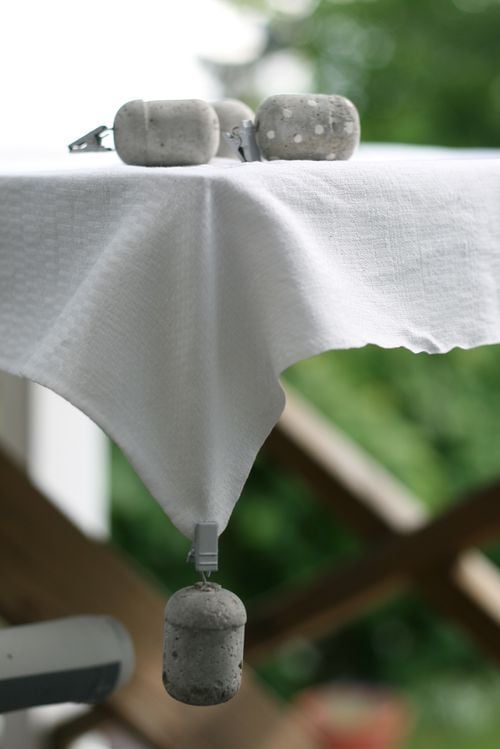
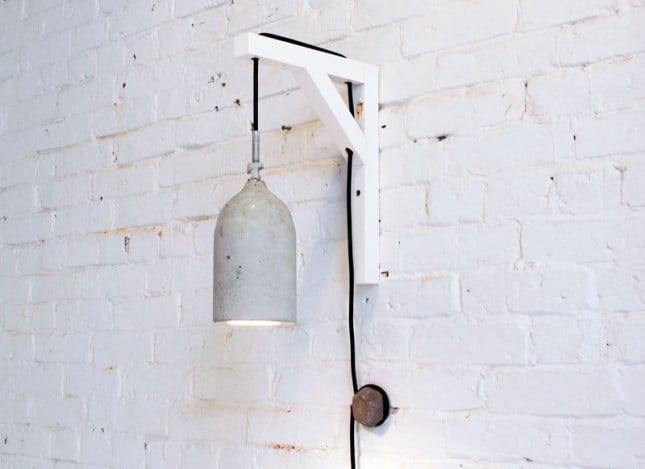
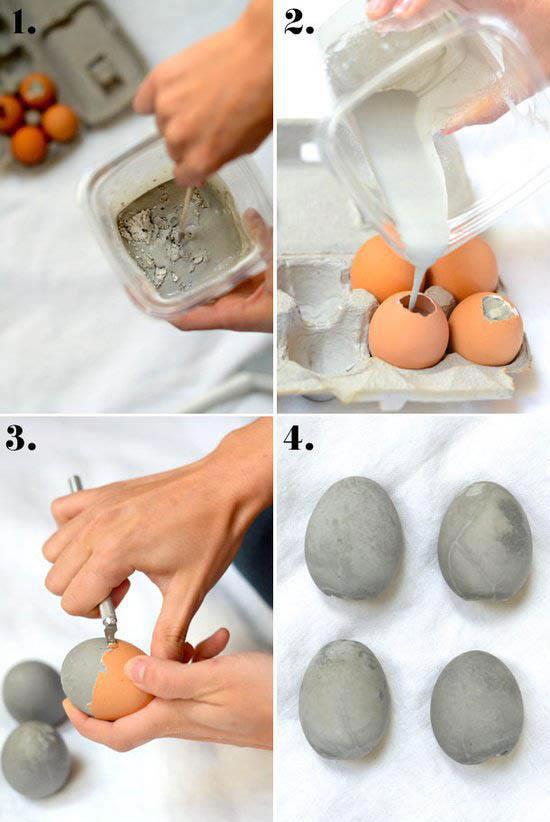


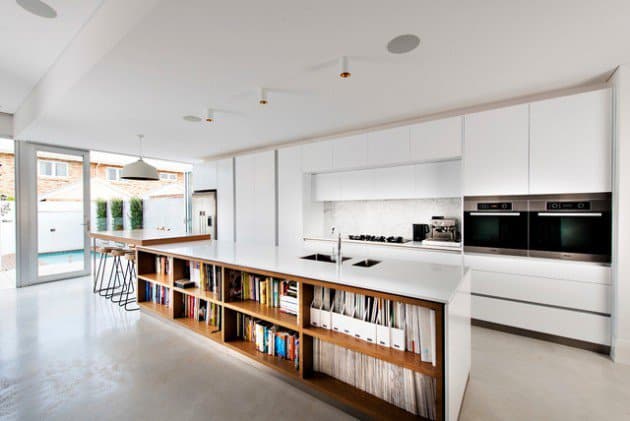
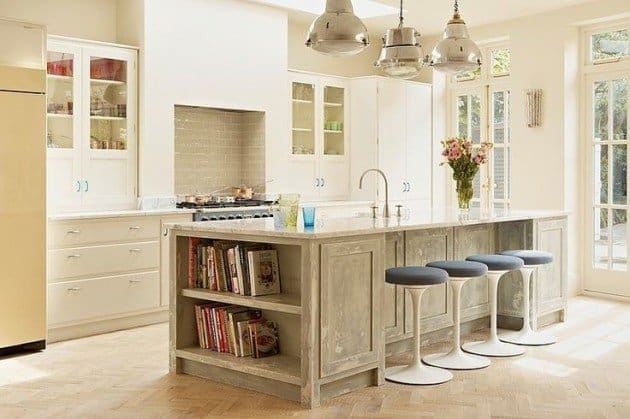
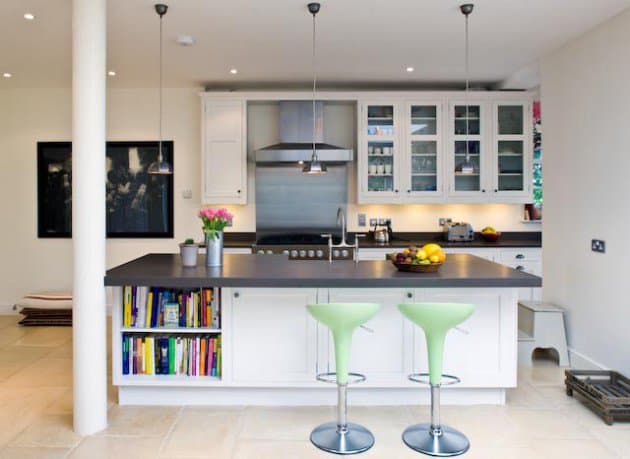
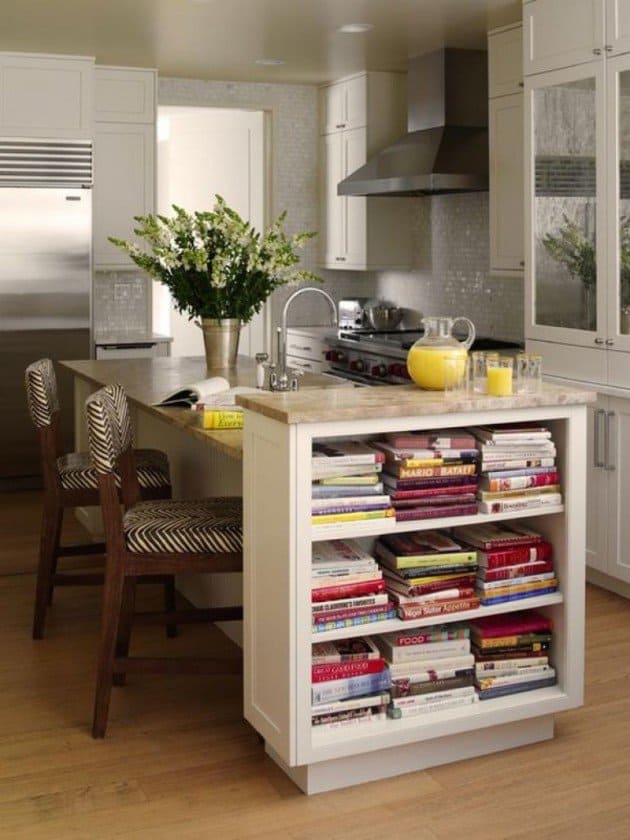

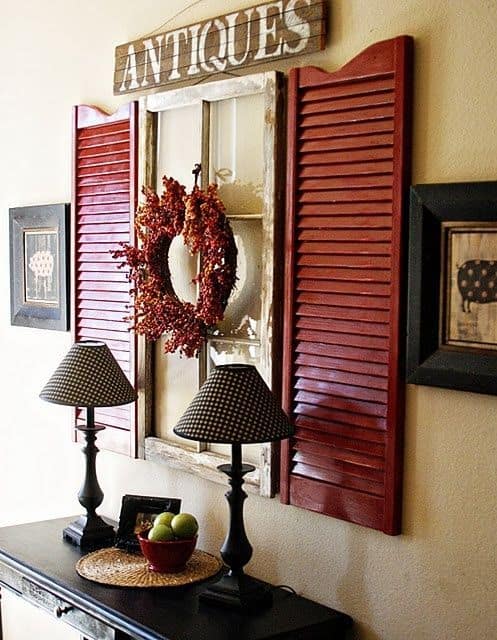
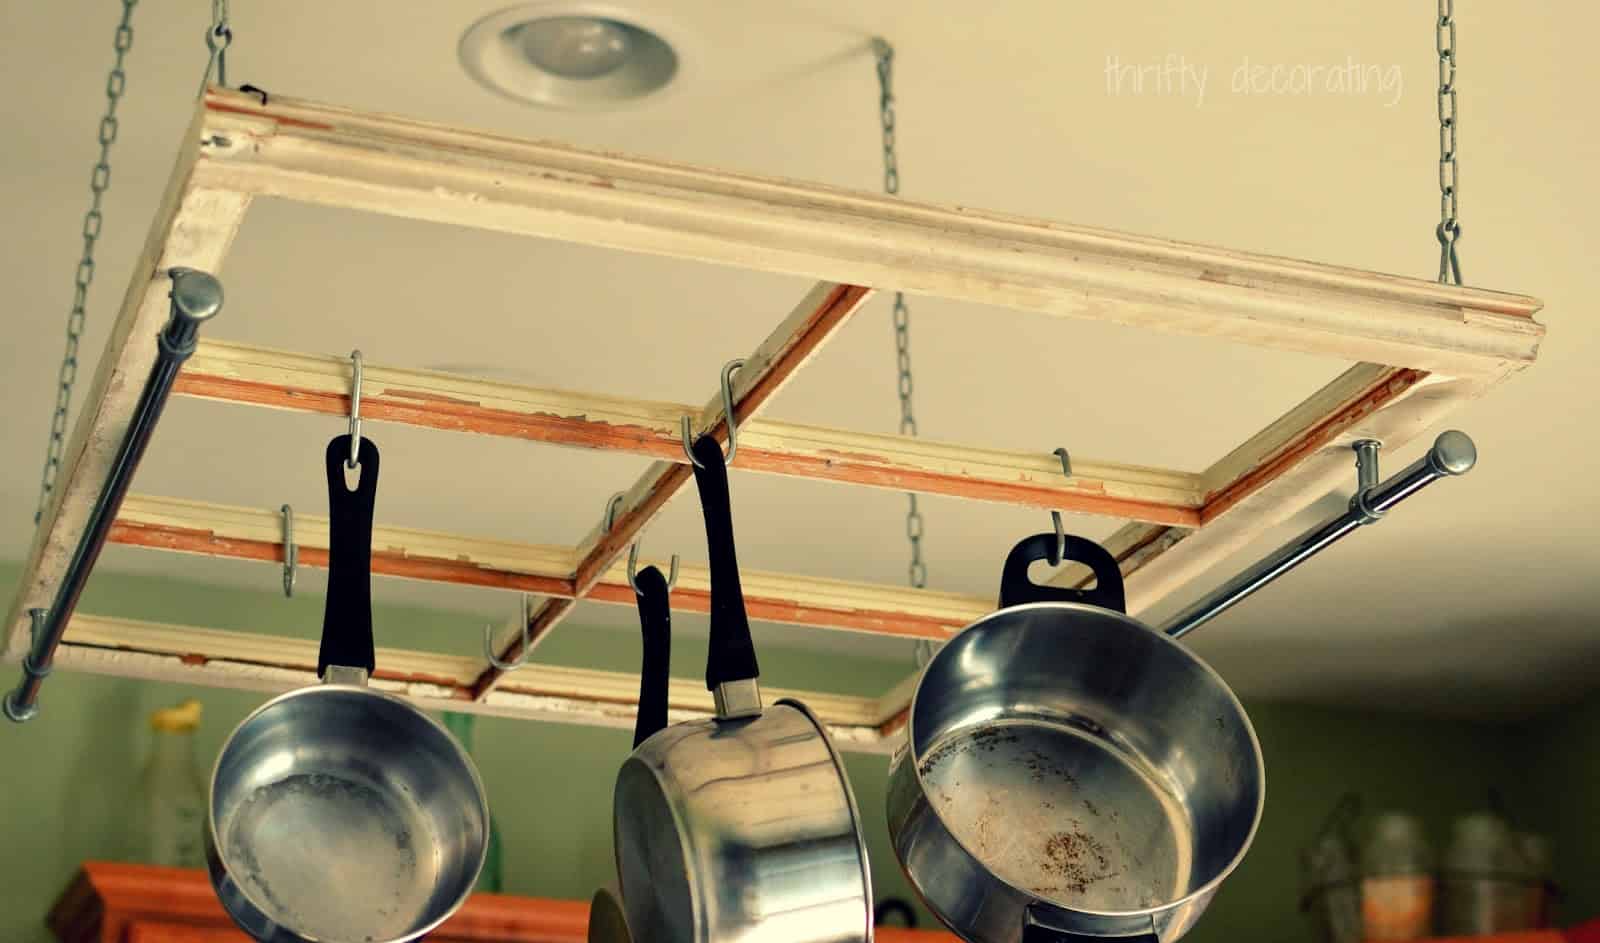
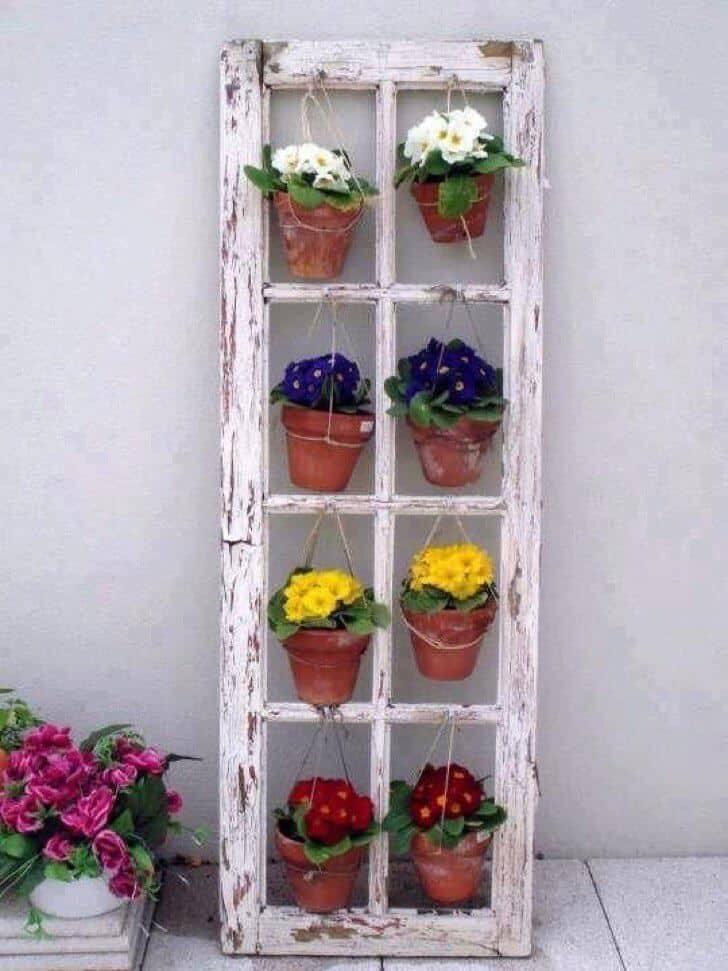
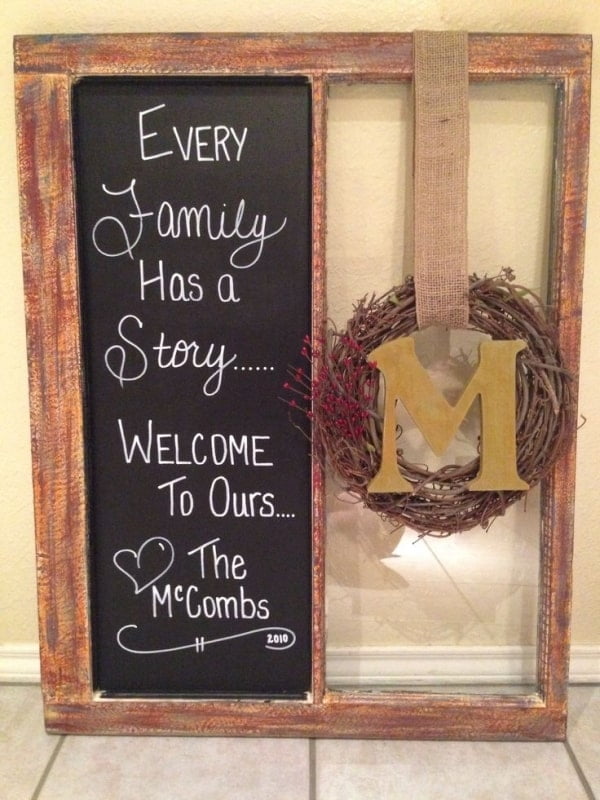


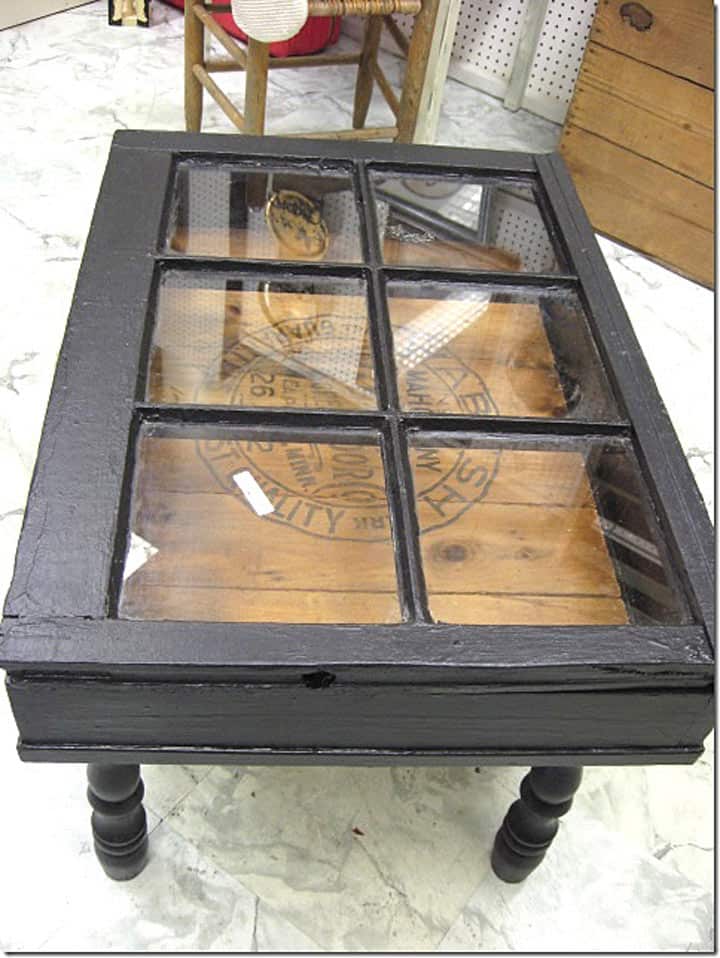

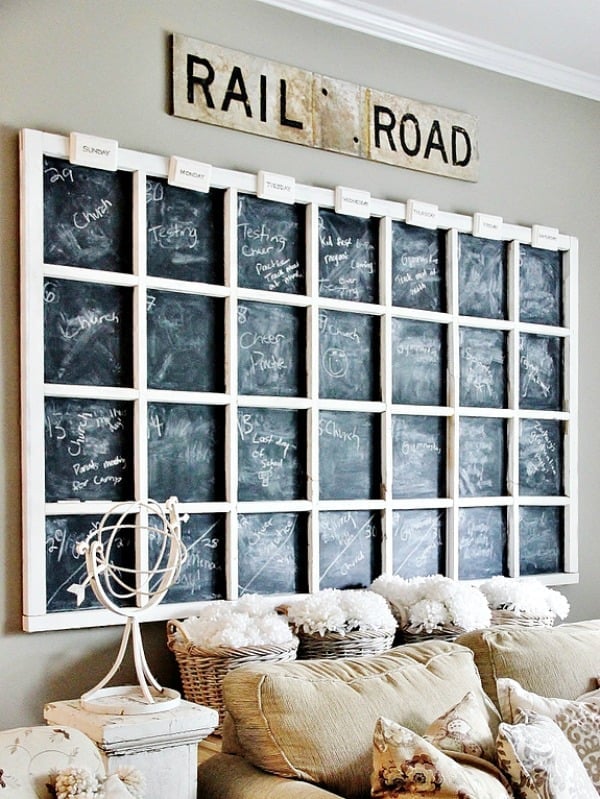

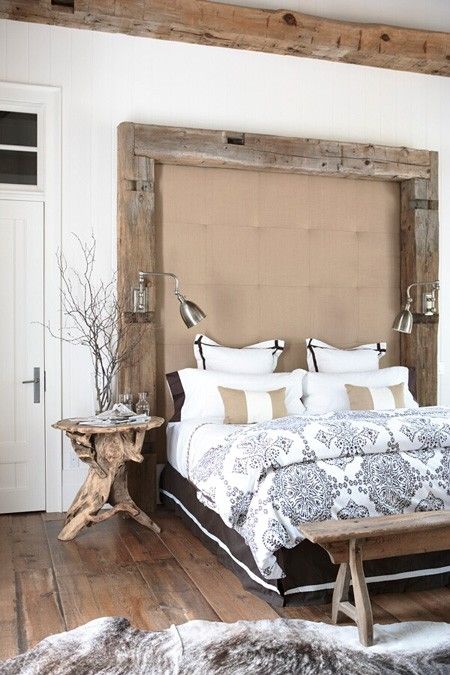
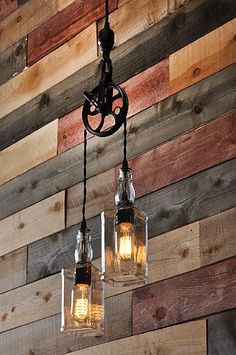


![FARMHOUSE [APRON] STYLE SINK](https://homesthetics.net/wp-content/uploads/2018/01/pinterest-14.jpg)


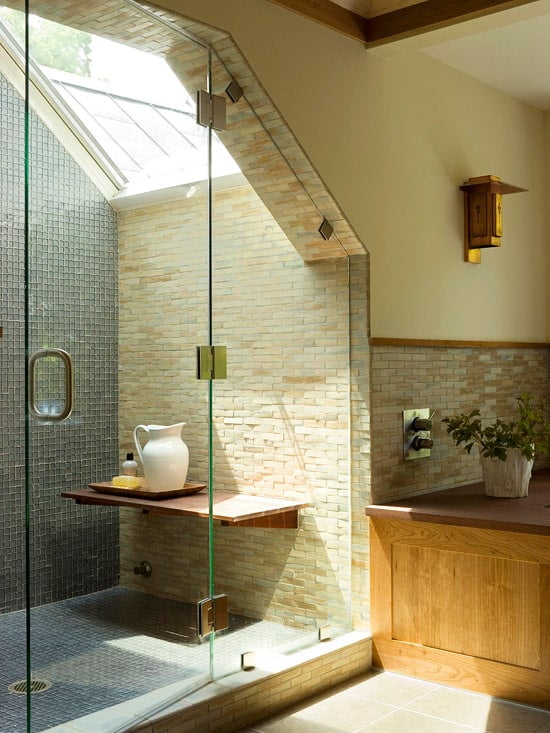
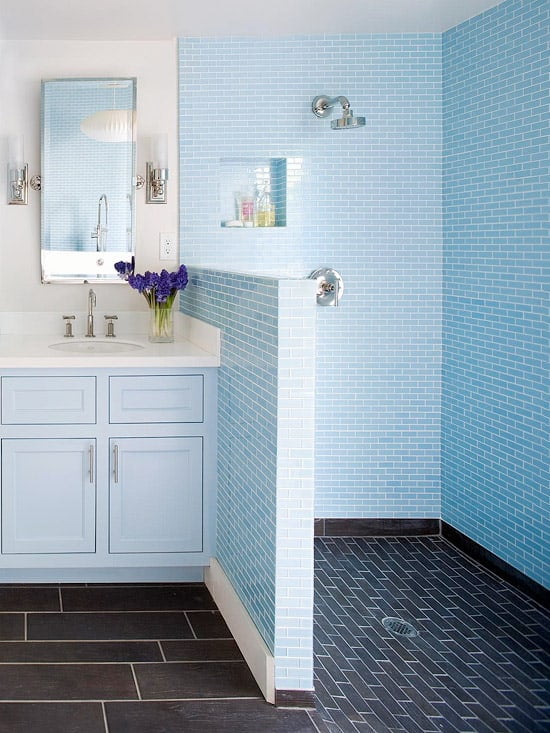
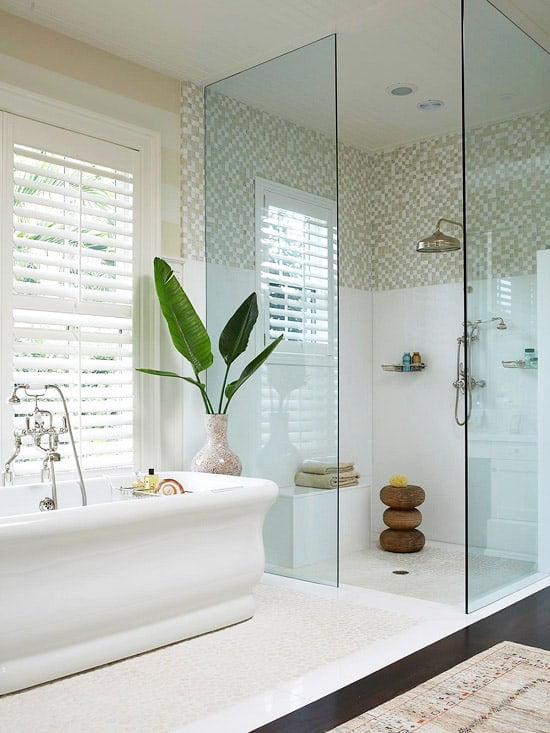
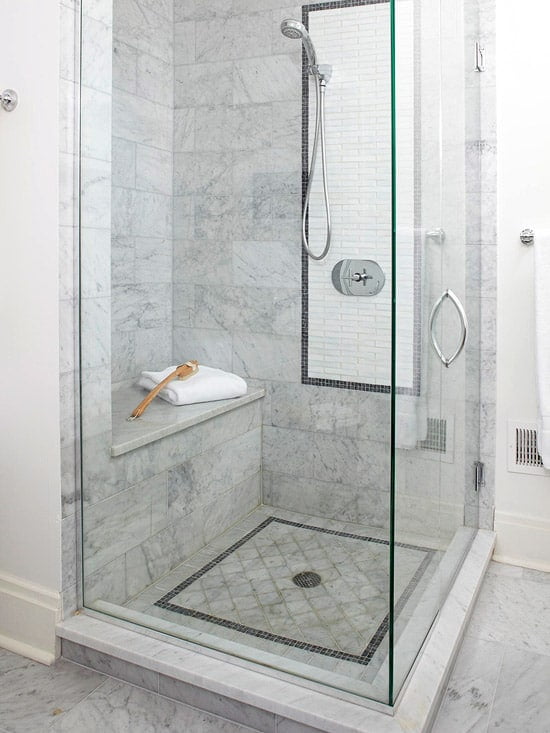


