

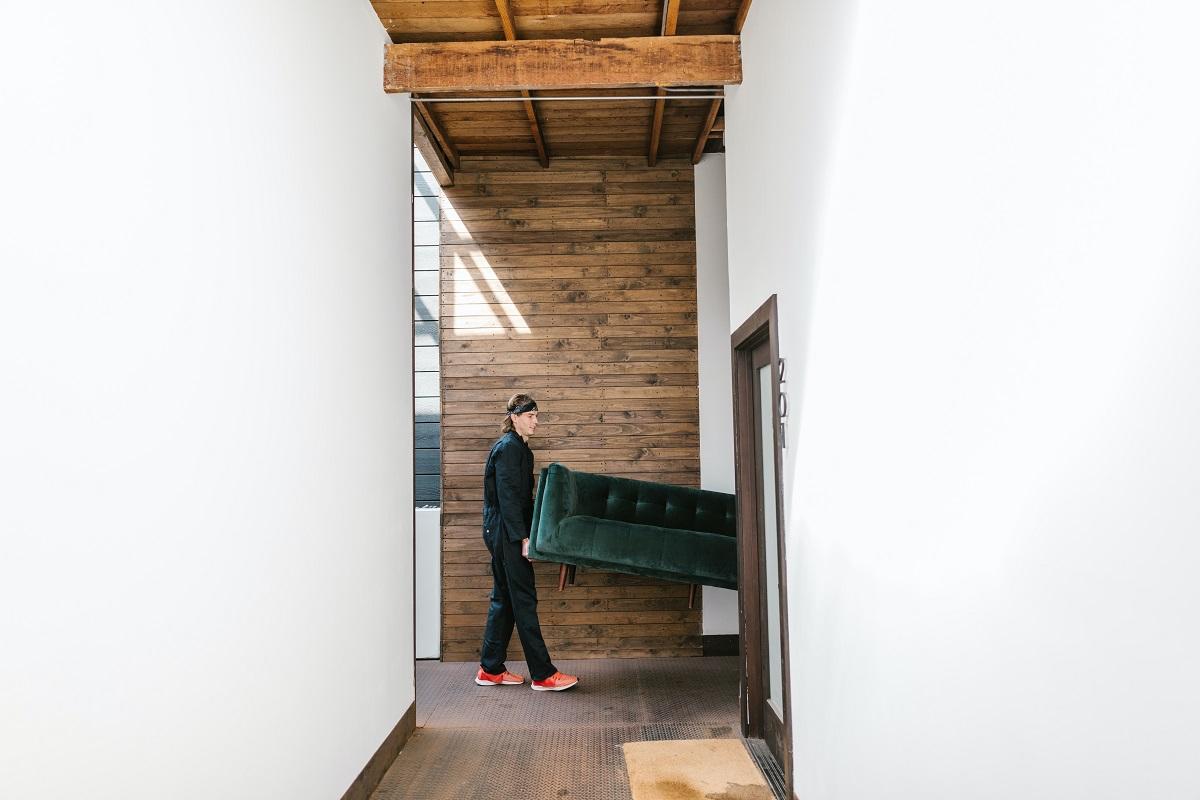
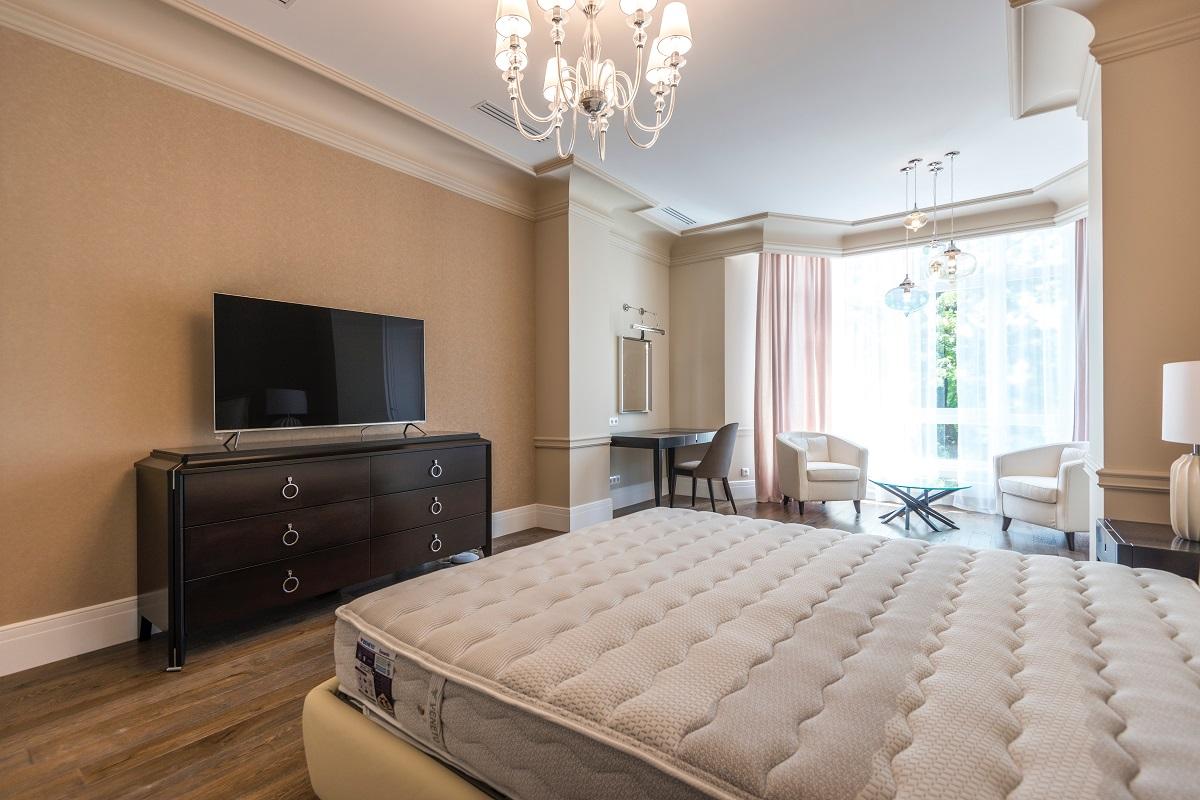
And not to mention, dragging furniture across the house without the help of movers can leave nasty scratch marks on your beautiful hardwood floors and ruin your delicate carpet.
It can also take you an entire day to move all your furniture. So, even if remodeling the house sounds fun, moving your furniture is not.
That’s why you’ve got furniture sliders. These sliding pads can be a lifesaver when it comes to arranging furniture. But, all furniture sliders are not suitable for every type of floor. Hence, you have to be careful while choosing the right sliders — and here’s where we come in.
We’ll discuss some of the best furniture sliders for carpets and hardwood floors in this article. So, without further ado, let’s begin!
Best Furniture Sliders
Best Furniture Sliders For Carpet
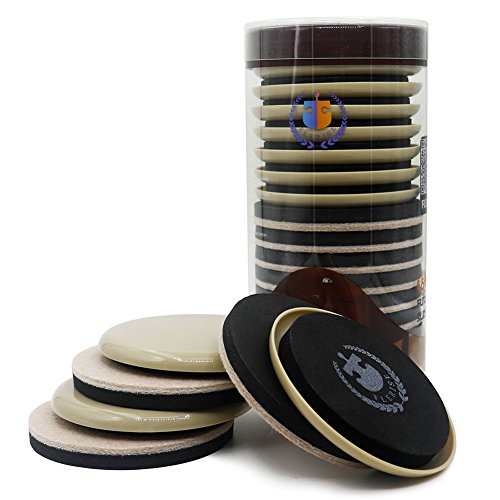
1. Waxman SuperSliders 4744095N
First up on our list is the carpet-friendly furniture slider from Waxman Consumer Products, cleverly dubbed as SuperSliders. These are heavy-duty, reusable and versatile sliders that make moving furniture a piece of cake, no matter the size or shape of the furniture legs.

- MOVE FURNITURE WITH EASE - Moving furniture can be the worst...
- PERFECT FOR ALL FURNITURE - There is no piece of furniture...
Why Did We Like It?
When we talk about furniture, it’s not just a single chair or a small bookcase. Bigger and heavier furniture like beds, couches, or cabinets are the most difficult to move and reshuffle — and that’s where these SuperSliders shine. That said, you can use these to move all types of furniture, from small to XL pieces.
Plus, you don’t have to worry about throwing away the sliders after one move. On that note, the durable rubber foam base makes the furniture sliders reusable and won’t give in to wear. So, if you’re big on house remodeling, this product can be an excellent investment.
On top of this, the smooth, plastic design of these sliders makes them perfect for your plush and soft carpeted floors. The smooth and sleek plastic bottom can effortlessly drag even the heaviest furniture over rugs and carpets without pulling on their threads and ruining them — it doesn’t get better than this.
What Could’ve Been Better?
Even though the sliders protect your delicate carpet from getting ruined while moving furniture, the floor under it may get scratched if you are working with heavier weights. On that note, you won’t be able to use these padded sliders on hardwood floors or tiles. So, if you have tiled floors or hardwood floors, steer clear of these sliders.
- Durable rubber foam
- Heavy-duty design
- Protects carpeted floors
- Reusable and multifunctional
- Scratches hard surfaces
2. NeoSales X-Protector Furniture Sliders For Carpet
The X-Protector furniture sliders for carpet from NeoSales are available in a 16-piece pack that makes moving heavy furniture safe and hassle-free. Just put the sliders under your furniture and move it without scratching or ruining your rugs and carpets. The sliders are made from premium material, so durability will not be an issue.

- ✌ IS YOUR FURNITURE TOO HEAVY TO MOVE IT EASILY? ARE YOU...
- ✌ HEAVY FURNITURE SLIDERS FOR CARPET - just put our moving...
Why Did We Like It?
The most attractive feature of these X-Protector sliders is perhaps their premium quality material and build. Also, there’s no glue on top of the sliders, and the strong plastic and rubber foam can handle the weight of heavier furniture pieces. Needless to say, NeoSales offers durability with this handy product.
Not to mention how the company has designed these furniture coasters so that they don’t leave any permanent dent or impression on your expensive rug or carpet. Here, the strong rubber foam of the sliders offers a secure grip, which facilitates smooth movement without any accidents.
Moreover, these sliders are suitable for any furniture, including chairs, recliners, sofas, cabinets, dressers, beds, or tables. As an added tip, you can use these furniture coasters to make cleaning under the sofa so much easier. So, save your energy and try out these carpet sliders.
What Could’ve Been Better?
While the furniture sliders are durable and reusable, sliding the furniture itself requires some elbow grease. Additionally, there are limited customer reviews as NeoSales is not a well-established brand in the business.
- Available in different sizes
- Reusable design
- Made to last
- Easy to use
- Compatible with most furniture
- Doesn’t slide well
- Relatively unknown brand
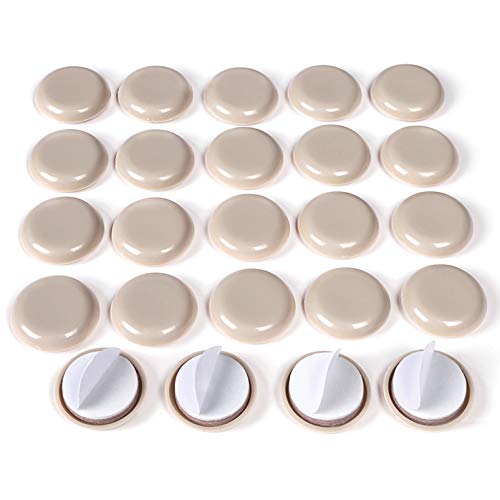
3. WEHOTECTION
Next up on our list is the self-stick furniture sliders from Wehotection, which are perfect for moving furniture on carpeted floors. The sliders have a durable design that makes them reusable and suitable for moving heavy furniture pieces, which glide smoothly over carpeted floors without causing any wear and tear.
- INCLUDE:24 Pcs High-Quality Chair Sliders(OUTER DIAMETER:1...
- Easy Moving: Chair Sliders Furniture moving pads with smooth...
Why Did We Like It?
The beautiful beige color of the padded plastic sliders is an instant attraction, in addition to their premium material. These furniture sliders are made from high-quality felt and foam, and come complete with a hard plastic bottom.
They are also extremely durable owing to the extra 2 mm Eva foam under the adhesive pads of the sliders. This super-strong adhesive foam base acts as a protective pad that prevents the furniture legs from leaving scratch marks on the carpet.
What’s more, these are multipurpose sliders that you can use on chairs, desks, tables, beds, and even electric appliances. So, whether you’re trying to shift the entertainment set from the living room to your bedroom, don’t hesitate to use these versatile felt furniture sliders.
Also, since they are self-stick models that you can place underneath any furniture piece, almost anyone can use them with ease. Just pull the protective films off the sliders and stick the adhesive foam base under the furniture leg, and you’re good to go.
What Could’ve Been Better?
These sliders are not suitable for wooden floors. They can slip quite easily and leave scratch marks on polished wood finishes. So, if you have wood floors, these plastic sliders might not be your best choice. Also, they have a loose grip on the furniture, even on carpeted floors. Thus, they might slide off from under the furniture.
- High-quality felt sliders
- Durable Eva foam
- Self-stick hard plastic body
- Durable and multipurpose
- Reduces friction and noise
- Not suitable for wood floors
- Loose grip on furniture
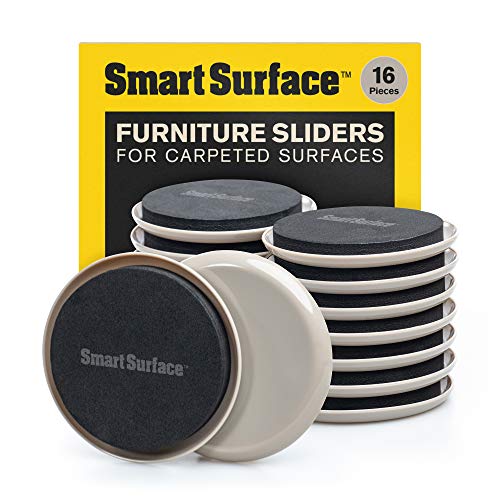
4. Smart Surface
Moving on, we bring you the furniture sliders from Smart Surface that are specially designed for your carpeted floors. They are perfect for all carpeted surfaces, whether it’s your living room, dining room, bedroom, or office. So, you can use these carpet sliders on any piece of furniture anywhere around the house. Reshuffling the furniture has never been easier.
- A Must-Have for Every Home: Easily move your living room...
- Easily and Safely Move Furniture: Create a flexible living...
Why Did We Like It?
We were most impressed with the versatility of these carpet furniture sliders, which work well on all types of carpeted surfaces. So, whether your rugs are thin or thick, polyester or plush, you can use the sliders on rugs without worrying about ruining them. Plus, they can slide under any furniture piece with ease despite its size, height, or weight. Whatever the furniture, just use the sliders to move them without a sweat.
Furthermore, the soft EVA foam base of the carpet coasters keeps the furniture legs from ripping or tearing your carpets and rugs. The high-quality EVA foam also makes the sliders suitable for everyday use. So, if you’re planning to rearrange all your furniture pieces or move them for daily cleaning, these carpet coasters can be a perfect choice.
On top of this, these furniture sliders are ideal for the easy and noiseless moving of furniture pieces. The high-quality plastic bottoms of the coaster discs help you to move the furniture without causing any noise or strain. They can make your dream of noiseless and frictionless furniture reshuffling a reality.
What Could’ve Been Better?
Even though the furniture sliders are multipurpose, they are smaller compared to similar products. Their assembled diameter of 3.5 inches is often not enough to hold larger and heavier furniture legs. So, these carpet sliders may not be ideal for holding heavy cabinets or dressers. Plus, they are not very attractive, which can inconvenience your aesthetic room decor.
- Works on all carpeted floors
- Moves any piece of furniture
- Quiet and noiseless sliding
- Suitable for daily use
- 30-day money-back guarantee
- A bit small in size
- Not very attractive
Best Furniture Sliders For Hardwood Floors
1. X-Protector Furniture Sliders 1
We now come to the best furniture sliders for hardwood floors, and the first product under this sub-category is the X-Protector furniture sliders for hard surfaces. These are heavy-duty felt sliders that are designed to move bulky furniture pieces across hard surfaces without any hitch. They are also designed to offer long-term durability.

- 👍 IS YOUR FURNITURE TOO HEAVY TO MOVE IT EASILY? DO YOU...
- 👍 16 HARD FLOOR SLIDERS WILL HELP You TO MOVE THE...
Why Did We Like It?
The foam sliders are designed for heavy-duty applications and thus can be reused time and again for moving and adjusting all types of furniture pieces. So, if you are struggling with bulky furniture pieces, such as dressers or cabinets, just put these sliders under the furniture legs, and moving them will be a breeze.
Also, the felt pads are truly effective in preventing the furniture legs from leaving scratch marks on your hardwood floor while transporting furniture across it. They offer a secure and long-lasting grip on bulky furniture pieces, allowing them to glide gracefully.
What’s more, these foam sliders are easy to use; all you need to do is place them under a sofa, table, bed, or dresser. Additionally, the premium rubber and felt foam base of the sliders are made of high-quality material, allowing you to use them for heavy objects throughout multiple moves.
What Could’ve Been Better?
Even though the sliders are easy to place under furniture legs, taking them out can be tricky. Furthermore, if you keep these sliders under a heavy piece of furniture for a long time, you may find dents on your hardwood surfaces.
- 16 durable hard floor sliders
- Multipurpose and reusable
- Thick felt and rubber foam
- Secure furniture grip
- Removing the sliders can be tricky
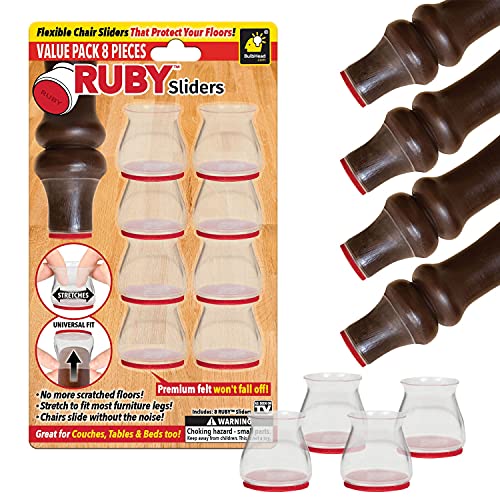
2. BulbHead
Next up on our list of best furniture sliders for hardwood floors, we have the Ruby plastic sliders from BulbHead. These sliders are ideal for protecting your polished hardwood floors from getting scratched by furniture legs. They are compatible with most pieces and perfect for moving heavy objects around the house.
- Pack of 8 Chair Leg Sliders: One package contains 8 AS SEEN...
- Furniture Movers Protect Your Hard Surface & Tile Floors:...
Why Did We Like It?
The Ruby Sliders fit perfectly over the furniture legs of large and heavy pieces to prevent them from leaving scratch marks on any hard surface, such as tile or hardwood floors. So, your floors stay beautiful without getting any nasty dents or marks from the furniture.
Moreover, the distinct red felt pads are responsible for a soundless gliding of the furniture pieces over a hard surface. In other words, no more scratches and no more screeching sounds.
Additionally, the sliders can stretch to fit any furniture leg. Square, circle, thick, or thin, whatever the size or shape of the furniture leg might be, the sliders will fit right over them without any trouble. Plus, the premium nano-weave felt pad is glued to the bottom of each slider with industry-grade adhesive so that it doesn’t fall off easily.
What Could’ve Been Better?
These sliders are not designed for carpeted floors and should not be used to move furniture pieces over rugs and carpets. The available sizes are suitable for larger pieces, and the company does not offer smaller models. You may have to look elsewhere for furniture with smaller legs.
- Protects hard surfaces
- Soundless gliding
- Stretches to fit any furniture leg
- Premium-quality nano-weave felt pad
- Suitable for heavy furniture
- Not designed for carpets
- Incompatible with small furniture legs
3. Waxman SuperSliders 4705195N
Next product is the SuperSliders from Waxman that are designed for hardwood floors. These are reusable furniture movers that can help you quickly and easily move all sorts of furniture across hard surfaces. They are suitable for dragging furniture across hardwood, linoleum, tile, and other hard surfaces. So, moving or remodeling becomes quite easy with these felt sliders.

- SET OF 4 FURNITURE SLIDERS FOR HARD SURFACES: Makes it easy...
- EFFORTLESS MOVEMENT: Heavy-duty felt bottom design glides...
Why Did We Like It?
Moving and reshuffling heavy furniture is pretty much the worst part of house remodeling. However, these SuperSliders make moving furniture pieces so much easier. Simply place the sliders under your heavy furniture and drag them effortlessly across any hard surfaces. Just be aware not to drag them across carpets or rugs.
Also, they are perfect for all furniture. Whether you’re trying to remodel your living room, bedroom or office, don’t hesitate to use these sliders for reshuffling and readjusting the furniture pieces. In addition to moving furniture, you can use these foam coasters to readjust any heavy electric appliances. They have multipurpose applications.
Furthermore, the dimension of each furniture mover is perfect for supporting large furniture. Each slider measures 3.5 inches x 6 inches and comes in an oval shape. Hence, you can easily put them under square or circular furniture legs without worrying about leaving dents on your hardwood floor.
What Could’ve Been Better?
Even though the sliders are good for moving bulky furniture, they slide out right underneath small or light furniture pieces. So, if you try to fit them under your small coffee table, they might just slide out. Moreover, we were also concerned about the quality of felt and rubber used in the foam base of the furniture sliders.
- Perfect for bulky furniture
- Durable and reusable
- Easy to use
- Ideal size
- Suitable for easy cleaningSuitable for easy cleaning
- Not for light furnitur
- Poor quality
4. Trushome Furniture Sliders 24 Pieces
Moving on with our list, we have the 24-piece furniture sliders from Trushome. These are reusable felt pads designed for heavy-duty uses, which help you move heavy furniture easily and quickly. Also, they are specially designed for protecting any hard floor surfaces. The rubber material of the sliders prevents the heavy furniture legs from scratching your hardwood floor.
No products found.
Why Did We Like It?
The sliders are excellent for easily and quickly moving heavy furniture pieces. Reshuffling and arranging furniture can become a piece of cake while remodeling your house. So, why hire movers when you can do it all yourself? It is so very effortless.
Also, you don’t have to deal with the annoying noise that comes from dragging furniture pieces when you use these foam sliders. The foam base of the sliders ensures a noiseless gliding of furniture on any hard floor surface. Plus, they reduce friction, preventing the hardwood floor and the furniture legs from scuffing and scratching. Moving furniture becomes easy and neat with these sliders.
On top of all this, they have a durable, non-stick grip that helps hold onto the furniture. There’s no glue present on the sliders so that they won’t stain your furniture. The felt and rubber foam also offer a superior grip on the furniture, resulting in a quick and effortless gliding across hard surfaces.
What Could’ve Been Better?
The furniture sliders are not ideal for moving light furniture as they tend to slip right underneath small furniture pieces. So, naturally, you cannot use them to glide small chairs or tables. Additionally, these are not permanent furniture sliders, which means you can’t hold furniture for a long time using them.
- Noiseless, effortless gliding
- Prevents scratching
- Prevents scuffing
- Suitable for all furniture
- Non-stick, durable gripper
- Not for light furniture
- Not permanent furniture sliders
Best Furniture Sliders For Both Carpet And Hardwood Floors
1. Flerise
As we move on to our final sub-category, we bring you the furniture sliders suitable for both carpet and hardwood floors. And the first product of this sub-category is the furniture moving kit from Flerise. These felt pads can protect carpets, hardwood floors, ceramic tile, linoleum floors, and all other hard surfaces from noise and scratches.
- High quality EVA foam felt pads,16 pieces value pack protect...
- EVA foam sliders keep your wooden floors no scratches and...
Why Did We Like It?
The most attractive of these furniture sliders is their versatility. They work well on carpets and all other hard surfaces, including hardwood floors. The high-quality Eva foam felt pads prevent the scratching of your polished hardwood floors and the ripping of your carpets while moving furniture.
Also, these Eva foam sliders help in the noiseless reshuffling of your furniture pieces while remodeling. Plus, they are reusable. So, you can leave them under furniture for easy moving and cleaning. Now you don’t have to waste your effort on pushing around the couch or wardrobe to clean the living room corners.
Moreover, these are non-stick gripper sliders that you can use on any furniture, including sofas, beds, tables, dressers, electrical appliances, and much more. The durable and reusable features of the Eva foam sliders help them provide a solid and secure grip for a long time.
What Could’ve Been Better?
Although the sliders work well on carpet and hardwood floors, they are not suitable for moving heavy furniture. You can use it mostly for adjusting light furniture. Also, gliding furniture pieces aren’t quick and easy. You need to put in some extra effort for reshuffling the furniture using these sliders.
- Suitable for carpet and hardwood floors
- Easy to use
- Premium materials
- Reusable purpose
- Durable Eva foam
- Not suitable for heavy furniture
- Gliding takes some effortGliding takes some effort
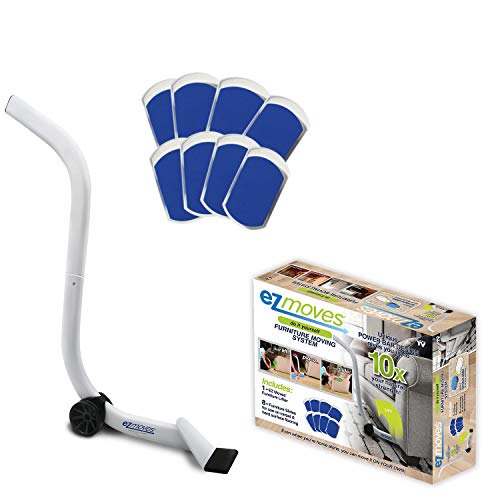
2. Allstar Innovations
The next product in this sub-category is the EZ Moves furniture sliders from Allstar Innovations suitable for all floor types, including carpeted and hard floor surfaces. This furniture moving system is ideal for moving heavy appliances and furniture easily and quickly without a sweat. No furniture will seem too heavy or too large to move if you choose to use these sliders.
- MOVING MADE EASY! – The do yourself furniture moving...
- PERFECT FOR ALL FURNITURE – There is no piece of furniture...
Why Did We Like It?
We were instantly attracted to the furniture lifter with this furniture moving system. Lifting and moving heavy furniture becomes a breeze with the lifter and the sliders. So, no need to worry about hurting your back while reshuffling furniture when remodeling the house.
Also, this is a DIY furniture moving system. You can easily do all the heavy lifting and moving by yourself without hiring professional movers. Hence, you can actually end up saving a lot of money if you choose to use this furniture moving kit.
Additionally, the sliders are perfect for moving all types of furniture pieces. You can easily move and clean your furniture without any hassle. The sliders are also reusable. Thus, you need not worry about changing them anytime soon. Plus, the kit comes with plastic and felt sliders. So, you can use them on carpet and hardwood floors.
What Could’ve Been Better?
The biggest drawback about these sliders and the furniture lifter is their poor design. The design of the lifter makes it extremely difficult and time-consuming to lift heavy furniture. At the same time, the poor design of the sliders results in falling away of the felt pads. Hence, the foam pads of the sliders come off easily only after a few uses.
- DIY furniture moving system
- Perfect for all furniture
- Reusable furniture sliders
- Easy moving and cleaning
- Comes with plastic and felt sliders
- Poor design
- Felt pads come off easily
3. X-Protector Multi-Surface Furniture Sliders
Finally, the last item on our list is the X-Protector multi-surface furniture sliders that can move your furniture on any surface easily and quickly. These are 2-in-1 sliders that work well on carpets and hard floor surfaces. So, if you are trying to shift your study table from the carpeted bedroom floor to the hardwood office floor, these furniture la sliders will work like magic.

- ✌ IS YOUR FURNITURE TOO HEAVY TO MOVE IT EASILY? DO YOU...
- ✌ FURNITURE MOVING PADS FOR ALL SURFACES - 8 furniture...
Why Did We Like It?
The 2-in-1 sliders come with hardwood socks and normal plastic sliders. If you want to move to furniture on carpets and rugs, use the plastic sliders. But, if you have a hardwood floor, just put on the hardwood socks over the plastic sliders and glide the furniture effortlessly on the hard surface.
The plastic sliders and hardwood socks also work well together to prevent causing dents and scratches on all types of carpets and hard floor surfaces. Hence, they are incredibly versatile for moving furniture pieces across any floor surface.
On top of all this, the premium quality materials of the sliders and hardwood socks make them durable and reusable. So, they can serve you again and again for a long time. No need to worry about replacing them anytime soon. Furthermore, if you’re not satisfied with the quality of the sliders, the manufacturer will refund your money without any question.
What Could’ve Been Better?
The hardwood socks that come with the plastic sliders tend to get dirty quite easily. And dirty hardwood socks can ruin the aesthetic appeal of your furniture. Also, the product information is outright misleading as it says that the package comes with eight pieces of hardwood socks and eight pieces of plastic sliders. Whereas in reality, four pieces of each are included.
- Hardwood socks included
- Prevent scratches and dents
- Suitable for all furniture pieces
- Reusable premium-quality sliders
- Easy refund policy
- Dirty hardwood socks
- Misleading product information

Furniture Sliders Buying Guide
Now that we’ve talked about all the major furniture sliders, it’s important to discuss the key factors that come into play while you’re choosing the right sliders for your furniture. So, let’s take a look!
1. Floor Type
Always consider the floor of your room before purchasing furniture sliders. Some work well on carpet flooring, while some are good for hardwood floors. Also, there are some sliders that work as multi-surface movers. So, it is always essential to buy furniture sliders based on the floor type.
2. Furniture Type
Although most furniture sliders are advertised to work for all furniture, the reality is very different. Large, oval felt sliders usually work well on tall and bulky furniture pieces. If you’re trying to move heavy furniture, try to look for sliders that come with a thick, high-quality Eva foam for better grip and durability.
3. Durability
When you’re buying furniture sliders, you usually want them to last for a long time. It is best to choose furniture sliders with premium quality materials, like a hard plastic bottom and a thick rubber foam. Such premium quality sliders offer a secure grip on your furniture and can be reused again and again.

Verdict
After going through our list of best furniture sliders, we hope you’ll feel much more confident about choosing the right sliders to drive away all your worries about all the heavy lifting and furniture moving.
If you ask us about our top favorite, we think the Waxman SuperSliders 4744095N is the best choice if you have carpets. But, if you have polished hardwood floors, we’ll suggest you go for the X-Protector Furniture Sliders 1. Or, you can also check out the multi-surface Flerise furniture sliders.
Whichever product you choose, just make sure it meets your needs. You can also roll up your sleeves and do some more research before deciding on a product.
And on that note, we’ll be signing off. Take care, and we’ll see you next time. Happy shopping!
Related Articles
10 Best Furniture Stores In Dallas
17 Best Furniture Stores in Houston Today
15 Best Furniture Stores In Chicago Today
9 Best Hand Sanders For Furniture Right Now


![9 Best Wood Wax of 2026 [Reviewed & Buyer’s Guide]](https://homesthetics.net/wp-content/uploads/2021/06/Best-Wood-Wax-of-2021-04.jpg "9 Best Wood Wax of 2026 [Reviewed & Buyer's Guide]")


![8 Best Wood Lacquer of 2026 [Reviews & Buyer’s Guide]](https://homesthetics.net/wp-content/uploads/2021/12/Best-Wood-Lacquer-1.jpg "8 Best Wood Lacquer of 2026 [Reviews & Buyer's Guide]")


![9 Best Varnishes for Wood [Reviewed & Buyer’s Guide]](https://homesthetics.net/wp-content/uploads/2023/11/Best-Varnishes-for-Wood.jpeg "9 Best Varnishes for Wood [Reviewed & Buyer's Guide]")
![12 Best Spray Paints For Metal Of 2026 [Buyer’s Guide]](https://homesthetics.net/wp-content/uploads/2021/04/Best-Spray-Paints-for-Metal-of-2021-01.jpg "12 Best Spray Paints For Metal Of 2026 [Buyer's Guide]")


![9 Best Pump Sprayers For Staining Fence [Reviewed & Buyer’s Guide]](https://homesthetics.net/wp-content/uploads/2023/07/Best-Pump-Sprayers-For-Staining-Fence.jpg "9 Best Pump Sprayers For Staining Fence [Reviewed & Buyer's Guide]")


![7 Best Primers For Covering Red Paint [Tested]](https://homesthetics.net/wp-content/uploads/2023/07/Best-Primers-For-Covering-Red-Paint.jpg "7 Best Primers For Covering Red Paint [Tested]")
![8 Best Primer for Bare Wood [Reviews & Buyer’s Guide]](https://homesthetics.net/wp-content/uploads/2021/05/Best-Primer-for-Bare-Wood-01.jpg "8 Best Primer for Bare Wood [Reviews & Buyer's Guide]")


![11 Best Paint Scrapers to Rock in 2024 [Reviewed]](https://homesthetics.net/wp-content/uploads/2021/07/Best-Paint-Scrapers-to-Rock-01.jpg "11 Best Paint Scrapers to Rock in 2024 [Reviewed]")


![9 Best Paint Roller To Hide Imperfections Tested [Buyer’s Guide]](https://homesthetics.net/wp-content/uploads/2021/06/Best-Paint-Roller-To-Hide-Imperfections-01.jpg "9 Best Paint Roller To Hide Imperfections Tested [Buyer's Guide]")


![6 Best Paint Primers For Rusted Metal [2026] [Buyer’s Guide]](https://homesthetics.net/wp-content/uploads/2021/07/Best-Paint-Primer-For-Rusted-Metal-001.jpg "6 Best Paint Primers For Rusted Metal [2026] [Buyer's Guide]")


![7 Best Exterior Primers for Peeling Paint of 2026 [Tested]](https://homesthetics.net/wp-content/uploads/2023/11/Best-Exterior-Primers-for-Peeling-Paint.jpeg "7 Best Exterior Primers for Peeling Paint of 2026 [Tested]")
![9 Best Concrete Stains to Consider [Reviewed]](https://homesthetics.net/wp-content/uploads/2021/06/Best-Concrete-Stains-to-Consider-03.jpg "9 Best Concrete Stains to Consider [Reviewed]")


![7 Best Cold Galvanizing Paints [Tested]](https://homesthetics.net/wp-content/uploads/2021/07/Best-Cold-Galvanizing-Paints-Tested-001.jpg "7 Best Cold Galvanizing Paints [Tested]")


![8 Best Cedar Stains Of 2024 [Tested]](https://homesthetics.net/wp-content/uploads/2021/07/Best-Stains-For-Cedar-of-2021-012.jpg "8 Best Cedar Stains Of 2024 [Tested]")


