
![7 Best Basement Cement Floor Paints [Reviews & Buyer’s Guide]](https://homesthetics.net/wp-content/uploads/2021/09/Best-Basement-Cement-Floor-Paints-0111.jpg "7 Best Basement Cement Floor Paints [Reviews & Buyer's Guide]")
However, with these advantages, there is also a downside to its industrial, cold aesthetic. Matching a concrete floor to the décor in a basement can be a challenging task. Not to mention the susceptibility to cracking over time.
Applying floor paint can bring life into the concrete floor along with a layer of protection. It’s just that any old paint won’t work if you want to add a splash of color to the floor. Due to the density and properties of concrete, there are specialized paints that you should use to have the best coverage and protection possible.
If painting on concrete is a new experience for you, or if you need suggestions for the best concrete floor paints, look no further than this guide.
Without further ado, let us begin!
Best Cement Basement Floor Paints
Here's the list of the 7 best basement cement floor paints that will not only enhance the aesthetics but also provide durability and protection for your concrete floor.
1. Rust Bullet DuraGrade Concrete - Best for Basement Aesthetics
DuraGrade Concrete from Rust Bullet is a paint option to be considered for those who need a bit of color for the basement. With a range of colors to choose from, this paint also packs strong protection from many elements.

- Ultimate Concrete Protection: Industrial-strength coating...
- No Etching or Primer Required: Applies directly to clean,...
Why Did We Like It?
The aesthetic value in a basement can change drastically with a simple layer of colored paint. The availability of the DuraGrade in a number of shades is a great selection to match any design style.
Additionally, the paint formula is versatile and durable, not to mention easy to use. This makes it a great starting option for those who have little to no experience with painting a concrete floor. No additional applications of a primer, basecoat, or topcoat are necessary.
There is no doubt of DuraGrade’s durability either. Basements can be exposed to a number of mishaps that can damage the concrete flooring. With a scratch and chip-resistant formula, this paint will protect the floor from any damage.
Additionally, it is strong against chemicals and UV light for even more protection against the sun and any compound you may store in the basement.
What Could've Been Better?
In many home renovation projects, the budget is a huge factor in deciding where compromises need to be made. Regrettably, the DuraGrade does carry a steep price tag which may deter some from spending a large amount of money. The decision of whether floor paint has value for money is entirely up to you.
- Easy to apply
- Available in various shades
- Durable against many elements
- It can be applied with a brush, roller, or a spray
- Steep price tag
2. KILZ Basement & Masonry Waterproofing Paint - Best for Moisture Protection
KILZ offers premium paint for waterproofing basement and masonry surfaces in this interior/exterior ready paint. Using special nanotechnology and an alkali-resistant coating, it is more than capable of sealing off the basement floor from any moisture creeping in. This is especially useful for concrete, which is highly porous in nature.

- Waterproofing Protection with Nanotechnology: Engineered...
- Interior & Exterior Versatility: Ideal for both indoor and...
Why Did We Like It?
Waterproofing the basement is an important step to take in preserving the quality of the room. The smallest leak can make the entire basement unsafe. Moisture can break down materials and cause mold and mildew to form.
Applying this paint to porous surfaces is where it really shines. The spaces in the mortar and porous concrete are filled adequately. There was no need to have multiple passes in order for the paint to stick.
What’s more, it has a clean white finish that brightens an otherwise dark basement. This basic white color has a matte finish that is smooth to the touch.
Cleaning it up is a simple process to tidy up the edges of the surface or if the paint has been accidentally applied. The paint will rub off using a simple soap and water solution to give a clean and finished look.
What Could've Been Better?
Although this paint is not designed specifically for floors, it is still a great pickup to ensure a complete protective layer in the basement. Although it is meant for walls, when combined with waterproof floor paint, it helps create an all-around seal against any moisture coming in.
- Low odor
- Fast drying time
- Strong waterproofing
- Effective on porous surfaces
- Not recommended for flooring
3. Rust-oleum EPOXYSHIELD Garage Floor Coating - Best for Durability & Glossy Finish
A two-part epoxy formula from Rust-oleum, the EpoxyShield is a water-based paint designed for concrete floors. The glossy finish the epoxy takes on adds to the floor’s lifespan and helps make cleaning easier. It is a great all-in-one package that has everything you could need from decorative flakes to instructional videos with strong adhesion to boot.
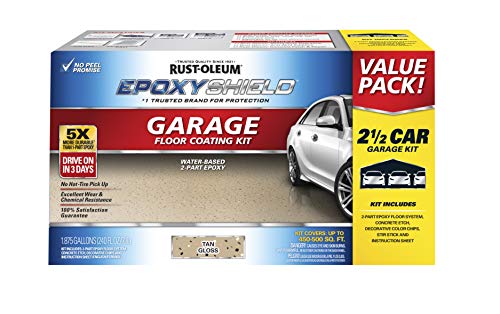
- Durable, 2-part epoxy formula works on interior concrete...
- Professional glossy finish is easy to clean and provides a...
Why Did We Like It?
Two-part epoxies are known to be more durable than single epoxy formulas. In many cases, they are up to five times as hard as a single epoxy. EpoxyShield is no exception to this. It is no surprise that there were no issues with the paint flaking or peeling off.
Included in the kit are the two-part epoxy itself, a stir stick, a concentrated cleaner, and decorative flakes. The flakes are a nice touch for those who don’t want a solid color floor, a simple yet appreciated touch.
Additionally, having the instructions and even a detailed video to show you how to mix and apply the epoxy correctly is extremely helpful. For those who have never worked with epoxy or painted a floor before, these instructional tools can help give a professional finish to the room.
What Could've Been Better?
Despite applying the recommended two coats to protect the floor, the epoxy is prone to wear away still. With a heavy weight on top of it, such as a car’s tires, the epoxy has been found to peel away.
- Stronger than single epoxy formulas
- Tough adhesive coating for durability
- Low odor
- Low VOC
- Peels under heavy pressure
4. FIXALL Skid Grip Anti-Slip Paint
Skid Grip is an acrylic-based paint with unique qualities that can bring an extra layer of safety to your concrete floor. As is evident from the name, it increases the grip of a floor to have less slippage and accidents.

- ANTI-SLIP PAINT: Skid Grip is an acrylic textured paint that...
- INCREASE SAFETY: This slip-resistant coating is ideal for...
Why Did We Like It?
Concrete floors can be slippery surfaces when wet or with little grip on your feet. Applying this skid grip paint solves this problem with flying colors. As advertised, the skid grip is effective in creating a textured surface to prevent falls and sliding.
Furthermore, it has strong adhesion to not just concrete but a range of other materials as well, like wood and stone. There were no issues with filling in the porous gaps in different materials.
Applying the paint is no difficult task as well. Regardless of if the surface is indoors or outside, simply clean the surface and paint the skid grip on. Drying time was not long at all compared to other floor paints. Additionally, re-application of the paint is easy, extending the life of the paint further.
What Could've Been Better?
On the one hand, the skid grip paint is exceptional in increasing safety. On the other hand, this same anti-slip compromises maintenance to some degree. The textured surface of the paint is elevated with grooves and dips, making sweeping and mopping difficult.
- Increases grip
- Strong adhesion to a variety of surfaces
- Easy application
- Durable for indoor/outdoor use
- Texture makes cleaning the floor difficult
5. Drylok Extreme Latex Masonry Waterproofer
For those whose primary goal is to waterproof the flooring of their basement, the Drylok brand has you covered. They are confident in guaranteeing a complete seal against water, backing it up with a 15-year warranty. It penetrates and bonds to the pores in the material to create an impenetrable wall against any moisture.
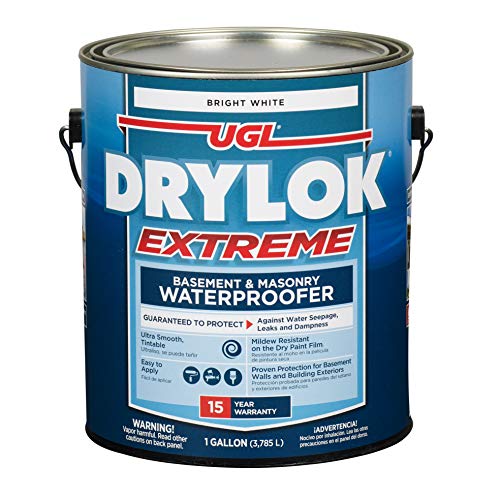
- This item is Drylok Extreme Latex Masonry Waterproofer Latex...
- Used for Painting Supplies Paint & Stains
Why Did We Like It?
It goes without saying that the Drylok is more than capable of waterproofing concrete flooring. Keeping out moisture not only at the surface level but down to the pores between the material, there is no chance of water breaking through this paint.
Speaking further on the safety features of this paint, it is able to block radon gas by reducing vapor transfer. Additionally, it has a very low odor that complies with all VOC requirements. Overall, this paint option is safe to use and has been GreenWise certified.
As for the paint itself, it is easy to apply for the level of adhesion it has on the surface of the material. When dried, the paint has an ultra-smooth finish. To further increase the aesthetic quality of the paint, it can be tinted to match any palette.
What Could've Been Better?
Due to its extremely thorough penetration and adhesion to create a waterproof barrier, the Drylok is thick in consistency. This thickness can cause the paint to have a more extended drying period.
- It ages well and lasts long
- Easy application
- Can be tinted
- Low odor compliant with VOC standards
- Long drying time
6. Rust-oleum EpoxyShield Concrete Floor Paint
Another unique paint option from Rust-oleum is this one-part epoxy shield. What makes it stand out is its self-priming ability; there is no need to mix the epoxy before applying it. This paint is able to hold its own with durability rated to withstand indoor and outdoor obstacles.
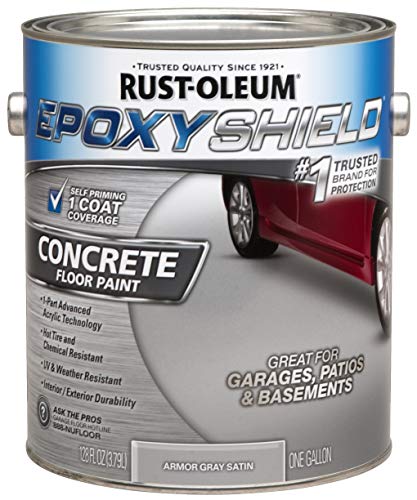
- The product is Gallon GRY Conc FLR Kit
- Elegant design and Smooth finish
Why Did We Like It?
Applying the paint itself is a smooth experience. It covers the floor well and has a medium viscosity, so any seepage into the floor is not too bad. If any mistakes are made while applying it a simple soap and water mixture will gradually get it off.
Additionally, the paint is resistant to UV light, so any windows shining sunlight onto the concrete floor won’t crack the cement. Chemicals and hot car tires are other materials that this paint is able to withstand.
Overall, it is a safe choice for beginners with its single epoxy formula. The pre-mixing of the epoxies and applying a finishing coat is not a requirement with this paint. The finish of this paint, in particular, is an “armor gray satin” with a smooth texture.
What Could've Been Better?
When applying this paint, it is essential to have an even and thorough application. The reason for this is to prevent any patches of different shades from forming. As it is a one-part epoxy, the paint’s finish can vary if it dries at different speeds, which can be inconvenient.
- Easy cleanup
- Indoor and outdoor-proof
- Simple application
- Resists fading, chipping, and stains
- Varying finishing shades if applied unevenly
7. Drylok Concrete Floor Paint
A simple paint that packs many features, this product from Drylok is exceptional at what it does. It is incredibly durable and has excellent functionality besides being a protective layer to the concrete floor. This durability, combined with easy cleanup, makes the Drylok a superb choice for any basement floor.
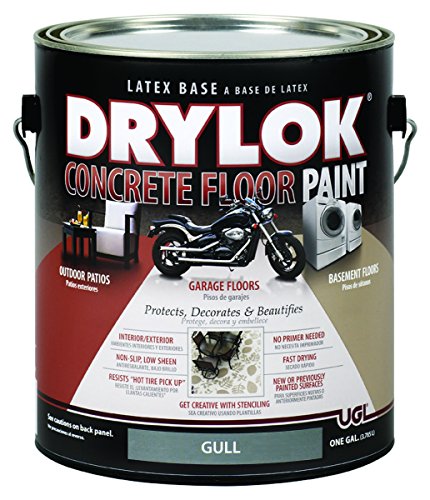
- Drylok Concrete Floor Paint Is A Scientifically Formulated...
- It outperforms ordinary floor paint under traffic, washings,...
Why Did We Like It?
The Drylok concrete floor paint is easy to use and apply. The ability to paint on fresh and previously painted surfaces makes using it a breeze. What’s more, there is no need for a primer to prep the paint.
When dried, the paint has some features which add to its functionality as a protective barrier. The finish is a medium grey color that has a low sheen to it, making it appear matte. Additionally, this finish is non-slip and provides adequate grip without being too raised.
Once applied, the paint takes very little time to dry for floor paint. If there are any mistakes made in the application process, a soap and water solution is enough to remove the paint. However, if allowed to set, it is durable and can handle heavy traffic and even moisture.
What Could've Been Better?
If using the Drylok on a floor as is, it is a good idea to apply a sealer coat on top of it. This is just to preserve the color of the paint. There are cases of tire marks being left on the surface of the paint.
- Non-slip finish
- Low sheen surface
- Dries fast
- Little to no surface preparation is needed
- Sealant layer recommended
Best Basement Cement Floor Paints Comparison Table
| Product | Paint Type | Dimensions | Weight | Size | Durable | Waterproof | Coverage |
|---|---|---|---|---|---|---|---|
| Rust Bullet DuraGrade Concrete | Hybrid polyurethane | 4 x 4 x 4.5 inches | 3.24 pounds | 0.25 Gallons | Yes | Yes | 300 – 350 sq ft |
| KILZ Basement & Masonry Waterproofing Paint | Oil | 7.2 x 7.2 x 7.8 inches | 12.5 pounds | 1 Gallon | Yes | Yes | 200 – 300 sq ft |
| Rust-oleum EPOXYSHIELD Garage Floor Coating | Oil | 14.25 x 11.5 x 9 inches | 27.4 pounds | 0.66 Gallons | Yes | No | 250 sq ft |
| FIXALL Skid Grip Anti-Slip Paint | Acrylic | 9 x 7.5 x 7.1 inches | 14.67 pounds | 1 Gallon | Yes | No | N/A |
| Drylok Extreme Latex Masonry Waterproofer | Watercolor | 6.8 x 7.3 x 7.8 inches | 11 pounds | 1 Gallon | Yes | Yes | 100 sq ft |
| Rust-oleum EpoxyShield Concrete Floor Paint | Acrylic | 6.62 x 6.62 x 8 inches | 10.7 pounds | 1 Gallon | Yes | No | 180 – 220 sq ft |
| Drylok Concrete Floor Paint | Watercolor | 3 x 1 x 2 inches | 10.78 pounds | 1 Gallon | Yes | No | N/A |
Buying Guide For The Best Basement Cement Floor Paint
To select the best option of paint for your home and needs, including acoustics and soundproofing, there are a few points that should be kept in mind. Different paints have different features and qualities that make them exceptional in specific areas while others may not be suitable for certain purposes. Knowing what to look for in paint can help you make a more informed decision.
Waterproof
Whether or not floor paint is capable of waterproofing is important to keep in mind. Waterproof paint can keep water from seeping into the concrete. As a porous material, concrete is susceptible to cracks from moisture. The water seeps into the pores and expands and contracts when freezing and melting, damaging the integrity of the concrete over time. Basements are the most prone to this water damage as they are usually unprotected by a layer of paint. Additionally, the house structure has most of the leaks occurring in the basement itself.
Special floor paints that have been designed to be waterproof are rated in terms of PSI or pound-force per square inch. Essentially, the higher the PSI, the more water pressure the paint is able to keep out.
Acoustics and Soundproofing
The acoustics and soundproofing qualities of your basement paint can be an essential consideration when transforming the space into a music room, home theater, or another purpose involving sound. Some paints on the market are specifically designed to aid with soundproofing by helping to dampen noise and vibrations. These paints may contain added mass, sound-absorbing particles or materials that effectively contribute to the soundproofing of your basement.
Paint Type
When it comes to paints, floor paint is just one overarching umbrella in terms of classification. Under this, there are many different types of paints. The best type of floor paint for a concrete surface is epoxy.
Traditionally, epoxy paint is composed of two parts mixed together in a ratio. The first is an acrylic latex paint as the base, and the second part is a small amount of epoxy. These epoxy paints are suitable for concrete flooring due to their durability and hard finish. It is able to replicate the feel of the underlying concrete while maintaining a protective layer. Additionally, epoxy paints do not require a sealant coating as they can provide their own.
Bases
The main difference between paints is their base, which determines many of their qualities. Depending on what base the paint is using, you can have very different results. When choosing the right paint for you, there is an option to go with a water-based or an oil-based option.
On the one hand, water-based paints are popularly used for basement floor jobs, as they are safer to work with in a closed space. They emit fewer harmful odors and have a lower number of VOC, or volatile organic compounds, released.
On the other hand, oil-based paints are more durable compared to water-based paints. This durability can make them especially useful on flooring, which experiences much activity that erodes it away. However, oil-based paints also release strong odors, which can be harmful to health. As such, it is not advised to use these paints in a closed area or without proper ventilation.
Yes, some paints are specifically formulated to enhance soundproofing qualities in basement spaces. These paints may contain added mass or sound-absorbing particles to help dampen noise and vibrations. Waterproof floor paints are typically rated in terms of PSI (pound-force per square inch), indicating their ability to withstand water pressure. Higher PSI ratings indicate better waterproofing capabilities. Water-based paints are popular for basement floor projects as they are safer to work with in enclosed spaces. They emit fewer harmful odors and have lower VOC (volatile organic compounds) levels. Oil-based paints, on the other hand, offer greater durability but emit strong odors, making them less suitable for closed areas or poorly ventilated spaces. While oil-based paints are more durable, it is generally not advised to use them in closed areas or without proper ventilation due to their strong odor and potential health hazards. Water-based paints are a safer and more commonly recommended option for basement floor applications. Epoxy paint is considered the best type of floor paint for concrete surfaces. Epoxy paints consist of a two-part mixture, including an acrylic latex base and a small amount of epoxy. They are known for their durability, hard finish, and ability to provide a protective layer without the need for additional sealant coatings.Cement Basement Floor Paints FAQs
Conclusion
In order to have an ideal safe basement, you should definitely protect the concrete flooring with a layer of paint to keep moisture and other harmful elements out.
From the above 7 Best Basement Cement Floor Paints, here are the top three expert recommendations. Rust Bullet DuraGrade Concrete is an ideal option for its versatile and durable formula, scratch and chip resistance, and protection against chemicals and UV light.
KILZ Basement & Masonry Waterproofing Paint is a good option, offering excellent waterproofing capabilities and a clean white finish that brightens the basement. Finally, Rust-oleum EPOXYSHIELD Garage Floor Coating is the right choice with its two-part epoxy formula, decorative flakes, and instructional resources for a professional finish.
As the foundation of your home, the concrete basement floor must be preserved, a job that these floor paints have covered.
Related Articles
Best Floors For a Chicken Coop Options Right Now
7 Best Paint for Interior Garage Walls


![[HLC] 4 x Hairpin Table Legs – Superior Double Weld Steel...](https://m.media-amazon.com/images/I/318bxPaqf0L.jpg)


